kahunaminor
-
Posts
443 -
Joined
-
Last visited
Content Type
Profiles
Forums
Events
Gallery
Everything posted by kahunaminor
-
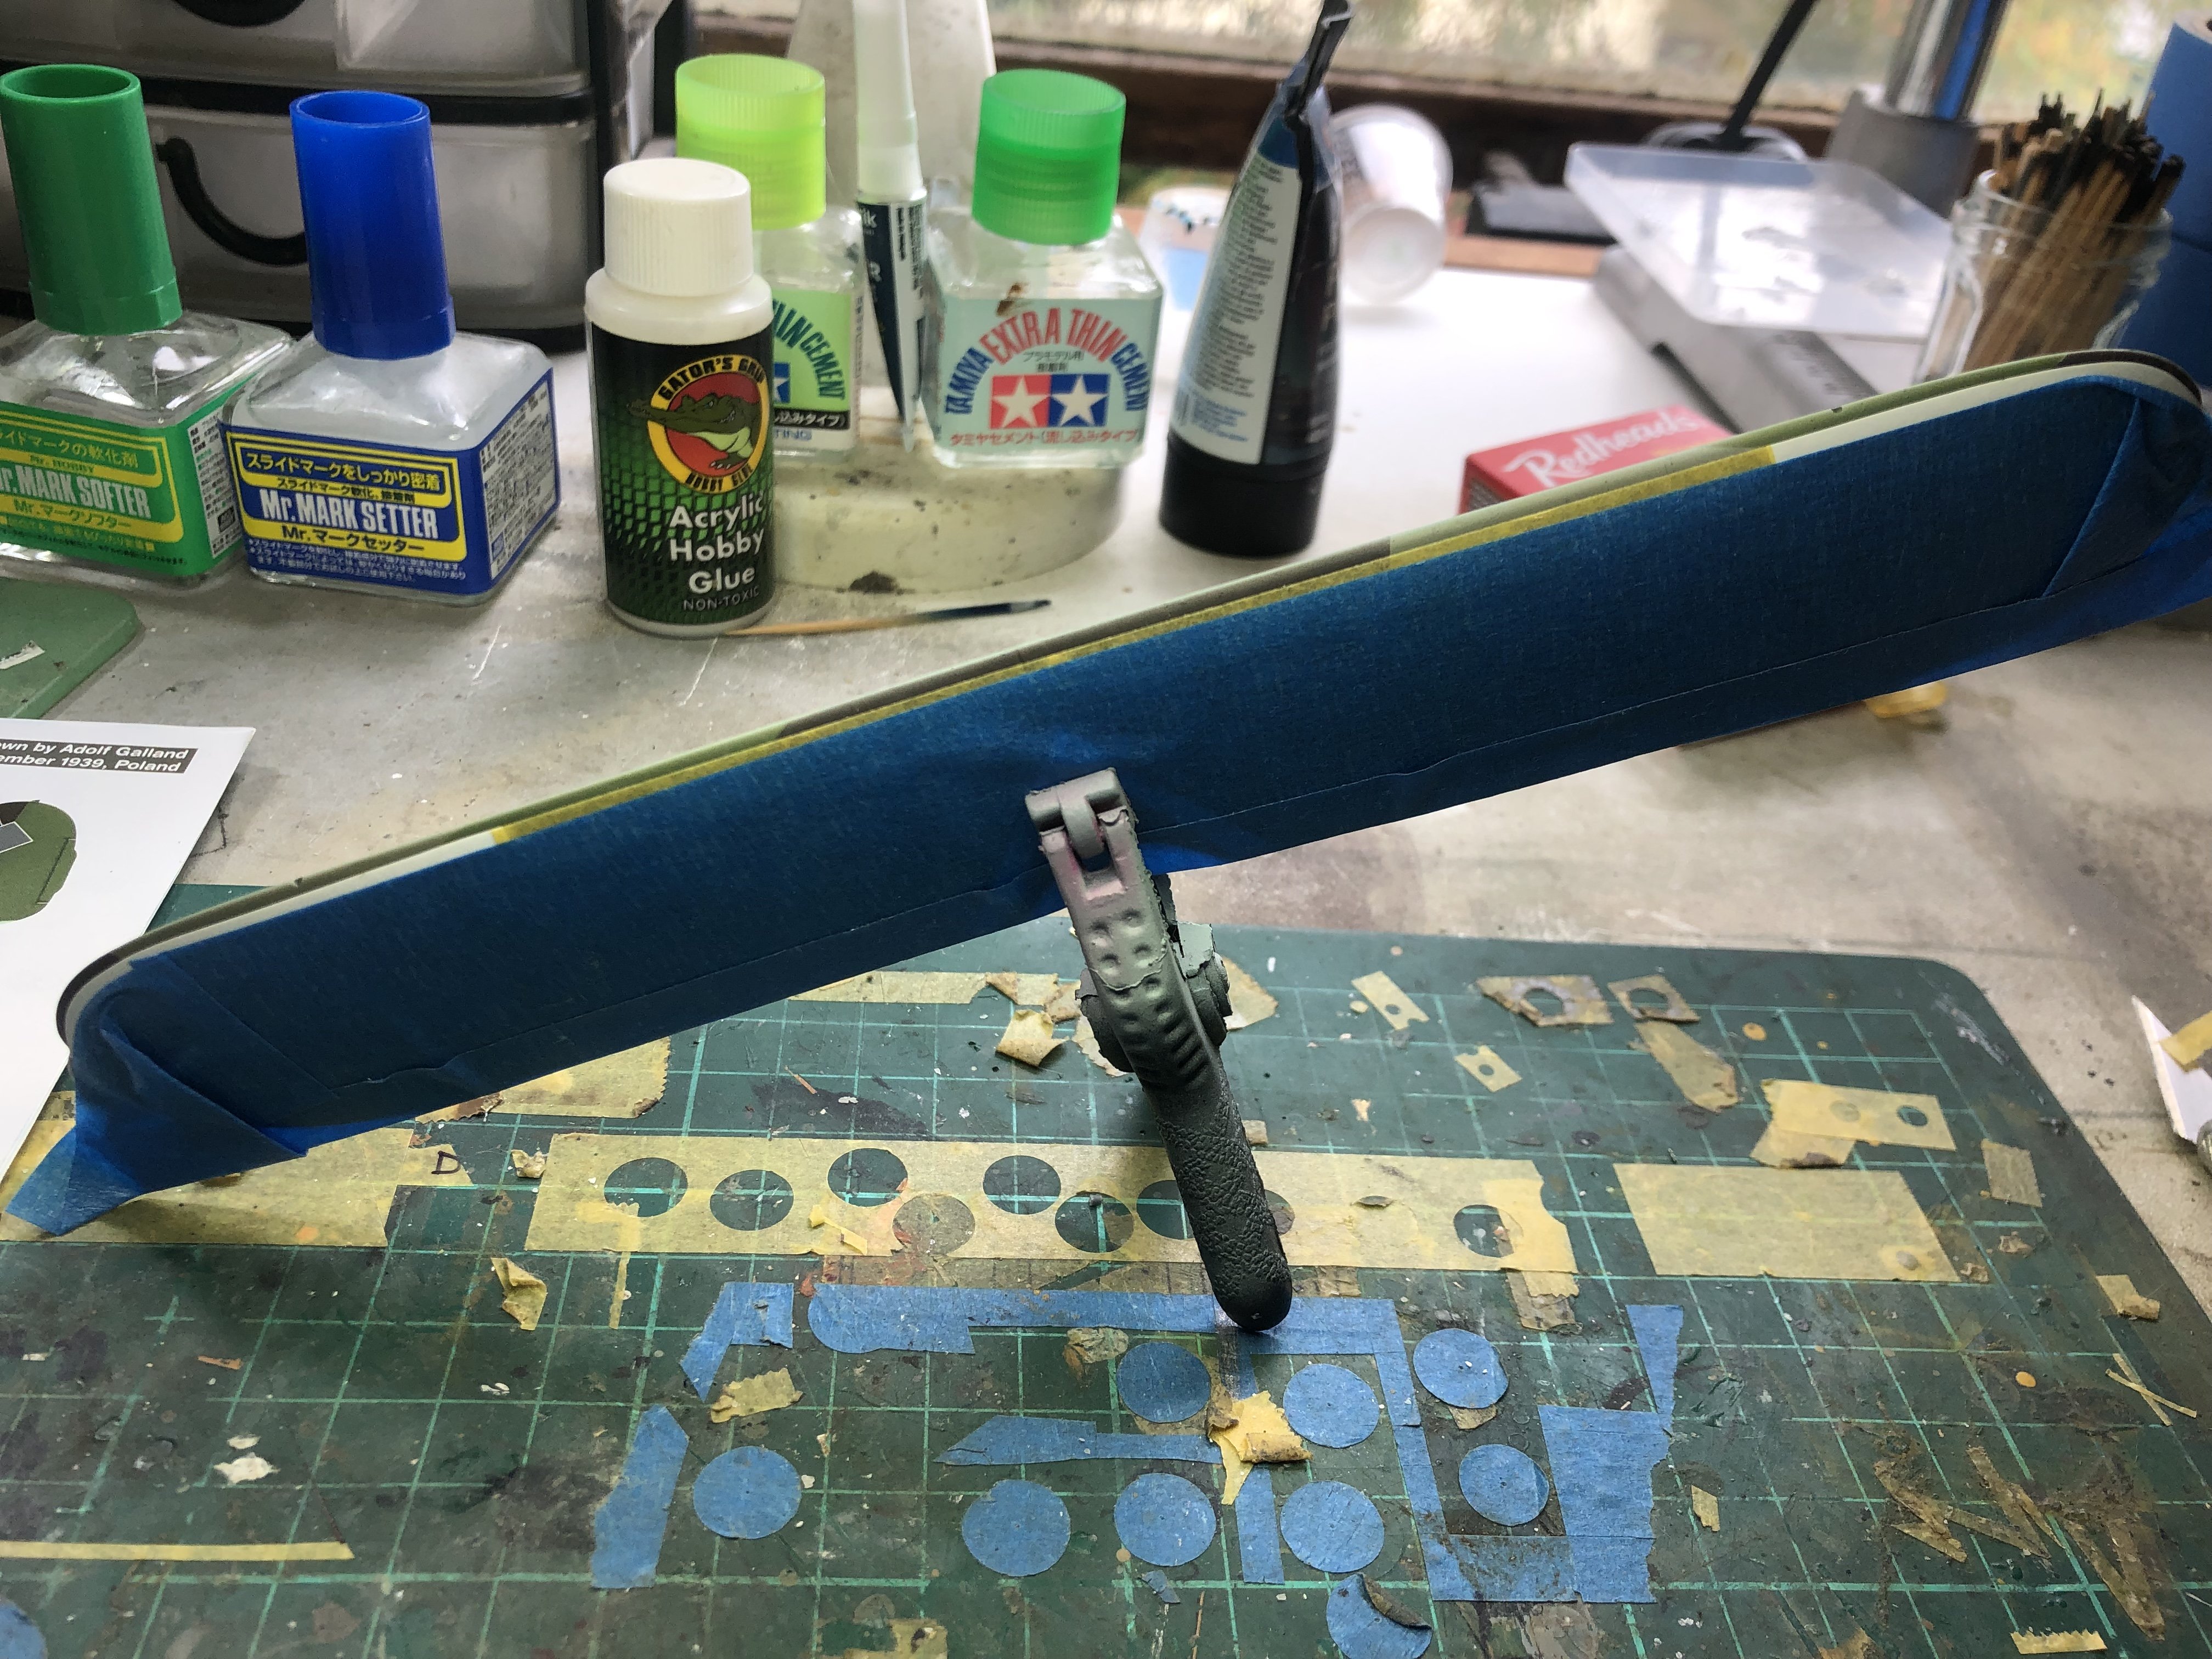
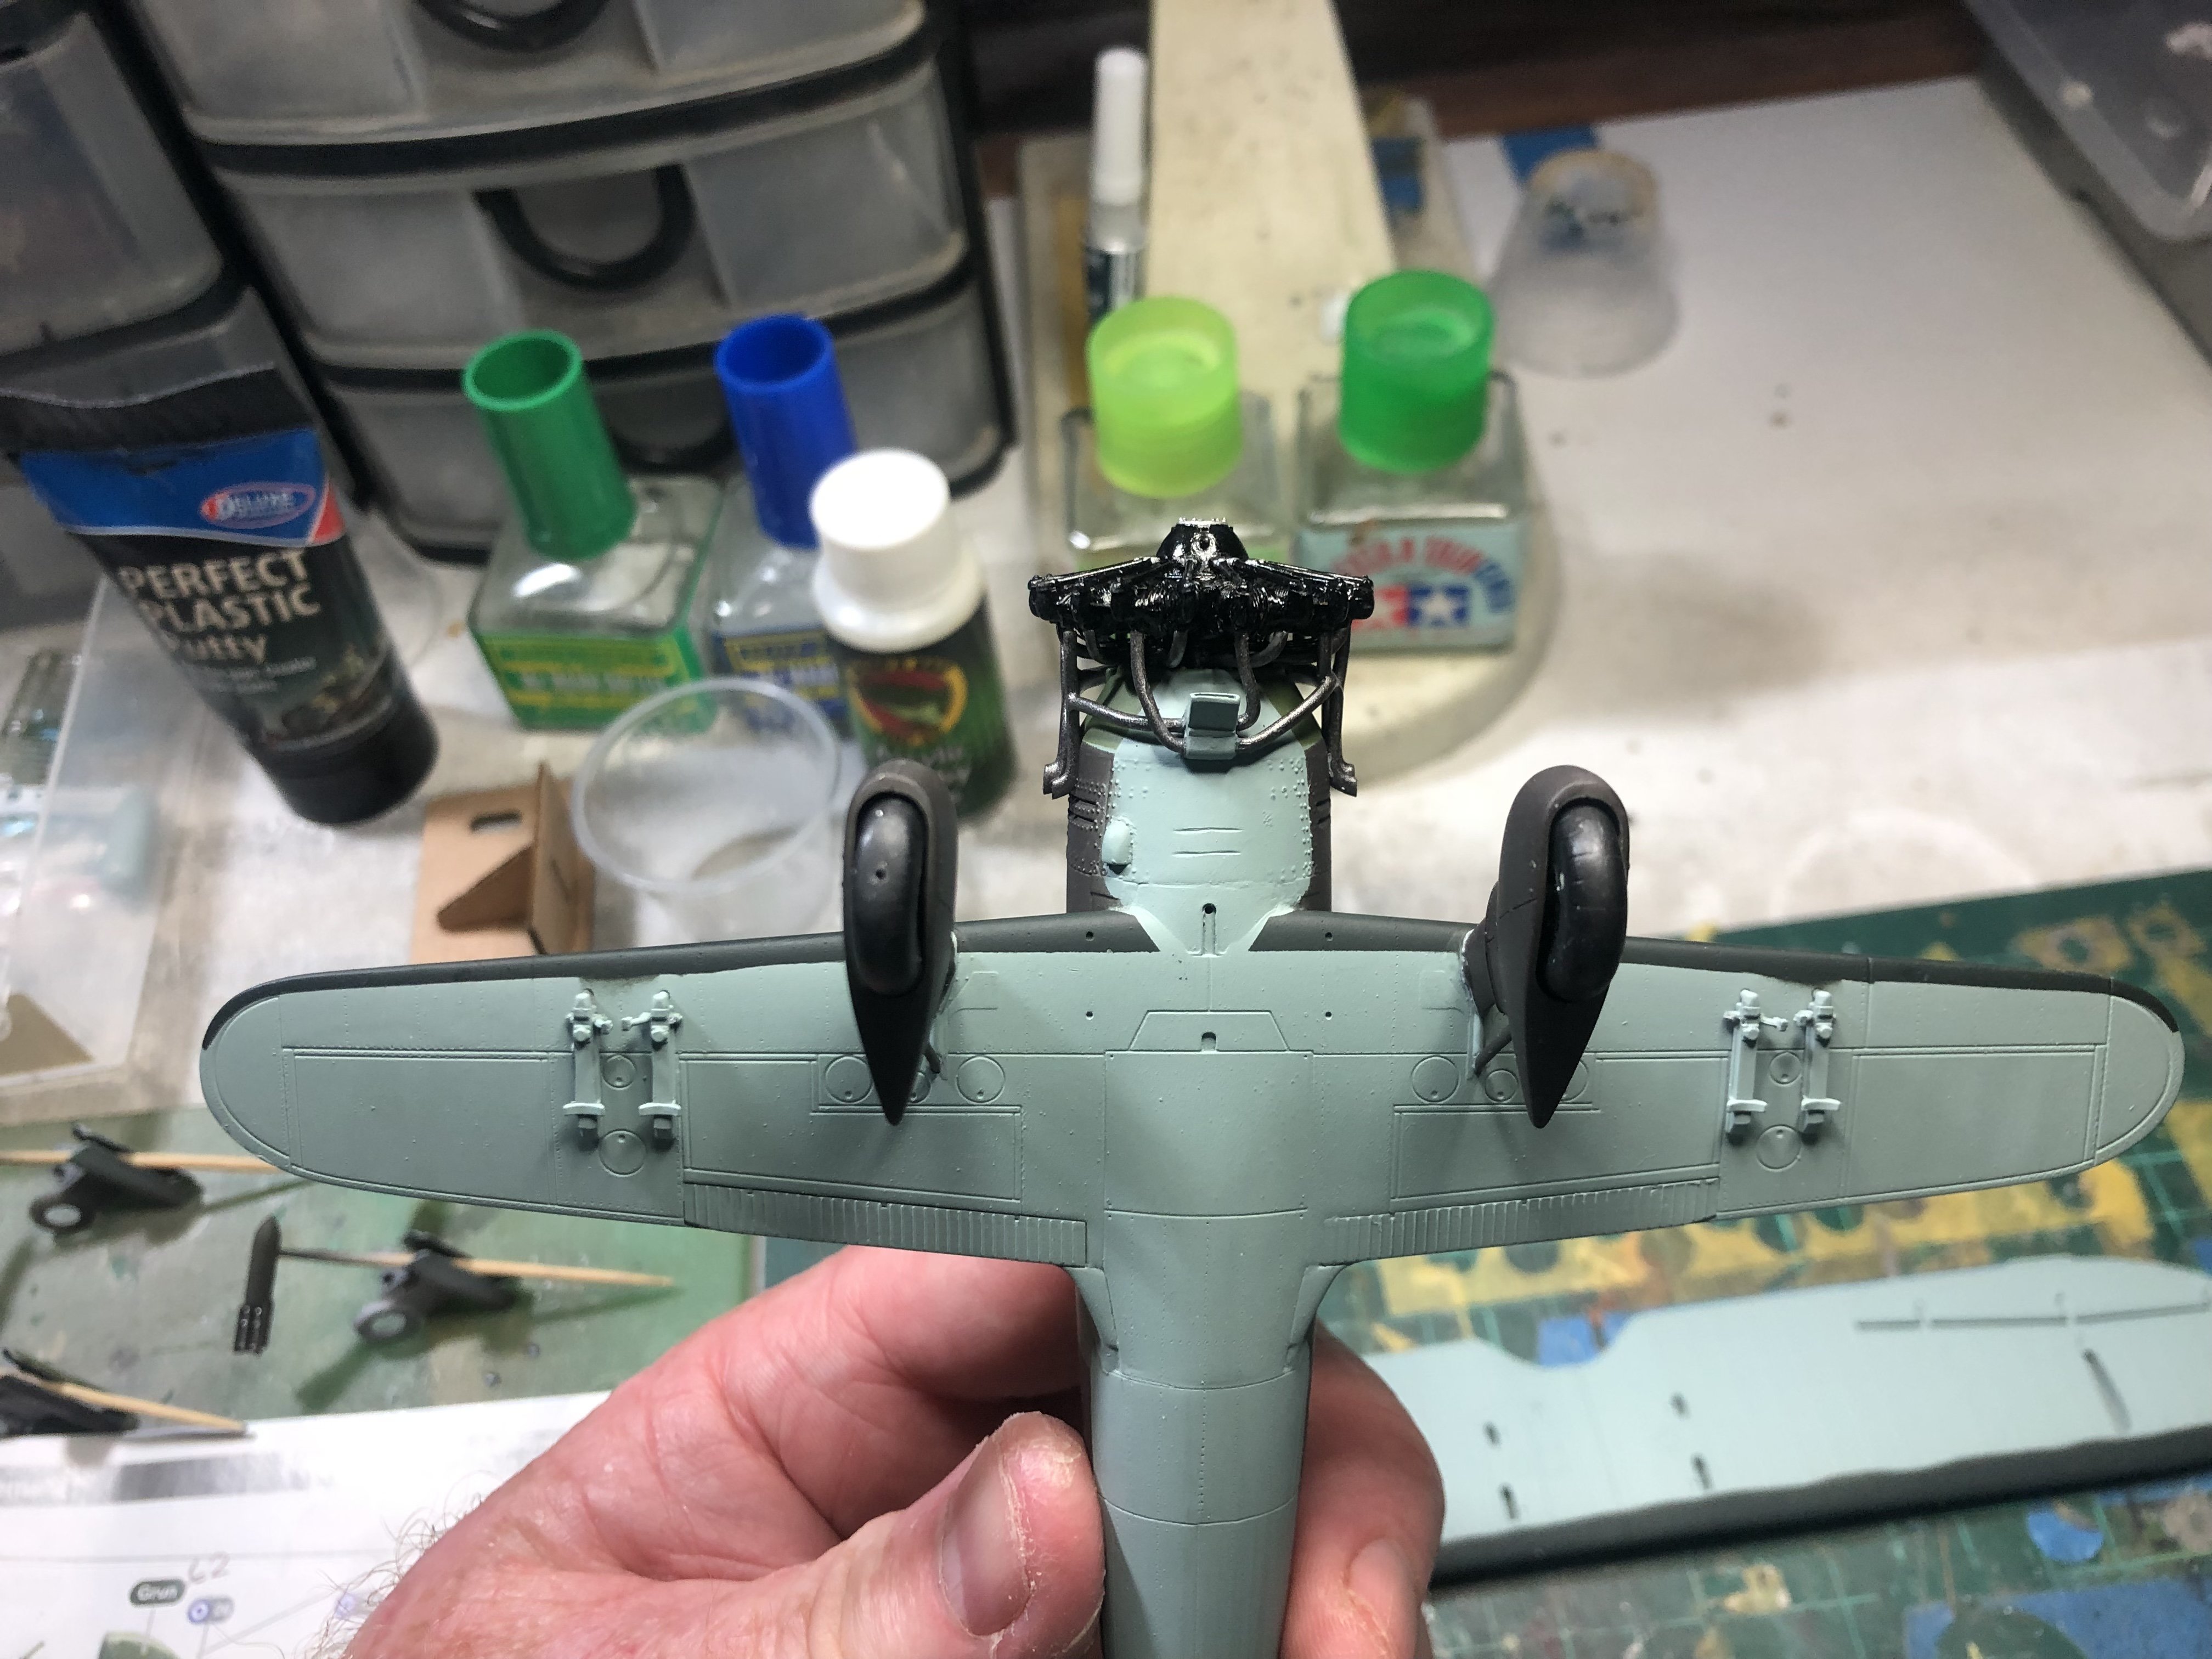
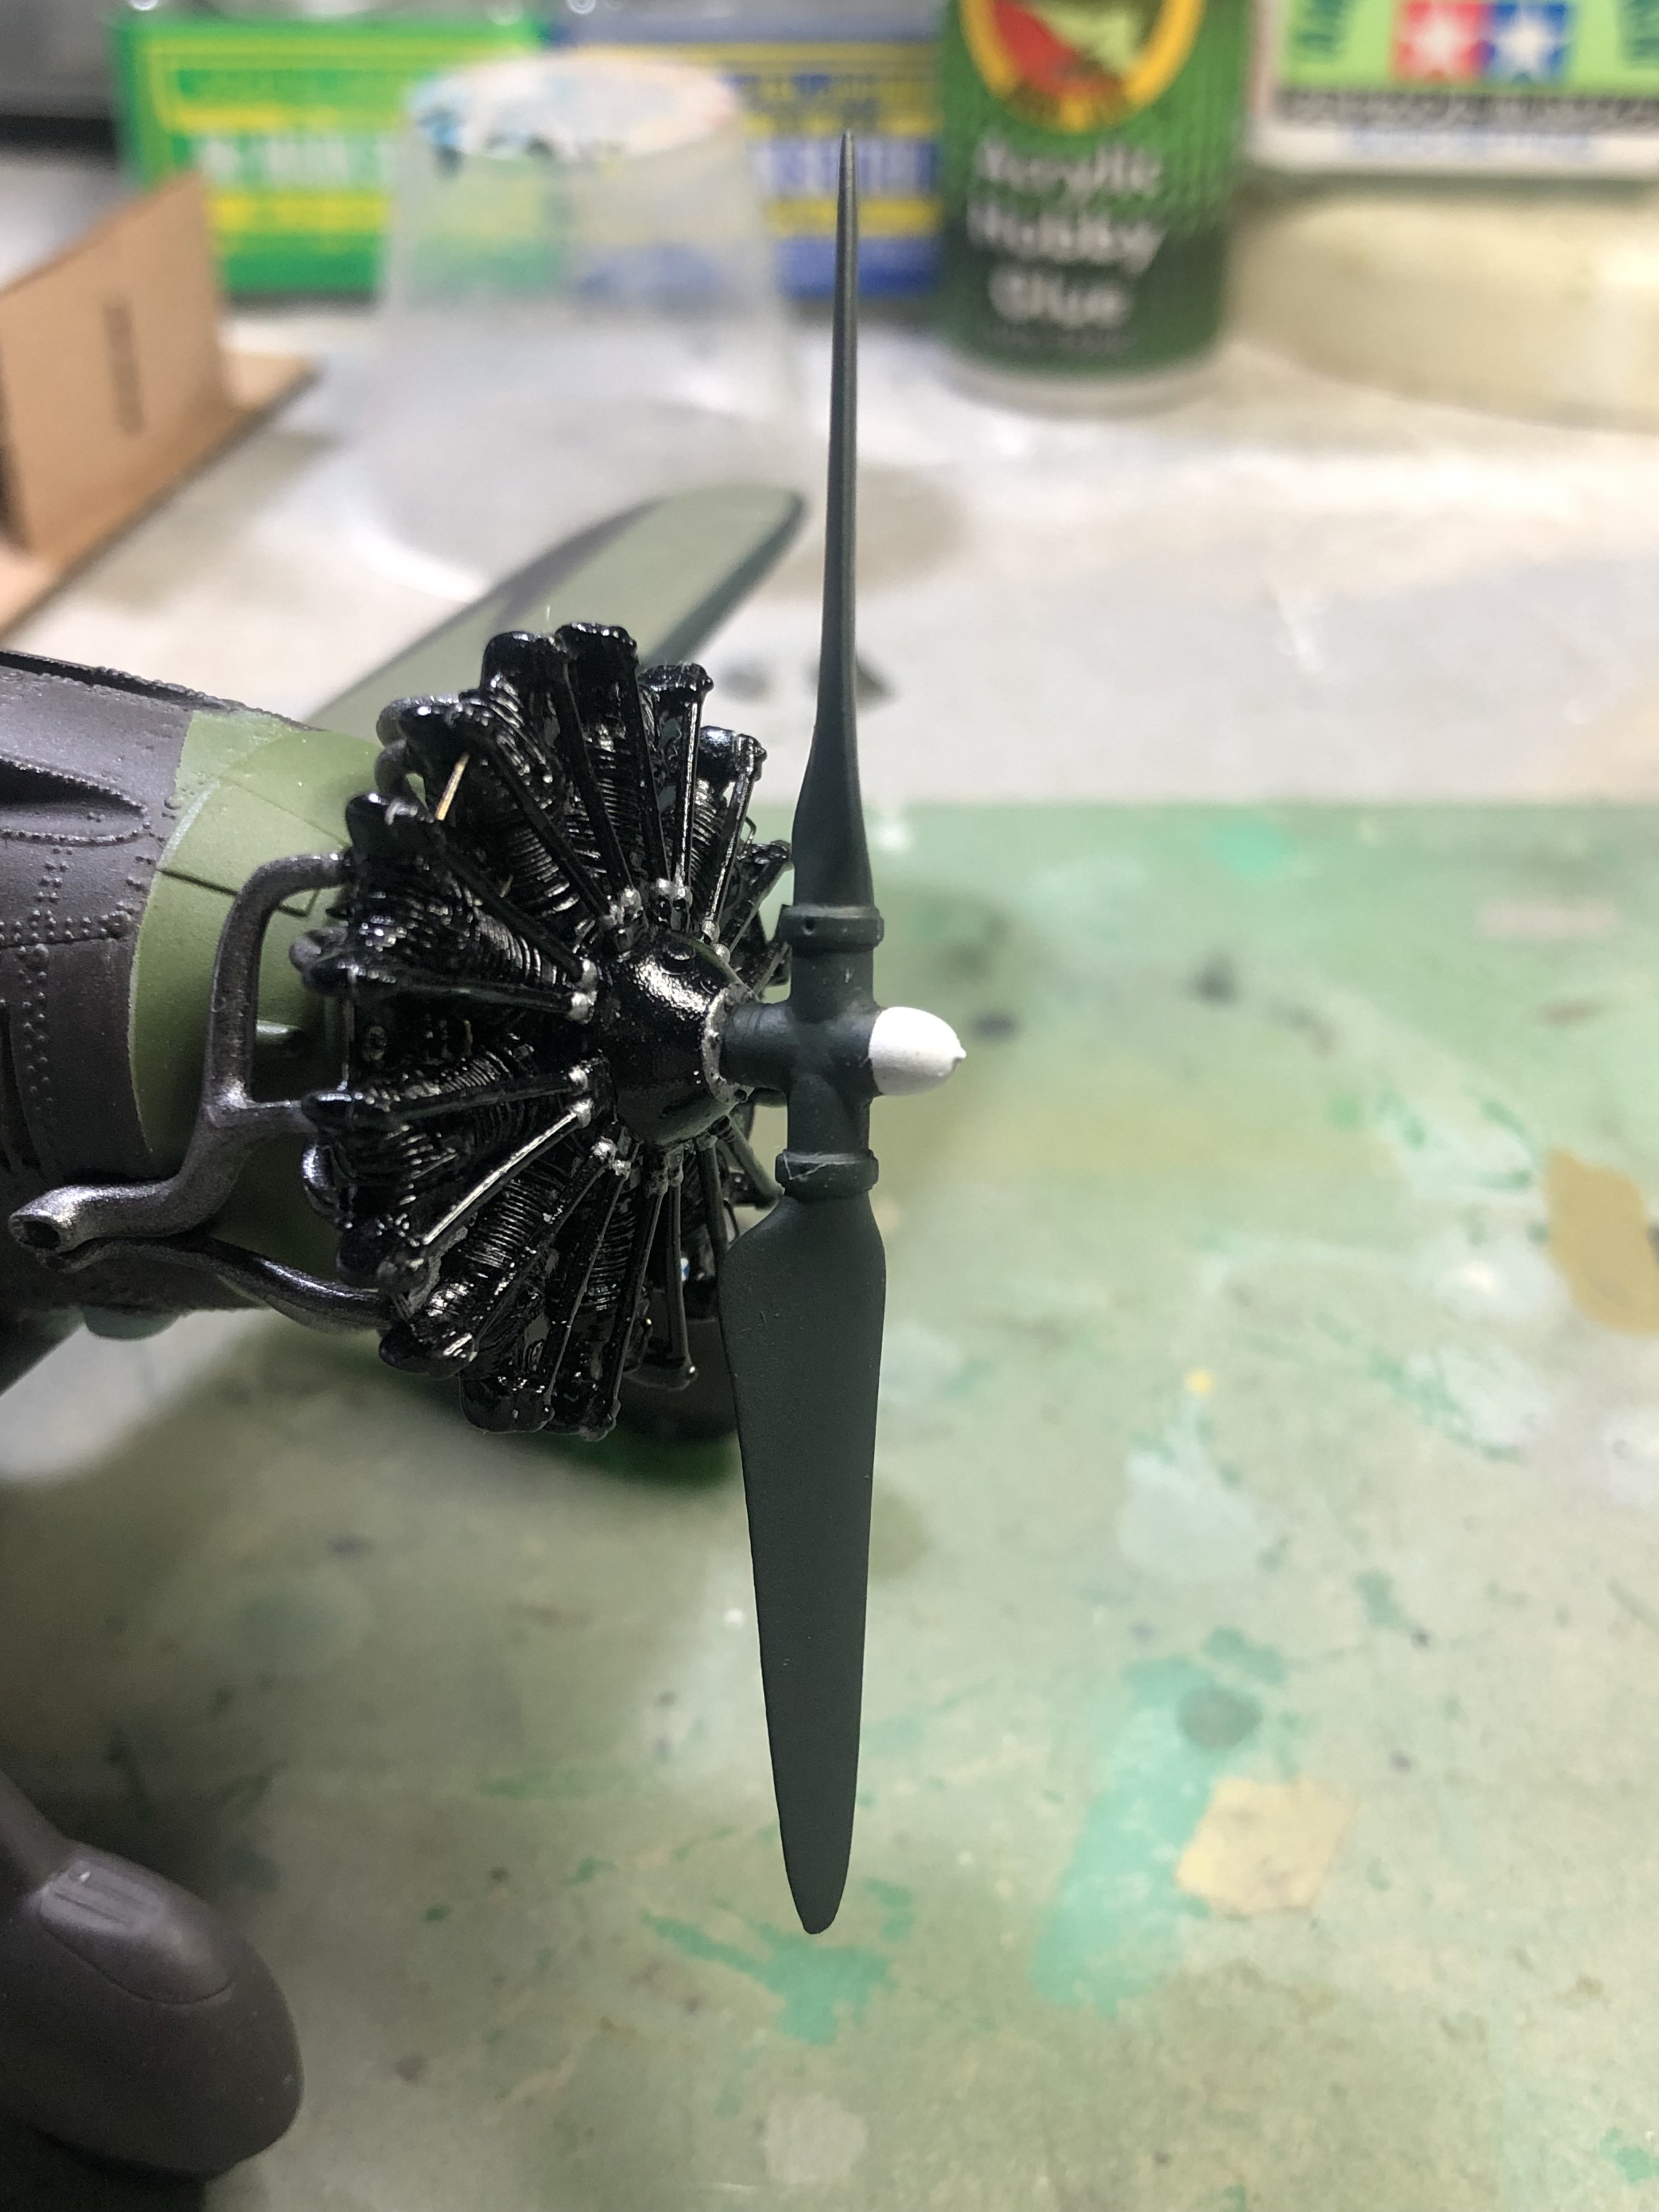
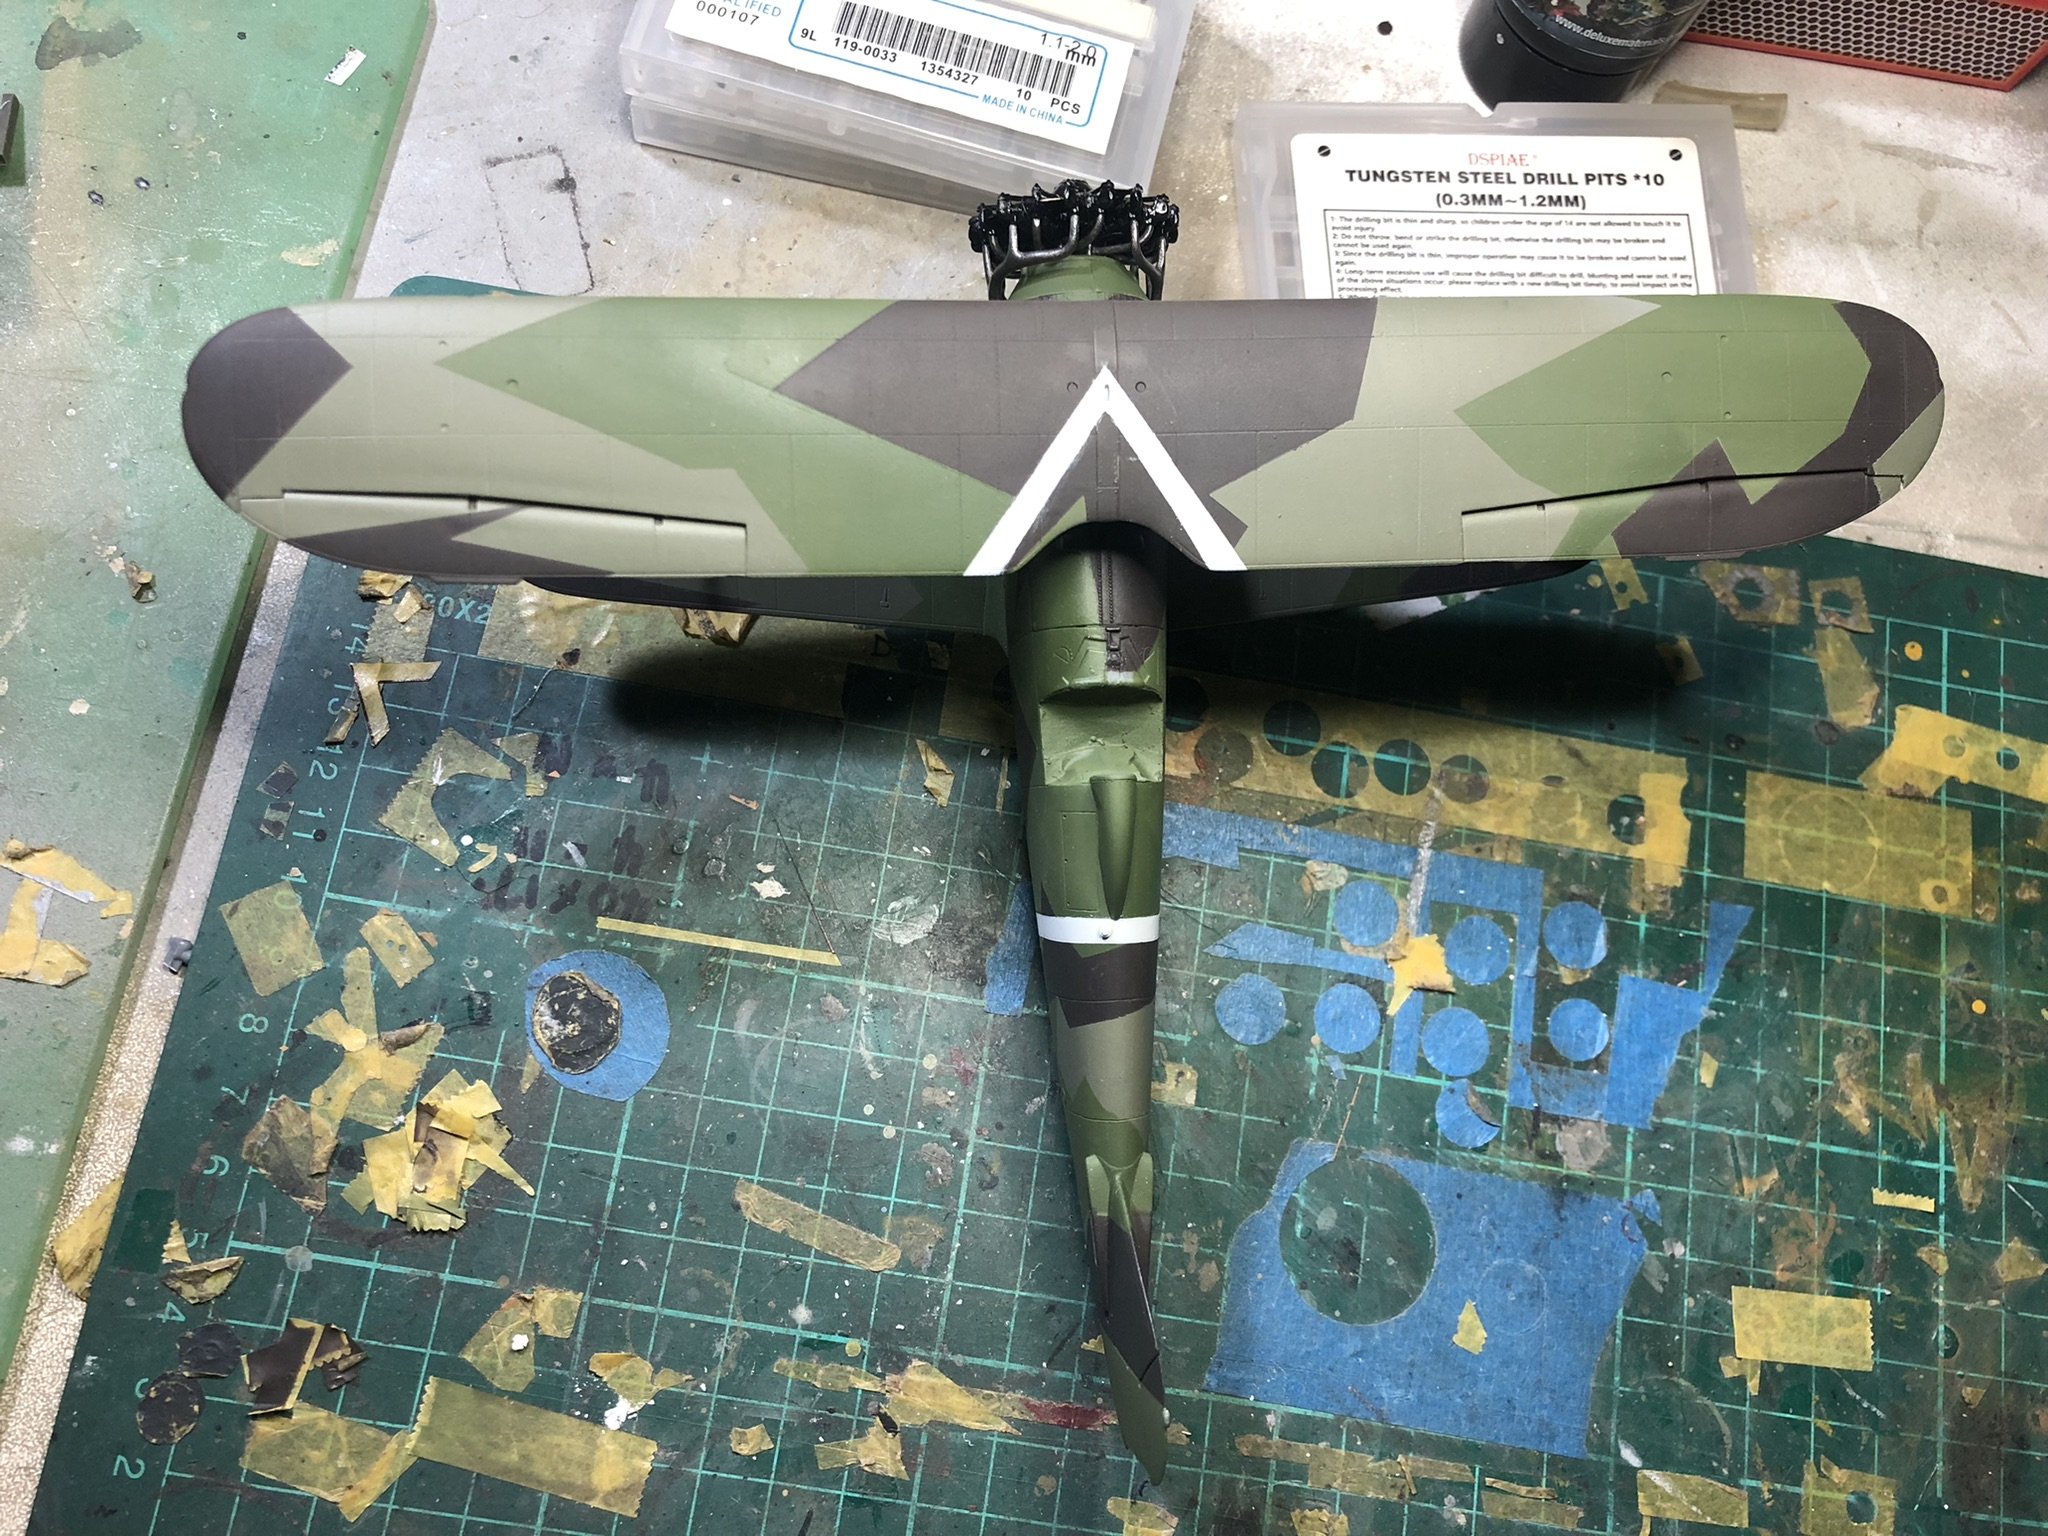
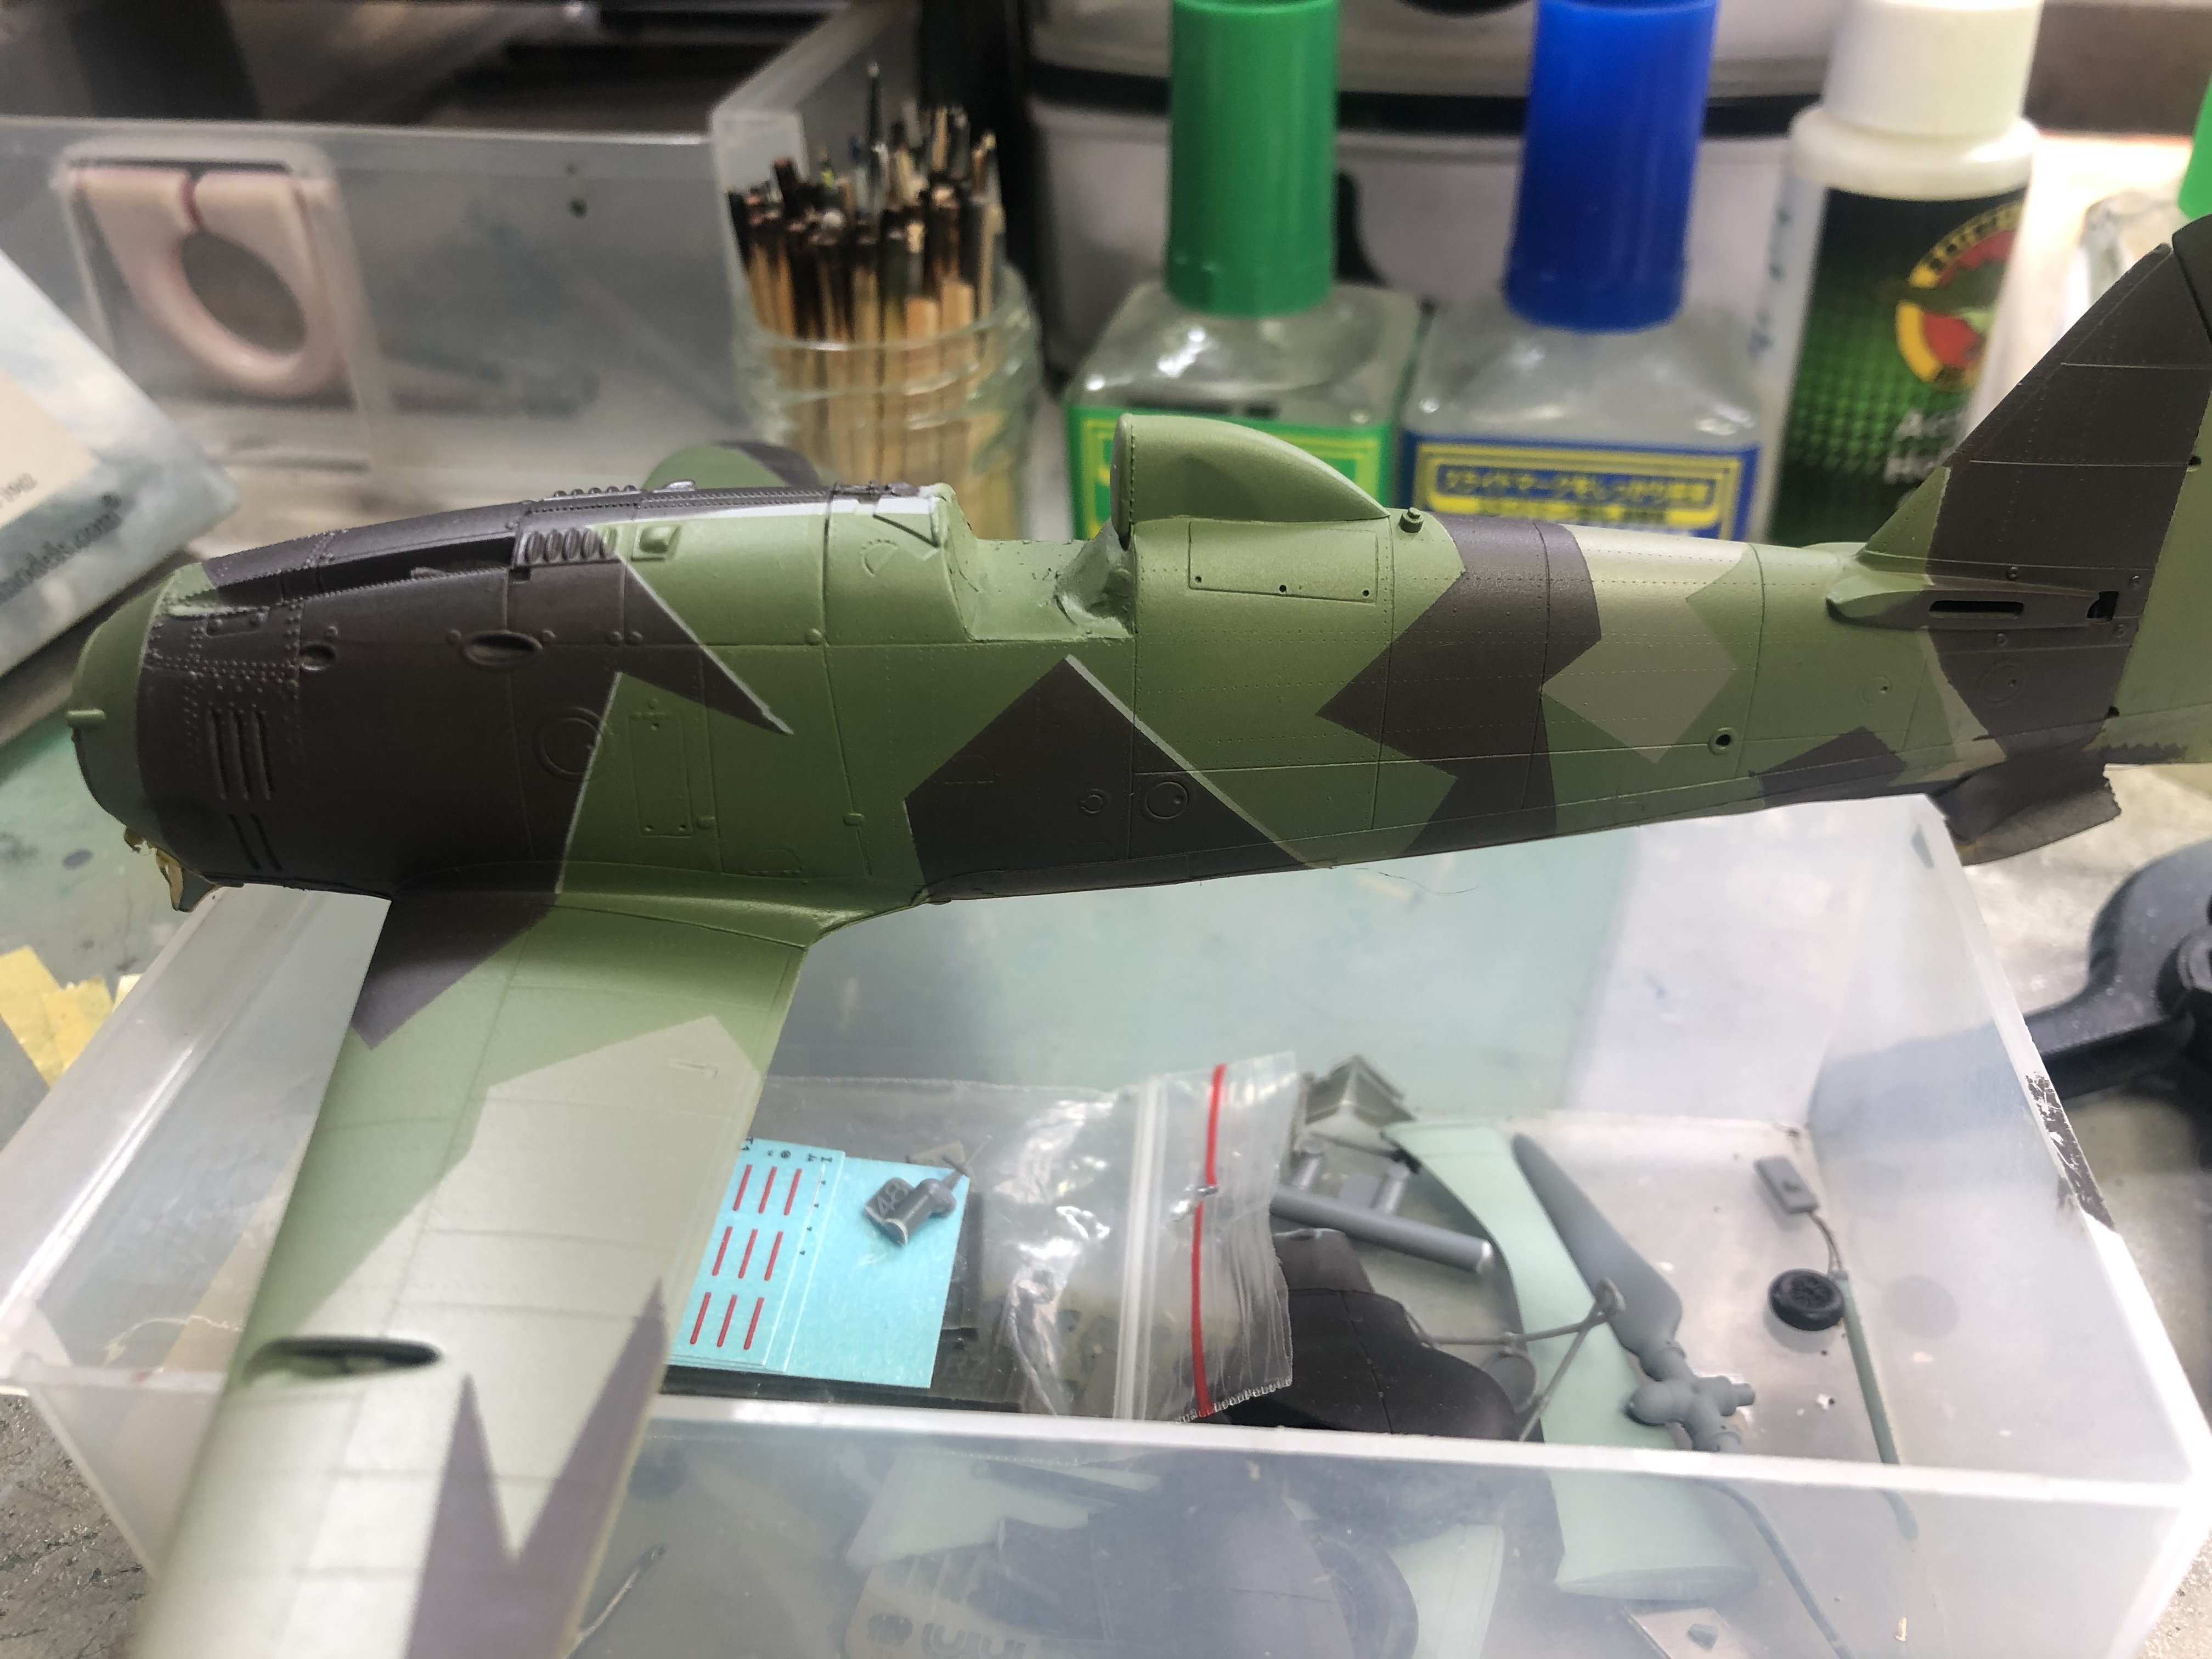
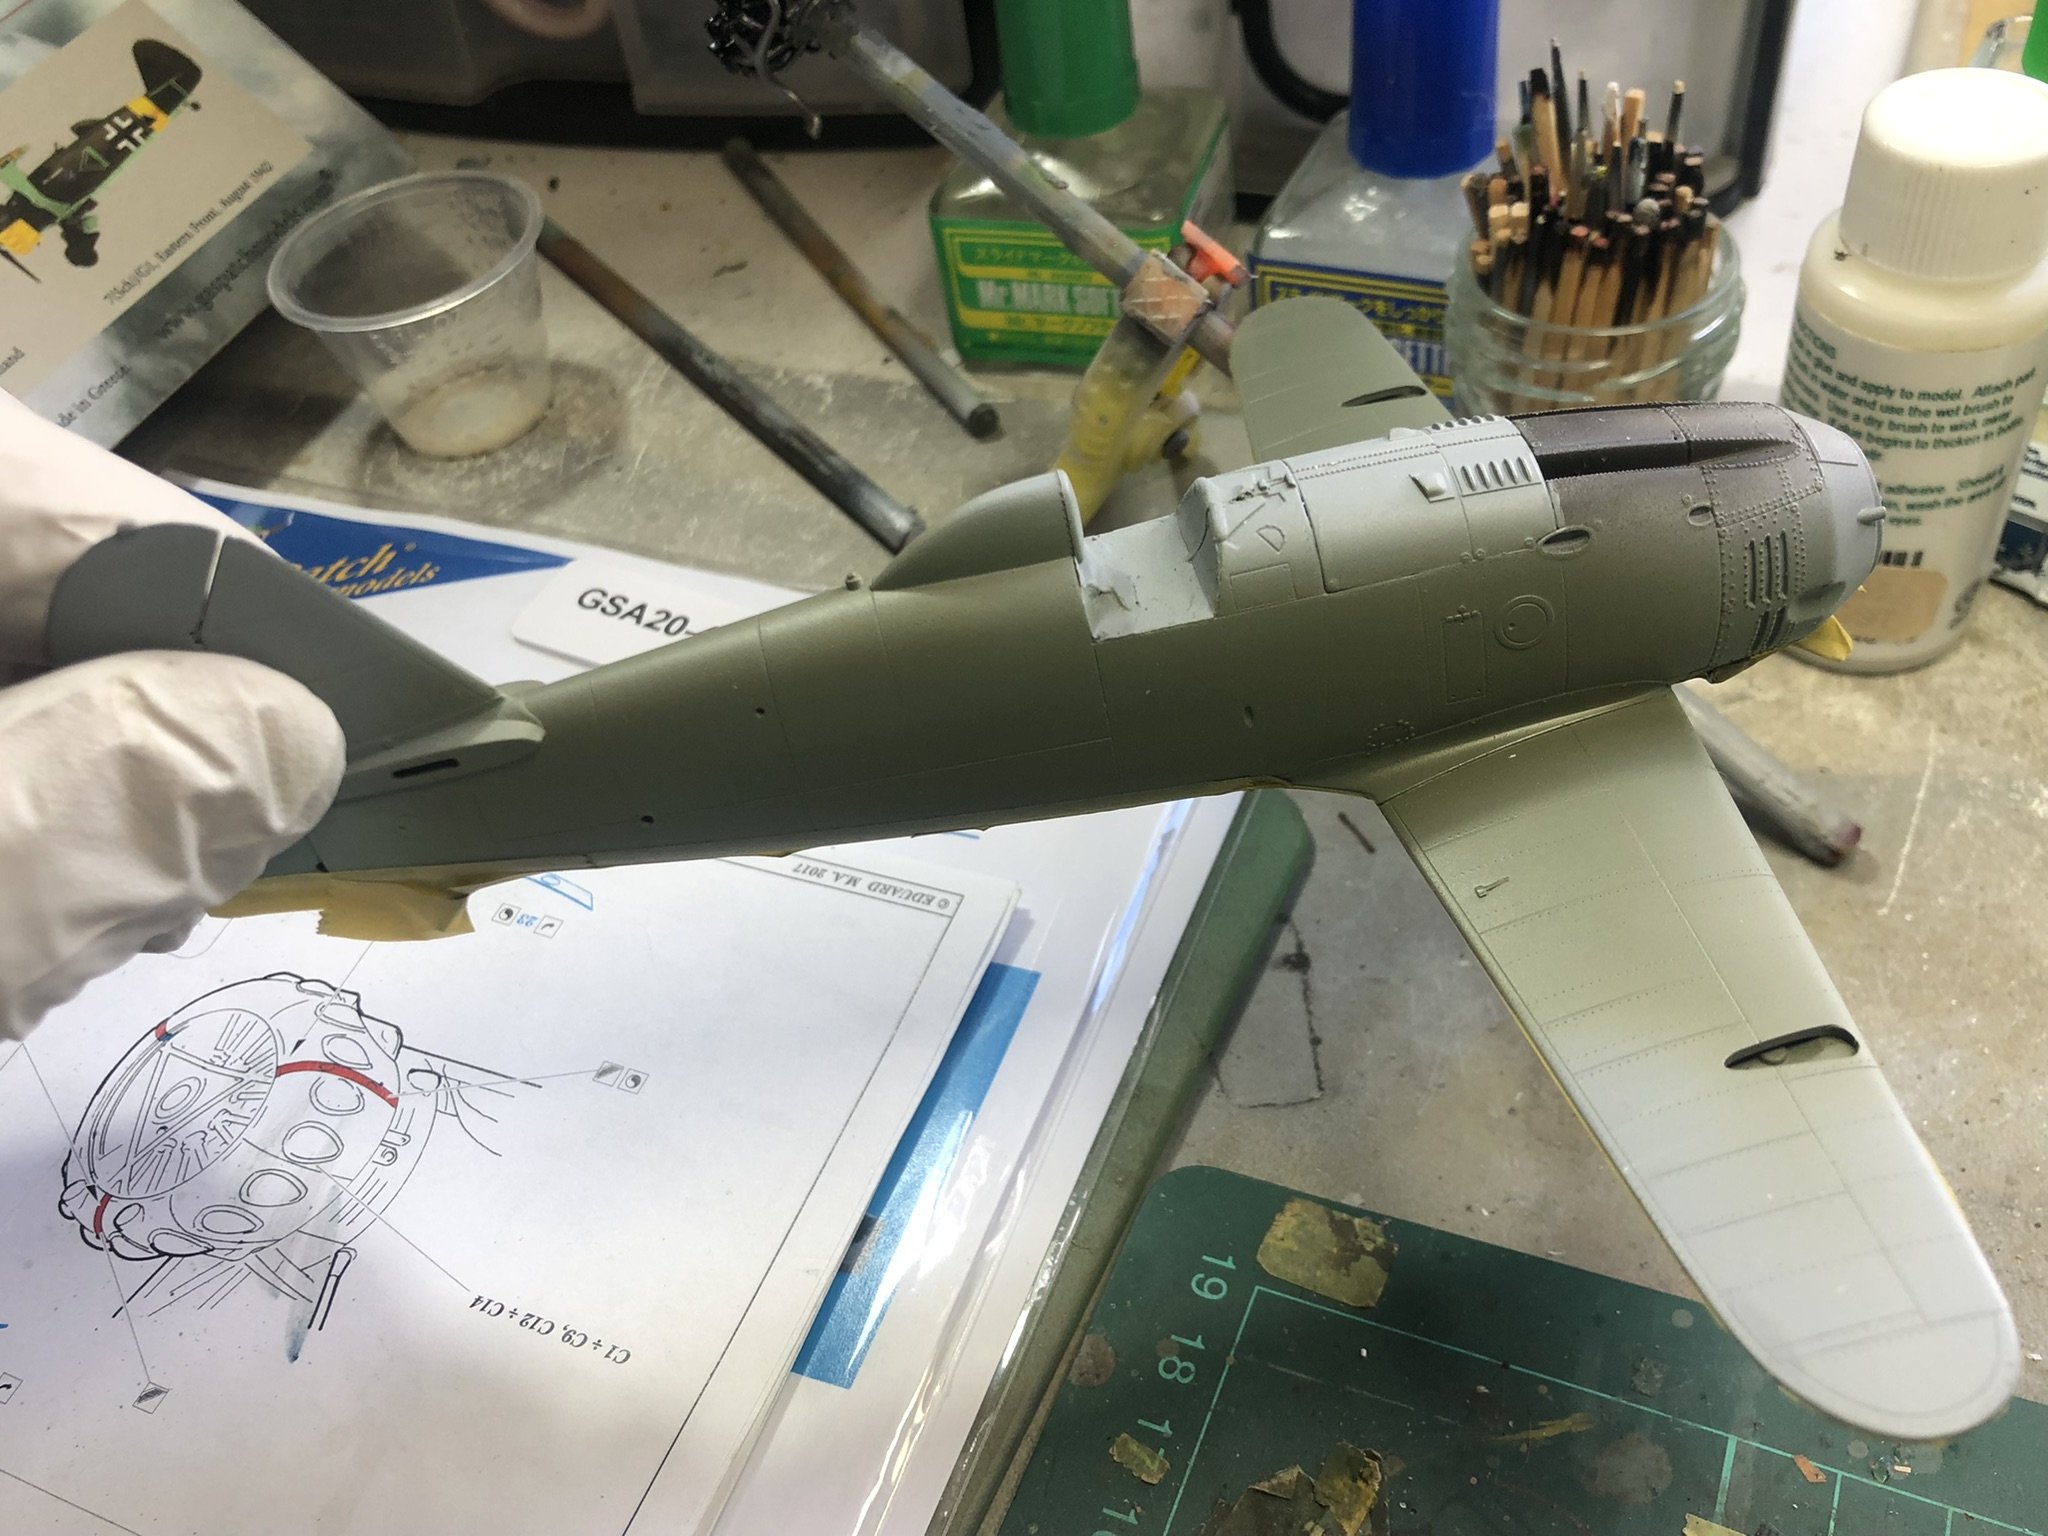
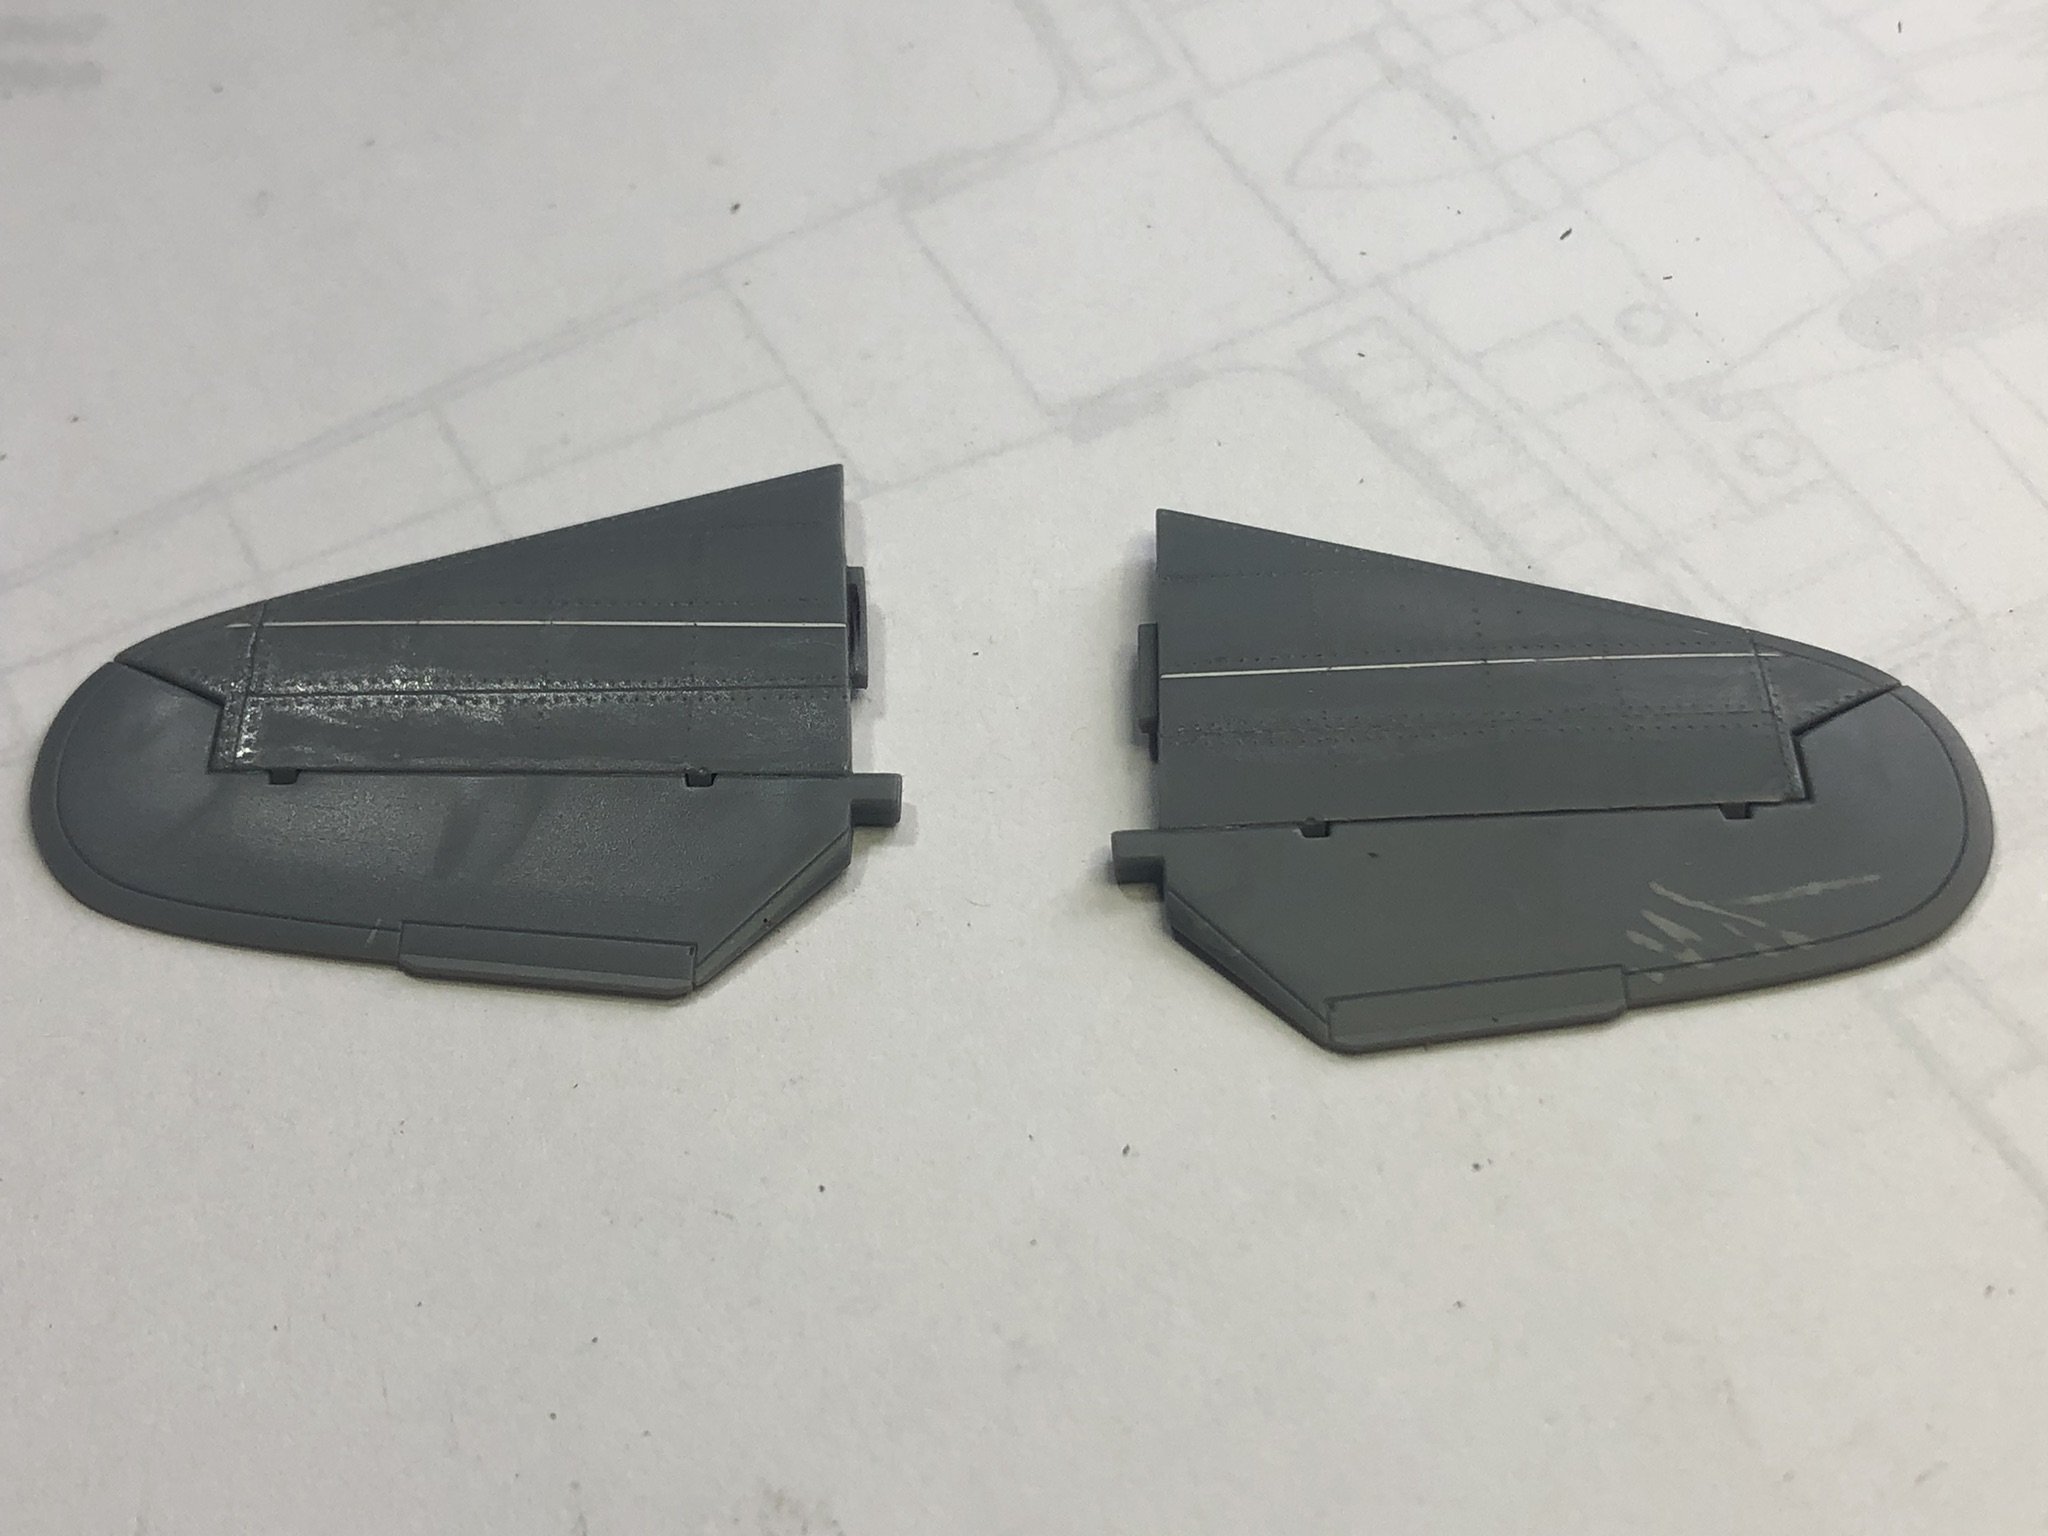
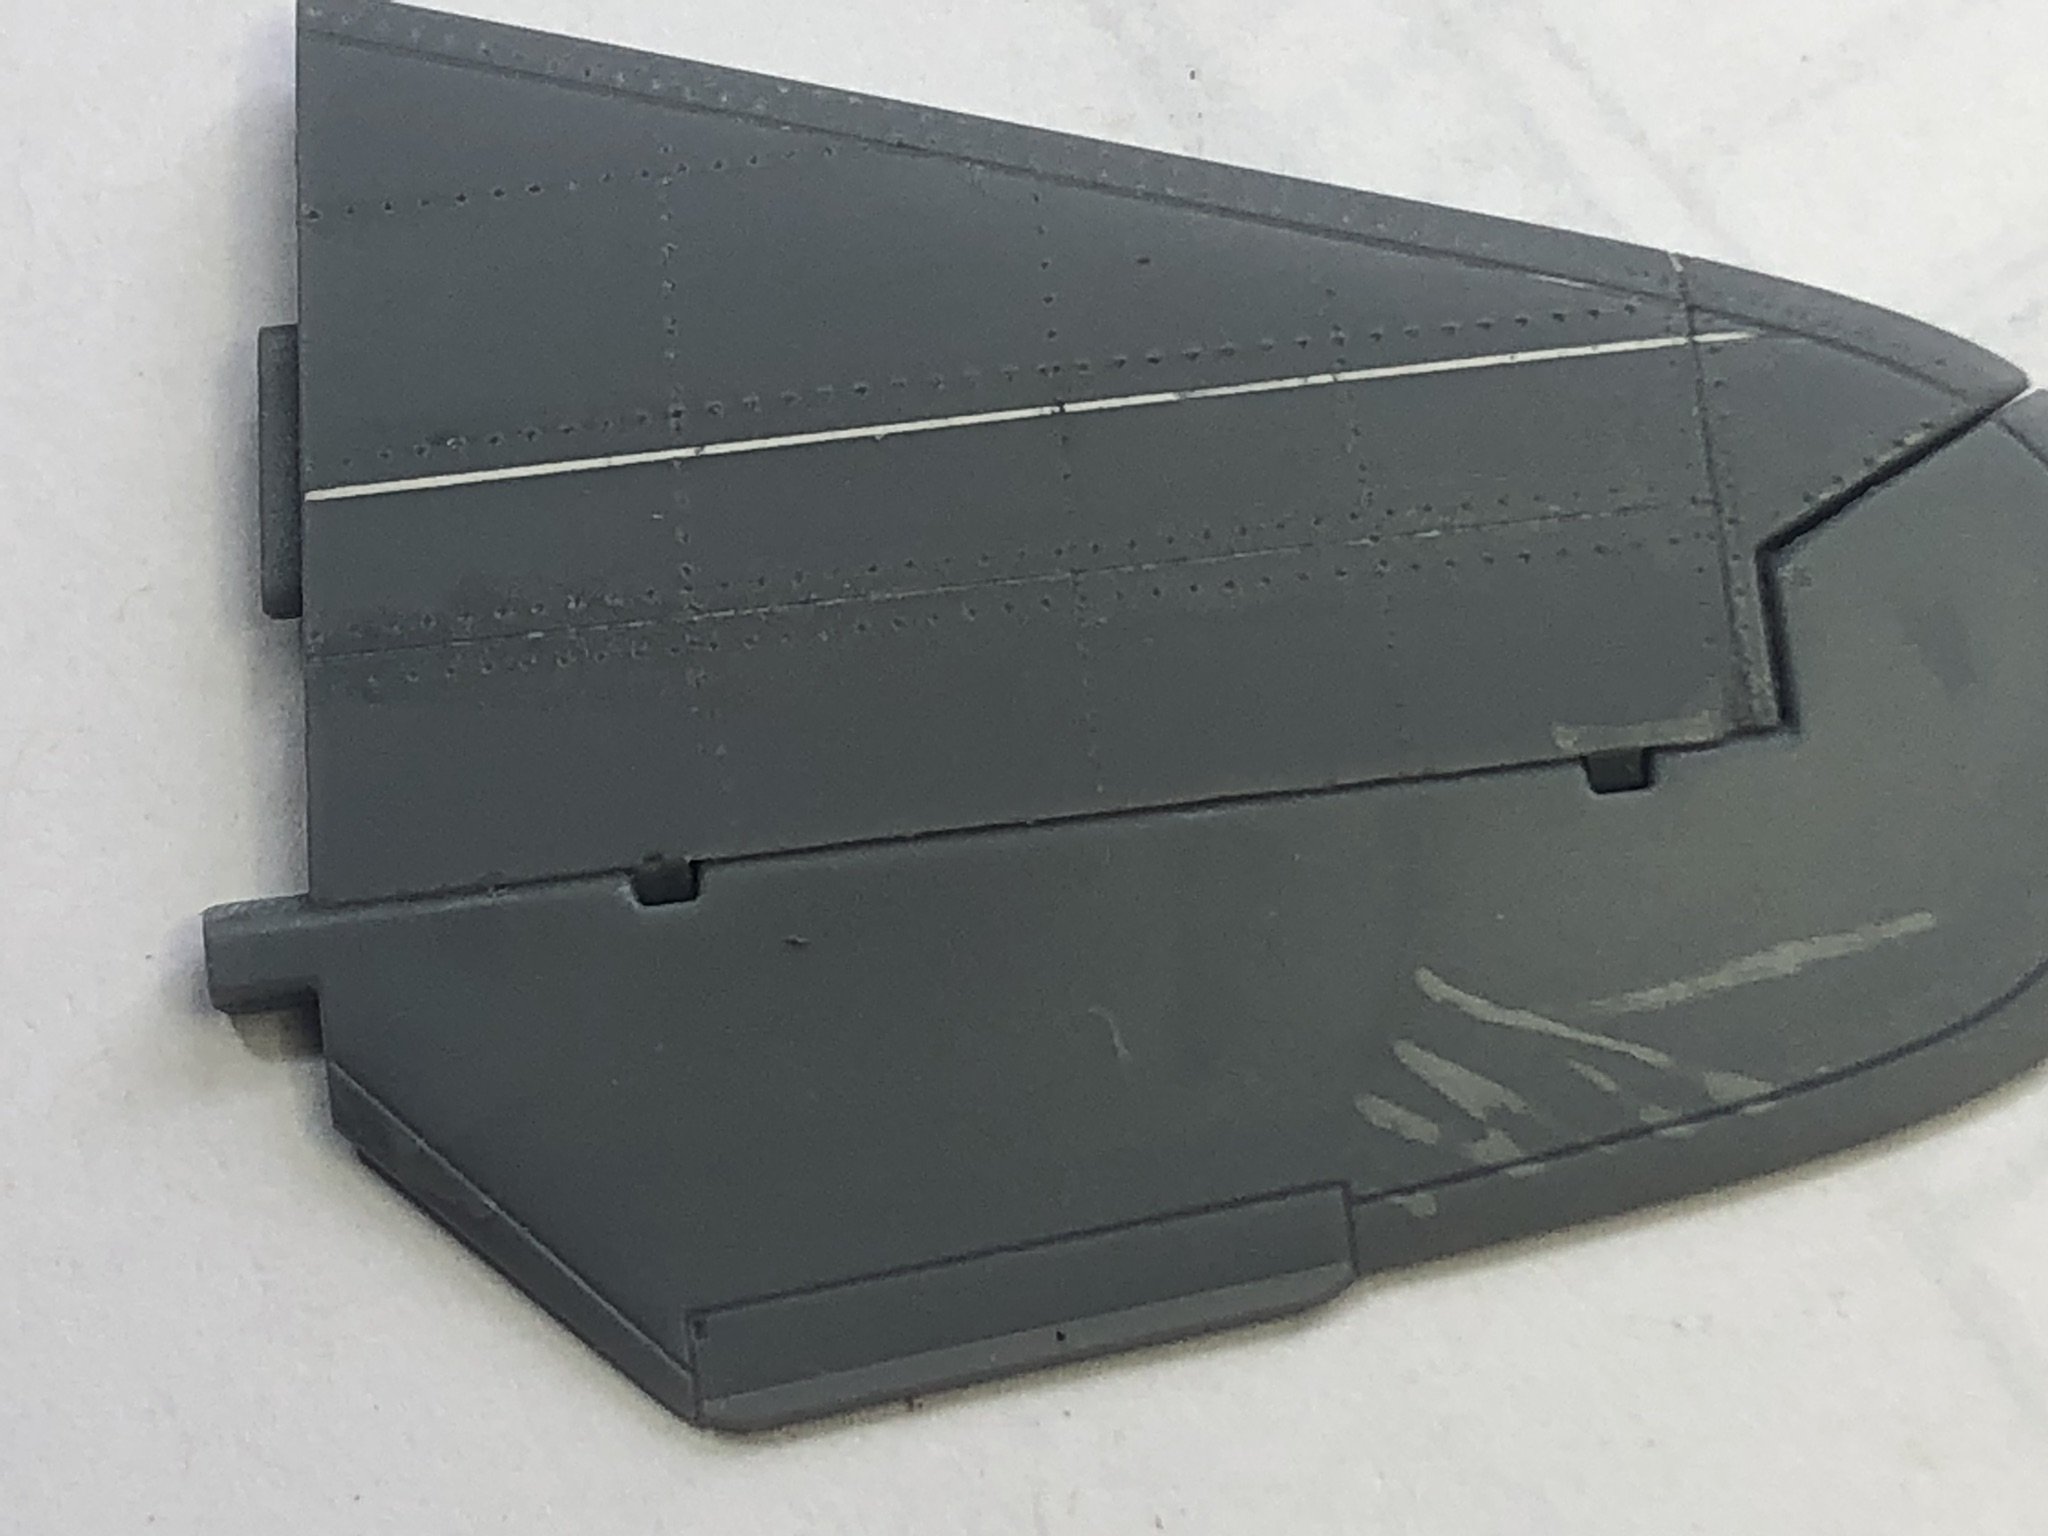
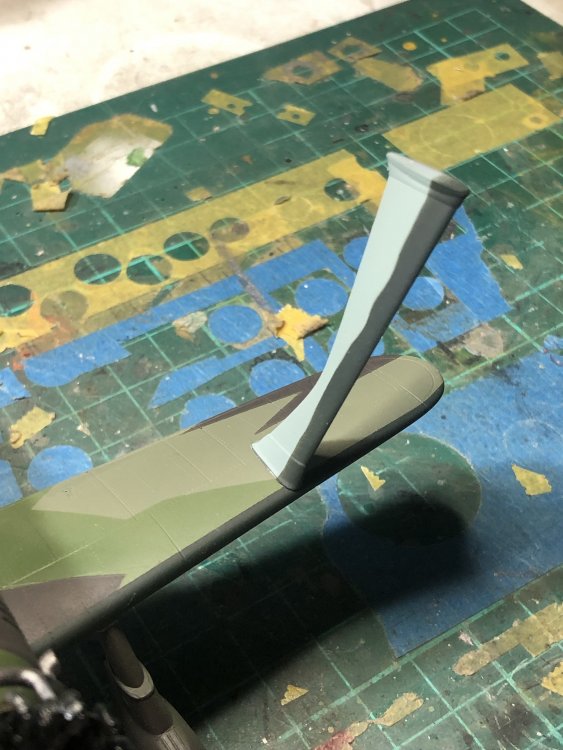
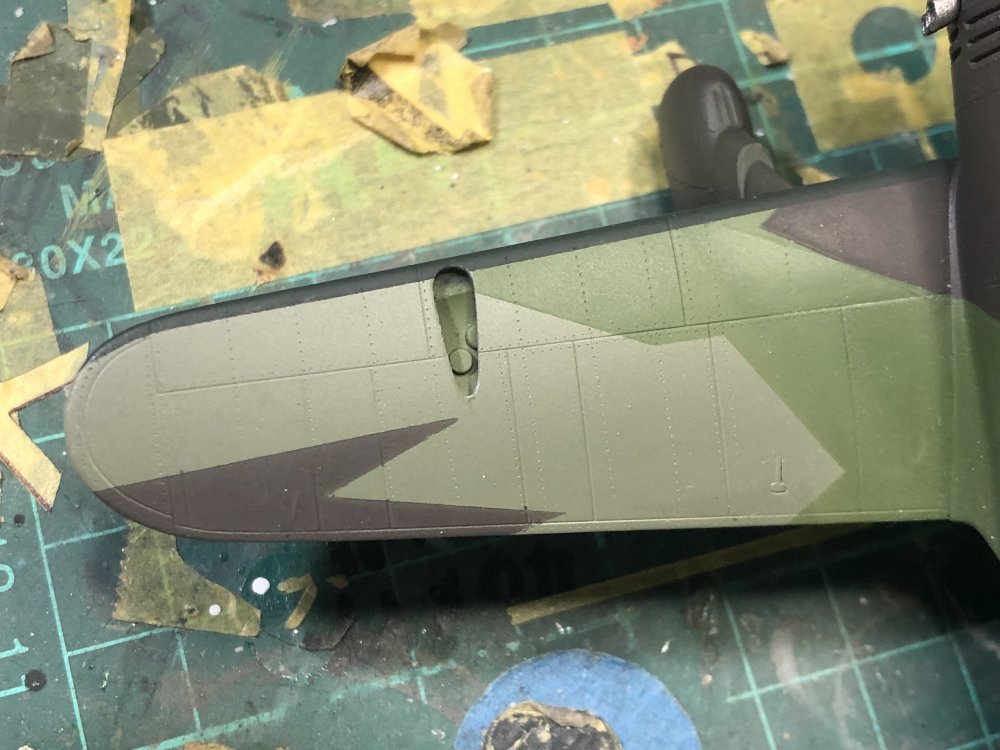
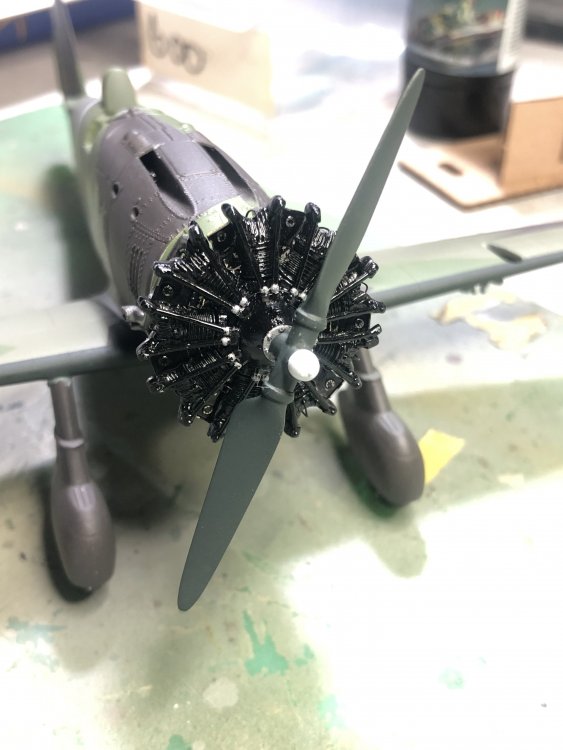
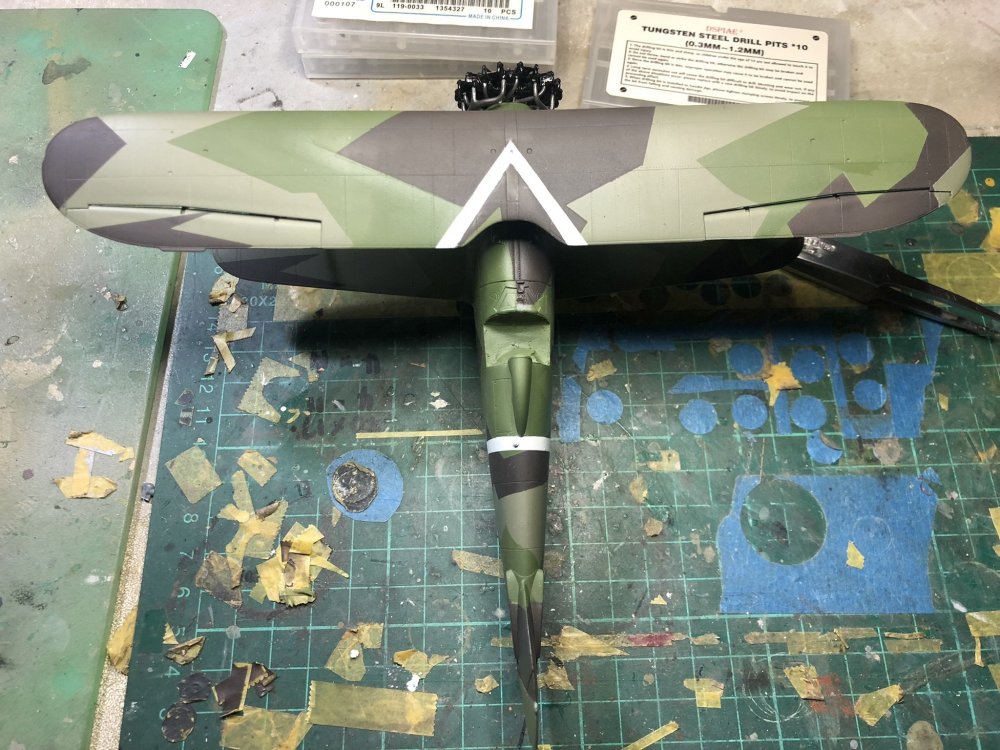
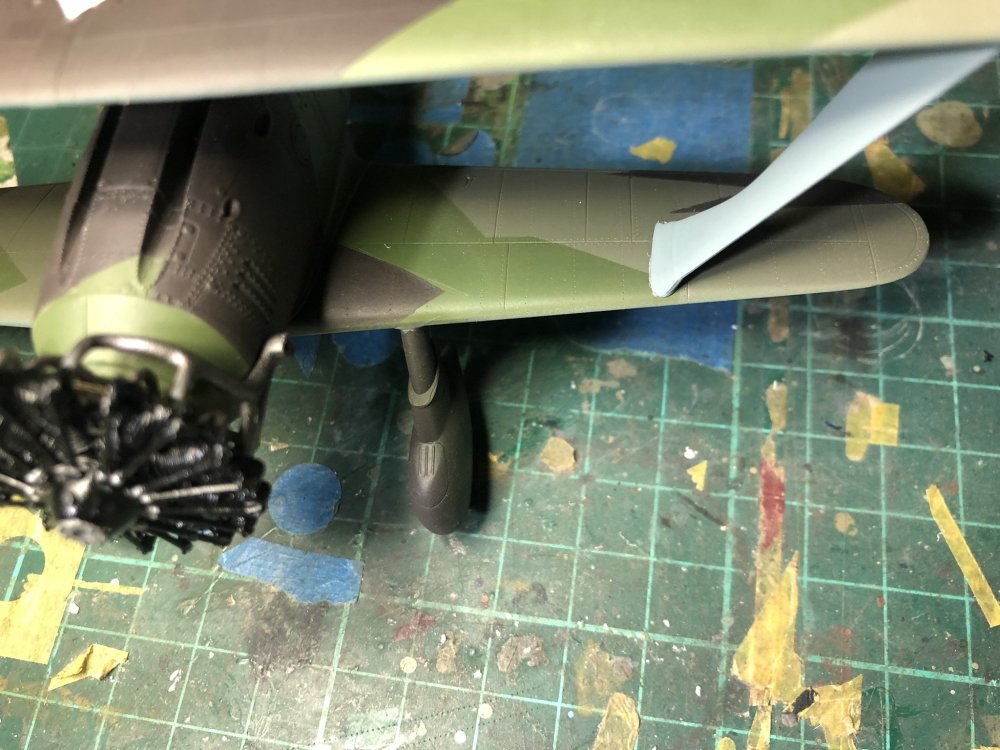
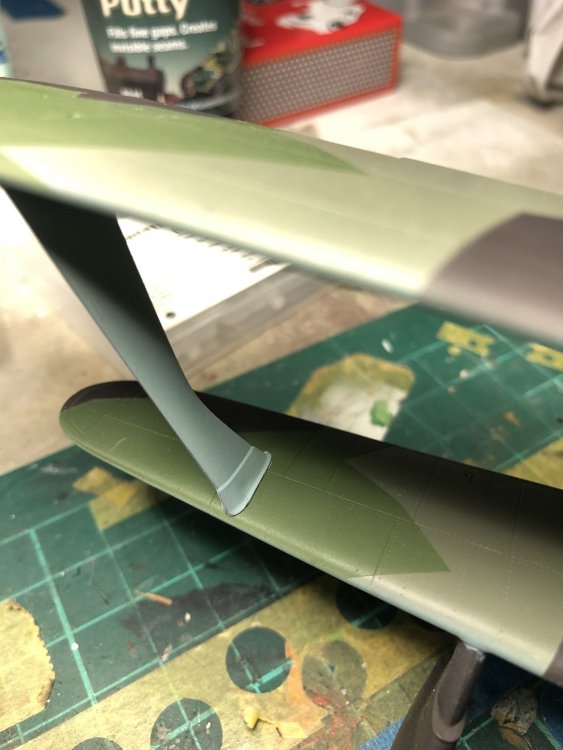
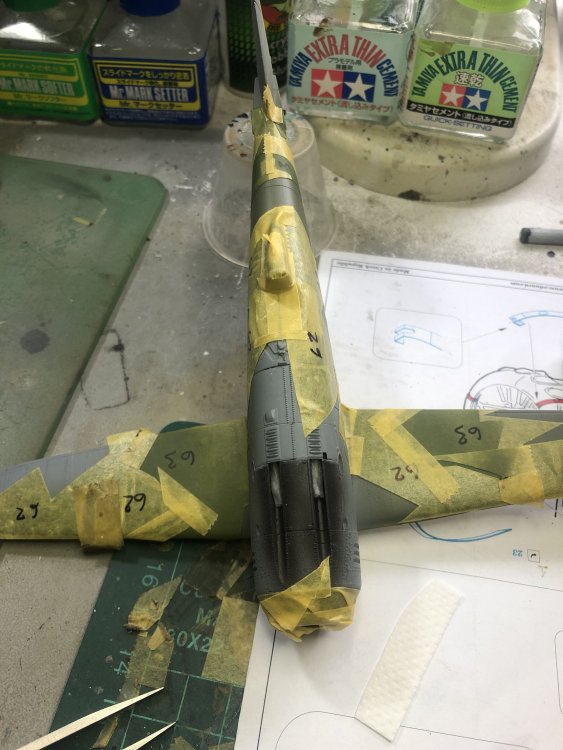
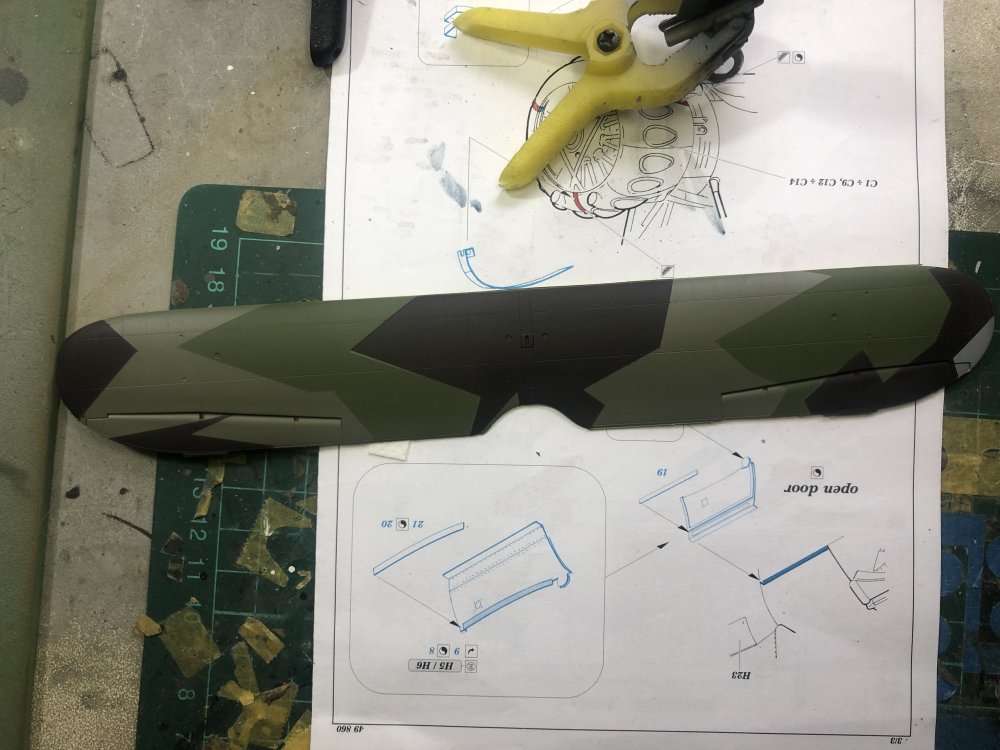
Thanks guys! More masking mayhem! Time to add the RLM 70 to the leading edges. The support struts and lower wing seem to have a softer demarcation, so these were masked and blue tak used for the front pieces. The upper wing and stabs were hard edged. The prop was finished after filling some sink holes on either side which were slap bang in the middle. Dry fitted the prop. Next up comes final painting touch ups before we get down to decals!


-
Understated but very effective. Nicely done that man! Regards, Kent
-
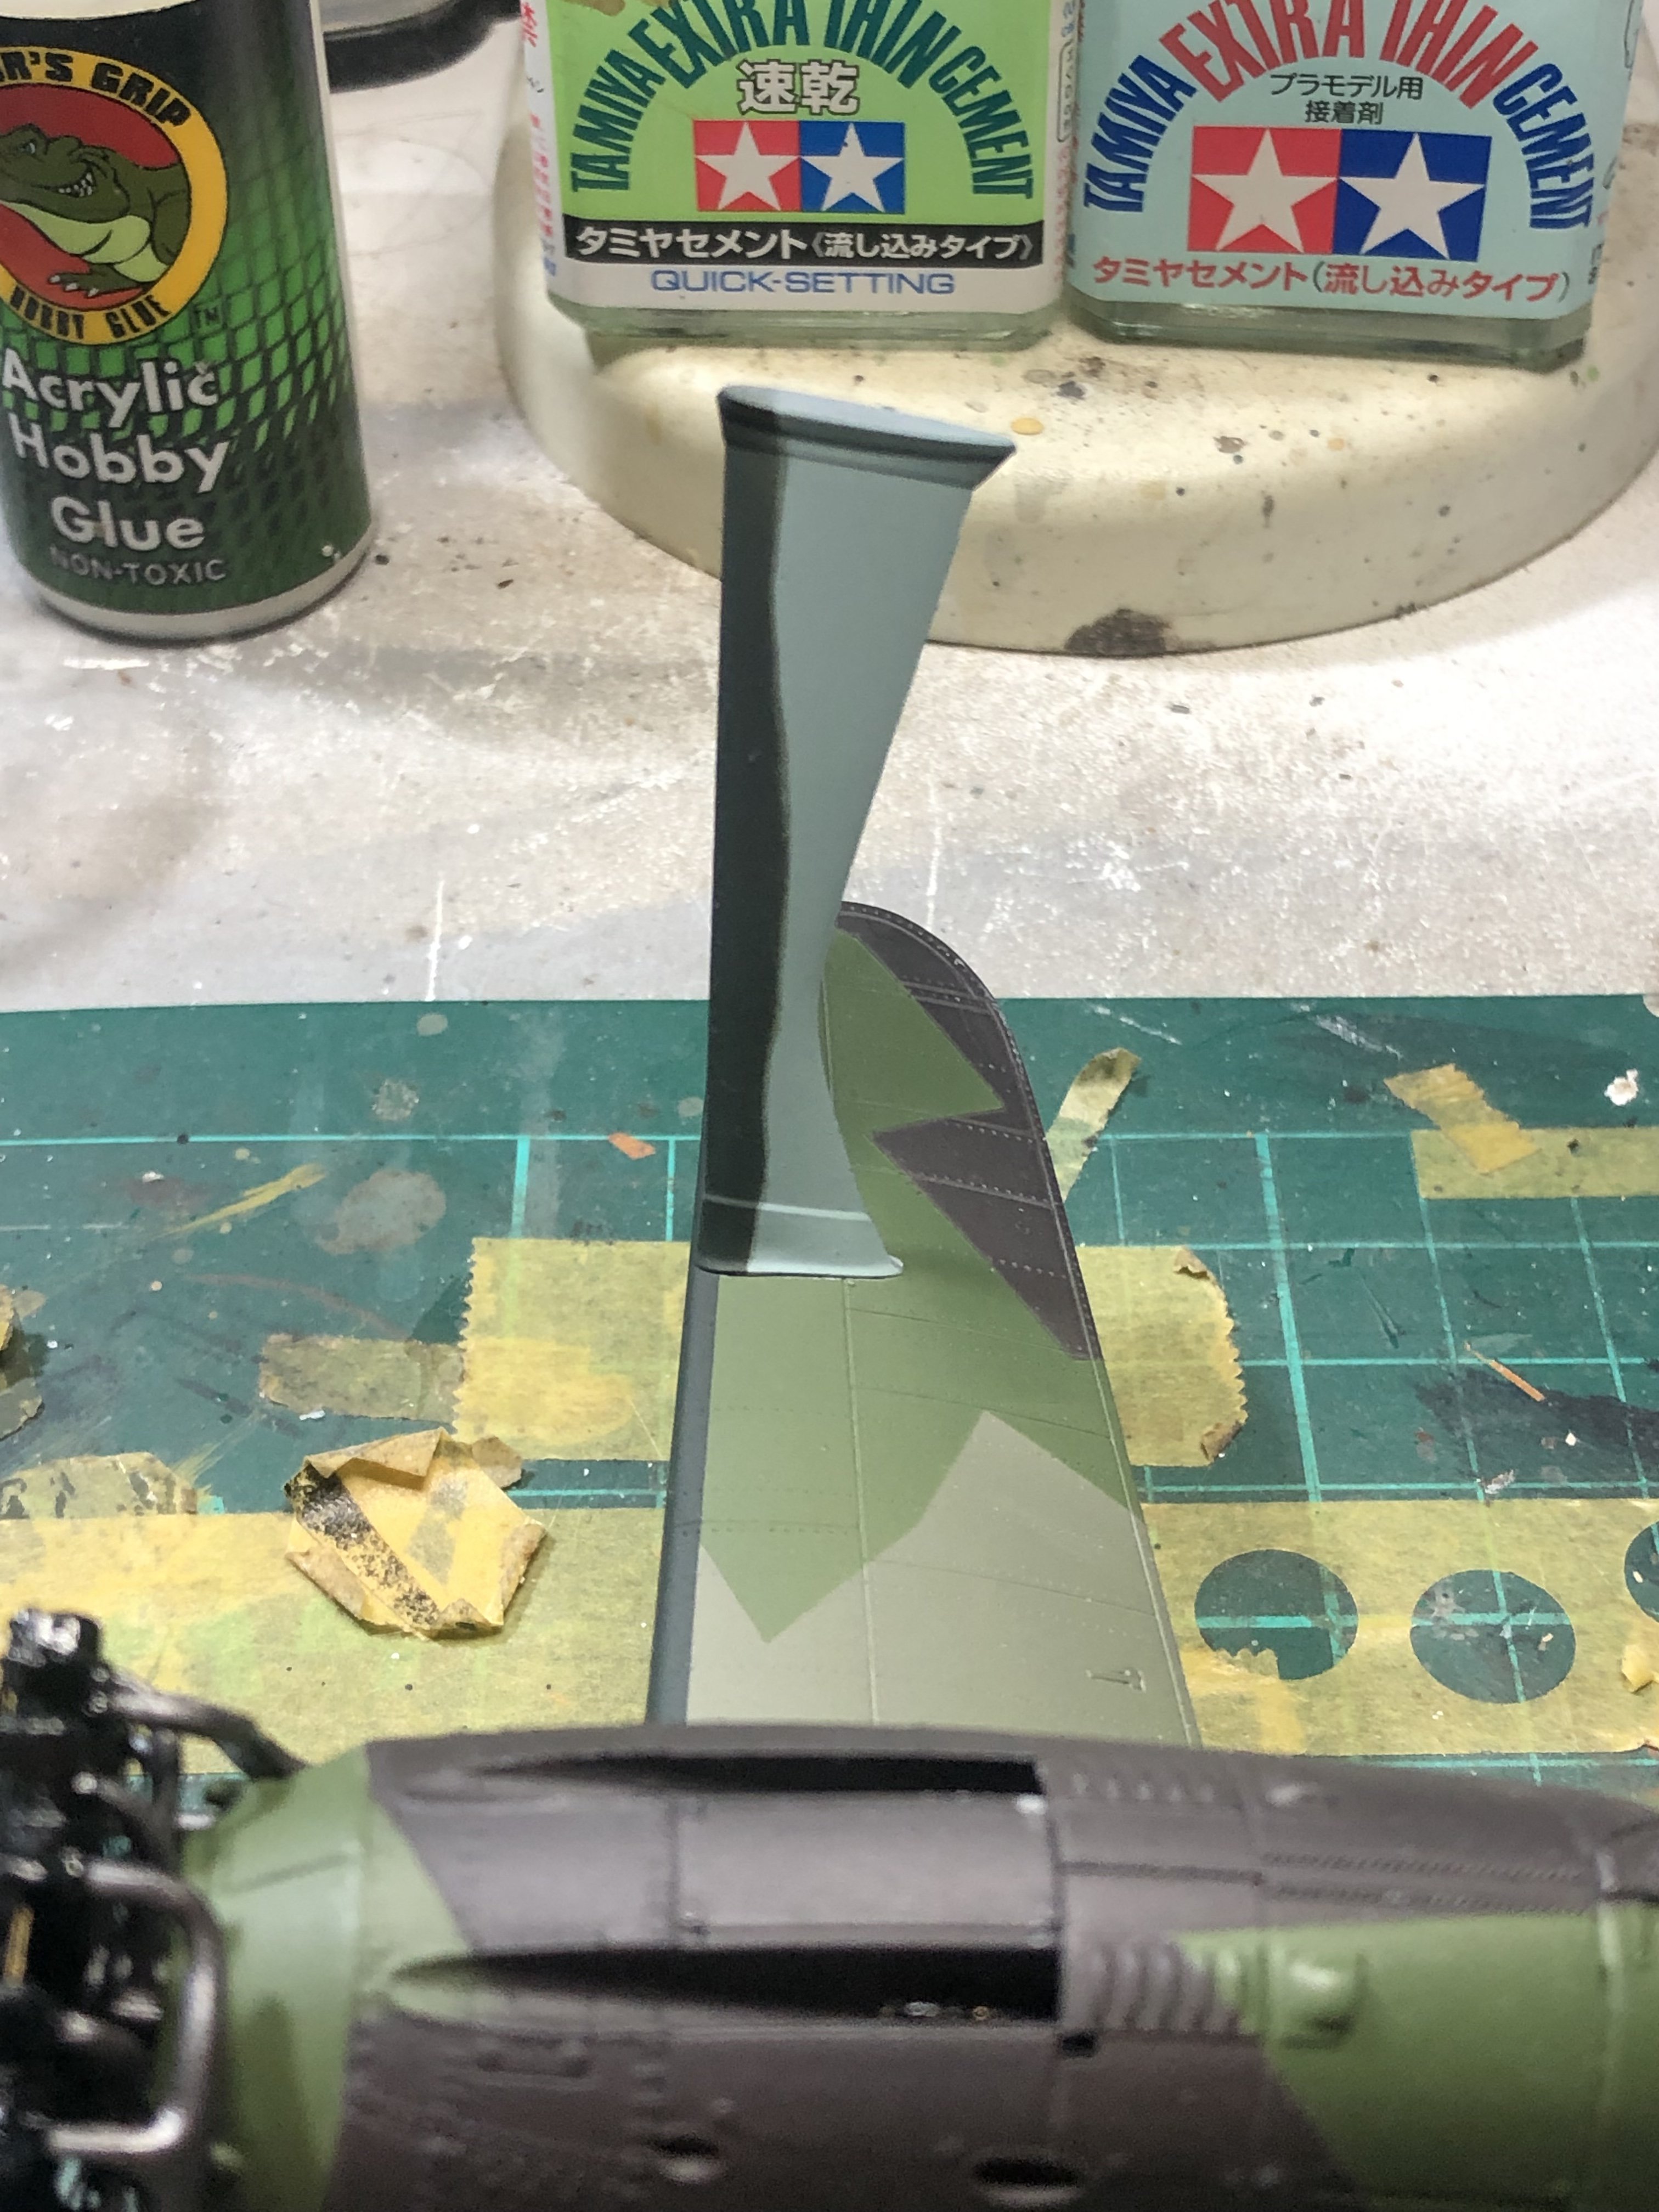
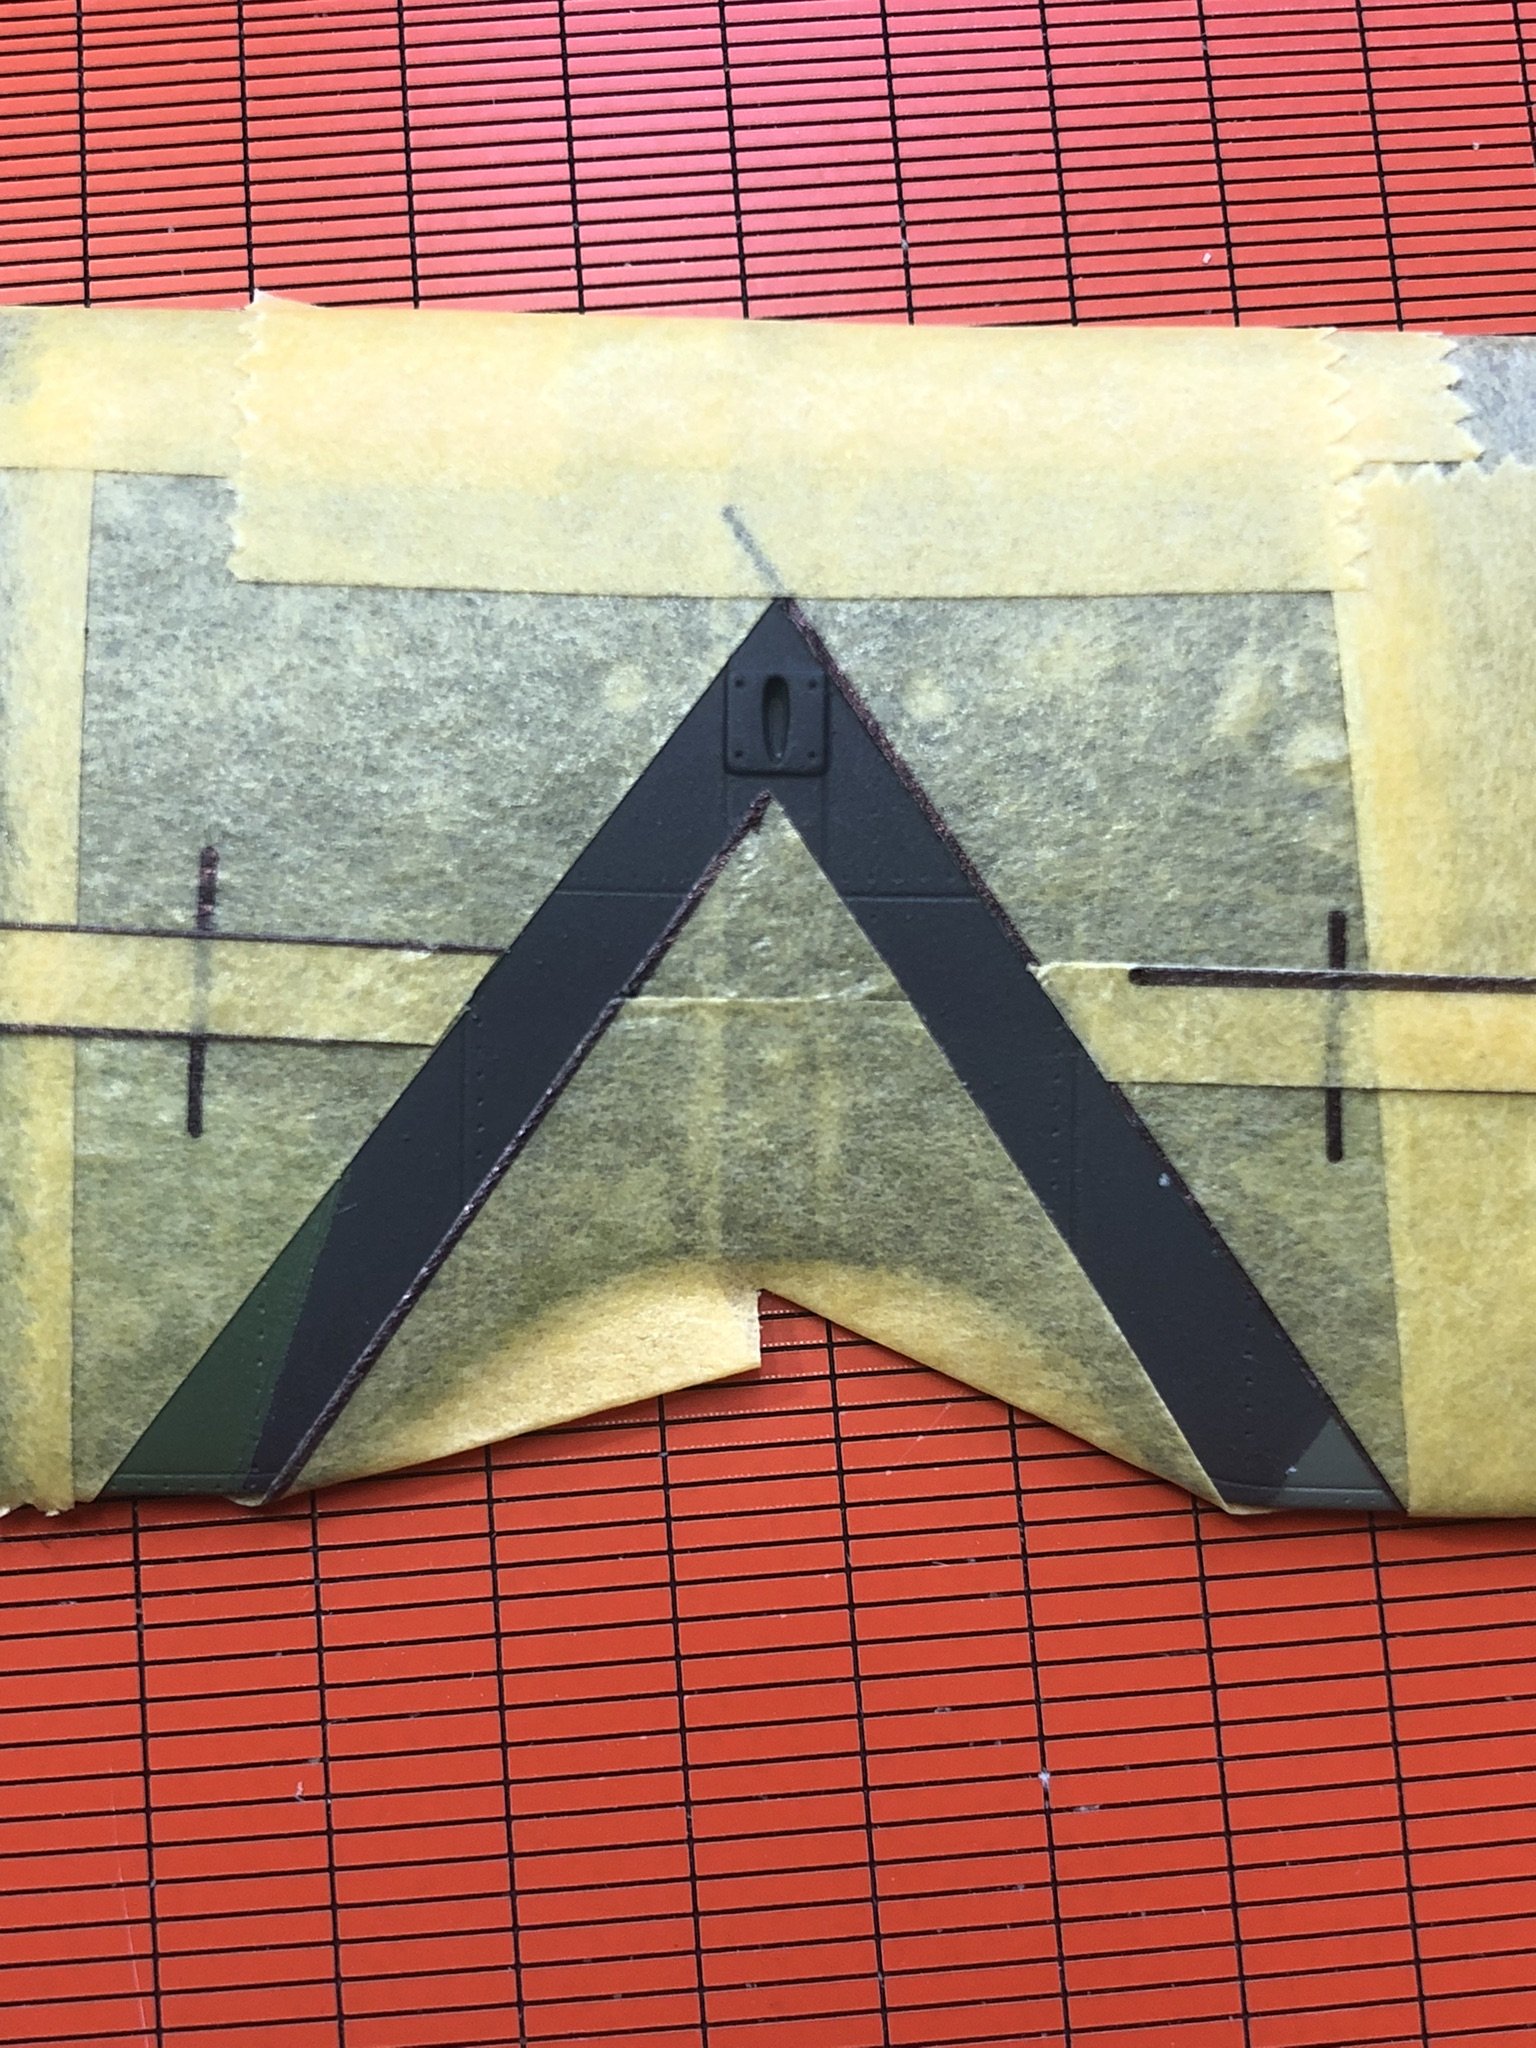
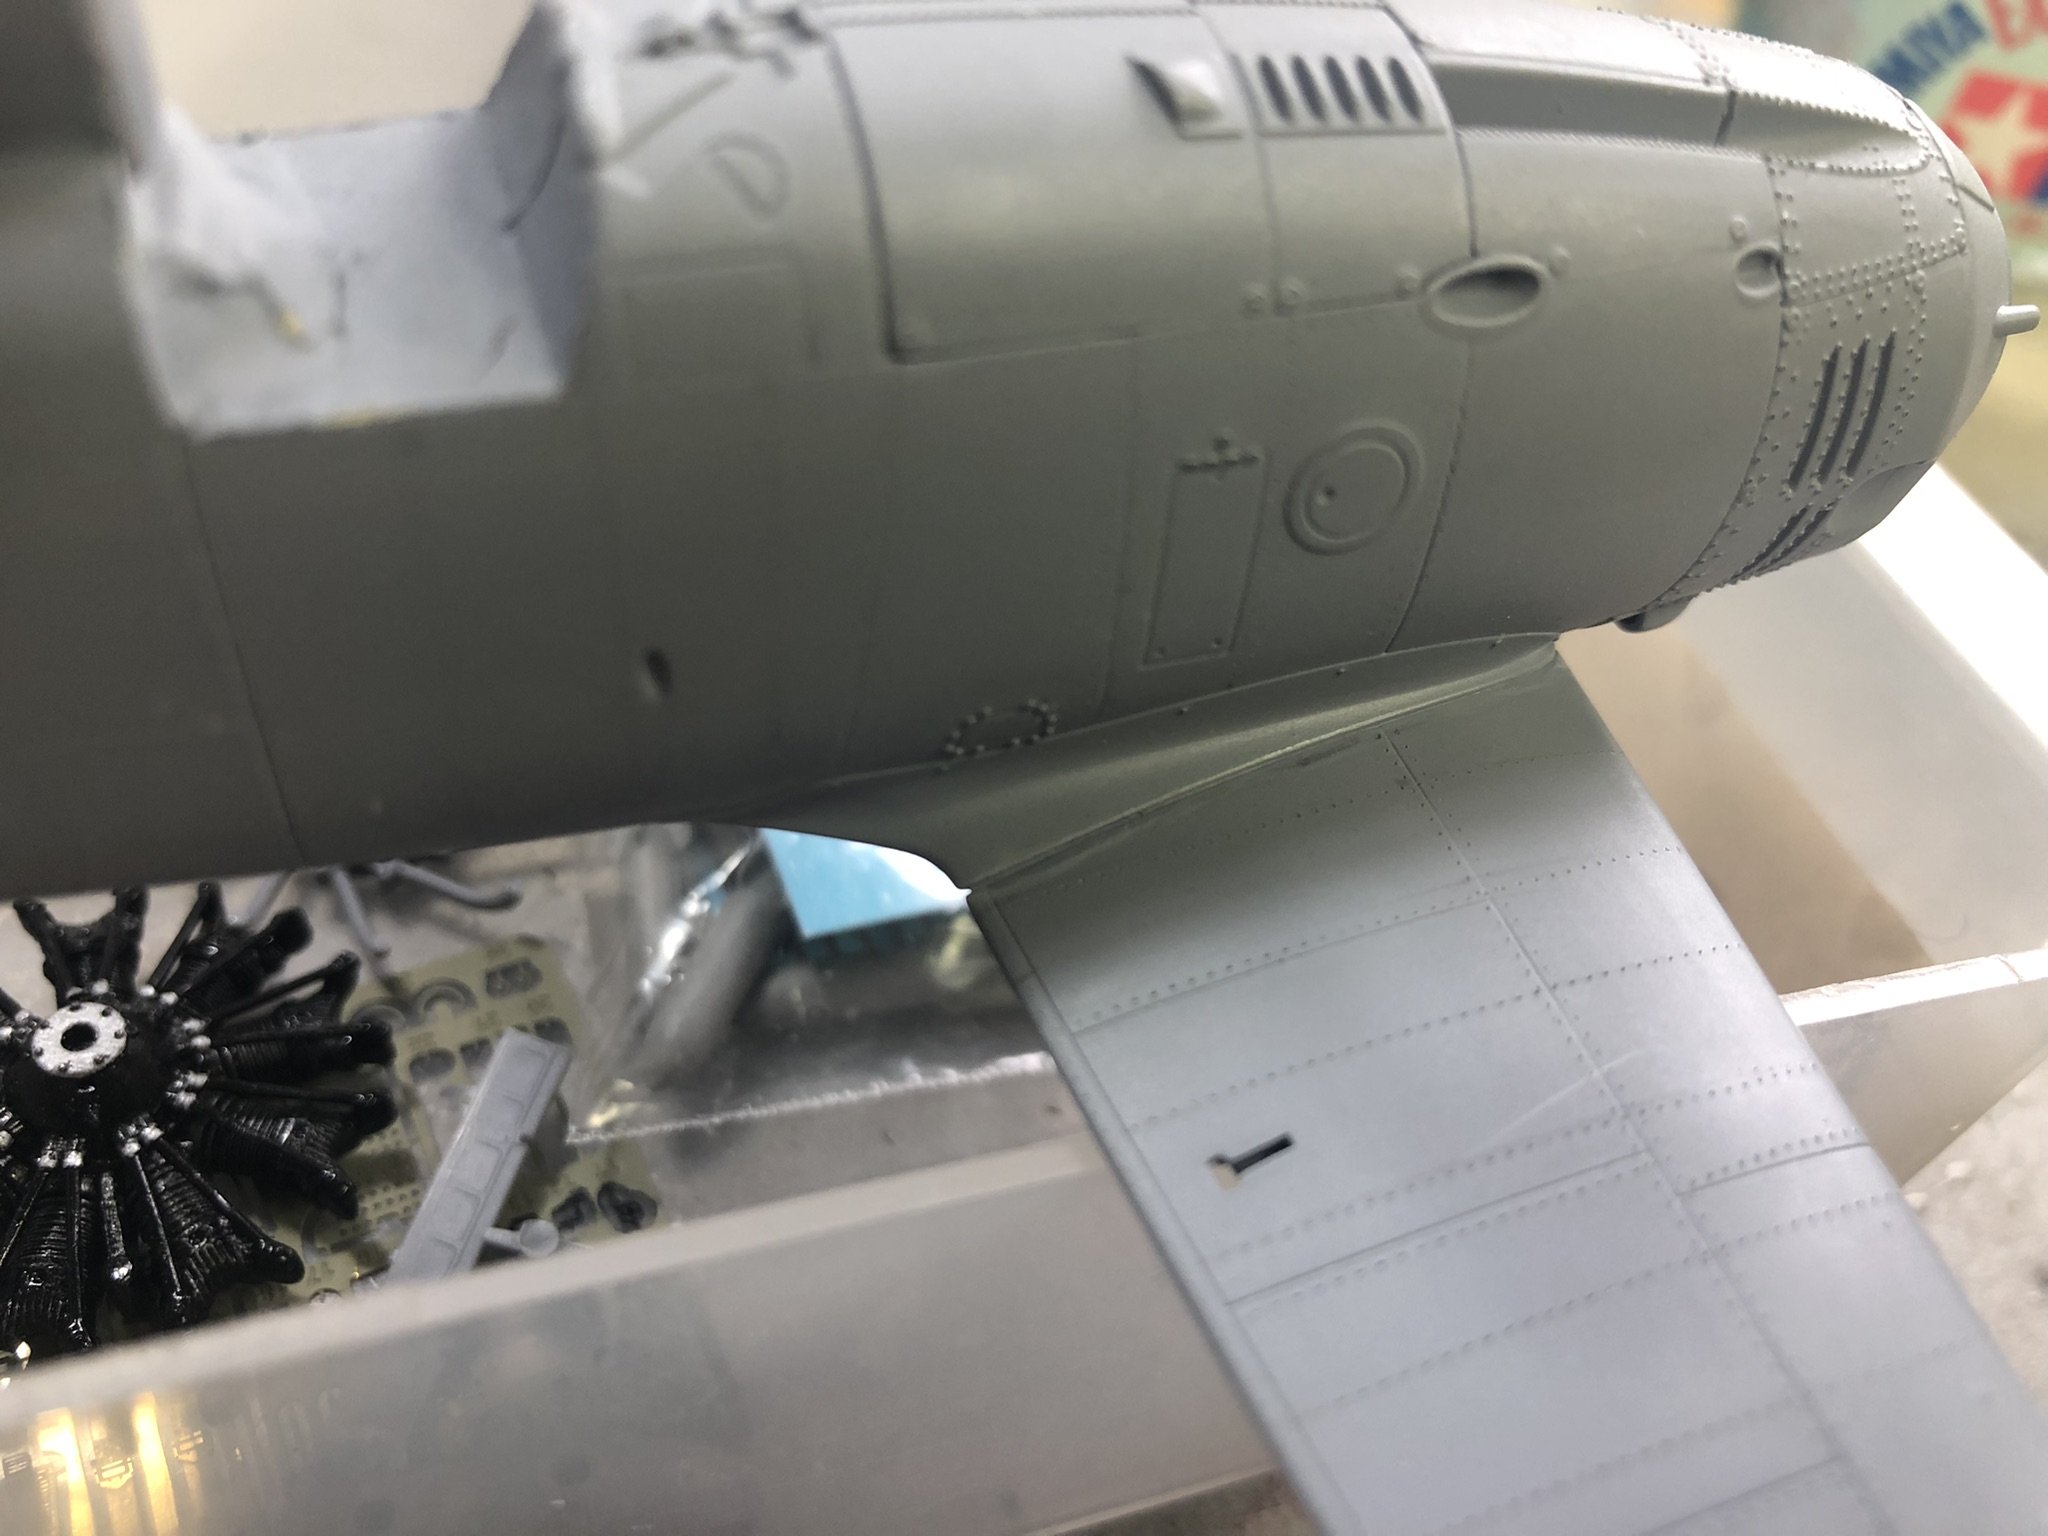
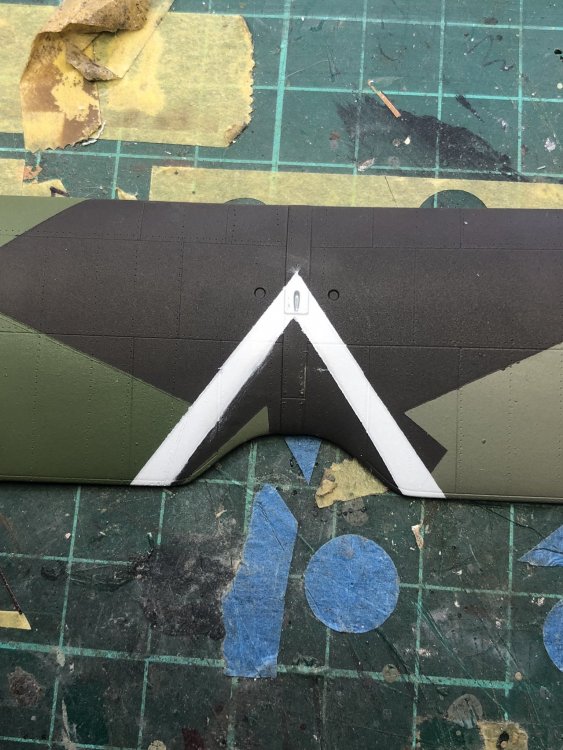
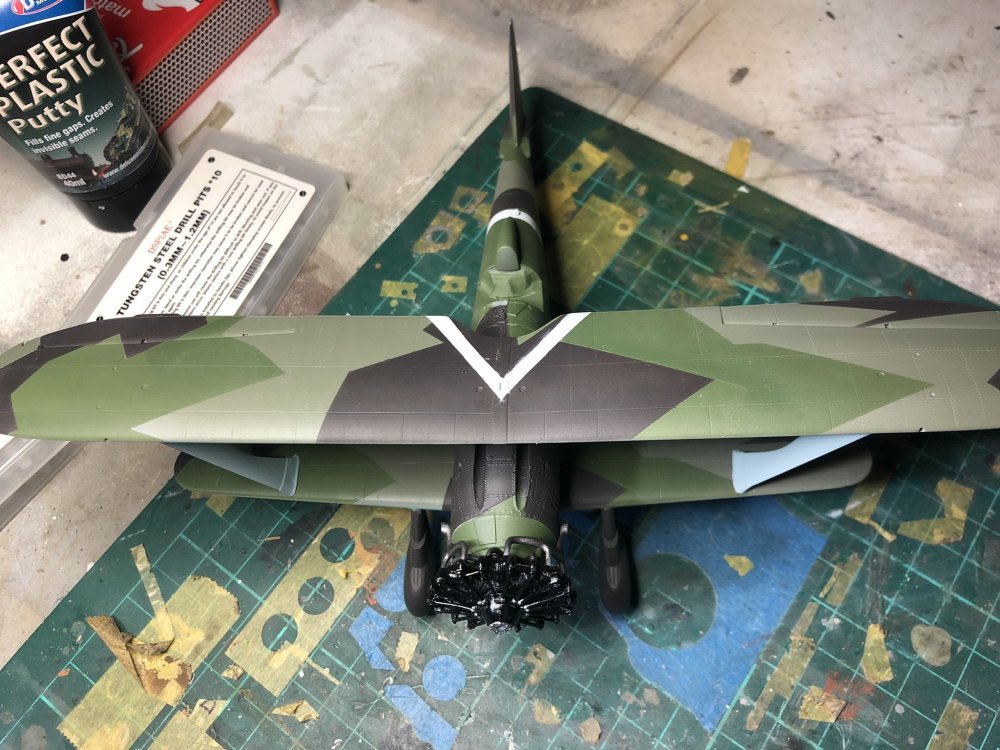
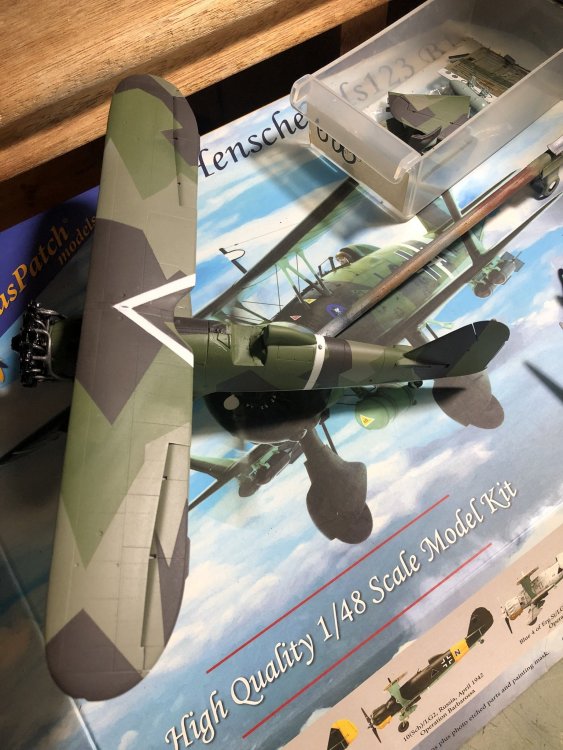
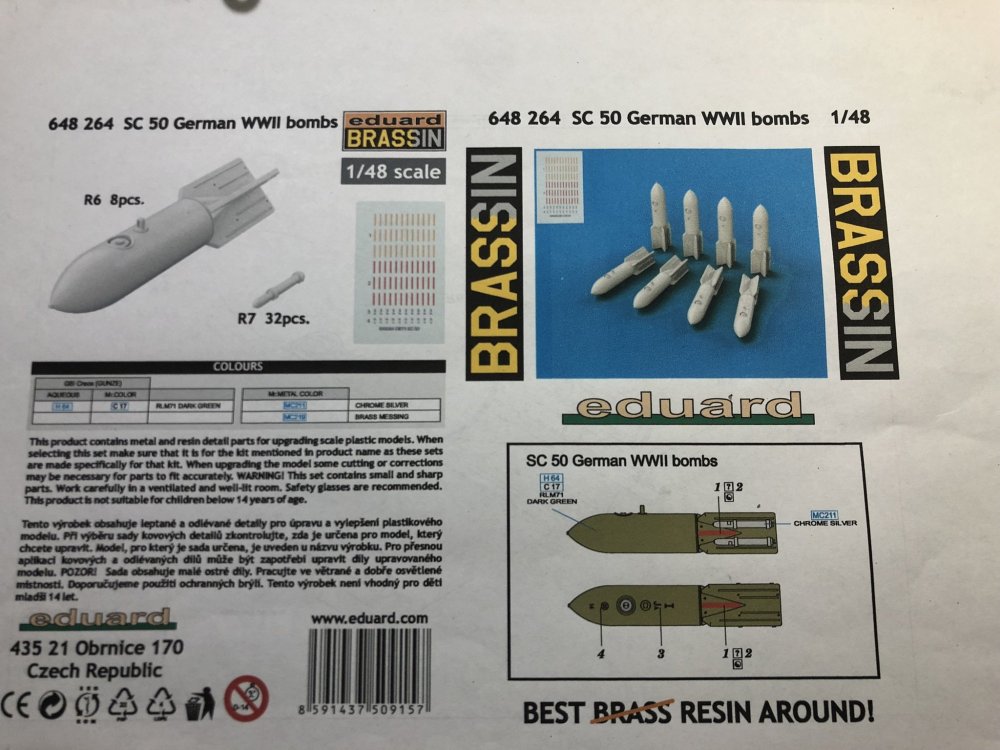
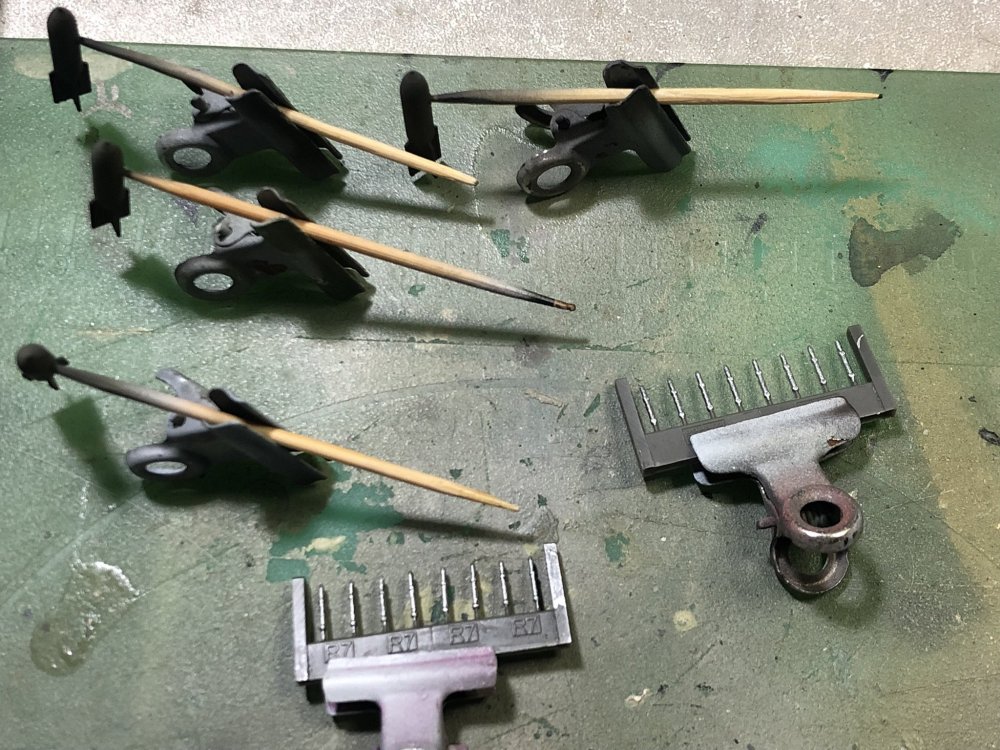
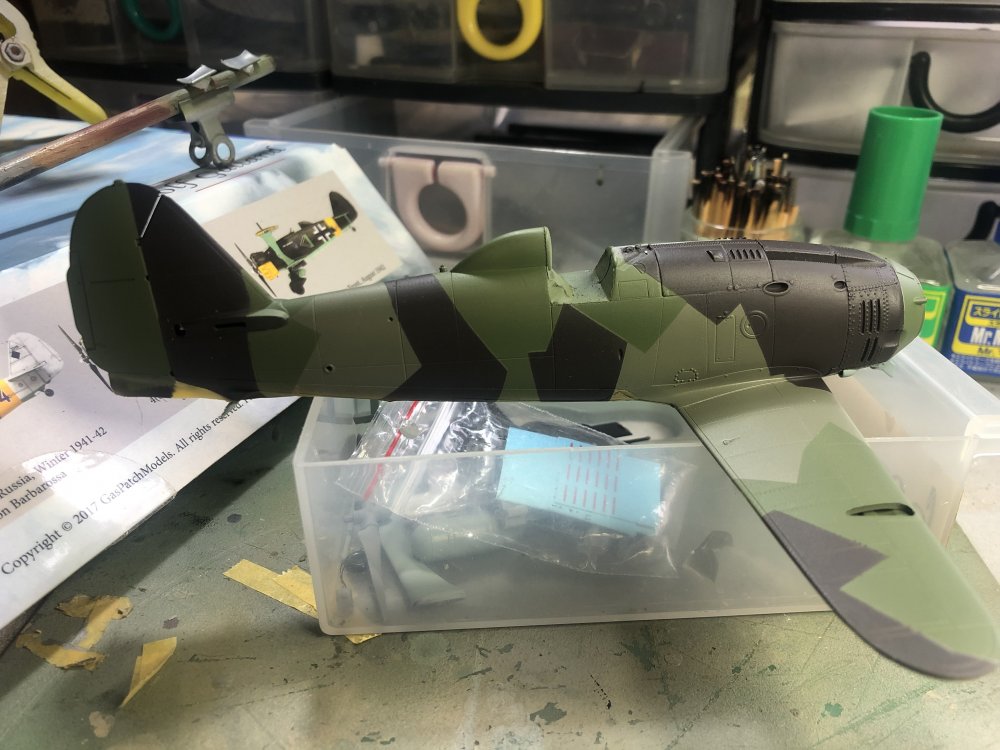
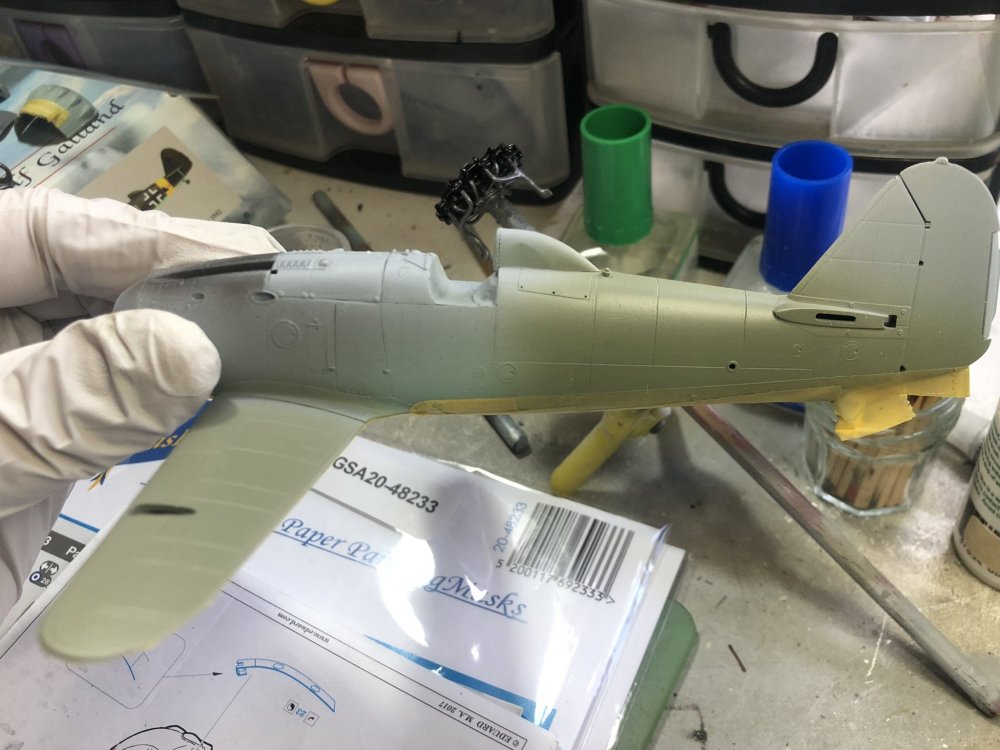
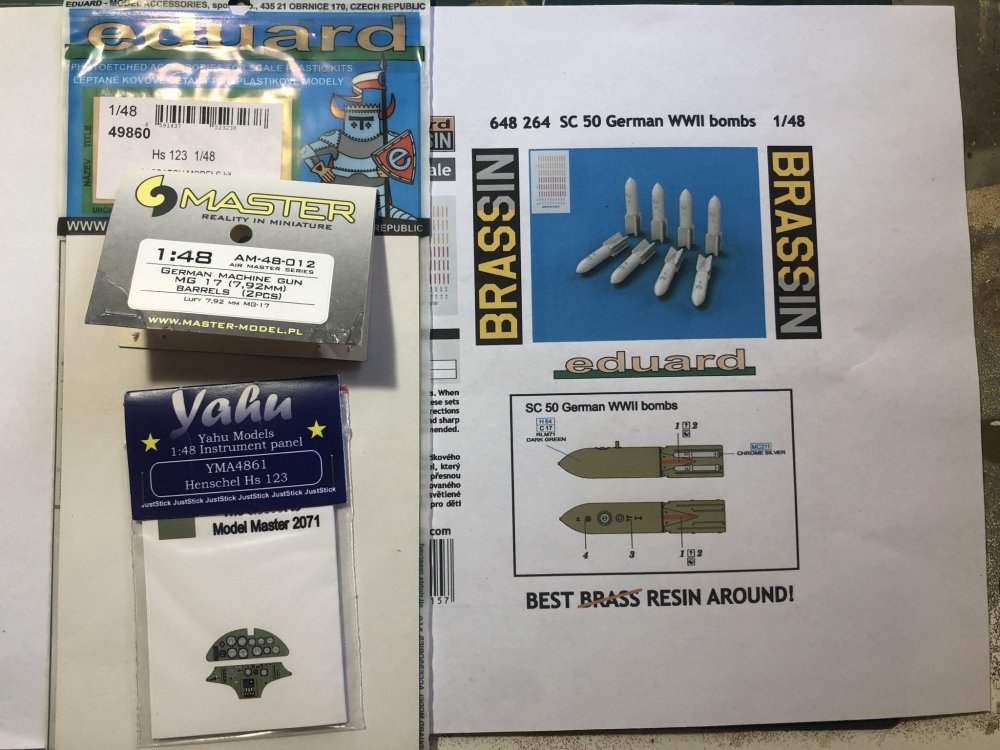
Welcome back and thank you. So after touching up the camouflage, I decided to paint the white markings. Once these were done I couldn’t resist a dry fit of the upper wing. The fit is, again, excellent and gives me an idea of the look of the finished product. The Brassin bombs were painted Humbrol RLM 71 and the chrome pieces had a dose of Molotow pen. Next up is the RLM 70 for the wings and rear stabilisers leading edges.


-
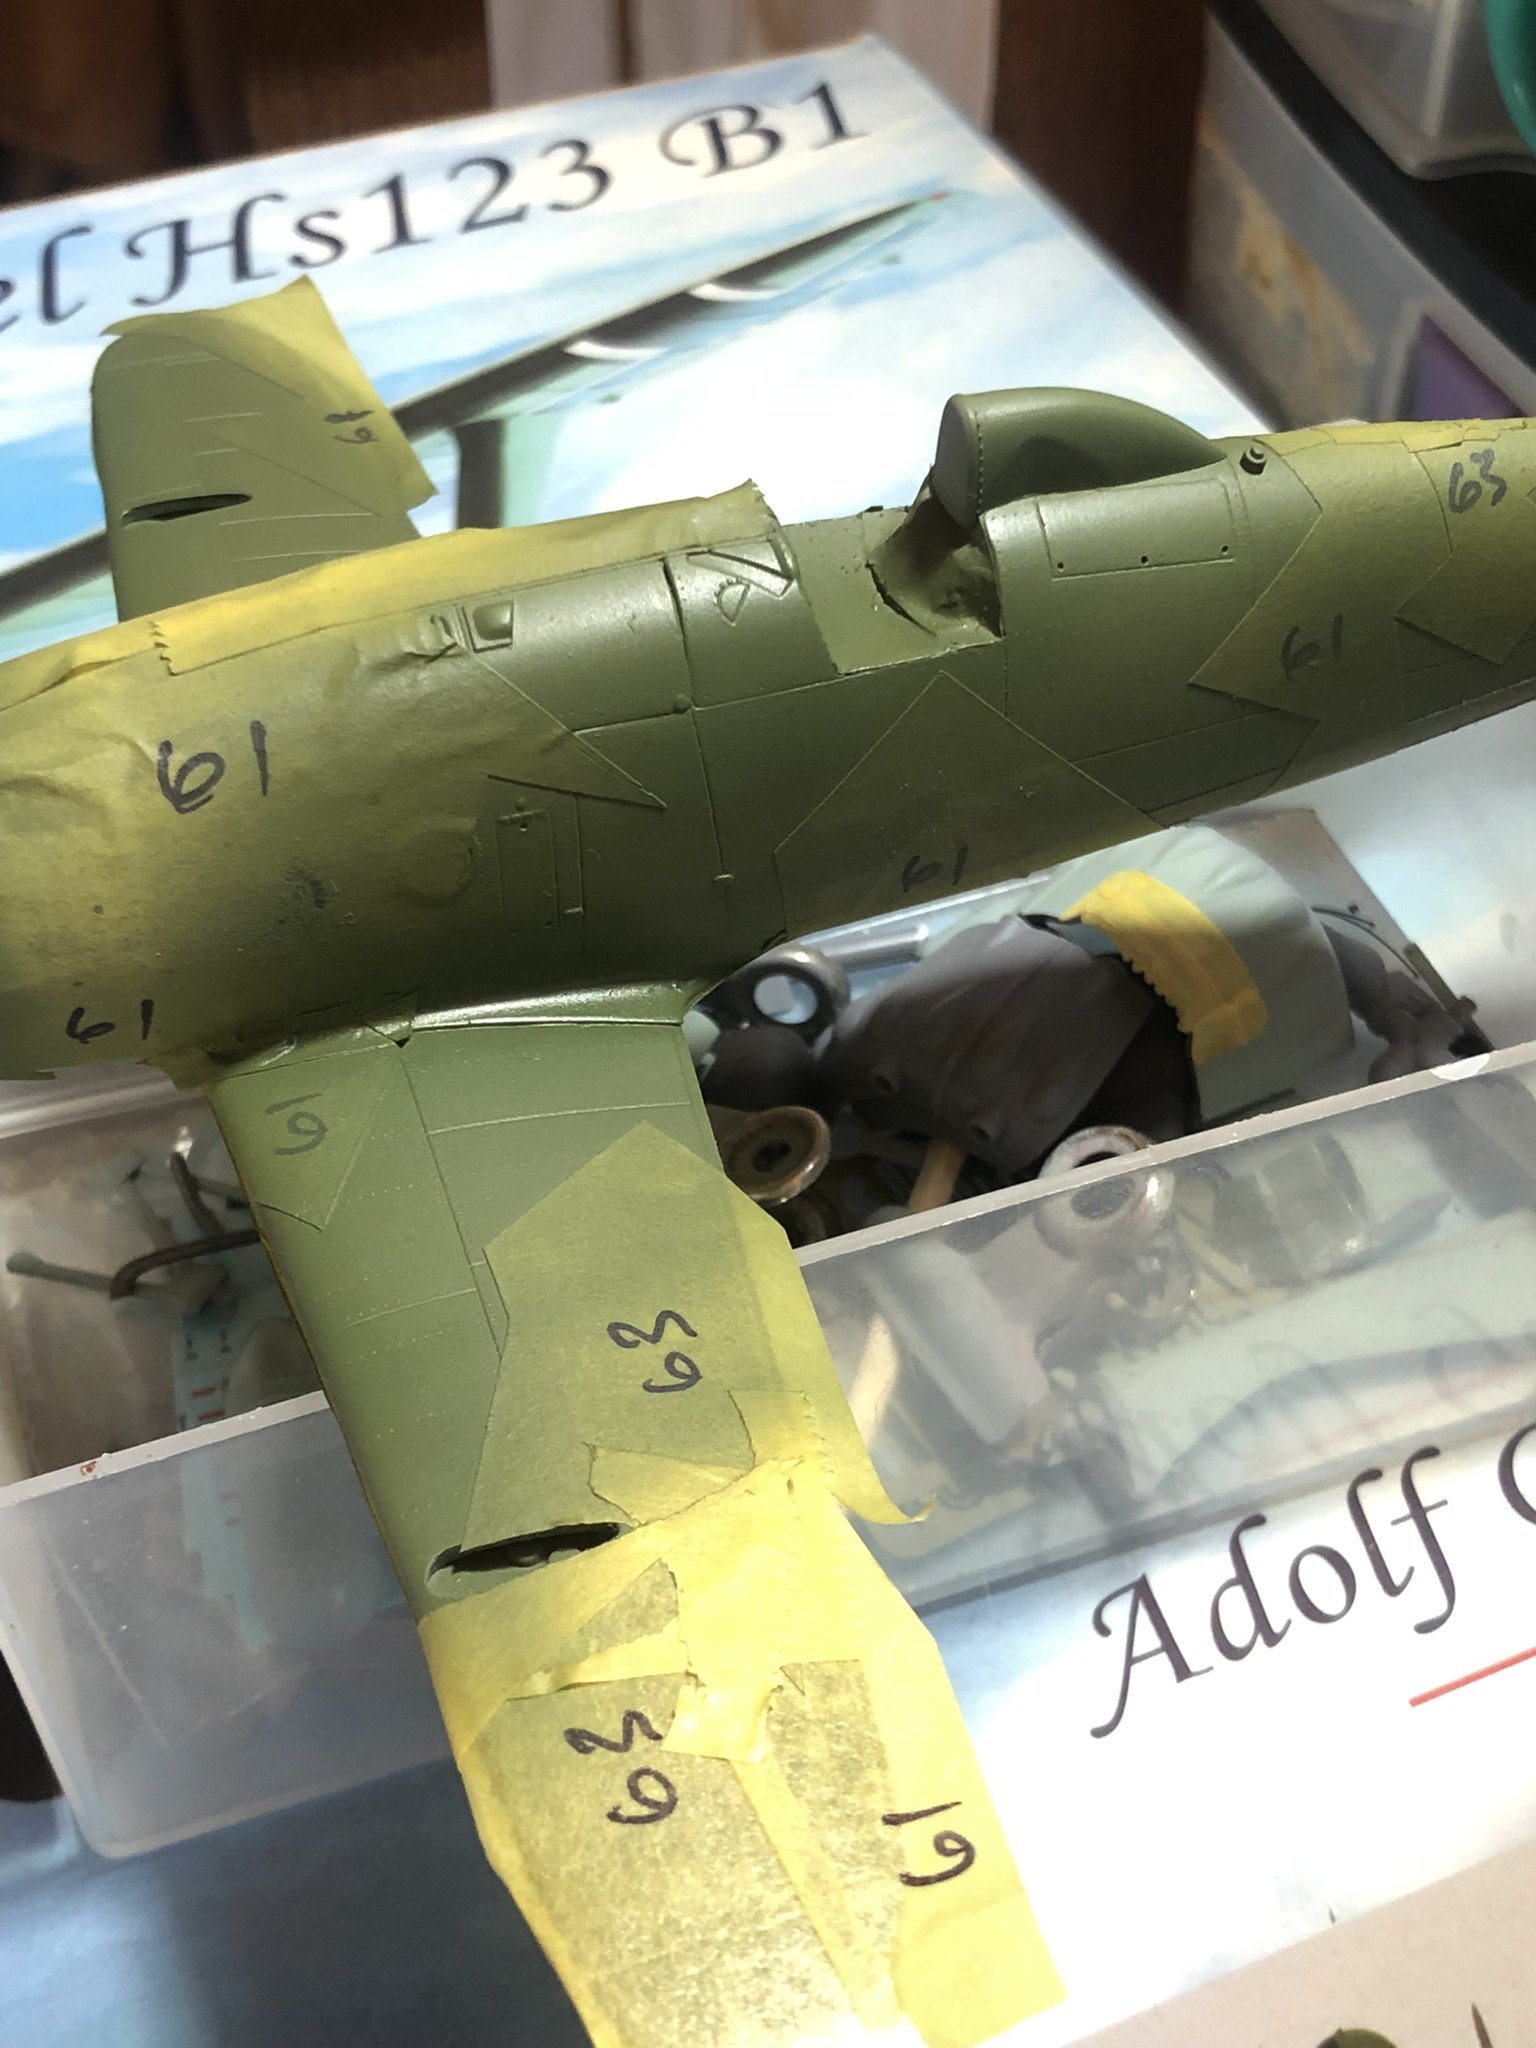
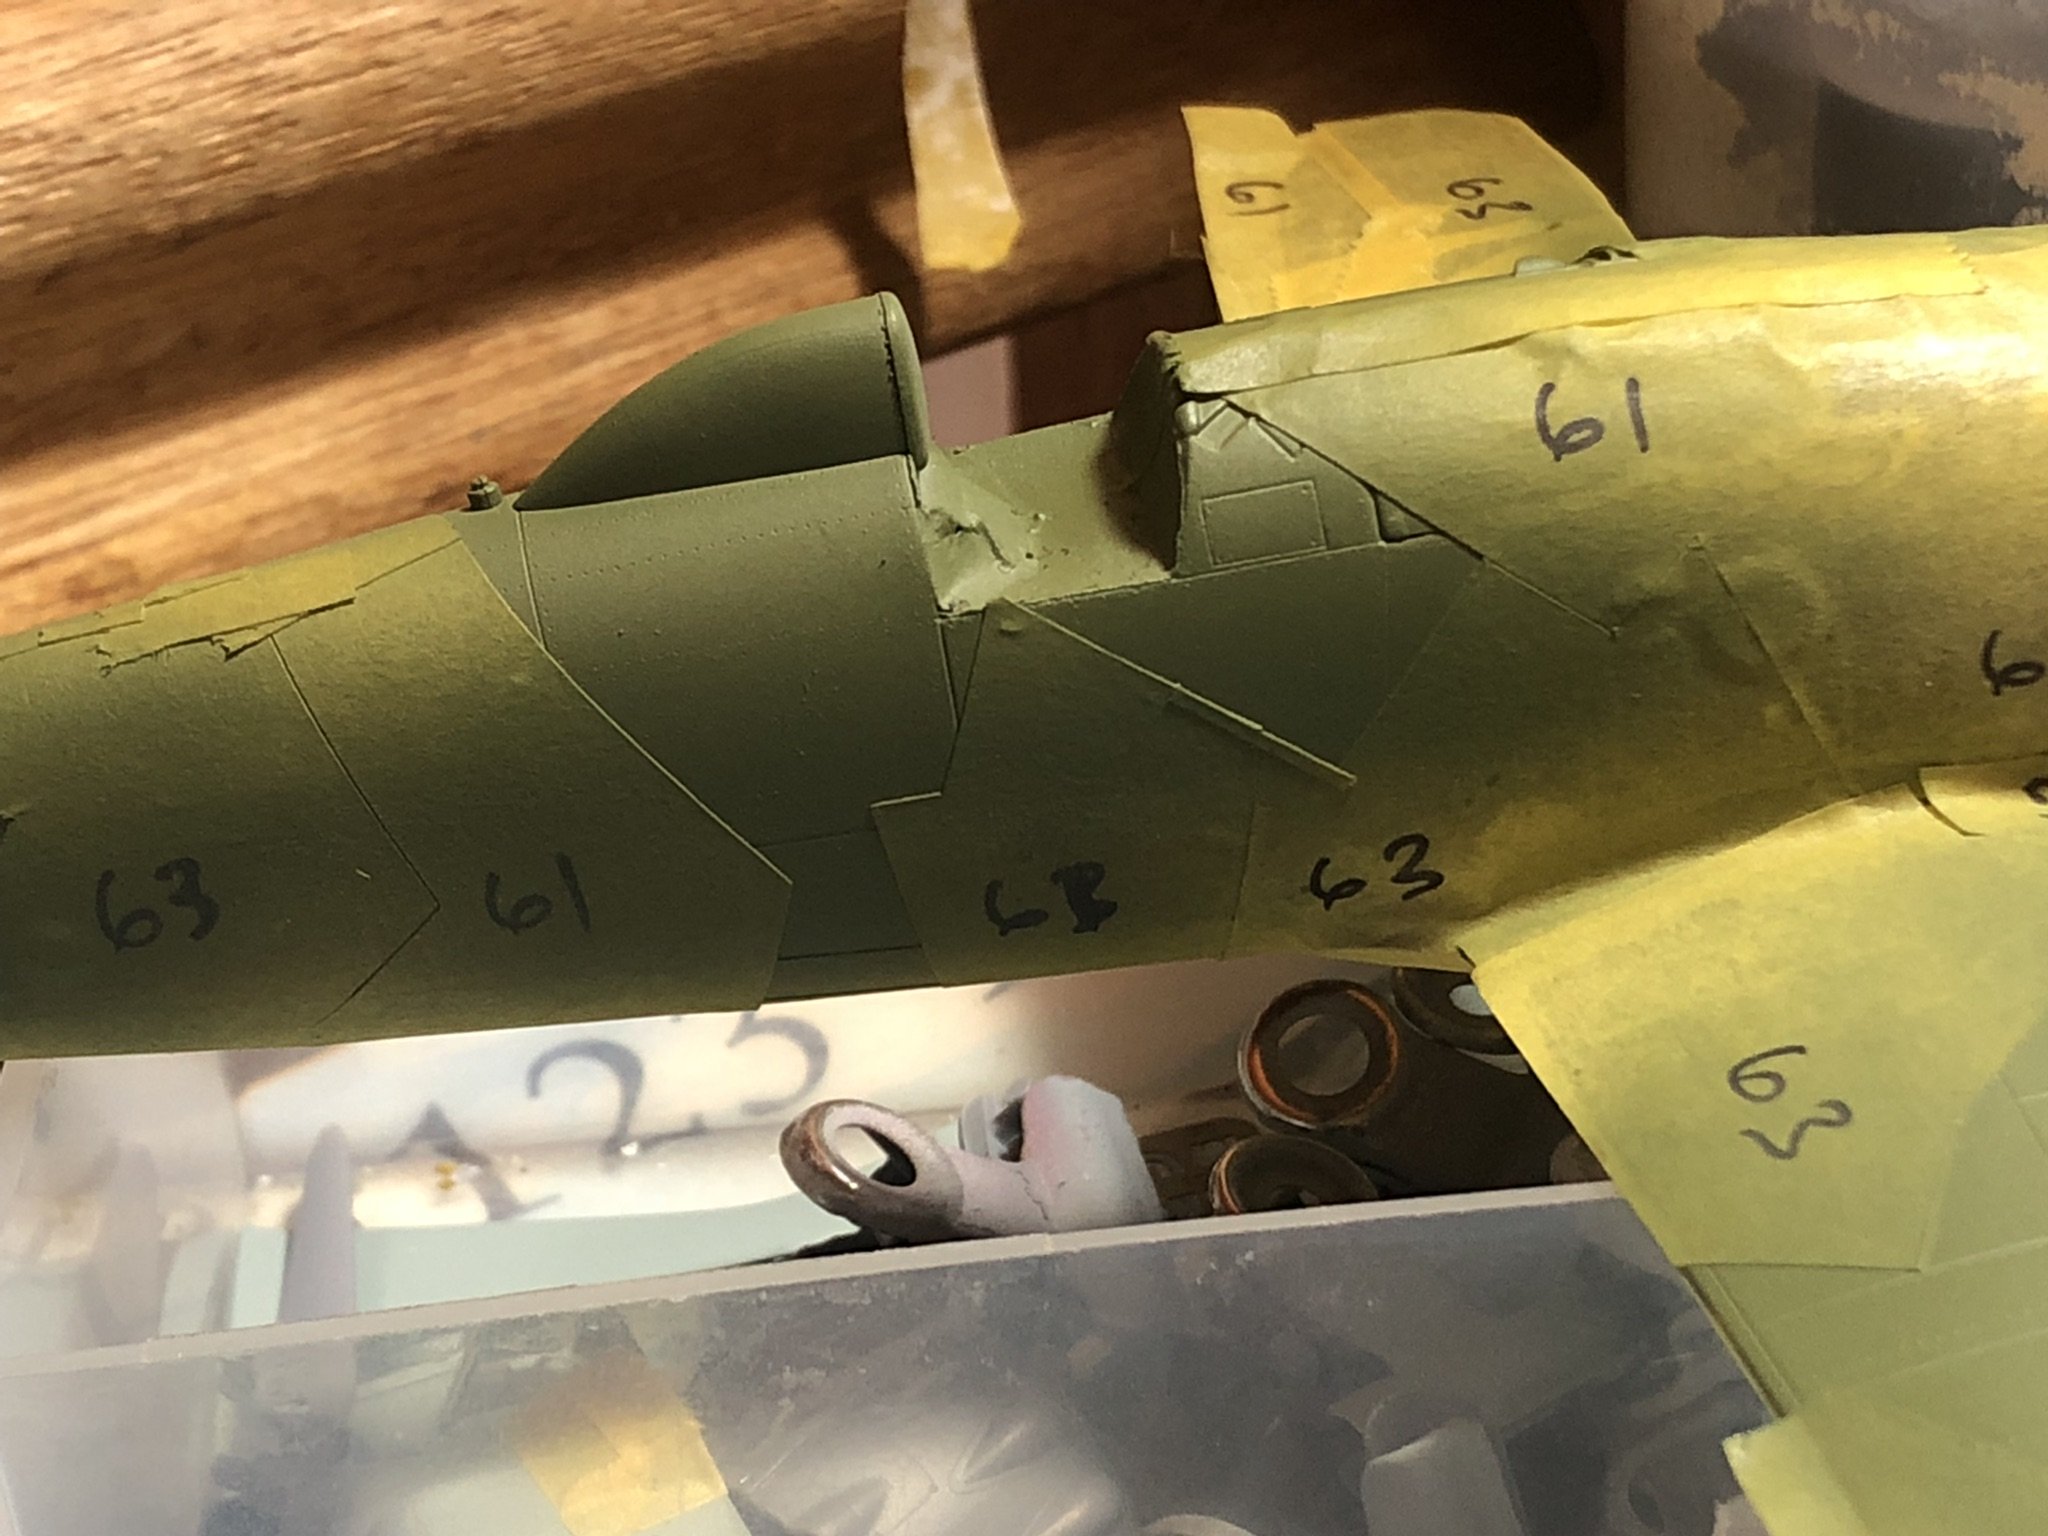
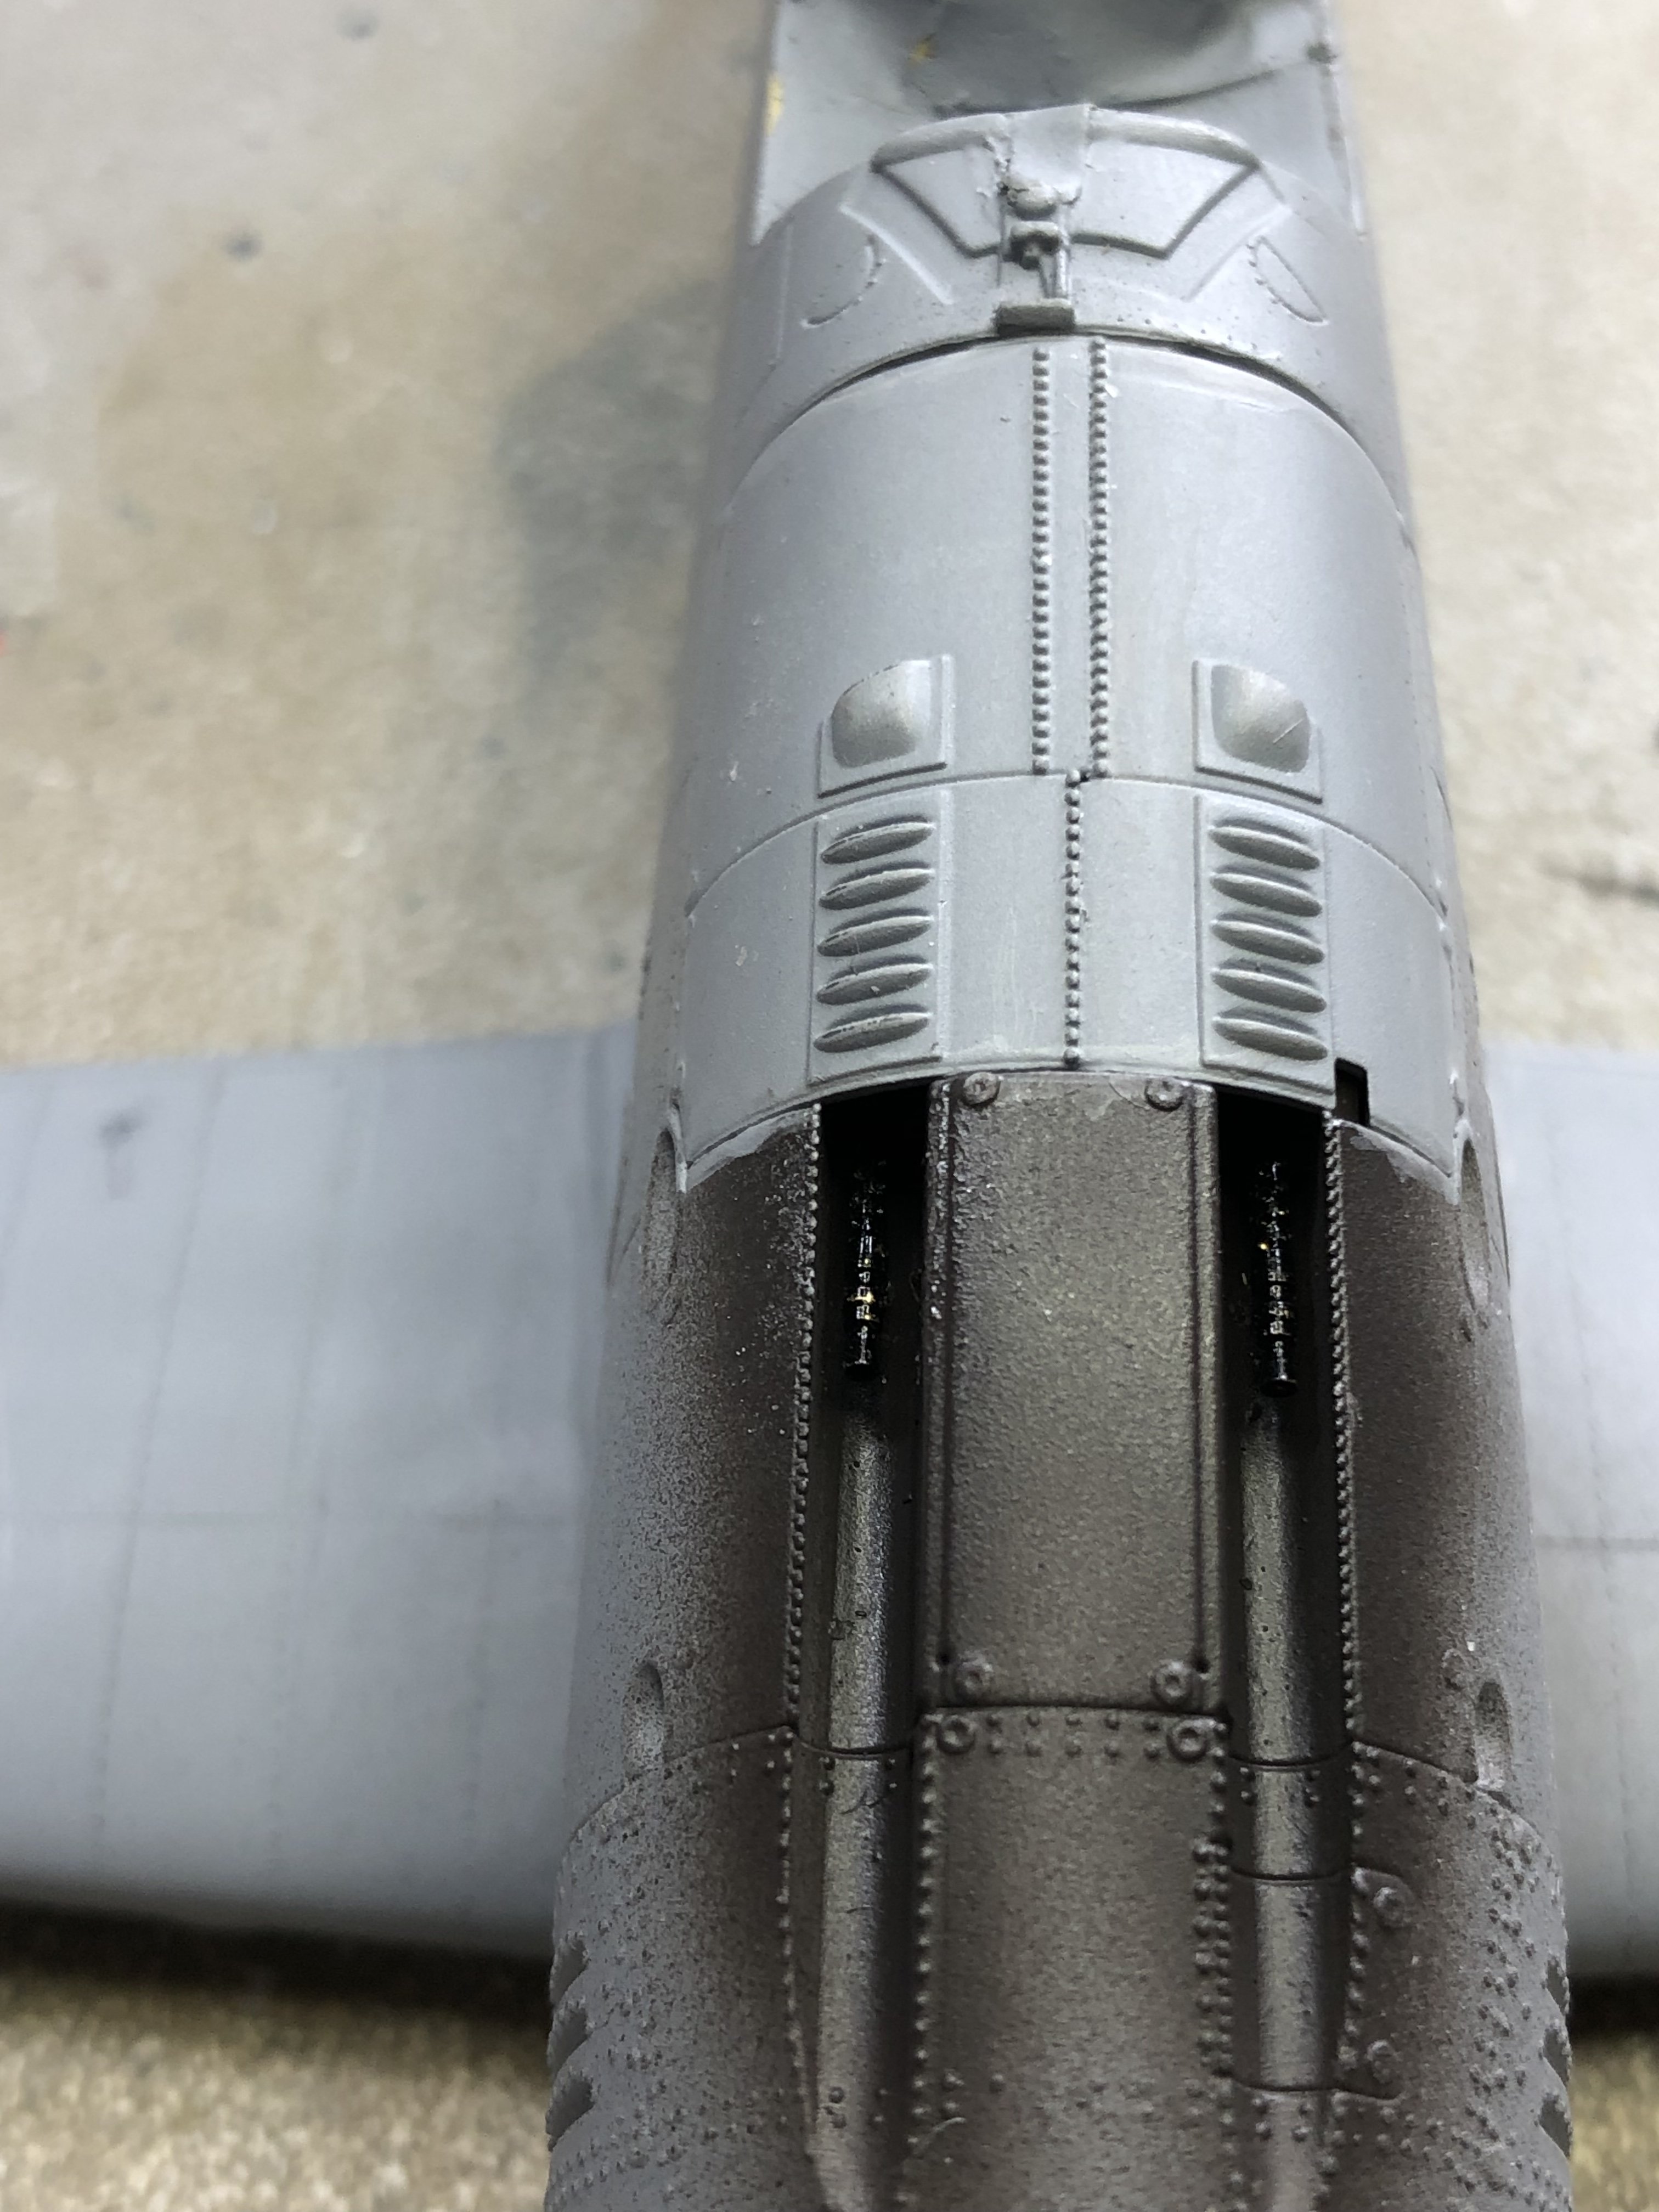
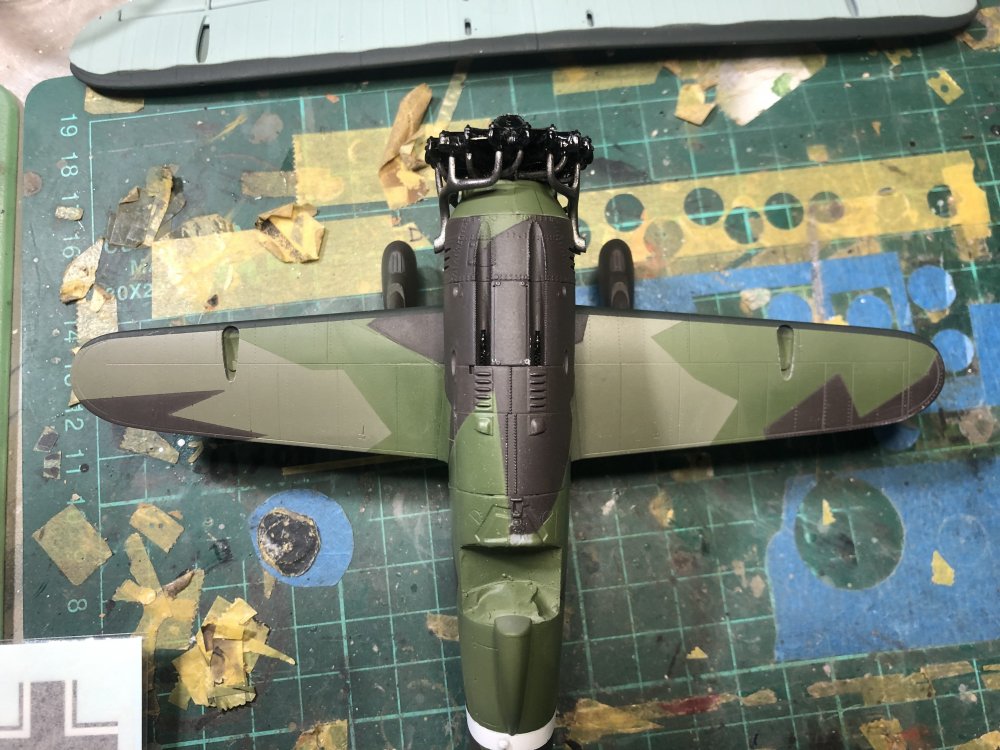
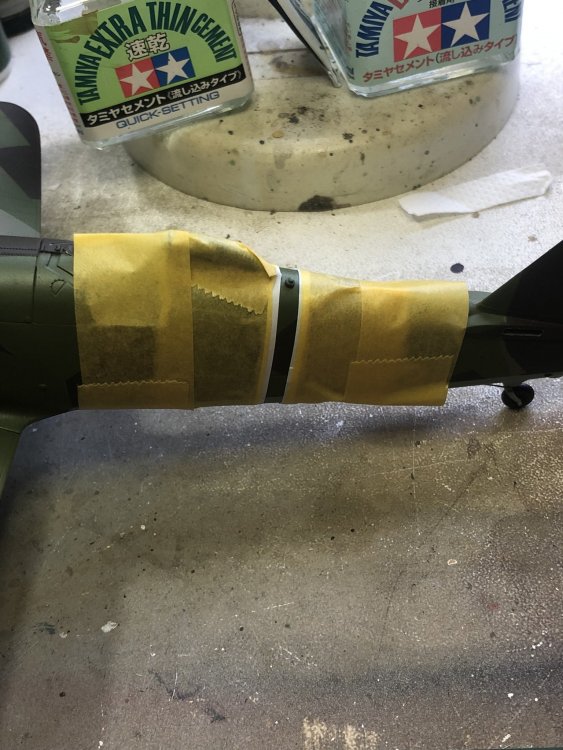
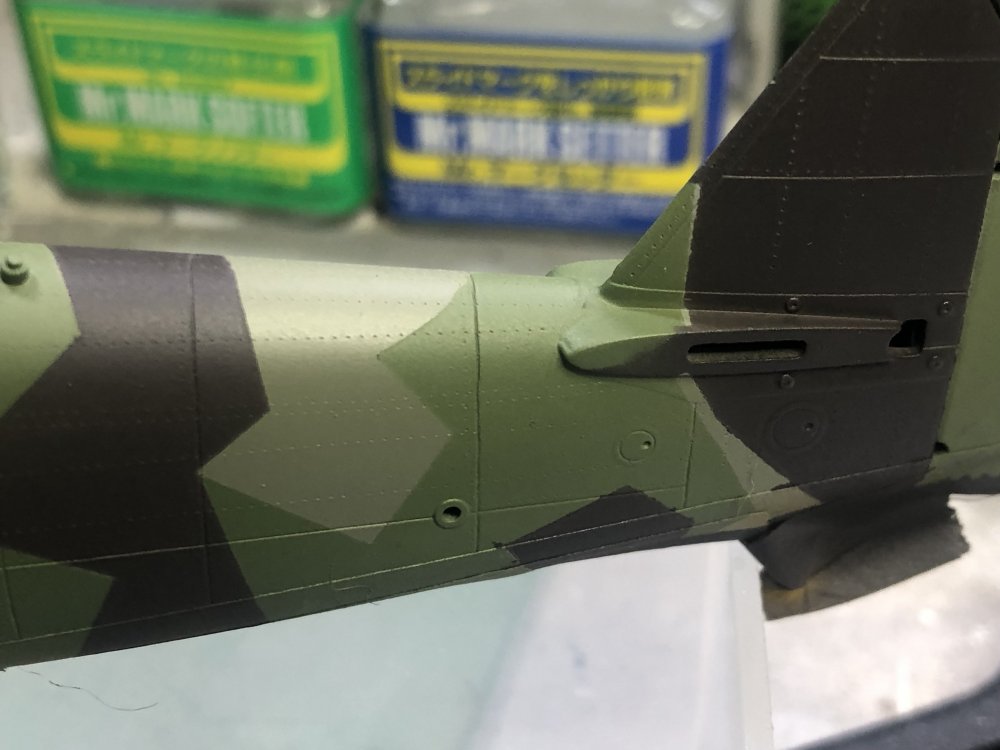
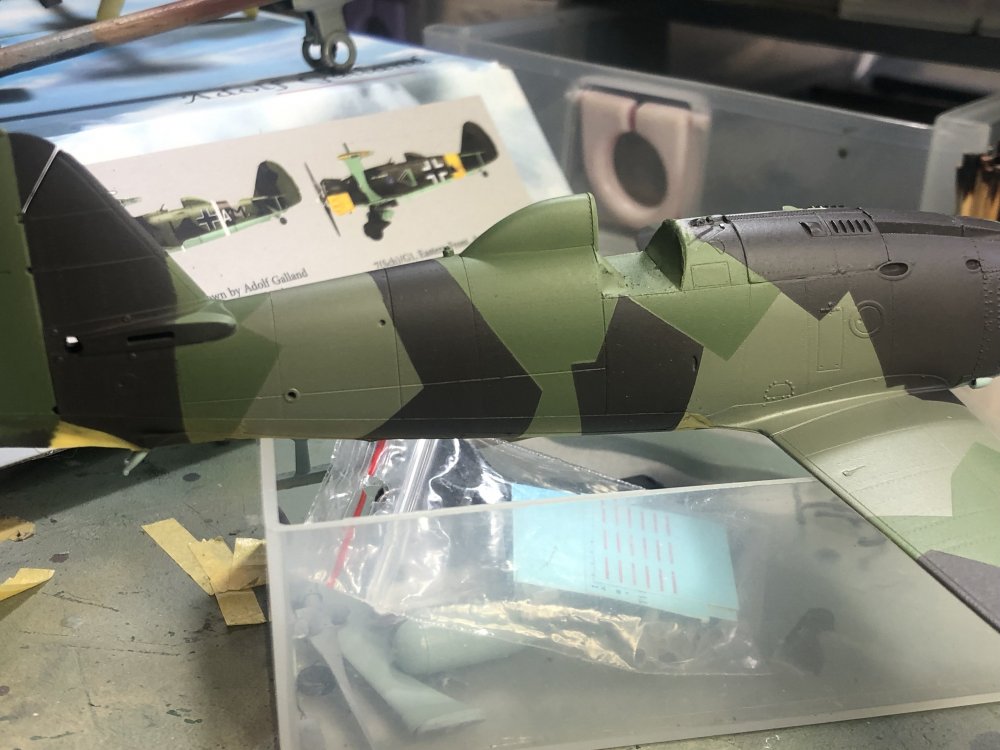
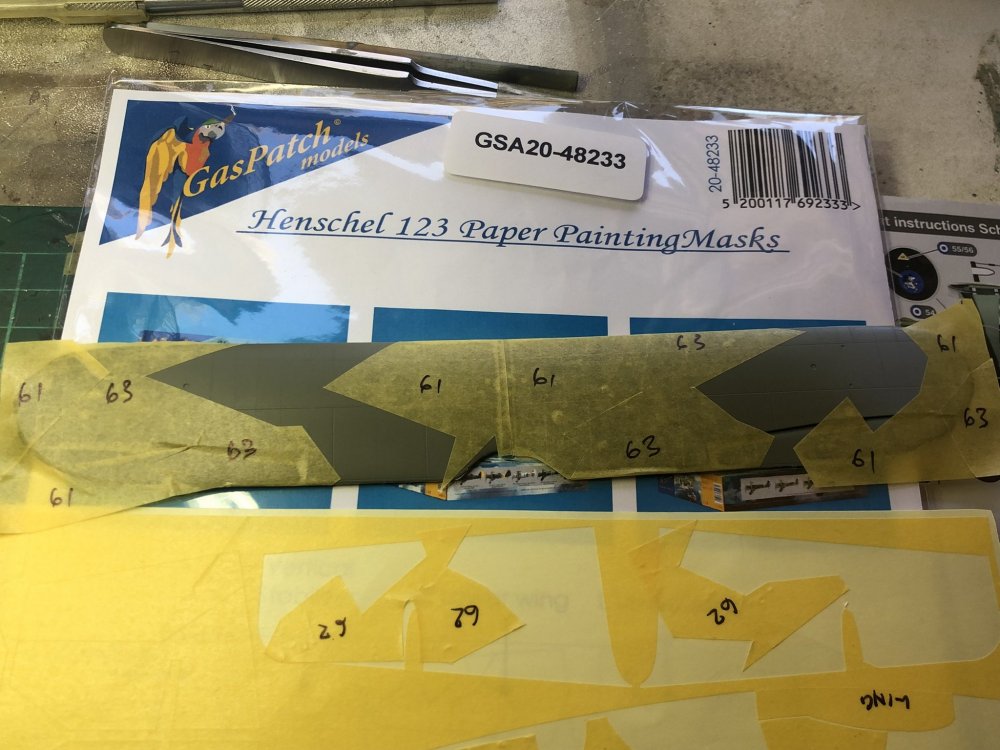
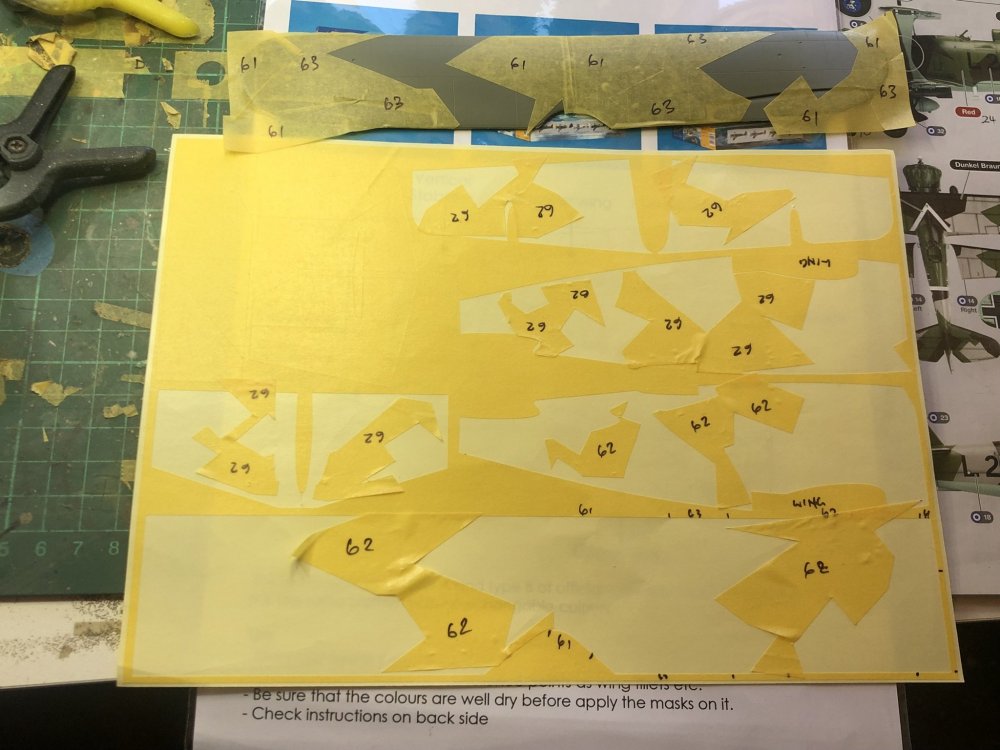
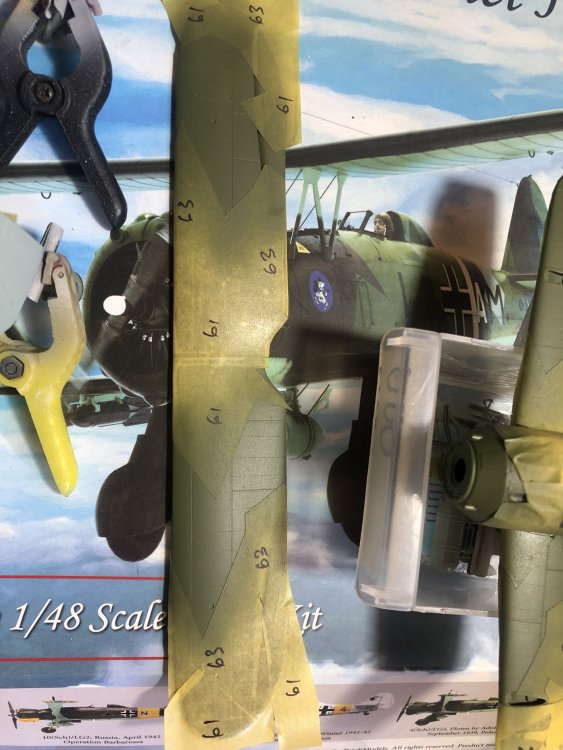
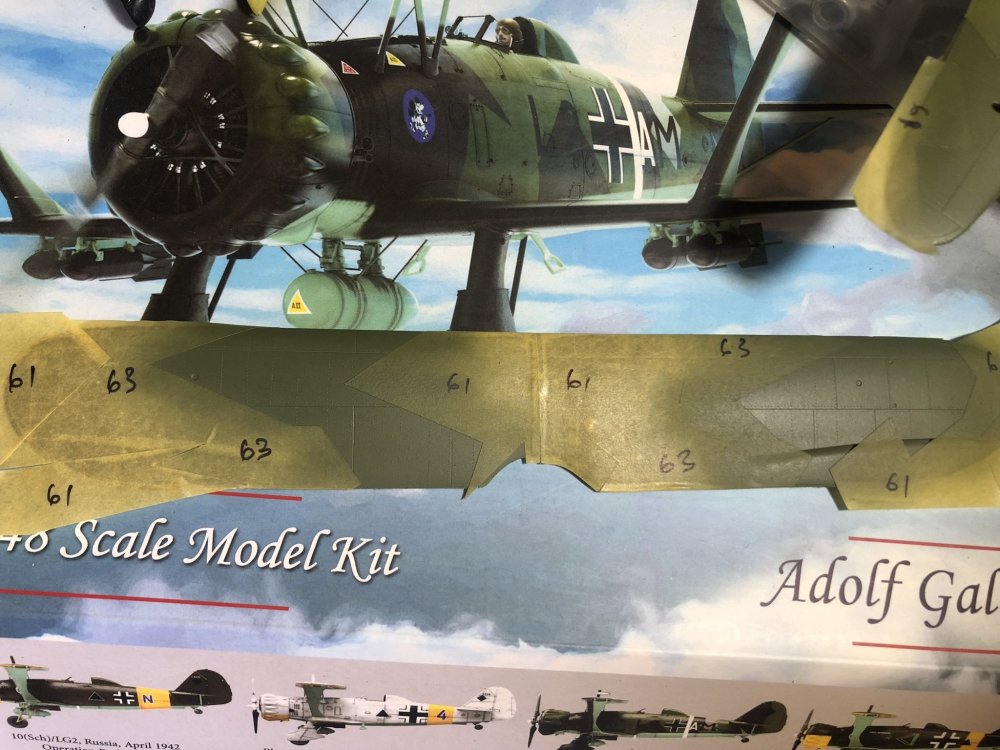
Thanks guys, So today saw the RLM 62 masks reapplied and the RLM 61 laid down. Tedious work but resulted in a 98% happiness rating. Some small misalignment issues and a case of forgetting to paint an upper wing section but overall a good result. I used some small pieces of tissue wrapped around the MG barrels and held in place with a drop of water to mask the barrels during the RLM 61 application. Again this will set up for a day (it is raining quite hard here) and then some touch ups. Regards, Kent


-
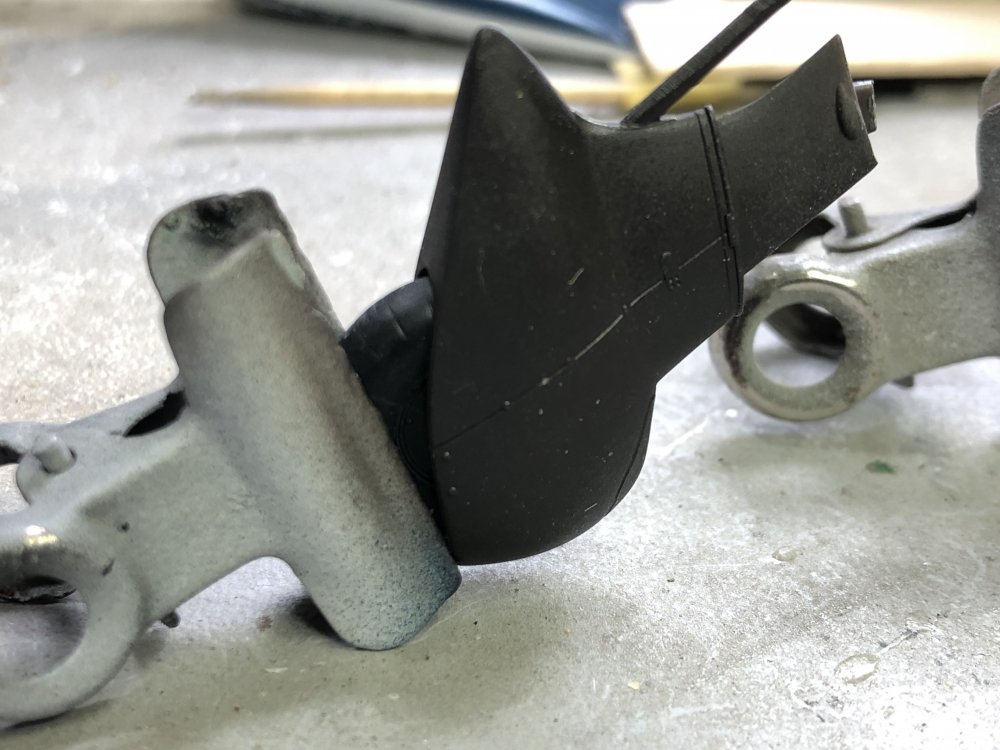
Thanks Rob, It is a departure from my normal procedure (painting at the end, sort of). This is only the second multi wing aircraft I have built so still lots to learn! I thought long and hard about the way to do this. I had several different progressions, this plan was not the first but I think I have made it easier for myself (but it is only my approach). This way there will be minimal paint coats that build up. At this stage, I plan to attach the engine and then build the cowling around it, mask and paint. Attaching the wheels earlier was a mistake and I was happy I get get them off without damaging them or the paint. Dry fitting the horizontal stabs shows a little gappage but hopefully some finagling will close those off. Thanks for looking and regards, Kent
-
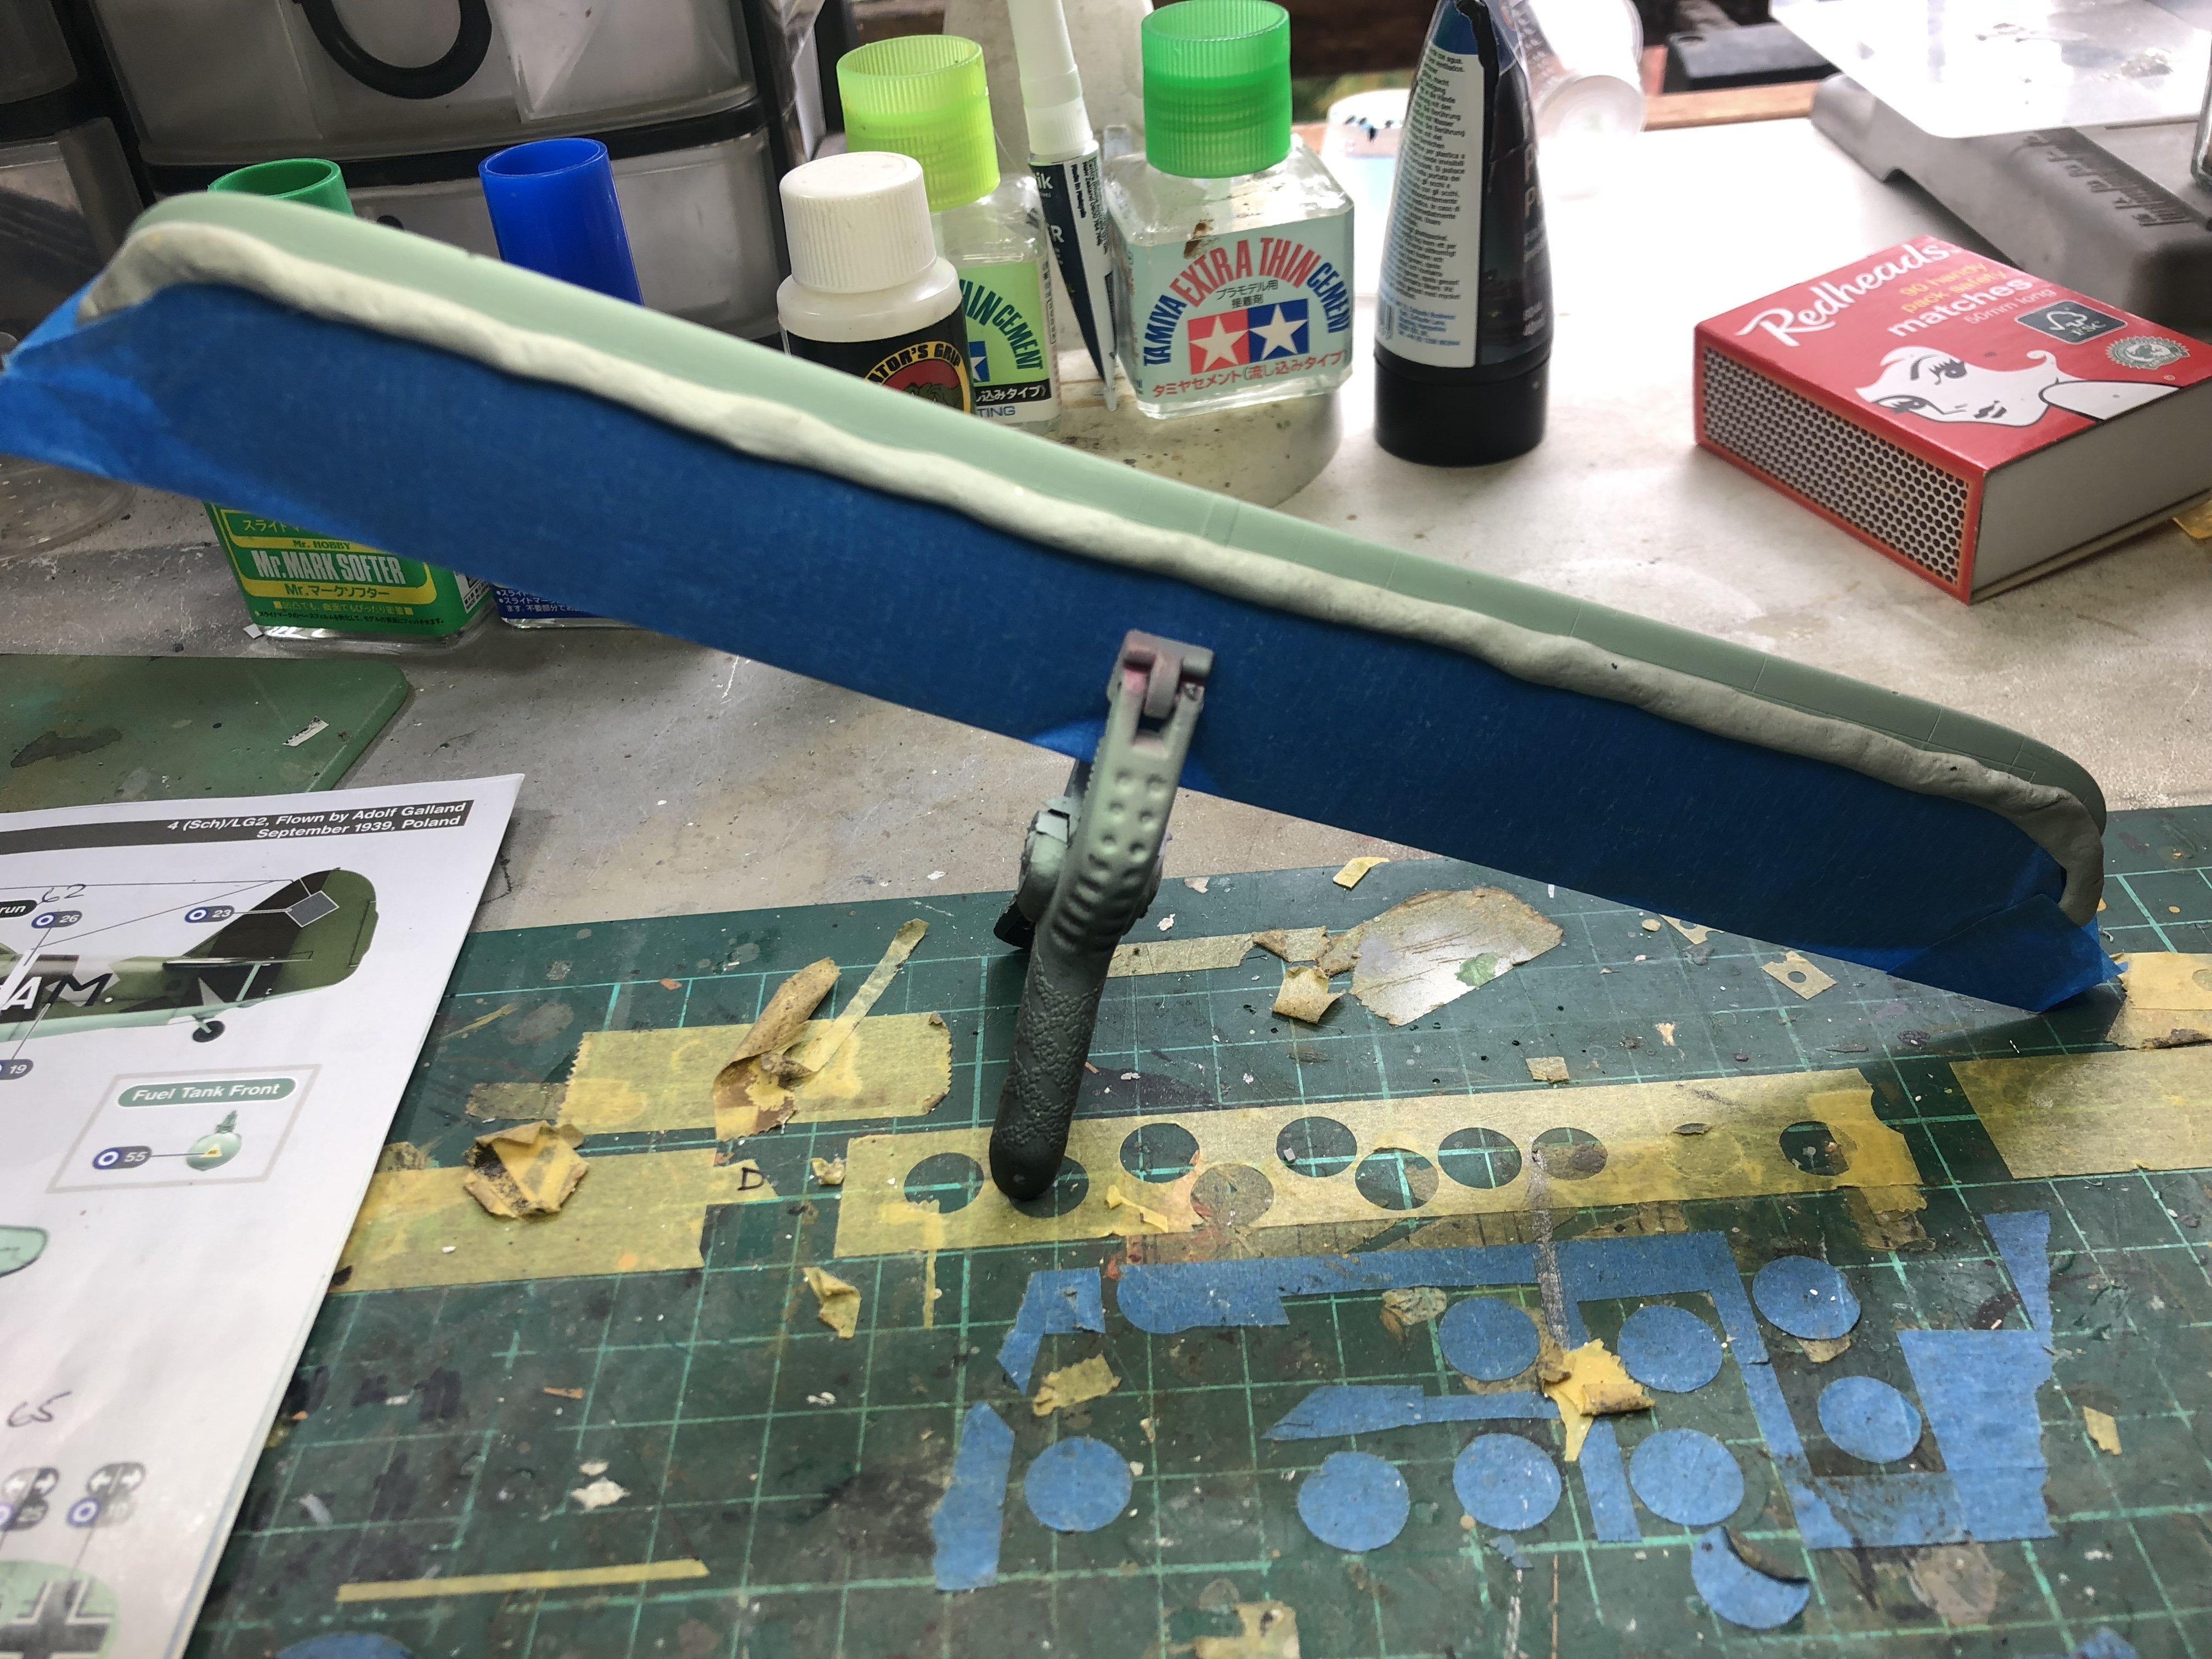
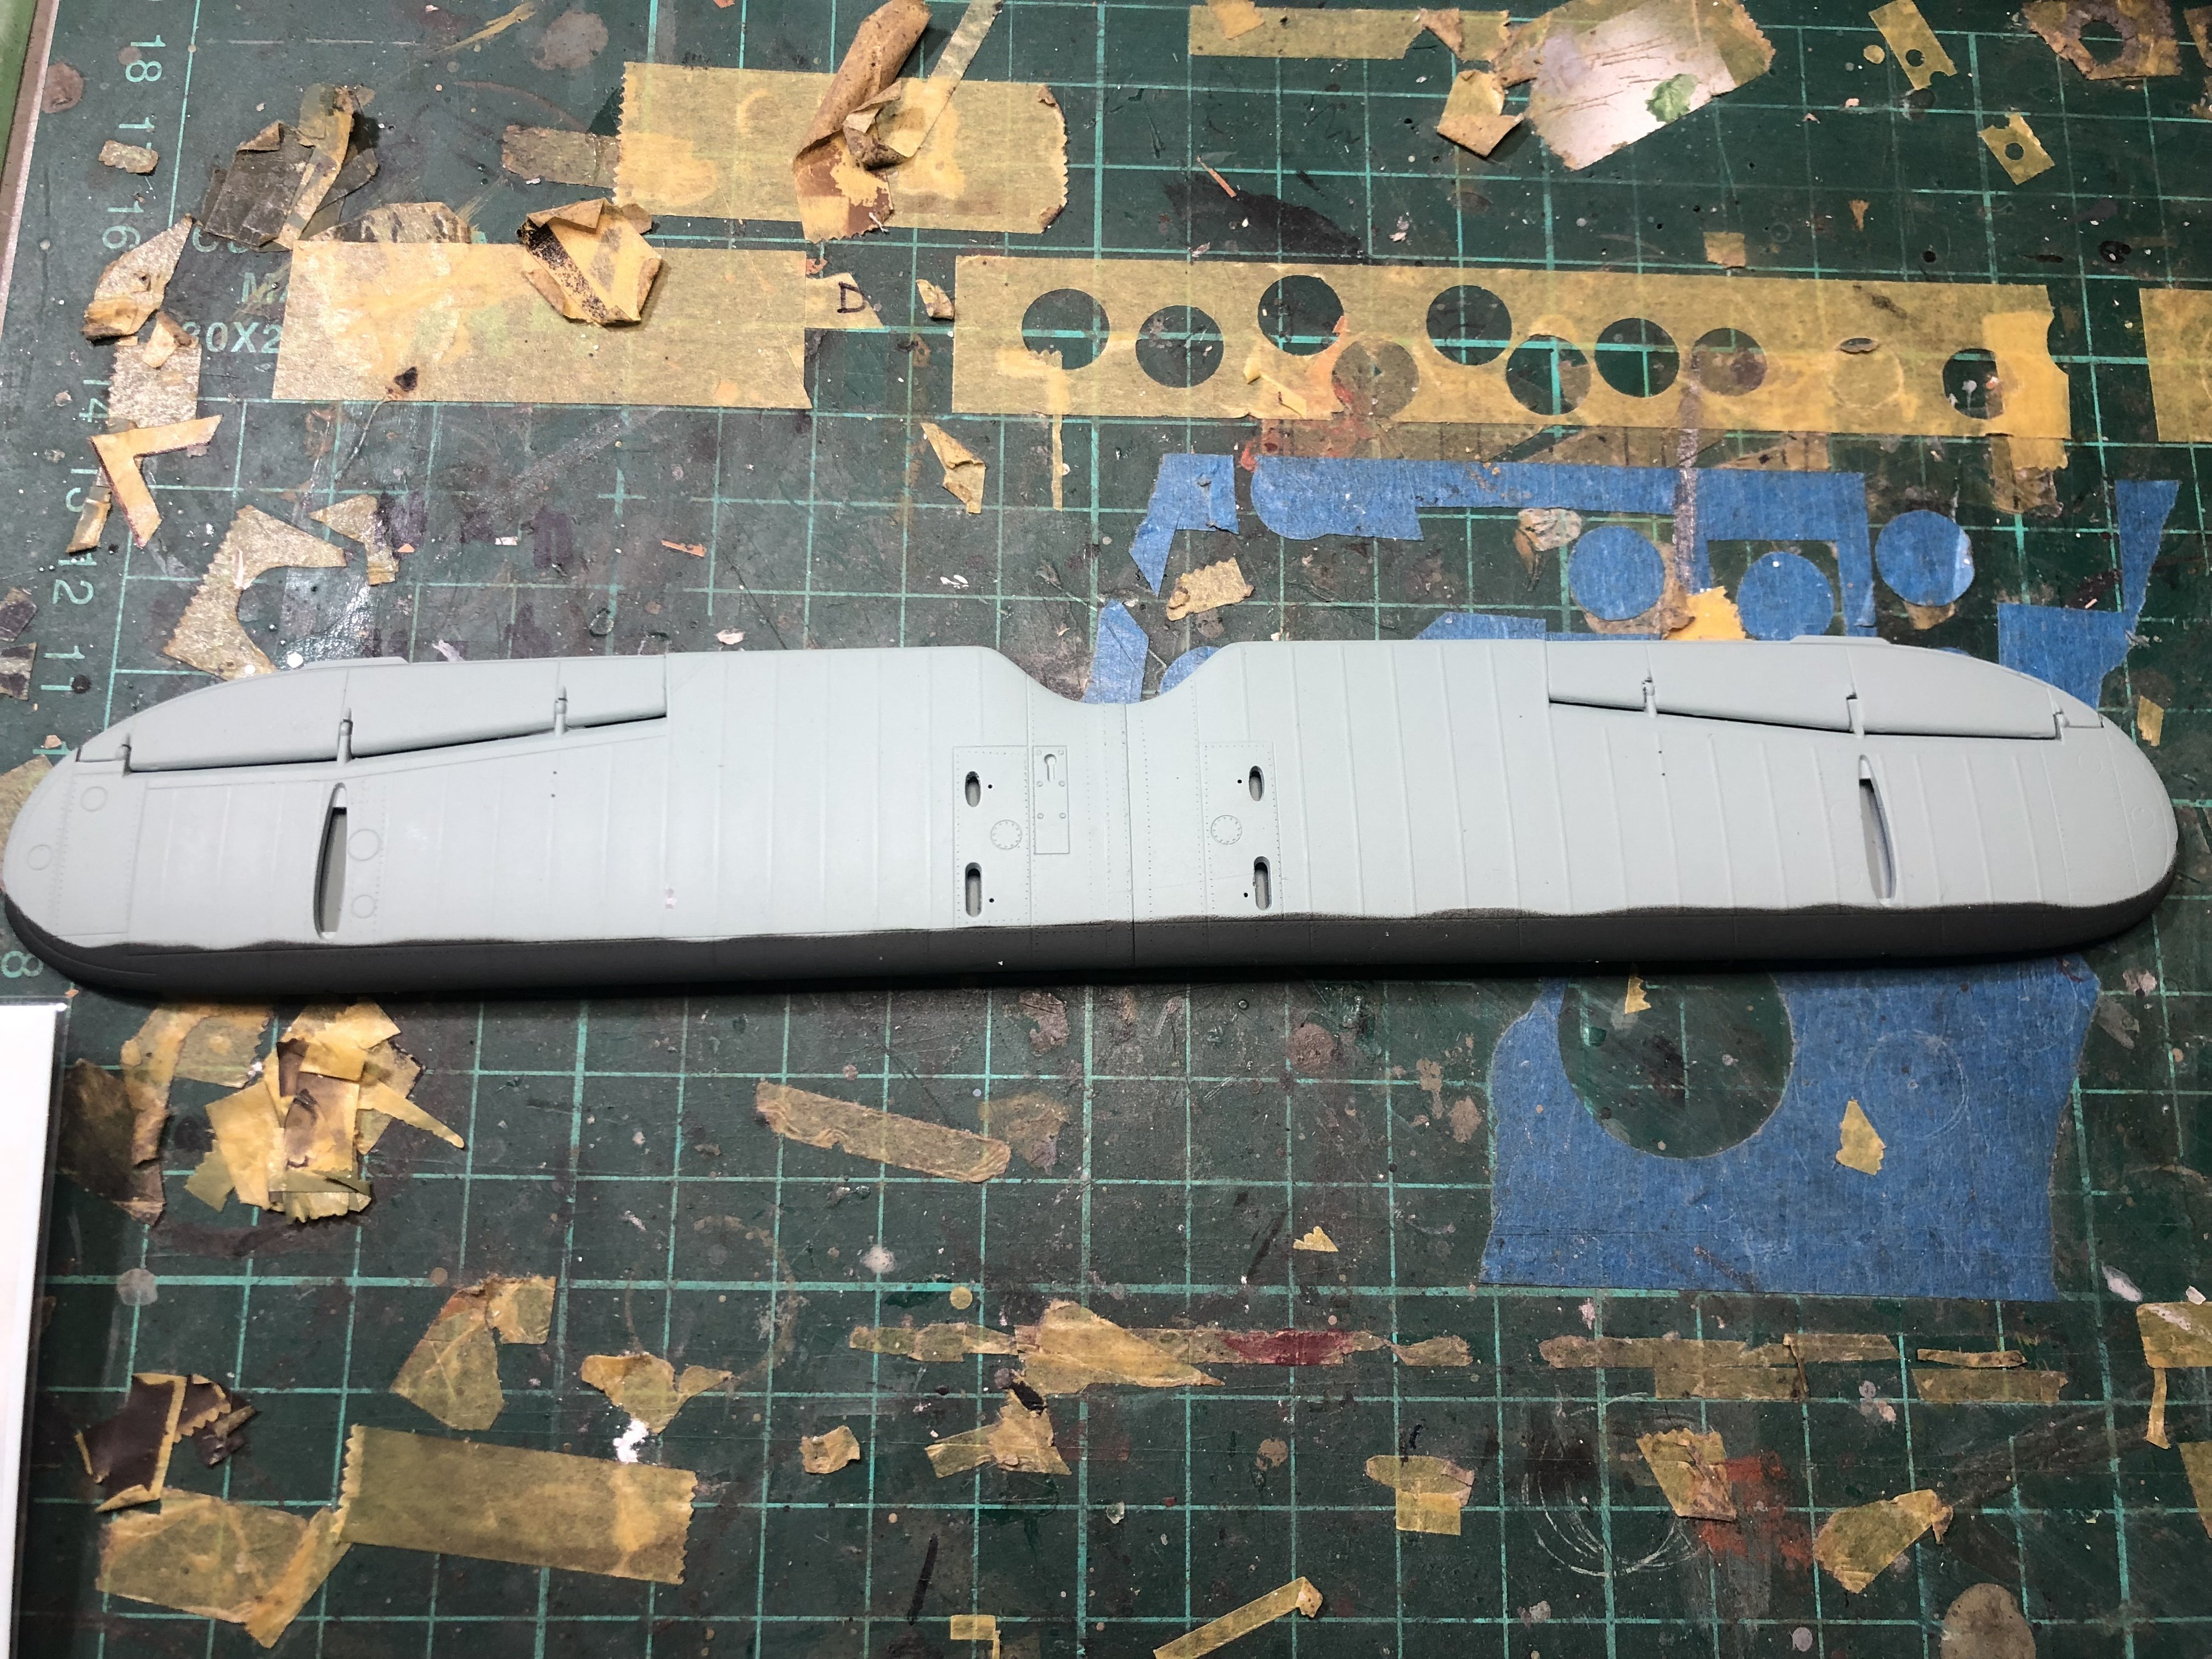
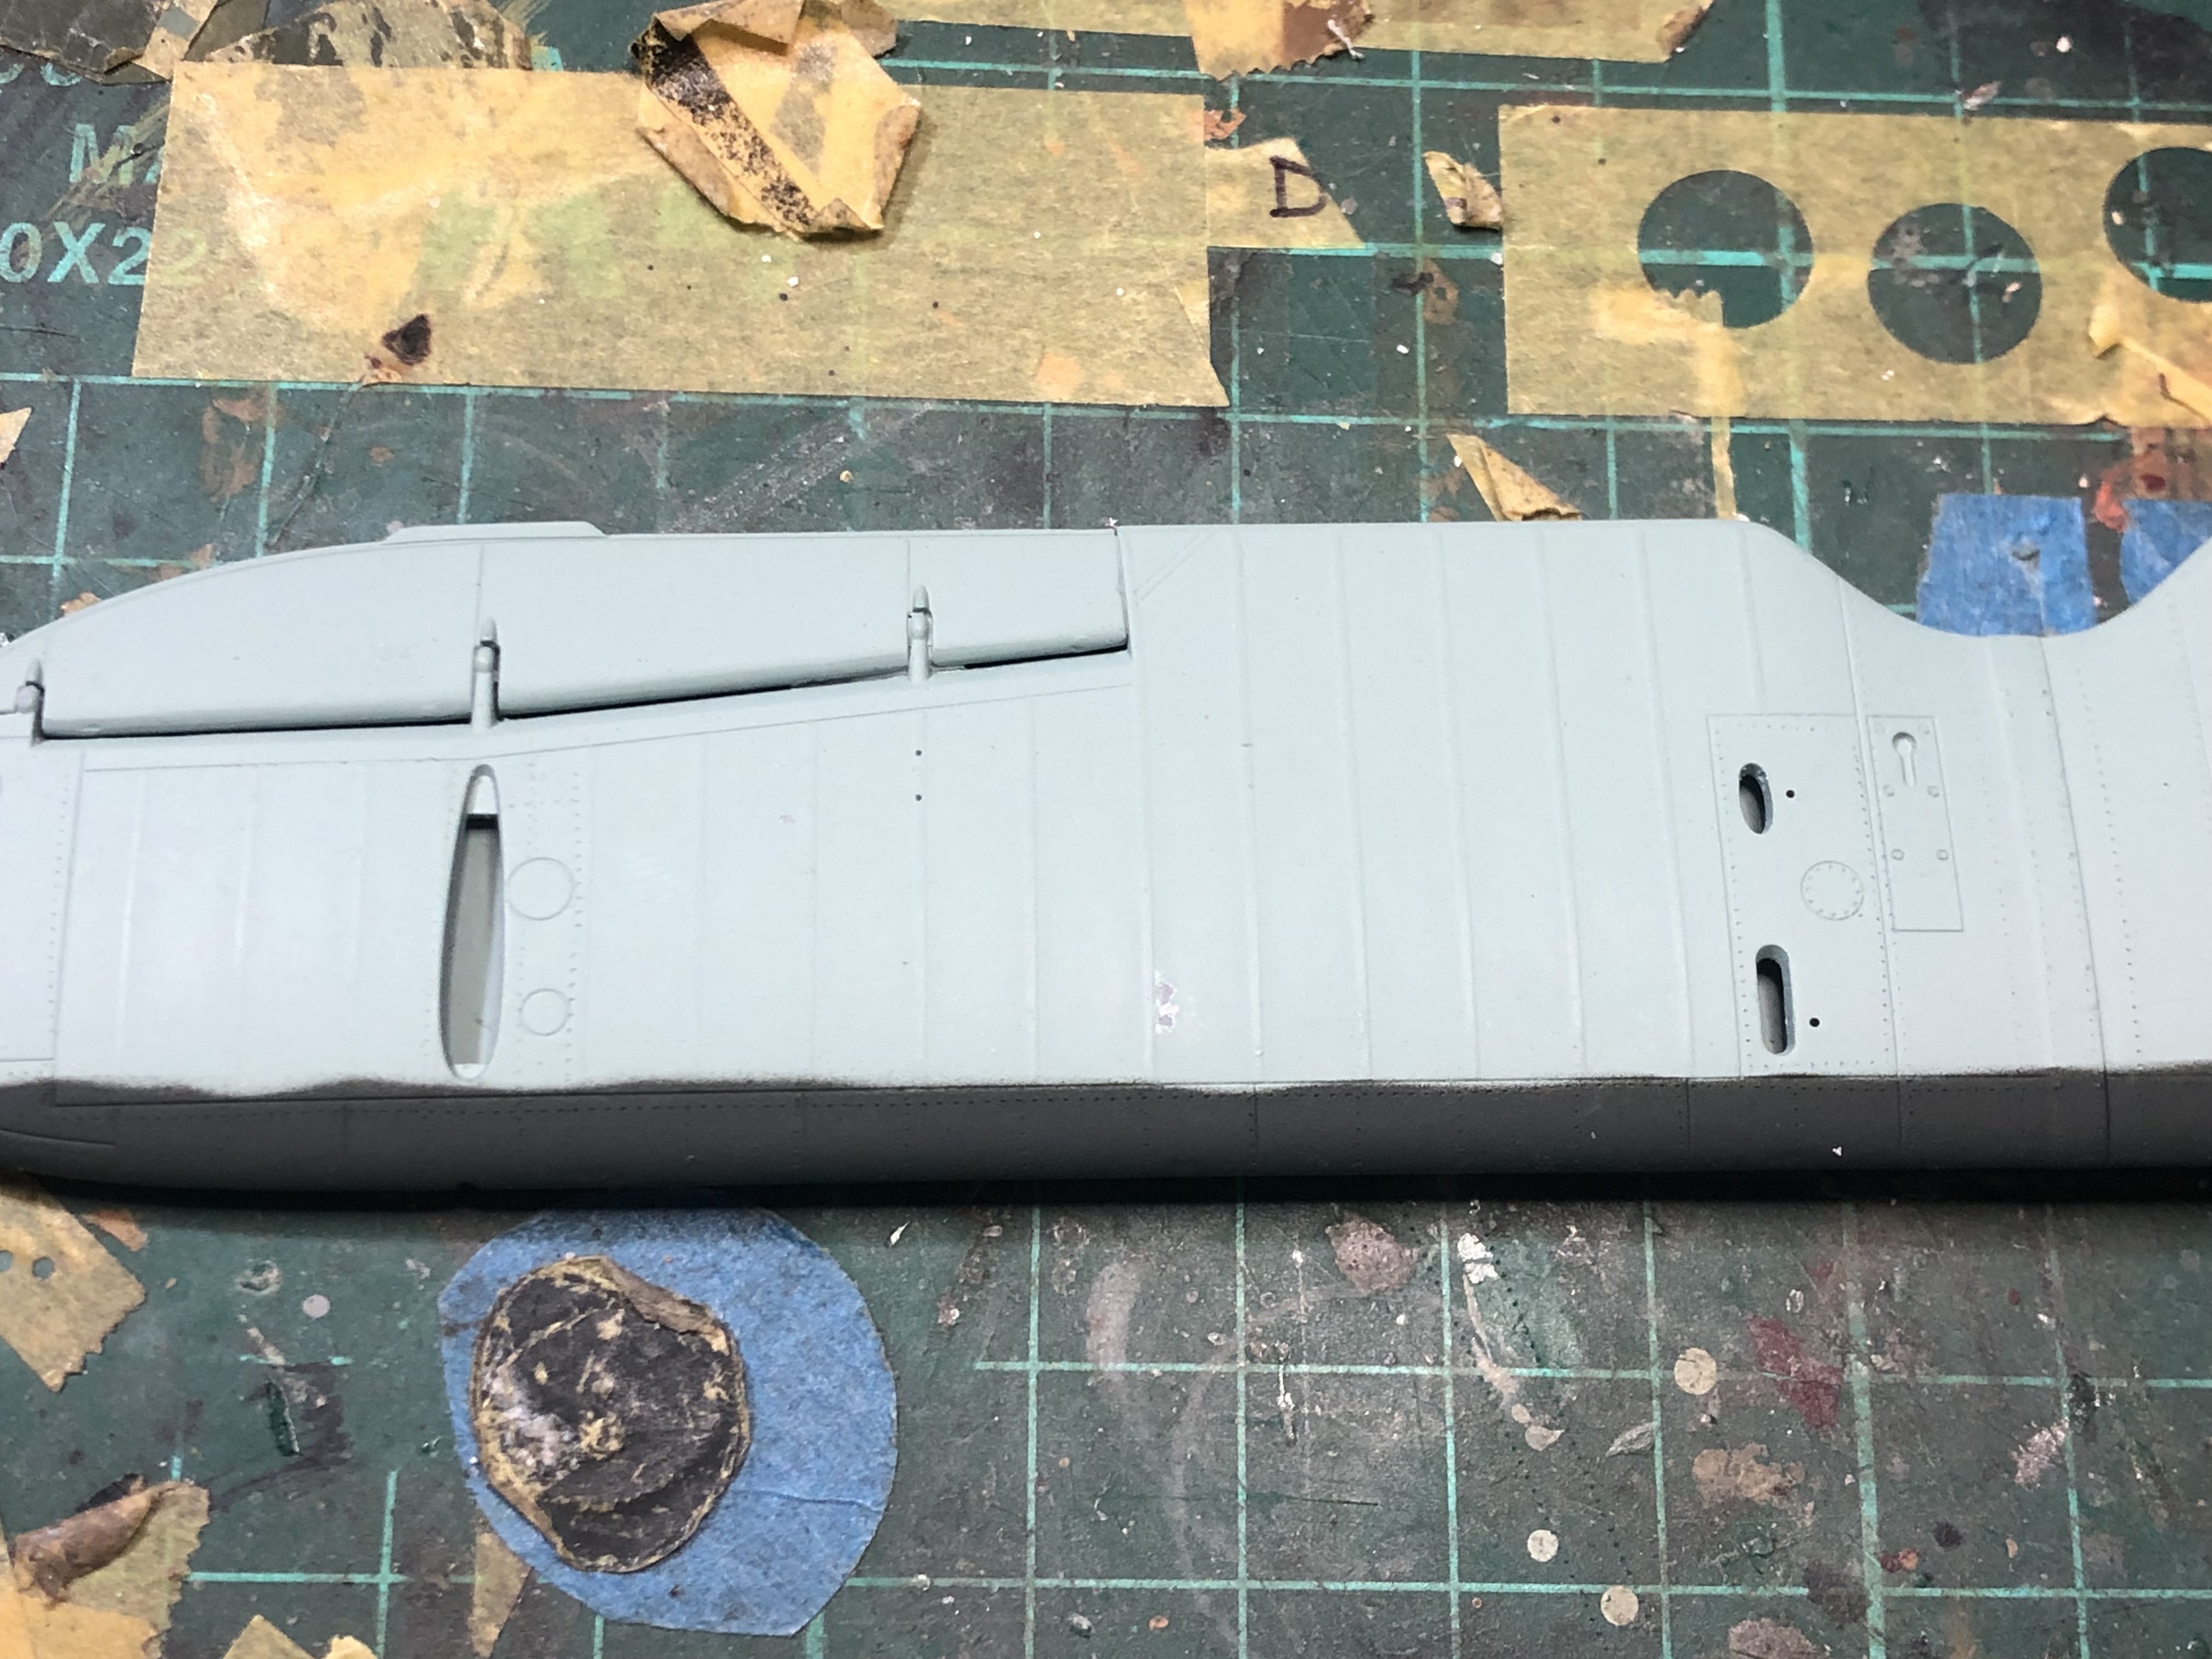
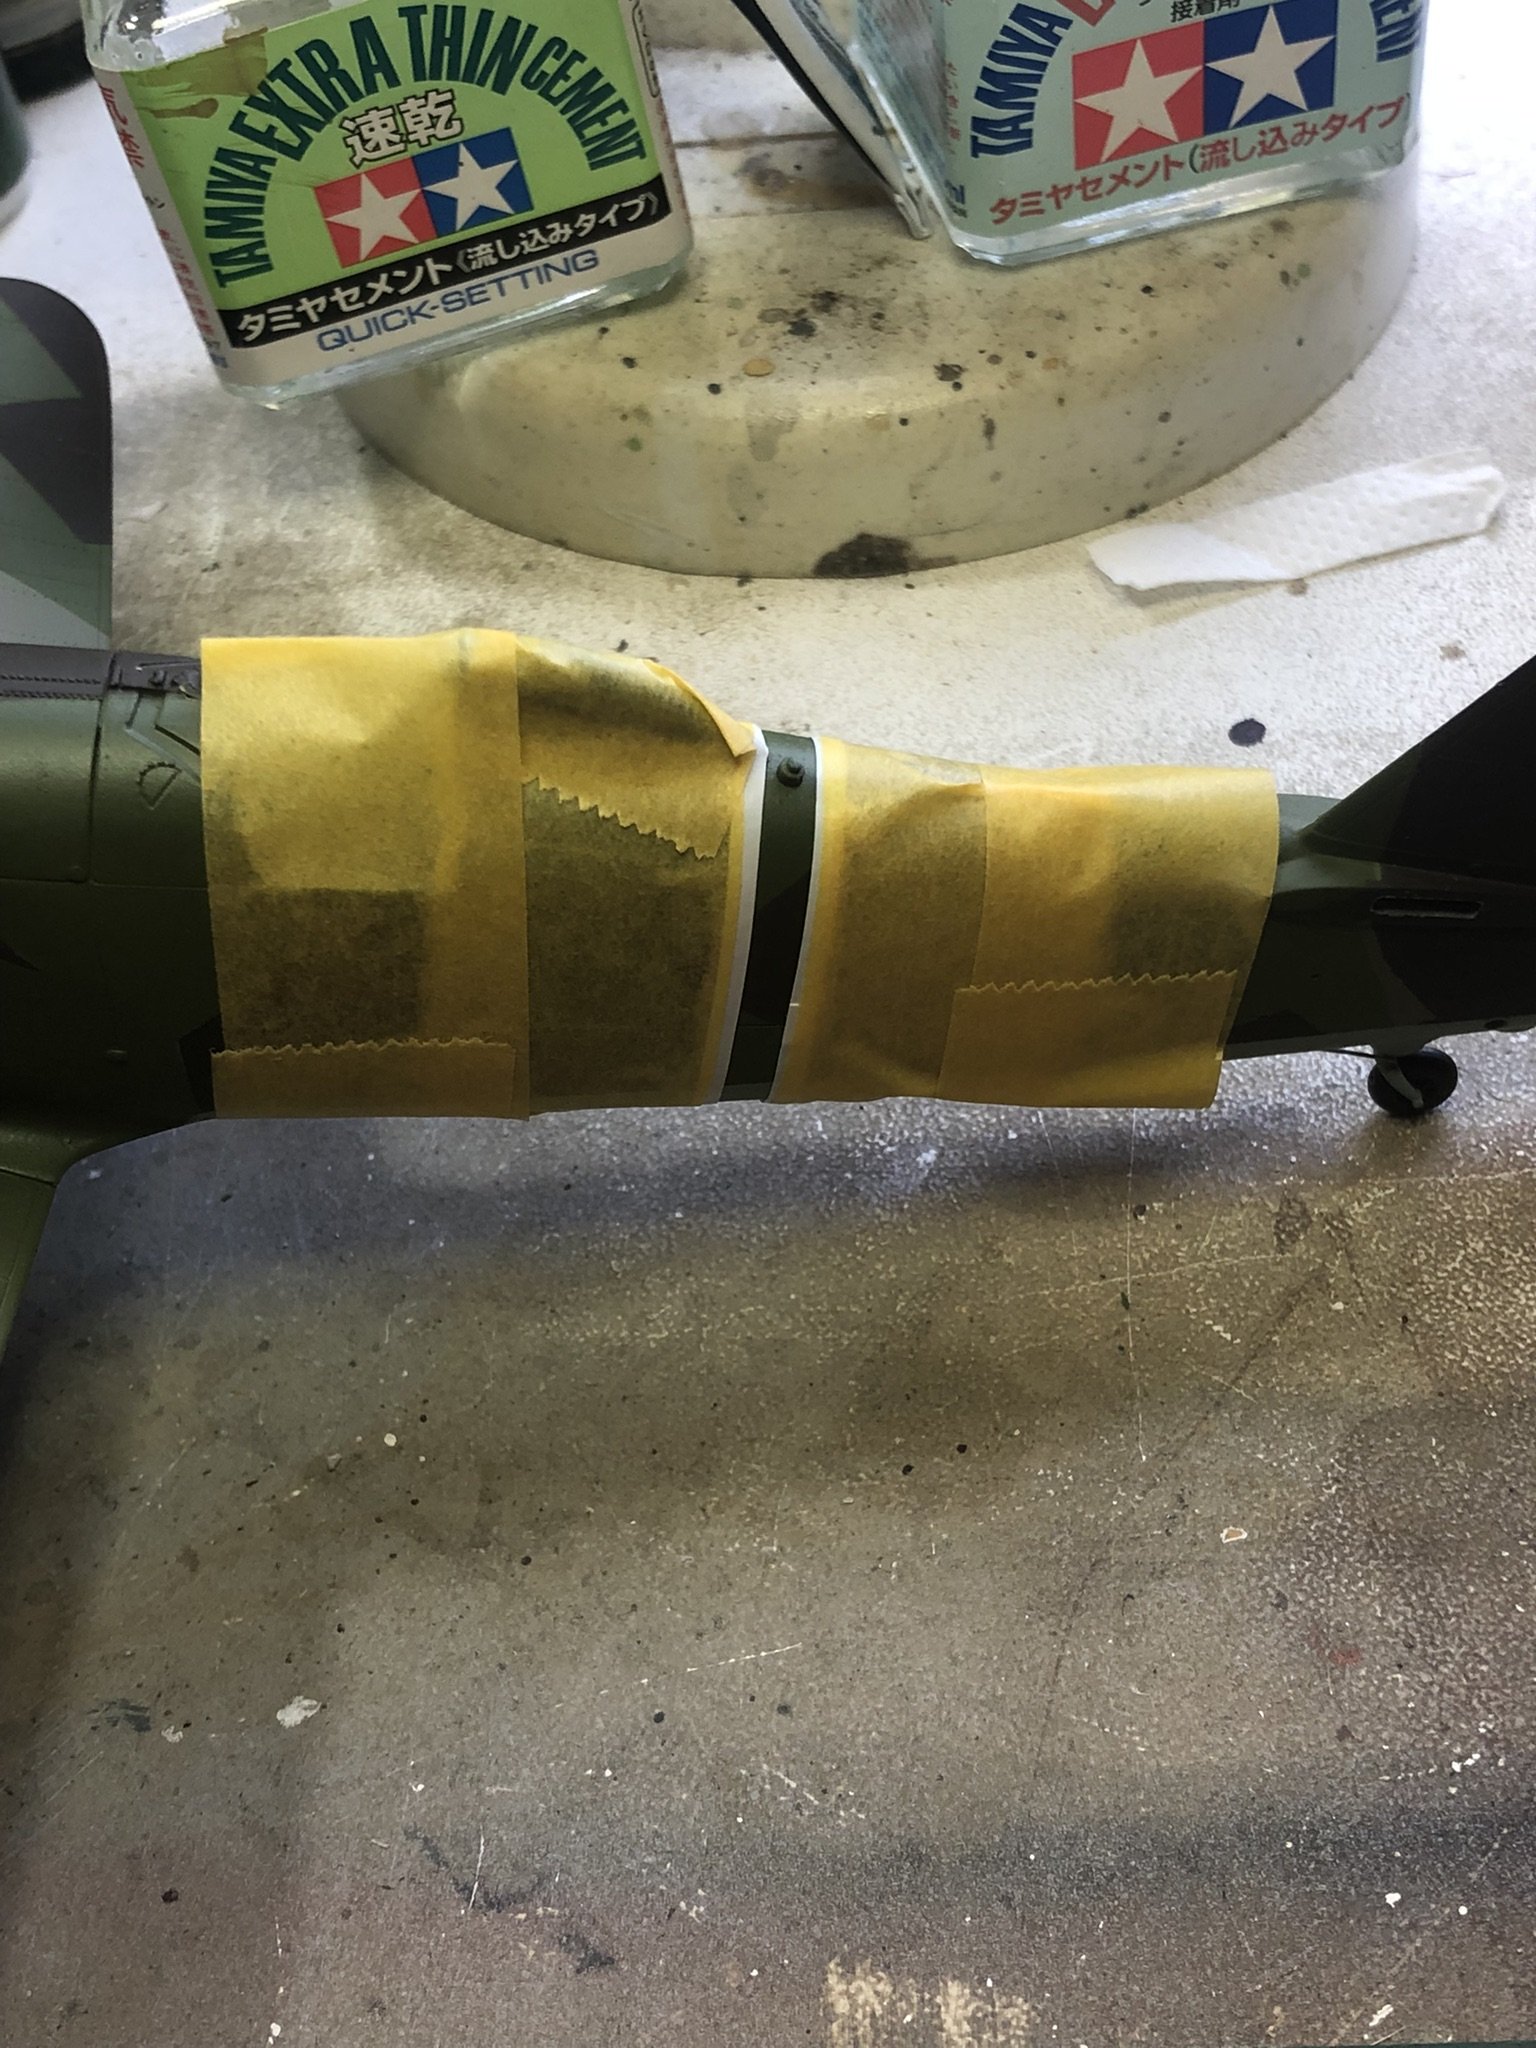
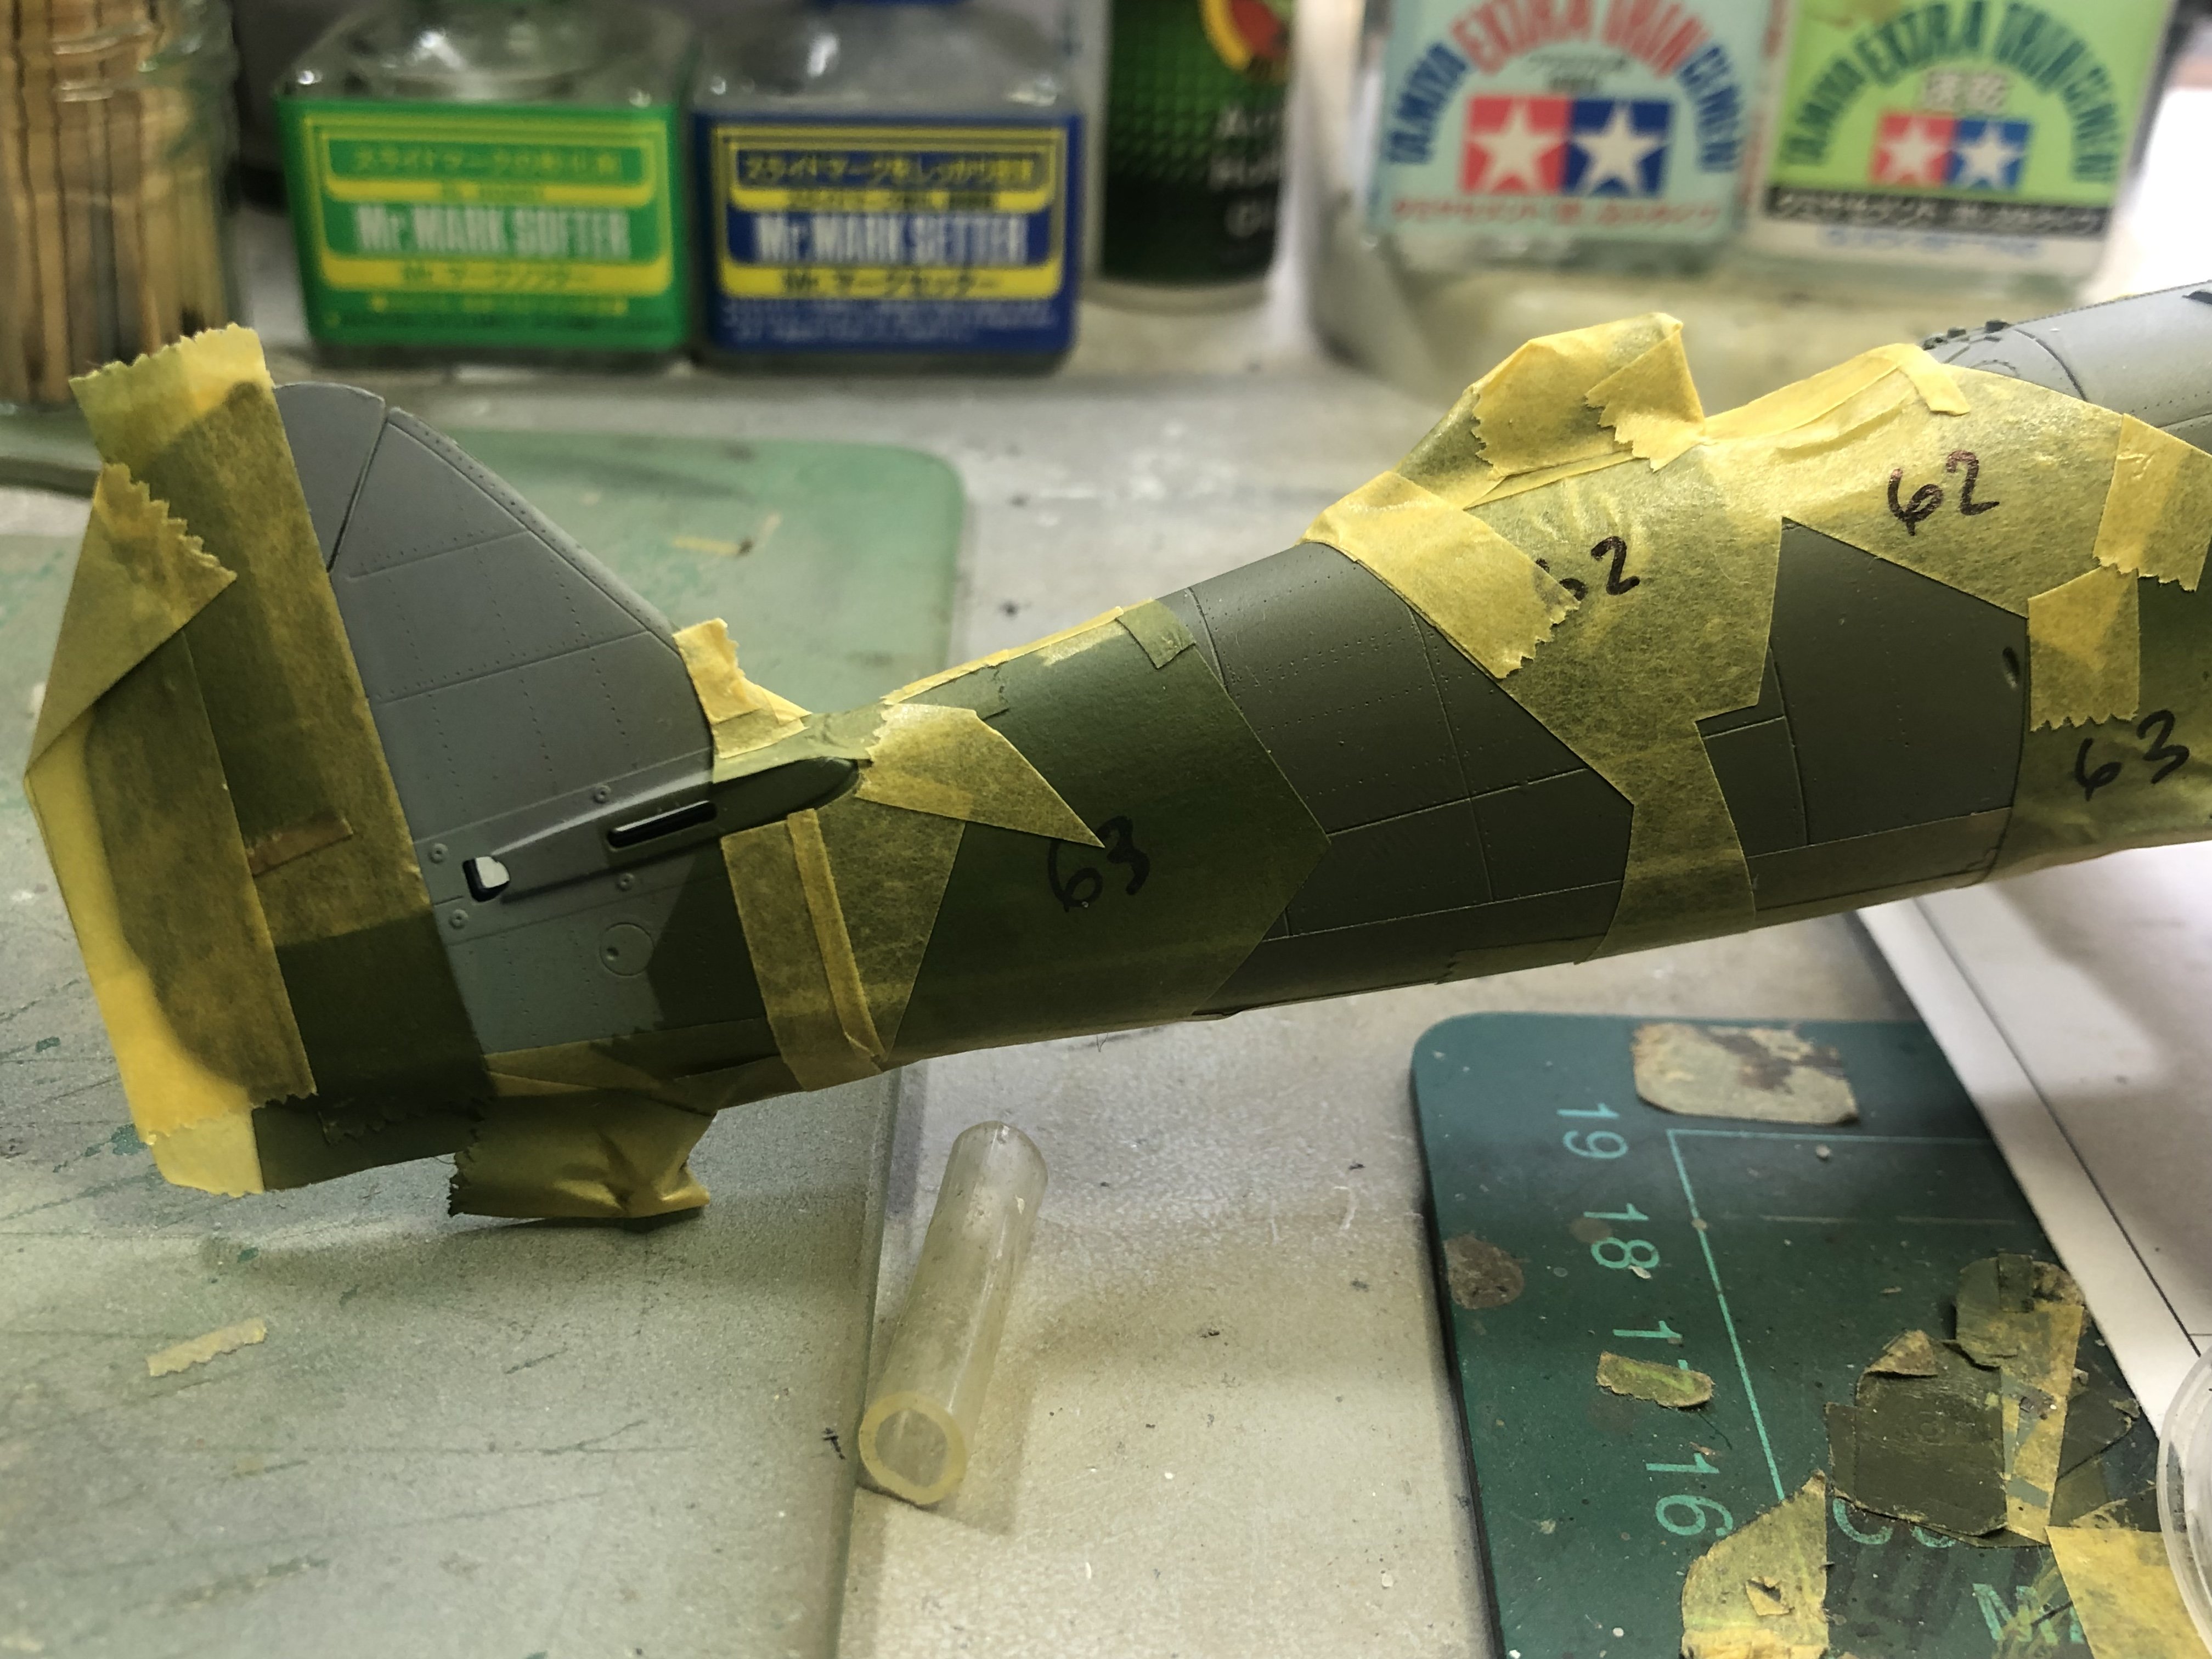
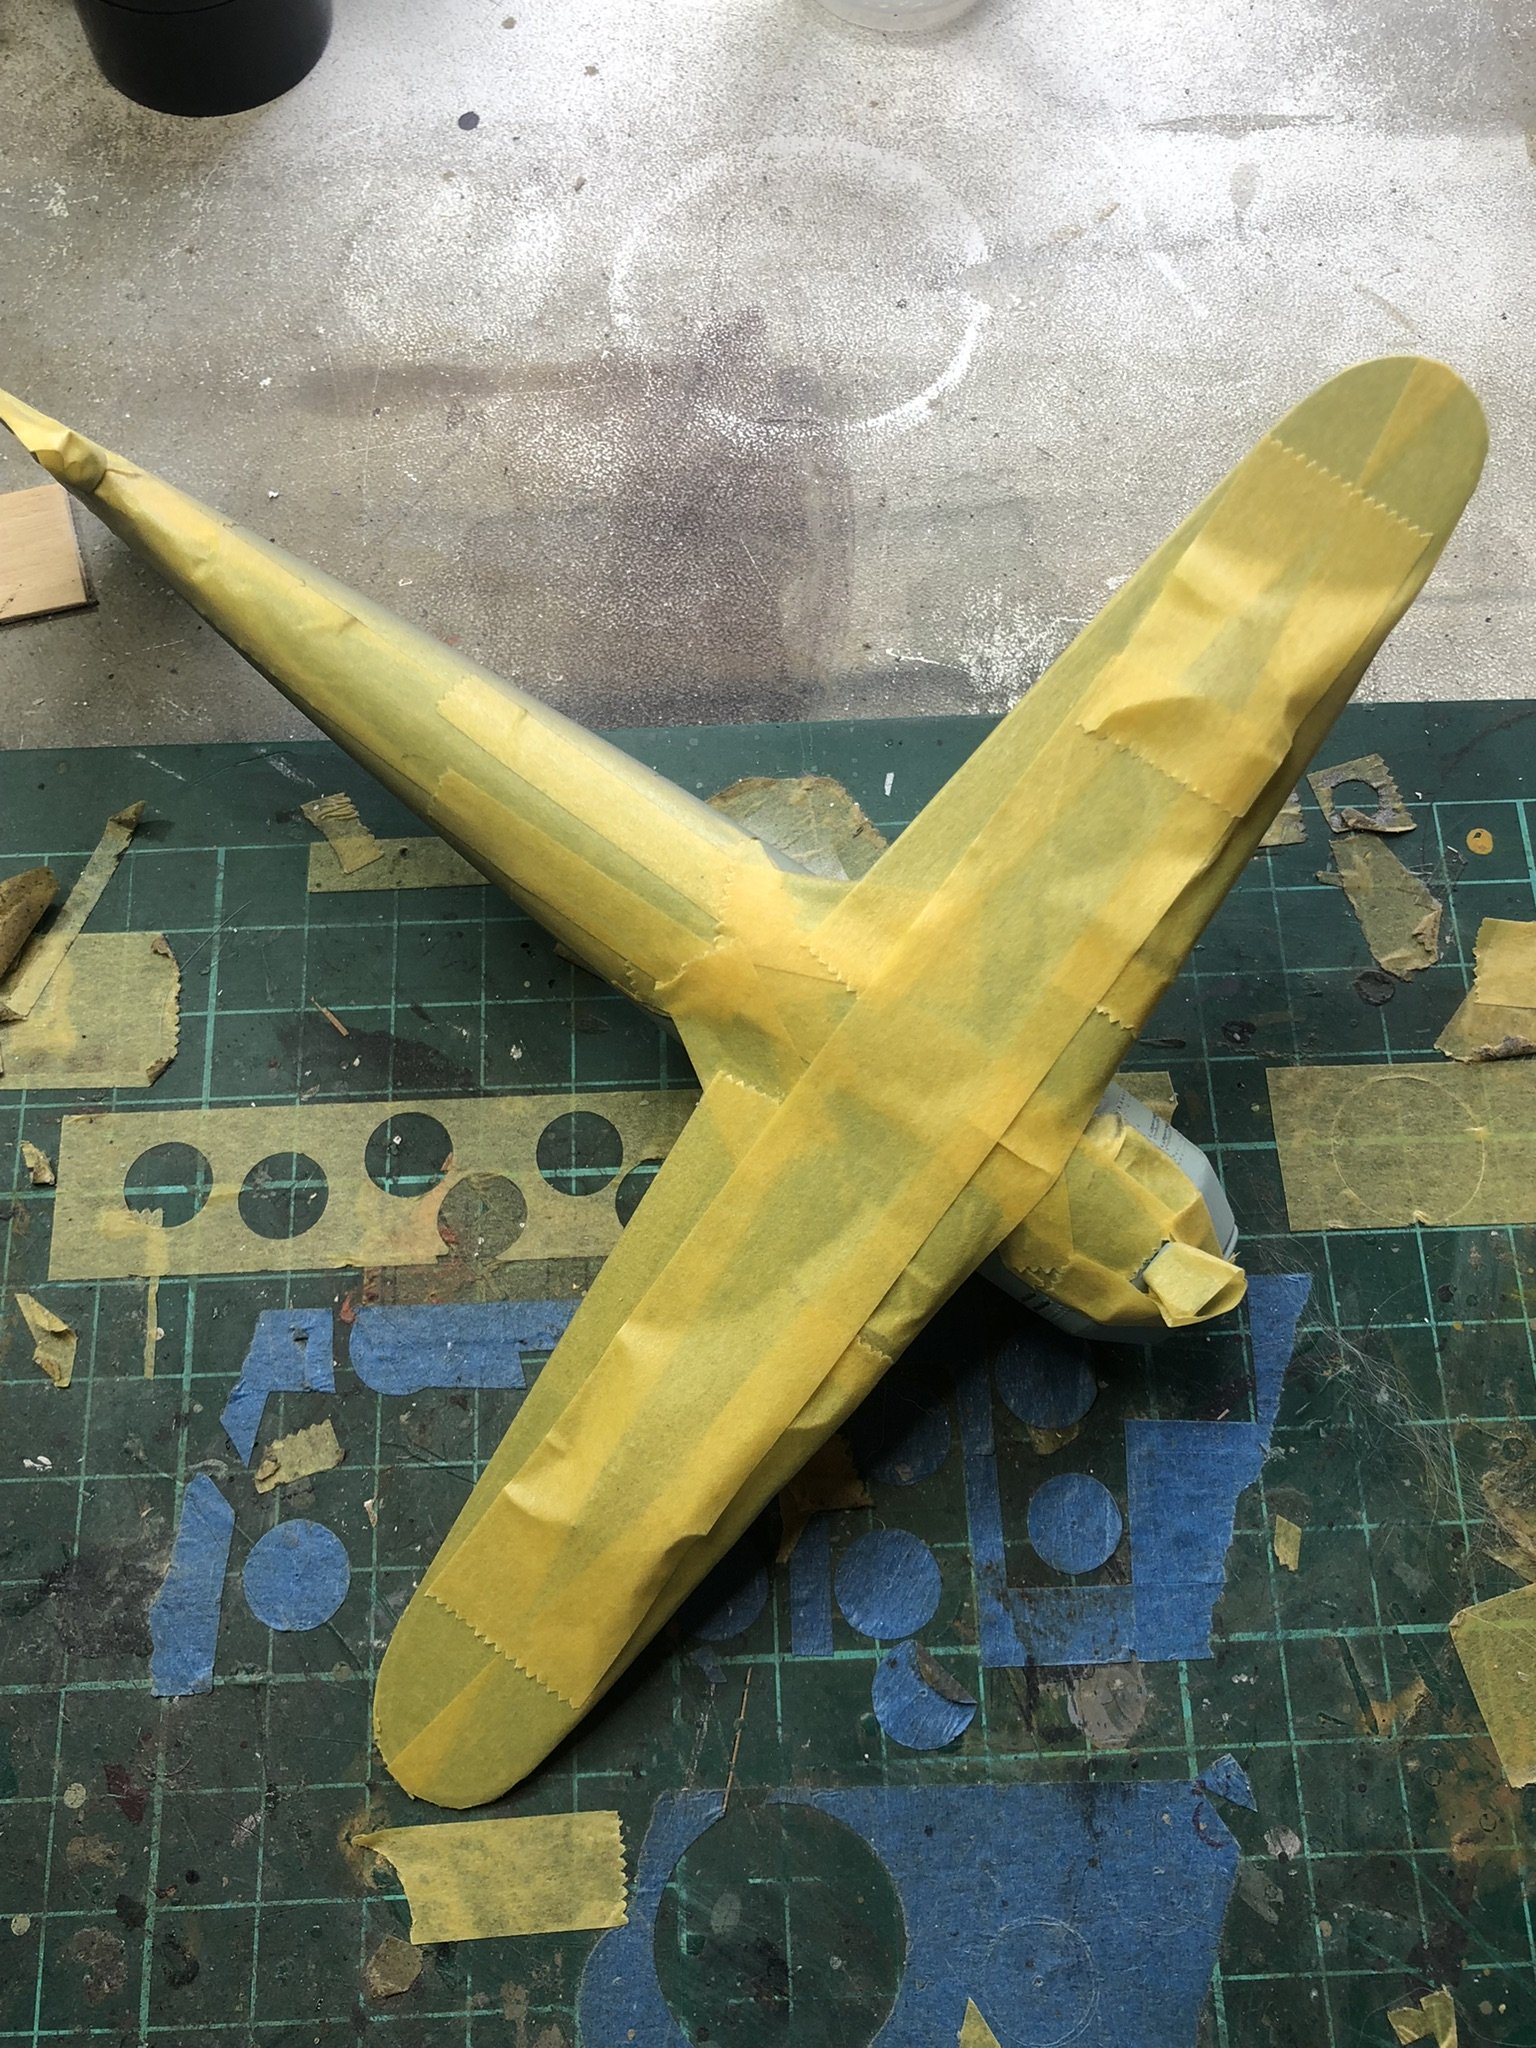
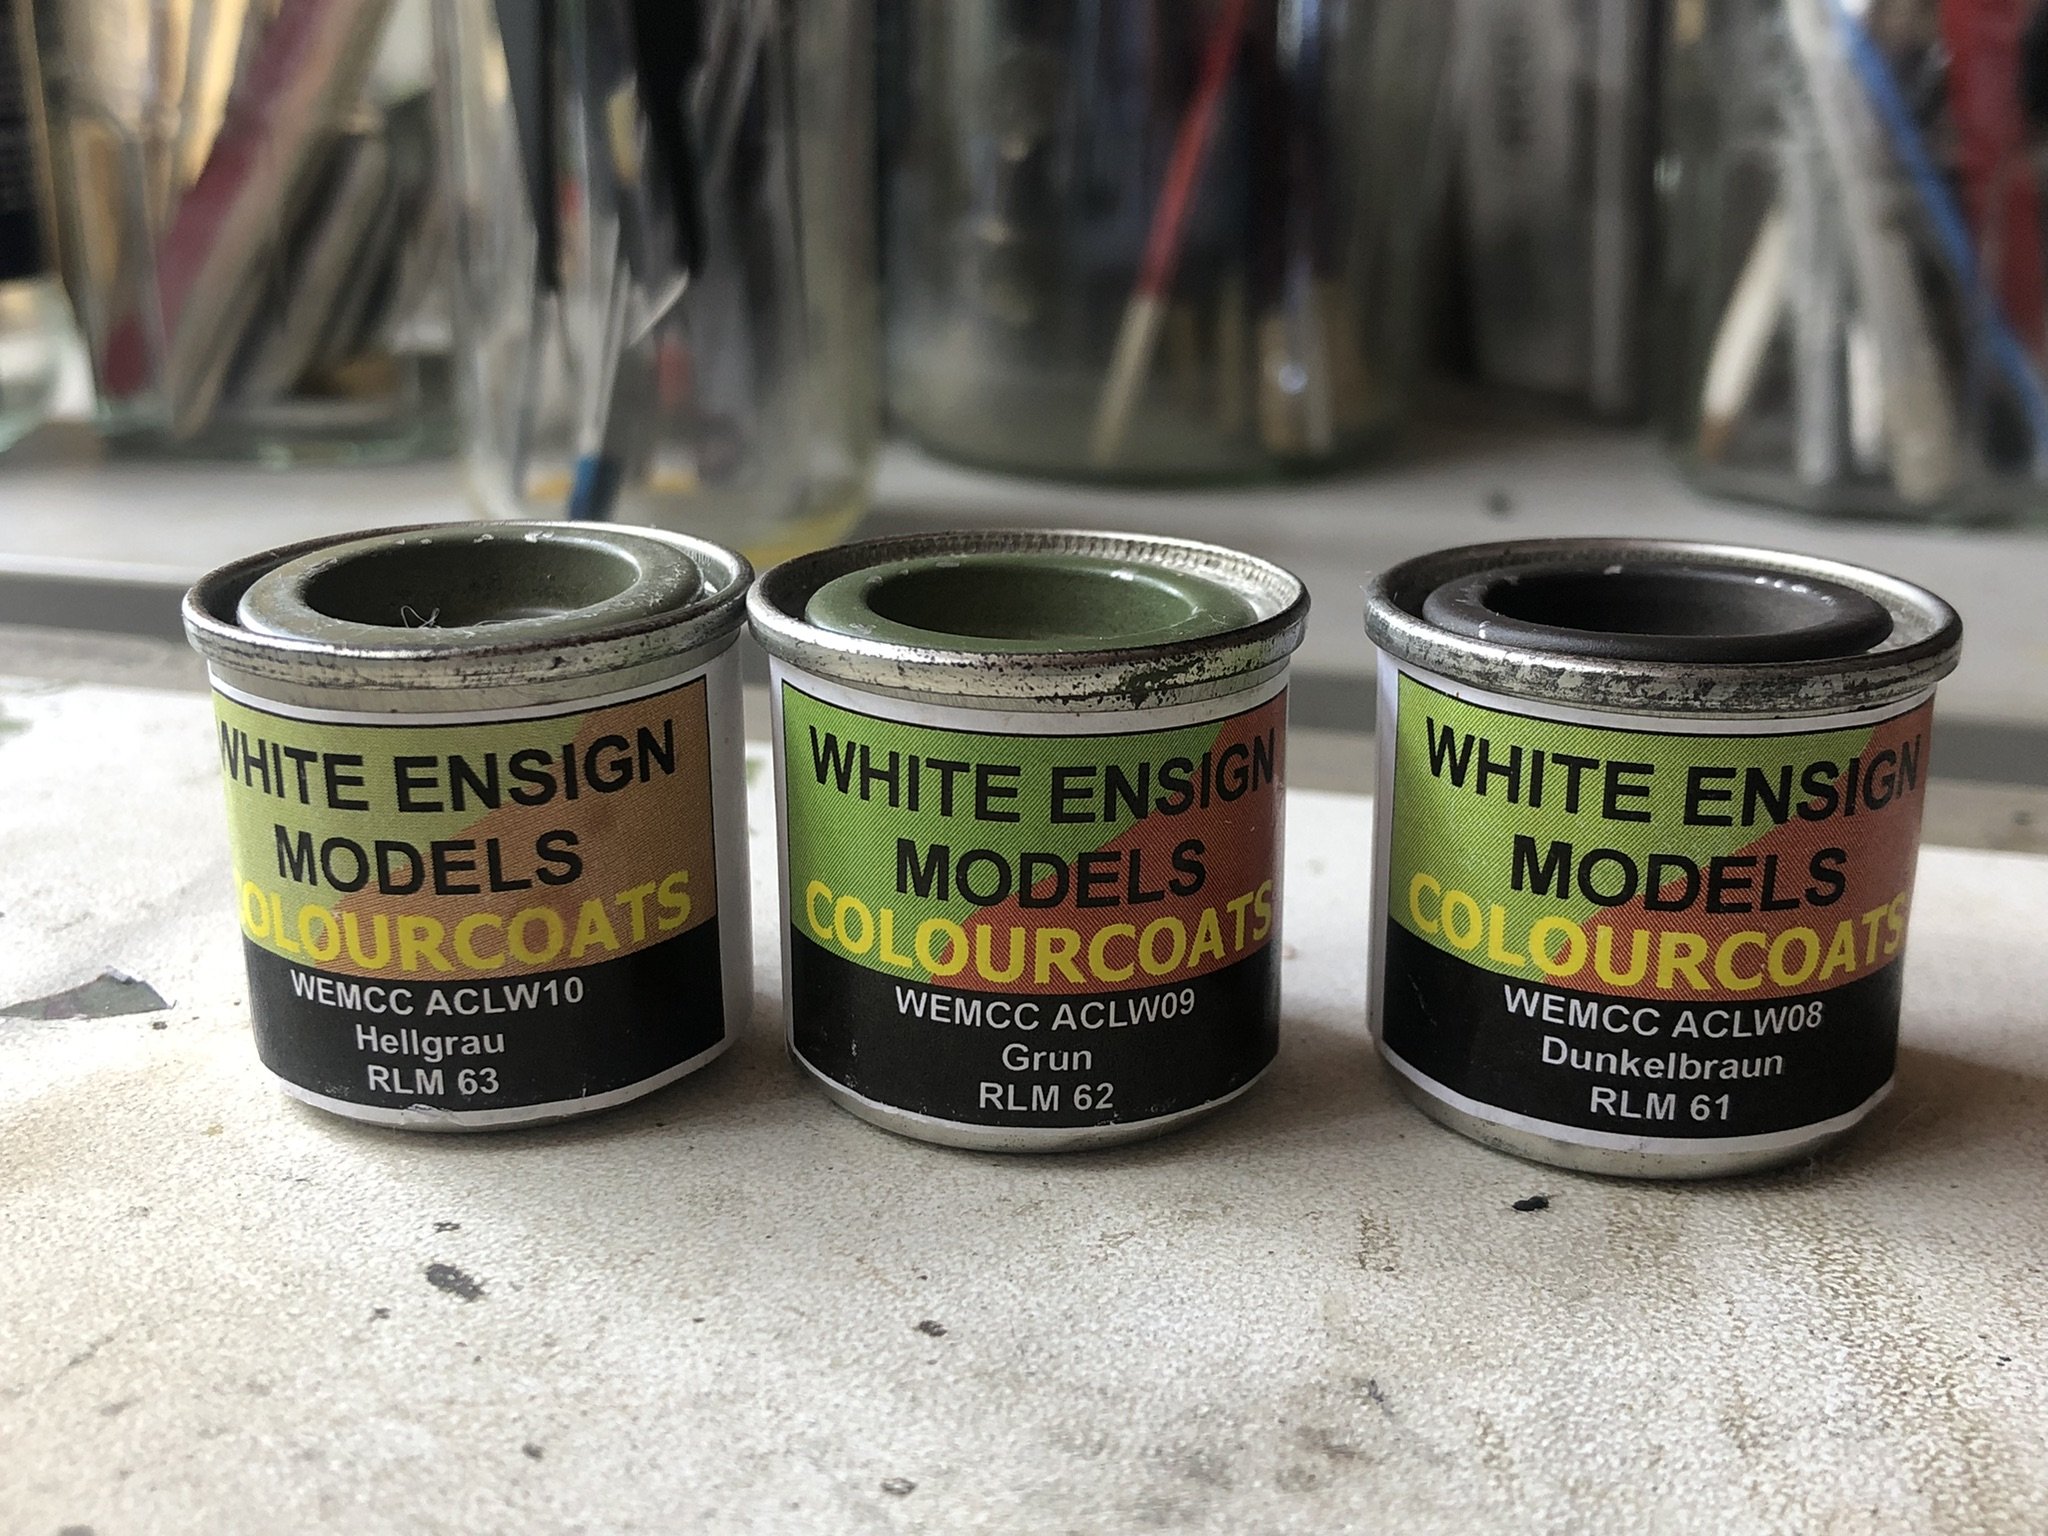
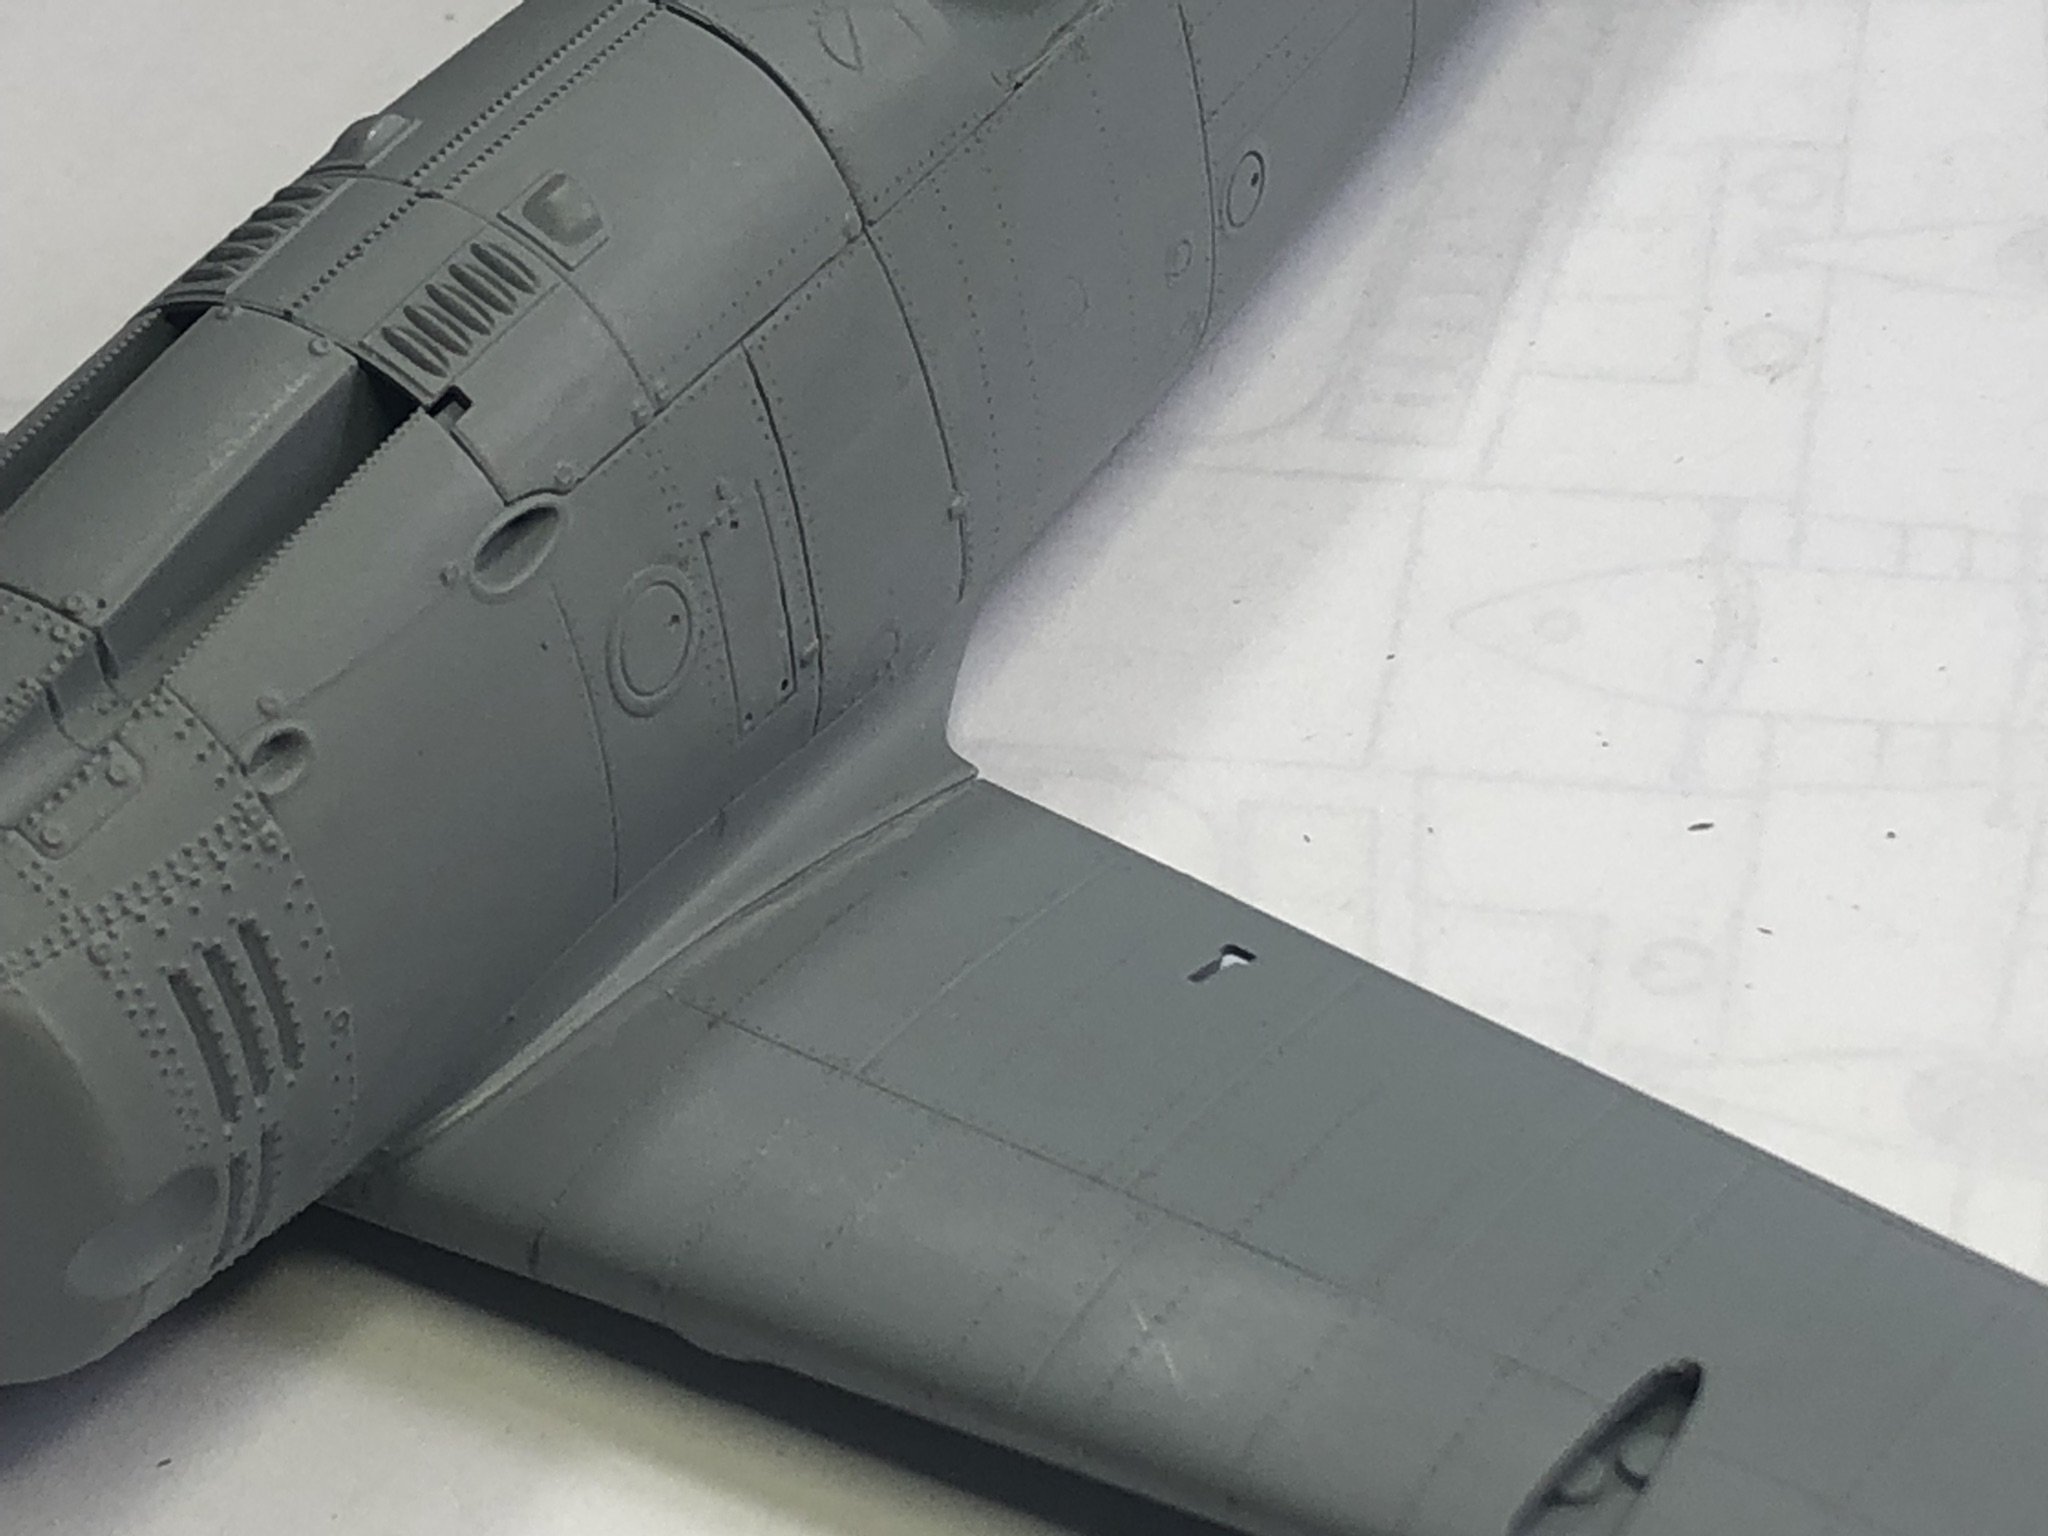
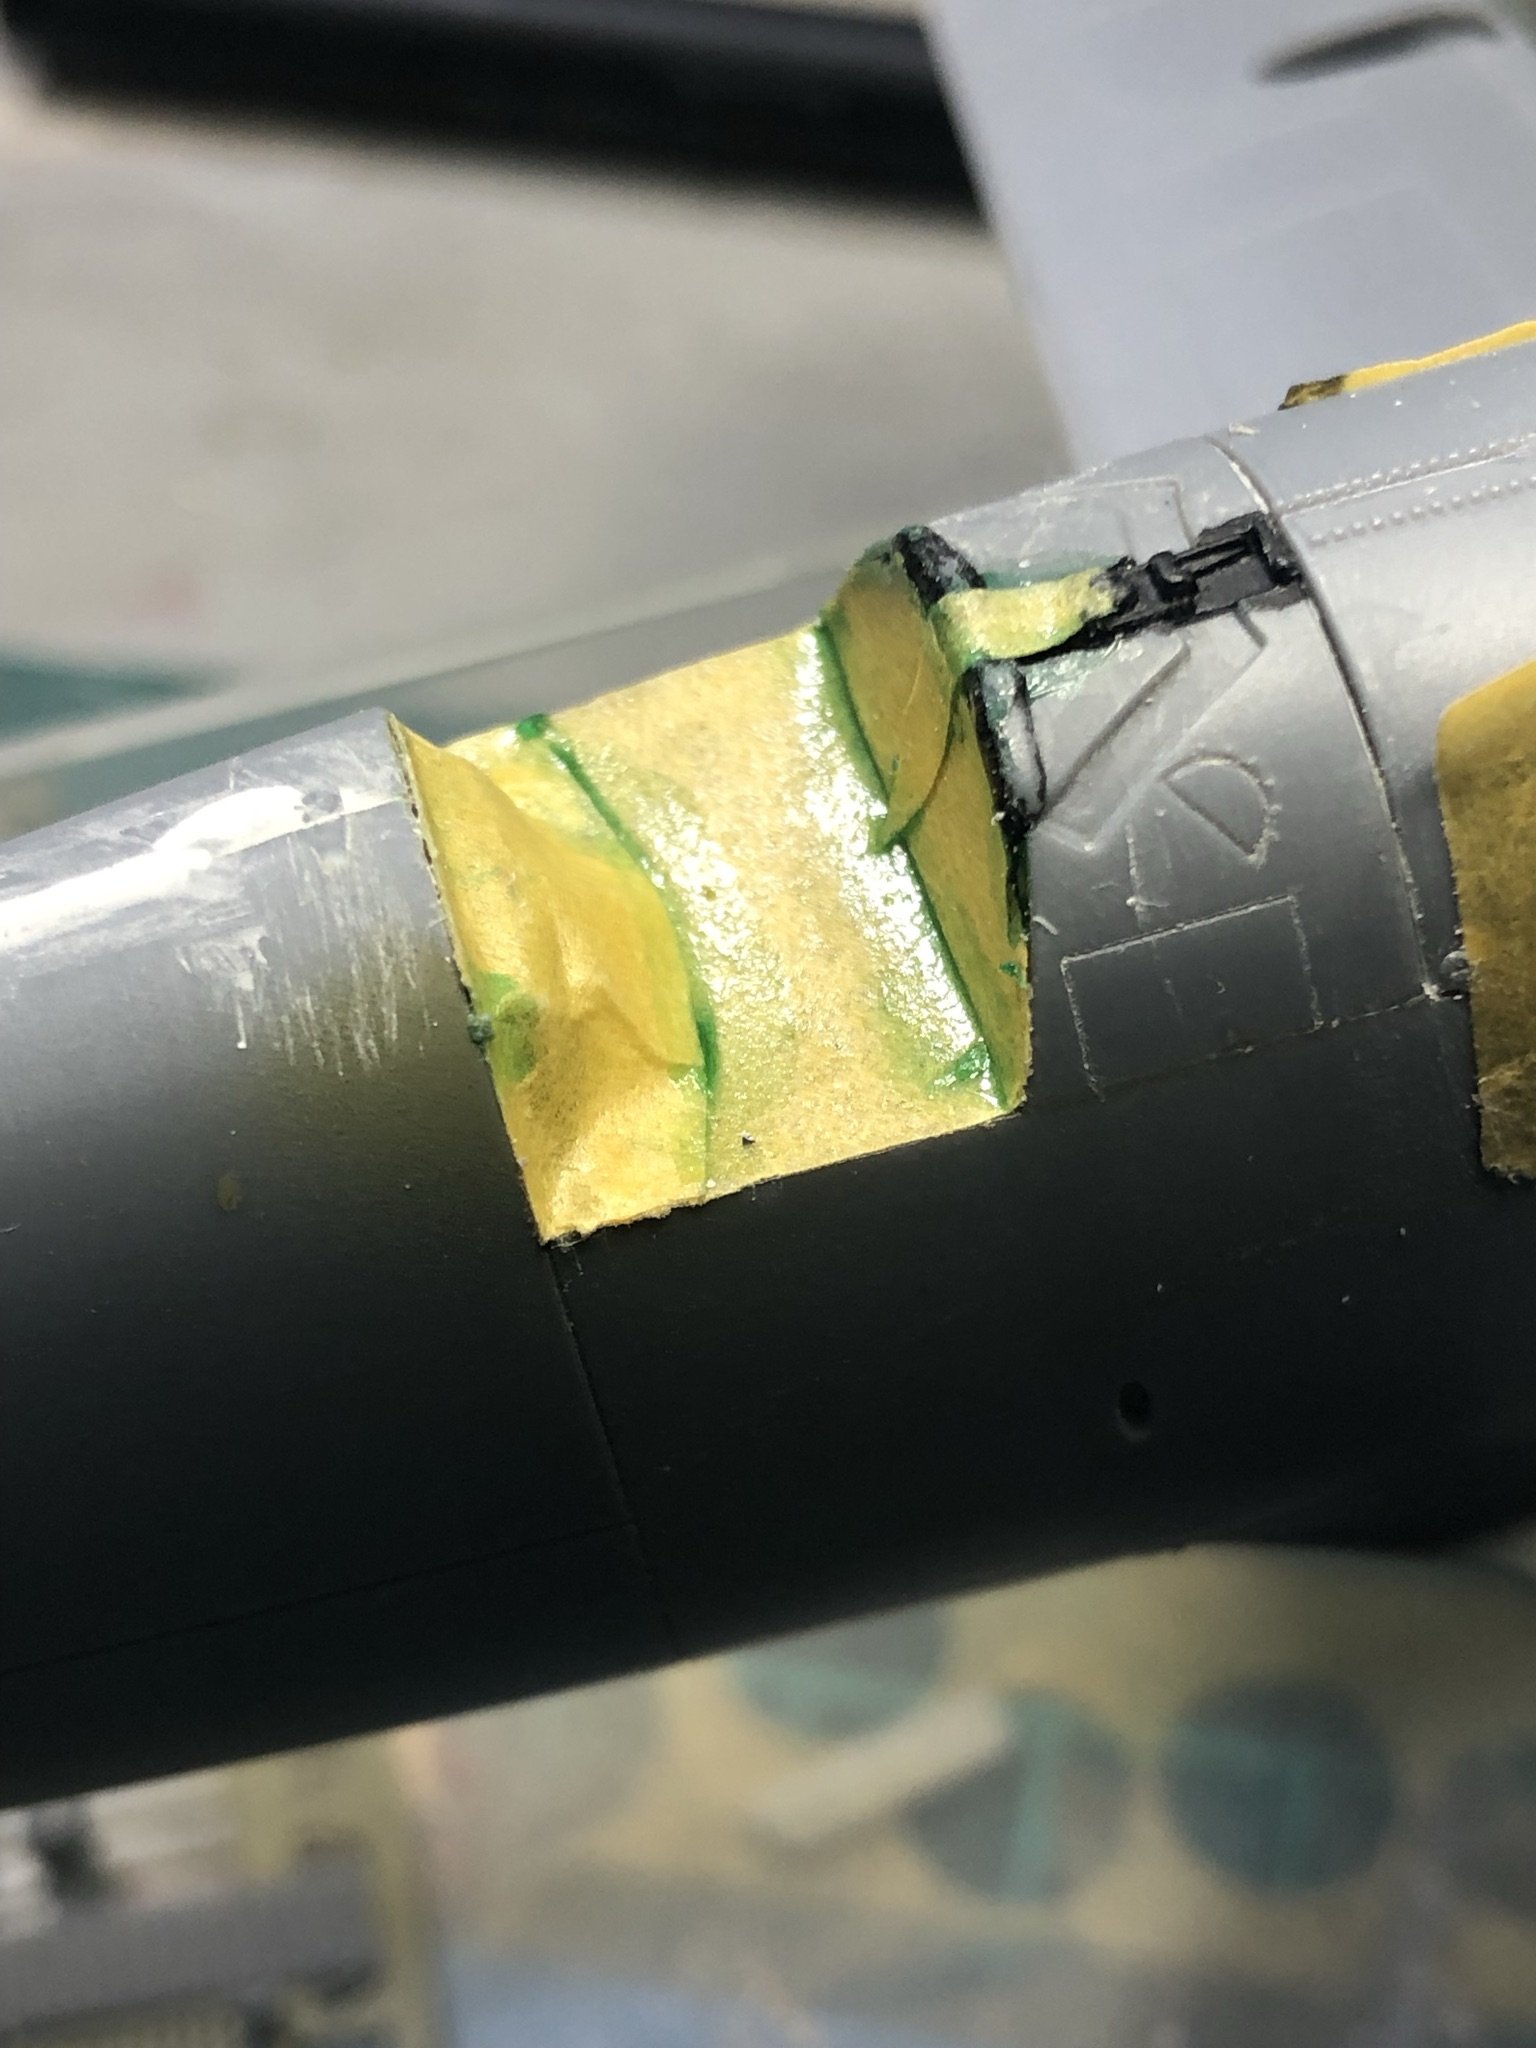
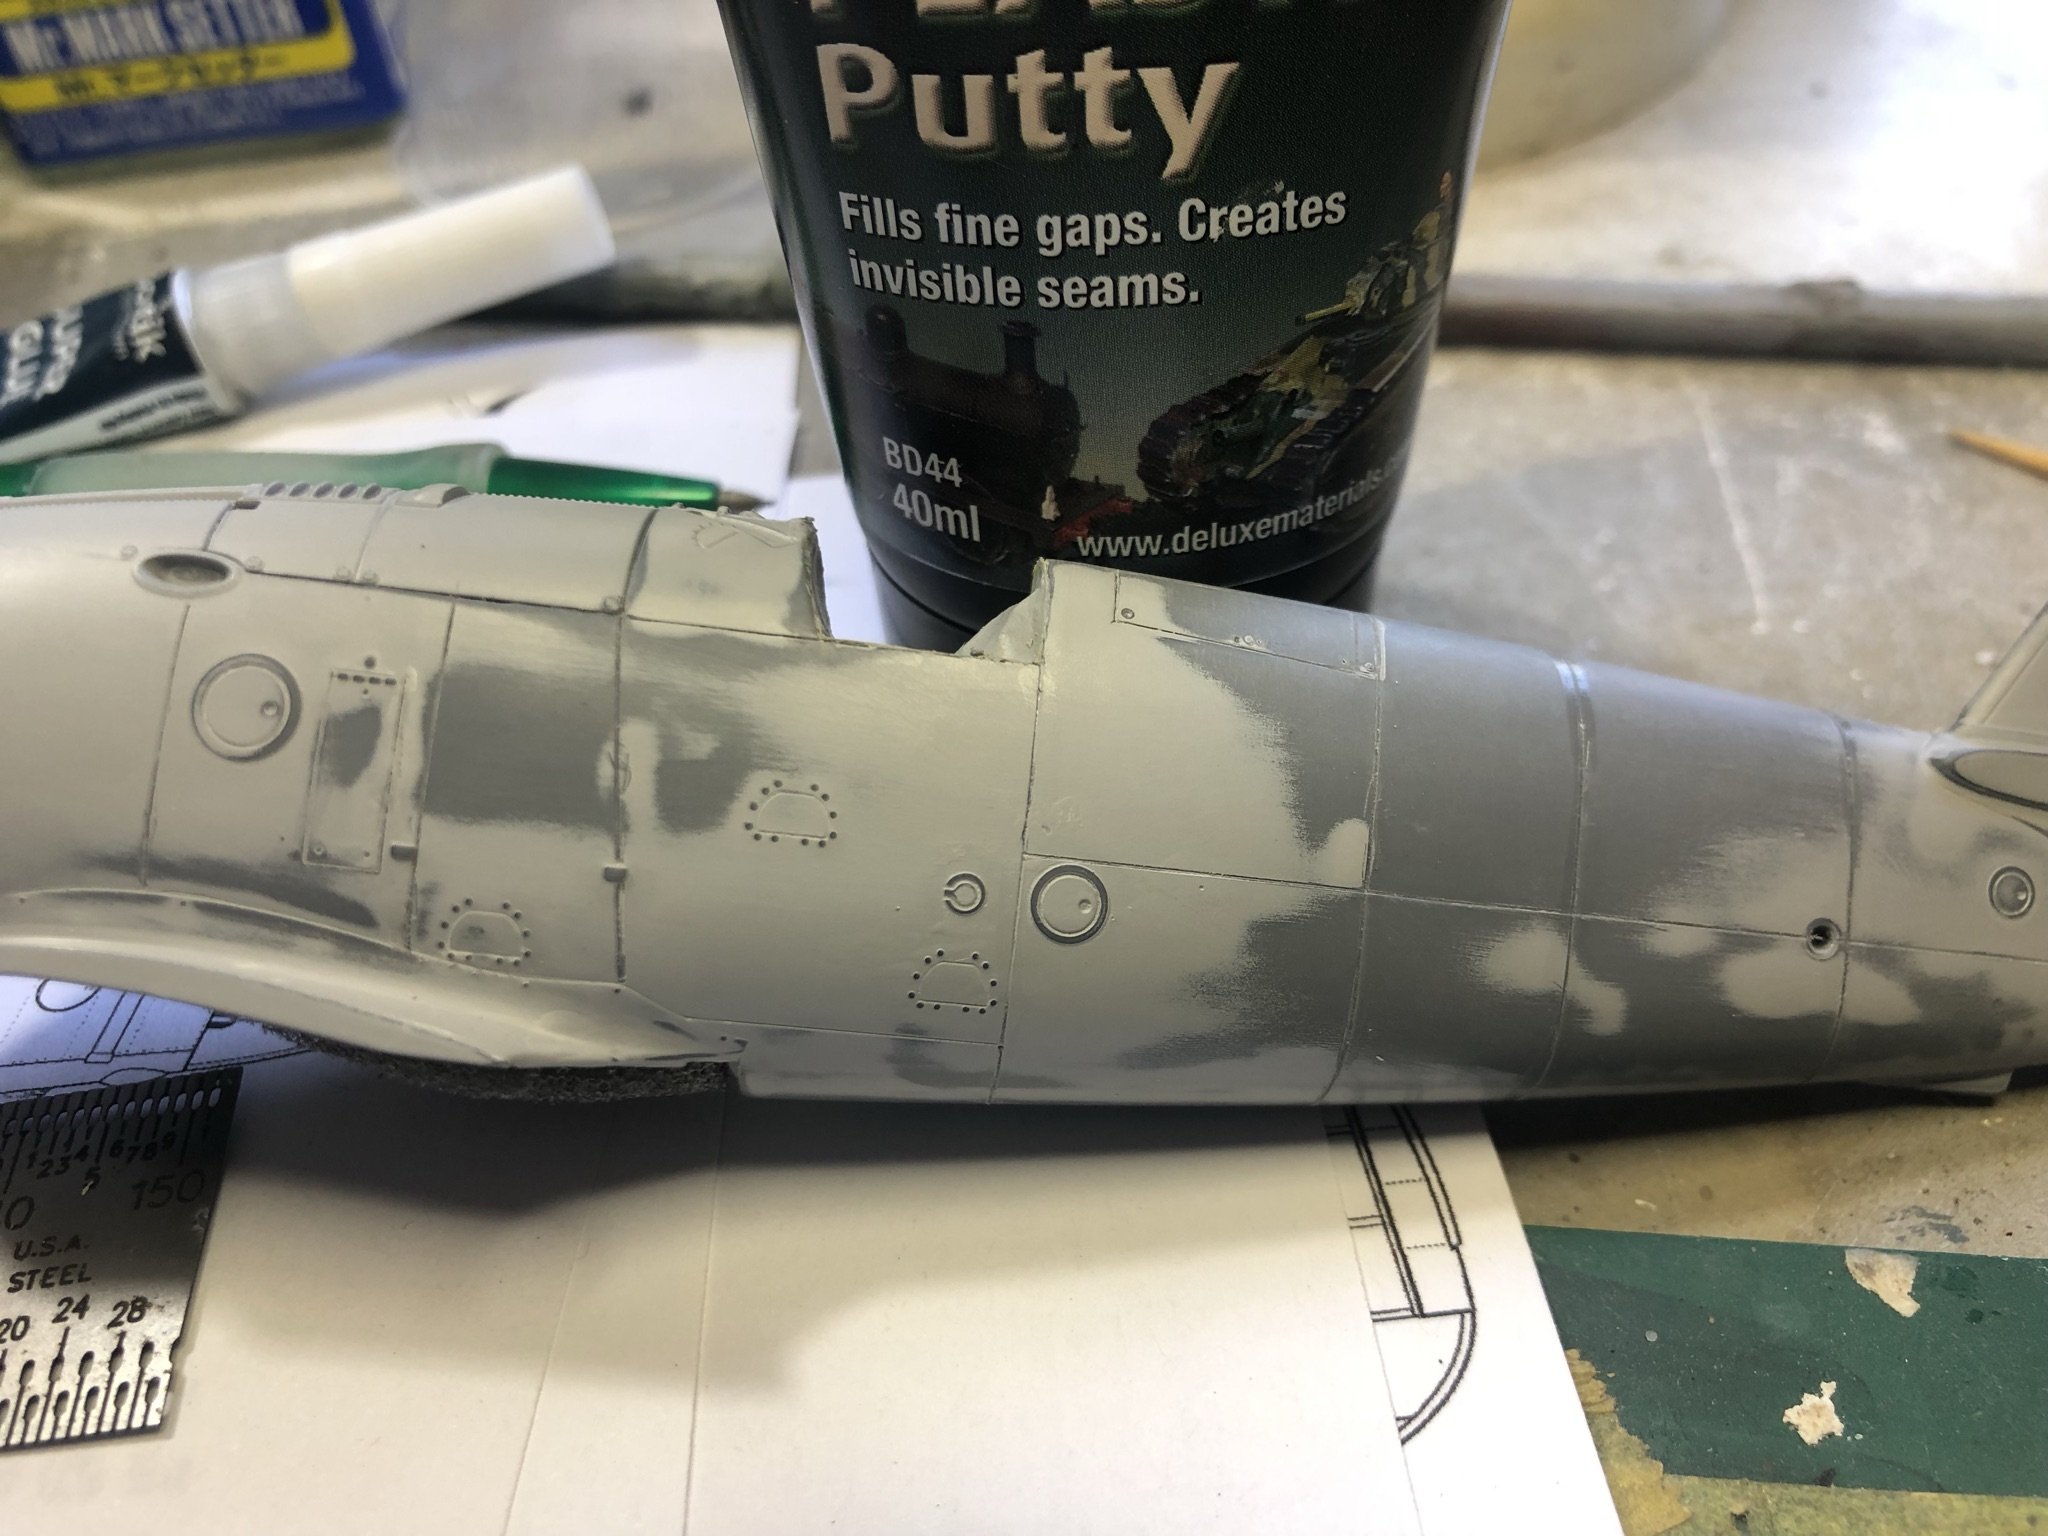
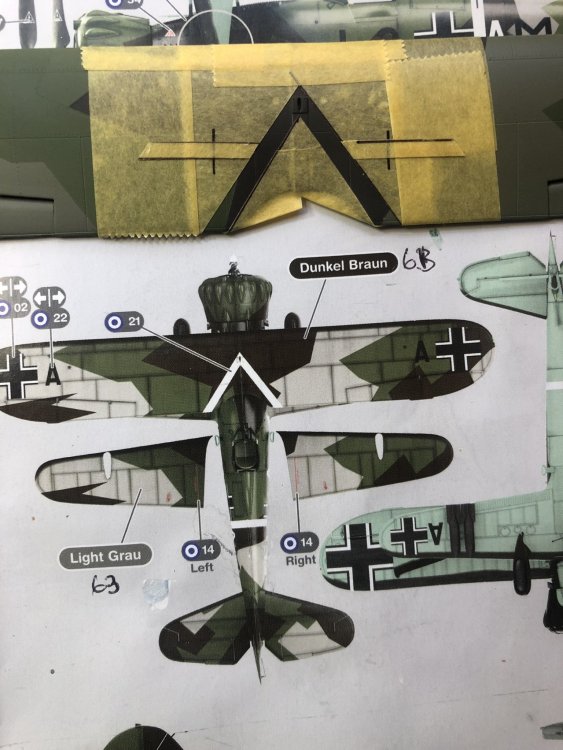
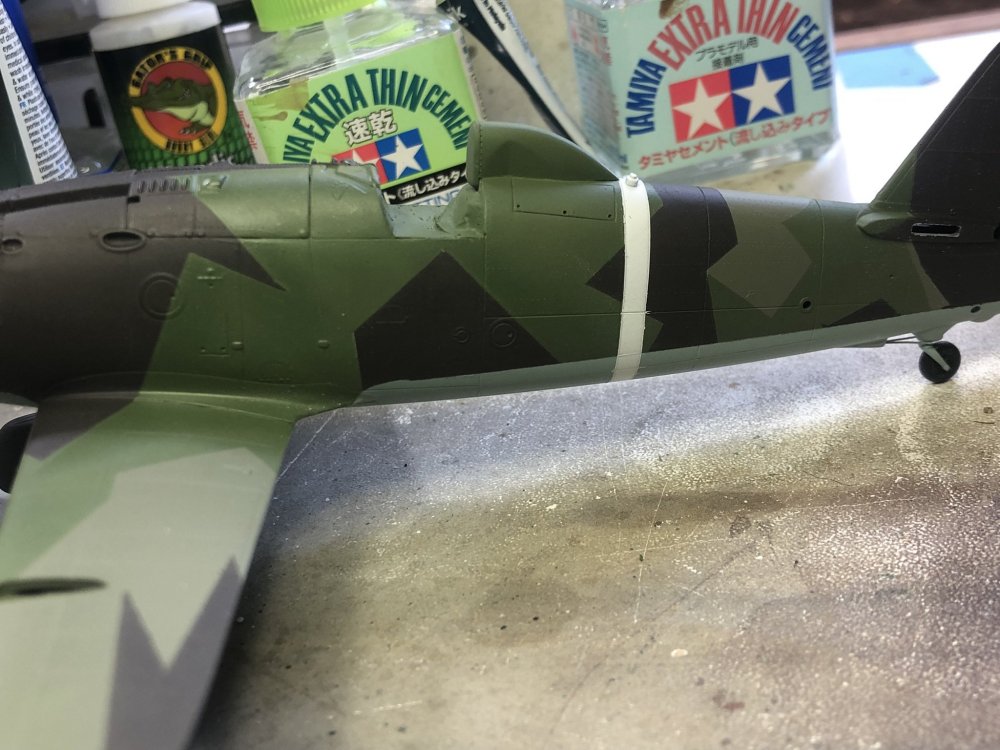
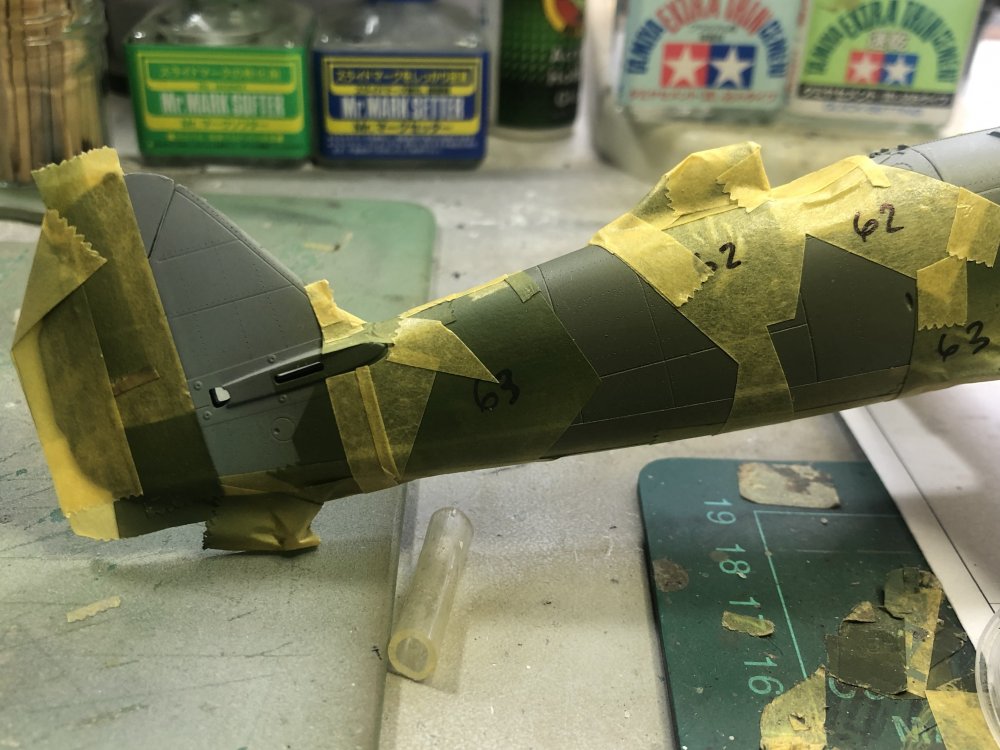
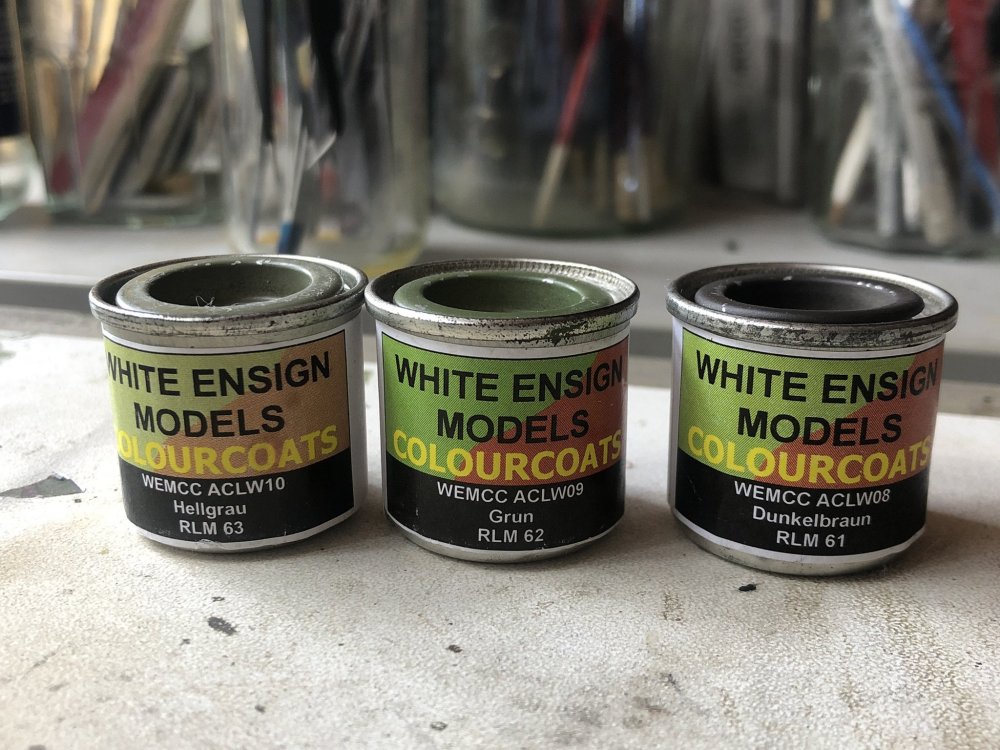
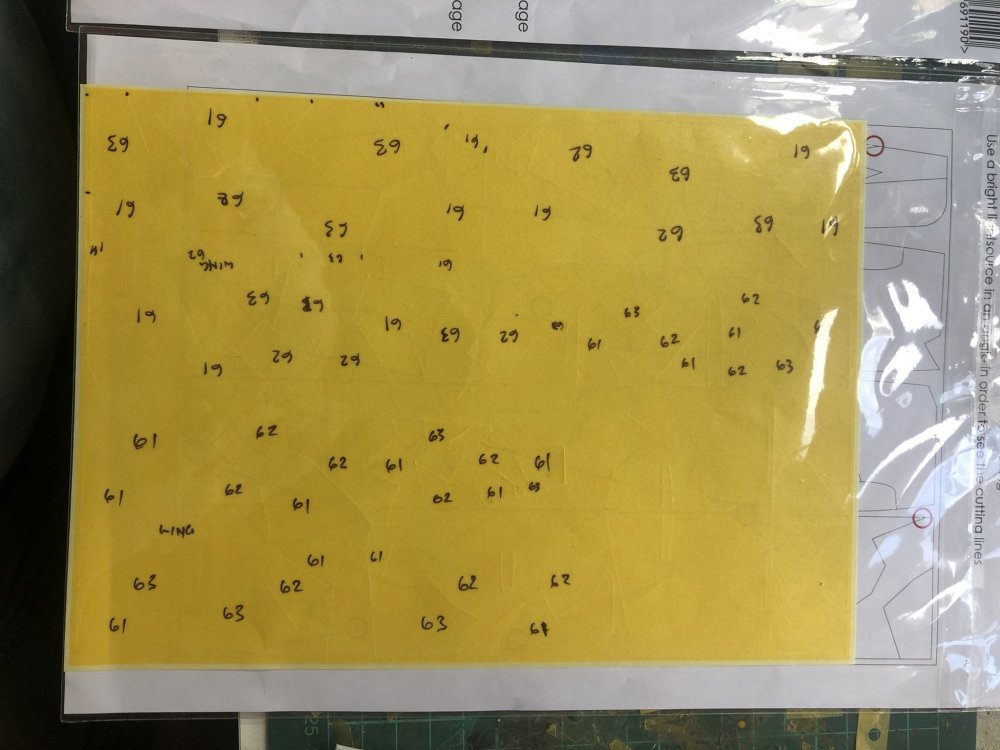
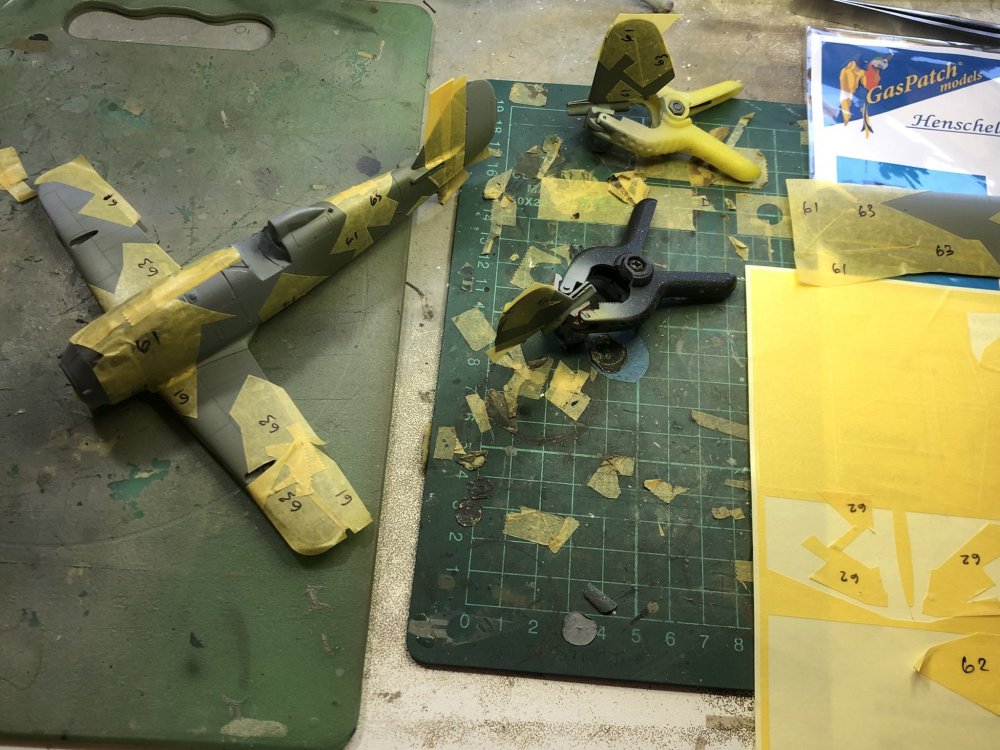
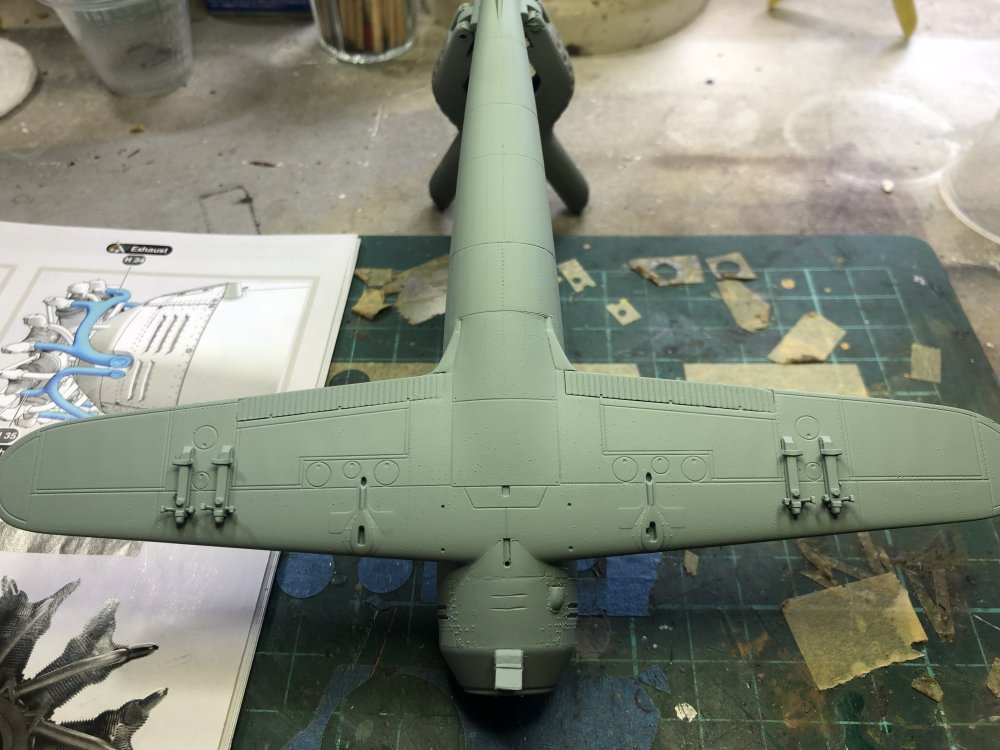
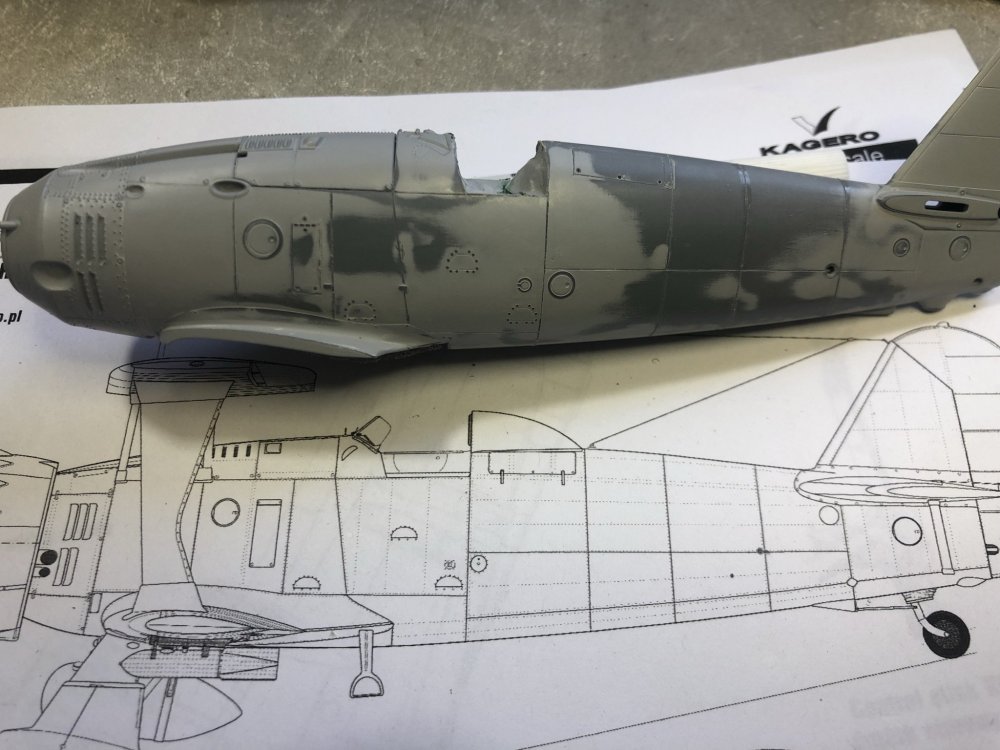
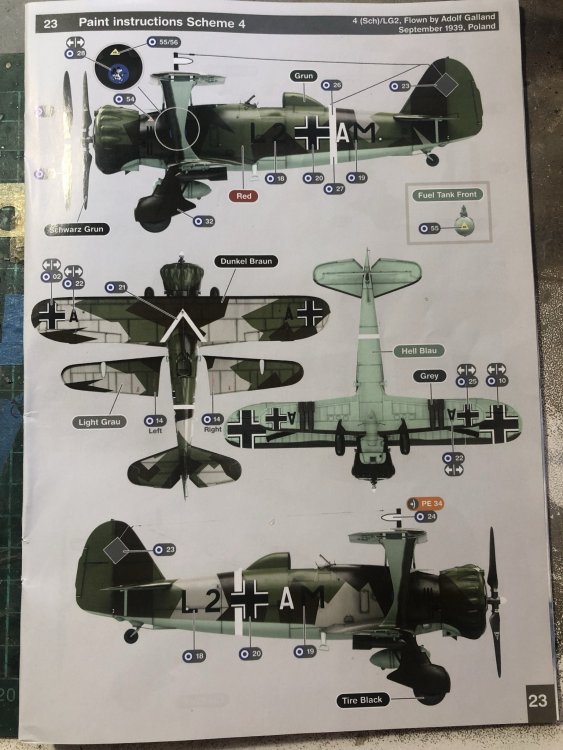
So the last couple of days have been all about the paint! I am using Colourcoats enamels for the RLM 61/62/63 camouflage pattern. Gaspatch provides masks in both vinyl and Tamiya type tape. I have both but went with the tape version as the vinyl had already shown evidence of shrinkage. Using the instruction painting guide I numbered all the individual pieces with their respective RLM numbers. The actual tape pieces are a tad oversized for the build, allowing some wriggle room I guess. The underside RLM 65 was masked off, including under the cowl with some creative taping with circles cut using my Waldron tool. I pondered over where to start the masking, reasoning a definitive line was needed to ensure overall accuracy and compliance. Starting from the tail/rudder edge as a reference the entire fuselage was masked and the RLM 62 pieces then weeded out and retained for future use. The upper wing was commenced at the central point and worked out to both sides. The paint was applied and will be left to dry for about hours. I did not do the cowling nor windscreen at this time as they will be done at a later point. The astute amongst you may note the landing gear has been removed from the previous update for painting. I did so to make life easier for masking. Regards, Kent


-
Thanks Peter, I wish I could take credit for the landing gear alignment but Gaspatch supplied the jig in the kit. Very “out of the box” thinking so to speak. Thanks Kent
-
A little bit of decal work on the BMW engine by adding the BMW decal. The underside was rescribed and riveted around the central area which allowed me to put the first real paint on. Aeromaster Warbirds RLM65 enamel thinned a tad with MLT. The main undercarriage was then added using the quirky GP cardboard guide and let set up. I did manage to lose one of the fuselage steps into the great unknown (you know that feeling as it accelerates away in an unknown direction right?). I will leave it a day or so then hopefully locate it whilst looking for something else. Regards, Kent


-
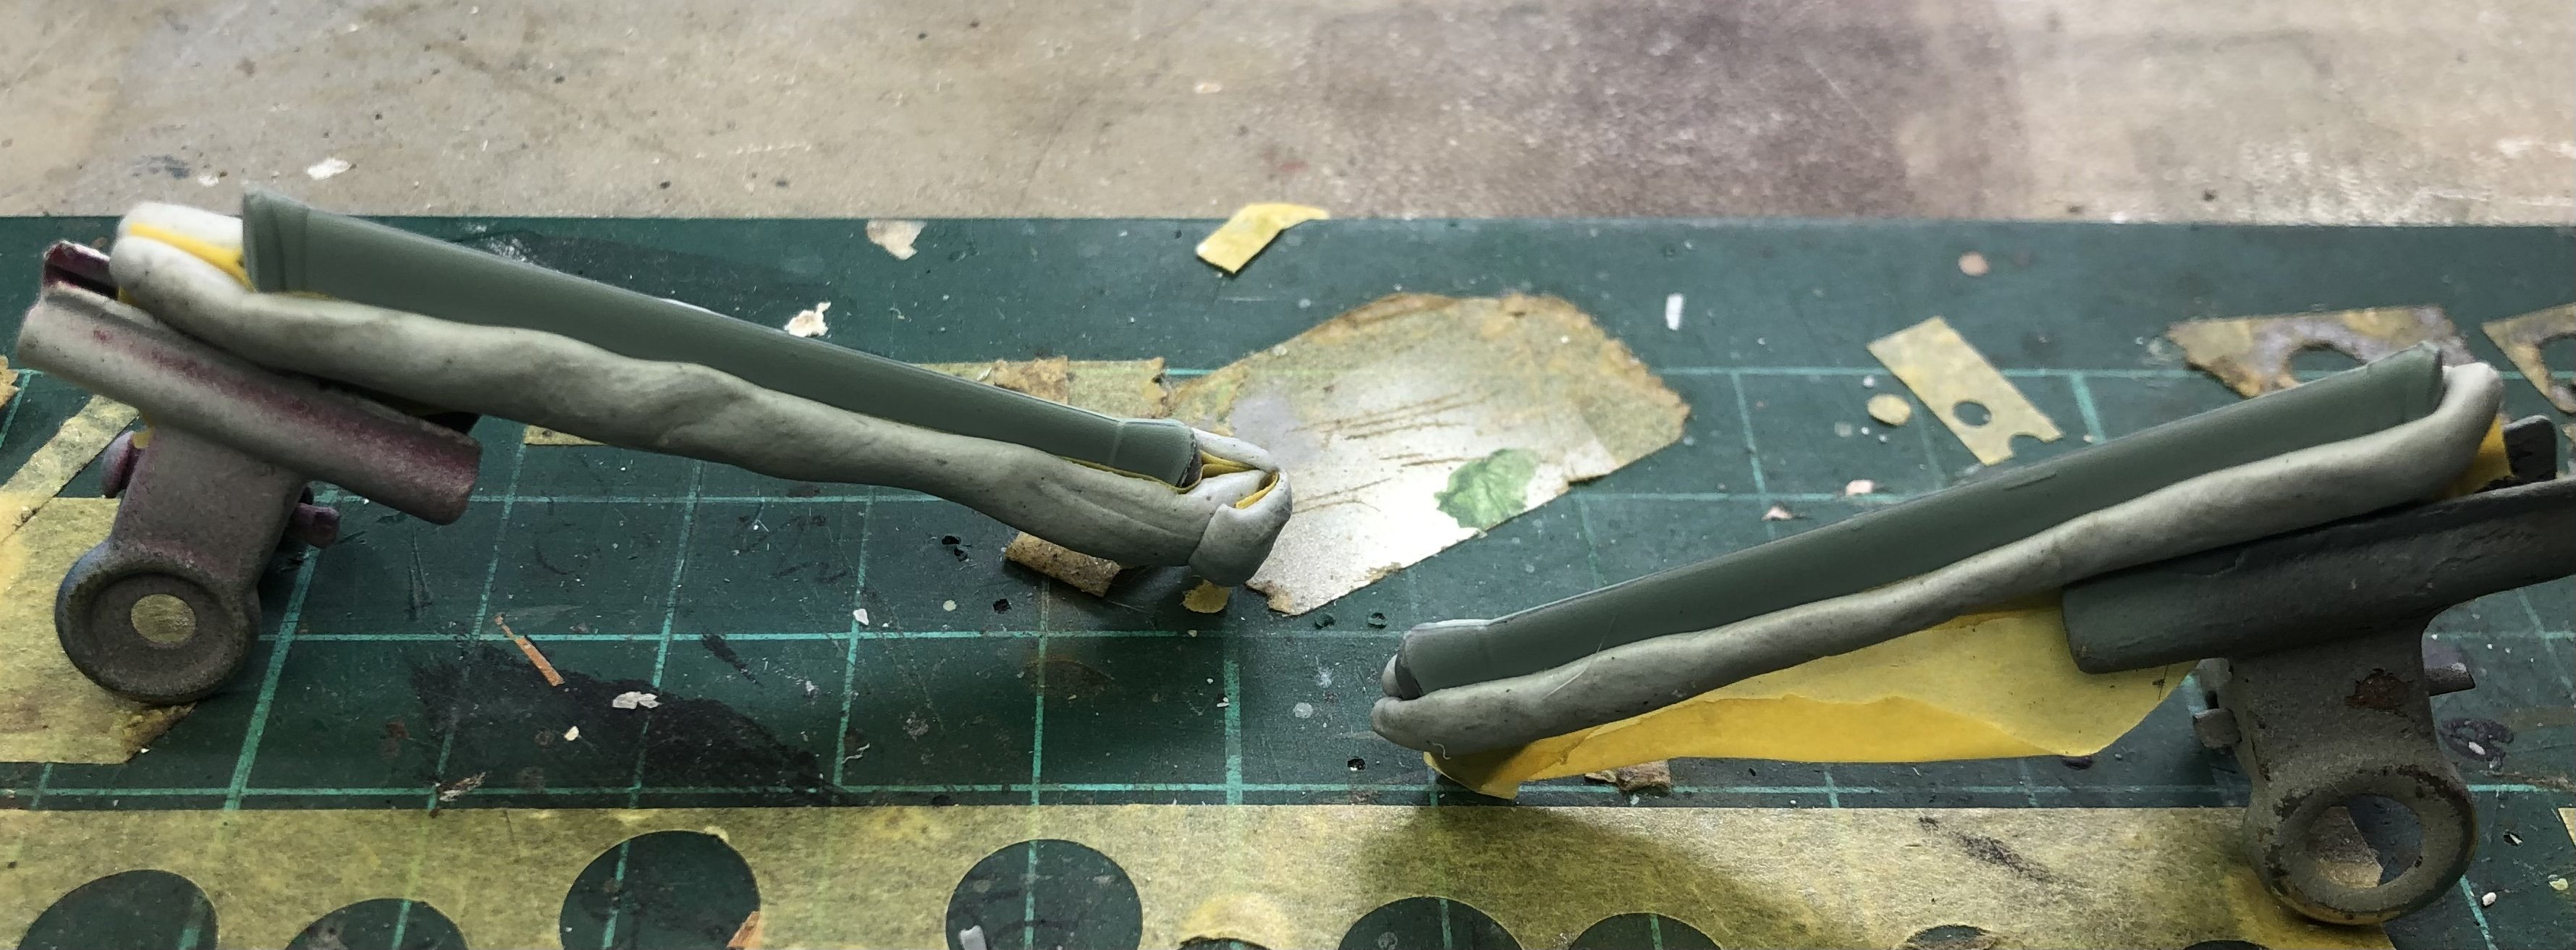
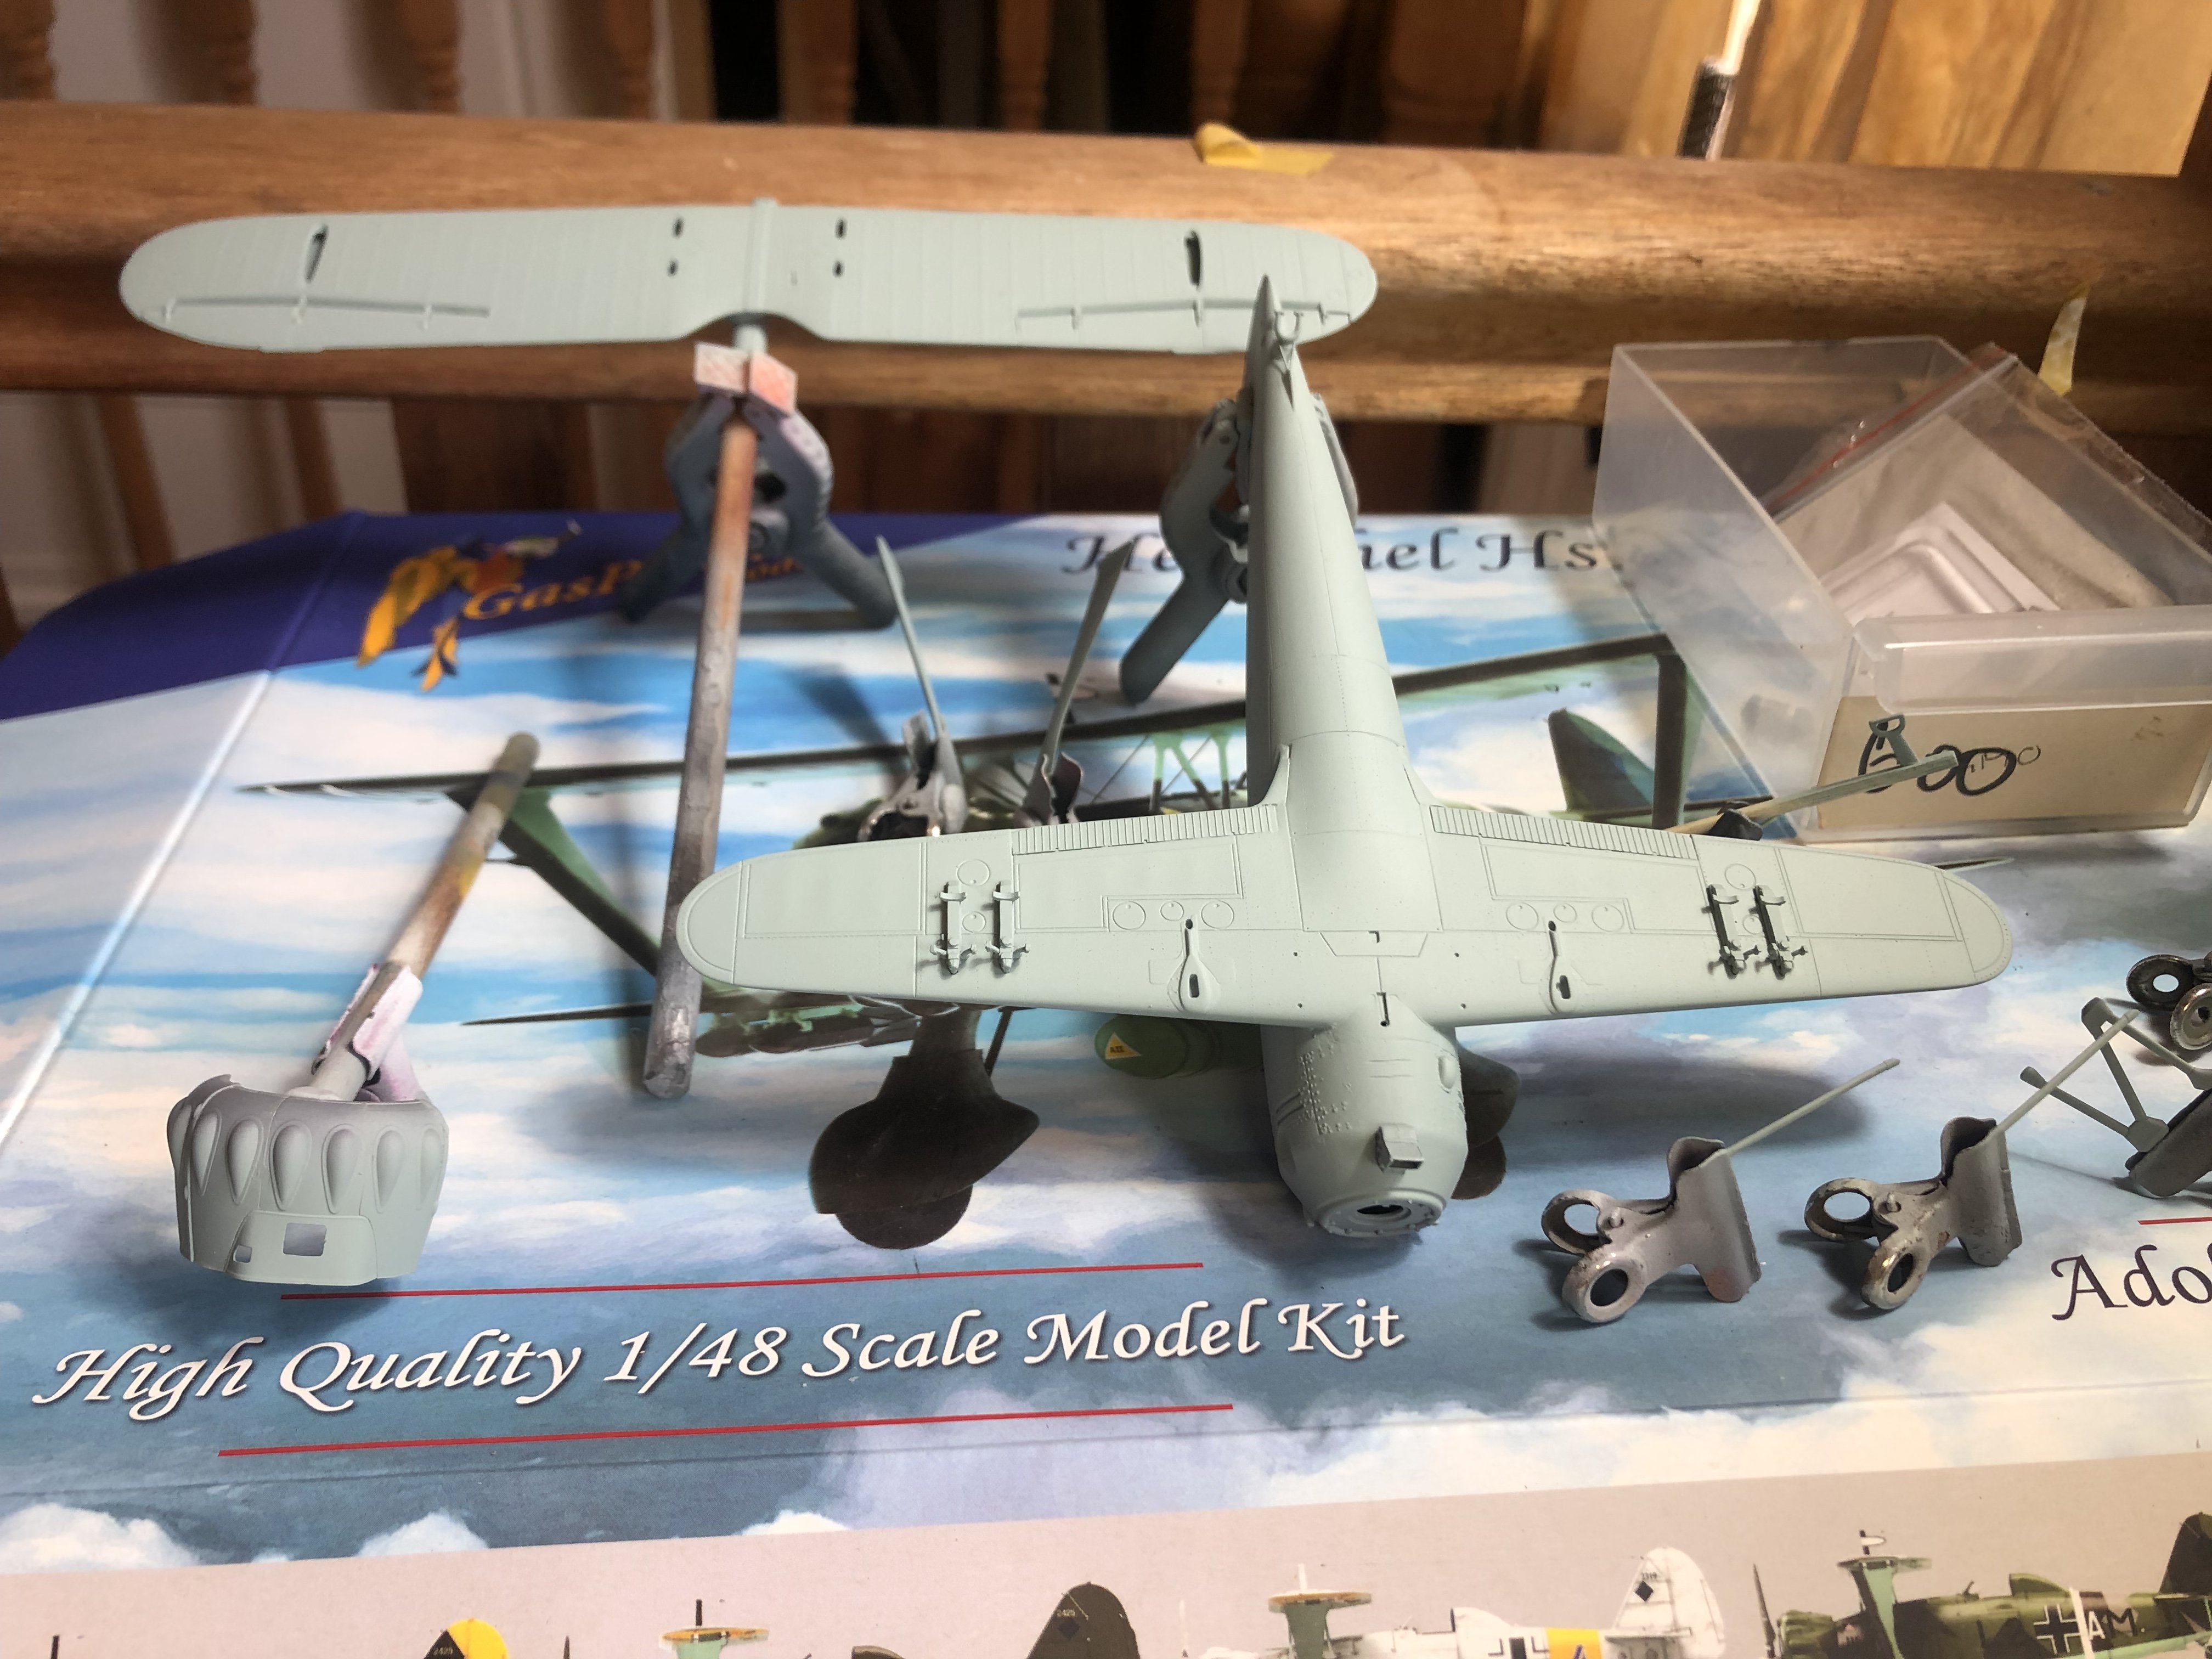
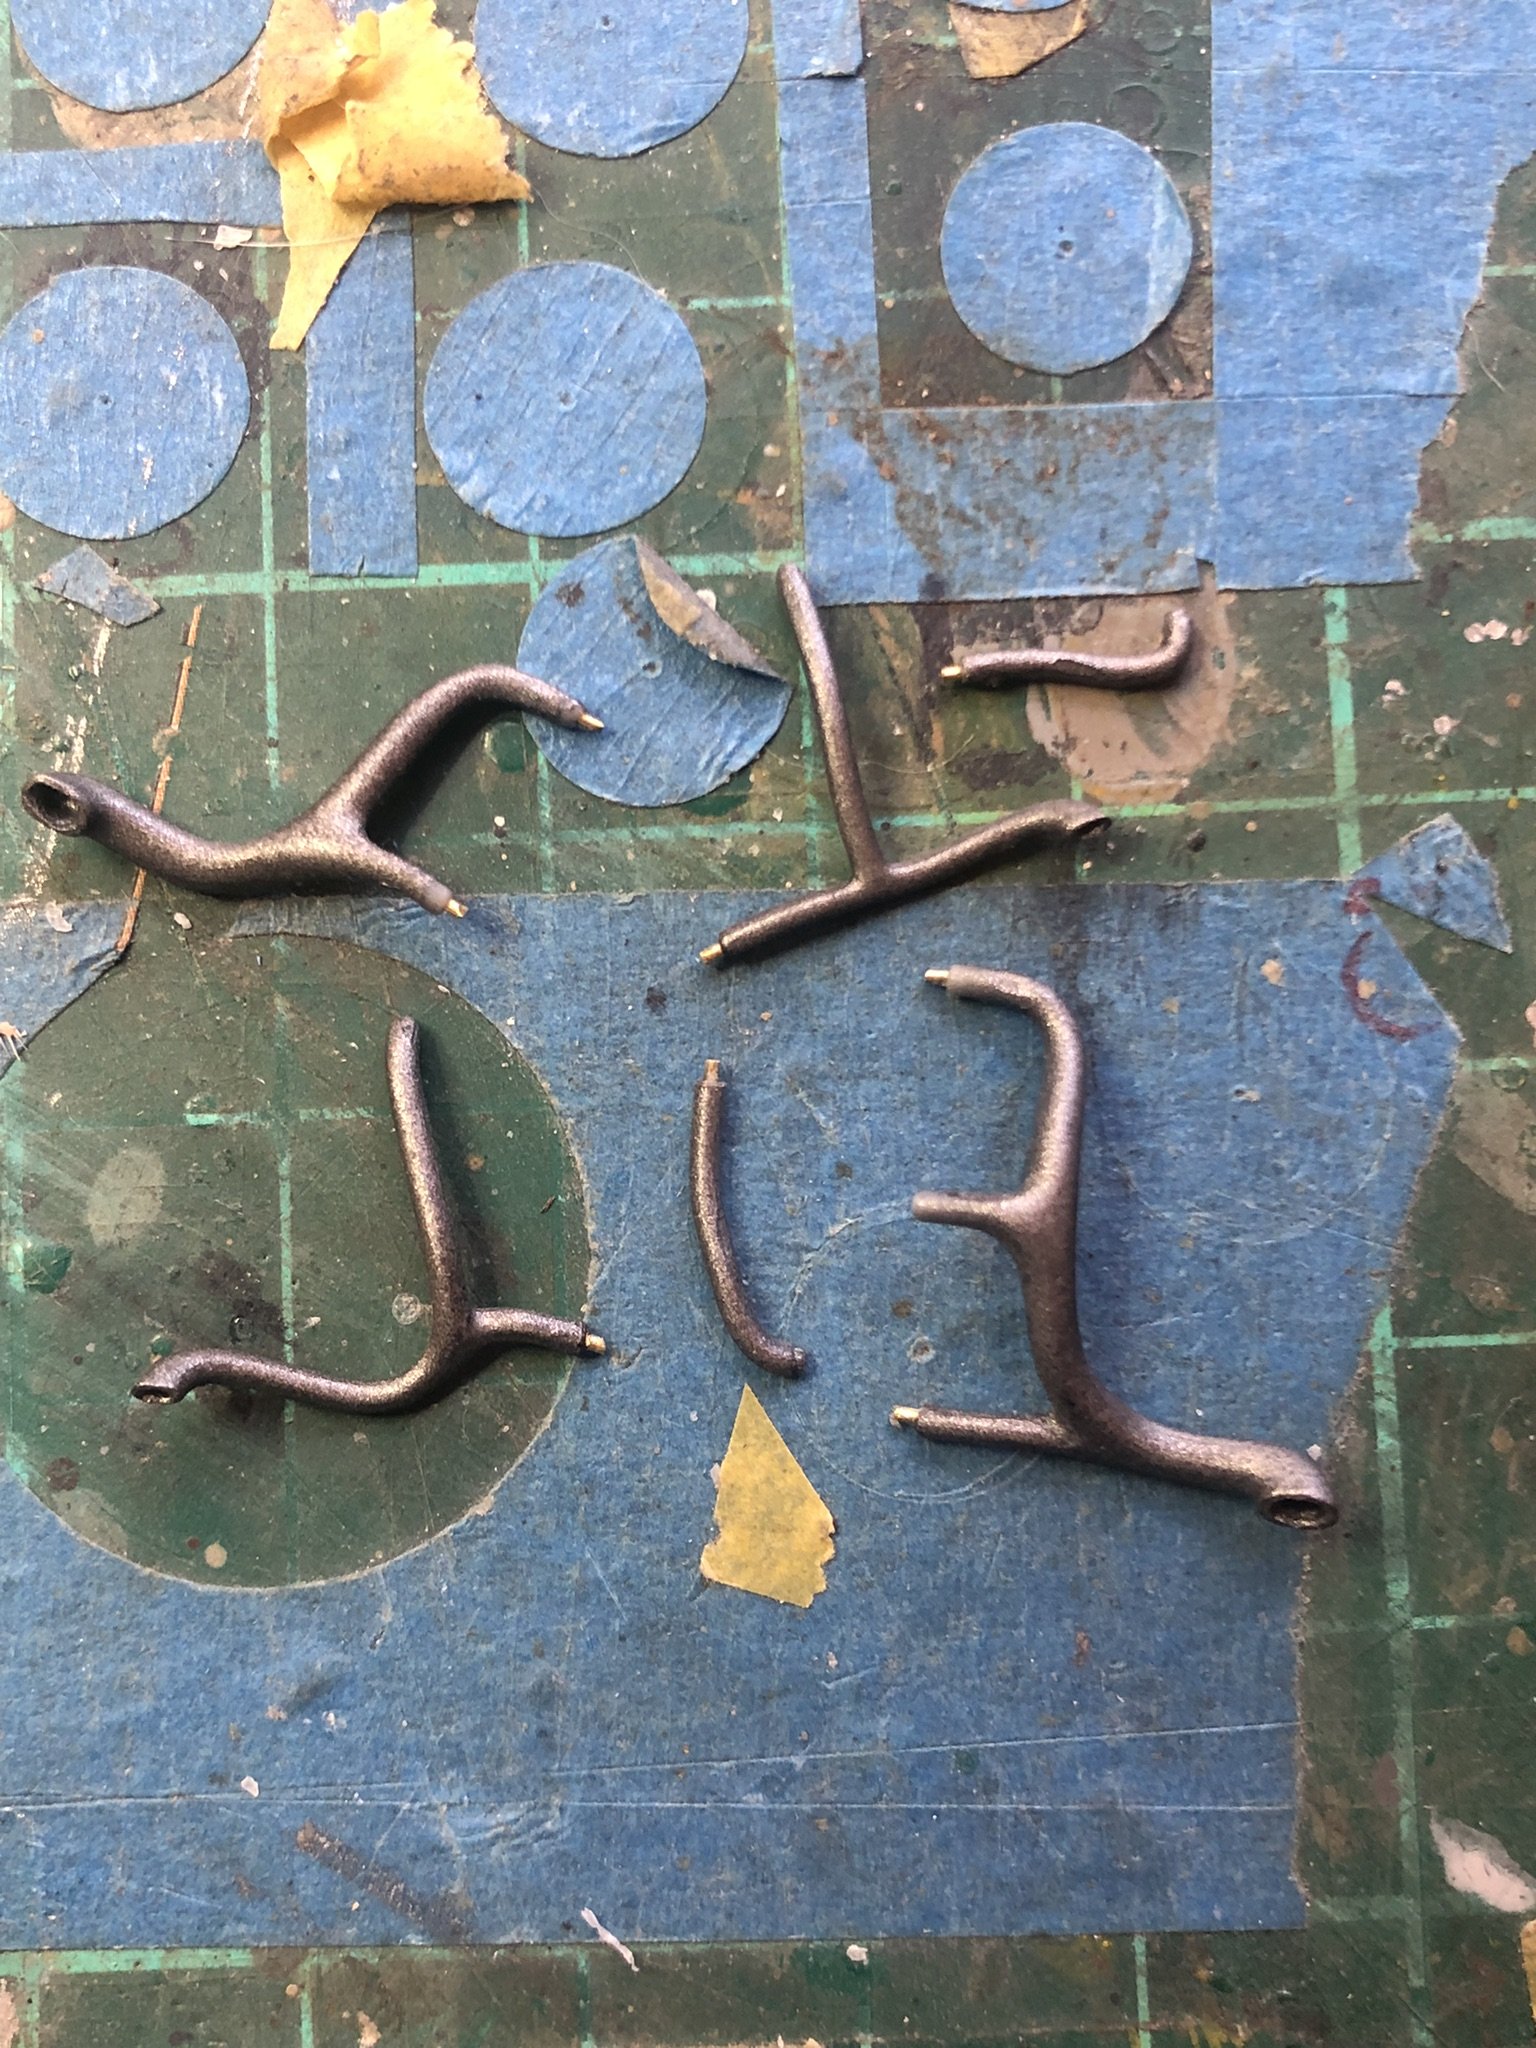
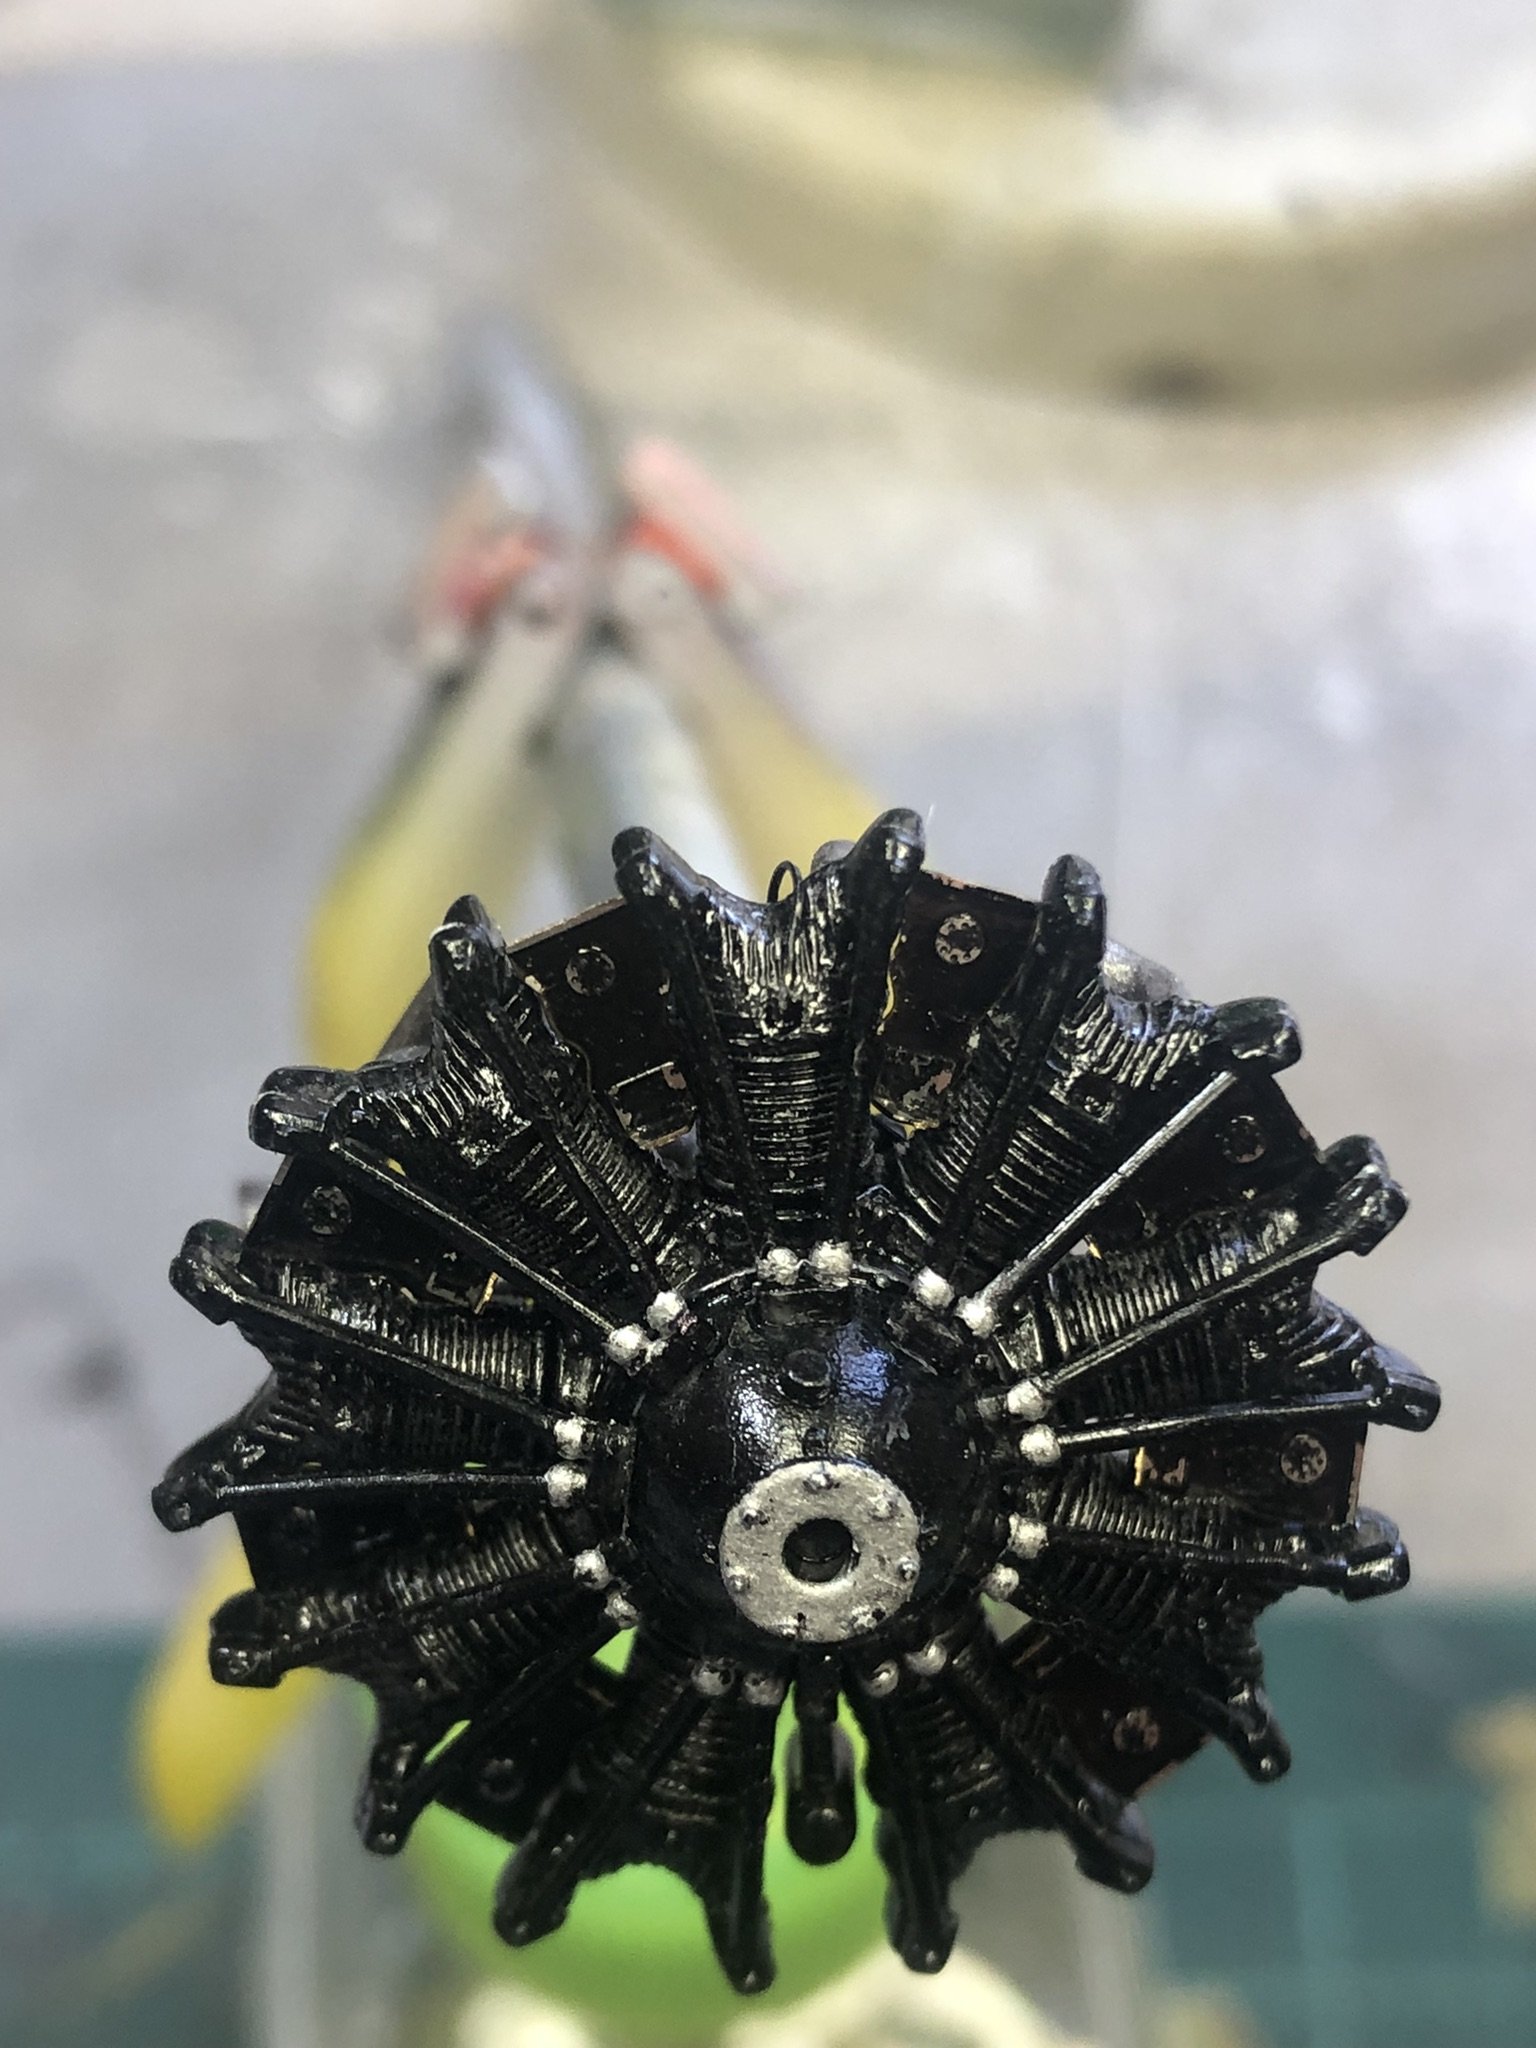
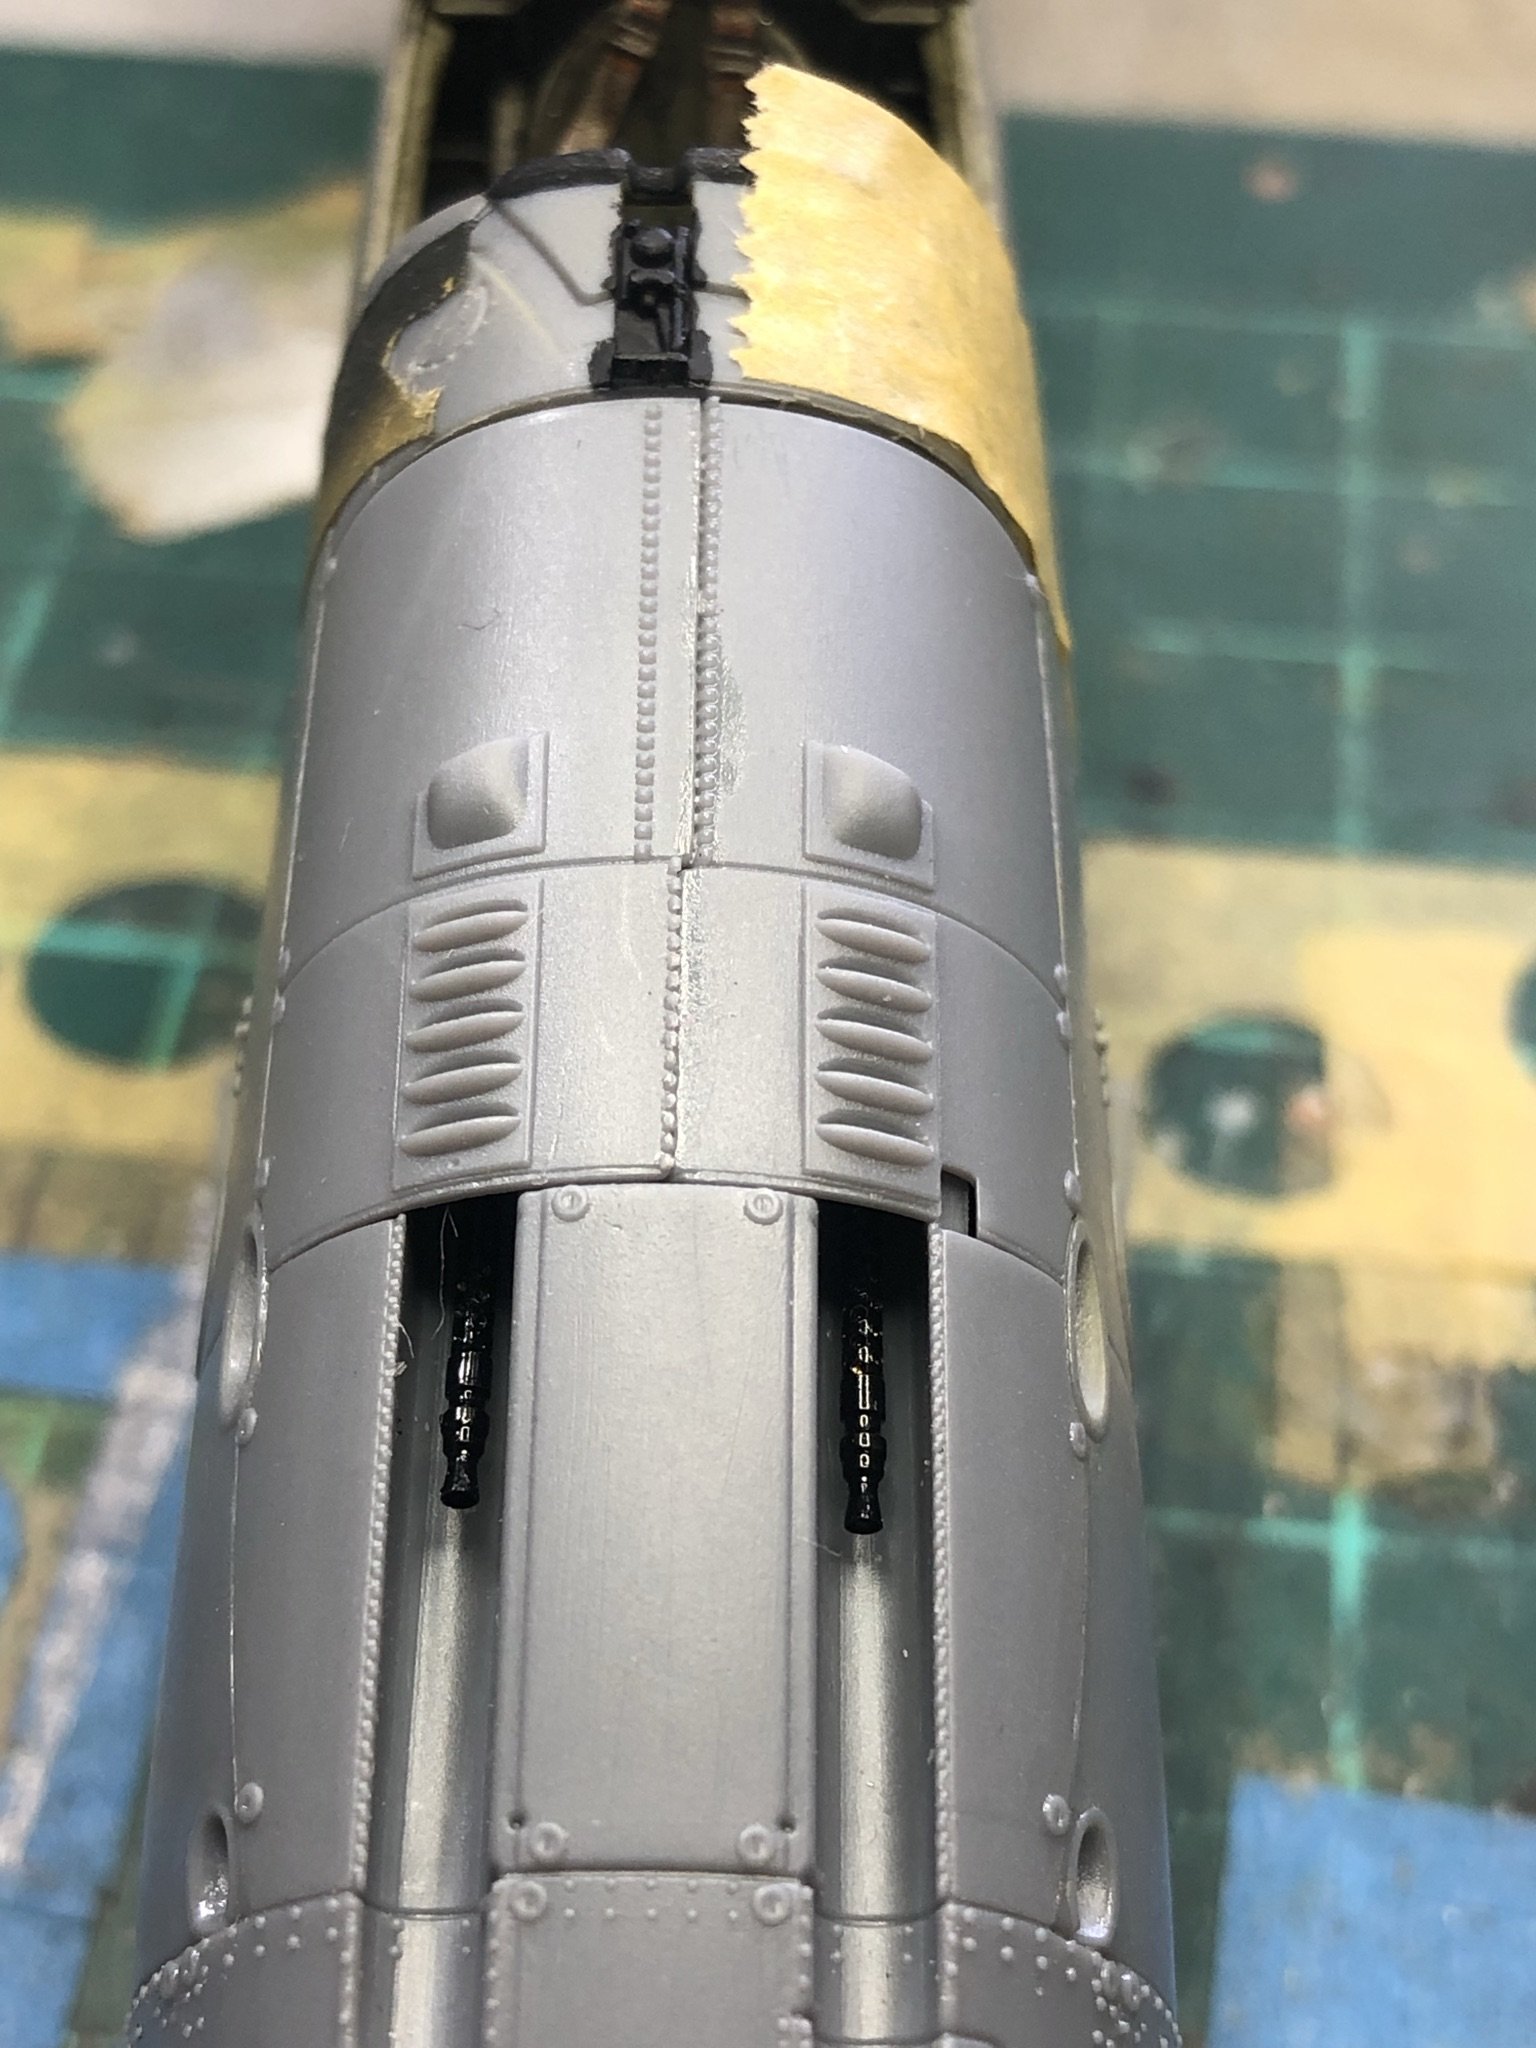
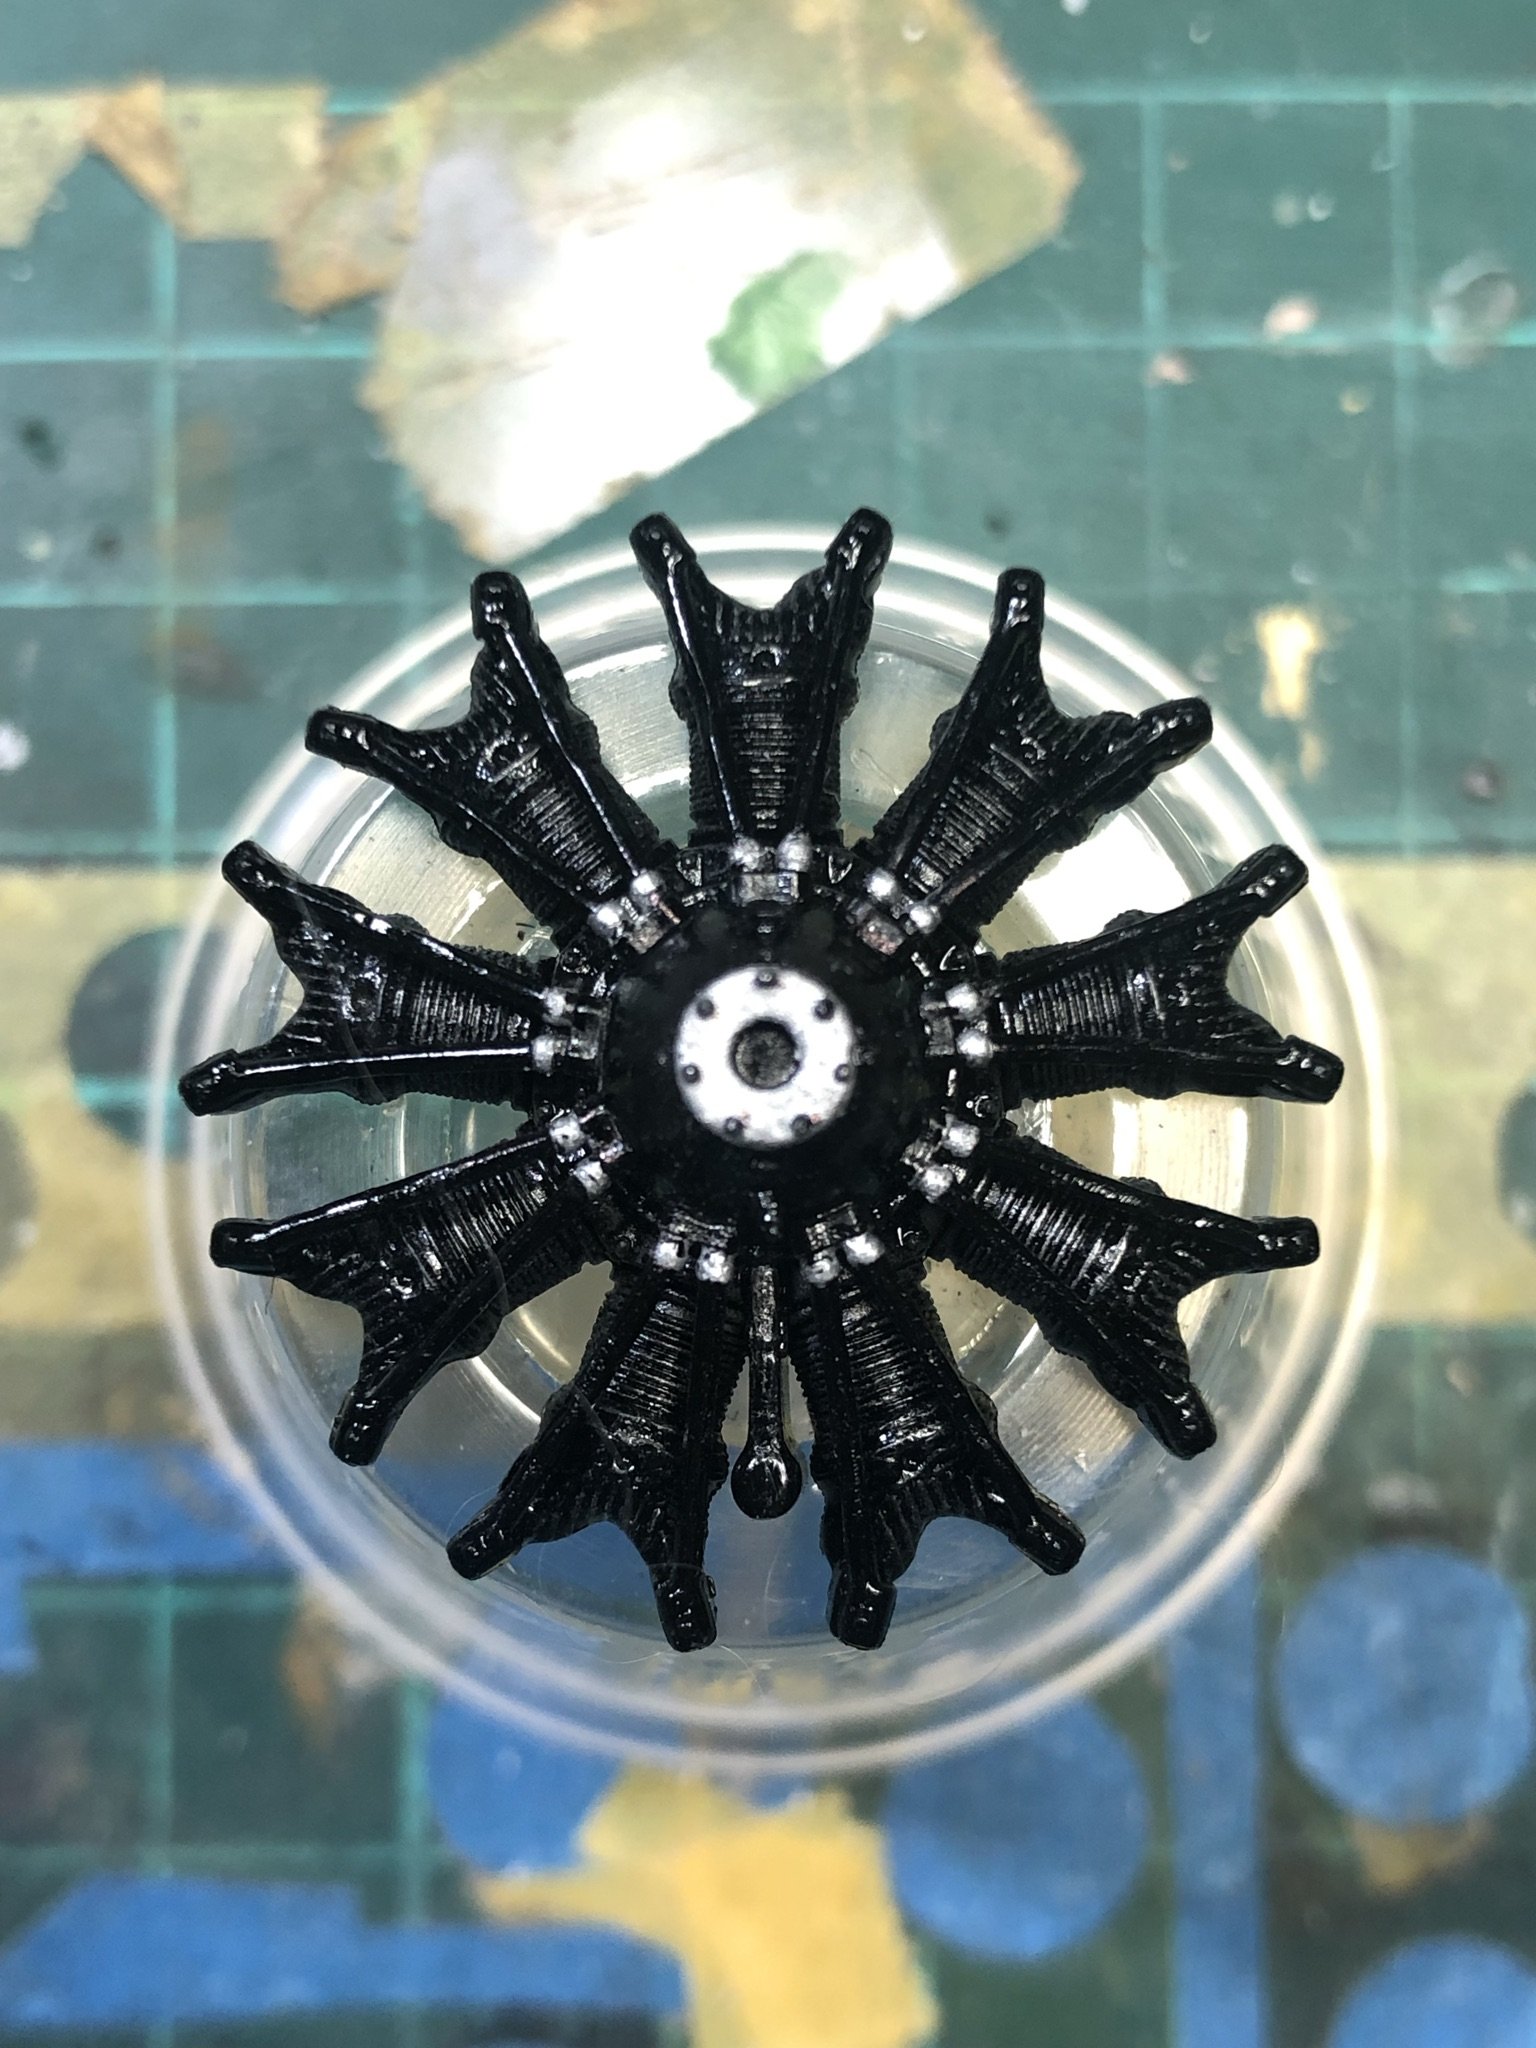
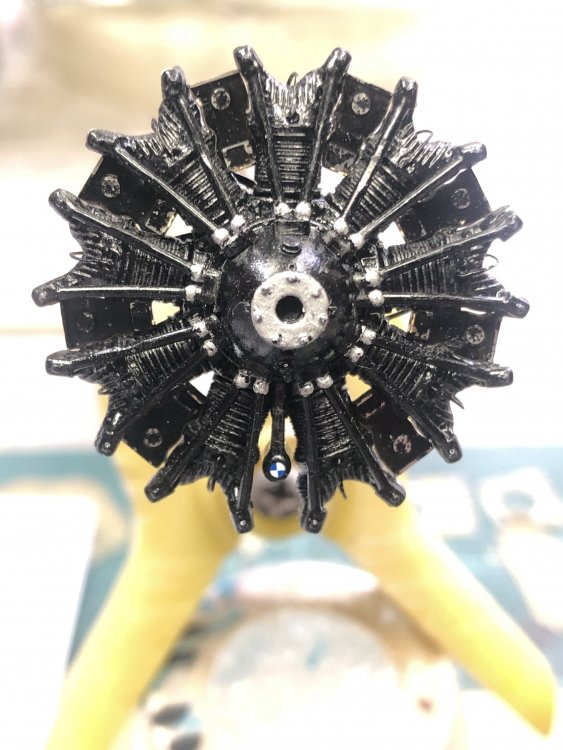
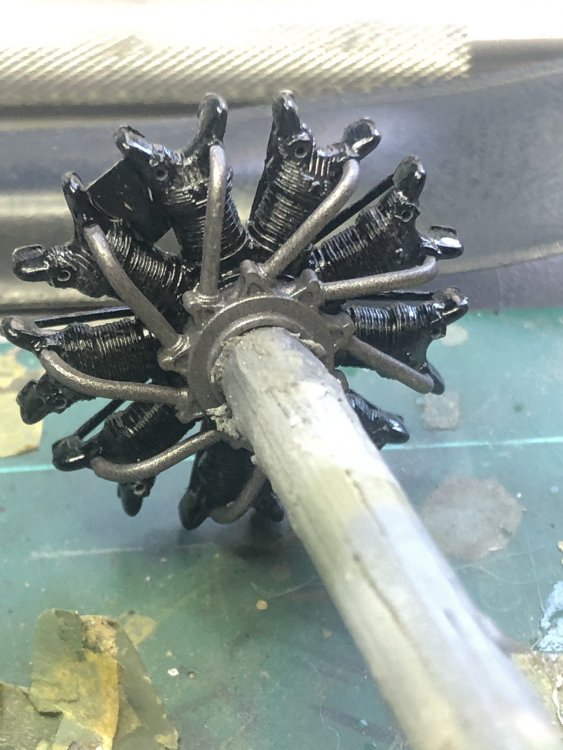
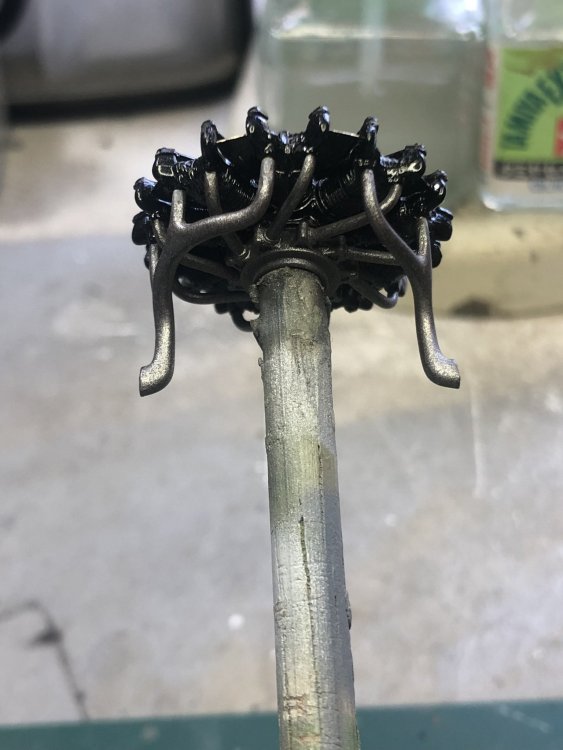
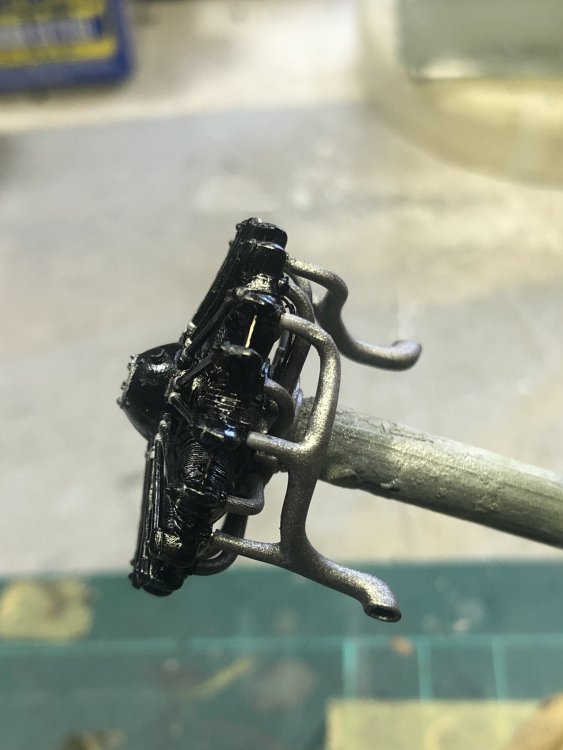
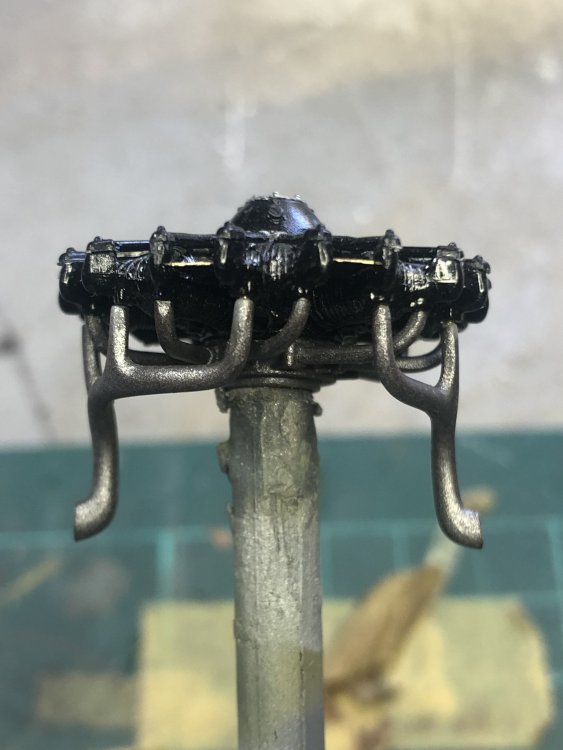
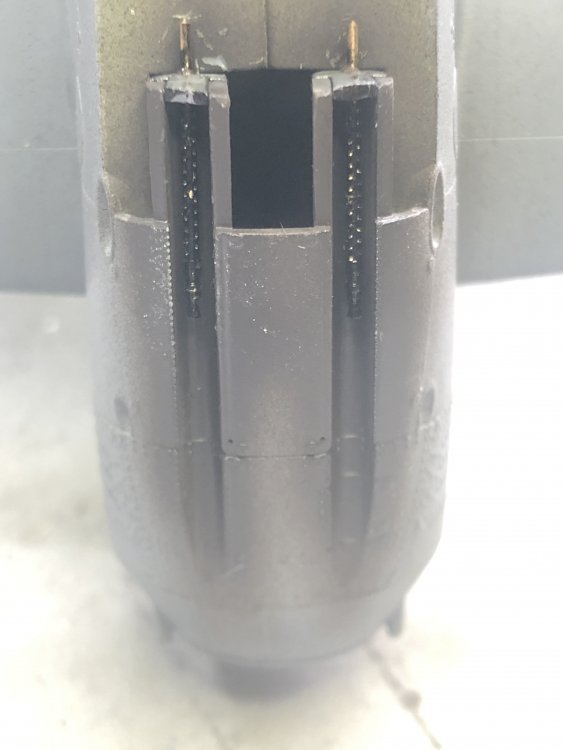
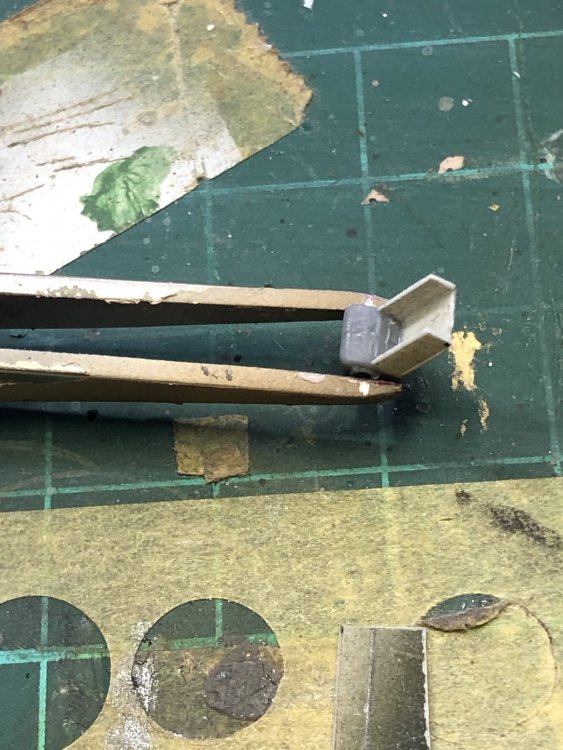
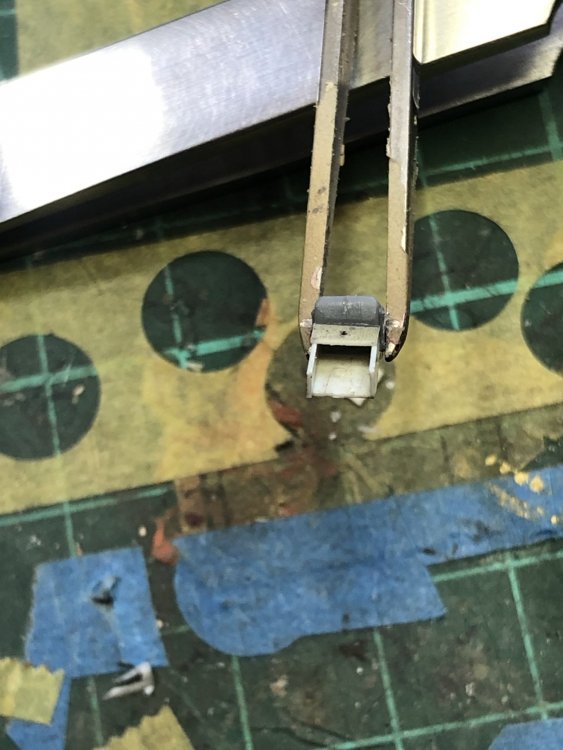
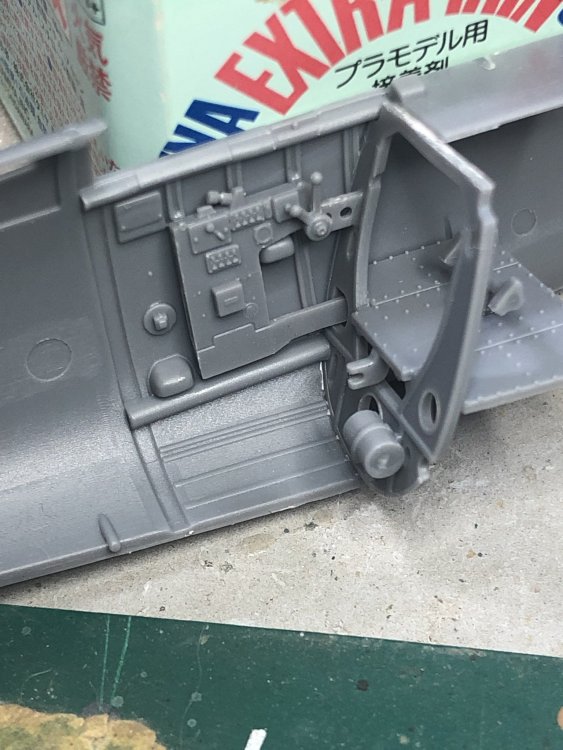
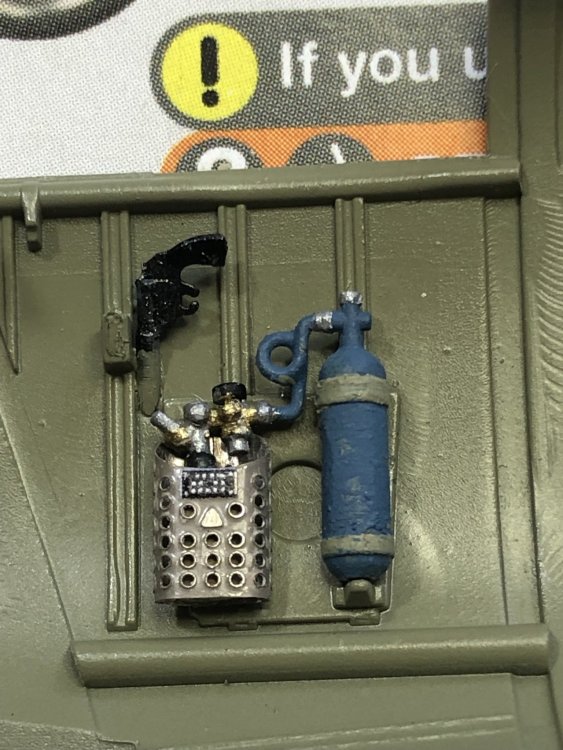
Hs123 update: I spent the morning drilling the rear of the exhaust ports and pipes to fit some 0.5mm brass rod. The rod is attached to the pipes with CA. This will allow me to properly attach the exhausts at a later time as the kit gives you some basic butt joins (one of those questionable engineering decisions) that just don’t cut it. A test fit shows I am on the right track but will need to file the ends of the brass rod just a smidge to get a better fit. I also added the PE pieces between the cylinder heads and the first of the ignition wiring. Once all the wiring is in place I can finish up the engine and weather it as a single unit prior to attachment once the airframe is painted. Thanks for the encouragement and looking in on the build. Regards, Kent


-
Notch up another victory Gaz, Nice composition and placement. All the components just work together. Regards, Kent
-
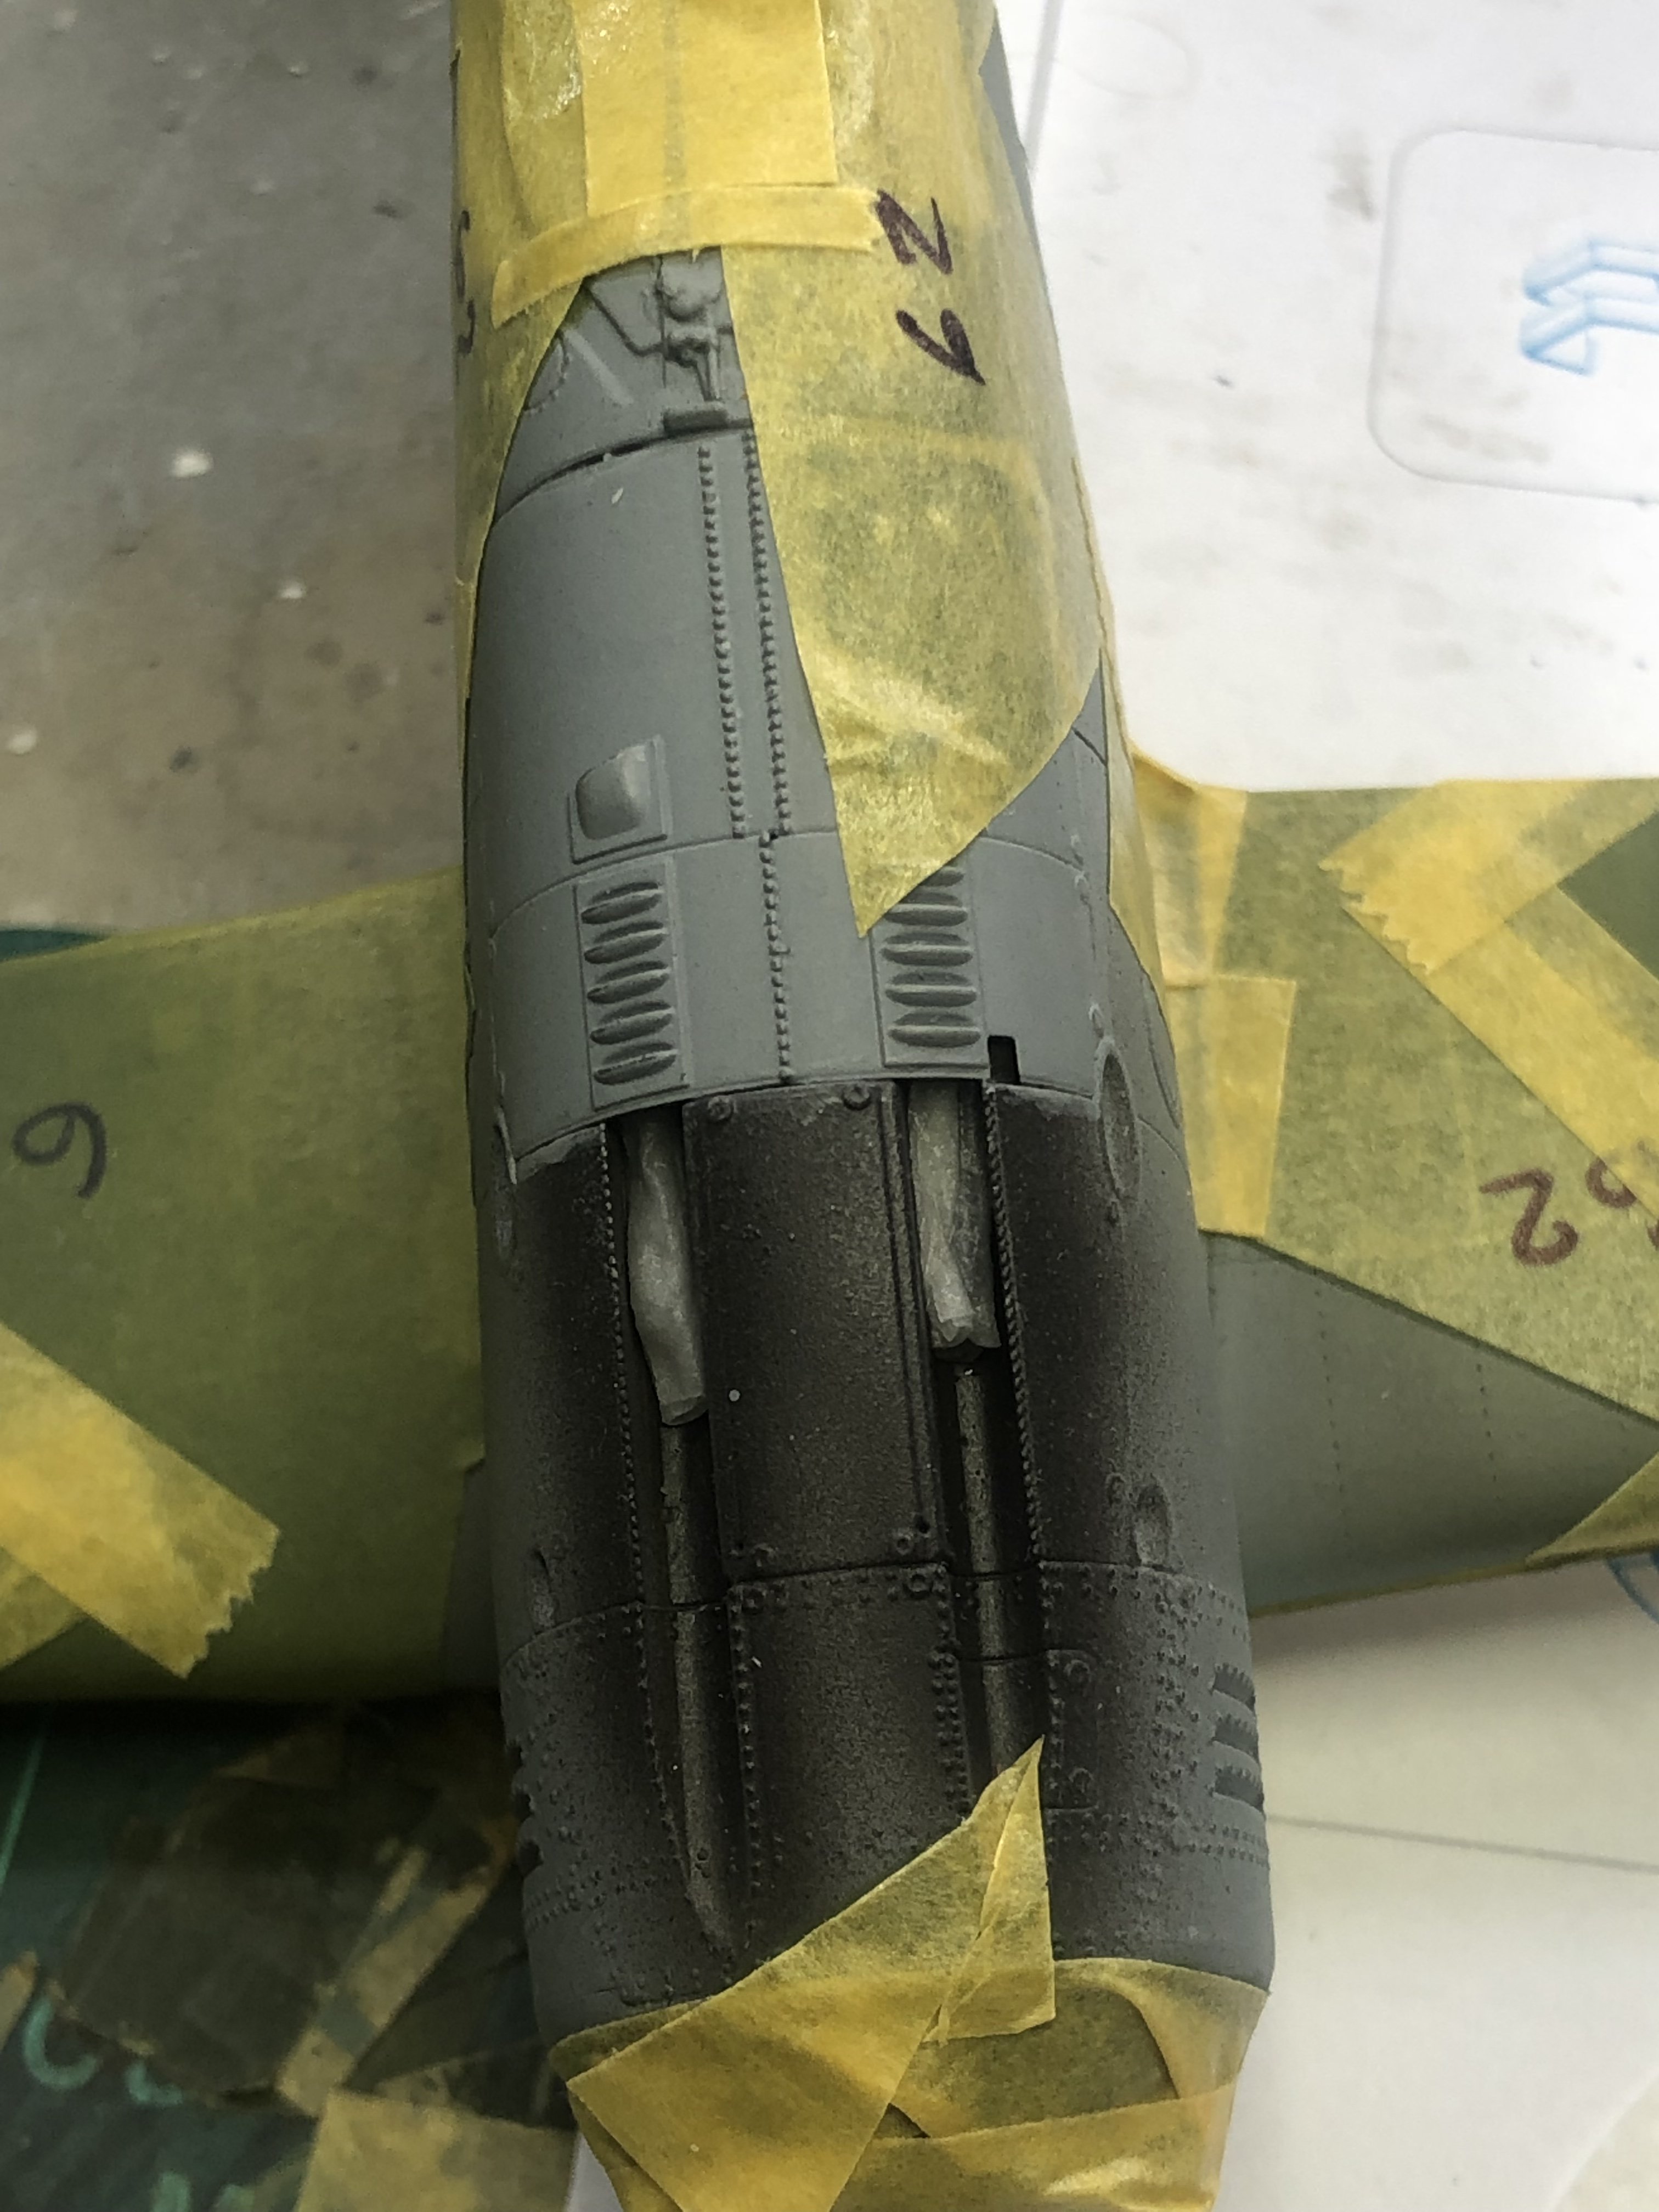
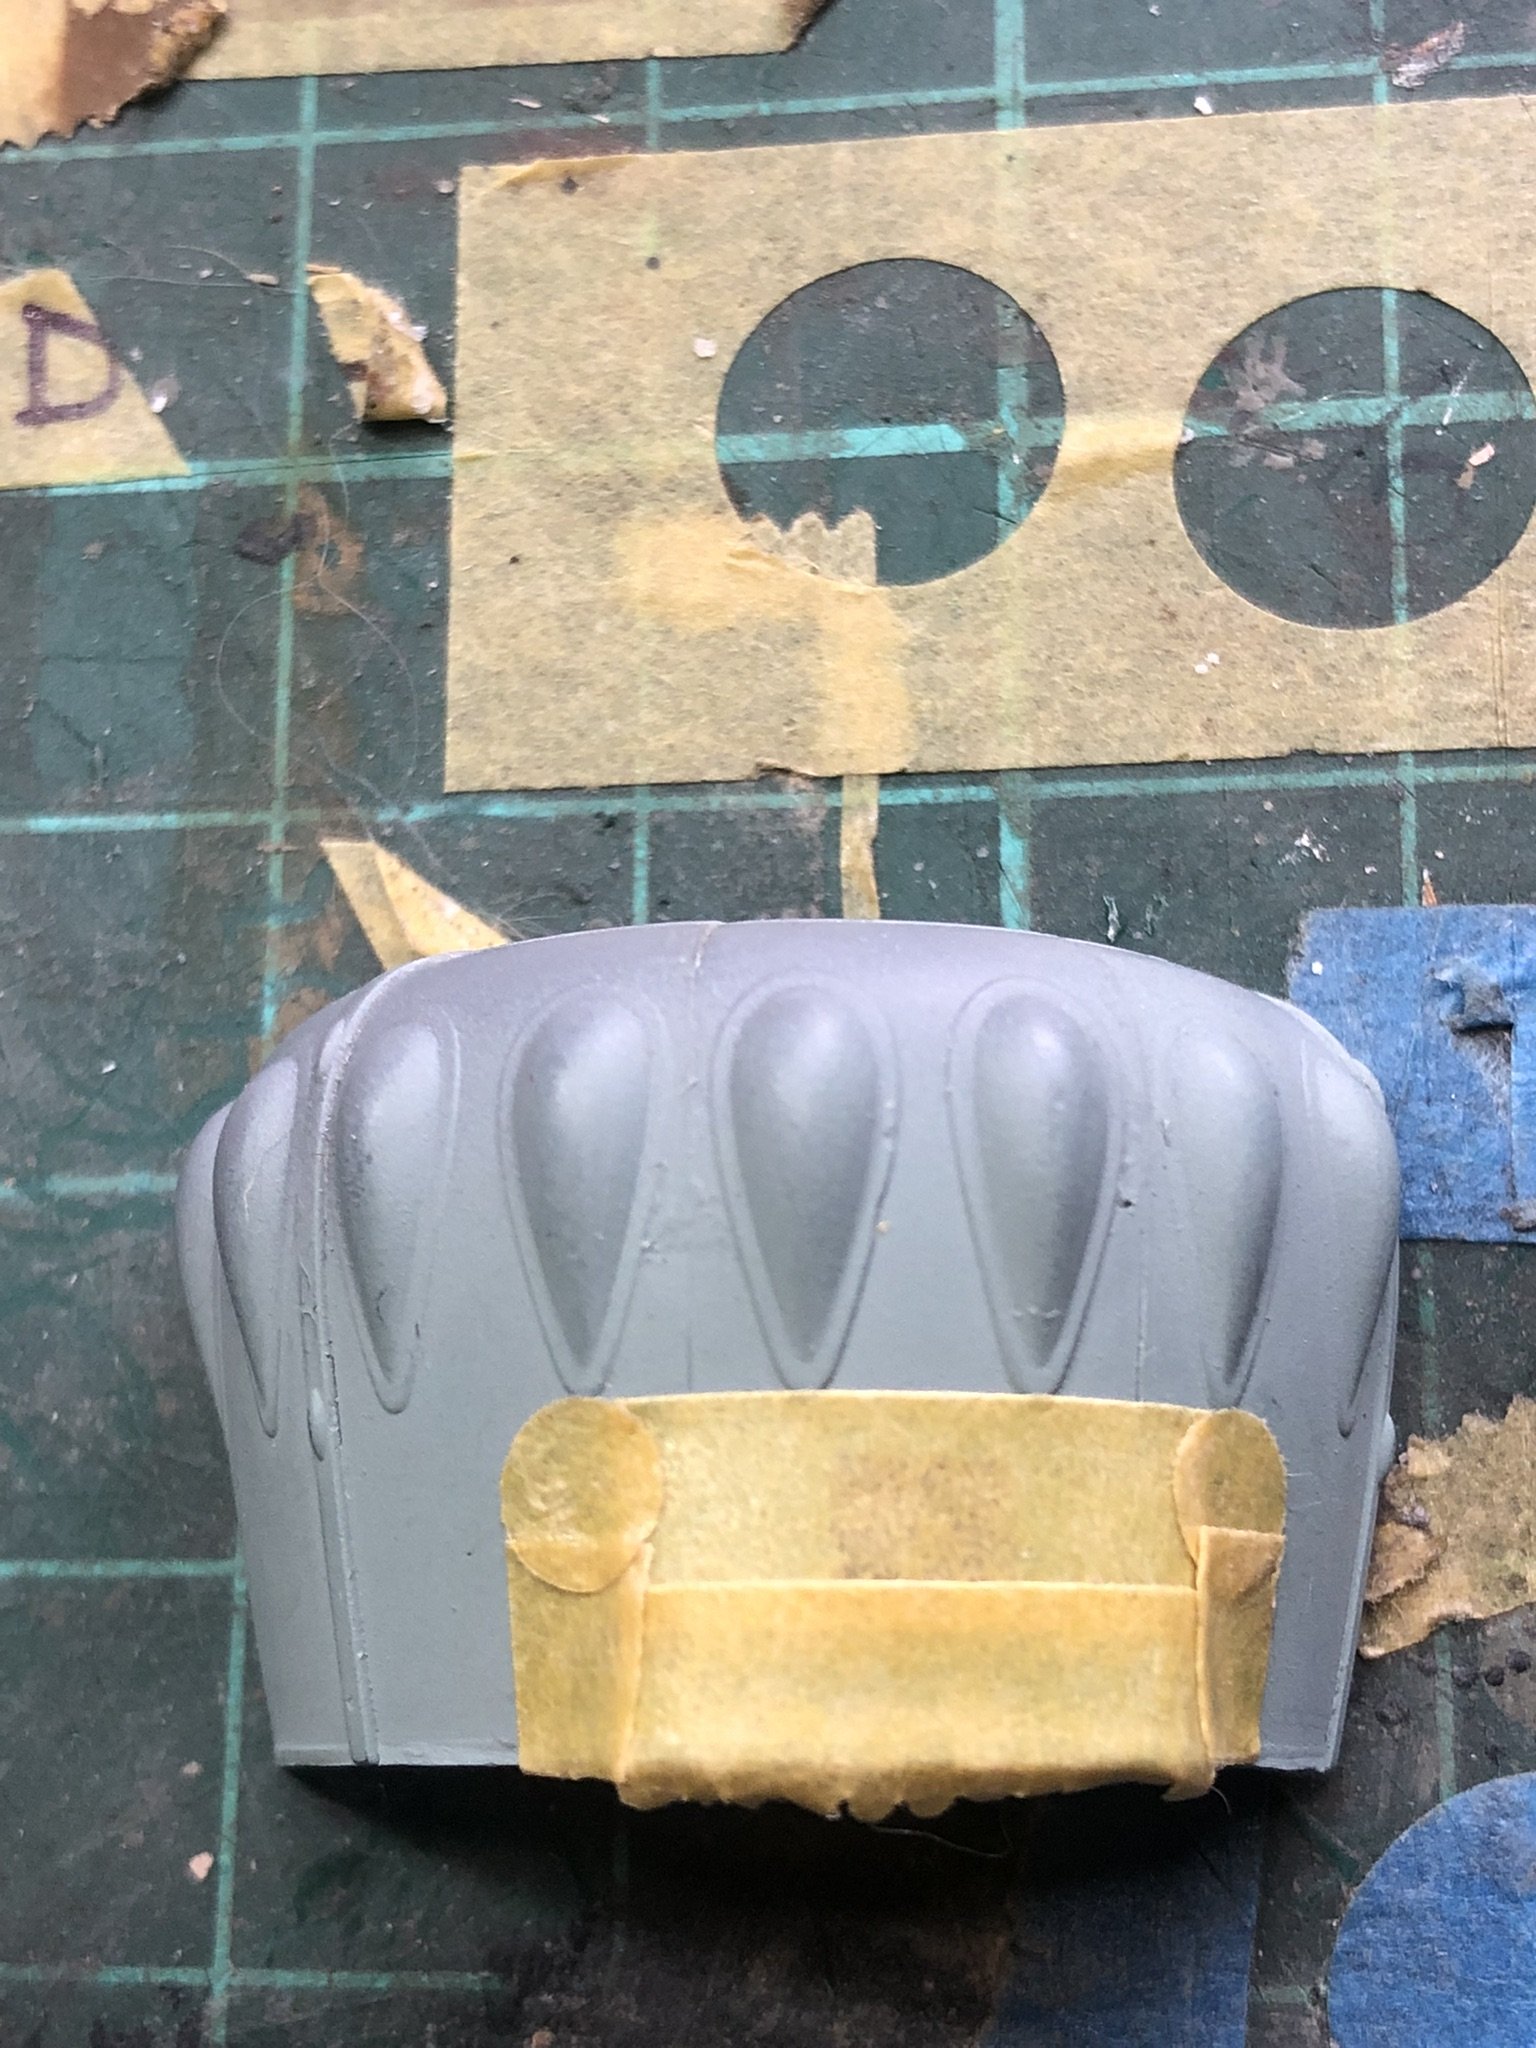
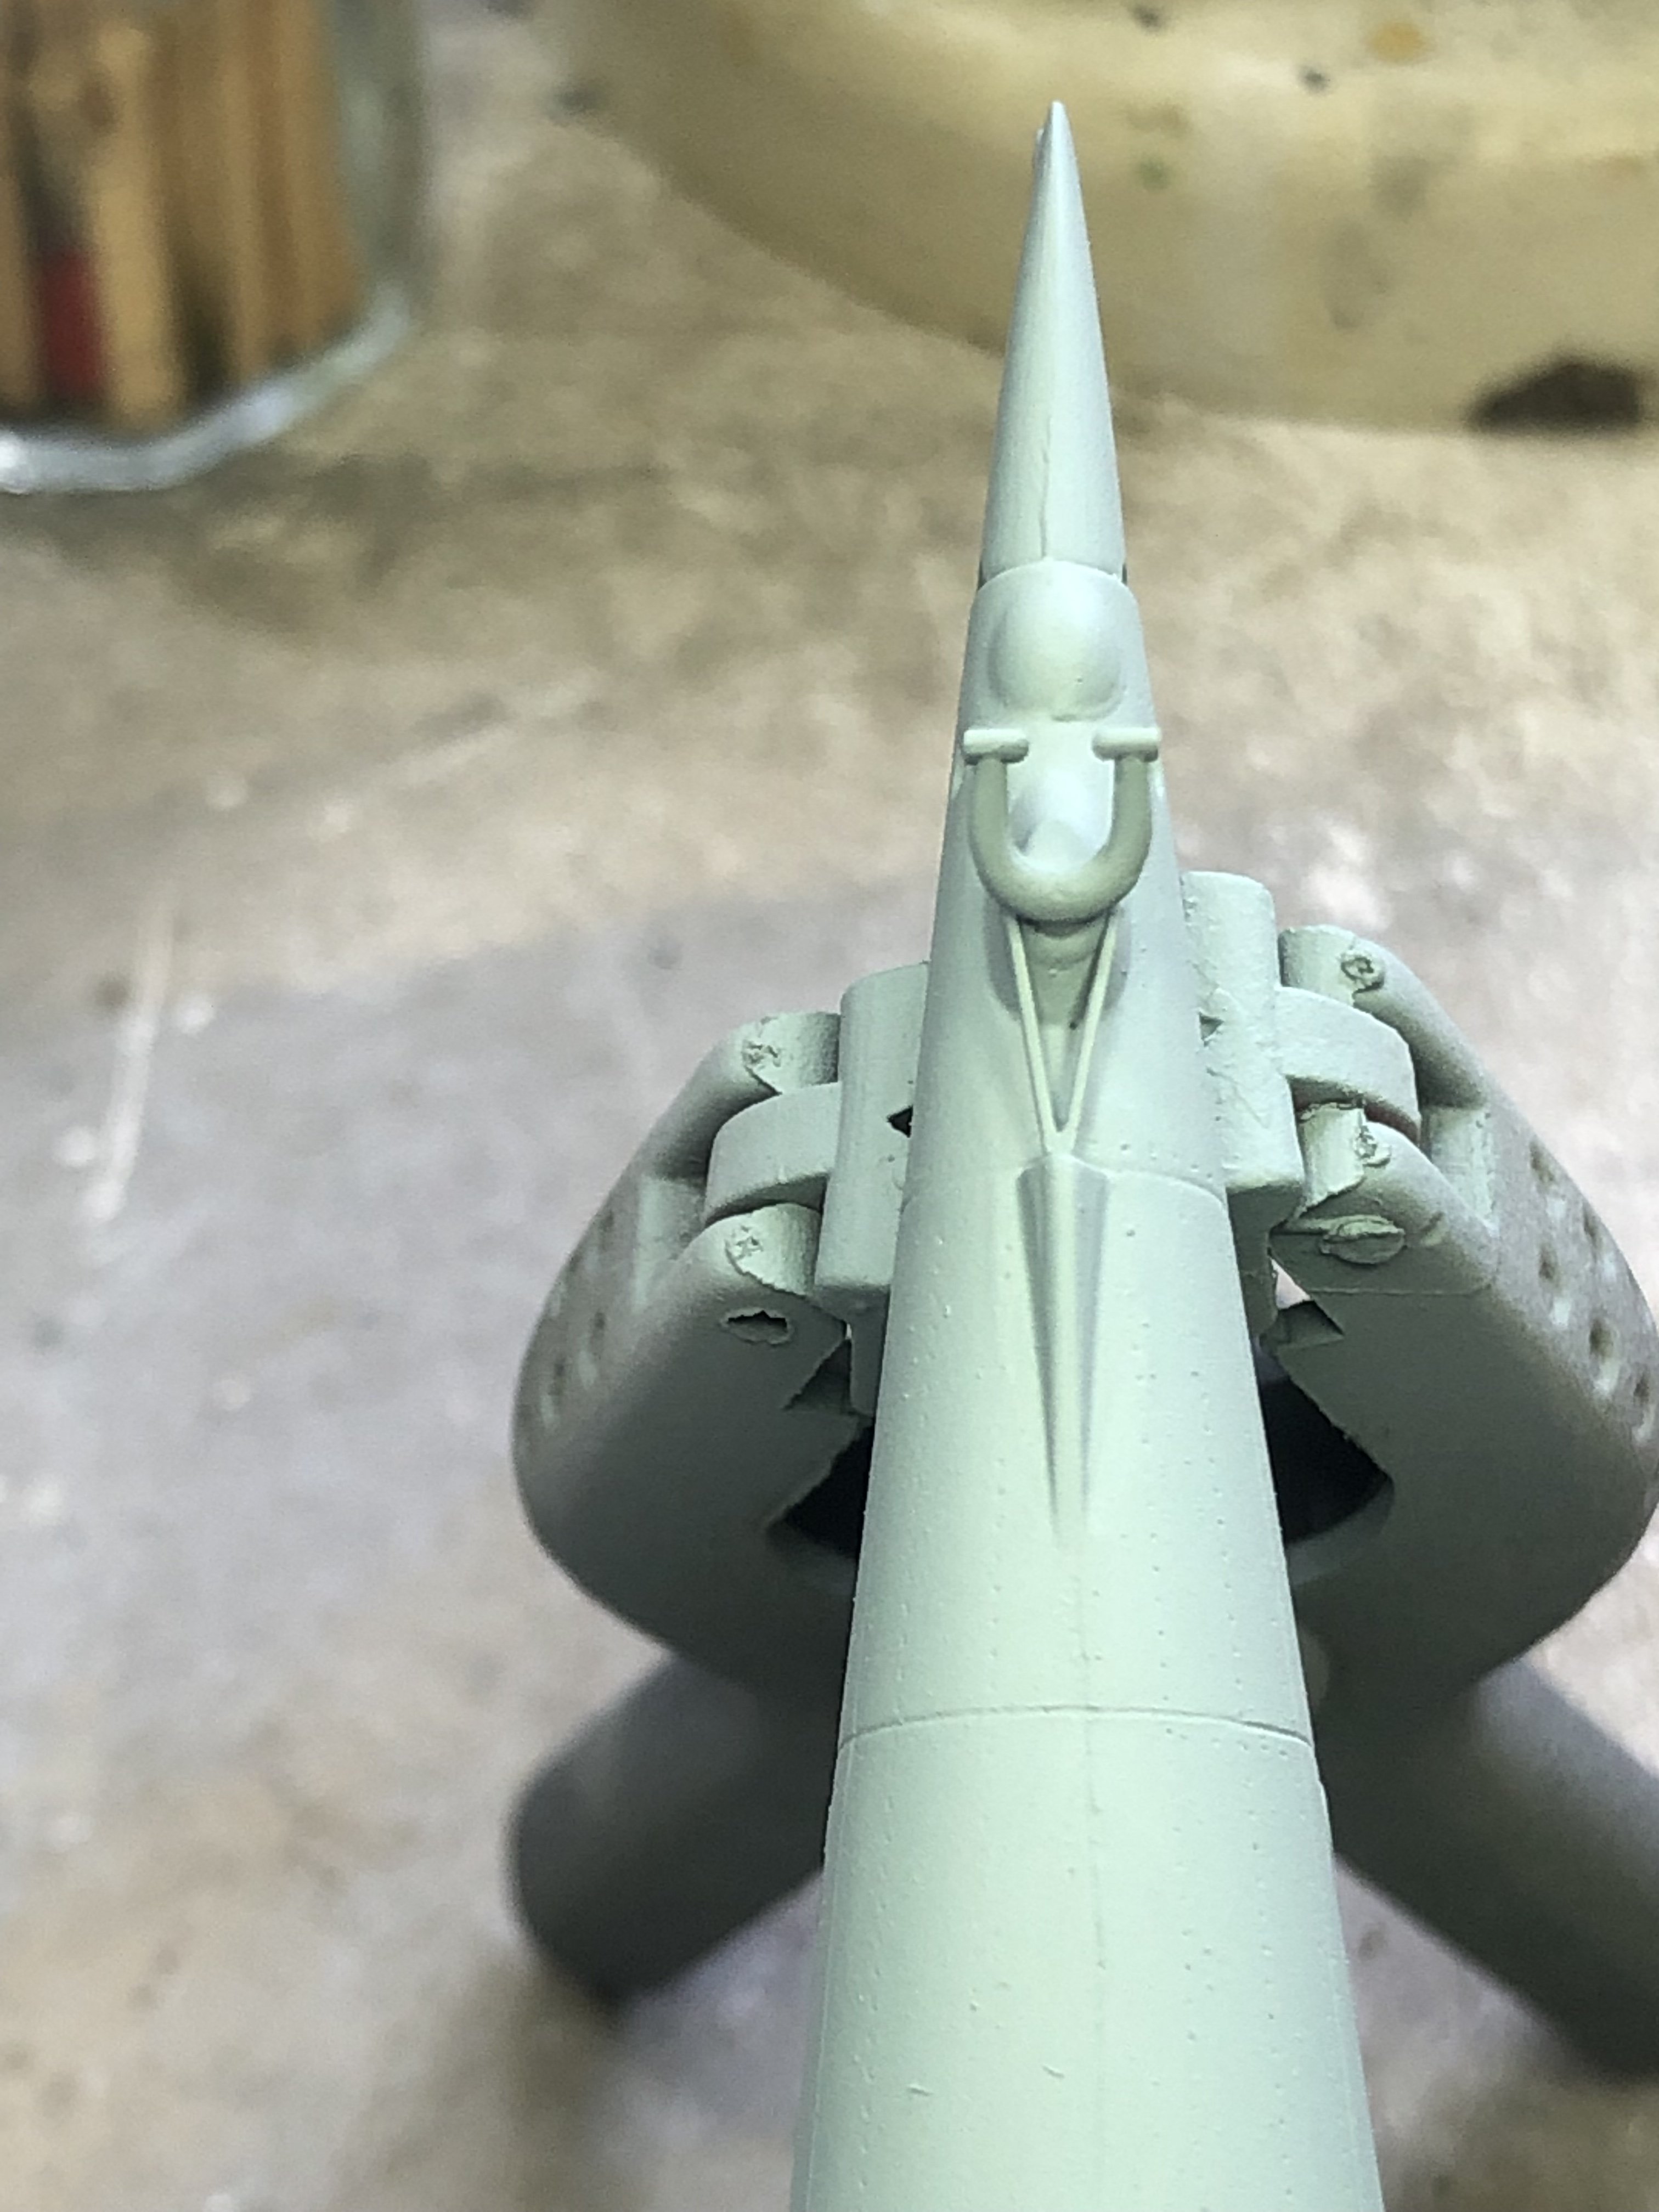
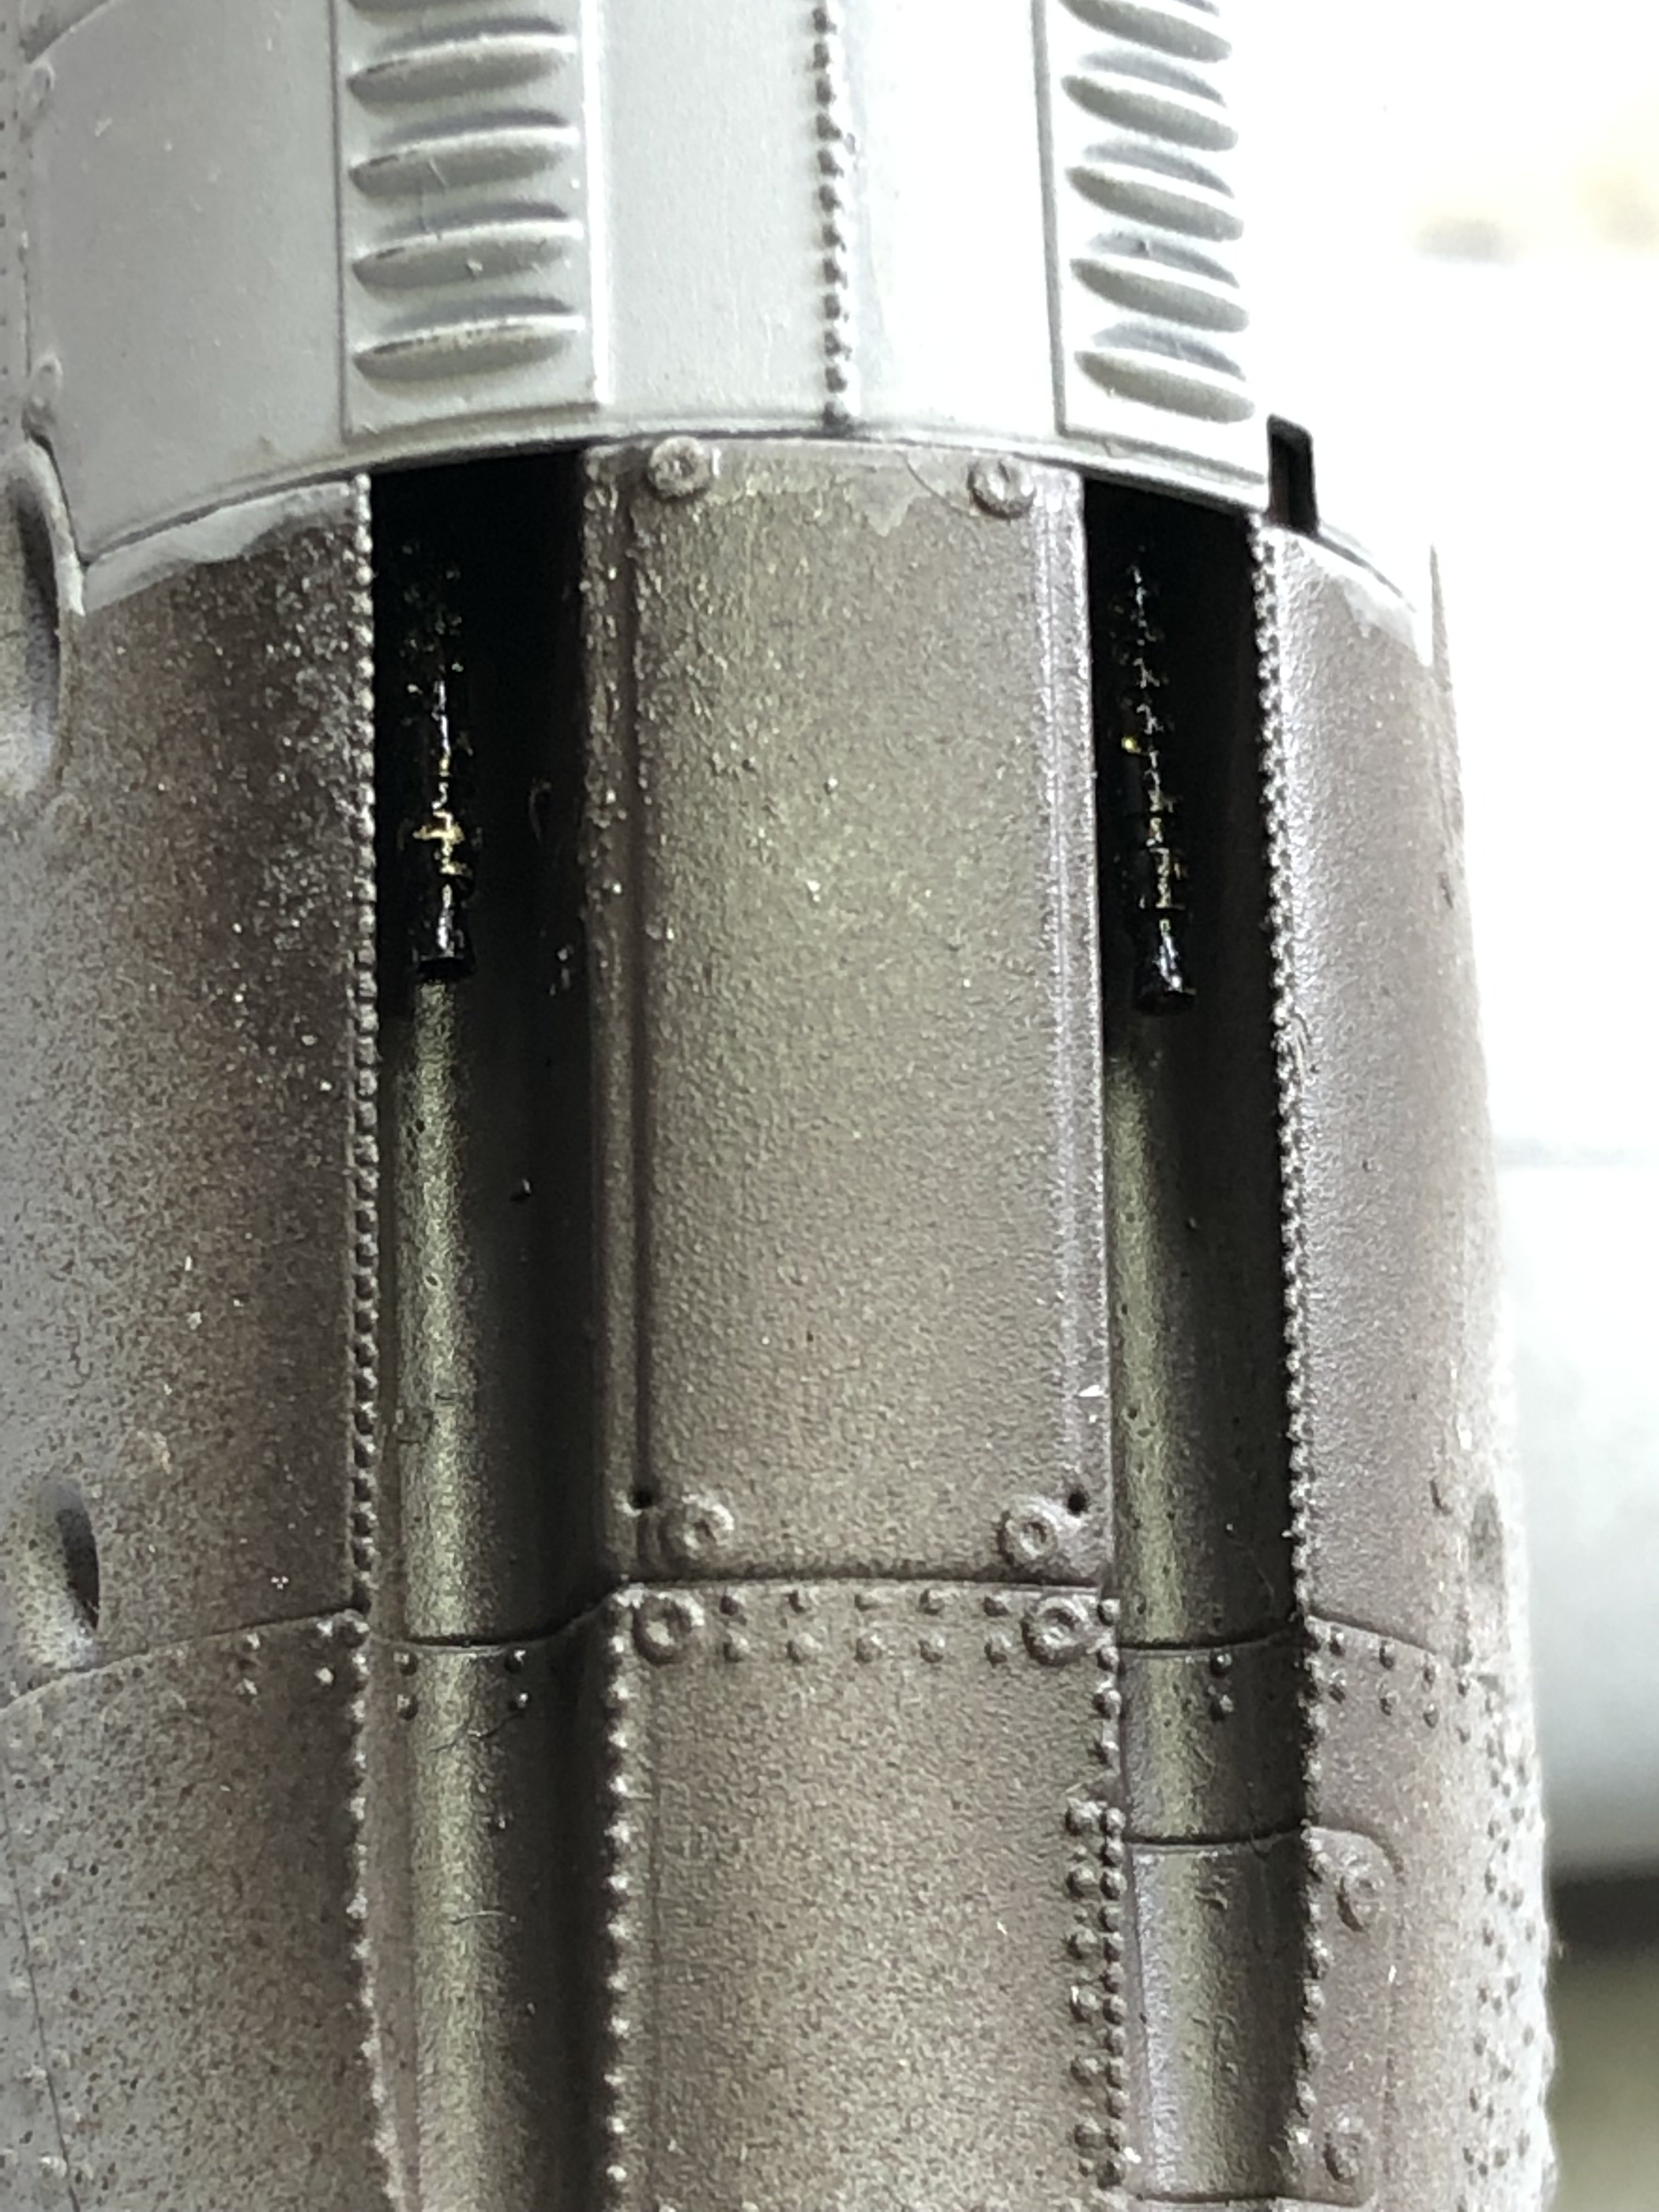
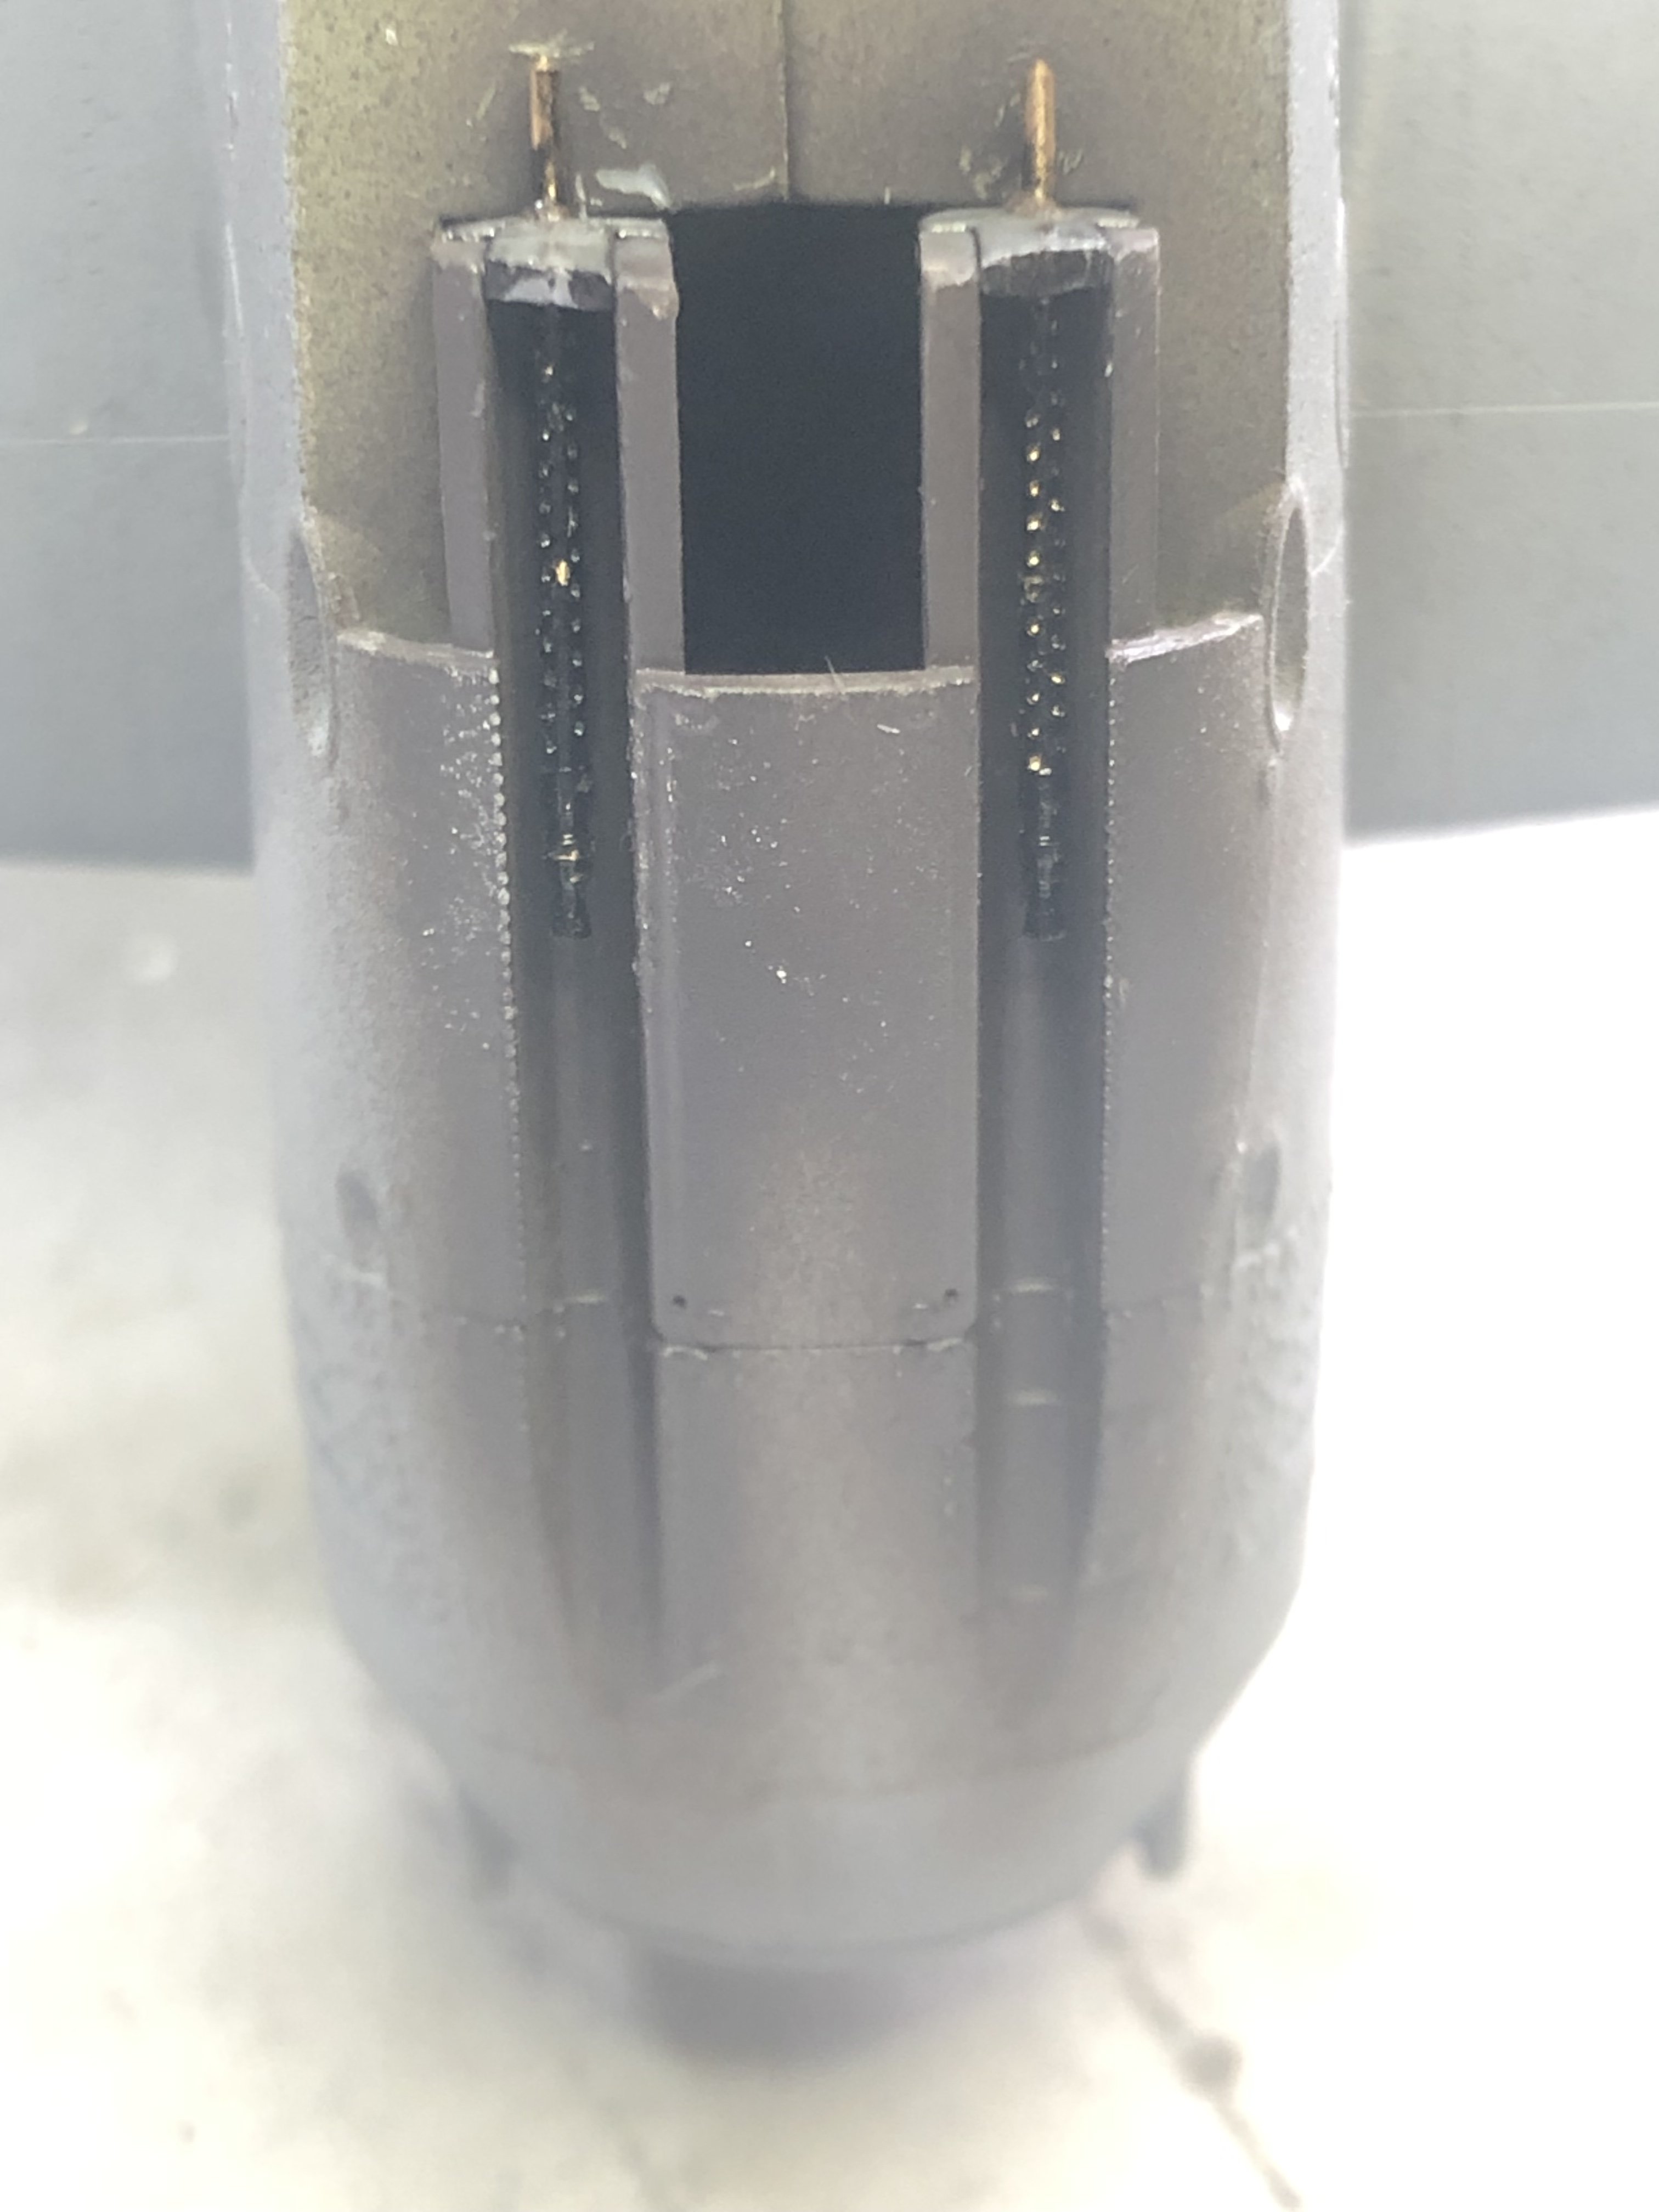
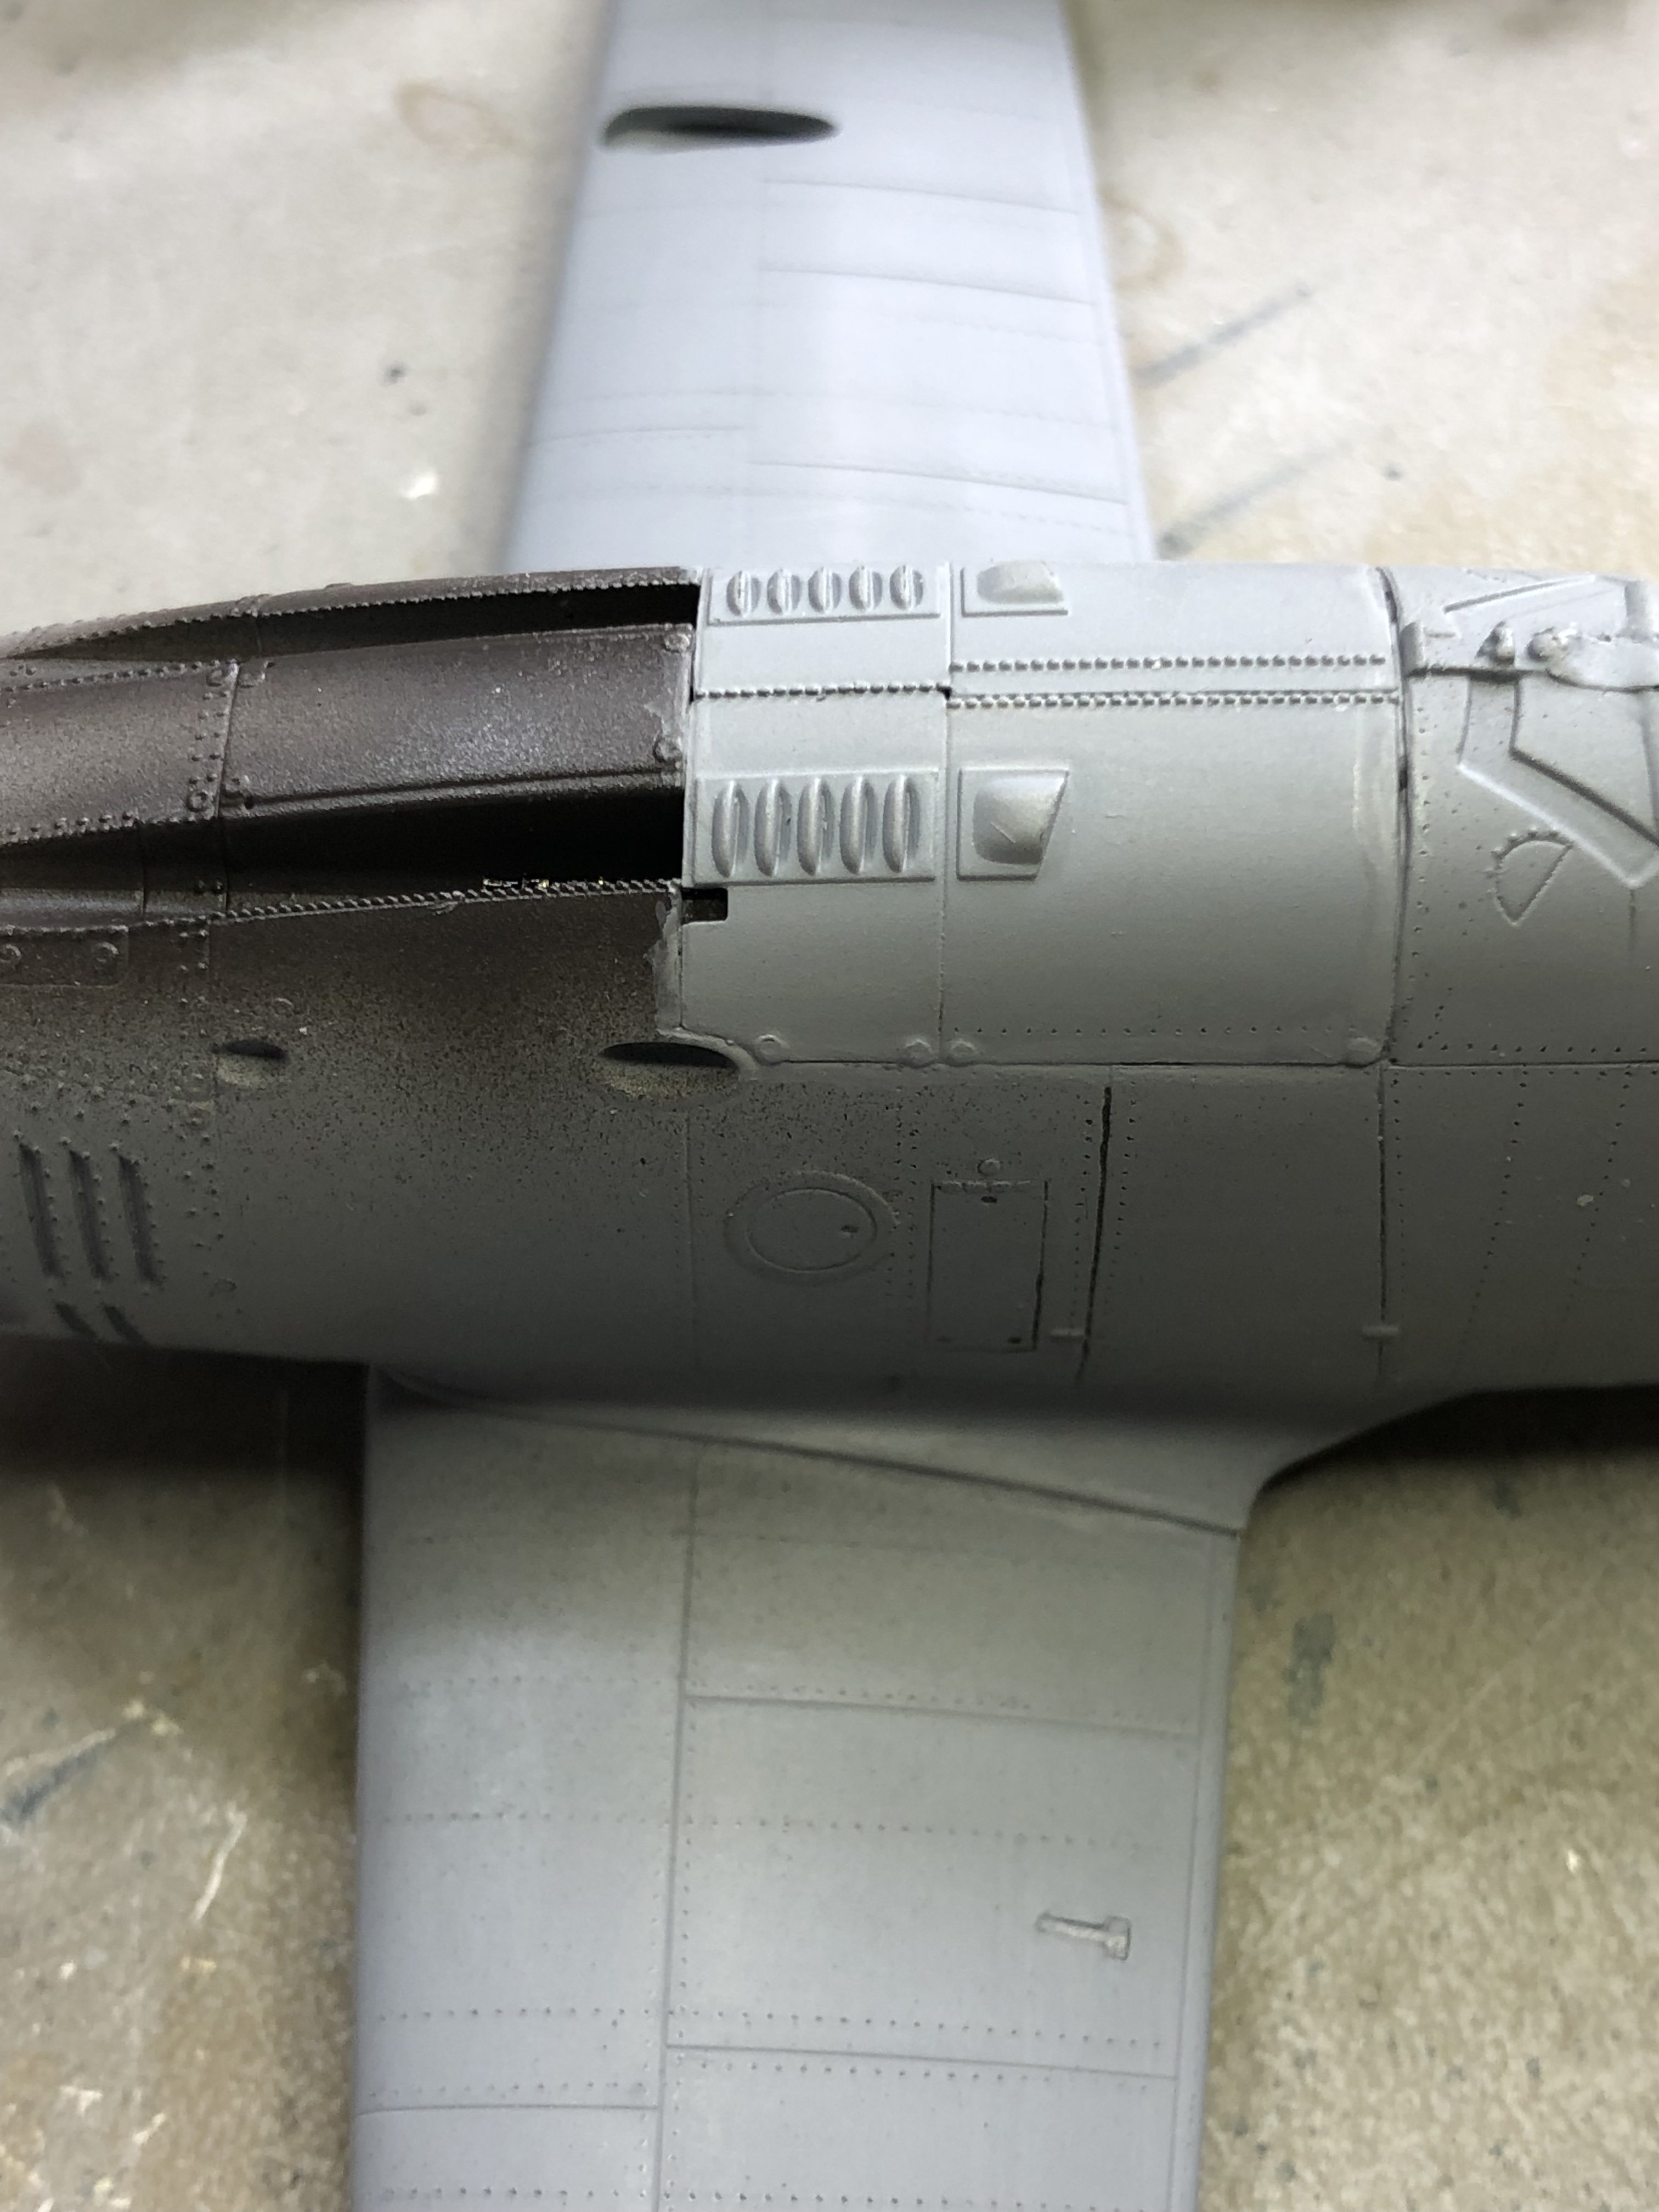
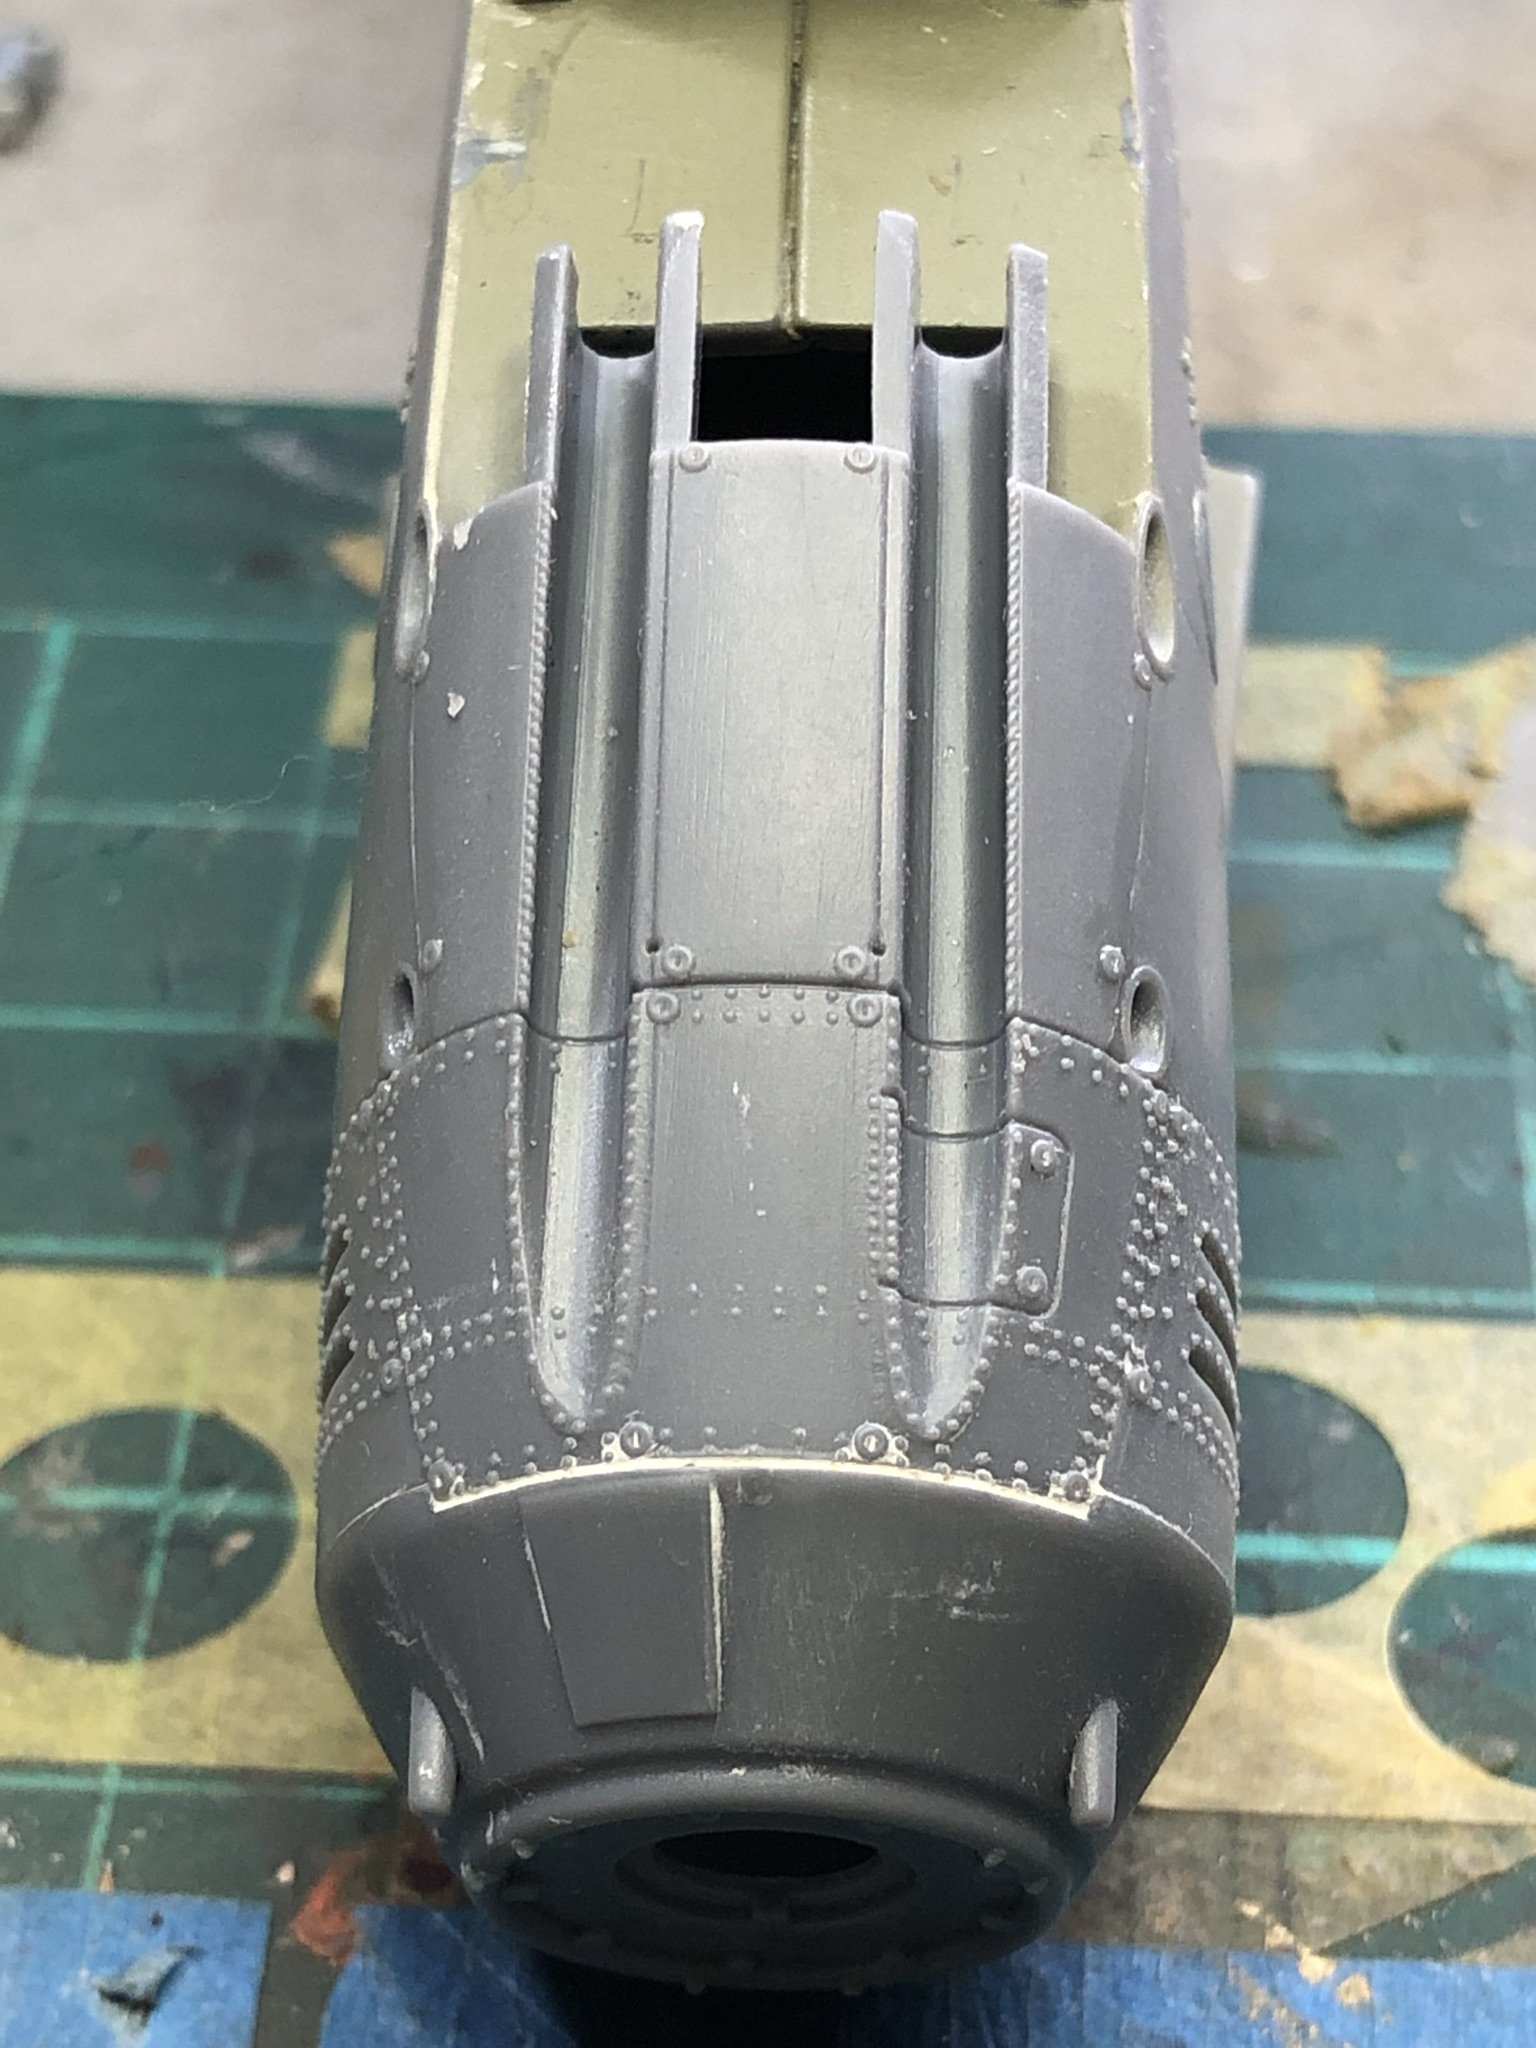
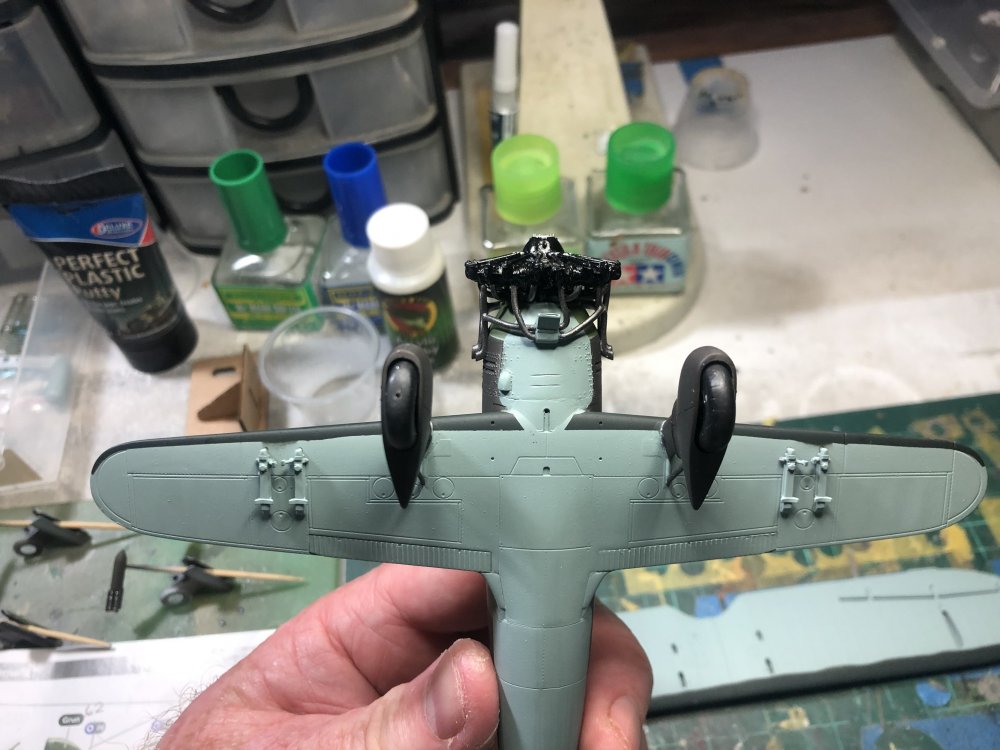
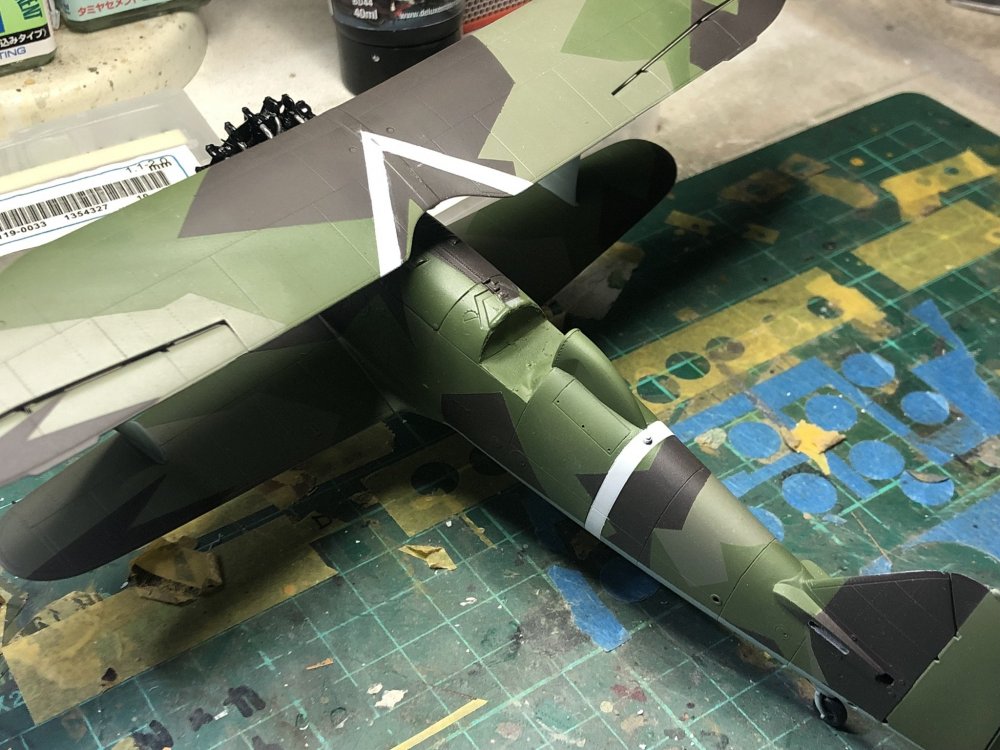
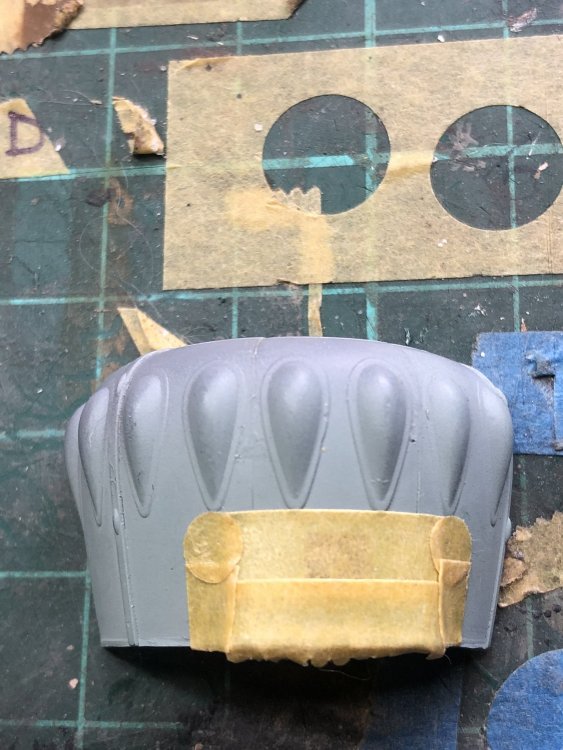
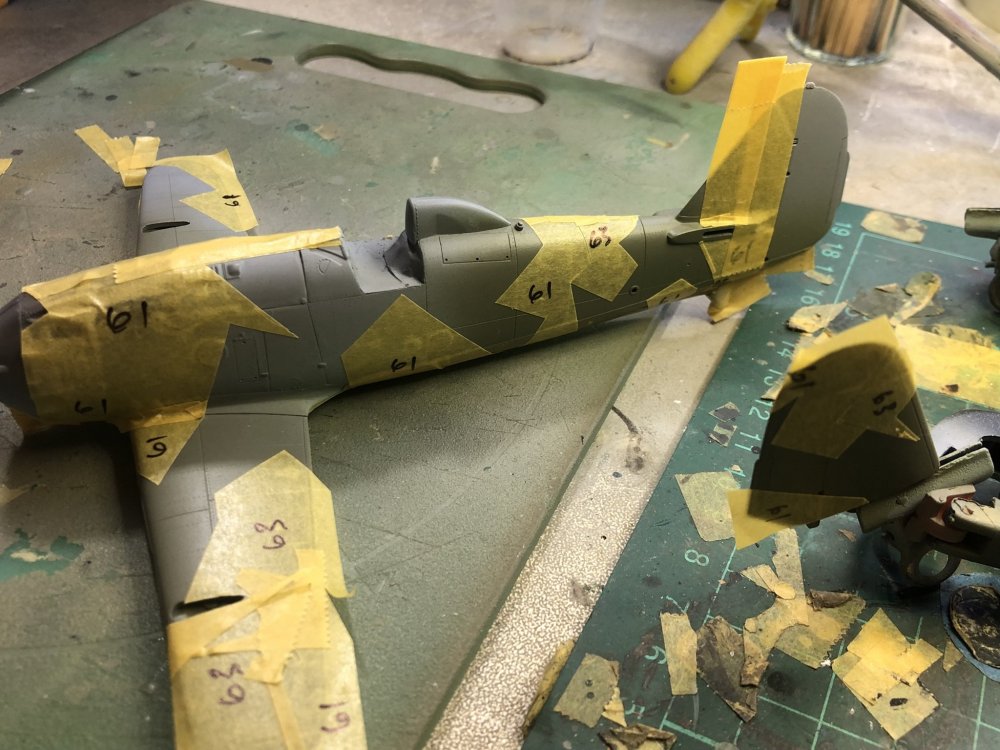
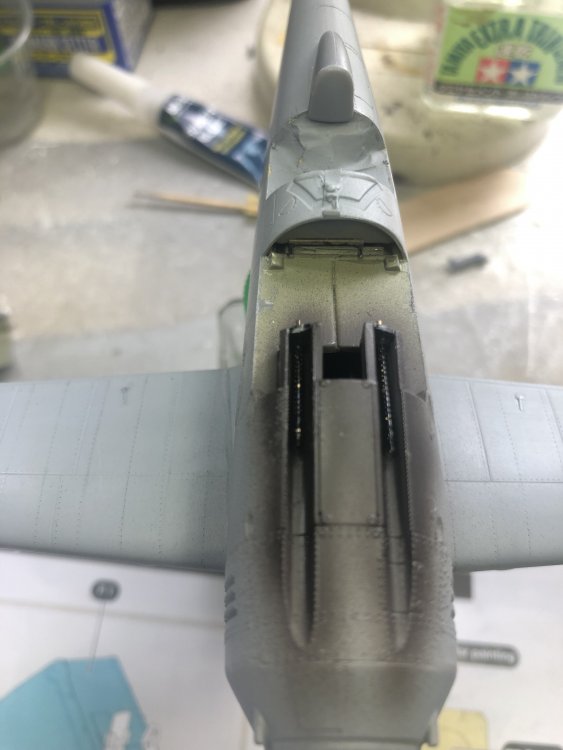
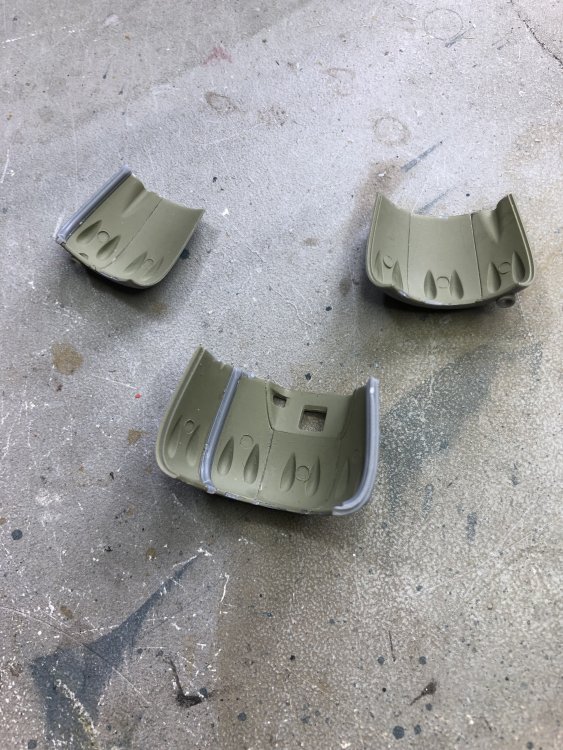
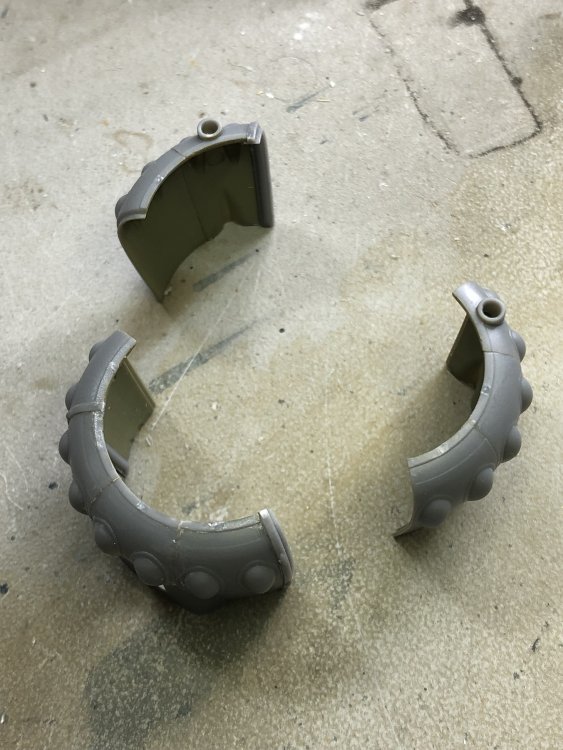
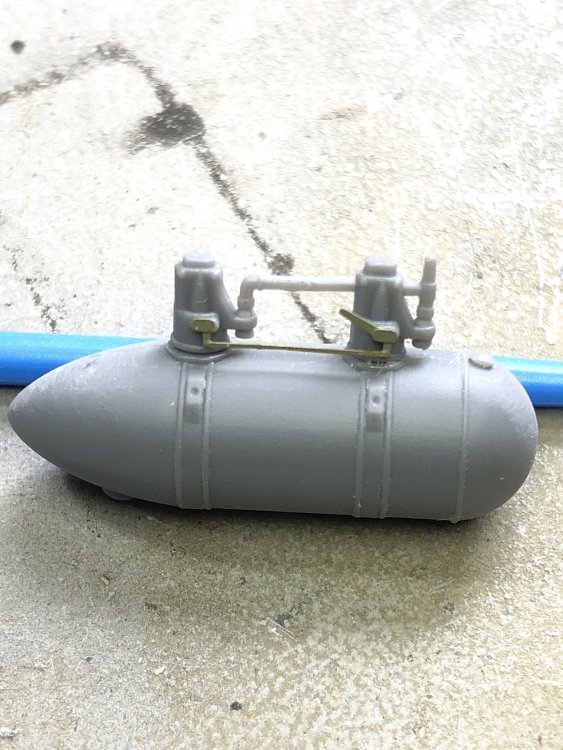
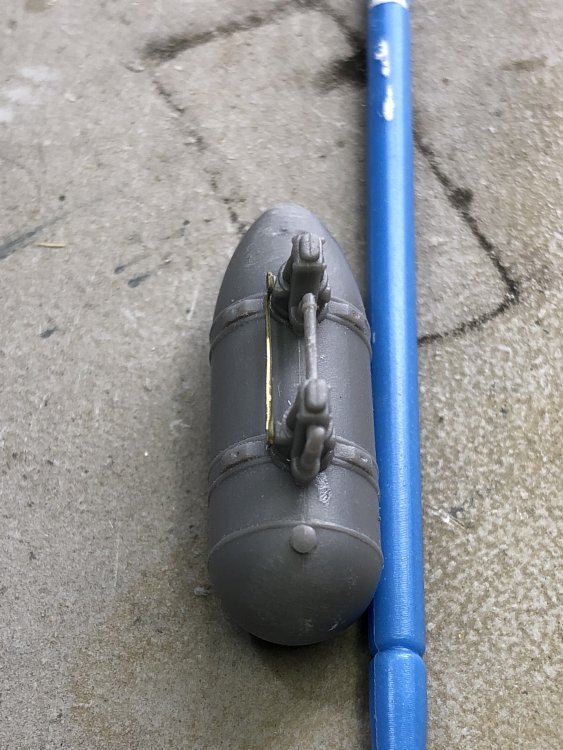
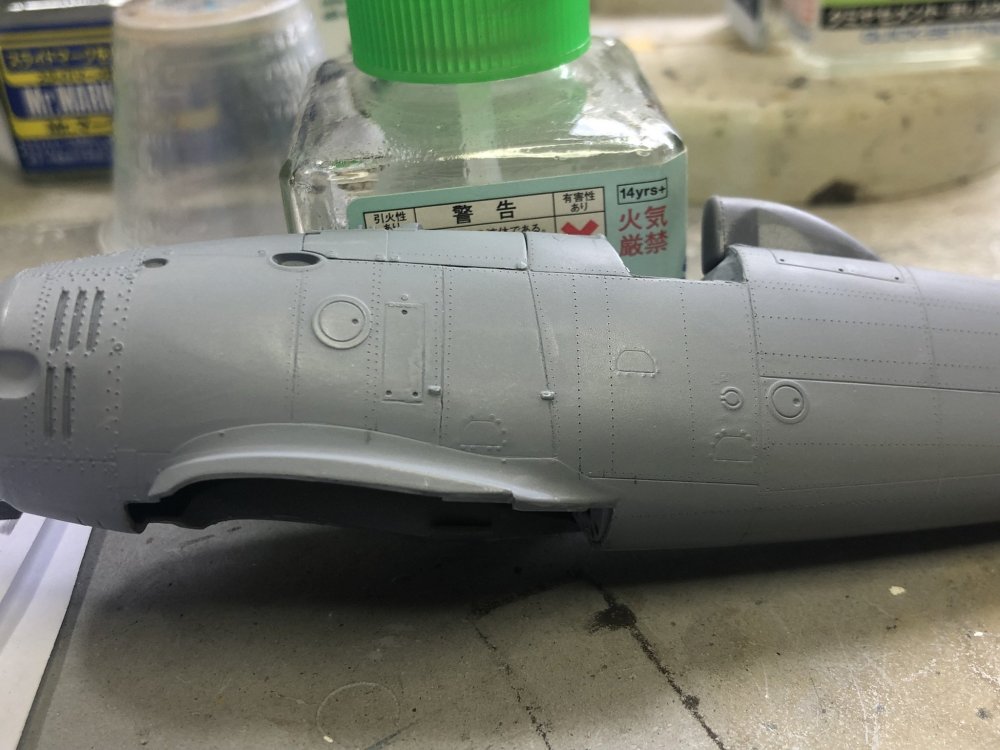
Finally got around to shooting some paint. The wheel spat assemblies are both RLM 61 as is the area surrounding the upper fuselage MG troughs. Painting these allowed me to install the Master MG barrels and secure the cover in place. There is some minor seam work to be done here. The wheels were painted, installed in the spat assembly and then masked prior to the overall RLM 61 application. The engine cowl is a multi part construction that must be built around the finished engine. I started working out some sub assemblies. These will be taped from the inside to allow me to paint the camouflage, disassemble the cowl then permanently attached it to the engine. The central drop tank is assembled and awaits some paint.


-
I Rob, Nice if you to mention Gazza and my build as inspiration. I would be interested to see what you think of the kit. I think GP have done a great job on 98% of the kit. Just a few curious decisions on small details. Regards, Kent
-
Revell P-51D Mustang - 2nd time around
kahunaminor replied to Peterpools's topic in LSM 1/35 and Larger Work In Progress
I have just read through this epic entry Peter. Many thanks for taking one for the team and posting your results. Regards, Kent -
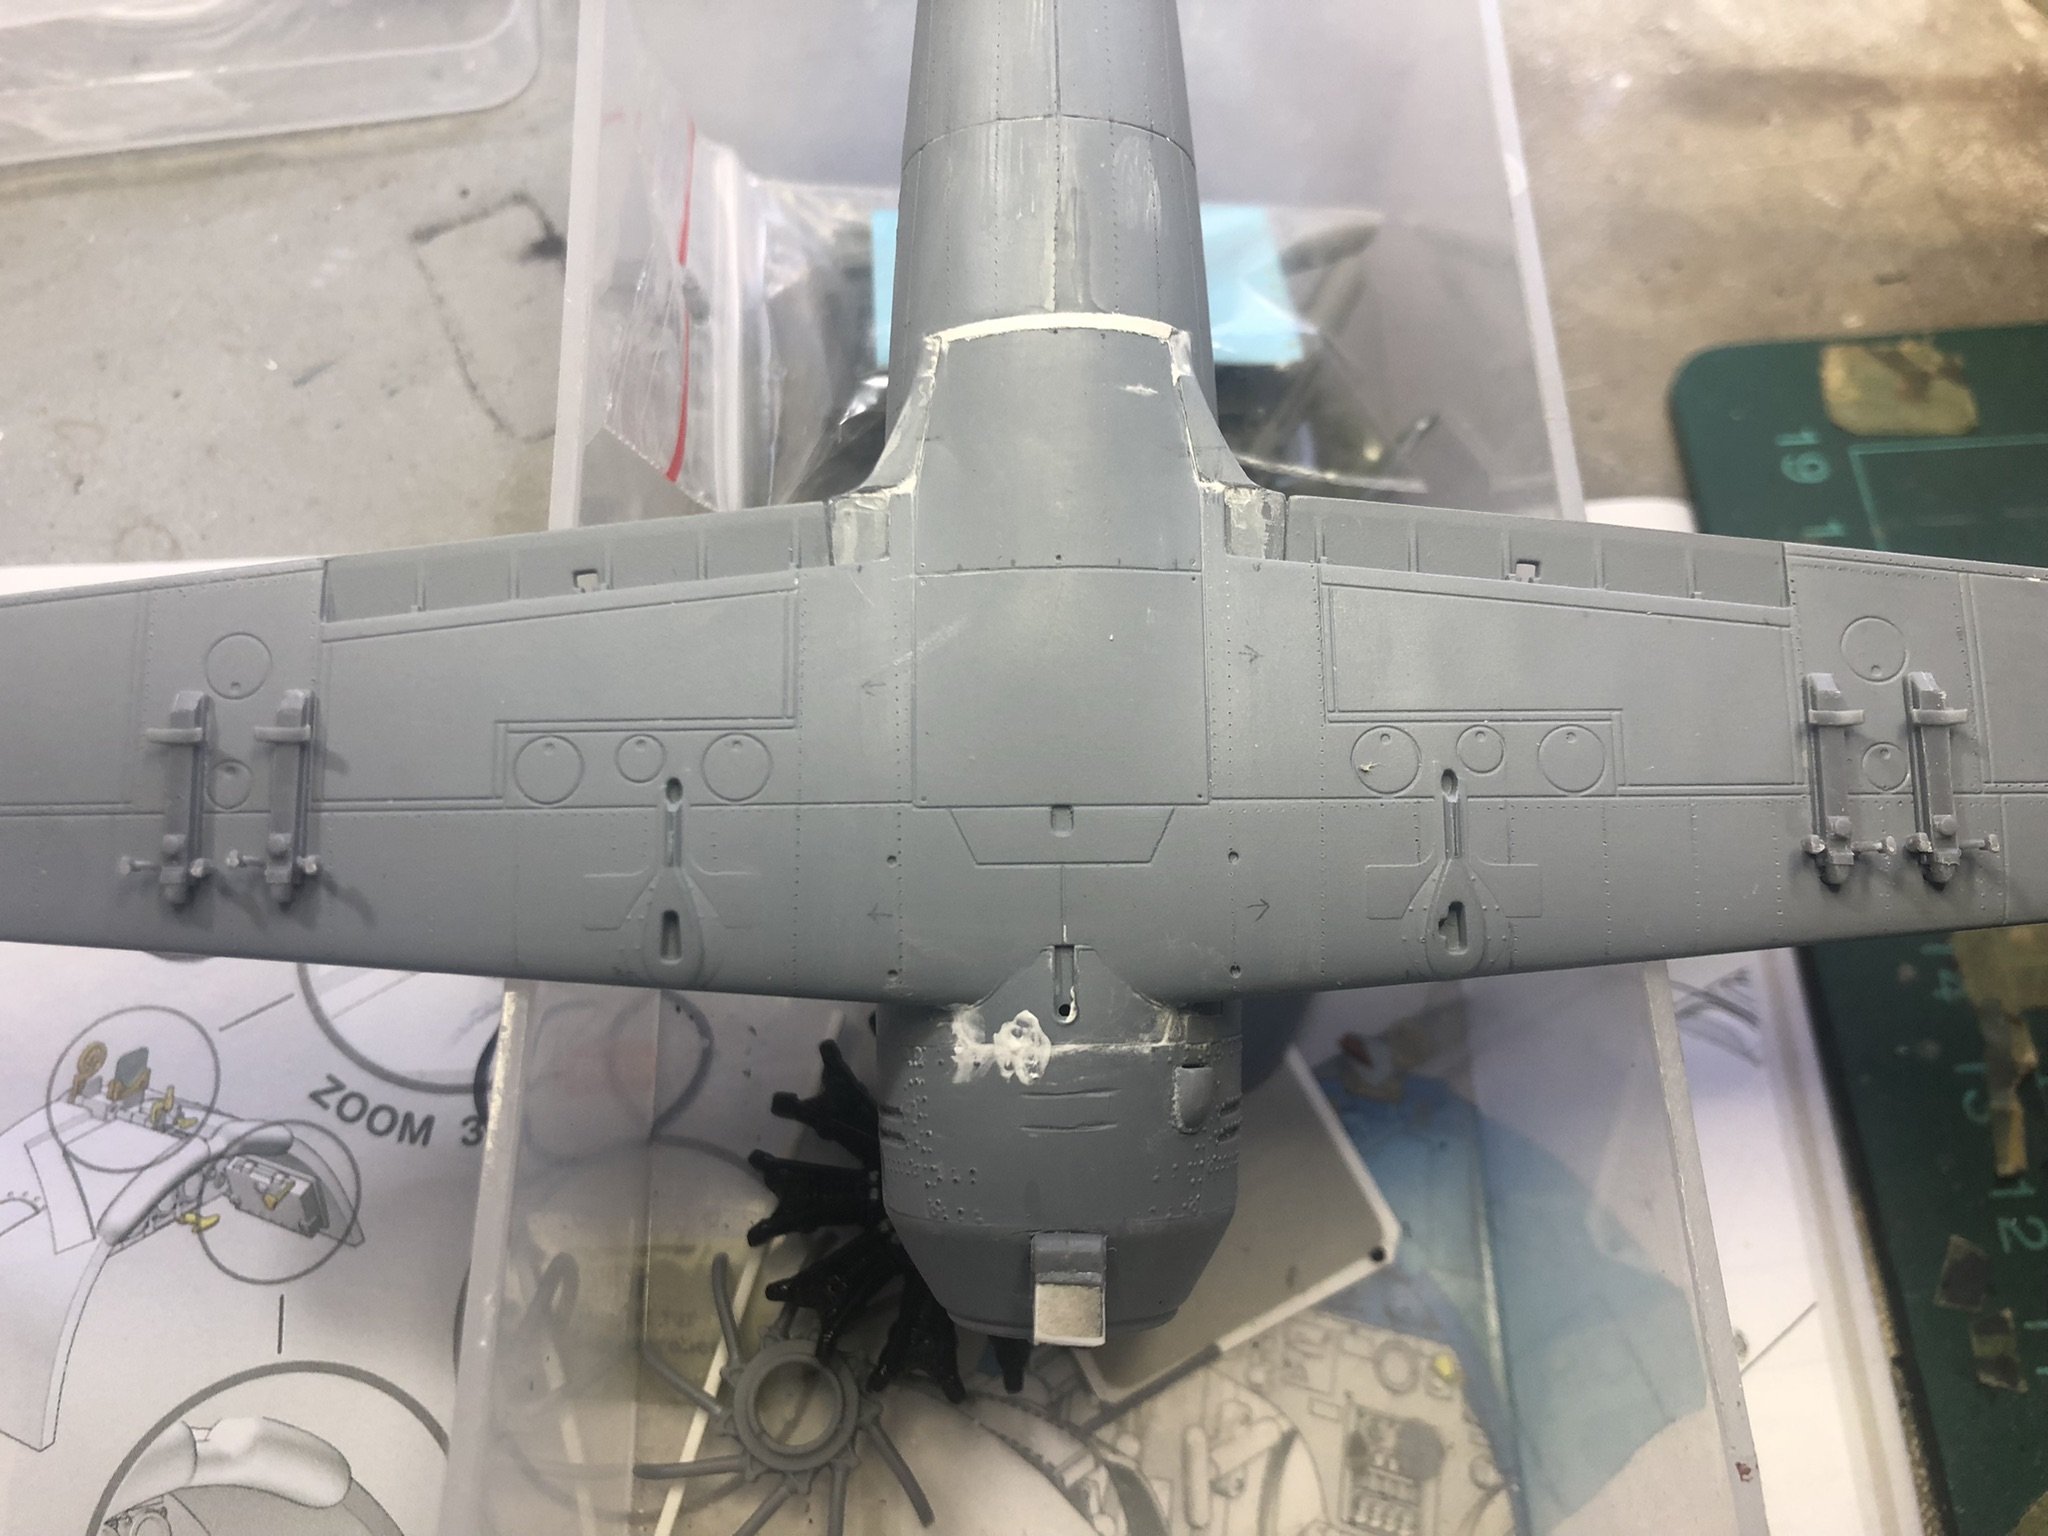
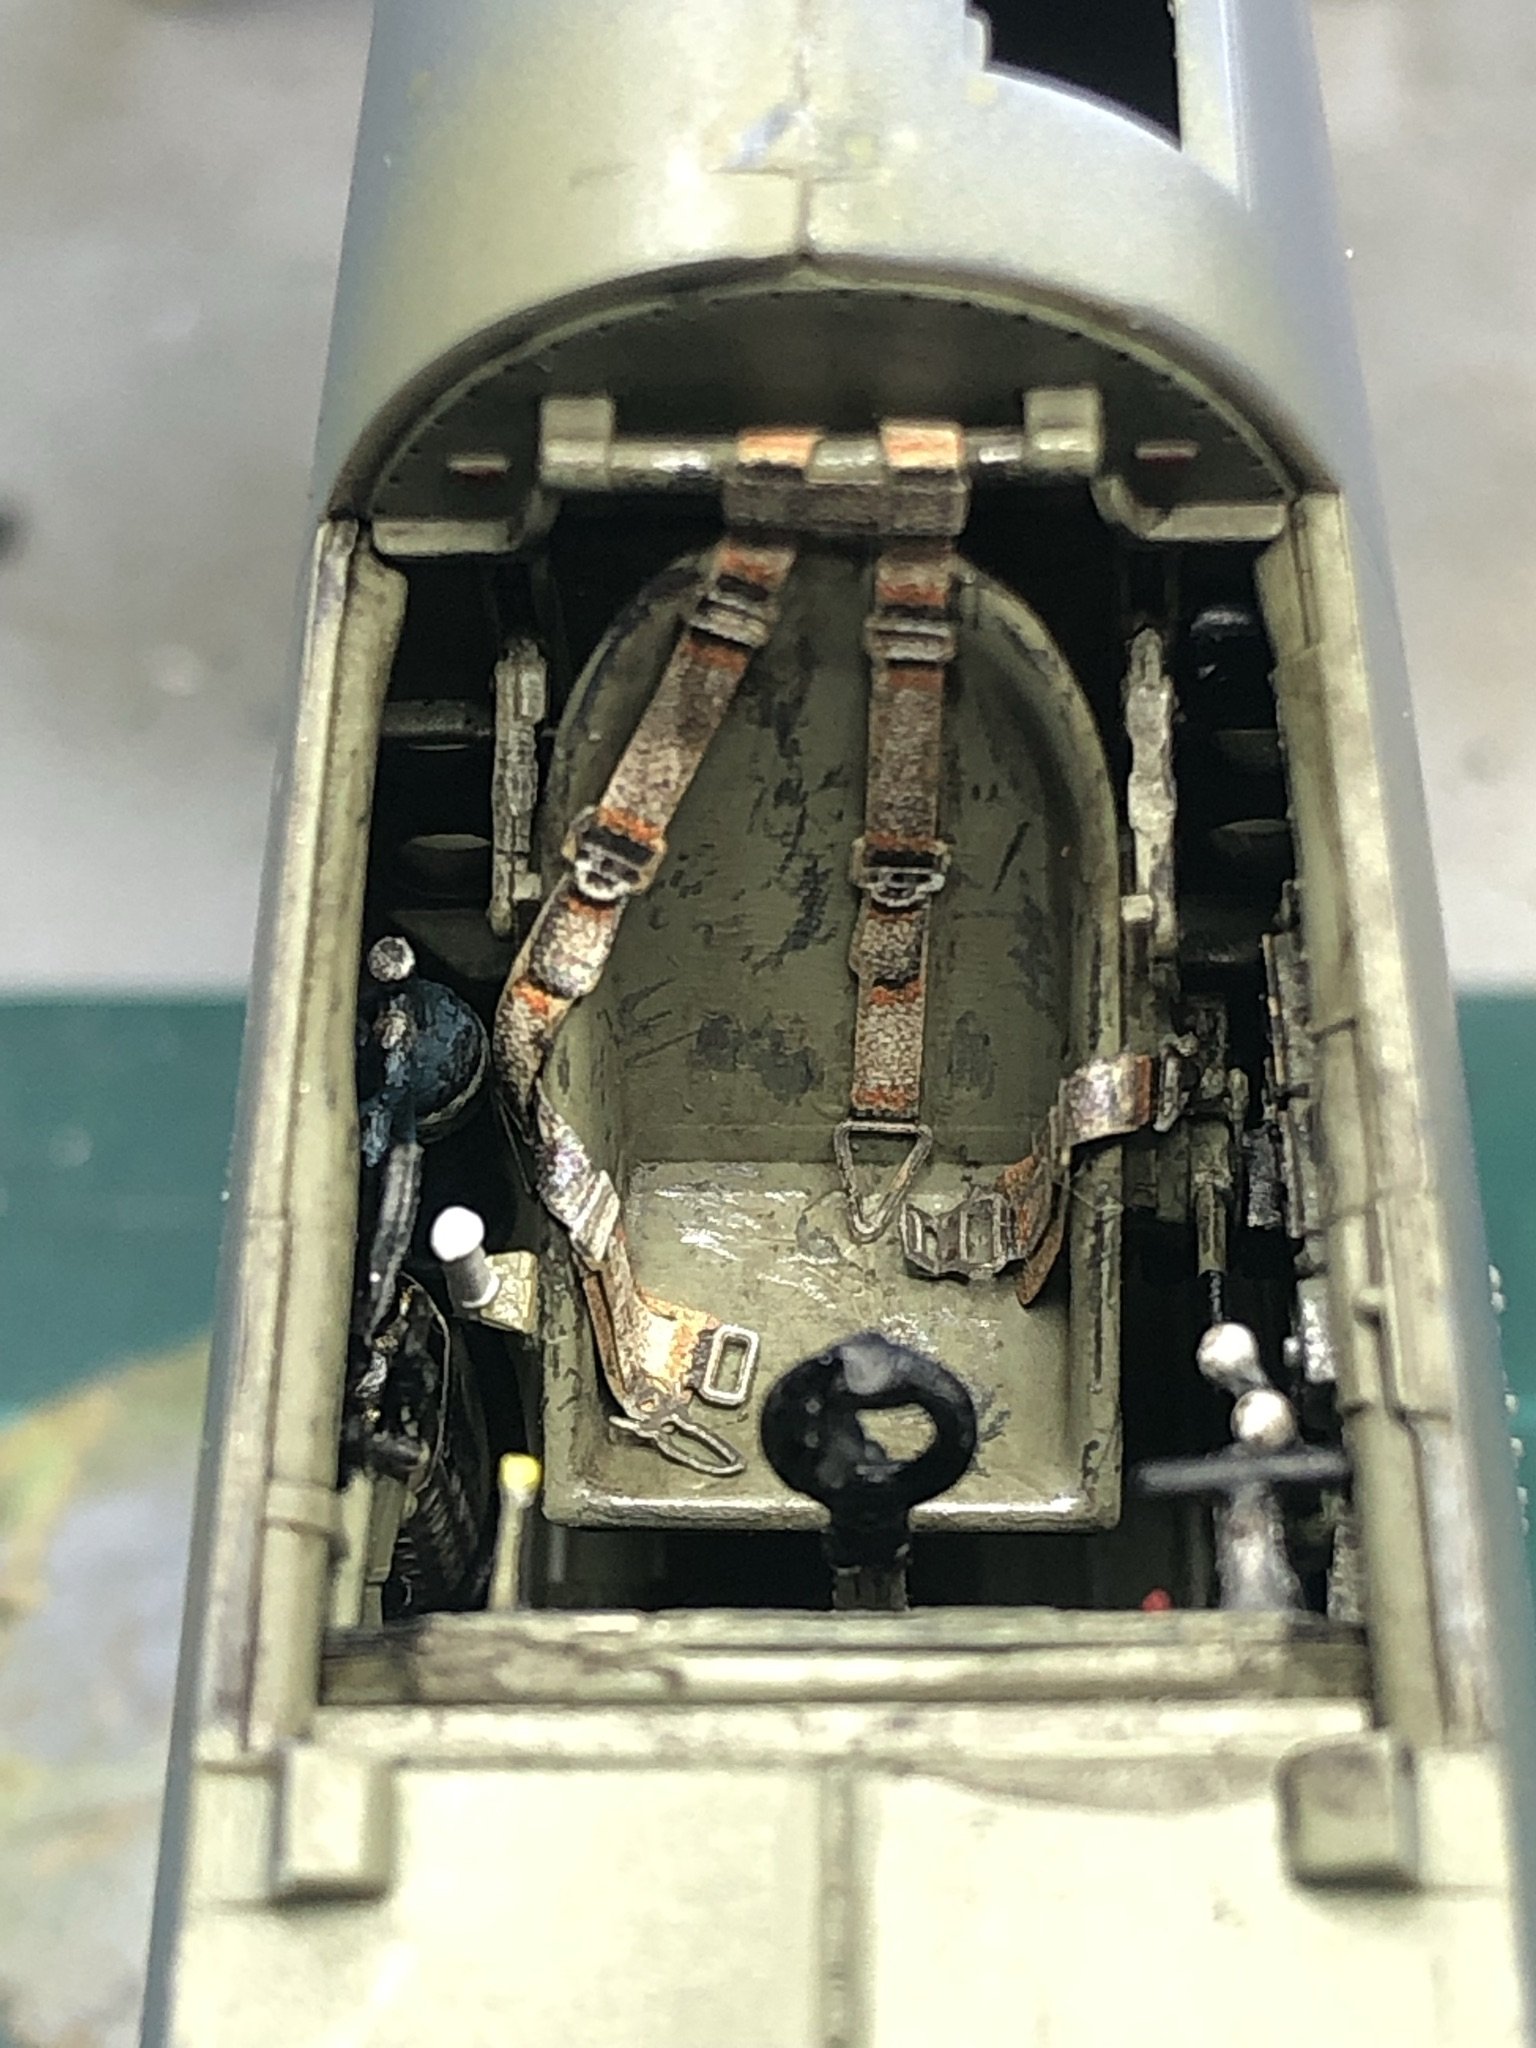
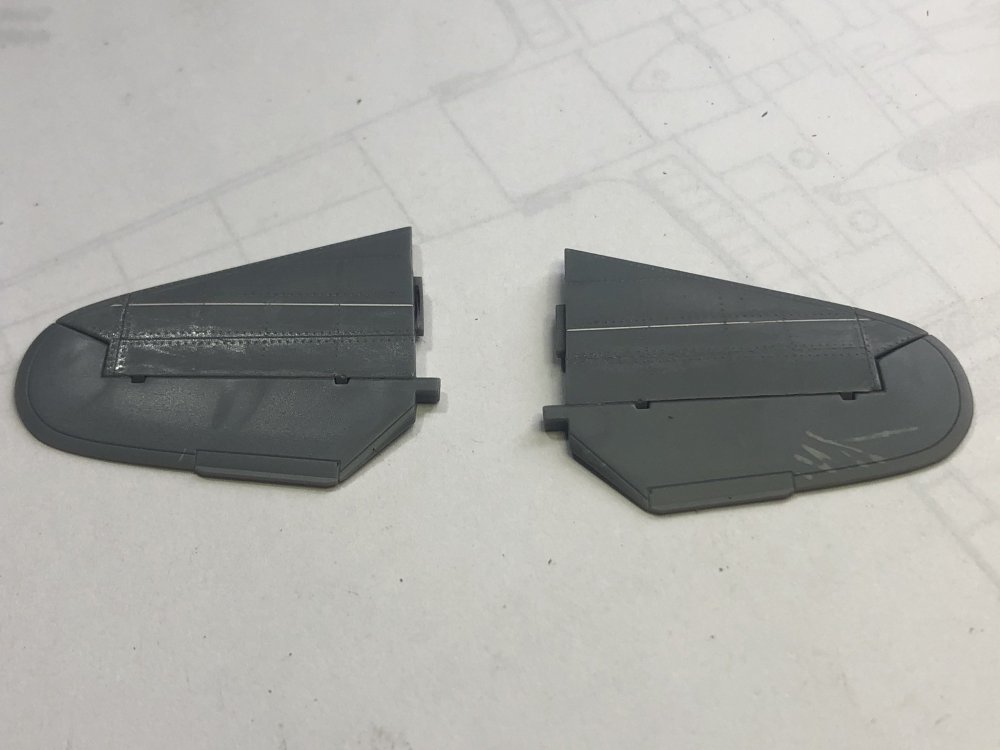
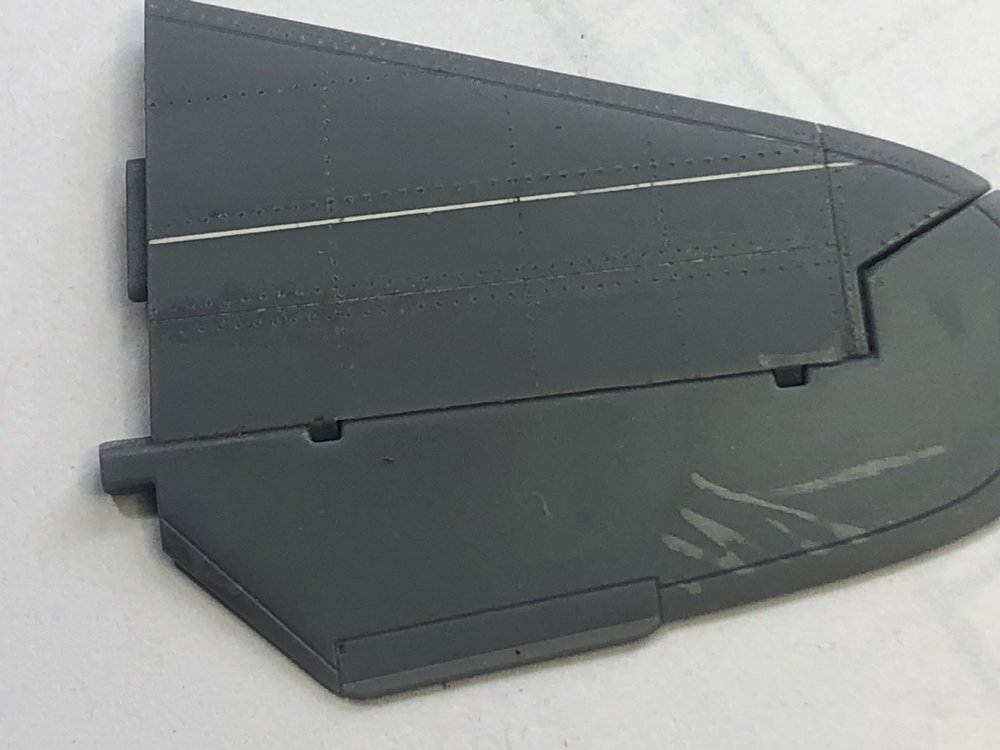
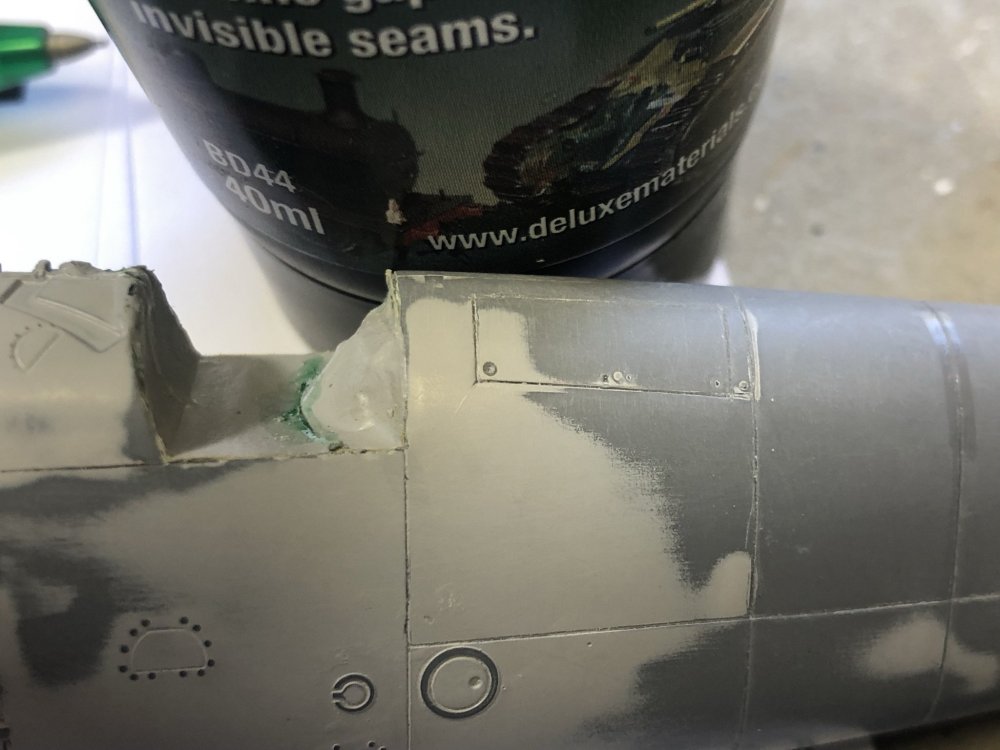
Thank you one and all for your support. Well the riveting is 95% complete on the Hs123. I just have to wait until the putty on the underside is set up to allow me to finish that central section. The stabs had a spurious panel line that was filled, repositioned and rescribed along with the rivet pattern according to both references. The small PE rings on the fuselage that surround the tie down holes were positioned and set with Future. The bomb racks have been assembled and attached to the lower wings. I will let all these bits set up before a final rivet fest on the underside, polishing and overall primer to check I have got it all. Regards, Kent


-
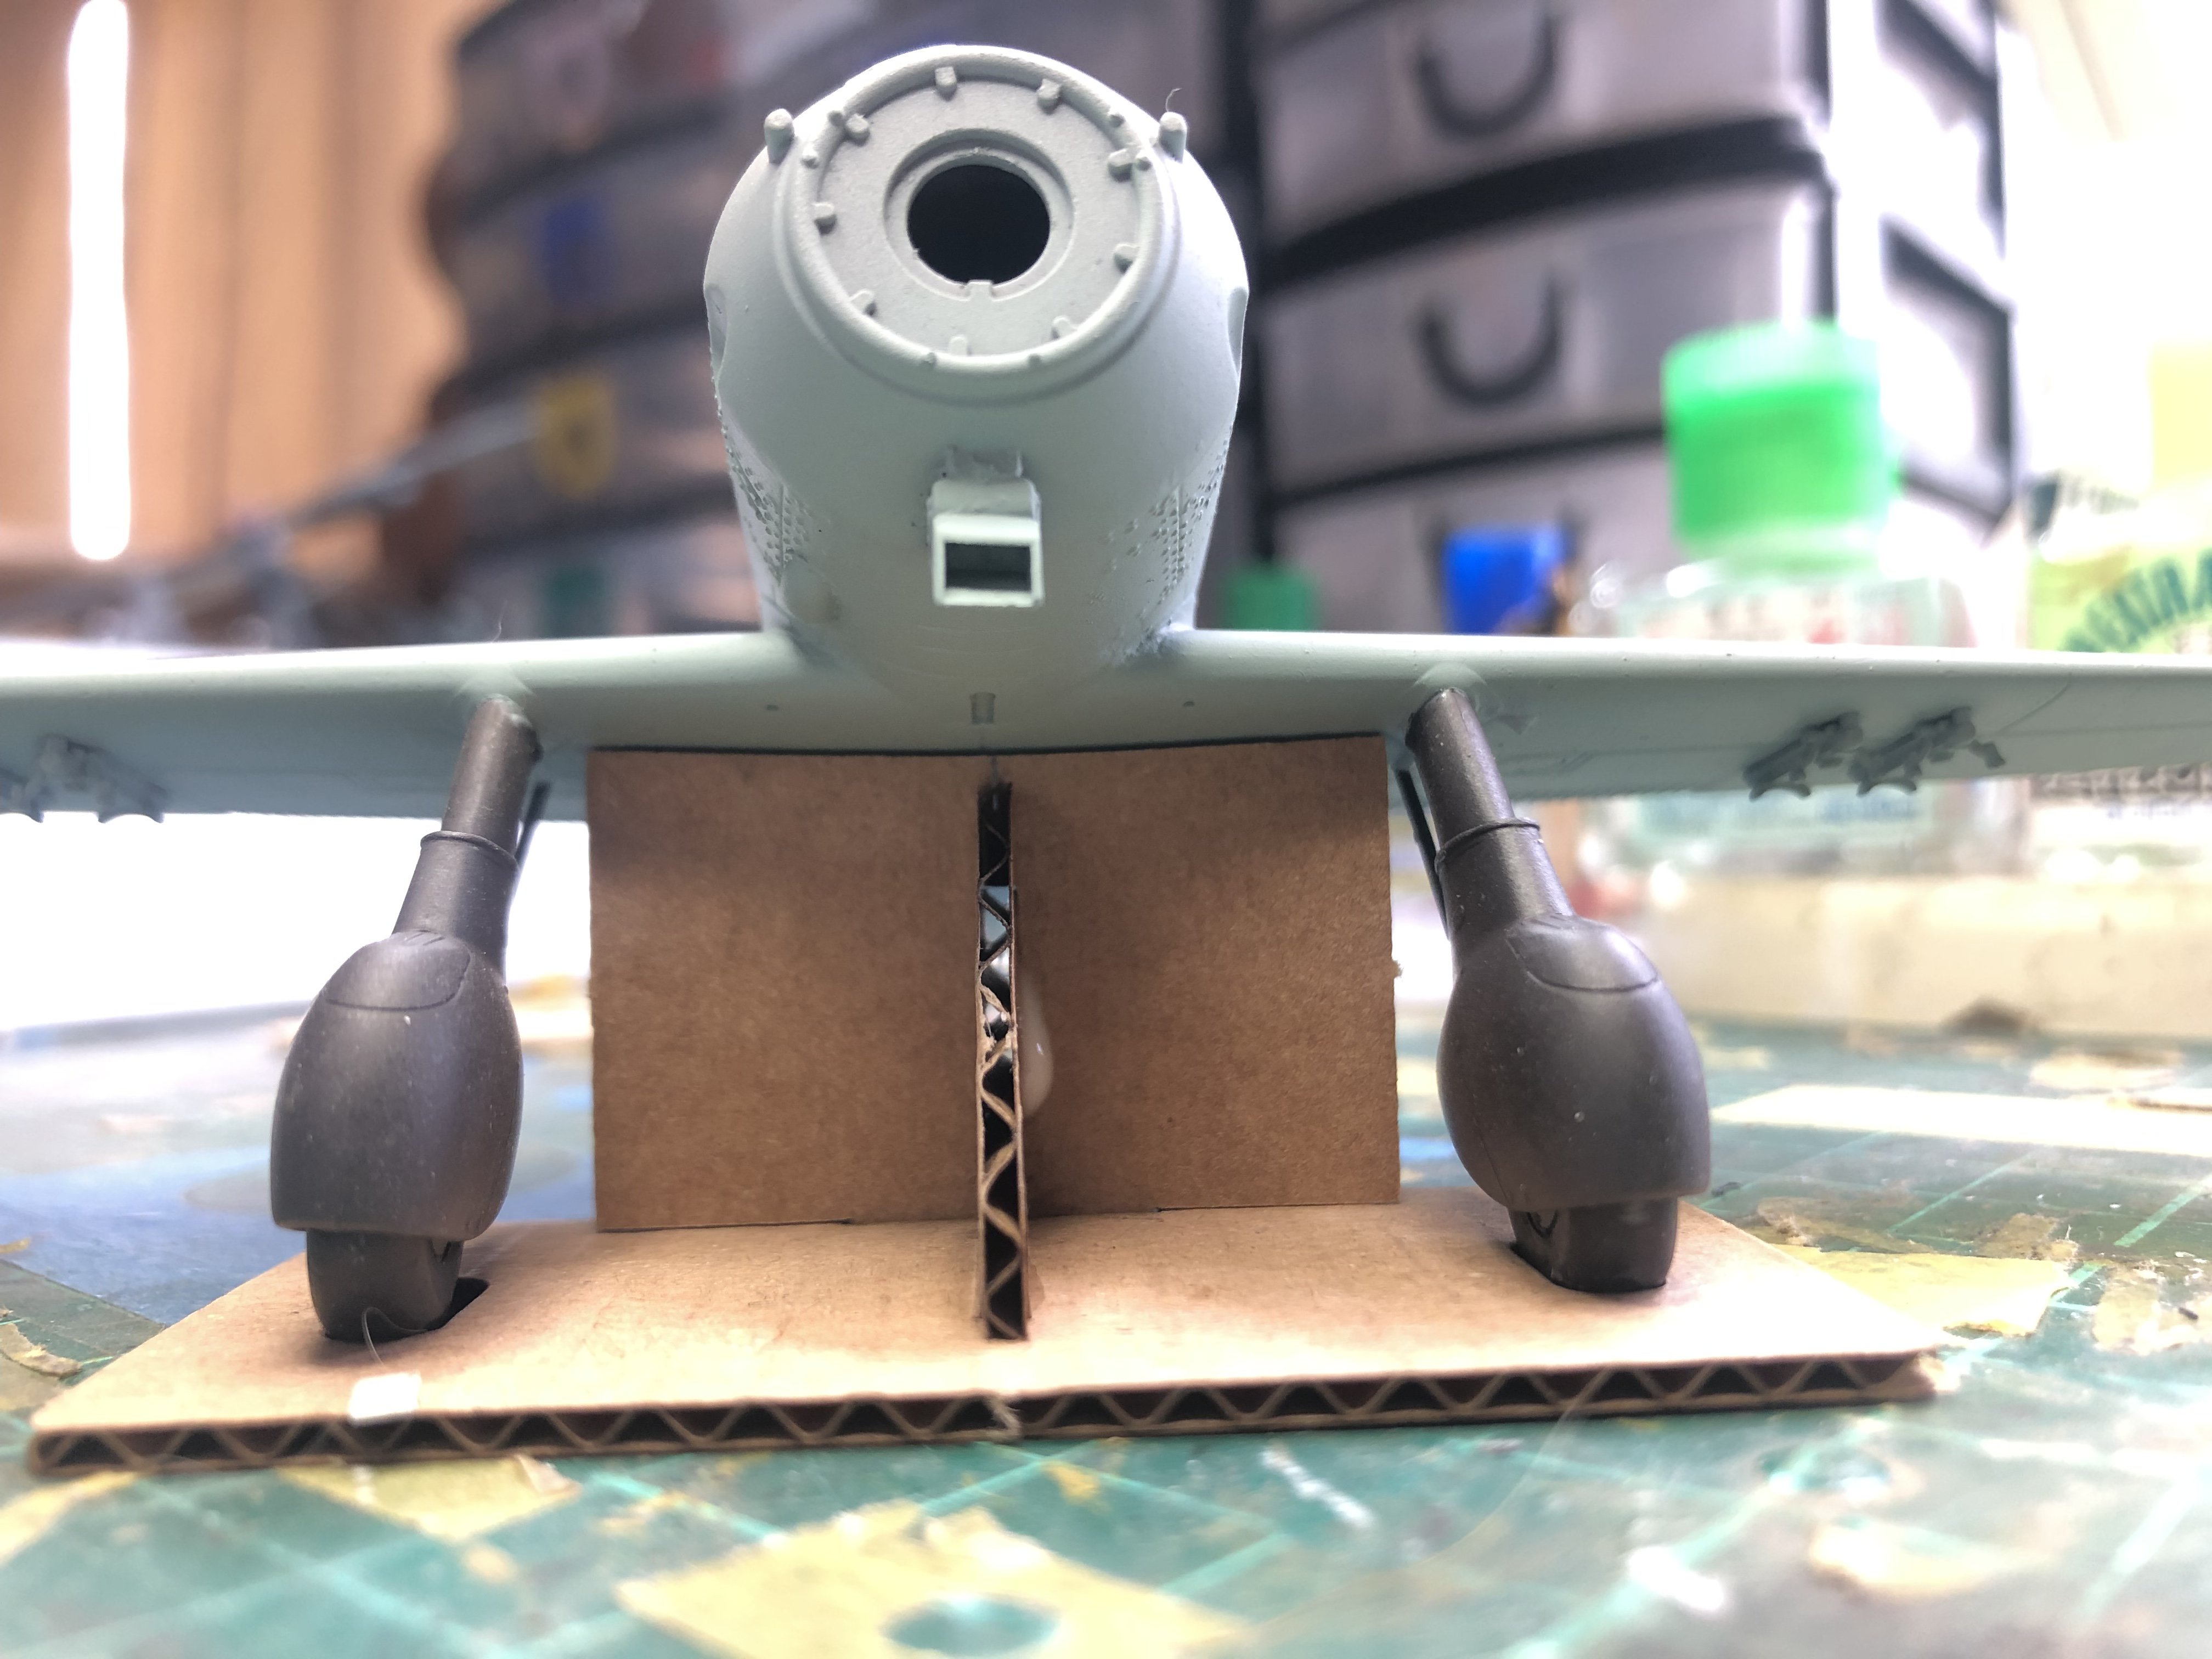
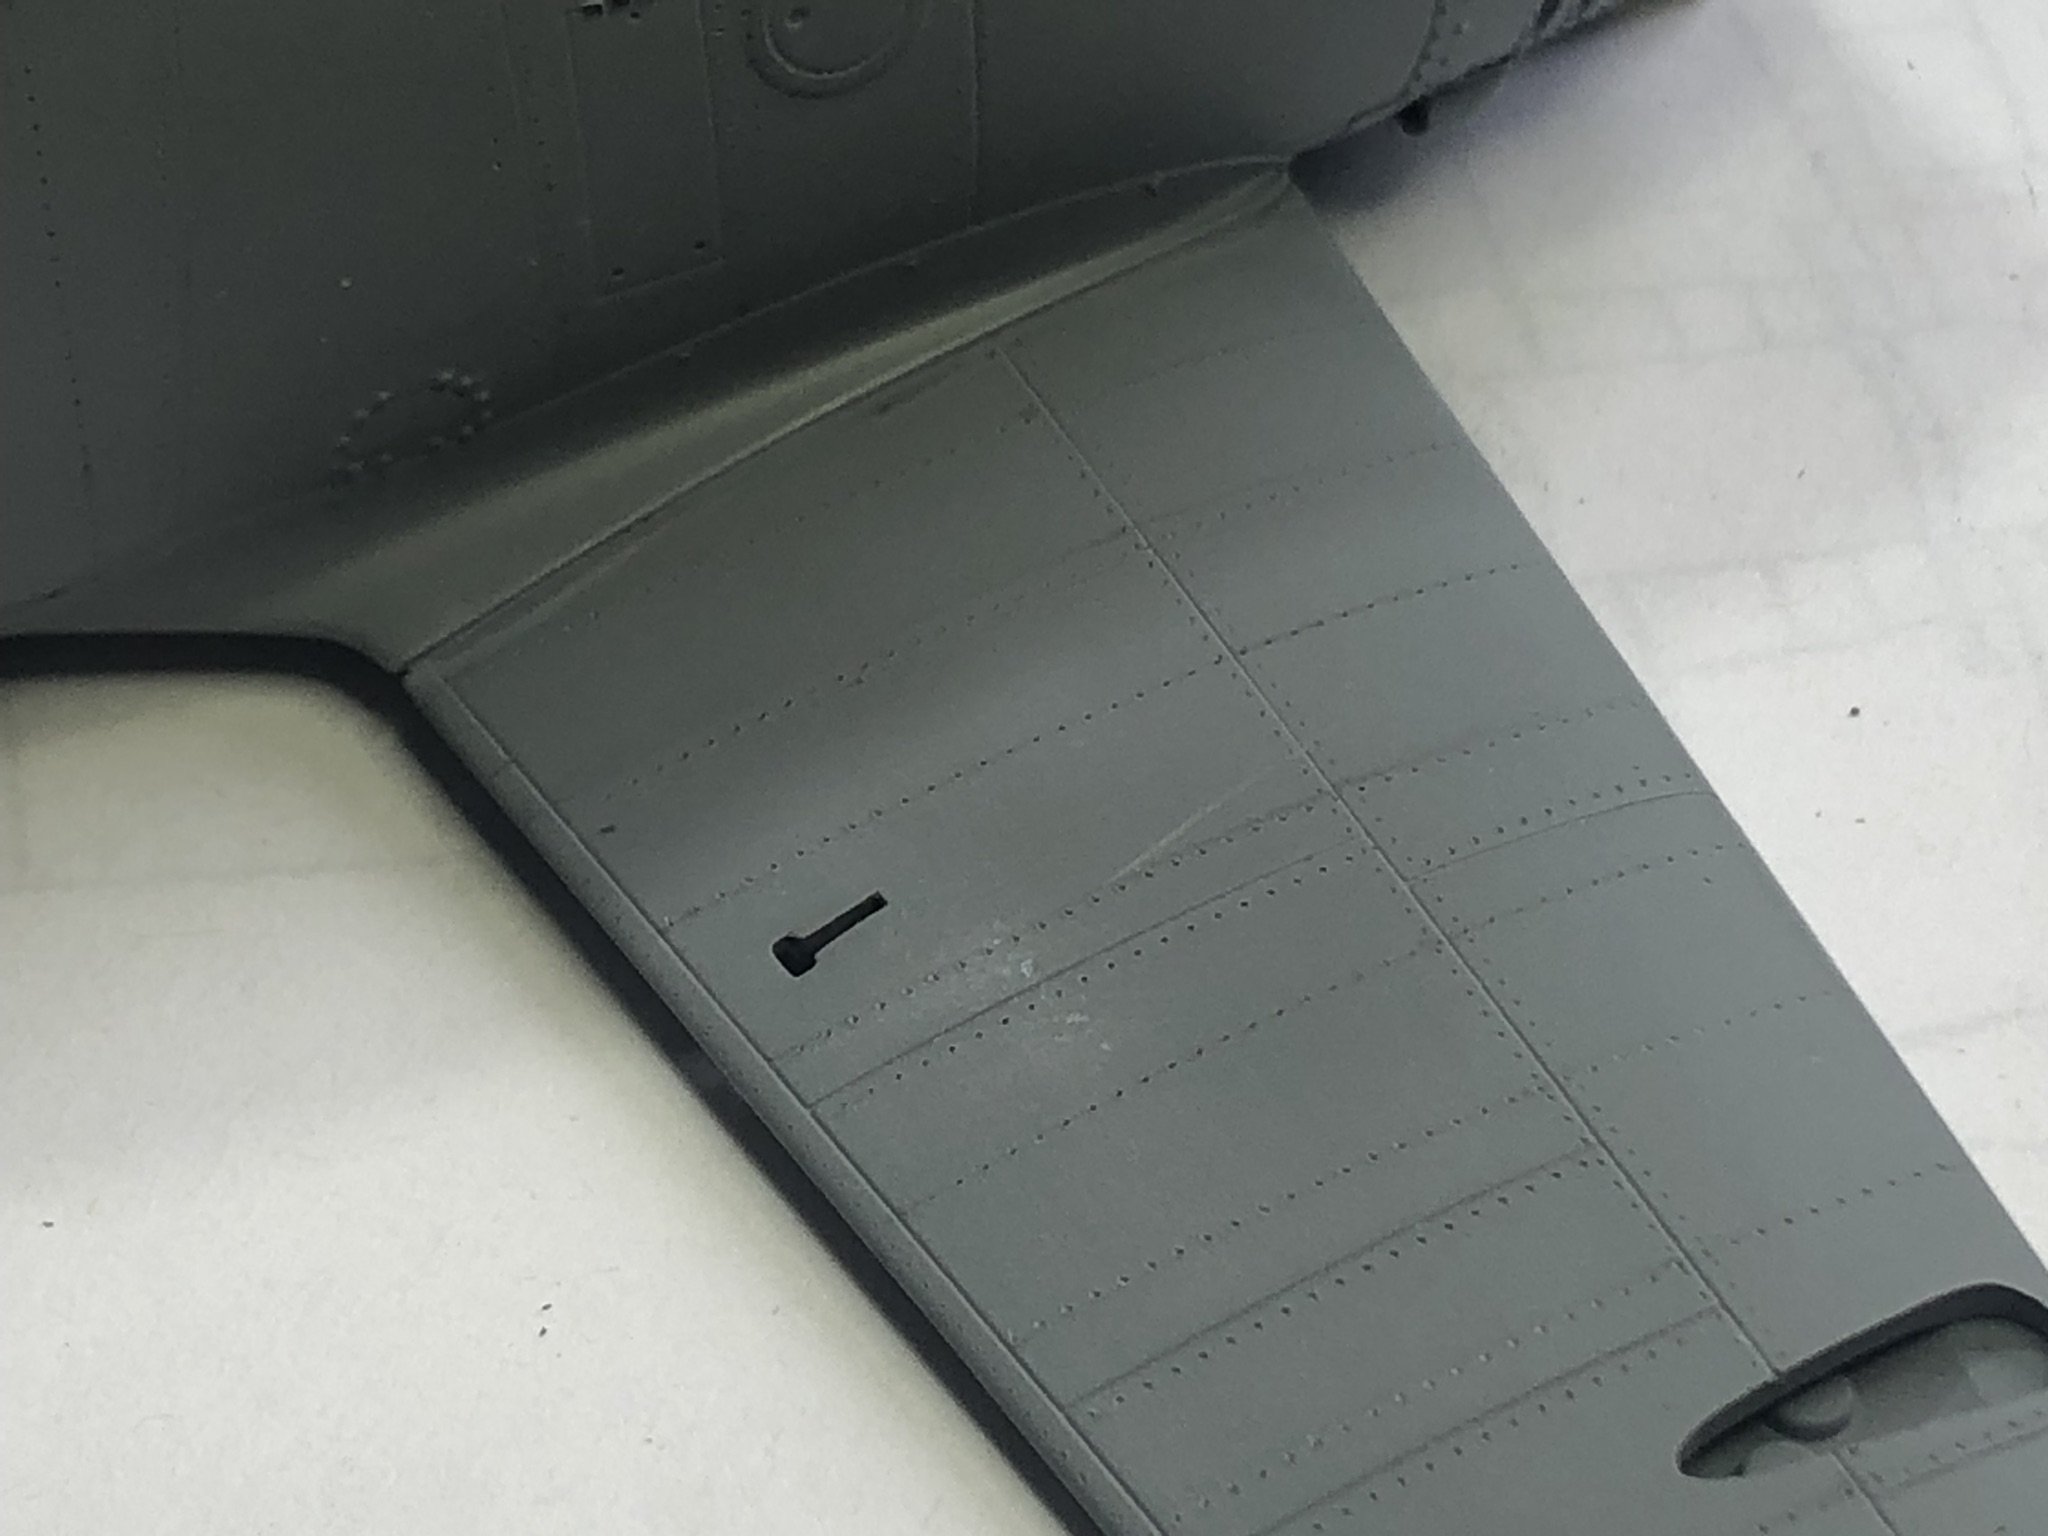
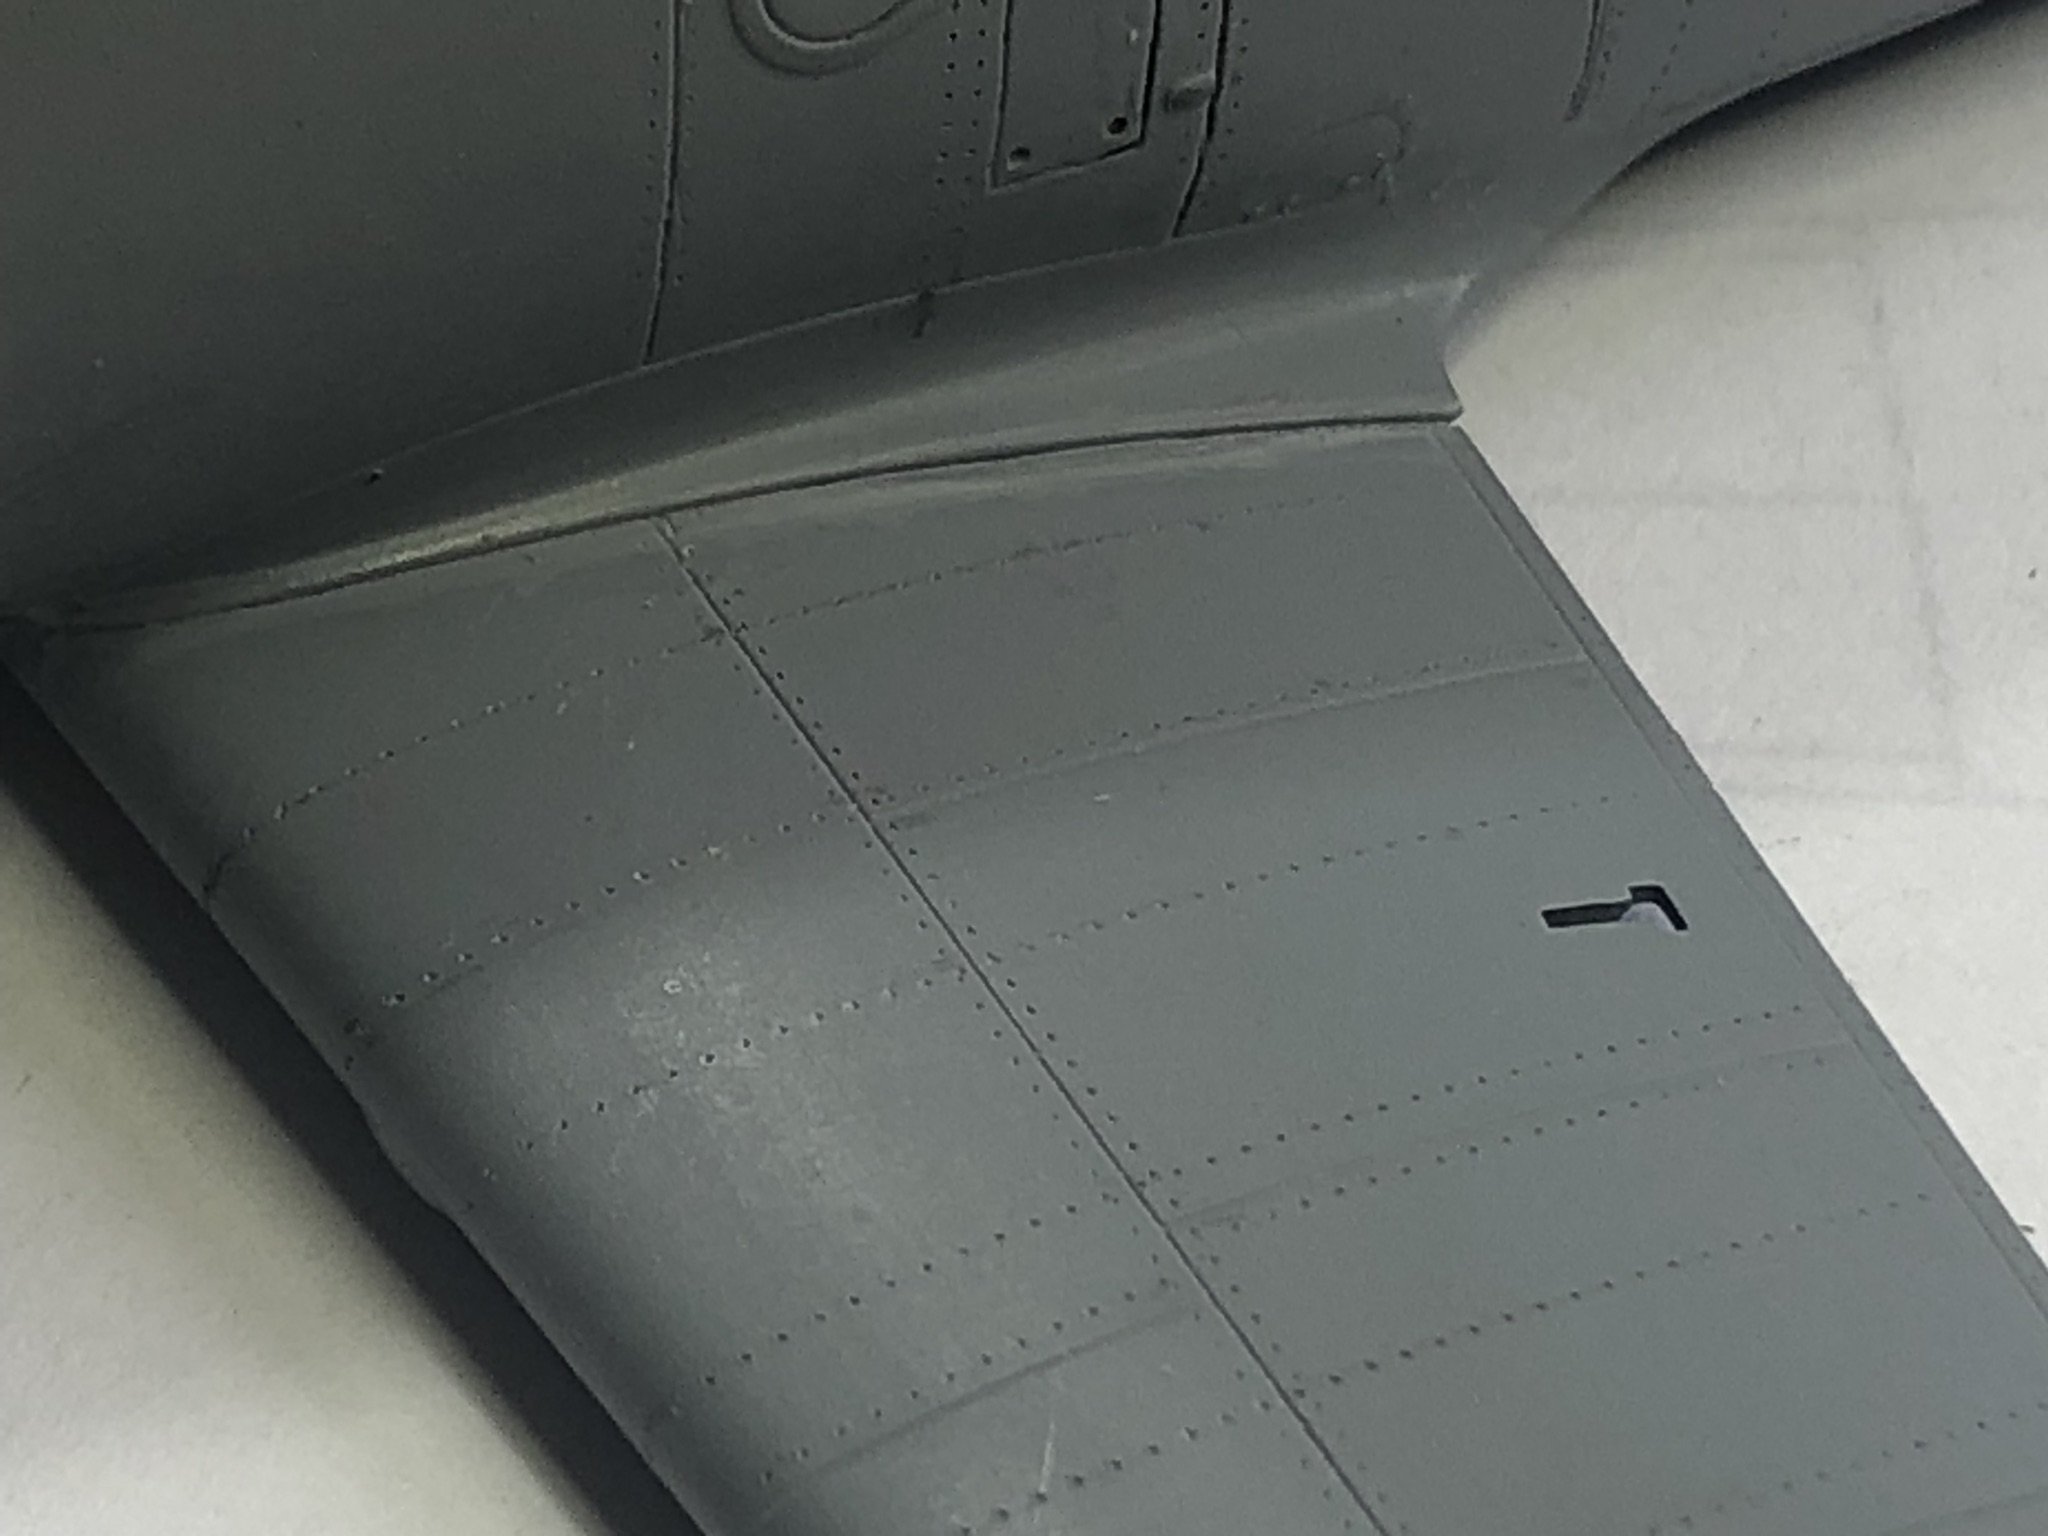
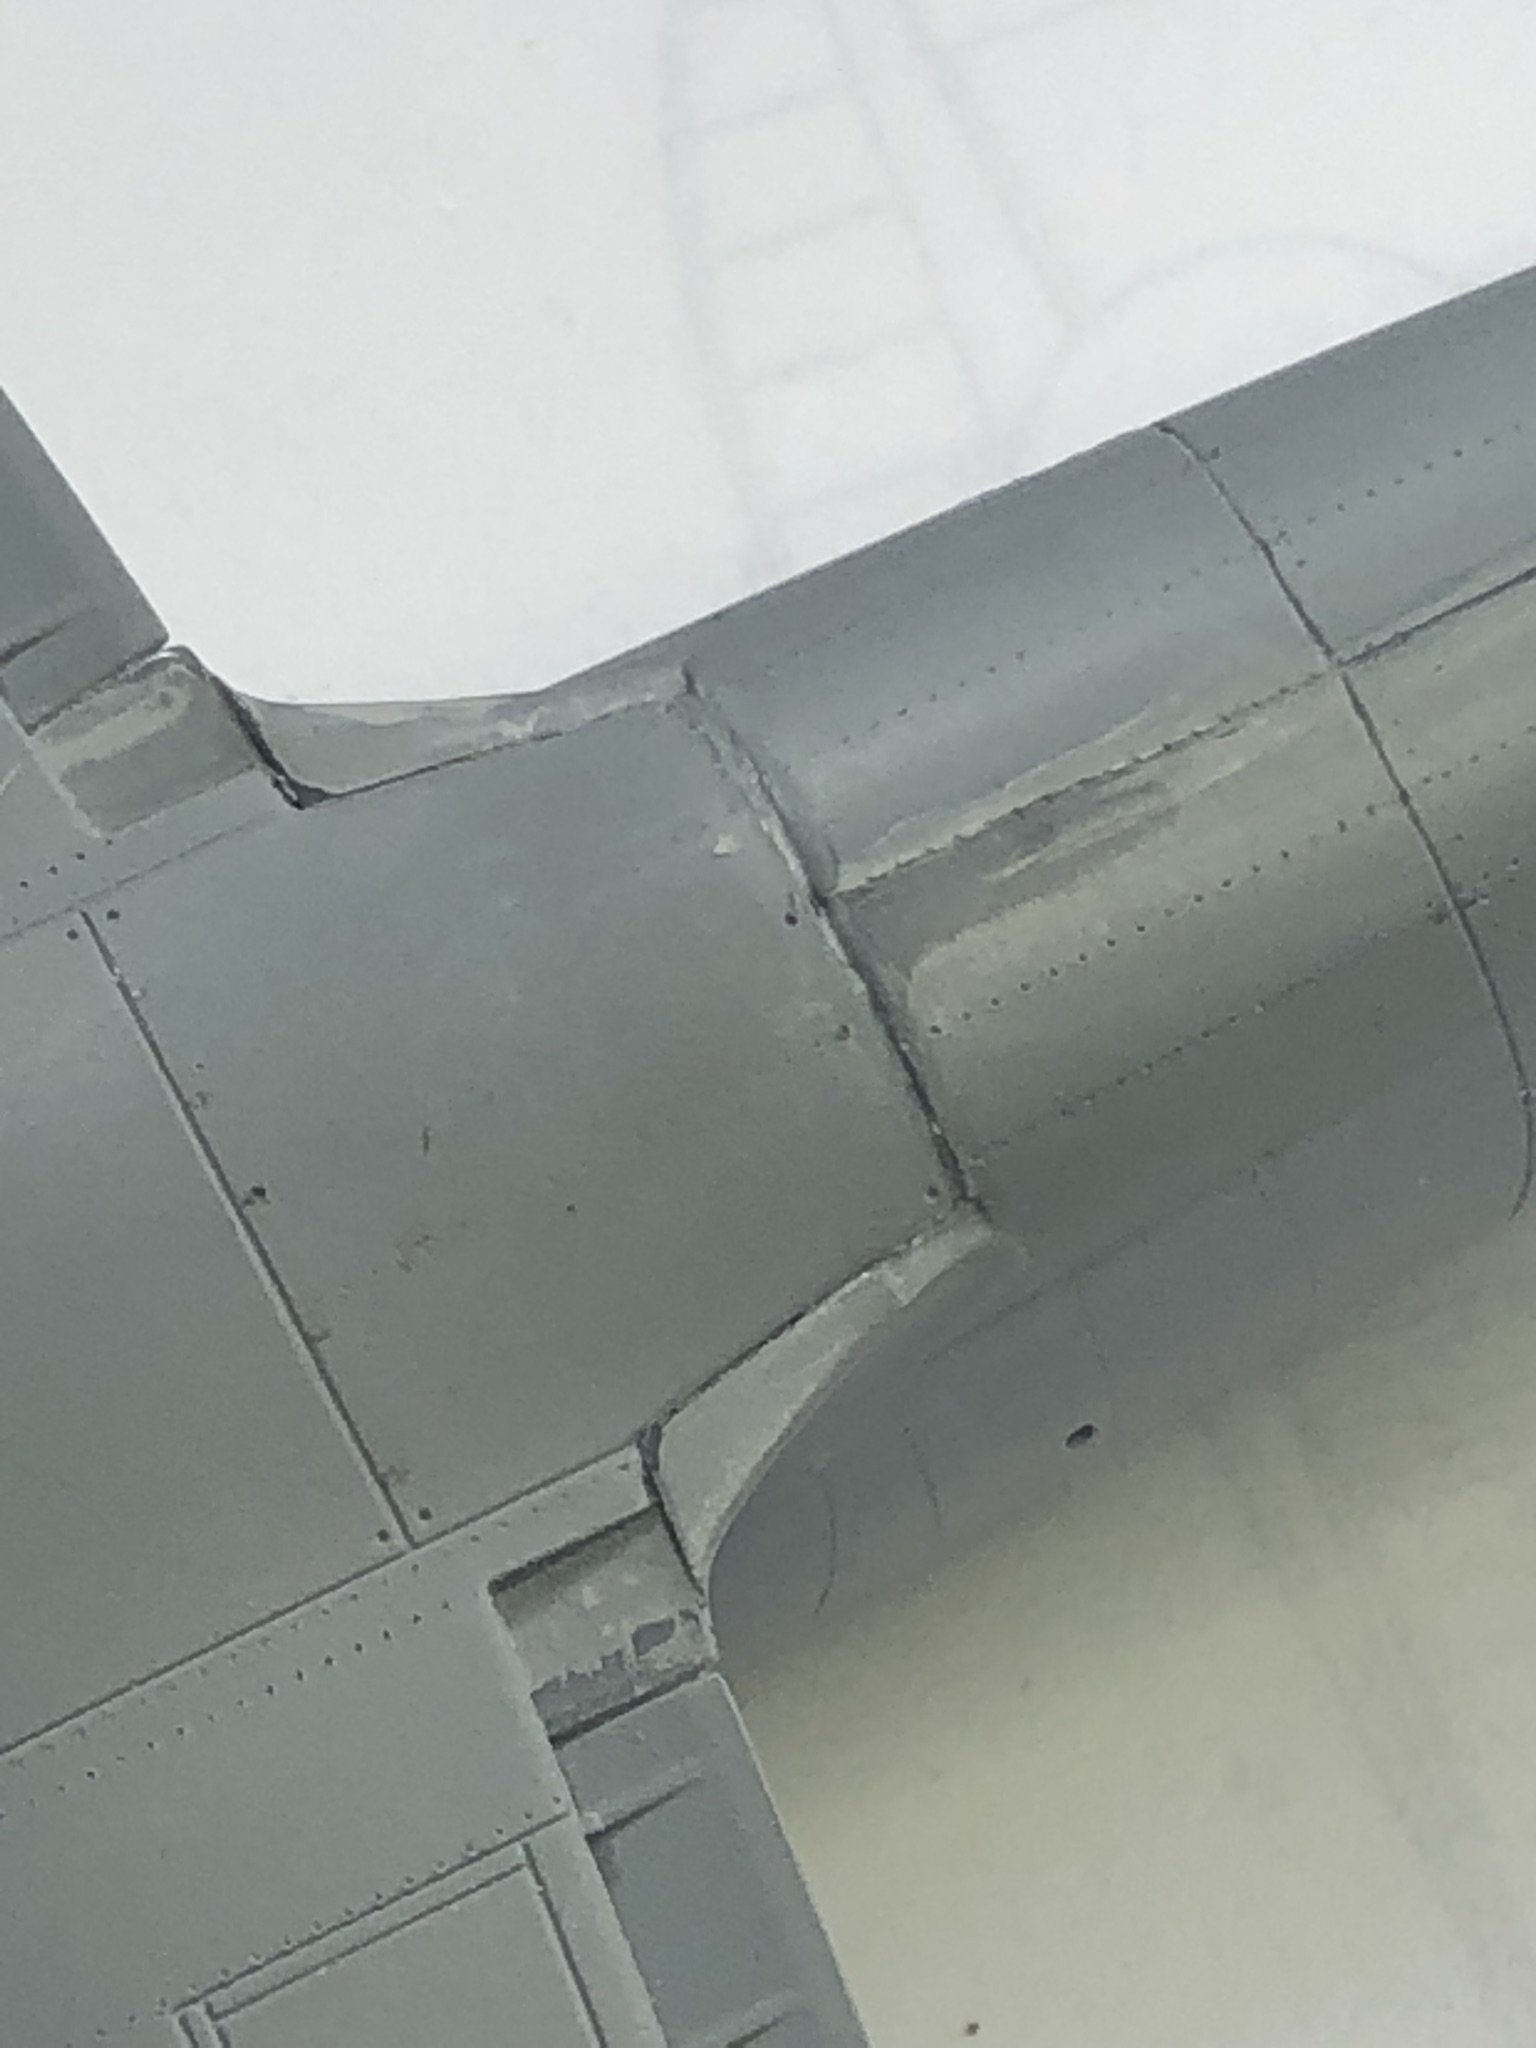
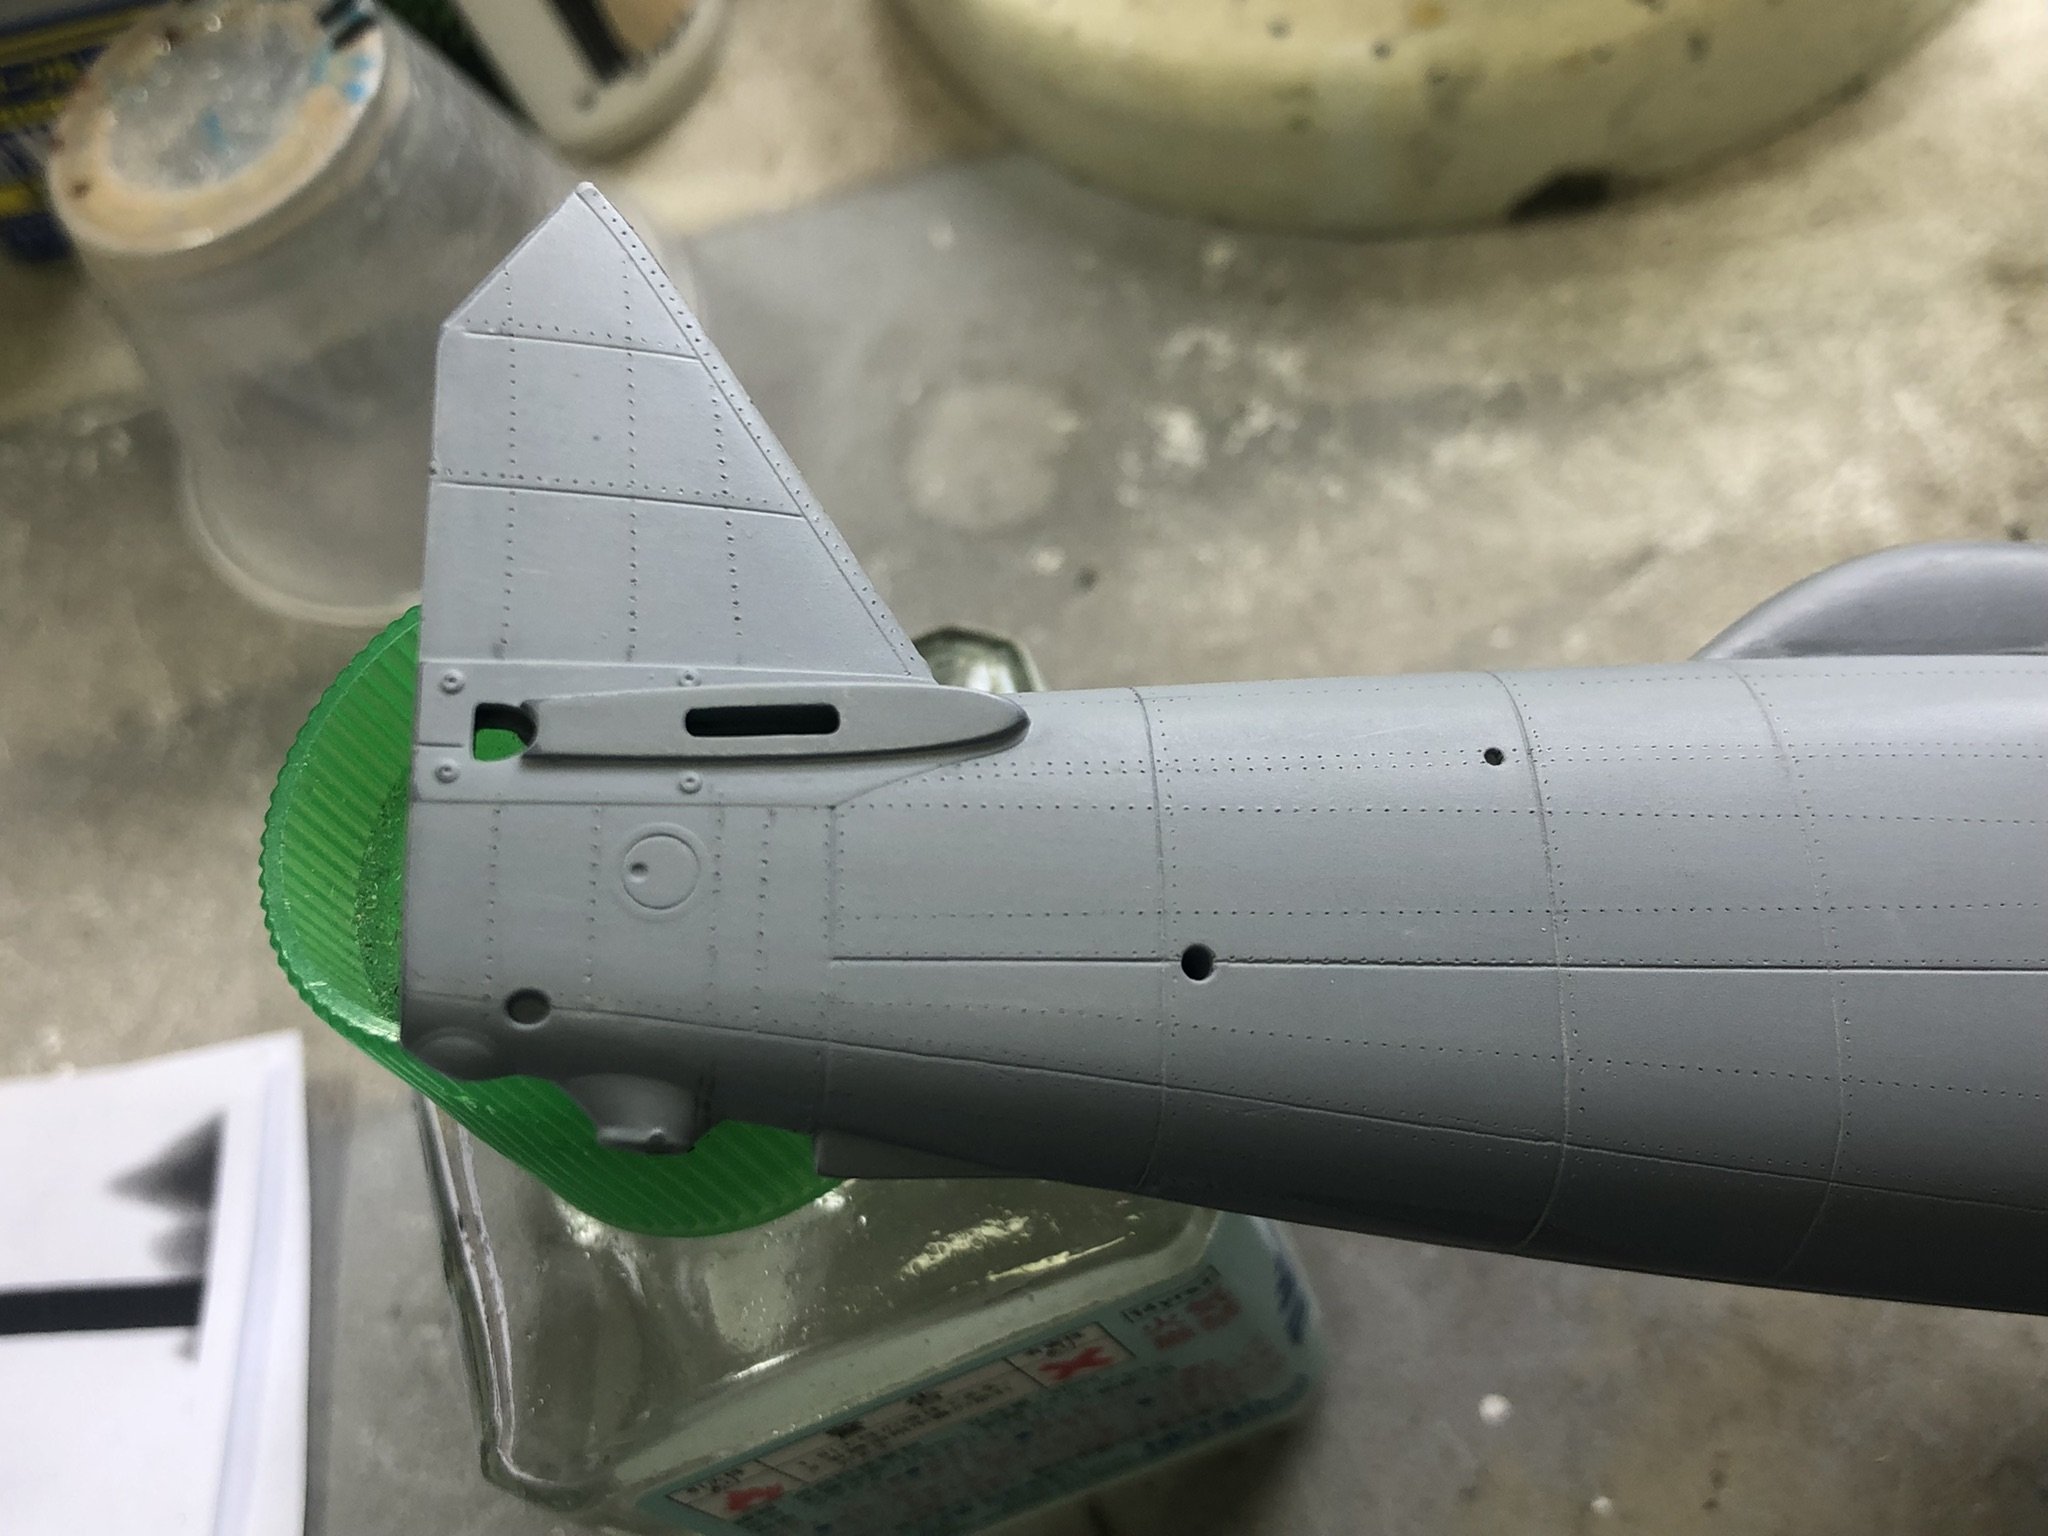
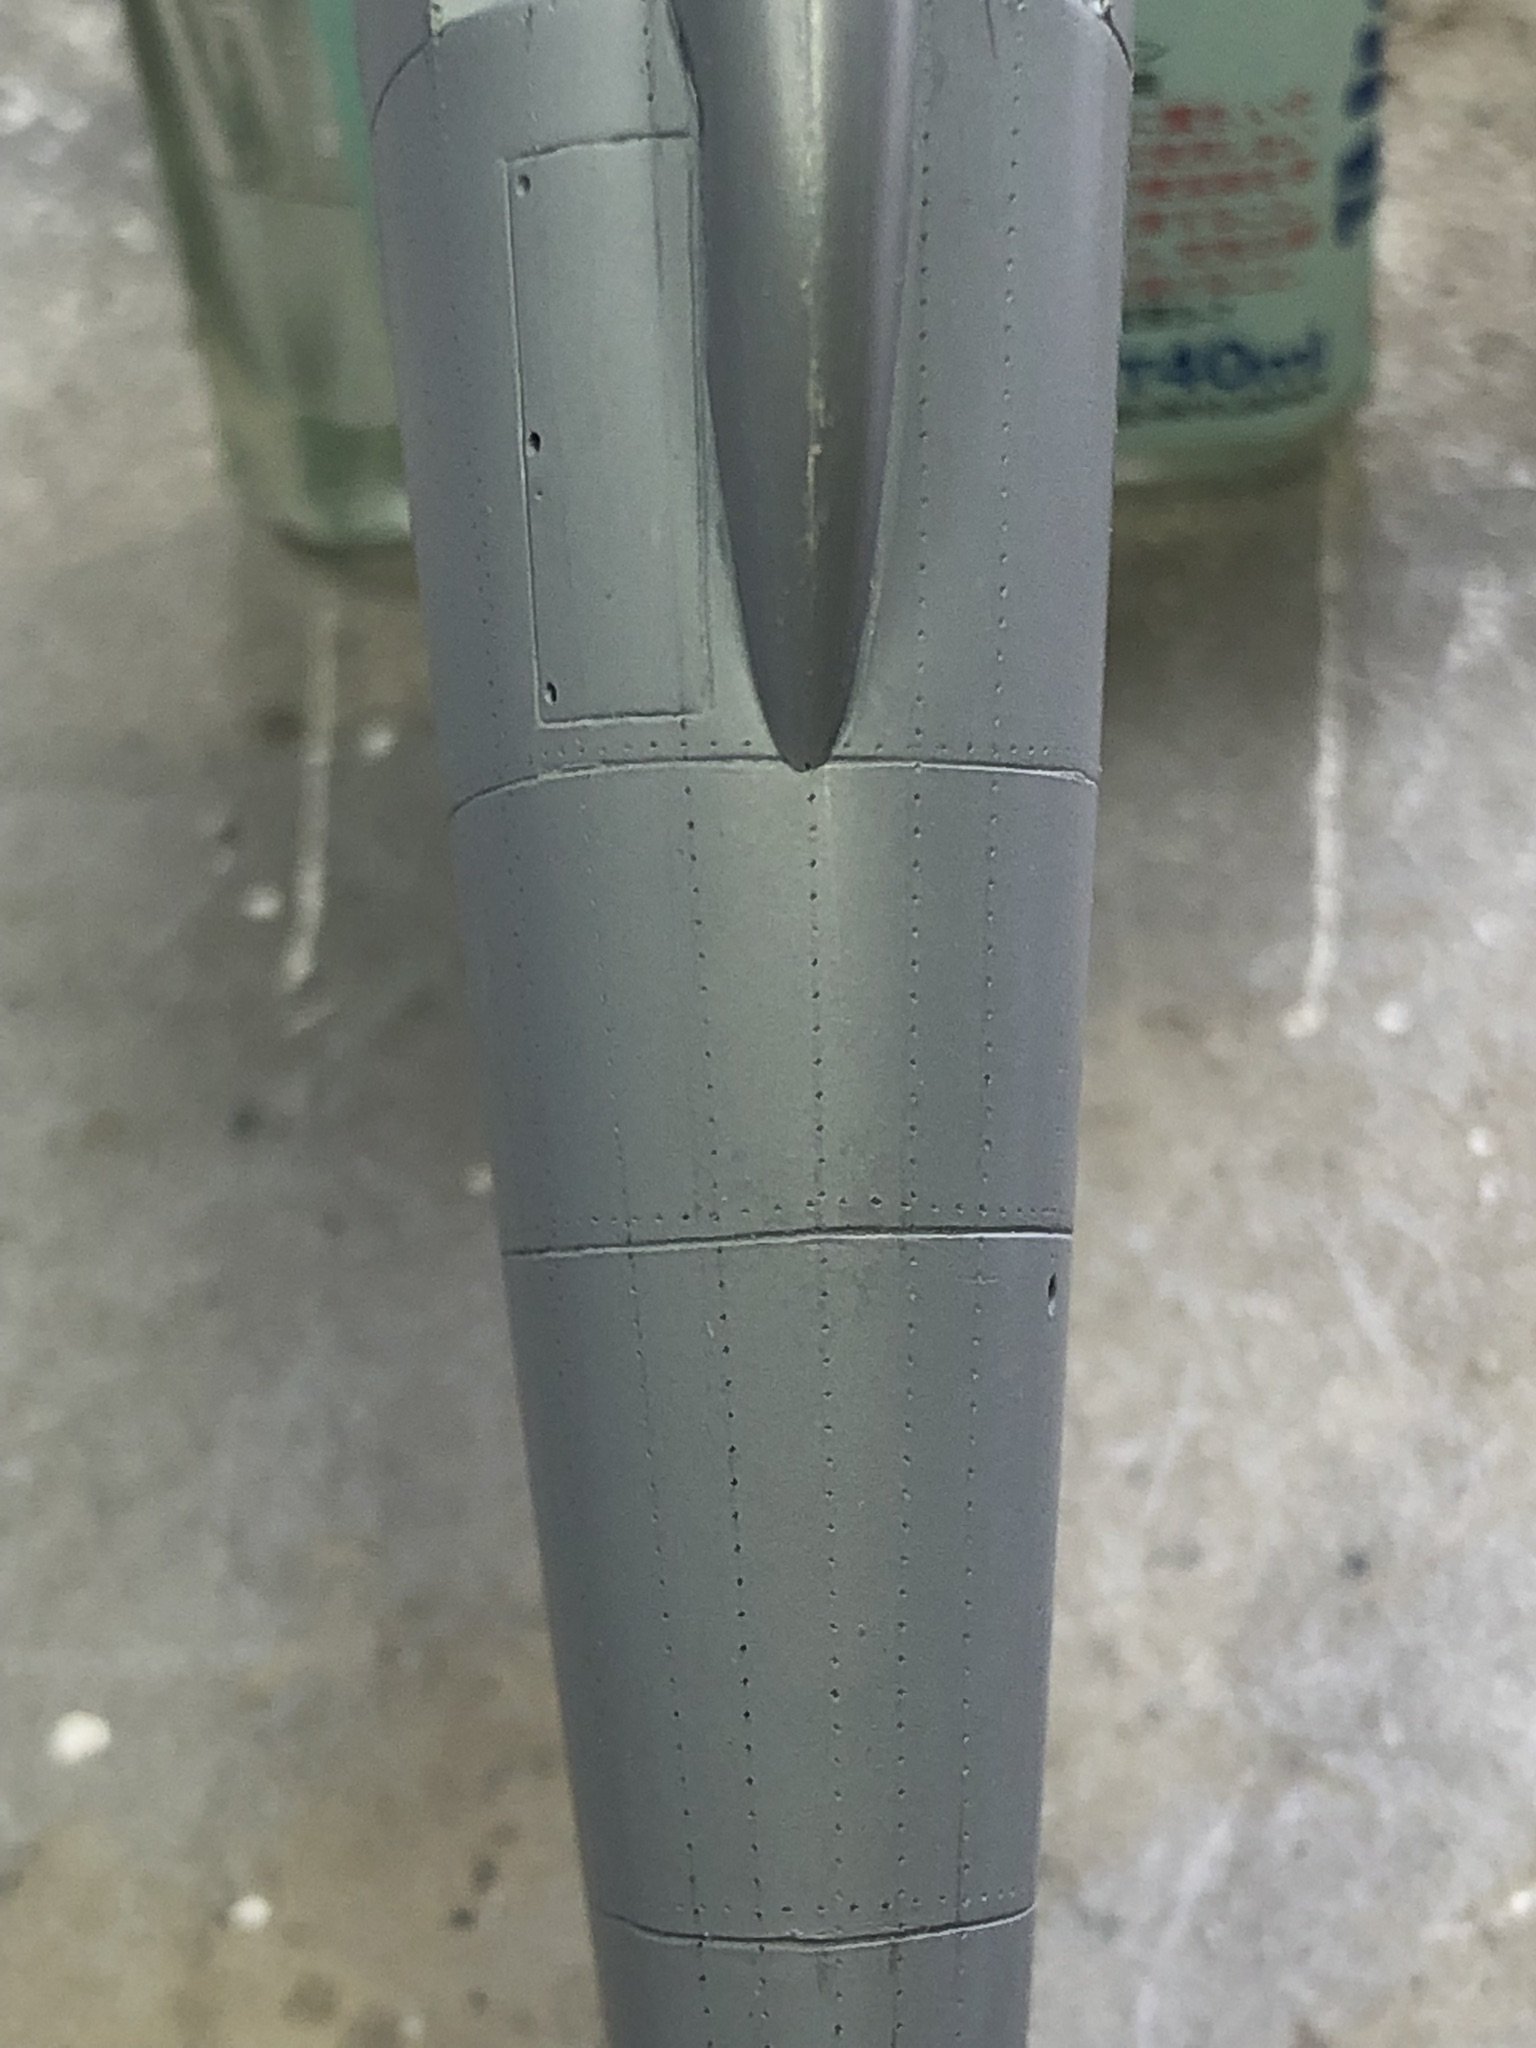
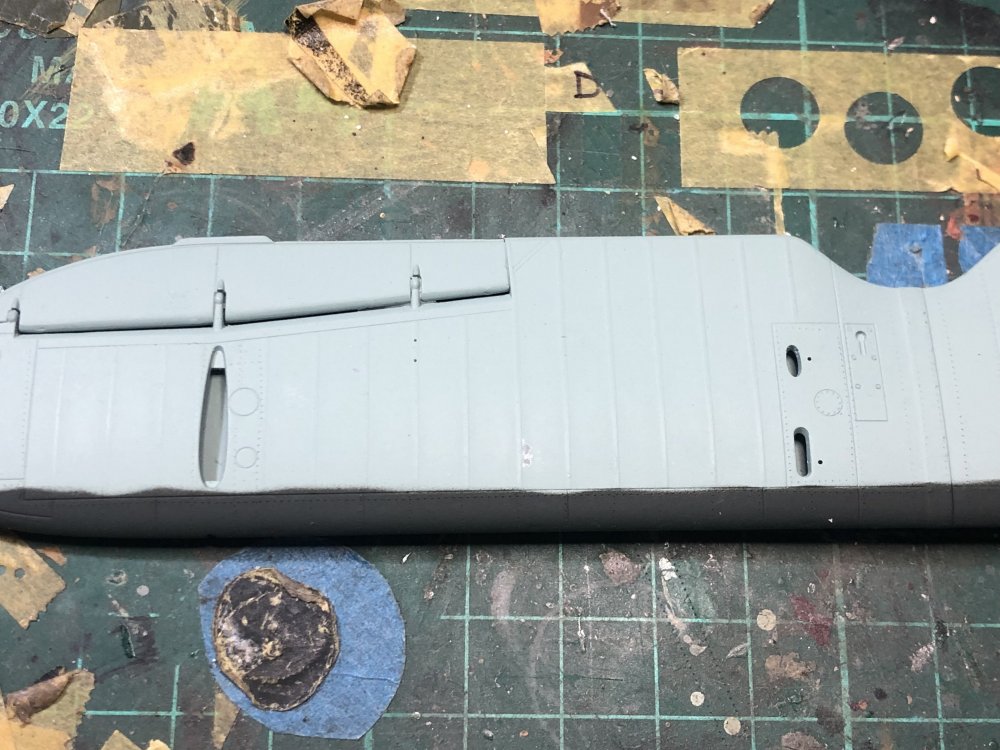
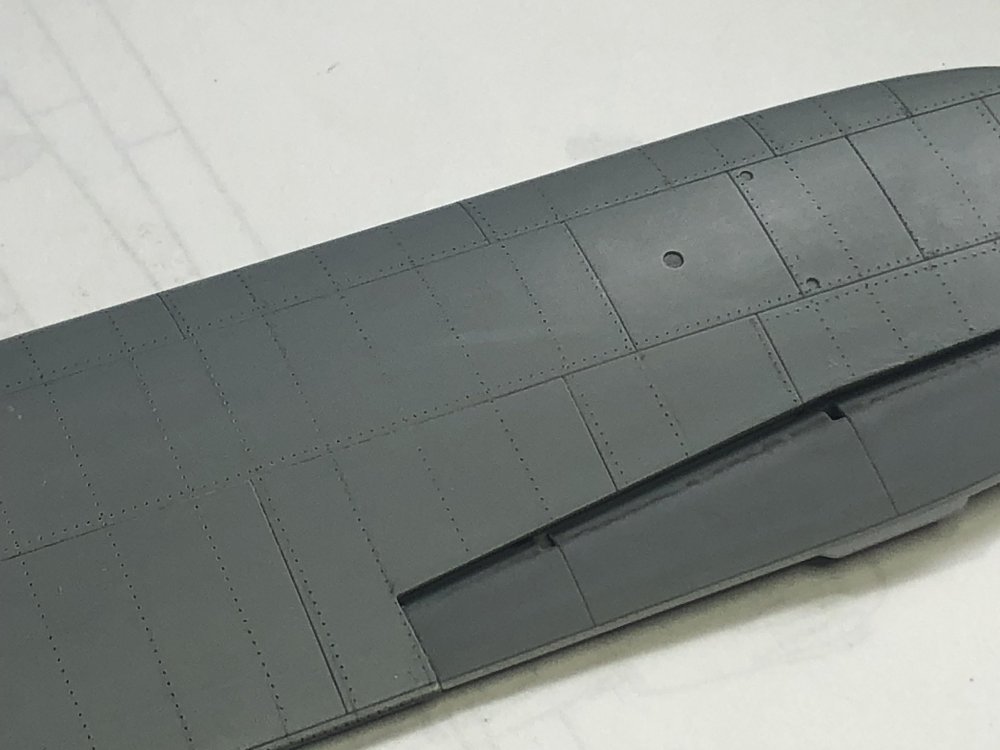
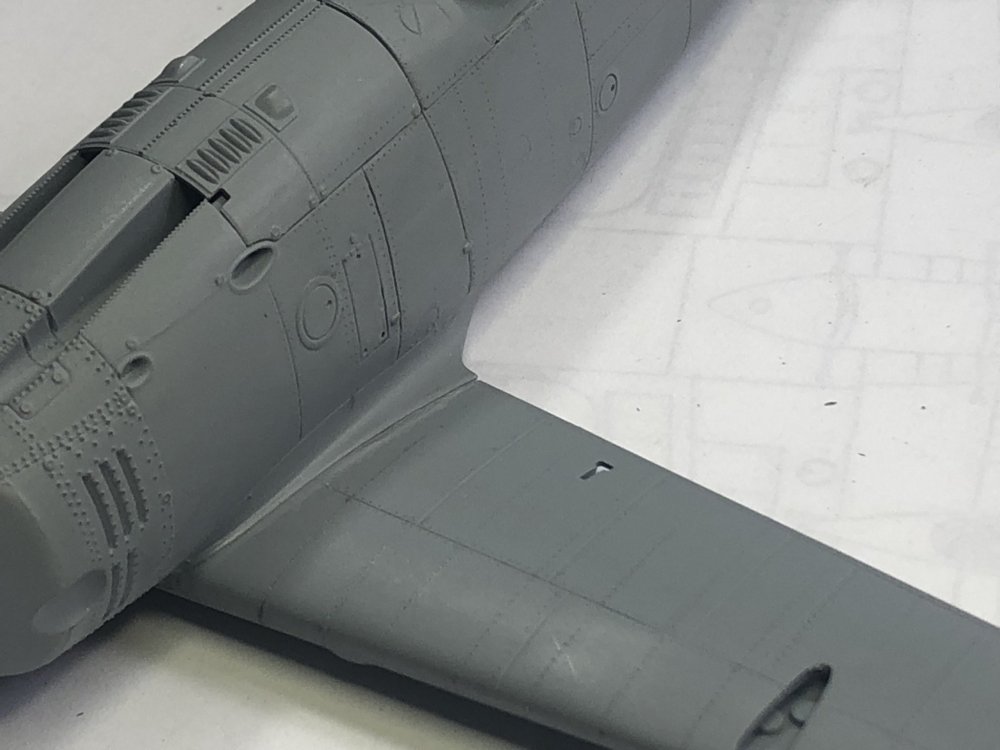
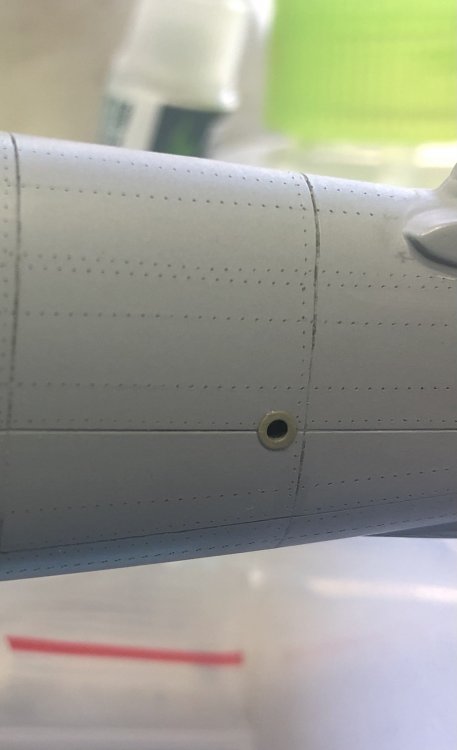
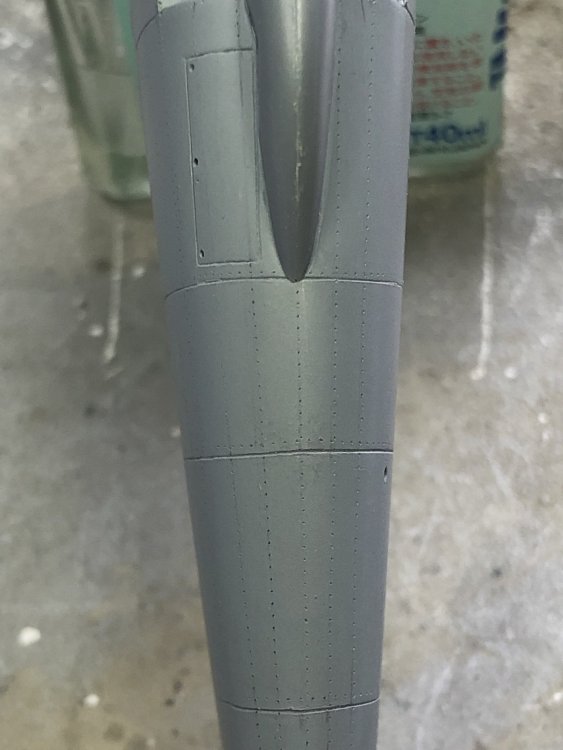
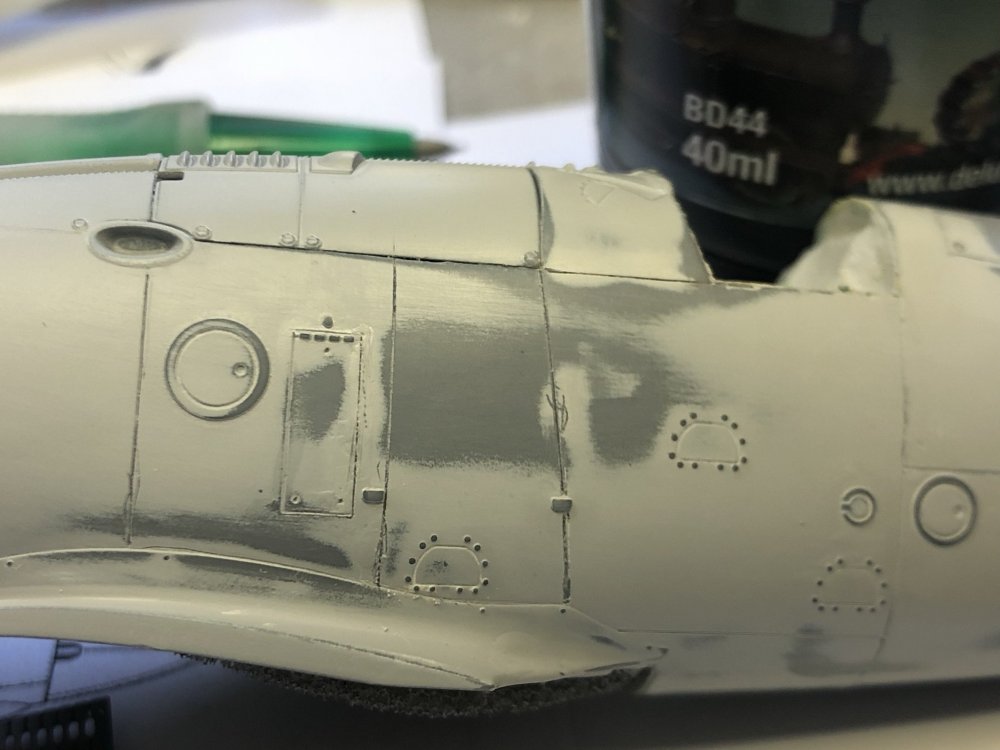
Thank you one and all for your comments. I have worked on riveting the fuselage, something that caused me some trepidation and thus had this set aside a while. The tools are set out below and I have the RB Productions rivet-r and rivet-r mini with 0.75mm wheels. The smaller one obviously gets into smaller places. Tamiya and carving tape (think dymo but clear), compass, pencils, ruler, eraser and of course scale plans. The rows of rivets adjacent to panel lines were done first by free hand. The interior lines were measured, marked and a pencil line drawn along tape. It was then a case of just following the lines. It is not without errors but the fuselage is now done. This allowed me to attach the external headrest. Next up will be the upper and lower wings and stabilisers. The lower wings will then be attached and some minor filling work done before she hits the paint stage.


-
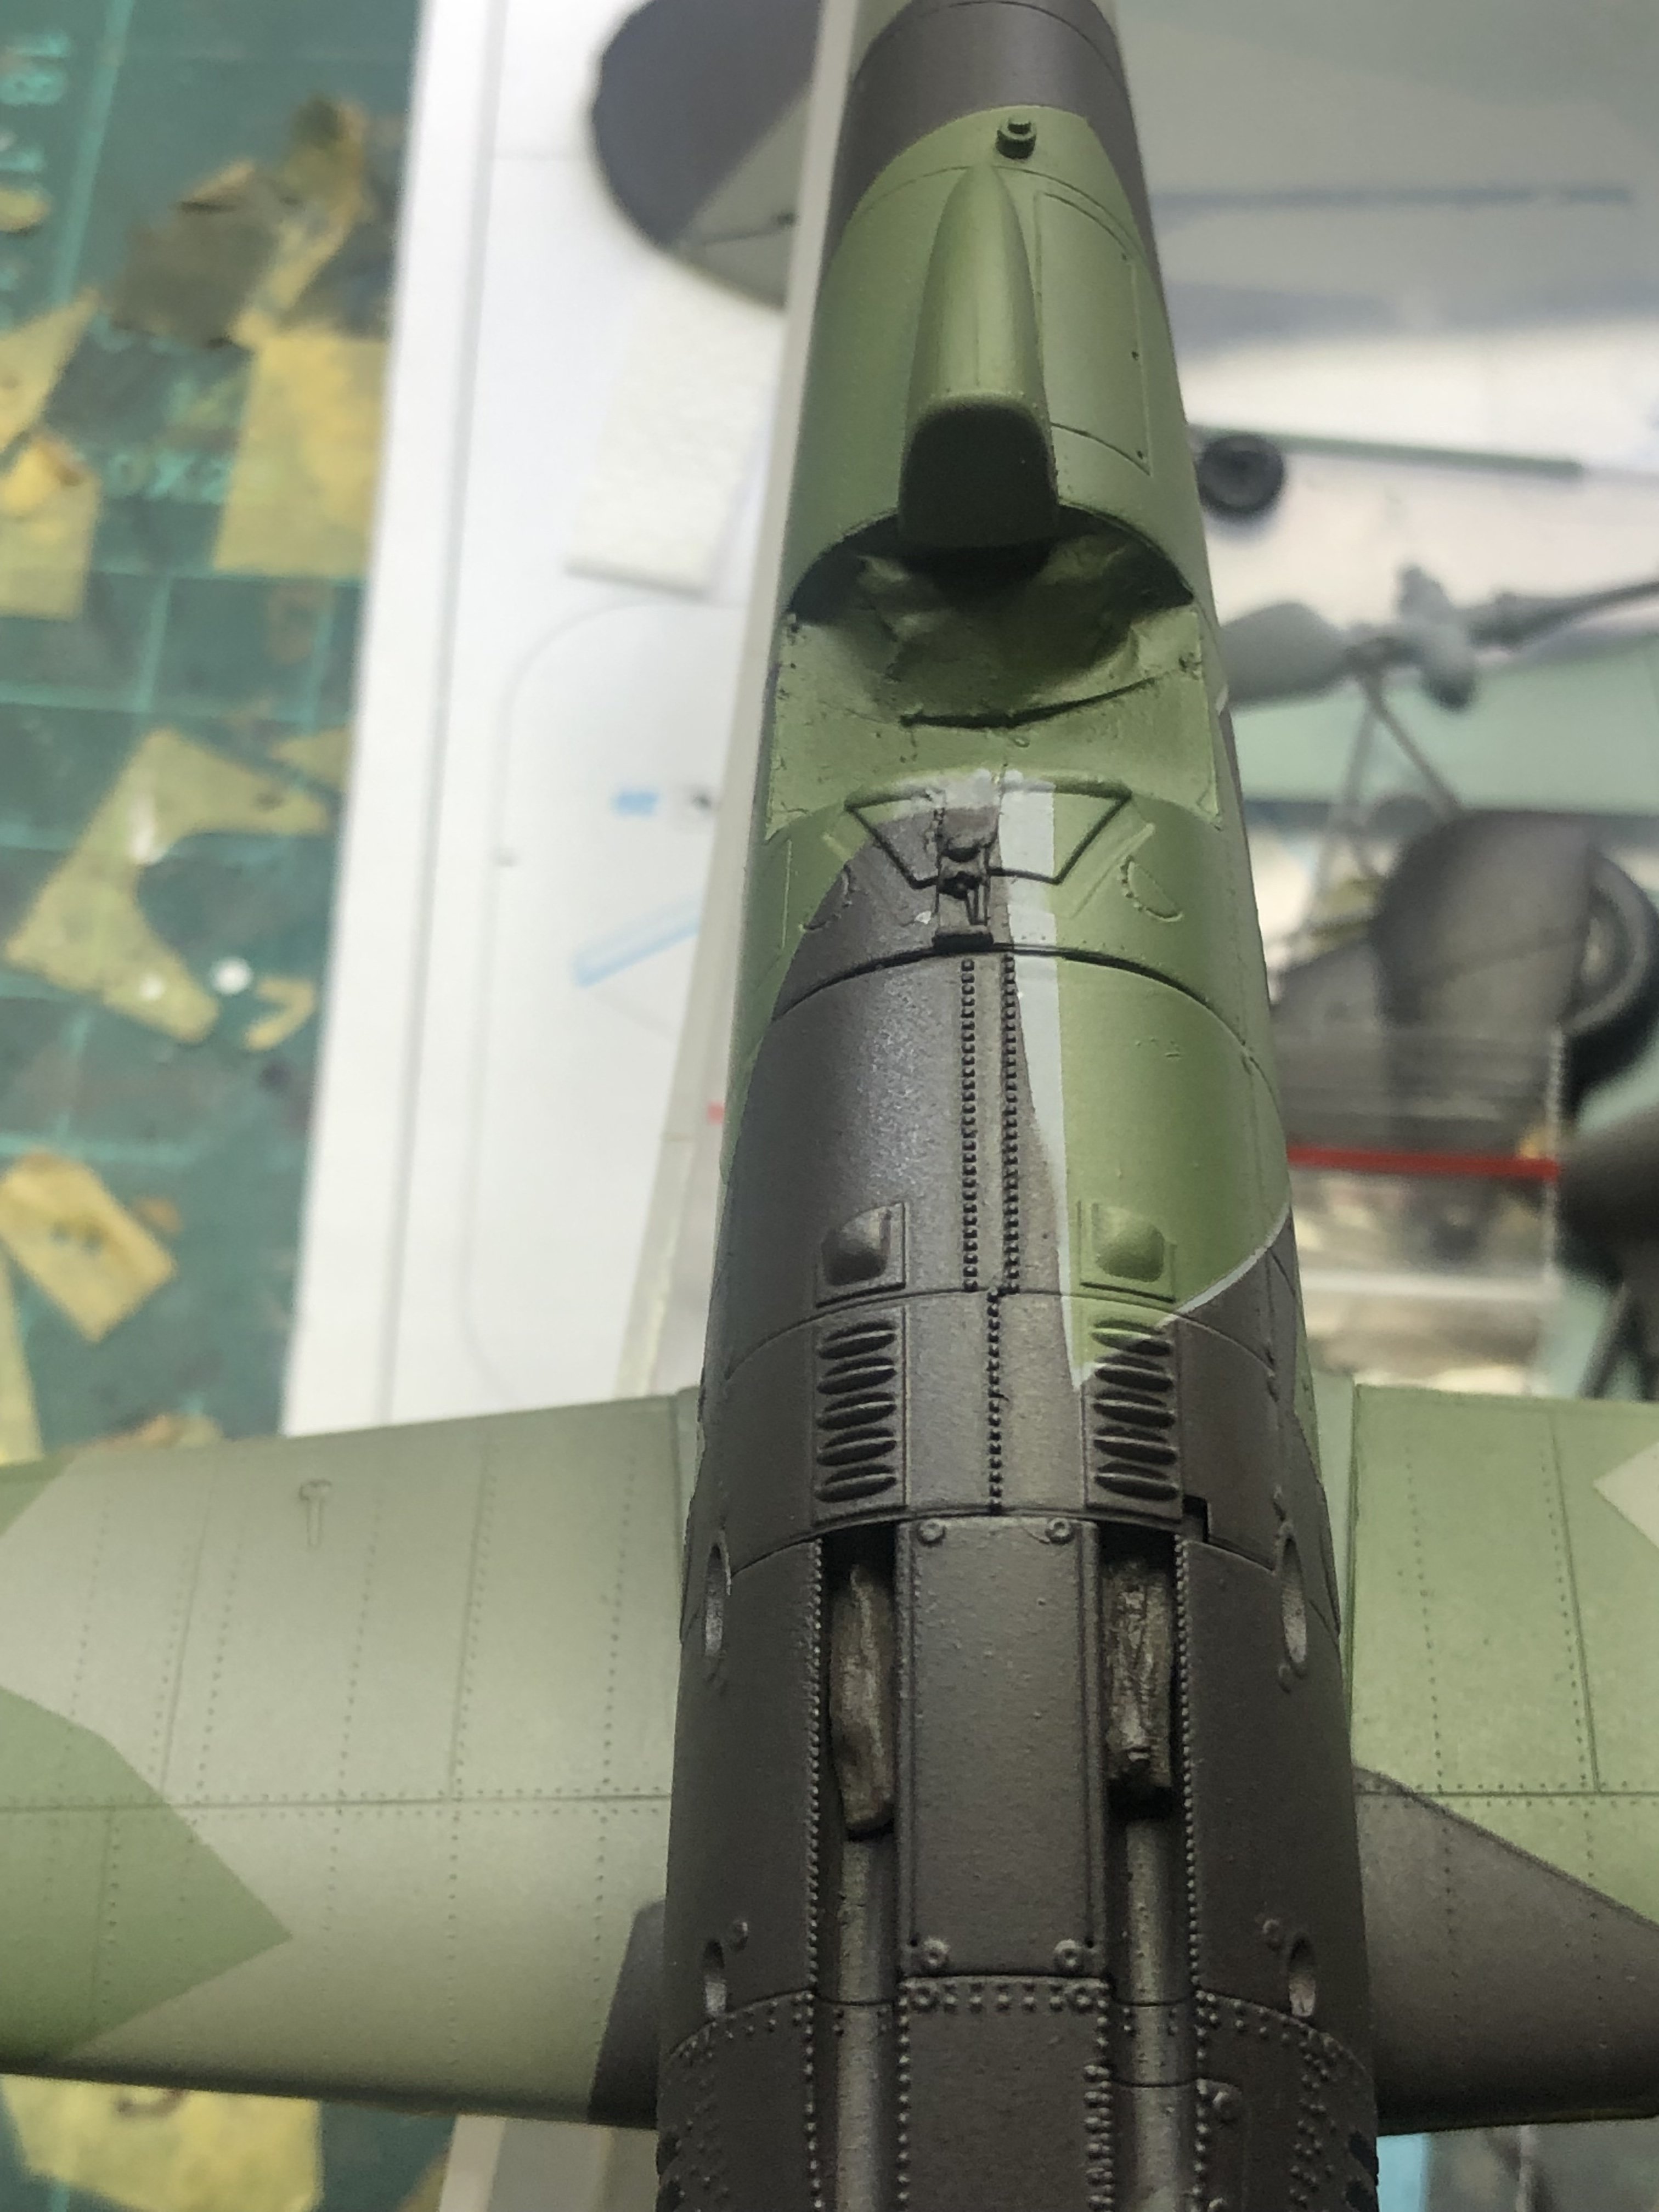
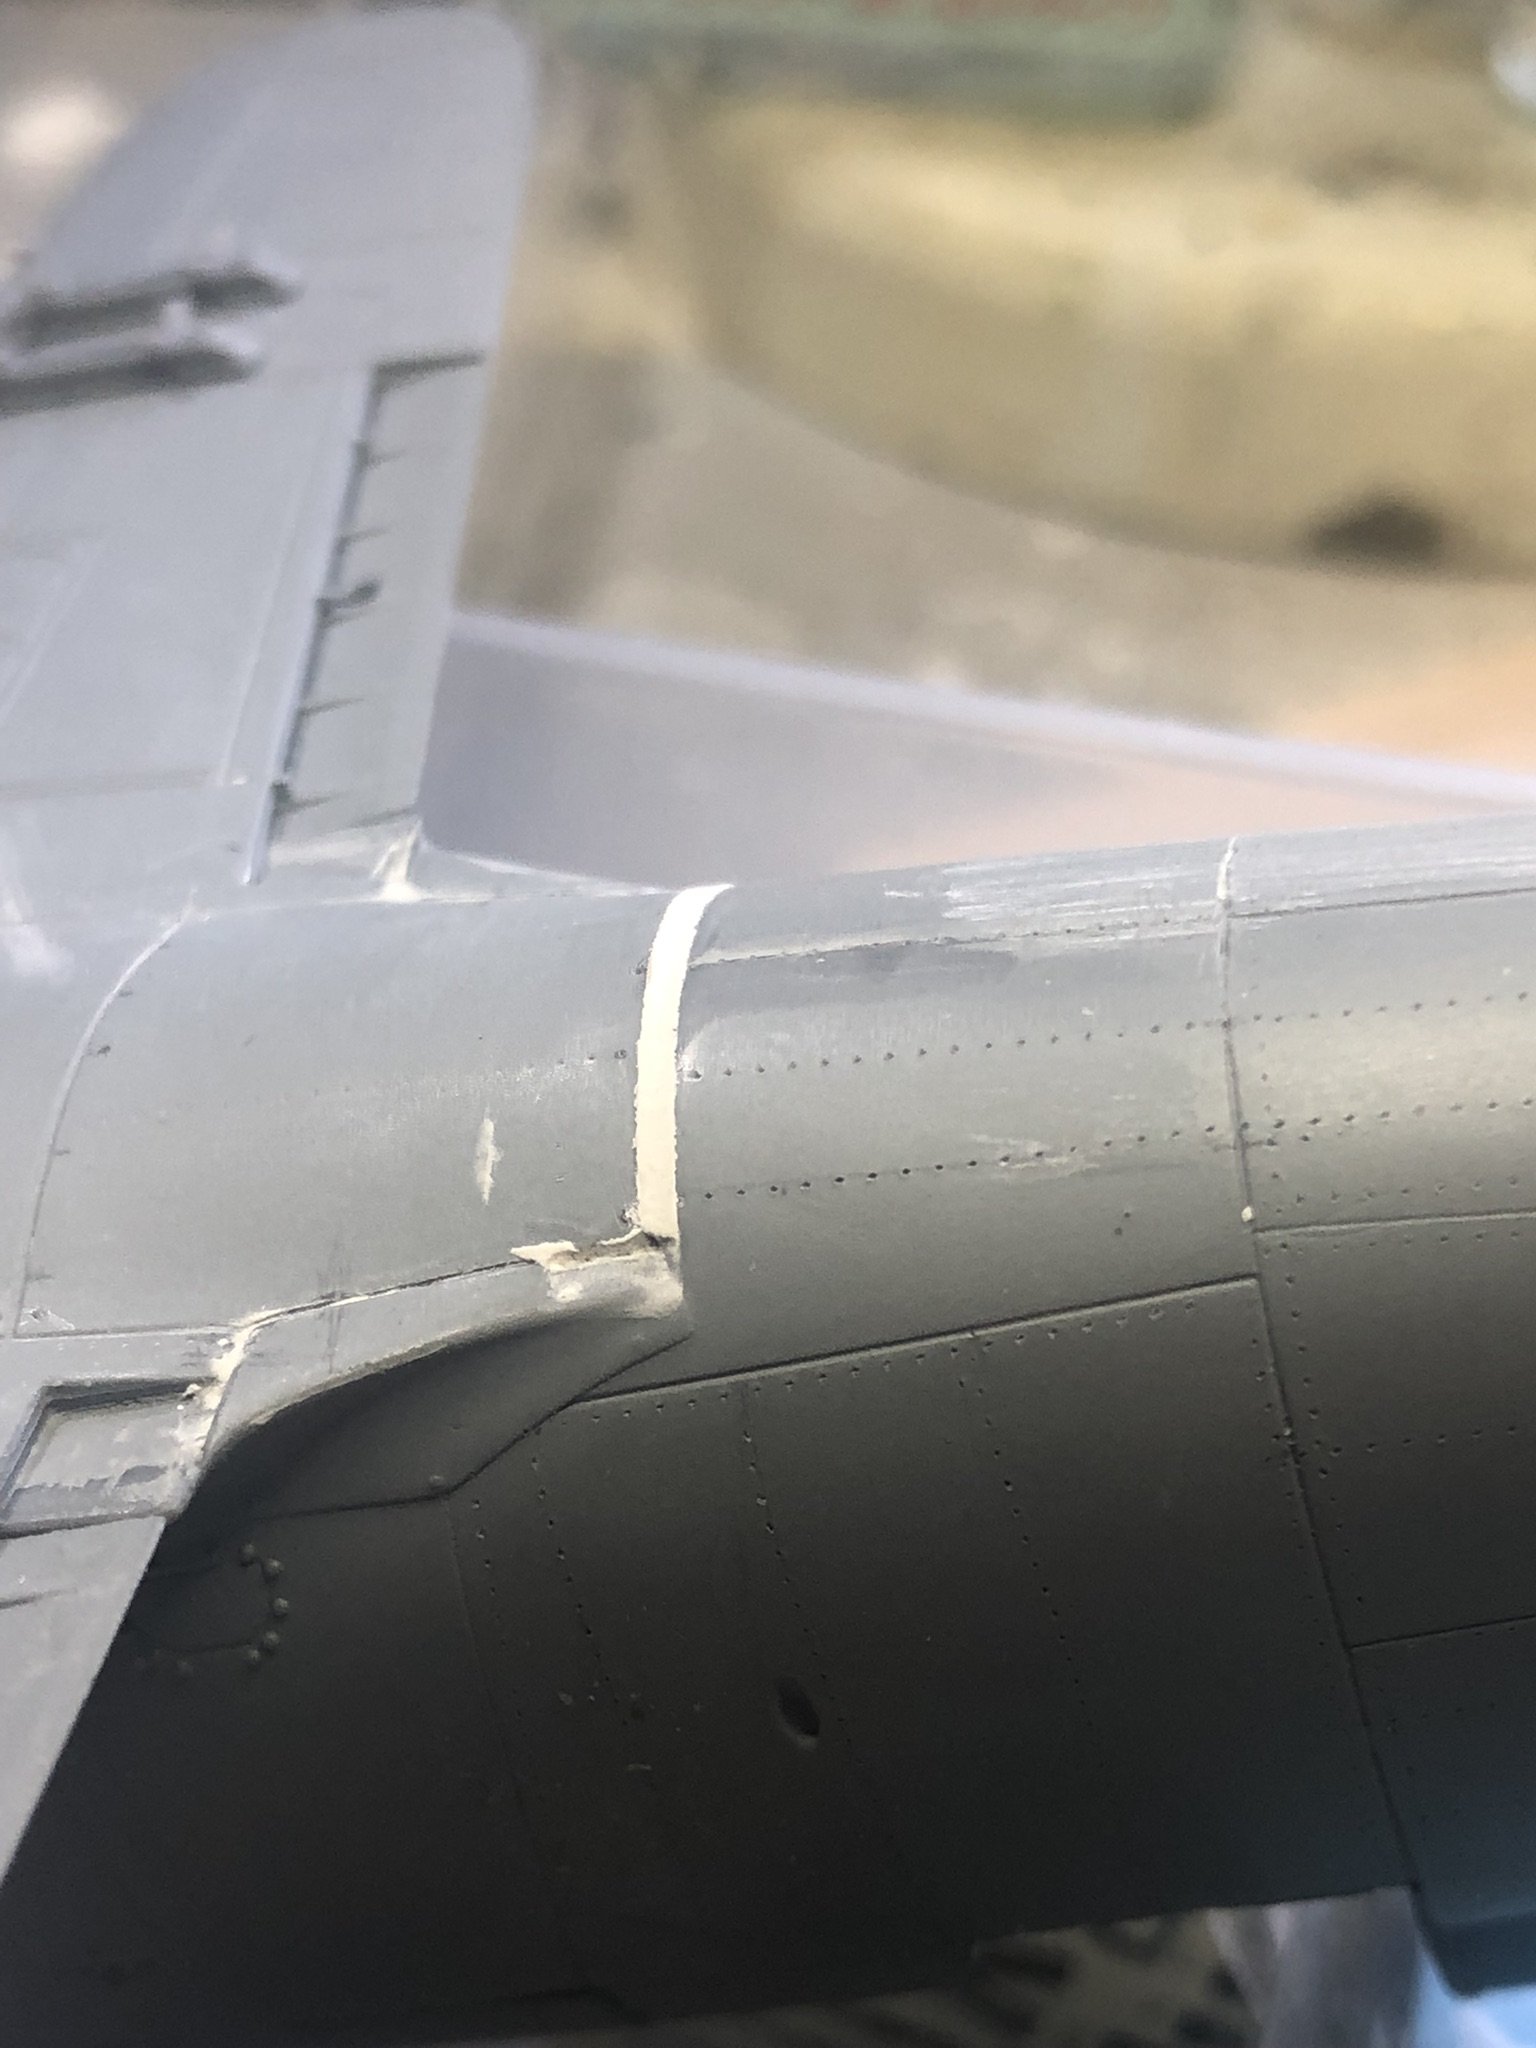
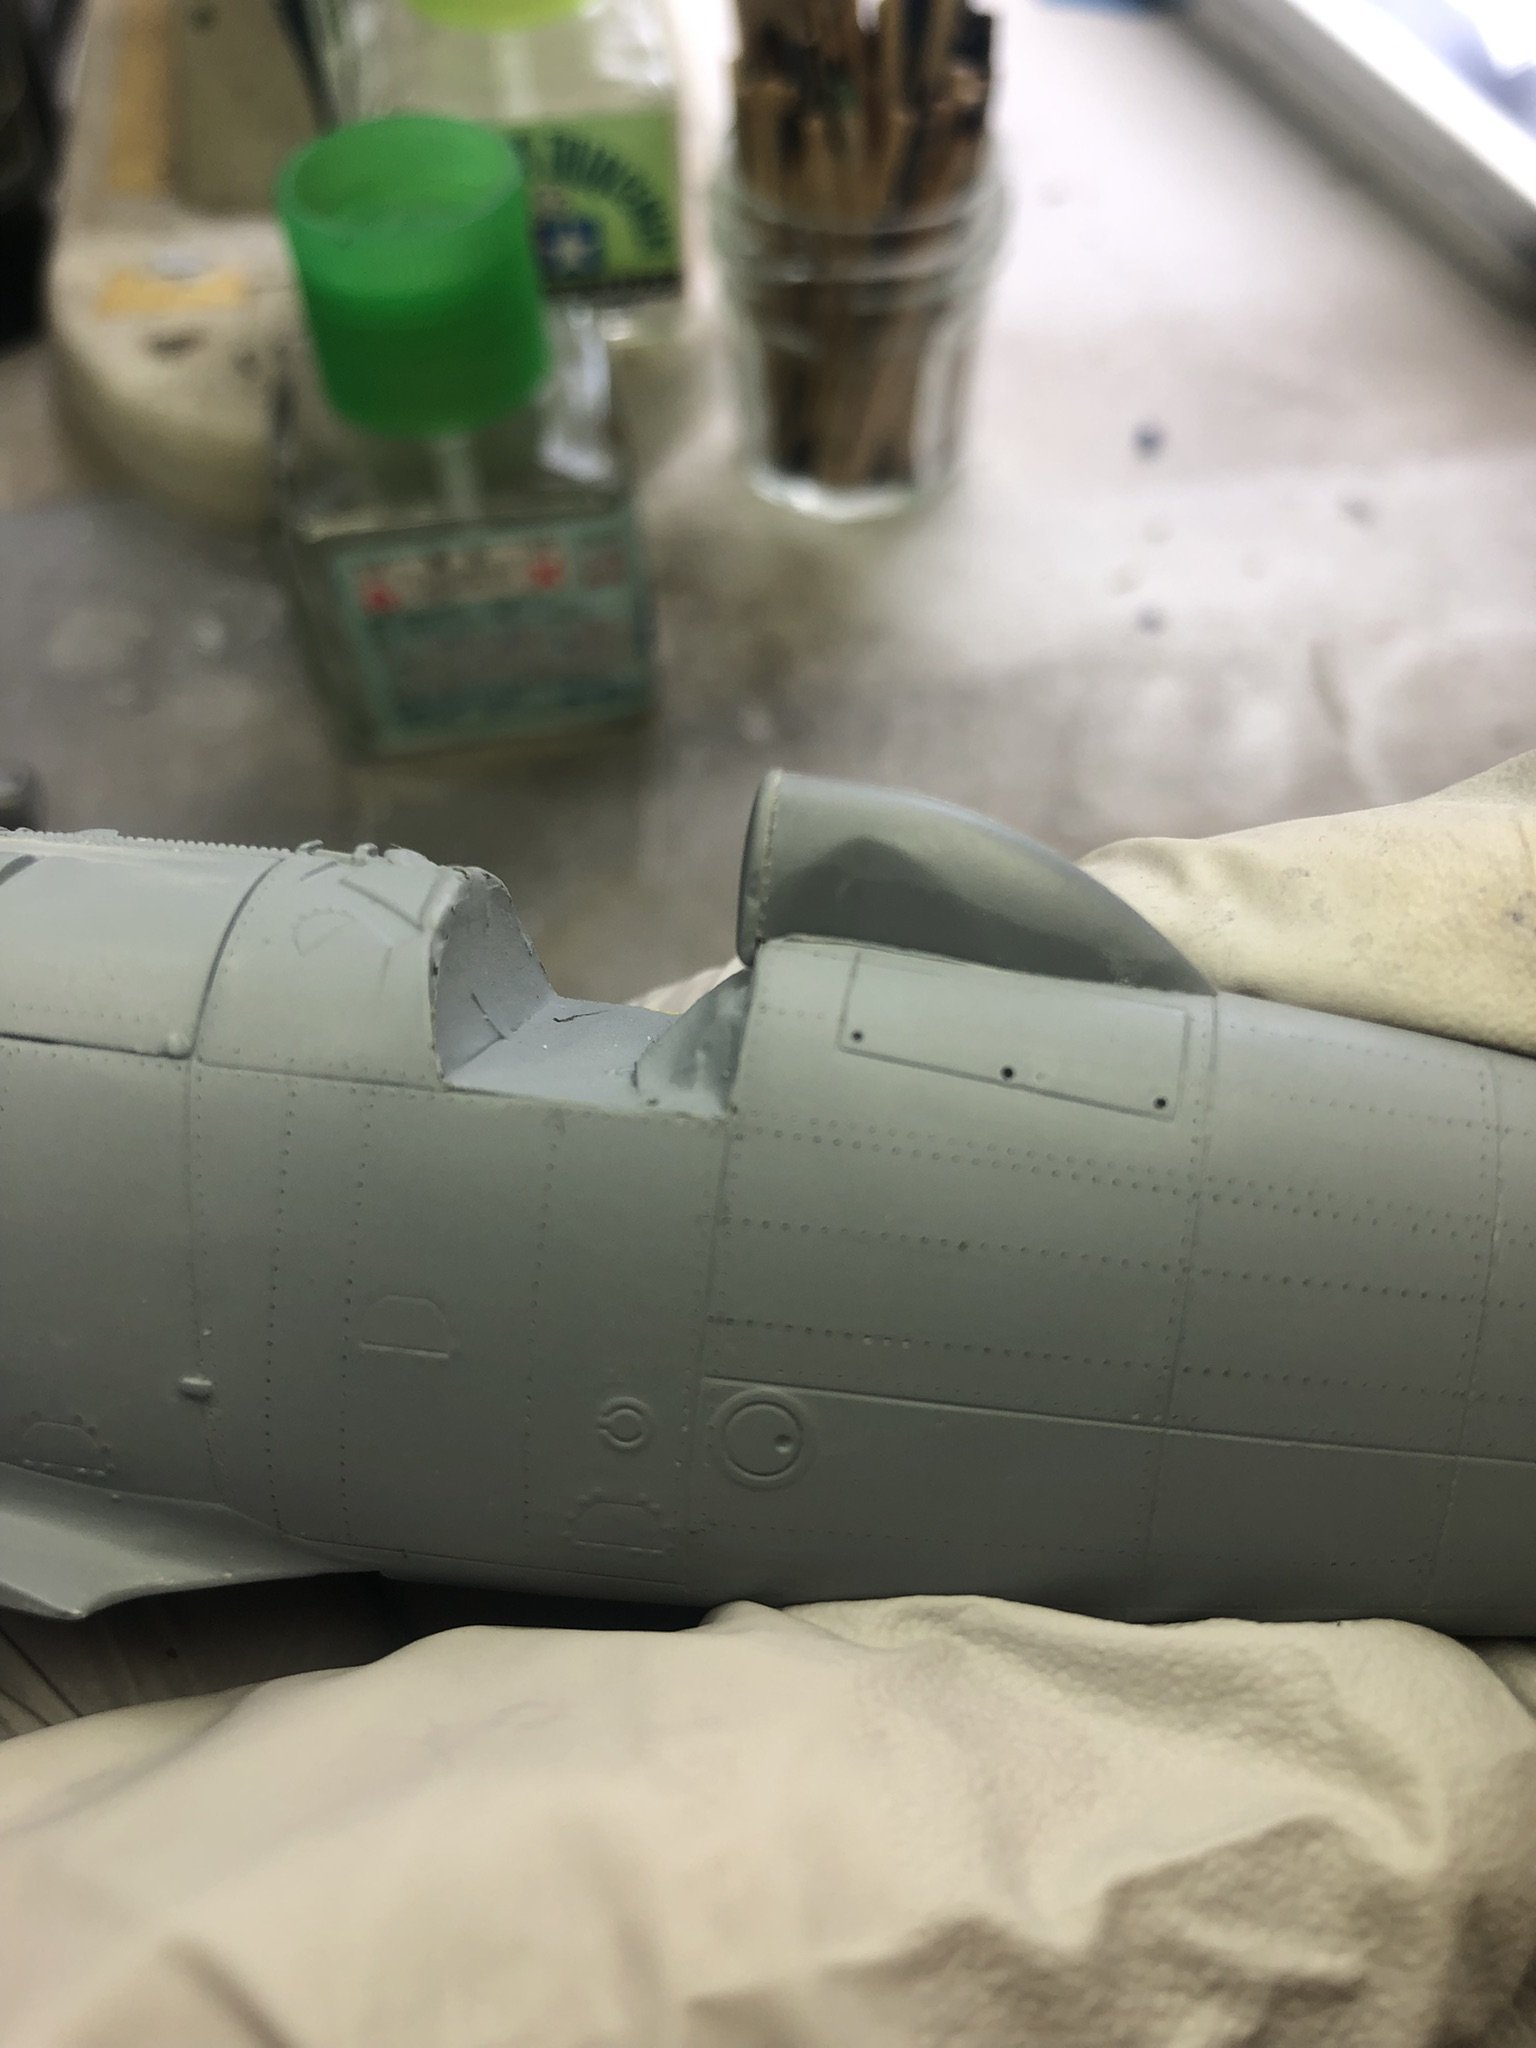
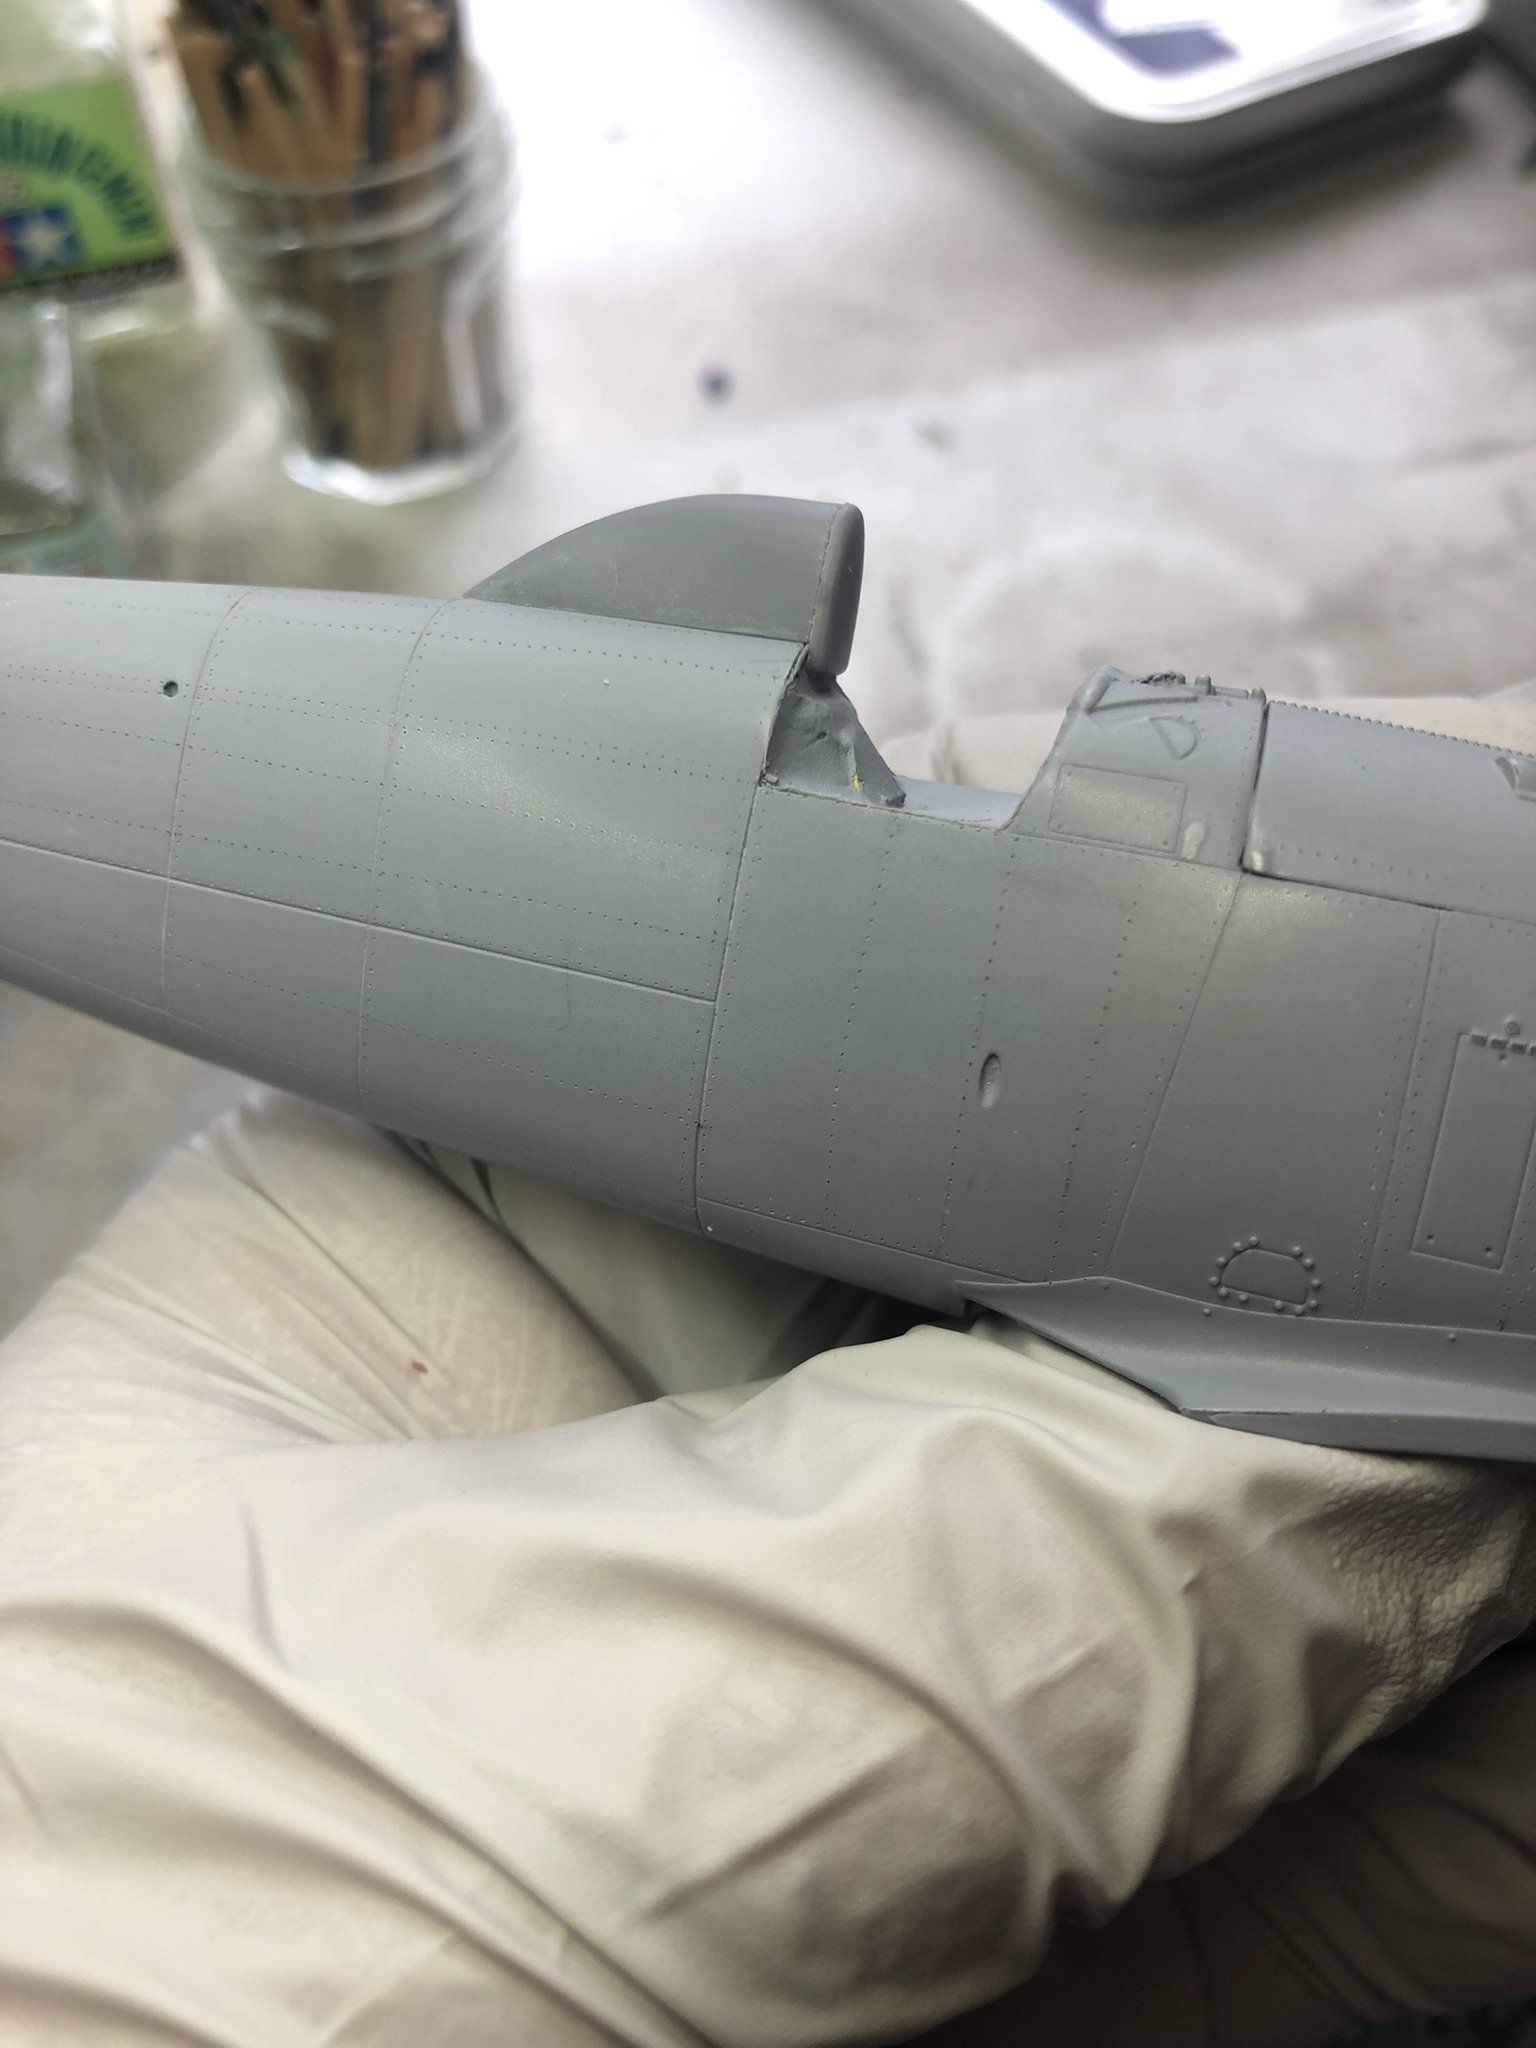
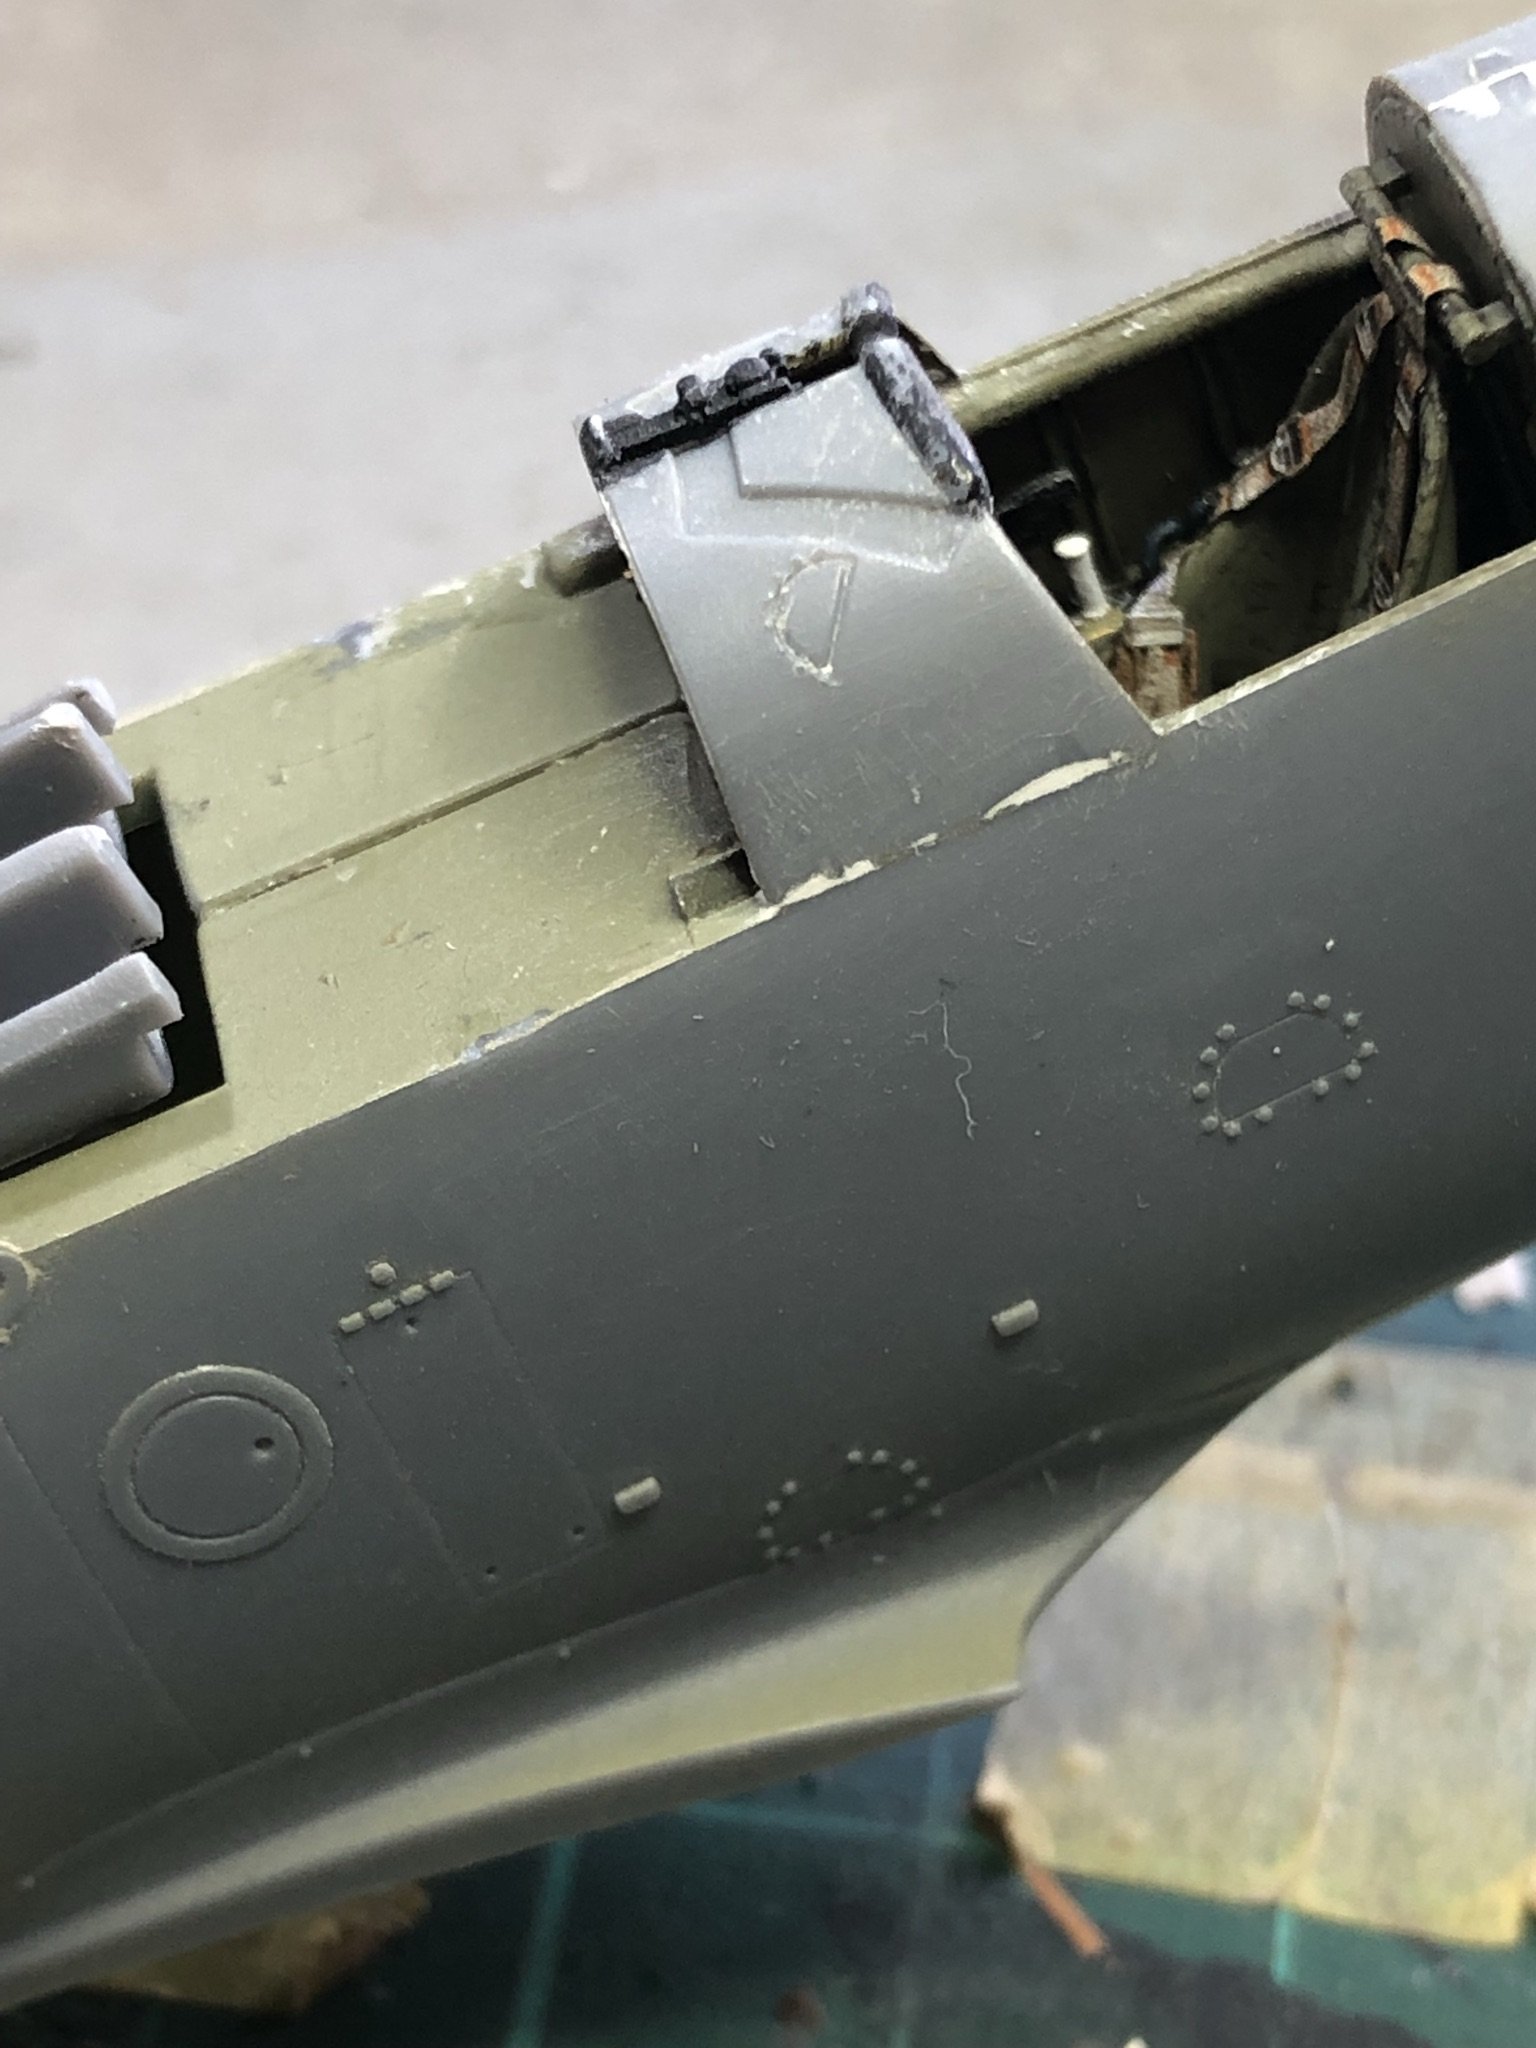
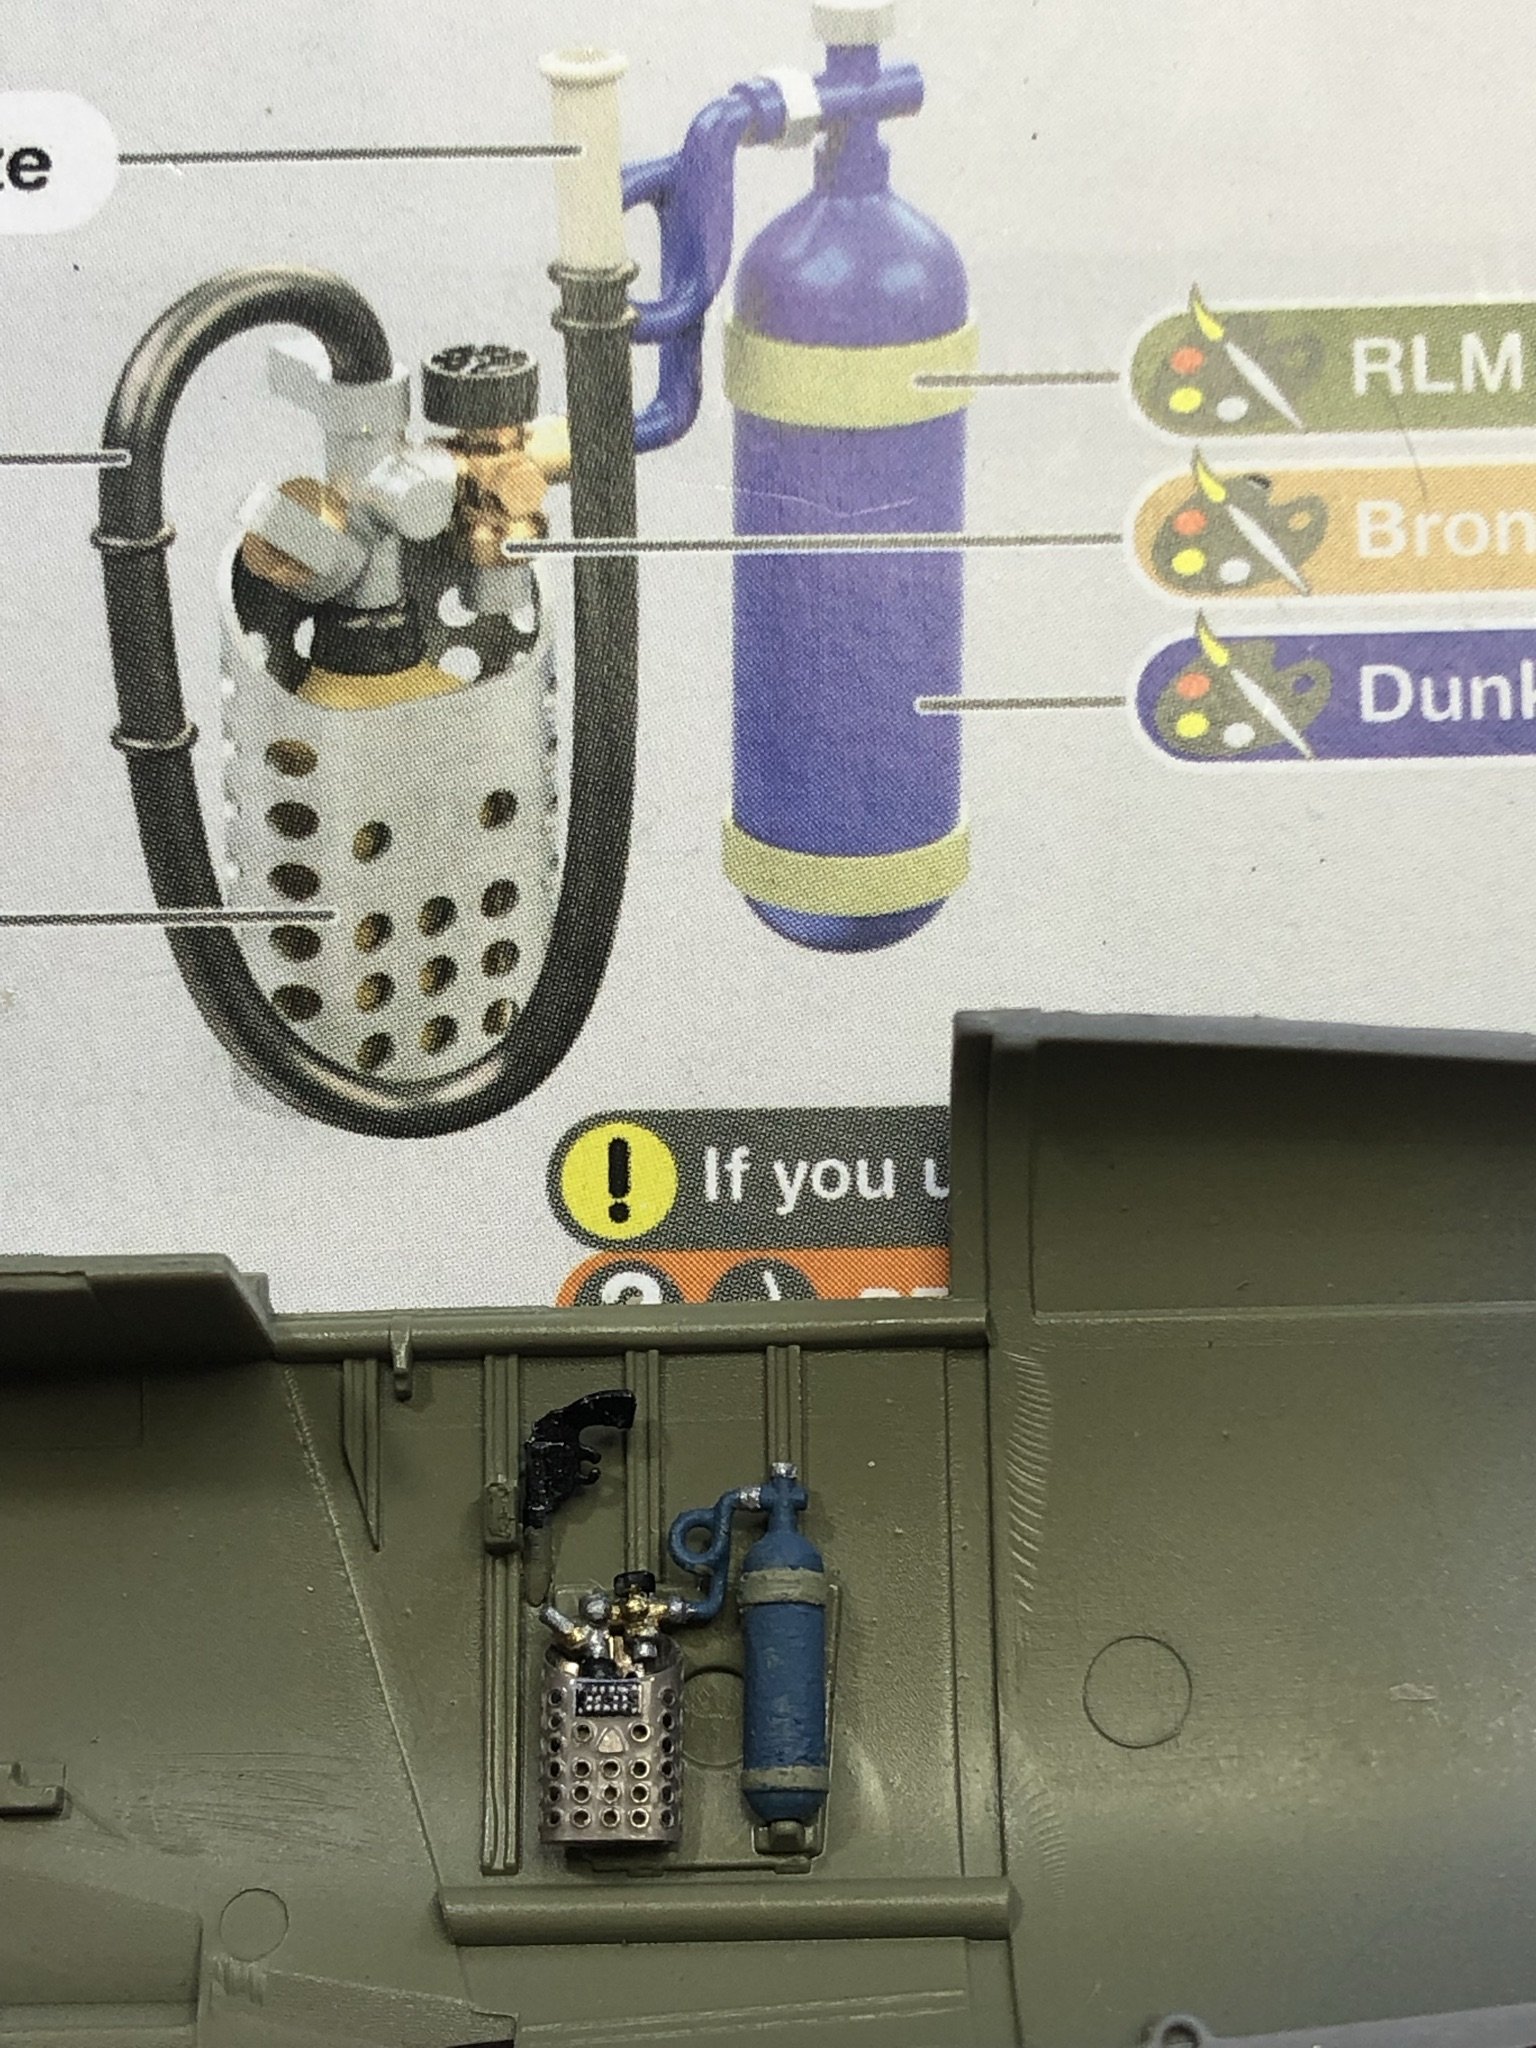
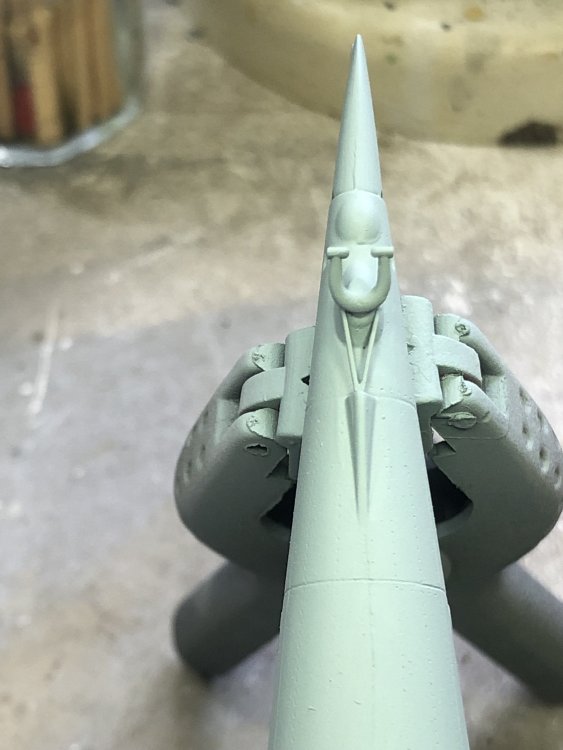
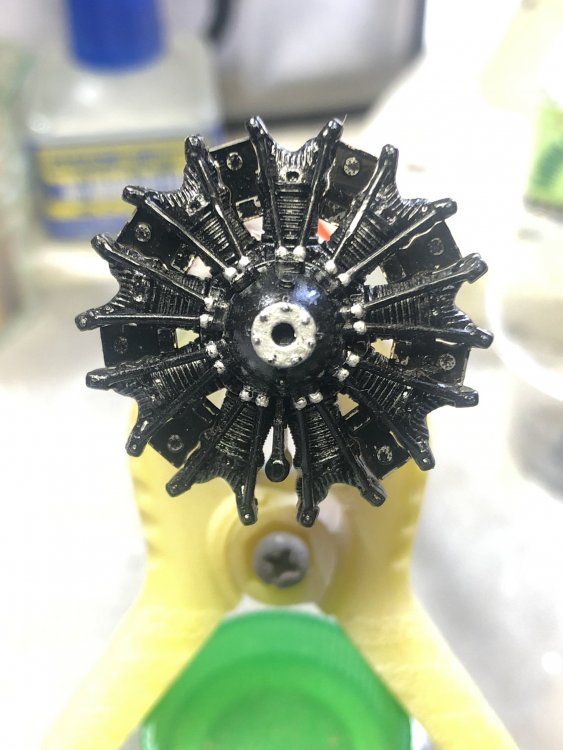
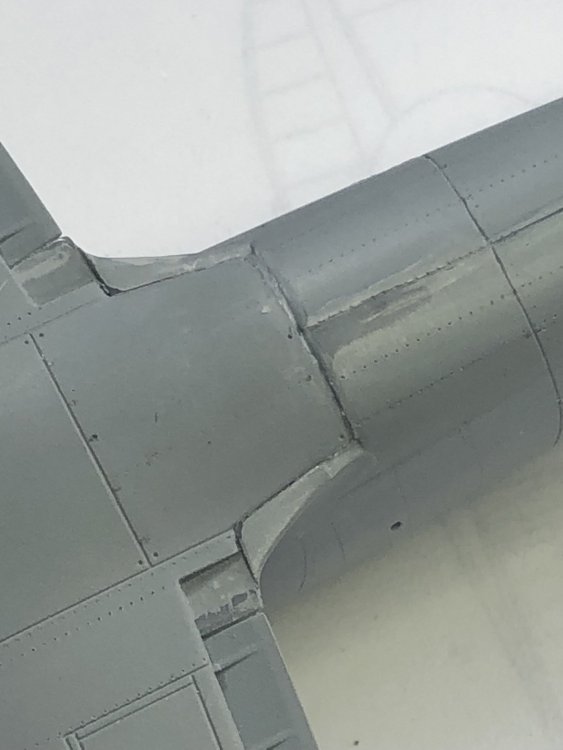
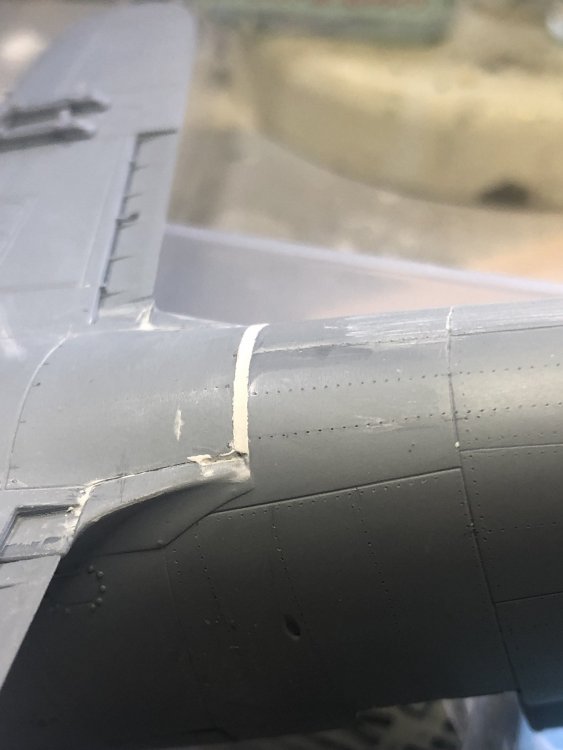
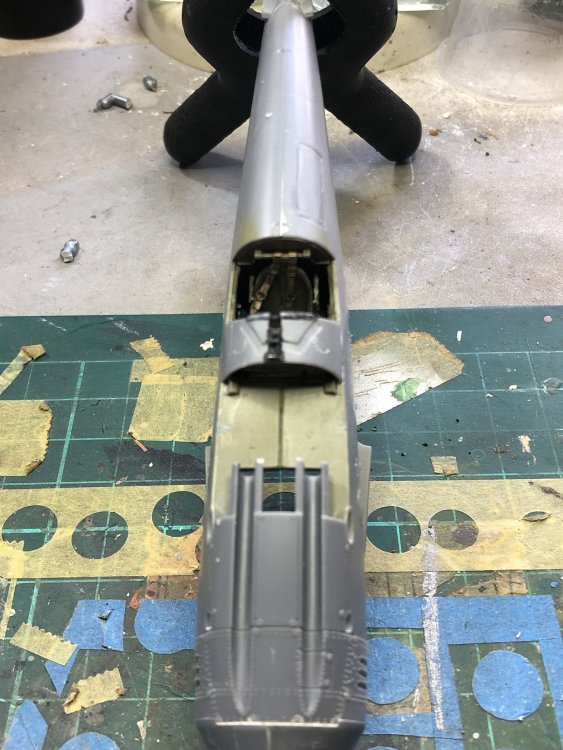
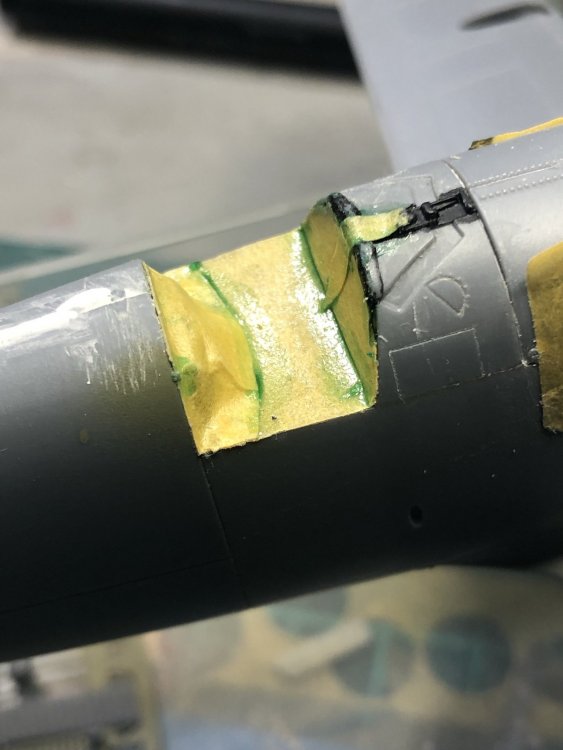
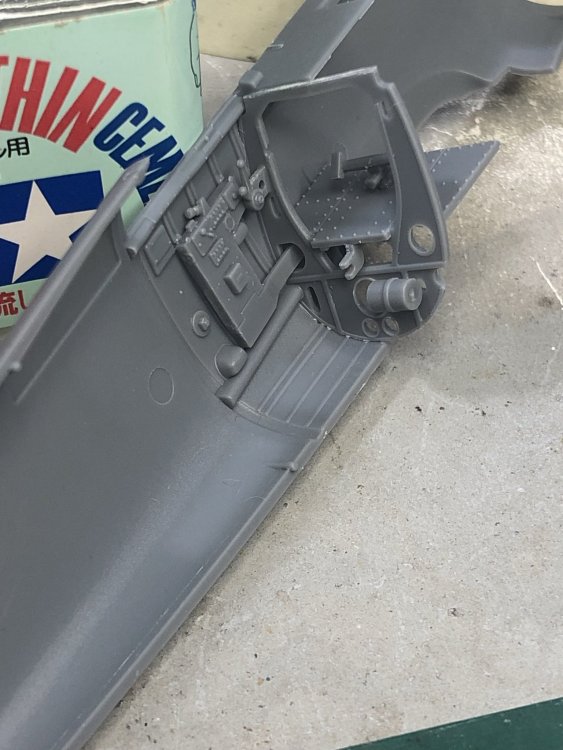
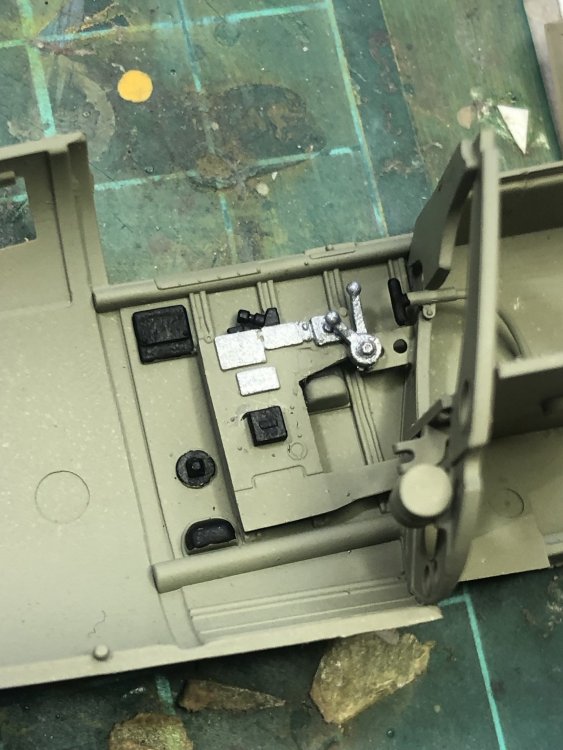
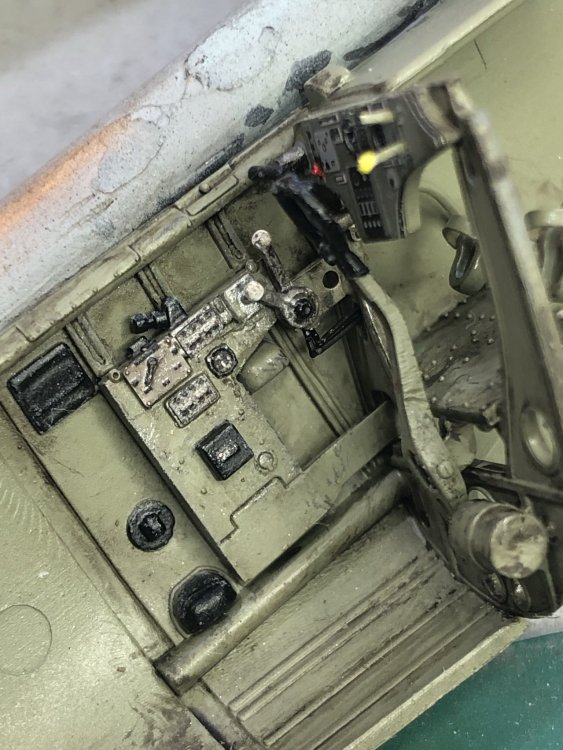
Welcome back, Many thanks for the positive feedback and encouragement. So moving forward, the IP shroud was affixed and the gun covers are just dry fit. Again the joins are great, except where the human factor is introduced and a misalignment occurs as in the shroud. The engine was painted and lightly washed and weathered. There are still some PE ignition wires and parts to go on. The air intake looked sloppy, so I cut it off and remade it using some 0.5mm card, glued and shaped accordingly. The cockpit opening has been masked and sealed with liquid mask to keep out the dust. There are some panel lines that GP has not included on the fuselage according to plans, so these have been measured, marked and scribed on one side (the other side gets done tomorrow). The luggage door on the upper canopy is 2mm too long and would sit astride the panel line behind it so it was also filled, rescribed and now sits better. I have also reinstated the panel lines under the fixed IP shroud and added a couple on the forward fuselage. Thats up to date so thanks for looking. Kent


-
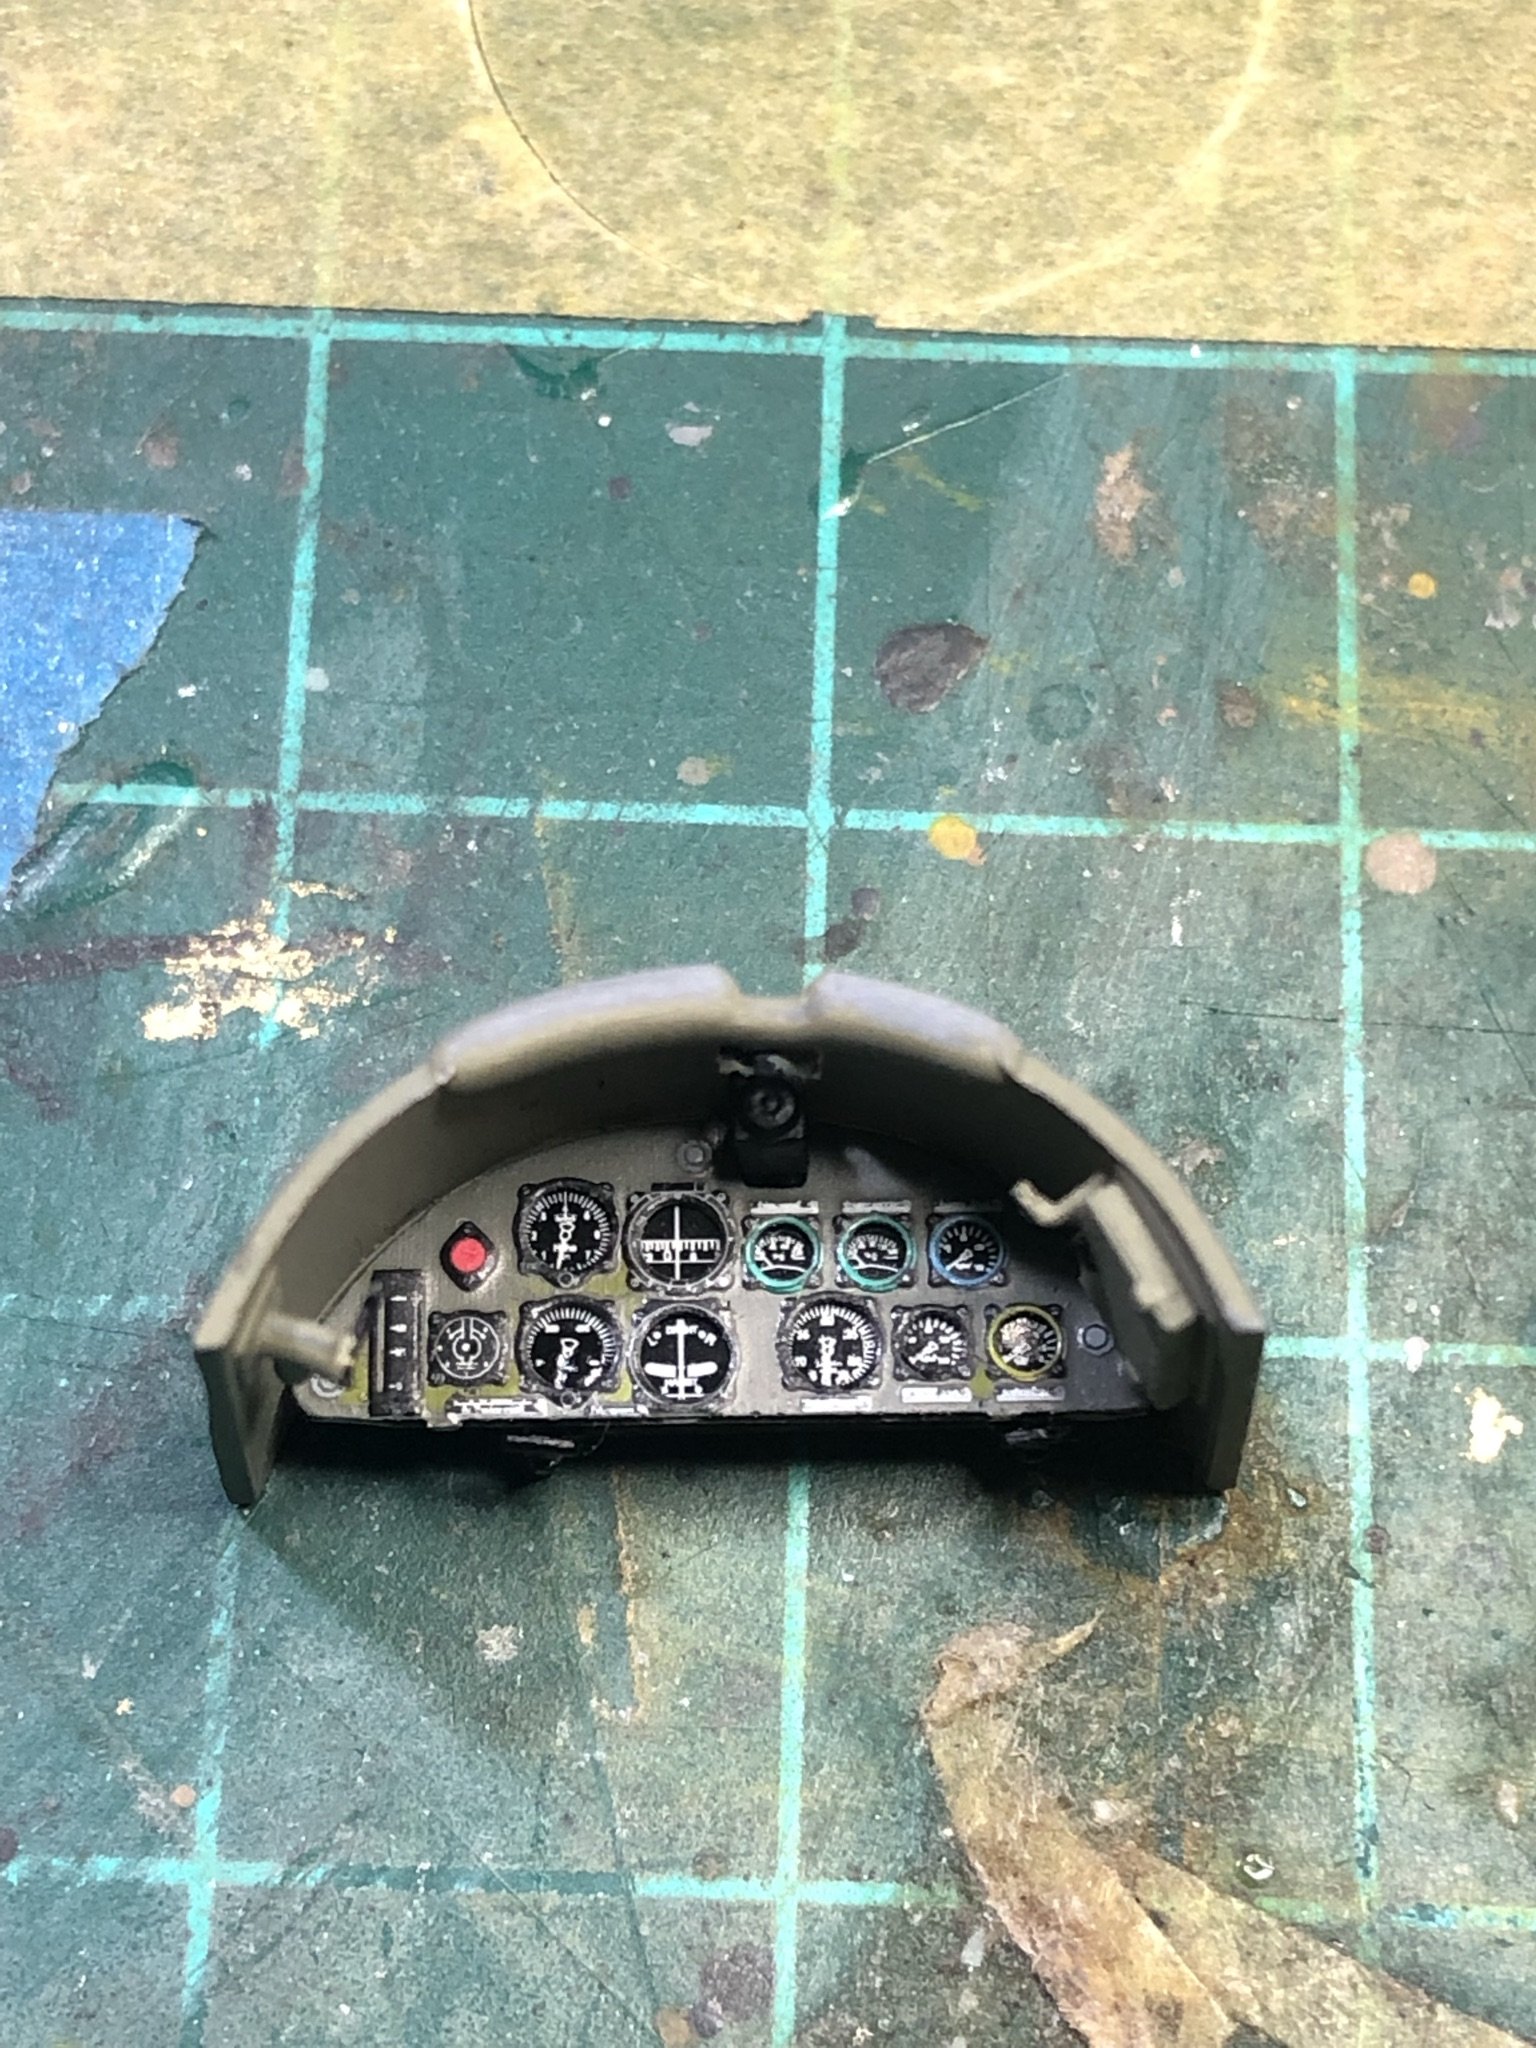
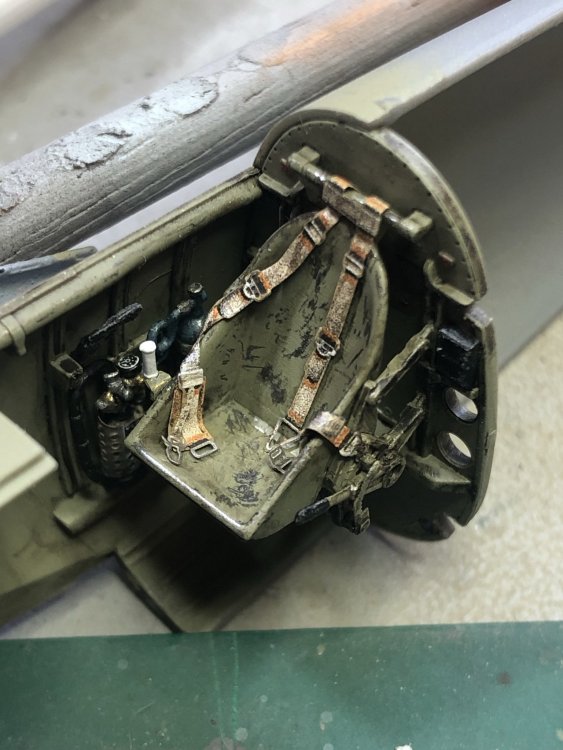
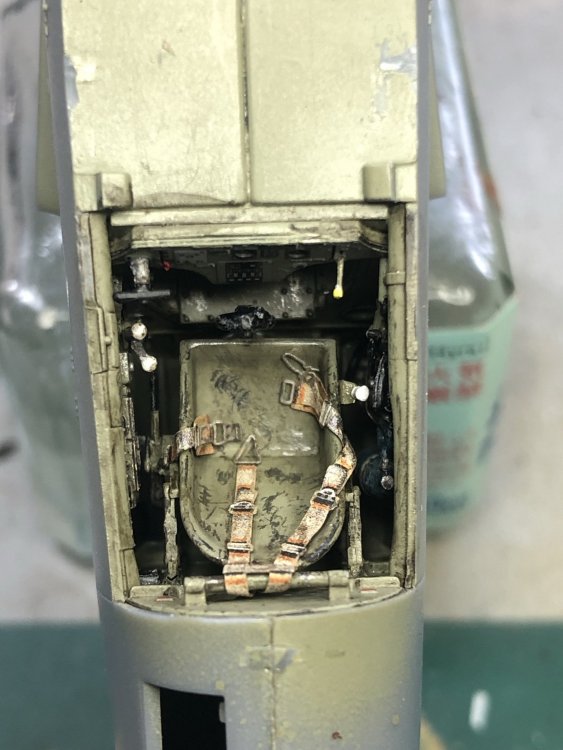
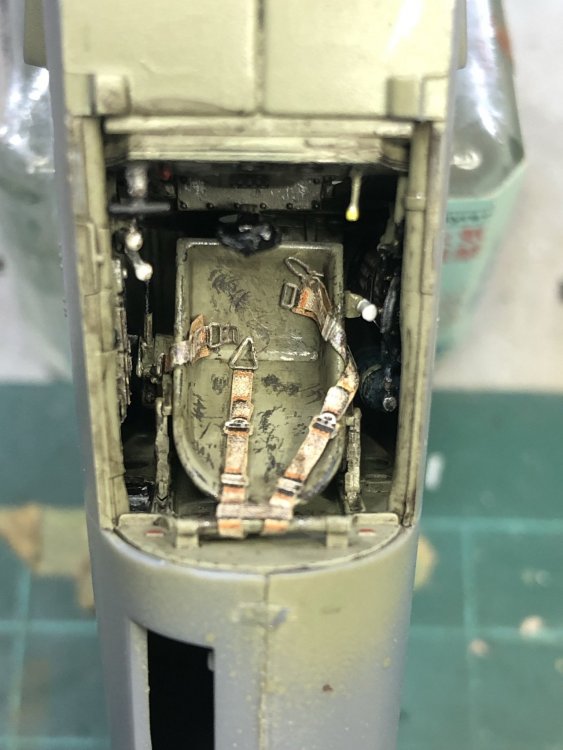
Welcome back, The build moved forward quite rapidly, even if deviating slightly from the instructions. The level of detail from OOB is very good but I did choose to add some Eduard PE, Eduard steel seat belts and a Yahu IP. Paints are Aeromaster Warbirds enamel RLM02 and some Tamiya base colours. Sealed and then washed with AKI enamel washes. Final weathering was Fabre Castell water colour pencils, some simple lead pencil and the fuselage was sealed. Thanks for looking, Kent


-
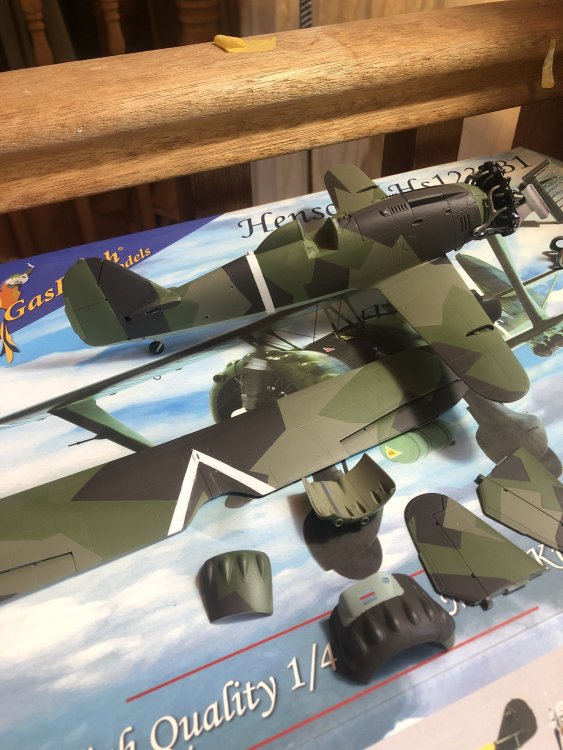
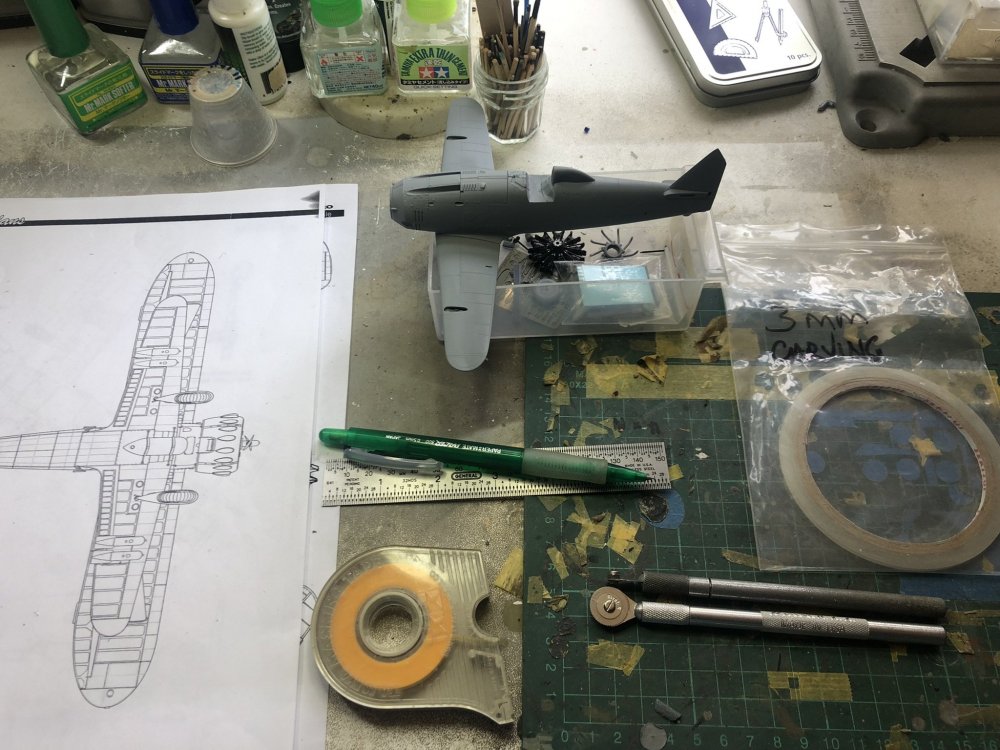
Gazzas build has stirred me out of ambivalence and back onto the forum. I started this a little while ago so I will be adding a few photos at a time. At the start I must commend Gaspatch for the fidelity and engineering of this kit. The quality of the instructions is excellent and the plastic, whilst being of the softer variety, is well detailed and easy to use. Here is the obligatory box top shot, along with the chosen scheme and some AM I picked up along the way. Regards, Kent

-
Gaspatch Henschel Hs123 1/48 scale
kahunaminor replied to GazzaS's topic in LSM 1/48 Work in Progress
Nice choice Gaz, I also have one on the bench at the moment. The fit of the kit is truly excellent. I intend to rivet mine. Using both the MMP and Top Drawings plans, I have found a small error in the luggage hatch on the port fuselage upper may be a little long (2mm to the rear) as it appears to dissect a panel line that GP didn’t include. Once I confirm and rectify I shall post a picture. Dive in and enjoy some quality engineering and fit! Regards, Kent -
If like me, you like the properties of PPP but struggle with a delivery system and are always on the lookout for modelling hacks, try this. If you know someone in the medical game, or even a friendly chemist, ask for a small syringe (5ml should be fine) and a blunt “drawing” needle. Decant (if that is the correct word) some PPP into the syringe and apply. The needle cap should keep it fresh and you don’t need to fill the syringe, which can be washed in water after use if you wish. Saves wastage and clean up. Regards,
-
Currently screening on Netflix here in Australia. I watched it the other day, not too shabby with the effects at all. The imbedded clip from Adam Savage is also worth a look. Some very talented people at Weta! Regards,
-
Noice, real noice mate. Regards,
-
hk models Lancaster B Mk.I, R5868, PO-S (S-Sugar)
kahunaminor replied to JayDee's topic in LSM 1/35 and Larger Work In Progress
Brilliant, just brilliant. I am so pleased I have the PE panel. I just hope I can do it justice and will be using your build as a guide. The guage surrounds hand painted or a decal? Regards, -
I know this may be early as I have only had the kit in my sweaty mitts for a couple of hours, but is there any talk of 1/32 Lancaster masks on the horizon? The usual suspects can chime in here......
- 1 reply
-
- 2
-

-
1/32 Tamiya A6M2 Zero
kahunaminor replied to Nat Wale Plaia's topic in LSM 1/32 and Larger Aircraft Ready for Inspection
Simply put it is sublime. Thank you. Regards,