JayDee
-
Posts
3,265 -
Joined
-
Last visited
Content Type
Profiles
Forums
Events
Gallery
Everything posted by JayDee
-

AK Interactive Metallics V1 / Learning series 4
JayDee replied to JeroenPeters's topic in Tools, Books & Misc.
Got that one here, and it is a neat read and pretty informative. -
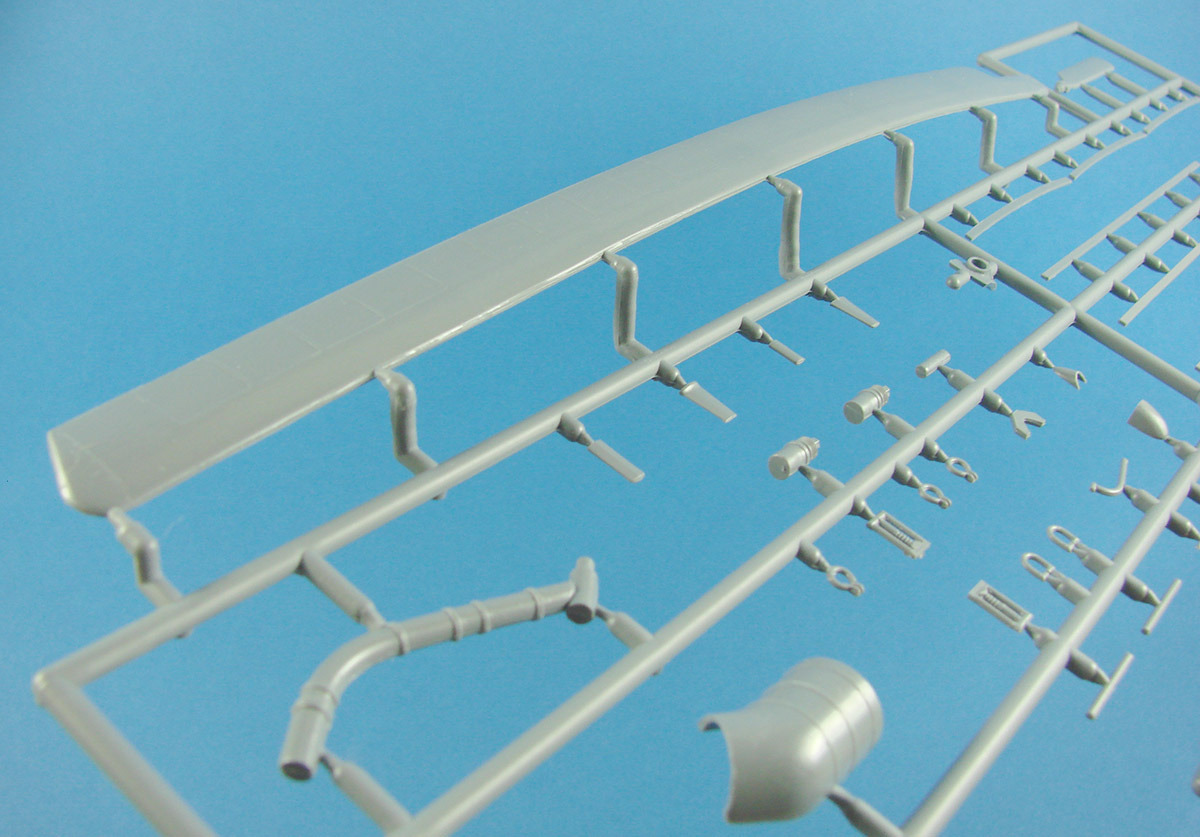
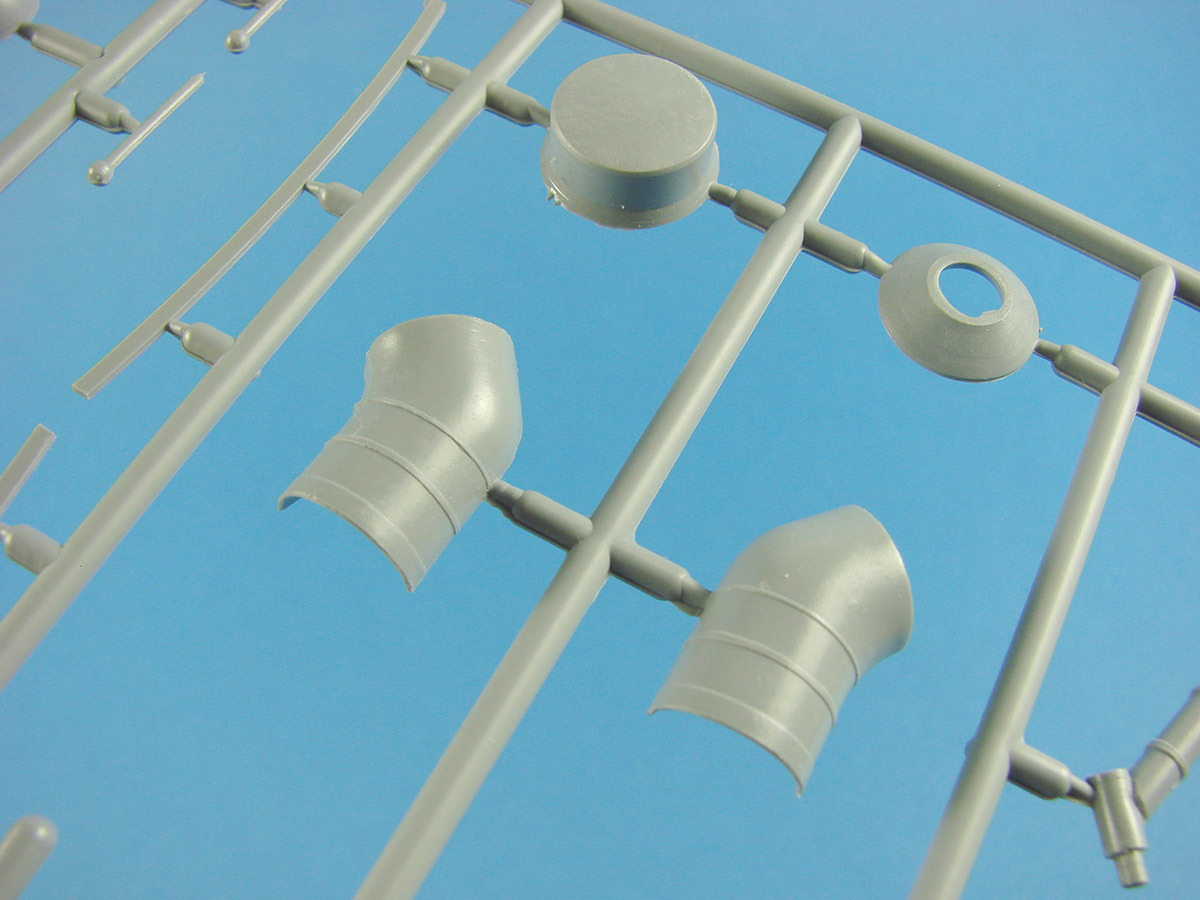
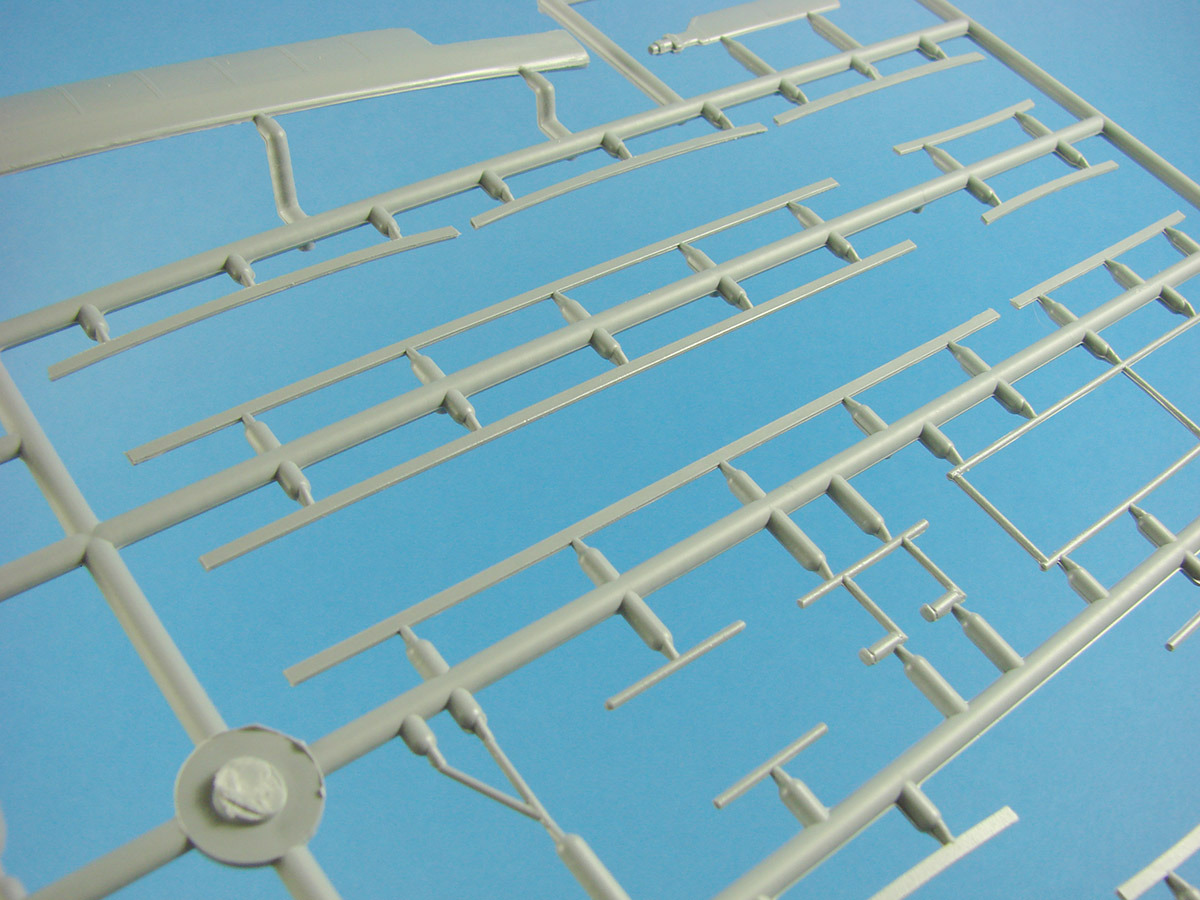
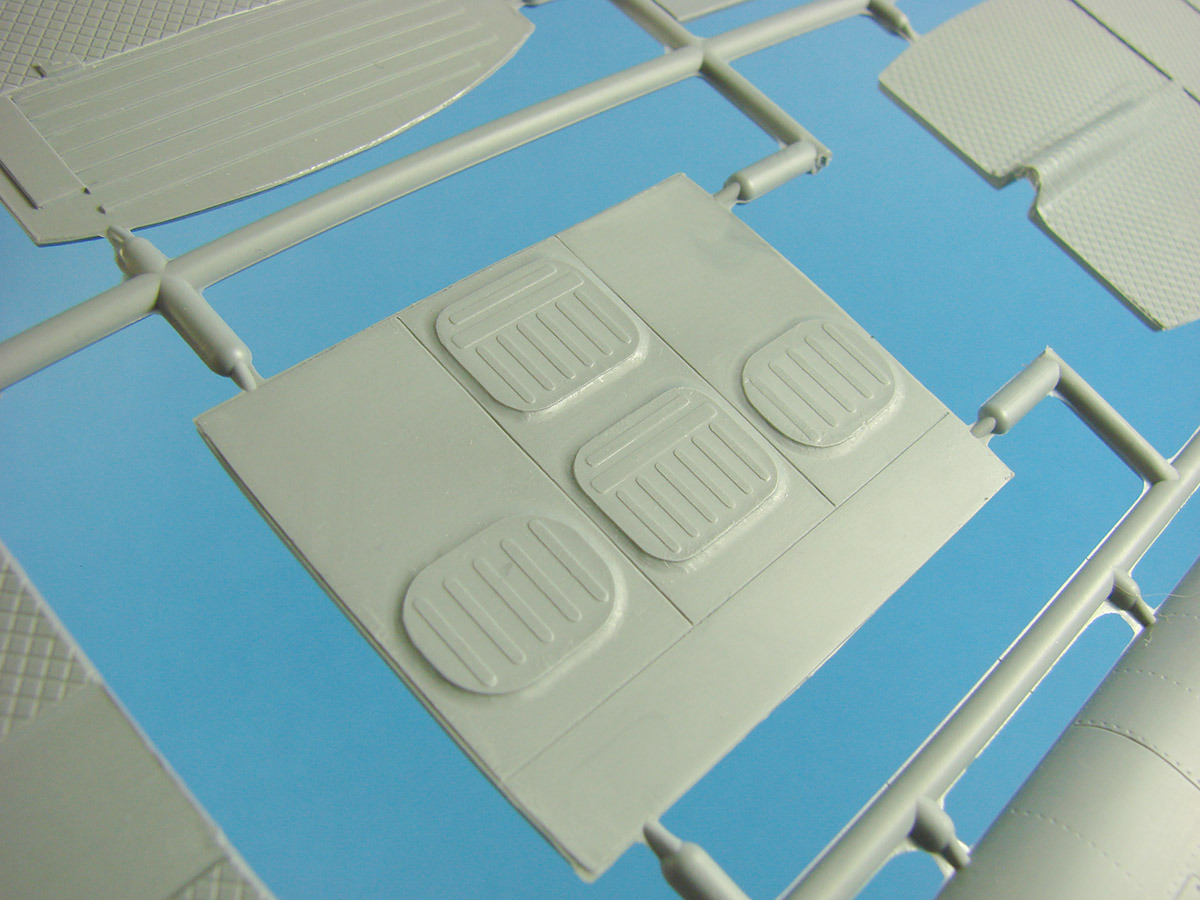
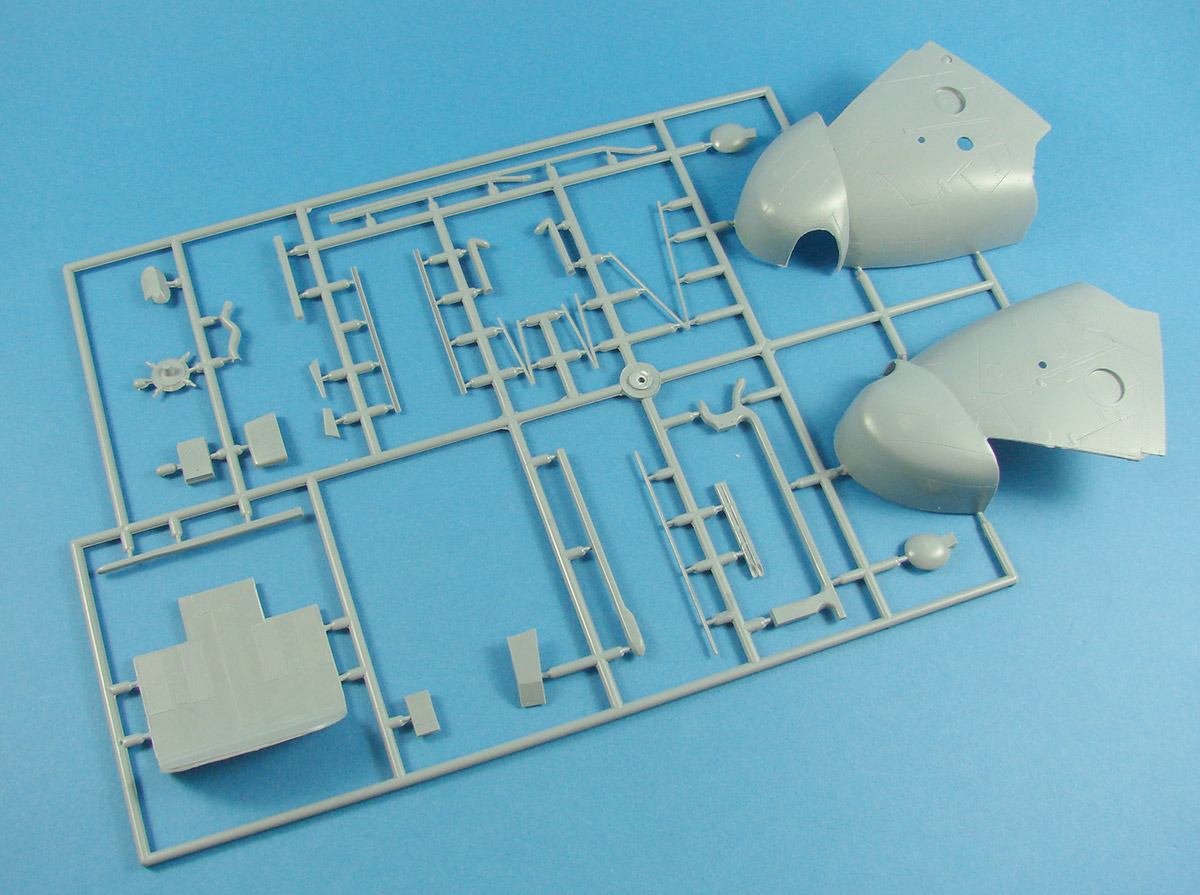
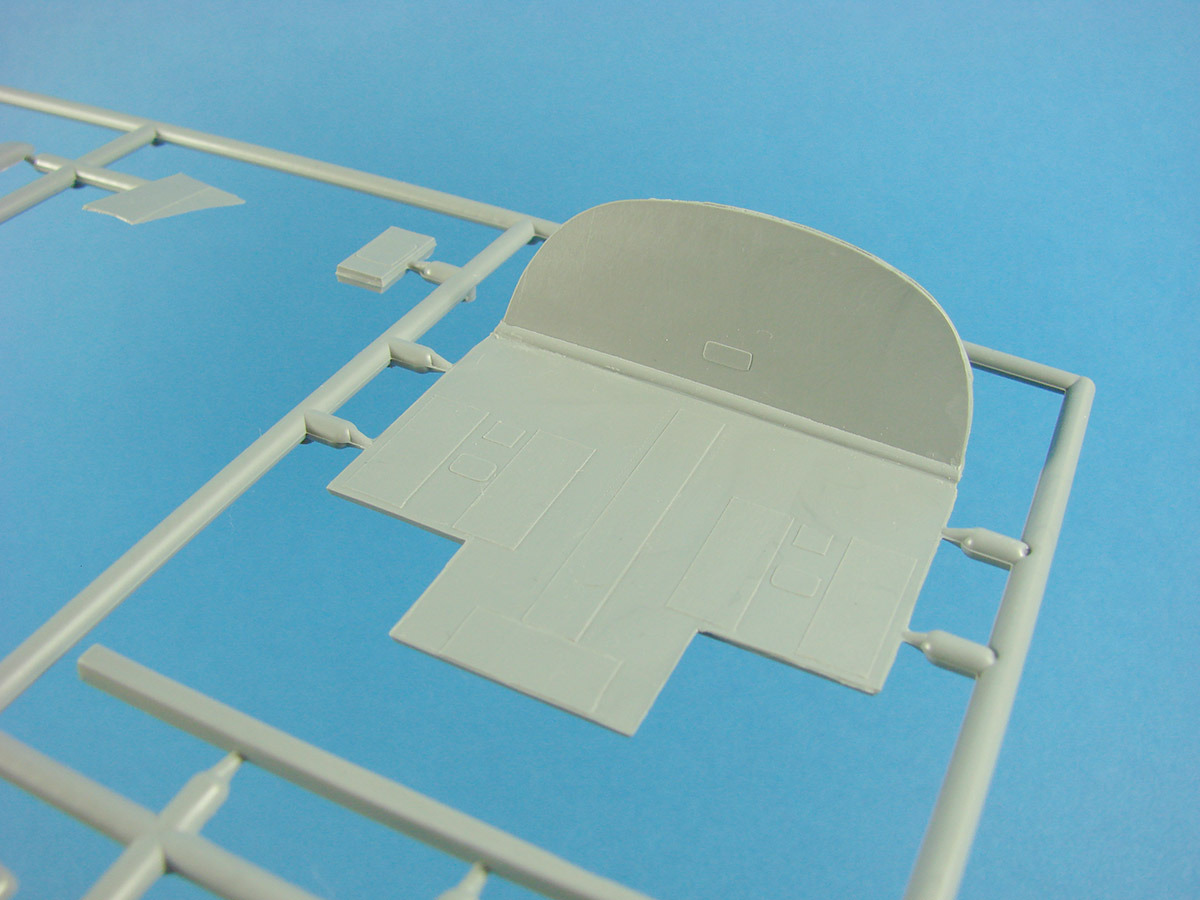
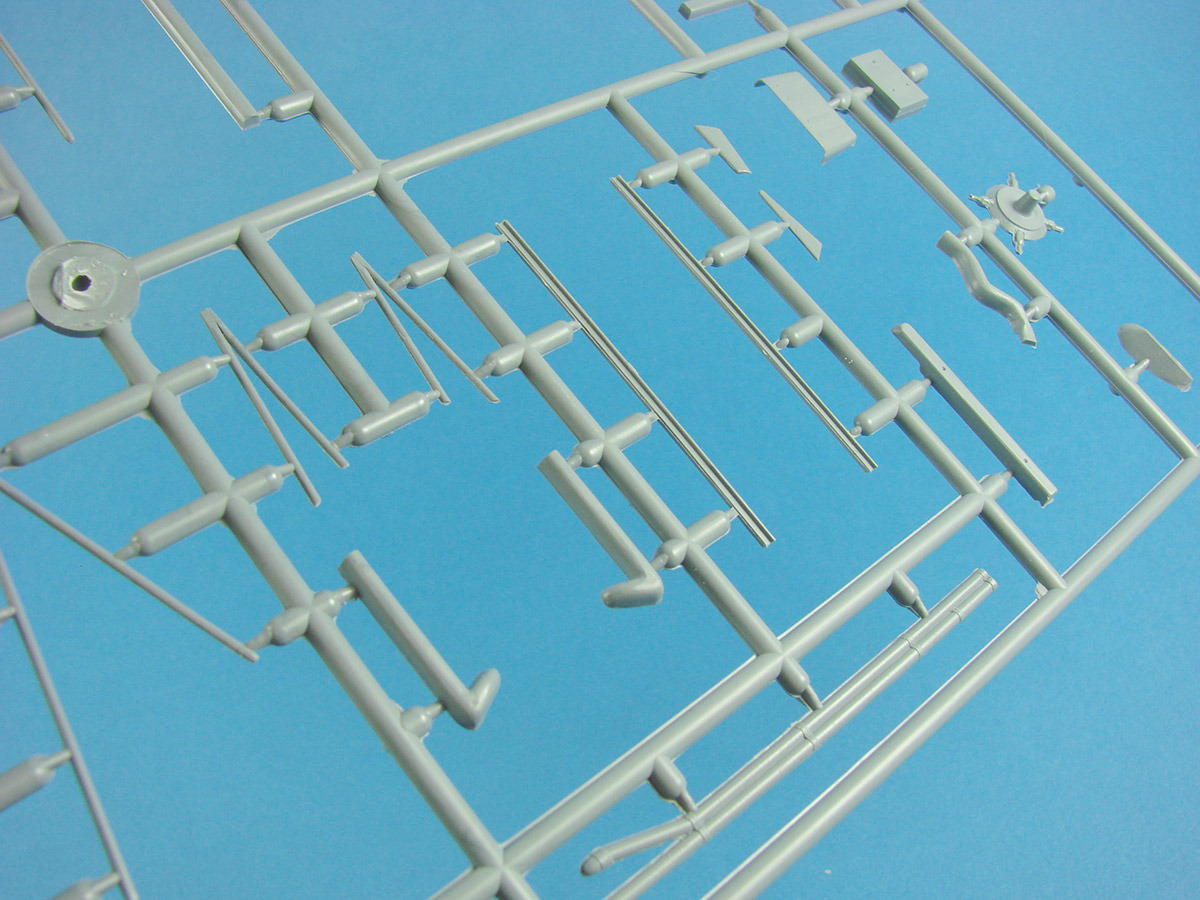
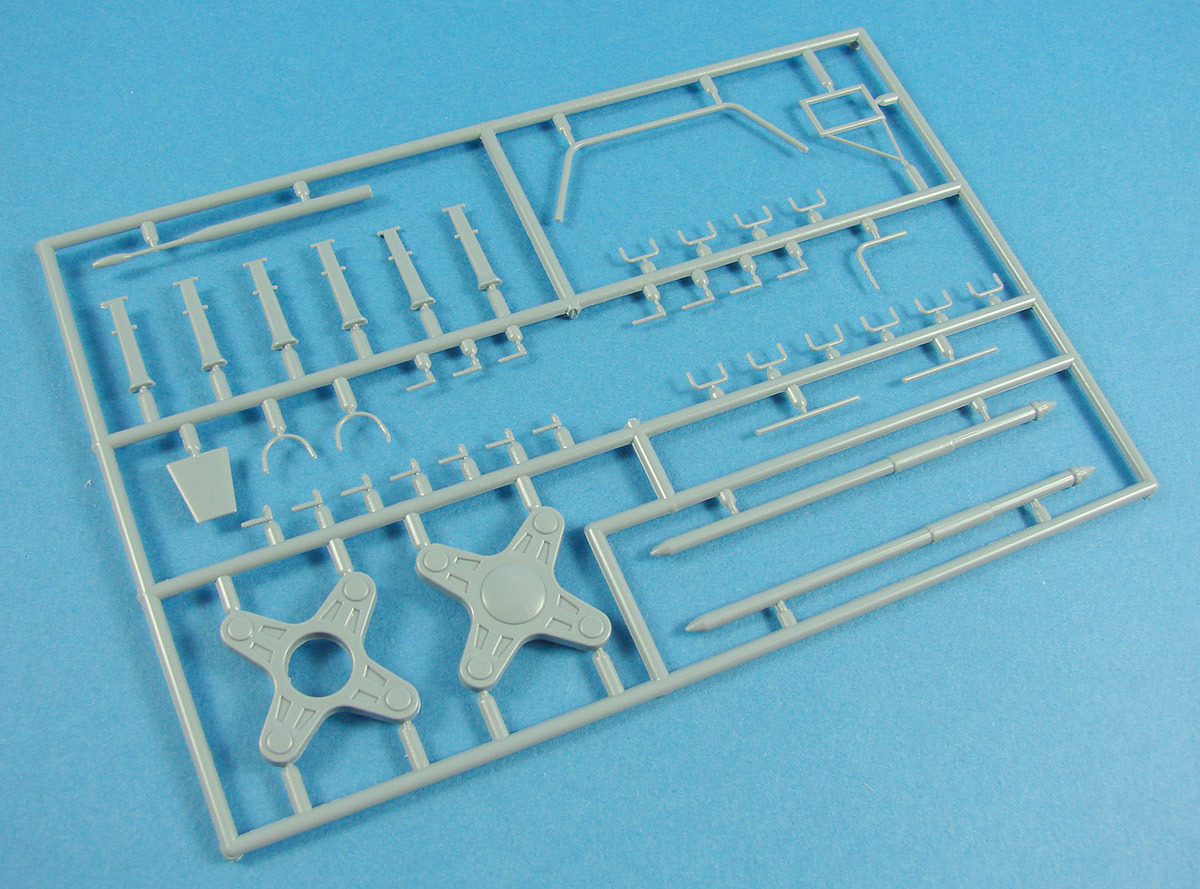
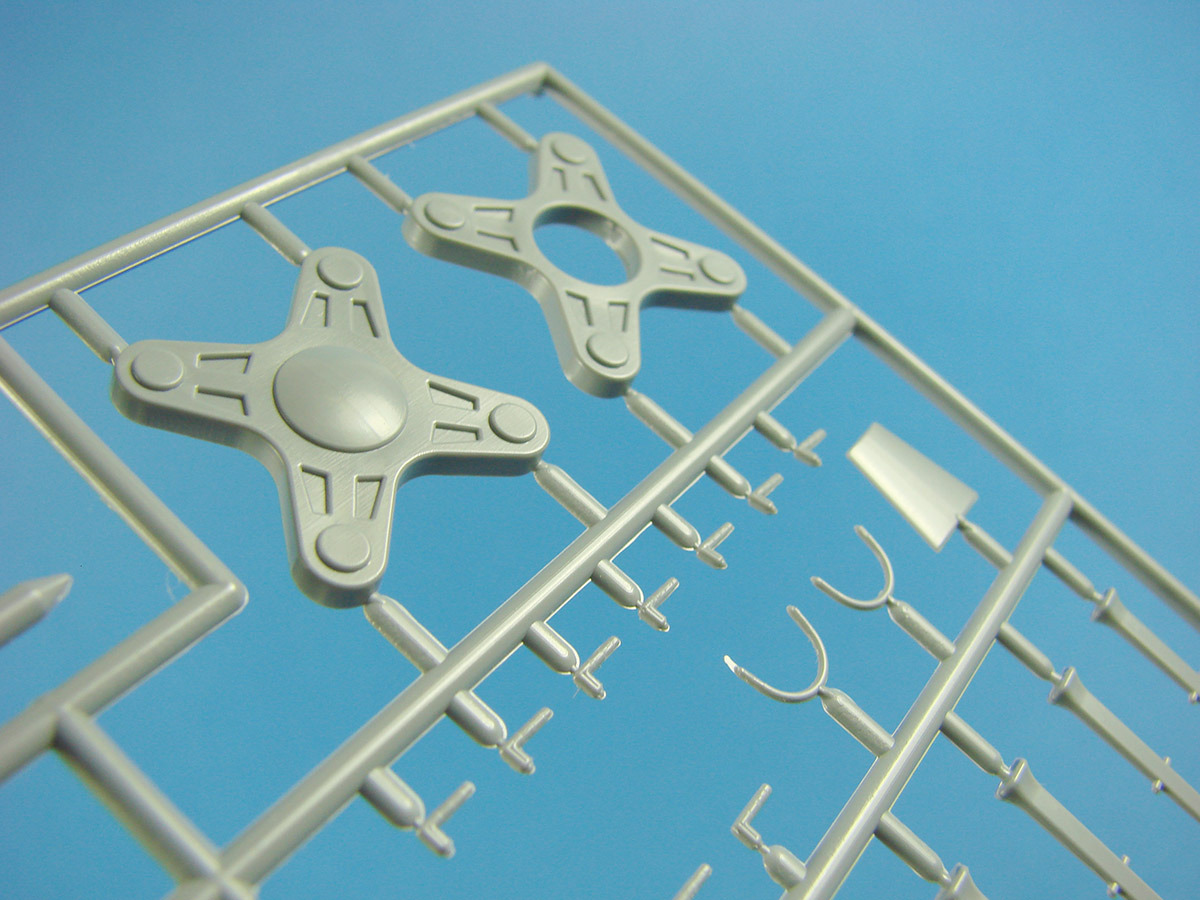
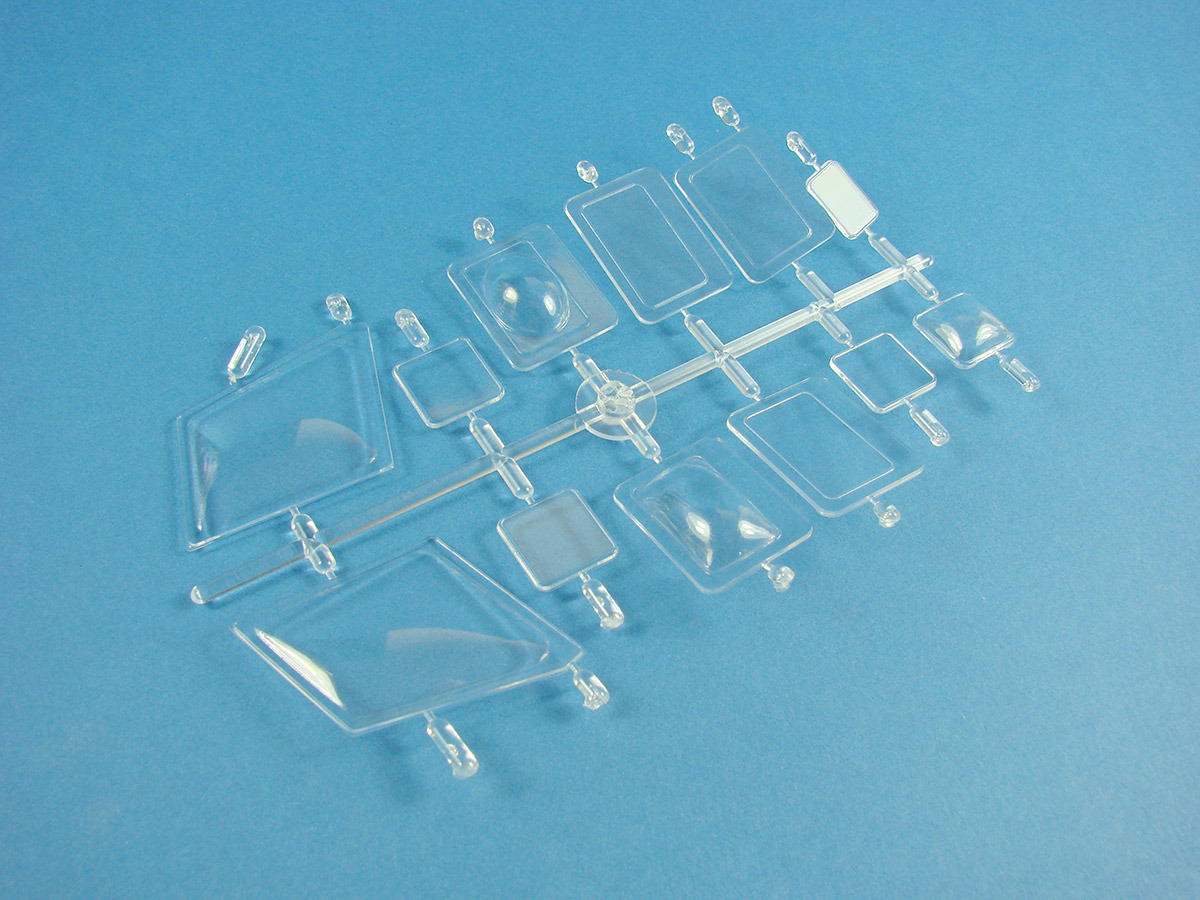
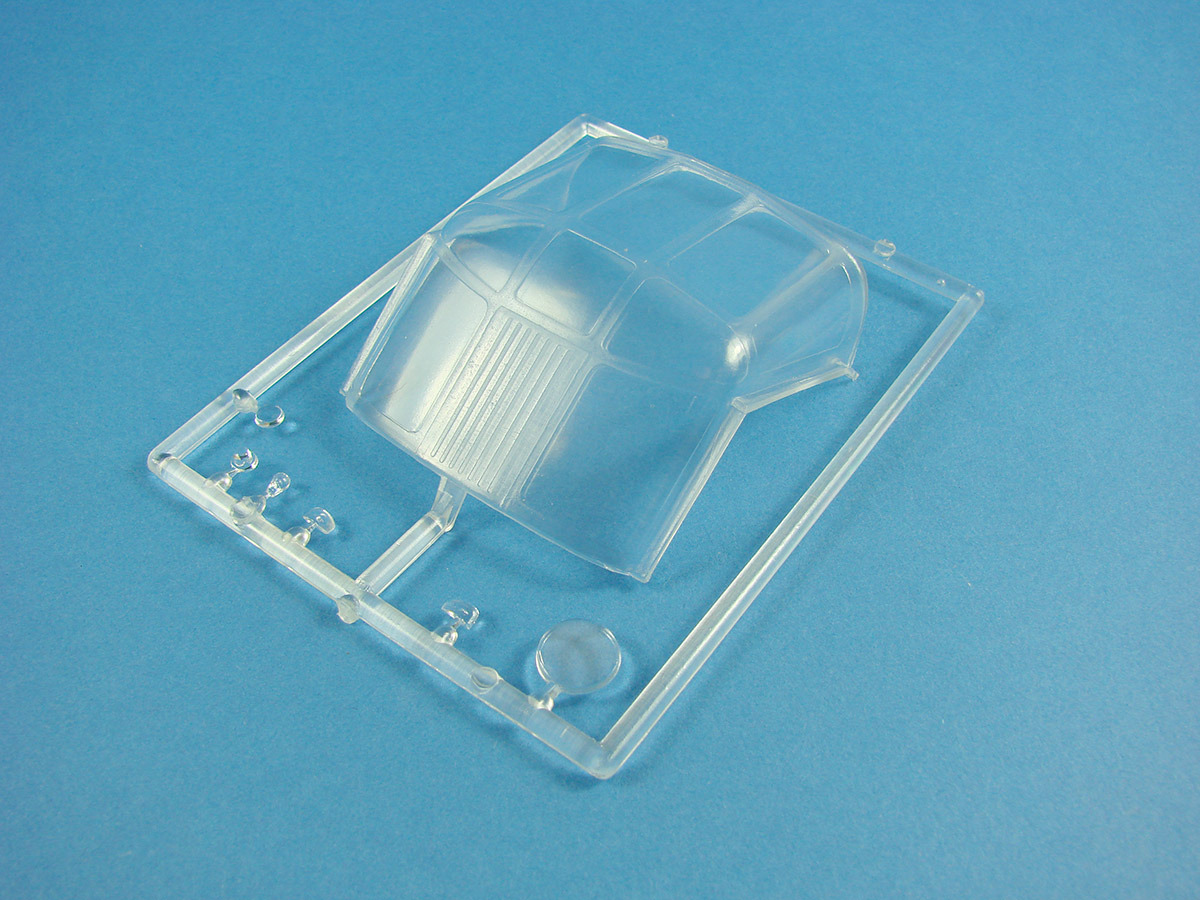
1:48 X-Wing Starfighter ‘Moving Edition’ Bandai Catalogue # 0196419 Available from Hobby Link Japan for 8,467Yen From Wookieepedia: The Incom T-65 X-wing starfighter was the primary all-purpose starfighter of the Rebel Alliance and its successor governments. Known for its versatility and exceptional combat performance, it was a favorite with Rebel and New Republic pilots. Possessing deflector shields, a hyperdrive, an R2 astromech for repairs and navigation, and a complement of proton torpedoes, the X-wing allowed the Rebellion to launch raids in Imperial space with improved odds of a successful mission. The X-wing played a major role in the Galactic Civil War following its capture on Fresia and the defection of its designers to the Alliance. It was most heralded as the fighter that destroyed the Death Star at the hands of Luke Skywalker. Later in the war, it would form the backbone of the Alliance Starfighter Corps, defending Alliance ships and leading attacks on Imperial vessels and installations. Most importantly, it could perform on near equal terms with the Empire's high-performance TIE fighters when handled by an experienced pilot. Pilots of Rogue Squadron favored using the multi-role X-wing fighter, flying it as often as they could on most missions; they only employed other craft for highly specialized missions, such as missions that required ion cannons. The X-wing was so predominantly flown by Rebel and New Republic forces that it became a symbol of their faction, much like the TIE fighter and Star Destroyer were symbols of the Galactic Empire. Thanks to continued upgrades to the basic design and improved tactics, the X-wing series remained one of the galaxy's predominant multi-role starfighters for over 40 years. First of all, it needs to be said that if you live outside of Bandai’s far eastern licence territories, then this is going to be like a kick in the balls. For reason’s only Disney can answer, the specific territorial licence for this region is now being strictly enforced, meaning that Bandai Star Wars products are only available there and NOT to other regions. If you want these, you’ll either have to ask a Japanese friend to get and ship to you, or you’ll have to take your chances with the chancers (and their inflated prices) on eBay. I’m really sorry to break that to you. I have my kit on pre-order for about fours months from HLJ, and thankfully they honoured that arrangement. I just wish I’d bought two! Courtesy, Deviantart The kit itself comes in a not insubstantial sized box ( size) with a seriously attractive image of a frontal attacking X-Wing on the upper lid. Various images around the side panels depict the model at different angles, showing the various features and functions of this particular edition. I’m a real fan of Bandai’s visuals on their kit boxes, and this is by far the very best, in my opinion. The box is also quite heavy, and this model is also a very reasonable size, despite it being 1:48 scale! Upon lifting the lid, the interior or split into two compartments. One of these contains the various coloured sprues, and the other a large black box containing the ‘action’ components of the kit. This kit contains EIGHT sprues that are moulded in a variety of colours. In some cases, you’ll see multiple colours per sprue, which is still something that I find a novelty. There’s no doubt that Bandai have mastered this process as the parts quality is unsurpassed, with no flash or flaw and no seams that are apparent. The clear parts are possibly the very best that I’ve ever seen from any manufacturer. All sprues aren’t individually bagged, but they have been packaged with serious care and attention, and are in perfect quality. Bandai’s plastic is also extremely high quality, and the whole model has been designed to fit together without using any glue. From my previous experience, the part fit is also spot on. SPRUE A This is moulded in THREE colours, and also contains CLEAR parts. The most obvious, the Rebel Alliance emblem is moulded in the red sector, and this clips to the base. The other red parts form fuselage and S-Foil panels. Two cream yellow parts form the panels on the forward upper fuselage, and the light grey mouldings include parts for the laser cannon and various other panels, plus parts for the R2 astromech. Clear parts include a whole single piece canopy with moulded frames, or you can use a two-part solution that has a separate frame that clips over it. Diffusers are included for the engine tail pipes, as well as a part for the instrument console and proton torpedo bay. SPRUE B This whole sprue is moulded in light grey styrene, and the four internal S-Foil panels are moulded here, as is the main lower fuselage and rear upper deck. Two pilots are included, for both sitting and standing position. The detail is just beautiful and will requite some nifty painting to do it justice. External X-Wing detail consists of fine panel lines and beautifully raised panels etc. The panel lines will easily take a wash if you want to paint and weather this model. SPRUES C1 & C2 These two light grey sprues contain the main S-Foil wings. Detail here really has to be noted as the inboard walkway panels with their treadboard detail is just amazing! It has to be seen to be believed. Extremely fine….. Also found here are the upper fuselage halves, two part nose cone, proton torpedo channels, rear fuselage chamber and forward engine cowls. SPRUE D (x2) Anything on this model that contains multiples, tends to be found on these two identical sprues. They contain forward laser cannon barrels, tips and flash suppressors, Incom 4L4 Fusial Thrust Engines, various other engine parts, landing gear and doors etc. Of particular note here are the thrust engines that are moulded as complete tubes, and yet retain excellent detail. We have some nifty slide moulding to thank for that miracle of technology! SPRUE E The only way to describe the colour of this sprue is that it appears to have a dark graphite sheen. It certainly helps to bring out the detail on various parts here. Look closely, and you’ll see the deflector and power shield generator panel that fits along the upper rear fuse, forward engine sections, cockpit tub, S-Foil servo actuator, undercarriage struts, and further cockpit parts, to name but a few. SPRUE F Moulded in a sort of bluish-dark grey plastic, this sprue contains canopy frames and the fuselage canopy sealing frames. Display stand and Mecha parts A large matt black box with Star Wars logo, contains the brains behind this outfit. Open one end and you’ll find the internal mecha-module for the X-Wing. This is moulded in light grey and has a series of LEDs and wires that run to the various locations on the model. It’s actually pretty obvious to where they run just by looking at the location of the wires on the block. Four of these with clear LED lenses, concern the engine tailpipes that glow red. Another clear LED runs into the area where the proton torpedoes will fire from, and a yellow LED will sit neatly behind the instrument console and illuminate the panel On the underside of this module is a small black socket into which you will plug the display stand. That stand is to be found in the larger box chamber, and is wrapped in cellophane. Moulded in black, a small screw secures the neck to the base. Be careful not to trap any wires here. Screws for fastening the parts are found in this mecha box. Spin the base over and unscrew the panel to fit 3 x AA size batteries. When you remove the protective cap from the connector plug, there is a recess in the bottom of the base, designed to store this little part. Now…..plug the mecha module to the base and switch on the power. The LEDs start to glow, except for the proton torpedo. Press the left hand button and the S-Foil motor will operate and the foils will open, complete with a really neat sound that looks like it was sampled from the movie. Press the button again and the foils will close. The sound itself comes from a speaker in the lower face of the stand. Press the middle button and the proton torpedo light starts to fade in and out, complete with electronic sounds. You may have heard about the demo mode that this unit has. Since everything is in Japanese, I had to fathom this myself. Turn OFF the model, hold down the left hand button and then power up the model. You will hear a couple of R2 astromech droid noises and then the model will go into a sequence of opening its foils, firing a torpedo and then closing the foils. The unit then powers down to save battery. There are other modes too, including silent, but I need to spend time fathoming them. If you look closely at the underside again, there are three more locations to store parts. If you wish to take the model OFF the stand and display by itself, then three plugs need to be inserted into the X-Wing, to hide the mounting points. Conversely, if you then wish to mount the model on the stand, these plugs can be stored underneath the base. To finish the base, the Rebel Alliance emblem is moulded in red styrene, and pushes onto the upper plinth. Once the model is fitted, its angle can be tilted due to the adjustable head. Decals/Stickers Decals Whilst this model is moulded in multicolour plastic, and there is no real need to paint it unless you want to weather the crap out of it (and who doesn’t!!), there is also a comprehensive decal sheet. Like any decals, you do need to apply these to a gloss surface, and from that, I imagine a painted one. The stickers are simply a duplication of the decals, and they do look very good, despite me being generally averse to anything that peels and sticks. I have used these on the 1:12 figures, and with no issue. The vibrancy of the decal sheet is a little greater than the stickers, but the stickers are cut to precisely fit, whereas you may need to manipulate the decals and trim carrier film. I’m actually quite tempted to NOT use many decals, except for key ones, and actually airbrush the various tinted and coloured panels. I think this would be useful in order to maintain much of the intricate surface detail. Stickers Please note that a small metallic sticker sheet is included, and these printed stickers are designed to shield wire looms from view (engines) and to hold various wires in situ during construction. Instructions Unlike the fold-out sheets that come with the figures, this publication is a proper booklet that is stapled. The illustrative quality is fantastic, BUT, it’s all in Japanese. This means you will need to pay careful attention to every single detail, so that nothing is missed. The instructions do seem to jump around a little in areas, but there is a logic to them. If you have a smartphone (and who doesn’t?), I advise you use a free, real-time translator scanner app. You can hover the phone over the instructions and you see them magically appear in English (or Engrish!!) on your phone screen. Decals and stickers (or painting!) will need to be added as construction progresses, and specific markings are illustrated throughout construction. The rear of the manual also has a final, comprehensive set of model photos that have annotation for these. This also extends to the pilot and R-2 unit. A generalised colour guide is also provided. Conclusion As I said, I really wish I’d bought two of these, or maybe even three. The kit is just mind-blowing, with exceptional levels of detail and authenticity. The fact that it lights up and spews sound at you too is just the icing on the cake. You might be in mourning for missing up the chance to build a FineMolds kit when they were generally available, but seriously, if you have one of these, then you’ll be as happy as a pig in the proverbial. This isn’t a walk in the park to build when you consider the Japanese instructions and the complexity of the model, but it is one that will look amazing in your collection when finished and weathered with blaster marks etc. Recommended? Damn right!!!!! Review sample courtesy of my wallet.
-
Check out EagleCals. Pretty neat shit there!
-
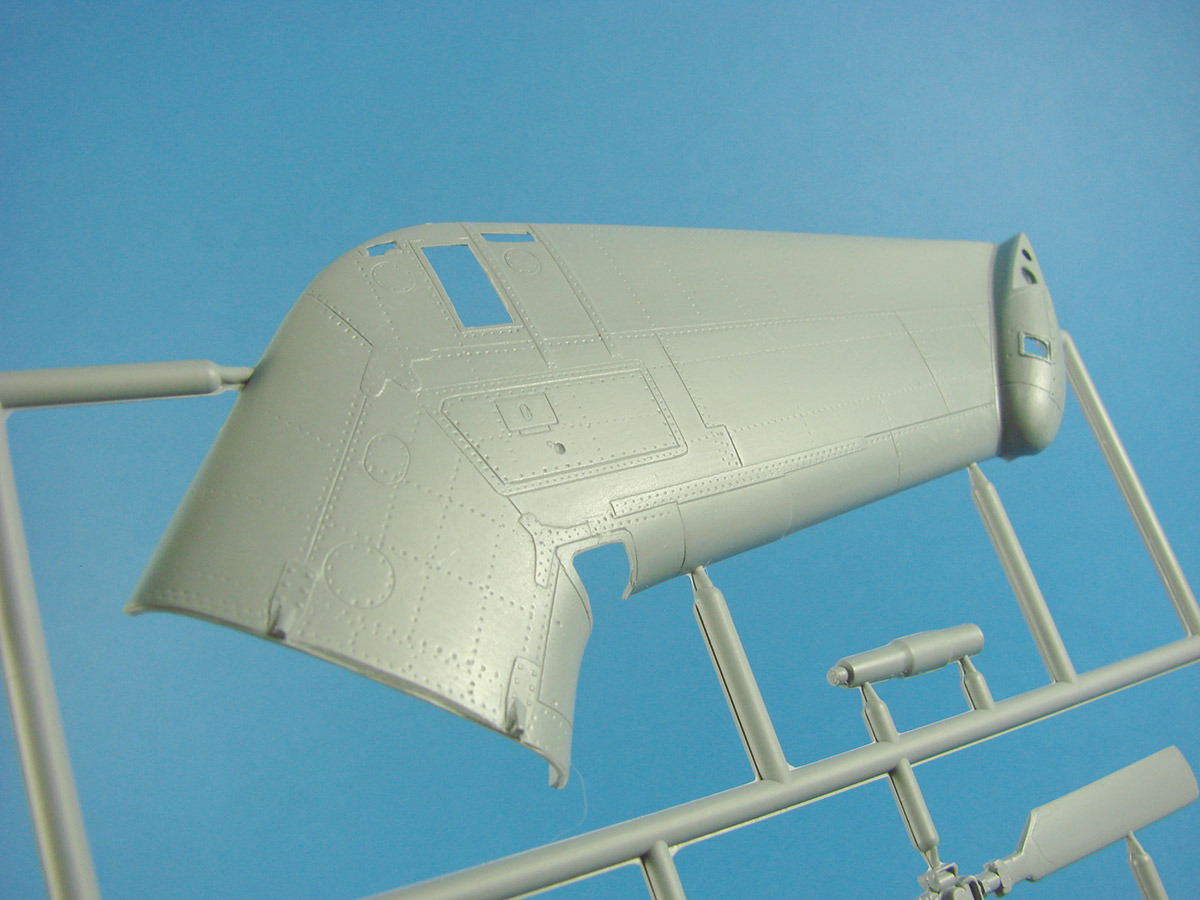
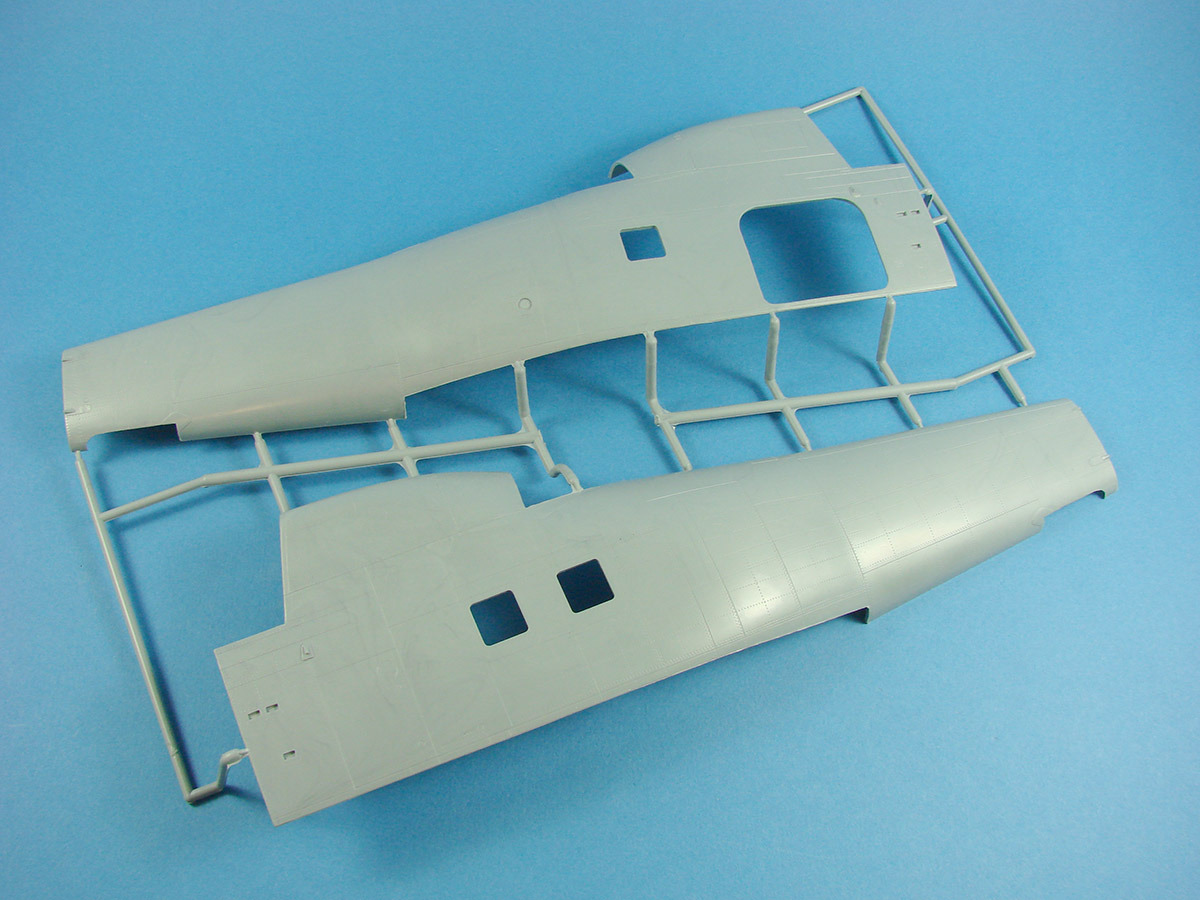
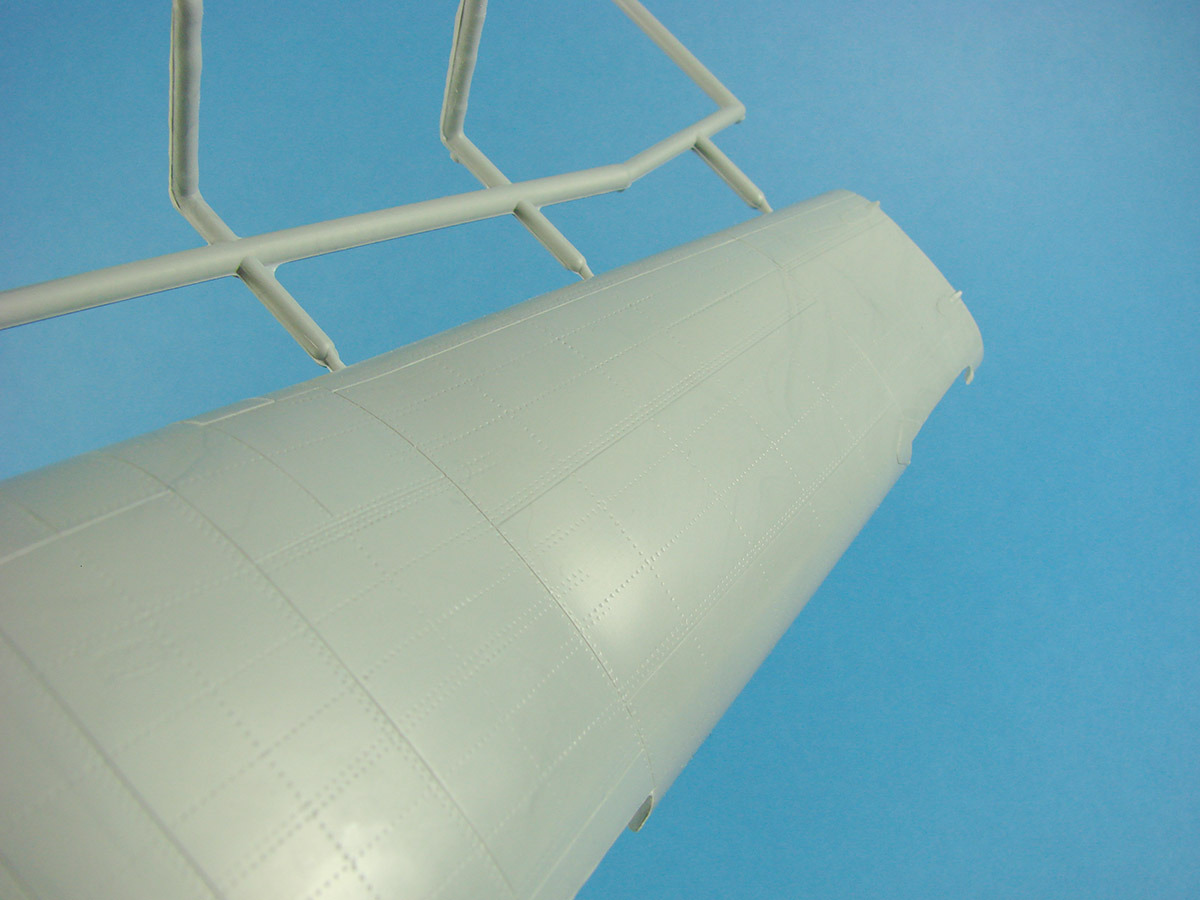
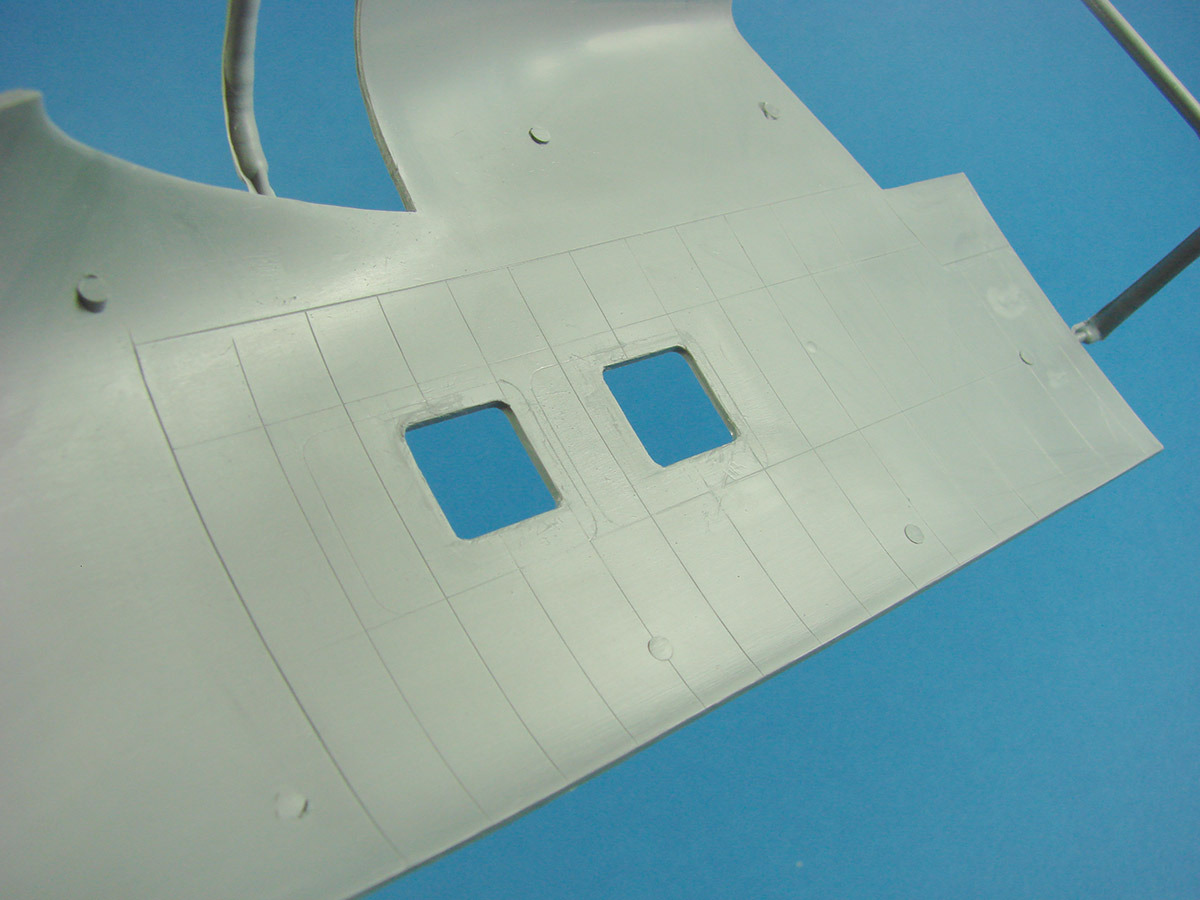
1:32 Focke-Wulf Ta 152H-0 Zoukei-mura Catalogue SWS#11 Available from Zoukei-mura for 10,584¥ Kurt Tank’s Focke-Wulf Ta 152 was the ultimate incarnation of his Fw 190 series of thoroughbred fighter aircraft. As Germany’s war situation was worsening, there was a call to introduce a fighter aircraft that could fly at higher altitude in order to intercept enemy aircraft, and the possibility of the B-29 being introduced into the European Theatre of Operations. The Ta 152 was Focke-Wulf’s submission to the RLM when key aircraft manufacturers were approached with the problem of developing a high-altitude interceptor that could tackle the increasing numbers of bomber streams that were pulverising the Reich to rubble. The Ta 152H was based on a lengthened Fw 190D fuselage, although technically different. In order to re-establish the centre of gravity, the nose was also lengthened, producing a startlingly long and sleek fuselage for a fighter of the day. Powered by a Jumo 213E with a good high altitude performance, the ‘H’ series machine had a wingspan of over 48ft. Electrical gear retraction systems were replaced with hydraulic systems, and a heated windshield was introduced, for bad weather operations. Of course, a pressurised cockpit was also a necessity. Weapons were a single MK108 Motorcanone that fired through the spinner, and two MG151/20 cannon in the wingroot. The Ta 152 came way too late to make even the slightest difference in Germany’s war effort, but that shouldn’t detract from the innovation and achievement in the design itself. Very few Ta 152 were built, with the figure standing at around 43 machines of all variants, including prototypes. It’s been a whole FIVE years since Zoukei-mura released their second SWS kit, the Ta 152H-1. With this release, it’s now the turn of the rarer H-0 variant. This is the type which sits in the NASM, and of course is the only machine now left in existence. Of course, there is no excuse to them get this wrong. So, as we have already seen the H-1, what exactly does this kit offer that makes it worth buying? If you don’t have the original release and you like the Ta 152, then nothing is stopping you! However, if you do have the original H-1, then I can tell you that there are significant differences in this kit, and owning the original shouldn’t preclude this from being in your collection. This kit is a mix of original H-1 sprues, newly-tooled H-0 sprues AND re-tooled H-1 sprues! Yes, Zoukei-mura have revisited those areas in their earlier release that some may have thought weak, and perhaps areas they wished to refine themselves anyway. Either way, we’ll now take a look. For a retro look at the original kit, take a look HERE The artwork on this kit does seem quite familiar in style to the original release, and no less attractive, with a single Ta 152 tearing into a stream of Liberator aircraft. Box sides show the completed model, with most text in Japanese. As ZM are now firmly a global brand with their model show presence and US offices selling their kits, some dual language text would be nice for photos etc. Lift that lid and you have SEVEN sprues in light grey styrene, and ONE in clear. You might remember that the early ZM kits, including the Ta 152H-1, were moulded in different colours. This was always something they drew criticism for, with them being likened to Matchbox kits (without the garish colours!). Underneath the plastic lies another sleeve containing the decal sheet, masks, instruction manual and an amendment sheet that is specific to this H-0 release. SPRUE A Notice this is an H-1 sprue, but one that has been reworked and we see it for the first time on this kit. Comparing against my original H-1 kit, the only real refinement I can see here are the main wheel hubs and their brake line. The reworked parts look far better than the originals. If there are no other reworked parts here, then that is just fine as the parts here are already refined, and look far more than they did under the original silver plastic that seemed to make things look soft. Essentially, this sprue concerns itself with the engine and undercarriage. Engine detail is great, and this kit contains a fully featured Jumo 213E that is composed of main left, right engine block, crank case cover, coolant vapour reserve, ignition lead wiring loom and junction box, starter motor, generator, supercharger, oil cooler etc. There are over 20 parts to this and I know from experience of building the original kit for the Concept Note book, just how good the engine looks when painted and weathered. I think the engine firewall could benefit with a little wiring to the engine area, but that’s it. To cap the engine off, literally, a two-part spinner is included. I know the shape of spinners can be contentious, but this looks great to me, and includes a fine ‘panel’ line around the circumference. A forward radiator block and annular radiator parts are included. The latter has fine cooling fin detail on both the interior or exterior faces. Undercarriage struts are superbly detailed, and separate brake lines are included. Oleo scissors are also more than acceptable, and the multipart rear tail strut is no exception. The main part of this anchors high up in the vertical tail fin. SPRUE B Another H-1 sprue, and again re-tooled. Here you will find various engine components such as the supercharger, propeller, guns, fuselage fuel tanks (the H-0 carried wing tanks also), exhausts, and various other engine parts. The propeller is certainly more refined looking than the original, and the exhausts have marginally different detail. One thing I’m disappointed in that ZM didn’t rework are the tires. These would have looked better with a little weighting added. The opportunity was there to sort this, so if you want them to look a little flatter on the bottom, you can always get out a sanding stick. Another inclusion here are the engine bearers. One thing I found with the original release was that fitting the engine and bearers into the fuselage, proved a little problematic. To counter this, I snipped off the lower locating pips and aligned the engine with the upper pins only. The wing root cannon look a little simplistic too, but with some extra work and electrical wiring, they won’t look too bad. If you want to use any aftermarket for these, then look at the MDC resin gun replacements. There has been minimal slide mould use for the barrels on these guns, as also on the MK108 too. SPRUE C With Sprue C, we start to see cockpit parts, starting with the cockpit floor and integral rearmost bulkhead that encapsulates the battery/stowage compartment. Another rear cockpit bulkhead that incorporates the seat location and forward turtle deck is included. ZM’s attention to detail with this release still grabs me in the same way as it did 5 whole years ago, and the levels of detail more than hold up to current eyes, expectations and scrutiny. A new instrument panel, specifically for the H-0, is also included here. The details of the bezels look perhaps a little exaggerated, but they will make for ideal painting and detailing conditions, and a punched decal instrument should sit perfectly inside. A drop of Klear or Micro Crystal Clear will finish these nicely. Decals are provided for the instruments, but I think the definition/detail is poor. My choice, as always, are the excellent Airscale decals. This new part also has rear instrument detail, allowing you to add some wiring. Two seats are supplied. One of these is a standard part that allows you to place your own seatbelt set, and the other has moulded belt detail. I’m absolutely convinced that the moulded belt detail has been improved, and looks akin to the quality I saw on my recent Ho 229 build. Personally, I have no hesitation in using the seats with the moulded belts. They really do look superb! The cockpit contains separate consoles and a throttle lever that connects to a socket on the underlying floor. Rudder pedals are attached to rods that pass under the consoles. Yes, all the detail you want is here, even if you may never see it! You will find other bulkhead details here, and parts for what was the forward weapon bay on the earlier 190 series. Ammunition boxes for the wing root guns are to be found here, as are various oxygen and compressed gas bottles that fit within the tail section. One feature of the Ta 152 series was a nitrous oxide tank that could be used to temporarily boost engine performance. This was located in the rear fuselage. Also here are various other rear fuse internals, such as radio sets. Lastly, a wing spar is included that perfectly pre-aligns the wings for you, and provides some stability to this crucial area. Some wheel bay detail is provided here, and you will also fit the guns into the provisional wing root areas before installing to the fuselage. SPRUE D Here we see a new sprue, designated as H-0, and looking very similar to its counterpart in the previous release. However, things appear to be more refined here. Looking at the surface detail rendering, the new parts have better riveting and panel line detail. Originally, the general rivet lines were exaggerated, but now they appear to be represented far more realistically. Detail on the inside of the parts consists of the same frame lines etc, and remains unchanged. I have no problem with this though. A port is supplied separately on the rear fuse, allowing the modeller to pose this open and display the internals. That refinement of detail extends to the tail where the stabiliser fairing is now fitted with correctly raised line of fasteners, instead of sunken rivet detail. Again, the access panel on the fin is separate, so it may be posed open if you decide to detail the area within a little more. Engine cowl detail is also slightly different around the forward exhaust area, and a new part is included on this sprue, for the upper louvered vent that sits just behind the cowling ring flaps. SPRUE E I can’t see any difference between this sprue and my original H-1 release kit, and indeed it is still designated as H-1 on the ID tab. ZM’s unusual fuselage breakdown means that the lower belly section is separate, and moulded here, complete with internal rib structure detail. The single piece forward upper cowl that incorporates the ex-gun bay and engine cowl, is moulded as a single piece with some internal detail. Unfortunately, ZM didn’t see fit to remove the ejector pin marks from in here, so you will need to eradicate them yourself if you wish to display this part removed. The forward nose cowl is separate to the cowl flaps, and the latter are provided as open and closed options. Tail surfaces have some superb external detail, and control surfaces have a taped effect finish. I’m not absolutely convinced by this, but some photos do seem to look quite similar to the ZM approach, if maybe not quite as raised and obvious. Still, the finish is very attractive. The modular wing approach sees the forward belly section moulded here, as well as the main gear doors and other small parts. Note that there is the H-1 upper louvred panel included here, and this is NOT for use on this kit!! SPRUE F & G These are wing sprues and are essentially mirror equivalents of each other. Now you get an idea of the sheer span of this sleek fighter aircraft. As these are H-0 specific sprues, they are indeed newly-tooled. Due to the difference in airframe wing tank locations, you will see a difference in engraved surface detail that is applicable to this machine only. It is noted that as with the fuselage parts, the riveting on the wings is also more subtle. Only key rivet lines are included too, leaving the way open for you to add the remainder yourself, if this is what appeals. The wheel well bumps are also more organic looking too and far more realistic. Some detail is moulded within the wheel bay roof, and this is more than adequate. Trailing edge flap bay detail is also moulded, but there are ejection pin marks you will need to remove. As with the H-1, the wing leading edges are moulded separately. I’ve heard some say they struggled to make these fit properly, but for me, I had no such issue. Just take your time and be methodical with your approach. Note that the wing roots still remain as single parts on this release. I wasn’t too happy with the protrusion of these from the fuselage when installed, so I thinned the joint face a little on mine before installation. Refinement of detail extends to the gun bay covers for the wing root. Engraving is shallower generally, and these are a big improvement over the earlier release. SPRUE H ZM decided to revisit this sprue and re-tooled it to make it more accurate. As well as a clear instrument panel and a few small parts for wingtip lights and gun sight etc. the main players here are of course the windshield and the familiar blown hood. Noticeably, the windshield looks more refined and the shapes have changed somewhat. Clarity is excellent, and the canopy parts have superb frame definition that will aid accurate placement of the vinyl masks. Plastic Summary I found a new level of plastic moulding quality with the Ho 229, and it continues here. Parts are generally flash free, and seam lines are minimal. There are a couple of sink marks here and there, but nothing too major. You could almost excuse them for metal ‘canning’ from the stressed metal of the real aircraft!! Masks A small sheet of vinyl masks is included for the canopy. My experience of these is that they adhere well, fit perfectly, and adhere well to the plastic. If you ever need to tweak a mask, then the flexibility of the vinyl will allow for that. Decals For me, ZM’s decals are possibly the weakest element of their kits, BUT they do adhere well and conform to surface detail with the help of a little decal setting solution. I don’t know who prints them, but they tend to be a little thicker than I’m used to, but in fairness, they are well printed with good, solid colour and minimal carrier film. Registration is also perfect. As well as markings that are designed to be generic and allow the modeller to make their own decisions, a full set of stencils is also included. I’m not too enamoured with the instrument decals. They lack vibrancy and definition. Swastikas are supplied in two parts, so as not to offend the sensibilities of particular countries that get all offended by them on model kits! Instructions The first thing you’ll notice is that the rather swish looking manual (designed to look like a 1940’s technical document) is actually the same one that was supplied with the H-1 kit back in 2010. However, a supplement is included with the correct H-0 nomenclature, and this includes the amendments and changes to this particular release. The first thing I would do is to mark these changes within the main manual so that you don’t fit the incorrect parts for this version. Illustrations are excellent, with CAD-style detail and shaded drawings. SWS kits have advanced a little since the manual was first printed, and as a result, this one doesn’t have all the fancy technical details of the real aircraft, as was seen in the Ho 229 manual. Still, ZM’s instructions are better than most within the industry. Paint references are Mr Colour and Vallejo. Conclusion I admit that I was a little too hasty to write this release off, due to the relatively small number of external differences between this and the original H-1 release. However, the inclusion of all of those refined and reworked sprues, along with the new-tool parts, serves to make this a worthwhile release. With the original H-1 kit now being currently OOP, the H-0 is the only real game in town for this stunning fighter aircraft, with the exception of the Pacific Coast kit that some claim to be difficult to build or hard to obtain. As far as price too, then this kit is well-pitched, being cheaper in some respects than the PCM kit, and also a more highly detailed kit. If you’ve never had the opportunity to build a ZM Ta 152, then I really, really can recommend it! HIGHLY recommended. Review sample courtesy of my wallet. To buy directly from Volks Japan, click THIS link. To buy directly from Volks USA, click THIS link.
-
1/32 HPH Models Ohka Model 11
JayDee replied to JeroenPeters's topic in LSM 1/35 and Larger Work In Progress
Finished yet? Just stunning. You embarrass me. -
What a gorgeous scheme Lovely build too. Seen the kit too, and it looks neat, especially the wing strut alignment trick.
-
1/32 HPH Models Ohka Model 11
JayDee replied to JeroenPeters's topic in LSM 1/35 and Larger Work In Progress
Love it! -
1/32 HPH Models Ohka Model 11
JayDee replied to JeroenPeters's topic in LSM 1/35 and Larger Work In Progress
I love your dented nose. Take that as a compliment. -
Is it just me, or is this starting to get a little weird?
JayDee replied to Iceman's topic in General Discussion
Some weird shit going on there, but I'm sure someone will love to buy those. -
Looks a real cool subject. Also first time I've seen the sprues despite kit being with me for ages. Soon to build?
-
1/32 HPH Models Ohka Model 11
JayDee replied to JeroenPeters's topic in LSM 1/35 and Larger Work In Progress
Damn, that's sexy, for a suicide plane. Sake, anyone? -
1/32 HPH Models Ohka Model 11
JayDee replied to JeroenPeters's topic in LSM 1/35 and Larger Work In Progress
Very nice! I like that colour. Time to formulate my own, almost -
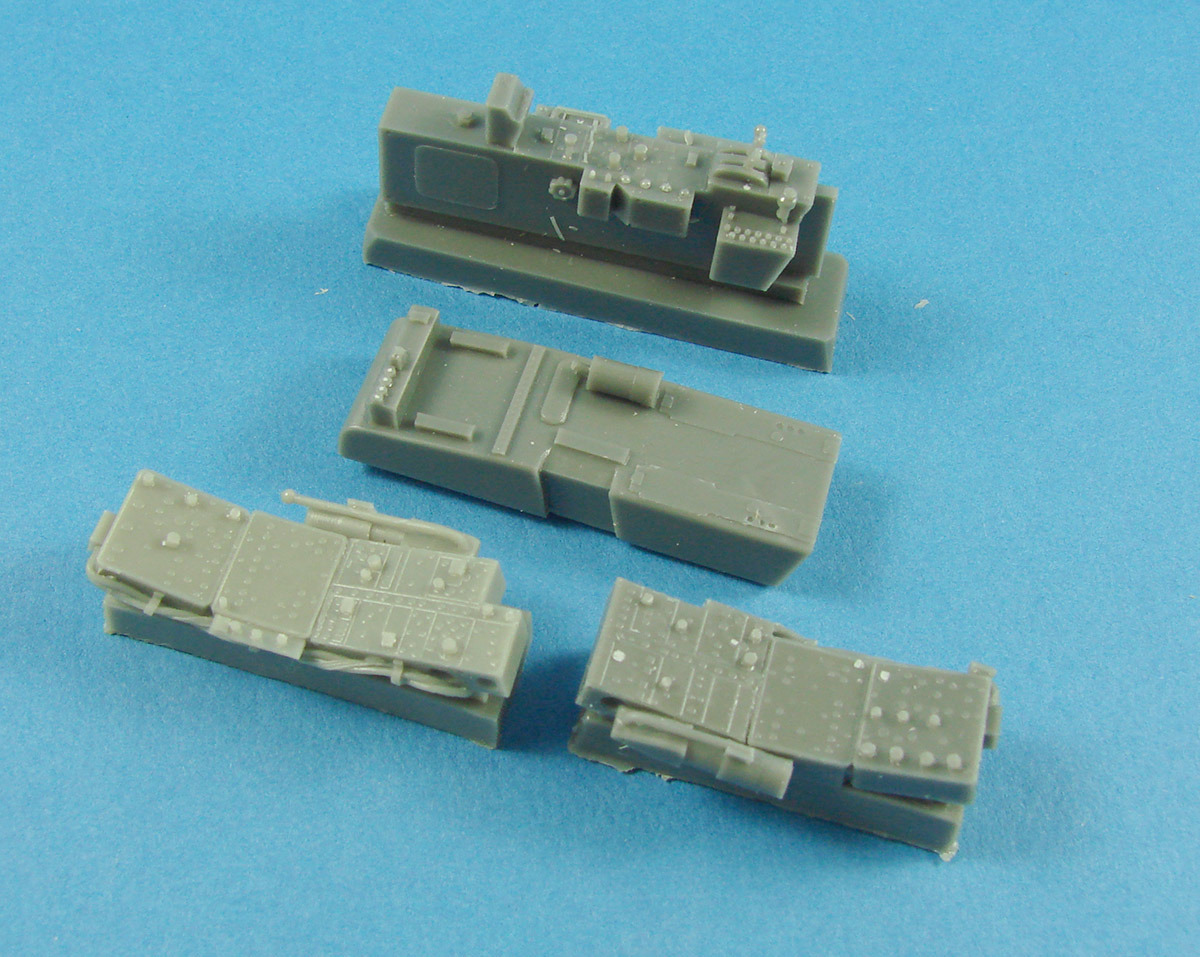
1:32 MiG-15bis HpH Catalogue # 32025R Available from HpH for €150,00 The Korean War was the first major conflict where jet fighters from both sides of the conflagration, fought against each other in pitched aerial battles. Even though the RAF operated the Meteor during WW2, and the Germans the Me 262, these two types never met in combat. Without a doubt, the most iconic jet fighters of the Korean War were the F-86 Sabre, and the MiG-15. Unlike the Allies in May 1945, the Russian jet programme wasn’t particularly advanced, with the MiG-9 ‘Fargo’ taking its first flight in 1946, after hostilities were ended. At the end of WW2, scientists, under military jurisdiction, raped German technology and spirited away Germany’s technical programme into various countries. For the Russians, already with their own disadvantage, the path to catch up to the Allies was longer hard fought for as the Iron Curtain began to fall. As with the slightly later F-86 Sabre, the MiG-15 was a swept wing, transonic fighter aircraft, first flown in 1947 and being introduced into service in 1949. https://www.youtube.com/watch?v=8APaZIxJEr4 Developed by the Mikoyan-Gurevich, the type was powered by a Klimov VK-1 centrifugal flow turbojet, and the second generation bis (improved) machine, was fitted with two NR-23 cannon and one Nudelman N-37 cannon, plus a capability of carrying unguided rockets, bombs or drop tanks on external wing stores. The MiG-15 has often been described as one of the most effective and robust fighters ever produced, and was operated by over forty countries before production ceased. Total production was around 18,000 aircraft, of which 6000 were licence built in China. The MiG-17 was designed to replace the MiG-15, but for continuity, serial production of the MiG-15 continued throughout the Korean War, and as a result, the MiG-17 never saw service in that conflict. By the time the type entered service in 1952, the MiG-19 was about ready for service. HpH manage to cram a surprising amount of resin into their superbly designed and robust corrugated boxes. These attractive packages have a colour profile artwork on their lid, and in the case of the MiG-15, highlighting the two schemes that are possible to be modelled. The box interior is compartmented so as to snugly fit the various bags of resin and main airframe parts. On top of the various parts lies a ziplock wallet that contains an instruction manual CD, decals, photo-etch frets, turned metal parts and some nifty seatbelts from HGW. In case the initial inspection makes you a little hungry, a small Belgian chocolate is tucked away into the lower compartments. Of course, my wife always takes this little treat. Not having a CD drive on my MacBook Pro, the first thing I do before starting to write my review is to dump the files from the CD onto my USB pen drive at work, and then print out the document. First inspection of the whole kit before photography shows that there is no flaw in casting. There are a couple of break-out points on parts where strengthening wire is included, but nothing that will cause any problem. The surface of the main parts seems to be speckled a little with what I think it simply mould release agent. I wiped this with a little isopropyl alcohol and it almost removed it. Again, I’m not overly worried about that. Only the larger parts have casting blocks that need traditional removal and clean-up. The other smaller components are cast on thin resin wafers. This means you will need to carefully grind the connecting portion of the part in order to remove the thickness of the wafer. In some cases, you could probably ignore this, but you need to test fit your part to be sure. This kit contains: Around 160 grey resin parts 9 clear and coloured resin parts 3 bare brass photo-etch sheets 1 plated and colour printed photo-etch sheet Series of turned brass parts and wire rod MiG-specific HGW seatbelts 1 comprehensive decal sheet Set of vinyl canopy masks CD with instructions in JPG and PDF format 1 Belgian chocolate Cockpit http://i1324.photobucket.com/albums/u614/LargeScaleModeller/LSMReviews/hphmig/DSC05437.jpg There really is no doubt that HpH’s releases drip with detail, and this mini-masterpiece is built upon two intake tunnels that are first glued to the inside of the fuselage halves. Here is where you of course need to arrange your painting early on in construction. Those tunnel parts are not only detailed for the interior cockpit, but they have rivet detail all the way down the exterior faces that you can see down the intake path. The same goes for the internal face of the fuselage parts too. Deep inside those intakes, HpH have even included airflow vanes that help to evenly distribute air over the intake fan. Once you’ve installed those intake sections, the cockpit work can begin. The cockpit is a true multimedia event, with some beautifully refined resin detail, supplemented by a respectable amount of photo etch work. All photo-etch parts in this kit are produced by Eduard. A combination of both brass and colour PE will be installed here. With the forward and rear bulkheads installed, the cockpit is then outfitted with ejection seat rails, avionics, regulators, valves, plus the usual gamut of parts, such as the seat, control column and hydraulic cylinder, rudder pedals etc. Cockpit detail is superb, with nice sharp resin detail shown alongside the Eduard colour PE parts. These early MiGs didn’t have the interior turquoise colour that defined the typical Russian Cold War cockpits, and the instructions show this as ‘Light Grey Blue. I know the some do not like the inclusion of colour PE, but the parts included here look perfect, with a non-pixelated, solid finish. I’m more than happy to use the parts supplied for this purpose. Of particular note is the laminated instrument panel, finished in black. To help you with precise location of parts in this tiny but packed cockpit, photos are included to assist you, as well as illustrations on assembling the various components themselves. Fuselage This is supplied in full length halves, with sharply refined panel line detail and subtle rivet lines. HpH added the casting blocks so that they run the full length of the fuselage underside. These are quite thin and just require a knife or razor saw to part them. You will of course need to recreate any missing detail from the surface in those areas, but you would need to do that anyway when you sanded the joint seam. There are actually a couple of areas on the underside that need to be cutaway in order to attach other parts, but these cutaways couldn’t be incorporated with the casting block position. RB Productions scribers and saws look perfect for adding any missing detail, as they are fine, and the pounce wheels are available in various pitches. You are sure to find one that matches. Note that the fin is cast as separate parts too, which for a resin kit is surely easier when it comes to alignment and gluing. When the time comes to attach the halves, a series of peg holes are provided so you can insert your own pins. This should remove any concern about the joints being raised/lower on one or the other parts. Just check the fit first before committing to glue. If you wish to pose the airbrakes in an open position, then you will need to first cut away the resin cast detail. This will then be replaced by photo-etch brake doors and internals surface detail, with a number of resin detail parts. This is always a leap of faith, and I would have liked to have seen some resin cast brake doors, onto which PE detail could be applied. Internal bulkheads are supplied to help you install the internal exhaust pipe. The latter is detailed with a rather nice fan surface. Wings and fins Before you can work with these parts, you will need to remove the leading edge casting blocks. Again, surface detail really is excellent and looks perfect for the scale, with fine panel lines and subtle riveting. The internal wheel bay ceiling detail will be added to with separate sidewall parts, leaving you to perhaps just add a little wiring here and there. There’s no real need for anything else, as HpH seem to have it covered! As well as a number of other internal resin components, and a clear light lens that need to be installed, the rear work here will be the inclusion of the landing flaps. These are a photo-etch addition, and unlike Eduard’s tried and trusted system of flat panel – fold and twist, these are mostly produced from individual parts, such as ribs etc. The result does look pretty damn good. Take a look at the photos here. For the flap itself, construction is mostly flat and curved plate, and looks very straightforward. More photo-etch is included for the wing fences, and there are clear locations to which these will insert. As previously stated, the vertical fin is a two-part assembly. The upper and lower rudder elements are cast as single parts, as are the stabilisers and their separate elevators. You will need to look at pinning the stabilisers to the fin, and as the latter is separate to the fuselage, you might opt to do this before assembly to the fuselage itself. Ailerons are also separate parts. Wing tanks look realistic! Undercarriage The struts themselves are steel wire reinforced, and will take the weight of the model with no problems. There is a little wire break-out at one point, but this will be entirely covered by the gear bar doors. Wheels and hubs are separate parts, which, depending on your assembly chronology, will make painting these parts much easier. All undercarriage ancillary parts are highly detailed, and all you may need here is a little plumbing from lead wire. Photo-etch parts are used for various brackets and couplings. Weighted wheels have been supplied for this release, and to my reference, HpH appear to have got this right. Whilst the nose wheel is tread-less, the main gear wheels have a fine, circumferential tread. To attach the nose wheel to its strut, you will need to drill it and slide it onto a hidden length of wire that juts out between the fork. Be careful that you gauge the position correctly so the wheel ‘flat’ sits on the ground. Clear parts HpH really are the masters of clear resin. They have this down to a fine art. The canopy parts here are just amazing. There are casting blocks to remove, but they have thoughtfully included a resin web to separate the part from the block. Clarity is exceptional, and frame lines are sharp. A small piece of sticky-backed card is included, with a number of coloured resin parts included, such as the wing tip lights. Yes, no need to formulate your own translucent painting solution for this model! Photo-Etch & seatbelts FOUR sheets are included, containing a myriad of parts that are assigned to just about every area of the airframe. These include landing flaps, airbrakes, undercarriage parts, and of course a whole colour-printed sheet for the cockpit. Buckles required for the seatbelt set are also included on these main sheets, and not as a separate fret, as is normal with an HGW release. As this is Eduard, production standard is high. All I can say is that you’ll need to carefully follow the instructions so as not to miss any of the parts supplied. The seatbelts are made from a ‘microfibre’ textile and are laser cut. You’ll need to peel off the packing sheet, scrunch up the parts to break their stiffness, and then assemble. HGW’s belts are incredibly realistic when assembled, and they can be washed with oils or enamels etc. Turned metal parts Barrels for the three cannon are included, and the larger cannon has a rather exquisite but fragile looking muzzle. A real masterpiece of turning and milling. Beautifully done. These parts are included inside a small zip-lock bag. Masks A small sheet of vinyl masks are included for the canopy, but strangely enough, not for the other clear areas such as the transparencies in the belly and lower wing. You’ll need to mask these yourself! Decals These have all the hallmark of Eduard-produced decals, and that’s a possibility due to the other Eduard parts in this release. A single sheet is included which supplies decals for two machines, plus a whole load of stencil data too. Printing is very thin, and has minimal carrier film. Colours are solid and look authentic, plus everything is in perfect register. The two machines catered for here are: MiG-15bis, 147.GIAP VVS, Soviet Air Force, Kubinka AFB, 1952 MiG-15bis, 351.IAP, Major A.M. Karelin, Korea, 1952 Instructions Unless you have a tablet, PC or laptop in your workroom, you will need to print out this manual. I suggest it anyway, or you’ll be constantly flicking backwards and forwards to reference build sections. The instructions themselves are excellent, being a combination of both drawn illustration and photograph reference. There are 36 pages included, with a parts breakdown and simple colour reference. The colour profiles and stencil placement diagrams are excellent. Conclusion This really is no kit for the beginner to resin models. Resin can be notoriously tricky to master, and this model is very complex, as are many other HpH releases (Note, if you want an introduction kit, try their Ohka Type 11/Reichenberg kit). You’ll need your wits about you at all times to ensure that everything comes together as it should, and that no parts are omitted. Detail is just crazy, and if you crave amazing cockpits and other such areas of eye candy, then this release will fulfil your needs. I think my only real criticism is the lack of a really good scheme. One is quite standard, and the other is fairly difficult to achieve unless you are a demon with an airbrush. To screw your model at such a late stage would be gutting. Nonetheless, we now have a fully detailed MiG-15bis, and I can’t wait to start! Note: Profimodeller have a neat engine set for this kit, complete with new rear fuselage, drip tray etc. VERY highly recommended My sincere thanks to Profimodeller for supplying this review kit. To purchase directly, click THIS link.
-
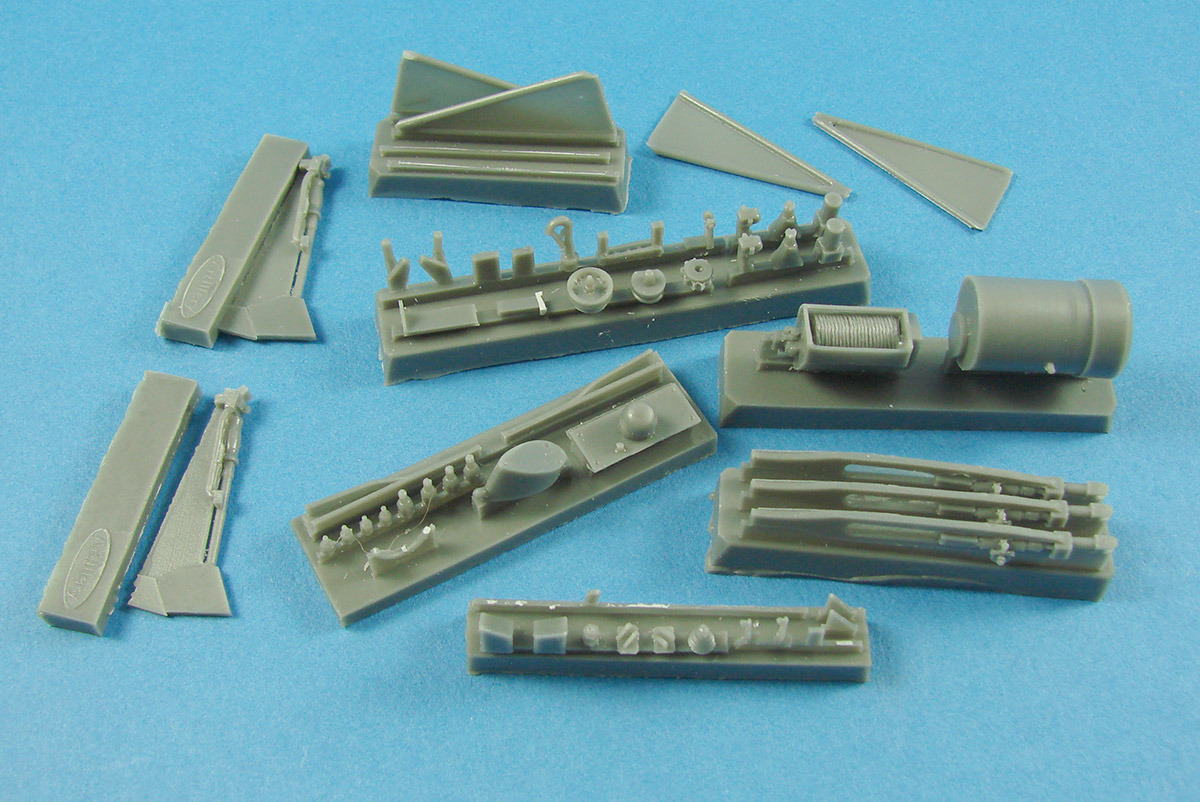
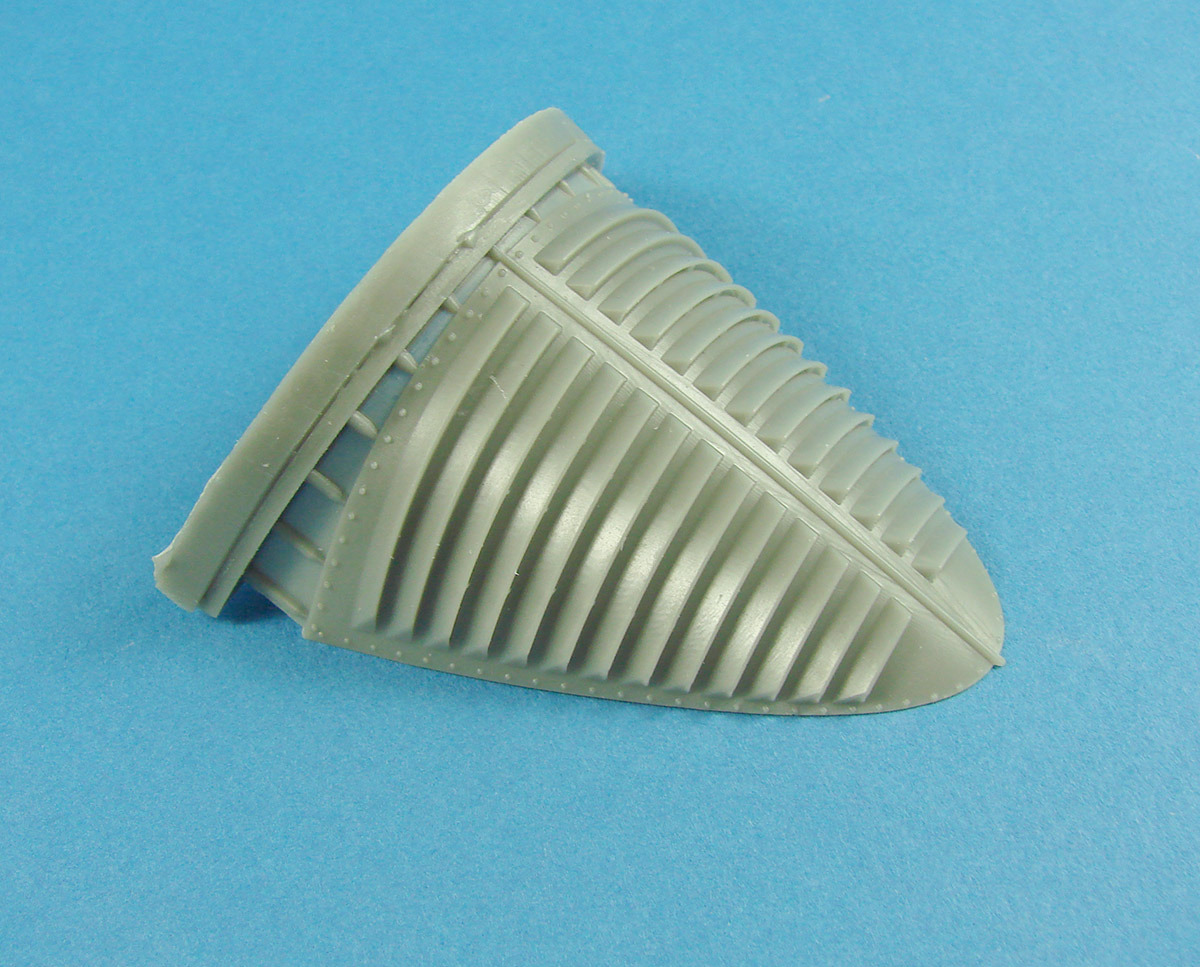
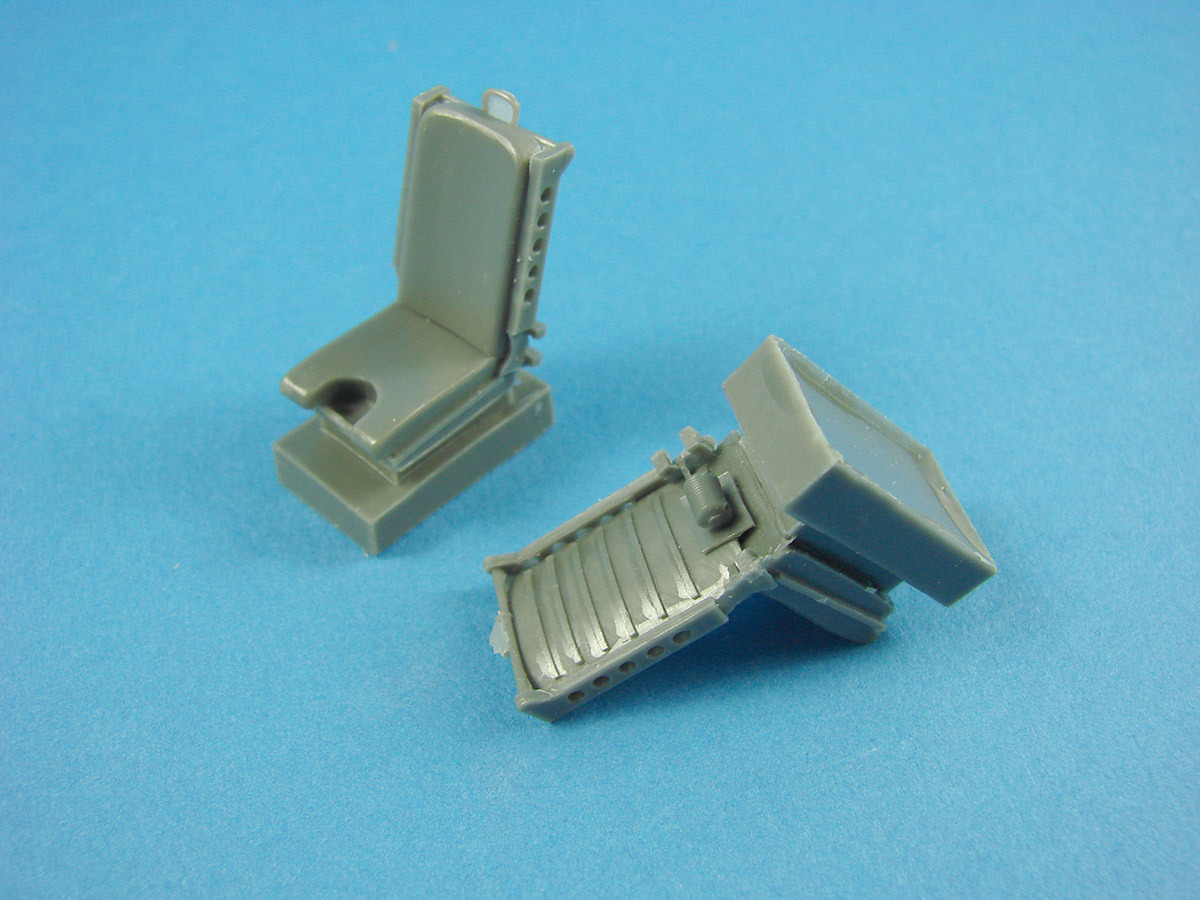
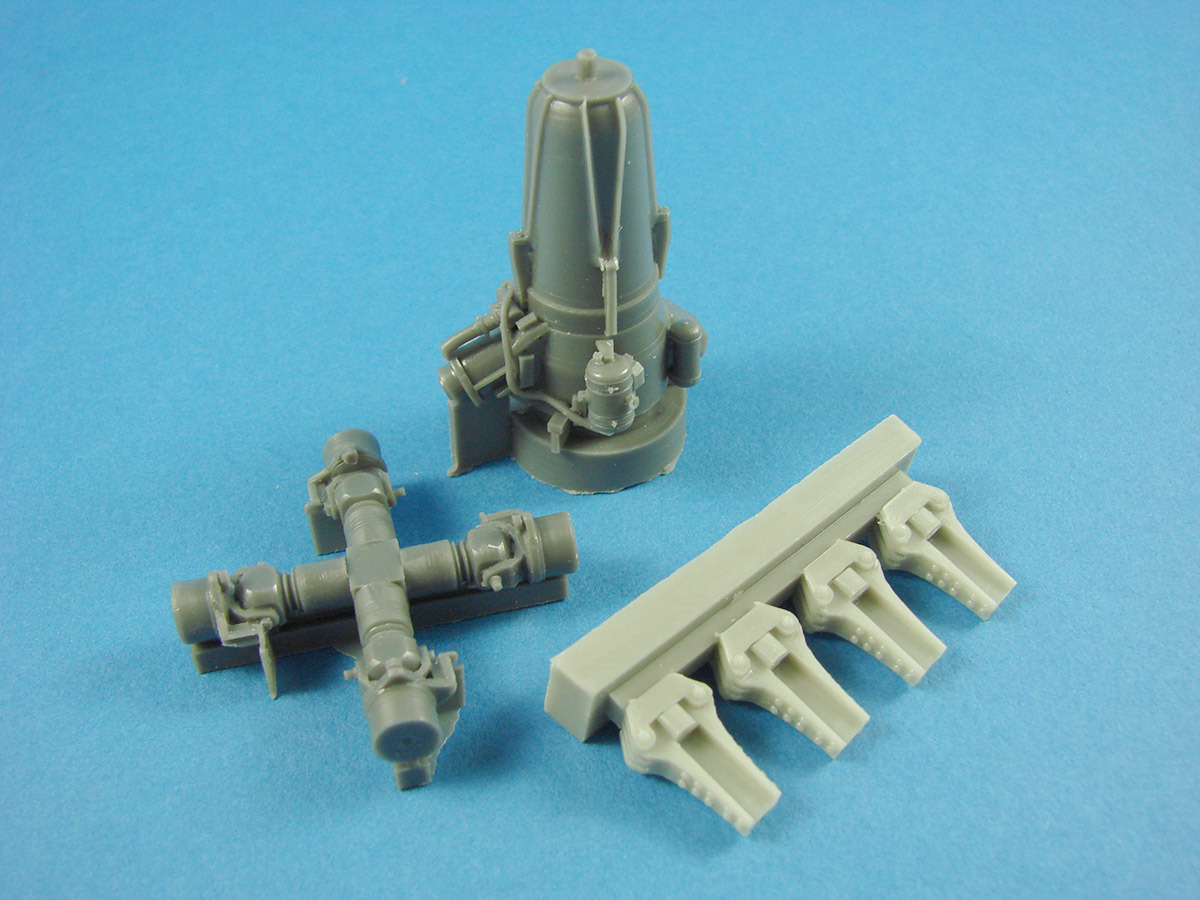
1:32 MiG-15 Engine (for HpH release) Profimodeller Catalogue # 32119 Available from Profimodeller for 1590,00 CZK I have to say, I adore the very early jet aircraft. This was of course a technology which was still frighteningly new when the MiG-15 first took to the skies in 1947. Only two years earlier, the Messerschmitt Me 262 was still in operational use, being the world's first mass-produced jet fighter to enter front-line service. With the collapse of the Third Reich, Russia trialled much German technology, and only had limited success with their reverse engineering of both the Jumo 004 and BMW 003 jet engines. For their next generation of fighters, the Russians opted to buy the British Rolls Royce Nene power-plant, and reverse engineer this for their own purposes. To say the Russians were amazed that such technology was so easily purchased from the British Labour government, is a severe understatement. After purchasing the engines, Russian engine designer, Vladimir Klimov set to work and designed/developed the Klimov RD-45. A later attempt by Rolls Royce to rightfully claim a licence fee, ultimately failed. Klimov RD-45/VK-1 The Klimov RD-45 turbojet was quickly developed and first run in 1947, and the MiG-15 was specifically designed to operate with this new engine. Of course, the rest is history. The MiG-15 was a highly successful aircraft that was introduced into service in 1949, and set a further developmental path for the Russians. We'll look at this aircraft in more detail when we have the HpH kit here for you. There's nothing like doing something arse about face. My original intention was to have the review of the HpH MiG-15 kit online before I published this one, but sometimes, things are a little out of my control. I will endeavour to have the MiG-15 kit itself reviewed here, very early next year, followed by an online build of both items together. Until then, you'll have to satisfy yourself with this rather impressive engine upgrade said for the aforementioned kit. I'm sure you won't be disappointed. If you want to display with your HpH kit, you really are going to have to perform the most radical and destructive surgery possible, to two of the kit's main parts; namely the fuselage. The Klimov engine was bolted to a framework that was supported on a bulkhead in the middle of the MiG-15 fuselage. To access the engine, the rear fuselage was unbolted, and wheeled away on a trolley. So, in short, you're going to have to saw that fuselage in half, along pre-prescribed panel lines. If that fills you with trepidation, then rightfully so! Luckily though, this set provides a whole new rear section in resin, based upon the HpH kit itself. Therefore, the surface detail etc is identical. Having these new sections means that you don't have to re-use the old rear section and make any precision cuts to do so. You can saw the fuselage to the rear of the line, and then gradually work to that line and finish it properly. Those fuselage halves are superb. Cast in pale cream resin, surface detail is precise and sharp, with neat rivets and panel lines. It also has numerous service panels which are cast 'open', allowing you to choose how you will set the access doors themselves. Internally, there is no detail, but you will add the numerous metal construction elements from detailed PE strip, and you will also fit the PE airbrake housings (supplied in this kit too) into this area, along with the exhaust pipe tunnel. Even this can be accessed by a panel which you can pose. Whetted your appetite yet? Casting blocks are connected along the fuselage mating joint, and will need careful removal. Several openings also have a thin resin web that will need to be removed. There are another TWO bags of finely cast, cream resin, containing the various engine parts, and also those for other areas, such as the tail pipe and rear, external nozzle fairing. This is quite an impressive and imposing resin upgrade, with a total of almost FORTY parts, and that's not including the numerous sheets of PE which you'll need to negotiate. Using my Rolls Royce Nene reference, accompanied with images of the Klimov RD-45, it's very obvious that Profimodeller have created what amounts to an extremely accurate-looking reproduction. All of the parts which you would expect to see here, are included, and the breakdown of the engine means that no simple compromise has been made. If it's better to use 2 or 3 parts to recreate something, instead of one, then this set clearly demonstrates this. You can more or less pick out the various engine areas and identify them against period illustration. The engine comprises of nine combustion chambers (all separate parts and with their own PE section flanges), centre around various assemblies, including rear air intake and main compressor housing. Nozzle box and numerous other parts are beautifully recreated here, including the engine's ancillary control unit etc. When complete, the engine will look both comprehensive and very complicated. Numerous sections and several PE parts go together to create the exhaust pipe which attaches to the engine outlet, and will slide into the rear fuselage section tunnel. At least I'm presuming that these halves will more or less go together. If they don't, I wouldn't have issue with that, as this engine is supposed to be displayed. That's the whole point. Profimodeller have spared no expense in recreating this area in the best detail possible. Another bag of resin parts contains more ancillary parts, and the engine mounting framework. All resin has some clean-up which is needed, whether this is light flash, or the thoughtfully placed casting blocks. Detail is sharp throughout, and no flaws have been visible to this reviewer's eye. Several items such as the tubular sections for the exhaust, are thinly cast. You're going to have to like photo-etch if you wish to use this set. And I mean, really like it. There are no less than SEVEN photo-etch sheets here, containing everything from internal structural detail, to engine detail, exhaust pipe tunnel, access doors, bulkheads, and also both the internal and external airbrake assemblies. Etched relief detail is excellent, and all parts have minimal tags holding them to the frets. You may need to anneal some parts before use. Lastly, several short lengths of copper wire, and one length of neoprene tubing are included. The wire is quite thick, and I'm a little unsure where these items fit, but wire is required for shackling the access ports to the rear fuselage. For this, however, I imagine it should be thinner. I find the instructions for this set to be pretty clear, despite being of the drawing type. I have said, this is no weekend project, and the manual pretty much highlights this. Colour references are given throughout, but no actual manufacturer paint codes. The last page is given over to the various access plate construction, and where they fit on the rear fuselage. This is certainly an upgrade which offers many options for the builder. Conclusion It's fair to say that this isn't a cheap upgrade, but in all fairness, for what you get, it is very well priced; a full engine and internal rear detail suite, plus half of the fuselage, and all that photo etch. I think thank once you get your head around the mass of PE, this set should build up pretty easily. Hacking the kit fuse in half will always be a nervy part of the build, but this is one upgrade which will surely set your MiG-15 above anything else out there. Absolutely superb! Very highly recommended My sincere thanks to Profimodeller for this review sample. To purchase directly, click THIS link.
-
- 1
-

-
You are one sick puppy.
-
Two mins in, and he's sawing it apart! Can't wait to see this progress.
-
Exactly. A good kit is a good kit, no matter where it comes from. The Ho 229 was amazing, and still would've been even if HKM was doing one. Novel perspective eh?
-
Mmmmm, what did I get? THESE: Just HAD to get one of these to build a Russian machine! This little kit was a gap in our HpH review list: After chatting to Kuni from ZM, he arranged to have this put away for me: A nice pit for a future project: An ÜBER F-104 Starfighter decal set from DACO. 6 sheets and over 700 decals for German/Bavarian machines. Thanks to Erik for sorting this for me
-
HPH Models 1:32 Focke Wulf Ta-154 'Moskito'
JayDee replied to JeroenPeters's topic in Aircraft Reviews
Amazing review! The parts look better than injection moulded detail. Exterior is amazing! Surprised to see no colour PE in there, but I think I prefer to paint the instrument panel. Dual HpH build-off next year? Your Ta 154 vs my Me 410? -
1:32 Messerschmitt Me 163 Anhänger Profimodeller Catalogue # 32248 Available from Profimodeller for 1,749Kč We recently took a look at the new Scheuch-Schlepper and Pressluftballonhänger from Profimodeller. Read the historical noted there for an insight into the release of this new set. The balloon cradle lifter, whilst I talked about this in conjunction with the Me 163B, was possibly more akin to the recovery of the earlier Me 163A, although possibly not exclusively. However, it is certain that the tracked recovery cradle was the type that was generally in use for the later service Komet aircraft. We’ve seen this in both 1:72 and 1:48 scales before, but this is the first time this has been released in 1:32, and suitable for the Meng and Hasegawa Komet kits. Of course, this was towed by the Scheuch Schlepper, and you really should look at both of these kits for your Komet diorama. This release is packed into a sturdy little corrugated box that has an attractive product label attached to the lid, depicting a clear line drawing of the Anhänger. Inside this box, there are two smaller boxes containing the resin parts and another that contains the photo-etch, and wire etc. No other loose parts are contained in the rest of the main box expanse. In total, there are around 118 resin parts that are cast in a combination of black and cream resin. There are also no shortage of metal parts, with a further thirty turned brass parts, plus wire, metal rod and TWO photo-etch frets. I think you can see that this is no weekend project! Instructions are supplied as a 14-page A6 booklet. First of all, let’s see what we have in each box, then a look at construction. Each of the resin boxes has a single bag, containing all the parts therein. Careful handling is a necessity, and in my sample, there don’t appear to be any broken parts. Contents Box 1 Contents Box 2 Contents Box 3 The breakdown of this is quite different from the Pressluftballonhänger in that each arm of the lifting cradle is constructed from a number of smaller components instead of being a single large casting. Of course, this means that you have a number of elements that need to be assembled so that they lie correctly, without any twist. Looking through this kit, I would advise either small quantities of epoxy or CA gel for adhesive, allowing some adjustment time. I would also advise that both left and right booms are assembled at the same time, and one at a time, per side, whilst ensuring both sides are balanced. Remember, there are tracked wheels on this, and they really should lie ‘on the flat’. Get it wrong, and these won’t lie equally flat. Construction starts with the bank of two hydraulic rams that I presume are for raising the rear arms of the lifting boom. As I have no reference of the Anhänger, I have to try to understand the mechanics of it. The Anhänger is quite unusual in that these boom extremities have their own articulation. I presume this is so that each can be raised in turn until the Komet is safely off the floor. If the ground is uneven, it could be another reason for needing to raise each arm at different levels. The body of the Anhänger is next to be built, and again, there is a lot of importance that I need to push here for ensuring that alignment is correct. A number of subassemblies are required to fit between the two main frame halves, including a complicated jack/ram system that is used to raise the whole main, rear boom. There is, of course, a third hydraulic cylinder, standing vertically, which would have been used to move this section. As a number of holes are required for line up, I would perhaps use some styrene/ABS rod to aid in this, whilst waiting for other sections to dry. I think it’s important to look a couple of stages ahead during all construction. Each beam has 3 x 3 sets of wheels, made from resin, and mounted upon turned brass axles/spigots. As this is probably one of the most important areas of construction, I’m pleased to see that metal parts are used instead of resin. To encompass these, TWENTY-SIX resin blocks are included, each with two resin track parts. Both parts are different as only alternative tracks are fitted with a running guide that slips in between the outer/inner wheels and the centre wheel. I’m afraid you will need to drill these out so that you can insert a wire link to hold the tracks together. I would suggest that you actually link the tracks together and drill them at the same time whilst dry fitted, or you may find that you can’t accurately pin them together. Of course, these wheels are fitted to fixed beams, with the actual lifting beam sitting above this. Please look at the images of the instructions, just to see the level of detail on this kit. All resin parts are superbly cast, with very little clean-up, except for casting block removal. My sample has no flawed or broken parts. Of course, these is a lot of block removal due to the high parts count. Connection points are designed to be easy to remove, and production is some of the best I’ve seen, outside of the big name companies in our hobby. The metal parts are also excellent. PE frets are beautifully made, with sharp detail, and are left in their bare brass finish. Turned metal parts are perfect, with no burrs or other issues. Instructions These are clear and concise, but with many constructional stages due to the nature of the model. Unfortunately, there is no painting guide, so you’ll have to either ‘wing it’ or see what the general consensus of opinion is over this item. Conclusion Profimodeller have improved in leaps and bounds over the last couple of years, with some of the best detail and improvement sets available, outside of the regular companies, such as Eduard etc. The set is well designed and thought out, and beautifully produced. I can’t vouch for accuracy, simply because I don’t have the prerequisite reference material, and of course, this sort of review is quite difficult to put together, and remain informative. Everything you need to build this model, should be included here, such as wire for linking the tracks etc. A very comprehensive kit, albeit not too cheap, but in my opinion, well worth the asking price (currently at around £48 equivalent). Along with the Scheuch Schlepper, you can guarantee that the actual Komet part of your model, will actually only account for around a quarter of the total parts that you assemble!!! HIGHLY recommended Is that it? Er no! We have ANOTHER set here designed to be hooked up to the Scheuch. If you’re actually able to source a 1:32 V1 flying bomb, then we now have a trolley designed to carry them around the launching site....... 1:32 V1 Anhänger Profimodeller Catalogue # 32247 Available from Profimodeller for 1,749CZK This cradle-like trolley was used to carry the partially disassembled V1 ‘Doodlebug’ or ‘Buzzbombs’ from their storage facility, out to the waiting launch aircraft, such as the Heinkel He 111P. Essentially, this consisted of a transporter frame that had a hydraulic crane that allowed the weapon to be loaded and unloaded. Like a lot of specific German technology, it was quite innovative and fulfilled its purpose precisely. The wings of the V1 were packed alongside the fuselage, and once the fuselage was located to the Heinkel, the wings would then be fitted. Again, packed into a rigid cardboard box with a line drawing product label, this particular set contains THREE small boxes and another beautifully drawn instruction sheet. One package contains two PE sheets, with some wire, metal rod and the Anhänger wheels that are supplied as rubber rings. Another box has the more fragile rods and support parts cast in black resin which I think is perhaps a little more resistant to breakage than normal resin, and the last box holds a number of cream coloured resin parts for the frame, chassis, turntable etc. There are a total of around SEVENTY resin parts, SIX rubber tyres, THIRTY metal parts, including rod and turned metal items, and a further EIGHTY pieces of photo-etch. Again, this last figure is an approximation. Resin parts are superbly cast, with casting blocks that will be simple to remove and clean up any remnants. No breakage or flaw can be seen on my example. Photo-etch parts are also extremely good, with small connecting tabs and some great detail, such as the tread plates. Turned brass parts are also cleanly produced, sharp and with no burrs or debris to remove. Wire is included for the various hydraulic lines. Contents Box 1 Contents Box 2 Contents Box 3 This is no simple to make model though, and you’ll need to really take your time in ensuring that all beams and frames are aligned, and I would advise some slow-cure CA for those final connections. Instructions look easy enough to follow, with the line drawing illustration being pretty clear. There is NO colour information at all, so you’ll need to get creative but sensible with this little model kit. I know you’re going to ask about a 1:32 V1, yes? The good news is that Profimodeller will be releasing one of these in a few short weeks, so get ready for that super He 111/V1 combo/dio you always wanted to build in 1:32! HIGHLY recommended! …… but it’s not over yet. There’s more… 1:32 Tipping body for Scheuch Profimodeller Catalogue # 32249 Available from Profimodeller for 499,00CZK Please remember that the Scheuch wasn’t actually designed for the Me 163 Komet. It was only the towed items that were for this purpose. The Scheuch was actually an agricultural machine, and as such, it could tow other things. This set depicts a simple tipping trailer that could also have been military in use, for carrying tools, equipment and building materials etc. This little kit is a much simply affair than the Anhänger we just looked at, and as a result, comes in a smaller box that contains all parts that are simply packed into zip-lock wallets. One wallet contains the creamy coloured resin parts, whilst the other holds the black resin, photo etch and metal rods. A little unusual to see PE in a bag with resin, but this fret is a heavier gauge than we normally see, so will come to no harm. BAG 1 This contains the cream coloured resin, with a total of four parts. Two of these are the wheels. These actually look very good, with nice hub and tread detail. My only reservation is that the casting block connecting point is a little too wide, obscuring more of that tread than I would have liked to see. The other two parts are the main tipper body and the flap door side. These are very thin indeed and require some care in handling. Again, detailing is excellent, with metal frame and bolt detail, and the body itself having a faux wood grain pattern which should look good with an oil grain application and wash. The casting blocks have been thoughtfully placed, and will be easy to remove. BAG 2 Another ten resin parts reside here, cast in black resin. These form the tippers chassis, and will connect directly to the ring attachment at the rear of the Scheuch. Essentially, these parts are blocks and rods, and you’ll need to follow the instructions carefully with regard to spacings and lengths of parts. Construction looks easy, it’s just that you’ll need to take constant care before you commit glue. All casting is first rate, with no flaw or defect to be seen in my sample. A single PE fret contains brackets, shrouds, latches and hinge plates. Production is excellent. Metal rod is included for axles etc. Instructions are quite a simple affair with line drawing imagery. A little colour notation is supplied, but you can pretty much paint this how you see fit, whether it be grey, green, yellow etc. Conclusion Profimodeller’s Scheuch family is building nicely, and this little kit will no doubt will a hole for a good number of modellers. All it really needs now are some figures, but where can we get them? Highly recommended 1:32 Scheuch German crew Profimodeller Catalogue # 32258 Available from Profimodeller for 249,00CZK The last of our current Scheuch review items is definitely most welcome. It contains crew figures in various poses, that would look great being seen adjusting the Komet or Anhänger, and of course, sat driving the Scheuch too. This release, packed into a relatively large box, contains not one, two or three, but FOUR figures. They appear to be dressed in Luftwaffe ground crew uniforms, as their hats and tunics sport the Eagle symbol. These guys were collectively known as ‘Black Men’ due to their uniform colours, yet these uniforms are depicted in a Grey-Green tone. My history and knowledge here isn’t good, so I’m probably wrong. Each figure is cast without arms, and with the exception of the kneeling figure (mechanic), also without hats. The three hatless characters have peaked caps, unlike the kneeling figure. The latter figure can be posed so that he’s adjusting the Scheuch or the Komet, as his arms have hands that mimic the handling of either a tool or piece of equipment. One figure is supplied as a Scheuch driver, and he stares intently forward with his hands on the wheel. This is only really any good if you don’t use the other guys, as he appears to be driving. A seated figure, looking over his shoulder with one hand on the wheel, would’ve been more appropriate for this set, or an option to pose as such. Two ‘helpers’ are provided too. As these are fully stood up, they would perhaps be batter placed around the Komet. One of them looks like he has his hand, chest height, resting on something, but his right arm is resting along a flat surface. I’m sure there is a role for him, it’s just that you’ll need to find what that is. All figures are superbly cast, with minimal clean up and easy casting block removal. A little flash can be found here and there, but it’s very fine. Left arms are identifiable due to numbered dimples signifying fit and position. Uniform detail is very good, with creases, folds, belt detail etc. being nicely rendered. My only reservation, not being good at figure painting, is that the various emblems aren’t supplied as decals. You’ll need a steady hand to paint the various insignia, epaulets etc. The instructions consist of a single sheet that shows each figure as a complete character, and printed in colour. A small colour chart denotes painting. Conclusion I do have a couple of reservations here, but that is probably because I’m no figure builder and painter. Detail on these figures is very good, and no doubt will look perfect in the capable hands of a good modeller. I just wish there was a driver option for a stationary Scheuch. Recommended My sincere thanks to Profimodeller for the review samples seen here. To purchase these, click the links in the article.
-
1/32 HPH Models Ohka Model 11
JayDee replied to JeroenPeters's topic in LSM 1/35 and Larger Work In Progress
Too cool. You can paint my figures too -
Yes, American manufacturer, but a Russian designer
-
1:32 Westland Wessex HC.2 Fly Model Catalogue 32010 Available from Fly for 2066,00 CZK (approx. £55 at time of writing) I’ve said to a few people that the Wessex appears to be typically British in appearance, but is literally only by design, and to be more accurate – RUSSIAN design! Of course, the Wessex was actually a licence-built version of the Sikorsky H-34, built by Westland Aircraft. The Wessex was slightly different to its American-built Sikorsky cousin, in that rotor power was generated by a turbo-shaft engine, rather than the piston engine of the Russian machine. In fact, the Wessex was the first mass-produced helicopter in the world to be powered by a gas turbine engine. Seeing initial production to satisfy a Royal Navy order, the type, having been proved successful, was also then ordered by the Royal Air Force for Air – Sea and Mountain Rescue duties. Of course, the Wessex was also employed for military duties with the RAF, being capable of transport and battlefield support, and saw service in both Hong Kong and Northern Ireland, on extended detachments. The naval HU.5 type saw service during the Falklands Conflict, where 55 Wessex were used to move equipment to frontline units and support battlefield positions. Entering service with the Royal Navy in 1961, it saw a respectable and pretty trouble-free operational period of over 40yrs, with the last Wessex being retired by the RAF in 2003. Other notable operators were Australia, Uruguay, Brunei and Oman. It was also used in a civilian role in Britain for ferrying of crew for North Sea oil rigs in the 1960’s and 70’s, with Bristow Helicopters operating the Wessex 60 type. Just wow! Not only do we get a new helicopter in 1:32 (I hate 1:35!!), but it’s also one of the few I actually like….the Westland Wessex! Serious kudos to Fly Model for not only developing this Holy Grail, but also shipping me one out so quickly. I was asked which version of this I wished to look at, so I opted for the HC.2 RAF version. Fly also produce the naval HU.5 too, with some beautiful colour schemes. However, the options here are also pretty colourful too, as we’ll see later. Packed into a relatively small box (for the model’s finished size), it’s nonetheless crammed with plastic, photo-etch and resin parts. Unusually for a box lid, the subject is shown in photographic form, with an action photo of the HC.2 in operation over a coastline. Also unusually, the photo is portrait in layout, unlike most artwork which is landscape. A nice photo which shows what this kit is all about. The colour schemes, four in all, are shown on the box lid side. A friend was here earlier, drooling over this release, and until he saw the resin bags, he said that the kit seemed to have a fairly small parts count. To a degree, that is true, as much detail relies on all those resin and PE parts, but there are still SEVEN sprues of medium grey styrene, and TWO clear sprues. With the exception of Sprue F, all the others are packed into a single clear sleeve. TWO photo-etch frets are included, a set of paper parts, one large decal sheet and I haven’t even begun to count the many, many resin parts in this release. Like other kits from FLY, the resin is cast by Artillery, and is excellent quality. There are a small number of broken parts in this sample, but we’ll look at that later. SPRUE A (x2) This is the only sprue for which there are two identical items supplied. Essentially, parts that have multiples tend to be moulded here. The main protagonists are the main rotors themselves. A quick note here is that no sprues have part numbers on them. You will need to refer to the parts map in the instruction manual. Being short-run in nature, you also won’t find any interconnecting pins either. You need to align things yourself. Ok, back onto those rotors. These have been represented in their at-rest, drooped stance, with the correct level of droop already set for you. Now, I can’t vouch these drooping more as time goes by, but I can say that Fly’s plastic is quite light, so fingers crossed, you won’t have an issue. These rotors will slip into resin mounts, and then secure to the resin hub. I suggest you pin these with rigid wire to prevent any stressing. Rotor detail is very good too. Two of the four tail rotor blades are also to be found here, and will fit to the main part that is full span. A multitude of parts on this sprue are concerned with the internal ribbing and framing of the crew compartment. This will also be supplemented by photo-etch joint plates. In all, it should look pretty impressive when complete. Other parts that can be seen here are engine exhausts, main gear struts, foot control pedals, and a good number of small external and internal parts such as scoops, vents, and minor hub parts etc. SPRUE B Here you will find various floors and bulkheads, plus the underside of the main fuselage area. This latter parts gives us an idea about what we can expect from the surface detail of this model. Now, if your impression of short-run kits hasn’t been good with regards to details, then this will shatter that illusion. Panel lines are as refined and as you would expect to see on a high-end manufacturer’s release, and as importantly, they are also even. External detail will be supplemented by further resin detail. I can also tell you that the exterior of this model is riveted too, and they look just perfect, as in not too defined to distract, and just enough to perhaps catch a little wash here and there. They are very subtle and only a secondary feature of the exterior detail. Reference I have does show that at least some riveting was actually raised. If you feel you wish to correct this, then I suggest either Archer or HGW positive rivet decals. Attention to interior detail is also very good, with chequerboard panelling on the floor of the upper rotor shaft assembly, and the same attention to on the crew cabin bulkheads. Of particular note here are the circular port details on the cabin floor. This is some of the best detail engraving I’ve seen, let alone on a short-run kit. SPRUE C As you’ll instantly recognise, the tail section halves are moulded here. This not only helps with tooling a large model, but the tail can also be posed in a folded position, complete with internal bulkhead joint detail, such as the rotor drive coupling. Again, I’m impressed by the fine surface detailing. I do note that these parts, as with the main fuselage and nose sections, have a feint patina. Before use, I would perhaps gently buff these with a very fine sanding sponge, followed by a polishing sponge. It’s no biggie at all, and I think would hep things massively, and of course, not damage any other raised detail. Some of that interconnecting bulkhead detail, plus the bulkheads, are moulded here. These will be supplemented by extra plastic and resin detail. There are THREE instrument panel parts moulded here, but only one part (#9) is used for the HC.2 release. Another is for the HU.5, and most tellingly, the last part is described as for ‘other versions’. I wonder is this means we’ll see further versions of this kit. Other sprue parts include tail rotor items, stabiliser, instrument panel coaming and the crew compartment door. SPRUE D Just two parts here; the main fuselage halves. And….totally Wessex! These look just great. I really hope my photos here help to show that external detail. I’ve built a few Fly model kits, and this looks to be the very best of them yet, and that’s including their Ar 234 that I recently built and raved about. Internally, there are engraved lines to help you place the internal frame parts. Note that there are also engraved lines to help with bulkhead placement etc. too. If you buy the other HU.5 version, you will need to open up the side fuselage windows, and there is some faint scribing within the fuse to show you this. SPRUE E Also helping with fuselage breakdown is the moulding of the nose sections as halves. The instructions show these being attached to their respective fuselage halves almost at the very start of construction, so I would do the same and not chance them being fitted later. I would also advise this of the tail section, providing you aren’t displaying it in its folded position. The upper, meshed area of the nose is actually left open, and without the mesh, but there is a resin cover that sits over this and looks very good. Should you wish to display that area without the cover, you will need to fabricate your own mesh and frame. That’s the only real downside here, as I would have liked to se both options provided. Apart from the bare cockpit floor, the rest of this sprue is taken up with various exterior sliding rails for doors etc. external pipework, and also support frames for the main rotor shaft. SPRUE F This sprue is the only grey one to be packed separately, and this is due to the fragility of the parts therein. Moulding also seems slightly more refined, with zero flash, compared to the other sprues. The plastic also looks slightly different (glossy) too. Here, you will find external grab handles, pitot, main rotor plates, and undercarriage damper legs etc. SPRUE CP-A, CP-B These are the clear parts. CP-A contains those blown cockpit side windows that are so familiar, as well as the other openings. Two bulged windows are included for the HU.5, that aren’t for use here. I’ll add my own notes about these possibilities soon though…. CP-B is a single part, namely the main cockpit window. Framing is very good, with none clear areas being frosted. Clarity is very good, but not in the same league as a Trump, Tamiya, HK or other kit that’s not limited run. However, I still don’t think the parts are too bad at all, and I have no problem with them personally. A dip in Klear may improve them further. Plastic Summary Sprue gate attachments should be easy to clean up, and moulding is very nicely executed. Small levels of flash occur in some places, but no actual defects can be seen. For a short-run kit, this is certainly far more than acceptable, and quite impressive. Ejector pin marks are no real issue, and seam lines are minimal. RESIN PARTS I’m really not going to go into naming every part here, but instead do a photographic breakdown of the various supplied components. See that there are parts here that are also HU.5 specific too. Essentially, apart from the box itself, and the decals. The parts included in this release could also build you the HU.5 version. If you wanted to build your own HU.5 scheme from masks or aftermarket decals, then buying the HC.2 kit is a perfectly acceptable thing to do. Even the instructions are common to both kits Take a look at these parts, all produced by Artillery, and you’ll see just how good they are. Casting is excellent, although I do have a very small number of minor breakages that are fixable by me. I’m sure if I ask Fly, they will send out any replacements I should ask for. Detail parts include those for the cockpit, rotor stack, rotor hub, plus other internal and external details. PHOTO ETCH Two frets here, which are again applicable to both the HC.2 and HU.5 kits. These pare packed into a single sleeve, along with some paper parts that we’ll look at next. PE is included for internal cockpit detail and framework stiffener plates, external rails, louvres, various mesh grilles, straps etc. There is a lot of metal here, and you’ll get a better idea of what is offered by looking at the photos of the finished text shot that I’ve included at the end of the article. PE quality is excellent, very small fret connecting tabs, and high quality, sharp detail and detail relief. PAPER PARTS A single sheet is included that feels slightly plasticised. The various crew cabin belts are printed on one side, in the correct blue colour, and the rear of the sheet is also in blue, so no having to paint the rear. You might need to touch up any white edges you see, but that’s no real issue. I think you can also scrunch this material a little to make it look more naturally like fabric. Seatbelts for the cockpit are printed here too, but I’m not too impressed with these. They lack buckles, and look very two-dimensional. DECALS One large sheet is included, and this is pretty comprehensive. Not only does it contain markings for the FOUR included schemes, but a thorough set of stencils. I don’t know where these are printed, but they do look perfectly fine to me, and having used Fly decals in the past, I have no issue with them. They are thin, glossy, have little carrier film, have solid colour, and are in perfect register. My only criticism is that the instrument dial decals don’t have great definition. I would maybe use Airscale for my build. Instructions These are mostly very easy to follow, being printed as a glossy A5 manual. You will need to be careful that you note all the correct HC.2 details, and not mix up with HU.5, due to the manual being used for both releases. Coloured ink is used to denote PE, decals, and clear parts, and the constructional sequences also have some simple colour notation. I would certainly look for some online reference to help you further though. A single full colour sheet is supplied simply for scheme illustration, and this is also high quality with easy decal placement identification and colour notation. Conclusion I love the Wessex. For me, it evokes memories of the 1970s and 80s and it’s one of those copters that just looks ‘right’, and purposeful. Fly have captured that very essence with this release. Detail, both internally and externally, is incredible, and you can guarantee it will build up into a perfect replica of this iconic machine. Apart from a few minor niggles with small, broken resin detail, there isn’t anything to fault here in terms of quality. The external representation of the aircraft is well thought out and executed, and I really can’t wait to tackle it. If there is only one other niggle, I would perhaps wish that there was an option to display it with folded blades, as the full span of this is about 500mm. Maybe look at pinning those rotors with rigid wire so it can be dismantled when not on display. For me personally, perhaps one of this year’s most anticipated releases, and I’m certainly not disappointed. VERY highly recommended. My sincere thanks to FLY for this review sample. To snag one yourself, hit THIS link!
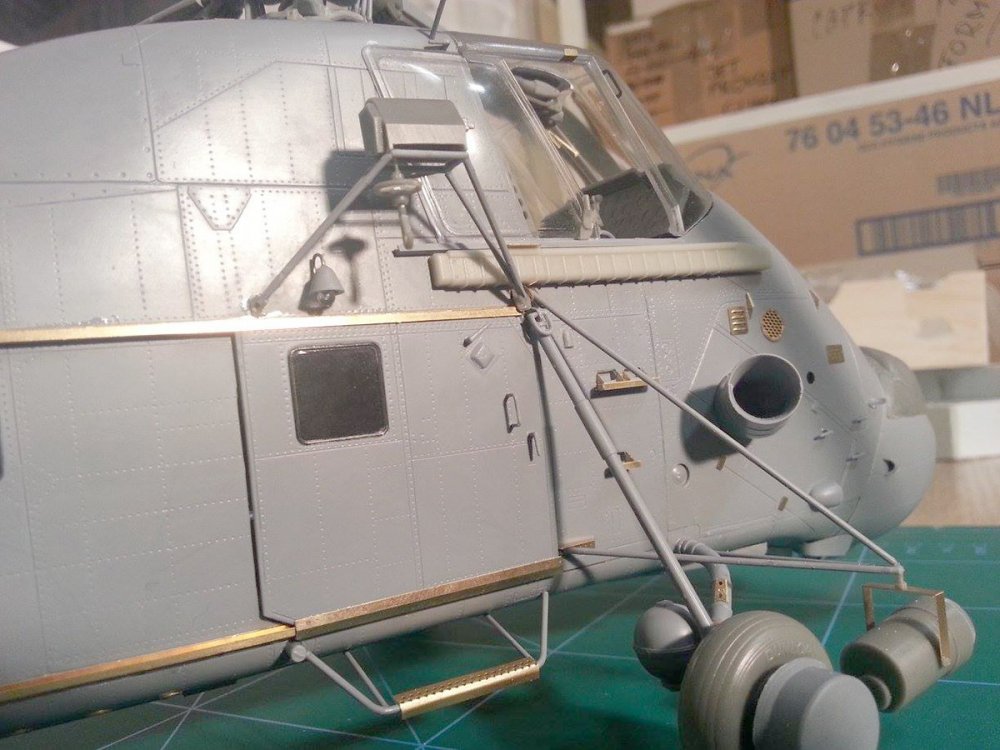


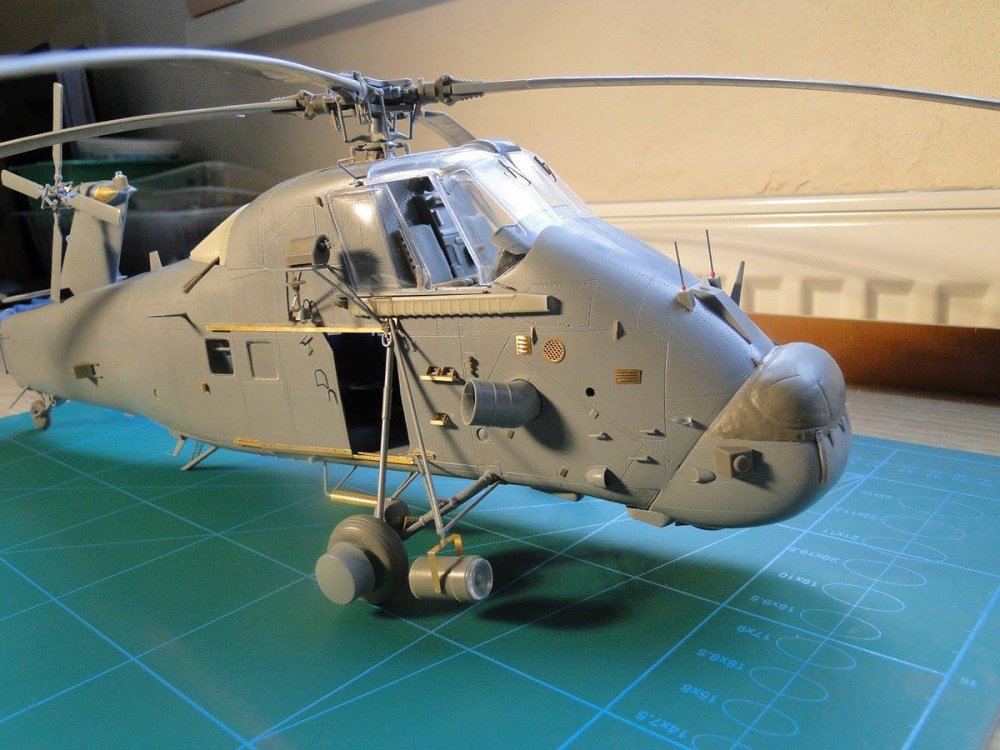
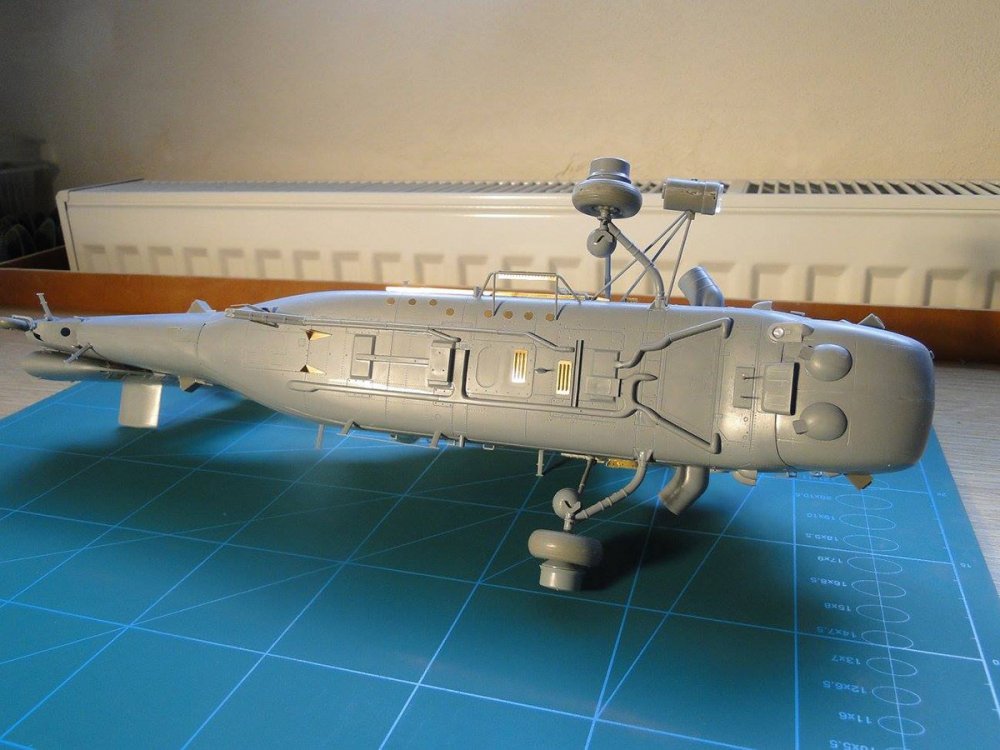


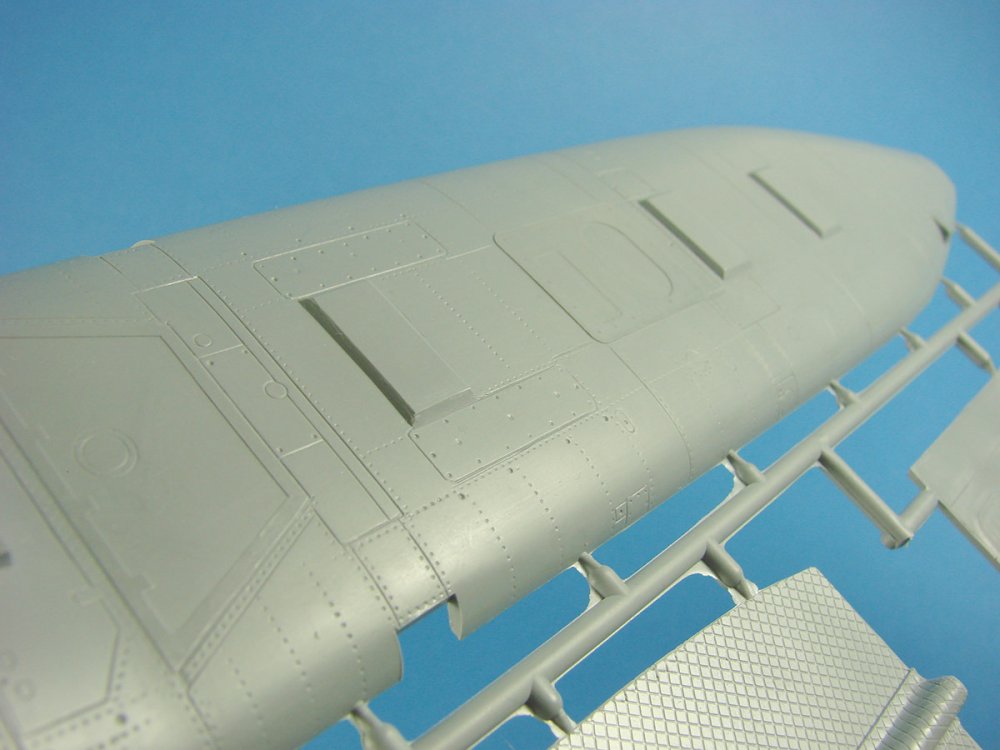
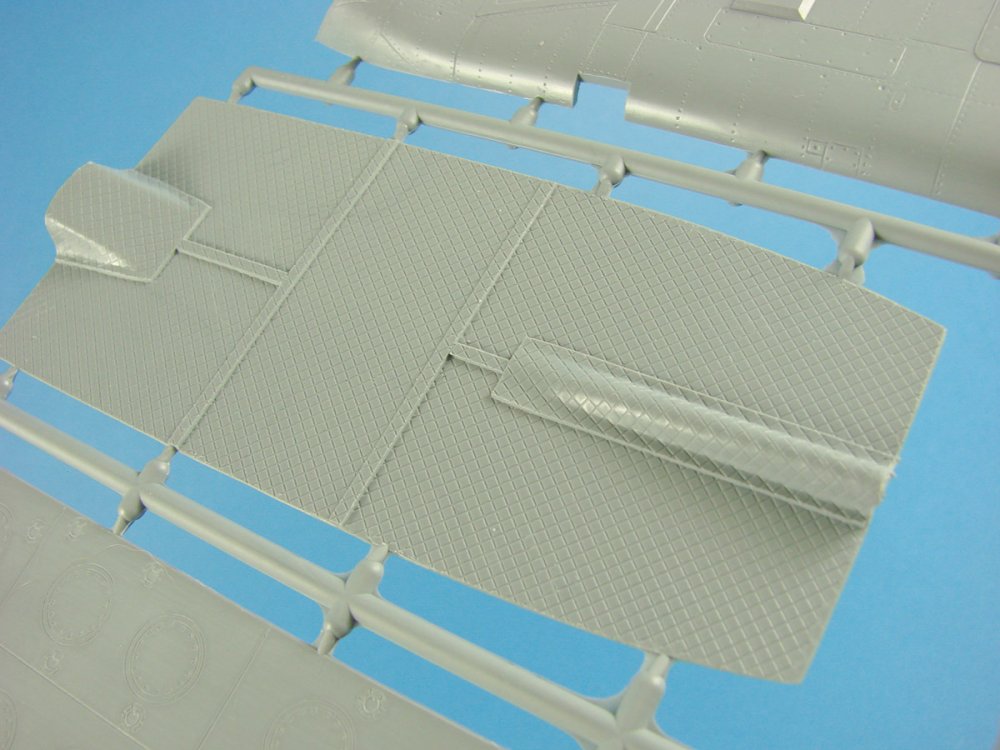
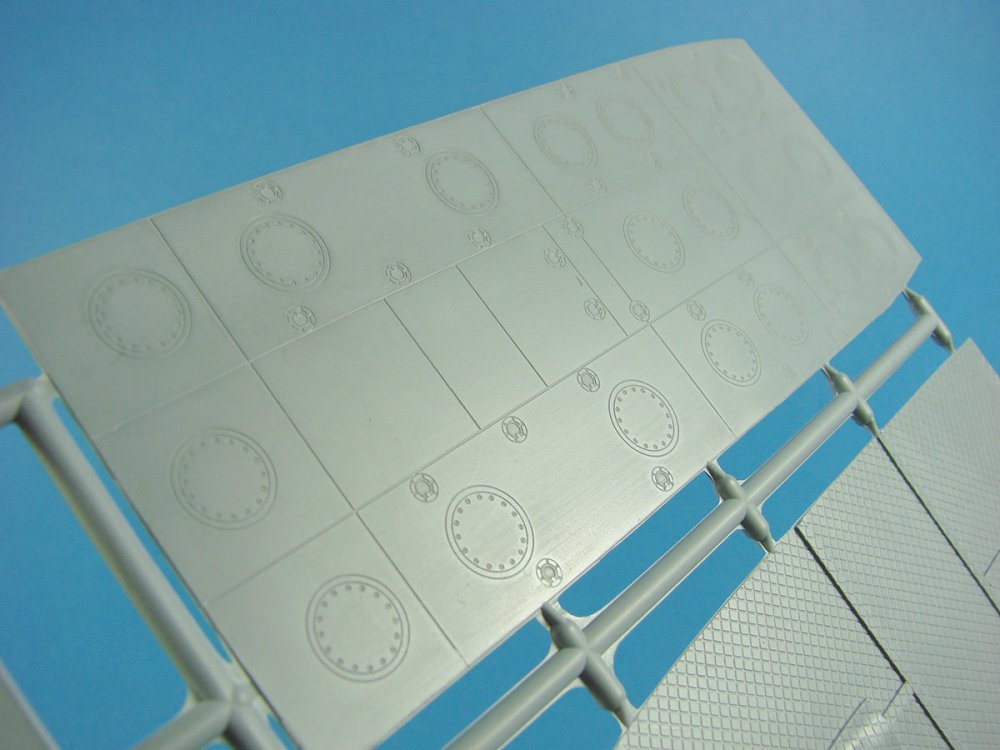

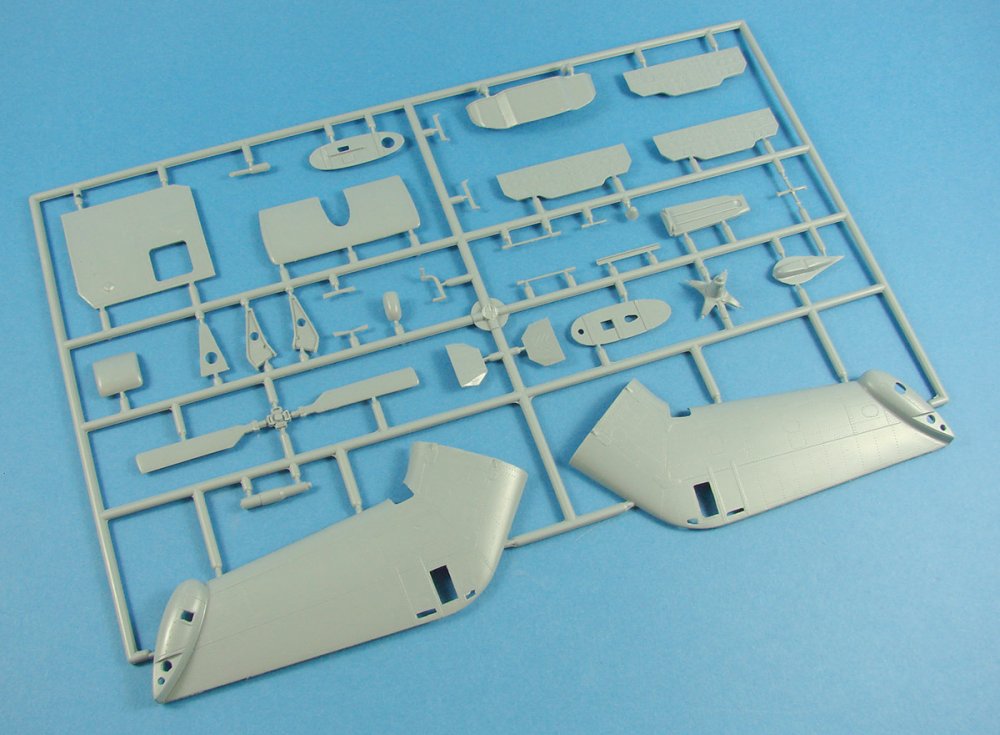


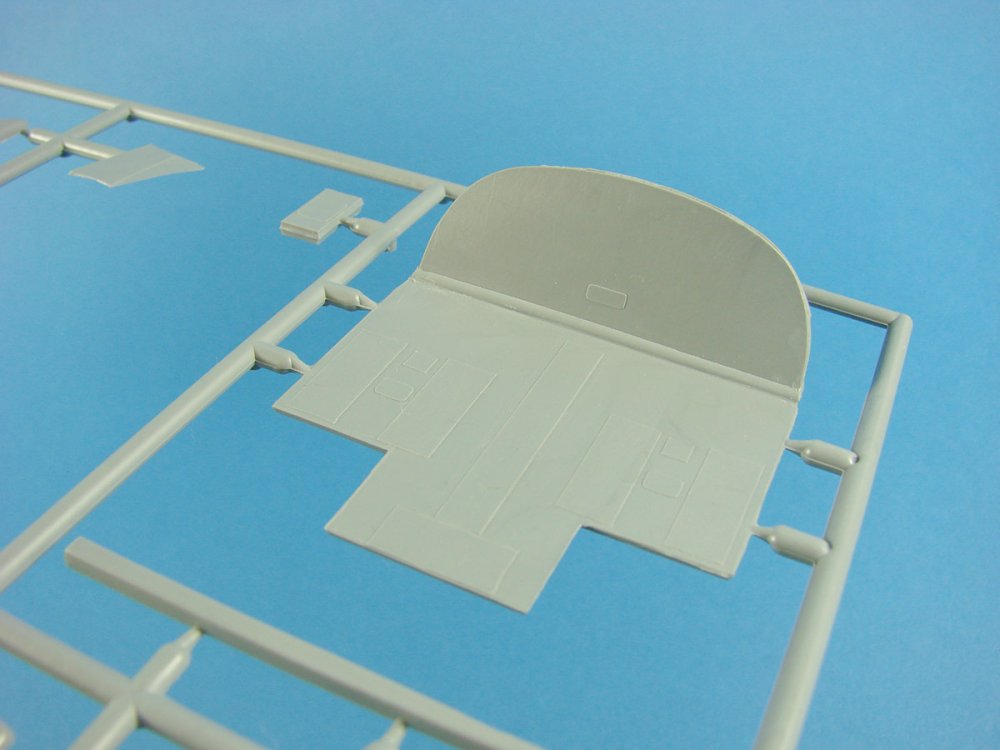
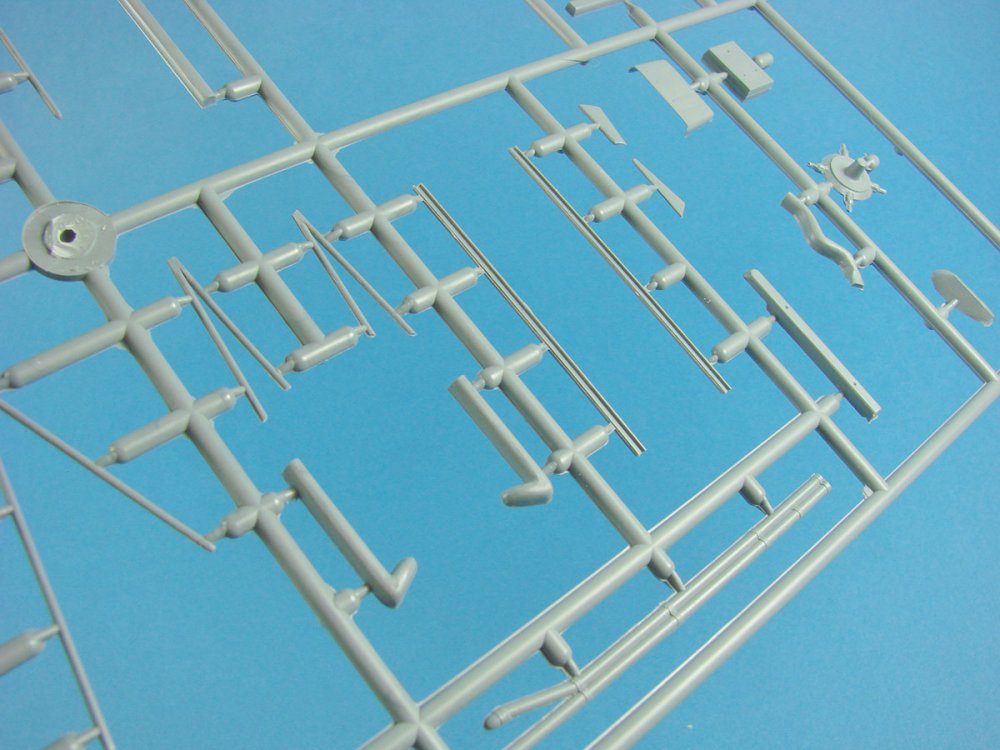
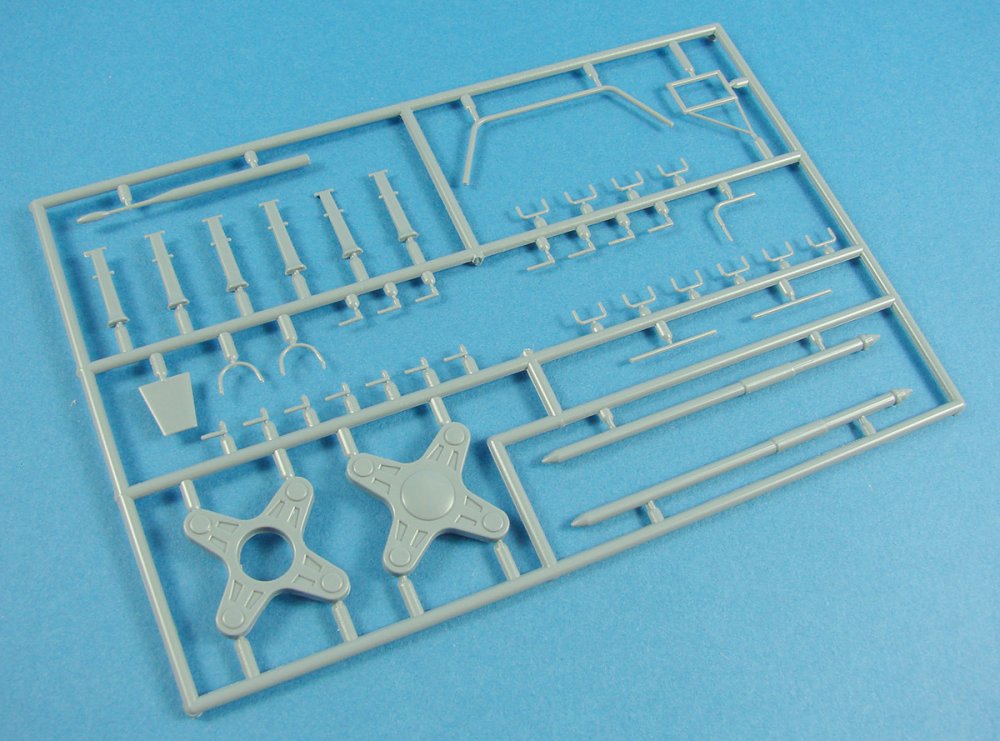
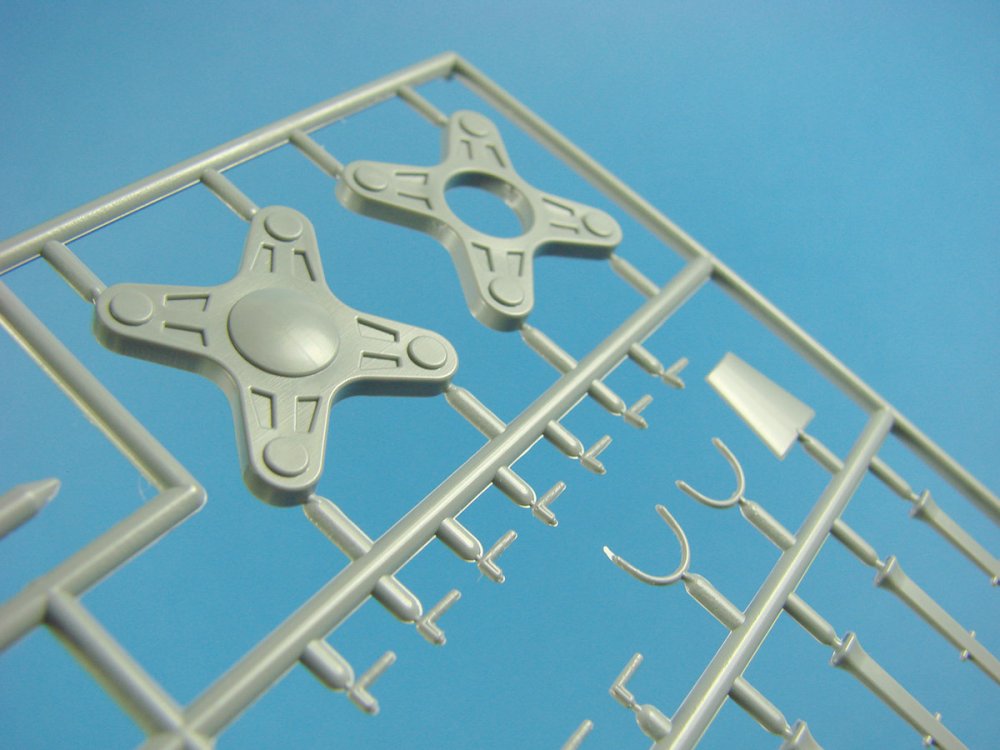


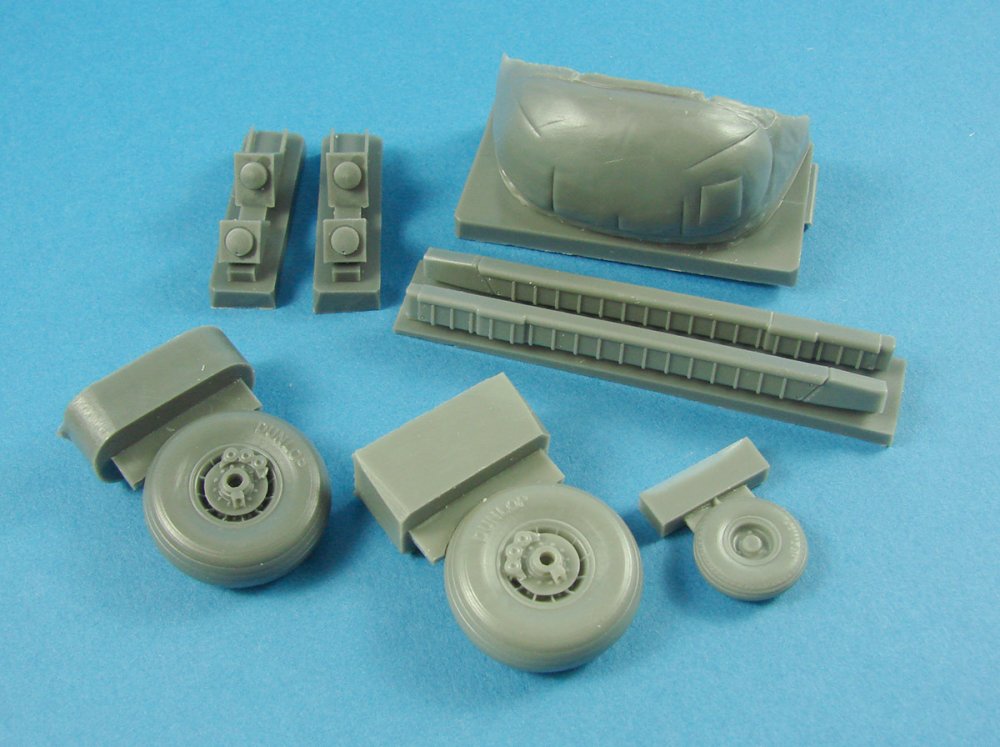
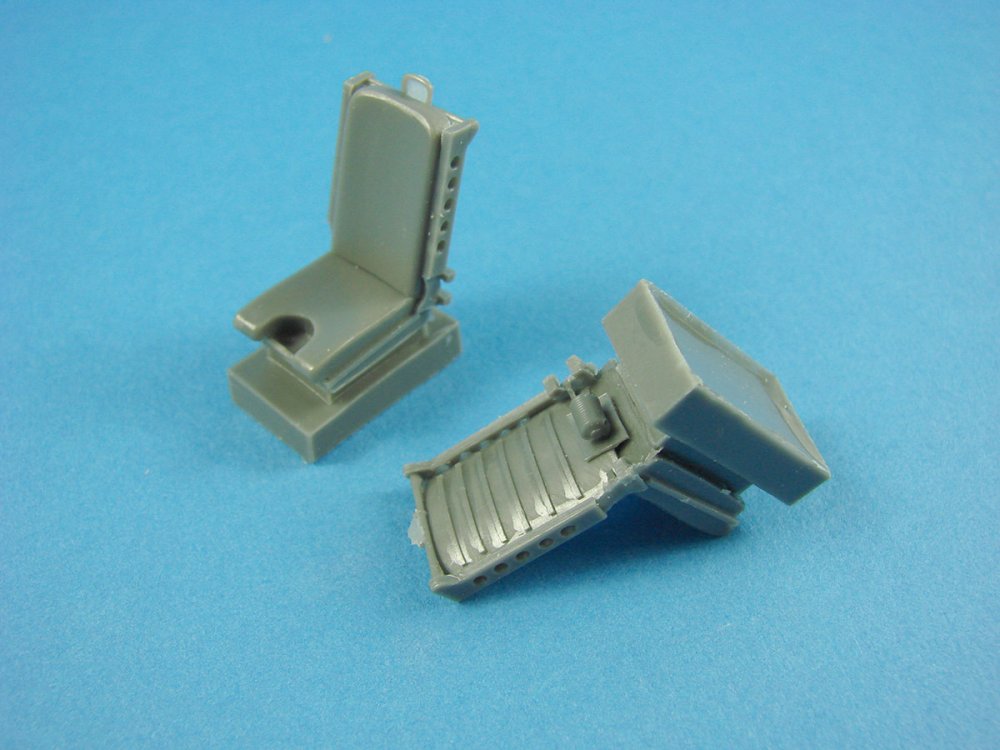
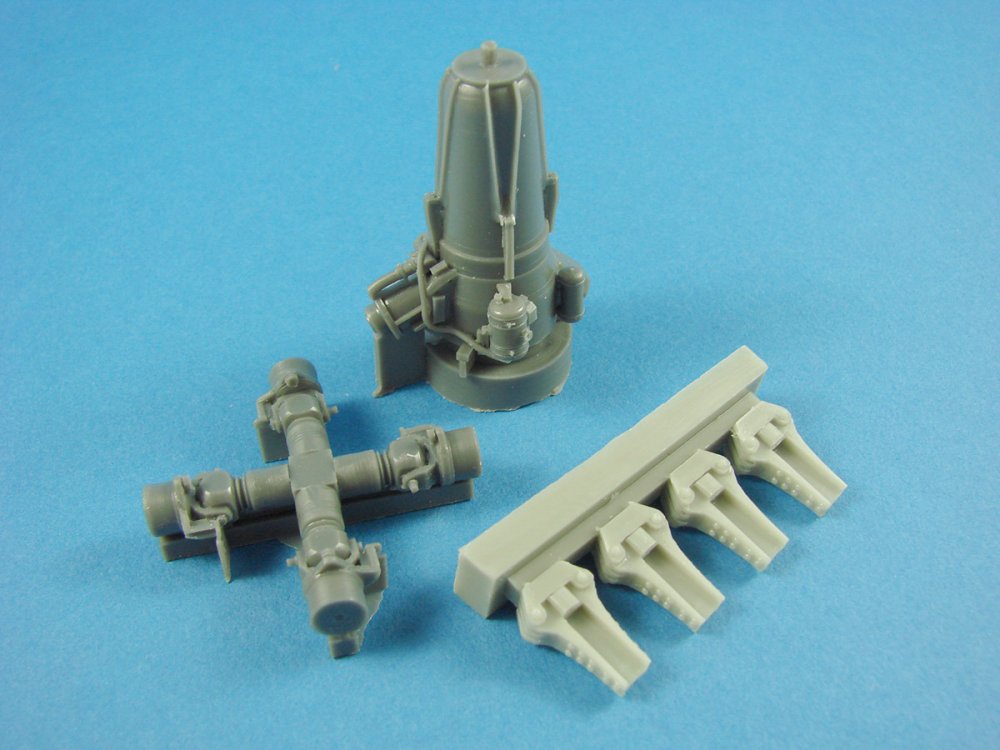
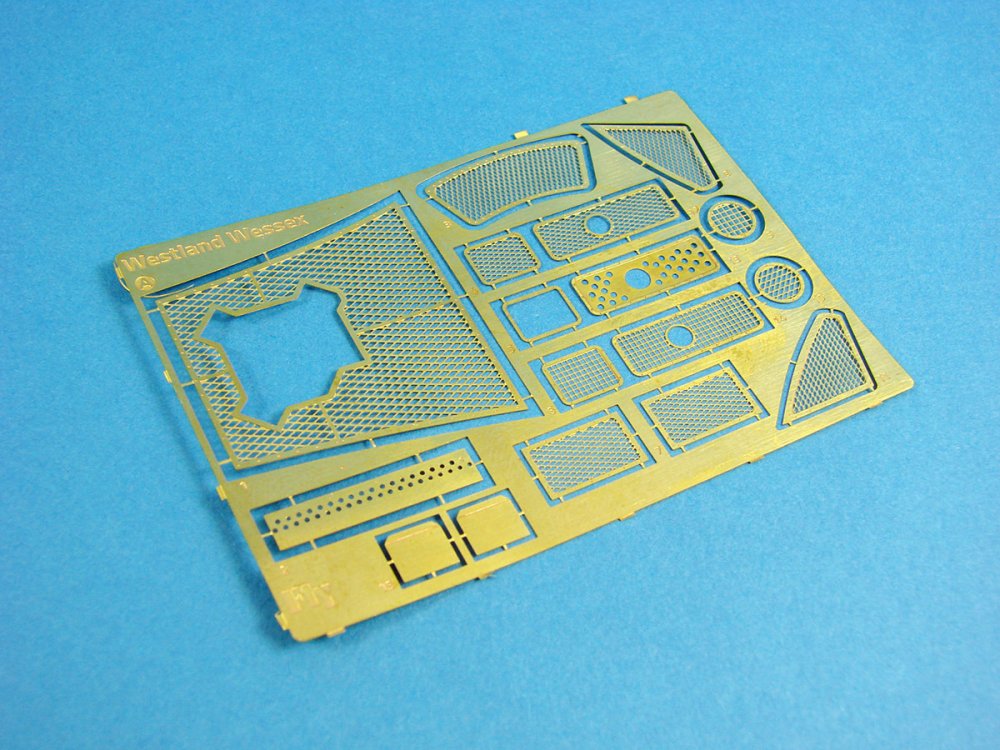
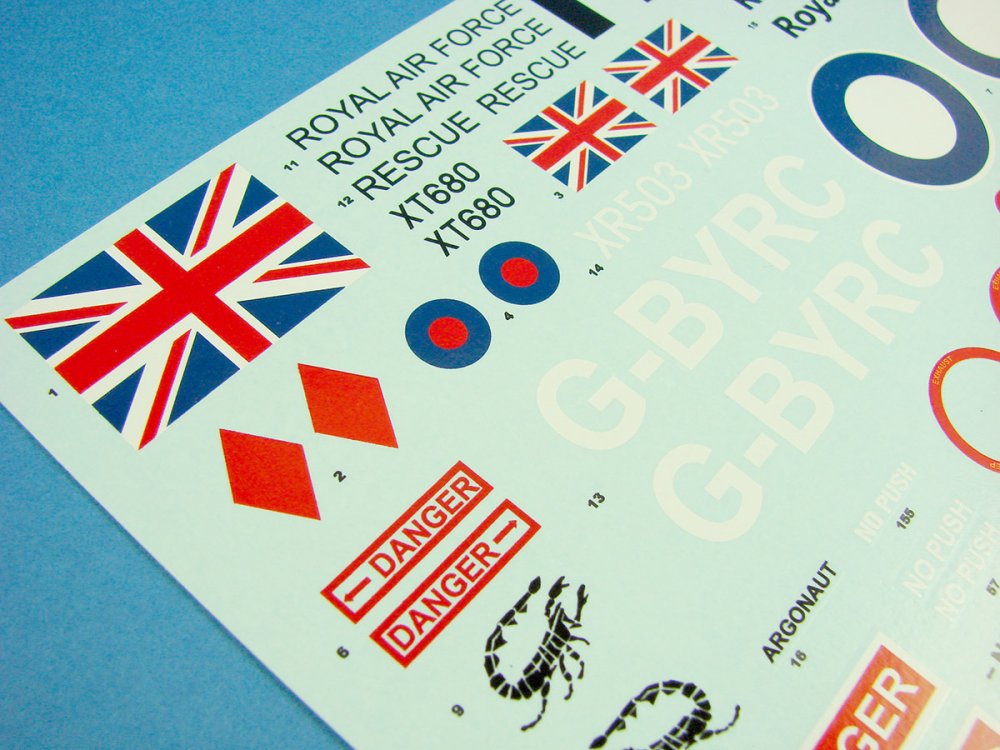
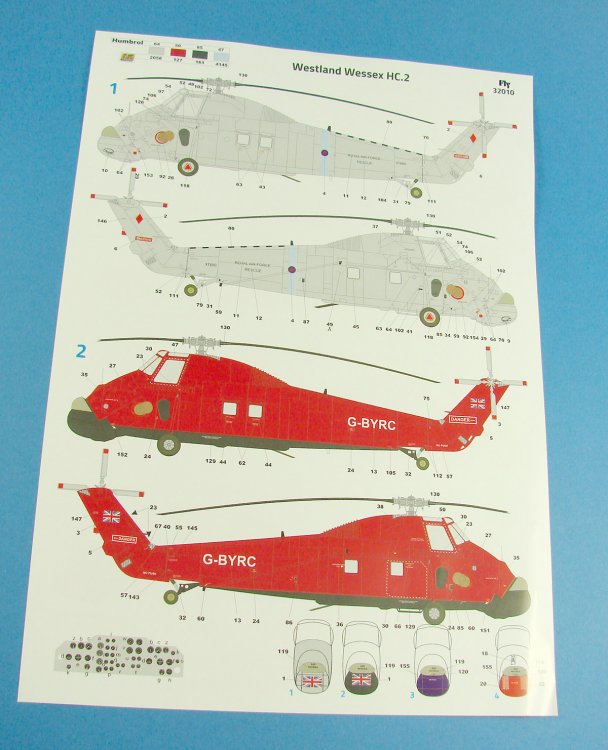
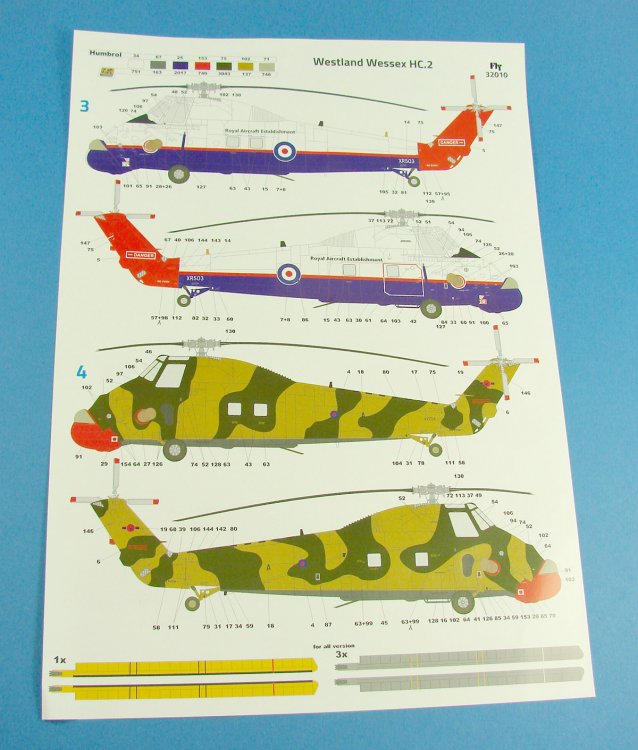
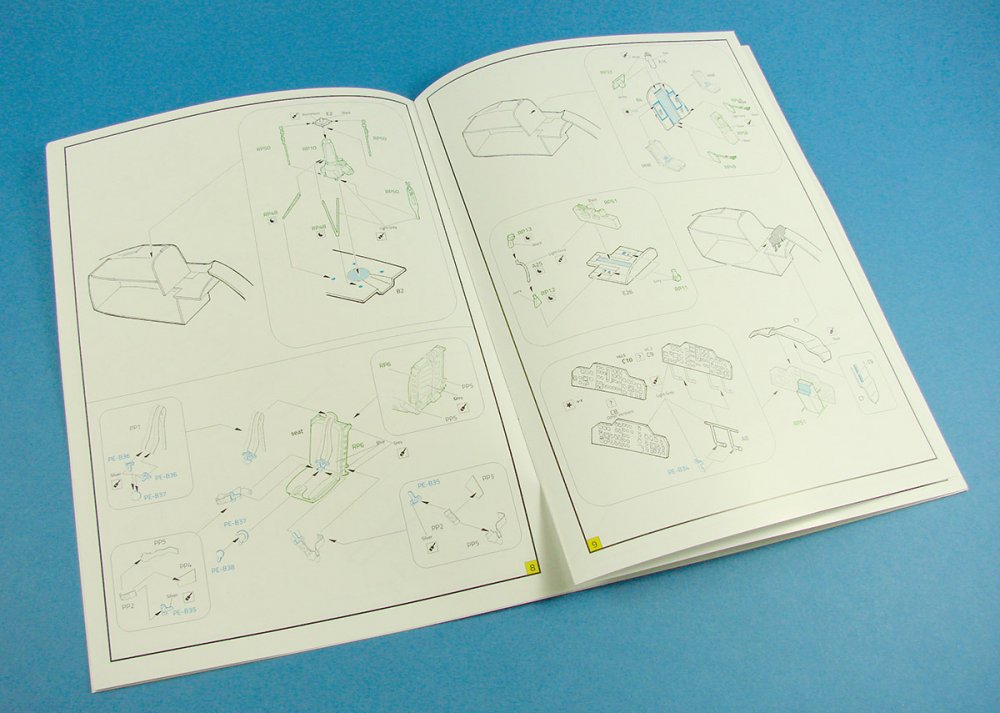
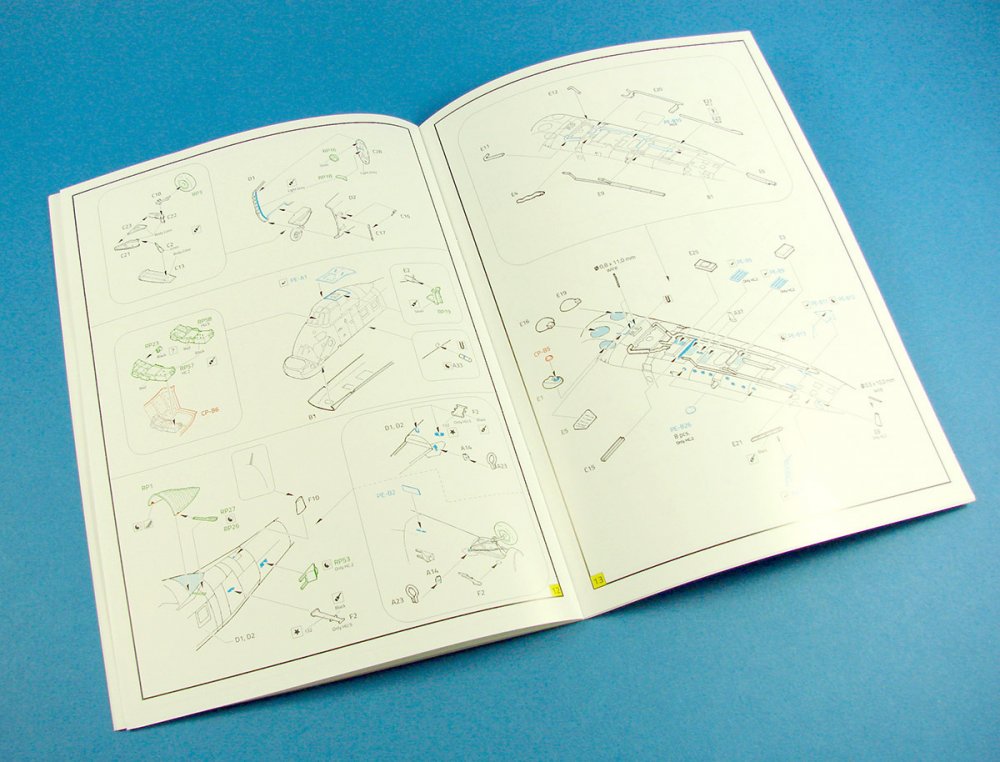

- 6 replies
-
- 1
-
-
- helicopter
- wessex
- (and 2 more)
-
HAF A-7E 1/32 Fullside scheme
JayDee replied to Gepard's topic in LSM 1/32 and Larger Aircraft Ready for Inspection
Certainly nothing wrong with that sir. Please, show more -
Great to see you back! Now, go tuck into a kit and do the shit!