JayDee
-
Posts
3,265 -
Joined
-
Last visited
Content Type
Profiles
Forums
Events
Gallery
Everything posted by JayDee
-

HPH Reichenberg Re 4a 'Piloted V-1'
JayDee replied to JeroenPeters's topic in LSM 1/35 and Larger Work In Progress
Loving this When complete, let's send some hi-res images to HPH. -
I'd like some tips on how you produce that beautiful wooden finish. Fantastic work!
-
EagleCals the Typhoon - coming soon in 1/24th scale
JayDee replied to judyc's topic in Modelling Discussion
The more I hear this kit mentioned, the more I want to build it. Sure looking forward to this release. -
Holland Spectacular! Fort Veldhuis museum walkaround
JayDee replied to JayDee's topic in Walkarounds
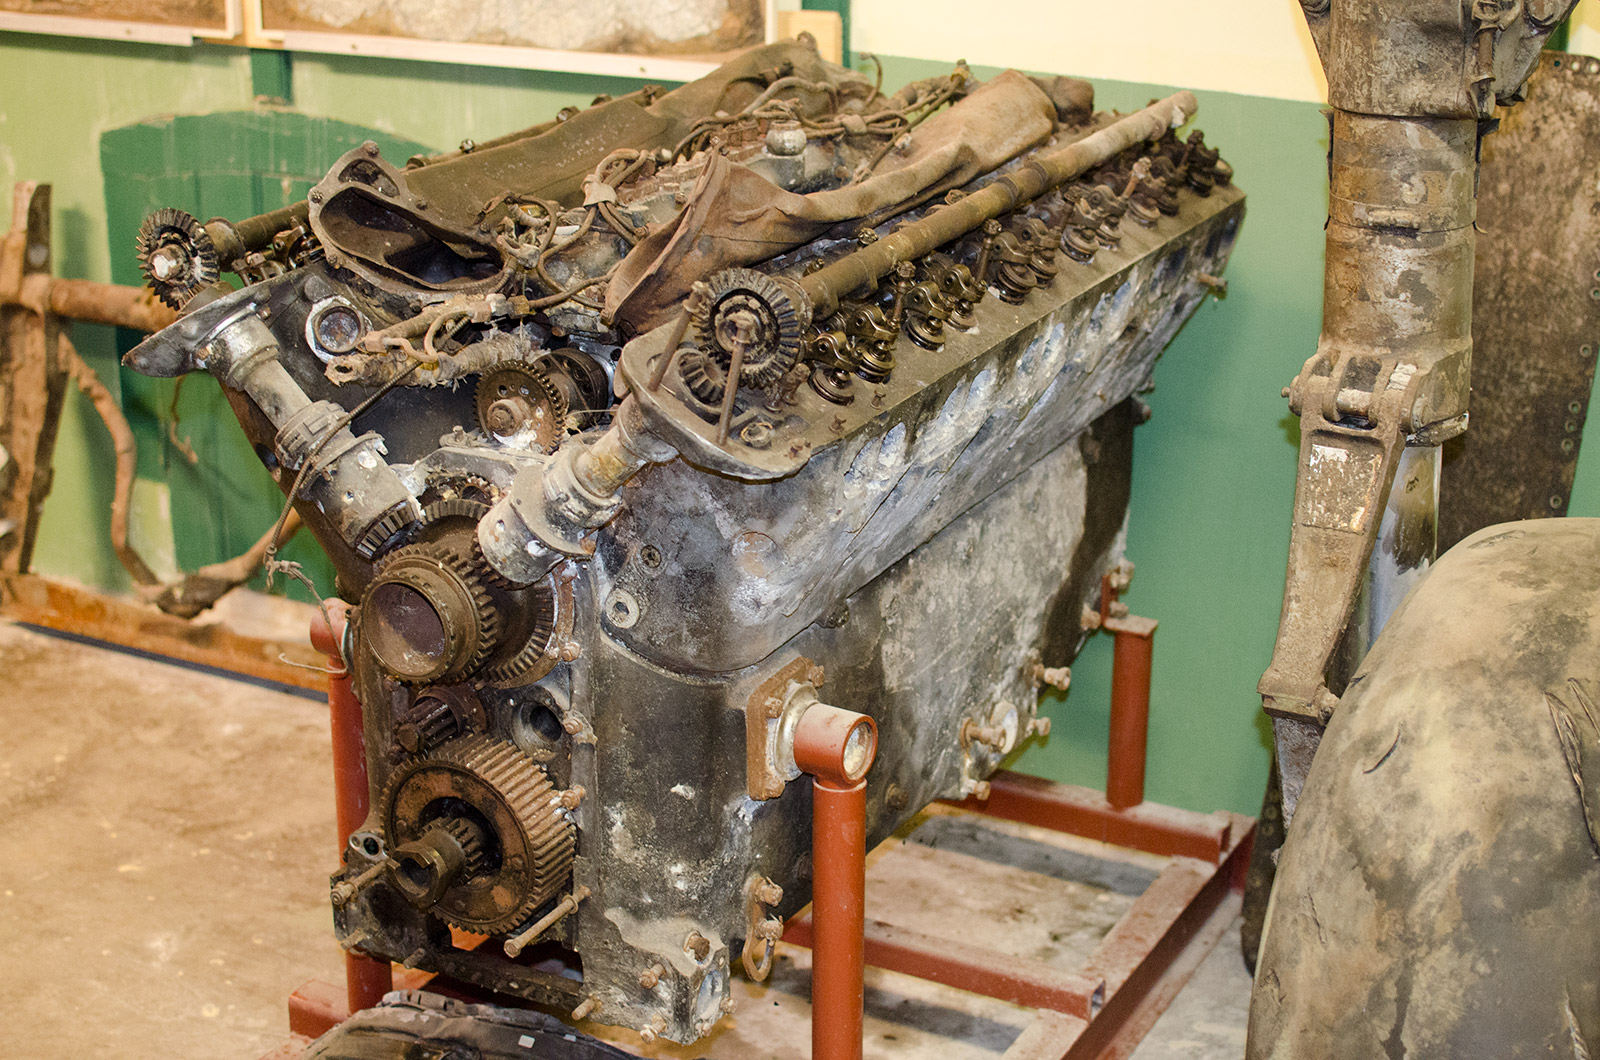
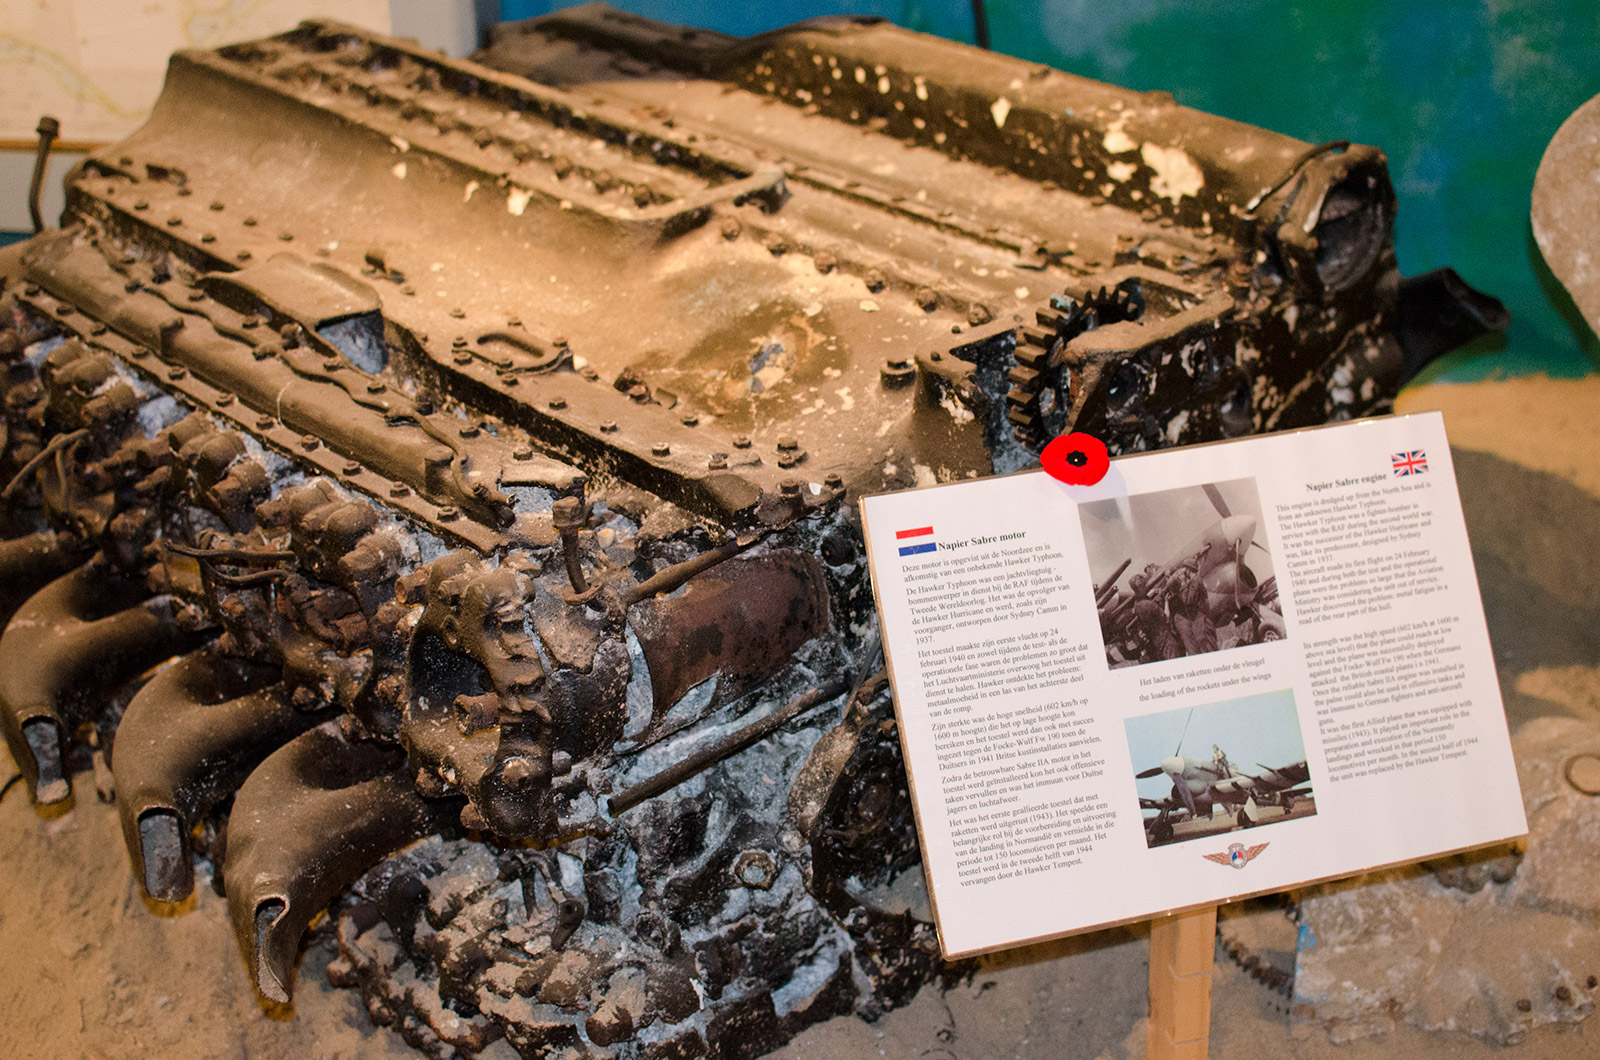
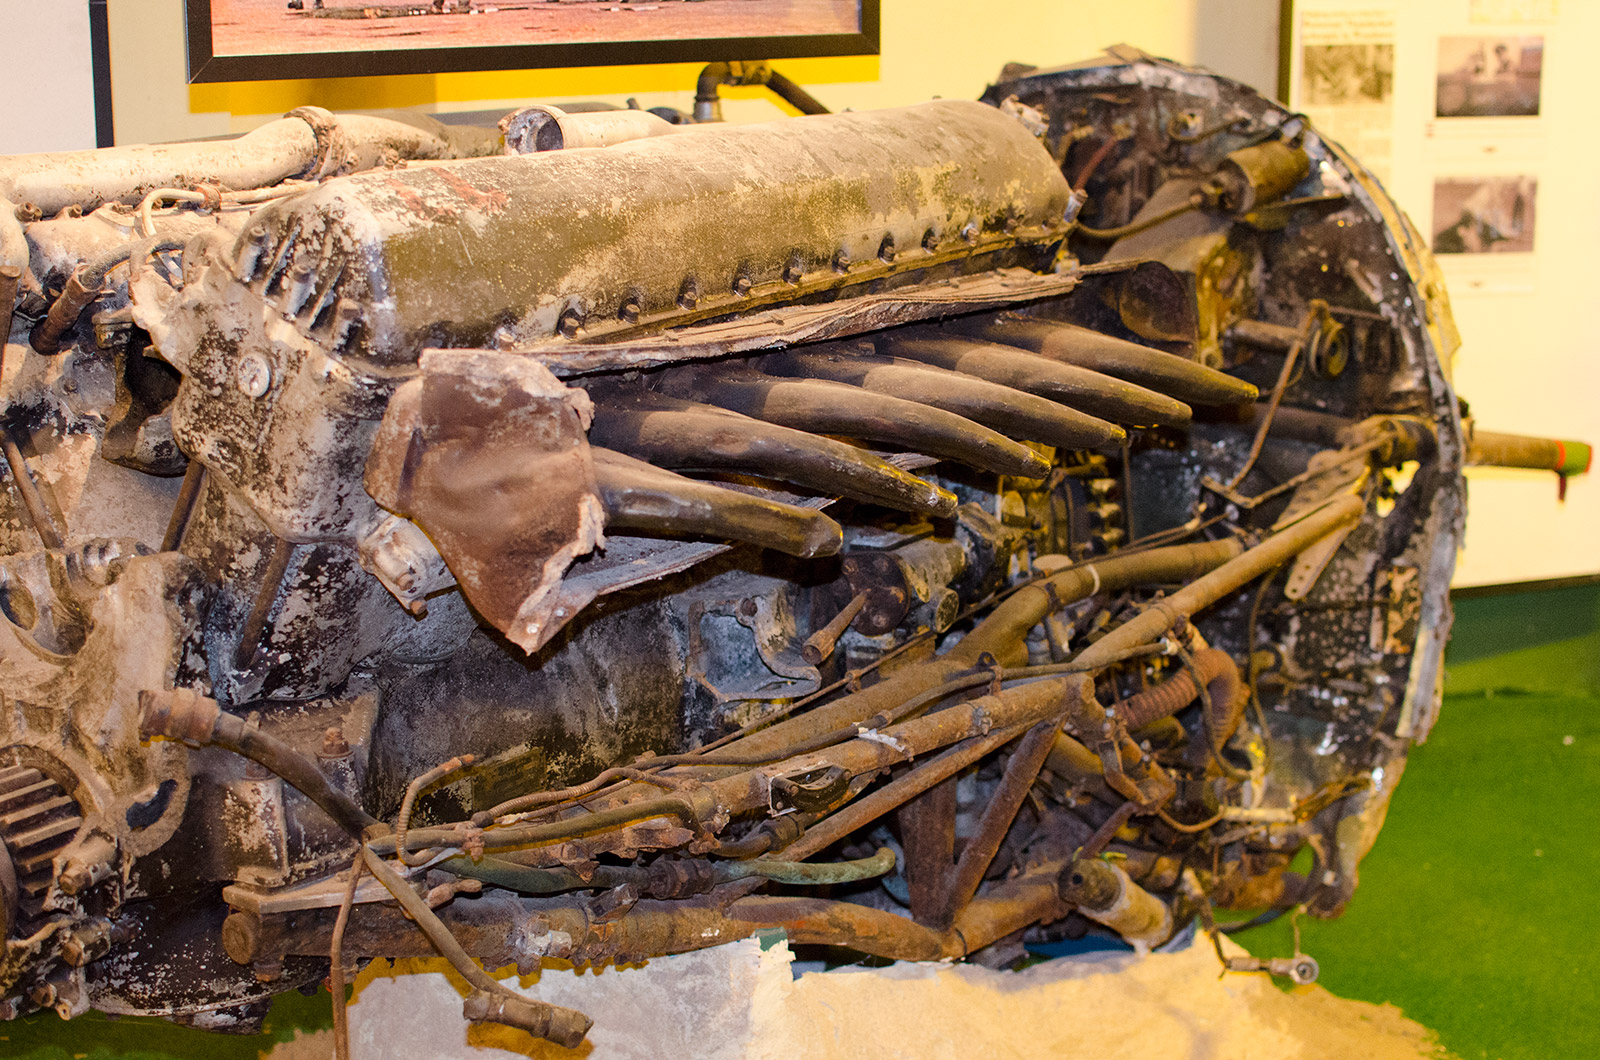
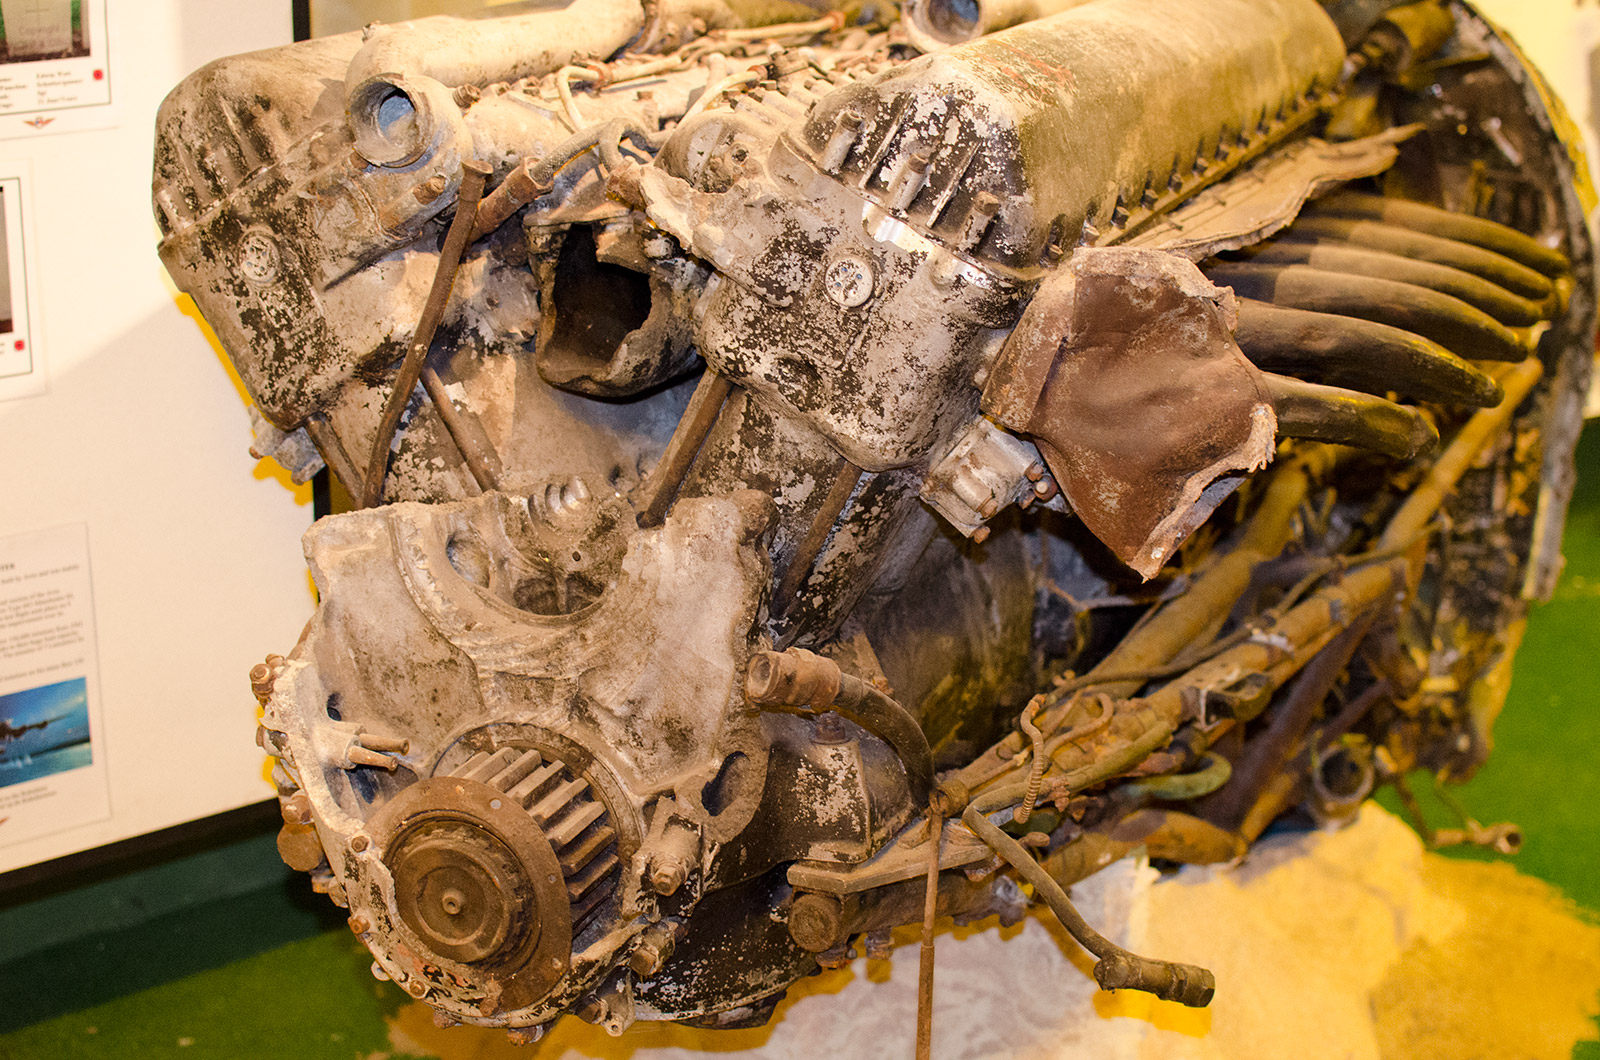
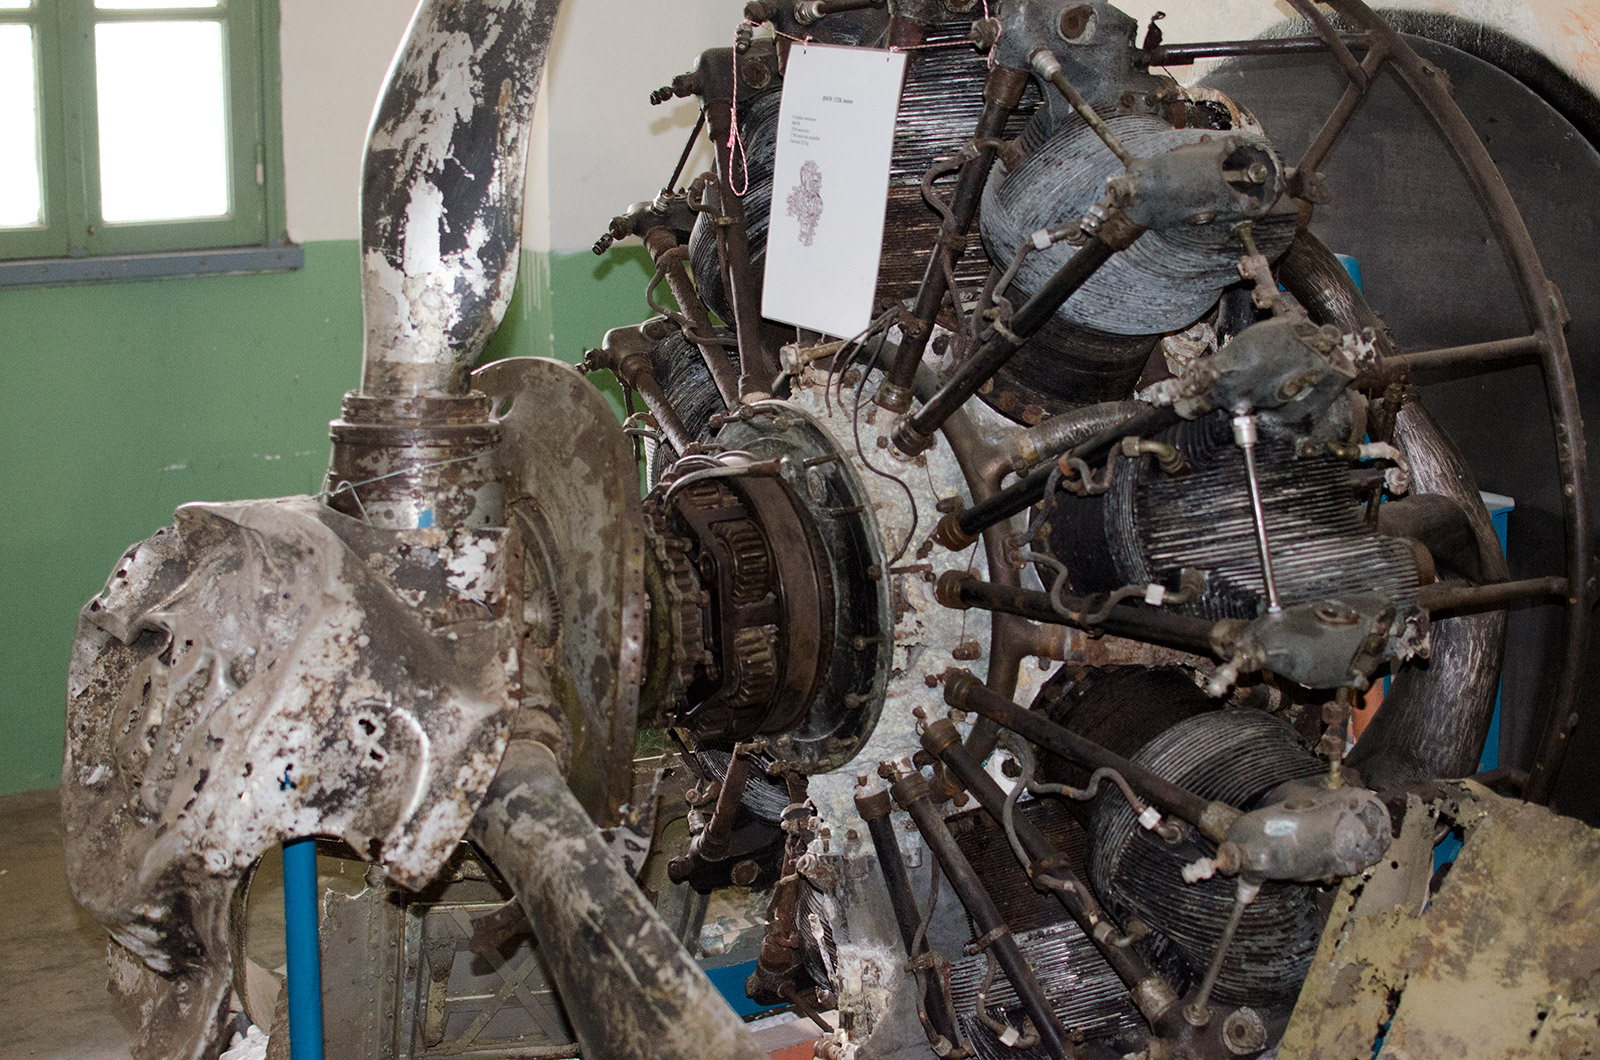
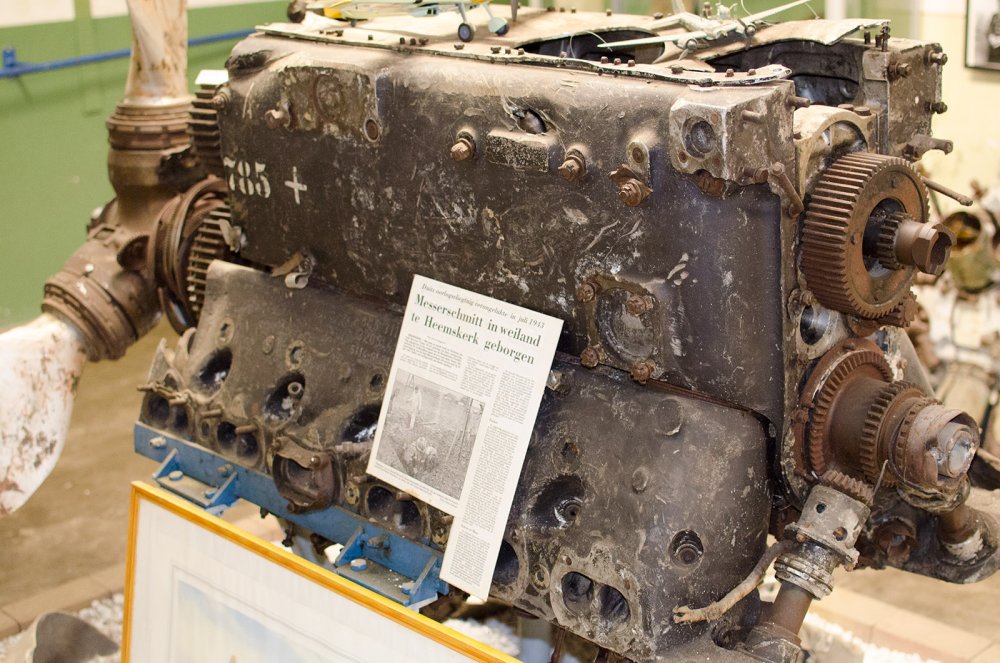
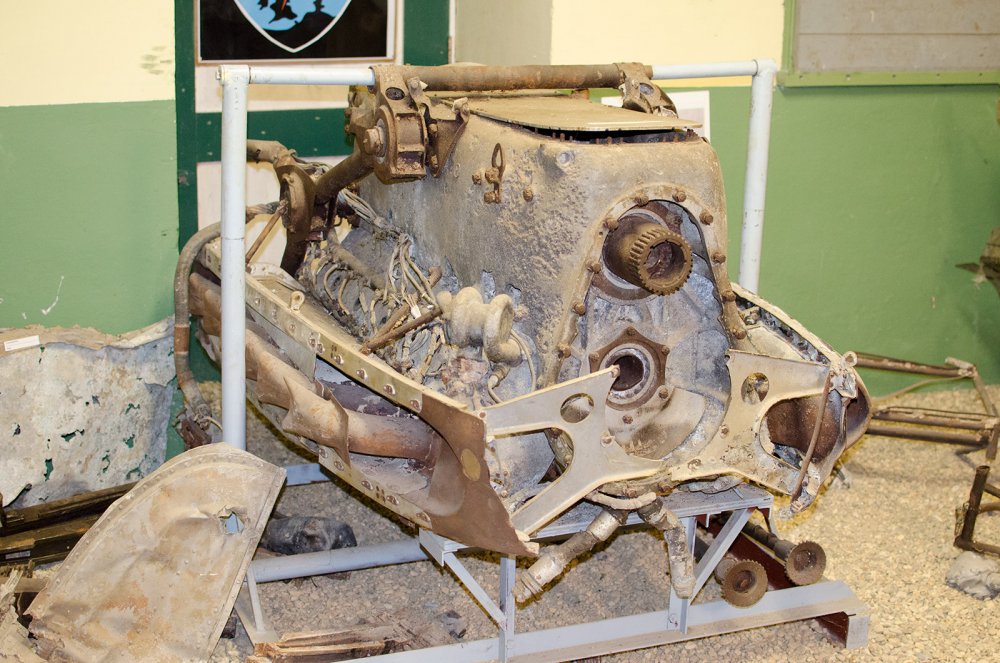
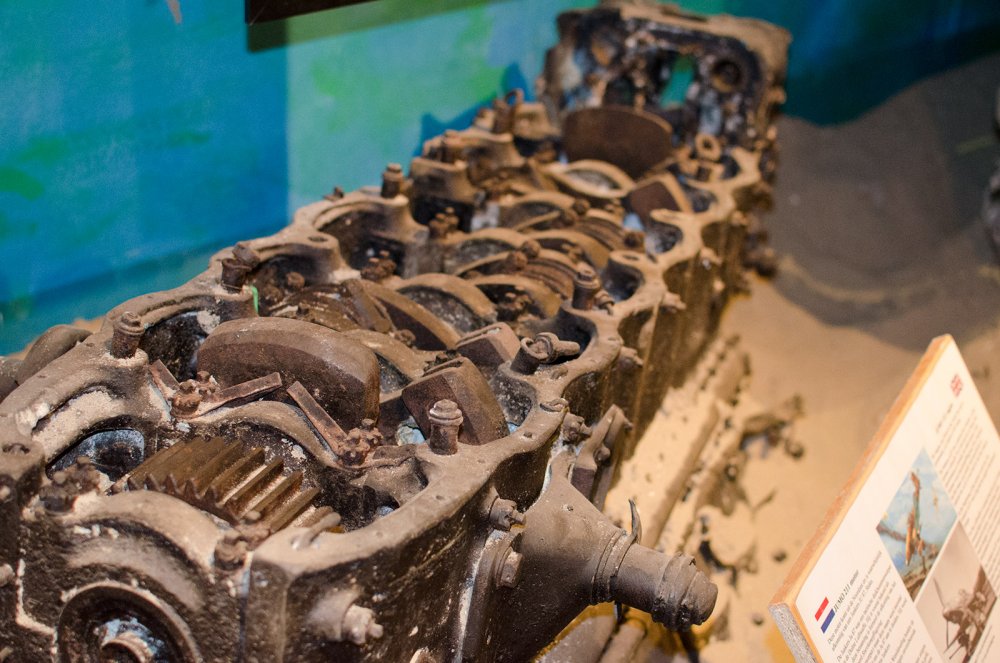
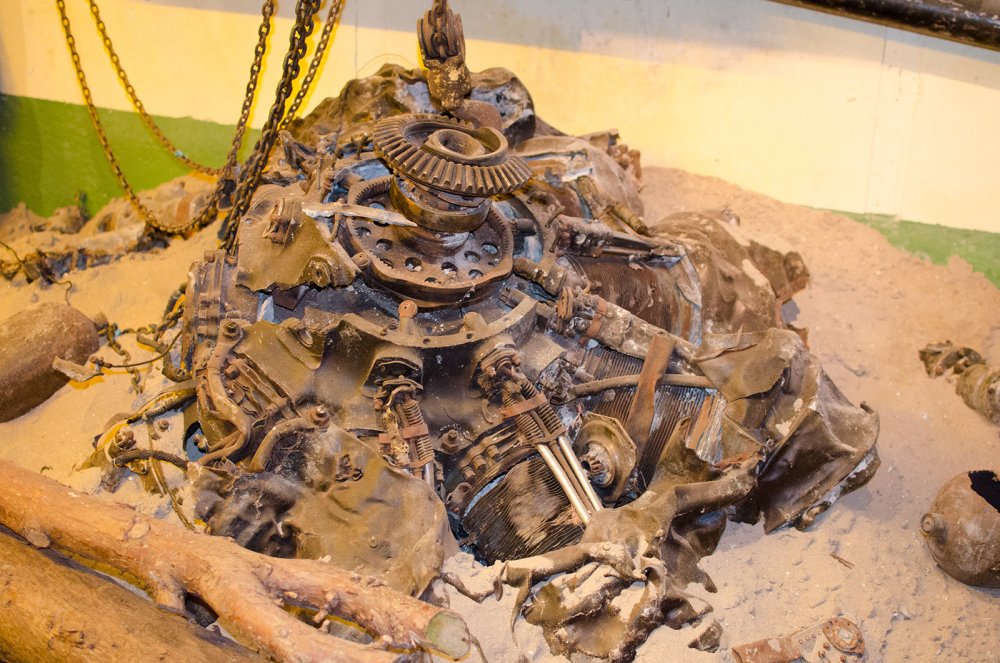
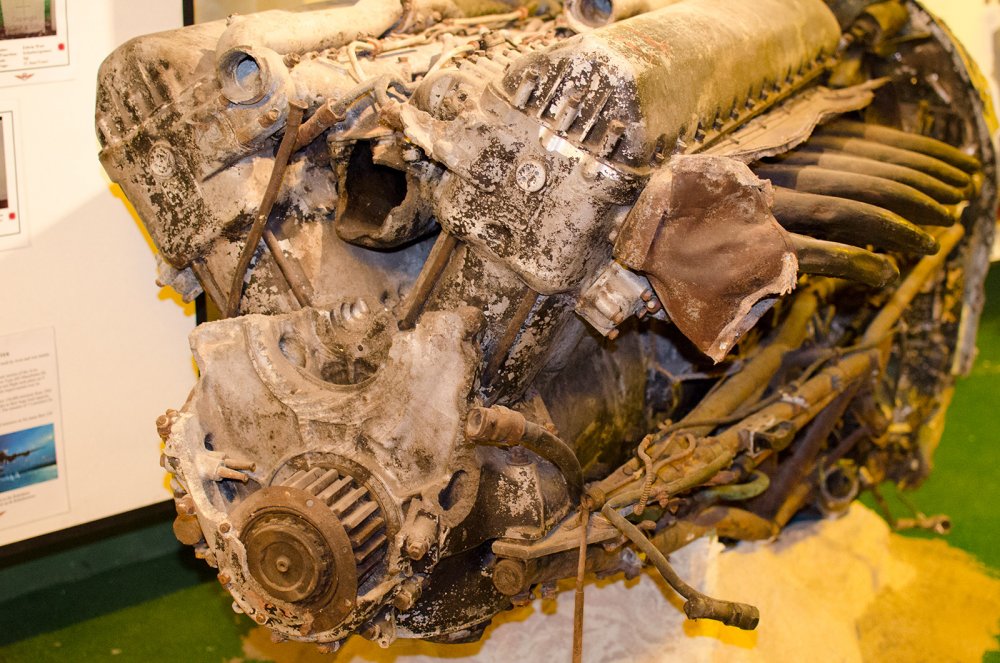
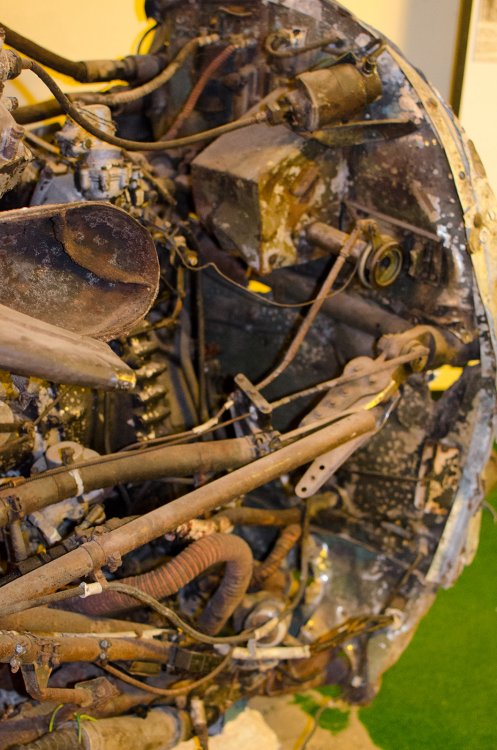
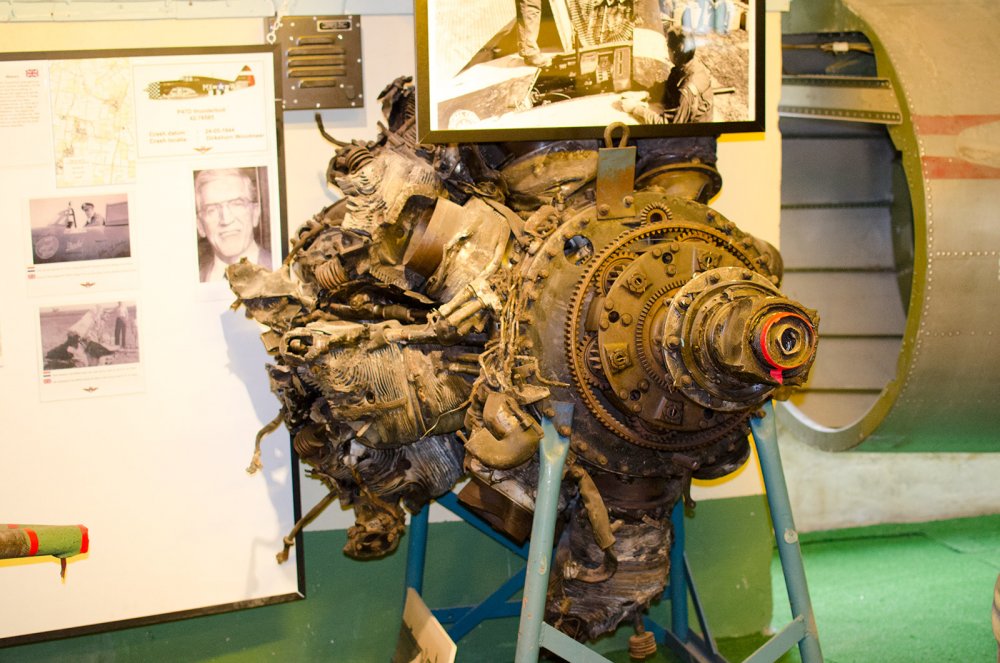
There are Bf 110 engines there. My favourite item was the Napier engine from a Typhoon/Tempest. That's a beast! -
A new Group Build has started! From the Beaches to Berlin!
JayDee replied to One-Oh-Four's topic in General Discussion
Ok, I think I should perhaps move my Do 335 build to this. How does that sound? -
1/32nd scale Halifax: *project complete*
JayDee replied to ThomasProbert's topic in LSM 1/35 and Larger Work In Progress
This is just gorgeous. I seriously envy those can can do vac form like this. Got to be one of my favourite builds, ever. -
HPH Reichenberg Re 4a 'Piloted V-1'
JayDee replied to JeroenPeters's topic in LSM 1/35 and Larger Work In Progress
Loving it! Do did a bang on job of the intake too. -
HPH Reichenberg Re 4a 'Piloted V-1'
JayDee replied to JeroenPeters's topic in LSM 1/35 and Larger Work In Progress
How well did it close? Anything to look out for? I feel the biggest part of the project will be the carriage. -
Holland Spectacular! Fort Veldhuis museum walkaround
JayDee replied to JayDee's topic in Walkarounds
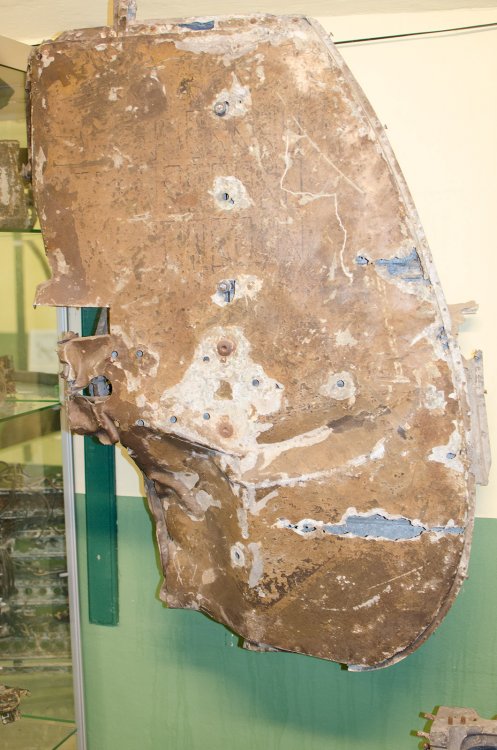
Some very rare and unusual items here......come on folks!! -
Holland Spectacular! Fort Veldhuis museum walkaround
JayDee replied to JayDee's topic in Walkarounds
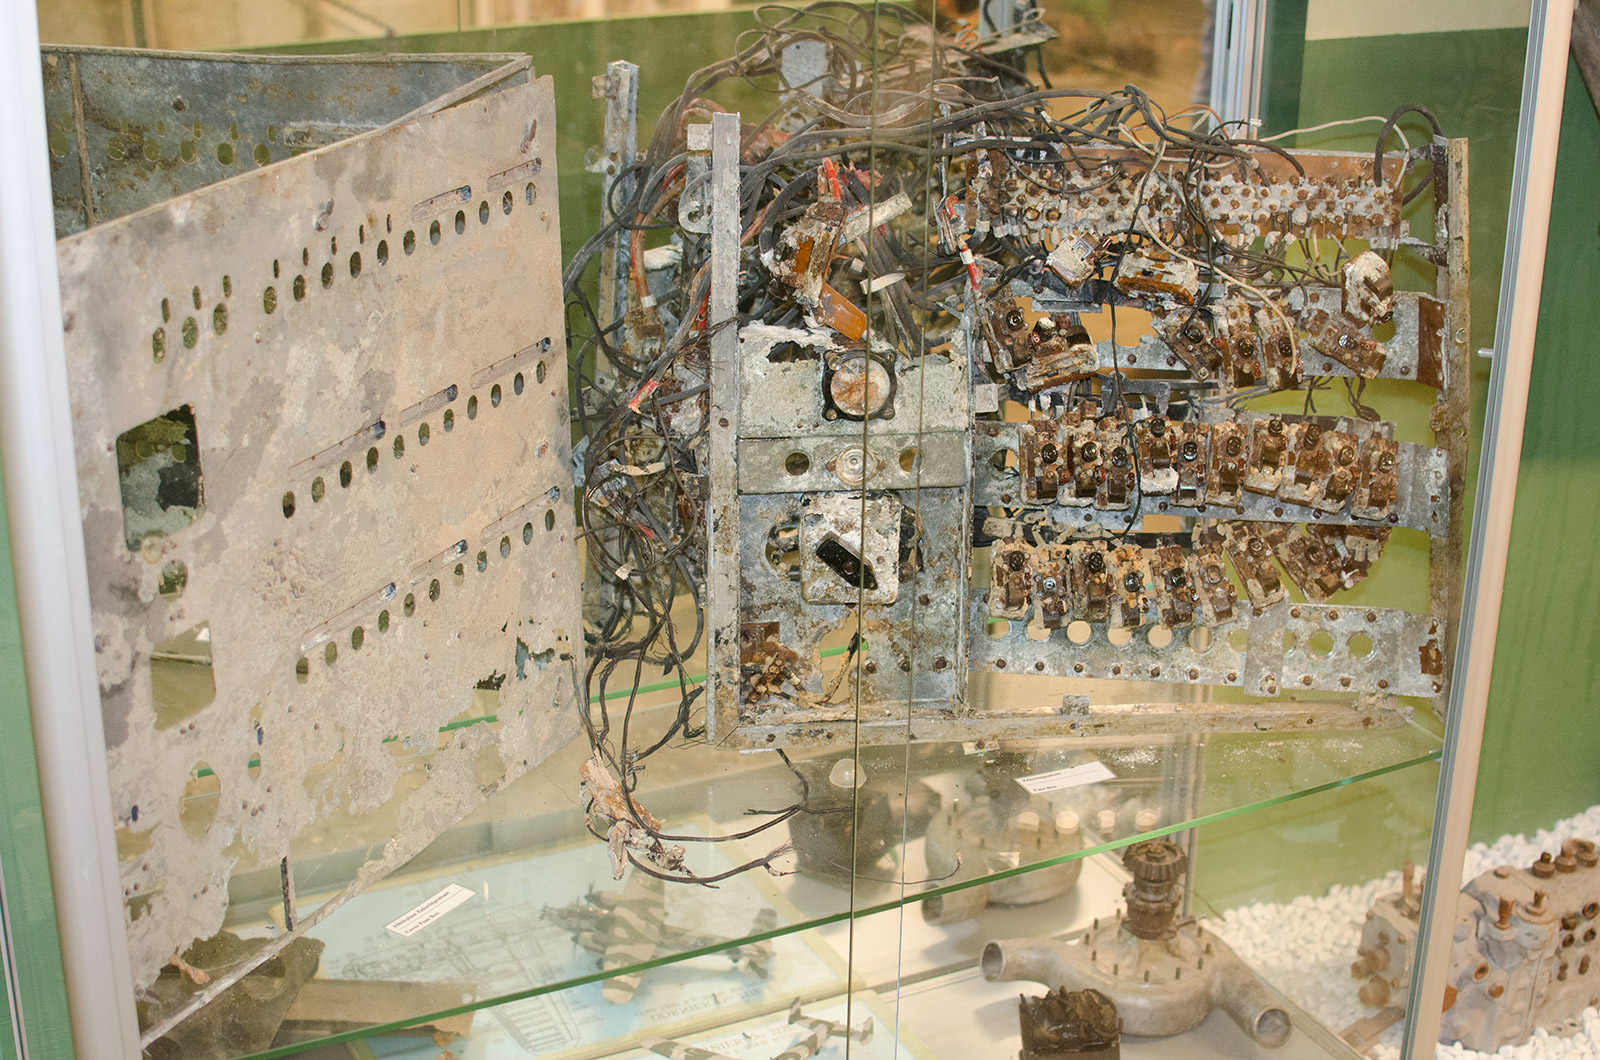
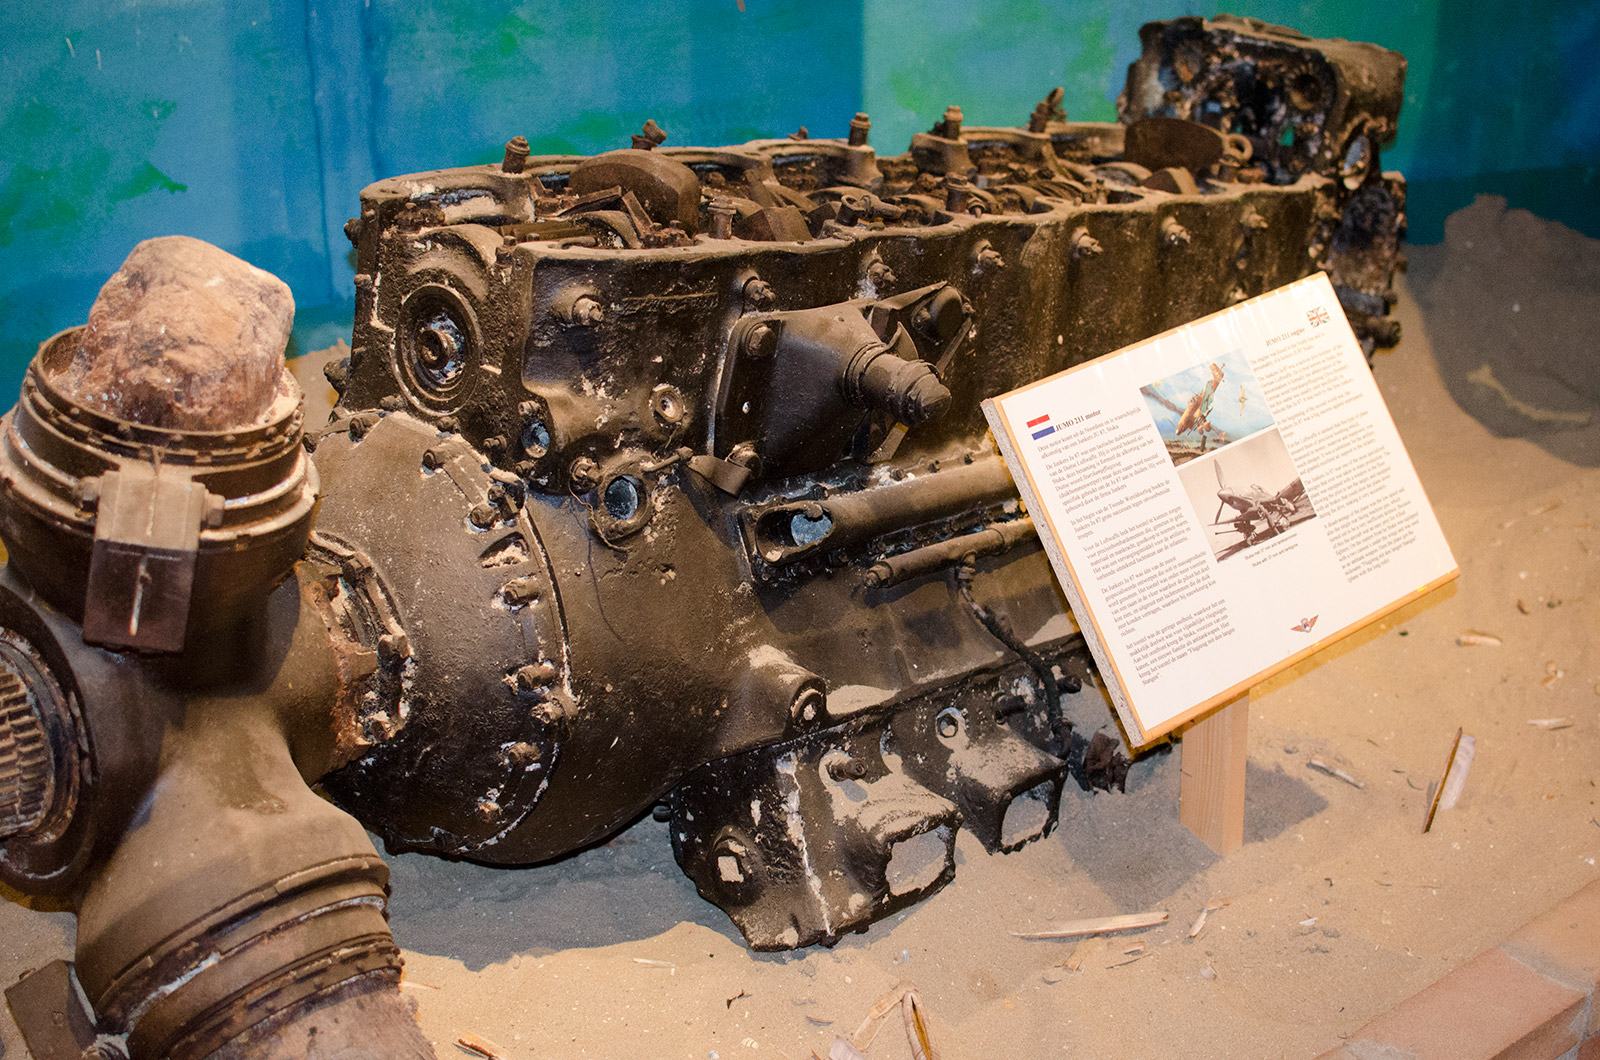
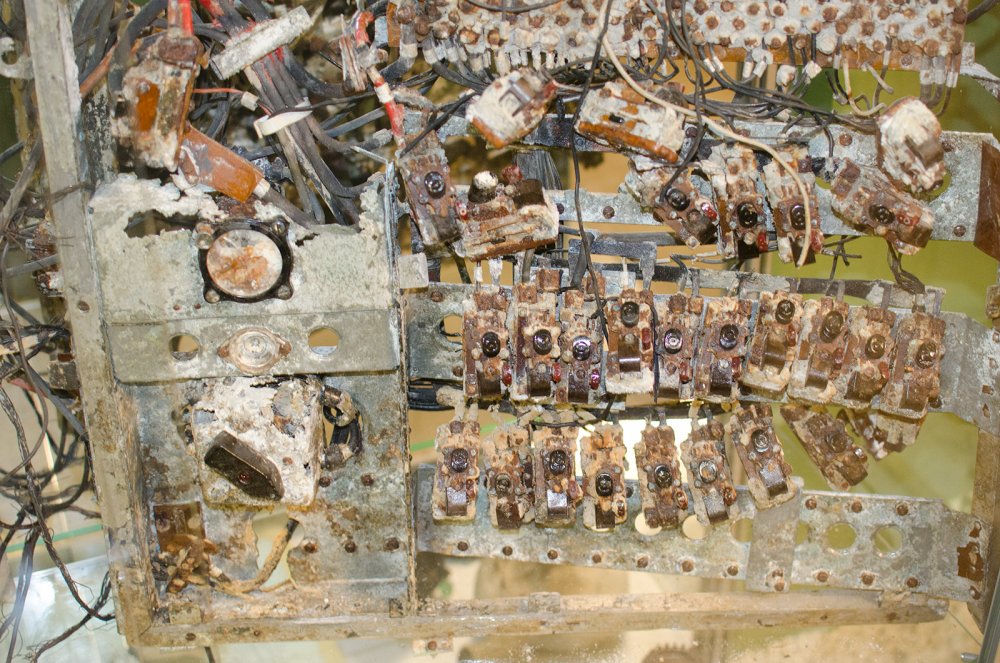
See if you can identify stuff here..... -
Holland Spectacular! Fort Veldhuis museum walkaround
JayDee replied to JayDee's topic in Walkarounds


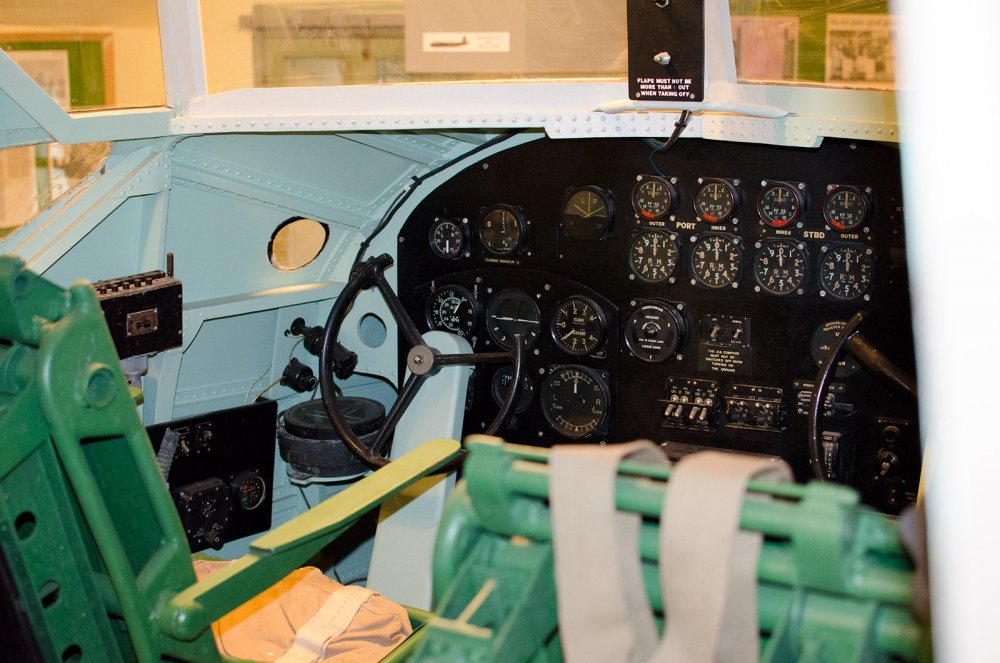
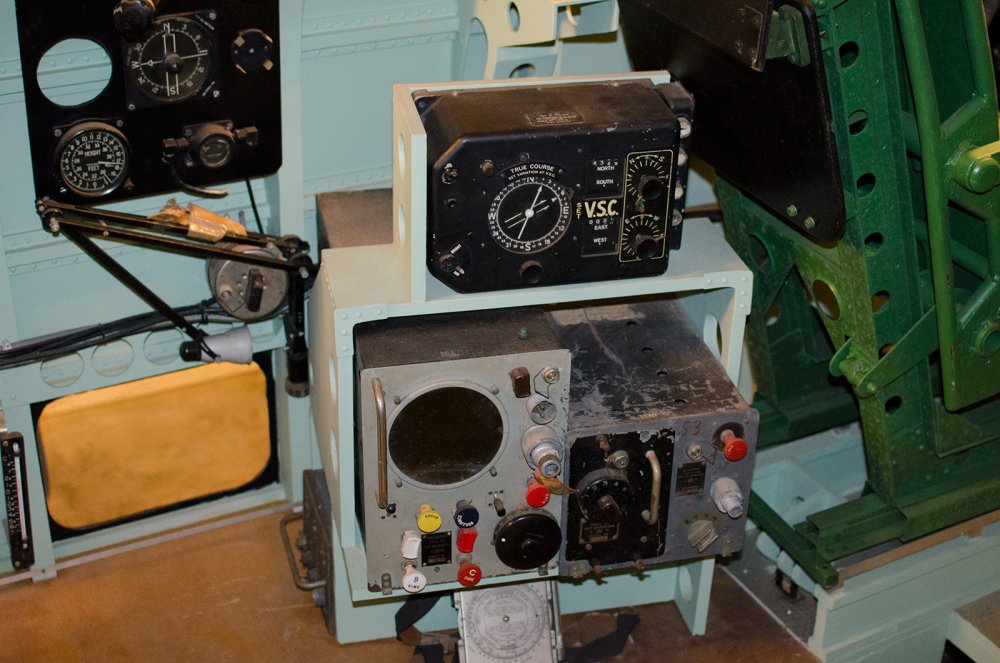
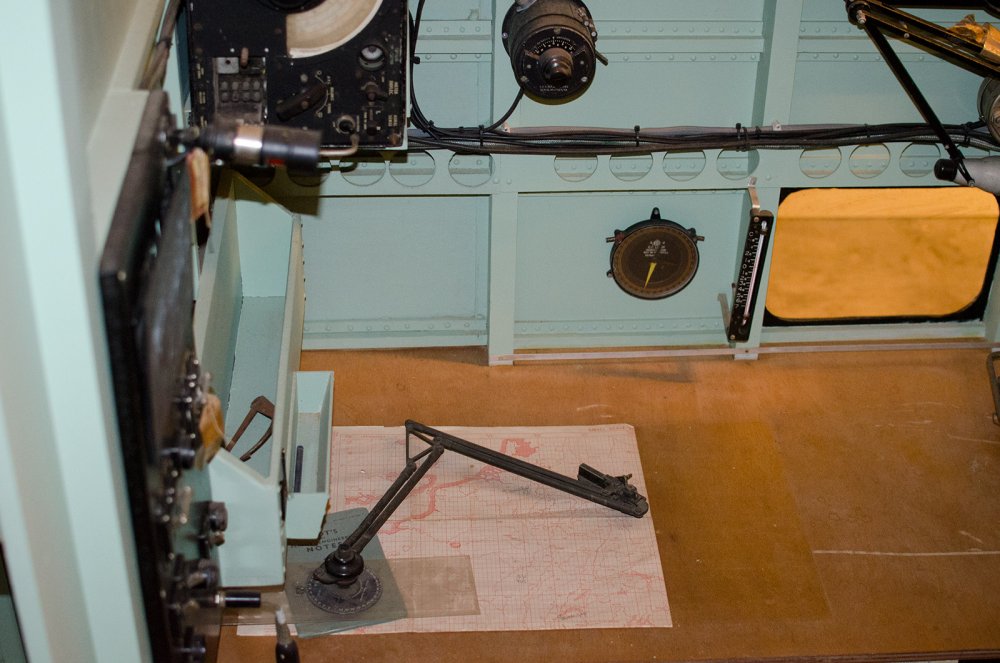
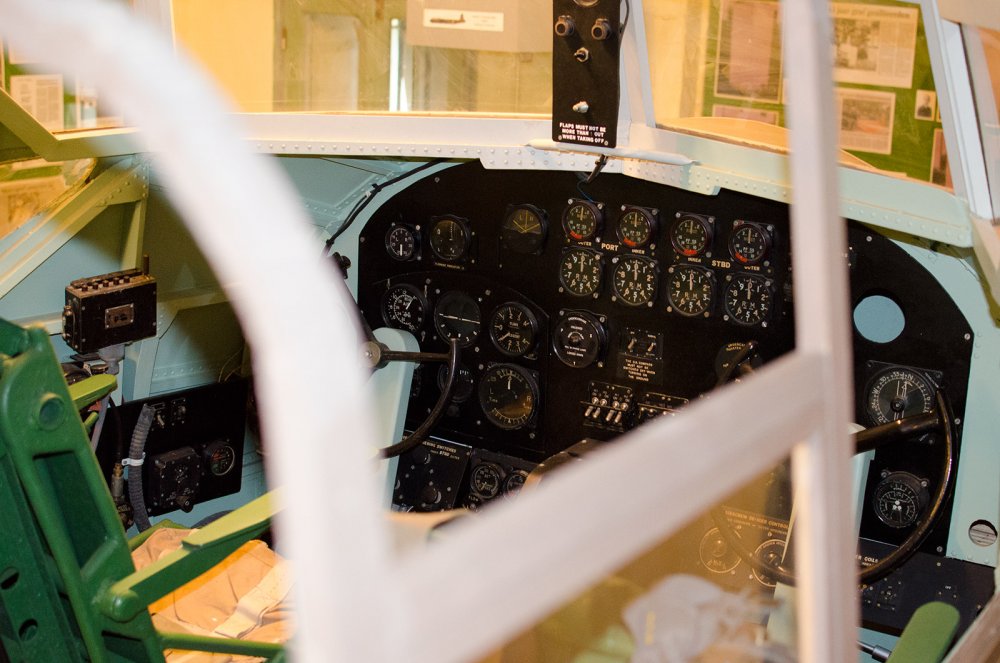


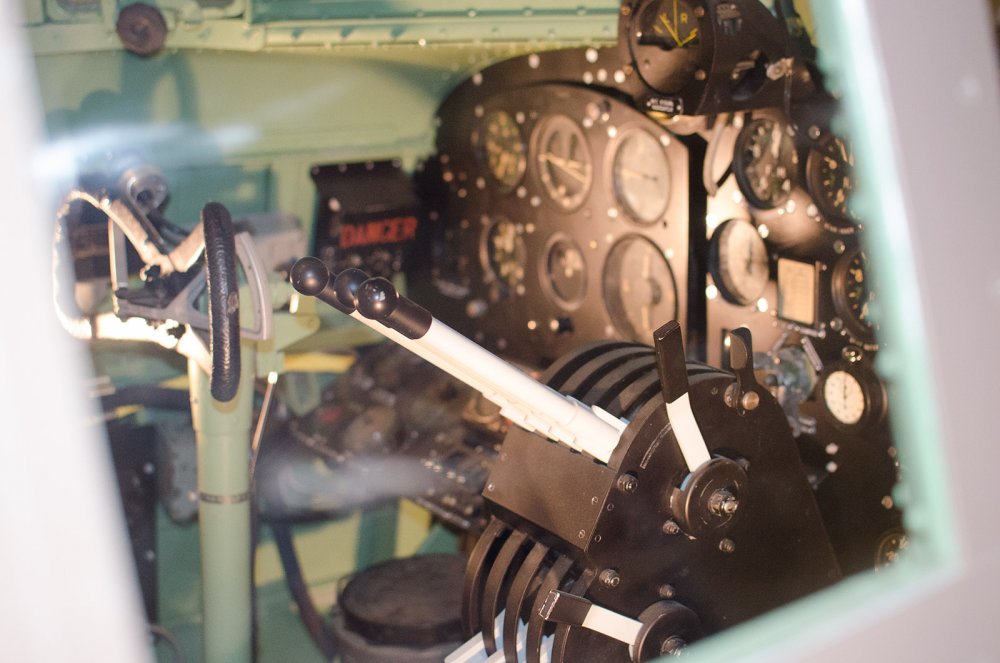
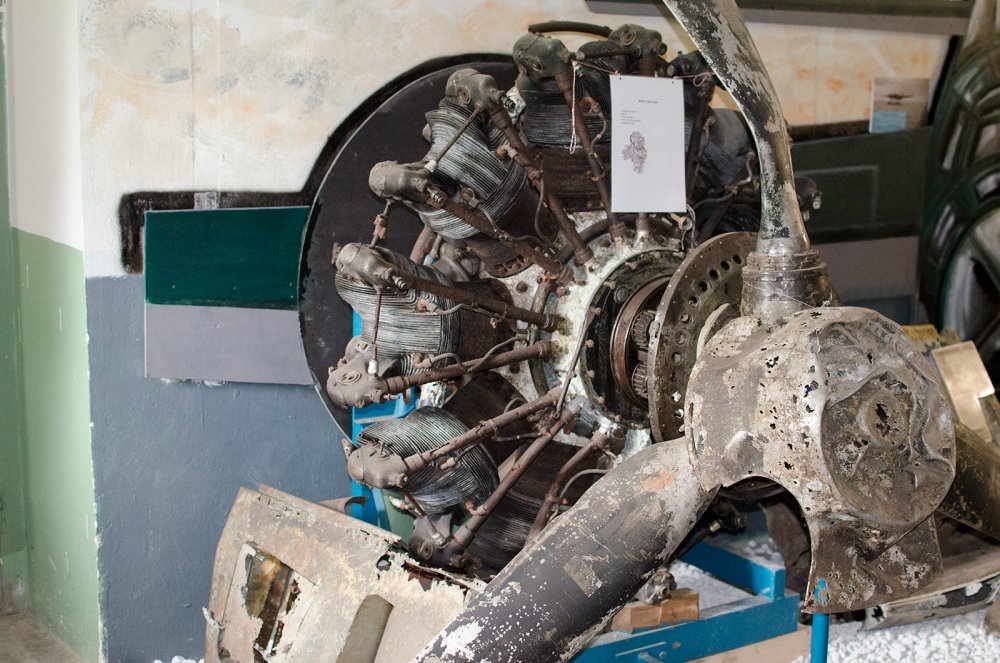

-
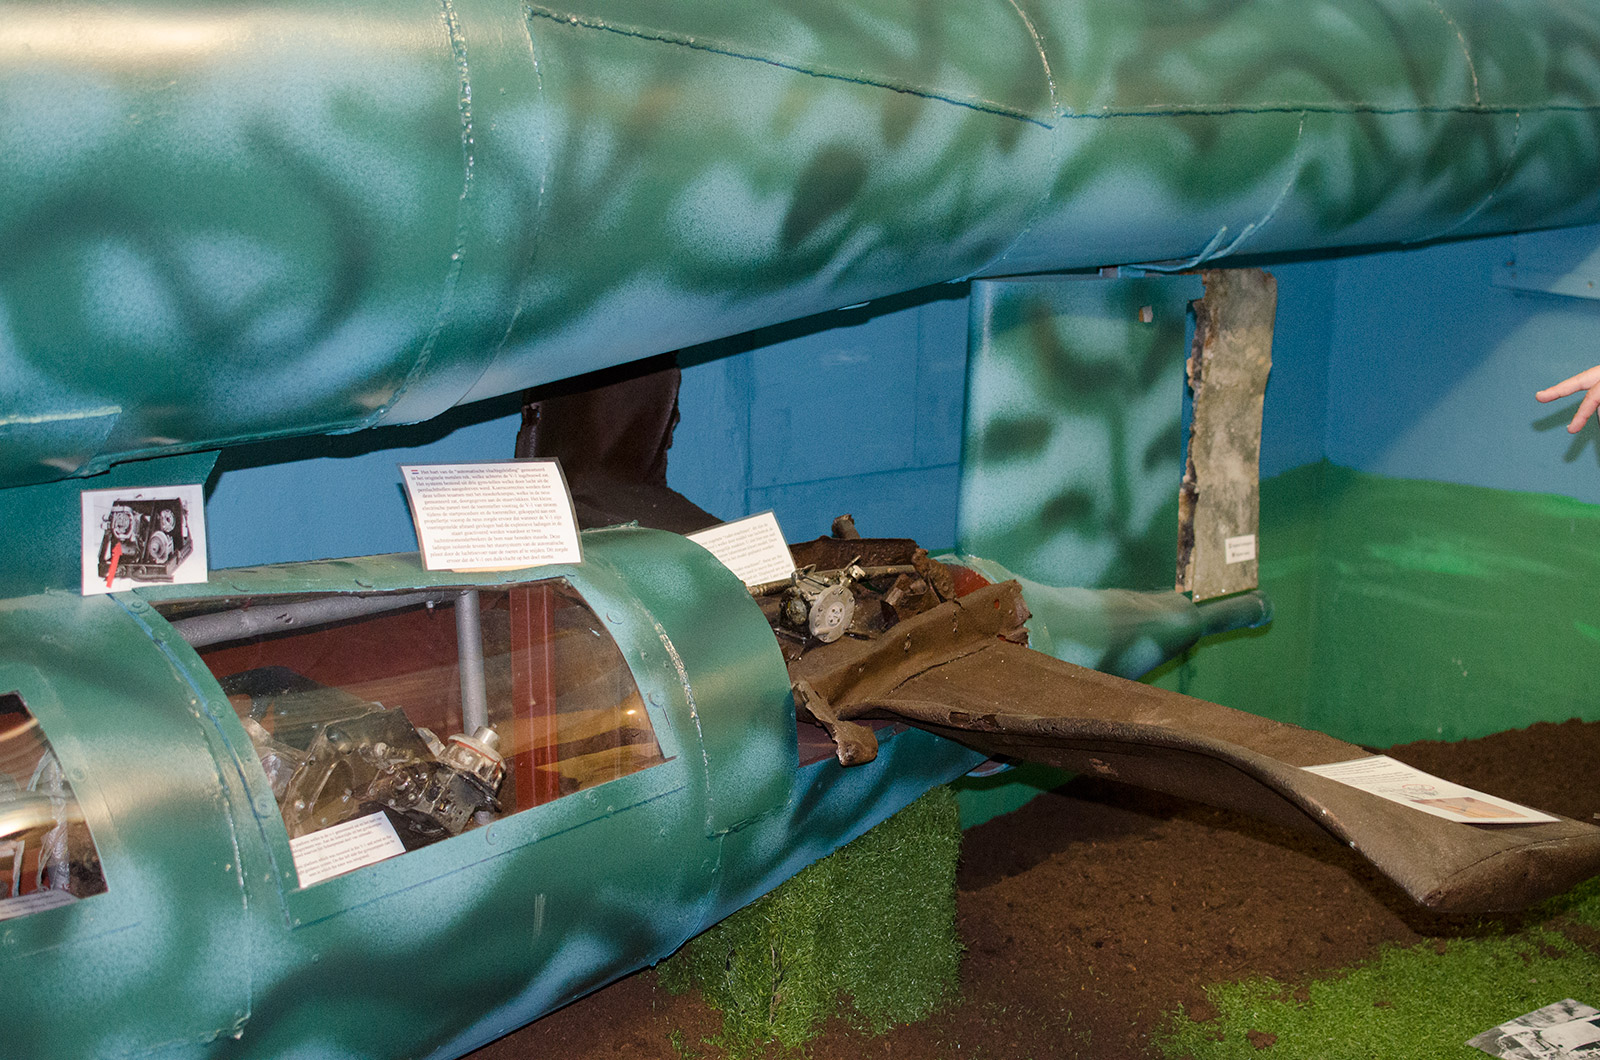
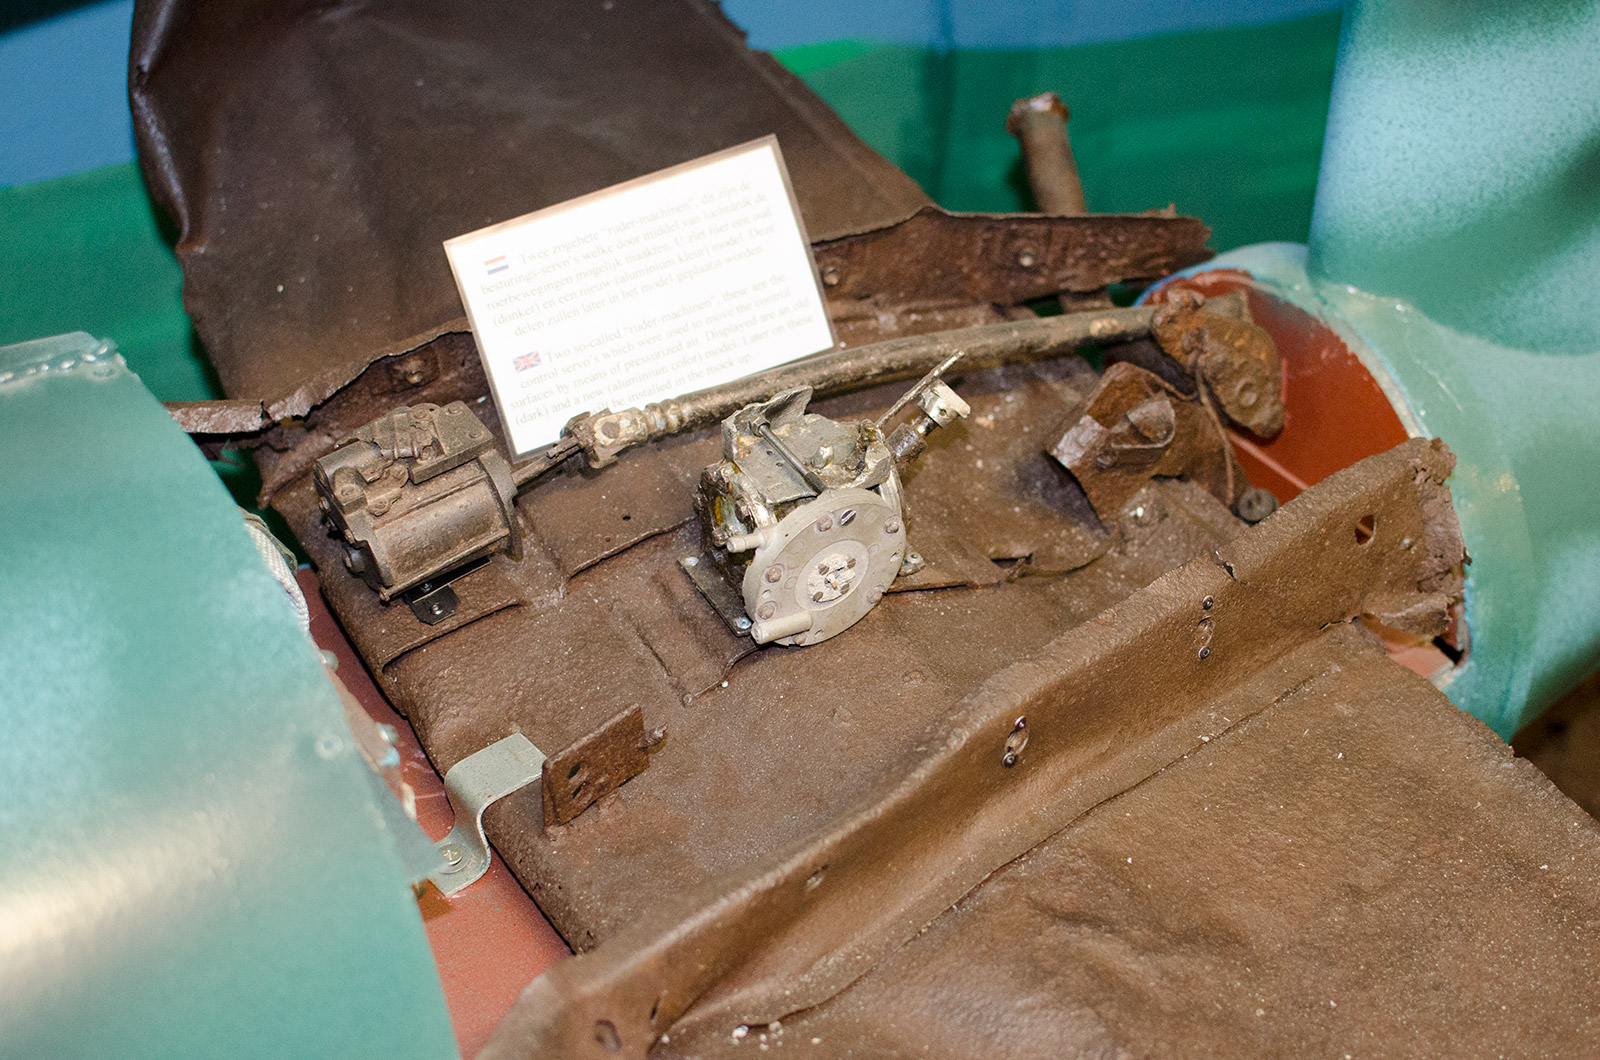
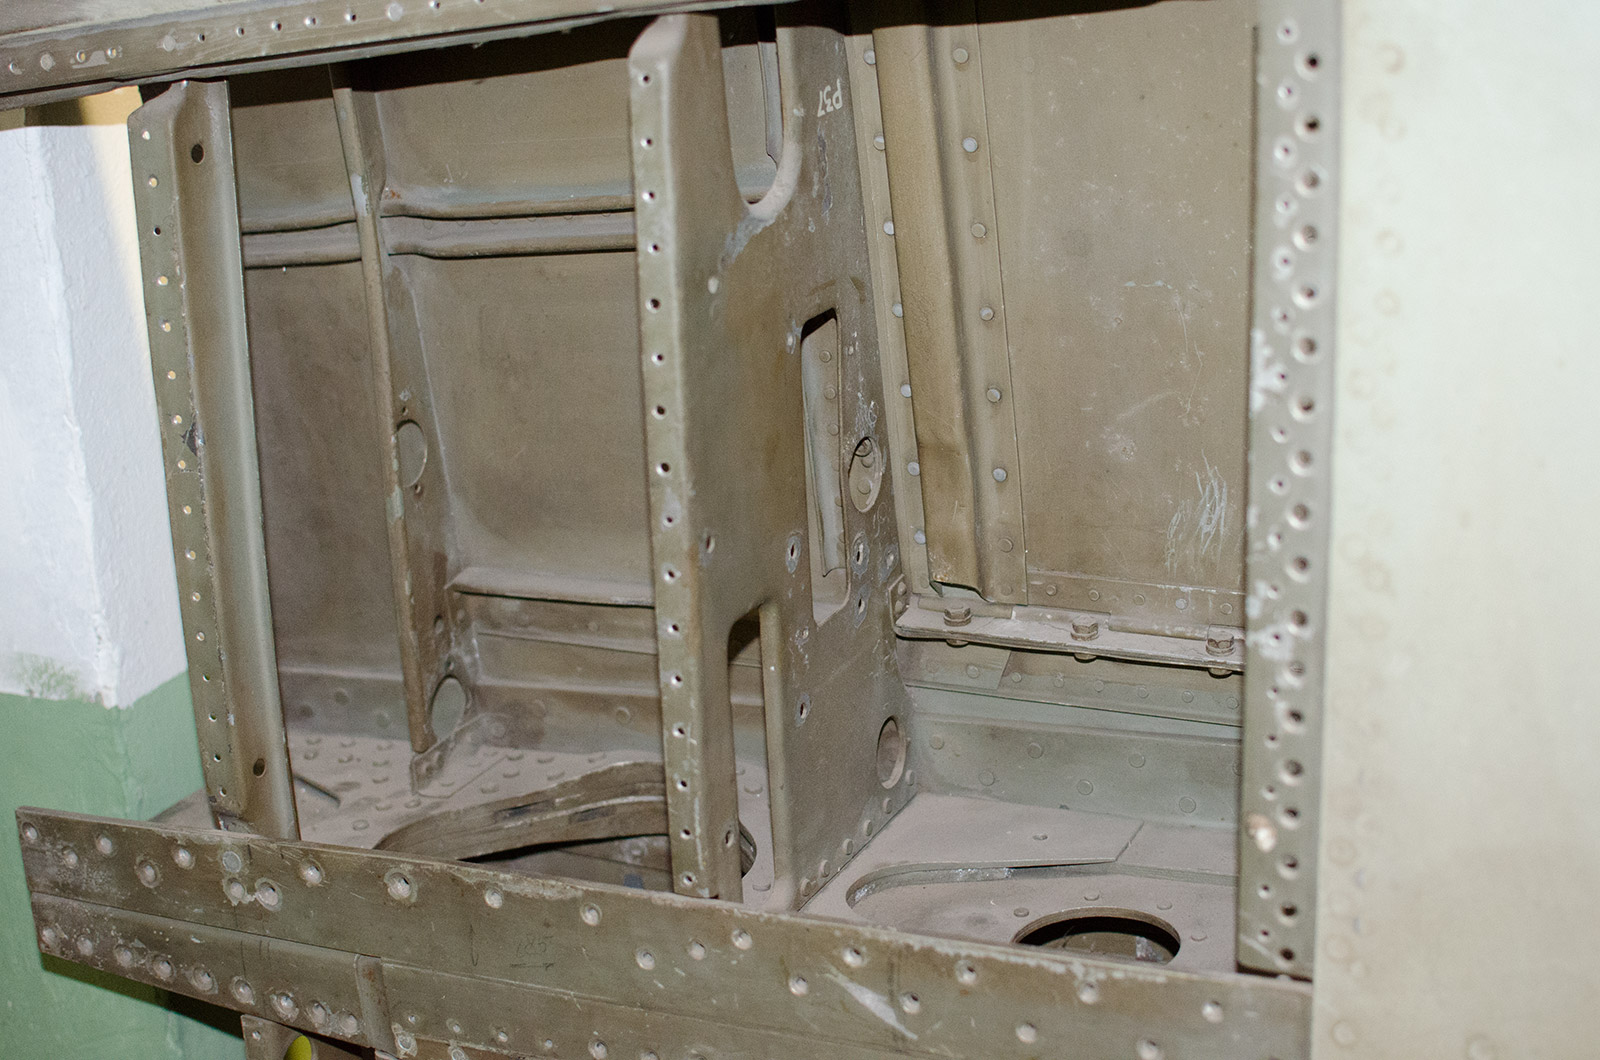
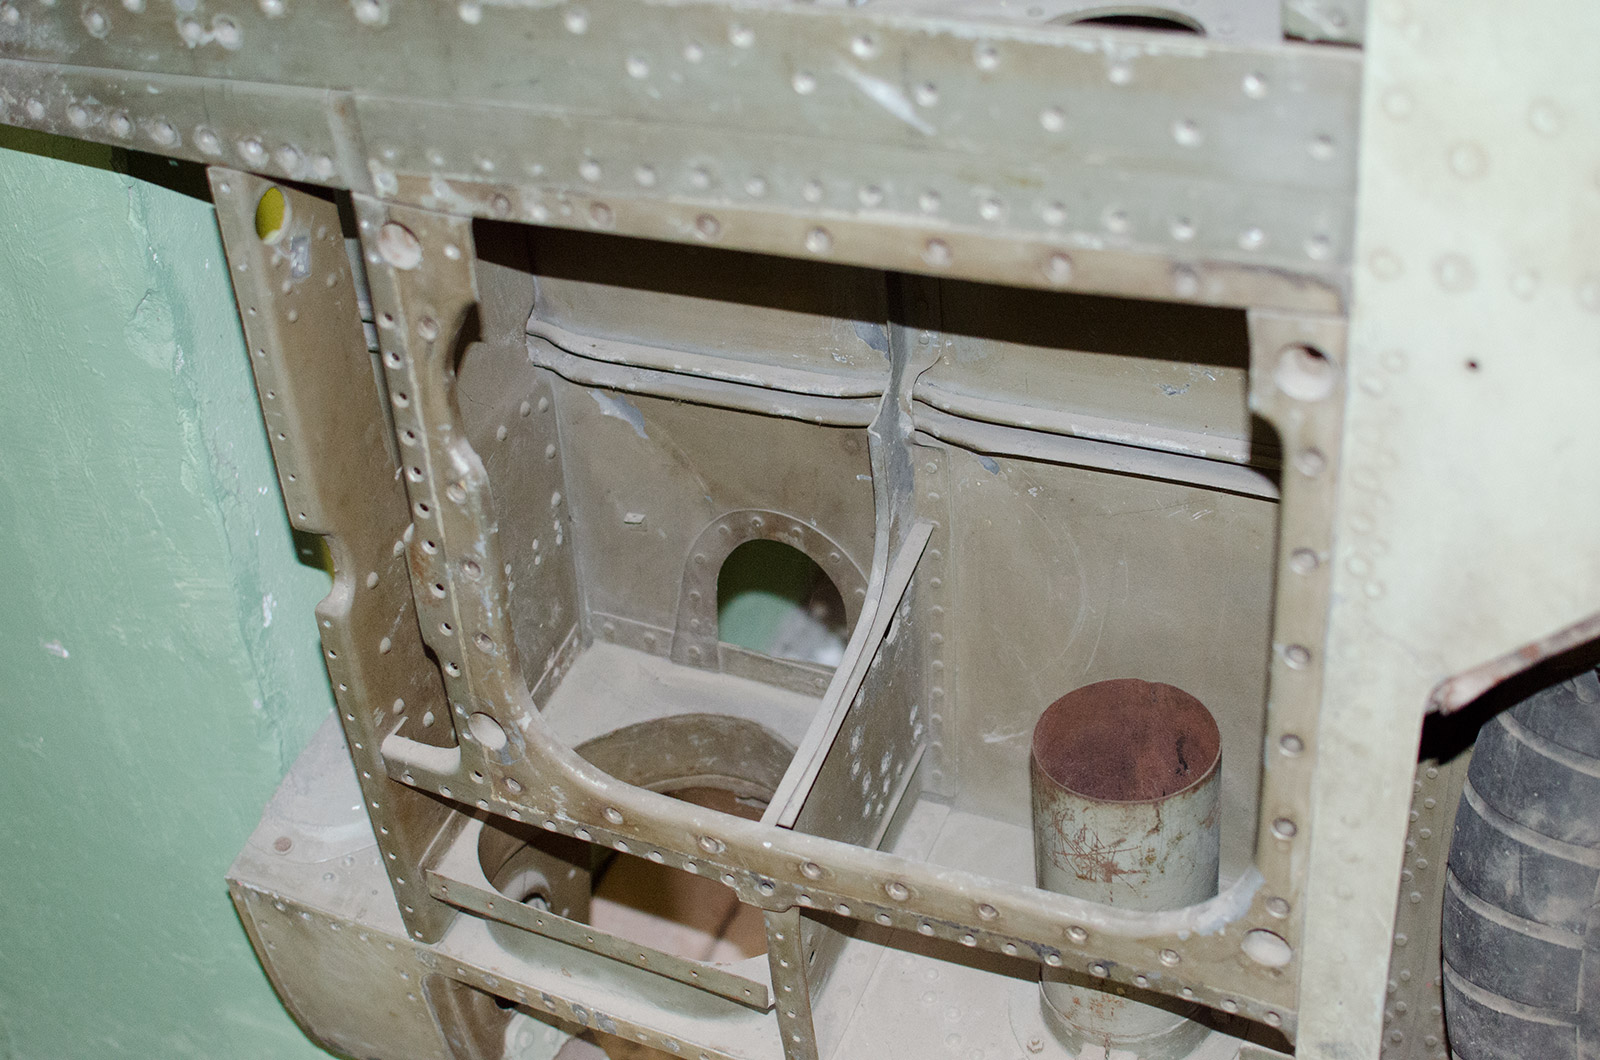
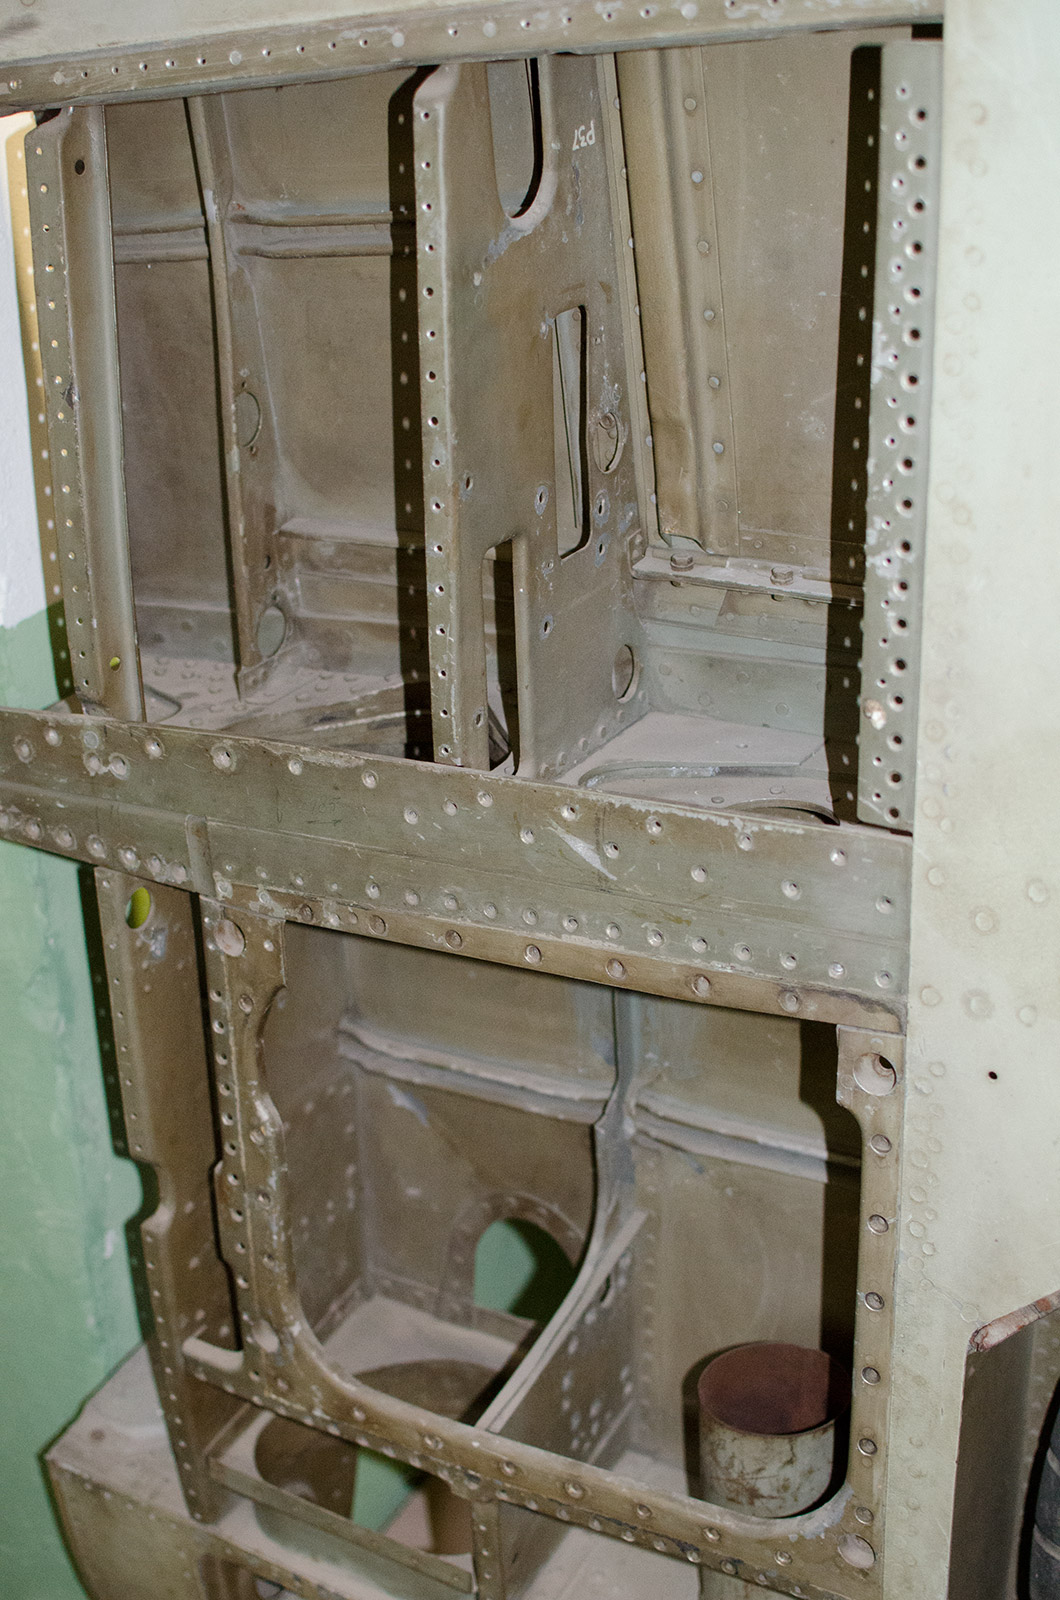
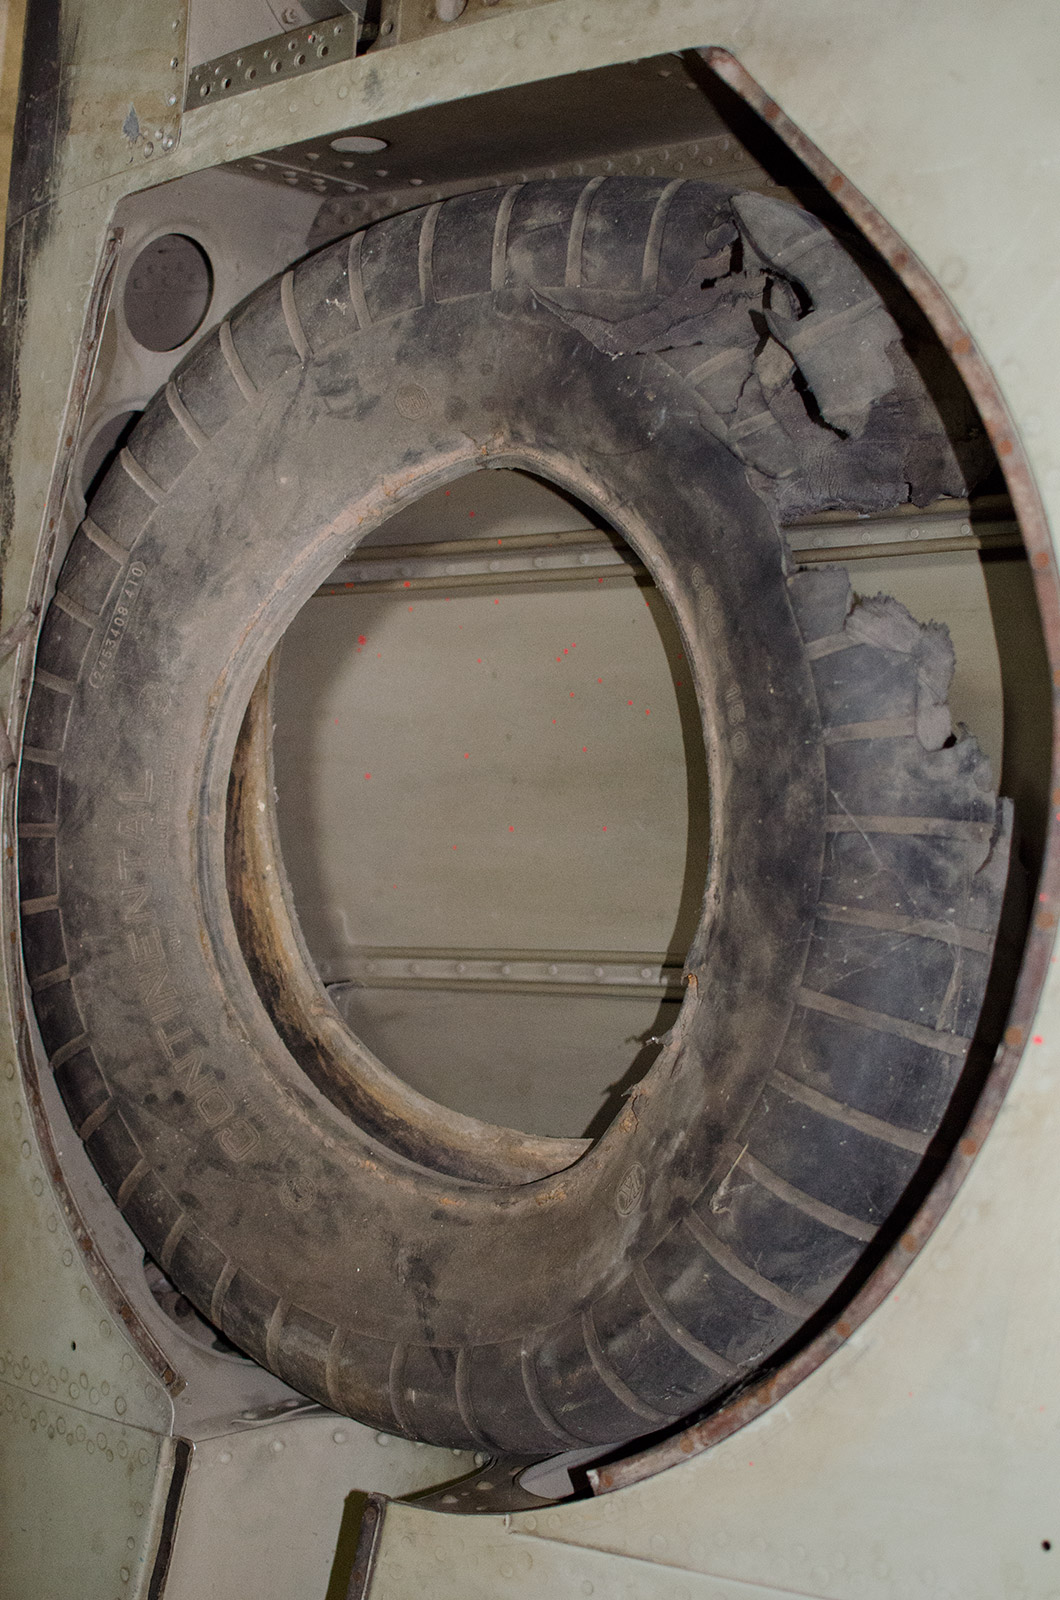
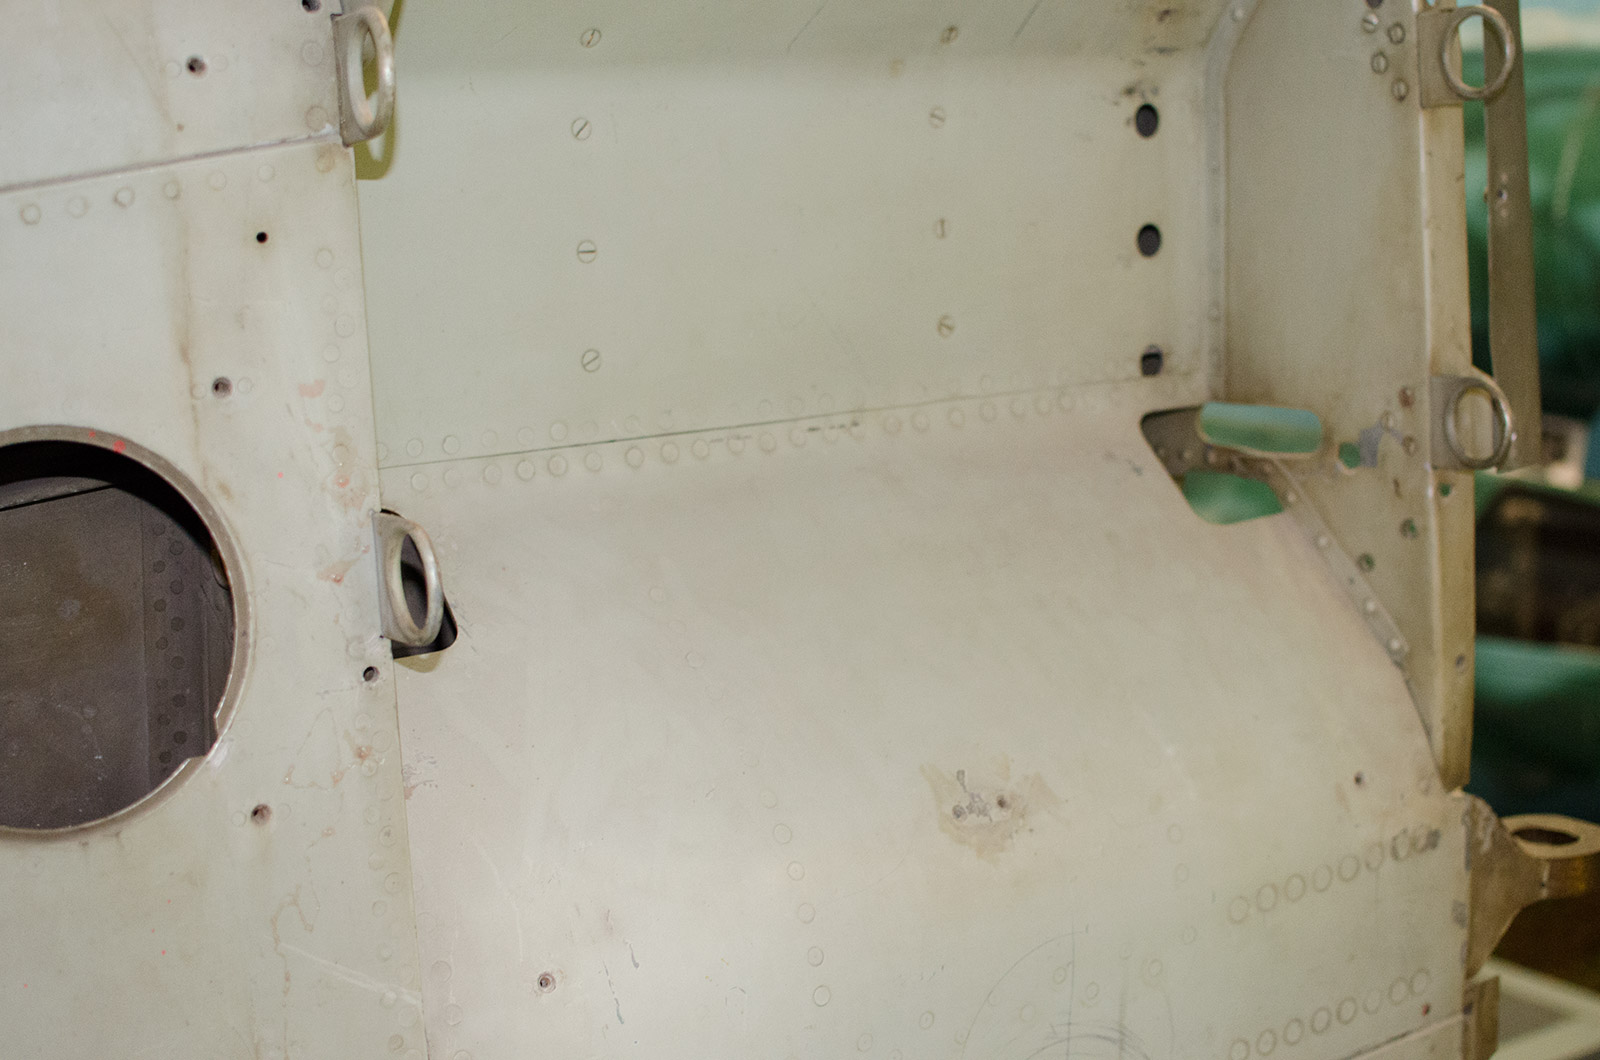
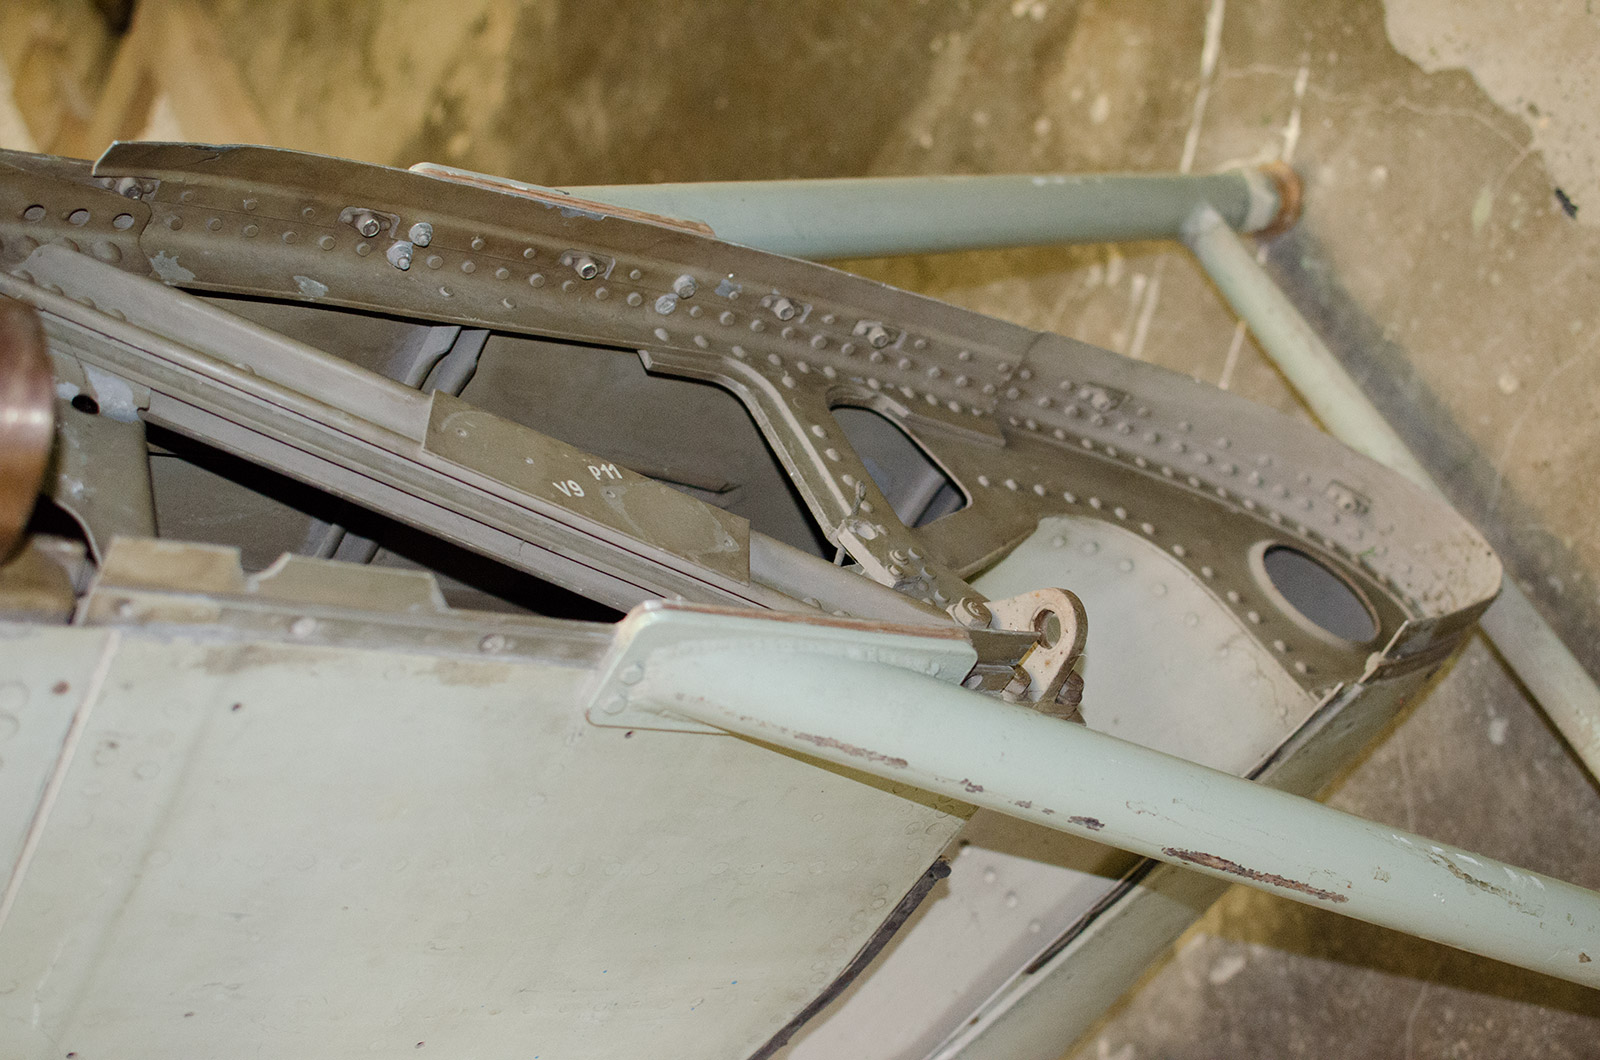
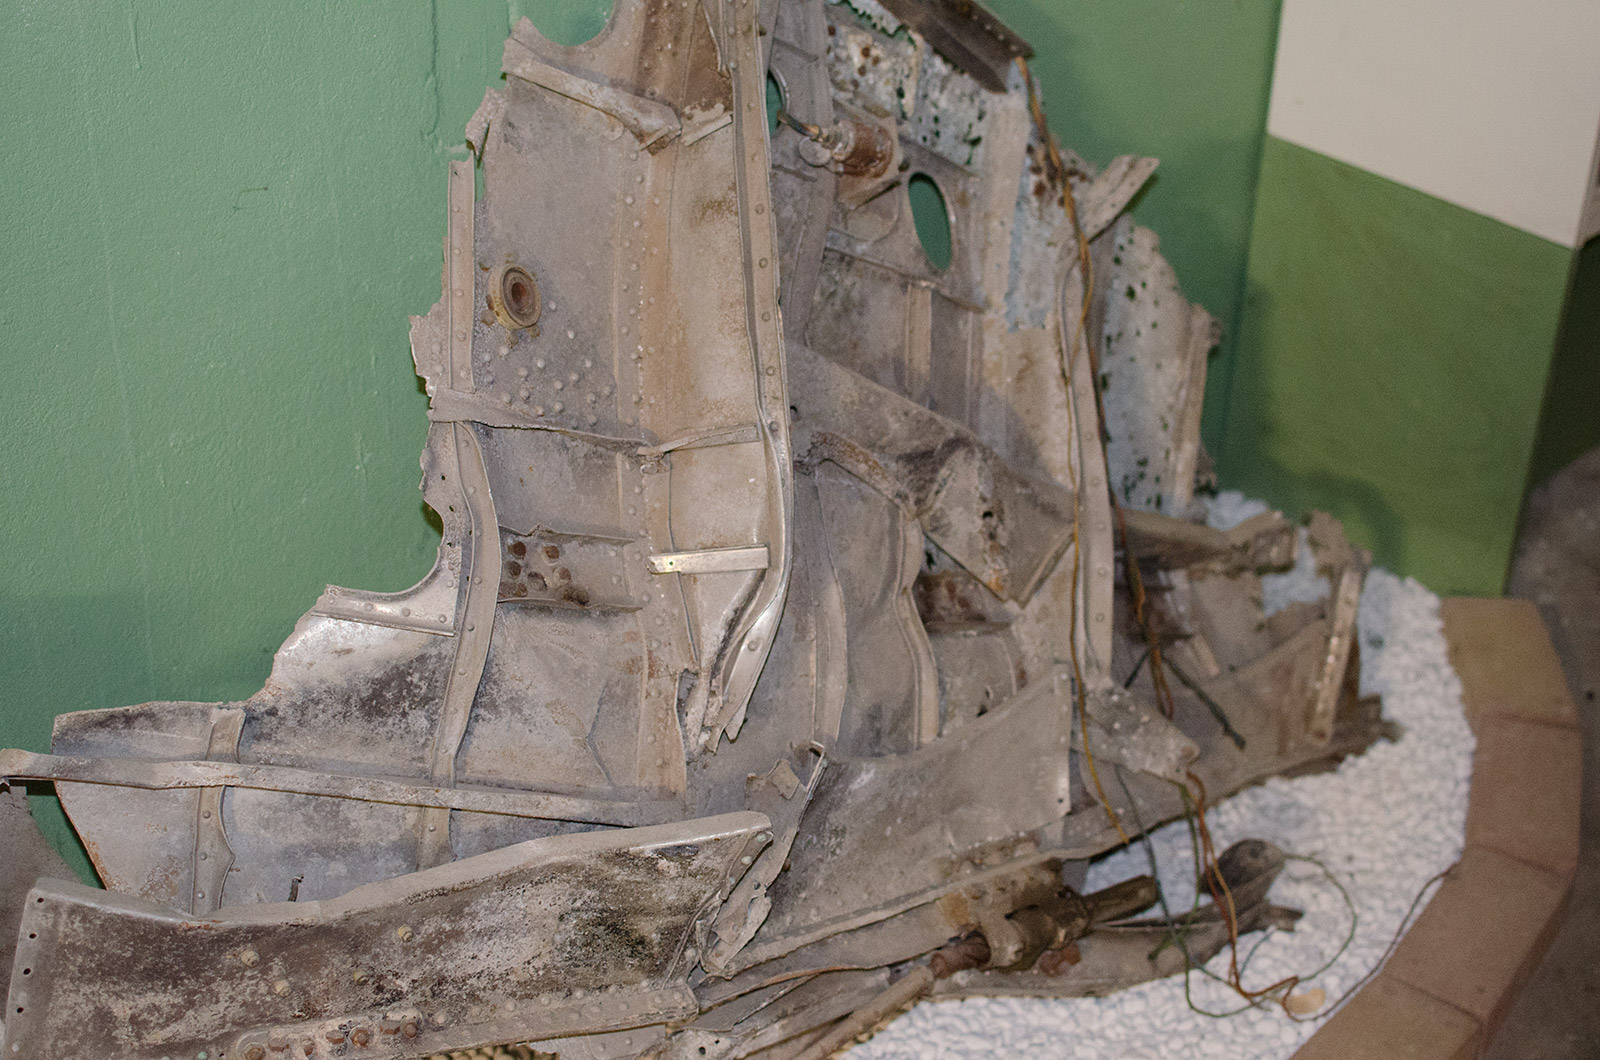
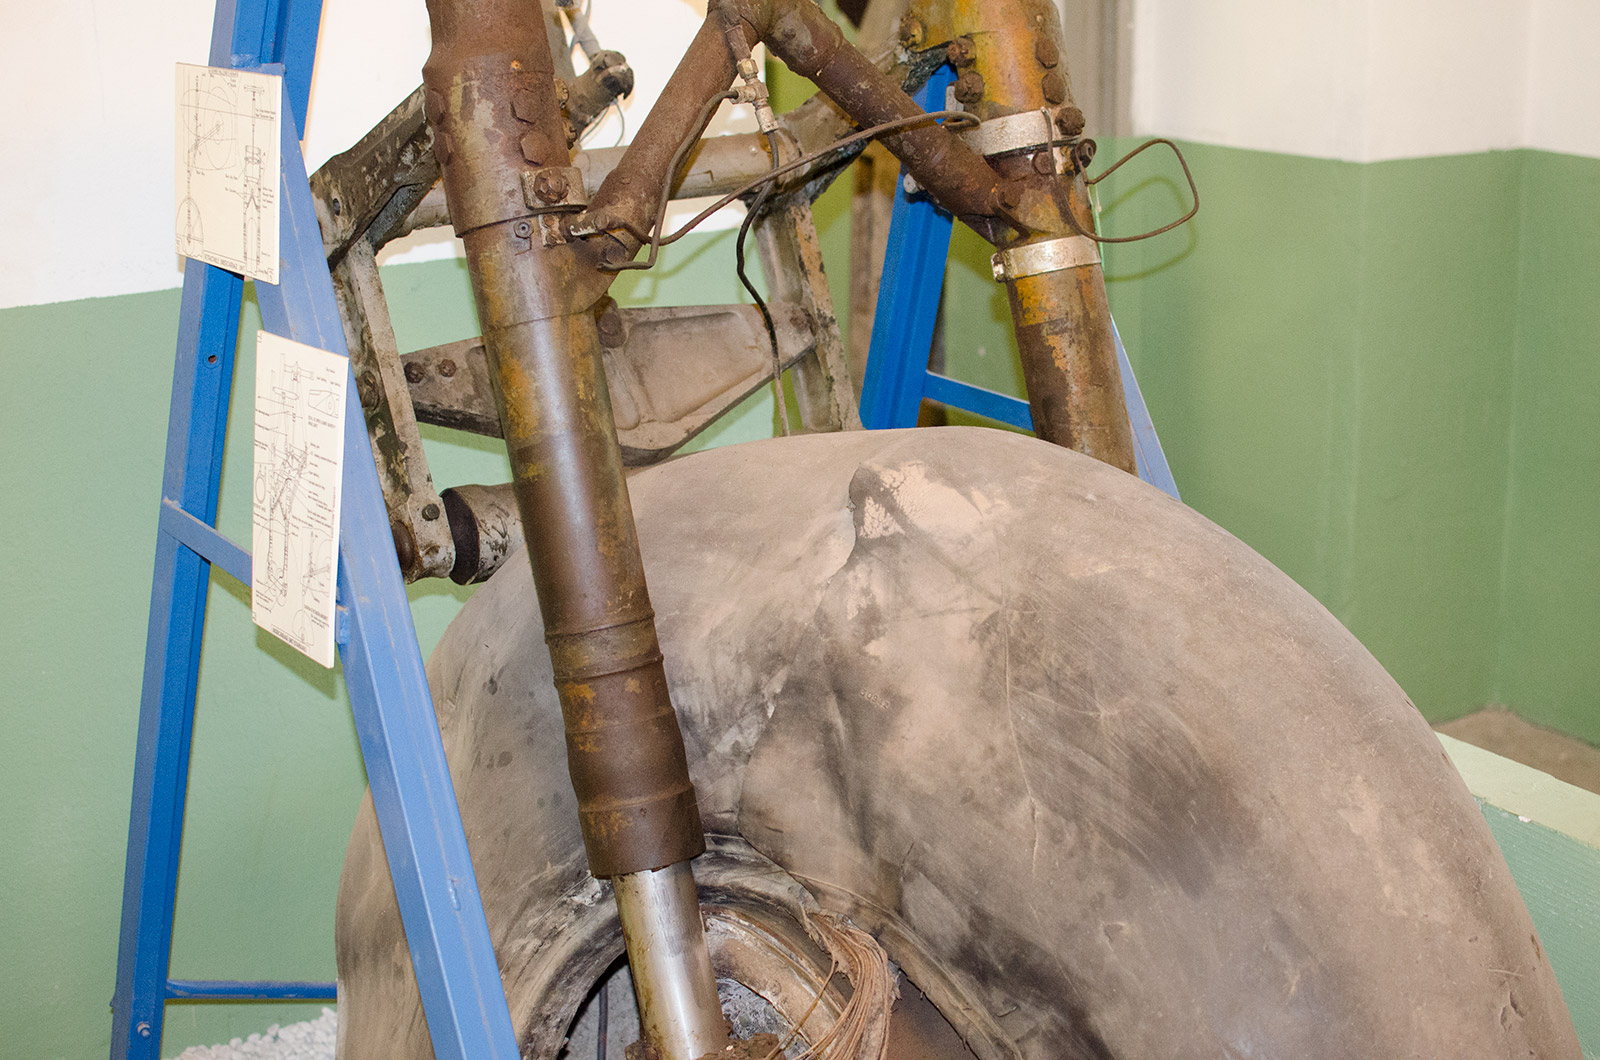
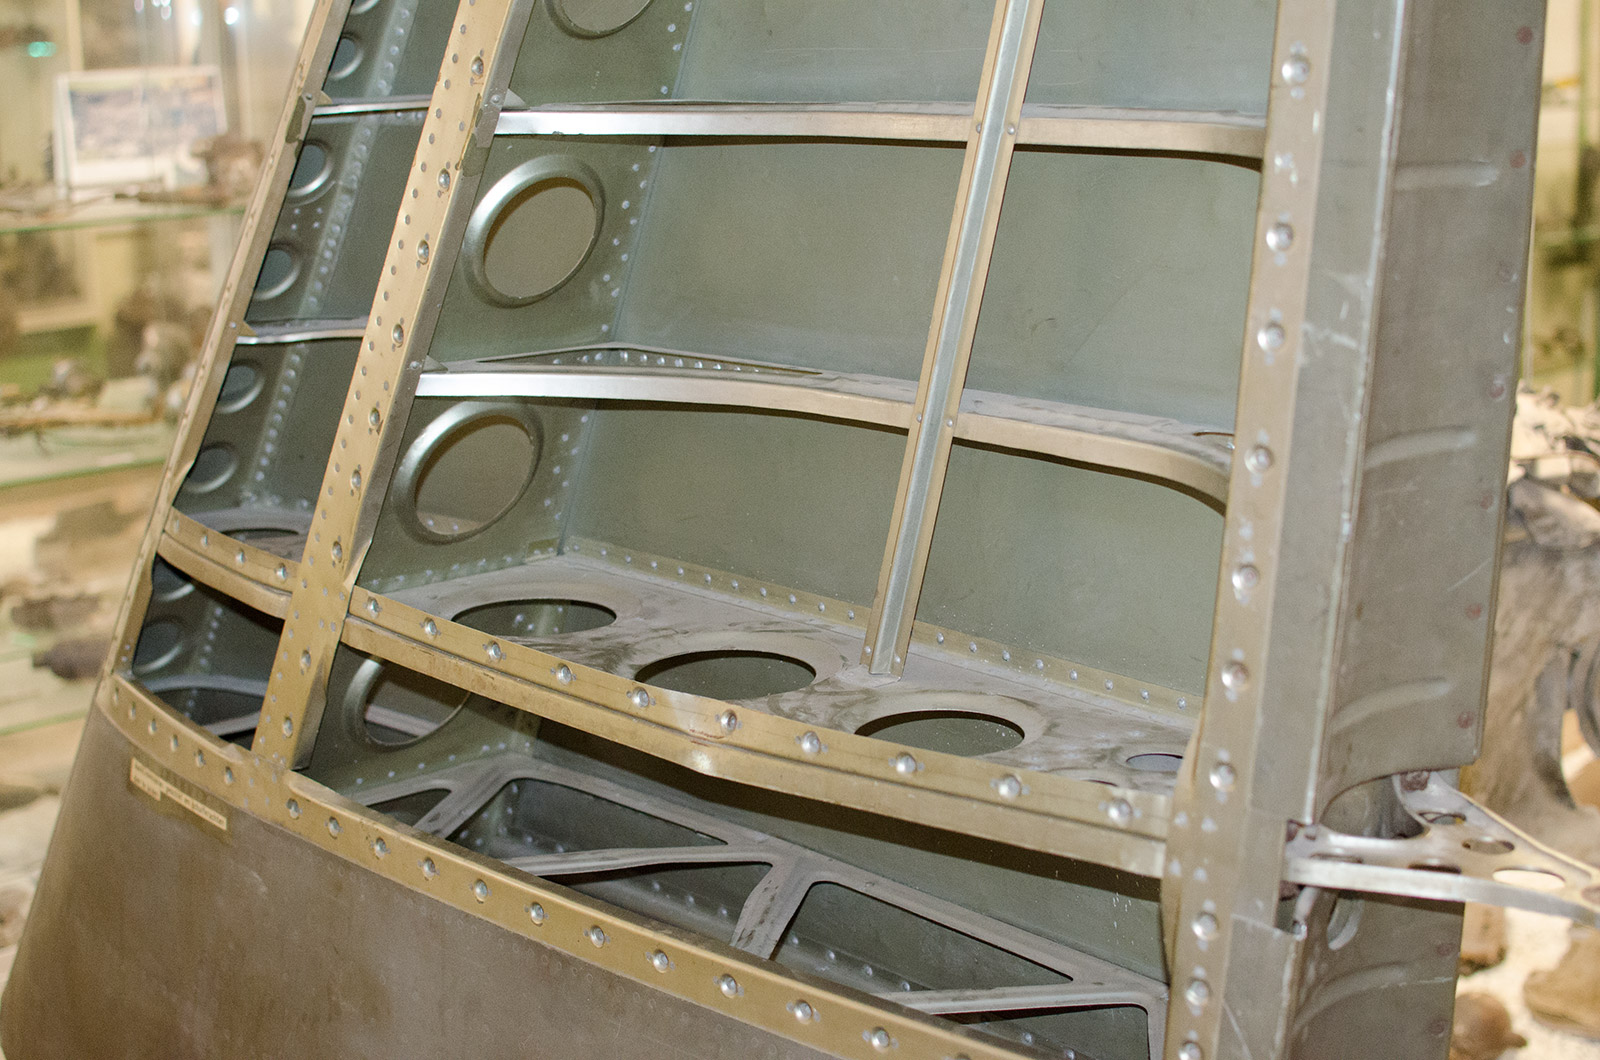
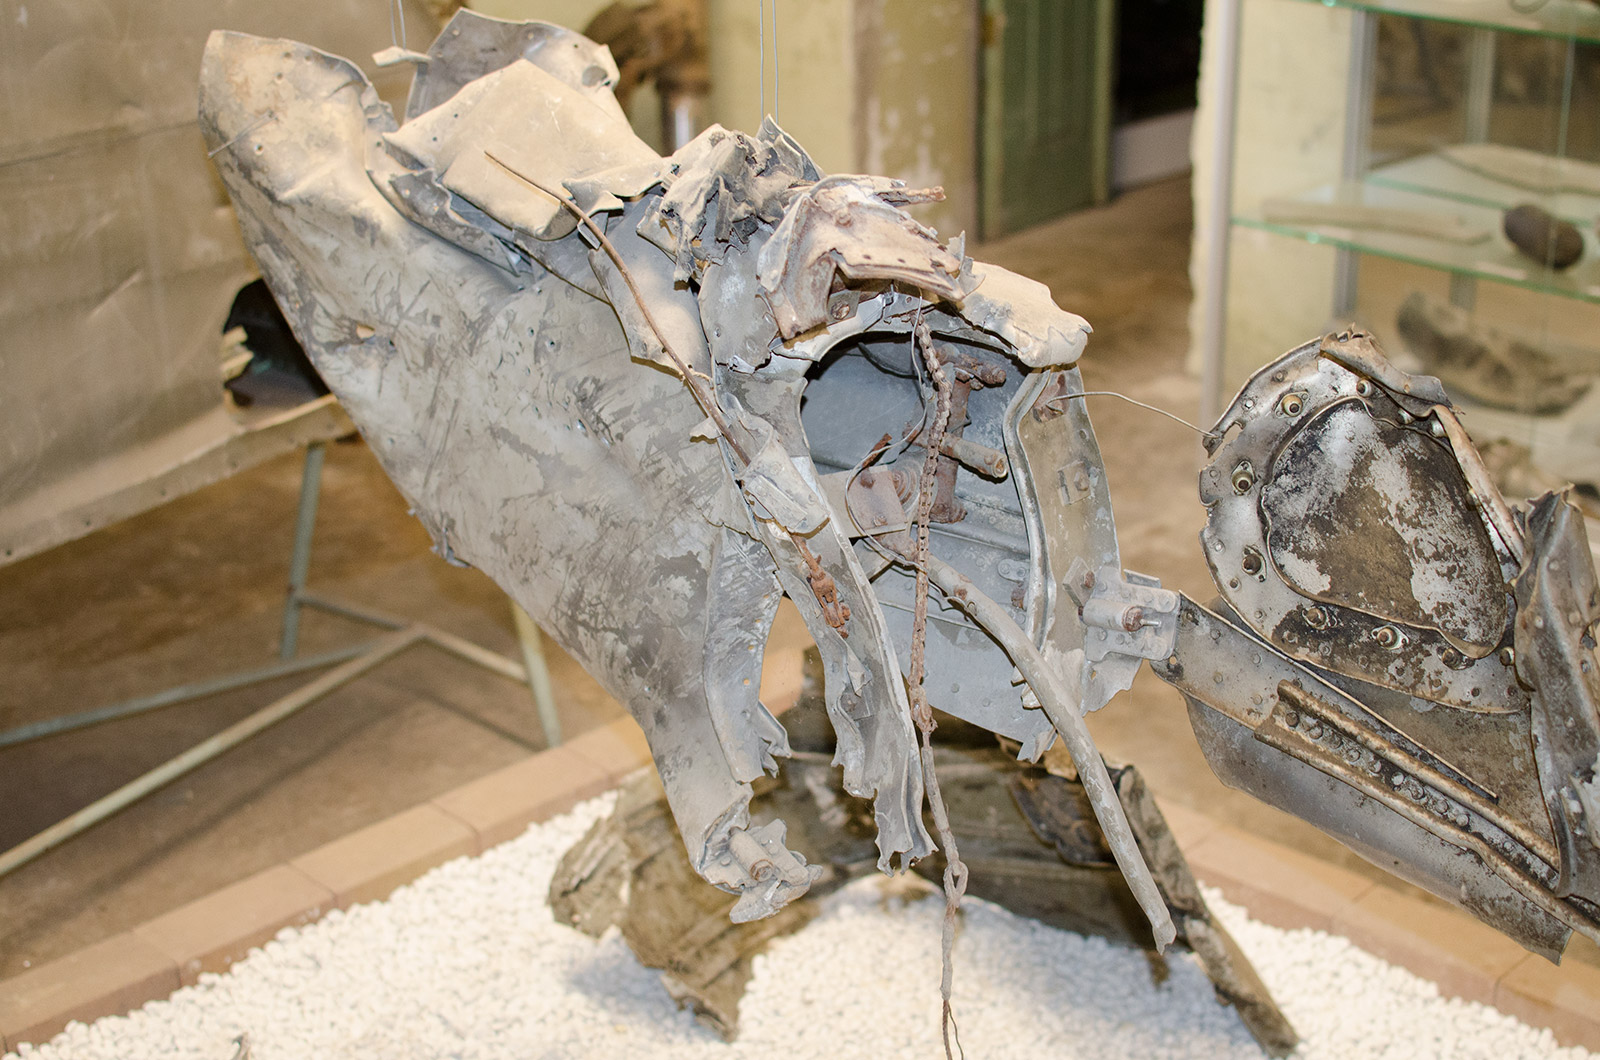
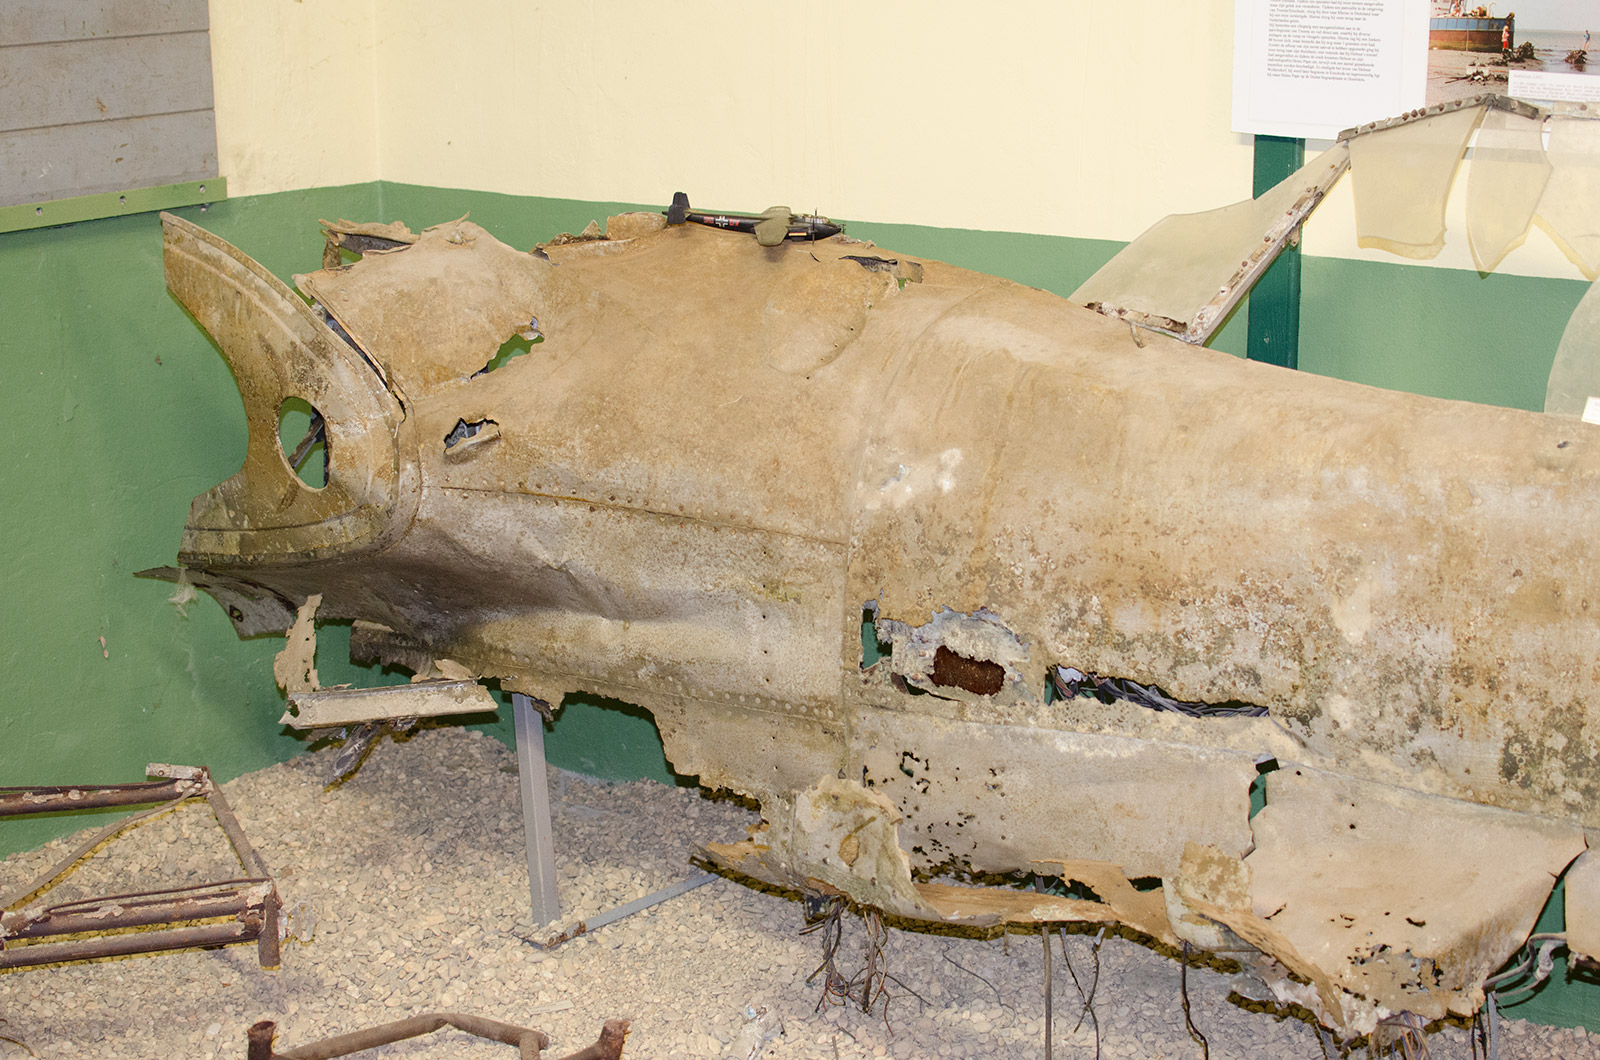
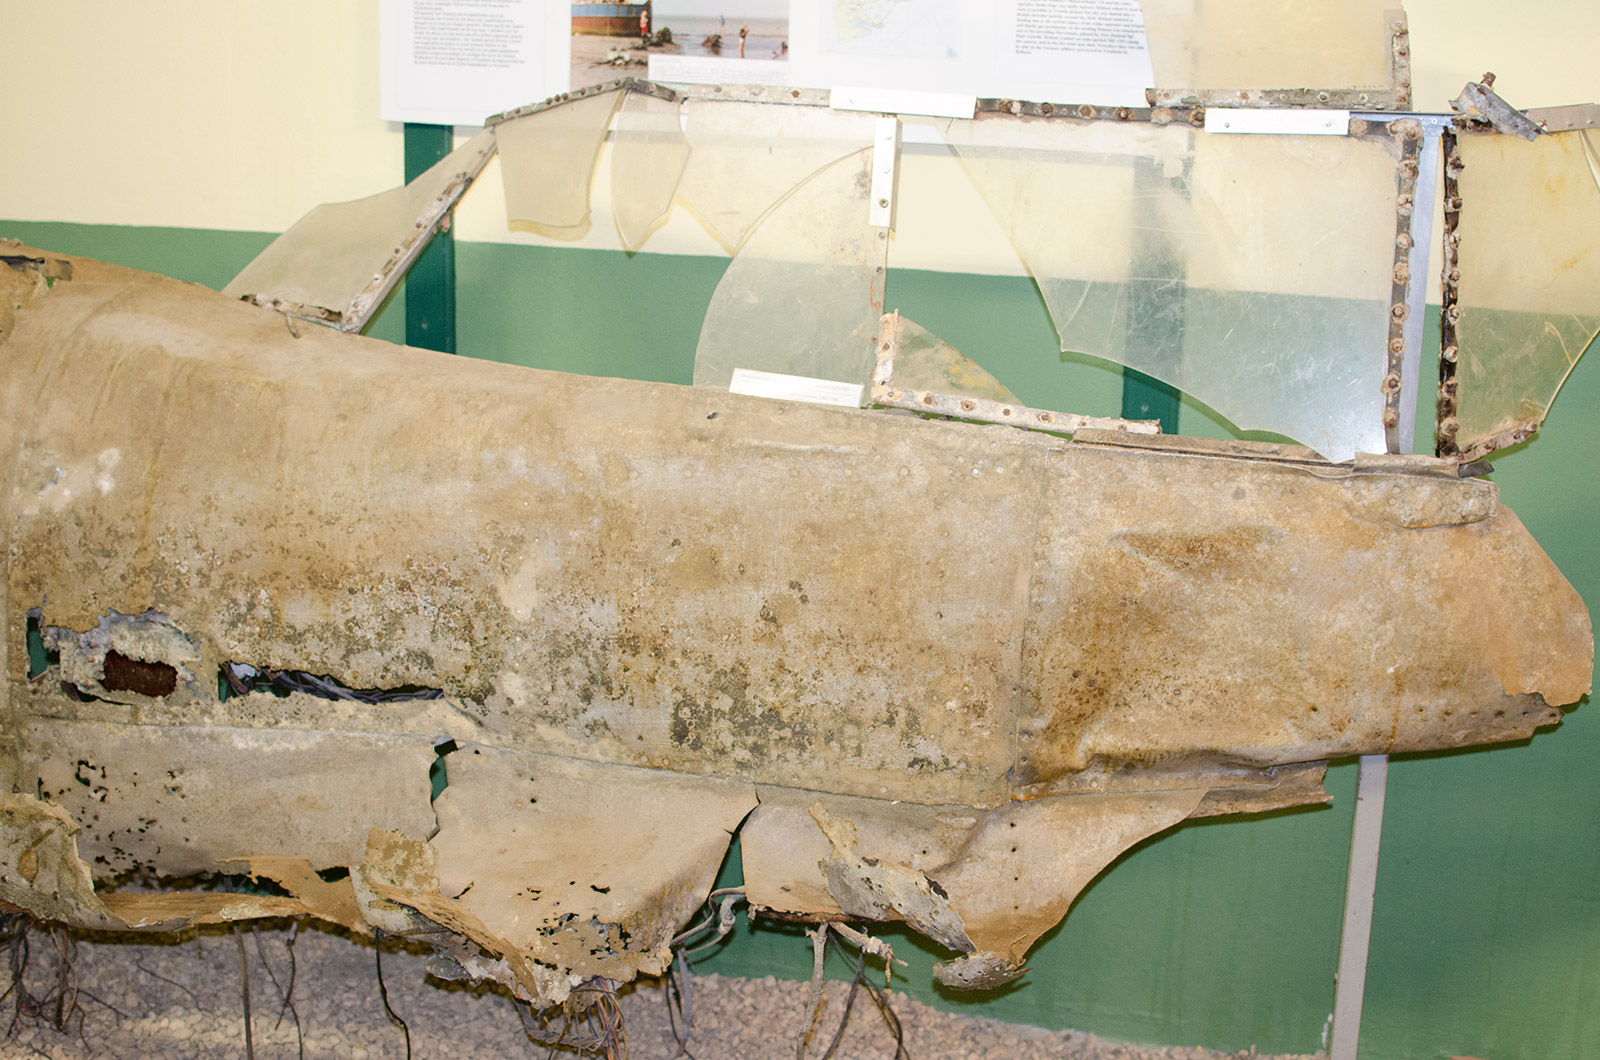
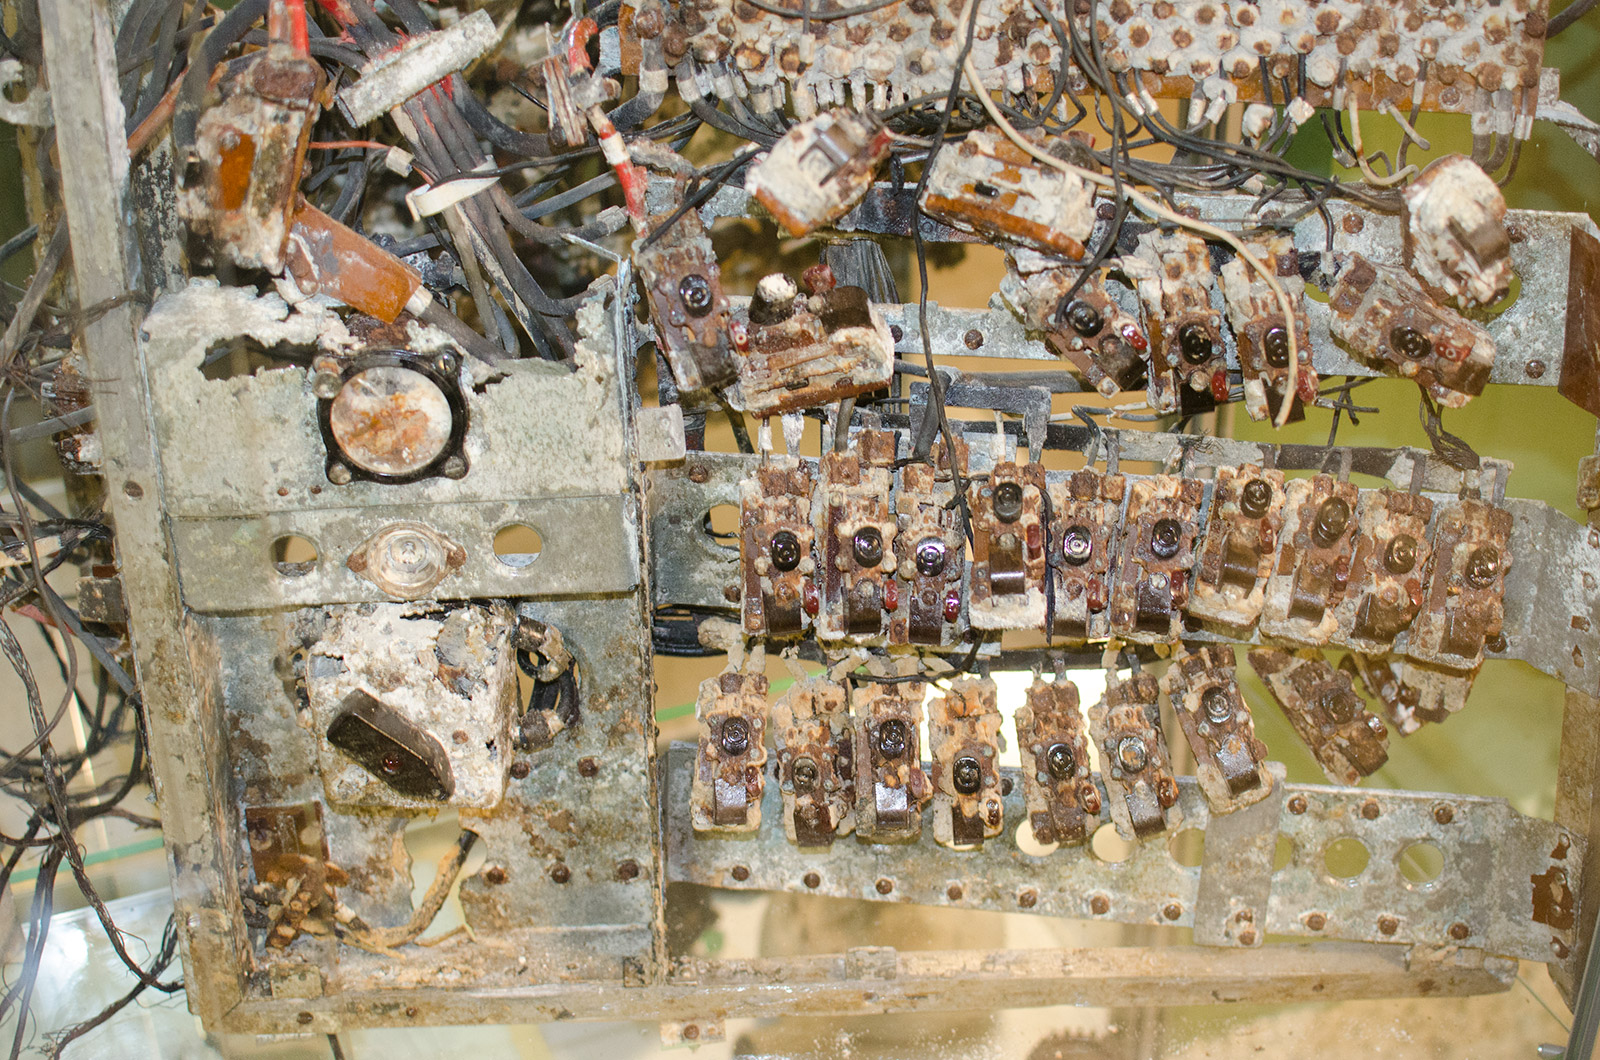
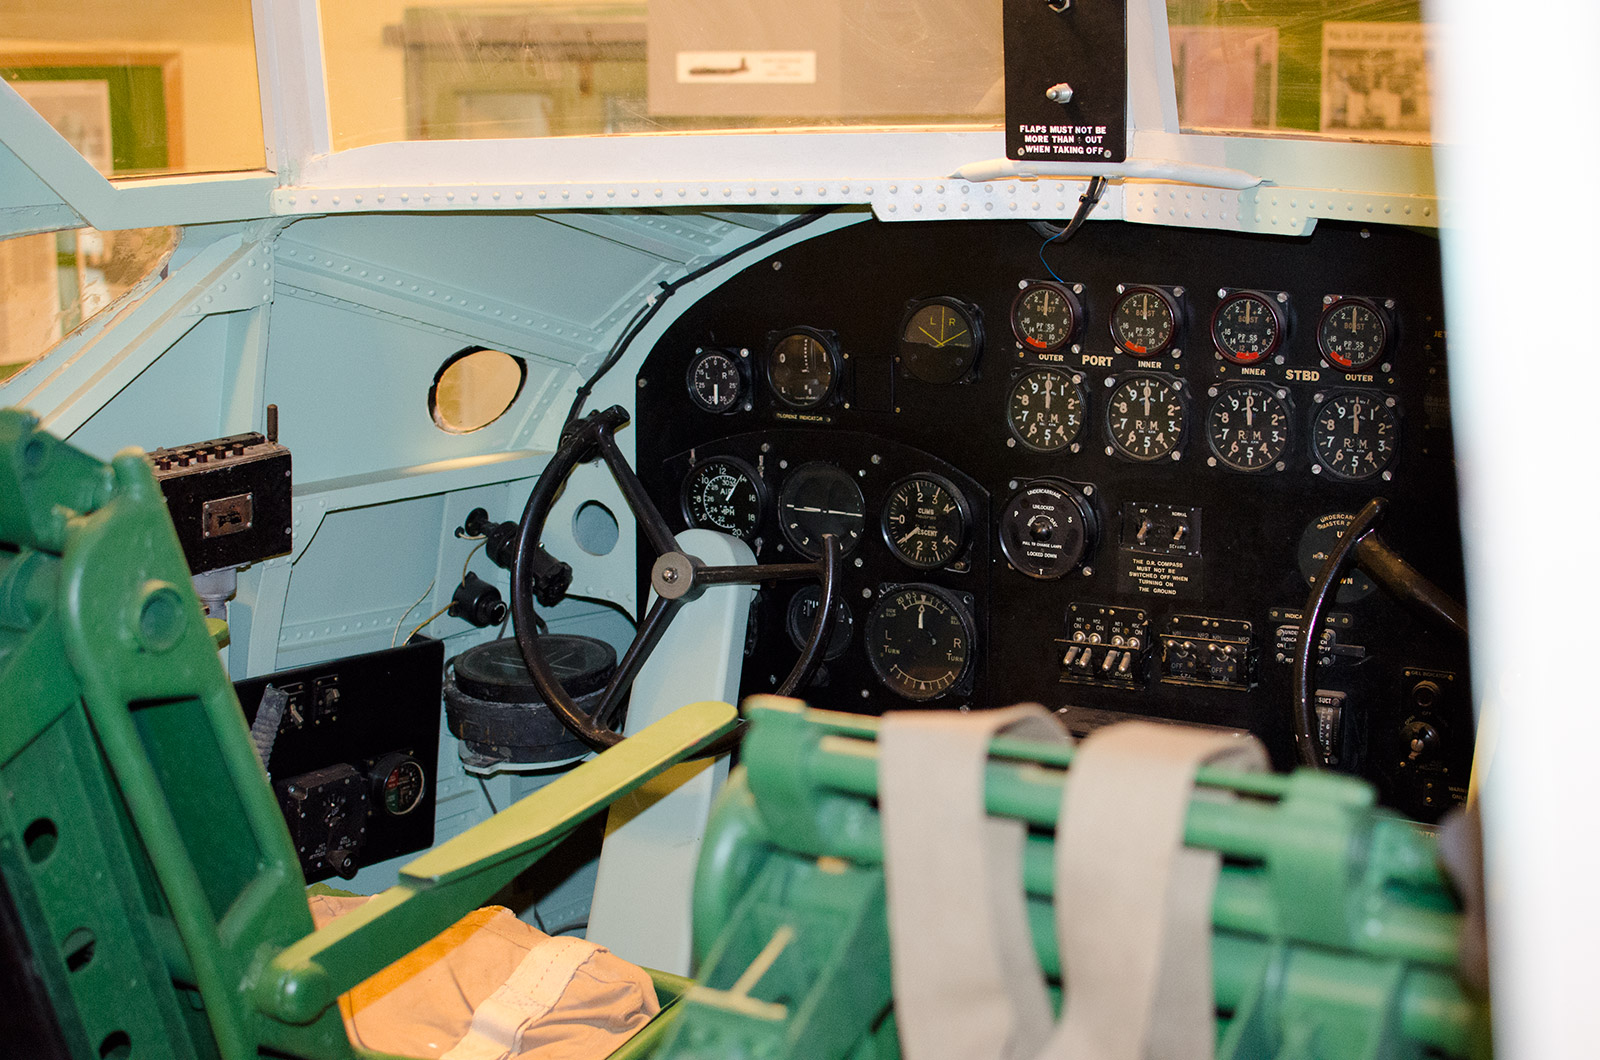
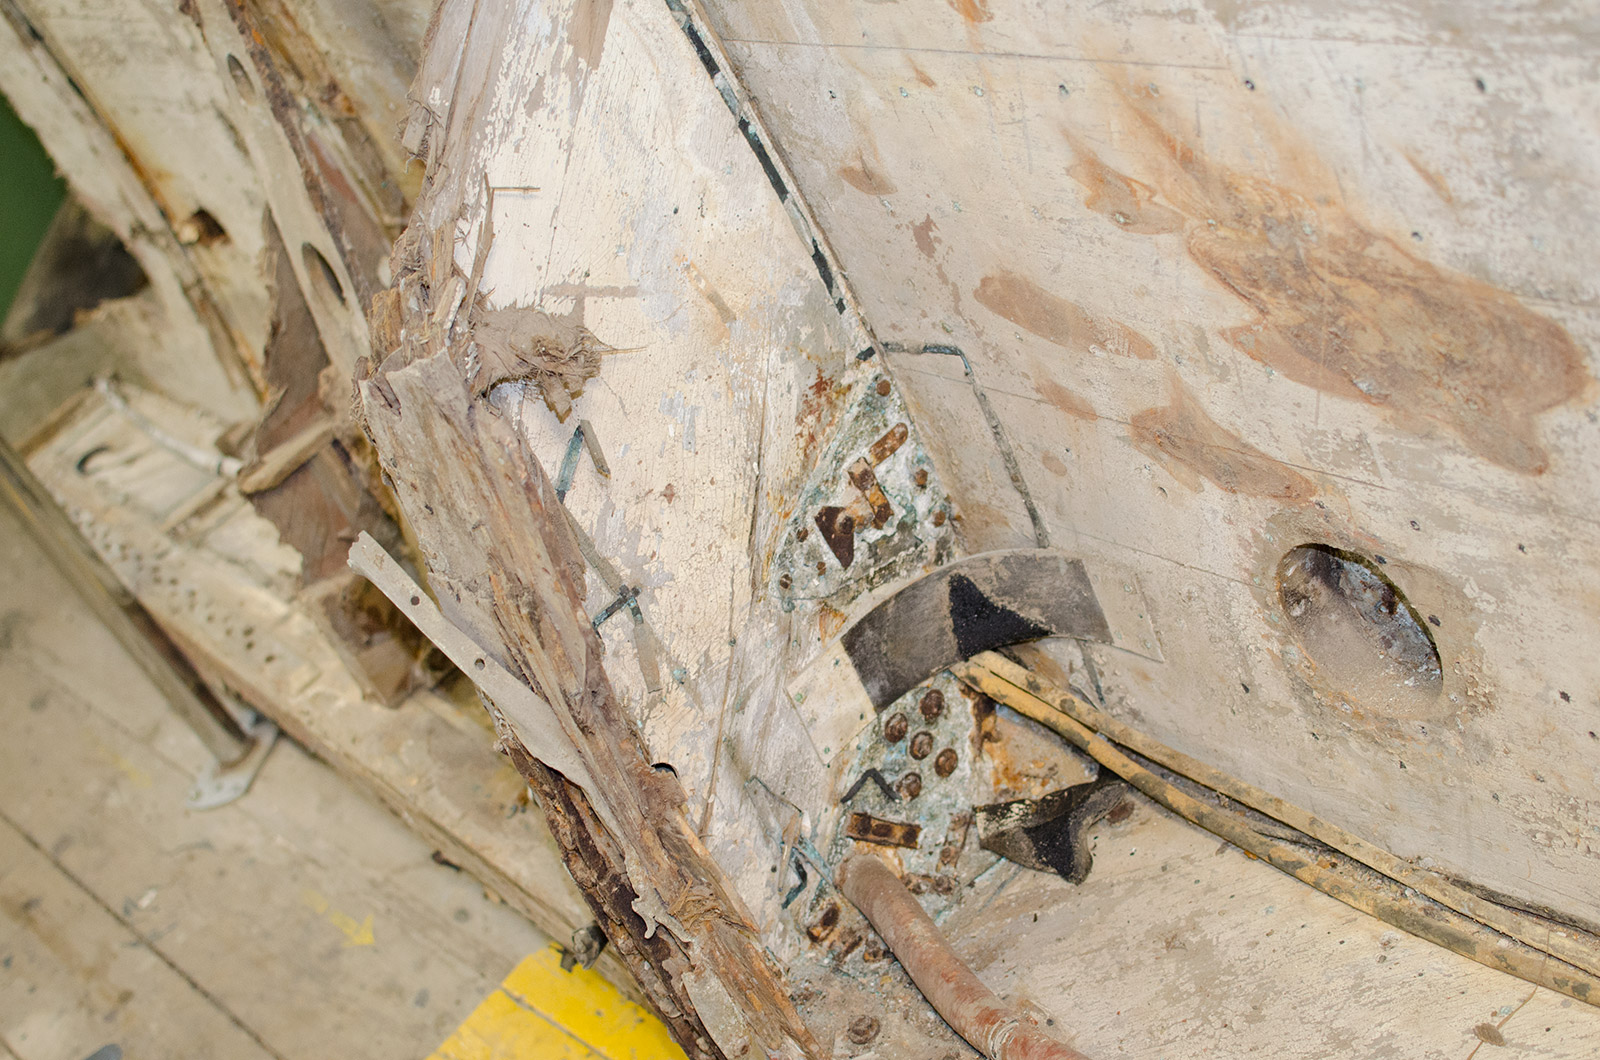
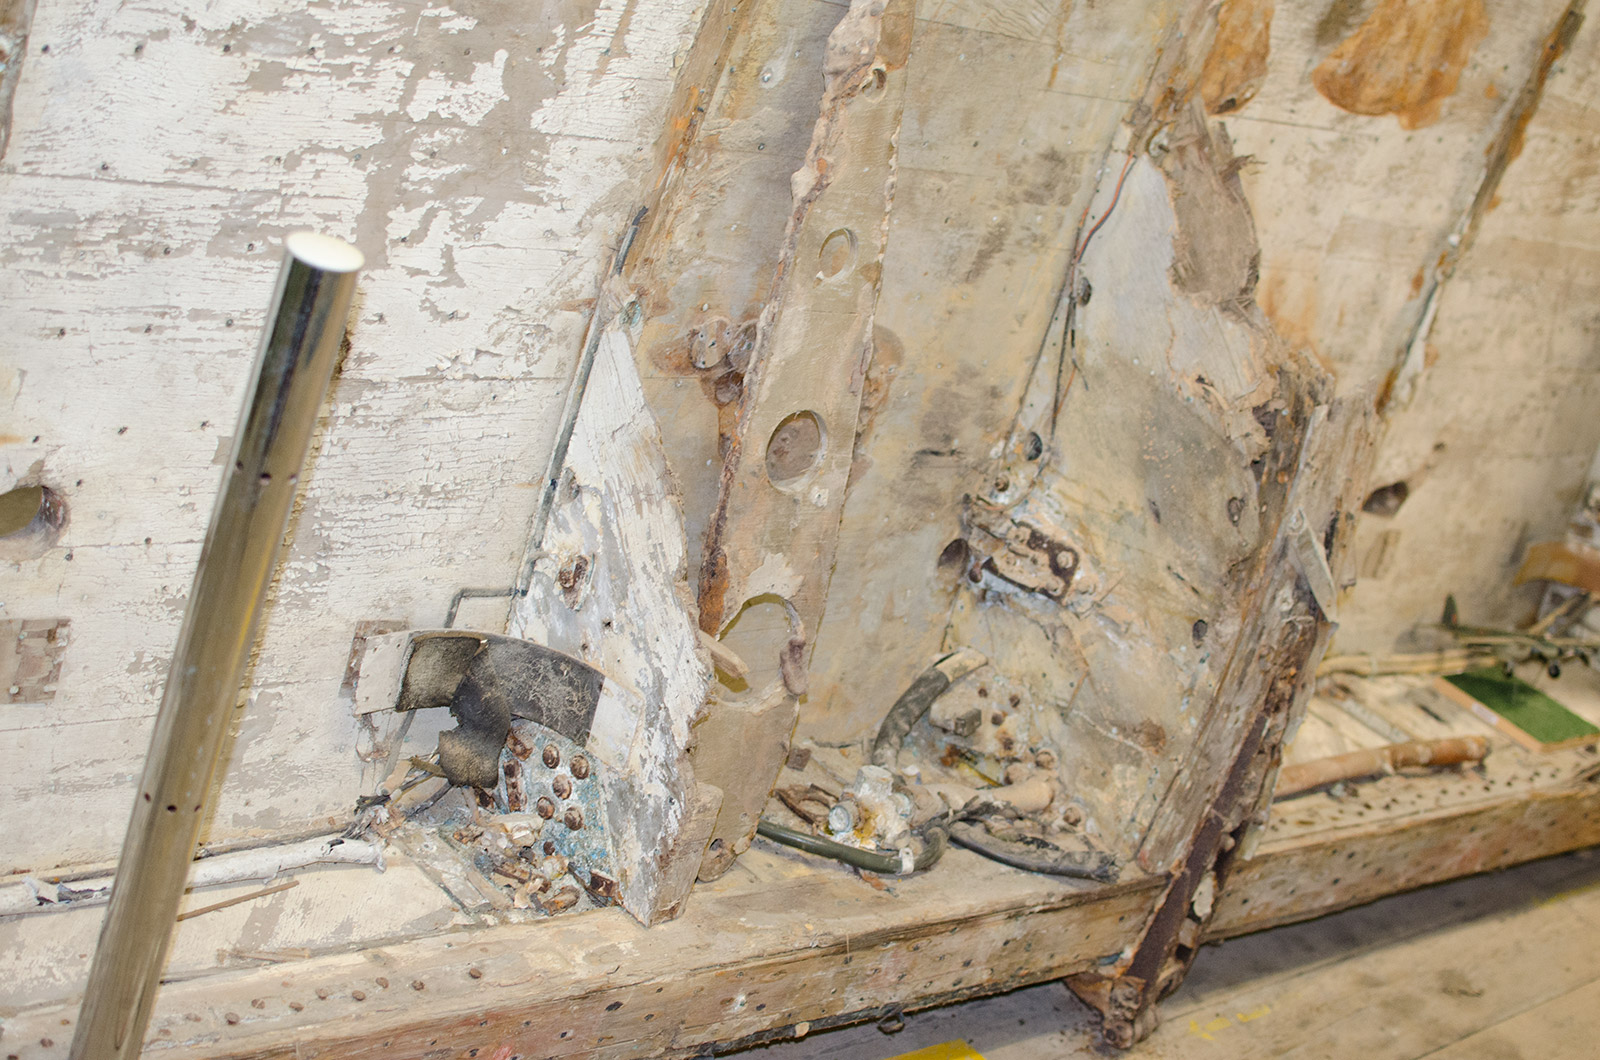
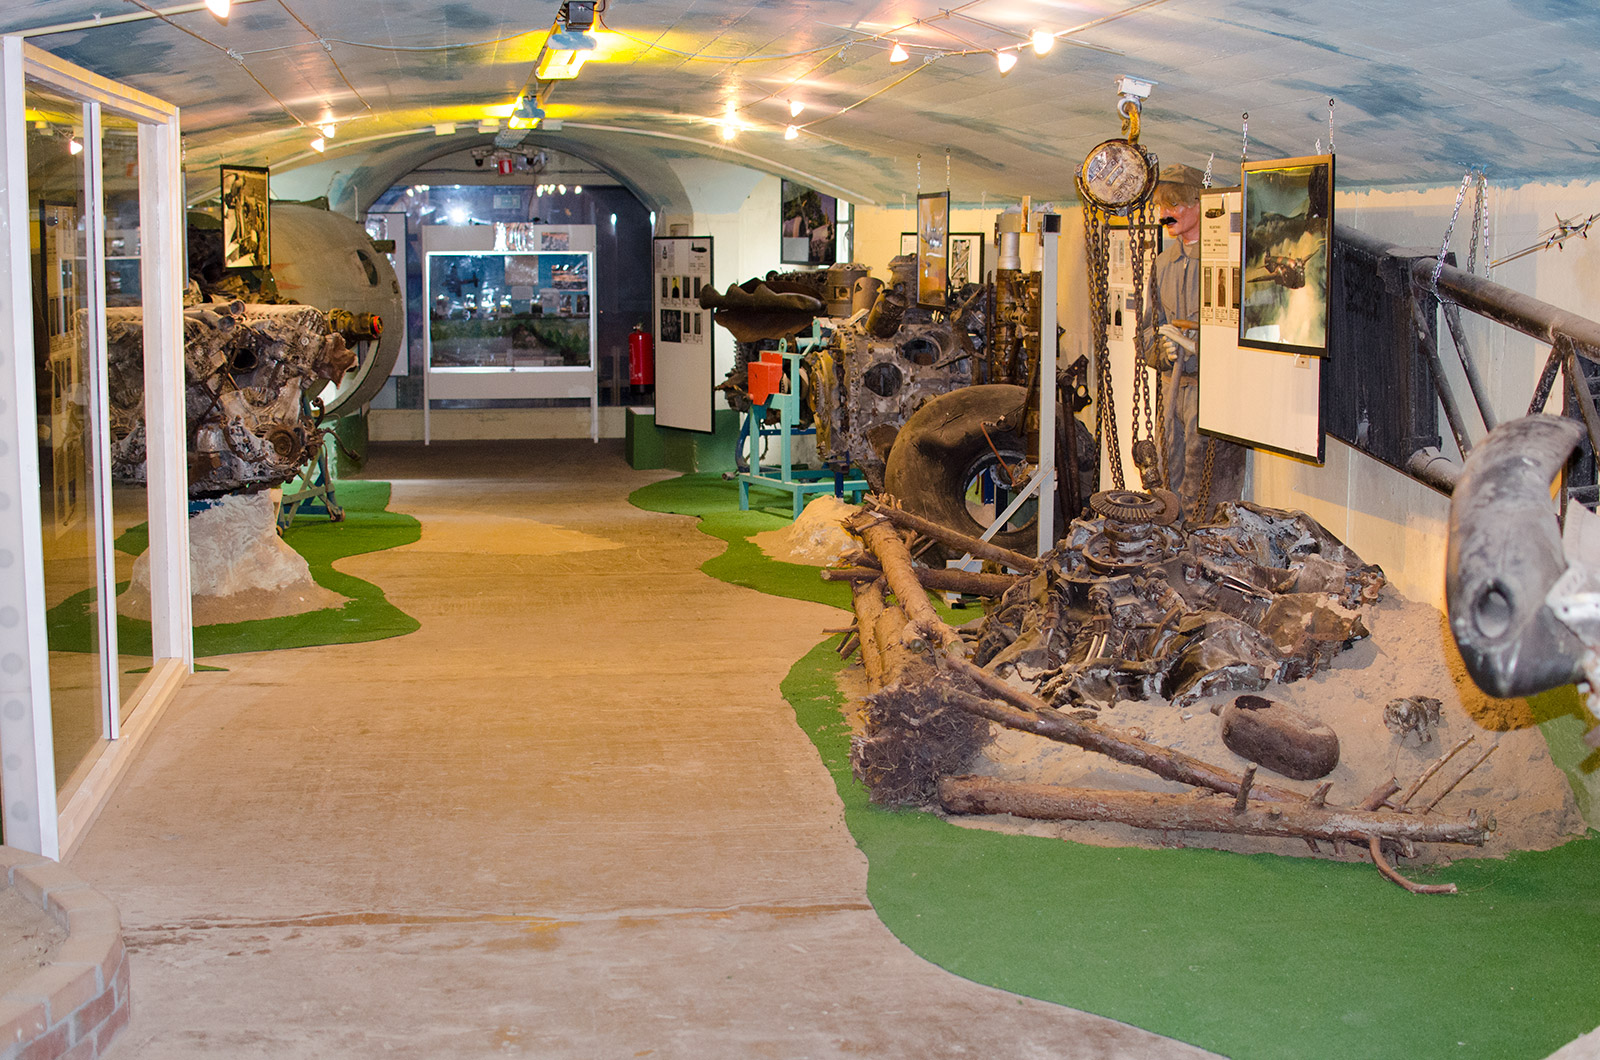
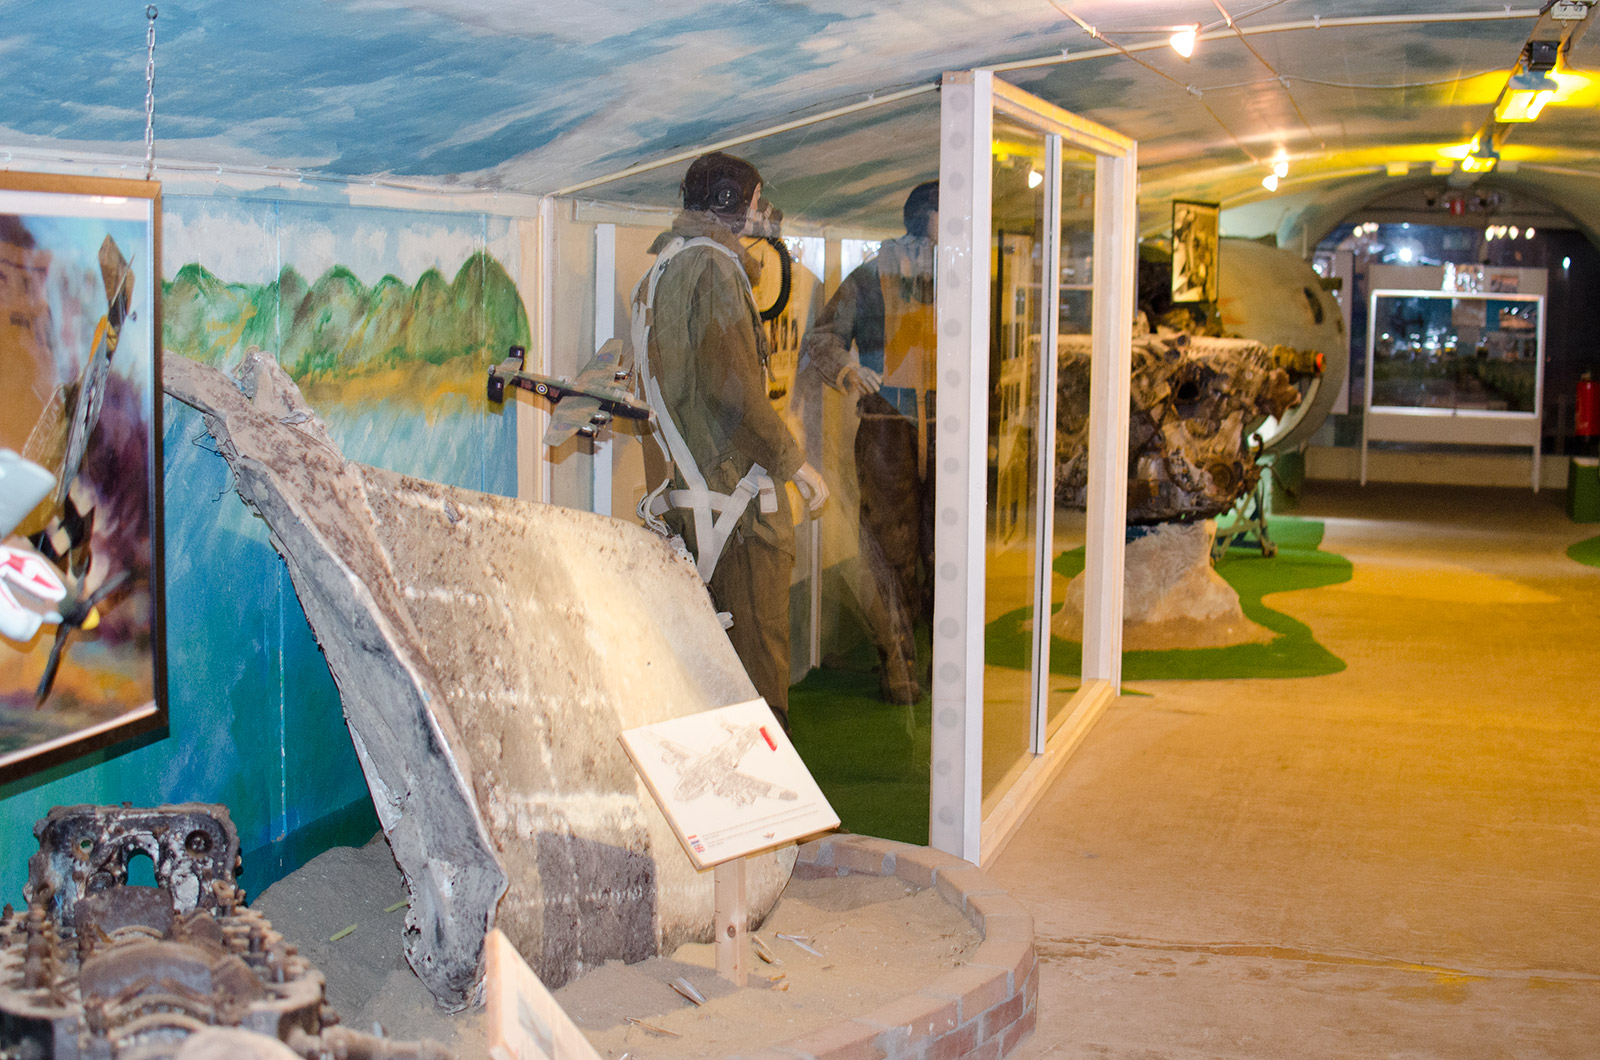
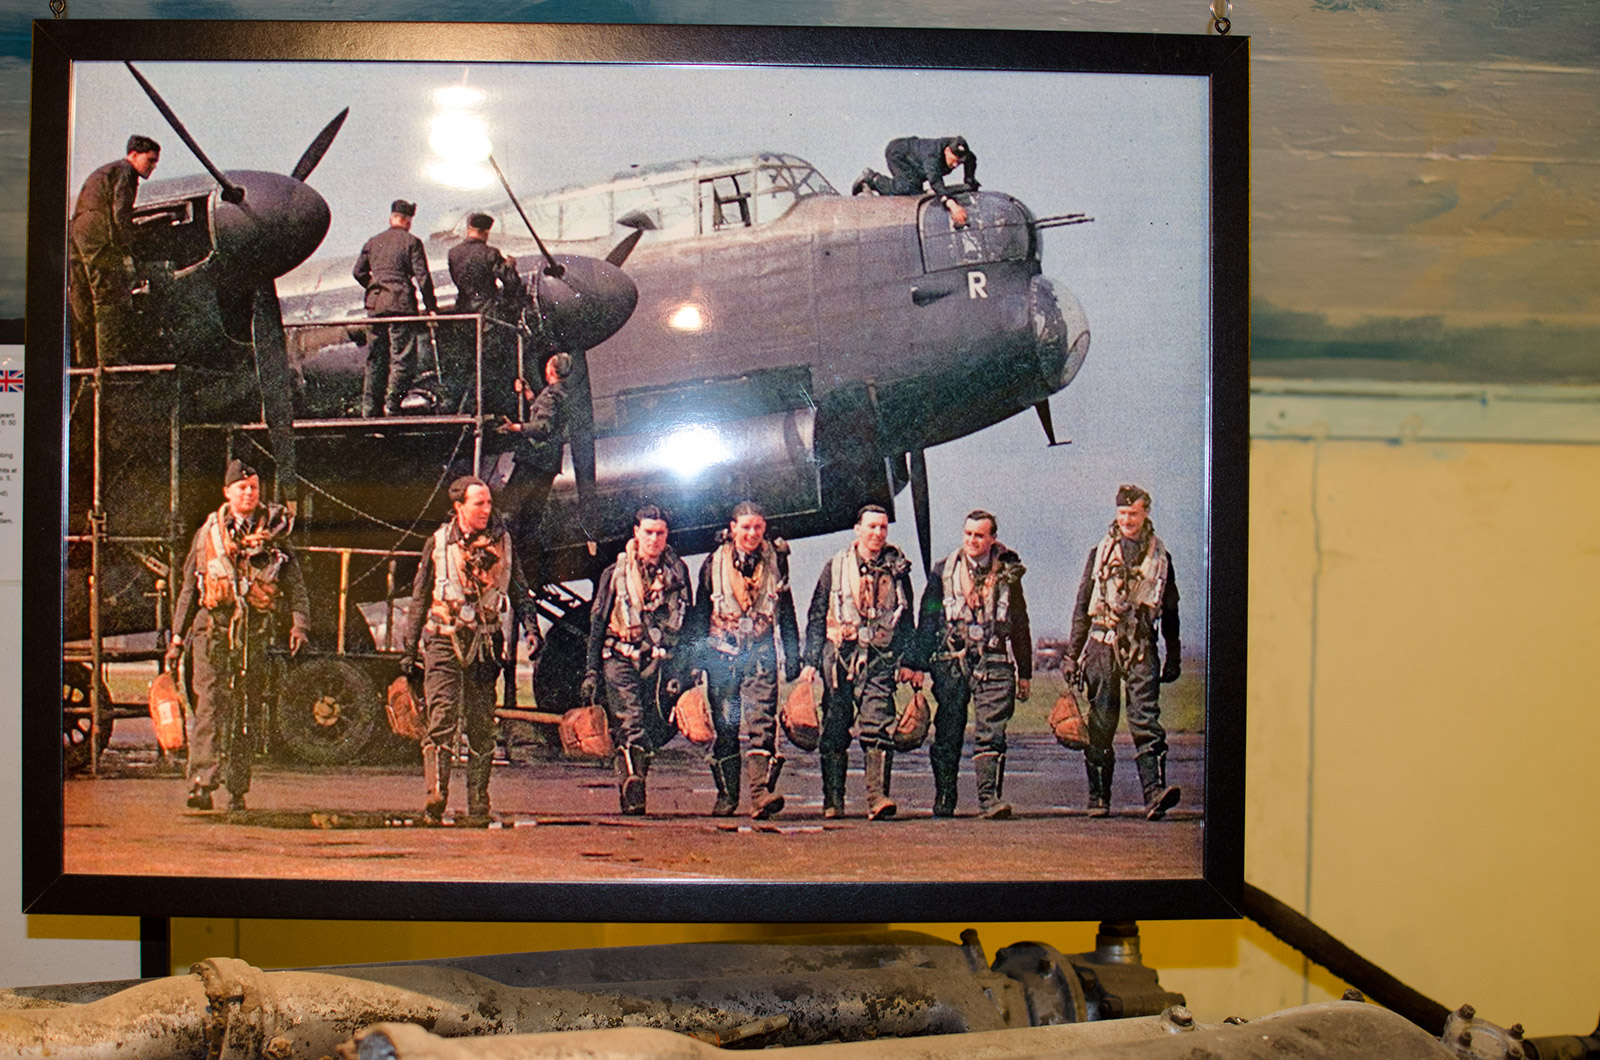
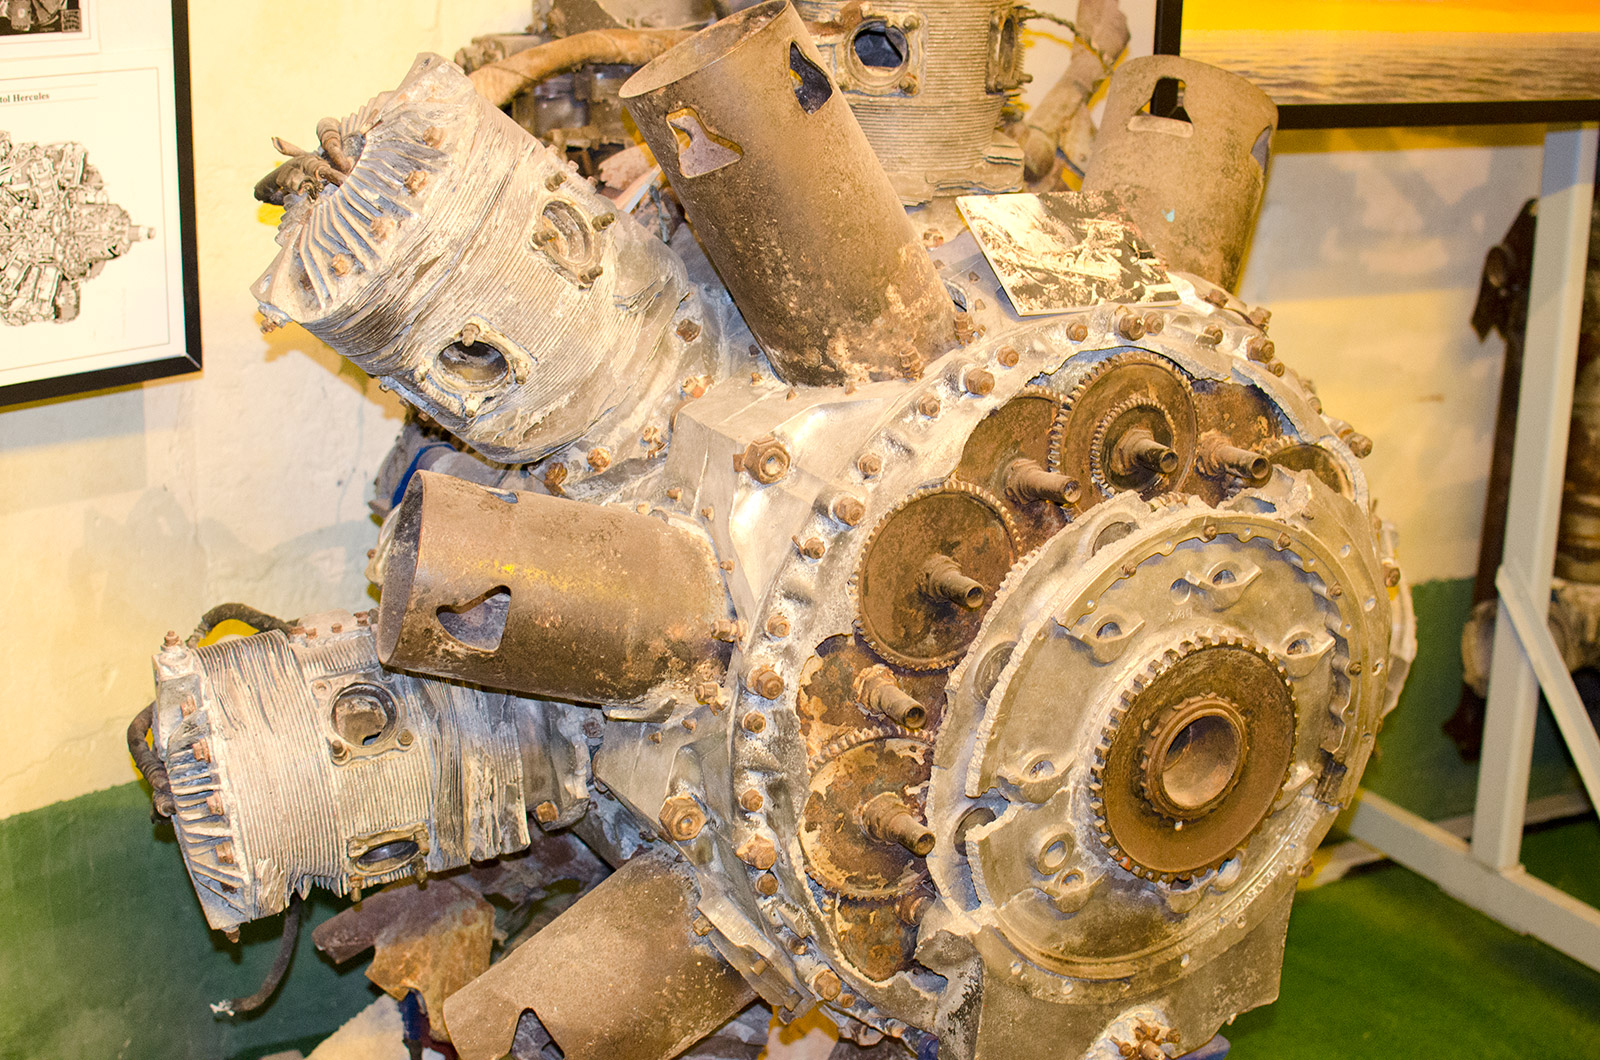
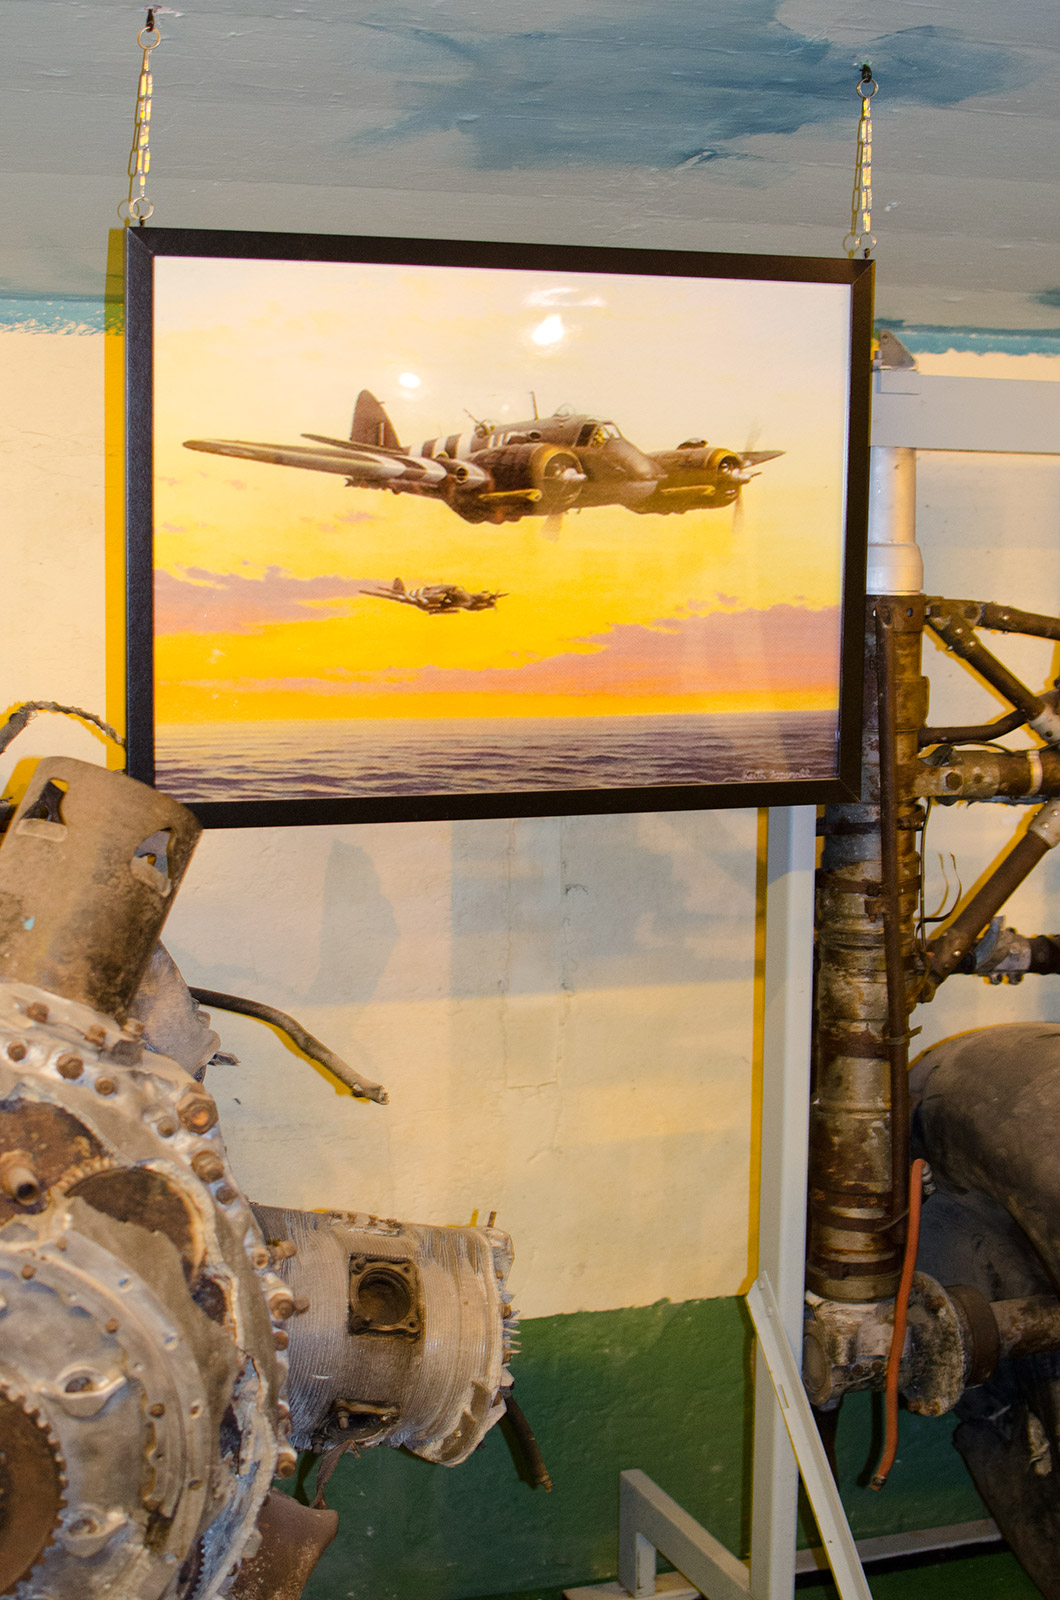
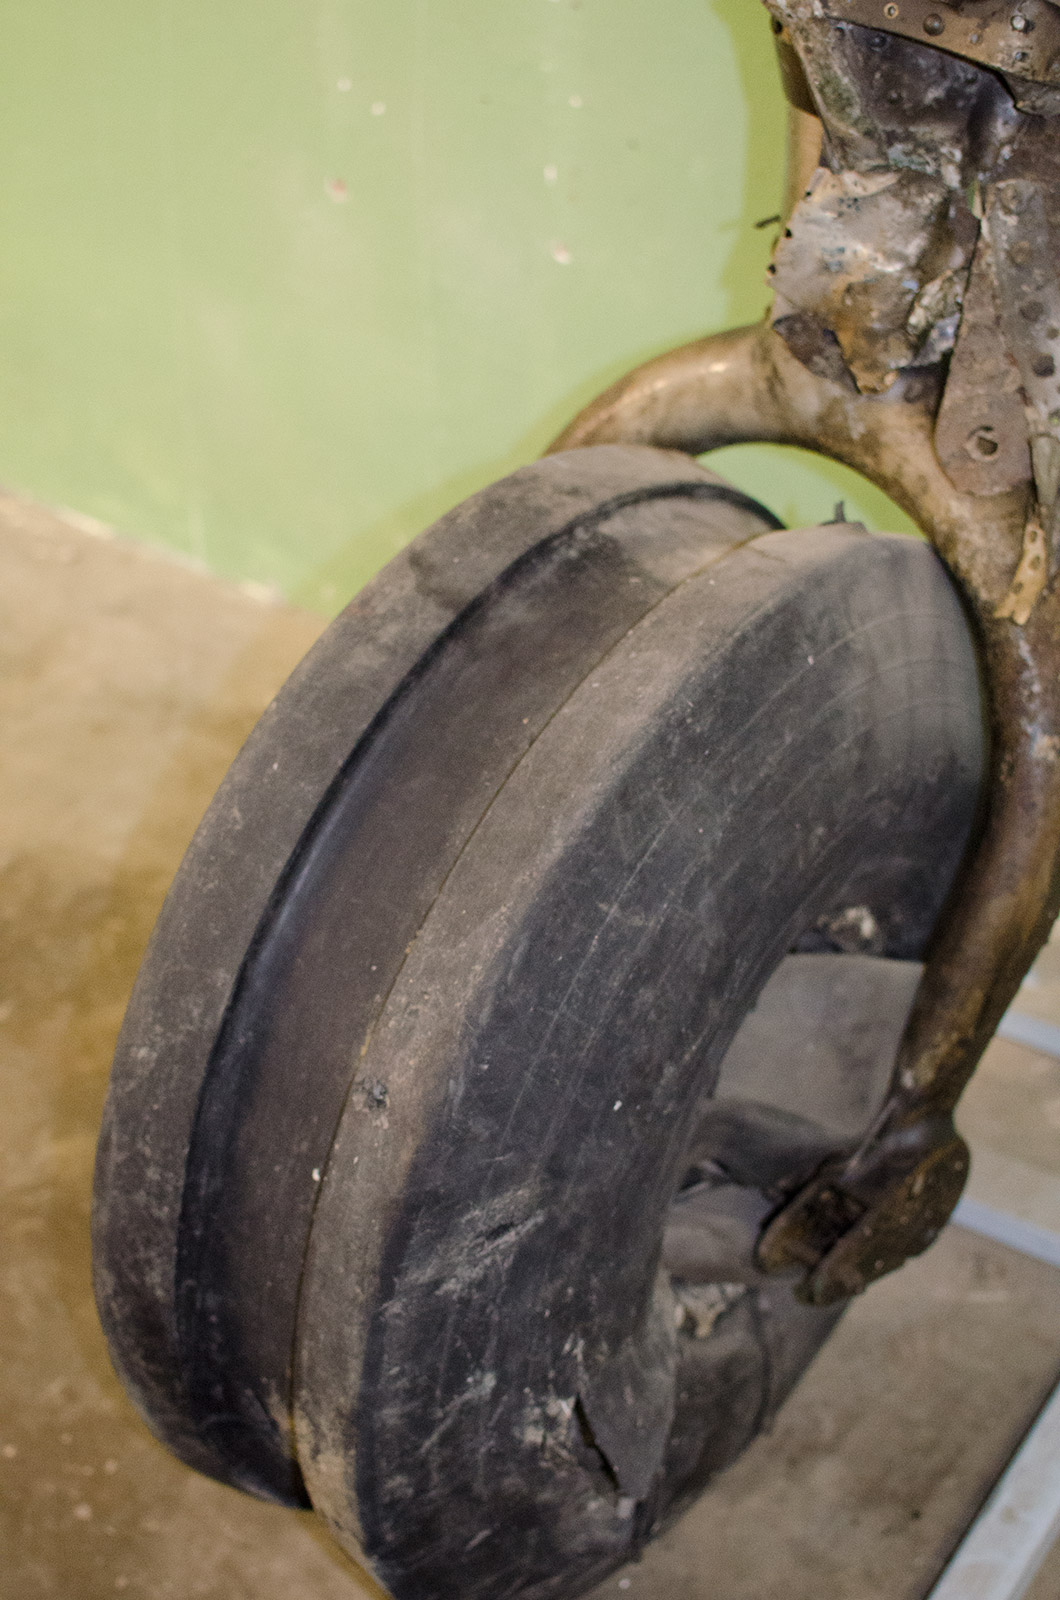
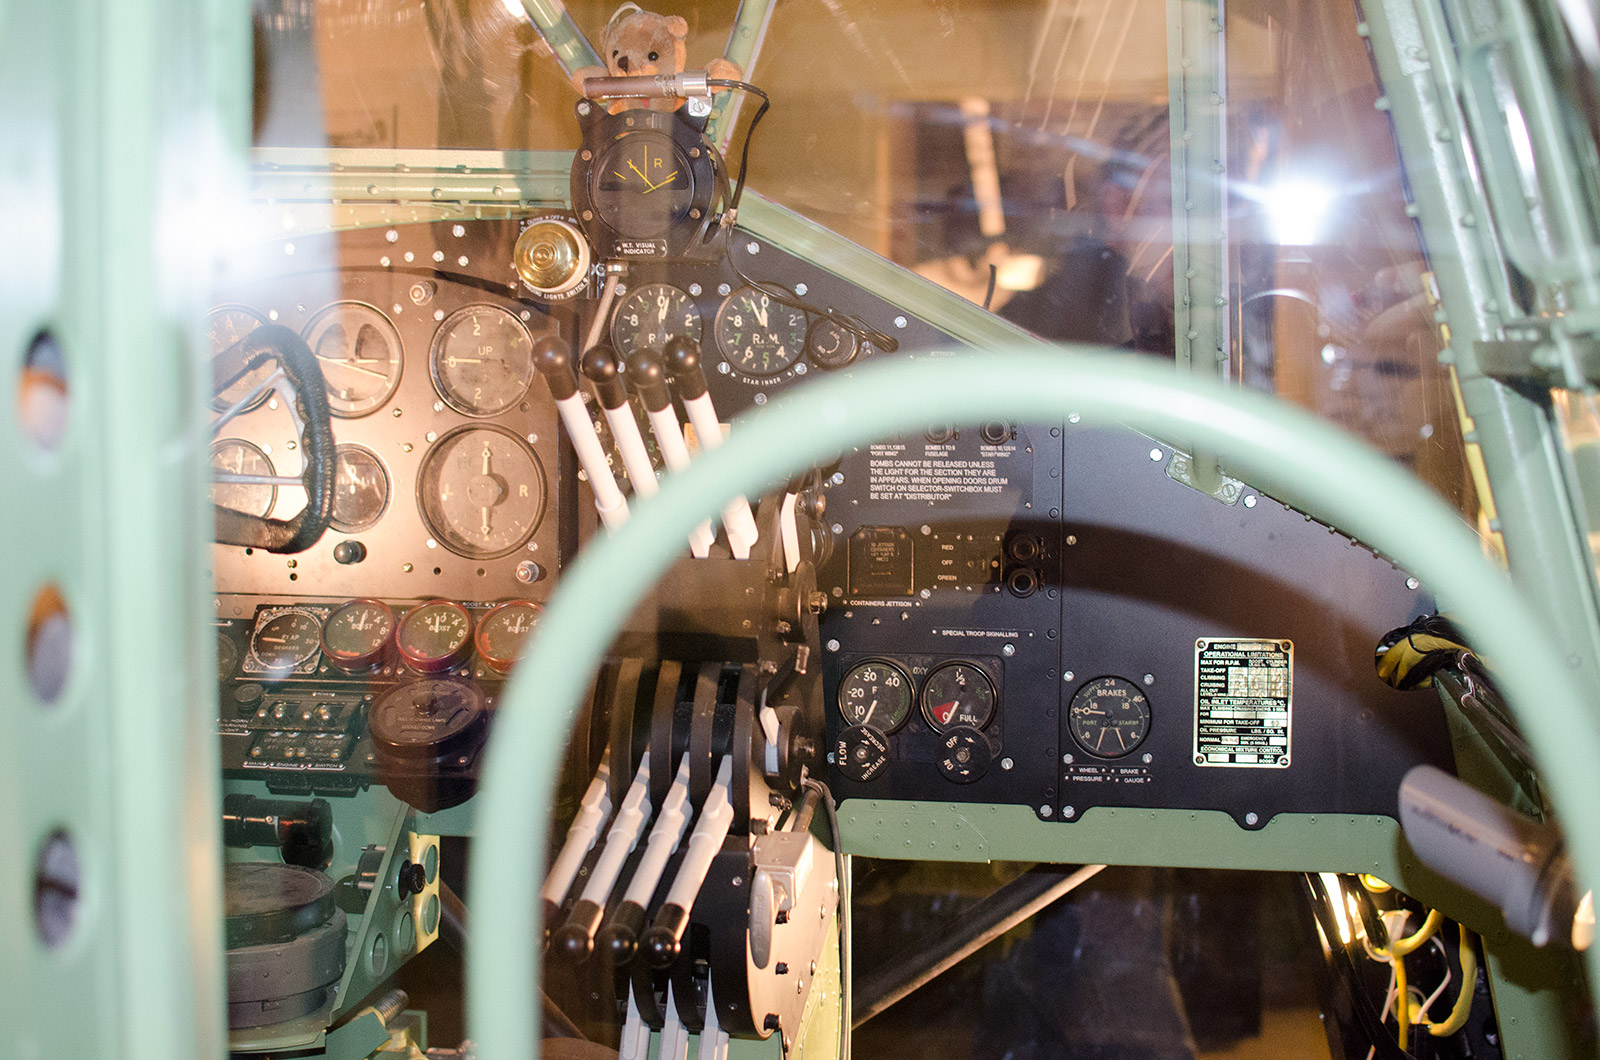
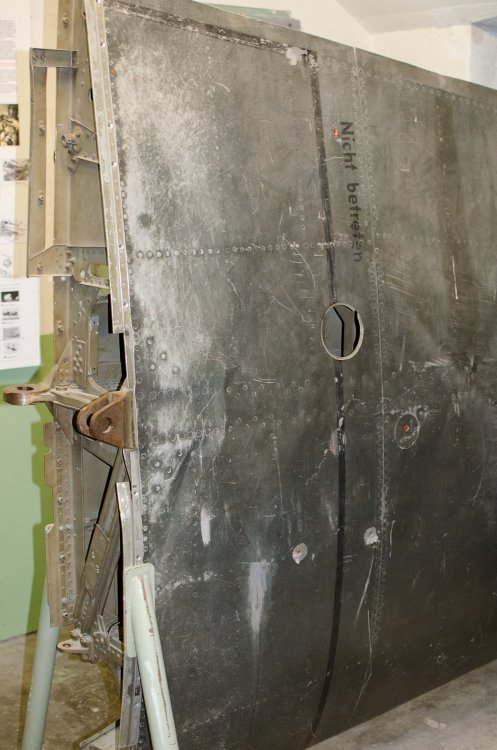
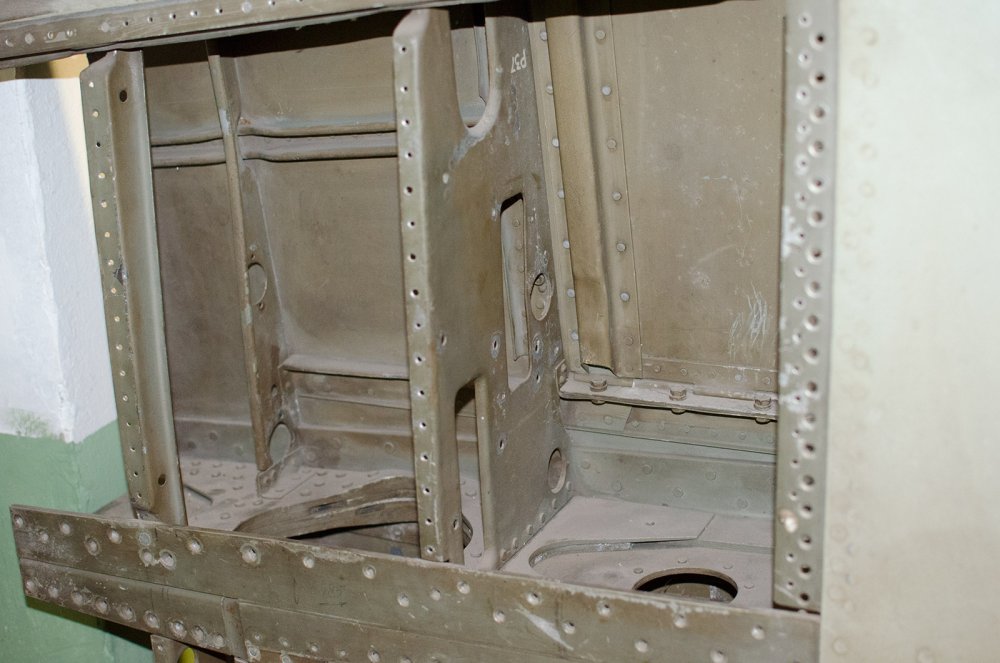
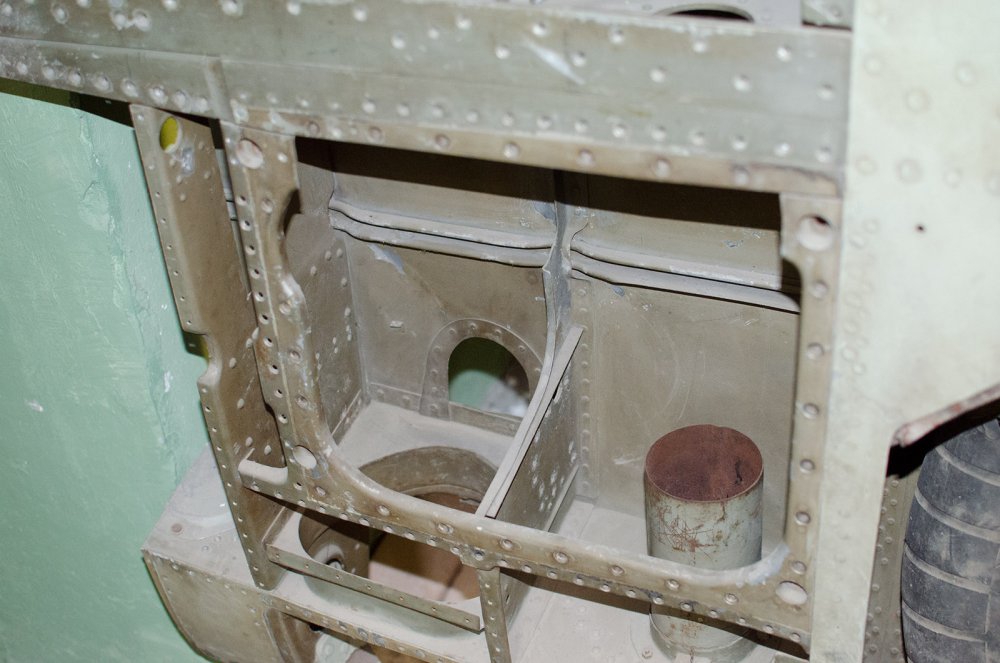
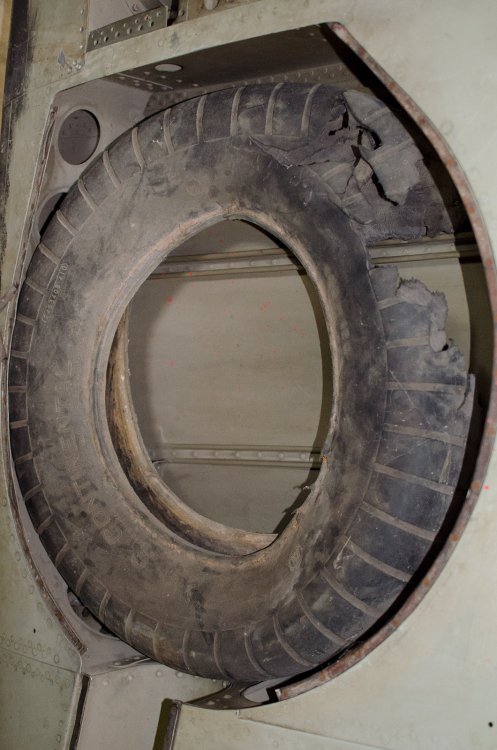
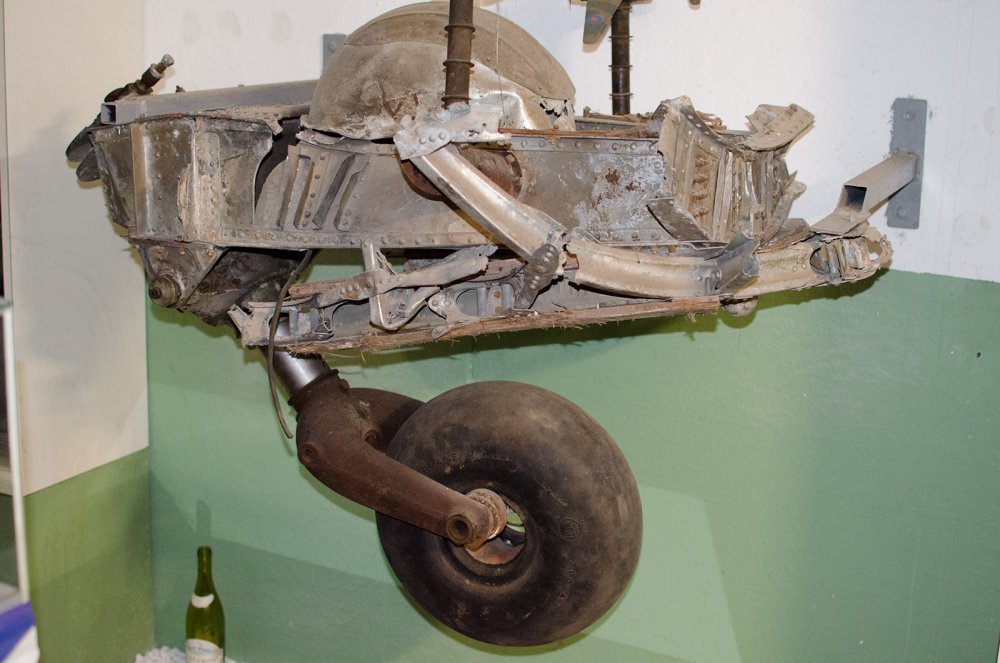
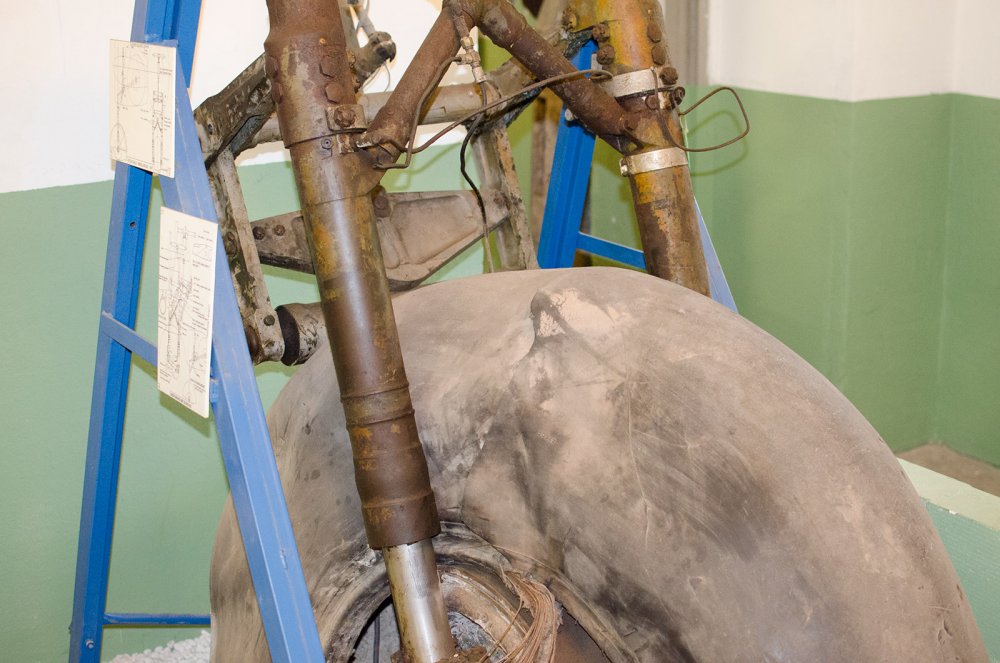
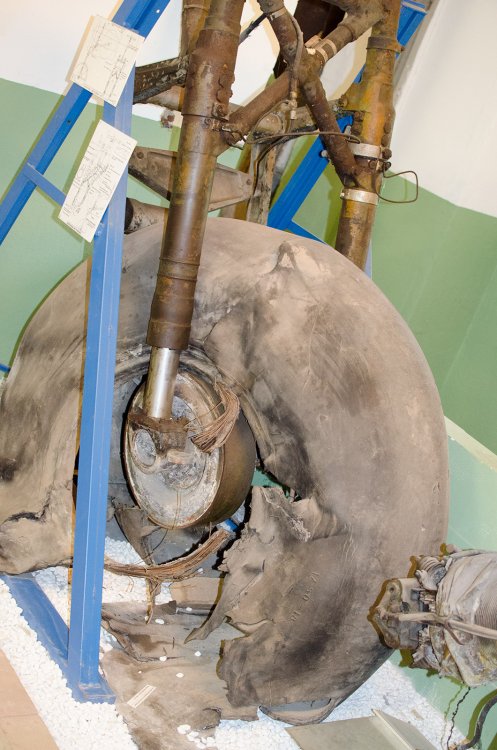
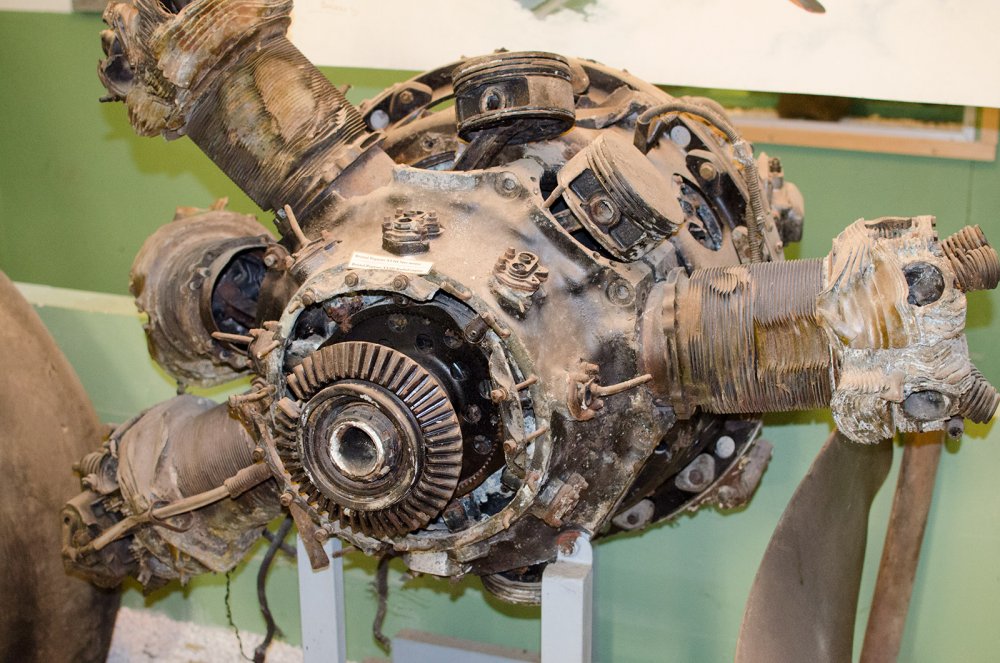
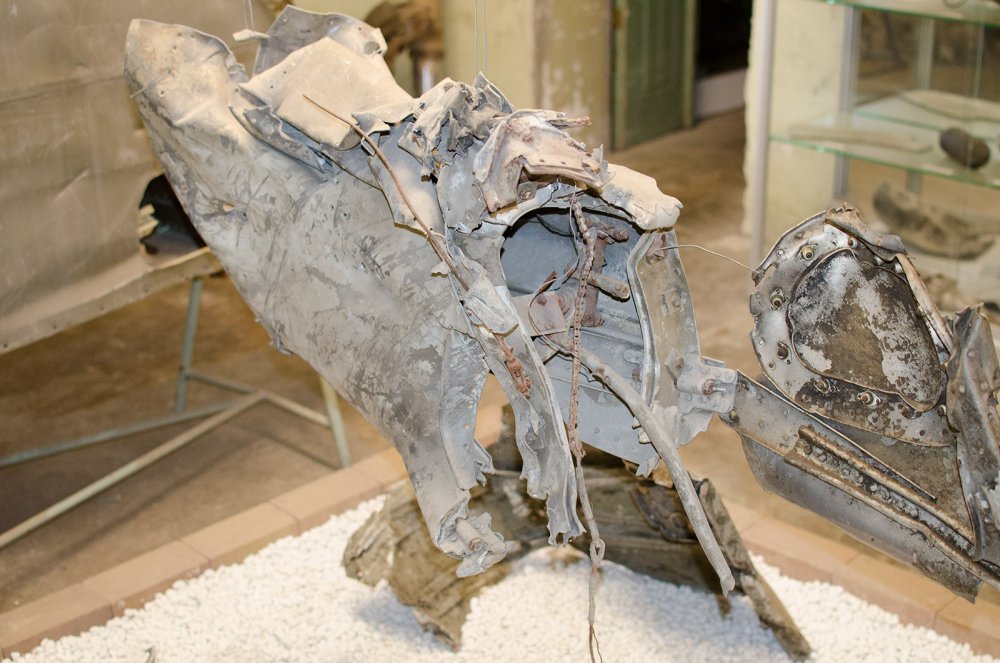
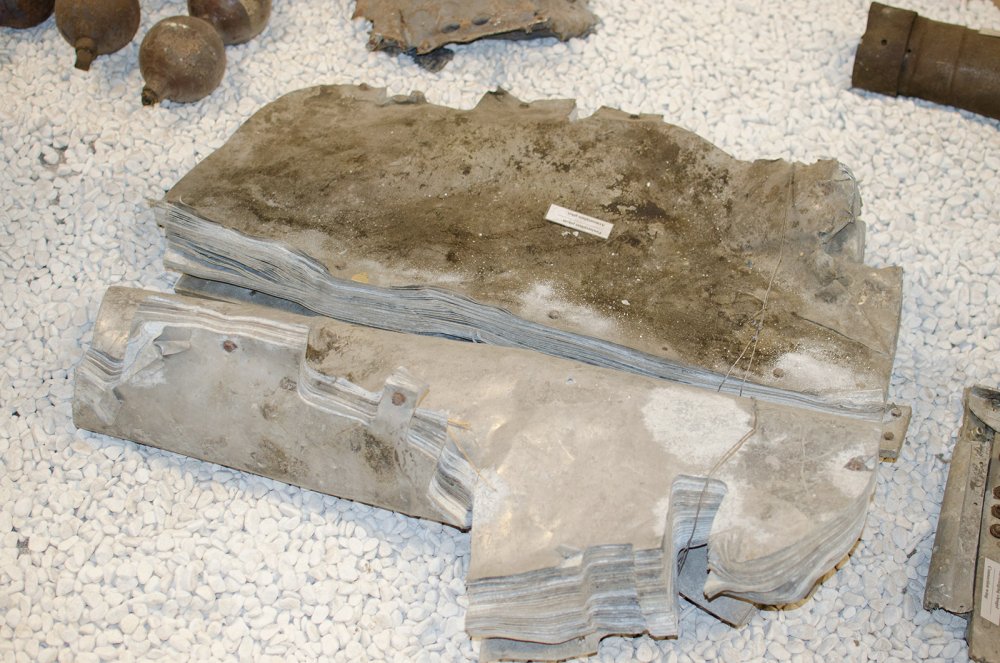
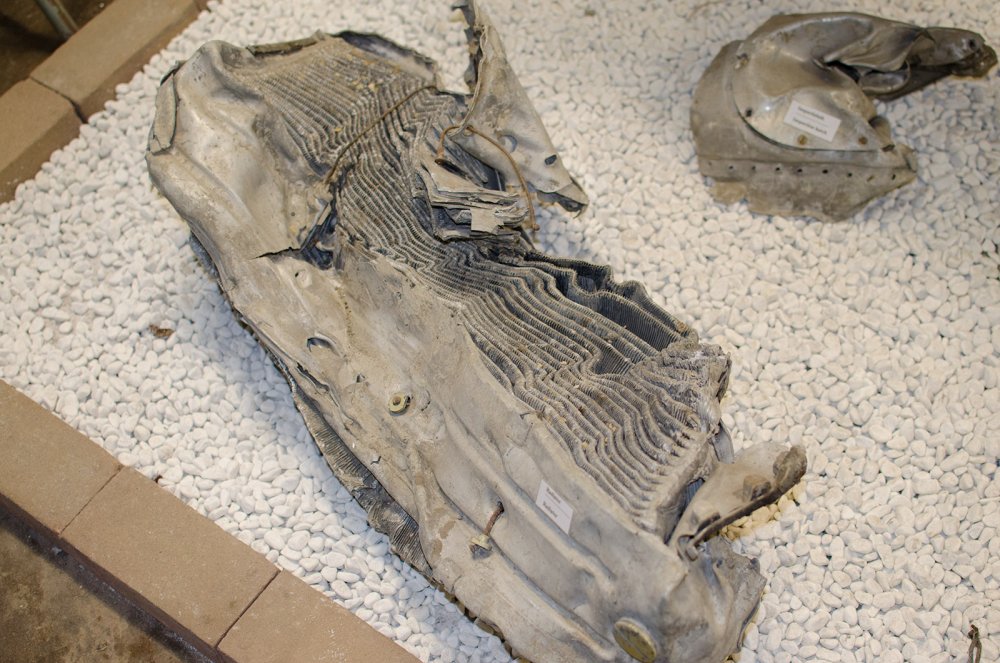
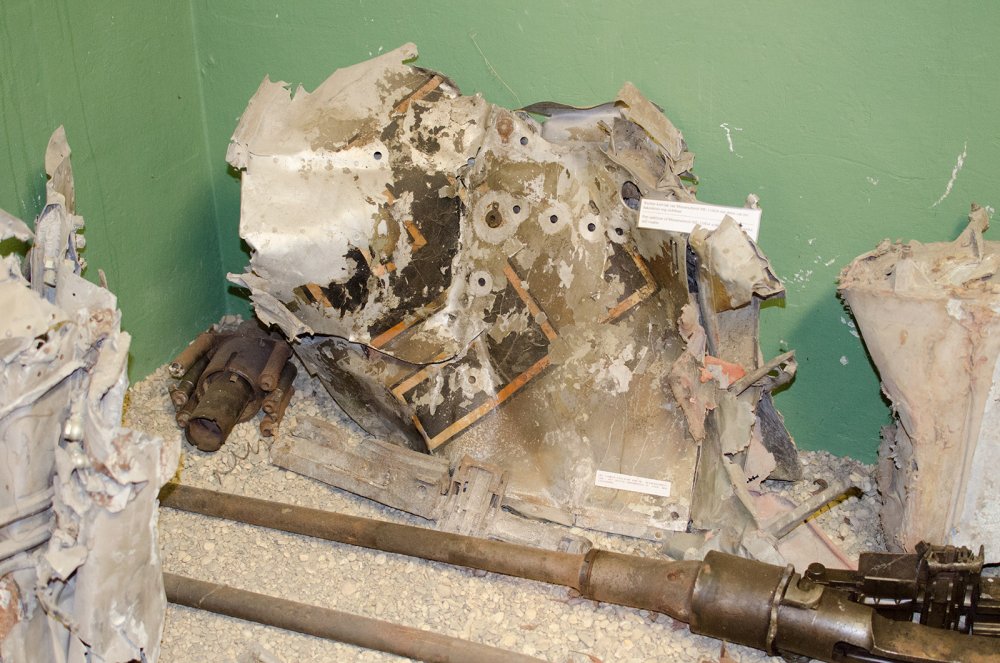
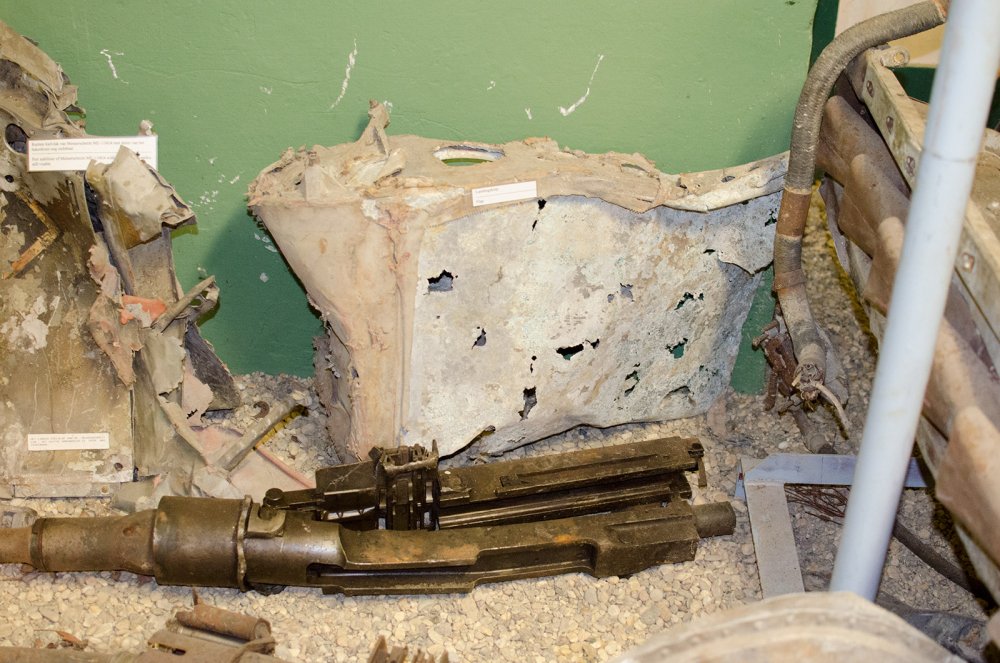
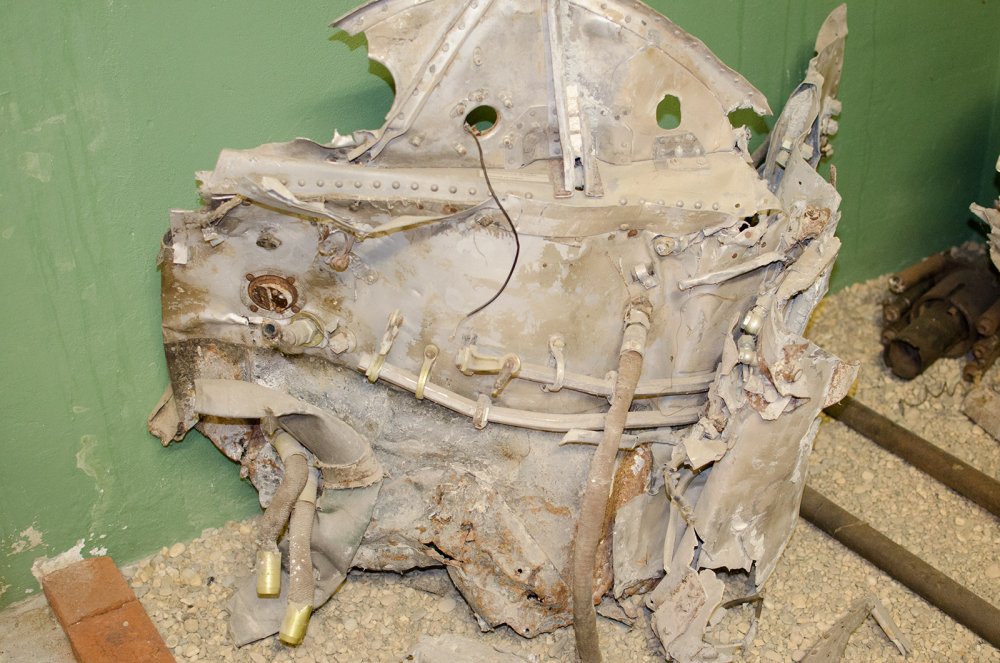
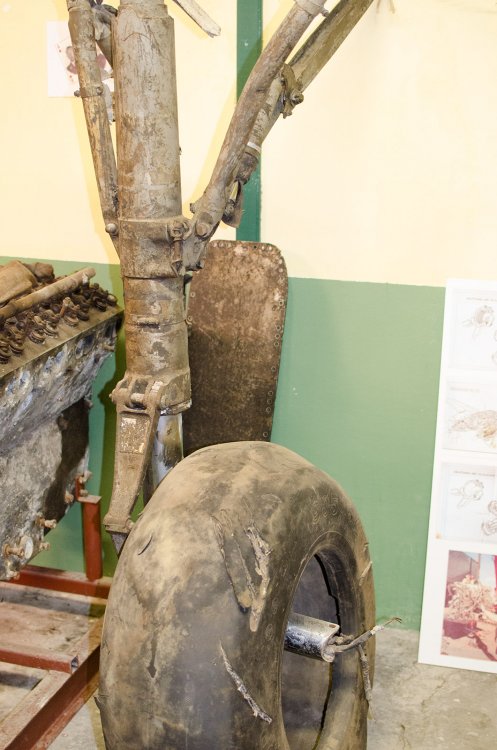
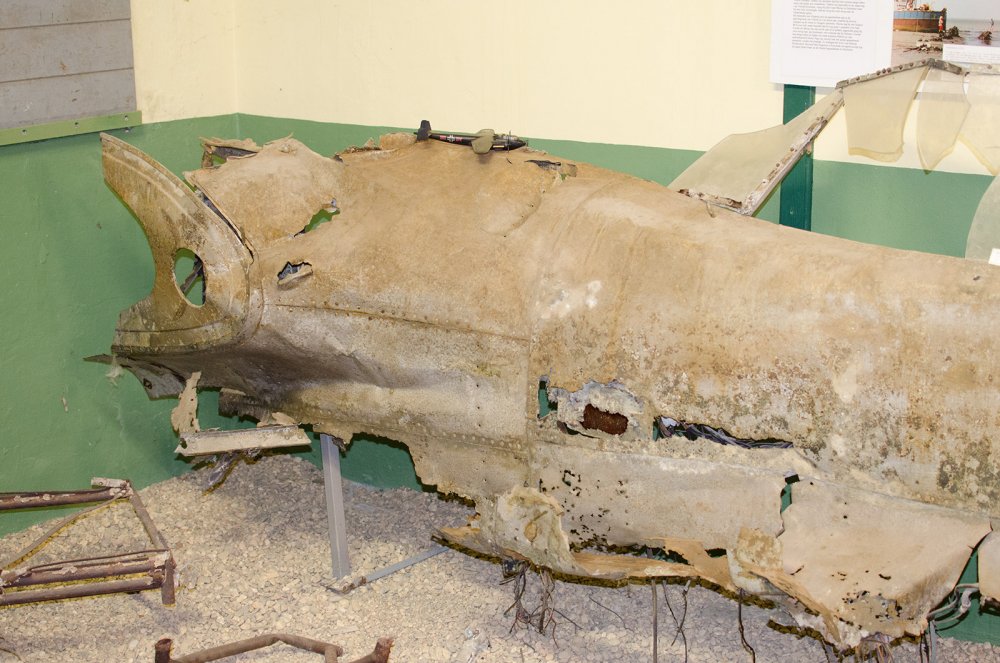
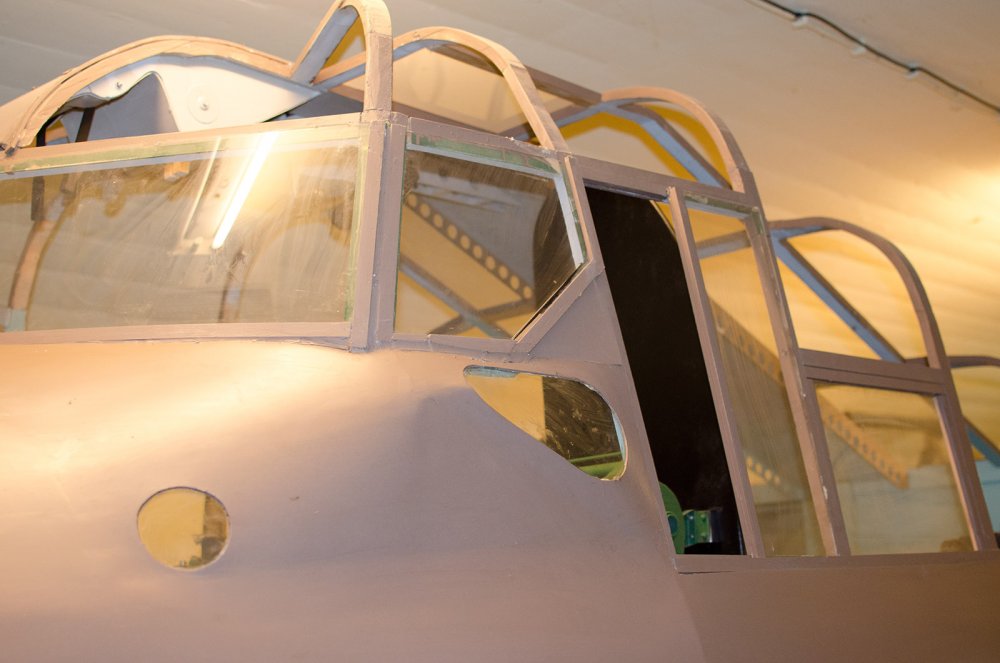
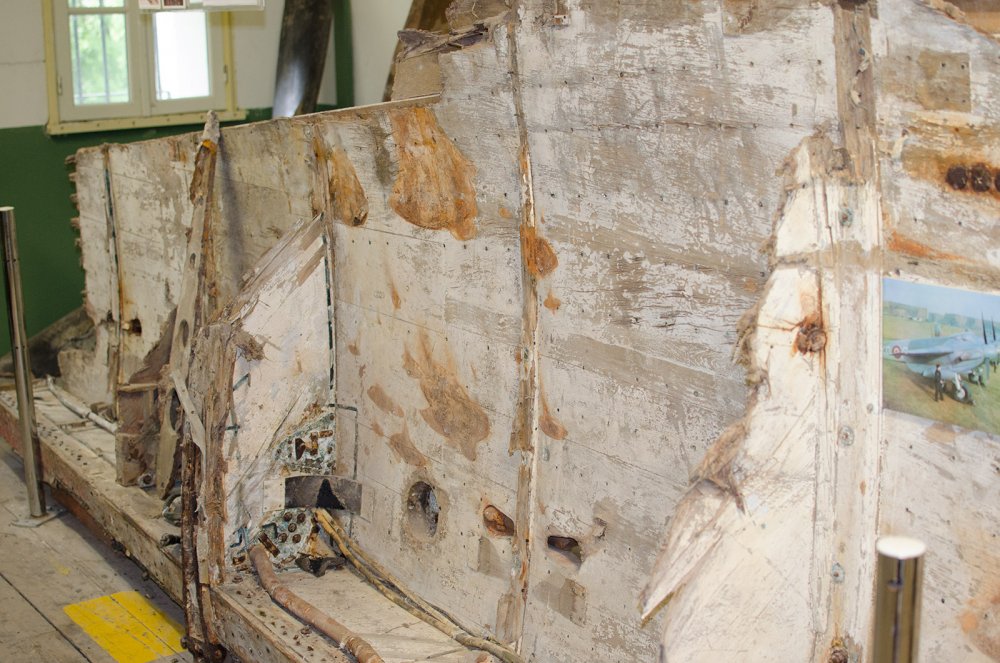
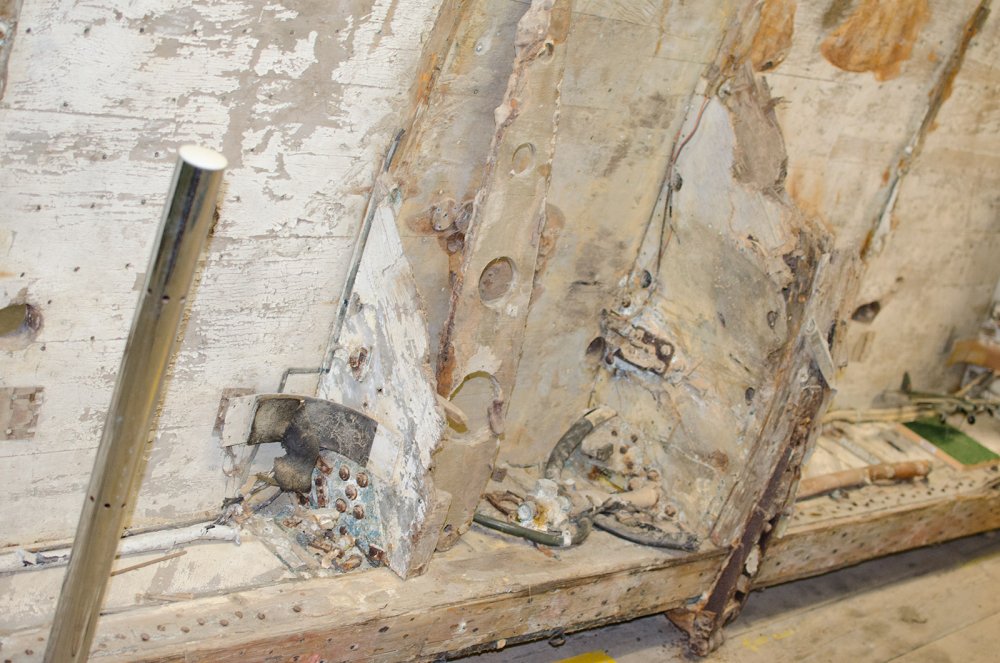
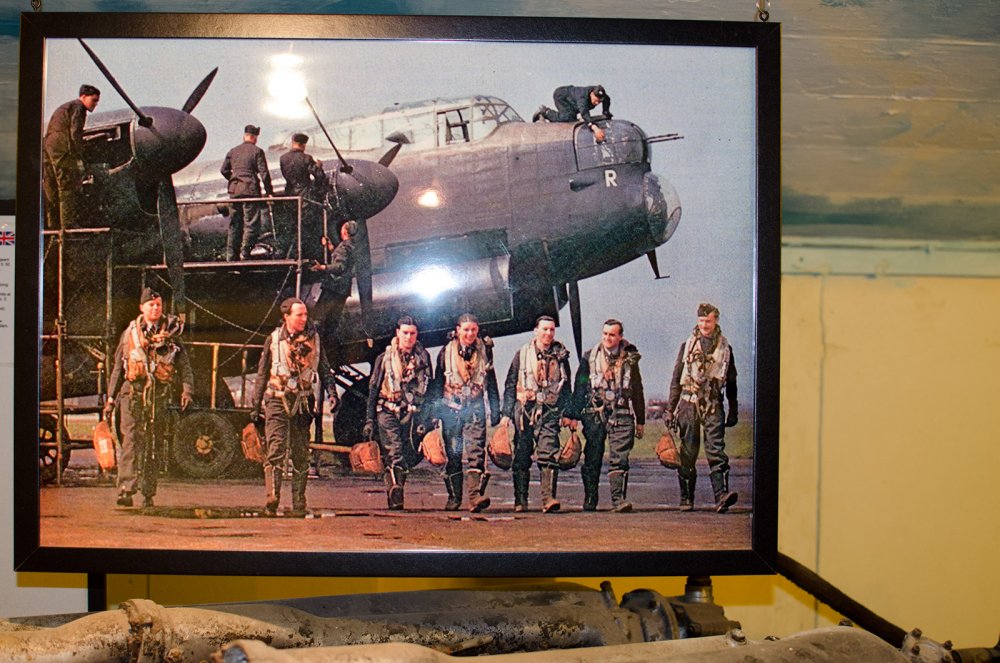
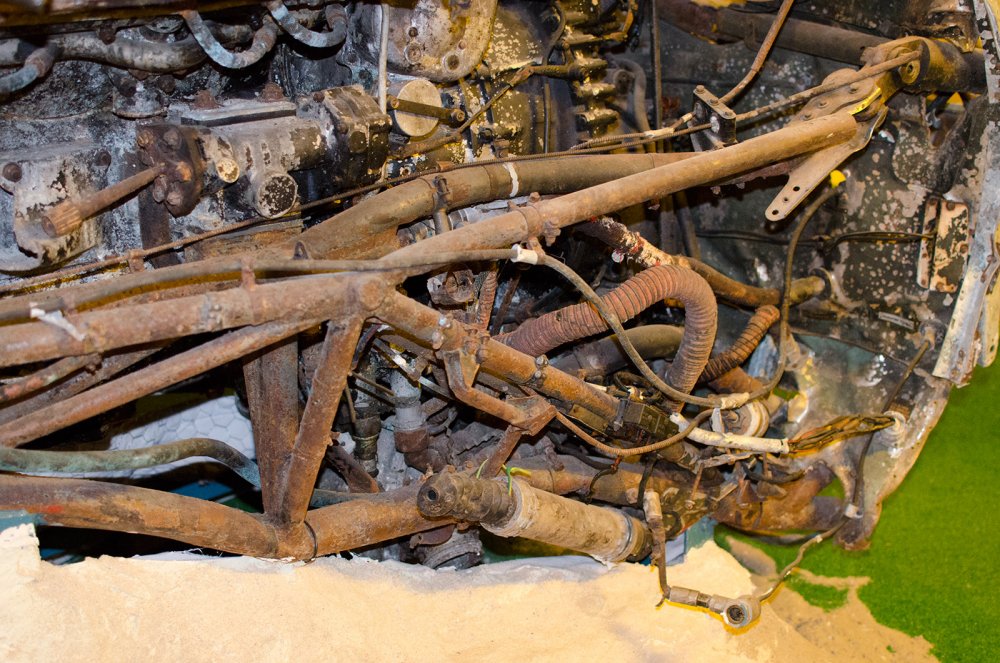
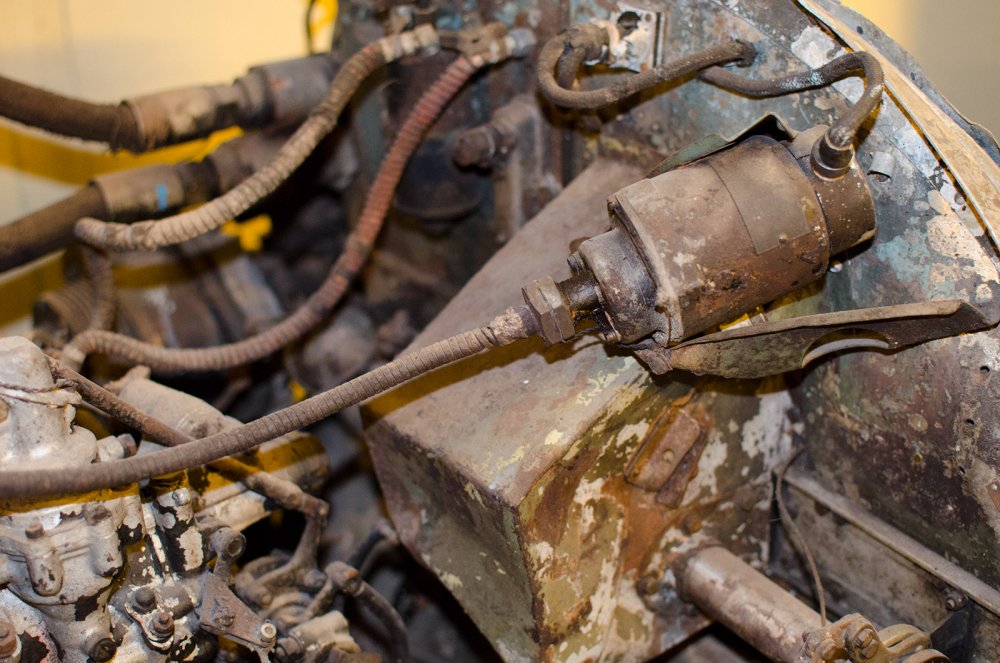
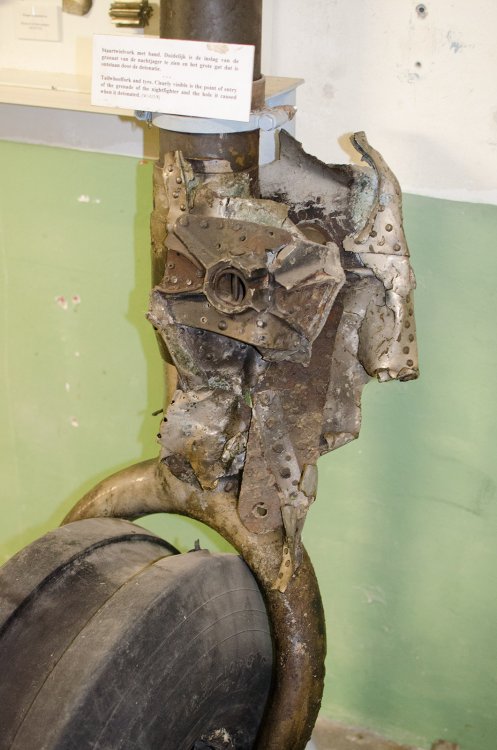
Hi folks, You'll have to forgive me for not remembering exactly what everything is here. Some are obvious, and some less so. Where you don't know, I'm sure Cees will give you the full information. Had a great time at a private viewing of the Fort Veldhuis museum this last week, with Cees Broere and Jeroen Peters as my guides. The beautiful thing about this museum is that it portrays a human story. I defy anyone to go there and not be touched by what they see. Each twisted metal fragment tells a story. In many cases, those stories carry a face; a son, father ,brother. Quite humbling. For more info, click THIS link: http://www.arg1940-1945.nl Anyway, enough of my sentiment. I hope you enjoy these:
-
Looking mighty fine Cees. One for the museum?
-
No price yet, but we'll bring you more info as soon as we can get it for you.
-
HPH Reichenberg Re 4a 'Piloted V-1'
JayDee replied to JeroenPeters's topic in LSM 1/35 and Larger Work In Progress
I handled that card stock. It was real exciting.- 74 replies
-
- 2
-

-
- v-1
- reichenberg
- (and 1 more)
-
1:32 Dornier Do 335B HK Models Catalogue #: unknown as of yet 'First Look' In-Box contents preview There are a number of subjects that you sort of dream will one day be released in 1:32. Just a handful of years ago, it perhaps seemed that those subjects wouldn't see the light of day for the foreseeable. Of course, we perhaps didn't vouch for a company such as HK Models making a big hit in our hobby, in more ways than one. HK Models, in quite a short period, have already brought us a B-17, three B-25 variants, a Meteor, and there is a Mosquito expected, as well as other planned B-17 kits. Apart from the Mosquito, the other releases represent the bulk of planned releases that formed the original Wingscale brand that eventually became HK Models. The Dornier Do 335B represents the first release from HK that has nothing to do with Wingscale, and as you'll see during the course of this preview, the future is looking very bright. LSM has had the privilege of being sent a test shot of the new Dornier Do 335B 'Heavy Fighter'. Being a test shot, this isn't entirely representative of what you're likely to see in the final release. Being in regular contact with HK, I know that tooling revisions can, and are implemented very quickly. Our test shot arrived, crammed into a 1:32 Meteor box, with some protective bubble-wrap. Neil Yan only just managed to fit this kit in this box. I don't know if this box size is indicative of what we'll see with the final release. The test shot doesn't include the decals, instruction manual or the shaped, cast weight which will allow the model to sit on its nose gear wheel, and not become a dreaded tail-sitter. There's little doubt the final box will be larger generally, or certainly deeper in order to fit the extras in there. Neil hasn't given any indication as to whether any photo etch parts will be included in here for things like seatbelts. However, there will be that cast nose weight I just mentioned. I don't intend this to be seen as a review, and as such, I won't be going into the levels of per-sprue detail you are used to seeing on our articles. Slide-moulded hollow control surfaces This kit is certainly no weekend project, and comprises of FIFTEEN light grey styrene sprues (inclusive of a couple of duplicated sprues for engines etc), and one clear sprue. As with the Meteor test shot that we looked at, the Do 335 sprues don't yet have any nomenclature (Sprue A, B, C etc) or parts which are numbered. All part number tags are blank at present. I will be expecting a draft copy of the instructions at some point, and I'll build this one up for you. Test shot sprues are packaged into bubble-wrap, whereas your final kit parts will be in cellophane bags. The largest sprues just about shoe-horn into the Meteor box. In all, this looks an imposing project. Time to take a closer look at what you'll expect from the final release. Leading edge moulded onto upper panels Some ejector pin marks on internal panels It's obvious from the break-down of this model that HK intend to produce further variants of this aircraft. I have been told this anyway, but it is clearly seen in the way that certain parts of the aircraft are modular. A future two-seat machine will easily be facilitated due to the inclusion of the spine as a separate part. It will be easy to fit a smaller fuselage fuel tank into the area to the rear of the pilot, and the inclusion of a new spine, canopy and rear cockpit parts, and there you have it! This 'Heavy Fighter' variant had two 30mm MK103 cannon installed into the wings, and this intruded into the space reserved for the internal, leading edge fuel tanks. To remedy this, auxiliary fuel tanks were installed internally within the bomb bay. HK have also included those tanks in this kit. Nose gear bay, with moulded detail Various bulkheads with pre-moulded detail Some bulkheads have ejector pin marks on one face Wing leading edges, where they have protrusions, can be problematic when it comes to finding a solution to creating these without troublesome and difficult to remove seams. This kits modular approach means that the inboard leading edge panes are moulded as separate pieces, INCLUDING the cannon fairings! This is accomplished via some rather nifty slide-mould technology. A small moulding seal exists around the outside edge of this, but that actually may be quite accurate with the fairing area itself. There must have been some sort of joint here on the real thing. Slide-moulded air intake scoops Even without the spinner in place, and the forward engine cowl/spinner, the Do 335 is an impressively sized model in 1:32. It seems that HK Models have gone 'slide-mould crazy' on this release too, and all for the greater good! Two sets of wingtips are included, one for M-13 and one for M-14 standard, and these are supplied as single pieces! No upper and lower parts to join. The whole parts are slide moulded, and when you consider the depth of the larger wingtips, that is some very impressive moulding. Slide moulded leading edges with integral cannon fairings Control surfaces are also slide moulded. Instead of upper and lower pieces where you need to remove seams, these are moulded as the main surface, with an insert for the leading edge. Very clever indeed. Each engine has an intake scoop. Normally these would be built up as halves, but again, slide-moulding has created these are single pieces that really do have to be seen to be appreciated. There are two sprues in this release of which two each are supplied. These relate to the engine, engine bearers, plumbing and also the exhausts. The latter are supplied as individual parts, with a hollow end and very realistic weld seams. A long tab is included for easy fitting to the engine itself. This model has a fully detailed interior, including bomb bay. No bombs can be seen in this kit though, despite an image on the HKM Facebook page showing one. The bomb is slated for the future 'A' variant, and not this one. I'm pretty sure that the whole bay was taken over by the two auxiliary fuel tanks anyway. Fuel tanks have been moulded with the various pipes etc already in place, just as ZM did with the fuel cells on their He 219 release. I have to say that this looks every bit, if not more refined than that kit Numerous internal bulkheads are included which contain some excellent detail. Unfortunately, it is the case that the reverse of these have some ejector pin marks in amongst the detail. These may be lighter in the final release due to tool adjustment. We'll have to wait and see. Some of these I will add thin plasticard discs into, and skim over with putty. Of course, the cockpit is always a focal point for the modeller, and when you are doing something in this scale, it needs to look correct. Bearing in mind that I have no instructions at the moment, and no way of absolutely seeing exactly what goes into the cockpit, the parts I can identify look very good. The main part of the 'office' is based around a single part tub which has some great console detail. There seems very little need to add any aftermarket to this at all. The parts I can identify as from the cockpit do indeed look very good. We will bring you more information on exactly what is included when we review the full, final product. The only thing I can see which most definitely needs changing are the quite small, thick rudder pedals. Some Eduard or RB Productions parts would look better here. More slide-moulding. This time, hollow, one-piece wingtips This model also presents weighted wheels with separate hubs, amazingly detailed undercarriage bays, and great looking u/c struts. Ejector pin marks on the inside of the main gear doors will be hidden by attaching the strut. There's also no need to worry about removing a seam along the front edge of the wing. The upper panel is moulded with the leading edge in situ, and this butts up against the forward edge of the lower wing panel. This is the sort of technical innovations I like to see on our kits. Surface detail is some of the very best I've seen in this scale. The exterior is indeed riveted, and that riveting is quite complex looking. Panel lines are extremely fine, as are access panels and plates. You can also see some of the finest screw/fastener detail I've seen in any scale, and it is so TINY! The whole exterior is very, very refined, and reminds me very much of the Tamiya Mustang and Spitfire releases, for which I have here and can directly compare. As a general aside, moulding quality is excellent, but some parts have a minimal amount of flash, which is also evident on the sprues too. I'm not at all concerned about this as this is usually just a symptom of the tooling needing a little adjusting. Having seen production standard HK kits, they aren't ay all 'flashy'. I expect this will be the same for the Do 335 when in its production run. Another thing which makes me think that this is just a tooling adjustment issue is that a couple of parts which have thin edges are a little short-shot in the most minor of ways. This was evident on the Meteor test shot, but eradicated on the final product. The only sink marks which are evident are on the rear faces of one propeller, near the pitch collar. This seems to be a 'feature' with many propellers on various kits. If this is seen on the production standard model, you'll need to pop a little filler in there. Most ejector pin marks are in areas which won't readily be seen. However, there are some which are in prominent places and will need to be addressed. These can be seen in the interior of engine cowlings, and also on the interior of the bomb bay doors. A more troublesome ejector pin mark is seen on the compression strut on the undercarriage, but again, I do expect the tooling to be adjusted at this point. The clear sprue exhibits excellent clarity, and sharp, well-defined canopy framing. Strangely though, the two main hood bulges which aided the pilot's rear view, are separately moulded, and attach to the outside of the main canopy, but with no cut out in the main canopy into which the mirrors would fit. I do believe that HK Models is now going to correct this and re-tool it. We should be able to show you this in the final review in the near future. This looks an exciting release, and as soon as we have more news to bring you about this, then you can count on us to do so. Our sincere thanks to Neil Yan of HK Models for this test shot. James H TEST SHOT ASSEMBLY BY HK MODELS
-
HPH Reichenberg Re 4a 'Piloted V-1'
JayDee replied to JeroenPeters's topic in LSM 1/35 and Larger Work In Progress
You're motoring! That's the first time I've seen an image from inside a real Reichenberg. HPH did a pretty bang on job there. As always, superb work from you too. How will you tackle replacing the raised rivet detail when you join fuse? -
Special Hobby 1/32 Hawker Tempest Mk.V (SH32049)
JayDee replied to petr@specialhobby's topic in Special Hobby
Real pleased to see progress on this one again, and that I don't have to rivet this one myself -
Revell Spitfire II New Test shot pics
JayDee replied to benjaminsummerfield's topic in Modelling Discussion
I'm building this for a book..... I'll post a finished image when this one is nailed.. -
Revell Spitfire II New Test shot pics
JayDee replied to benjaminsummerfield's topic in Modelling Discussion
I sure am....well I've cleaned the parts up ready for assembly, but I need to get a few supplies in stock first. -
P47D Razorback Trumpeter 1:32
JayDee replied to Jacek K's topic in LSM 1/32 and Larger Aircraft Ready for Inspection
Hi Jacek, Welcome to LSM! I hope you don't mind, but I fixed the images in your post. Great work. I hope you'll share your new projects with us. -
Revell Spitfire II New Test shot pics
JayDee replied to benjaminsummerfield's topic in Modelling Discussion
I'm building test shot now. Well, cleaning up parts, ready to assemble. So far, so good. It seems like an early test too, certainly not release quality. -
British WW1 fighter / trainer - Bristol M1C
JayDee replied to petr@specialhobby's topic in Special Hobby
Hi Petr, Sent you a PM.... -
1:32 Letov LF-107 Luňák HPH Catalogue # HPH32031R Available from HPH for €60.00 The Luňák first took to the air in 1948, designed by a number of key, prolific Czech aircraft designers. It has the title of being the first ever glider to utilise laminar wing technology, put to great use in WW2 by the North American P-51D Mustang. Construction was generally of metal, with a later version being constructed of wood. Aerobatic performance was exceptional, and the type notably caught the eye of many aviation enthusiasts of the time. The late 1940's were a tense time in Eastern Europe, and the Soviet Union was increasing its grip over a number of countries. The facilities where the Luňák was being produced was taken over for military aircraft production, notably MiG fighter planes. A total of 75 of the Luňák were produced, with only 9 surviving to this day. Perhaps if you are a builder of military model aircraft, as I am, your eyes will also be opened by this cute release. Normally, I model WW1 or WW2 Luftwaffe subjects, so when HPH sent this to us, along with their Me 410 kit, it was an opportunity to take a look at something I would possibly never have looked twice at. That would have been a crying shame. We know HPH are more commonly known for military aircraft themselves, but they do produce a range of civilian/quasi-civilian types, and today, I'm pleased to be able to bring you our review of the LF-107 Luňák. This release is packaged into a relatively small, but deep and sturdy cardboard box, with a forward flap which releases the lid. Inside the box, all smaller resin parts are sealed into zip-lock bags, and overlaid with plenty of bubble-wrap. The fuselage halves are simply wrapped in bubble-wrap. HPH have compartmentalised the interior of the box so nothing rolls around. One of these compartments runs diagonally, from corner to corner, and contains the wing parts. These aren't wrapped, but are still well-protected. As well as the resin, there is a wallet containing a TWO photo etch frets, canopy masks, a decal sheet and a set of printed instructions. This is the first HPH release I've seen without a CD, but as the instructions pages are low in number, I presume it was a better solution to just include the paper version. Last but not least, there is the now standard inclusion of a Belgian chocolate. Mine lasted just long enough to get the package photos. You can ask my wife what happened to it after that! There are around 30 parts of pale, olive green resin which comprise the Luňák, plus a single vac-form part for the canopy. The parts which intrigue me first are the wings. This aircraft had quite a reasonable wingspan, hence the need to pack the wings diagonally so they fit into the box. Overall, the model will have a wingspan of around 45.6cm. These wings are quite narrow and thin, so in order to strengthen them, they have been cast with a full length stainless steel rod within them. This protrudes at the root, to provide you with a locating pin for fixing to the fuselage. A casting block exists along the leading edge of each wing. This slightly encapsulates the extreme forward leading edge point, so please remember this when removing it, and profile the leading edge accordingly. I absolutely love how HPH cast parts such as the fuselage. This is a beautifully thin casting, with a block which needs to removed from the lower joint. External detail is almost non-existent due to the filled and sanded structure of the real thing. A fine wing root fairing can be seen though. Internally, the cockpit walls are a little thicker, with some constructional elements reproduced. A structure exists for you to fasten the instrument panel to. Along the joint between the fuse halves, exist a series of point where you can insert pins to help align the parts together. The vertical fin is a separate part to the fuse, as is the rudder to the fin. All fixed structures are smooth externally. Construction is unusual with this in that the fuselage should be completed and painted, fit together, and then the wings added BEFORE you install the cockpit module. A large casting block contains all of the wing aileron sections (3 per wing), and elevators. Detail is fine, with neat rib and fabric being subtly reproduced. Again, the casting block is joined to the parts via their leading edge, but by a thin wall of resin which will be easy to remove and clean-up. As an aside note, the wing control surfaces don't connect directly to the wing, so no need to pin them. They are instead connected via the photo etch linkages supplied. A drawing in the instructions clearly show the angles at which these surfaces need to be posed. Another casting block contains the horizontal stabiliser, fin, and rudder. Despite the relative simplicity of a glider to a military aircraft, the interior of the Luňák still contains a very respectable amount of detail. A profiled cockpit floor, with separate resin/fabric overlay is connected to a detailed back wall. There isn't a seat in this bird, as the floor is shaped to fit to the pilot. It must've been a pretty uncomfortable ride. Rudder pedals, control yoke and instrument panel are supplied as resin parts, but if you want to use a PE instrument panel, then a two part, colour—printed one is included. A number of other photo etch parts are included for the cockpit, and these include levers, instruments, map case and placards. A full set of colour seatbelts is included too, but these look to be exactly the same as Luftwaffe types. Perhaps the Czechs were using these in the late 1940's. I would perhaps choose to use a replacement laser cut seat belt set from HGW. All resin parts are beautifully produced with no visible flaw. Clean up is an minimal as HPH could get it. Some resin parts are supplied as separate parts in a zip lock wallet, but some others are connected to a thin resin sheet. Other resin parts include the landing wheel. The colour fret is produced by Eduard and is superbly printed. As well as the cockpit parts just mentioned, other parts include those control surface linkages, wing access plates etc. There is a small, bare brass fret which contains wing root reinforcement strips and also a riveted strip that I can't identify on the plan. That cockpit is a vac-form part, but is almost exactly trimmed to size, except for a small section at the front and rear. This makes using a vac-canopy quite easy, and not something to be feared. There is no framing on the canopy, but this is supplied as vinyl parts on the 'mask' sheet. You will of course have to fathom how you will paint this. I think application of the vinyl, and then further masking of the open canopy areas. Clarity is excellent, and what's more, you get TWO canopies, just in case you do screw up! A wooden veneer is supplied for you to laminate the forward landing skid, as per the real plane. That's a nice touch. Just try to induce a subtle curve into it before use, possibly by soaking it in boiling water for a short while. A single decal sheet is included, catering to TWO schemes which HPH have supplied for this model. These are: LF-107, Prague Aero Club, Letňany, 1970-1971 LF-107, Airborne Troops CSLA (Czechoslovak Army), 1950's The decals appear to be an Eduard-produced item, or at least they seem very familiar to me in terms of style of layout and printing etc. Printing is superbly thin and in perfect register. Carrier film is minimal and colour authentic and solid. A small number of airframe stencils are also included. Both schemes are printed in colour on an A4 sheet, with decal placement being easy to follow. Predominantly, the schemes are yellow, but both very attractive. Another sheet contains the instructions for this kit, in line drawn format, with easy to identify parts ID. The sequences only take up less than 2 sides of one A4 sheet, and look very easy to follow, with both resin and PE parts clearly identifiable. Conclusion This really is a simple model to build, as the instructions clearly show. Nothing here should be taxing to the modeller, and I may even venture as far as to say that this would be a perfect introduction for a modeller who wanted to try their hand at a full resin model. Please don't think that that means that there is compromise here. There isn't. This is a beautiful and detailed model kit with superbly refined detail. The price isn't a killer either. If you're thinking of dipping your toe into the resin model world, look no further! Very highly recommended James H My sincere thanks to HPH Models for this review sample. To purchase directly, click THIS link.