nmayhew
-
Posts
1,154 -
Joined
-
Last visited
Content Type
Profiles
Forums
Events
Gallery
Everything posted by nmayhew
-
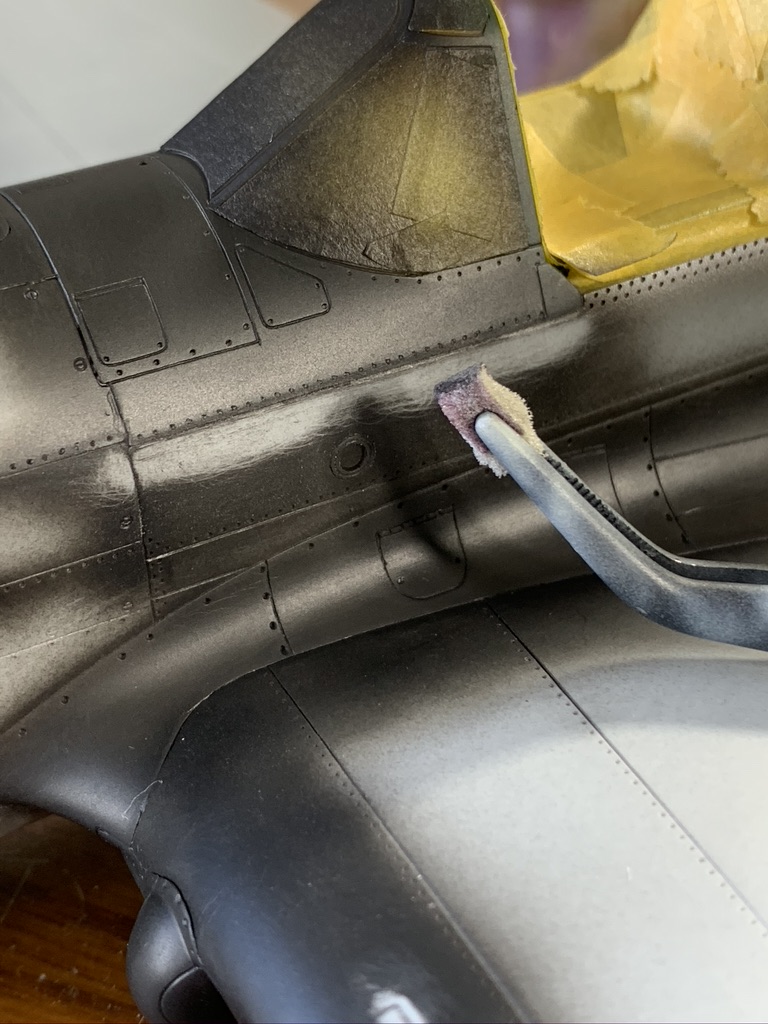
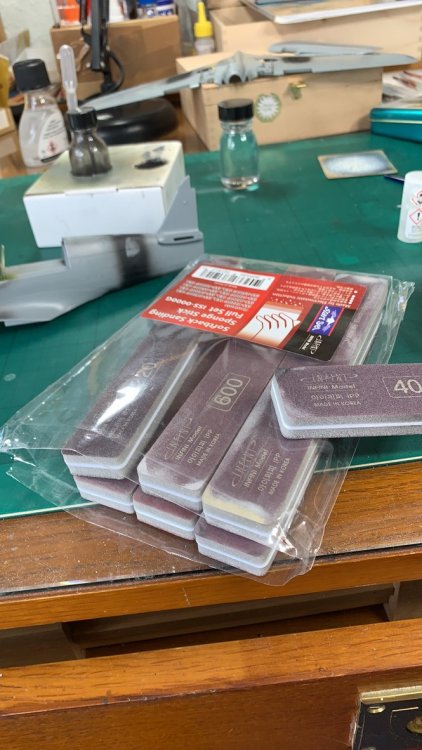
not sure if i mentioned this before but i found it a bit of an eye opener to cut bits of sanding sponge off and use forceps / tweezer thingies to get in and sand quite 'forensically' if i had used this approach earlier in the build i would have either got better results or at the very least achieved the same in less time / with less effort i found that i had not attached the front canopy correctly - the fit was fine on dry fit, this was entirely user error - so i had a small area requiring filler again probably not showing anyone anything new, but i found putting masking tape either side of the slit i was trying to fill, then brushing on some Mr Surfacer 500, allowing to dry, then sand the area on top of the masking tape off (rough grade fine for this), remove sanding paper and then use technique as shown above provided a fairly quick and very pleasing result

-
thank you in retrospect i should maybe have persevered? another reason i was hesitant was that the hassy kit links the wheel well construction with a wing spar which aligns the dihedral going slightly 'off piste' with my construction method meant i was quite keen still to be able to take advantage of it next time - and that will be a long time in the future! - seeing as i didn't have any problems in that area, i might have another go at using the covers i actually tried to trim them and fit them in *on top* of the normal wheel well, but just ended up cutting them to sh*t because i was going about half-arsed lol anyhoo...
-
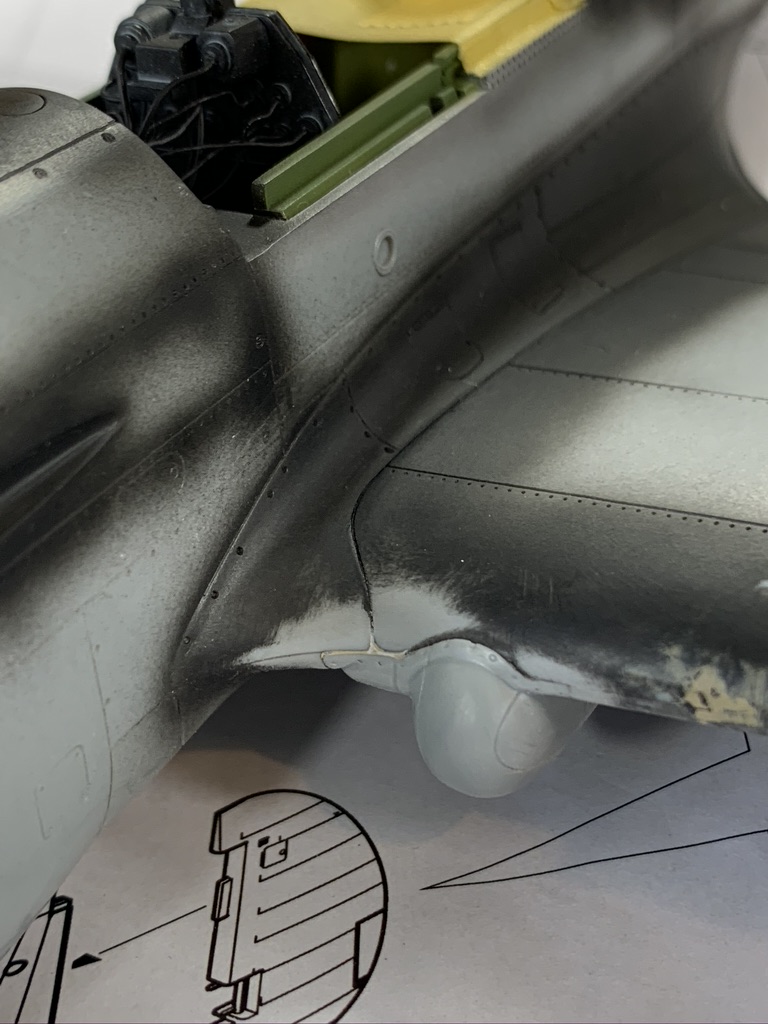
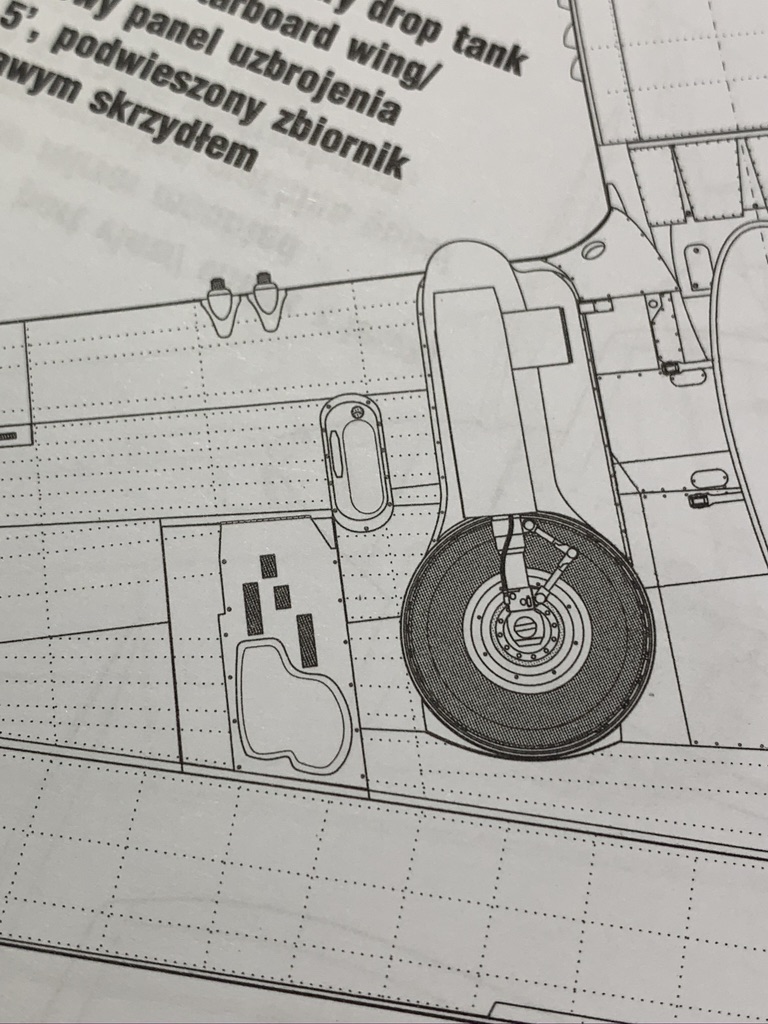
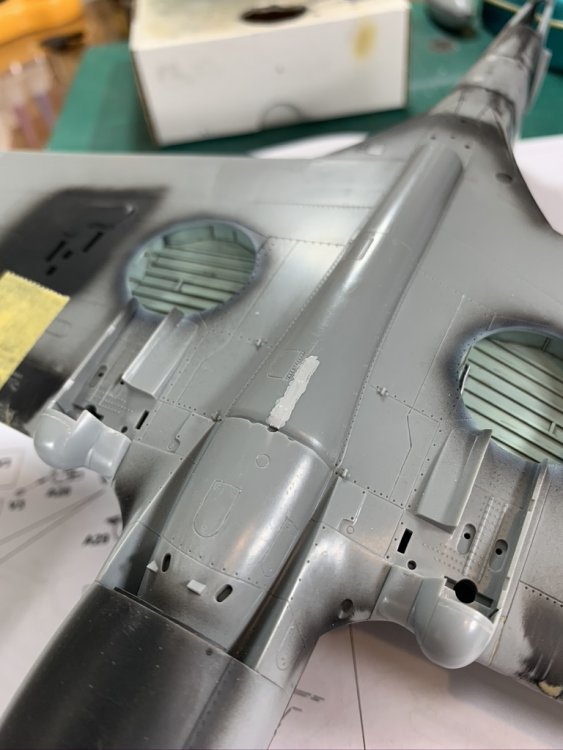
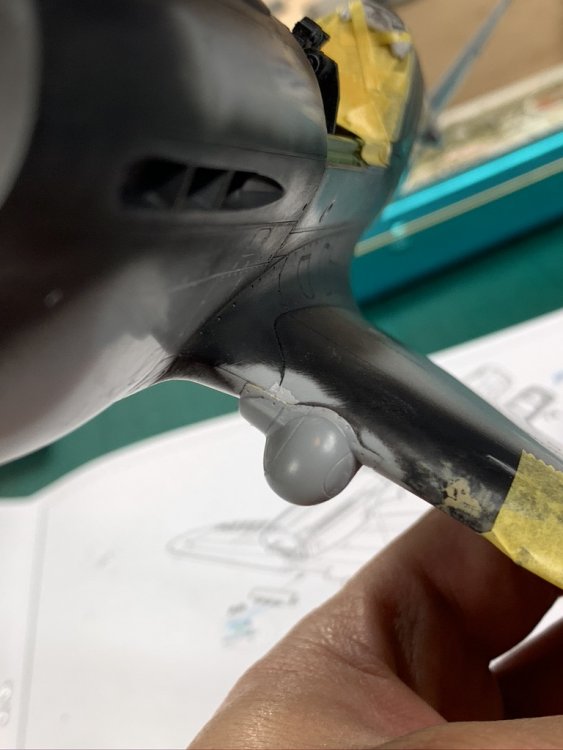
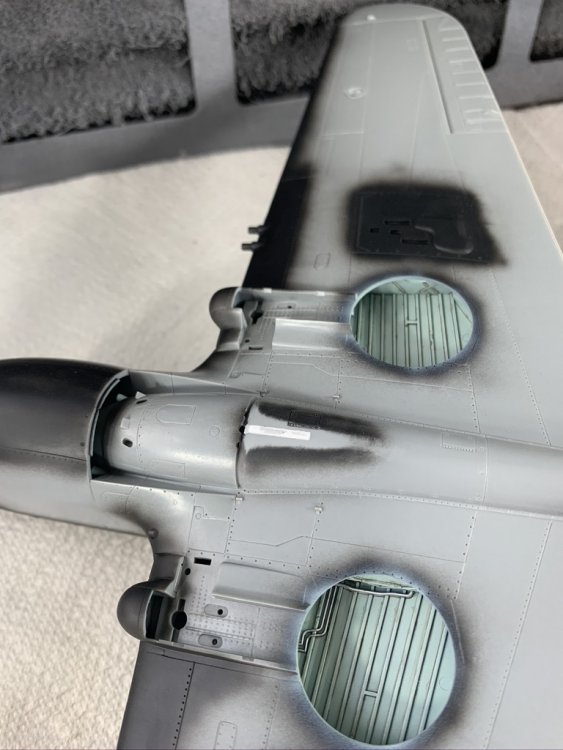
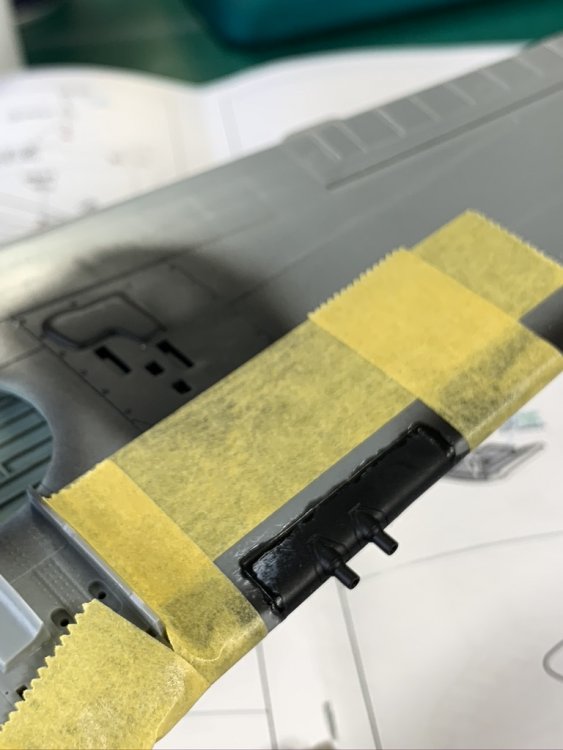
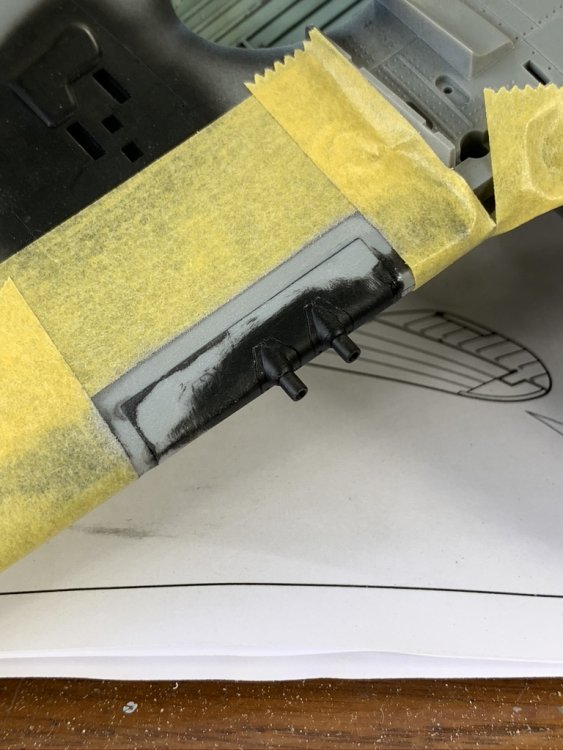
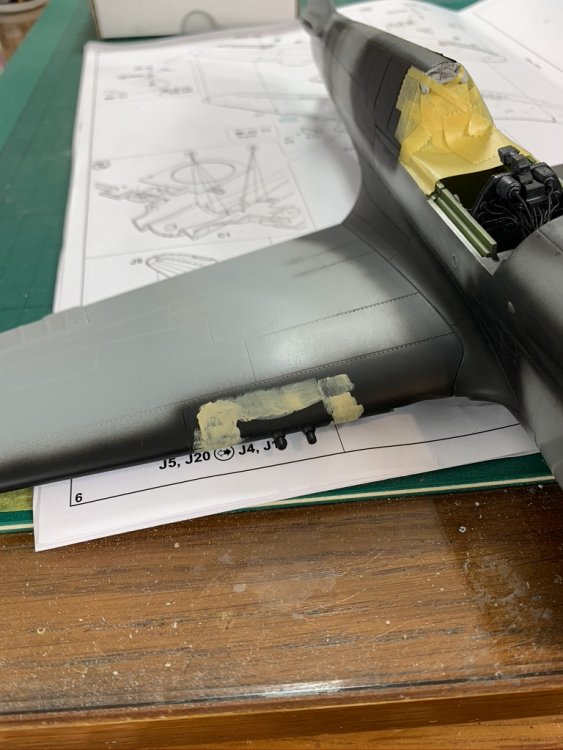
the landing gear blister thingies were glued on only *after* i was satisfied with the wing root and leading edge inside of the blister i was dreading this area but luckily it did not turn out too bad here you can see the wheel wells...hmmm anyway moving on early P-40s like this one did not have bomb racks; some research and i was told that the bottom was just flush, so more filling and sanding that's all for now i am off to the pub

-
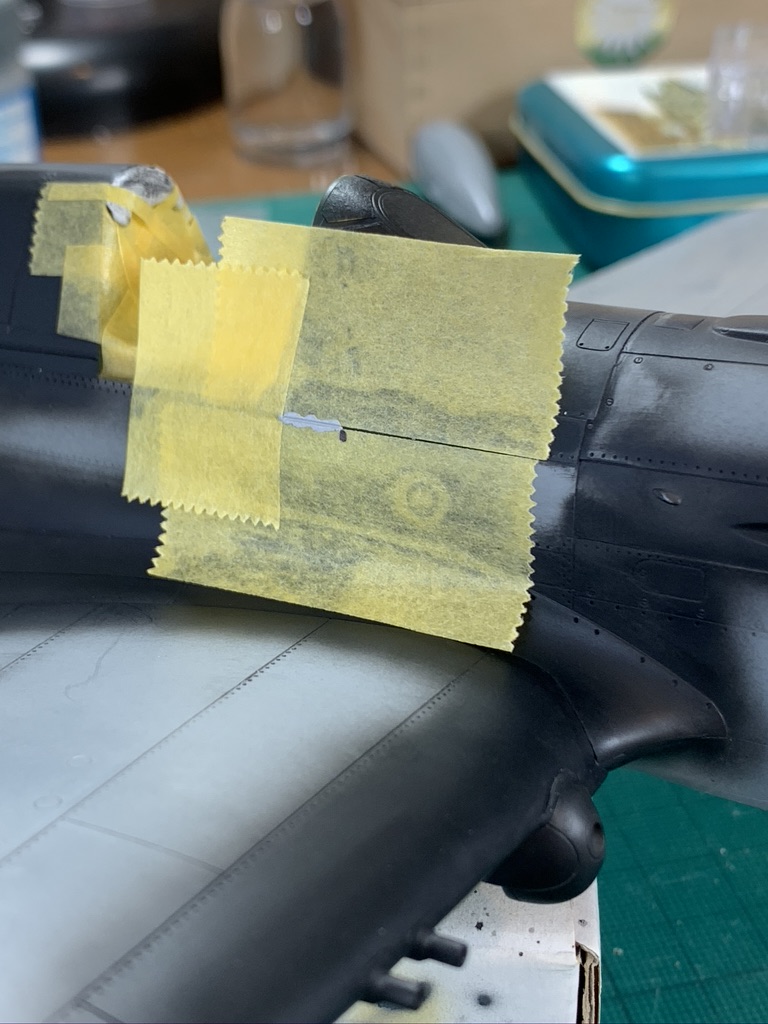
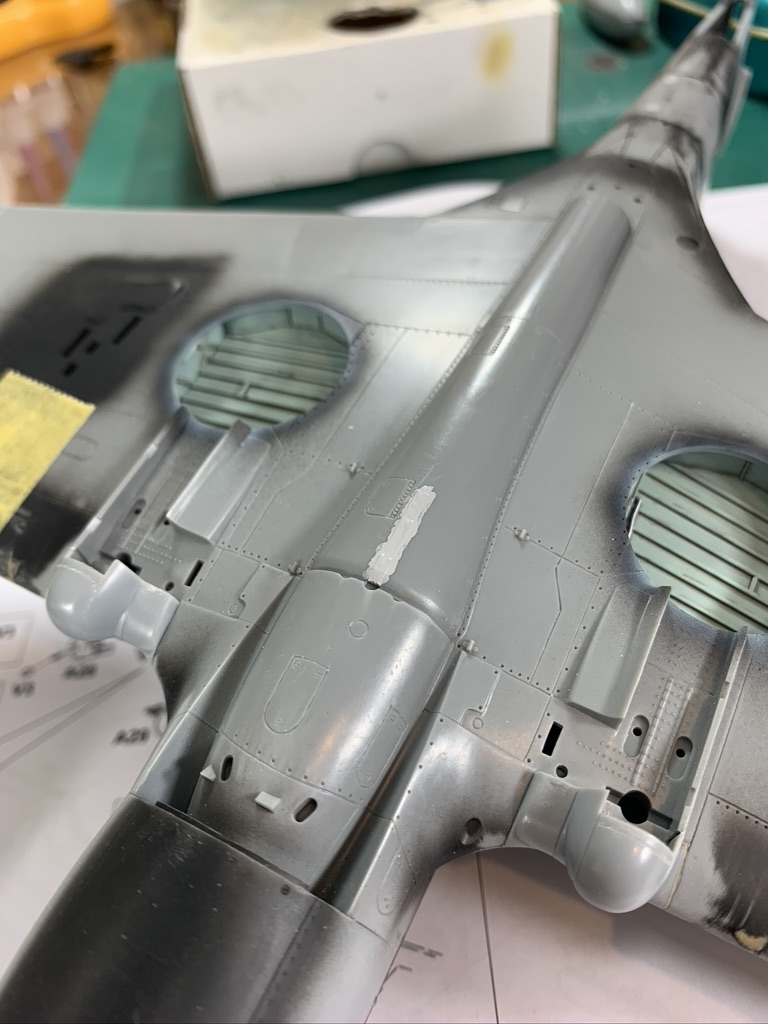
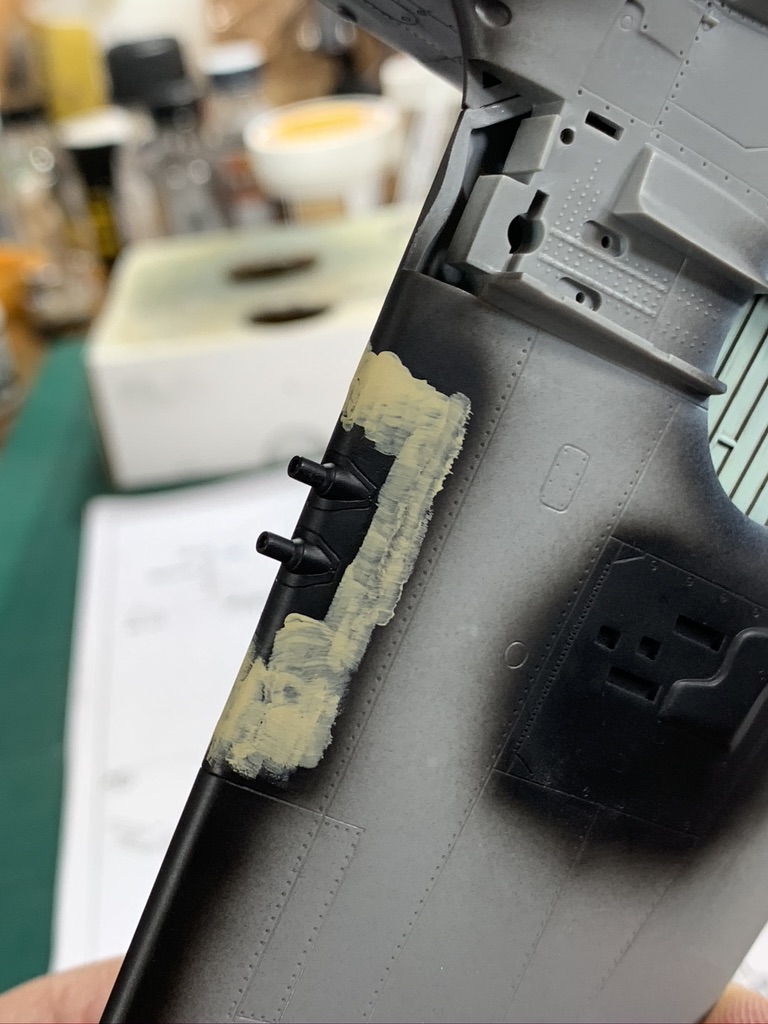
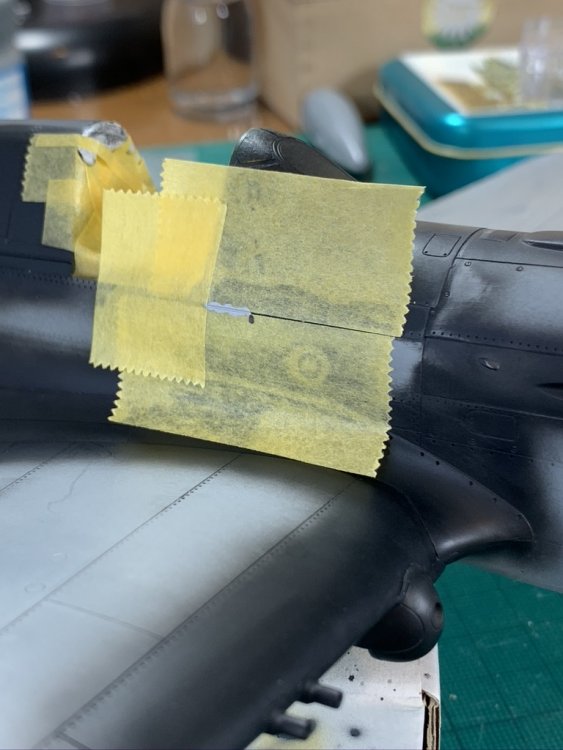
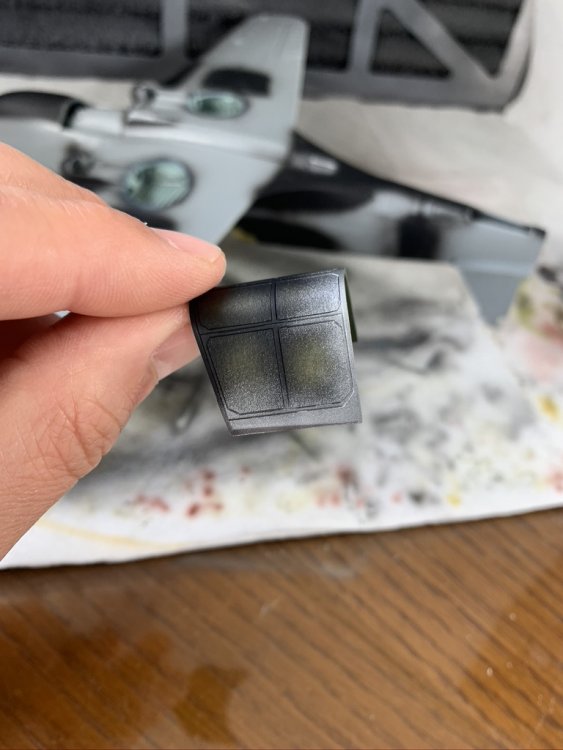
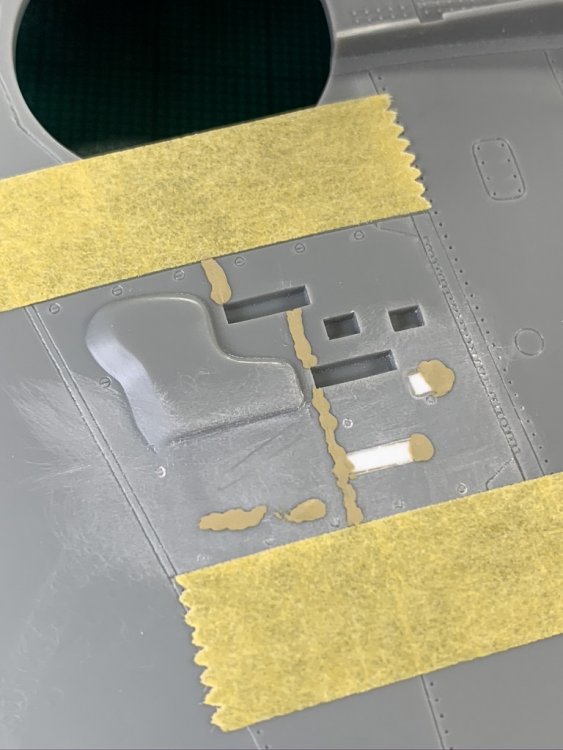
wings and stuff... as i said i glued bottom on first, then added the top pieces the gun cover parts are moulded as rectangular inserts but there is no panel line on the real thing... i had thought taping round where i don't want scuffed was clever and whilst the idea was laudable, you can (as i did) end up just shifting / creating another problem this is mr dissolved putty laid on with a small flat brush, thinned with some Mr Levelling Thinner; sands quite nicely as you would expect a note about the wheel wells - the CMK inserts do not fit well - they were just too small to fill the round wheel well hole which was sooo frustrating as these birds would have had canvas covers as you can just see above i ended up going without them they are painted (at present) the US equiv of Sky - i have taken a stab and used MRP RLM76 my conundrum is whether the wells should actually be Interior Green - I am beginning to think that they should be they will be a pain to paint and weather correctly again, but it shouldn't be impossible i could even go with some cheeky hair spray chipping as well

-
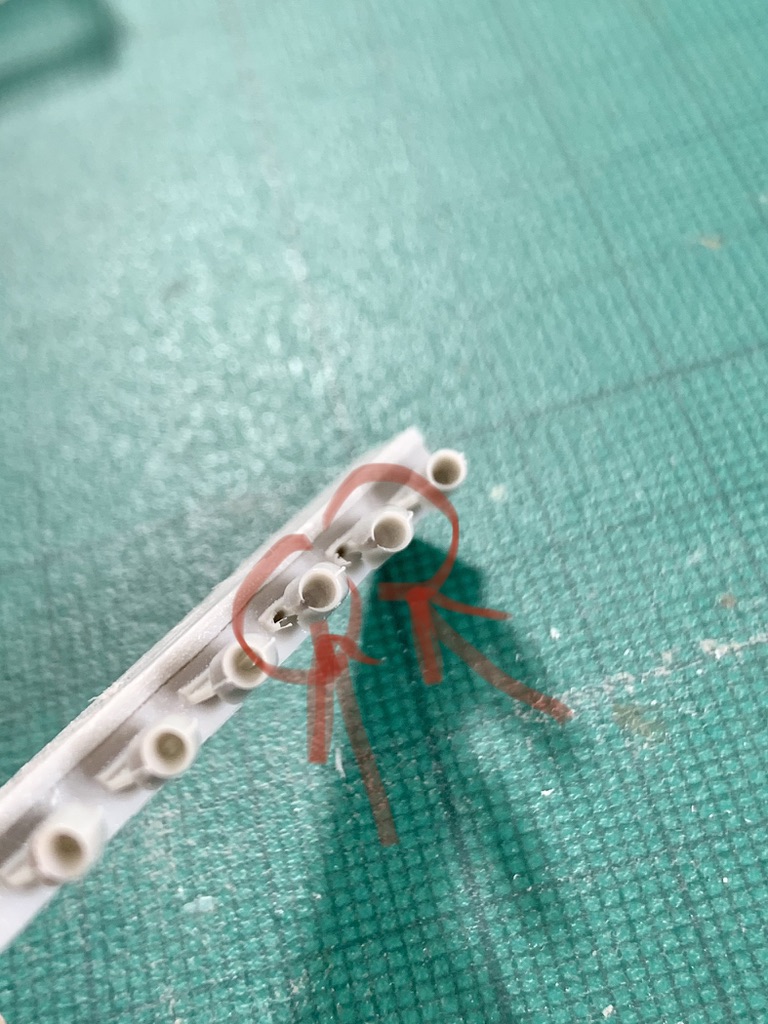
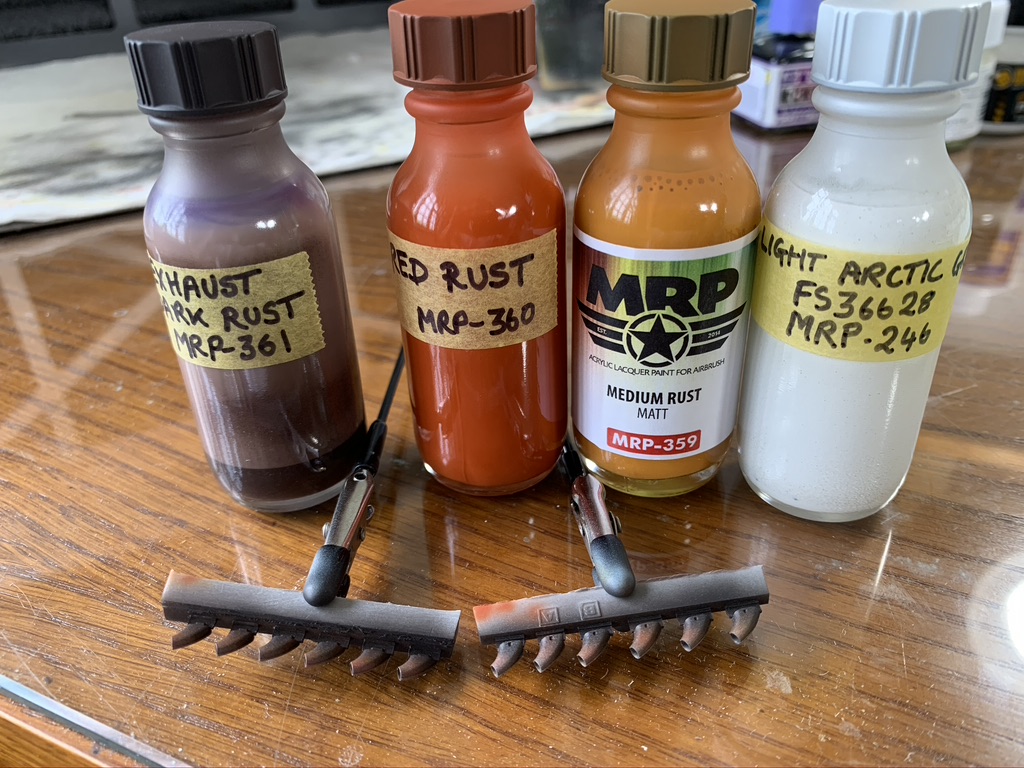
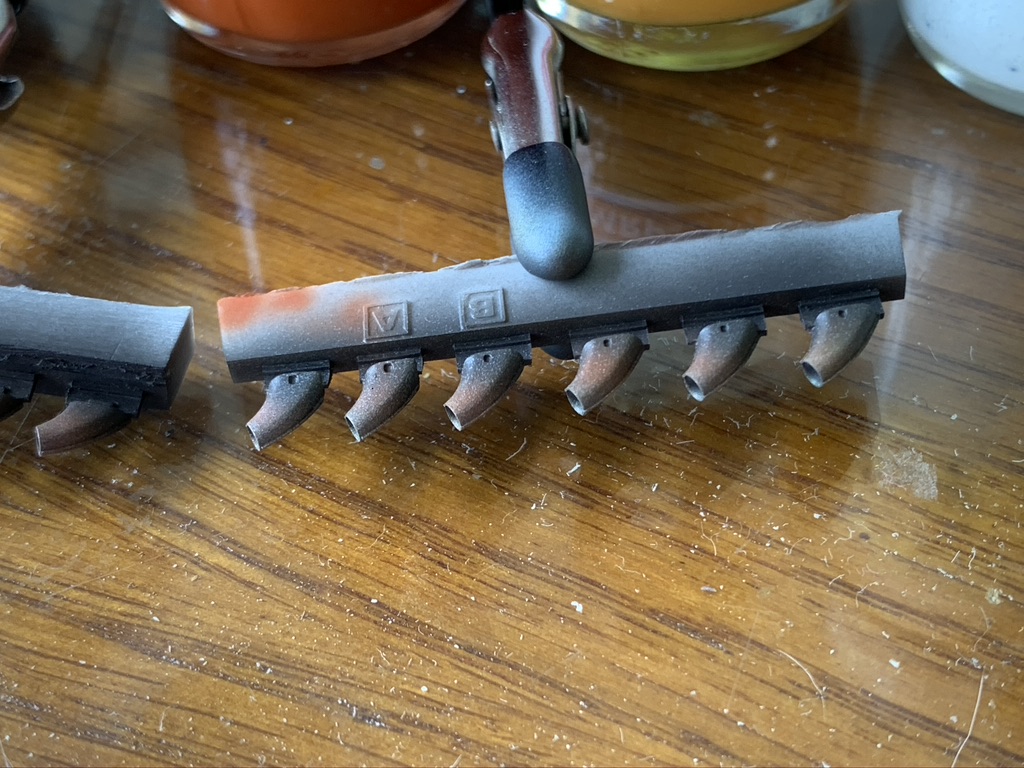
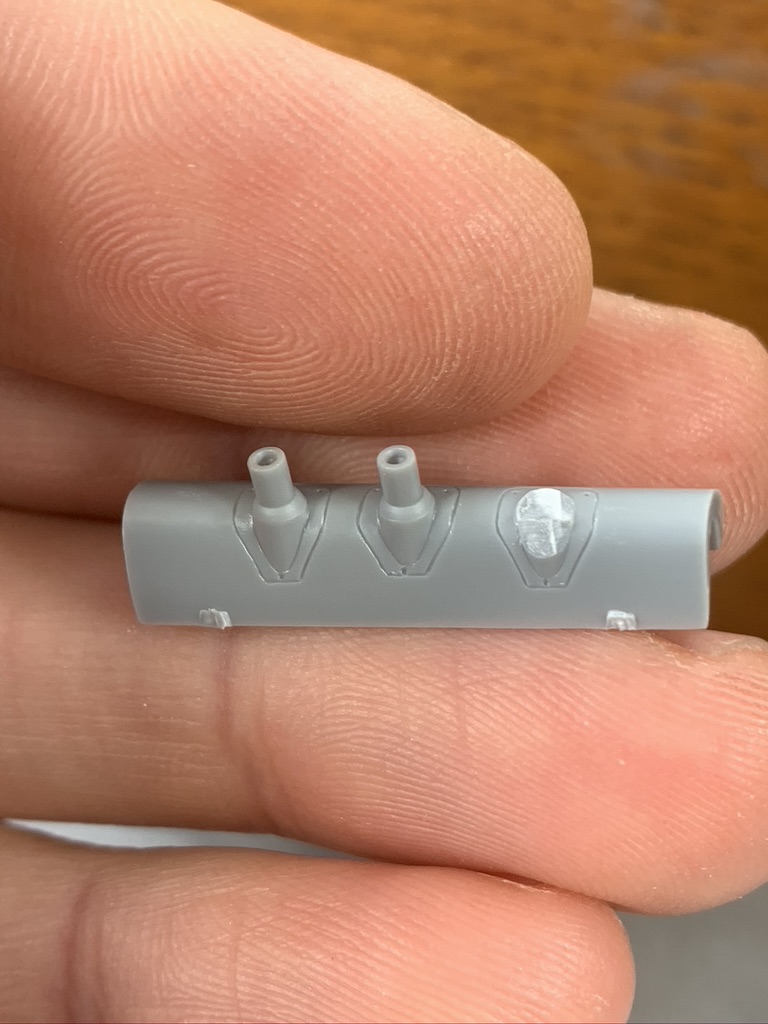
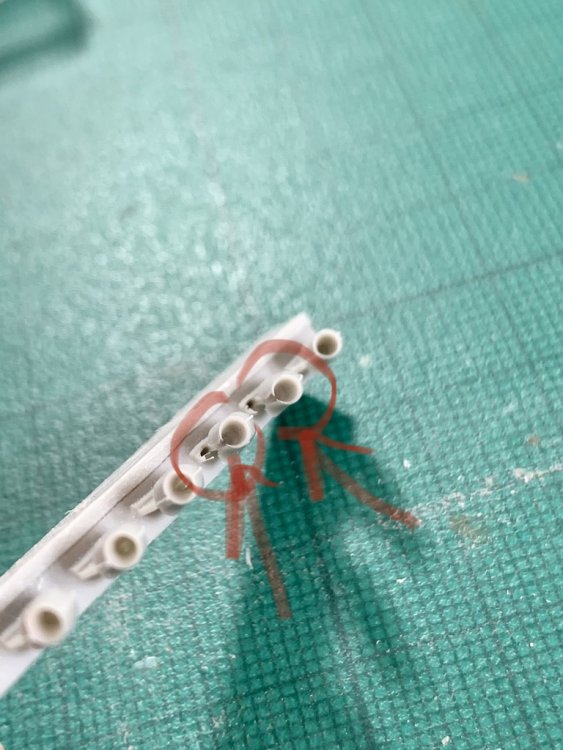
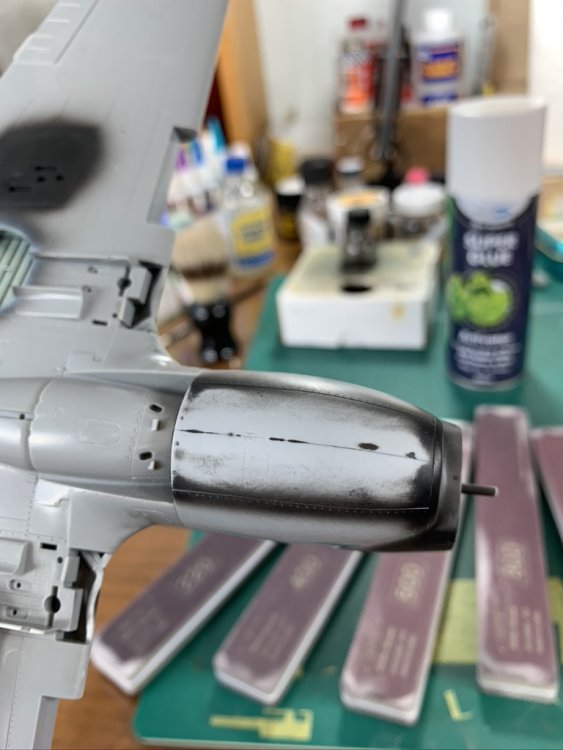
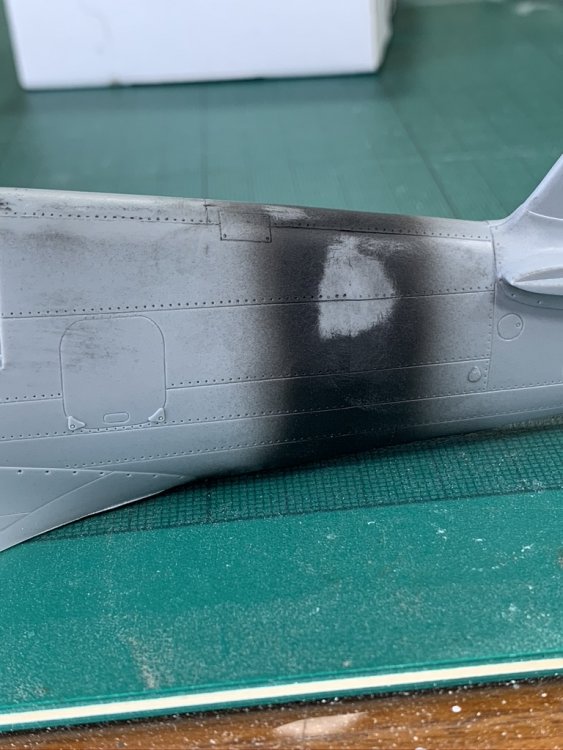
a note about the exhausts... the Brassin ones look cool but infuriatingly they need to go in before you glue the fuselage halves together which is really feeble by Eduard i think i will instead by using Quickboost ones which you can paint and weather and THEN glue on unfortunately my first QB set were miscast / damaged - see below - but Hannants sent replacements quickly so thumbs up for their customer service the pic below does not quite do them justice, but still not sure entirely satisfied and i may come back and weather with oils later, we'll see. exhausts primed as usual and then sprayed in order from left to right, trying to get some graduated colour etc etc once i am happy they will be snipped off the casting block and the glued on; this will after i have sprayed on the exhaust staining.


-
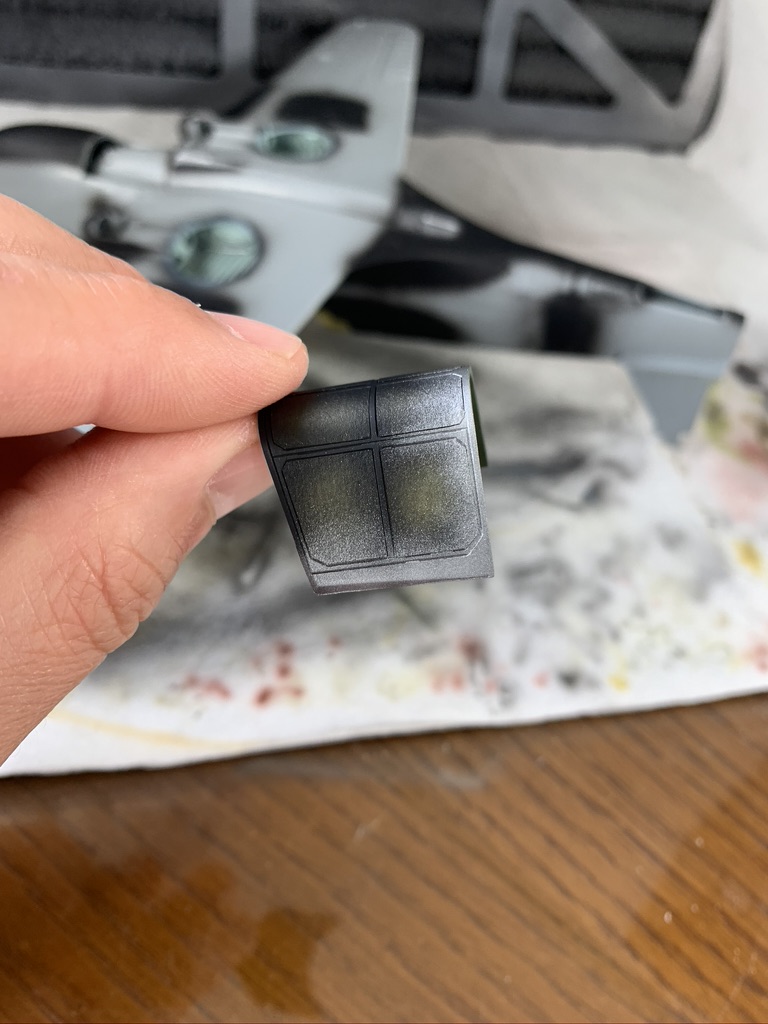
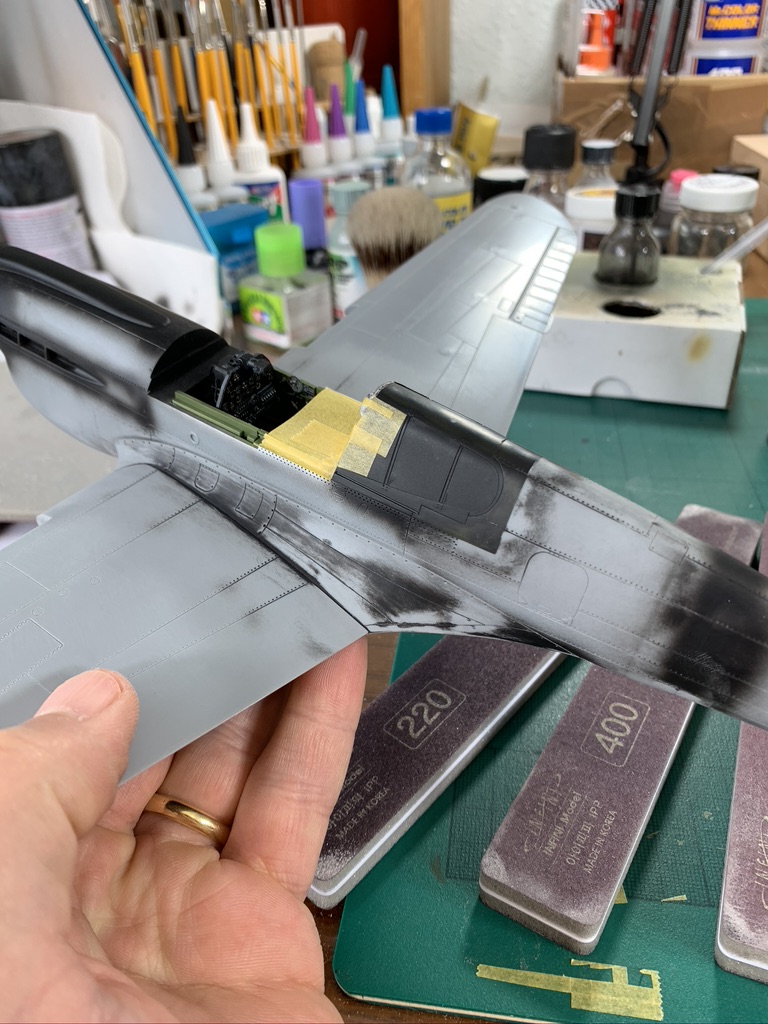
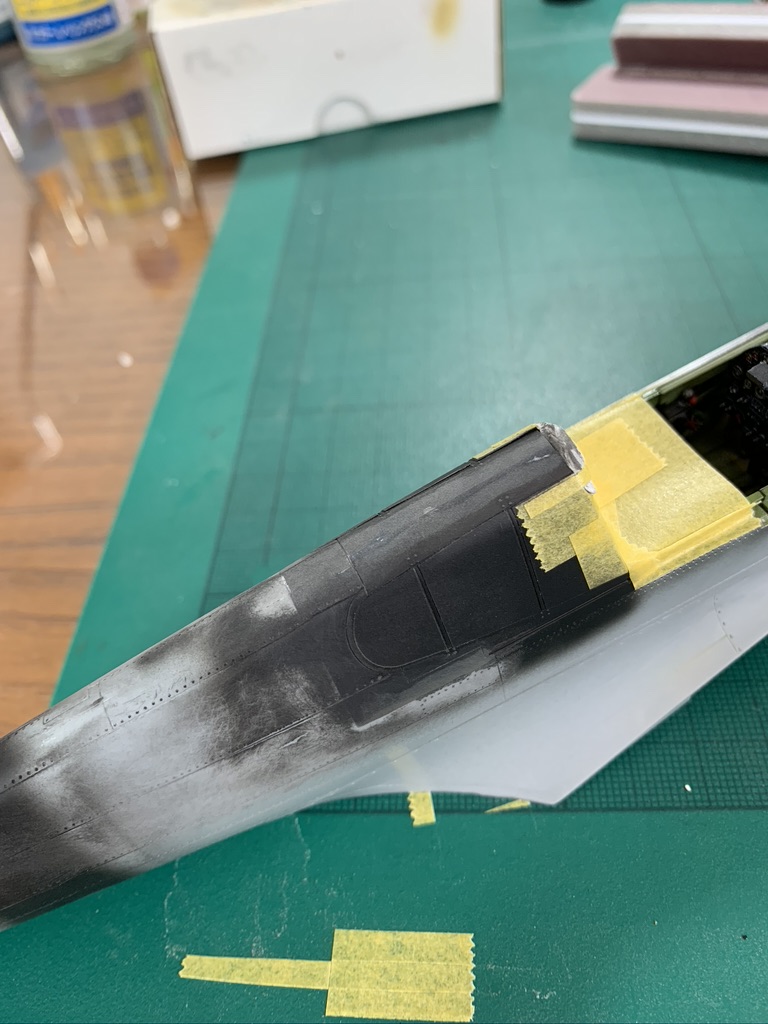
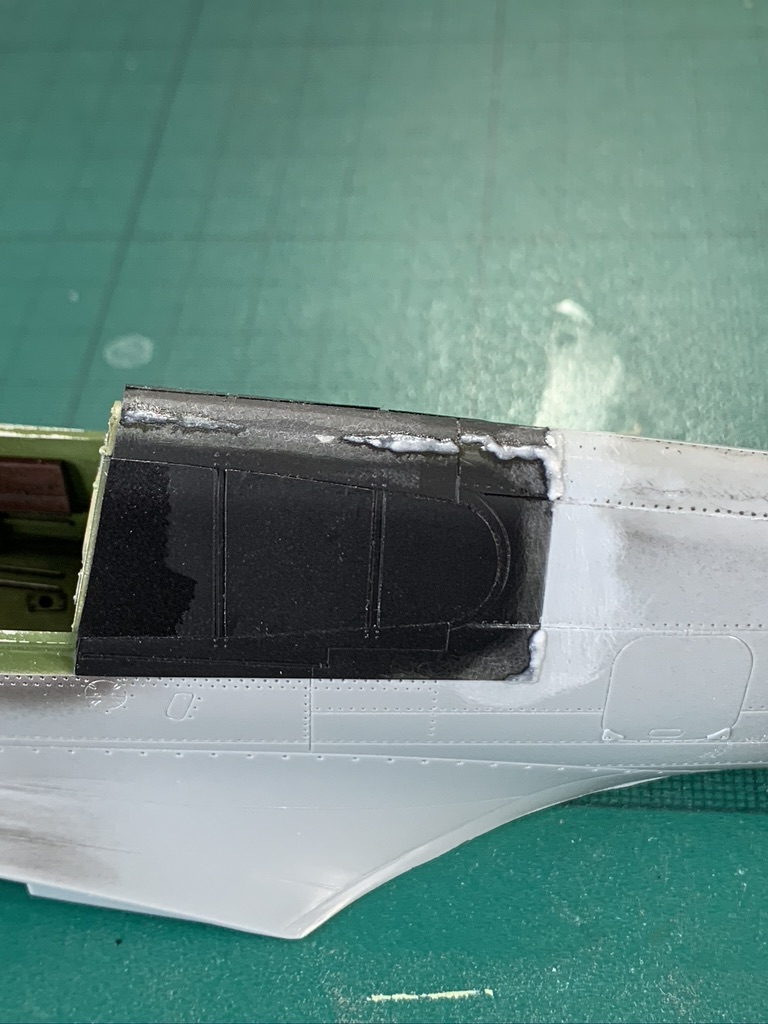
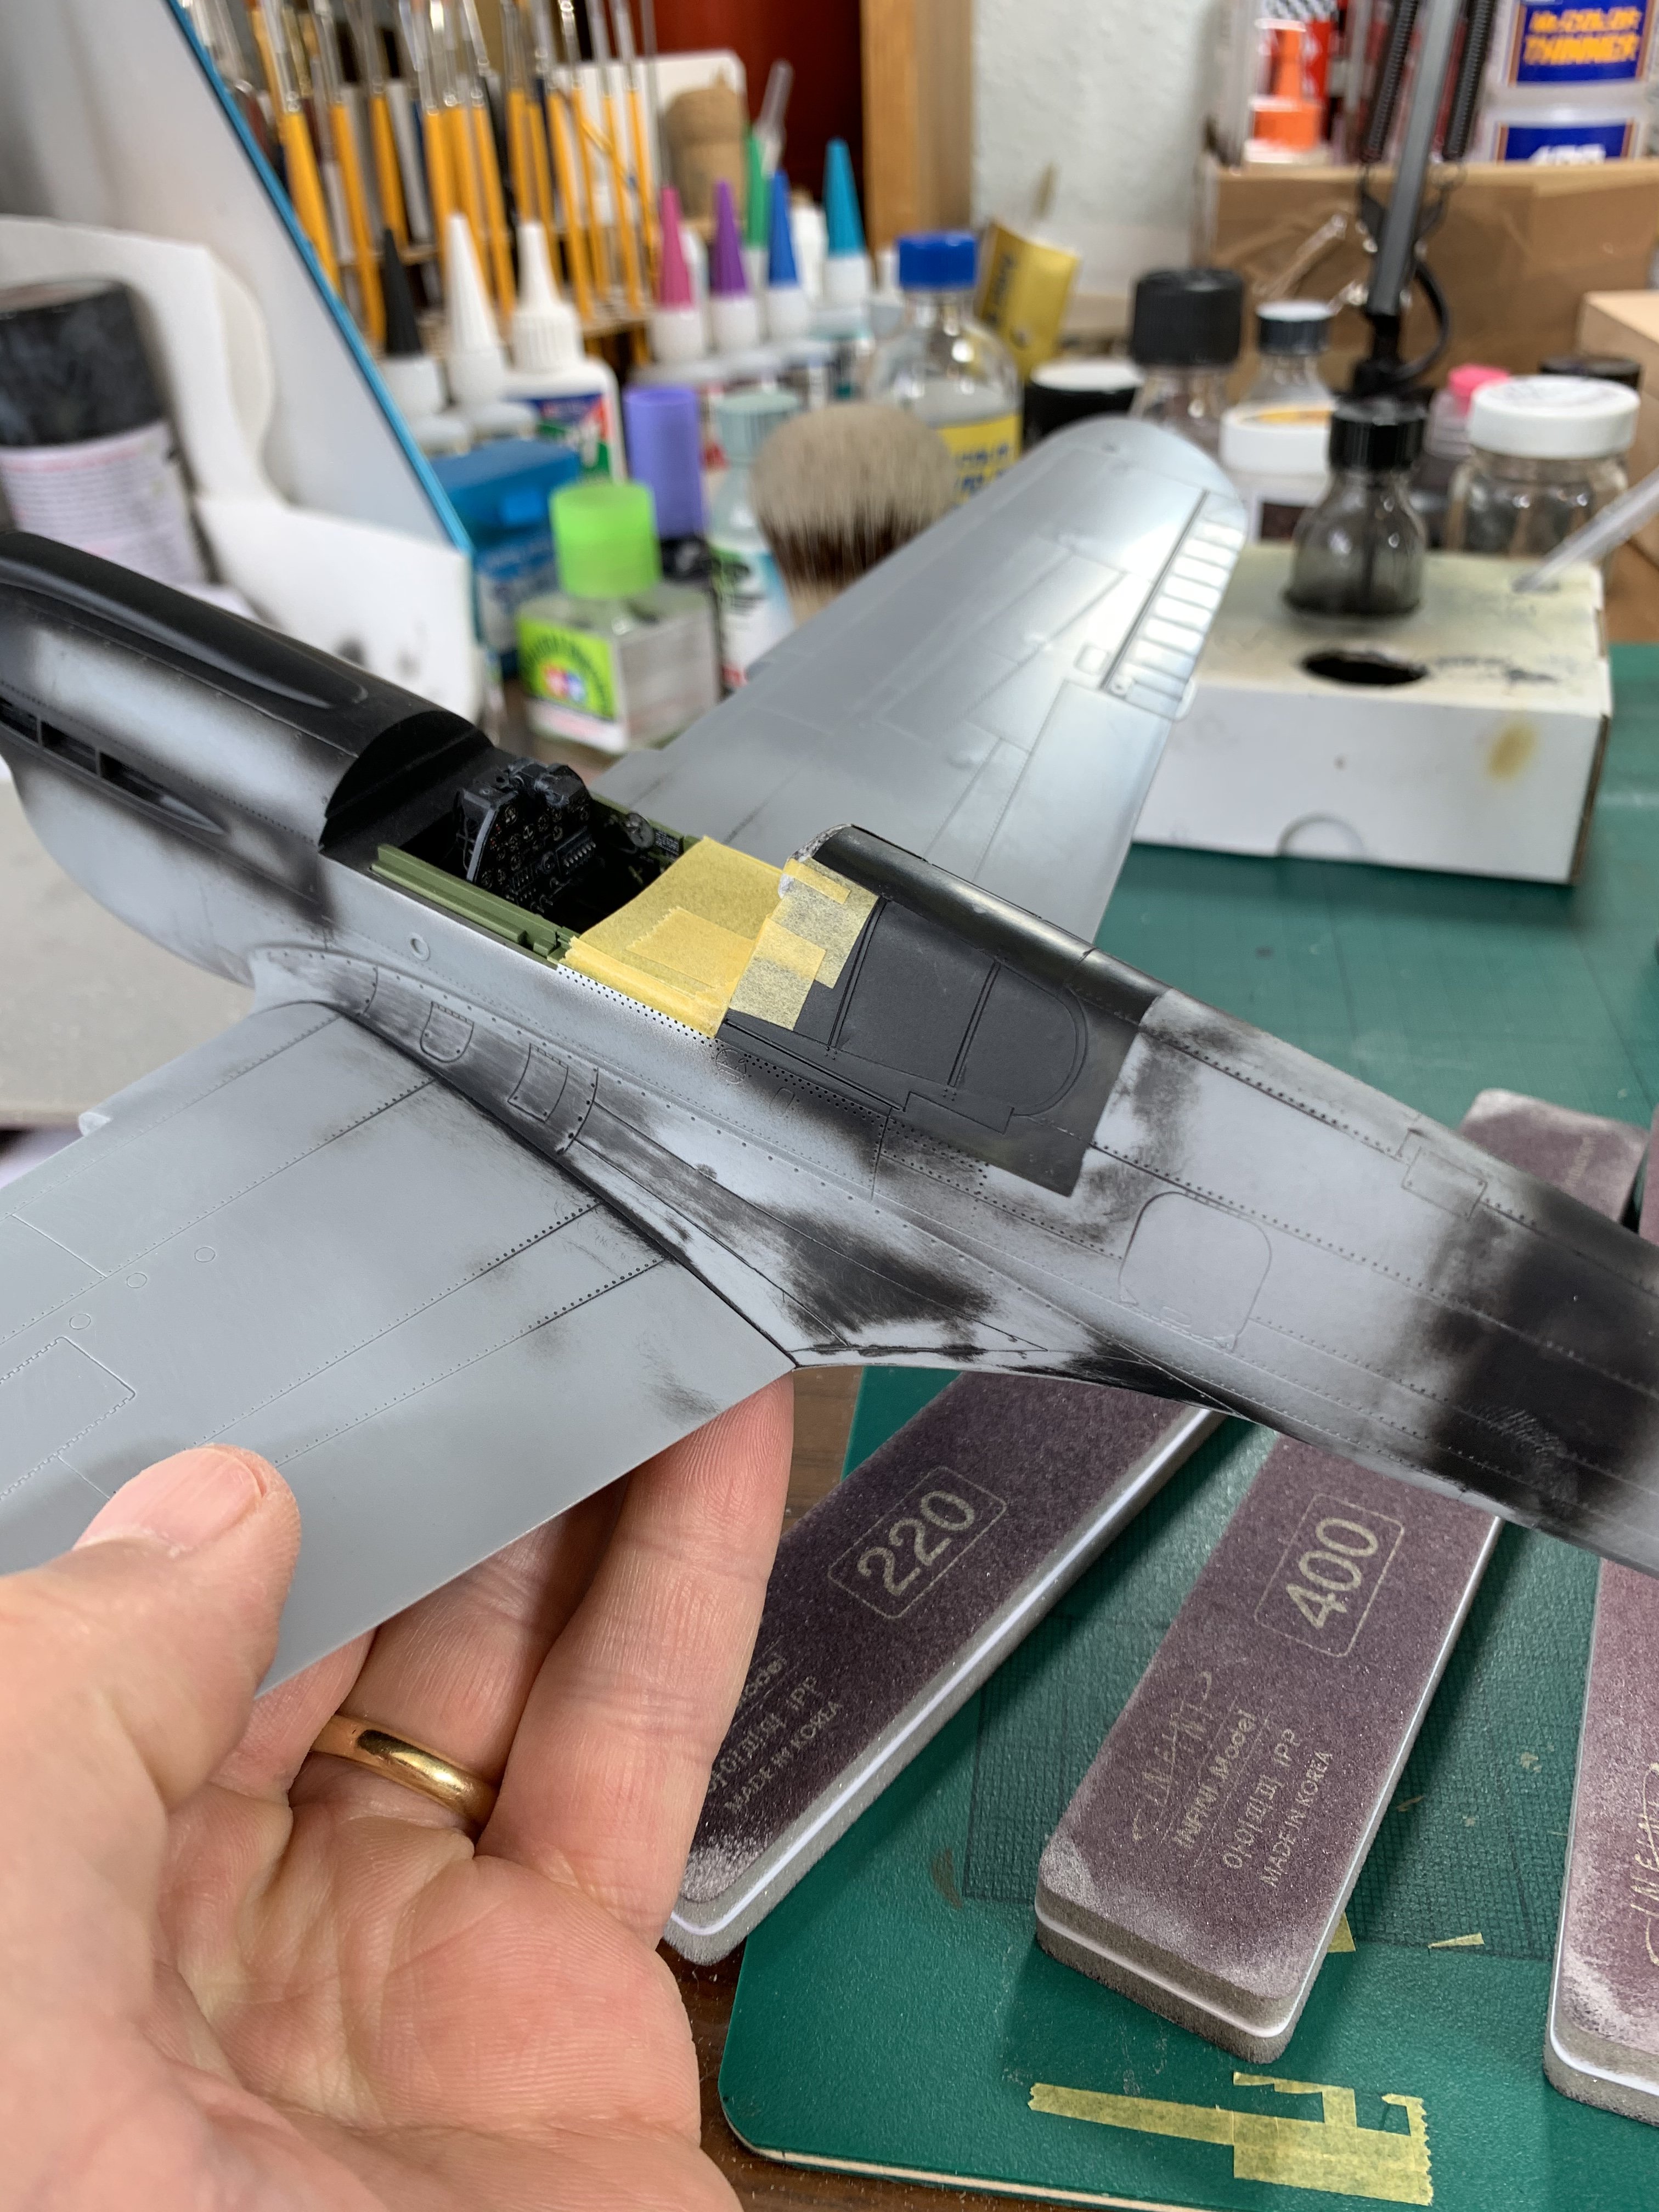
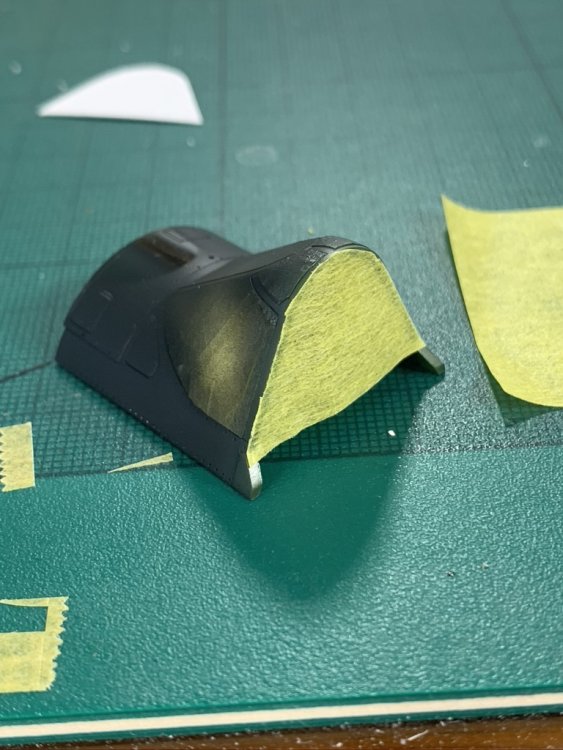
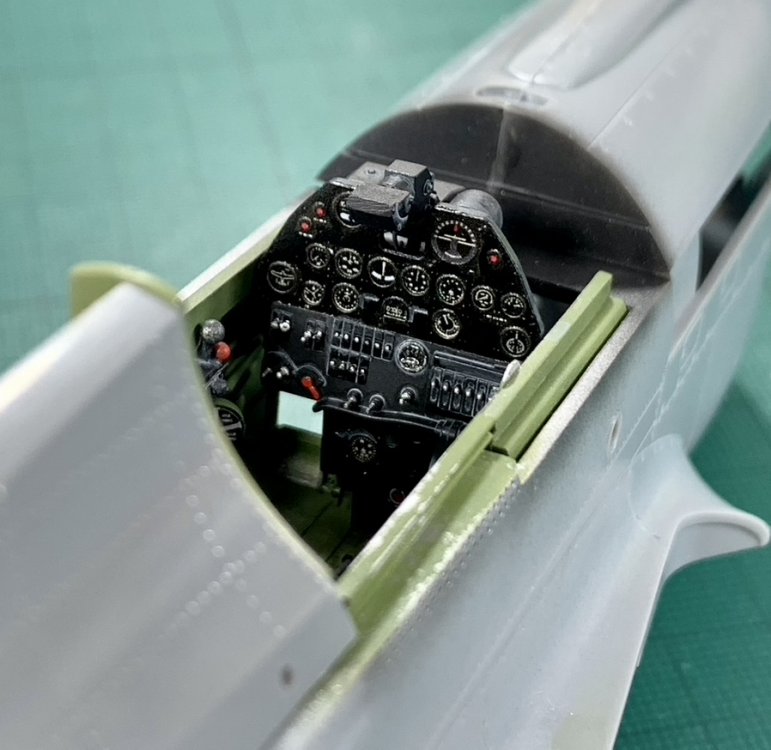
nothing too exciting here but masked the canopy inside and out primed Mr Surfacer 1500 black both sides, then US Interior Green inside interior masks removed and made some masking to fit to protect it once attached and spraying main camo montex masks used in combination with Eduard generally i prefer Montex for flat surfaces, and Eduard for compound curves; Montex usually provide inside and outside which is great whereas i don't think Eduard did here i ended up using Eduard on outside for all the parts, main windshield included fiddly, but with patience it's not too bad the gunsight - which is obviously very delicate - will not be fitted to the instrument panel until just before the canopy part above is ready to be attached some wheel well stuff next which i will try to post later

-
correct - it's meant to be fun; fun for different people means different things, so it's all good but i only have limited appetite for this stuff i may go build some armour next where you don't have any of this nonsense!
-
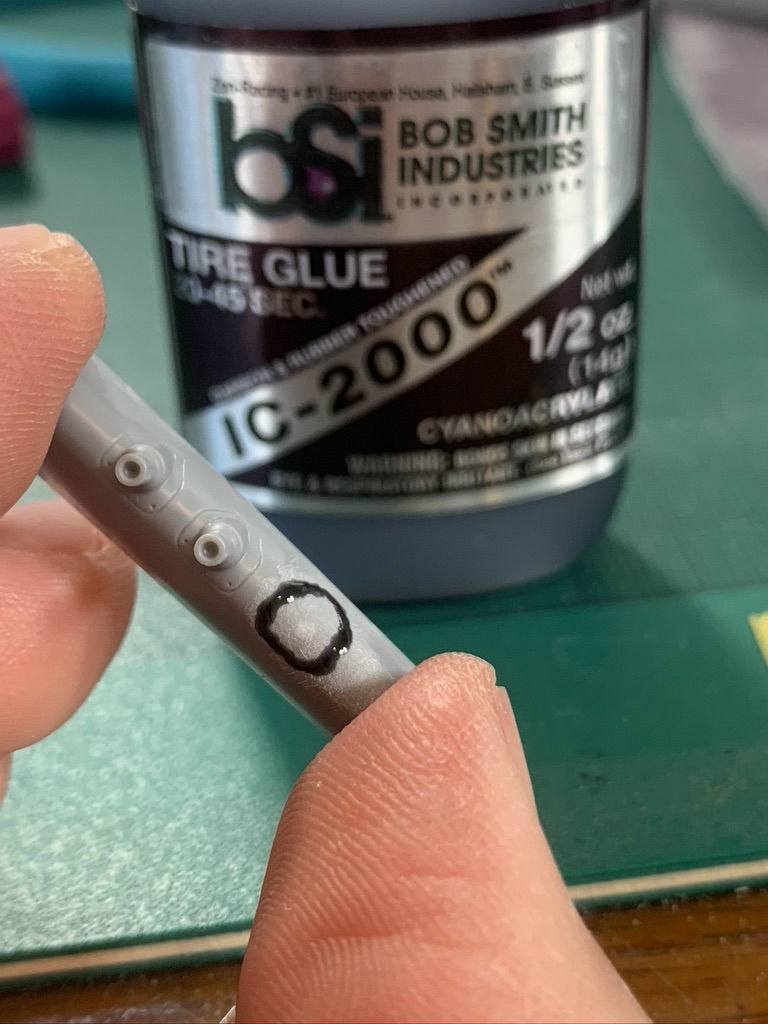
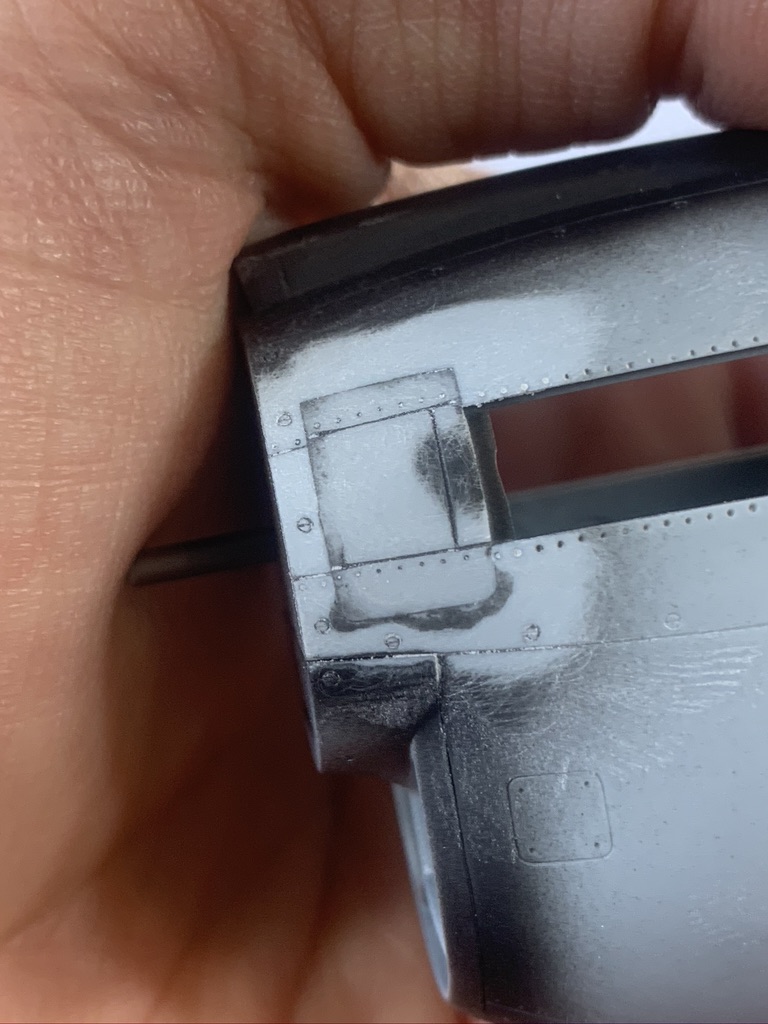
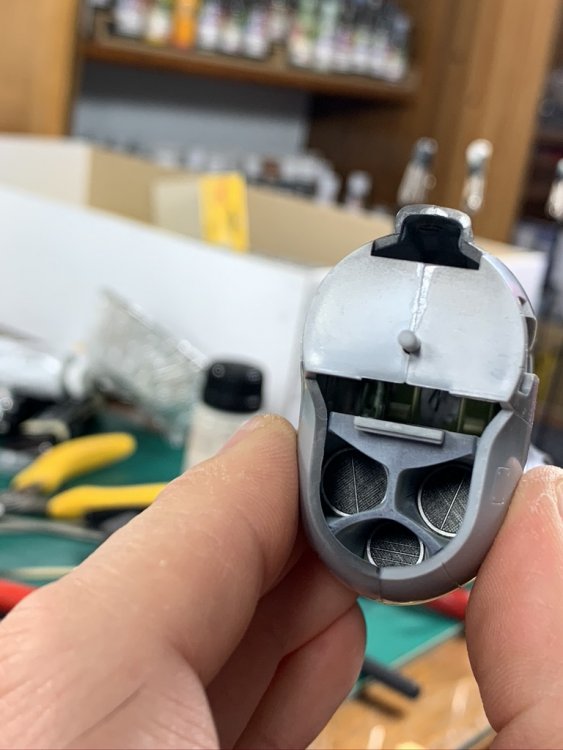
additional changes re the 4 guns vs original 6...once i did this there wasn't really any going back! i thought about using Master Model barrels - and they do look sweet - but i was not confident of being able to drill out the right amount / area of the piece shown above i used black CA - which is slightly rubberised - as an experiment here i think ultimately CA mixed with talc is better, but this stuff is definitely not as hard as regular CA wings.... i will do almost anything to avoid wing root problems! so i glued the bottom half first, and then added the top halves in the grand scheme of things, i think most modellers could do this - i certainly didn't do anything special - and whilst it potentially just moves the problem around from wing root to say leading edge, it's a damn sight easier dealing with the latter when doing this stuff i make a point of scribing / emphasizing the panel lines and rivets **before** i get to sanding it's soo much easier going over something that is already there, rather than trying to redraw lines and rivets from scratch your mileage may vary of course! there is no panel line on the bottom cowl...*sigh*... more sanding this bit was not very well handled by me - i broke own rule of not scribing before the sanding began and i had to rescribe some stuff from scratch meh cheers Nick


-
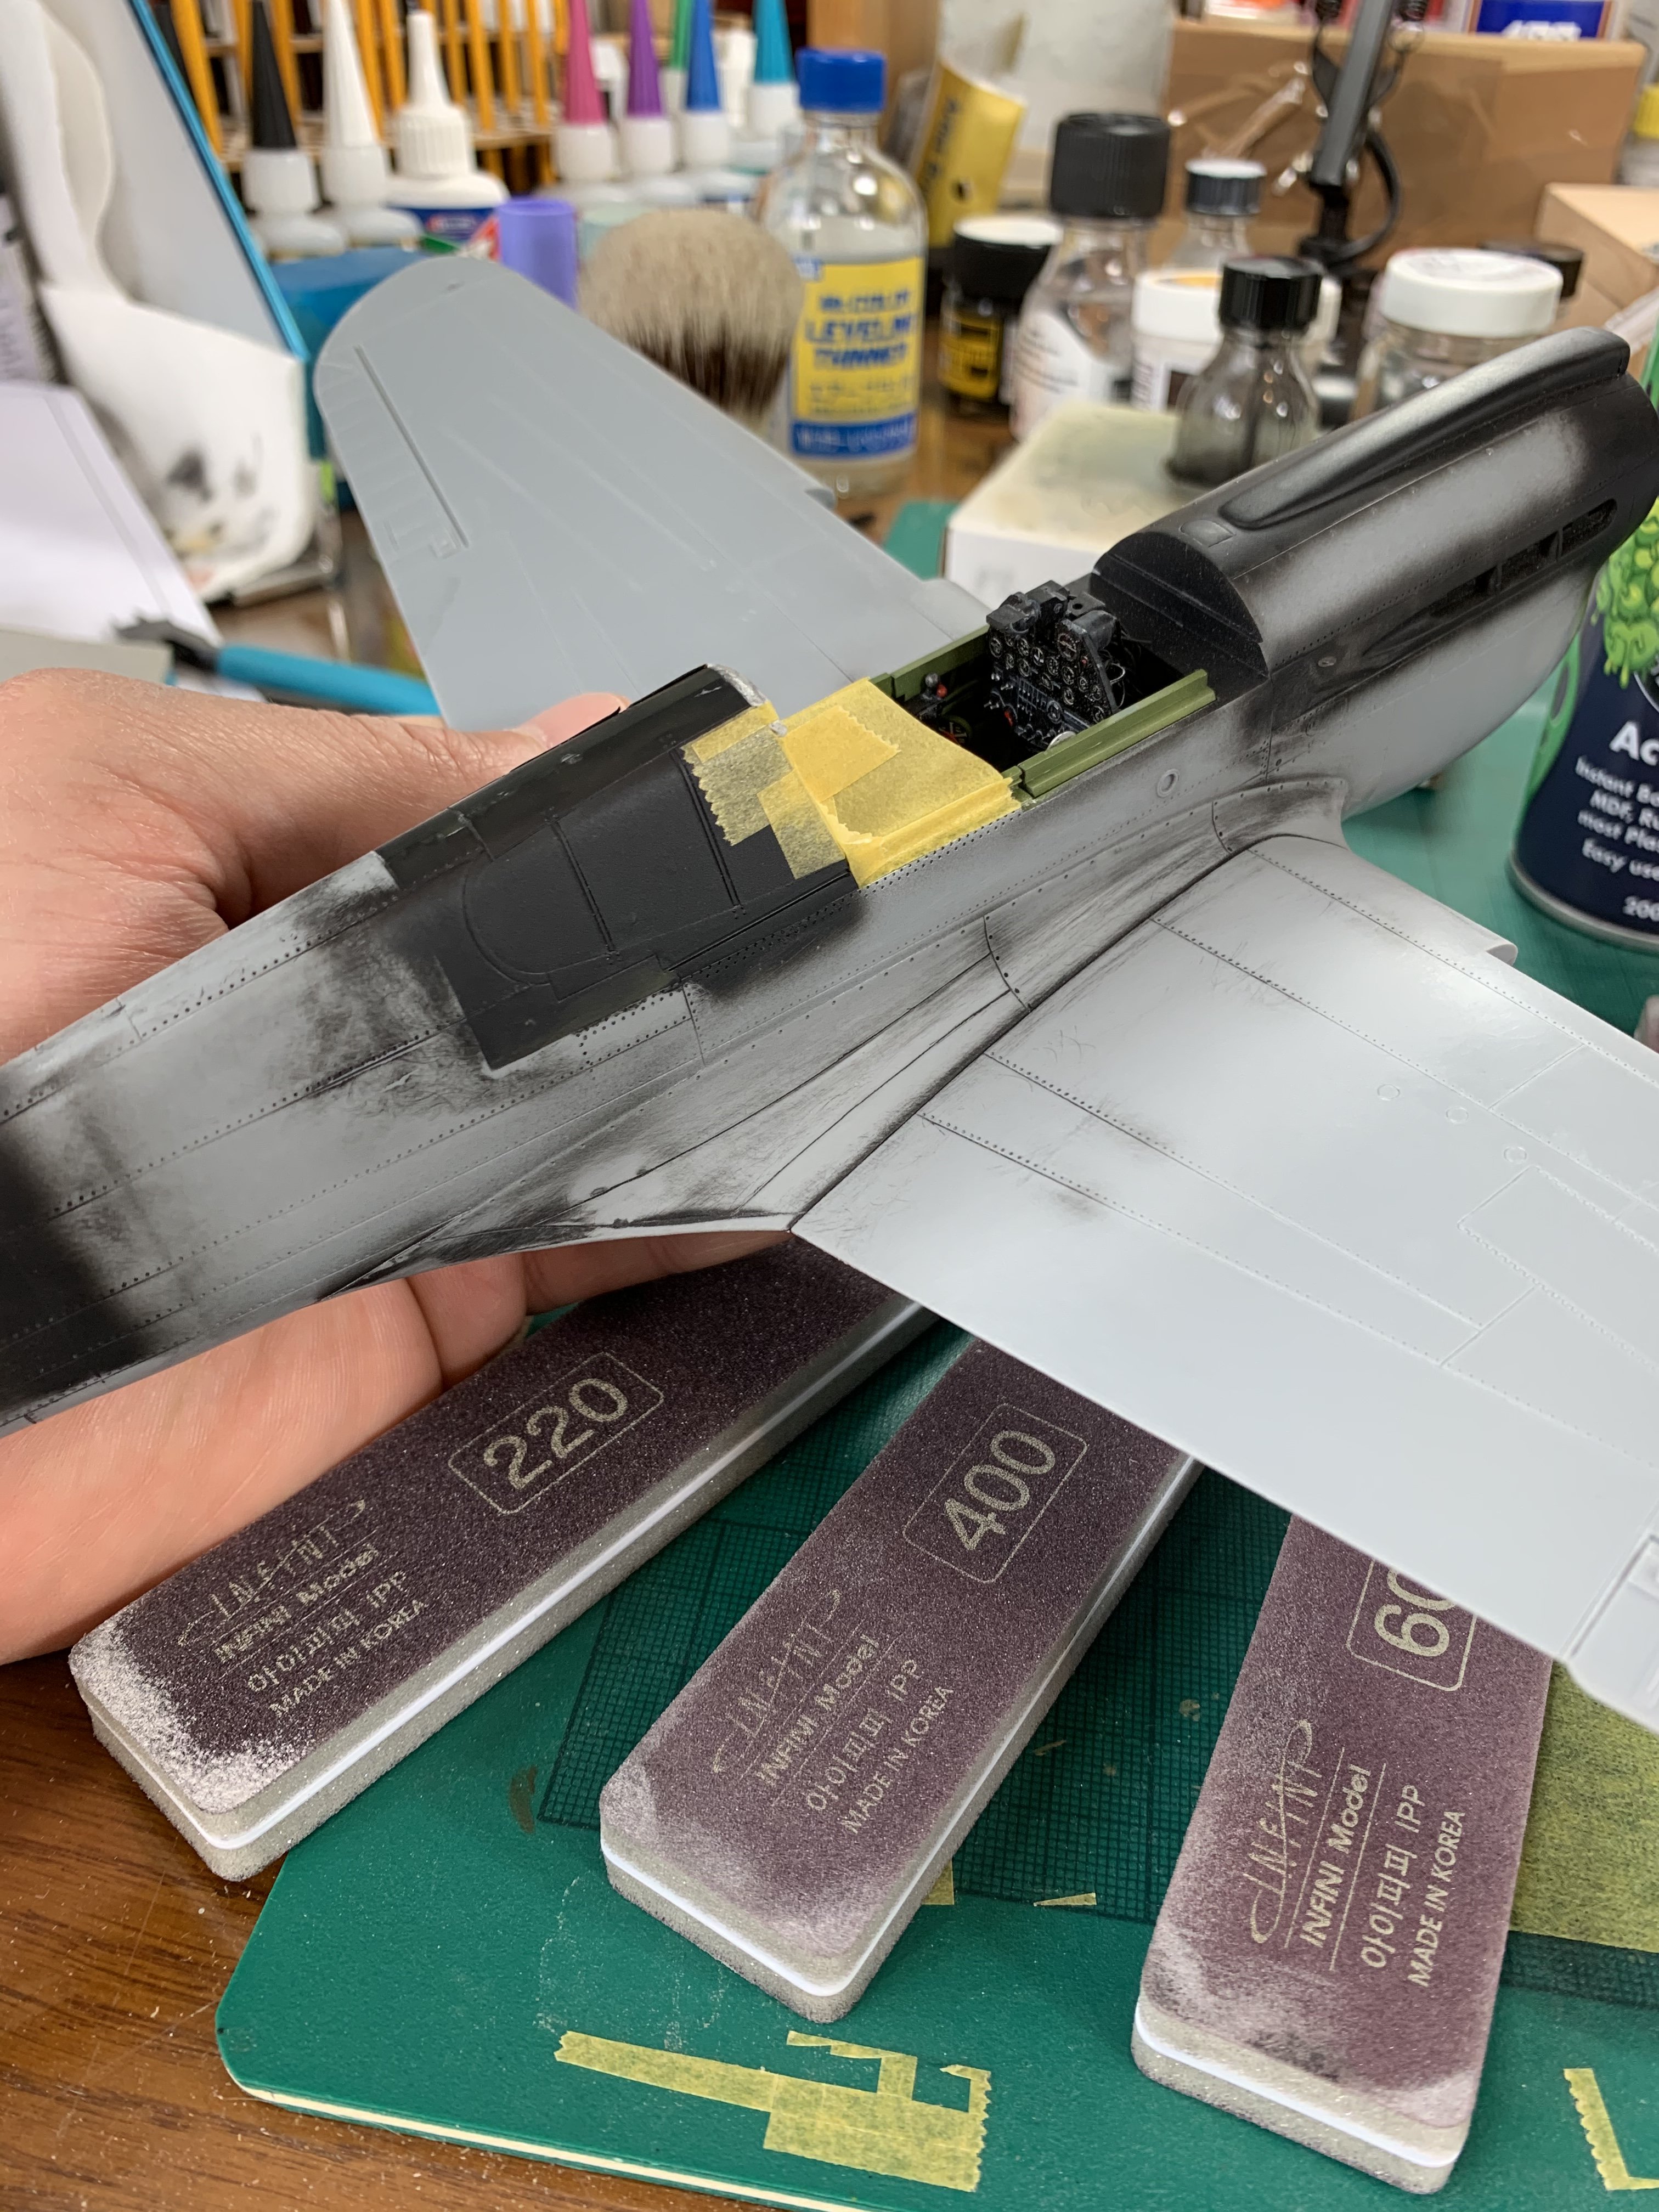
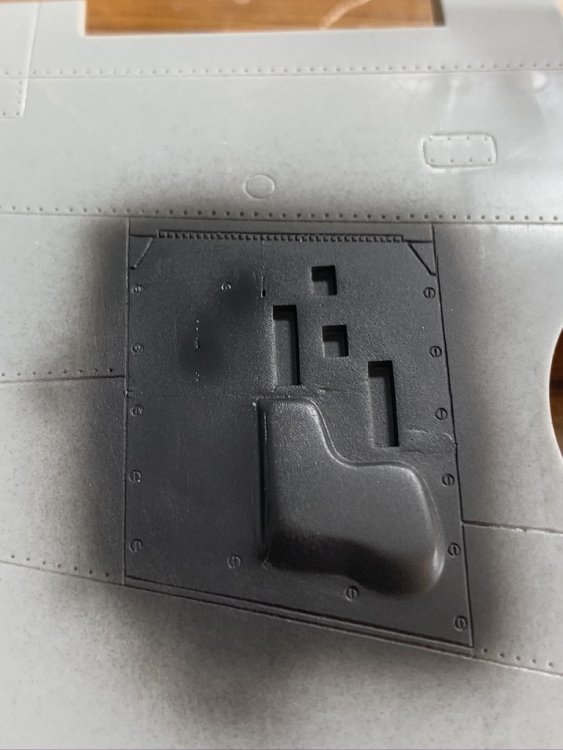
Hassy kits have the reputation of being simple and easy to build for the most part if you want to have panel lines where they should be, and more importantly not to have them where they shouldn't be, then their P-40s are not for you notice the horizontal lines inside the insert do not line up with main exhaust area this was a learning experience for me 1) i will be better the next time i tackle a kit like this 2) the next time may be some way off and i am leaning more towards Tamiya's (limited) selection of uber kits - life is just too short to build what saps the life out of you 3) simple kits are *not* easy kits - this is far more challenging in terms of skills required than building a Tamiya Spitfire in 1/32 - no way you'll need to be doing so much of this shit! more fun... in the below, i experimented with talcum powder mixed with CA glue - it did indeed make it much easier to sand and i will consider using this technique again, although i suggest masking along the areas you are going to fill so that you don't have to sand stuff unnecessarily also note in the above the panel lines on the scallop mating the wing to the fuselage are almost completely washed out this were a PITA to re-scribe, but do need to be done given the lines just above them are so crisp


-
got a link please?
-
amazing cockpit / engine details and wires from Anyz
nmayhew replied to nmayhew's topic in Modelling Discussion
yeah he's been a bit 'meh' as regards shipping - I sneaked in there just before he said no UK shipping because of Brexit (don't know if that's changed) whilst the switches are very cool, the spark plugs are not drilled out and therefore pretty useless for what i had in mind (engine detailing, connectors for brake lines etc) i just don't have the ability or the inclination for that stuff 3D parts in general will revolutionise the detailing side of our hobby i think - the regular resin guys better get on that train or in a few years they will be dinosaurs in my view, but that's for another discussion I suppose! -
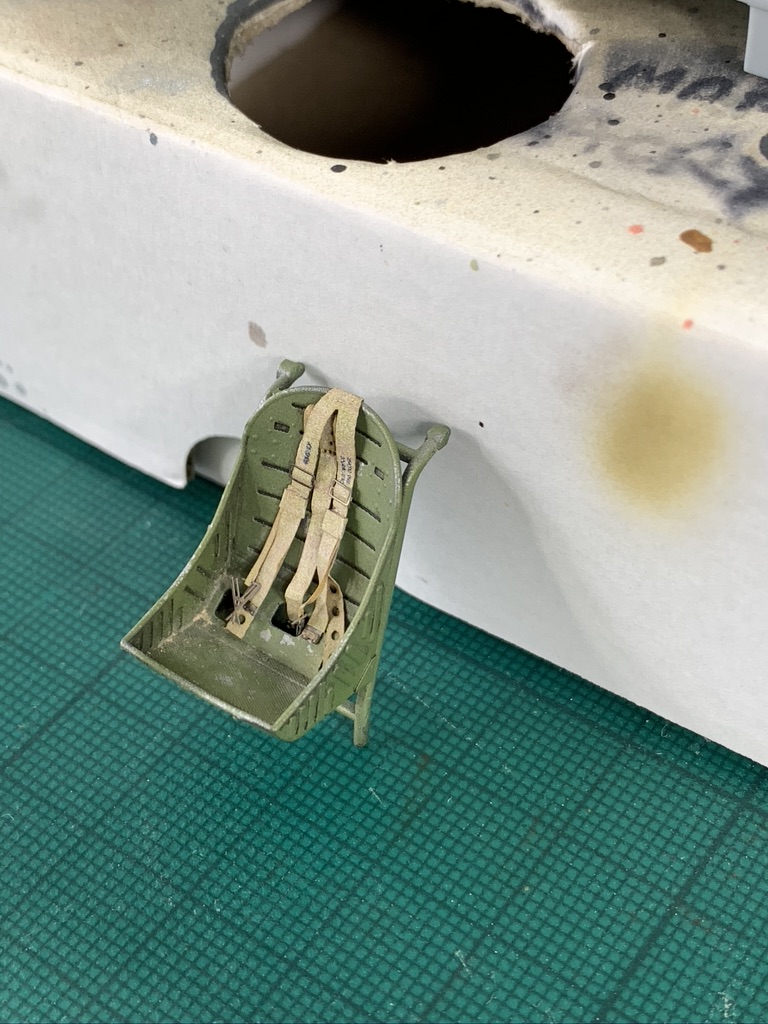
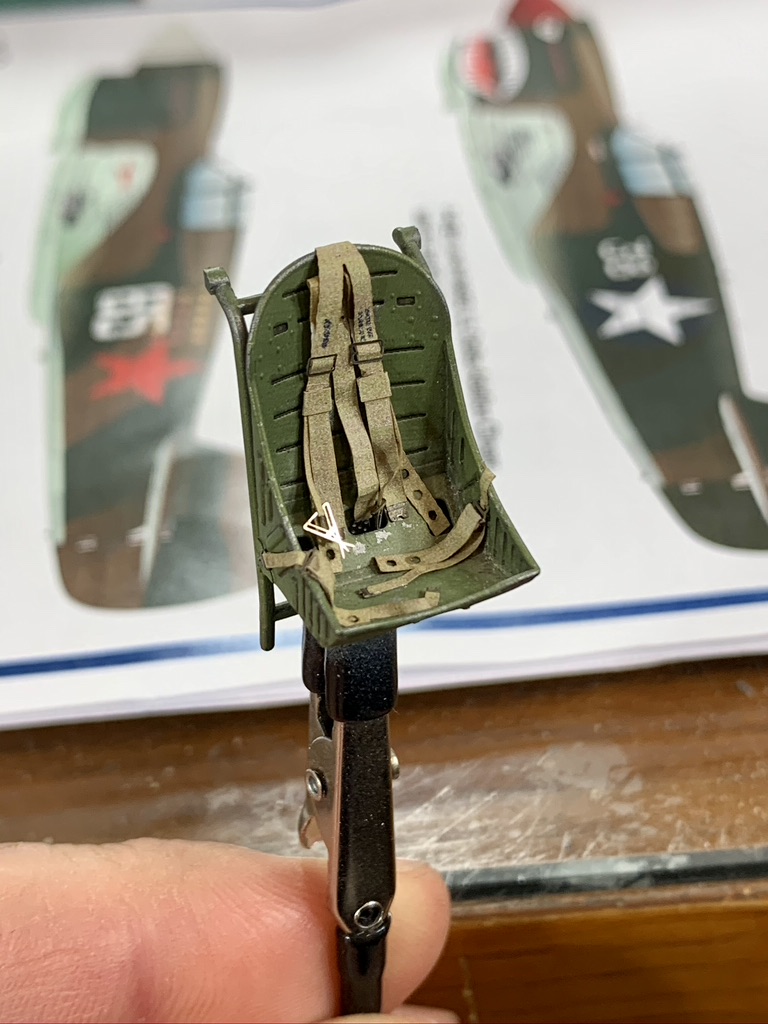
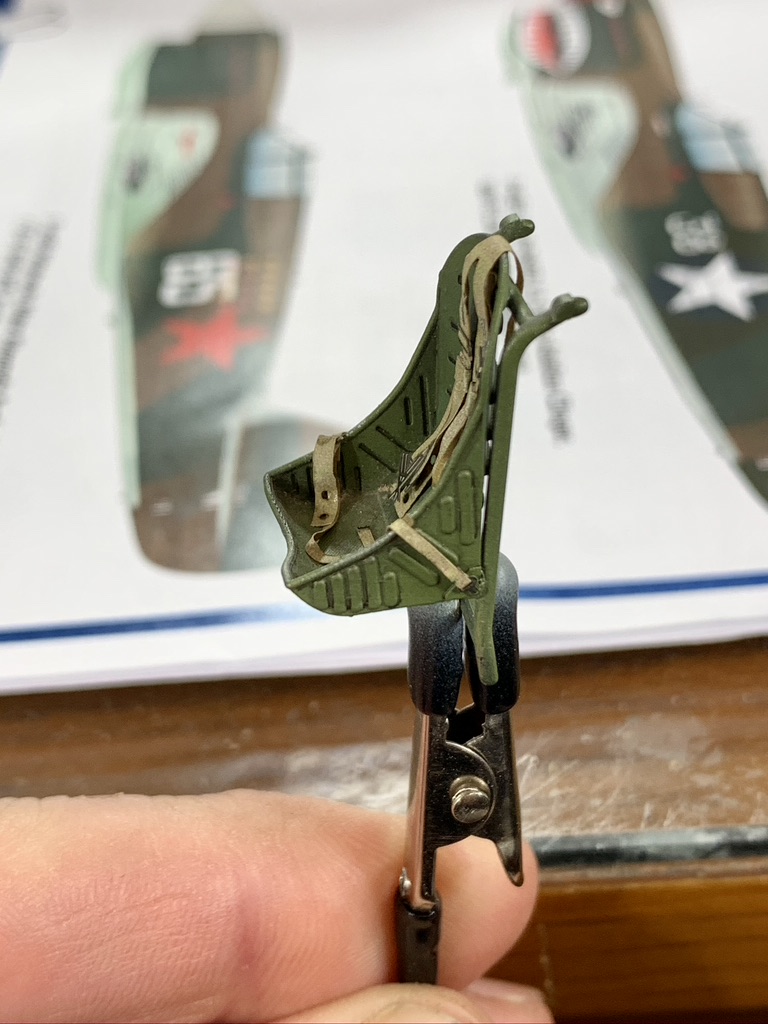
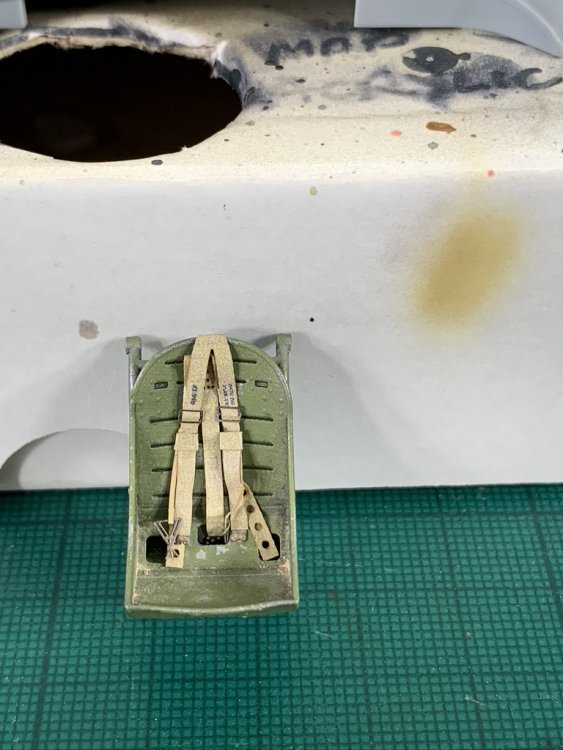
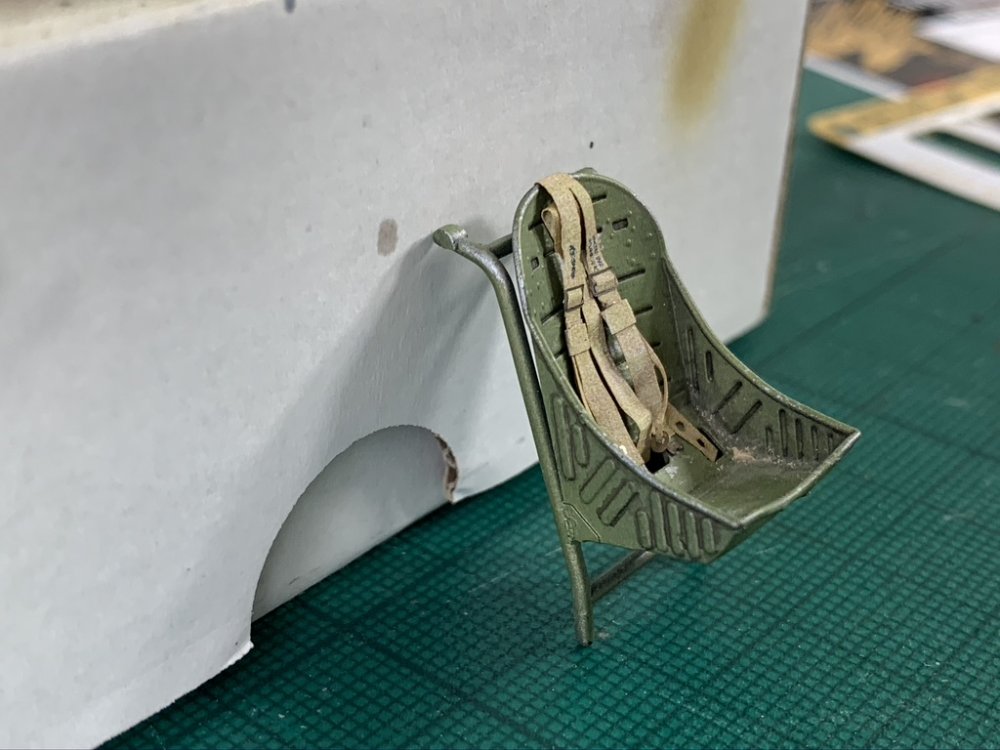
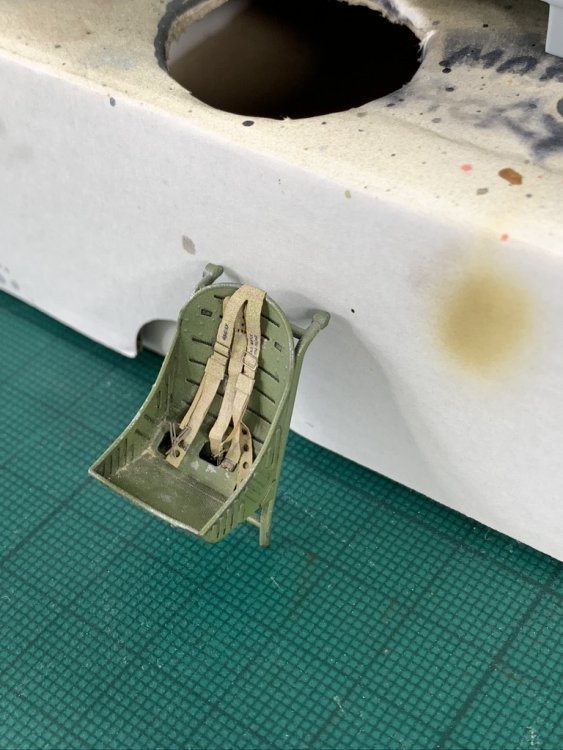
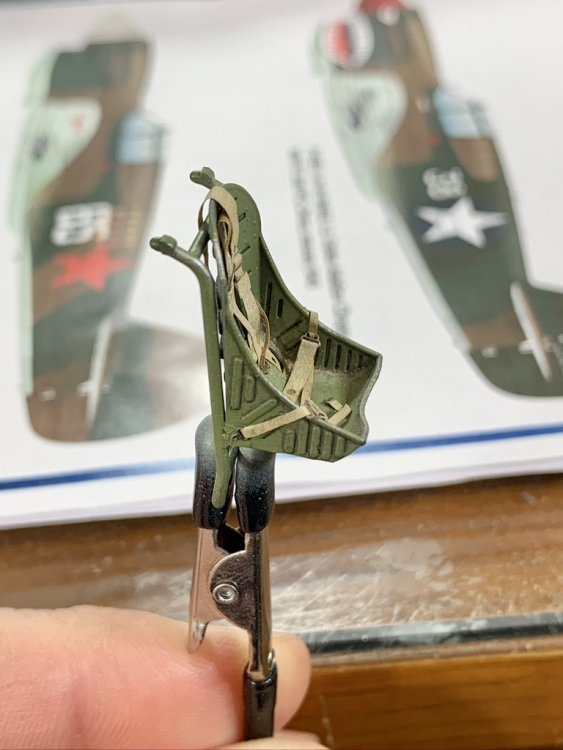
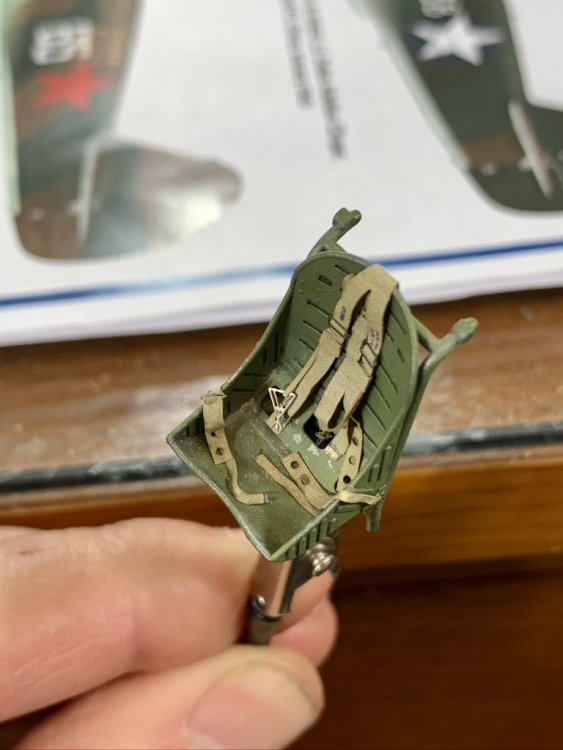
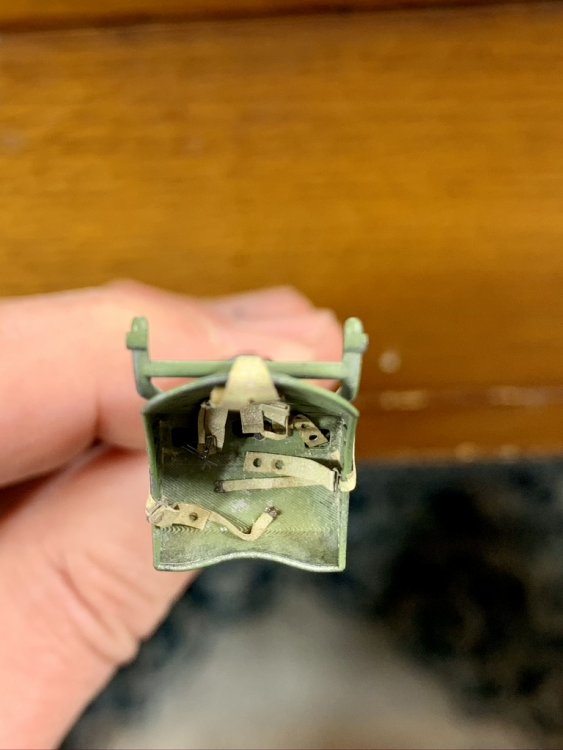
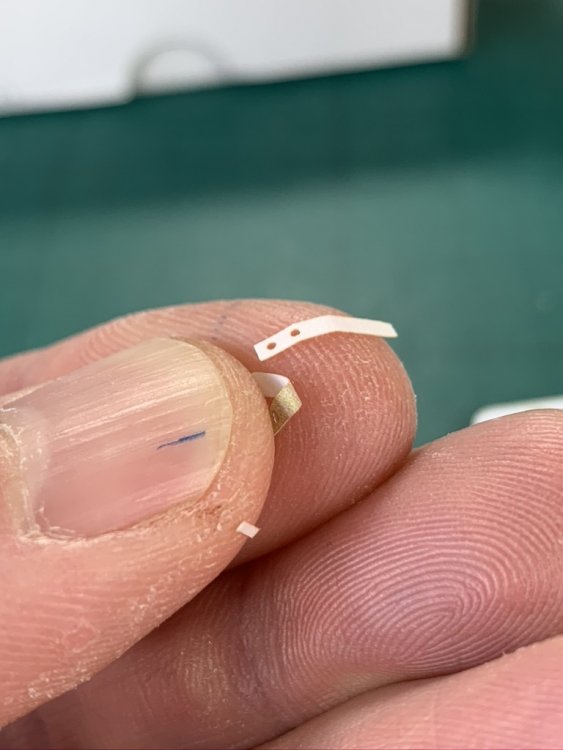
and then attach to the seat being RAF belt it attaches in two places - behind the seat down the back (doesn't matter can't be seen) and also down in one of the holes in bottom of the seat back glued using super glue because it needs some strength - i hadn't crumpled them much so they were quite springy!


-
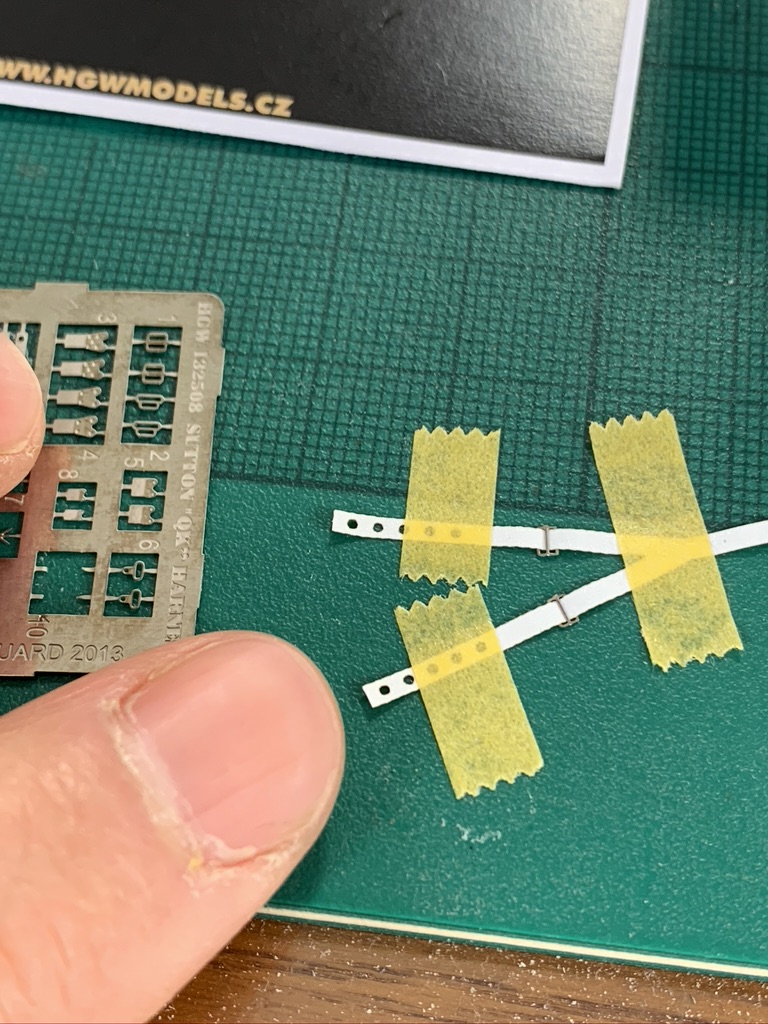
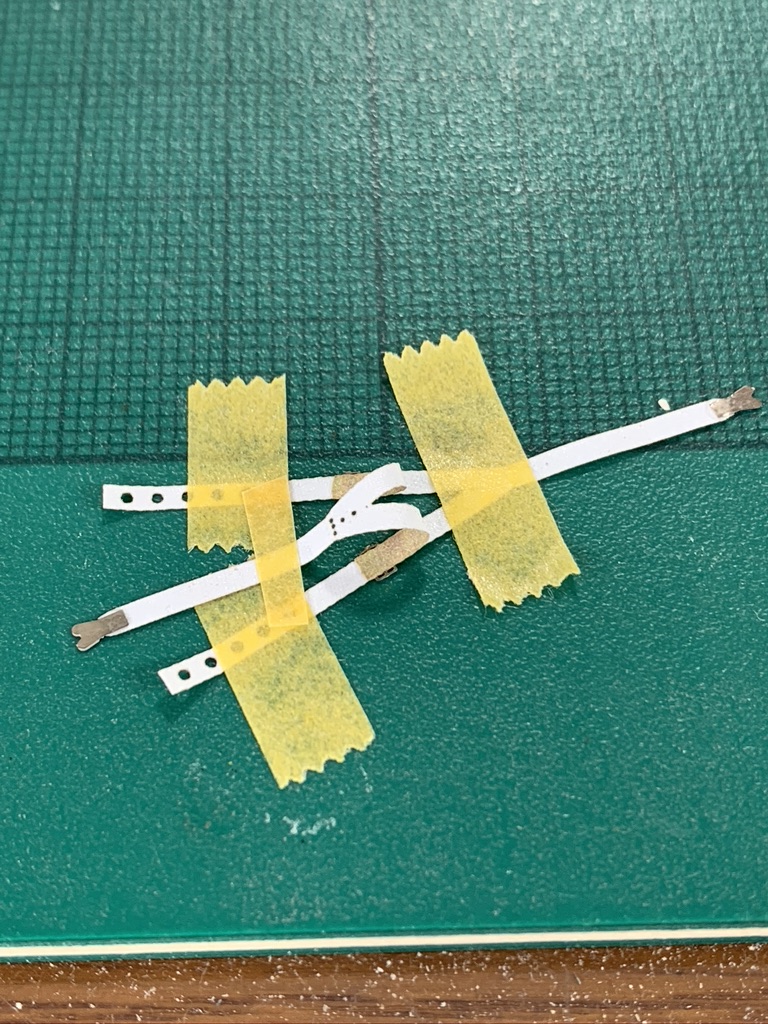
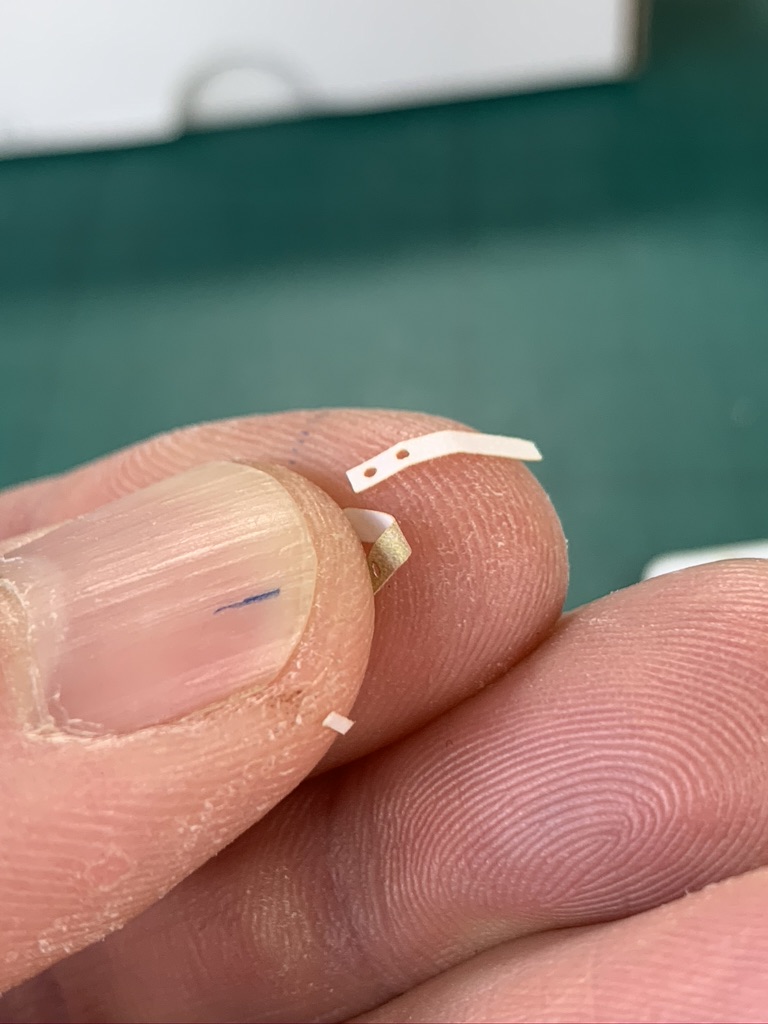
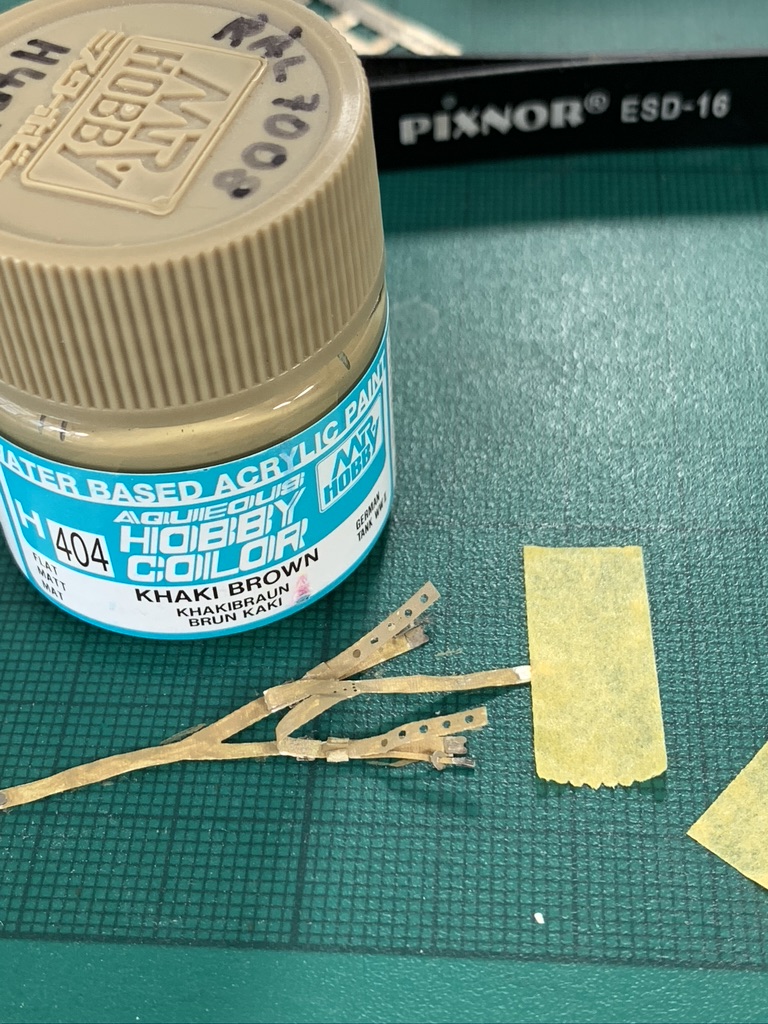
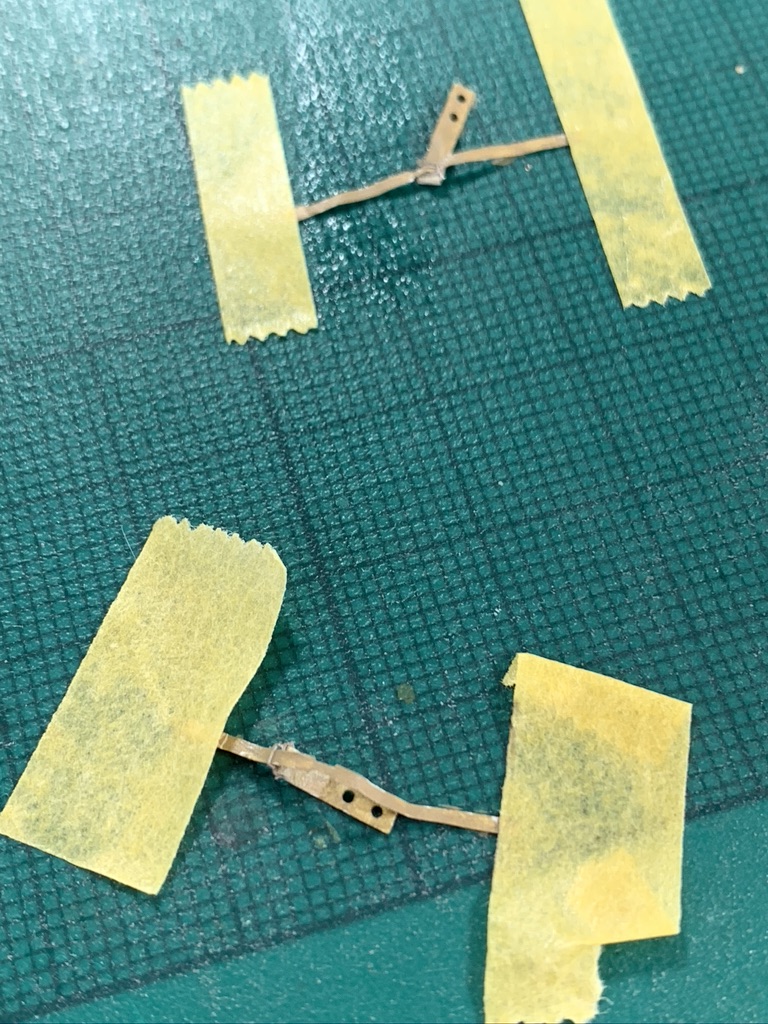
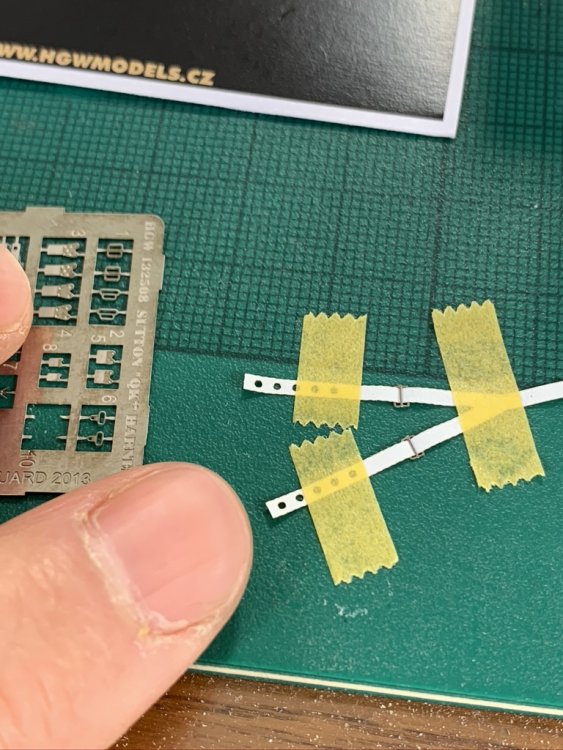
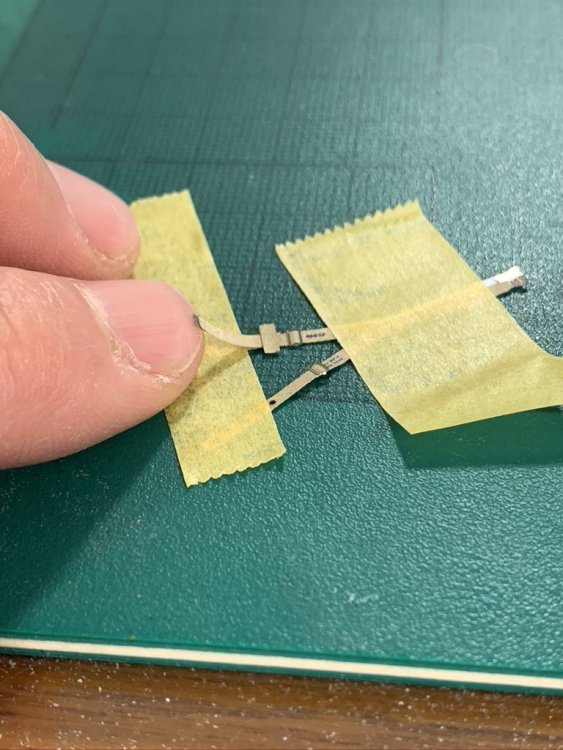
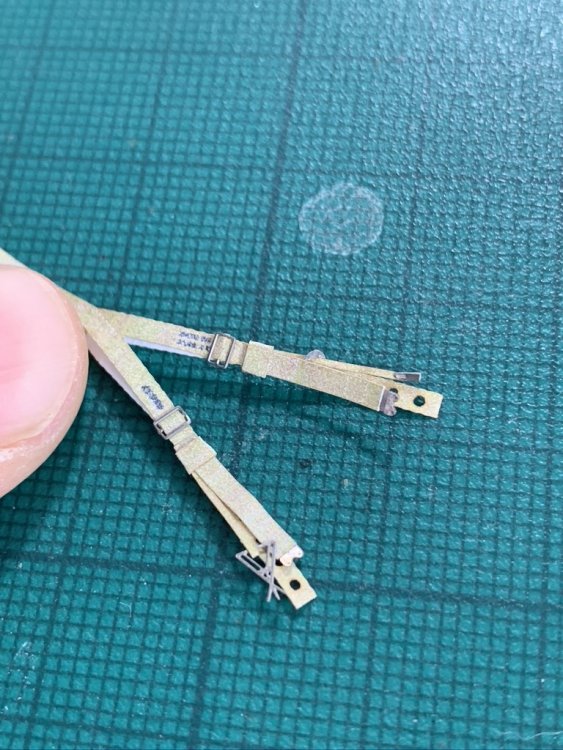
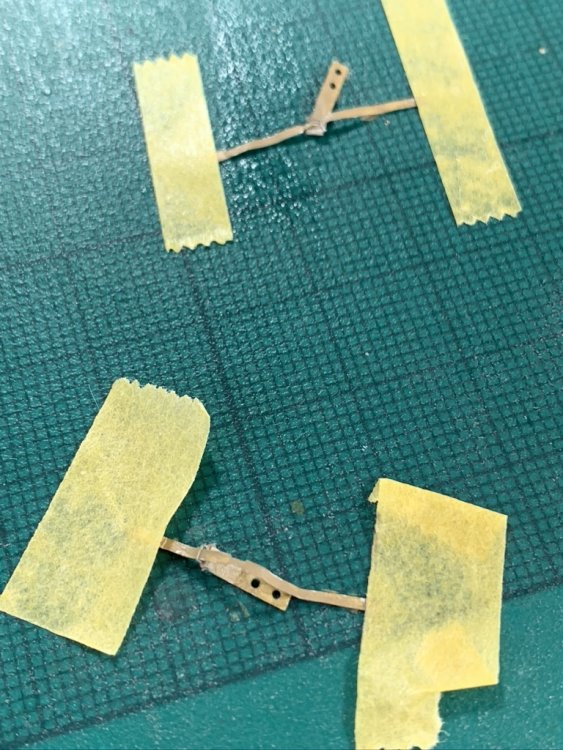
cheers guys HGW belts... remember Sutton harness rather than US belts... i found it helpful to tape it down to the desk to act as a second / third pair of hands also to thread belts where possible before removing the buckle from the PE fret note that the belts are not coloured both sides which is a shame because half the beauty of these things is being able to drape them which ever way you please - see below white back showing... so i painted them a tan / buff colour as a make do...


-
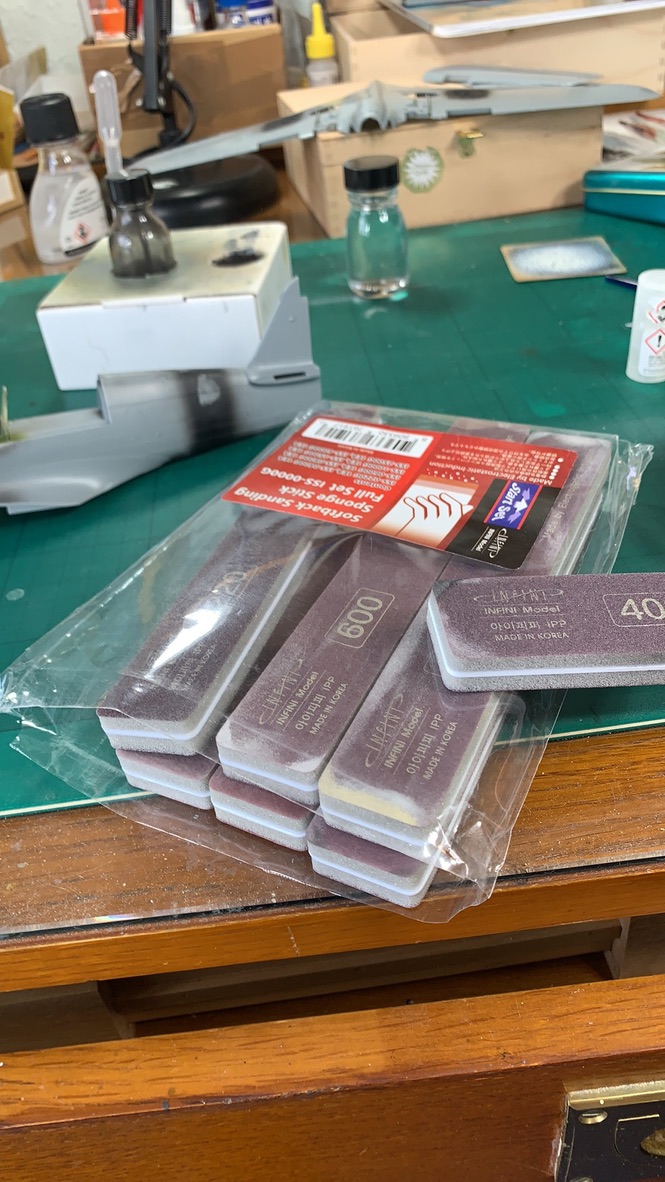
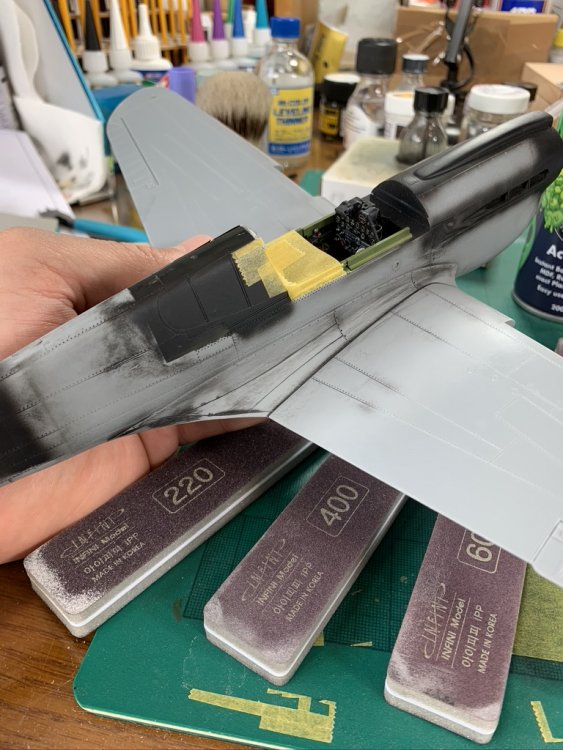
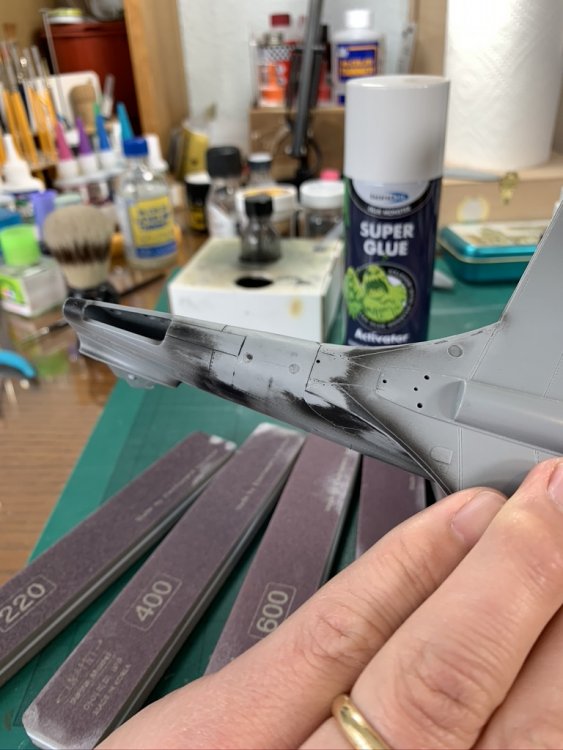
i glued the tail section together then attached to an already assembled fuselage when i made my P-47 (Trumpy) with a similar arrangement with the tail fillet, i glued the individual fillet / tail sections to the fuselage first, *and then* glued the fuselage together - this in retrospect was a much better way to do it it is very hard to get a good join *that you won't see* and not leave yourself with a lot of sanding, filling and rescribing to do ask me how i know this is just one of many attempts at fill / sand / spot prime / repeat... the best sanding stuff i have ever used - Infini! i have their big pads as well which you can snip up and use in between tweezers to sand even the tiniest nooks and crannies! (pic later) and so for weeks i had something like this... HGW belts up next - i'll try to post later today if i have time cheers Nick
-
radiator - i had some Braz or something resin piece and also Eduard PE grills in the end i chose the simplest option re construction of using the kit parts some masking, glossing and dark wash and it looks pretty reasonable
-
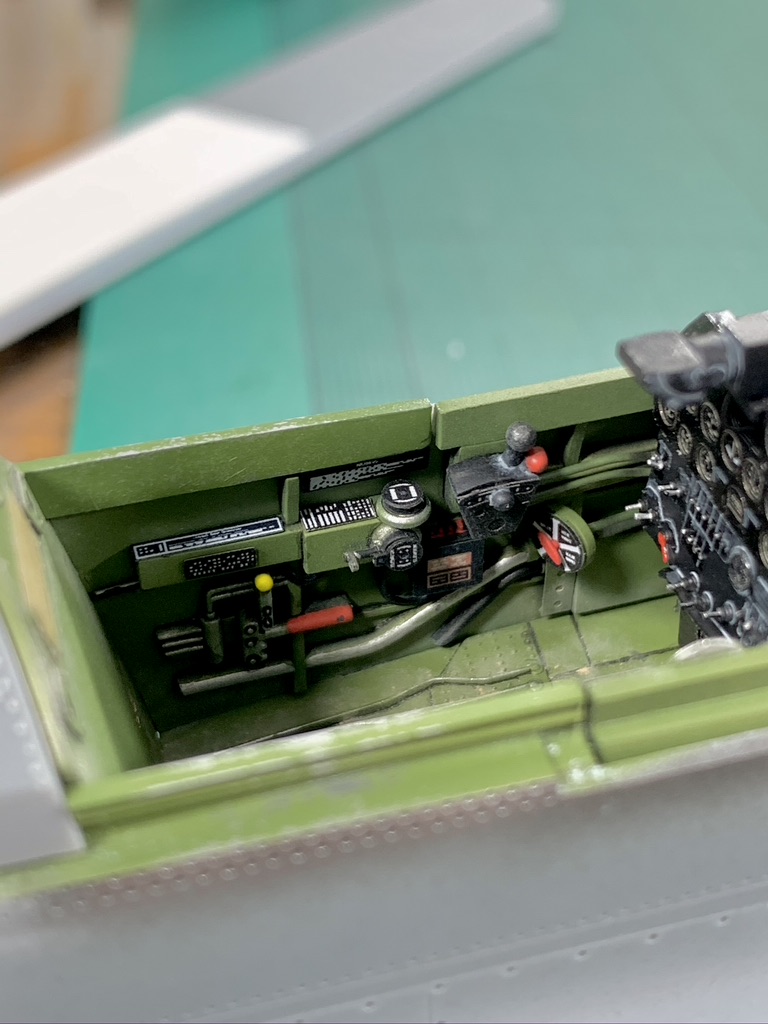
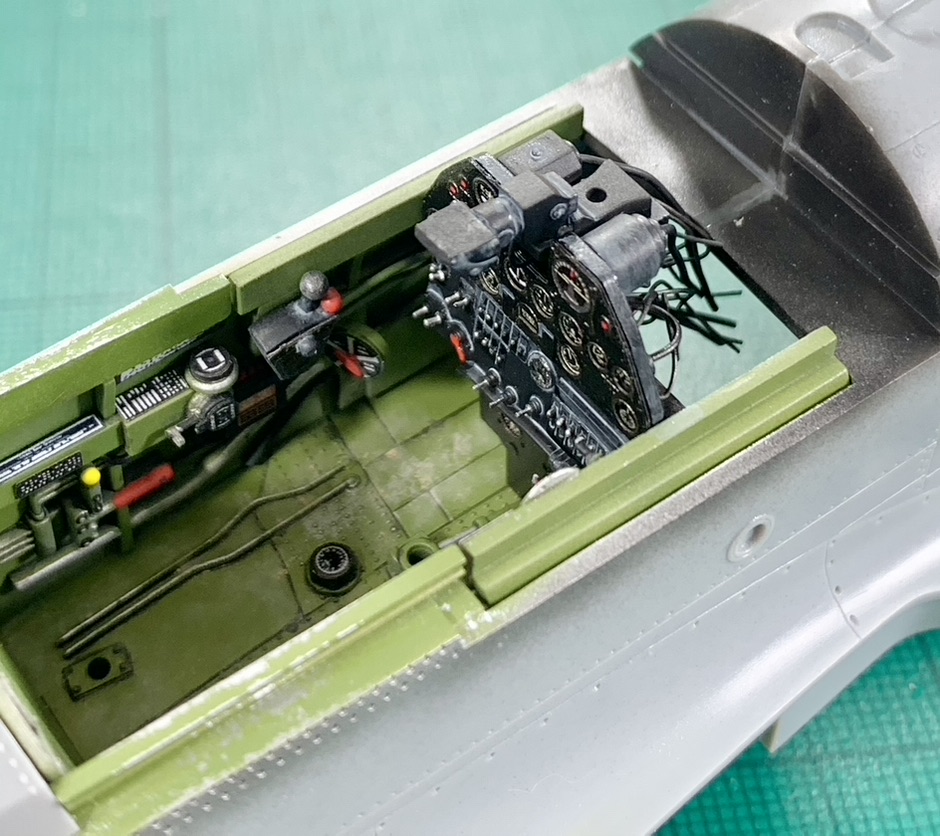
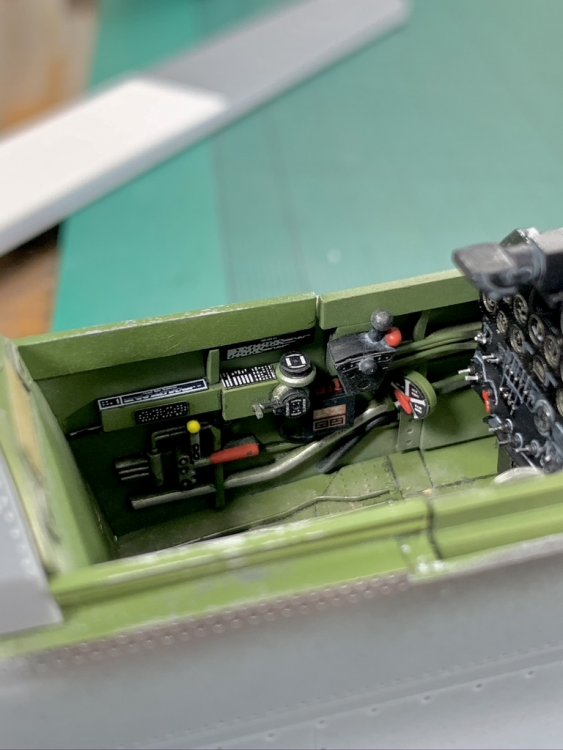
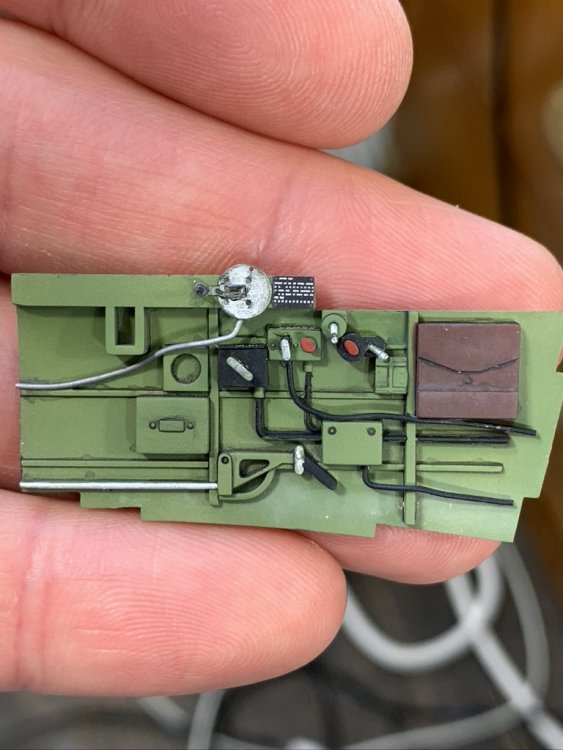
a few more cockpit pics... i was very pleased with the switches did some hairspray chipping on legdes as well...


-
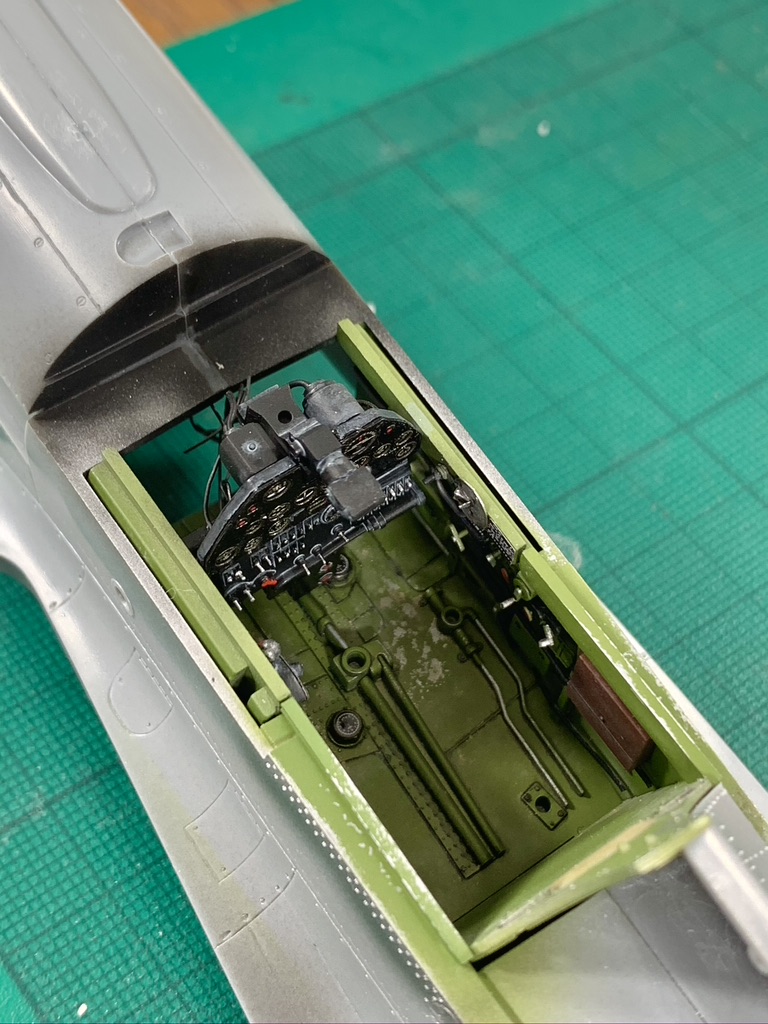
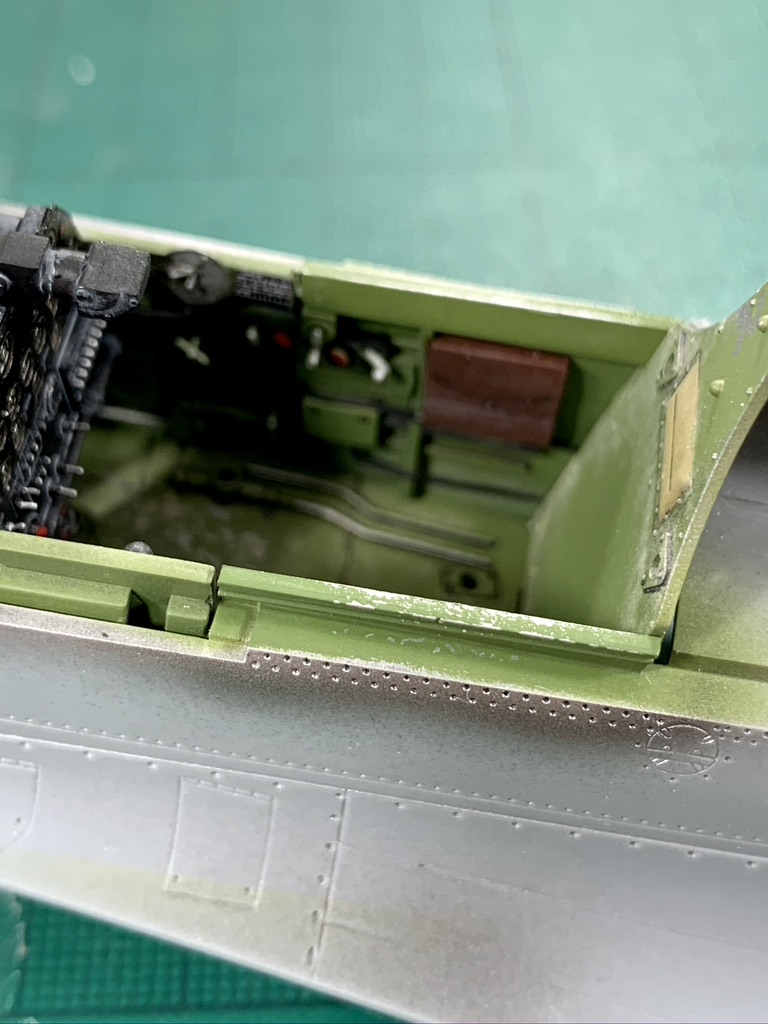
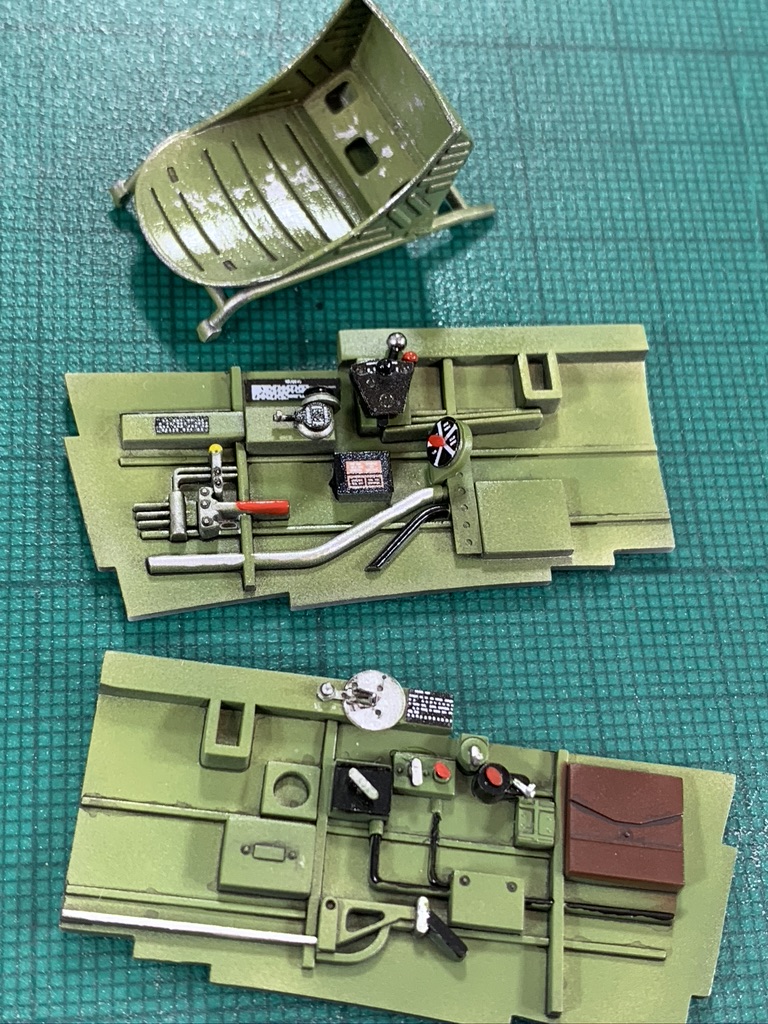
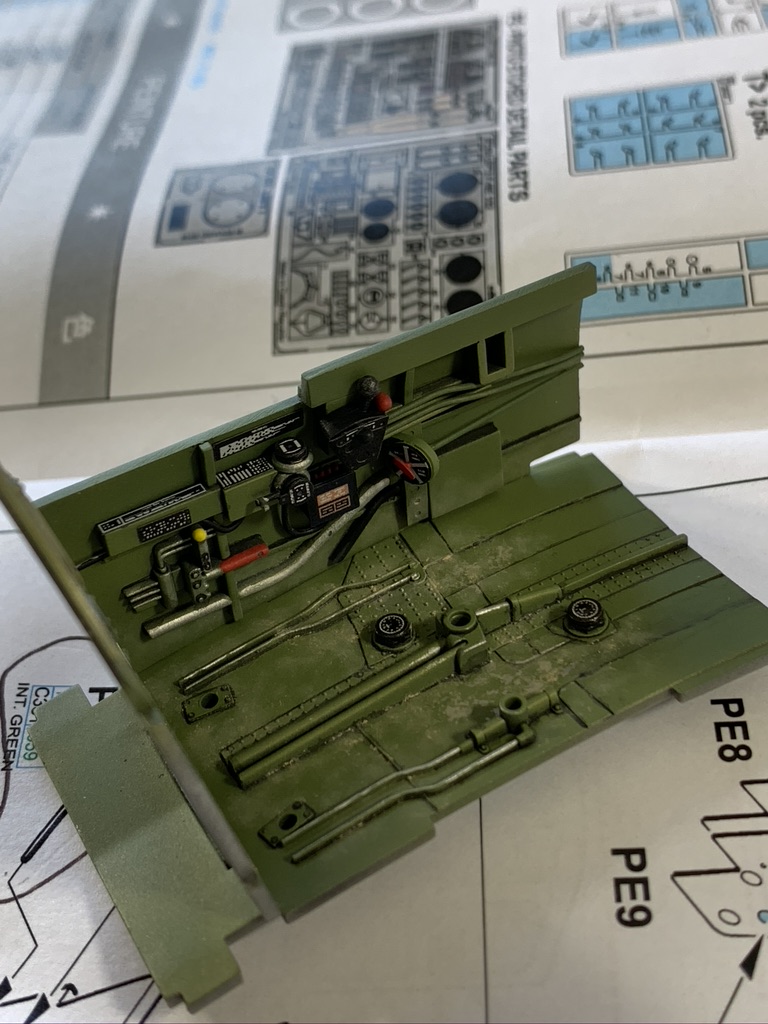
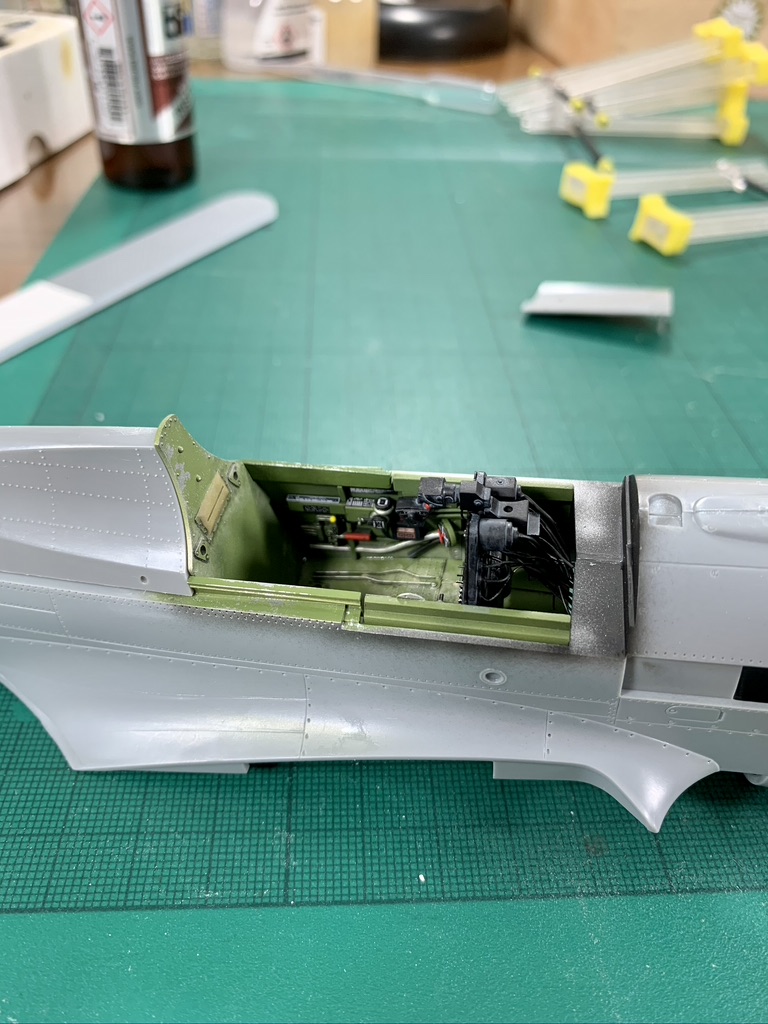
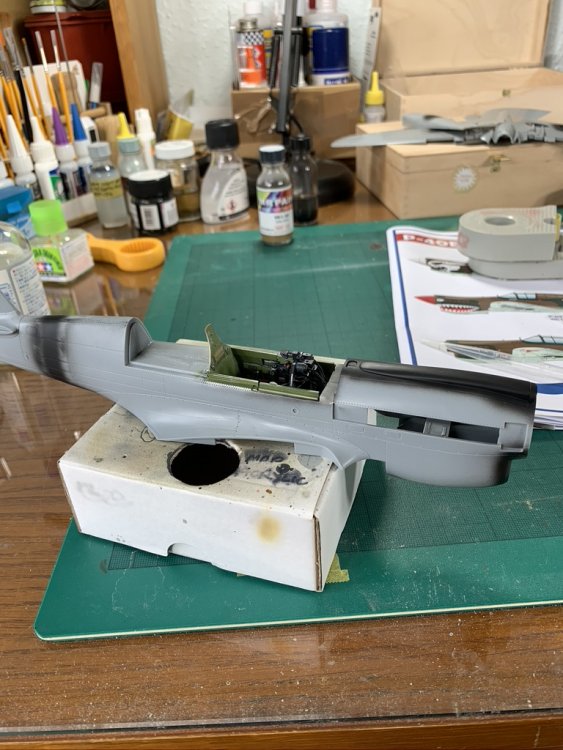
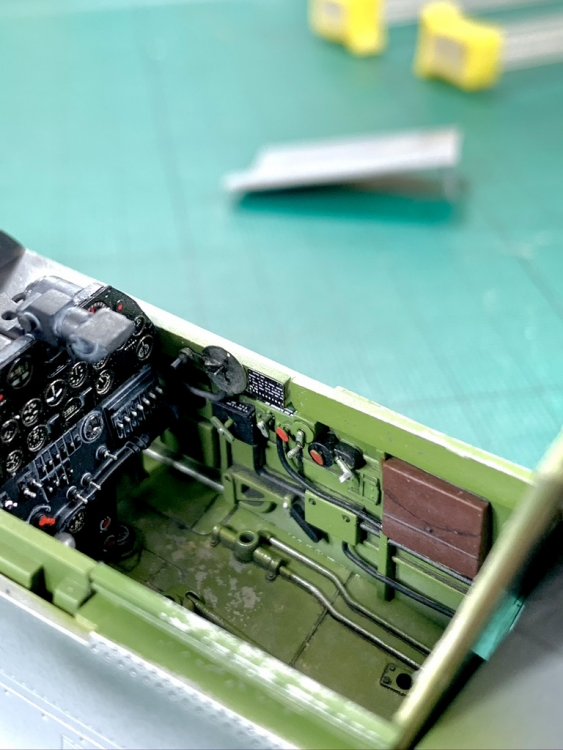
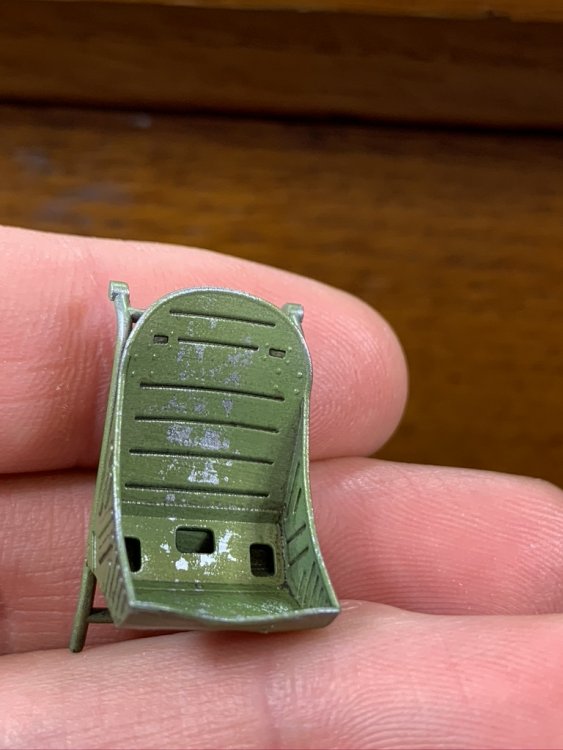
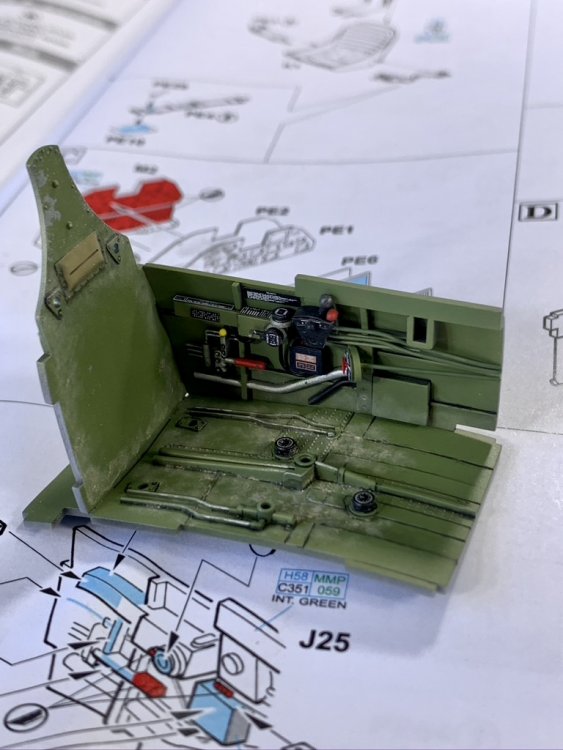
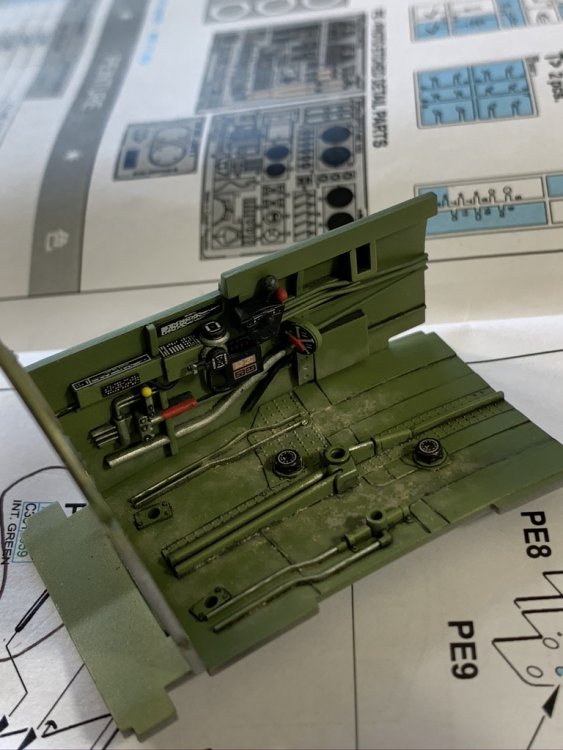
cockpit: seat was 3D printed using file from SMCG Facebook group - Will Pattison - and 3D printing from TimC over here in UK hairspray chipping on seat yahu instrument panel anyz cockpit switches a few placards HGW belts floor is hairspray chipped and weathered with oils and also a panel line wash there were only one or 2 pipes added with lead wire or styrene rod - a shame no-one makes a decent resin pit for the kit some dry fit and realised the cockpit does not need to be glued in to fuselage - a small bit of play but it helped later on when putting everything else together


-
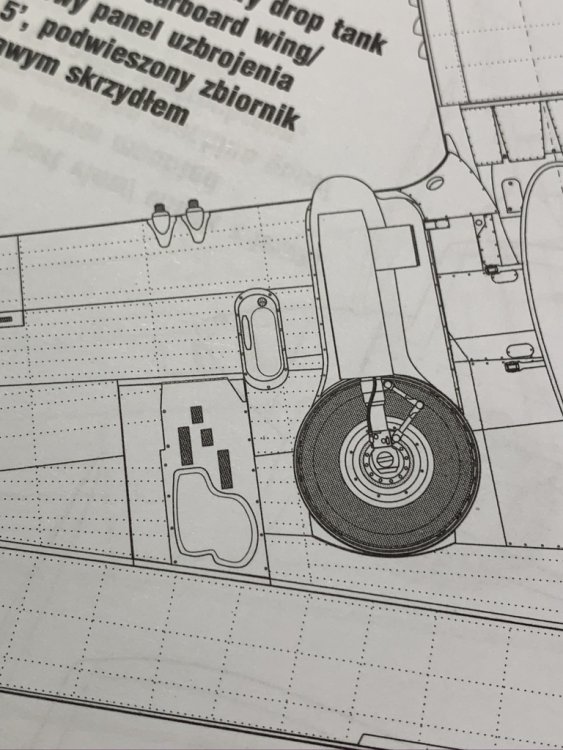
4 gun version should look like this underneath i decided to fill the holes, but not rescribe the panel line it was an ongoing dog show really if doing it again i would probably use sprue goo to fill the holes this is really how *not to* do it! there was a lot more touching up etc after the shot below, but if i am honest only minimal improvement - at this stage i was considering ditching the whole project
-
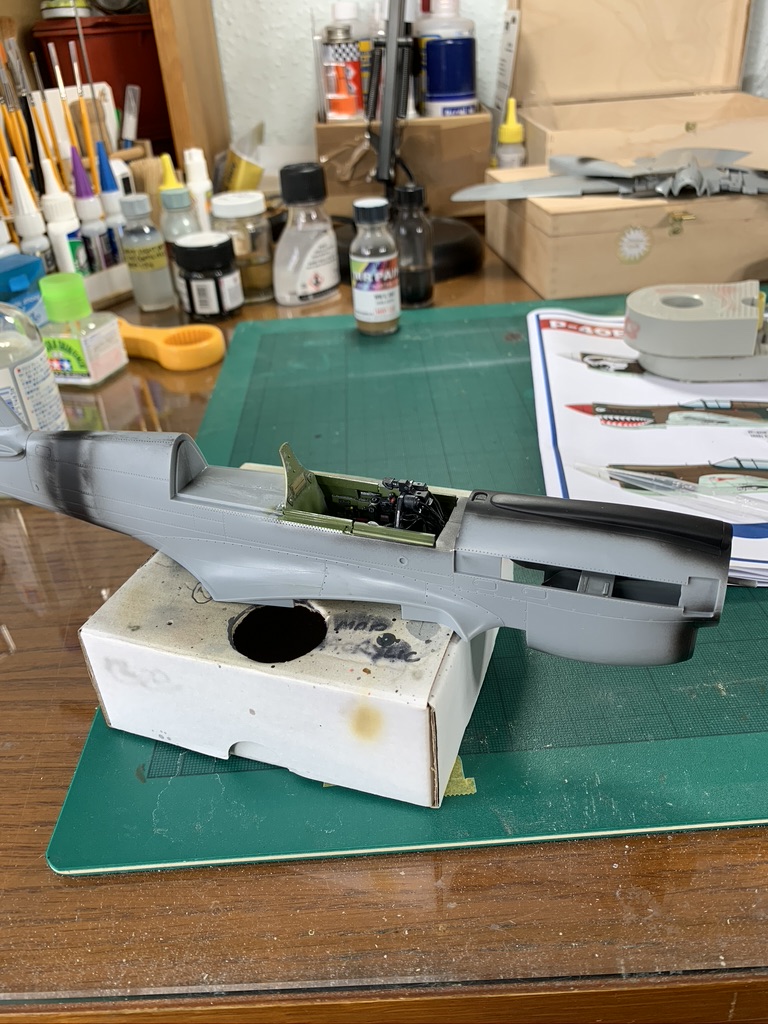
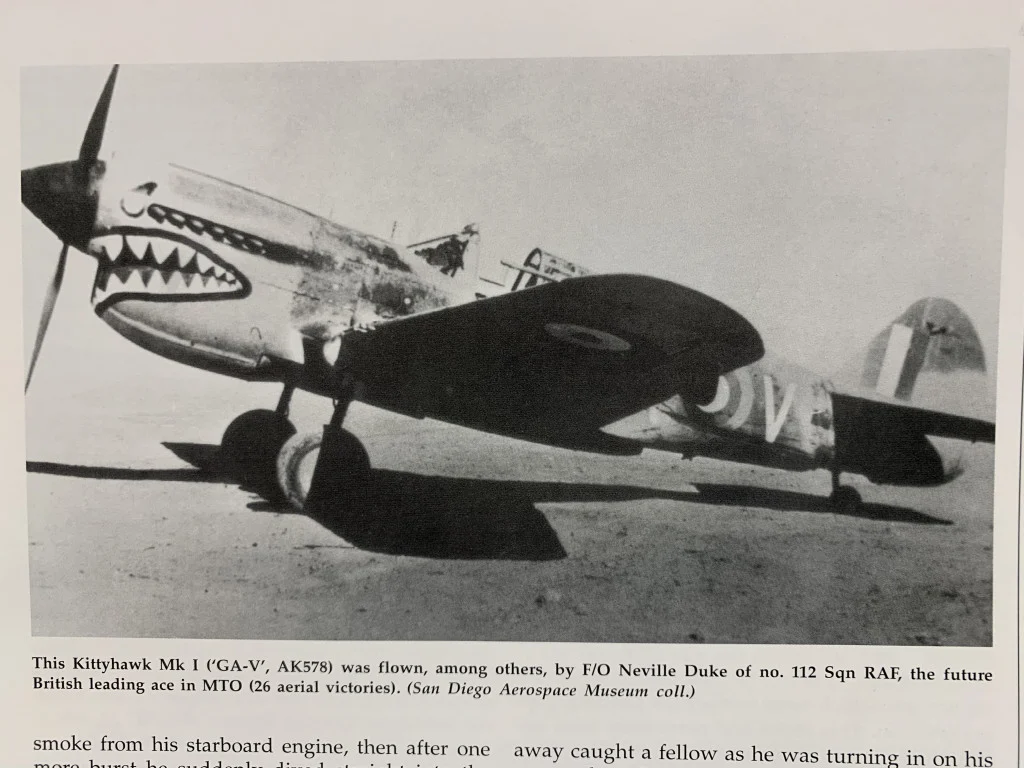
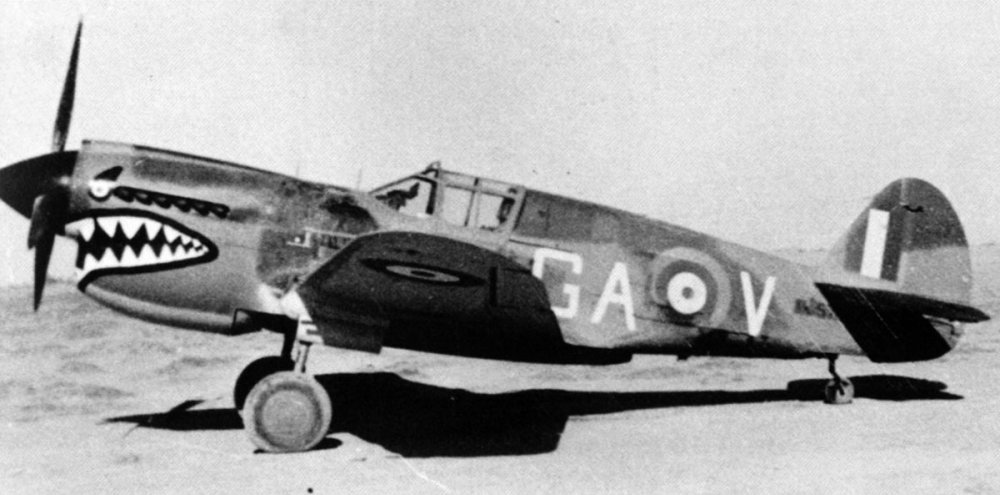
Hasegawa 1/32 kit Neville Duke went to my school so this my tribute build to him for those not familiar, he was the highest scoring Allied ace of North Africa and the Med he was also quite a 'chap' - he kept a diary which is like a cross between a comic book and Lord Flashheart in Blackadder - well worth a read: Neville Duke Diaries to be converted to 4 gun 'early' model - not a great pics but enough to go on thing to note: - to be converted to 4 gun 'early' model - middlestone and dark earth top side, with serial kept over small dark green patch - dark green behind rear window - US attempt at Sky underside - discussed here on Hyperscale: AK578 discussion etc - would almost certainly have had canvas covers in wheel wells, but CMK parts are about 1-2mm too small so beyond me to get them to look right - yellow strips on wing leading edges - would have Sutton seatbelt i believe - I have Barracuda decals but may not use (they fail to identify 4 guns, sky undersides etc) - custom masks will probably be used I am currently half way through but will post some WIP pics which i have taken along the way cheers, Nick

-
Yes! finally!
-
yup unless i missed something? i was hoping against all hope that Tamiya would spring a surprise and release a new 1/32 WWII fighter... hopes dashed
-
wow i just scrolled through what felt like 500 pictures of pure 'meh' absolutely nothing new in 1/32 see you next year
-
What is on your bench right now ? Share a picture :)
nmayhew replied to Martinnfb's topic in Modelling Discussion
Hassy P-40 pleased with the wing roots but f*ck me it's tedious clean up on the tail section and behind the canopy (panel lines which should not be there) Won't be doing another one of these in a looooong while

-
Fw190A-8 3/JG1 crash Vreeland
nmayhew replied to JeroenPeters's topic in LSM 1/35 and Larger Work In Progress
Super cool project have you contacted HGW about their ‘short shot’ masks? -
1/32 Focke Wulf D9 // Wrnr 600150
nmayhew replied to Rowdy's topic in LSM 1/35 and Larger Work In Progress
impressive!