

Trigger
-
Posts
211 -
Joined
-
Last visited
Content Type
Profiles
Forums
Events
Gallery
Everything posted by Trigger
-
Israeli Mirage III C with Atar9C
Trigger replied to Kaireckstadt's topic in LSM 1/35 and Larger Work In Progress
Wunderbar! Turned out magnificent Kai, all the effort it has taken is now rewarded big time! Nice and smooth paint job, it really looks like the real deal. I can't wait to see this bird all fueled up and ready to take off, Frank -
Hello Peter, i was on a vacation, I will now continue with the build and give you guy's an update soon, so hang in there, Frank
-
Hello Kai, I had a little break (vacation) so I will continue with the build and give you guy's an update, so, hang in there, Frank
-
Israeli Mirage III C with Atar9C
Trigger replied to Kaireckstadt's topic in LSM 1/35 and Larger Work In Progress
Looking good Kai!, I use the same method as you when painting with blue tack and taping off the area that you already painted, it is indeed a lot of work, but it works out in the end, I also see people who do this freehand, but I think this way is better, you don't get any overspray, and when you carefully make consistent rolls with blue tack, the result is what you have right now, a nice transition in the colors just as on the real aircraft. Looking forward to the next update, Frank -
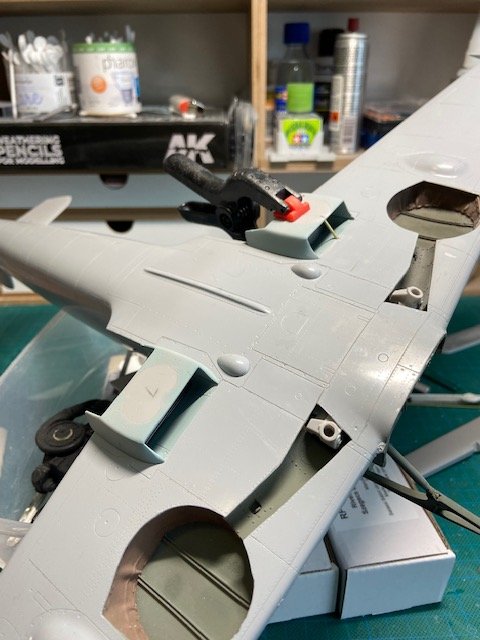
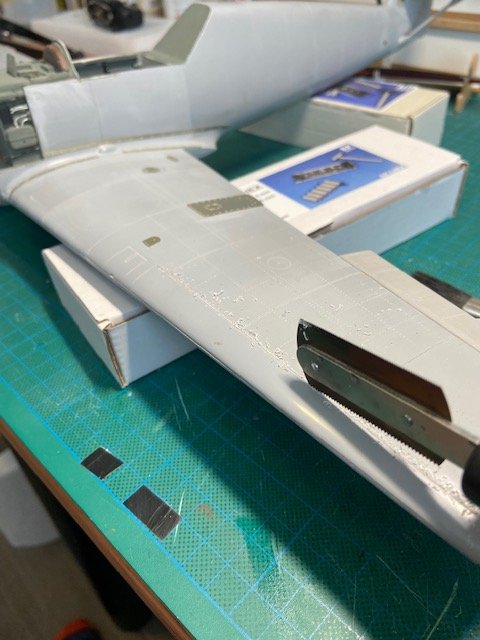
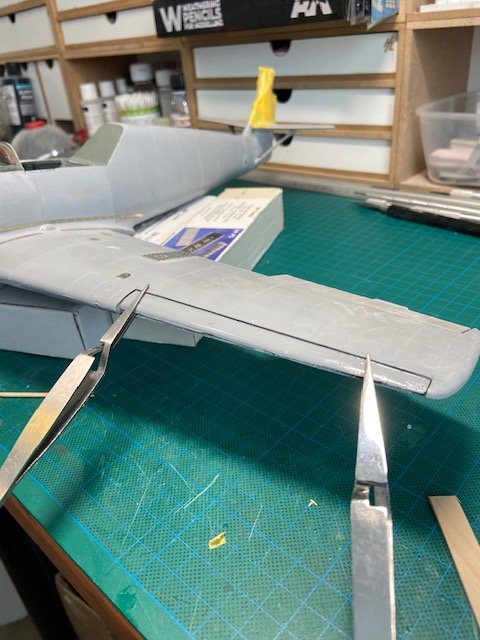
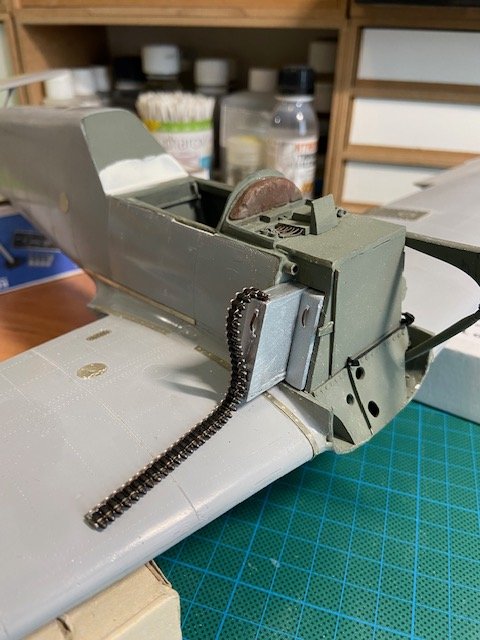
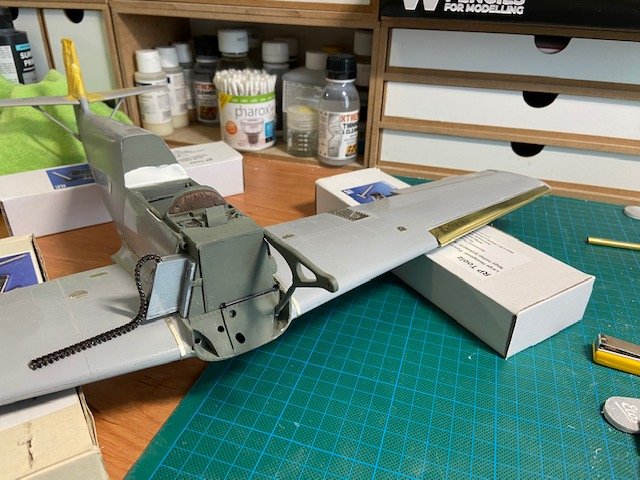
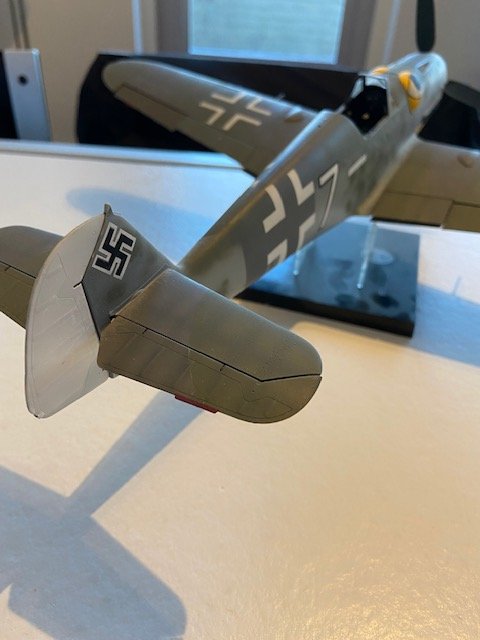
Hello Guys, here's another update on the 109, Started on the underwing coolers, sprayed the coolers in aluminum, and gave them a black wash, Sprayed the underside of the wing where the coolers are situated in light blue and placed the cooler housings, Next thing was to place the ailerons The flaps are only test fitted here glued the pe hinges in place on the ailerons Installed some pe on the tail, and made the hole where the airplane can be lifted, and inserted a copper tube, Some more pe on the wings, Then it was time to cut the other wing for the new slat, the cut out piece was used to accept the new build slat, Had to fill a small gap on the underside of the wing, now to do something else besides butchering the aircraft, I started working on the ammo boxes for the MG's, I intend to make some sort of diorama where the 109 is being serviced and reloaded, so all the panels will be off and the engine visible , so the next pictures show what I intend to do Next picture with the new slat, Also started on the under cowling, cut out the piece where the oil cooler is situated and installed the exhaust cover plates. Not much left to attach on the airframe, it's going to be a combination of the engine struts and a very small bit of copper plating to get the cowling in the right place, but I will get there in the end, so that is it for now, until the next update, Frank


-
Israeli Mirage III C with Atar9C
Trigger replied to Kaireckstadt's topic in LSM 1/35 and Larger Work In Progress
Wow Kai, as Peter said, nice smooth finish on the sand color, and you are right, the exhaust now really stands out with the sand color on, how thin did you make your paint?. I'm curious about the next phase with the green, good work so far, the extra mile you took in preparing the Mirage now pays of, Frank -
Israeli Mirage III C with Atar9C
Trigger replied to Kaireckstadt's topic in LSM 1/35 and Larger Work In Progress
Hello Kai, Looking good, and the panel lines are also still visible, luckily yellow is a very transparant color, so that helps. Masking the weapons pylons for the black color will be a bit of a challenge I guess, looking forward to the next update, Frank -
Gottfreid Weiroster Bf 109G6 R6 Revell 1/32
Trigger replied to GazzaS's topic in LSM 1/35 and Larger Work In Progress
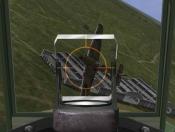
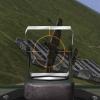
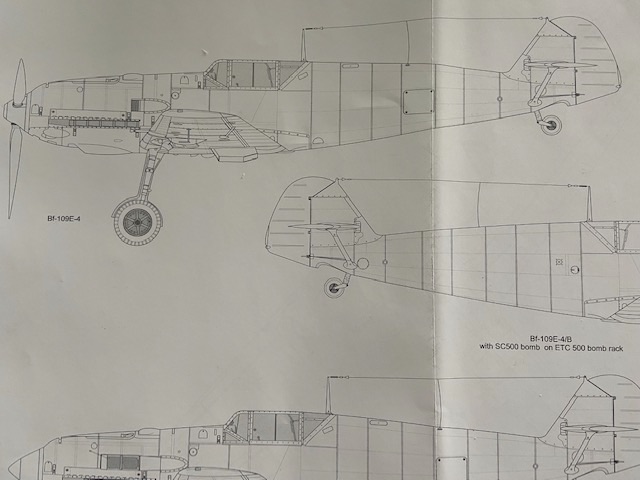
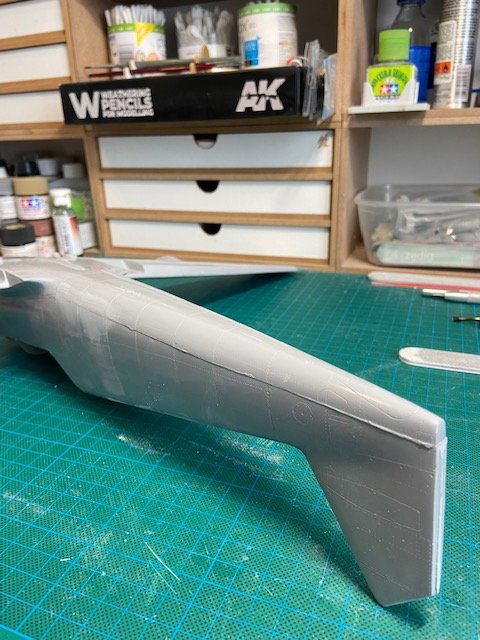
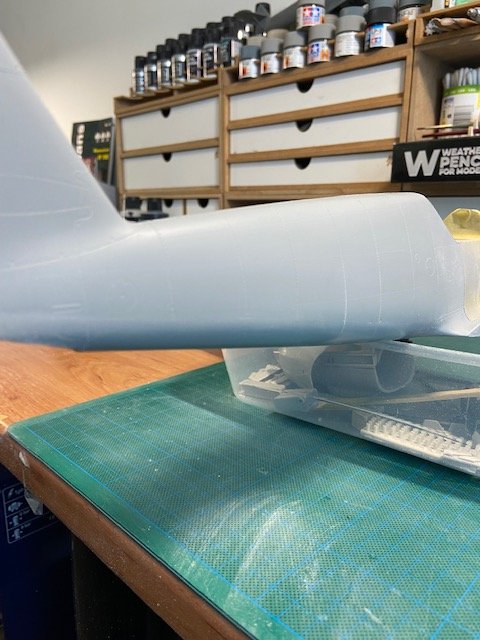
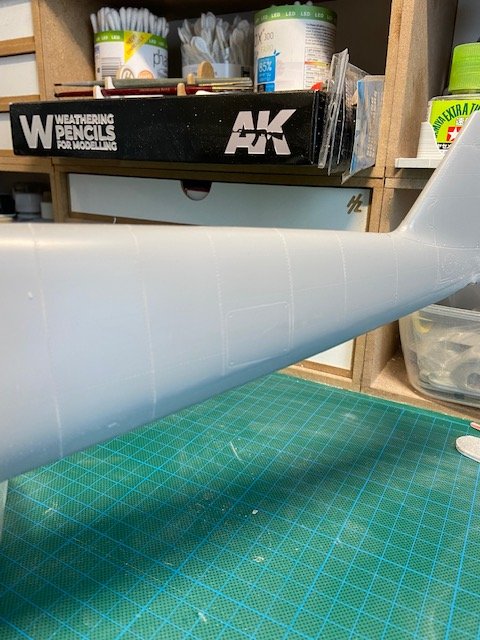
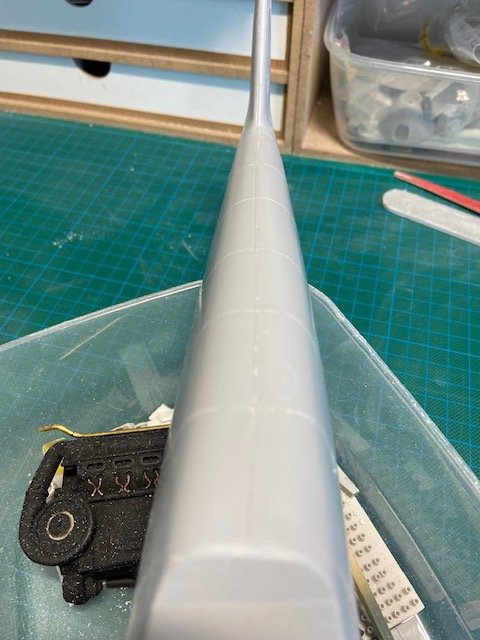
Hi Gazza, it might almost not be so bad as you think, after reading about the subject I immediately checked my own models that I have, and they all have a slight "camel back", so I thought they cannot all be wrong? So I took out the scale drawings that I have from the 109 in 1/32 scale, and placed a ruler over the Spine of the aircraft, and found out that there really is a sort of " camel back" , so here are the photo's, So I think there really should be a bit of a bulge on the spine and the sides, but not to much of course, so I wouldn't crash land the model in the bin yet if I were you, I hope this helps a bit........ Frank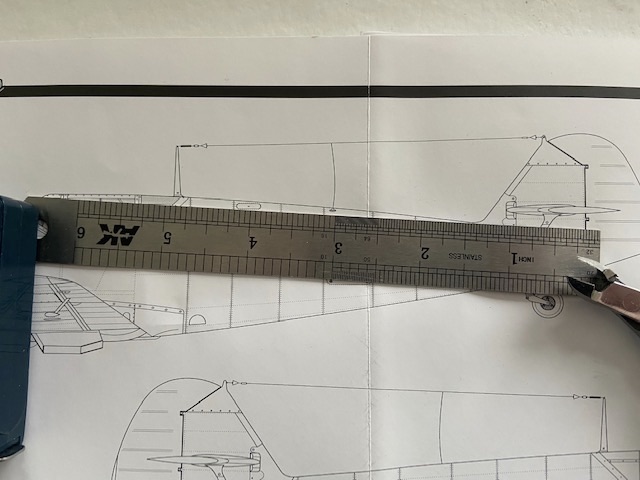

-
Thanks Kai, it's indeed a lot of work, but I couldn't just leave the the slats as they were, still some detailing to do, but I am getting there, next the underwing coolers, when these are done I will move on to the engine again with most of the fuselage work out of the way, Frank
-
Thanks, now the next slat, and then the coolers underneath the wings...... Frank
-
Thanks Harv, more to come so stay tuned..... Frank
-
Thanks Kevin, I'll do my best, I just stopped with the engine because I wanted the bodywork out of the way, I am much to afraid to knock the engine off while handling the model, but when that is all out of the way I will go on with mounting the engine and detailing it, Frank
-
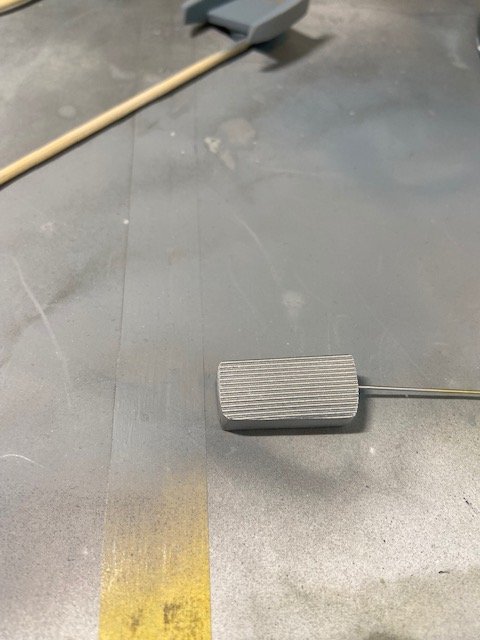
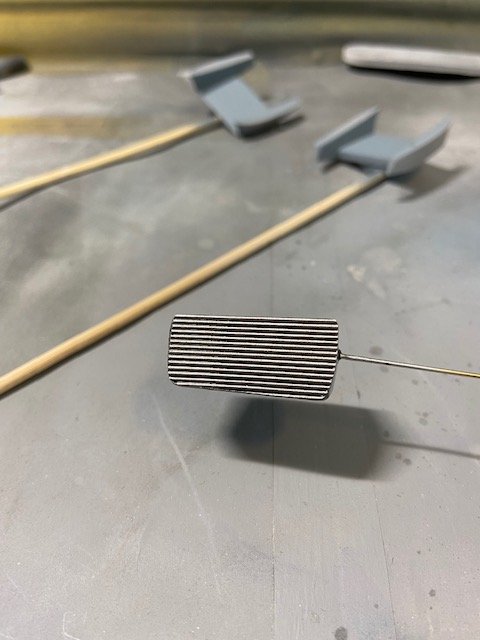
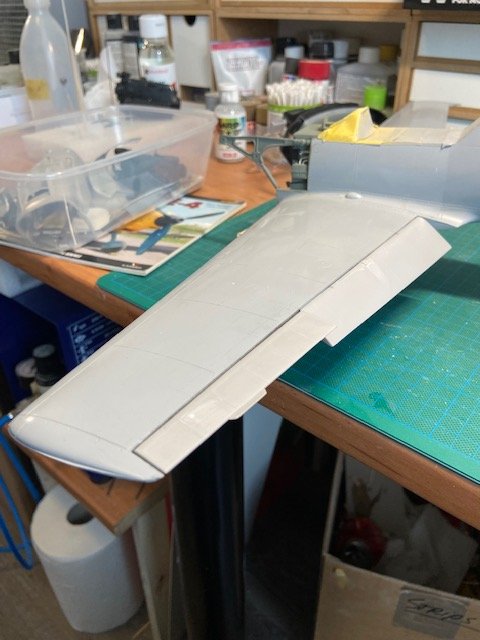
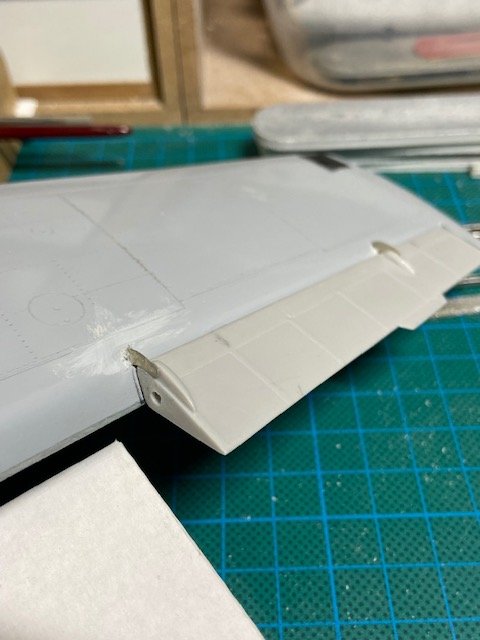
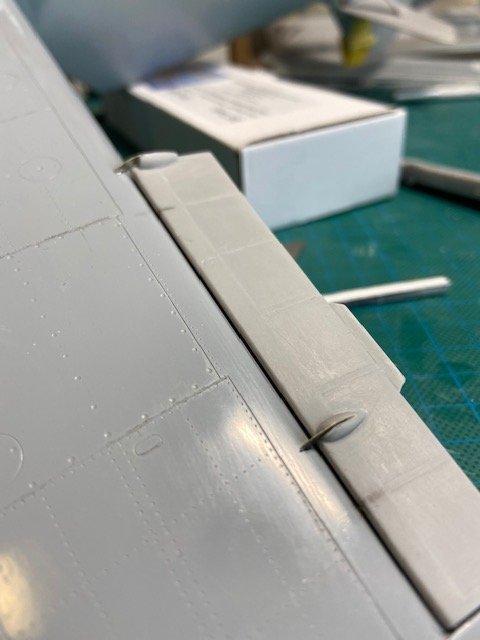
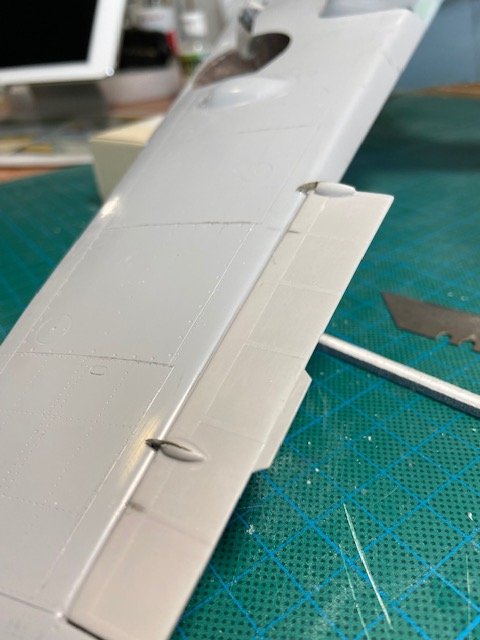
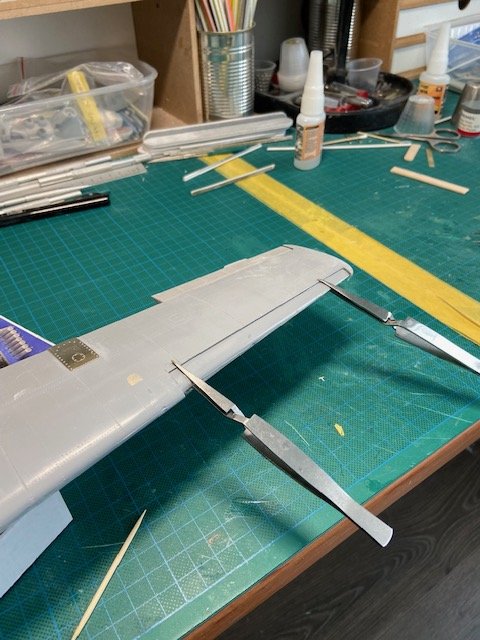
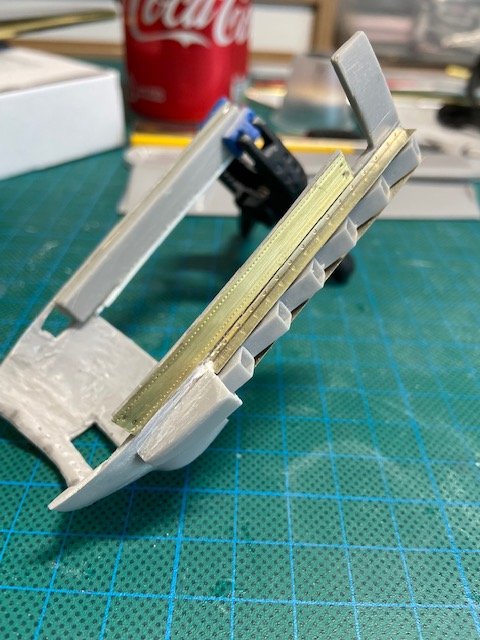
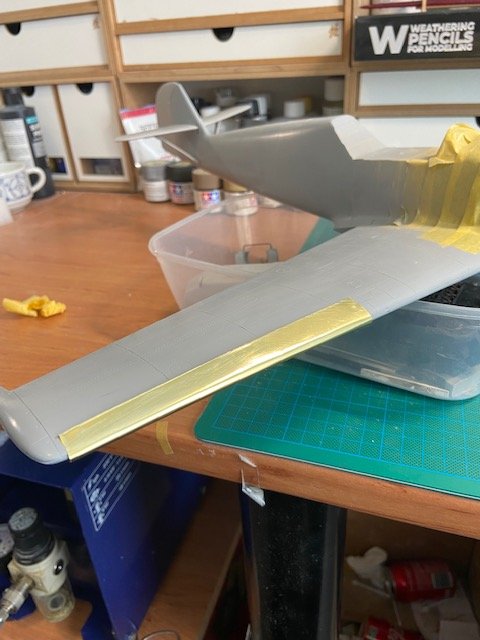
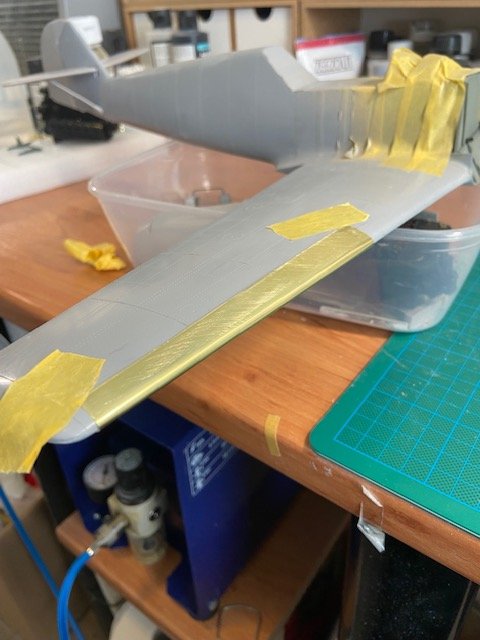
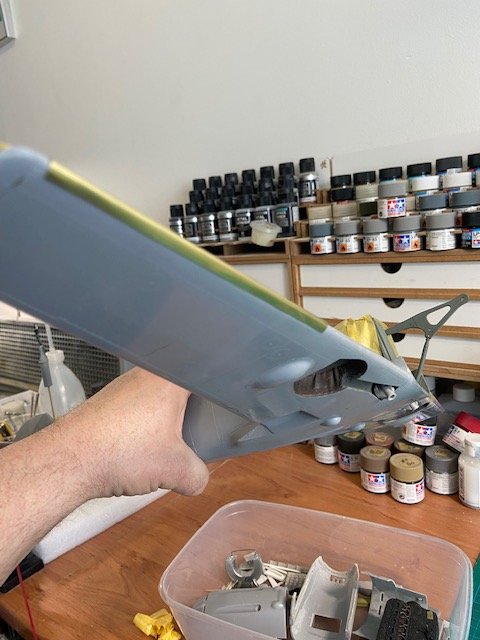
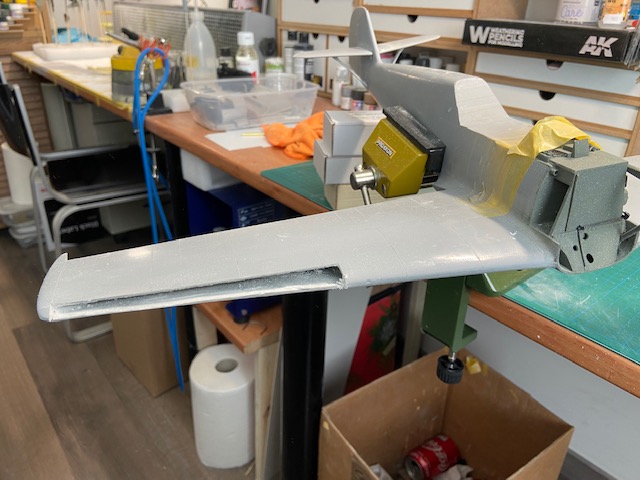
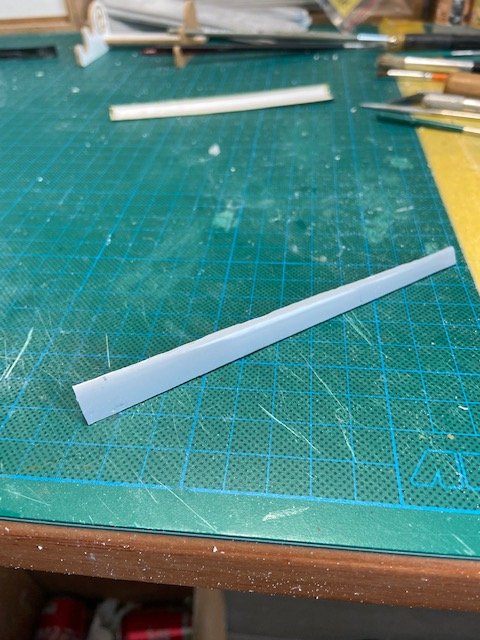
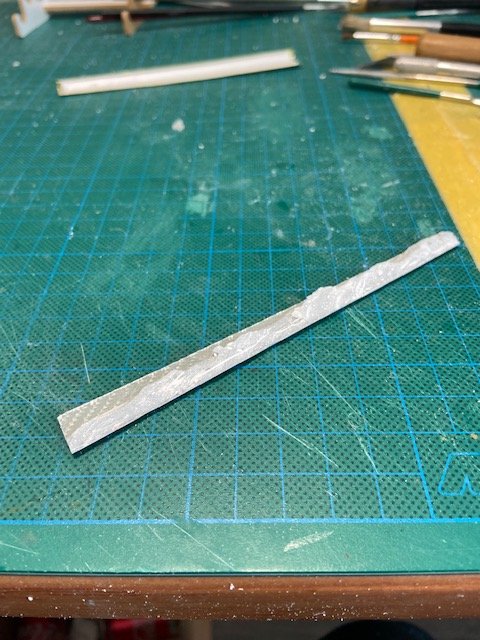
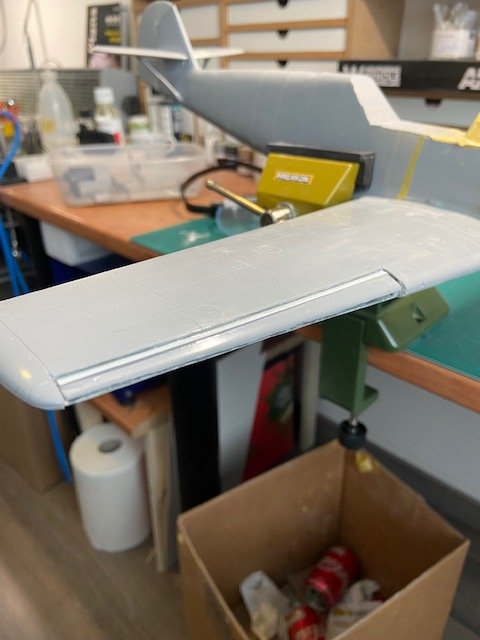
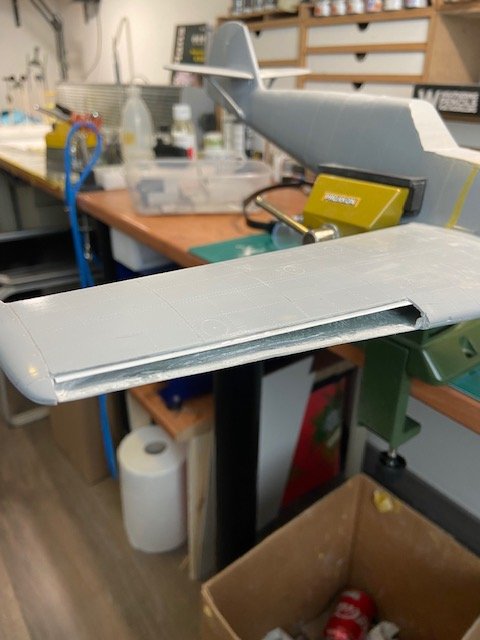
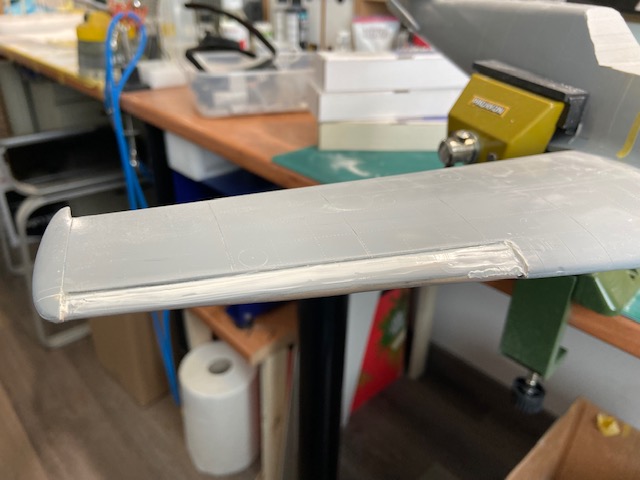
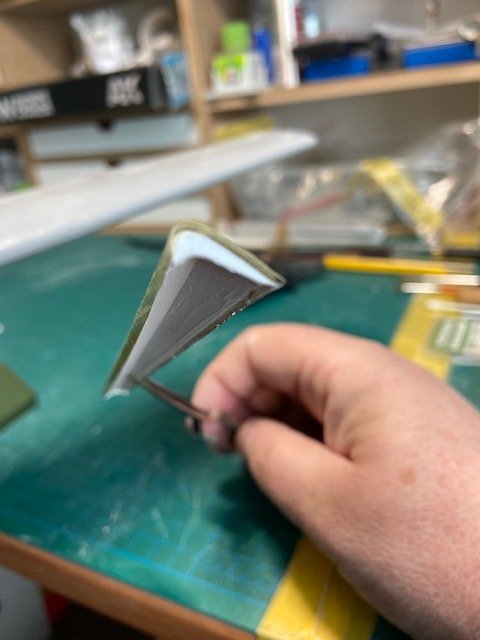
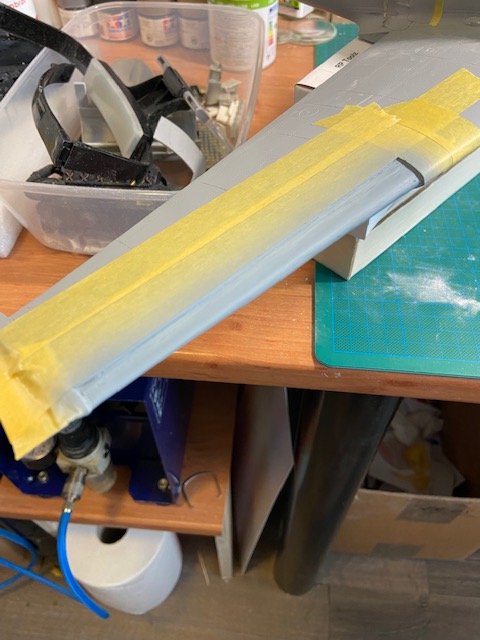
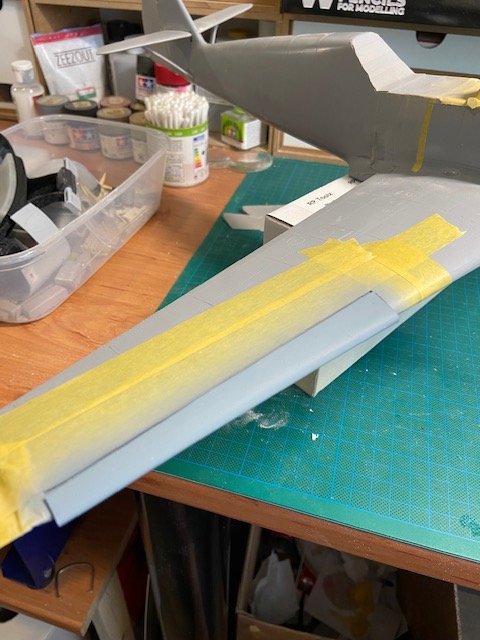
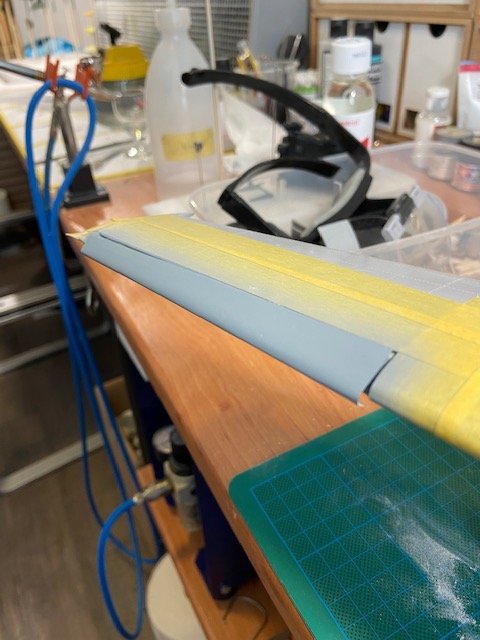
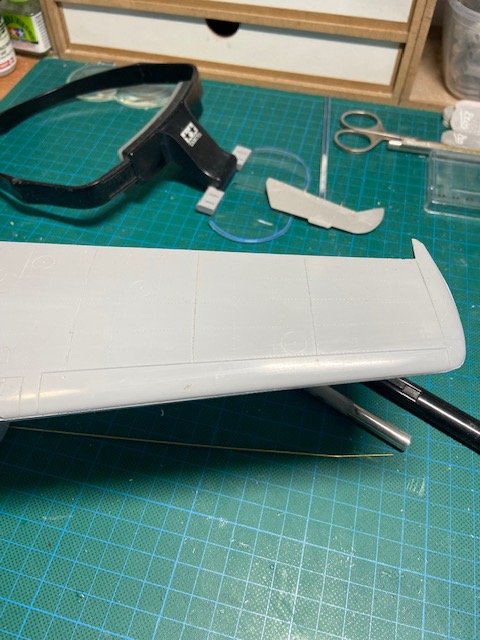
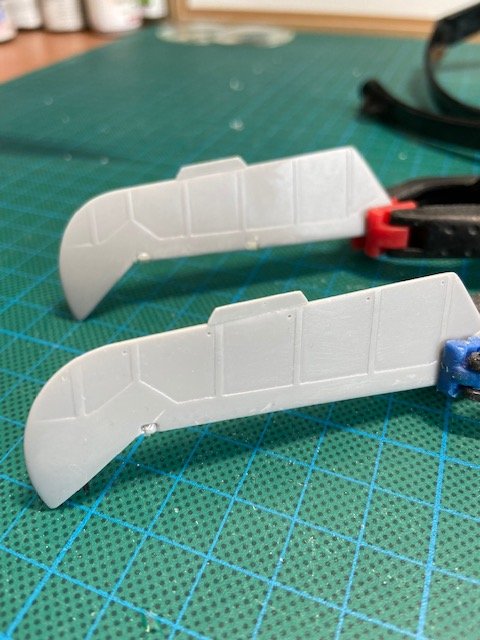
Hello Guy's, here is another update on the 109, I decided that the moulded in slats just wouldn't do it for me, so I decided to cut them out and make them myself, see pictures below, The moulded in slats......, first I took a template in thin copper sheet and moulded it around the existing wing, Moulded and rolled it until the shape was correct, then I cut the wing up...... wasn't so easy, where the wings were joined together there was a huge amount of polyester that I had to cut through.... the cut out piece, I was going to re use that to fill the hole. lots of polyester to remove, trimmed the hole and placed a thin strip of plasticard so the old slat had a attachment point and the old slat in place with a little recess like the original slat, the real slat will be attached to this one, I only had to fill the gap at the underside of the wing to get it closed, the slat copied from the wing reinforced the slat with plasticard and added profiles at the the left and right end of the slat, All the gaps filled now and sanded Still some sanding to do, but test fitted the slat with some blue tack... Fitted in place with blue tack just to get the look, I still will have to align the slat an make the opening in the wings where the slat slides in, but the idea is there, and they look so much better than the moulded in ones, certainly in 1/18 scale I thought this was a "must do" thing, now the left side still to do.............. until the next update, Frank


-
Israeli Mirage III C with Atar9C
Trigger replied to Kaireckstadt's topic in LSM 1/35 and Larger Work In Progress
Hello Kai, it is what you said about blending the colors, they look much better and even now, the shading is very subtle visible. I like it, it's always hard to come to the point not to overdo it, but you have got it right. (I have a few models where I post shaded the panel lines, and if you go at it with the same technique by building up thin layers you get pretty much the same effect. when the color is on the model I mix a somewhat darker tone of that same color and then I spray the panel lines again thin layer after thin layer until you reach the effect you want)For example a ME109 G6, (that I still need to finish). I fell in to the trap of putting to much color on the model, so my pre shading was gone under a layer of paint, so i tried to make the best of things and started post shading the panel lines, and I wasn't unhappy with the result curious about you painting the top side, ( I also visited your Lancaster build in the finished model section, very nice work, and I love the colors you used, looked spot on to me) Couldn't help noticing when you where painting the crew members that you have a pretty Nice collection of action figures in a large scale in your display case, looks great, you certainly painted the crew members very realistic! well, I won't keep you from painting anymore, Frank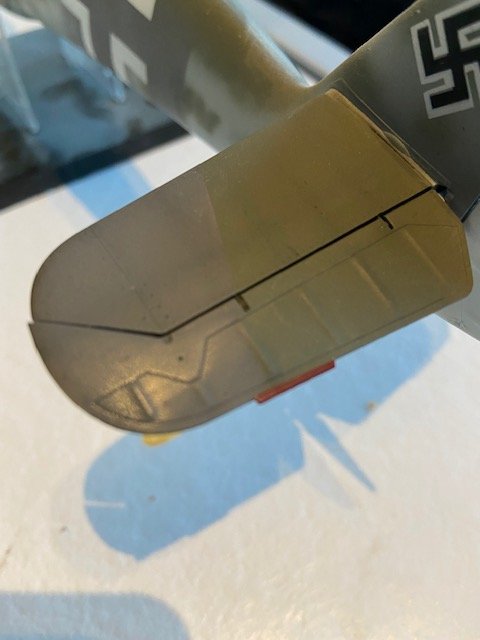
-
Israeli Mirage III C with Atar9C
Trigger replied to Kaireckstadt's topic in LSM 1/35 and Larger Work In Progress
Hi Kai, the Lanc looks spot on, so I guess you will get the Mirage done also, looking better with every pass of the airbrush. I have used Vallejo on some models, (model air range), and they spray nicely, but you have to use the same brand for thinning the paint, a few drops of their retarder, and off you go. When doing that Vallejo comes out pretty good. Ak real is now also one of my favorites , certainly their x-treme metal range, that comes out awesome, I use it on every surface that needs a metallic look. Looking forward to the next paint session, Frank -
Israeli Mirage III C with Atar9C
Trigger replied to Kaireckstadt's topic in LSM 1/35 and Larger Work In Progress
Hello Kai, looking very good, and you are right about building up thin layers that’s The trick, not to much paint. You are well underway. I’ve also got the infinity airbrush, do you like yours, for fine detailing i use the 1.5 needle, but than you really have to thin your paint well, but it gives more control over your paintwork building up layers. Looking forward to the next step Frank -
Hello Kai, You are right about the scratch building and the rework, it's a great kit with lots of Nice looking detailing, but there are also areas where I would have expected more detailing on such a big kit, for instance the slats on front of the wings, they are moulded in, for me that's a little dissapointing, you would have expected that at least you would have some kind of slat that you can move or place in an opened position, but no, (see pictures) Great rivet detail though...... Having said that, you basically get a model that leaves a lot of possibility for improving (like the engine), so you really have to dig deep to get those areas right, because you don't get a manual where every step is laid out, you basically get a series of photo's where the parts need to go with a minimal amount of information, and the rest is up to you to figure out. I have read a lot of books, walk arounds, examined photo's etc to get the necessary information to continue, that really is part of the fun of building, you learn a lot about the subject you are building. But for a 1/18 scale it surely could have had more details. I have build a few ME109's in 1/32 and 1/24 scale that had more detailing than this bigger brother. The Catalina is a whole other kit, with tons of details for the inside interior, it's from the same manufacturer, but the Catalina is packed with details. I will finish the Catalina , but right now I will focus on the 109, I knew it was going to be a challenge, but I want to get this one done, like you I really like the 109 in all it's variant's, and with over 30.000 ones build, I think it's one of the most produced aircraft's of WWII. Ready to drop some paint on the Mirage? Frank
-
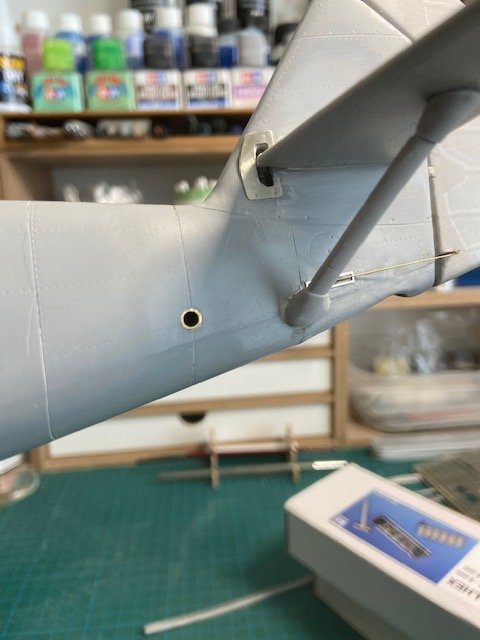
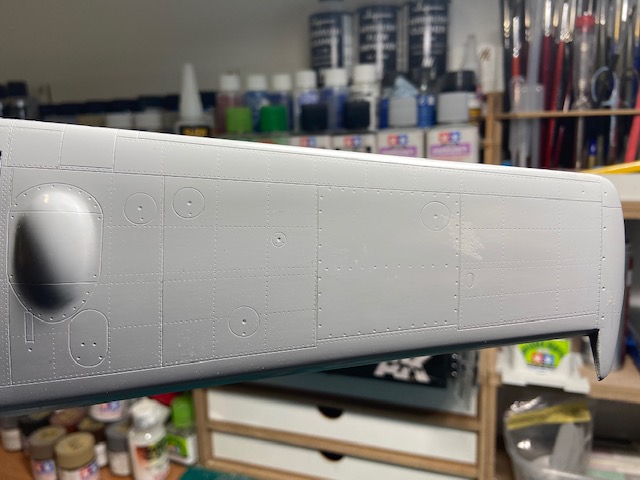
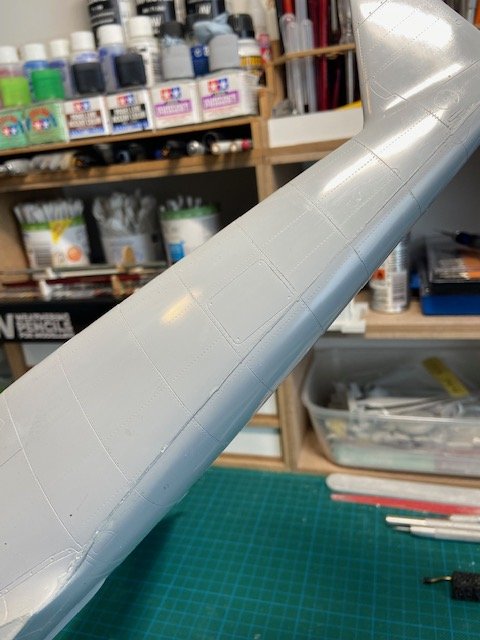
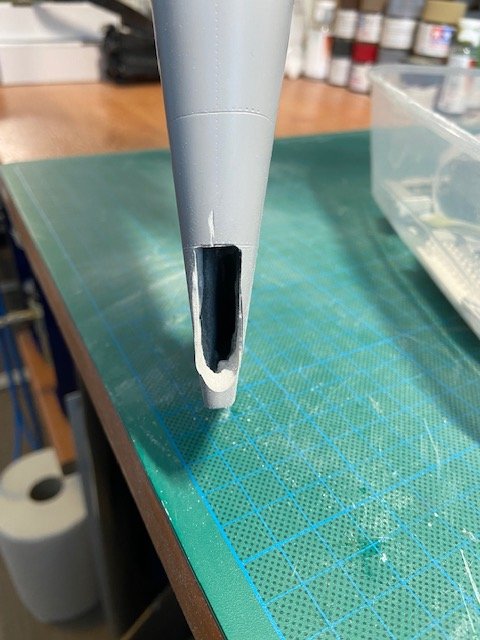
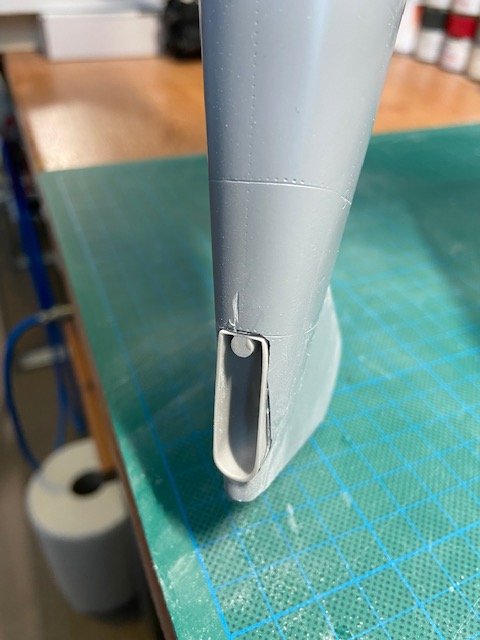
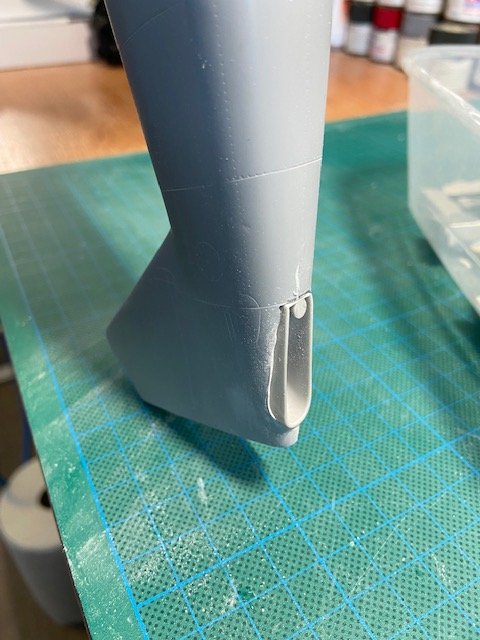
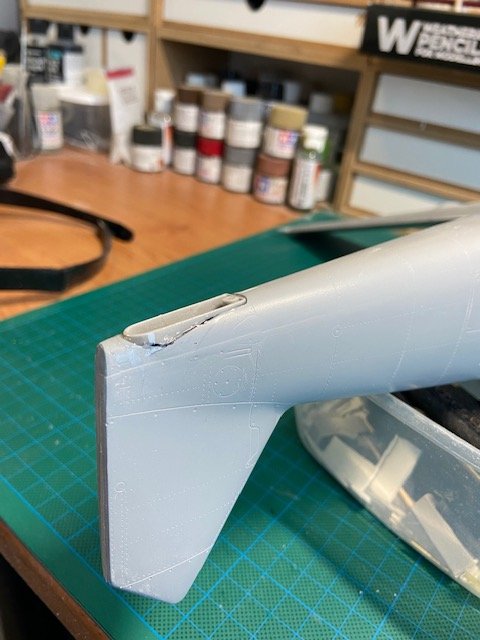
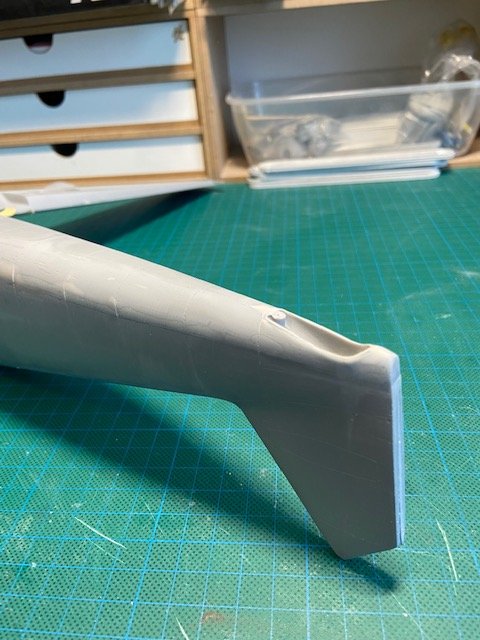
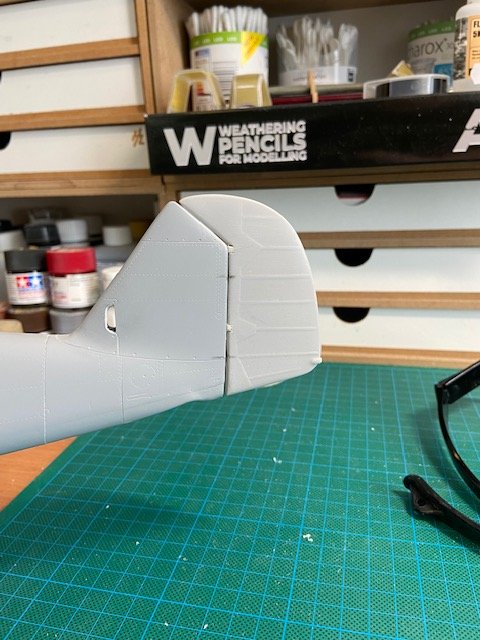
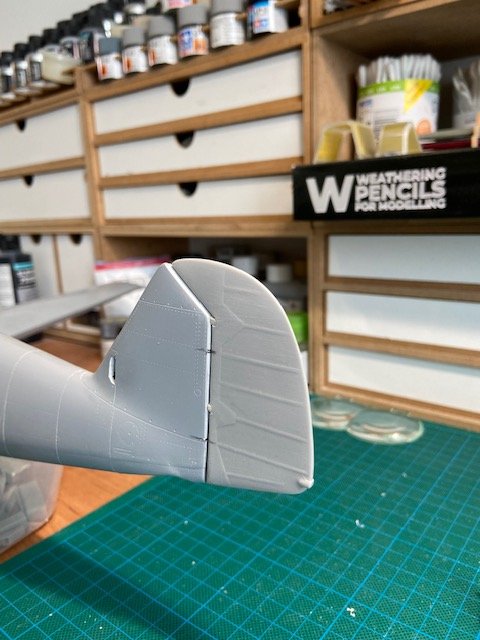
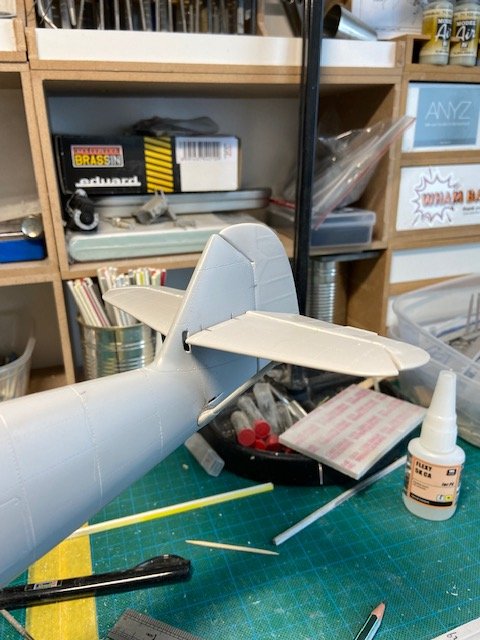
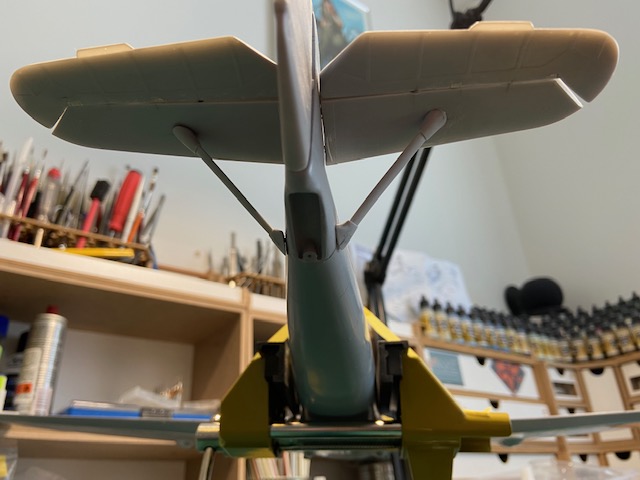
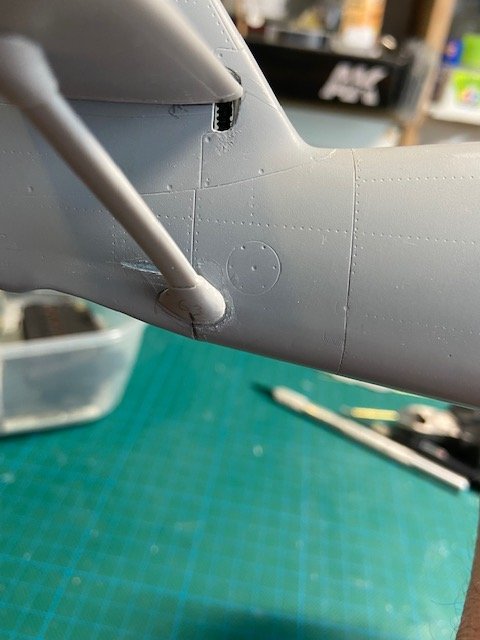
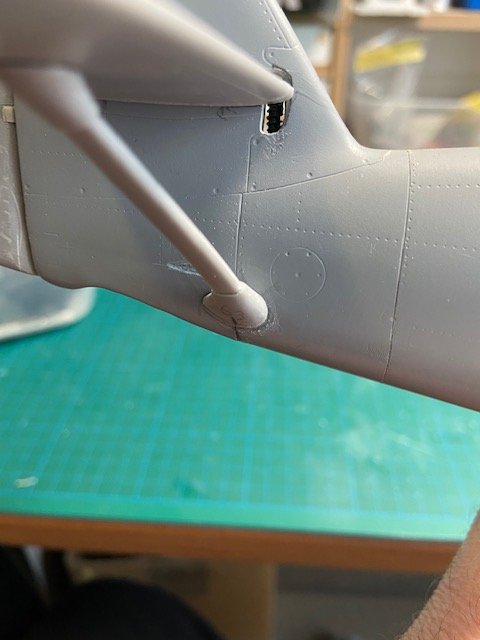
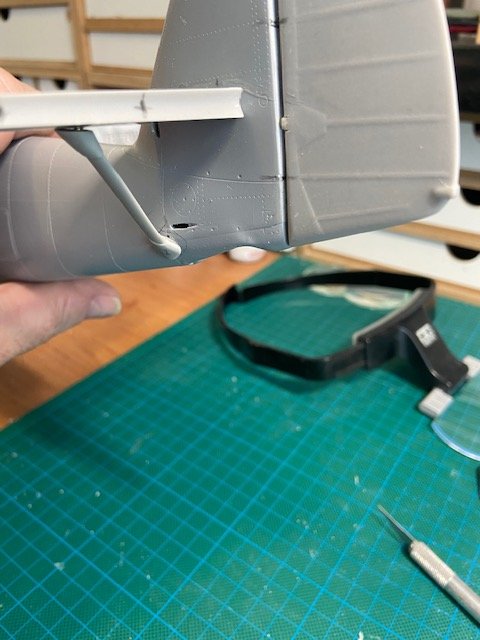
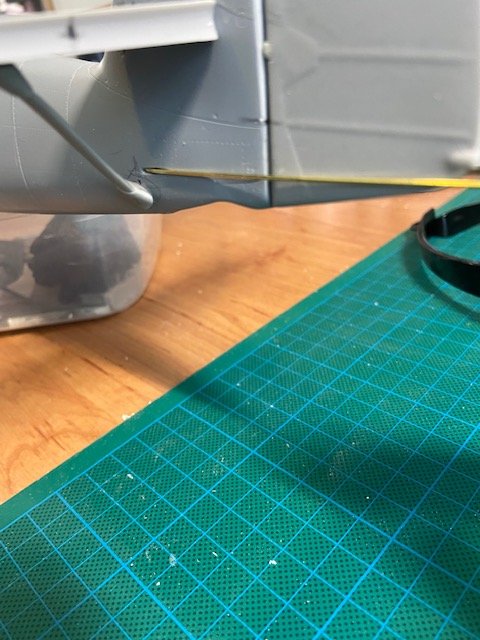
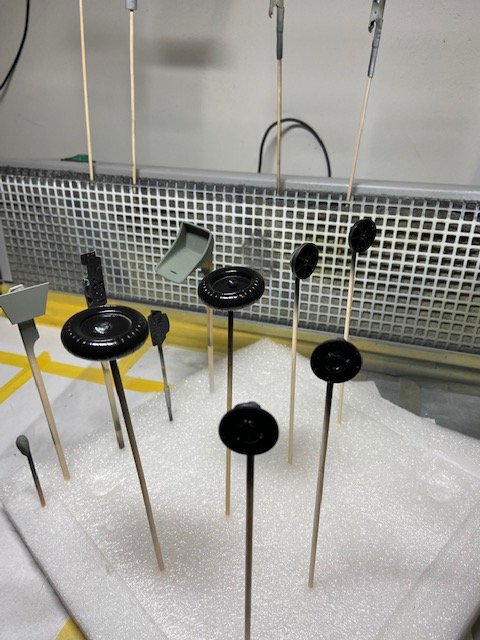
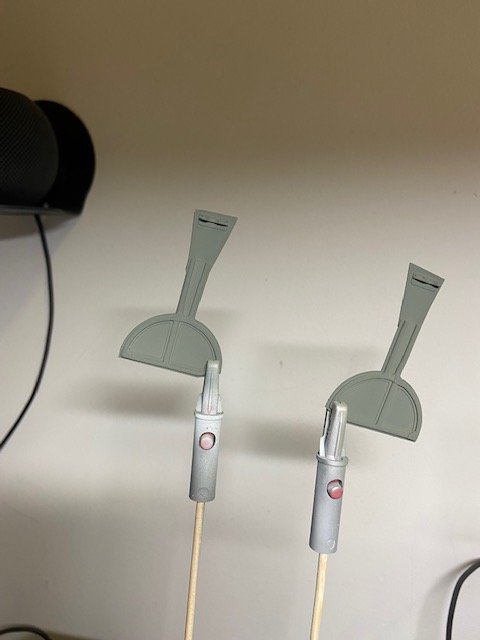
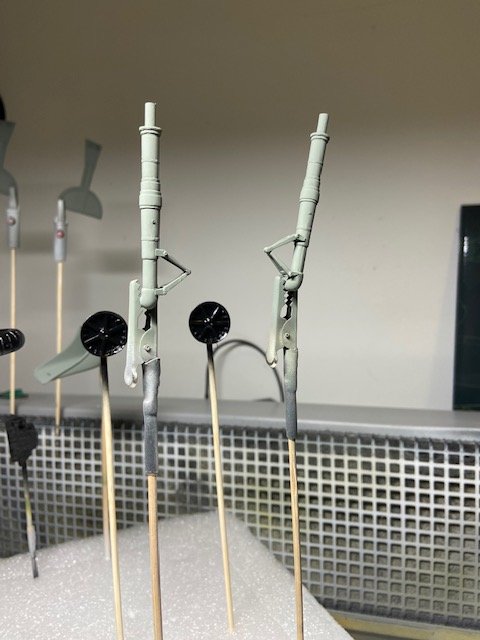
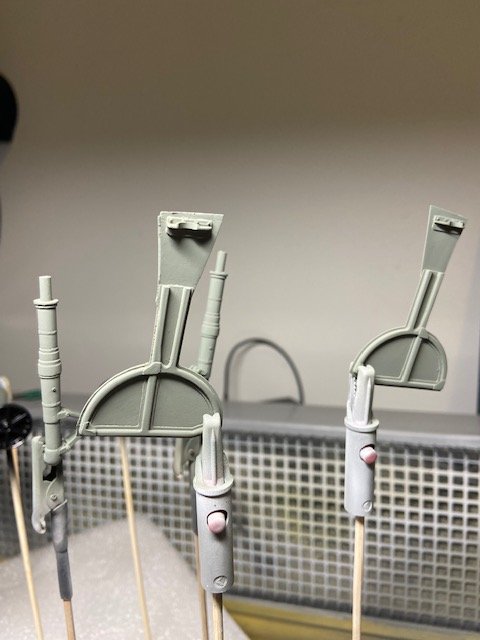
Hello Guy's, time for an update on the 109 I was working on the engine, but decided to put my attention to the fuselage, because once the engine is in place it becomes very tricky to handle the entire plane, and the fuselage also needs a lot of work, and I don't want to knock of the engine by accident. So first I will do the fuselage, I have begun to remove all the seamlines as you can see in the pictures below, Had to sand the spine also, rescribed all the rivet lines , next the tail wheel well, had to cut a piece in the tail to make it fit and after sanding and some filling, next thing thing to do, the tailplanes, Test fitted the tail, had to scratch build the hinges and cut a slot where the spindle sits to adjust the angle of the tail planes when taking of and landing scratch build hinges Test fitted the tailplanes and the struts underneath the tailplanes, took a lot of time to get the dihedral right At this stage everything was still loose and test fitted As you can see I also made a spindle for the tailplane adjustment , was a bit of a nightmare to get that into place, but I think it looks allright Next thing to do is making the rudder control cables and attach them to the rudder, also started on the landing gear and gear doors Cu a slot for the control cable put a copper rod in to line up the cable for the attachment point on the rudder, Some pictures of the landing gear and wheels in black primer and the landing oleos, Well that's it for now, more to follow..... Frank

-
Israeli Mirage III C with Atar9C
Trigger replied to Kaireckstadt's topic in LSM 1/35 and Larger Work In Progress
At least they are consistent in some things................. (I hope that someone at Italeri looks at the Internet forums so they can read and weep , ........) Frank -
Israeli Mirage III C with Atar9C
Trigger replied to Kaireckstadt's topic in LSM 1/35 and Larger Work In Progress
Hi Kai, At last The rewarding things are coming now, i am very curious how the colors will Turnhout, great job so far, Frank -
Israeli Mirage III C with Atar9C
Trigger replied to Kaireckstadt's topic in LSM 1/35 and Larger Work In Progress
I think there's a Gremlin somewhere hidden in the fuselage , so much bad luck is no coincidence, thank god you are now at the painting stage, Looking forward to that, Cheers, Frank -
Israeli Mirage III C with Atar9C
Trigger replied to Kaireckstadt's topic in LSM 1/35 and Larger Work In Progress
Wow Kai, those hydraulic lines and landing gear look absolutely convincing with the decals on, those are the details that will stand out when the Mirage is done, like a cherry on the cake. really curious how you will handle the painting, keep up the good work!, Cheers, Frank -
Israeli Mirage III C with Atar9C
Trigger replied to Kaireckstadt's topic in LSM 1/35 and Larger Work In Progress
Hi Kai, Well, at least we had a good laugh............. the nightmare continues I see, but you are getting there, the finish is in sight... Cheers, Frank -
Good news Peter, You can't get any better news than a full remission statement , so now it's full speed forward and try to leave this behind you, must be motivating to get your models done, looking forward to your builds , Cheers, Frank
-
Israeli Mirage III C with Atar9C
Trigger replied to Kaireckstadt's topic in LSM 1/35 and Larger Work In Progress
Hi Kai, Found this on the Italeri homepage, , in Germany TUV really does stand for Quality, but I had a good laugh when I saw this, maybe they will send you a new canopy ? But I hope you have taken the last hurdle before painting, company with Quality System Conformity. Cheers, Frank
