crazypoet
-
Posts
826 -
Joined
-
Last visited
Content Type
Profiles
Forums
Events
Gallery
Everything posted by crazypoet
-

Trumpeter P-47D Razorback
crazypoet replied to crazypoet's topic in LSM 1/35 and Larger Work In Progress
In the continuing saga of “proper prior planning”, I’ve realized that I should have fitted the gun cap inserts on the wing *before* mounting the guns and doing all the internal work in the bays. 😂🤦♂️ The fit of both parts is truly *bad* - huge steps and gaps Getting everything filled and sanded smooth without damaging the gun barrels is the challenge of the moment, not to mention that when I installed them, there was that tell-tale “snick” sound of a bit of CA breaking loose on gun one in the (fortunately for me) open bay - in this case, *underneath* the breach. And of course that gun is now misaligned. Wheee! This is what I get for following the build order in the instructions 🤷♂️😂🤦♂️ No pics yet - they look a right mess at the moment. Once they’re filled and sanded, I’ll figure out how to re-scribe the turn-latches along with re-scribing panel lines and rivets And of course this all happened just before a week-long trip out-of-country, so I have this all to look forward to when I get back late next week -
Those Merlins are pure art!
-
I made a similarly 🤦♂️🤦♂️🤦♂️ discovery once with my own airbrush - but in this case it was in the barrel where the cup connects yah, these things get finicky when we don’t tend to all their nooks and crannies 🤣
-
Yup! One trigger action = one round fired, so still technically a semi-auto Annnnnnd, with black-powder rounds, in 45/70 or even 50/100…! 😎😎😎 it’s a black-powder rifle - but with real teeth 😂
-
1:32nd scale Sopwith 1 1/2 'Strutter' (1.B2)
crazypoet replied to sandbagger's topic in LSM 1/35 and Larger Work In Progress
Following with interest! -
In the US, black-powder firearms aren’t regulated at all, excepting when carrying one in your luggage during a flight (when normal TSA regs apply). No serial numbers needed, no registration. My guess is that they don’t see them as a “threat” I’ve been tempted to build a functional Gatling gun in 45/70, to see how far I can push that 😎 Of course, since I moved to Cambodia it’s all kind of a moot point - can’t get most of the materials here, and getting them shipped from the US would be a nightmare 😂 Though…hmmm…. There are tons of small professional machine shops that would not ask many questions… 😎
-
I love this! I had an opportunity to fly as a “guest” on one of these (J model) during a live-fire training mission way back in the day, and I’ve been in love with them ever since I keeping hoping to find a kit in 1/48, but it seems none of the manufacturers want to take it on I’d like to build a copy of the bird that was lost during Desert Storm (I think it was an H model - have to do some research on that). They stayed on-station too long, supporting a Marine Detachment, and were shot down by ground fire after the sun came up great work!
-
Trumpeter P-47D Razorback
crazypoet replied to crazypoet's topic in LSM 1/35 and Larger Work In Progress
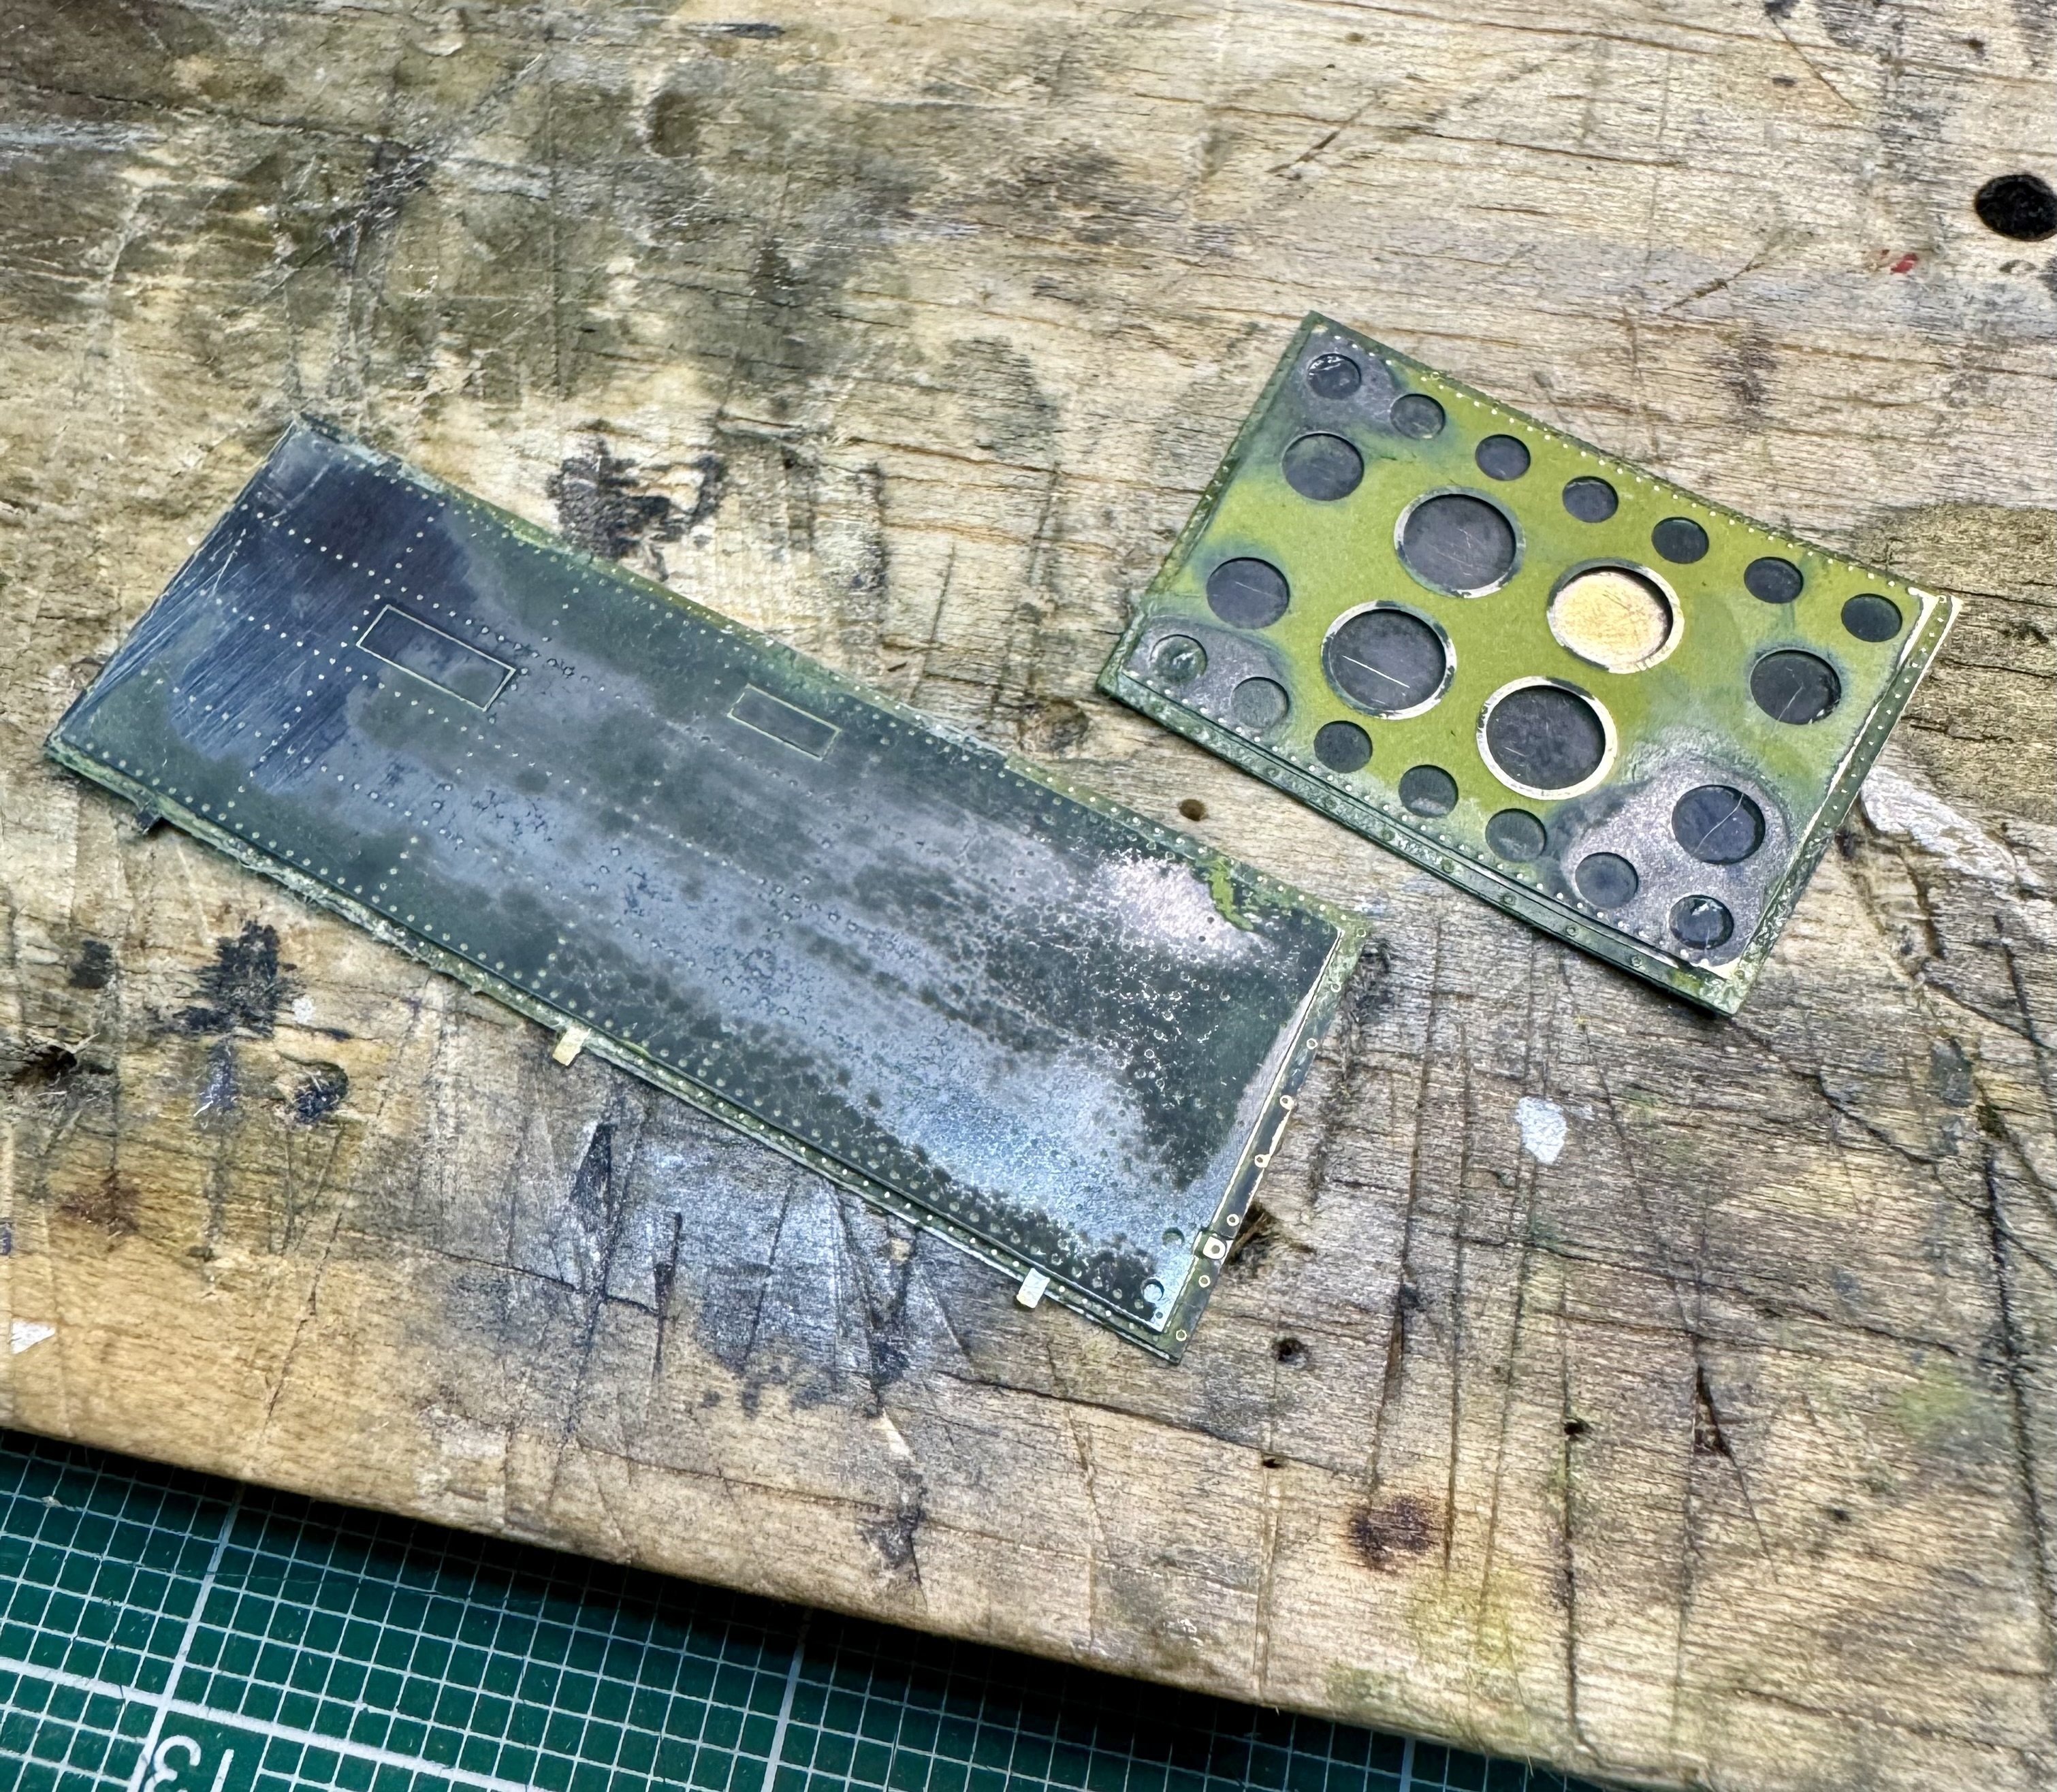
PE is painted up the Duralumin looks a bit bright, but it will tone down once I apply a bit of wash i also folded up and shaped the bay covers. They look a right mess at the moment, due to some paint experiments I did a while back (they were very useful canvases 🤣), but that will all get sorted when I paint the rest of the model Now at least I can move on to attaching the wings and getting this thing up on its legs 🙏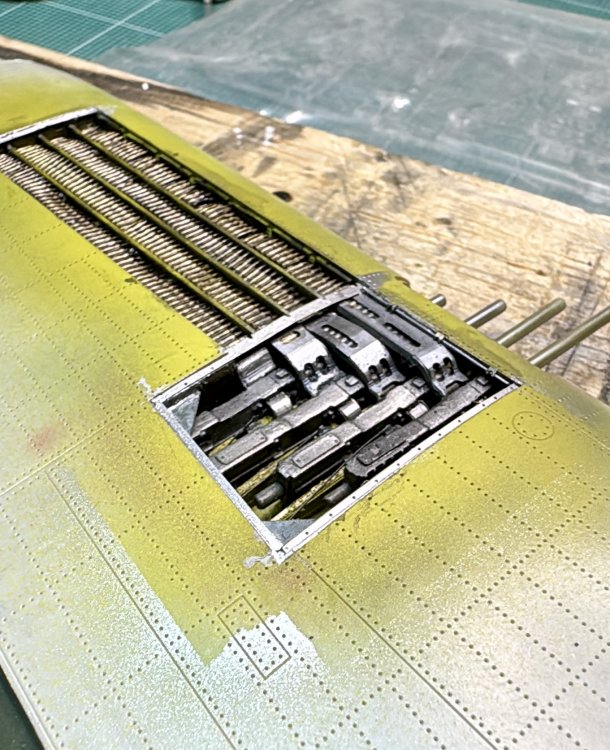

-
Following this! I have the ancient Monogram kit, that I’ll (eventually 🤣) build, also in Linebacker II colors It will be an education for me to stare over your shoulders as you build this one 🙏
-
Trumpeter P-47D Razorback
crazypoet replied to crazypoet's topic in LSM 1/35 and Larger Work In Progress
Installed the PE bits around the perimeter of the gun bay - they slotted right in, mostly The piece that bridges across the ammo trays and the ends of the feed chutes was longer than the space, and it took some thinking and judicious trimming. It’s now just long enough that, when installed, it bends up into the airfoil curve that will match up with the panels. I haven’t put any paint on these yet - that will happen later today (my girlfriend is asking about lunch and dinner plans, and those come first 🙏) I’ll do these in Alclad duralumin, I think, with a bit of silver pencil highlights on the fasteners I’m going to try to fit the steel fastener rod across the aft side of the bay (similar to the rod across the forward side). It will take some fiddling around to see if I can shoehorn it into the space and make it look right
-
Trumpeter P-47D Razorback
crazypoet replied to crazypoet's topic in LSM 1/35 and Larger Work In Progress
Thank you! 🙏 I think it will work when taken as a whole - this is an airframe that’s been though a year of great maintenance but hard service, and it will show and FA made a good point to about emphasis in shadowed spaces, to “pop” the highlights just a bit -
Trumpeter P-47D Razorback
crazypoet replied to crazypoet's topic in LSM 1/35 and Larger Work In Progress
Yup - and I know now how to make it better and brighter next time ‘round Using the right paint but with the wrong approach, on a material it wasn’t designed for left things too dull for the space. You're right, it needs to “pop” a bit in that space As Doc said, it should blend a bit better once it’s done, especially taken as a whole, and it will work with the overall weathering I’m planning But I certainly learned something 🤣🤷♂️🤦♂️ -
Trumpeter P-47D Razorback
crazypoet replied to crazypoet's topic in LSM 1/35 and Larger Work In Progress
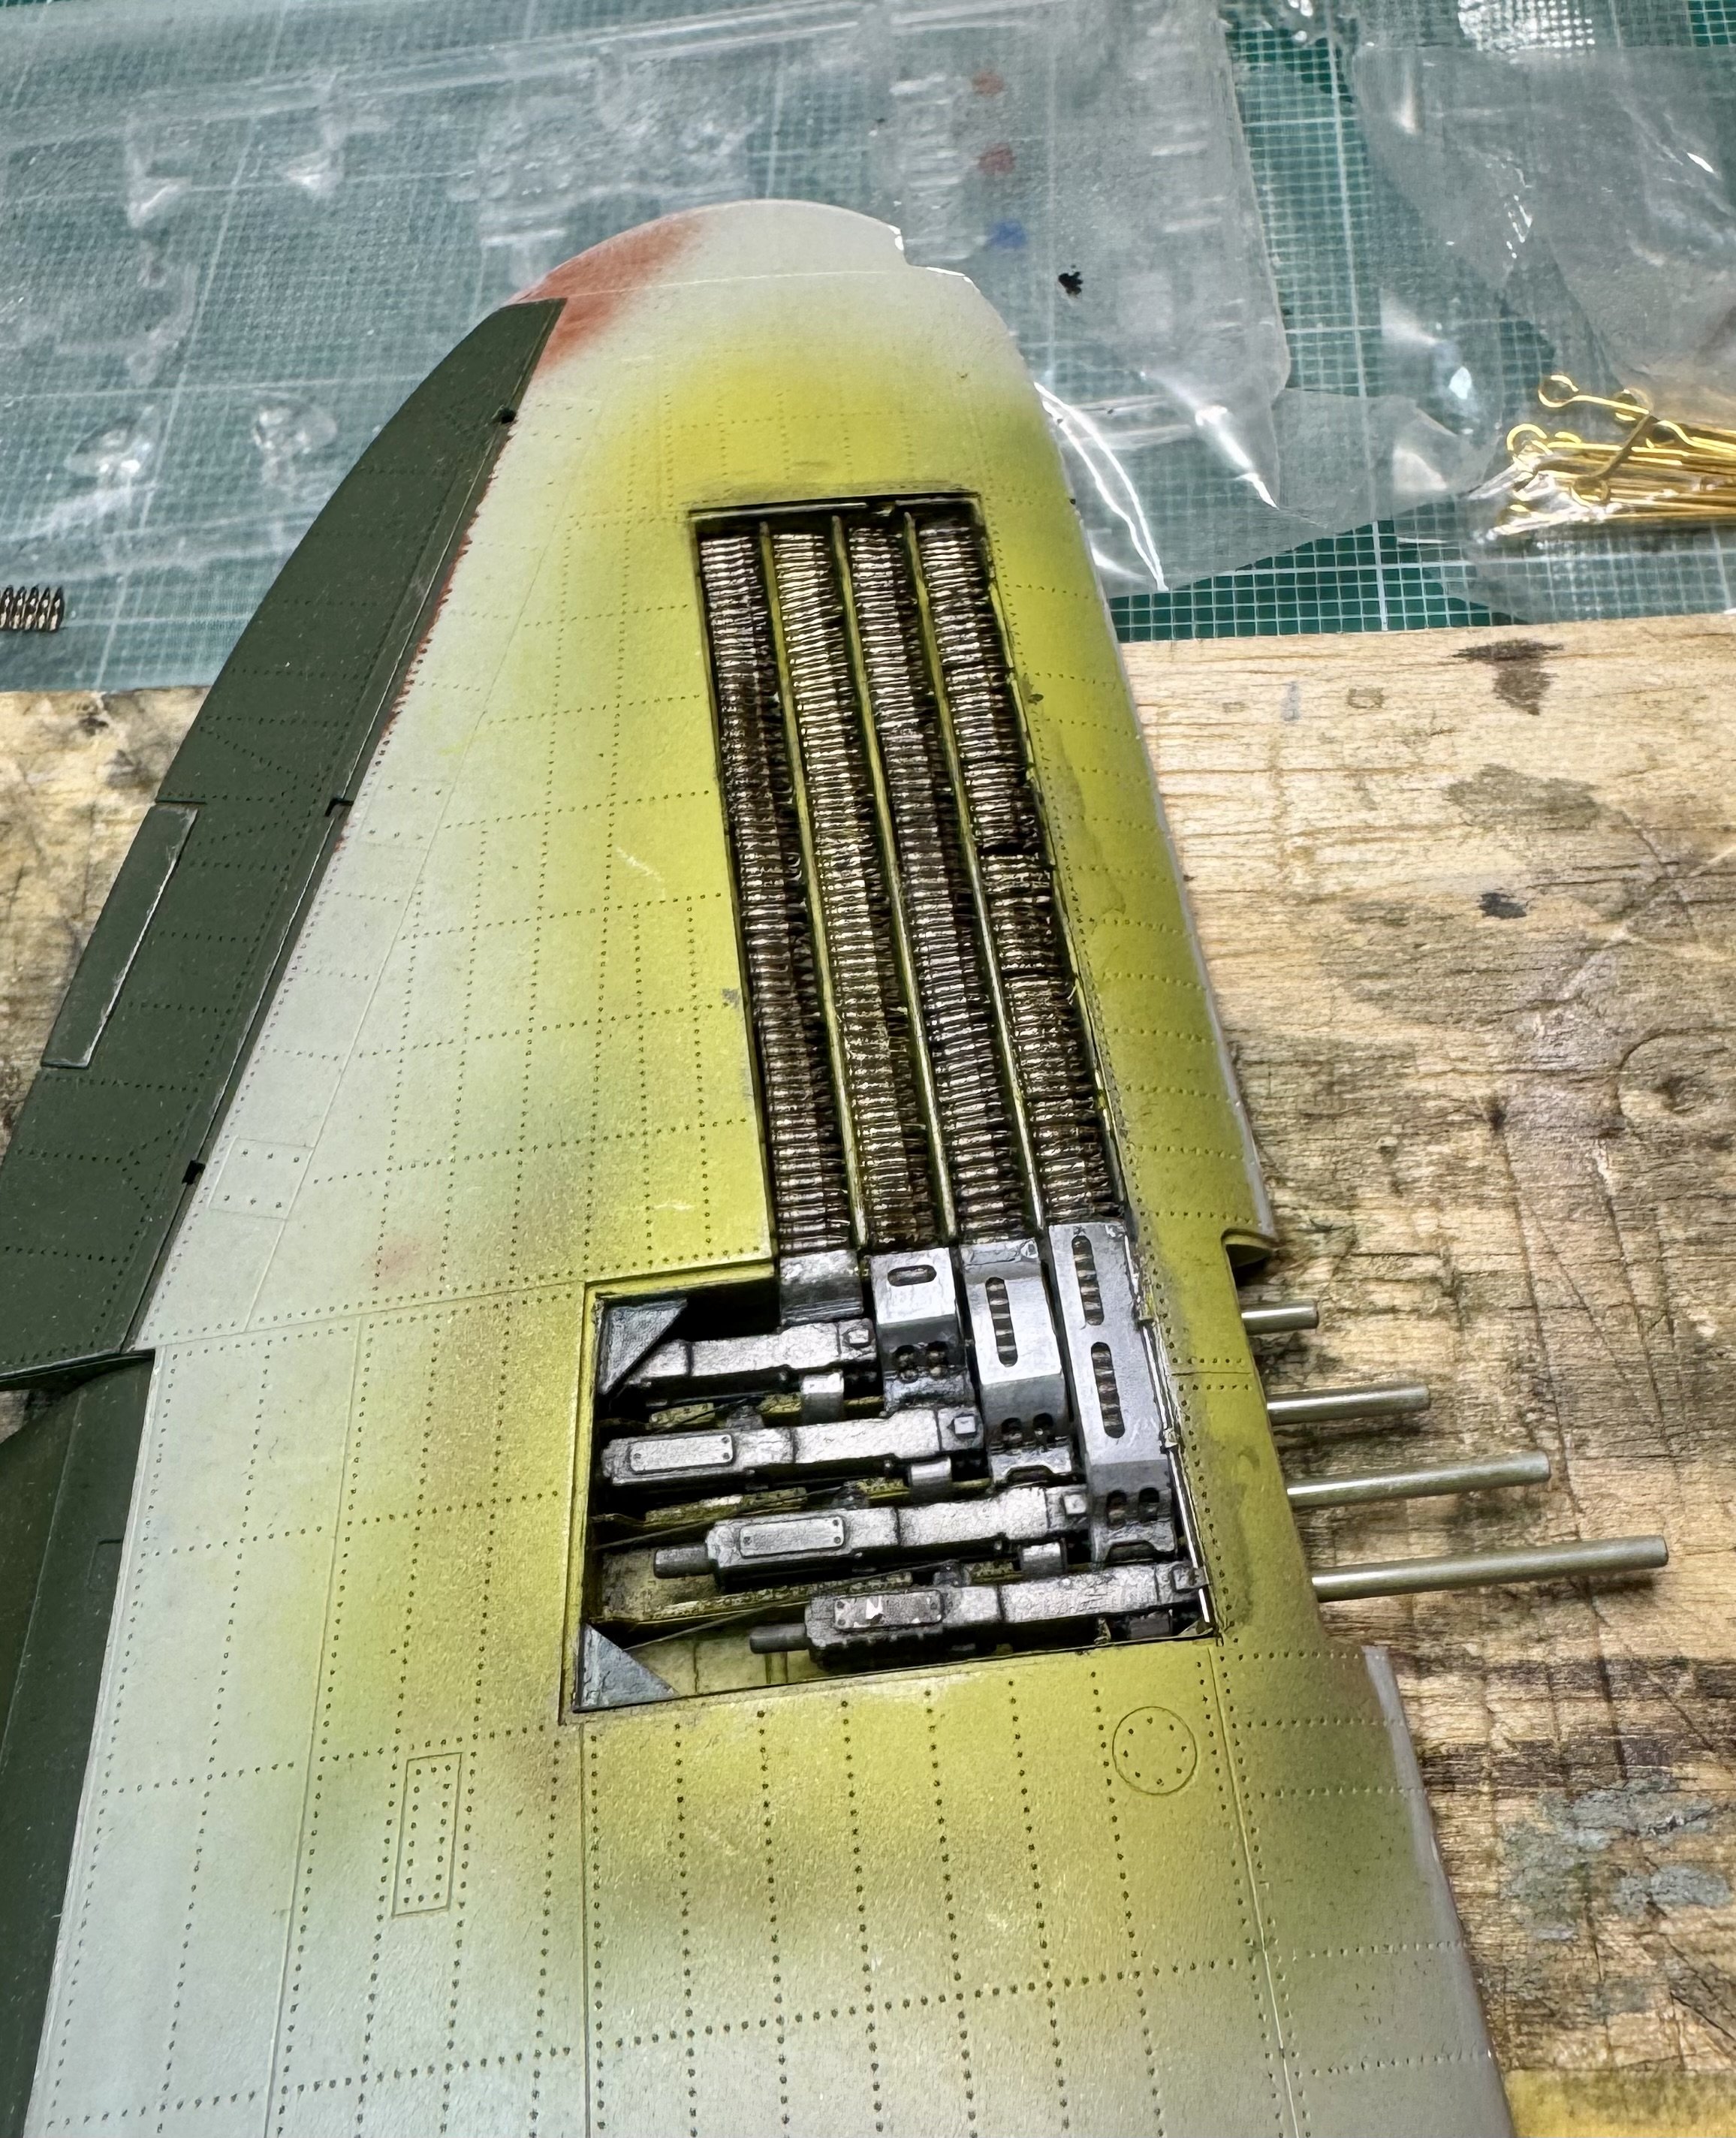
Belts are in and have a gloss coat applied. I’m not 💯💯💯 thrilled with how they look - the brass should be a bit brighter and the links should be better defined (and a lot more even than I could get with slightly shaky hands and a brush 🤣), but I’ll live with it - and promise myself that *all* future ammo belts will be accurate cast resin with realistic links, that I can straighten with a bit of hot water and then airbrush The PE chutes were a bit fiddly to install while stuffed with the rubber ammo belts, but they lined up with no more than the usual amount of cursing, and it’s worth it to see proper links in the chute cutouts I’m chalking this up to “learning experience” and will take a deep breath and move forward. A bit of thin wash once the clear coat dries will help a bit, and then I can finish up the PE in the gun bay and get the wings properly attached
-
Lotus 49C - Ebbro - 1/20
crazypoet replied to DocRob's topic in LSM 1/35 and Larger Work In Progress
This is beautifully done, and the work you did to make everything “work” is inspiring me to power through some of the similar issues I run into - you’re always a good teacher! 🙏 -
Henschel Hs-123 A-1 ICM 1/32
crazypoet replied to Marek Models's topic in LSM 1/35 and Larger Work In Progress
Welcome to the asylum! And great work, there - always a bonus to be able to watch and learn from each other 🙏 -
Trumpeter P-47D Razorback
crazypoet replied to crazypoet's topic in LSM 1/35 and Larger Work In Progress
Useful for running, when out of ammo! 😅 -
Trumpeter P-47D Razorback
crazypoet replied to crazypoet's topic in LSM 1/35 and Larger Work In Progress
The max load per-gun on these was 425 rounds. That would make the full belt a bit over 32 feet long, or about six layers when folded into the bays - these things could get seriously crowded! Even the “normal” load of about 250 rounds per gun would give three layers of linked ammo in each tray I wish I had enough belts to actually do this, but I have to go with what I’ve got on hand 🤣 -
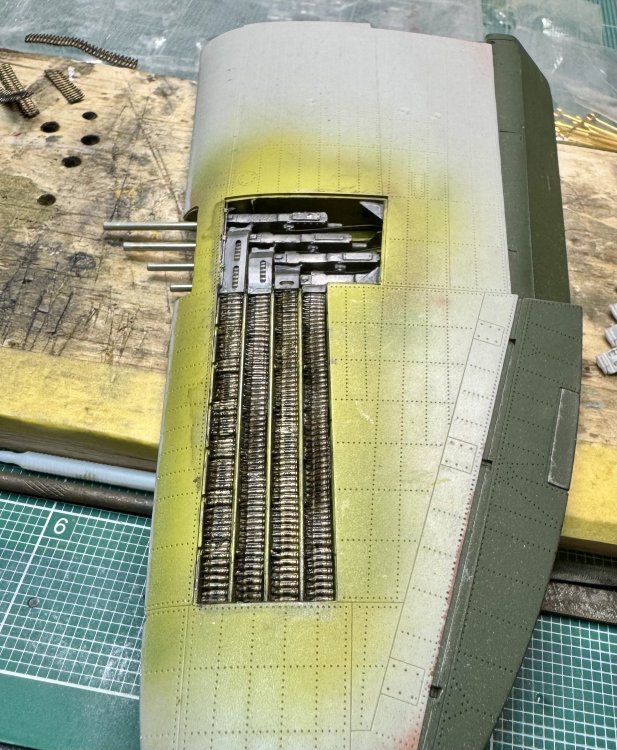
Trumpeter P-47D Razorback
crazypoet replied to crazypoet's topic in LSM 1/35 and Larger Work In Progress
A bit of actual installation progress, finally 🤣 I have the first two chutes and belts in, and I’m mostly happy so far I realized (of course *after* the glue had dried on the first belt) that I’d set far too much “sag” into it between the supports in the tray. Sooooo…. I went back and added a few snippets of links to fill-in, and it looks ok unless you get closer than about 3-4 inches away. grrr It will look a bit better after a gloss coat and some wash, but it shows what happens when I’m thinking a bit behind what my fingers are doing with the tweezers 🤣🤦♂️ The chutes themselves will also get a bit of a touch up with the Uschi powder once they’re all in place Once these are all in and dry, there are a few bits of PE framing around the perimeter to install, then I can face the bay covers. There is supposed to be another steel rod across the back side of the gun bay, according to the photos I’ve seen, but I’m not sure that there will be room for it alongside the PE strip in that same area. We’ll see how it goes at that point The covers will need to be folded up and bent to the appropriate airfoil curves, then they’ll be set aside until I do the final painting and assembly The gun tray cover will sit loose on the wing (not a hinged piece), but the ammo tray cover is hinged with some delicate bits holding it in place The wing insignia overlaps these somewhat, so getting the decals right will be kinda fun - I’ll have to set the covers in-place, cut the decals accordingly, and hope my fingers are steady enough to get everything properly lined up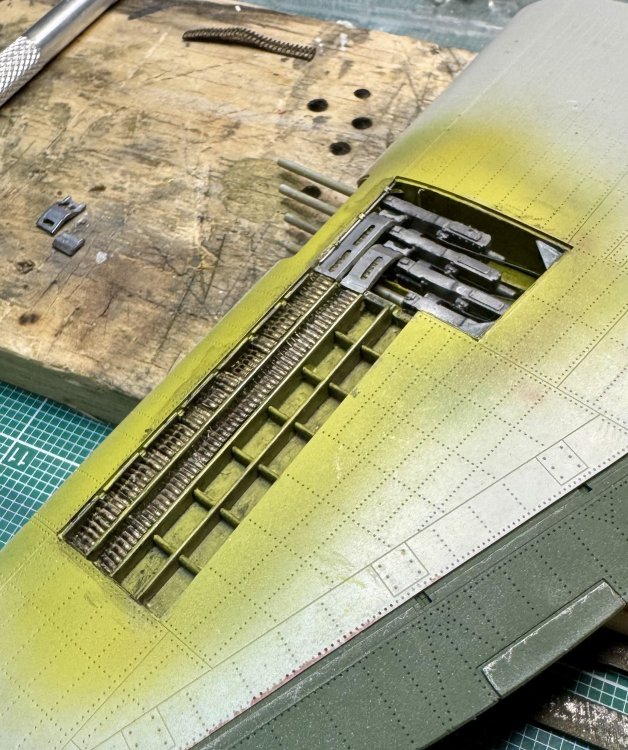
-
That’s nice detail out of the box! Have fun with those 😎
-
1/35 scale engine house with workshop
crazypoet replied to CP1's topic in LSM 1/35 and Larger Work In Progress
Very cool work on that locking latch! -
Lotus 49C - Ebbro - 1/20
crazypoet replied to DocRob's topic in LSM 1/35 and Larger Work In Progress
That is brilliant work, dealing with the fit issues and making them look seamless 🙏 -
Trumpeter P-47D Razorback
crazypoet replied to crazypoet's topic in LSM 1/35 and Larger Work In Progress
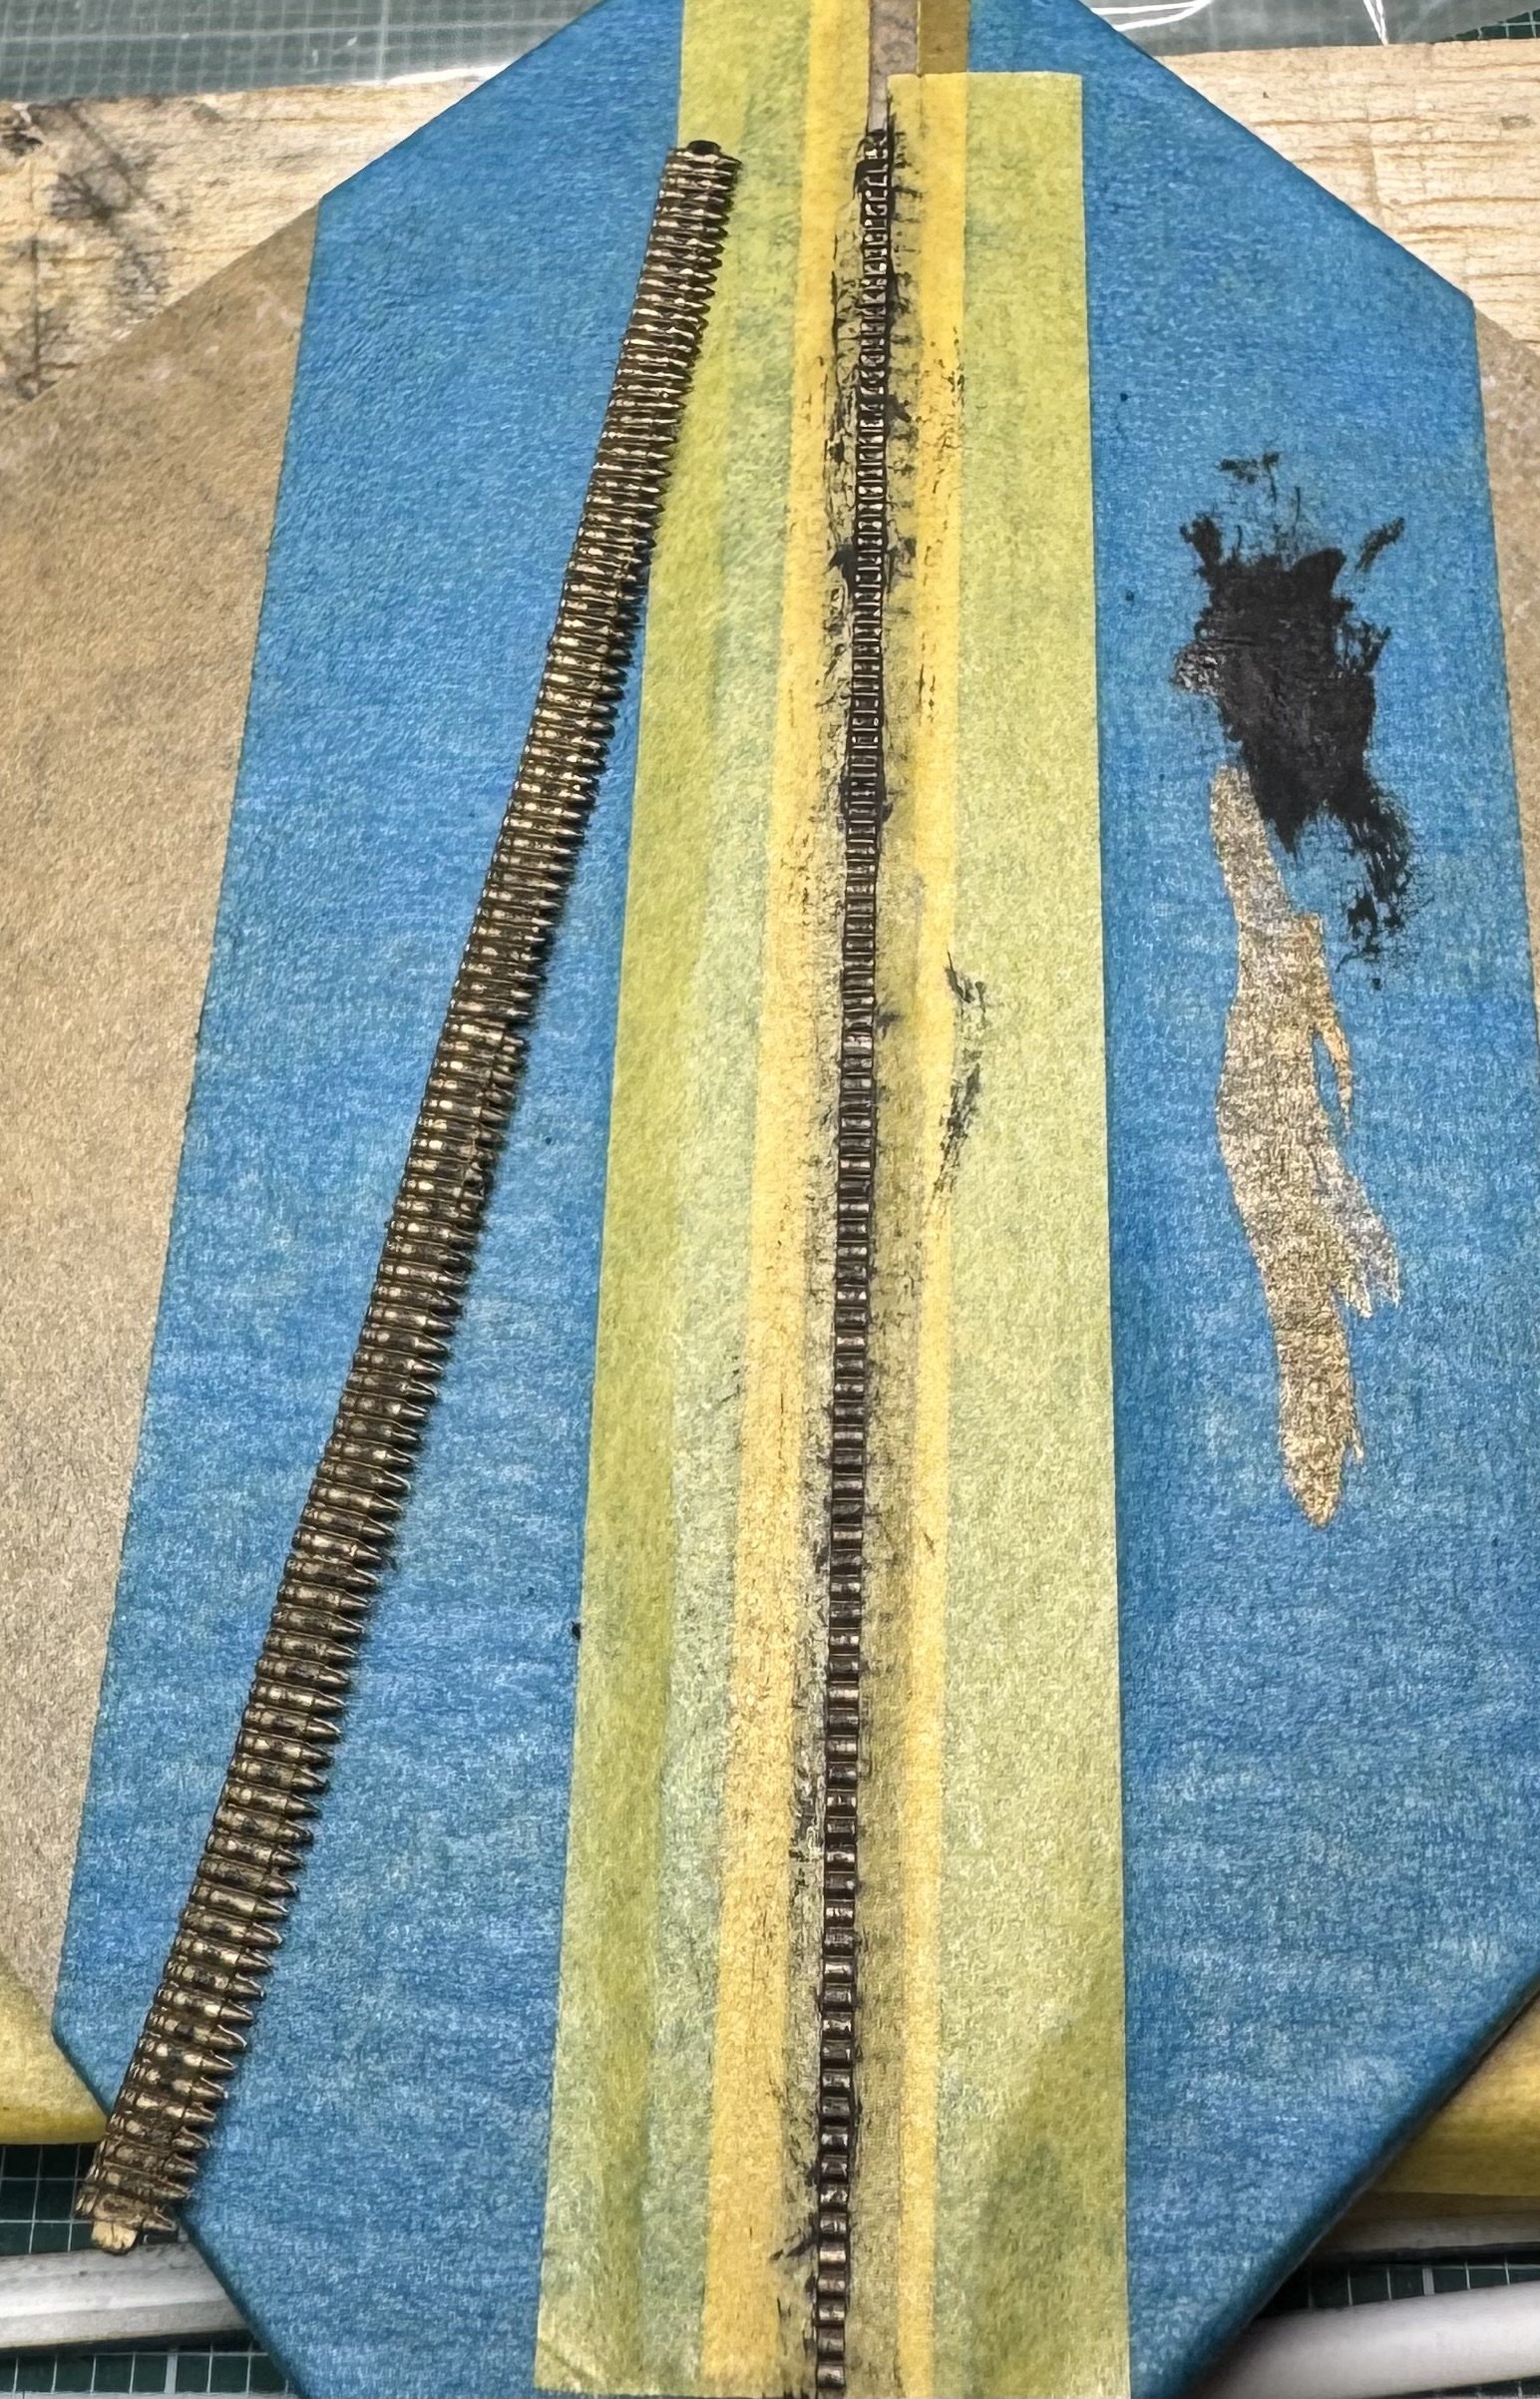
So far, so good-enough 🤣 I made an impromptu “straightening jig” with a little lucite square, some doubled-over office tape to hold the belts down, a couple pieces of thick PE fret left over from the picket boat I finished way back when, and a bunch of masking tape The results aren’t magnifying-glass perfect, but given the belts themselves not having molded links, they’re at least reasonably presentable from more than a couple of inches away You can still see where I glued the belt-ends together, but only if you look closely. I’ll live with that, especially since the glued bits won’t all be lined up side by side in the ammo trays. I’m hoping that it will just look like normal variations in the individual links and rounds once it’s all glued in and a light wash applied to tie everything together 🤷♂️🙏🤦♂️ There’s enough of each belt that looks good that I’ll be able to fill the feed chutes and the ammo bay itself, then I can move on to the last bits of Eduard PE for the gun bay and wrap this stage up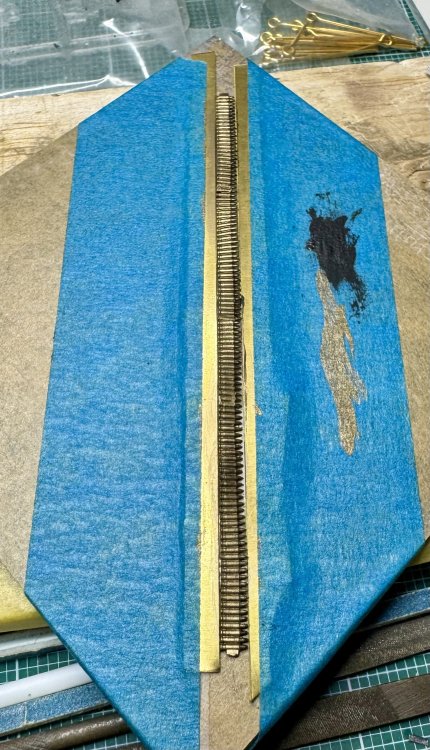


-
Trumpeter P-47D Razorback
crazypoet replied to crazypoet's topic in LSM 1/35 and Larger Work In Progress
I may give this a shot next 🙏 My first effort at masking and painting the belt links failed miserably - these vinyl/rubber belts are seriously twisty! It’s hard to tape them down solidly enough to get masking tape in nice straight lines along the full length of the belt 🤣 This is the case even after pretty aggressive treatment with hot water to straighten things out - they tend to slowly re-curl a bit during handling *Parts* of the belt I tested on came out perfectly, but other sections were…not perfect 🤣🤦♂️ I’m going to strip off the paint and try a slightly different approach I’m going to use some good sticky office tape and some straight edges cut from spare PE to hold these things as rigidly straight and level as possible, then try again with the masking approach. if *that* doesn’t work, I’ll go with your suggestion. *Really* thin tape might be just the ticket, if I can get it to settle a bit between the individual cartridges (depending on how much trial-and-error I go through with this, the gaspatch cast resin belts may arrive in time to save me and my rum stash from disaster 🤣) -
Trumpeter P-47D Razorback
crazypoet replied to crazypoet's topic in LSM 1/35 and Larger Work In Progress
(Eduard *could* have saved us all a ton of headaches by doing these belts as resin in their Gun Bay set, but noooo 🤣🤷♂️🤦♂️) [edit] and of course, as soon as I said that, I realized that Gaspatch does *indeed* sell resin 1/32 .50cal ammo belts. All I had to do was look 🤷♂️🤦♂️🤦♂️ Now, all I have to do is find someone who can either drop-ship to my friend in the US or ship them to Cambodia. I will probably not get them in time for this build (and they may have some issues with the short-radius bends needed to fit the P-47 ammo trays anyway), but I *will* have them on-hand for my upcoming builds where ammo belts are kinda prominent 🤣 -
Trumpeter P-47D Razorback
crazypoet replied to crazypoet's topic in LSM 1/35 and Larger Work In Progress
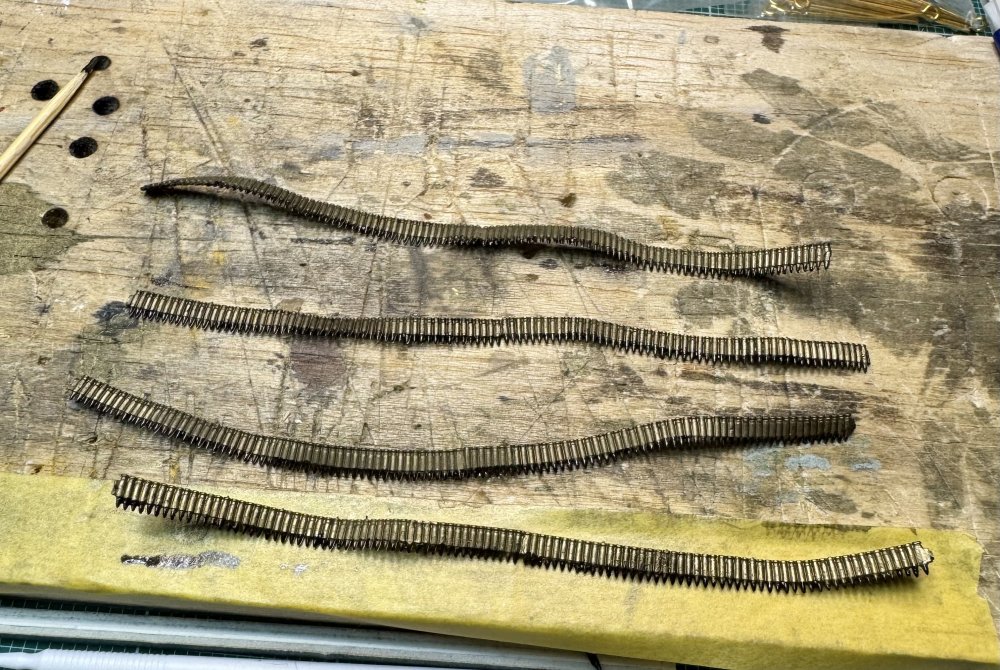
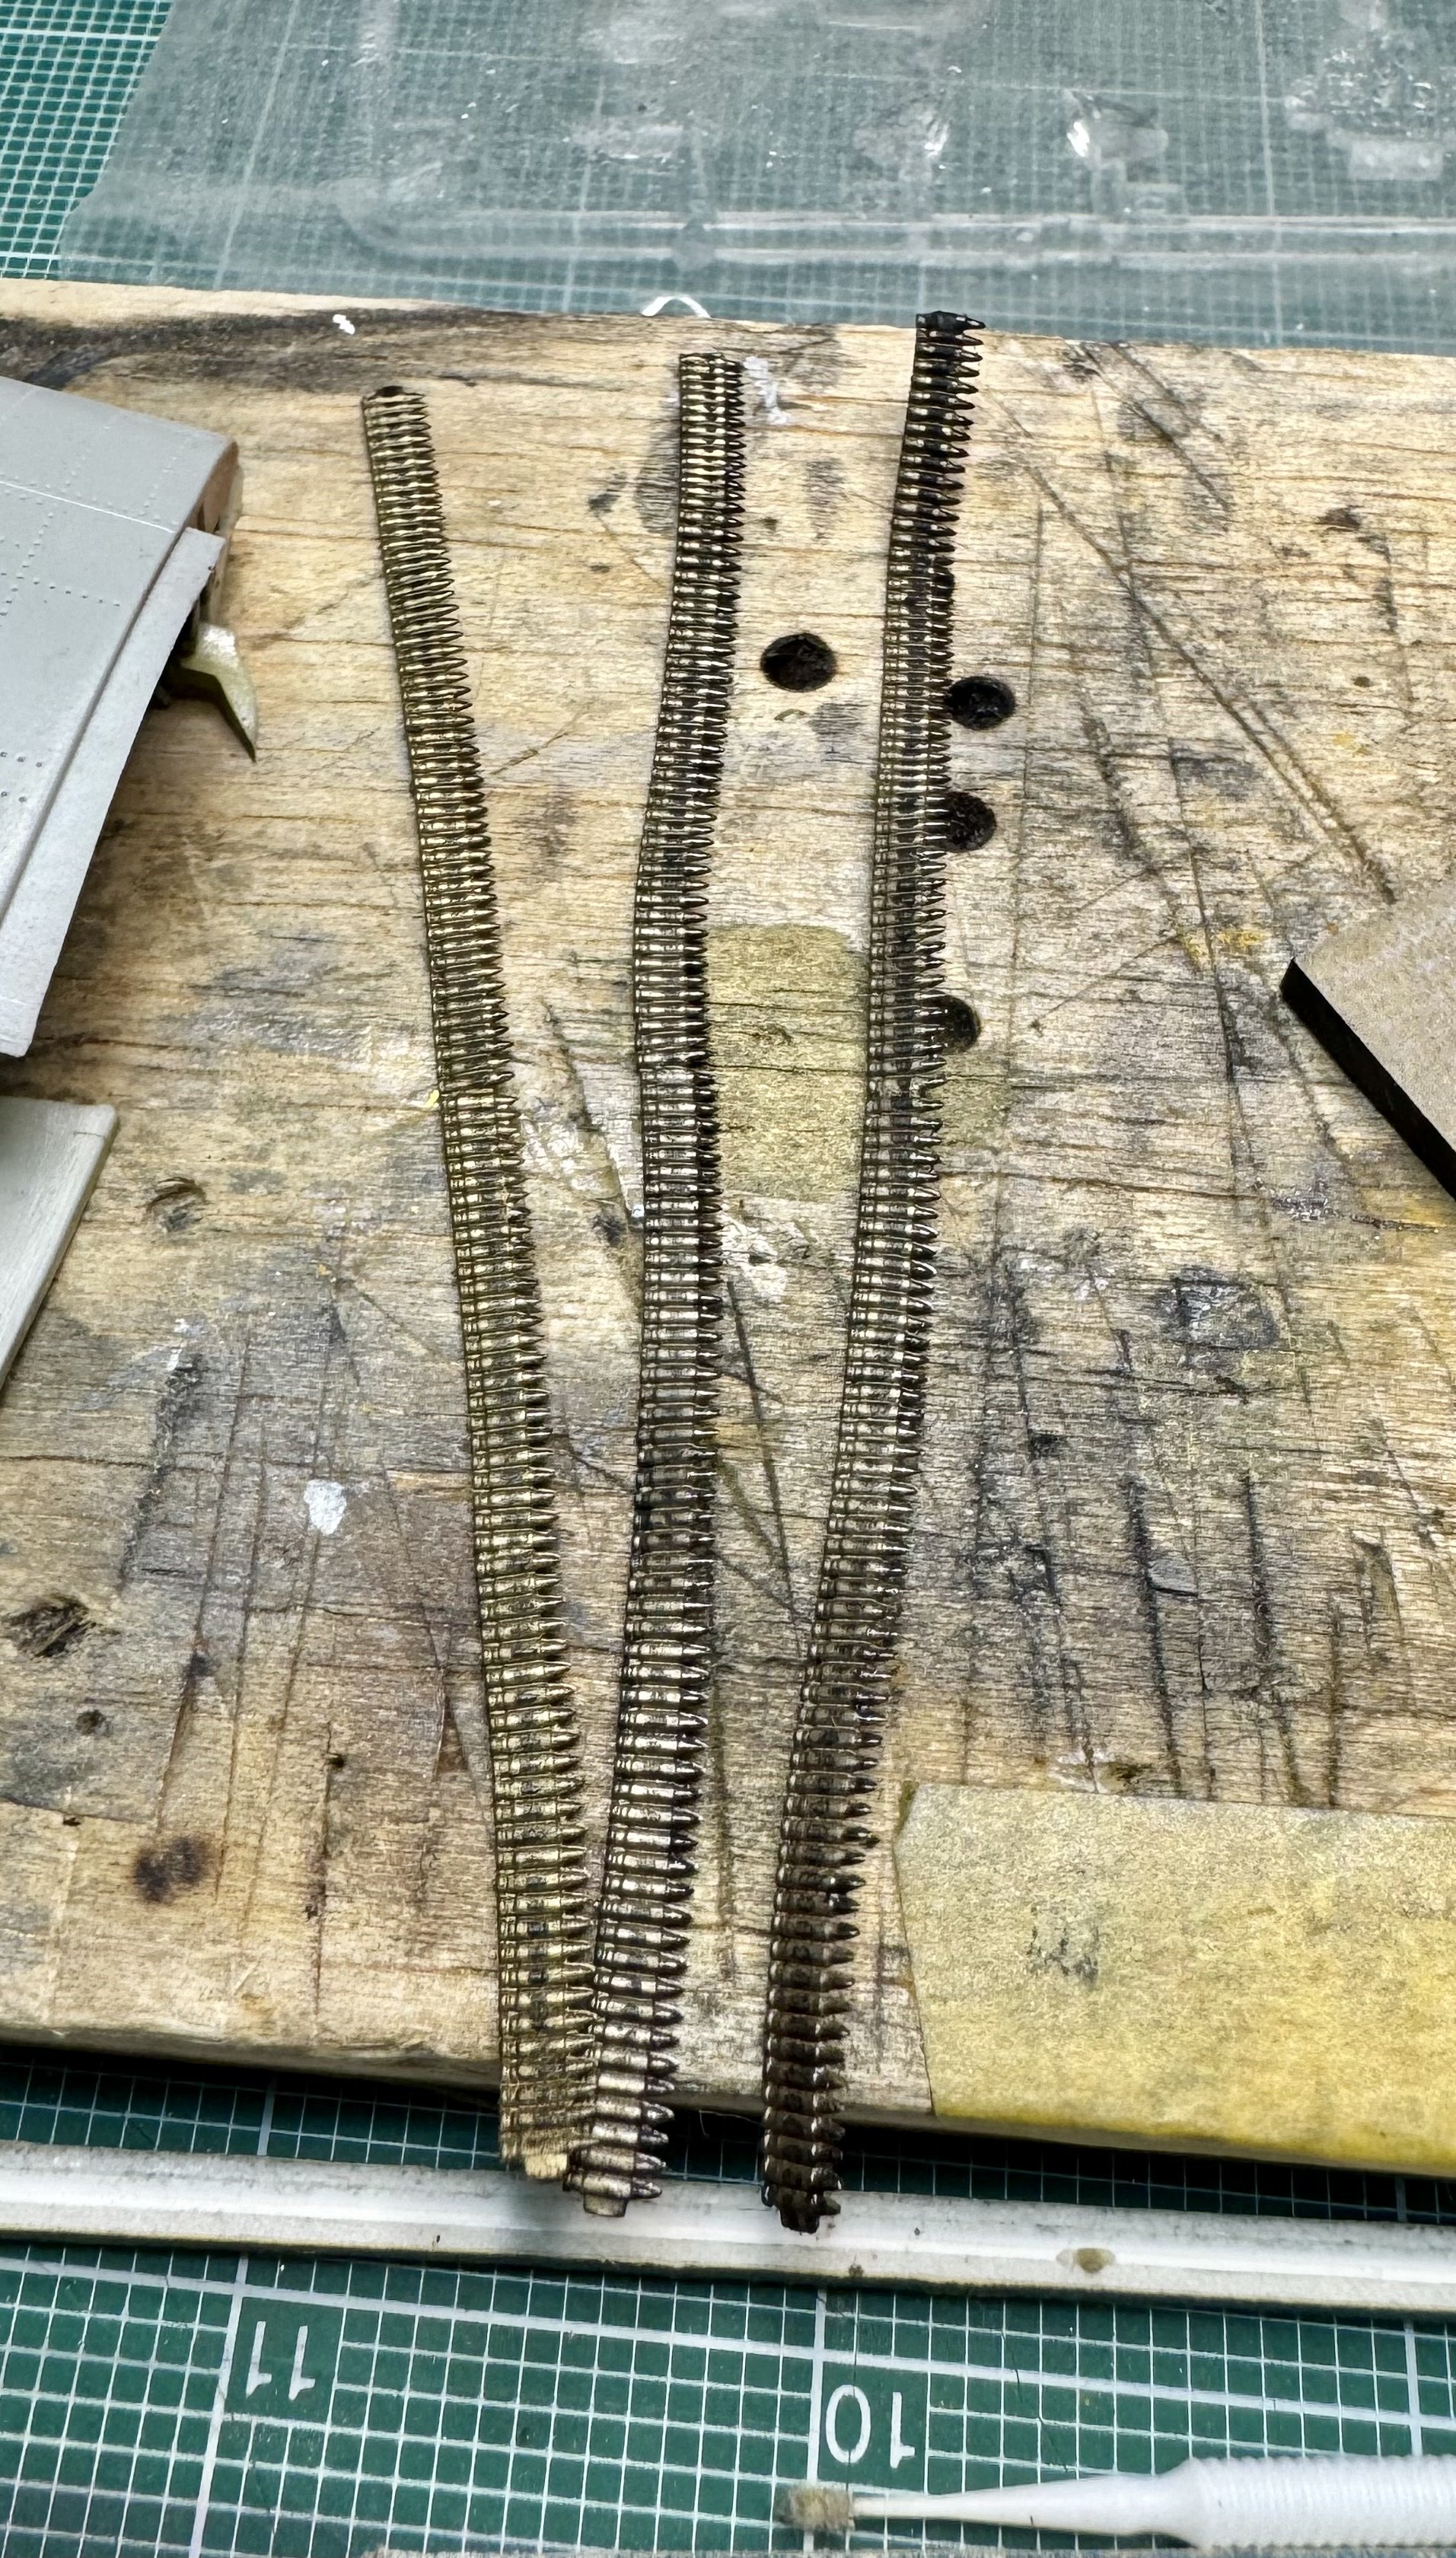
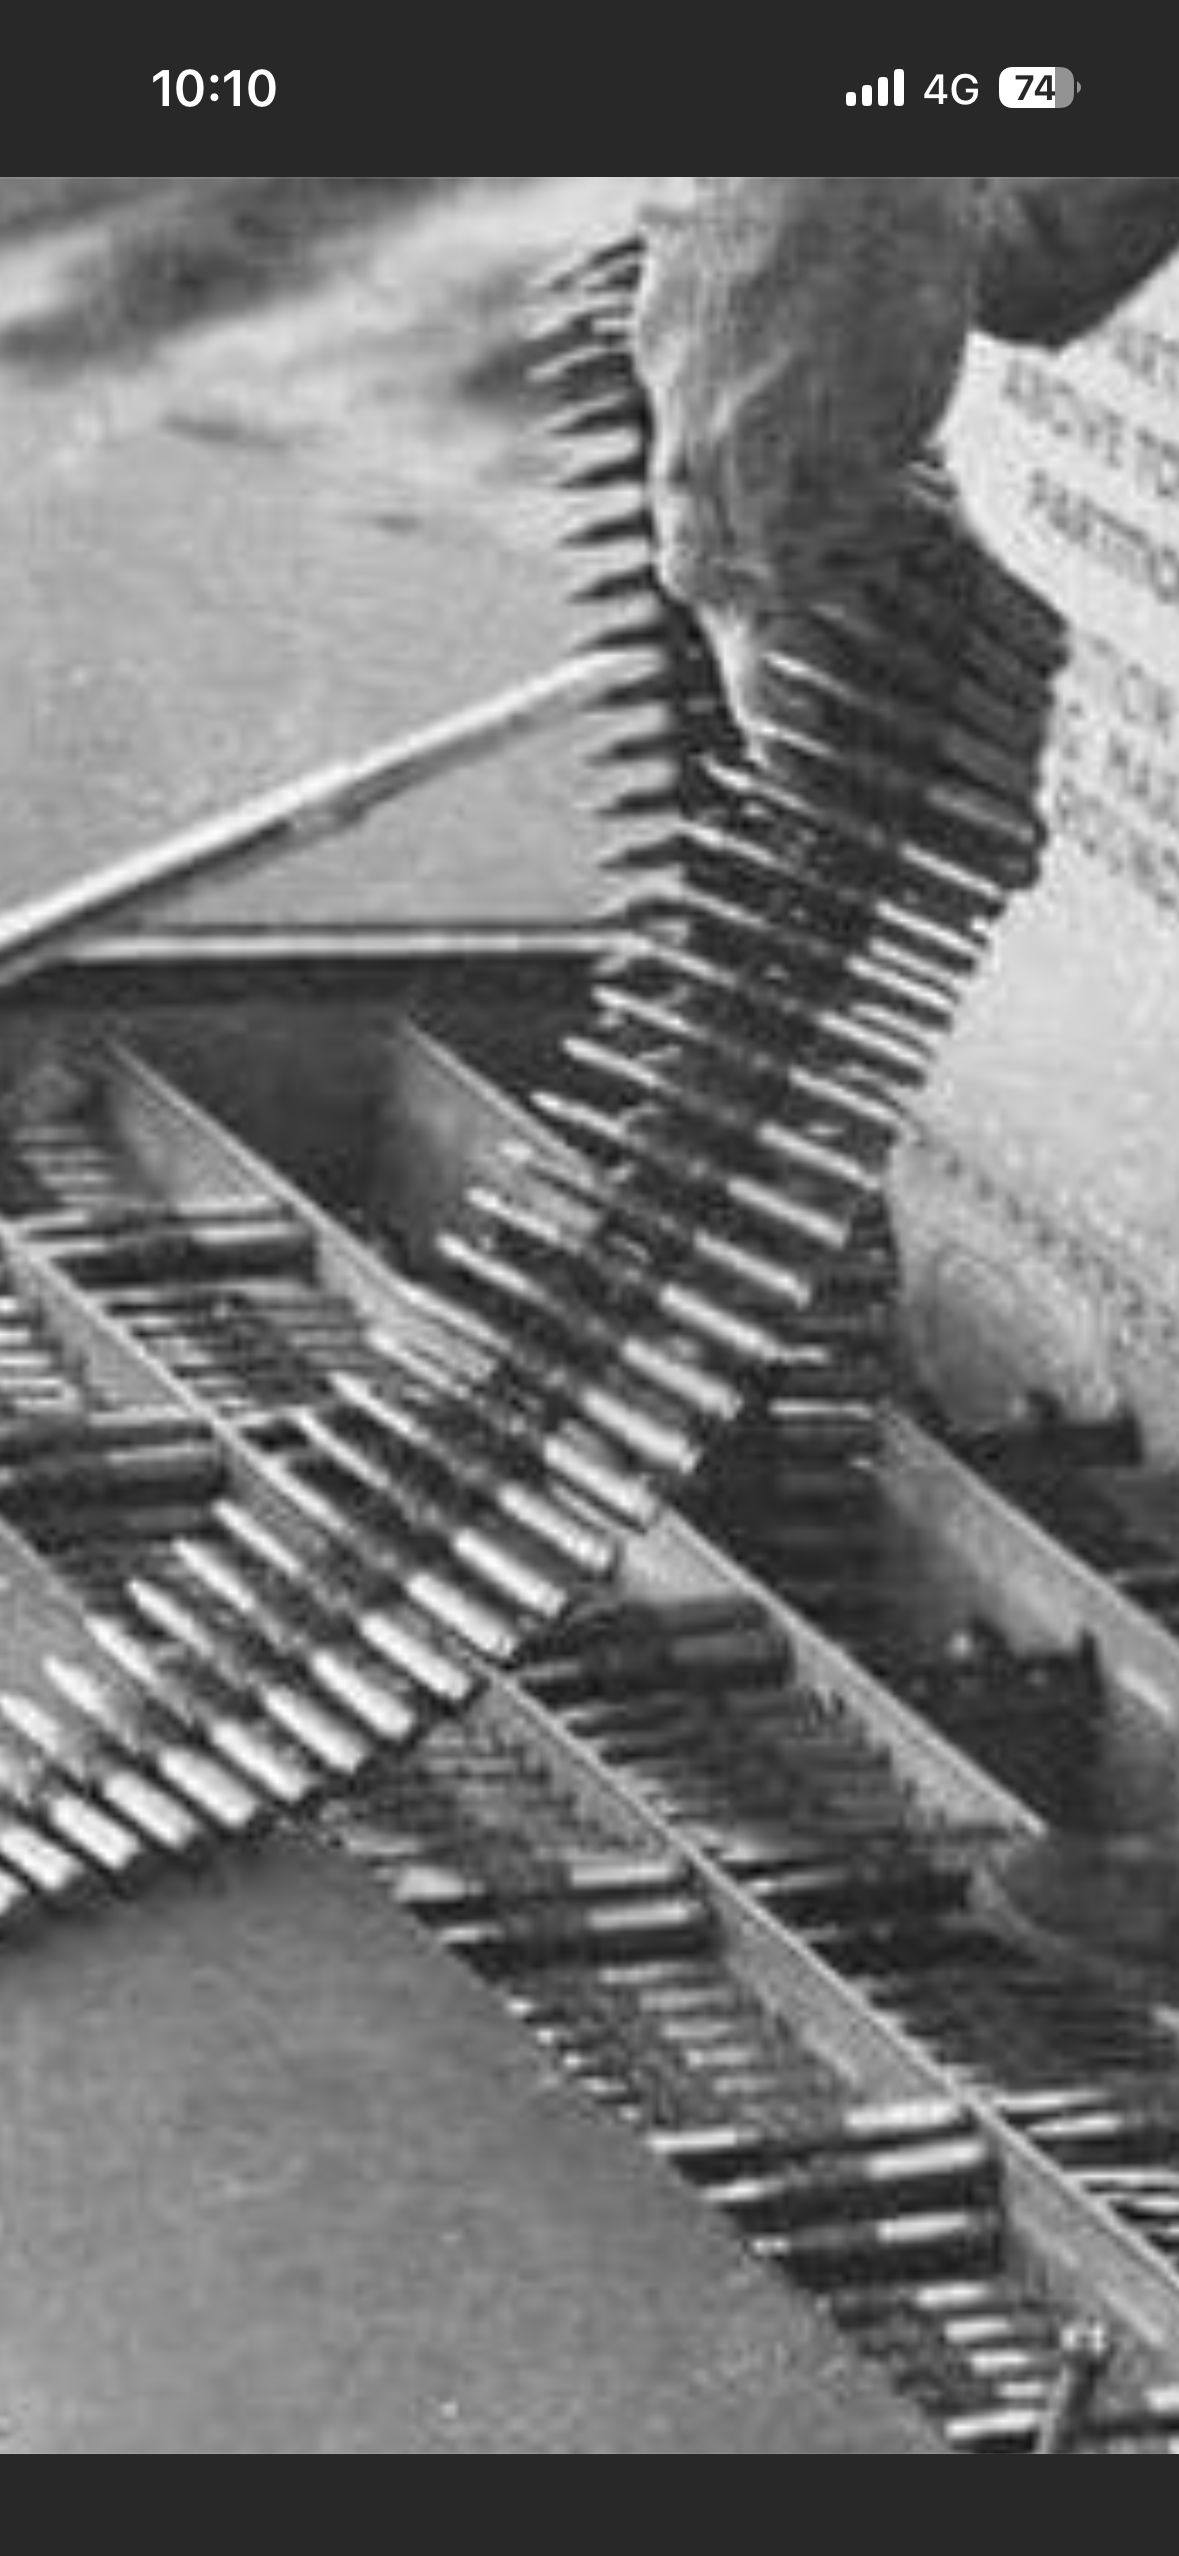
State of play with the ammo belts. having a girlfriend is awesome, but also means that I don’t get a lot of bench time on weekends or most evenings 🤣🙏🤷♂️🤦♂️ So. I ended up having to use a tiny bit of CA to glue the belt ends together, which was a bit of a pain but at least it worked (I tried three other glues, but none of them held together at all). Now each belt is long enough that I can both fit them into the Eduard feed chutes and have enough left to also drape them properly in the ammo trays These have been primed with thinned Vallejo Surface Primer in Panzer Gray, then the cases brush-painted with Alclad Polished Brass, and the bullets themselves hit with just a touch of Tamiya Bronze. its all a bit sloppy up-close right now, but I’ll smooth things out with the next steps There is a lot of *tiny* vinyl flash around the bullets themselves that I’m going to simply ignore - I can’t cut it without making it look worse, so I’ll take a deep breath and hope that it’s hidden once I get them settled in. Once this is all thoroughly dry, I’ll swipe it with a tiny bit of Mr Leveling Thinner to smooth things down, then dust the bullets with Tamiya Weathering Master Copper powder. I'm debating with myself on the belt links. Theres no molded detail on the belts, so I’ll have to do those entirely by hand. Masking long skinny flexible things will be a challenge, but the alternative is to either leave them be or try to paint each link by hand. We’ll see how much I can screw things up when I get to that point 😂🤷♂️🤦♂️ After all that, I’ll glue them down, along with the feed chutes. Once they’re in place, I’ll use my go-to Secret Weapon washes (heavy-body black and sewer water), to refine the links and tone things down a bit Hopefully, I can get them at least close to the reference photo - we’ll see