crazypoet
-
Posts
826 -
Joined
-
Last visited
Content Type
Profiles
Forums
Events
Gallery
Everything posted by crazypoet
-

Trumpeter P-47D Razorback
crazypoet replied to crazypoet's topic in LSM 1/35 and Larger Work In Progress
Quick note to anyone who wants to do this kit in the future, with the Eduard Gun Bay set… do *not* follow the Eduard instructions in step one about removing the rear mounting/alignment pin on the inboard gun. you'll regret it later, when you need to add the same amount of material *back*, to get the guns to align properly during the installation ask me how I know 🤣🤦♂️🤣 -
I get that 💯💯💯🤣 one day when I’m feeling truly adventurous, I’m planning a 1/350 Arizona with all the AM stuff I can find probably also USS Johnston and Sammy B, in honor of their respective stands as part of Taffy 3 during Leyte Gulf, off Samar but that will come *after* I work through my existing stash 🤣 …and figuring out where to *put* the bloody things once I’m done 🤦♂️🤣😬
-
1/1 Revi16 restoration
crazypoet replied to JeroenPeters's topic in LSM 1/35 and Larger Work In Progress
Simply gorgeous work! -
Trumpeter P-47D Razorback
crazypoet replied to crazypoet's topic in LSM 1/35 and Larger Work In Progress
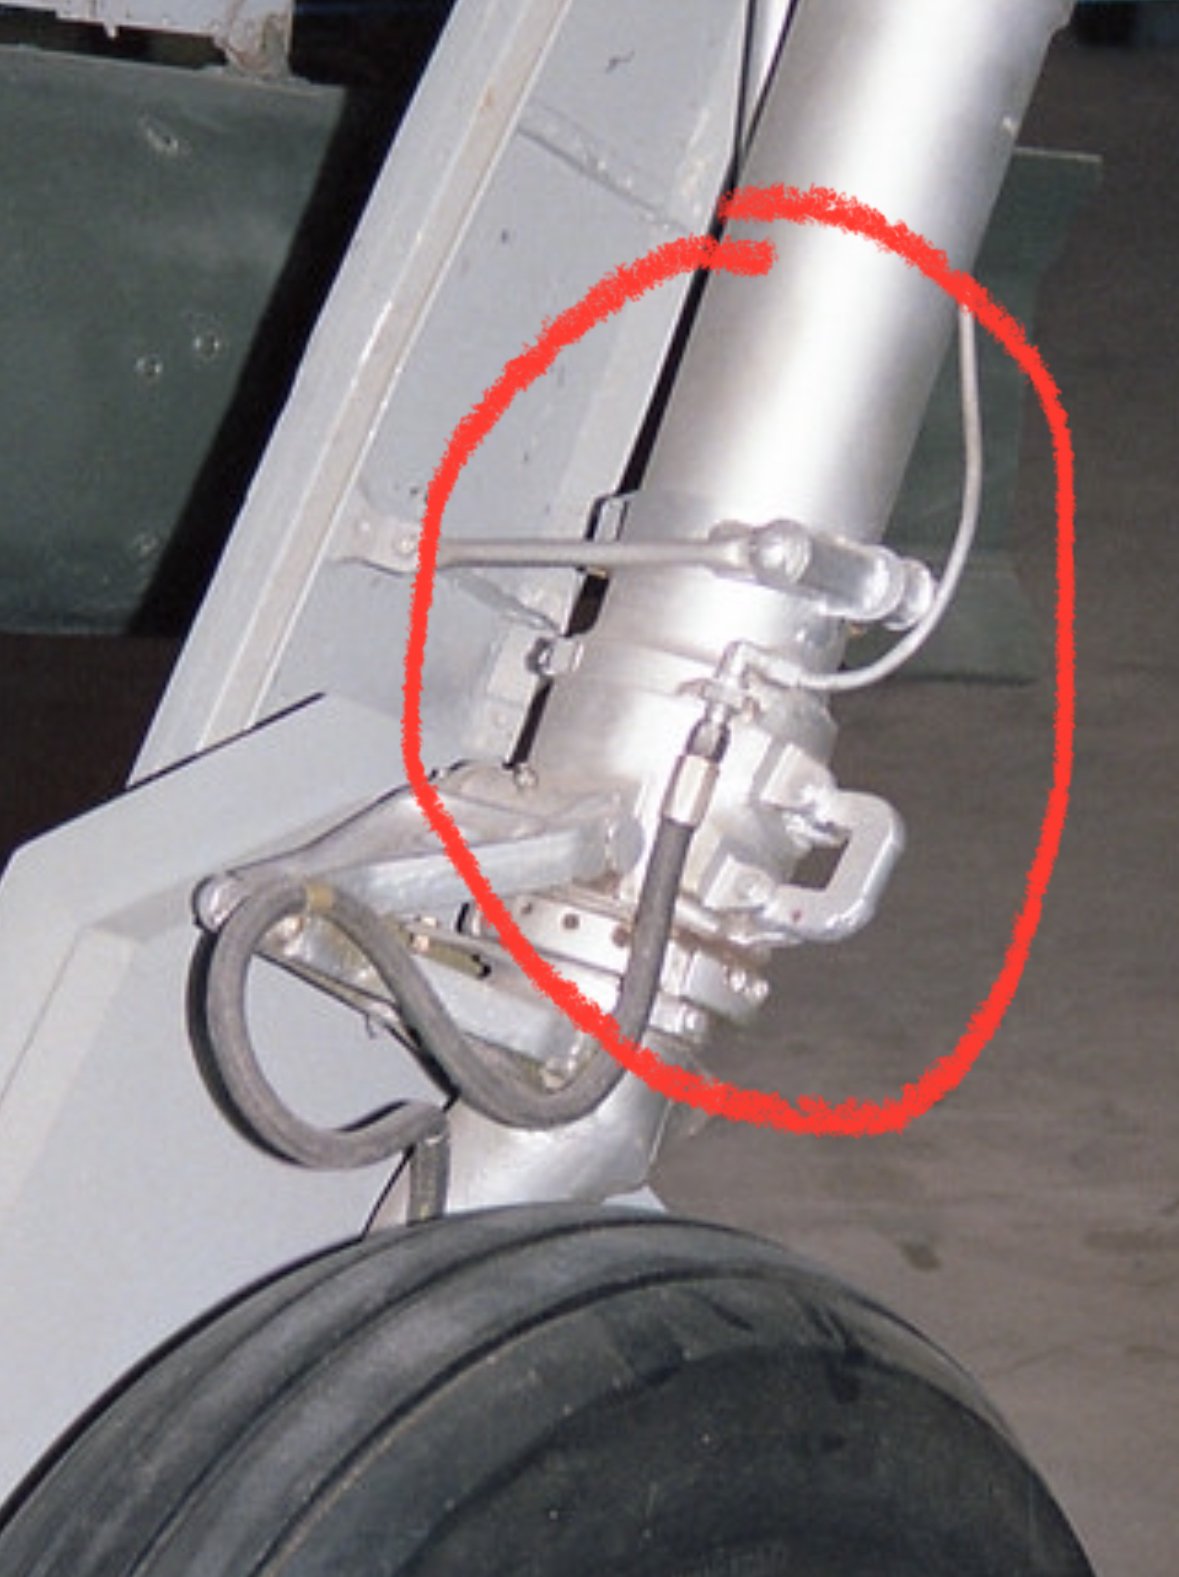
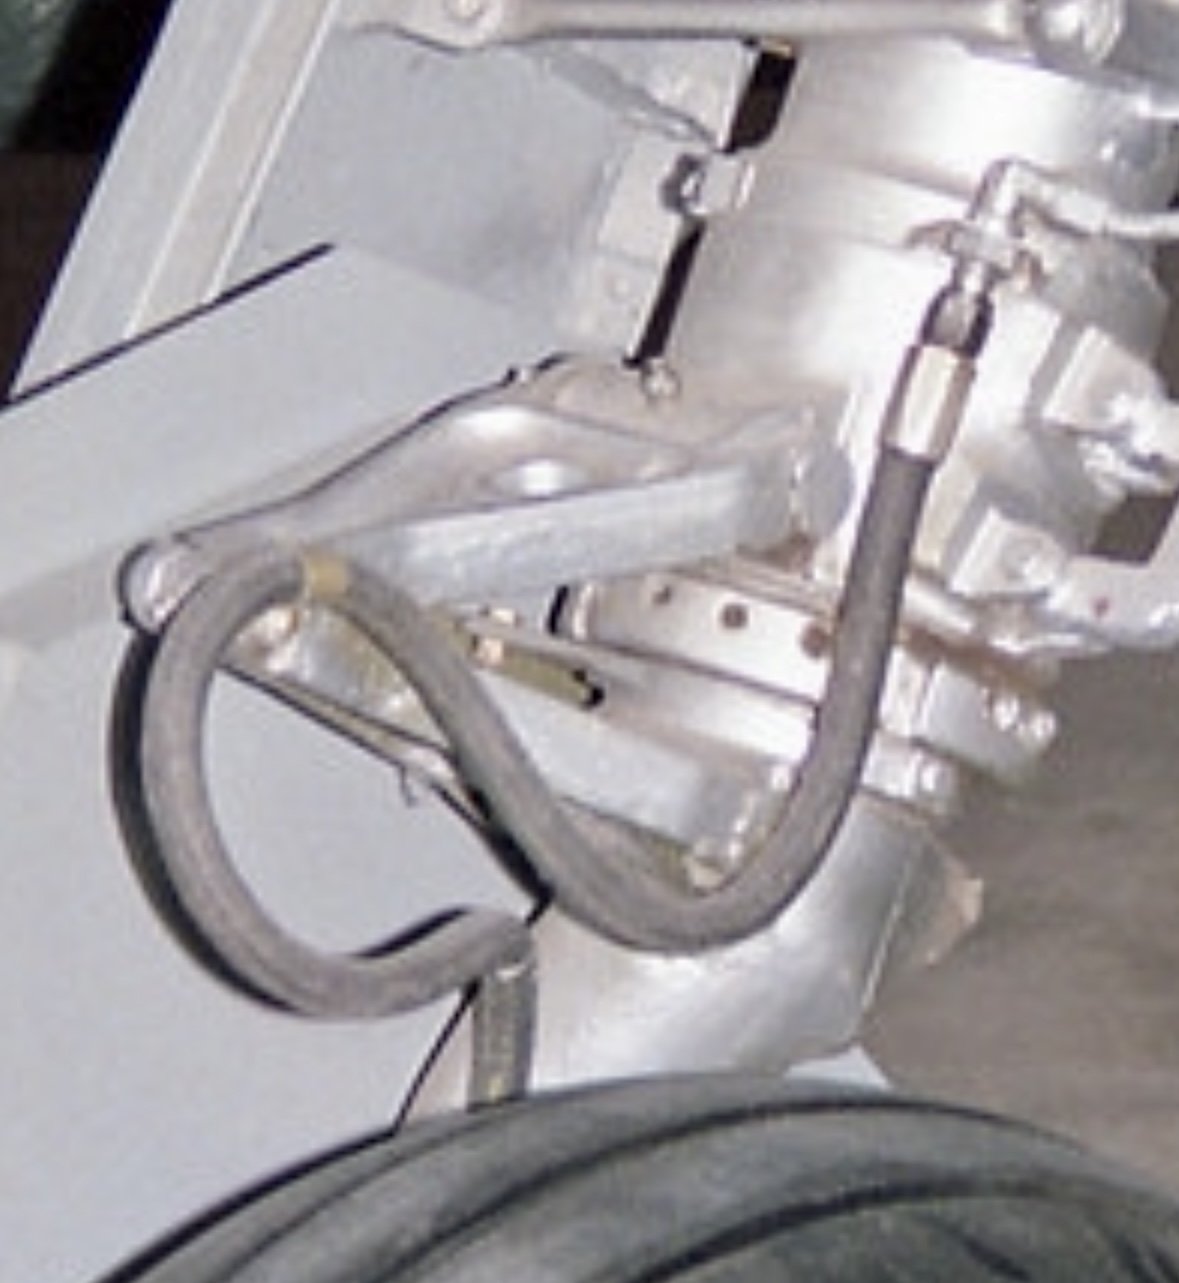
I dug up another good pic of the P-47 gun bay, still without any ID on the specific model. this one has yet another gun-charging setup - looks electric in this one? One of the pics I posted yesterday is either pneumatic or hydraulic on the other hand, the Eduard set has simple charging handles that connect somewhere behind the wing spar, which is fine, and that’s what I’ll use. What is interesting to me is that this makes at least three different approaches to this on the same aircraft - I’d love to know the hows and whys behind all the changes. So I have a new fun research project 🤣 this picture also shows some interesting clutter at the font of the bay, similar to what I is visible in one of the other pics from my last post. there is what looks to be a structural steel rod and some hydraulic lines along the front of the bay, just above the gun barrels. I need to look up what they connect to, and decide whether I want to include them in my build one of the pics also shows some larger-diameter hoses that connect to metal fittings under each of the guns that look as if they connect to the ejection ports, maybe. i have zero clue what they are, and (looking at how crowded things are going to be in there), I'm going to simply pretend that they don’t exist (or were specific to a later model 🤣)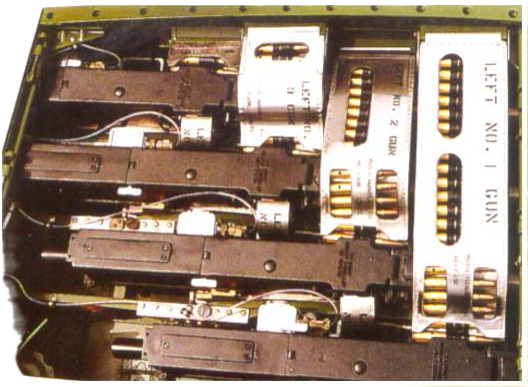
-
Trumpeter P-47D Razorback
crazypoet replied to crazypoet's topic in LSM 1/35 and Larger Work In Progress
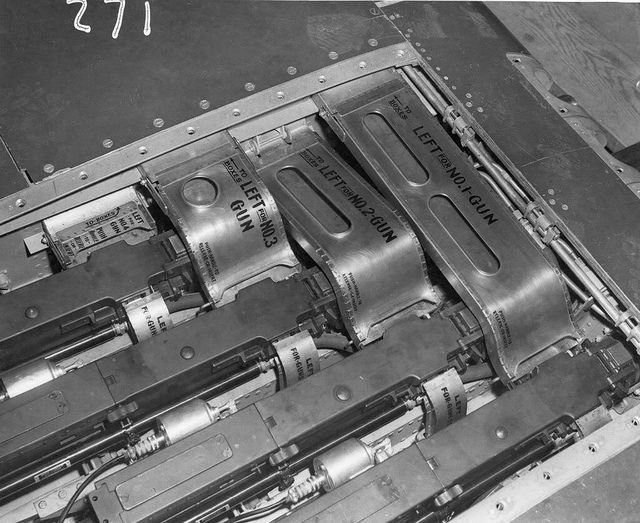
Ok, belay that last 😂🤦♂️ I’m going to do one open and one closed gun bay. I’m going to wall off that part of my brain that’s screaming “but noooo…!” to a couple of the incorrect details in the Eduard gun bay set and just go for it as-is. there was sufficient variation in actual field implementations that I can kinda justify the differences I’m using these two photos as working references - you can see notable differences between the two (though they don’t, sadly, note which photo represents with variant of the P-47 they display) you can see some of the different approaches even between these two pics - like stencils vs no stencils on the feed chutes, and different kinds of gun charger between the reference photo and what is included with the Eduard set. The good news on the gun charger detail is that I *think* that the second photo shows a later version of the Jug, since the wing appears to be NMF rather than painted. At least that’s my story and I’m sticking to it 😂 Sadly, the Eduard feed chute for gun #2 is simply wrong against *both* references, but I’ll bite the bullet and just use it as-is the big question is whether I can make the rubber/vinyl/whatever ammo belts that came with the kit work with the Eduard chutes. The Eduard ammo belts are kinda “nice try, but NO” for me 😂 The kit belts are much more accurate, but I have to be able to run them at least some of the way through the Eduard chutes to make the final assembly look right hopefully, this won’t take more that one large bottle of rum to get me through all the cursing - wish me luck! 😎🙏😂
-
Trumpeter P-47D Razorback
crazypoet replied to crazypoet's topic in LSM 1/35 and Larger Work In Progress
Ohhhhkay bugger I’ve looked long and hard at both the Eduard and kit parts for the gun bays, and neither of them is going to really look “right” at least not without a shitton of additional scratching and such. so rather than going the way of madness, I’m going to just mount the guns and close things up. Maybe drape an ammo belt somewhere I’d hoped to have one of the bays open, but I just don’t like the results so far (I got a good start with the Eduard set, but the closer I look, the more I realize how much even *they* got wrong. I get that they had to work within the limits of flat PE, but damn - they could have done a resin piece for the feed chutes that would have fixed pretty much everything so oh well 😂🤷♂️🤦♂️ at least this will save me a month or two of heavy drinking and head-scratching, and get me along towards finishing this thing 😂 -
Me either - let alone the engine pistons and crankshaft like this. 😳 its kinda cool, as it shows how the things were actually designed to work, but I can see it being a bit of a PITA to assemble still - very cool!
-
Trumpeter P-47D Razorback
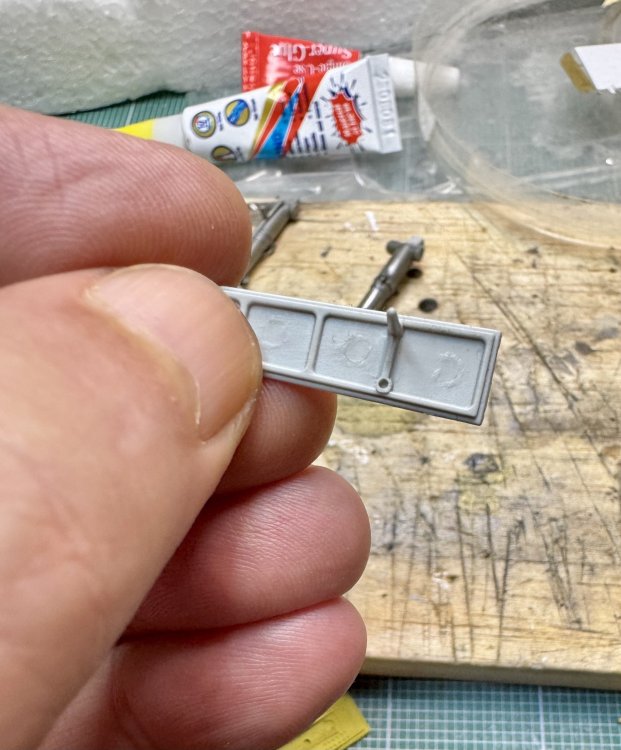
crazypoet replied to crazypoet's topic in LSM 1/35 and Larger Work In Progress
Just about ready to call this stage done. I have to put down the first layer of color on the outside of the gear covers, then these will be ready to attach to the wings (after attaching the wings to the fuselage, which I’ve so far put off doing) I know that conventional wisdom would have me leaving the gear covers off until after gluing the struts to the wings, but with the way this particular bunch all goes together, it was *much* simpler to do all of this up-front. If I need to do any fine-tuning to get everything properly aligned later, I’ll deal with it 😂 I now have to go back and face the reality of the gun bays 😬
-
Trumpeter P-47D Razorback
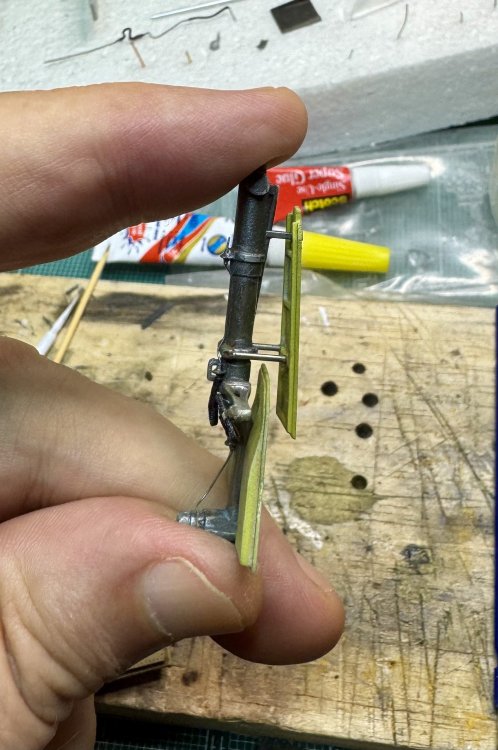
crazypoet replied to crazypoet's topic in LSM 1/35 and Larger Work In Progress
Got the pins cut and glued to the struts It’s easier to align from this side than it would have been to glue them to the gear cover first The test-fit looked good (of course it will somehow be “off when I go to glue things together, because of course it will 🤣) But I’ll take a deep breath anyway and prime/finish the pins in place while I finish cleaning up the ejection pin holes and get a color coat down on the covers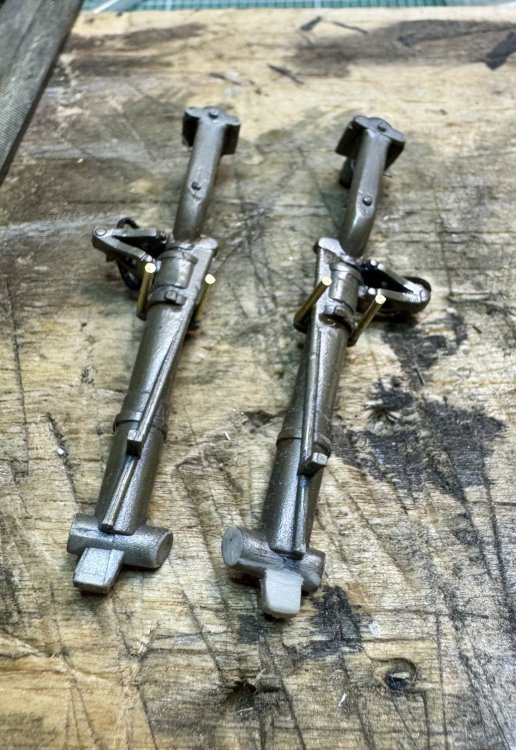
-
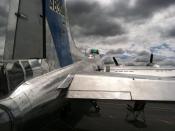
Happily following this! I love the Grumman float planes of that era 🙏
- 15 replies
-
- 5
-

-

-
- grumman duck
- j2f-3
- (and 4 more)
-
Beautiful work!
-
The Revell 1/32 HE-111 P1. It’s a pretty solid kit, with the opportunity for a *bit* of dressing up the interior without too much fuss and bother. The only real challenge will be masking all that glass with just Tamiya Tape and liquid mask 🤣
-
Gawds yes! A break after a long build is a nice “reset button” 🤣 I already picked out my next build after the P-47 - an HE-111 with zero aftermarket and a promise to myself that I won’t do any major surgery 🤣 I haven’t done a straight out-of-box build since I was a teenager, so this will be a very nice break 😎🤣🙏
-
I agree with y’all about the Mossie - she’s both elegant and deadly, and was able to perform well in pretty much every role possible for a warbird of the era 🙏 watching with interest!
-
Trumpeter P-47D Razorback
crazypoet replied to crazypoet's topic in LSM 1/35 and Larger Work In Progress
Well, I have a *tiny* bit of progress to report - I’ve had almost zero real bench time the last couple of weeks, but I’ve gotten a *bit* done The flexible lines for the oleos are done, and I’m fairly happy. I cut the hose just a bit long, but it works. this leaves just the flex hose that connects from the strut to the gear bay (which I’ll install just before I glue the struts to the wings), and the hard line connecting to the wheel hubs, which I’ll do when I paint and glue the wheels themselves. I’ll create the fitting for the hubs with a bit of .5mm tube once I figure out the proper placement, then shape, trim, and connect the line after I glue the wheels to the struts. This will mean doing some minor adjustments to the shape of the hubs themselves - the barracuda resin wheels and tires are amazing, except for the detail on the strut side of the hubs, where the shape is just a bit off Next up is to replace the molded plastic arms that connect the gear cover thingy (insert proper technical term here 🤣) to the struts with some 1/32” brass rod. The plastic arms just look terrible, so this was an easy decision after about five minutes of staring at them. I’ve done the measurements for both length and angle to match the kit bits, and got started with the first bit of cutting and drilling today (note to self - fill in the ejector pin holes and paint the thing *before* gluing the rods into place 🤦♂️🤣) I’ve learned a lot about proper techniques through this process, which is fun in itself. Several false starts and head-scratching to get to what actually works - but that’s all part of the process 💯😎🤦♂️🤣
-
Trumpeter P-47D Razorback
crazypoet replied to crazypoet's topic in LSM 1/35 and Larger Work In Progress
Primer and first color down 😎 I used a mix of Alclad light and medium gray primers, thinned with Mr Surfacer 400 for the primer coat. I’ve tested Uschi steel on black, and it looks good but it’s too dark for these, so I went *much* lighter in tone this time i let the primer dry for about 90 minutes, then hit it with the Uschi steel powder, plus a bit of the iron powder here and there to deepen the tone a bit tomorrow, once everything cures, I’ll do a clear coat. It will likely dull some of the bright spots, but that’s not really an issue here. If needed, I can do a light touch up before I start adding oil stains and suchlike there is only a thin sliver of the oleo cylinder showing - I’ll hit that with some bright steel while I’m doing the rest of the details i like the look so far!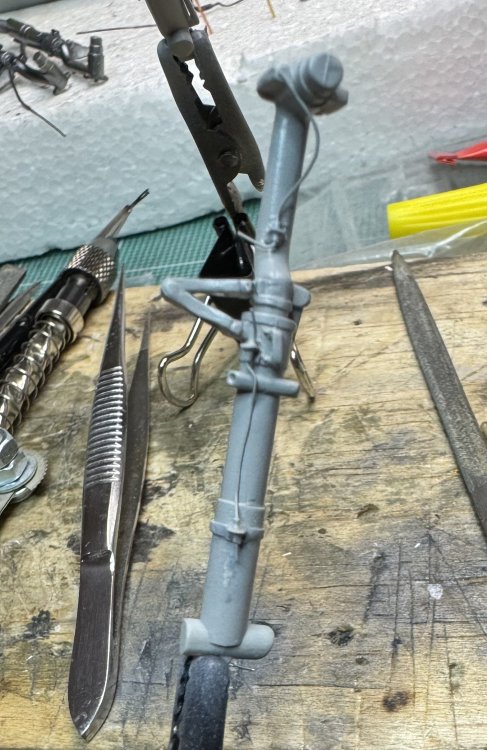

-
I’m following as well 🙏 I have a P-40, B-25, and A-20 in the stash that I’ll be doing up in South Pacific colors, and a Zero would make a perfect addition to the set i look forward to seeing how your build works out 🍿 …now if only someone could put out a 1/32 Betty, I’d have a whole set 🤣
-
Trumpeter P-47D Razorback
crazypoet replied to crazypoet's topic in LSM 1/35 and Larger Work In Progress
I’ve spent more time than I care to admit crawling around the floor with a flashlight, after something *pinged* out of my tweezers 😂 -
Trumpeter P-47D Razorback
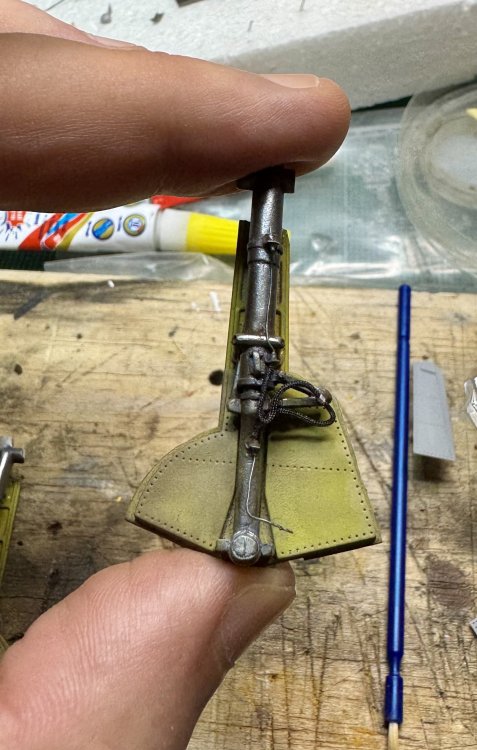
crazypoet replied to crazypoet's topic in LSM 1/35 and Larger Work In Progress
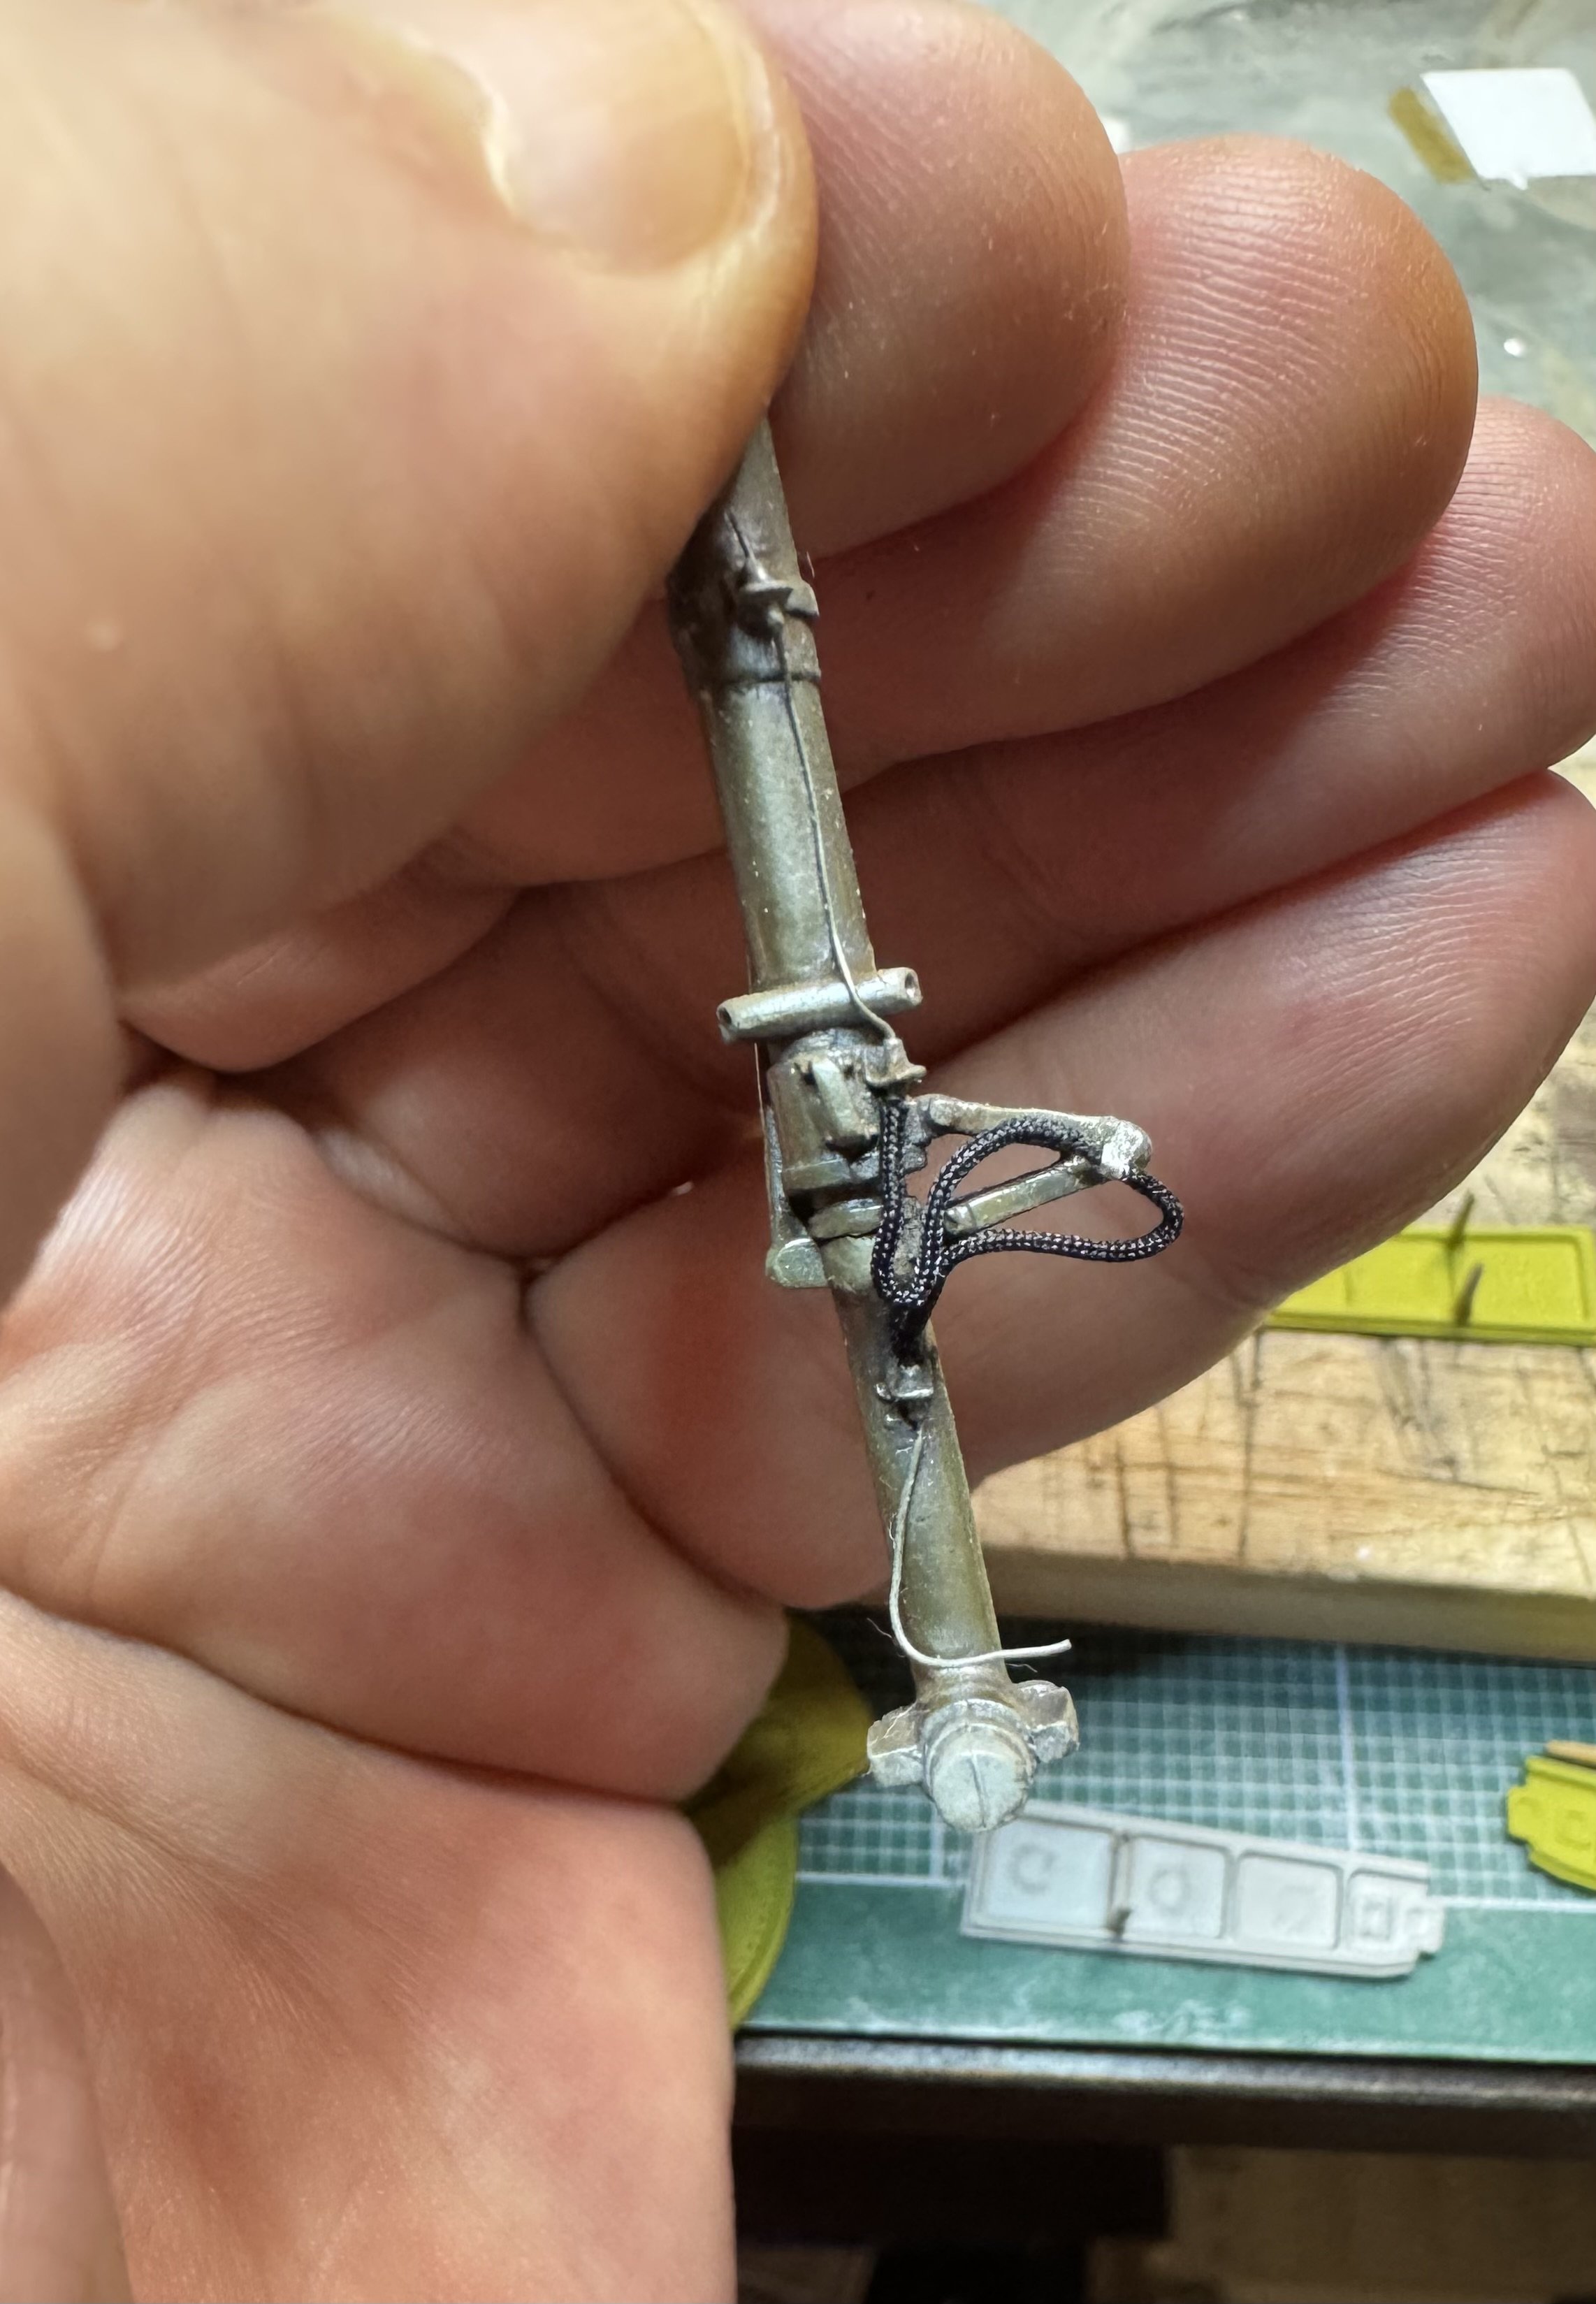
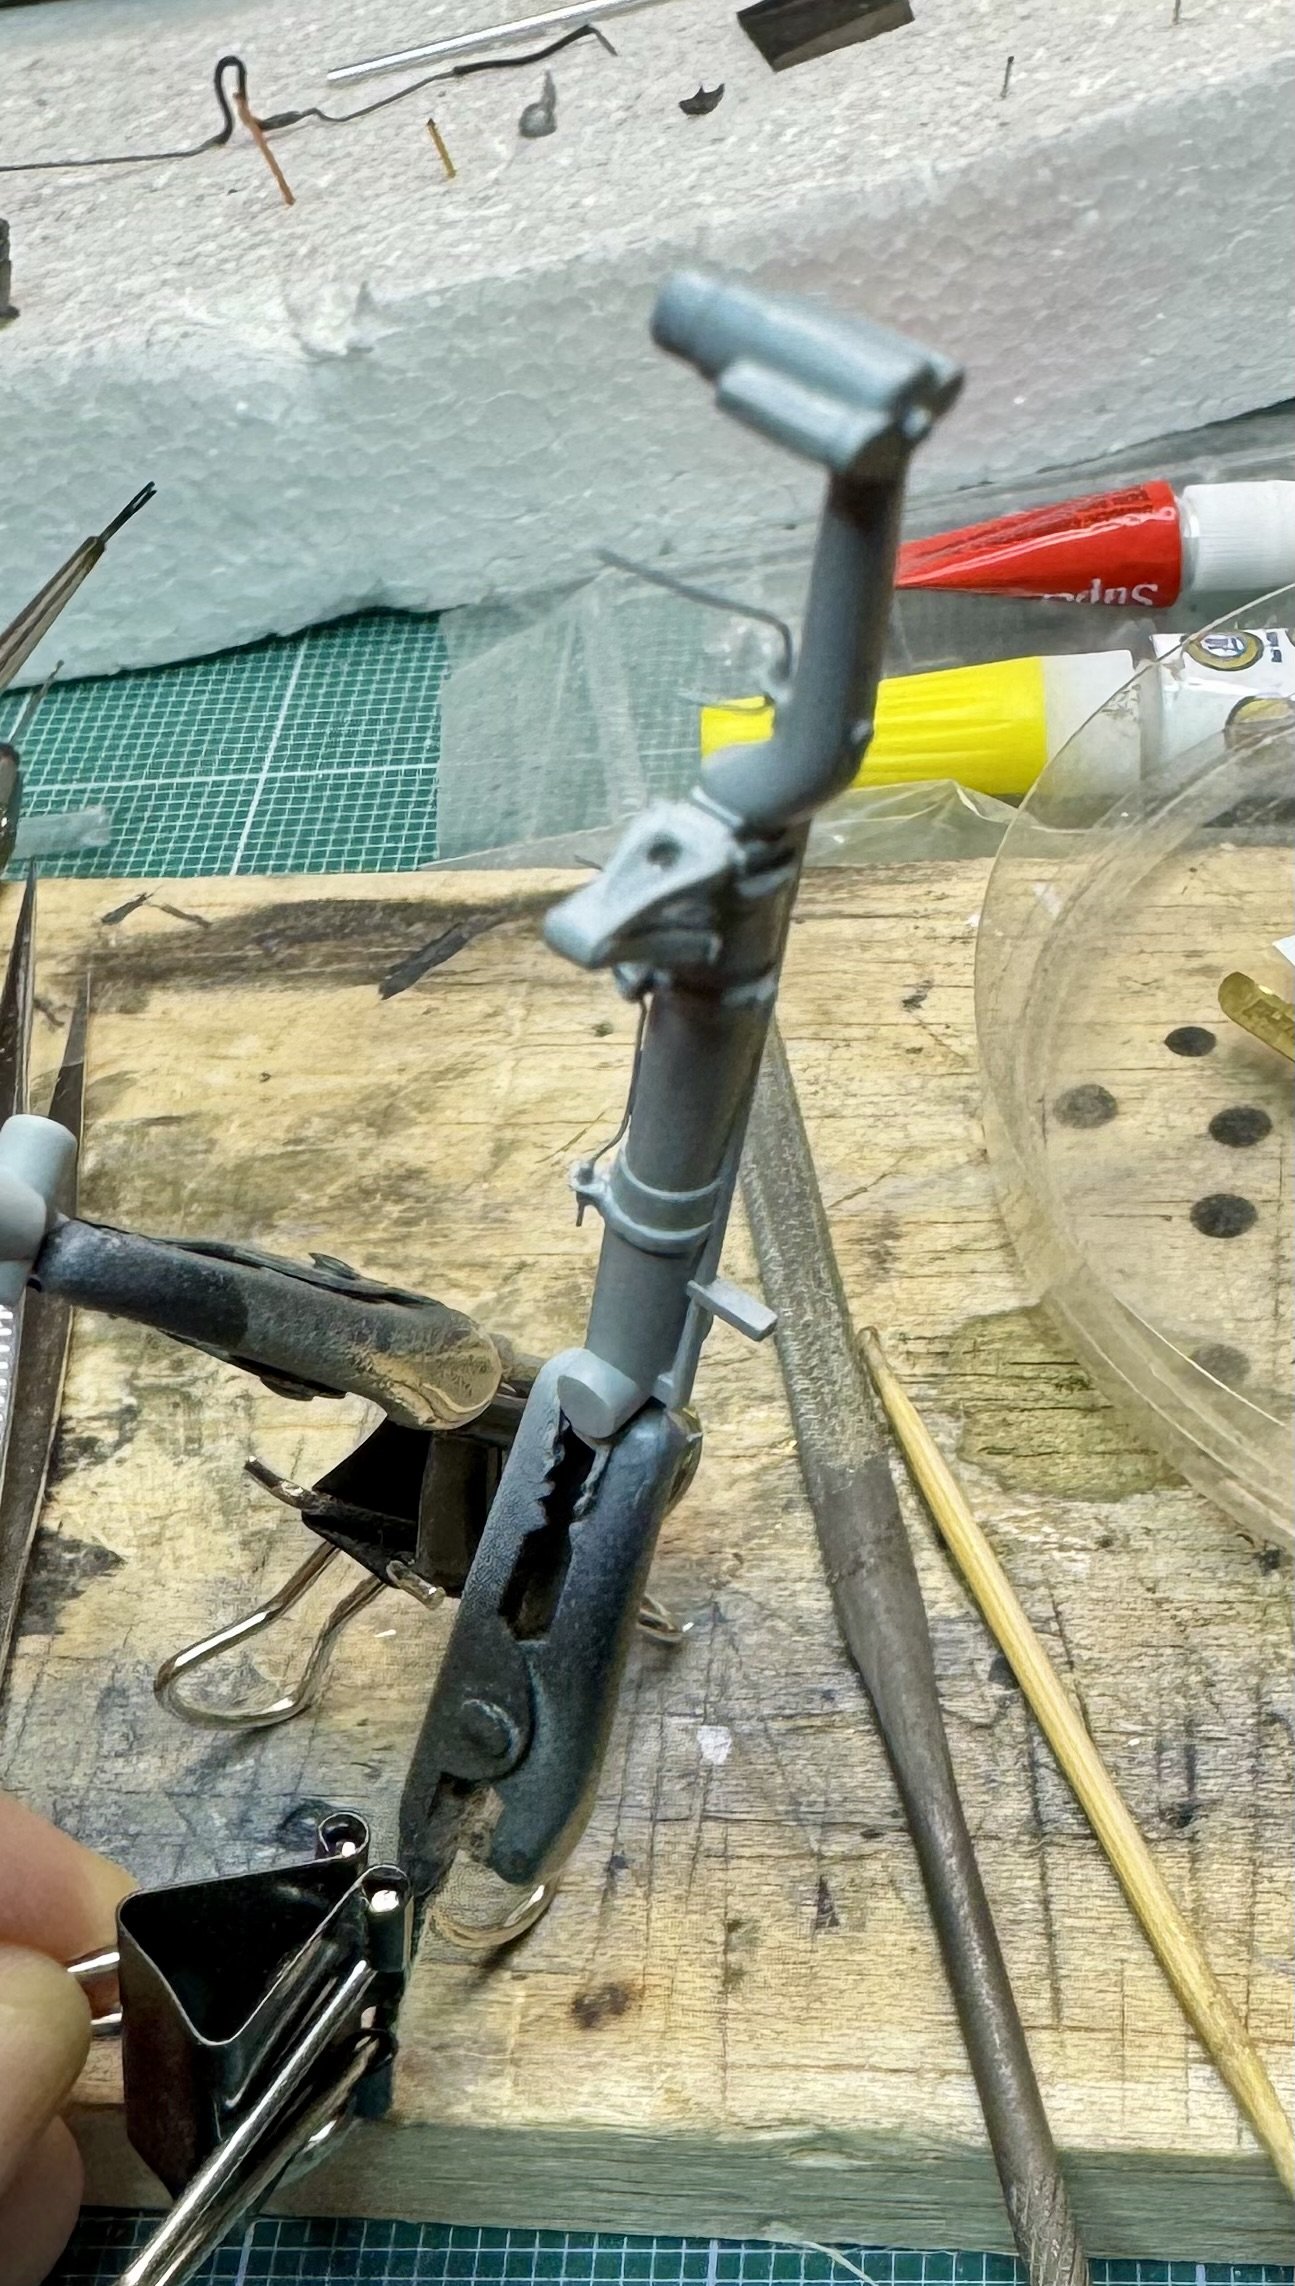
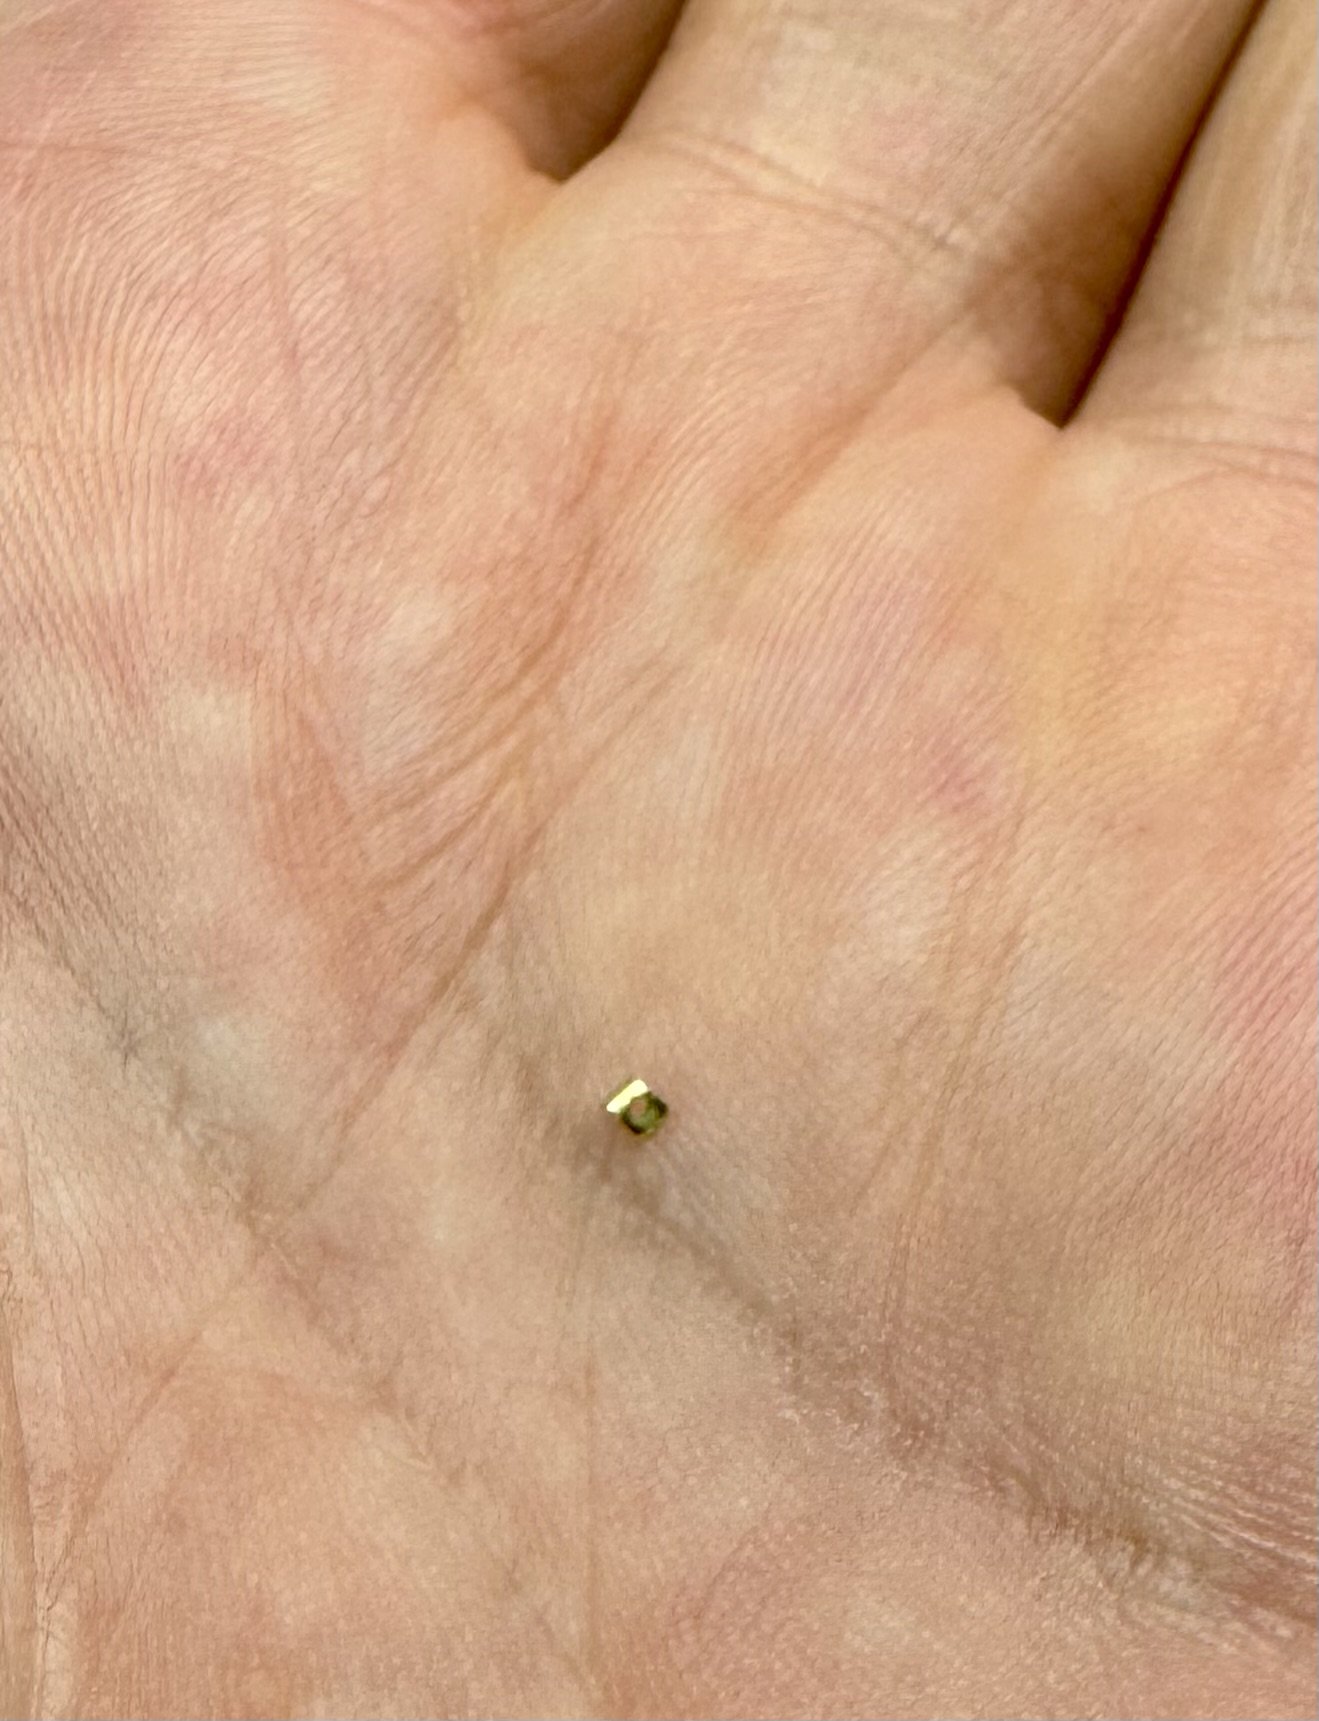
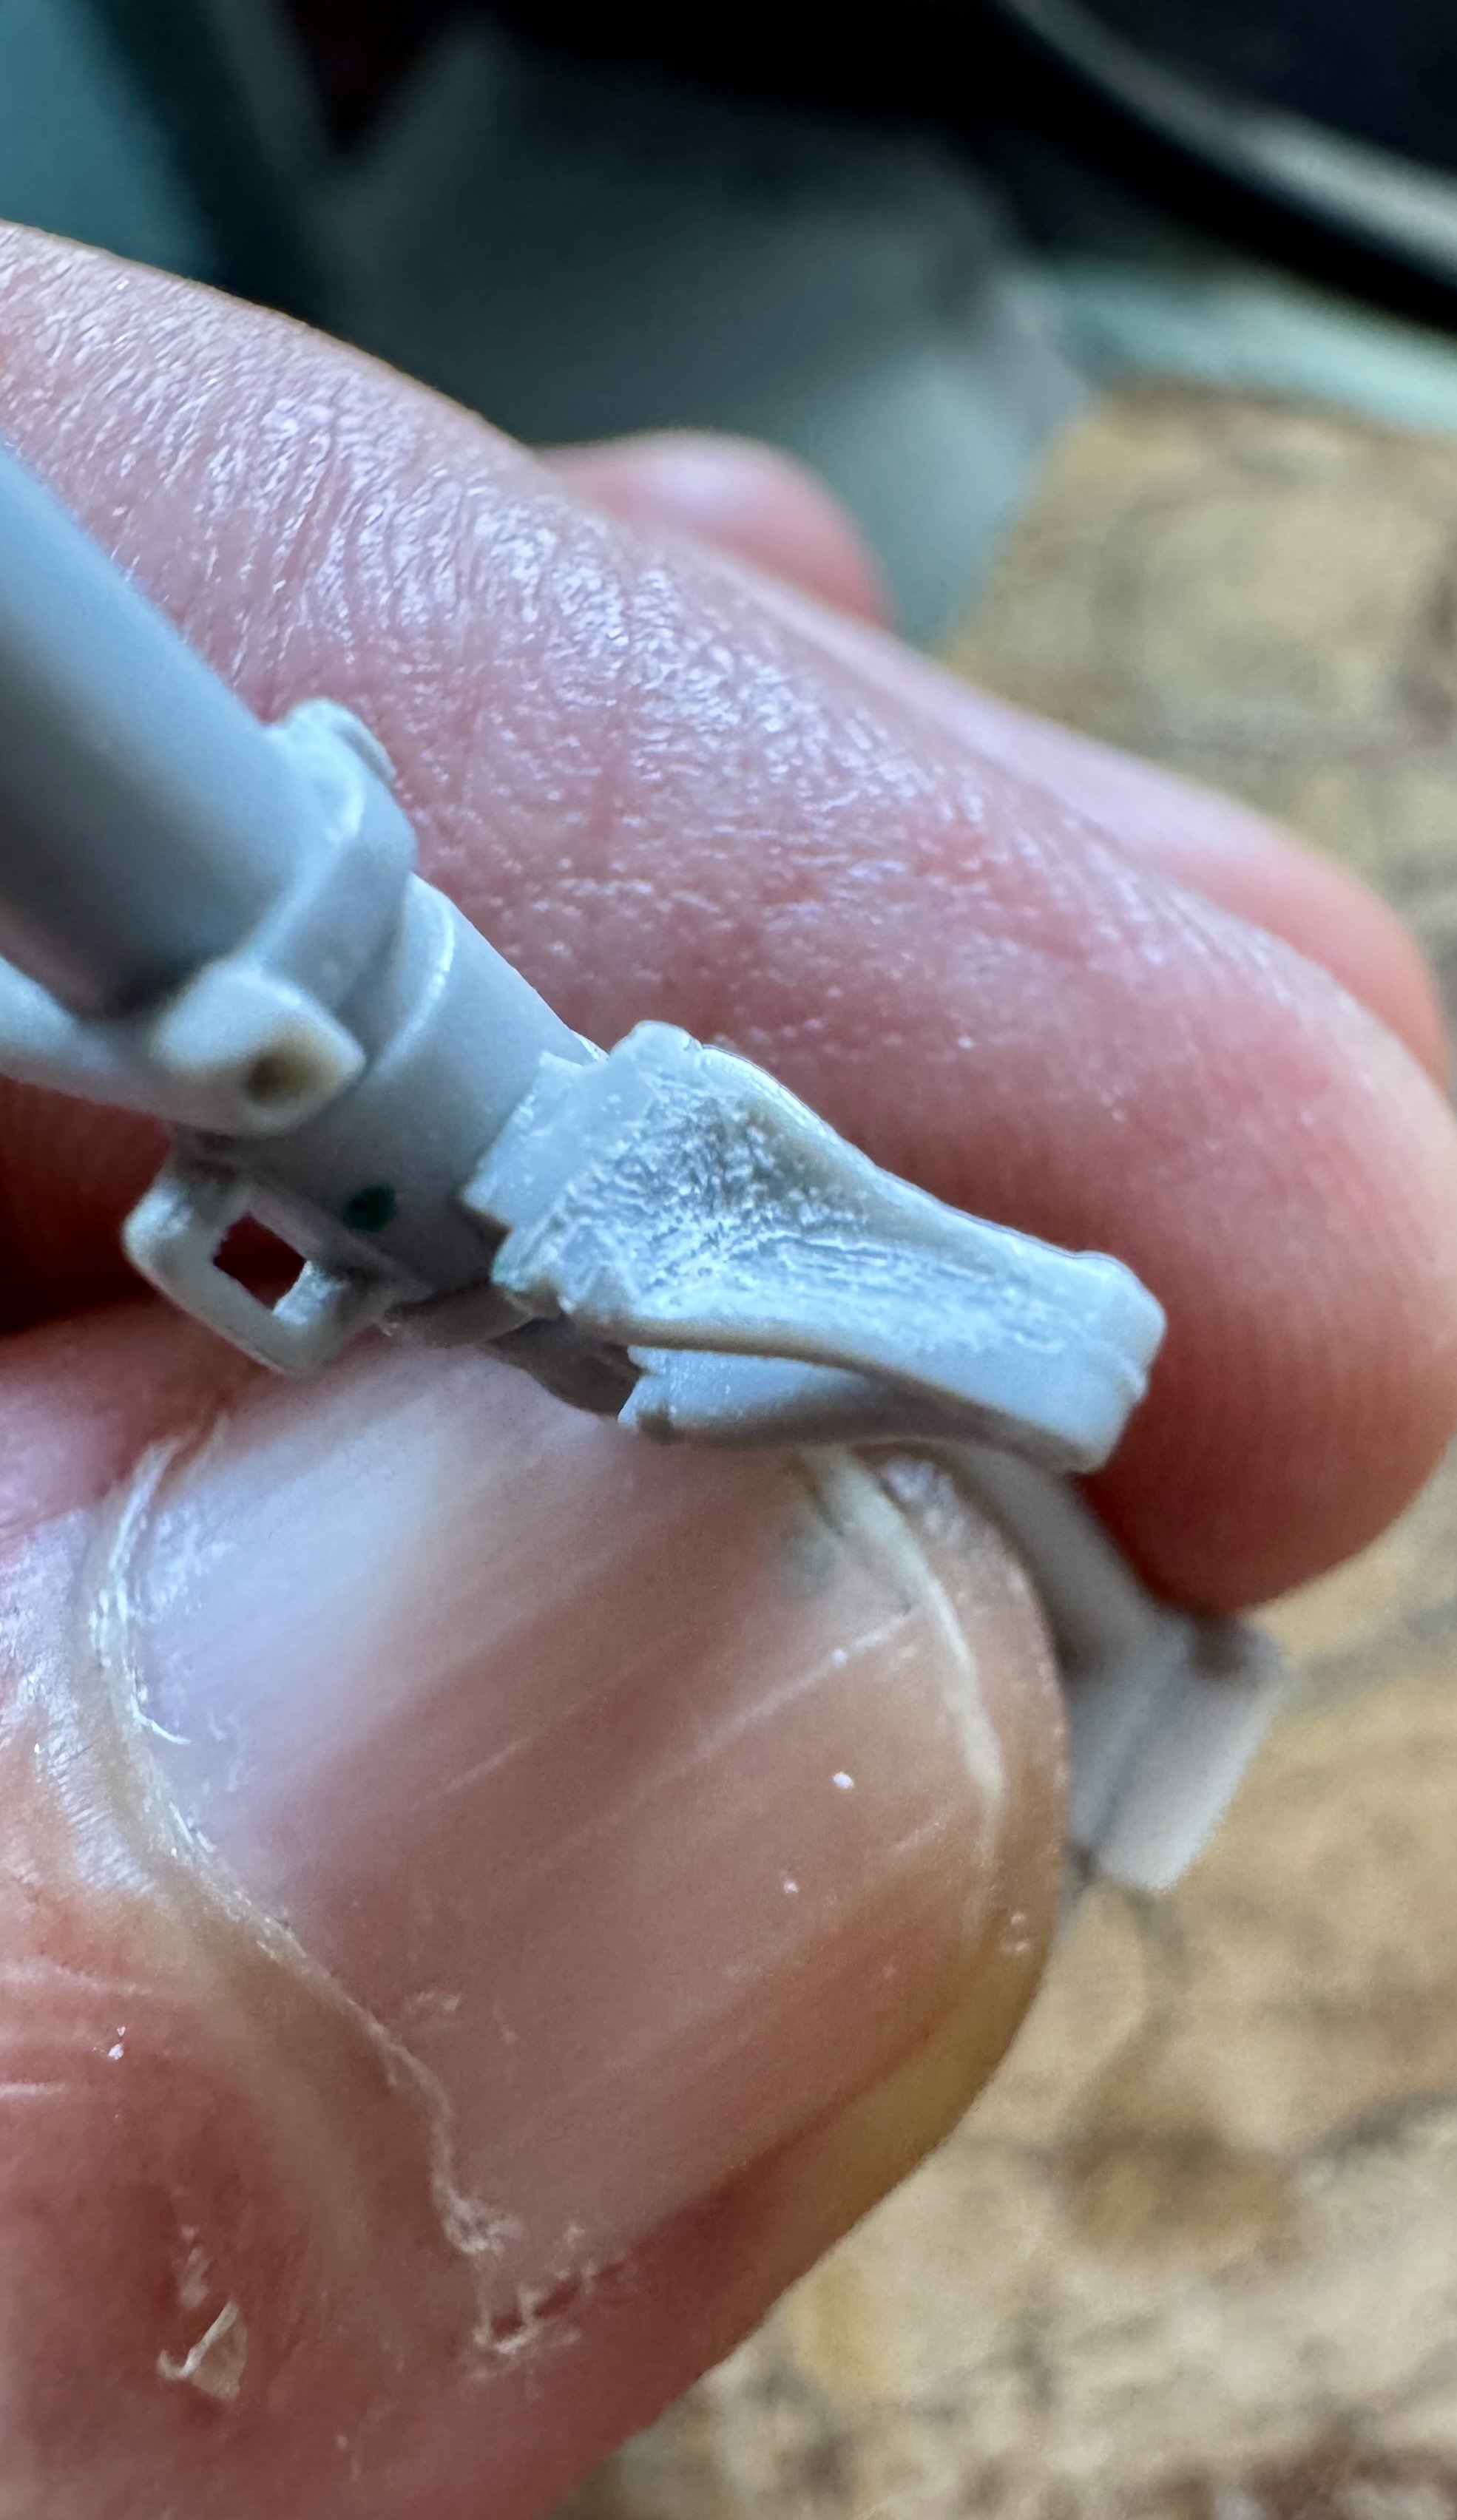
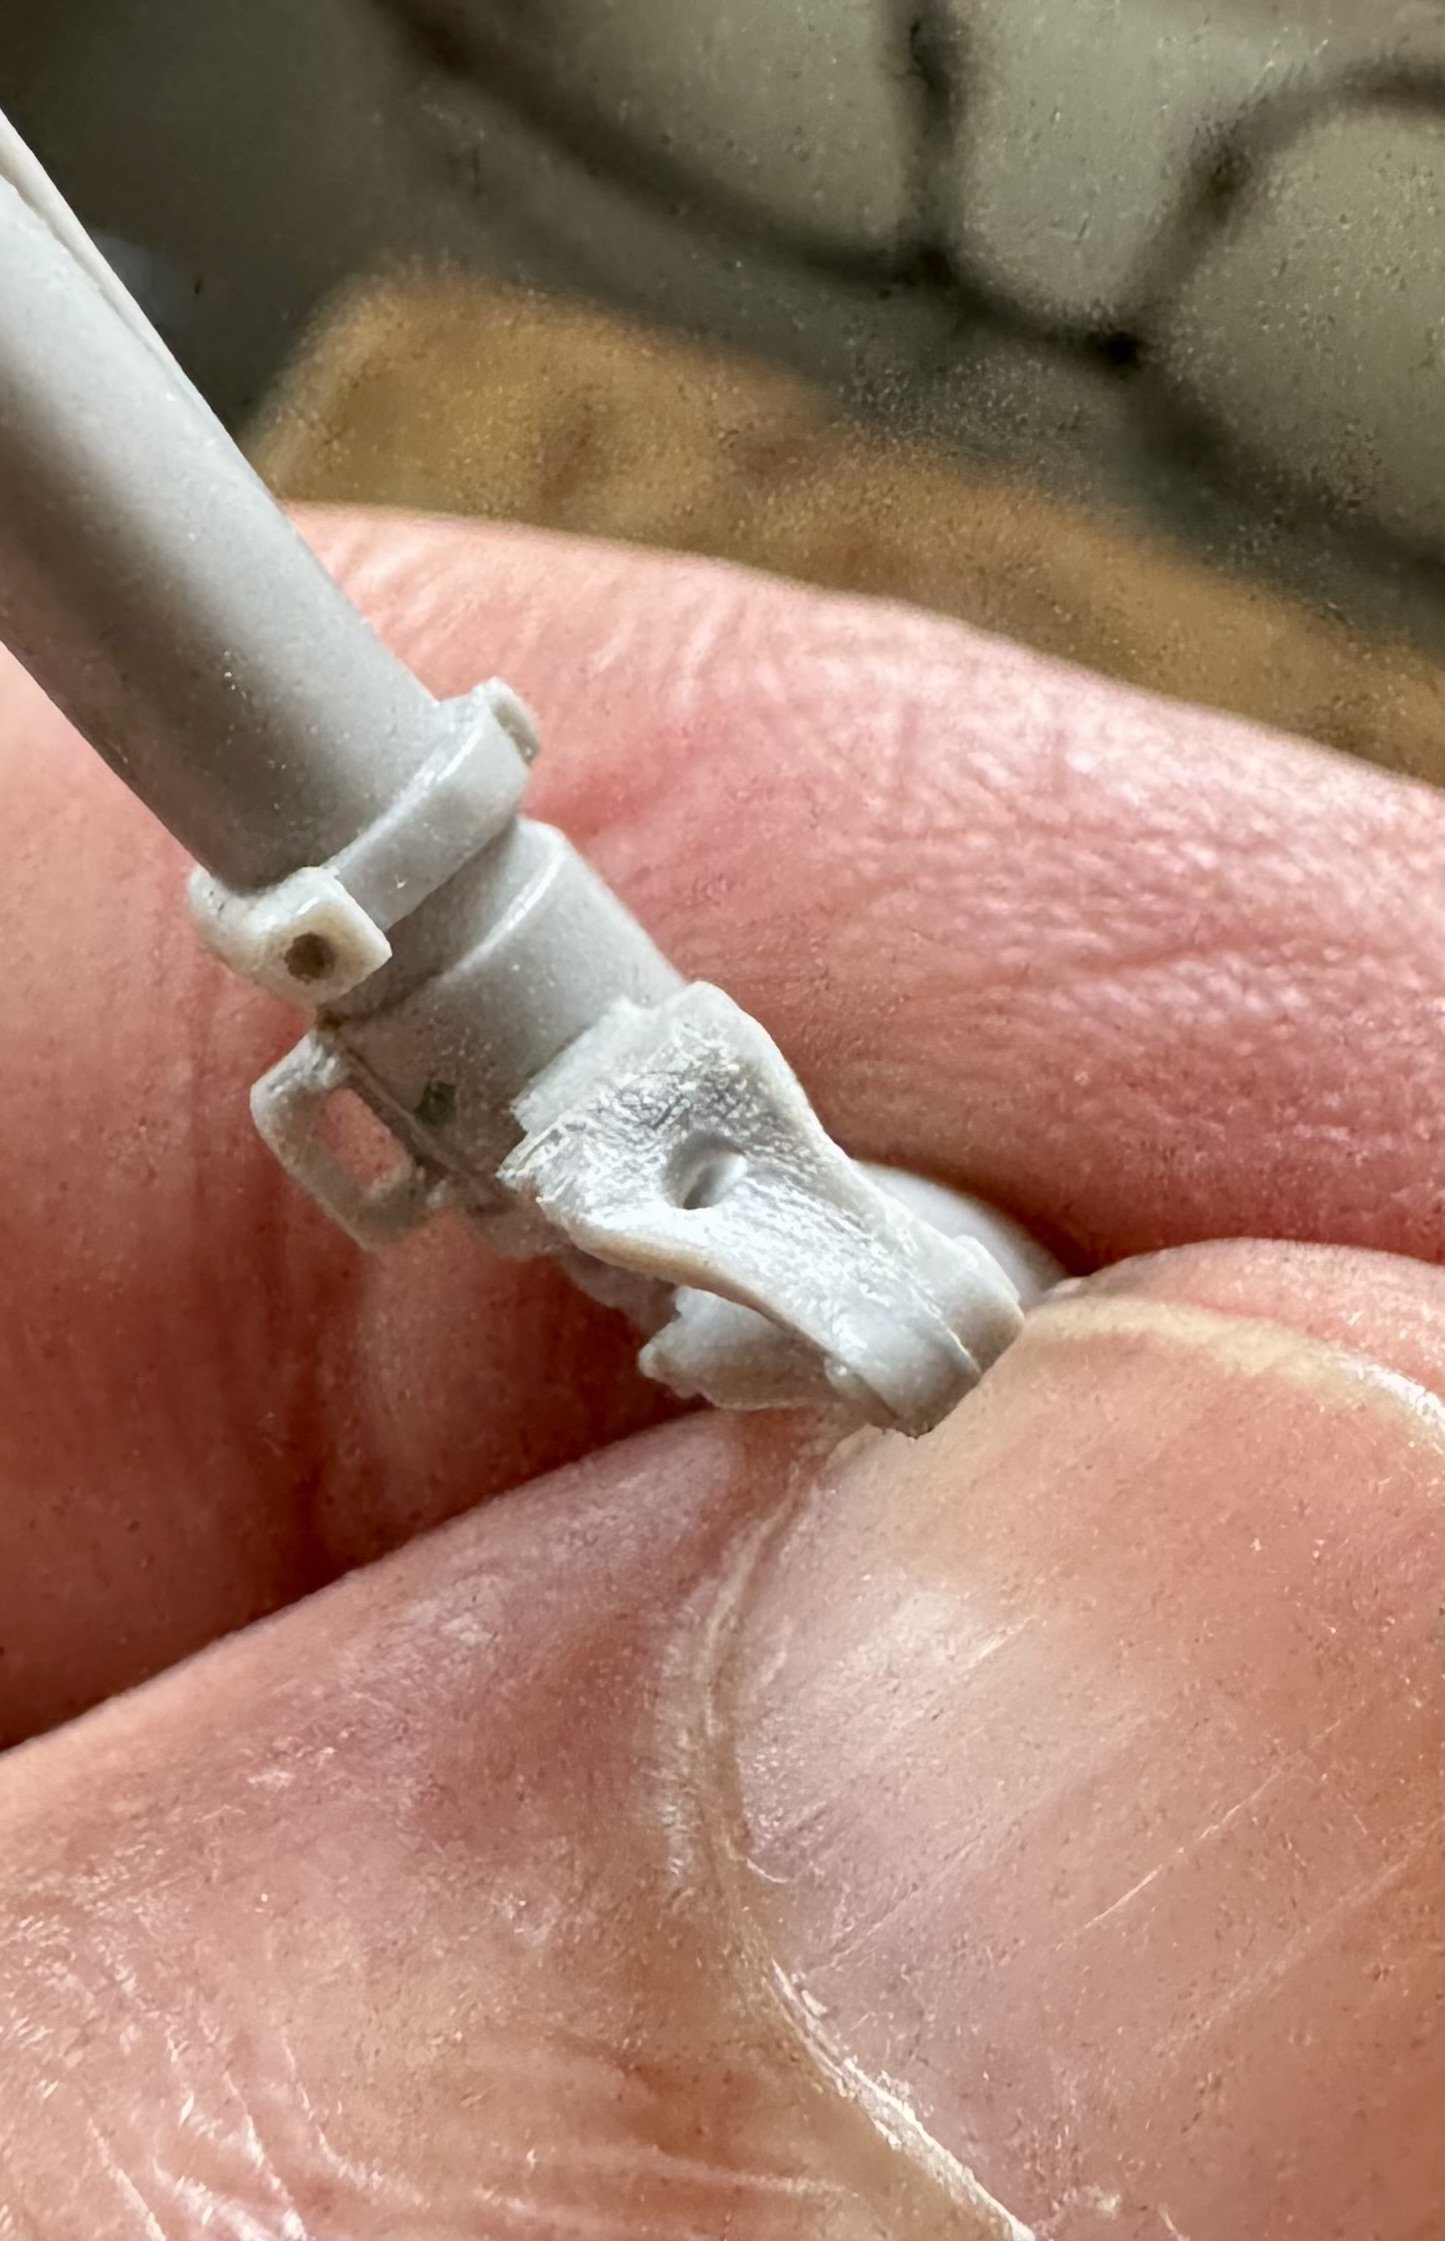
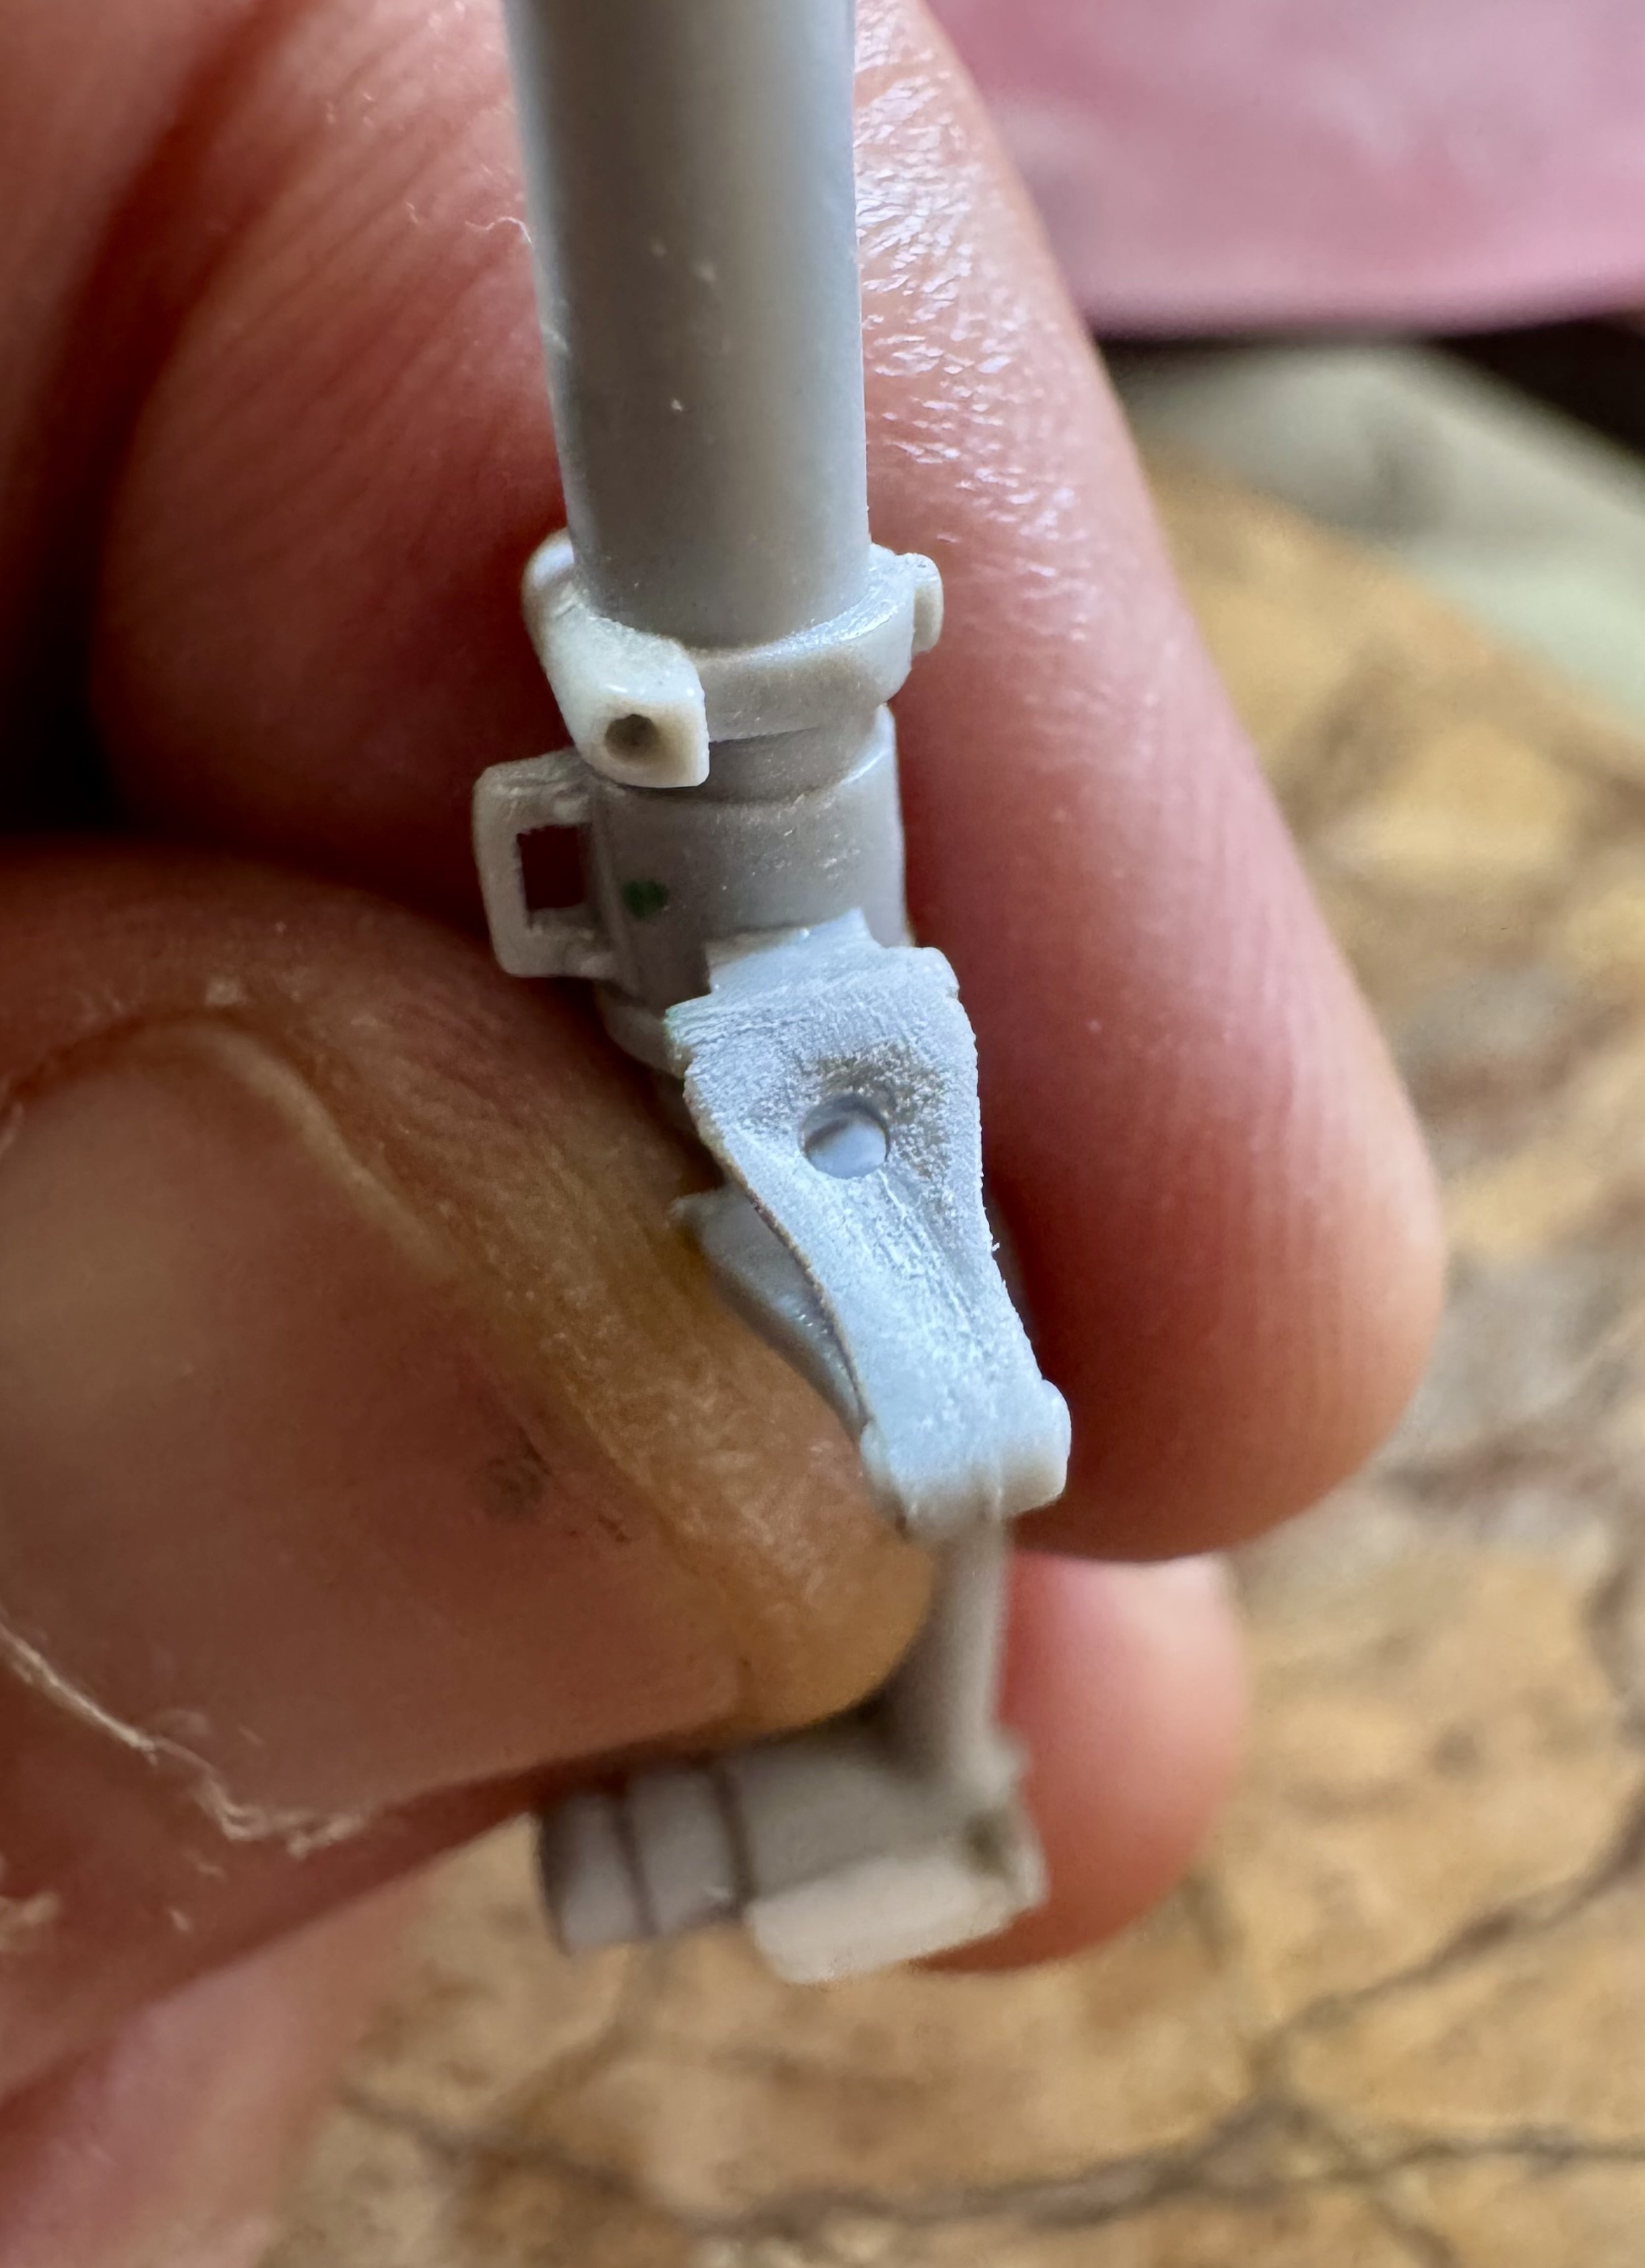
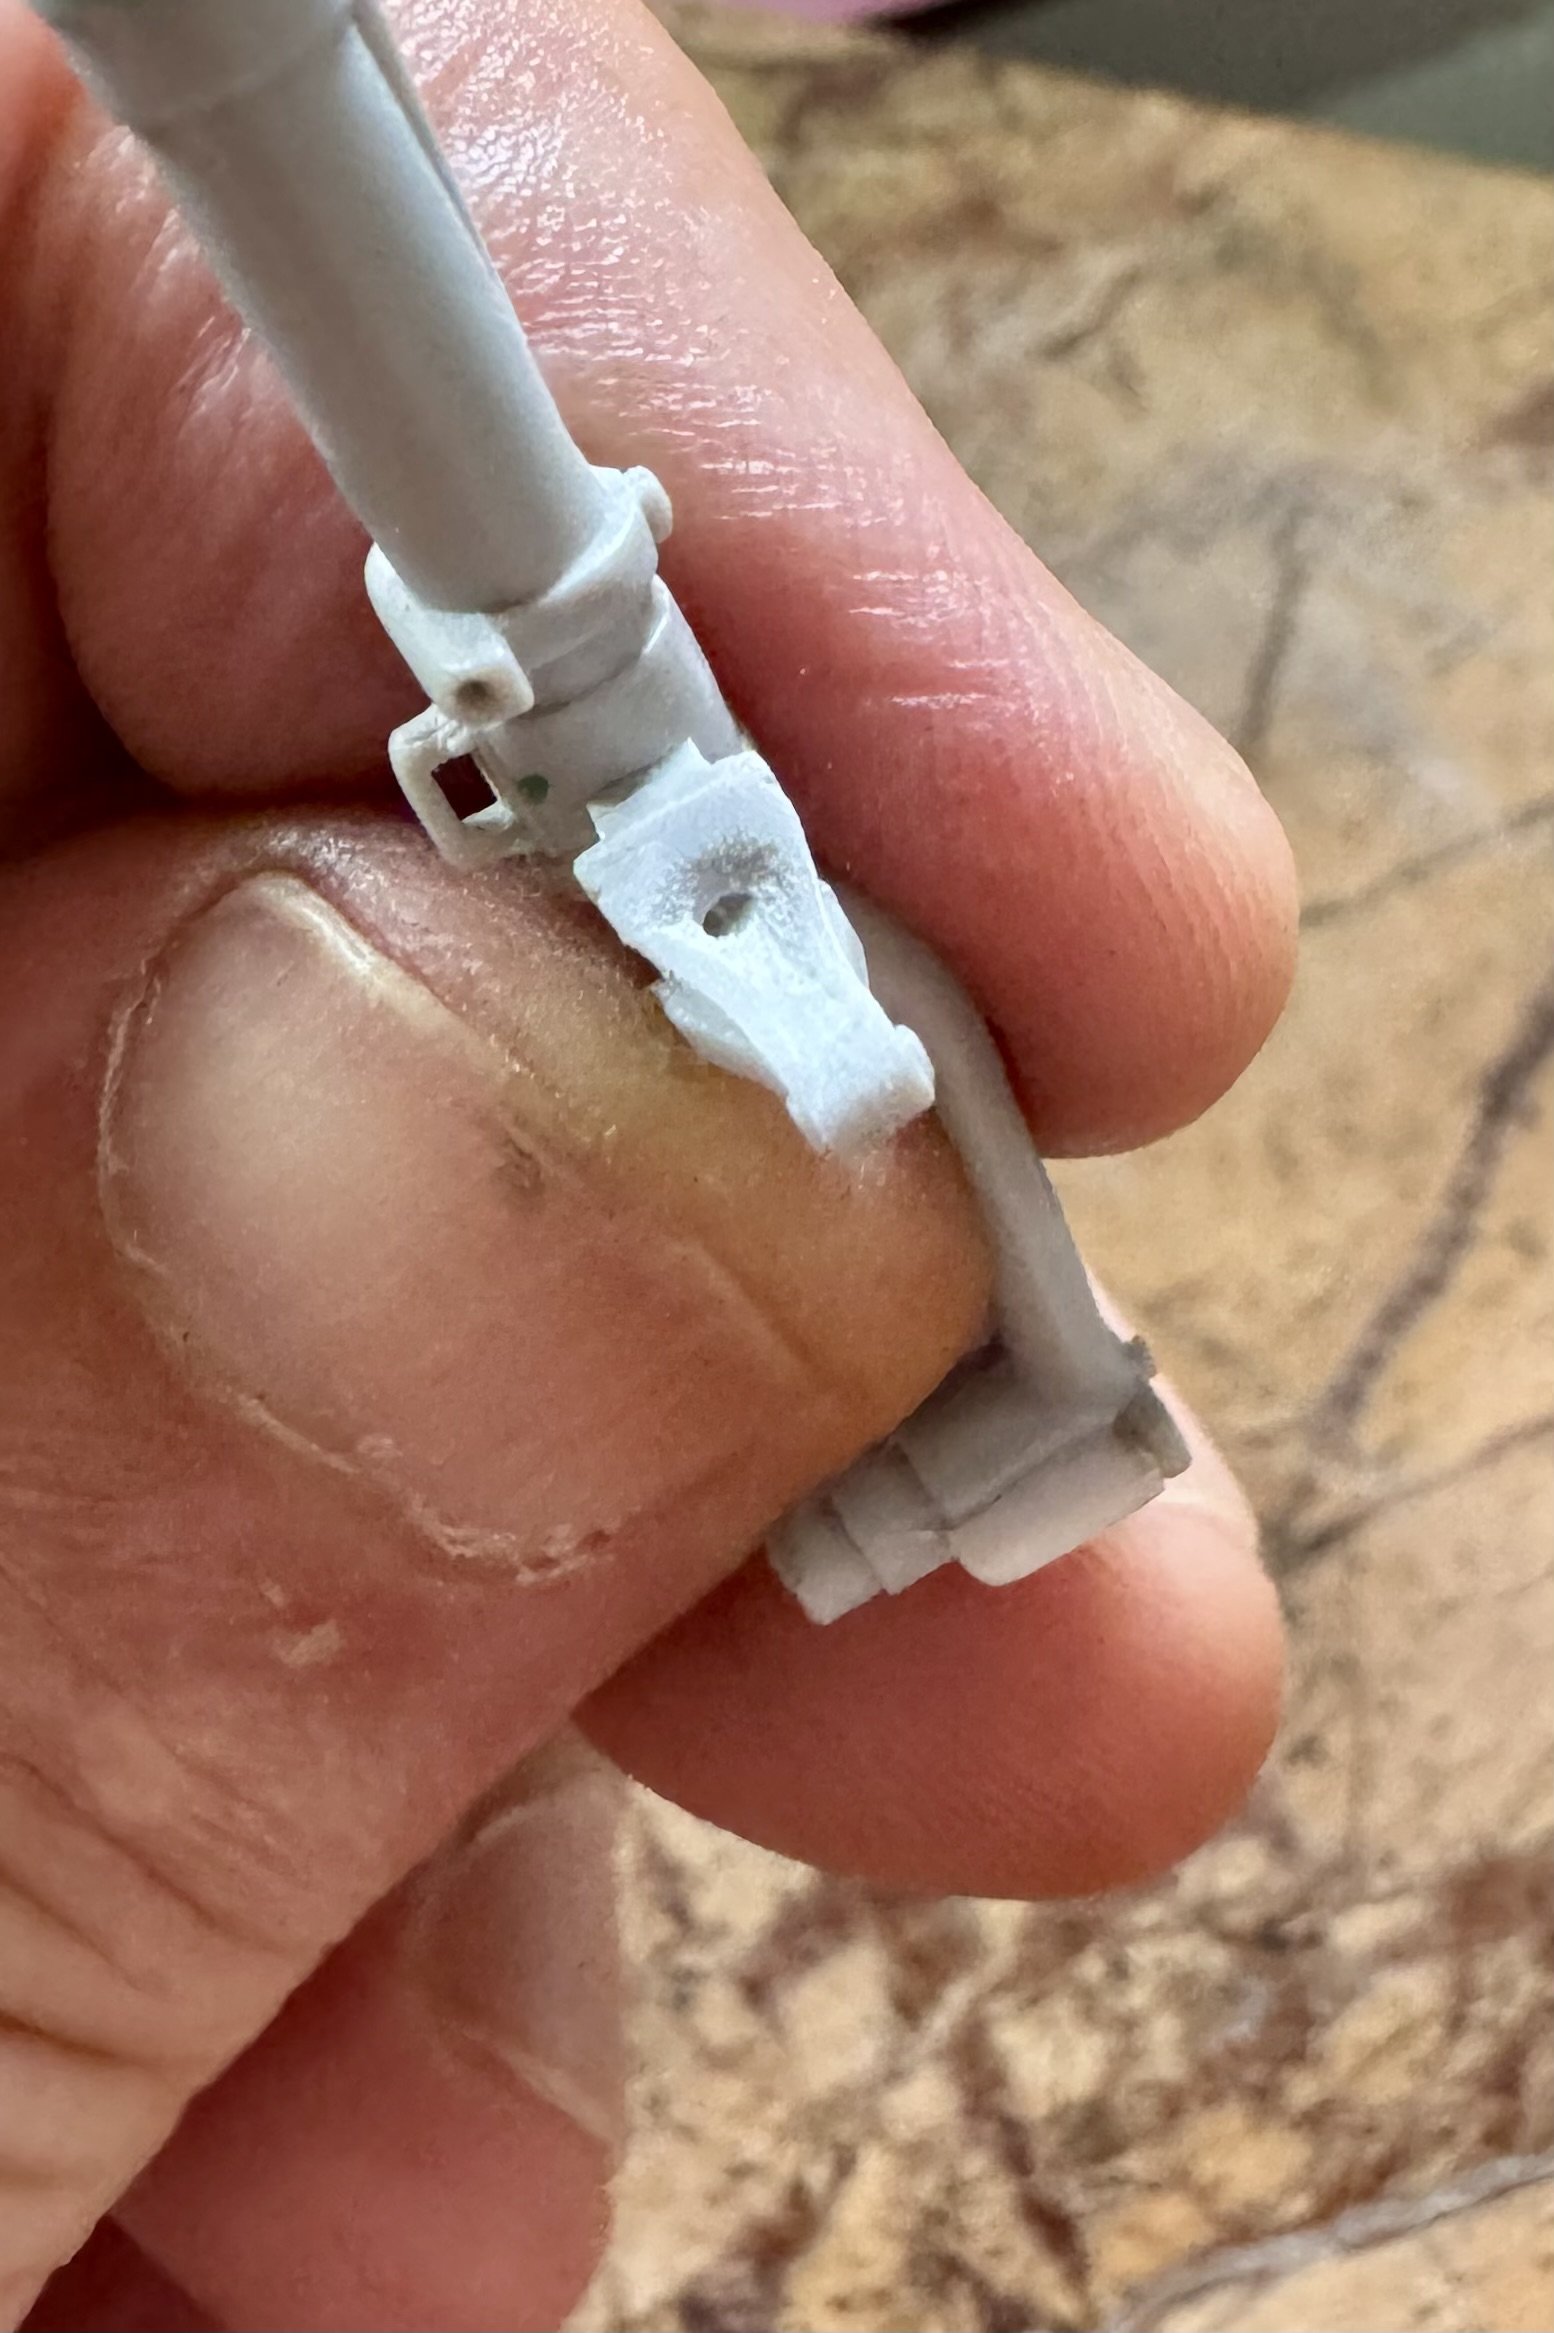
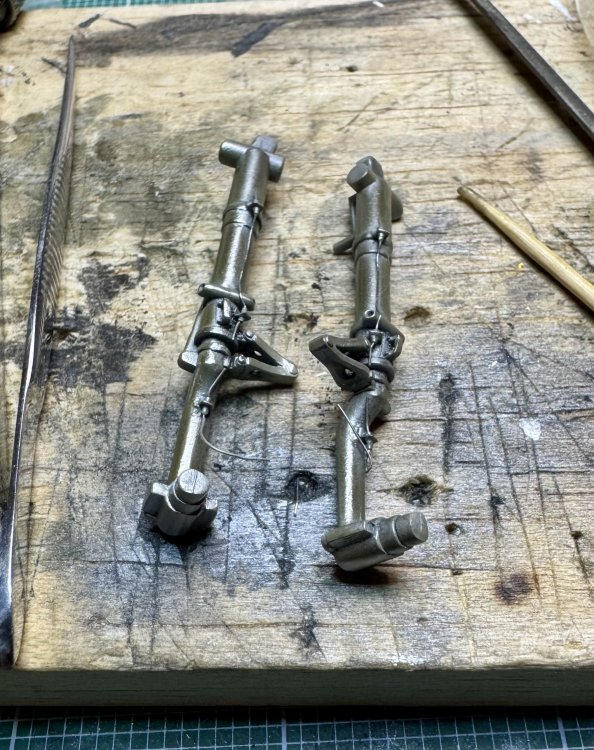
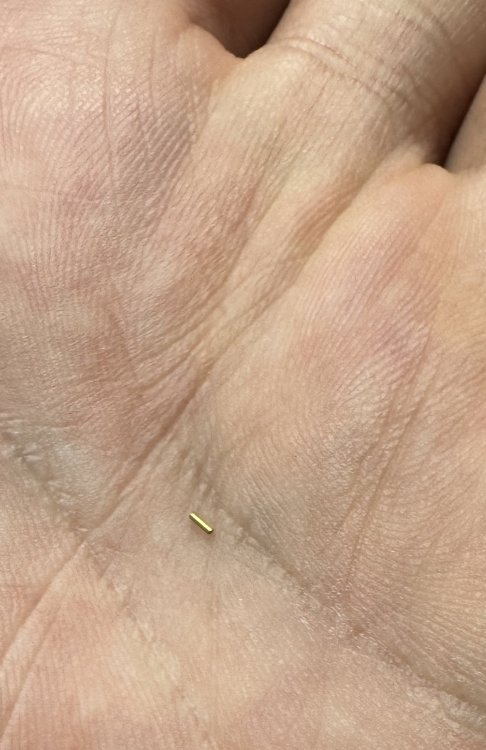
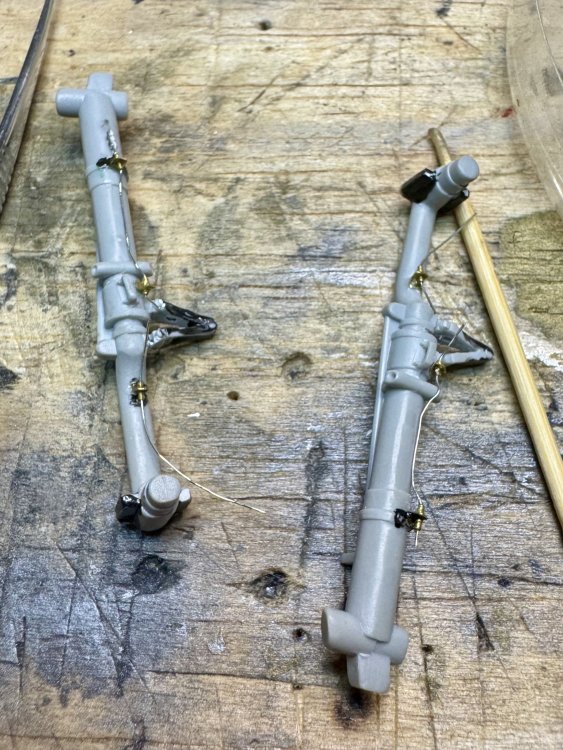
Sooooo… 😂 this took a bit longer than I’d hoped, but I have the line fittings and hard lines fabricated and installed. Also, the oleo scissors are as good as I can get them within the bounds of my eyesight and fat fingers 🤷♂️😂🤦♂️ Getting the tiny bits of .5mm tubing joined up with the flat brass hose fittings was a right PITA, and I have a few small blobs of excess CA to clean up before I spray a coat of primer over the whole thing I'm overall happy with the results, but I’m still cursing the lack of proper spacing between the oleos, up-lock lug, and the attachment points for the gear covers. I made it work, but it’s a bit crowded in there 😂 this took a couple of failed attempts before I found the approach that worked, so I had to do some “error correction filler” spots on the struts. Hopefully a layer of primer and remedial sanding will take care of those. what can I say? It’s all a learning thing 😂🙏 so here are some pics of one of the brass hose clamps, one of the short lengths of tube that forms the hose fittings, and a view of everything installed and waiting for primer 🤷♂️😎😵💫 once it’s primed and I’m happy, this will all be finished with Uschi’s steel powder, then a clear coat (which will tone down the powder finish a bit, which should make it “just right”), then washes, then the braided lines. I’ll decide later whether I want to fix the connectors between the struts and gear covers, so they look like proper steel rods instead of plastic tabs. That’s for next week, though 😂

-
HK 1/48 B-17G Early Production resumed
crazypoet replied to JohnB's topic in LSM 1/35 and Larger Work In Progress
Solid work! I love the attention to details 🙏 I have the 1/32 HK B-17G in my stash, waiting for the time my skillz catch up to my ambitions (Eduard PE flaps?!?! Oh. My. Gawd. 😵💫😵💫😵💫😳) meanwhile, I’ll enjoy watching your build and taking notes 🙏 -
Trumpeter P-47D Razorback
crazypoet replied to crazypoet's topic in LSM 1/35 and Larger Work In Progress
I took a short break from brake lines, and decided to go through with adjusting the oleo scissors (mostly because the handling required would probably bend or snap off the hose fittings if they were attached) I discovered that my US-spec dremel doesn’t like working with a 220v step-down transformer, since it only puts out 9 amps. soooo…. I used the same carbide bits that I’d have used with the dremel with just fingertips. After a couple of tries on some spare struts, I’m giving it a go here i have the basic form down, and the hole drilled. Now I have to do a bit of final shaping, filling, and sanding to smooth things out. Right now, it looks like a real hack-job up close, but things should smooth out with some careful sanding/filling/sanding and a bit of re-scribing the hinges then, do the same three more times for the other scissor faces its a right pain in the arse, but I think it will be worth it to fix a sort of in-yer-face error from the good folk at Trumpeter (which error was, of course, faithfully reproduced in the white metal set i picked up along the way)


-
1/32 Lippisch P.13a / 3d printed
crazypoet replied to JeroenPeters's topic in LSM 1/35 and Larger Work In Progress
I love the idea! -
1/32 Lippisch P.13a / 3d printed
crazypoet replied to JeroenPeters's topic in LSM 1/35 and Larger Work In Progress
I can see now that learning CAD and shelling out for a resin printer is somewhere in my future 😂 I used to have access to a very nice resin printer at work, but I wasn’t able to get *too* creative with it. But the resolution was amazing, and I can see through your work here what is possible with good models and good CAD skills this is truly *nice* work, and you’re a master of both the modeling and creative sides of this -
This is gorgeous! and love the way your mind works alongside your fingers 🙏🤣