
Clunkmeister
-
Posts
7,200 -
Joined
-
Last visited
Content Type
Profiles
Forums
Events
Gallery
Everything posted by Clunkmeister
-

Trumpeter TBD-1 Devastator
Clunkmeister replied to Clunkmeister's topic in LSM 1/35 and Larger Work In Progress
Yes it is a model that seems like it’ll really benefit from at least some interior upgrades. I’ve never been a fan of PE seatbelts, and Airscale decals have spoiled me rotten as well. 3D instrument panel decals will really made the interior pop here as well. The consoles are ripe for upgrades. I’d so love to see the R2D Helldiver treatment done to this one as well. And of course, those rubber tires need to GO! -
Trumpeter TBD-1 Devastator
Clunkmeister replied to Clunkmeister's topic in LSM 1/35 and Larger Work In Progress
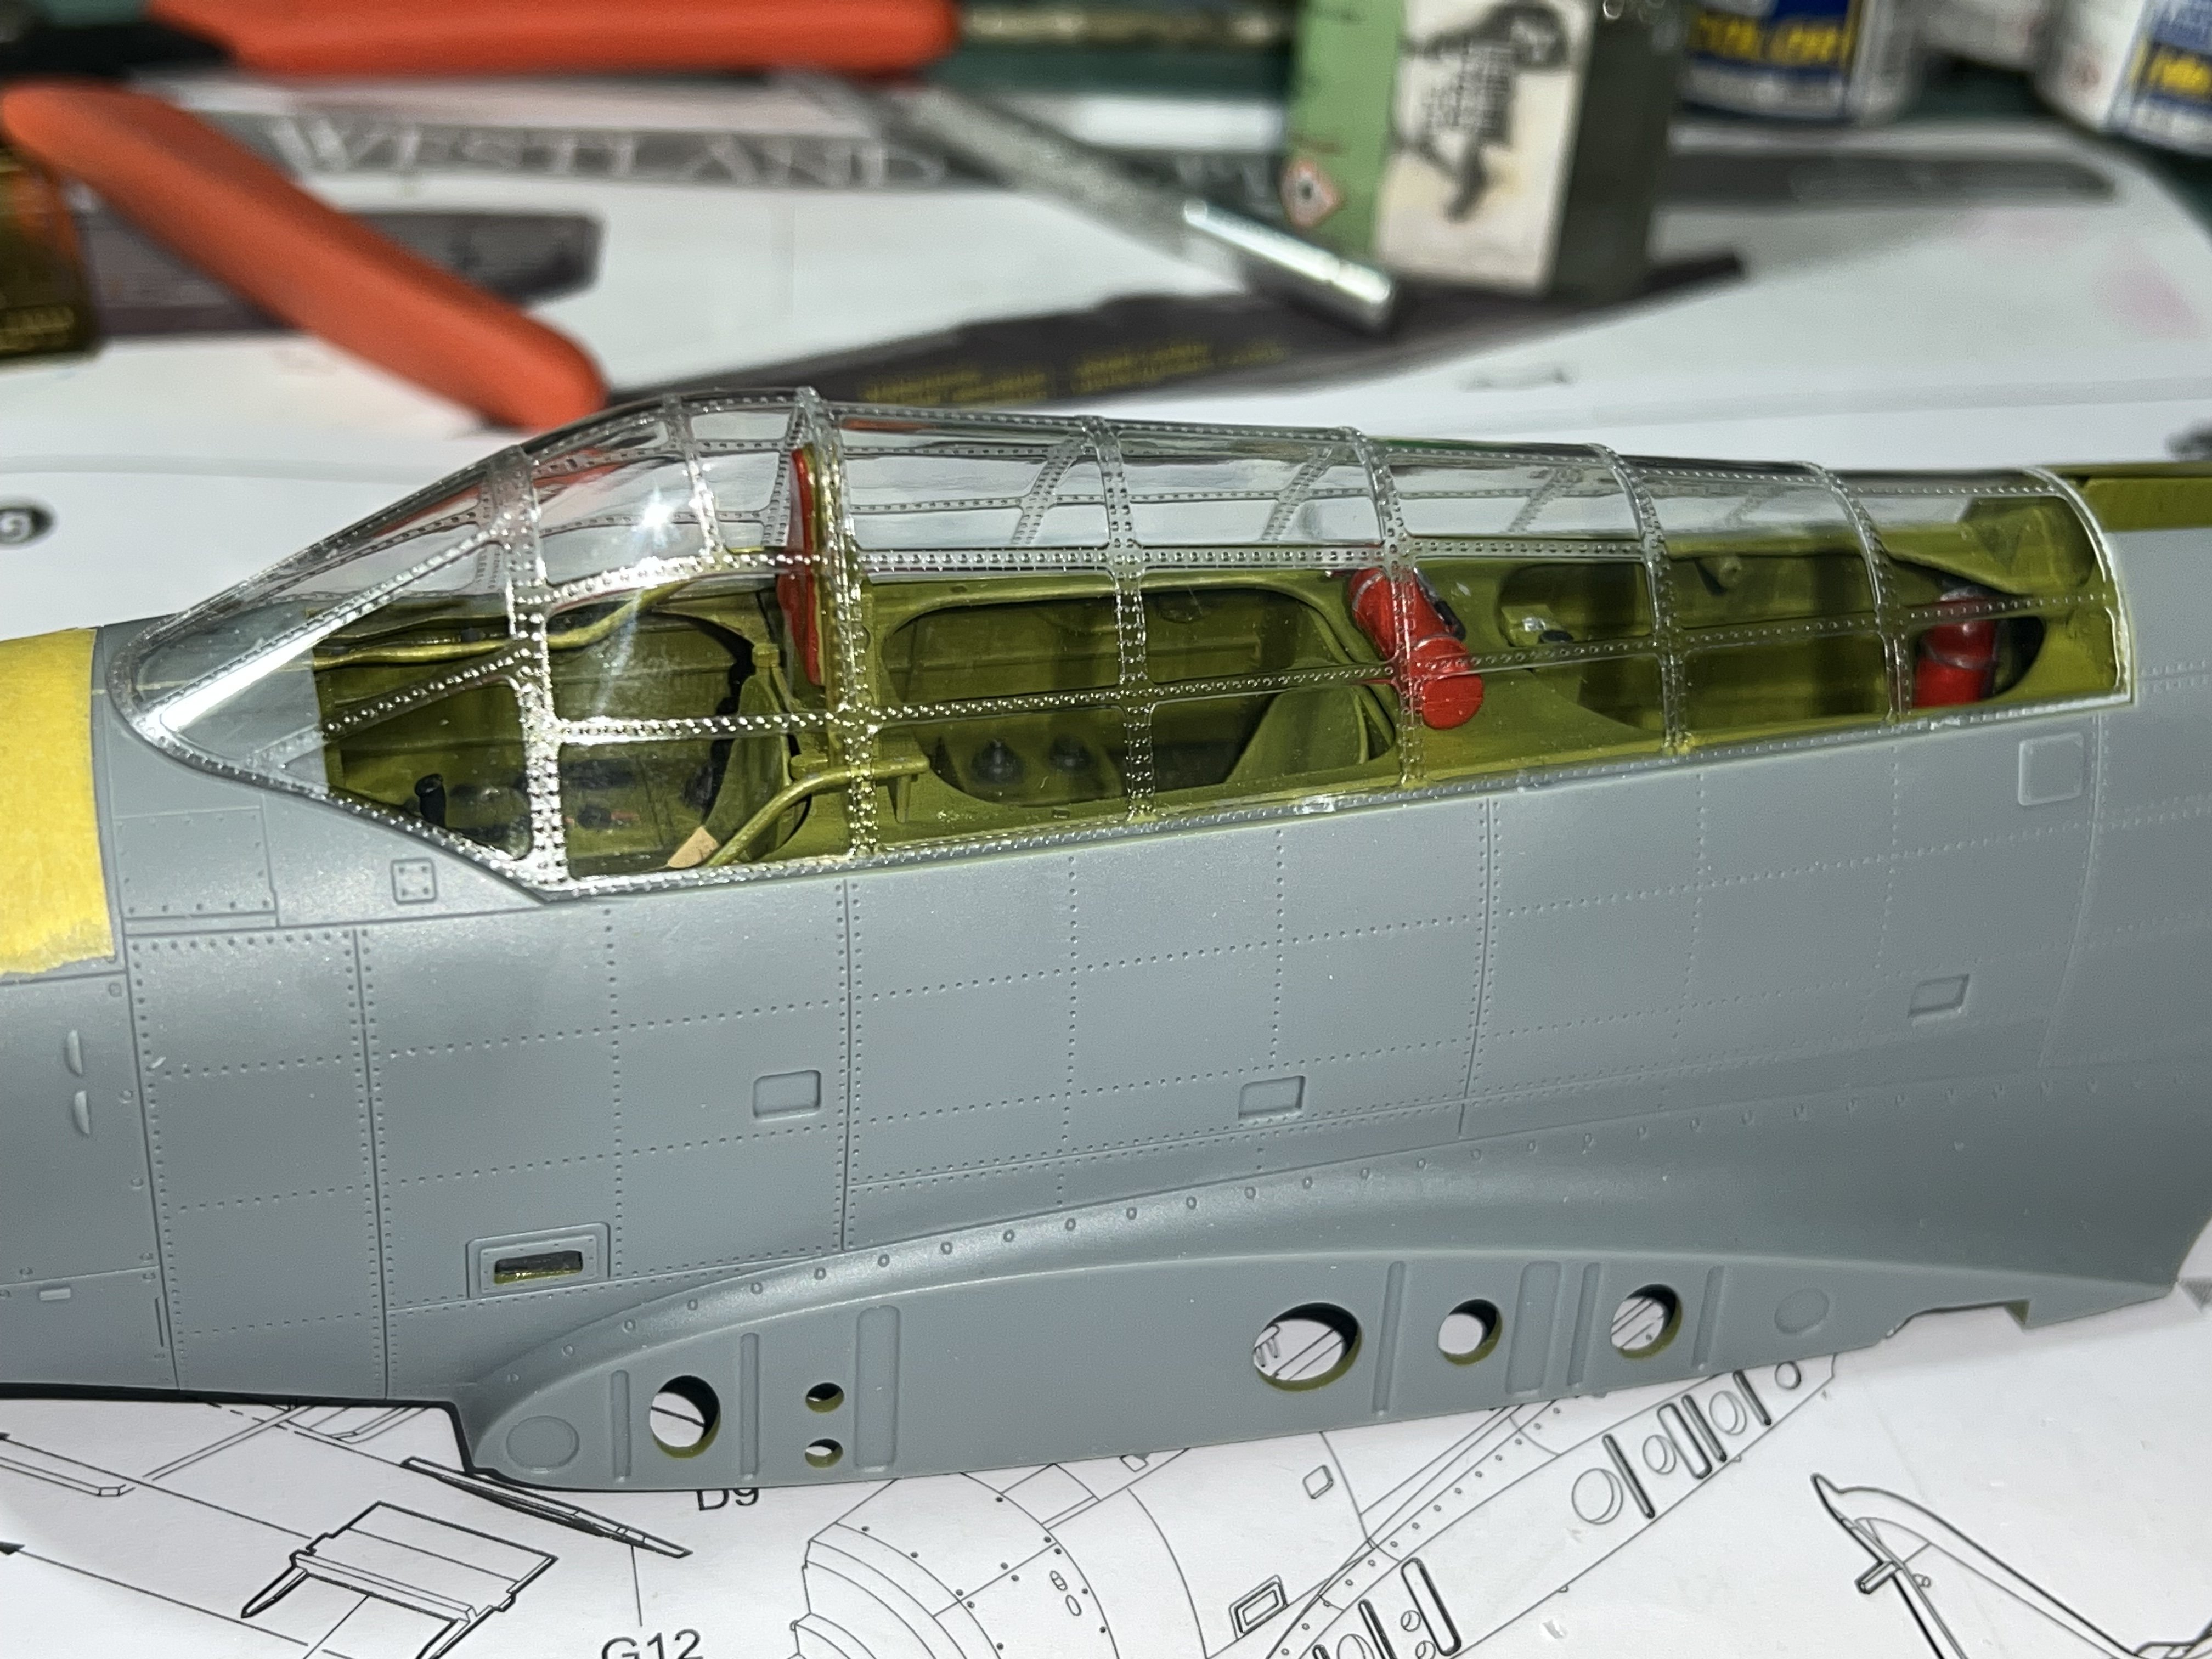
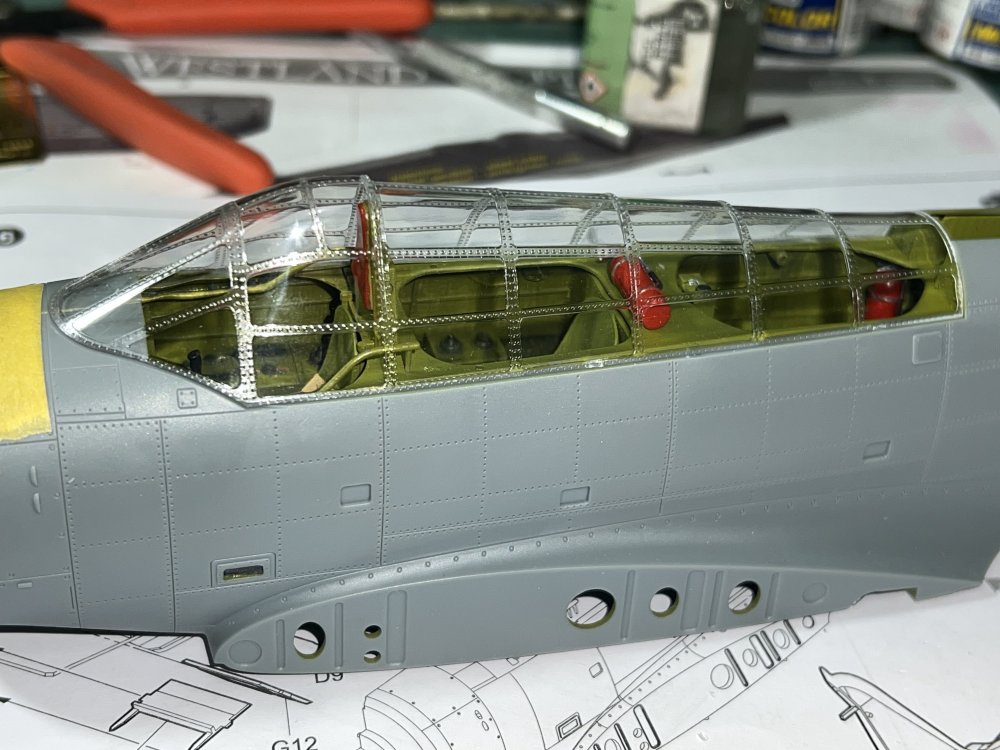
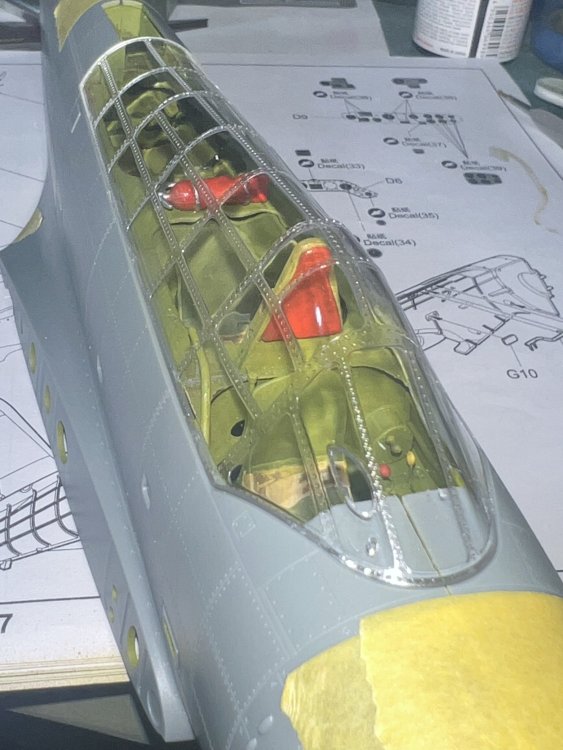
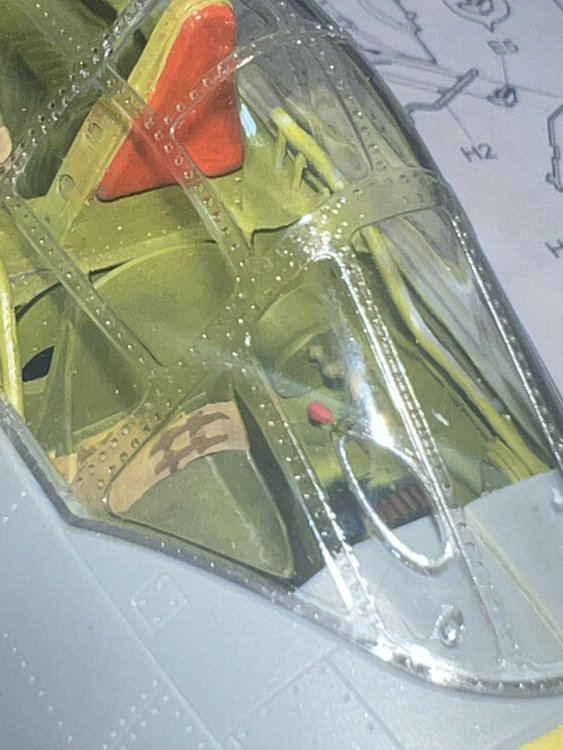
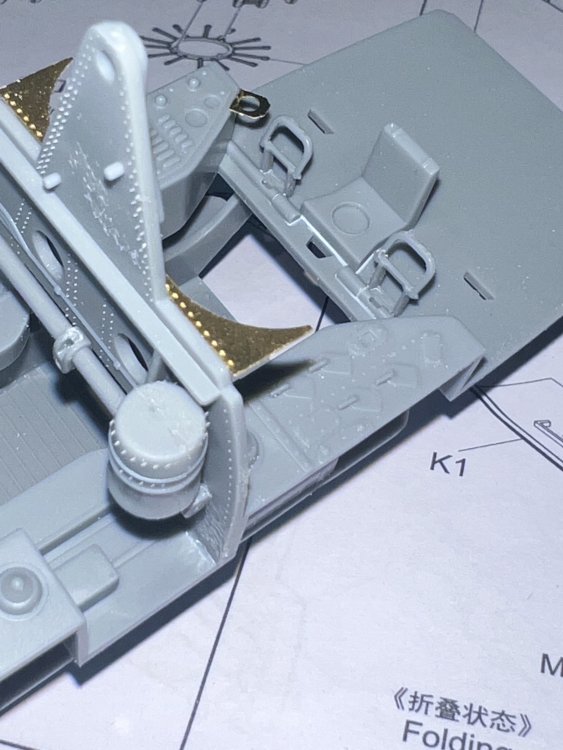
Let’s look at the canopy. You get a 1 piece canopy for the closed look, and a multiple piece canopy for an open canopy. This canopy is an absolute work of art. It is absolutely crystal clear with NO blemishes at all.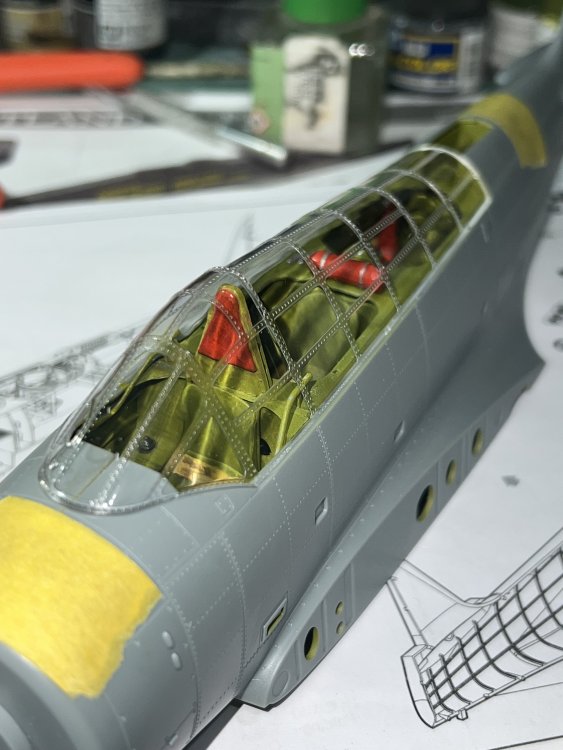

- 94 replies
-
- 10
-

-

-
Trumpeter TBD-1 Devastator
Clunkmeister replied to Clunkmeister's topic in LSM 1/35 and Larger Work In Progress
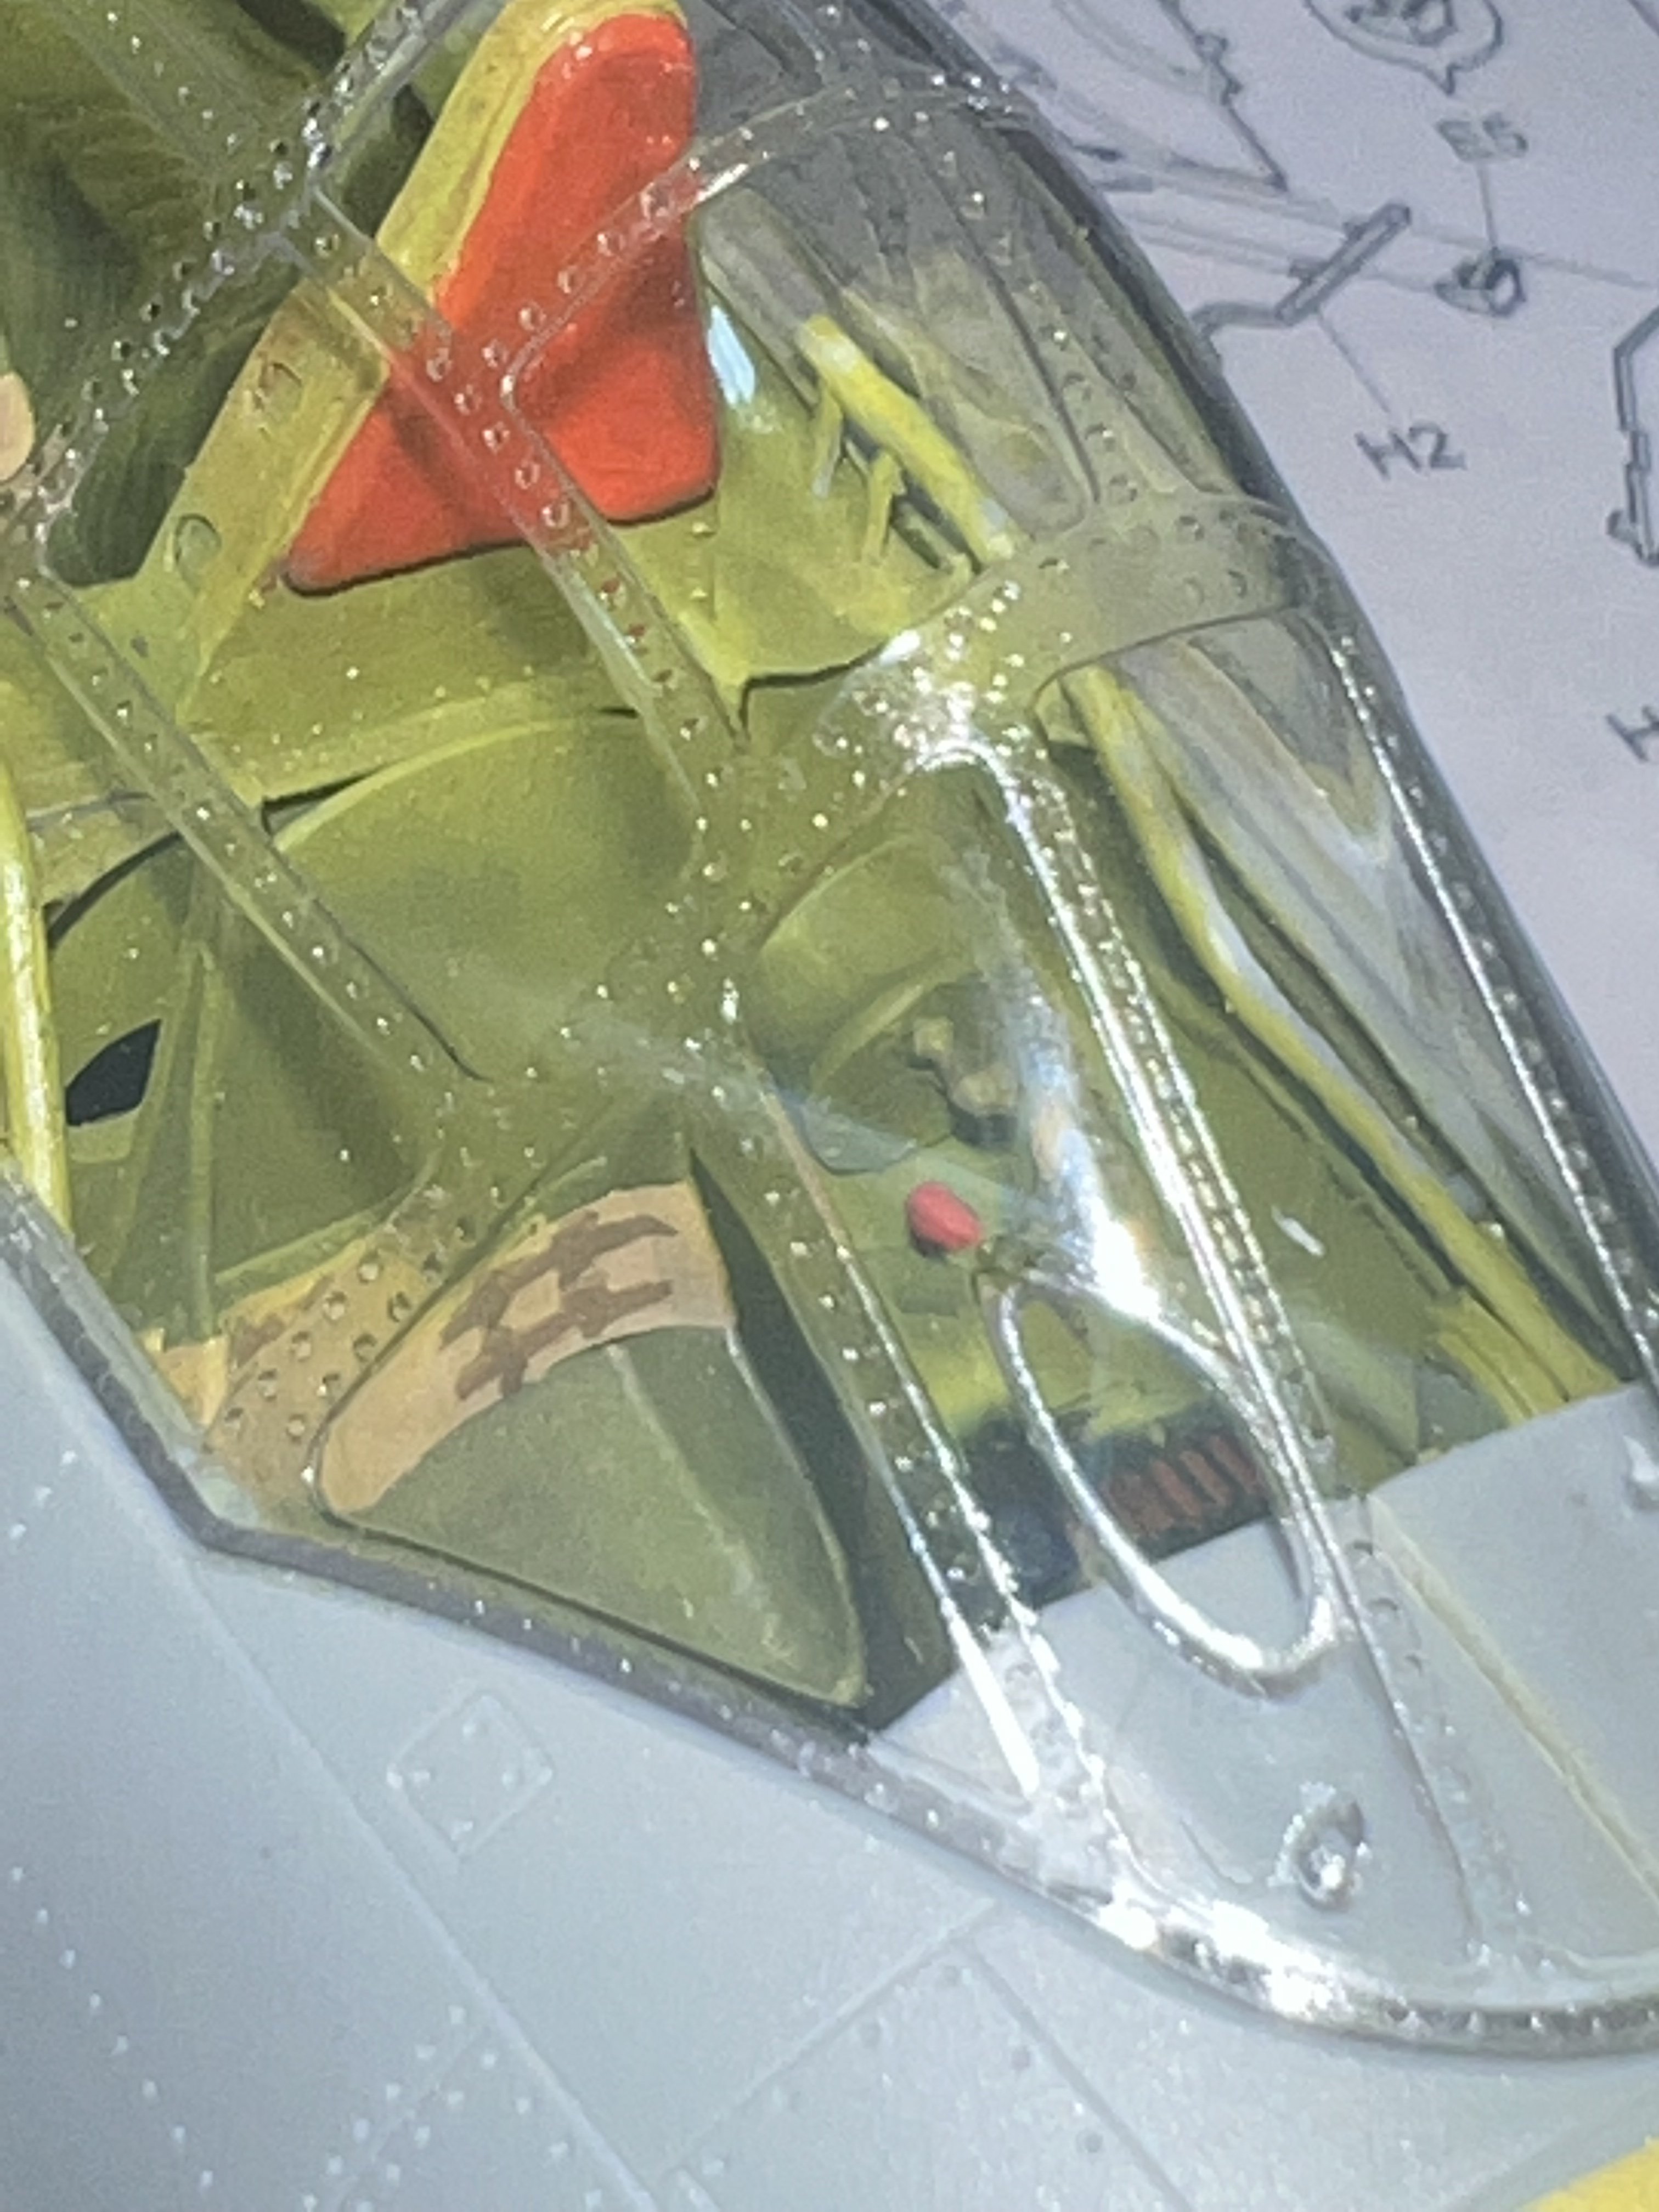
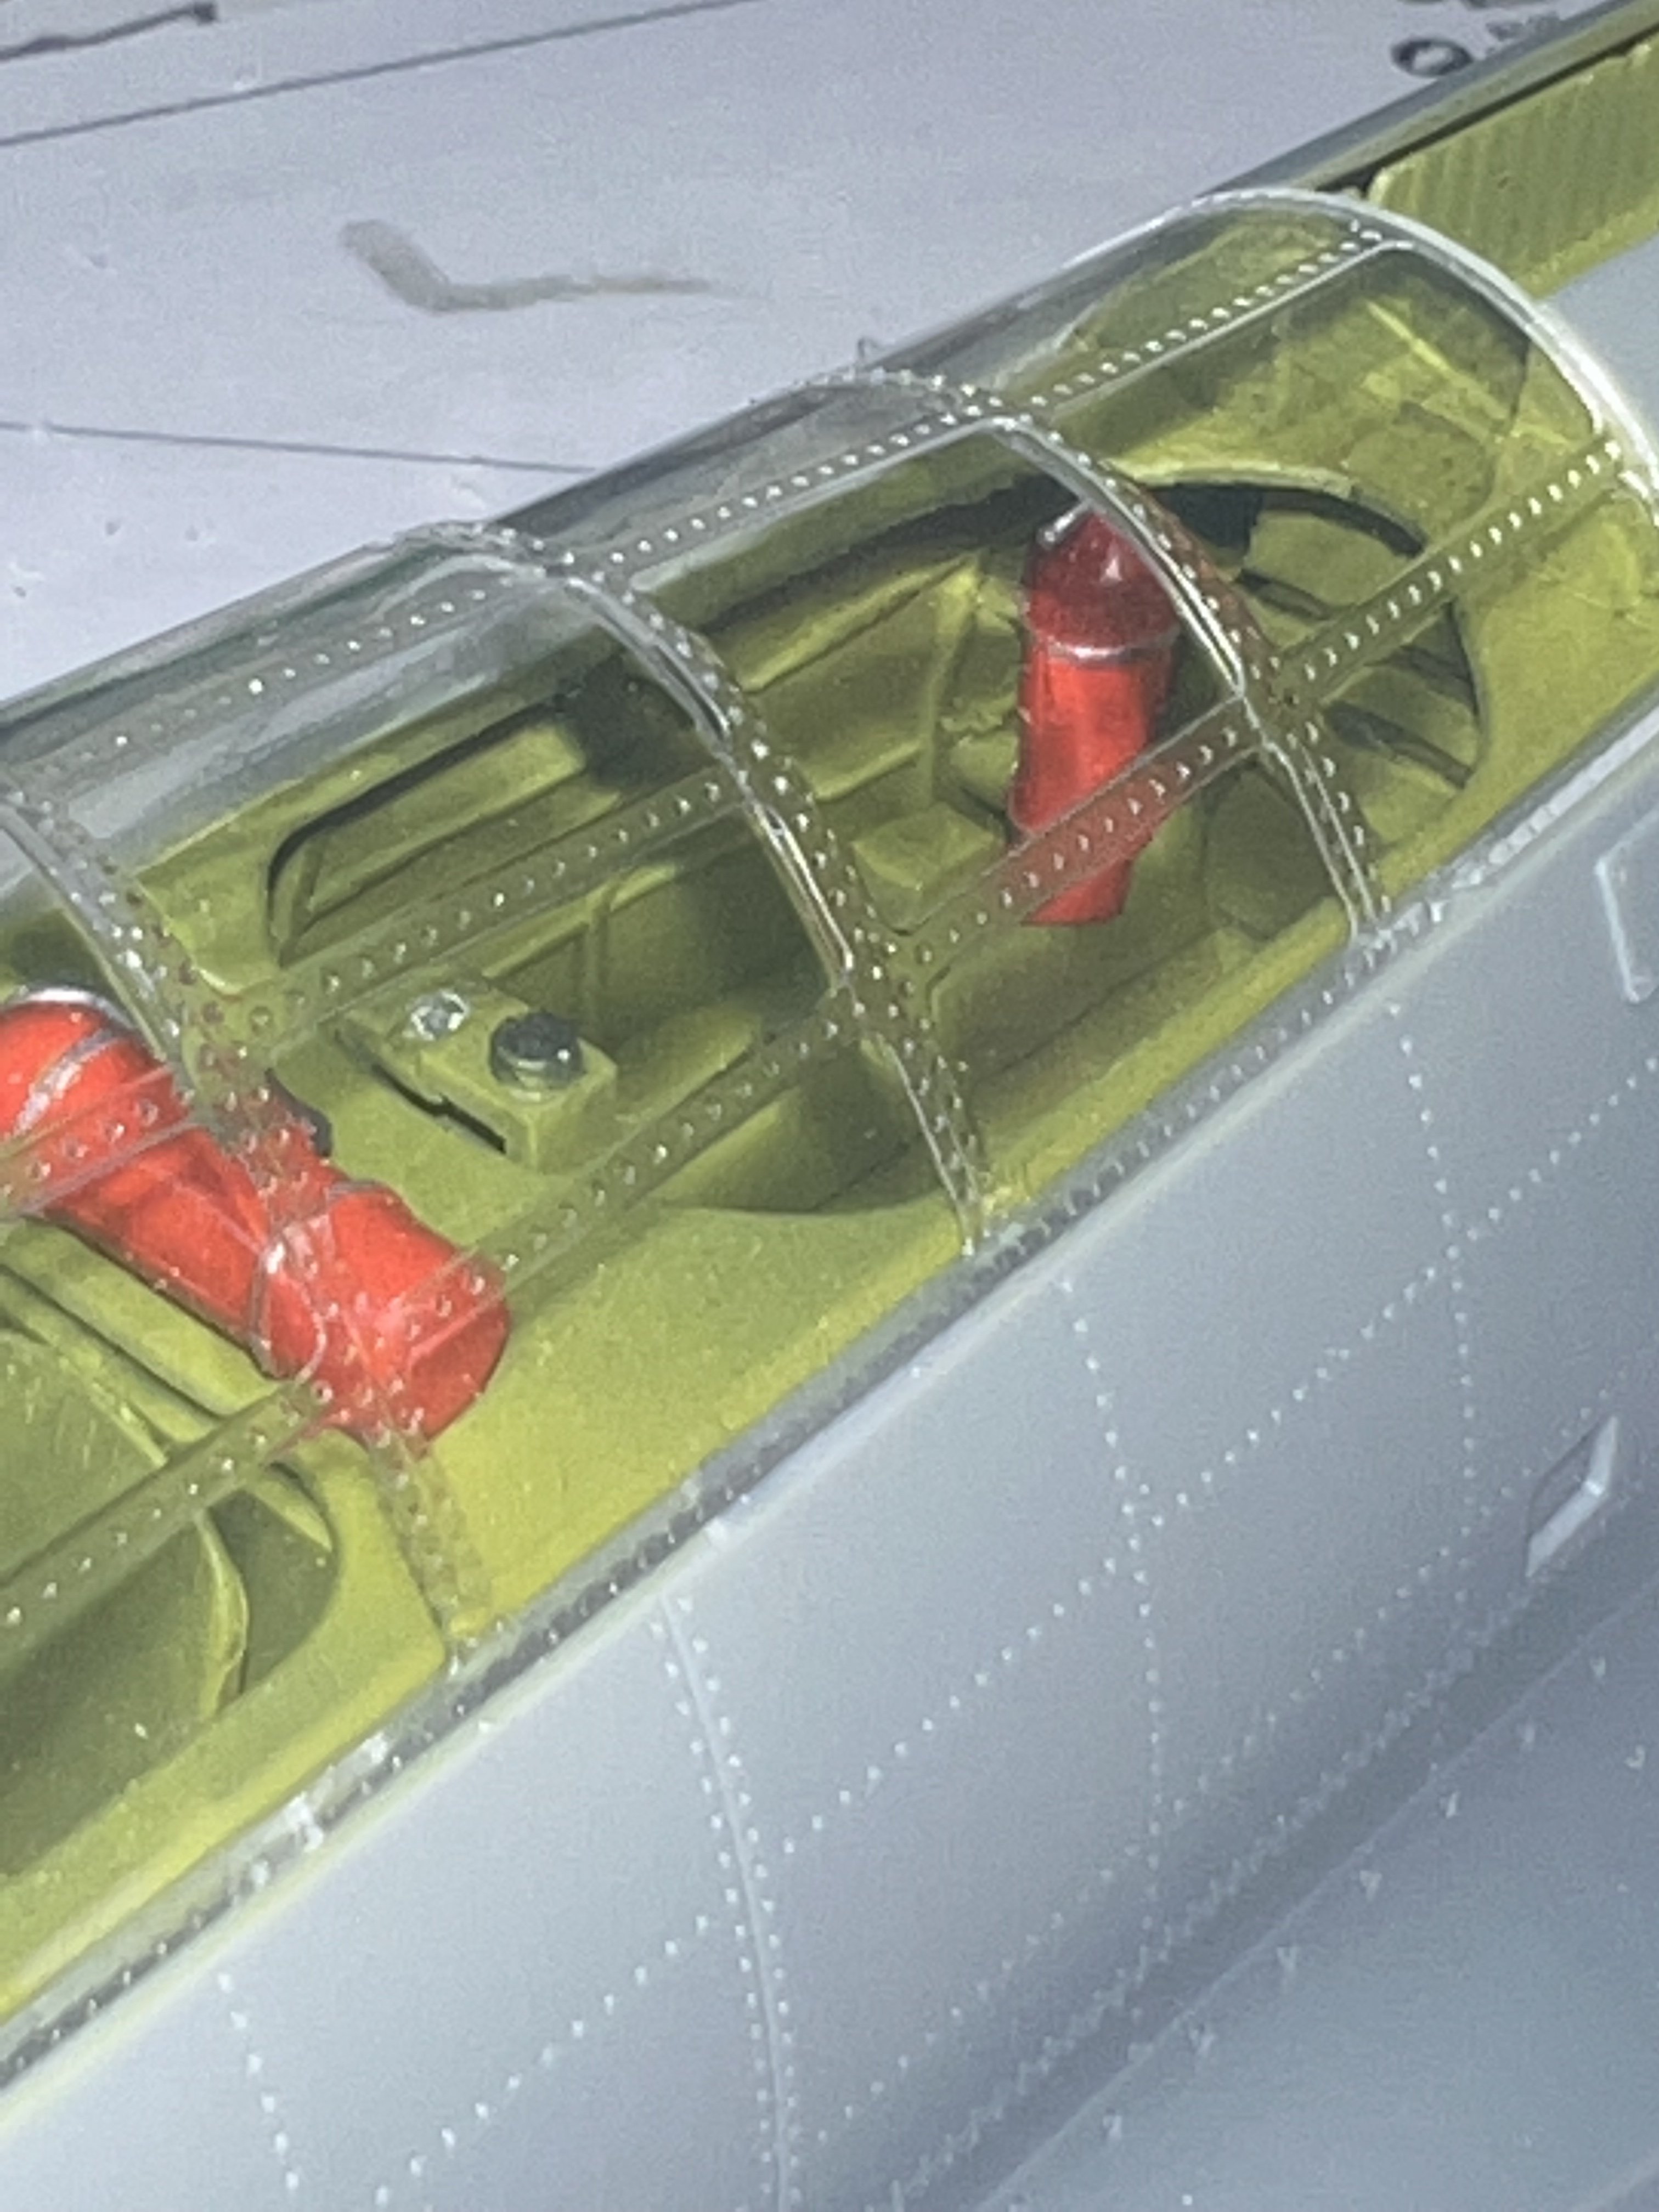
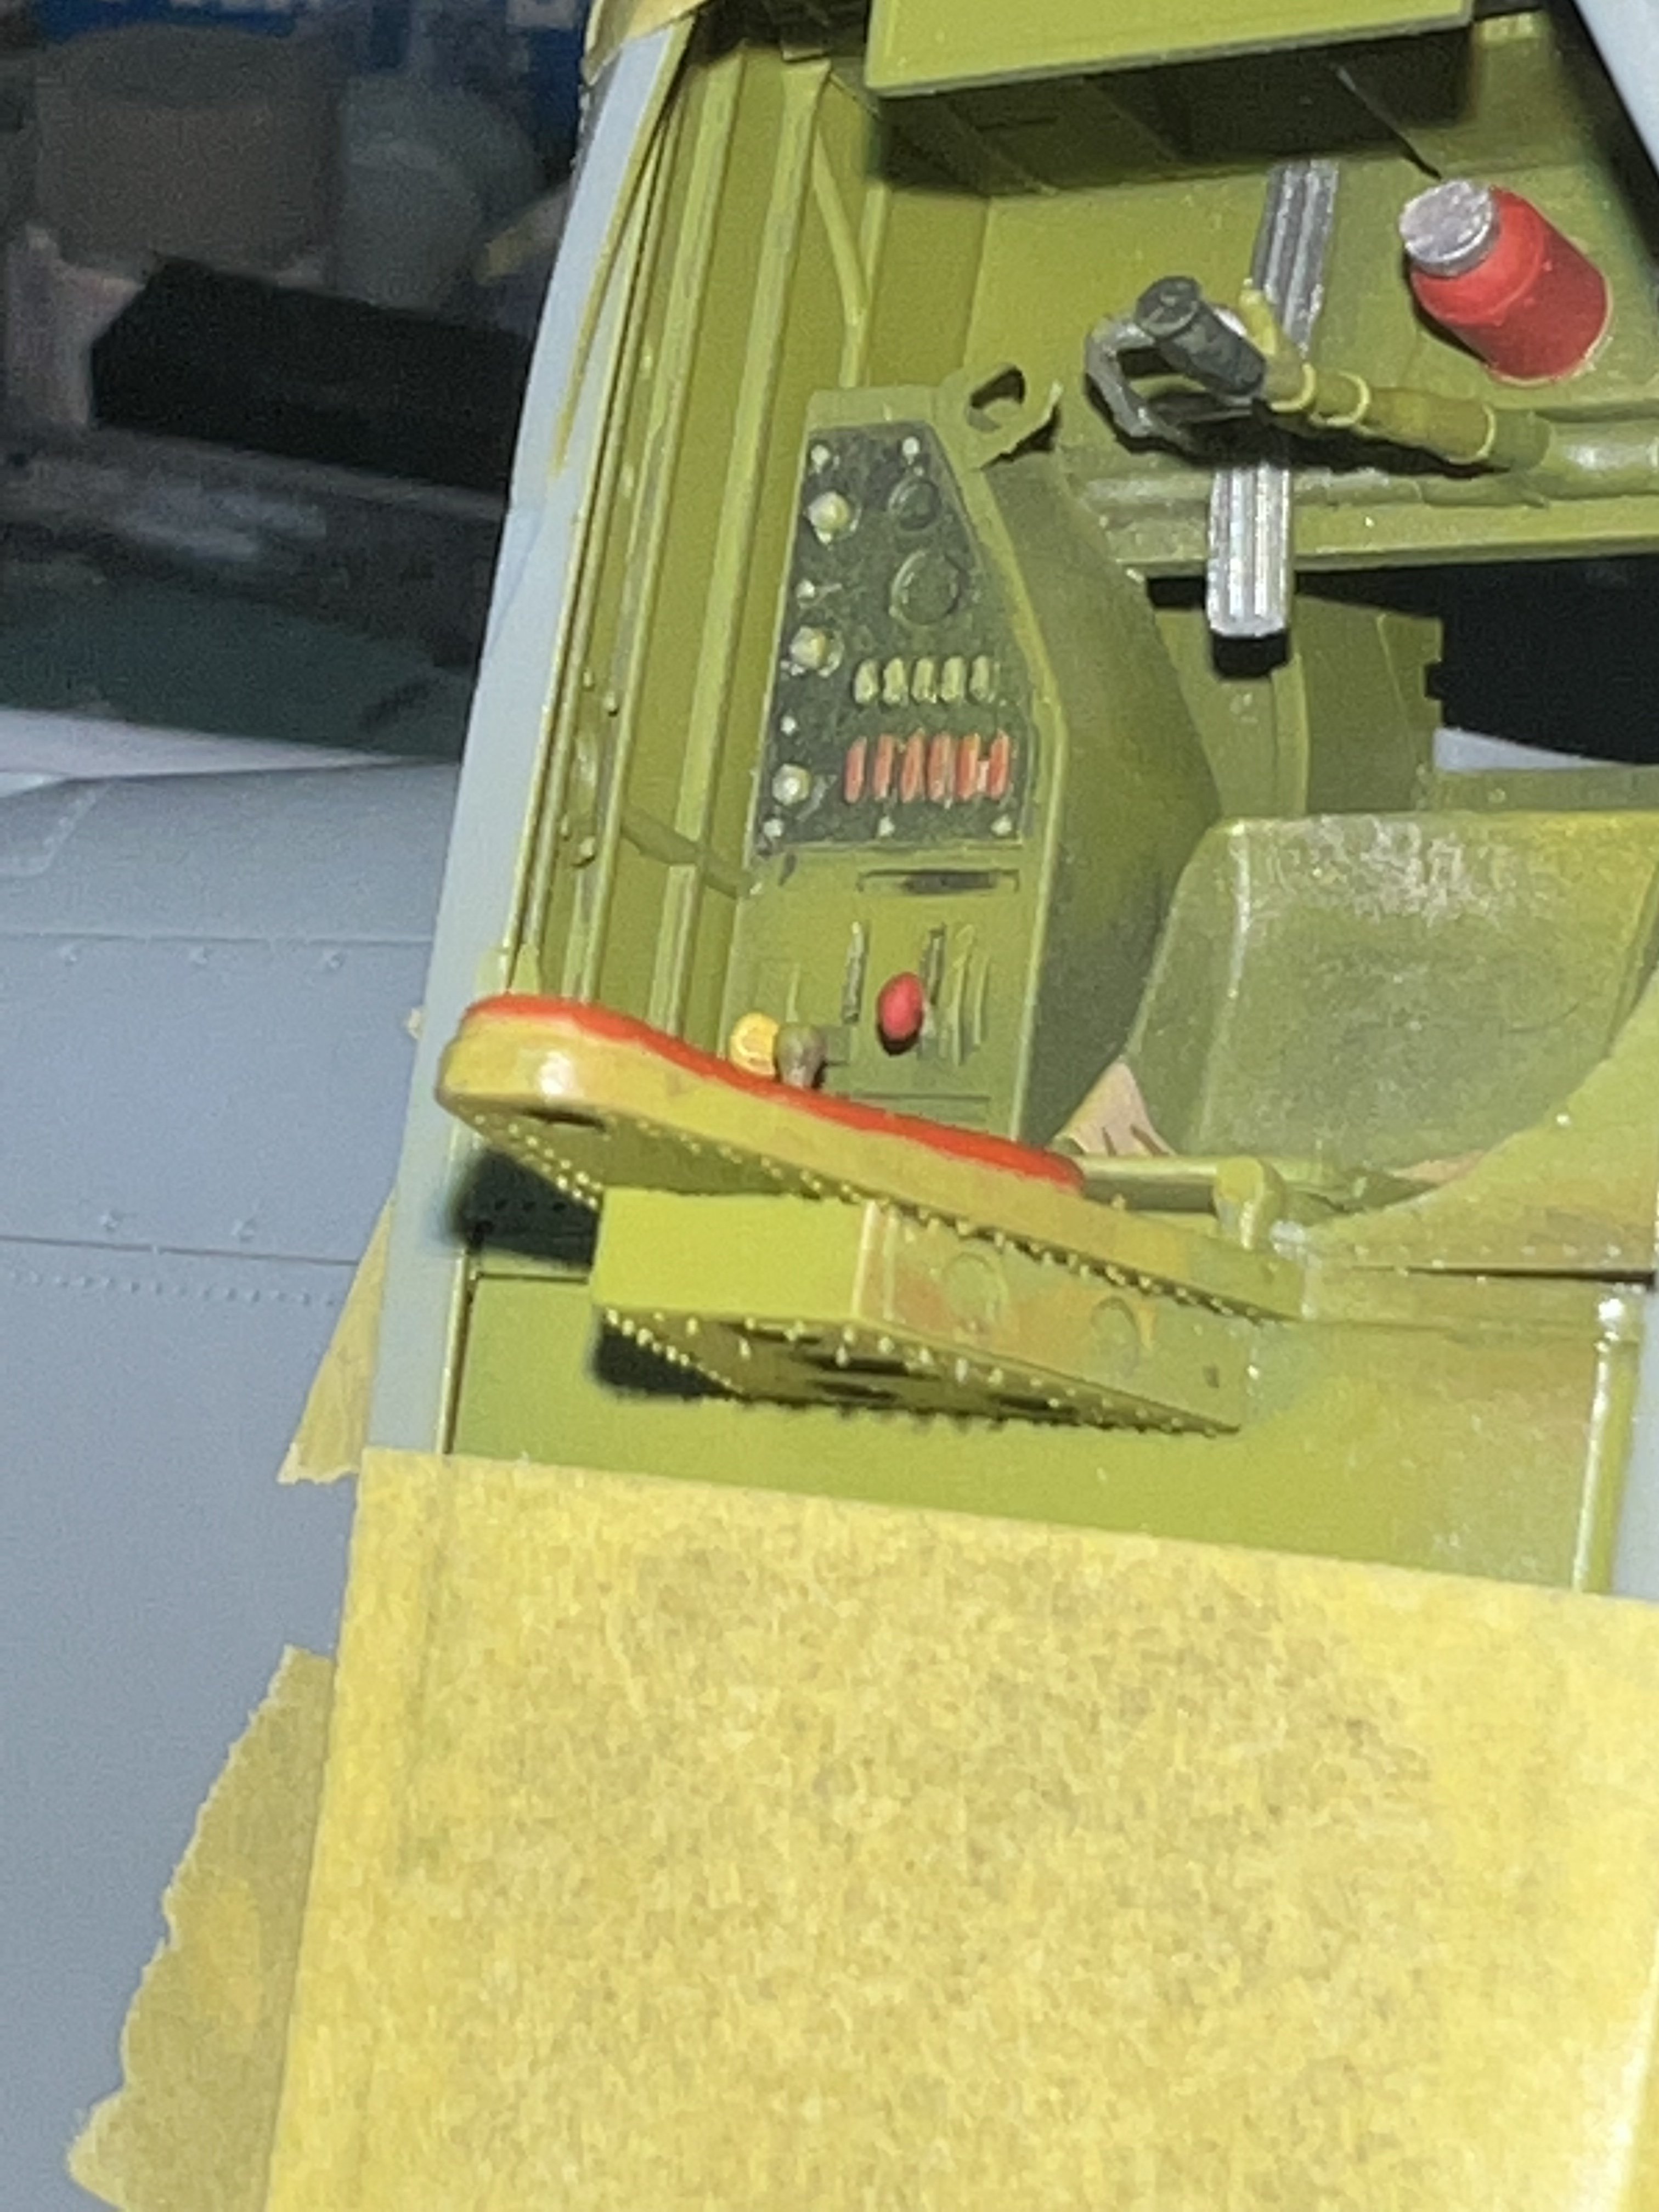
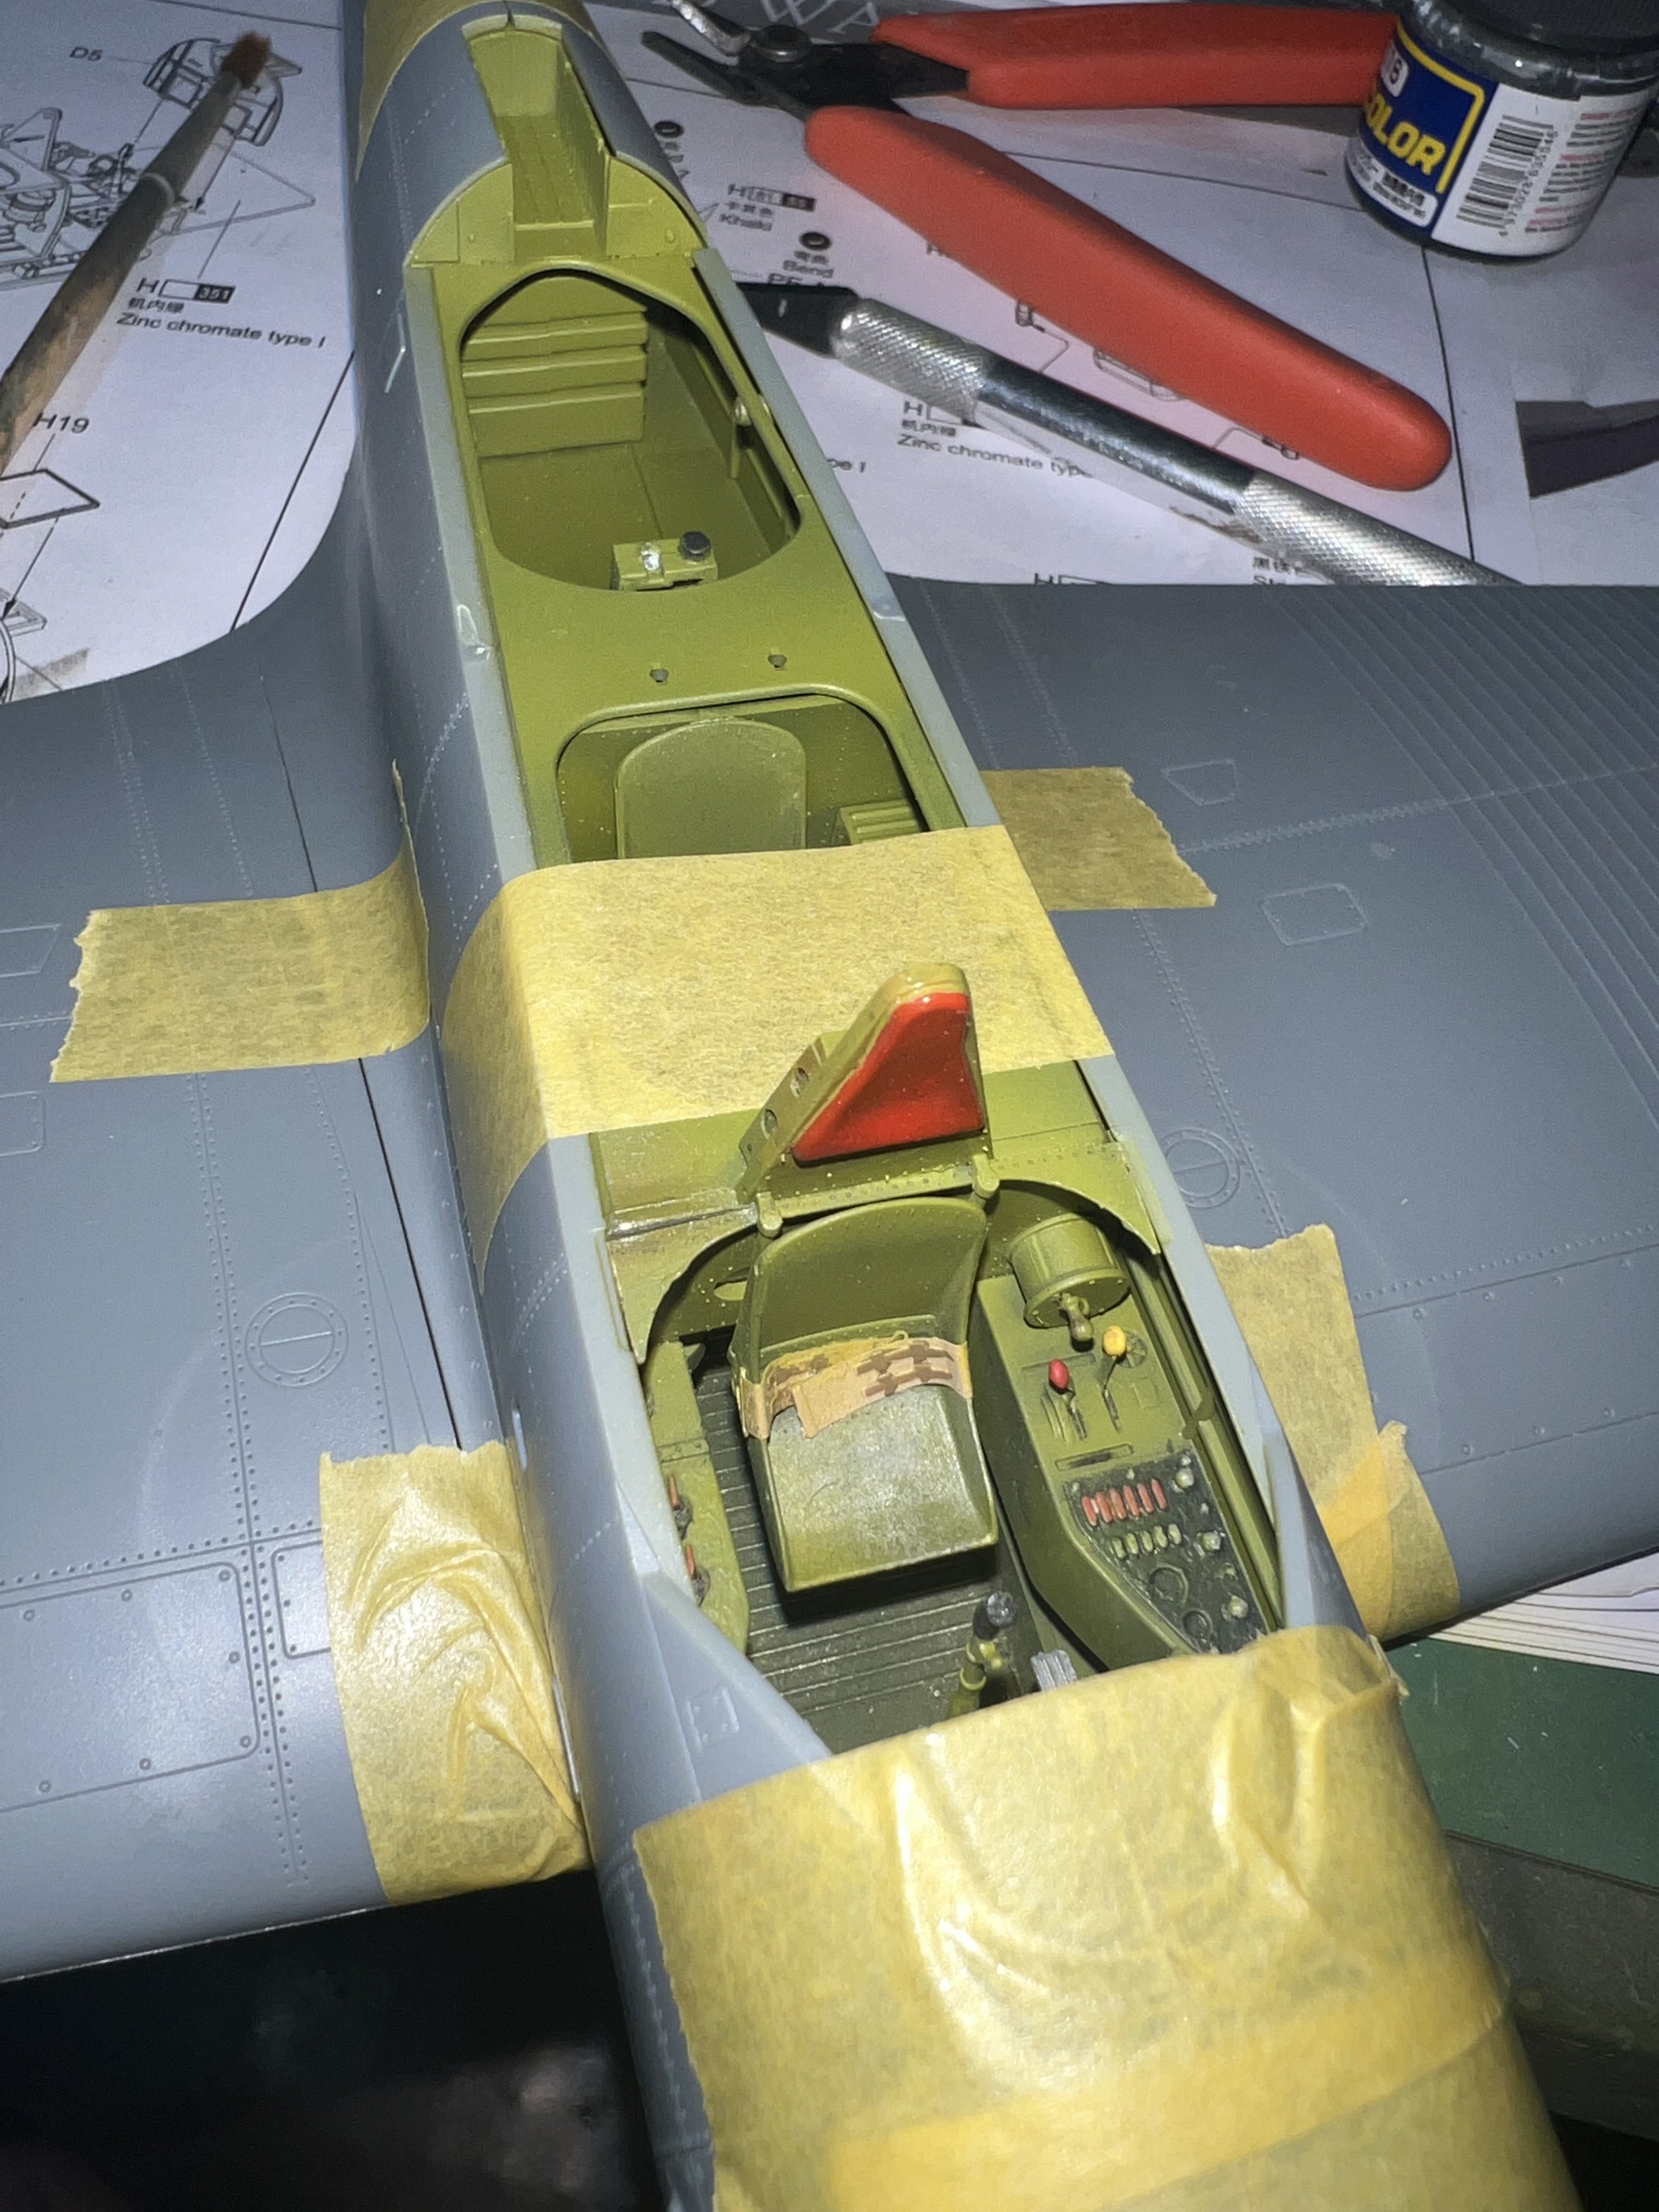
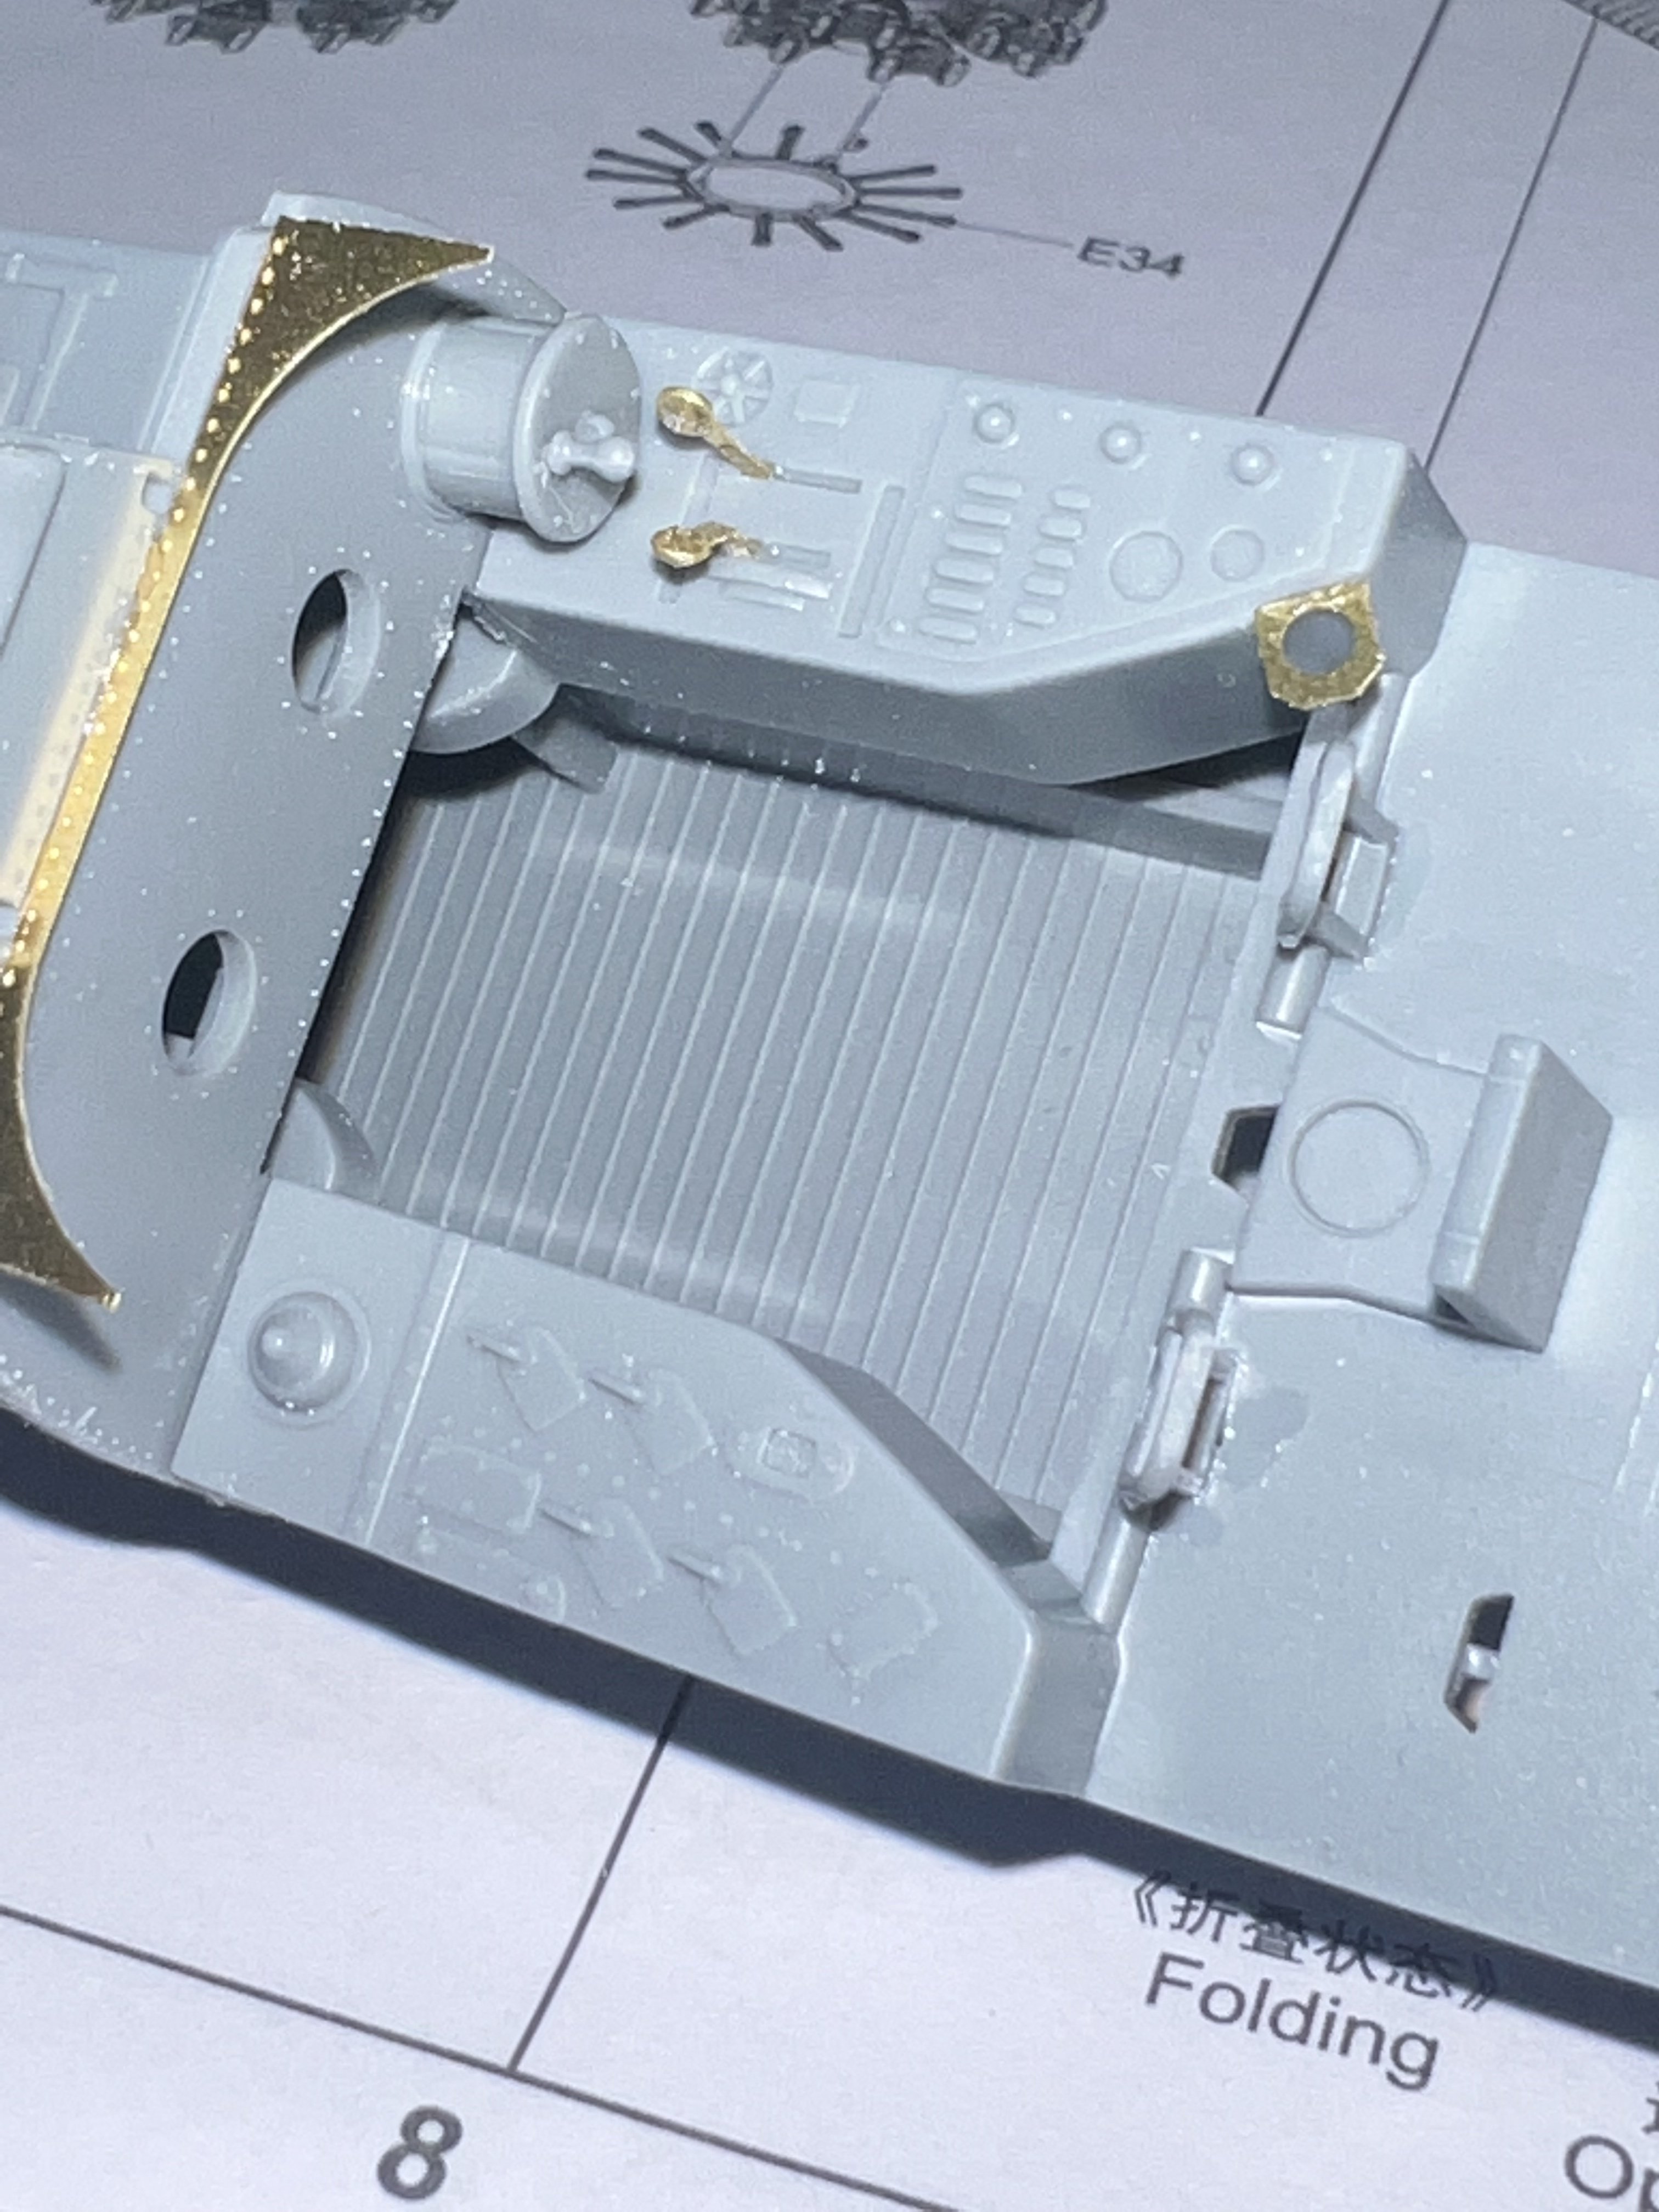
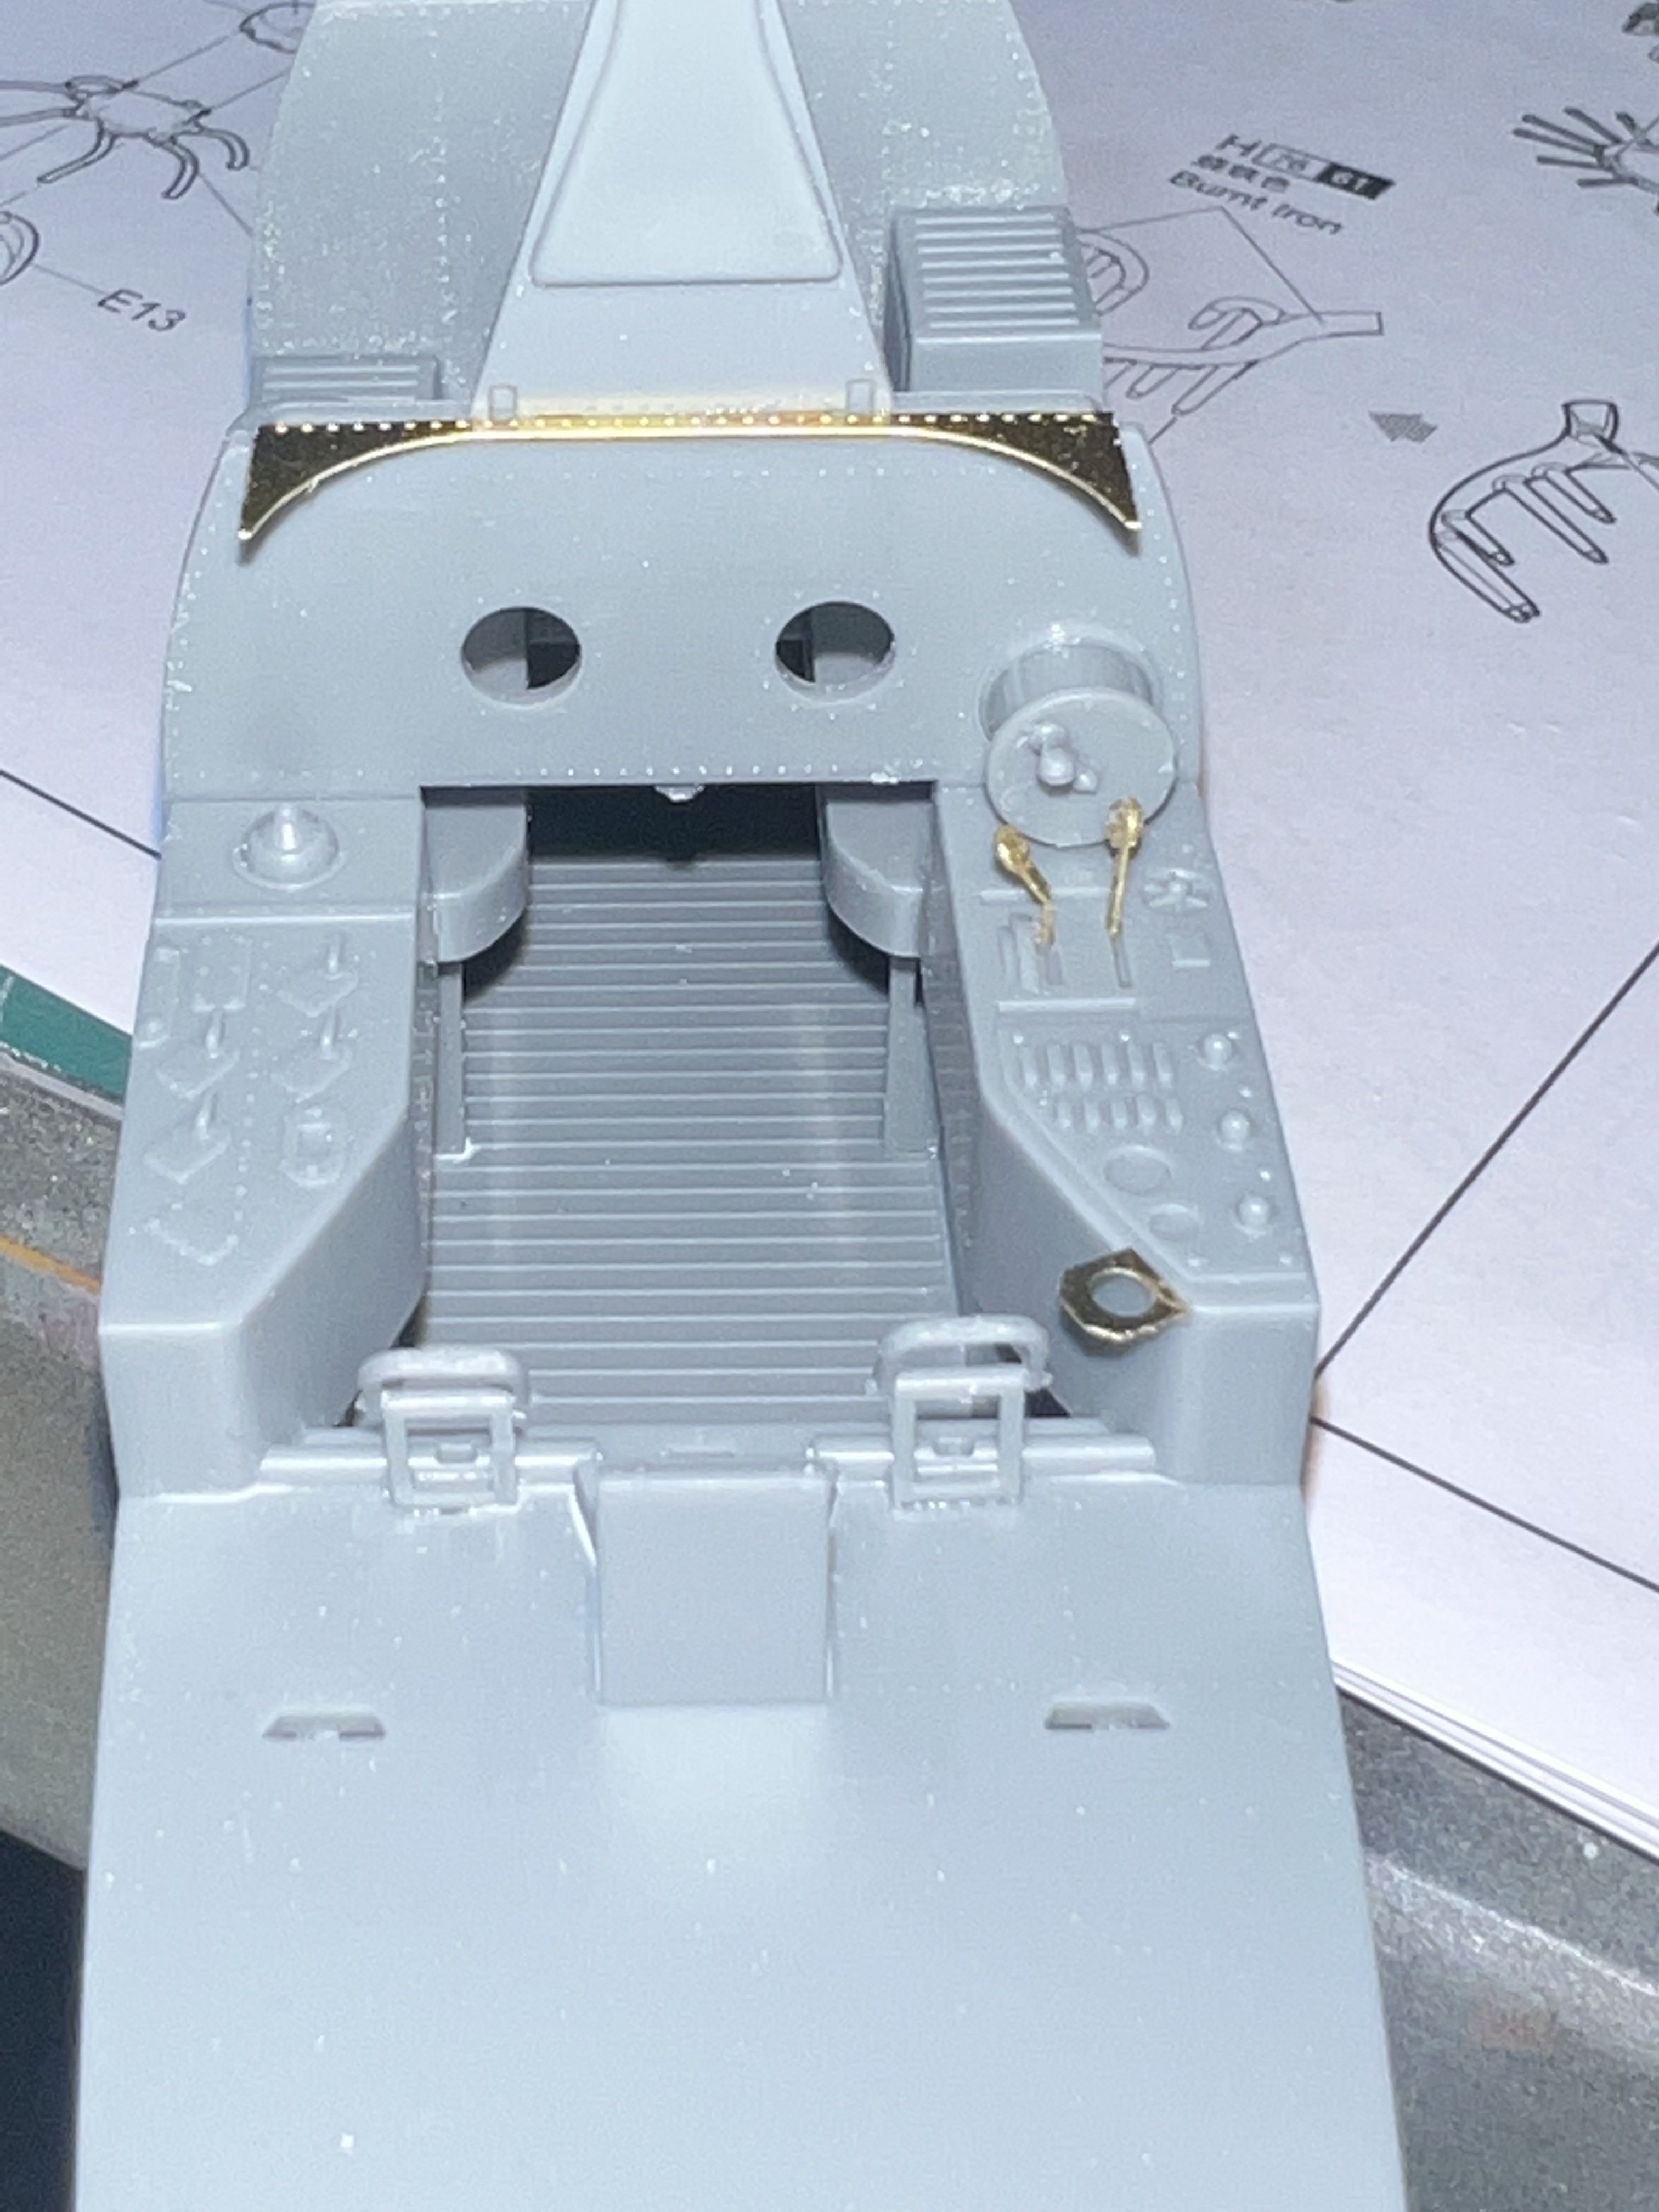
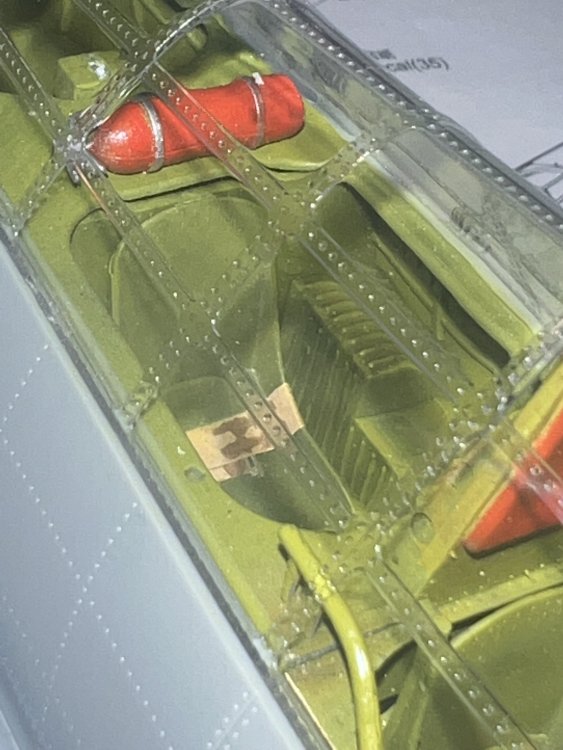
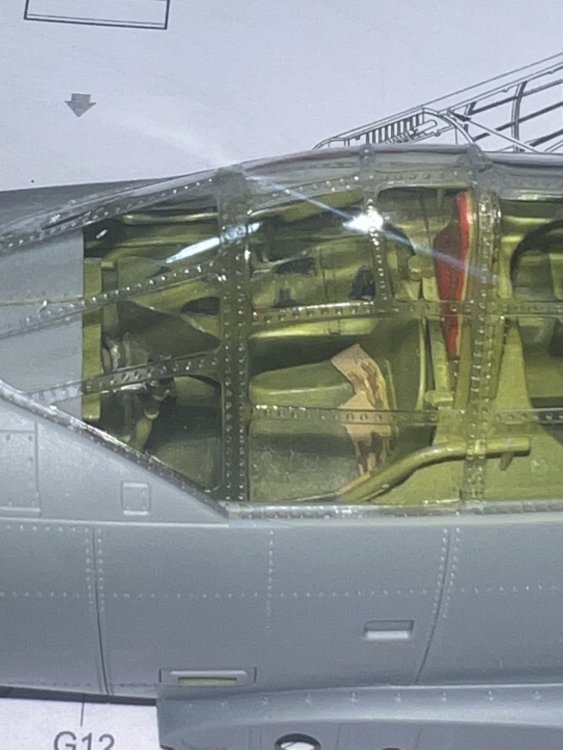
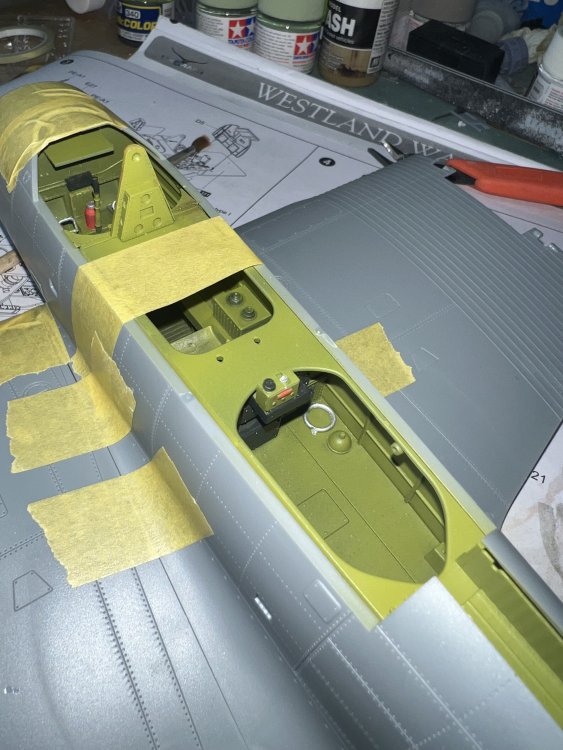
Well, so far, it appears that the throttle quadrant may be missing, although I’m not that far ahead yet. The cockpit is missing quite a lot of pipes, tubing, wires, etc, and a few levers, etc. that is simple dimple for someone with a few hours of time on their hands. This kit will massively benefit from a Quinta set or similar. The cockpit itself is tailor made for a Company like Resin2Detail to 3D print one like they did the Helldiver. The interior is definitely simplified to some extent. -
Trumpeter TBD-1 Devastator
Clunkmeister replied to Clunkmeister's topic in LSM 1/35 and Larger Work In Progress
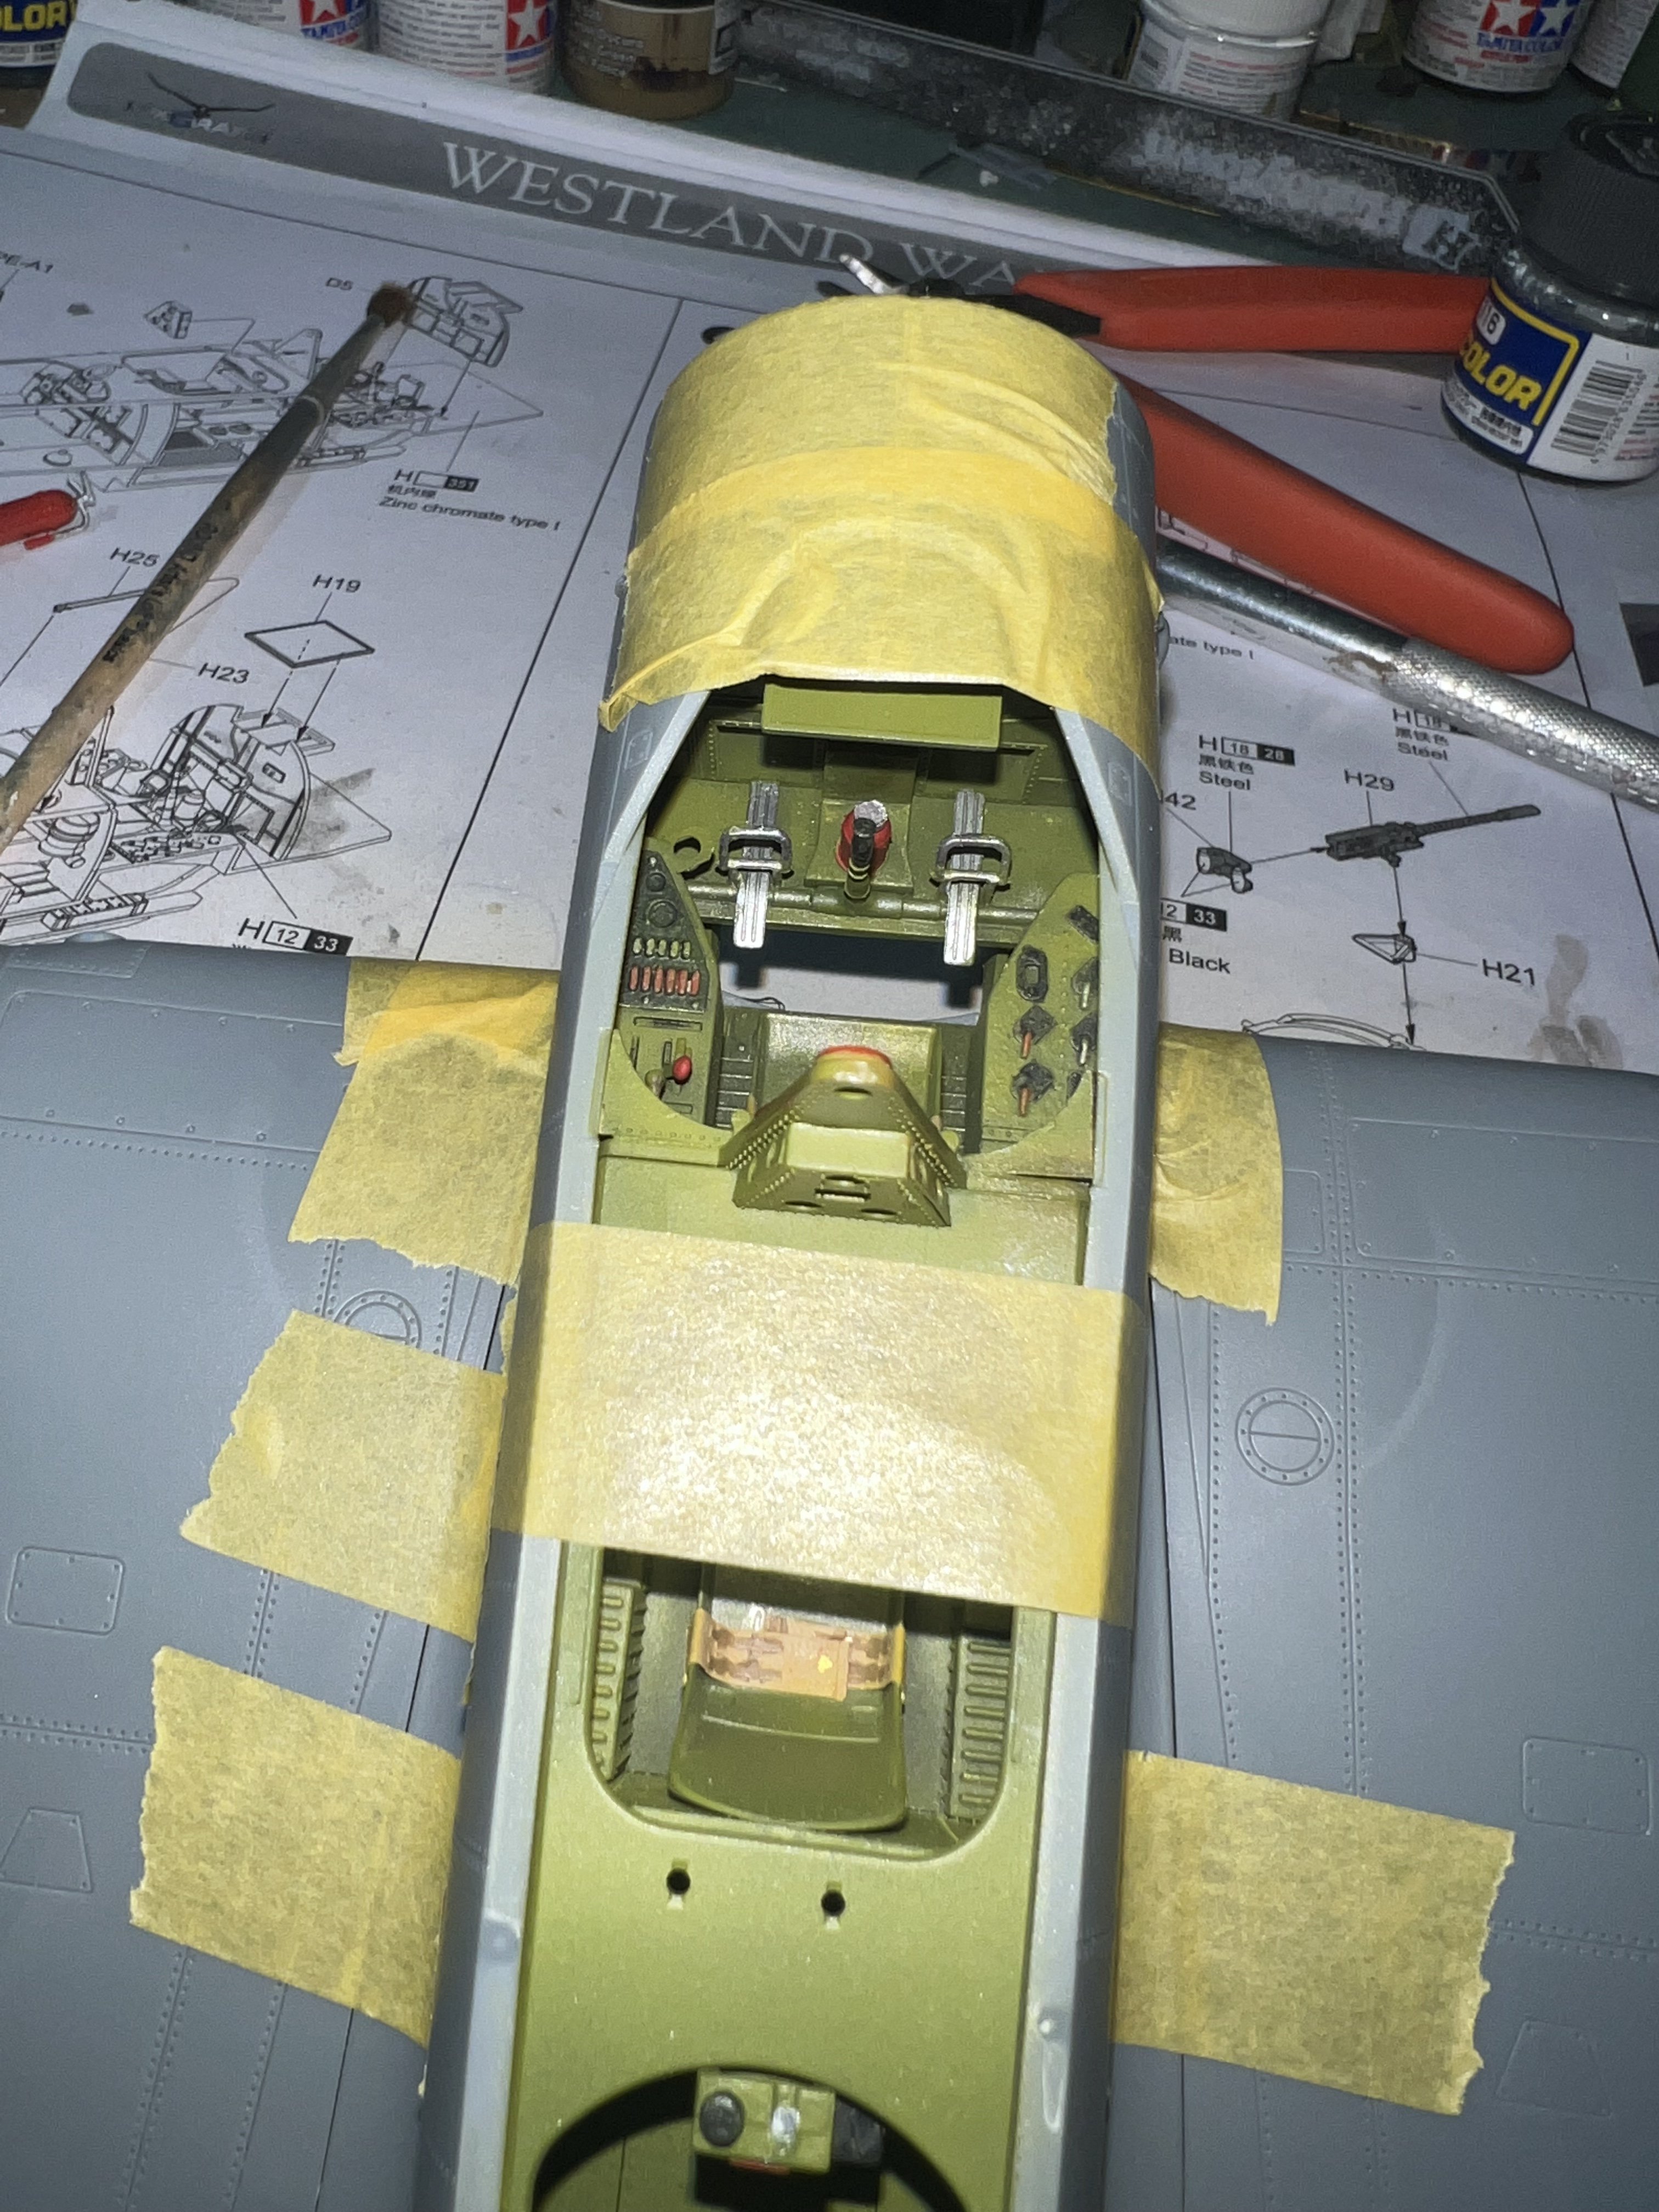
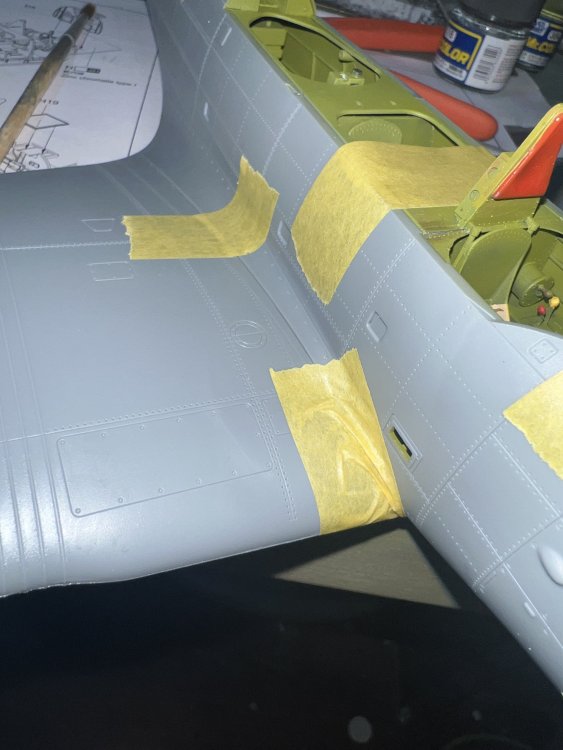
Here’s the basic 3 person cockpit and the fuselage halves. The fit is pretty decent, actually. At least so far. I did lighten up the green a fair bit.


-
Trumpeter TBD-1 Devastator
Clunkmeister replied to Clunkmeister's topic in LSM 1/35 and Larger Work In Progress
I just moved this to WIP, where it needs to be, folks -
Trumpeter TBD-1 Devastator
Clunkmeister replied to Clunkmeister's topic in LSM 1/35 and Larger Work In Progress
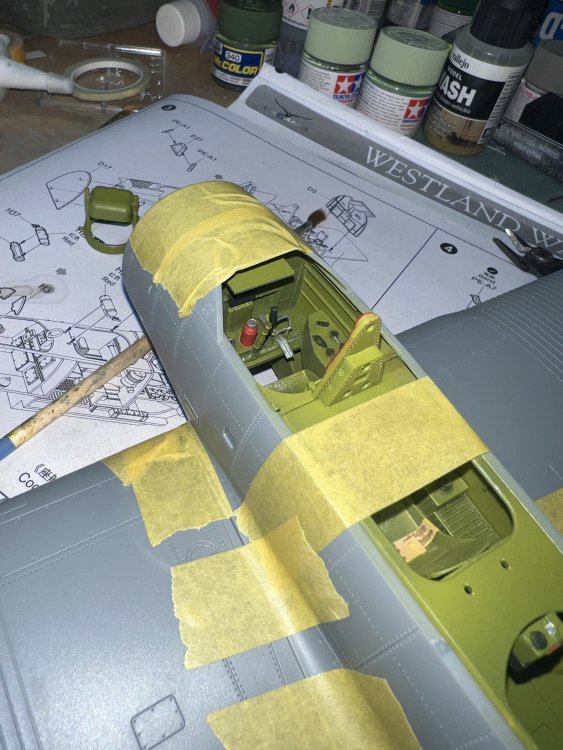
Thanks. I’m not happy with that cockpit effort and am redoing the details. Yes, it’s way to monochrome for me and looks toylike. I gave it a strip, and now a thin coat of green. Tonight we get an oilwash. My forté is not fast slap them together builds. Those who can, and have it look good, have my respect. -
GB Award for modeling greatness decided
Clunkmeister replied to Clunkmeister's topic in Let’s Get Wet Group Build.
And here I didn’t even have time to finish mine! 🤣. But I expect in the next couple months, I’ll have an RFI for it. -
Trumpeter TBD-1 Devastator
Clunkmeister replied to Clunkmeister's topic in LSM 1/35 and Larger Work In Progress
Rog, we need to remember that these are an extinct aircraft, and unless you’re doing a pre war yellow wings bird, there is absolutely no documentation out there on these. I’ve simply made it sorta pretty. It got an oil wash tonight to bring out the detail, and that’s about it. In typical Trumpeter fashion, there are a lot of internal details, much may very well be invisible when complete, I have no clue, but for now, all goes in it. The oil wash definitely helps tone down the starkness seen here in the pictures. -
Trumpeter TBD-1 Devastator
Clunkmeister replied to Clunkmeister's topic in LSM 1/35 and Larger Work In Progress
Hey Rog, I’ve been taking plenty of pictures as I go, as I am doing an “all ahead flank” quick build for what I hope will be a decent review, and am so far quite happy with the fit of this kit. I’m going 100% OOB here and doing whatever the blue scheme is in the kit, kit decals and all, warts and everything. I have to keep telling myself “NO!” as I lustily and longingly eyeball my stash of Airscale instrument decals and Barracuda placards, but I may yet cave.. I DID use the kit PE lap belts, though! Mr HGW has scratched me off his Christmas Card list, I reckon. I hope you’re right regarding the Avenger, Dauntless, Wildcat team being the team unleashed on this kit. As of right now, it seems to remind me of a bigger GWH Devastator in engineering and fit. Other than the separate control surfaces, it’s like an old friend here. -
Trumpeter TBD-1 Devastator
Clunkmeister replied to Clunkmeister's topic in LSM 1/35 and Larger Work In Progress
Agreed. I have never built a Trumpeter kit to completion. I have an F-100 built 90% and that’s it. Sad. -
Hasegawa Fw-190A5... or 6.
Clunkmeister replied to GazzaS's topic in LSM 1/35 and Larger Work In Progress
Gaz, are you using the kit gun covers, or the Eagle Editions part? Somewhere, I KNOW I have Henri Dahne prop for this kit. I can’t believe that after all these years, the only 190s I ever built were the long with 152H’s. 🤡 -
Hasegawa Fw-190A5... or 6.
Clunkmeister replied to GazzaS's topic in LSM 1/35 and Larger Work In Progress
Mr 190 comes through again. Is there a 190 detail that Martin DOESN’T know about? -
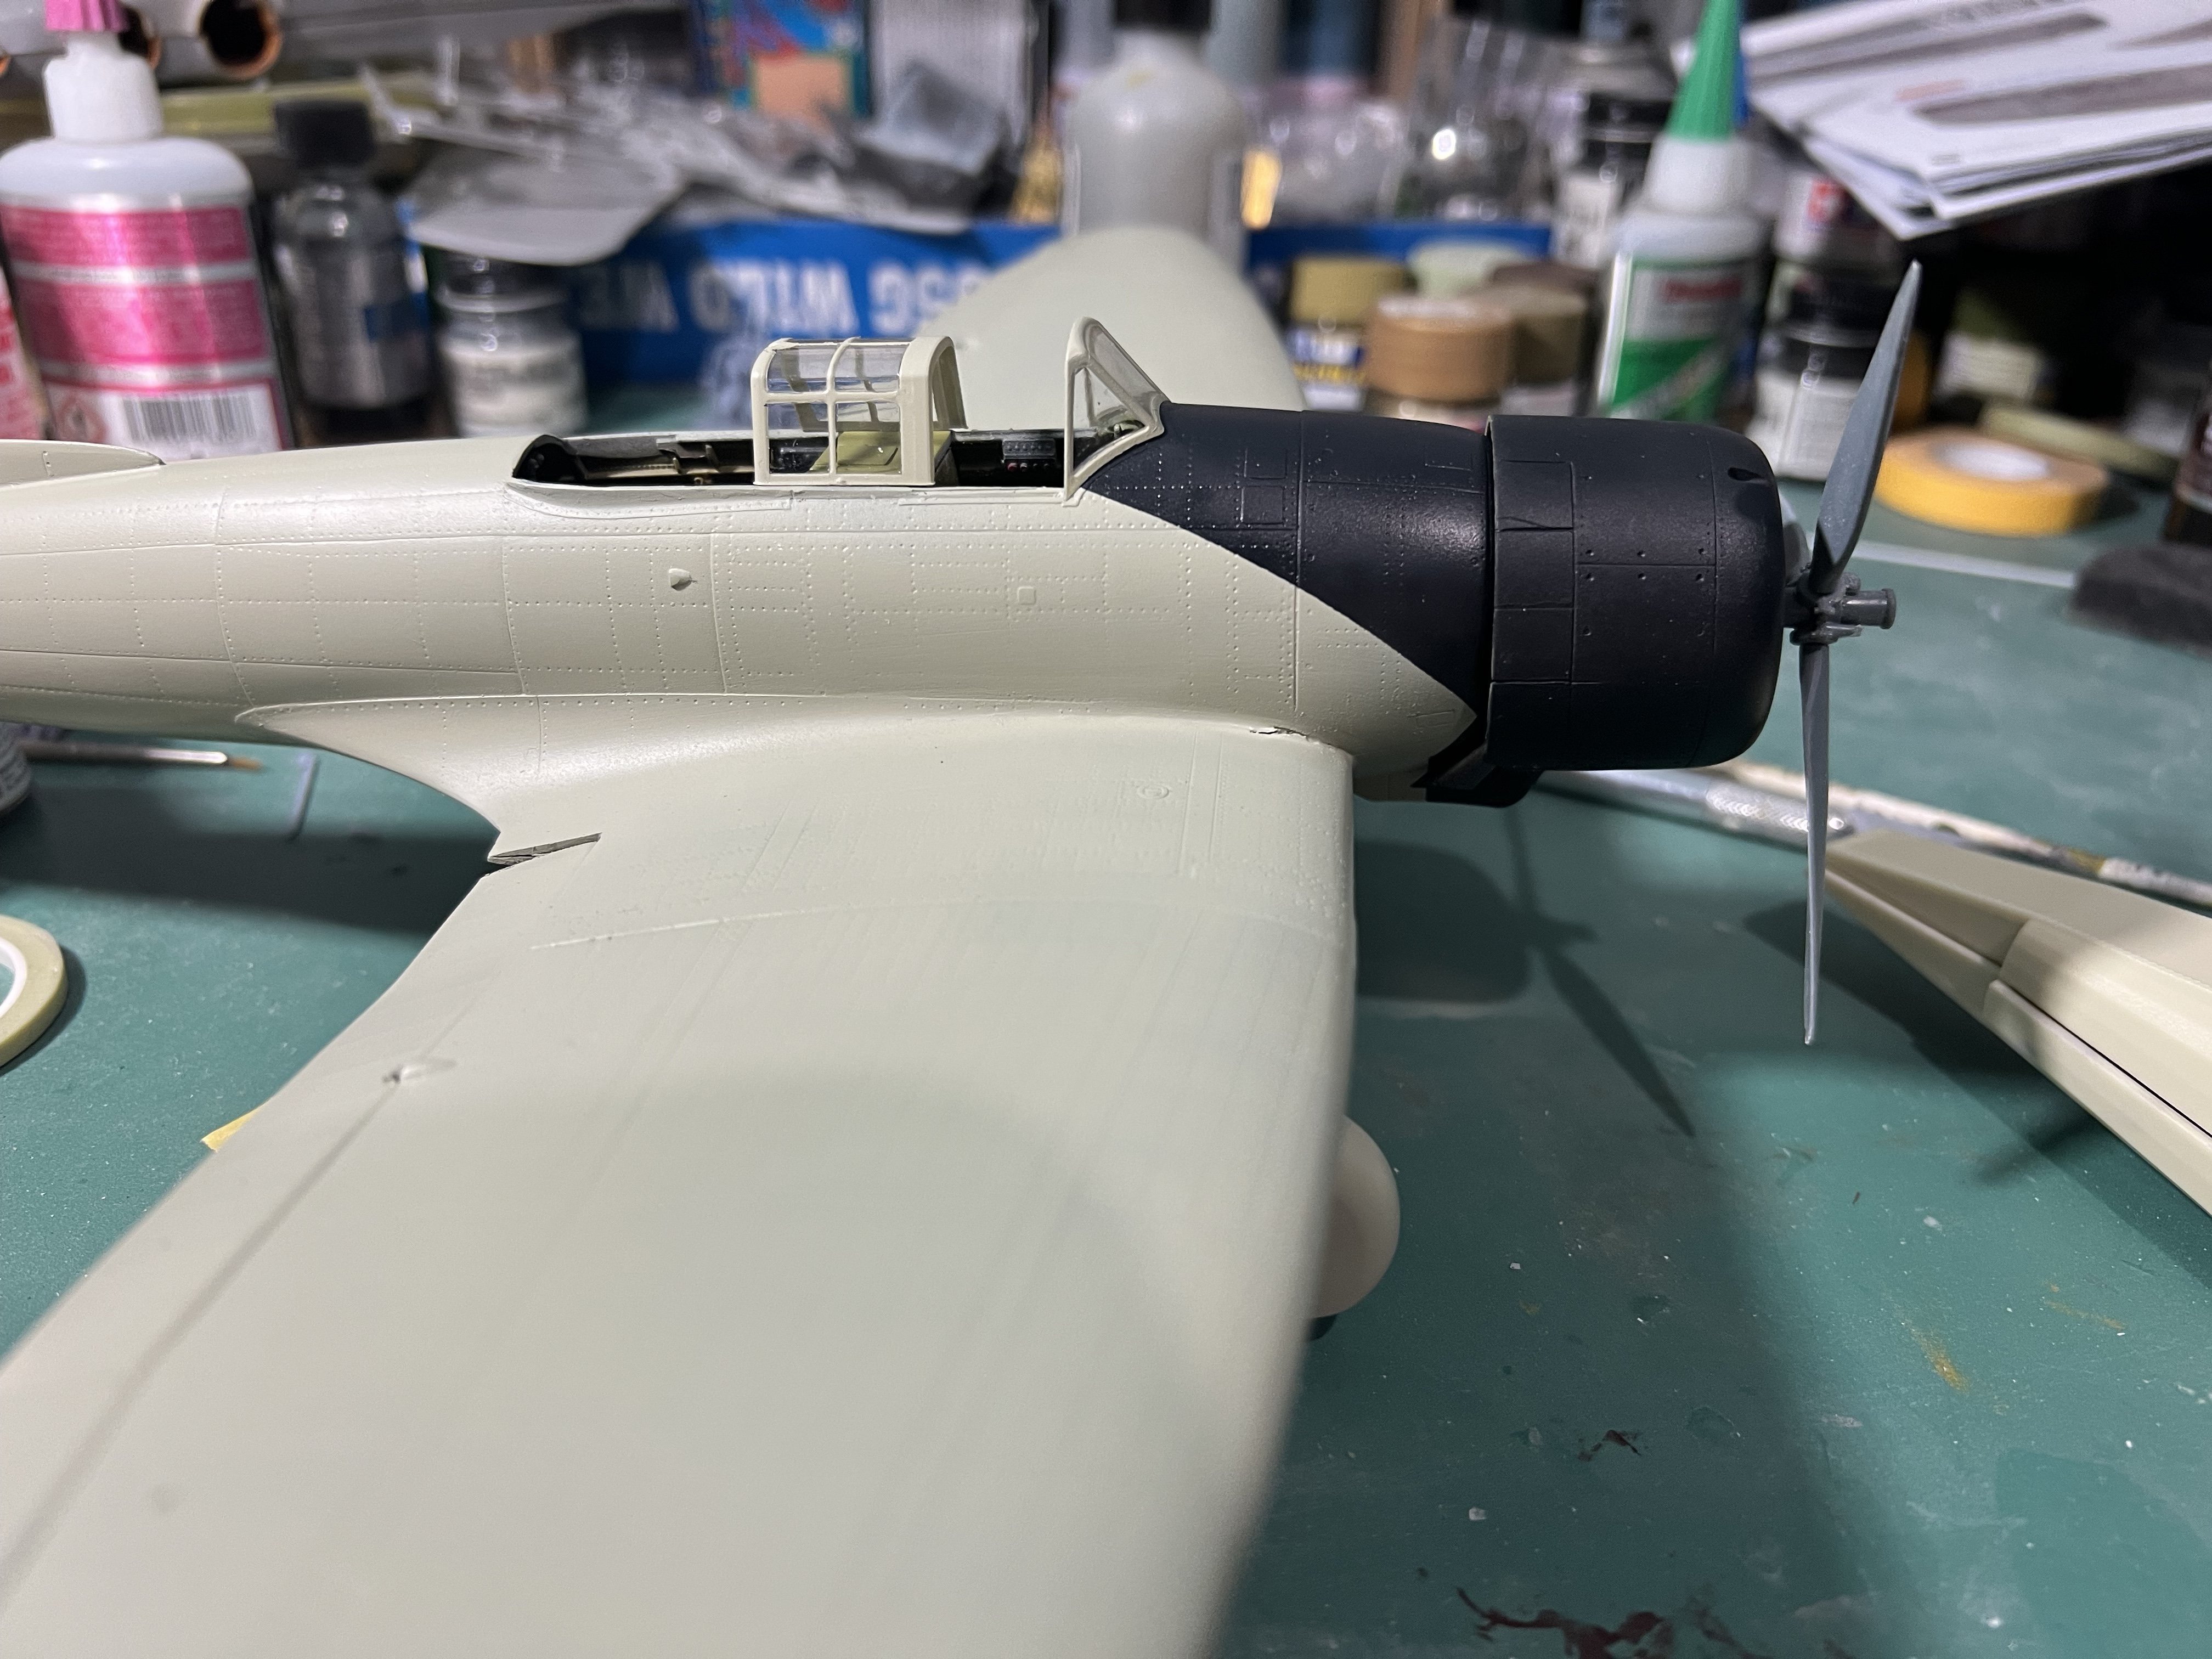
Thanks Kevin! I sanded the Milliput today, and I’ll apply one more tiny bit tomorrow as well. I want the forward wind/fuselage join to be perfect.
-
I have decided to do something a bit different this time. We will have two winners, first and second. Plus last place. Last place will need to provide the prizes, however have no fear, the 9 year old judges already told me my half finished build sucks, so I guess I’m it 😂 Two kits: both brand new releases. An Infinity/HPH D3A1 Val, and a Trumpeter Devastator. First place gets to choose, second place gets the kit the other guy didn’t take. Two truly awesome kits, two awesome models to be chosen. Let the games finish up.
- 19 replies
-
- 13
-
-
-
Trumpeter TBD-1 Devastator
Clunkmeister replied to Clunkmeister's topic in LSM 1/35 and Larger Work In Progress
Yep, knowing Trumpeter, it’s way iff, but assuming they pantographed the 1/48 GWH kit, it should be accurate-ish. -
Trumpeter TBD-1 Devastator
Clunkmeister replied to Clunkmeister's topic in LSM 1/35 and Larger Work In Progress
Tonight, I’ll put a review together -
Trumpeter TBD-1 Devastator
Clunkmeister replied to Clunkmeister's topic in LSM 1/35 and Larger Work In Progress
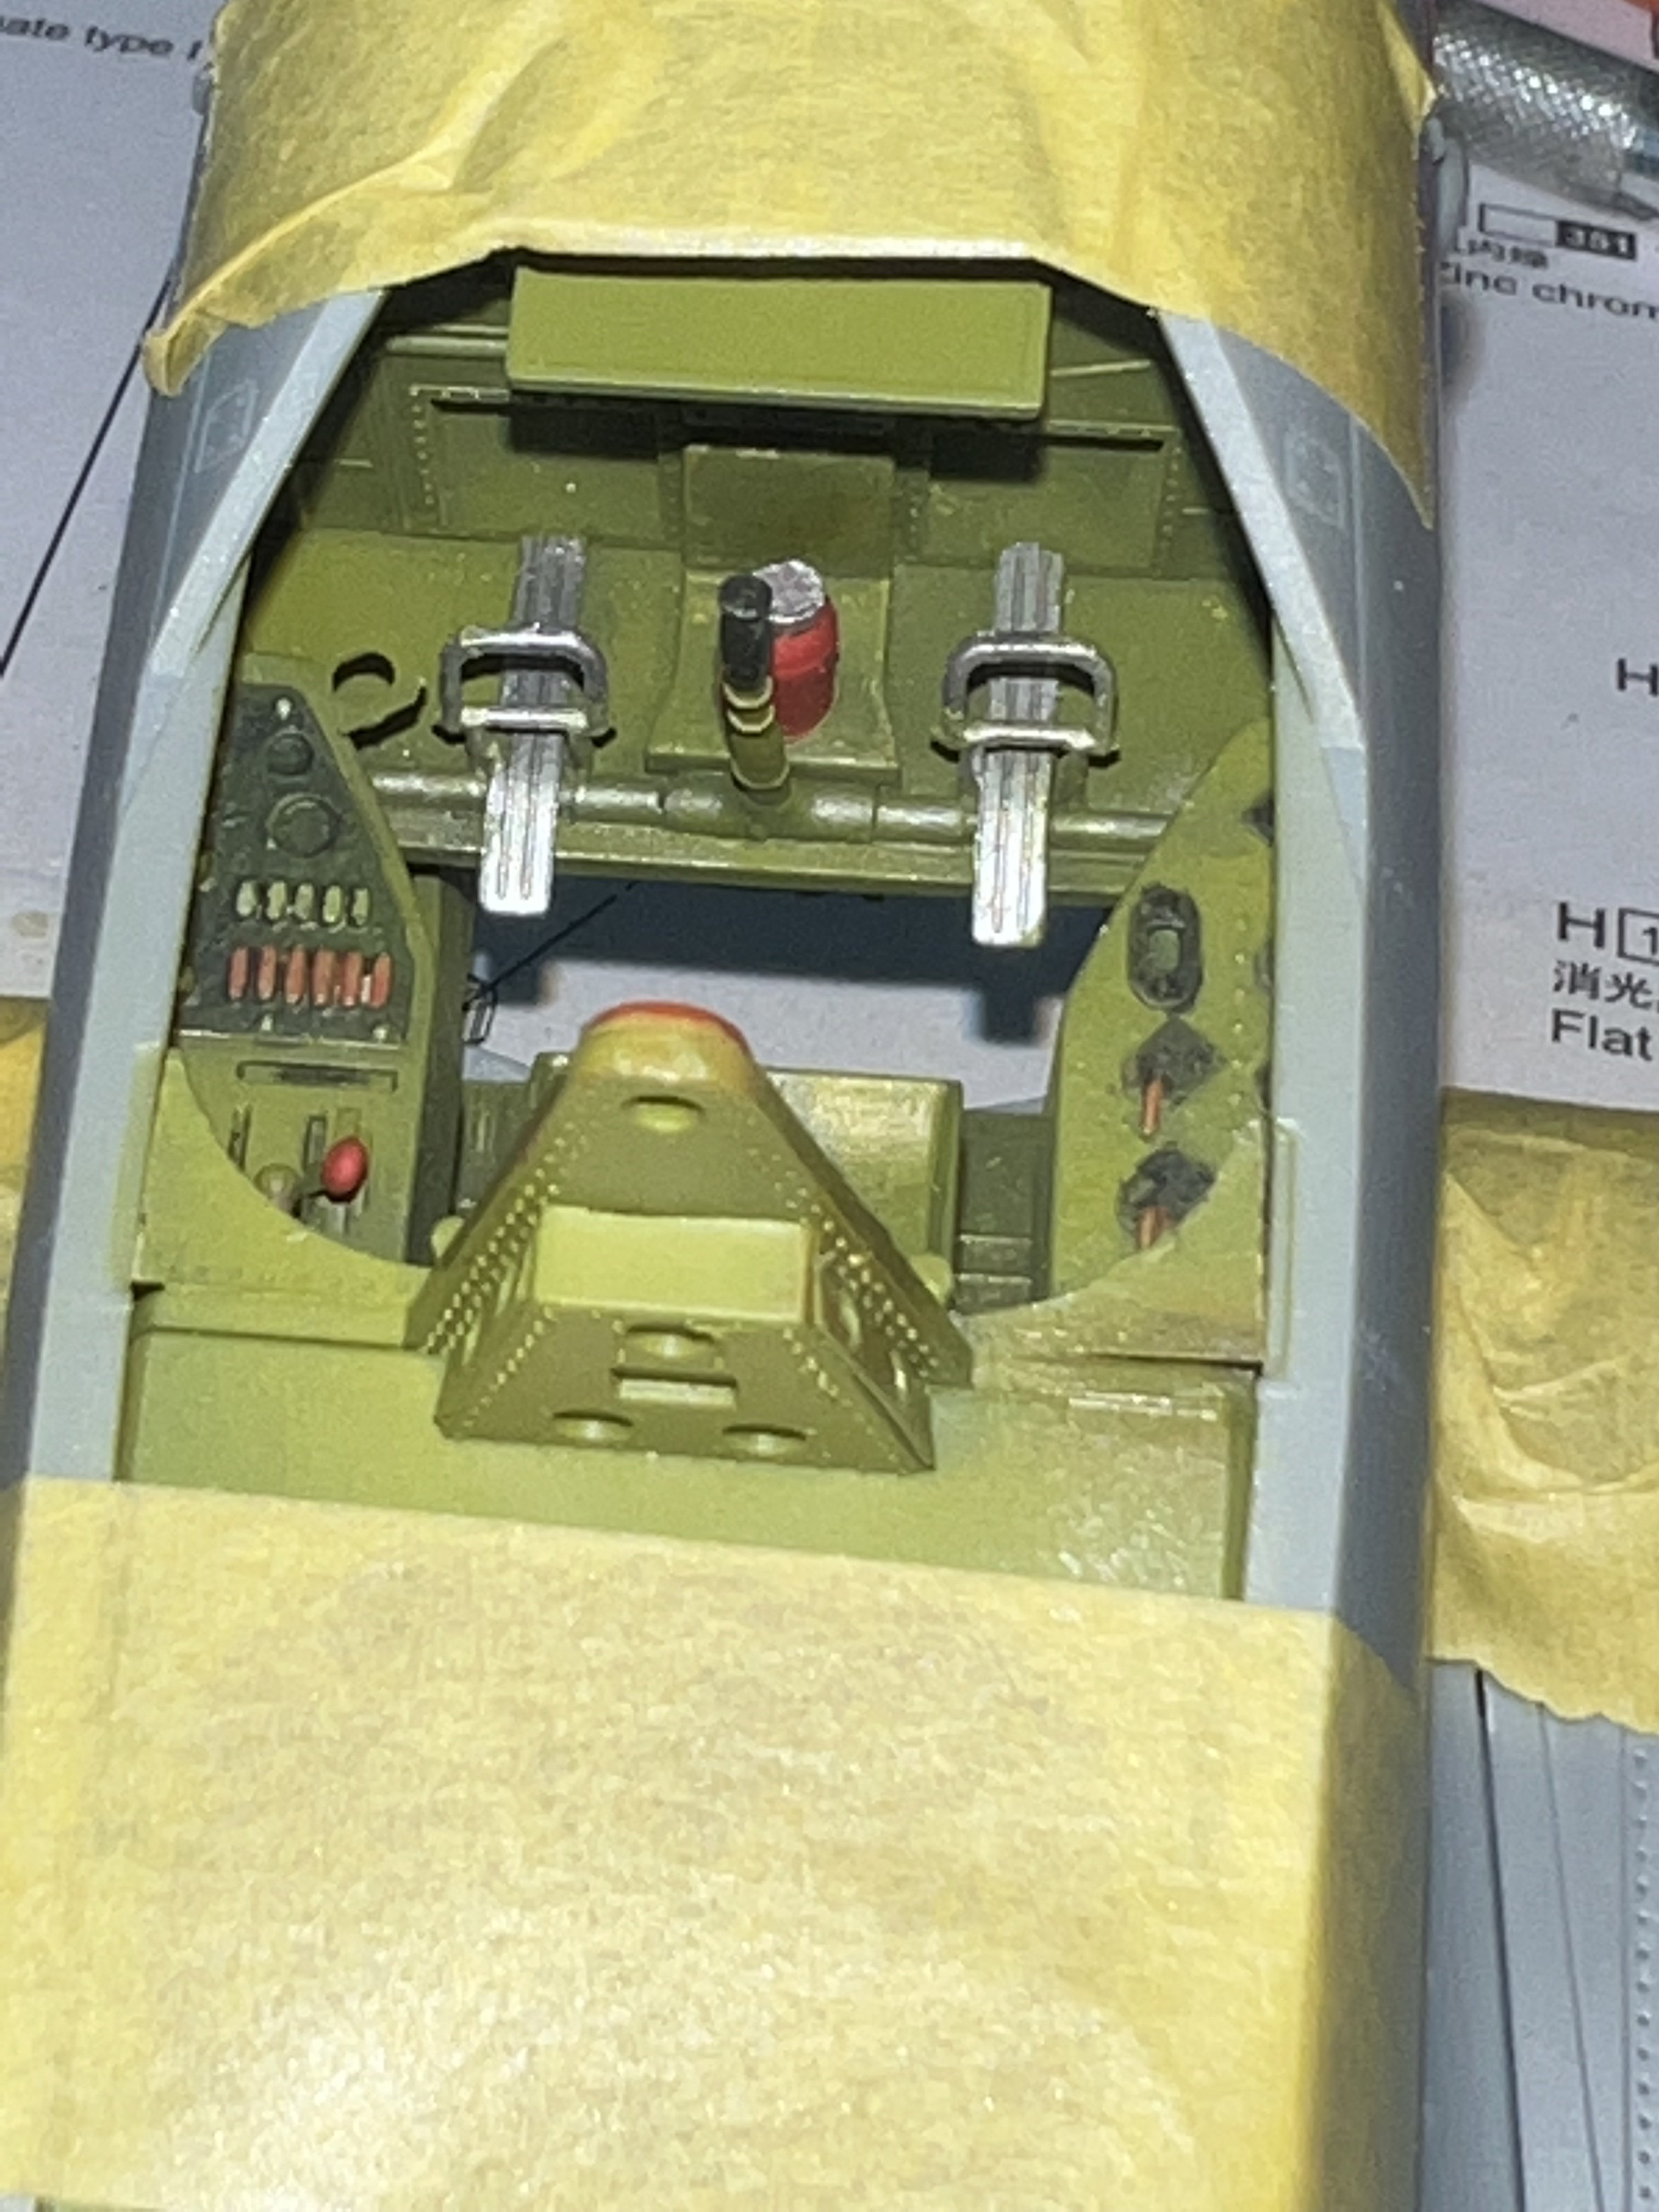
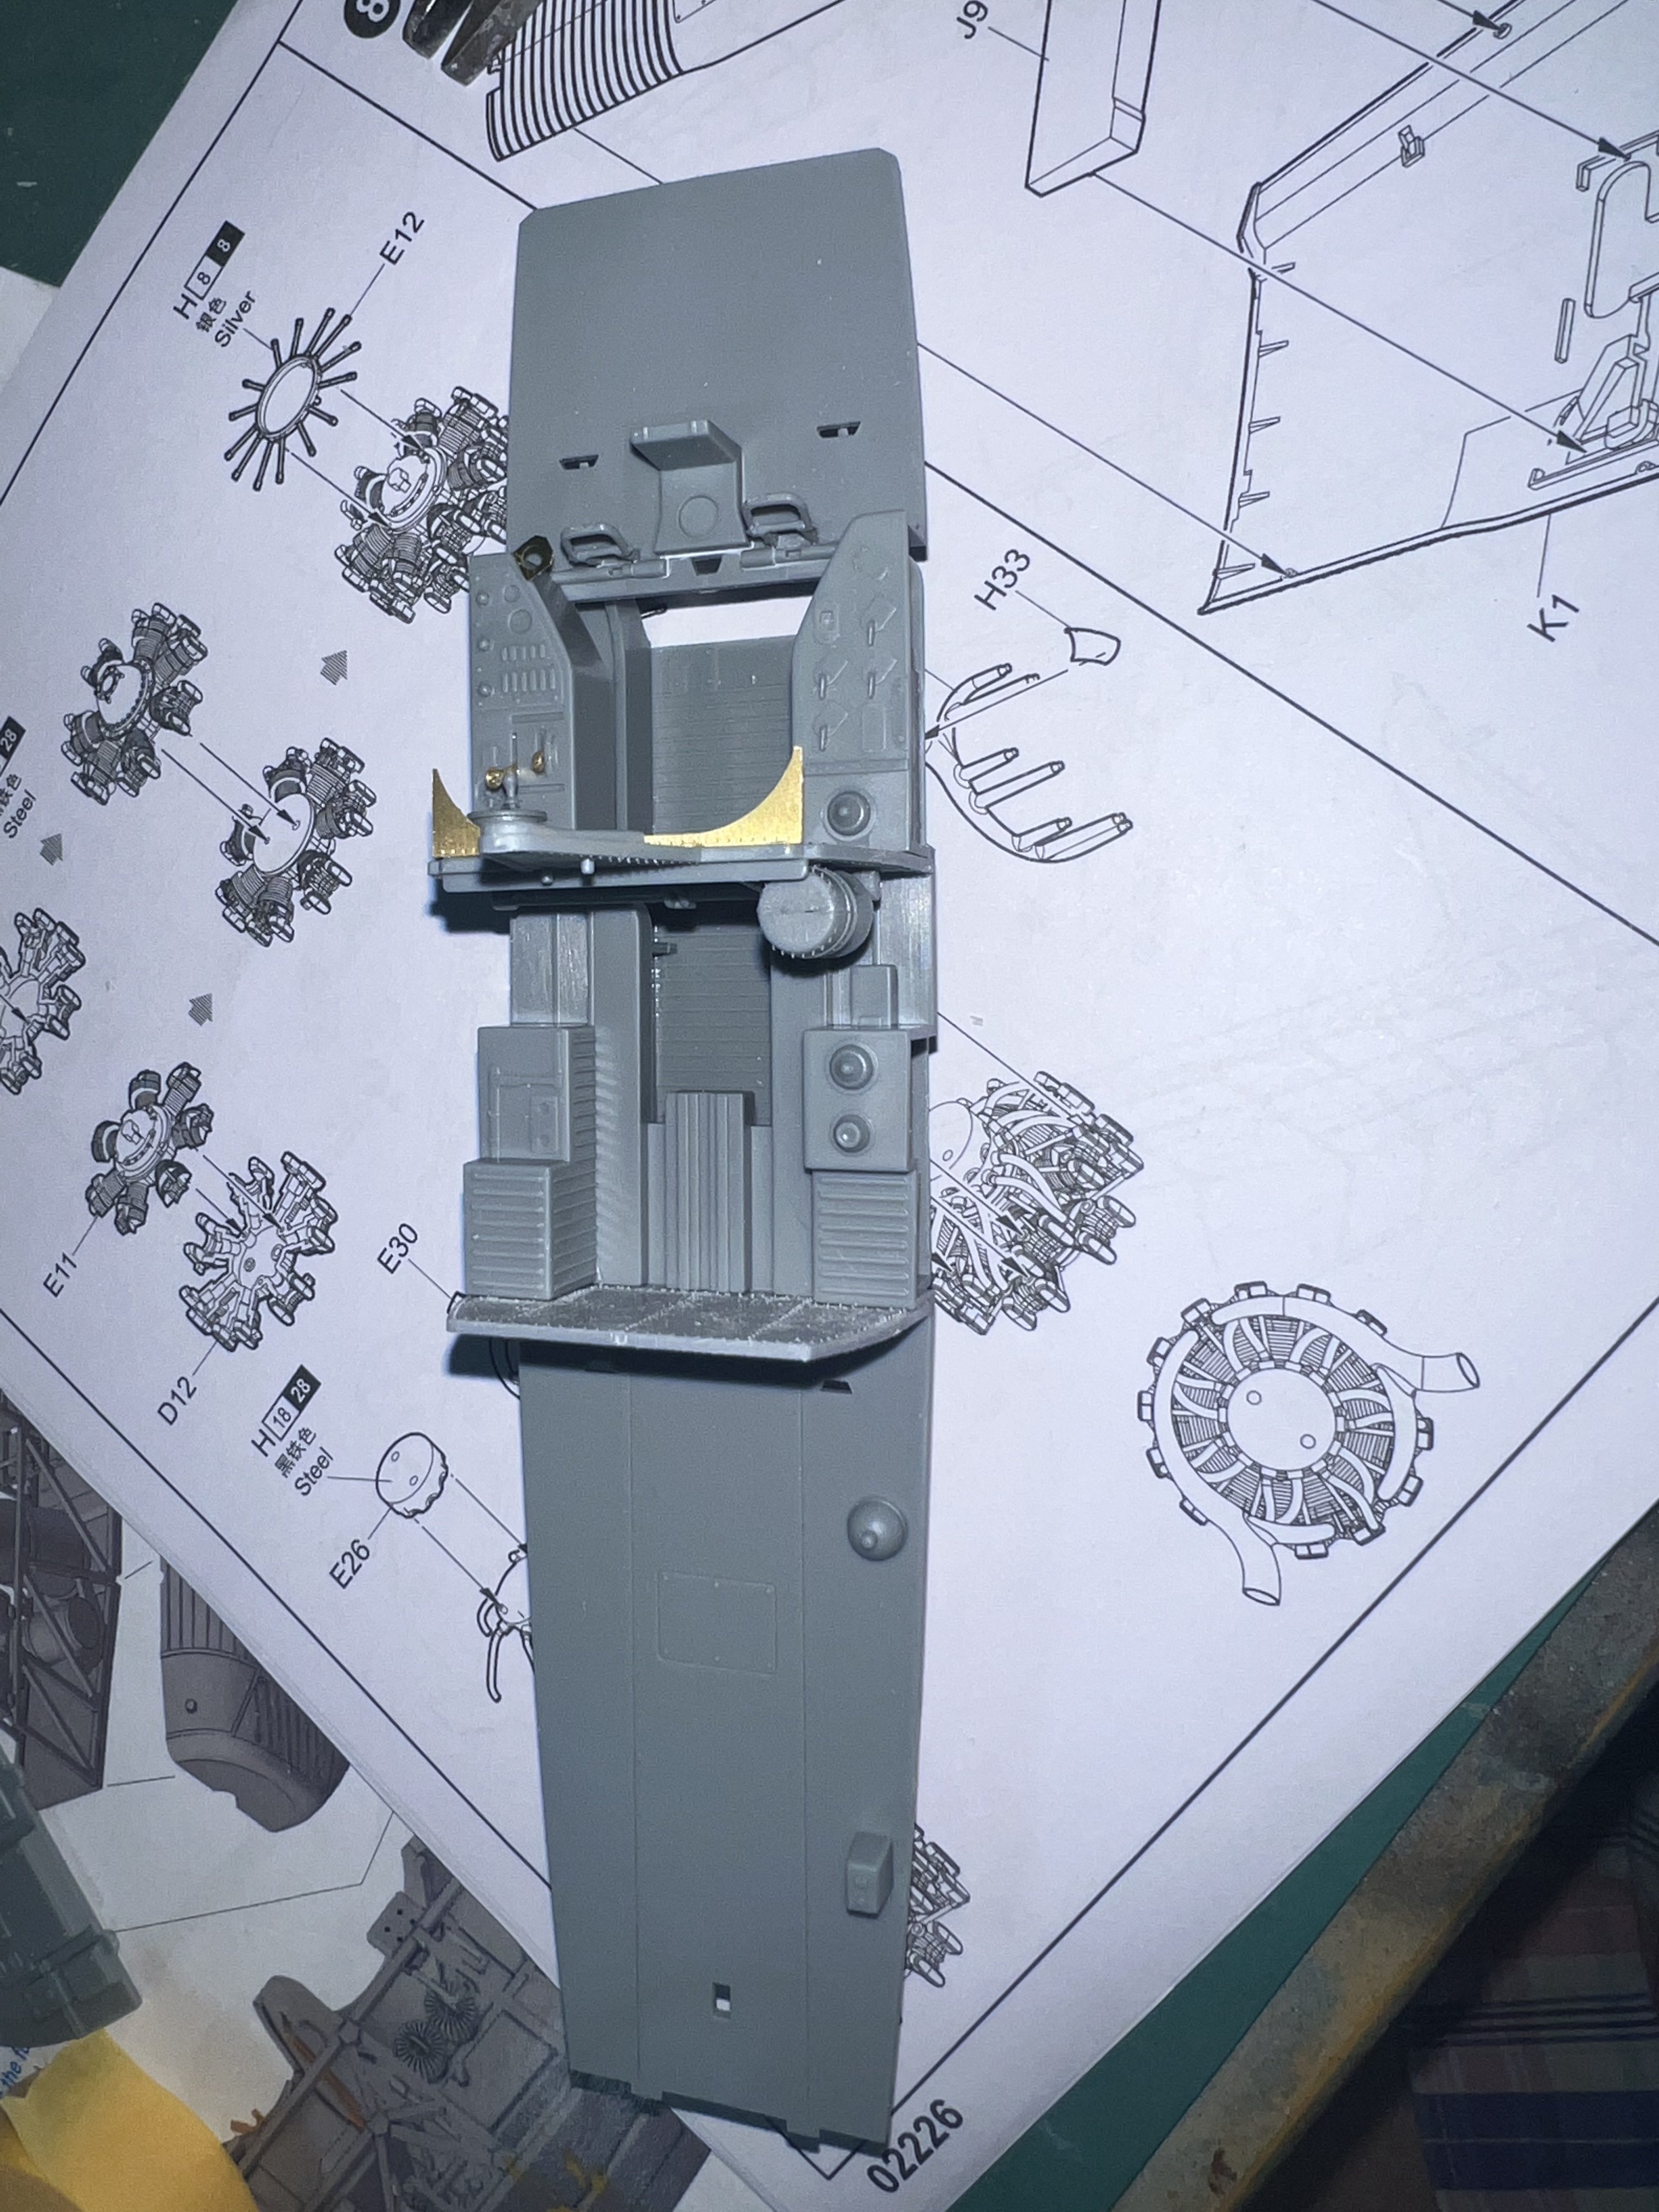
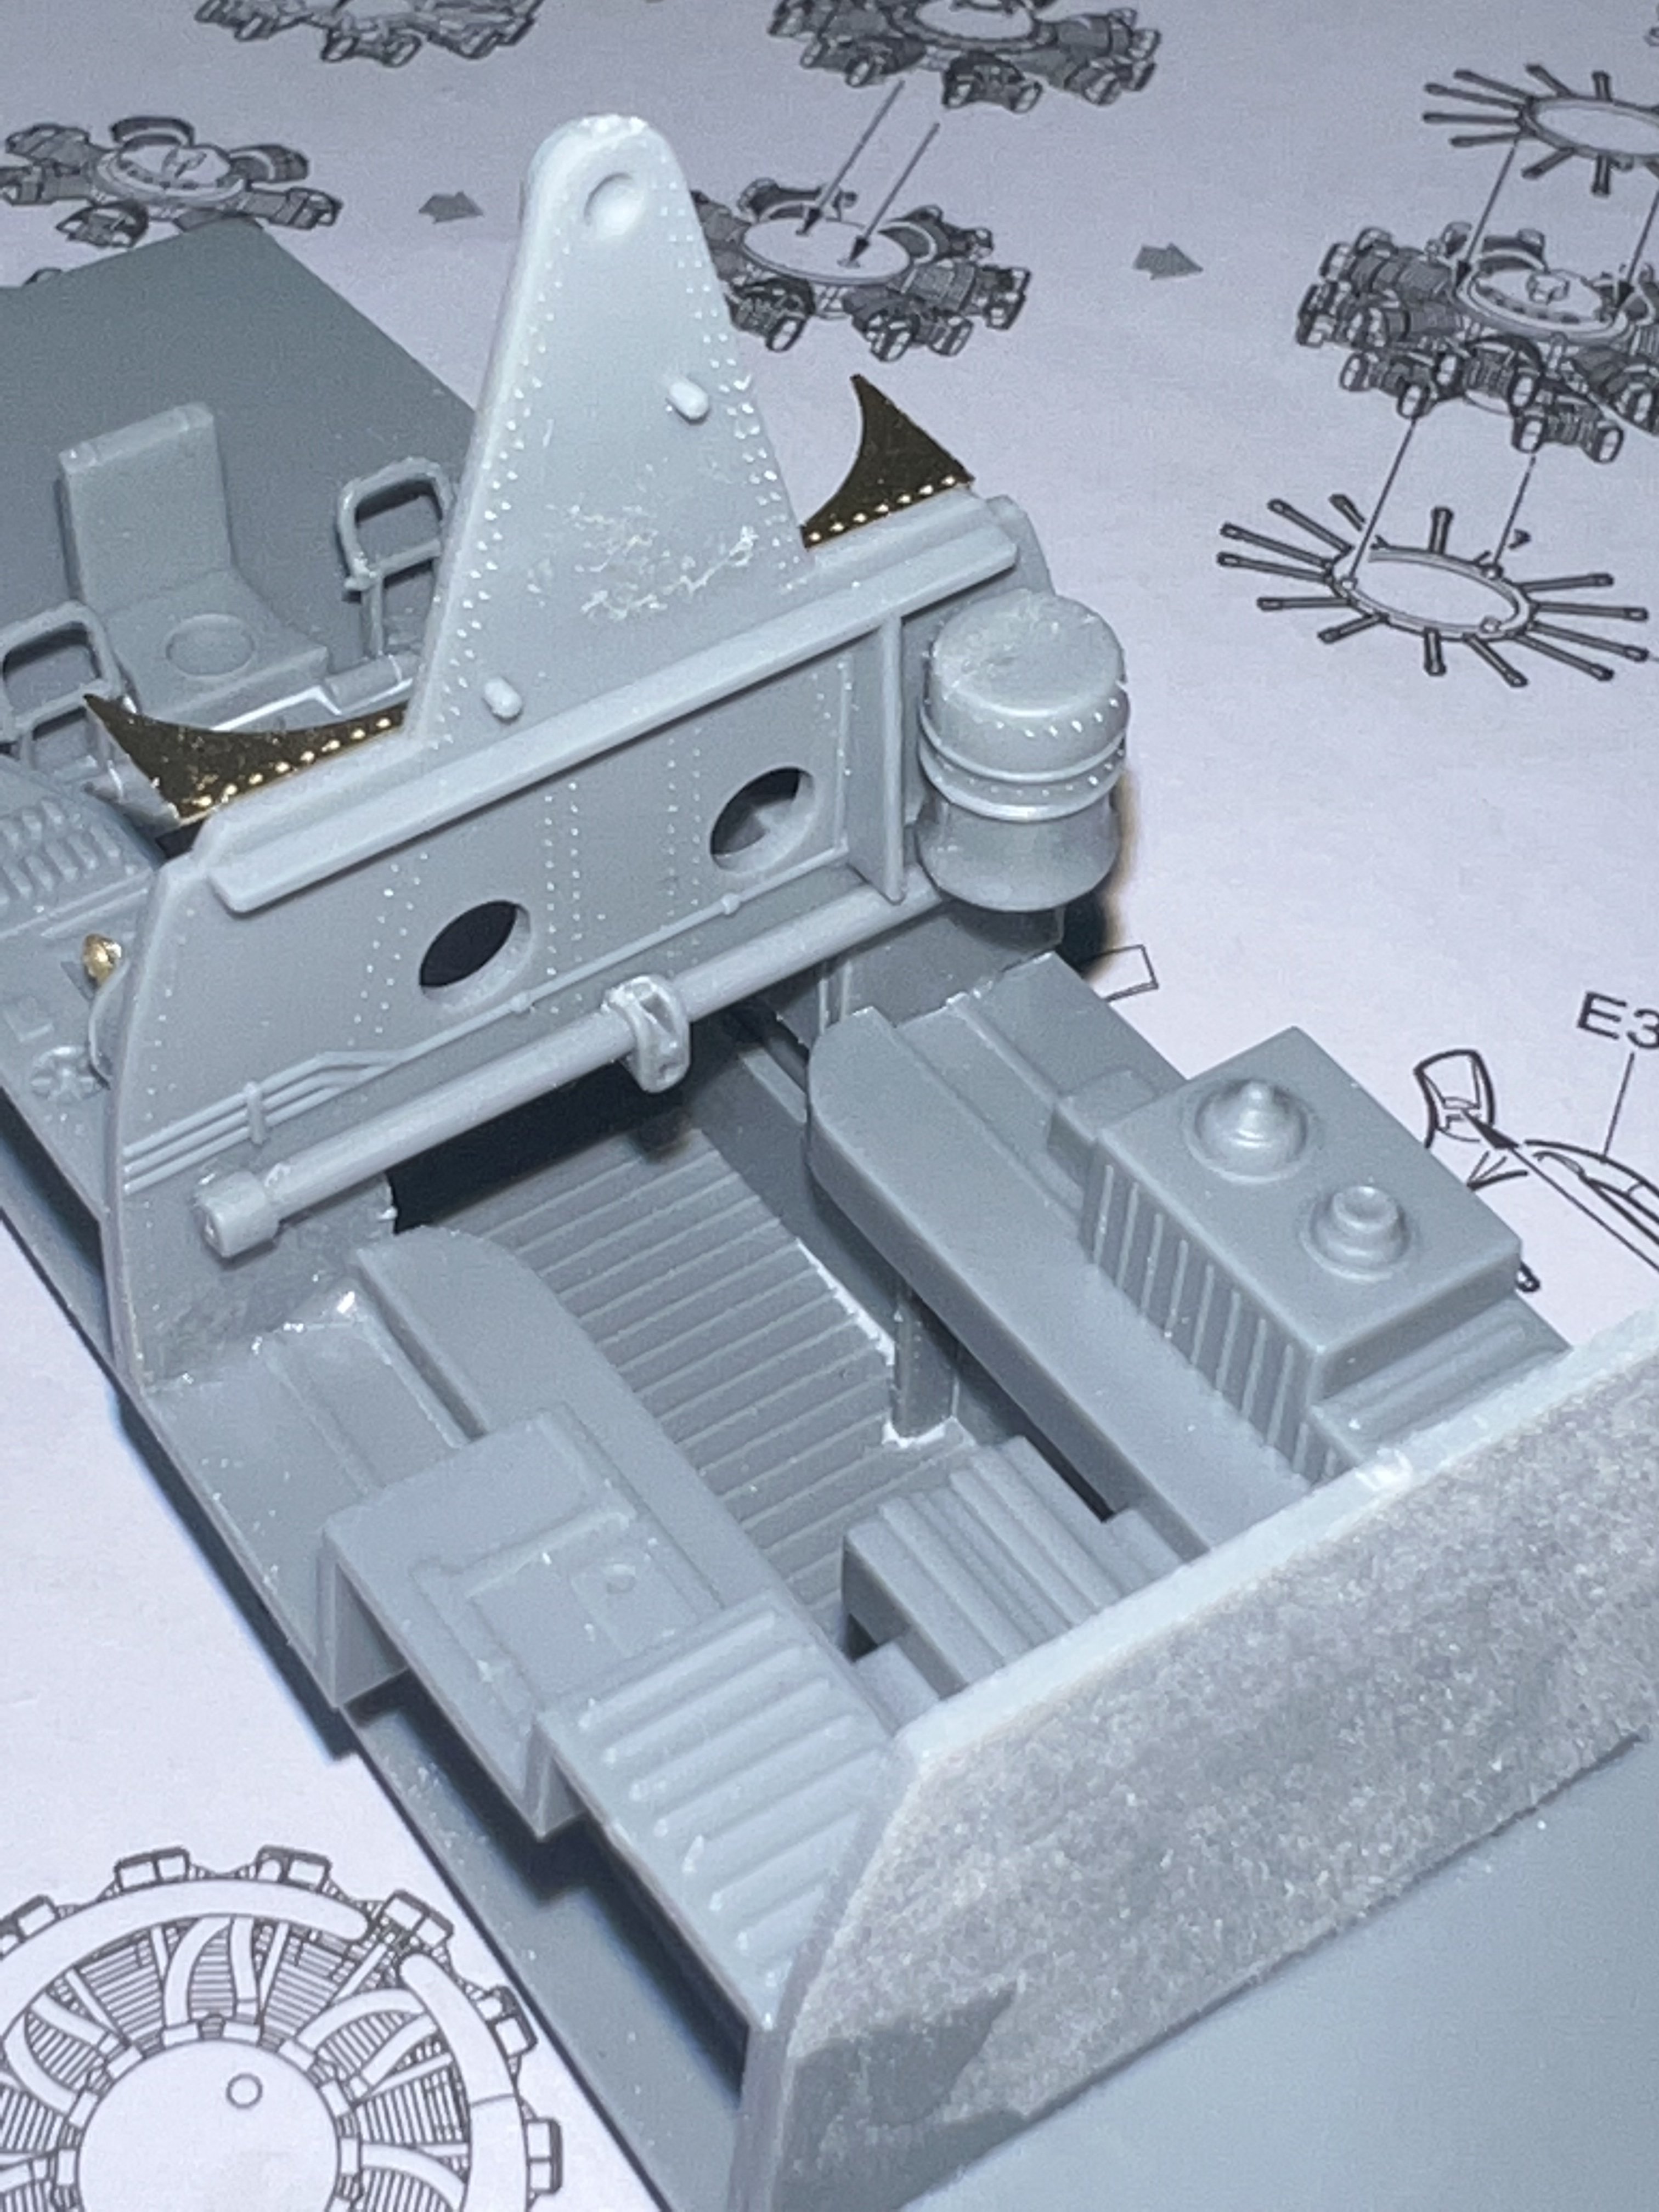
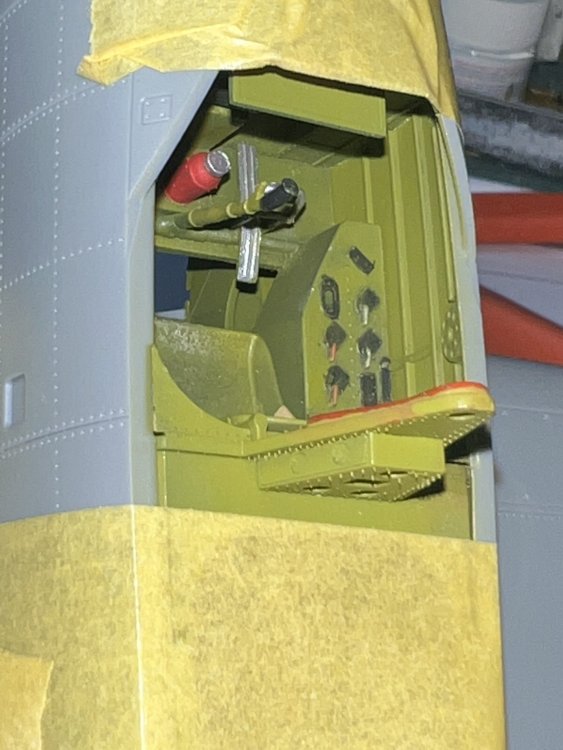
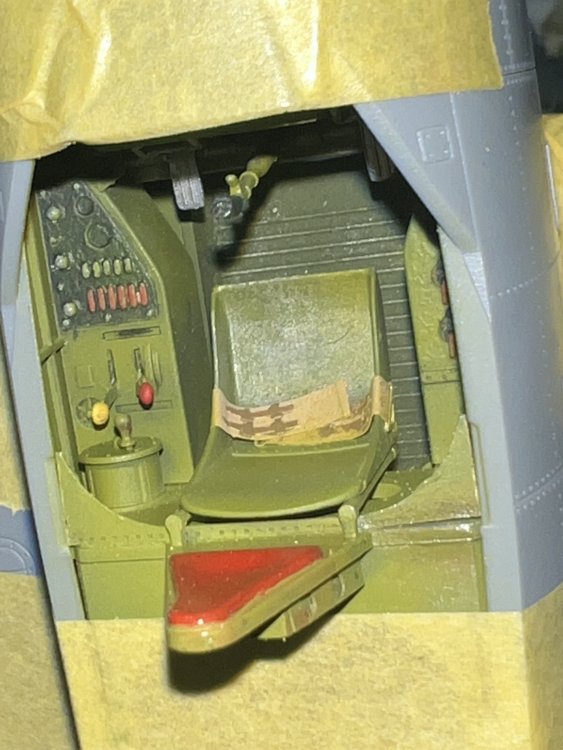
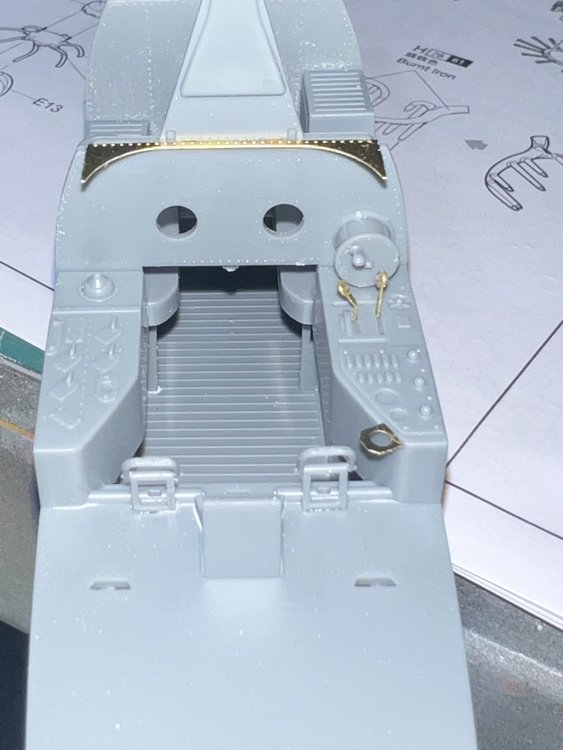
Cockpit quickie. There seems to be a decent level of detail, and this is going to really POP with Quinta, Red Fox, or Yahu 3D decals.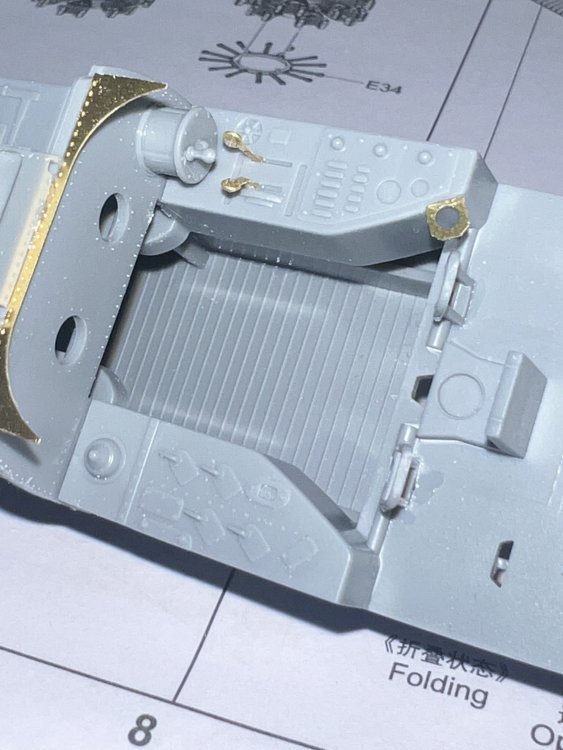


- 94 replies
-
- 12
-
-
-
Trumpeter TBD-1 Devastator
Clunkmeister replied to Clunkmeister's topic in LSM 1/35 and Larger Work In Progress
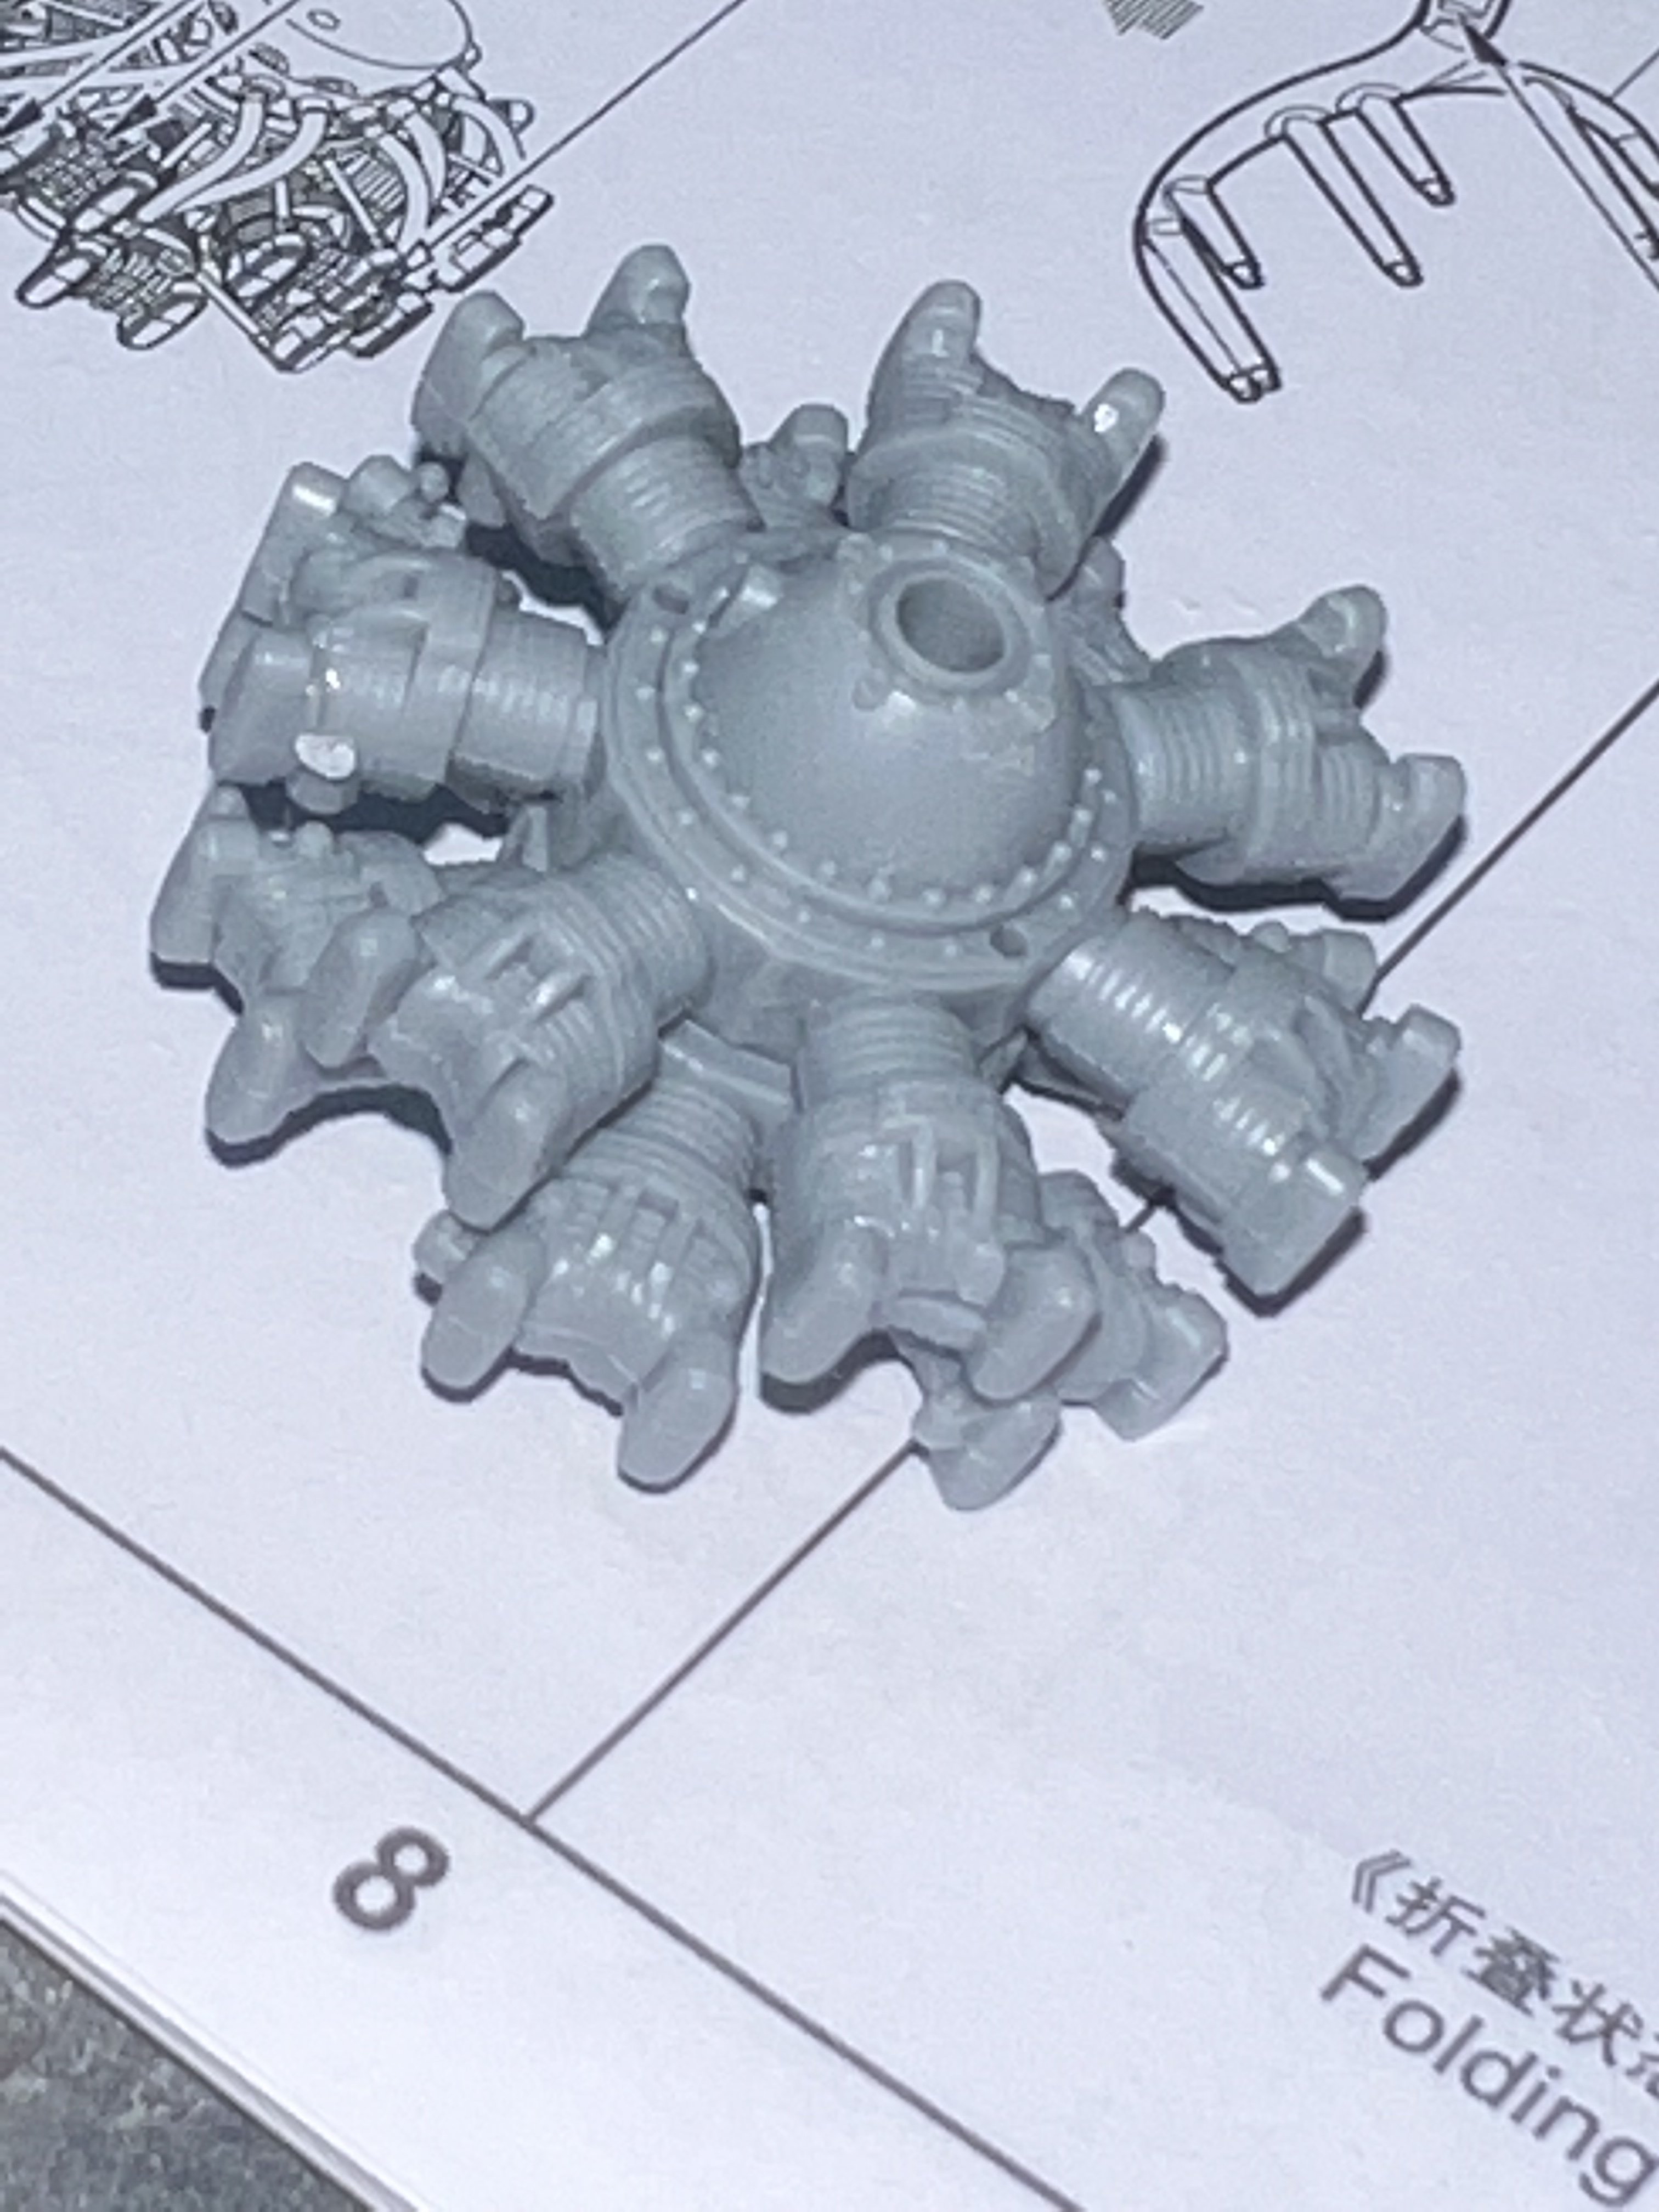
Engine? Typical a trumpeter engine. A real decent level of detail, but no idea on accuracy. I’ll need to look.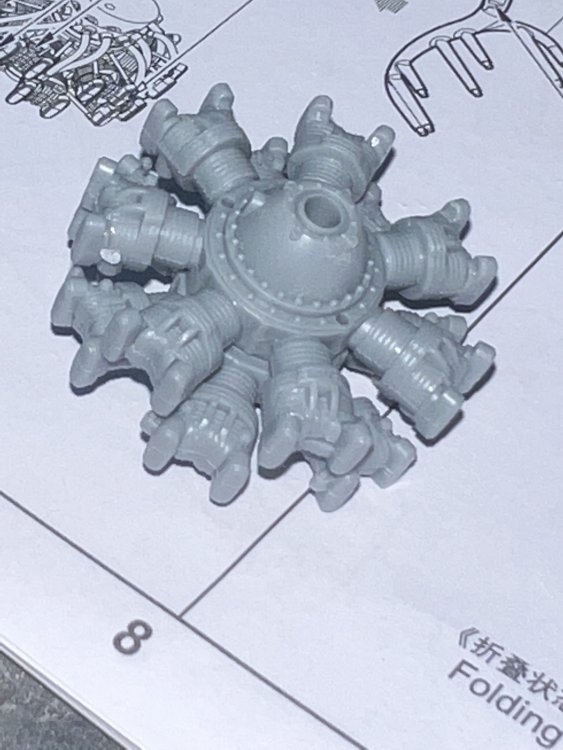
- 94 replies
-
- 11
-
-

-
-
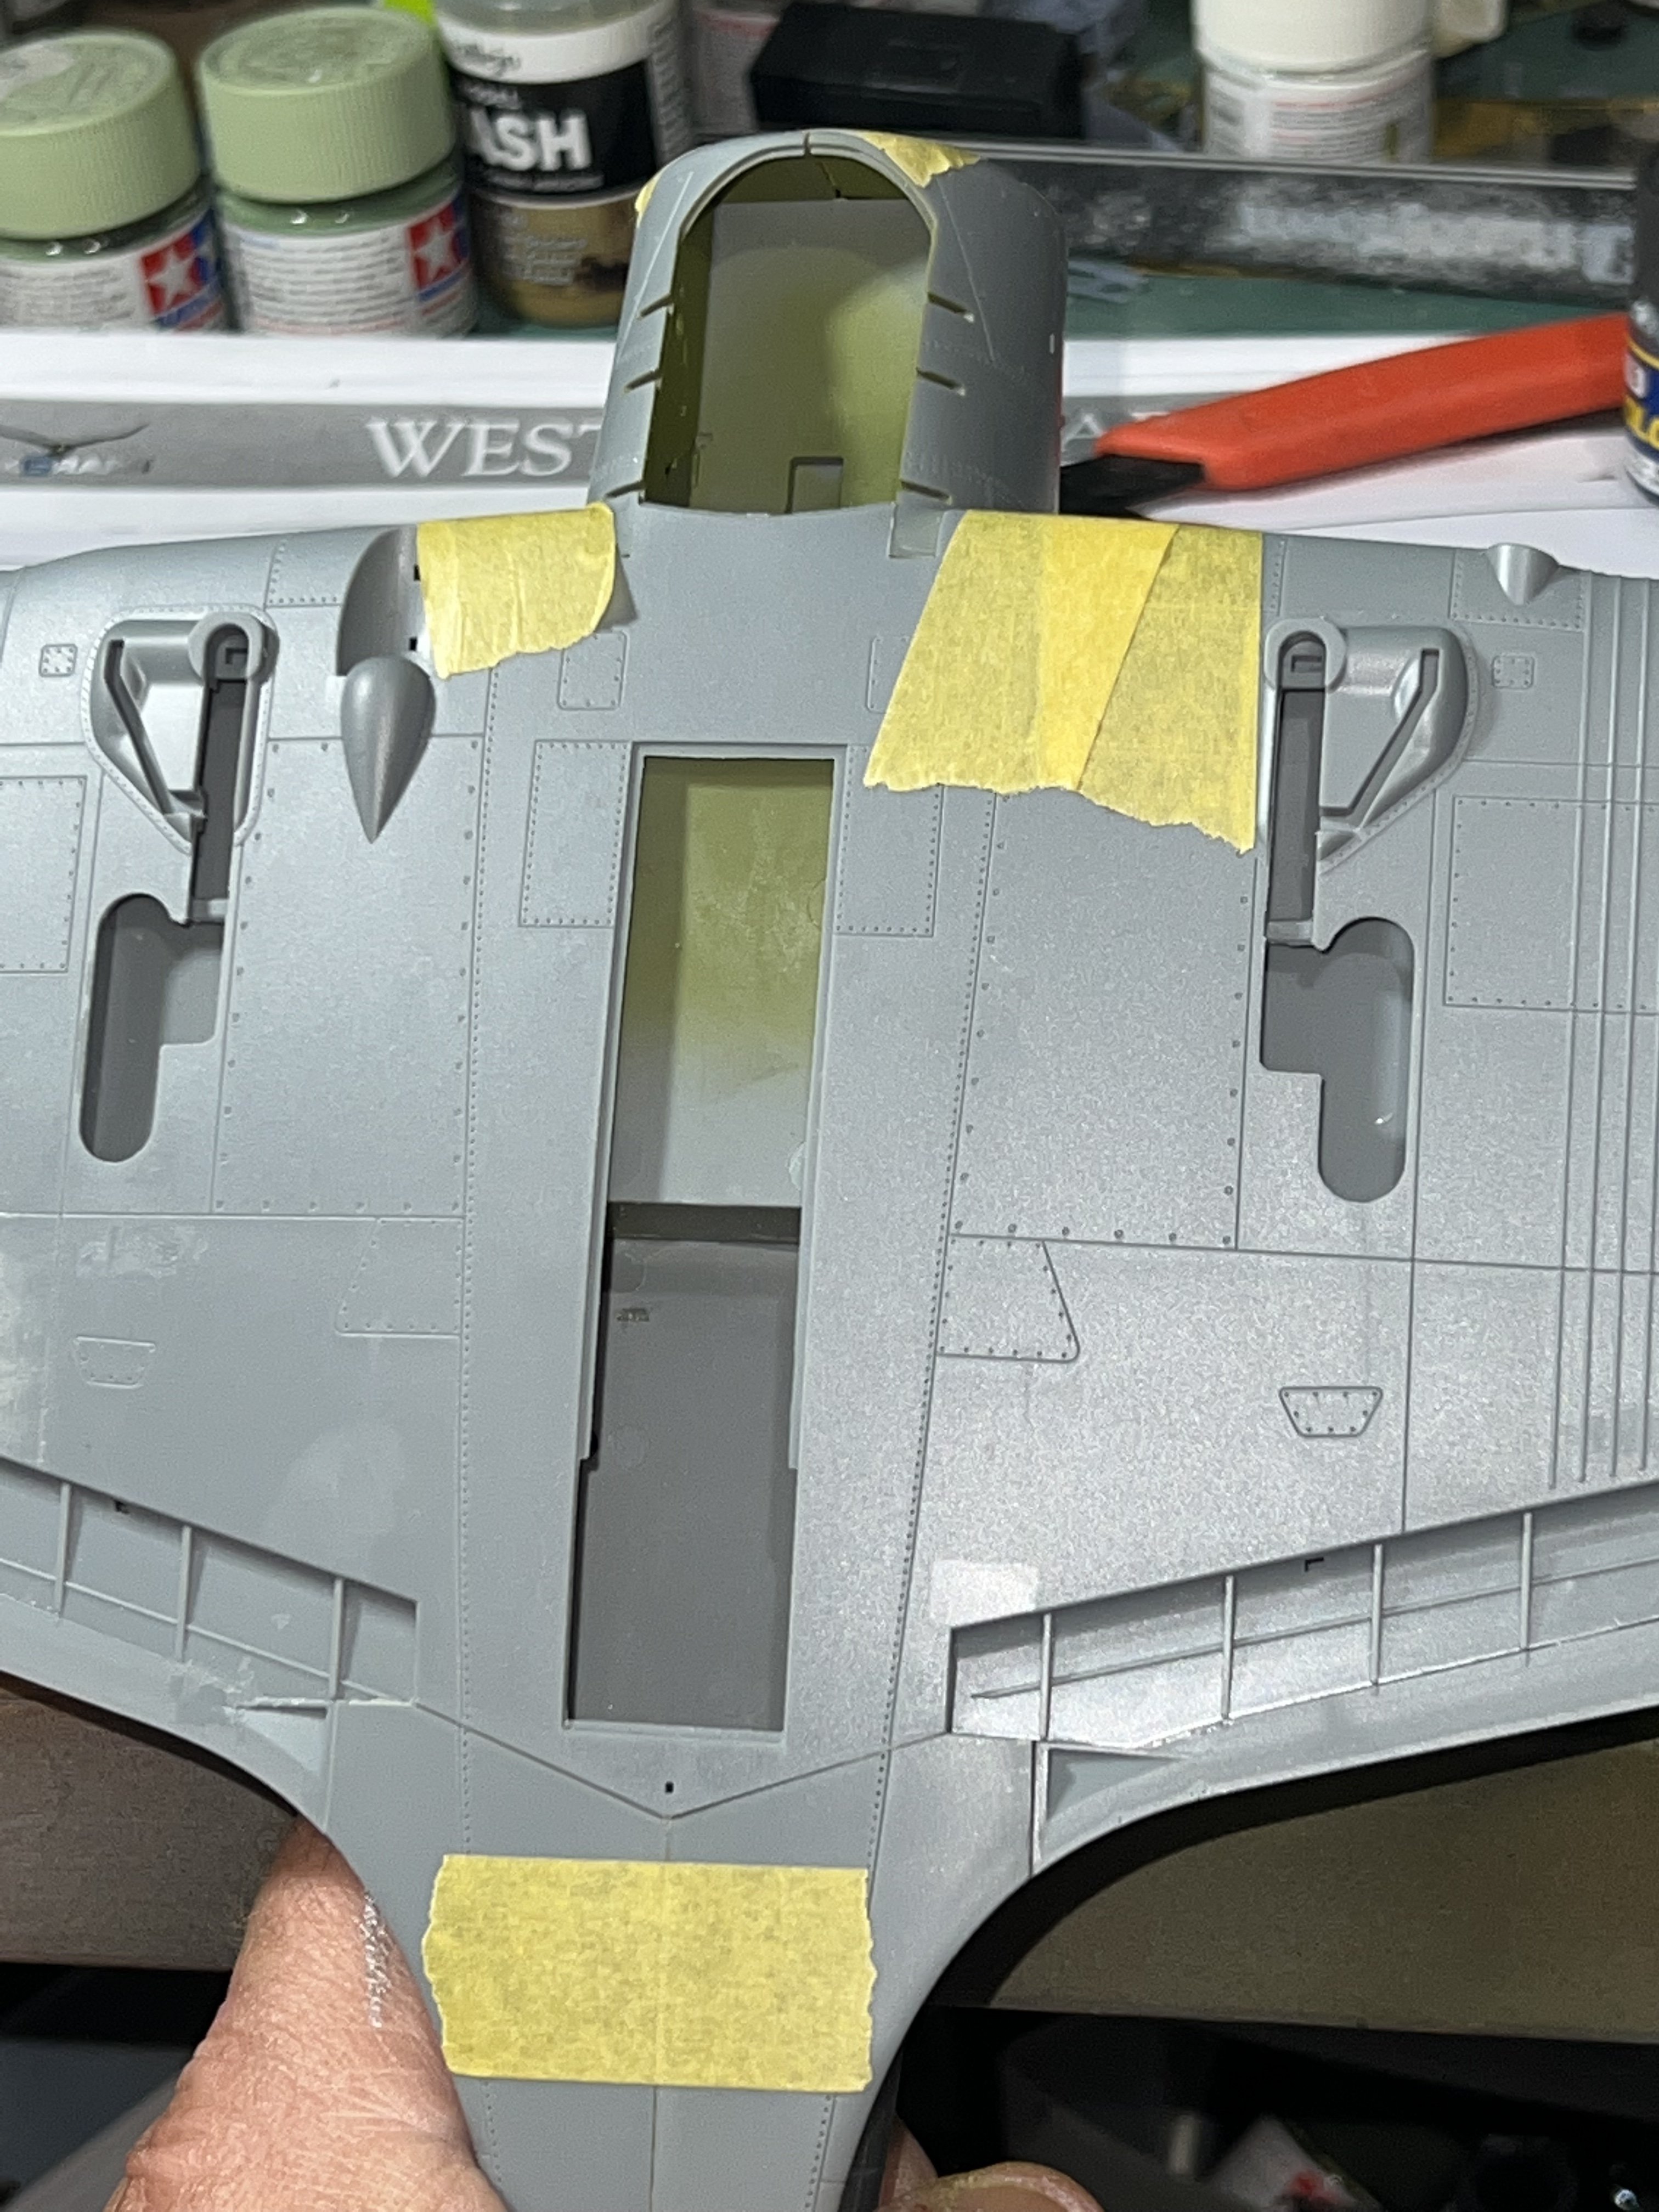
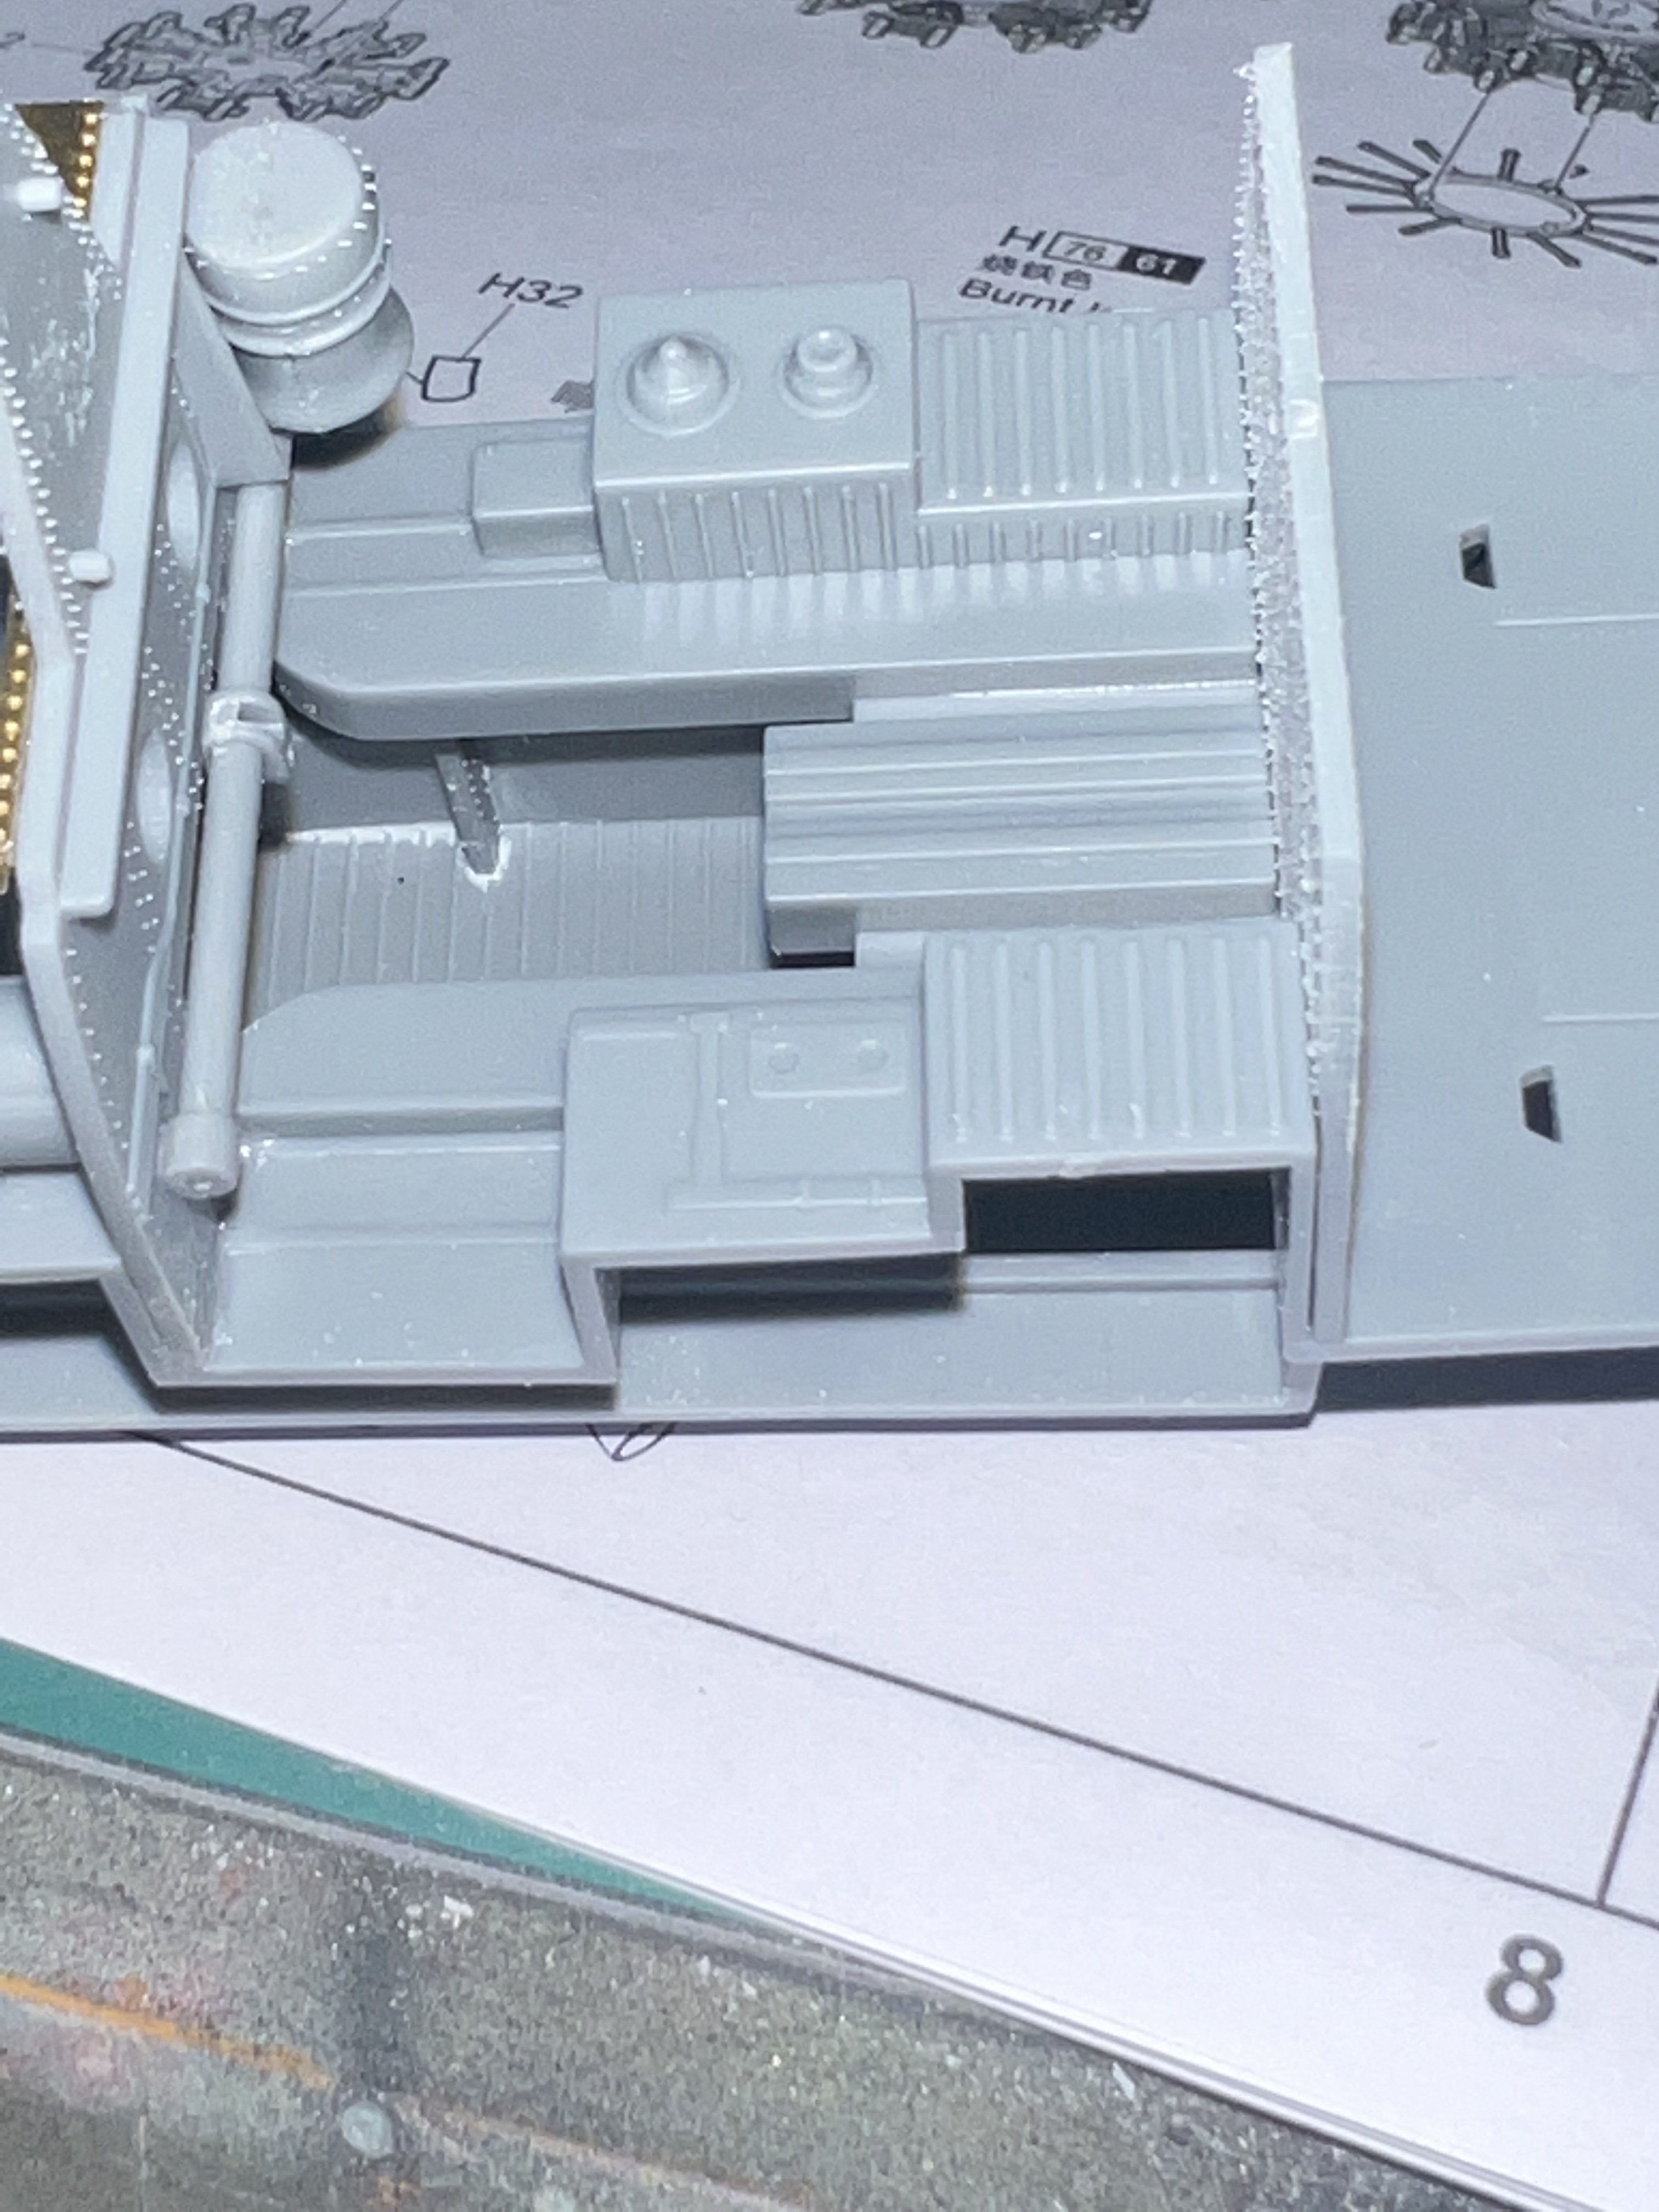
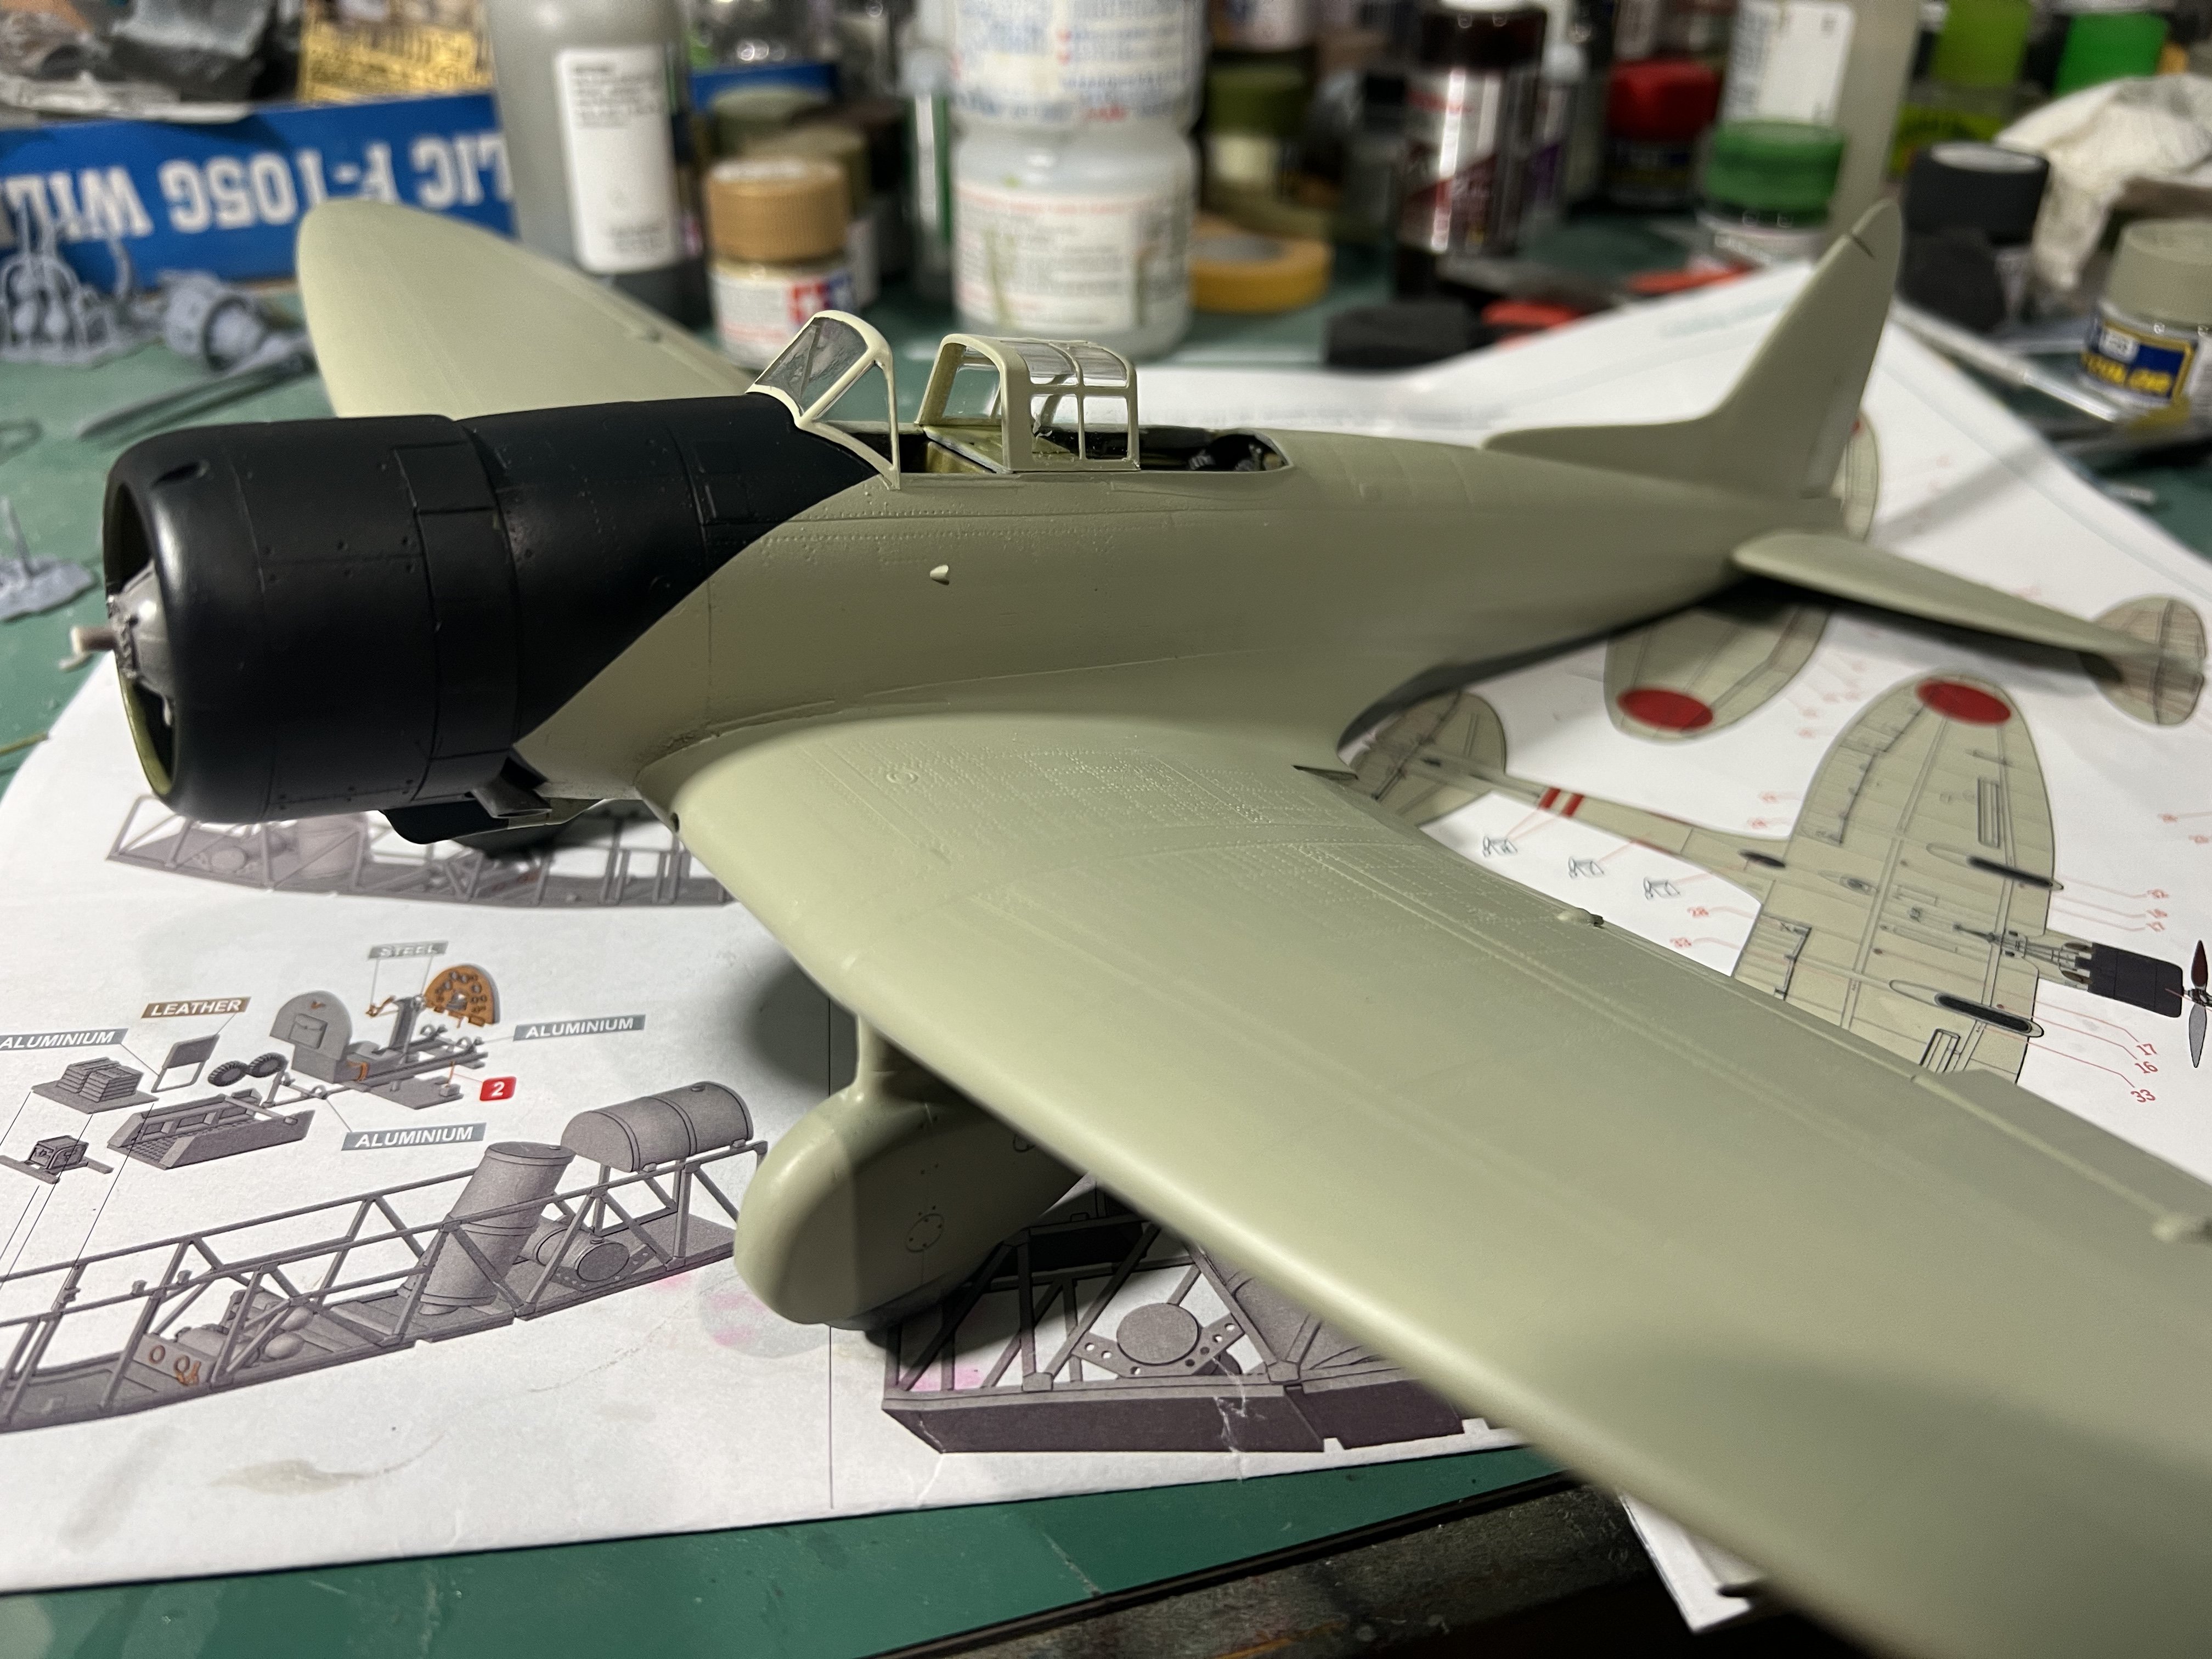
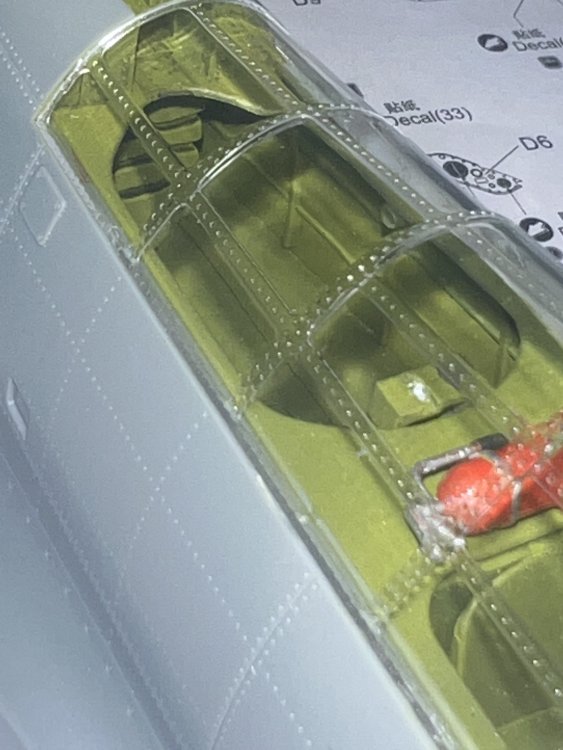
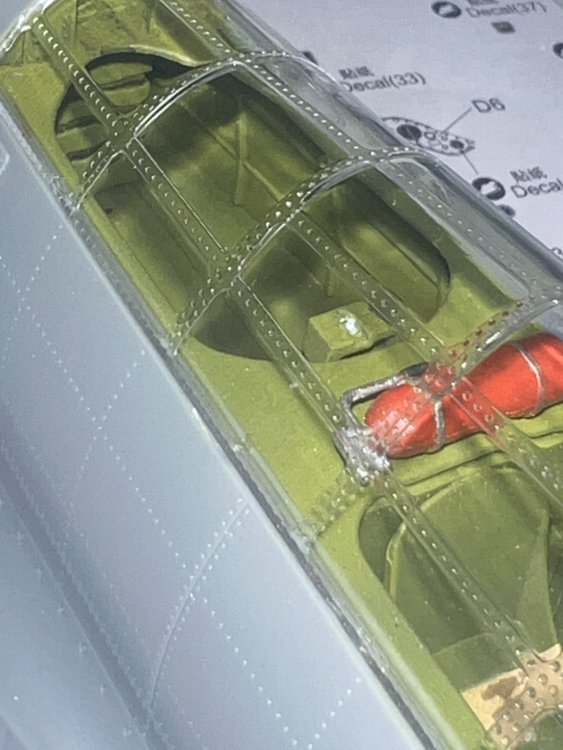
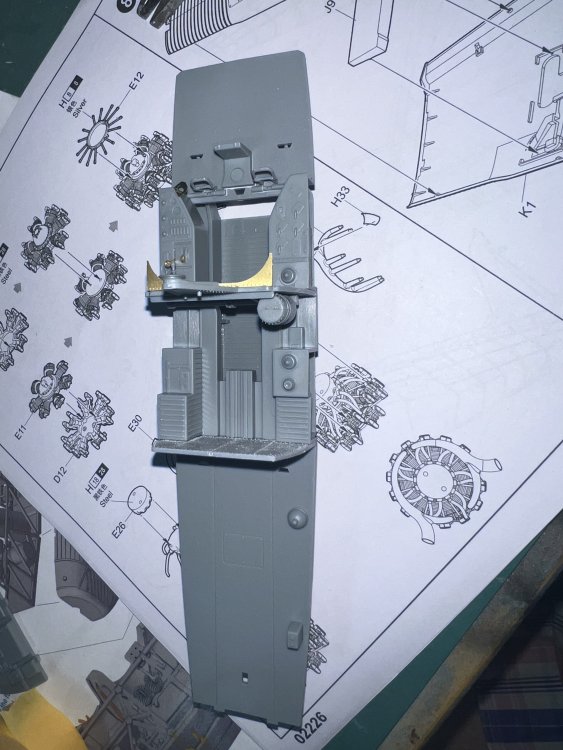
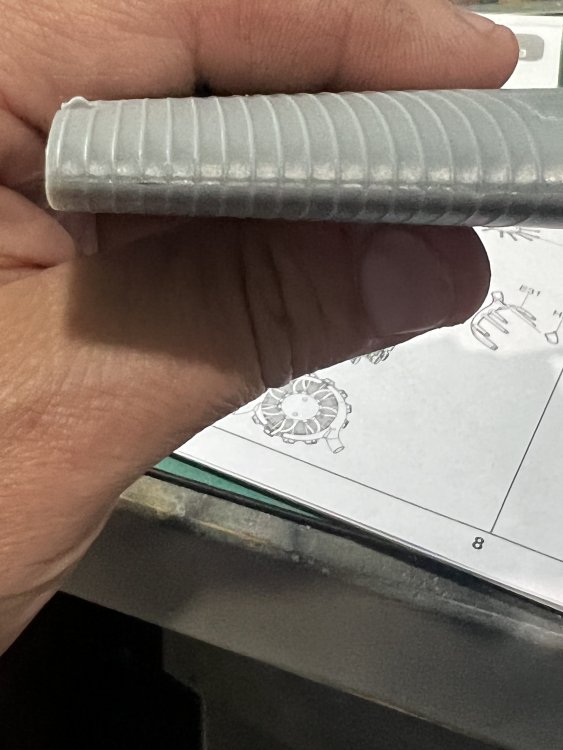
A quick look at the corrugating. This seems to come together nicely. opinions? I intend to do a quick in box review followed by a very fast, 100% straight OOB “slap it together and check the fit” build. Probably a waste of a hundred bucks, but I’m really really curious about this.

- 94 replies
-
- 11
-
-
The price seems to be around $110.00 USD, so about average. It’s nice to see that Trumpeter has stopped their astronomical MSRP practices. This kit almost looks like a simple blow up of the GWH 1/48 kit.
-
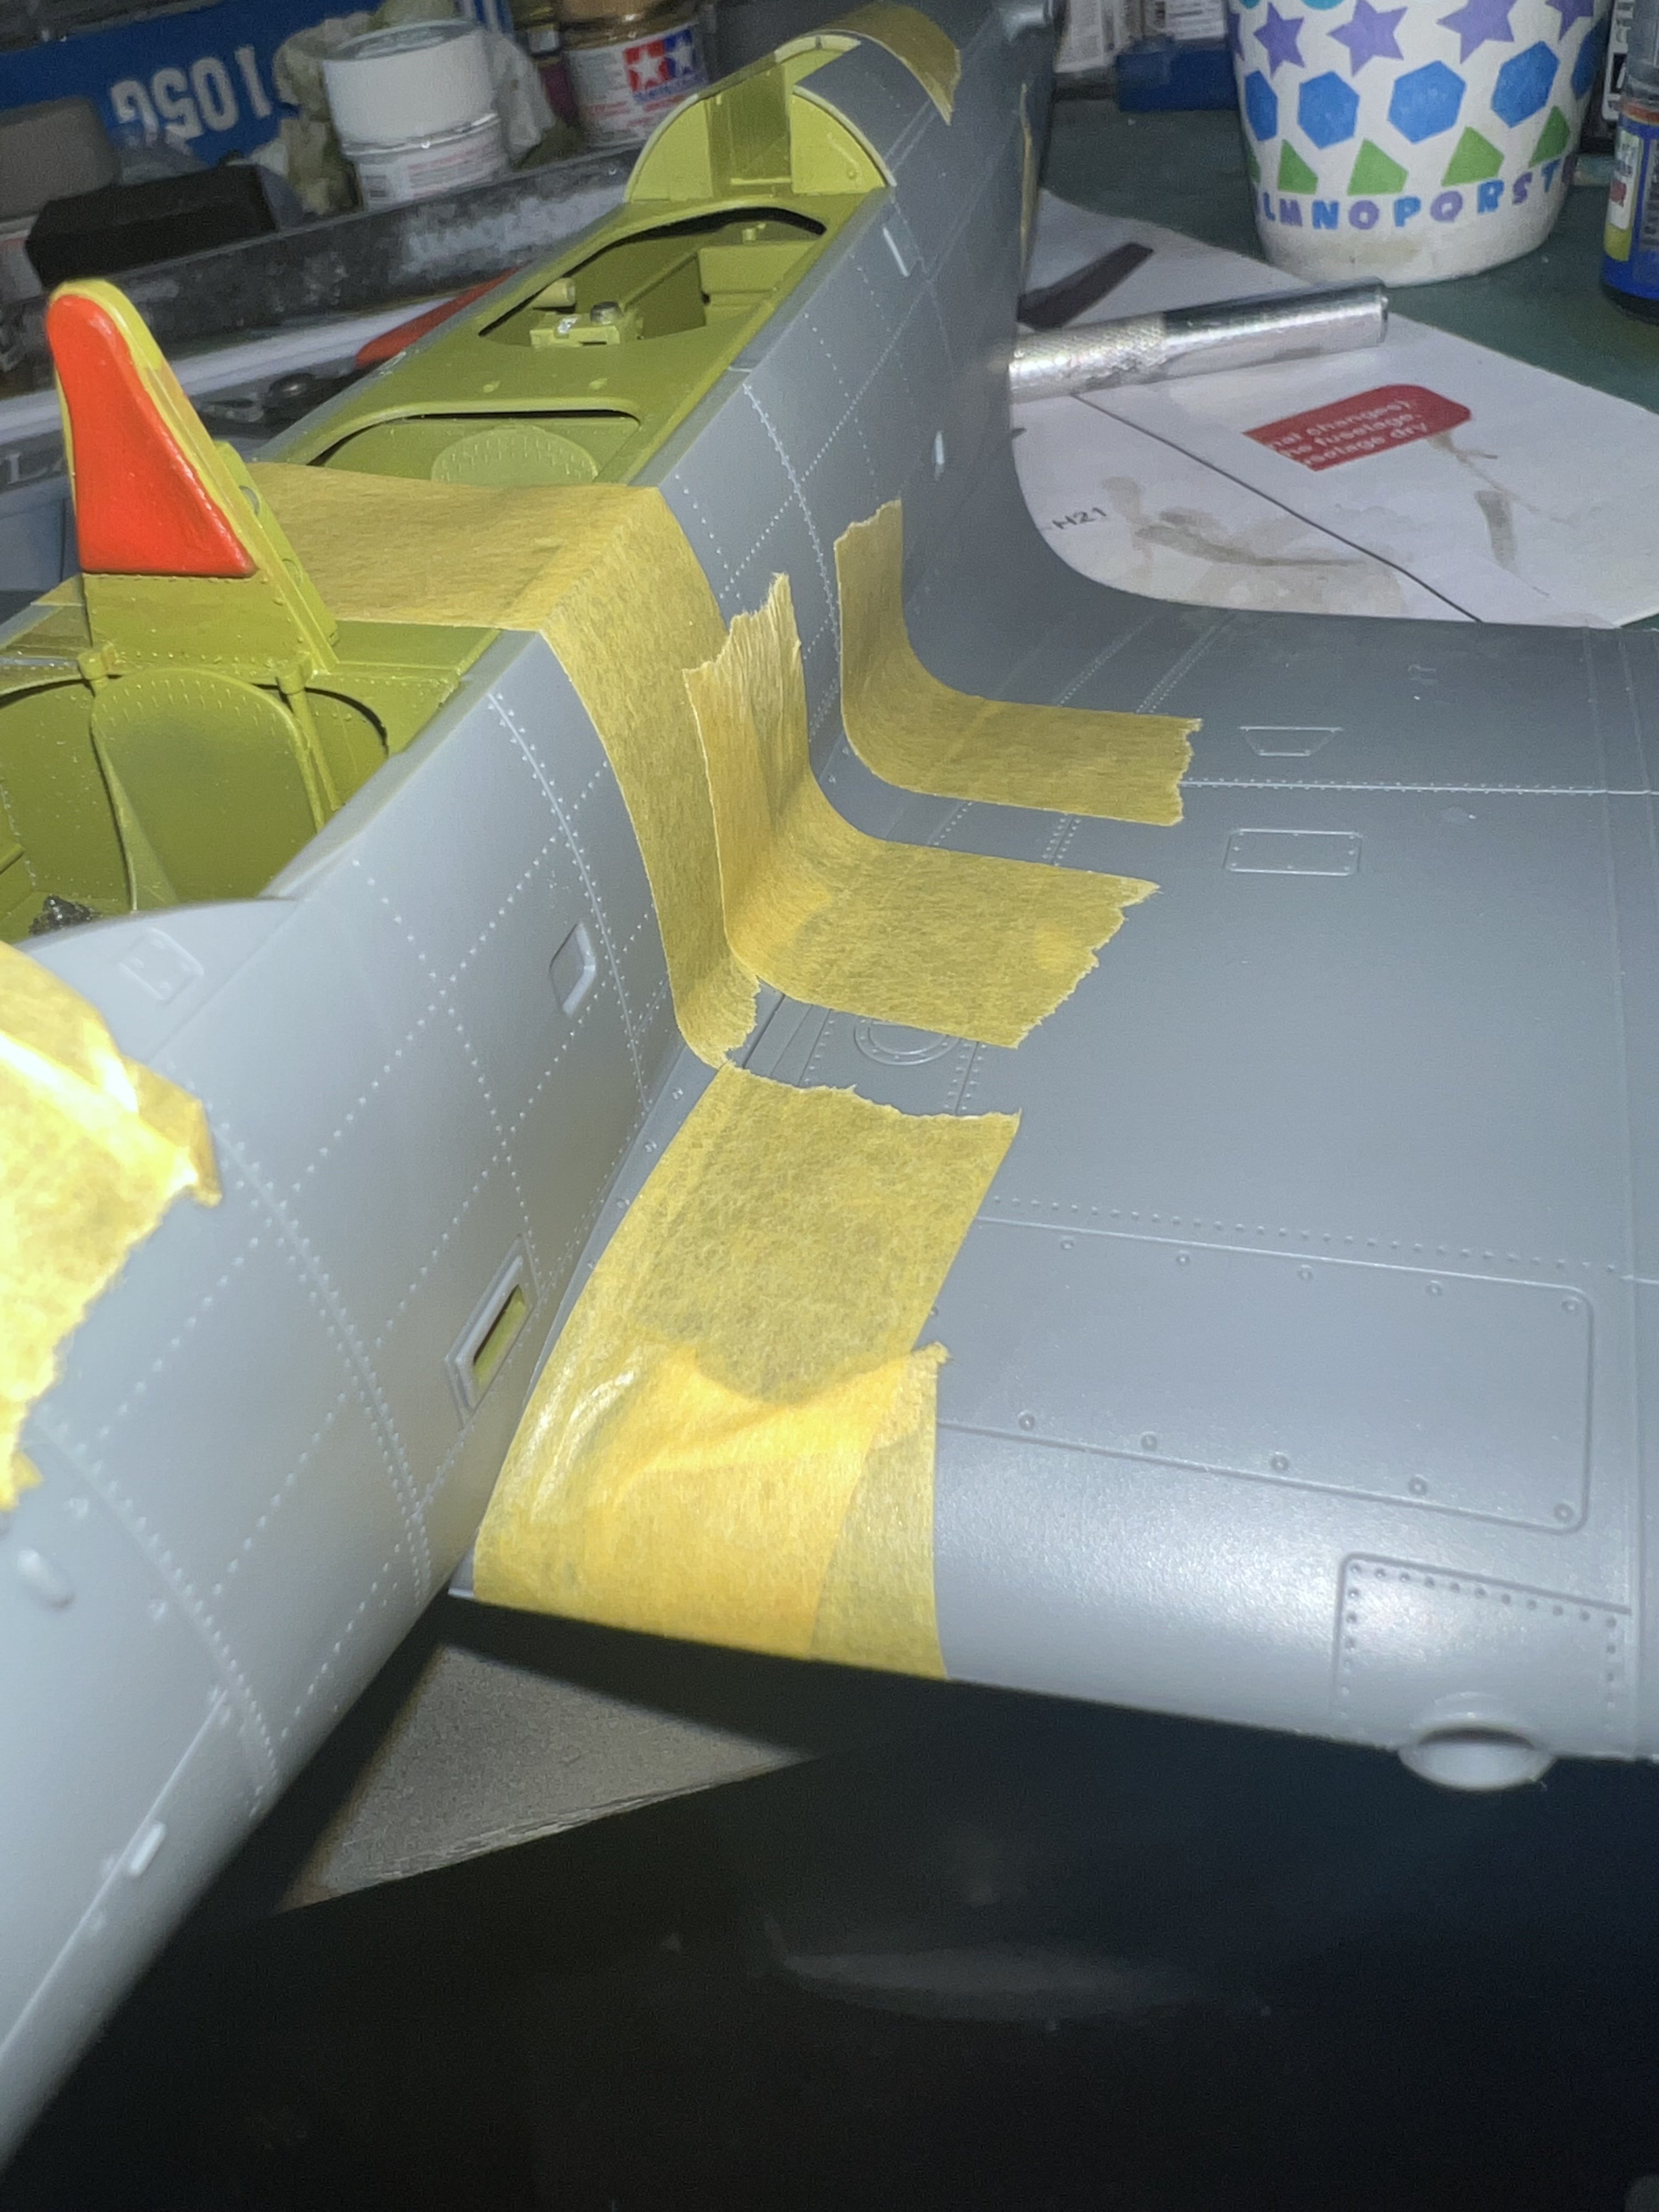
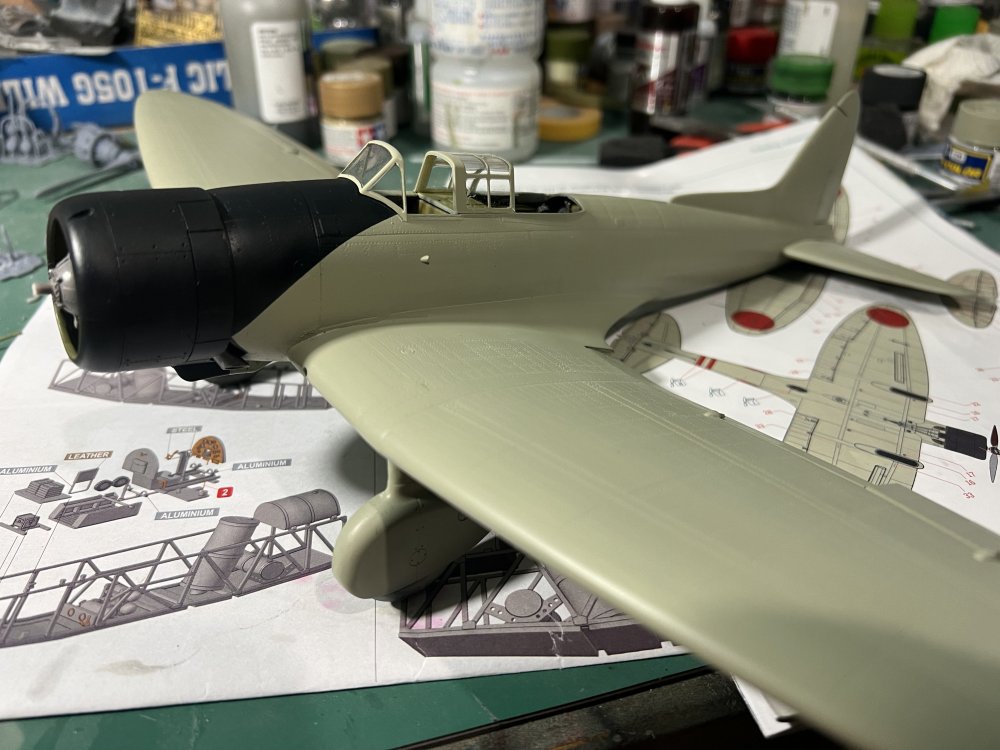
I see the front of the wing root filler is cracking. Oh Milliput! Where are you? update: rolled an itty bitty string of Milliput into the front wing roots, and jammed it in as far as it’ll go. Today, I sand and smooth, then repaint those tiny areas. Then a bit of a lighter faded highlighting a few areas, high points, and panels, and after some streaking and general light mucking up, we see about decals. Maybe mask and spray the Hinumaru areas, and see what gives. Imhave all the respect in the world for those who went to war in these aircraft. They were apparently a delightful and responsive machine in the air, but so is a Beech Bonanza, and this machine has about as much battle damage protection as the Bonanza. 😵💫😵💫😵💫 No wonder they were so easy to flame when the incendiary rounds started flying.
-
I’m thinking of waiting until the new decal sets from Art Scale arrive on the market within a few weeks. Mike Swinburne is developing a new 3D prop hub for this as well. I think this will go on a table at the IPMS USA Nationals, along with my Lanc and Helldiver, Hurricane, and possibly either a Devastator or Wapiti in the Display Category.

-
Uncool. I preordered from Squadron, and I received notice today that they may ship on the 30th. But I just bought one for the exact same price from my LHS. 😡😡😡🤬
-
Second Cavalier F-51D build
Clunkmeister replied to JohnB's topic in LSM 1/35 and Larger Work In Progress
John, this looks amazing, man! I NEED to get a couple of these. -
ICM Fiat CR-42CN 1:32
Clunkmeister replied to shadowmare's topic in LSM 1/32 and Larger Aircraft Ready for Inspection
Very, VERY nice build! I LOVE it! Superb!