Clunkmeister
-
Posts
7,200 -
Joined
-
Last visited
Content Type
Profiles
Forums
Events
Gallery
Everything posted by Clunkmeister
-
 Oh there’s going to be putty involved, just not as much as it could have been. 🤣
 -
Nice work so far! I love those “imitation seats”. I have a 1/48 Hobbycraft CF-100 interceptor, and I kid you not, the two seats looked like La-Z-Boy reclining easy chairs. It was pretty darn sad, actually, at least after I stopped laughing.
-
Hahaha, yep. Smitty told me Sprue got a few in on a Monday, I immediately ordered it, got it two days later, and here, a week after that, I’m close. Someone’s gotta build one!
-
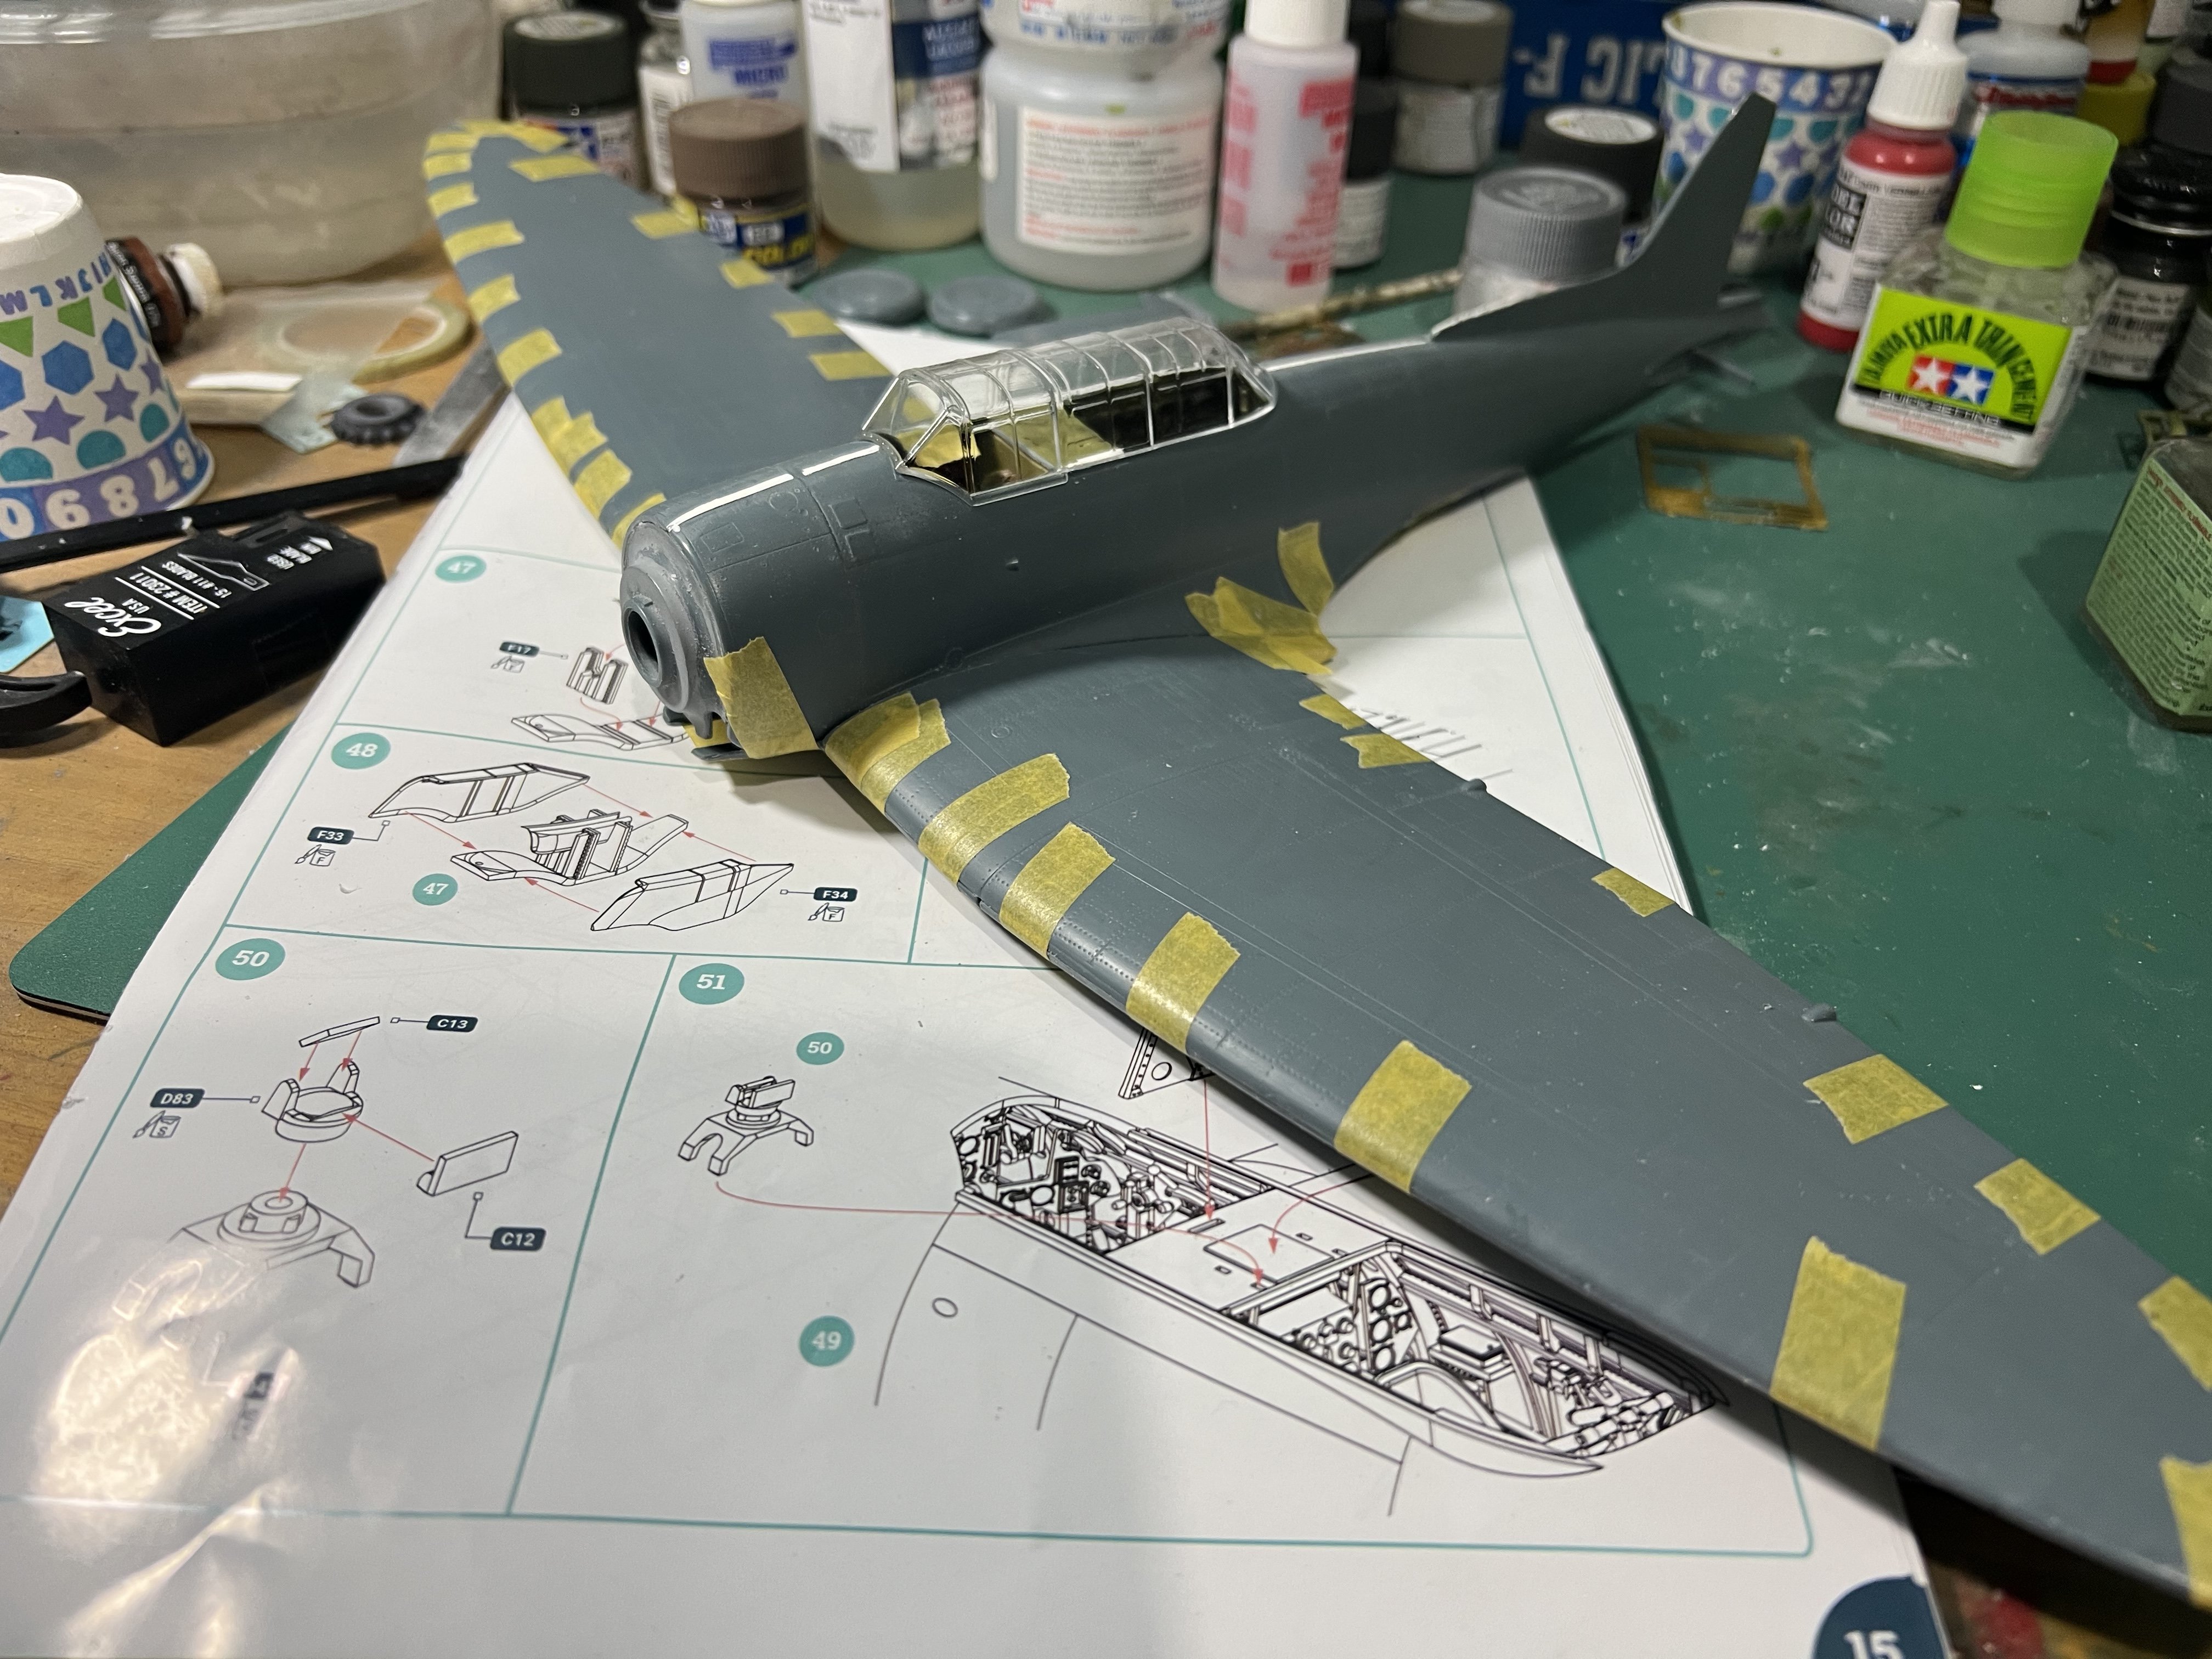
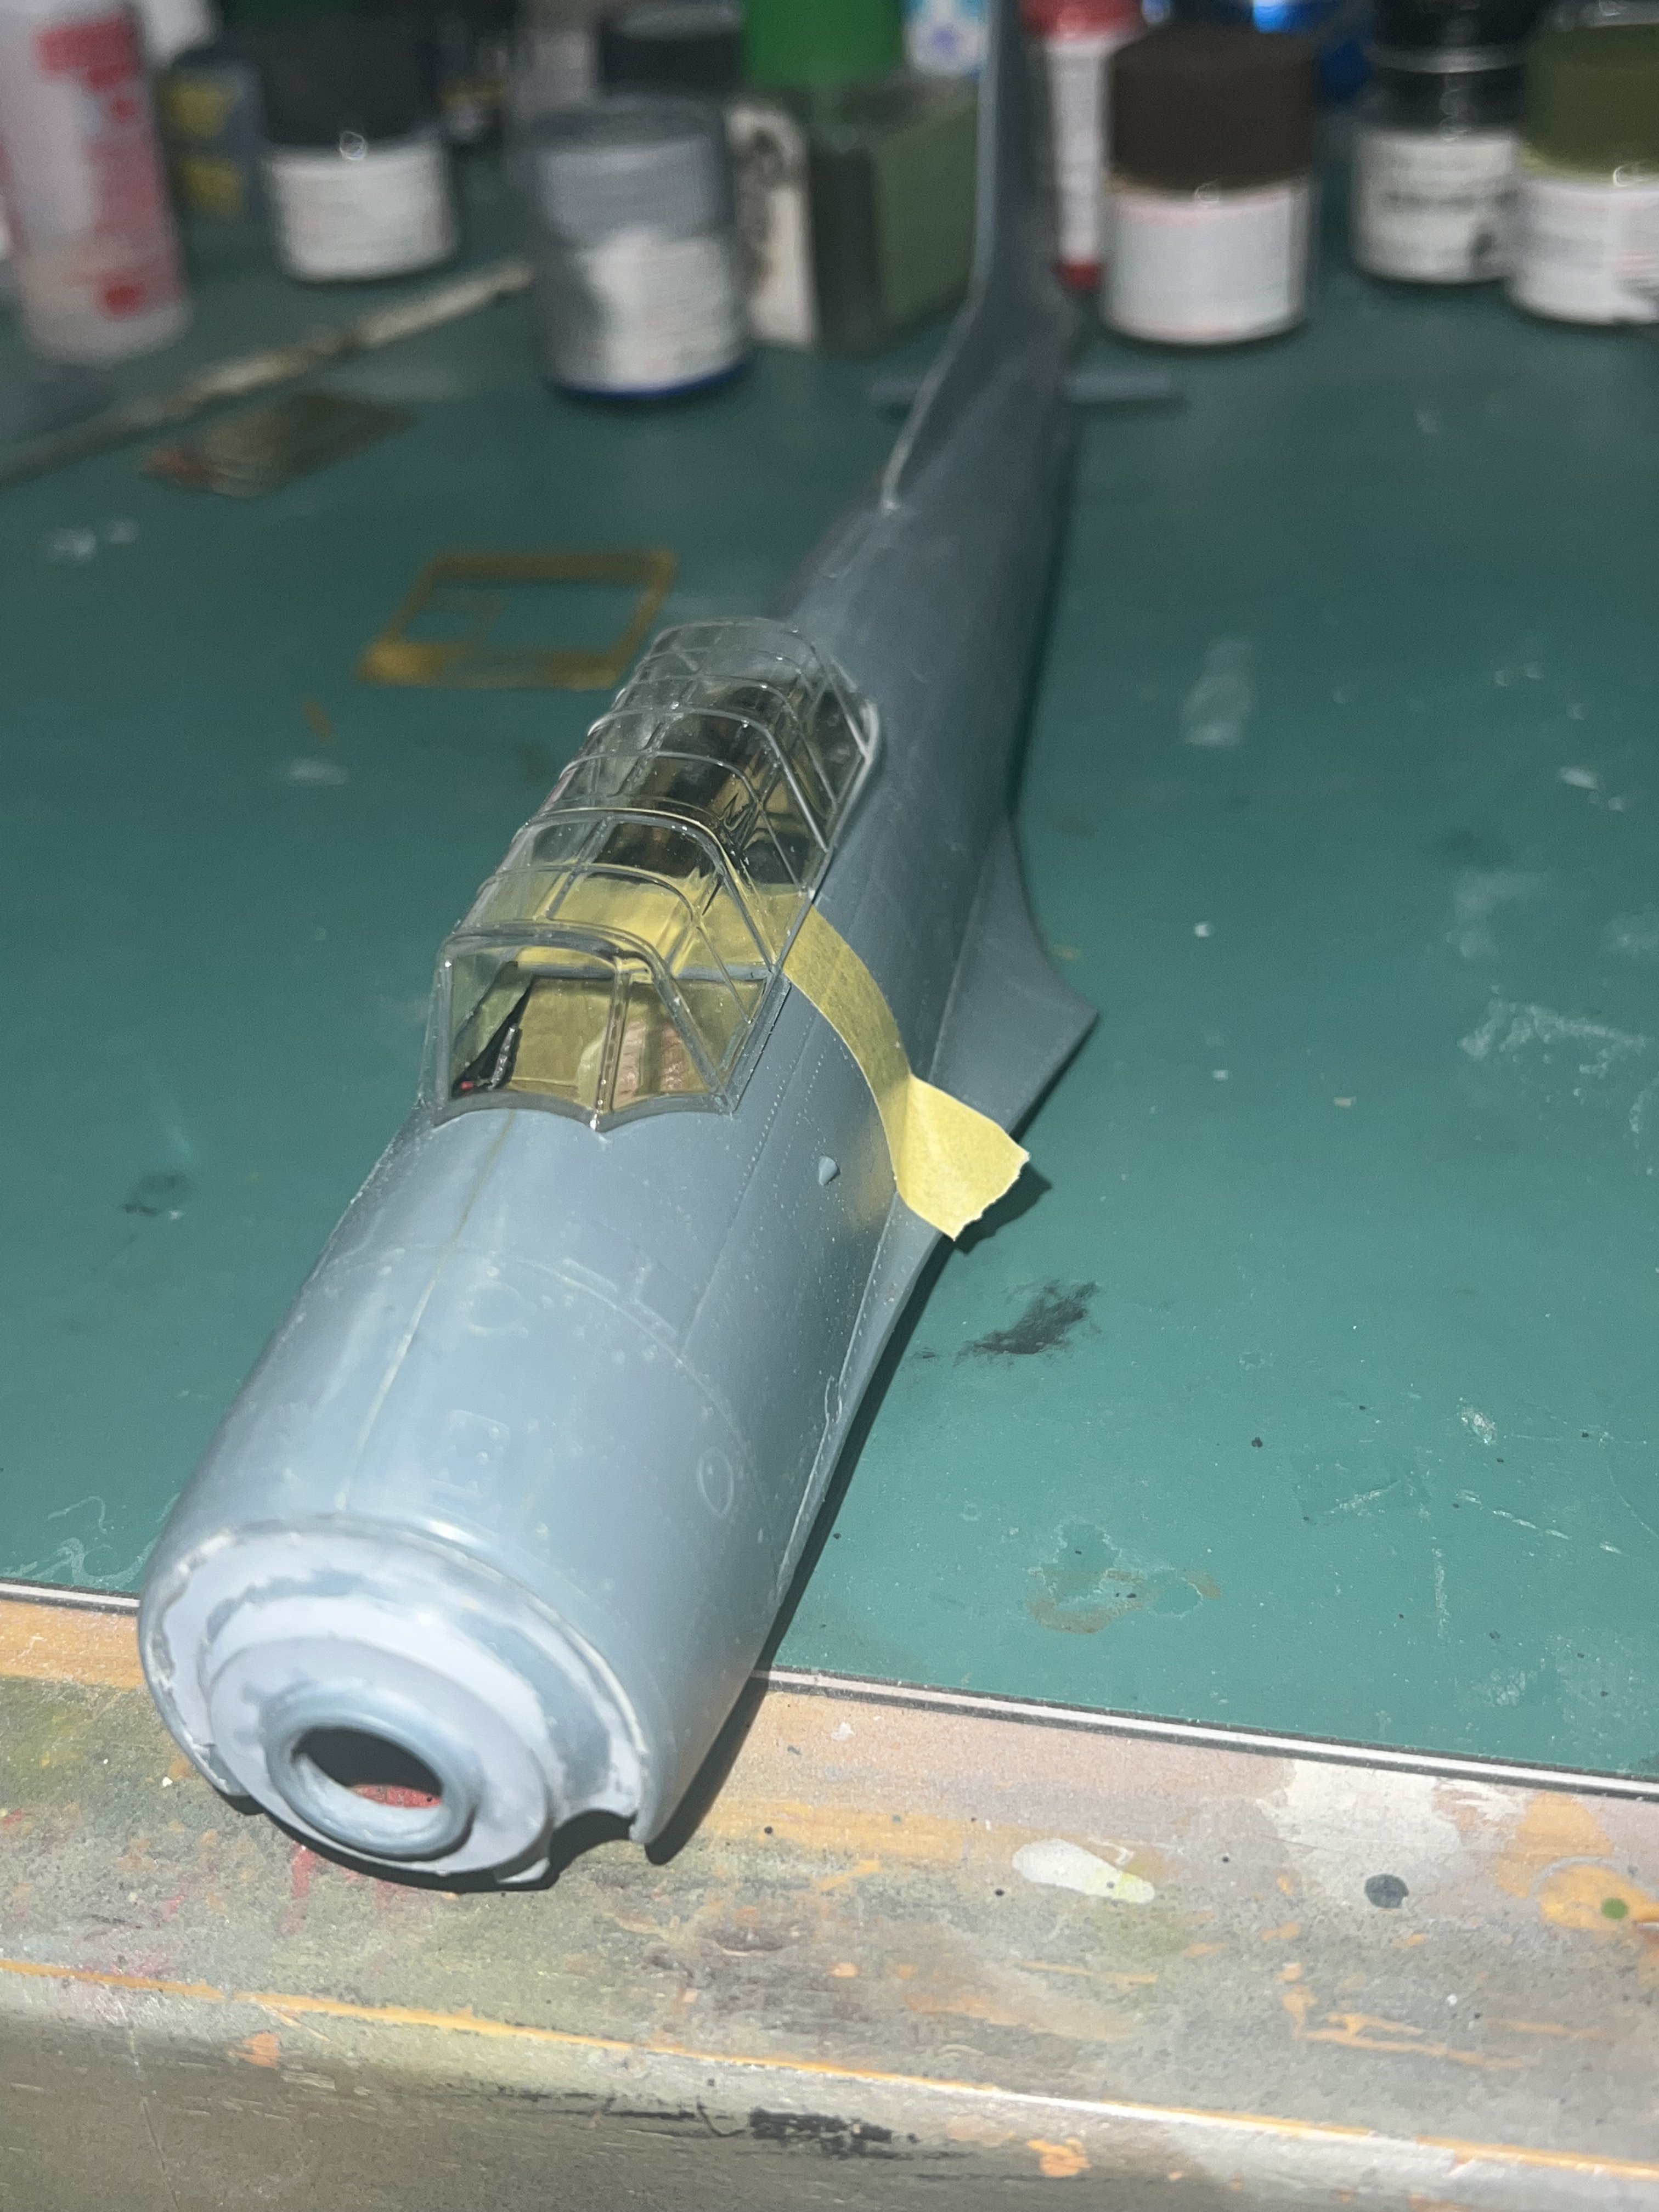
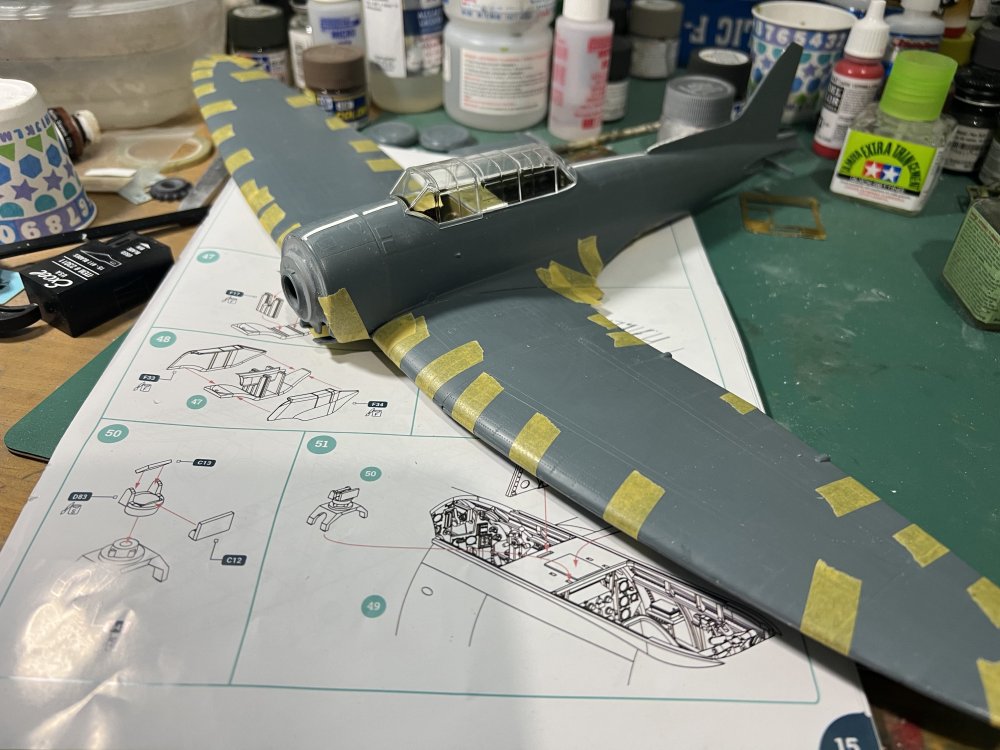
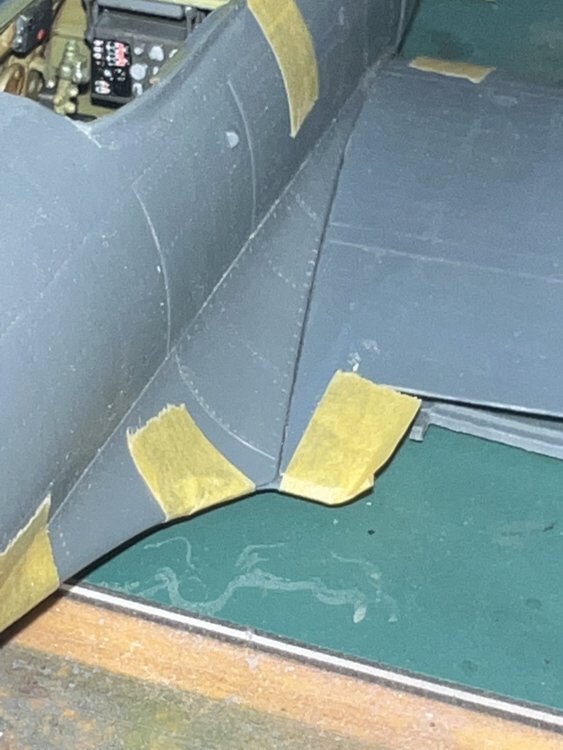
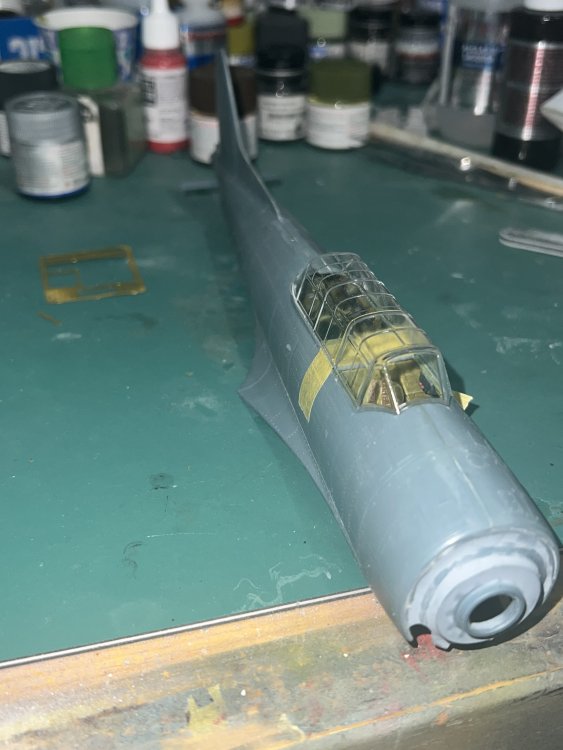
Wing is attached. A bit of fuss, but did some sanding and scraping and it went on relatively painlessly.

-
This is a bit better fit than the Helldiver, simply because this kit boasts that massive spar which sets the wing thickness and dihedral.
-
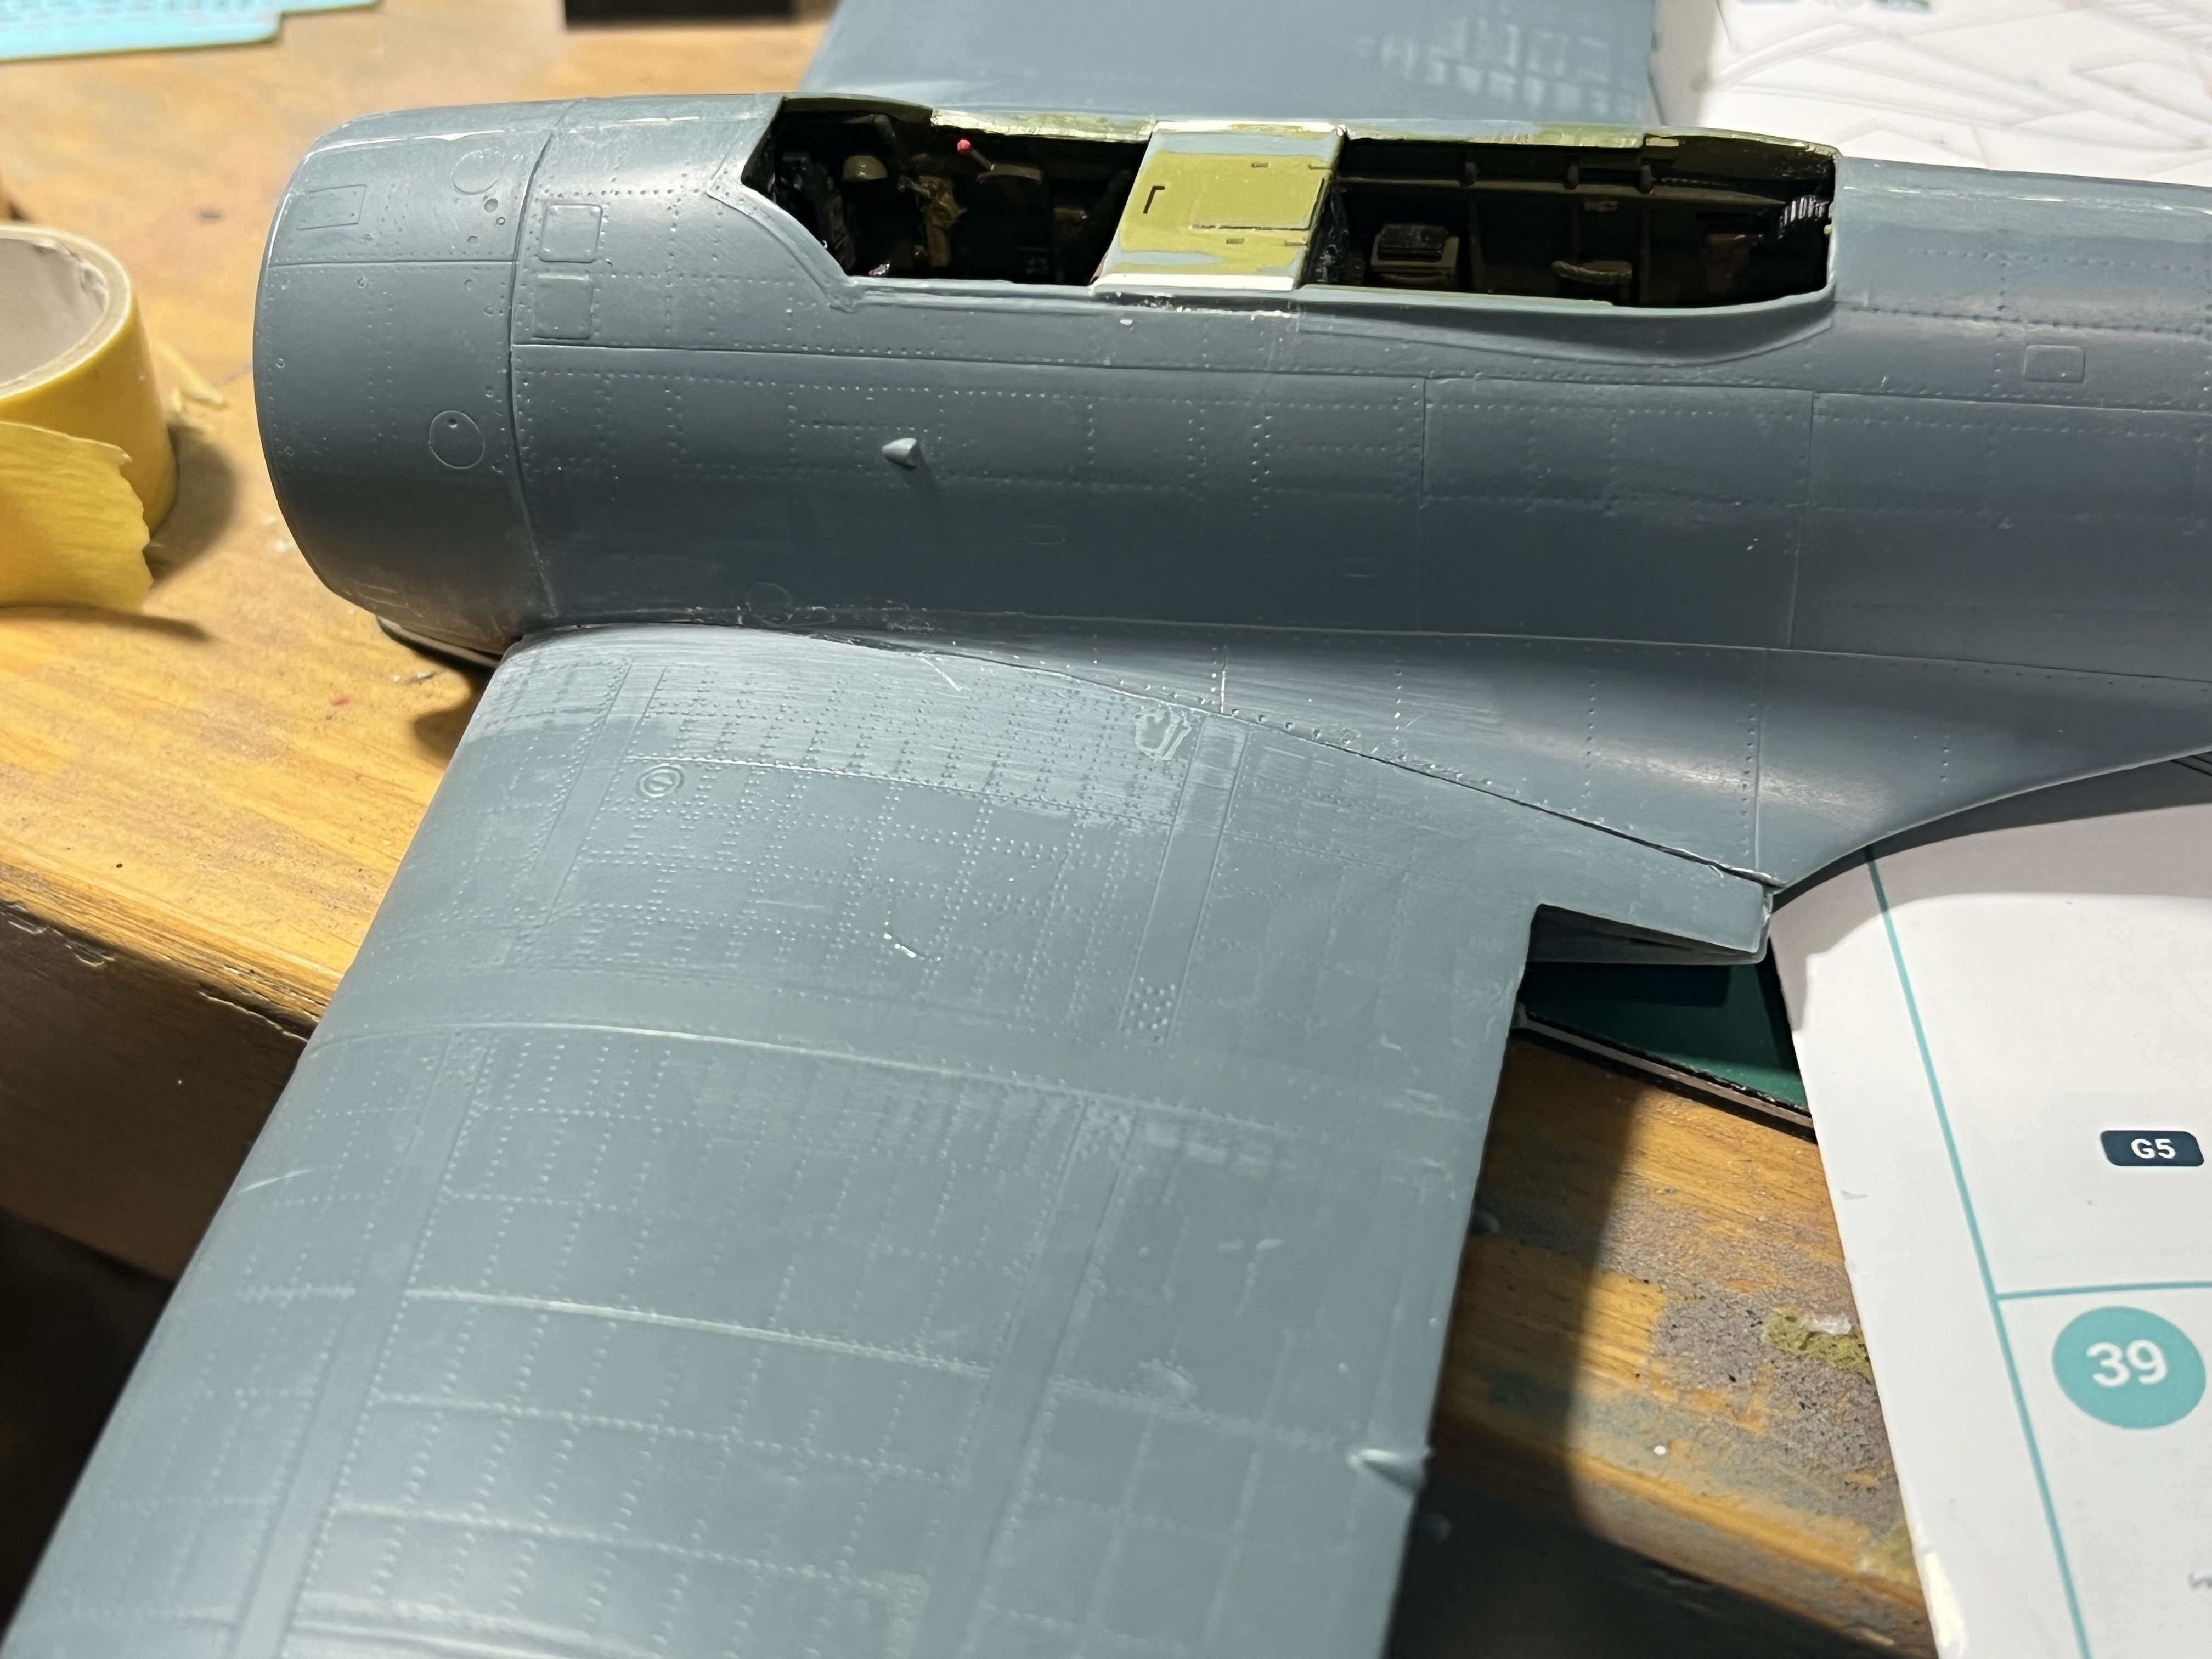
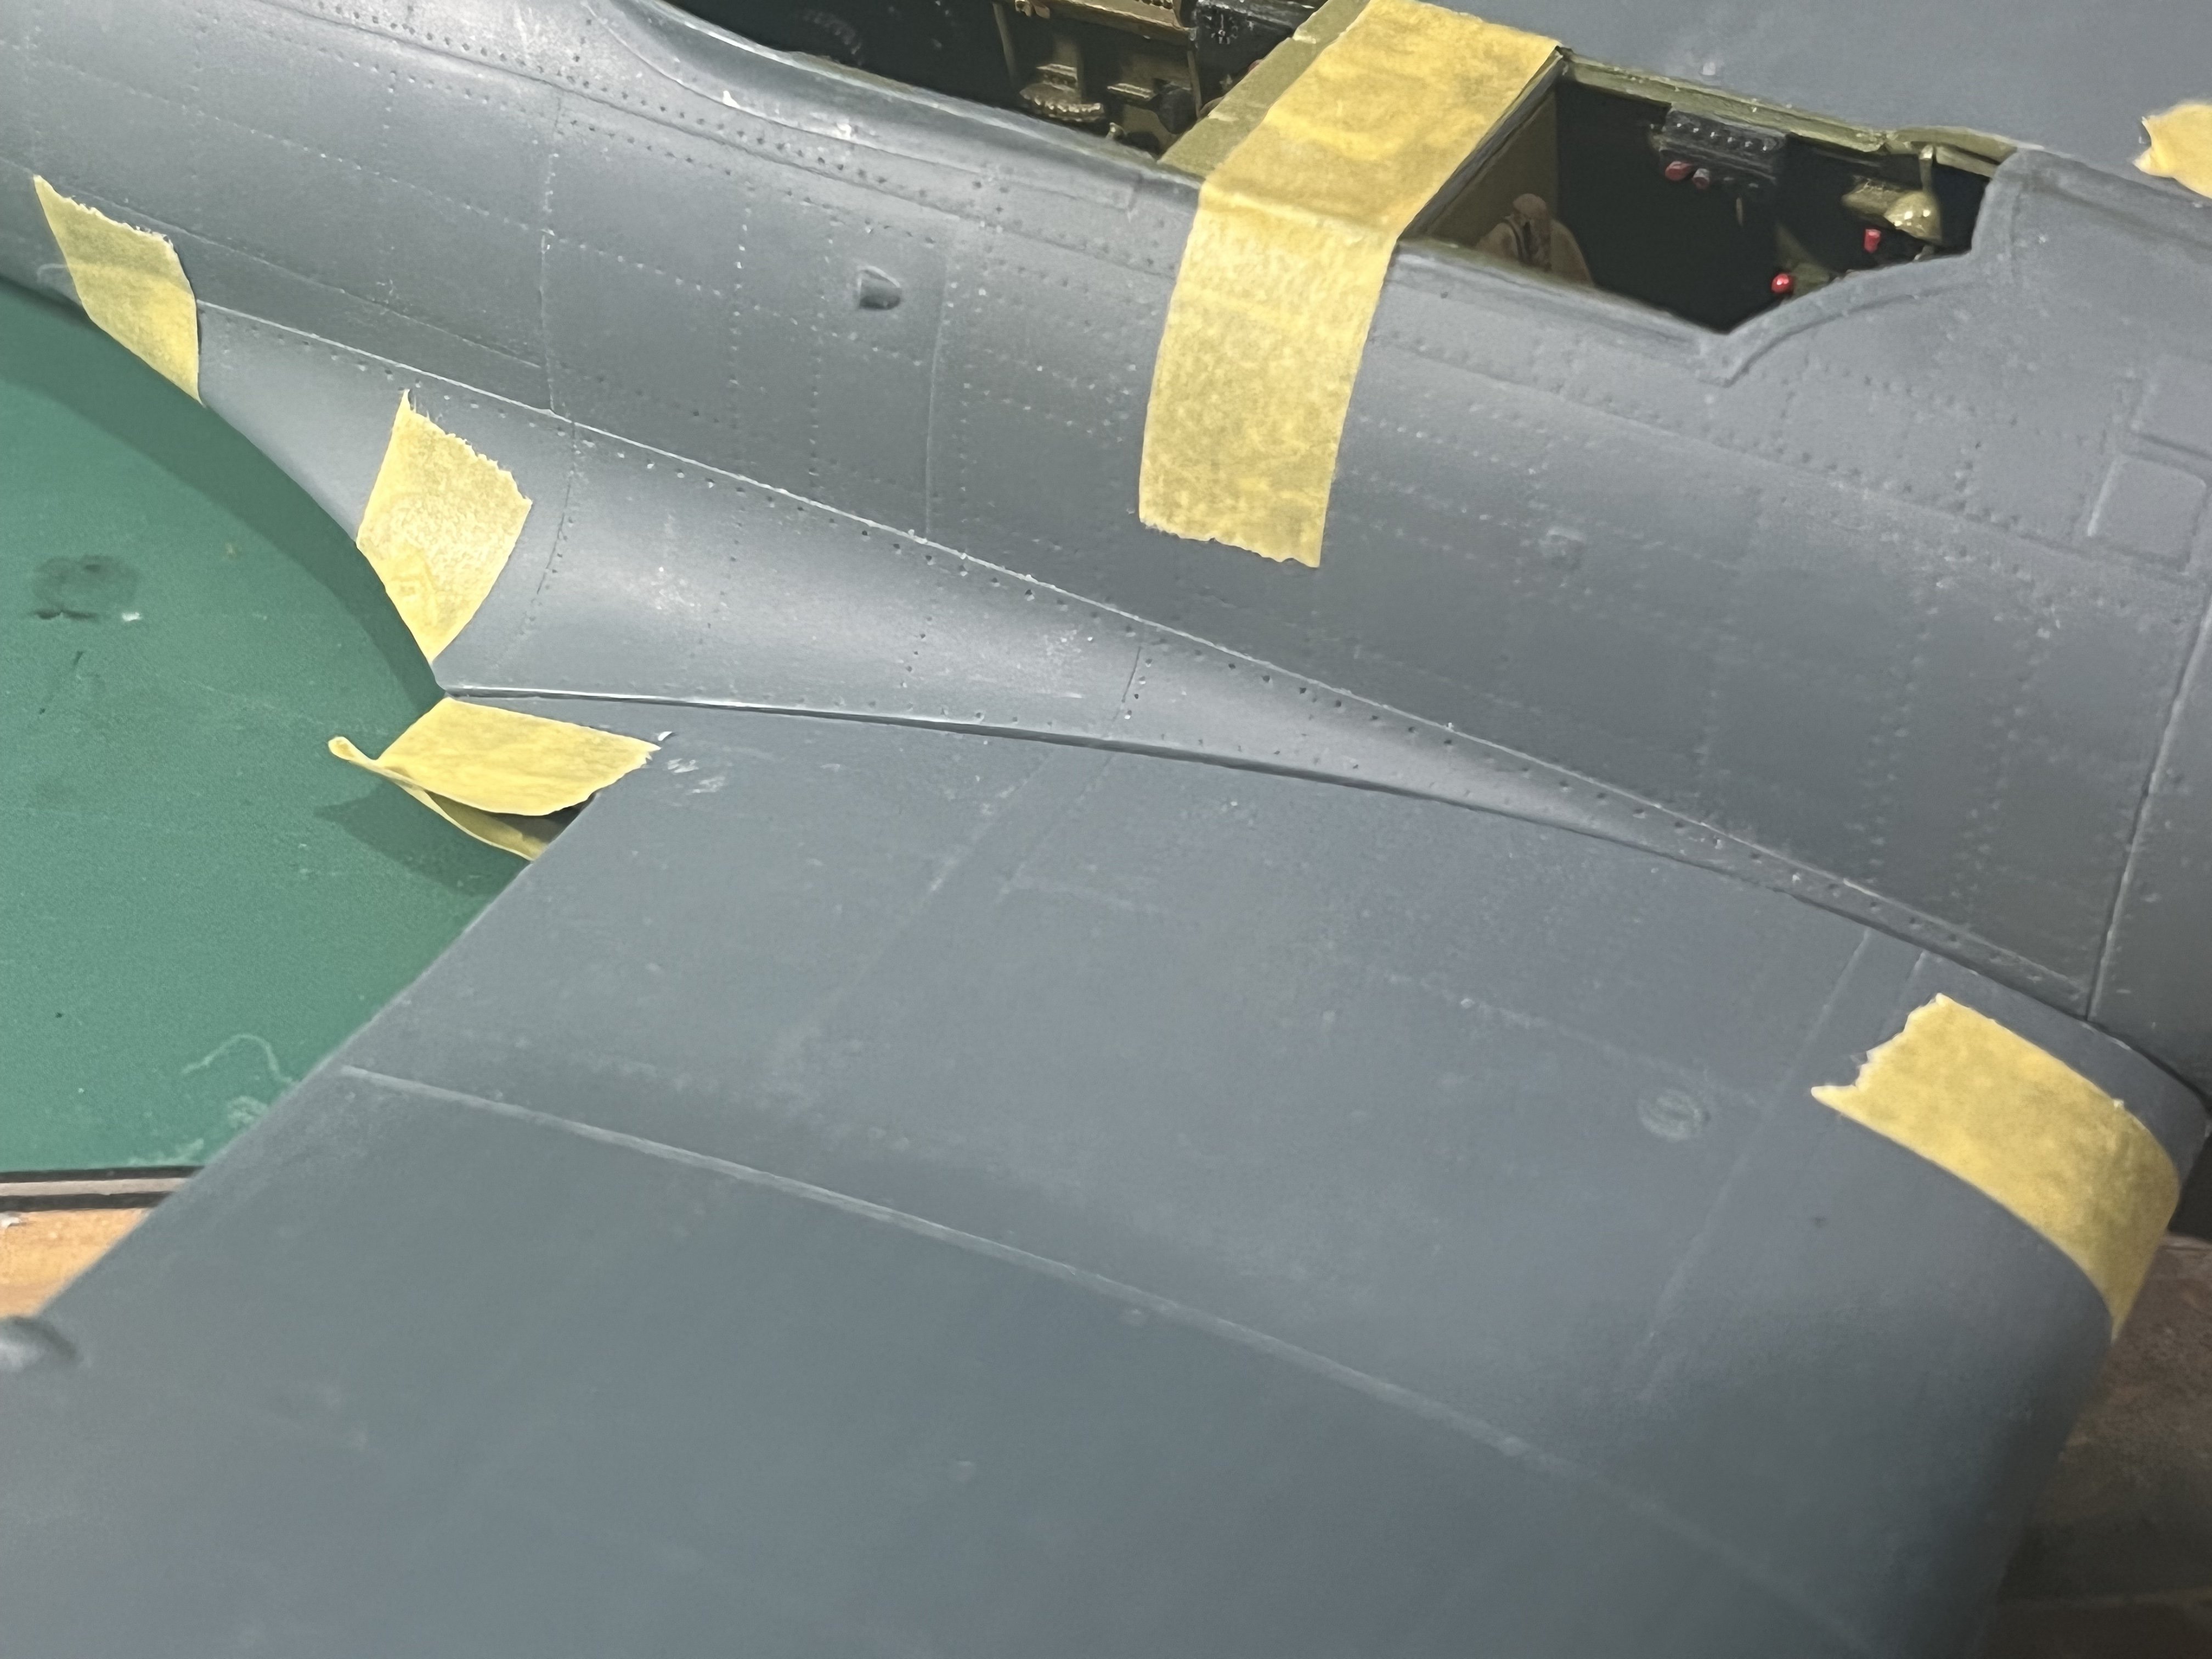
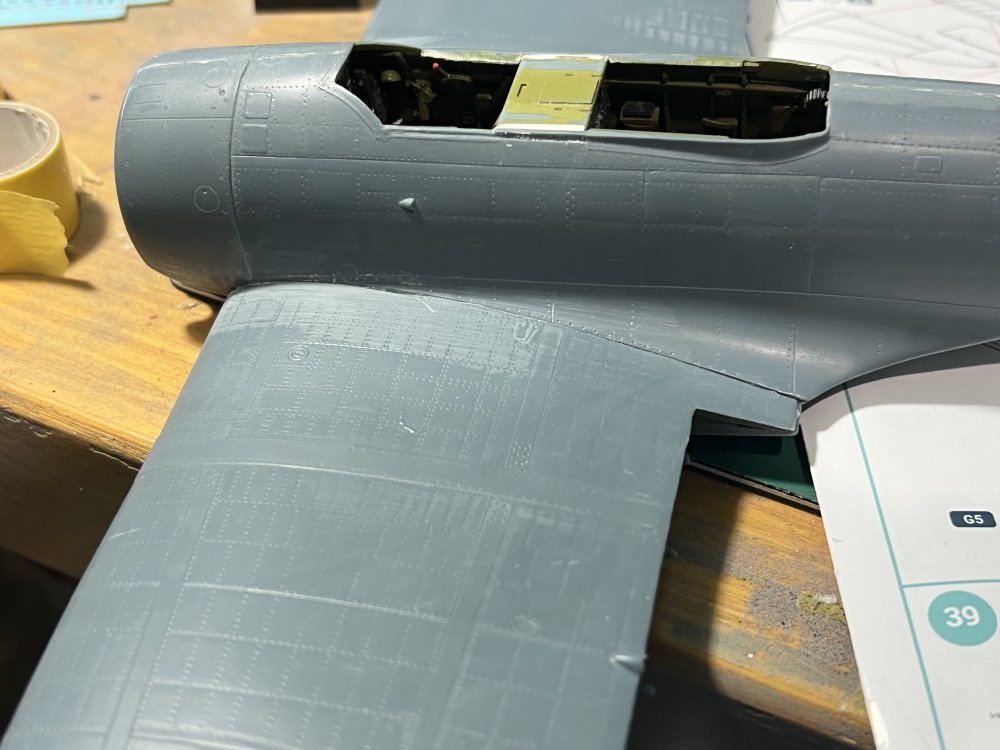
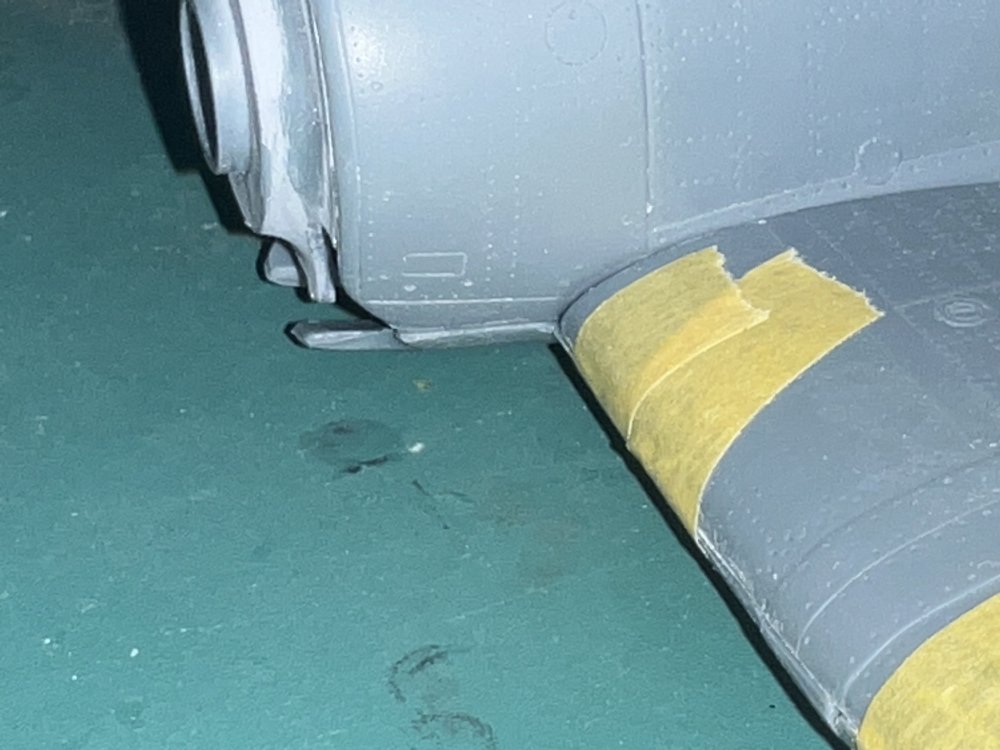
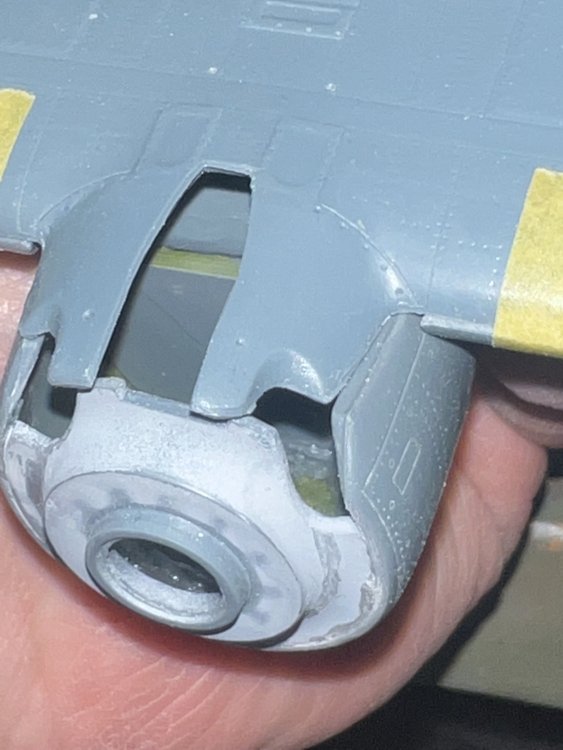
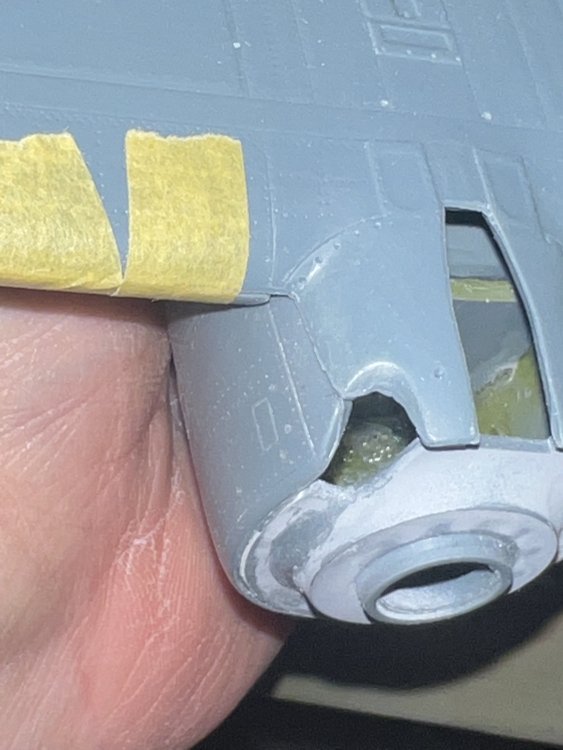
Now we check the wings. Careful checking along the way assured us that there will be no major surprises here. The ARE some fairly major gaps at the wing root to fuselage leading edges. But these are compound curve joints, so filling and sanding will be easier to accomplish and hide from Capt. Obvious.


-
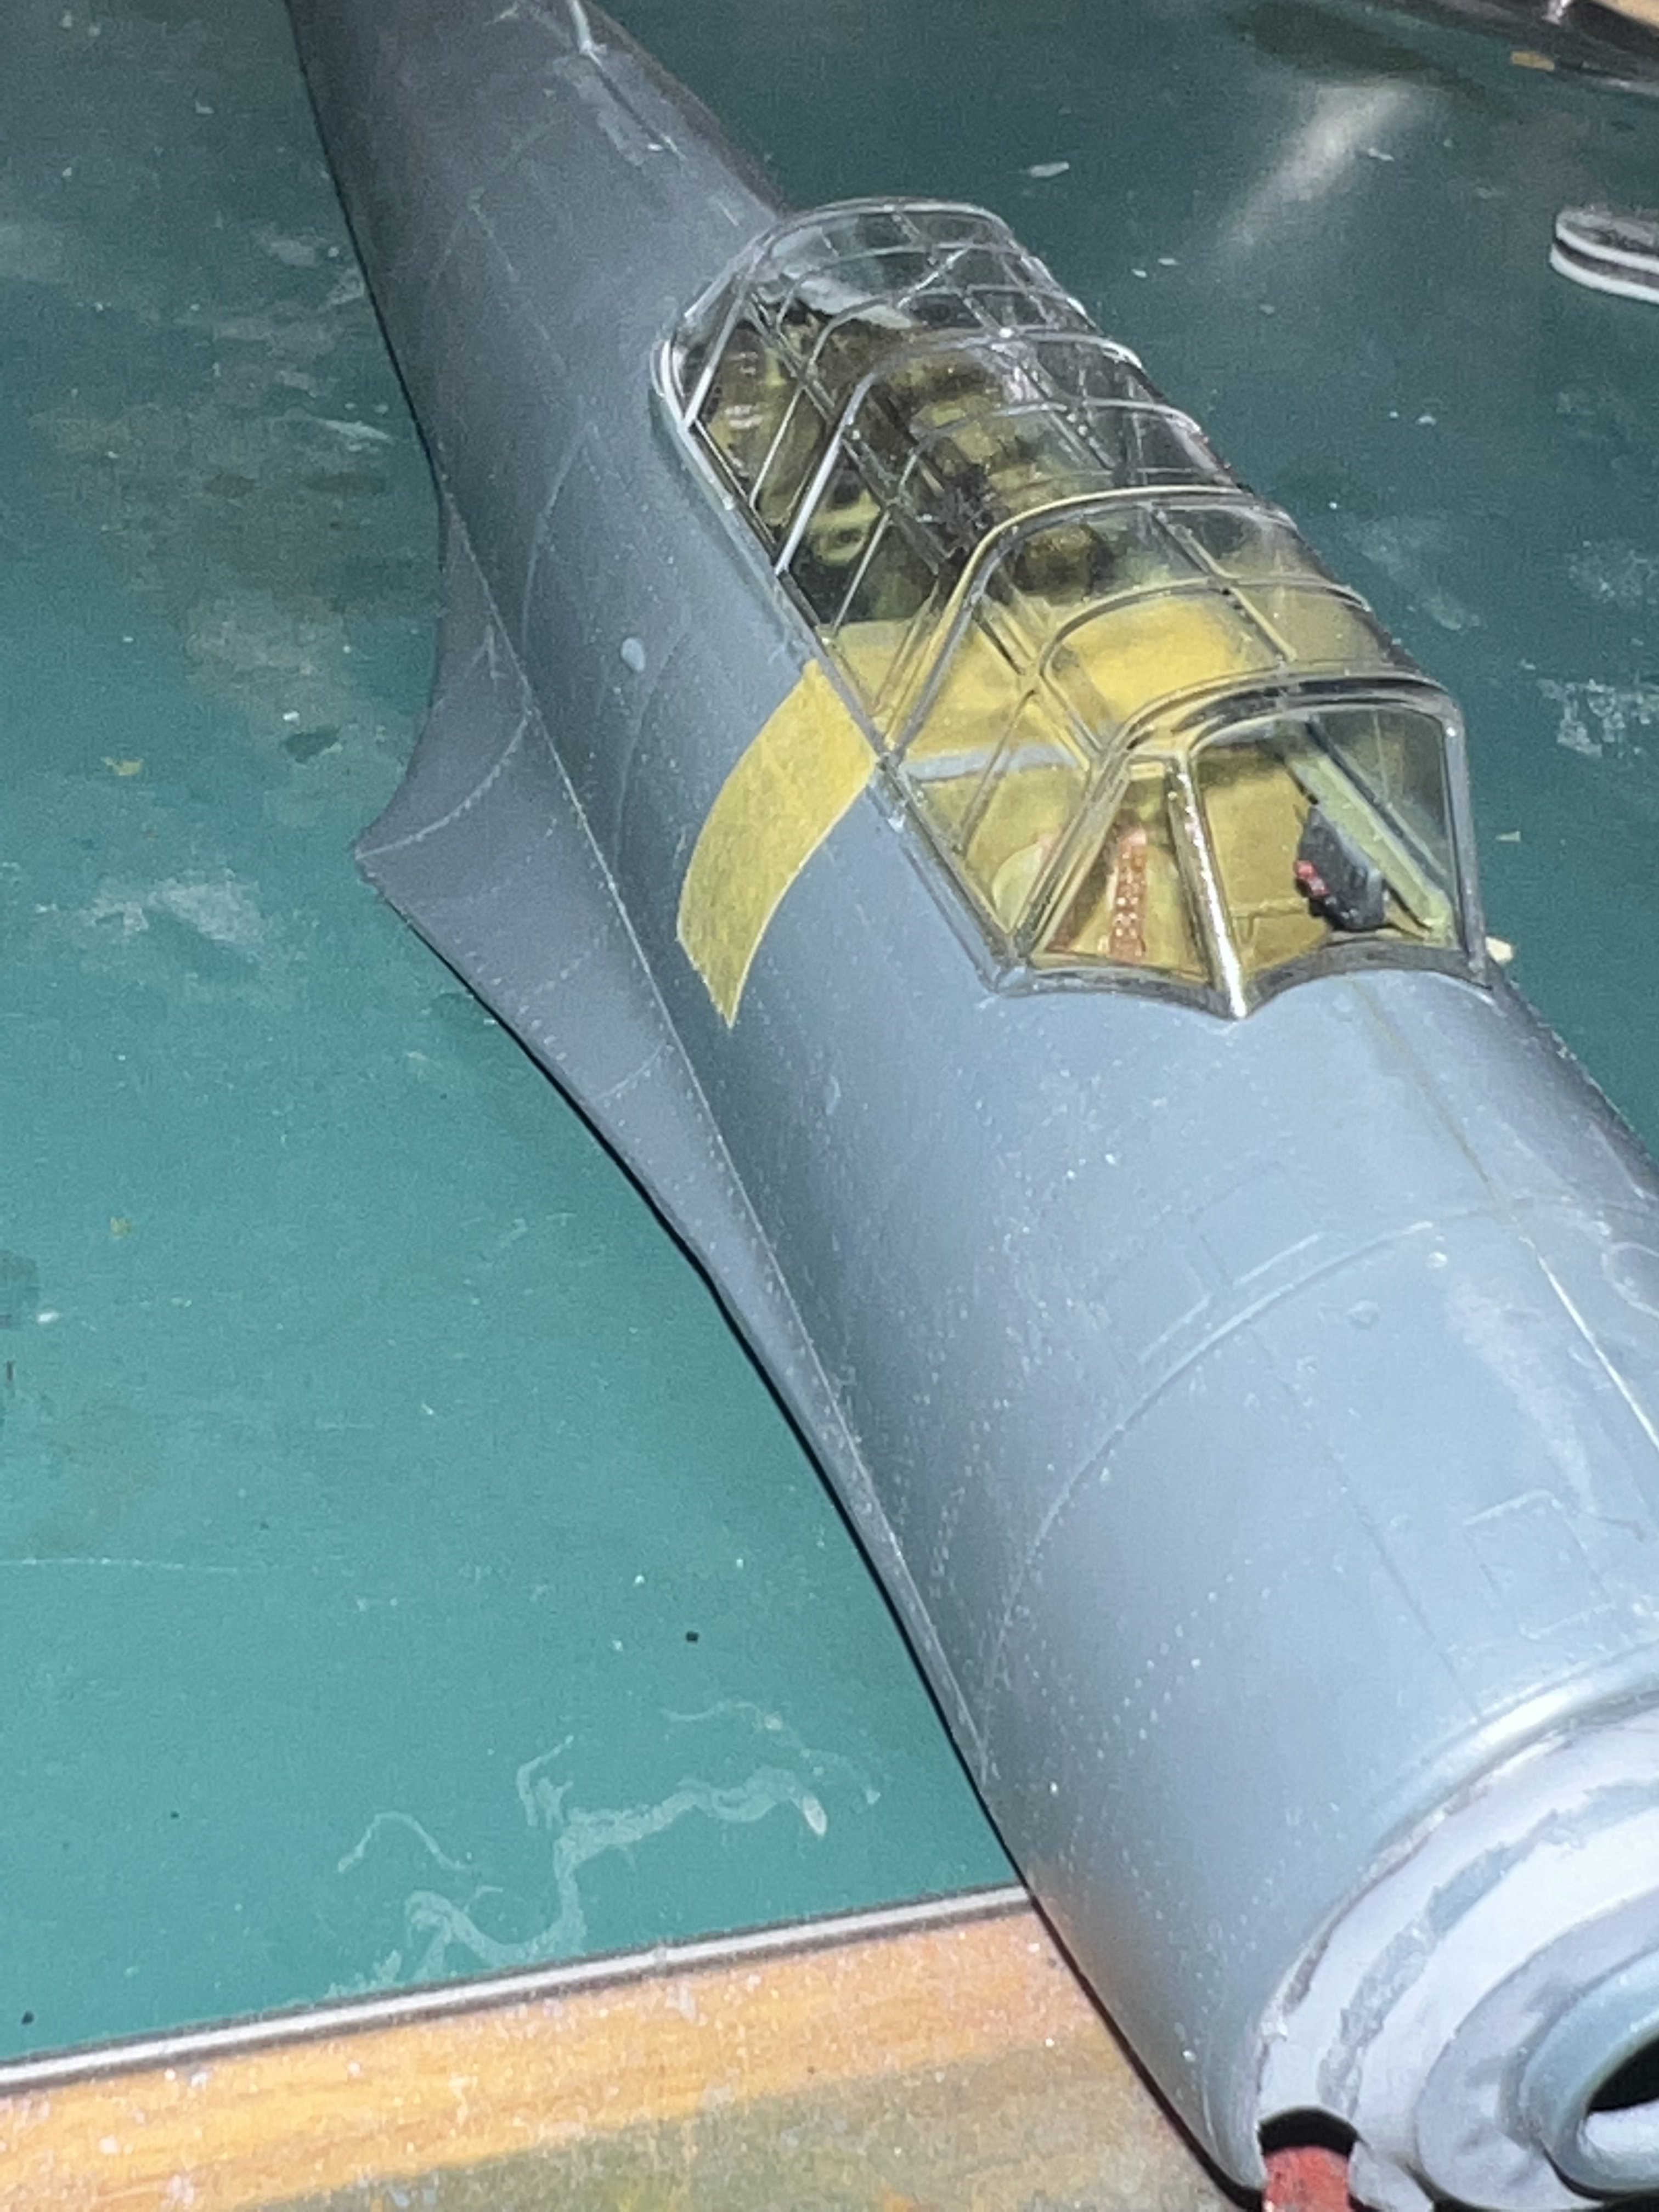
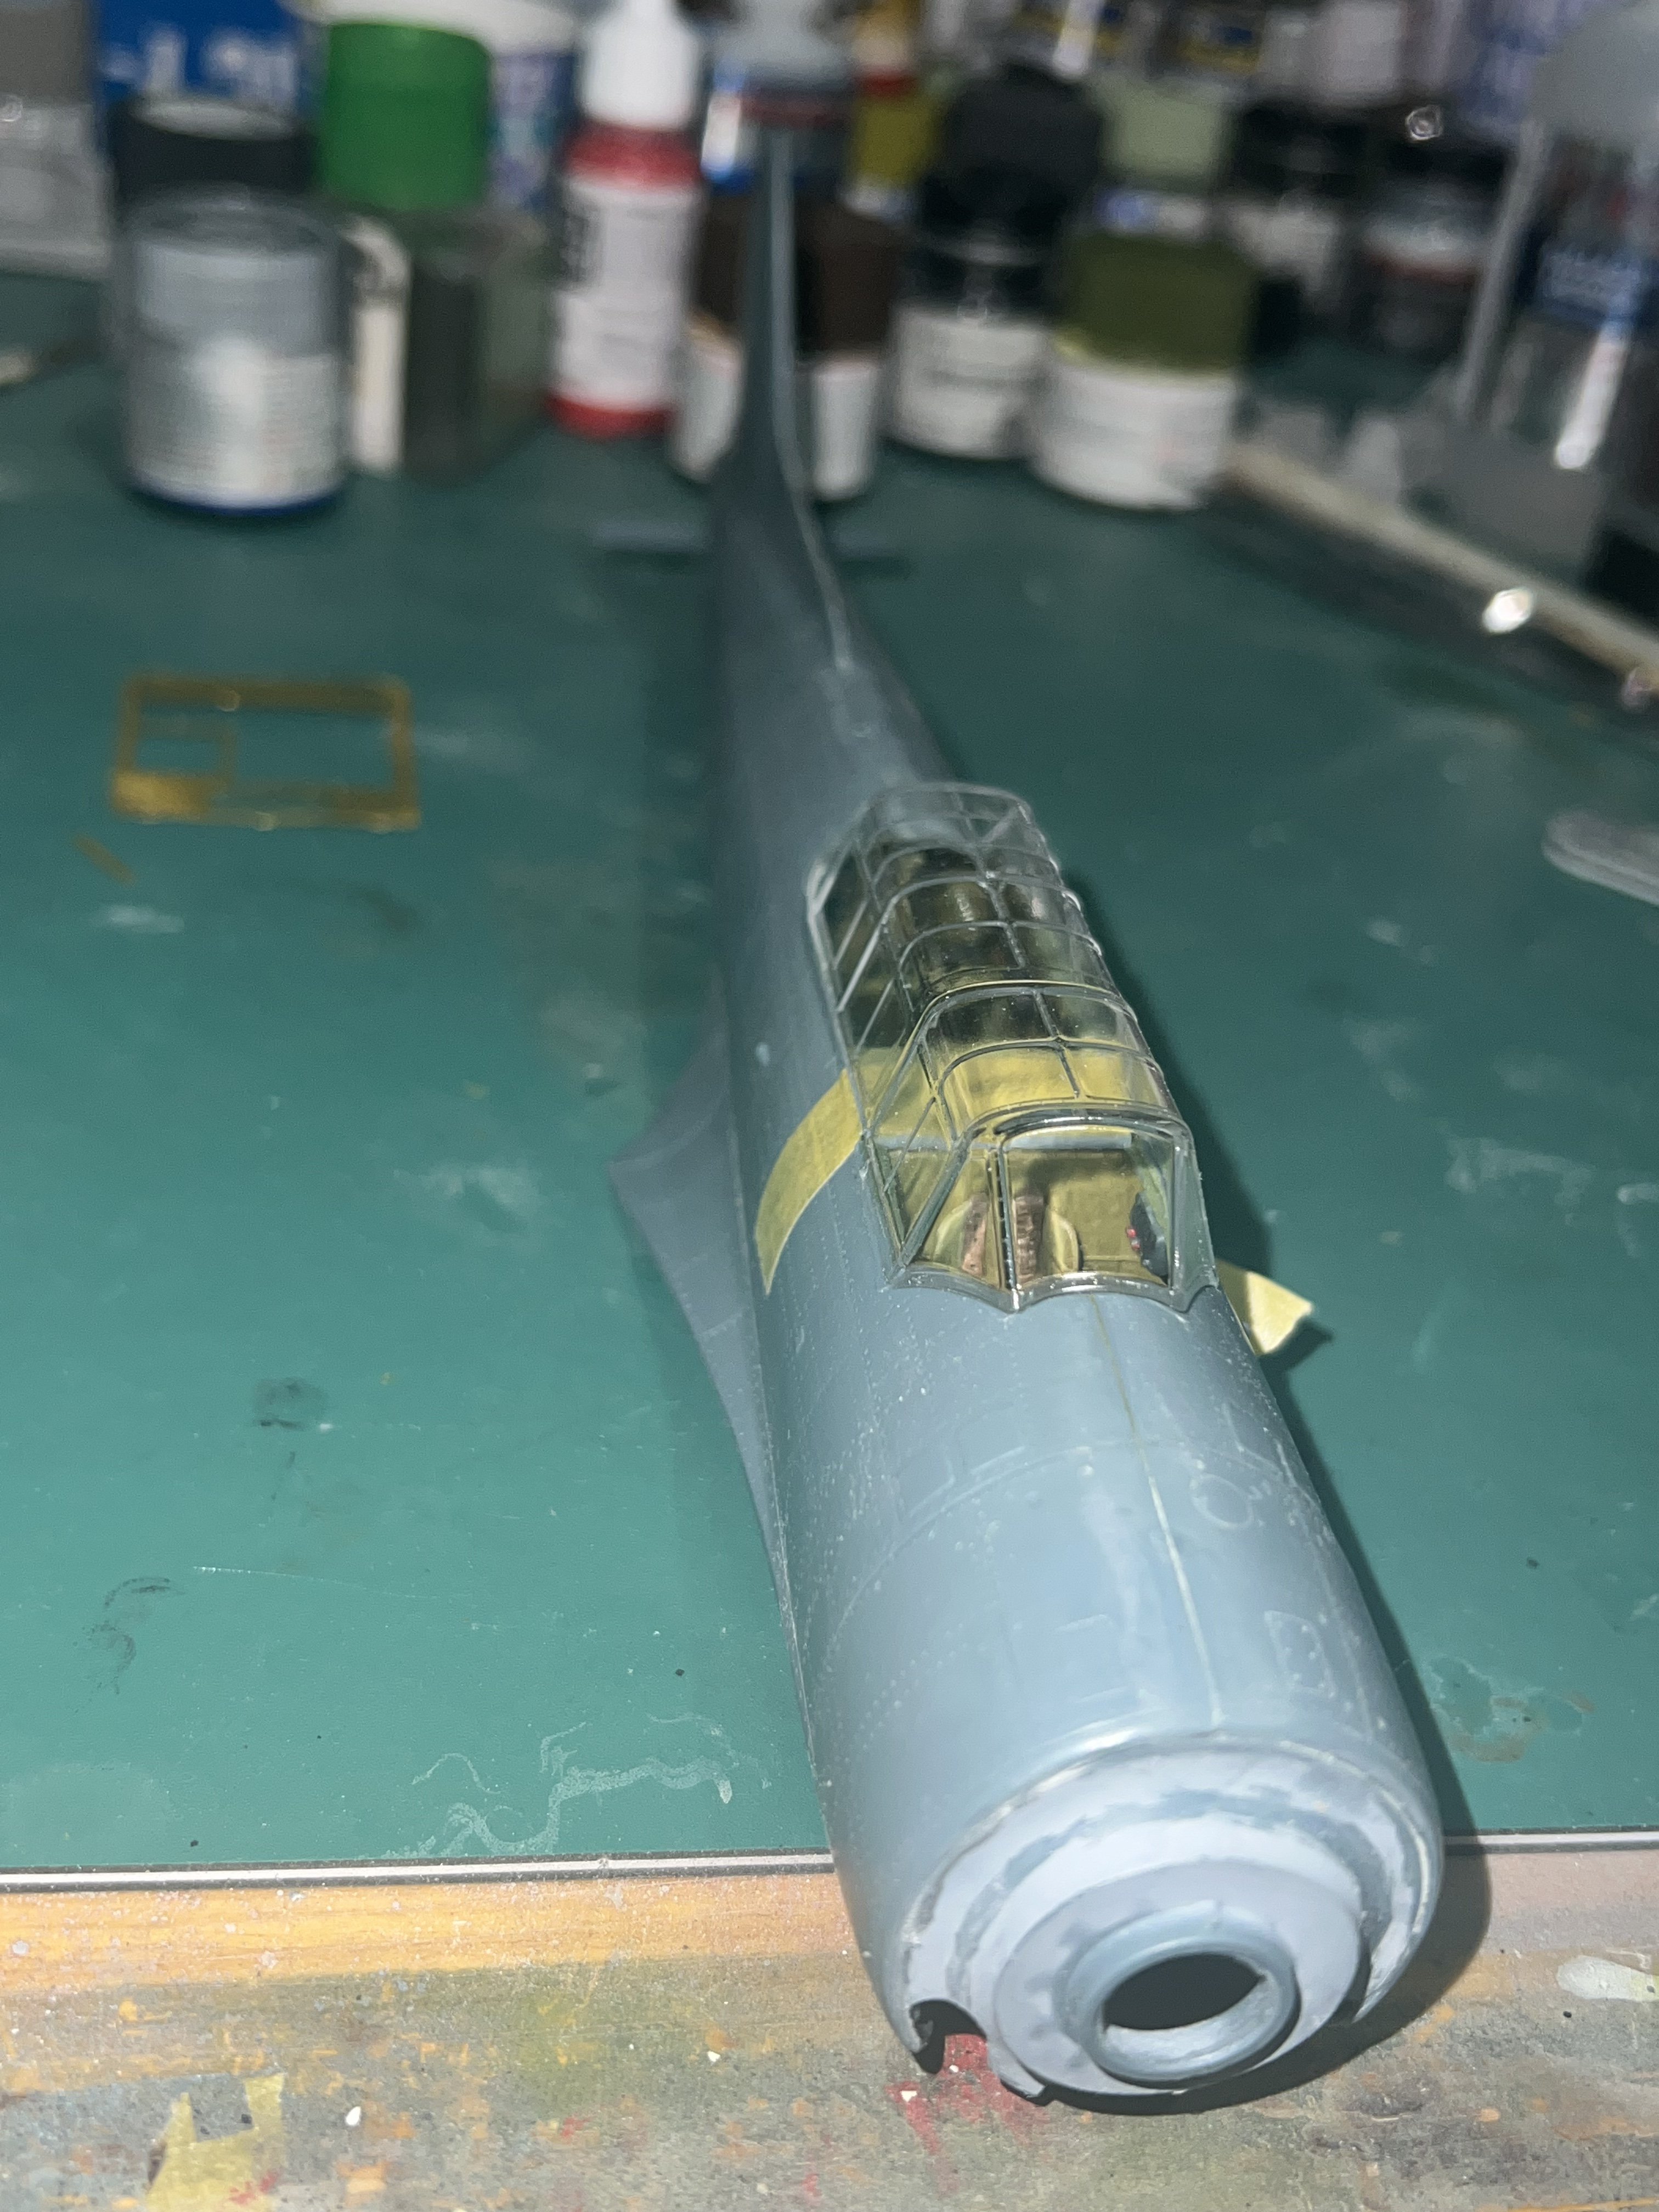
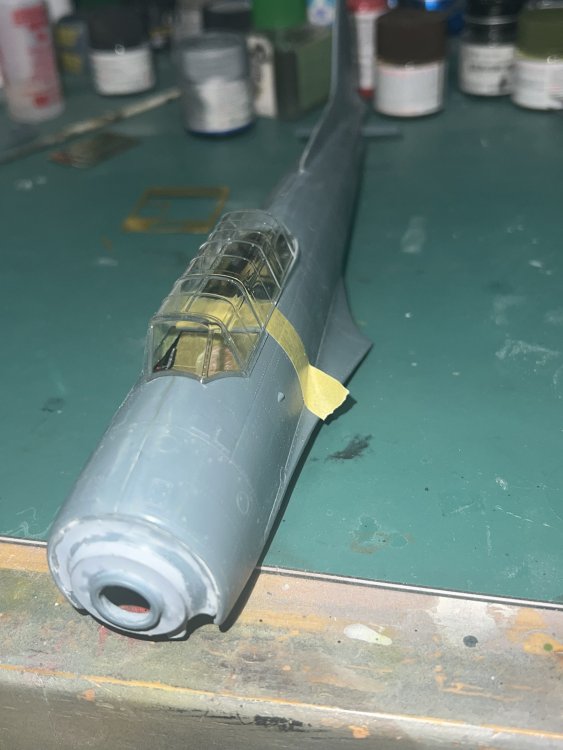
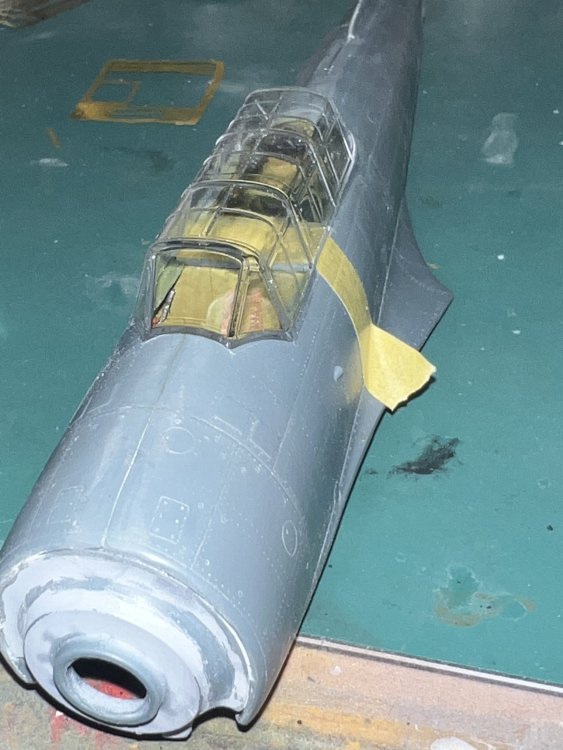
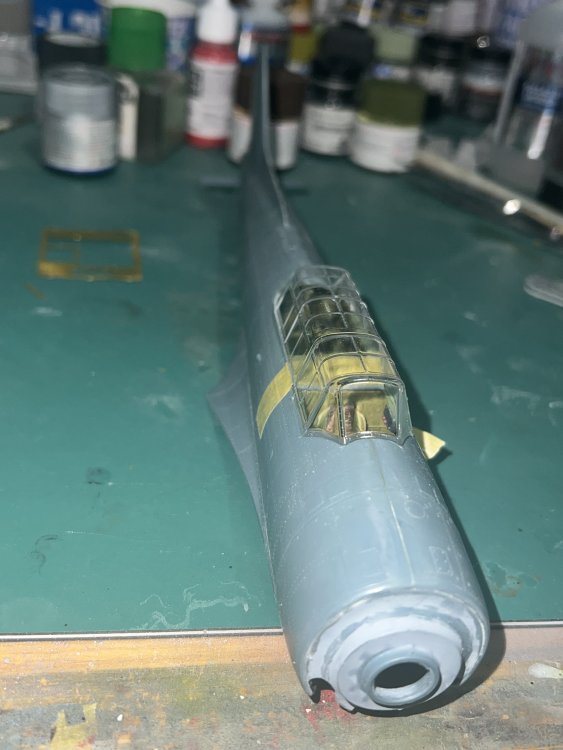
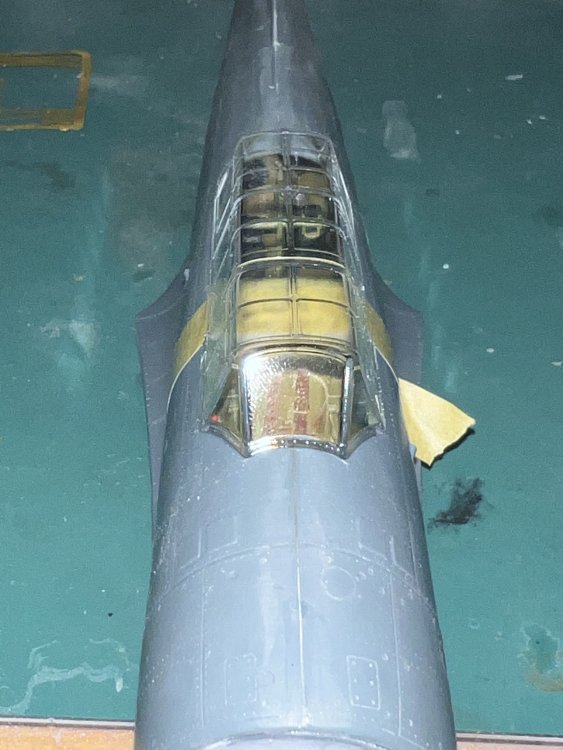
As you can see, the canopy fits well. When you build this model, or any short run model, use “Resin Model recommended best procedures and practices” when you proceed. Verify that all major assemblies continue to fit together as you proceed in adding little pieces. Otherwise, you could get to this point, and lo and behold, the canopy isn’t wide enough or vice versa, depending how much you sand the fuselage join areas. Continually sight down the fuselage moment by moment to ensure you’re not creating a banana. We’ve all done that a d it’s no fun, especially when you’re dealing with a long out of production, Holy Grail resin kit.
-
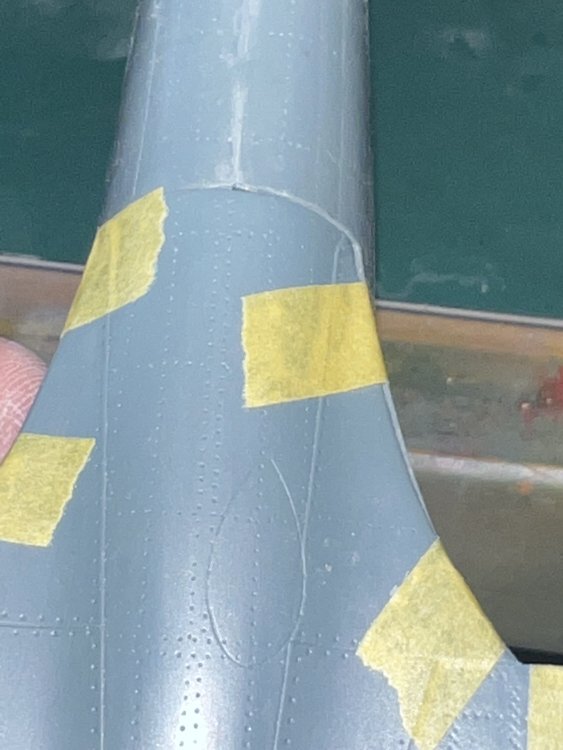
So here we are with a fuselage in, more or less, one piece.

-
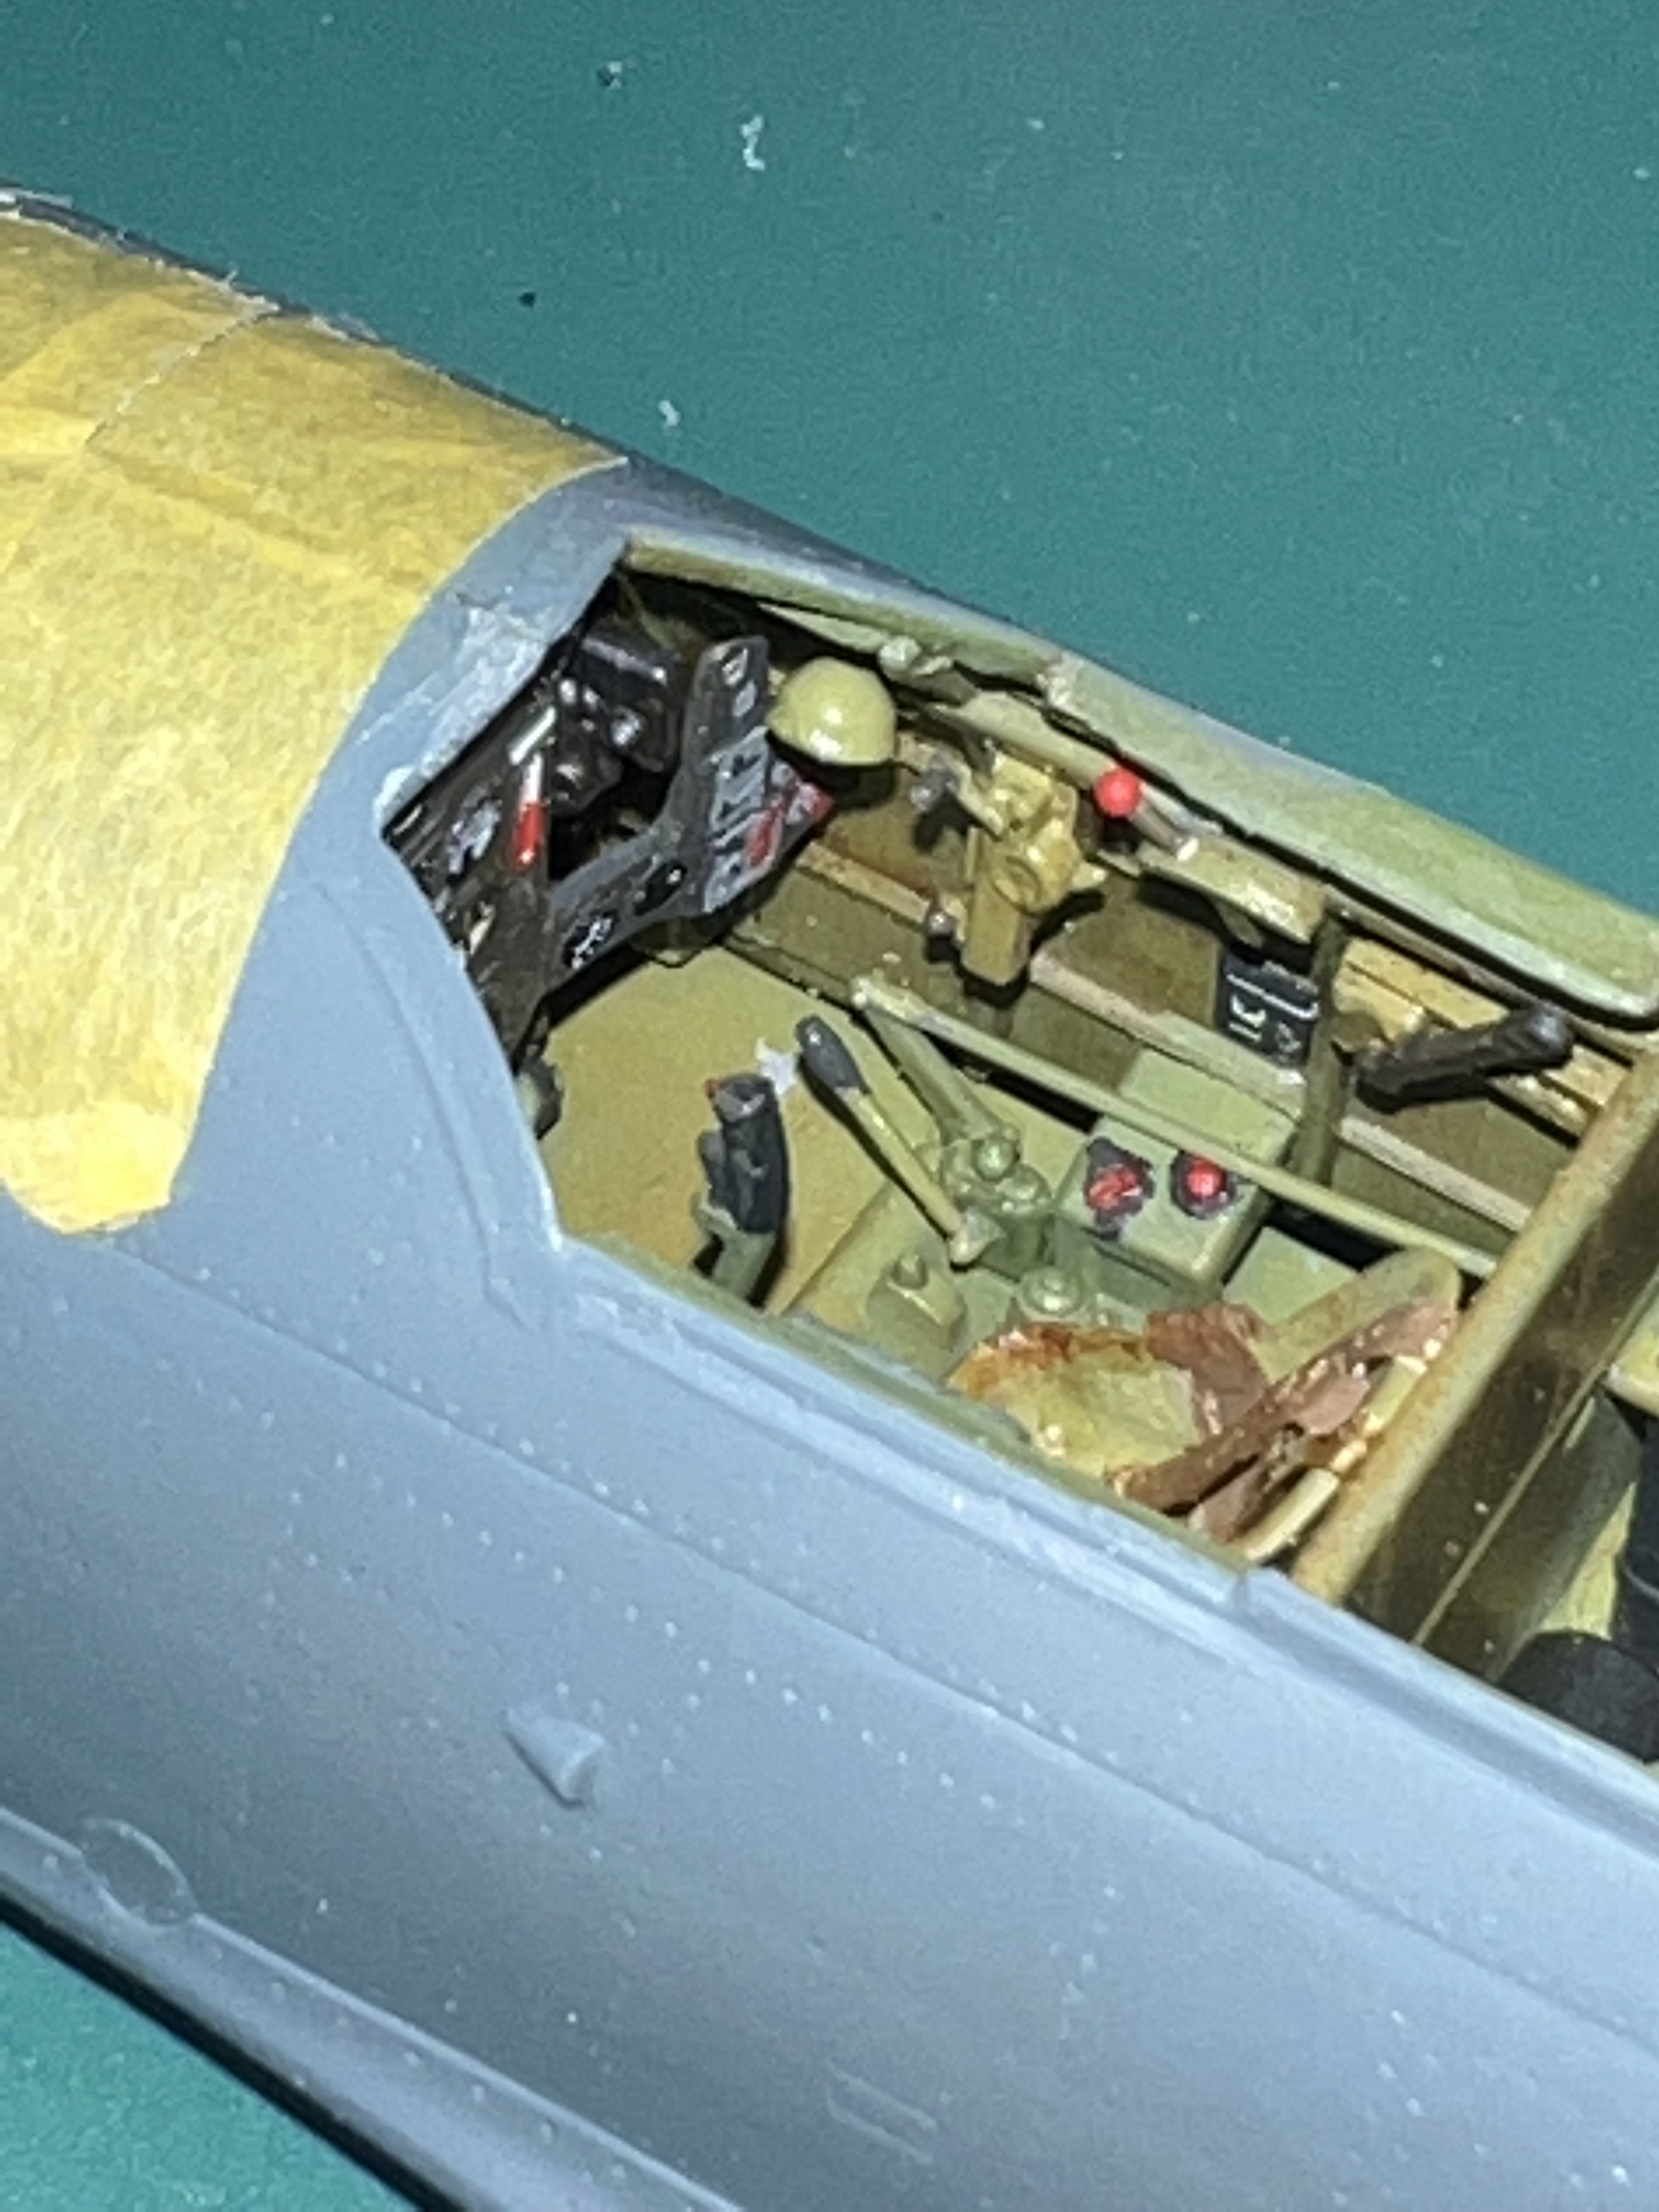
I need to re orient one of the spotlights. Right now it’s be shining in the pilot’s eyes.
-
Thanks Steve. I’m one of those guys who actually enjoy working in resin, and HPH kits are some of the best out there. The Walrus is a rough build in places, and the Tigercat is a real project, but still, they’re decent, solid kits. The Infinity line give us a break from the resin dust, and that’s never a bad thing. The Val is really an awesome kit in so many ways, but those with little patience may find it a chore. So far, I’ve tried to verify airframe fit before any glue is applied, to avoid any nasty surprises down the road. This kit is a long time coming, and HPH appears to have taken the extra effort needed to ensure everything lines up. Stay tuned! 😄
-
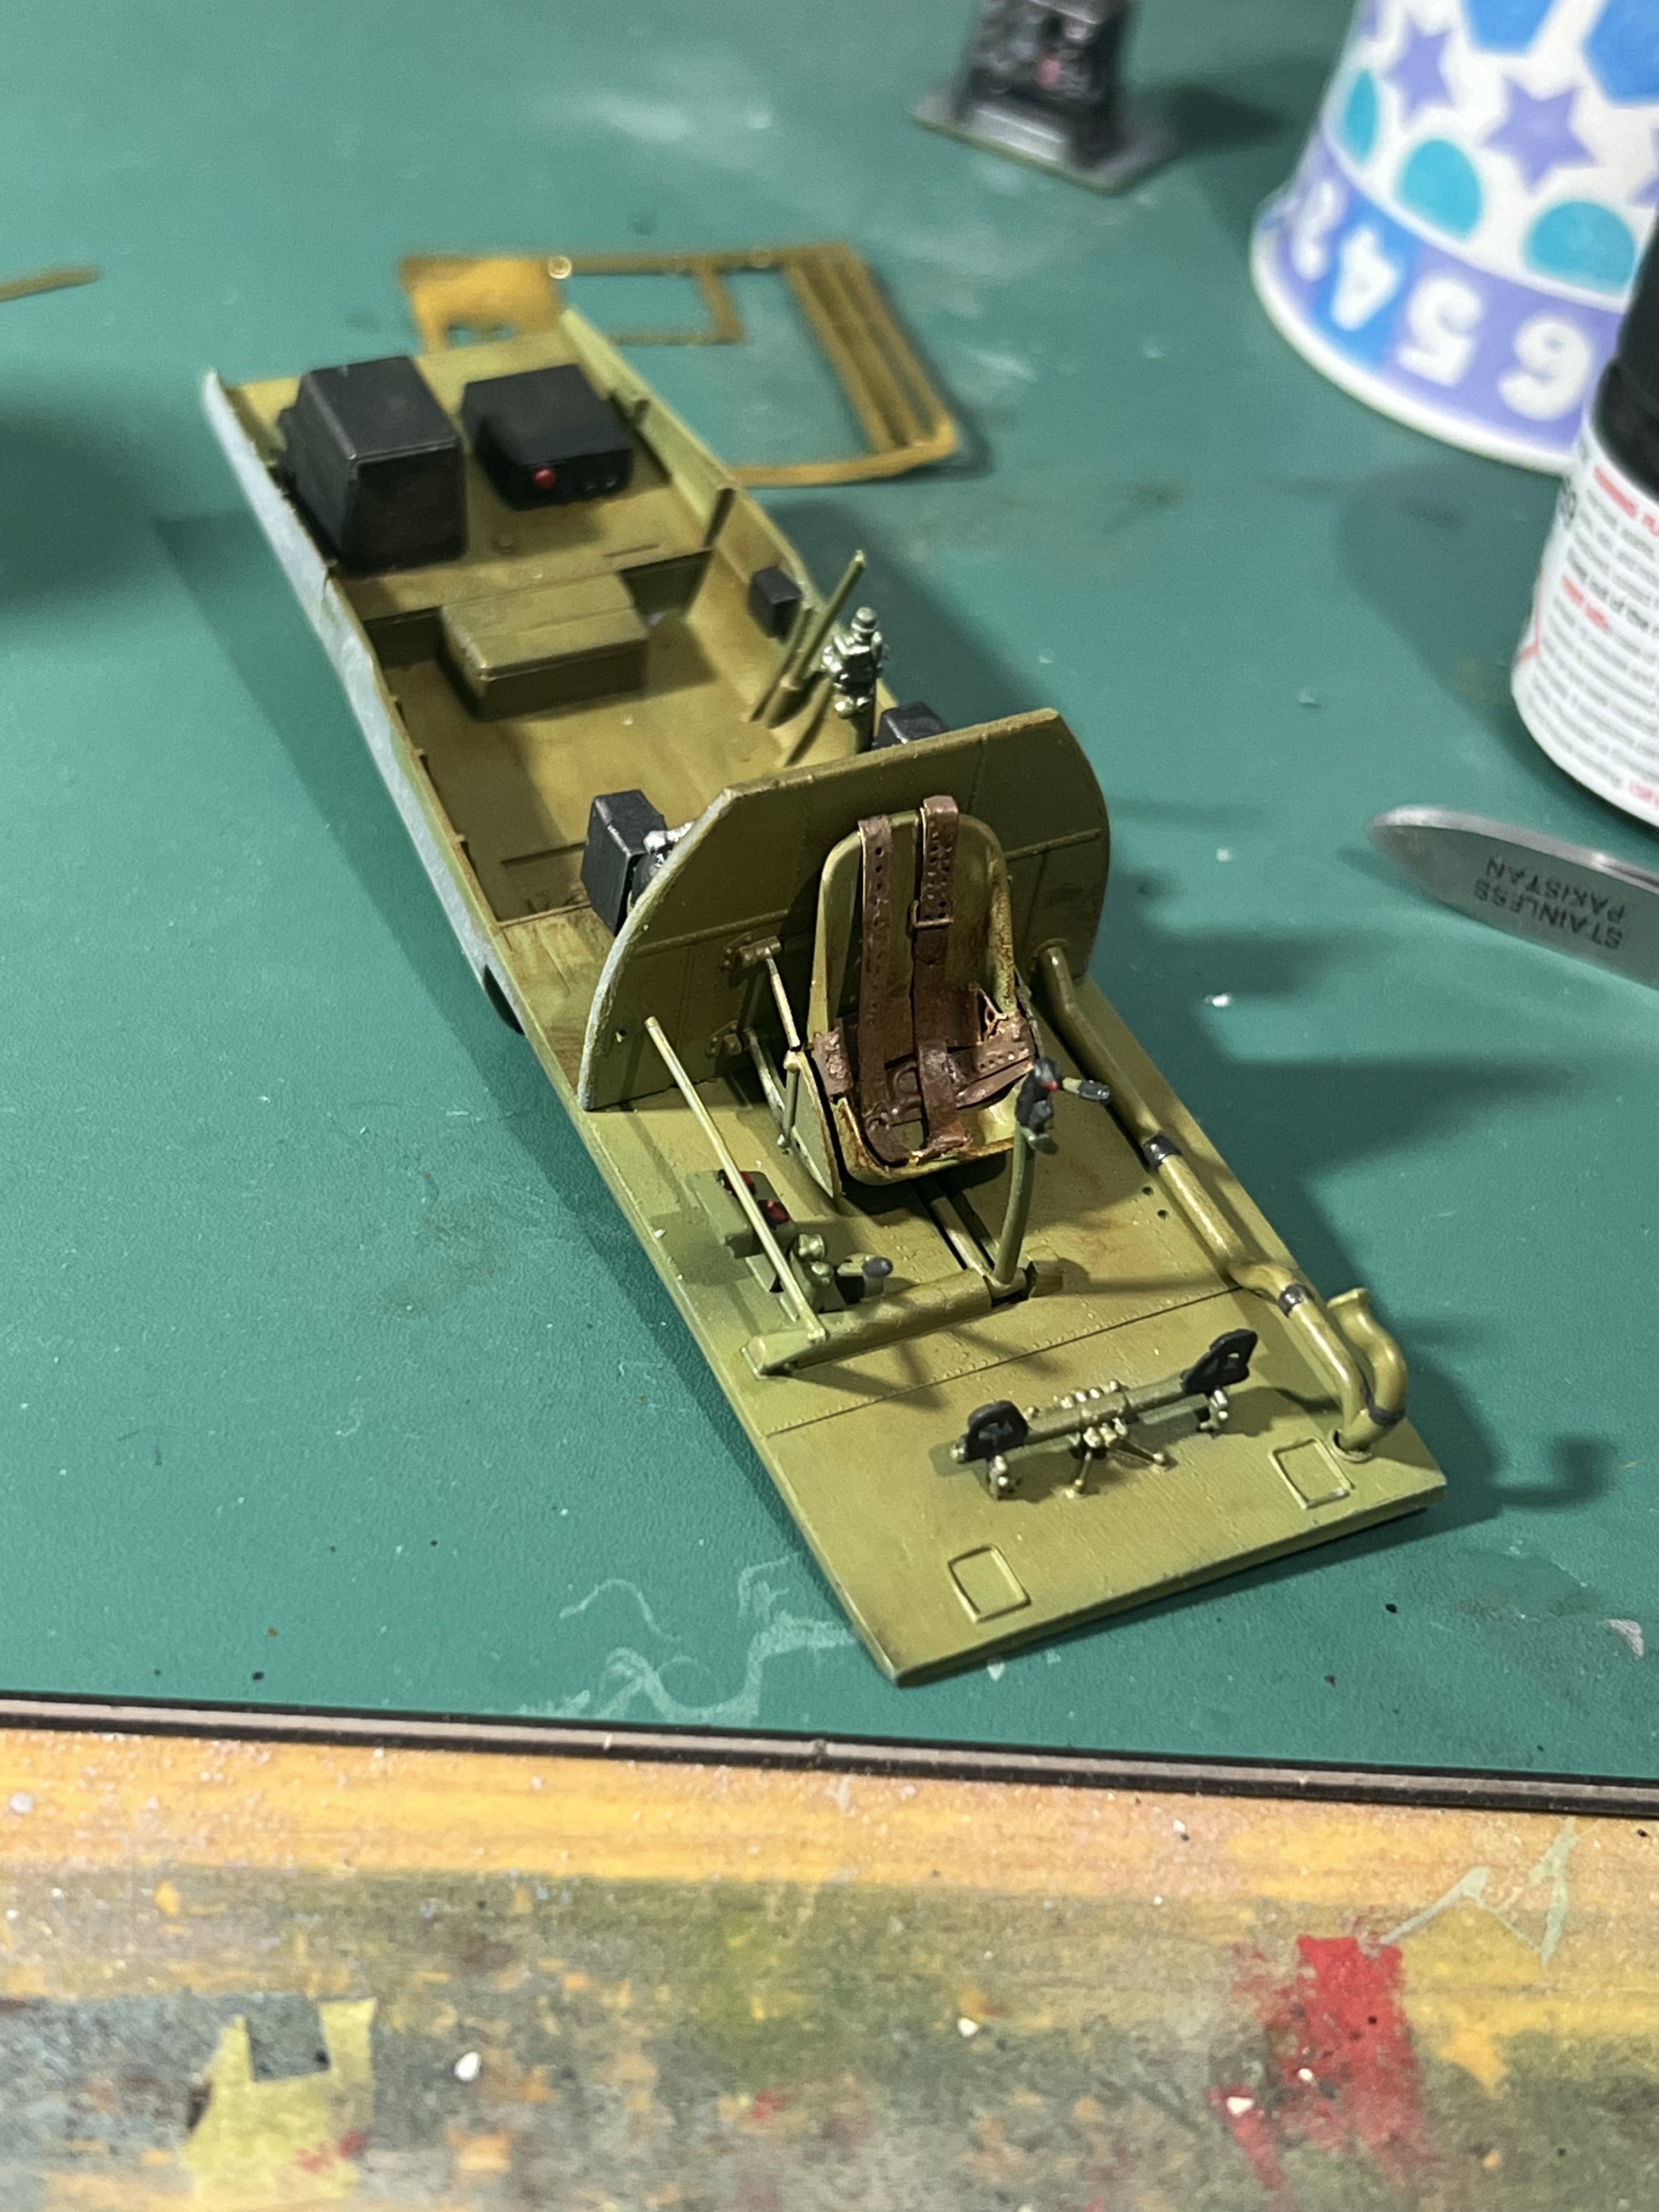
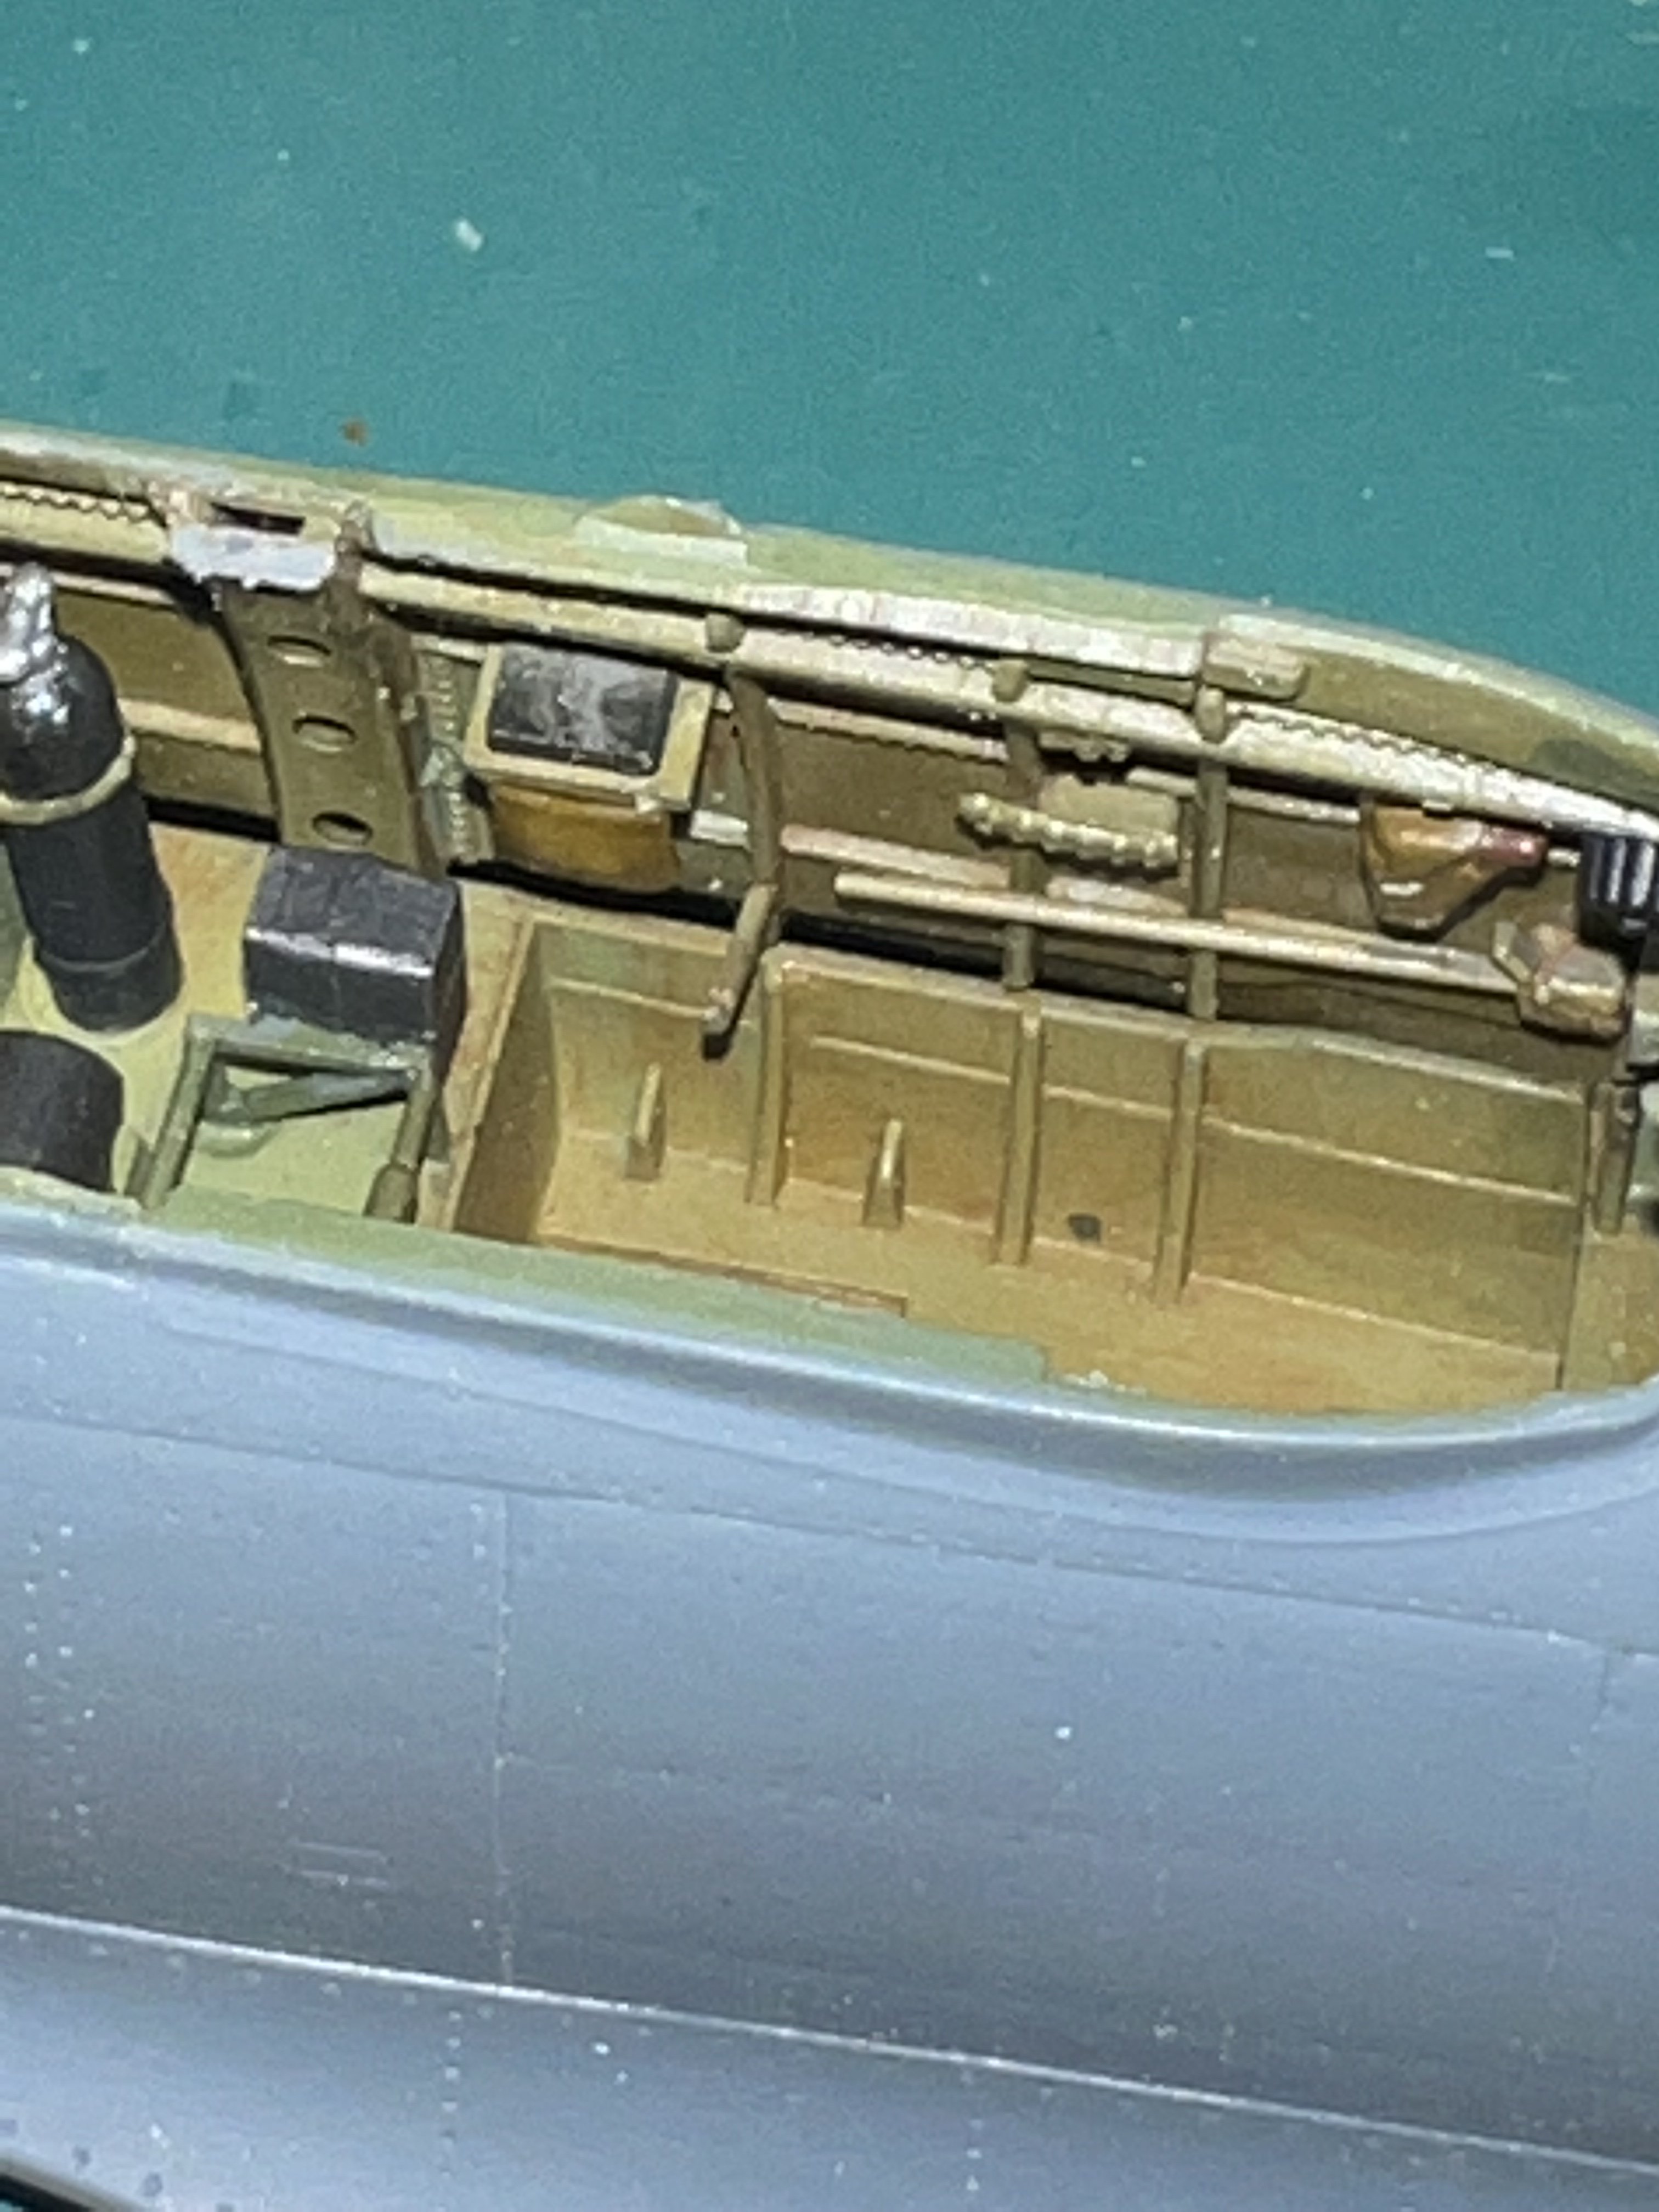
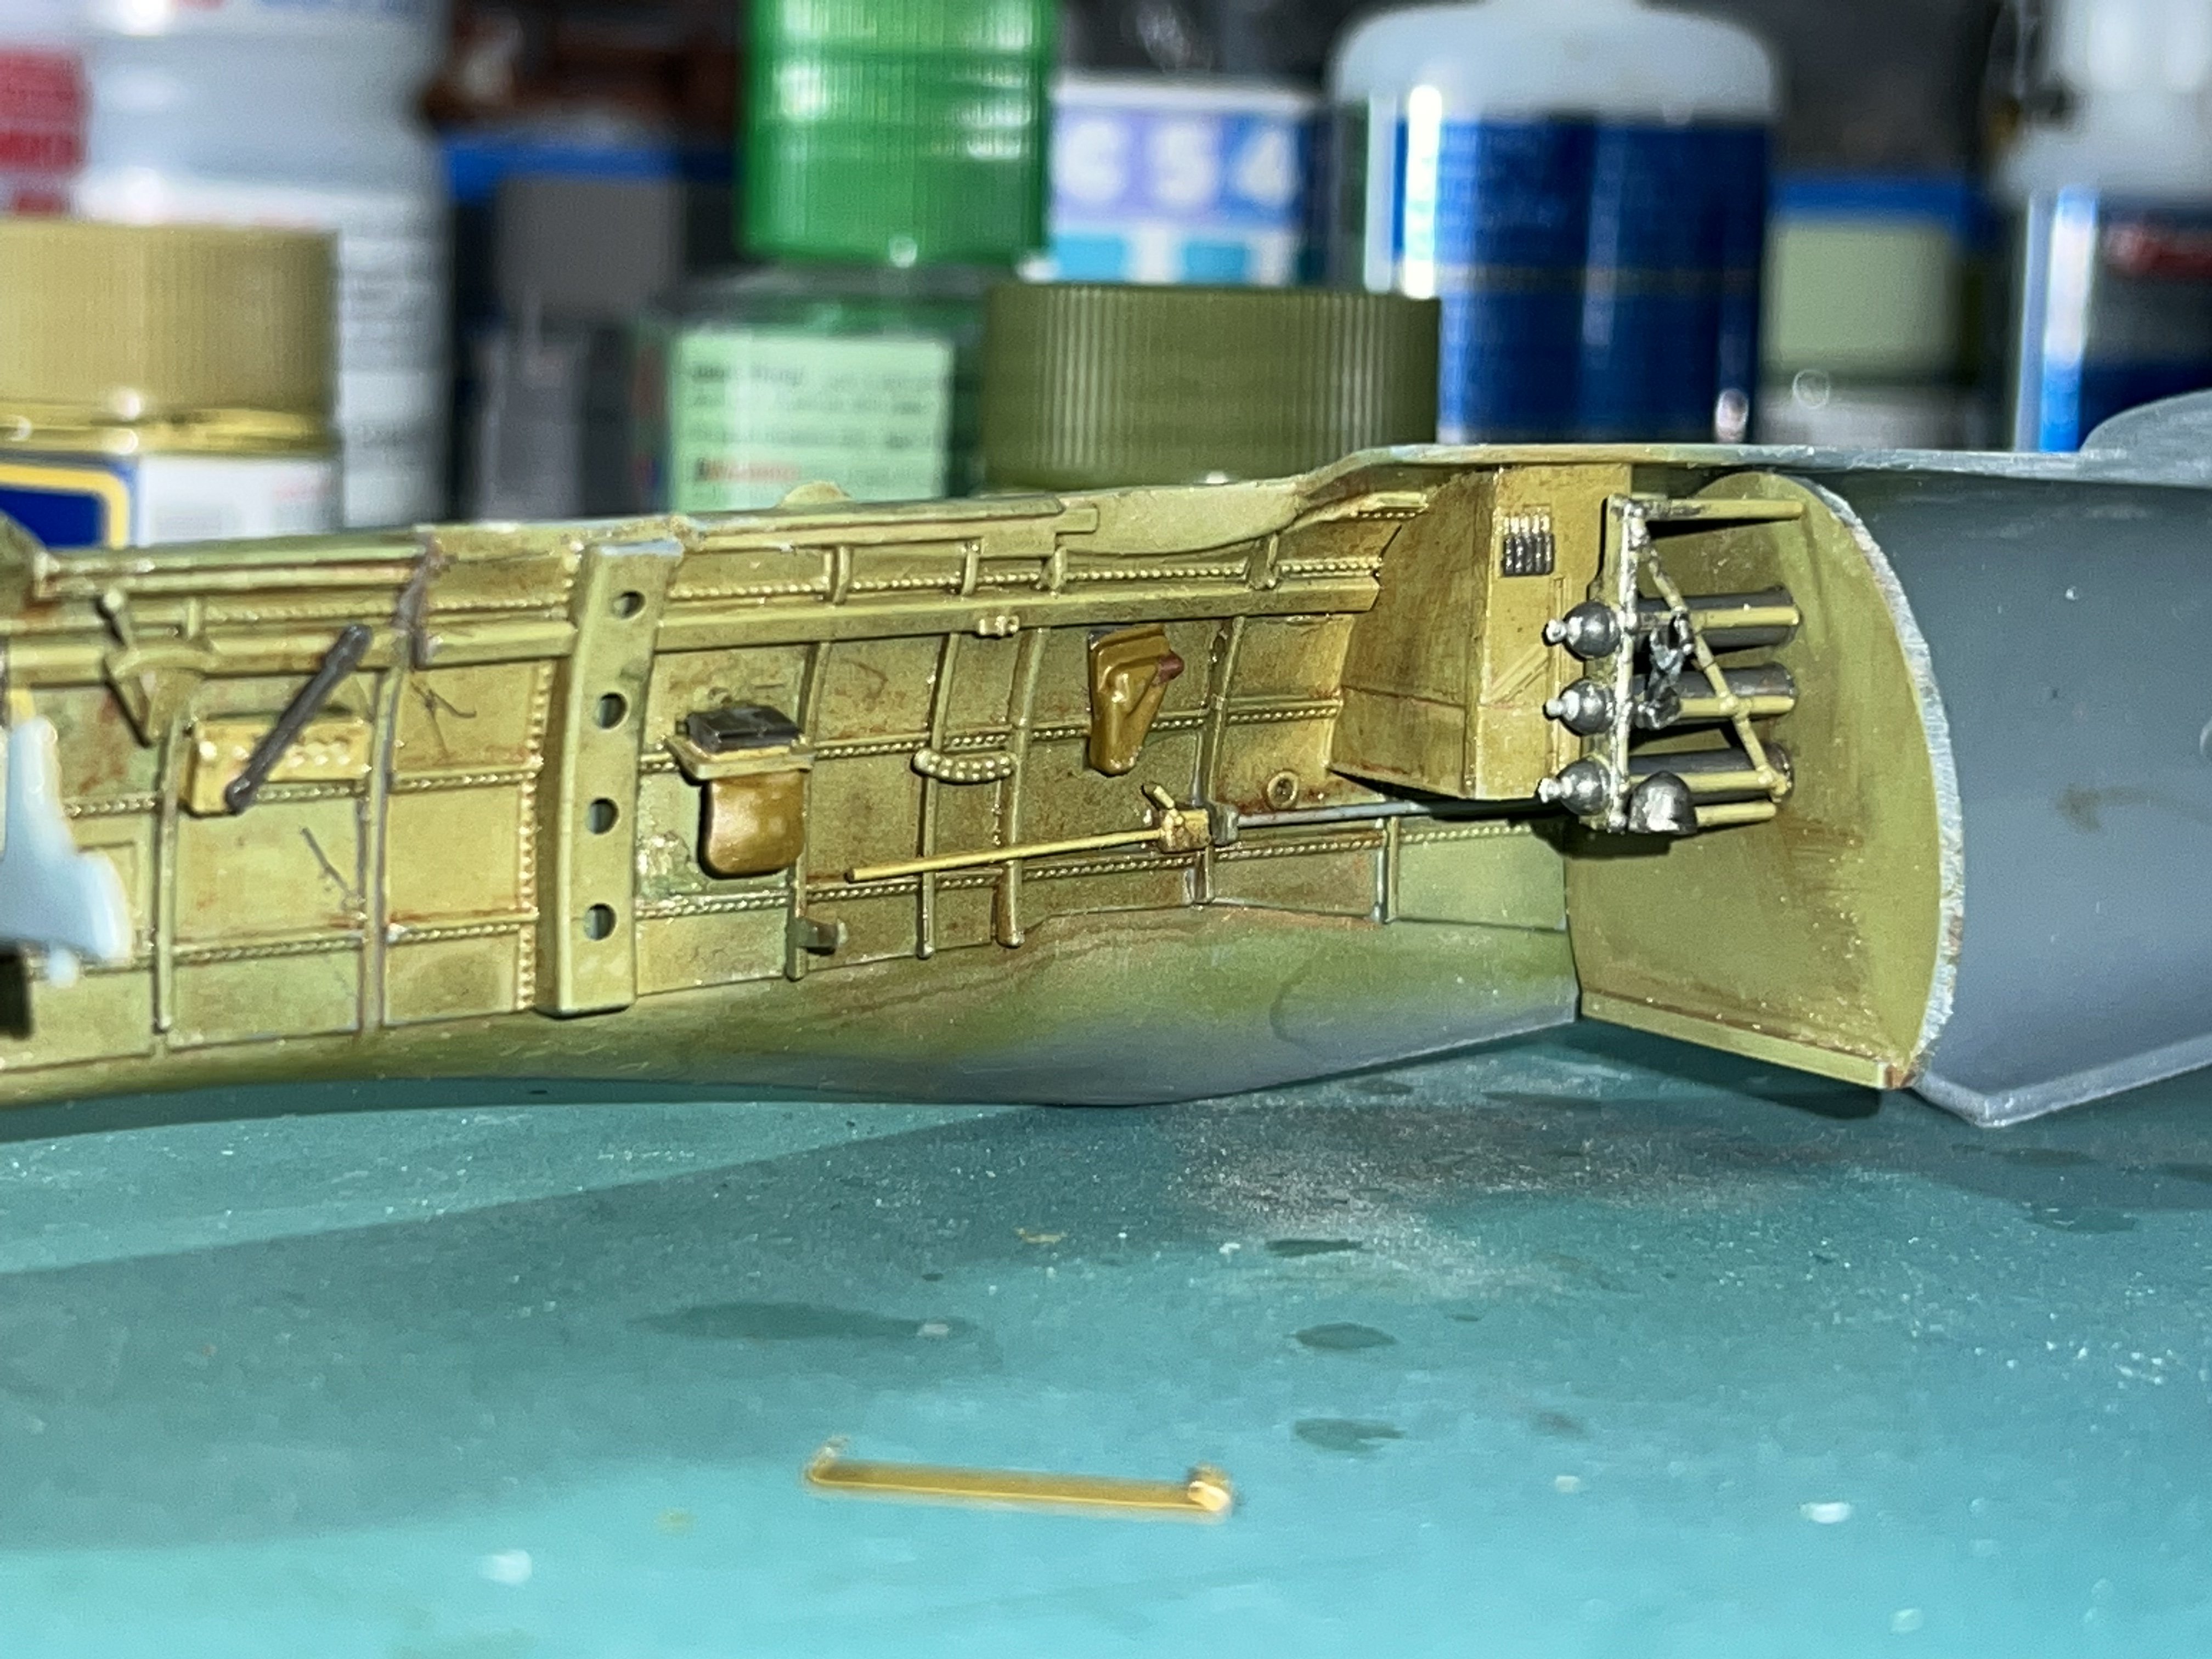
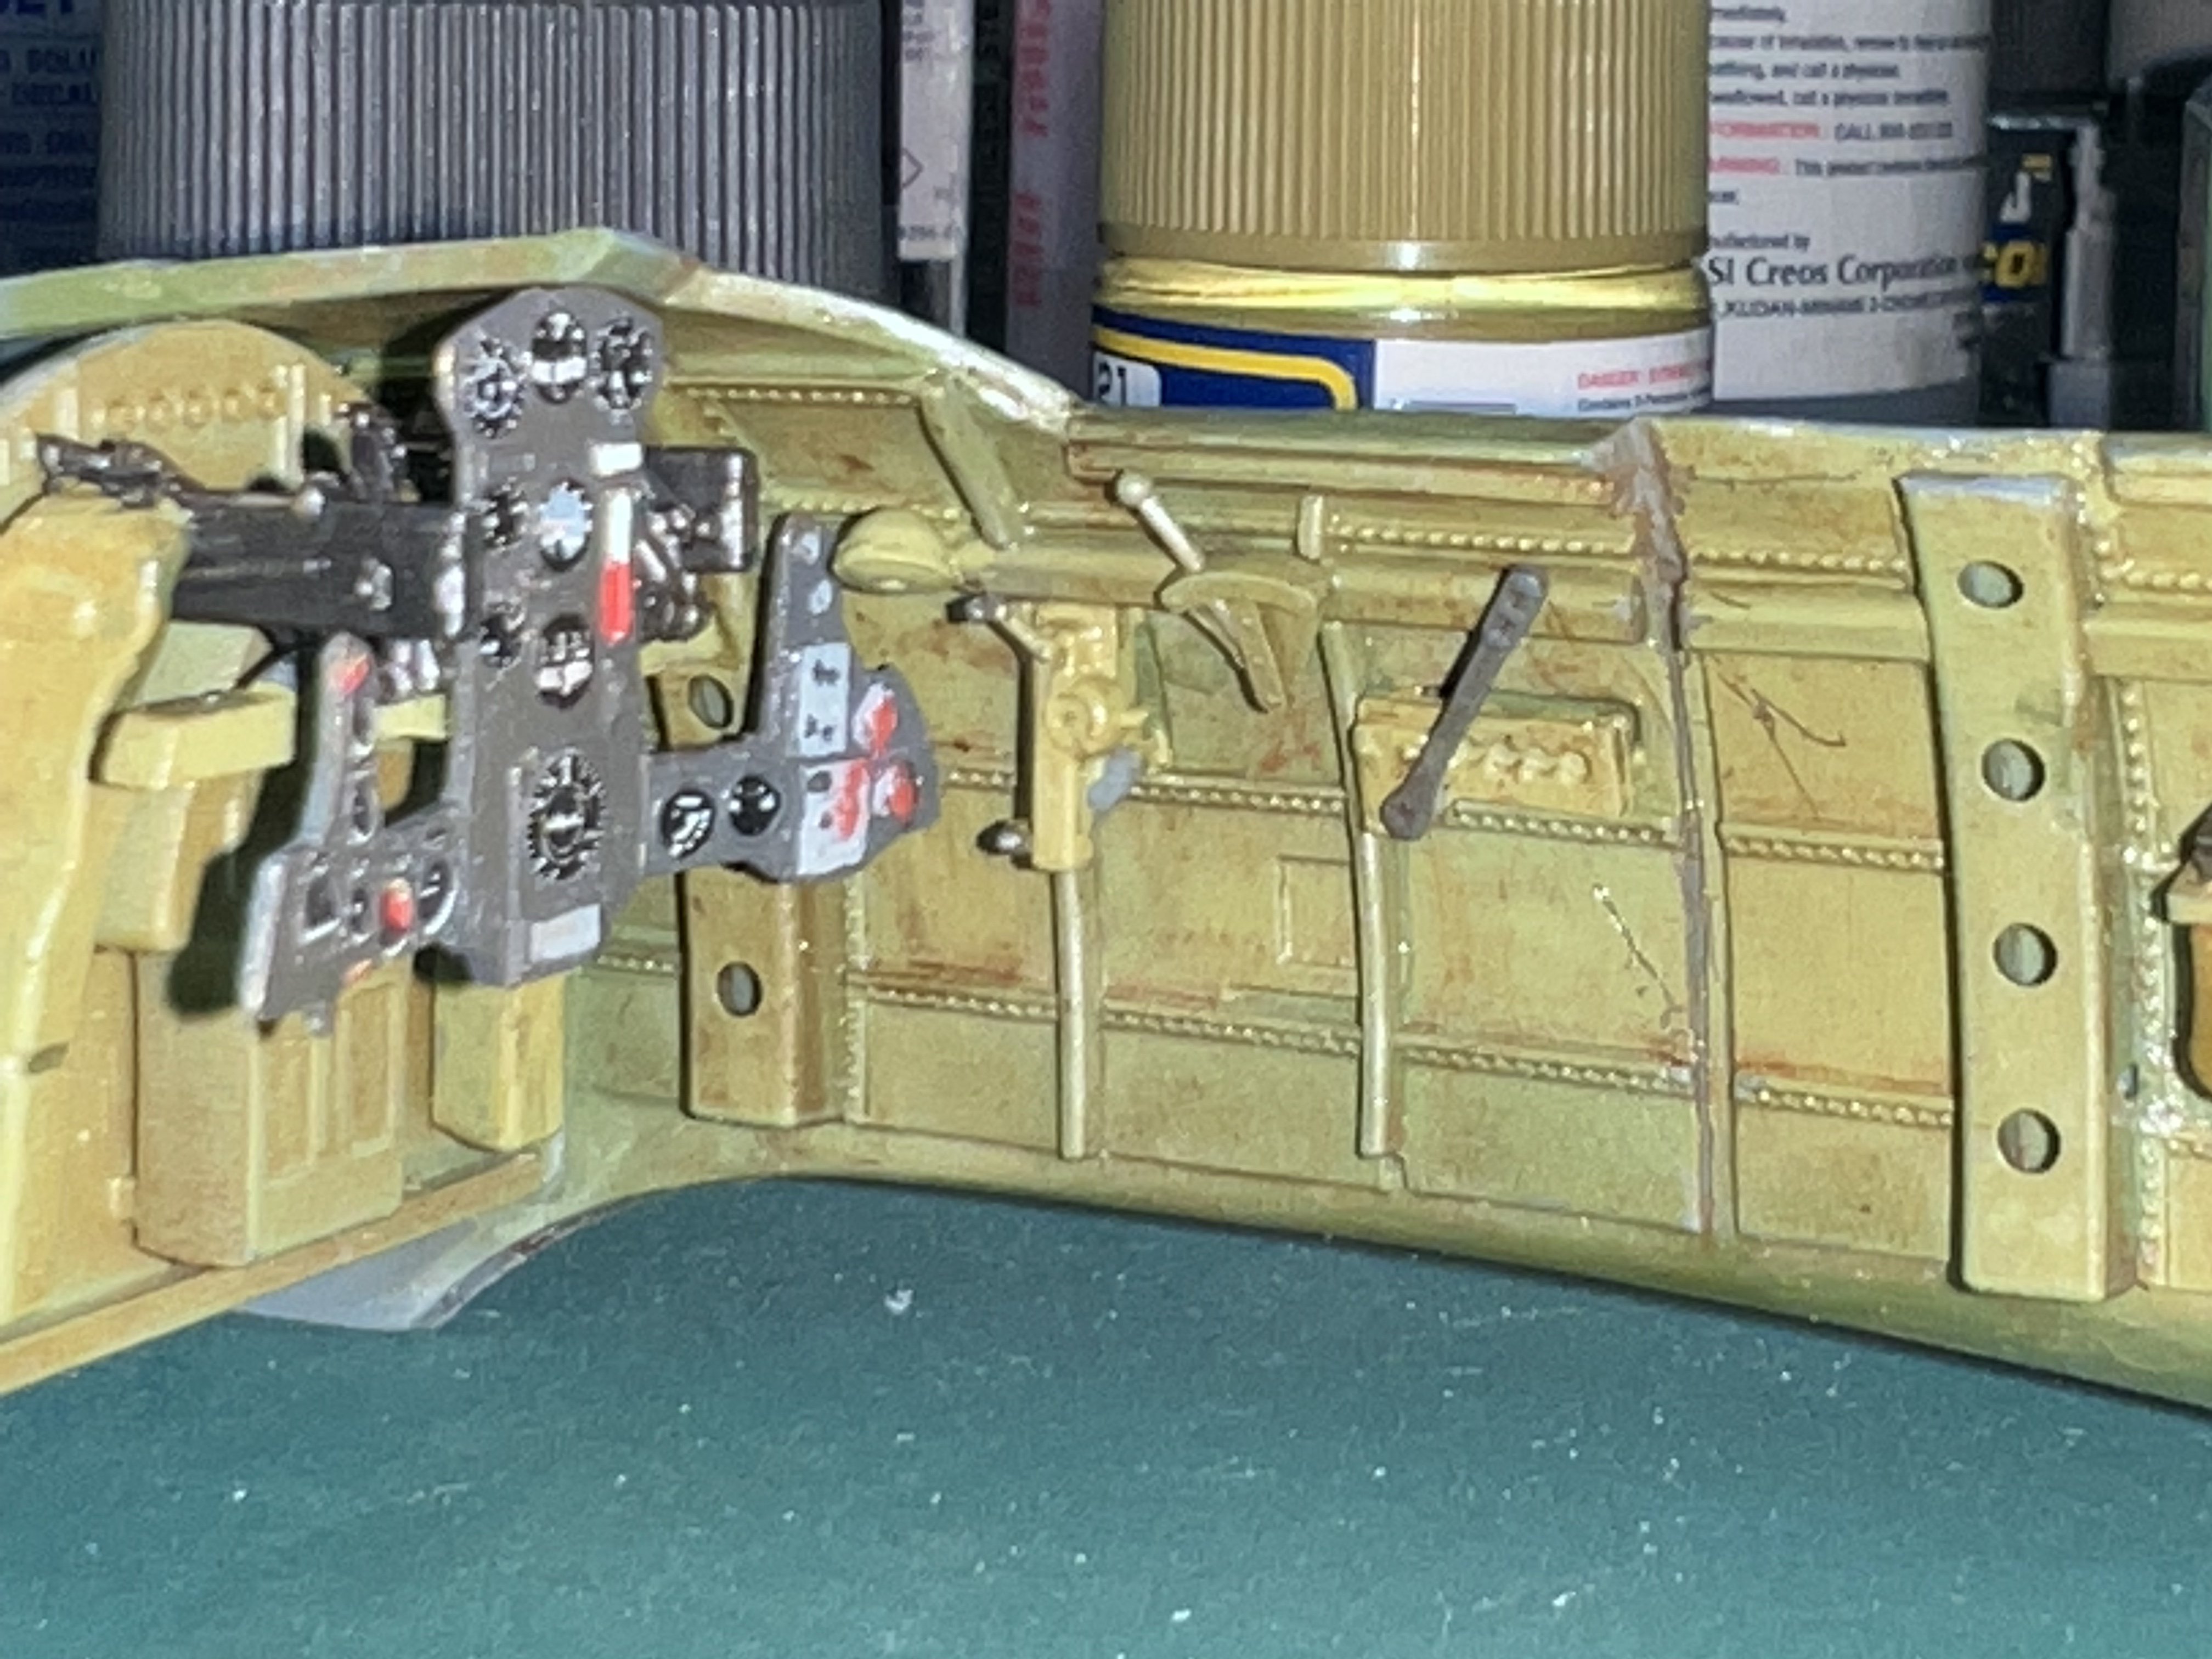
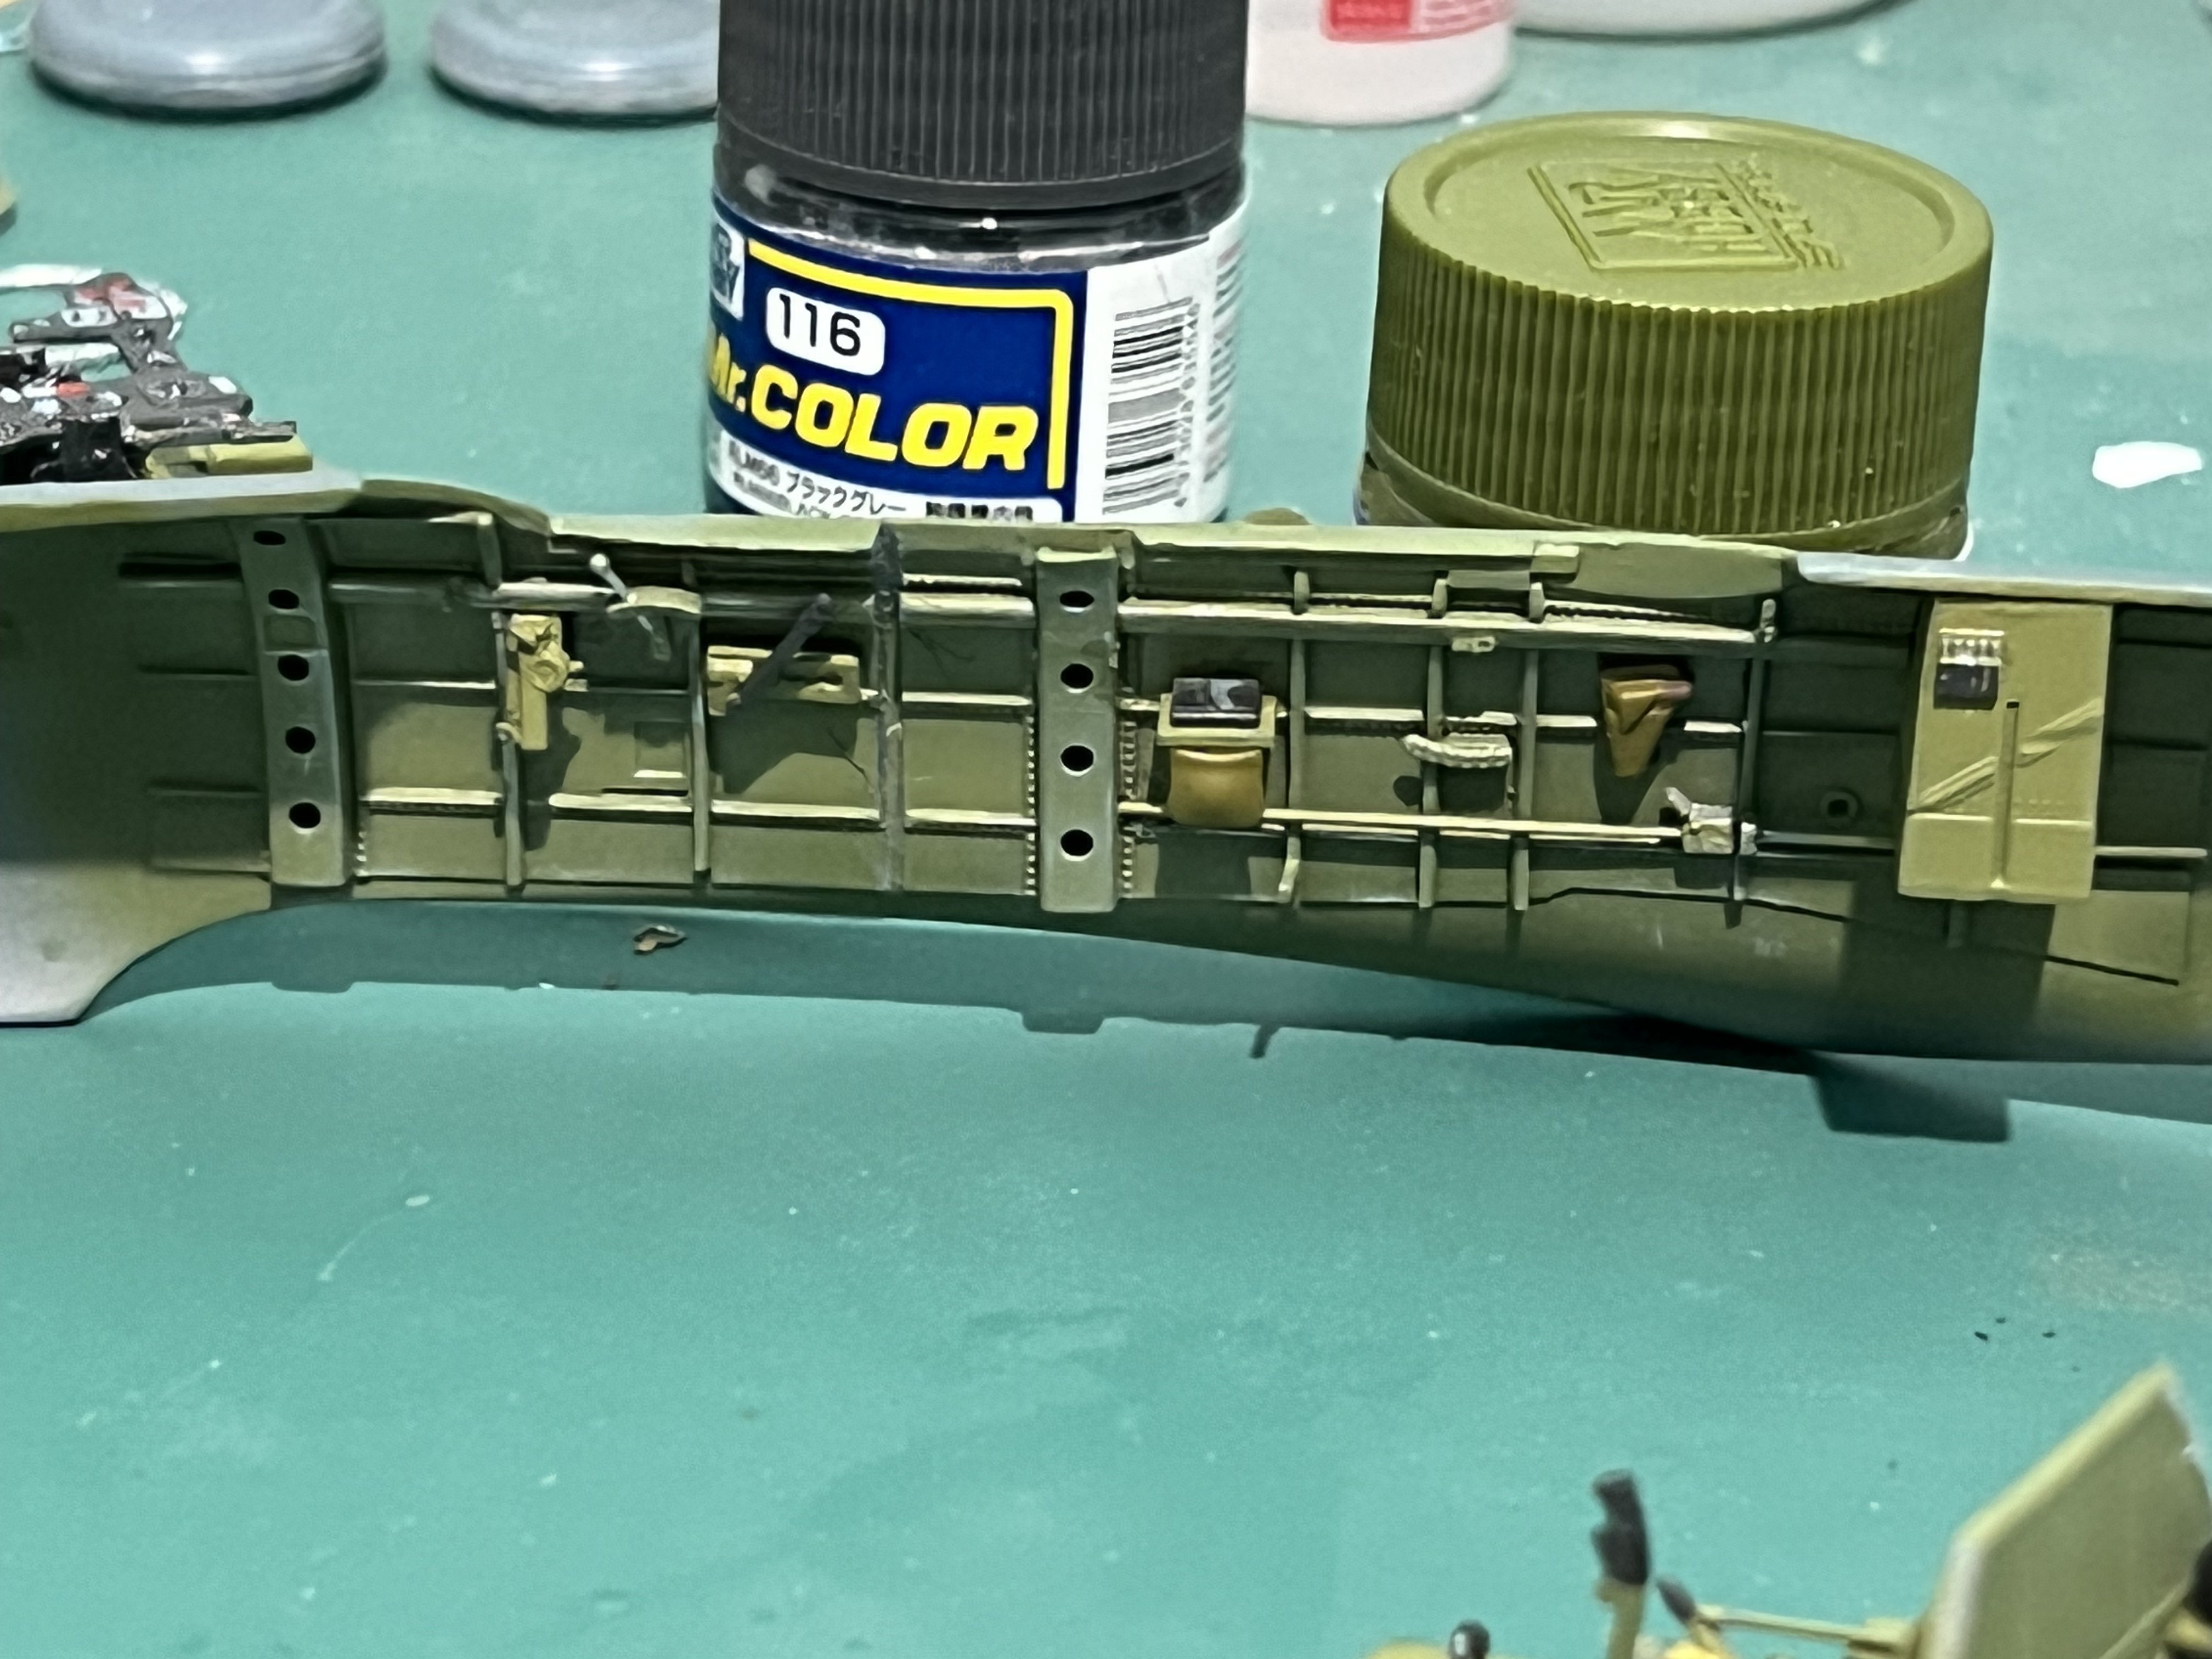
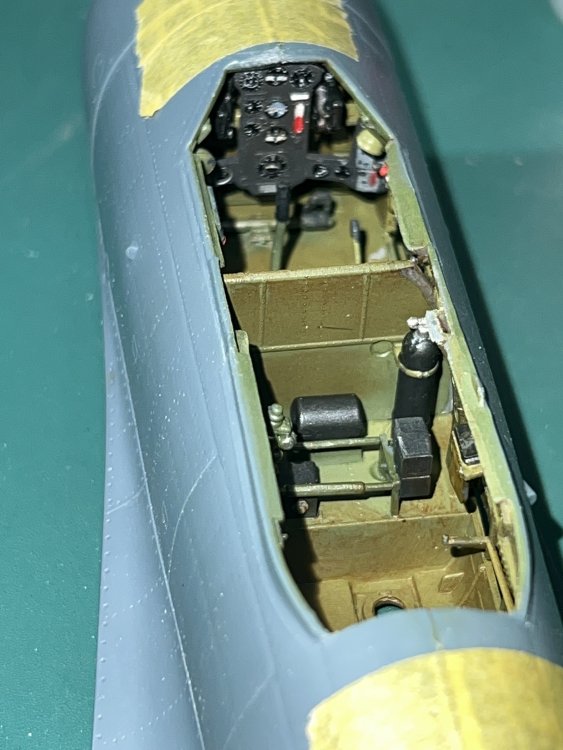
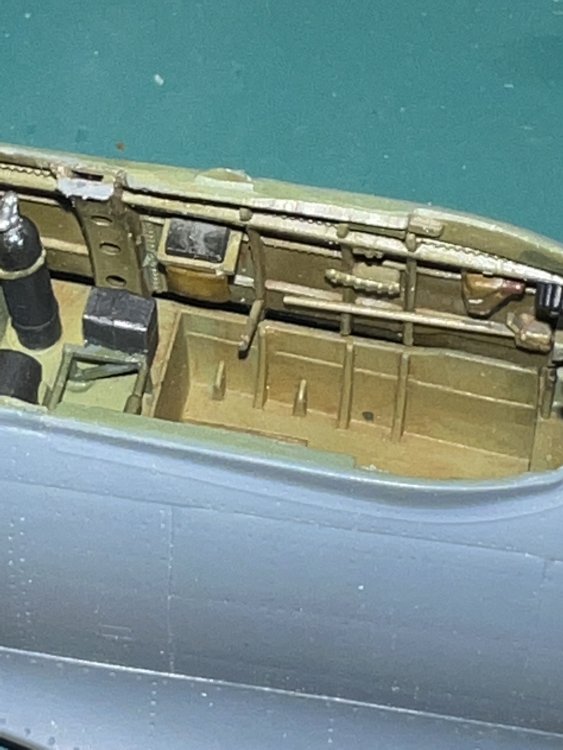
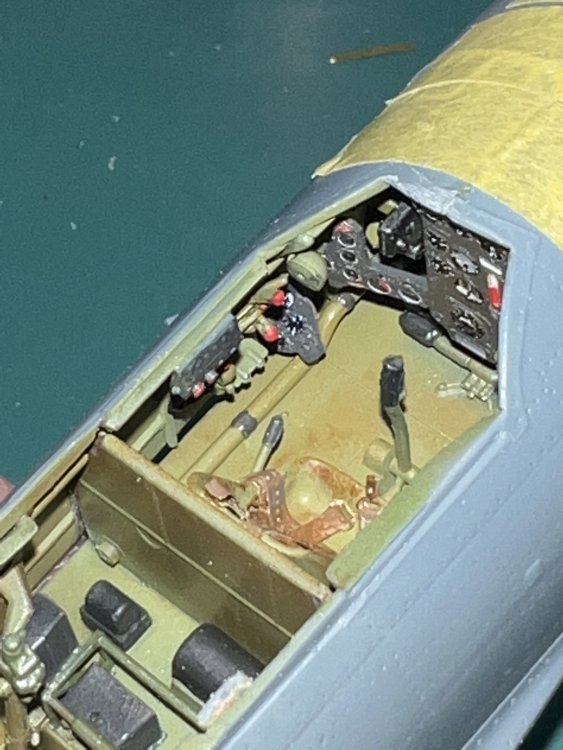
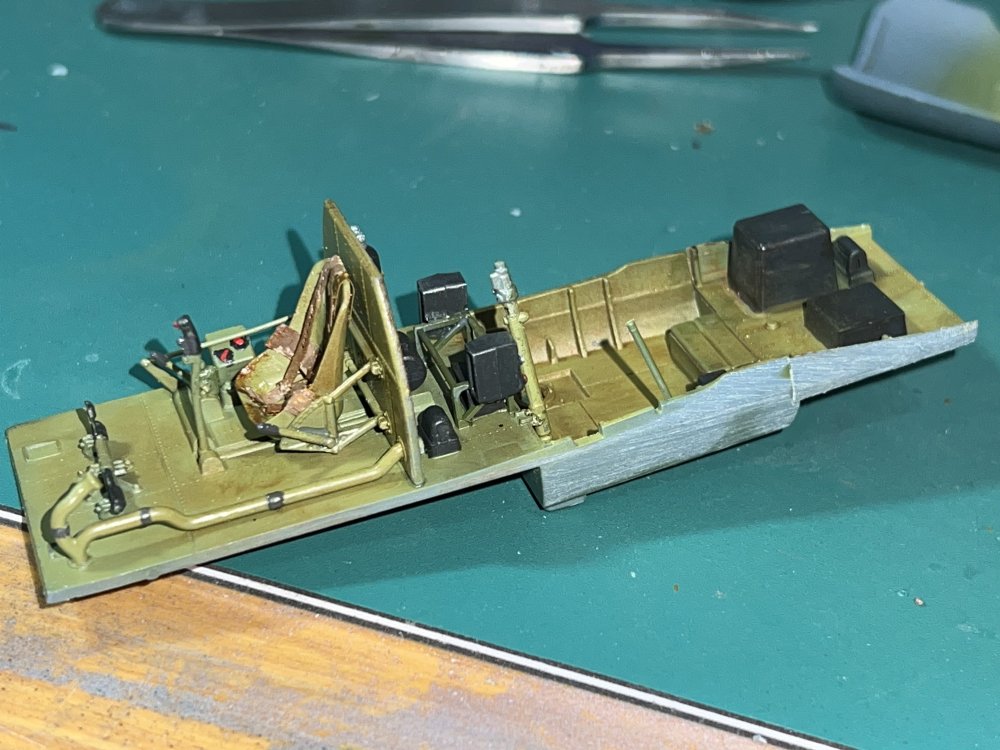
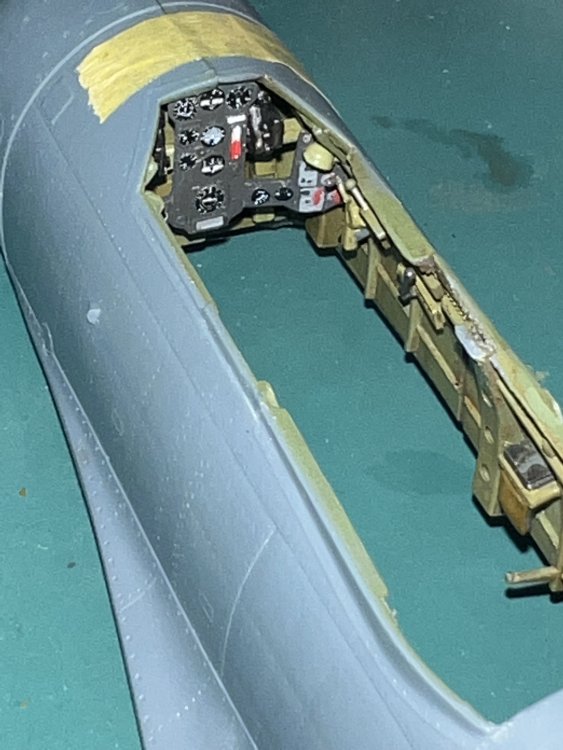
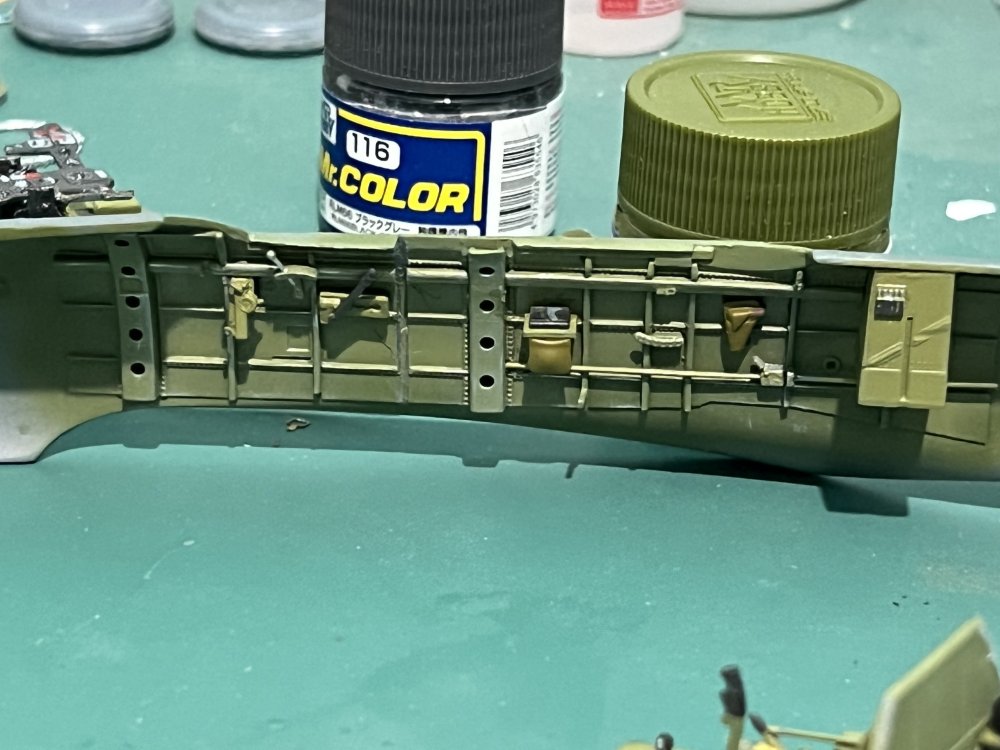
Tonight I started easing the fuselage halves together. The interior is gloriously detailed and complicated, but every single solitary part has to be added individually. I don’t have any problems with that, matter of fact, I prefer it so I can paint parts individually. I’m sure there’s going to be people who will loudly complain about that, but as far as I’m concerned, this is exactly how I wish more manufacturers would do it. Trying to pick out molded on boxes and stuff is absolutely tedious to me.


- 125 replies
-
- 11
-

-
Thanks Peter. It’s a fun build so far.
-
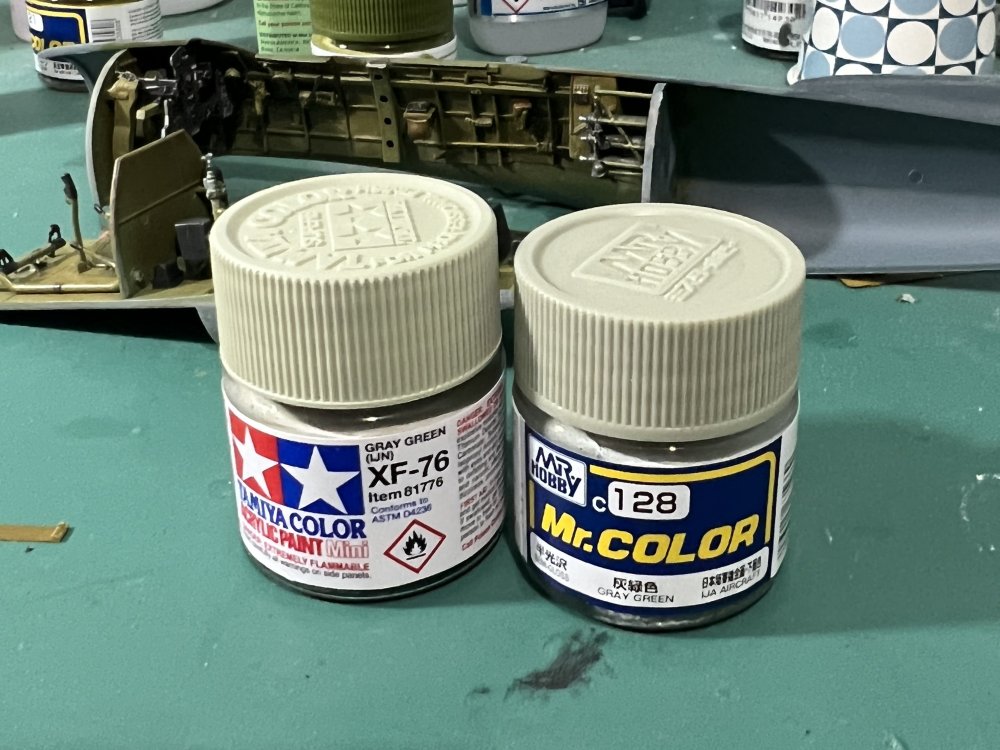
So I went to my LHS and walked out with several bottles of twos different Manufacturer’s take on IJN Grey-Green. Bith manufacturers are Japanese Companies, so I expect both poured their heart and soul into these homegrown shades. Tamiya’s XF-76 is the tried and true color that was introduced specifically for Tamiya’s 1/32 A6M2. Gunze’s C128 appears to be a fairly new release on IJN grey-green. so we will do a couple test sprays and compare.
-
I had mixed my RAzf interior green using ratios I got off od Britmodeler, and it was indistinguishable from Modelmaster
-
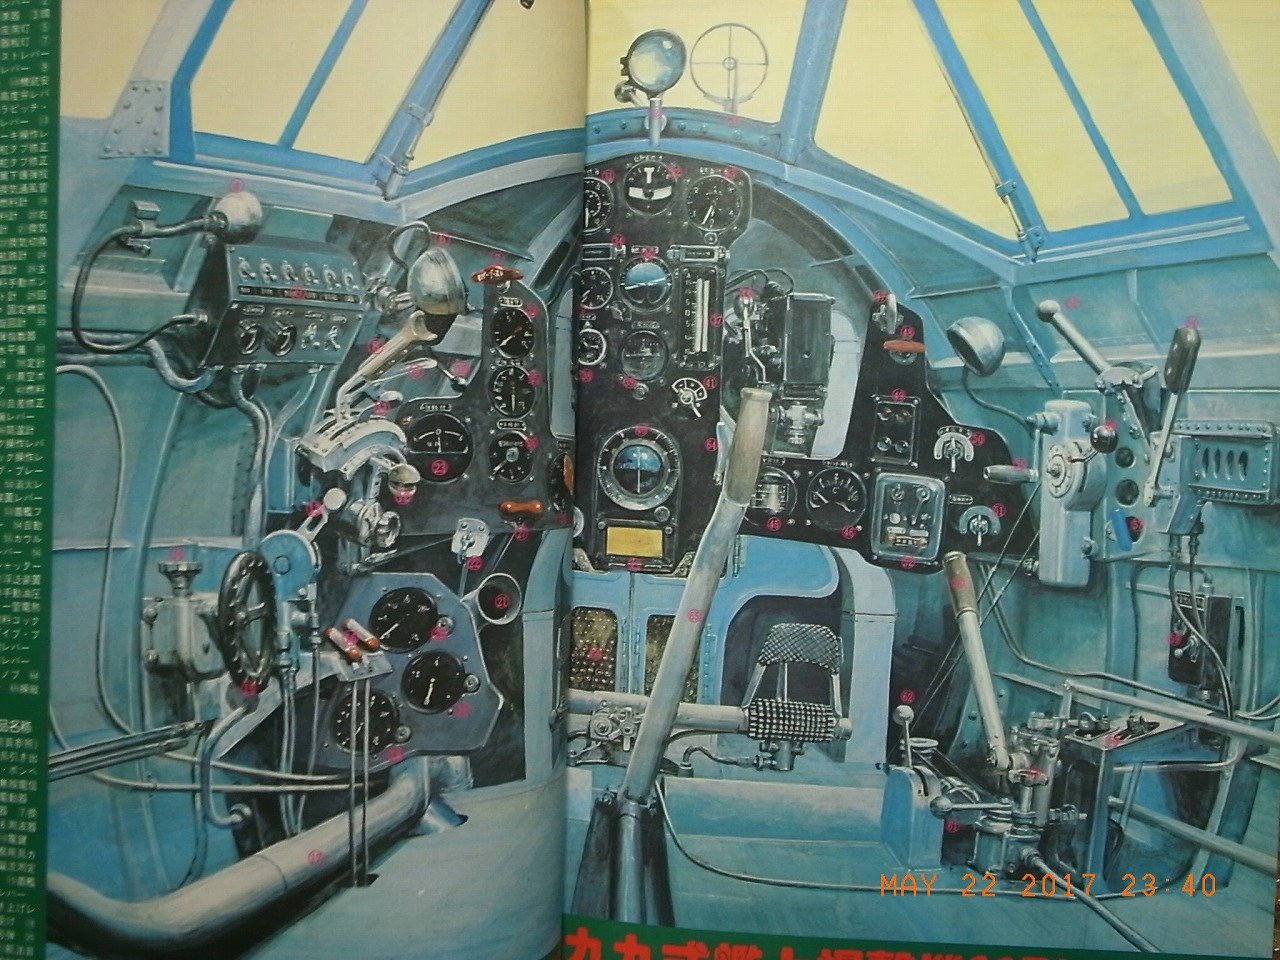
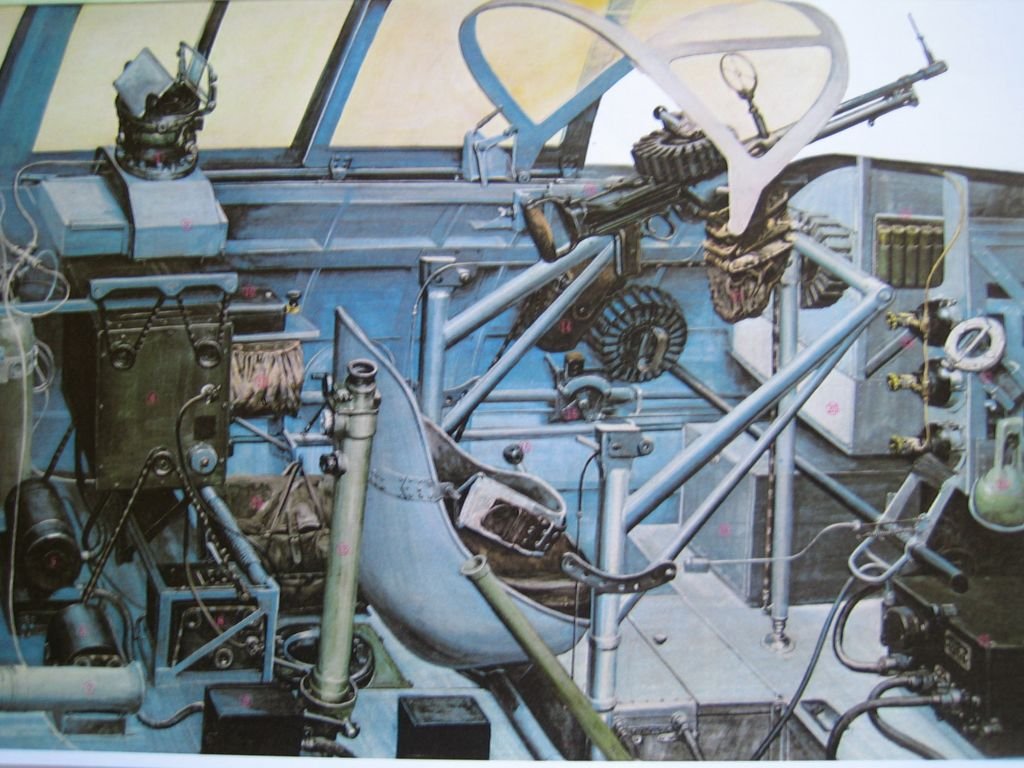
Yes, I have the same booklet. It IS informative. But it’s amazing how so very little is actually known about the particulars of this design. And yes, simply be requesting it. No charge at all, but you need to personally request it from Ryan Toews.
-
What do y’all use for the early war Japanese aircraft? I’ve heard some say Gunze’s interpretation of RLM02 is a really decent starting point. Of course, there’s also Tamiya’s XF-76… What y’all think?
-
So the age old question… which Grey-green? I’ve heard three possibilities: 1. Tamiya XF-76 2. Gunze’s RLM02 3. Floquil Concrete. Well, Floquil is made of unobtainium, and both of the other two look pretty good. Comments?
-
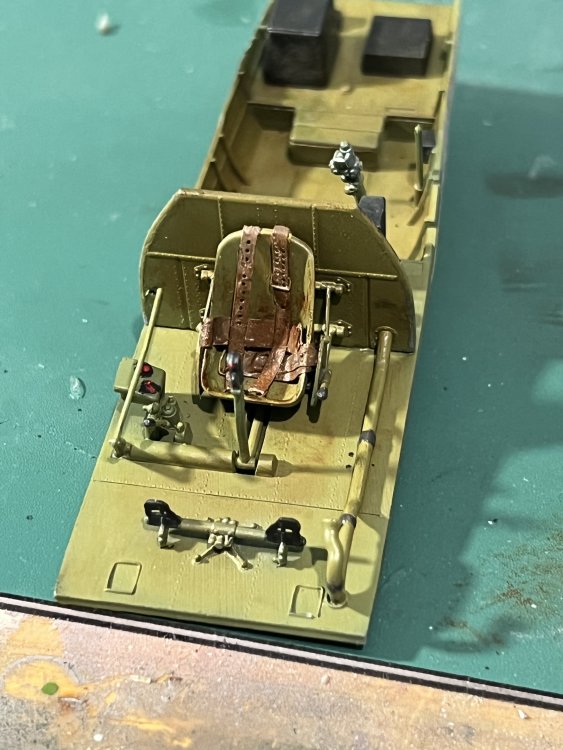
The cockpit looks suitably busy. Started with a few oils and dirt to dirty it up a bit. I’d say it’s a bit much, so a mice wash with turpenoid dulls it all up. One thing to remember with Japanese D3A aircraft: up until mid 1941, the aircraft were natural metal with red fins and meatballs with no white band. Mid 1941, they were repainted at the Squadron level with the grey-green and a clear lacquer protection applied over top. Stencils we’re masked and still appeared over bare metal. NO primer was used. Paint applied directly to the skin.


-
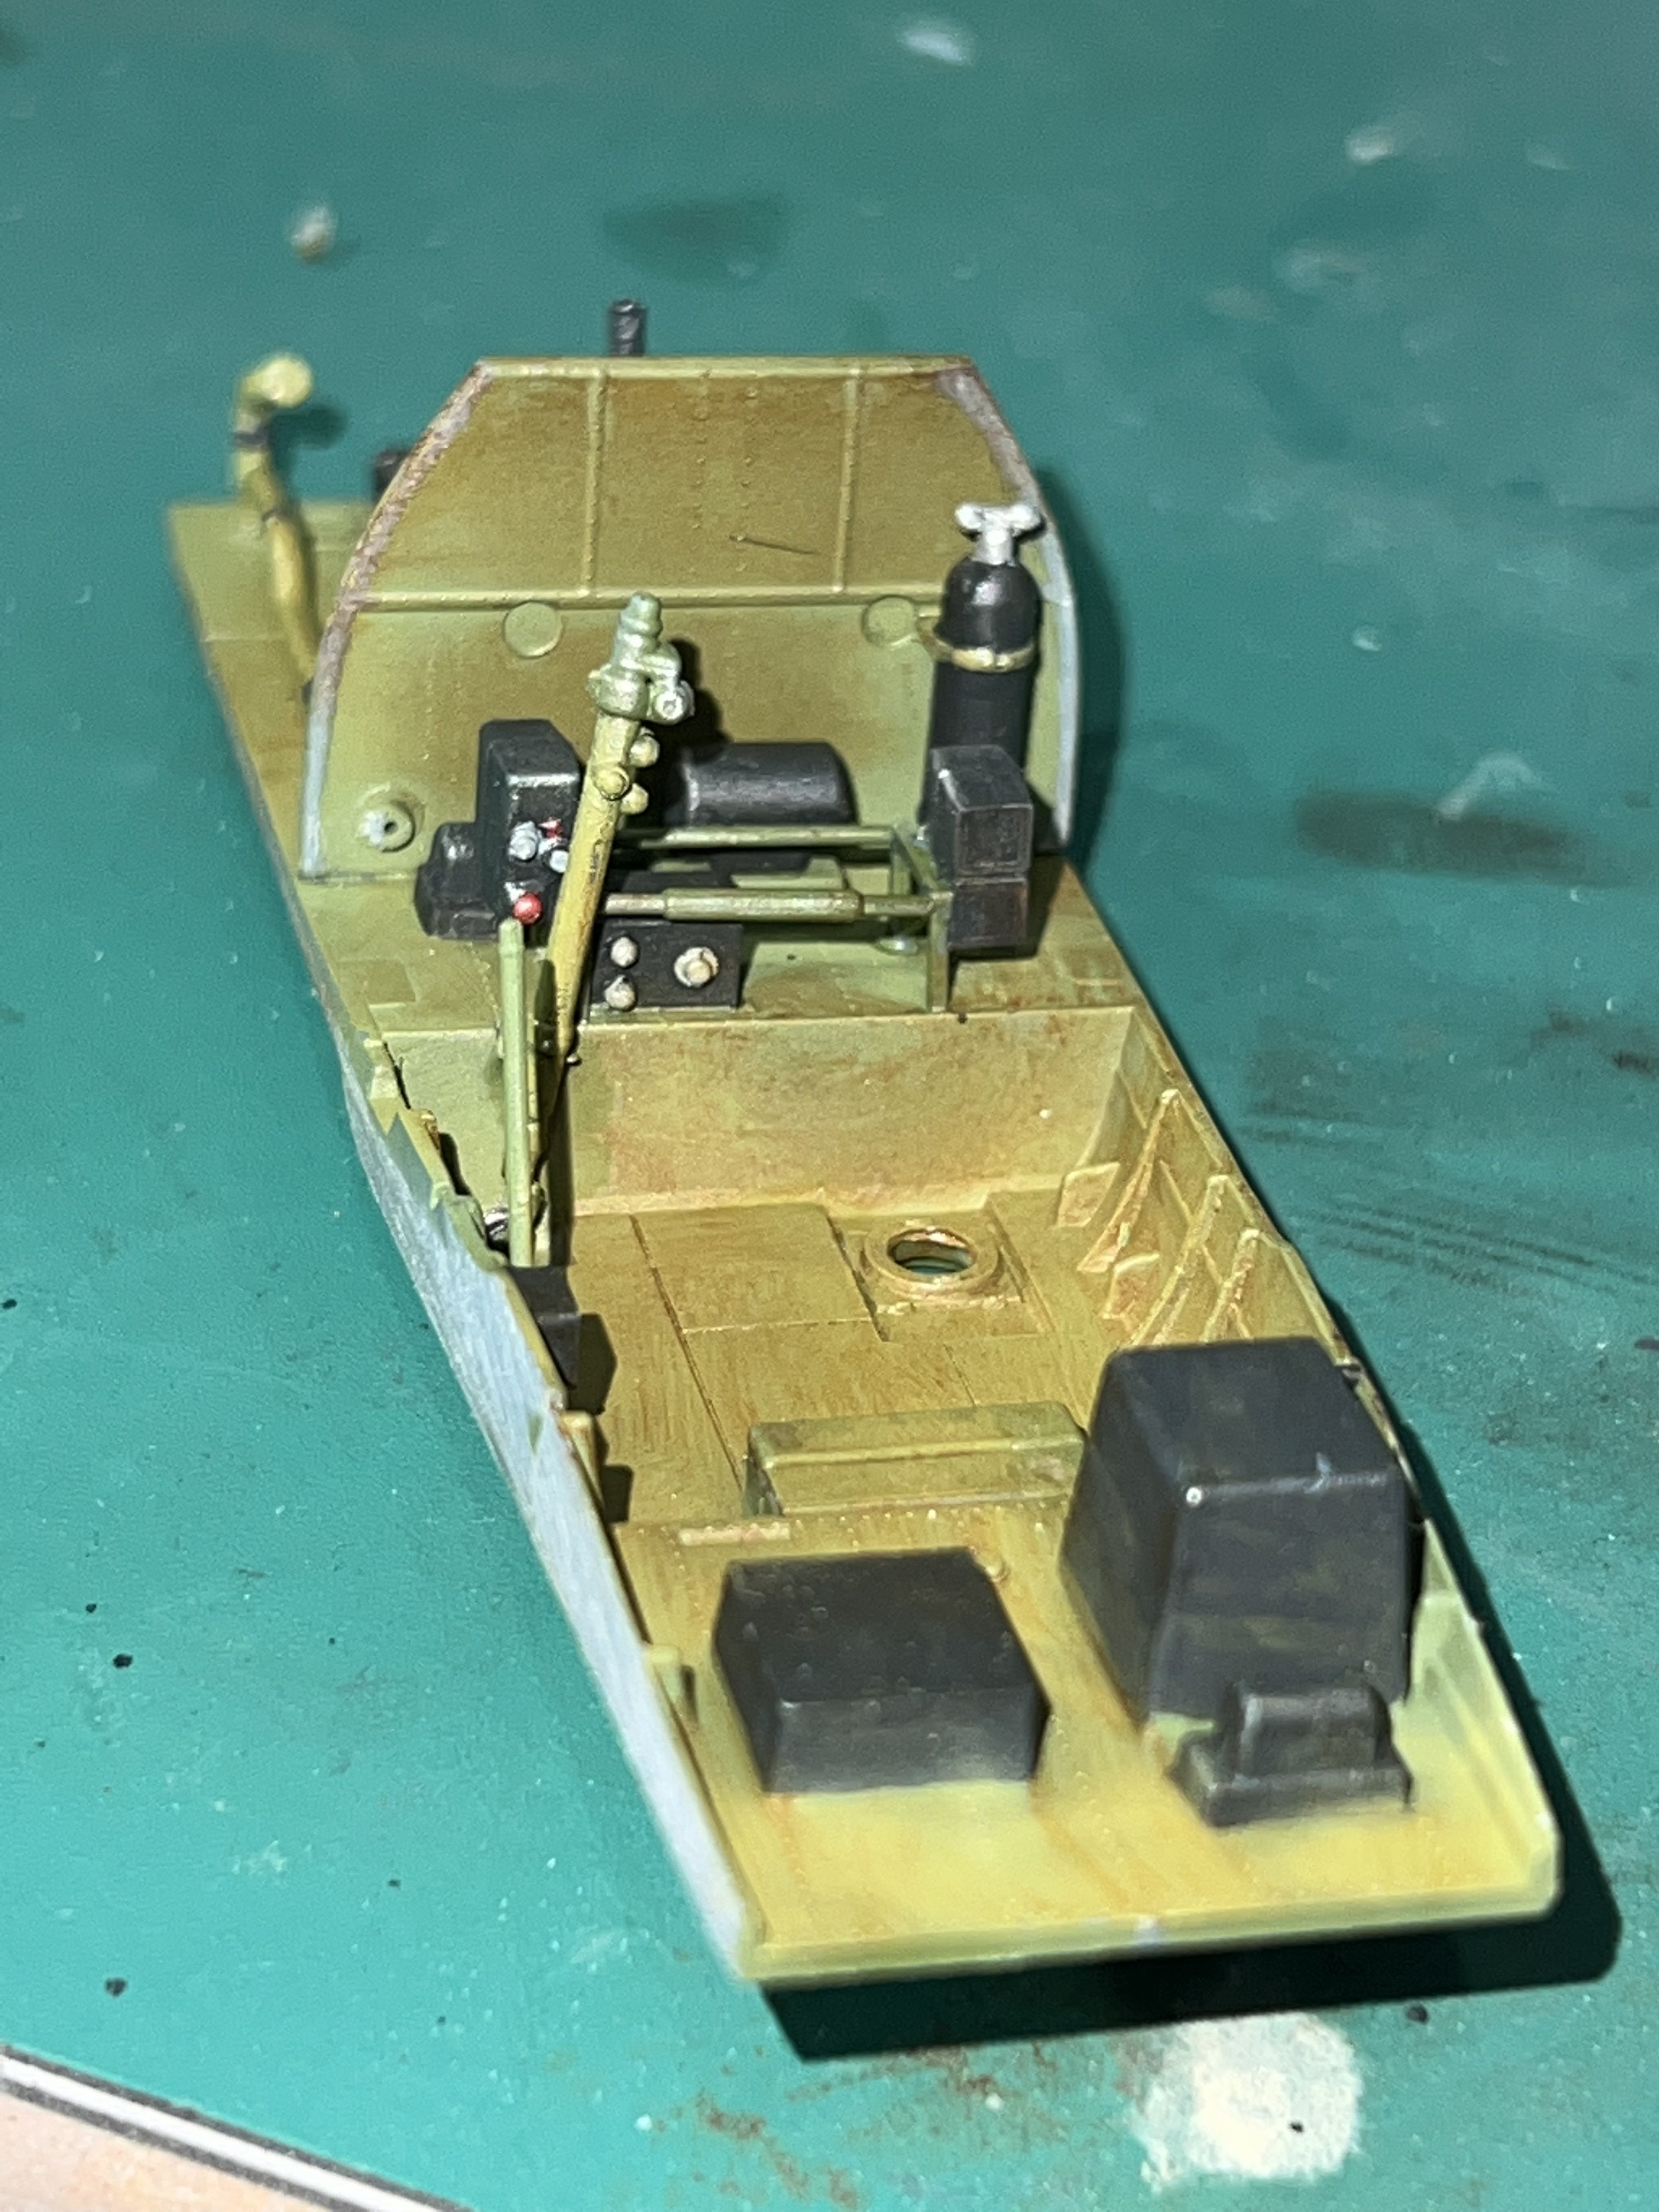
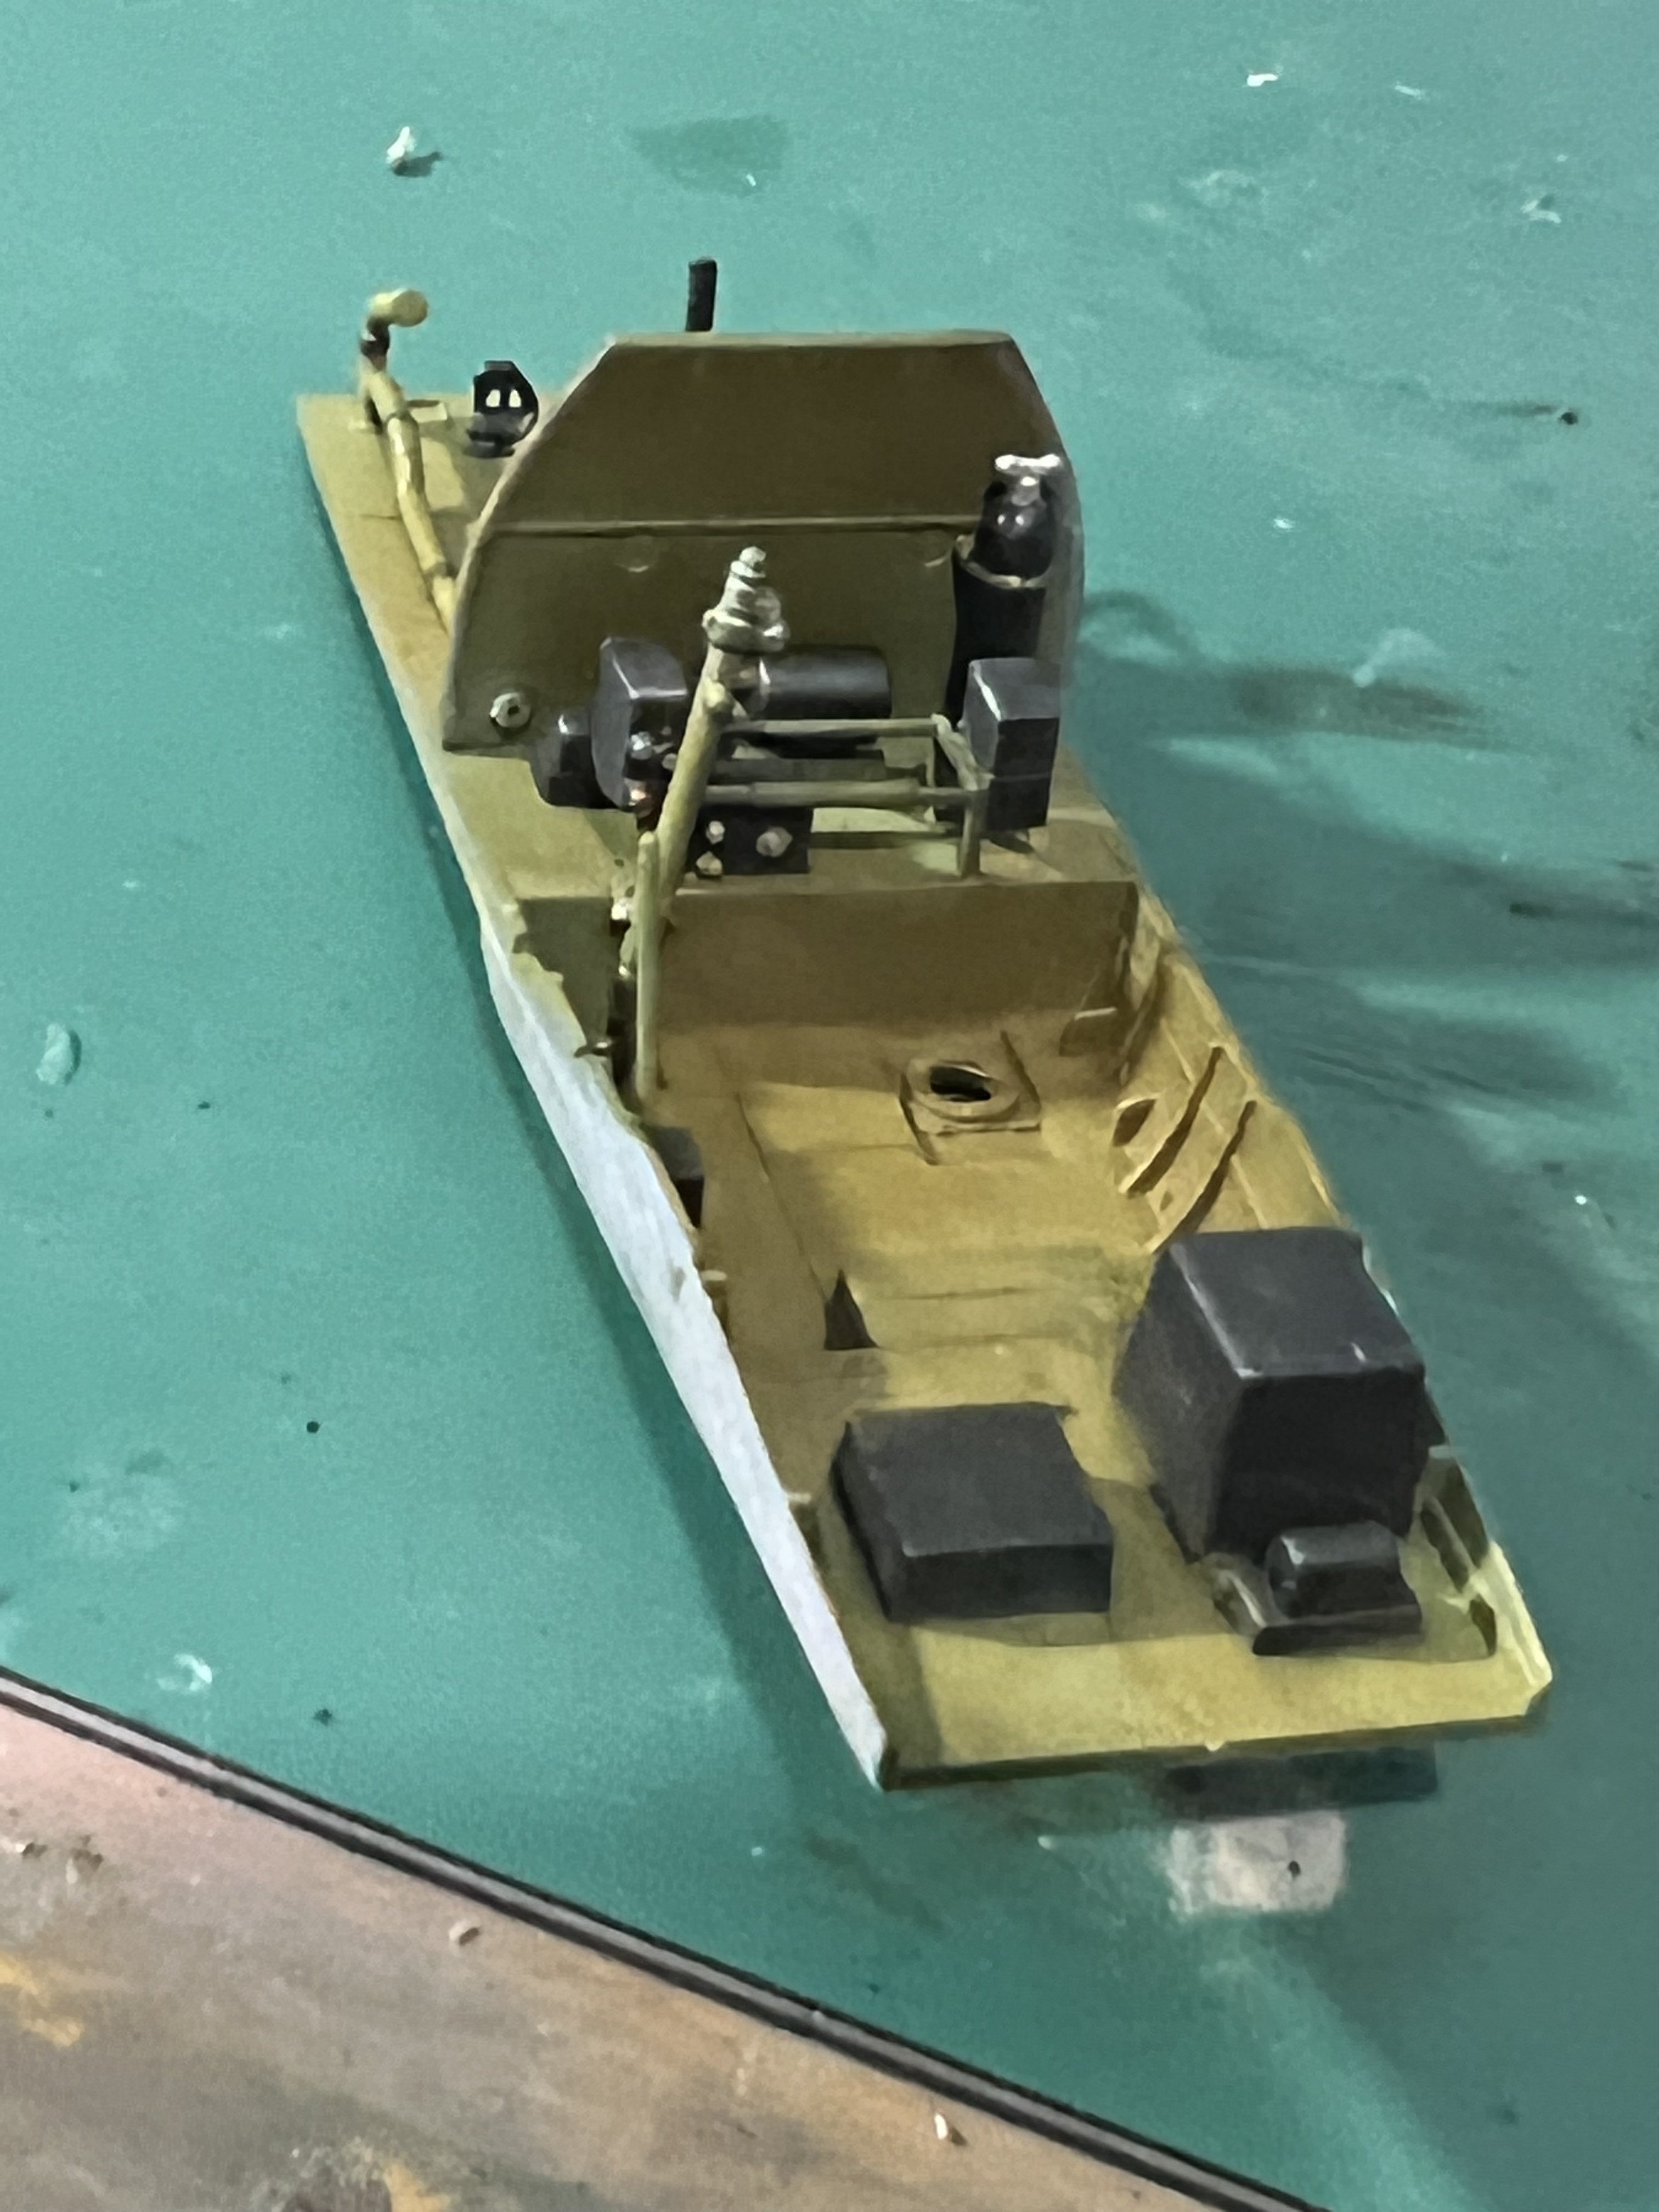
My advice? Just keep adding parts until there are no more to add. Lots of touch ups to do, followed by a decent oil wash.
-
Revell/Dragon Me-110 1/32
Clunkmeister replied to KevinM's topic in LSM 1/35 and Larger Work In Progress
I believe Brett agreed published a revision of the instructions on Hyperscale several years ago. And it’s available for download if you search Wingtech 1/32 Bf-110 instructions corrections. Matter of fact, here it is: https://www.hyperscale.com/2008/features/bf110c732erratabg_1.htm -
Revell/Dragon Me-110 1/32
Clunkmeister replied to KevinM's topic in LSM 1/35 and Larger Work In Progress
This looks great, Kevin! Regarding Dragon’s original boxing of the kit, there were misnumbered parts, vague placement of items in the cockpit, and worst of all, the nacelle pieces are handed, as in they only fit one side of the airplane, and Dragon doesn’t advise on that. As a result, if you accidentally reverse the numbers back, the nacelles won’t fit at all, and you had a major putty and sand adventure ahead of you. -
Good LORD, Ron, this is Gorgeous work! I have to live vicariously through y’all when it comes to armor, because I absolutely, truly SUCK with armor. I was ok 30 years ago, but I lost my AFV drive long ago. Just the thought of dealing with those guide horns gives me a migraine!
-
I’m having a peek… 😄
-
Dang! I may need to revisit those gun insert gaps!