
Clunkmeister
-
Posts
7,200 -
Joined
-
Last visited
Content Type
Profiles
Forums
Events
Gallery
Everything posted by Clunkmeister
-

-

Infinity Models 1/32 D3A1 “Val” dive bomber by HPH.
Clunkmeister replied to Clunkmeister's topic in Aircraft Reviews
I must be the only guy in the world who is not sent into hot flashes by the Beaufighter. To me, it’s cool and all, but I also remember people talking about it as a widowmaker. A very large number of crews set out in one, doing U-Boat suppression patrols, and just plain disappeared. No log references from U Boat Commanders or German radio intercepts, nothing. Liberators may have occasionally been the losers in some gunfights with U Boats, (not normally, though) but they generally made a big enough of a stink that U Boat Commanders were able to talk to their bases. -
Infinity Models 1/32 D3A1 “Val” dive bomber by HPH.
Clunkmeister replied to Clunkmeister's topic in Aircraft Reviews
Martin, I think this kit is gonna be a winner for Infinity. Talk about a license to print money! -
Rog, political and openly religious posts are not supposed to be on the public part of the forum. We DID do a Ukraine GB, but it was all encompassing. Maybe a mistake? Who knows, but it brought in new builders who had never been here before. I know there are comments about this and that regarding AM and kitmakers in that part of the world, but I, for one, buy from manufacturers on both sides. As far as religion, what do you refer? Personally, I say “I pray” this or that, but it’s a figure of speech. Or “I’m feeling blessed” as in something great happened, or whatever. We have a Christmas raffle. We wish Happy Easter. ’m praying for your fast recovery”, etc. If I’m missing something, let me know. Please. We build models of warplanes and armor. Plus ships, etc. that by their very nature are “political” as they have National markings. I personally despise what the crooked cross has become. But our models feature it. Please do me a favor. If you see something, say something. PM me, please. What I may see as an innocent comment, others may see as unwise. I can’t be everywhere, and neither can anyone else. We added two Global Mods to help Fran, Jeroen, and I in our jobs. We want LSM to be an inviting forum for all. Whatever Nationality, Creed, Color, Male, Female, everything. Nobody’s perfect, so please help us out!
-
Take a look and chime in.
- 1 reply
-
- 1
-

-
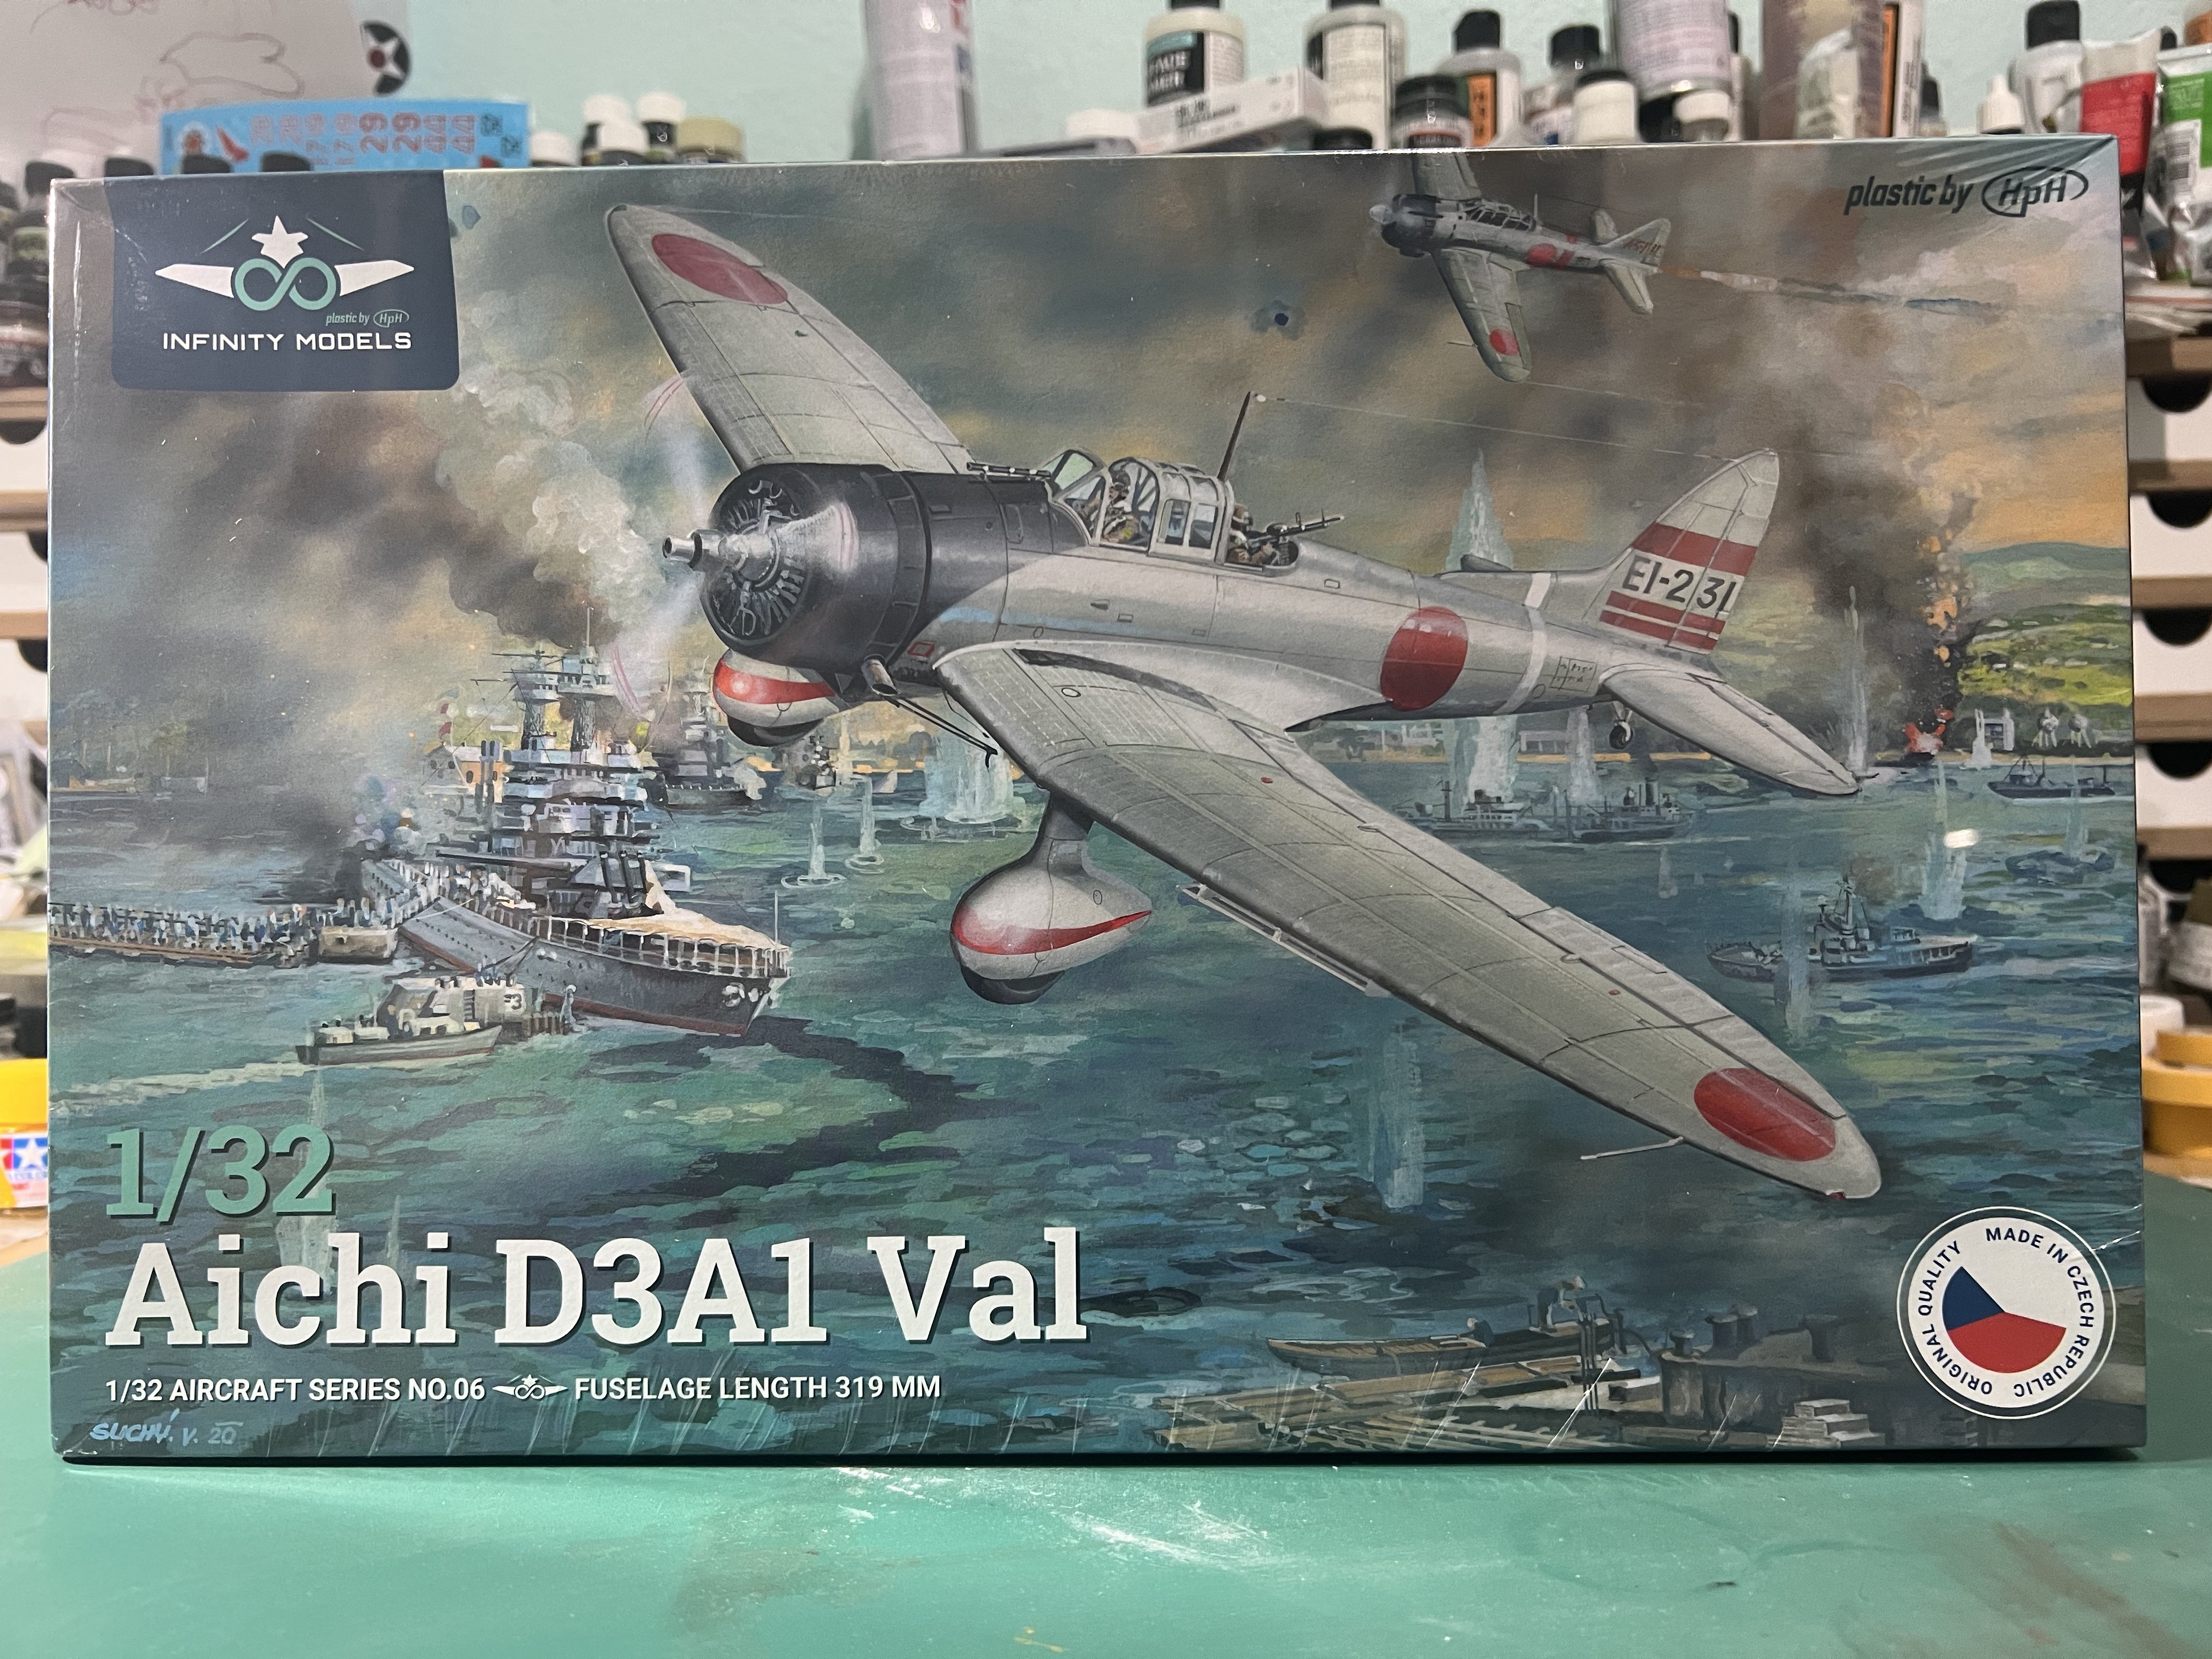
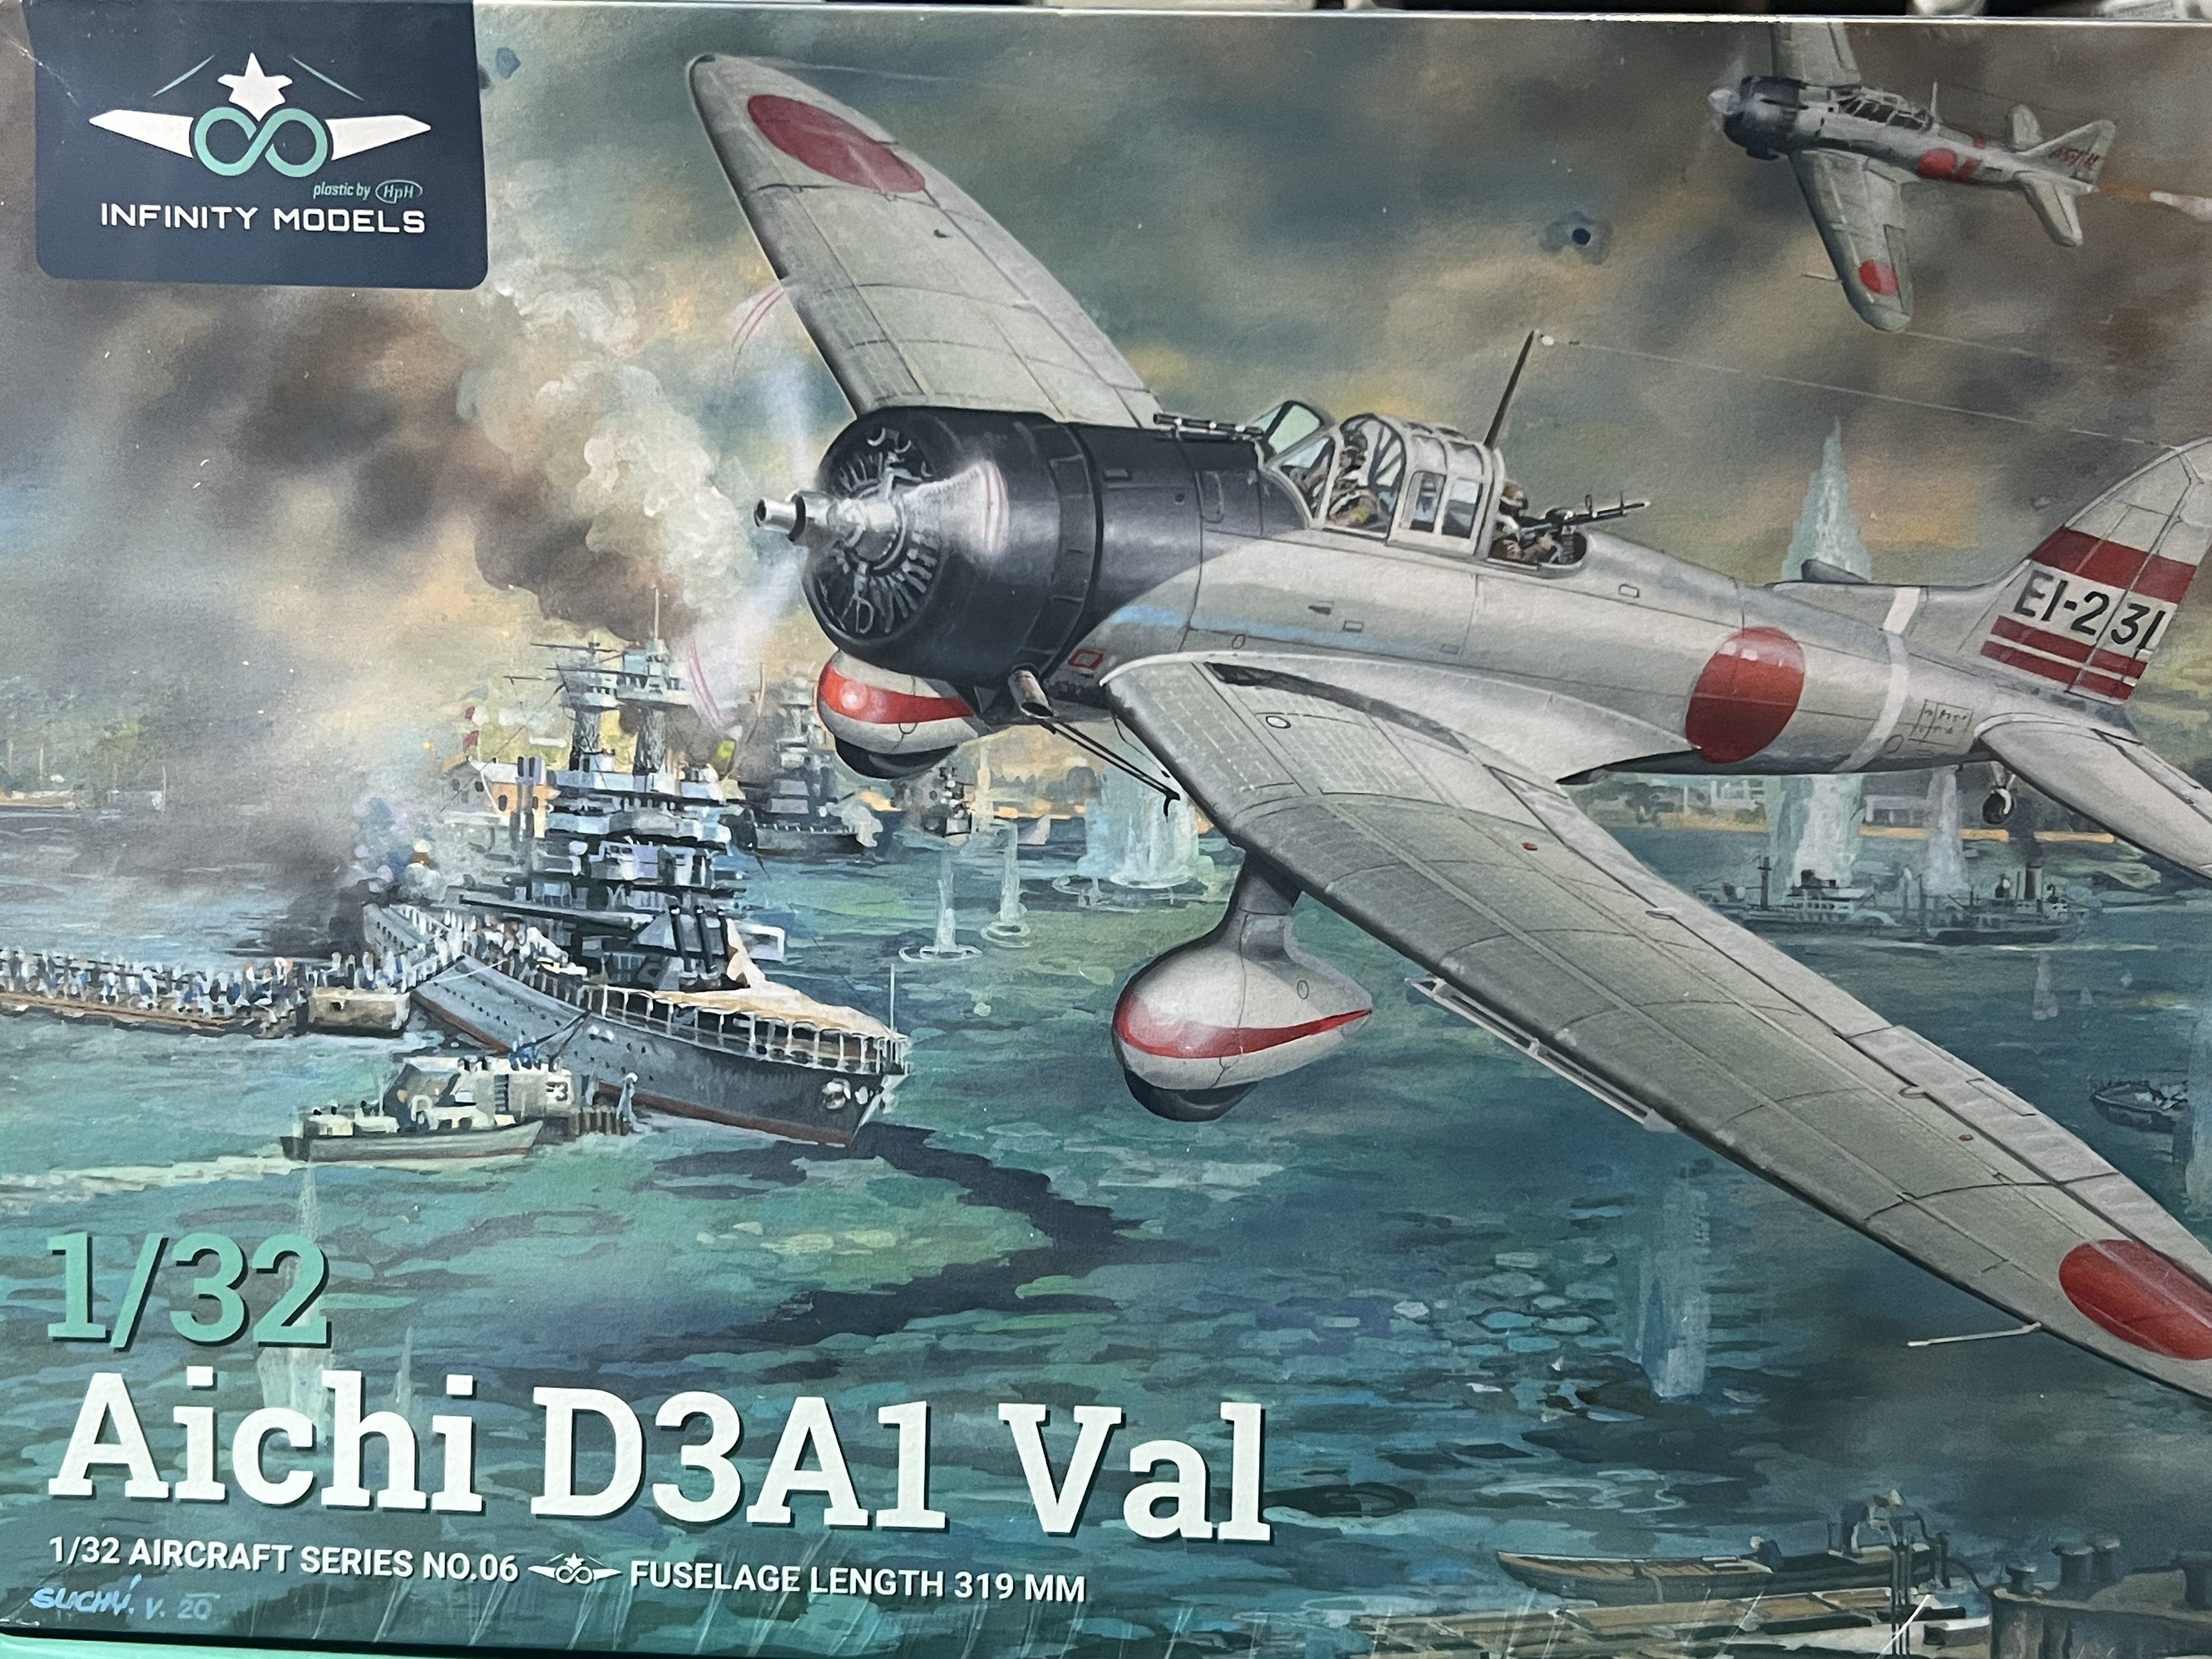
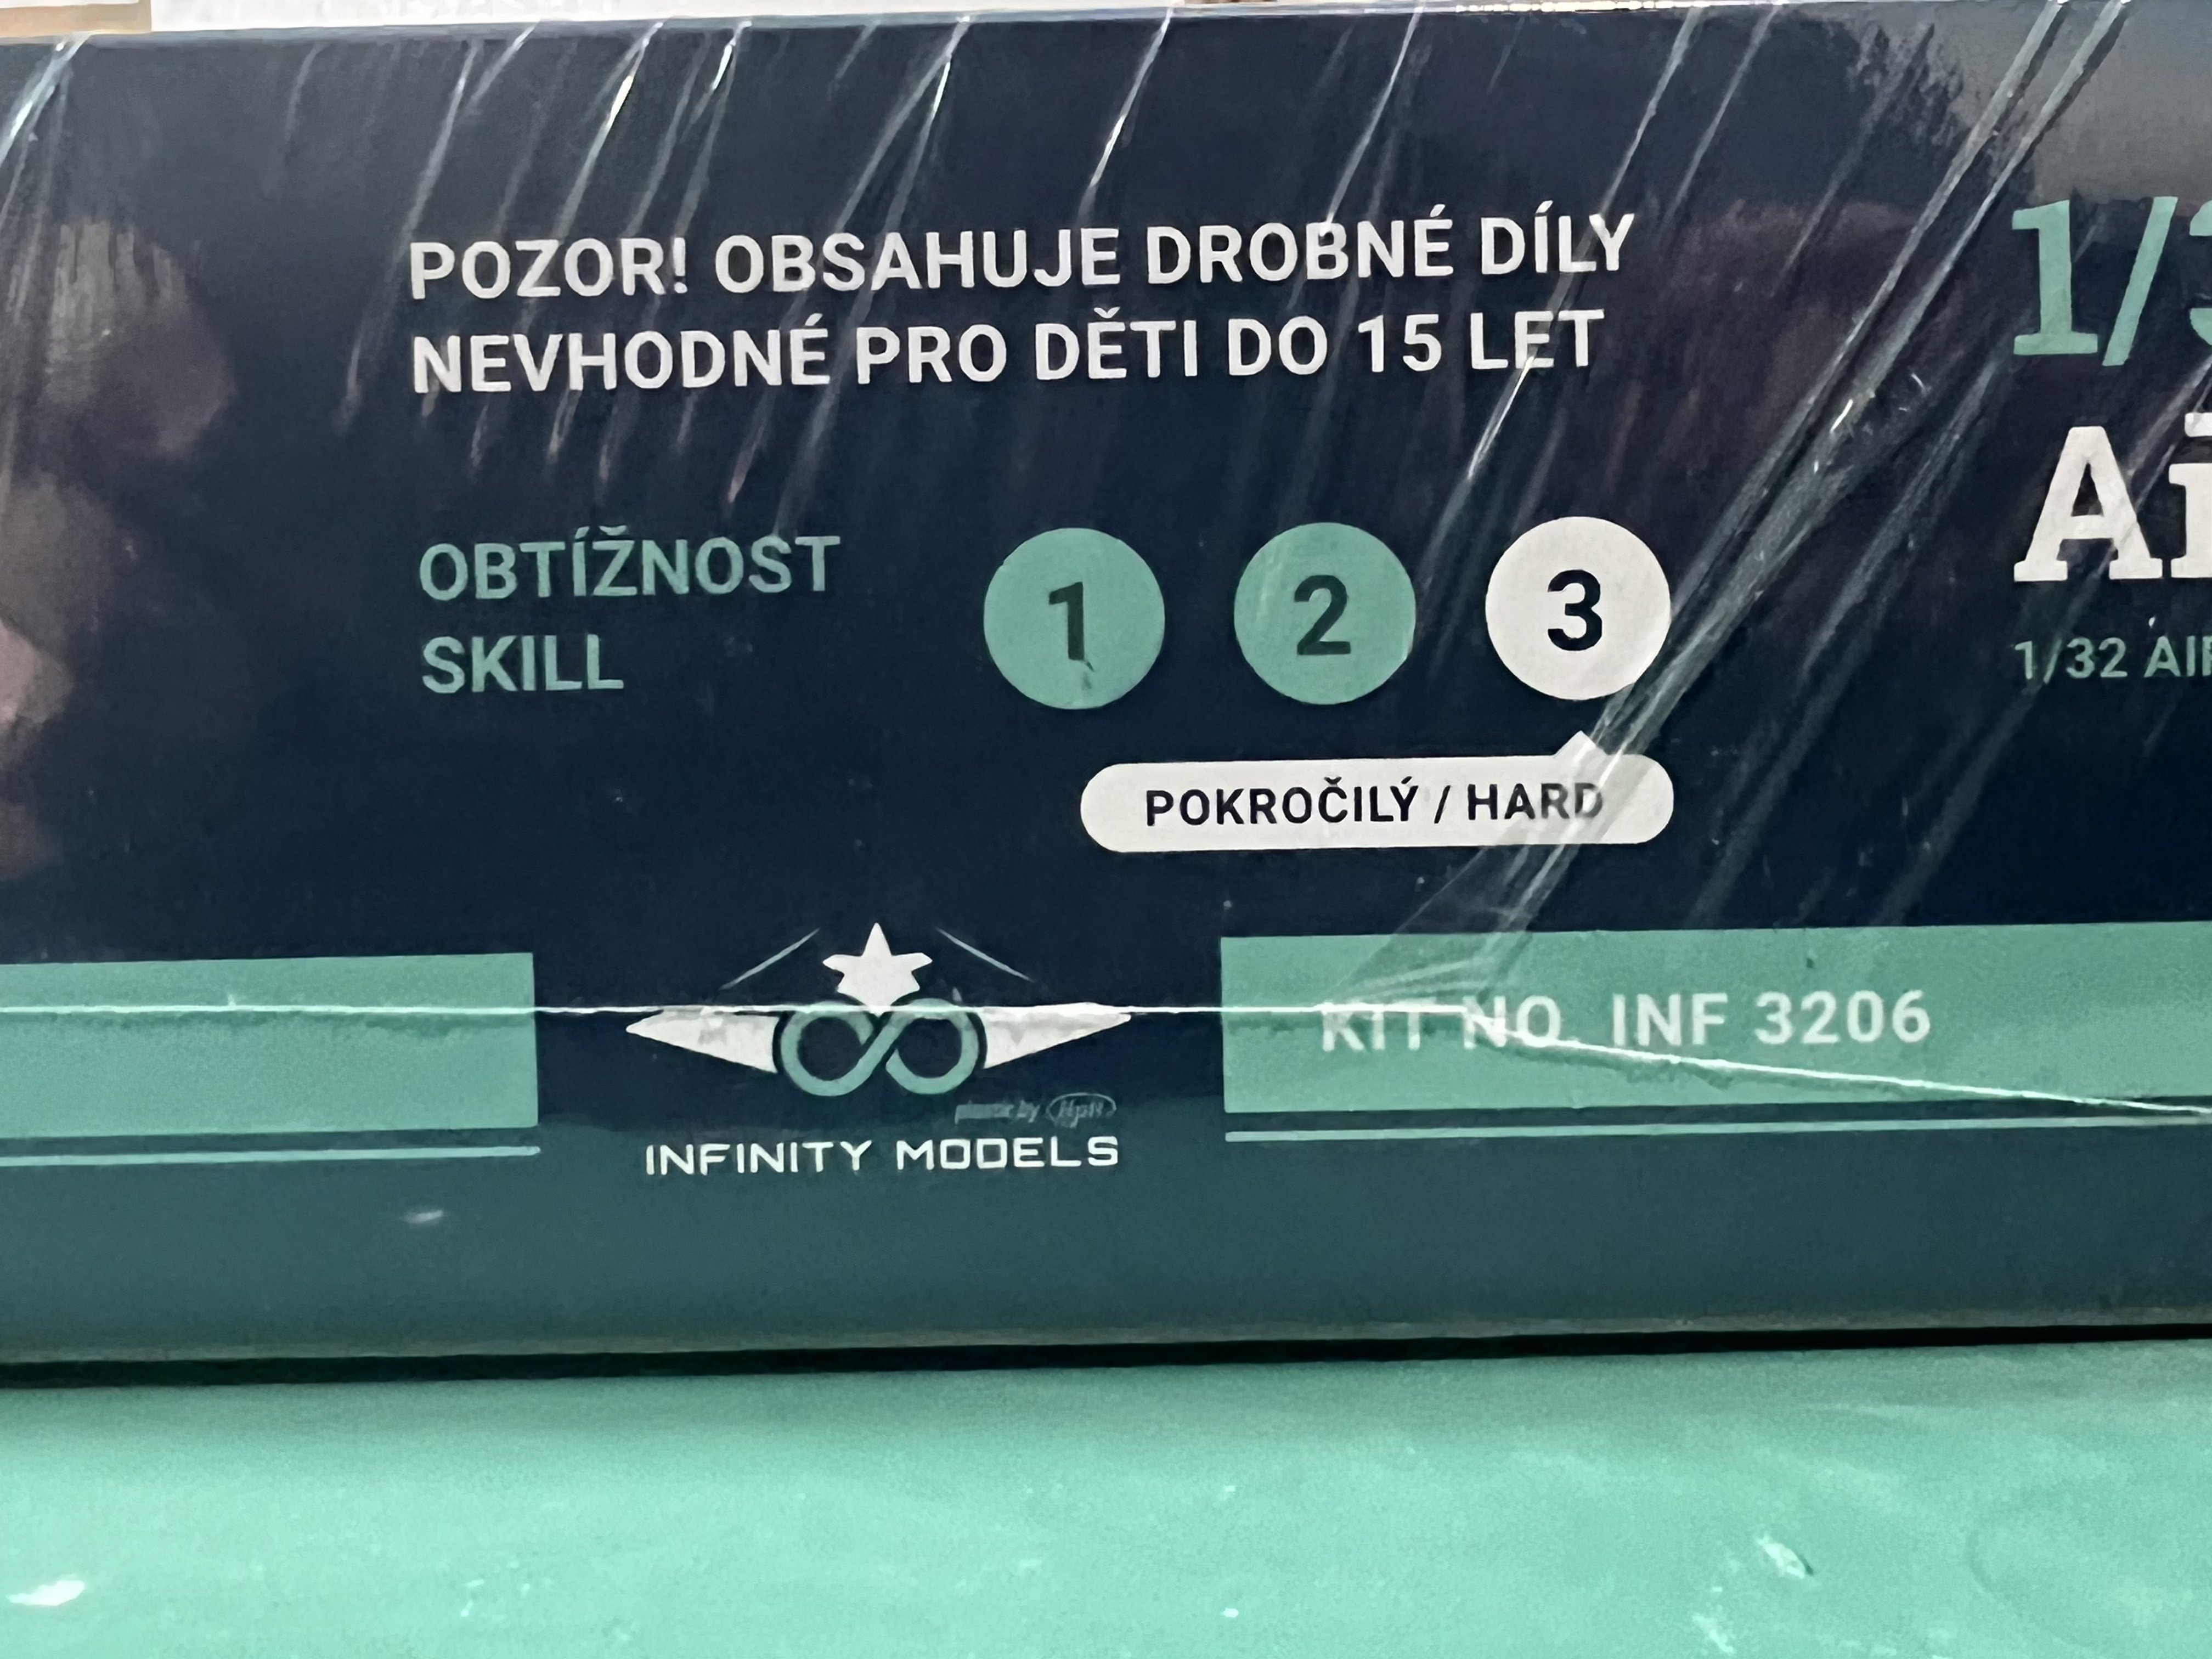
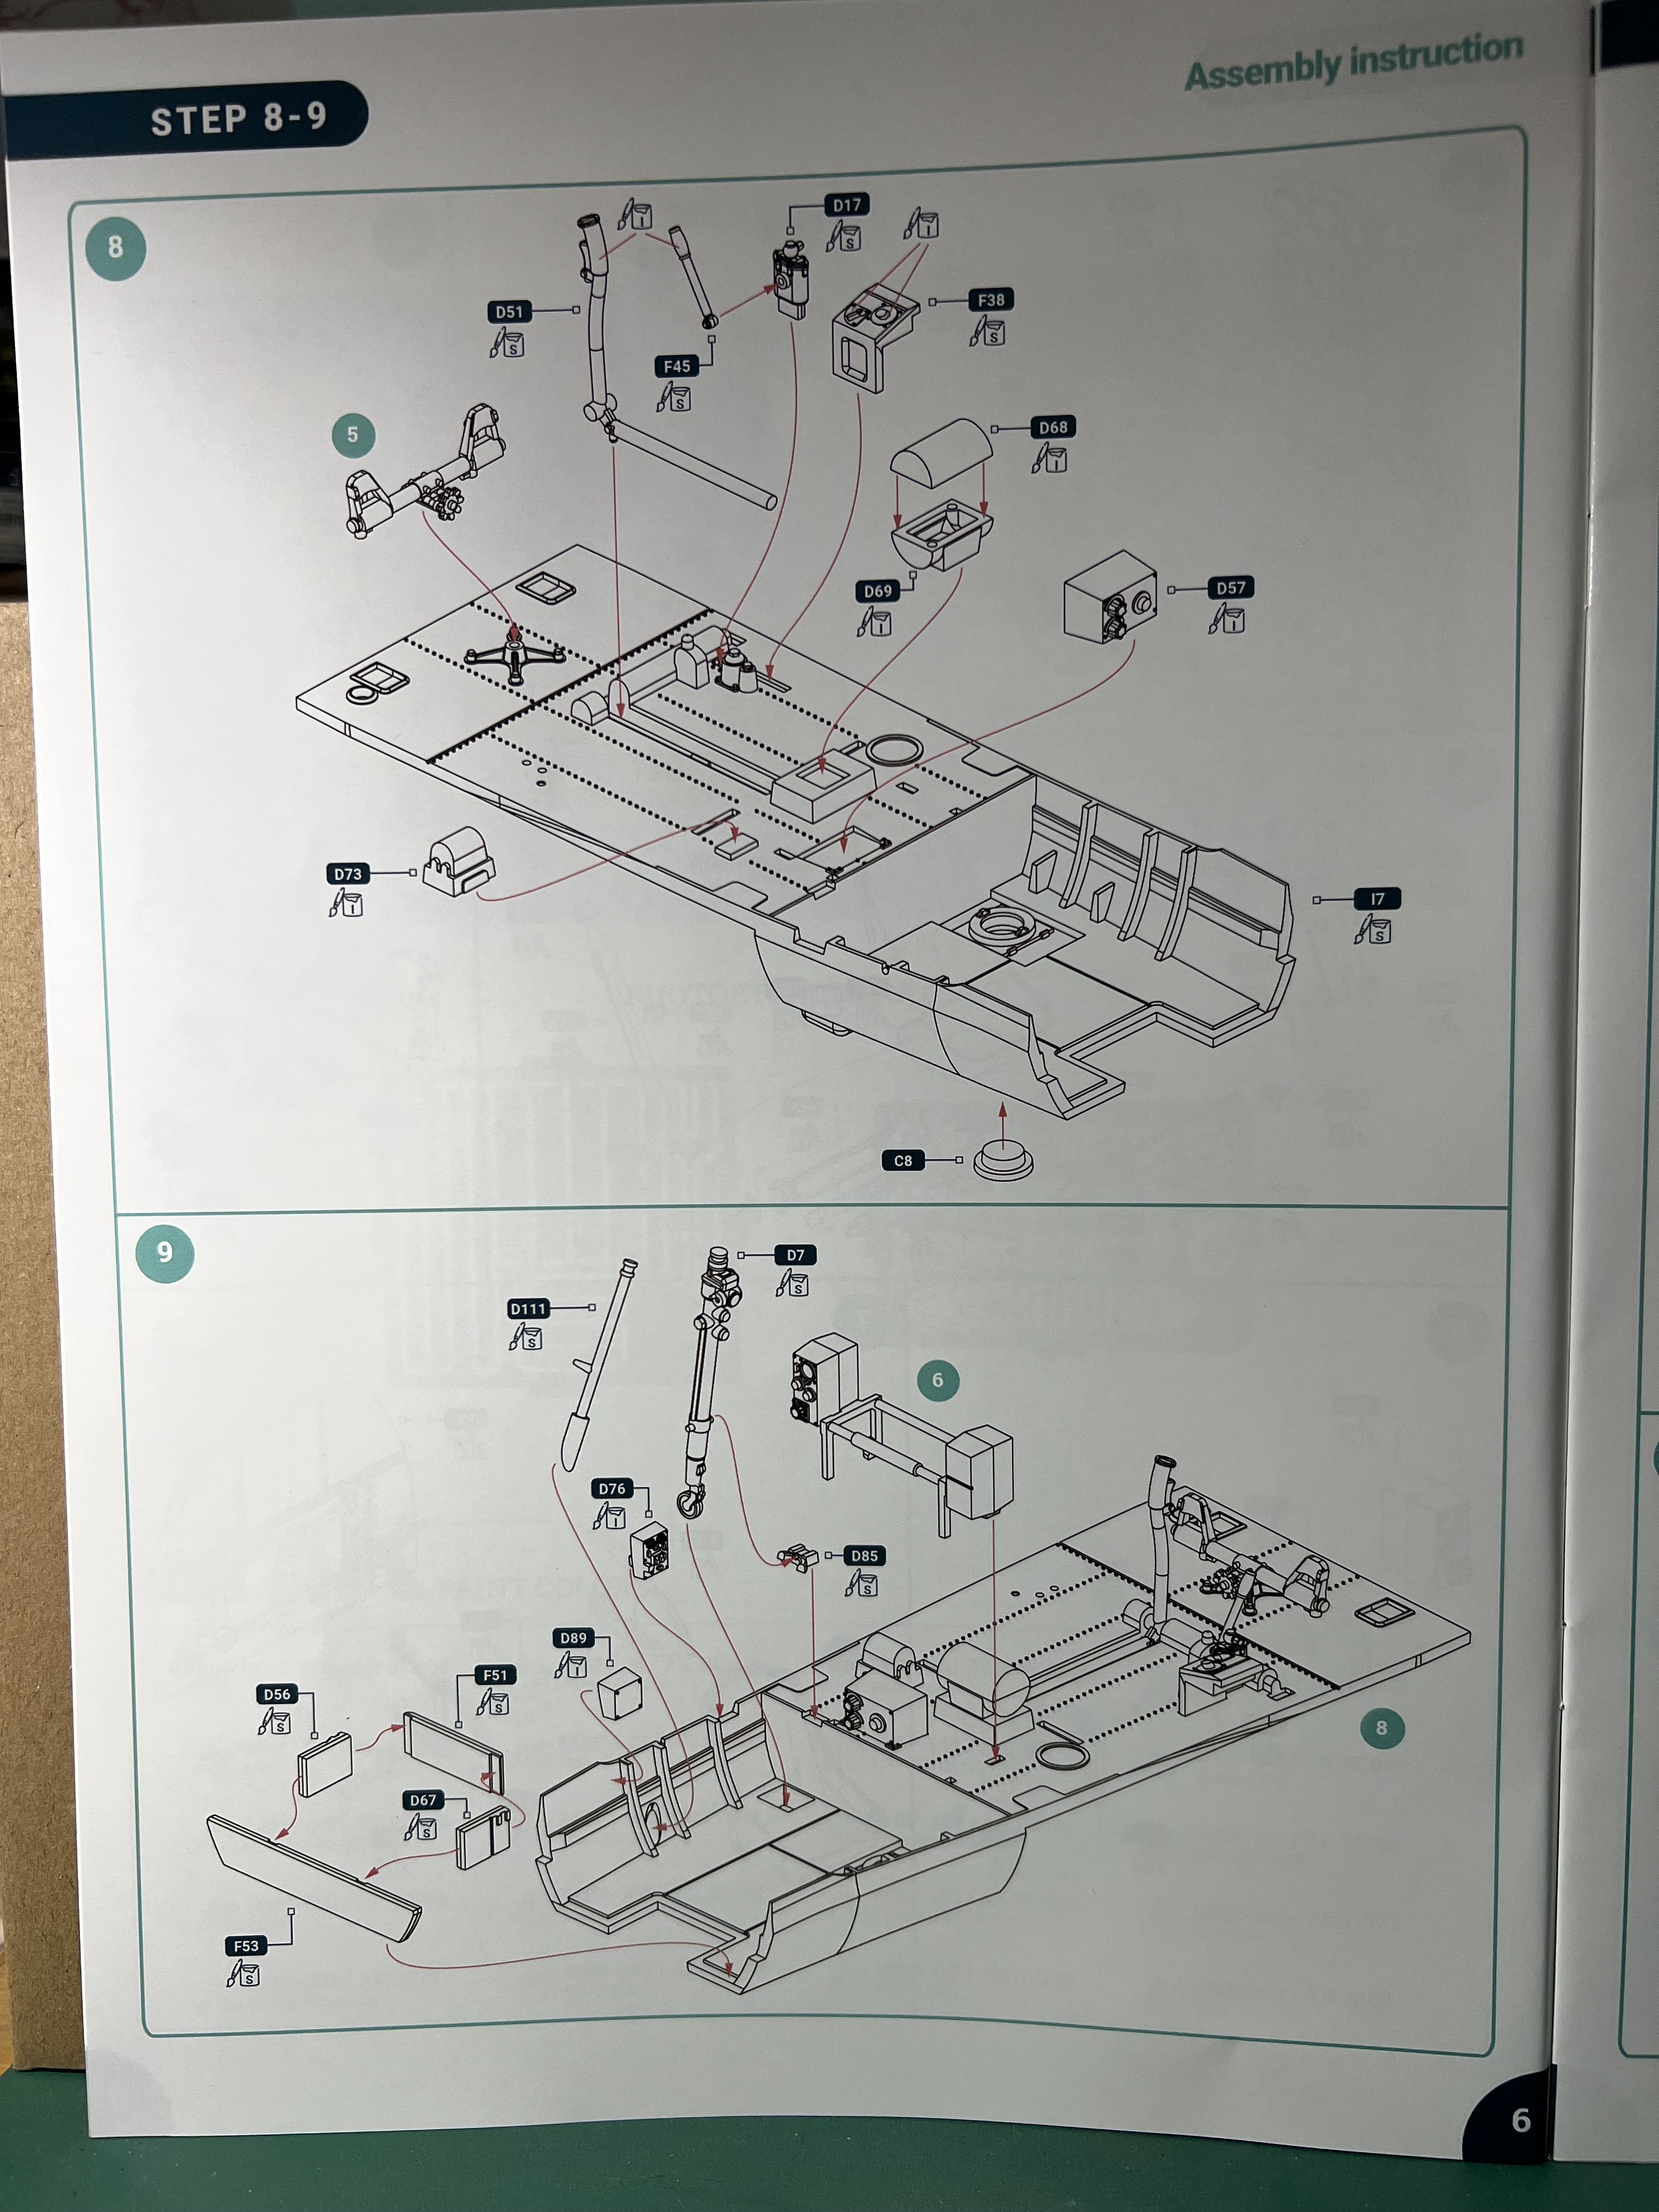
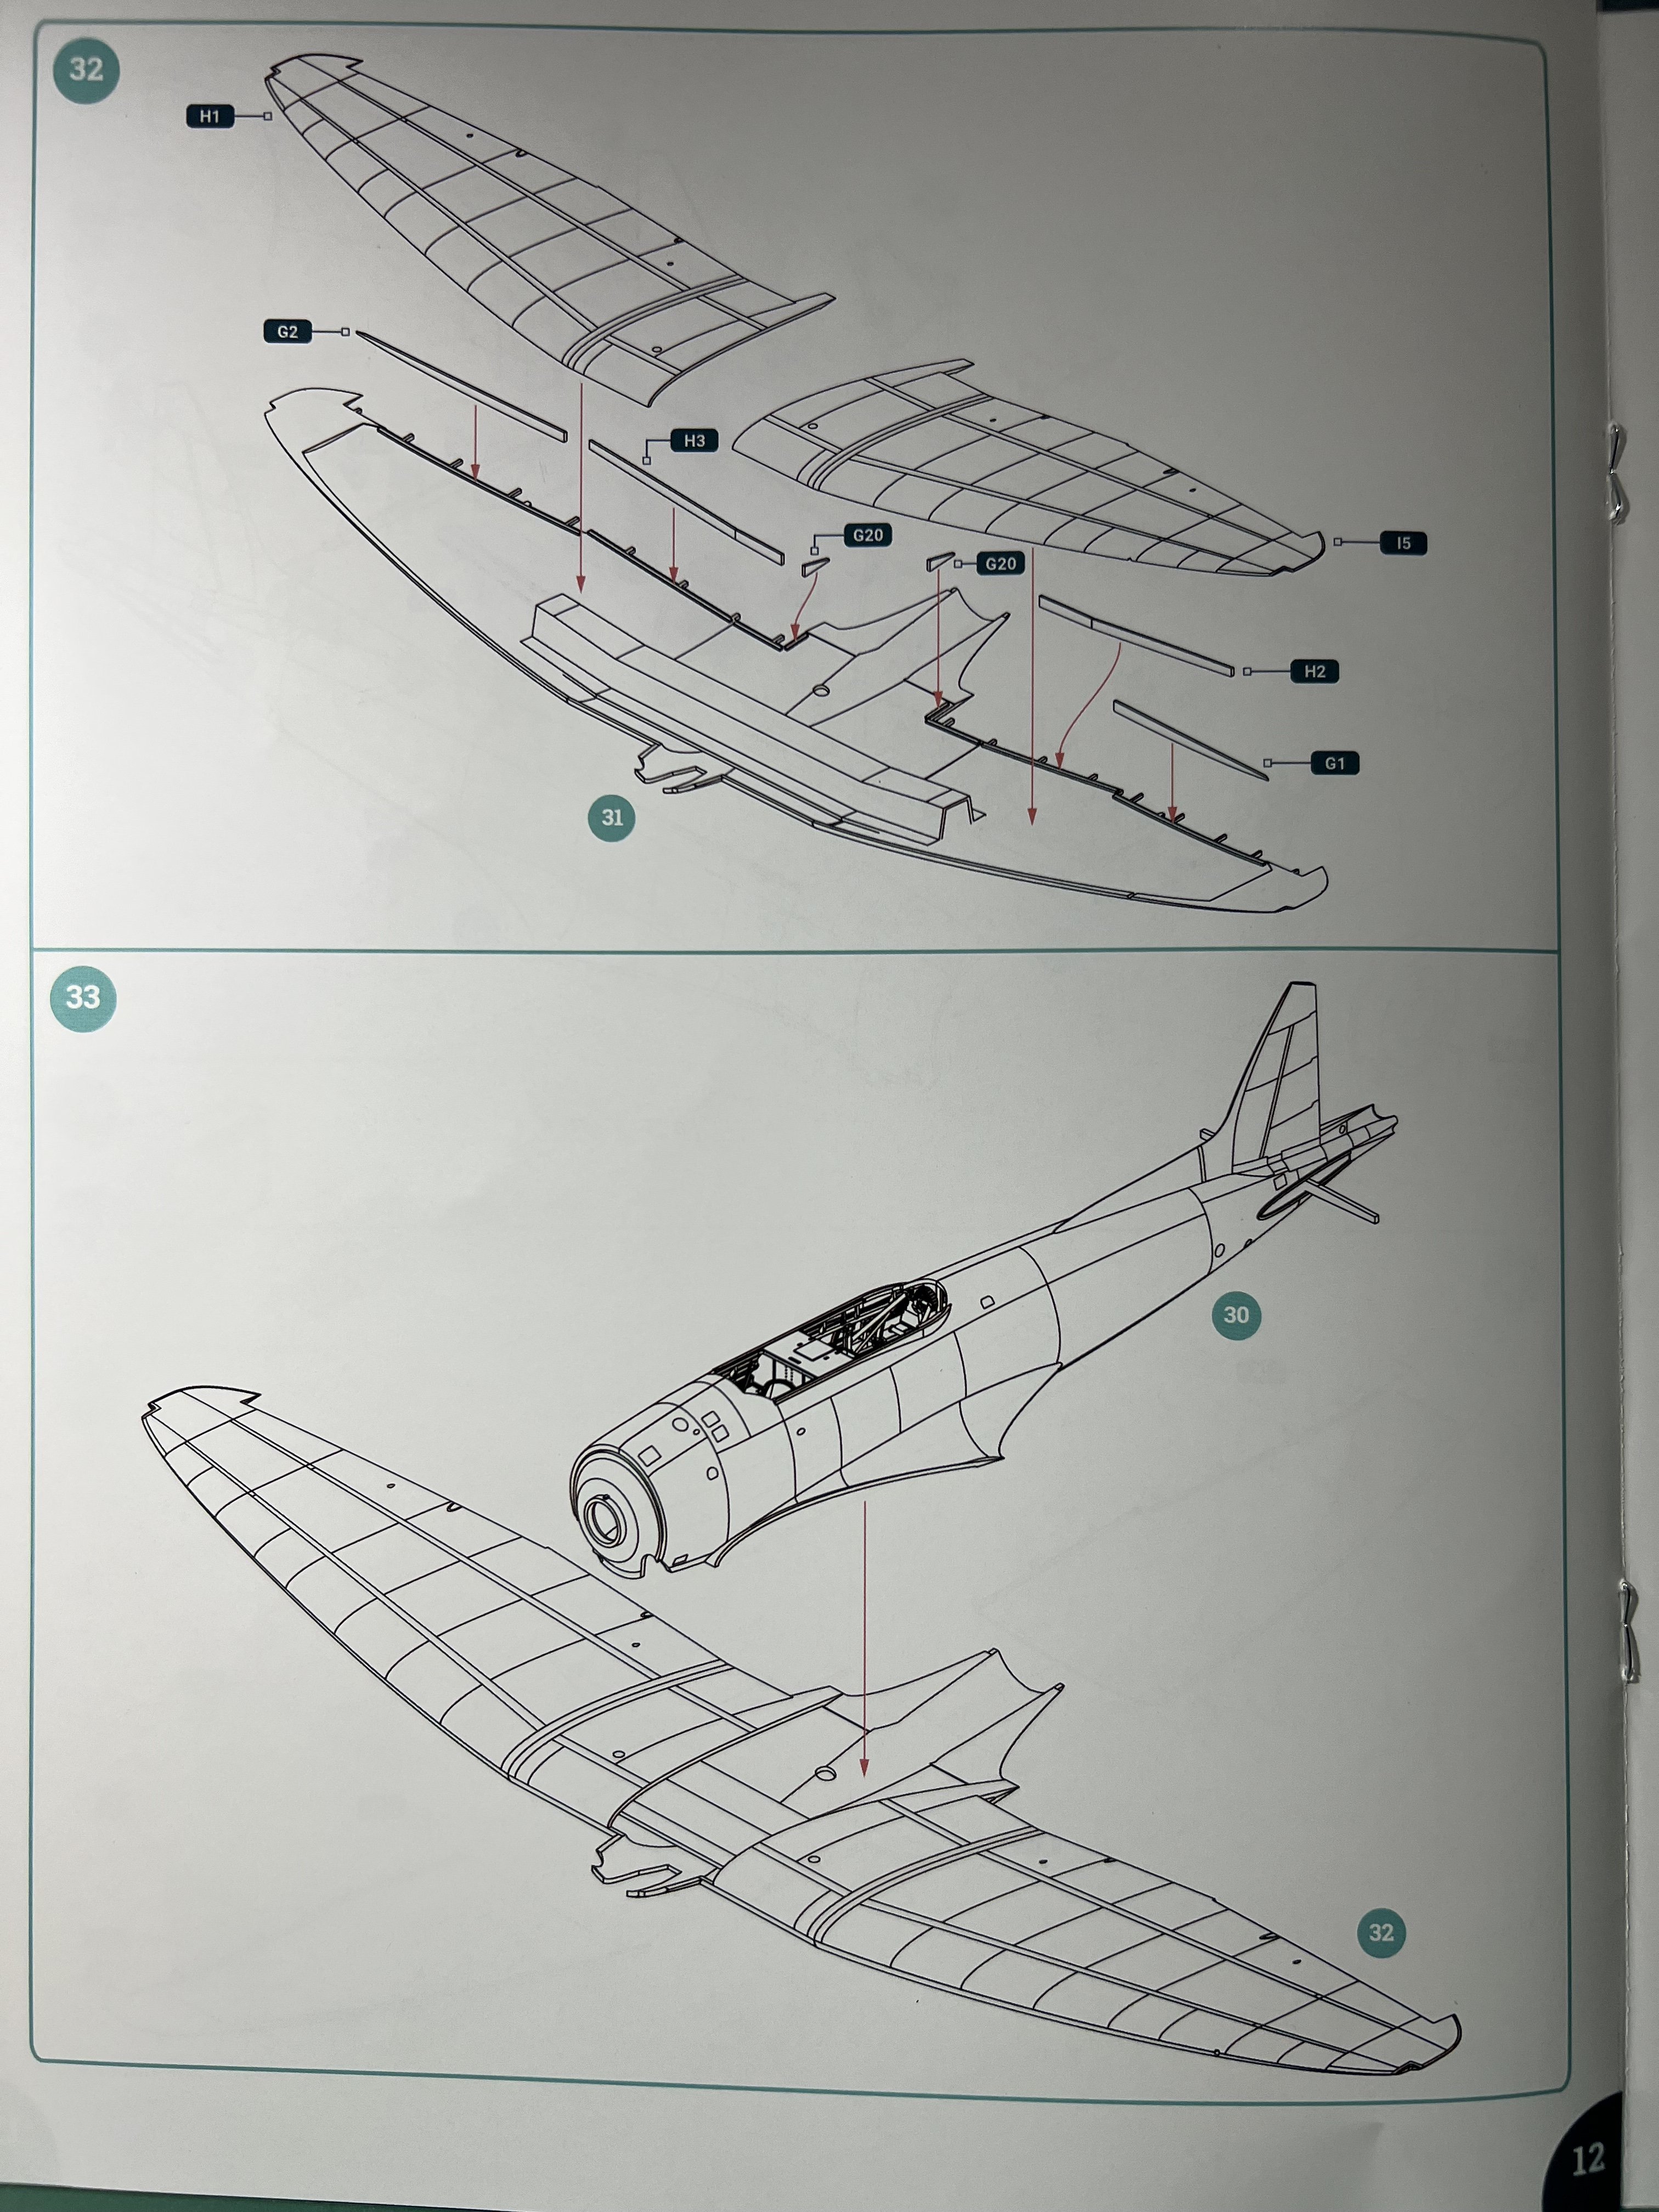
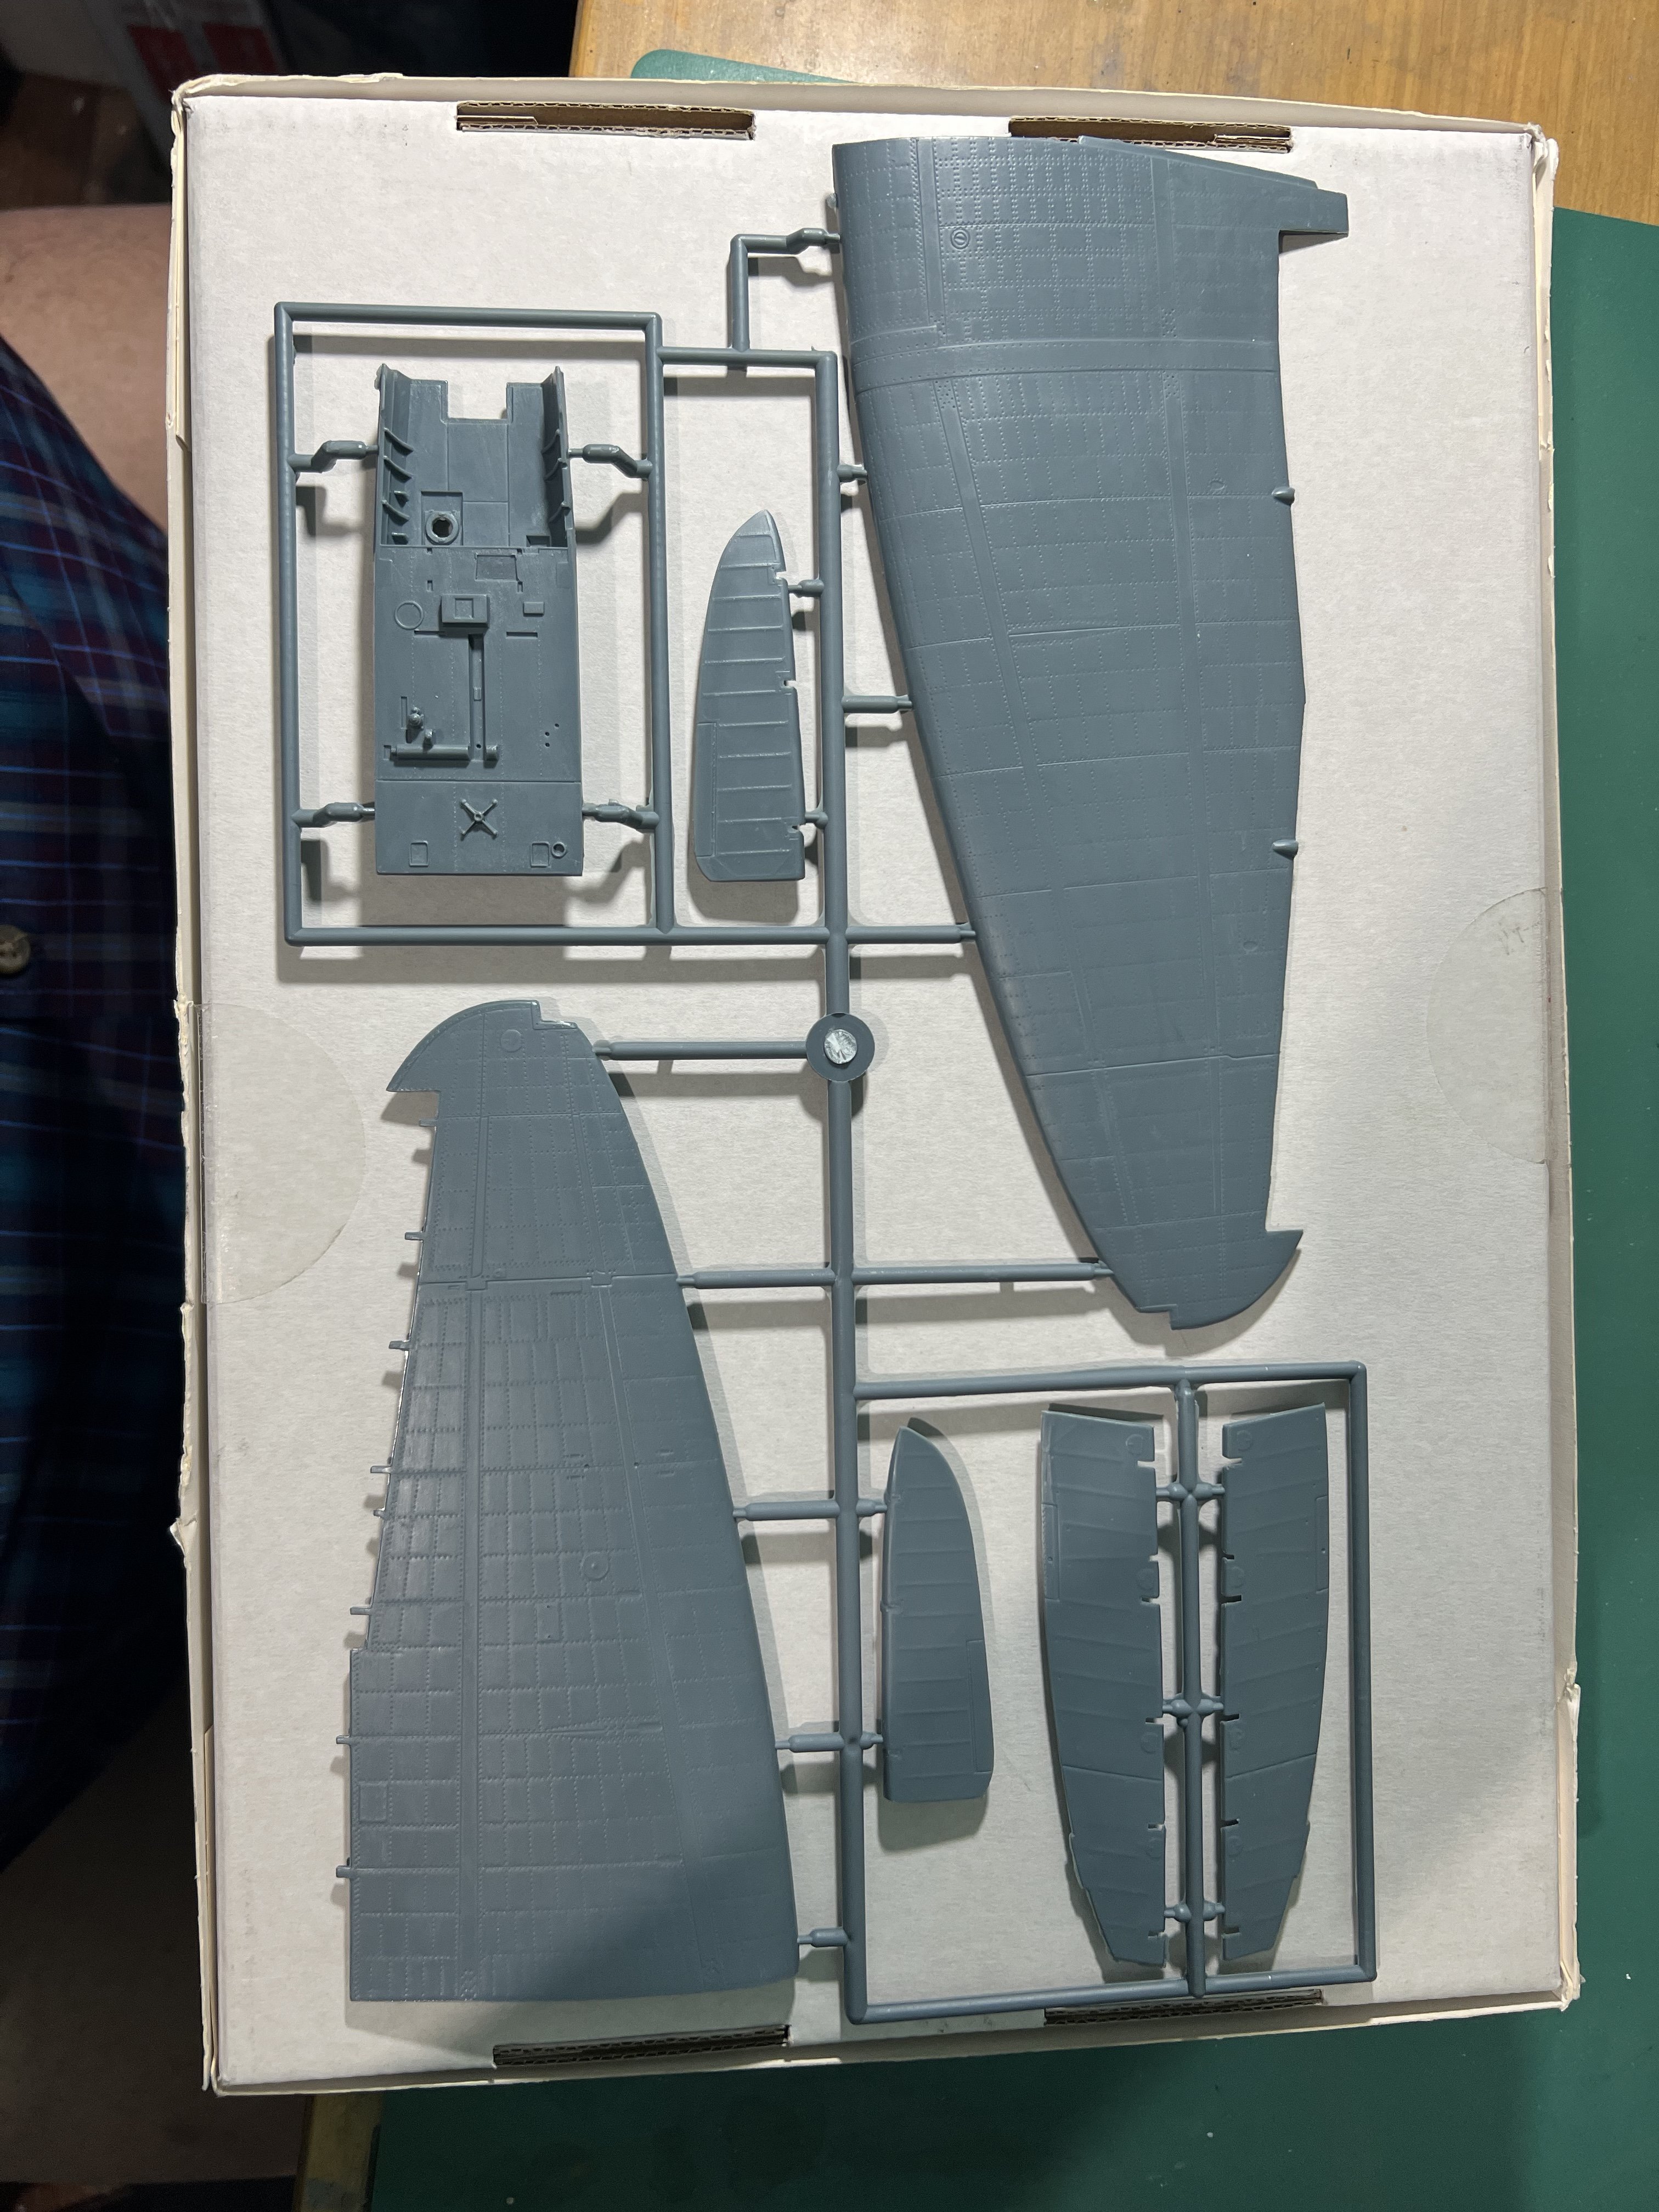
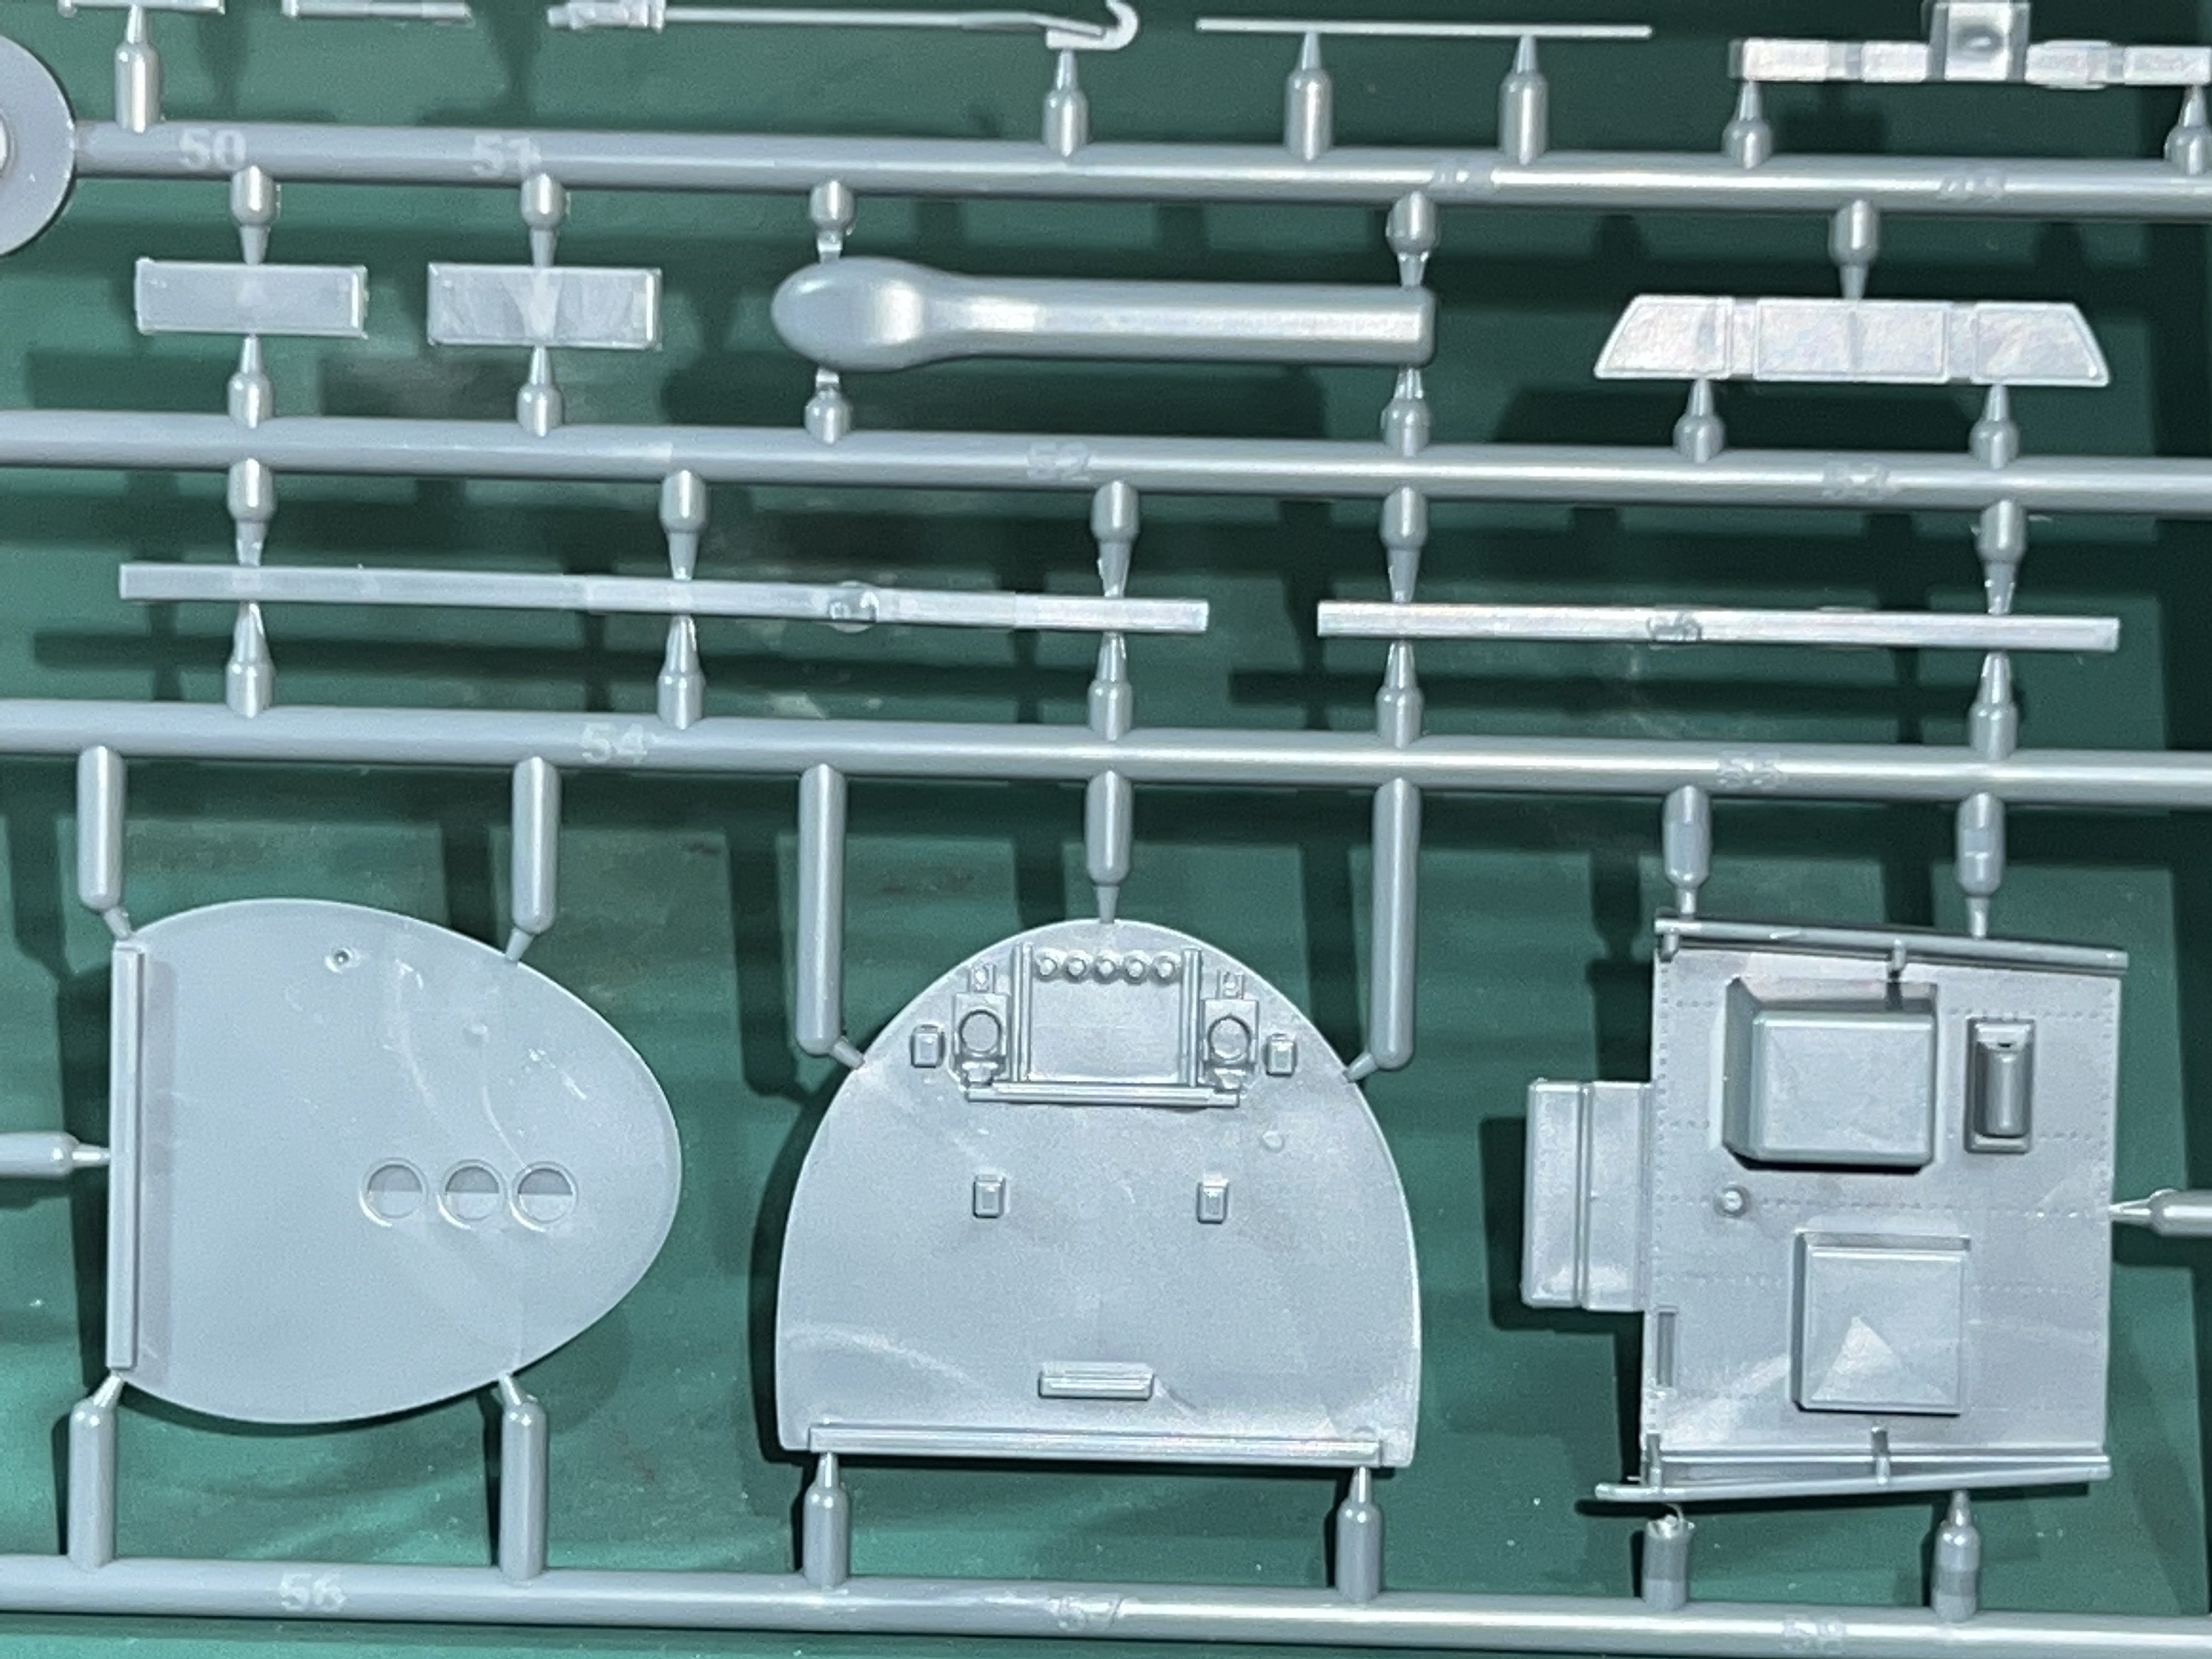
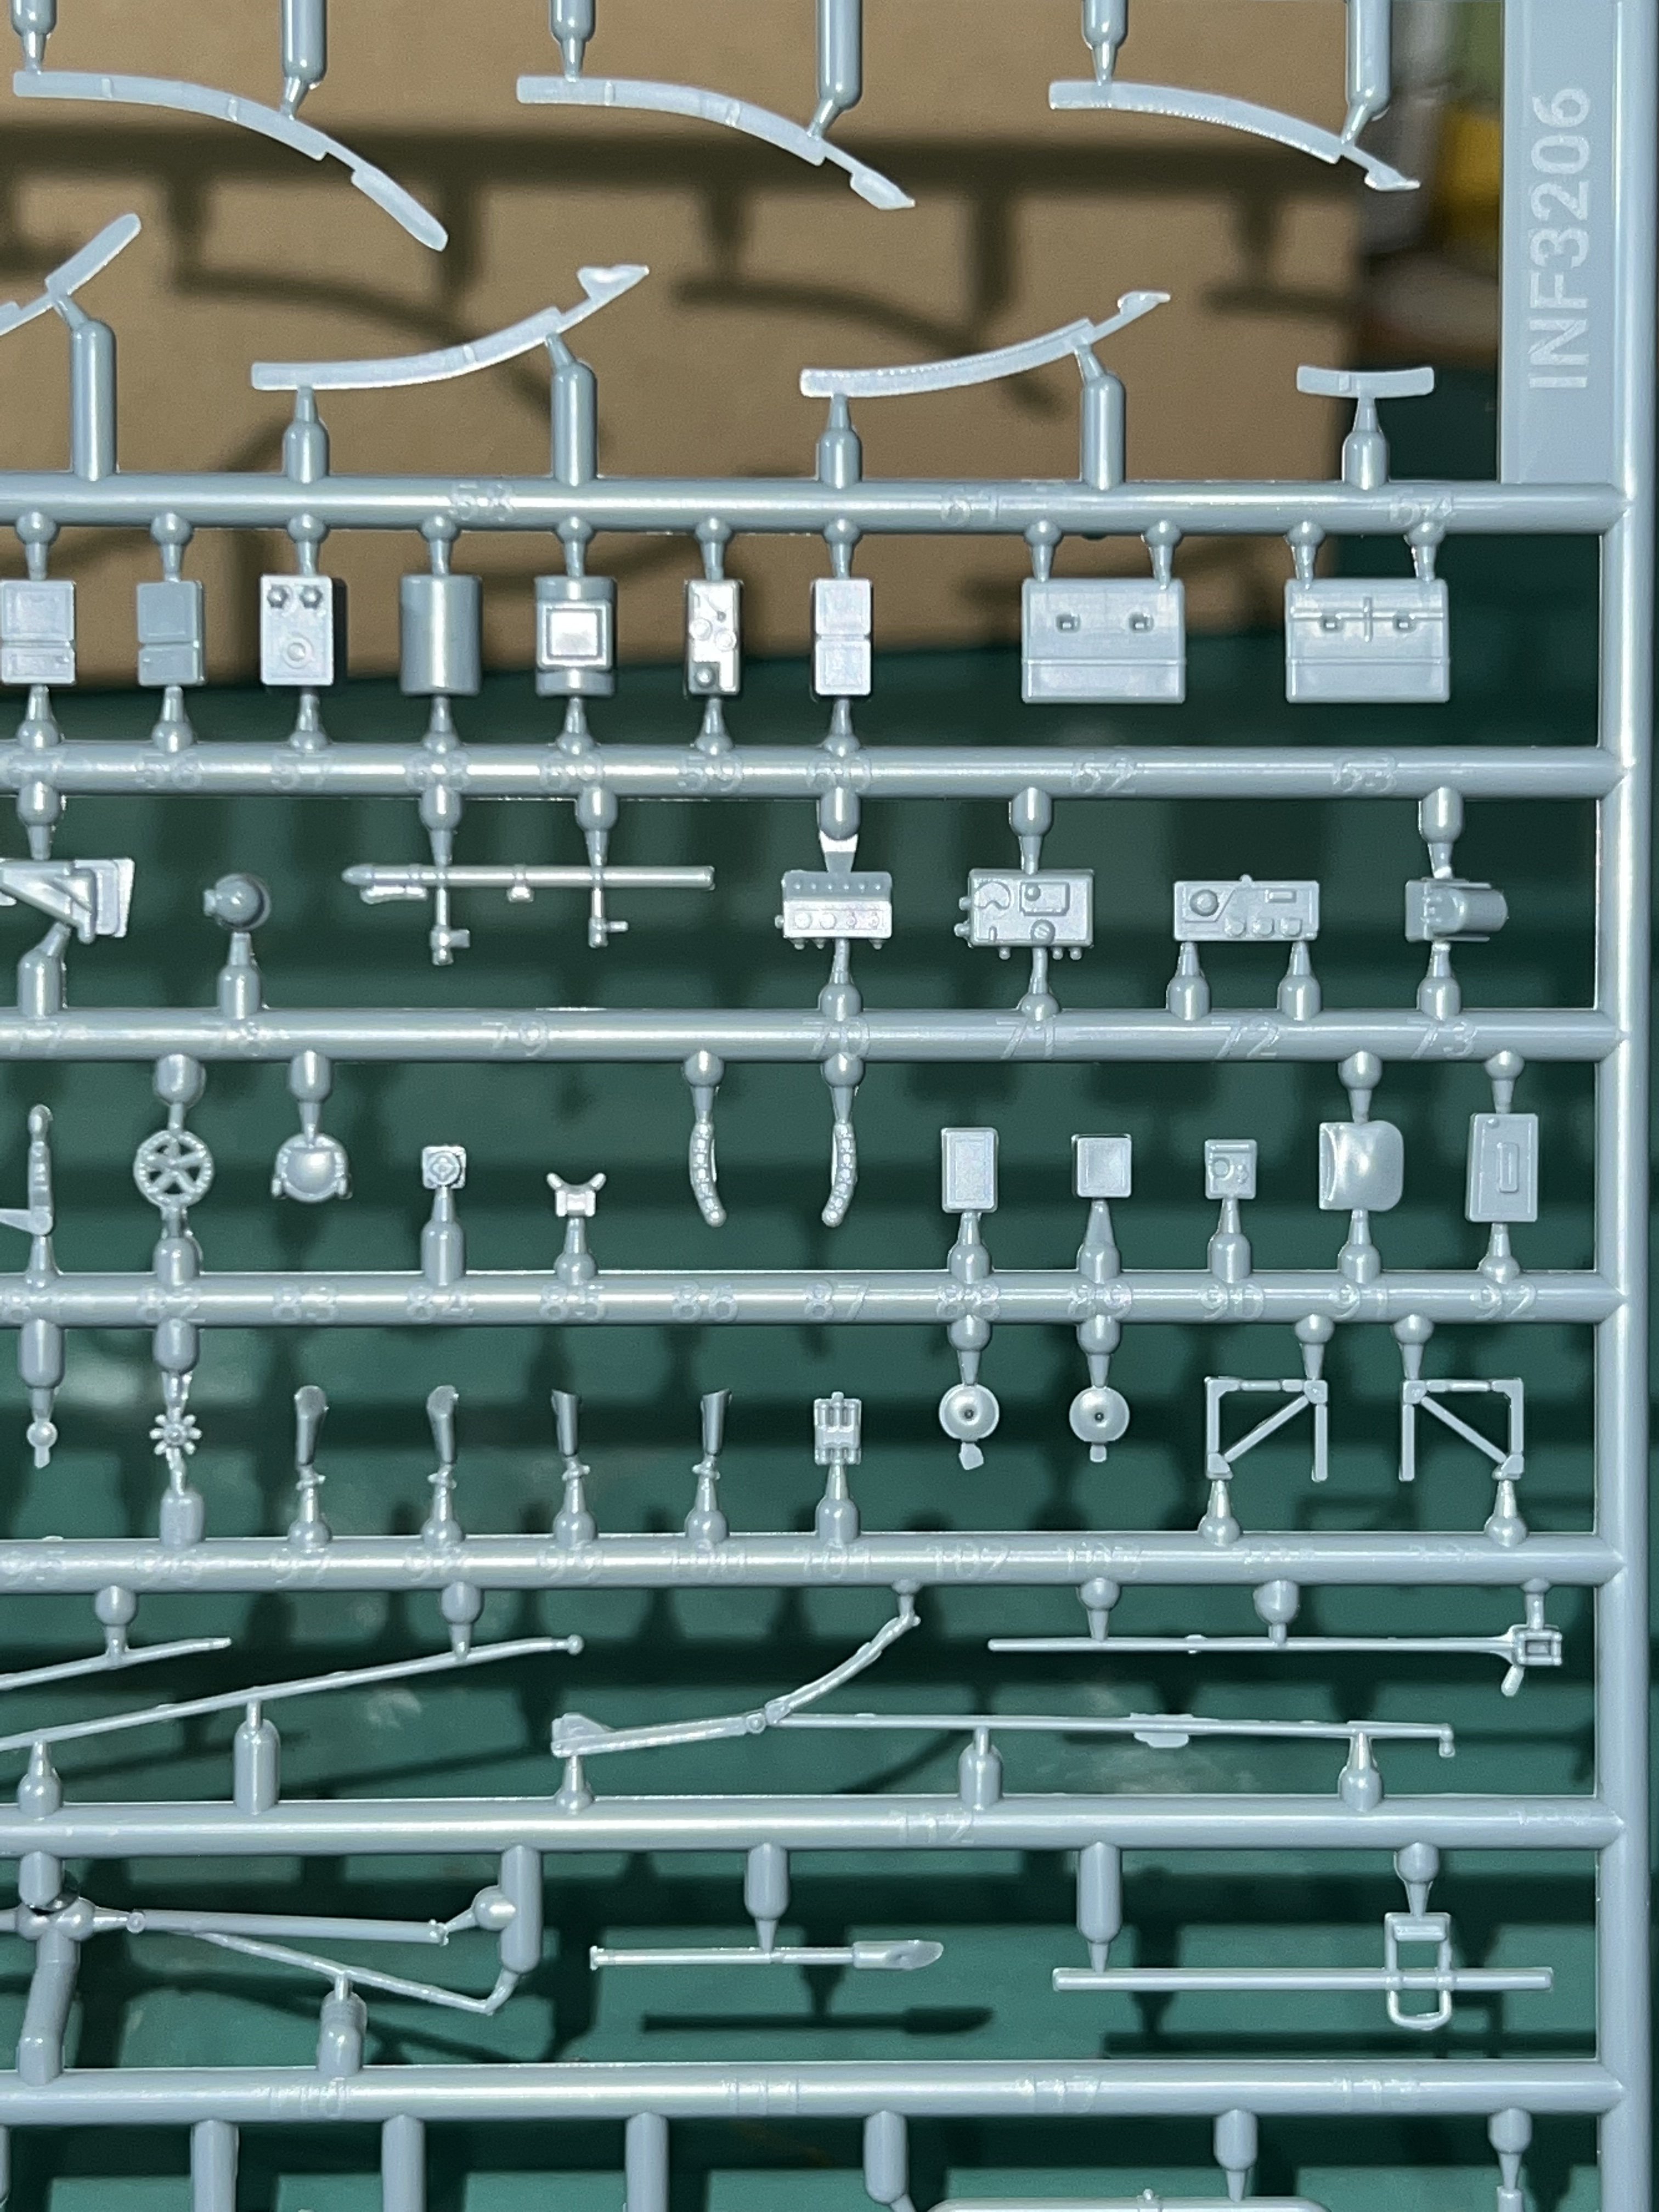
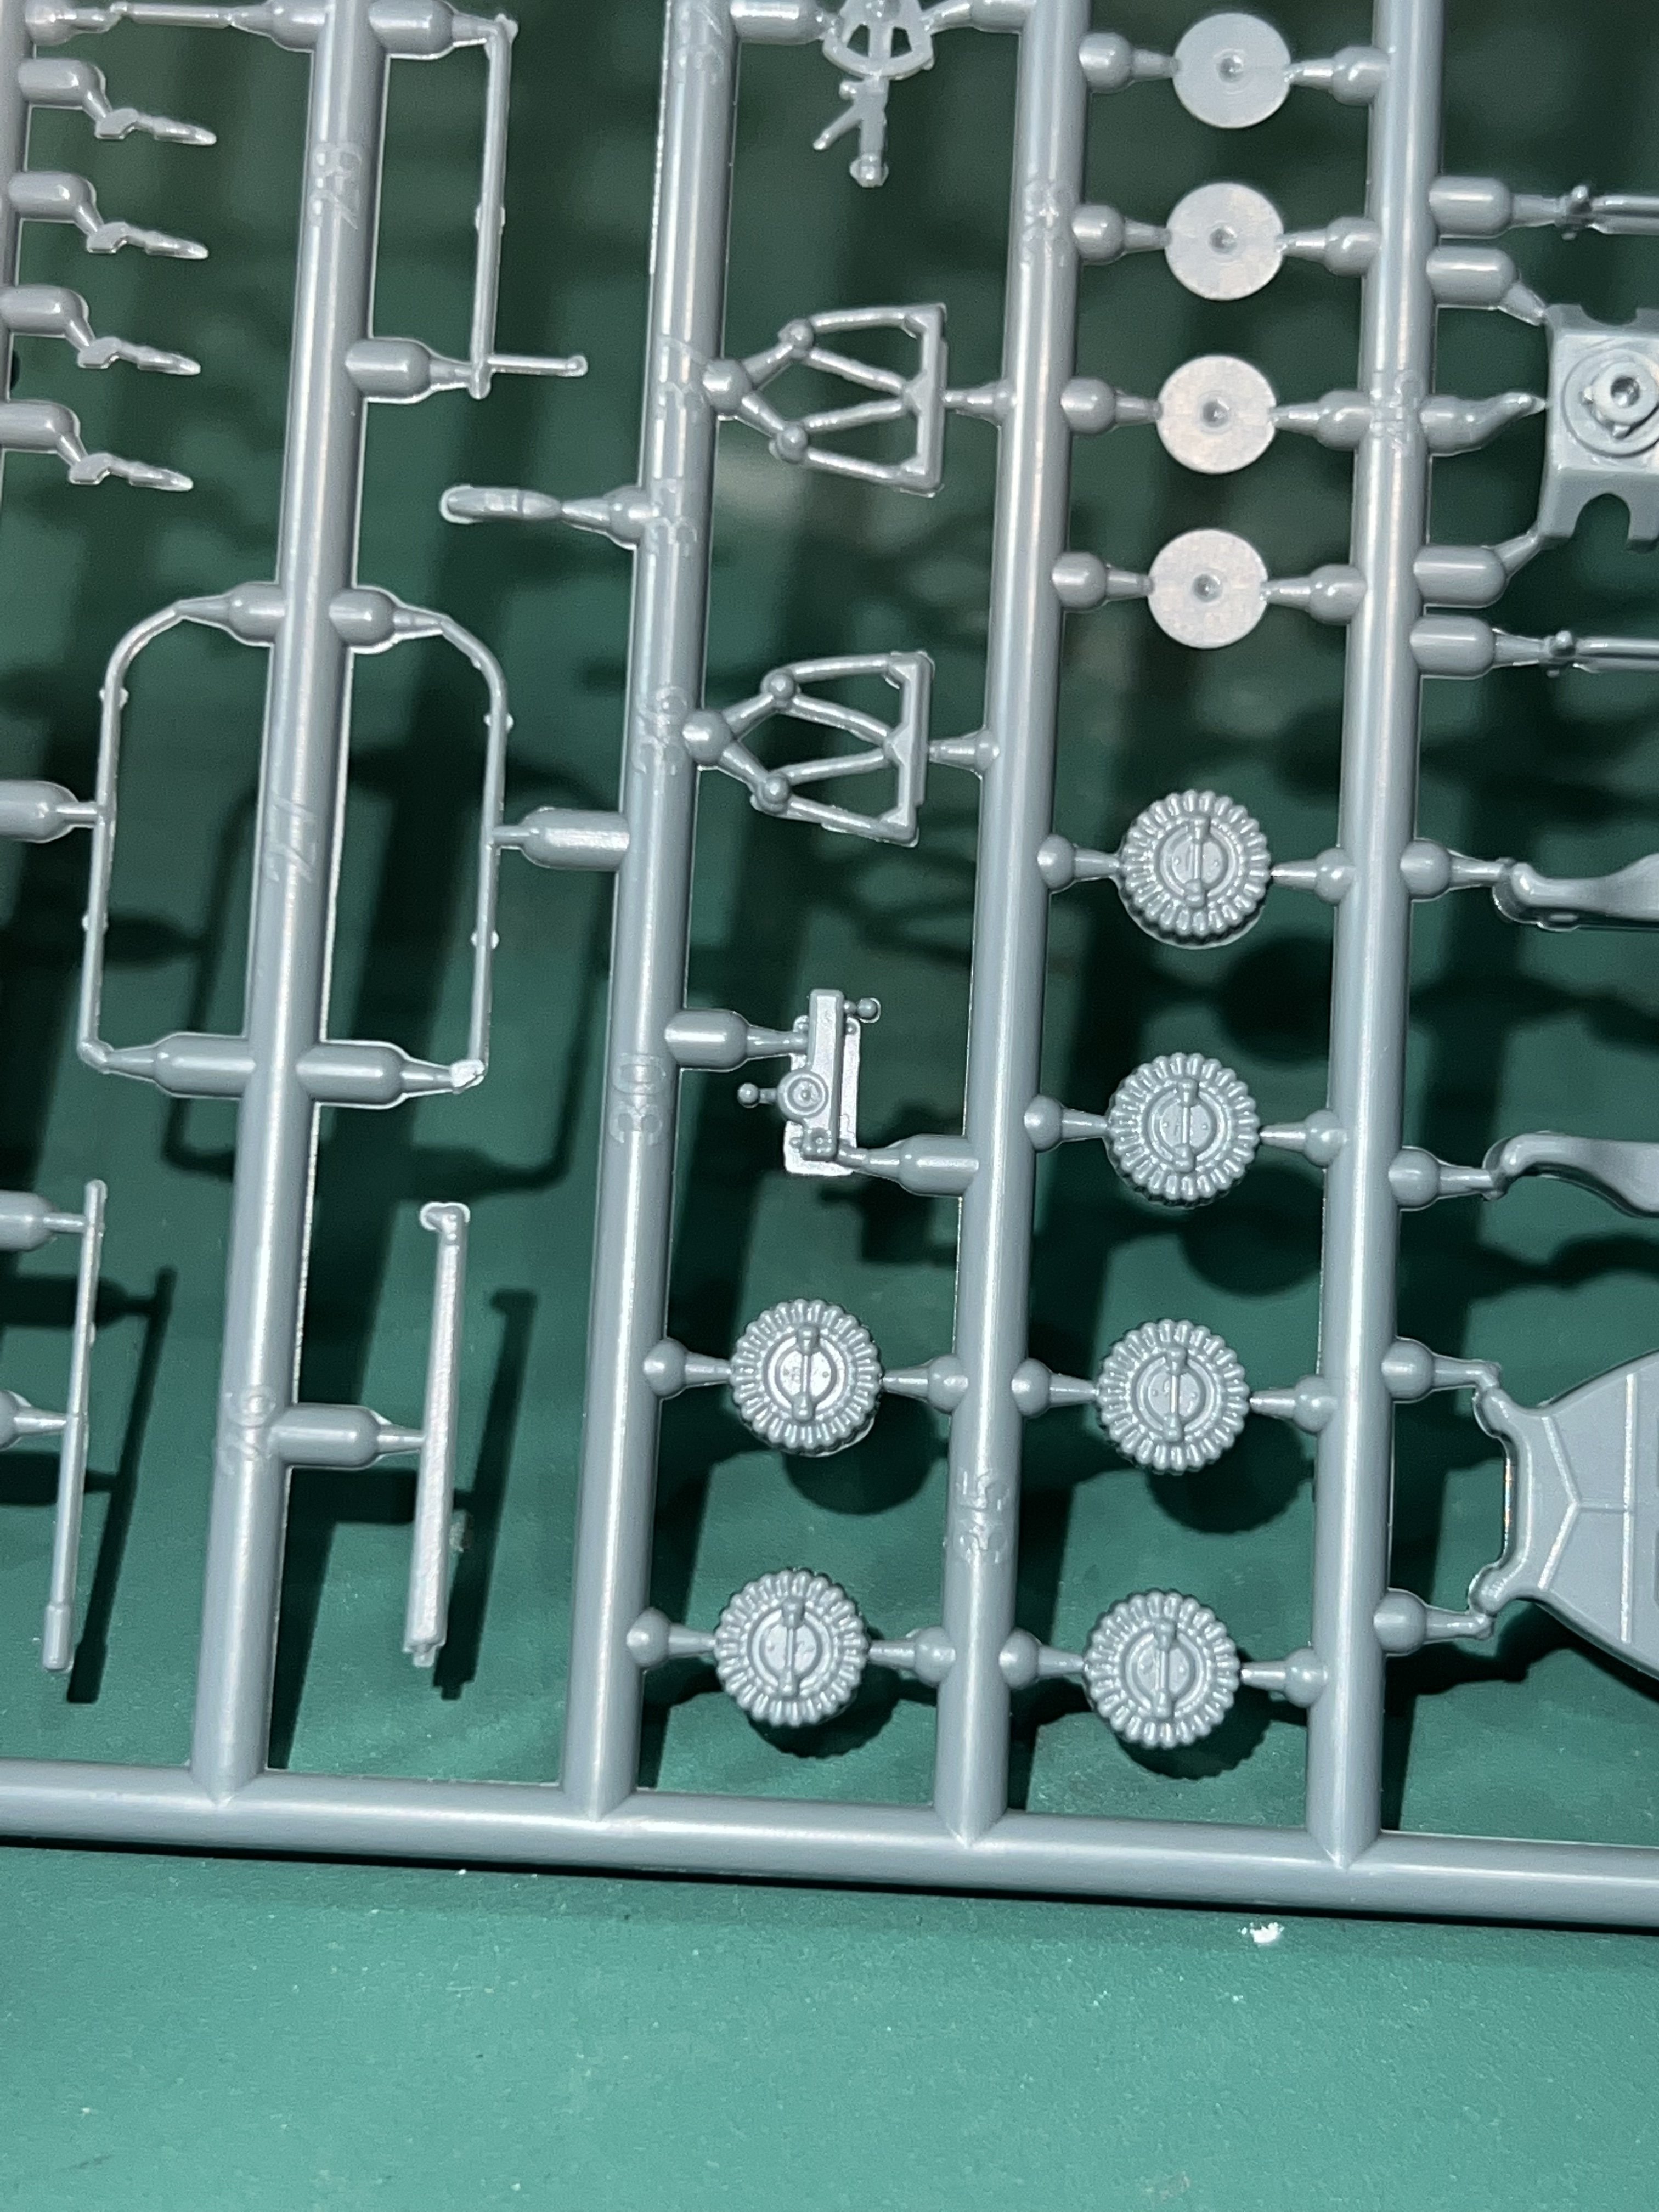
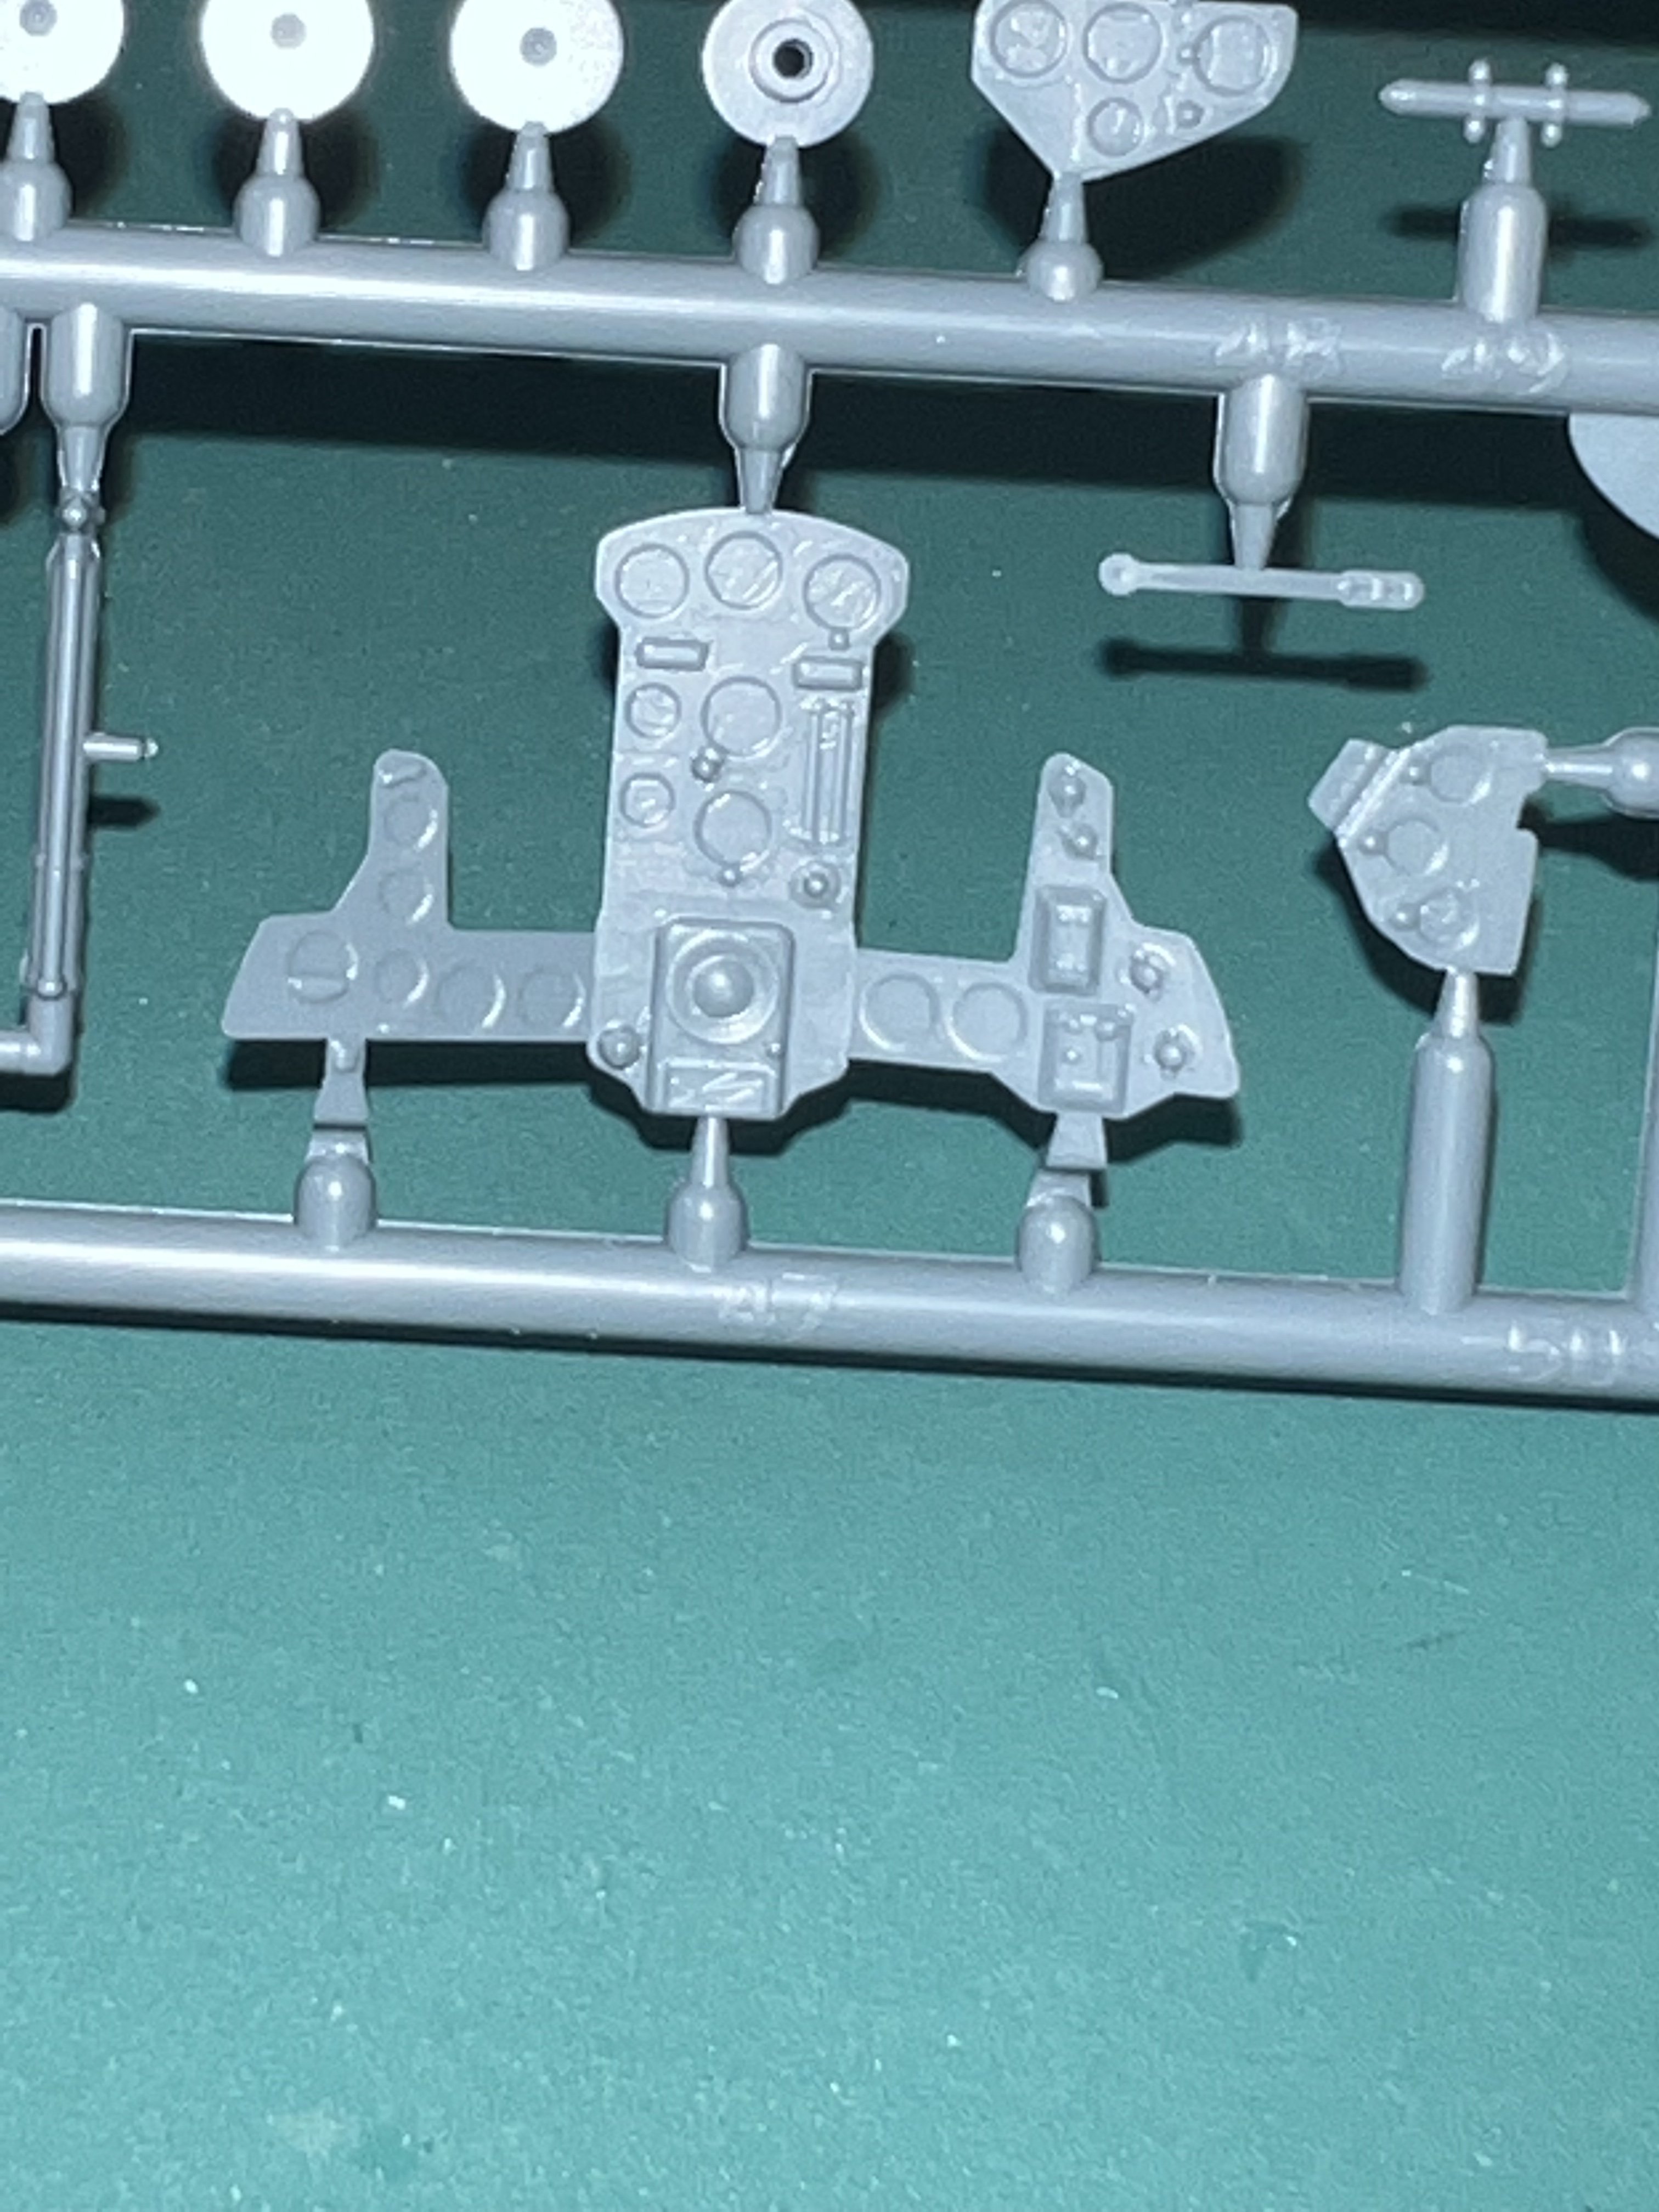
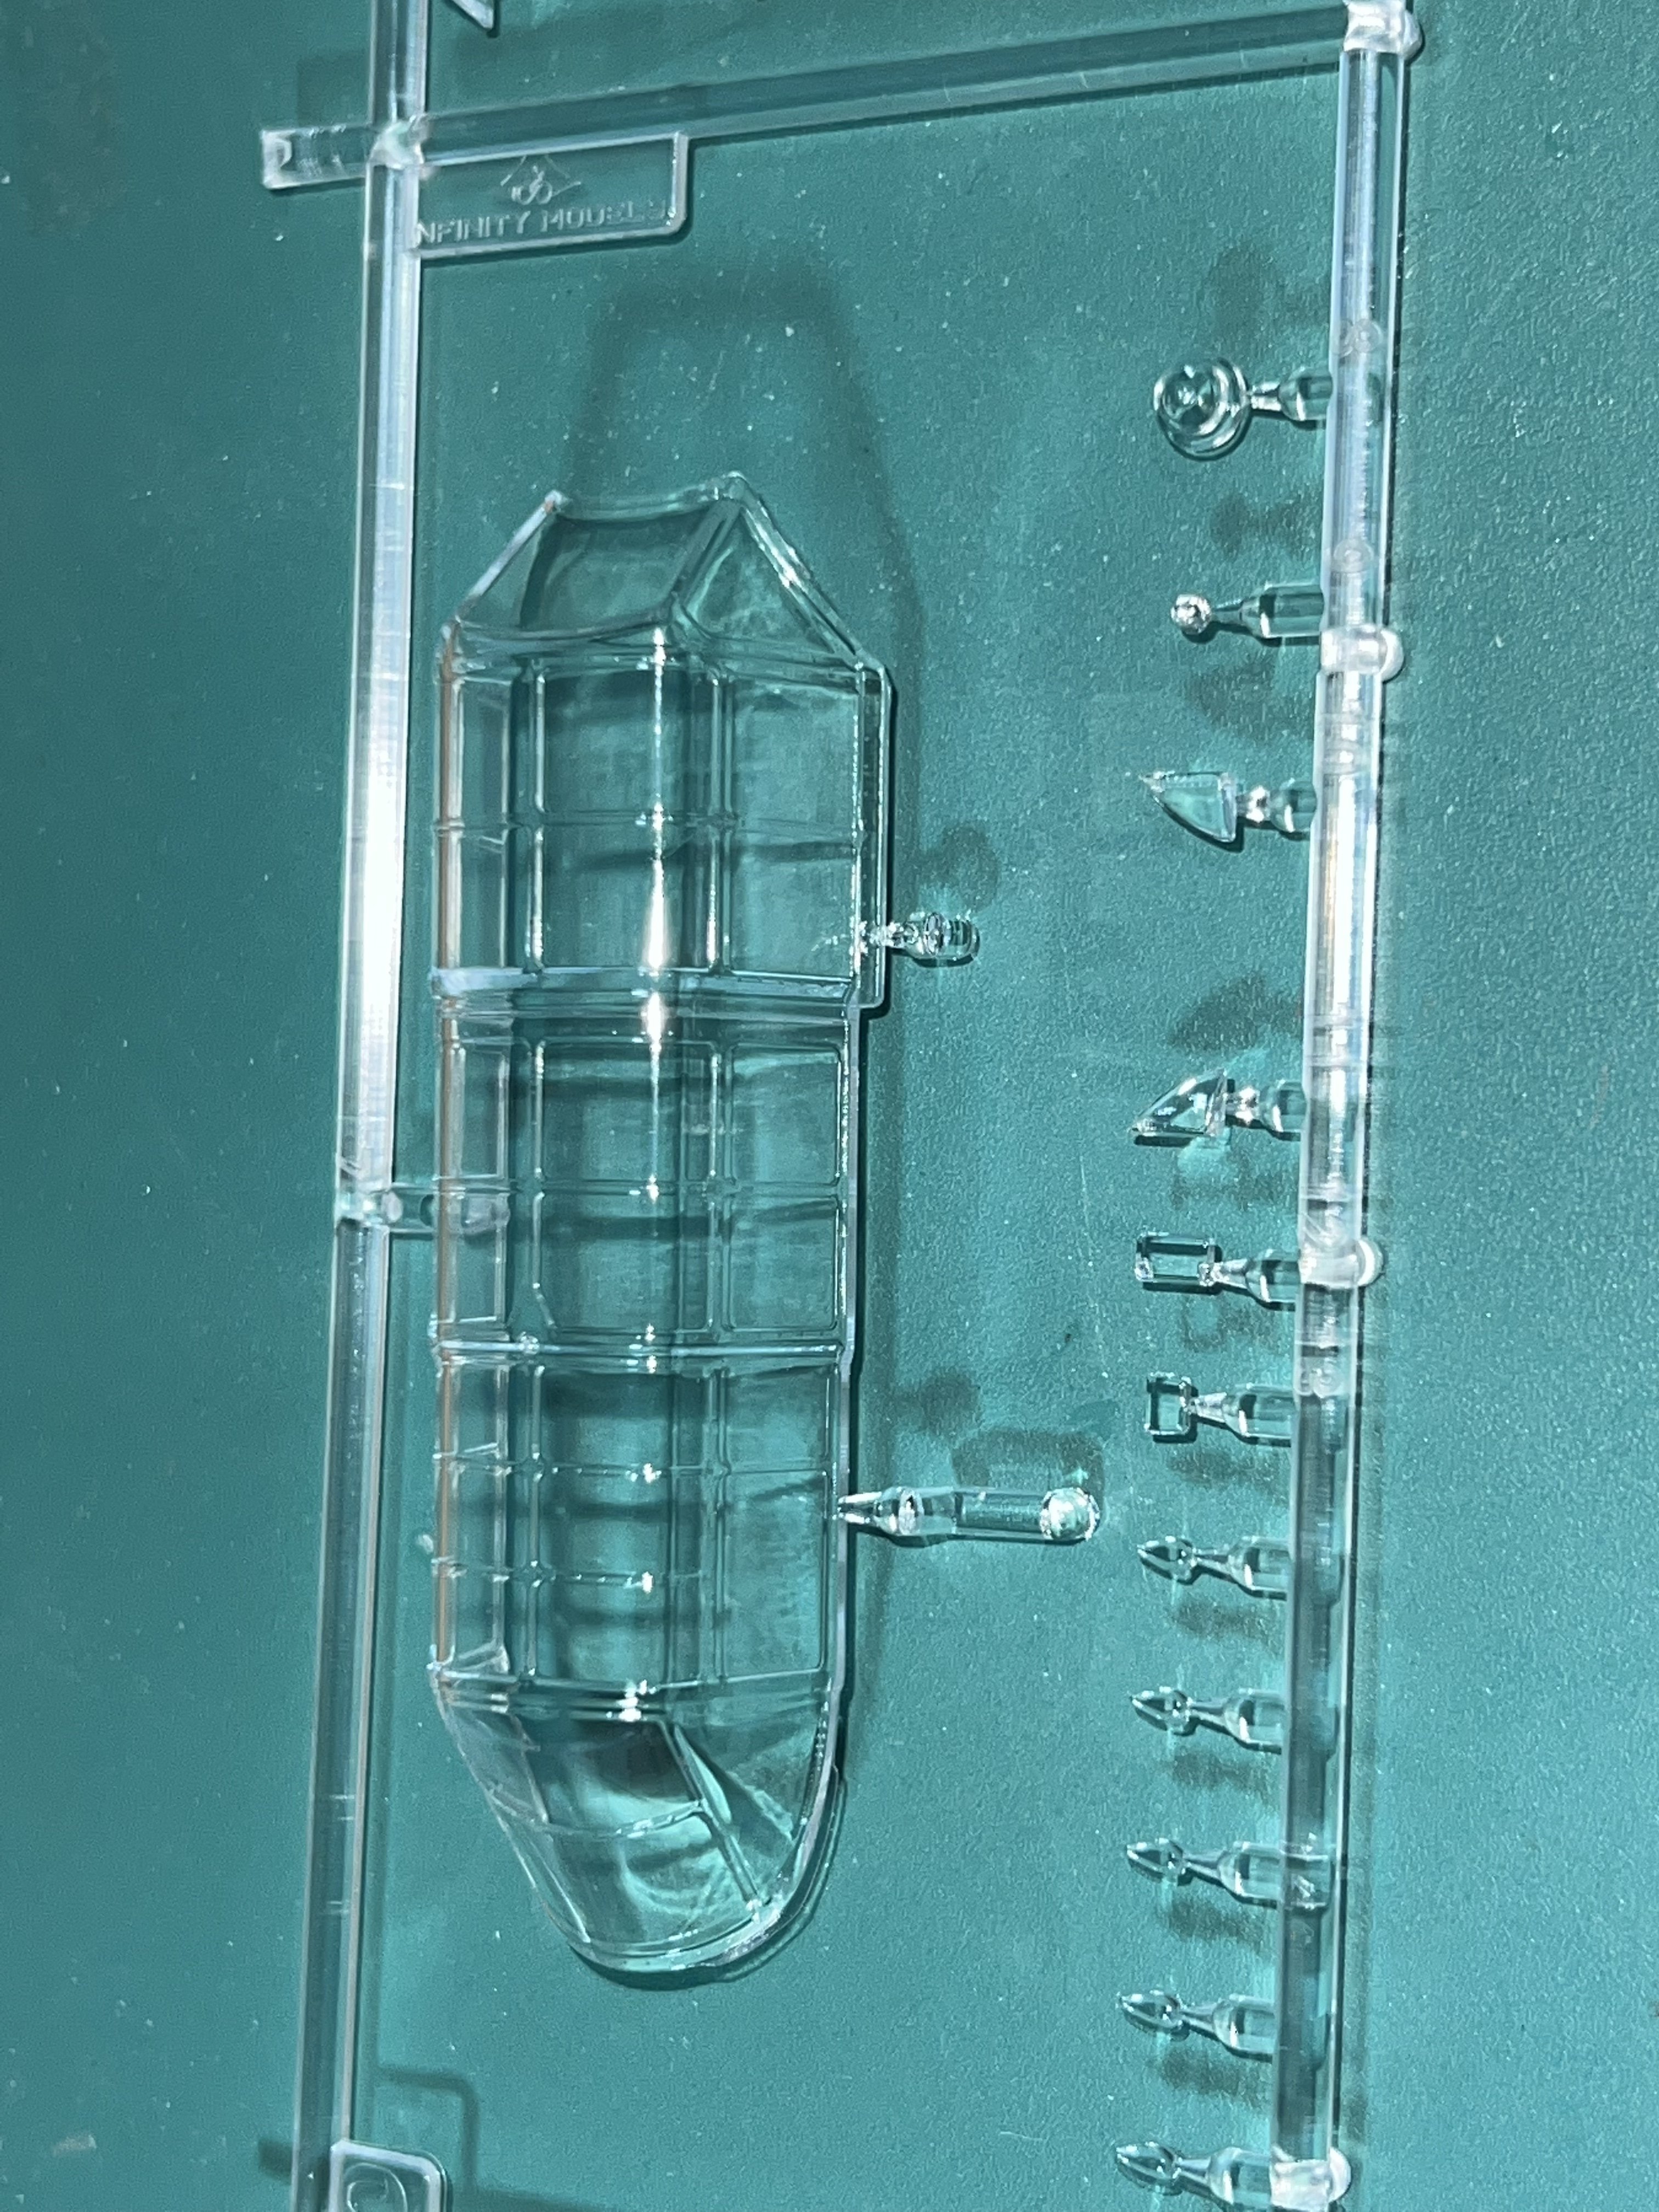
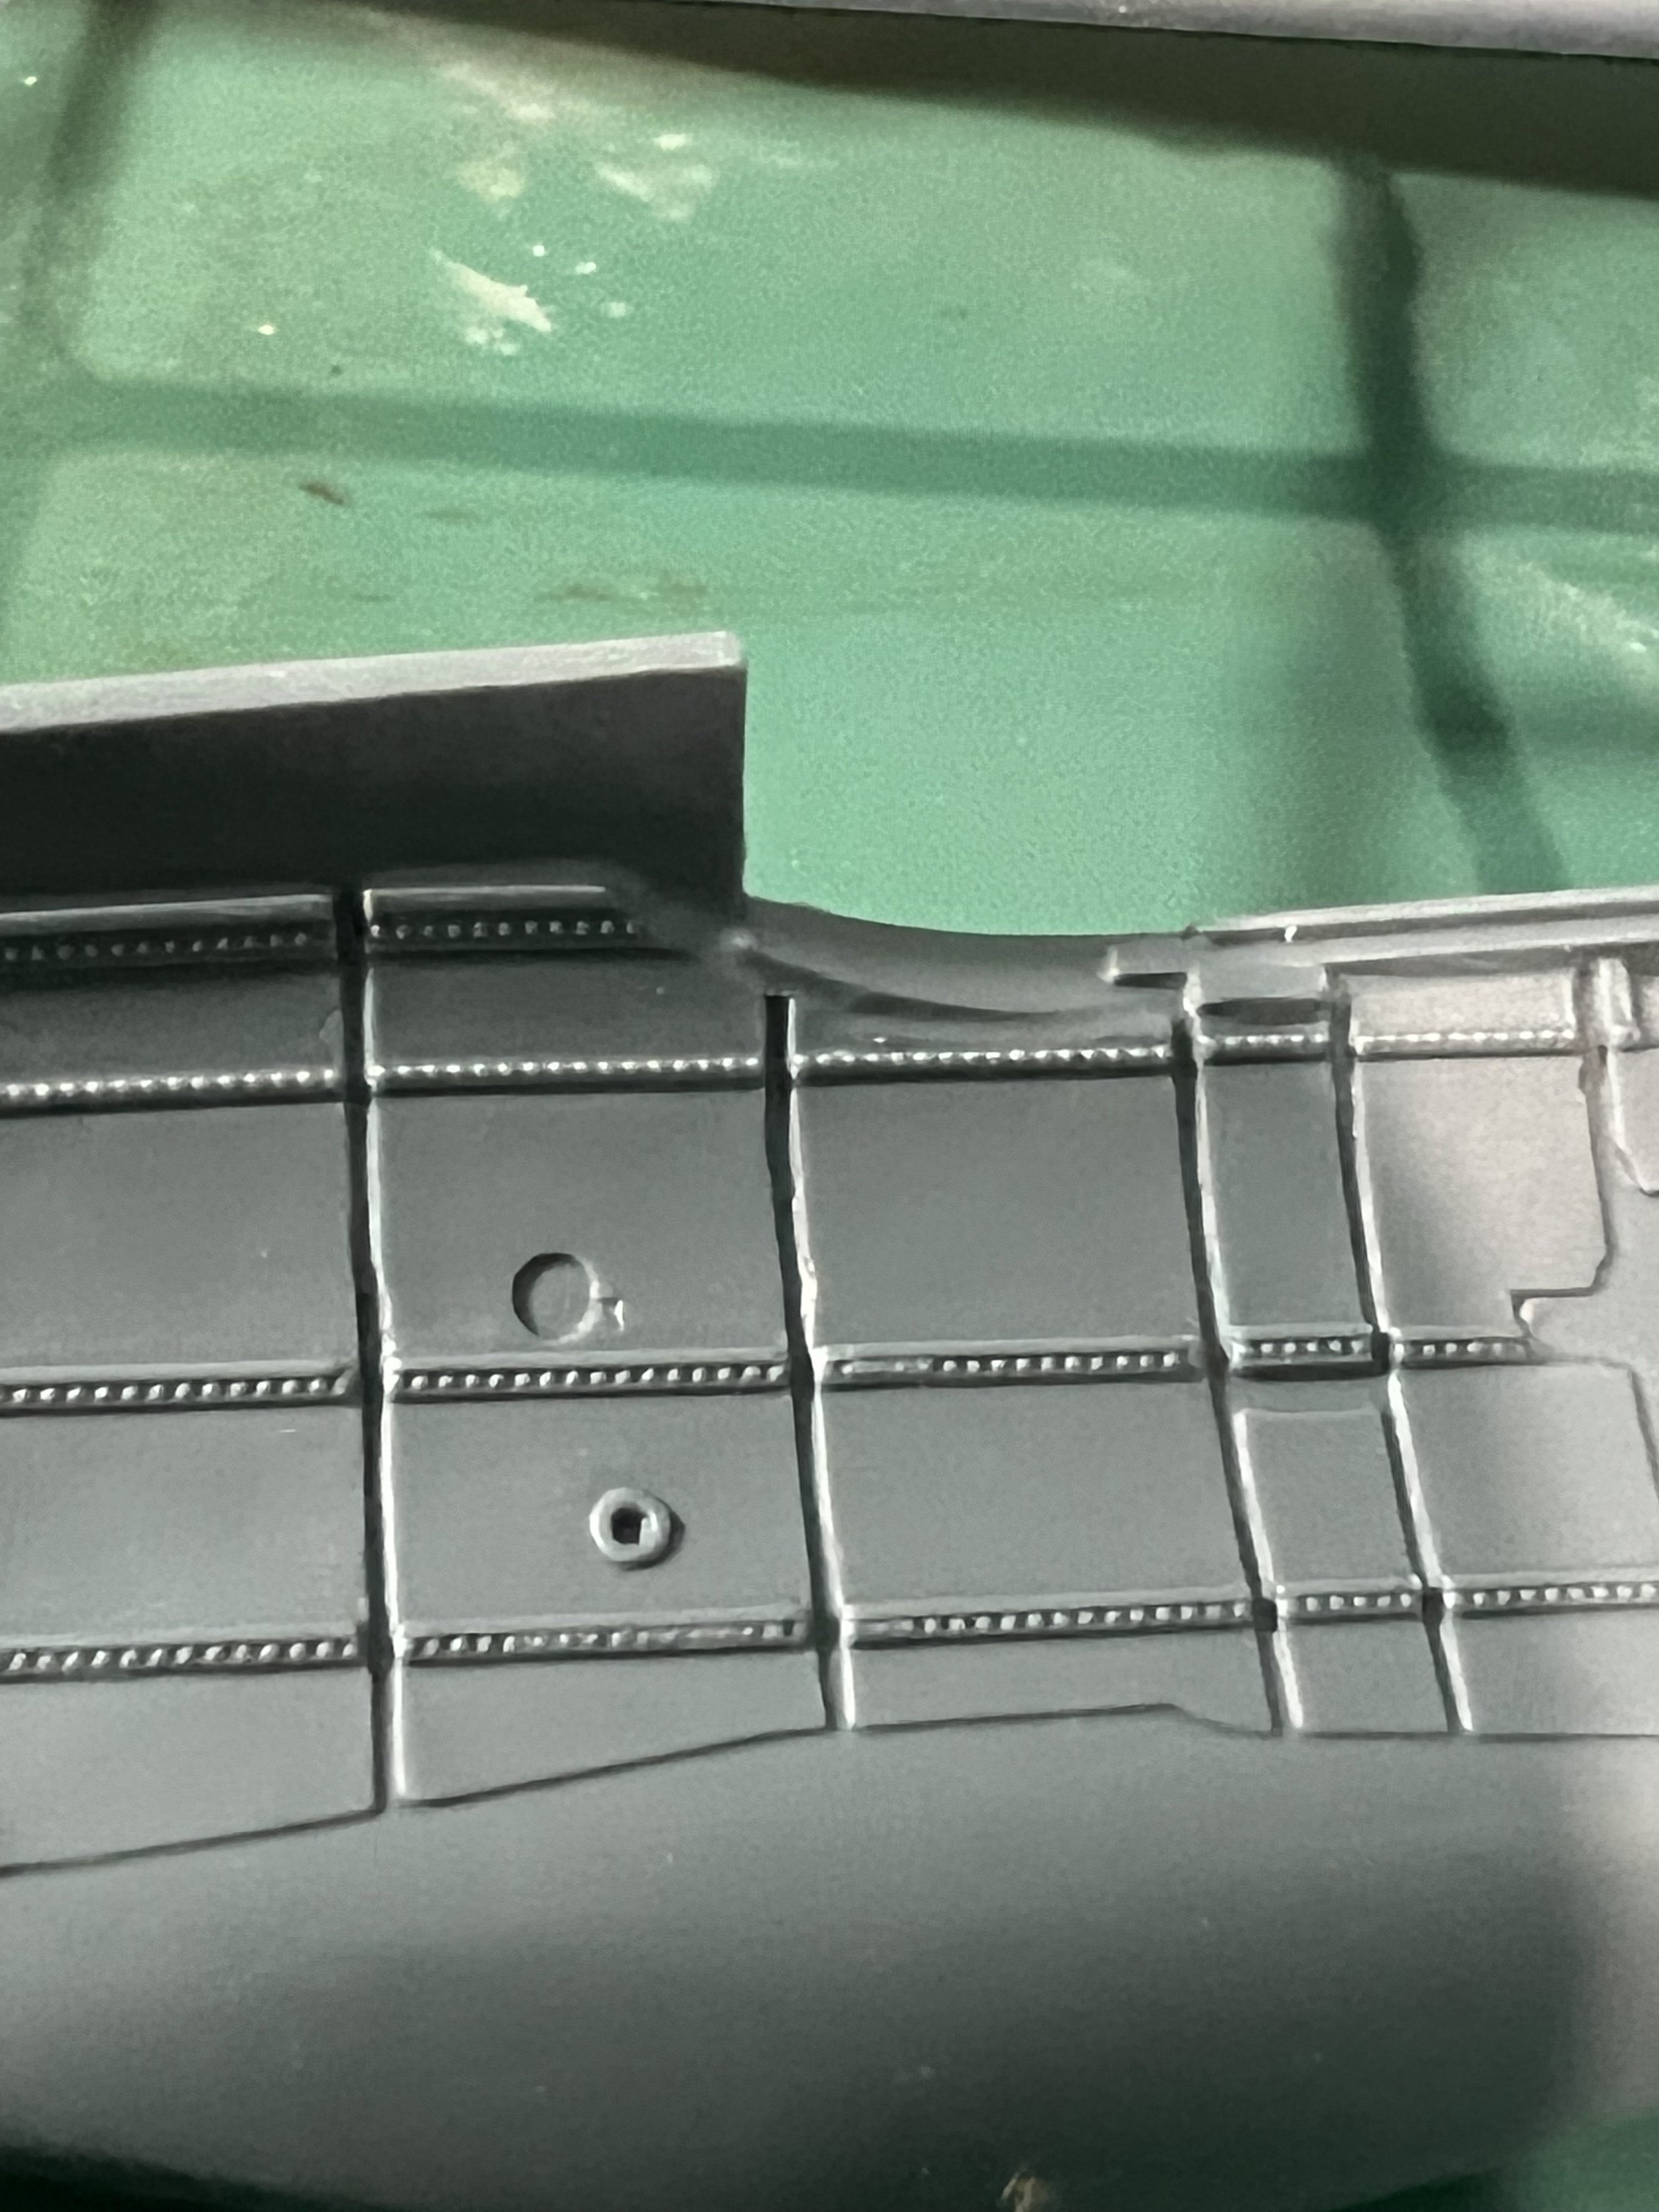
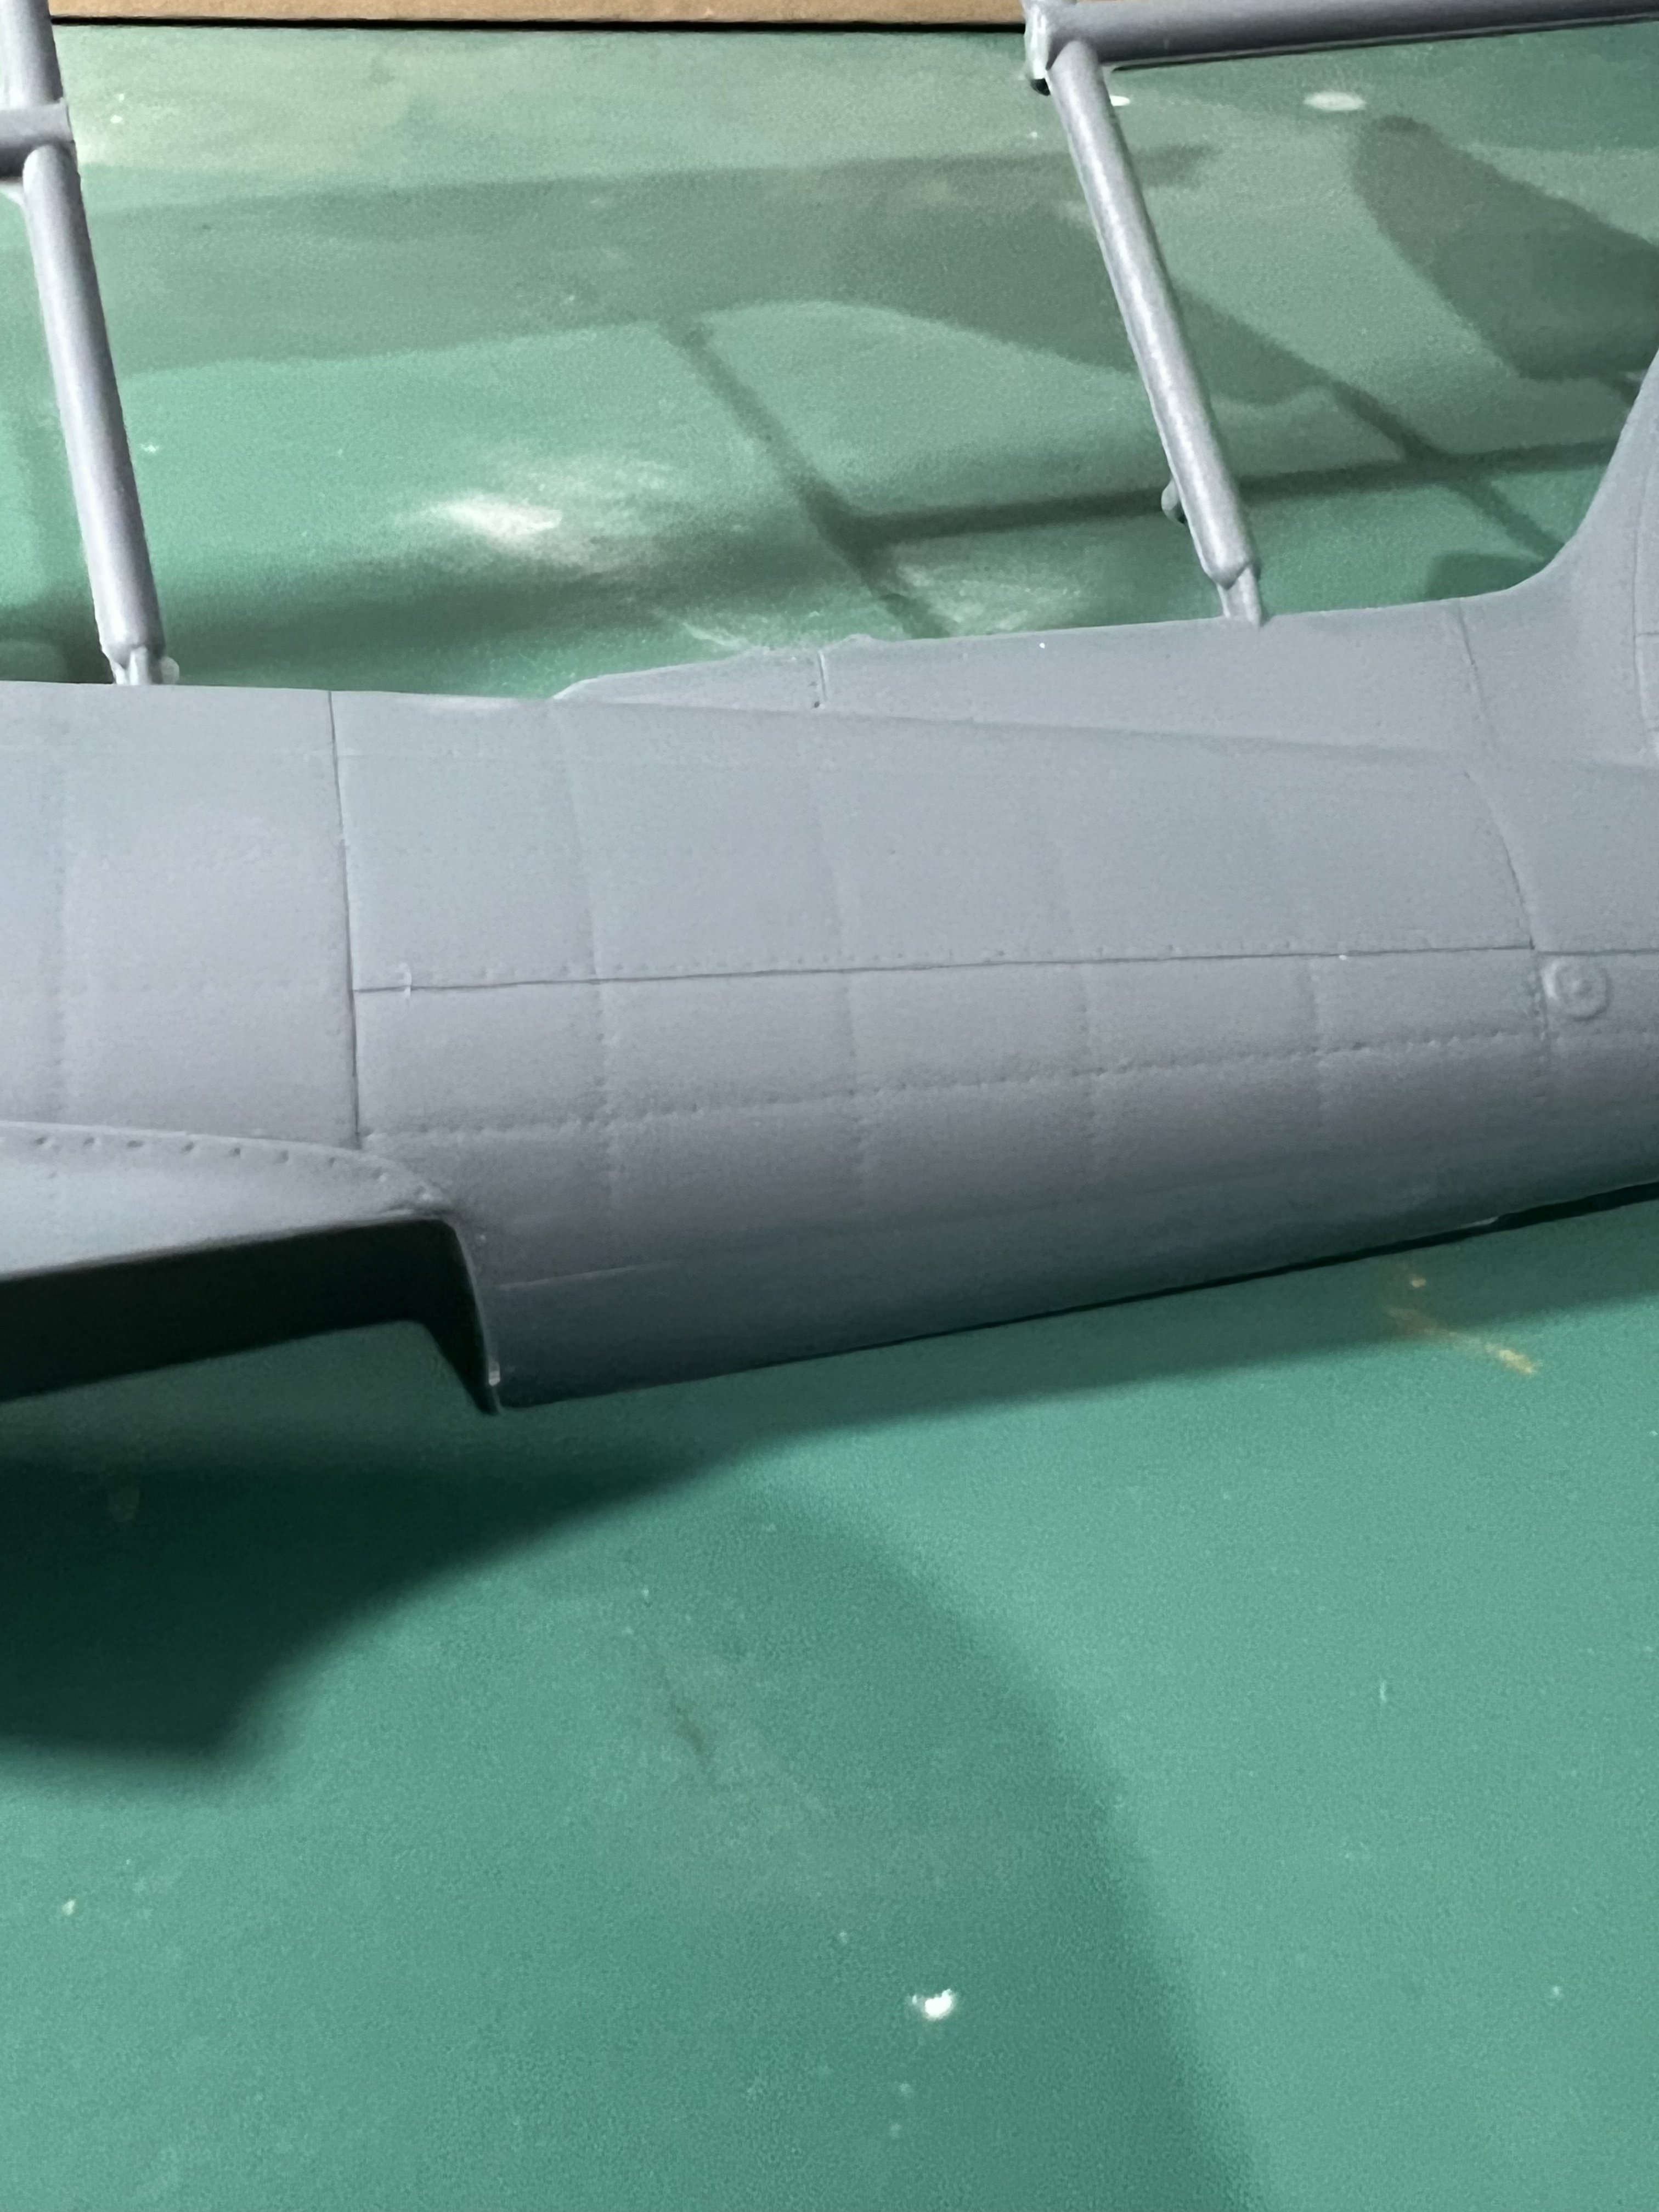
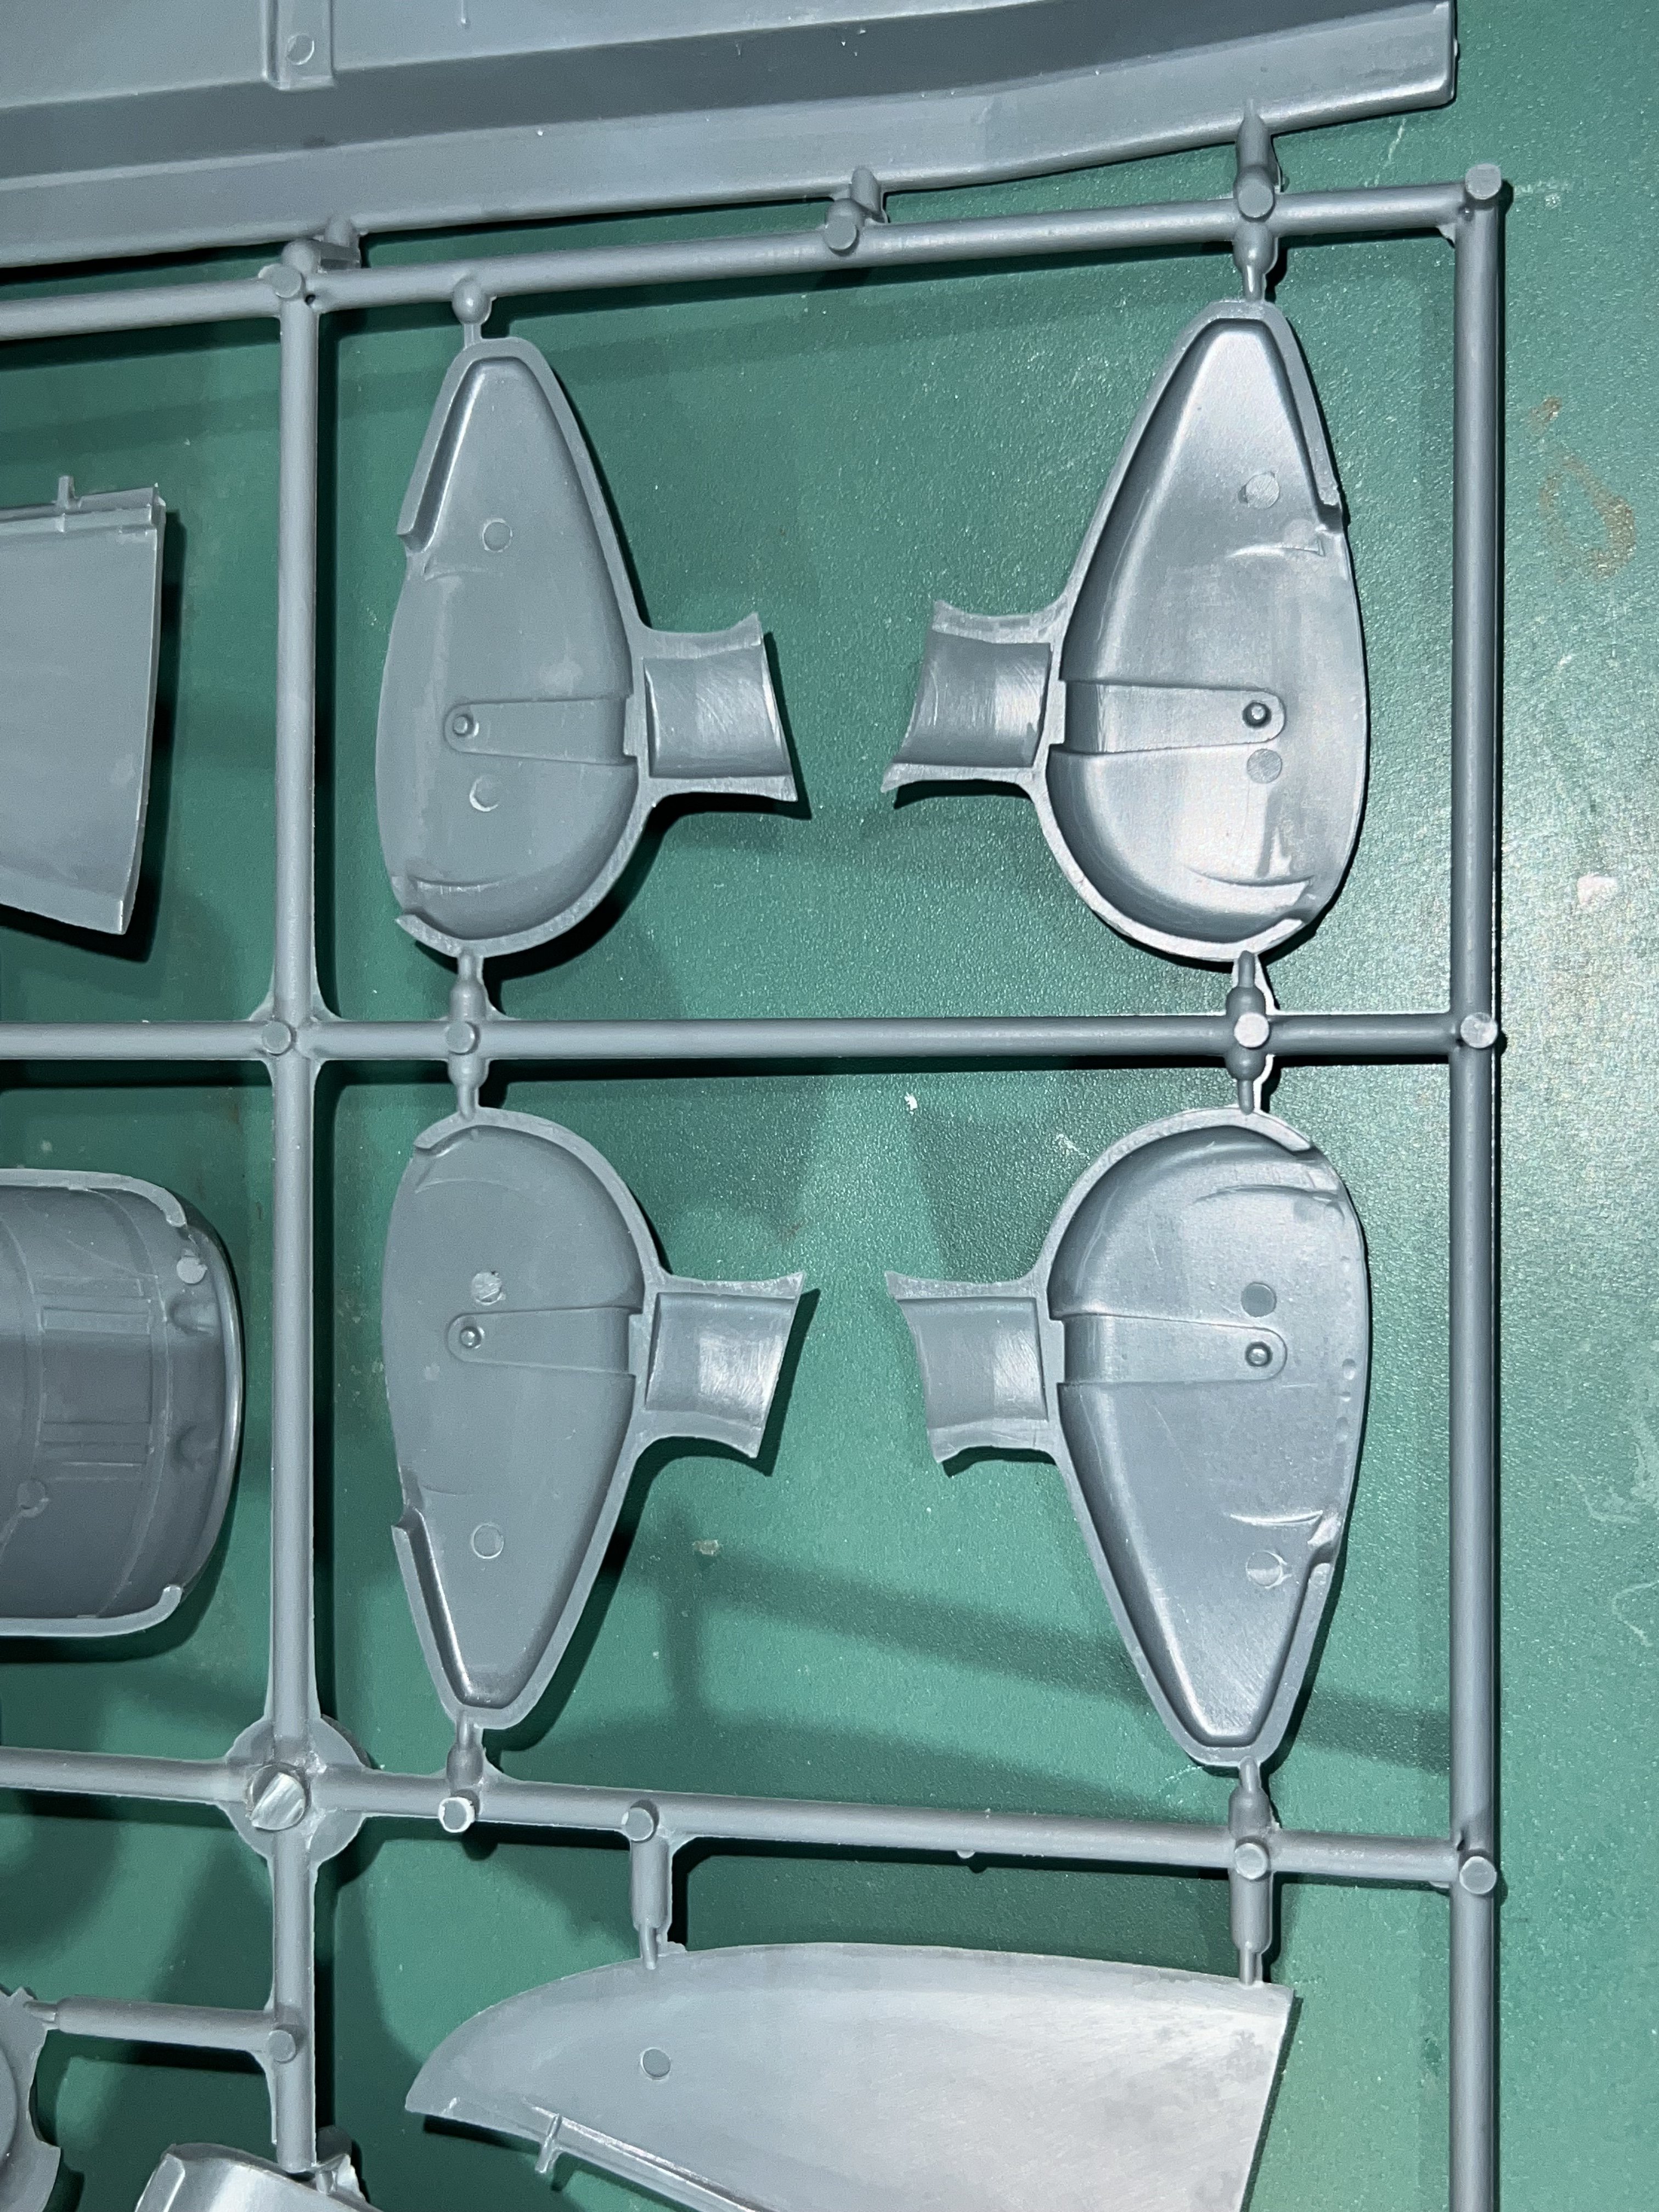
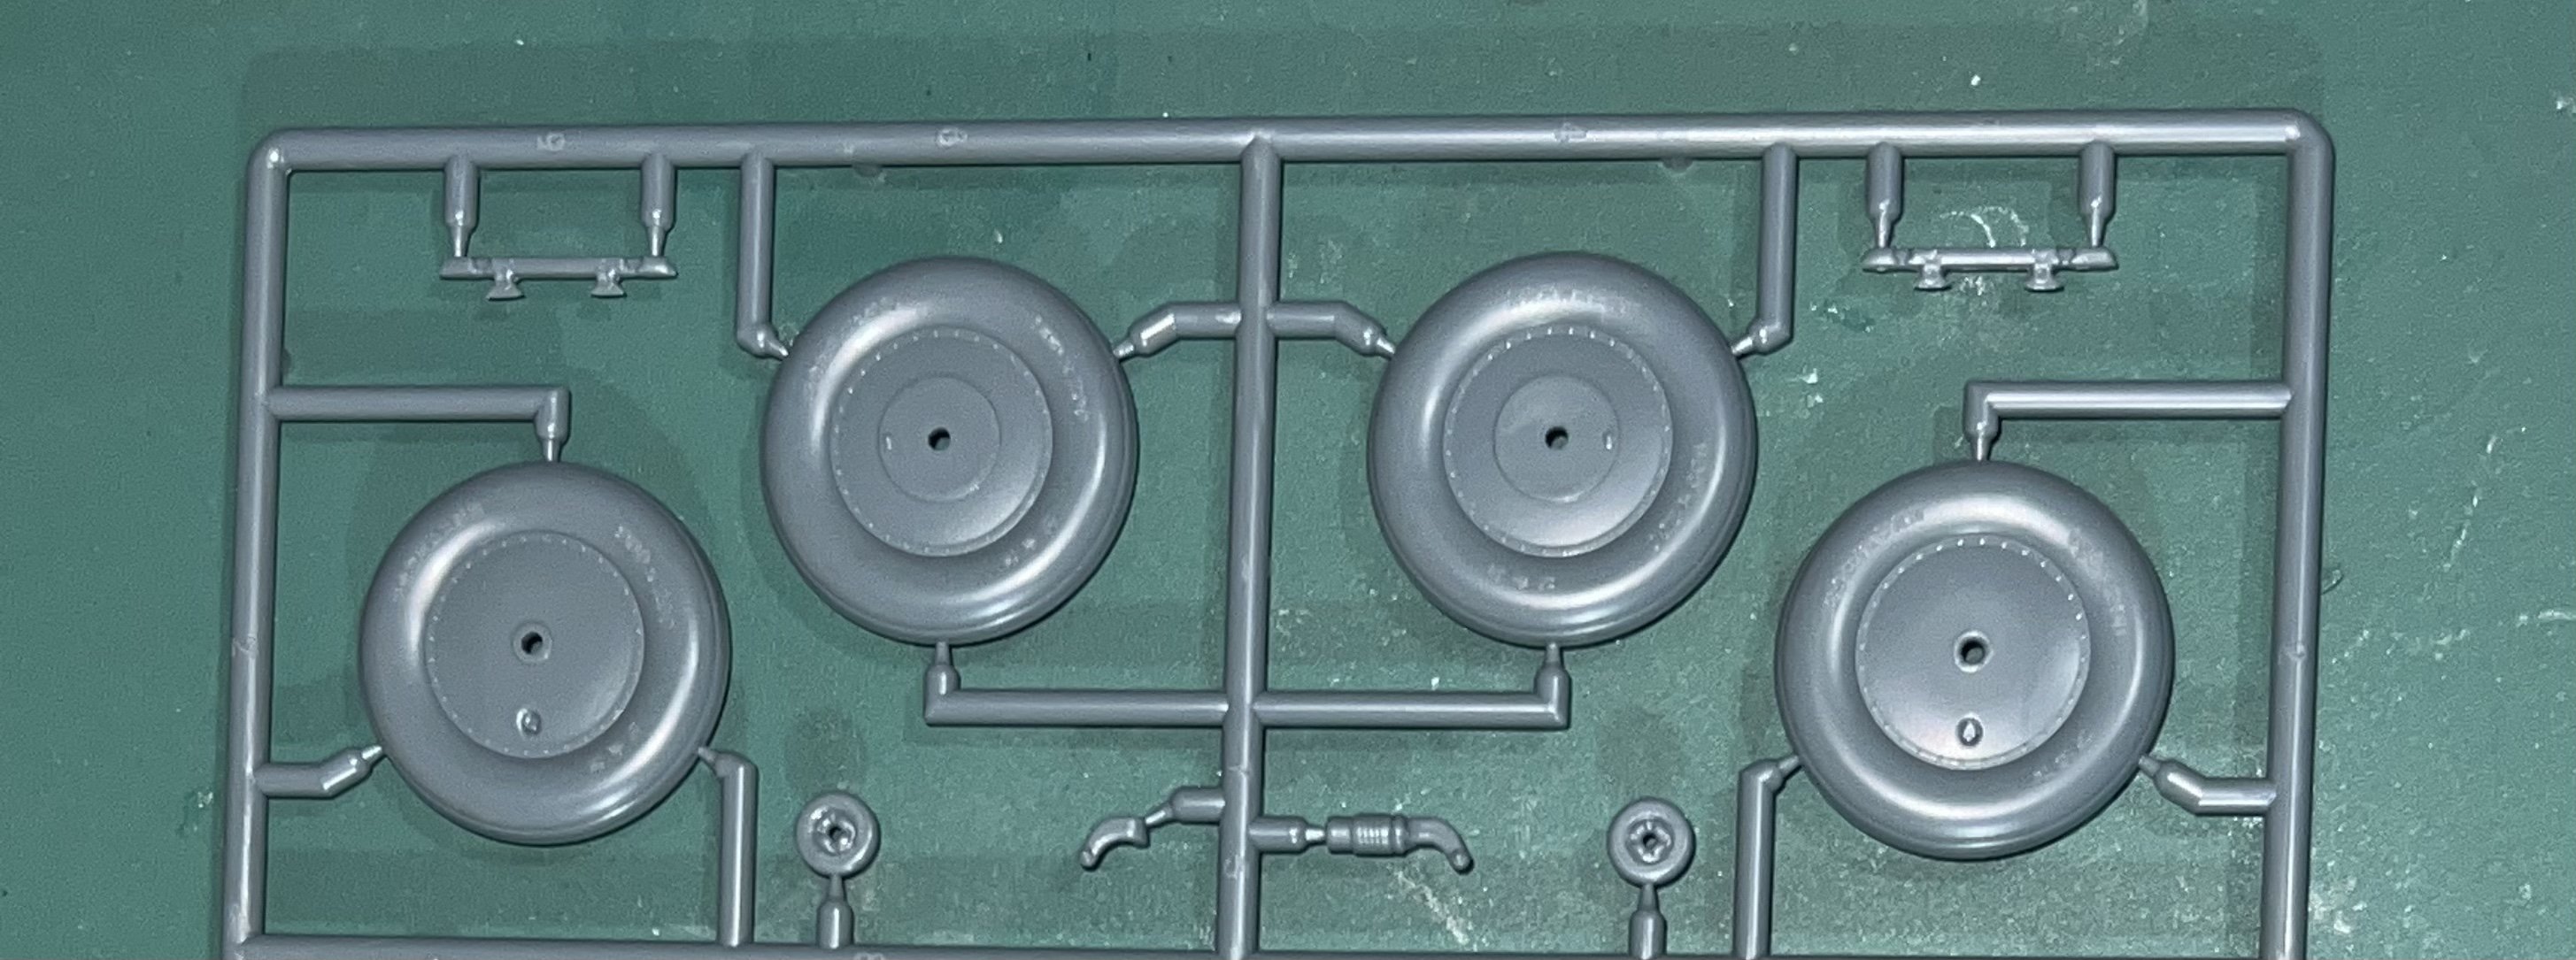
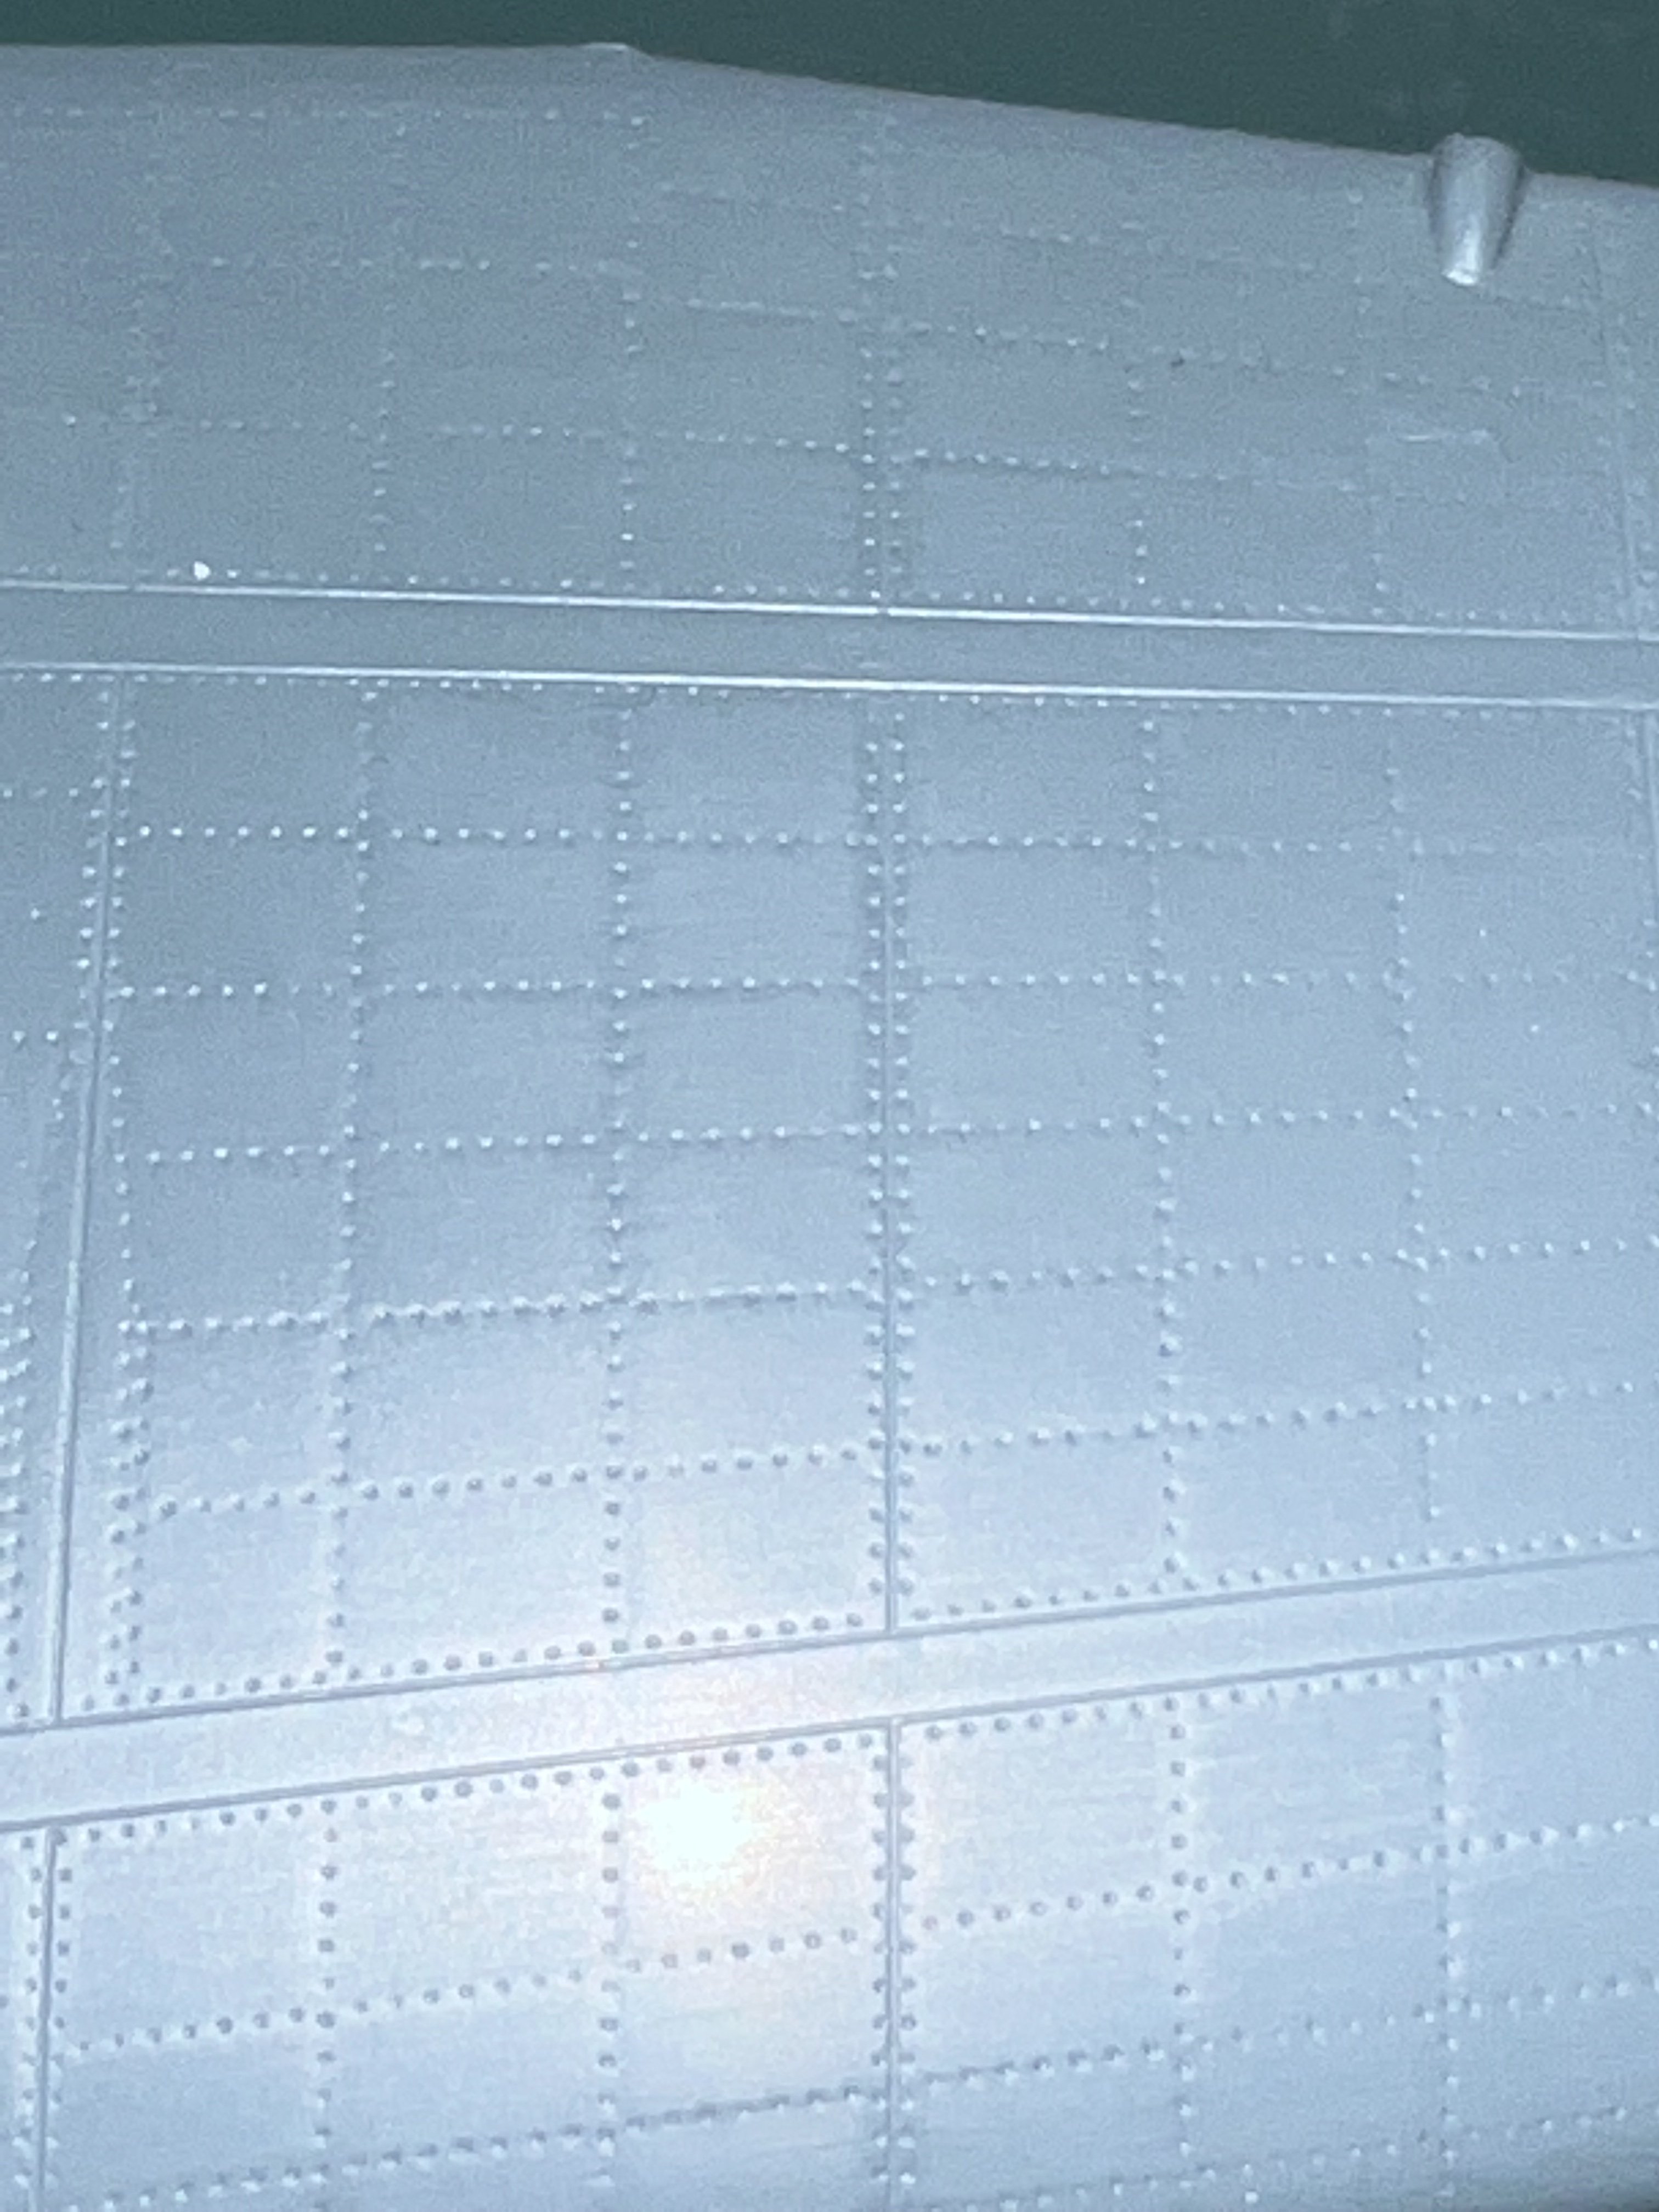
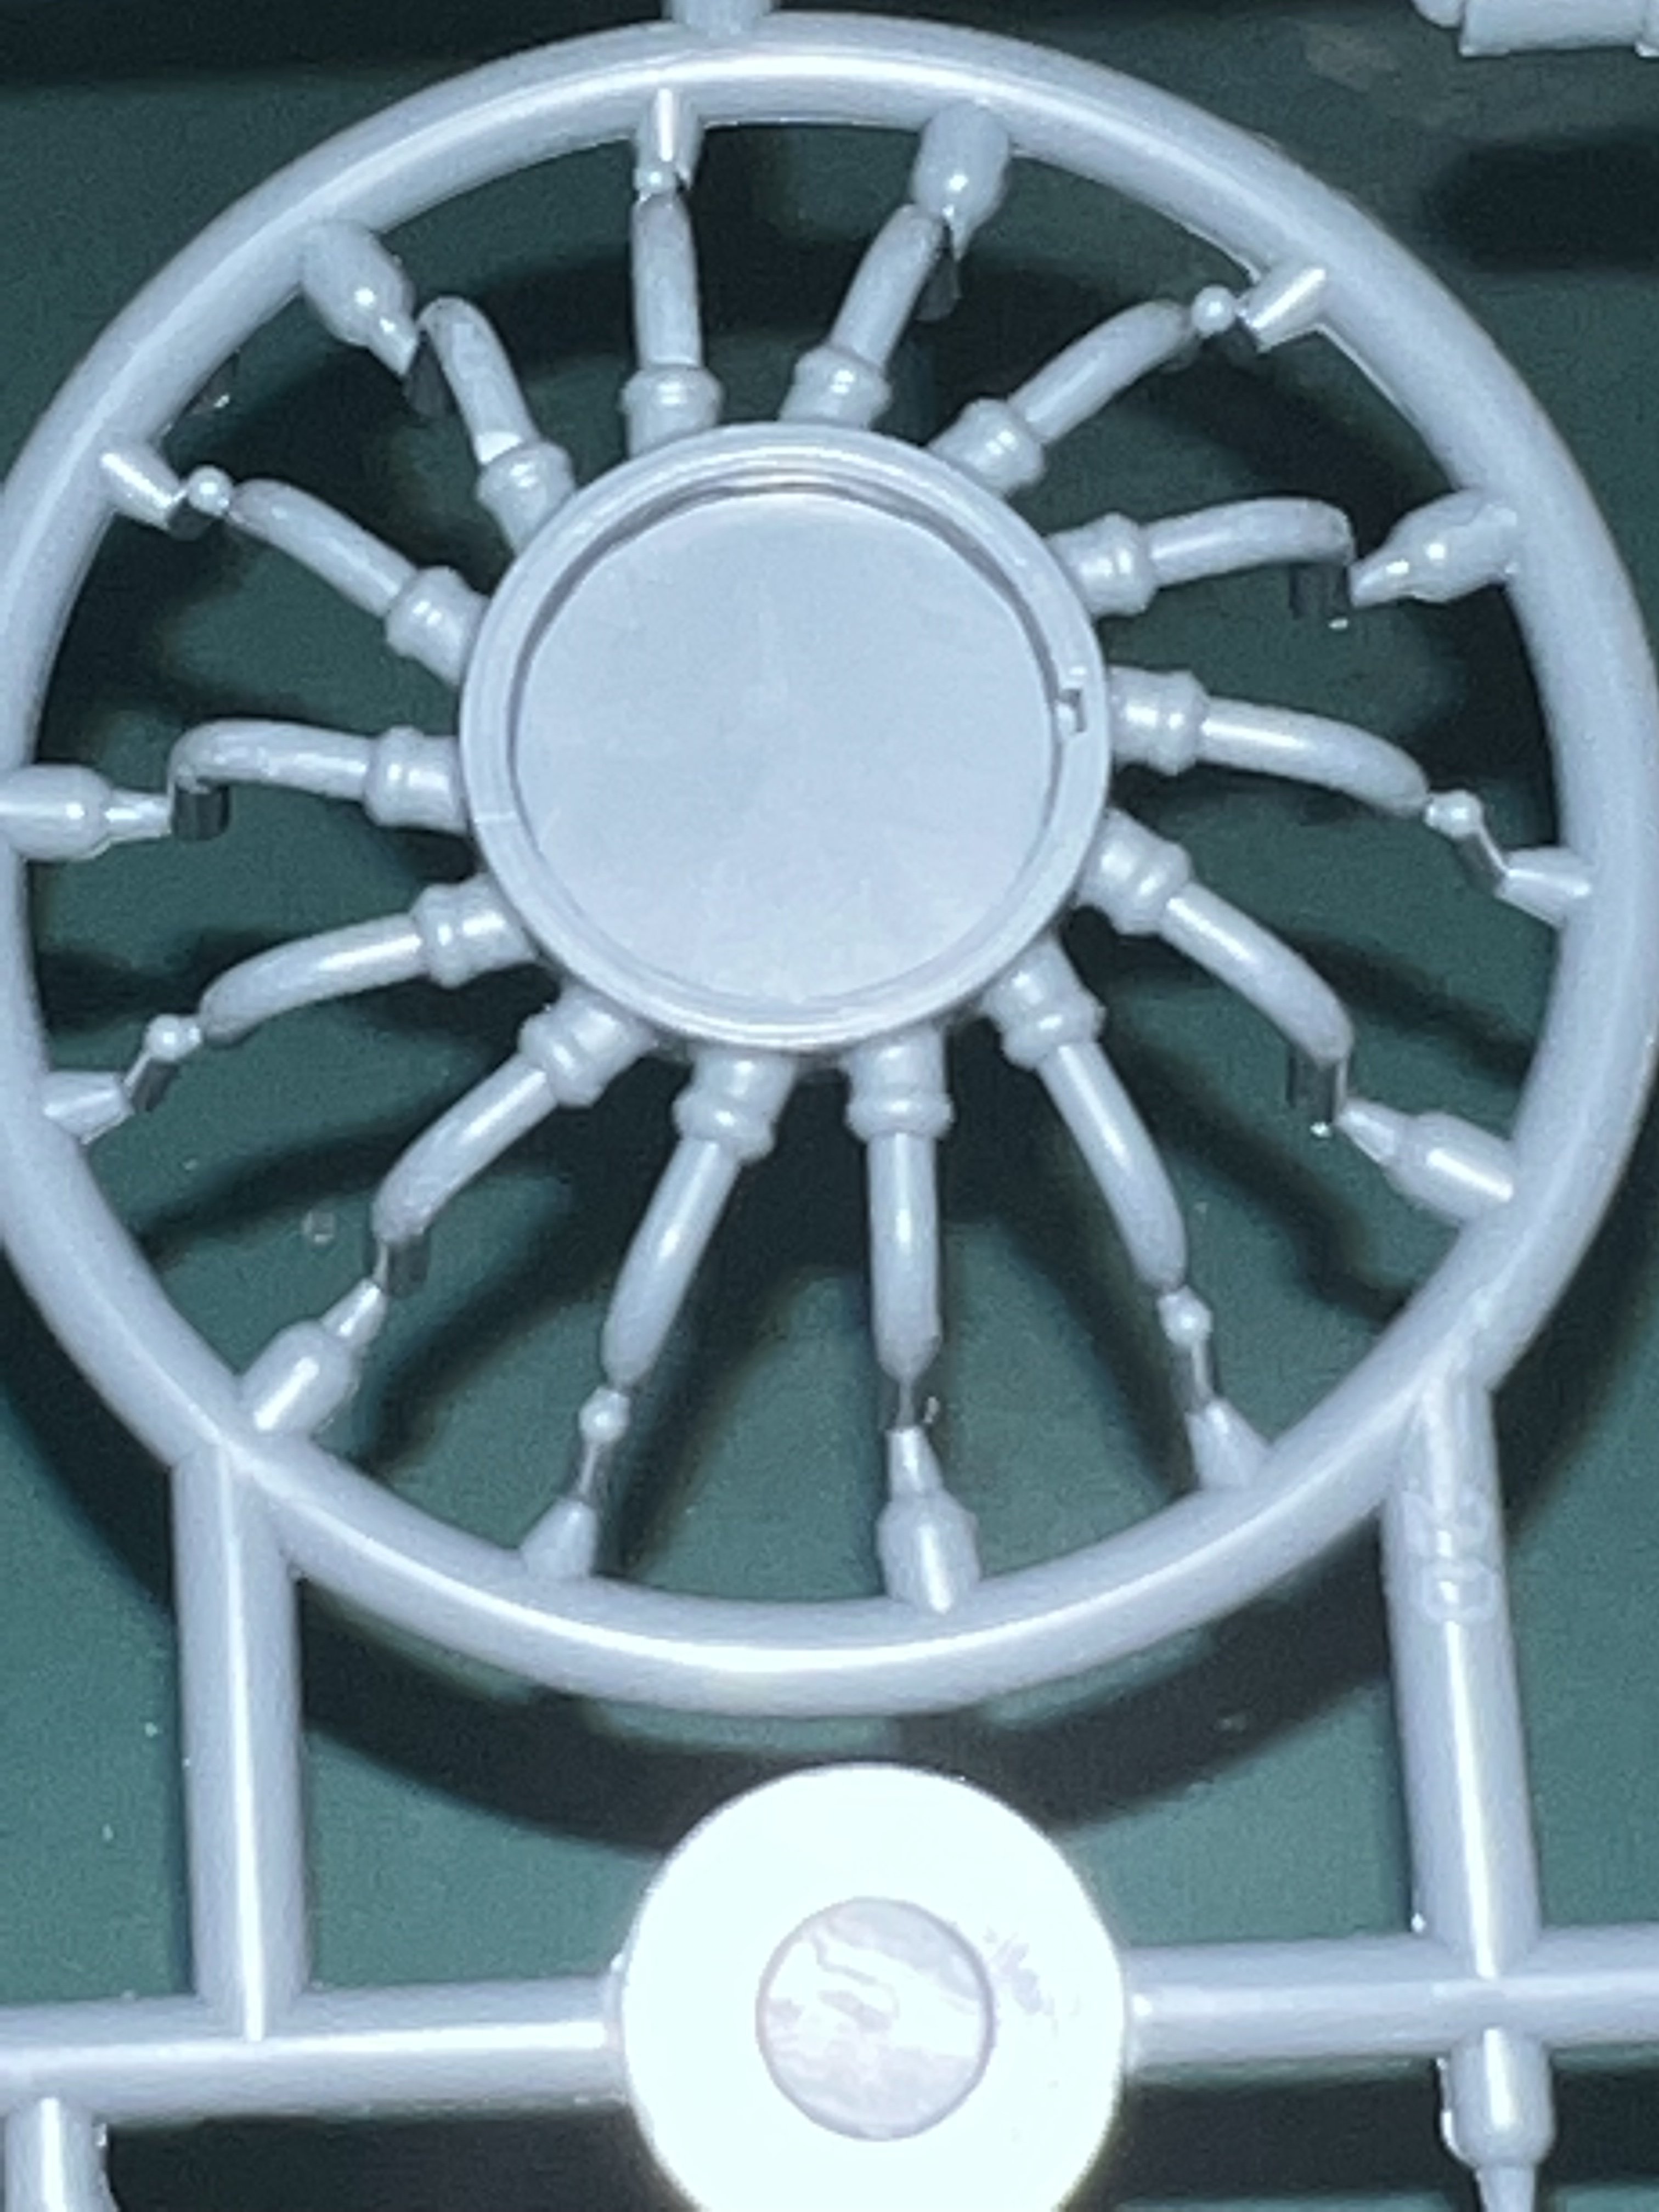
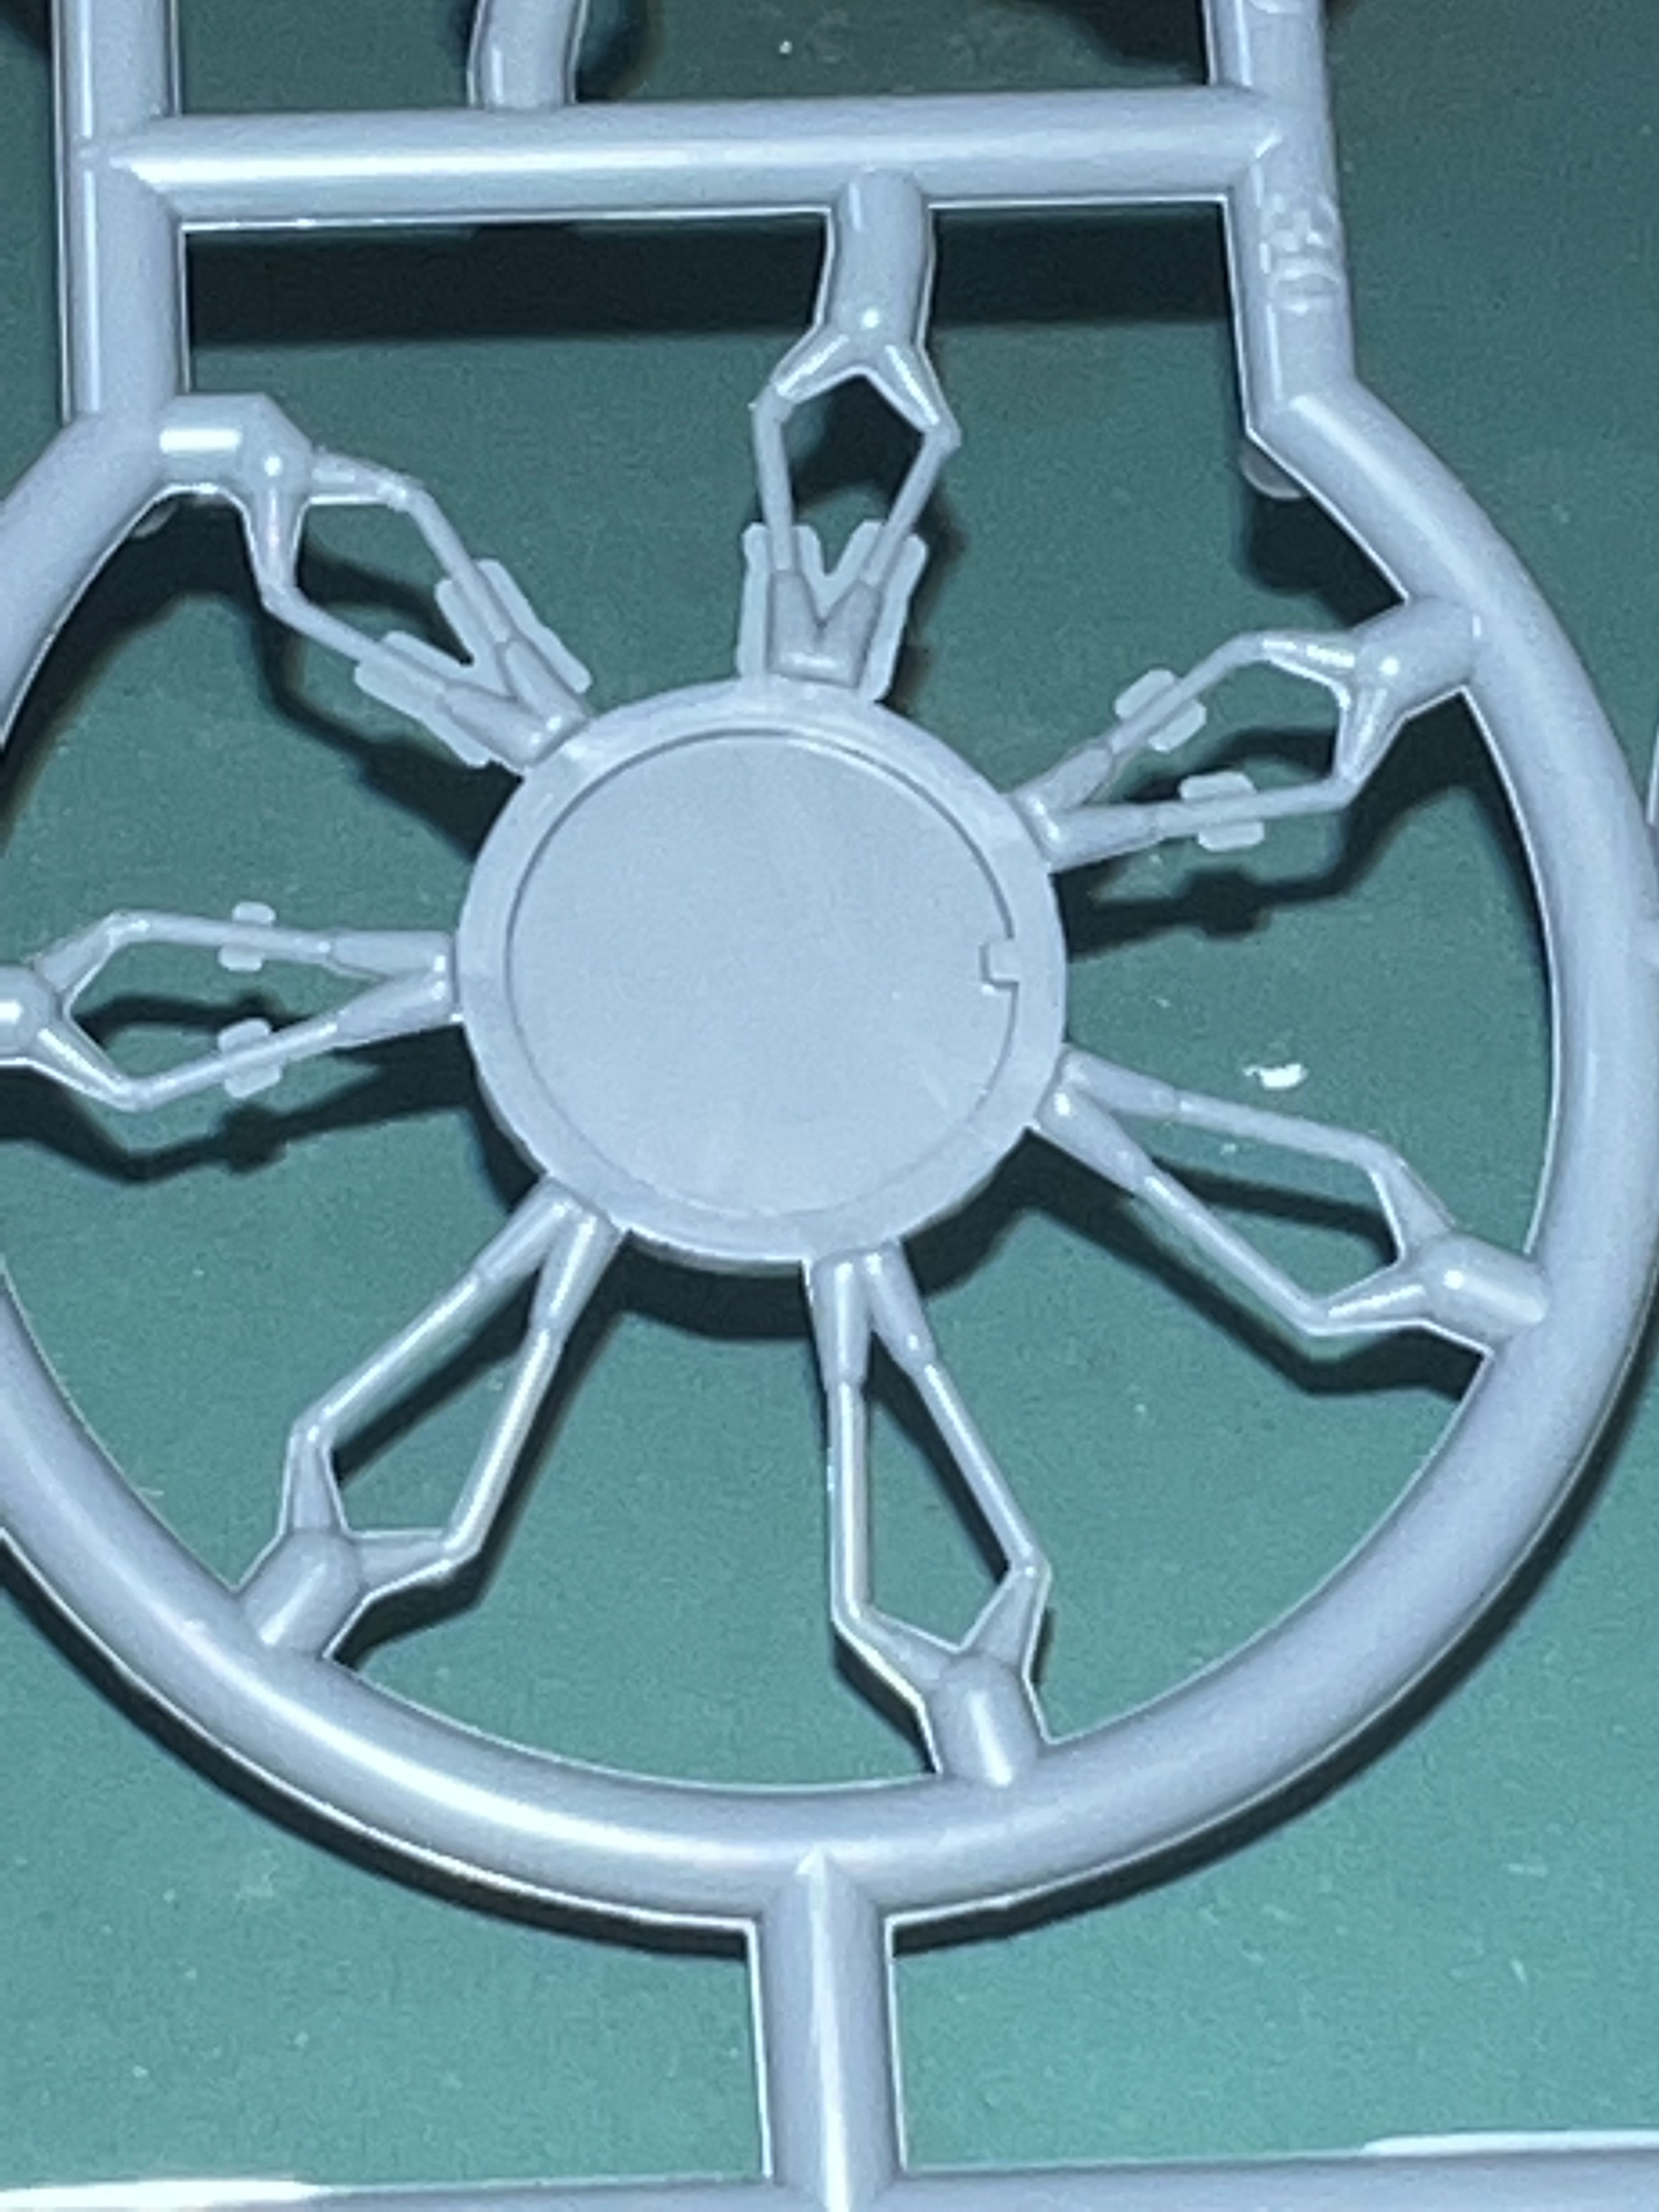
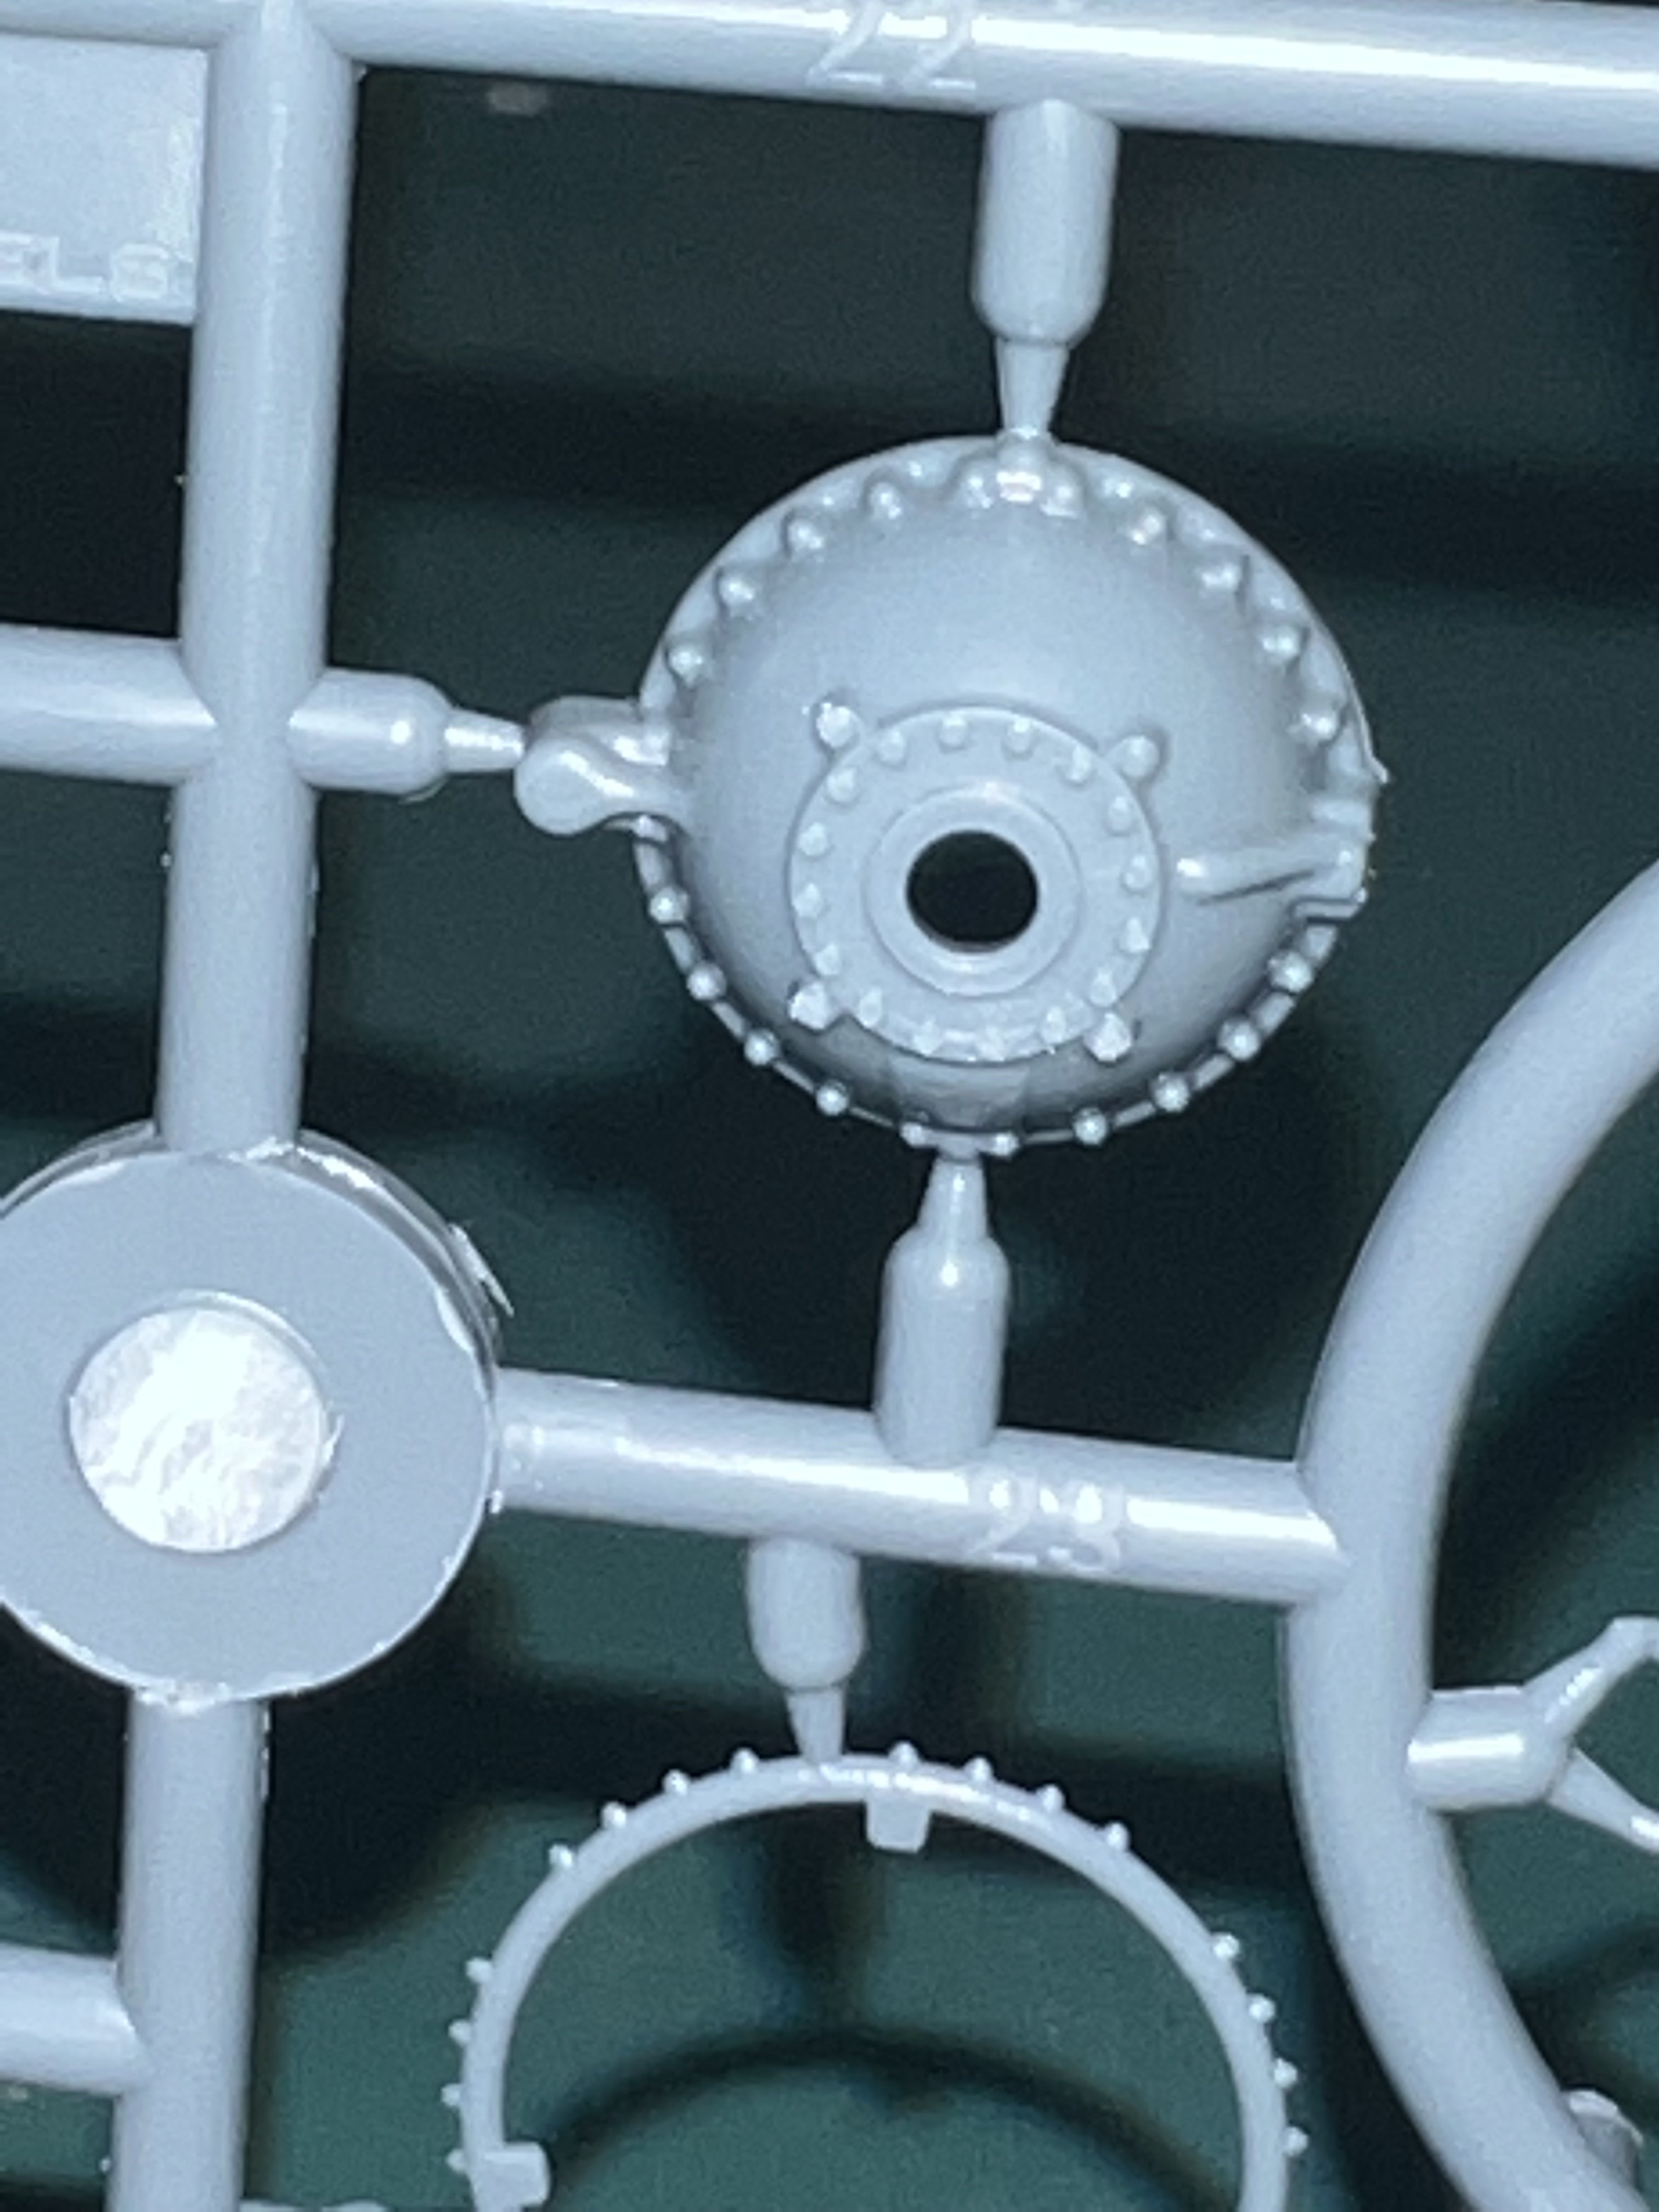
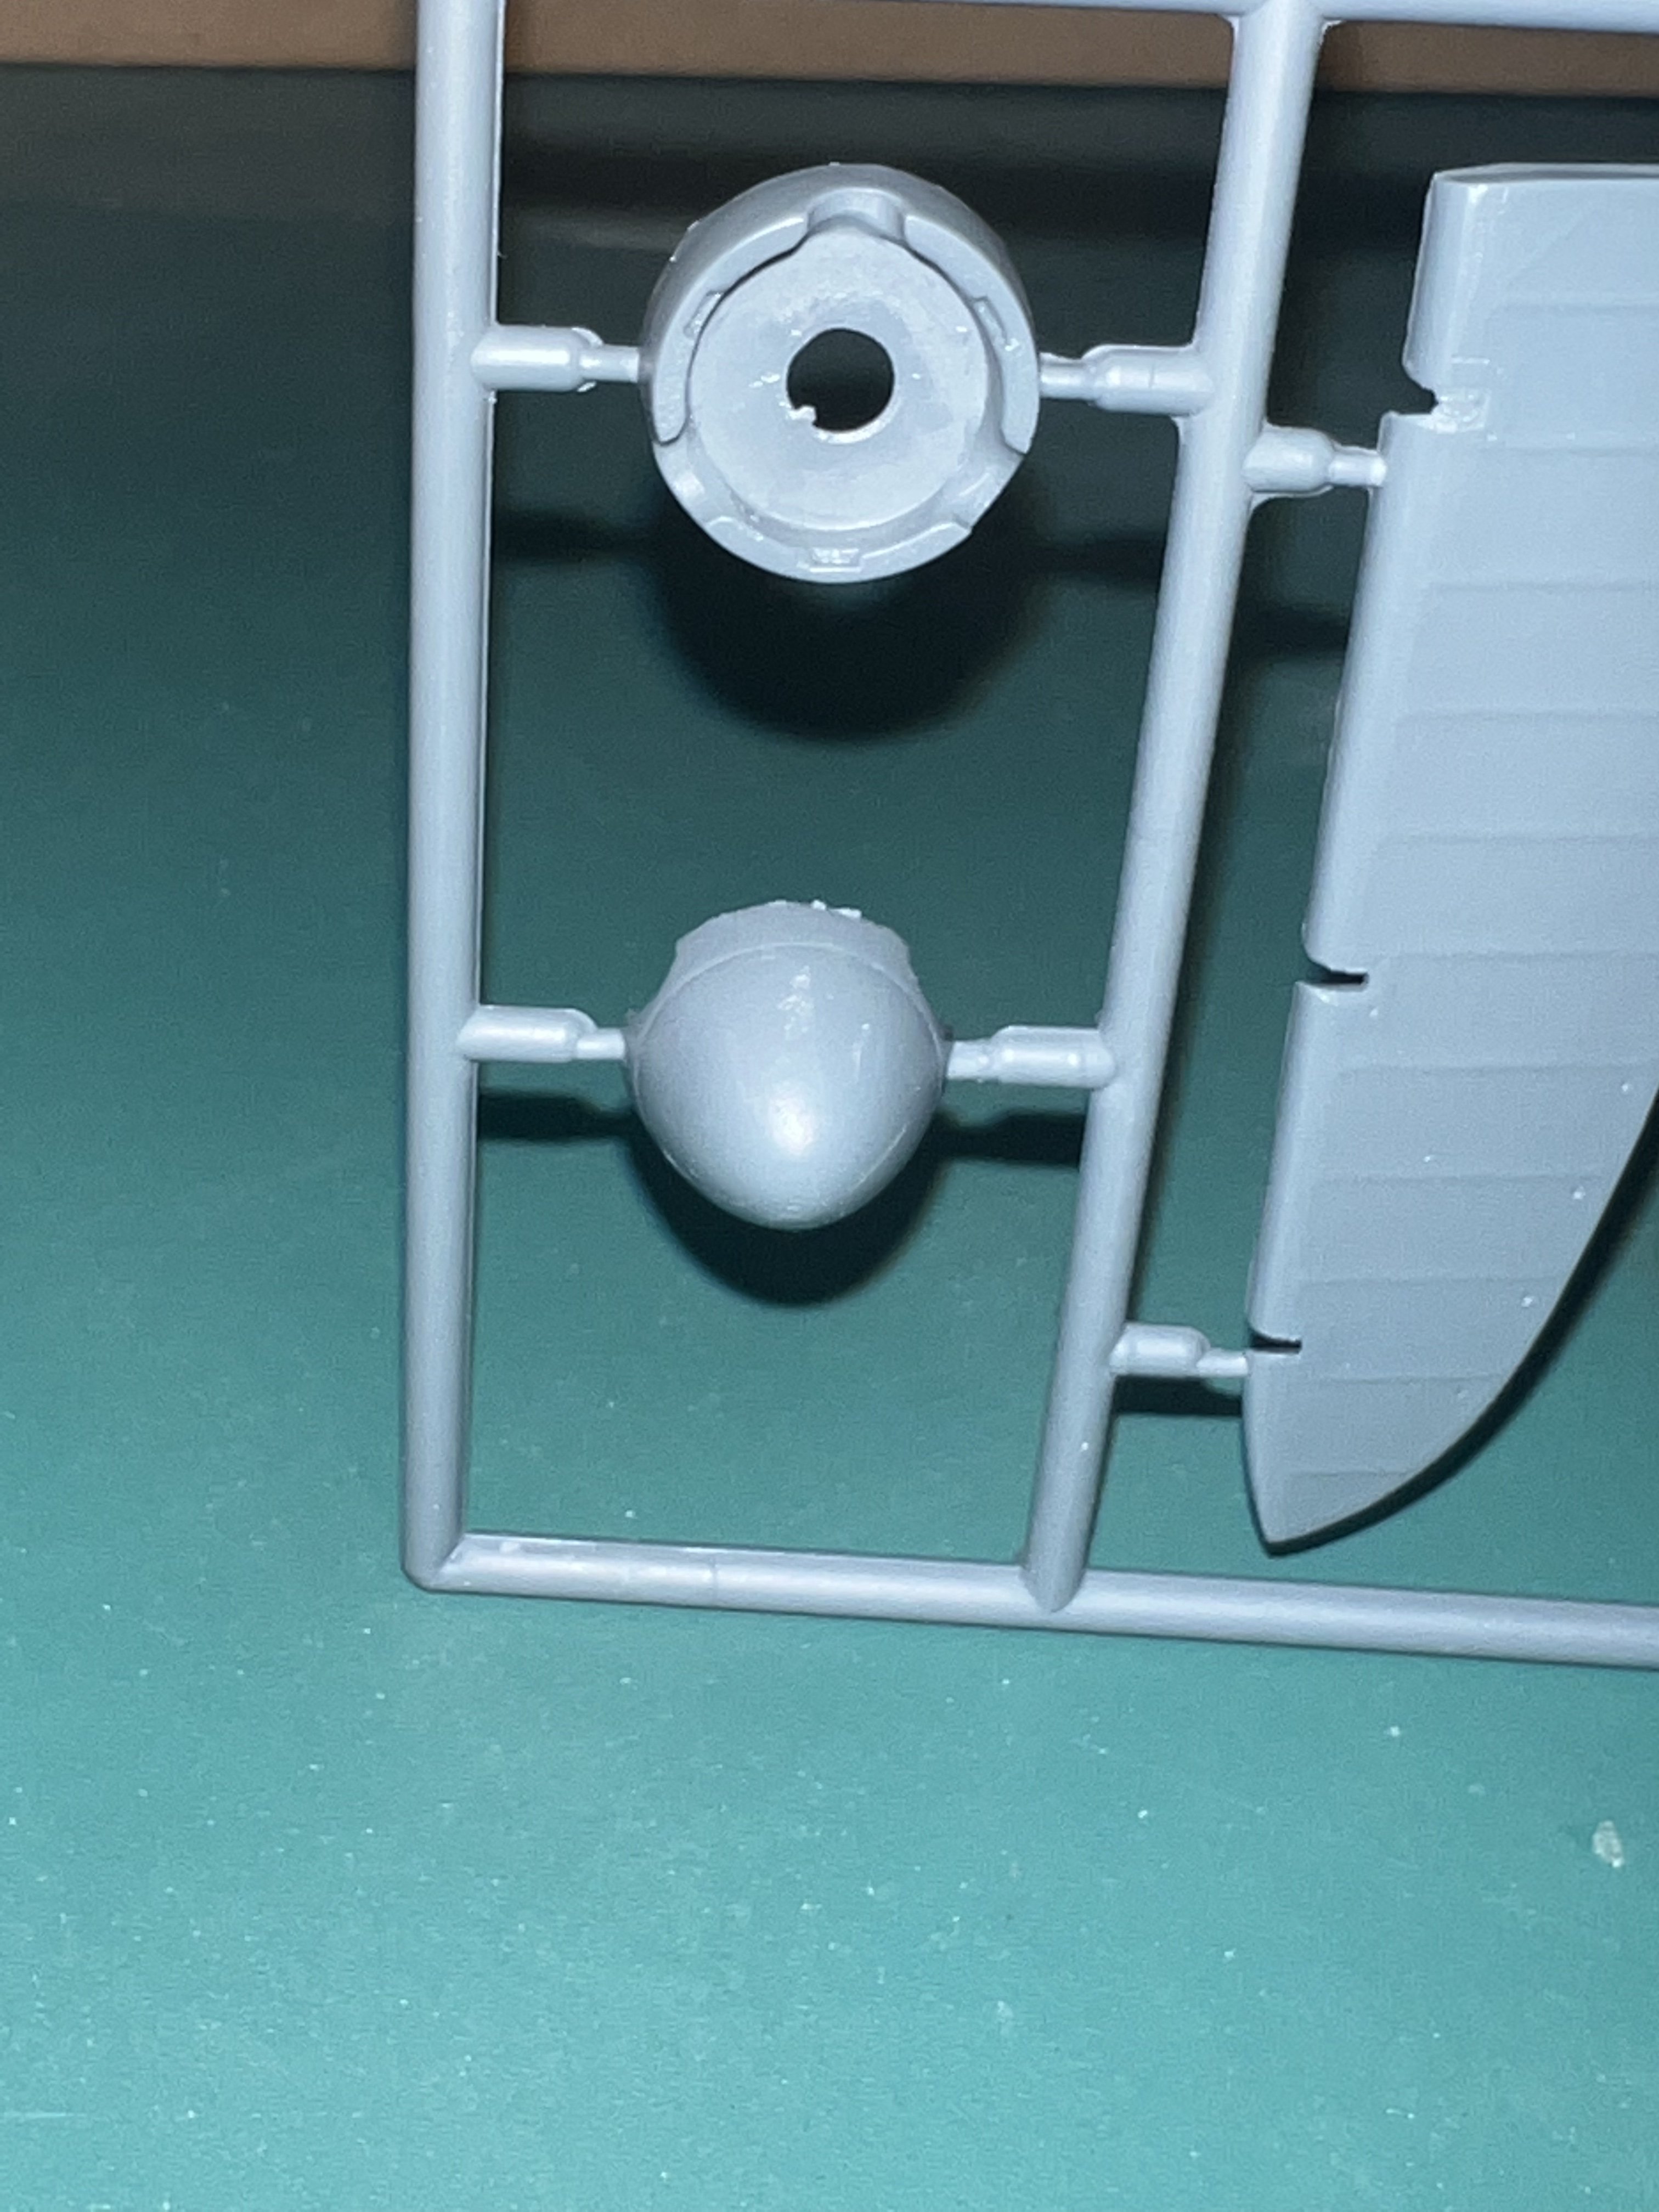
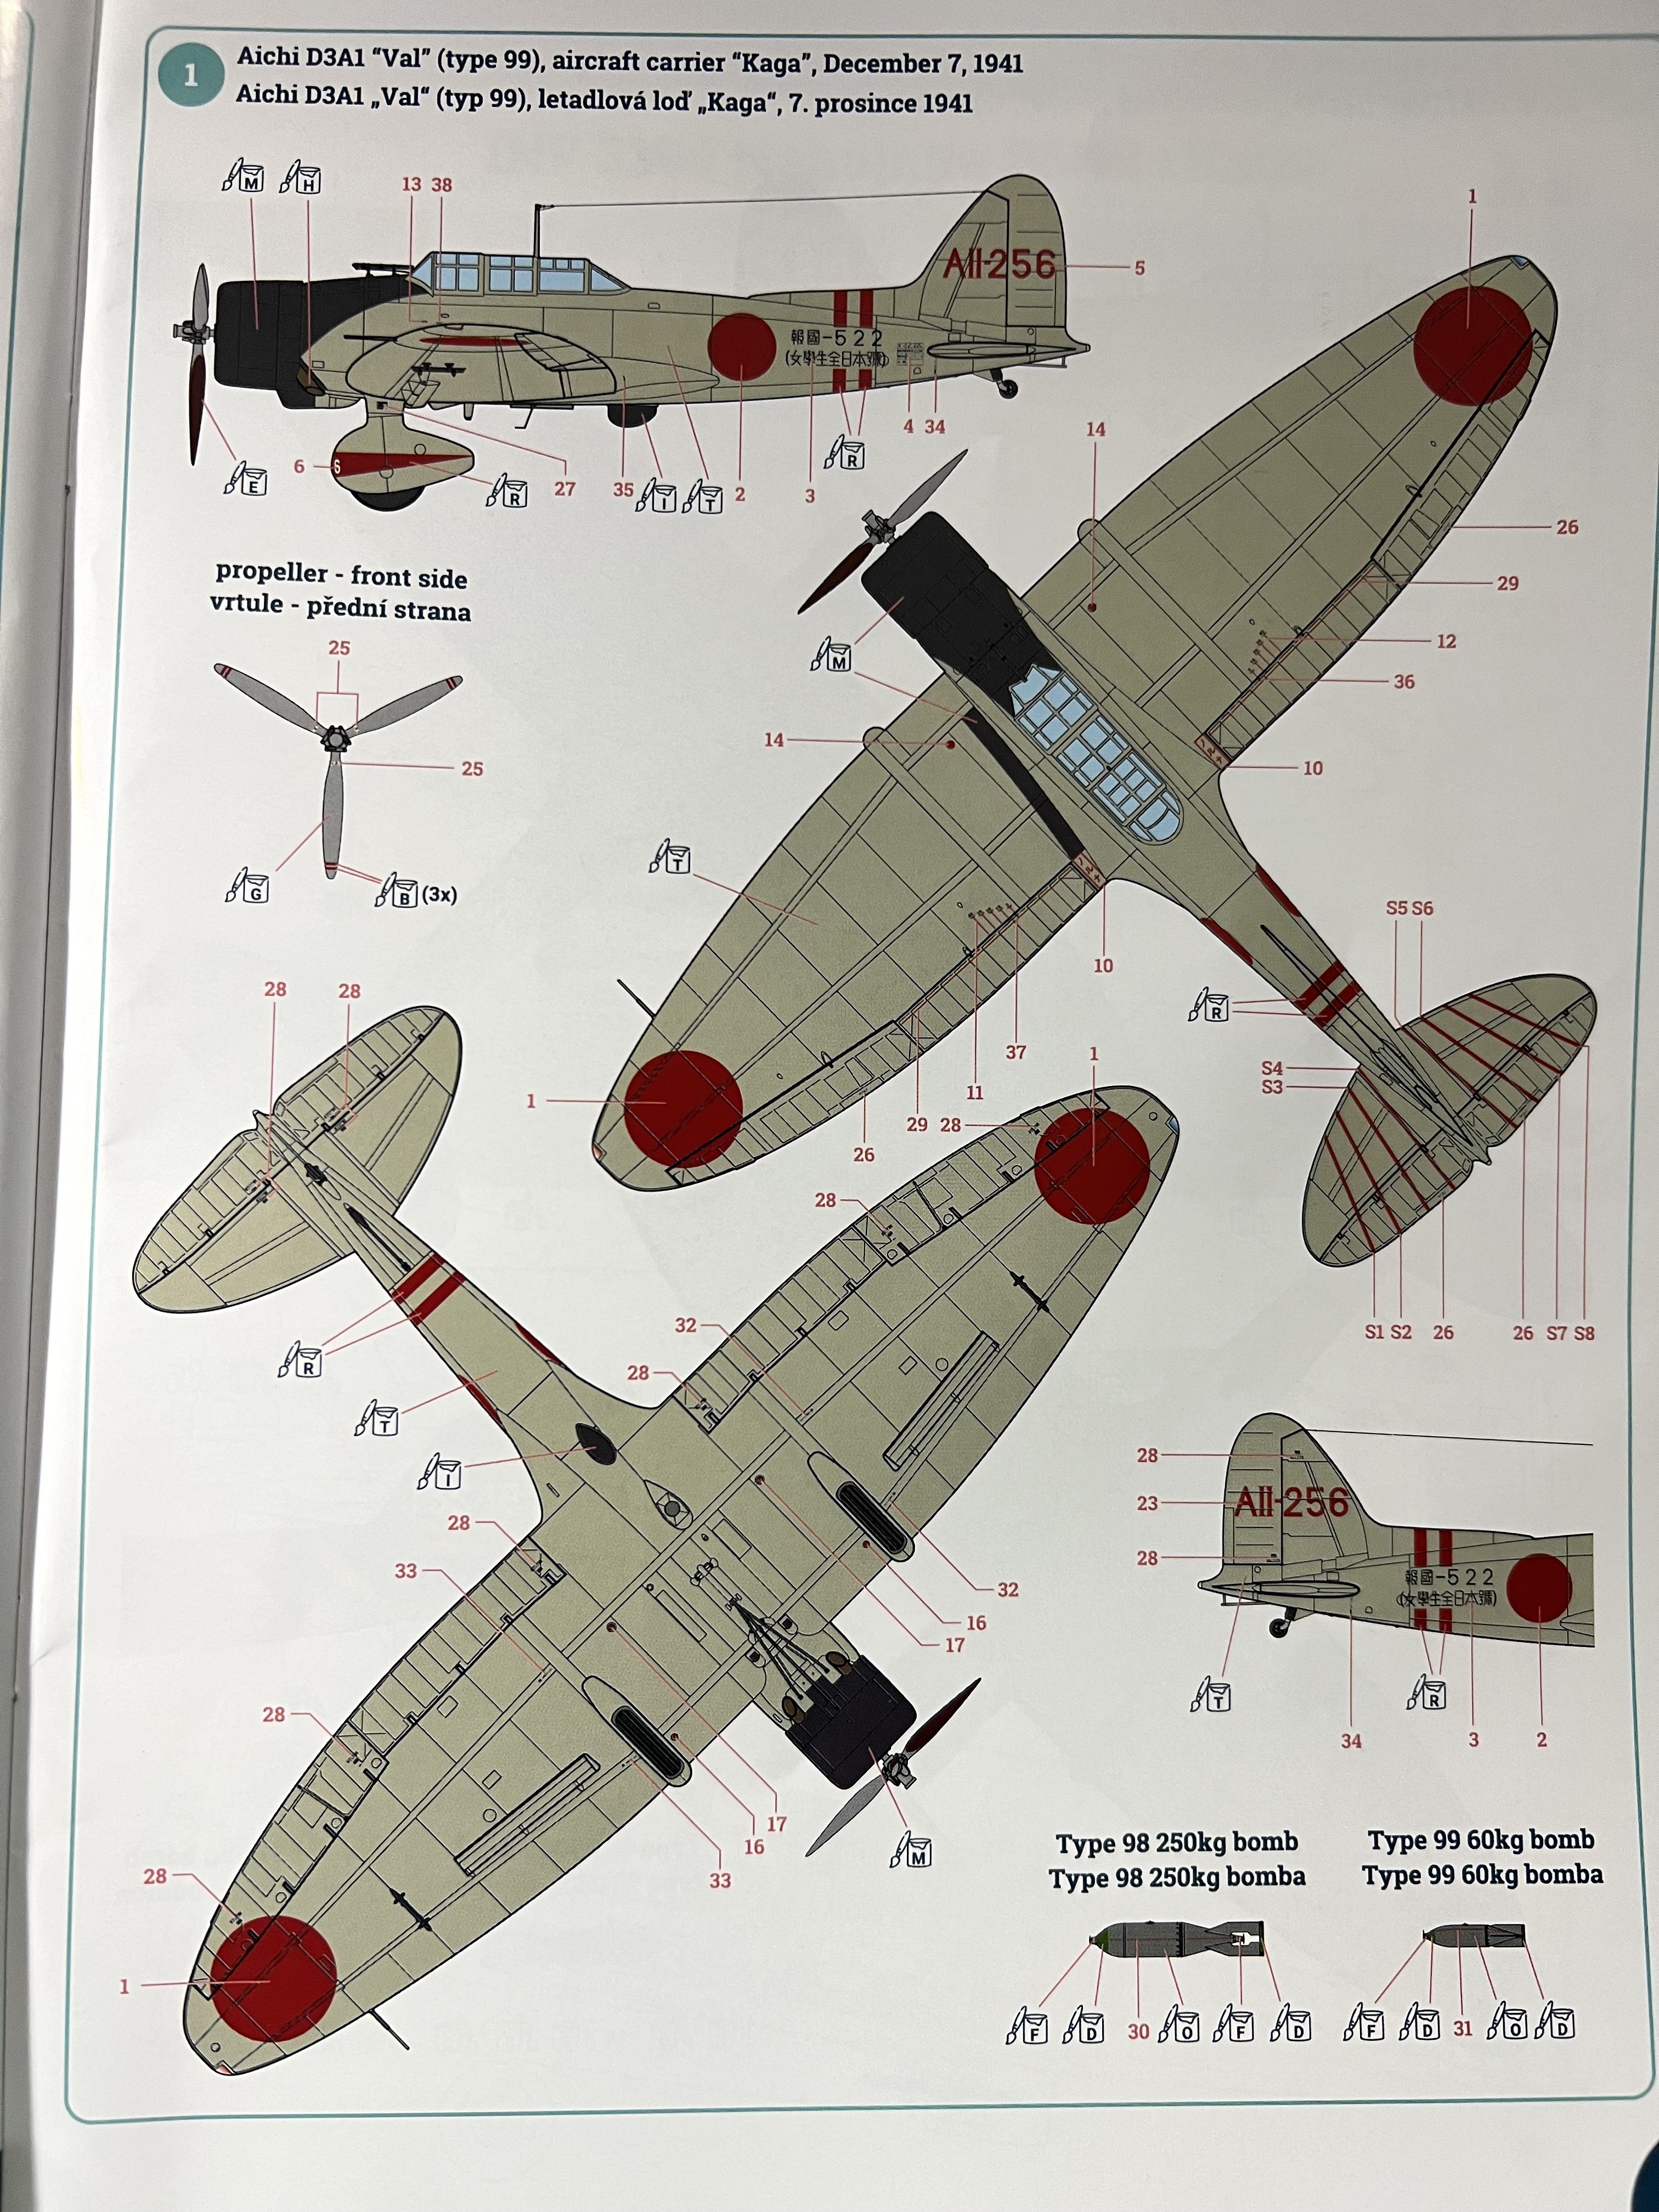
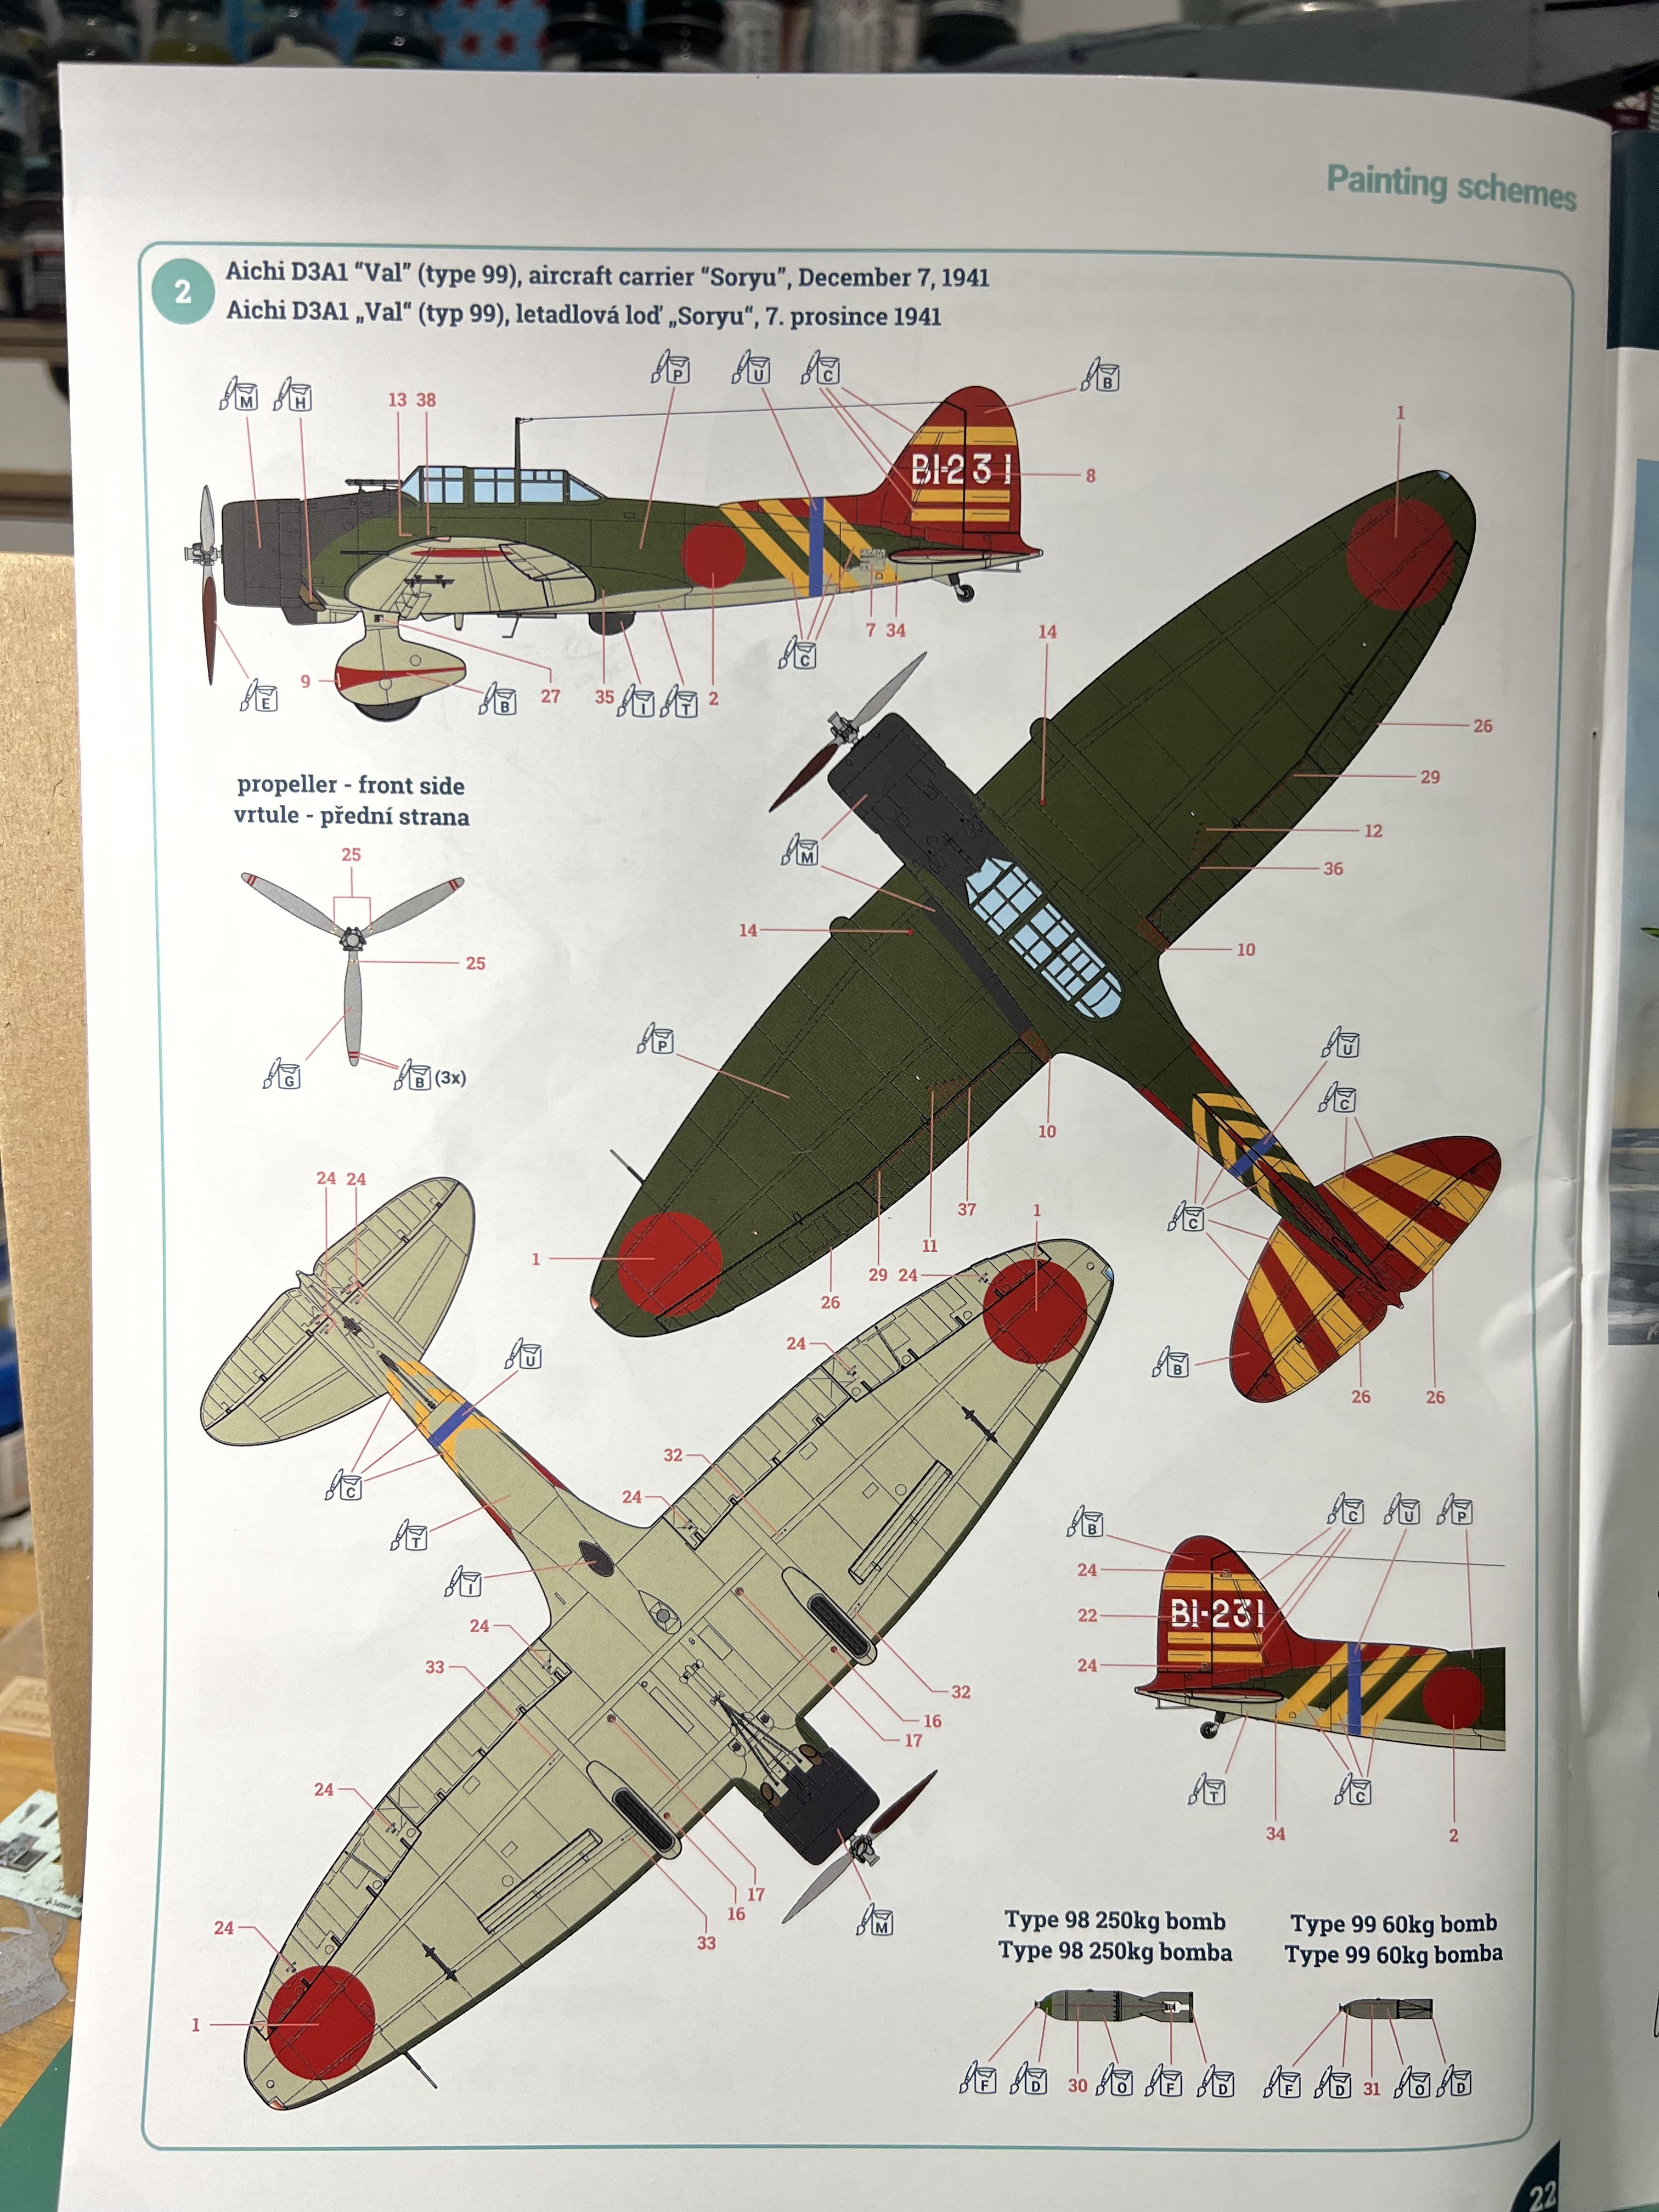
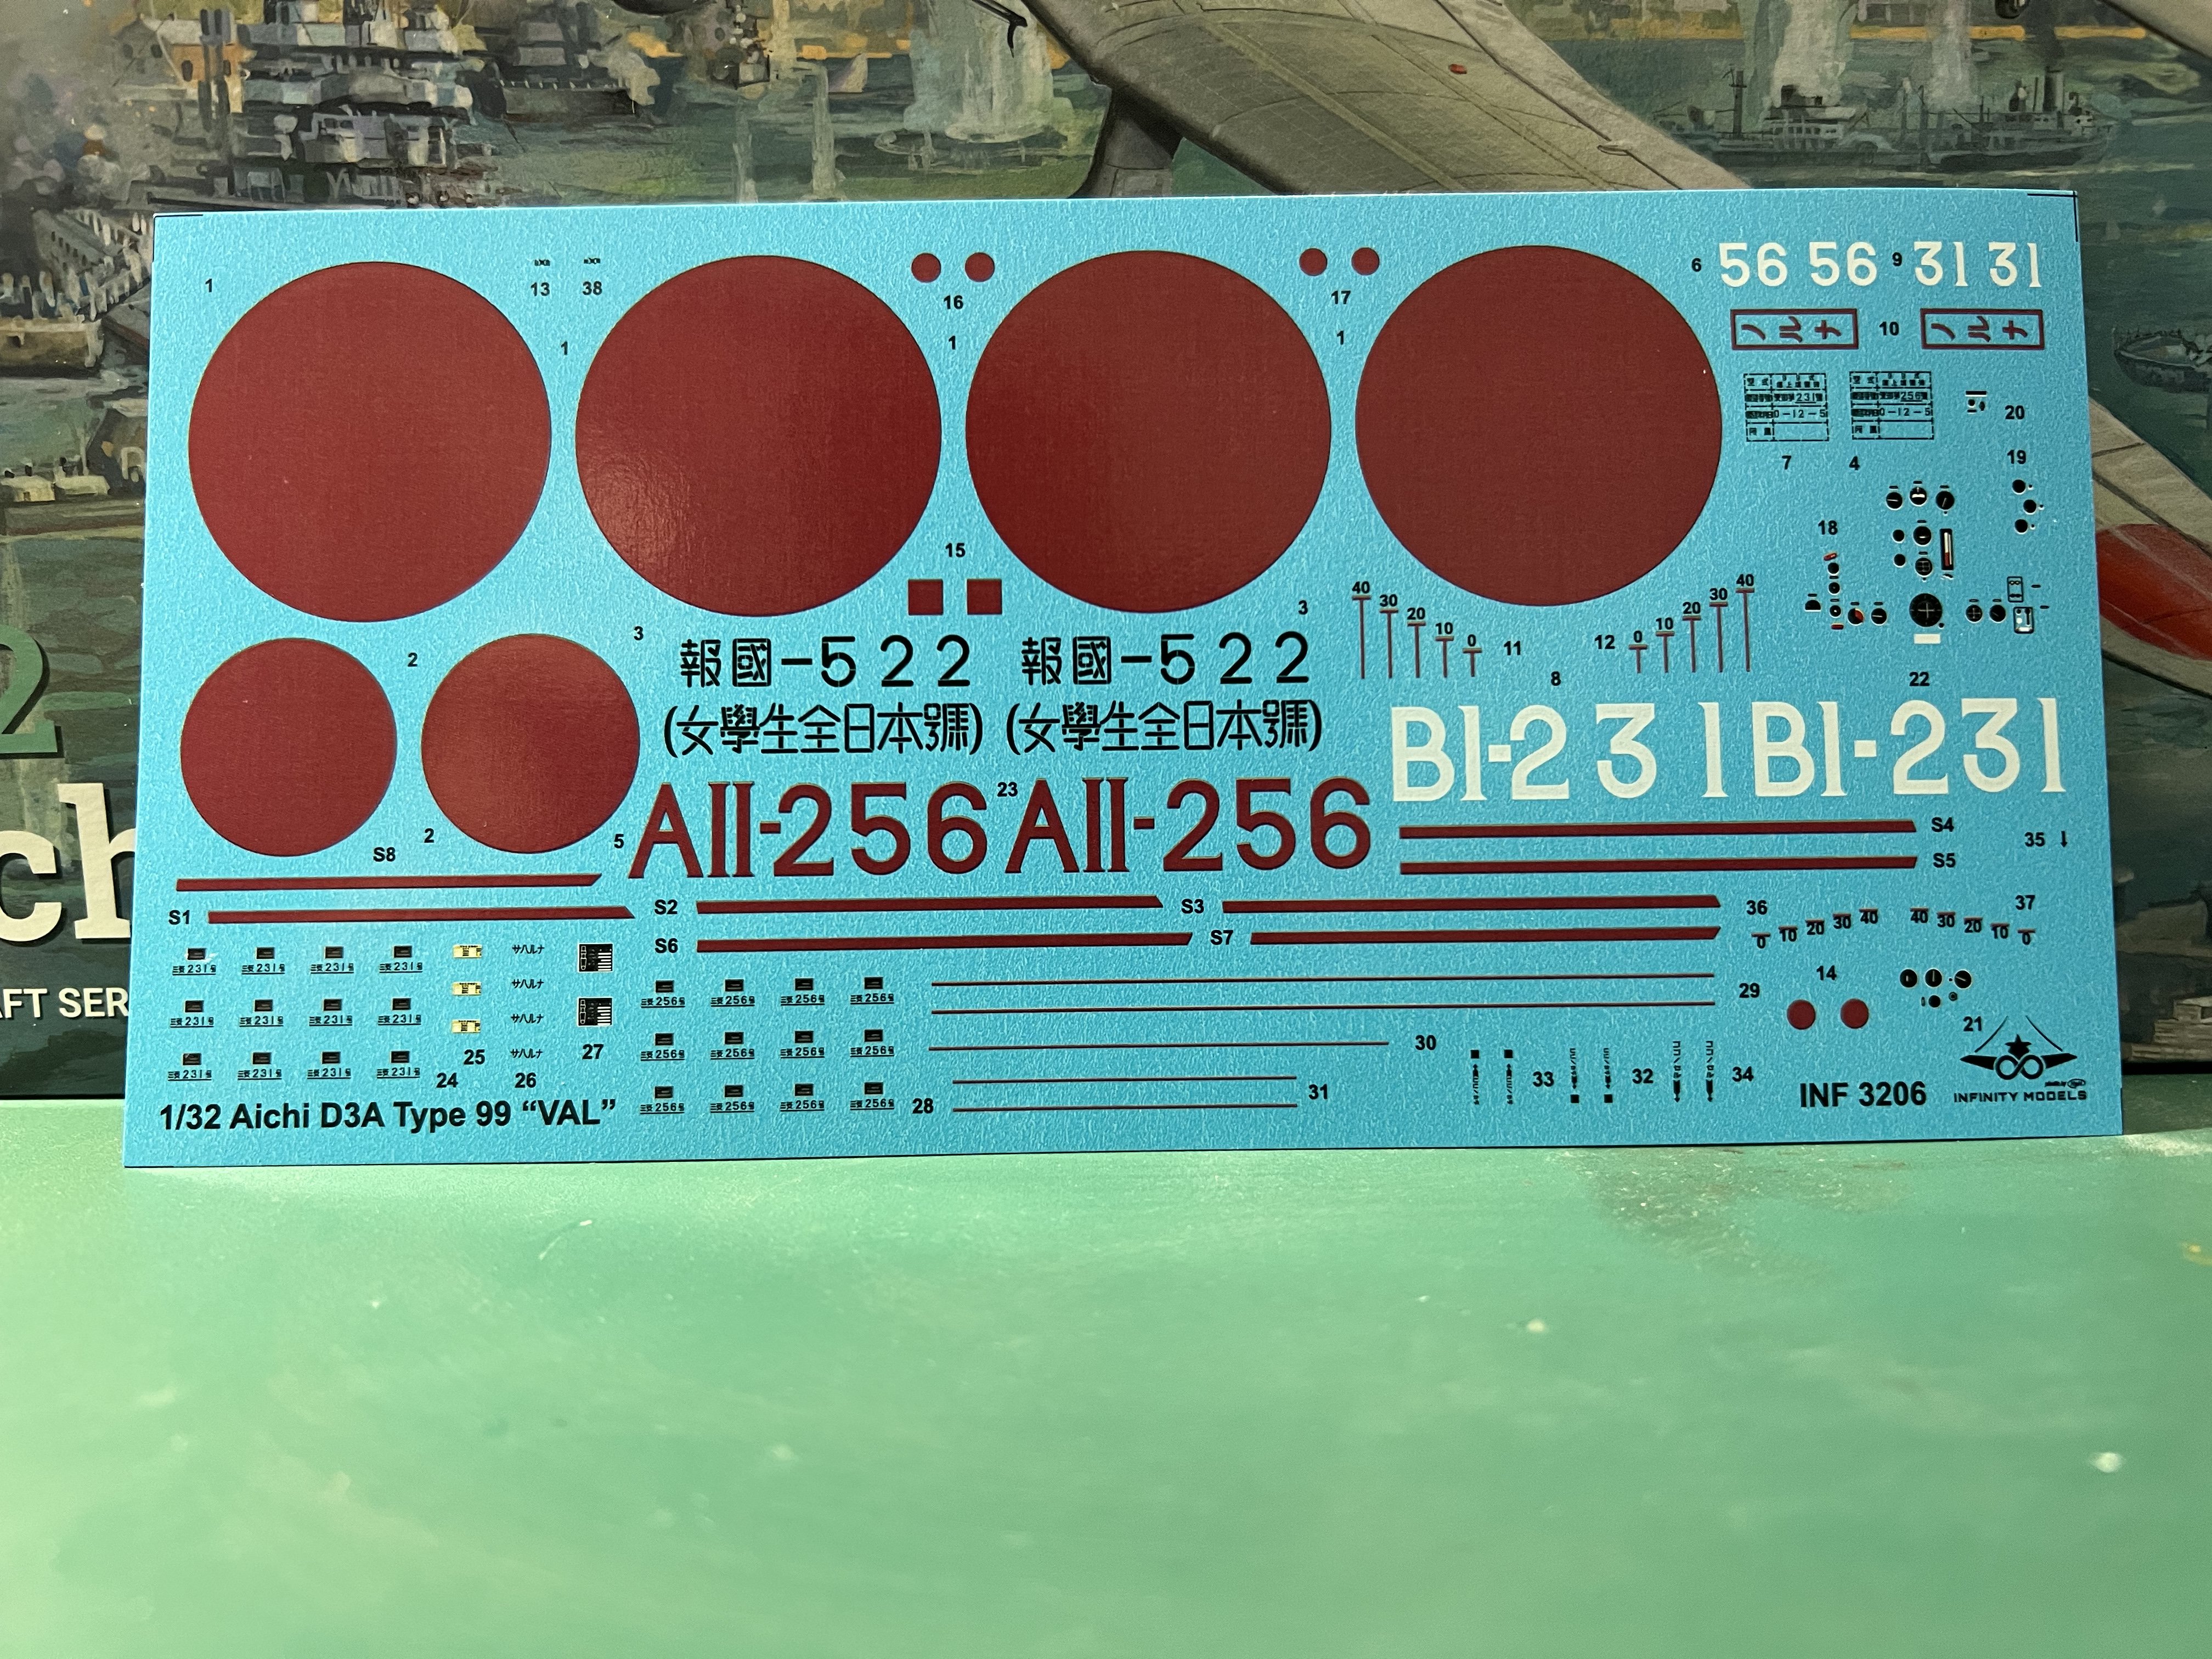
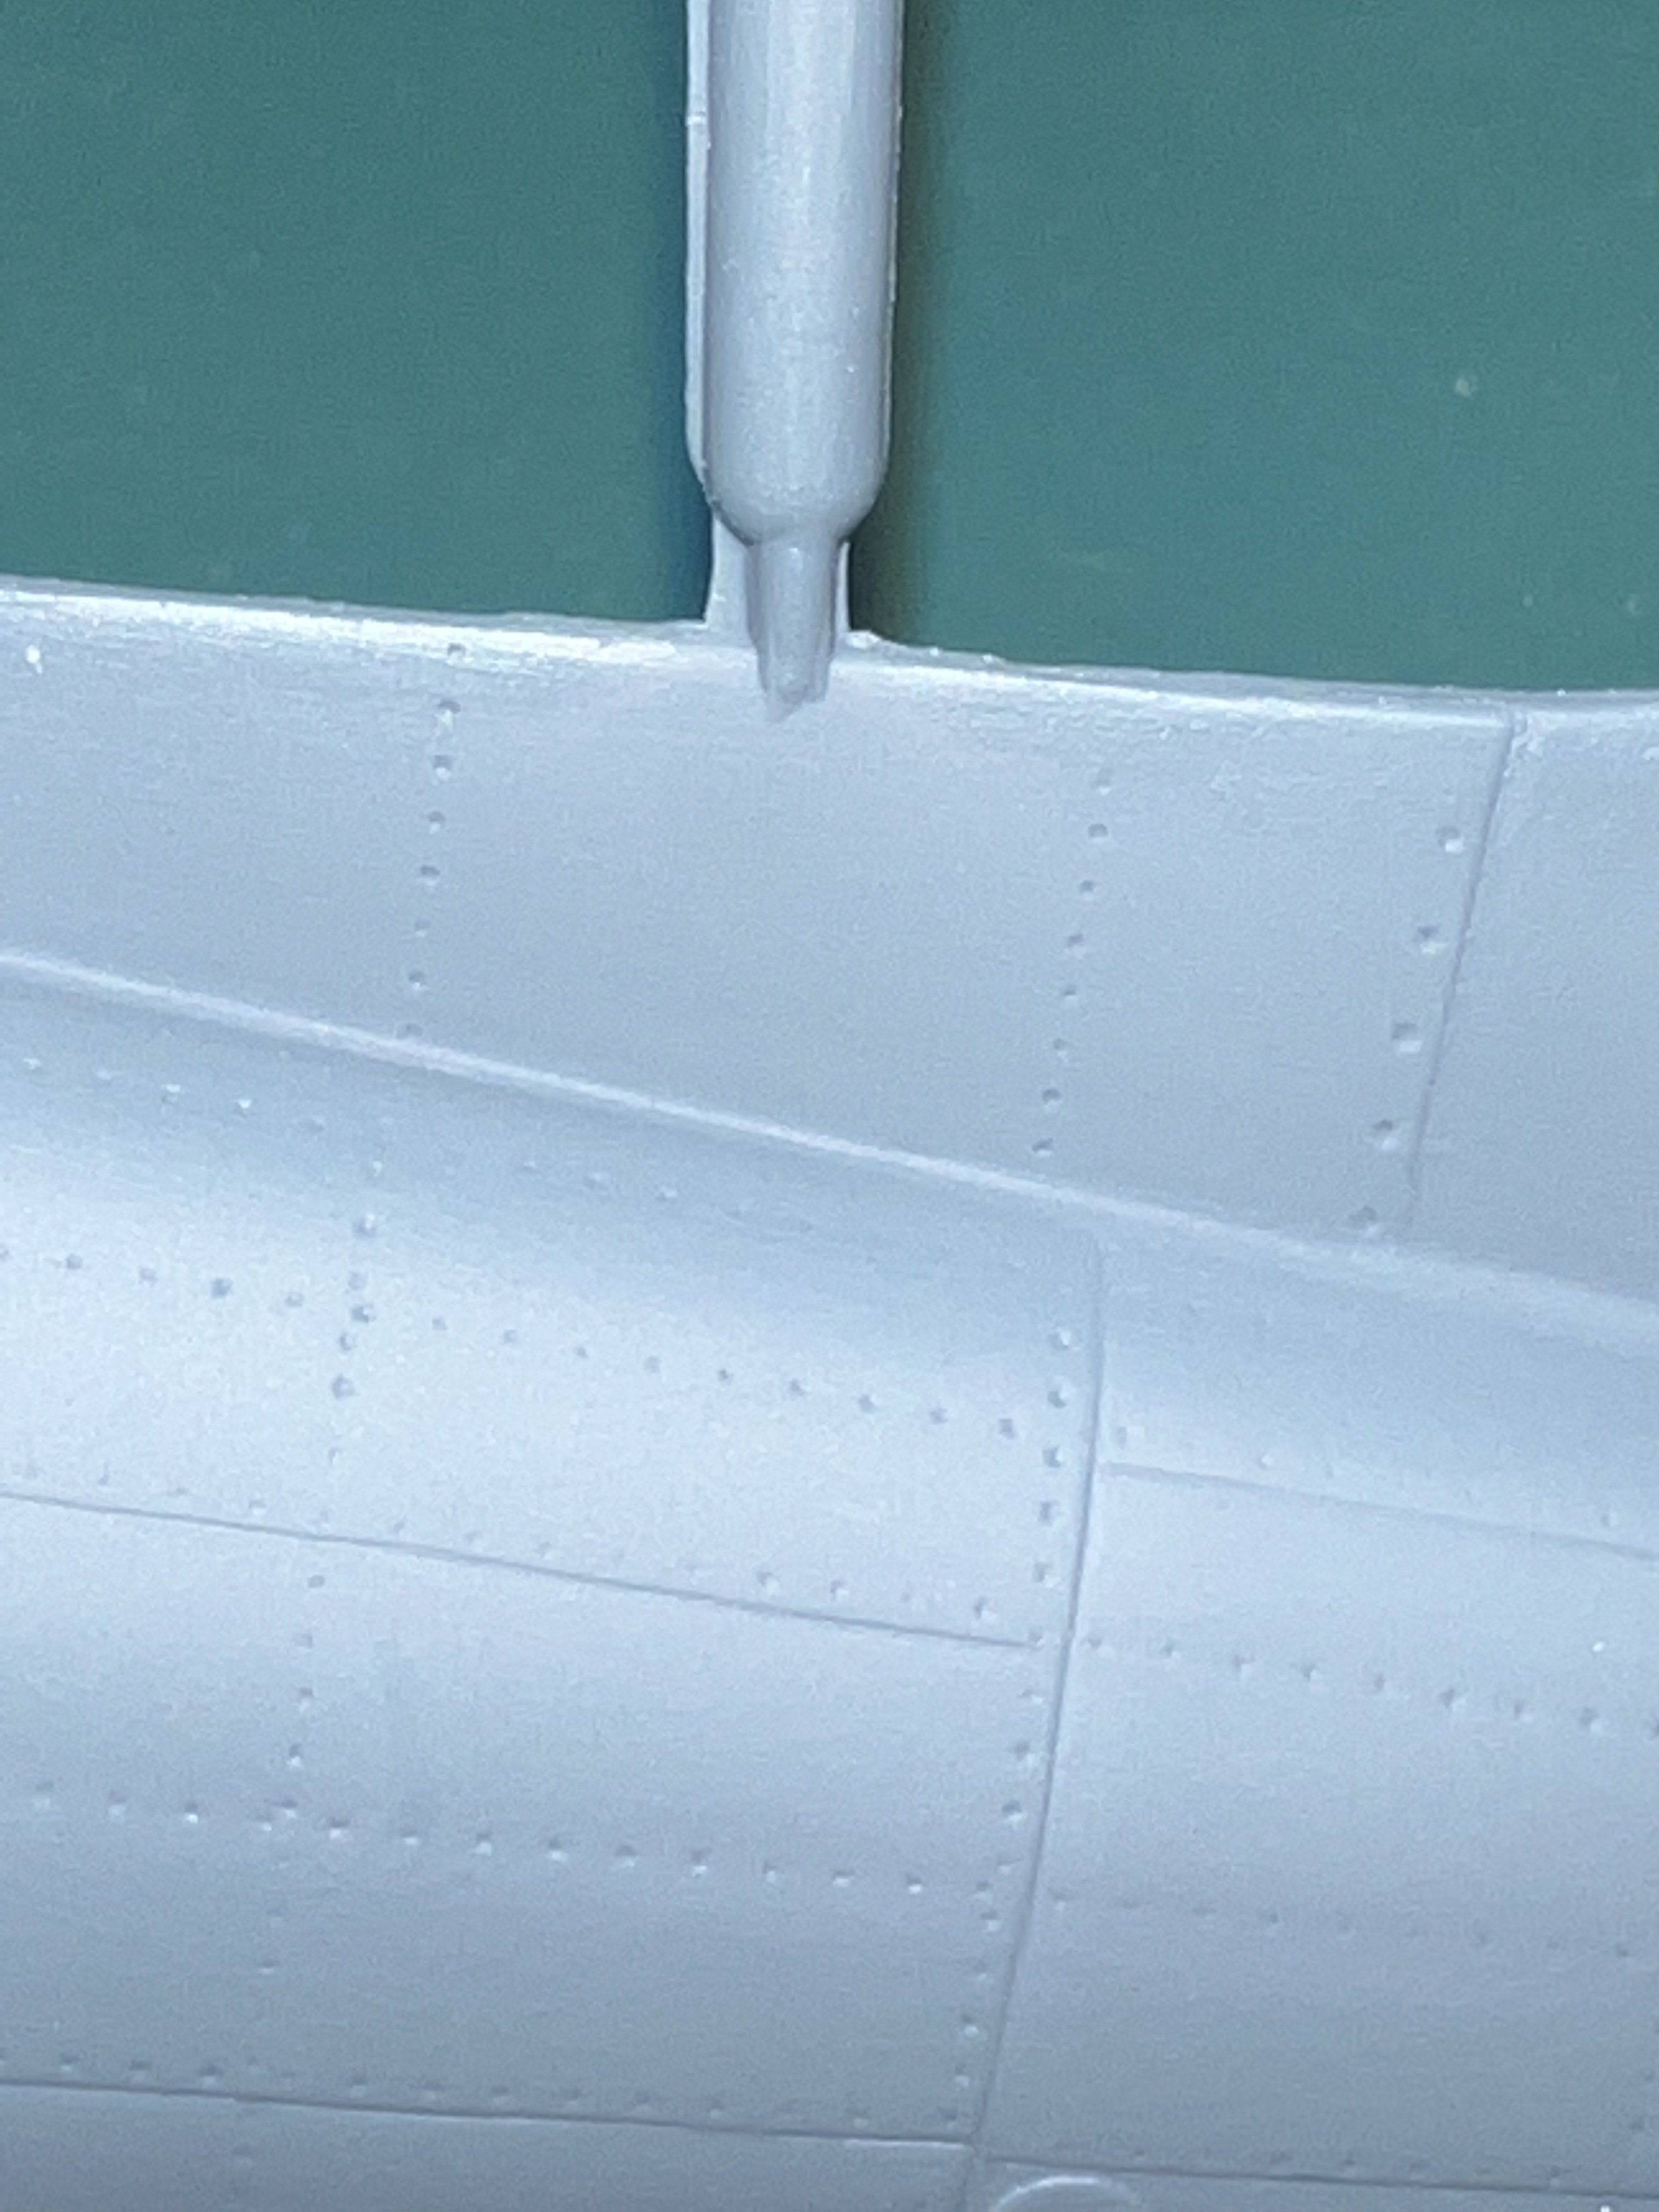
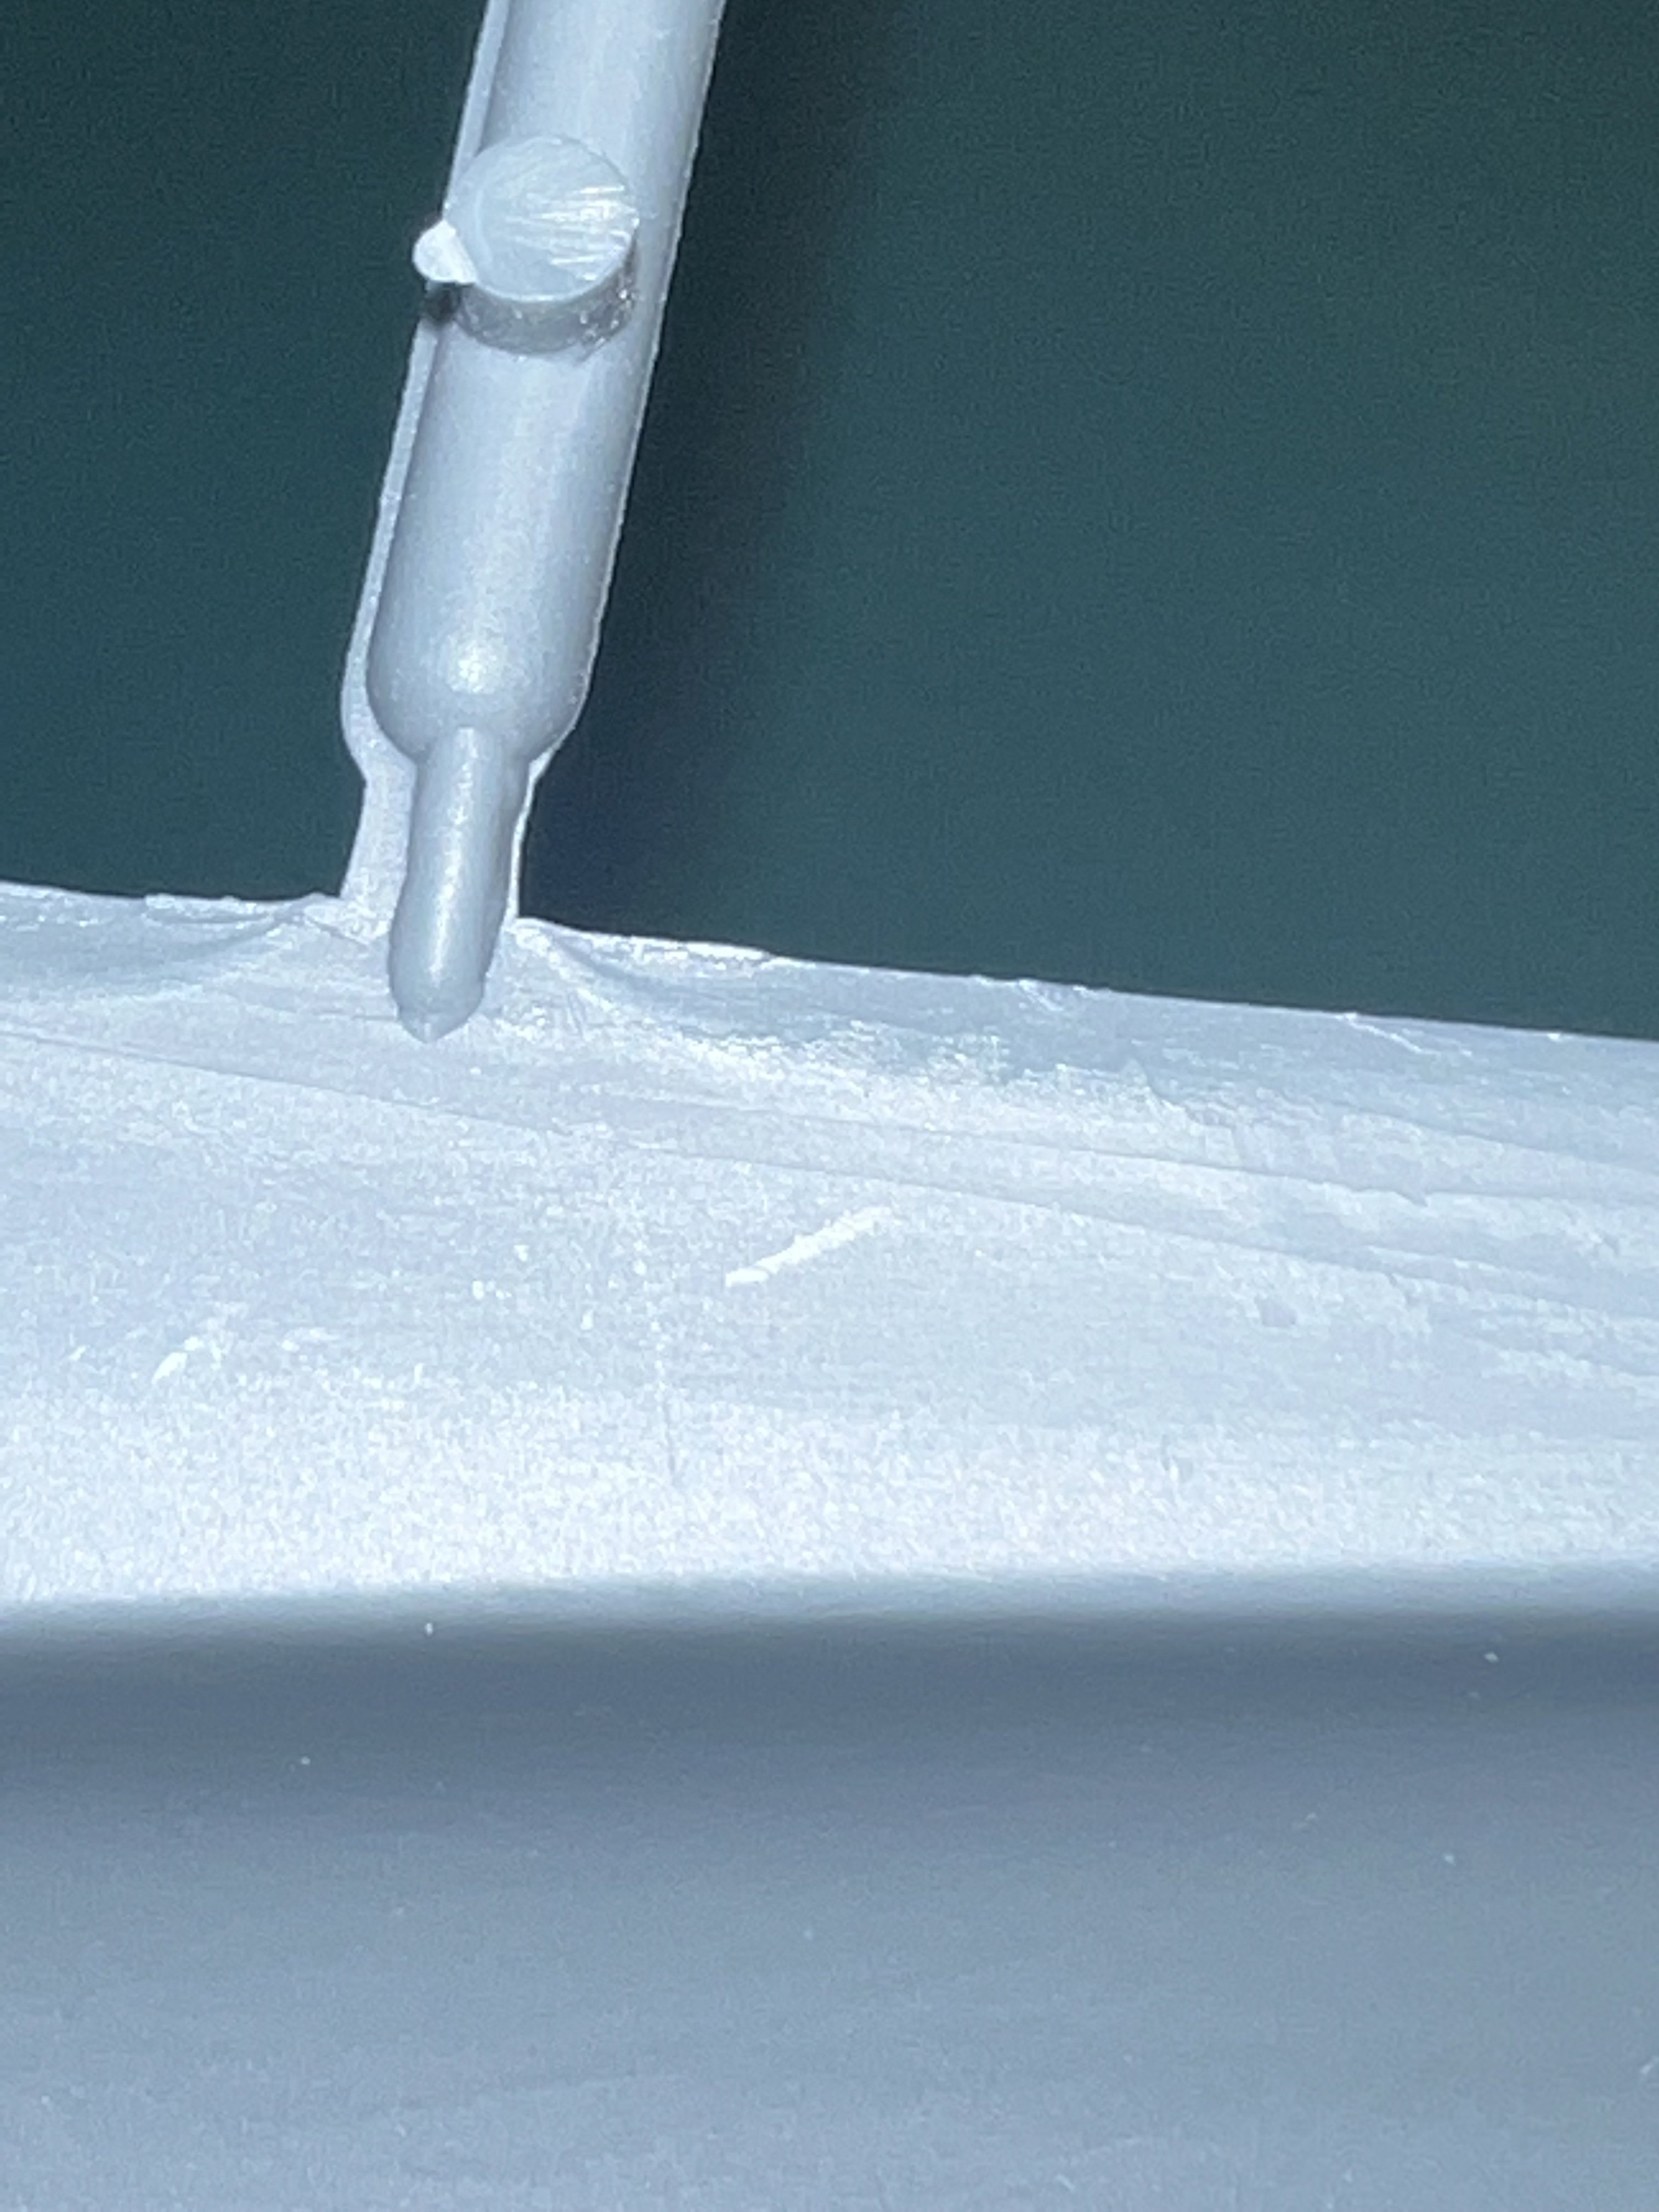
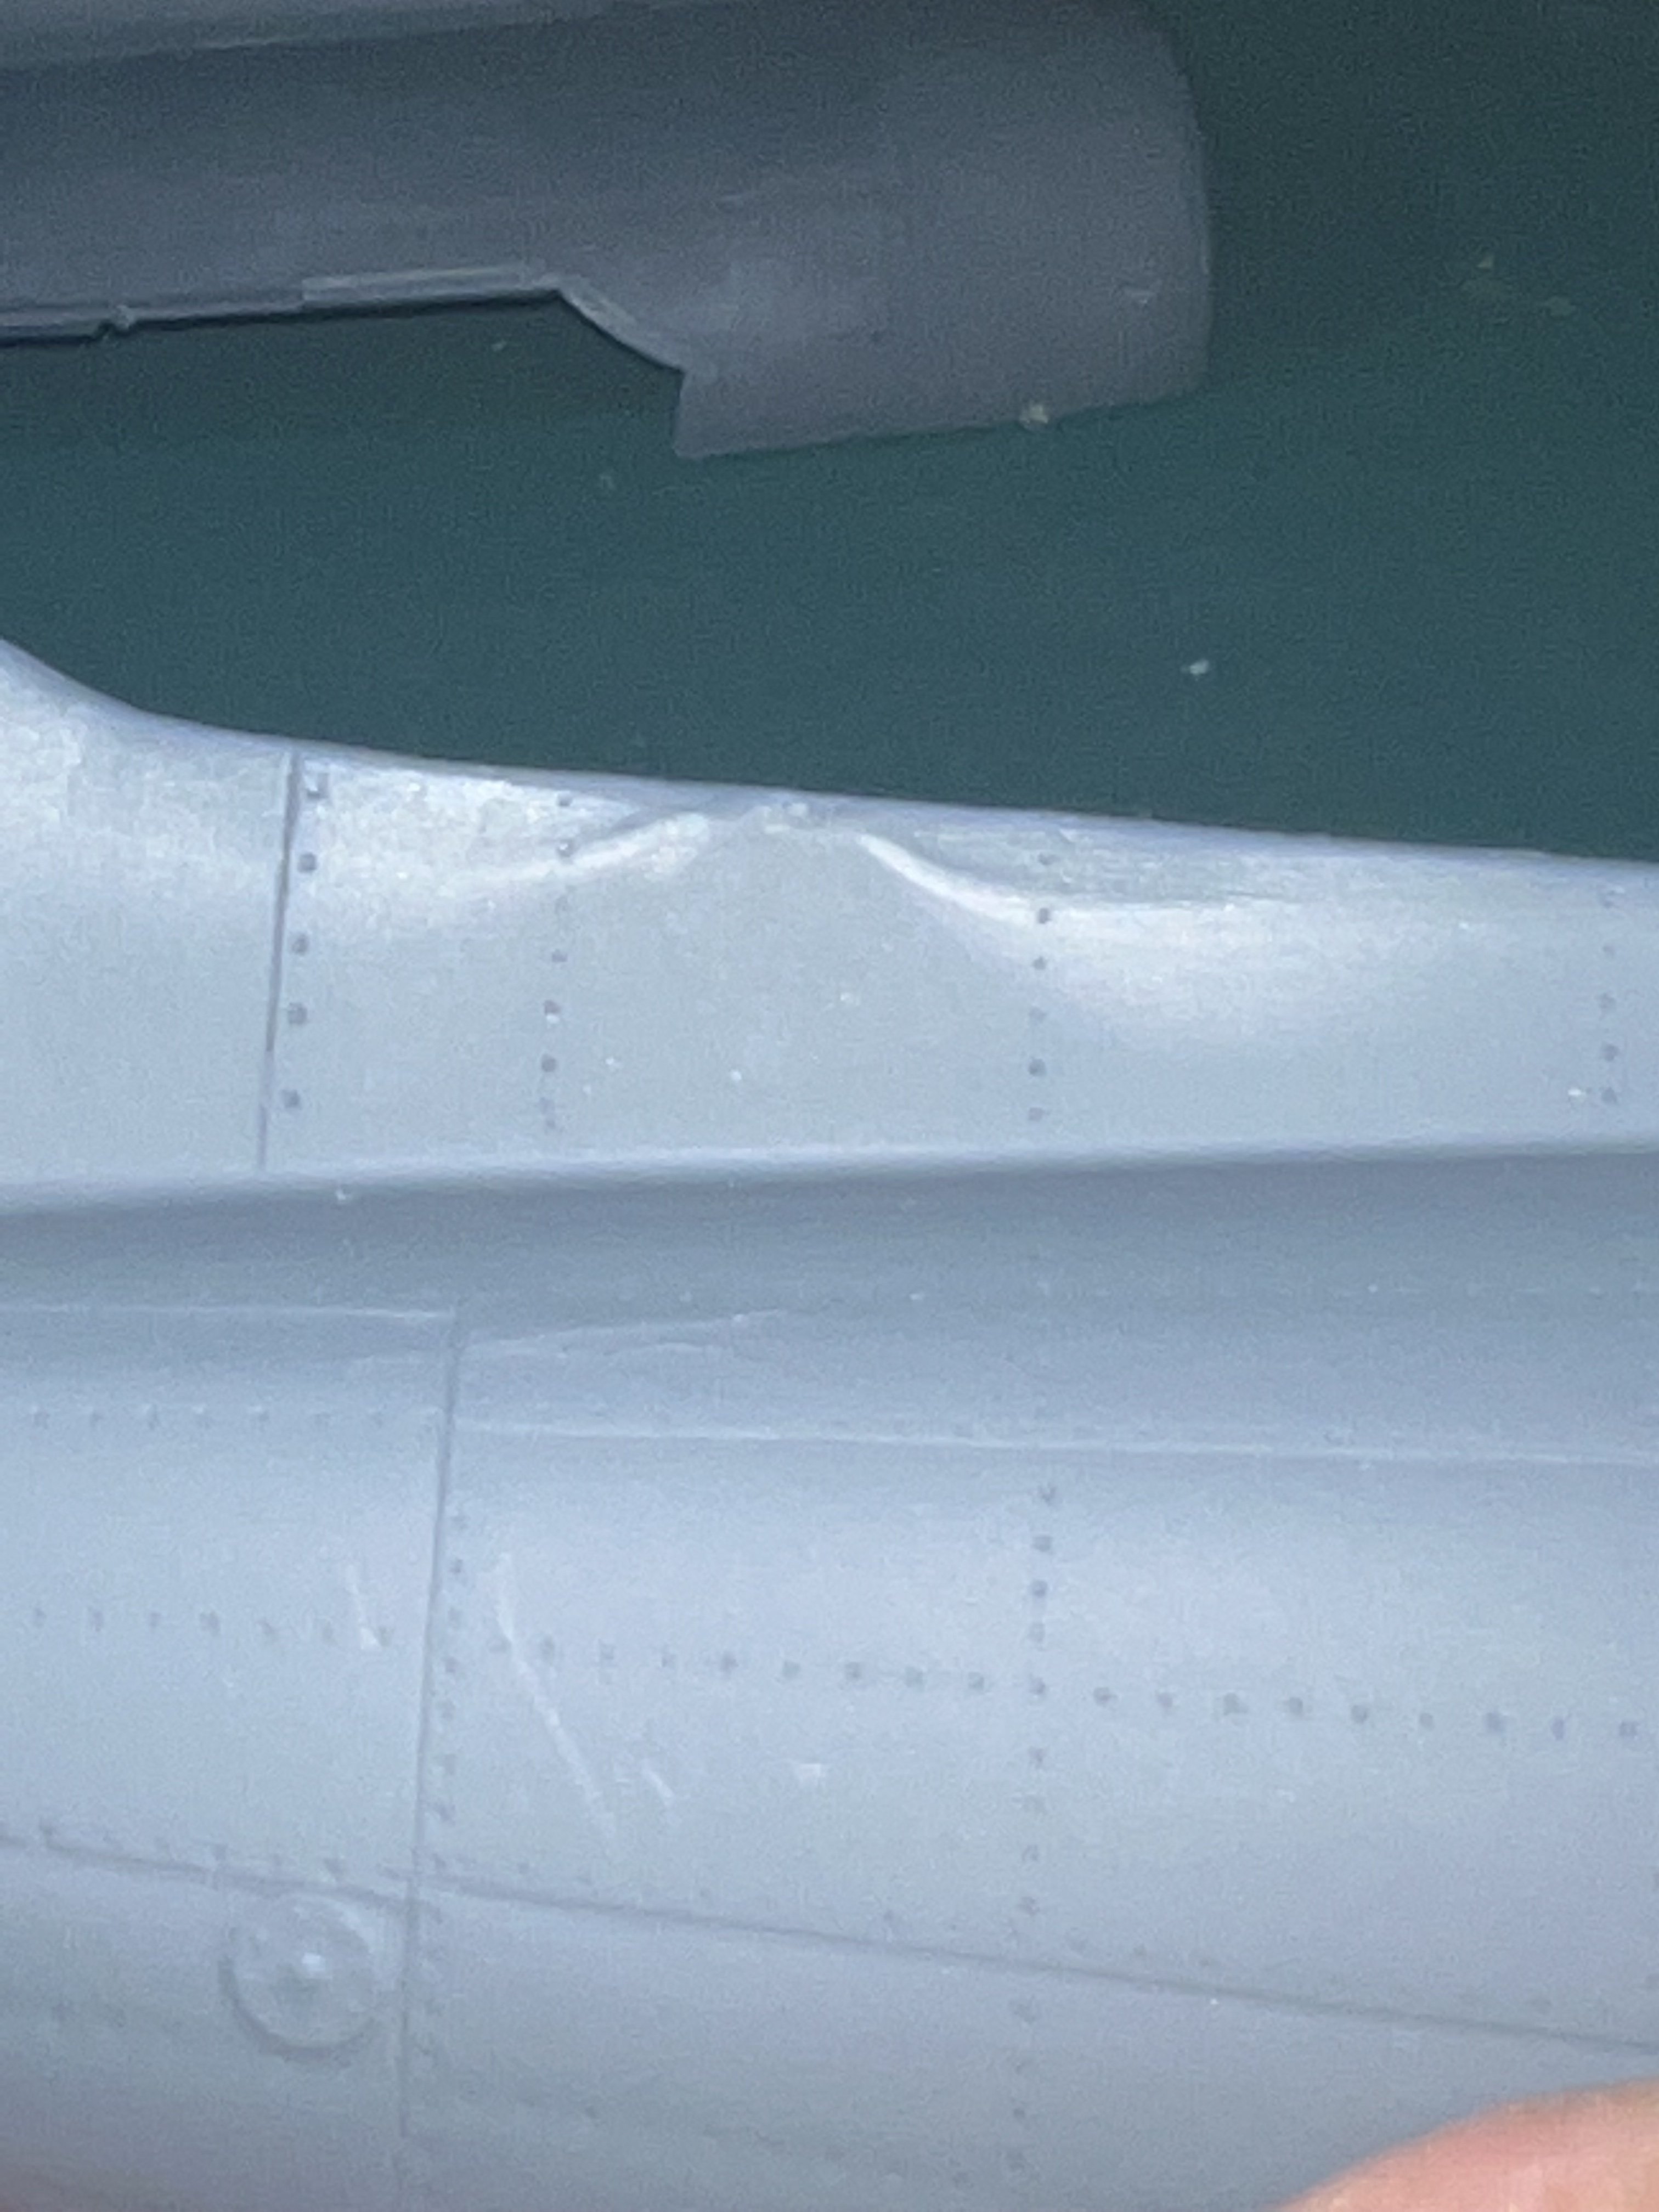
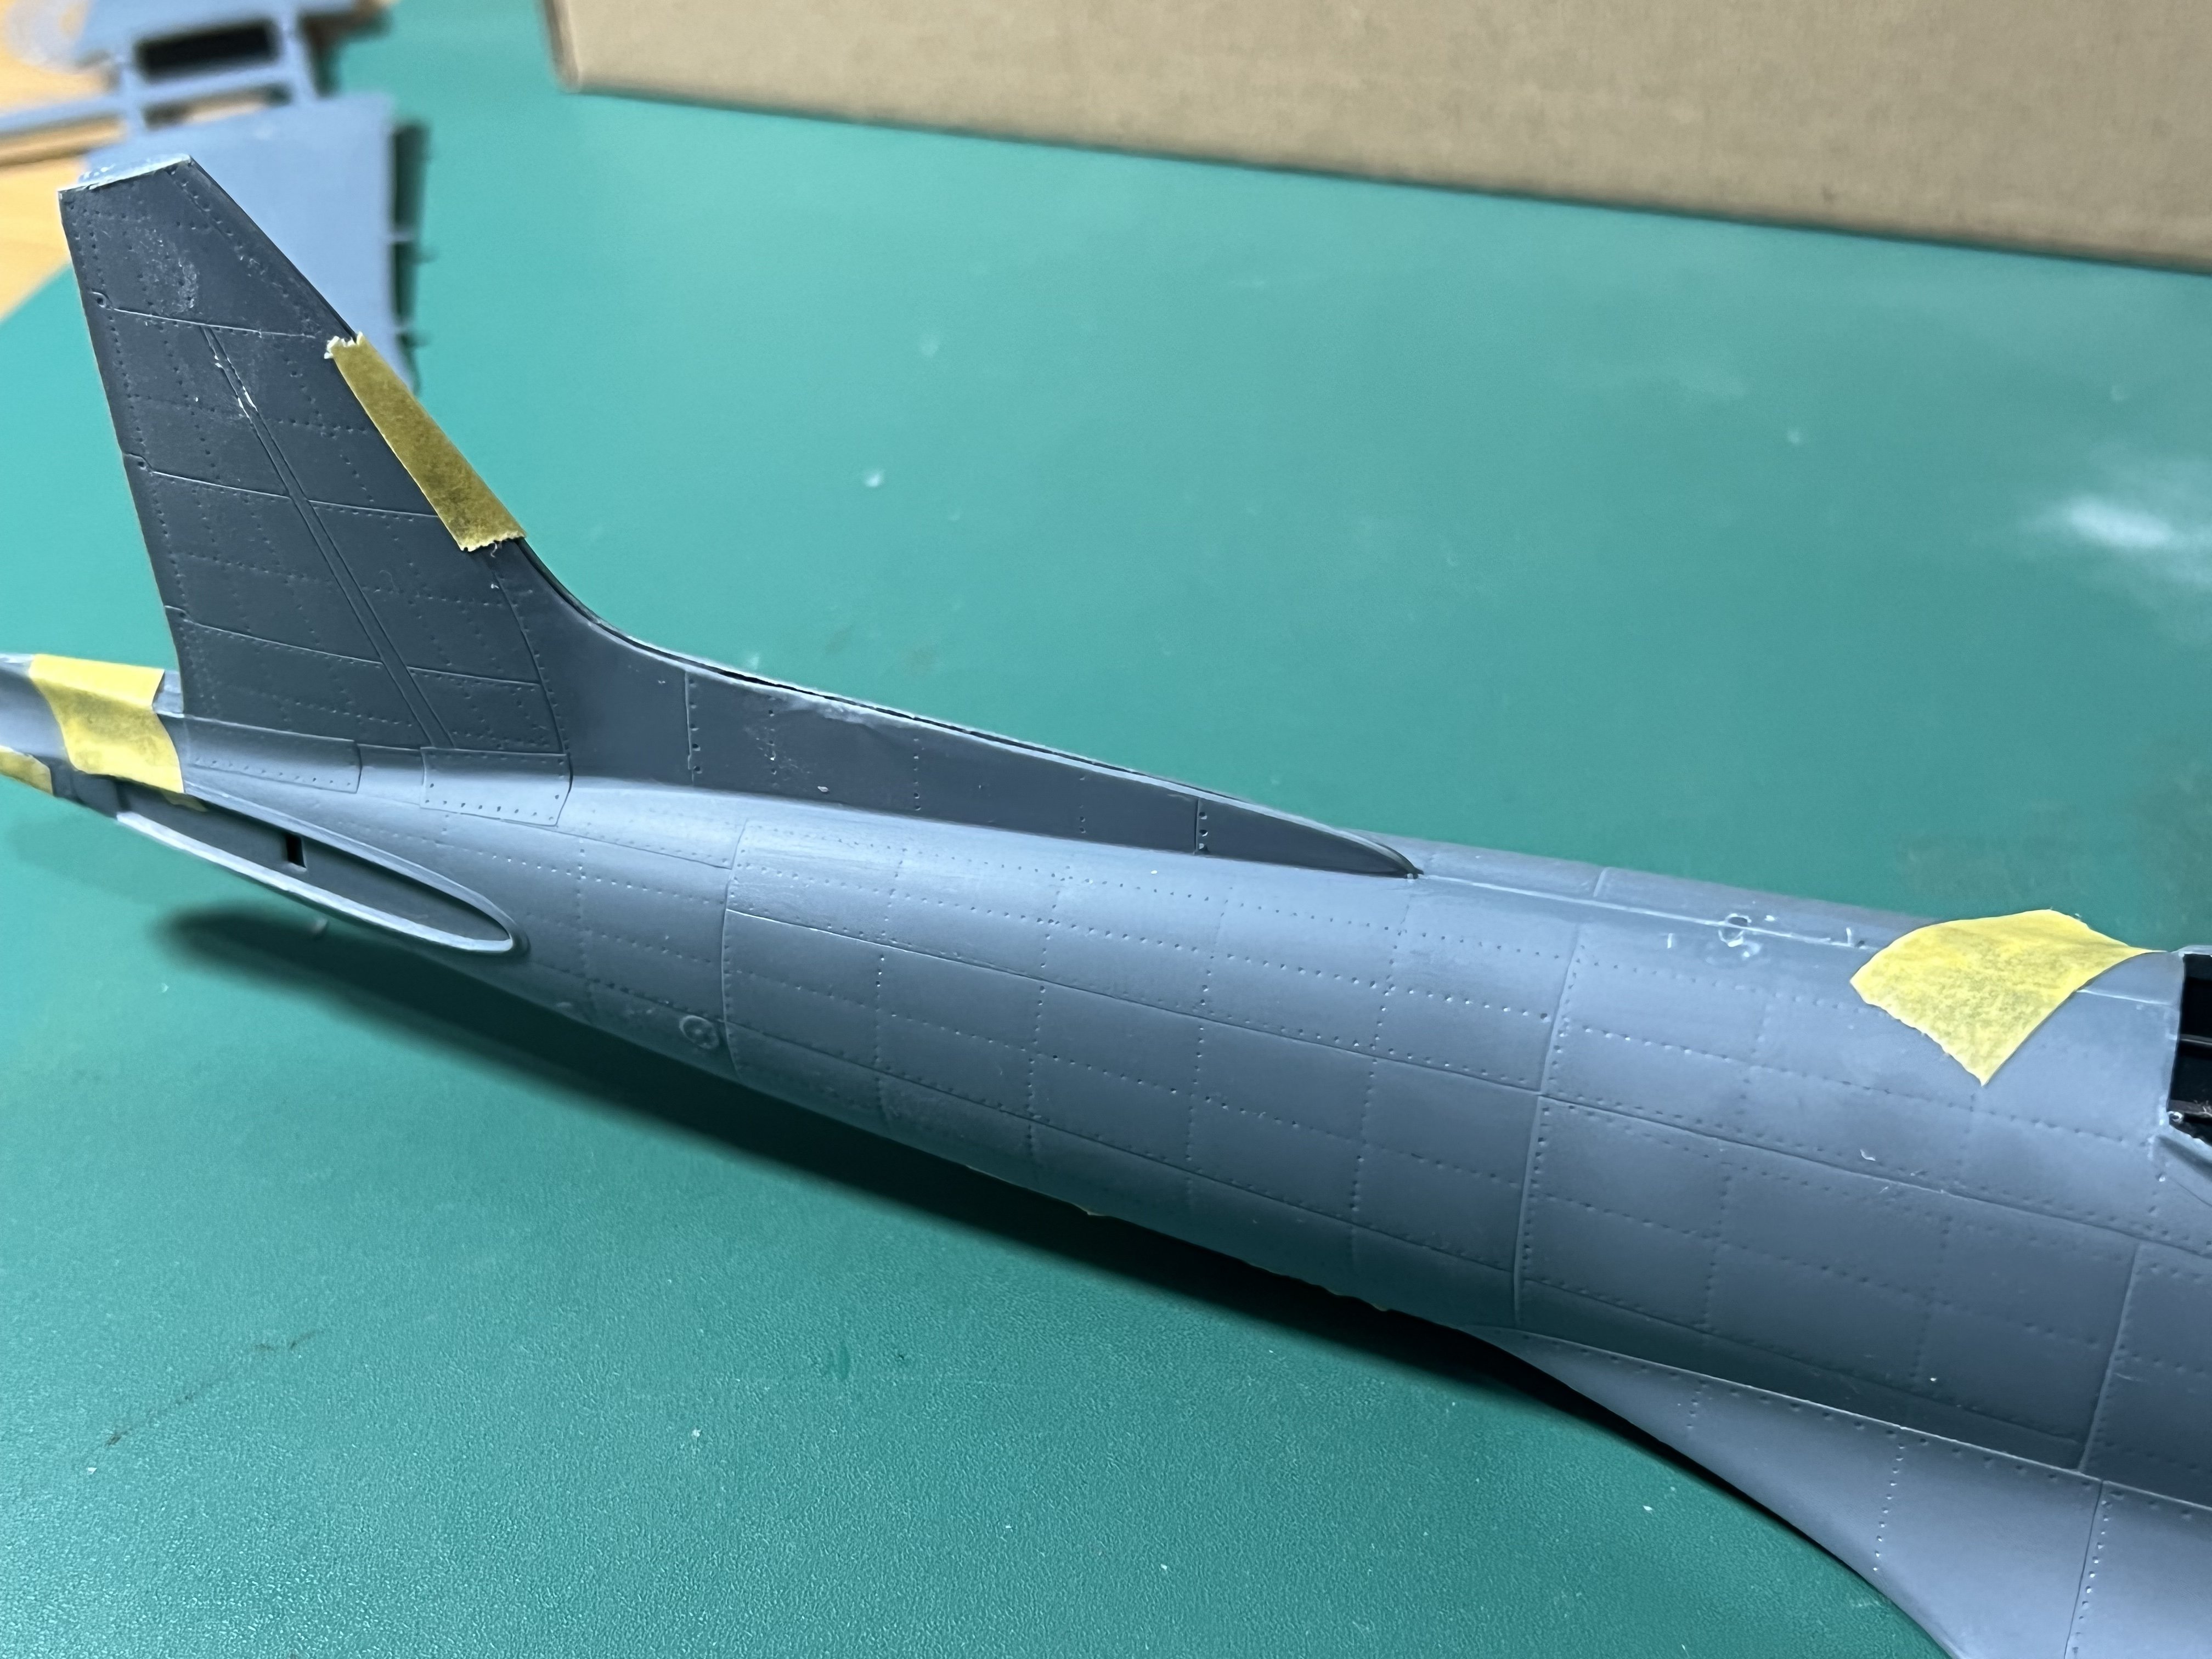
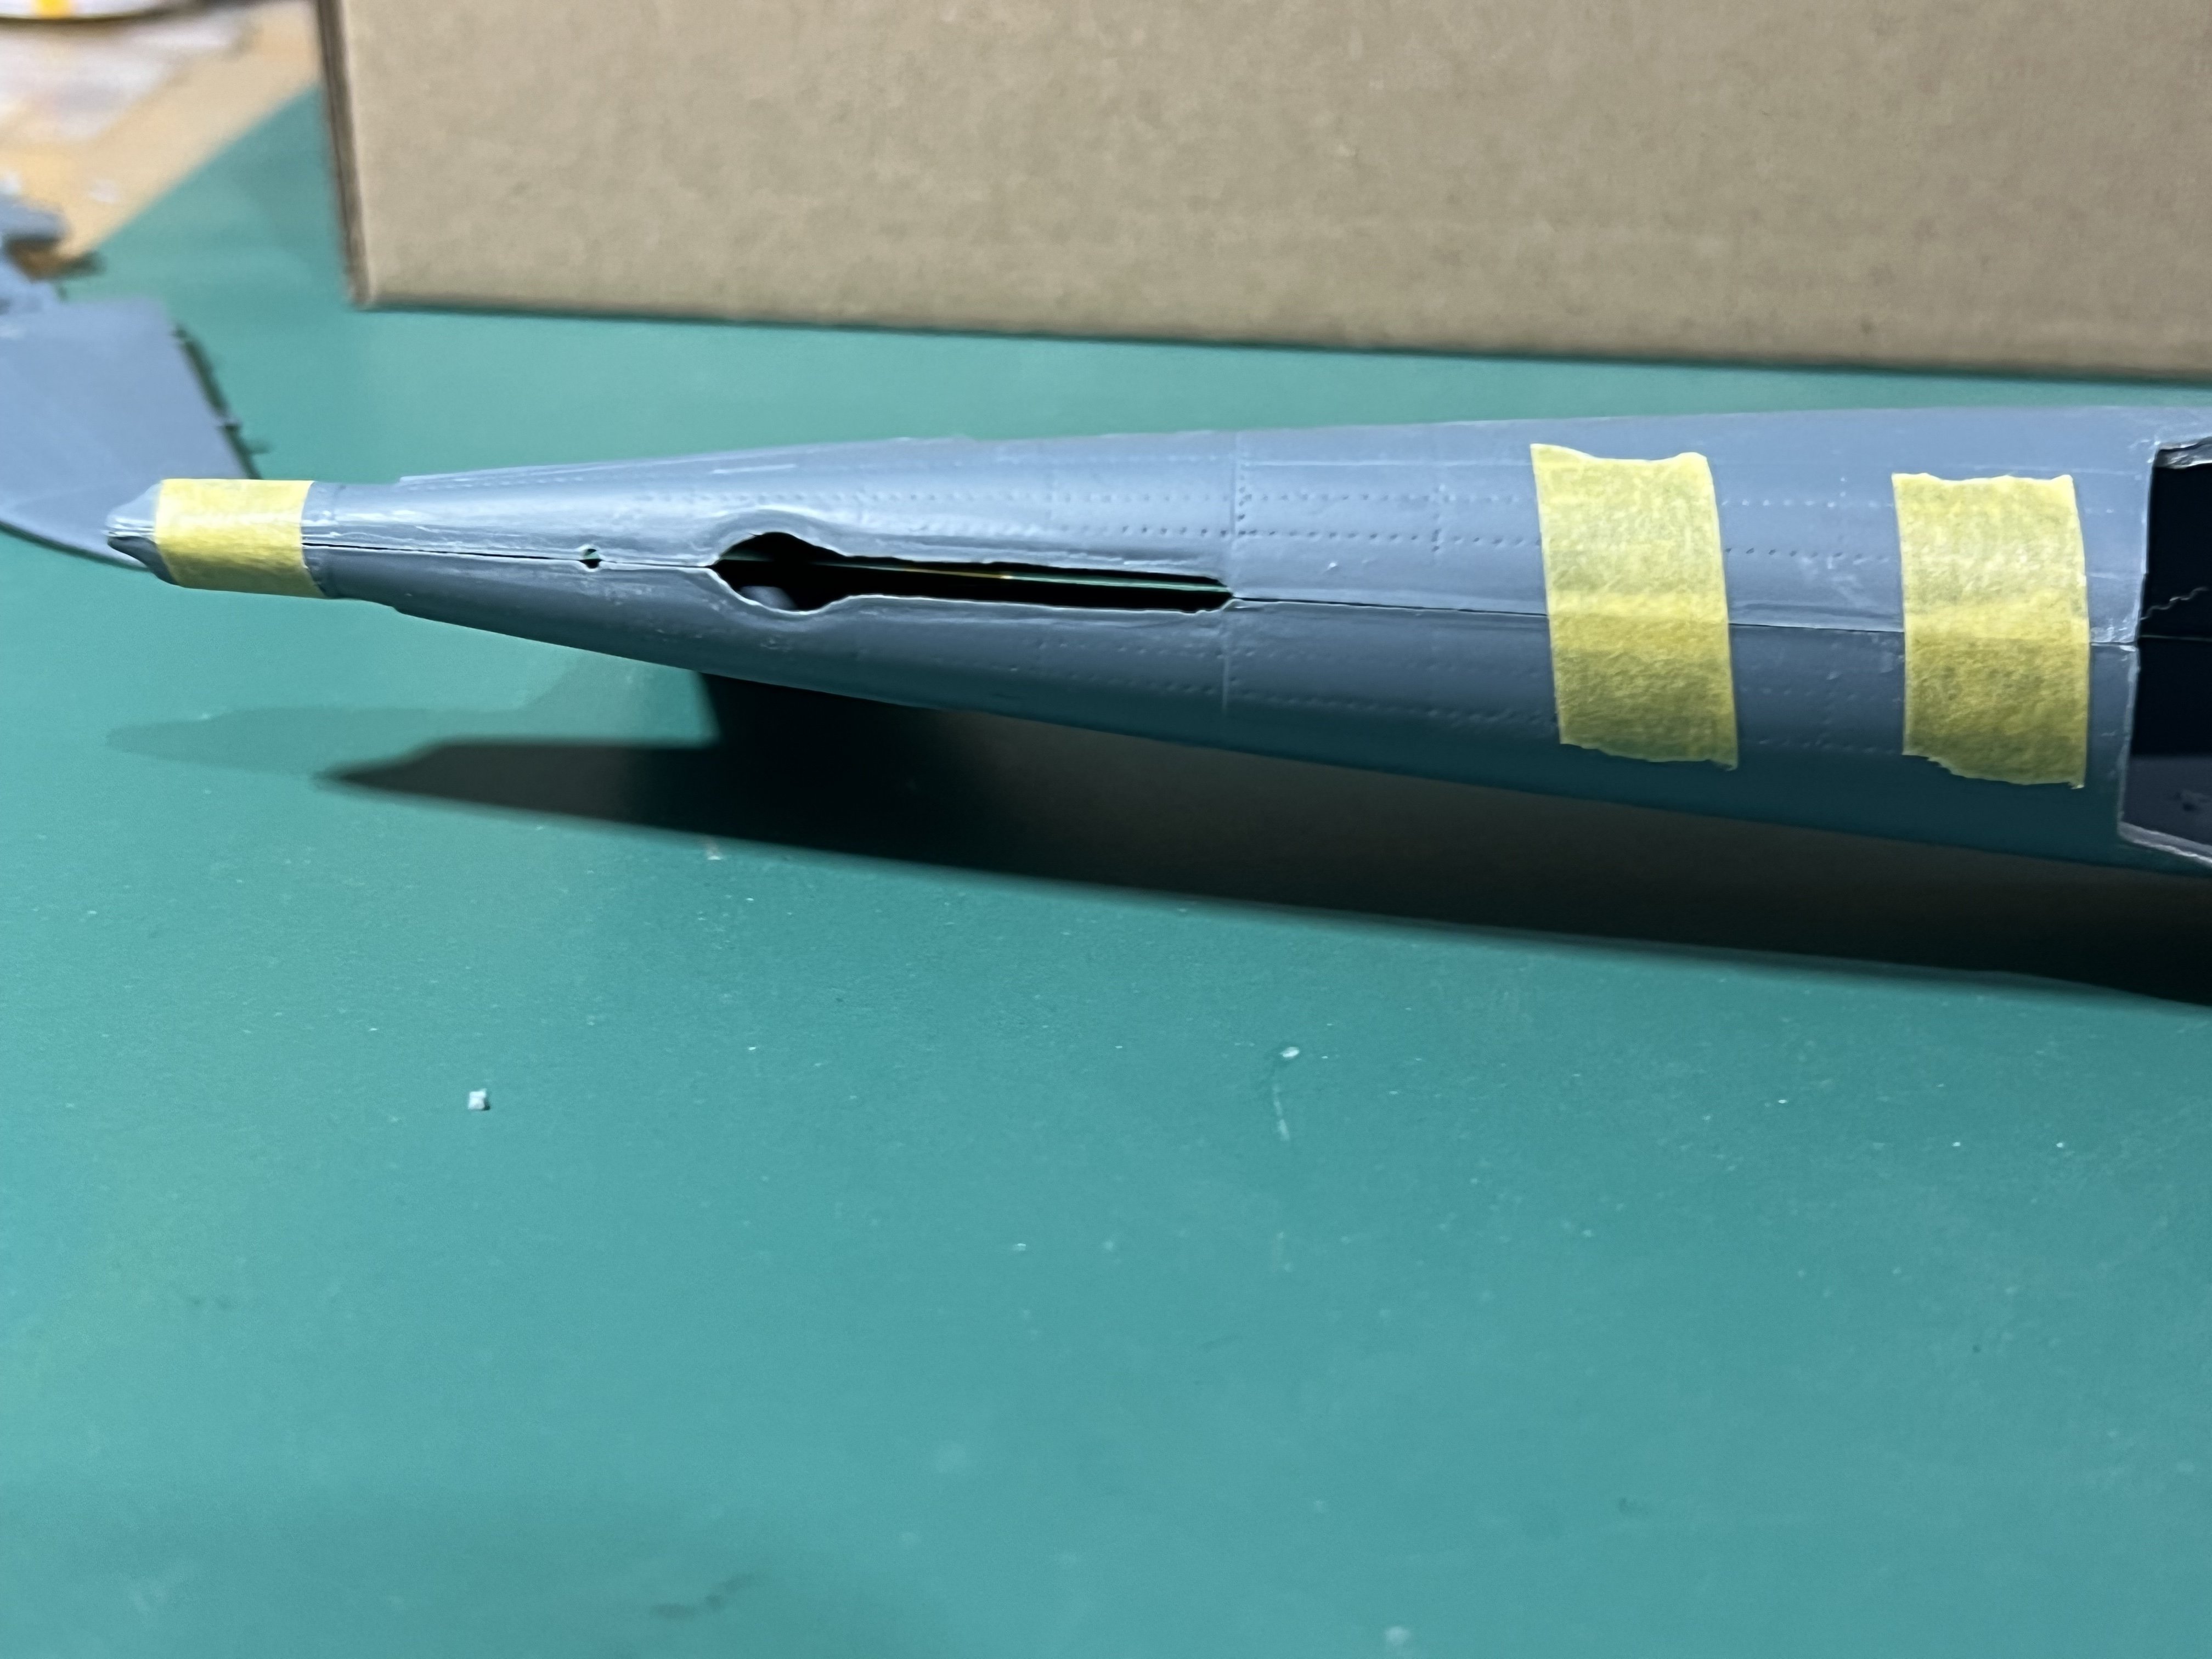
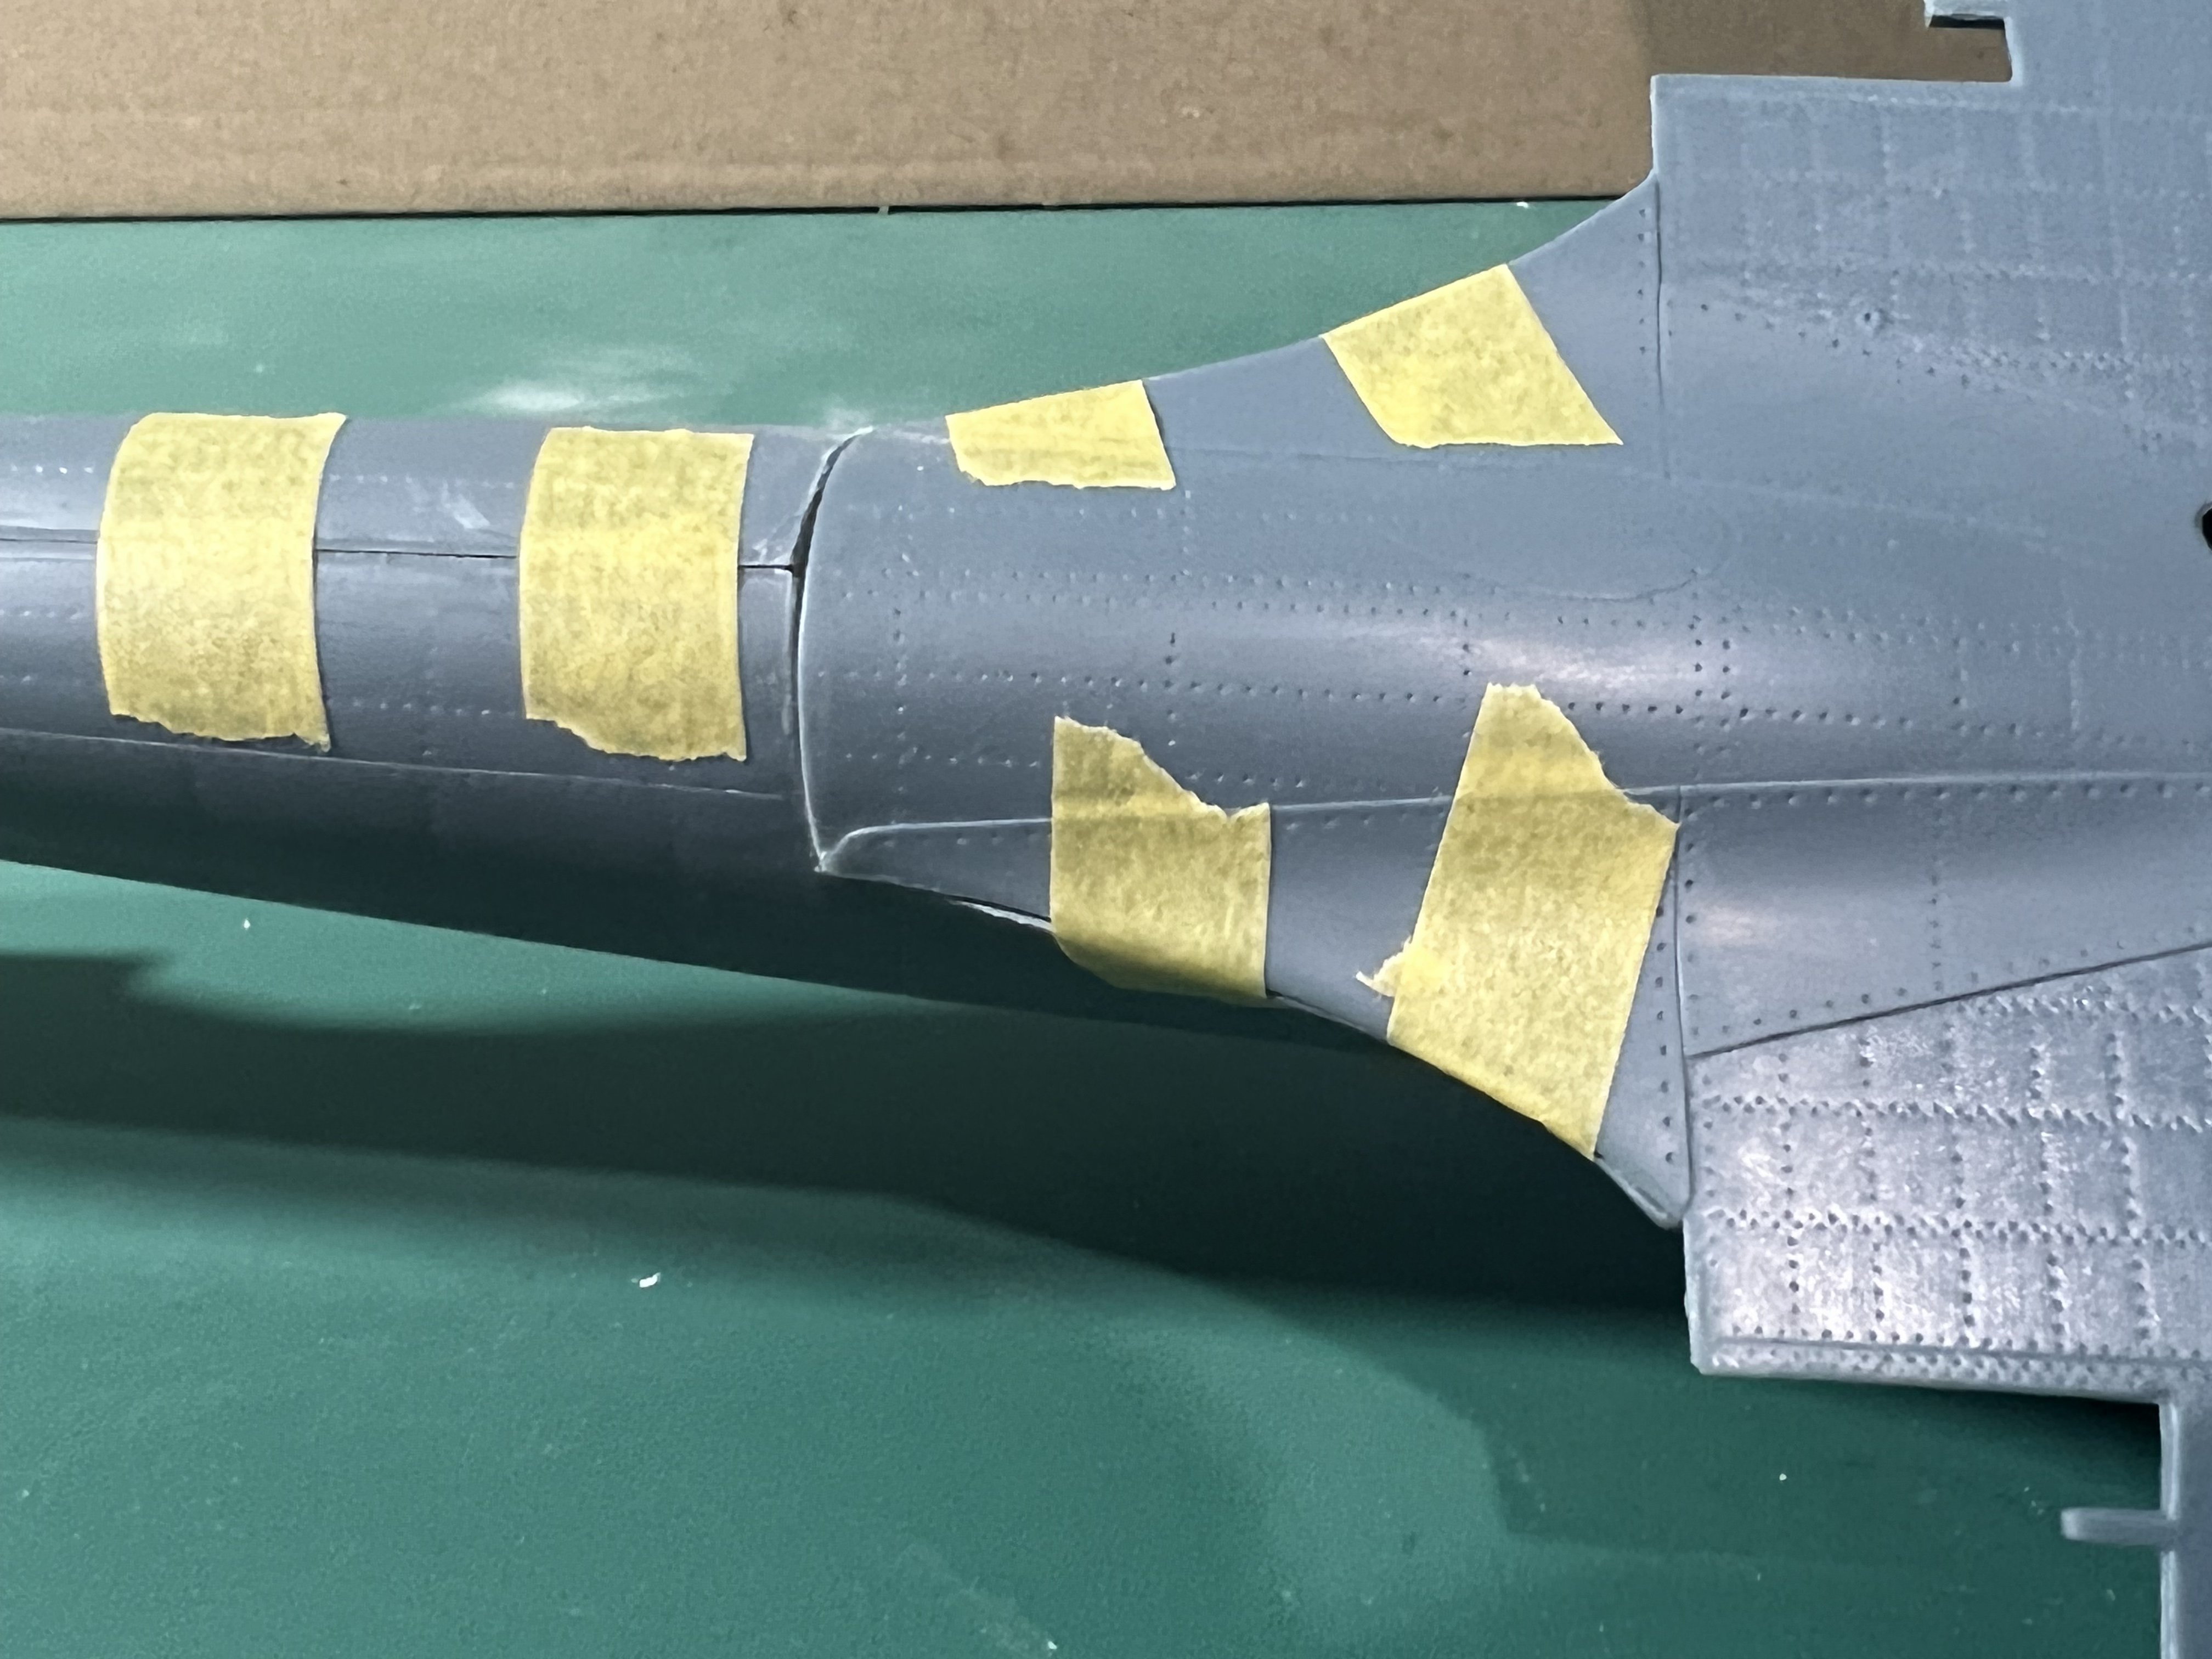
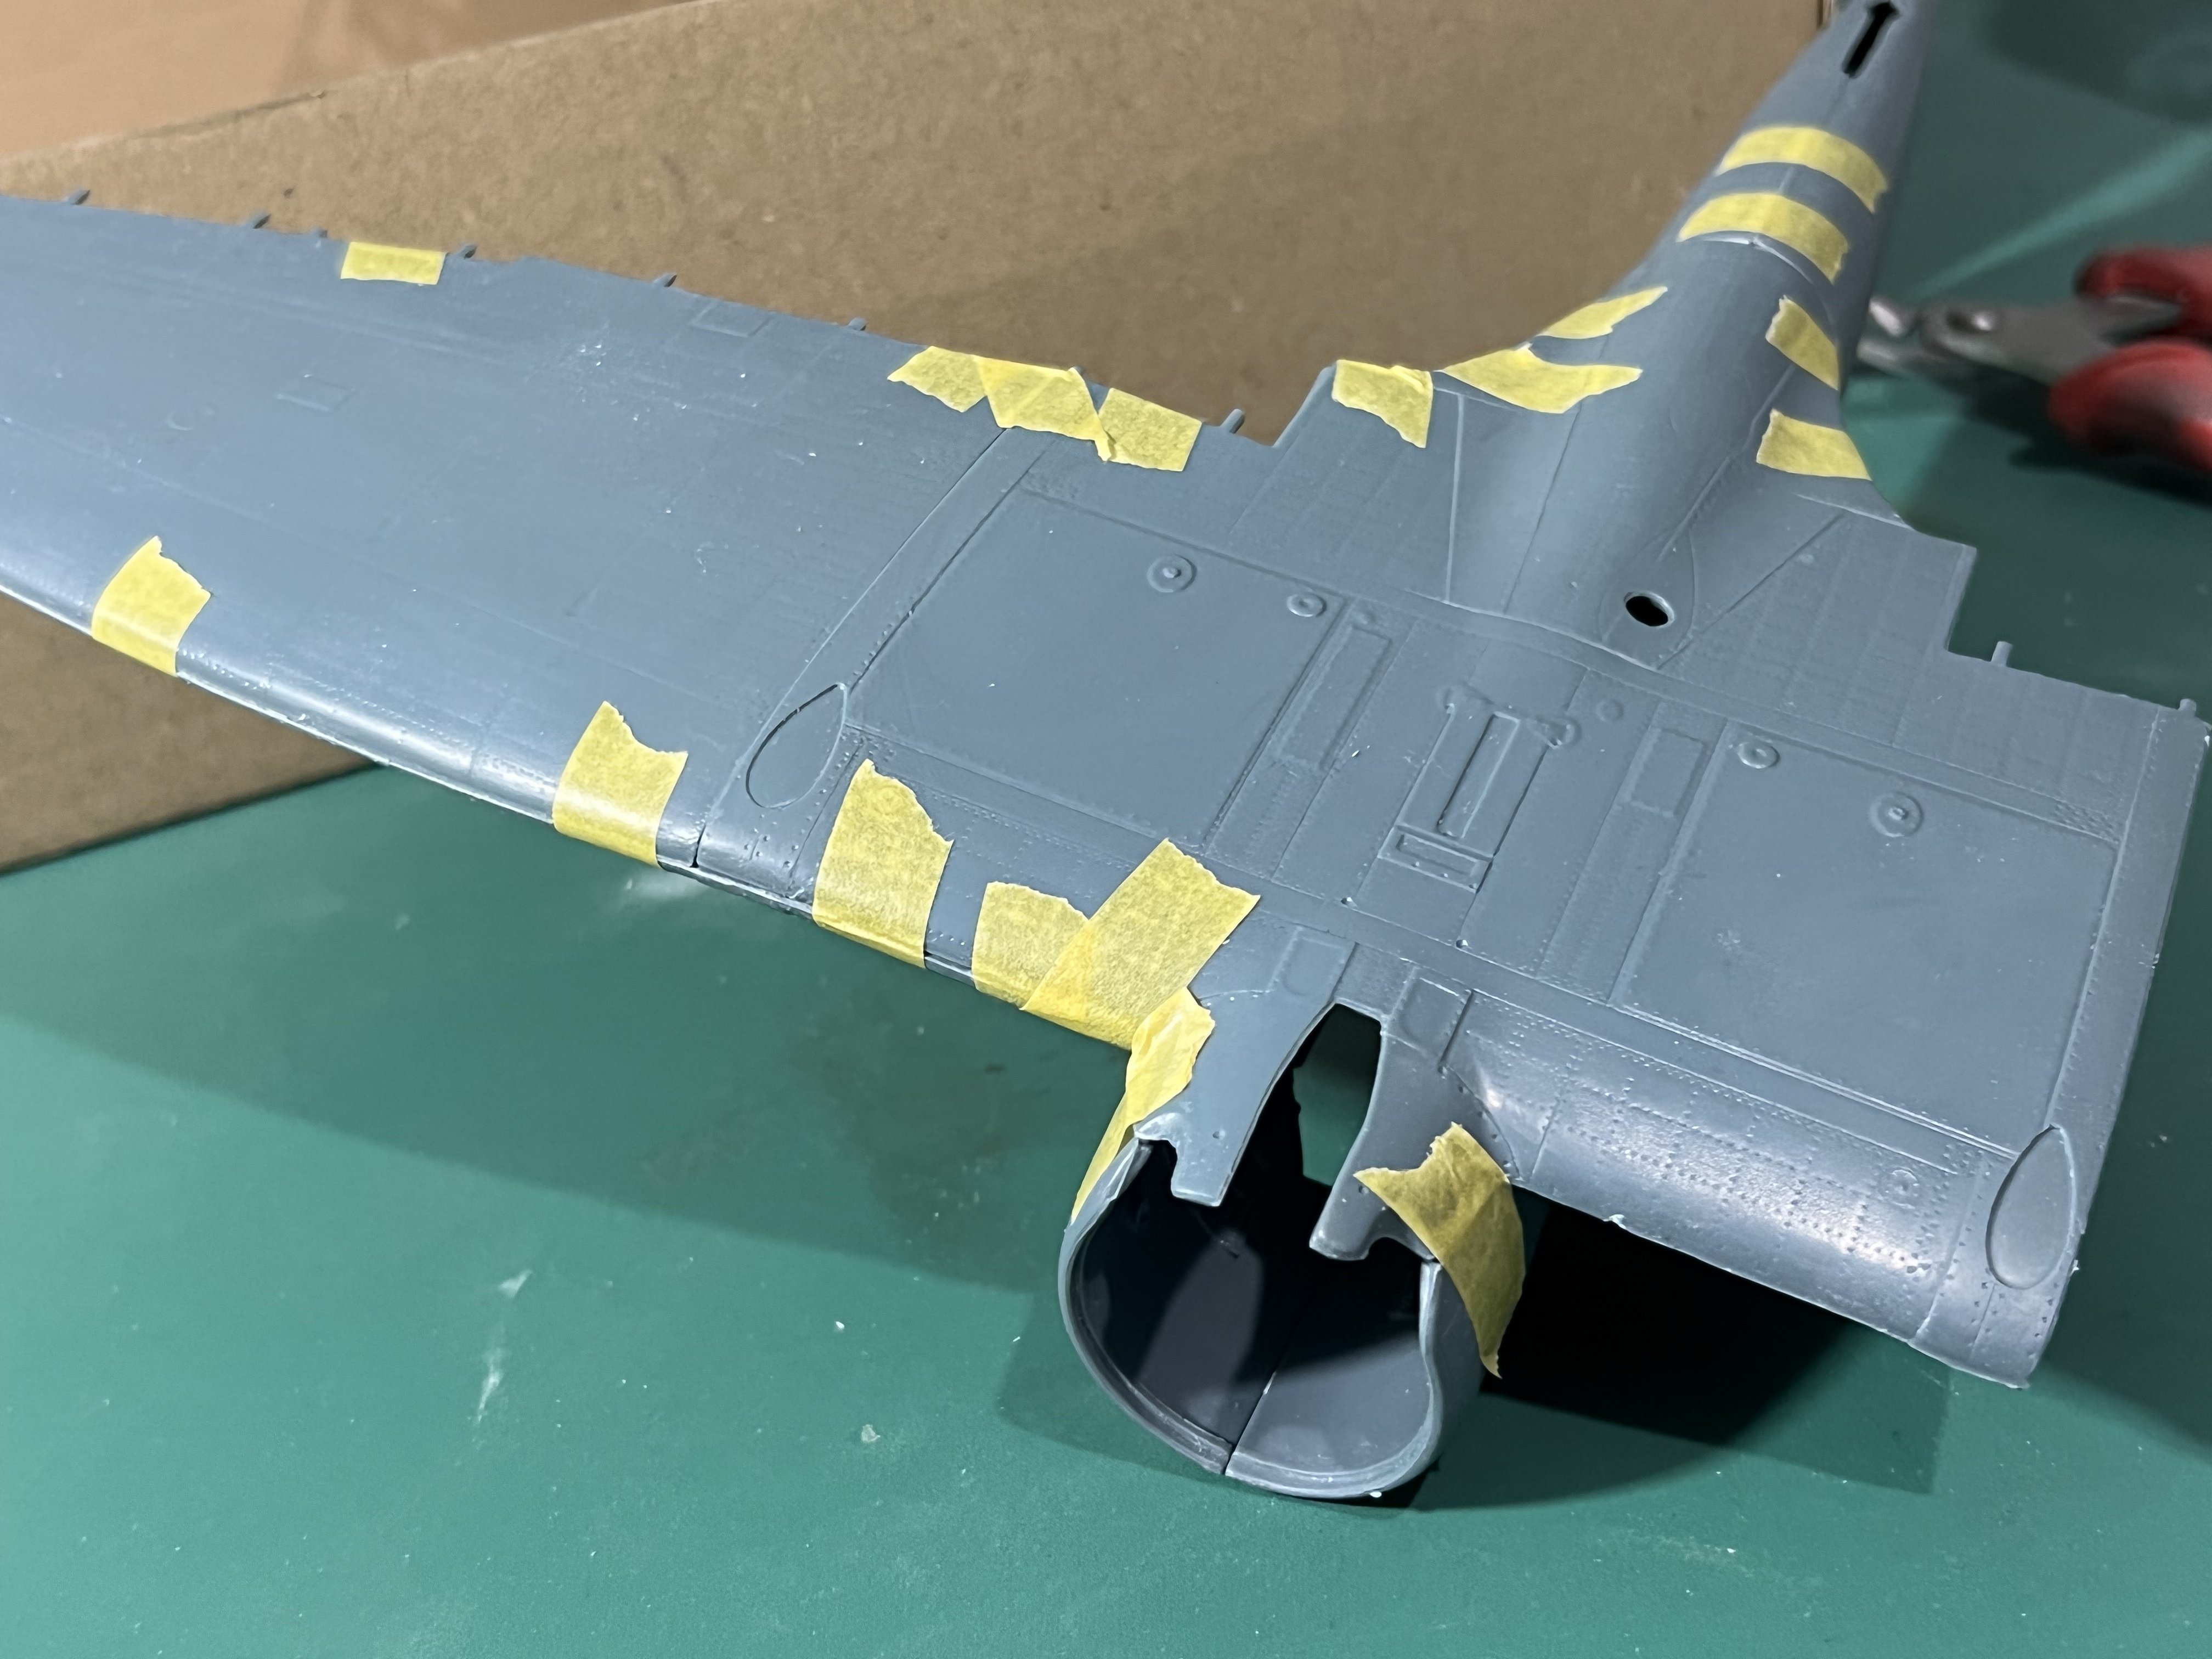
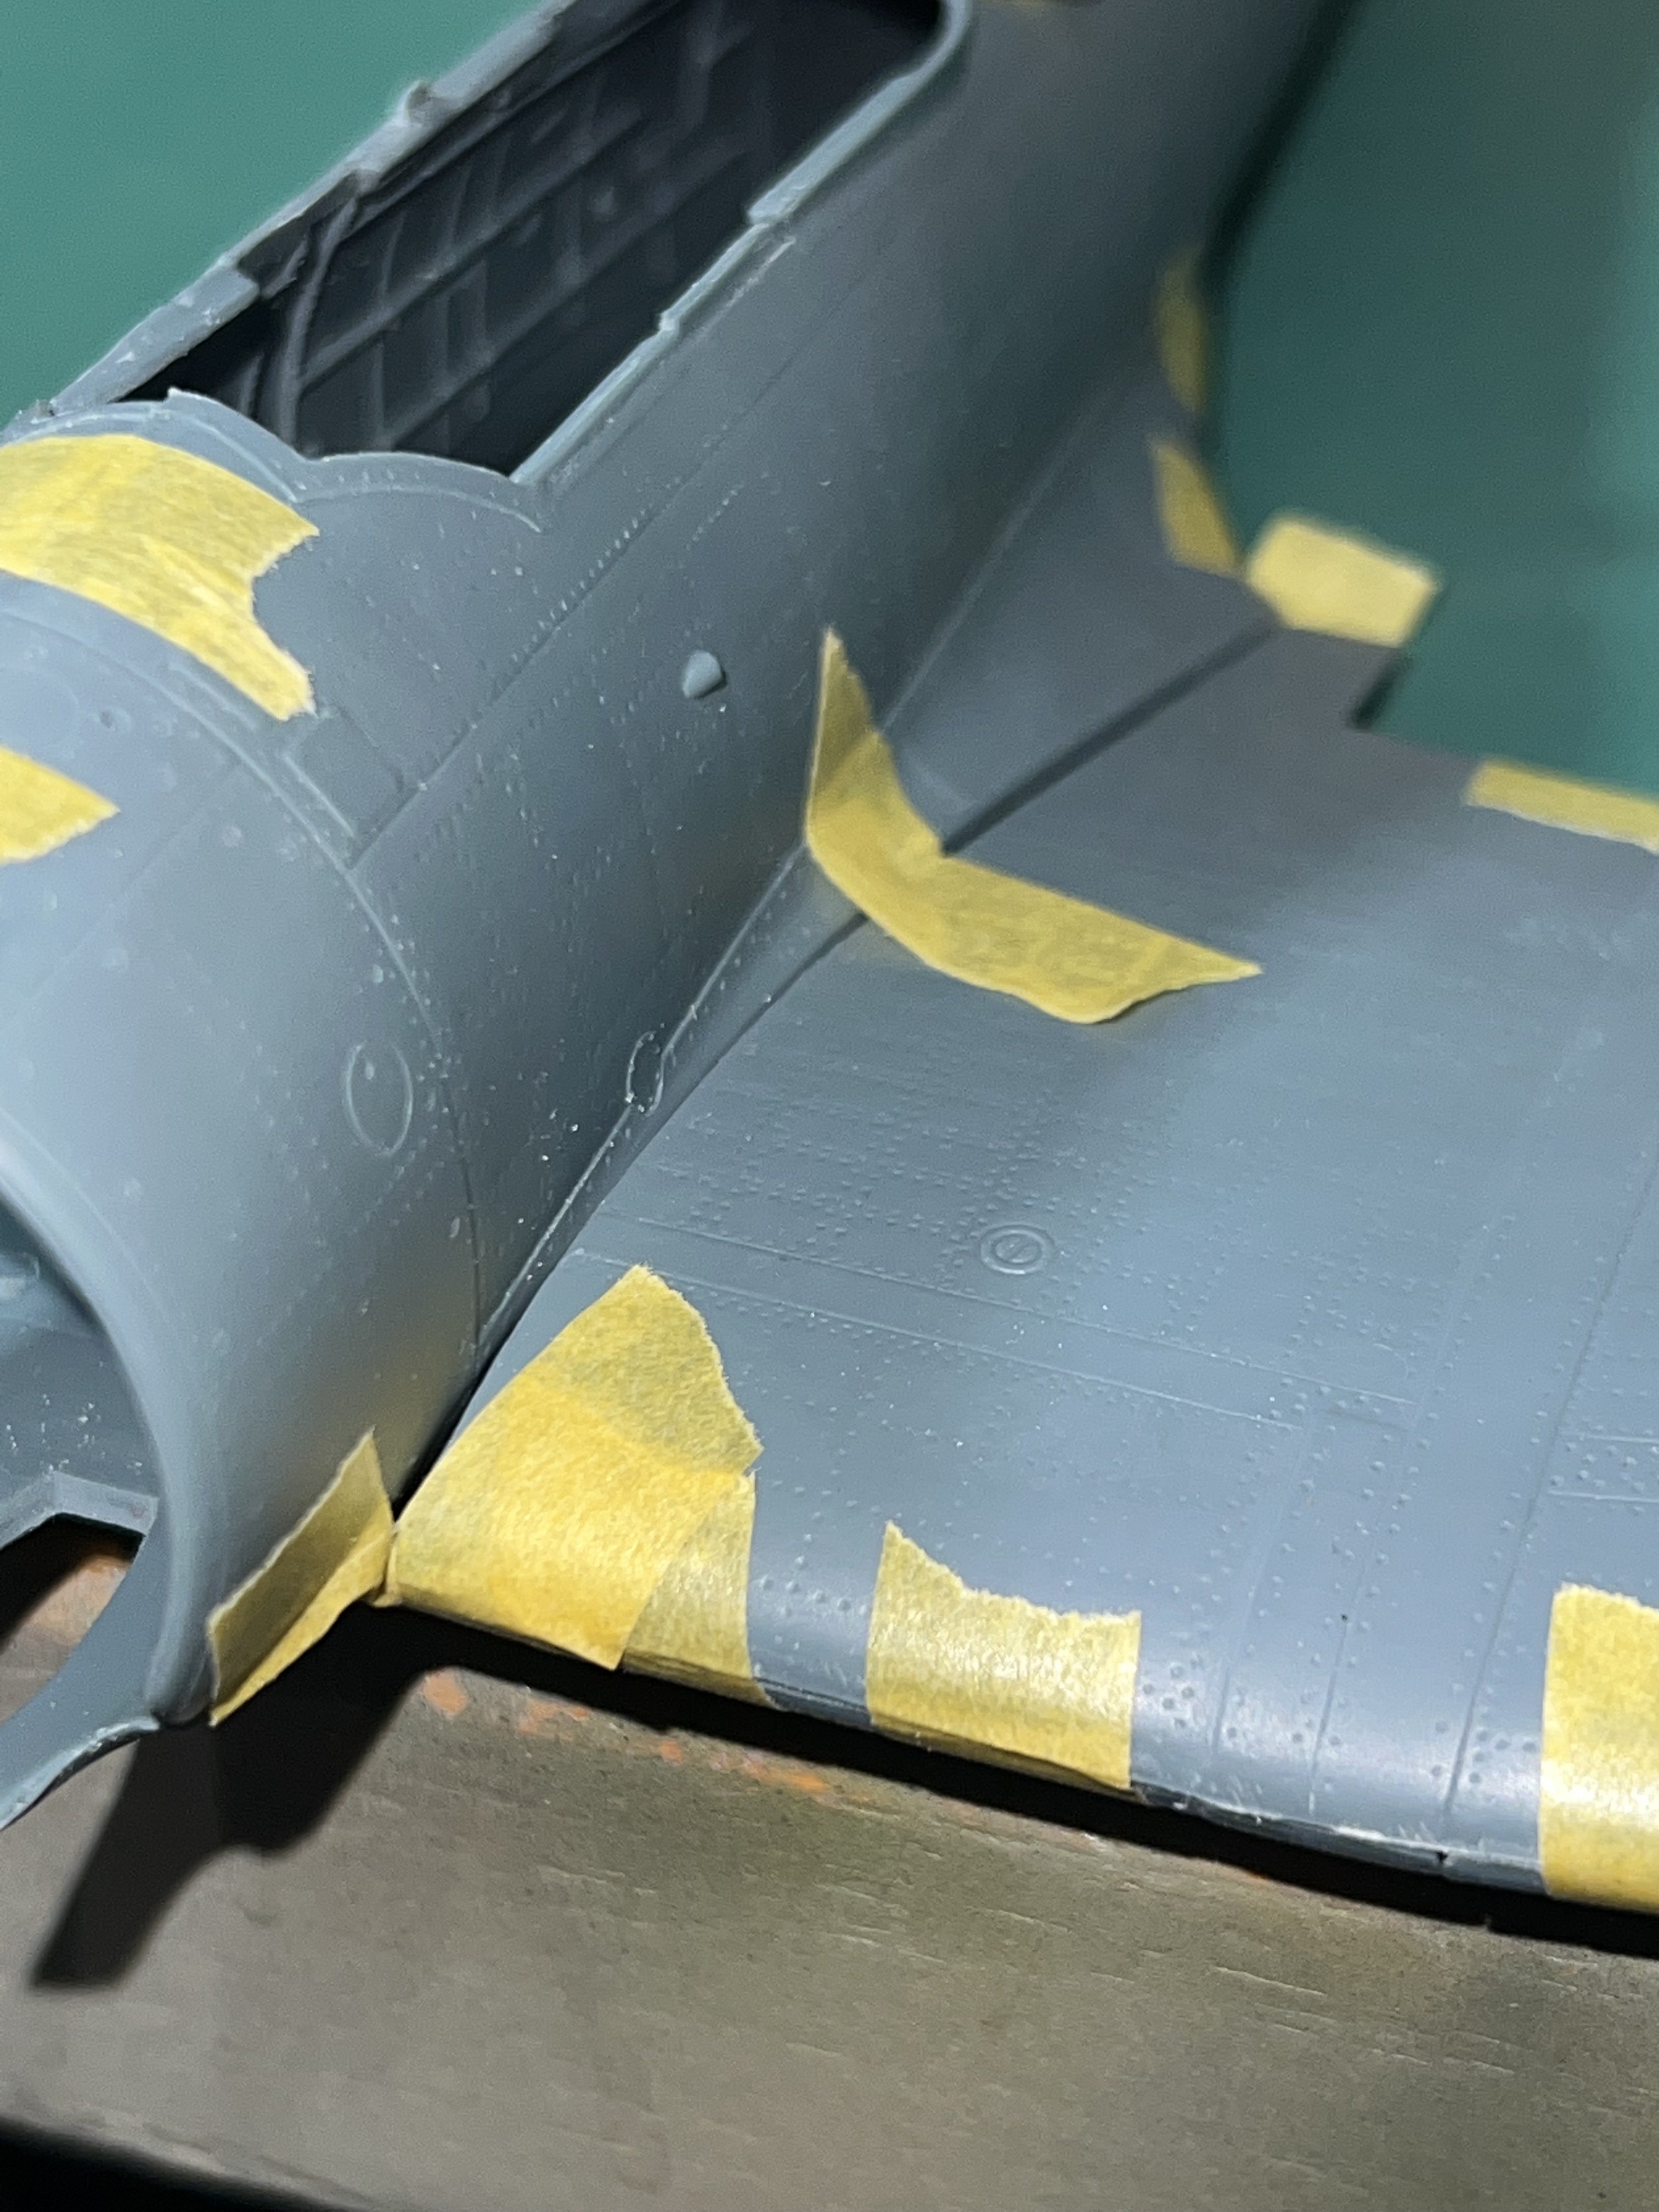
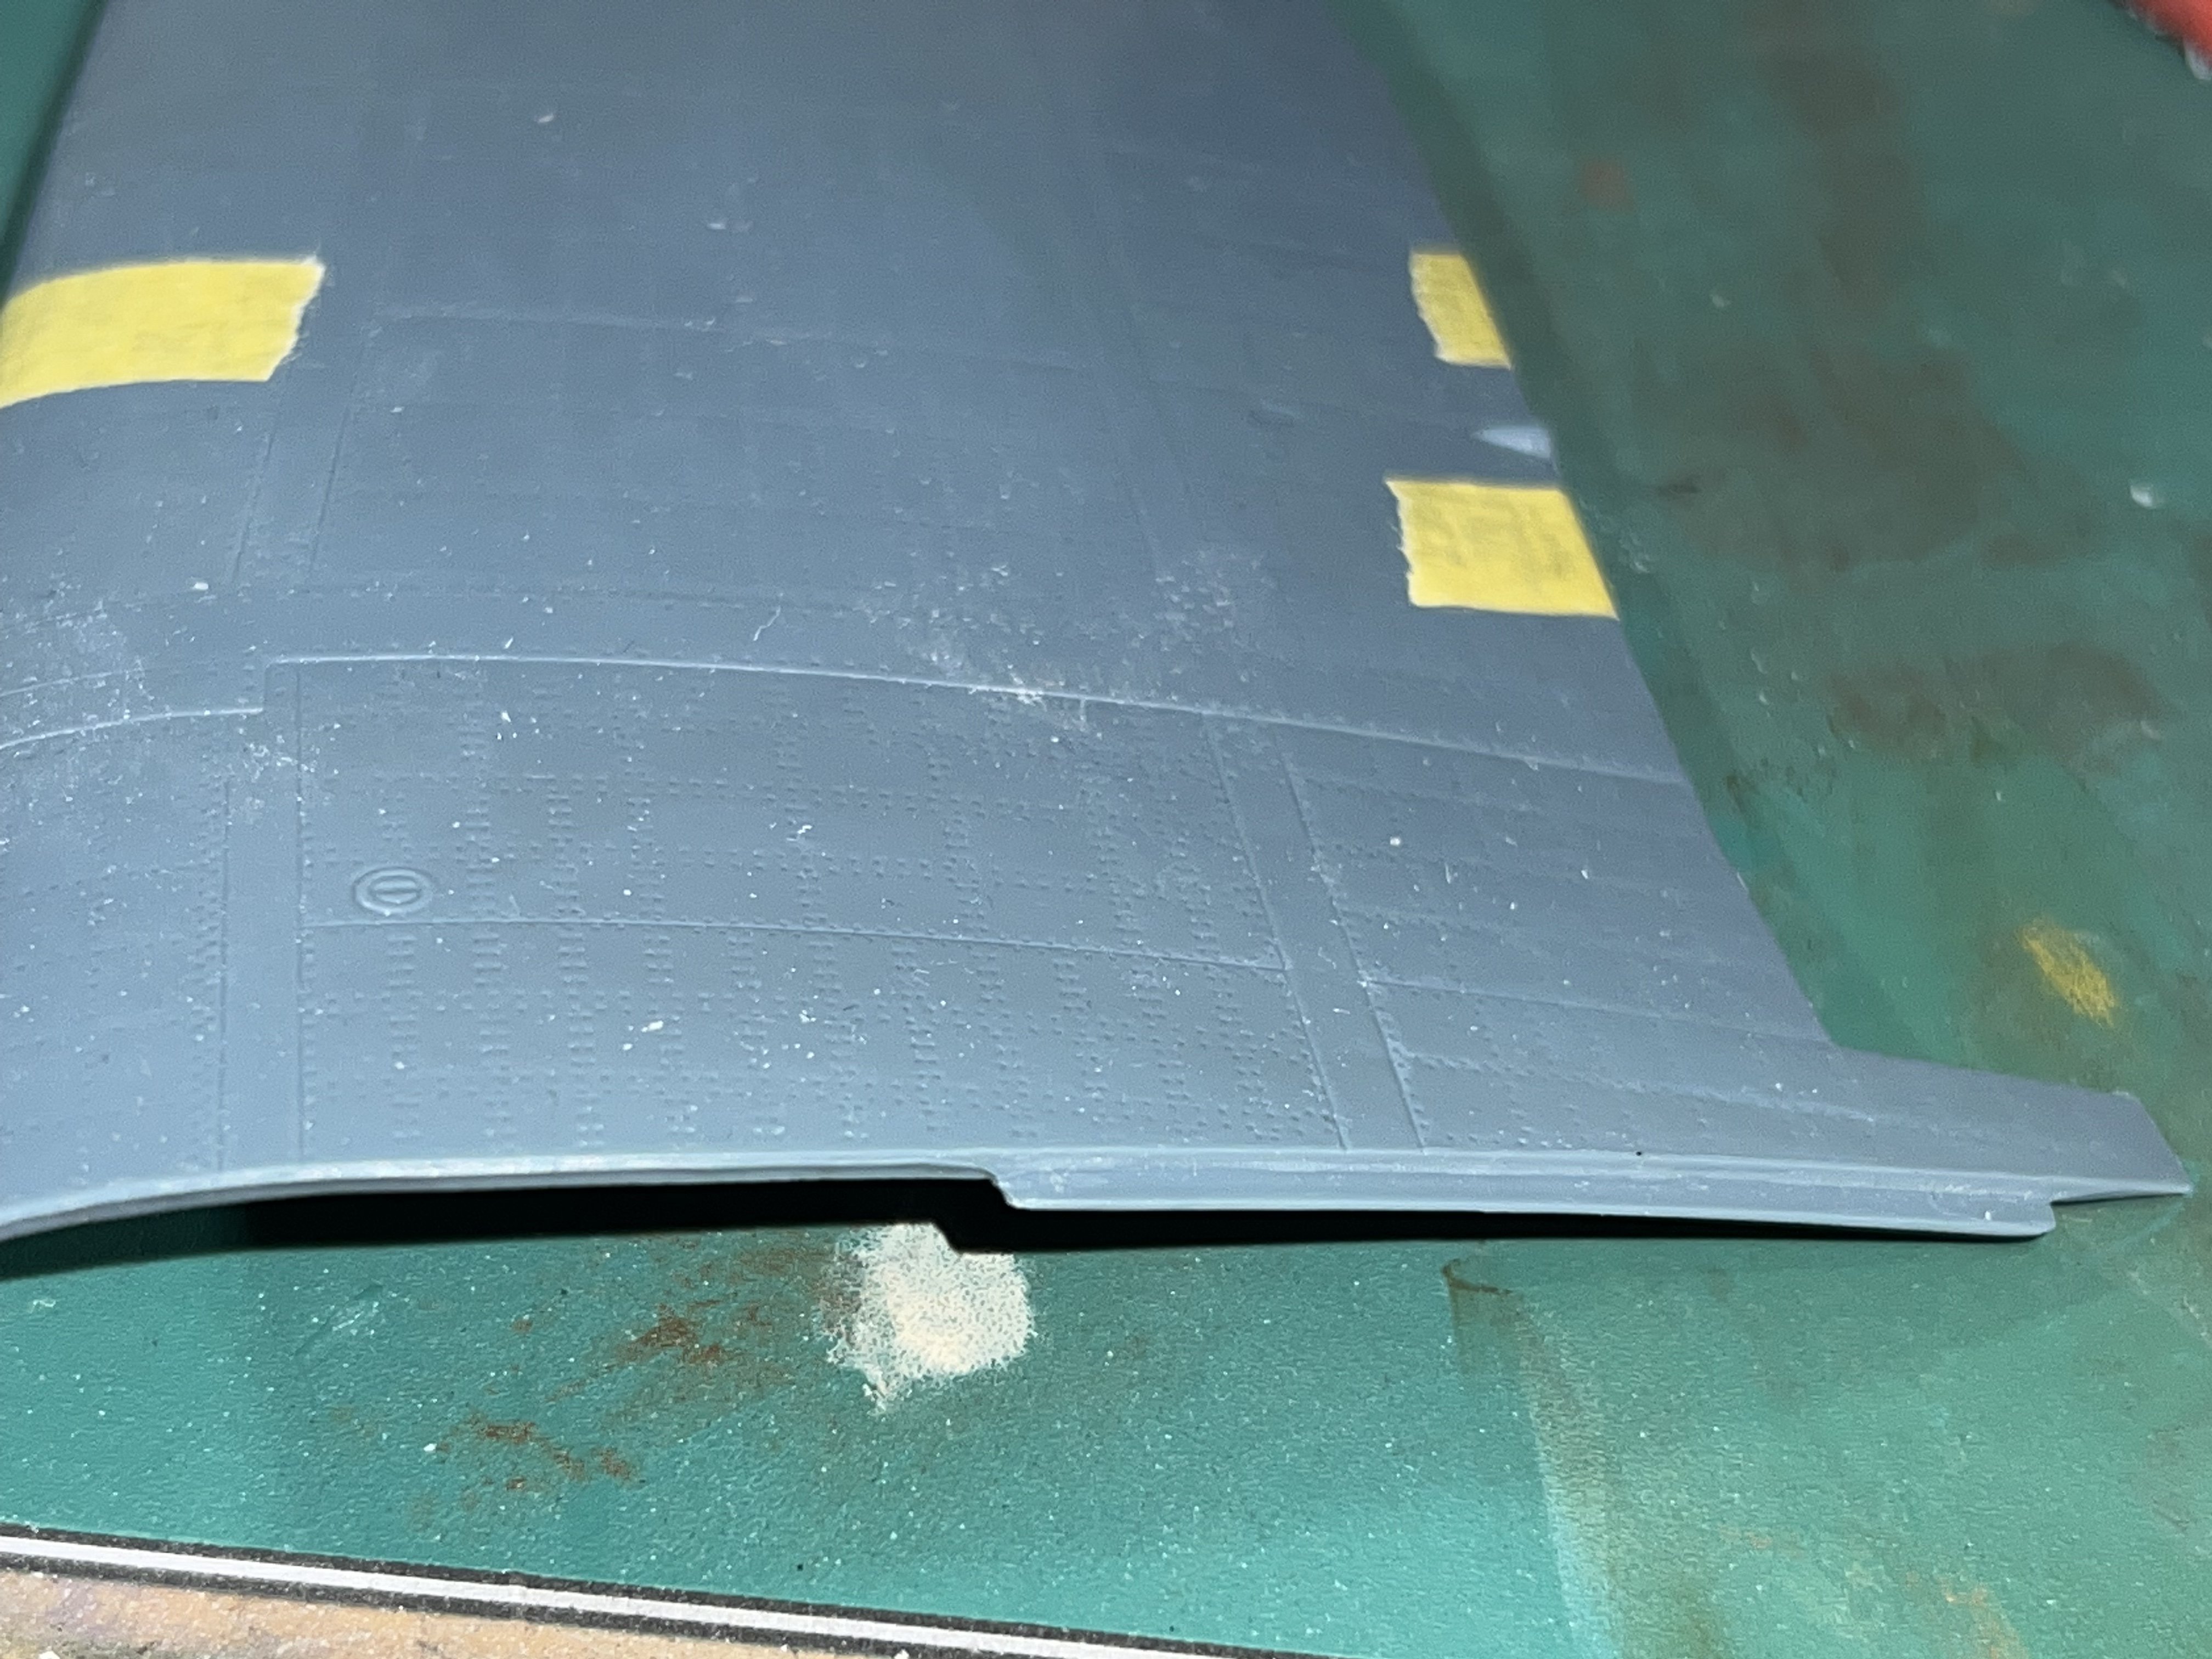
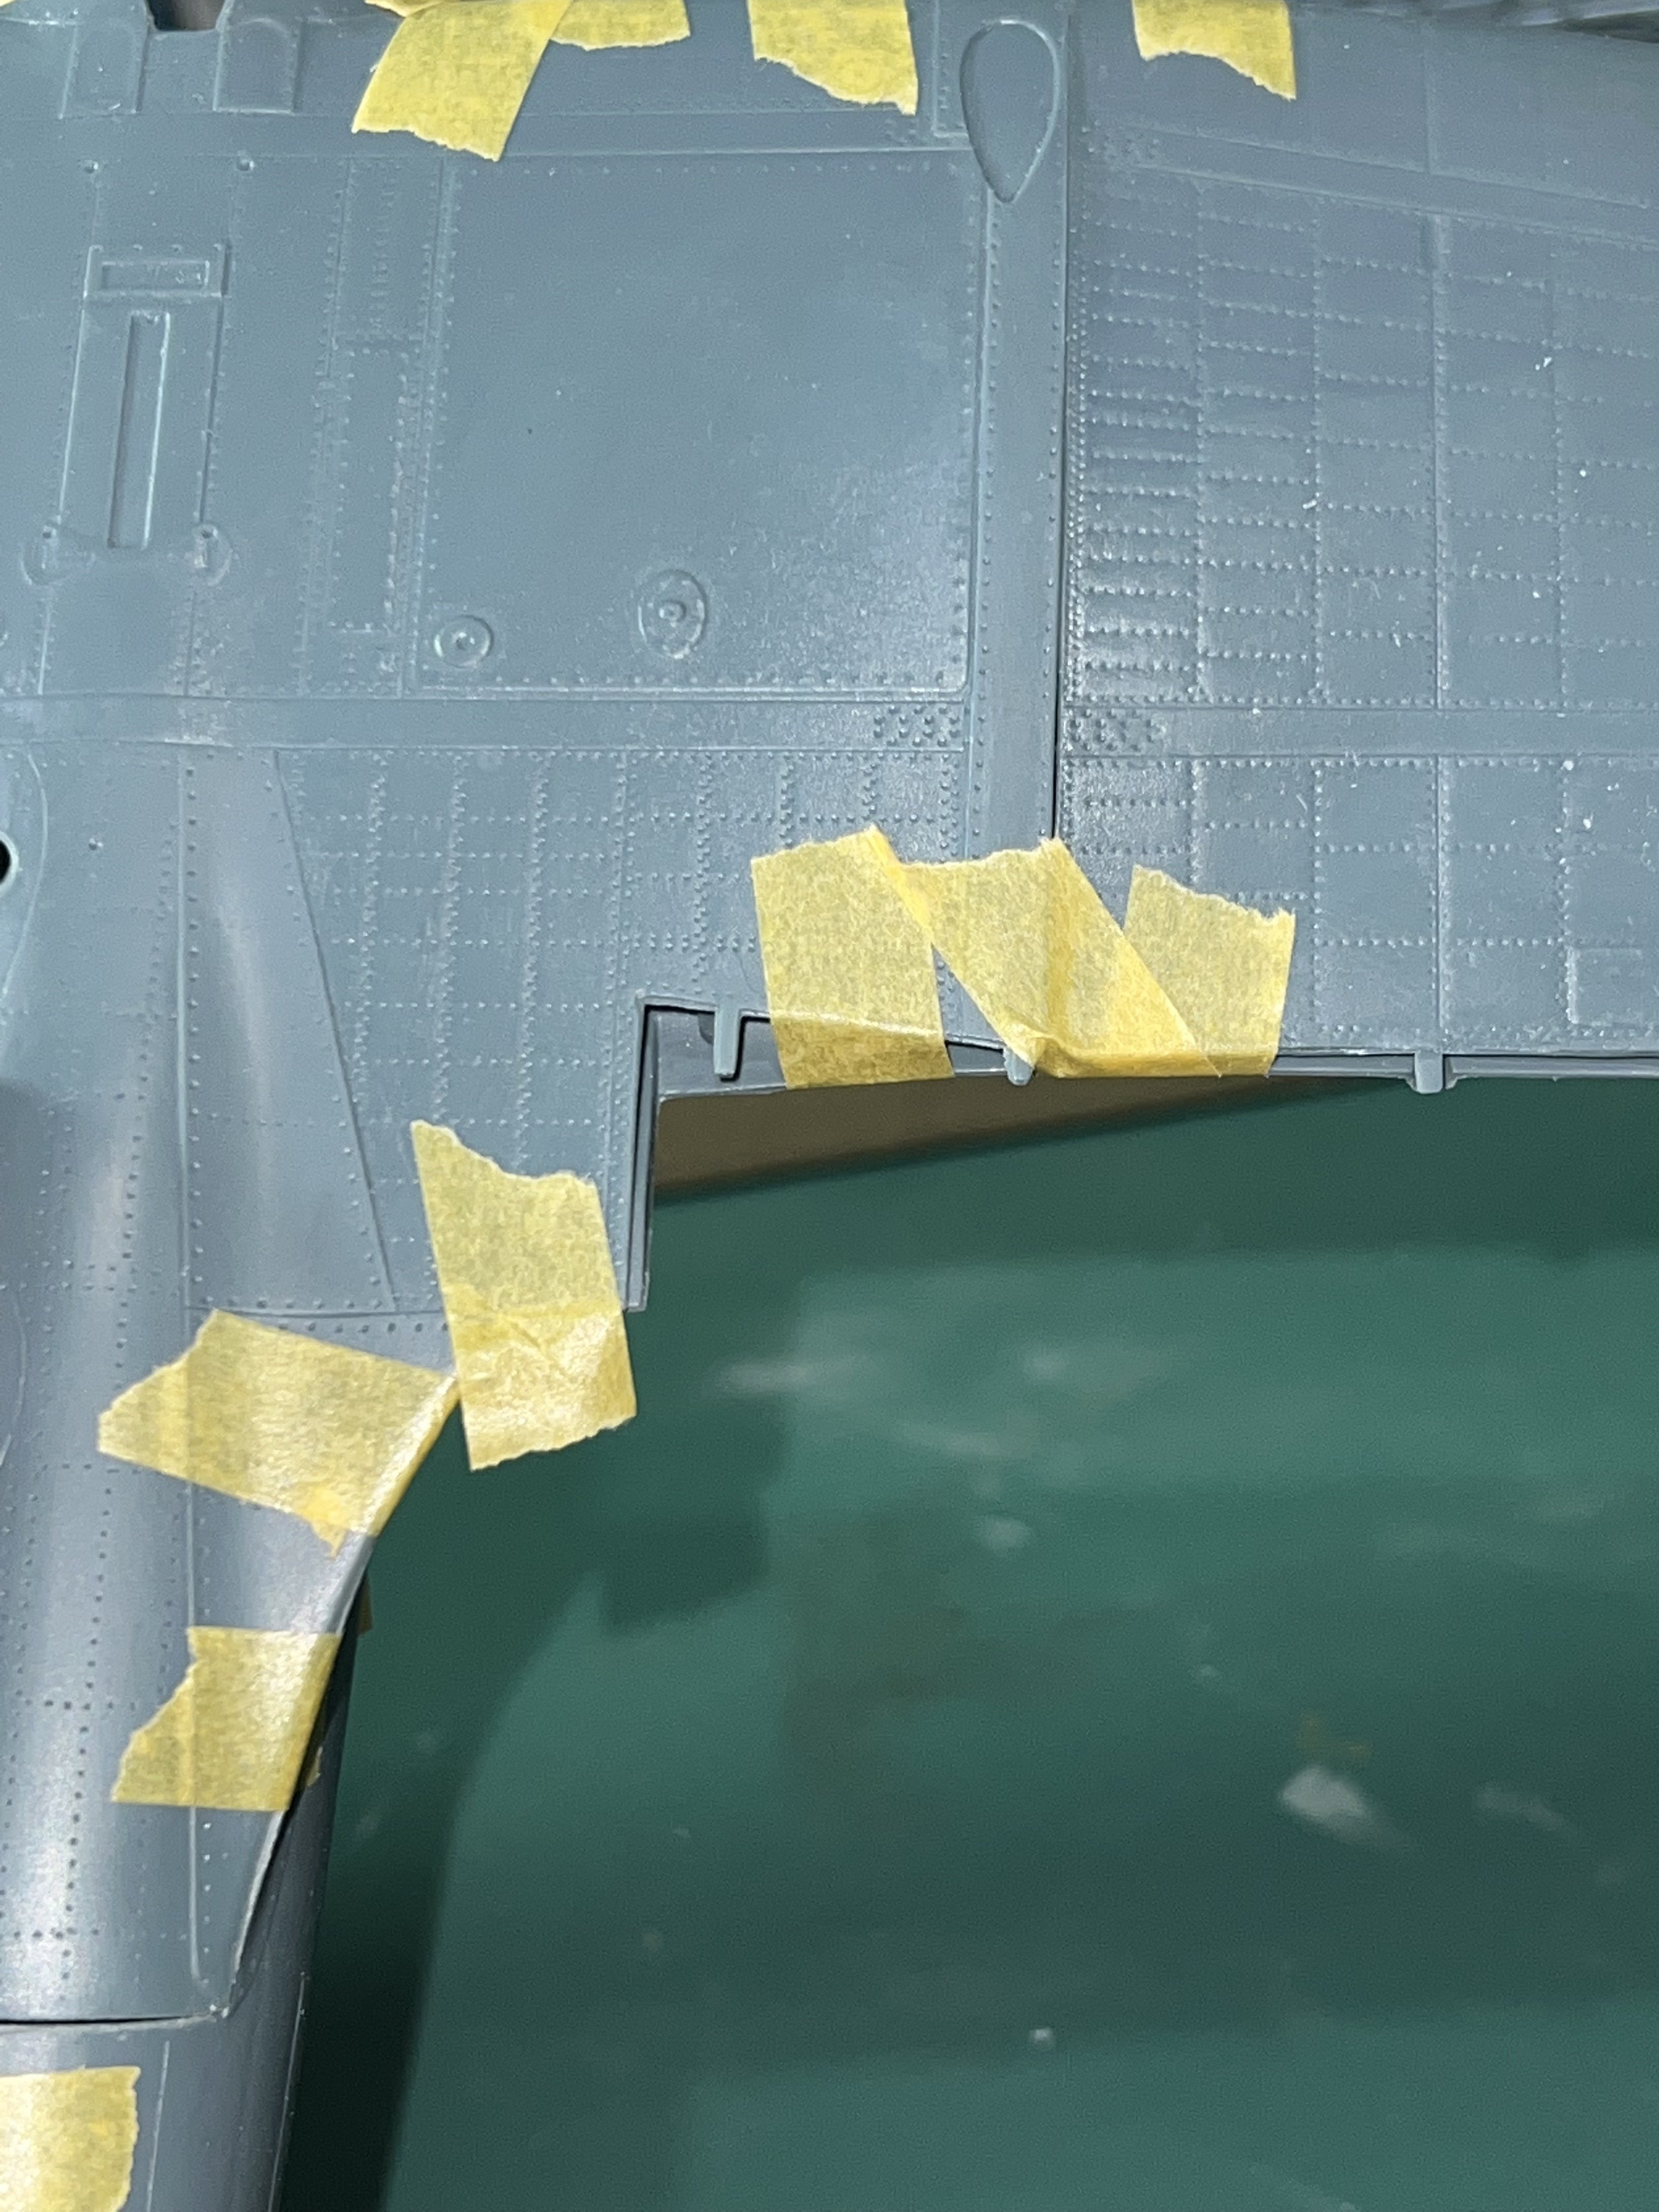
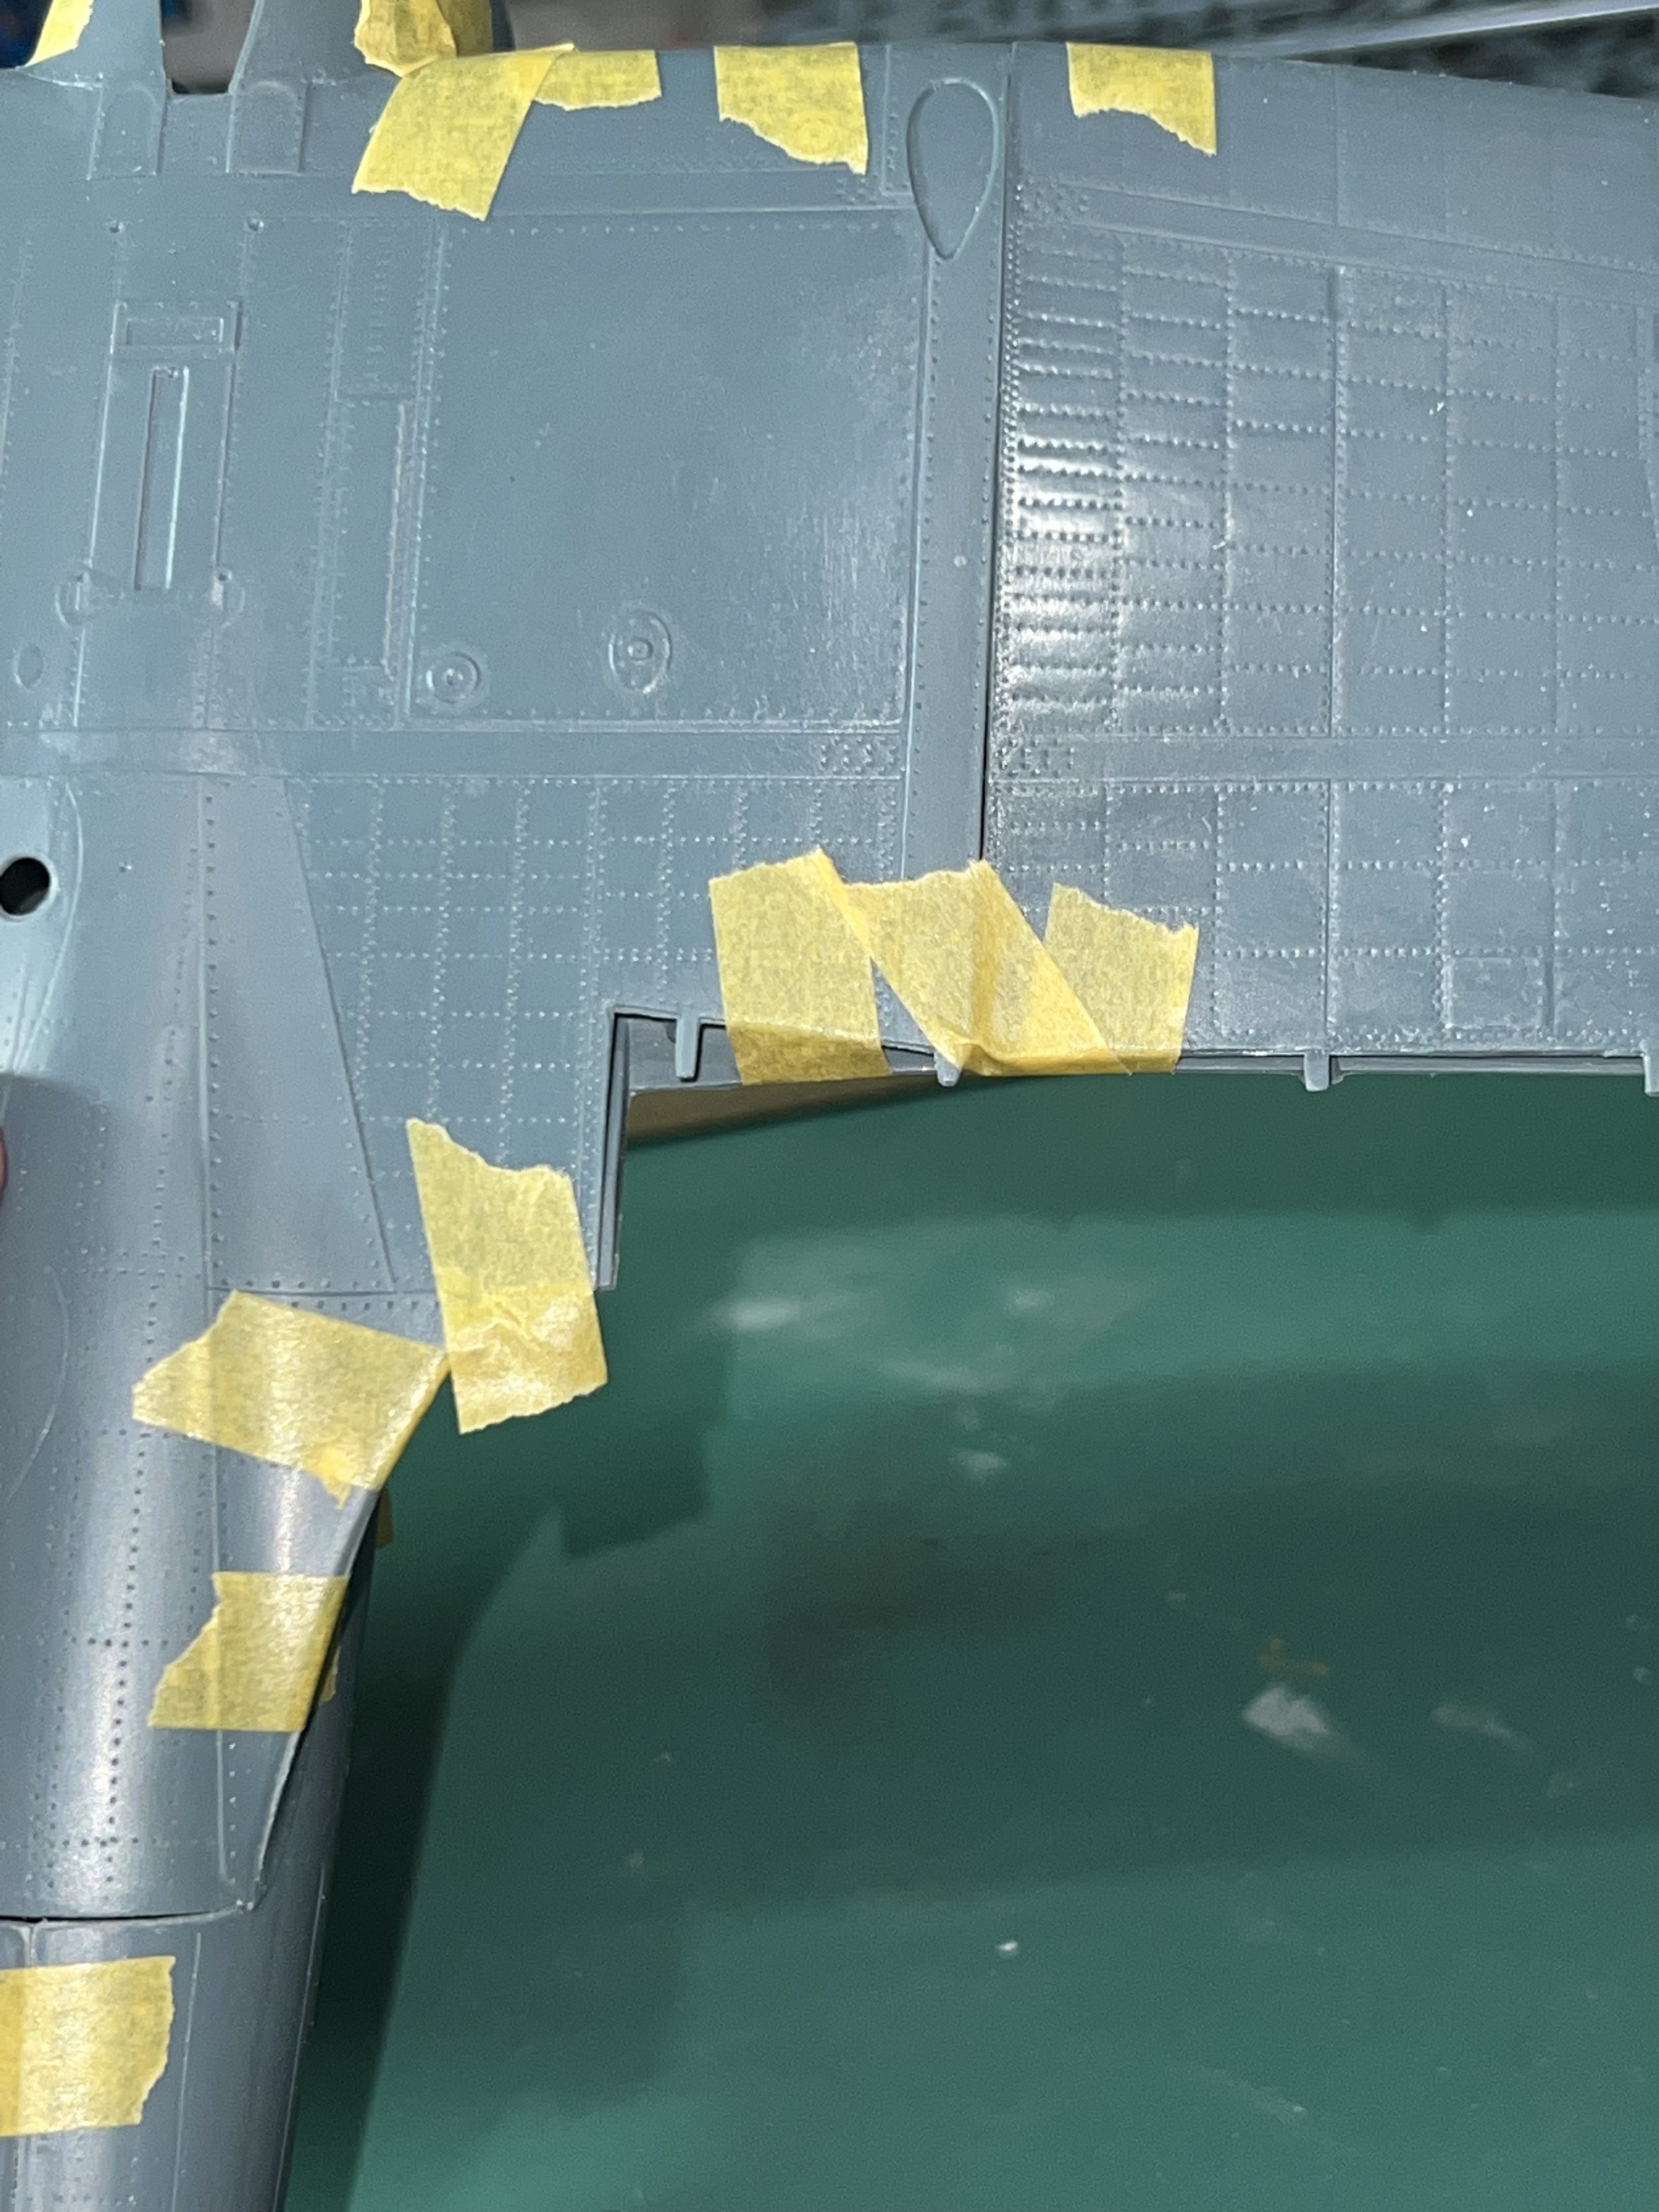
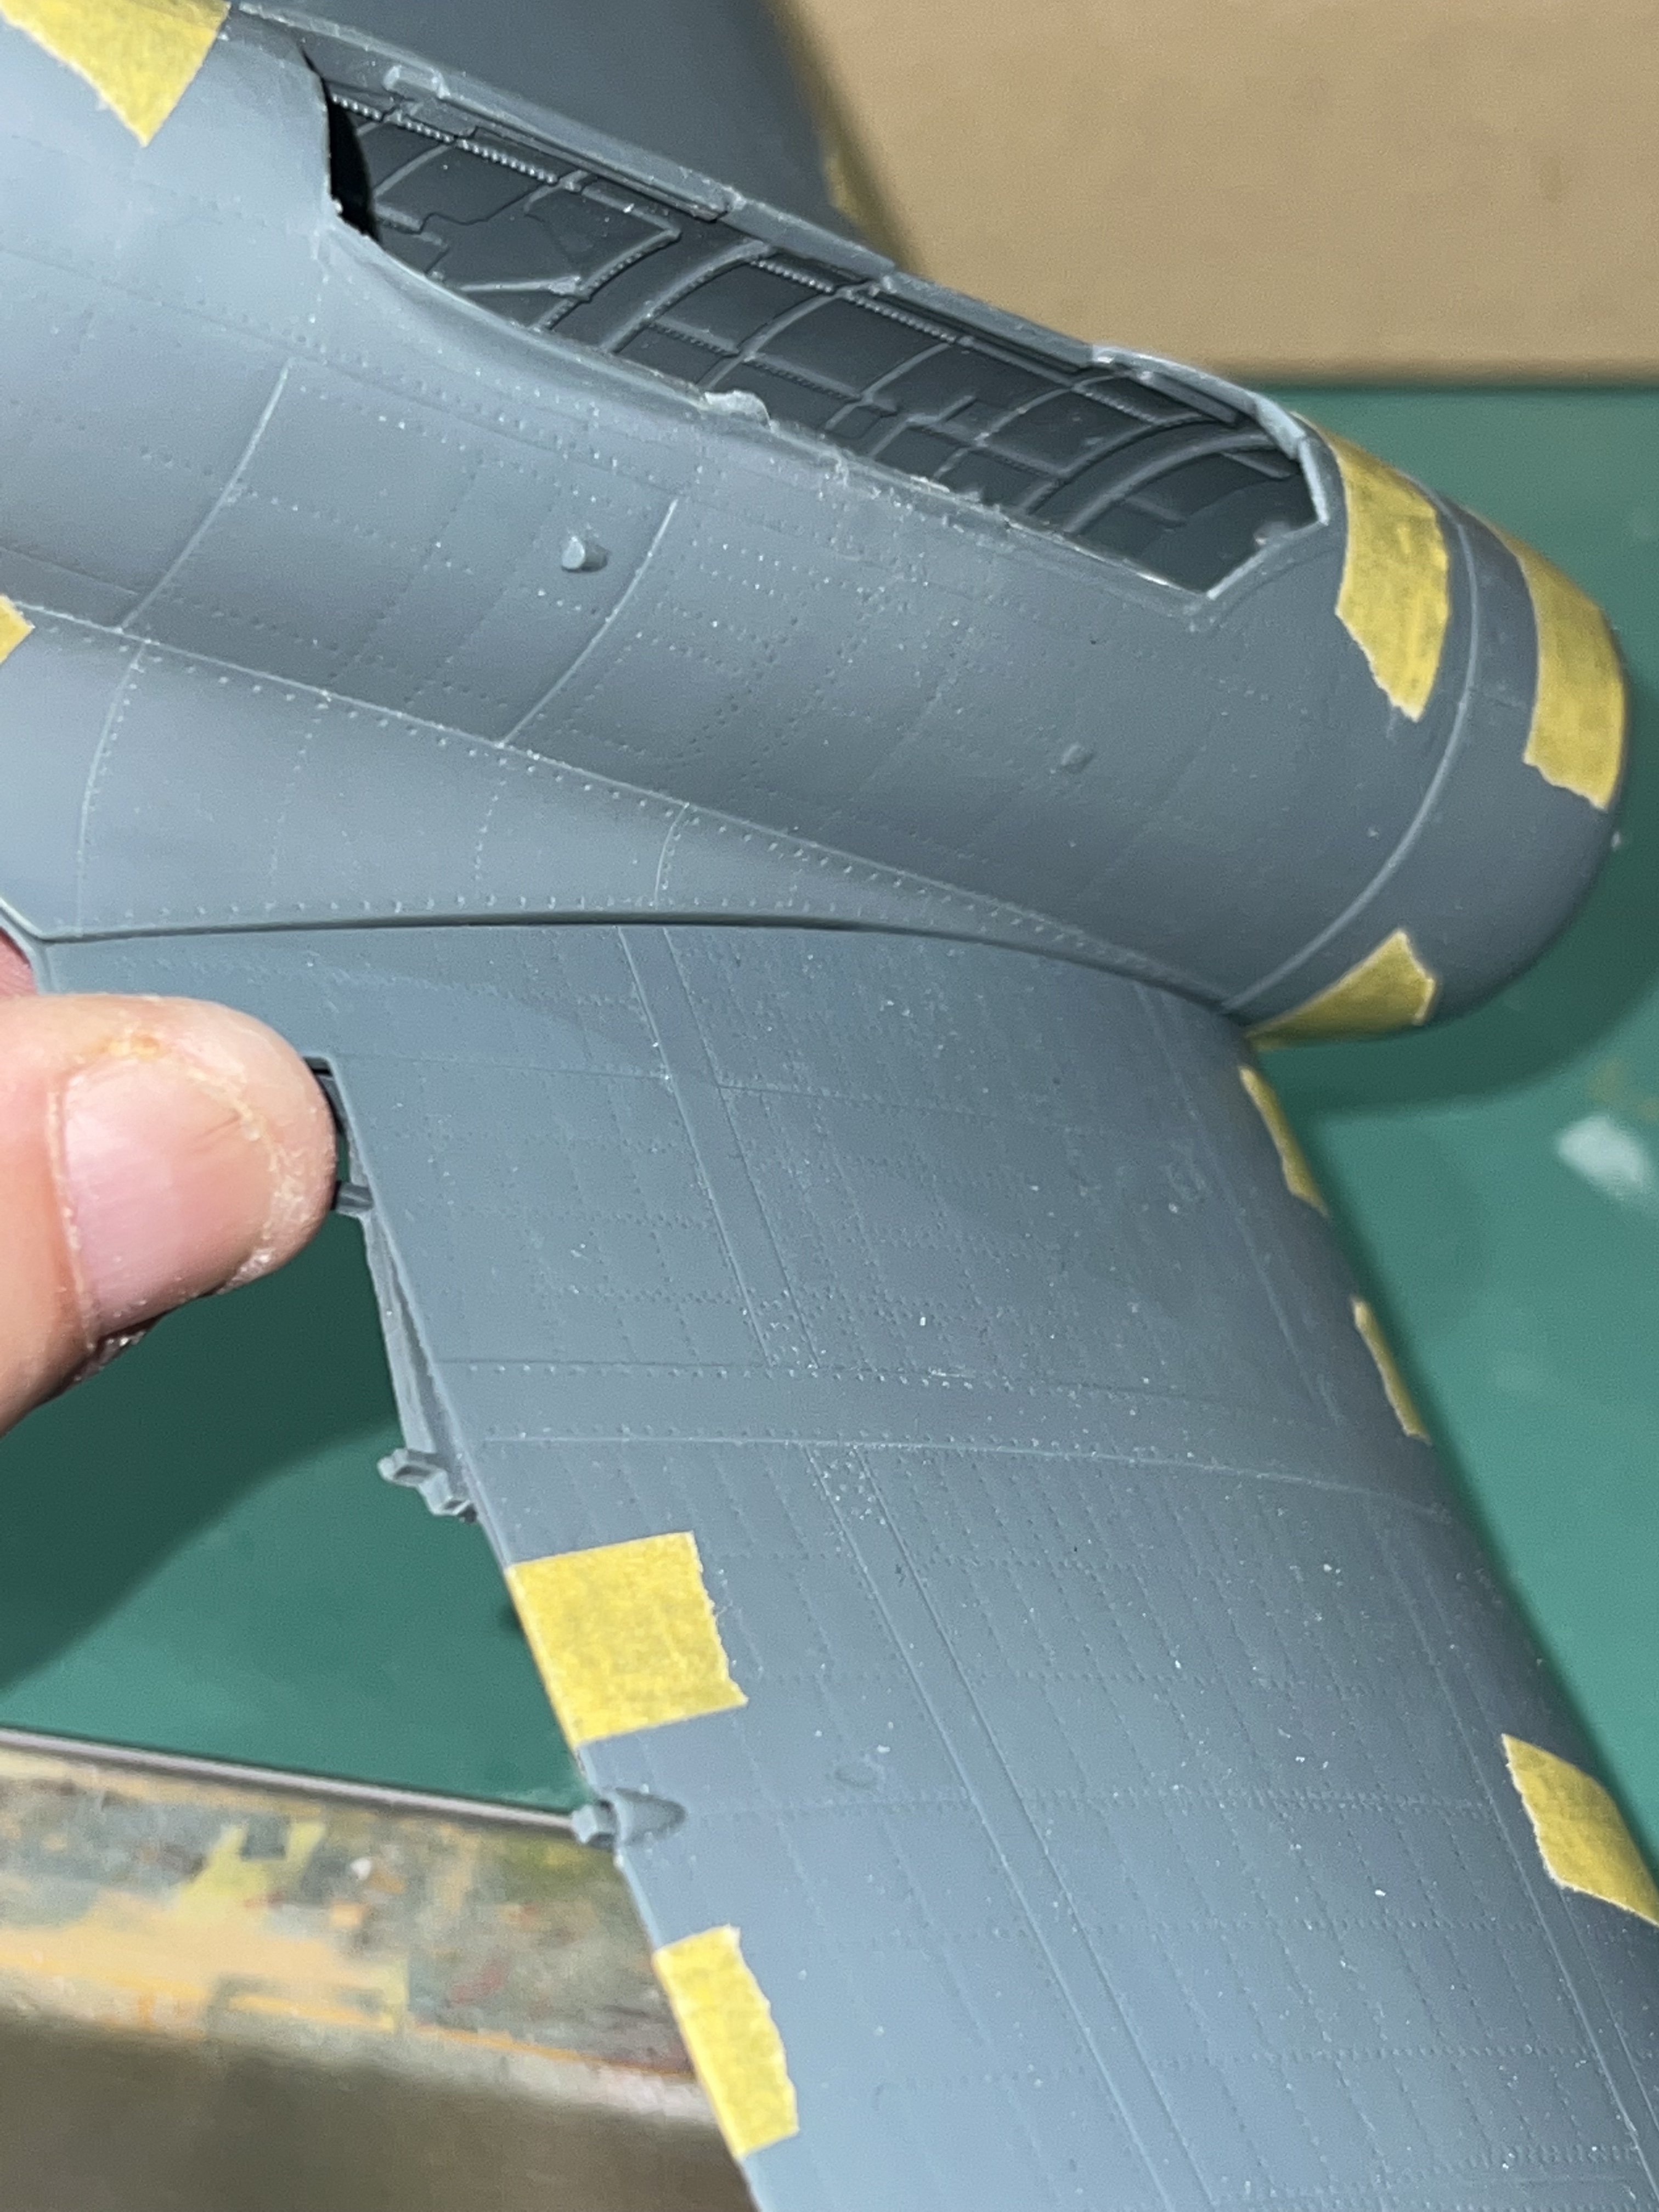
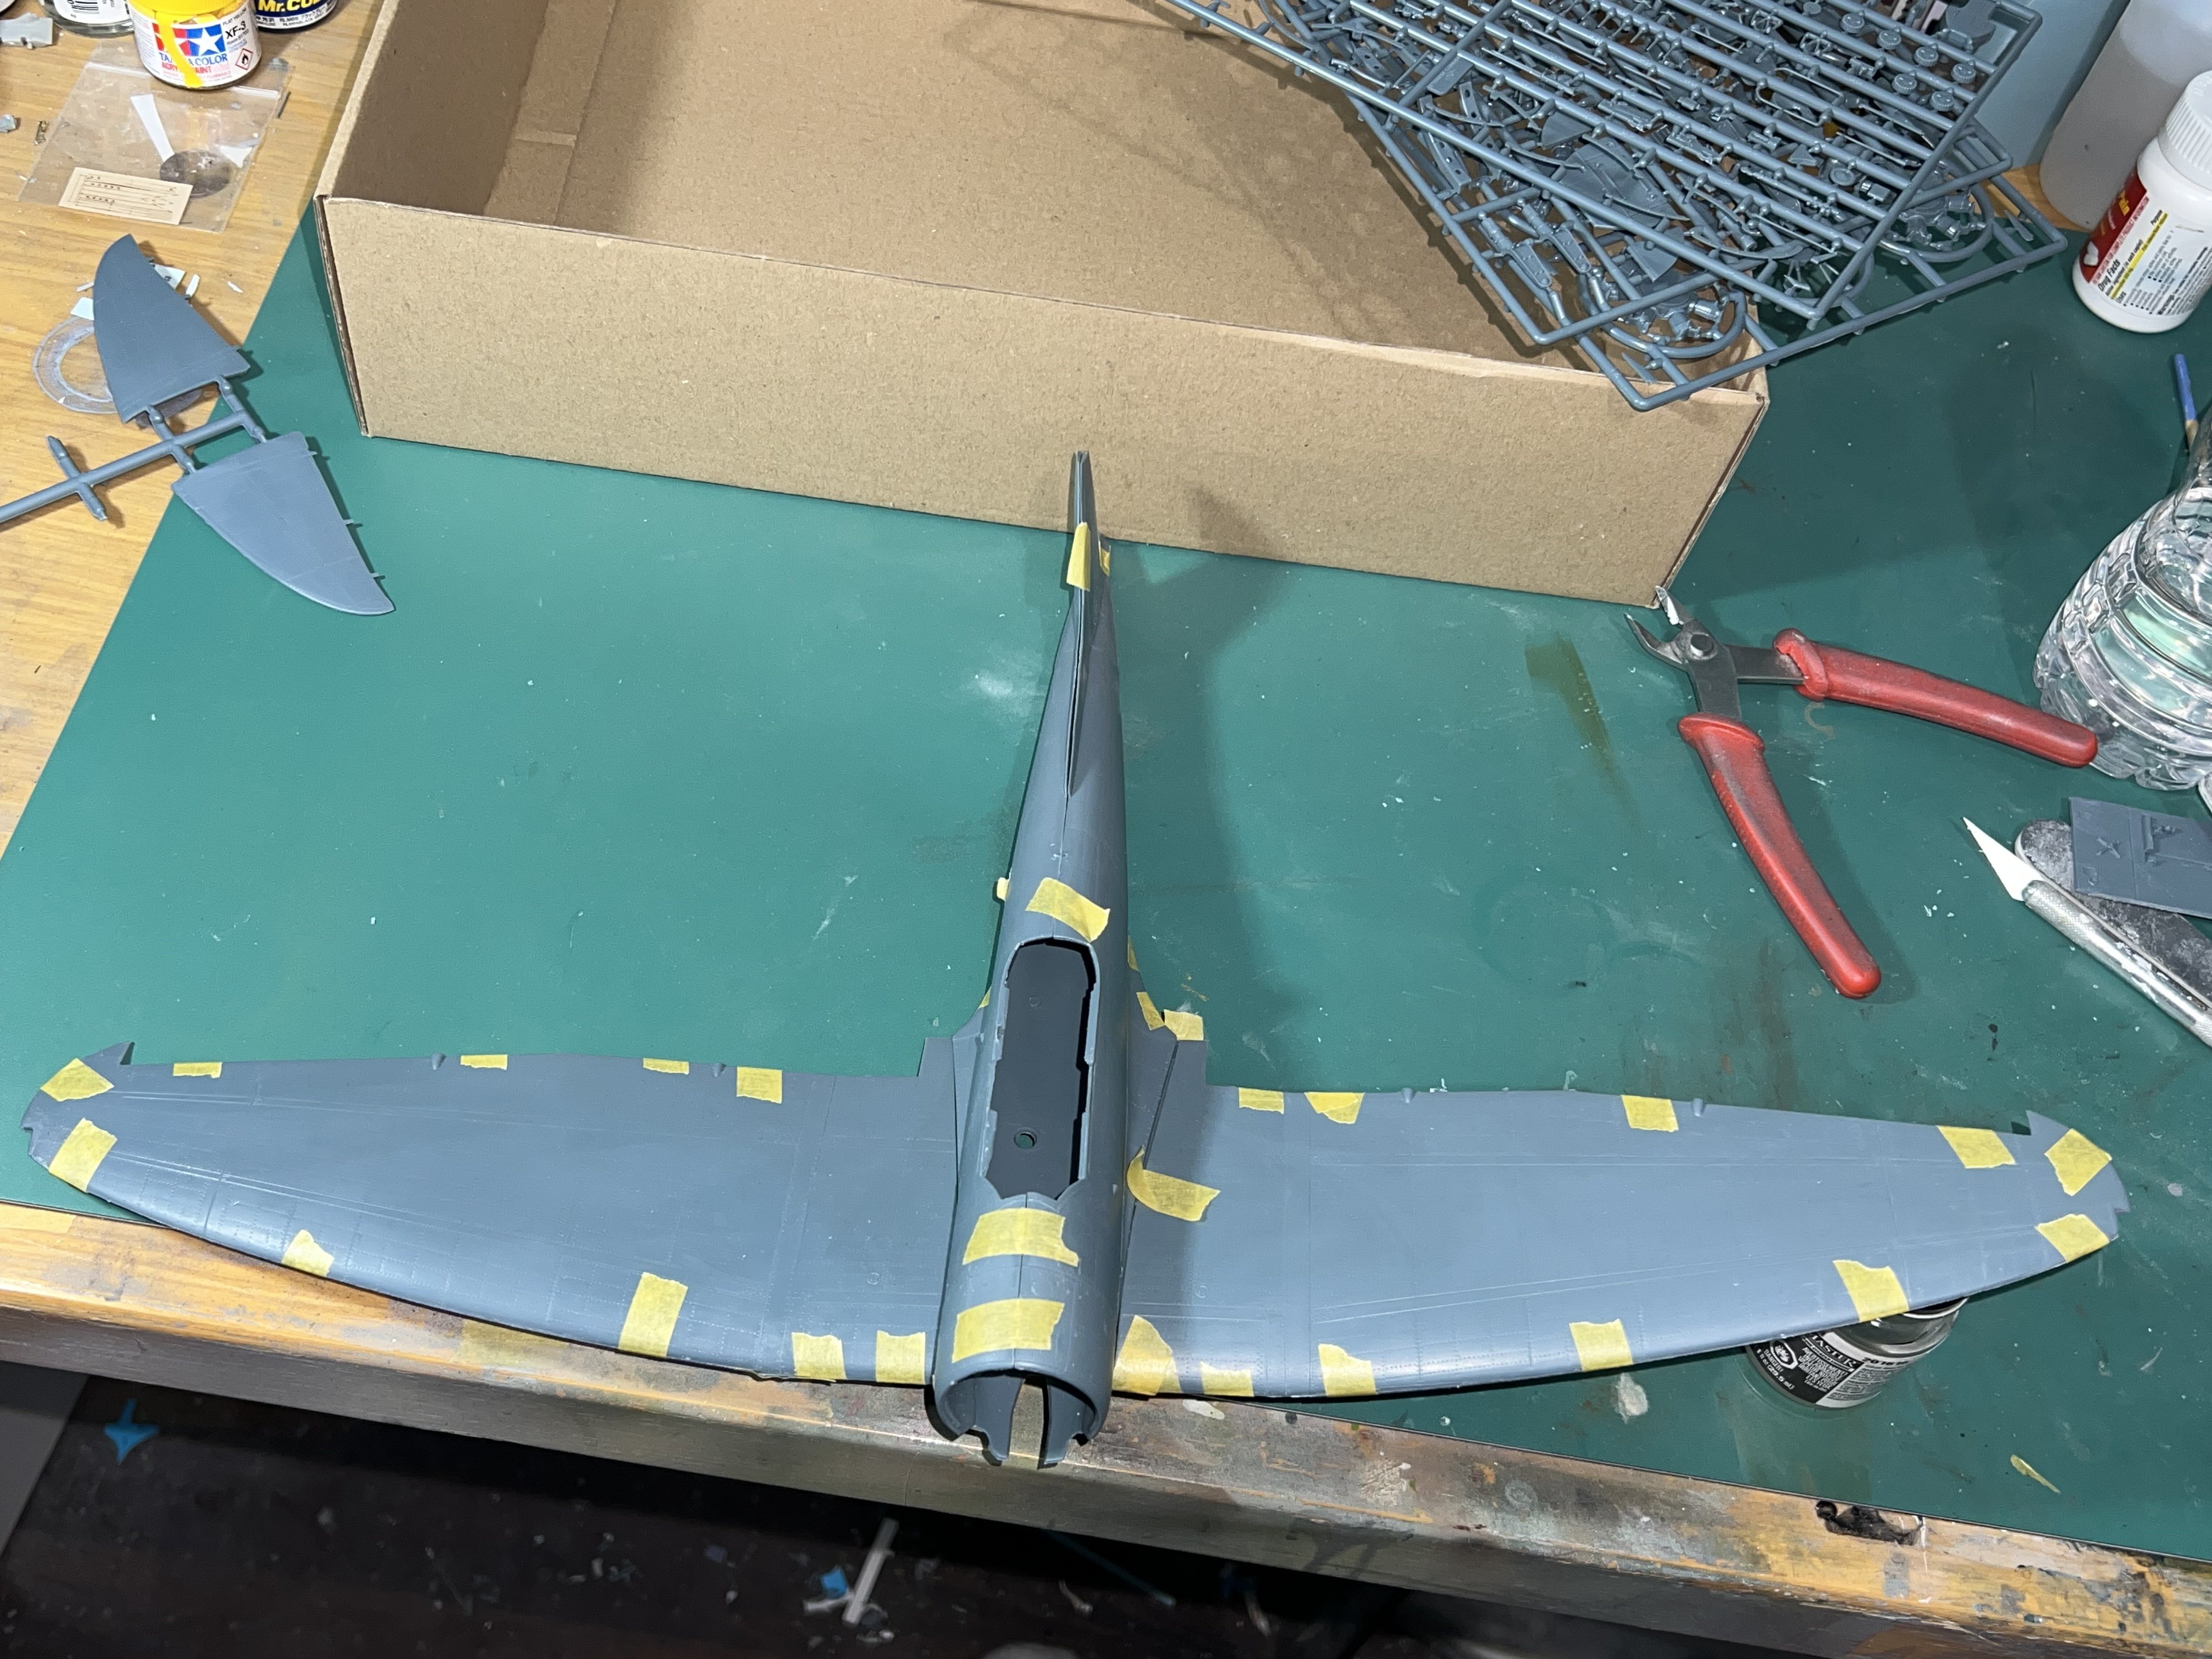
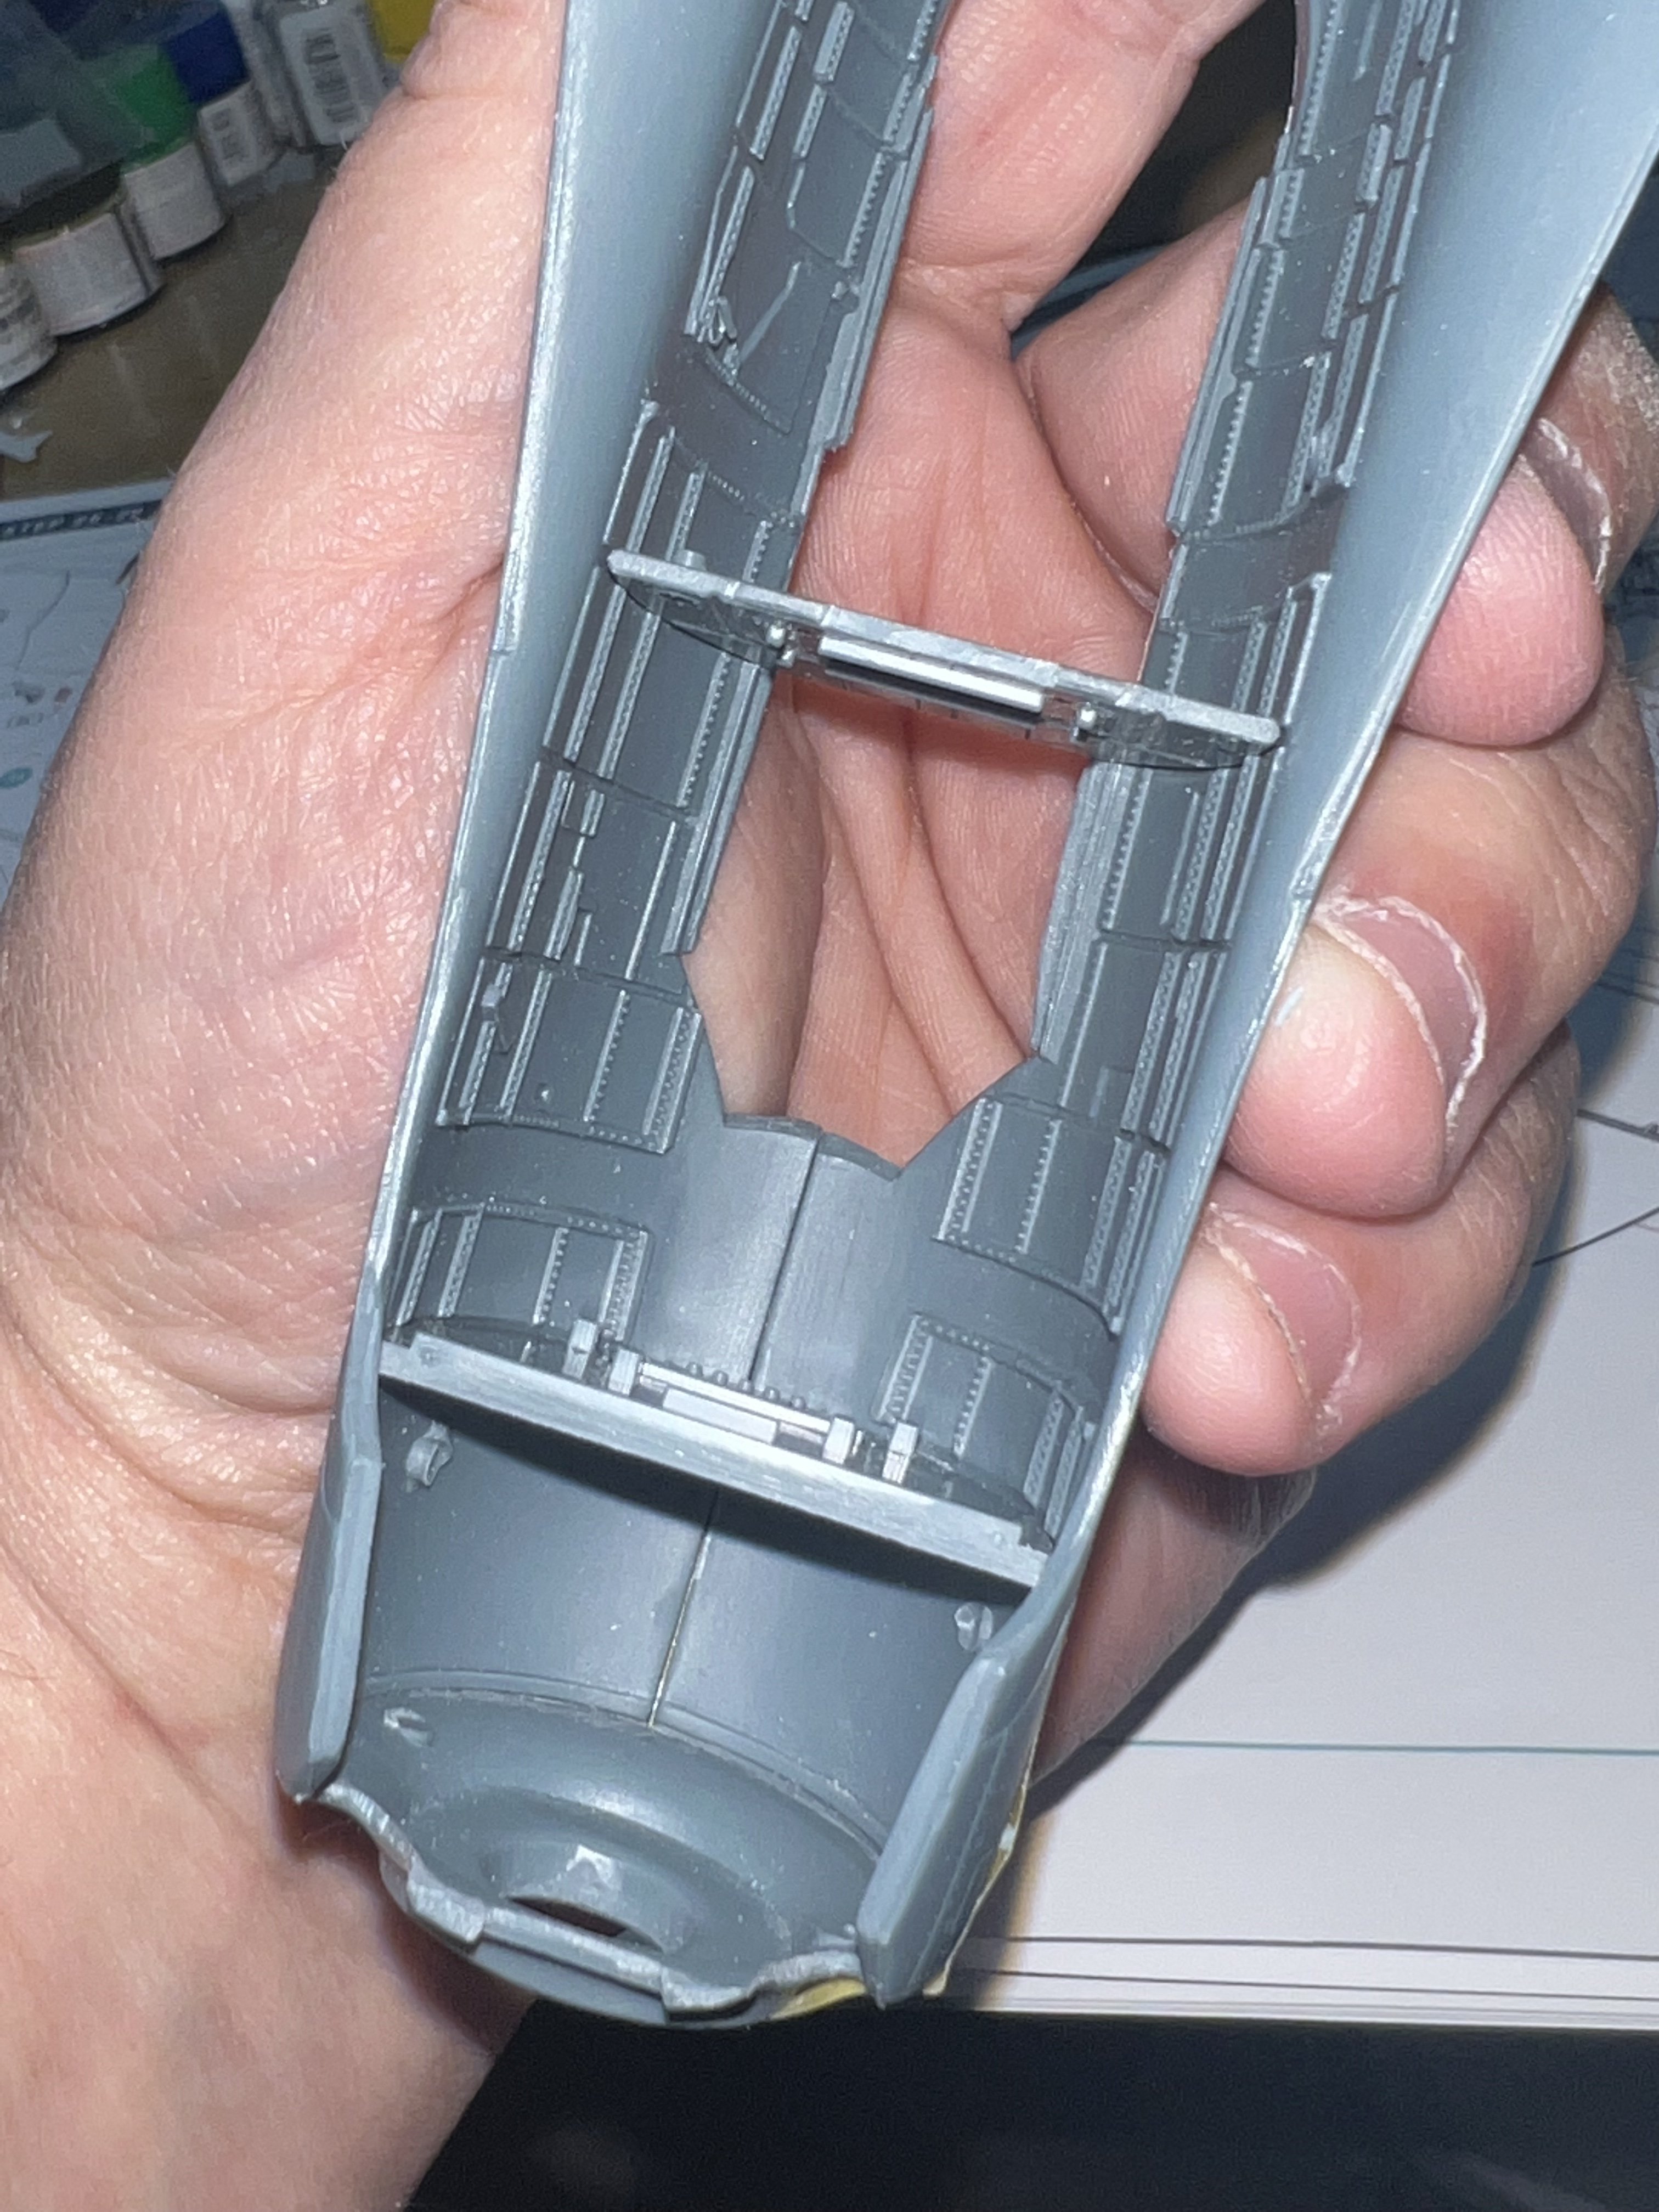
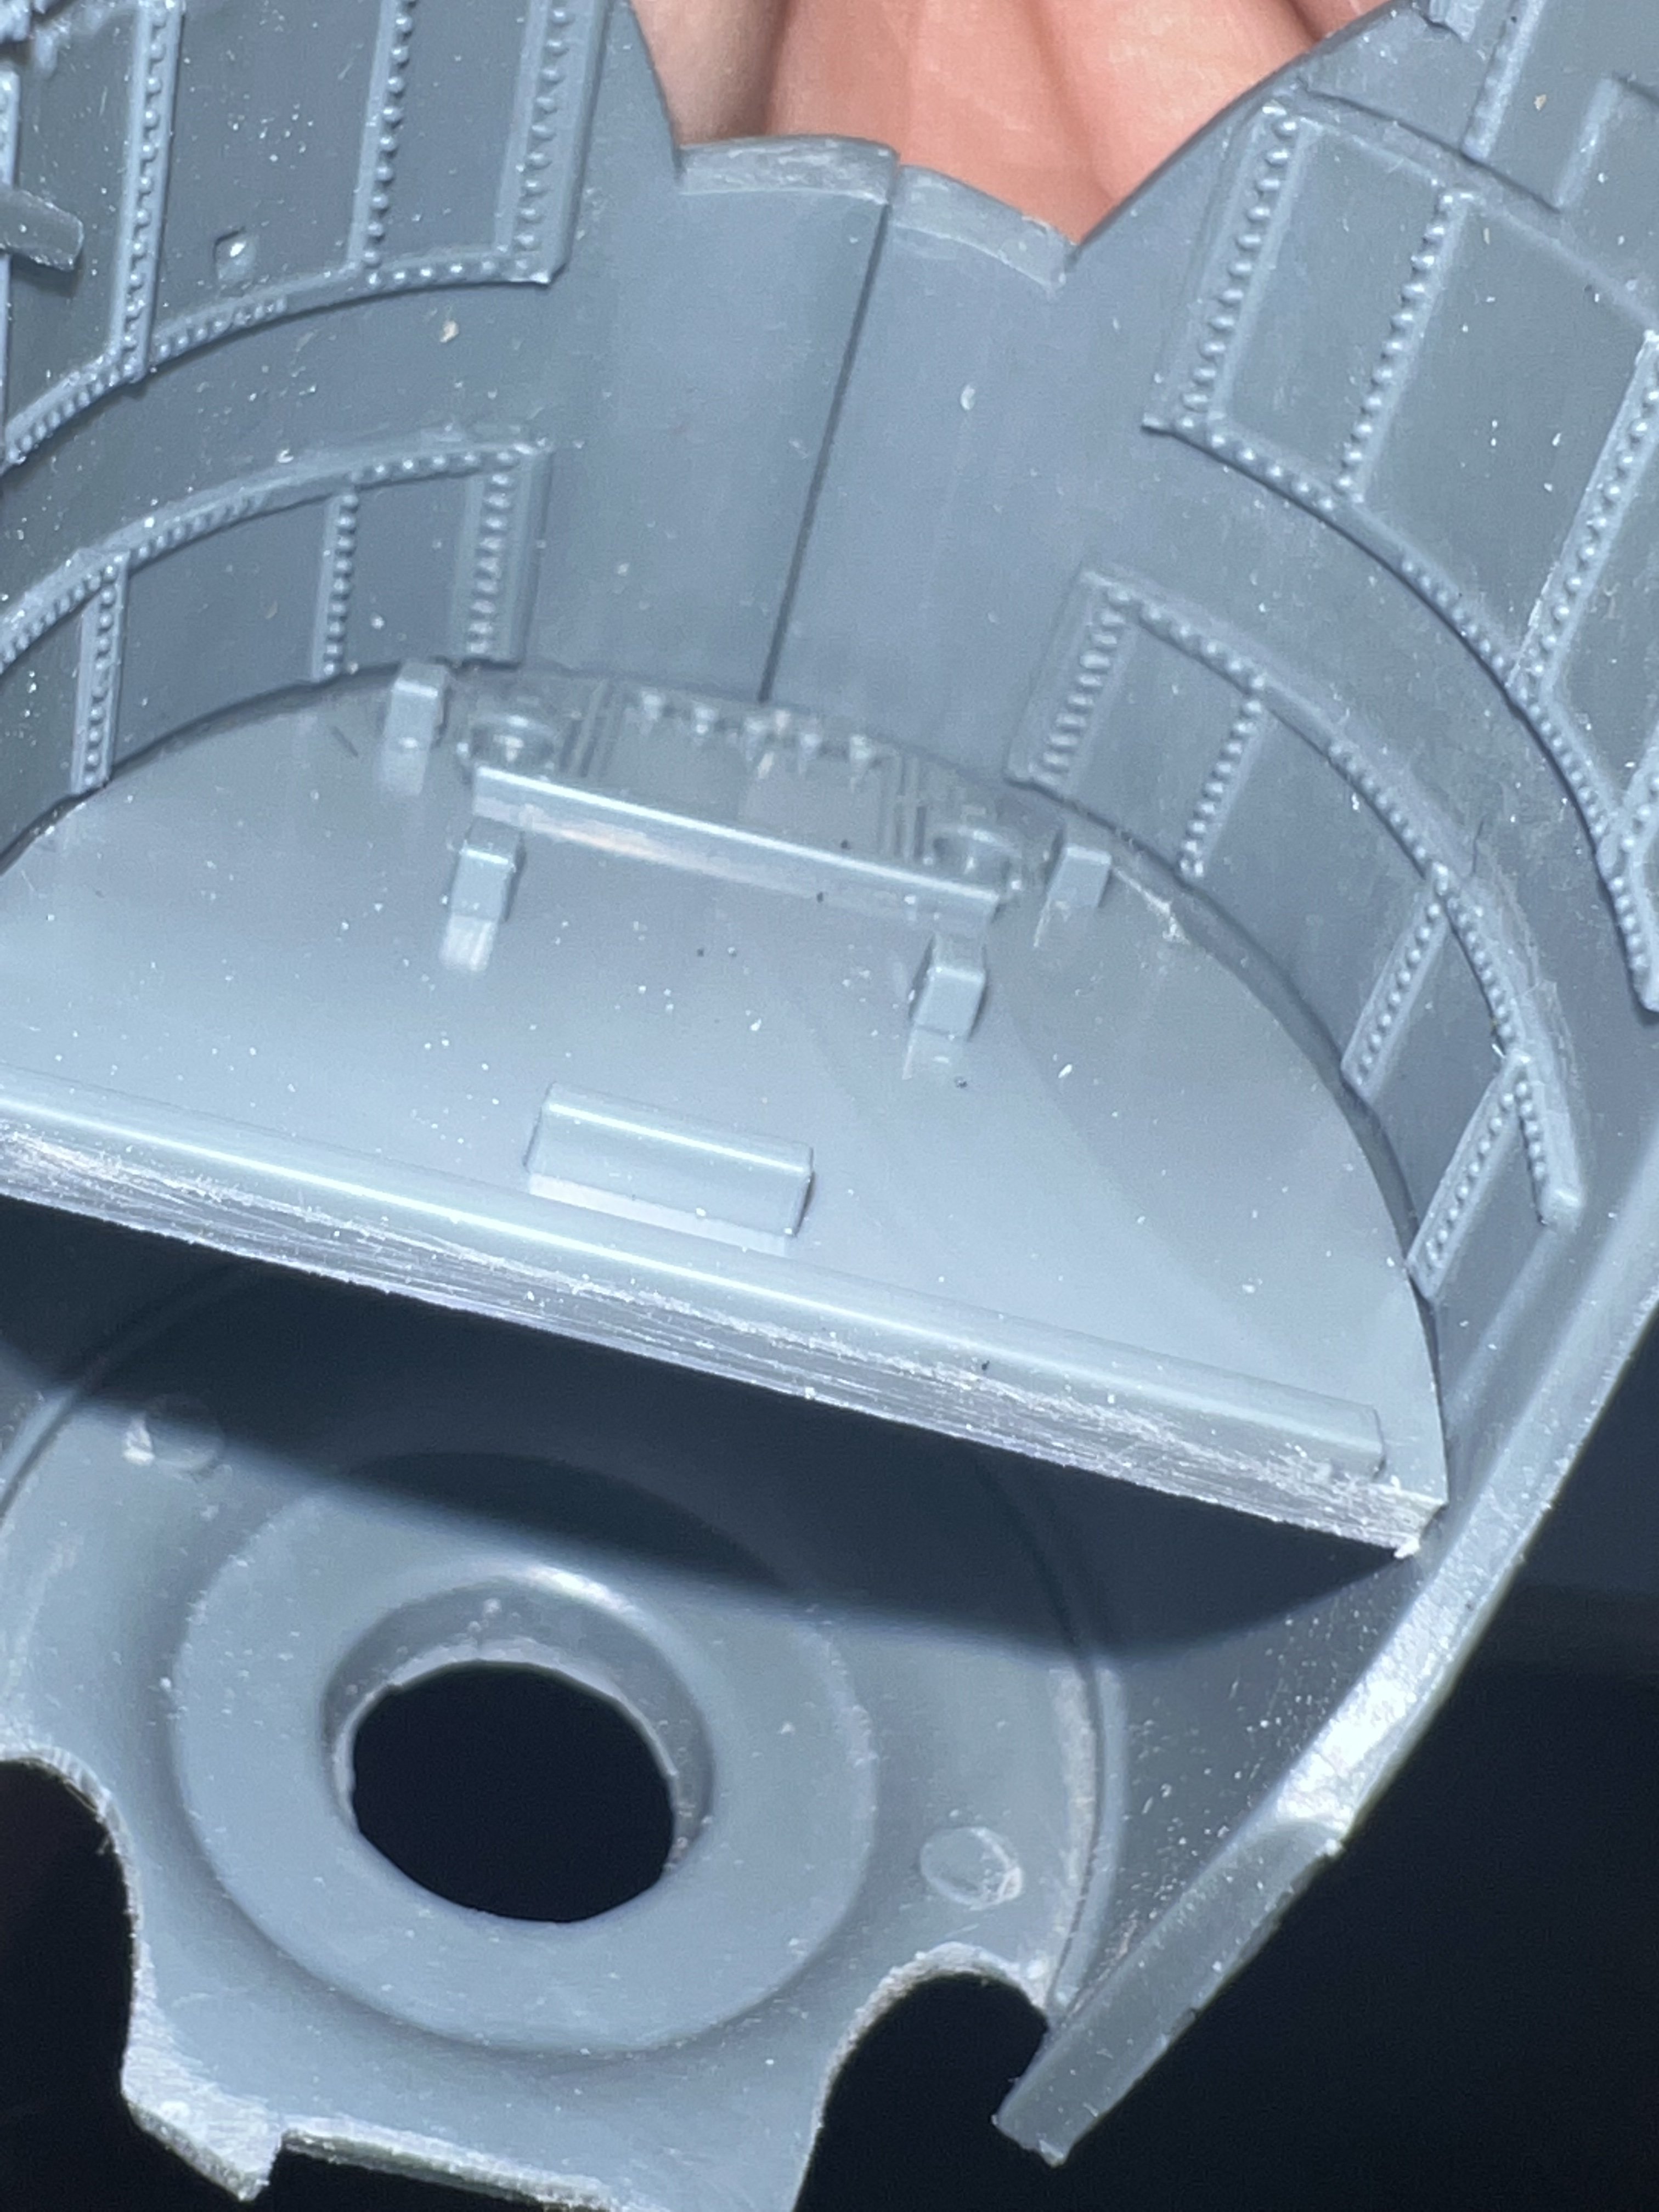
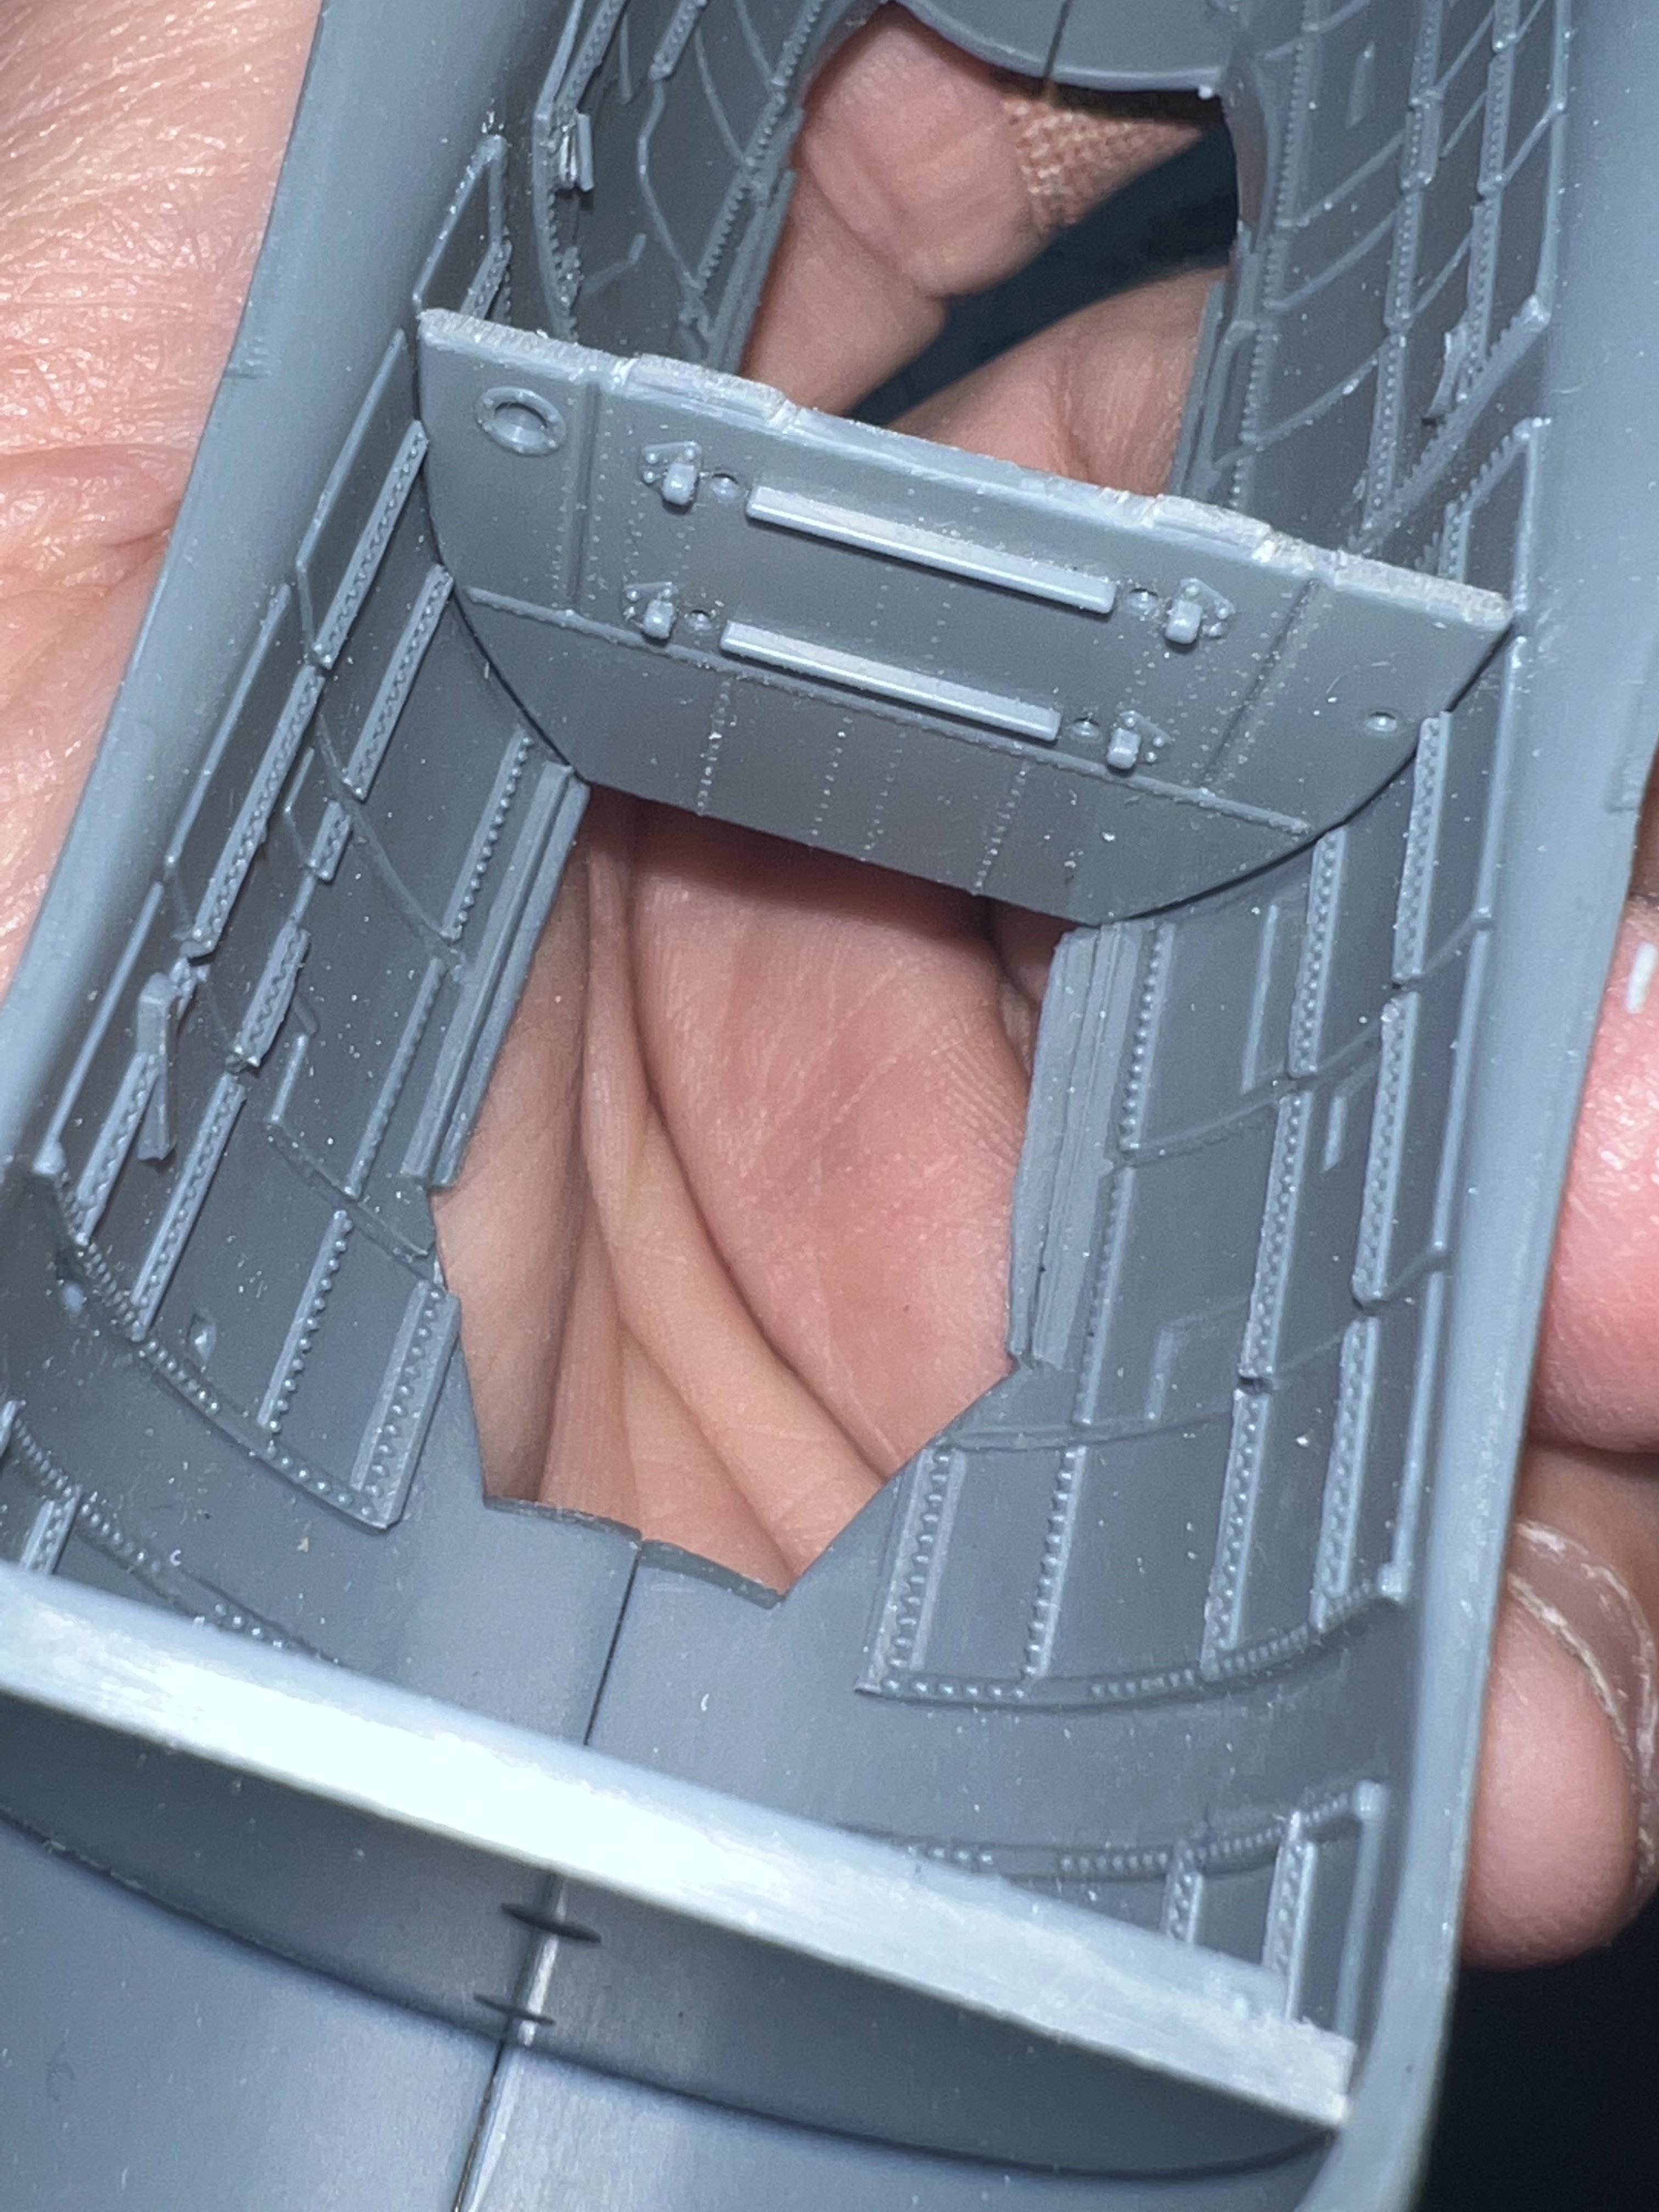
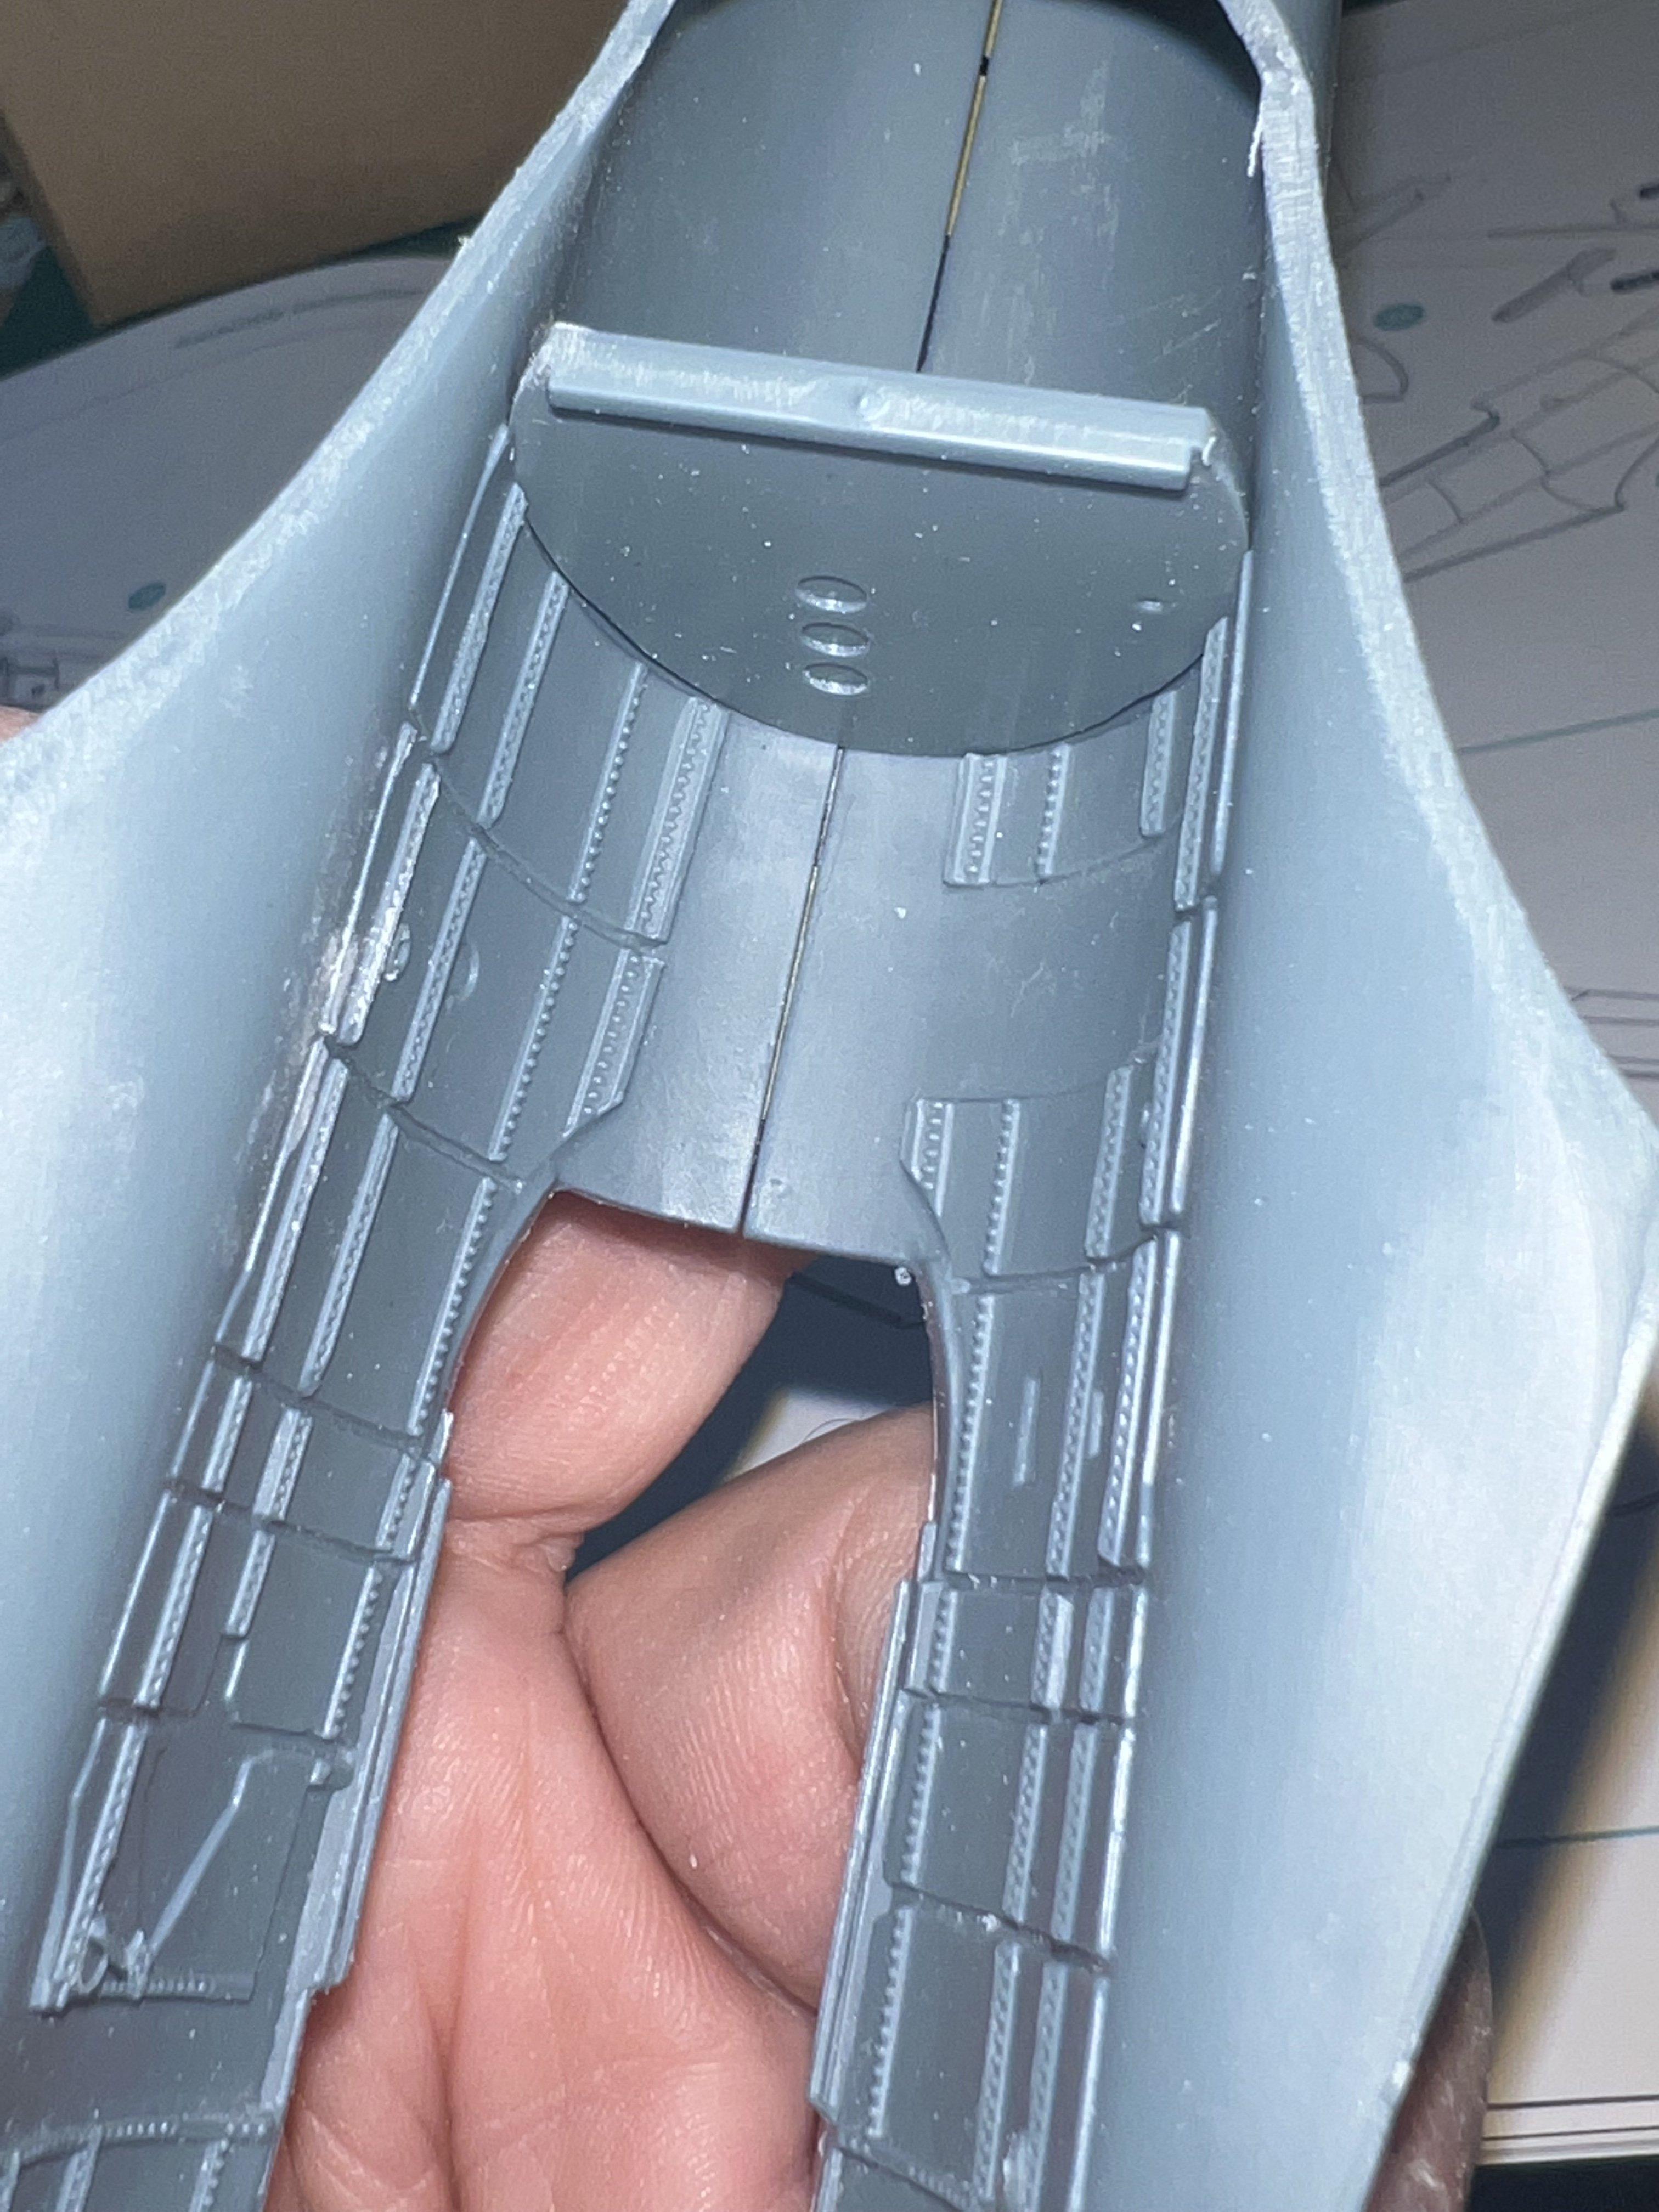
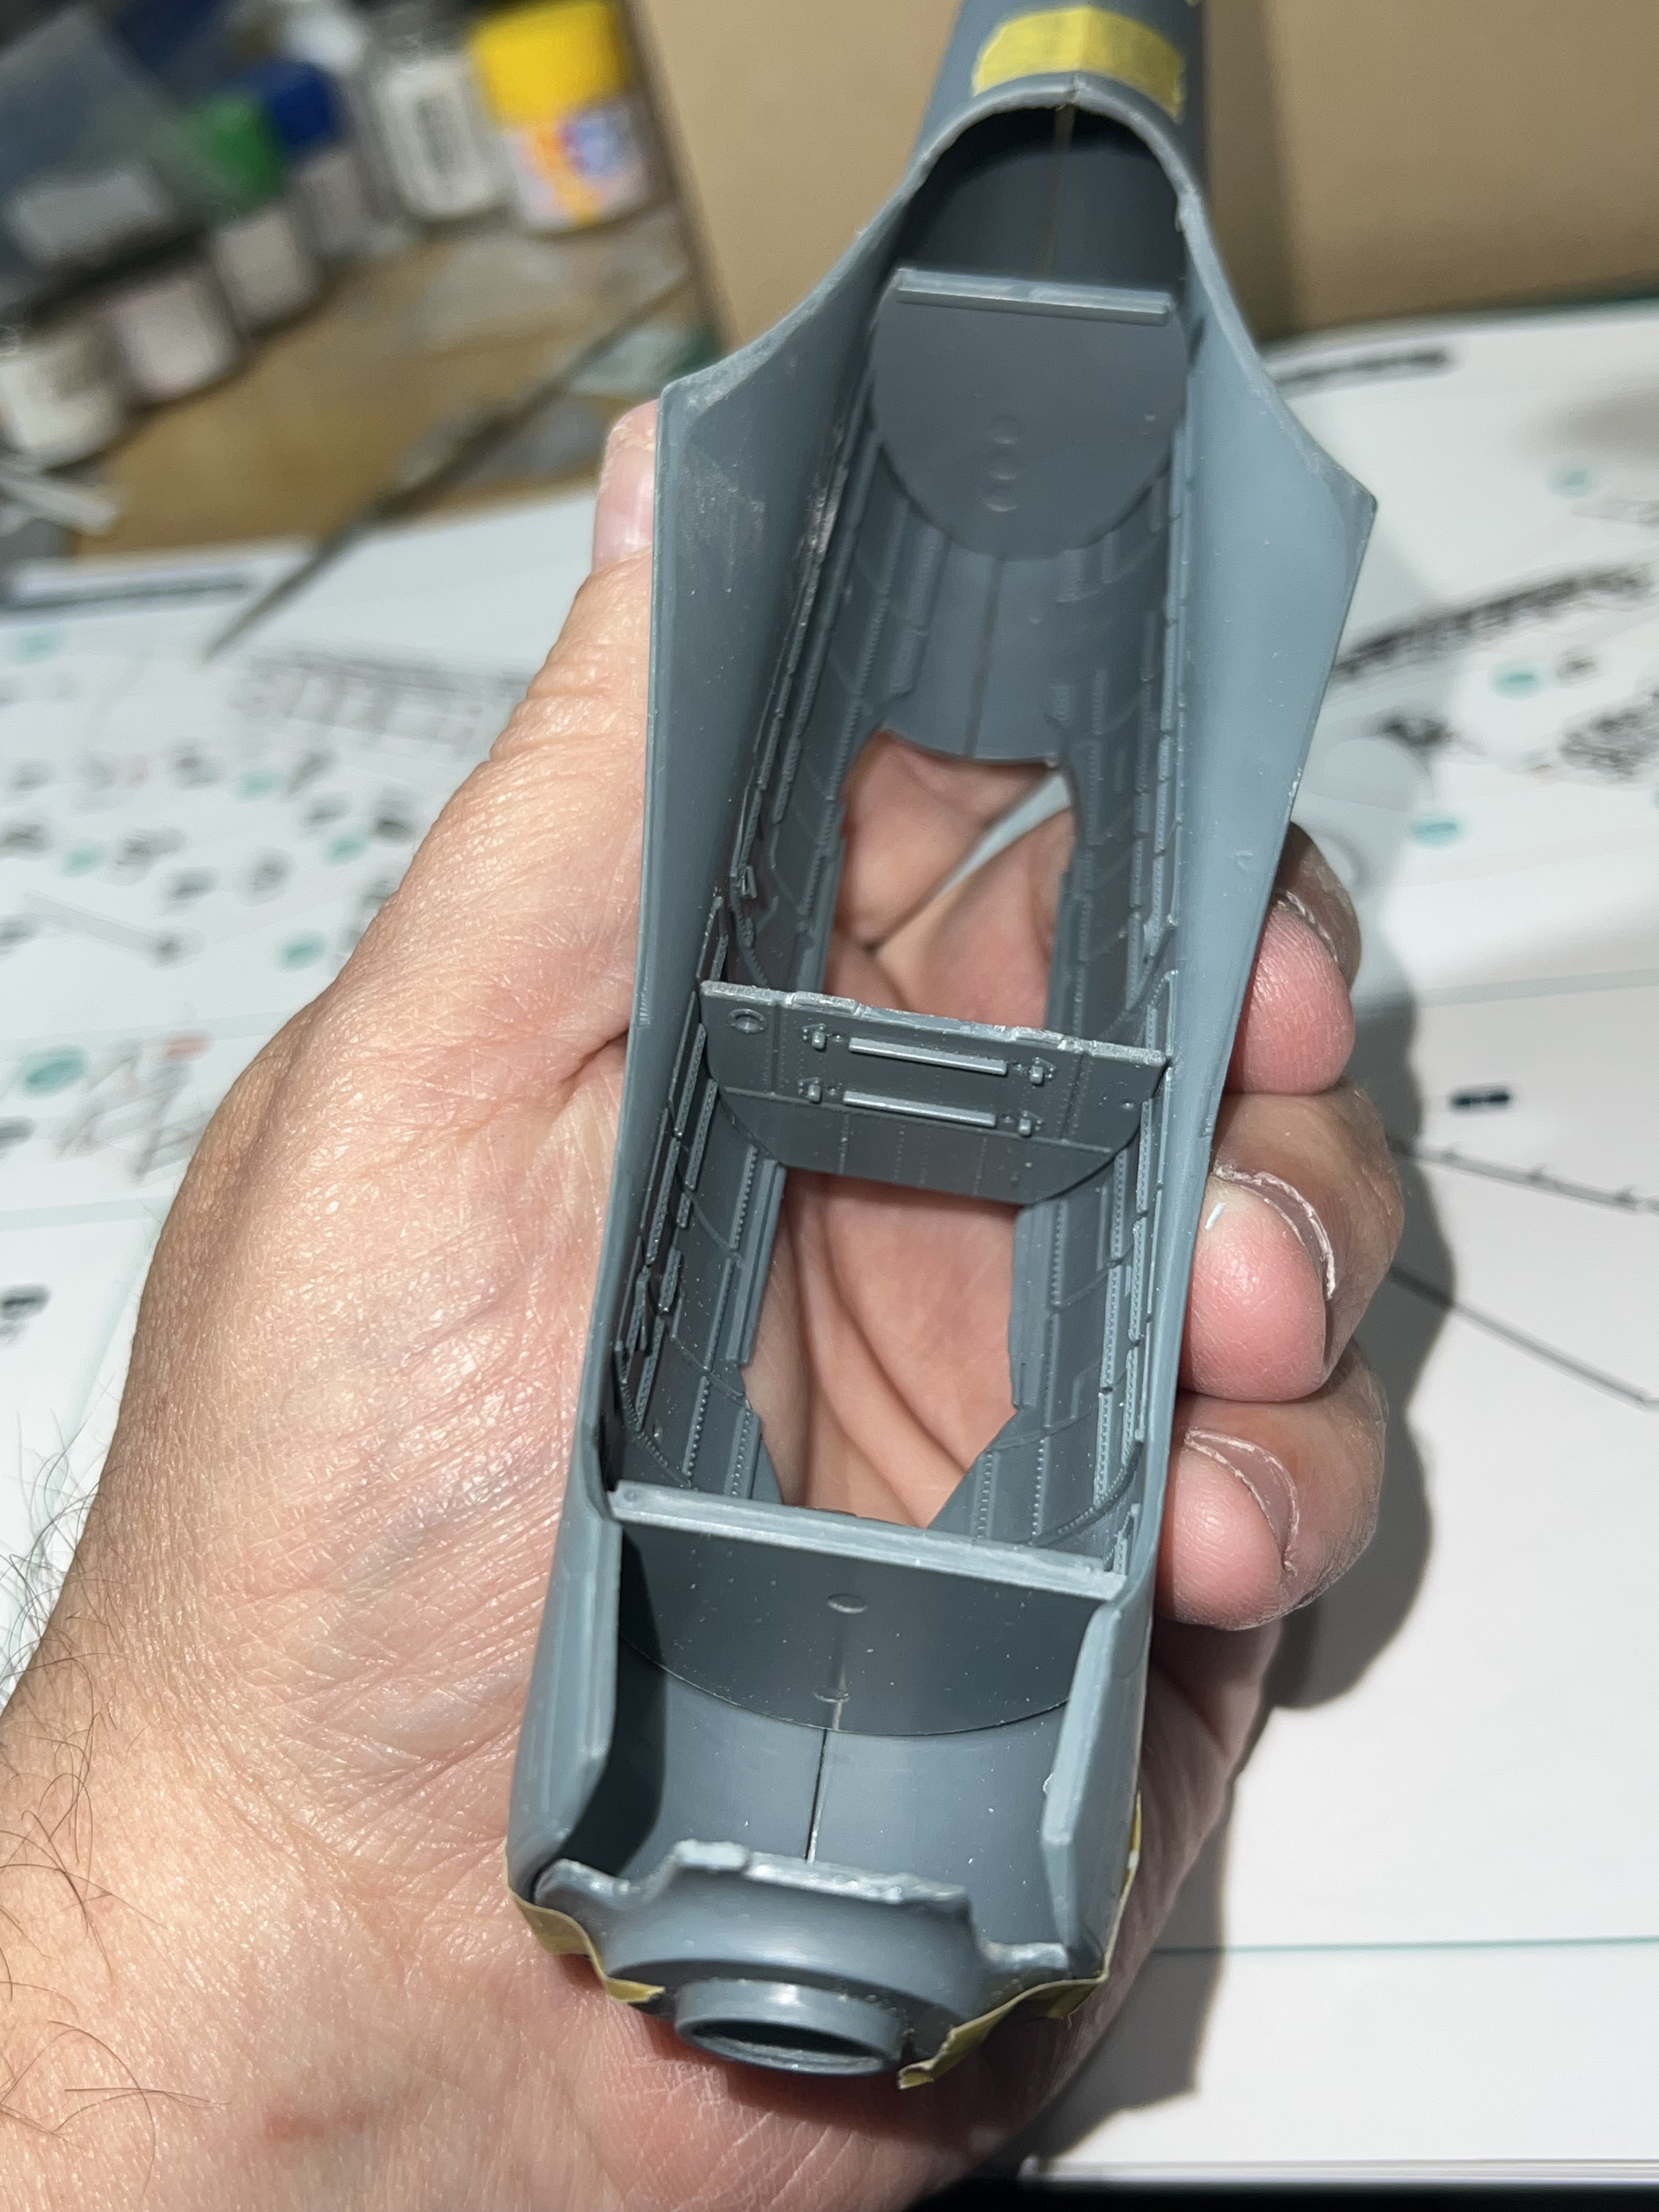
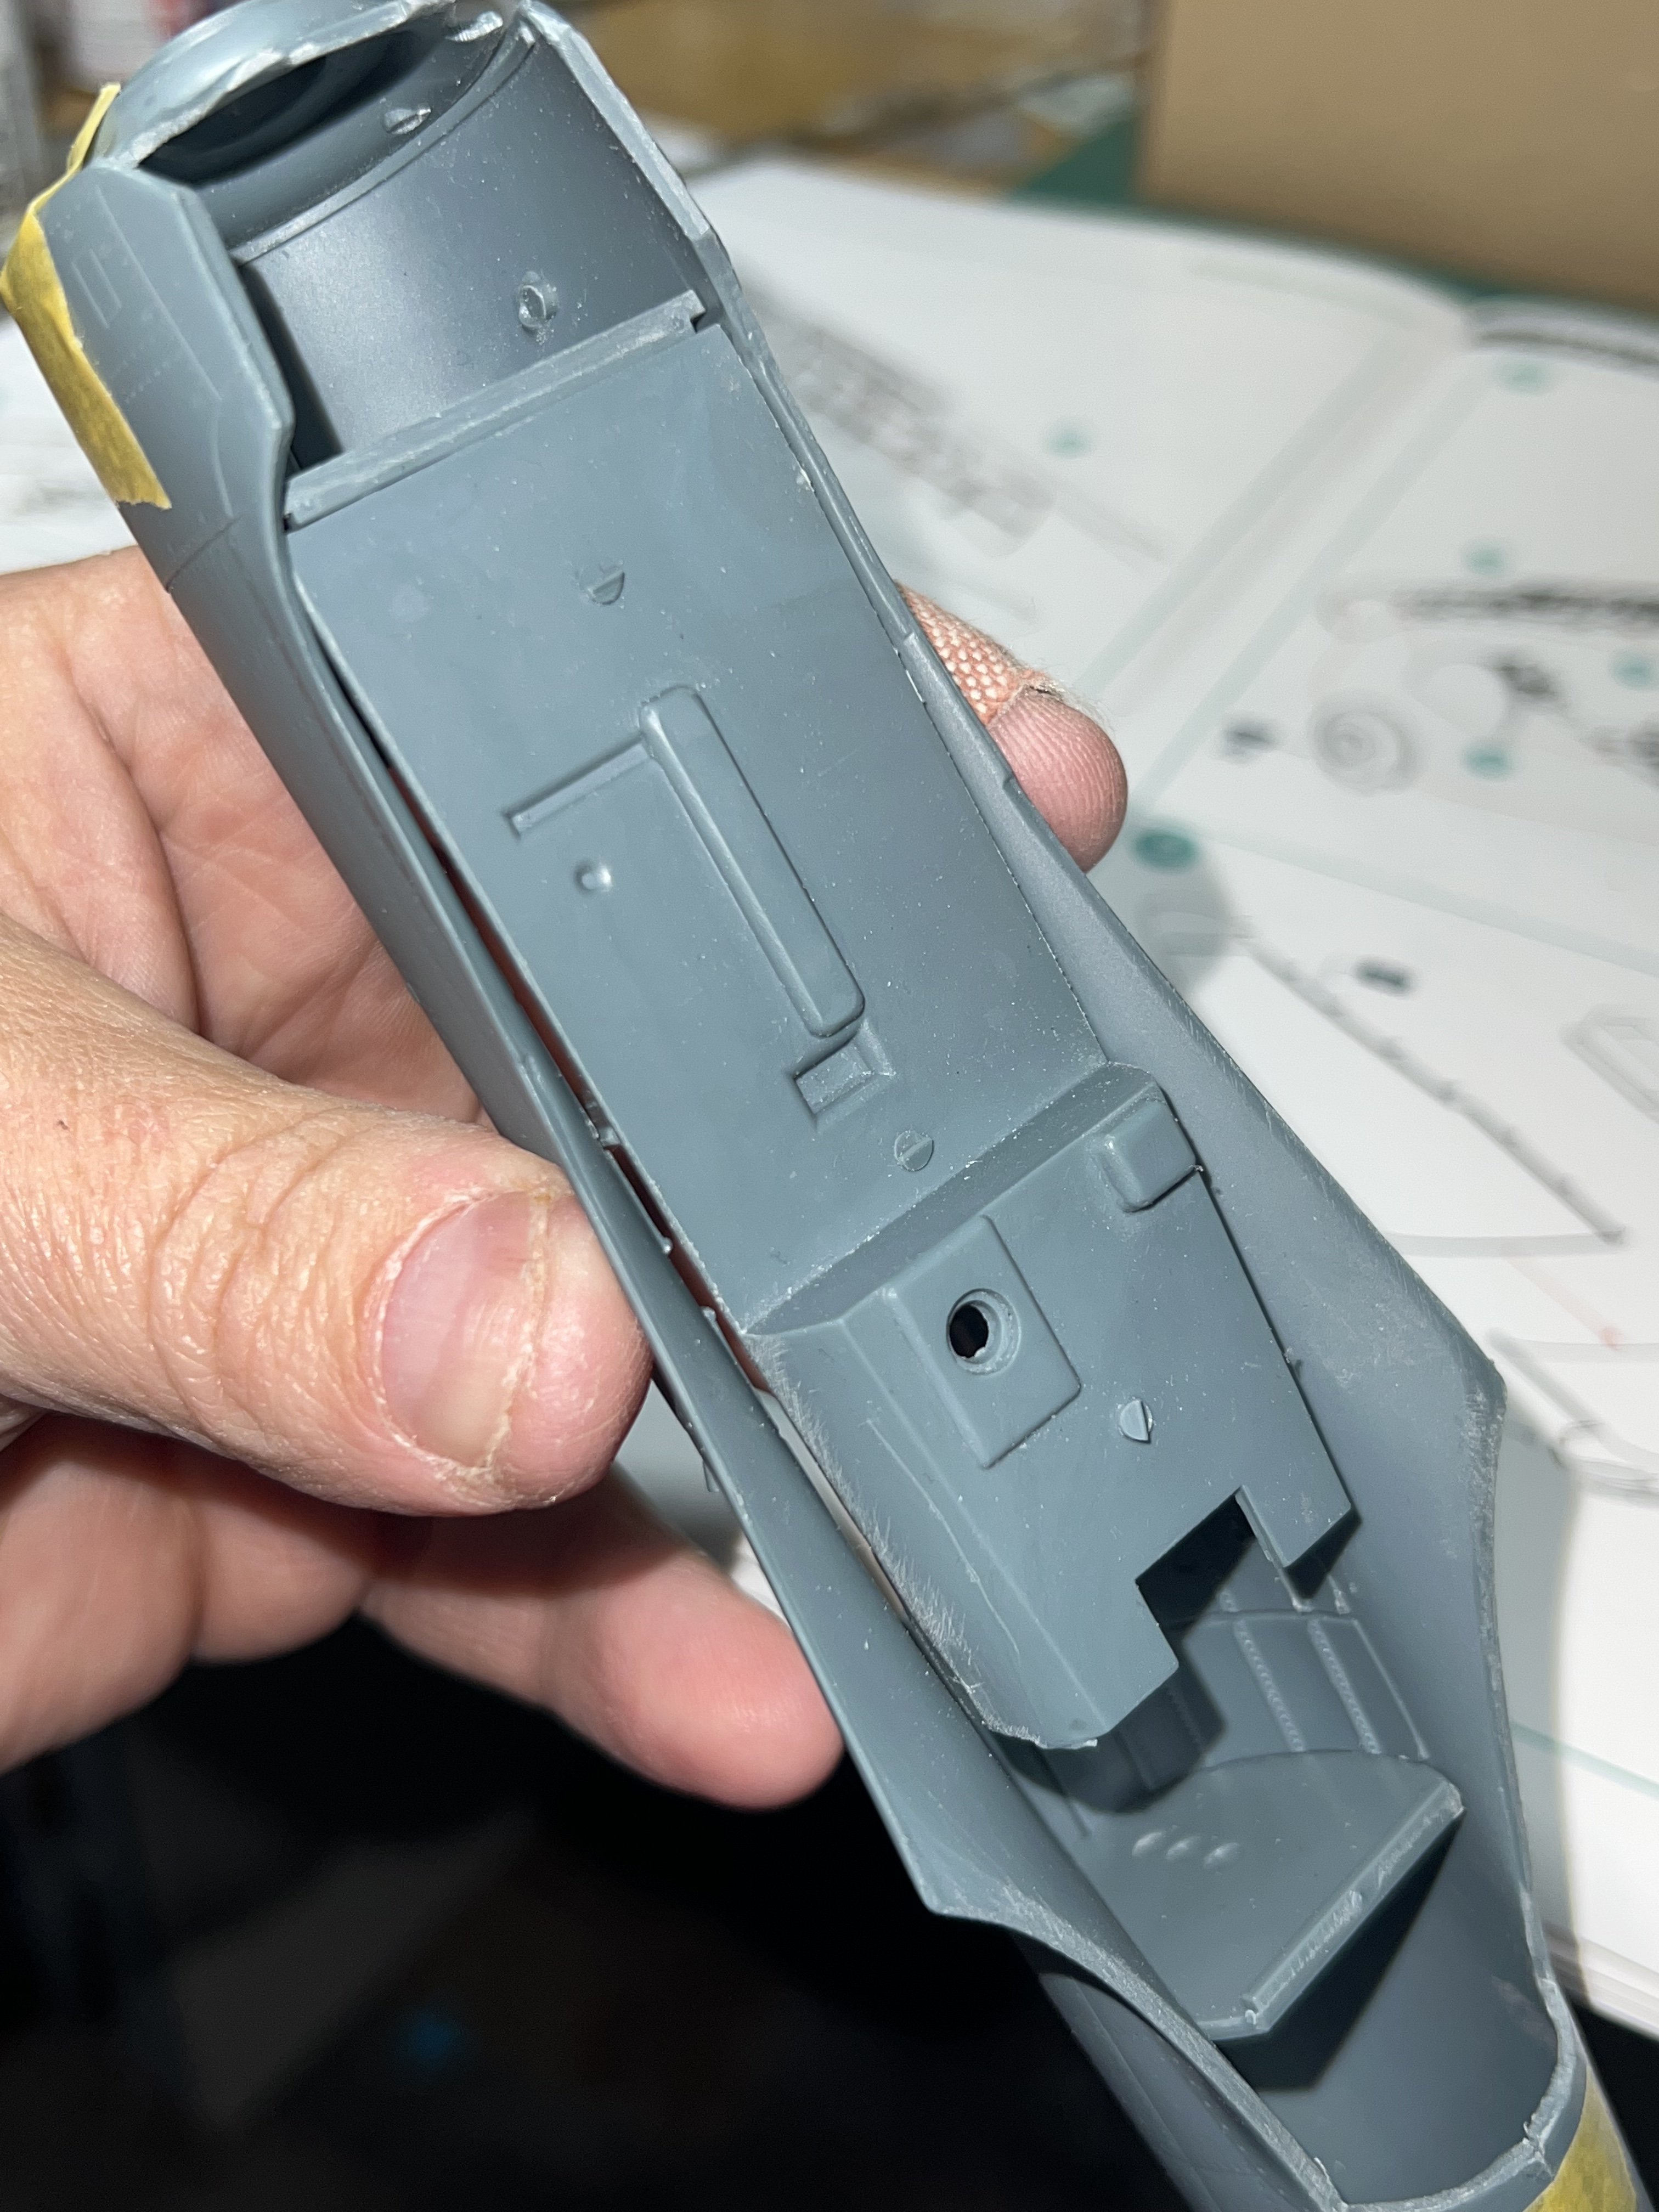
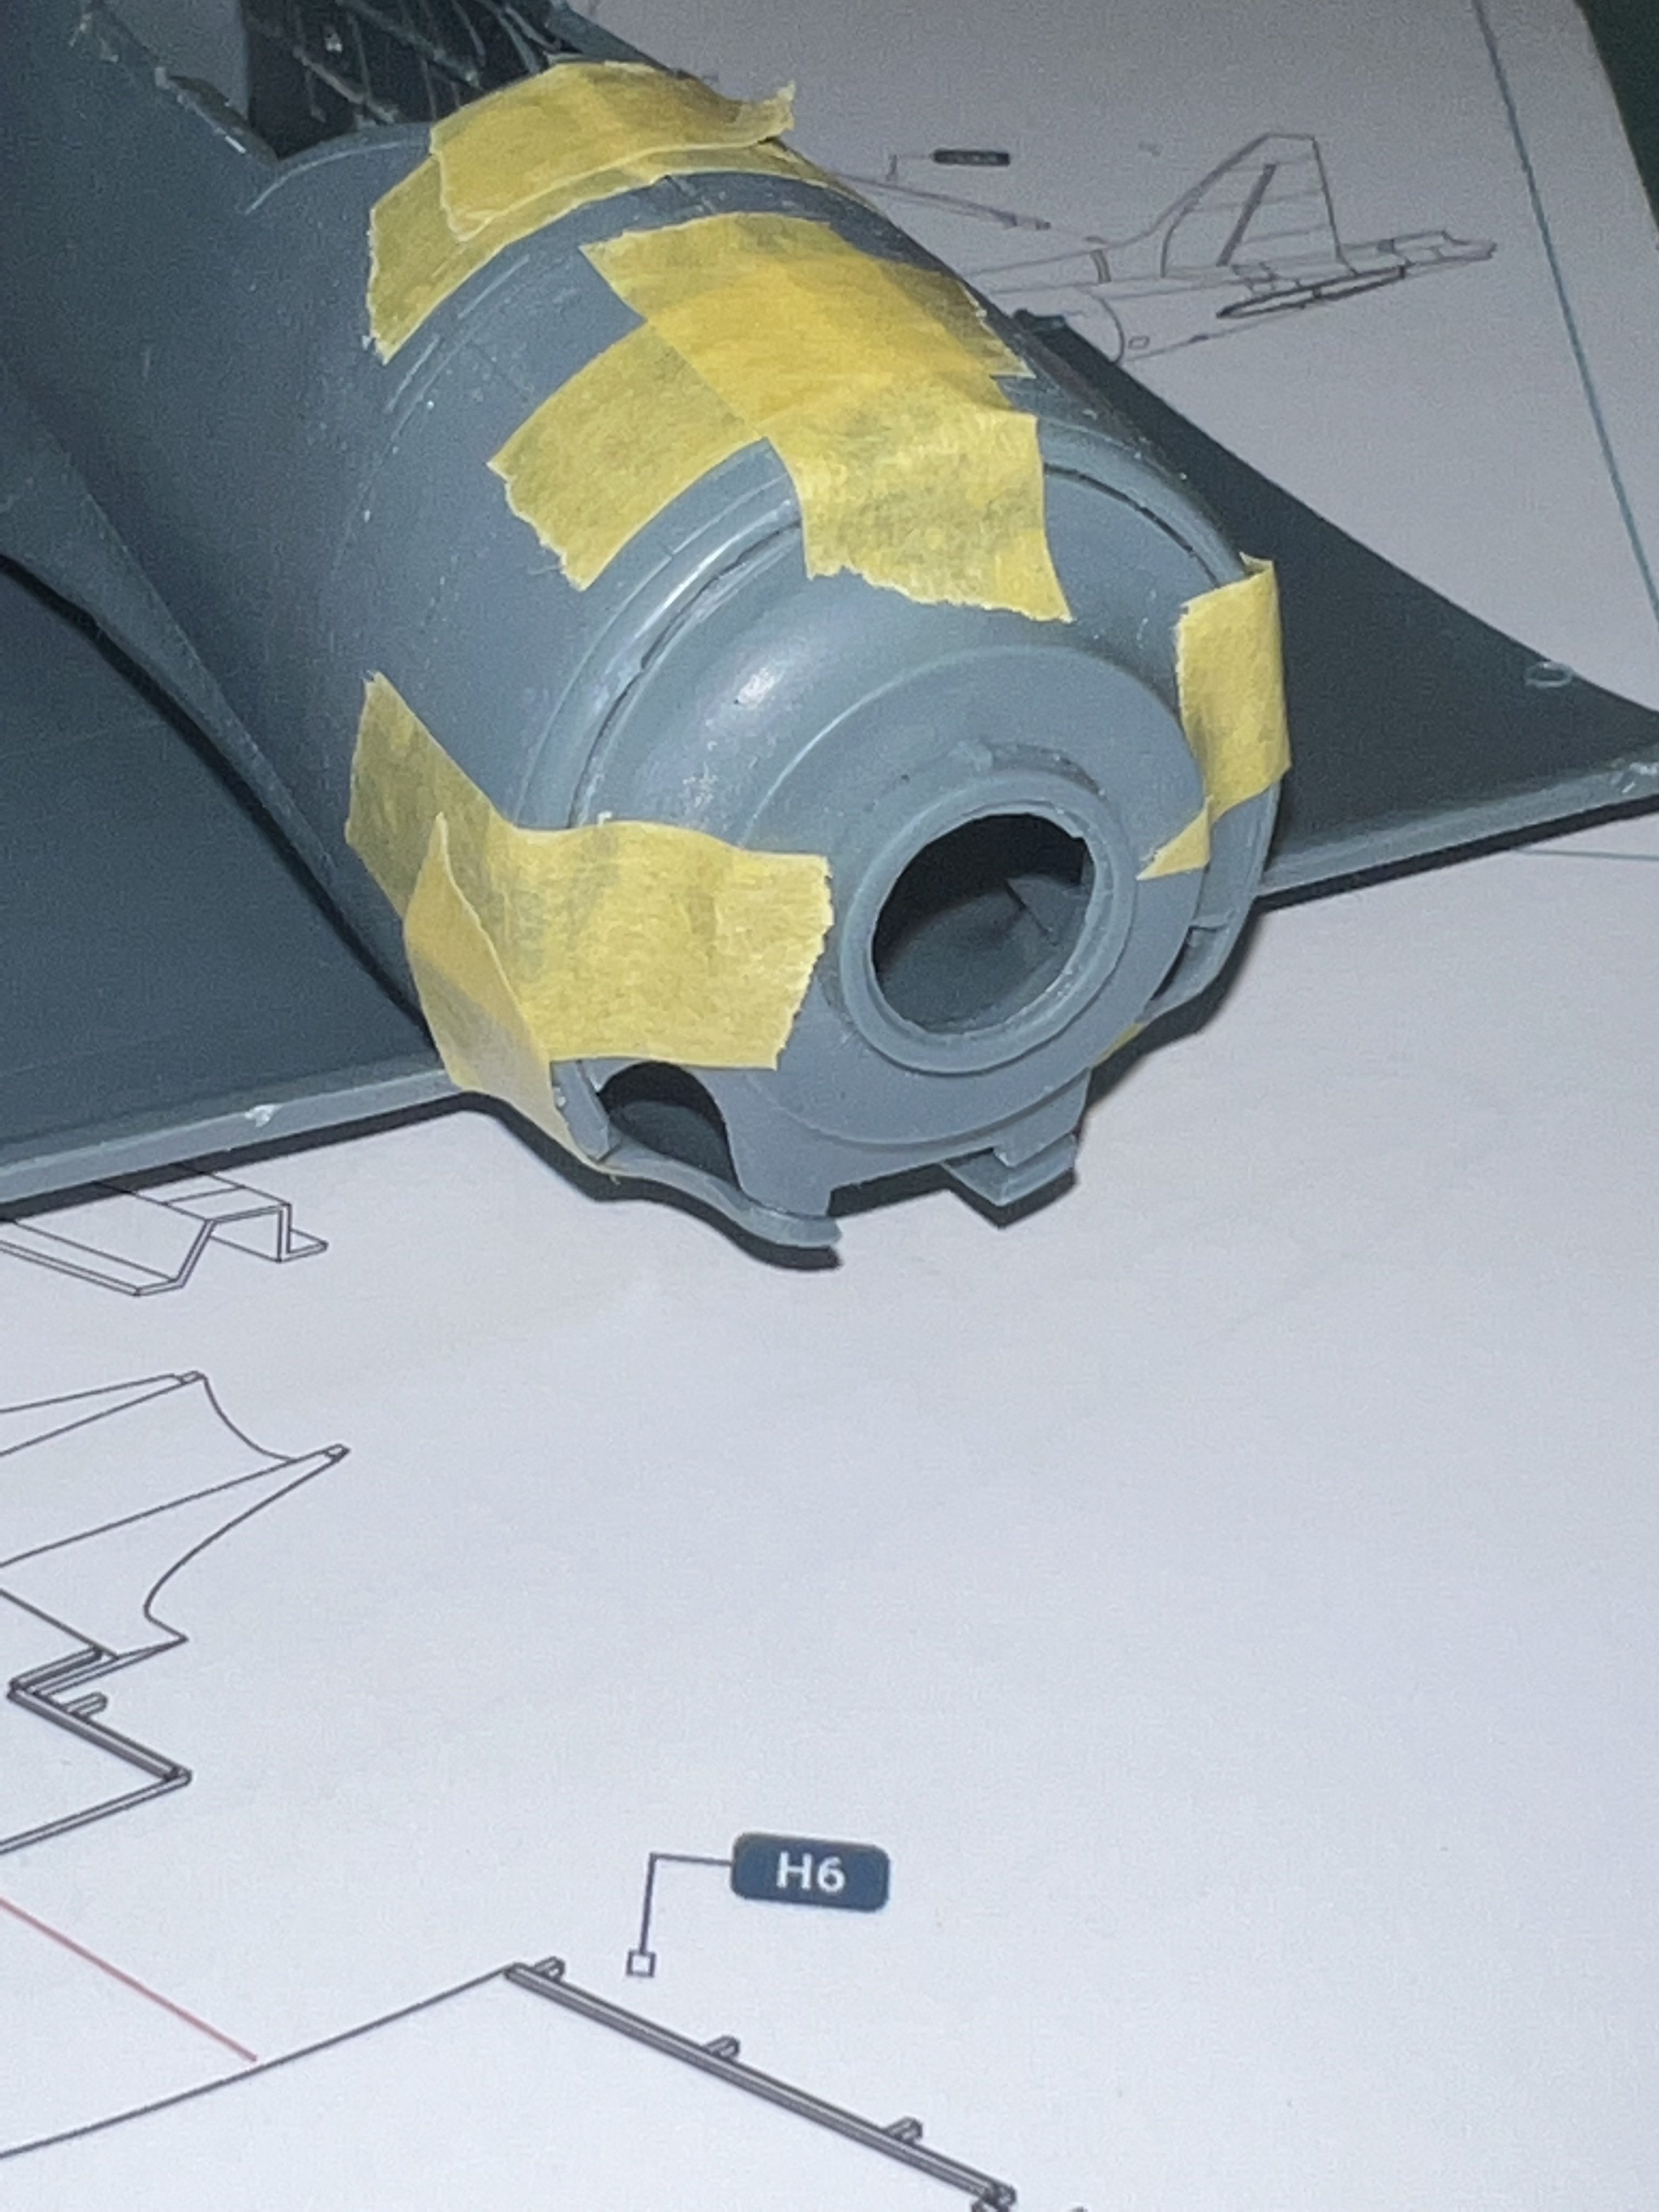
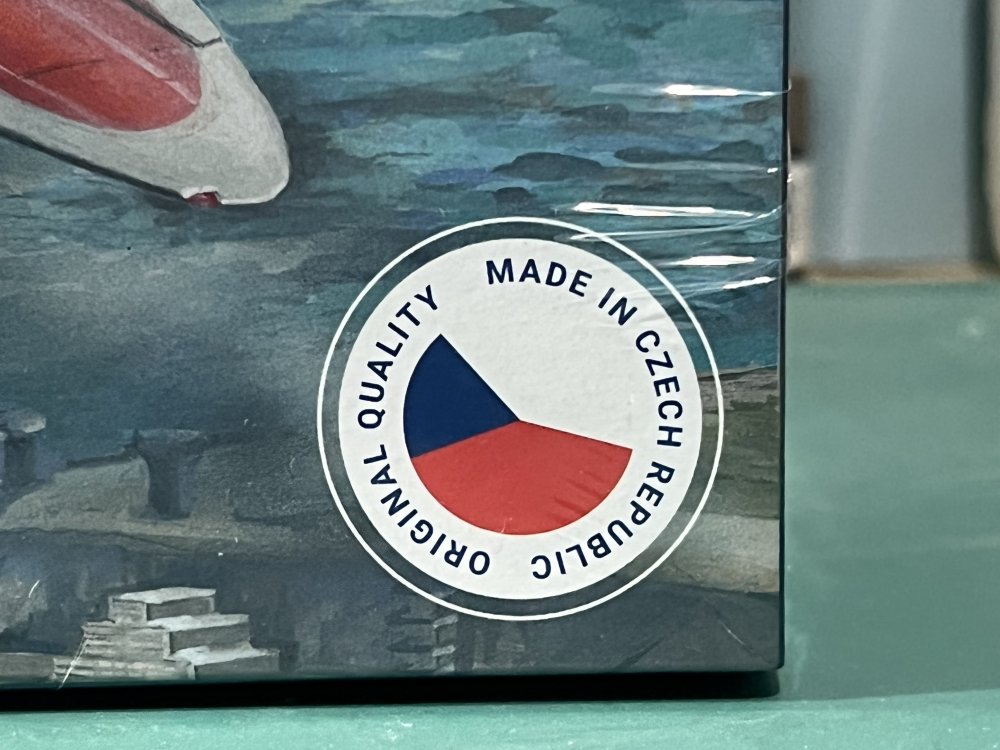
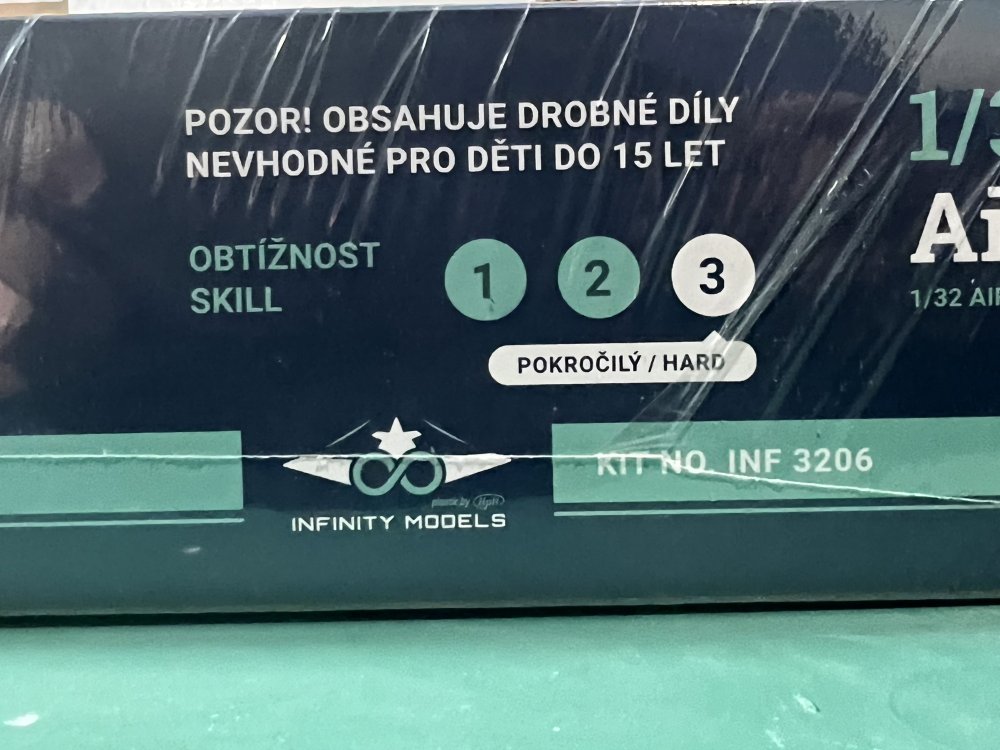
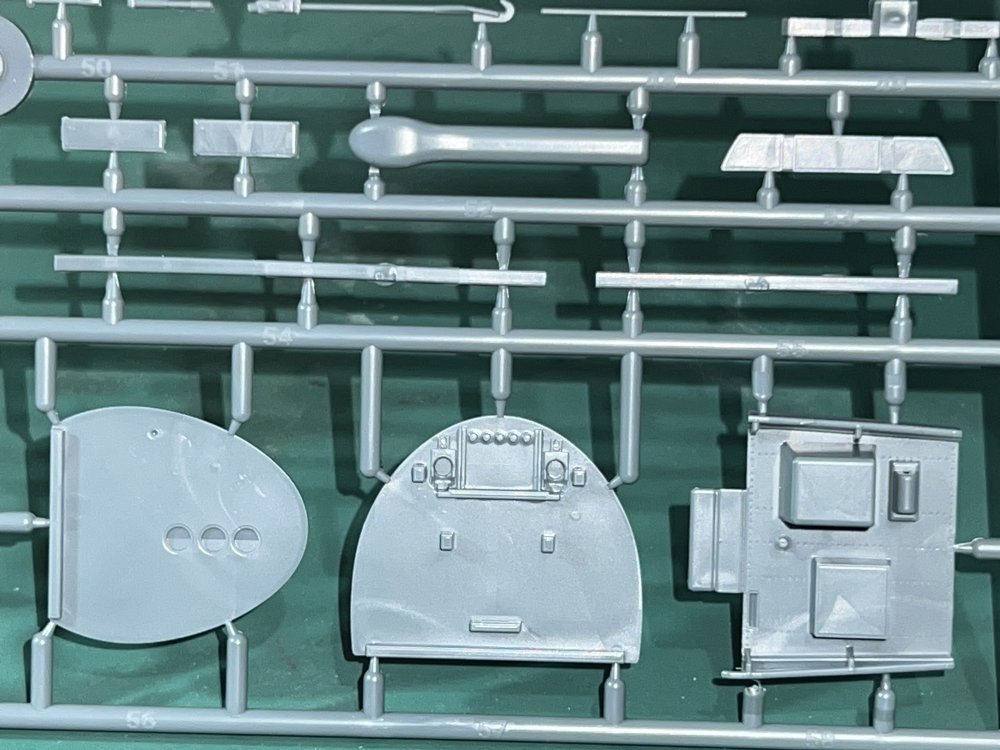
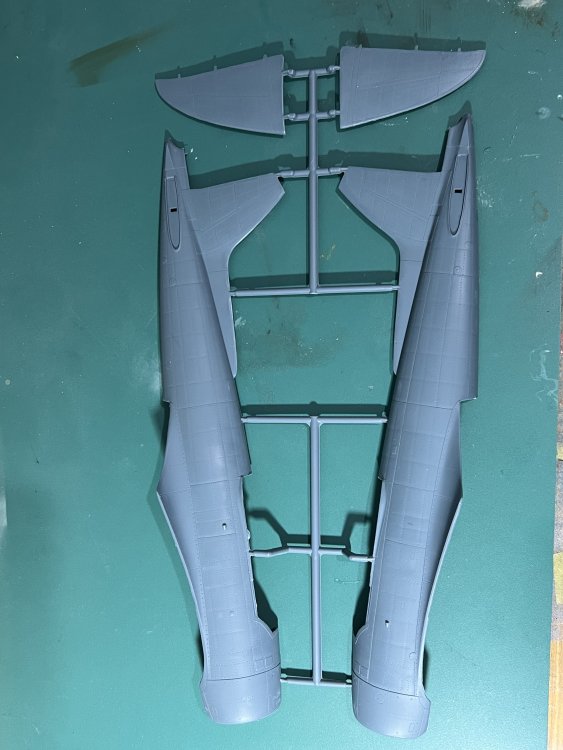
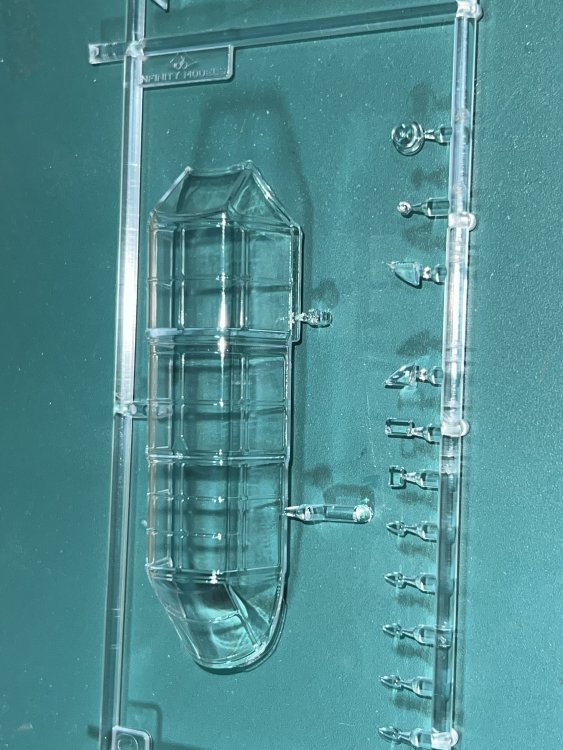
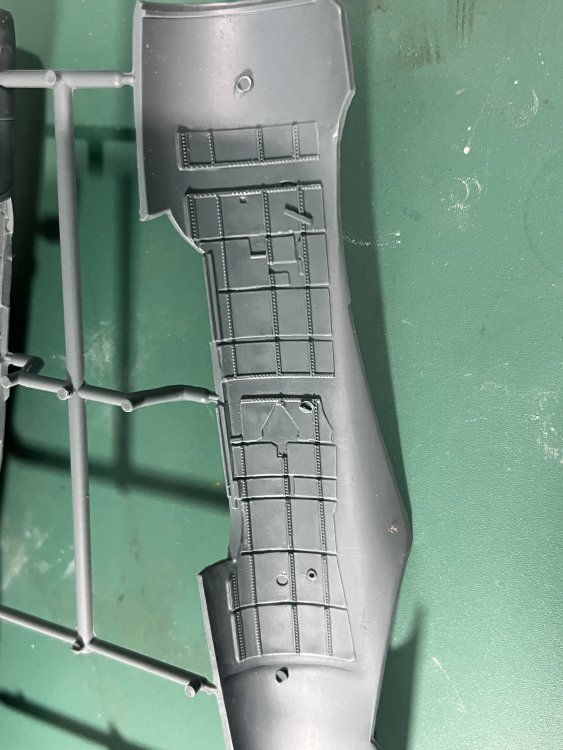
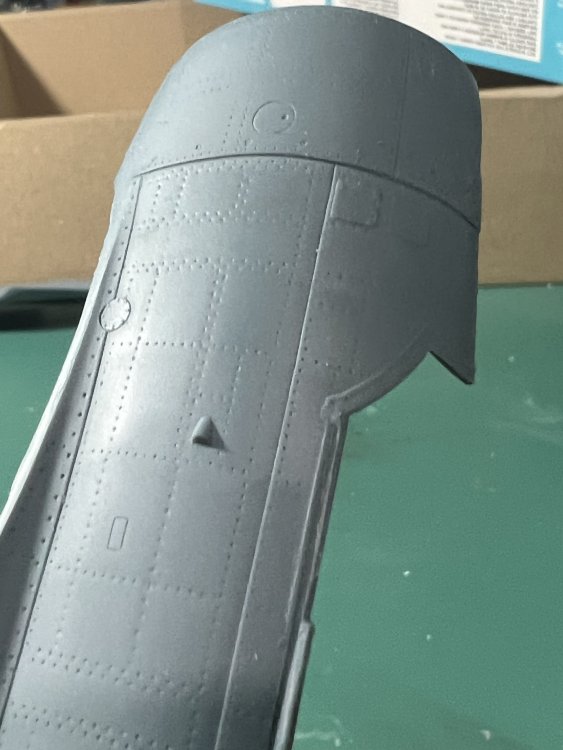
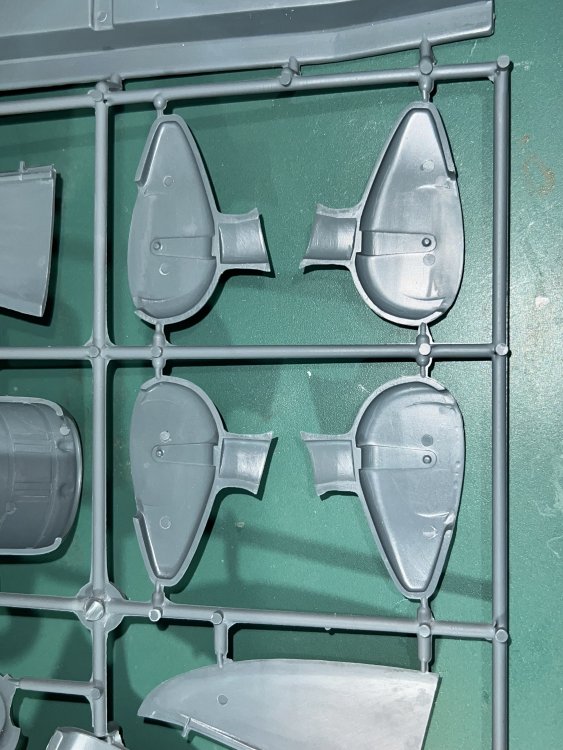
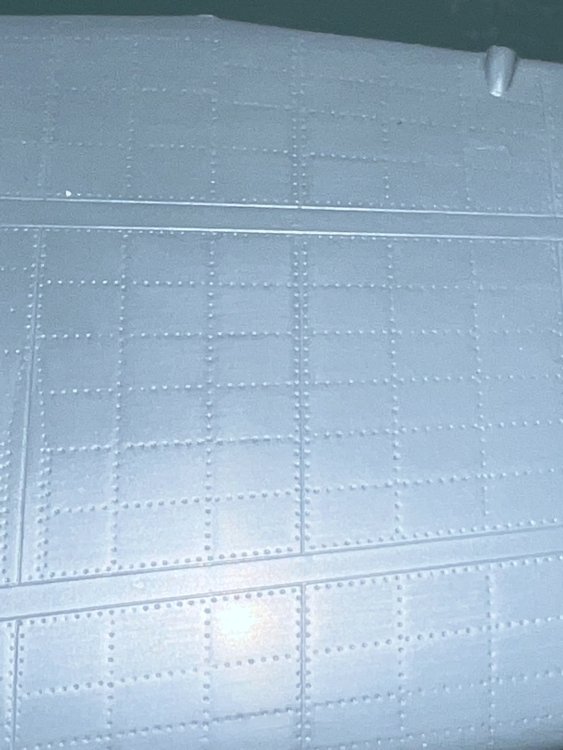
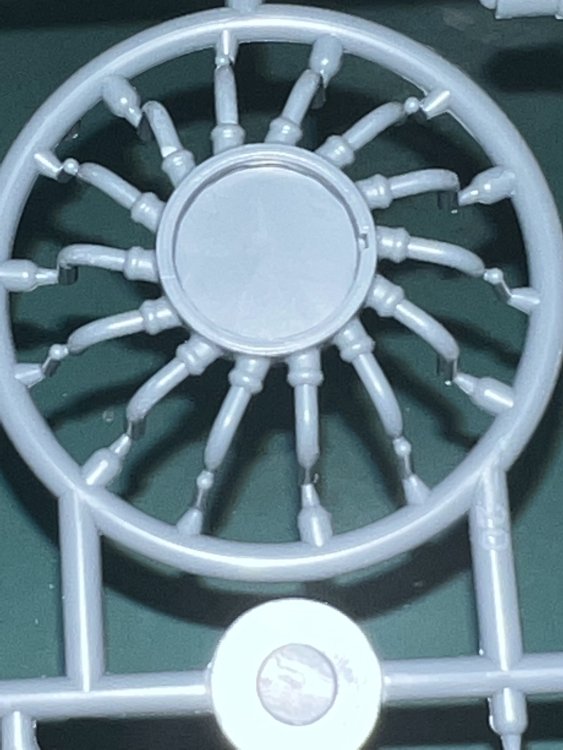
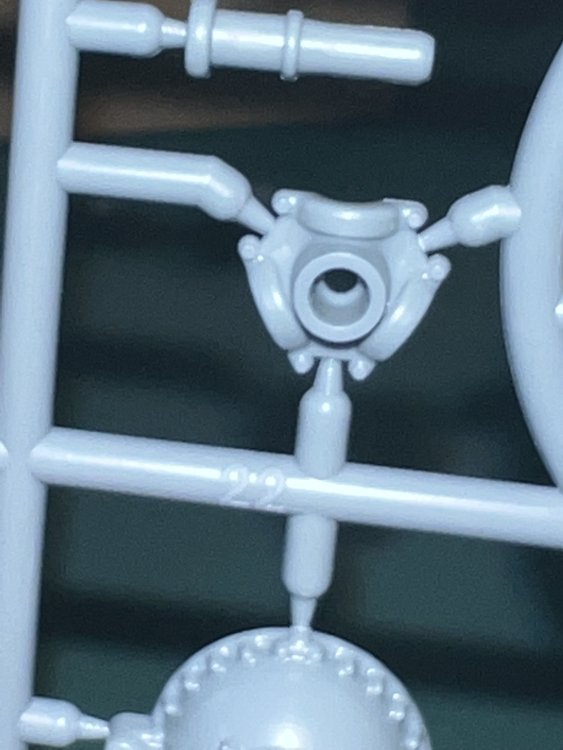
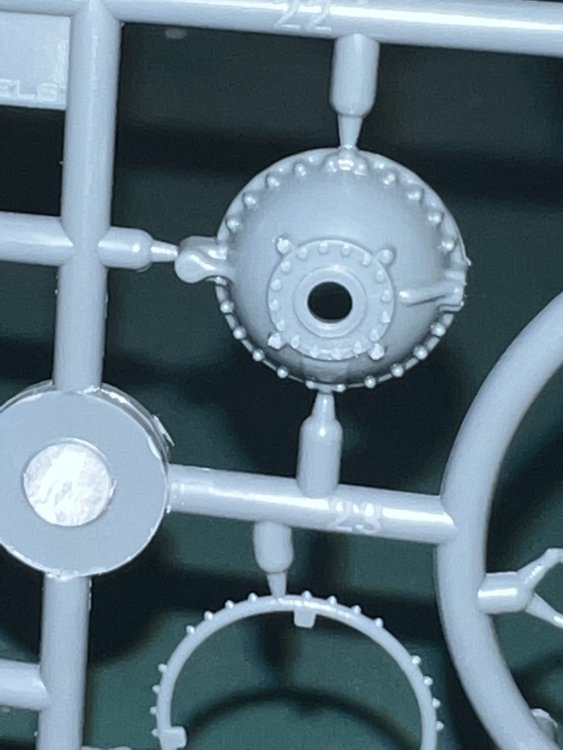
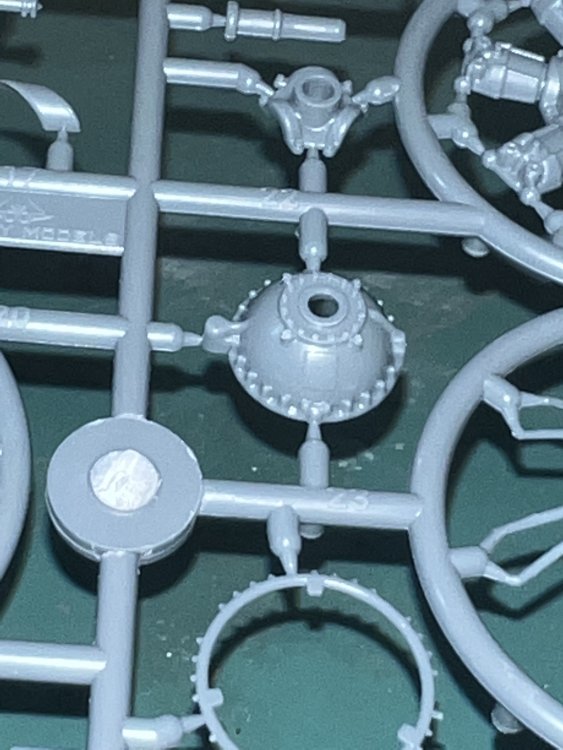
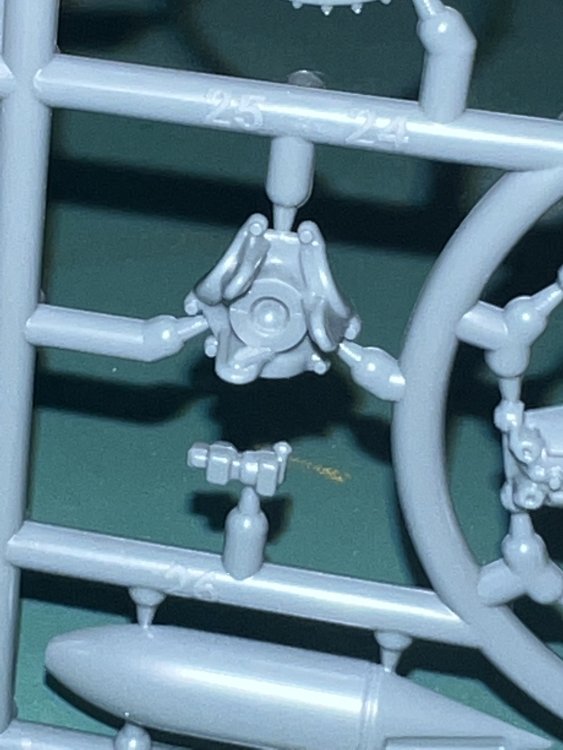
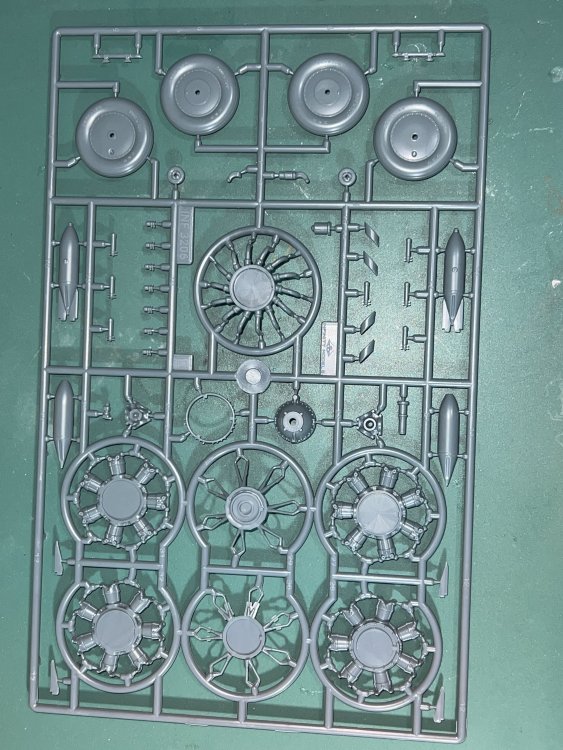
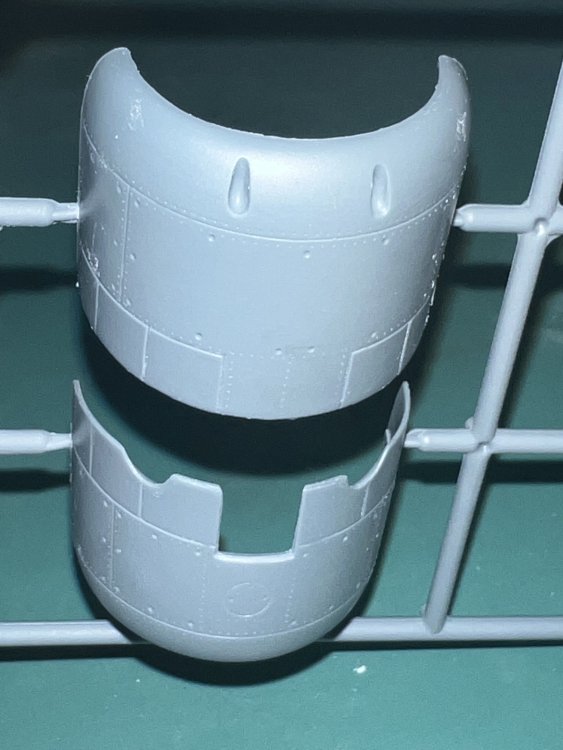
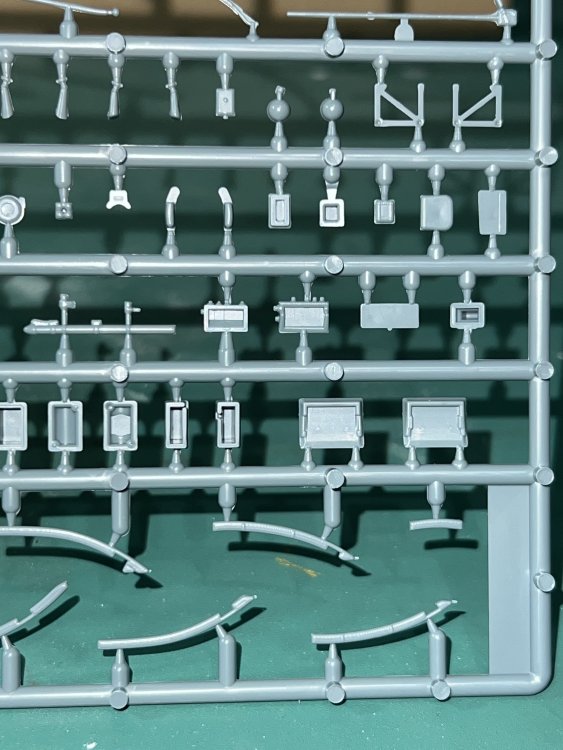
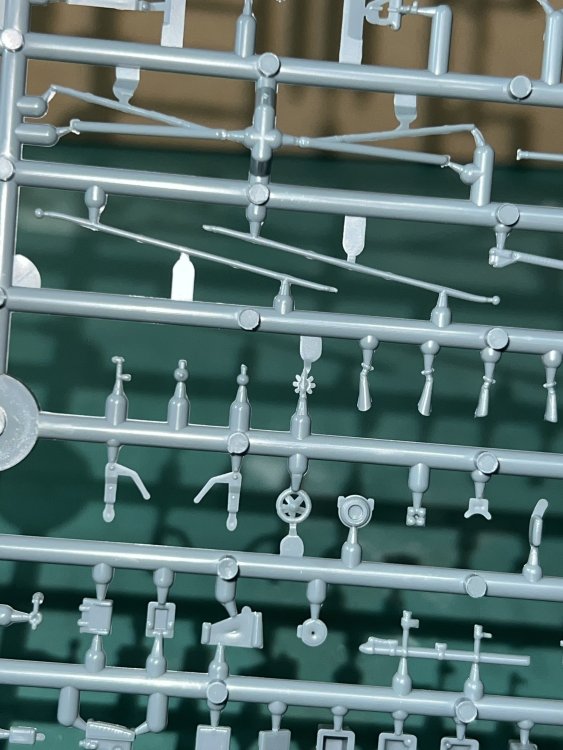
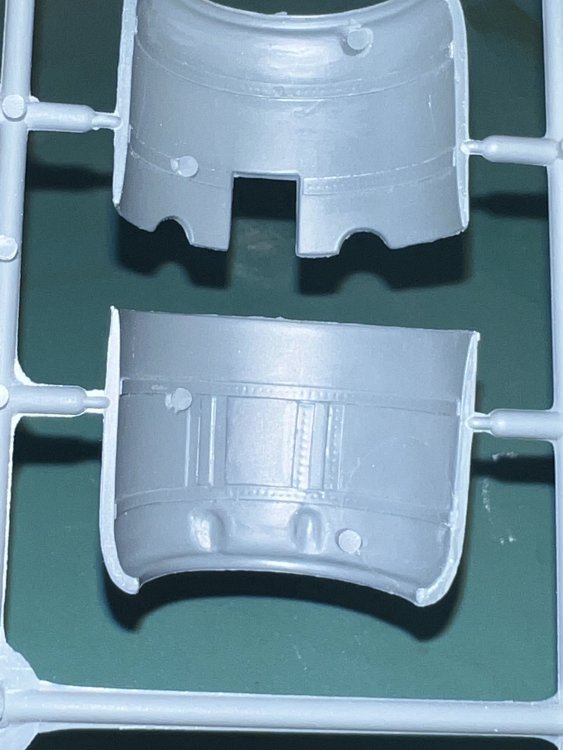
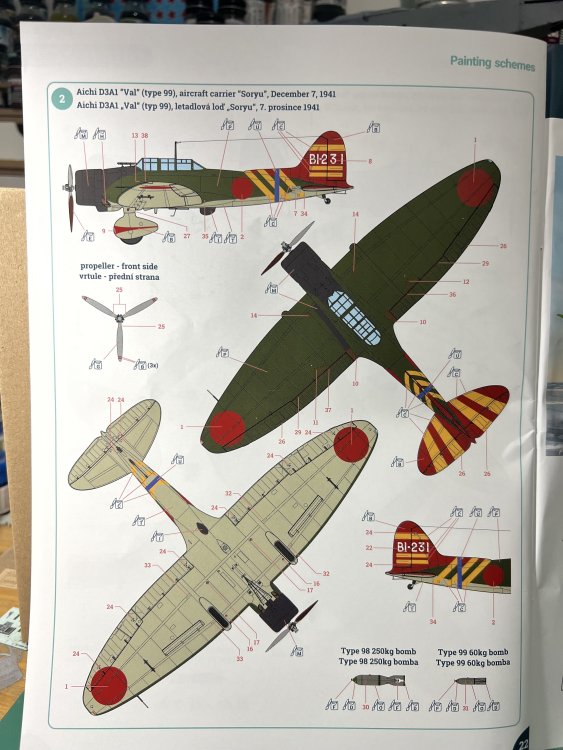
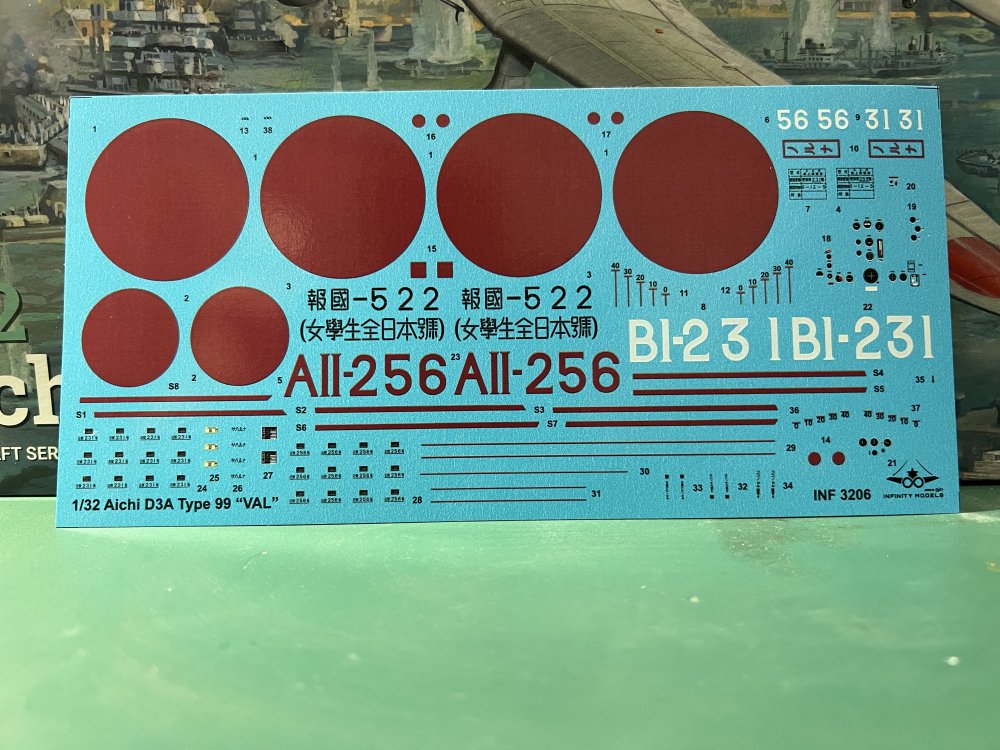
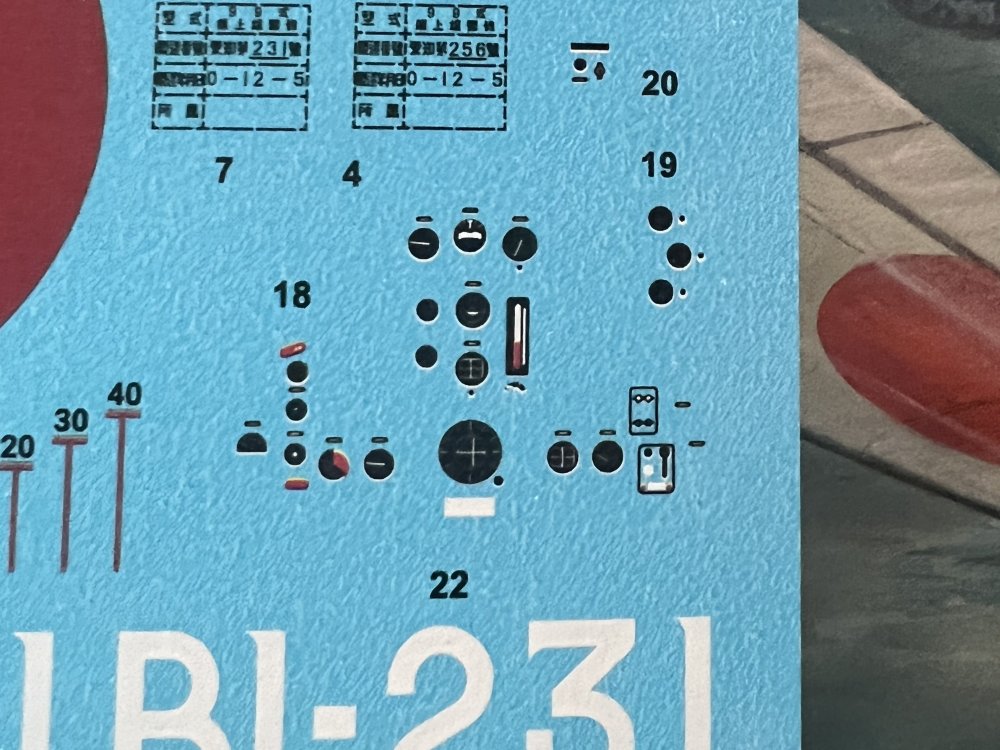
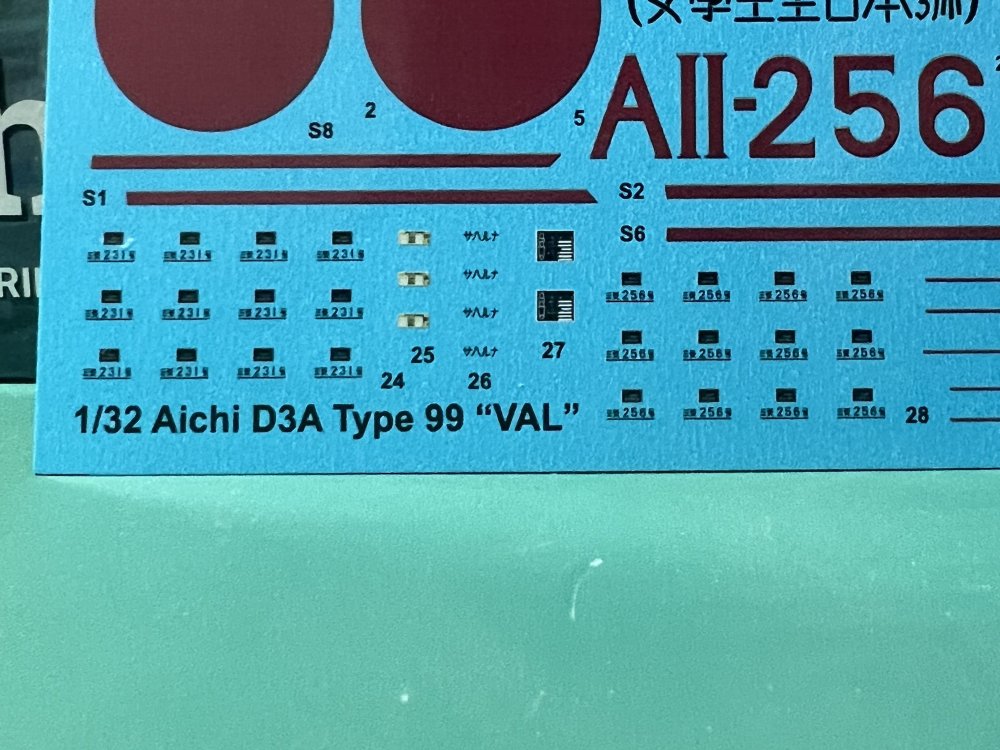
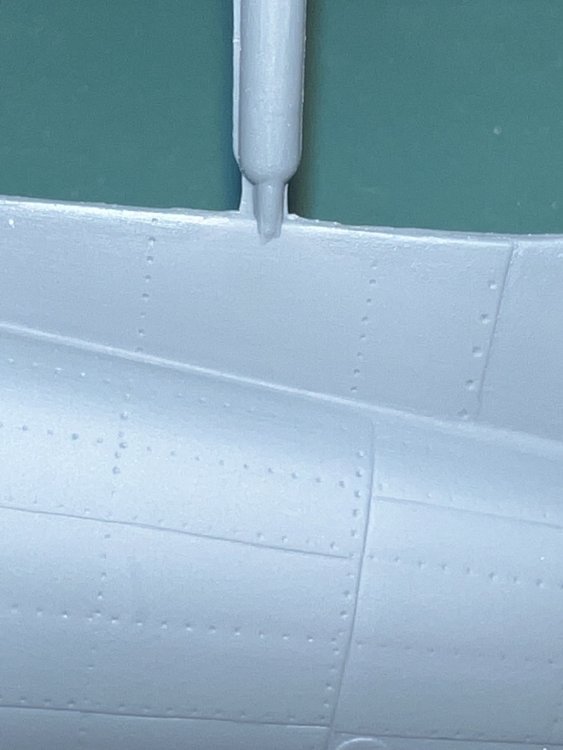
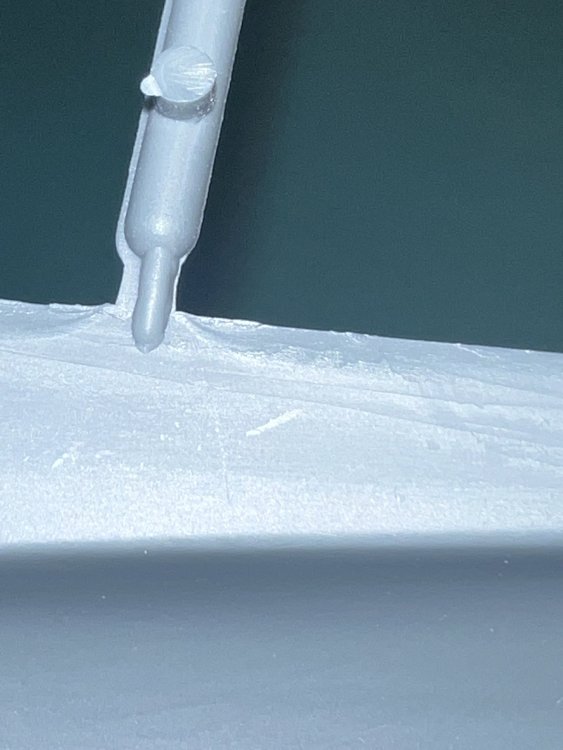
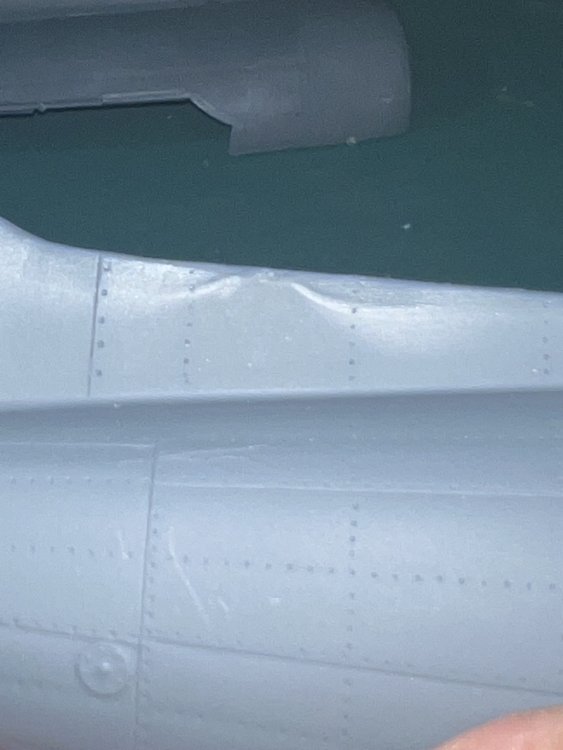
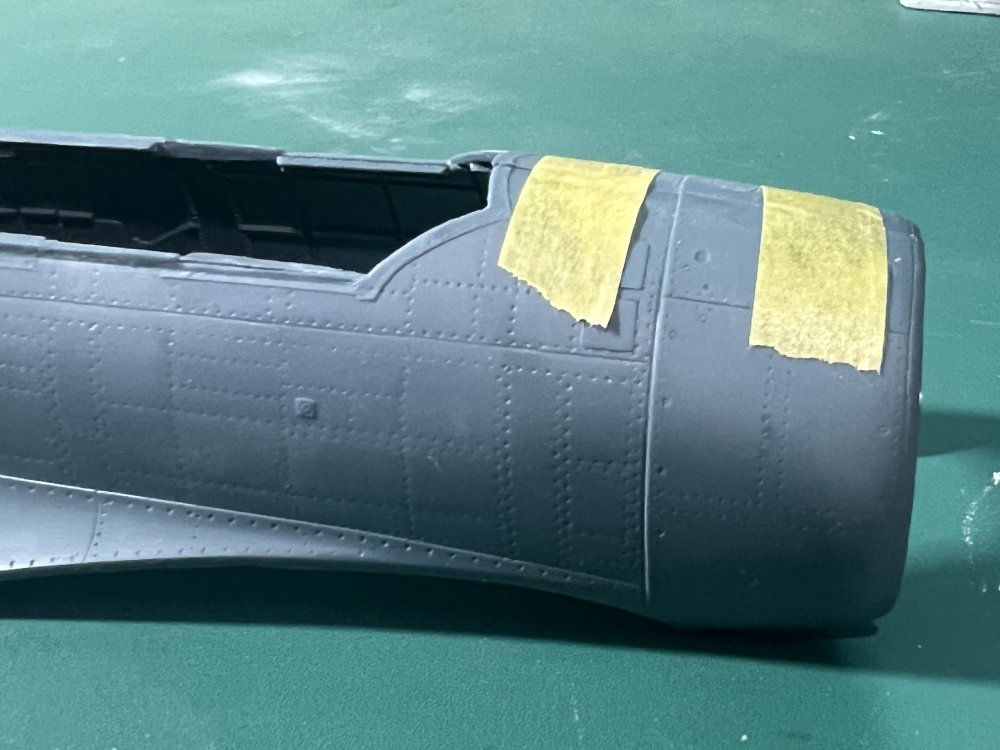
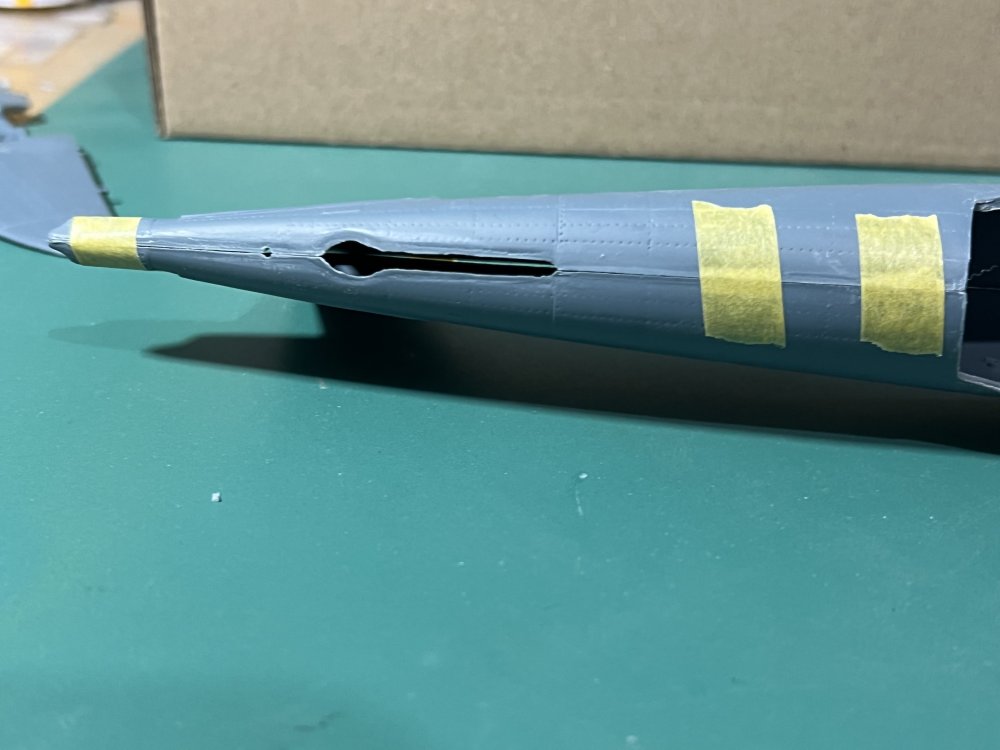
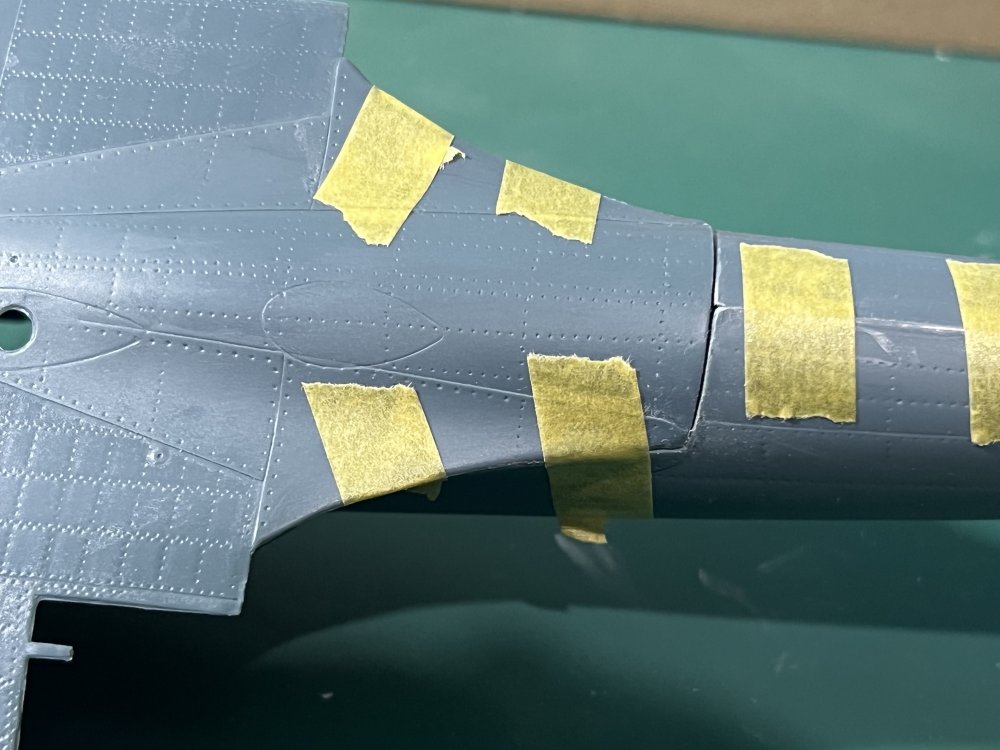
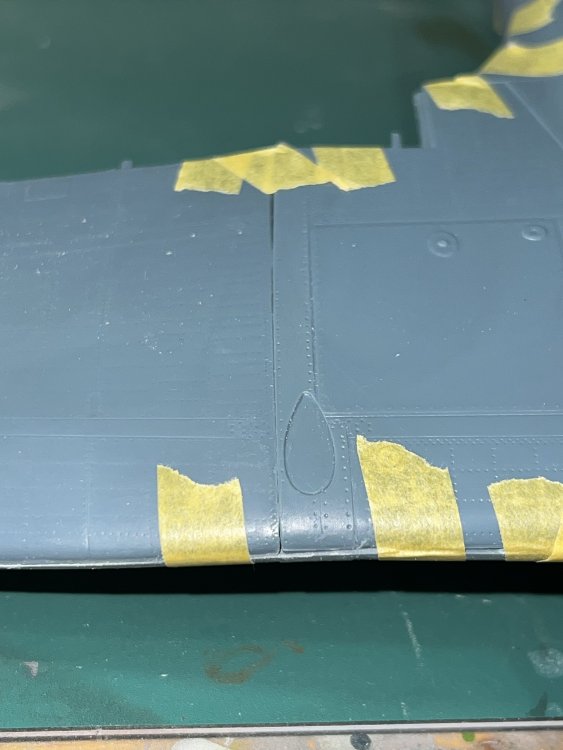
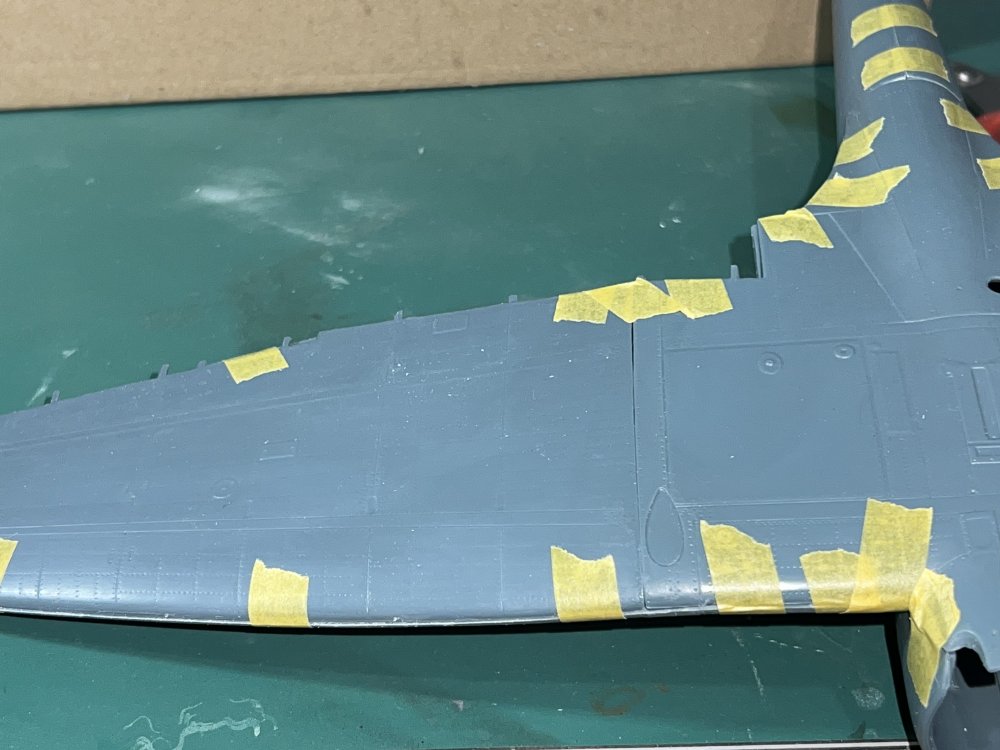
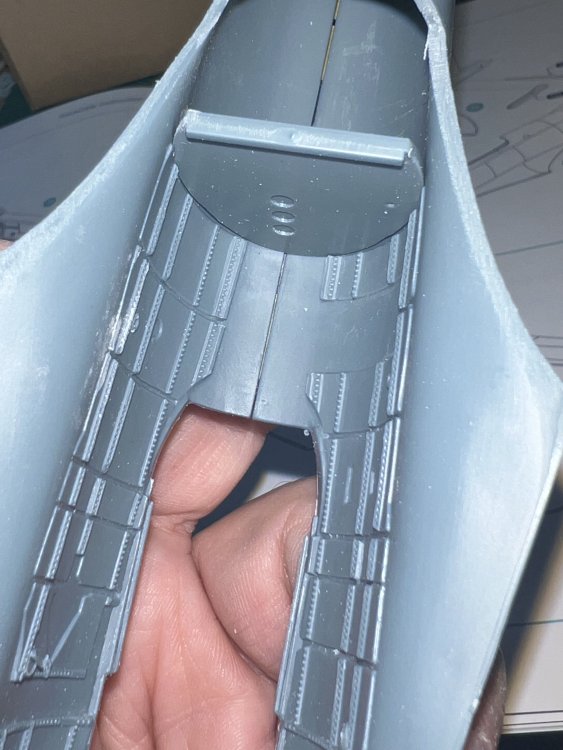
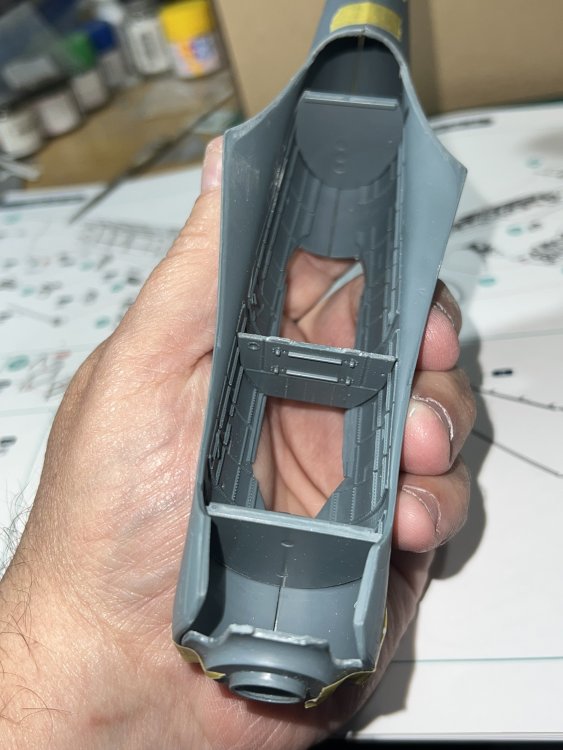
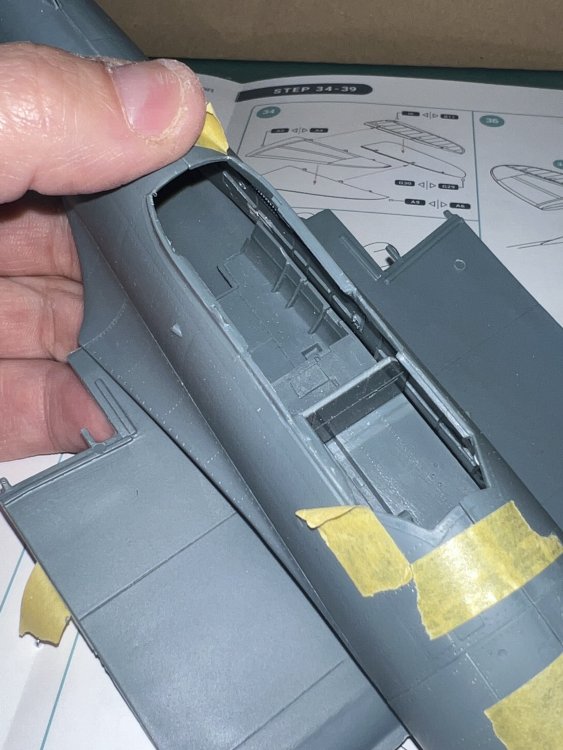
A bit of history on the Aichi D3A The Aichi D3A Type 99 (Allied name Val) was an Imperial Japanese Navy carrier borne attack bomber that instantly became infamous with the Dec 7, 1941 attack on Pearl Harbor. The design was the result of a 1936 IJN request for a modern, long range attack and dive bomber capable of operating off of IJN carrier decks. The prototype first flew in 1937 and was found to wholly unsatisfactory, which meant a major redesign. The aircraft was slow, underpowered, had poor maneuverability, and was directionally unstable. After the redesign to include a much more powerful engine, all issues were fixed except for the directional stability, which was later solved on the -1 with a long strake ahead of the fin. The D3A1 became famous literally overnight as it was one half of the two pronged air attack on Pearl Harbor which seriously crippled the US Pacific Fleet. The D3A served throughout the entire Pacific war, and was used in every major Naval Aviation operation by the IJN. It proved to vulnerable to attack due to its light construction and lack of armor plate, self sealing fuel tanks, and a total offensive gun capability of three .303 caliber machine guns: two fixed in the cowl to fire forward, and one for the observer on a flexible mount. . However, the D3A turned out to be a quite competent dogfighter due to it’s uncanny maneuverability. The Kit. Infinity Models announced last year that their next release will be the Aichi D3A1 Val, which would then be followed by the Nakajima B5N2 Kate, the other half of the double pronged attack on Pearl. Large scale modelers worldwide have been hoping for these two aircraft in 1/32 scale for many years, but until HPH announced it in their Infinity line as a short run kit, no manufacturers showed the slightest interest. If you want a large scale Val, here it is! There have been many negative comments from modelers who claim to have had major issues with Infinity Models kits. Poor fit, incorrect parts, etc. Most swipes were unfair, but a couple had merit. However, there have been fixes published here, which now prepare a builder for that to expect and how to fix it. So How Does it Stack up, Compared to the Previous Infinity releases? Well, let’s look…. The box itself is typical Infinity: Sturdy! A beautiful full colorblind painting of the aircraft in action over Pearl Harbor is on the box top. A small logo proudly announces that the model is a product of the Czech Republic, and another small logo states that the plastic is provided by HPH. The side of the box let’s it be known that this kit is not for beginners. Instruction booklet The instruction booklet is a well organized and attractive presentation in standard 8 1/2 x 11, and is offered in well drawn black line isometric illustrations. A brief history of the type is provided on the front cover, in Czech and English. PaInt call outs are given in MRP and AK codes. Cross referencing to Gunze, Tamiya, Mission, or any others is simple enough. The wing alignment should be pretty easy here, or at least easier than most short run kits. The wing is held steady by a massive u shaped spar that holds the center section to the outer wings. The Sprues. Plastic is offered on 8 sprues of light neutral grey styrene along with one sprue of clear parts that appear beautifully clear. Two small PE frets are included that mostly include seat belt parts. All moveable control surfaces, including the flaps, are molded separate so they can be posed off neutral. One HUGE improvement Infinity has achieved is a great reduction in the size of the sprue attach points to small, fragile parts. Well done, HPH, this right here is a huge improvement. The plastic itself reminds me of IBG Models, or even Mini Art. The texture is smooth, molding details are superb, and the plastic is not quite Hasegawa hard. When shilling parts, it cuts positively. No shattering, a d NO mashing of a part because of soft plastic The instrument board is decently molded, and should respond well to paint and kit decals. If you’re like me, Airscale decals will work as well. Closed canopy is provided molded shut, or a multiple part open unit There are lots and lots of molded on details, and much more to add. Some mold marks do exist, but that’s simply discoloration Fuselage interior shows a lot of detail. Ribs are provided individually for the builder to install. Ejector pin marks, are, thankfully, few and far between. There has been a lot of online griping on the various forums regarding test build pictures posted online, regarding supposedly excessive oil canning. I’m glad to point out that those people knew not of what they whined about, because the surface it textured with a slight oilcan effect, it’s VERY mild, and will look superb under paint. I expect the din of those people will never go away, so my advice is to simply ignore them 🤣 Fuselage oilcanning looks really, really nice. A coat of primer and paint will tone it down nicely. Be careful on the washes, this detail means lots of spots for it to collect, and it’ll overdo the effect. I will point out the only place where the Sprue gates ARE too big: on the fuselage. They’re huge, but being where they are, it’s an easy clean up. Wheels and spats look great. Unladen spatless gear legs are also provided for those who like going in the nude. The wheels come in two halves, and that detail will all be hidden behind the spats A close up of the wing texture. There was bound to be oilcanning on these aircraft, as they were VERY lightly built. The engine itself looks decent, with a nice gearbox and reduction drive, along with decent intake pipes. The exhaust itself is closed off on the end, so you’ll need to either hollow it out, or install a resin replacement part, available from HPH. The VERY prominent prop hub. The D3A1 is not use a spinner over the hub and it’s counterbalance weights. A spinner is included, though, in case you are modeling an aircraft that had been retrofitted The spinner, which wasn’t factory equipment till the D3A2 A personal nit to pick. The cowl flaps are molded shut. I like open cowl flaps. I expect the aftermarket will supply them to those who want them. More small parts. Fuselage ribs, and interior goodies. I think, at least looking at what I see here, this kit is going to be a real winner! Assuming it all fits, Infinity may be easily the most improved kit maker I’ve ever seen. This looks GREAT, y’all, and I have a feeling I may have bought some unneeded AM. Yes, there is a bit of flash to trim, but such is the case with short run kits. Color schemes and decals Infinity offers two color schemes in the kit. The fist is what I would call the classic Pear Harbor raid scheme of IJN light grey with an off black cowl. The aircraft pictured includes decals for one operating from IJN Kaga on Dec 7, 1941. We’ve all seen the pictures of the light grey Vals attacking Battleship Row, a d this is what pops into my mind when I think “Pearl Harbor.” Well, this, and Arizona exploding The second scheme is a bit different, and oneI have never seen before; a green D3A operating from IJN Soryu on Dec 7, 1941. I have a feeling there will be more than a few of this scheme built. The decal sheet is nice. Having built the Helldiver, and with Smitty having built the Meteor, I can attest to Infinity’s decals being really, really nice. They’re in register, they’re thin, tough, and settle down nicely under Micro Sol. One strange spot that has me scratching my head. Where the sprue attaches to the dorsal fin, the gate is heavy. The fuselage sides are the only areas with heavy sprue gates, but this area has an oddball flow pattern. It almost looks intentional, but I’m pretty sure it isn’t. Thankfully, it’s a 30 second swipe with a sanding stick. Area affected? About 3/8 inch. SO HOW DOES IT FIT? So, being that Infinity has developed a (mostly) underserved bad reputation, I wanted to go a bit further here, and show you if, in fact, stuff actually fits together. Are the fuselage sides the same size? Are the bulkheads actually for the D3A1, or instead, fo, say, a Fokker Trimotor? Let’s see…. VERY nice here. A bit of a gap here, but the assembly has been quick with no attempt to line it up perfectly. No matter, a bit of Evergreen if needed, and this is the best place to deal with it Tell me this doesn’t look good? It has really nice fit down here. The wing roots show a bit of a gap, but I have a sneaking suspicion these will close up nicely once the big spar is installed A nice, sturdy lip is provided to aid in wing root alignment Look at that surface detail! Bulkheads and Cockpit Floor. The Helldiver bulkheads needed rework, (heavy sanding), but can be made to fit. So, just to see where we’re at when it comes to these. The fuselage has three main bulkheads, plus a firewall and cockpit floor. I installed them without any cleanup other than cutting off the sprue nubbies and insuring the edges were square. Absolutely NO other prep was performed. These just drop into place With the bulkheads, floor, and bottom center section. VERY nice fit so far I tried the center section to verify it’s not pushing the fuselage out. It’s Not. Conclusions? Well, at first glance, and as I got a bit further into it, this kit had been planned, thought out, developed, engineered, and kitted by people who really like doing that they do. Gone are the few issues that plagued the first two releases: incorrect parts, parts way too big or way too small, massive sprue gates on tiny parts, etc. I found one, yes, ONE issue, and that was a half inch area with plastic that needs knocking down flush on the dorsal fin. The surface detail is superb, stuff appears to fit, decals look great, instructions are awesome, and we have two VERY classic Type 99 schemes. I see very little need for aftermarket: maybe some cowl flaps, that’s it. I’d grab a few of the smaller accessory packs from HPH: the 3D printed rear .303, some resin exhausts, HGW seatbelts, and maybe the PE panel just because I like PE. Other than that, I’d build this out of the box. It’s that nice. I’d dare say that this kit maybe the kit to save Infinity. This is a gloriously nice kit, and as soon as I find the Hurricane landing light I dropped on the floor, I’ll finish my Hurricane and jump right on this. I want this done for the IPMS-USA Nationals this year. BUY THIS KIT. IT’S THAT NICE.


- 18 replies
-
- 11
-
-

-
Sitting on my porch, panting like a dog…
Clunkmeister replied to Clunkmeister's topic in General Discussion

-
Sitting on my porch, panting like a dog…
Clunkmeister replied to Clunkmeister's topic in General Discussion

-
HPH, Infinity Model ... and poor decisions!
Clunkmeister replied to Artful69's topic in General Discussion
Peter, the Felix was a really easy build. It’s just that there’s a whole lot of it there. That kit NEEDS structural flying and landing wires. EZ line won’t cut it on that one. It’ll just fall in on itself. The Helldiver kit is very much like the prototype aircraft. (And I use “prototype” as used in Model Railroading, it refers to the full size machines) The prototype aircraft were very complicated, squirrelly, and hard to master, but once crews learned how to fight the aircraft, it became the most potent weapon system the USN had in WW2. In its short front line Service Life, the SB2C sank more tonnage than any other aircraft in the entire war. Crews and aircraft working together were positively lethal towards the enemy. It’d reward competence with amazing results, but fight you every step of the way, and simply kill, no questions asked, no second chances, the incompetent or poorly trained. -
Waiting for UPS to show up with the bloody Val! The ONE day I want it here on time, he’s bloody well late, the sodding fool! OK, I’m a tiny bit perturbed. 😡🤬😡🤬😡🤬
-
I don’t understand the willingness of so many to simply accept the constant bullying, personal attacks, and disparaging remarks. They, for the Love of God, finally recently banned Jennings and one or two other perpetual troublemakers after living with it for the best part of a decade of abuse and reports made. I remember once over there I was suddenly attacked by an apparently less than 100% sane individual, who, because of a hobby of mine involving collecting and displaying antique military arms, stated that I personally have the blood of every murdered child the world has known, on my own hands. He was simply asked to take a few weeks to reevaluate himself, and I was told not to respond. LOL I choose not to a part of the Romper Room Crowd. I’m damn near 60, and I’m sick of that crap.
-
HPH, Infinity Model ... and poor decisions!
Clunkmeister replied to Artful69's topic in General Discussion
Peter, good take on that. In all honesty, I’d say that John, even though he’s stopped chasing problems and now just builds mostly for fun and to fill his case, is a more accomplished builder than I am. He has built THREE HPH P-63s, where I built barely one. I enjoy the challenge of resin and short run kits. My big thing now is to work a problem kit and try to find ways to do work around a that’d be easy for an average builder to accomplish. I’m of the opinion that nobody at Infinity actually sat down and built the Helldiver from start to finish, using only the kit parts without modification, because I know for an absolute fact that can’t be done. The little triangular bulkhead in the fin root behind the gunner does not fit without a stretching machine, and yes, the famous canopy issue. Both are fixable: for the bulkhead, make one from Evergreen card stock, and the canopy can either be sectioned or use the resin kit parts. The rest is easy peasy, just measure and sand stuff to fit, as the airframe basics fit beautifully. -
Don’t expect anything from Mastercasters for 5 years
Clunkmeister replied to Clunkmeister's topic in General Discussion
Hopefully Leeroy has 3 teefs and a rotten stump in his mouth, is 7 ft tall, tips the scales at 280 and they call him big man, and not because he’s physically imposing. -
HPH, Infinity Model ... and poor decisions!
Clunkmeister replied to Artful69's topic in General Discussion
Do.17 is certainly high on my list, but the kit maker that keeps popping into my head for no apparent earthly reason is ICM for that one. As for Infinity, today should tell the tale. I’m anxious to have a peek at it. -
JetMads 1/32 C-21A, U-36A, Learjet 35 kit #302101
Clunkmeister replied to Clunkmeister's topic in Aircraft Reviews
Either way, King Airs are a great ticket as well. Fixed wing is fixed with. And, not to be a cynic, buuuut,… civilian job prospects are many times greater as a fixed wing pilot than for chopper jocks. And yeah, when the lead is flying, being a cowboy is a good thing. On a routine haul to a secure LZ, not so much. -
HPH, Infinity Model ... and poor decisions!
Clunkmeister replied to Artful69's topic in General Discussion
The Val and Kate will be goldmines for HPH/Infinity. I’ve wanted these right up there with the Helldiver. I’d dig a Beau, but a Firefly is my FAA gotta get I would also love an L-39. To me, it and the L-29 are the most important Czech designs to come out, after the CZ75 and Bren Gun. The L-39 and the upgraded L-139 are flown literally everywhere in the world, including the USAF as an aggressor. And it’s bloody gorgeous! The BAE Hawk is about the only jet even close to the L-39. -
HPH, Infinity Model ... and poor decisions!
Clunkmeister replied to Artful69's topic in General Discussion
Rog, nice thoughts. You hit the nail on the head. But HPH’s main business is aerospace. They produce components for Boeing, Airbus, and various other manufacturers, as well as produce and sell their own complete line of full scale sailplanes. https://hph.cz The entire model business is a sideshow. I tend to differ in opinion on the Helldiver. It, quite simply, is not a bad kit, and other than the one huge mistake with the rear canopy, it’s pretty buildable. But you need to go in with a short run mindset, and dammit, you better have built a few short run kits already, or you’ll be caught short. You know on these types of kits: treat them like a resin kit that’s already had the parts trimmed off their blocks. Prefit EVERYTHING and sand to fit. Don’t assume a single, solitary thing. Do that, deal with the canopy, and you’ll have a decent representation of a parked, closed up Helldiver. Which, by the way, is the only mid to late war US carrier based bomber we didn’t have in 1/32. The Helldiver, in prototype form and in a model, is an extremely complex aircraft keep that in mind just adding an open rear gun position is a major job Smitty built the Vampire and had no difficulty. His looks stunning. I have the kit and will eventually build it. The feedback is coming in on the Val, and so far, it appears to be a game changer for Infinity. The word is that it needs little to no AM, although I’ll throw the book at it just because I enjoy that stuff. I’m hoping they don’t give up on the market. If the Val is as good as it sounds, it’ll be a good seller, and I expect the Kate will be just as good. Only time will tell. -
I built the GWH kit. It was,…. Interesting. I’m expecting the pantograph edition, honestly. But, like others, if you want it bad, and I do, you’ll do what you gotta do. I know someone in Ridgeway, SC who might just be asked to do a build review on it, depending on how hideous it actually is. 😬
-
Don’t expect anything from Mastercasters for 5 years
Clunkmeister replied to Clunkmeister's topic in General Discussion
Phil, you got the screens, and the money we all paid him went to his Solicitor. When he gets out he might have changed his name to Francine. But Ol’ Jay will be singing soprano like a bird. -
Should be a good read. T-28 and A-26 Air Commando operations in Laos are still shrouded in secrecy. But those guys, Ravens and Zorros, punched far, far above their weight class. As fearsome as a gunned up T-28 was, there was absolutely nothing in the inventory, anywhere, short of C-47 or C-130 gunships that could bring anywhere near the devastating firepower that a B-26K could.
- 1 reply
-
- 1
-
-
I’m certainly glad we are here as an alternative to TOS. I’ve never quite grasped their animosity over there. I’m even very good friends with one of their long-standing serving Mods over there, and he just throws his hands in the air and says, “good grief it’s just little plastic airplanes”. He’s mystified by the moronism that thrives there. I’ve always held that there is room for two really good large scale forums on the web, and I know most here belong to, and post on both. That’s how it should be, IMHO. Personally, I can’t even bring myself to join again. Ever. I’m done. During the big web shitshow over the Helldiver kit fubars and the fixes we figured out here, I contacted them directly and offered outright my descriptions, pics, and workarounds. Not to puff anyone up, but to help modelers who may not look in here alot. I heard nary a peep. As in radio silence. I think someone from here eventually posted a link to the fix in their Val thread, which is good, but it wasn’t someone on staff, it was a member. I just don’t get those guys. Anyway, y’all, welcome (again). I know we’re not as busy as them, but most of our content is meaningful and there is zero hate and discontent. Tomorrow, the Val should be here and I’ll give it an in depth look with a review and thoughts. So far, comments are that it may be a game changer for Infinity.
-
If I remember correctly, Labour reneging on the F-111 deal royally pissed off a lot of people over here who had poured a metric ton of gold into that system. In the end, US and Australia only. SMH. The 111 was desperately needed at the time, if I remember. Now I’m surprised the RAF hasn’t had an air to air victory since War 2. I would have thought Iraq or Afghanistan. FAA gives a good accounting of themselves when allowed to mix it up with their fangs out. Damn Harriers mauled the Argentinians pretty badly.
-
JetMads 1/32 C-21A, U-36A, Learjet 35 kit #302101
Clunkmeister replied to Clunkmeister's topic in Aircraft Reviews
Are they getting the Bombardier Globals? That’s probably the most capable executive jet in the world today. The biggest Gulfstream and Falcons are no slouch either, but the Globals are the cat’s ass. That’s a dream ticket for an Army pilot. 99.999% of Army pilots go rotary. Matter of fact, I’ve been told that every Army pilot is a helicopter pilot first, and anything else is a bonus. He’s one lucky kid. Keeps him out of Blackhawks at least, where he’d simply be one of multiple thousands of pilots. -
1/32 Aichi D3A1 Val is in at Sprue Brothers.
Clunkmeister replied to Clunkmeister's topic in Modelling Discussion
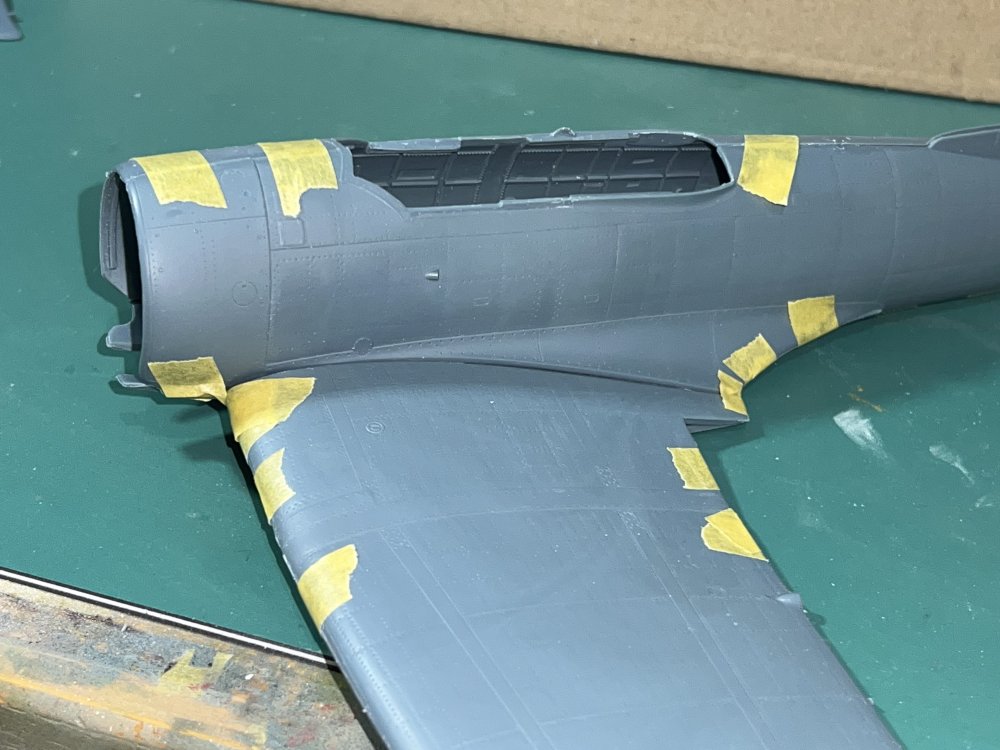
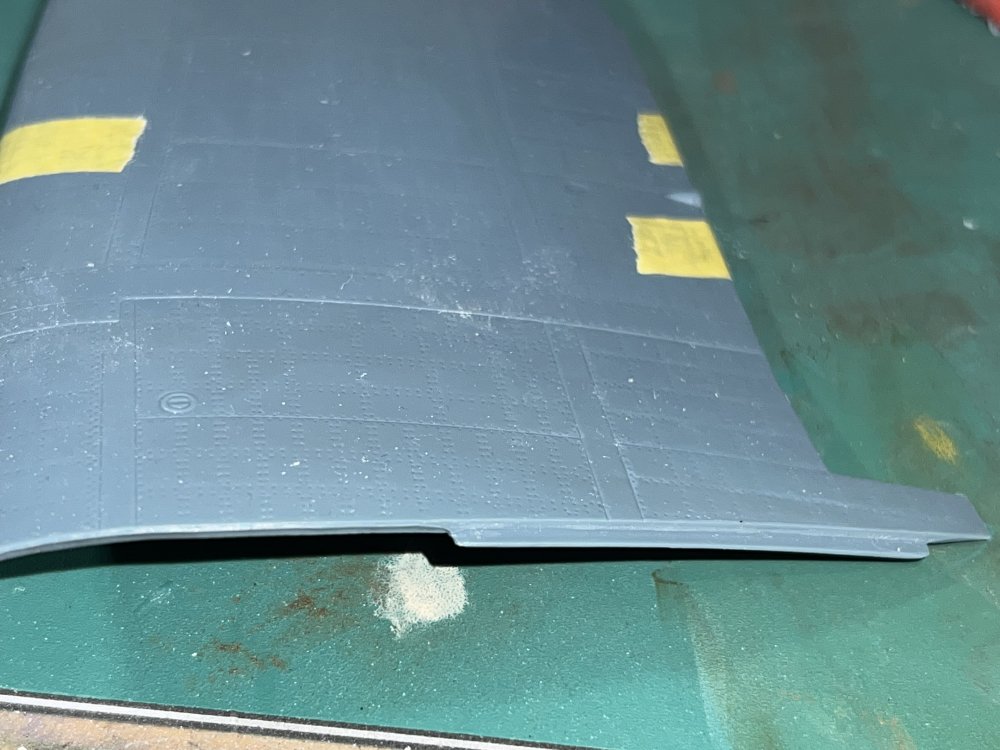
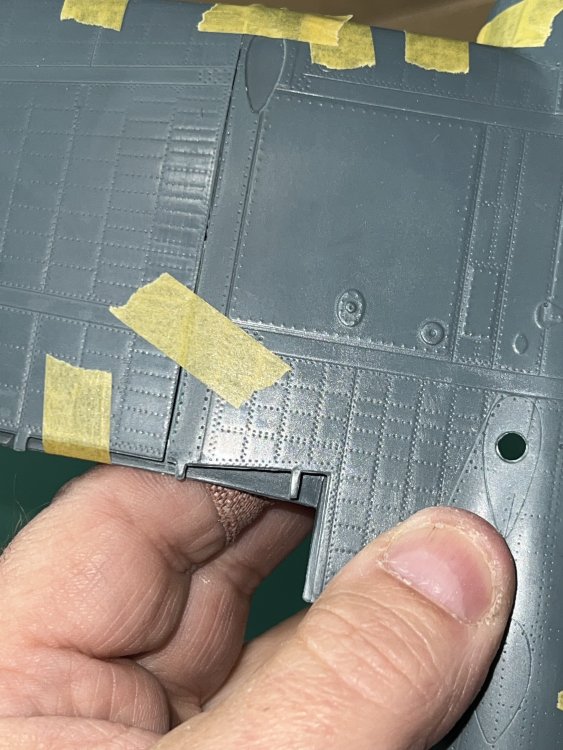
Hubert, that’s very good to know. Plus, this is the -1, a very early war D3A, so yes, they were lightweight. All Japanese aircraft were lightweight. I’d assume that yes, if it’s like Mitsubishi, they were much lighter at the beginning of the war. And just taking a look at how Japanese aircraft literally moldered away into the earth after the war goes to show you how light they were. I’d expect some serious oilcanning. Very heavily built German, British, and US aircraft certainly oilcanned. -
1/32 Aichi D3A1 Val is in at Sprue Brothers.
Clunkmeister replied to Clunkmeister's topic in Modelling Discussion
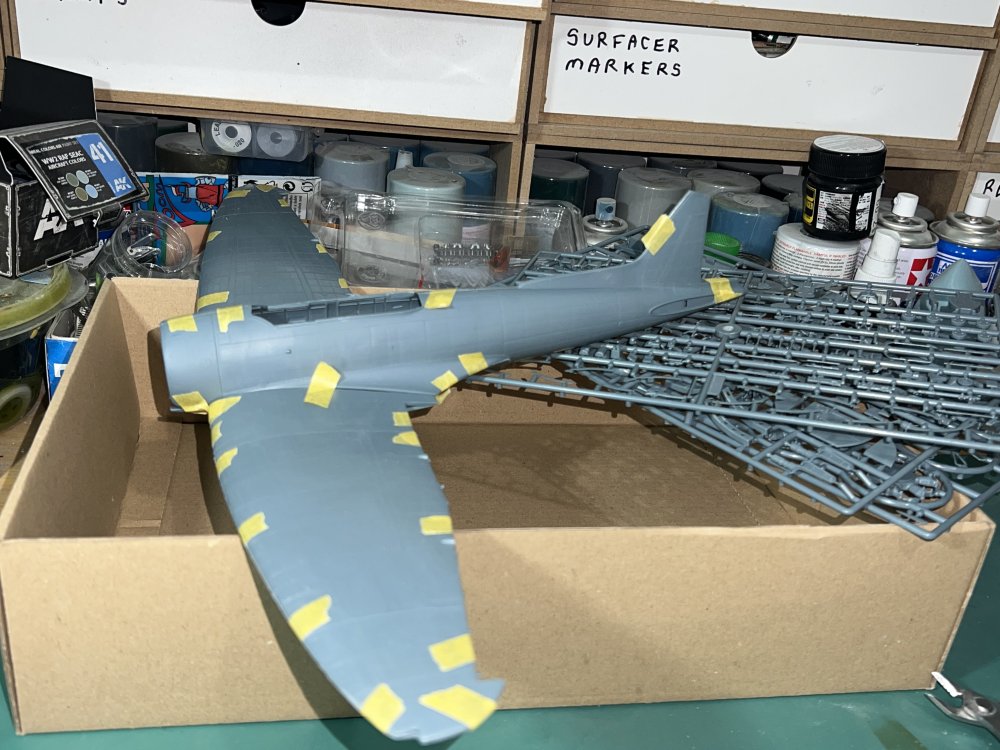
A couple noted modelers in Germany have received theirs today. They both say they are very pleasantly surprised, and that this may be a game changer for Infinity. If the kit can simply assemble like a typical new Special Hobby kit, with a bit of trimming and sanding as is normal for short run kits, I’ll be thrilled. I actually really enjoyed the Helldiver. It was a challenge, but in the end, very rewarding. If I can get similar here, but not have to fight the canopy, I’ll be thrilled.