Clunkmeister
-
Posts
7,200 -
Joined
-
Last visited
Content Type
Profiles
Forums
Events
Gallery
Everything posted by Clunkmeister
-
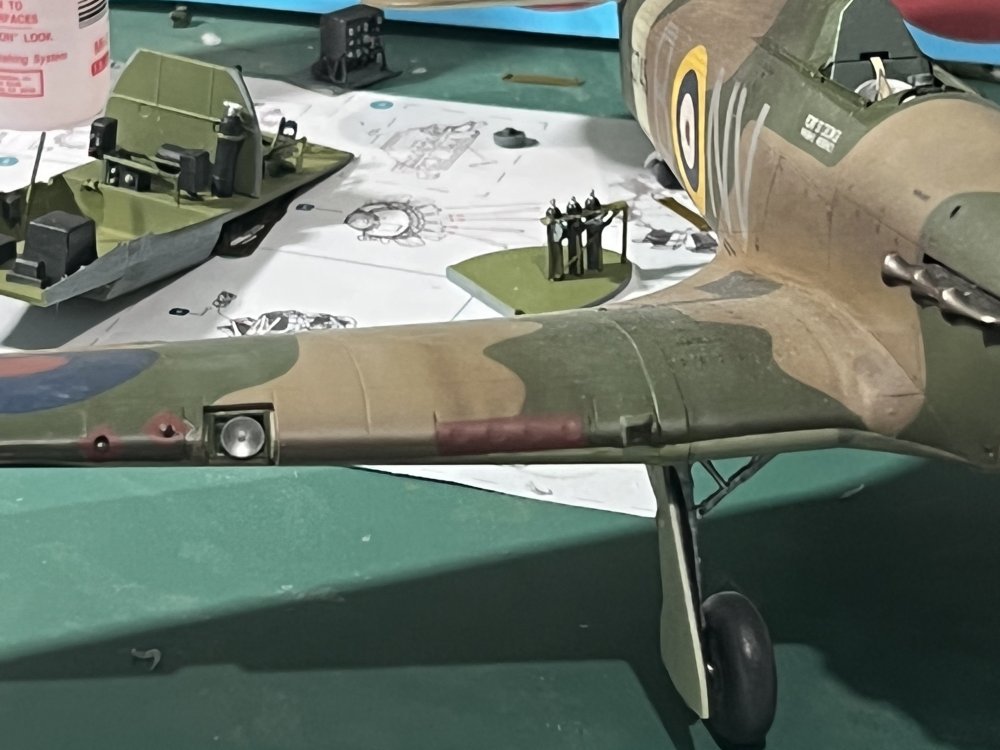
 And then, a bit of paintwork, and drop the wayward part into place. Landing Lights are a very prominent part of the Hurricane, I was unwilling to make something. These a Revell reflectors are exquisite!
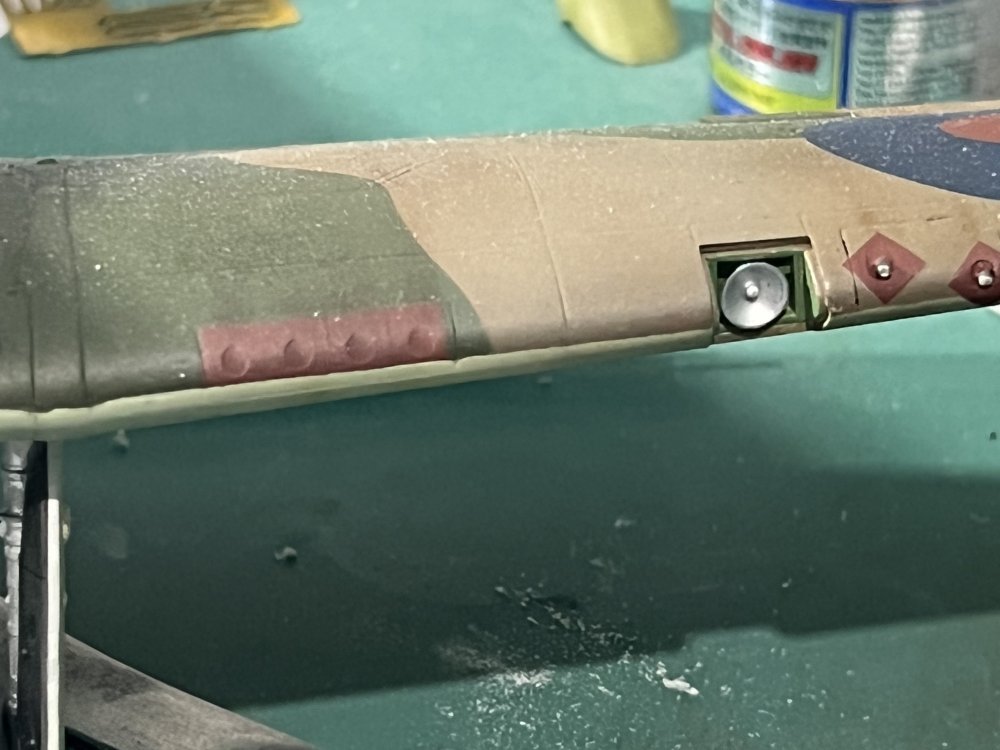
-
Today, I got a little box from Revell, GMBH, and I was thrilled to find this inside. Revell’s Service is second to none!
-
New Research and Documentation Forum area
Clunkmeister replied to Clunkmeister's topic in General Discussion
Back when it was socially acceptable to do so, Martin was such a research hound with unbelievable never before seen pics, especially eastern bloc aircraft, that I jokingly referred to him as “The ex Soviet Spy.” He is second to none with the ability to find stuff. -
Thanks, Ron! Good to see you back!
-
I’m thinking the same thing. The cockpits are a bit tedious, much like the Tamiya Corsair. You CAN blow through it and stick it together, or you can spend a bit of time and doctor it up a bit. Other than Airscale decals, I’m trying to build this kit completely OOB, and document any goofy areas. There are a few spots that require a bit of care, but no more than any typical Czech short run kit, and so far, and difficulty wise, it reminds me of a two seat version on the SH 1/32 Brewster Buffalo, or even their 1/32 Tempest. Tons of detail, and acres of room to go farther if you want.
-
This old thread just popped up again, folks, thanks to a hacker. We certainly get hacked on occasion, so i cleaned it up and, I think, got rid of all the rules breaking stuff. 🤬🤬🤬 Thanks for reporting this, Hubert, although now I’m glad you did, because now I’m going to finish this build. 😄😄😄 Let’s keep it clean and between the lines, y’all, and have fun. We can laugh at ourselves, which is exactly why I started this post way, way back in 2020, when Covid had us all freaking out.
-
Martin had a brainstorm, where we would set up a new Sub Forum on LSM to post documentation, research, pictures, etc. We’ve set up three areas where we have Aircraft, Armor, and Ships. We can add others as well, if the need arises and members want it. Right now, there has been some action regarding the various F4U versions, and it’ll only grow from there. So, 109, 190, Spitfire, P-40, P-47, P-39, P-63, P-38, whatever would hearts desire, add to the information as you feel. Ships, armor, whatever, just post under the heading that best suits your material. I expect we will take the large areas and break them off into their specific makes and models, but for now, post what you feel will help others. Be aware of copyright laws, but generally speaking, WW2 pictures are public domain now, and besides, nobody’s making money off this. I’d there is any question, give photo credit where due. It should grow into quite the impressive library. Discussion, heated or otherwise, can be up on the discussion pages, but when posting here, be relatively sure that what you’re posting is correct to the best of everyone’s knowledge. If something is proven wrong, or slightly off, either let us know or better yet, edit it yourselves. This is more or less gonna be Martin’s baby to run, and I’m sure nobody here will argue his knowledge and ability with research. I call him the “Dean of the Obscure”. This, folks, is your area to make, and if everyone grows it, you’ll get out way, way more than you put in. Maybe Martin will post up some of his basements full of old ComBloc documentation that he has at his fingertips. This is y’all’s time to SHINE.
- 4 replies
-
- 10
-

-

-
Great information here! Awesome! I’m no huge Corsair fanboy, as blue and grey are morning to me, BUT, the FAA birds interest me greatly. I assume the FAA and the RNZAF scrapped all theirs to avoid having to buy them all postwar? What a waste!
-
Thanks, Carl. Yes, it’s a pretty big improvement so far, with nothing bad occurring yet at all. I actually ordered another Helldiver yesterday, this time it’ll be an Atlantic Bird with folded wings. I’m quite psyched about the D3A so far. It’s been quite nice. No issues, no oops moments, just fairly decent fit with little trimming needed here and there. These short run kits are never “exact”, but close gets You in the ballpark, then simply fiddle with it a bit.
-
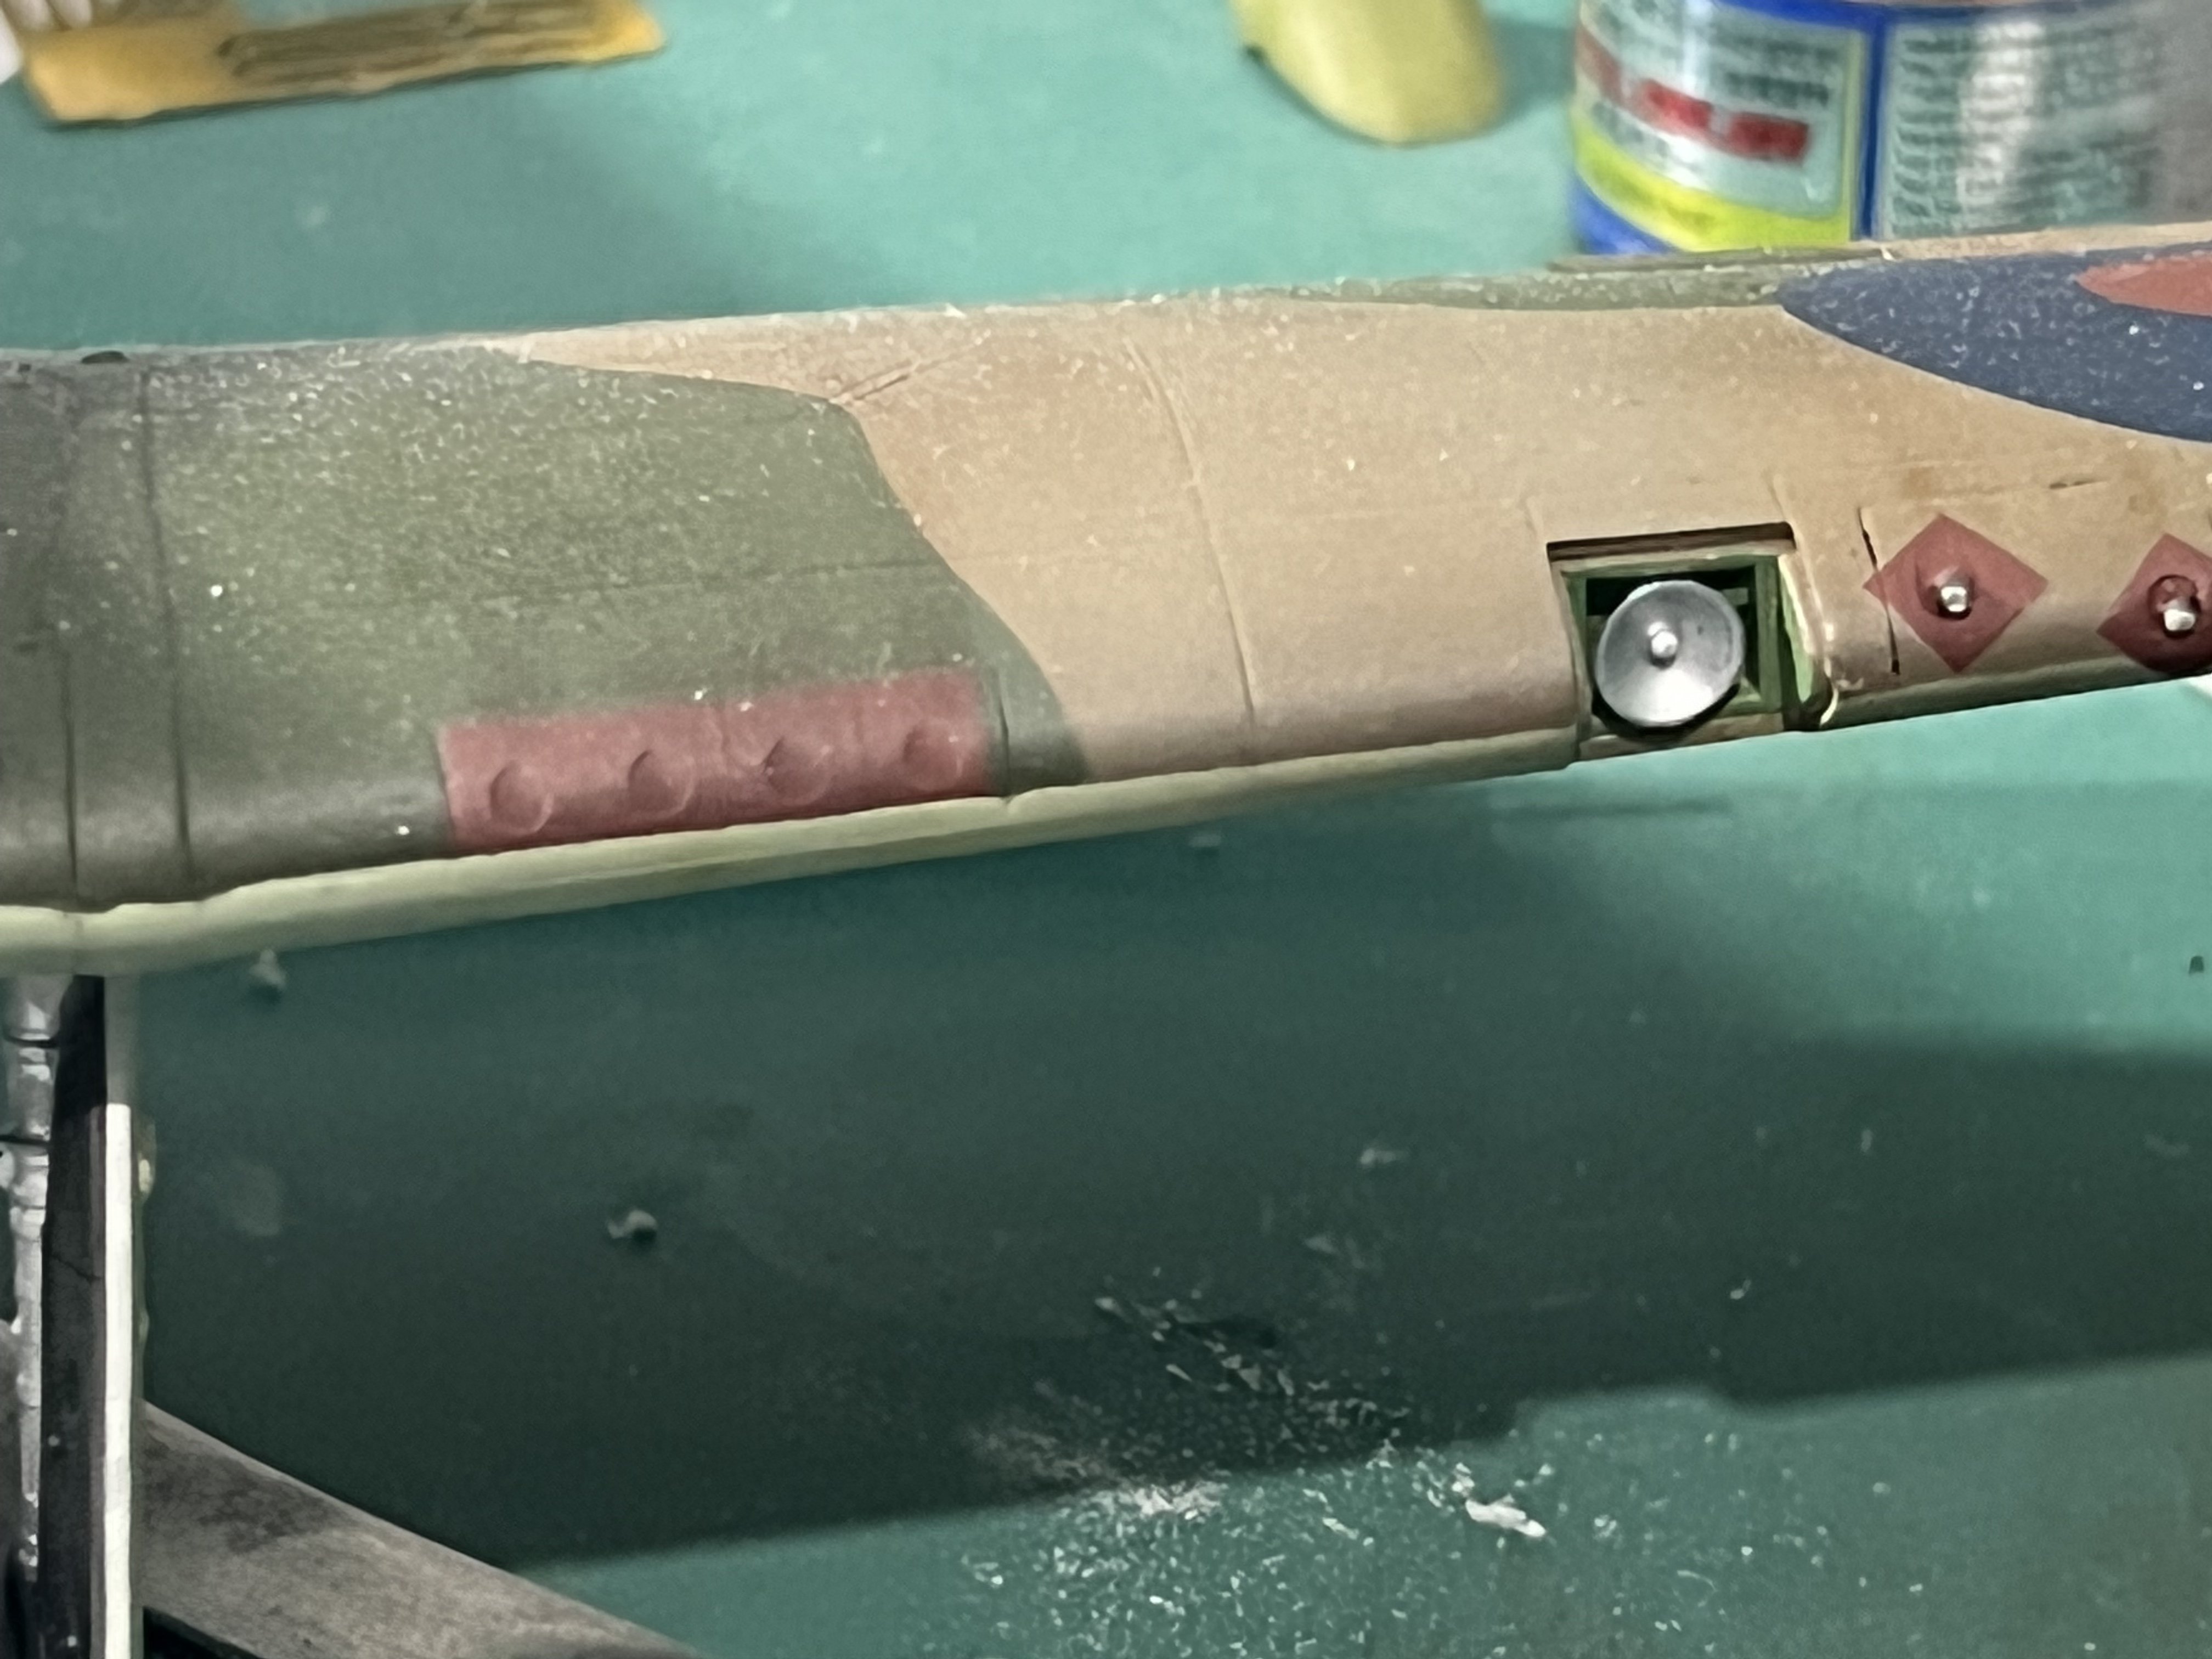
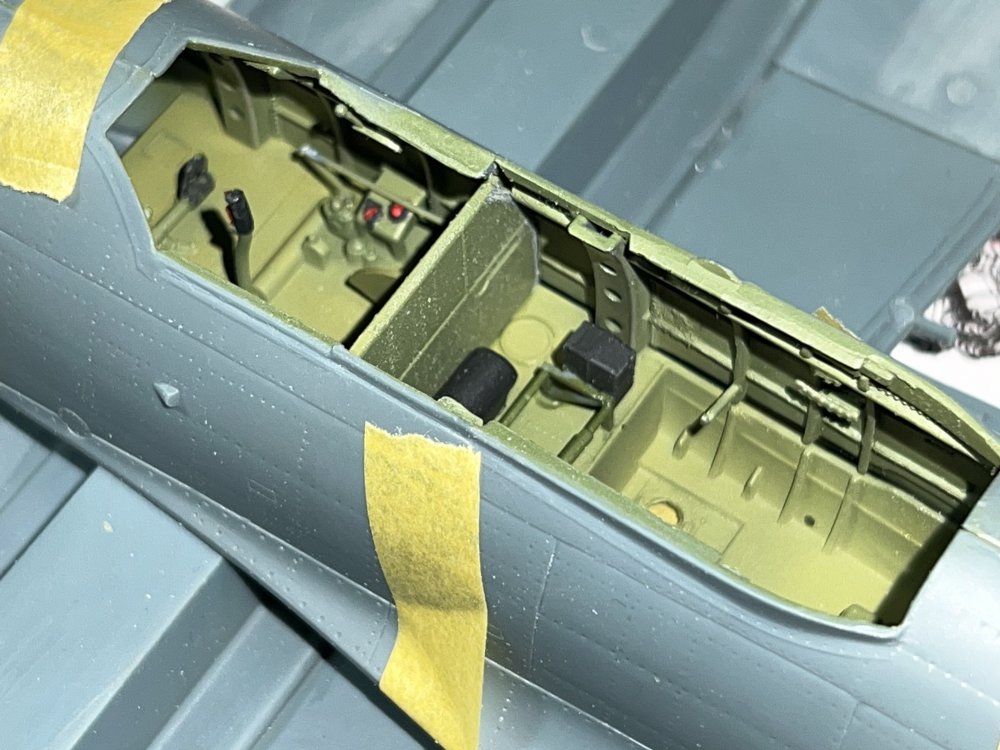
A bit of an update, y’all. Didn’t get much building done yesterday, as I had a car show to attend, but this afternoon, I got a couple hours bench time in. I’ve been doing a bit of work assembling the optional resin radial engine, and also tarting up the various radios and black boxes scattered all throughout the cockpits. Airscale decals do wonders for the instrument board. As always, I should buy Tamiya stock! I easily go through three rolls of tape per build.


-
LUBLIN R.XIII D 1:32 LUKGRAPH
Clunkmeister replied to Kriss's topic in LSM 1/35 and Larger Work In Progress
Of all the Nations who fought the Nazis to the death, Poland and her people are the ones I admire most of all. Poland literally fought like demons, right to the very last man. Anything, anywhere, anytime that honors Poland’s fallen warriors is a worthy cause for me, and a must visit site. Oh how I love the hearts of the people of Poland. -
I’m late to the party, John, and it may have been stated already, but the changing of the “A” to “B” was purely political. The various Governments (Laos, Vietnam, Cambodia, Indonesia, etc) didn’t want “attack) airceft, so the USAF just changed it to “B” bomber which was cool..
-
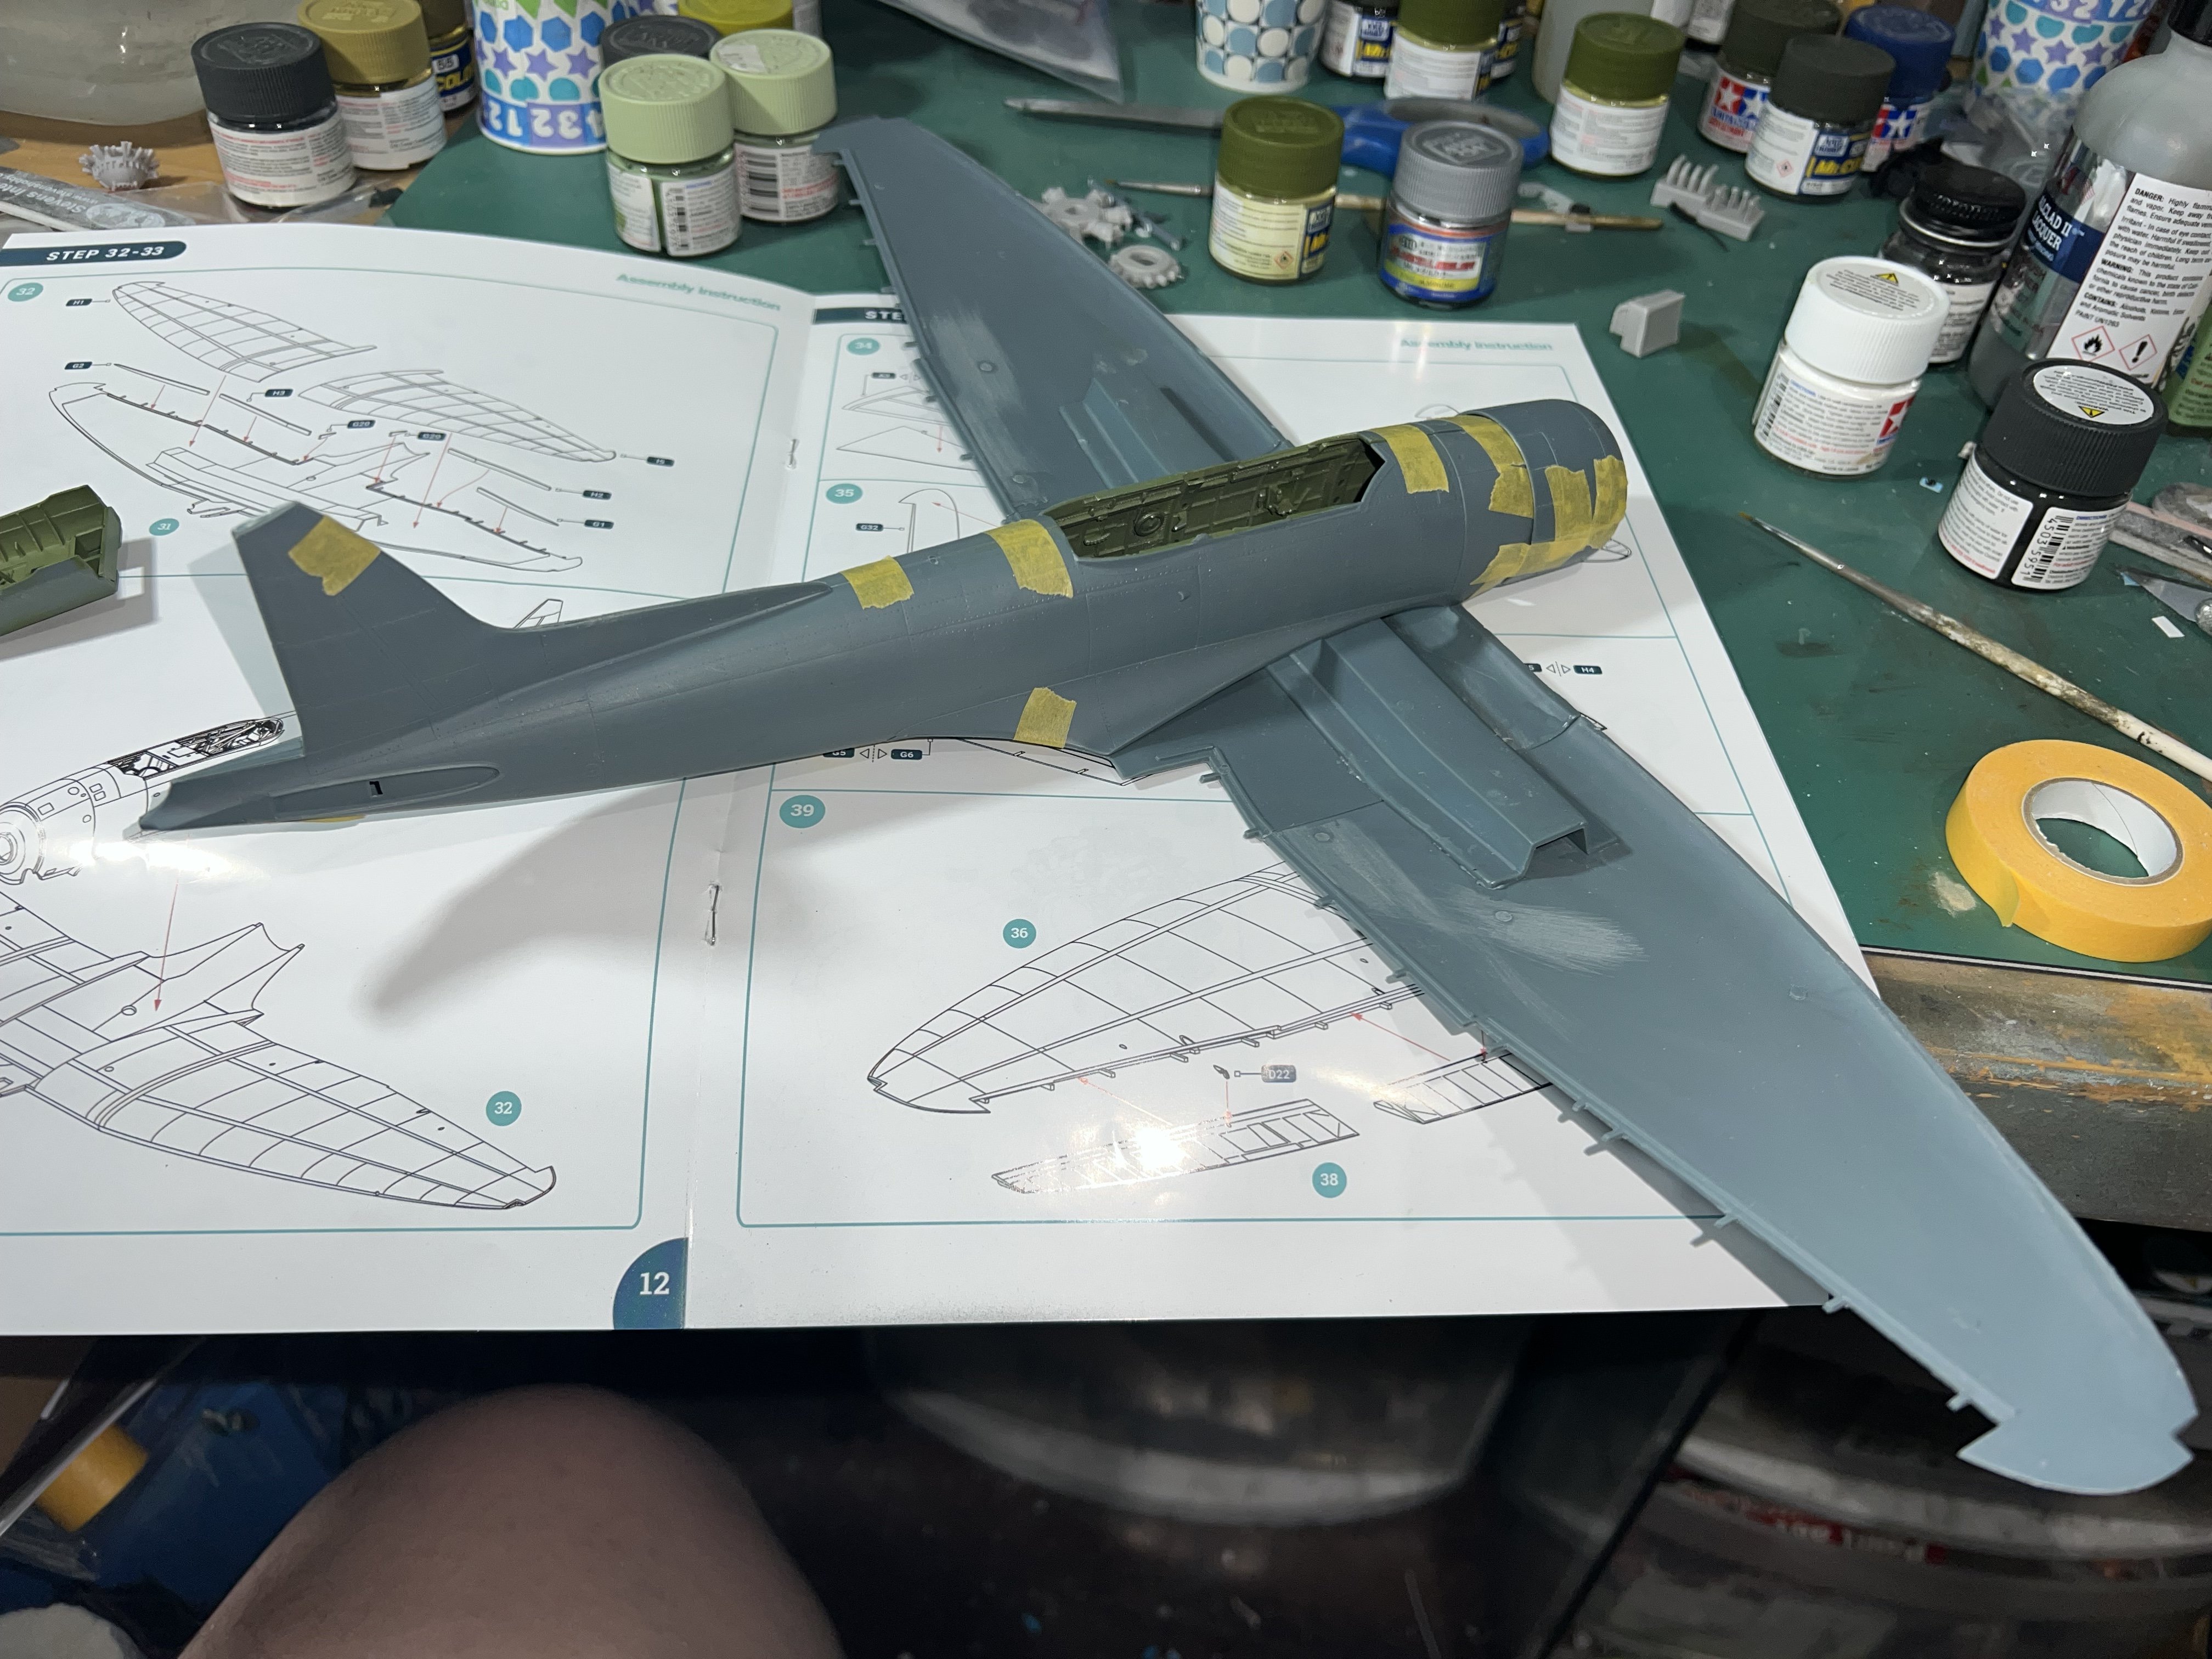
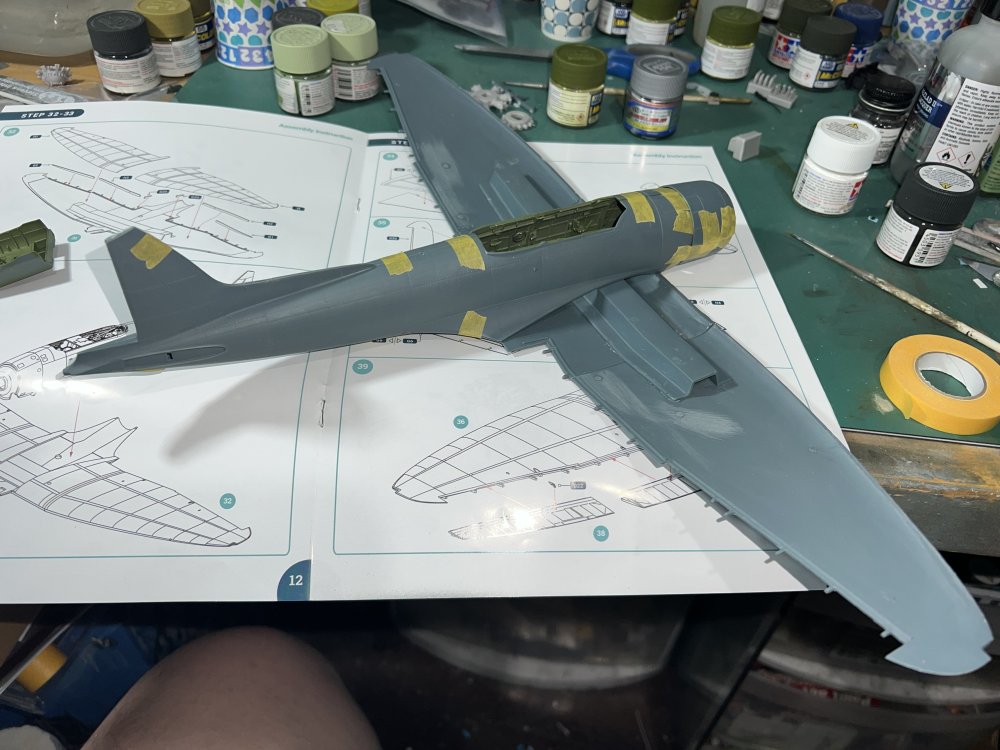
She’s gonna be a big girl. Her wings are as big as the Helldiver, but her fuselage is much slimmer. The wing is held together by this absolutely massive spar. The correct dihedral I’d molded into place, and it all fits beautifully so far. For every major component that goes on, I check the fit before, during, and after cementing the component in place. That way, if we run into a fit up issue, we’re not scratching our heads at the end, wondering where we screwed up. Quite honestly, if more people followed this method, there would be so much less frustration happening during a short run kit build. Special Hobby kits would get BUILT, and not end up on the SOD. With this kit, I have yet to have to adjust anything. Literally everything fits so far.

-
1/16 Takom Willys 1/4 Ton 4x4 G503 MB Jeep
Clunkmeister replied to Axeman's topic in LSM 1/35 and Larger Work In Progress
Now THIS is awesome, and I could really get into a build like this! Great work so far! -
I hope to see more of these getting built soon. 🤣
-
Thanks Carl and Ron. Special Hobby does it the same way: multiple little pieces to be added. To me, it’s pretty prototypical. If you look at cockpit pics of the real D3A’s, they were quite cluttered.
-
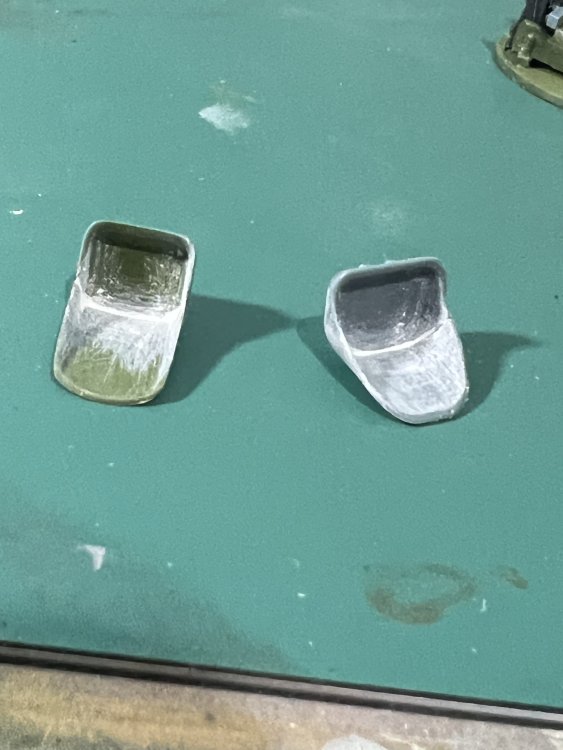
A word to our aftermarket guys. The seats are two pieces each, and I see no reason why that is, except for molding limitations. The seat halves fit OK, but then the fun with Tamiya extra fine starts.

-
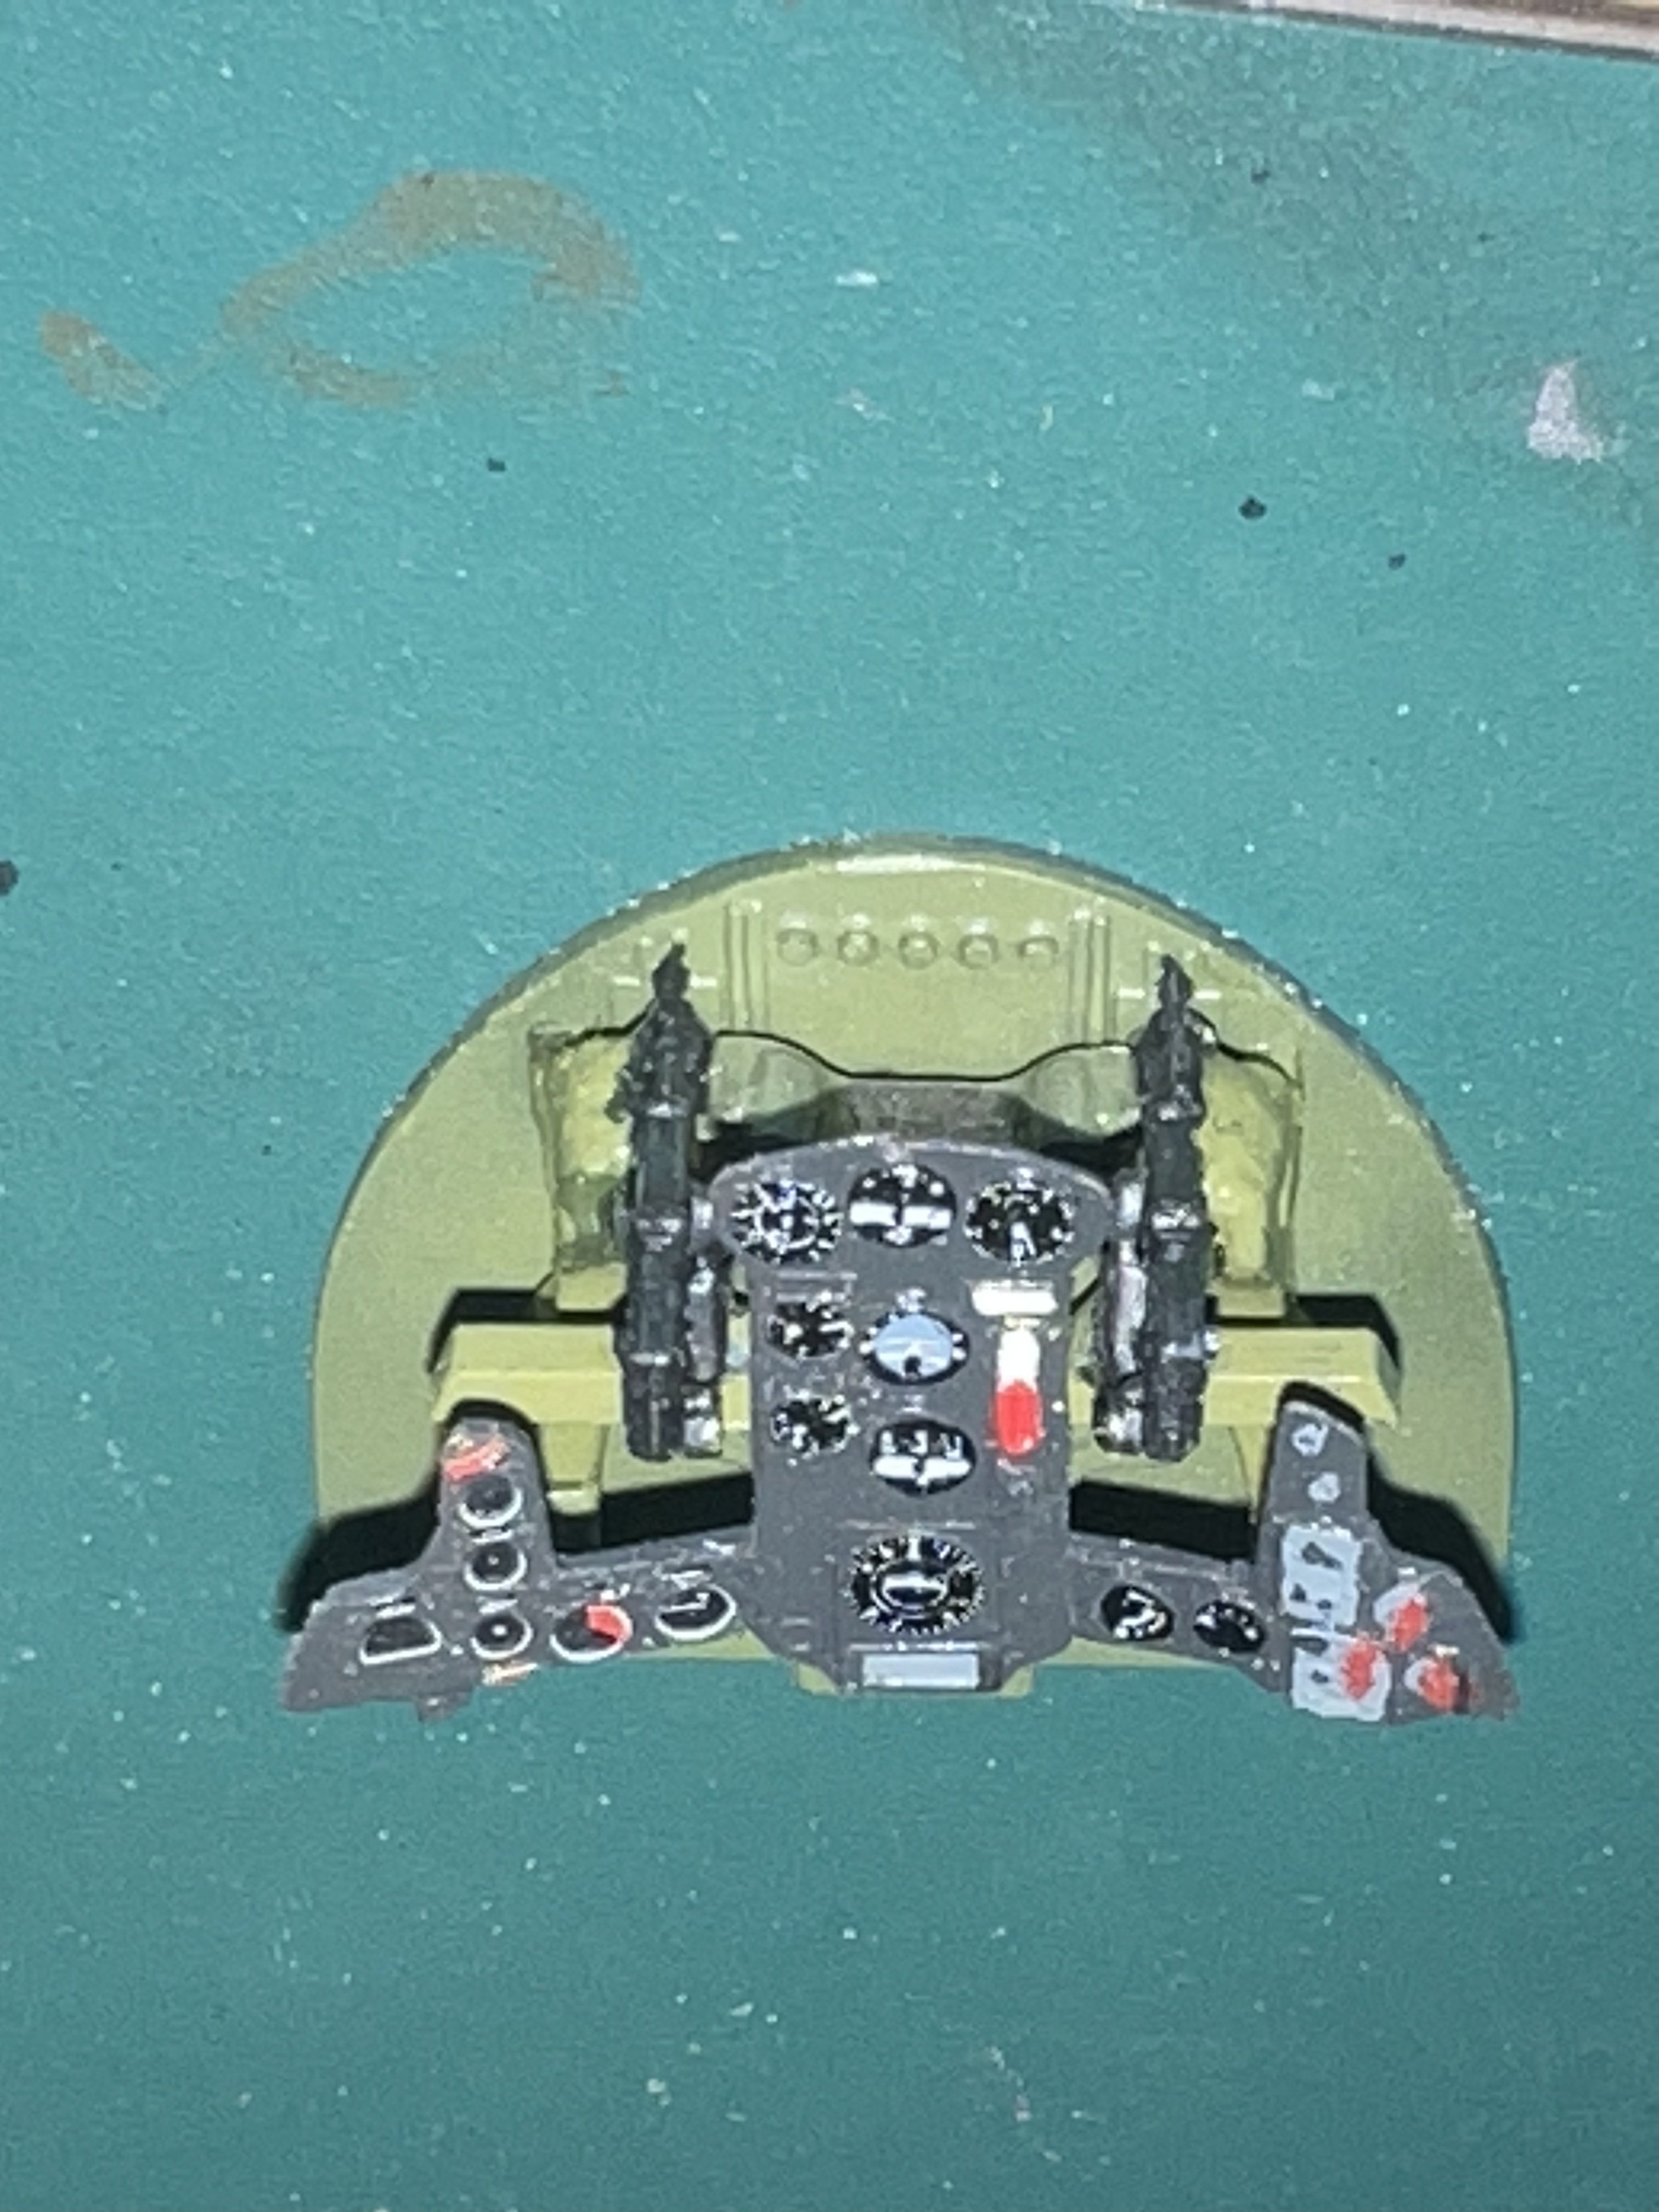
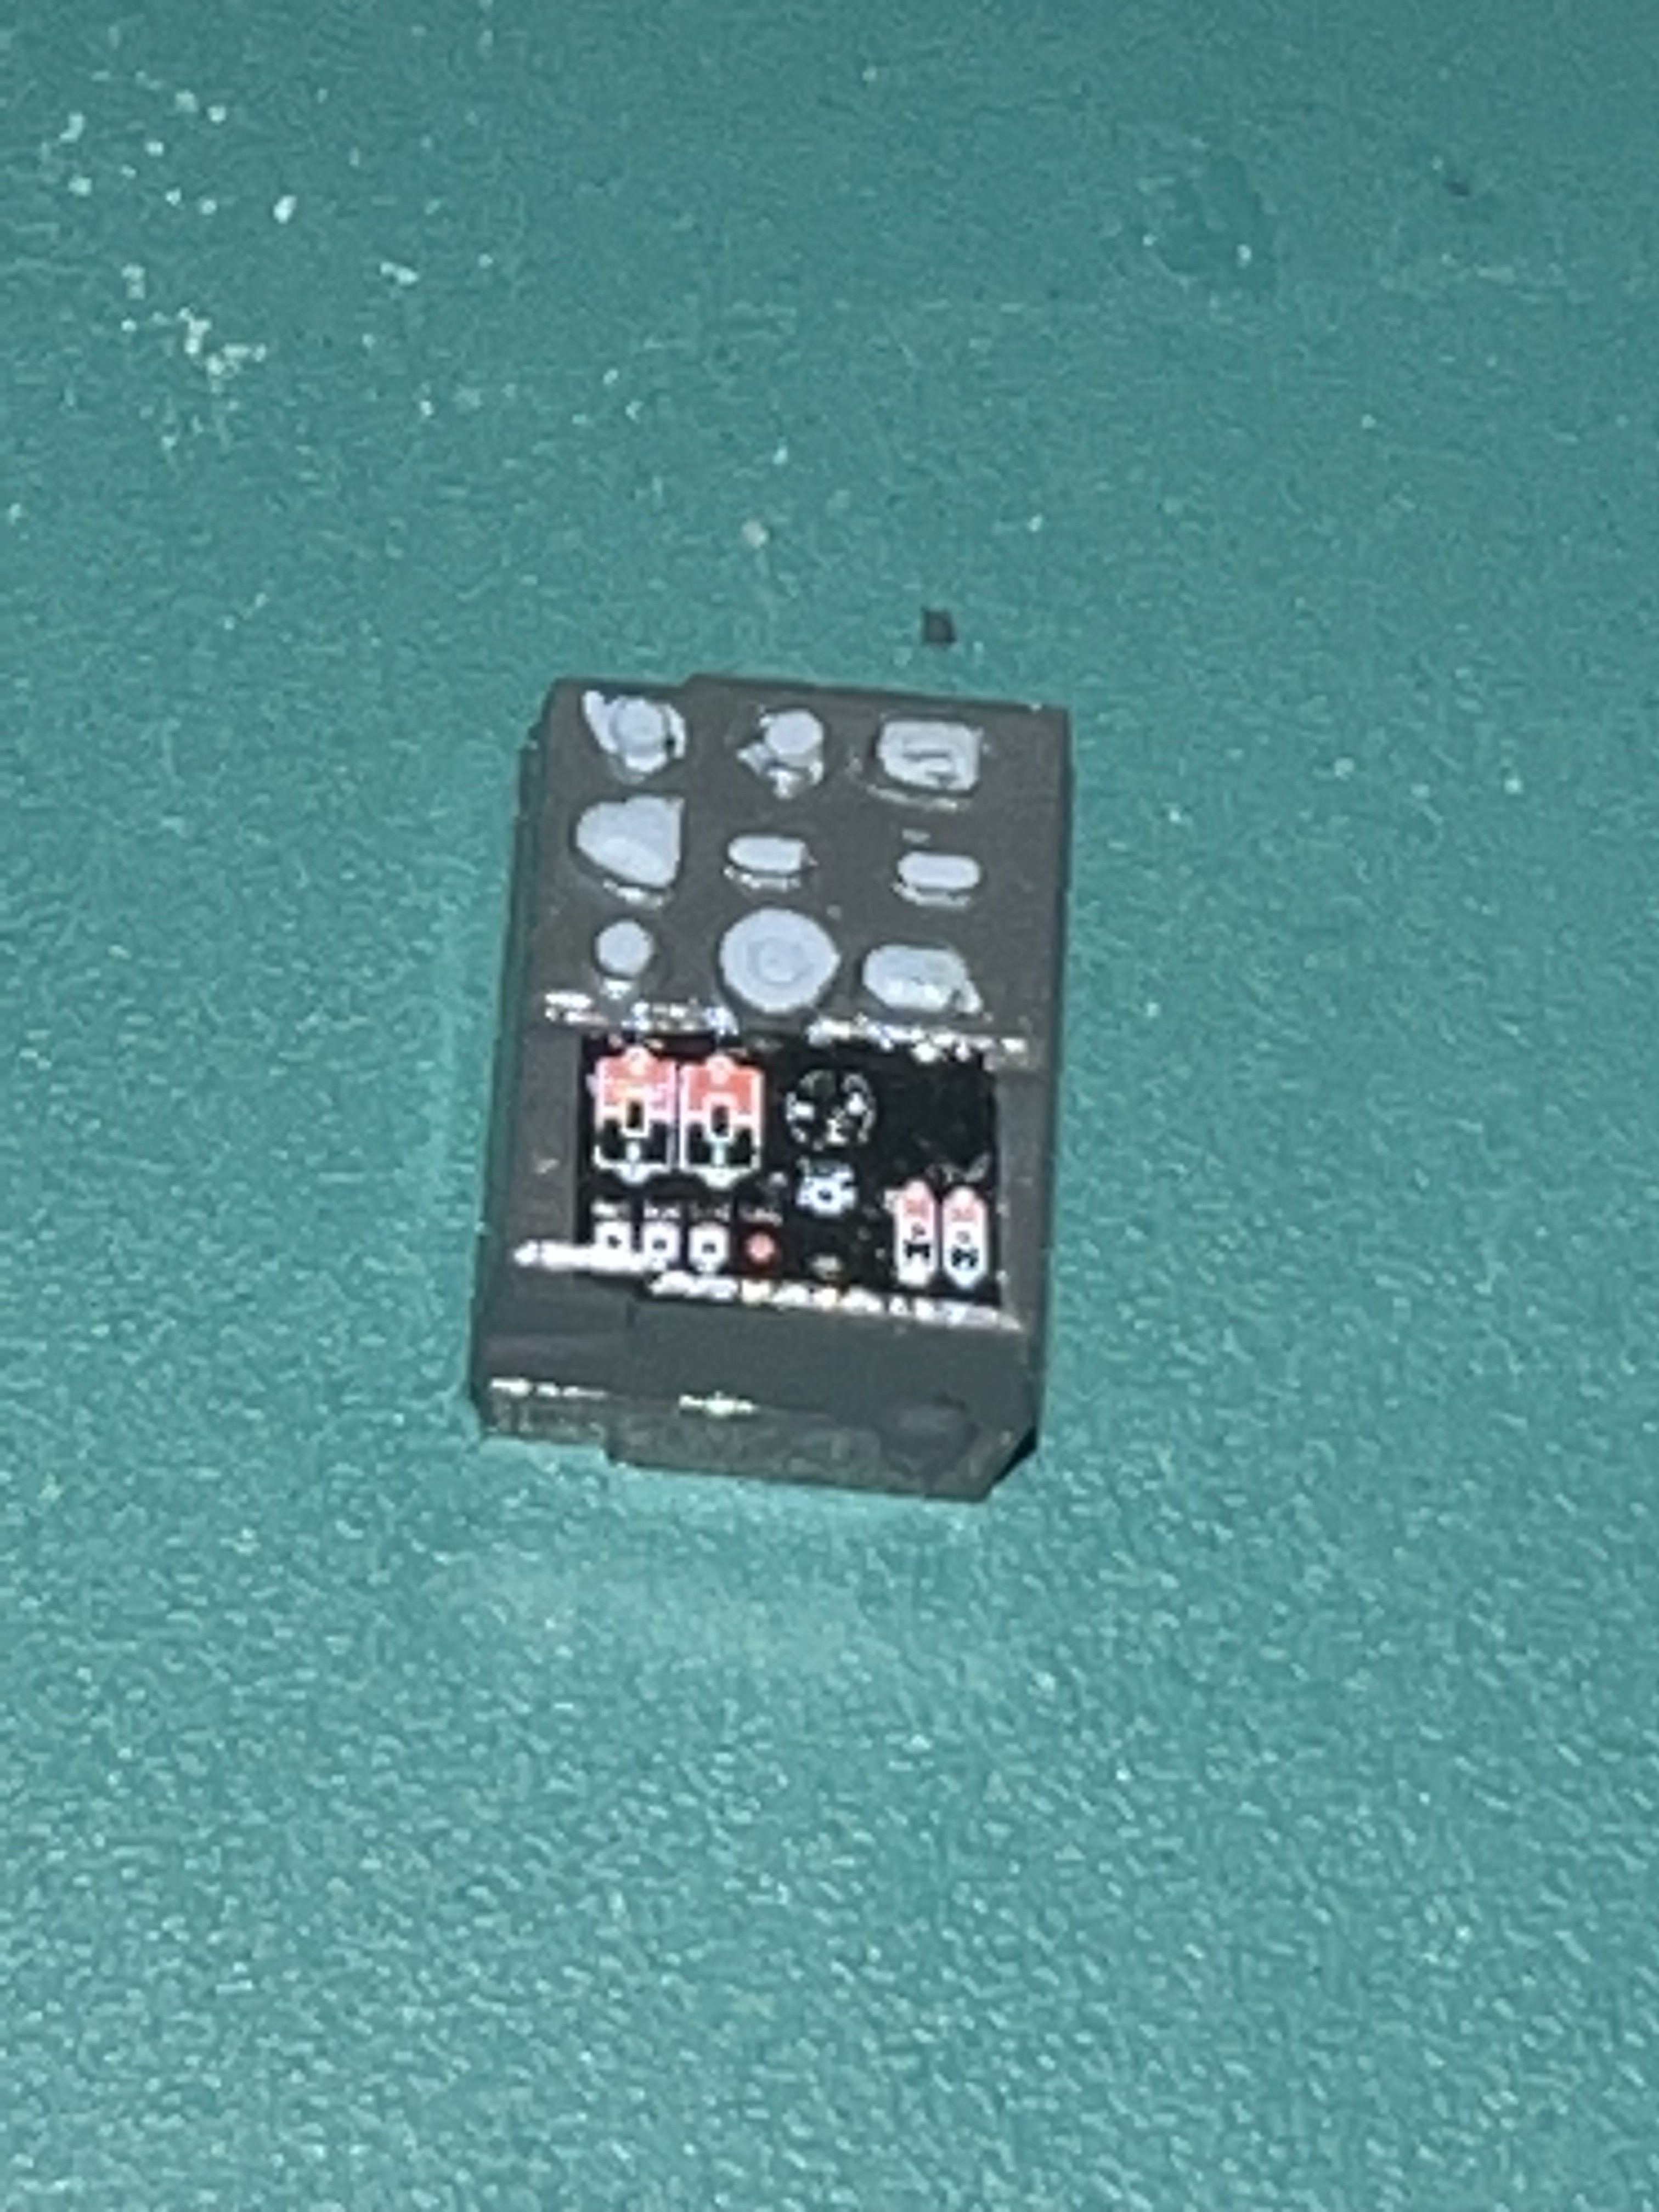
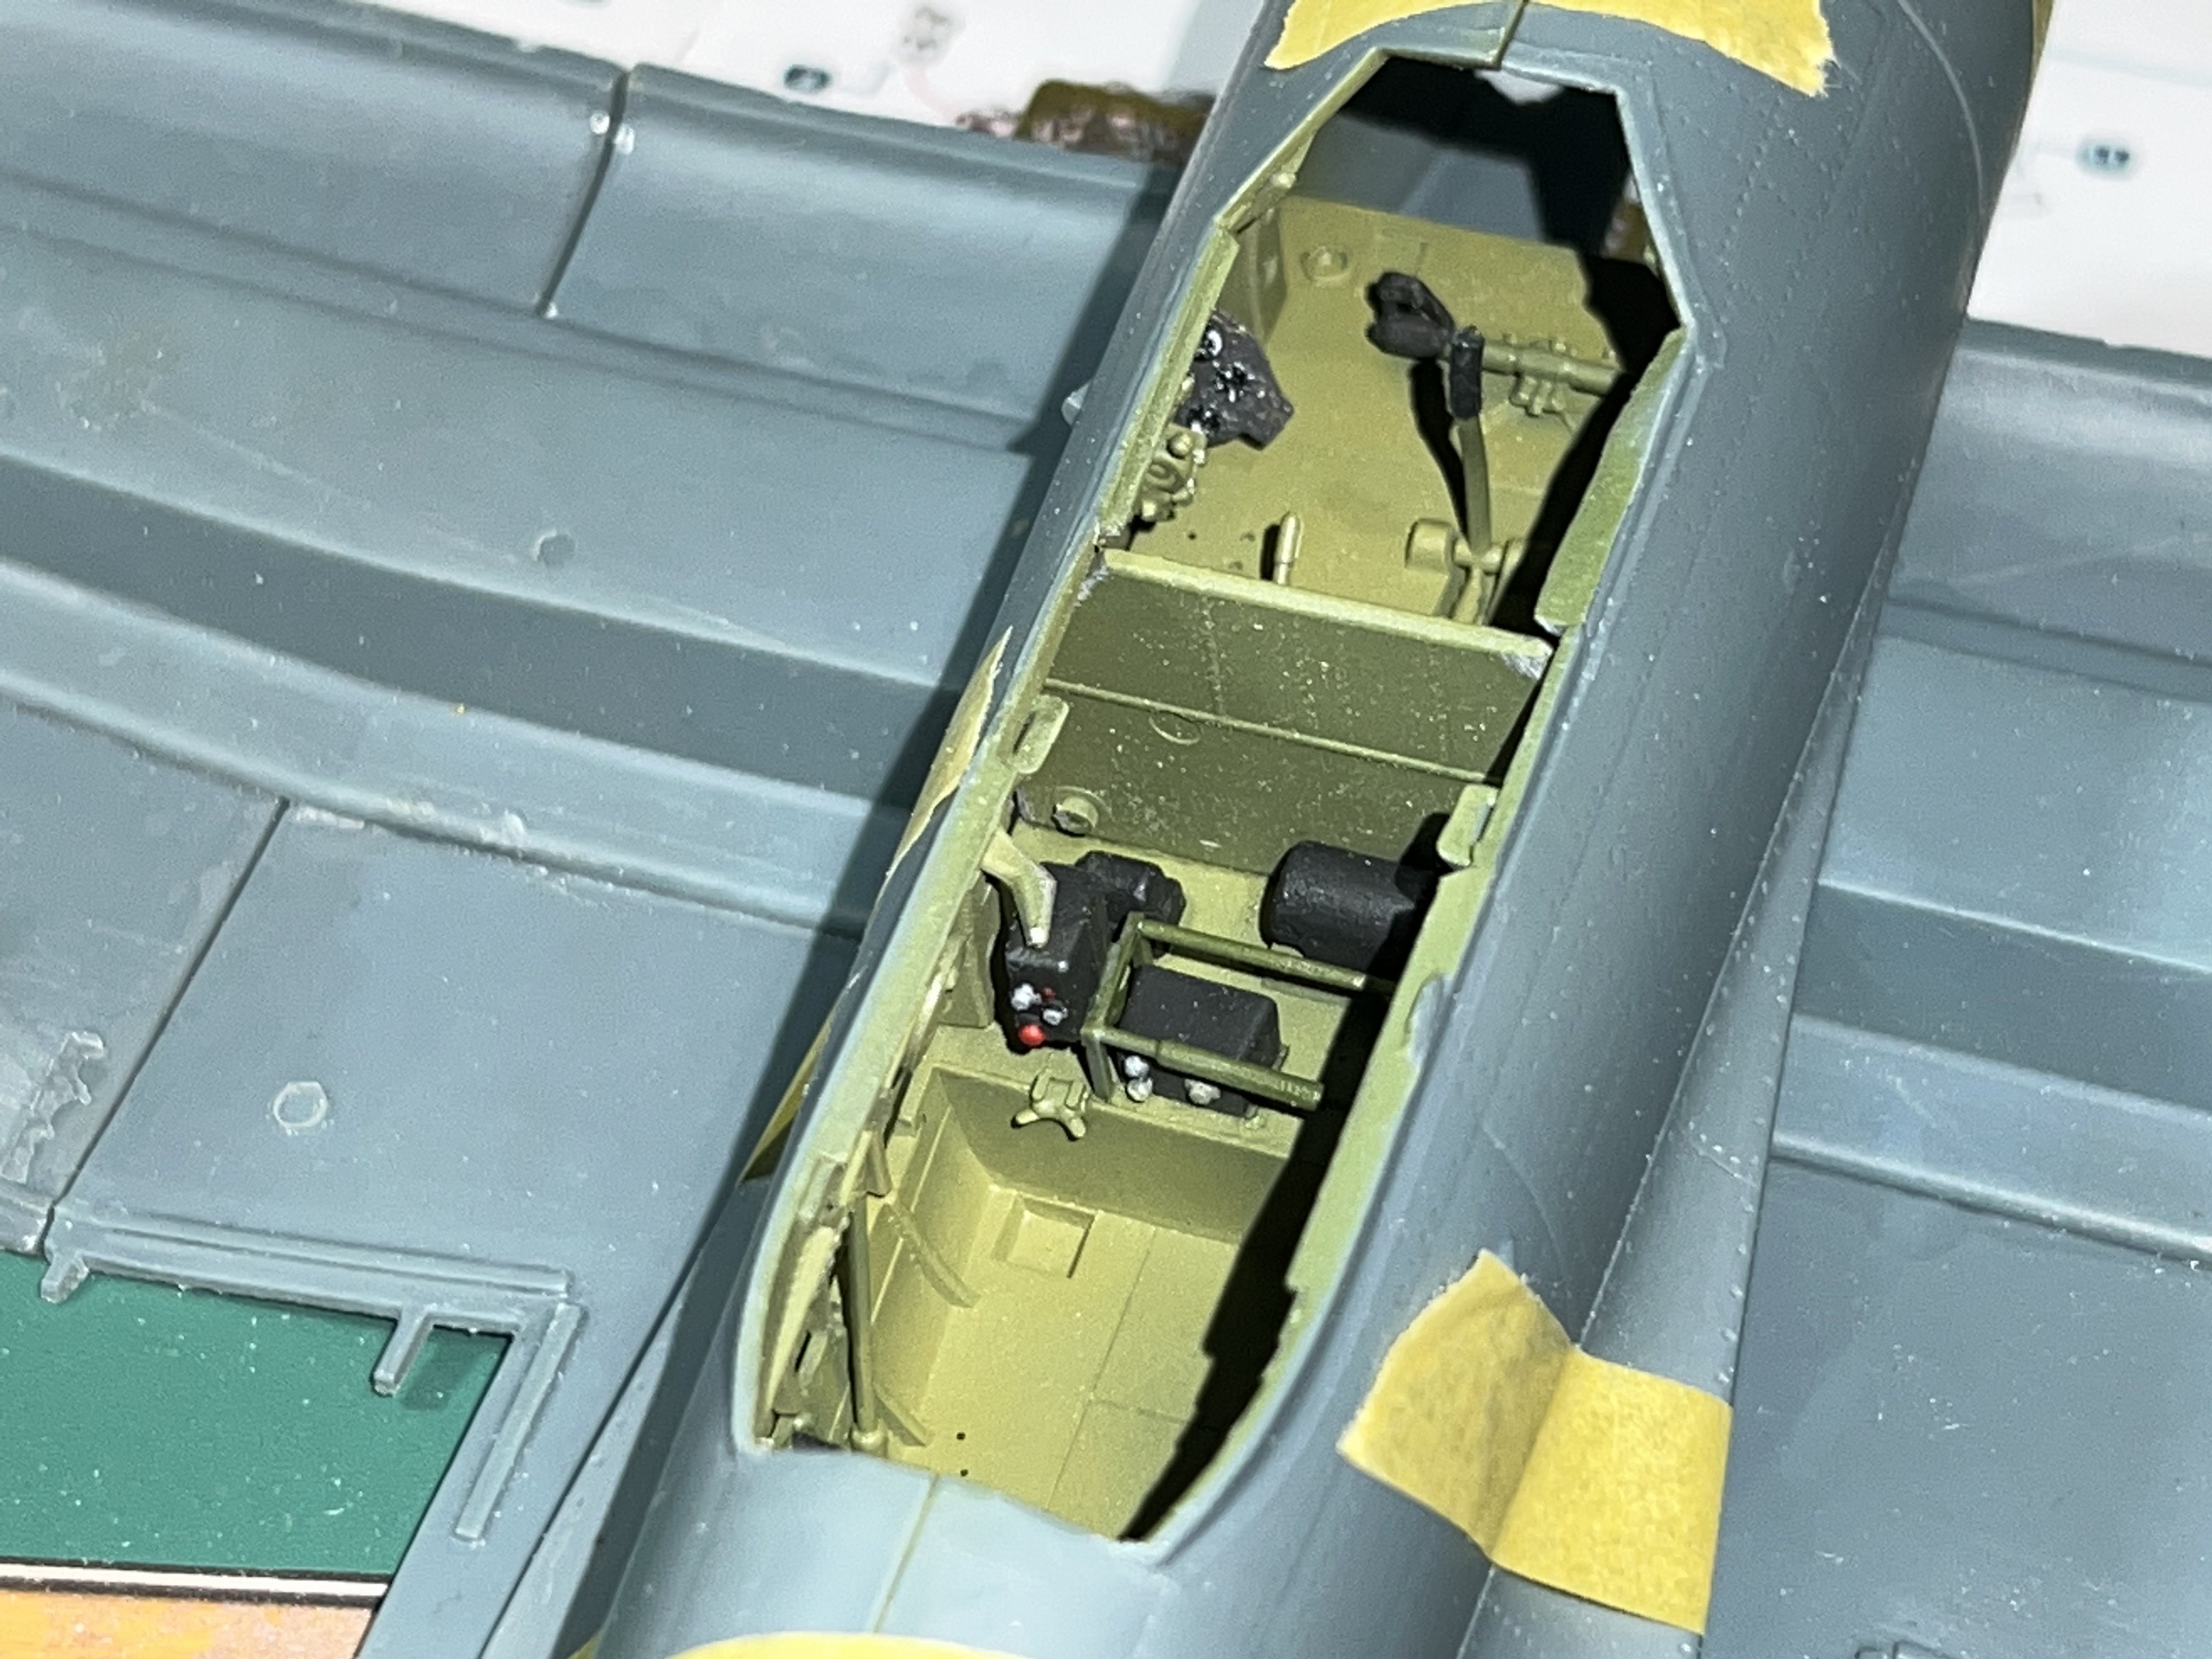
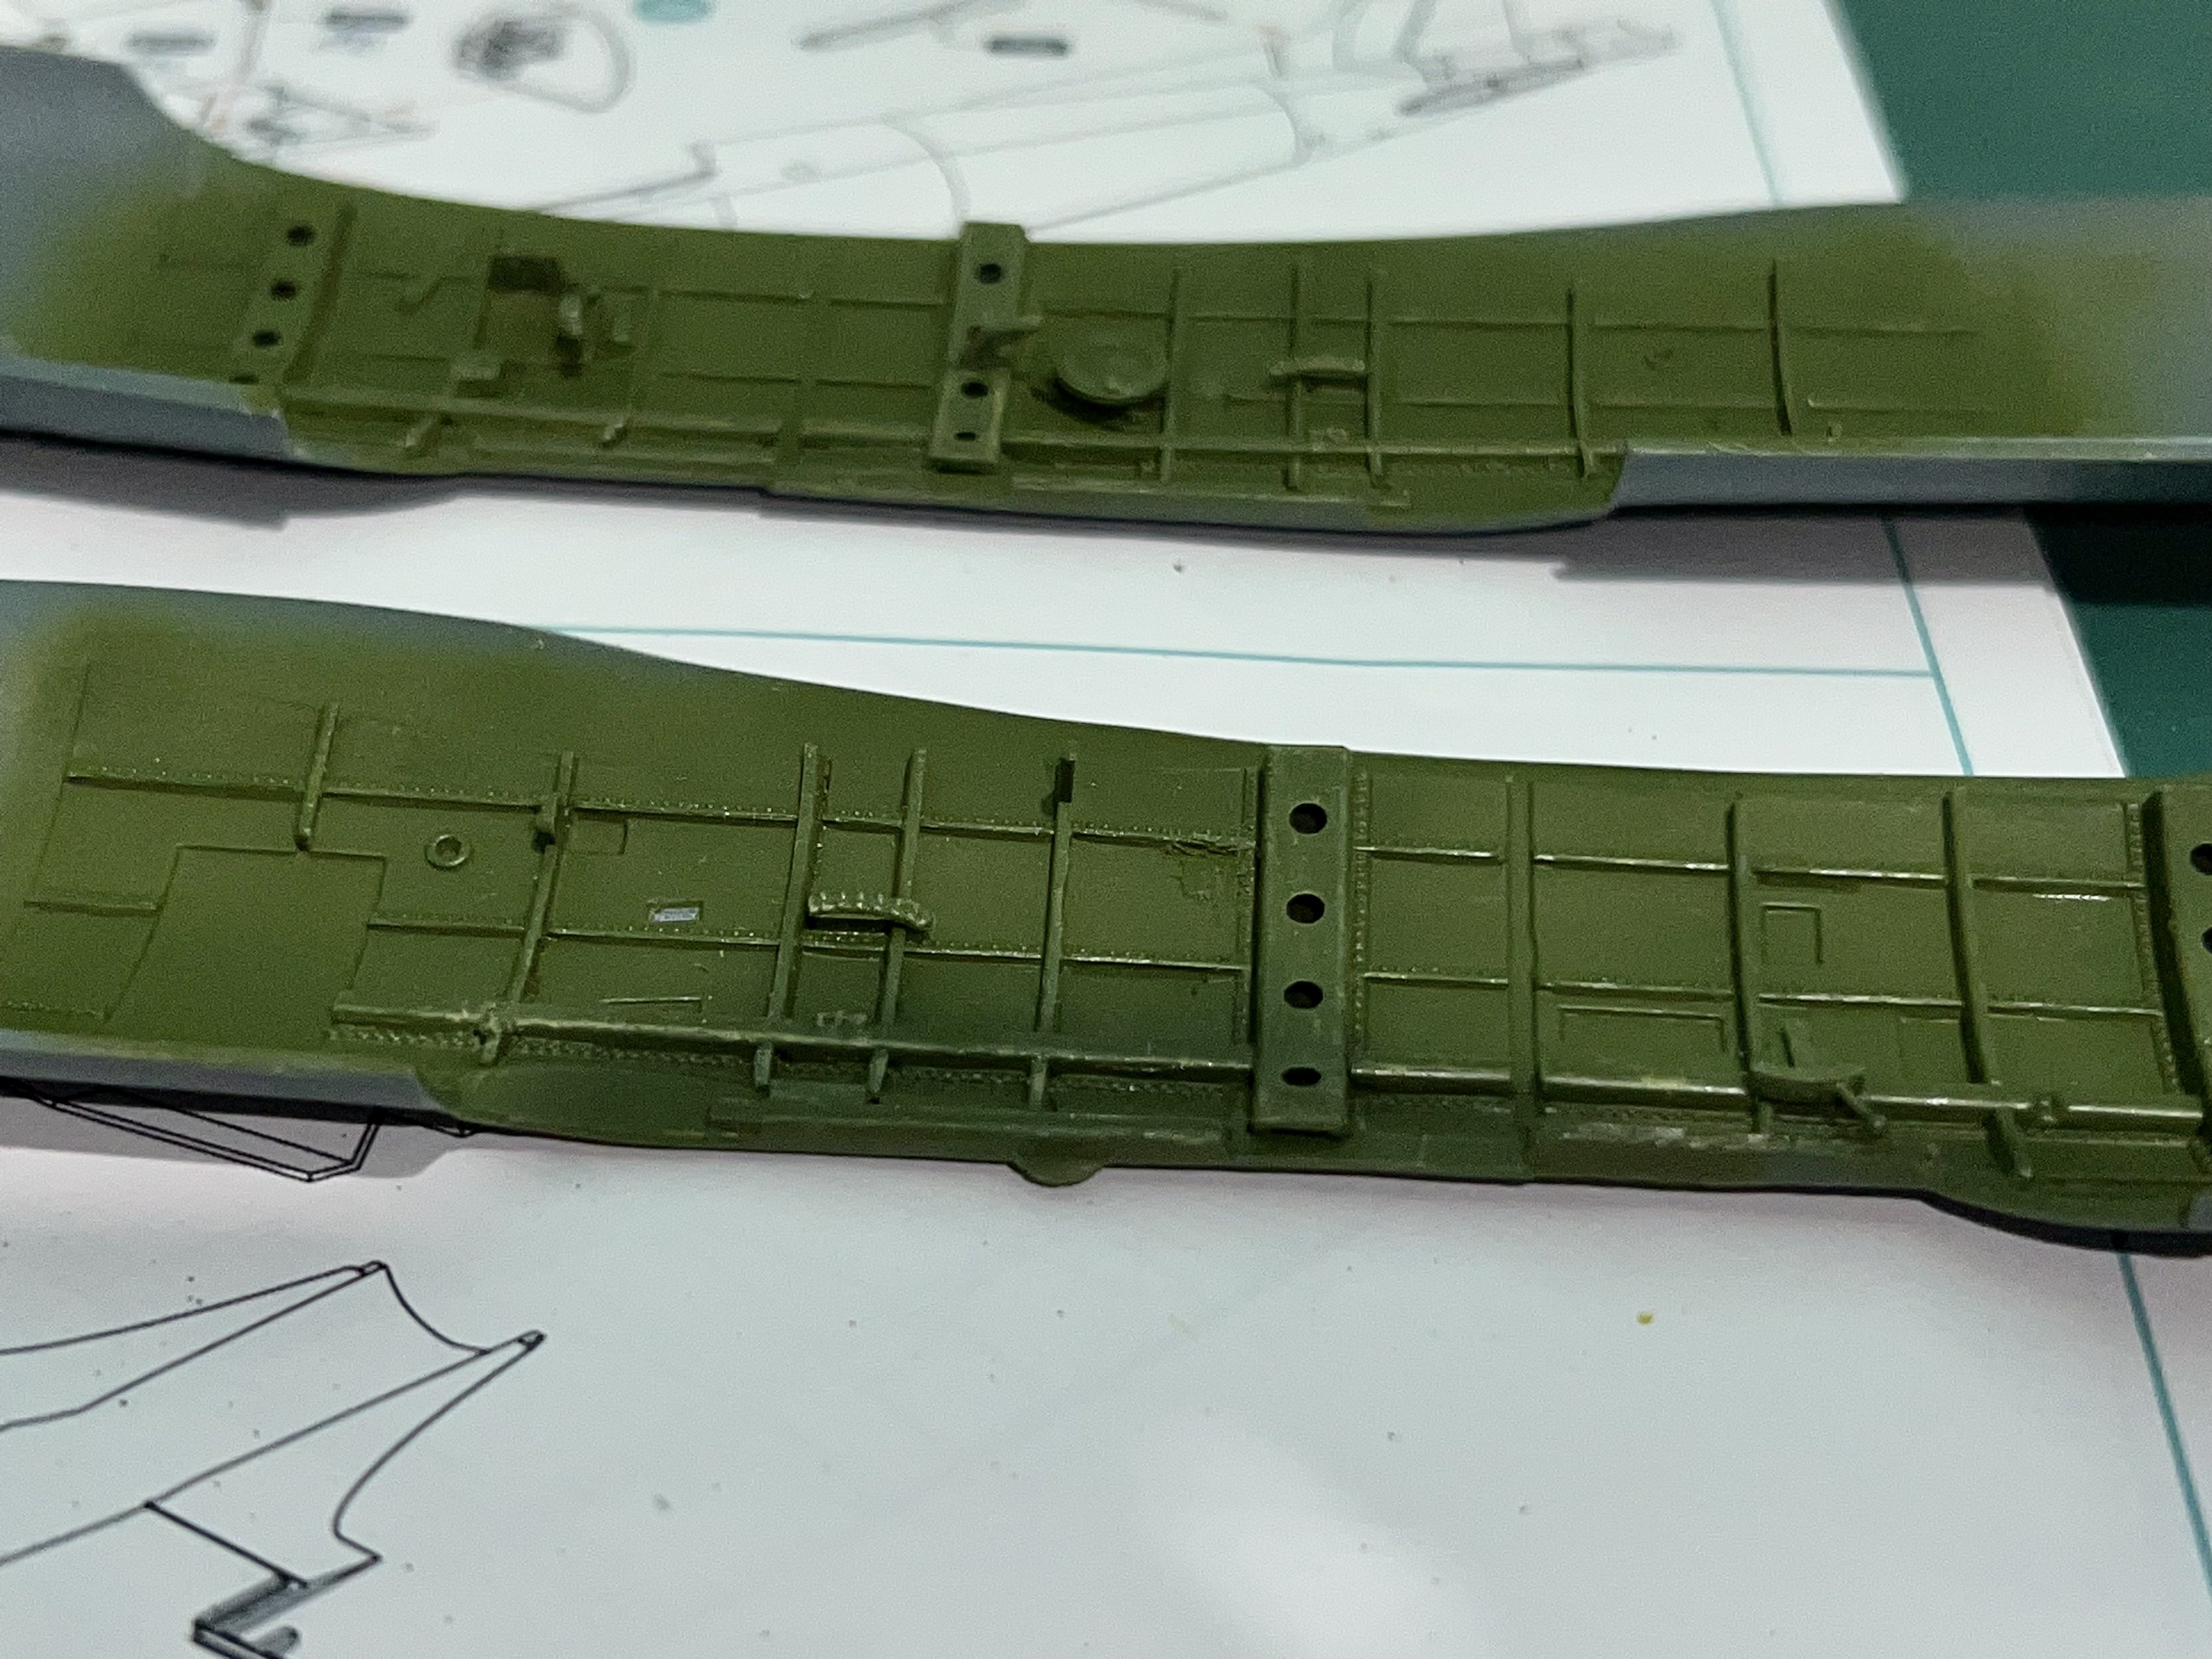
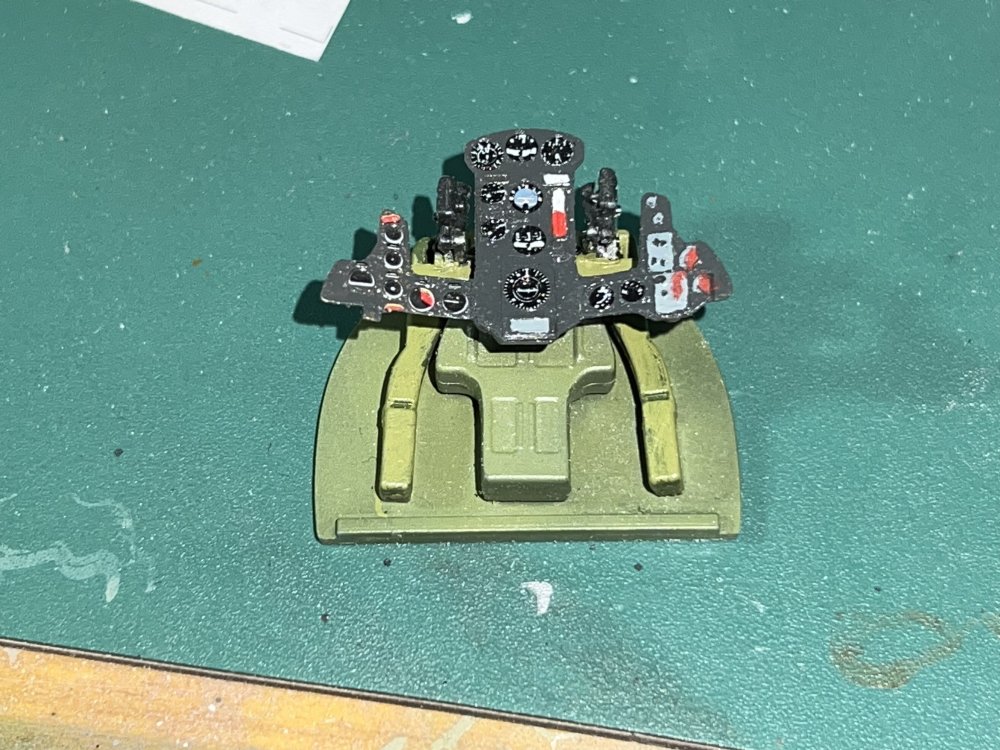
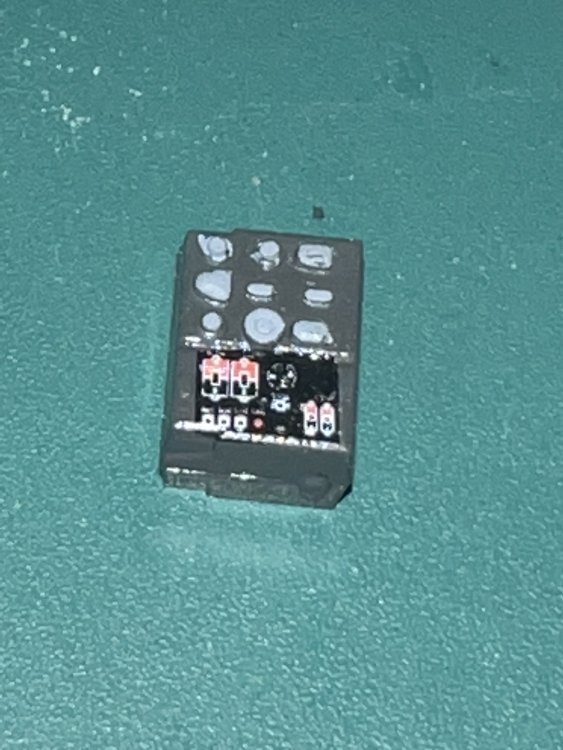
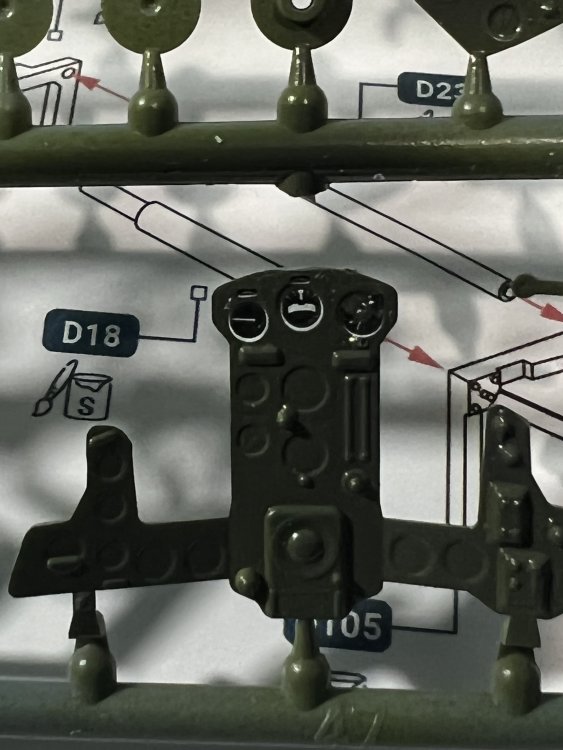
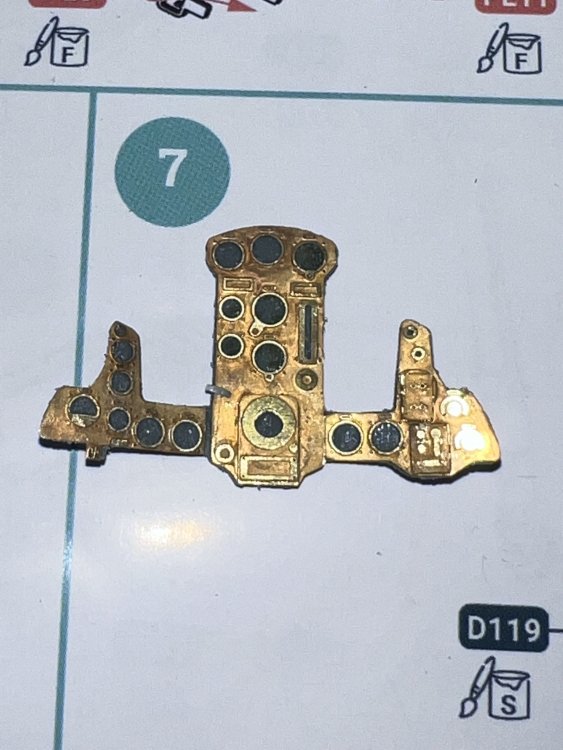
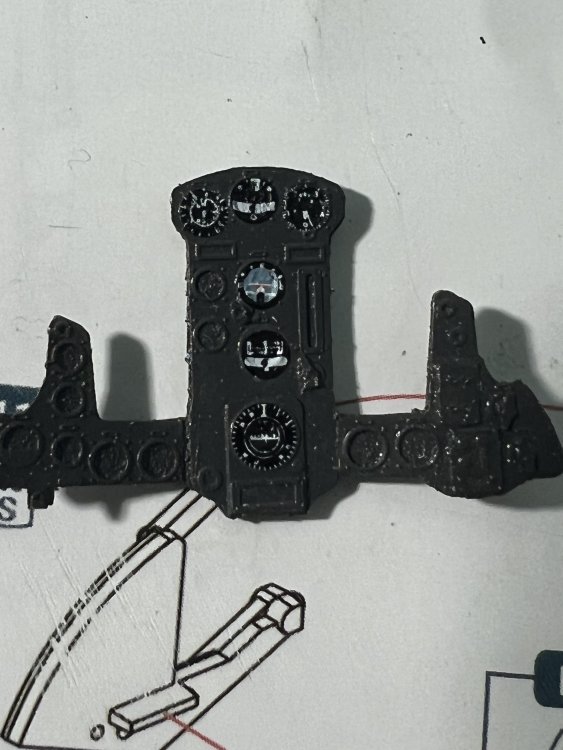
A bit of an update, folks. As I promised, I’m going to give my thoughts on what I find, as I find it. There ARE a few numbering discrepancies between the instructions and the sprues. The part numbers on the sprues are quite soft, so you need to look carefully. However, they are there. So far, everything fits nicely with no real issues. I was looking sideways at the instrument panel, because I’m never a real fan of kit supplied instrument decals, especially with the superb Airscale decals always available at my fingertips. If you have never experienced the sublime Airscale instrument decals, I HIGHLY recommend you give them a try. They’re available from 72nd right up to 24th scale, and are sold as a package based upon nationality and era. So logically, this needs WW2 IJN instrument decals. So we first tried the kit decals on the stock panel….. aaand yes, the kit decals seem slightly out of register and it all looks like Hammered SH!T. So now we go whole hog. I had purchased the accessory “PE set” for the Val, which consisted of a brass PE instrument board, so I sanded off the molded on detail, and applied the brass. Things are definitely taking a turn for the better. You don’t need to use the PE, the kit derptail will look great with some drybrushing and Airscale decals, but I bought the PE, so I’ll use the PE. And now, a shot of paint, and the first few Airscale decals. They are still soaked and under the influence of Micro Sol, so they’re a bit wrinkly, but hey, so am I, so whatever. This’ll look mighty fine, I think. Especially after a bit of picking stuff out, the rest of the decals, and maybe a placard or two go busy it all up. The panel looks very basic, and I’ve seen Cessna 185s with a better equipped panel than the Val. I’m thinking it needs a fully slaved flight director with RNAV, moving map, Stormscope, and be Mode C compliant. How they ever thought they’d enter US airspace and not be Mode C compliant is beyond me. And NO backup HSI! WTF, Over! Seriously though, it looks orders of magnitude better.
-
Thanks. LOL. Ok. Aaaand it’s out of production. Dang!
-
John what paints are you using for your light blue? Are they AK? Because I need to buy some more, I use them all up on my buffalo and my birdcage and of course I threw the empty bottles away like an idiot.
-
Hey Alfonso! You didn’t do anything wrong because you didn’t know. Personally, on my builds, I appreciate a deep dive into accuracy issues. I’m kinda anal that way, but other folks react differently. So no need to apologize everything‘s cool with me
-
One thing we don’t do here is point the same thing out multiple times regarding a member’s build. The build is the member’s personal representation of a historical subject, and one we offer a constructive criticism it’s up to the builder whether he wants to make changes or not FYI, my birdcage has the same scheme as John’s and I used two tone as well. It sounds like you have a lot of knowledge of USN schemes. I’d recommend you prepare a feature on them and publish it in Modeling Discussion, where it’ll benefit everyone and not be buried in someone’s build thread. If it’s convincing enough and can be backed up with fact, we’ll even pin it to the top of the board for all to see. Thanks, an welcome to the forums. Ernie
-
A quick coat of Nakajima green, followed by plenty of dry brushing. Tomorrow, some oil washes, a bit more staining, some chipping, and the start picking out the details.

- 125 replies
-
- 10
-
-
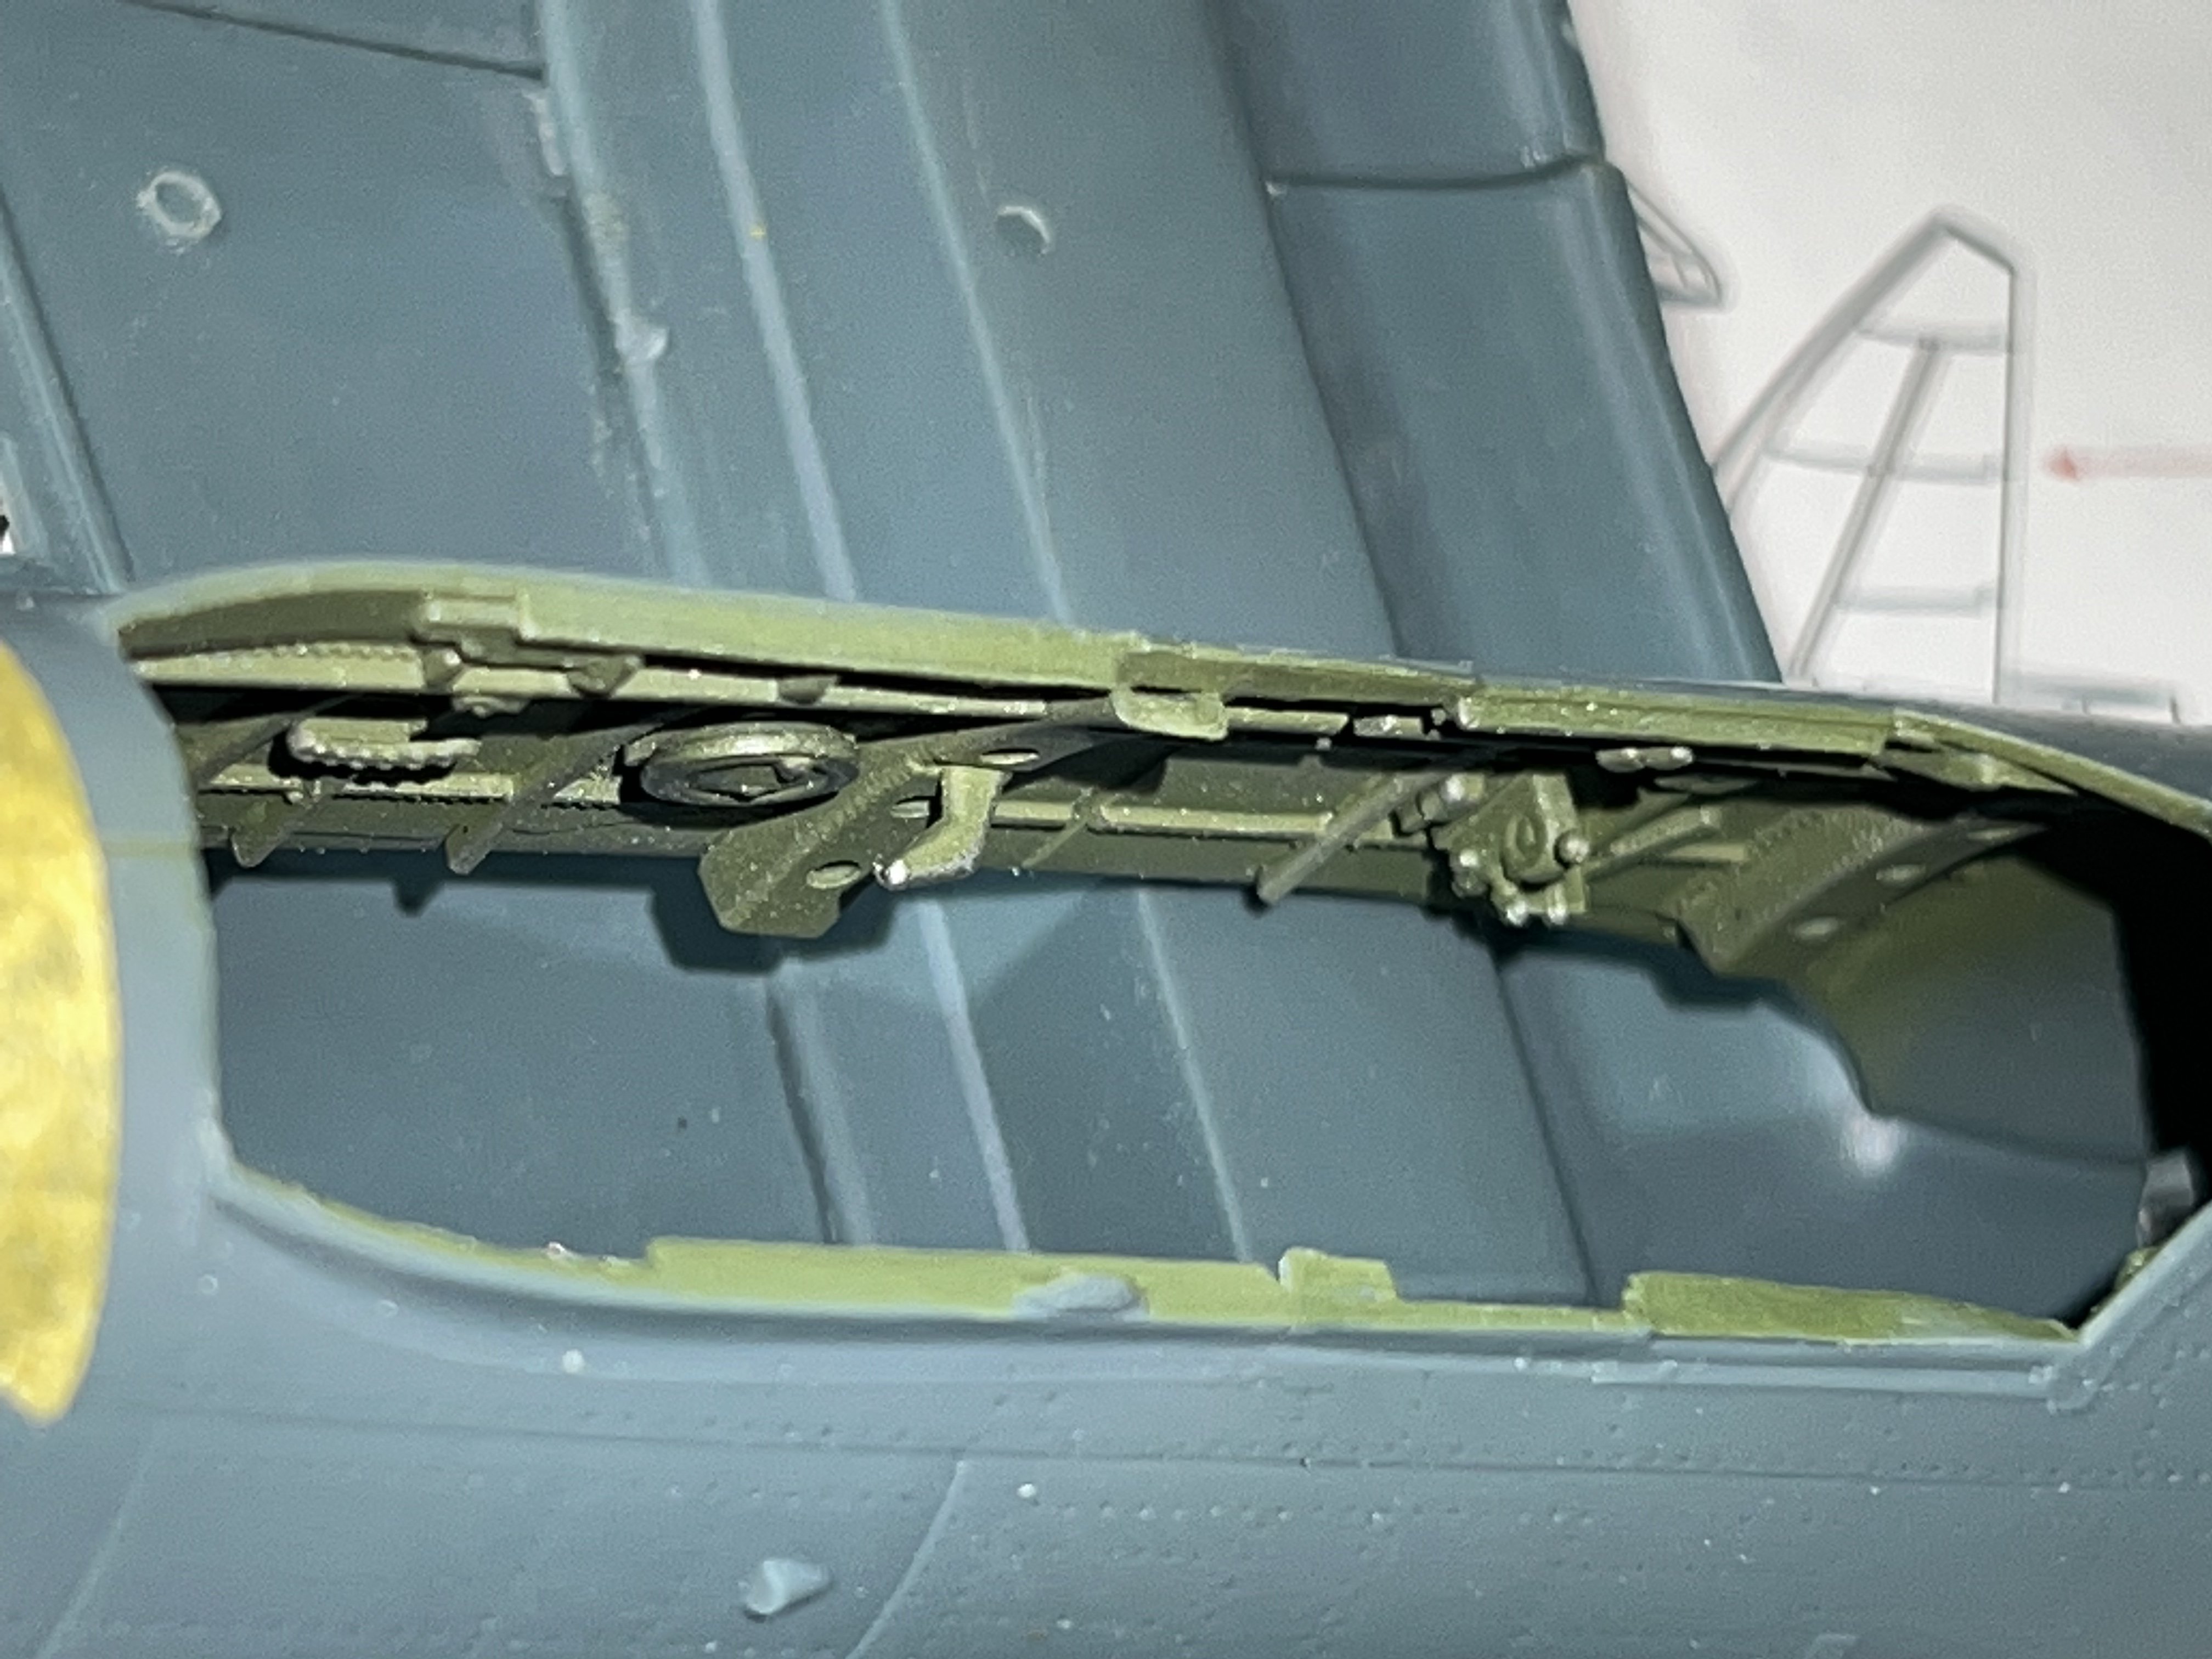
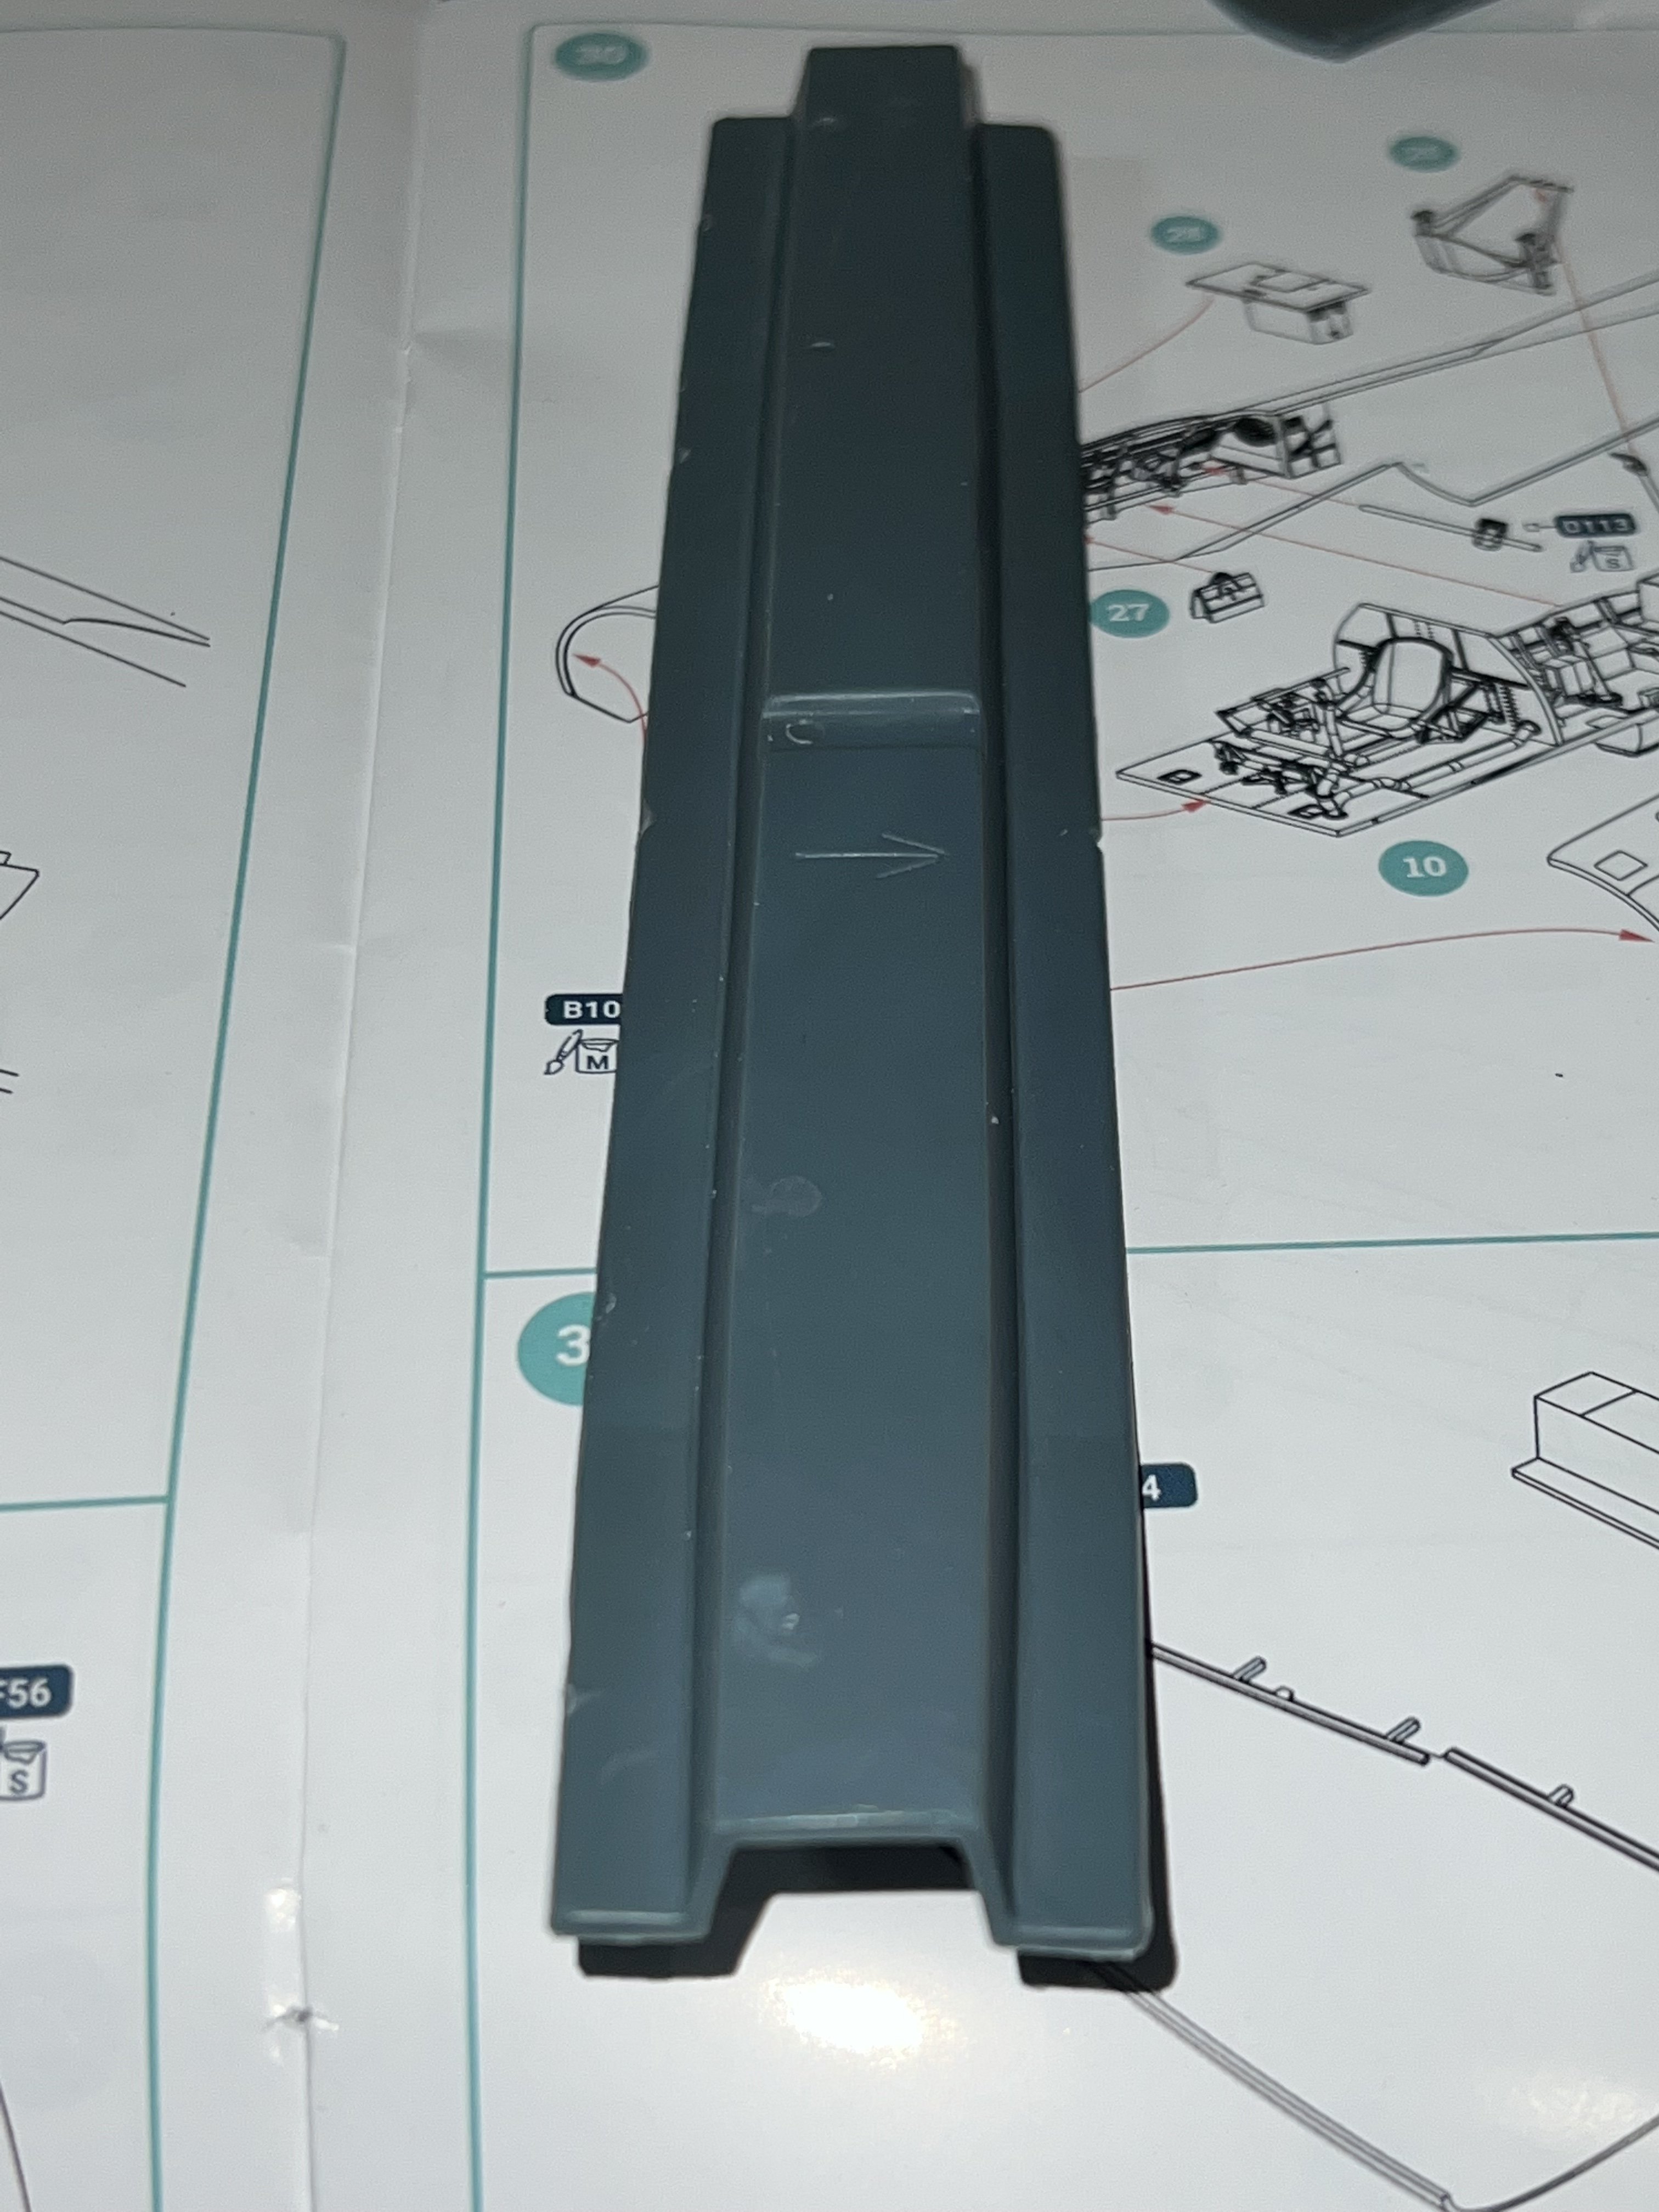
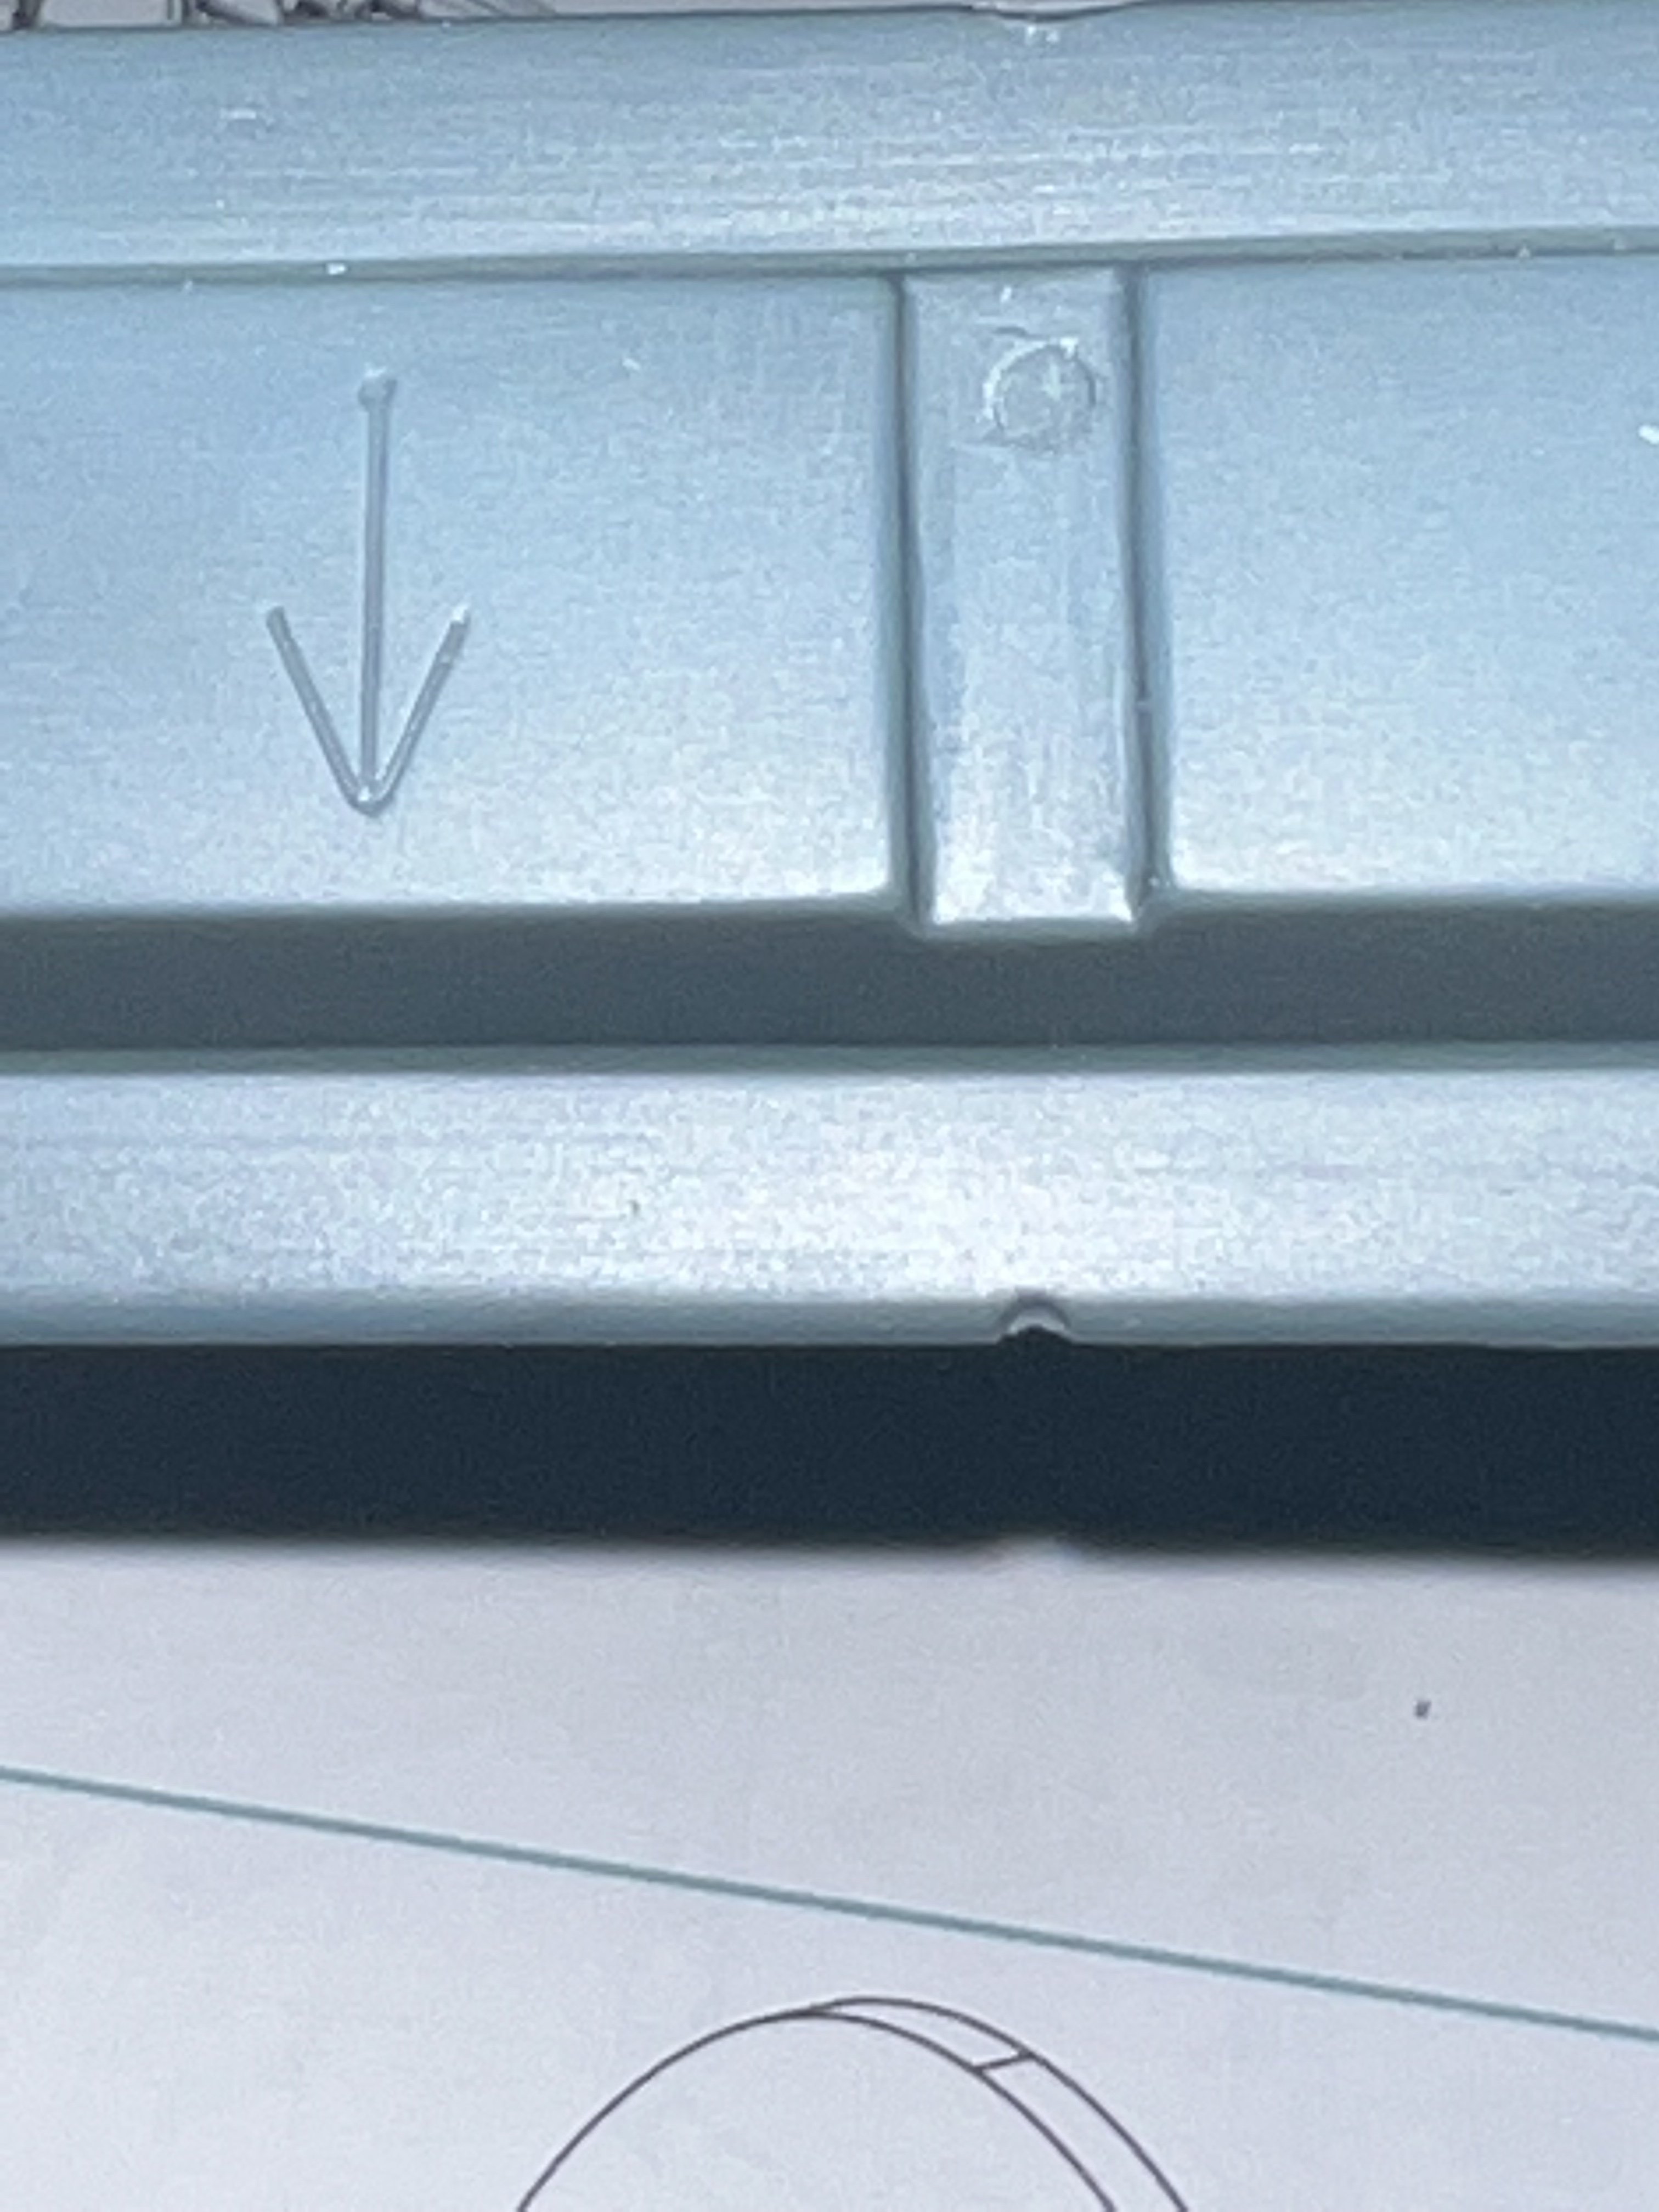
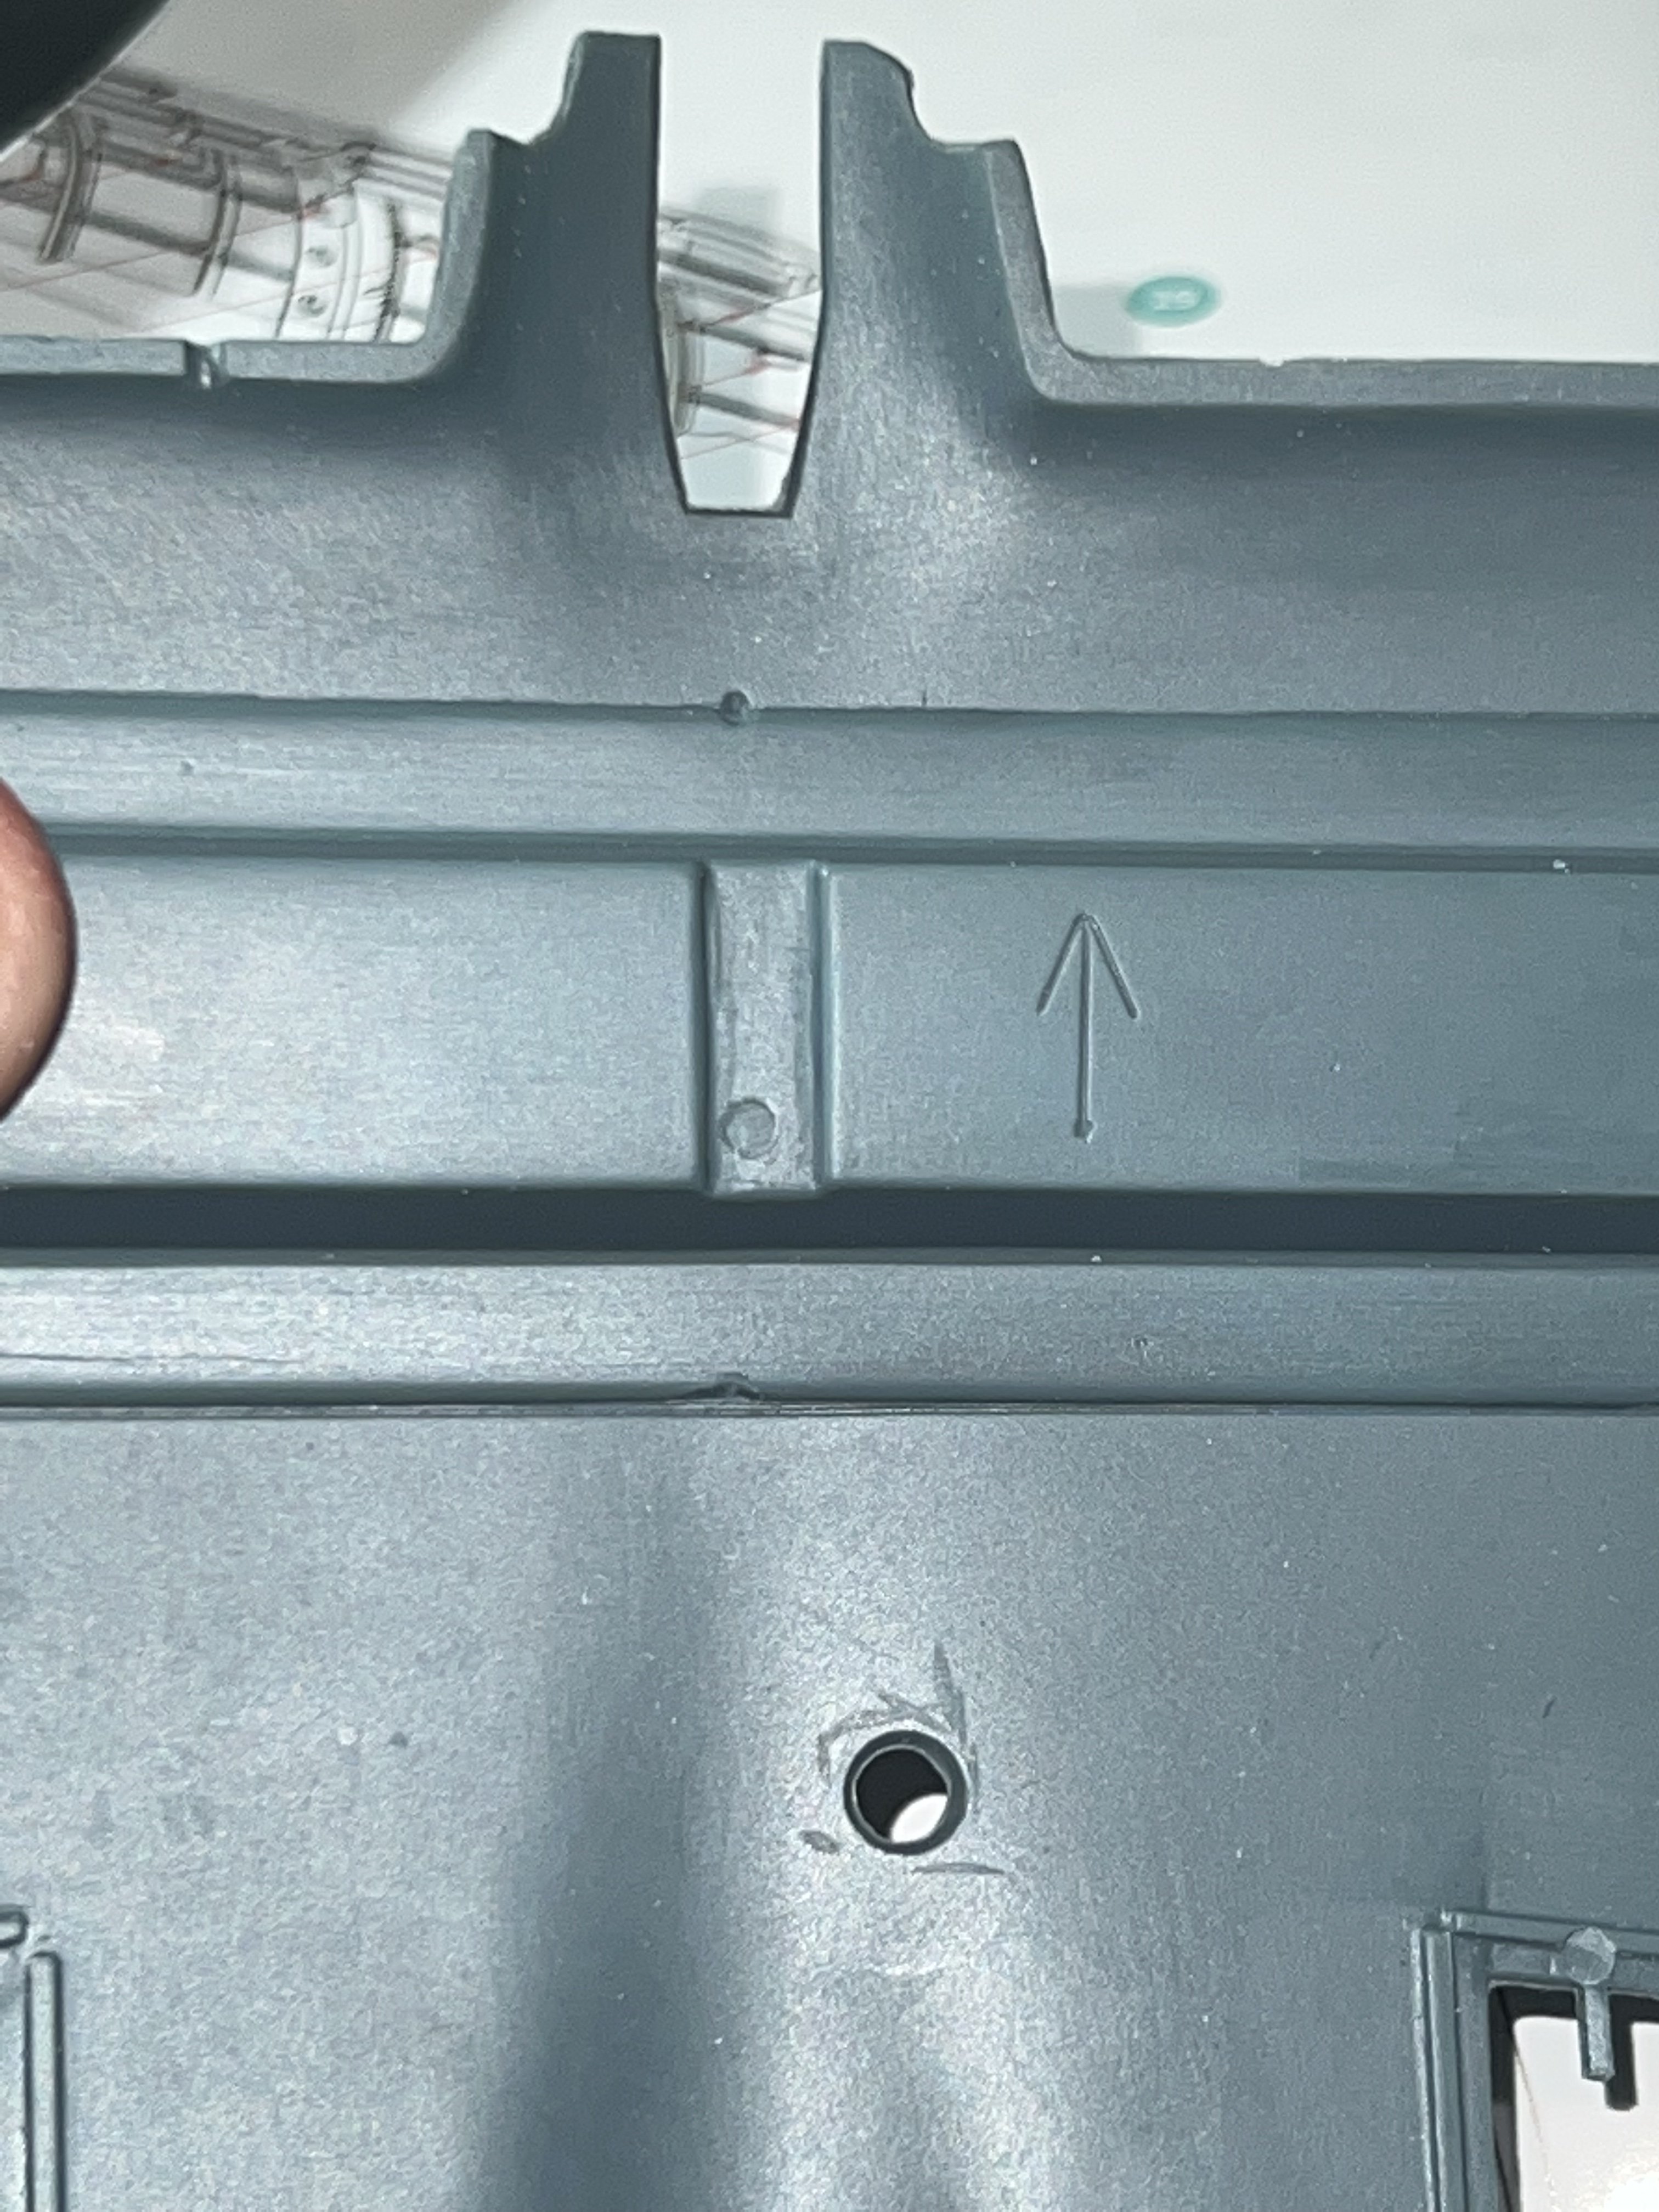
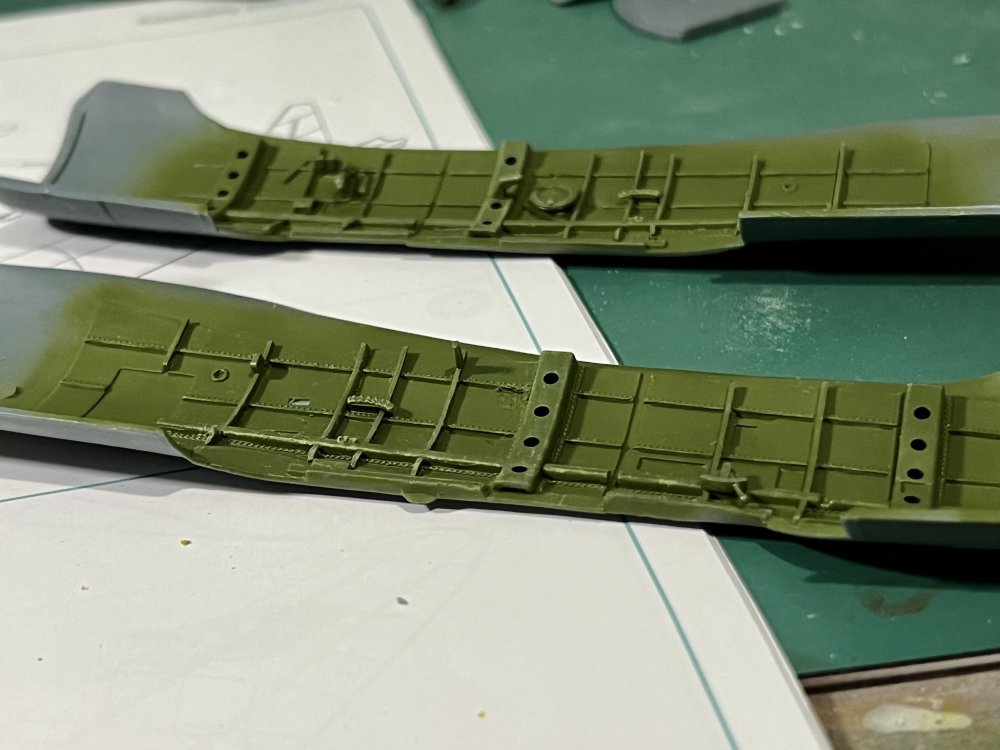
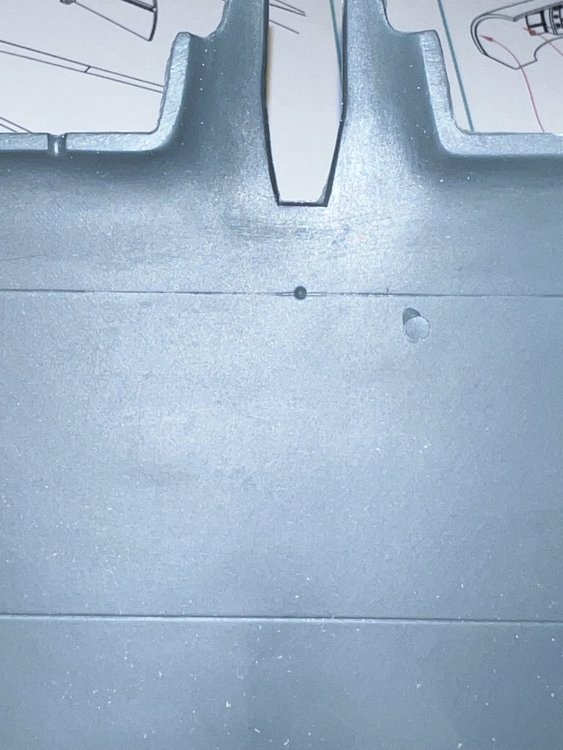
As for the wing. Infinity has followed HPH’s example when it comes to rigidity. We have a truly massive U-Channel main spar that will give the wings incredible strength. There are no locator pins on this kit, but Infinity gave us two scribed lines to mark where the spar goes, as well as a handy-dandy arrow to point which way is forward. They also made alignment pretty much idiot proof, as there is a notch molded in the center of the spar, that corresponds to a dot on the center section. Put the notch on the dot, and Bob’s your uncle.


-
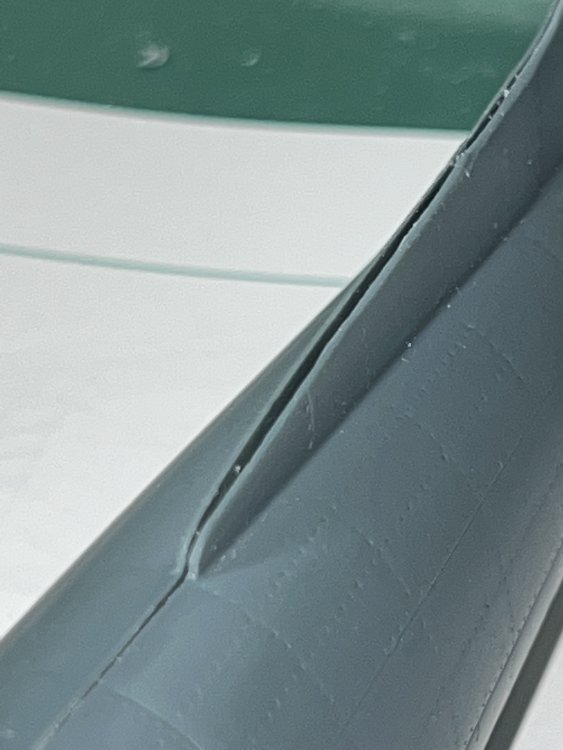
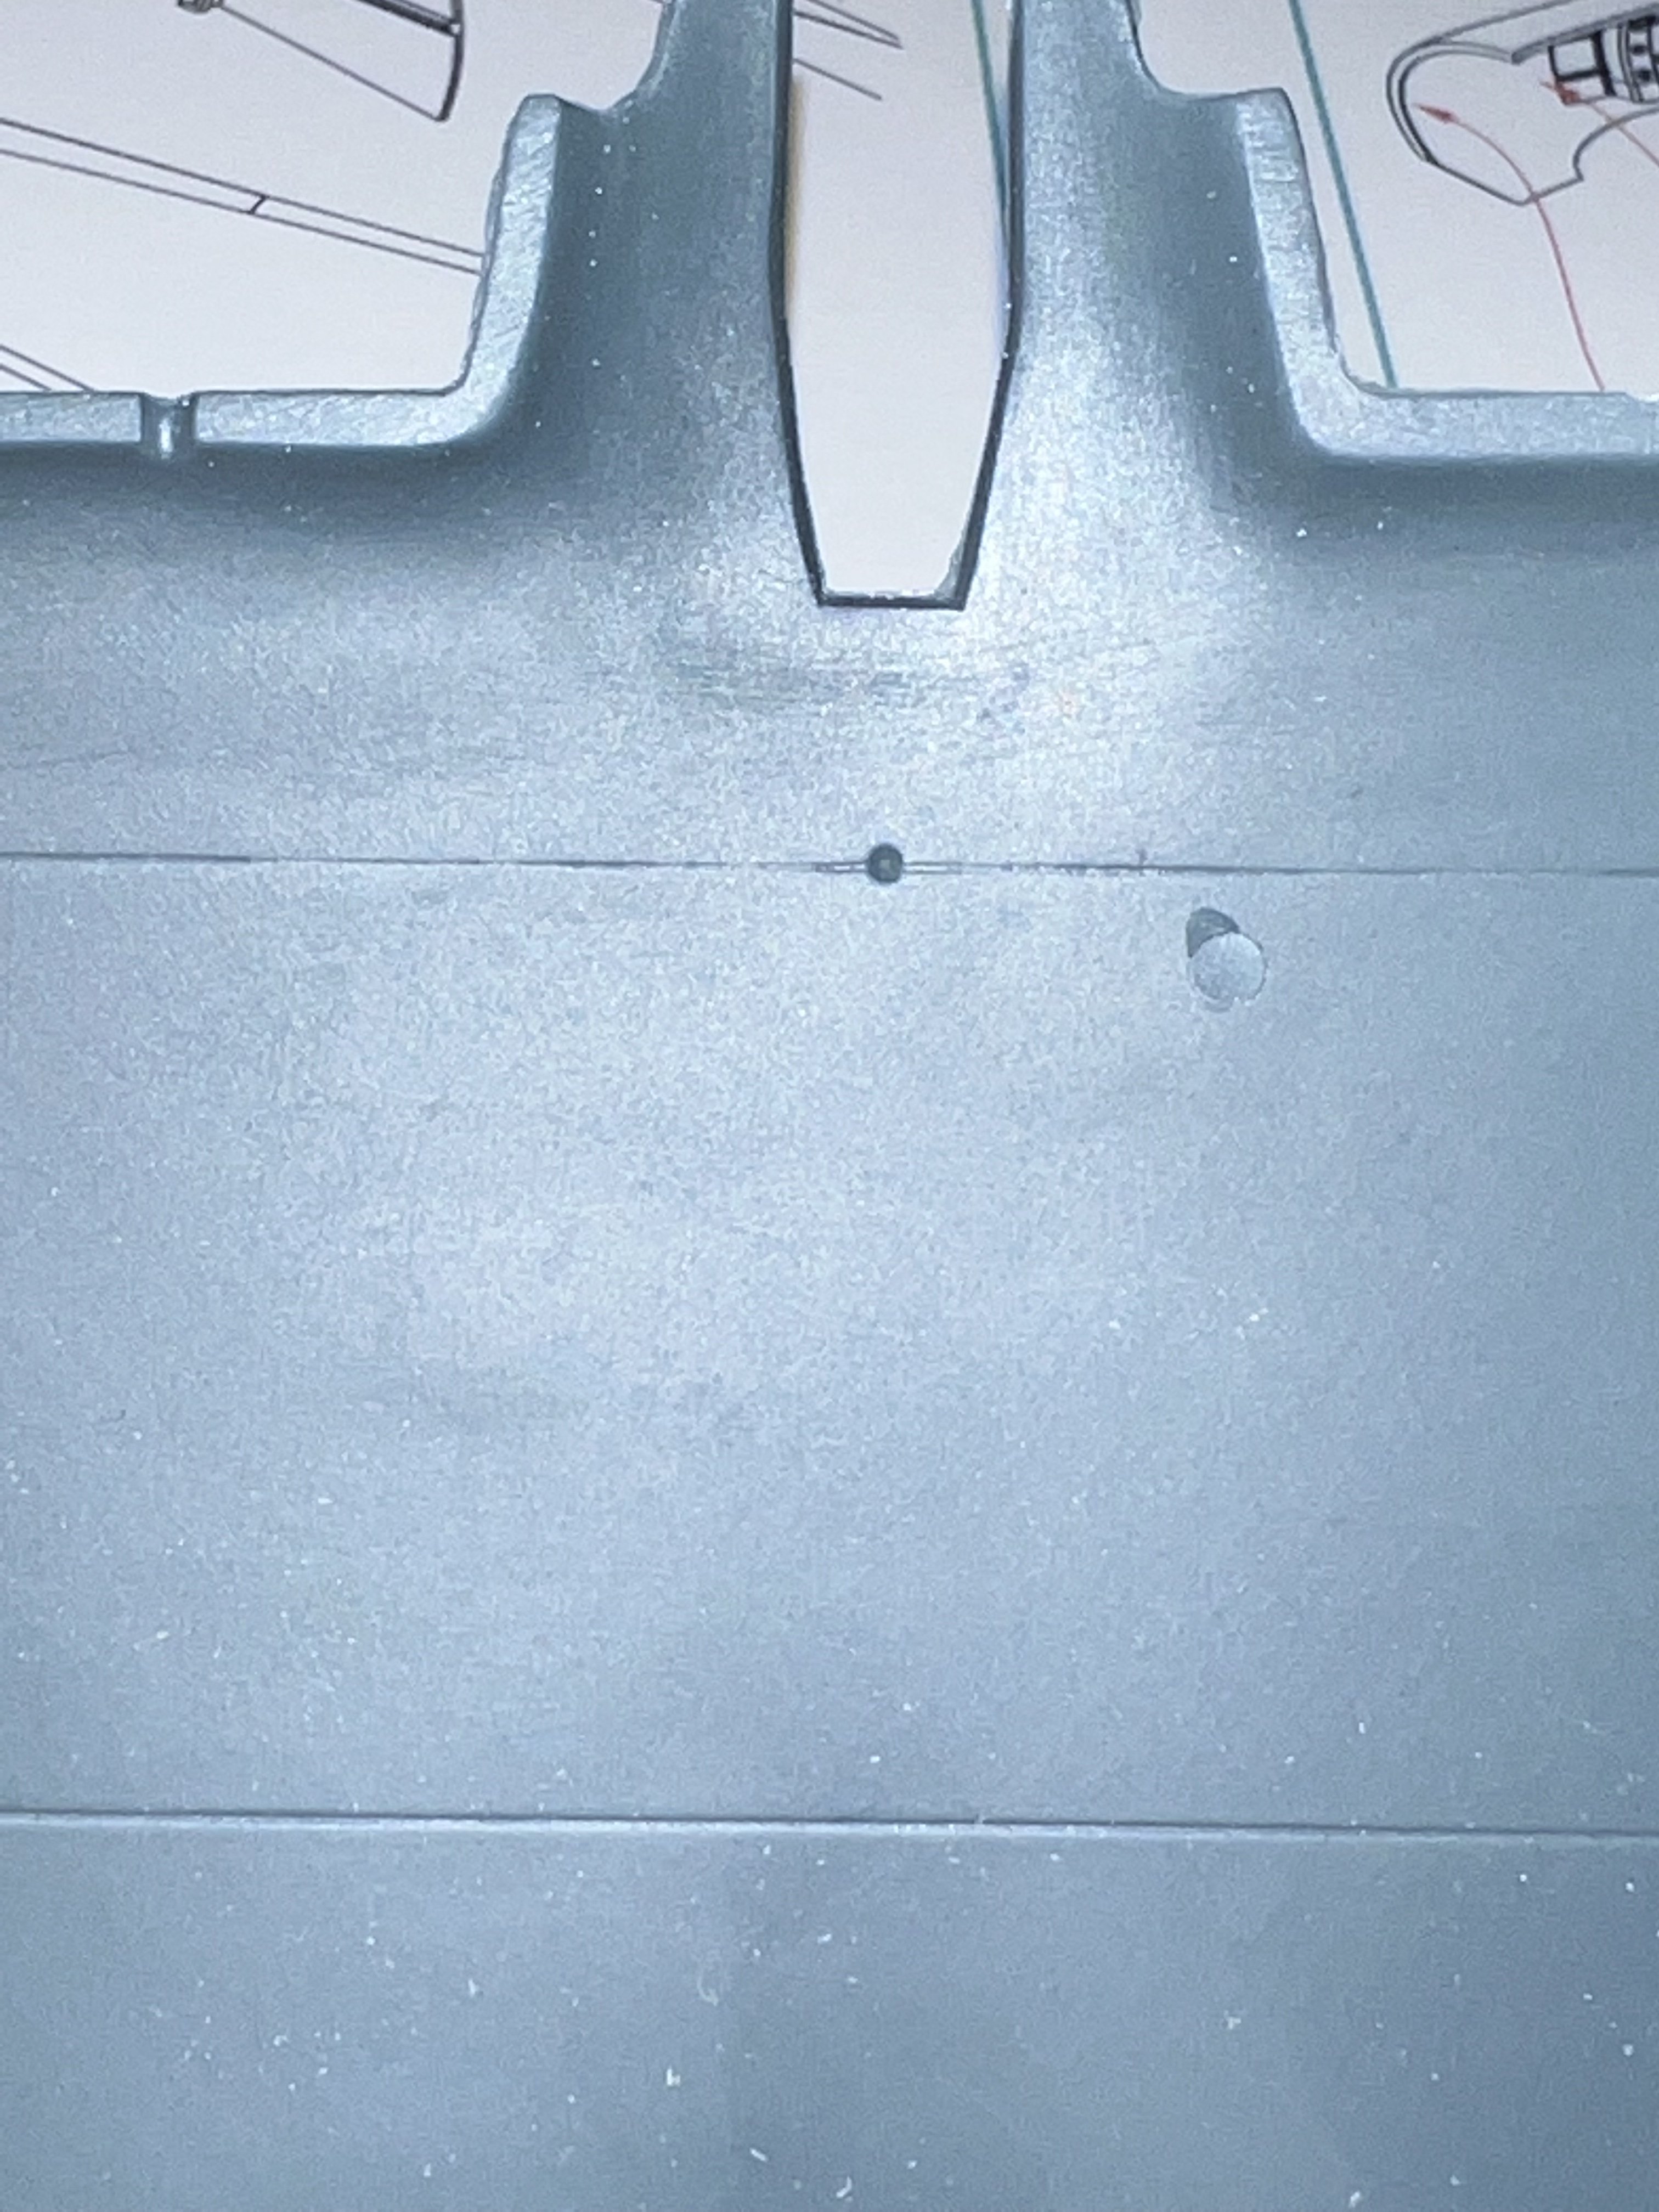
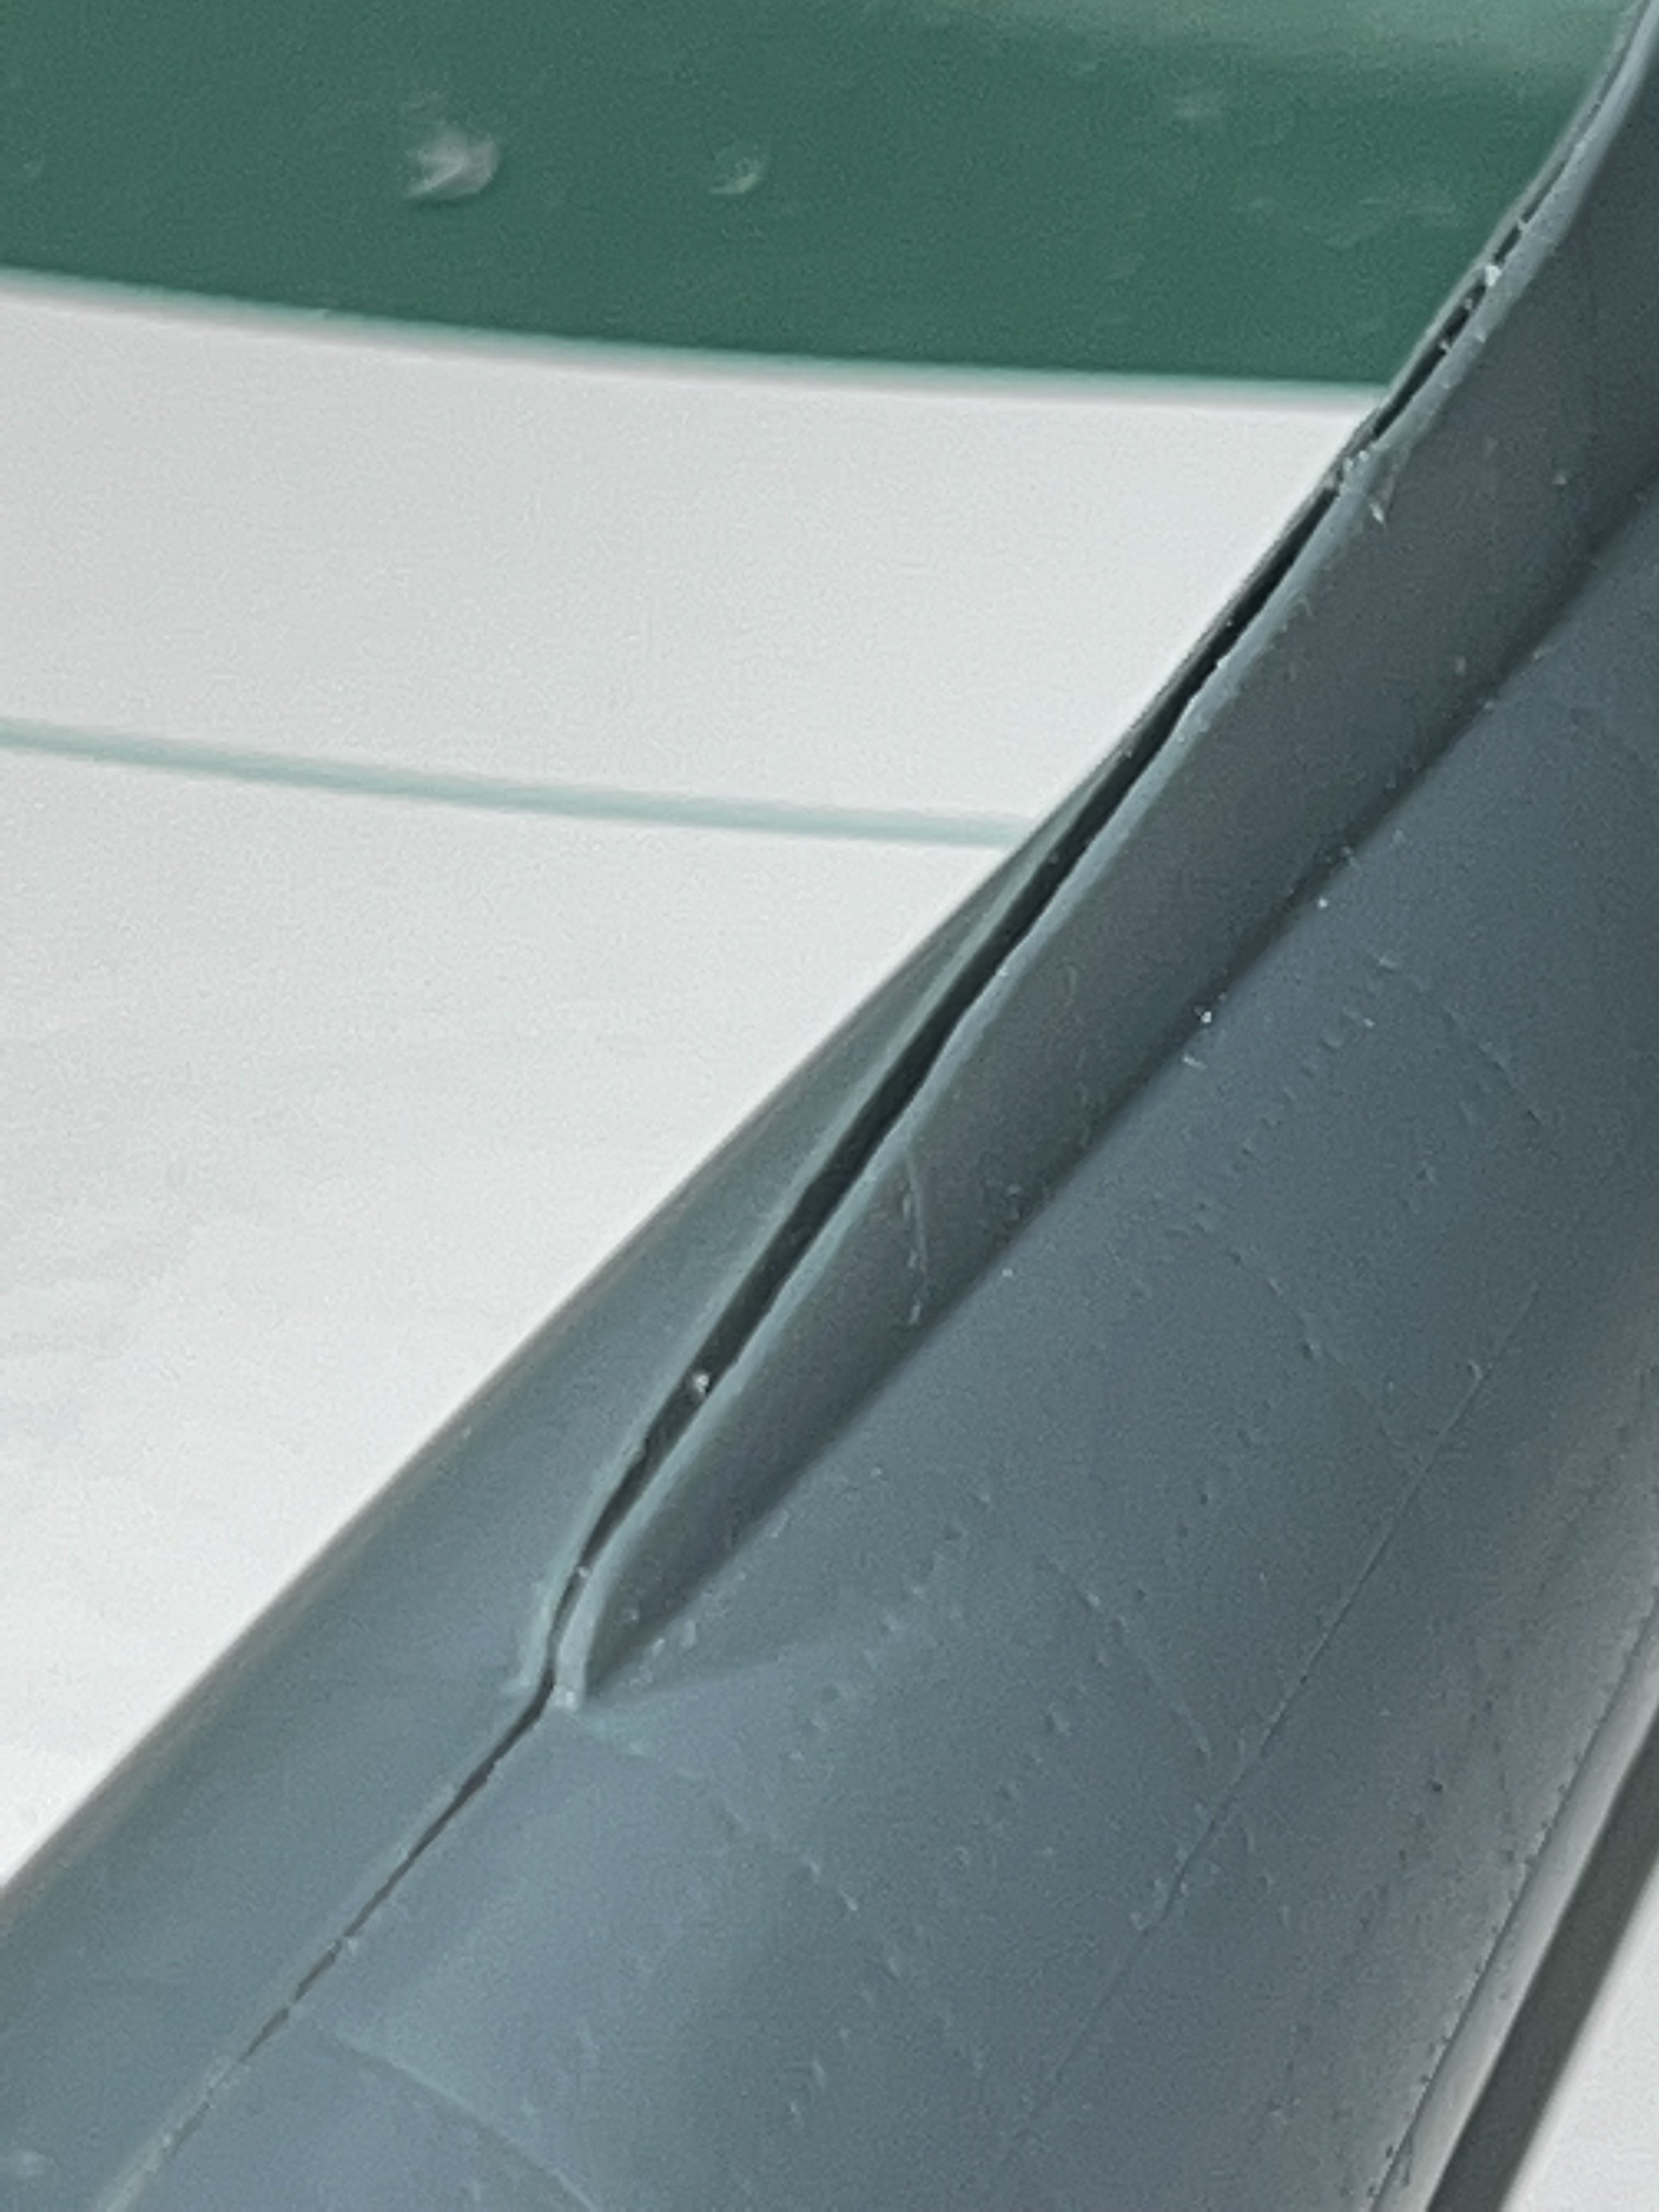
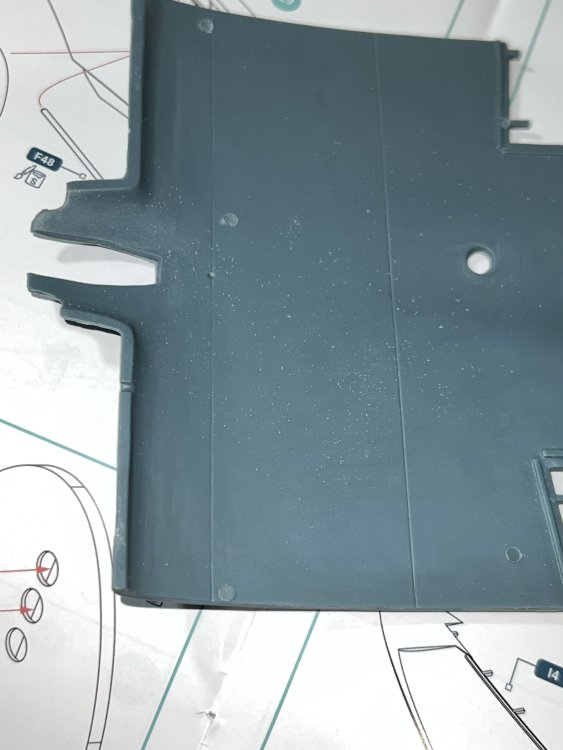
One little issue I ran into is a very slight thickness variation of the mating surfaces on the dorsal fin. Not a big deal, but this is why we always test fit, and test fit, and test fit. 30 seconds attention with a flat sanding stick will iron that problem out. No issues on the outside, that is on the inner side. The rest of the fuselage fits to perfection.