JohnB
-
Posts
7,206 -
Joined
-
Last visited
Content Type
Profiles
Forums
Events
Gallery
Everything posted by JohnB
-
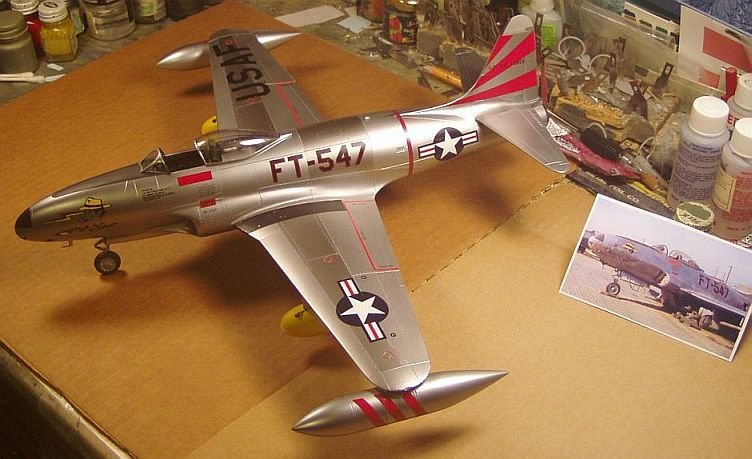
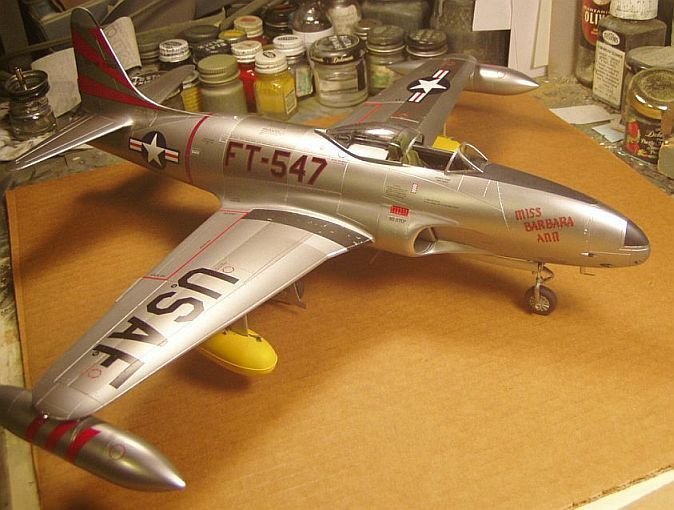
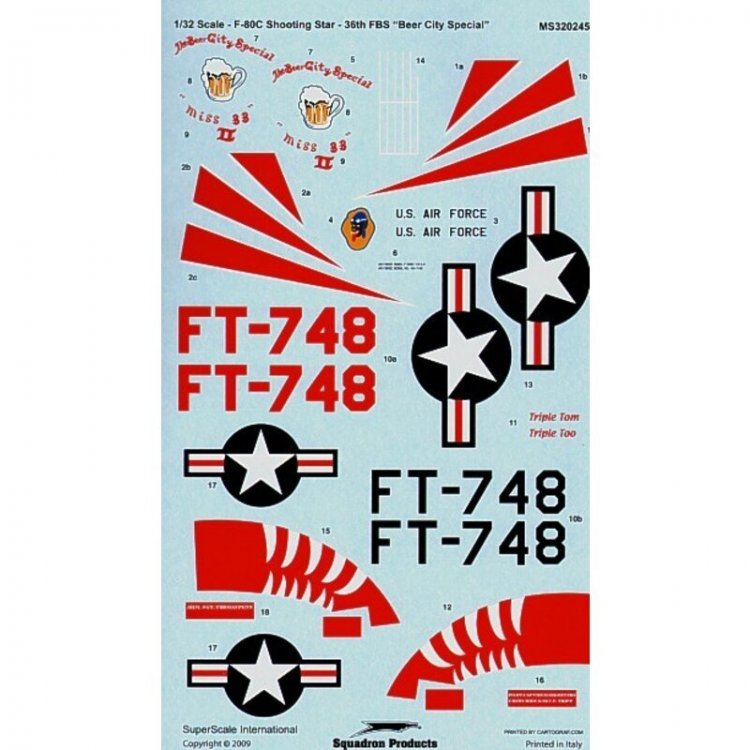
This is as far as I can go decal wise until that sheet shows up. I'll set it aside for now.

-
Thanks Paul. I was hoping the decals I ordered for it would show up today but no luck. Tracking now says "by Friday". I'll finish applying the kit decals today and hope the Super Scale sheet shows up soon.
-
Thank you Kevin. I hope the Super Scale decal sheet gets delivered tomorrow! Then I can get the rest of the decals on.
-
Thank you Harv. I do too! LOL
-
I decided to use some of the kit decals to get a start on decaling.

-
Yes it's coming right along. It'll be ready for decals when they show up (I hope on Wednesday).
-
Making a little progress.
-
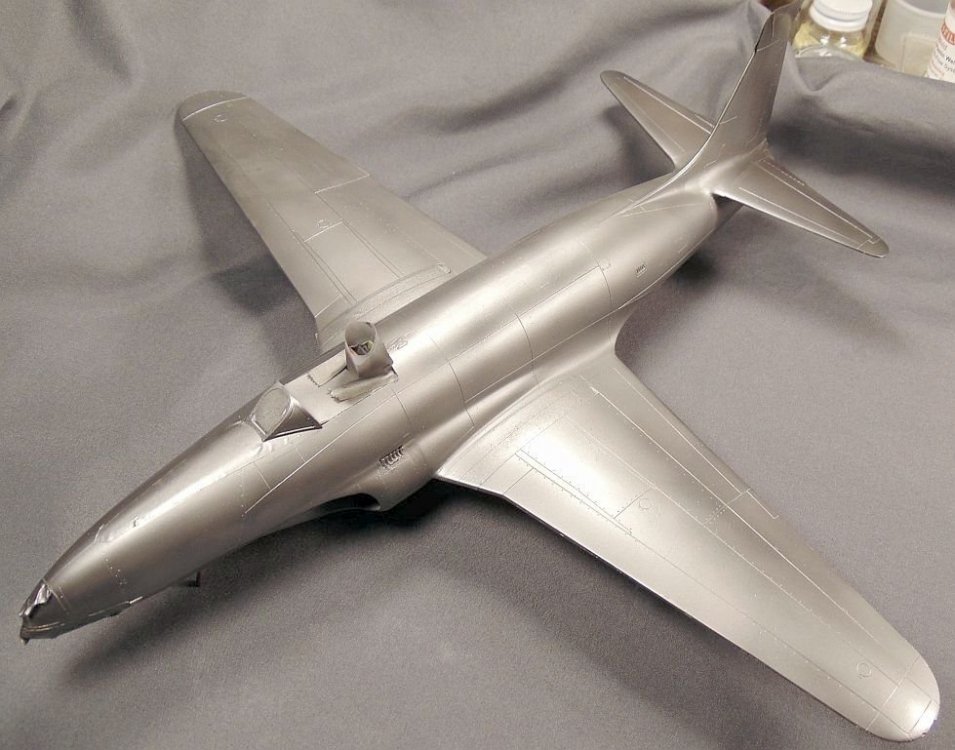
Painting underway. Alclad Dk. Aluminum w/a touch of black added to it will be the base.
-
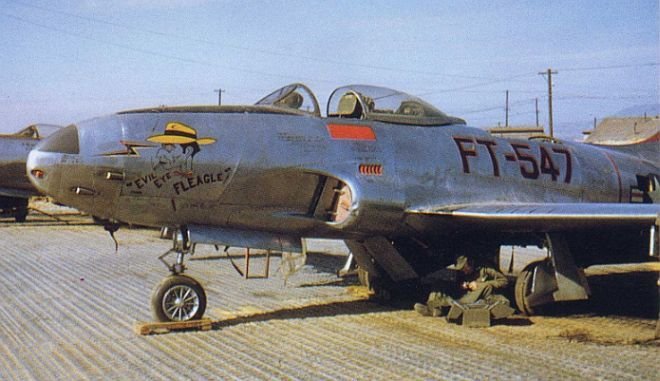
I think it will go well with my previous build of "Evil Eye Fleagle" done before the teeth markings were added. As a side note, I built that one BEFORE the decals were available. I used my laser printer to make my own.
-
Probably this one Kevin.
-
I like what you are planning for this one Martin. It should really be a winner!
-
Nice attention to detail Carl! Gonna be a beauty!
-
Looks fine to me.
-
Thank you Phil. I'll get started on painting today.
-
Indeed. Most of the frustration is past now I think (fingers crossed). Thanks!!!
-
Thanks. It's all greased up with elbow grease, filler and sanding sticks. LOL
-
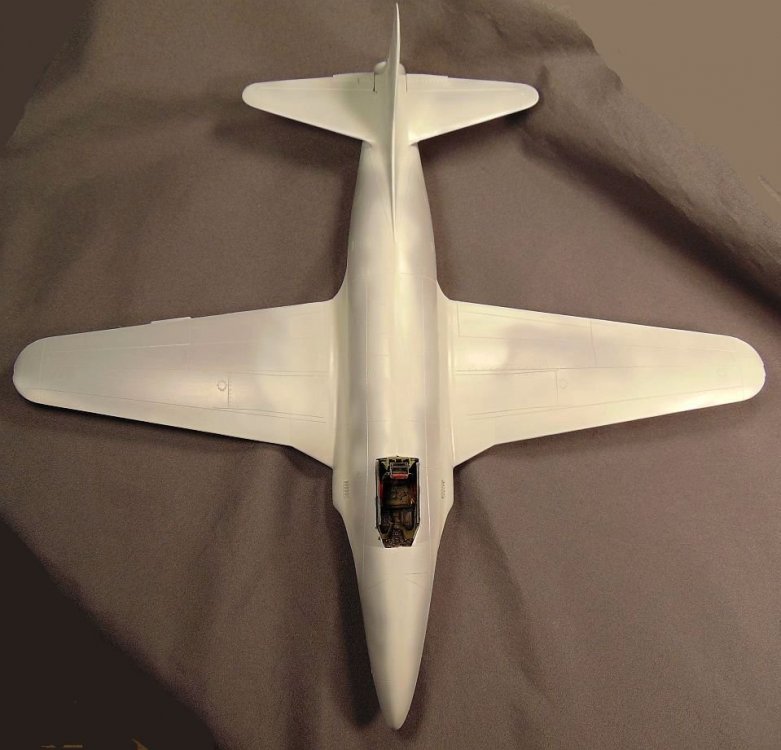
Filling and sanding completed. Now I can proceed with the other parts of the build.

-
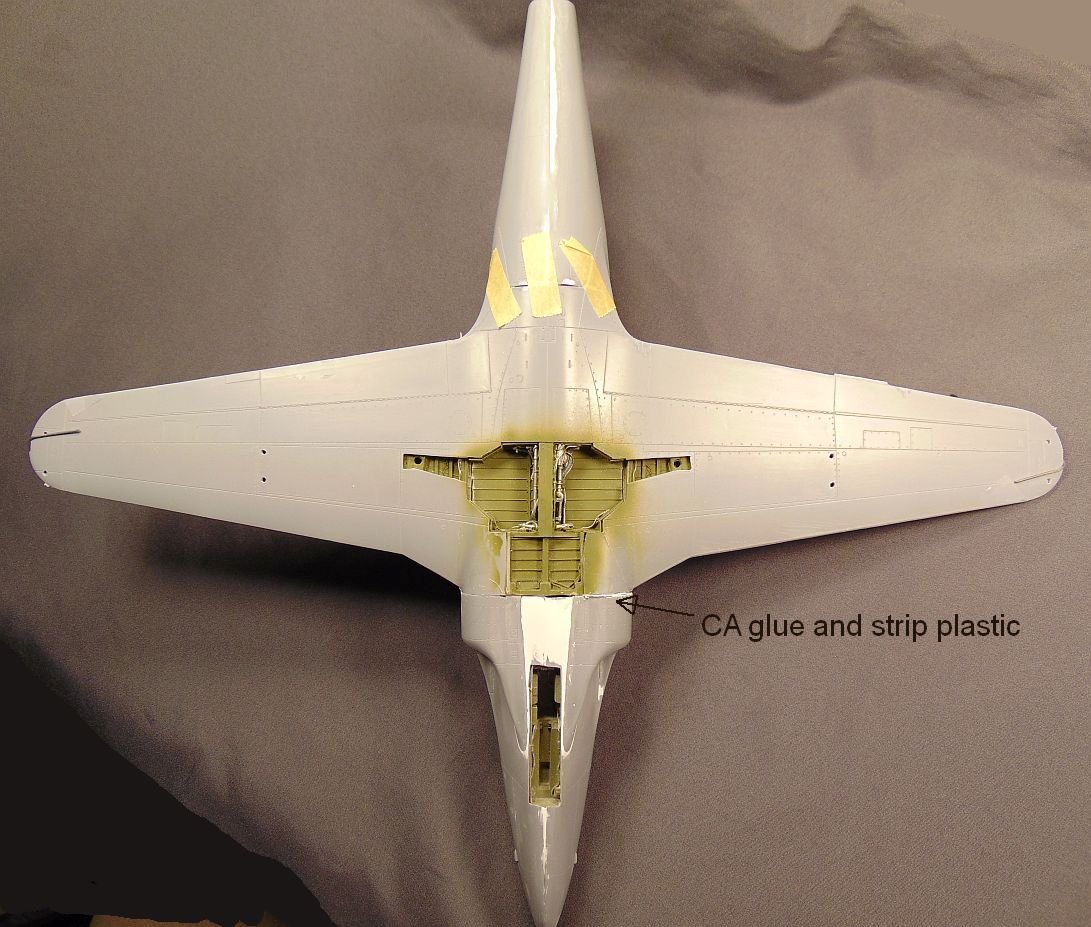
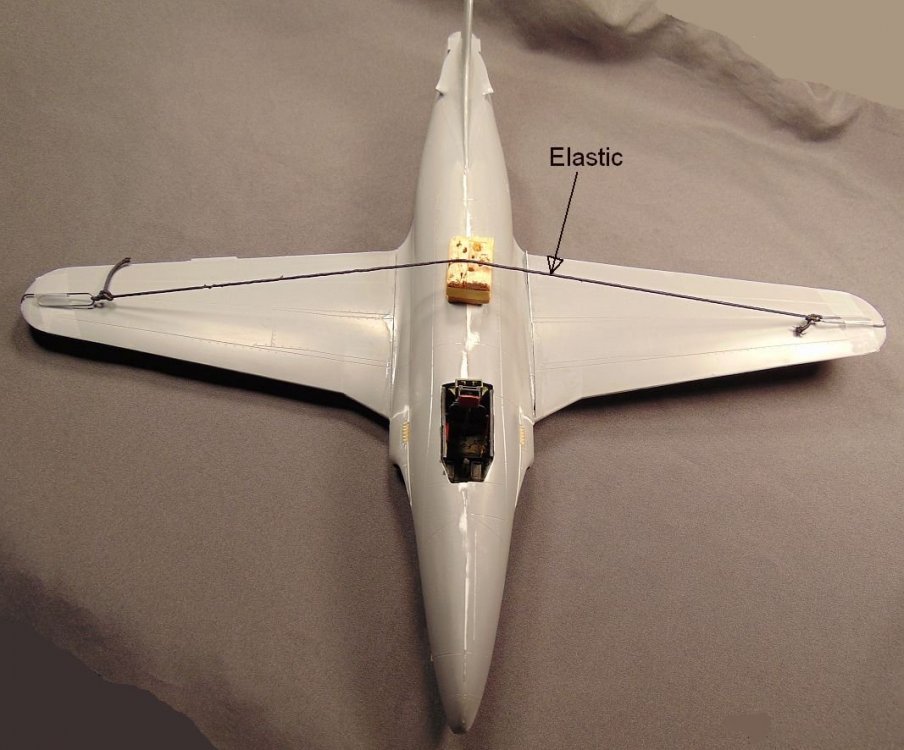
This one has come very close to ending up in the trash bin too. I've put too much effort into it though to admit defeat so I'm still working on the SOB. I'm gonna beat this bas--rd into submission if it takes til next month! LOL 🤪 Here's a couple of shots for today. Using a length of elastic to raise the wings for some dehidral works for me. CA glue is a must for this build.
-
Build 'em on up Harv.
-
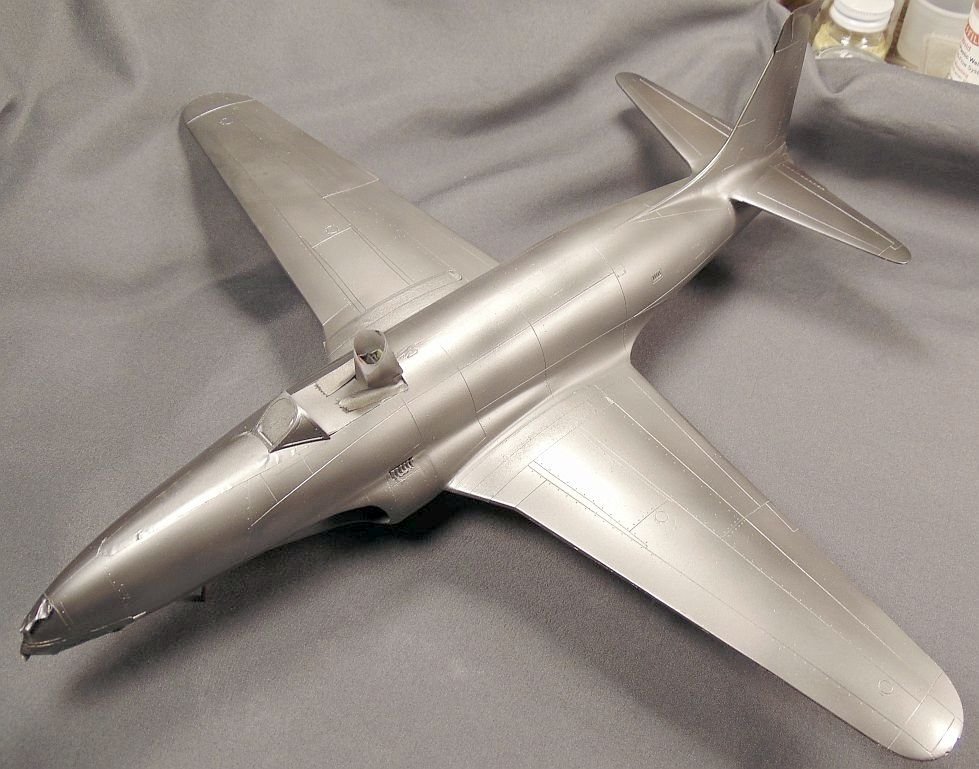
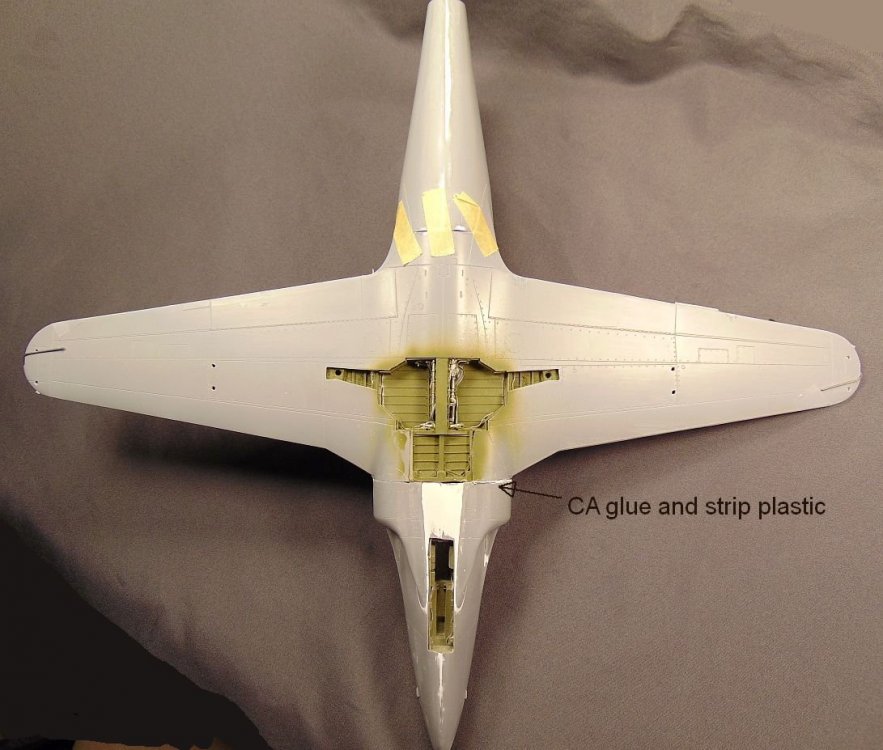
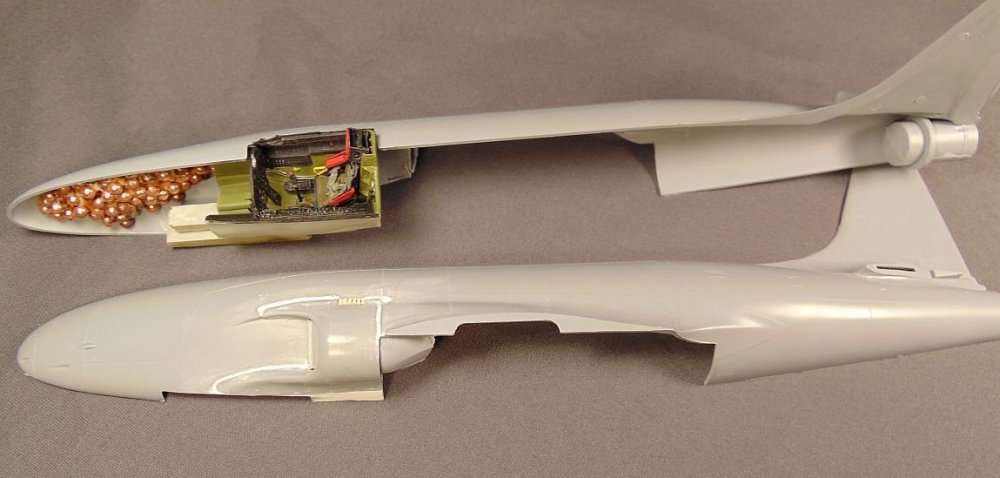
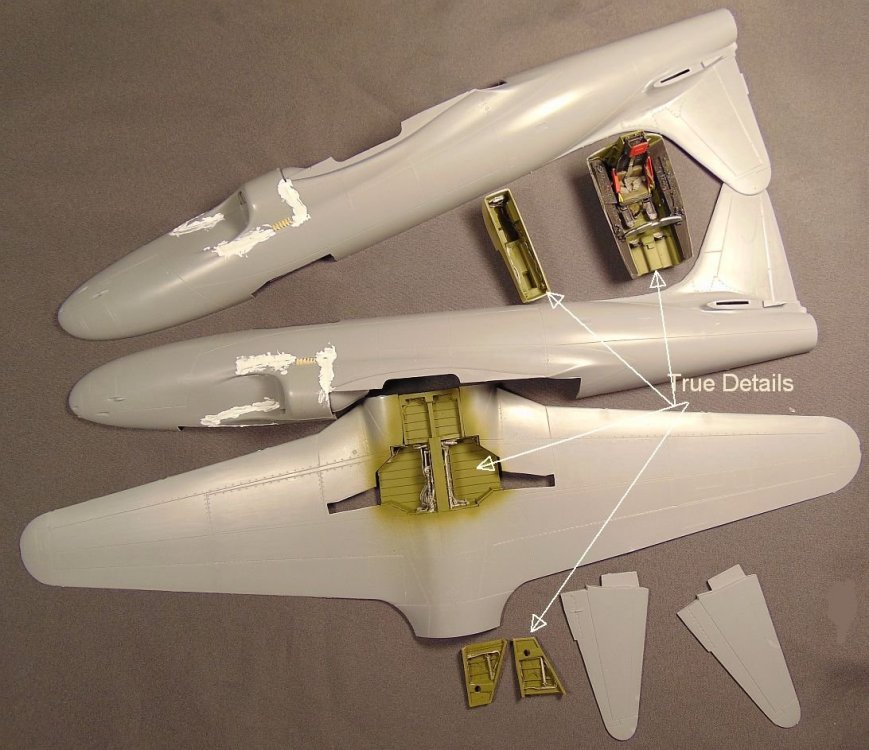
Coming along but not without some "bumps in the road". Even with all the headaches it does build up to be a good looking model. I think most of the problems come from using the after market resin cockpit and wheel wells. However, since I used the same after market stuff on my 1st build, I really don't know if there would be as many problems just using the crummy kit parts. You would still have the poor fit of the intakes to deal with no matter. As for me, I'll willingly suffer the problems presented by the resin parts as opposed to using the corresponding kit parts.
-
Ready to join the fuselage halves. I added plenty of nose weight "just to be sure". LOL
-

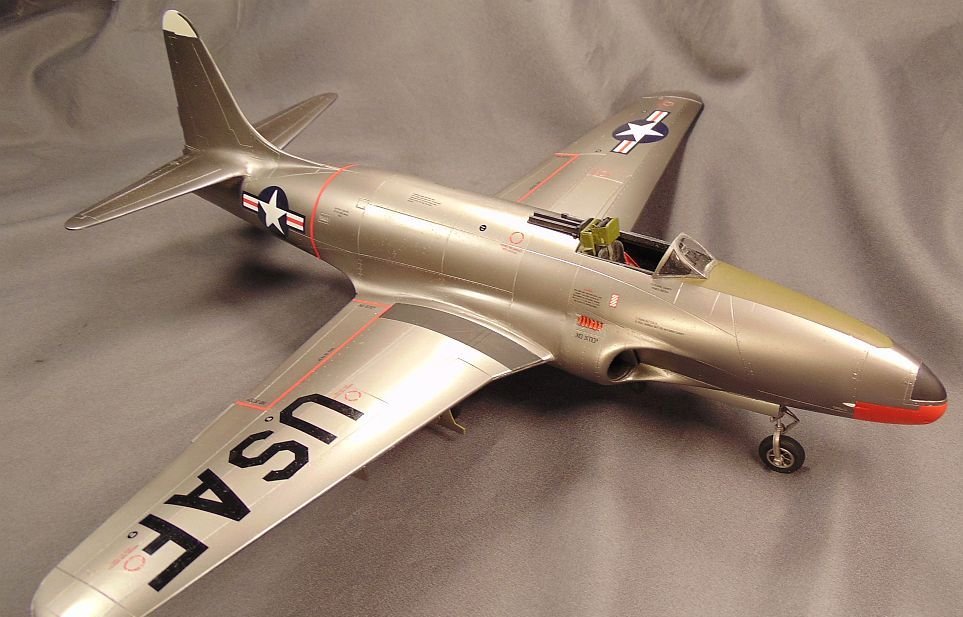
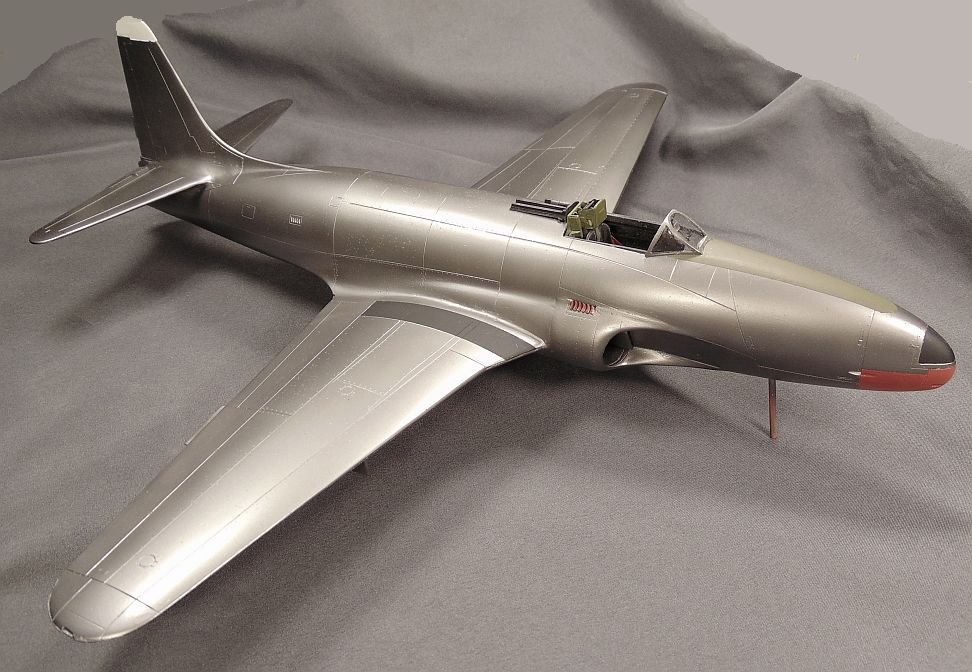
Korean War F-51D finished
JohnB replied to JohnB's topic in LSM 1/32 and Larger Aircraft Ready for Inspection
Thank you. -
I hope so!
-
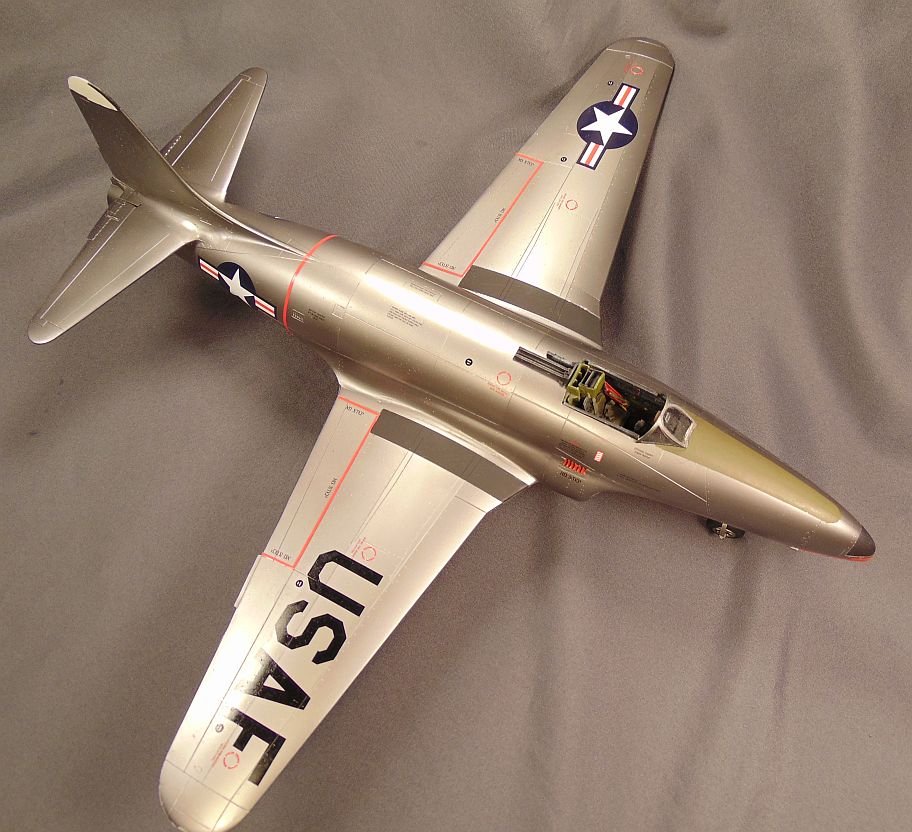
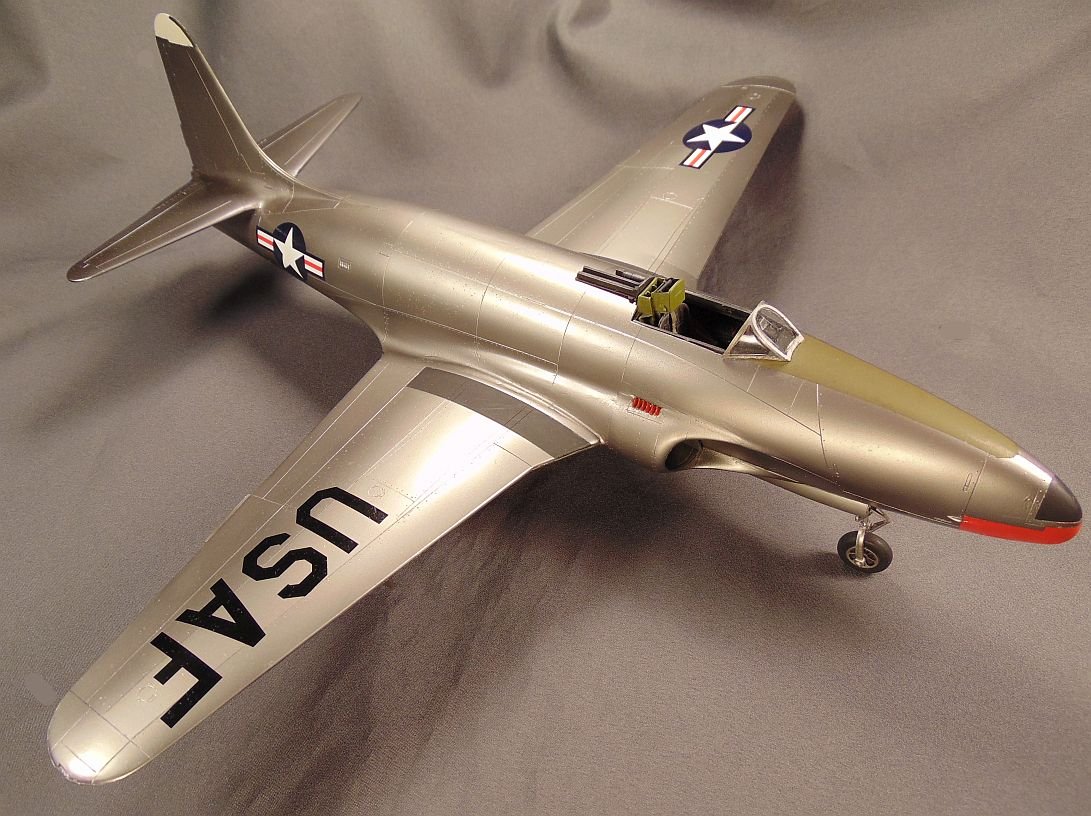
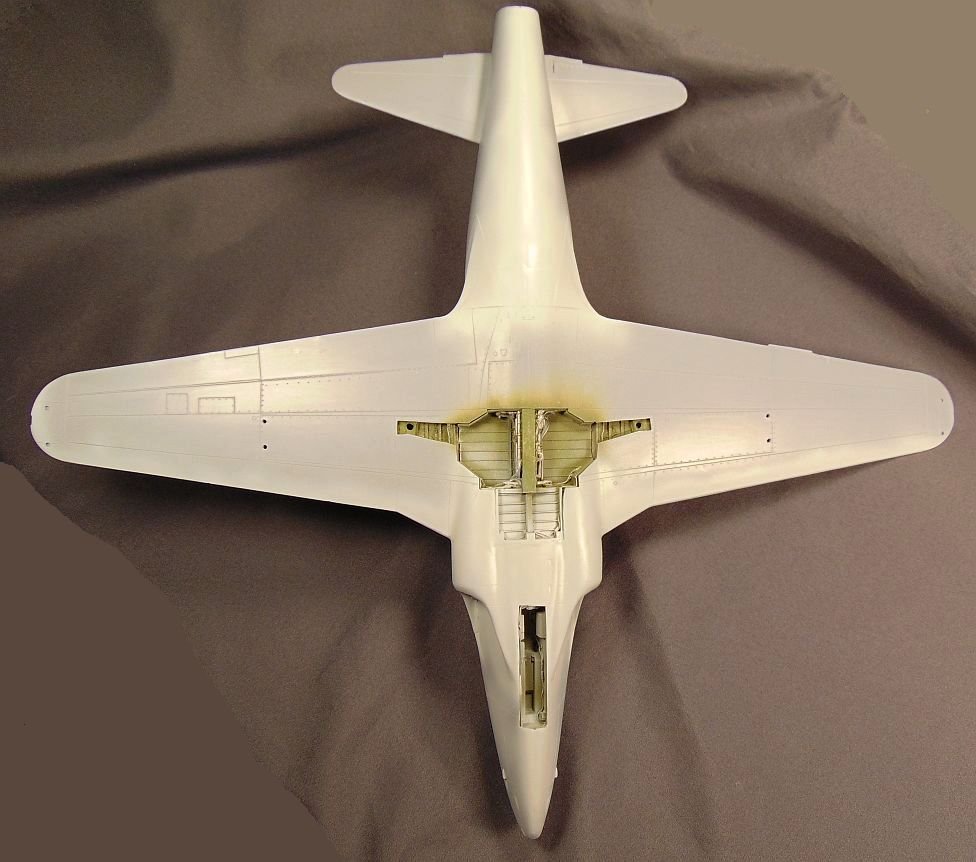
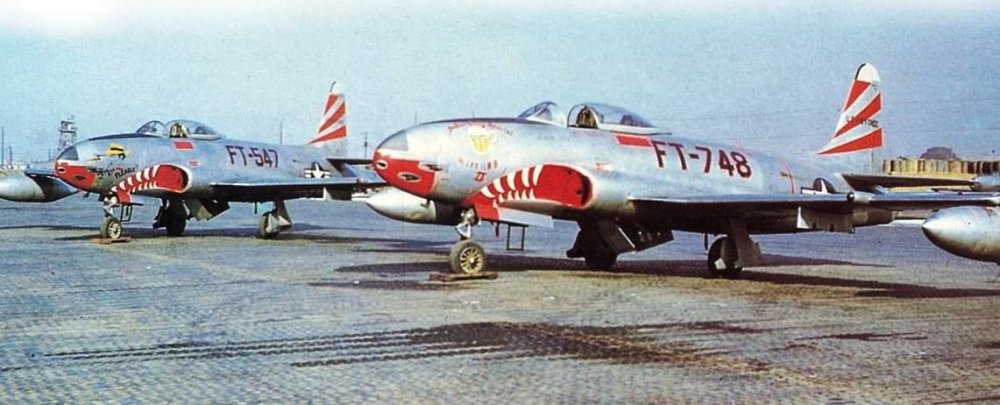
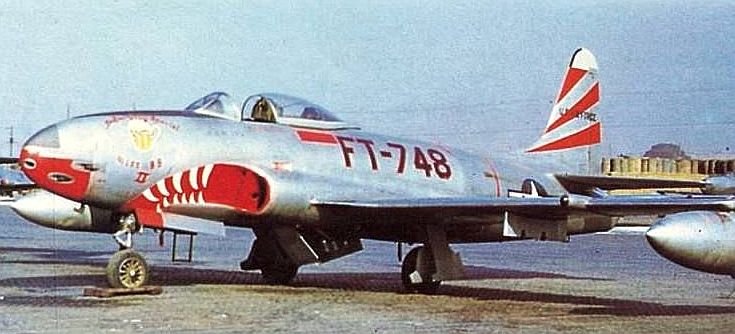
For some reason I wanted to build another one of these even though it is a "HIGH CUSS FACTOR" build. Just a glutton for punishment I guess. LOL As you can see I've replaced some of the kit parts with nicely detailed True Detail parts which are much better than the kit parts although they do present some fit problems, especially the cockpit tub and the main wheel well assembly. I remembered to have my Dremel ready and a fresh blade in my Xacto knife, fresh putty and some fresh super glue ready to use! Since I had built one of these a few years ago I knew what to expect so it holds no surprises for me. Onward and upward as they say!
- 50 replies
-
- 11
-

-

-
Korean War F-51D finished
JohnB replied to JohnB's topic in LSM 1/32 and Larger Aircraft Ready for Inspection
LOL The QB prop needed some trimming to be "right" although it was supposed to be correct for the '51. It looked more like a T-28 prop than a P-51 prop. 🤪