JohnB
-
Posts
7,283 -
Joined
-
Last visited
Content Type
Profiles
Forums
Events
Gallery
Everything posted by JohnB
-
I have to say I really didn't notice the white gear but since you asked I think aluminum would have been the way to go. At any rate, checking my library that covers such things, I think aluminum would be correct. I did a 1/48 PBJ a while back and I did the gear in Alclad aluminum. Now this isn't to say your model is "wrong" as there may have been some PBJ's with white gear. At any rate, your model looks really good. 🙂
-
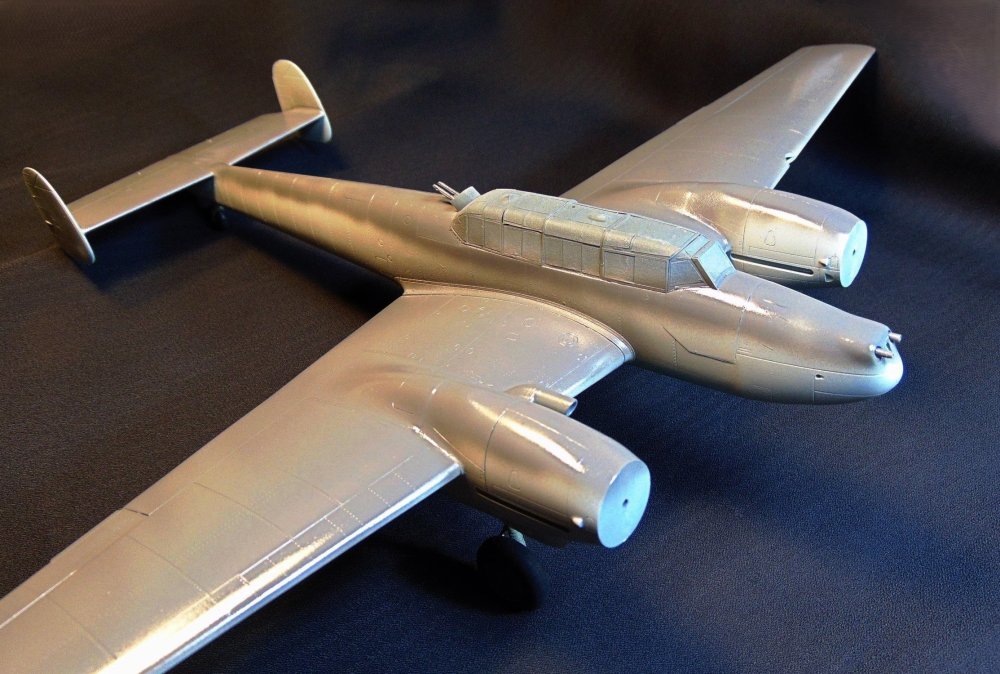
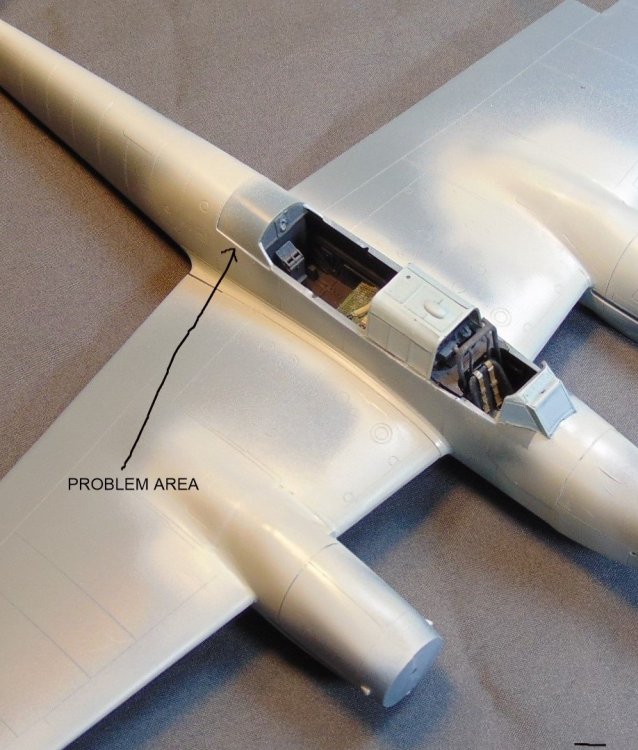
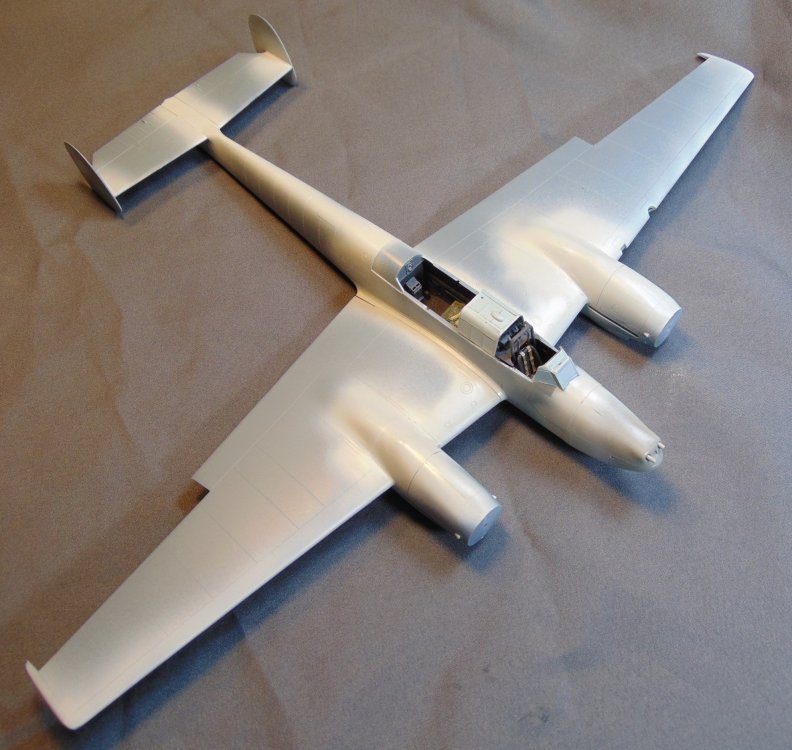
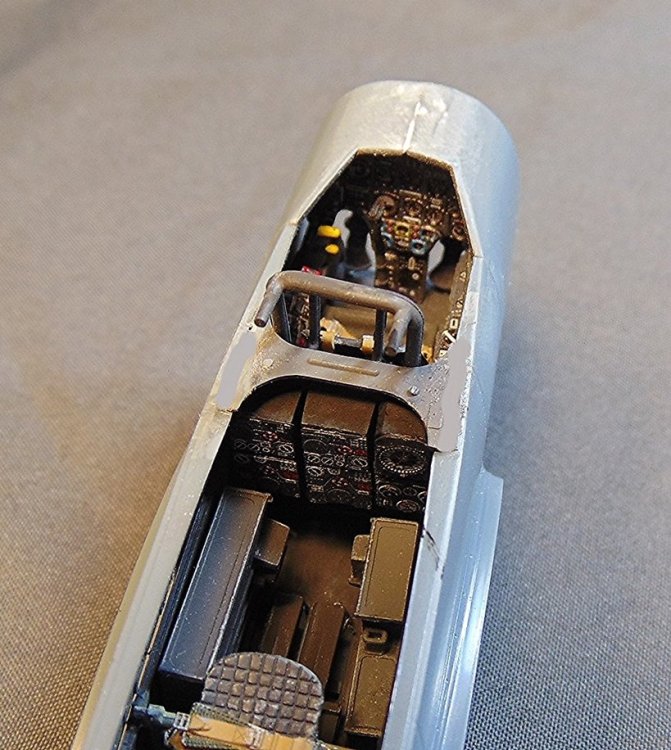
Finished and RFI. https://forum.largescalemodeller.com/topic/20309-bf-110g-4-148-rfi/
-
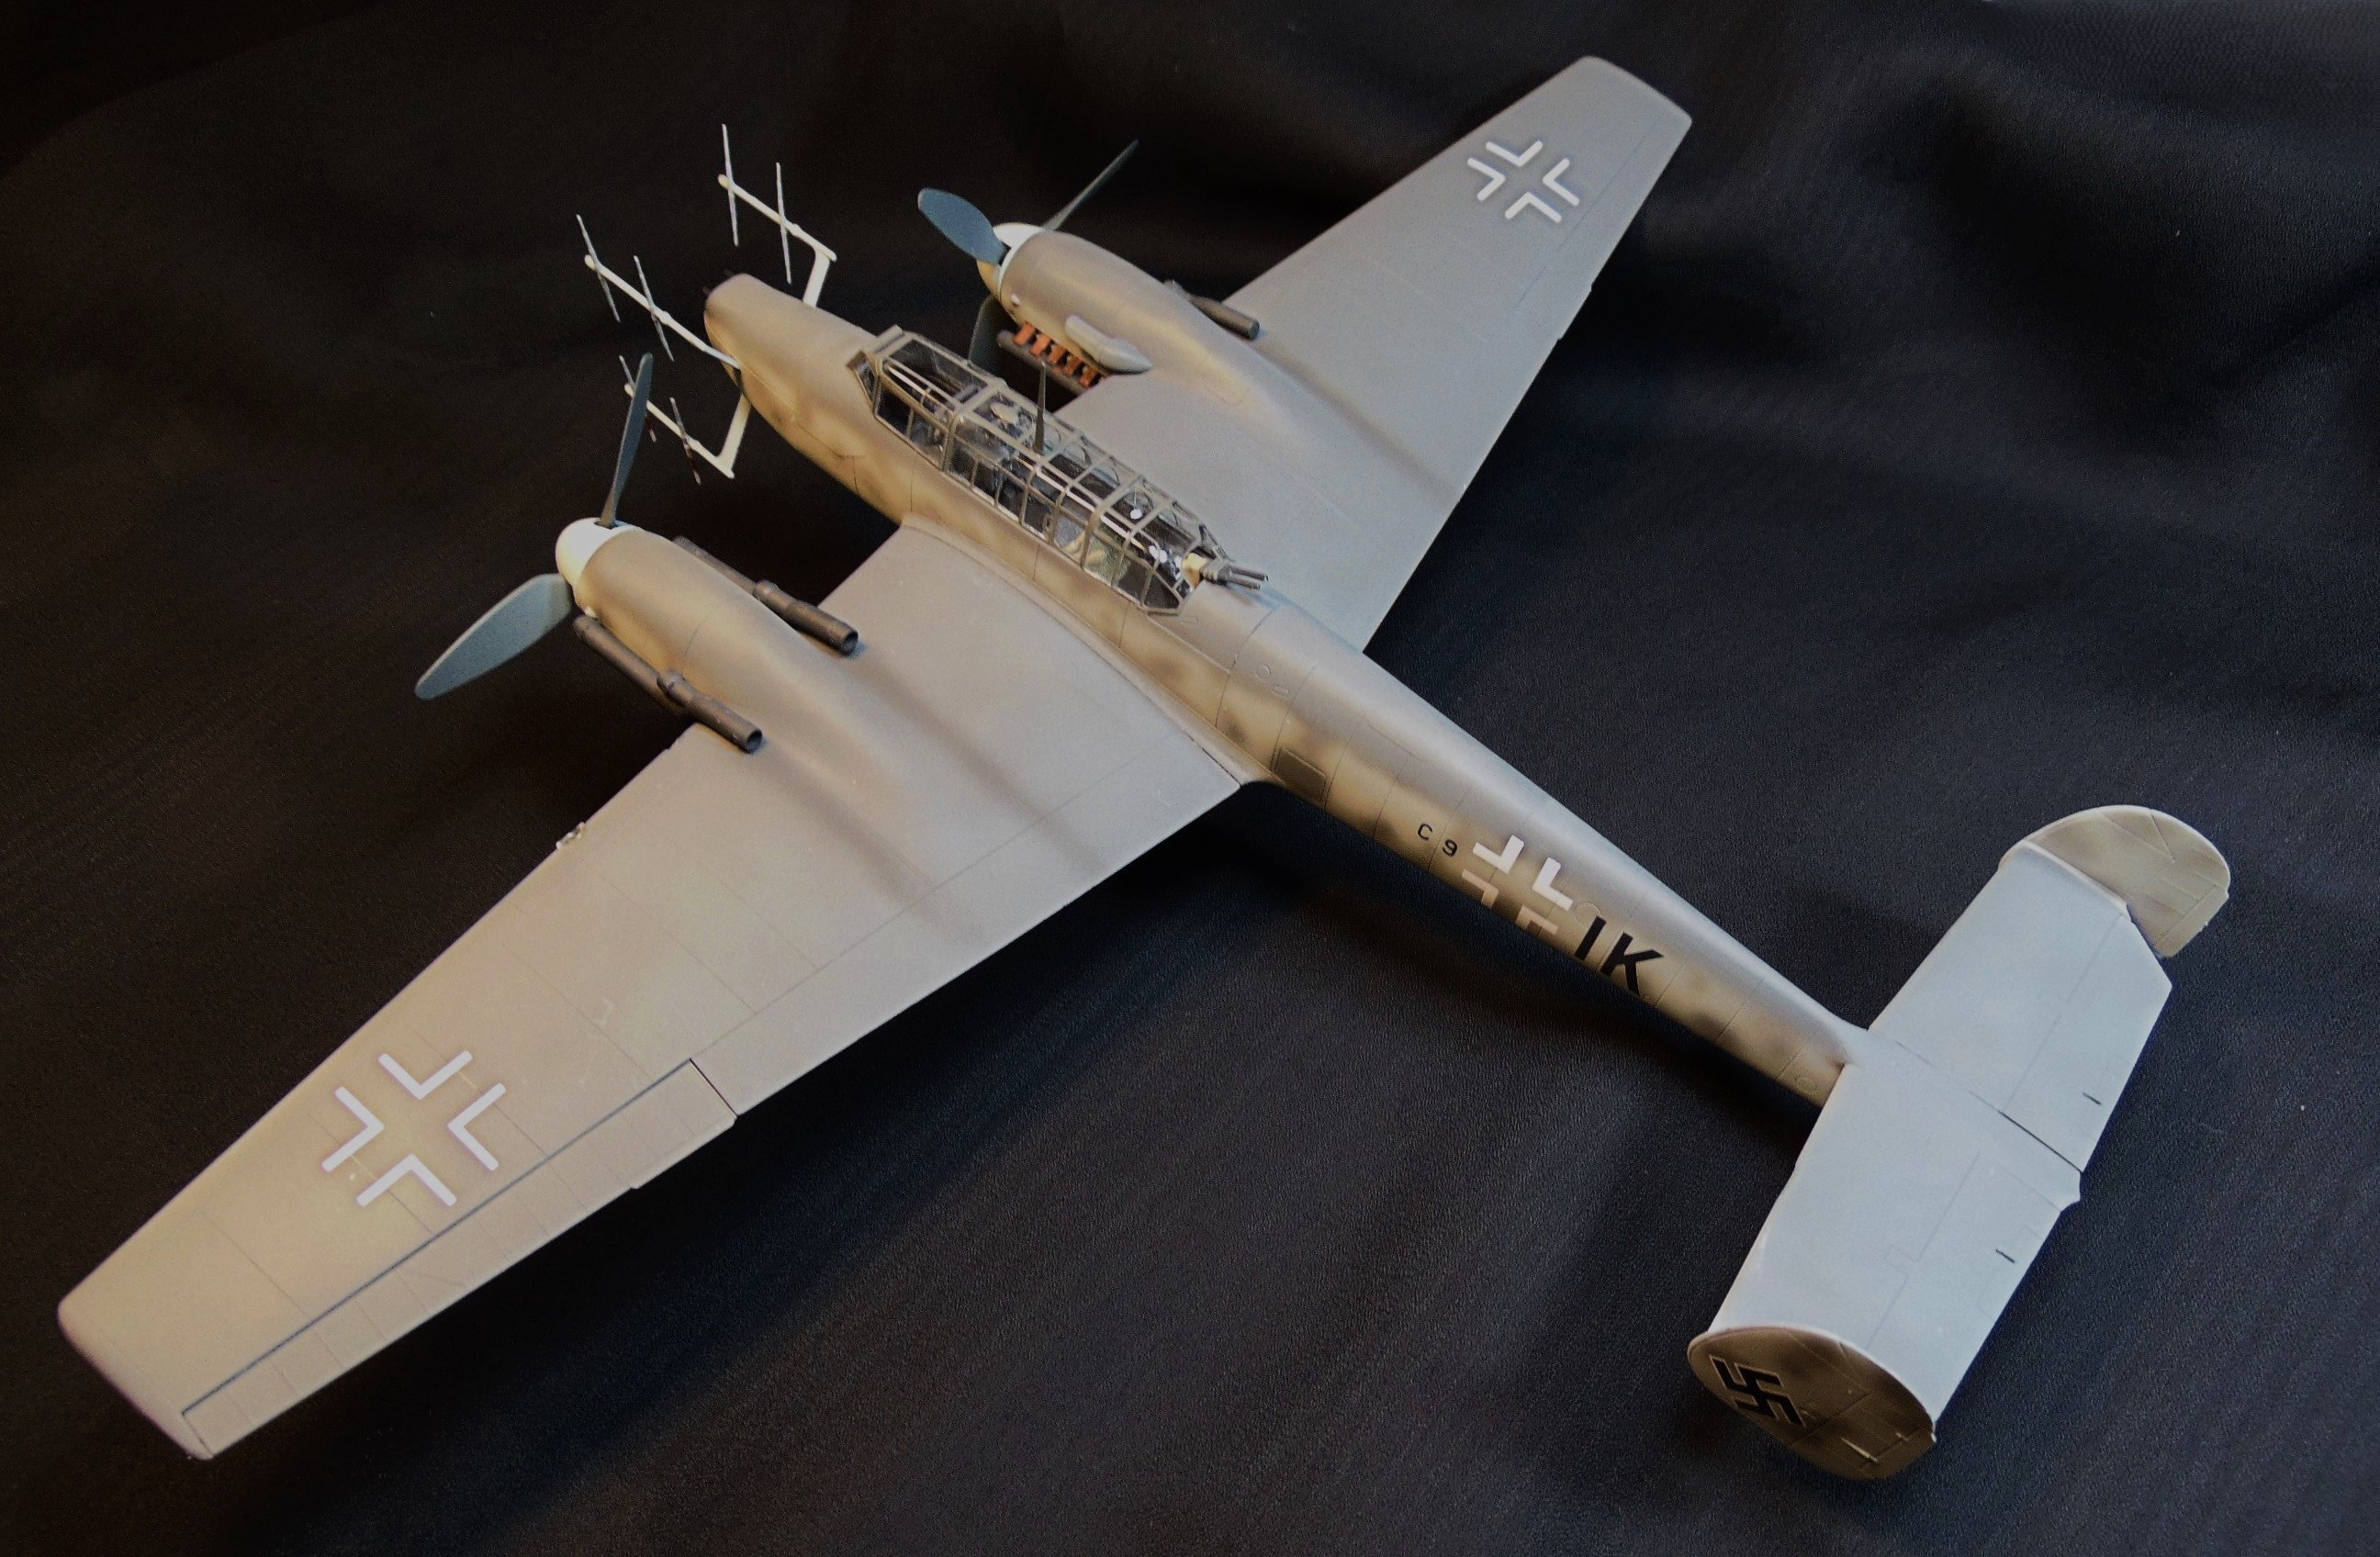
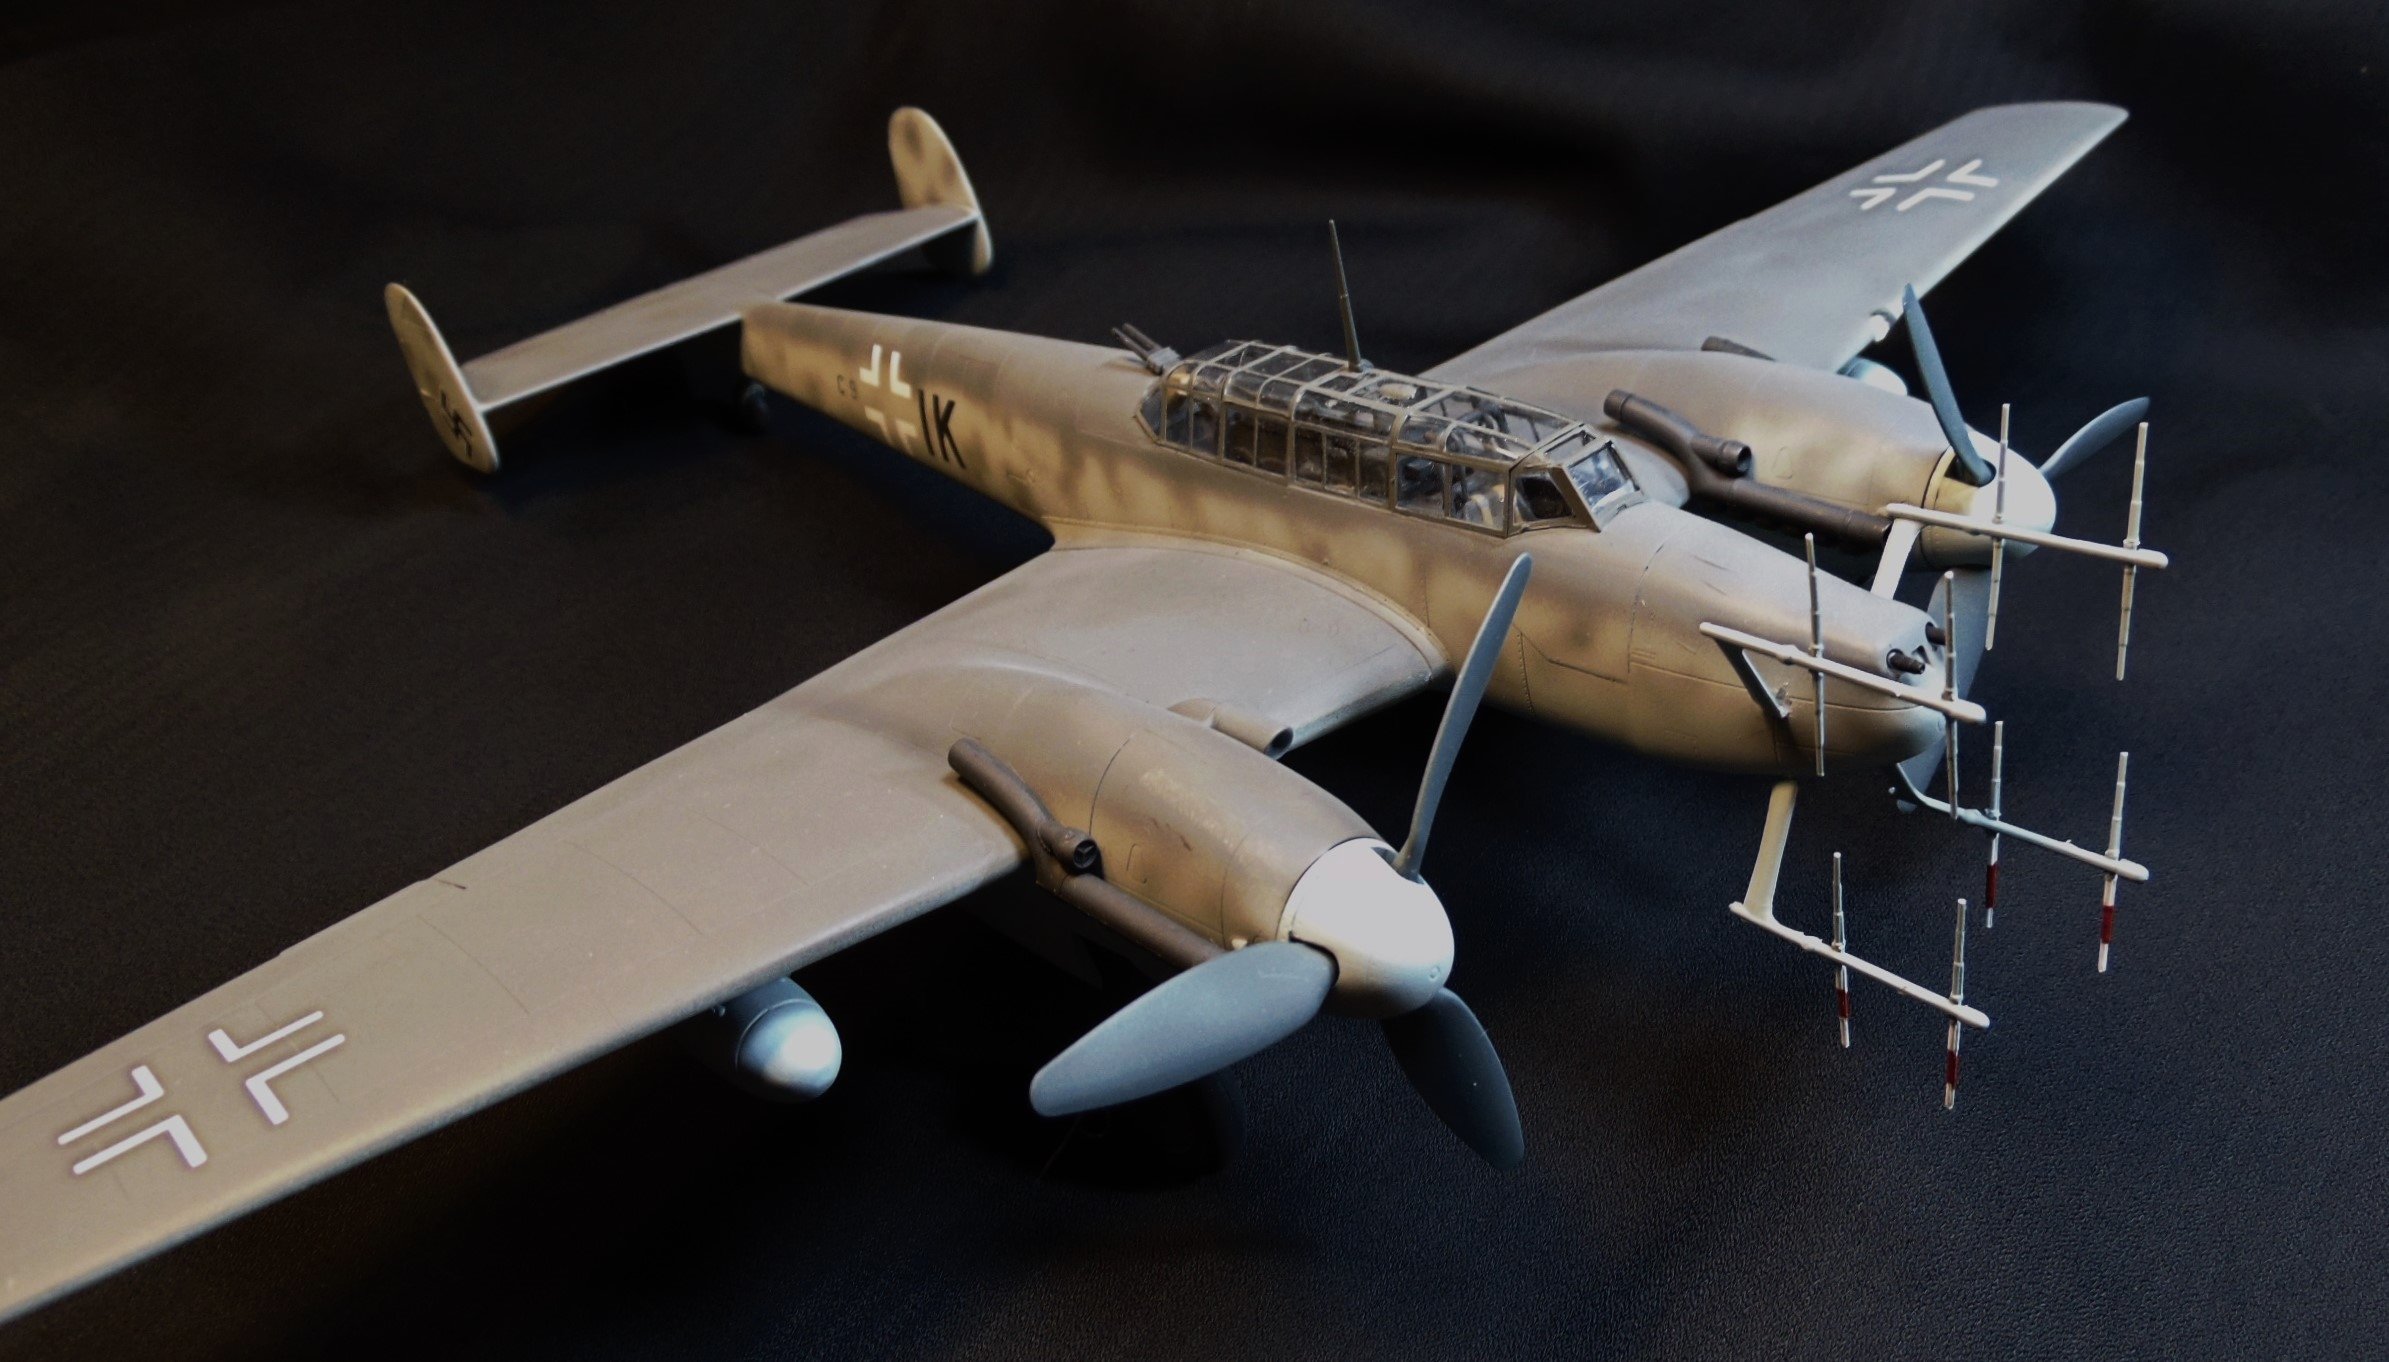
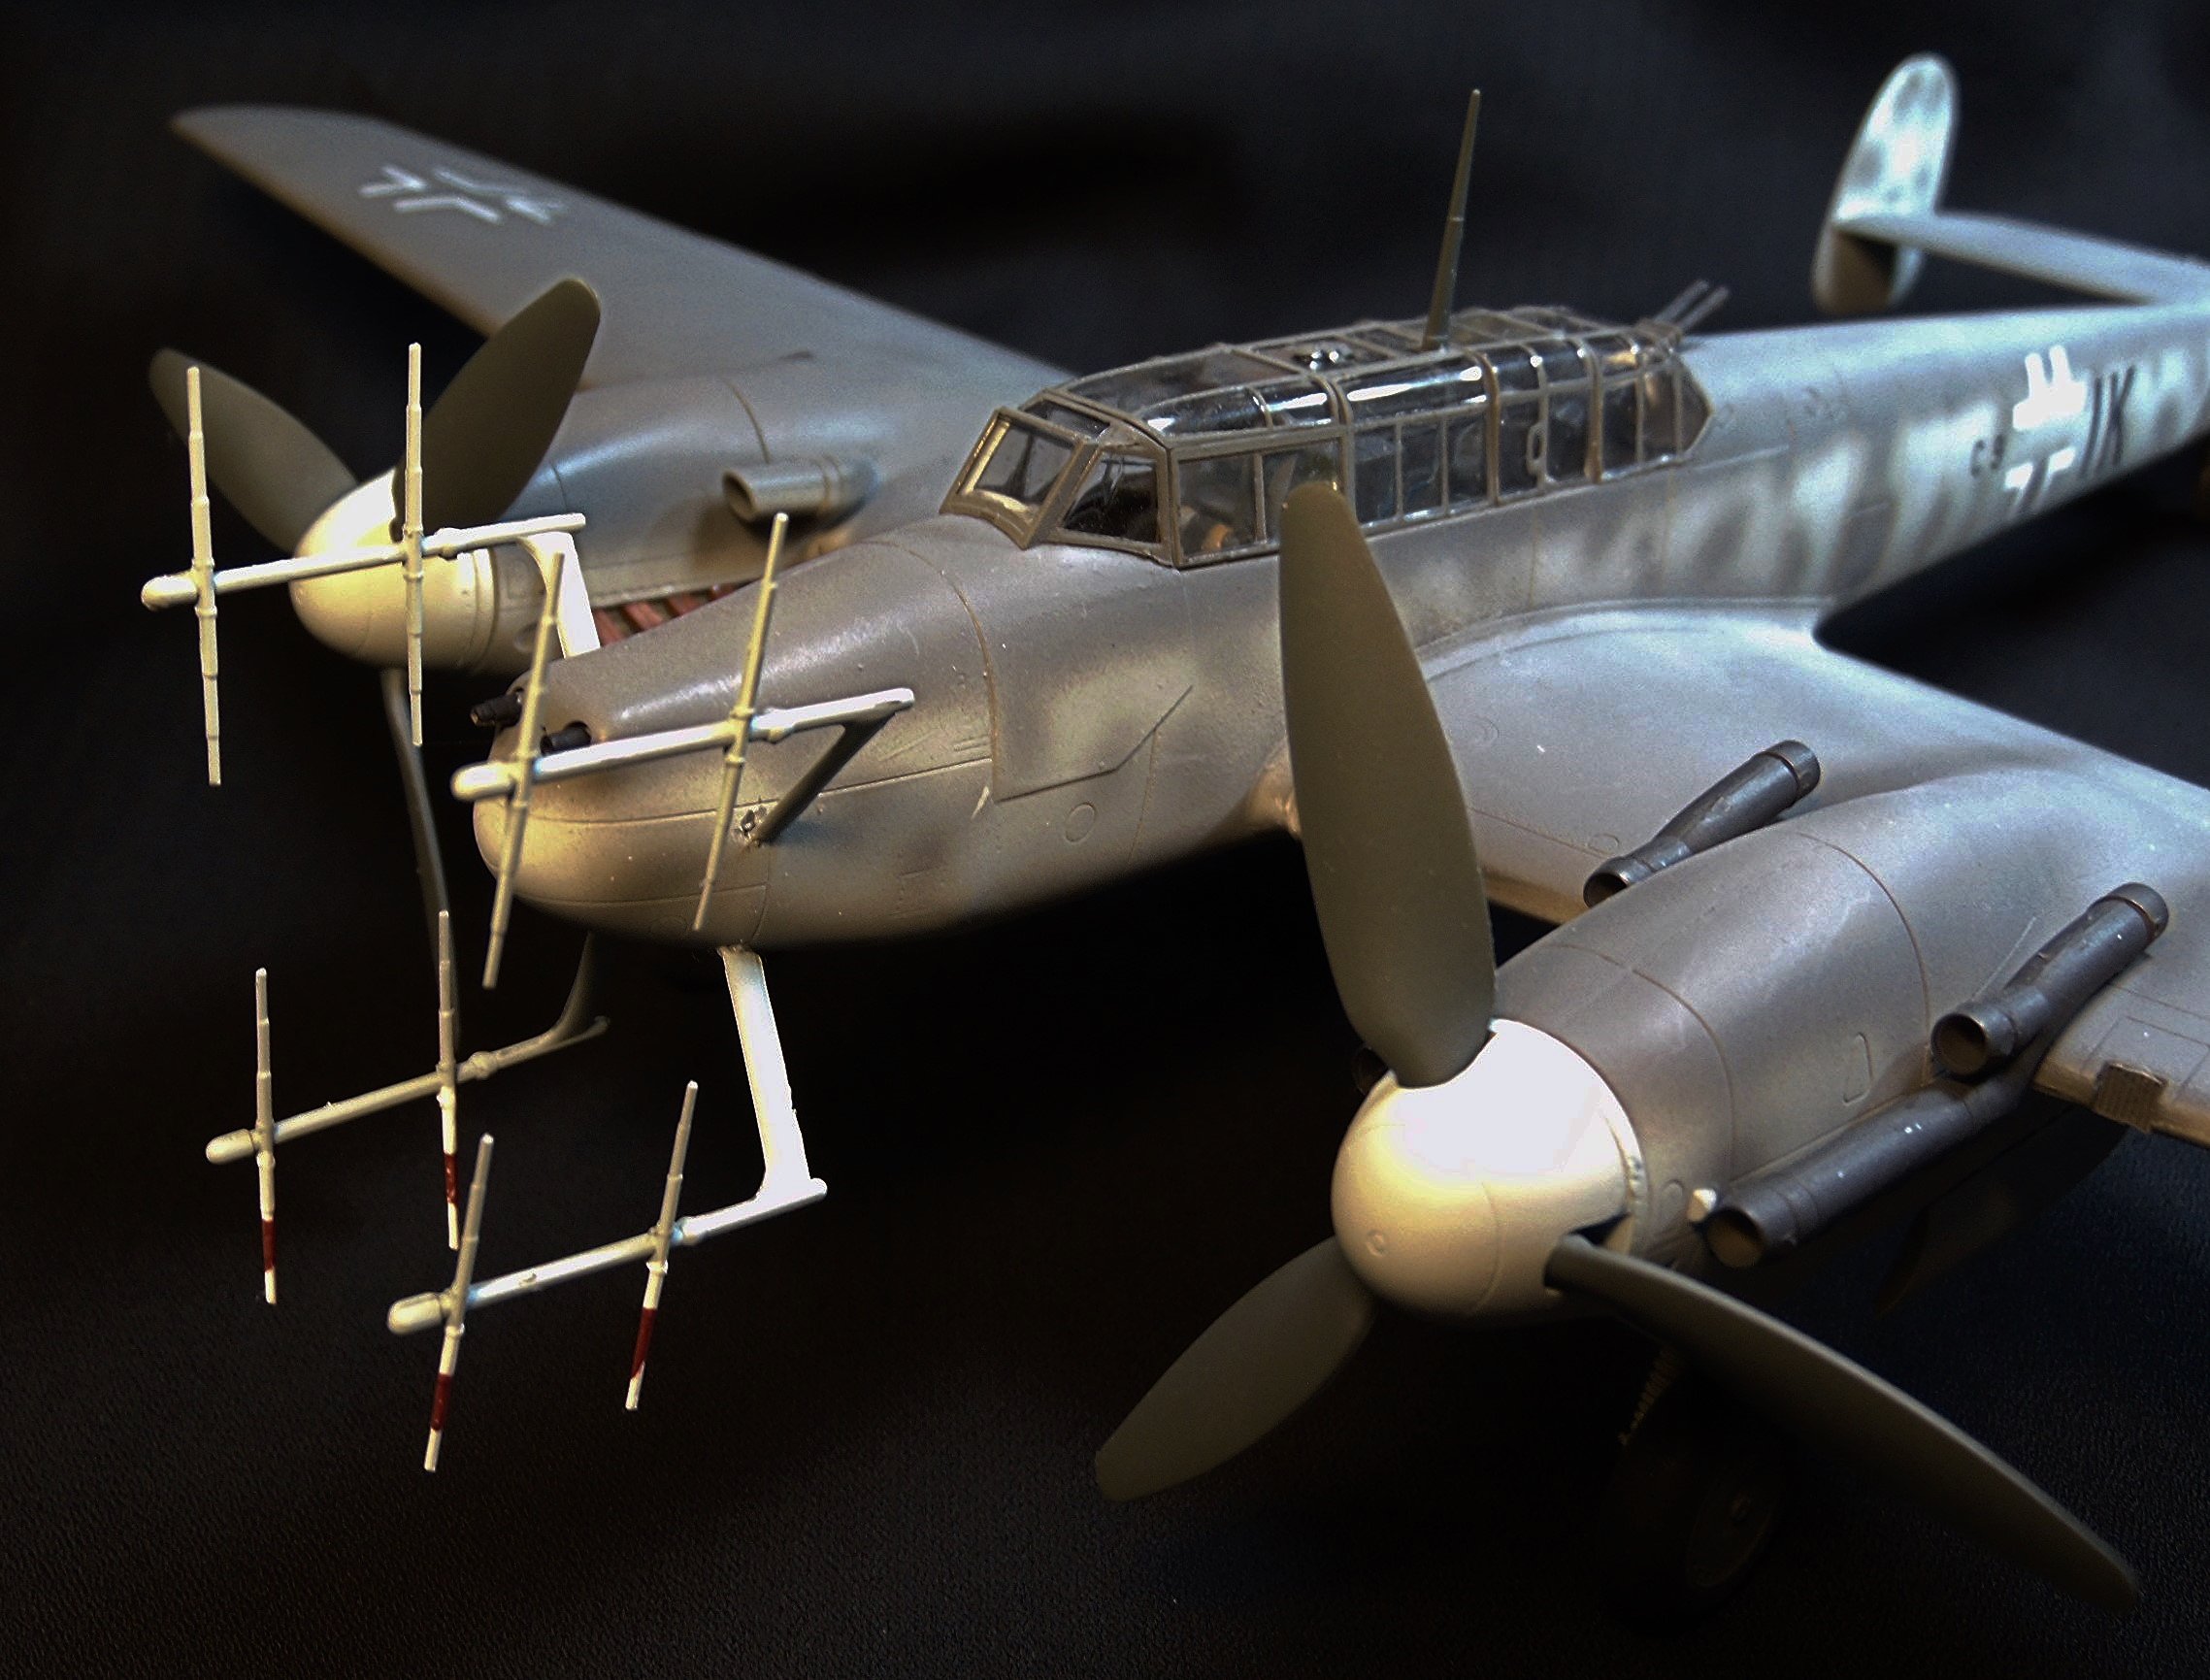
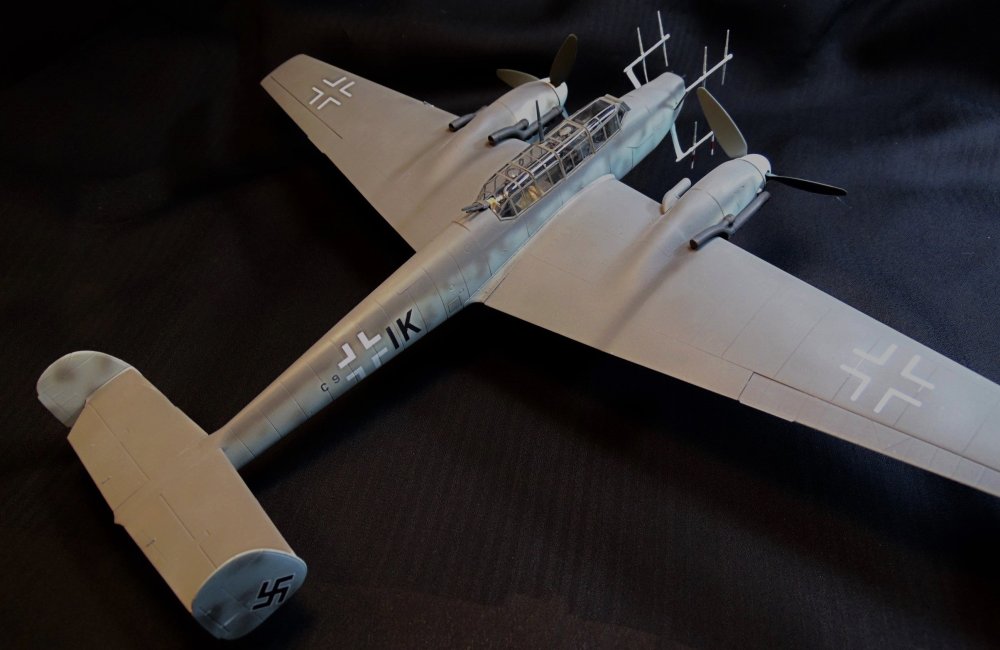
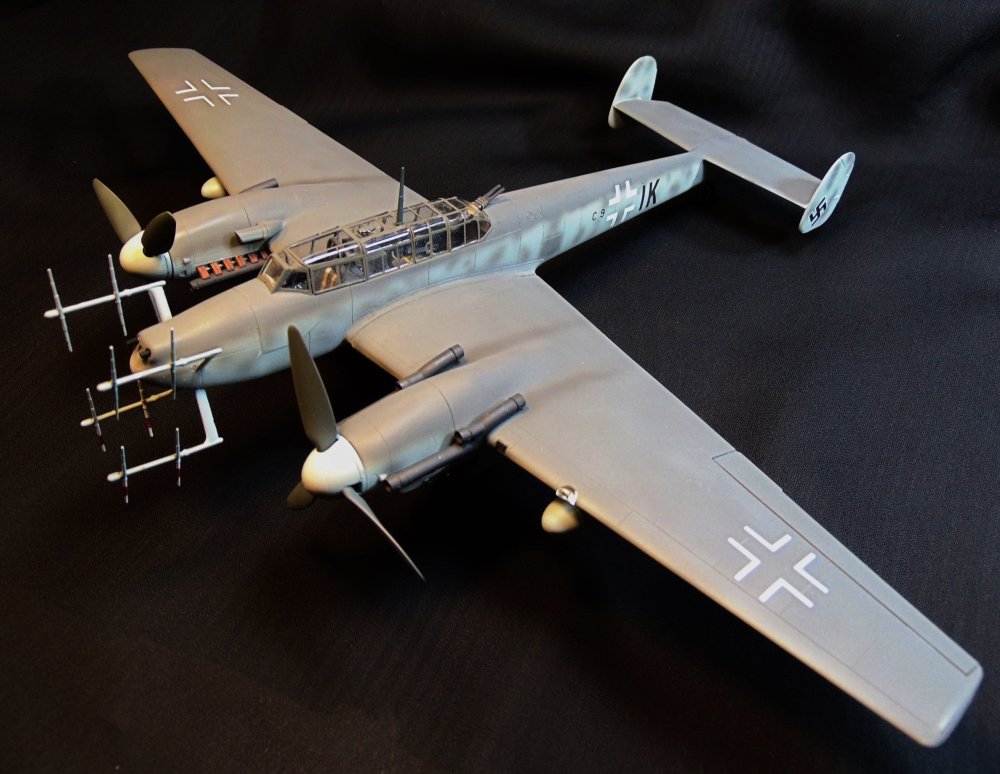
Calling this one done. A very nice and detailed Eduard kit. The only after market items were the pilot's and gunner/radar operator's seat belts by FineMolds. I substituted a few items from a old Revell 1/48 kit which includes the antennas, some of the black boxes in the cockpit and the drop tanks. Painted with Xtracolor except for the cockpit which is Testor's. Attaching those antennas is a tedious high cuss-factor operation! LOL I hope y'all like it! 🙂


-
Great looking PBJ Kevin. Nice work. 🙂
-

1/48 Monogram B-58 Hustler - SEA RFI
JohnB replied to CANicoll's topic in LSM 1/48 Aircraft Ready for Inspection
Wow Chris! That's a neat looking B-58. Very unusual scheme but really cool! 🙂 -
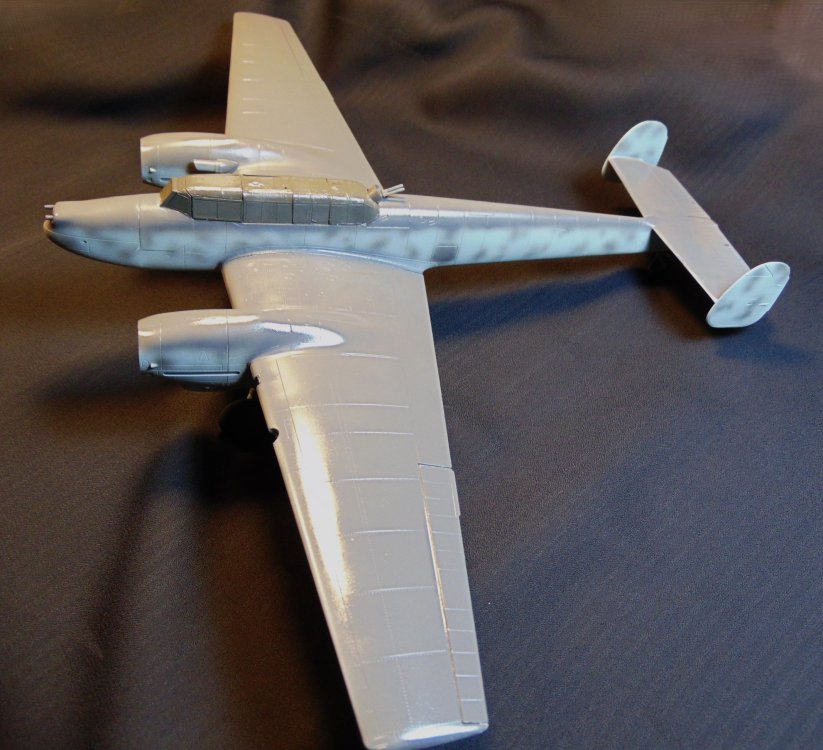
Painting and decaling completed. Antennas, props, exhausts, gear doors, and wing tanks are next to be attached.

-
Thanks Peter. I've applied the decals and am giving them time to "set", etc then I'll overspray with clear flat. I still have the exhaust flame dampeners, landing gear doors, and radar antennas to attach. I figure it'll be finished either late today or some time Sunday. Just in time for the next group build (Sandbox I hope) which I have a Hasegawa Bf-109F-4 of JG27 in N. Africa for that. Already done a little preliminary stuff such as a Barracuda spinner/props.
-
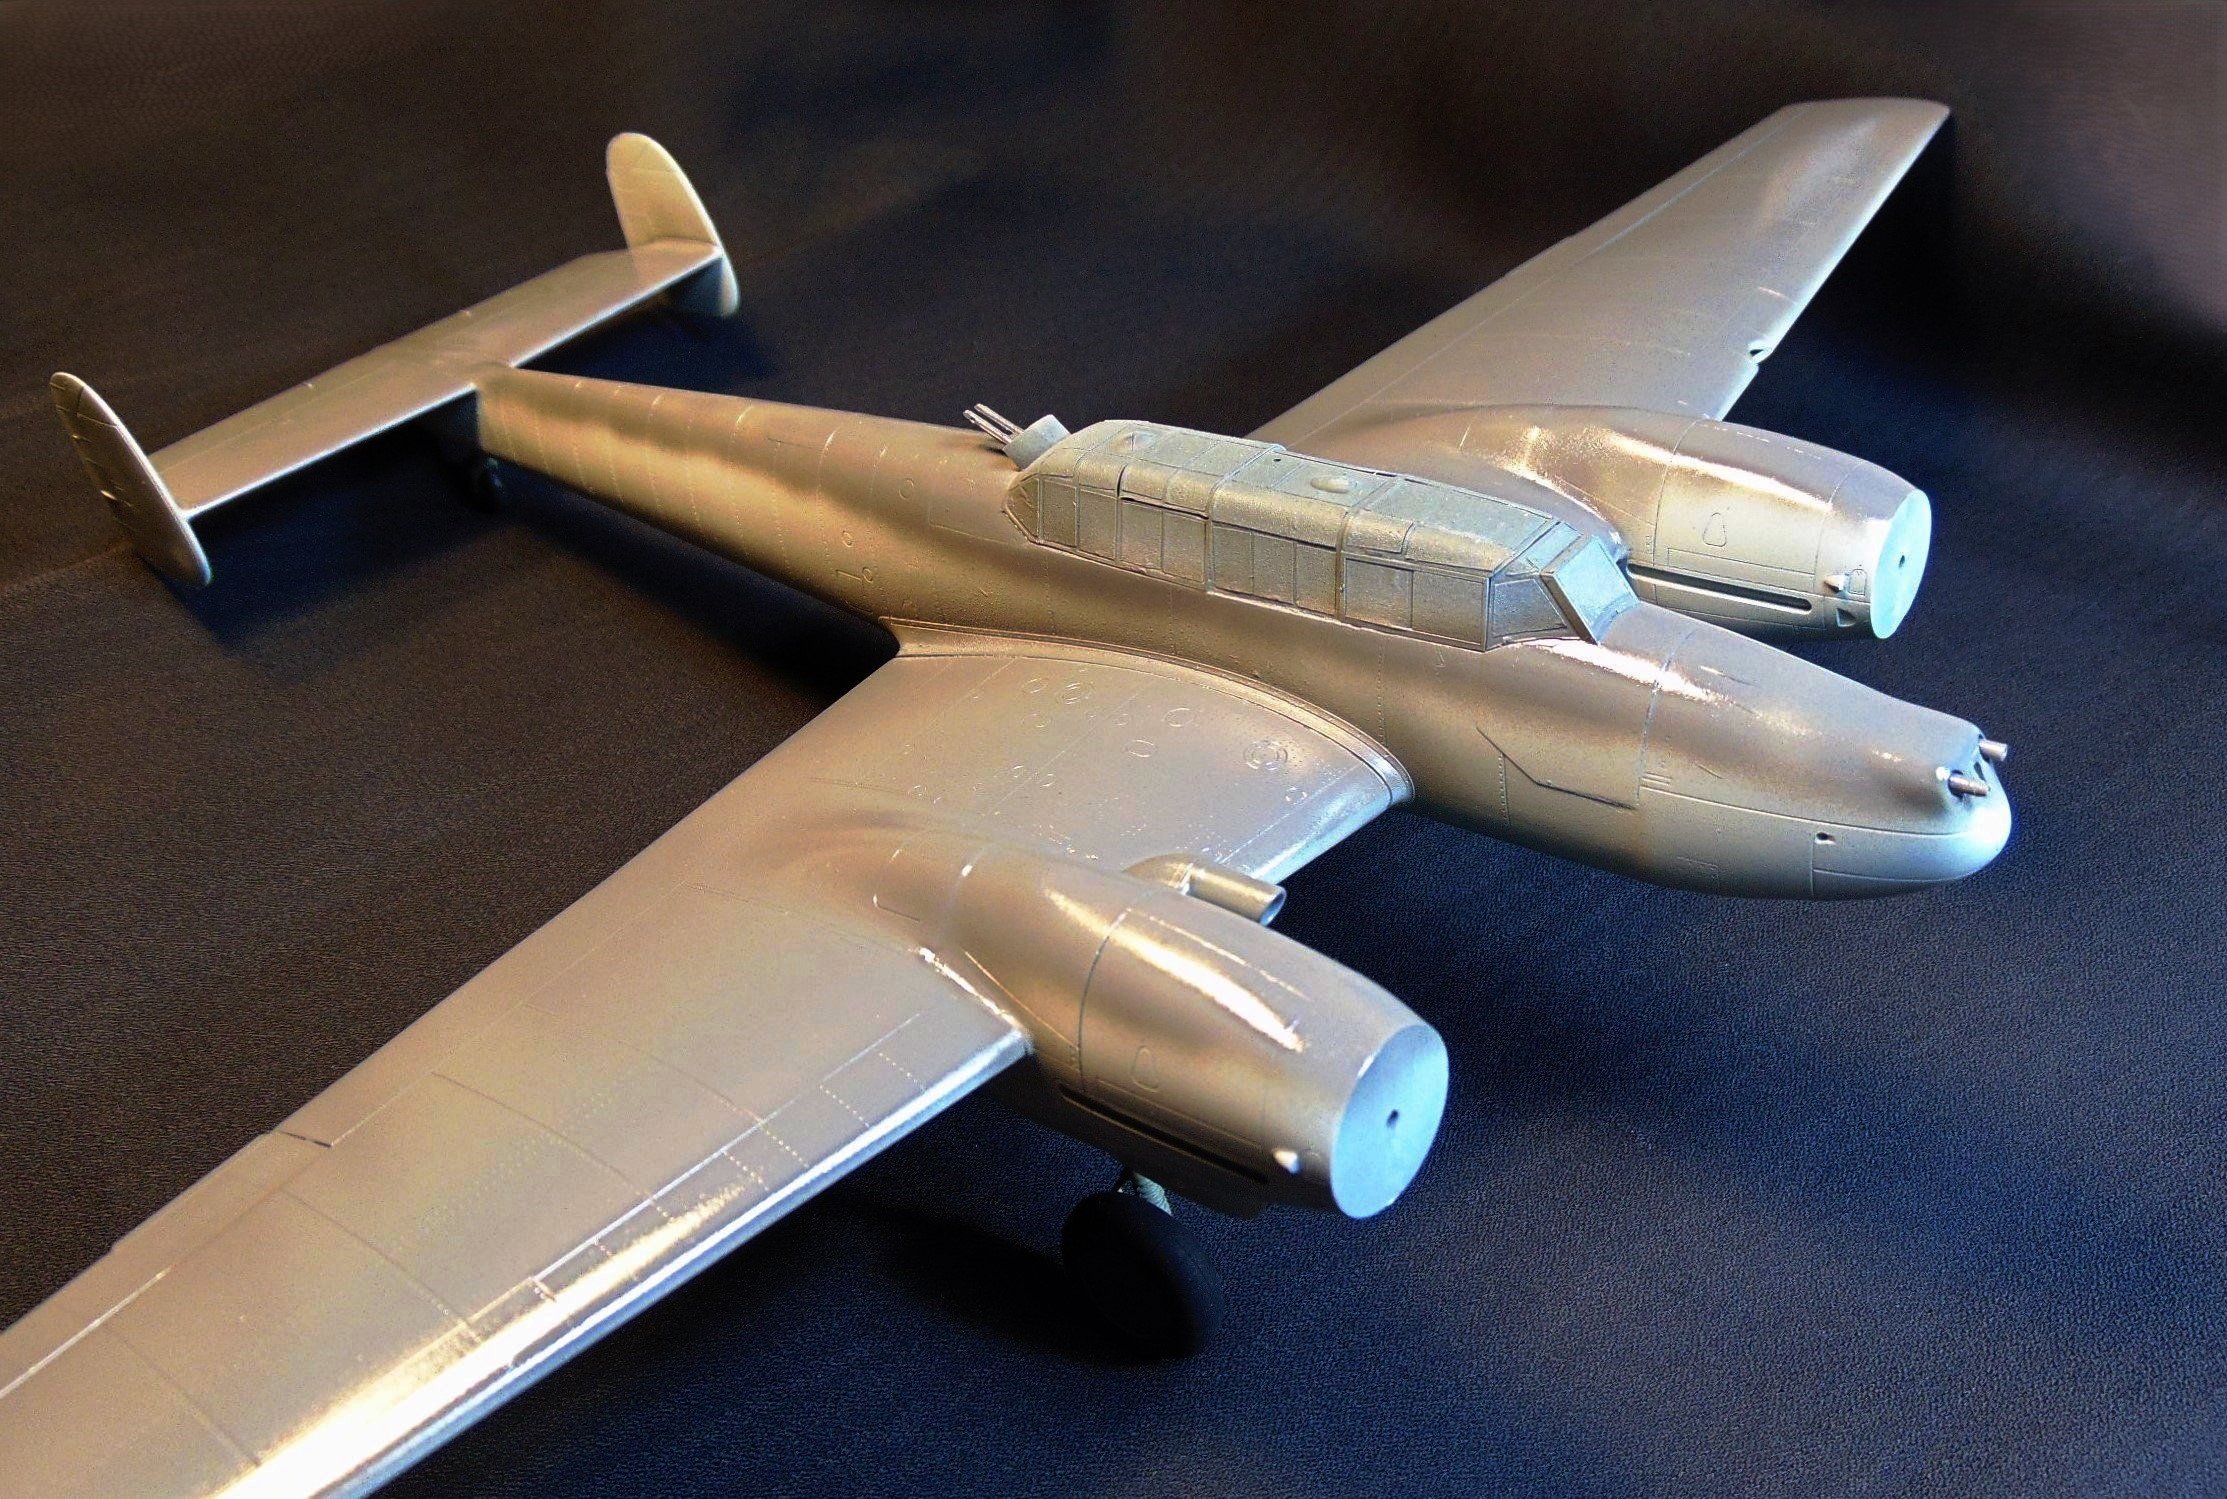
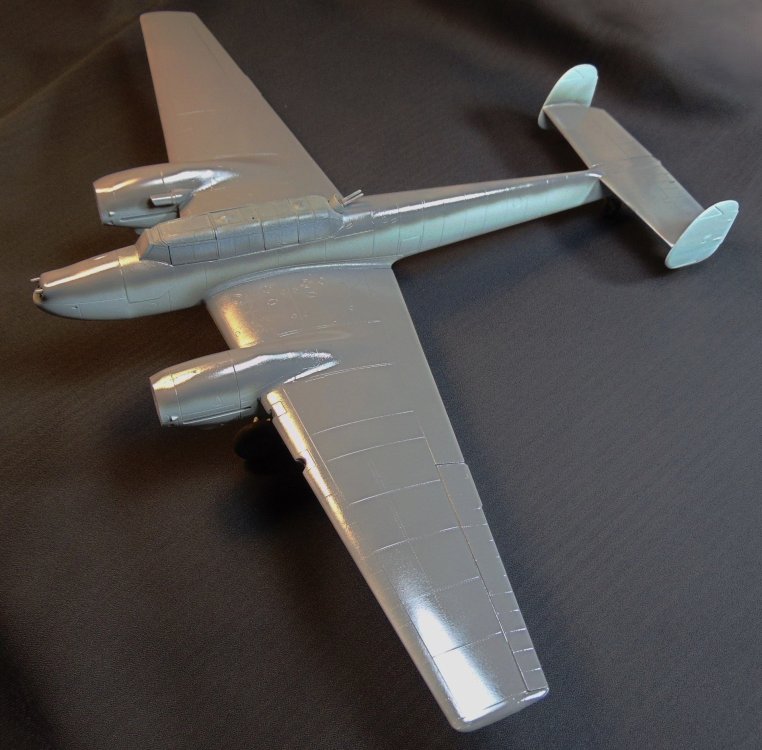
Just getting ready to start decaling.
-
That would be nice!!! 🙂
-
Thank you Peter. 🙂 Ya just can't go wrong with Xtracolor.
-
I guess the person who has the job of compiling the tally is............a tally whacker???? LOL 😄
-
LOL Pretty slick alright! I really like that Xtracolor as it always sprays nice and smooth. Plus, being glossy, there is no need for a overcoat of clear gloss. 😀
-
Painting with Xtracolor under way.
-
F2G Corsair re-paint, etc. all done
JohnB replied to JohnB's topic in LSM 1/48 Aircraft Ready for Inspection
Thanks Martin. This one was in bad need of a cleanup and re-paint. It had sat on the shelf gathering dust for far too long. -
Yes indeed! Got lucky I guess. 🙂
-
Academy 1/35 AH-1Z Viper
JohnB replied to Peterpools's topic in LSM 1/35 and Larger Work In Progress
That small "addition" has saved me from many a big mess!!!!! 🙂 -
Academy 1/35 AH-1Z Viper
JohnB replied to Peterpools's topic in LSM 1/35 and Larger Work In Progress
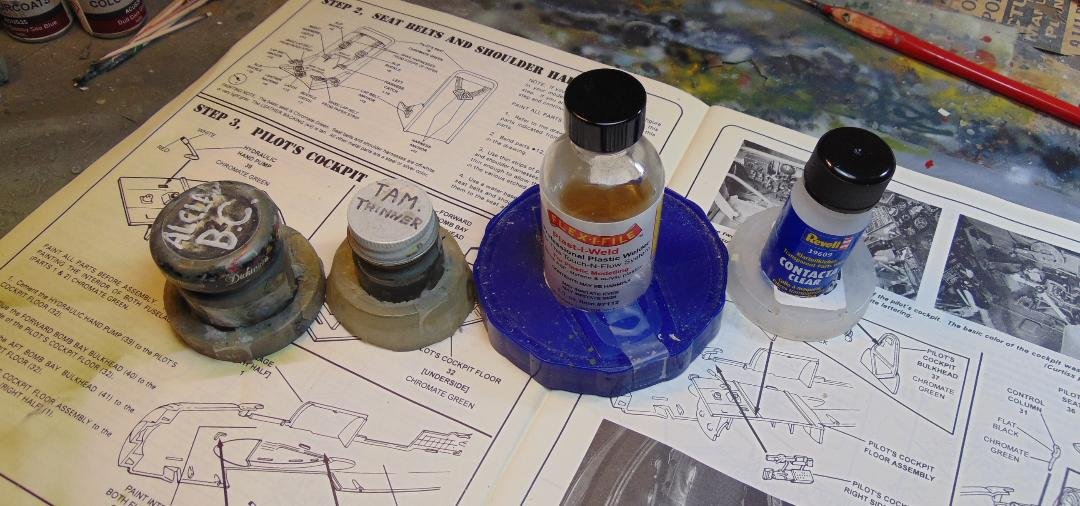
Might be a good idea to post this also Peter. I recommended adding "collars" on paint jars, etc. They have saved me from knocking over thinner, paint, liquid glue, etc many times. A simple and useful thing. 🙂
-
Academy 1/35 AH-1Z Viper
JohnB replied to Peterpools's topic in LSM 1/35 and Larger Work In Progress
My pleasure Peter. Always happy to help.🙂 -
Academy 1/35 AH-1Z Viper
JohnB replied to Peterpools's topic in LSM 1/35 and Larger Work In Progress
It's coming along nicely now Peter. Looks good! 🙂 -
Thanks Kevin. Maybe not quite that soon but not too long. 🙂
-
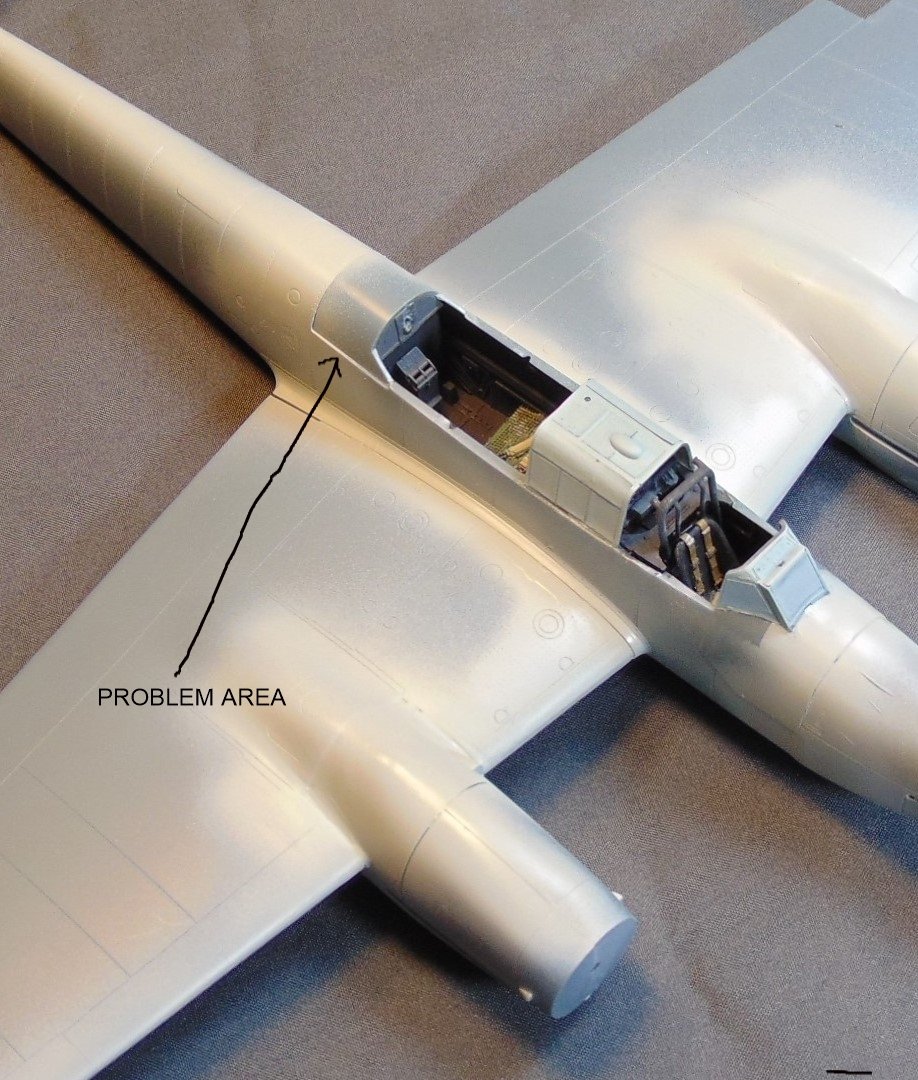
Coming along pretty well Peter. 🙂 There is a bit of a fit issue I will have to address.
-
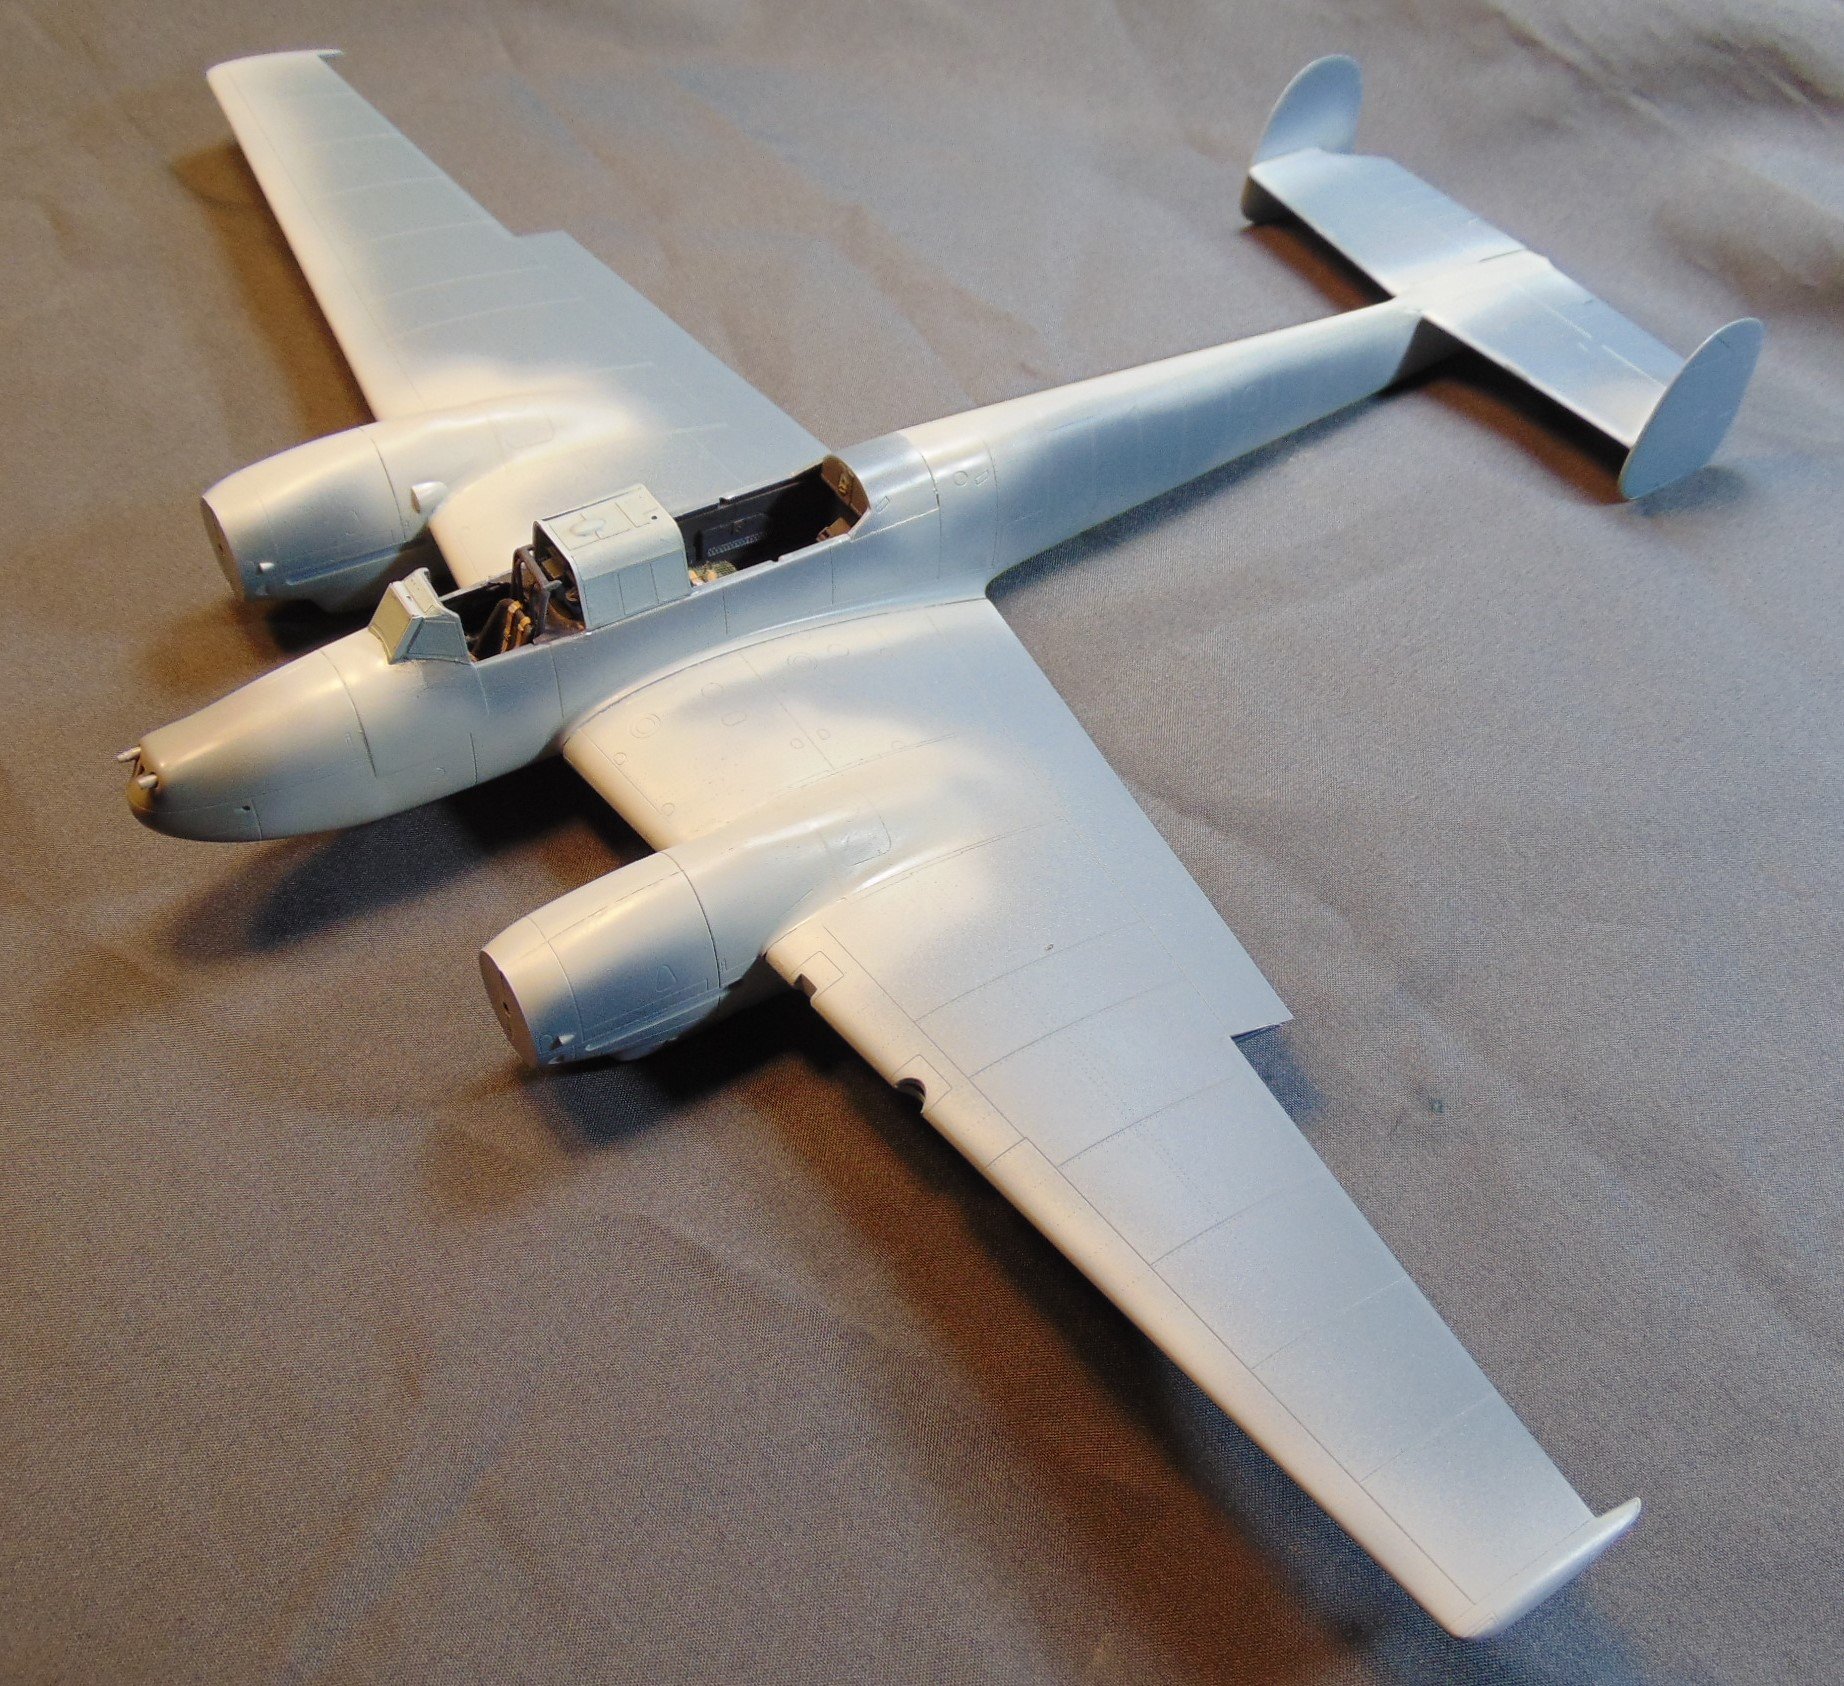
Made some good progress in the last couple of days.

-
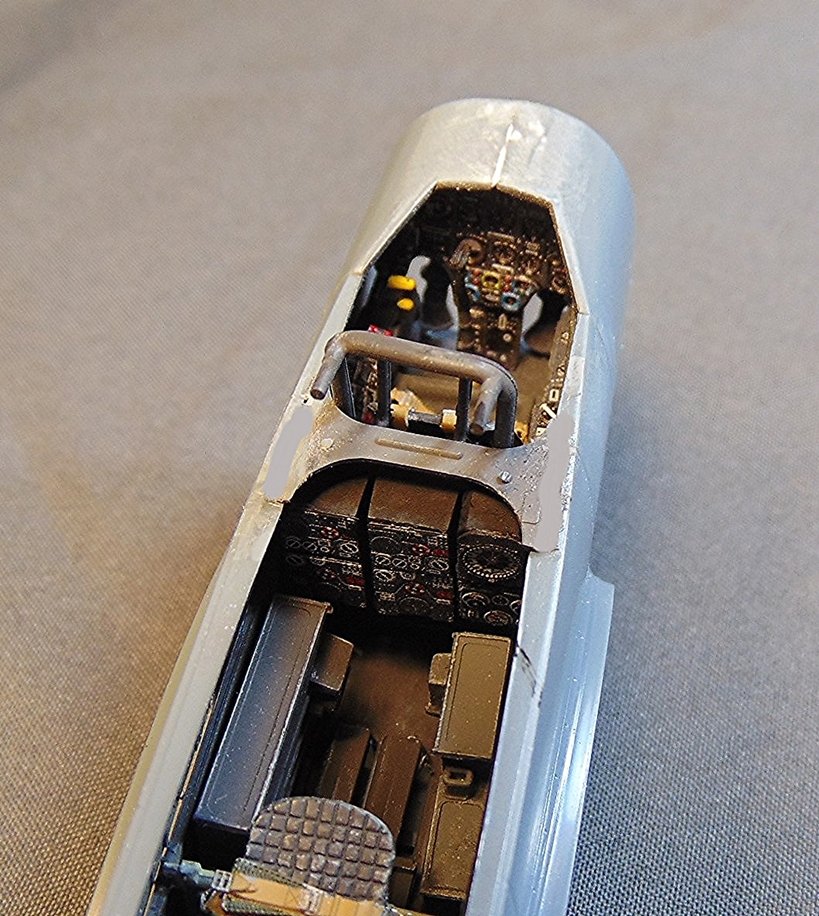
Nice PE instrument faces. 🙂
-
Some progress on this build.
-
Should be a beauty Kevin! 🙂