


GazzaS
-
Posts
6,396 -
Joined
-
Last visited
Content Type
Profiles
Forums
Events
Gallery
Posts posted by GazzaS
-
-
16 hours ago, Peterpools said:
Gaz
Some amazing progress and dealing with all that PE is nerve racking for sure but you have it well under control. The assemblies all look like you're mighty close to the paint shop and that's always been my favorite part of any build.
Keep 'em comin
Peter
There are still some very large pieces of photo etch to deal with, Peter. The close off the back end of the fighting compartment. I'm not really looking forward to them.
-
 2
2
-
-
16 hours ago, Bomber_County said:
Looking really clean build Gaz, when I did the Marder III H I couldn’t find any either, which camo are you going to do? How did you find Bronco? It’s one manufacturer that I haven’t built…..
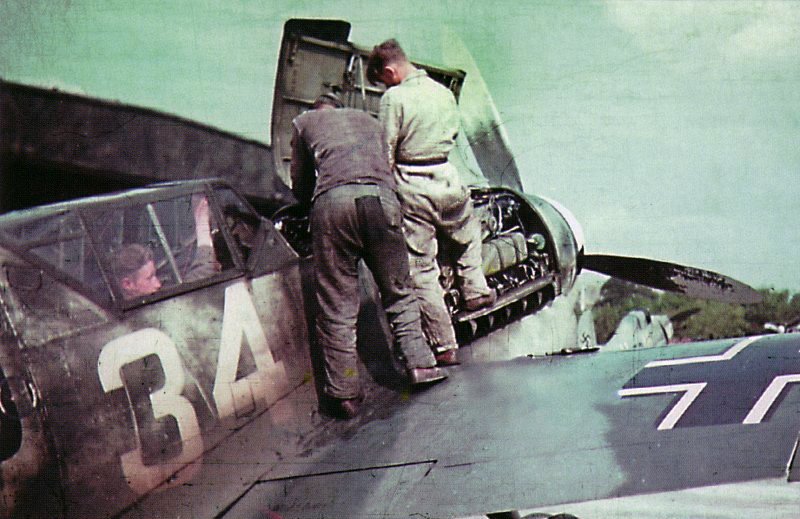
I'll probably go for the box camo I showed on page 1.
Even though the pic shows a hard edge camo, the photo with all of the guys in the same positions, shows a very soft camo with much less color density.
I've heard about Bronco kits for some time. And knew they had a propensity to be parts-heavy and over-engineered. But I'd never heard any other complaint against them.
They are the only ones to make this AFV and the PZ III with 5 road wheels. So it was really deciding which ones I wanted when the daughter gave me a gift card for one of the larger model kit sellers in Australia. I've never seen any for resale. ... not that I have looked too hard.
They do make a lot of the British cruiser tanks from the early war years like the A9. I may get to those eventually as I've already done Matilda and Valentine by other kit makers.
-
3
-
-
15 hours ago, Bomber_County said:
Totally agree Gaz, I noticed that on trailing edge, nice detail. For the price of the kits I’ll definitely be buying more. On the MG’s, I was toying with the idea of putting metal barrels on but not all of them are available in brass. I’m sure I’m wrong on that though…..
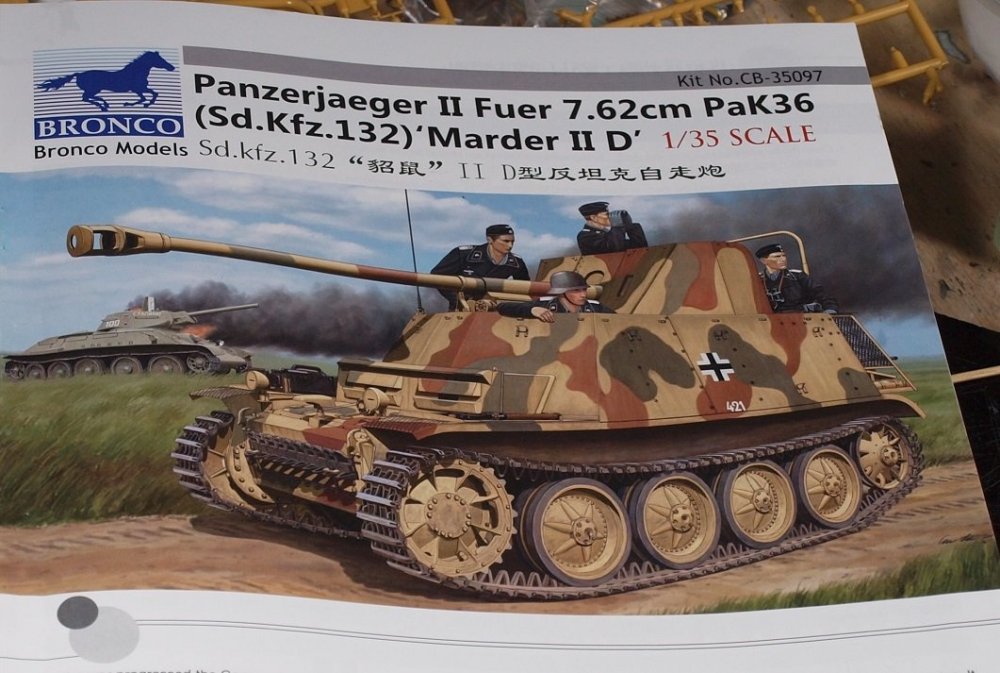
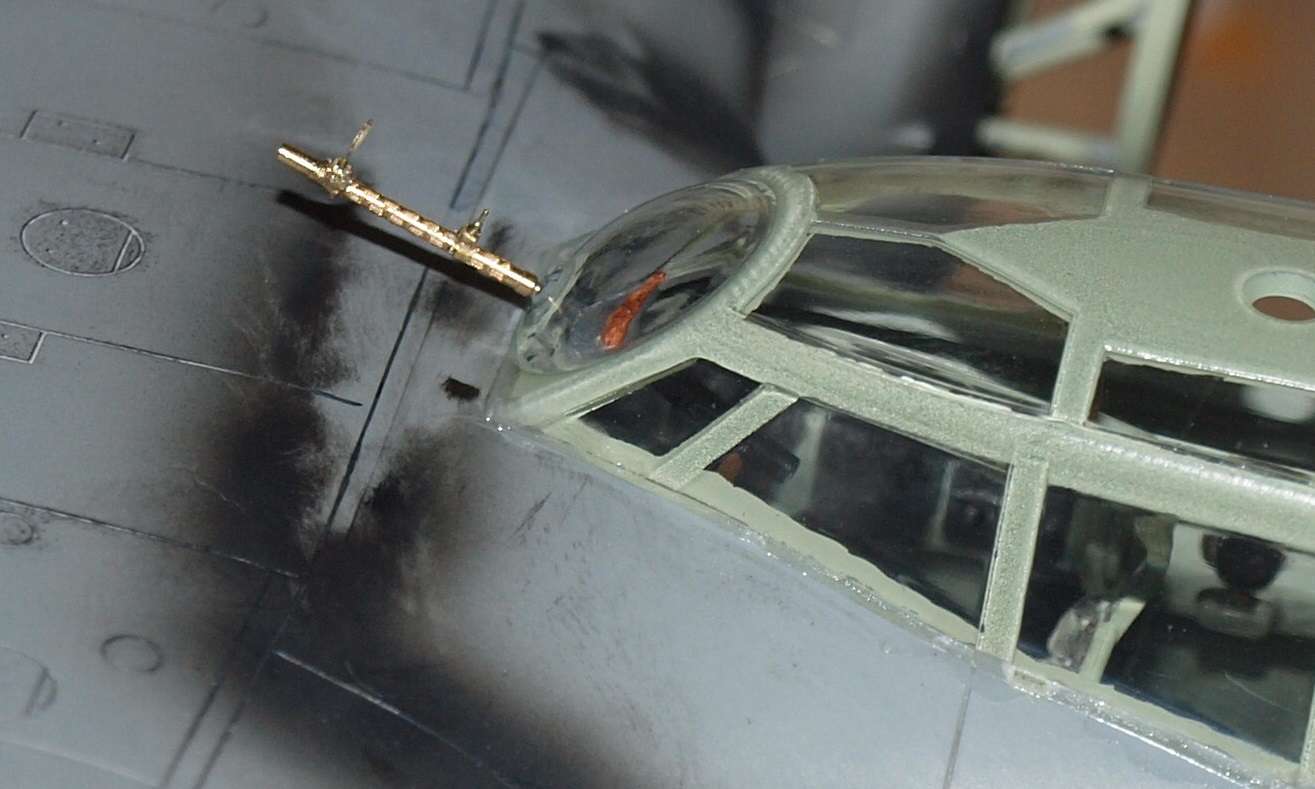
I know that Master made MG 15's... I bought like 20 of them.
... they look pretty snazzy:
The next question is... are you supposed to be using MG 81?
-
5
-
-
It's hard to believe that it's been more than a month since my last update. Anyway... here we go!
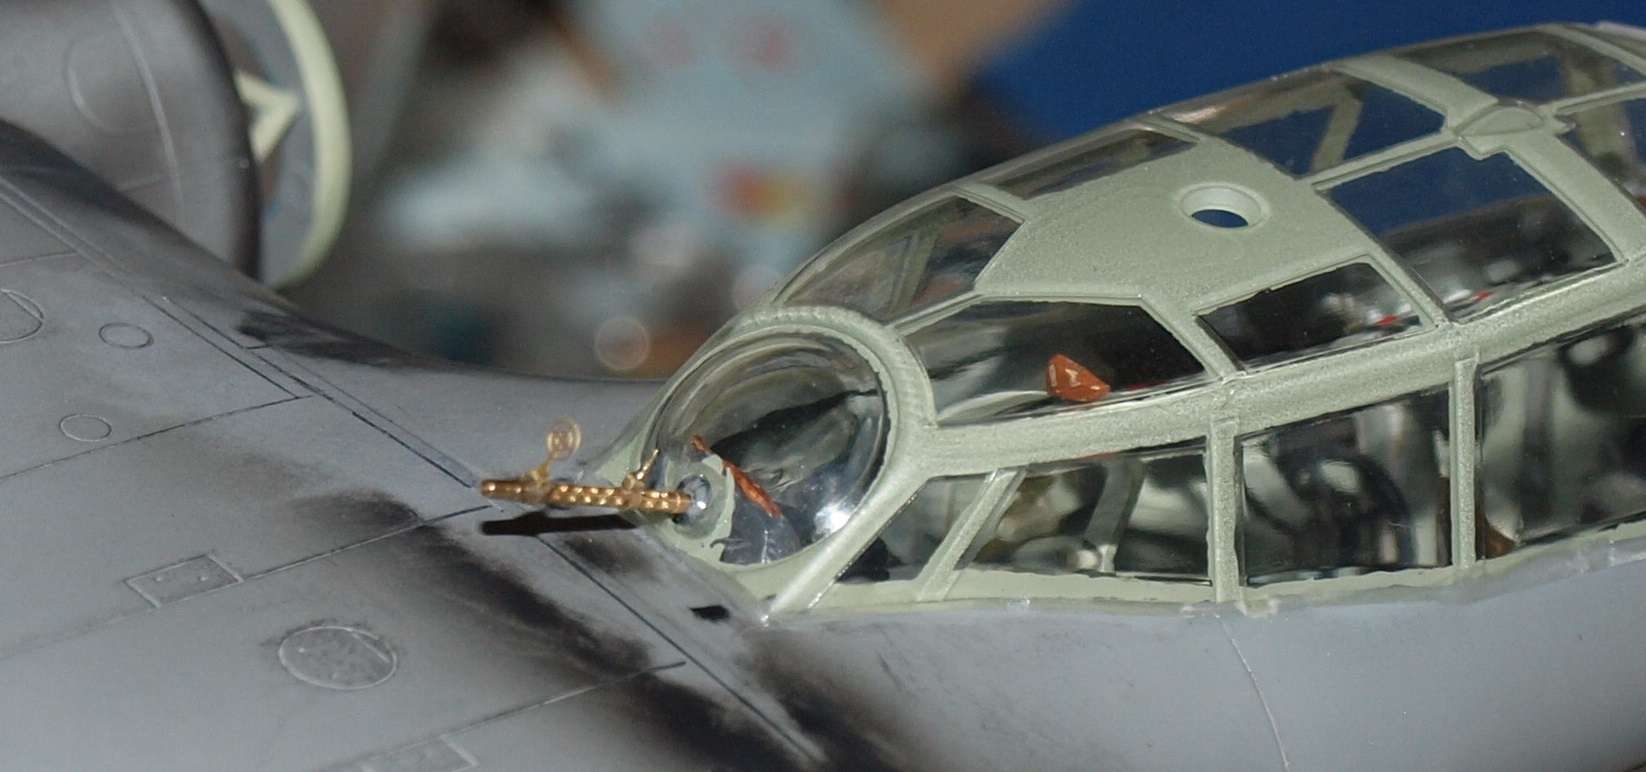
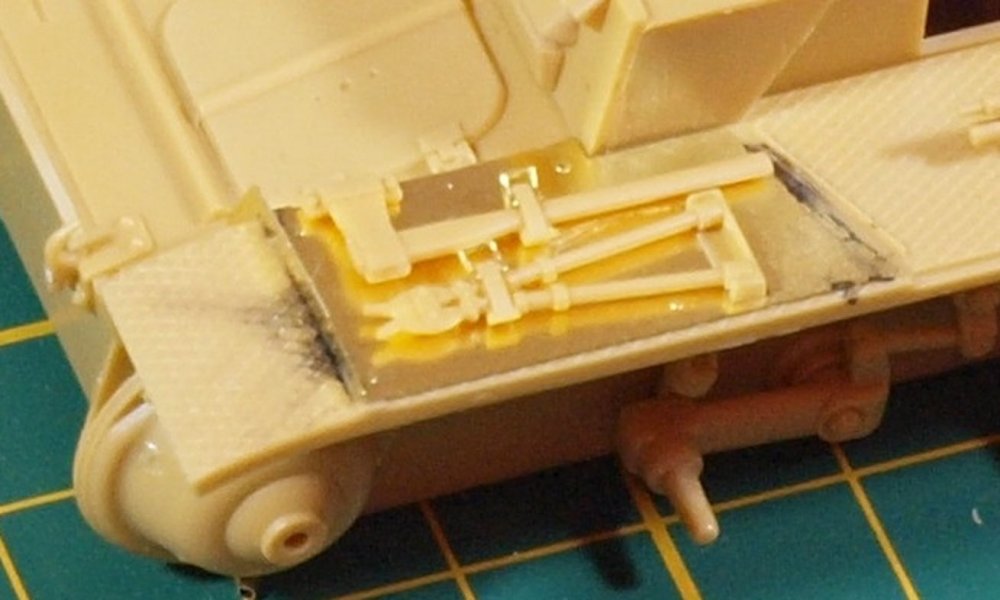
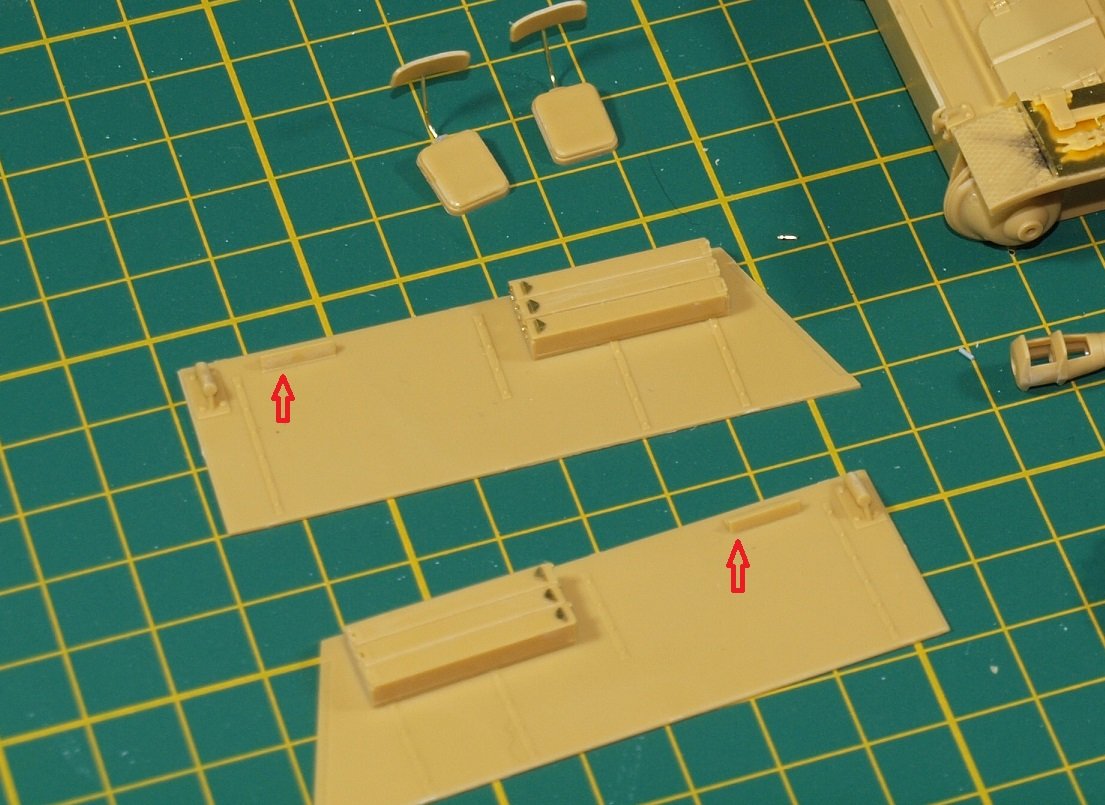
Today I started by putting metal back supports on the chairs. A friend told me that he broke the plastic supports repeatedly as he was assembling the model.
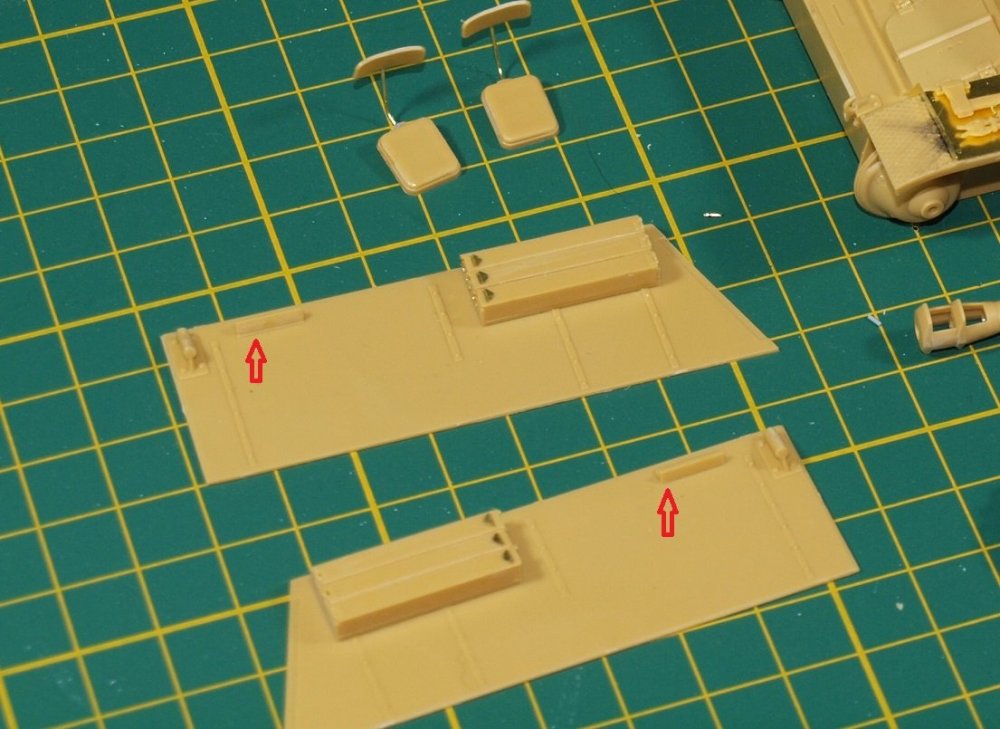
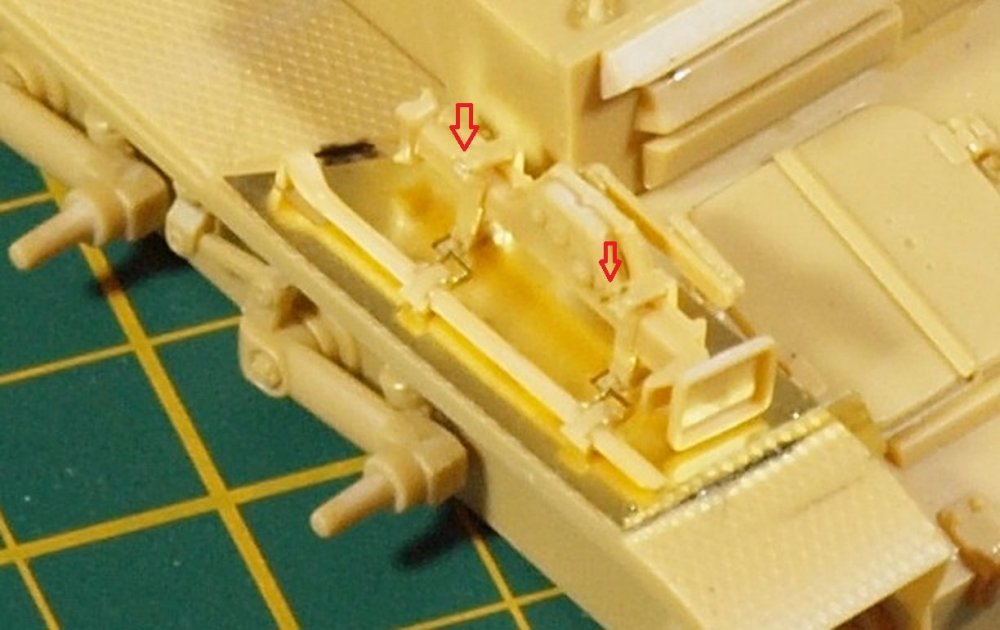
The two seats will sit on the small rails over the red arrows. Also note the 3-shell ammo storage boxes on each side of the fighting compartment. There are PE latches at the end and PE triangles one each case, Not sure what they are for... but there they are.
I started adding tools. Some have PE latches.
And then there were more wingnuts holding on the jack.
And finally the group pic with everything done so far.
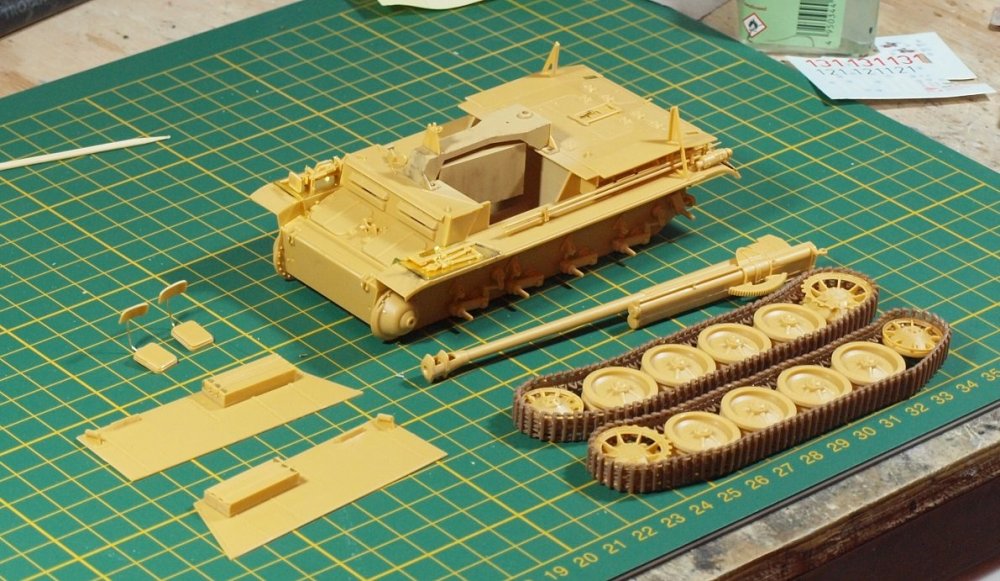
So far, nobody has produced any interior photos of this machine. So I wonder how close this kit is to the real article. Anyway...getting closer to paint.
Happy modelling!
-
6
-
-
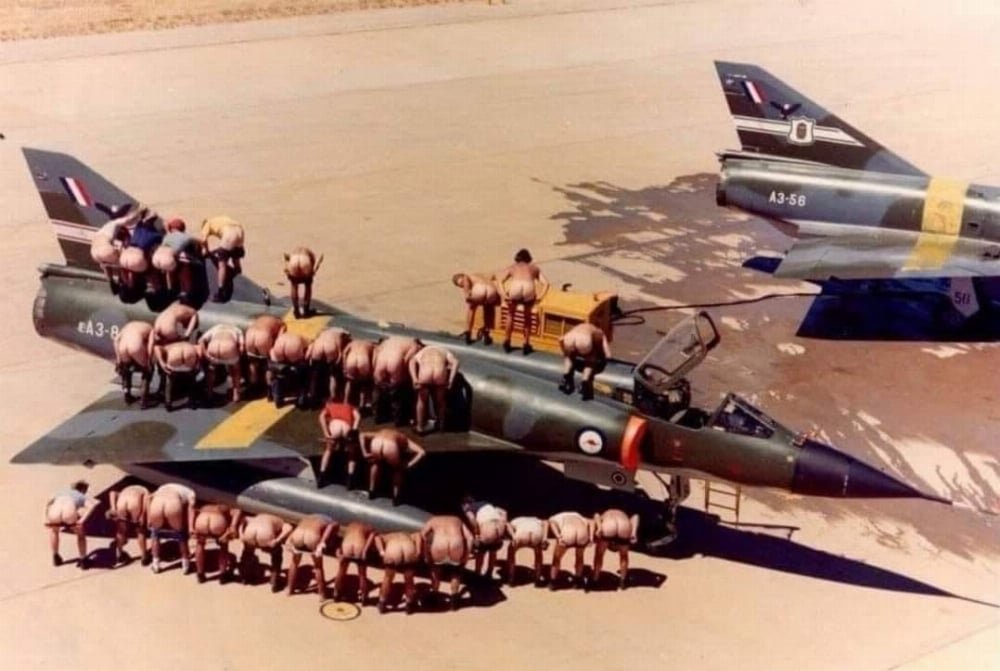
Just couldn't help myself.... from Farcebook.
-
 7
7
-
-
I've never lived anywhere geologically unstable. My heart goes out to those who suffer from nature's fury. Glad that it wasn't your island, Rob.
-
5
-
 1
1
-
-
8 hours ago, Bomber_County said:
Sorry Gaz sneaked in there, be my guest, as I said first ever German twin I have built………
The ICM twins I have built have been pretty nice. They are quite adventurous when it comes to molding stuff... amazingly thin stuff quite often. One think I like about all of their kits I have built so far is that they mold the trailing edges of the wings solid, leaving the seam on the underside of the wing.
This is the MG 15 that comes with the Dornier 17 kits. Probably the best MG 15 you'll find molded in plastic.
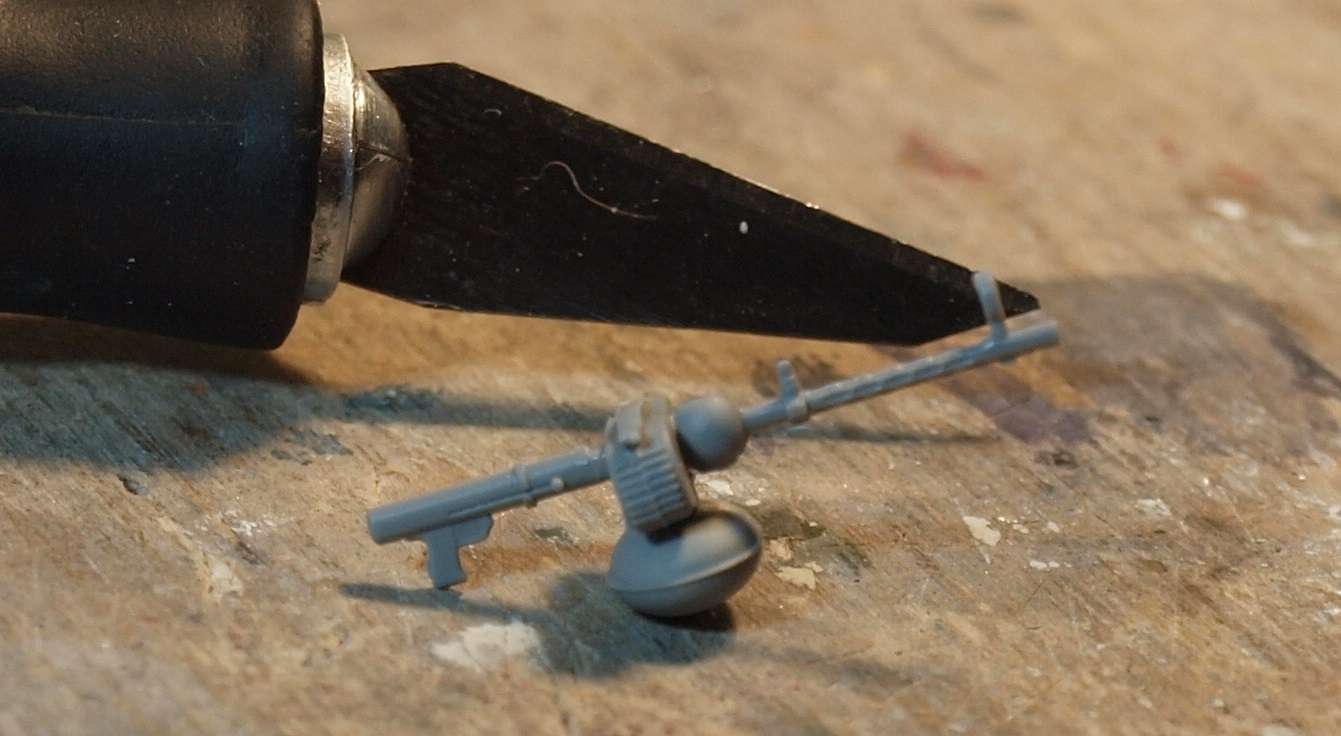
Though it's not quite as sharp as the Master Barrels Mg 15... it's a lot less fiddly.
-
9
-
-
-
You caught me napping. I wanna watch.
-
1
-
-
Nice work on completing the office, Peter! I much prefer the HGW cloth belts to the PE belts... though I imagine nicely molded resin belts and seat would please me most.
-
2
-
-
17 hours ago, Kaireckstadt said:
This will be looking awesome when finished Gary!
Great work on the decals.
I have a tipp for you for the small decals:
When I apply them, I don’t press them on with a paper towel because then they might move.
I use a cotton swab and carefully roll it over the decal. This will take out the bubbles but the decal won’t move.
HTH
Kai
16 hours ago, Martinnfb said:Amazing airbrush control.
13 hours ago, Peterpools said:Gaz
Attention to details is nerve racking, time consuming and needs an ultra steady hand - of which you have conquered all. Absolutely looking simply fantastic.
Part of the problem on how our models look in photographs, especially closeups, is the un-natural magnification. We're looking at a photography of a small area larger then life and what is seen in the photograph isn't how we will ever see that part or area on the model without a magnifying glass. Closeups are great to check out details and whatever but should never be used to judge the actual work as it's unrealistic. Step back a foot from the model and what you see is what your photographs should show.
Applying small decals is a PIA at times. Here is where a super glossy surface works against you as the small critters slide all over the place. What seems to work best for me:
I slide the tiny decal into place, after the spot has a drop of wet water (water and a drop of Dawn to break the surface tension) and a few drops of Micro Set - my decal soak water. Position the decal and leave it alone. No matter what you do, it's going to move. Let it dry a bit until it has started to adhere and then with a Q-Tip dampened with my soak water, I very gently tap it with an up and down motion. If it doesn't move, then I'll roll the Q-tip across the decal to remove any excess water and/or air. Micro Sol after dry and all should be good.
Personally I always was a huge fan of Letraset Rub On stencils on a flat finish as they were fire proof but time has passed them buy.
Keep 'em comin
Peter
Guys,
Thank you for the tips and and kind comments! I will try them on future decals.
-
3
-
-
Decalzzzzz.....with an emphasis on the zzzz

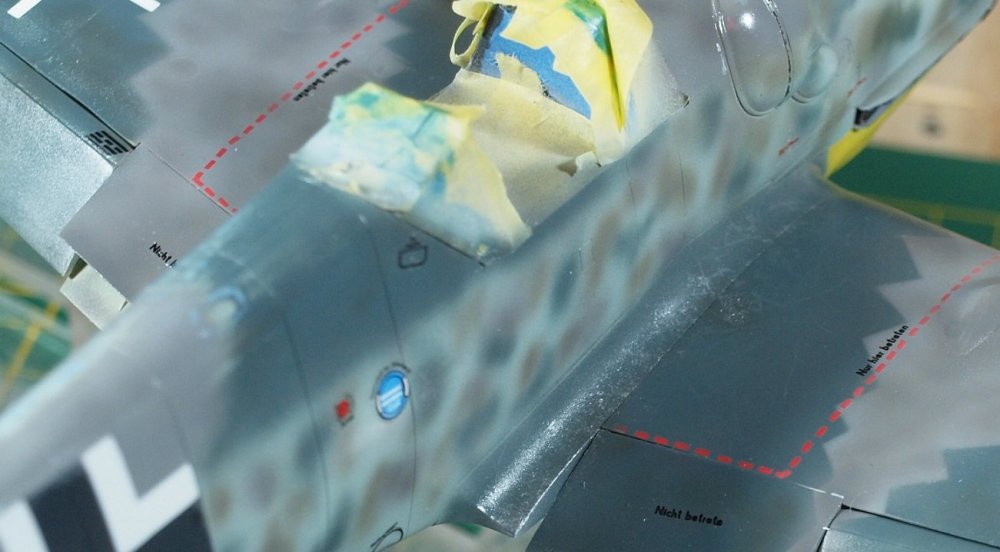
Surprise, Surprise, Surprise exclaims Gomer Pyle. The hand-hold and toe-kick decals don't matched the molded surfaces.
I dislike little decals. You can't apply as much pressure on them to get the air bubbles out. If you do, they move. I uh... look forward to slicing all of the tiny bubbles once the matte coat is applied. Anyway... this one can sit for a couple days.
Happy Modelling!
-
8
-
-
1 hour ago, brahman104 said:
Thanks Kai. Should look even better once the whole thing is covered in metal!
Craig
That's what I'm looking forward to.
-
2
-
-
NO instructions?!?!?
-
3
-
-
Nice!
-
2
-
-
11 hours ago, DocRob said:
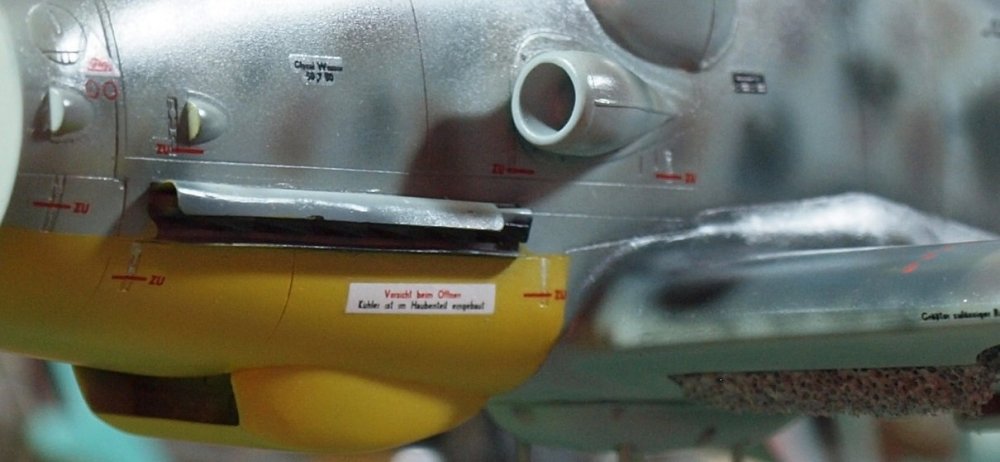
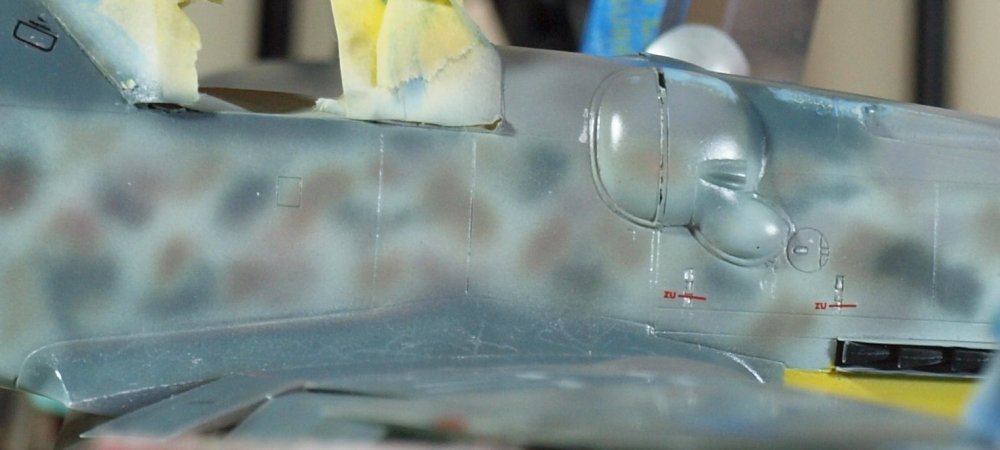
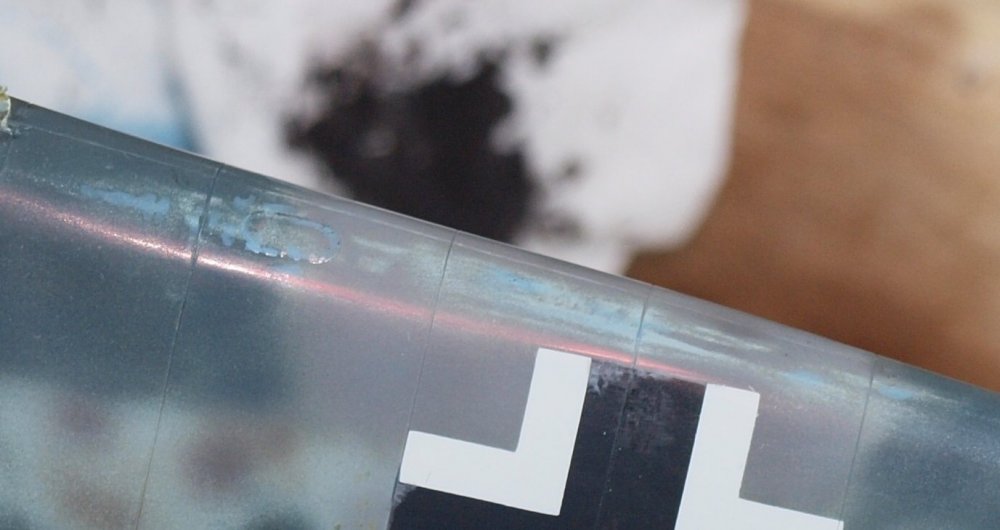
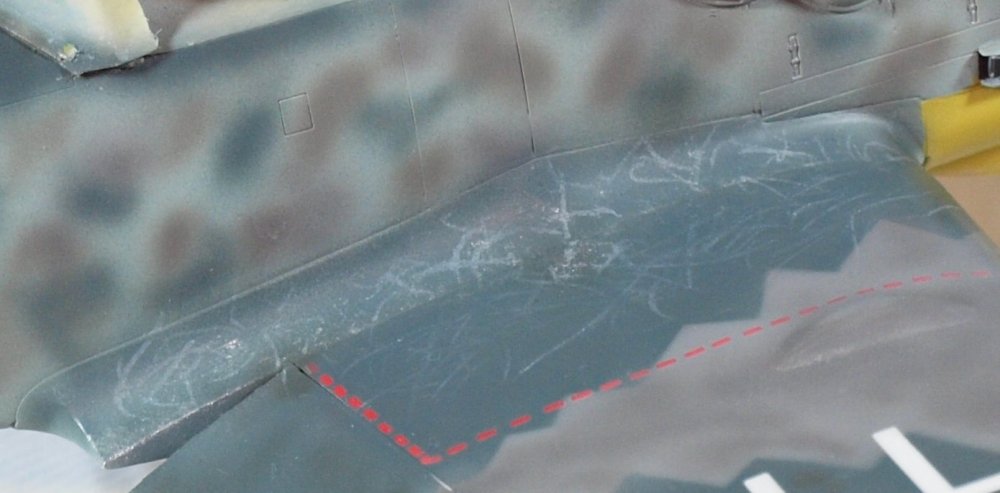
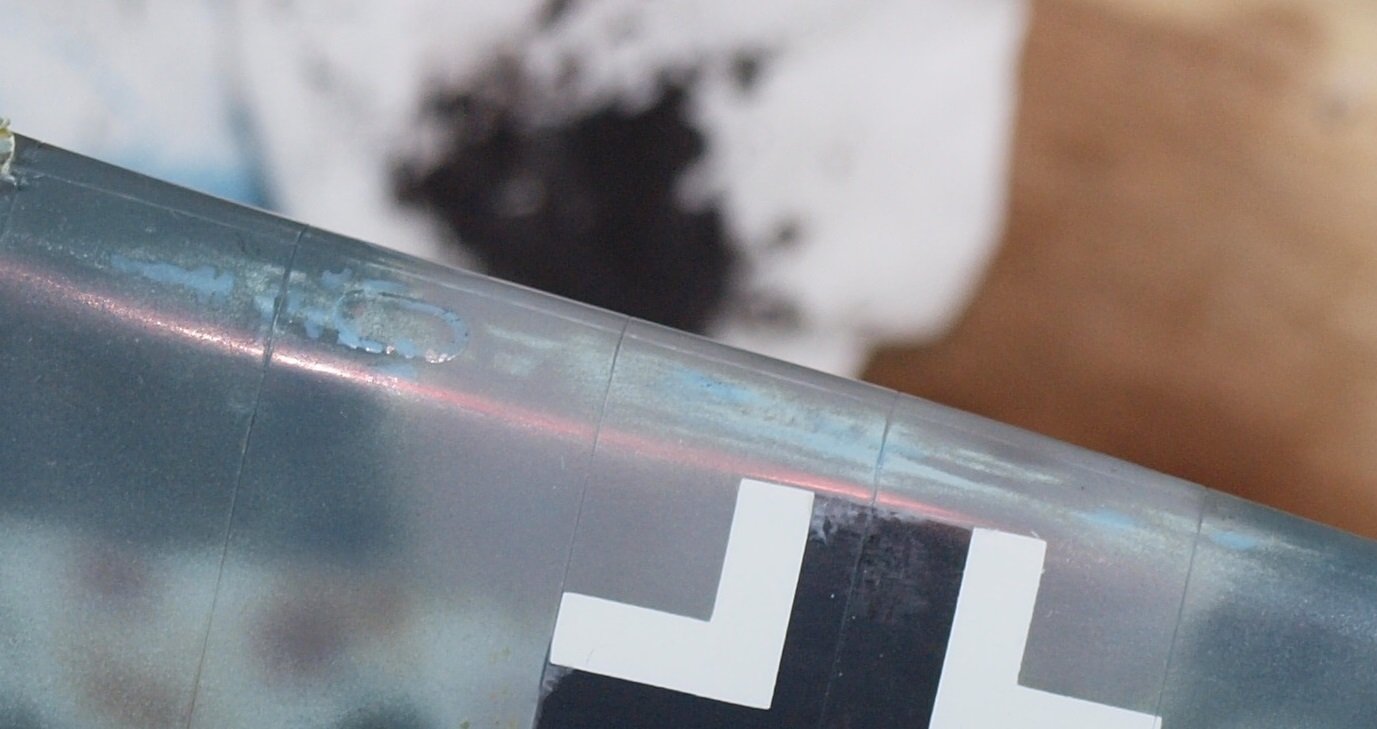
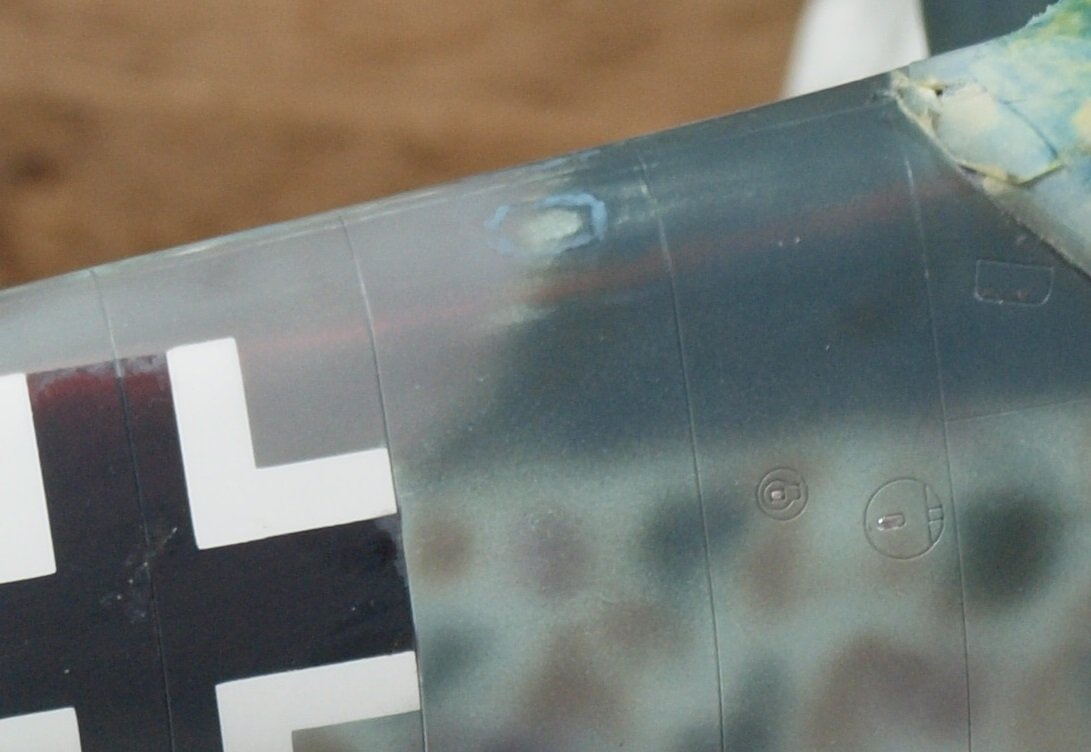
I never sanded for weathering effects, but it seems to work great. Love the dedication to details, like the different wear on the overpainted sealing.
Cheers Rob
Sometimes Rob... it can be a lot of sanding to get a desired effect:
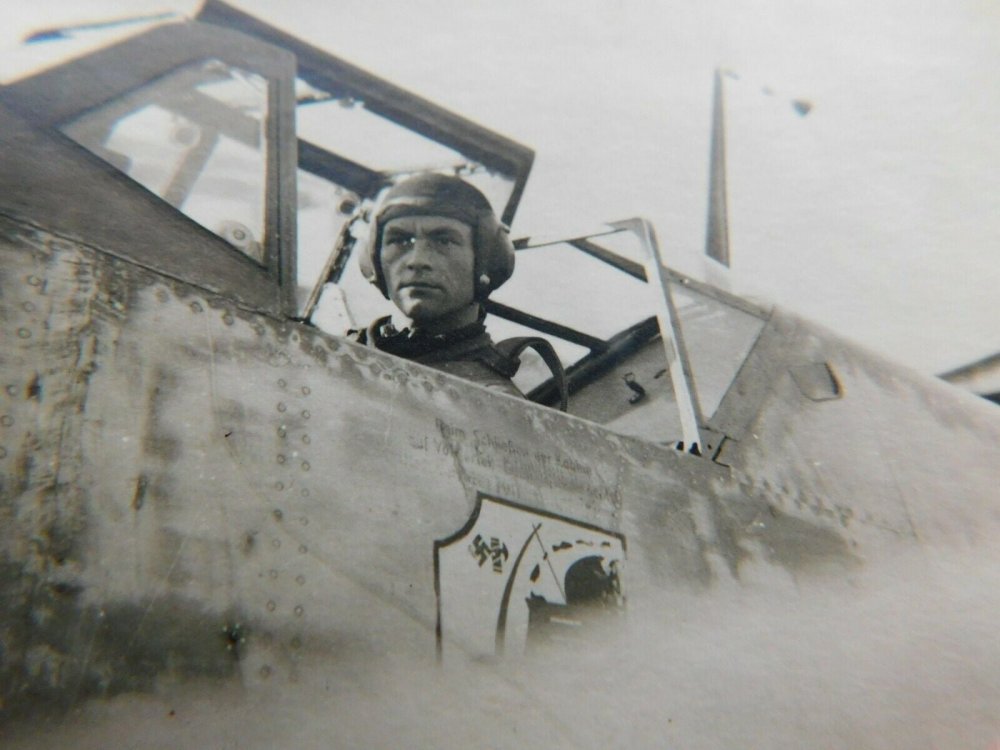

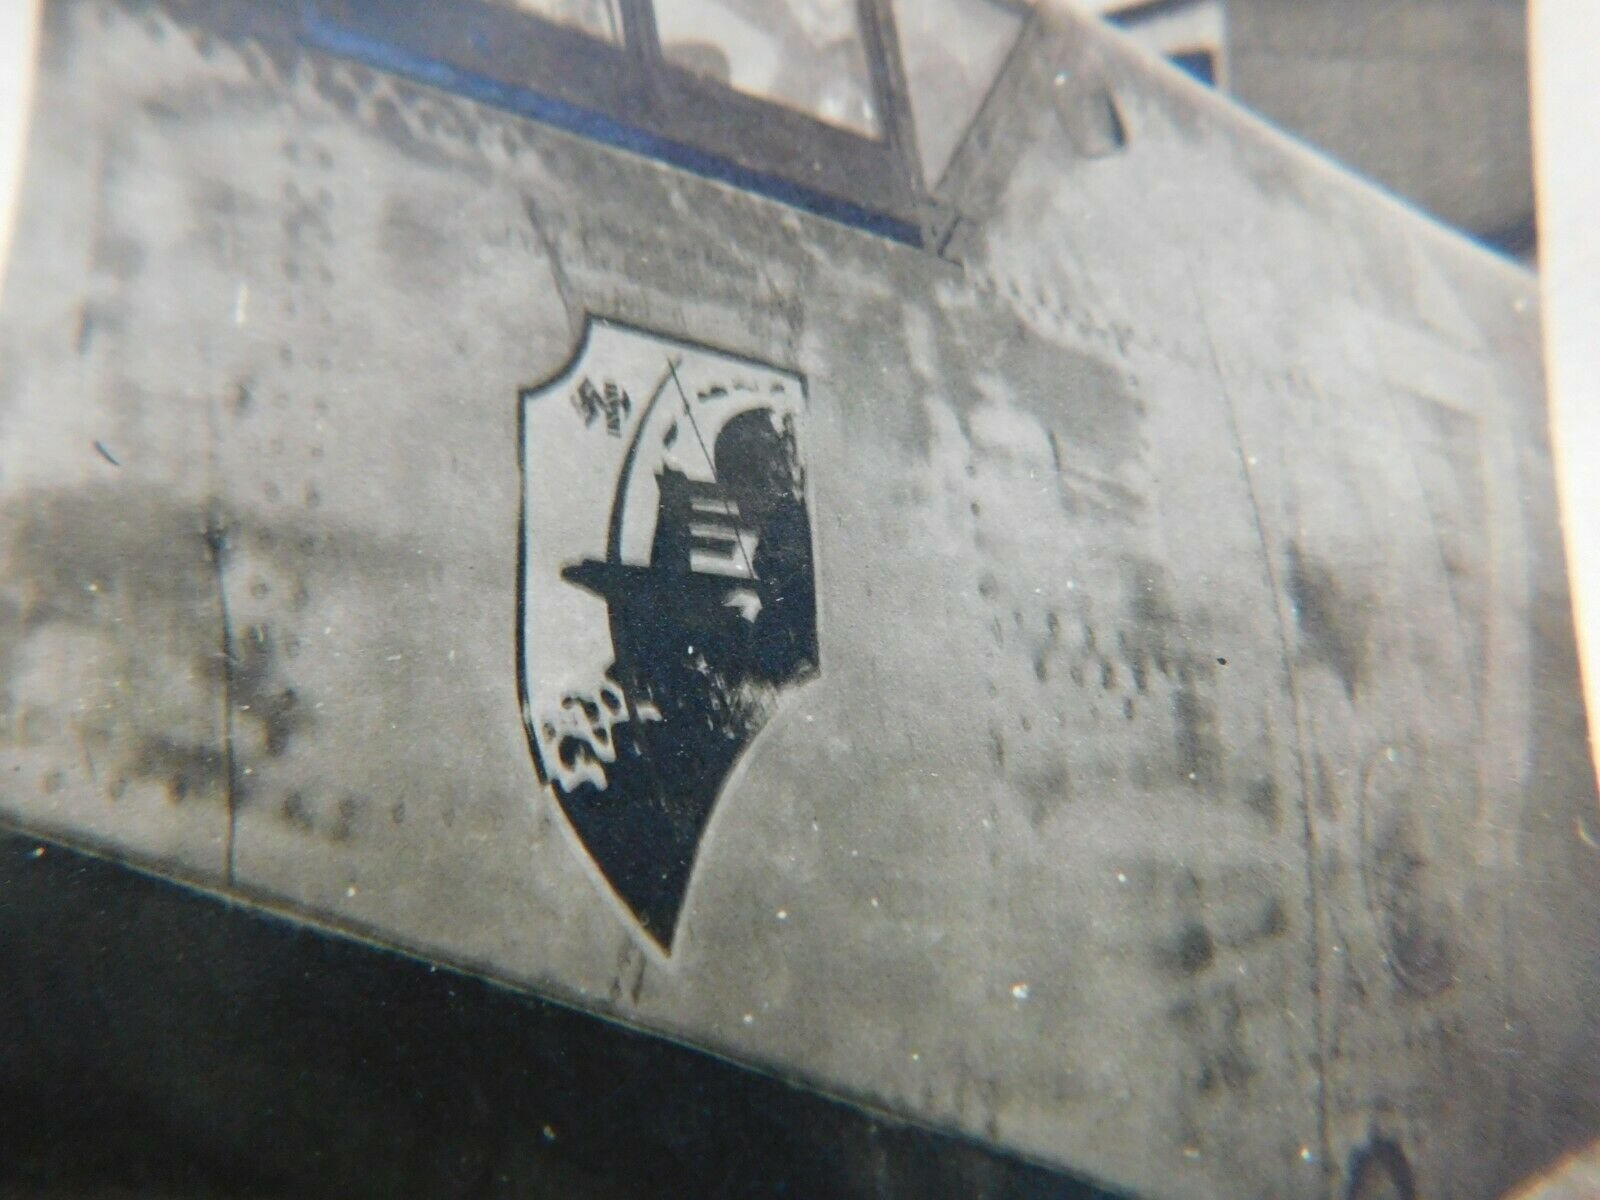
Wish I knew the name of the JG 1 pilot.
-
3
-
1
-
-
4 hours ago, Clunkmeister said:
What truly sux is my first Viggen batch order is within 50 of the end. So late October they say.
Dangit.That will give you plenty of time to foil the B-36.
-
2
-
3
-
-
58 minutes ago, Kaireckstadt said:
Great detail work Gary. To me it’s not overdone and also look convincing from close view.
Thank you, Kai. Clear coated and waiting overnight for decals.
-
3
-
-
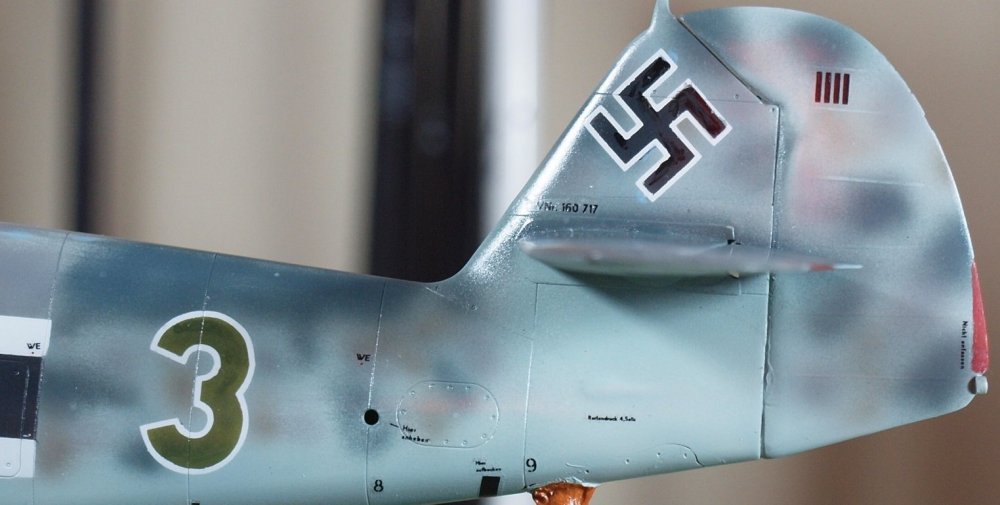
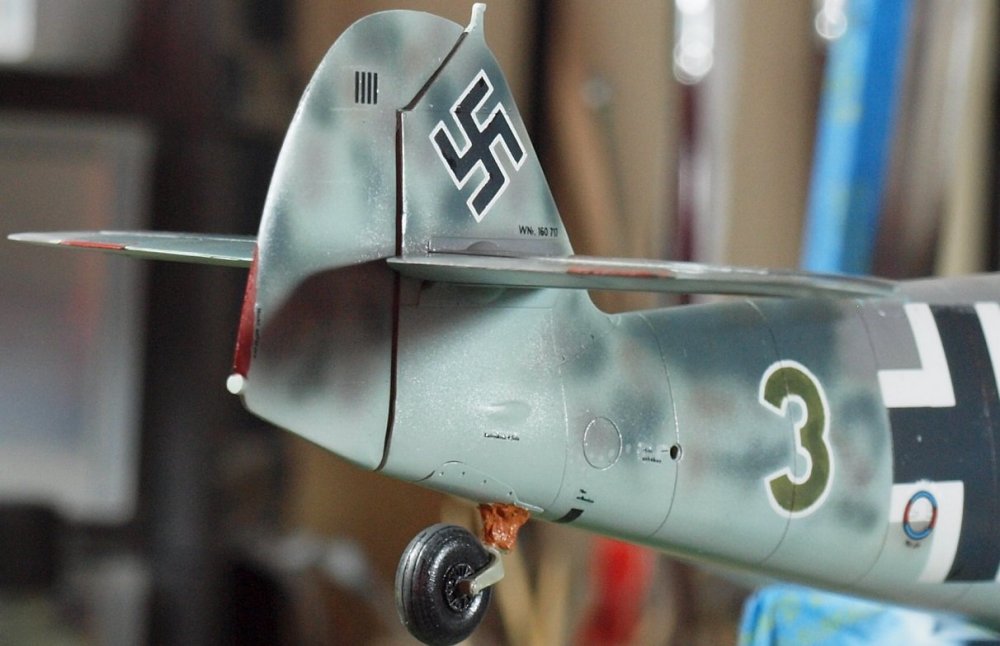
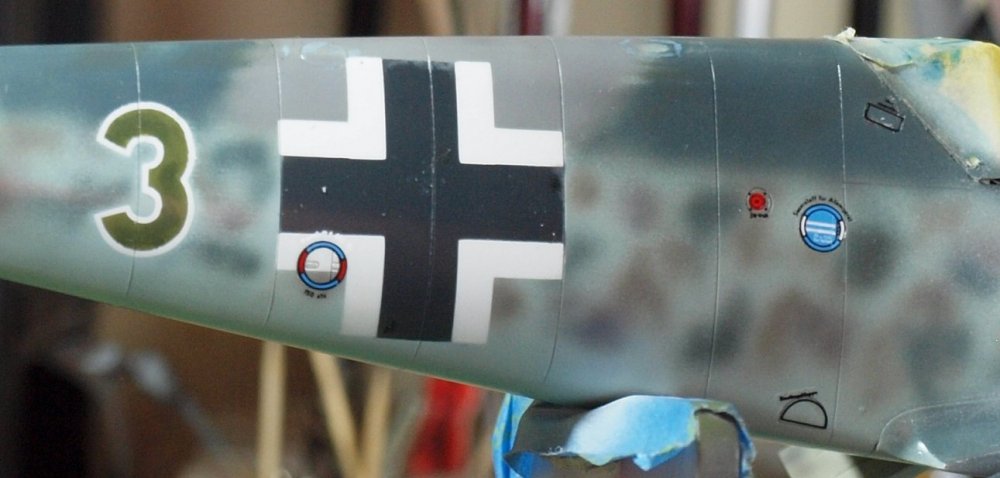
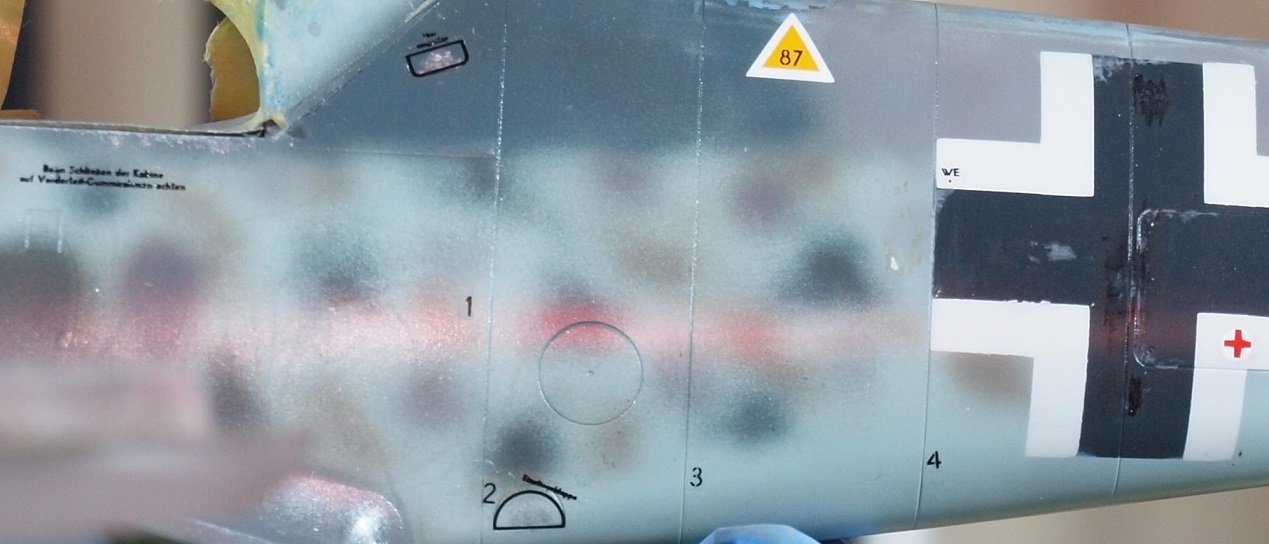
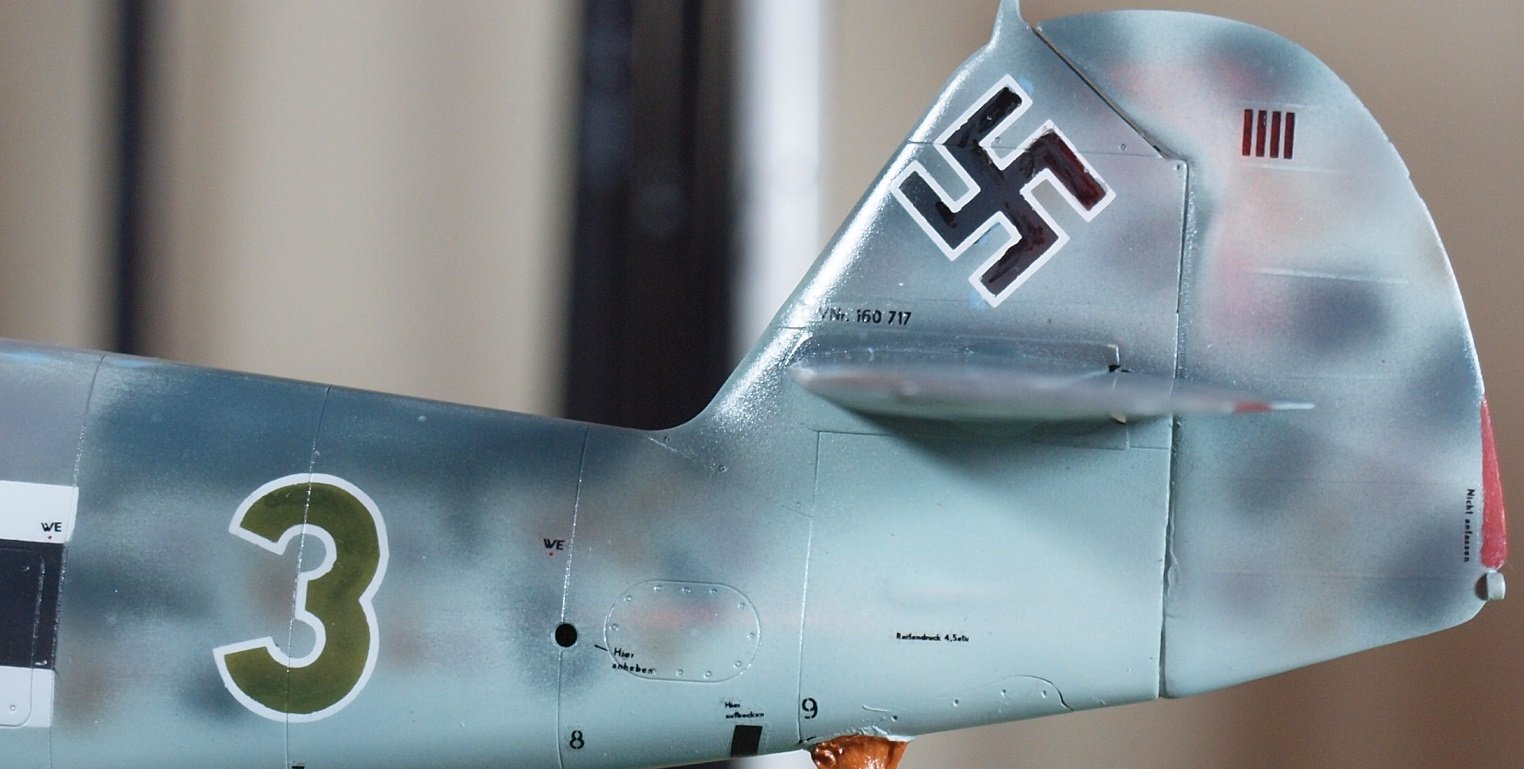
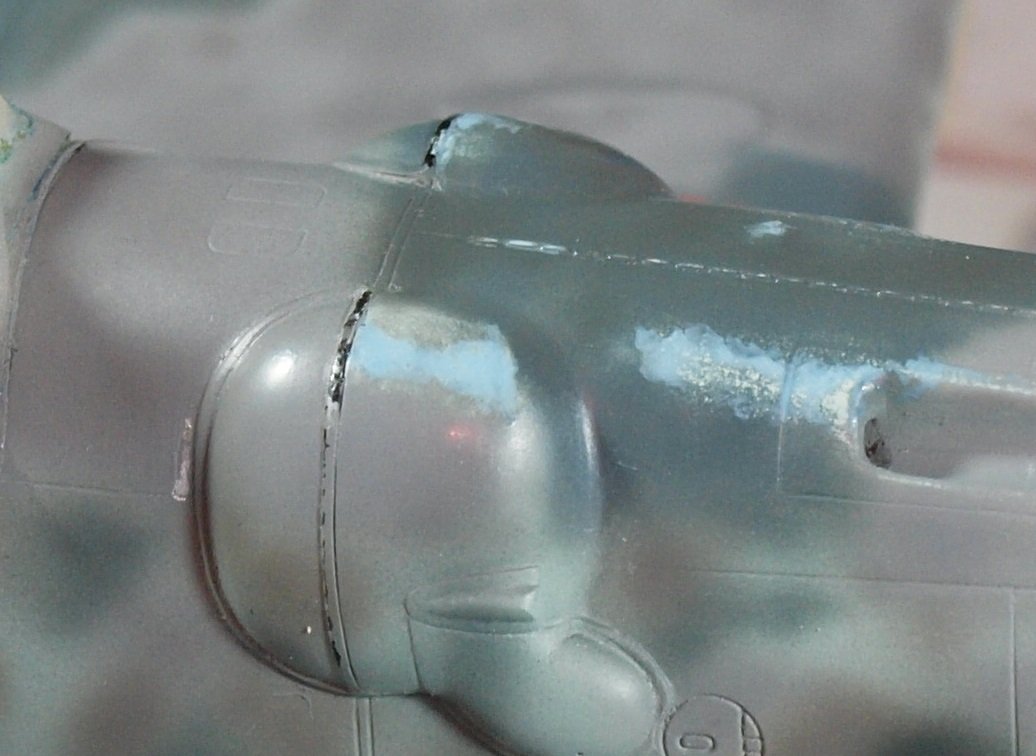
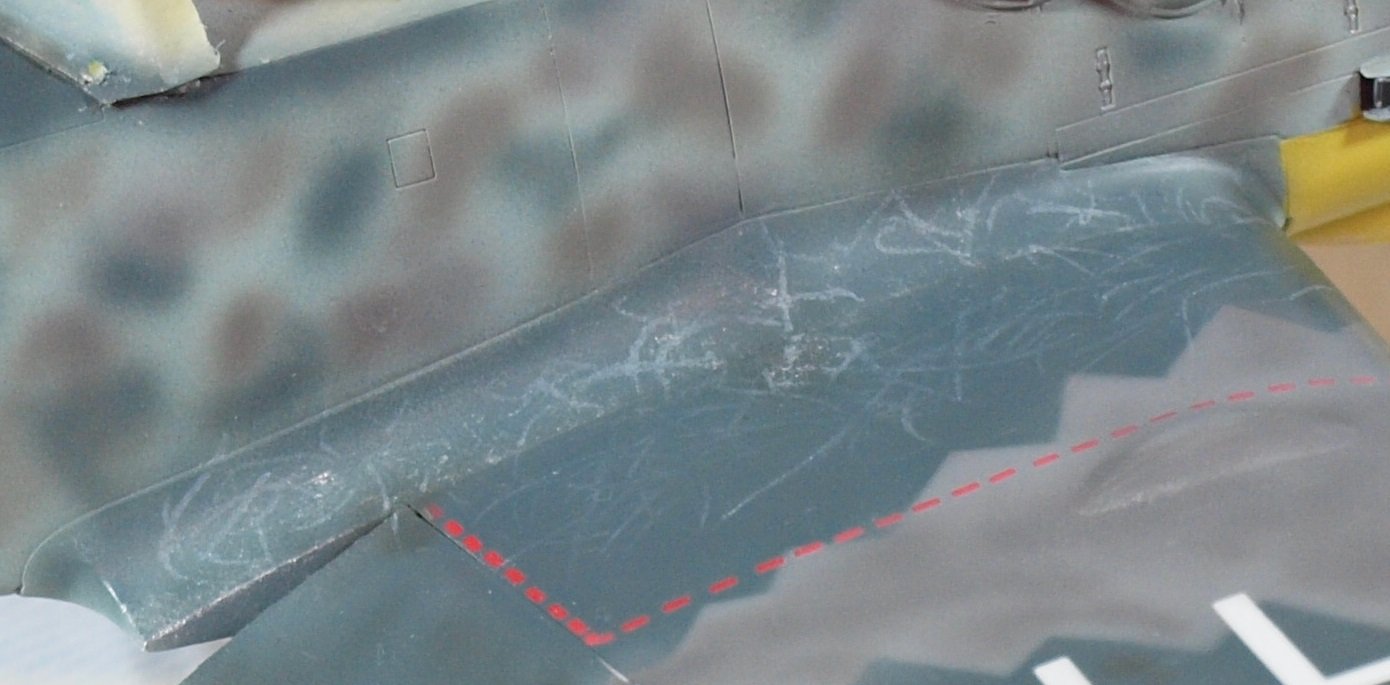
Individualizing the aircraft:
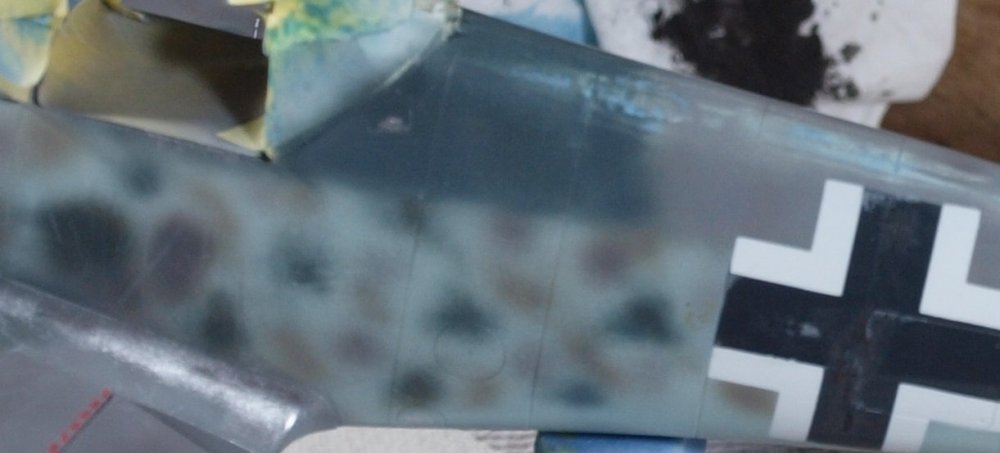
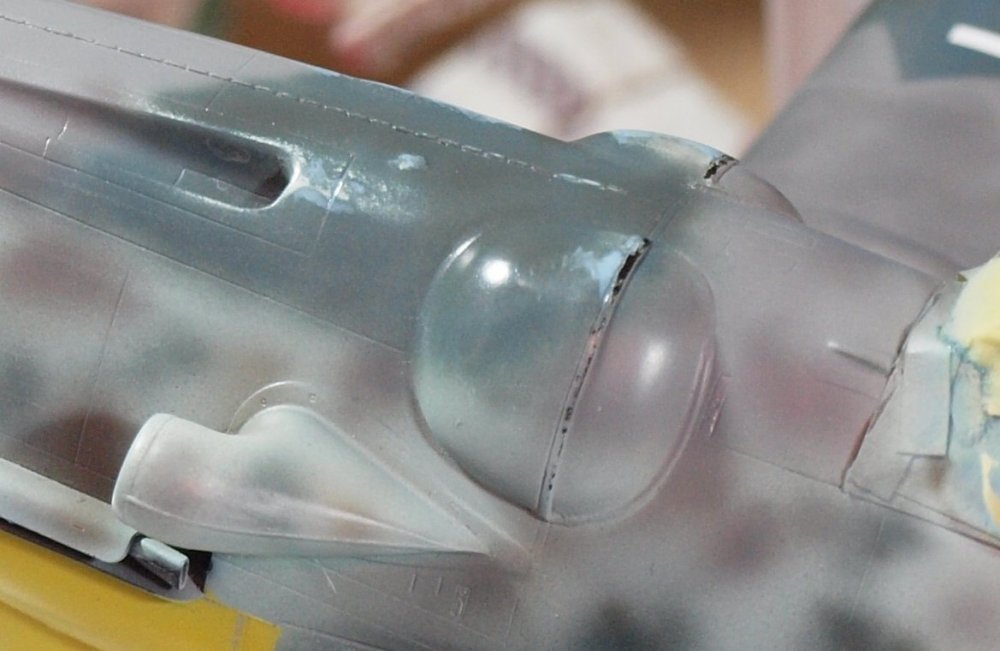
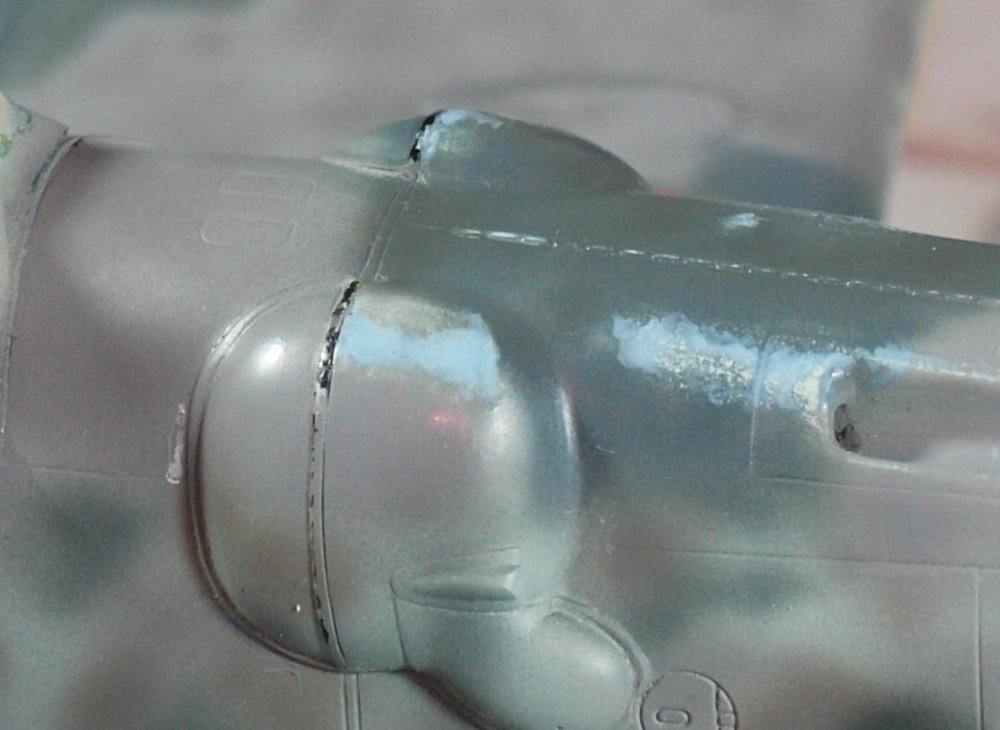

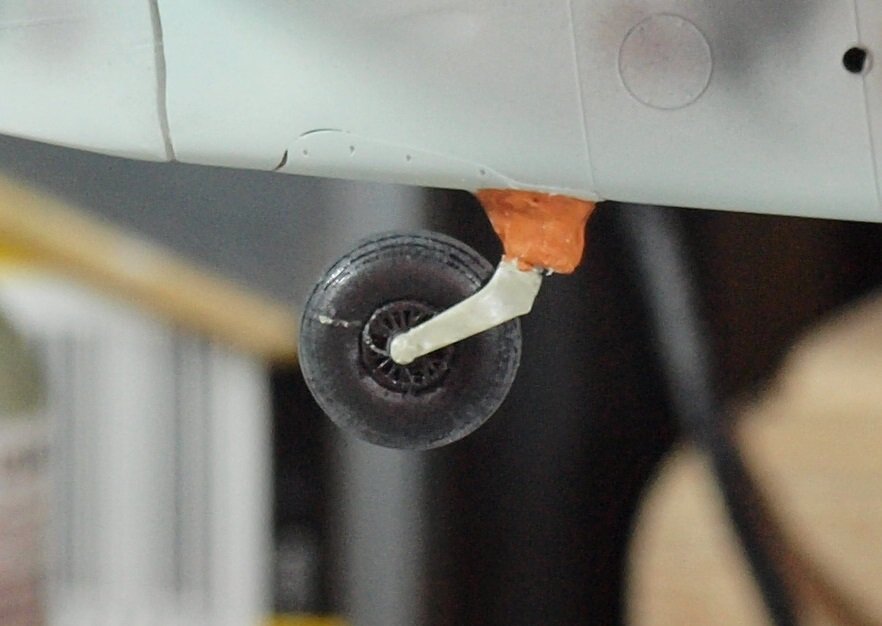
I've done some brush and sponge chipping, as well as wearing the paint by sanding. I've added scuffs, painted the tail wheel as well as the leather boot around the tail wheel strut... I also scratched it putting it back into the tail wheel yoke. I've never done much in the past too illustrate the rubber seal behind the engine cowl. But, since it's molded there in clear view, I couldn't imagine the black rubber not shedding paint somewhere.
Not sure how I like everything yet. Looks better from a foot or three away.
-
6
-
-
Good to see progress, Harv.
-
2
-
1
-
-
12 hours ago, DocRob said:
It's normal Gaz, on normal drill bits, which have the typical angles for drilling metal, there is a dead center in the middle, which causes the tip to wander easily. Therefore, it's best to use another tool for punch marking.
Cheers Rob
Oh... I didn't know this. I will make my starting holes bigger, then.
-
3
-
-
Fabulous work, Gus!
-
3
-
-
Very sharp!
-
2
-
1
-
-
19 hours ago, DocRob said:
If you still need to drill, even after Martins great idea, it pays, to center the markings for the holes with the point of a sharp blade. This way, the drilling process is more controllable.
Cheers Rob
You'd be amazed at my ability to get the hole off center... or the drill bit to drift off center... It is another of those simple manual tasks at which I have failed to excel.
-
3
-


Bronco Marder II
in LSM 1/35 and Larger Work In Progress
Posted
Thank you, Kai. I wish I felt close.