


GazzaS
-
Posts
6,396 -
Joined
-
Last visited
Content Type
Profiles
Forums
Events
Gallery
Posts posted by GazzaS
-
-
On 9/13/2021 at 4:42 PM, HubertB said:
That’s WHEN Gary will have spilled a bottle of Tamiya Extra-Thin and a pot of enamel, plus let a drop of hot solder fall on the mat, that he will really be able to claim he has joined the rest of the modelling world 😁!
Just my

Hubert
Sorry Hubert... I missed your comment. I've been pretty lucky with the extra thin so far... don't jinx me. And... my dearly beloved would never let me solder in the house.
-
 4
4
-
-
Even though not my favorite plane... it is my favorite version of that plane. Thankfully they used their heads and didn't whip out some interwar &(**%$!^, some unarmed @(&%, or some civilian %()(@.
I'm sure they'll be famous.... unless their next plane is a Fairey Battle, or Blackburn Skua. Personally, I wouldn't turn my nose up at an early Tiffie.... or have those been "done to death"?
-
4
-
-
On 9/14/2021 at 5:42 AM, Martinnfb said:
1930's

1940's


Great pics, Martin! Thank you!
17 hours ago, Kaireckstadt said:Great progress Gary. The camo came out perfect to me! I love these 109 camos with the blotches on the fuselage side. Not easy to replicate but you did it perfect.
Chair is also stunning! Curious how it will look like in the end!
After trying to thin down the strip evenly, I decided to buy thinner strip. The new strip will be .5mm X 1mm. Should be interesting to work with. There is a lot of work to do on the camo. Step 1 of the weathering process will be to stress the paint by wet sanding. This will eliminate some 1/1 scale overspray as well as show wear given to the fuselage in particular as the upper layers of paint on the fuselage were often buffed away in places showing the RLM 76 underneath.
... then there will be touch up and more weathering.
-
2
-
-
8 hours ago, BlrwestSiR said:
All this talk of Klingons and K'tingas makes me wand to get one now too.
At least they're smaller than the Enterprise.

Carl
I think mine is the 1/570 scale version. I would like to do Enterprise one day, too.... and then a couple ships from Babylon 5.
-
2
-
-
3 hours ago, Clunkmeister said:
Buffalo is looking up… I goobered up the tail decals, then made a mess out of painting the stripes on, now I’ll try it again, this time taking more care. The Killer Egg was the result of getting pissed off at the Buffalo for a few days. I’m not a helo guy, but that little kit is a really precise and nice building kit.
Haven't got as much bench time as I really wanted, simply because I’ve been enjoying the summer with the old cars.
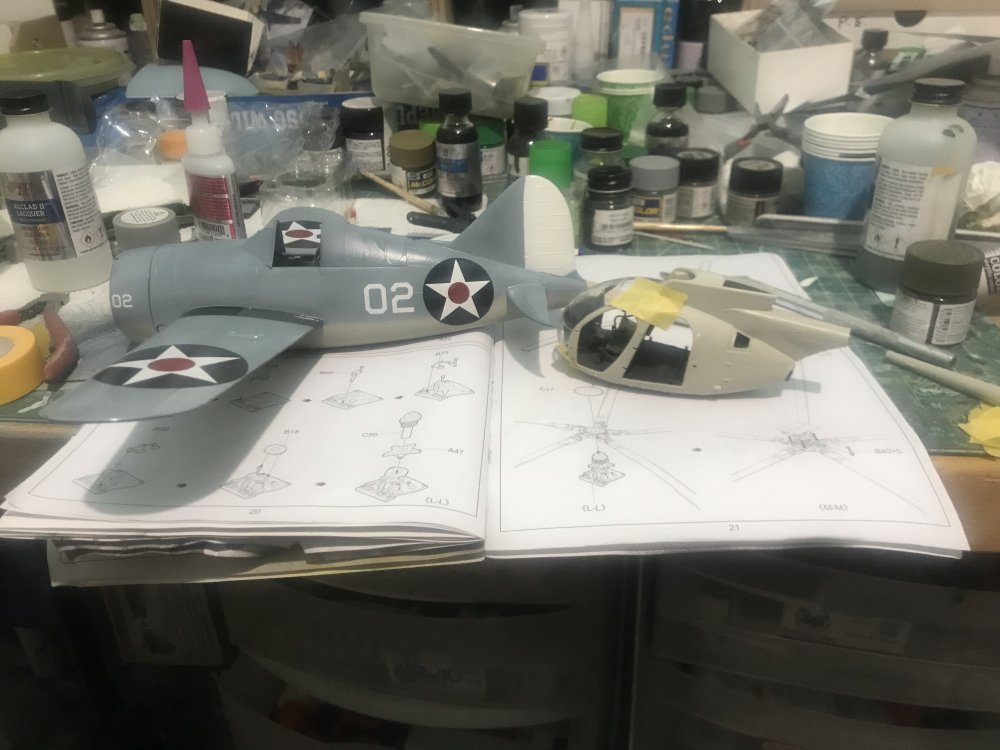
For a half second I thought you had two of those egg plane kits on your bench.
-
2
-
 5
5
-
-
Nice cutting, Harv. I've taken to use the method where you drill a line of holes and then the saw follows the holes. I had too many instances of saw-drift in my life.
-
2
-
 1
1
-
-
Looks good, Rob. Sunlight is your best friend to show the shine. And I find white backgrounds suck the life from a model photo.
-
4
-
1
-
-
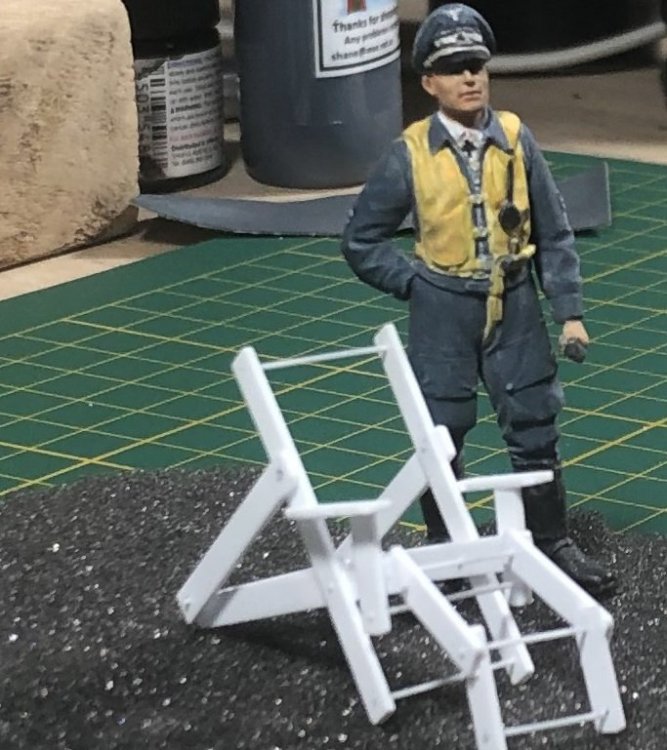
2 minutes ago, DocRob said:
Very ikeaesque Gaz
. By the way, they have manuals to download, which could help with the proportions. The chair would clearly benefit from narrower strips.
Cheers Rob
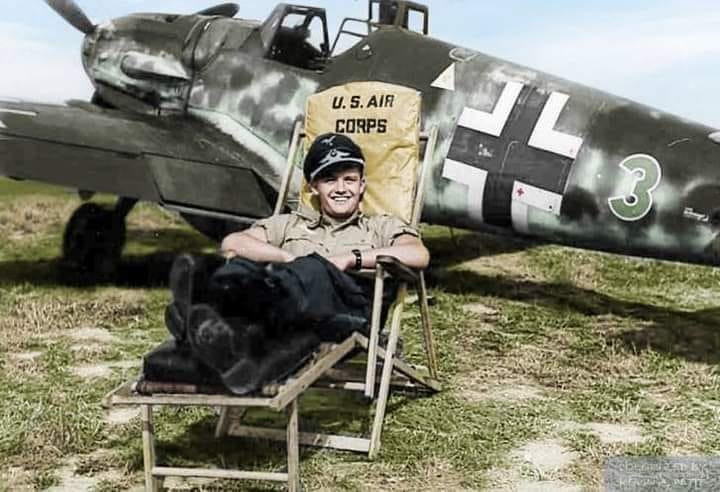
It was hard to find the same-ish design of chair. I may have already ordered the stock when I found the DIY article.

It's not quite the same. But it has a lot in common with Weiroster's chair.
-
2
-
-
1 hour ago, mark31 said:
very nice camo ont the 109 first time i have seen thes on the wings
Keep it up
Mark
Thank you, Mark. I've yet to see a good representation in a photo from a perpendicular angle. All the pics I've seen are from a low angle... So I have no idea how close I am.
-
2 minutes ago, DocRob said:
This mat really ties the room together
 .
.
Cheers Rob
Everyone is a comedian!
-
7
-
-
32 minutes ago, mark31 said:
nice clean cutting mat but for how long .
Mark
That is the question. My most regular fault is blobs of superglue all over the place.
-
3
-
1
-
-
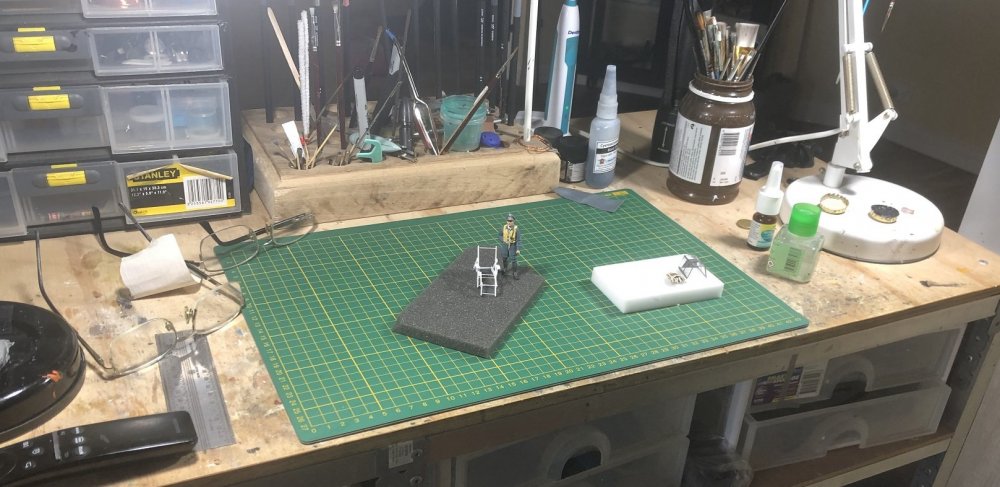
Today... along with a cutting mat... my plastic strip arrived... so of course I put together a deck chair.
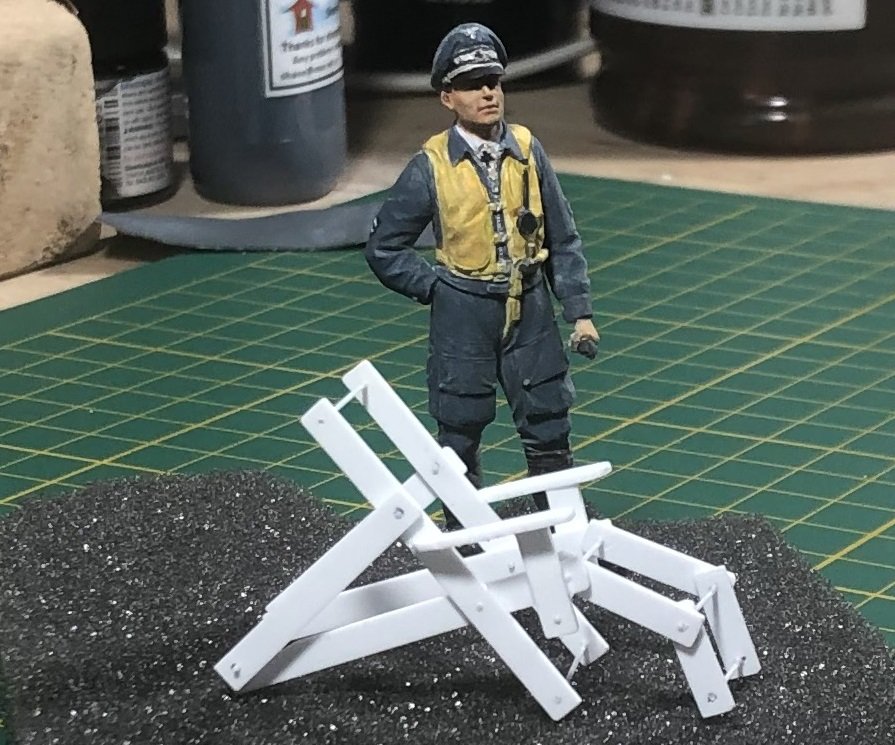

As you can see... my plastic strip stock is way out of scale. I may disassemble the chair, make each piece more narrow... and reassemble it. Most importantly, now I have some experience putting together this rickety thing.
-
4
-
-
I finally joined the rest of the modelling world.
I bought a cutting mat.
-
5
-
1
-
4
-
-
7 hours ago, BlrwestSiR said:
Starshipmodeler has a section devoted to lighting but you'd need to sign up.
http://www.starshipmodeler.net/talk/viewforum.php?f=58&sid=eec9b15222fb304a6233caee81bfd378
Try also RPF (Replica Prop Forum) but I'm not on there so can't say how best to navigate their site.
Thank you!
-
2
-
-
3 hours ago, Clunkmeister said:
Gazz, here in the USA, it’s 230 to my door with discounts. That includes around 35 bucks freight. Tamiya and ZM kits are often more expensive than that.
No worries, Ern. I was just taking this opportunity to sob.
-
5
-
-
33 minutes ago, antonio argudo said:
looks phenomenal that camo, which paint brand did you use for the 74/75/76? cheers
Thank you. The external paints except for the green #3 are all MRP. RLM 76 is actually 50/50 RLM 65 and 76. RLM 75 is RLM 75 made more gray by adding Black and USN White. RLM 74 is RLM 74 with a little International Blue mixed in.
-
1
-
-
11 hours ago, HubertB said:
Sorry, I can’t help you much, but I know that the only thing that will last for 3 days are LEDs.
I also know that there are some fiber optics sets. With one led as a light source you can carry light to many points on you kit. I wish I did know where to point you at for those, though
Hubert
7 hours ago, DocRob said:Cool project Gaz, I only build one model with LED lights, the Nautilus submarine, where I bought a dedicated lighting kit, because I'm not much into electronics. It was easy to install with some required extra work. Most important is to check for unwanted light emissions.
I don't know, which kit you have, but there are lighting kits out there for Klingon battlecruisers.
I can imagine that my submarine with it's maybe 15 LED's would run for three days with one 9V batterie.Only one example: Amazon.com: Polar Lights - Star Trek Klingon K't'inga Lighting Kit 2T (Upgrades to kit POL950), 1:350 (MKA031M), White : Arts, Crafts & Sewing
Cheers Rob
4 hours ago, BlrwestSiR said:Gaz, check out CultTVmanshop.com
They specialize in sci-fi kits and carry lighting kits and supplies to make your own.
https://www.culttvmanshop.com/Lighting-Electronics_c_27.html
Here's one for the K'Tinga that you have. It's out of stock at the moment though.
https://www.culttvmanshop.com/Lighting-Electronics_c_27-3.html
Check out Paragrafix as they have a set of LED and connectors that are supposed to the easy to use.i haven't tried them so can't confirm that.
If you have the time Warren at Tirydium Models does custom sets that are plug and play and very reasonably priced. His sets I've used and they work as advertised.
Hope that helps.
Carl
Thanks for the quick response, guys. I'm really looking more towards a cheaper DIY solution from parts I can get locally. I have a soldering iron yet need soldering practice. I'd like to build my skill set without spending too much.
-
2
-
-
4 hours ago, Peterpools said:
Gaz
Holy Smoke - awesome paint work and all in one massive day at the bench to boot!
Keep 'em comin
Peter
Thank you, Peter. Yep... big lay day it was. Watching football now... so another lazy day happnin.
-
1
-
-
7 hours ago, DocRob said:
Wow, very cool paintjob and it even camoes the false shapes of the kit
") . Gutsy call to spray the walk lines with masks, but it payed in the end. She will look great and will make you forget all the issues, this subpar kit has.
. Gutsy call to spray the walk lines with masks, but it payed in the end. She will look great and will make you forget all the issues, this subpar kit has.
After all, it's somehow good to see, that not all the kits out there are perfect. Being in my third Tamiya build in a row, I have the feeling, that a kit which needs a bit more of extra work, should be next. The most fun generating project overall in the last years was the Mikro Mir Fokker D.VIII, where I could be very creative about finding solutions for the kits weaknesses.Cheers Rob
Thank you, Rob. The walk lines aren't exactly perfect. But they'll do from a couple feet away. It might be one of those techniques that has to be done last.
The shape still bugs me. Bugs me enough to keep thinking on how I might fix the problems on the Revell G10. If scribing wasn't required, the simple answer would be putty. I have filled 109 panel lines before. And the major problem with that is what happens to the details you don't want to fill. Invariably they suffer, and rescribing fuel hatches and handholds... is tough. They never look right for me.
If the ZM 109 comes out before I get to it... I might have to give the Revell away.
-
1
-
-
Excellent stuff, Craig!
-
3
-
-
Fantastic work, Mark! Love that engine.
-
3
-
-
That's a very nice looking first effort, Peter. The 'old school' effort yielded first class results in your hands.
-
2
-
-
-
*SAAB* *SAAB* ... so expensive!😪
-
1
-


Fly Hurricane IIc re-do done
in LSM 1/32 and Larger Aircraft Ready for Inspection
Posted
Very nice work, John!