


GazzaS
-
Posts
6,396 -
Joined
-
Last visited
Content Type
Profiles
Forums
Events
Gallery
Posts posted by GazzaS
-
-
22 minutes ago, Wumm said:
They seem exquisitely detailed Gaz...
I was going to get the Galland version a while ago, mainly for the Spaniel to add to a planned JG1 Bf109 kit, but $50 seemed a lot for the asking.
S
Yes, they are awesome... but pricing them so high just ruins a lot of their appeal.
-
 2
2
-
-
Saw this on Farcebook today:

I think you can get them without the aircraft tails and separately,too. You'll just have to google Dolman Miniatures.
I just find it difficult to cough up the cost of a full kit for one resin figure.
-
2
-
-
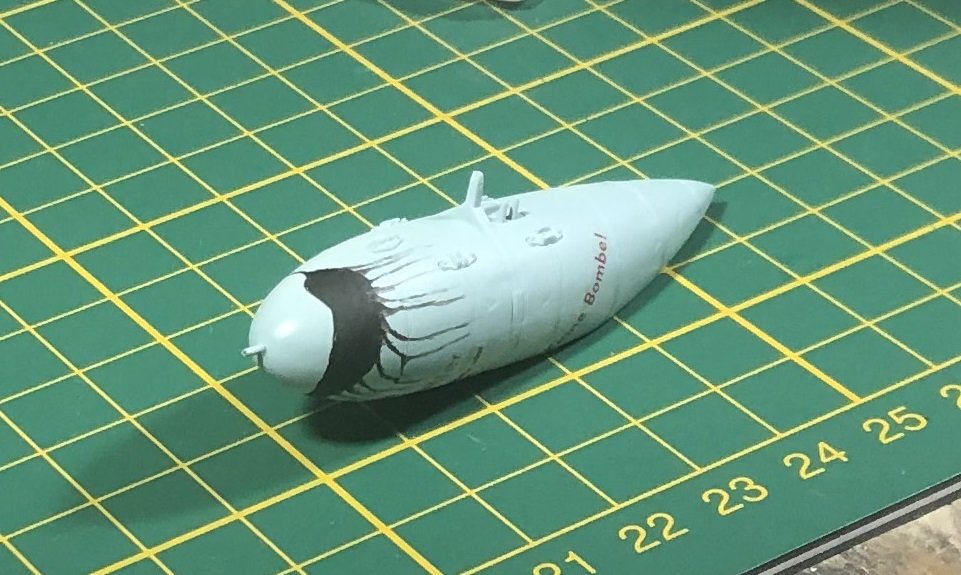
Today I spent a lot of time on weathering with enamels and chipping with acrylics. Not sure if it looks realistic... but it doesn't look too clean.
Weathering with enamels is quicker than oils... but it doesn't allow you to spread them as far, or blend them in as much... which helps make it look dirty... if ya know what I mean.

I left the gun sight green. I figured there's really no reason to repaint it... and it gave me another opportunity to provide contrast.
For scale purposes I've included a failed figure... one I tried to do with acrylics only.
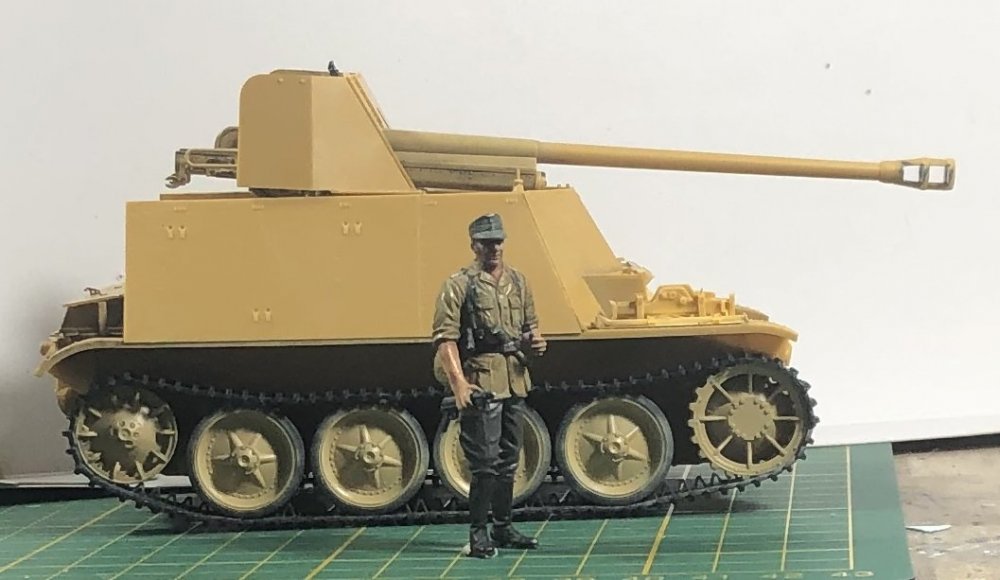
You can see it's a cramped space for five guys to share.
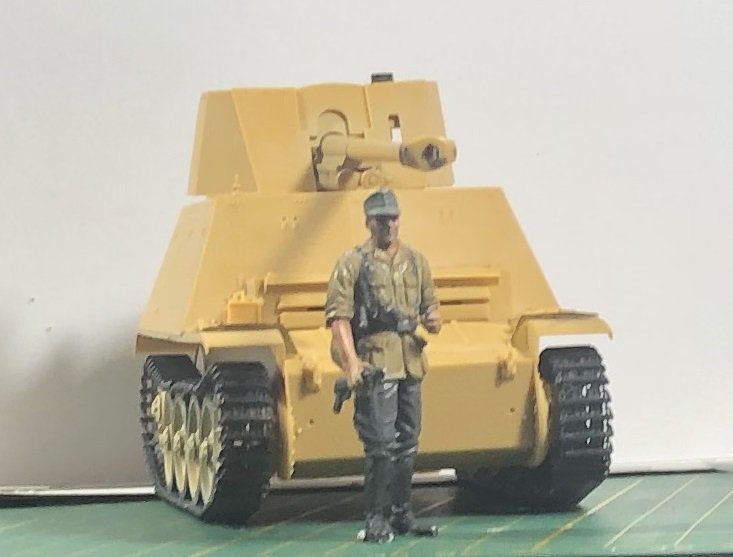
I have a little puttying to do... but not much.

And not that I see the full layout of the thing, I can see that the ammo was passed up from below for the loader to shove into the breech. He didn't actually have to remove it from the ammo containers.
I have a lot of little details to add to the exterior... and still the lion's share of the photoetch as well.
Happy modelling!
-
7
-
-
Congrats on the wins!
-
1
-
 1
1
-
-
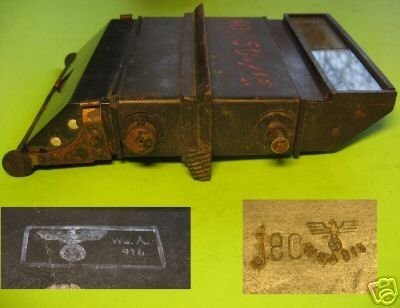
14 hours ago, Kaireckstadt said:
The details of the cannon and the shield are very crisp. Great kit!
And you‘re right: The periscope look brown to me too.
4 hours ago, DocRob said:This seems to be a nicely detailed kit and your fine work does it justice. I'm like you not very comfortable of painting and weathering in confined spaces, but had to learn it on my last two build. With a bit of pre planning some of the problem areas mostly are sorted out easily, the res,...
Cheers Rob
56 minutes ago, Bomber_County said:Gaz, looking amazing, ironically the Dragon Marder III H was my first AFV back after the dark period………..I’m going have a look at this range……
Thank you, Fellas!
-
4
-
-
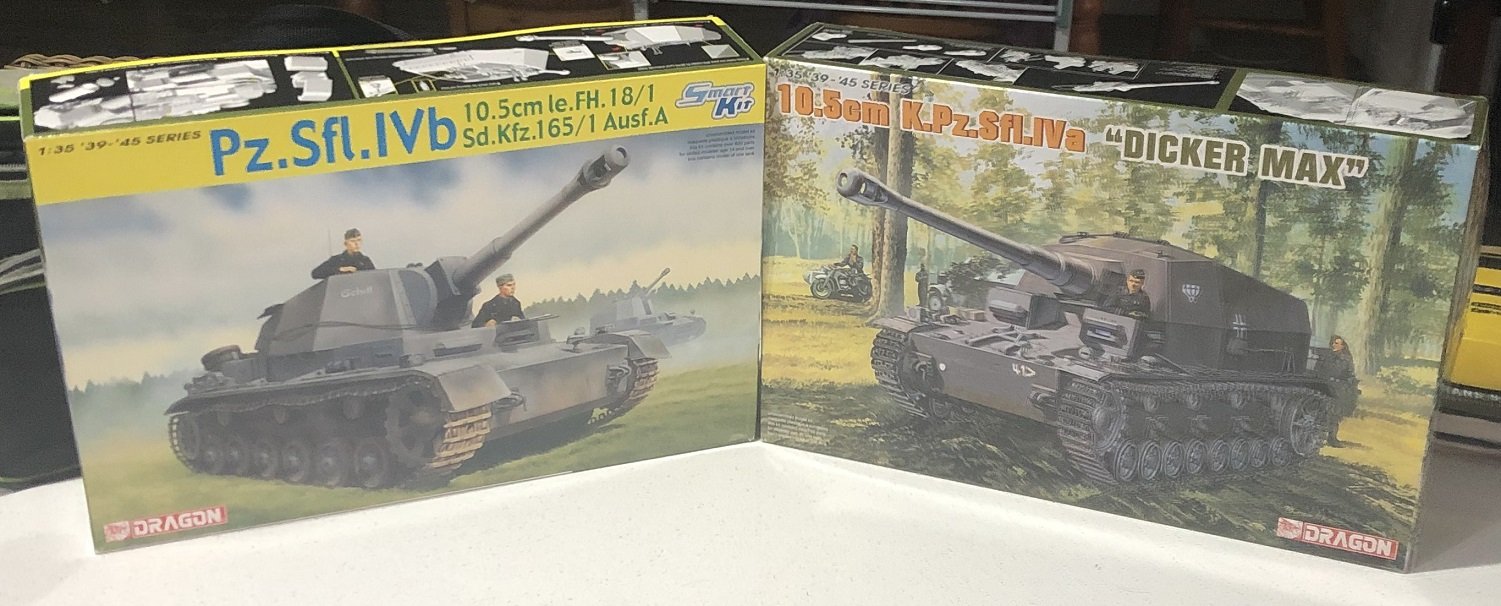
Had a club meeting yesterday. I won the raffle but called for a re-draw to give someone else a chance. Luckier still was finding these two kits (on my very short list of must-haves) for less than half price that a fellow club member was getting rid of.

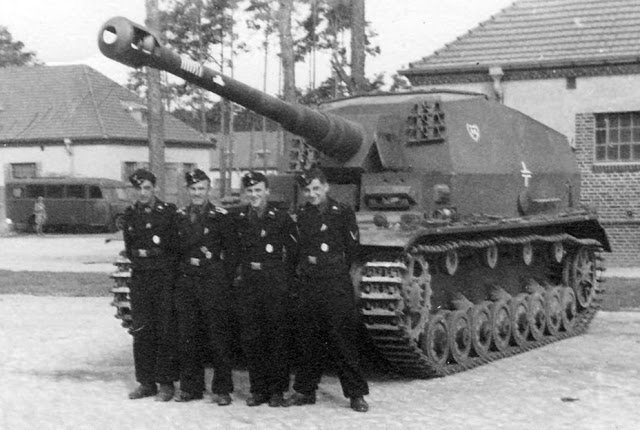
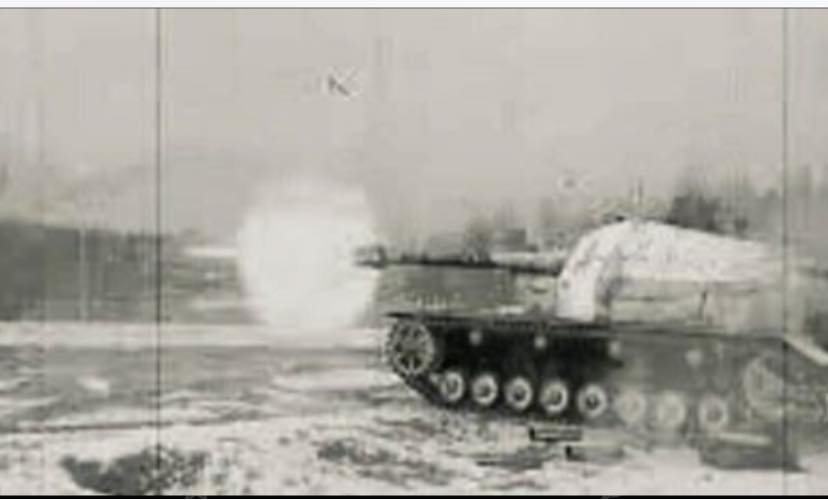
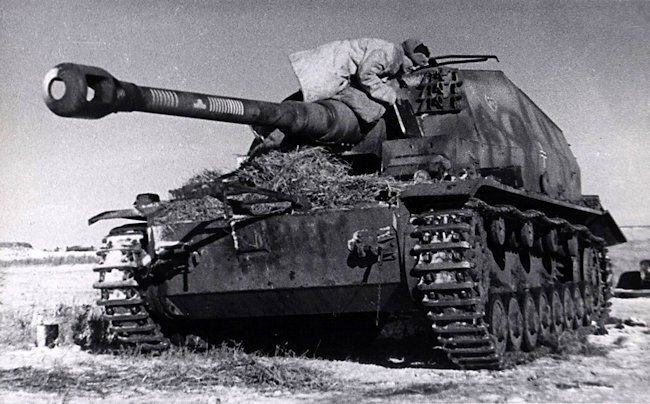
Dicker Max at least gives us some color and weathering options.
-
8
-
1
-
-
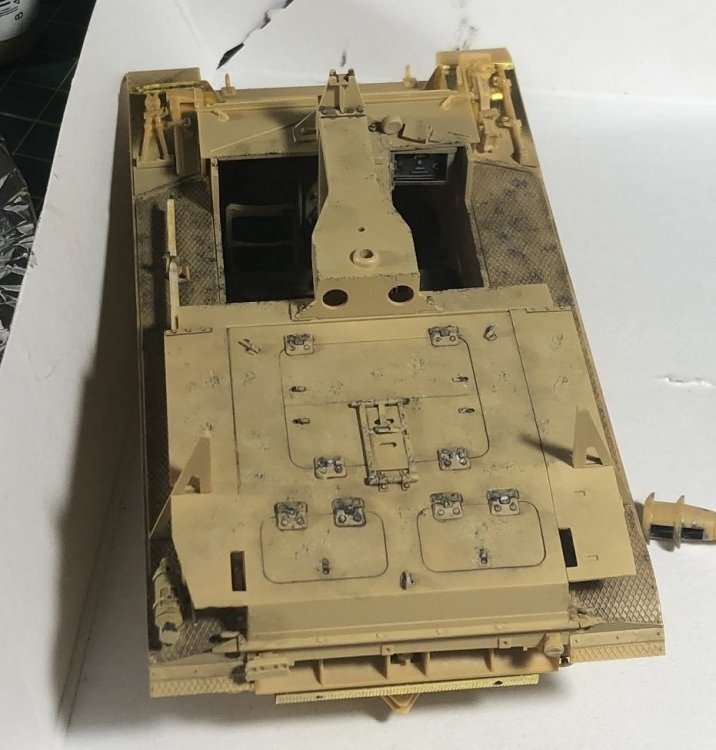
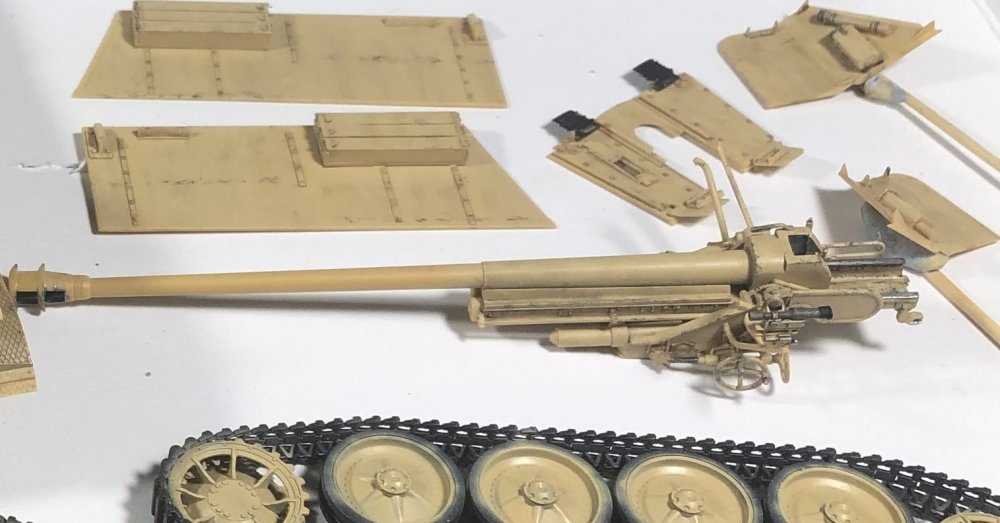
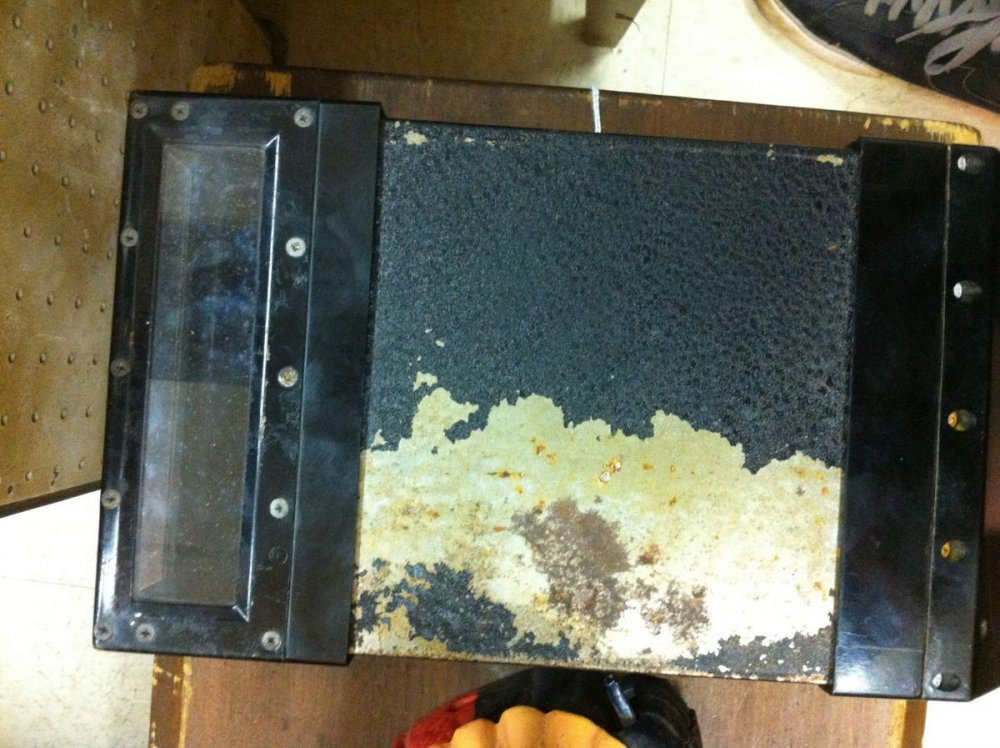
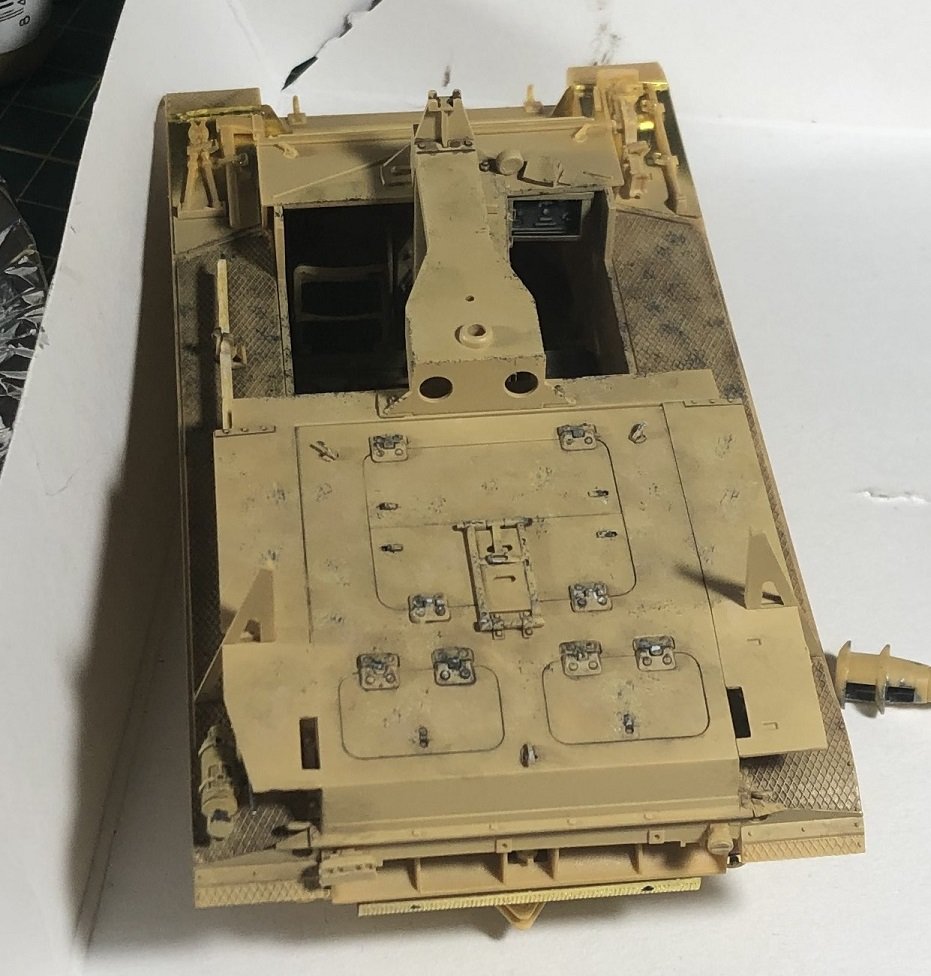
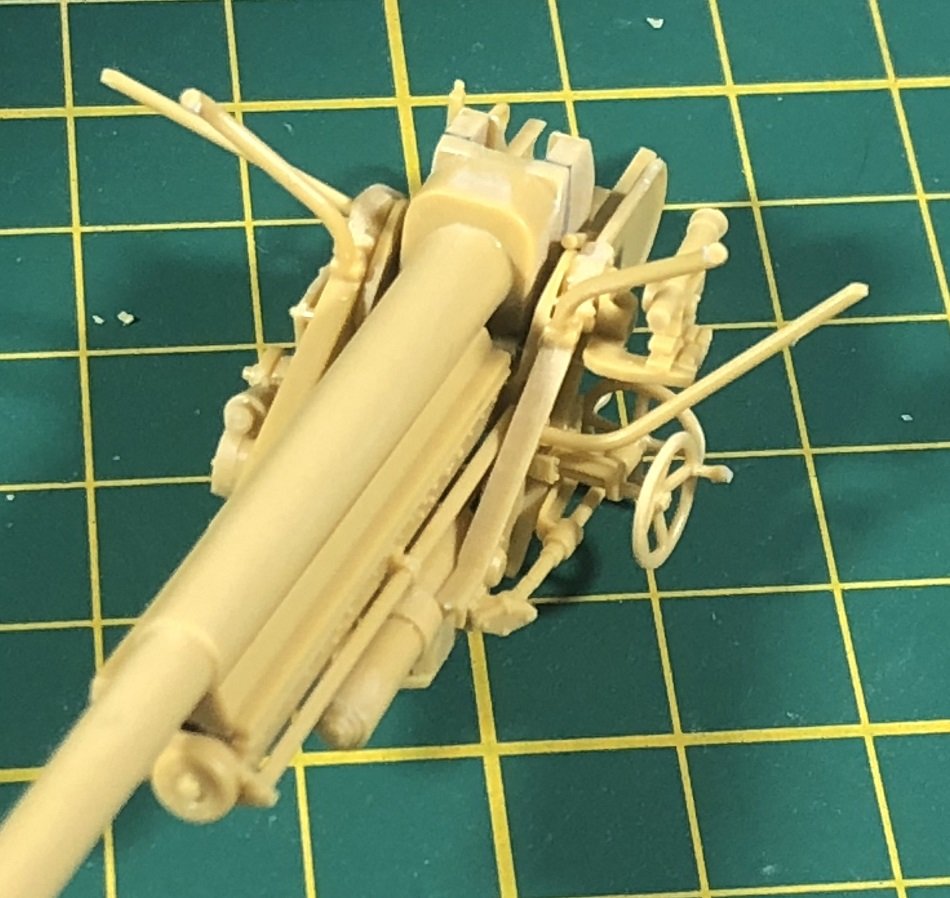
Thank you for the kind comments, fellas. Throughout the week, I've been slowly putting together sub-structures of the gun and gun shield to get to a point before I can paint, weather, and assemble... cuz I sure won't get a paintbrush in there once done.
This kit is on a whole other level for me. I haven't built much stuff with open gun shields. The last one I did was the Dragon Marder IIIH. And it was my first armor build after 30+ years without. Needless to say, it didn't go as well as I hope this one does.
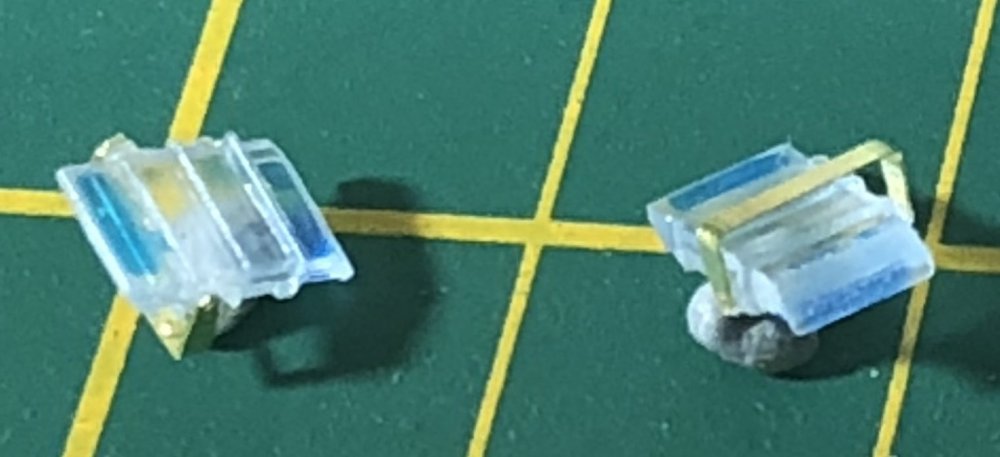
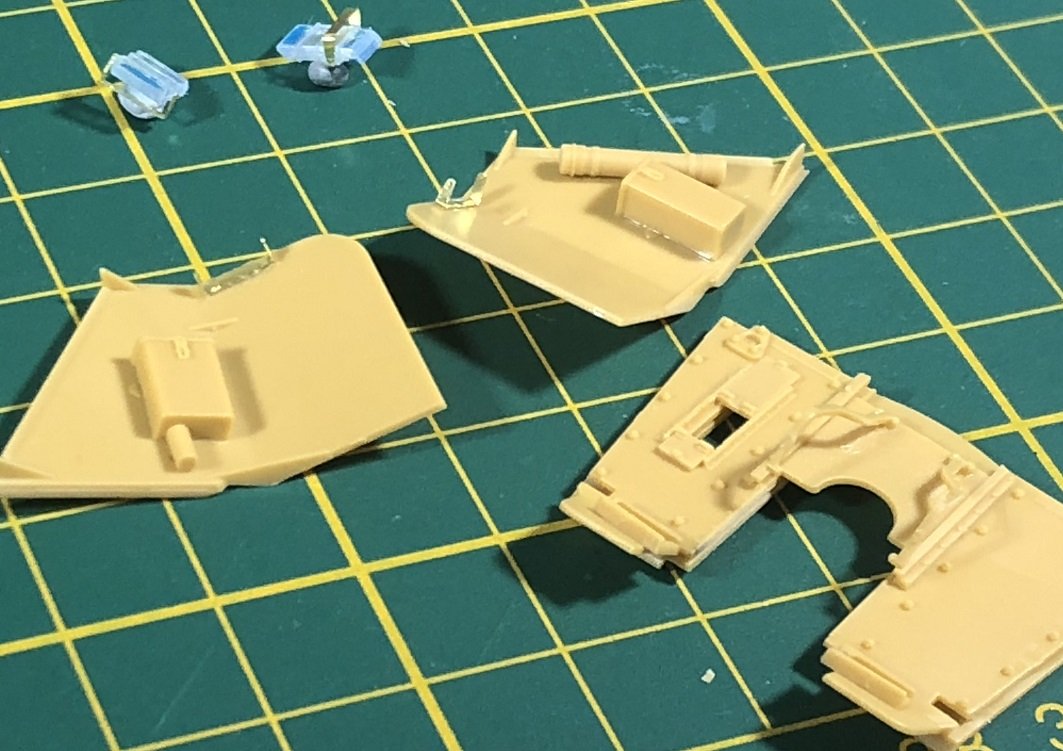
Two pieces of clear optics for 4 spaces. I'm assuming that they were only issued two and were expected to move them as required.
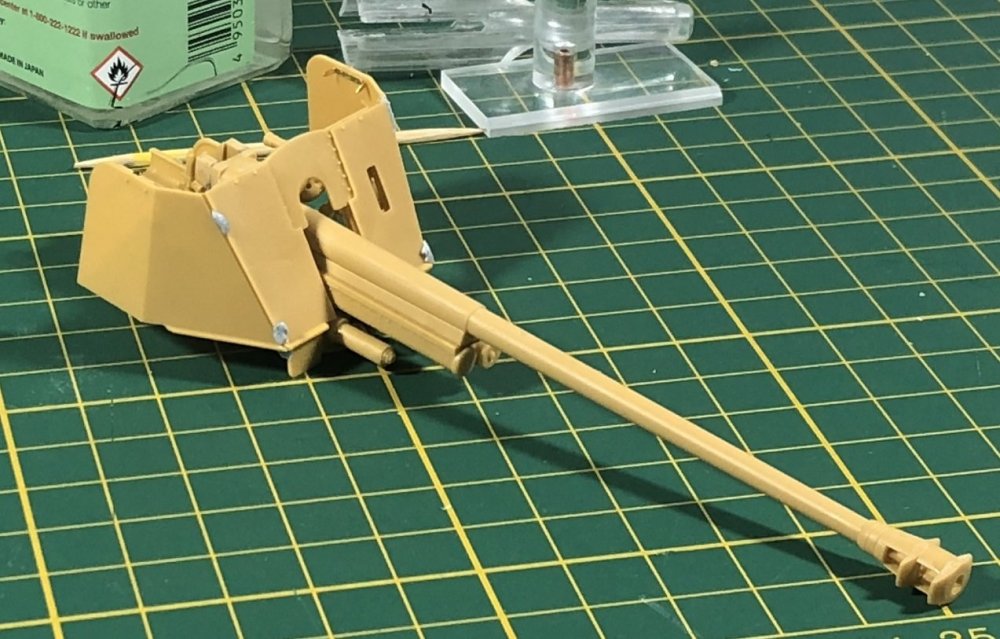
The interiors of the three main parts of the shield.

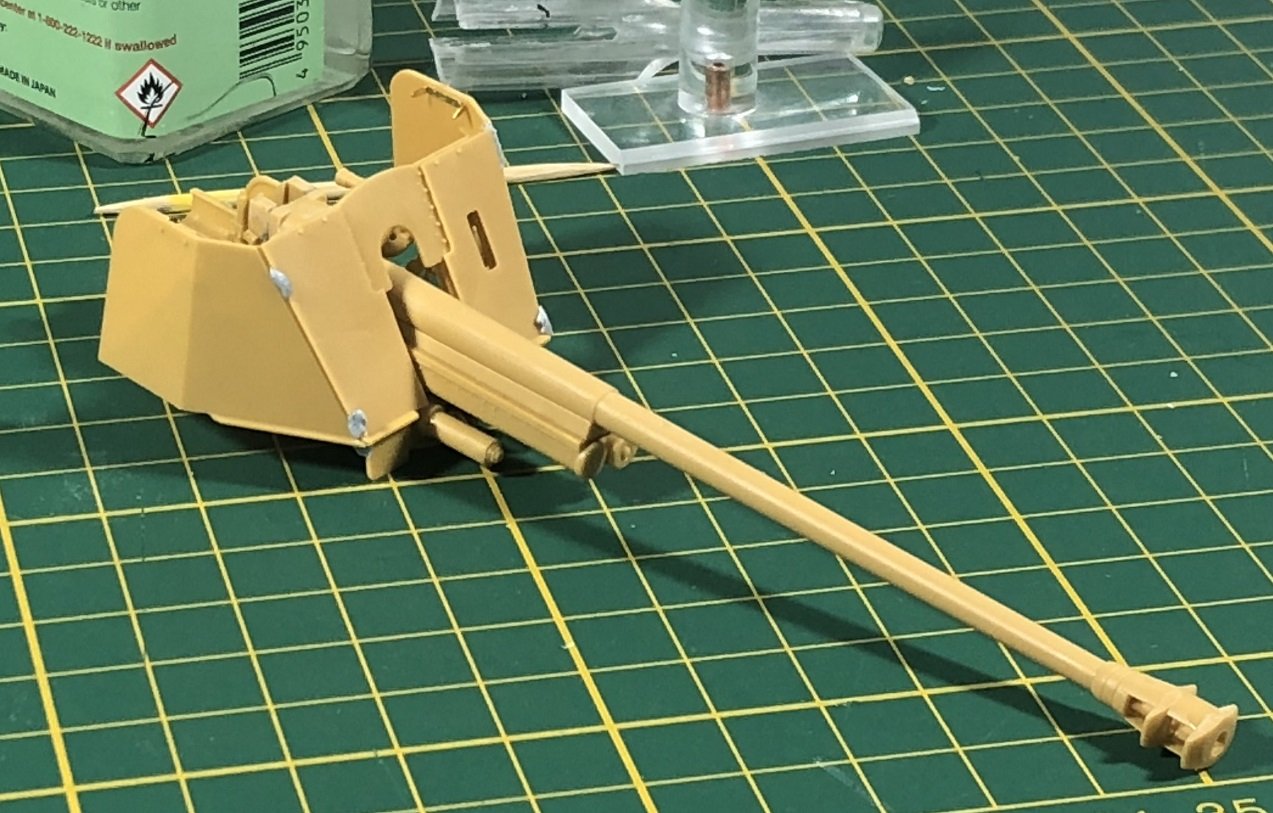
The gun and shield held together either by friction or blutack.

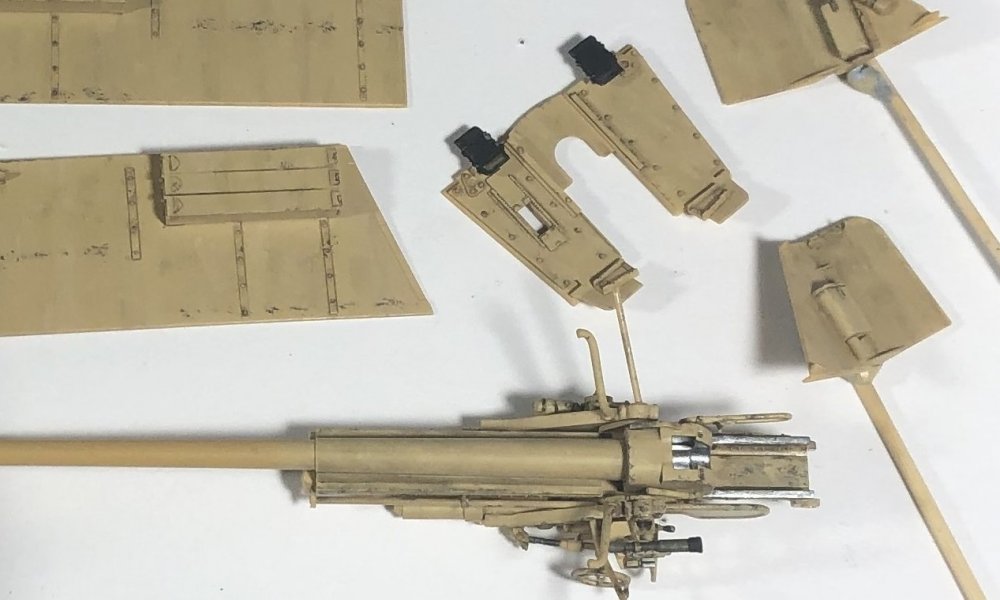
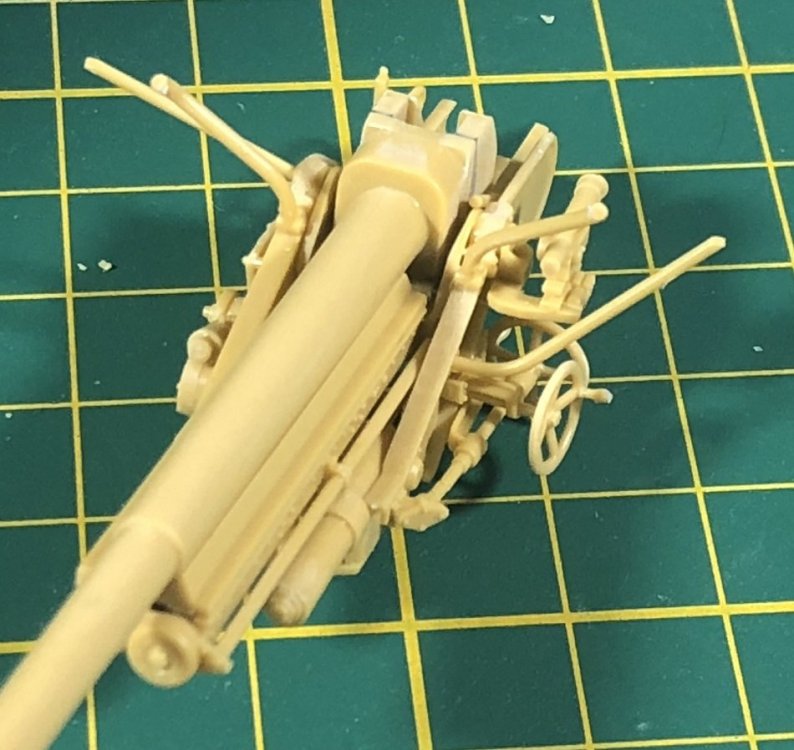
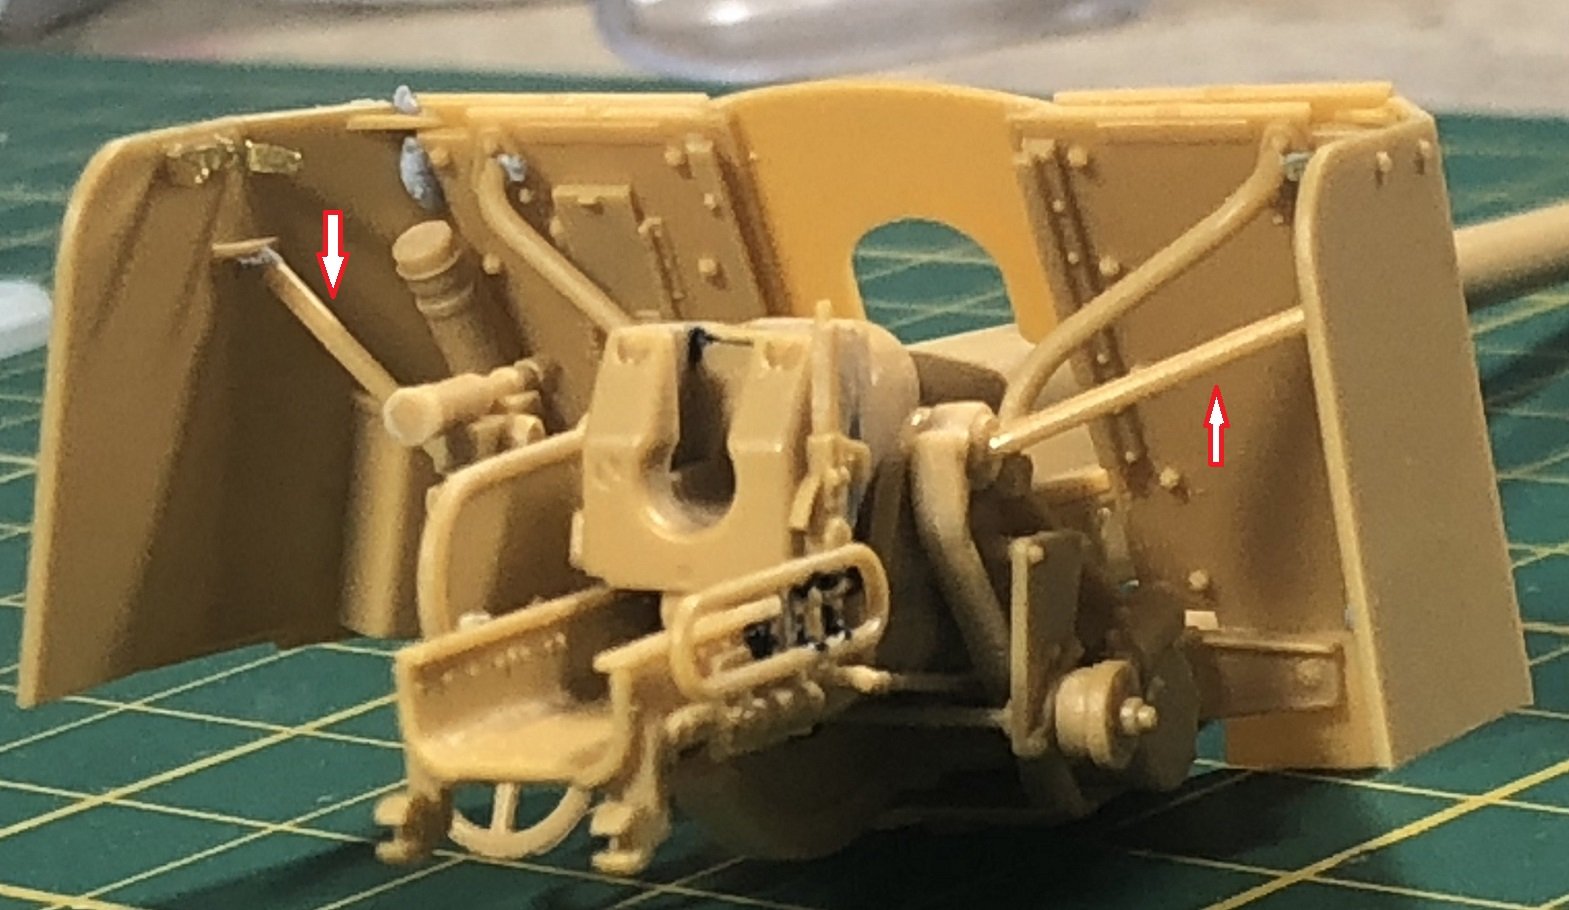
I think that whoever made the directions assumed you could build all of this in one session. The problem is that you have some very spindly parts without clear and definitive ways of assuring alignment unless it's all put together while the glue joints are all still soft. Which is all well and good if you're the type who can weather all of that in confined space. But I'm not. These two parts highlighted by the red arrows have no way of being aligned if the gun carriage and full shield isn't in place.

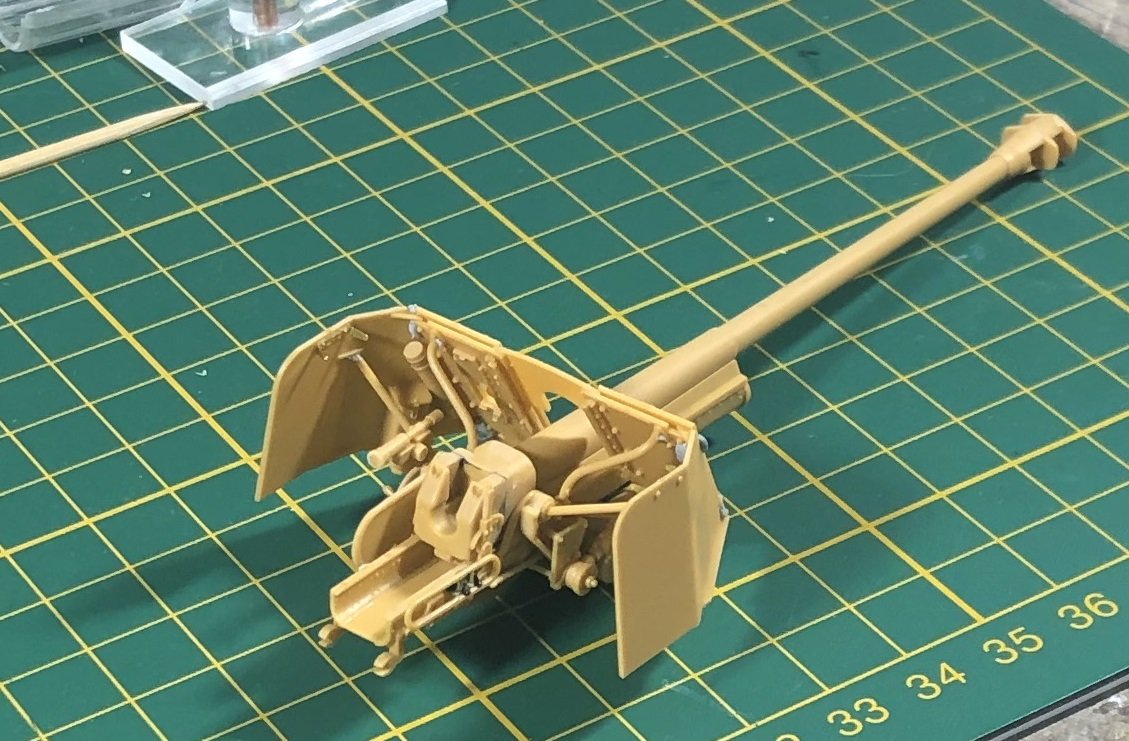
Here, you can see it after pulling apart. Once I attach the shields, hopefully all of these braces slip into place easily.
Once I put in the crew... I have no idea how much will be seen. But at least I hope the pre-completion pics look cool.
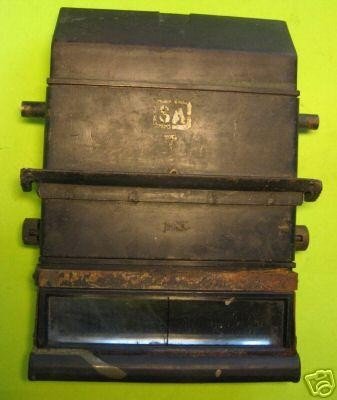
I was wondering about the possible color for the periscopes. I'm guessing these are black, but made to look brown by the yellow background.
Thanks for looking!
-
6
-
-
Nice paintwork, Rob. Saw some news on your neighborhood this morning. Hopefully you're not getting anything from that volcano.
-
4
-
-
Lovely job, John!!
-
2
-
-
Nice framework and PE, Rob!
-
3
-
1
-
-
Beautiful finish, Rob! Definitely a result to be proud of!
-
1
-
1
-
-
Well done!!
-
5
-
-
Peter,
It's always refreshing to look at your cockpit work when you're enjoying yourself. I don;t have many Tamiya kits. Those I have built have been nice experiences. I wish their LSP range was bigger. As cool as the Stang, Corsair, and Zero are... they aren't aircraft that interest me much. Their armor kits are great... but they leave out a few details on occasion that kill a kit for me.
-
5
-
-
No matter the cost... I just can't imagine finding a place to put the beast. A while back, I was building the Monogram 1/48 B-29. I was going to hang it on the wall inside a deep... heh... like 1-foot deep frame. Alas, it was a project never finished as some part of my skillset could not meet my expectations.
I even assembled it on a special stand I made over a cruciform base. Just like she said: "you too beaucoup, GI".
-
3
-
 1
1
-
-
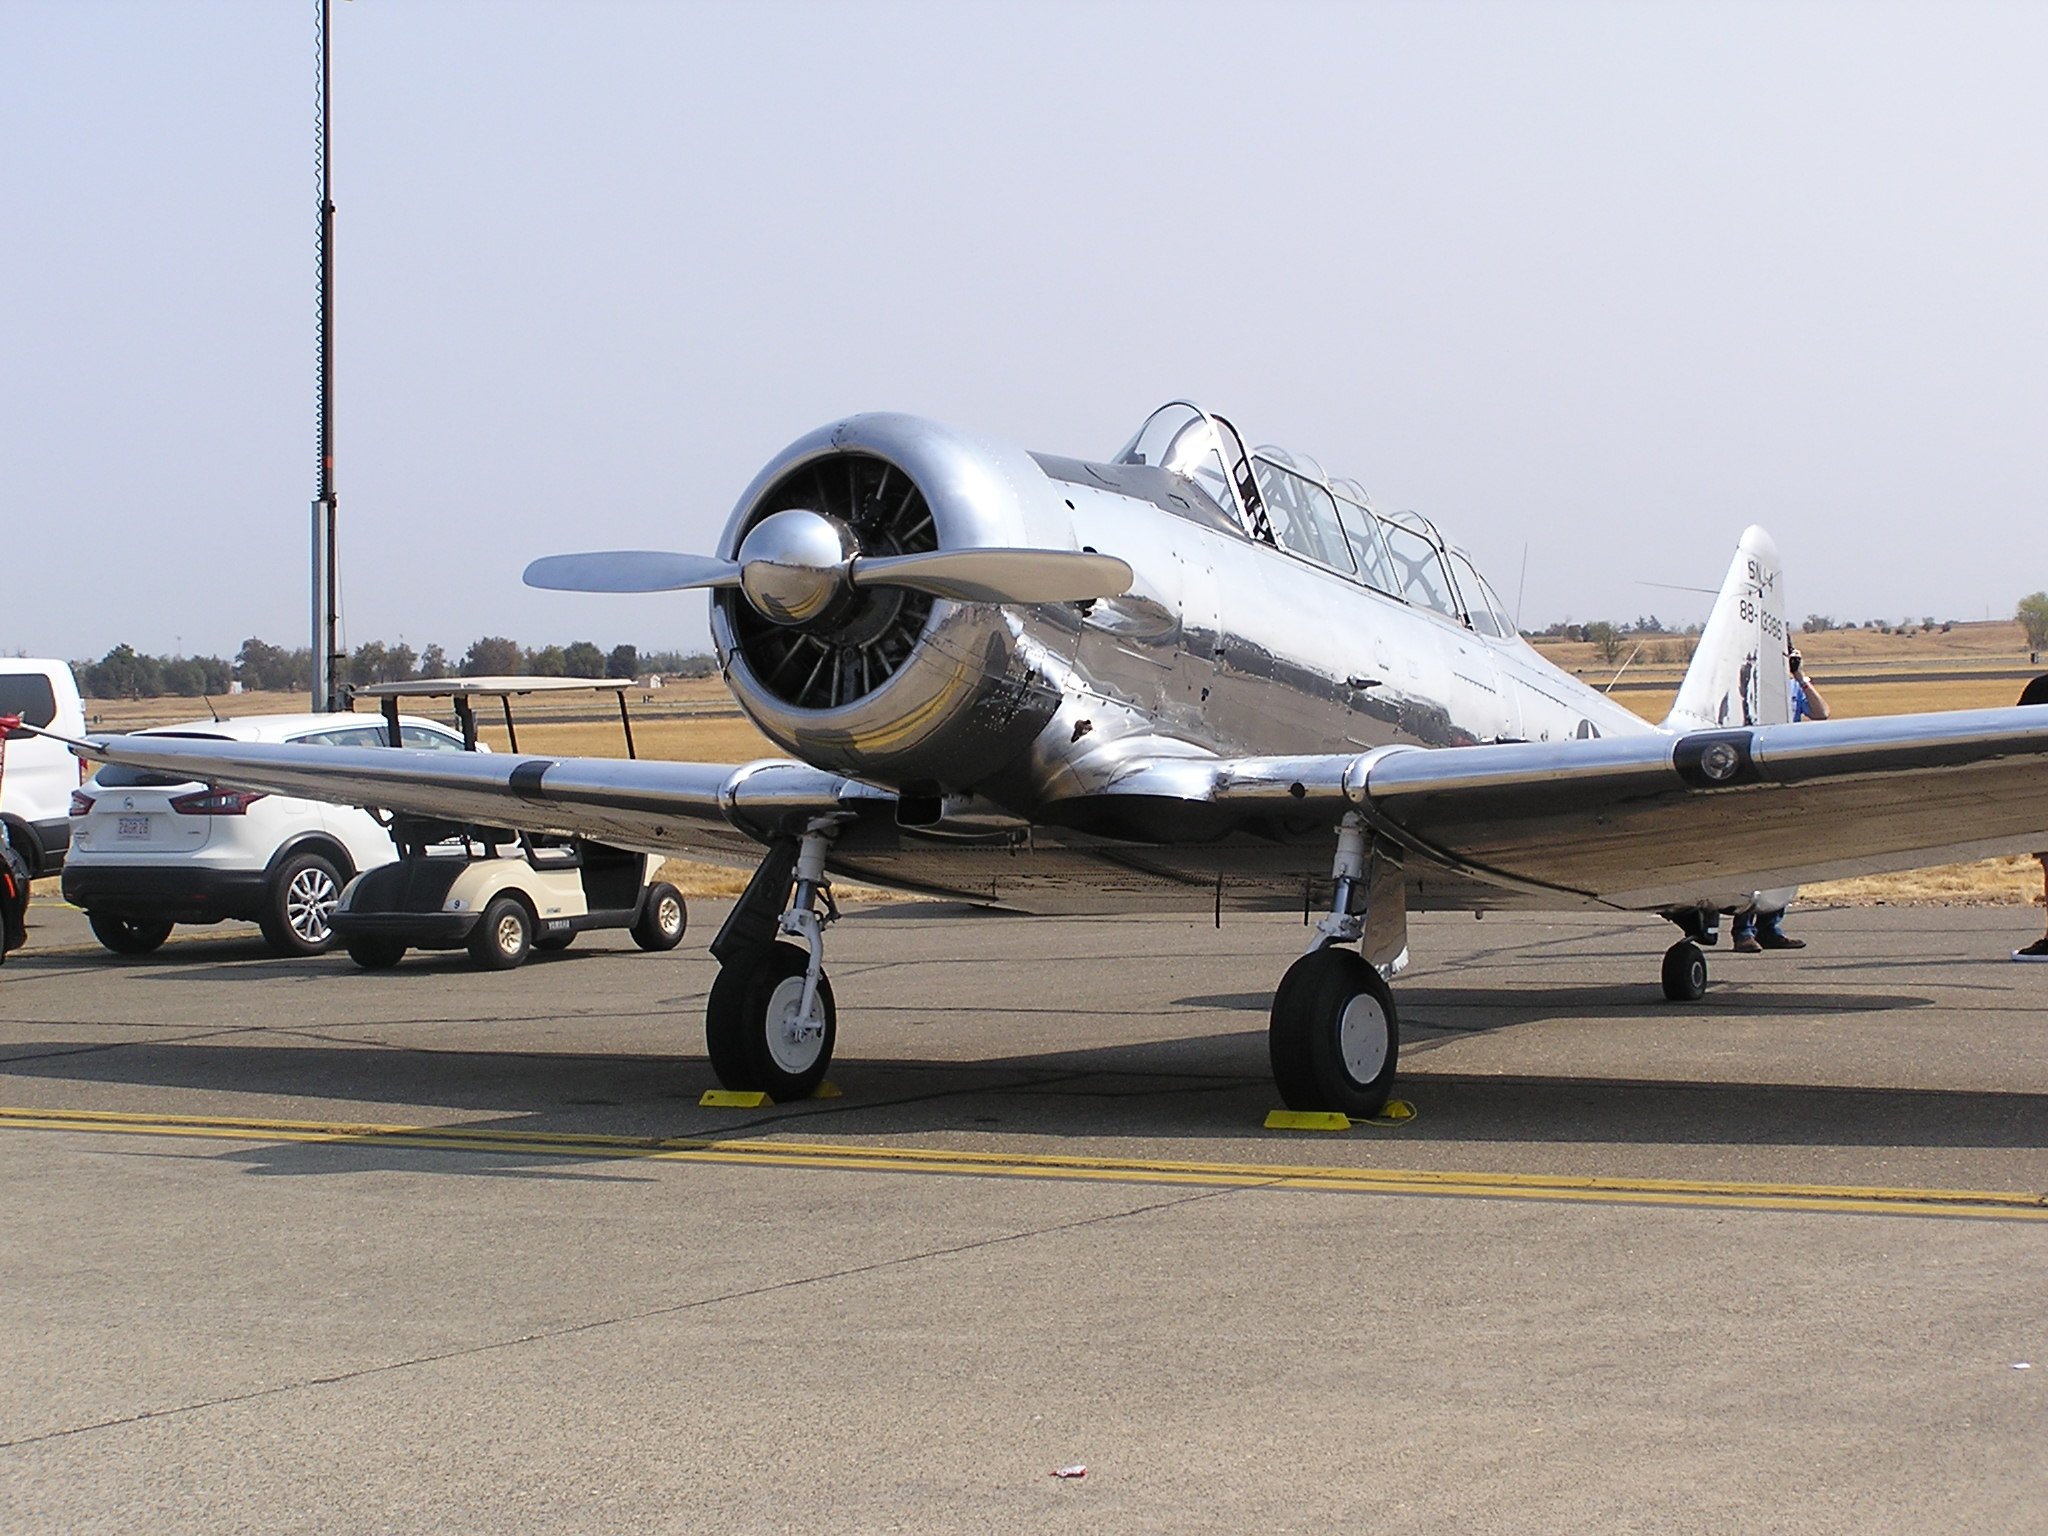
10 minutes ago, smitty44 said:
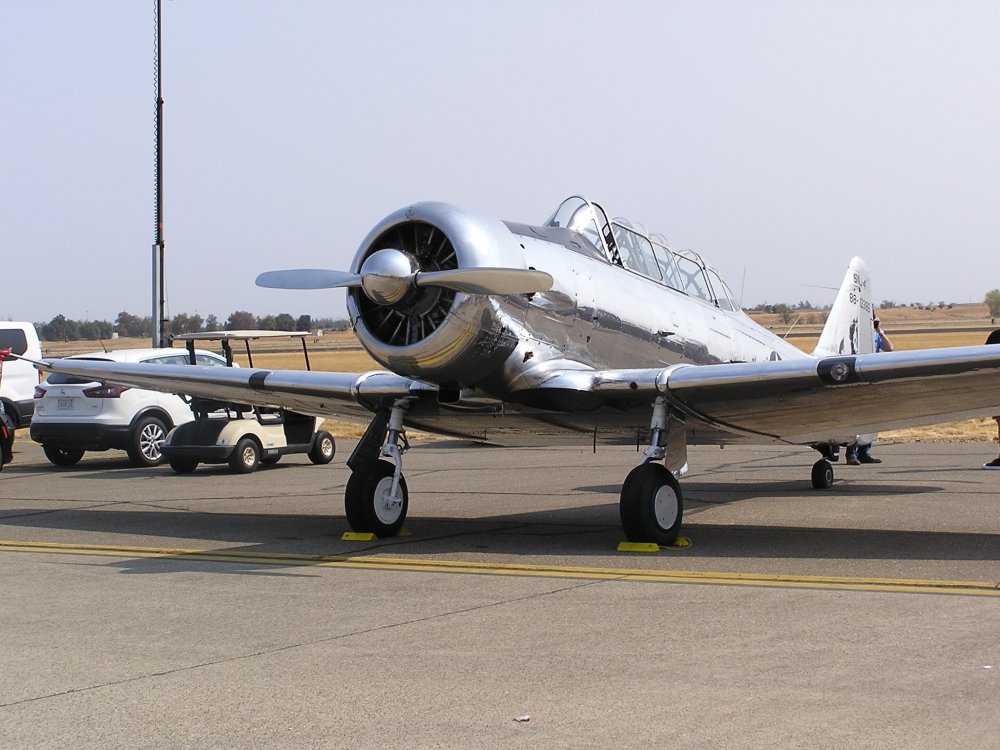
I 😍💖 shiny, real-metal planes. Even if they have itty-bitty propeller blades.
-
3
-
-
That Galaxy is so out of scale!
Nice pics, Smitty. Thanks for sharing.
-
2
-
-
Very nice, John!
-
3
-
-
NIce!
-
2
-
1
-
-
10 hours ago, DocRob said:
Very nice Gaz, but why is there so much grime coming from the wheel sections of the wheel wells?
Cheers Rob
That was an experiment... sadly... most of this stuff is an experiment as I am trying to learn how to weather an underside without it looking fake.
1 hour ago, Kaireckstadt said:To be honest Gary: For my gusto this is a little bit too much. Especially on the fuselage underside. Or do you have a foto of an original plane looking like this?
Same with DocRob: the dirt thrown on the wings by the wheels should be in another position and not that broad.
But that’s only my view!
What do you think?41 minutes ago, Peterpools said:Gaz
Looking at the underside, it almost appears that the 109 blew an engine and thusly the amount of oil. For me, it's the color of the oil streaking seems off - a bit too greenish. What I think needs some playing with, is the color of the oil/grime from the wheel wells shouldn't be the same as coming from the engine. Two different grimes.
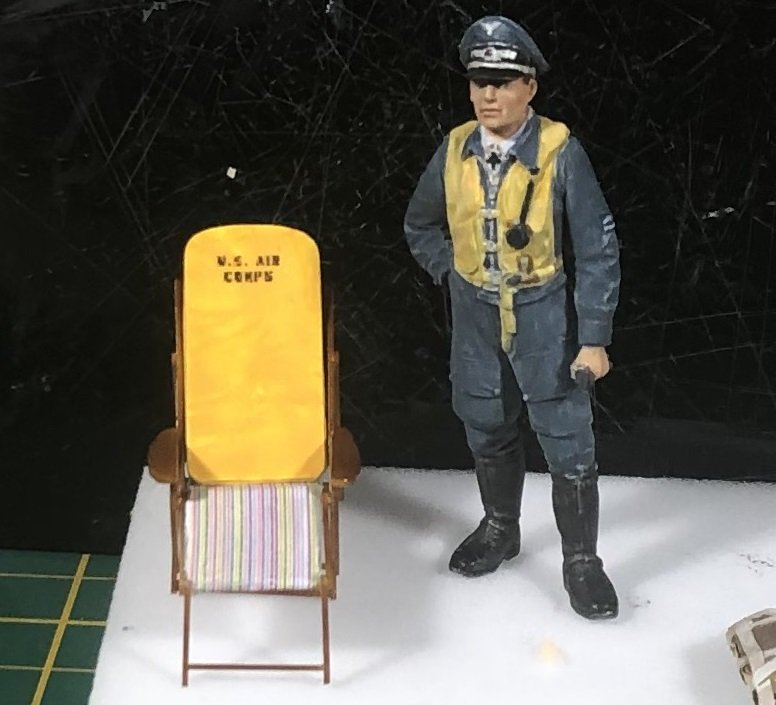
The lounge chair and figure -OMG just fantastic.
Keep 'em comin
Peter
Guys,
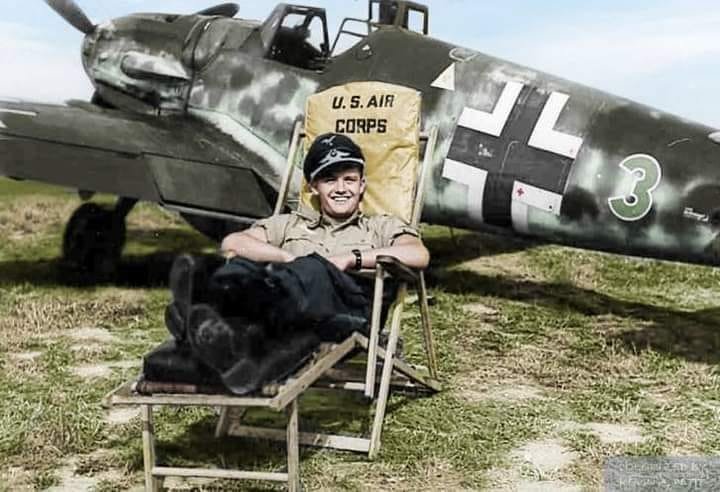
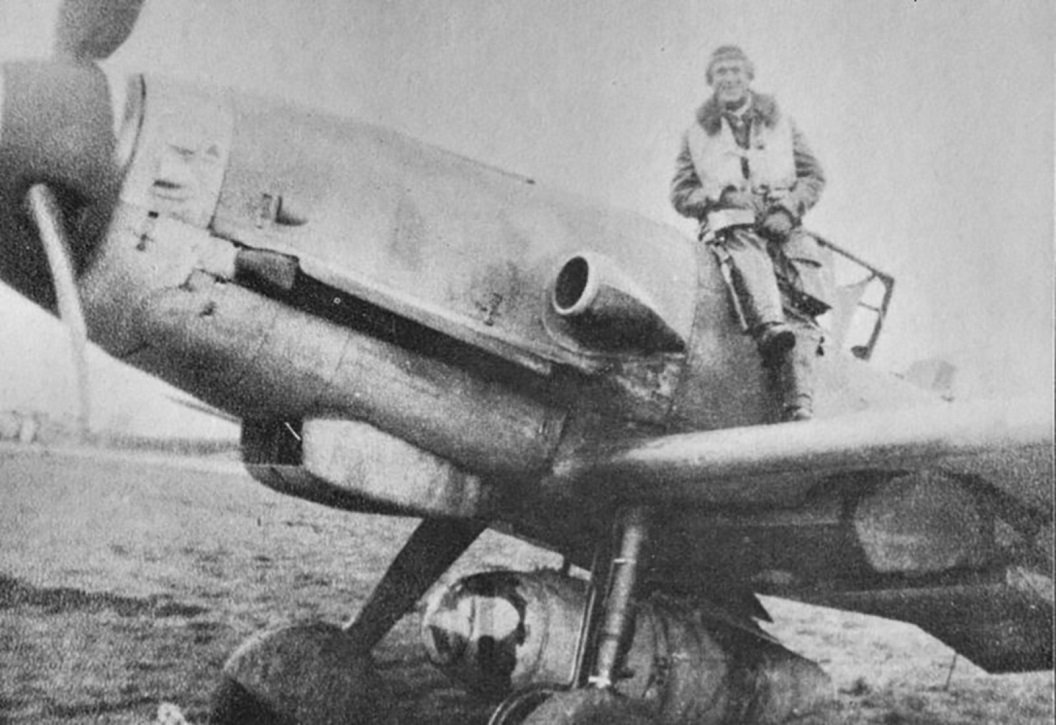
Pictures of the undersides of Luftwaffe aircraft are very rare. But I have done my best to collect them over time. As it may look like a 'blown-engine', the truth is that Daimler Benz and Jumo engines were prodigious leakers of oil. And they weren't the only ones. One of the things that impressed Japanese pilots and mechanics when they got to look at American aircraft postwar was how little oil they leaked.
Now... Weiroster and presumably his plane came from a unit dedicated to chasing Mosquitos before being amalgamated with JG 1. To me, that means a bit of flying time and time to leak.
I'm not totally happy with my attempts to make it look dirty. I'm failing at execution. But if you look at this small collection of photos, you'll see I'm not pulling it out of my hat.
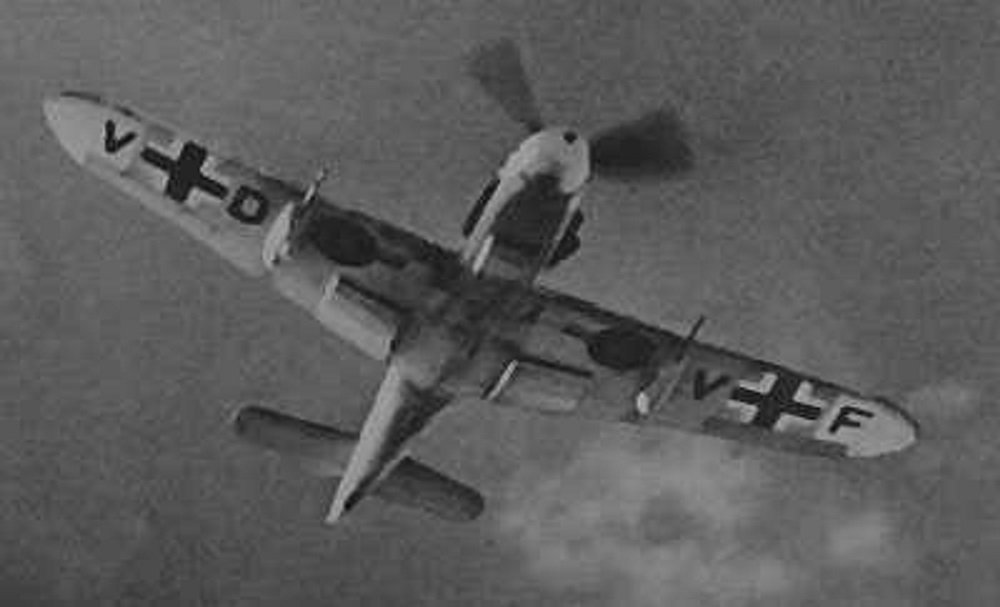
Newish plane here... Codes were usually painted out or washed off at unit level. But you can see the streaking has already begun.
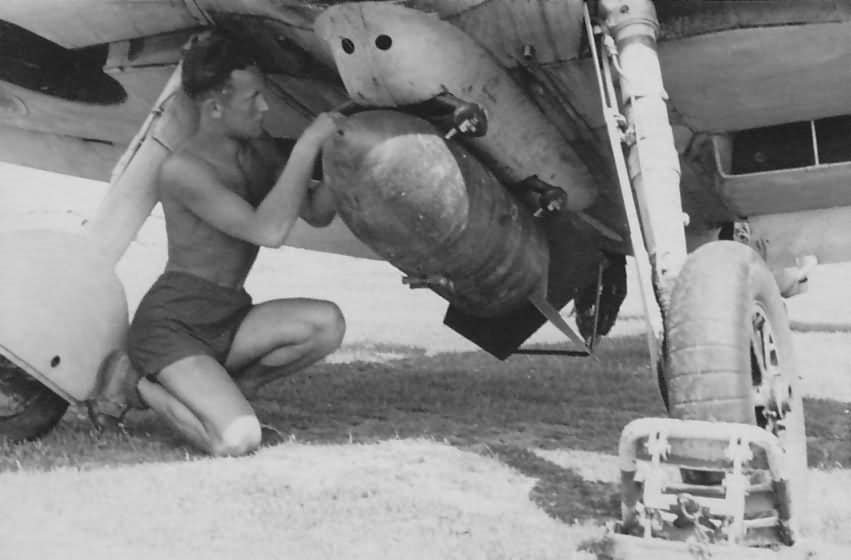

You can see how much has dripped down the back of the tank.
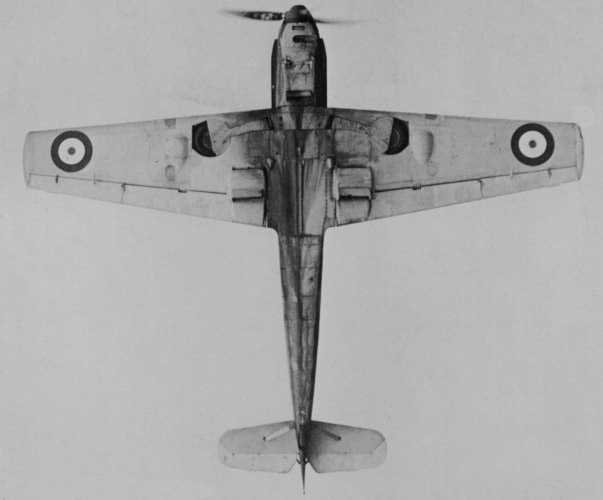
The Brits had this one for a lot of time. This is probably an extreme example.
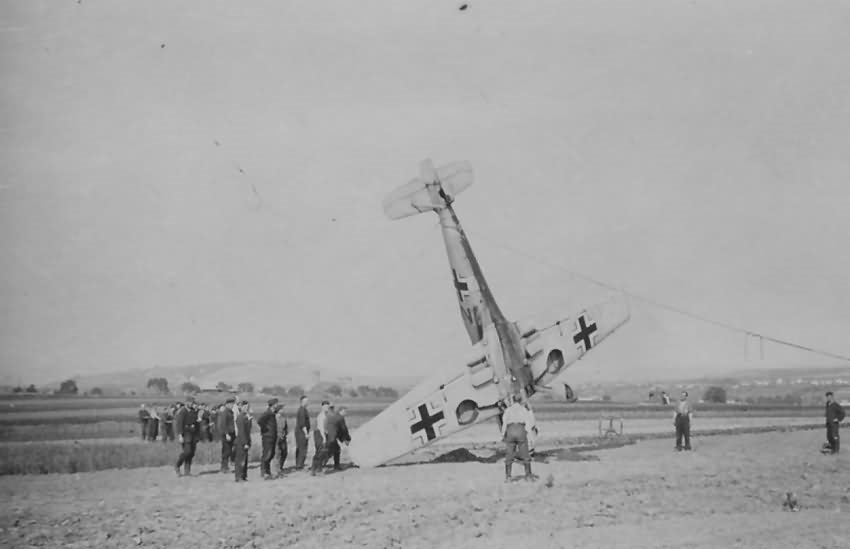
Pilot's monument... As the Luftwaffe men called it.
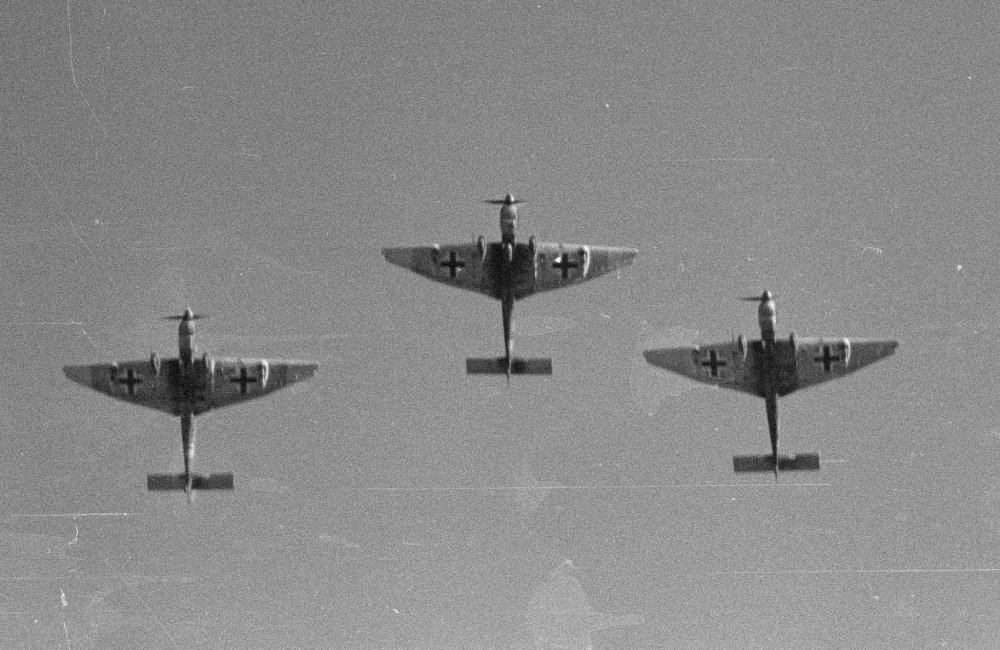
Some bonus Stuka shots...
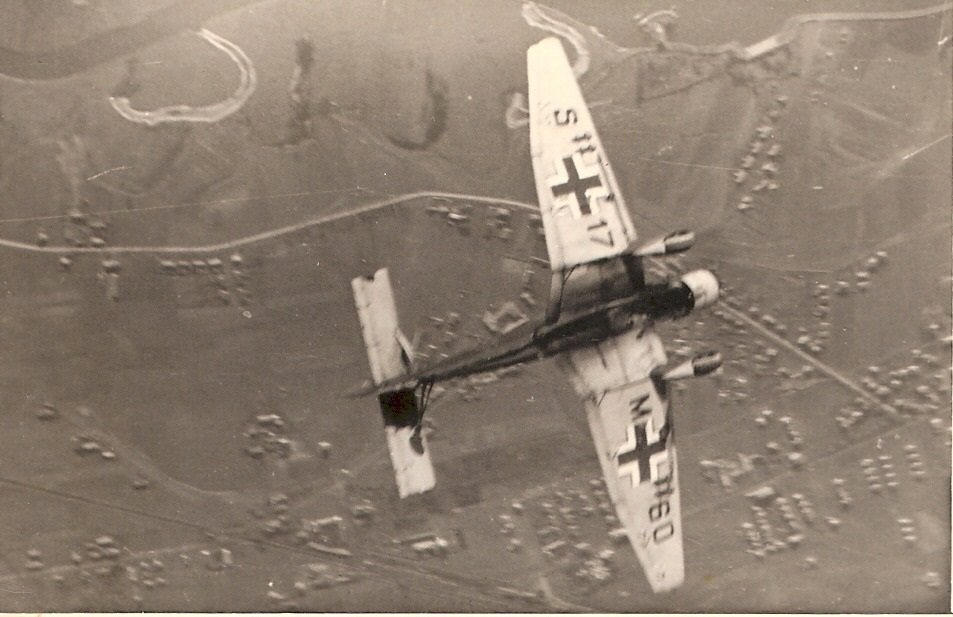
Really... a great photo.
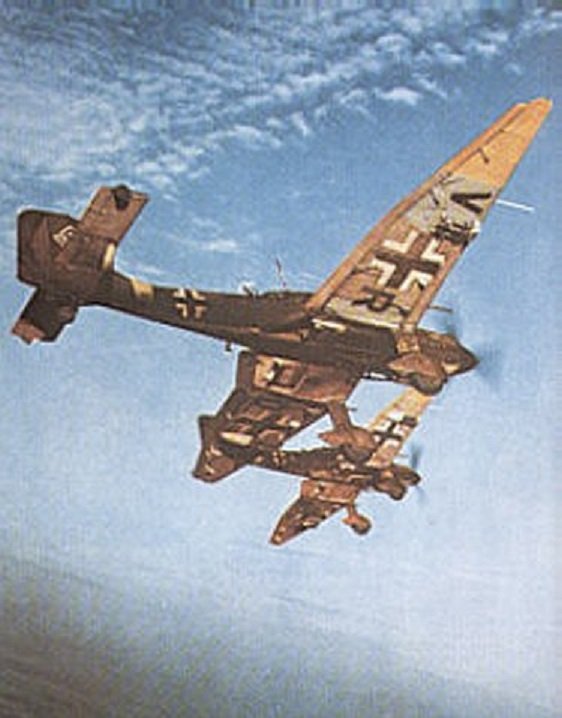
Now... every time I see a Ju-87 with a clean belly... I have to restrain myself.
-
1
-
1
-
-
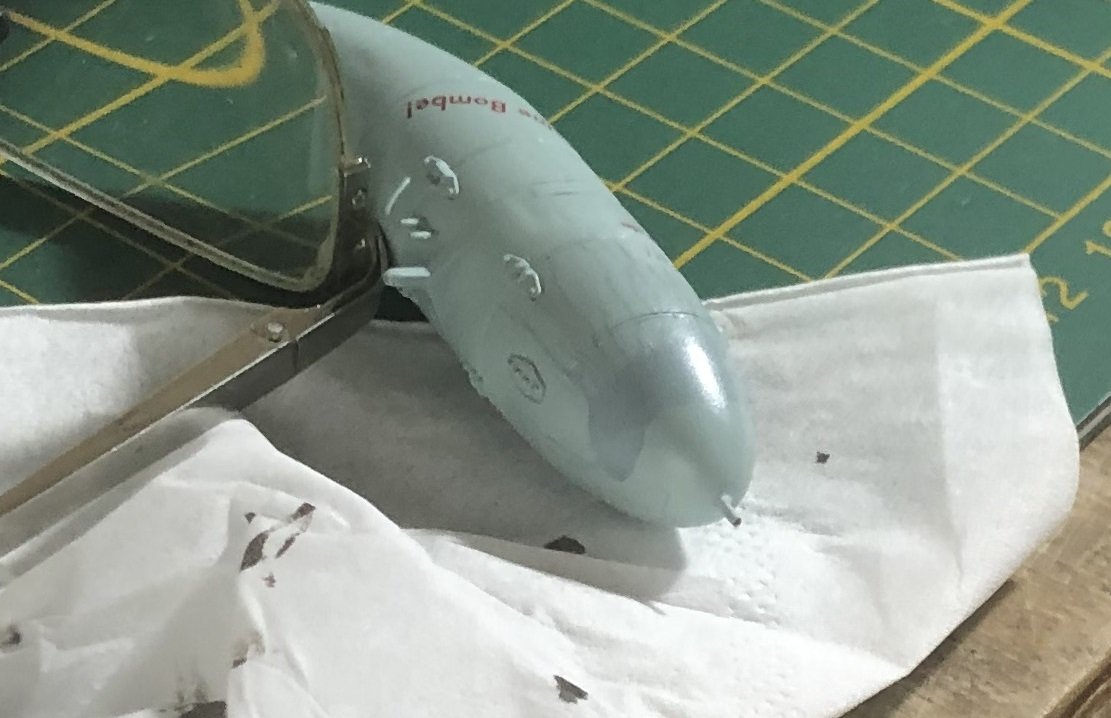
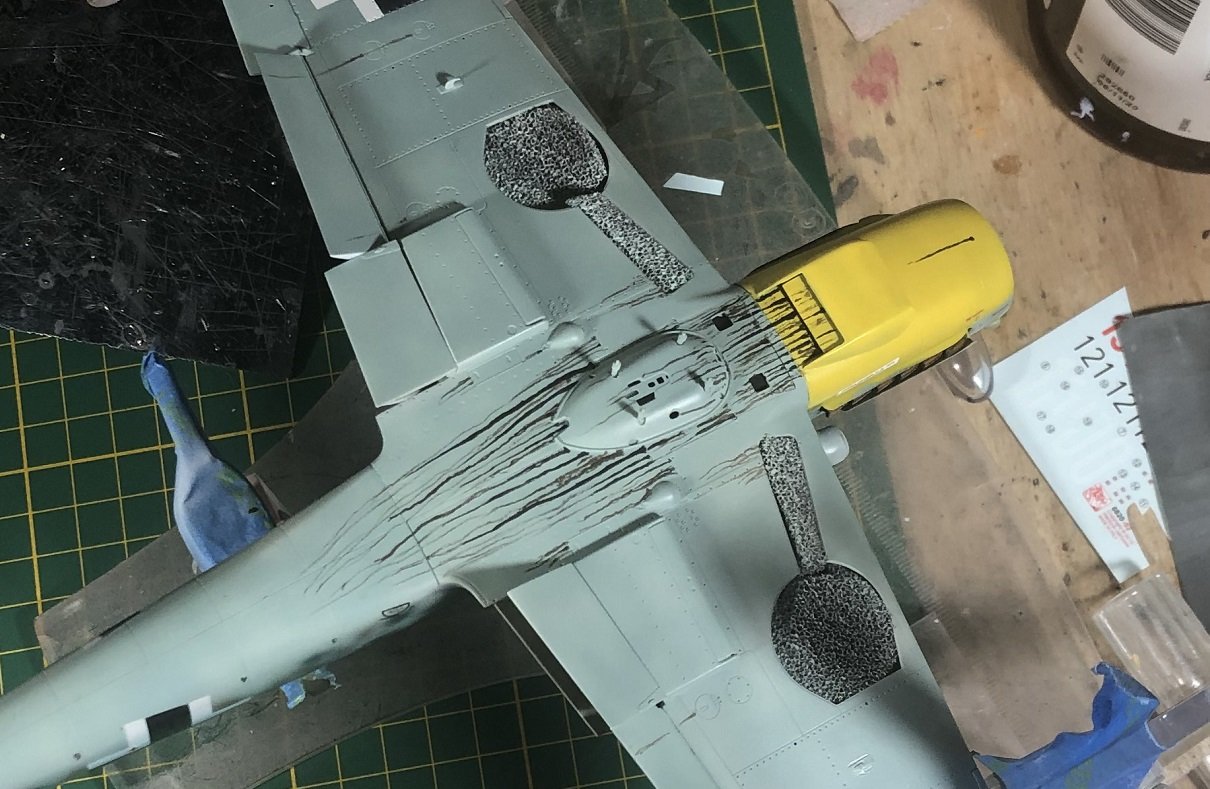
So.... here we are advanced into layer/Step # 2 of the oil streaks. This layer has grime that hasn't been embedded, yet.
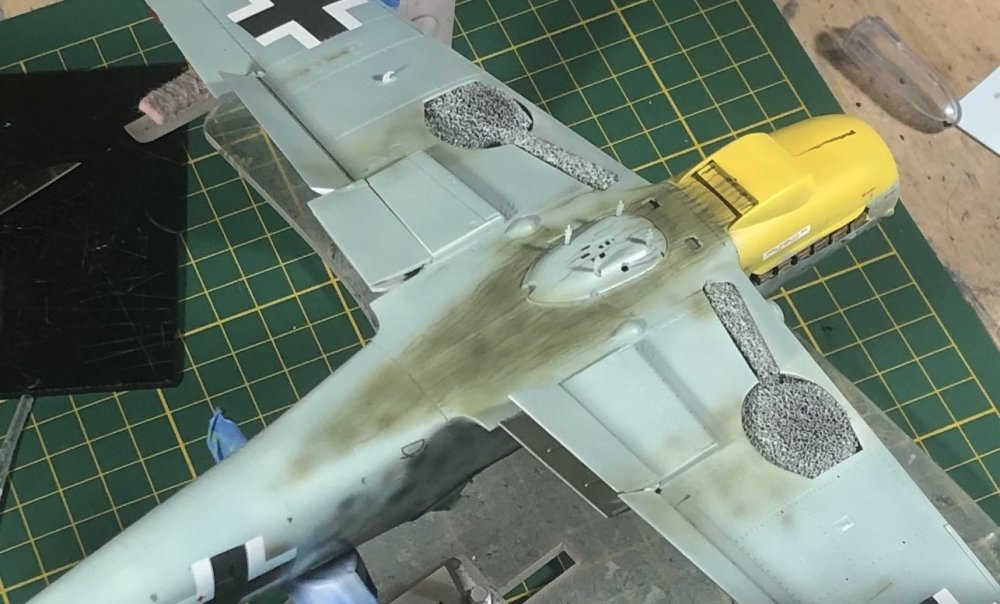

No grime on the fuel tank. I'm guessing that since they don;t seem that dirty in pics....besides the big runs and streaks of oil, that the prop wash and dust get flung onto the lower side of the fuselage.
I'm really not sure how far I should go, really.
-
5
-
-
1 hour ago, harv said:
Brilliant !!.....harv
46 minutes ago, Wumm said:Photos are fine...
And it's a great little vignette to place beside the kit. There's a whole different process for painting your figures to actually suit the type of lighting you intend to display them under. Some of the pros just seem to churn their figures out perfect every time, it's a knack you will get if you do enough of them.
On an unrelated note... Has anyone seen the tea-towl?
S
Thank you, fellas!
Here is the tea towel... he's sitting on it.
-
4
-
1
-
-
Oil Staining.... Step #1.
I have always been a miserable failure at oil staining. I understand the physics of it. Oil runs... prop stream makes it run back along the aircraft.... Dirt sticks to oil. Process is repeated until the plane is no more. But...despite knowing this, I could never get it to look right.
So, one day I asked somebody at the "weathered models" FB group page. He explained to me that painting oil stains is the art of tricking the eye into believing they are seeing oil stains. So what was needed was an an opaque oil mess in the form of paint... which you painted over with thin layers of regular color to make it look like the oil stain is embedded in the paint.
So, that is what I will do now. This is the original application of "oil"

-
5
-
-
Except for the clear coat, I'm going to consider the chair done. There are a few shoulda, coulda, woulda, but didn't things here... Rebuilding the chair and making it perfectly square... making the float seat cushion thicker and putting more effort into giving it textures and but I'm losing patience with the whole project. So I'll post this picture and move on.
-
6
-
1
-
-
Sharp result on your Yak, Kevin. Paintwork looks really nice.
-
2
-


Gaspatch Henschel Hs123 1/48 scale
in LSM 1/48 Work in Progress
Posted
Hi everybody!
When I came back to modelling a few years ago, the Henschel Hs 123 was high on my list of planes I would some day like to build. At the time however, the only kit was by Italeri. So, the moment I saw this one being advertised via a WIP at Aeroscale, I ordered one forthwith.
Since receiving it, I've developed a preference for larger scale kits. But I knew I'd never see one in 1/32. So I've had it in the back of my mind for some time.
It comes with some nice features. The best way I can describe it as 1/48 meets WNW meets WWII. Here are some shots from the instruction booklet,
Lots of options. Lots of parts. Lots of detail. Heh... It even has tie-owns under the wings so that it can be tied down to a base just as it was tied down to a windswept airfield. And, helpfully... a cardboard jig to help you get the wheels aligned properly.
I did a little bit saturday. And today I worked with some photoetch.
Happy modelling!