


GazzaS
-
Posts
6,396 -
Joined
-
Last visited
Content Type
Profiles
Forums
Events
Gallery
Posts posted by GazzaS
-
-
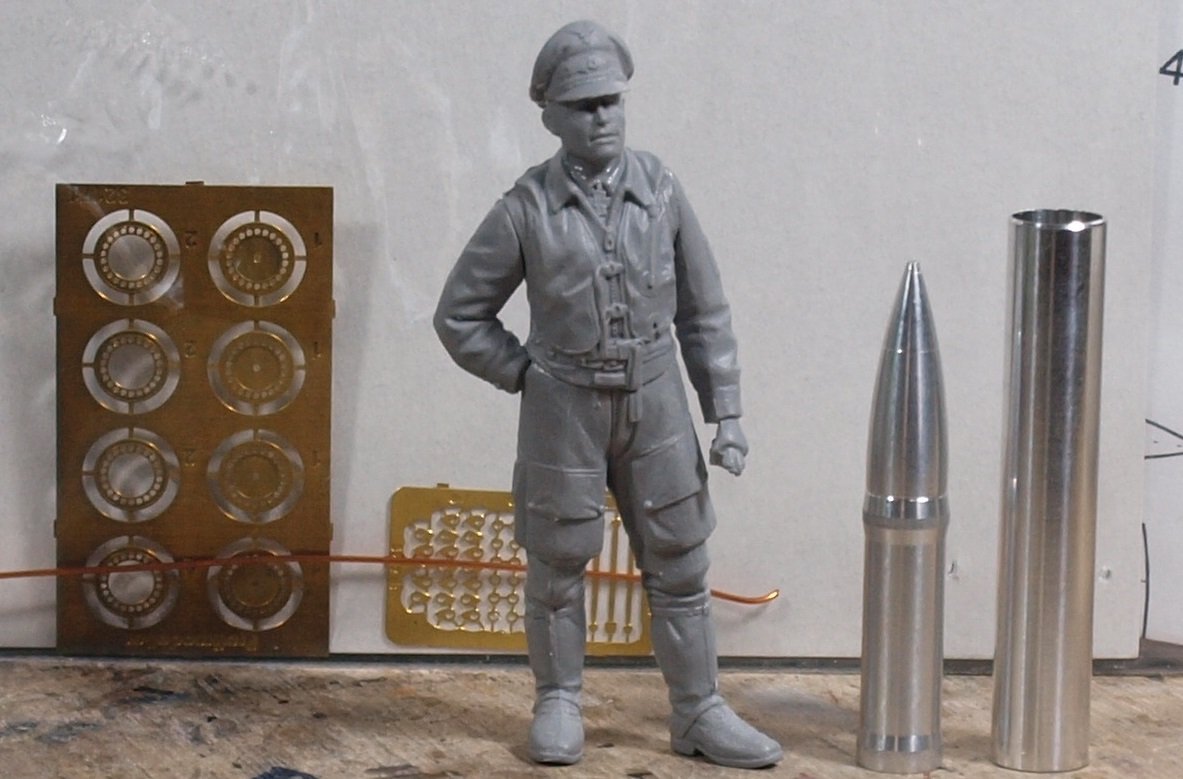
Is that a rocket in your pocket, or are you just happy to see me?
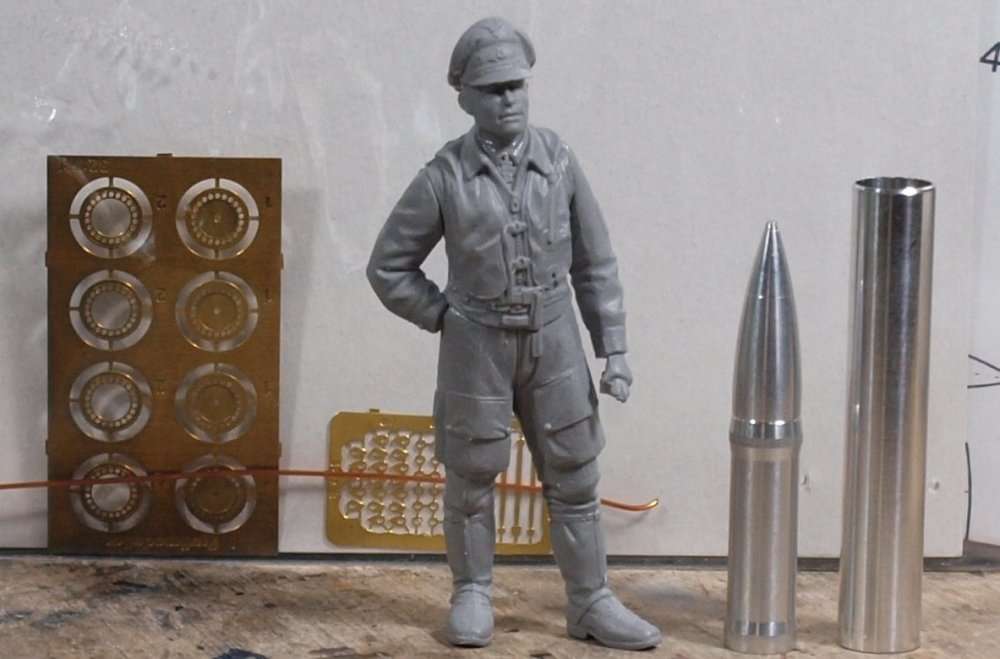
Our intrepid pilot and an underwing weapon. I think I'll finally invest in a drill press so that I can put the metal braces into the tube more securely than a simple glue joint.
Seem like you can't buy Germans that haven't won the Iron Cross. All three pilots in the ICM set have it.
You're saying: "Wait, I thought his plane had MG 151 tubs under the wings??"
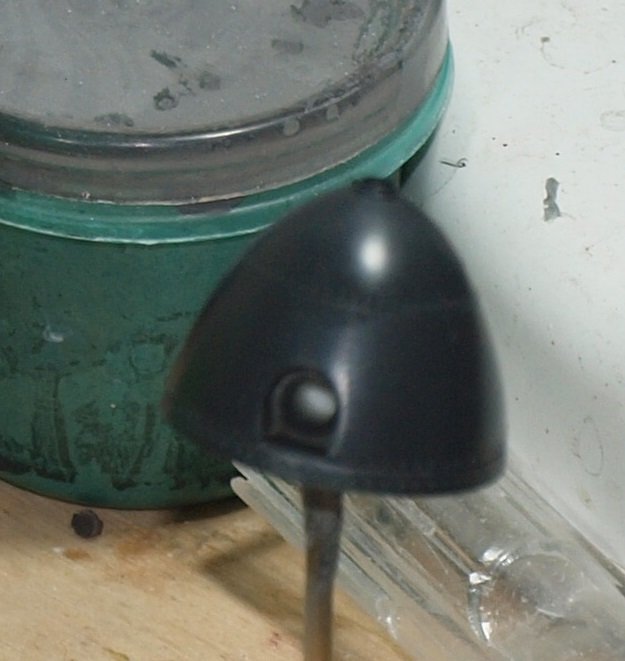
Well... that's what I thought. But this picture just came up last week causing me to spend yet more on this build. (it also caused me to make his propeller spinner a single color: black)
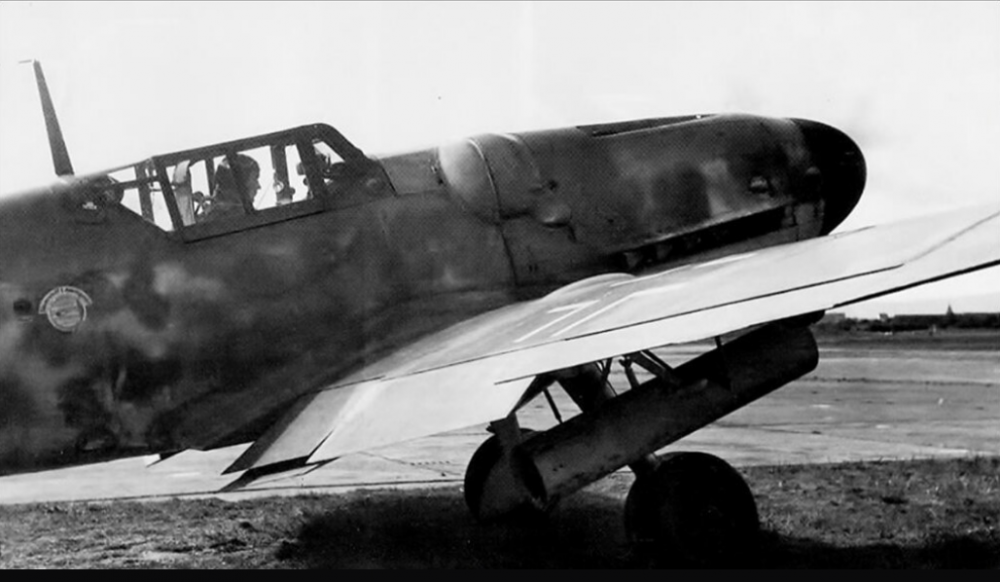
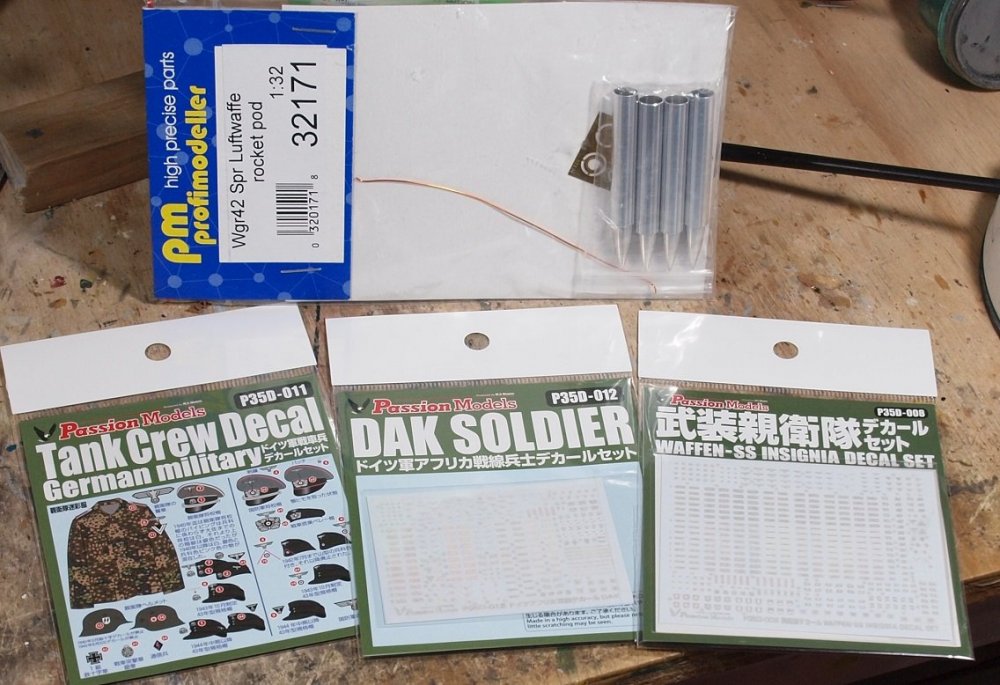
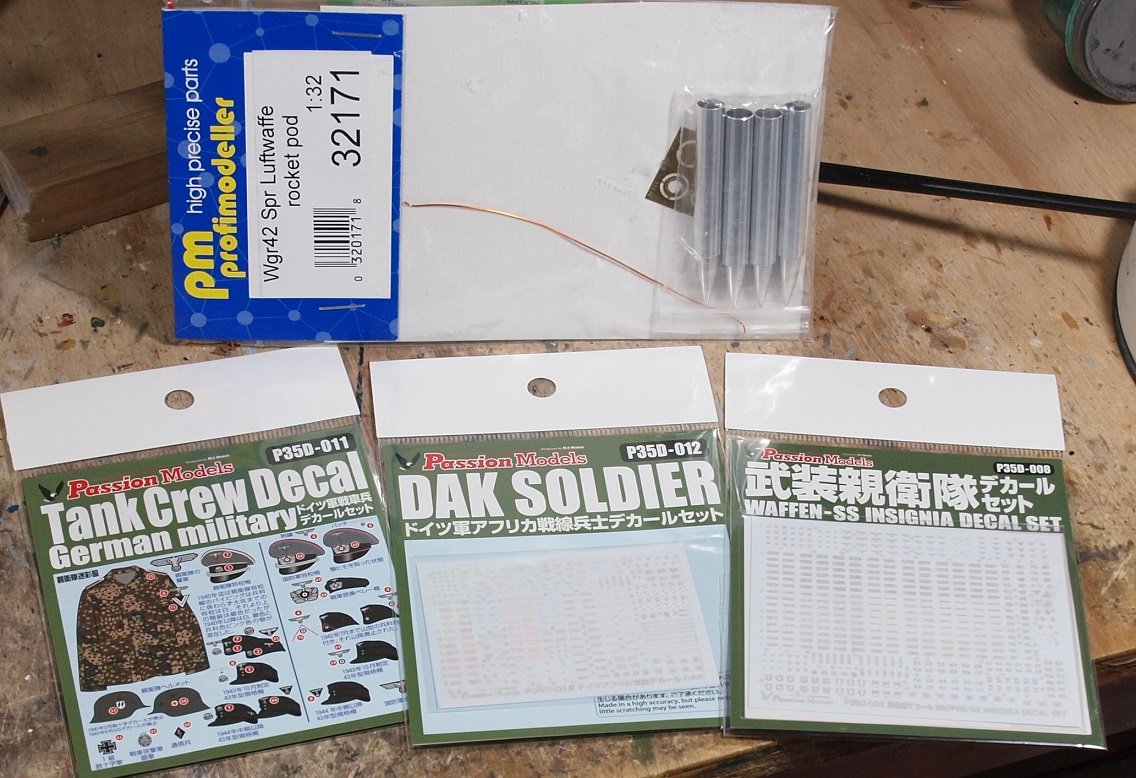
So... I'll have to make adjustments. The rocket set is by PM Profimodeller and is actually a four tube set for larger aircraft like 110, 210, or 410.
Just getting busier and busier.
-
 5
5
-
-
I got some rocket tubes for my 109G build... And some uniform decals.
-
10
-
-
Anyhow....
To quote Mr Miyagi in Karate Kid:

...or to misquote him....
Tracks on.

Tracks off.
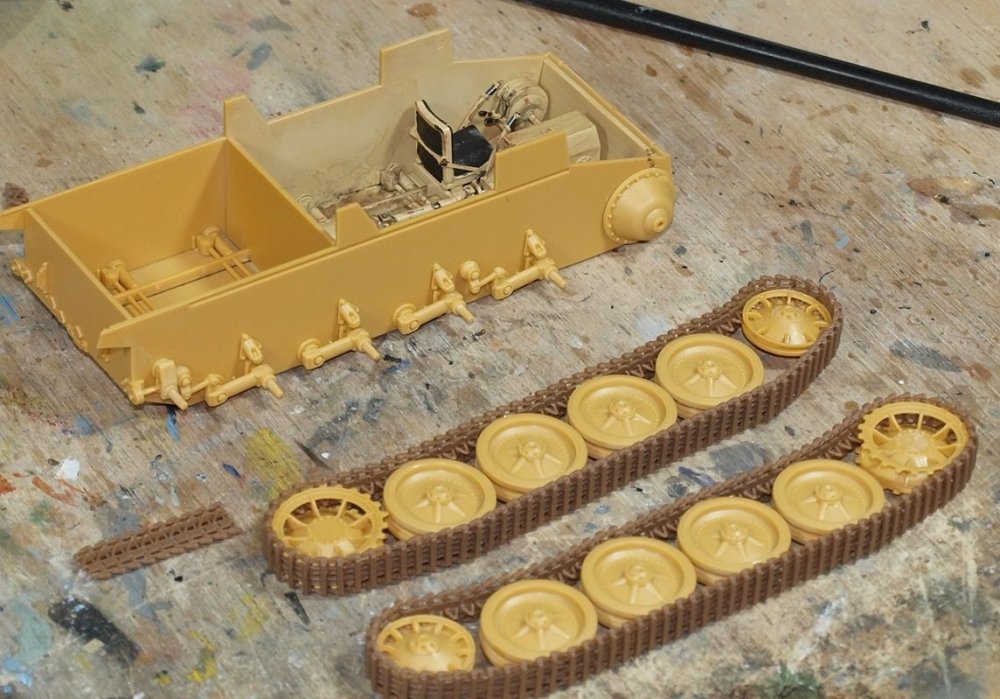
And then back on again...
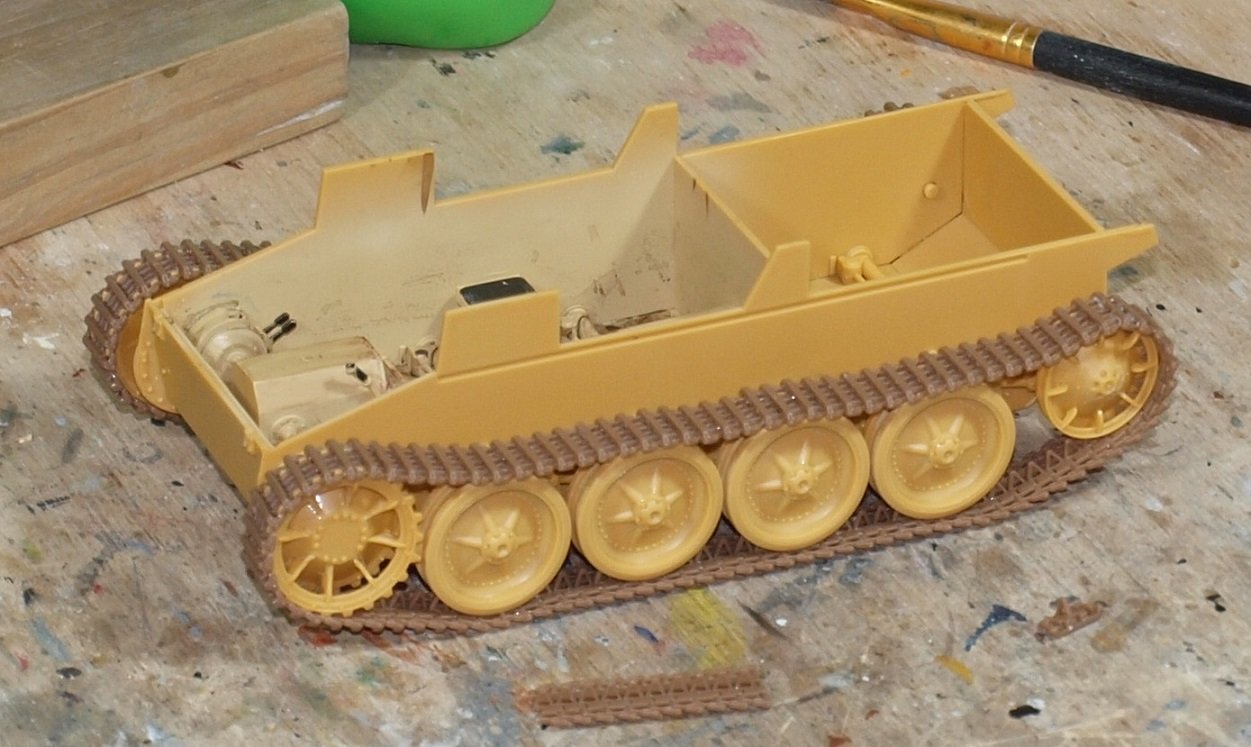
The kit is supposed to have four sprues of tracks. However.... as long as you aren't placing the extra long strap across the upper glacis... you only need three sprues. Interestingly... I had five. Until I realized I had too many sprues... I thought the task ahead of me super large.
But now we are past the tedium stage.
-
5
-
-
Nice correction, Kai! TBH... I never even noticed.
-
3
-
-
That's a great start, Peter! And your enthusiasm almost has me ordering one.
...almost. I already have a long build queue. So, I'll watch yours.

-
3
-
-
Front seat for me!
-
5
-
-
It's looking slick, John!
-
4
-
-
3 hours ago, Peterpools said:
Gaz
Nice start and thank you for explaining what the old school way is. The interior is looking mighty good and 192 track links to clean up - patience for sure and way more then I have. Nice stash and in these of nearly everything being back ordered or out of stock, makes so much sense. Of course, convincing our wives of that is a completely different story.
Keep 'em comin
Peter
Thank you, Peter. Doing the tracks wasn't so bad. It's just one of those things about armor. Best thing you can do is set yourself up to minimize swapping tools as you go. For instance... nip them all of the sprue with your nippers first. Then do all of your knife work, putting each part into a new pile as you go. Then... if you think necessary, do the sanding step, and drop each completed piece into a wide mouthed container. It can be very therapeutic, really.
Get up... have a few minutes to stretch or a drink... Then sit down to the next sprue.
My stash is only 5-6 years of modelling. They are all good kits, nothing too old or known to be troublesome (except for two Revell kits). The wife supports my hobby, and my bench area is just off the livingroom... So I'm pretty lucky.
-
2
-
-
4 hours ago, Bomber_County said:
Gaz, nice to see Marder II for a change, I did the IIIH ……I’ve a half built Sturmpanzer IV from Tristar, looks pretty similar moulding colour and detail as the Bronco. I also like these mobile artillery pieces……
Thank you, Phil. I've also done the IIIH and Brummbar... both by Dragon. Neither turned out as good as I had hoped... so they'll be on my 'build again' list eventually.
-
2
-
-
5 hours ago, Kaireckstadt said:
Good that you found a solution for the wheels Gary!
Great idea for the diorama! I hope that you choose a yellow scheme (but not plain)
") .
.
192 track links? You really need strong nerves for this job!
The 50-70 kits are only armor? Curious to see a photo of this stash!
Hope that your overcame your cold!
Looking forward to seeing the next update!
Thank you Kai, I think taking zinc and Vitamin D3 everyday minimized the effect of the cold.
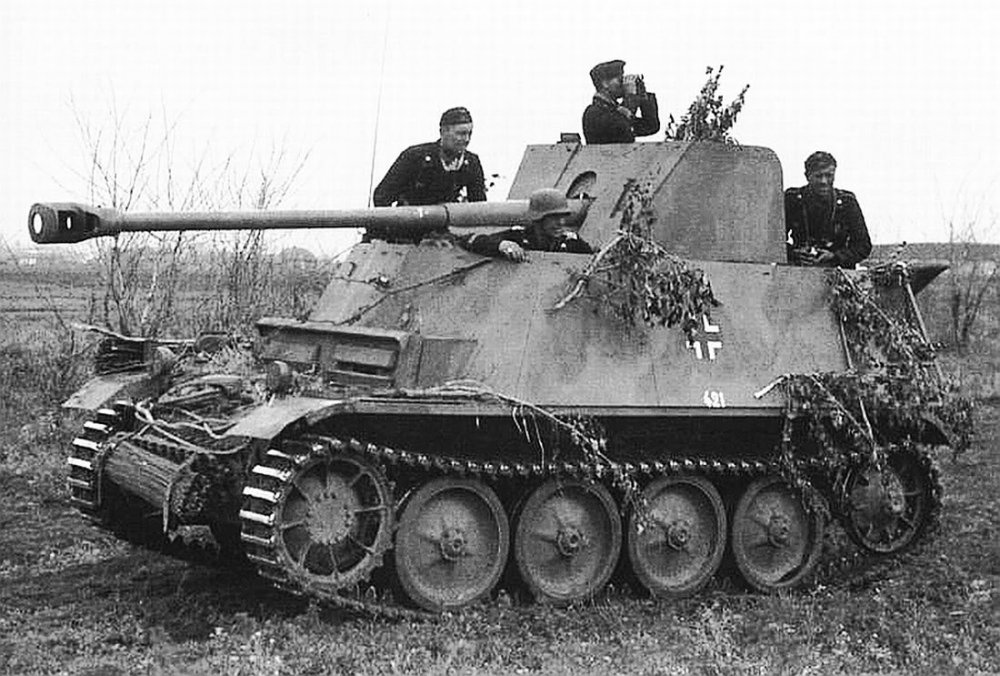
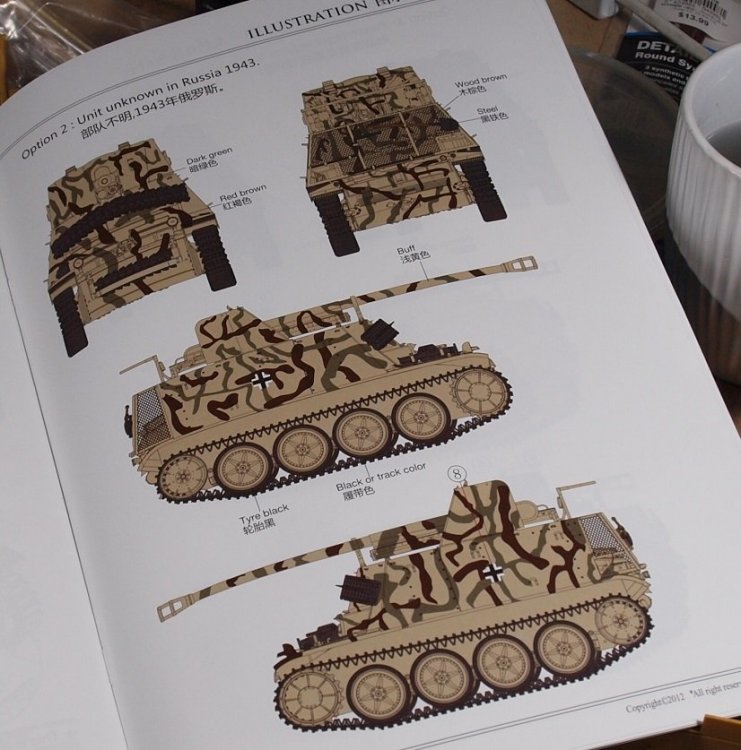
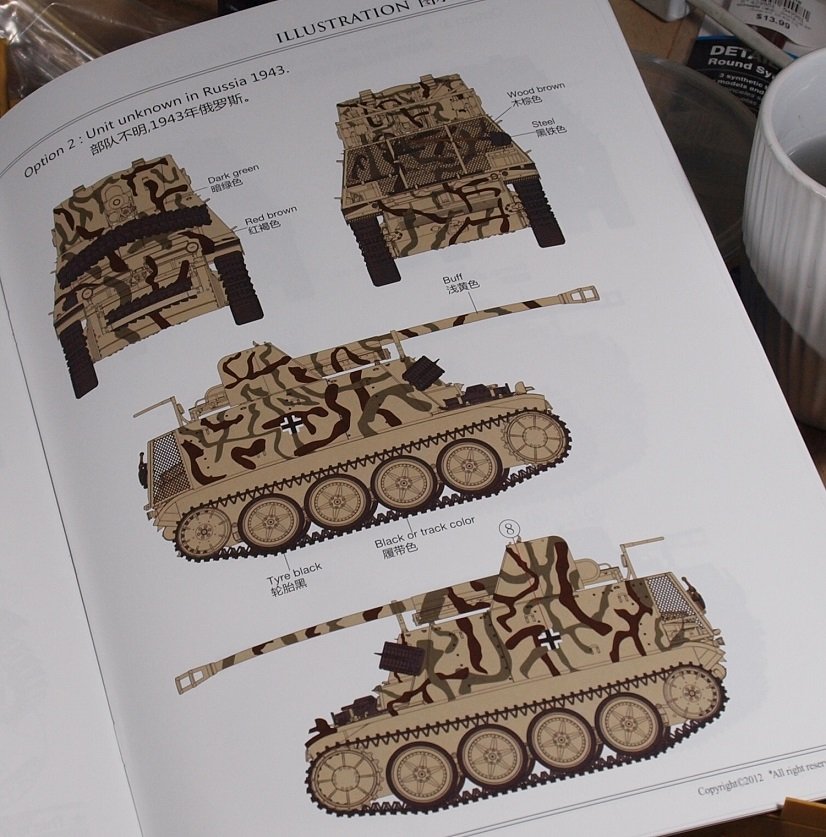
Speaking of schemes, what do you think of this one?

Sadly there is not a caption to help identify the unit.
I'm still thinking of this one which is on the box top:
But I have plenty of opportunity to change my mind as I go back to work tomorrow.
These were all converted from Flammpanzer... so they're not very numerous.
The tracks are almost done... I'll do a small update later today, hopefully.
-
2
-
-
7 hours ago, DocRob said:
Nice topic Gaz, I like these open topped tank hunters. It's maybe to late for that, but with my Ford GT build the manual asks for cutting the poly caps on sided, to slid the wheel onto the axle more easily. Might have been an option for your plastic caps.
Cheers Rob
Thank you Rob! I thought of that too, but after it was too late to do anything about it.
I've been a big fan of the Marders, too. When I was a kid, I think the only one I could find was the Tamiya Marder II. Which of course is the other Marder II... thank you for the confusion, OKW!
There is more info on this particular variant here: https://tanks-encyclopedia.com/ww2/nazi_germany/sdkfz-132_marder_ii.php
Sadly, it's the best site I've found so far, even though it doesn't tell you a whole lot.
-
3
-
-
Bummer about the ladder, Frank.
-
2
-
-
Craig,
it's been a long time since I saw this build. I'm glad to see it progressing so well and looking like a B-17D. Definitely looking forward to the metal skinning.
-
1
-
-
Einfache klasse!
-
1
-
-
Thank you Frank. Great images.
-
4
-
-
Holy shit, Methuselah!
Er.... I mean Happy Birthday Martin!!
-
2
-
 4
4
-
-
2 hours ago, Kaireckstadt said:
Wow Gary! Interesting new project and nice progress. The tub looks really beautiful.
Can you describe the old fashioned way of painting? Not an easy job with all the wheels attached…
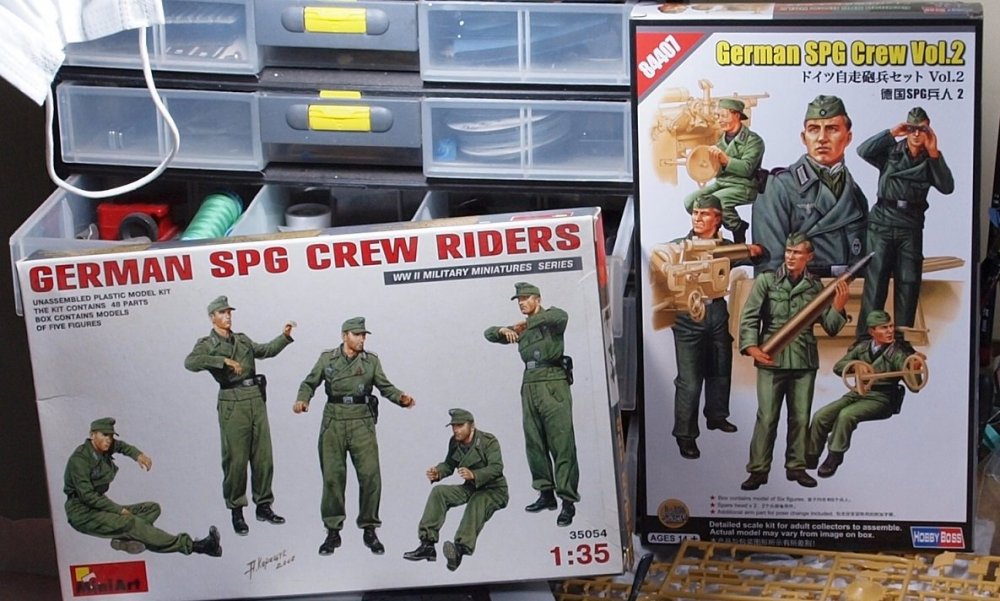
You must have a big stash! Really nice crew-figures! Which one will you use?
Did you already decide about the color-scheme? I would prefer the last one. Very unusual!Will follow this in the first row!
Thank you Kai.
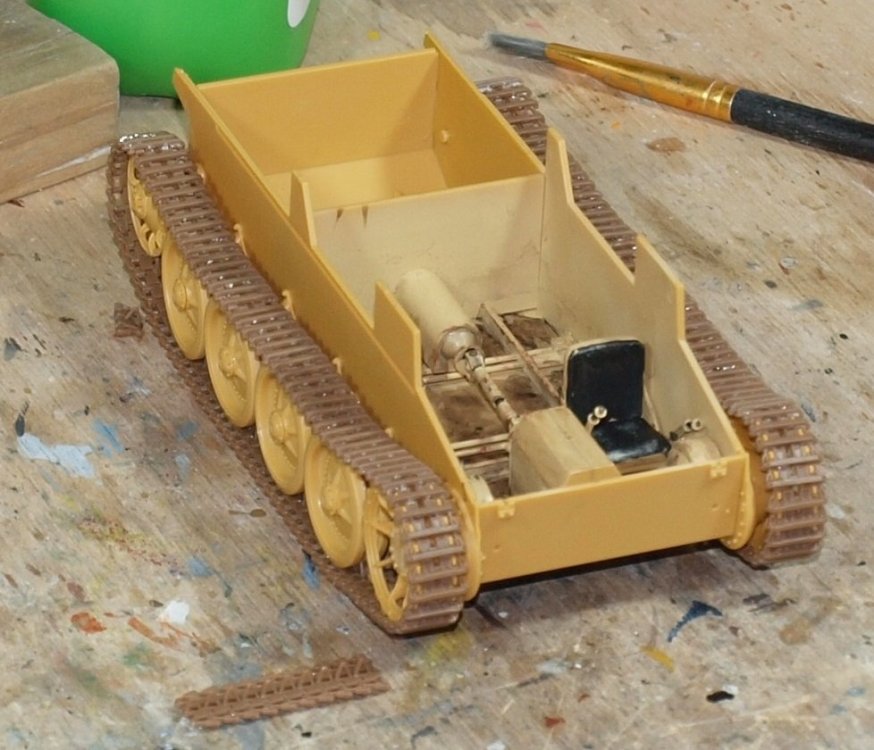
The old fashioned way... basically is just gluing everything together and painting it as one solid thing.
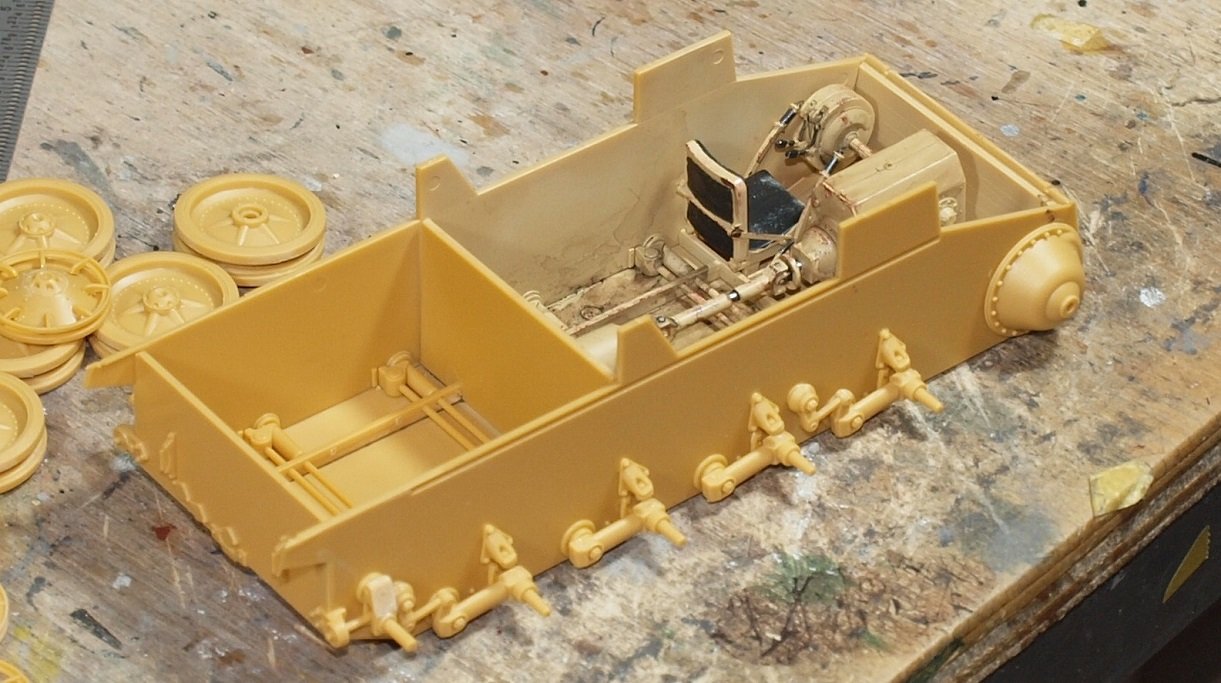
But... I have sanded the axles a bit and put each wheel on each axle to try to soften up the mating surfaces... so, I will go back to trying to keep the tracks and wheels separate from the hull.
My stash is somewhere from 50-70 kits. I will clean it up one day and take a picture. But mostly Dragon armor with about 7 figure kits. I have a few different Marders... so crew is required.
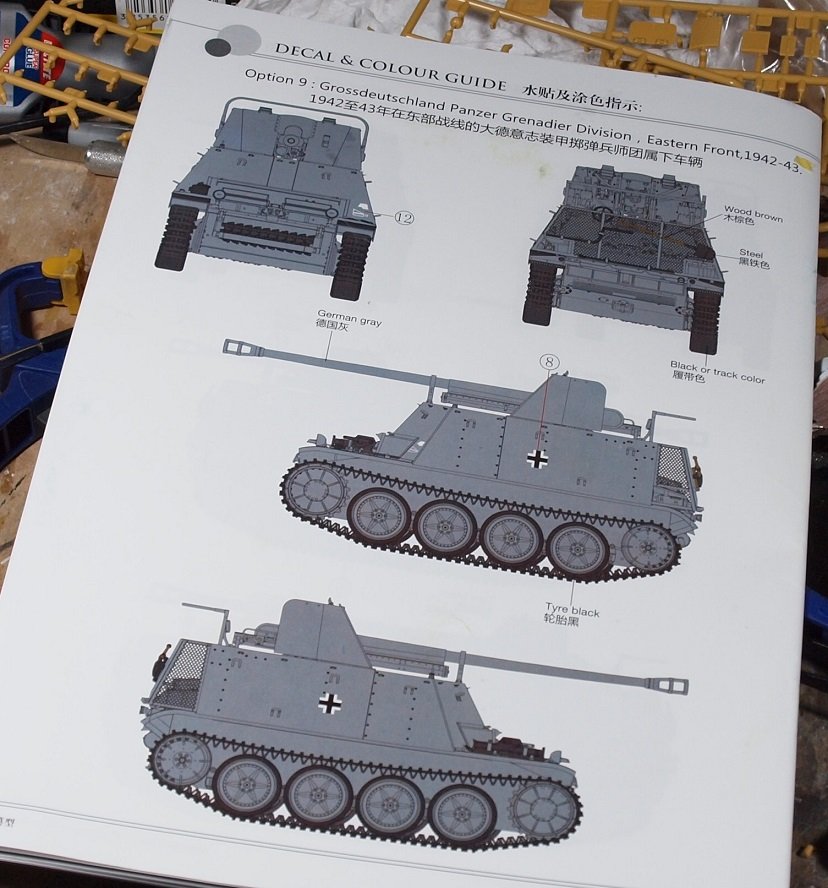
I haven't decided on a color scheme, yet. The first one you saw on the first post is Großdeutschland division and one of the gray ones is also GD. The one you like is an unknown unit. There is even a plain dunkelgelb scheme, but also unknown unit. There is even one from a training unit. I am pretty certain that I will do one of the yellow schemes. The main reason is I want to do a diorama with a enemy panzer also (partially, or in full) on the base...and the enemy vehicle is definitely a 1943 vintage. Who knows... I might find a scheme from a picture.
But now I much separate and clean 192 track links. Each link has four sprue gates. By clever molding, the ejector pins are all on the sprue and not on the track. And they are small tracks.
Glad to have you along!
-
4
-
 1
1
-
-
31 minutes ago, Martinnfb said:
Jesus did it
Do I have to give you the finger twice in one day?
-
2
-
-
29 minutes ago, Wolf Buddee said:
LOL guys!
I know exactly what you guys are talking about. I have the 1/200th Trumpeter Titanic and there’s an incredible detail set out of Korea that’s over $300. I paid $400 for the kit itself!
…….and yes, your cockpit looks great. Cockpits are actually one of my favourite areas of a model. On any real aircraft I love looking in to the cockpit.
Cheers,
WolfThank you, Wolf! I'm not a big fan of building cockpits. Though I find it much more rewarding when it has more painted parts or good decals.
-
4
-
-
Hello friends,
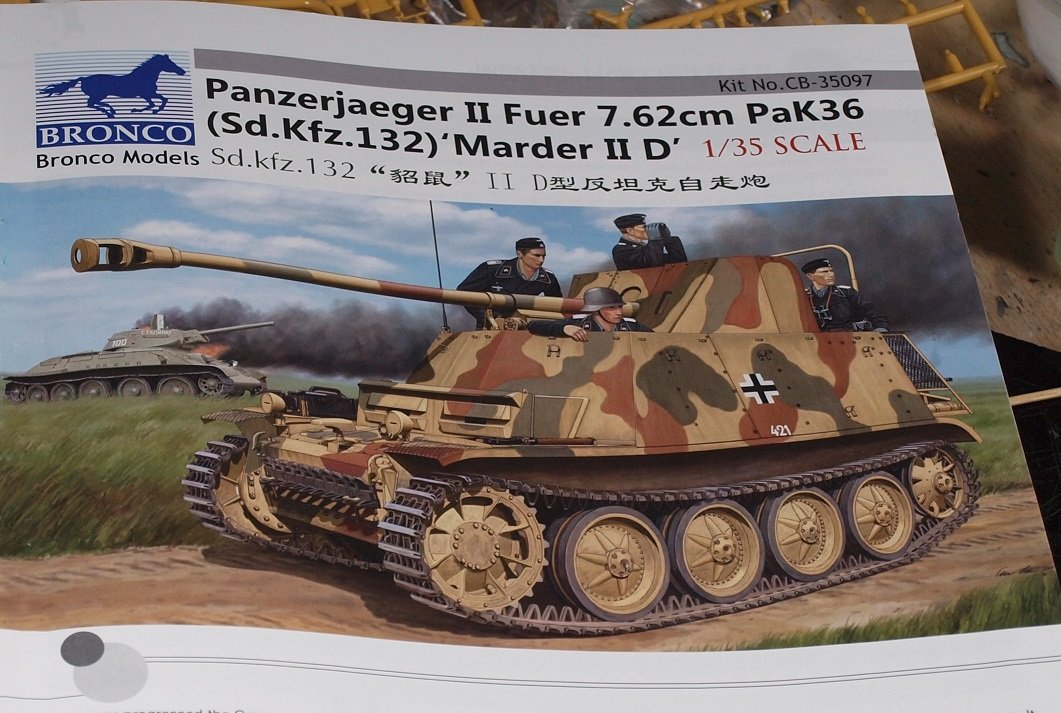
Now that my 109 build is waiting on parts, I've started this Kit. It's a fine kit with small flash and lots of parts. Some would say over-engineered. But... there are sacrifices we must make if we want to build certain kits in certain scales that aren't made by somebody like Mr. Tamiya-san.
There are several versions of the Panzer II. This one has four large road wheels on torsion bars instead of the usual five small wheels on leaf springs. So, when you look at the pics you'll have to mentally adjust to the smallness of the thing.
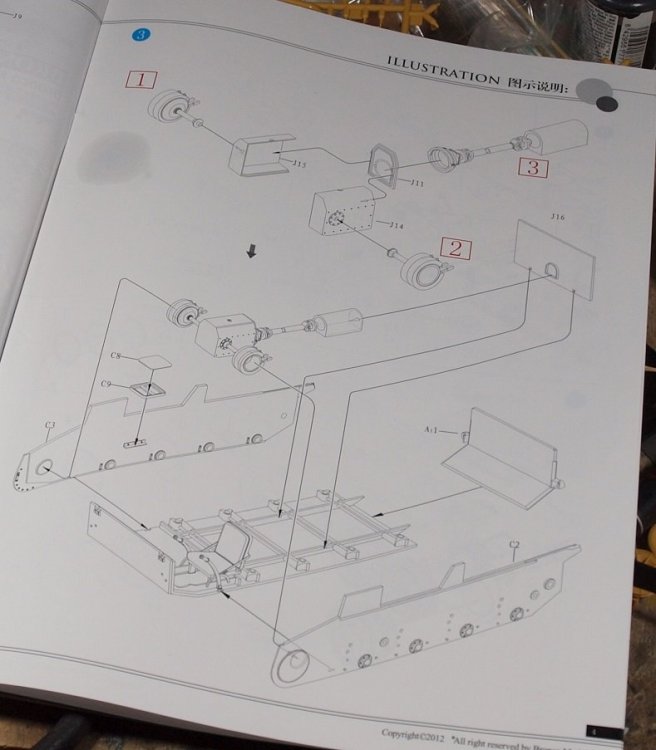
It comes with a nice instruction booklet:

With nice, uncluttered instructions:
There are several Panzergrau schemes:
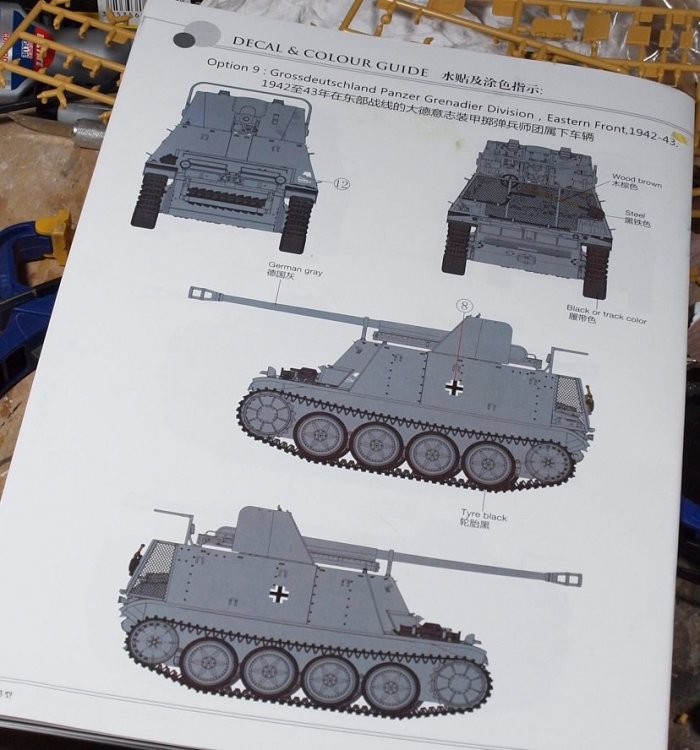
And one more three-color scheme:
...representing some of the Wehrmacht's most famous units.
Over a period I've build up the wheels and last night I started on the tub. It's a flat-pack tub, but fits together nice and square.

The Wheels have plastic caps that you would expect to work like Tamiya's Poly caps. But they don't.
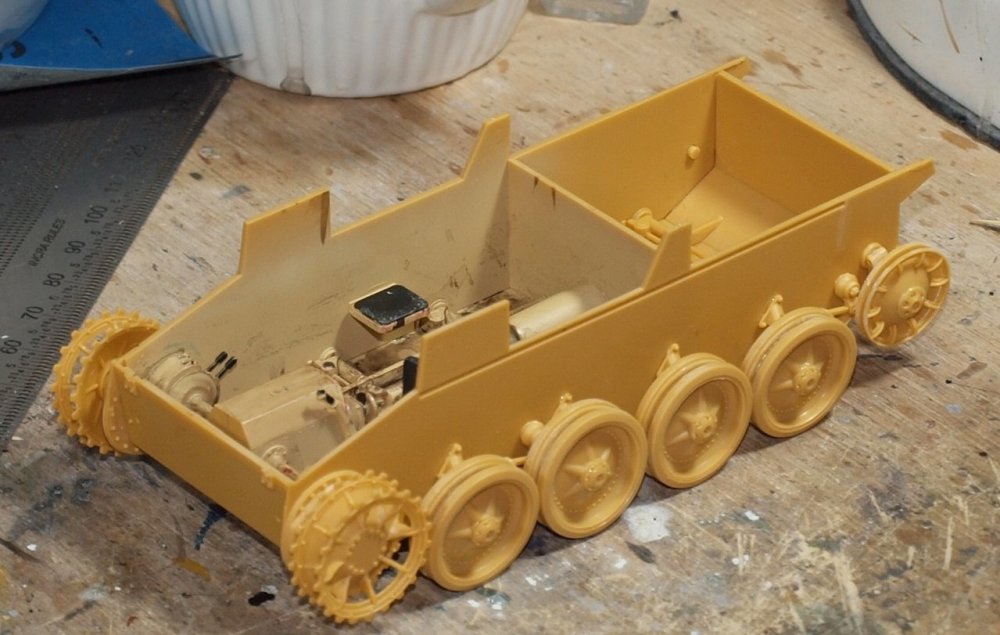
My original plan was to attach the wheels uncemented, glue on the indy-link tracks, and then pull off the assembly and paint it. But that won't happen. The plastic caps hold on tooth and nail. And to remove them, they either have to be twisted... or wedged off with a knife blade. No matter... I will do it the old-fashioned way
There are no figures in the kit. But I have two options:
So, come... watch and listen as I curse my way through another build. I curse mostly when I drop parts... or when they are ejected into space by tweezers. Even at this early stage, I have had to resort to a toothpick with a gob of blutack on it.
-
4
-
1
-
2
-
-
16 hours ago, Peterpools said:
Gaz
I’m taking this all in and what an education. It’s just so hard to justify spending $150 on AM for a $50 kit but if it’s the best way to achieve the accuracy you are looking for, then it’s the right move.
I follow a few large scale ship sites and the work is spellbinding. It’s not unusual to spend $150 - $1000 on upgrade PE and resin sets, especially in 1/200 scaleI. I’ve been closely following the HSM Hood build in 1/200 scale on the Model Shed vlog and the work ... beyond first class. The Pontos Upgrade set ($1000 I think) takes the build to a museum level. Keep’em comin
PeterThank you, Peter! Yeah, those ship sets will knock your socks off. I have a detail set for the Hobby Boss SMS Seydlitz.... I paid a staggering 250 for that puppy!
-
2
-
-
On 7/2/2021 at 6:18 AM, Kaireckstadt said:
But the prop seems to lack the ovoid holes for the propeller blades in the spinner?
Not ovid enough??
-
3
-
1
-
-
16 minutes ago, Wolf Buddee said:
Thanks Gary,
I’ve been using decals for detail for a long time. I have a 1/48 scale sheet of F-4 Phantom white data stencils that I’ve used for a quite a few years to try and replicate data placards. I used it to add the L and the R on the gun triggers for the Fokker’s control column.
Cheers,
WolfThanks for that one, too... leftover data stencils! I love it!
-
3
-
-
52 minutes ago, Martinnfb said:
I always wonder what happened to this build
")
Are you surfing the seas of antiquity today?
-
3
-


Bronco Marder II
in LSM 1/35 and Larger Work In Progress
Posted
Thank you, fellas.