


GazzaS
-
Posts
6,396 -
Joined
-
Last visited
Content Type
Profiles
Forums
Events
Gallery
Posts posted by GazzaS
-
-
Hi everyone!
Hopefully only the first update today... Anyway... Two of our pilots are being sent on leave. When you next see them...in a future build, hopefully they'll have nice, angular faces on new heads.
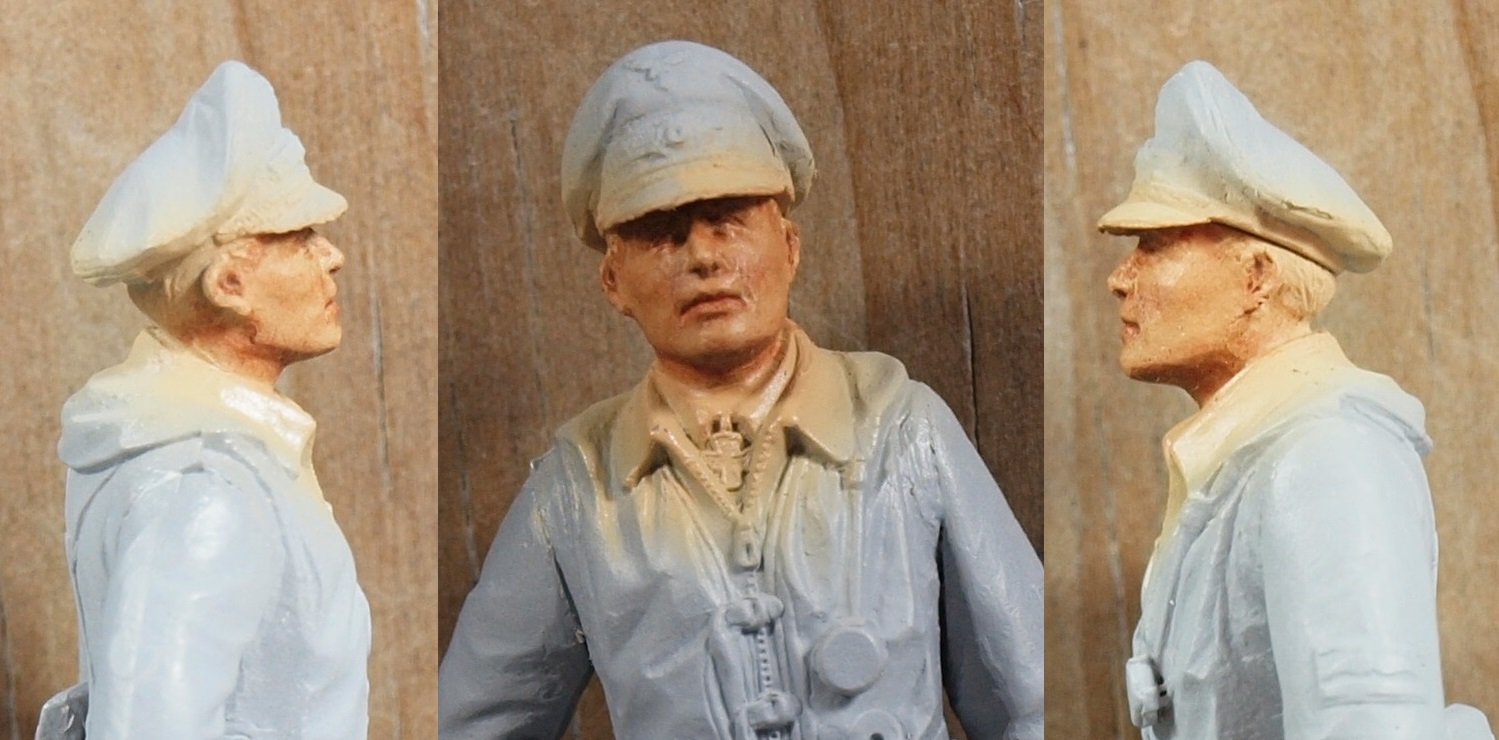
Meanwhile... Herr Weiroster gets the second phase of oils... the red-brown phase.

I'm going for subtle shading here. During the center pic, the camera didn't auto-flash. The out pics were taken when the auto-flash activated, though I put my free hand in front of the flash bulb.
Tomorrow, I hope to do the blue phase.
-
 5
5
-
 1
1
-
-
Holy sheep dip... that is some awesome work!
-
3
-
-
14 hours ago, Peterpools said:
Gaz
Terrific start on the three figures and thank you for posting the face painting tutorial.
Anytime something seems easy, it always turns around a lot harder and longer then planned.
Keep ‘em comin
Peter
Thank you, Peter. These self-imposed extras have really impeded my ability to complete kits. But what is a hobby without improvement?
9 hours ago, GusMac said:Mr Potato Head on the right looks a bit like Till Lindemann

Lead singer of Rammstein for those who don't know.
That would be ok if the were as old as Mr.Lindemann. But being young fellas who mostly grew up during the depression era...
9 hours ago, Kaireckstadt said:Nice tutorial Gary! Thank you!
The pilots heads are not that bad at all regarding the details even if they seem to be too big. Which company are they from?
BTW: your German translation is totally correct?
You are welcome, Kai. The translation was using Google translator. But I've put the phrase into my brain. The pilots are from this boxing:
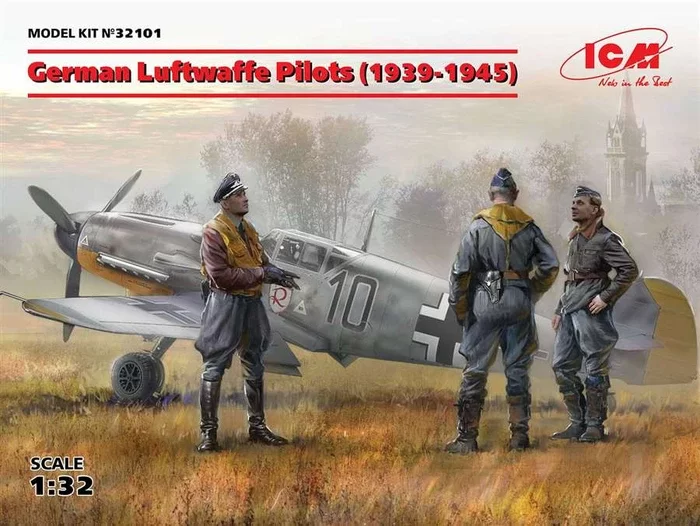
But honestly... the more I look at them, the more I hate the outer two.
-
2
-
 2
2
-
-
1 hour ago, DocRob said:
Nice progress with the cowl and the exhaust area. I hope you will address the obstacles there without too much trouble.
The face painting guide is very comprehensive, thanks for that. I follow the old figure painting rule of one base color and two lighter and two darker shades of the same color, mostly.
I like the result you achieved on the faces. The faces itself, hmmm, at least the guy in the middle looks a bit sharper, the right one looks like an oversized potato, I wonder if they produced 'Schiffchen' in his size.Cheers Rob
Thanks, Rob. I'm laughing about 'potato'. The center guy is ok... just. but the other two... may have to get new heads.
-
4
-
-
Holy moley... that's some awesome roundel painting! Great lesson.
-
3
-
1
-
-
Nice masking! This will be an epic paint job!
-
3
-
-
13 hours ago, Kaireckstadt said:
Where is the RLM74-Tape you promised to use Gary? 😁
To be honest: great preparation of the exhaust section which caused a lot of work but pays off!
And the resin upper cowling part again causes rework because there is no seam in that place on the original cowling.
Can’t wait to see your next post!
Well Kai... I hope this isn't a let down. Thank you for the kind thoughts.
13 hours ago, Peterpools said:Gaz
Nice progress and the effort put in was well worth it, as the results look so good. A bit of filler and you should be home free.
Great idea about doing three figures at once as done the rtoad, a huge time saver.
Keep 'em comin
Peter
Thank you, Peter.
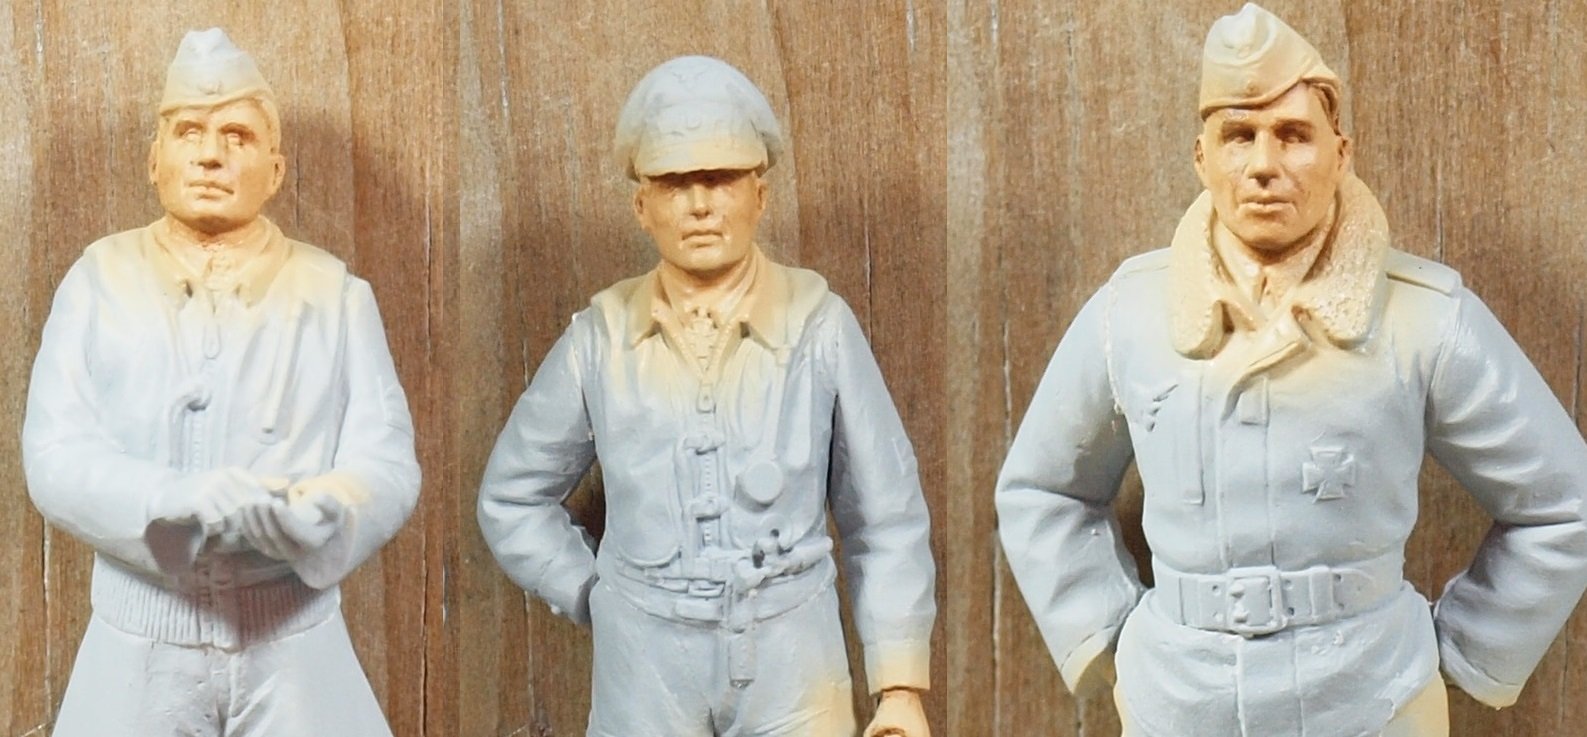
Meine Herren, treffen Sie meine Herren! Gentlemen, meet my Gentlemen. Did google get that right?

Here are the three pilots in question after the first layer of oils. This is just burnt umber blended over Tamiya Flesh.
These guys are all very broad faced. Not something I'm a fan of... I may have to start investing in other heads. Honestly, I think most sculptors have no idea how to make a narrow face with fine details. Remember WNW's Richthofen? He looked more like Robert Shaw than himself:

Anyway... a while ago, a guy on FB posted a bit of a guide. I was just a picture of where to stick paint, and how it should appear once blended.
What it didn't say was how long it should take to do it. I mean... how long can it take to paint something smaller than your pinkie finger nail? But it has finally dawned on me that you have to paint in stages, letting each layer/color dry so that you don't mess it up with the next layer. So... just one layer tonight.
Here is the guide image:
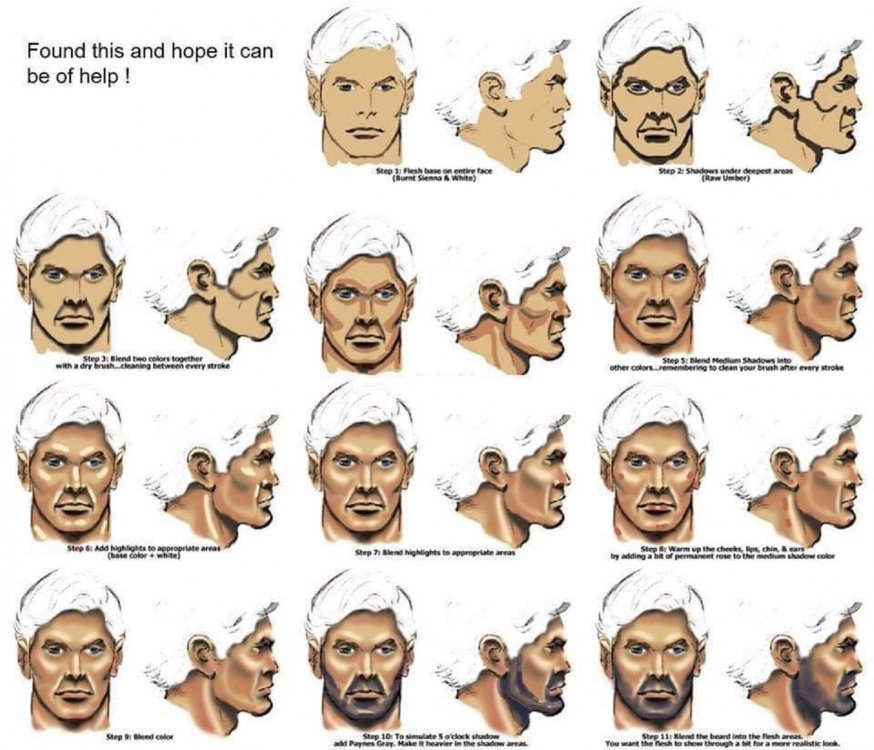
Anyway... come learn with me.
-
6
-
1
-
-
-
17 hours ago, Artful69 said:
Hey Gaz ...
I've really been time poor for the first 2 R&R swings ... BUT!! - I did get a chance to check out the Border Tiger kits today ... I don't know who posted those pics you showed me originally ... but those must be from the first (and stopped) production run ... Border had problems with its first set of moulds, so it stopped production of the kit ... made some adjustments and re started production at a later date ... which is why the product has taken some extra time to get back to market and why supply has been so slow.
I don't have time right now to take some pics of what is in my kit boxes ... but I can tell you the moulding is super crisp, highly detailed ... with no sink marks, flash, dags or blemishes ... I cannot attest to ejector pin marks - yet! ... While Davey Byrden was having his rant at me about how 3rd rate the kit is (in his opinion), he alluded to some fit issues experienced by a "well known" You Tube model builder ... Again - I cannot gainsay this particular argument as I have not proceeded that far ... but I would hazard a guess that the modeller concerned has received one of the first run kits made with the dodgy moulds.
We shall see ...
I'm hoping to get 2-3 solid days in when I get back at the end of the next 2 weeks (leaving tomorrow)
Cheers ... and thanks for the heads up
Rog
")
Rog,
Happy you got good kits.
-
5
-
-
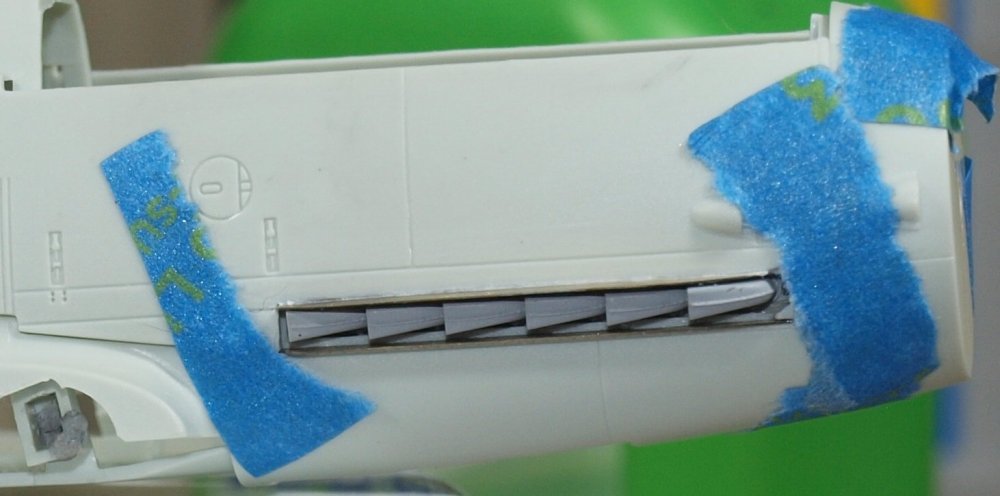
I started modelling today with the goal of finishing the exhausts and associated metal shields and applying the first layer of oil paints to the pilots face.
But before I realized it, I was cementing both halves of the fuselage together. So I didn't get to apply any oils to the pilots.... I say "pilots" because I'm going to do three pilots at once so I can have them ready for future builds.
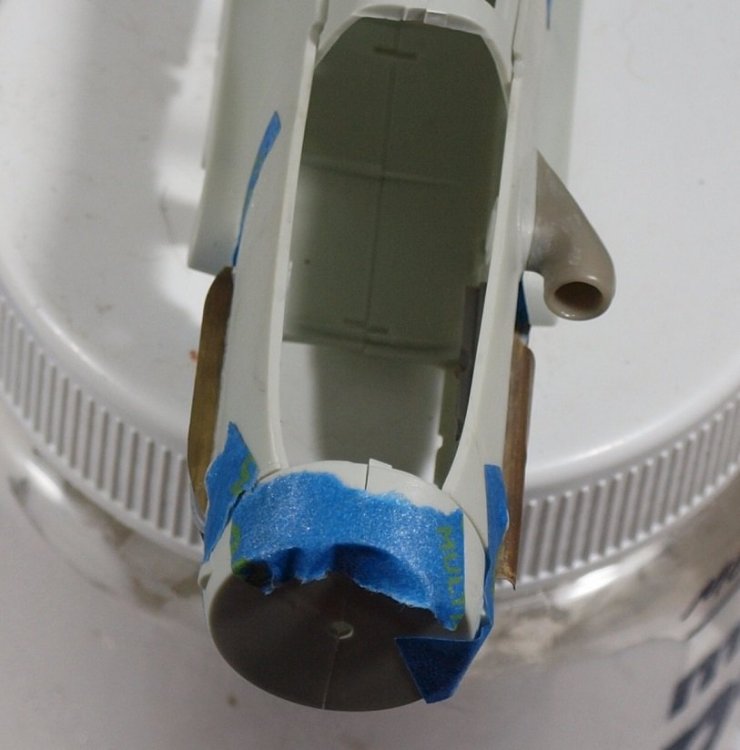
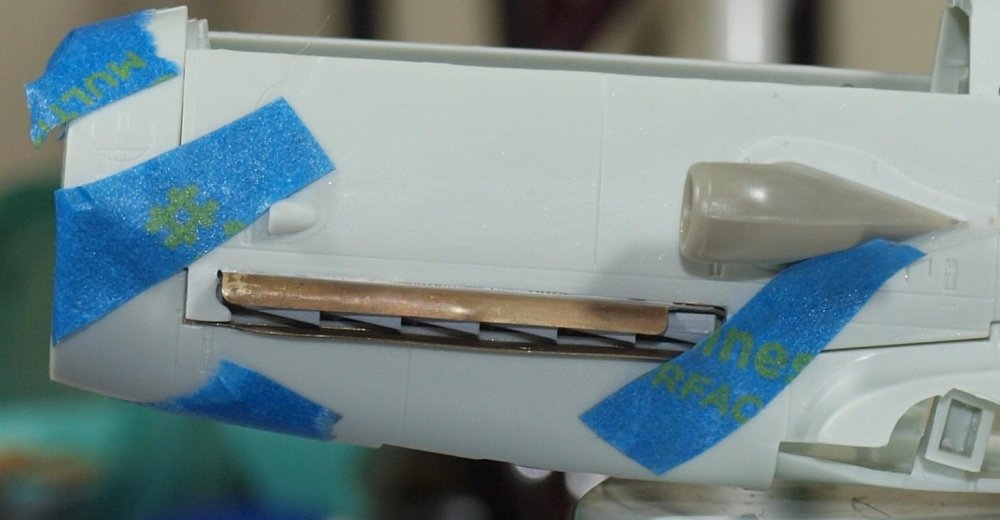
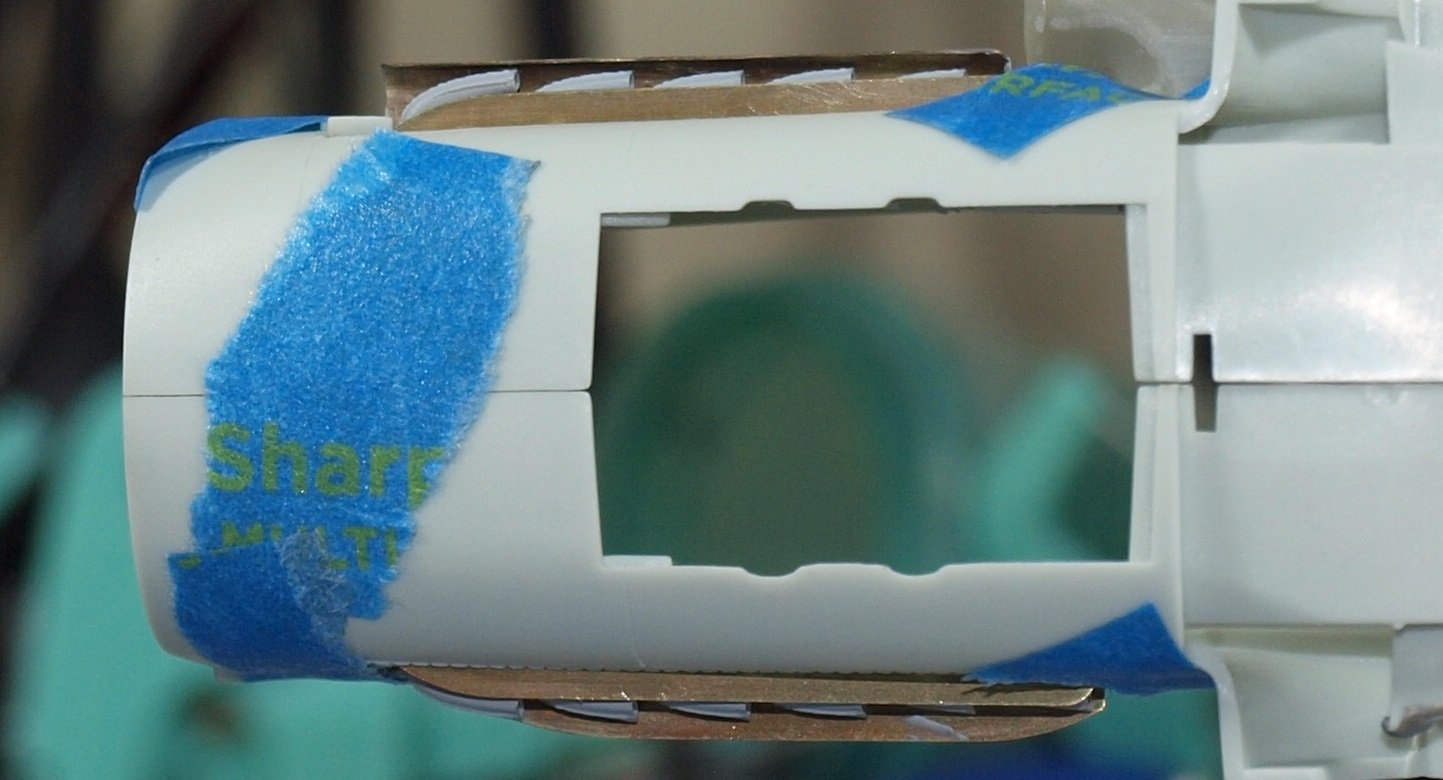
Anyway... Adding the Brassin shields was a big hassle. The kit shields aren't overly thick, and might have been thinned by sanding. Anyway... I annealed them so that they wouldn't fight the CA and because I had to put a curve in the port upper.
And then the resin exhaust stubs gave a bit of trouble. They just didn't want to stick without clamping for some reason.
At the end, I wanted to test the fit of the clear parts. Fortunately they didn't show any bad gaps or overlaps.
In any event... it was seven hours of work with only a small advancement in the build.
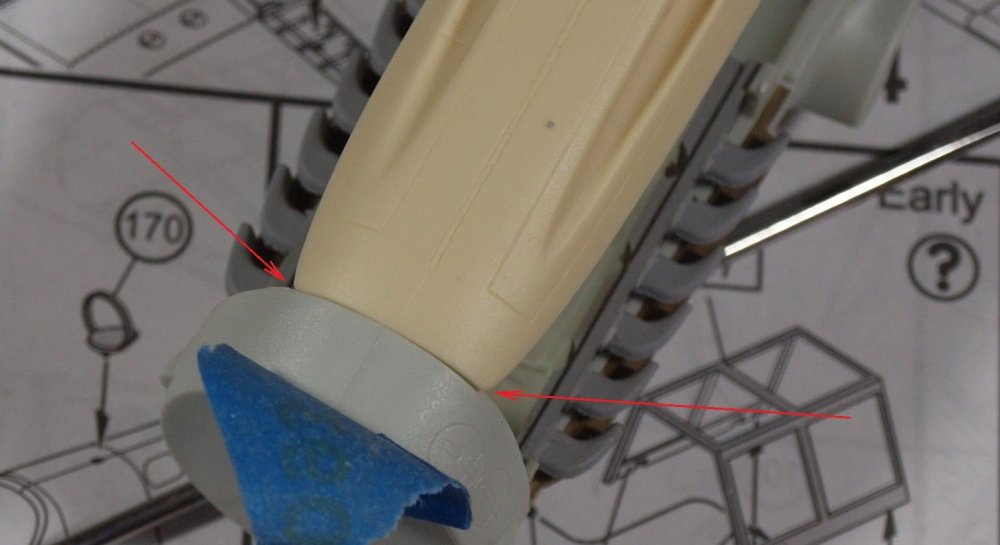
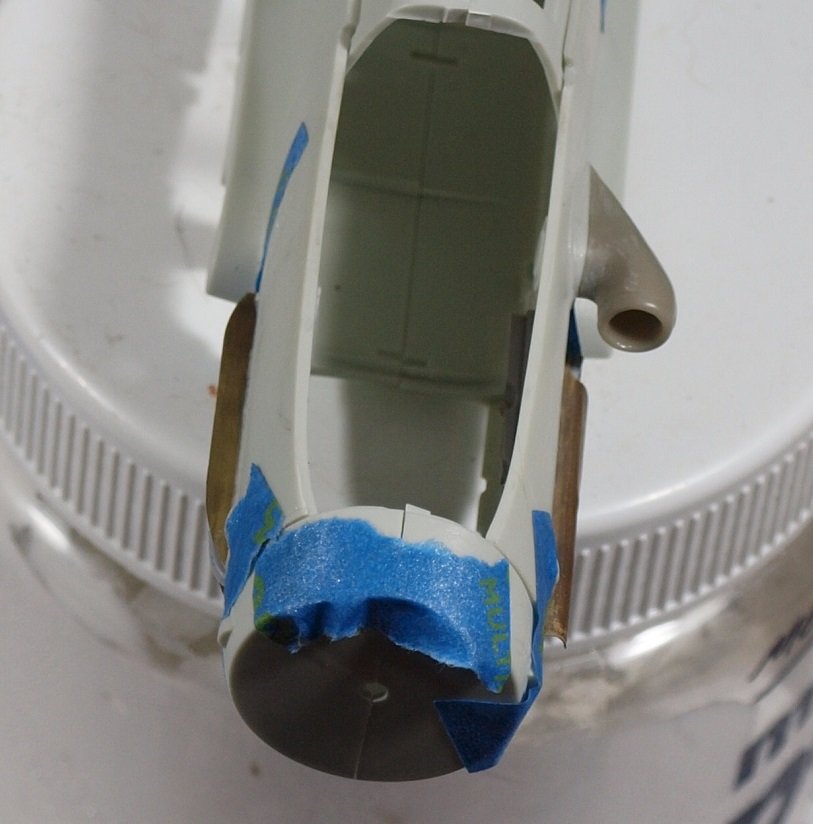
The only real fly in the ointment is the filling that will be required behind the oil cooler where the Barracuda resin cowling piece meets... note the red arrows.

-
9
-
-
Ummm.... cars... yeah

-
3
-
1
-
-
Wow. Peter those breather areas are stunning! Really happy to see how well this is going together.
-
3
-
-
Totally awesome, Gus!
-
2
-
-
Excellent masking and painting, John. Flawless!
-
2
-
-
14 hours ago, DocRob said:
Interesting camo scheme, with the tape on Gaz
 . Keep 'em comin to put it Peteresque.
Cheers Rob
12 hours ago, Kaireckstadt said:The part fit seems to be nice and the guns are a vast improvement over the kit ones!
Camo looks nice as Rob said…😁
Perhaps I should find someone who makes masking tape in 74/75/76?

-
1
-
2
-
-
9 hours ago, ScottsGT said:
Mines currently organized to. In a storage locker 25 miles from here and packed away in 25 large moving boxes. 🥲
until I can get the time to construct my garage loft/shelves, we’re going to be separated. I just got my building table unpacked. I did get the new lights in my display case though.

And I got my die cast cars back in the cabinets I built too. Unfortunately, I have about just as many still boxed up that I need to figure out how to display.
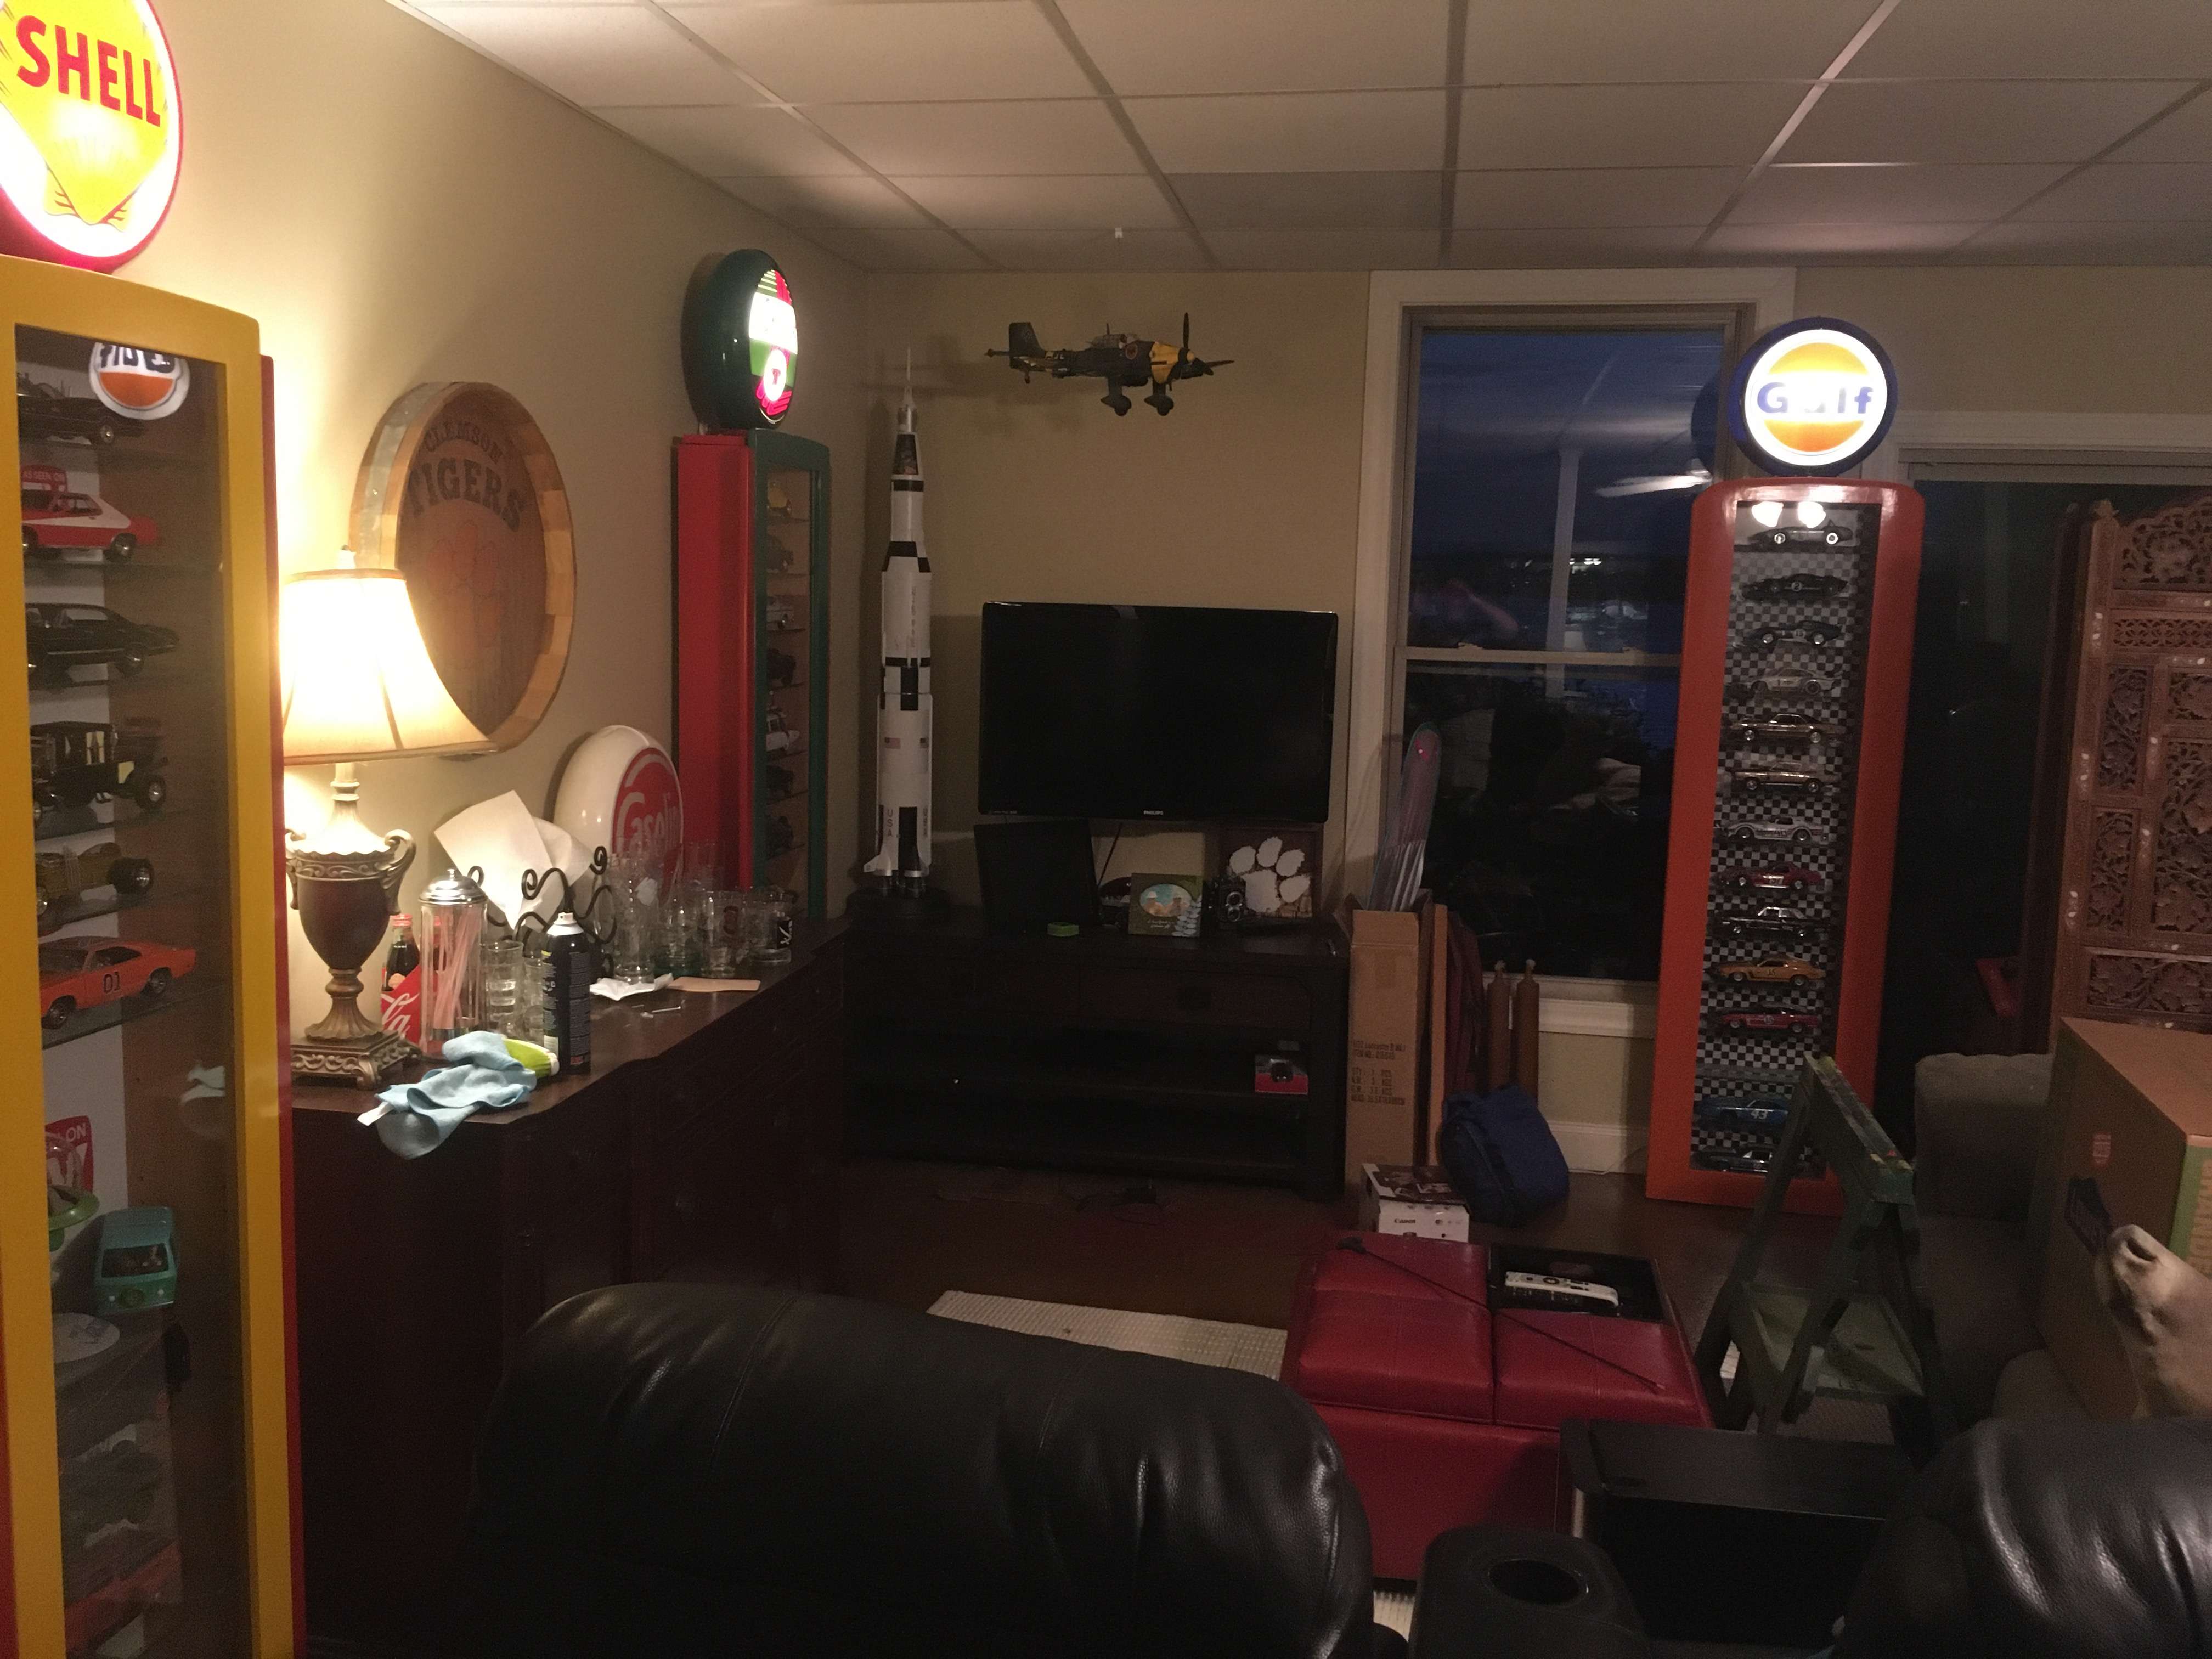
That's an impressive man cave.
-
3
-
-
18 hours ago, Bomber_County said:
Good idea with the Dragon AFV’s in picking them up at secondhand prices. Not sure where Dragon think they are going. The average price is now around £60-70 which for a non interior Pz IV for instance. Having dabbled with a part interior with my RFM IV H not sure as yet if interiors are for me. Saying that the RFM non interior are around £40.00 with as much detail as Dragon. They have a conundrum…….IMHO……
I'm not afraid to pay more for a better kit. But I don't feel like I have to buy it now.
After recalculating my build rate, I may have 7-10 years of kit there. I used to build a lot more 1/48 single engined fighters... but only have a handful left. So, I've slipped from a dozen kits a year to about 8.
-
4
-
-
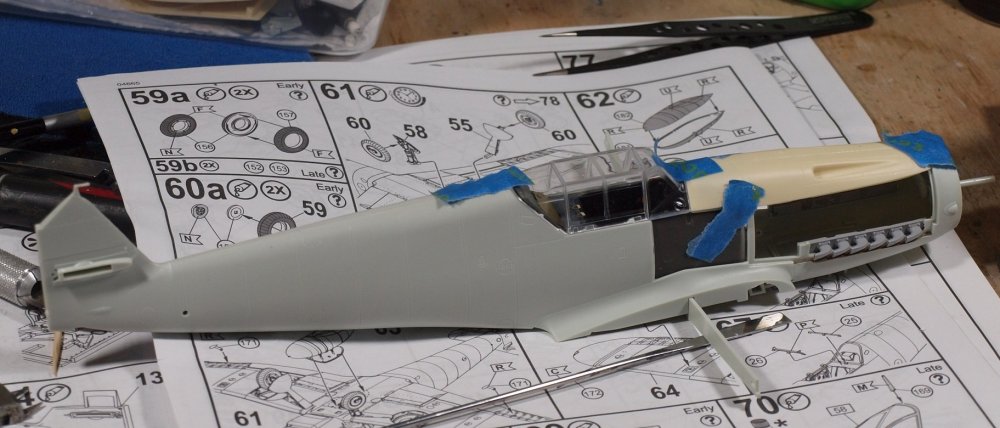
Not much time for modelling this weekend. Though I am happy to have the stash room sorted.
I removed all of the pouring blocks and trimmed the resin parts.
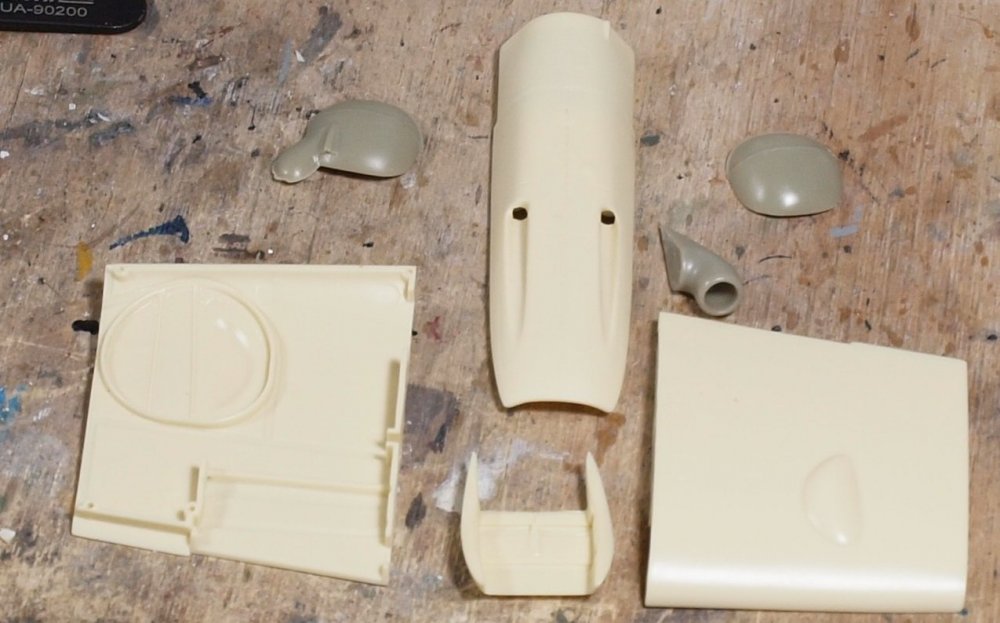
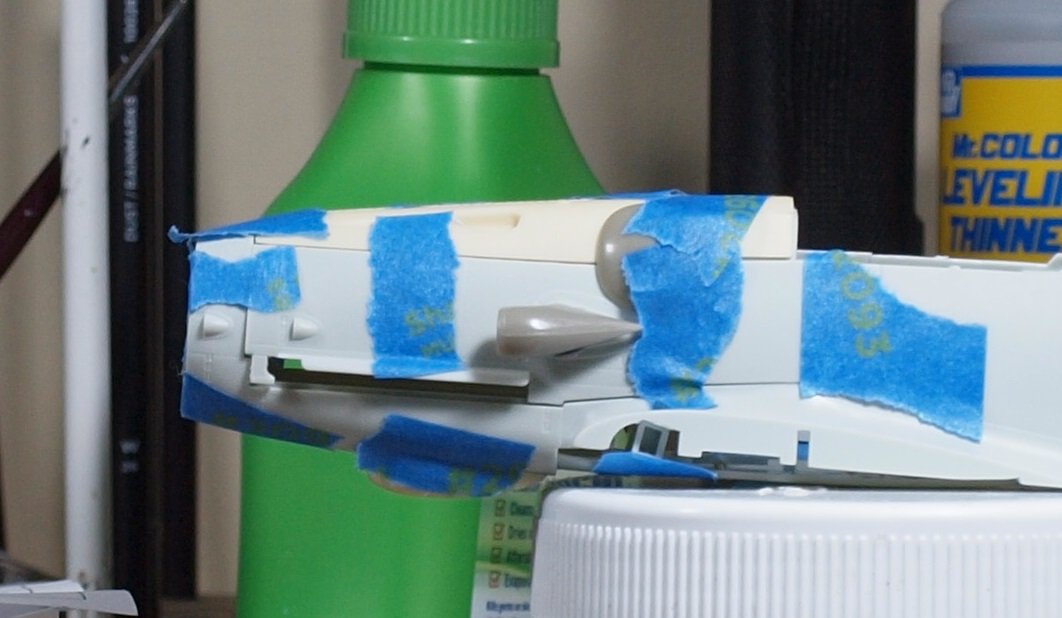
Then I decided it might be prudent to dry fit all of the parts, excluding the heat shields and exhaust stubs. Hopefully you can make out the parts despite the bits of blue tape.
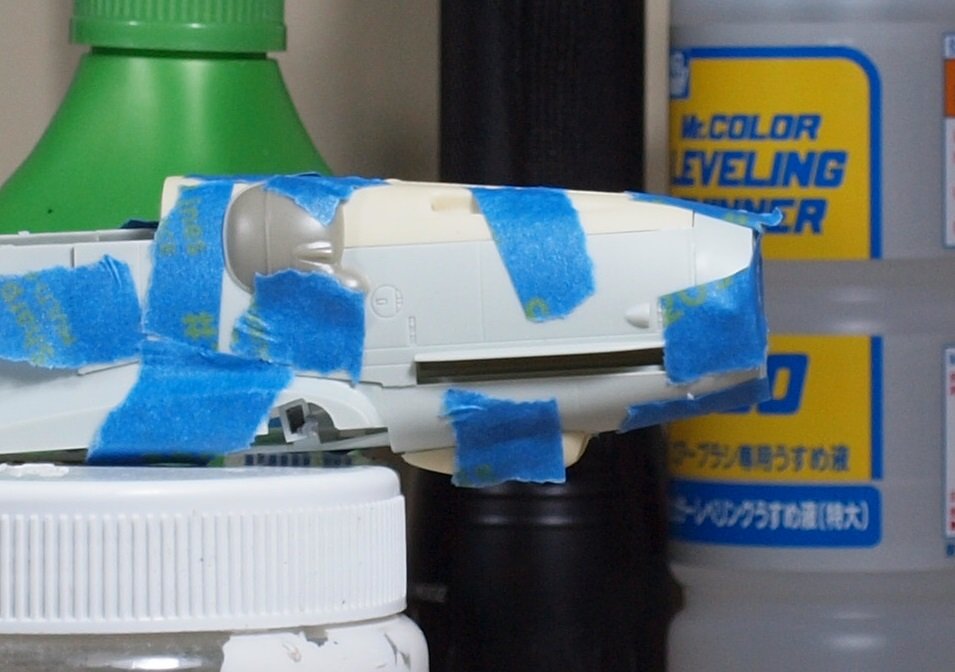

The fit seems ok so far.
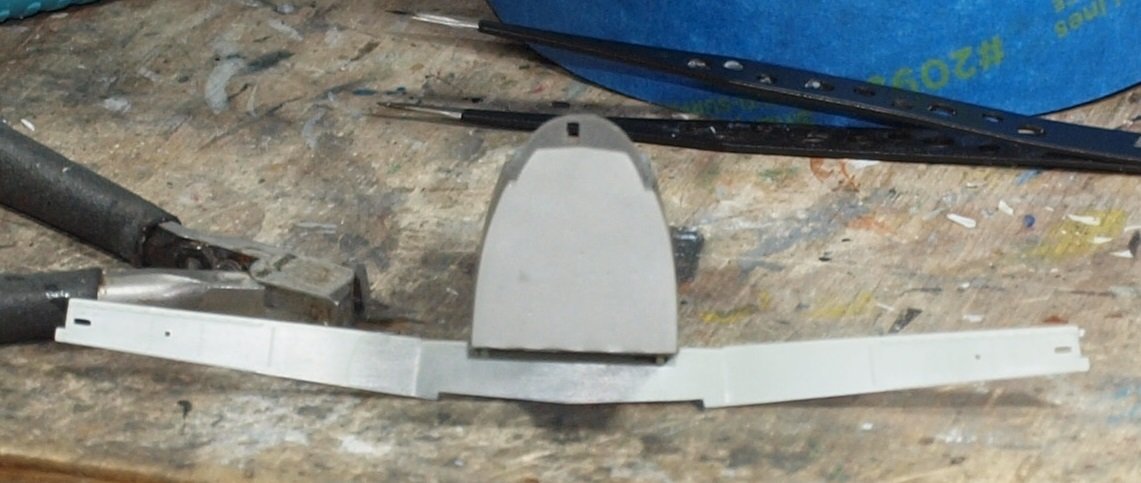
Finally I glued the spar to the cockpit tub.

Happy modelling!
-
4
-
-

Fabulous engine!
-
4
-
1
-
-
Definite improvement, Kai. A little variation goes a long way.
-
3
-
-
2 hours ago, BlrwestSiR said:
Nice, fairly compact collection there Gaz. I've gotten most of mine sorted with the basement reorganization.
How do you find that Panther book? The External Appearance one?
Carl
Thanks, Carl. Well... It's chock full of detail. I hope to use it during a build some day. I tried reading it, but it's really too technical for that. Some people consider it the panther 'bible'.
-
2
-
1
-
-
2 hours ago, BlrwestSiR said:
My LHS has a couple on their shelf. $60 each. One word of caution. We opened one and the funky rubbery gear bay walls were deformed and brittle/cracking in one of them so I suspect the other is the same.
Yeah, I'll have to deal with it when I get there. Dragon's biggest mistake was using that stuff.
-
2
-
-
Not that kind of stash, Devildog. Unless you're talking about classic Airfix kits.
-
2
-
2
-
-
Kai, Glad to see some color... I've been looking for it the past few days. The exhaust really stands out compared to the sand color.
-
1
-


Gottfreid Weiroster Bf 109G6 R6 Revell 1/32
in LSM 1/35 and Larger Work In Progress
Posted
Thank you, my friends!
As promised, another update. This Revell kit and associated AM keep giving. Yes... giving me the 🖕.
Anyway... here we go.
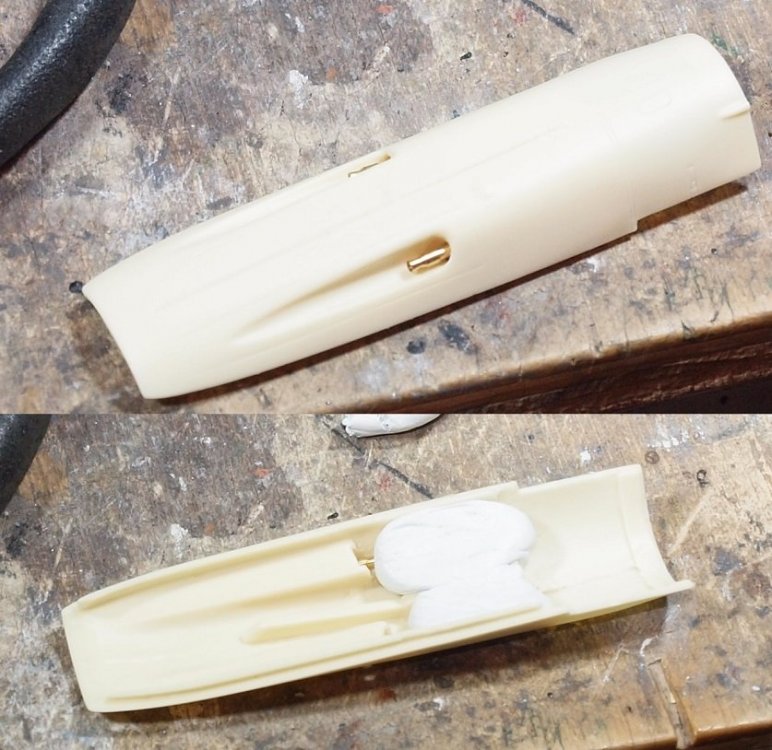
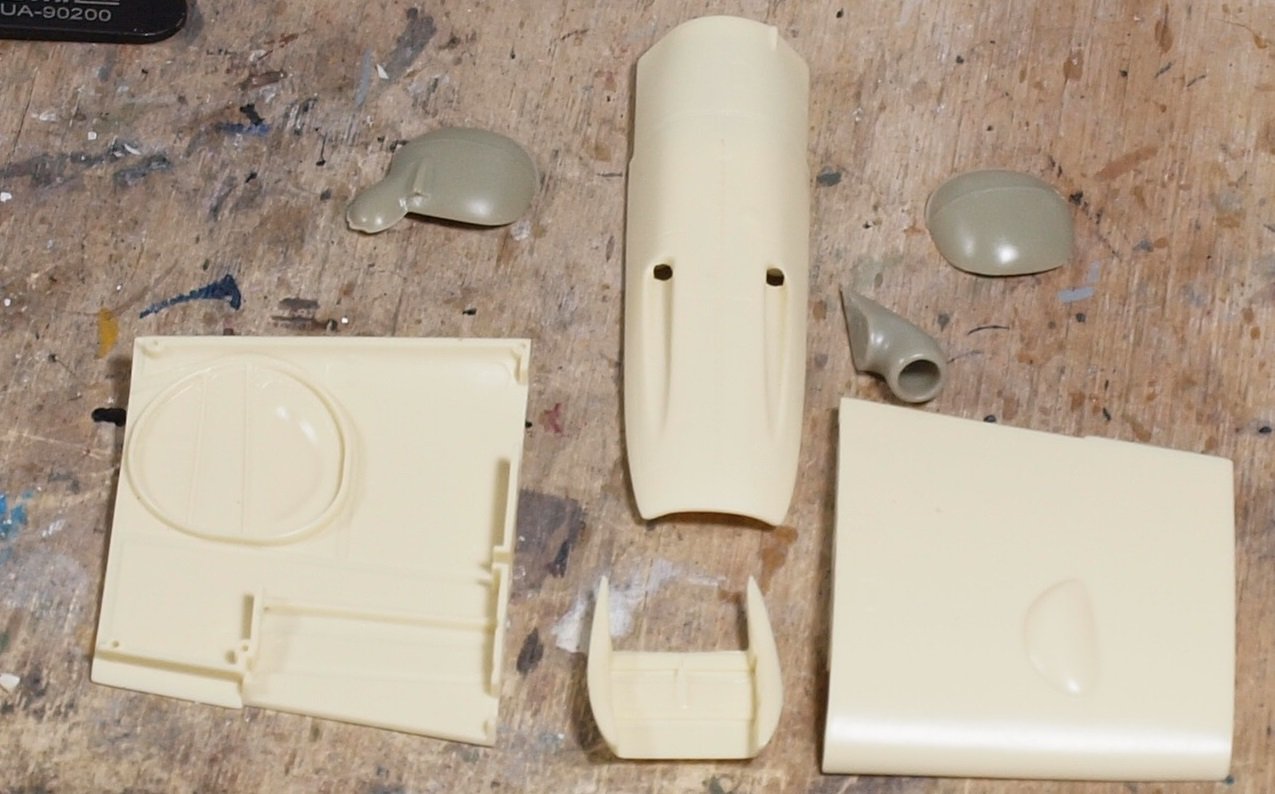
The first thing I did today was glue in the cheek pieces. I then modified the front end of the Barracuda resin pieces that will hold the MG 151's using CA and a piece of white card.
The ensuing problem was discovering that the cheek pieces were overly wide at the top:
To combat this, I glued a piece of sprue to each side, just a little bit shorter than the distance of the gap.
Tomorrow, once everything is dried, I will squeeze the the sides together, and then clamp the pieces of sprue with forceps.... then I will apply some Tamiya extra thin and let it dry.
Next up was the Barracuda upper wing beulen... or bulges. After I glued in the glycol radiators, I dry fitted the parts. Sadly, the port wing profile was too different from the Revell fuselage. Even worse, three corners did not mate up with the wing or fuselage. So... those parts were wasted money. I had to tear off the radiators and glue them to the it part... whose bulges are facing the wrong way.
My new task was to reshape the beulen using black CA and baking powder.
After much sanding and shaping... thank goodness for the electric toothbrush sander. It really takes the tedium and time out of these tasks.
...the hard part about 'liquid detailing' is that you often end up with tiny irregularities. So, I used un-thinned Tamiya paint as both primer and overnight filler.
n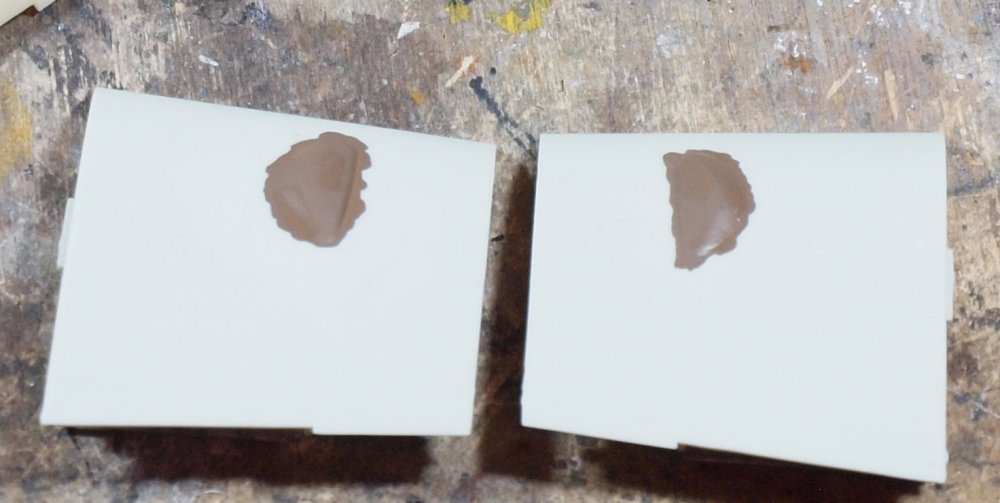
Finally... I gave the 109 her purposeful grin.
It took a little internal fettling, but eventually the resin oil cooler slid over the kit parts.
And the adjustable airflow gill/flap:
There are some notable gaps with the cheek pieces. I will fill those spaces with acrylic filler and then wipe off the excess. This should render them less noticeable.
C'mon Zoukie-Moura... bring out that accurate 109!