


GazzaS
-
Posts
6,396 -
Joined
-
Last visited
Content Type
Profiles
Forums
Events
Gallery
Posts posted by GazzaS
-
-
7 hours ago, Peterpools said:
Gaz
Not sure about the monochrome vs color. I've spent years enjoying photography and do shoot a lot of B&W work. I'm not sure exactly what you want to accomplish but the lighter the color up to a Mid tone the better the chances it will not show up well in a B&W photo. Flat, dull lighting helps a lot.
Nice work on your figure - the details are bringing it to life
Keep 'em comin
Peter
Thank you, Peter. What I'm really trying to accomplish. I understand that there are two sides of modelling. There is the historical reproduction side... and the artistic side. The goal of one is to perfectly emulate a scheme or situation, regardless of other considerations. Then the other wants to make something interesting to look at regardless of the facts presented in both print and photos.
In this situation, there are lots of guys who have chosen the 'art' side, using lighter colors with greater variations between the dark gray and dark brown as in this picture below.
Now... each to his own.
My goal is to make an interesting model with a lot less obvious artistic license. Will it work? I won't know until I get there.
I don't know much about photography. I had to do a websearch just to figure out how to take a b&w photo with my wife's Canon Olympus. The obvious tack for me to take was to take my own photos of the colors available and see how they compare in color and b&w. If one color virtually disappears, as they seem to in most historical photos, I figure I must be close.
-
 6
6
-
-
Peter... Glad to see the shape coming together!
-
2
-
-
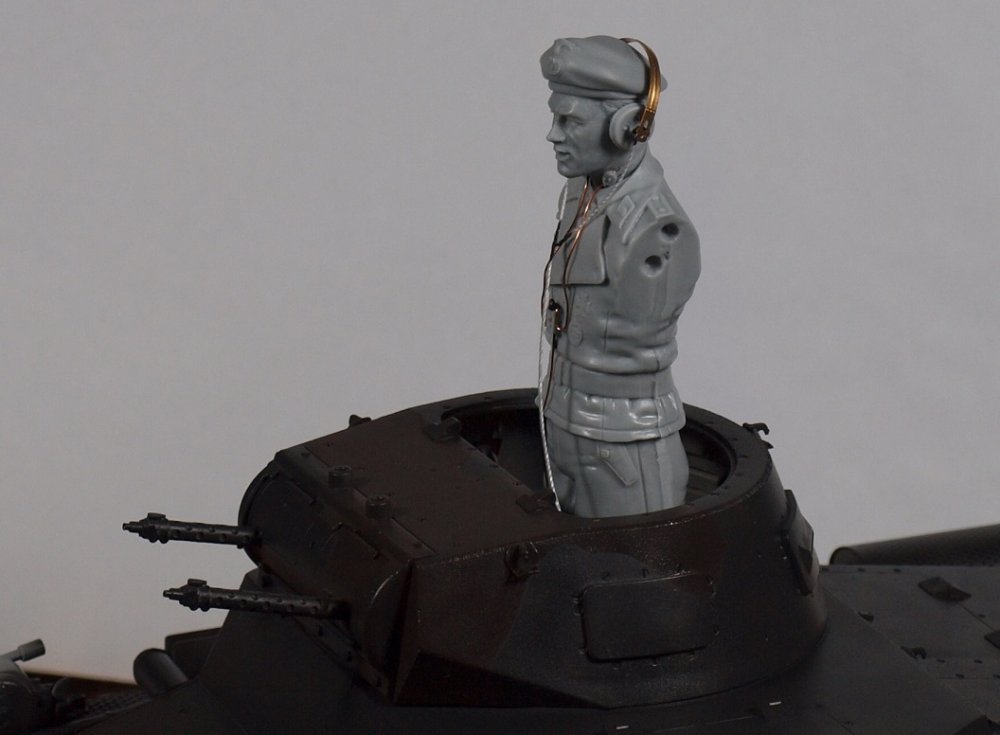
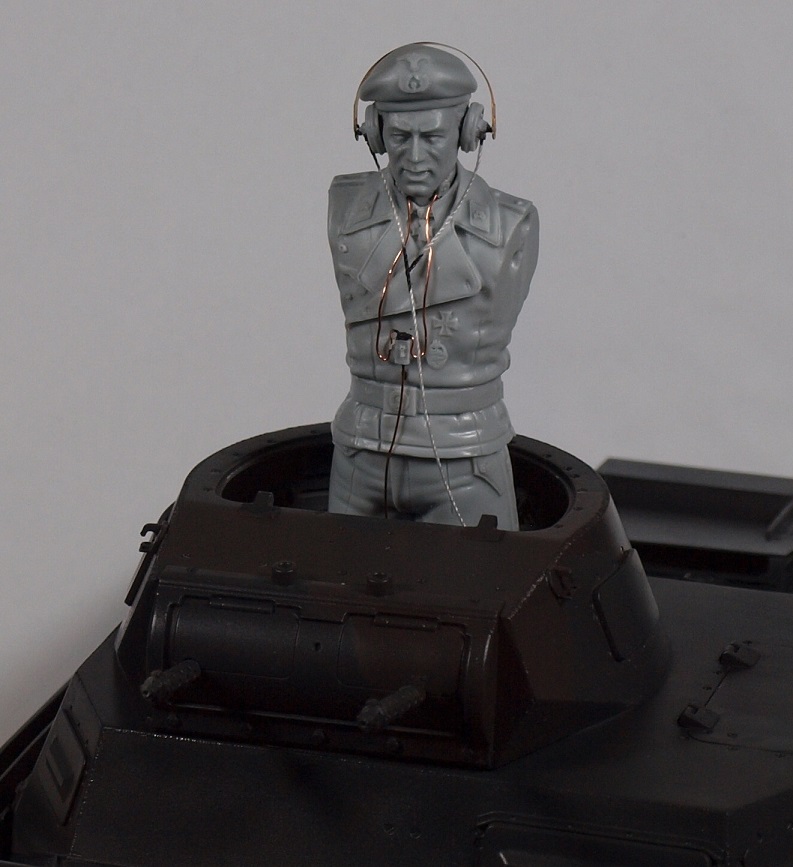
The figure is wired for sound, and the first dunkelbraun is on the turret.
He was supposed to have some binoculars... but they aren't there. I'm afraid he's gonna have to steal the canteen from the other dude.


-
7
-
-
Thank you Peter!
Here we go with the dunkelbraun test. The main goal was to have a color that didn't show up well in color, and virtually disappeared in B&W. Just like we see in historical photos.
Here is a monochrome photo of the PZ gray with my 'track brown', both colors united under a matte coat.

I was advised by a friend to go more brown, and here is the B&W result of that test.

Obviously too brown ins too easy to see in monochrome.
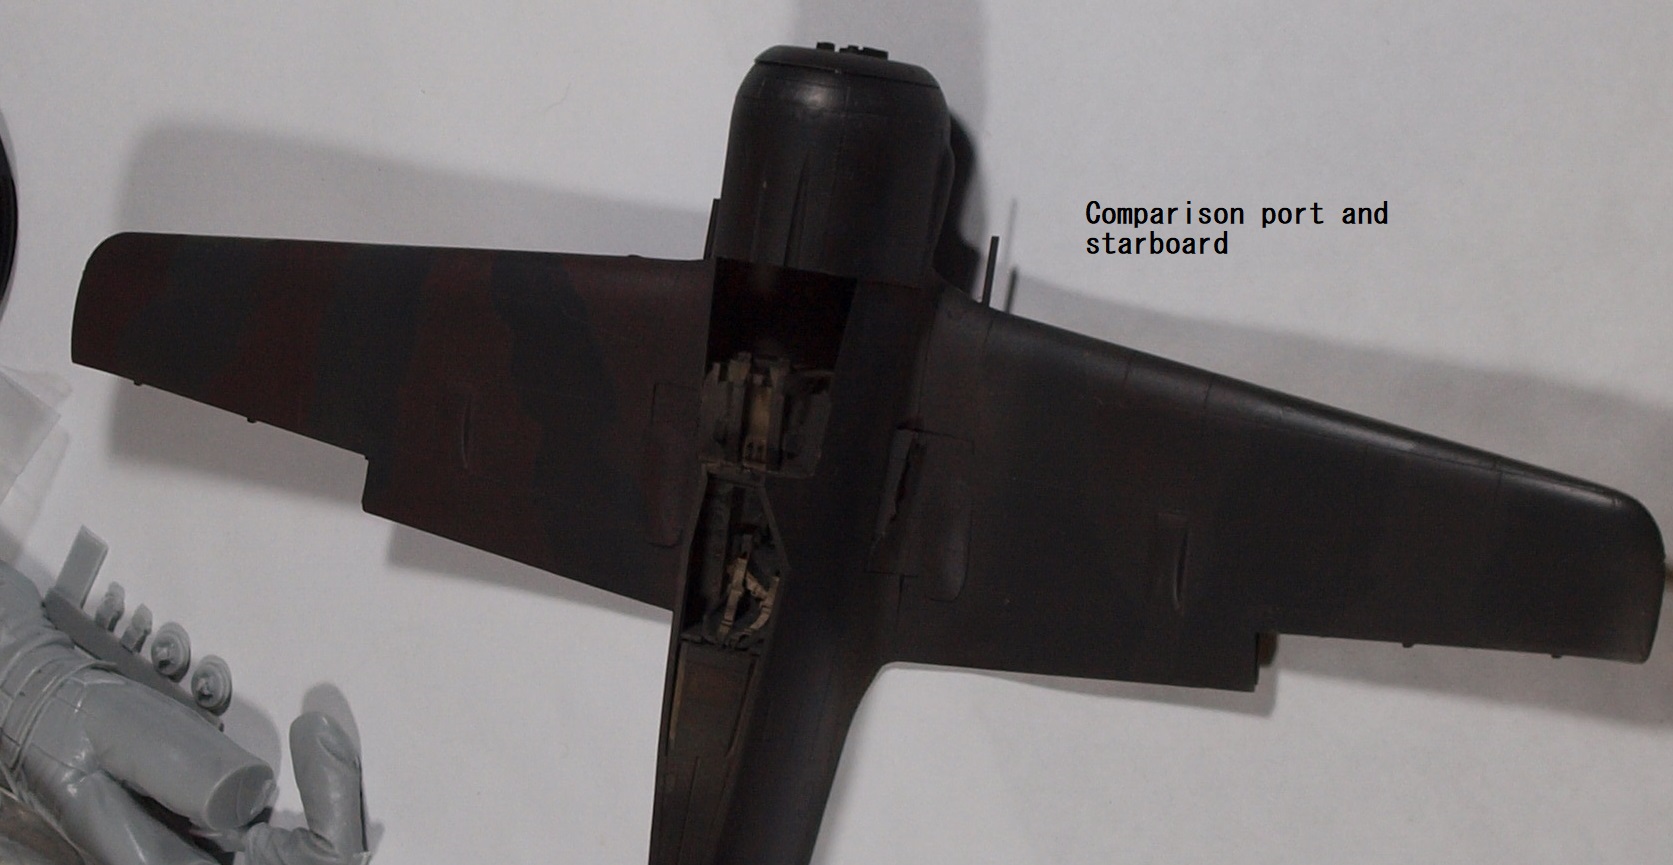
Just to give you an idea of the difference, here is a color photo of the two comparison tests together.
Now... the camera in electric light doesn't pick up the brown as well as the naked eye. I played with the ISO a bit, but it didn't make much difference.
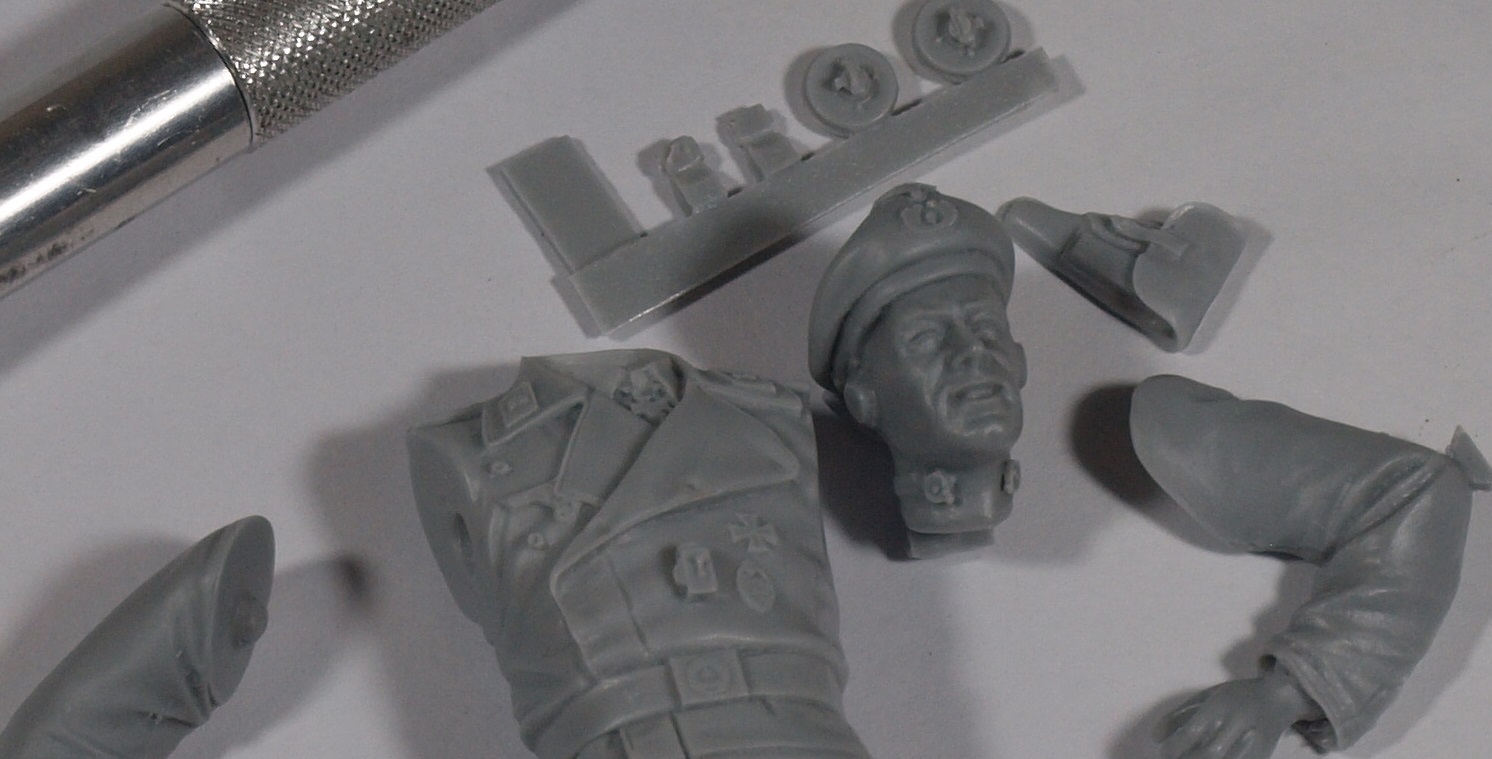
And as you may have guessed, my Panzer commander has arrived:
I think he looks nicely detailed and will add scale to the kit.
Happy Modelling!
-
4
-
-
Nice! Glad to see some paint!
-
3
-
-
Excellent result, Rob!
-
2
-
 1
1
-
-
Any plans for a figurine or some dock works?
-
4
-
1
-
-
VEry nice woodwork!
-
2
-
-
-
6 minutes ago, Kaireckstadt said:
Misunderstanding Gary: Do you have a foto of the original tank with this camouflage?
Oh... sorry. All the pics I have are black and white and don't show the difference between the two colors. It's one of those things that is widely accepted as being true but not visible.
-
1
-
1
-
-
6 minutes ago, Kaireckstadt said:
Great work Gary!
Can you post a picture how the final result of Dunkelbraun over Dunkelgrau should look like in the end?
Oh... you can count on it. But that's a ways away yet as the sunlight is fading and my paint booth is outside.
-
1
-
-
13 minutes ago, Kaireckstadt said:
That is very interesting Gary. Can you describe what are the main differences?
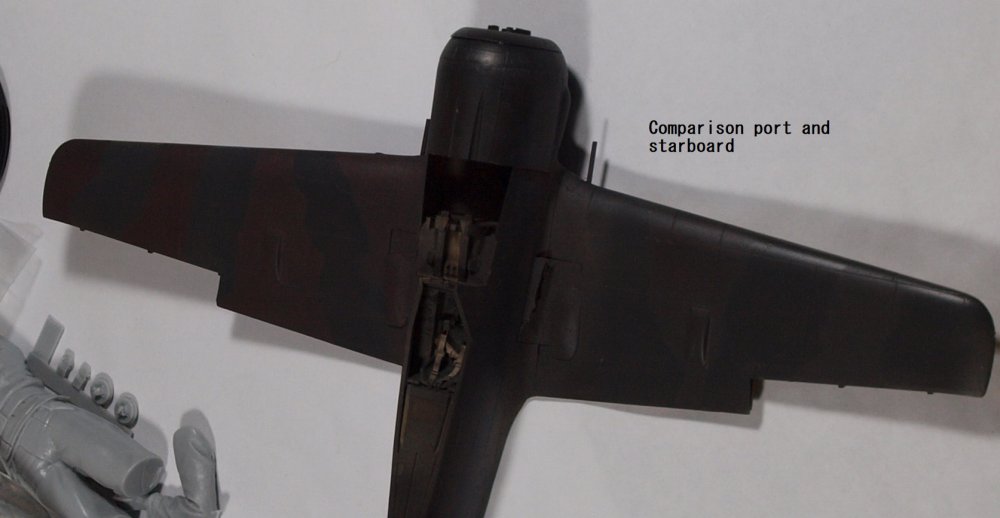
I never build airbrushed an armor model so far.Ok... lets compare your Mirage and a Sturmgeschutze. You can make broad, long strokes with your hand and sanding material without hitting anything in many areas on the Mirage. Whereas in a 1/35 scale StuG, the longest distance between details (excluding the barrel) is a mere 2cm.... in many places shorter.
So, it's not feasible to sand the StuG any more than absolutely necessary. Now... I wet sanded my FW 190. So, water and the sanding debris ran following the direction of gravity and I wiped it off with a soft cloth. But with a StuG...that debris is going to find a crevice to get into. Moreover...it's easy to accidentally sand away a raised detail or paint on it. So... I can't really beat up on a painted tank like I can a painted aircraft.
My technique for aircraft is to use multiple tints of the surface color and then sand them to get a worn look. But on tanks...and on the Albatros...I did everything with oil paints.
Hopefully this helps.
-
1
-
1
-
-
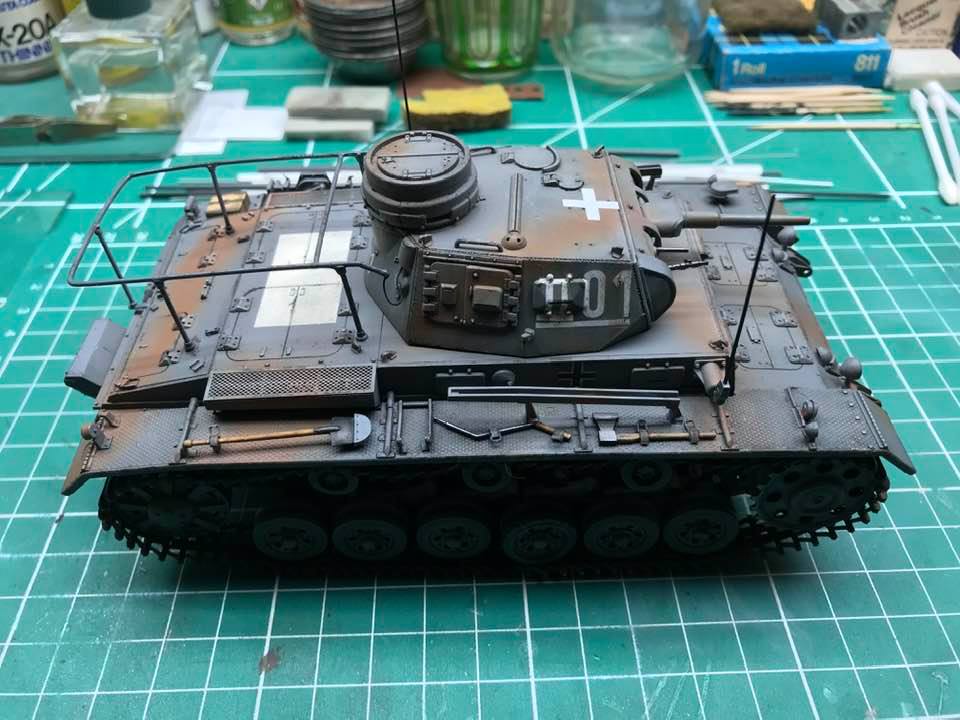
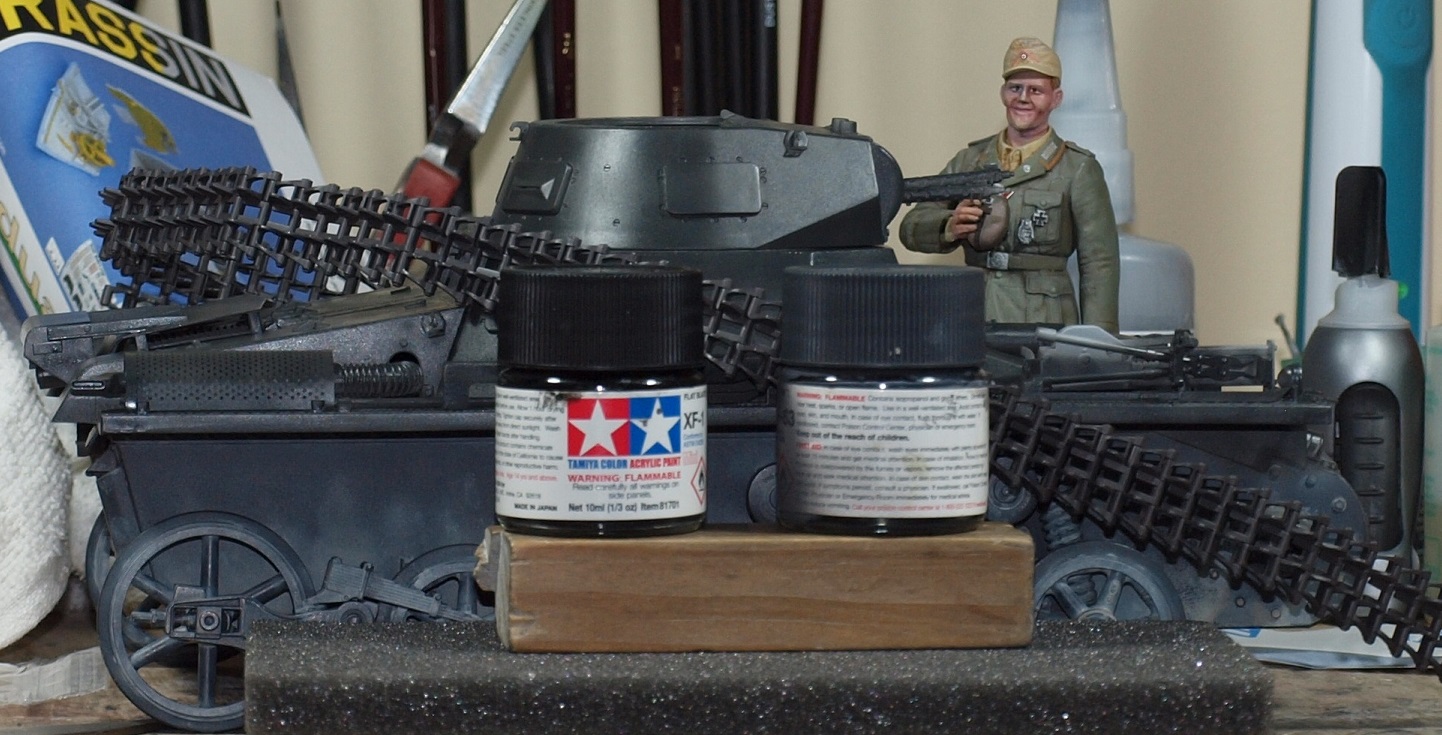
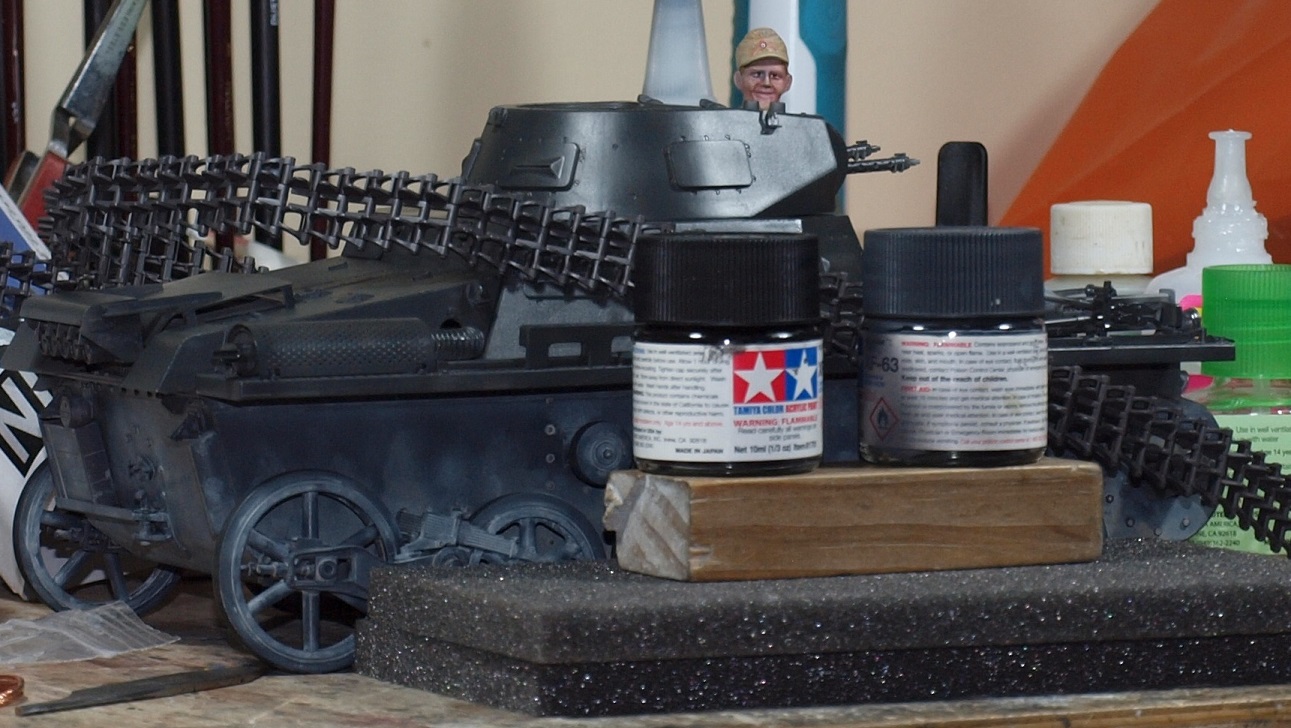
It's dark! Very dark!

I've painted the upper half with SMS Premium German Gray RAL 7021. For your comparative pleasure, I've placed a bottle of Tamiya flat black, and a bottle of Tamiya Panzer Gray near the tank.
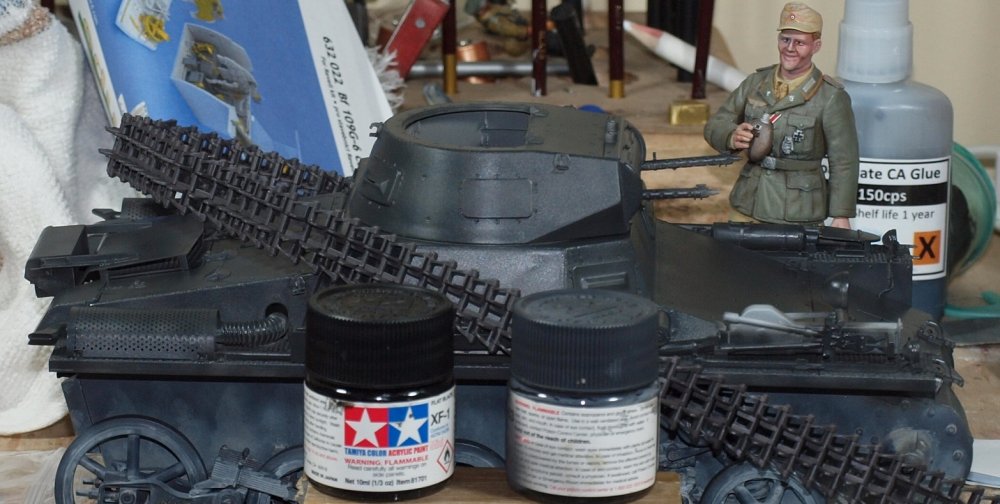
And taken pics from three separate angles to allow for lighting.
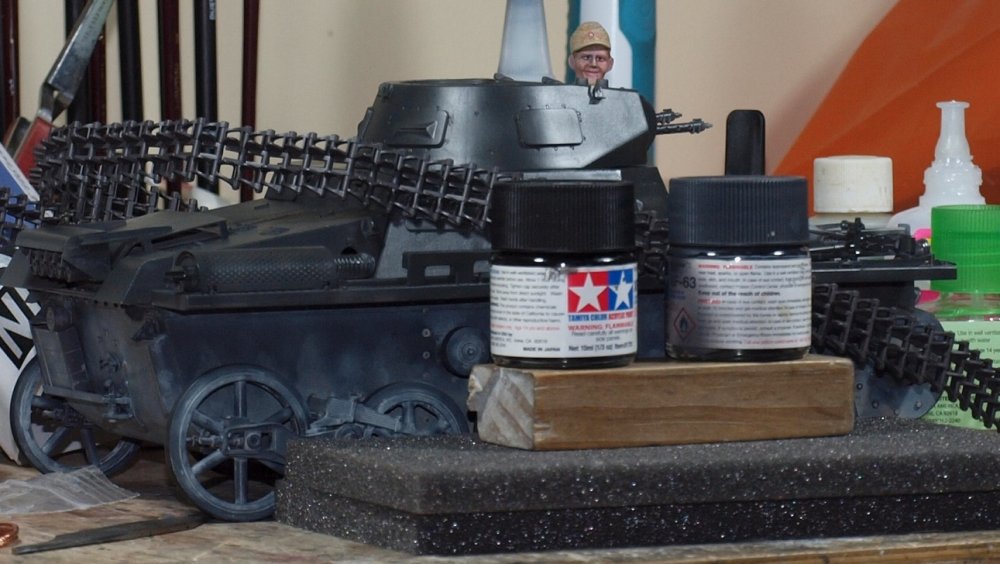
I've also laid the tracks across because I think the color I made for 'track brown' is actually a very nice match for Dunkelbraun #45.
I used about 1/4 of the bottle of SMS paint just to do everything above the return rollers. It's a big model.
Happy modelling!
-
3
-
-
Yay! Finally onto the good stuff! Congratulations!
-
3
-
-
Looks great, Carl!
-
6
-
1
-
-
1 hour ago, Kaireckstadt said:
When I remember how difficult the painting of your 190 was and how it came out this should be kein Problem for you Gary!
Kai, thank you for your faith.
There are some major differences between painting an armor model and painting a streamlined airframe. Even the Albatros I just did... I had to treat as an armored model instead of an aircraft.
-
2
-
-
9 hours ago, Peterpools said:
Gaz
Looking so good .. your building is simply flawless
Keep 'em comin
Peter
Thanks Peter. I wouldn't say it's flawless... but the extra effort certainly takes a lot more time than my teenage method of twisting the parts from the sprue and gluing them together without a hint of dry-fitting.
-
1
-
-
10 hours ago, Kaireckstadt said:
Great build so far Gary! This is really big! The chains came out looking awesome!
Curious how it will look like with paint on it!
Thanks, Kai. I'm curious about how it will look, too. I've never done Dunkelbraun over Dunkelgrau. So... it will all be new for me.
-
2
-
-
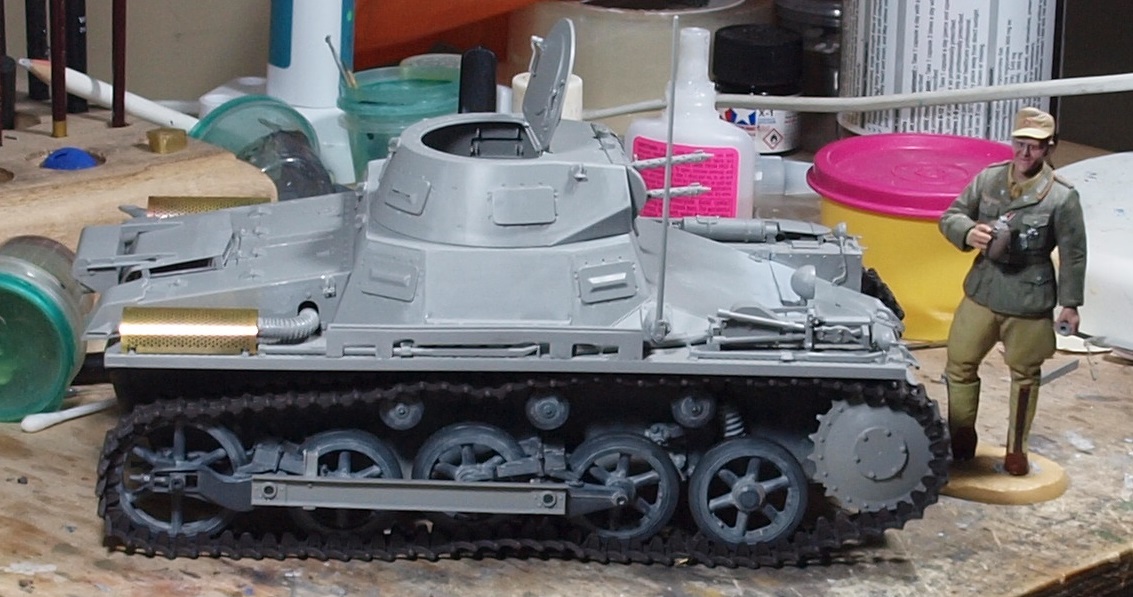
11 hours ago, DocRob said:
From far, it seems like Stan Laurel in DAK livery is inspecting the progress, Sons of the Desert
 . Great progress Gaz, the size comparison is interesting, this Tank is tiny.
Cheers Rob
Thanks Rob... tiny, yet very important. The Pz I made up more than half of German Panzer strength during operations in Poland.
-
2
-
-
Great start!
-
5
-
1
-
-
Lovely scribing! Definitely brings that huge hull to life.
-
1
-
-
18 hours ago, Peterpools said:
Gaz
Wow - thanks for the update and tutorial .. perfectly done.
Keep 'em comin
Peter
Thank you Peter...
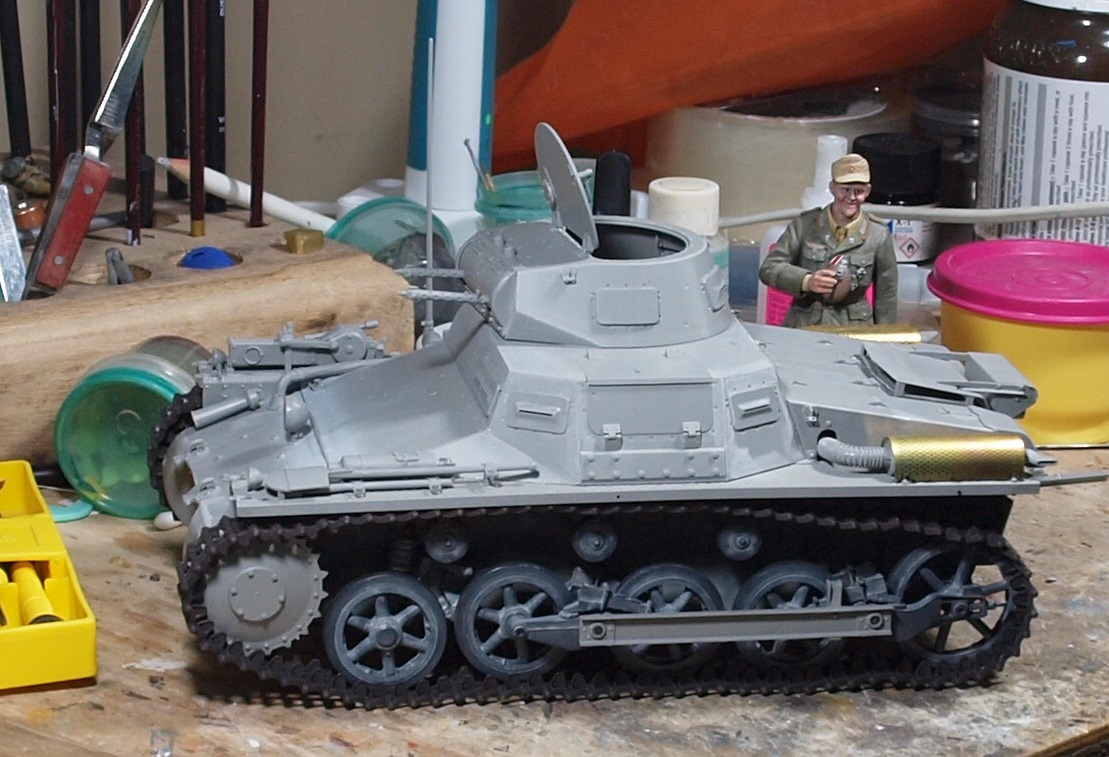
And here we are... with all of the pre-paint gluing done.
All of the unpainted, loose parts are either dry fitted, held on by blutack, or in the case of the tracks, joined by brass pins.

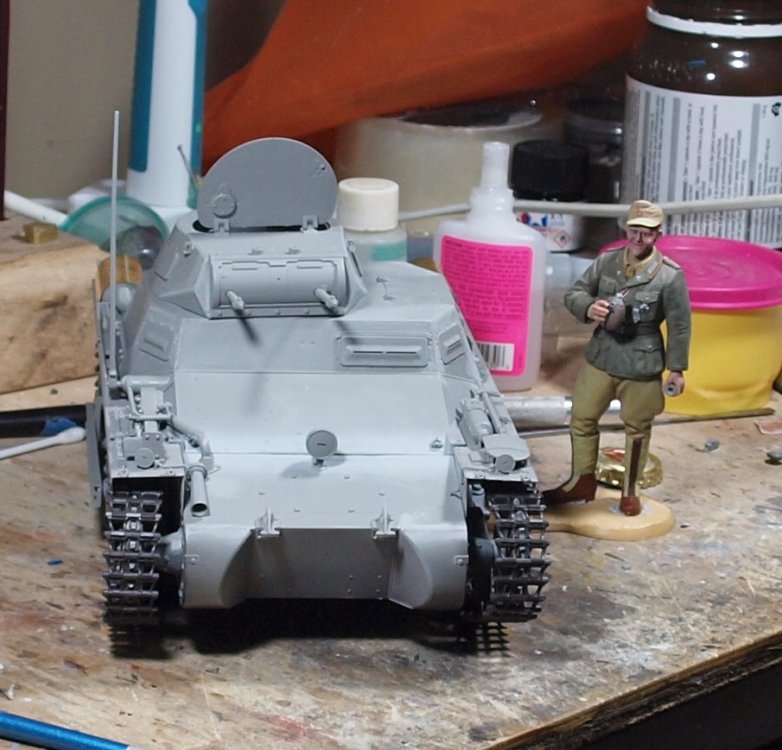

Happy modelling!
-
5
-
-
-
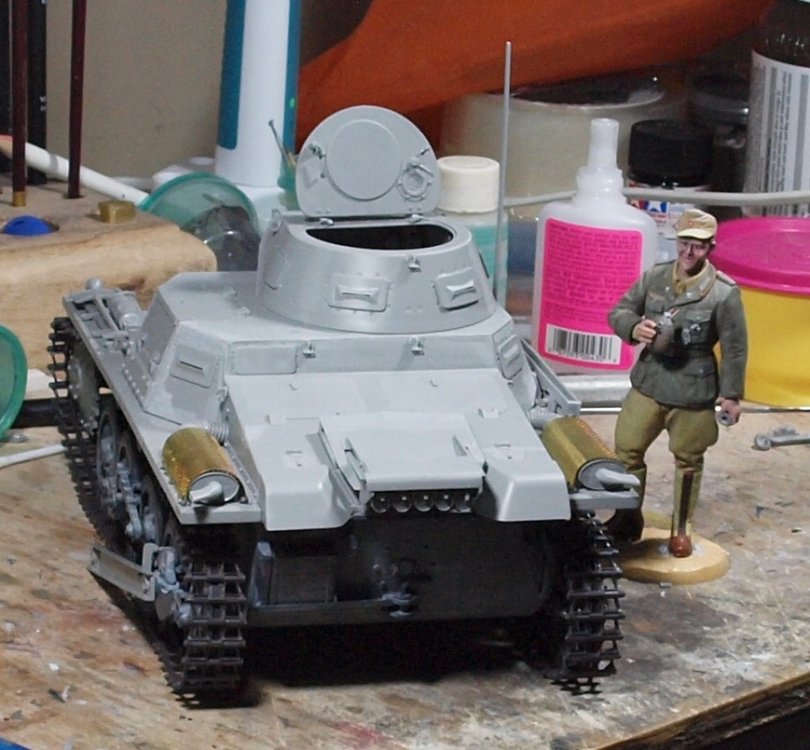
Nice work... though it looks more like an alien saucer than a weapon system.
-
2
-
 1
1
-


Takom Panzerkampfwagen I 1/16 scale... with figure
in LSM 1/35 and Larger Work In Progress
Posted
Anyway.... one step forwards, two steps back. This is a no-update update.
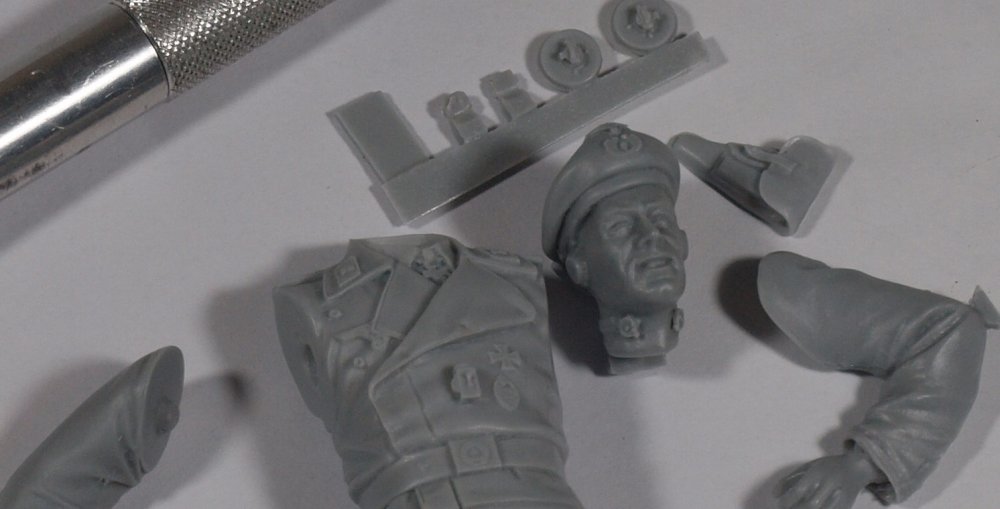
1. The figure. He is posed behind a vertical hatch....
Very t-34 ish.
This is a problem. Because all of the photos in my books and online show only two possible positions.
Either 3/4 open, like this:
Or all the way open, like this:
So, the hours I spent yesterday fiddle-farting around with the figure and hatch, looking for the perfect fit were wasted.
So now... the figure will be buried deeper in the tank, with the hatch fully open.
2. The decals are thick, unresponsive to decal softener, and every bit of clear decal film sticks out like a pimple on the tip of your nose.
...so, I sanded them off, and made masks. I also primed and painted white areas for the new insignias... the paint is resting overnight.
Speaking of the figure... I painted the red tones on his face today. I'll do the yellow and blue tones tomorrow.
Anyway... Like Freddy Fender sang: "Wasted days and Wasted nights...."
Hasta la Vista, Babies!