


GazzaS
-
Posts
6,396 -
Joined
-
Last visited
Content Type
Profiles
Forums
Events
Gallery
Posts posted by GazzaS
-
-
Nice rivetting. Just as I was telling Rob on another thread... They're just not 100% reliable.
-
 5
5
-
 1
1
-
-
Awww.... I thought you were past all of the annoying bits. Nice work!
-
4
-
-
2 hours ago, Martinnfb said:
Lifted the front one more inch to level up and take care of the rubbing issues
Was ist 'fubbing'?
Does it have anything to do with this?

-
 5
5
-
-
1 hour ago, BlrwestSiR said:
I figured I'd might as well clear up the bench a bit while I continue to work on the basement. Finally got some time to do that today. You can actually see a bit of the bench top now.

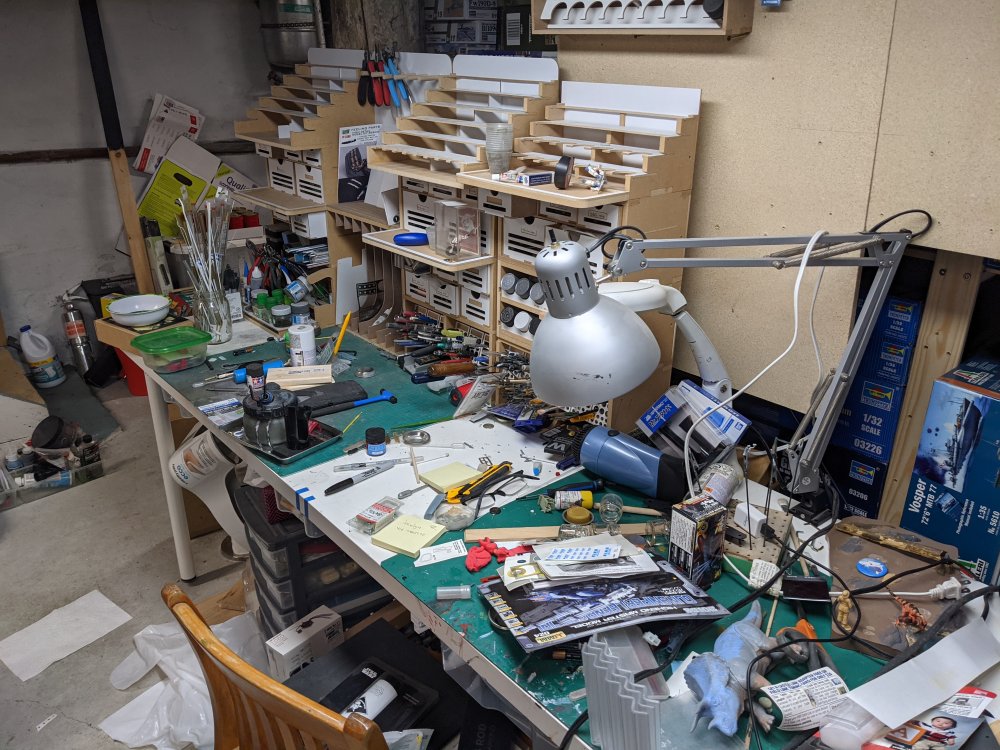
Lots more to do before I can move it.
Shit man... that is a lot of bench!
-
2
-
2
-
-
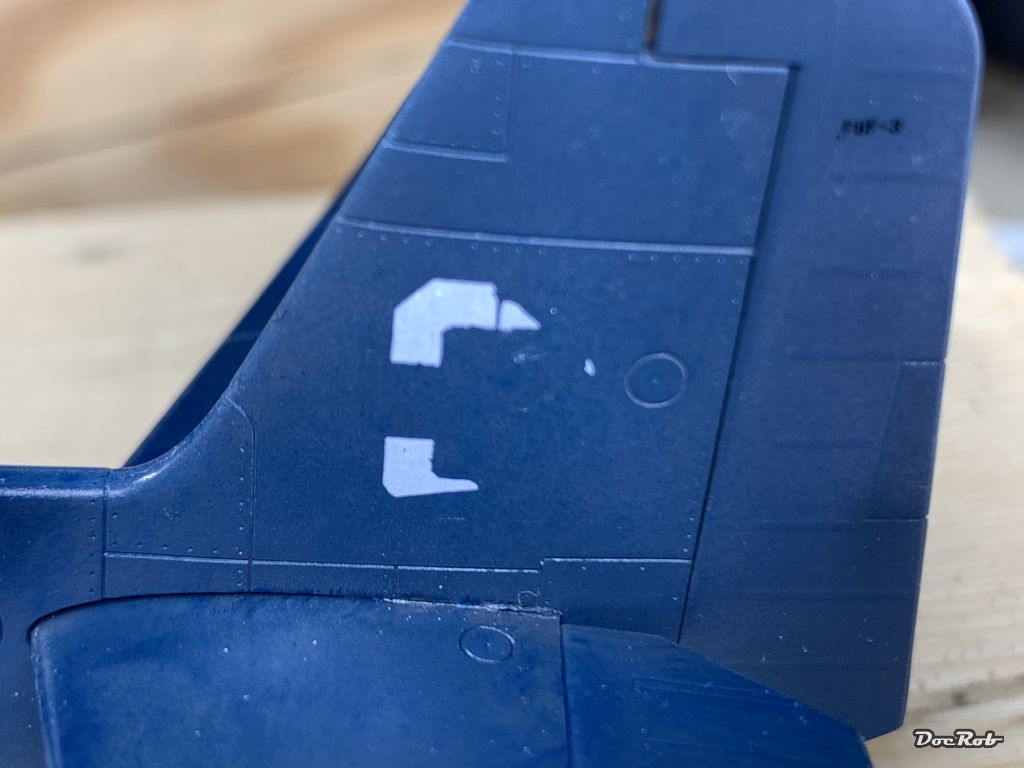
6 hours ago, DocRob said:
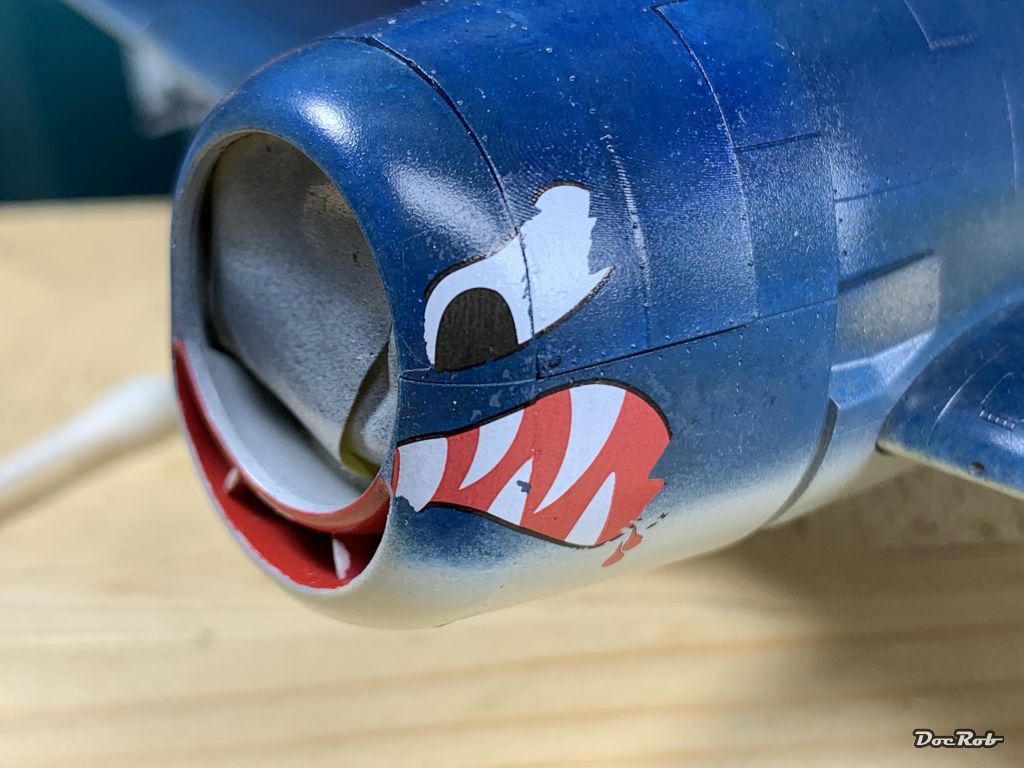
Hola Amigos, today I'm deeply frustrated and nearly made my Hellcat a lawndart. Again it was a HGW product which failed to deliver. I get more and more annoyed by their partly useless products. It started with the unusable wooden paper parts, terrible seatbelts (normally they are good), unbelivable fragile wooden decals for the Hansa Brandenburg, unfitting vinyl masks, ...
For the Hellcat, I had a set of wet transfers for the markings and stencils and after applying everything according to the manual, it looked like this, when I removed the carrier film.
This was supposed to be a three, on the other side the wet transfer lifted completely.
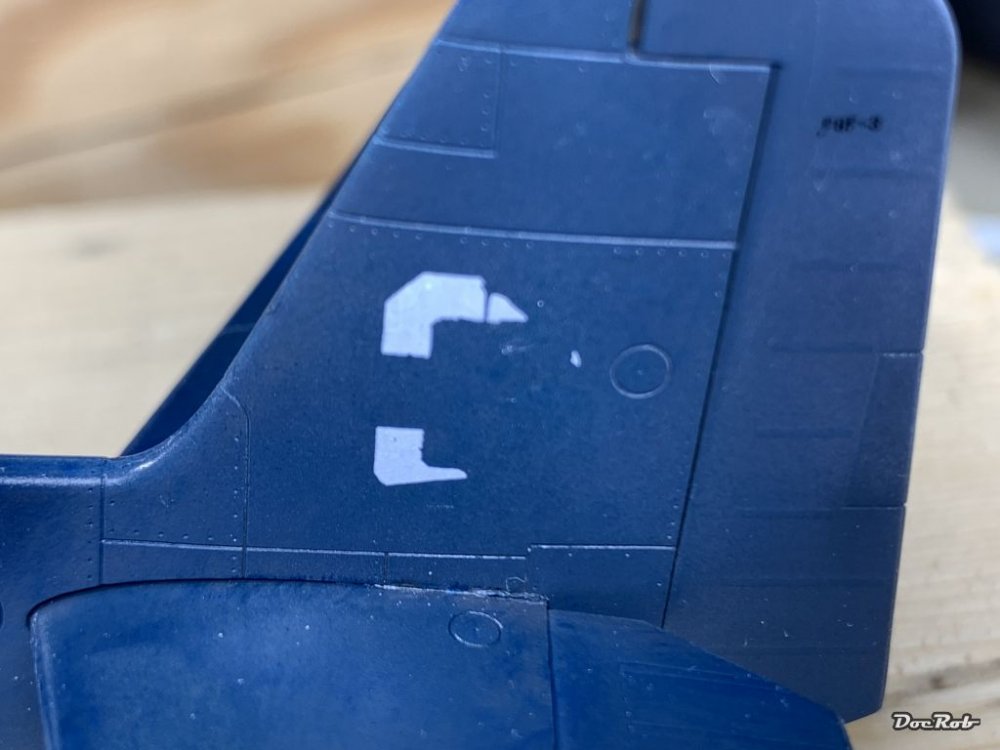
Luckily the large Stars and Bars and some other wet transfers stayed intact and if they do they look like tattooed on. I have used HGW wet transfers on my MIG-31 build where they were fragile but manageable. The preparation process was the same, it shouldn't be a rookie error.
I 'm not sure what to do about it. I have the Cartograph decals for the Hellcat, but it's a different plane they depict. I have to clean the complete nose for re-decaling and then I have to strip some other wet transfer to change the plane.
Cheers Rob
I gave up on HGW wet transfers. I bought a nice big packet for 1/48 scale 109G's with factory-exclusive stencils for all of the factories. Most will go unused because they are part fantastic, and part shit. Firstly... they forgive no error on your finish. On your cowl, you have a fingerprint showing. That is enough 'rough-terrain' to make them decide not to play along. There are other areas I see no excuse for them not to work. They are just not 100% reliable.
-
2
-
-
Wow! Fantastic job!
-
4
-
-
6 minutes ago, HubertB said:
If you listen to all the doomsayers on the net, you’d better sit down right where you are and wait for the Apocalypse, and the sky, and death to fall on your head, and from what I read from all the deskchair experts, that should be pretty soon
 .
.
Truth is, although some have suffered unexpected and severe side-effects from the vaccine, the benefit-risk ratio is vastly in favour of the vaccine. Whilst the vaccine does not protect you from an infection (what it does is prepare your body for it so that the immune system reacts faster, stronger and more efficiently to it), it is now proven that it definitely prevents any accute form of infection. It also makes you 10 times less susceptible to transmit the virus to others, in effect reducing the epidemic spread from a wave to a dribble. In short, you are still more likely to die from most causes than from an AZ jab.
The size of the pandemic combined with the unprecedented extent of social media, has unfortunately opened the floodgates to all kinds of conspiracy theories, false information, ill-intended rumours, etc. Even the media, in their quest to generate viewership to then sell advertising have thrown the basic rules of journalism to the winds and participate in this doomsday movement
 ...
...
Pasteur must be spinning in his grave hearing all the anti-vax proponents.
Btw, I am not infering that you are anti-vax. I am just saying that the AZ vaccine is as safe as an active medicine can be: not 100 %, but the risks are so low so not to be a real « no-go » factor. Like the Janssen, it is also infinitely easier than the Pfizer and Moderna in terms of logistics.
I got my AZ jab last Saturday, btw, with not even a small side-effect. But some of my close friends had a far more accute reaction, with symptoms like fever, headache, vomiting, etc.
Hubert
I'm not anti-vax. My wife's teacher's-aid got the AZ jab and is now losing sight in one eye. What is a modeller without eyesight? Nothing.
-
2
-
1
-
-
I've heard enough bad about the AZ jab that I'm not touching it.
-
1
-
-
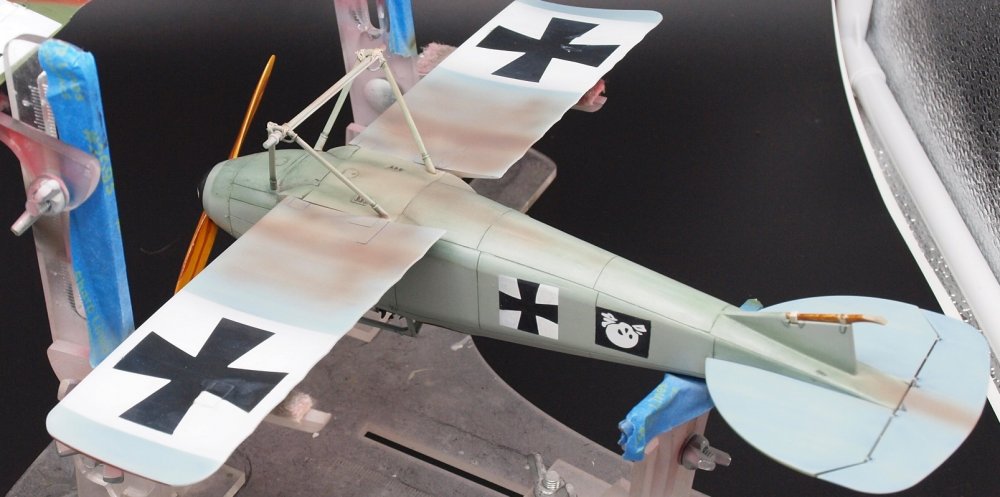
Alright, my friends!
Getting very close...
got the matte coat on the dorsal surfaces yesterday. I'm pretty pleased with the appearance.


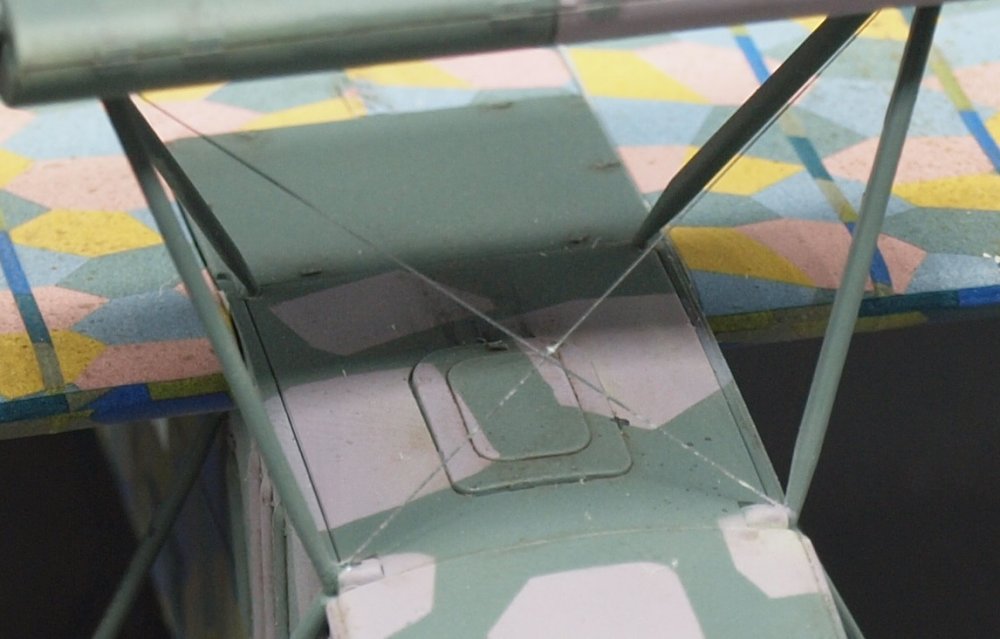
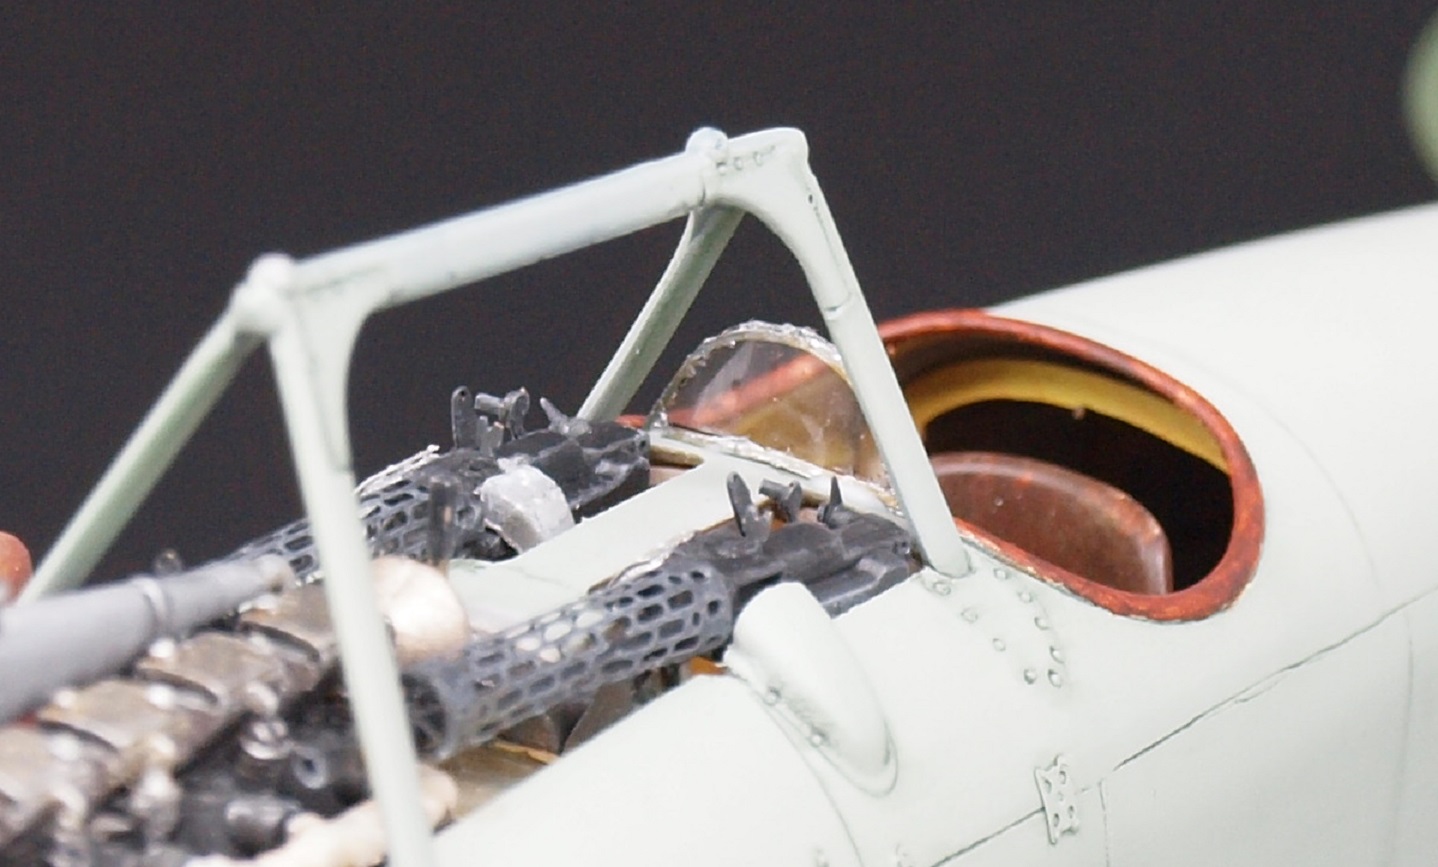
And now, the final non-rigging/final assembly detail left: adding the windscreen. This isn't a thick plastic windscreen a la' WNW. This is a thin flat piece of acetate. The Part PE set comes with metal frames that go nicely with the Roden Acetate... just have to paint them and attach. To attach them, I used canopy glue (a relative of white glue) backed up by CA.
Macro shots show a little excess glue...
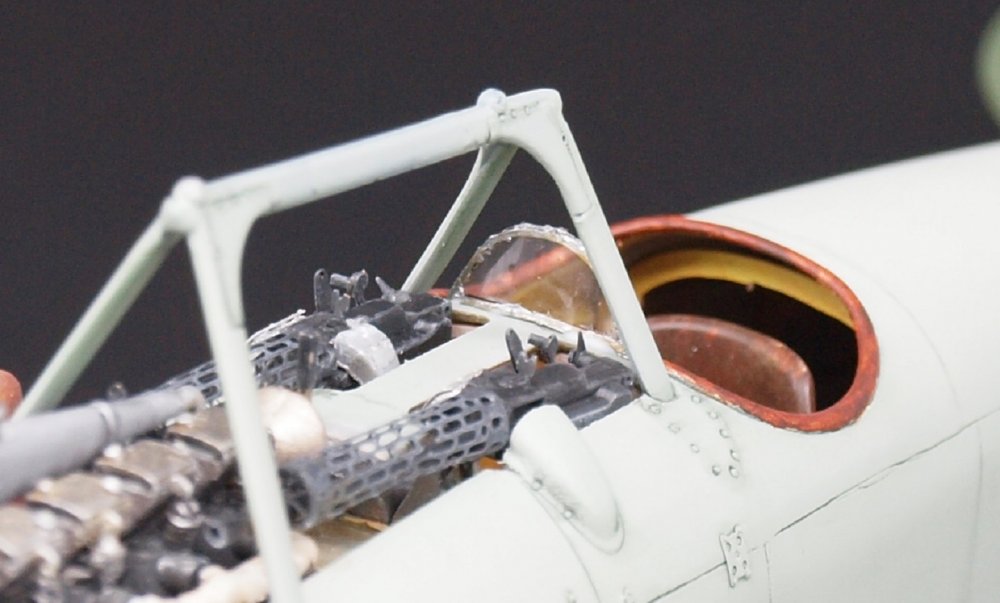
Once dried (gave it a few days) and bent a little to fit the curve of the fuselage, I used more canopy glue to fit it. Canopy glue is thick, and very tacky... so, the windscreen stayed vertical straight away.
Again... the large photos don't help my cause. In reality this thing is about half the size of a pinky fingernail.
I hope to get the upper wing set this weekend, and maybe the rigging too... so this will be the last update until it is completed.
Bis später!
-
4
-
-
Nice! Sleek looking beast!
-
3
-
-
Wow! You really have a penchant for detail work.
-
4
-
-
Some nice tips shared for my future builds! Your work look good... but I get that sometimes you don;t want to 'work' on a kit.
-
5
-
-
That's great news, Peter!
-
1
-
 1
1
-
-
Looks amazing! Reminds me of egress training in case of a wet landing. -- find a piece of structure when you first get in so that you can mentally align yourself towards the doorway. Cuz in the water at night... you can't see anything!
-
5
-
-
I'm glad you had another windscreen which looks nicely installed. Nice touch on the parachute housing too.
-
4
-
-
-
Being a principally Luftwaffe builder or whipping out foil on my latest USAF and USAF builds have left me a little knowledge poor about possible paints to choose for my F9F. Please... what colors am I wanting for either application, and who makes them in nice, easy to spray lacquer?
-
2
-
-
-
That is good news!
-
3
-
-
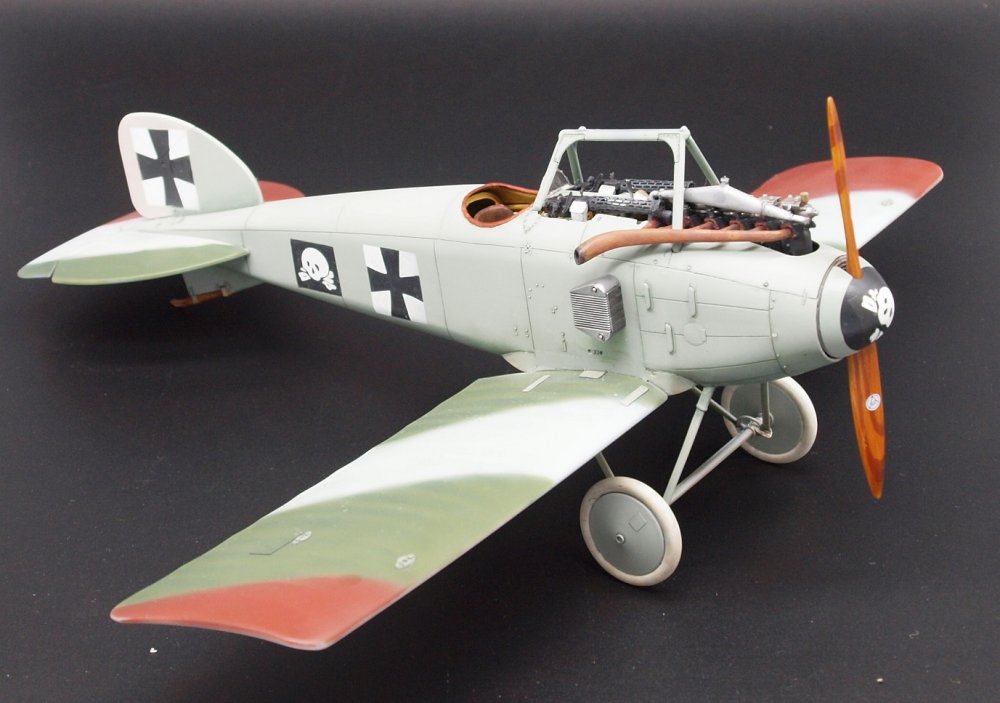
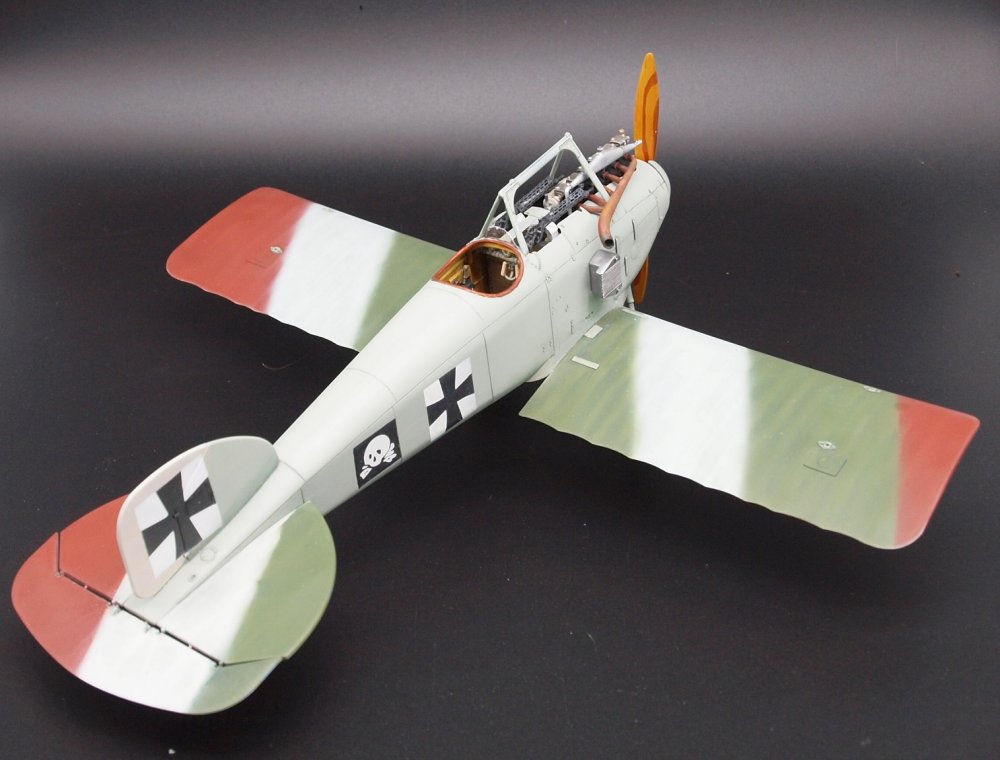
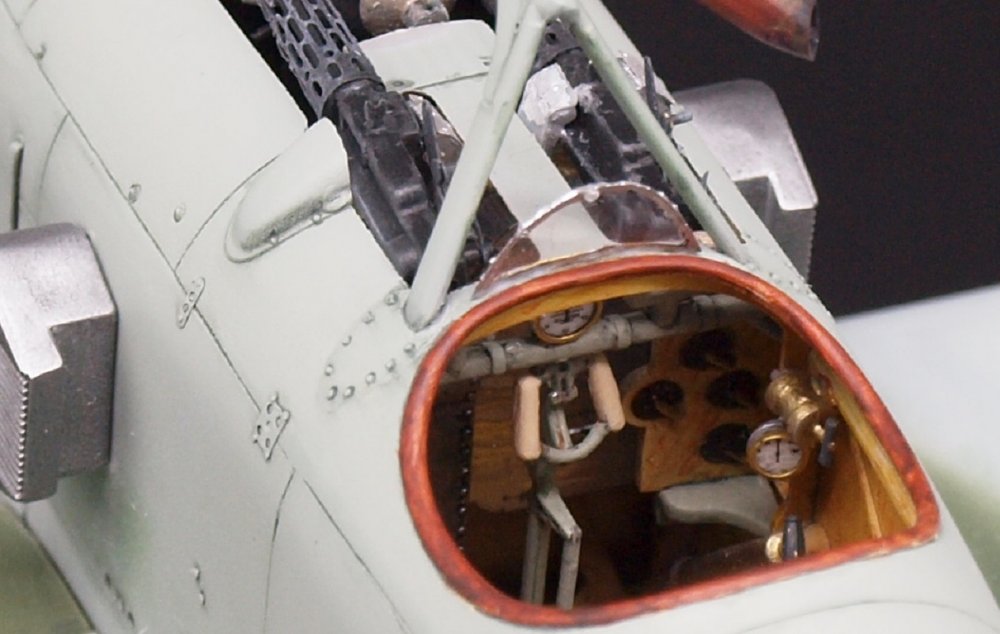
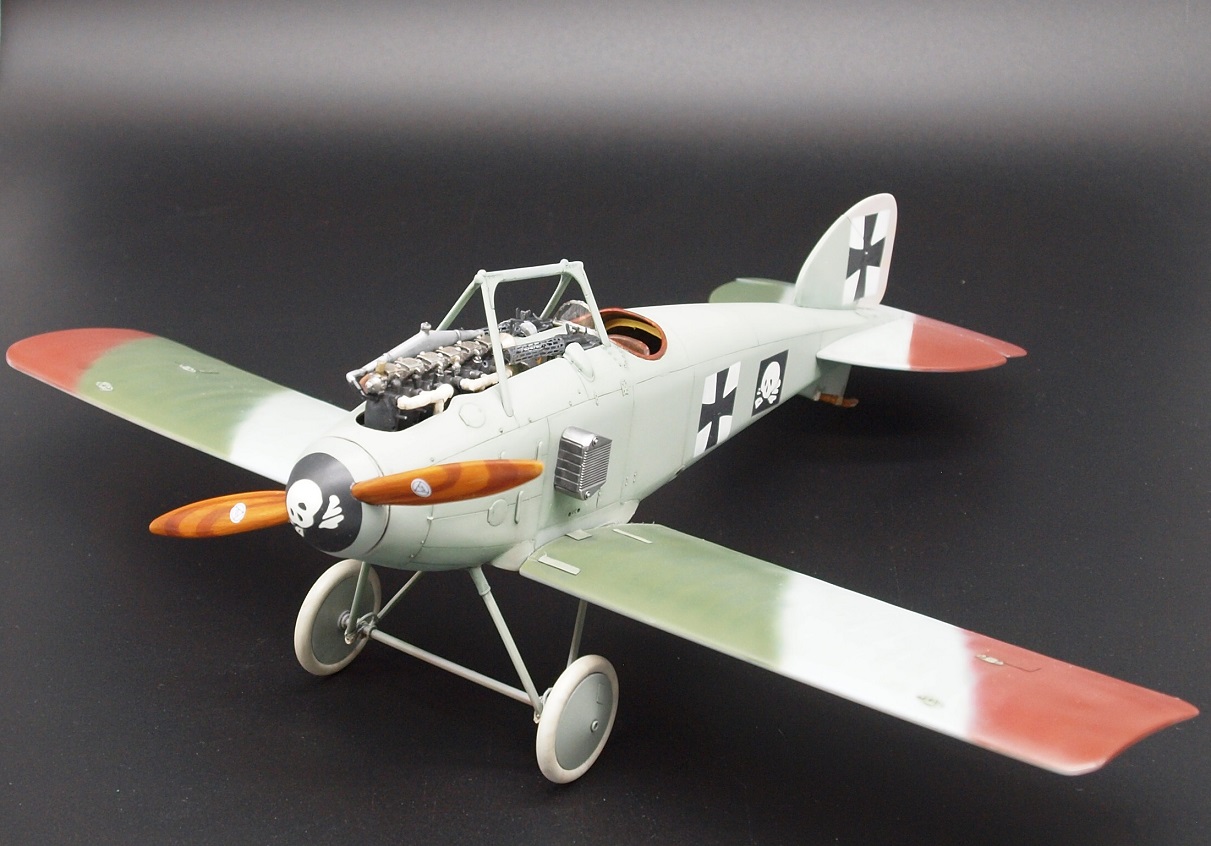
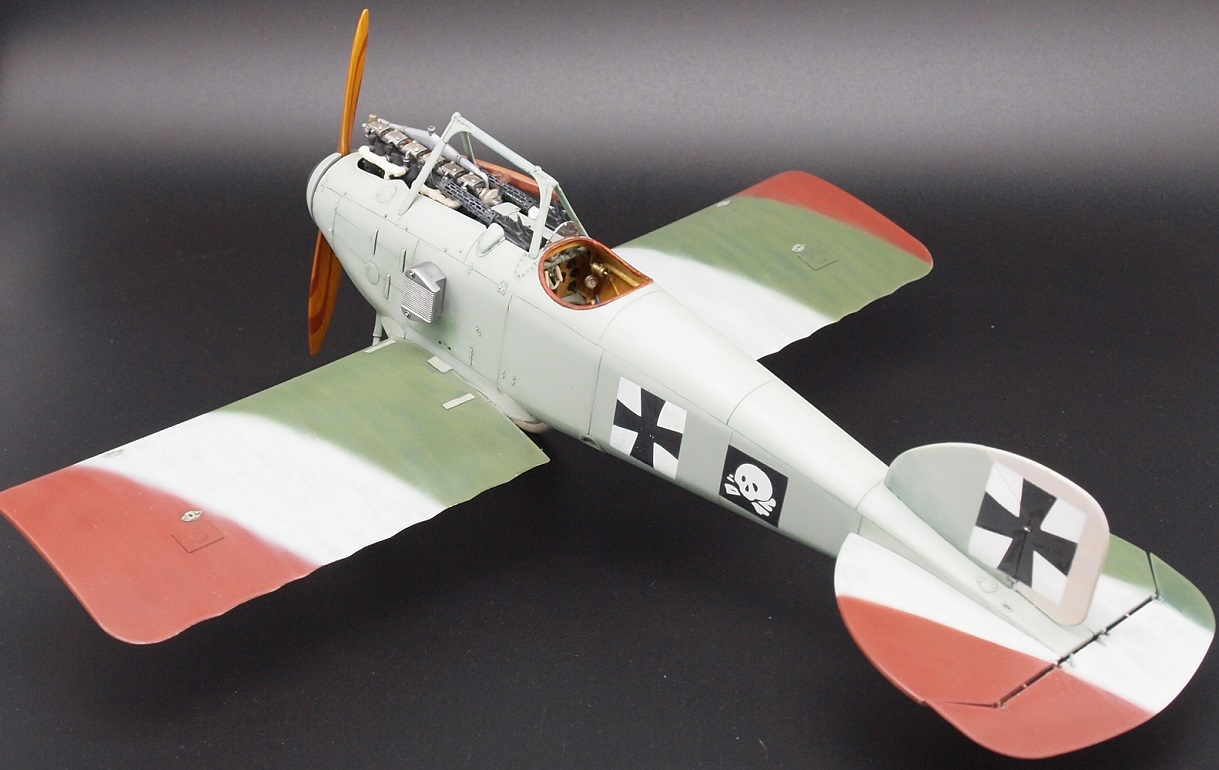
Anyway... how about a micro-update.
Last night I painted the combing for the cockpit.

I will try to give it a satin gloss once all else is said and done. Same with the prop.
I've decided not to use speckling anymore. It just doesn't look right to me. inadvertently I always get one hugely out-of-scale speck seen by the camera's unfailing eye.
So... I did this with an airbrush:
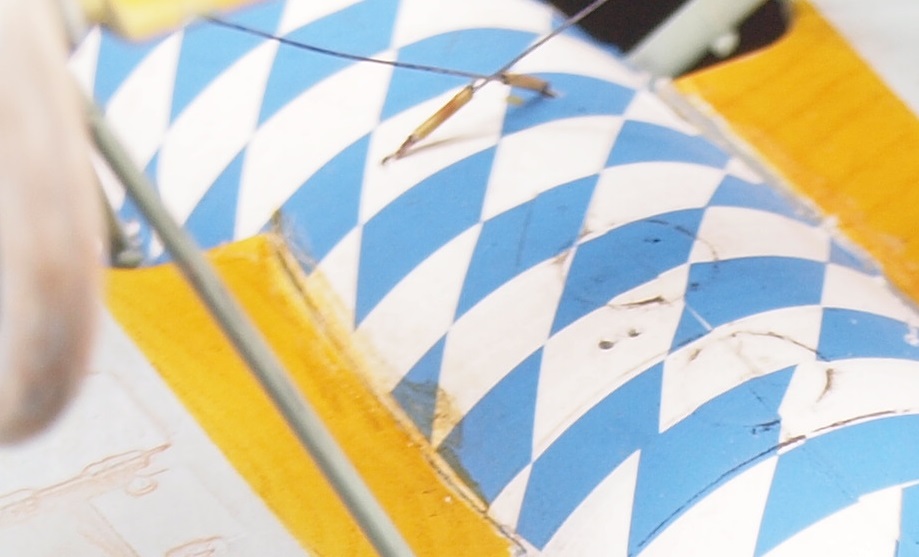
Then.... I remembered this picture I'd saved from Farcebook.
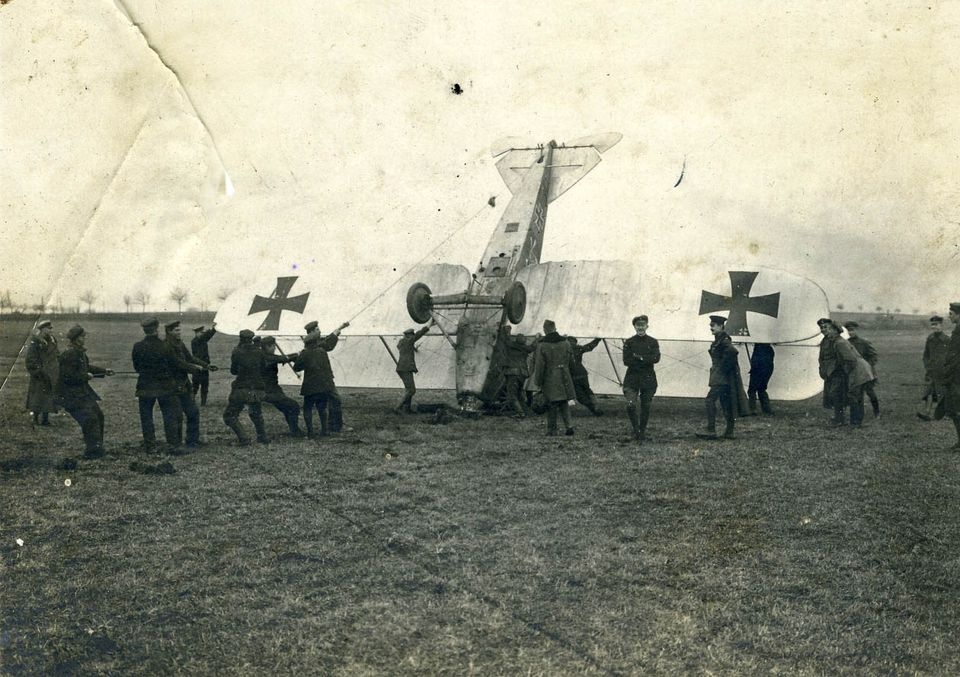
You won't find many better images of the underside of a used aircraft from WWI.
Happy modelling!
-
5
-
1
-
-
13 hours ago, harv said:
Really nice. You've nailed the look of the real one....harv

Thank you Harv.
-
3
-
-
7 minutes ago, belugawhaleman said:
Merry Christmas is right! That looks like a terrific kit of a beautiful aircraft!
I've never built a resin kit, but I hear the products from Fisher are supposed to be good.
I hope a build thread is to follow!
Regards;
Paul
Eventually there will be. I have a few other victims in the queue to ruin first.
-
5
-
3
-
-
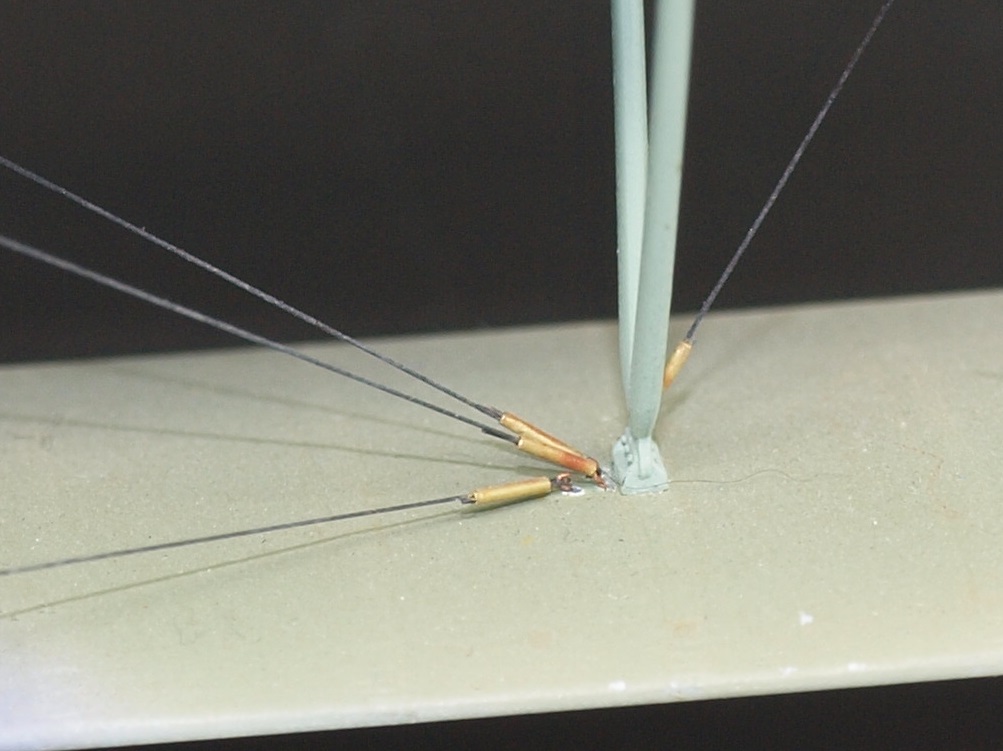
Here are some quick and dirty pics. You'll notice Bob's buckle used on the albatros along with monofilament fishing line.... I used Stren 2lb. test.
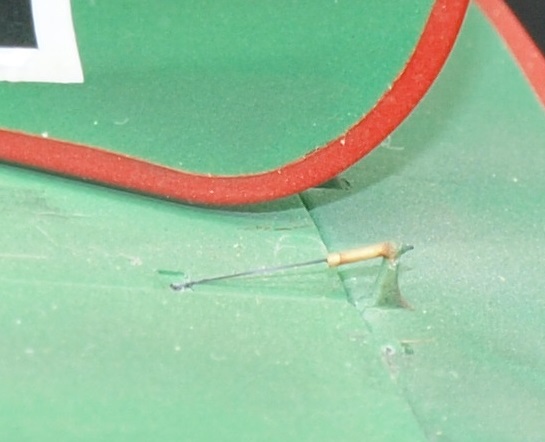


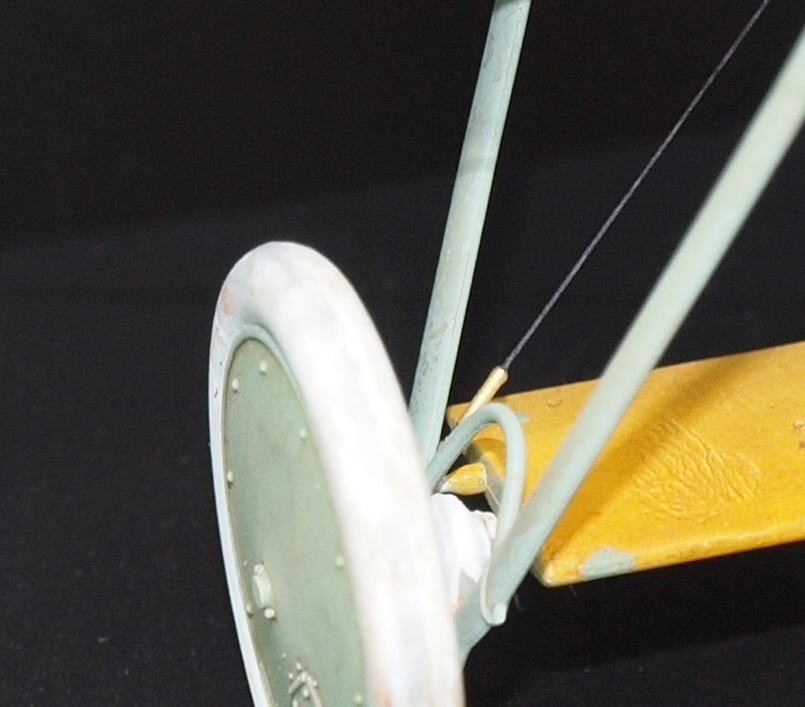
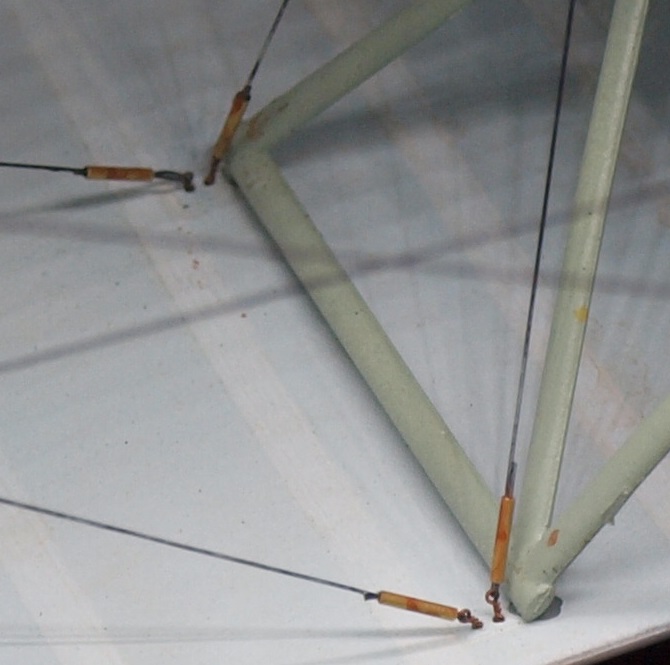
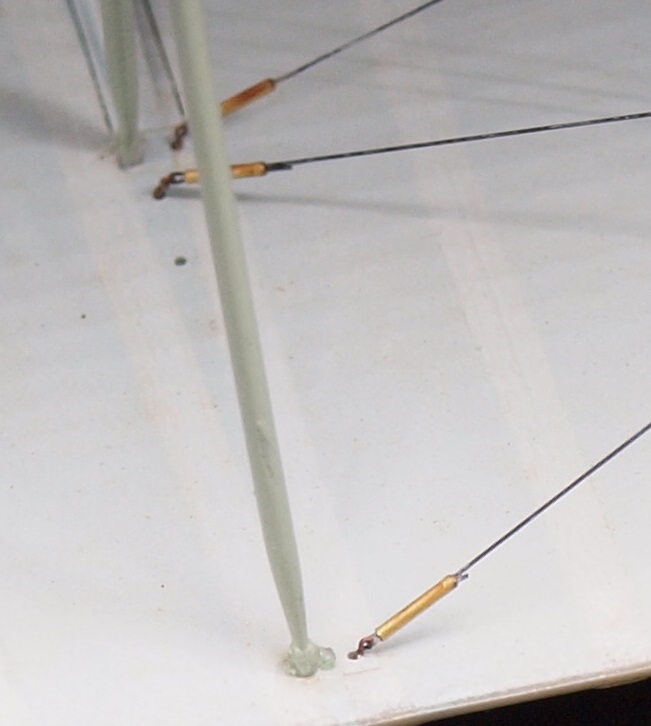
The tubes look really large in macro shots.
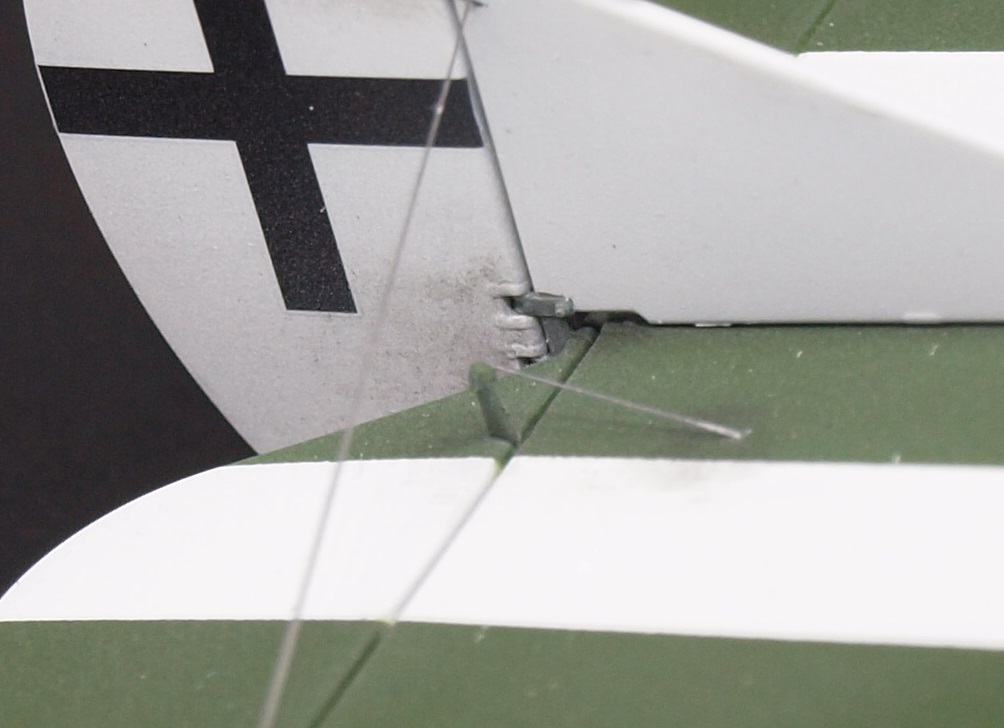
Here... on the Fokker, I used elastic line and only glued the tips of the line where I wanted... You really don;t need turnbuckles if you don;t want to use them...WNW says not to bother.
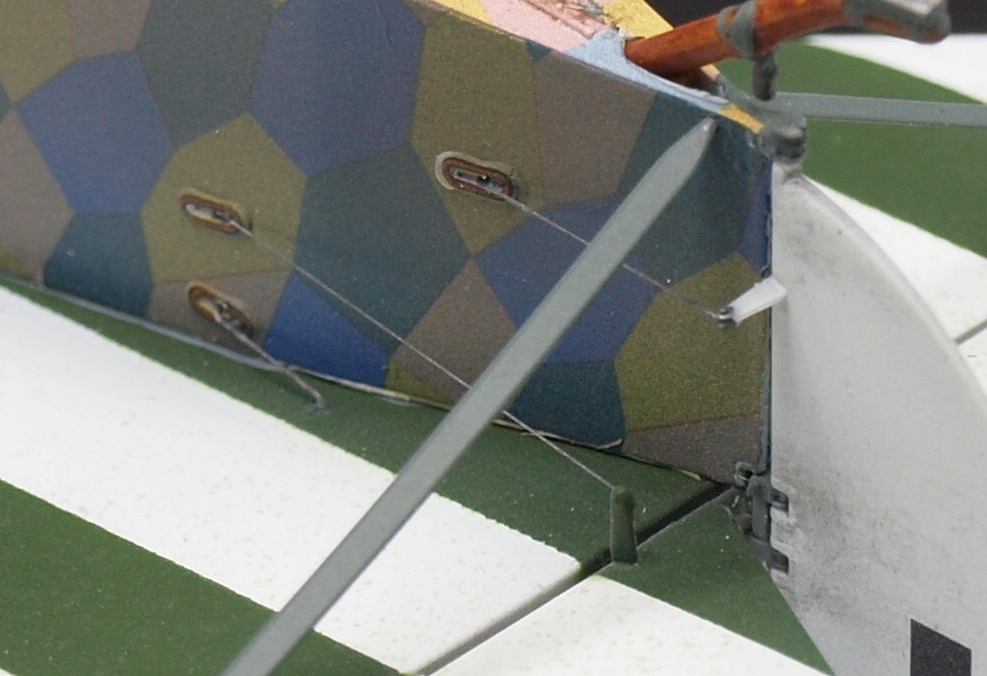

It's all easier than you think.
-
5
-
-
13 hours ago, Kaireckstadt said:
Thanks to both of you for your rigging-tipps.
I only have a normal rig for aircraft, Gary:

Could it be upgraded to a biplane-capable rig? If yes, how? If no: where do I get such a rig?
I also have buckles from Gazpatch and elastic line.
I‘m a little afraid that the line will not keep tight when rigged. This is why I thought of using elastic line which could be stretched and then glued.
@Rob: How do you attach the metal tube to the place where the rigging line should go? Or do you just make a hole at that place, threat the line through the metal tube and then through the whole and fix it with superglue in the metal tube after looping? How long is this metal tube, which diameter does it have and where do you get it from?
How do you assure with that method that the line will keep tight?Sorry for all these questions. I just want to be sure to use a method that works (even after training...).
Thanks in advance for your replies!
Hi Kai,
There are a couple jigs out there that are useful. You've seen the one I'm using on this build which is the Vertigo Jig. It's made out acrylic with some hardware and is held together with CA. I actually drilled holes and put copper pins in the joins because I kept knocking parts down. MIG makes another one that looks like it secures the model better than my Vertigo jig. Here is a link:
Let me introduce you to Bob's Buckles:
https://www.bobsbuckles.co.uk/index.html
This is my preferred method to rig. What you get from Bob's Buckles are eyelets and brass tubes. My favorite method is to drill a hole and place and glue with CA, the eyelet in the desired place. Then I slide my line through a the tube, through the eyelet, and back through the tube where I can snip it off cleanly. Stretch line is great for this as it disappears back into the tube.
This image is from Bob's page:

I prefer this to Gaspatch buckles because IRL, turnbuckles don't jump out at you. But Gaspatch buckles draw my eyes every time. But to each his own.
Like Rob has said, you can use monofilament fishing line. The trick with that is that I heat shrink it with an incense stick. I will be honest... I have actually melted a line before, or burnt though the wrong line. But it is stronger than elastic line.
You have WNW kits... And they are Fokker's Dr. I and D.VII. So, rigging will be limited. Very limited.
If you don't wish to buy a jig, here is a home made method that looks relatively simple:
https://modelpaintsol.com/guides/a-brilliantly-simple-biplane-assembly-jig
There is little that can go wrong with Bob's Buckles. Because the line is only glued inside the tube, it avoids glue blobs on the surface. If you make a mistake, you just cut your line, grab a fresh tube and start again. There is no need for tying tiny little knots. Because the line is drawn taut either by elastic action, or by heat shrinking, and because the ends are attached to eyelets and free-moving, there is no chance to get the angle wrong. That is one of the most common mistakes with the Gaspatch turnbuckles... getting that angle wrong on either the vertical or horizontal axes.
... tell you what... I'll see if I can manage some close up pic's of the finished installation.
-
4
-
2
-


Share how COVID-19 Quarantine has affected you.
in General Discussion
Posted
As I stated earlier. What is a modeller without eyesight? Nothing.
These vaccines were rushed into production, bypassing all of the normal precautions taken previously. I've never had a bad reaction to a vaccine before. Lord knows what the US Gov't jabbed me with whilst I was in her service. So, I'm not going to do it just yet.