


GazzaS
-
Posts
6,396 -
Joined
-
Last visited
Content Type
Profiles
Forums
Events
Gallery
Posts posted by GazzaS
-
-
Staggering collection! Nice cabinetry, too.
-
 4
4
-
-
Just now, harv said:
Thanks my friend. I just couldn't ytell....harv
You're quite welcome, Sir.
-
1
-
 1
1
-
-
5 hours ago, harv said:
I'm sorry, the fuselage. Not sure where the blue stops.....harv
Harv,
The 'blue' RLM 76 goes all the way up to the canopy line area. There is no light color in the middle.
-
2
-
1
-
-
16 hours ago, Clunkmeister said:
One of their P-63s against one of our P-51s would have been a pretty even fight, aircraft wise.
Can't give them any credit for the 63. They didn't make it.
-
2
-
-
-
-
Love the fish and tanks. I always thought that few things were as appealing as a salt water tank with a living ecosystem.
I never really had the stability to even consider one before.
-
2
-
-
Wow Beluga! Cracking little build!
-
2
-
1
-
-
9 minutes ago, JohnB said:
Thanks Gaz. That's right but now I intend to stay with the '63 until it's finished. Done with a lot of the high cuss factor stuff except for mating the wings to the fuselage. THAT has a pretty high cuss factor. I don't know why HpH didn't do a better job of engineering this kit as it would be a lot more enjoyable if some of the worst offenders had been paid better attention. Maybe they just wanted to irritate us!

It is a shame they did such a bad job. I know that it must have cost them sales. Cuz I really like the P-63, but ain;t gonna buy one of theirs.
-
2
-
-
19 hours ago, 1to1scale said:
Oh,I forgot, every single seam line shrank back. There is a line running from the radiator inlet all the way to the tail. Every time I pick it up, it gets worse. I am giving up Mr Surfacer 500 forever.
I have changed my building habit for aircraft. All of the big seams I do with CA now. I believe that 're-occurring' seams are caused by the some-time long term instability of solvent and plastic.
I've given up on sprue goo too. I did one model and filled panel lines with it. Once dried, I sanded it smooth. A few weeks later I applied primer and was shocked to see that where each narrow panel line had formerly been, there was now a 2-4 mm wide shallow ditch with very smooth contours.
Mr. Surfacer is a pain, too. Sometimes takes three or more applications due to shrinkage. CA is now my go-to filler.
Good luck!
Gaz
-
2
-
1
-
-
John,
I applaud your dedication. Seems to me you're bouncing back and forth from irritating kit to irritating kit.
Keep up the good work!
-
4
-
-
Nice work, Rob.
-
3
-
1
-
-
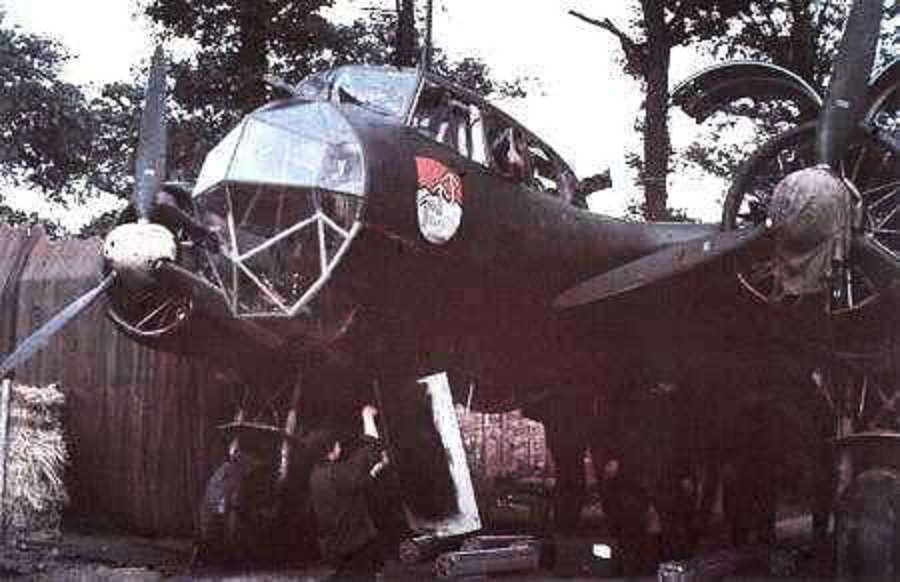
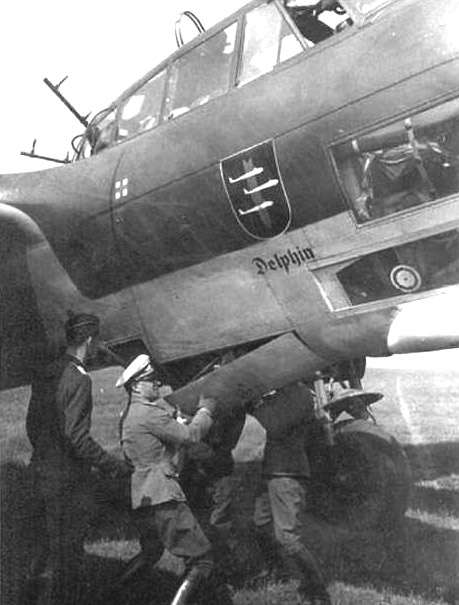
I got this one last Christmas:

The earliest night fighter variant of the Dornier Do 17. Kauz I. I don't think there was much different from the bomber version other than black paint and a fuel cell added to the forward bomb bay.
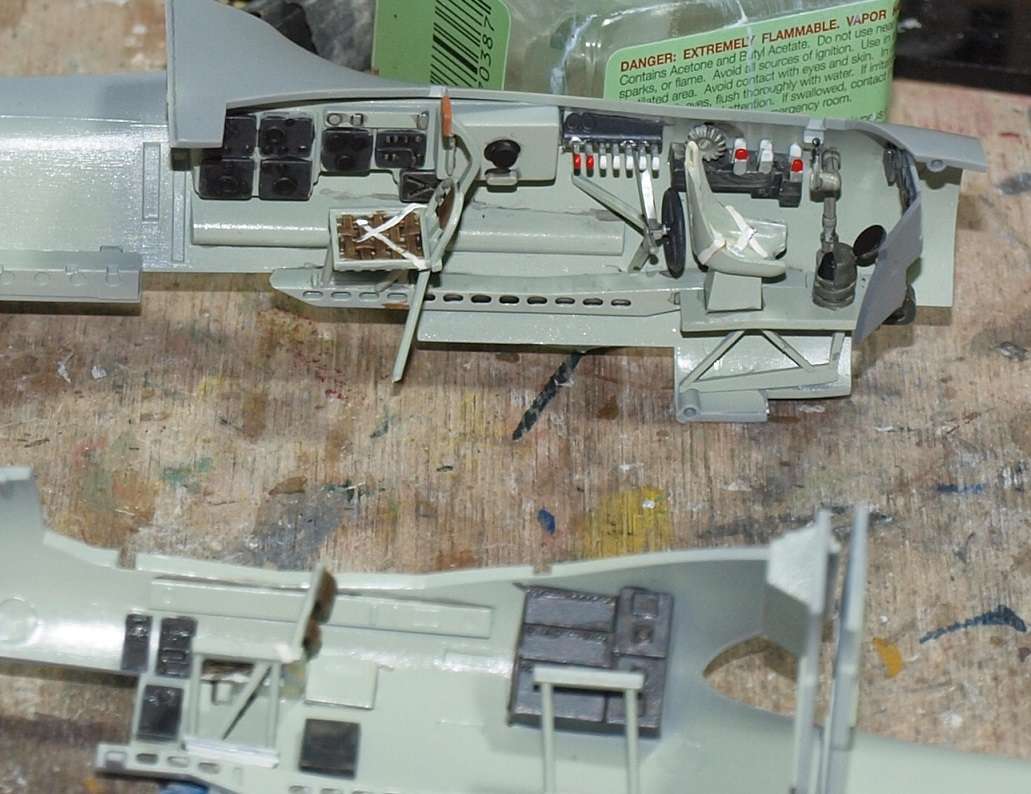
The cockpit is pretty simple, and with a lack of knowledge of what the type really looked like inside, I was left to my own devices. After all of the hours I spent detailing the inside of my Do 217 nightfighter, only to have everything disappear, I've decided that investing too much time in 1/48 pits is pointless.
The radio sets aren't very well depicted.
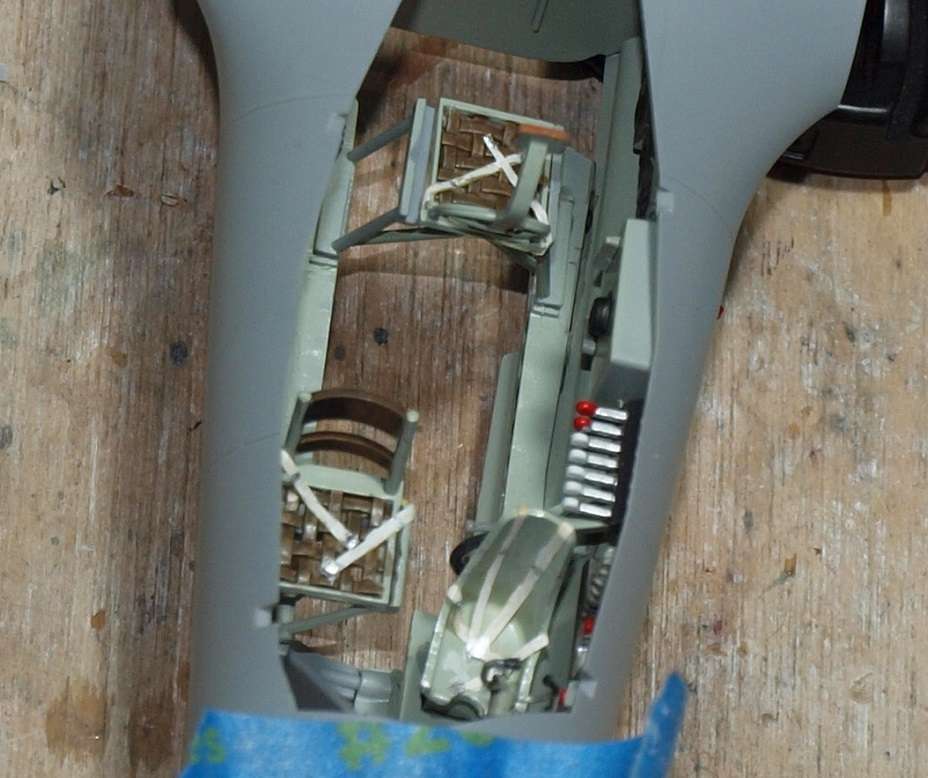
The seat belts are just .5mm strips of Tamiya tape with faux buckels painted on. Sorry for the blur. ....oh, by the way, DocRob.... thanks for showing the Voyager cutting templates. They arrived just in time today to help me cut the seat belt strips.
Why Diabolical, you say? I'll tell ya....
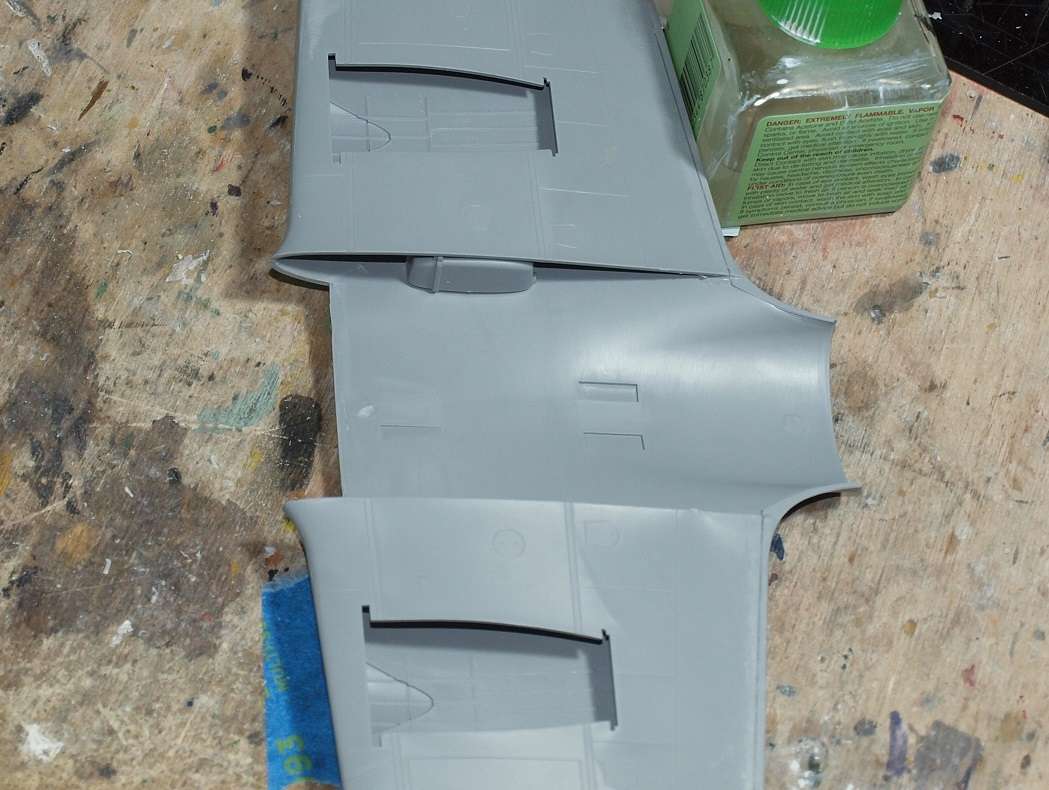
I was warned about ICM's older moldings. I didn't know this classified as older, but you can see here that I've used chunks of the spare fuel cell to try to get a better join between fuselage and wings. It's gonna be one of those deals where I glue one spot... let it dry, then glue another spot, and so on until the wing is securely dogged down. Then, it'll be filler and fun.
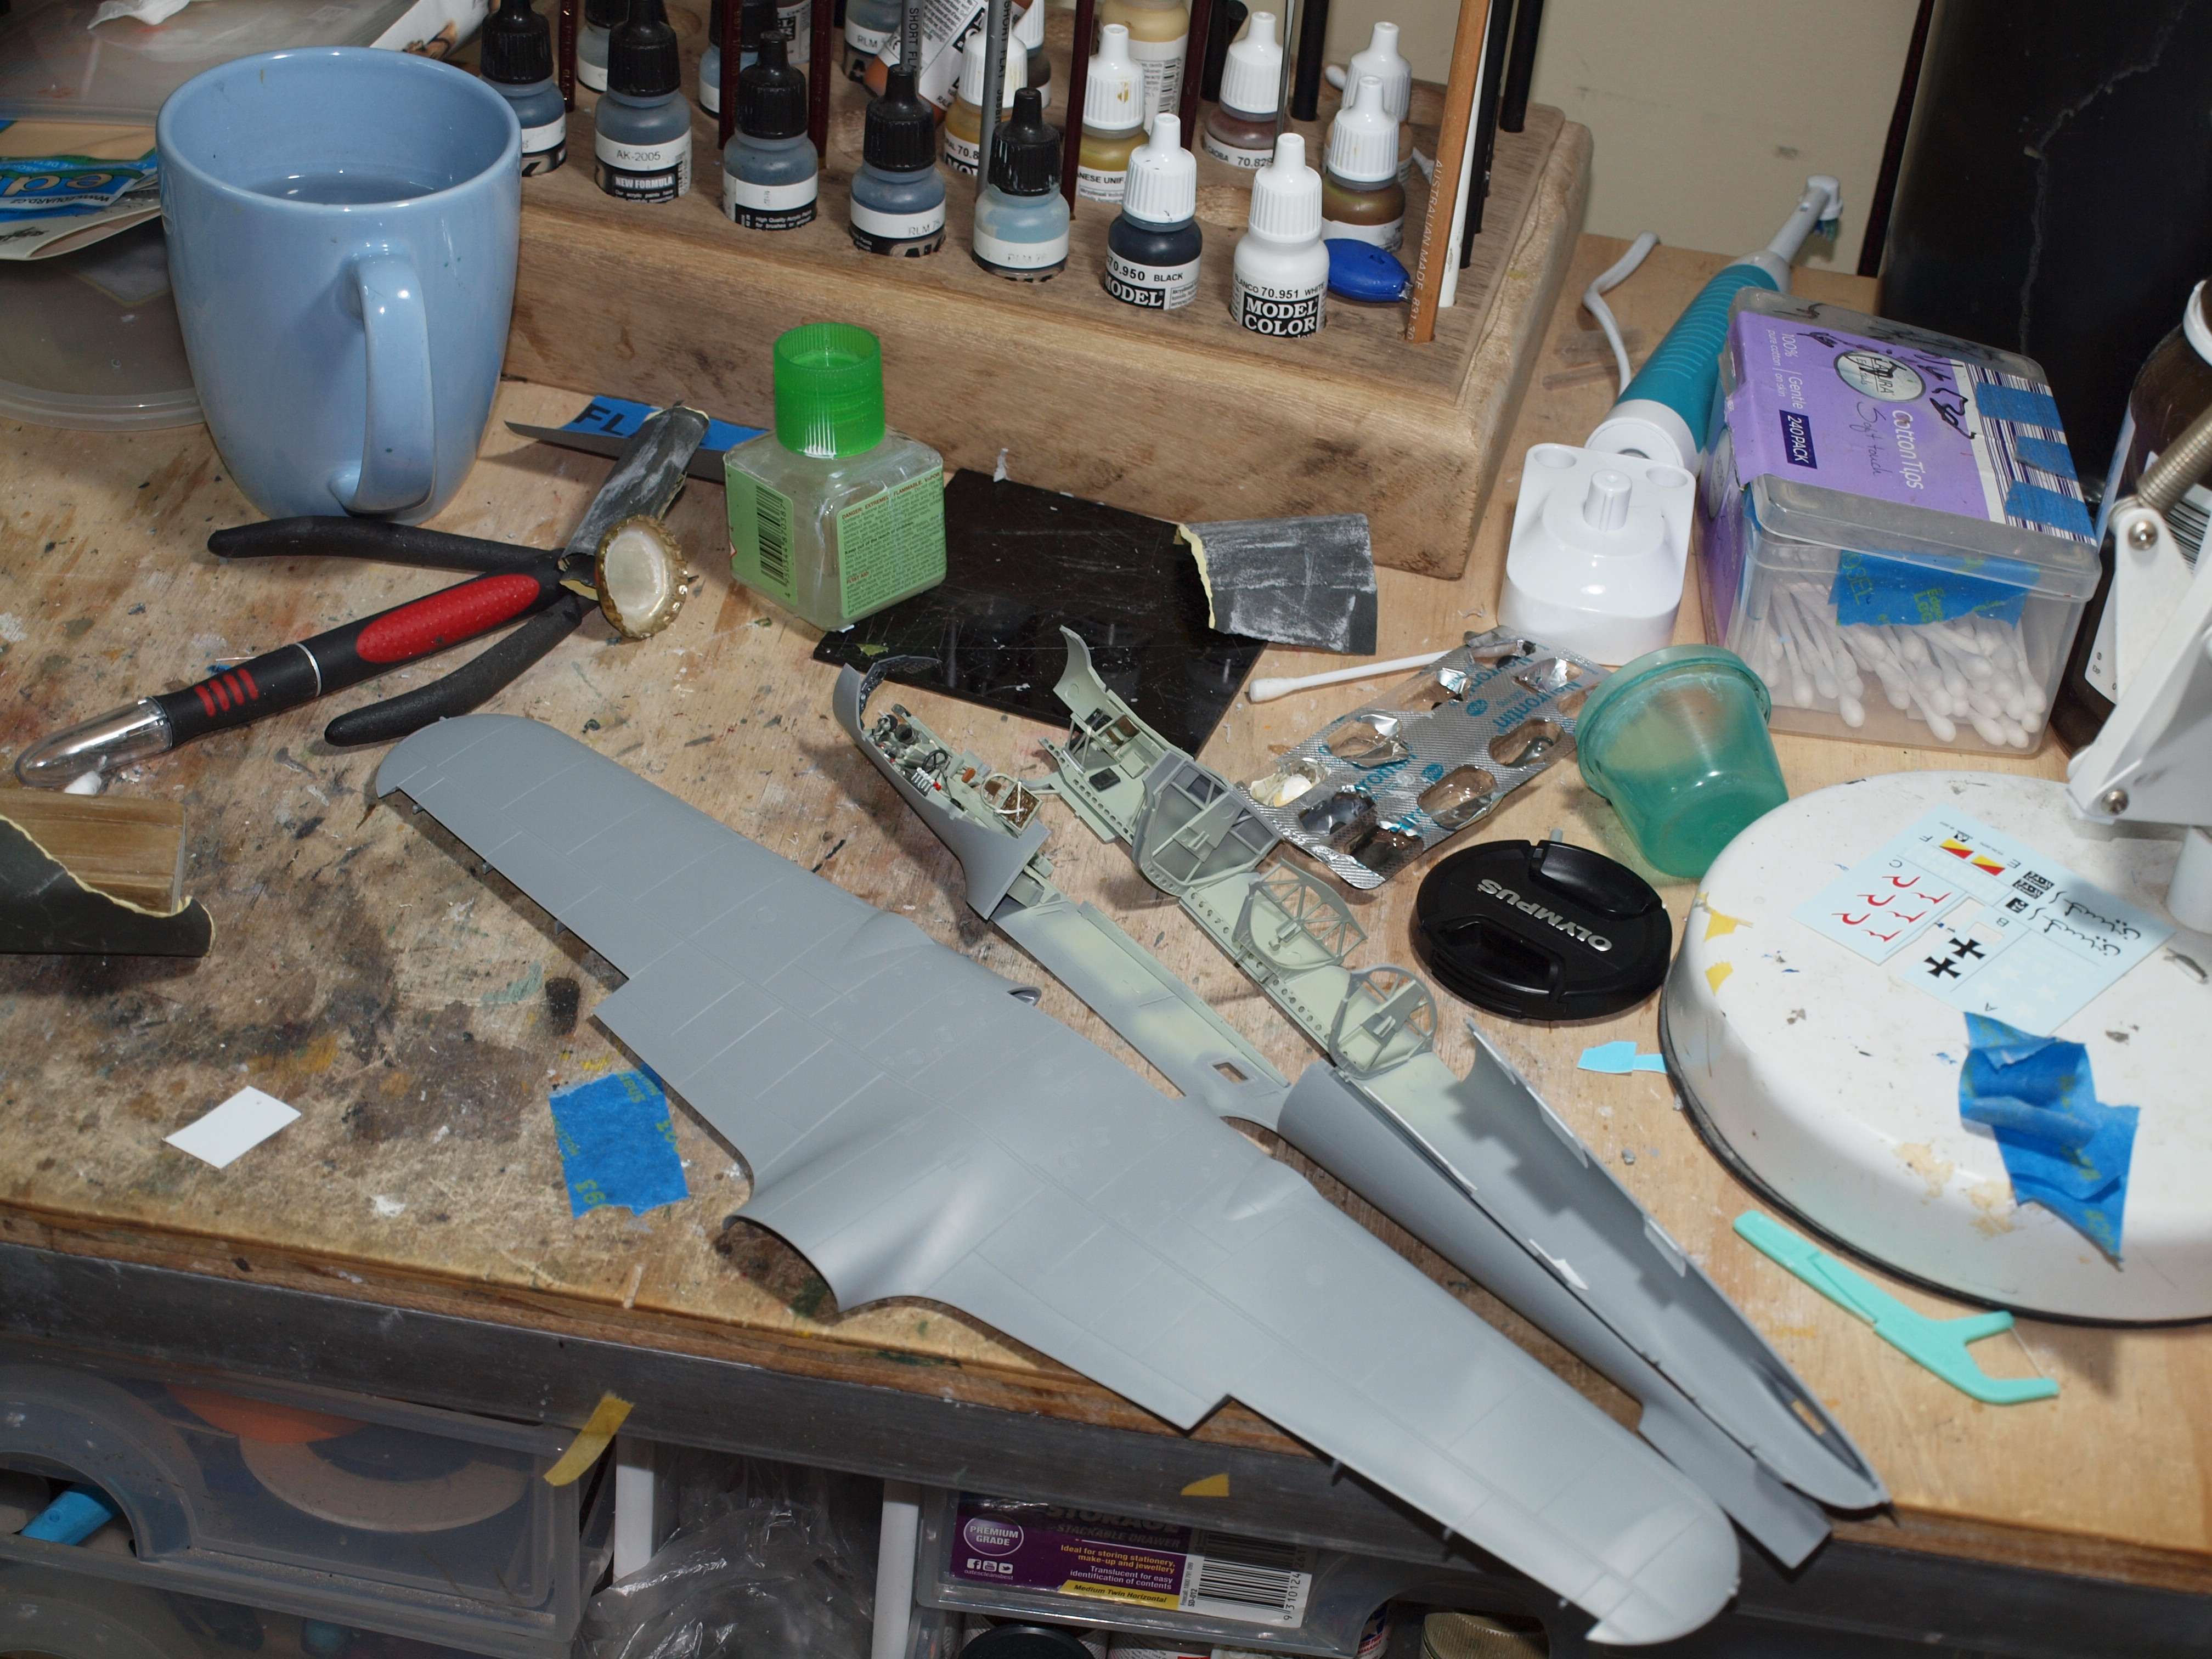
This is the state of her now. I've added white card stiffeners to make the fuselage seams stronger. Hopefully the CA will trickle all in there and provide a seam I can't pop.
This will be my first all black aircraft since I was a teen and ruined a Monogram 1/48 scale P-61. I hope to do better, this time.
Thanks for looking! I'd love to hear your thoughts.
Gaz
-
7
-
1
-
-
Looks like they laid down well. All in all... decals are so much easier than anything else. Too bad every kit doesn;t come with good decals.
-
1
-
1
-
-
Great work! I really hate working in the fuselage/wing junction.
-
1
-
-
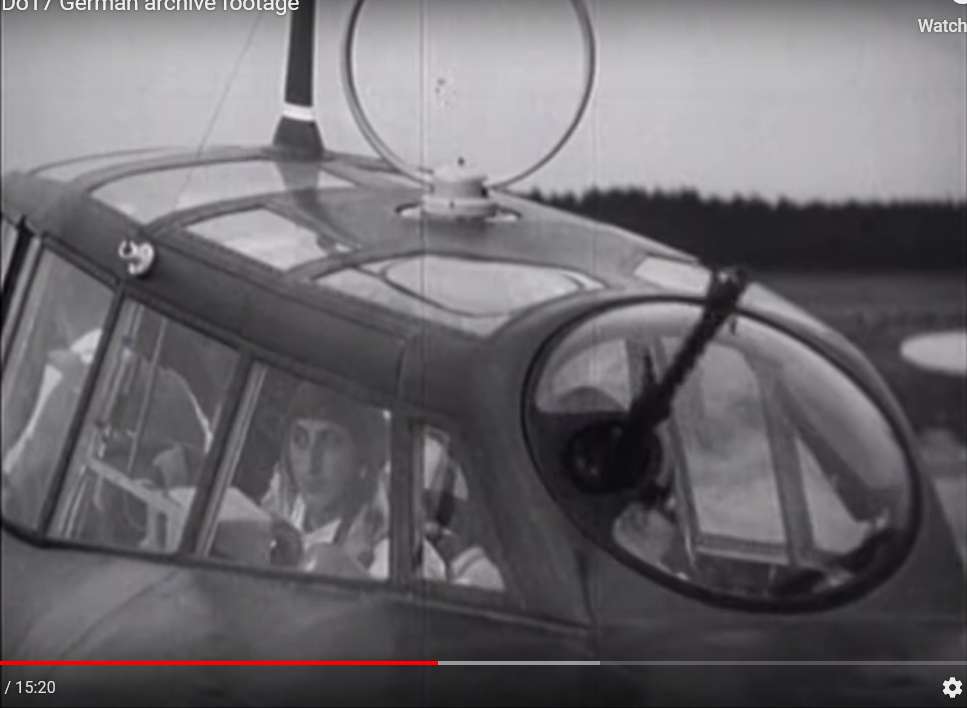
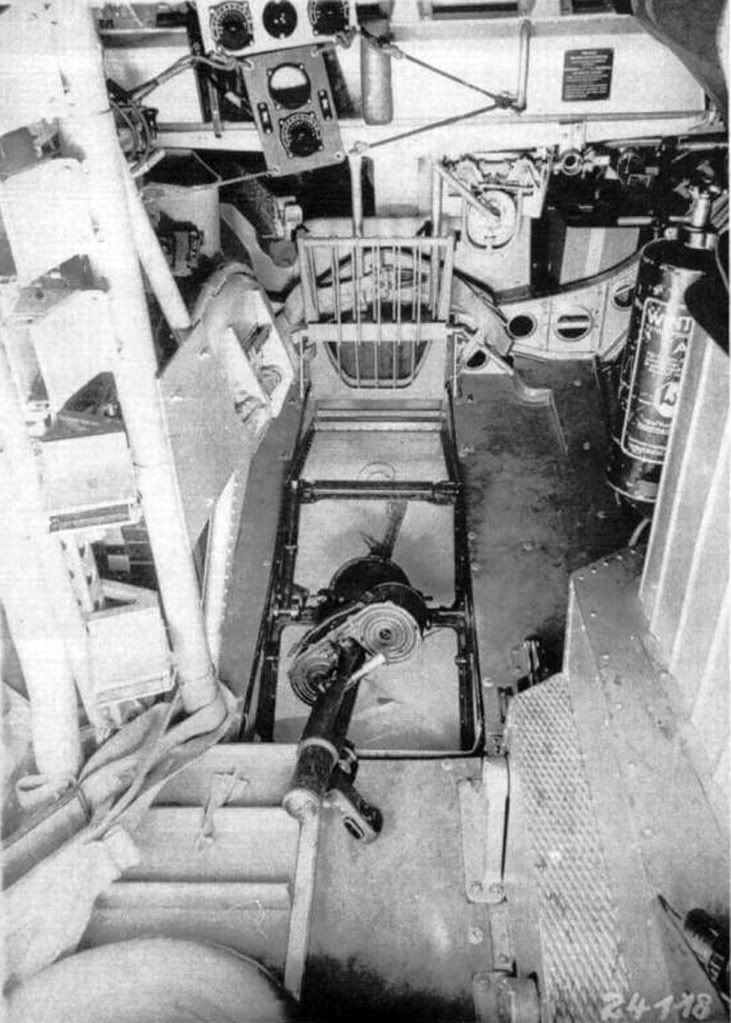
15 hours ago, Wumm said:
Most likely RLM 02. As in this interior photo from the earlier '17 P variant. Note the internal steps on the offset hatch, which was flat on the underside unlike the deeper dished cover of the '17 Z.

This image may also help...
S
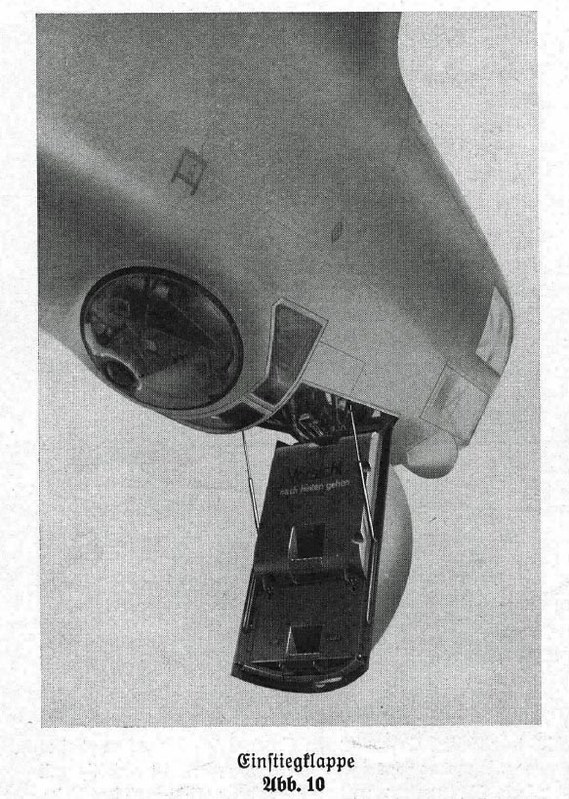
11 hours ago, Bomber_County said:This may help......these for the camera installation, but the bomber version should be similar, without the 'bump' on the top half
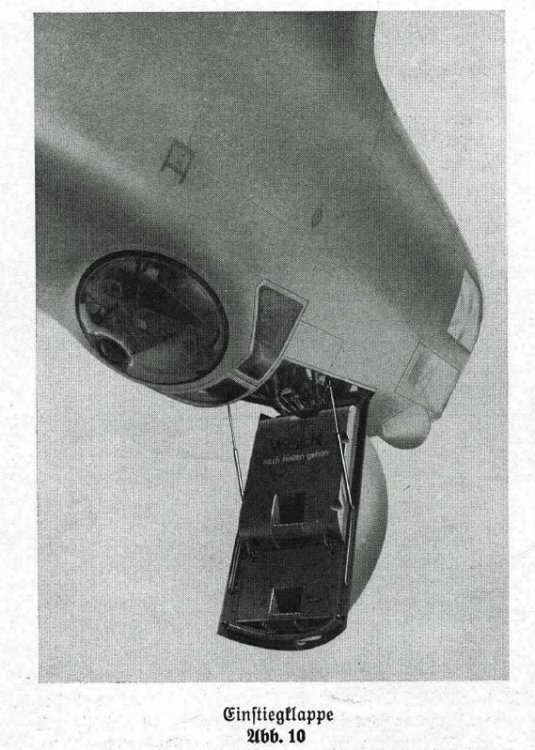
Excellent photos, Guys! Muchos Gracias!!
-
2
-
-
Imagine modelling without tedious parts... *shudder*
-
1
-
 2
2
-
-
I've been very fortunate. The Jug being my only real bad break.
My decal solutions are Mr Mark softer And Mr Mark Setter are in nice, square based bottles much like the Tamiya Extra thin bottle. And the only time I ever tipped the extra thin, it poured on to bare plywood.
One of my common errors is to gloss coat with Future and not put the cap on the airbrush. But each time a blob of Future has landed on the model, it's self levelled so as to cause no issue.
I love Future. I cant believe how many people have issues with it.
-
3
-
1
-
-
Last time I needed nose weight I took some large sinkers and hammered them flat. Then cut them into thin slivers so I didn't lose any space to air.
-
2
-
-
At least it wasn;t a whole bottle of Tamiya Extra Thin or a bit of lacquer thinner.
Once when cleaning my airbrush after spraying some Alclad on a 1/48 Hasegawa Jug, I dropped just a single drop of a thinner called Reducer 265 on the aileron. That one drop went down more than a millimeter into the surface. The only good thing was that I had been painting the underside.
-
4
-
-
5 hours ago, SapperSix said:
Gaz,
Excellent build man! Your current efforts and on the diorama are well done as always.
-S
Frank,
Thank you! Glad to see you survived your last deployment.
Gaz
-
3
-
-
I'm just noticing that the interior color looks way too light to be RLM 66.
Notice how light the interior framing looks. It totally contrasts with the 70/71 exterior.
-
2
-
-
Holy S*&t, Martin! You da man! Thank you very much!
-
2
-
1
-
-
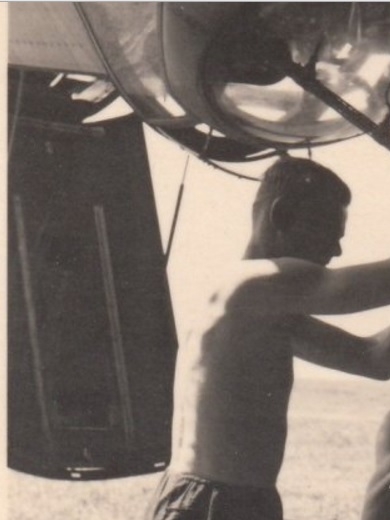
Hi everyone,
I've spent about four hours looking for a photo or drawing of the inside of the Dornier's crew entry hatch. I can find quite a few of the outside. But nothing useful for modelling detail. I've got a few of the ICM Dorniers, but the hatch isn't modelled at all. It's just a part of the fuselage unfortunately.

If anyone has one....
I'd appreciate it greatly!
Cheers,
Gaz
-
2
-
Fw190 A5
in LSM 1/35 and Larger Work In Progress
Posted
Think of it as a term of endearment.