
EmperorKai
-
Posts
82 -
Joined
-
Last visited
Content Type
Profiles
Forums
Events
Gallery
Everything posted by EmperorKai
-
Spitfire Mk Ia: 610 Squadron, May 1940
EmperorKai replied to EmperorKai's topic in LSM 1/35 and Larger Work In Progress
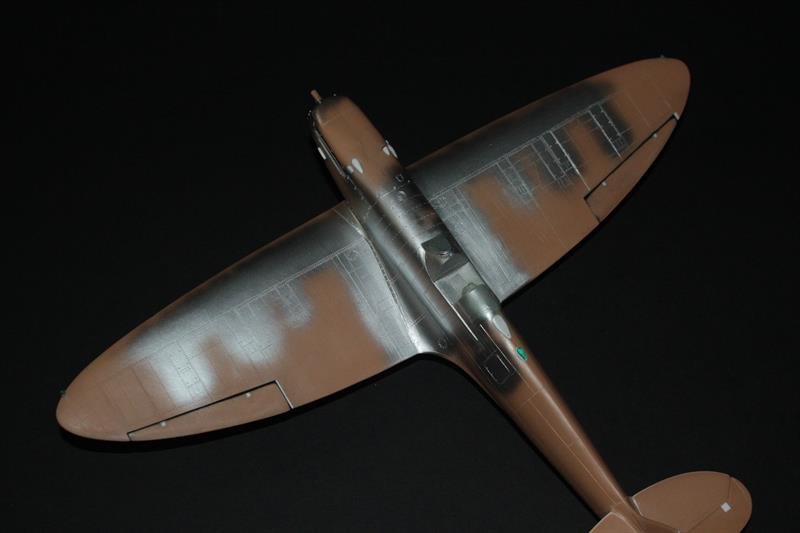
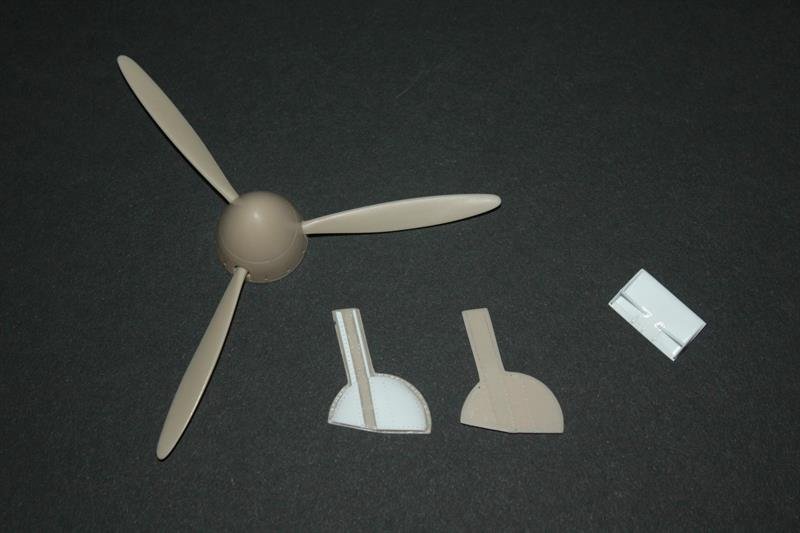
Have another update for today. I've finished up almost all the remaining details and have started on painting. The interior color at the cockpit glass frames was first. The prop was also airbrushed with Tamiya and Vallejo paints. Afterwards, any areas that may have some scuffing and wear were done with AK Interactive Xtreme Aluminum (LOVE the stuff). Once dried, two coats of Tresemme hairspray were applied for future chipping. The aircraft was less than a year old (L1016 rolled out of the factory in June 1939) and hadn't seen much combat yet, but I did want to keep the option open for some very minor chipping. Kai
-
Spitfire Mk Ia: 610 Squadron, May 1940
EmperorKai replied to EmperorKai's topic in LSM 1/35 and Larger Work In Progress
Drifter- Much better image. I'm not aware of why this one was reversed- perhaps Tom will be able to chime in. While looking at some of the pics I have, I was able to find a great shot of 610 sqn Spitfires from May 1940, and is the only one from this time frame that I have found so far. Of particular interest is the modification of the roundels and variations in the fuselage markings, which seem to indicate that some aircraft may still have had some of the original markings from their call-up. The fin flashes all appear to be correct. It also appears that these did not have the rear view mirror on top the windshield, though it might be they are just too small to see in the pic. I found these from an excellent aircraft profile booklet found here: http://www.rafchurchfenton.com/articles/page/3/ Kai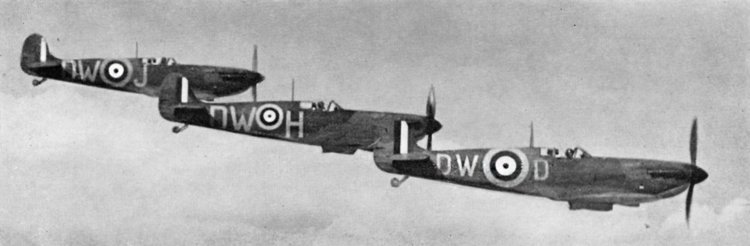
-
Spitfire Mk Ia: 610 Squadron, May 1940
EmperorKai replied to EmperorKai's topic in LSM 1/35 and Larger Work In Progress
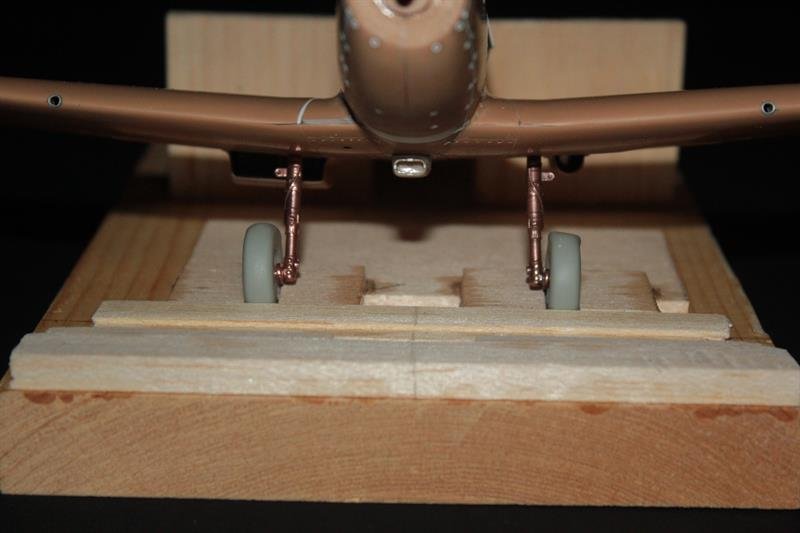
Thanks Cees! I wasn't aware of the variation in the rake of the main landing gear- good to know. Normally, I would be inclined to use the centerline of the wing cross-section between the leading and trailing edges, but due to the curvature of the wing underside, I wasn't able to get a reliable baseline for the exact angle. The only practical baseline was the ground level between the main gear and tail wheel. I'm using the Modellers Datafile for the Spitfire, which includes line drawings. I came up with a 65 degree rake from the ground line, which seemed to correspond well to images of the Spitfire Mk.I, which is what I ended up going with. I speculate that the Mk.V was either closer to a 68 degree rake or mine is off a few degrees (probably the case regardless). However, to my eye, it seems pretty close. Kai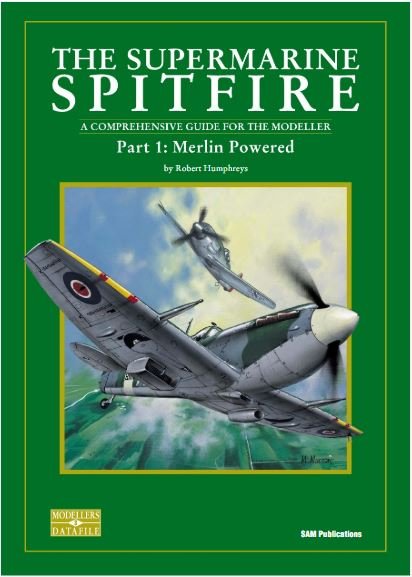

-
Nice work John! Nice to have it ready to go for your future project, but its also pretty cool on its own Kai
-
Spitfire Mk Ia: 610 Squadron, May 1940
EmperorKai replied to EmperorKai's topic in LSM 1/35 and Larger Work In Progress
Thanks Harv! Hoping to start paint soon Kai -
Spitfire Mk Ia: 610 Squadron, May 1940
EmperorKai replied to EmperorKai's topic in LSM 1/35 and Larger Work In Progress
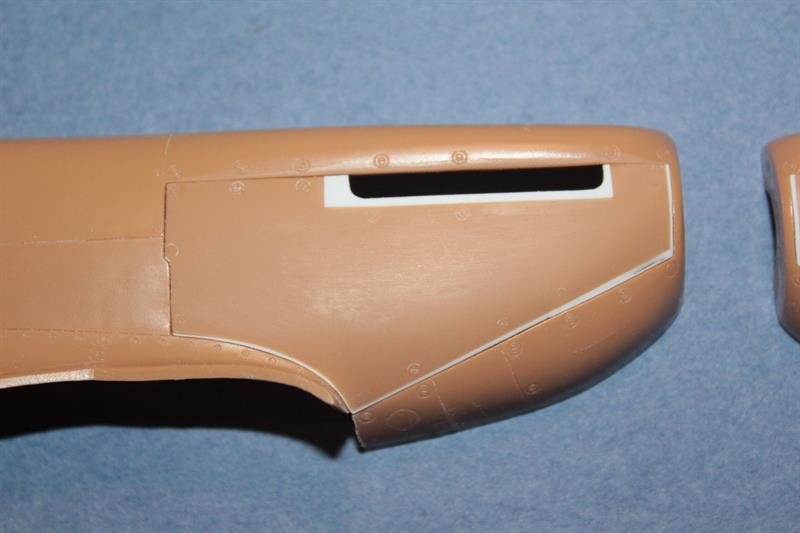
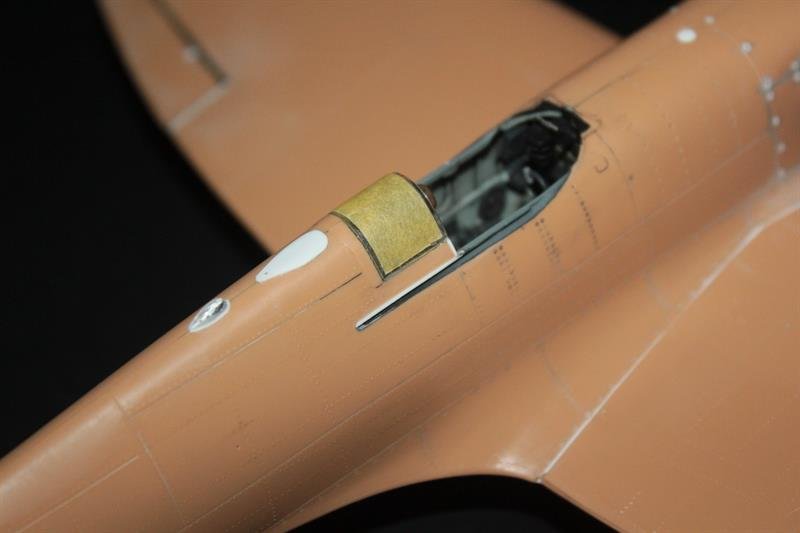
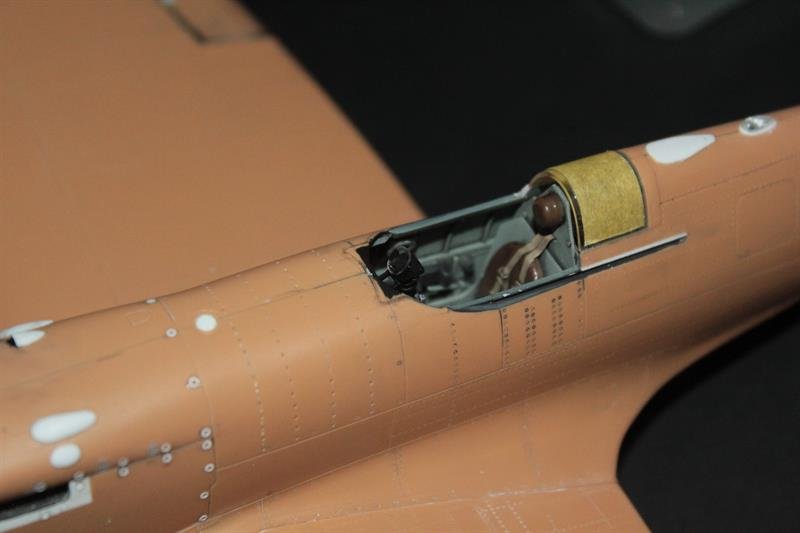
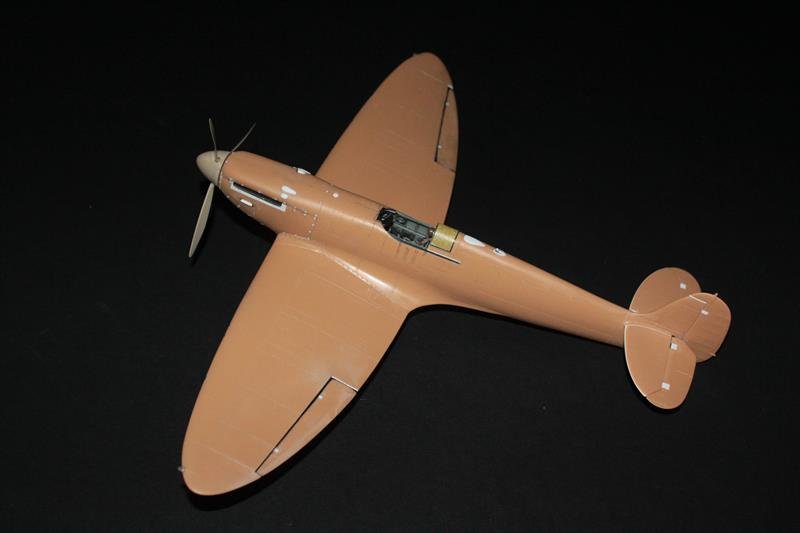
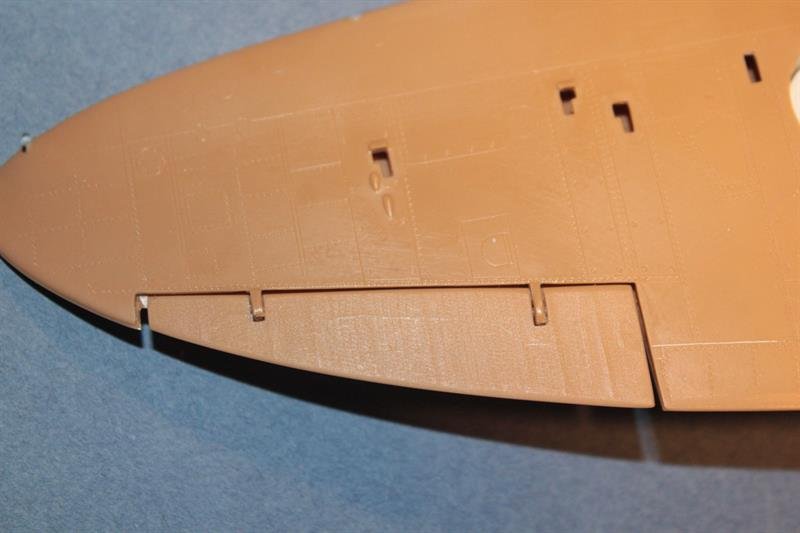
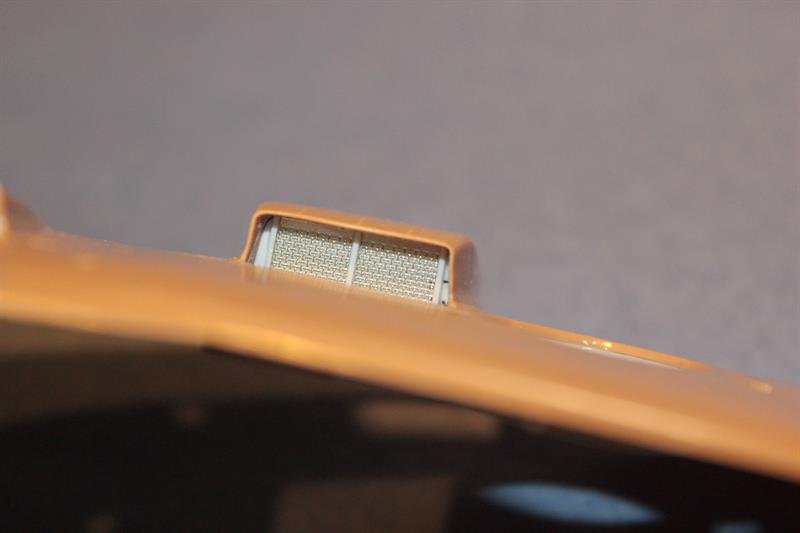
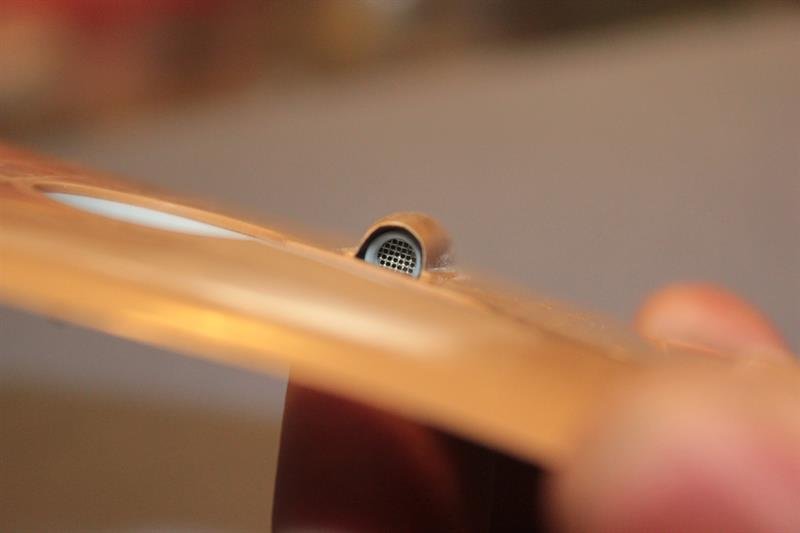
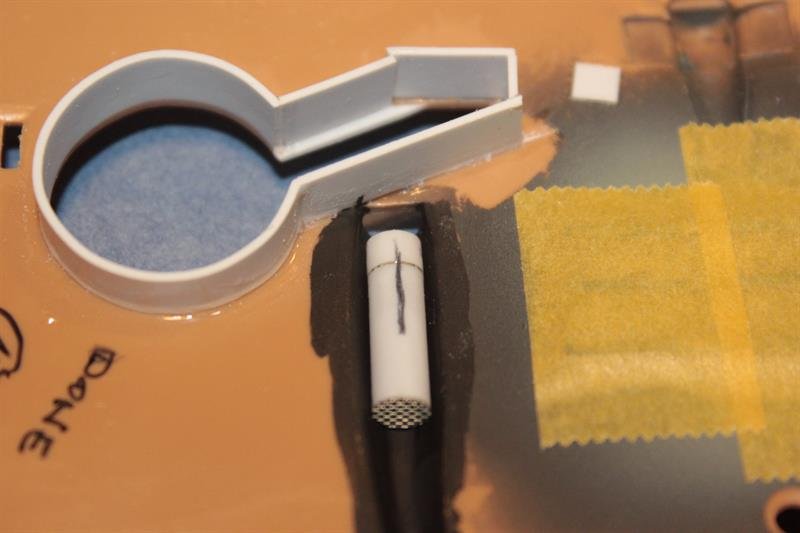
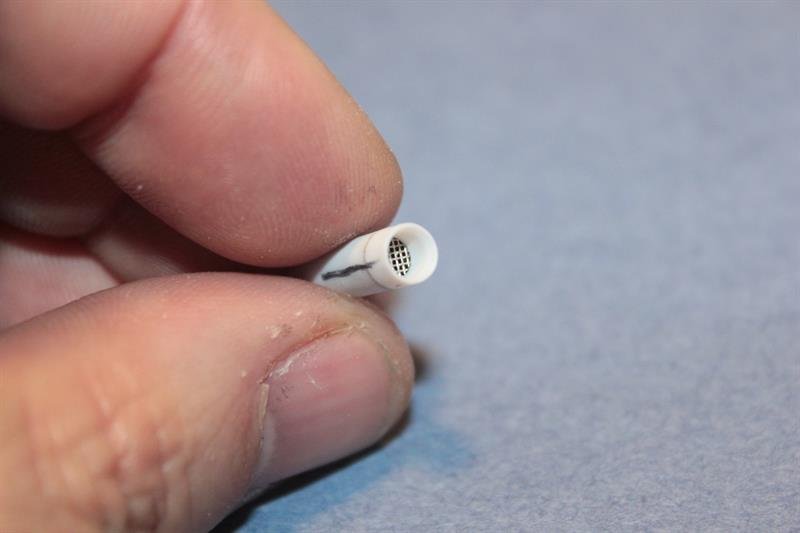
DETAILS Various details were also added including the small scoop on the engine cowl, control rod for the rudder, landing gear doors, radiator vent and small tweaks around the cockpit. The gunsight from the Hasagawa kit was modified to look more like the GM-2 Mk.II. The Hasagawa DeHavilland prop was updated with engraved details on the nose cone. Lastly, I've started masking and fitting the cockpit glass. I have to say that now that the build is coming together, I can't get over how graceful the Spitfire is. Truly a beautiful aircraft and I think the Revell kit does a good job of capturing its smooth lines. Thanks and hope you enjoy! Kai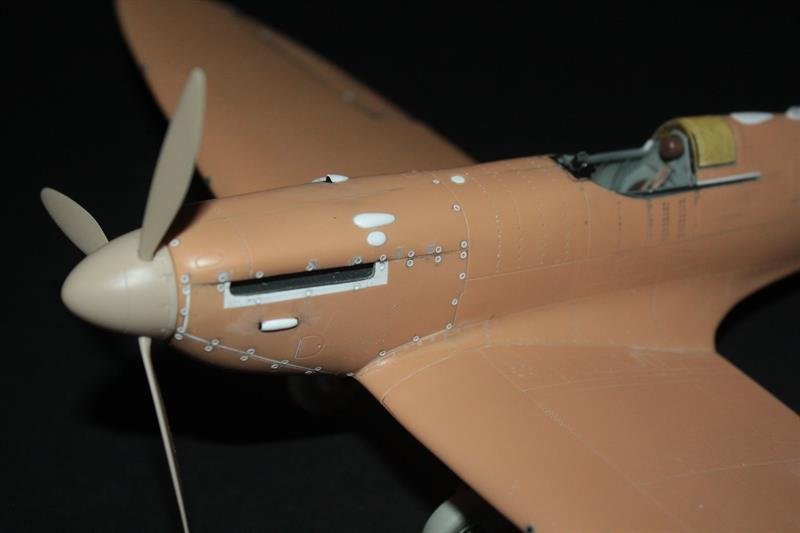
-
Spitfire Mk Ia: 610 Squadron, May 1940
EmperorKai replied to EmperorKai's topic in LSM 1/35 and Larger Work In Progress
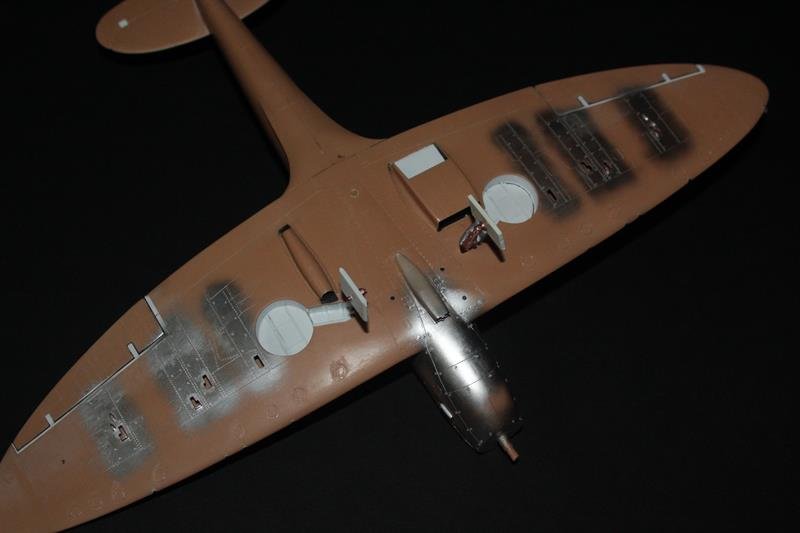
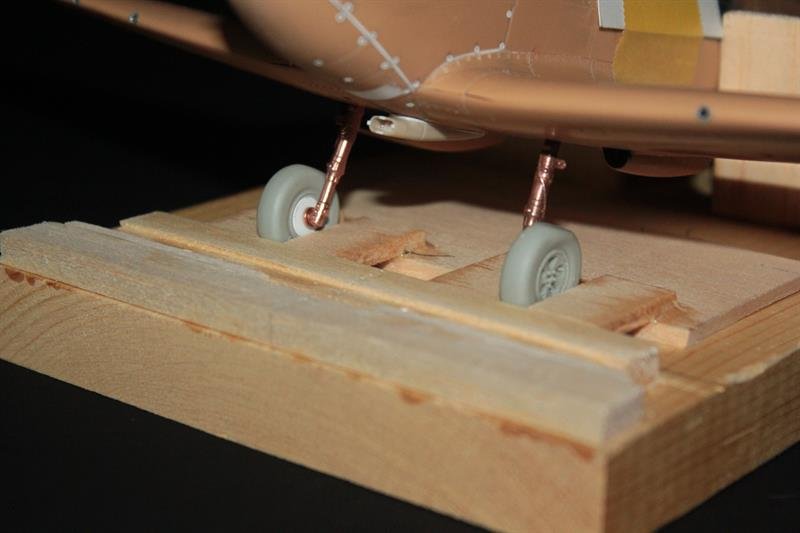
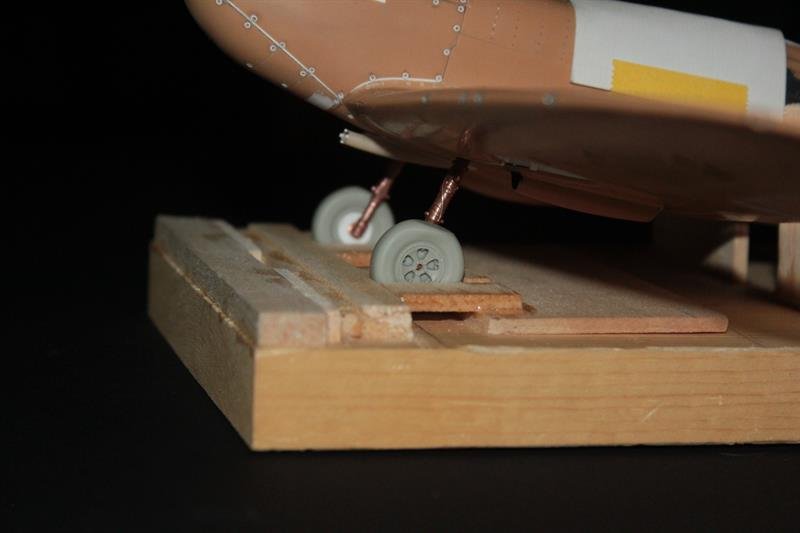
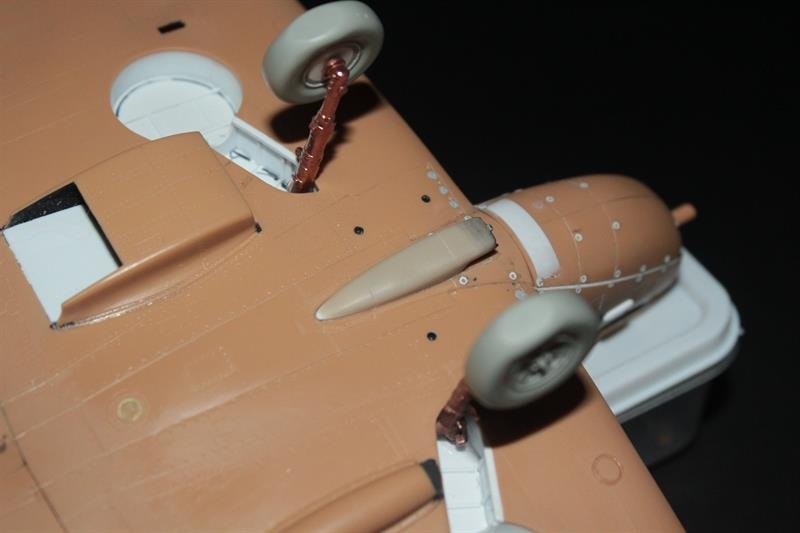
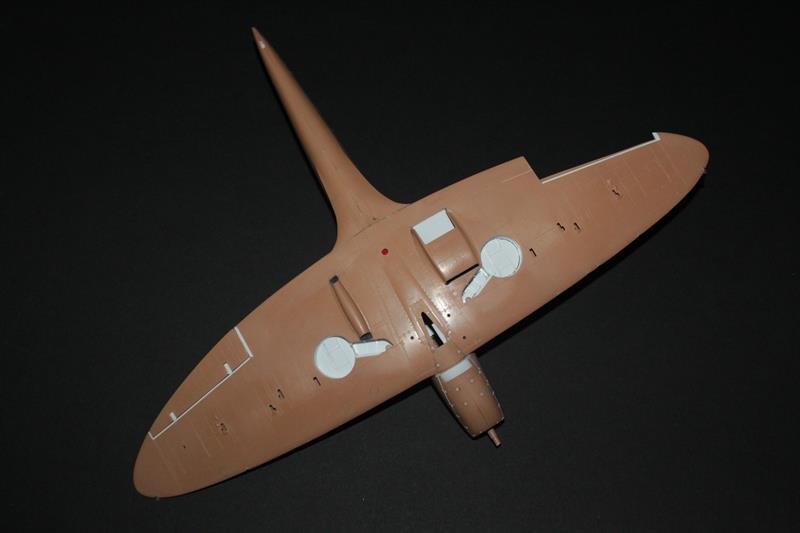
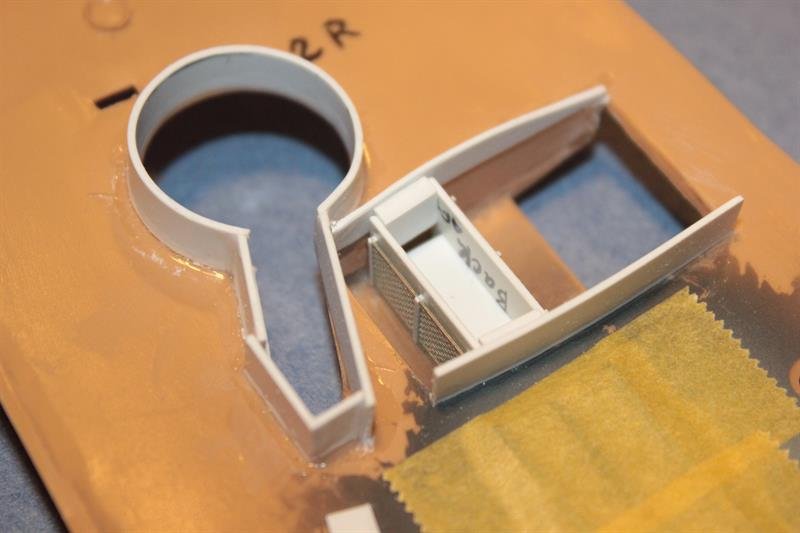
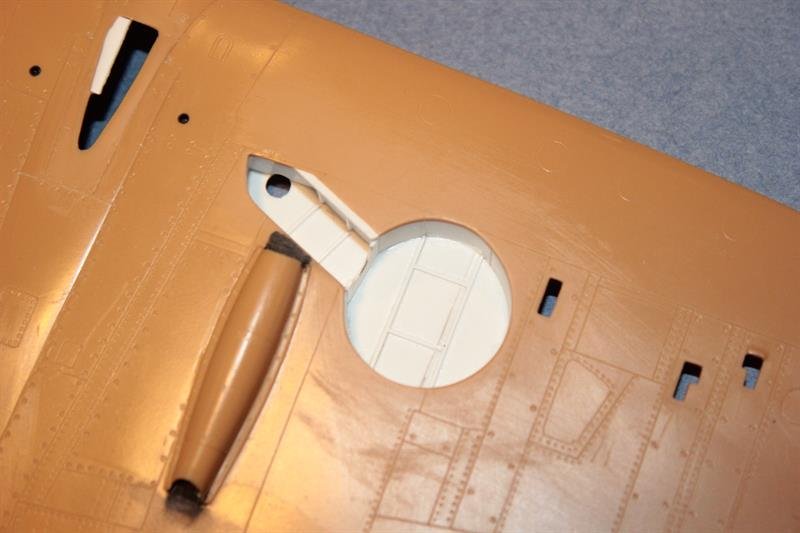
Computer's been acting up lately, so I'll squeeze a couple of updates in here this evening. LANDING GEAR I decided to use a Brassin landing gear set. While building the wing, I tried adding small pots for the gear legs, but wasn't satisfied that I would get the correct angle. So instead I built out an alignment rig that would allow me to adjust the angle as needed once I could see how the plane sits. At this point, the gear is in and quite solid. The wheels are a little wobbly looking without the rig, so they will need some additional tweaking. The carburator intake from the Hasagawa kit was also fitted and mounting brackets for the filter screen added.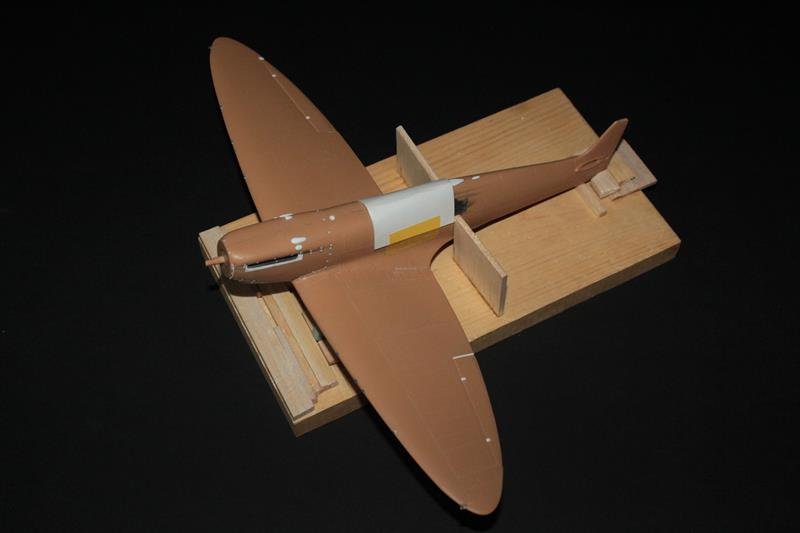
-
Spitfire Mk Ia: 610 Squadron, May 1940
EmperorKai replied to EmperorKai's topic in LSM 1/35 and Larger Work In Progress
Thanks gents for the kind words! Kai -
Spitfire Mk Ia: 610 Squadron, May 1940
EmperorKai replied to EmperorKai's topic in LSM 1/35 and Larger Work In Progress
Hey Drifter- I think Tom was referring to DW-O which is the lead aircraft in the picture. It's hard to tell, but it does look like the fin flash colors might be blue-white red instead of the red-white-blue based on the darkness of the colors. I get the impression Tom has chased this down already. Thanks for looking in on my build! Kai -
Spitfire Mk Ia: 610 Squadron, May 1940
EmperorKai replied to EmperorKai's topic in LSM 1/35 and Larger Work In Progress
Cees- Thanks! I too have a soft spot for these old Revell kits and its always good to hear from another Revell University alumni. The Spitfire and 109G were two of the better kits as they weren't as "fuzzy" as the Mustang, Thunderbolt or Stuka. -
Spitfire Mk Ia: 610 Squadron, May 1940
EmperorKai replied to EmperorKai's topic in LSM 1/35 and Larger Work In Progress
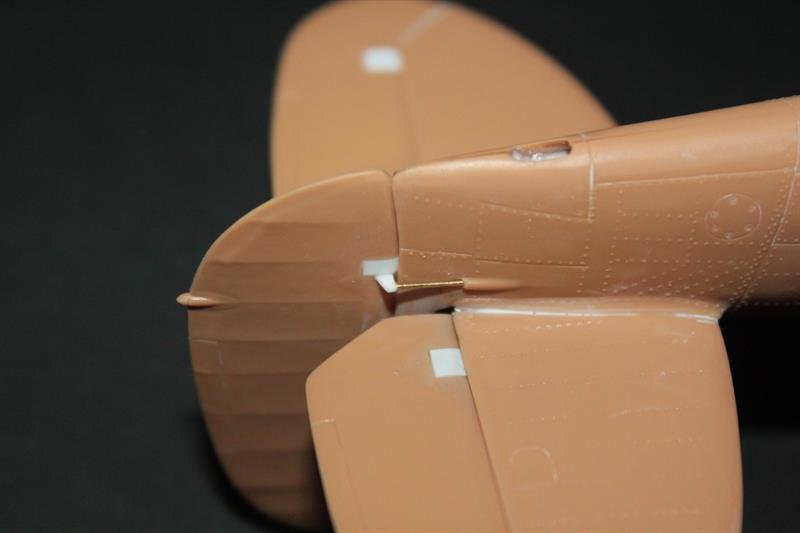
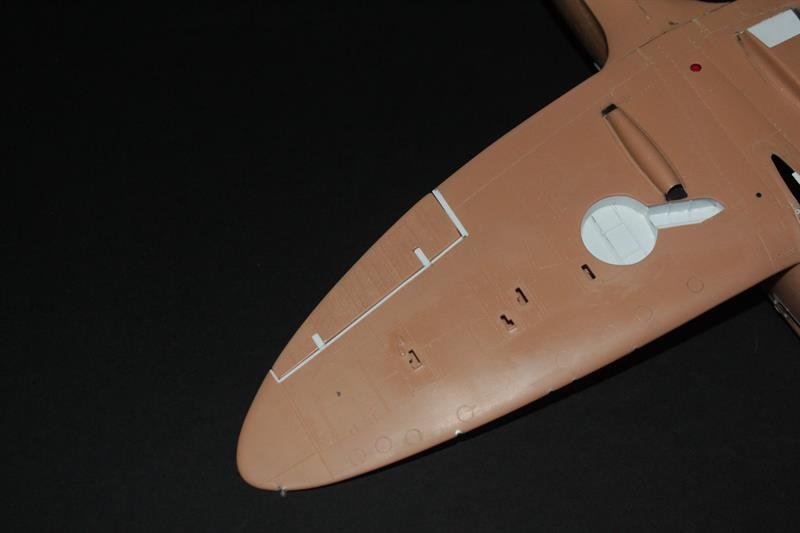
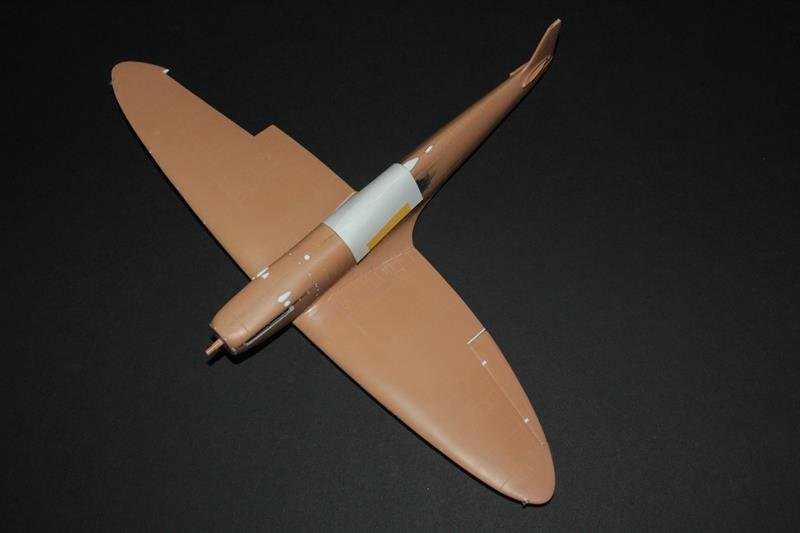
WINGS Having spent the weekend toiling away, I now have the wings joined to the fuselage and cleaned up. The contour under the nose where it joins the wing section didn't look right so strip styrene was added to fill it out for a nice smooth profile. The ports for the guns are faired over on the kit with "tape", so these were opened up and dressed properly with aluminum tubing. The kit ailerons need additional attention as well, and at this point I have one completed. Cowling fasteners were also finished up along the underside now that the major sanding is done. Hope you enjoy! Kai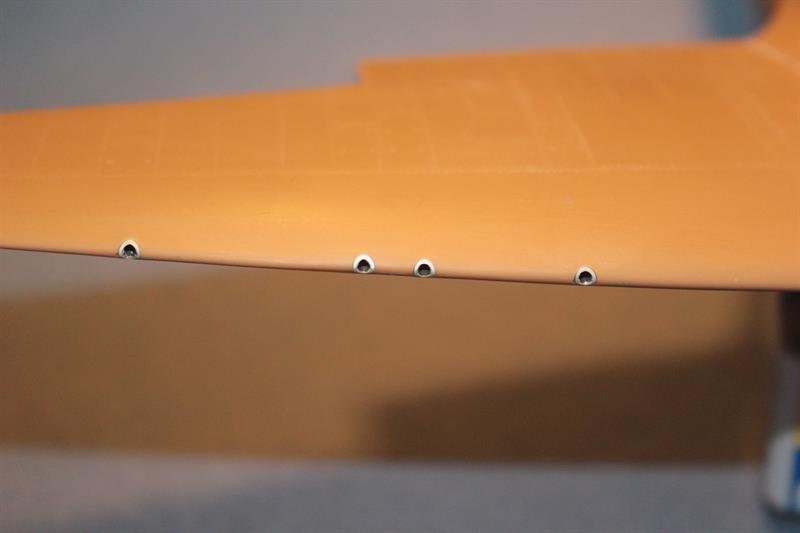
-
Spitfire Mk Ia: 610 Squadron, May 1940
EmperorKai replied to EmperorKai's topic in LSM 1/35 and Larger Work In Progress
Thank you gents for the encouragement and looking in on my build! Tom- I didn't notice that until you pointed it out. Nice catch! Kai -
SBD-3 clear Edition Trumpeter OOB
EmperorKai replied to Martinnfb's topic in LSM 1/35 and Larger Work In Progress
Looking pretty sweet Martin. Can’t wait to see where you go next with the paint. I already can’t wait to build this kit, and you’re build is making me think hard about doing it sooner rather than later. Kai -
P-47D-11 finished
EmperorKai replied to JohnB's topic in LSM 1/32 and Larger Aircraft Ready for Inspection
Fantastic work as usual John! Kai -
Tamiya F4U-1D Corsair: Update: 2/1019
EmperorKai replied to Peterpools's topic in LSM 1/35 and Larger Work In Progress
Beautiful work Peter. Always enjoy watching your builds and glad to see you’ve got your mojo back! Kai -
My First Heartbreak 27/Jan/19
EmperorKai replied to GazzaS's topic in LSM 1/35 and Larger Work In Progress
You go Gaz! I would also encourage you to let the shape and dimension questions go, and just build it, have fun with it and be that kid again. Kai -
Nice start GusMac! I like the really weathered ones too. Kai
-
Spitfire Mk Ia: 610 Squadron, May 1940
EmperorKai replied to EmperorKai's topic in LSM 1/35 and Larger Work In Progress
Thanks for the kind words! Should have another update tomorrow... -
Thanks much!
-
Spitfire Mk Ia: 610 Squadron, May 1940
EmperorKai replied to EmperorKai's topic in LSM 1/35 and Larger Work In Progress
Thanks Rob and for looking in on my build. -
Spitfire Mk Ia: 610 Squadron, May 1940
EmperorKai replied to EmperorKai's topic in LSM 1/35 and Larger Work In Progress
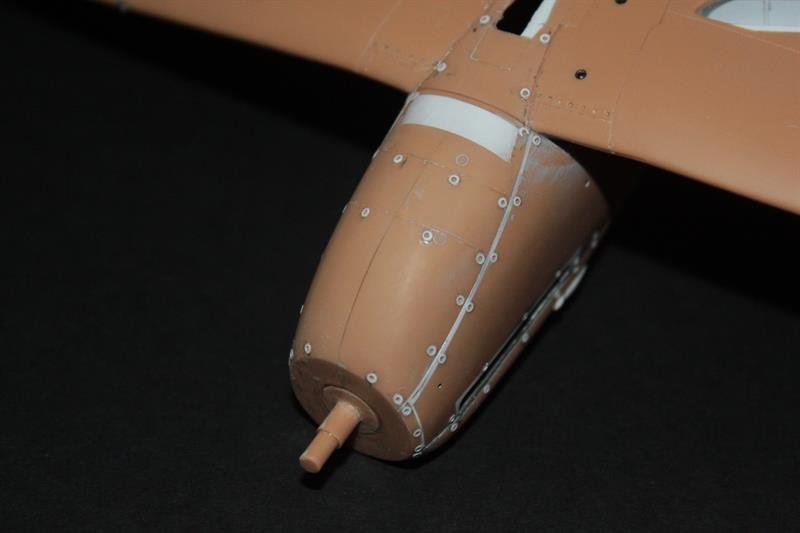
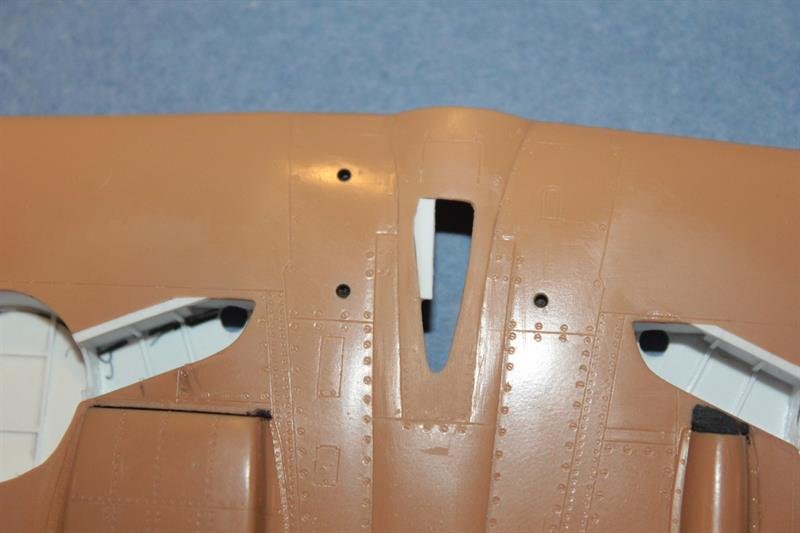
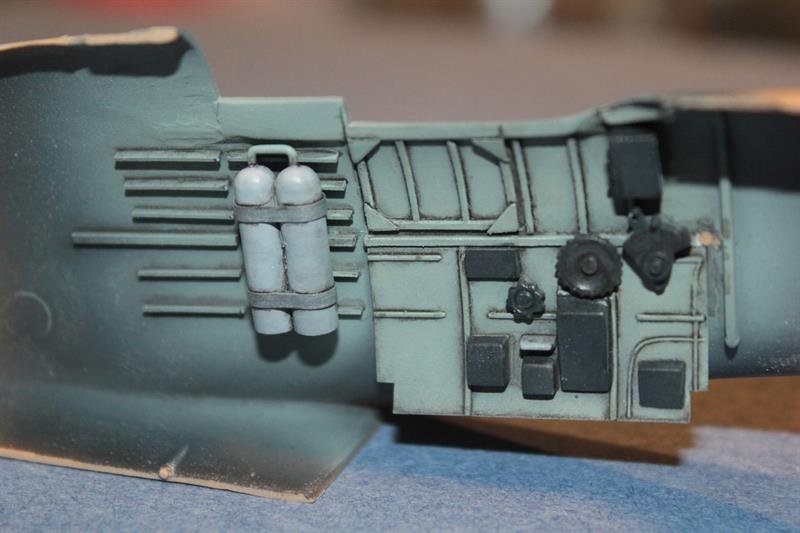
THE FUSELAGE The fuselage was closed up and I've started adding various details such as cowling fasteners and "hood bumps" for the Coffman starters, etc. Missing panel lines and rivets were added as well. At this point, this post is caught up to where I'm at now.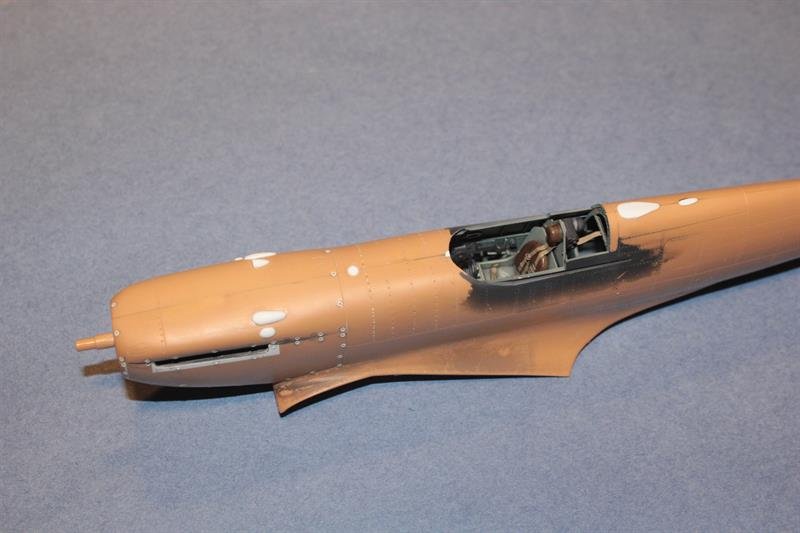

-
Spitfire Mk Ia: 610 Squadron, May 1940
EmperorKai replied to EmperorKai's topic in LSM 1/35 and Larger Work In Progress
THE WING Probably the single biggest issue with the kit is the lack of wheels wells. As a 10 year old, I was able to land many an aircraft just fine without them, but for this project I decided to include them The radiator and oil cooler were also built up with styrene and leftover photo-etch. The air scoop for the carburetor was also removed so it can be replaced with the Hasegawa scoop.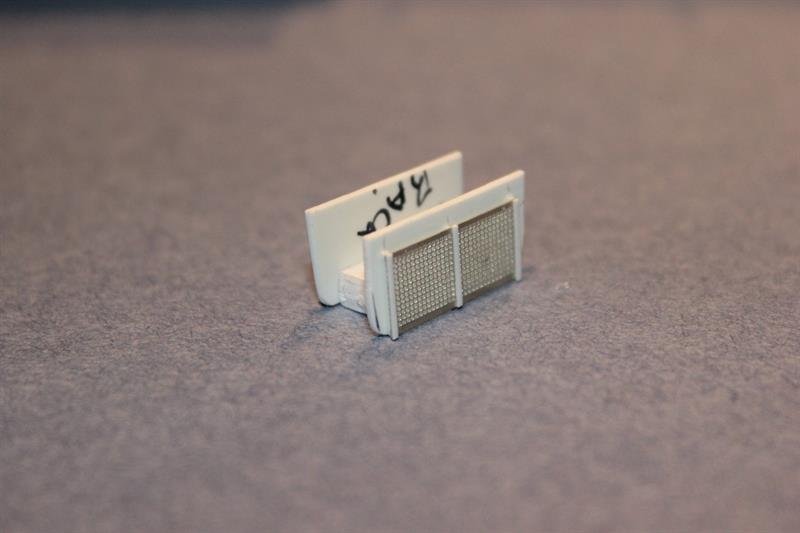
-
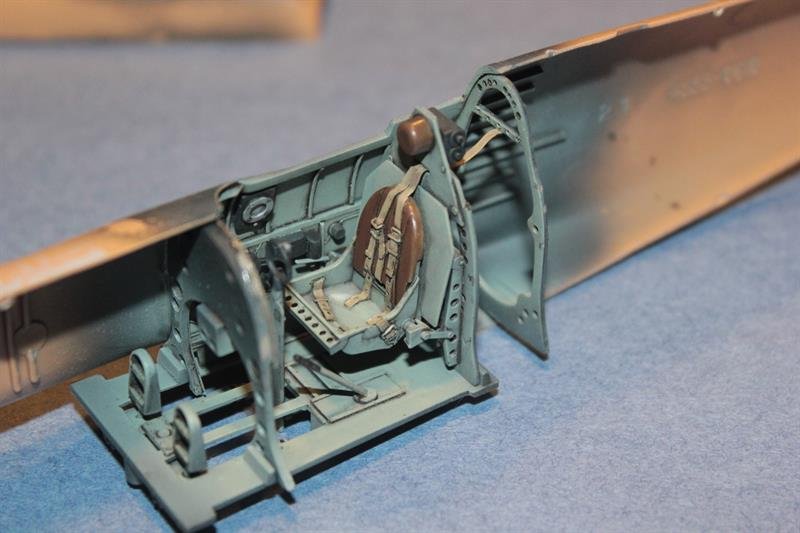
Spitfire Mk Ia: 610 Squadron, May 1940
EmperorKai replied to EmperorKai's topic in LSM 1/35 and Larger Work In Progress
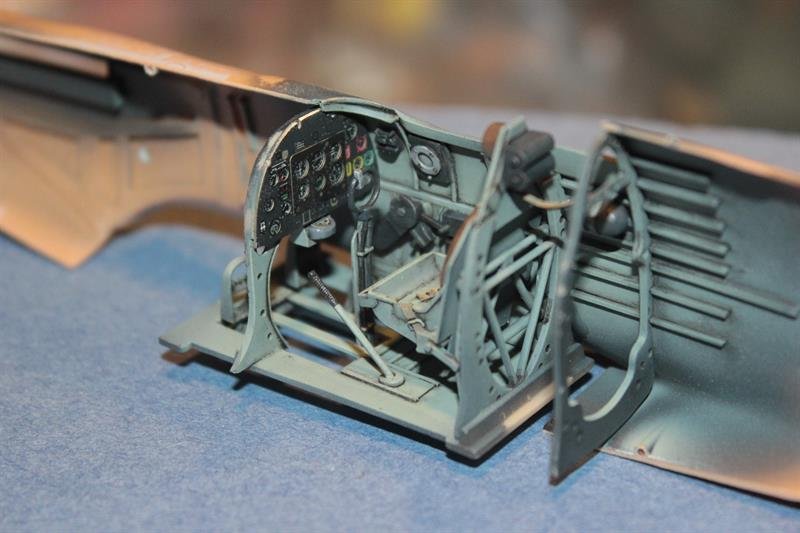
THE COCKPIT The Revell cockpit is also typical of the era, so the Hasagawa cockpit was fitted and embellished with a Yahu instrument panel. A CMK-Quickboost seat was also added. Strip-sheet styrene was added to flesh out the fuselage and various other details.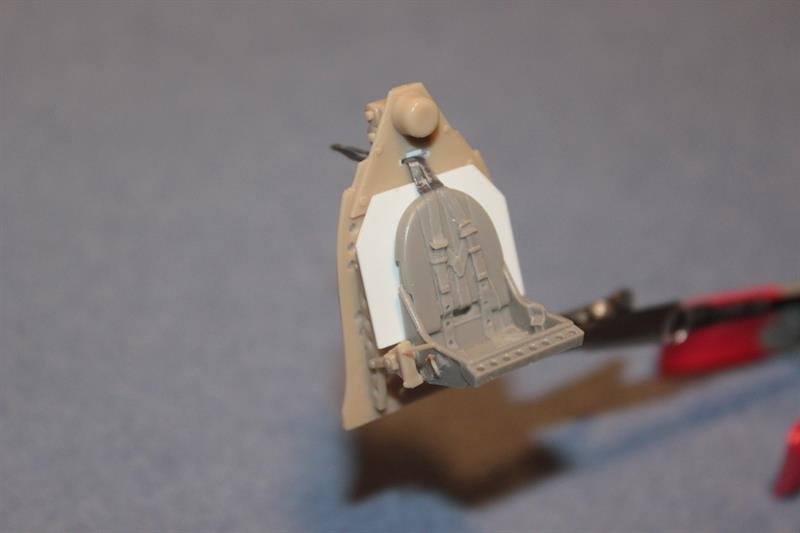
- 89 replies
-
- 10
-

-
Spitfire Mk Ia: 610 Squadron, May 1940
EmperorKai replied to EmperorKai's topic in LSM 1/35 and Larger Work In Progress
Thanks Mikester! -
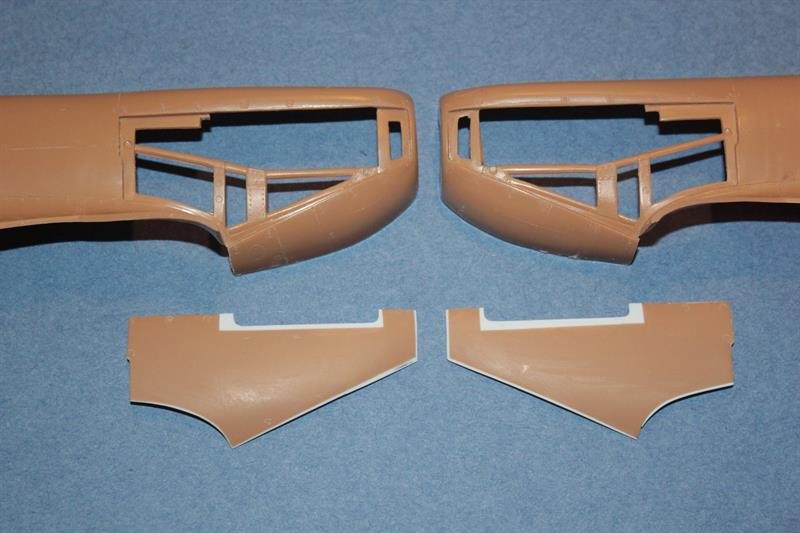
Spitfire Mk Ia: 610 Squadron, May 1940
EmperorKai replied to EmperorKai's topic in LSM 1/35 and Larger Work In Progress
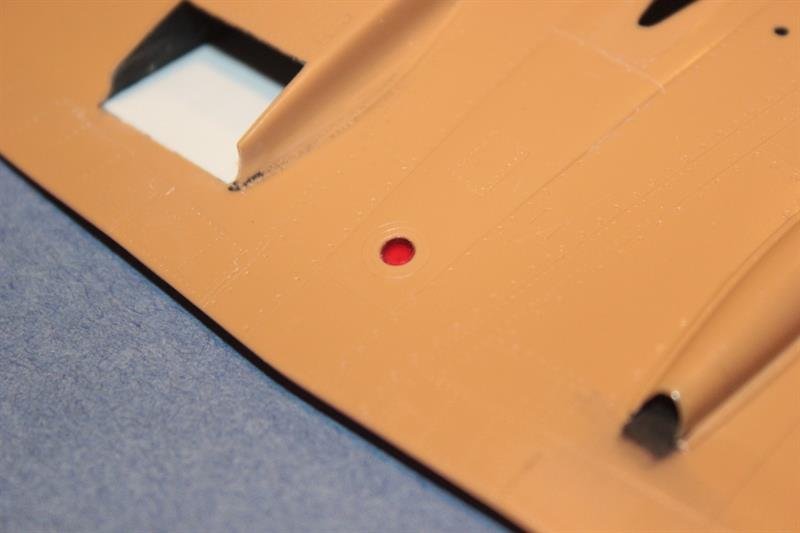
Another fit issue encountered was the engine panels. One of the signatures of the the Revell kits were panels that exposed engines and moveable control surfaces. At the time, and to a model-building kid, these features were awesome. However they also pose accuracy and fit issues. In the case of the Spitfire, the panels are undersized. I also found that the opening for the exhaust stacks are different sizes (!). These were corrected with styrene as well.