
FME erk
-
Posts
518 -
Joined
-
Last visited
Content Type
Profiles
Forums
Events
Gallery
Everything posted by FME erk
-
Lancaster ND644 in 32nd scale
FME erk replied to FME erk's topic in LSM 1/35 and Larger Work In Progress
So after a couple o nights work we have this . . . Window blanks fitted and covered with Mr. Surfacer More to come . . . Ian.JPG.3f66d0c18a0dba0073c372ab9c4f6170.JPG)
.JPG.c6b5ed28288031040583db57de342a2a.JPG)
-
Well it served on American airfields here in England but not with the RAF (not that that will stop people ) but I think its a nice inclusion for a scene . . . https://www.airfix.com/uk-en/shop/new-for-2021/austin-k2-y-ambulance.html I may be tempted to get one if only to convert to a 30cwt lorry dont tell anybody Ian
- 1 reply
-
- 2
-

-
Tamiya F-4J VX-4 „Black Bunny“
FME erk replied to Kaireckstadt's topic in LSM 1/32 and Larger Aircraft Ready for Inspection
Thats dedication for you . . . . when a man wants to put on 400 decals, 400 ? Black gloss can be a killer but you got it licked . . . Turned out really well great effort Kai Ian -
Lancaster ND644 in 32nd scale
FME erk replied to FME erk's topic in LSM 1/35 and Larger Work In Progress
Phil I believe the repair depot you mentioned was at Bracebridge Heath, still a couple of the big Belfast truss hangars there in use by a Lincoln haulage company. The windows were taken out on the production line around November 1943 . . . Ian -
Lancaster ND644 in 32nd scale
FME erk replied to FME erk's topic in LSM 1/35 and Larger Work In Progress
So, last night I started a major part of the spec for my particular aircraft. All the fuselage windows barring the W/op's needs to be eliminated. I dare say most modellers would put in the kit windows provided and smooth over with some filler ? I prefer to put in pieces of plasti-card and to that end I started to square off the windows to make it that bit easier to put pieces in. 2nd photo shows some measurements . . . That will keep be busy for a couple of nights . . ZZZ zz Ian.JPG.83326b3bba0eb65f257d811bab09f52d.JPG)
.JPG.c95bbe5e7c37961f8e32f76b98f8c030.JPG)
-
Lancaster ND644 in 32nd scale
FME erk replied to FME erk's topic in LSM 1/35 and Larger Work In Progress
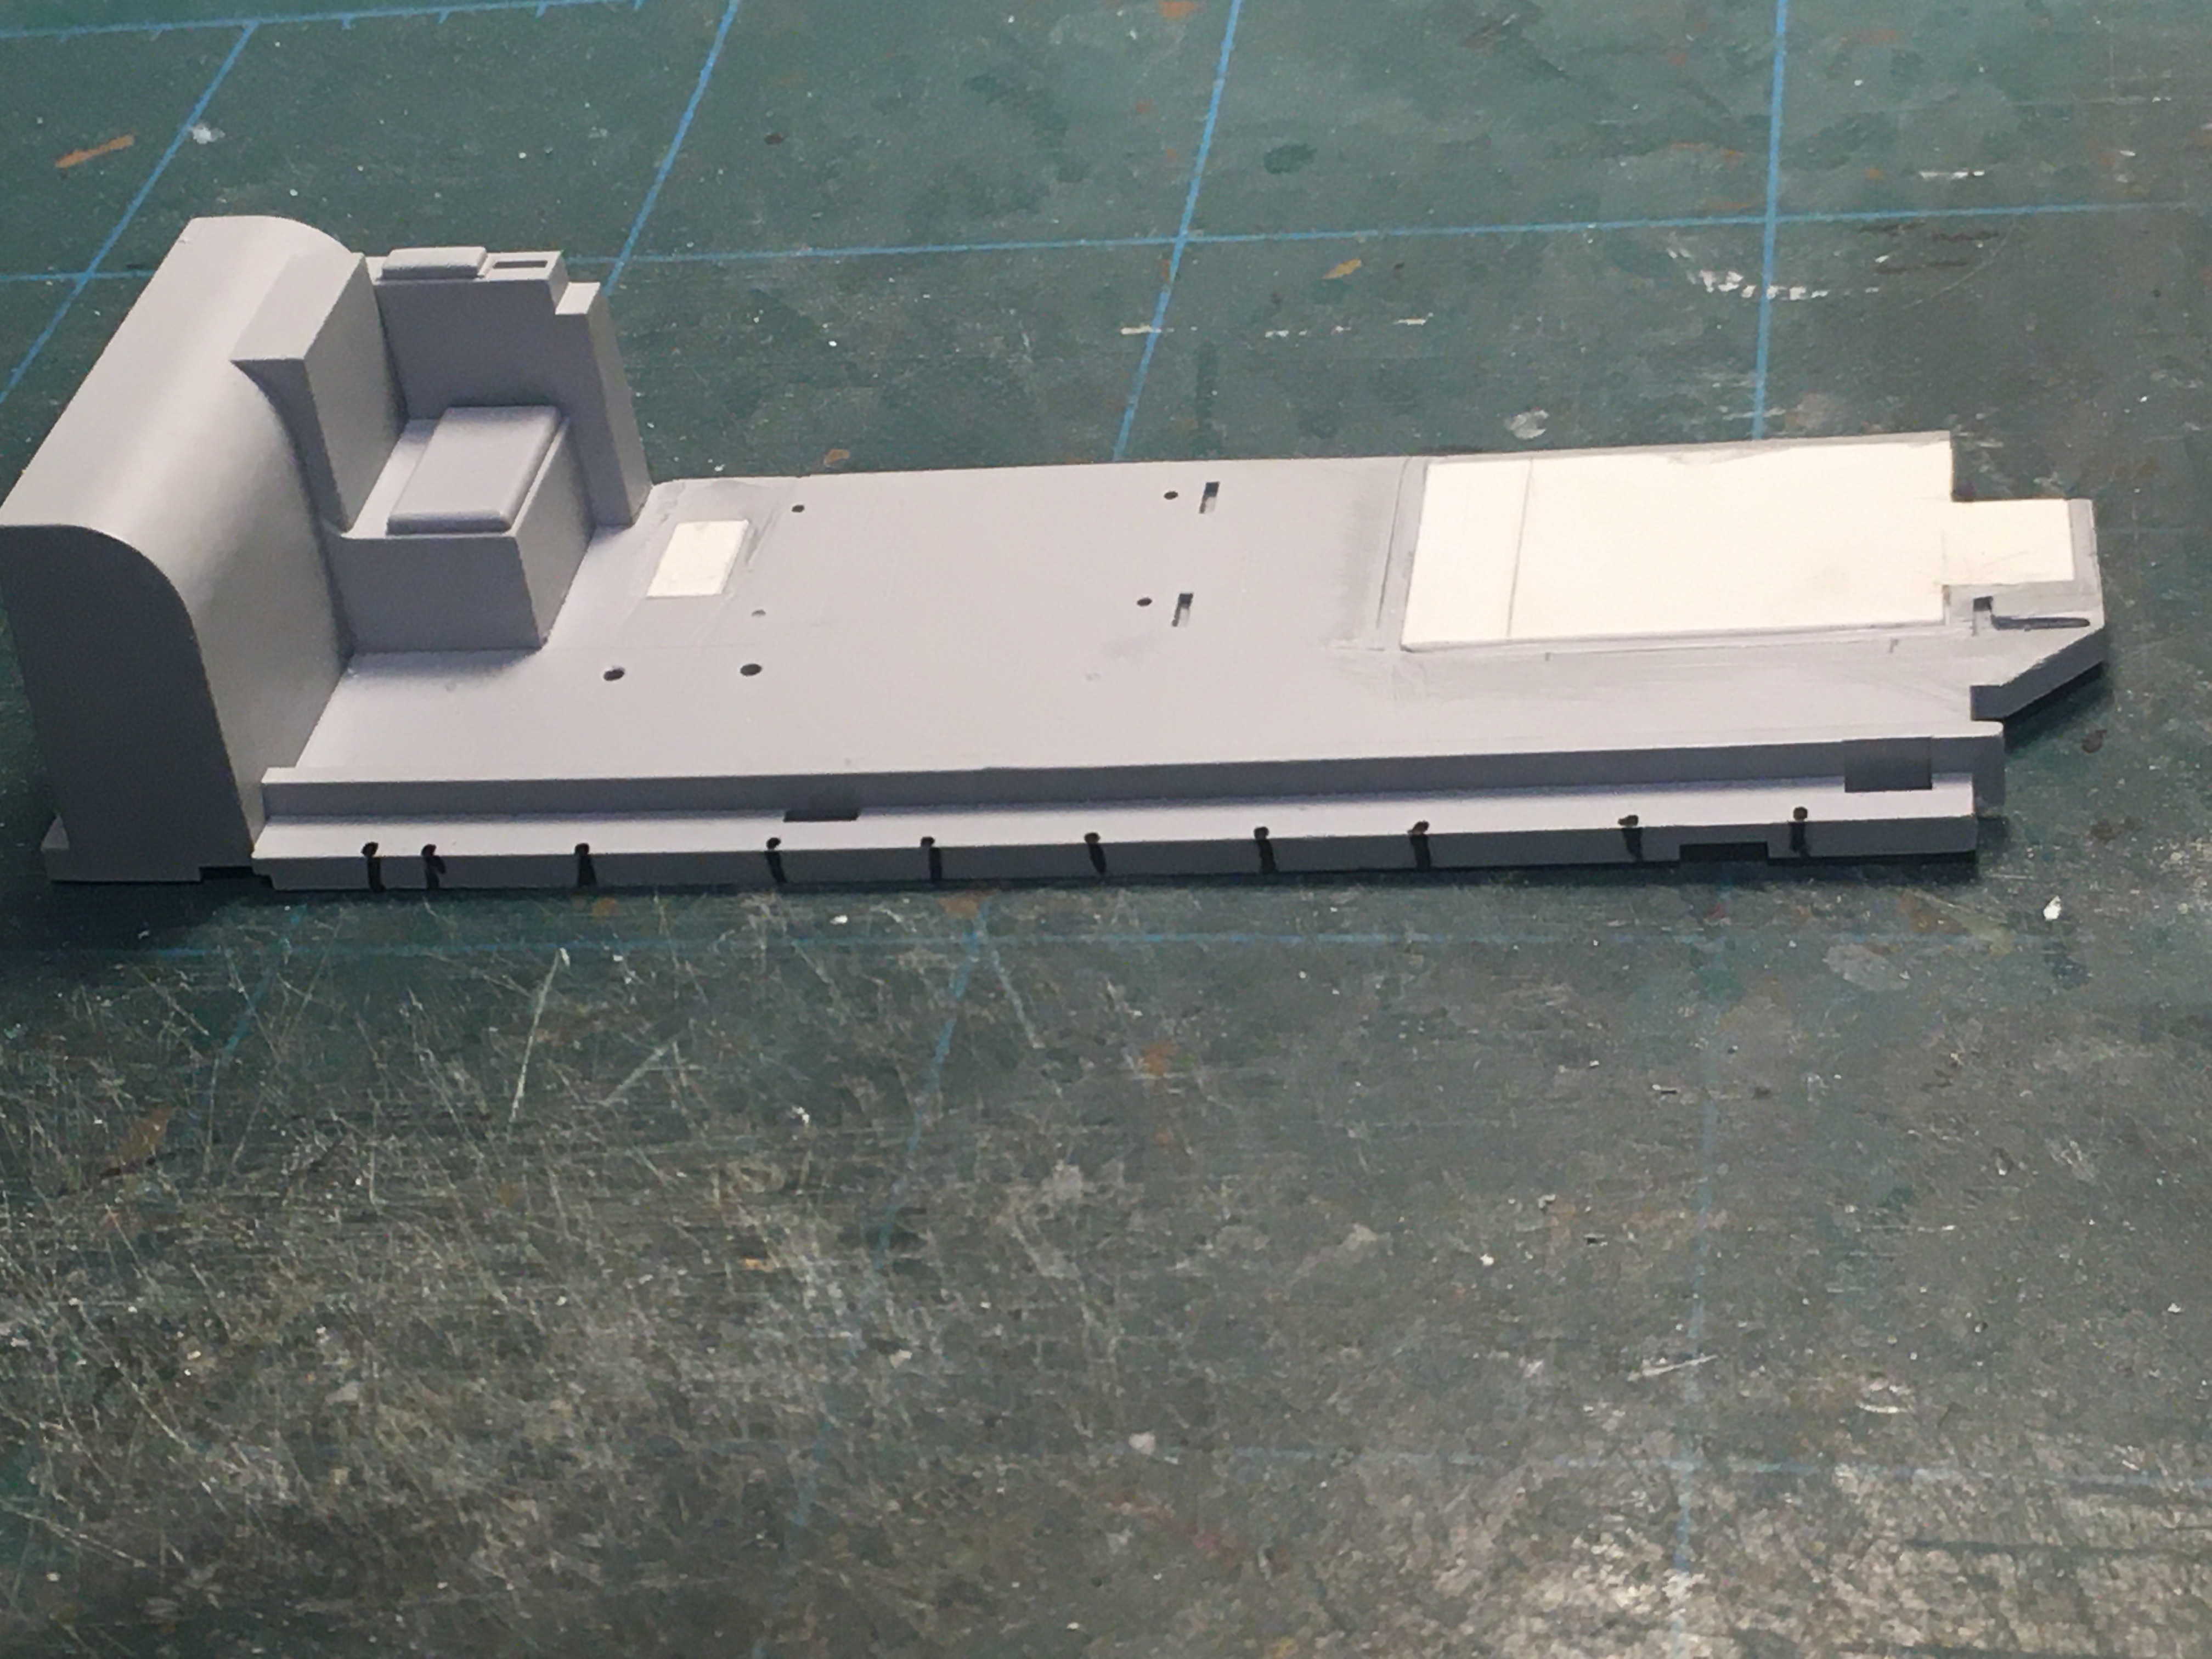
Good evening Chaps Another modification that is required is the lowering of the pilots platform. Apart from his seat being to high compared to the window of the cockpit, its also the wrong size so that too will require some modifications. The pilots platform was cut off flat to the cockpit floor and the hole filled with plasti-card. I also cut off the battery pack near to the W/op's seat as I intend to put down a riveted floor, just to make it look better . . . bye for now Ian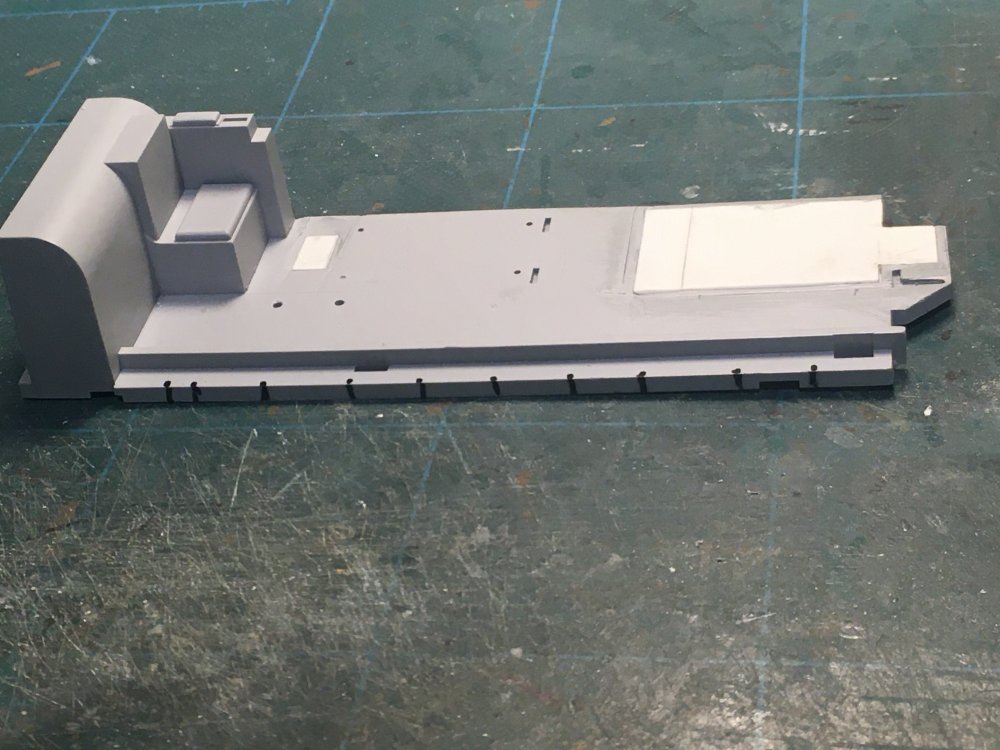
-
Unbelievable work so far Ron . . . . and all from scratch
-
Lancaster ND644 in 32nd scale
FME erk replied to FME erk's topic in LSM 1/35 and Larger Work In Progress
. . . and thats why we do it Kai I want to spend the time making the alterations cos for me, it will be the ultimate Lancaster kit. I too have spent £'s on after market stuff and if you include the cost of the vehicles to display with the aircraft when it finished . . . Some of the alterations probably are not required cos most members of the public that view it wouldn't appreciate the alterations. I not saying they wouldn't appreciate the size and look of the aircraft cos it is an eye catcher but Us modellers know that some kit dont 'fall together' and only we truly appreciate the workings that go into turning a pigs ear into a silk purse . . . Ian -
Lancaster ND644 in 32nd scale
FME erk replied to FME erk's topic in LSM 1/35 and Larger Work In Progress
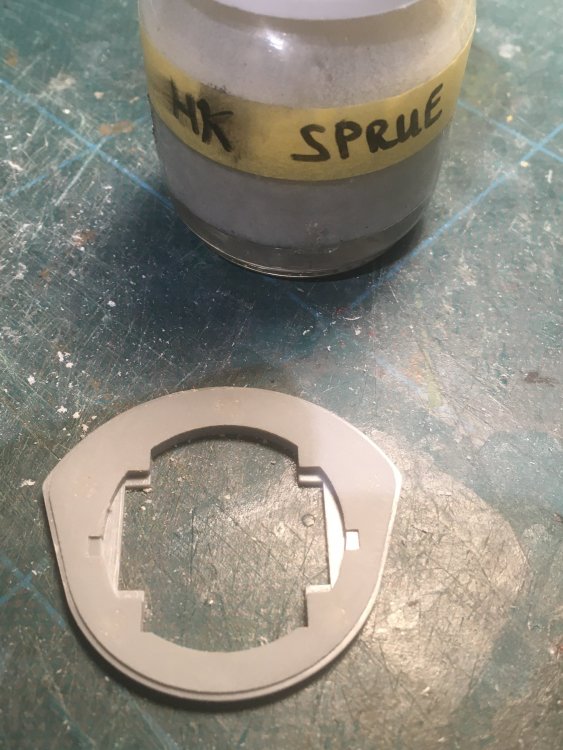
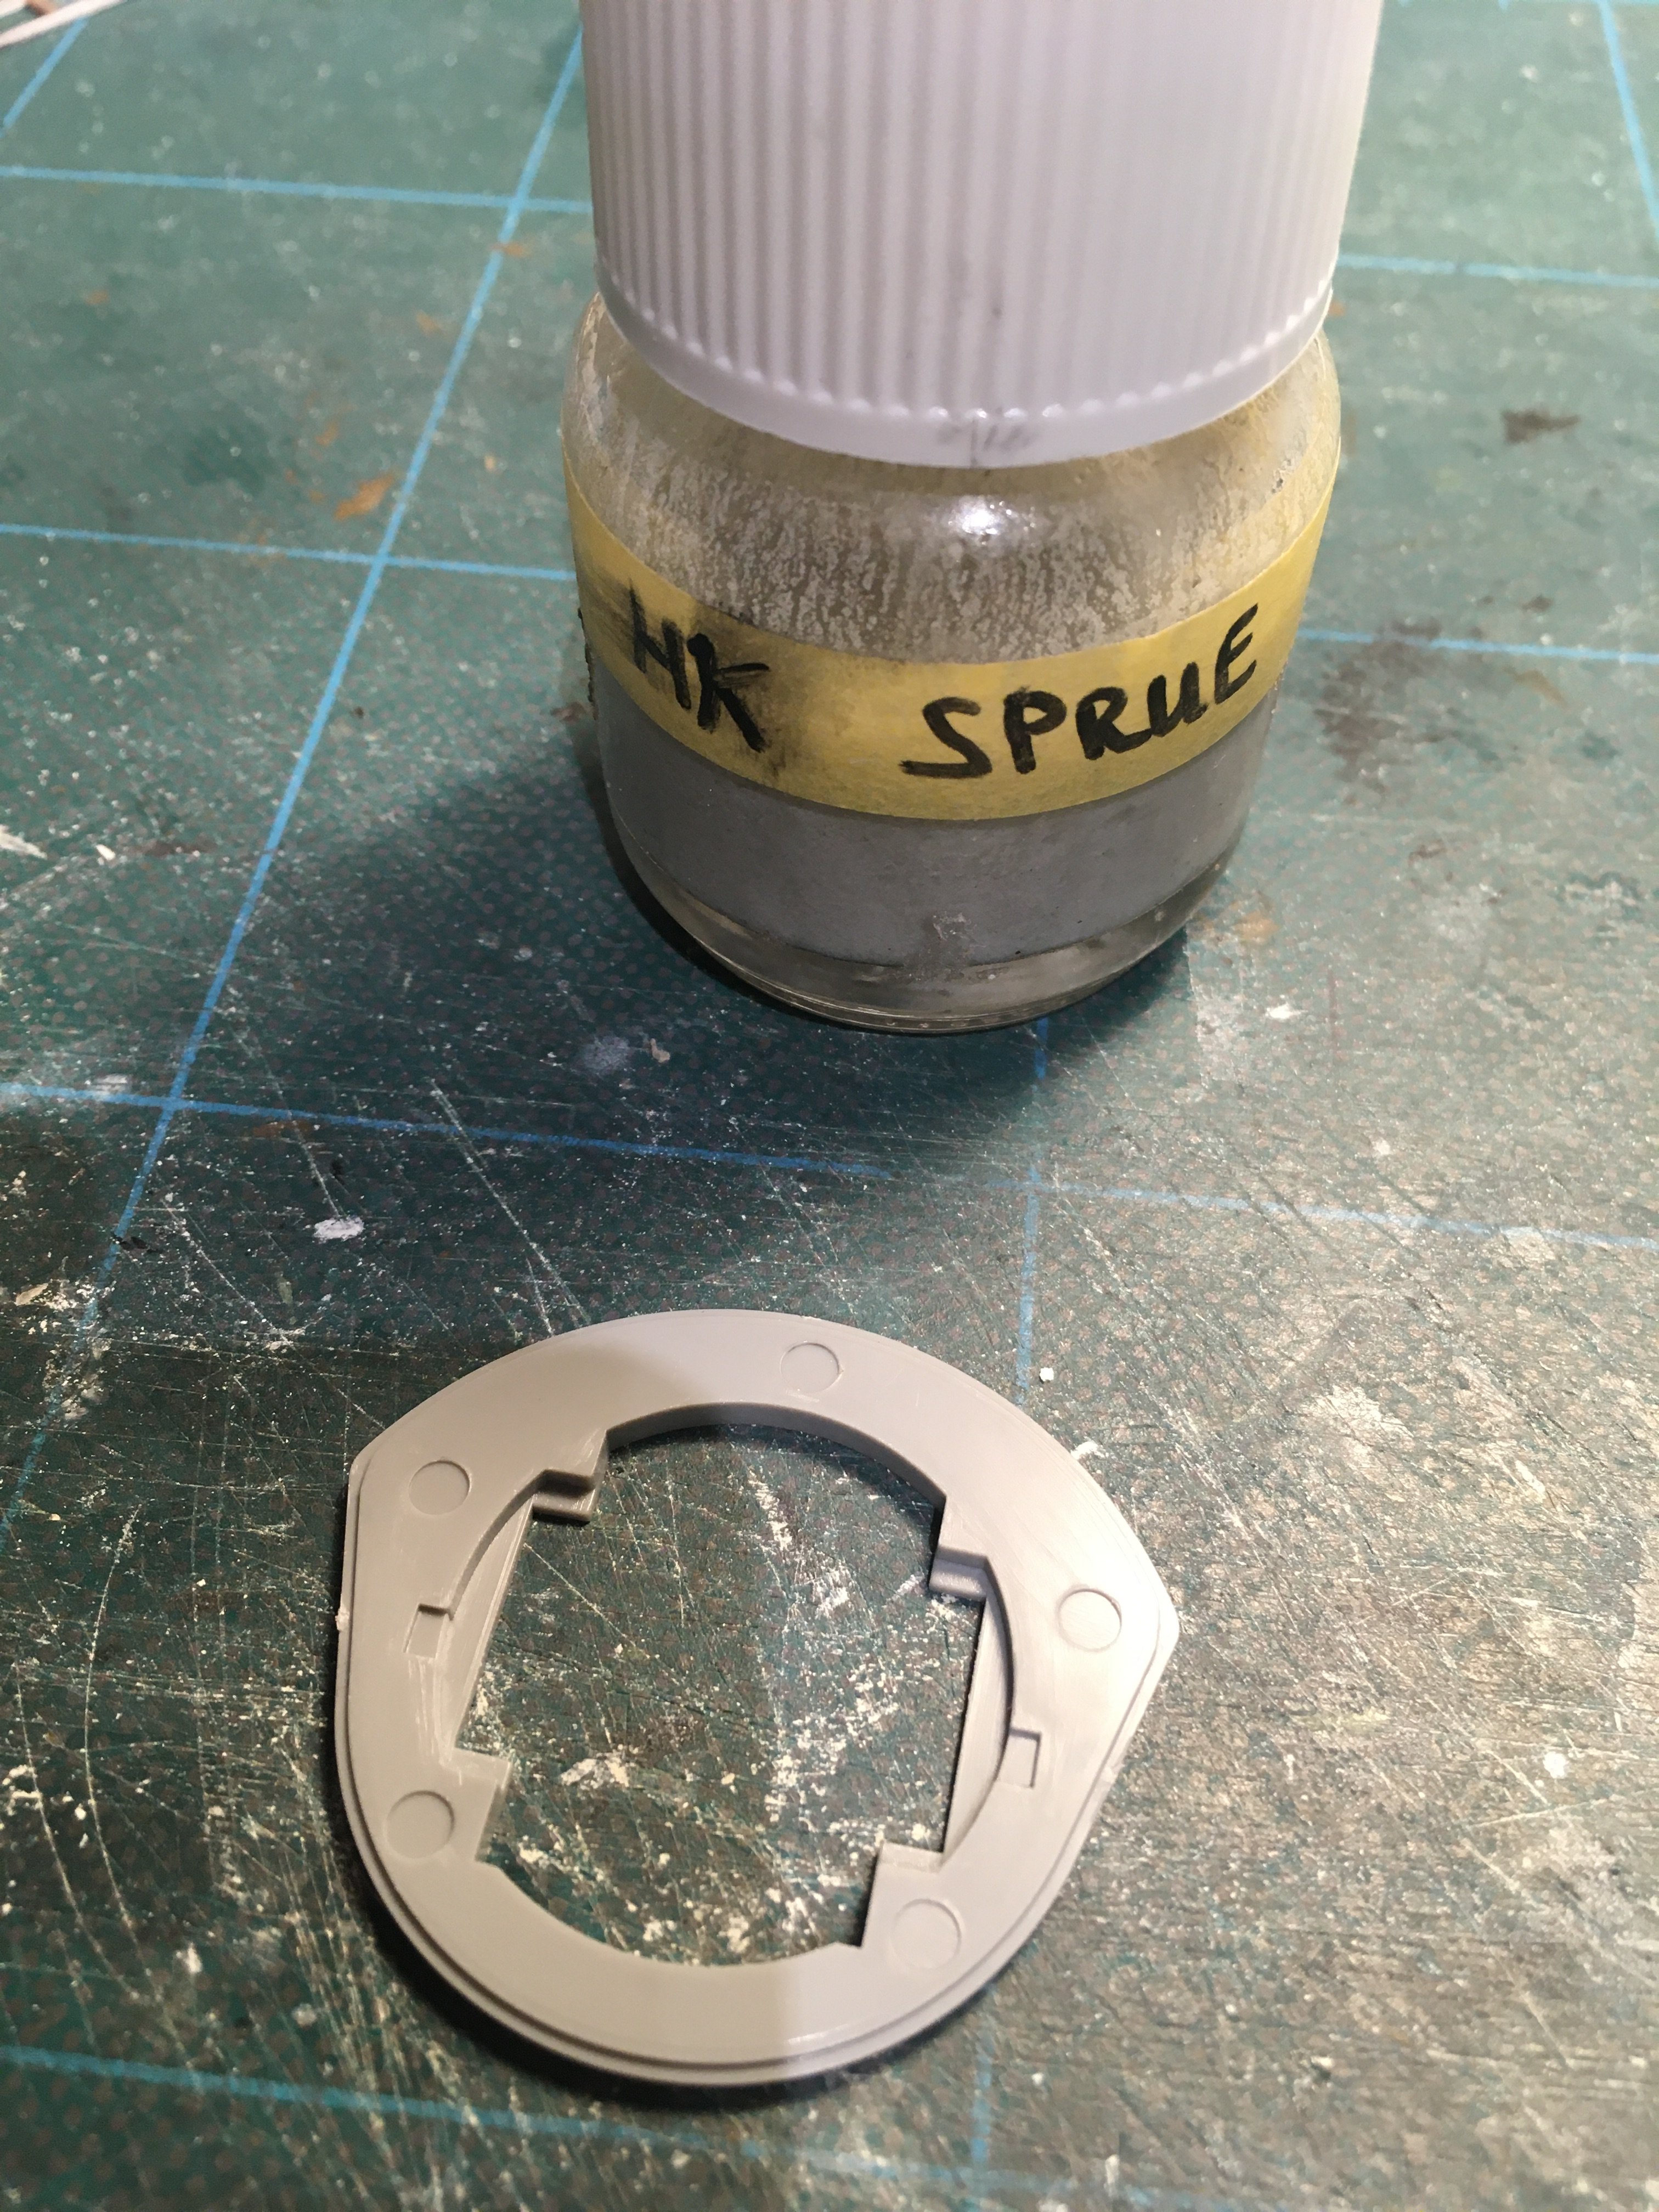
There are so many small jobs that are required to be done in order to obtain the very best out of the kit. The front turret is quite prominent and one can see into it so to that end, the five Sink marks needed to be filled. I made up a pot of Sprue glue made up of the HK tags removed from the fuselage . . . Another error that I have discovered are the side engine cowlings have a square panel on them. I haven't seen this on any wartime aircraft photos and it isnt clear on postwar aircraft either so I'm not sure where they have come from. Again Sprue glue has been put to use . . . I'll keep looking in the box for some more of the smaller jobs to add to the list
-
Lancaster ND644 in 32nd scale
FME erk replied to FME erk's topic in LSM 1/35 and Larger Work In Progress
Just a note to say that I have removed the ejector pin marks off the bomb and the undercarriage doors, all 38 of them Also removed the Flare chute exit molding on the starboard side just behind the bomb bay Going to give it a few more days before I start rubbing down Mr. Surfacer off the wings . . . Ian -
Lancaster ND644 in 32nd scale
FME erk replied to FME erk's topic in LSM 1/35 and Larger Work In Progress
I'll watch out for that. I must admit the front of the cockpit canopy does look a bit 'pointy' . . . -
Lancaster ND644 in 32nd scale
FME erk replied to FME erk's topic in LSM 1/35 and Larger Work In Progress
Carl there are no inner doors and I dont want to run to the expense of a massive PE set that covers the whole of the bomb bay and doors . . . thanks for asking Ian -
Lancaster ND644 in 32nd scale
FME erk replied to FME erk's topic in LSM 1/35 and Larger Work In Progress
Kia I did see that when you posted it, I couldnt tell from the above photo if I had seen it. I think its a splendid build and there is much to be admired . . . Quick question: What did you use to glue the cockpit blister onto the canopy ?? Ian -
Lancaster ND644 in 32nd scale
FME erk replied to FME erk's topic in LSM 1/35 and Larger Work In Progress
Kia that actual photo is what I have as reference . . . Perhaps I mis-read what you said, as we were talking about early aircraft having the trailing outlet on the starboard side and i thought you were thinking "In the ED-Series at least the 464-Provisionings also had that feature." Anyhow, I'm glad we cleared that up . . . Ian PS Would like to see a photo of your Lancaster build . . .. -
Lancaster ND644 in 32nd scale
FME erk replied to FME erk's topic in LSM 1/35 and Larger Work In Progress
Kia I dont think they did so I would be interested in seeing the photo that shows that in position . . . Gibson aircraft certainly had the trailing aerial on the Port side You are right though about finding as many pics as possible of the aircraft you want to model . . . Ian -
Lancaster ND644 in 32nd scale
FME erk replied to FME erk's topic in LSM 1/35 and Larger Work In Progress
Kai I do believe it was only on those aircraft with the serial no. starting with the letter 'R' and 'W'. You are right when you say its on the DV range but to which aircraft it changed will probably be never known . . . Ian -
Lancaster ND644 in 32nd scale
FME erk replied to FME erk's topic in LSM 1/35 and Larger Work In Progress
Sorry Harv wrong format . . . .# Should be able to see it now -
Lancaster ND644 in 32nd scale
FME erk replied to FME erk's topic in LSM 1/35 and Larger Work In Progress
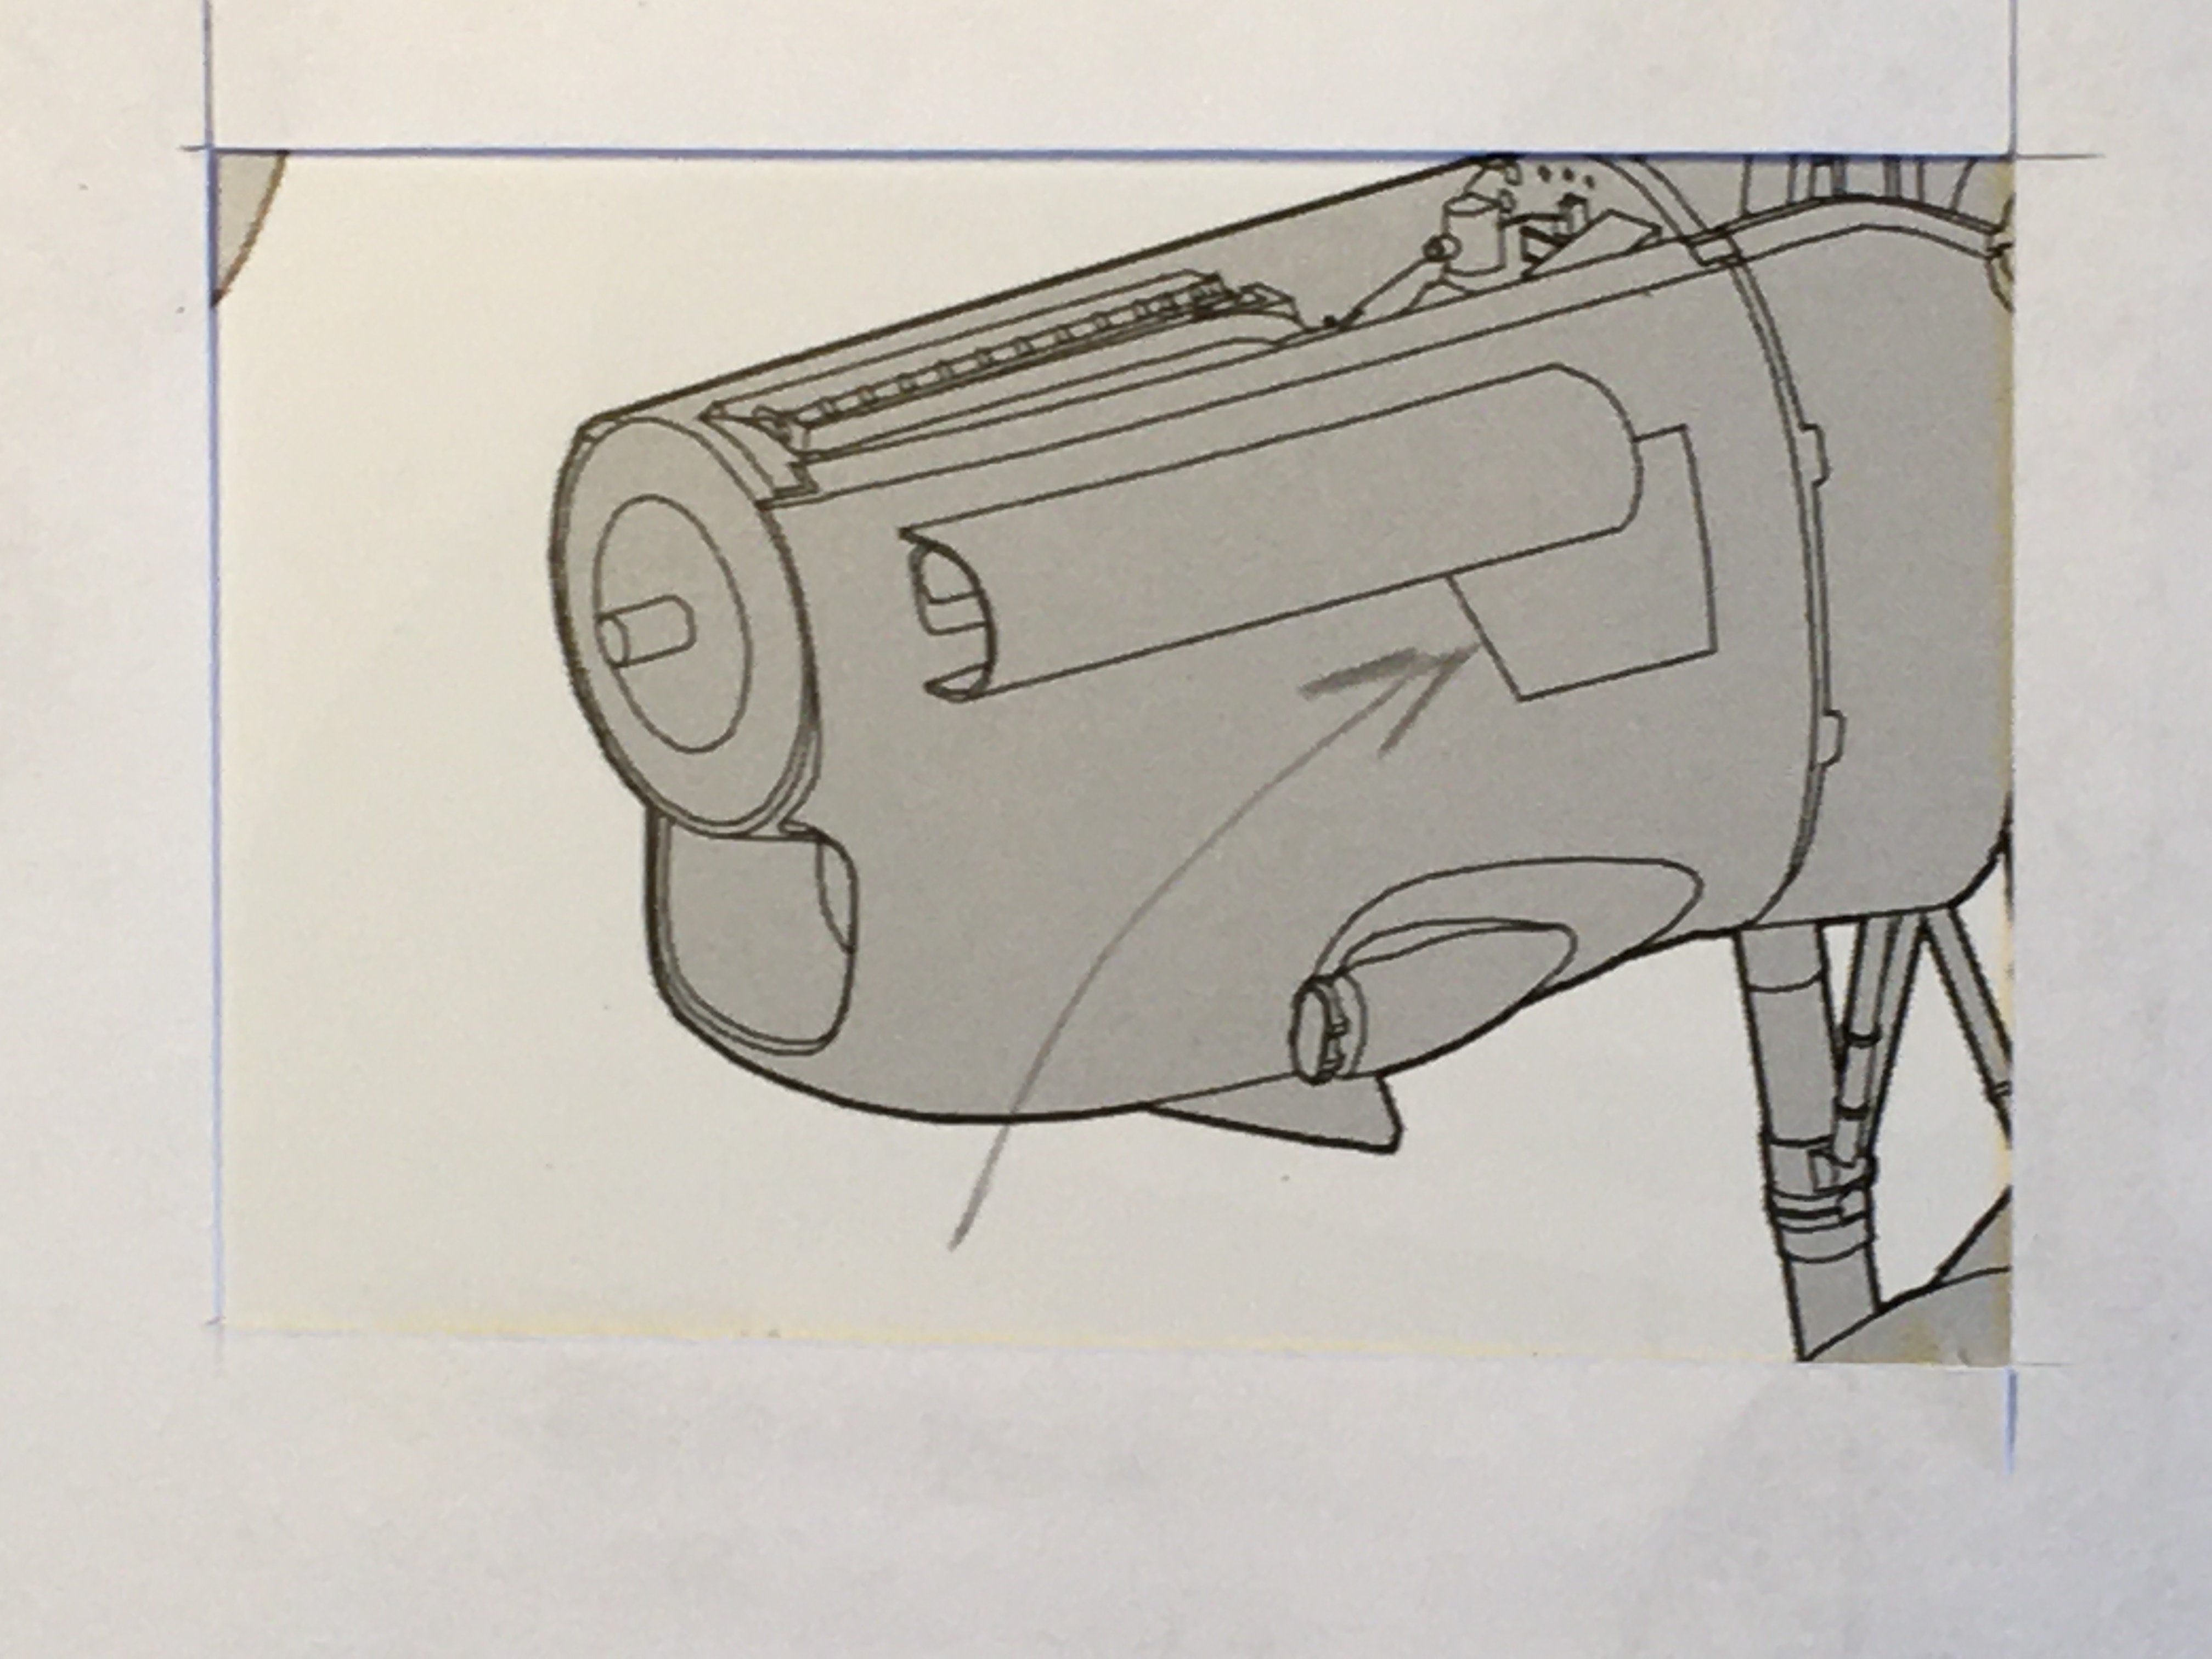
Another item on the 'To Do ' list . . . the removal of 22 ejector pin marks within the bomb bay doors . . . They are a good 12 inches long . . . plenty of space in there Probably get away with using a sanding stick Ian.thumb.JPG.fae5335082387bd43af030e1867caf92.JPG)
-
Lancaster ND644 in 32nd scale
FME erk replied to FME erk's topic in LSM 1/35 and Larger Work In Progress
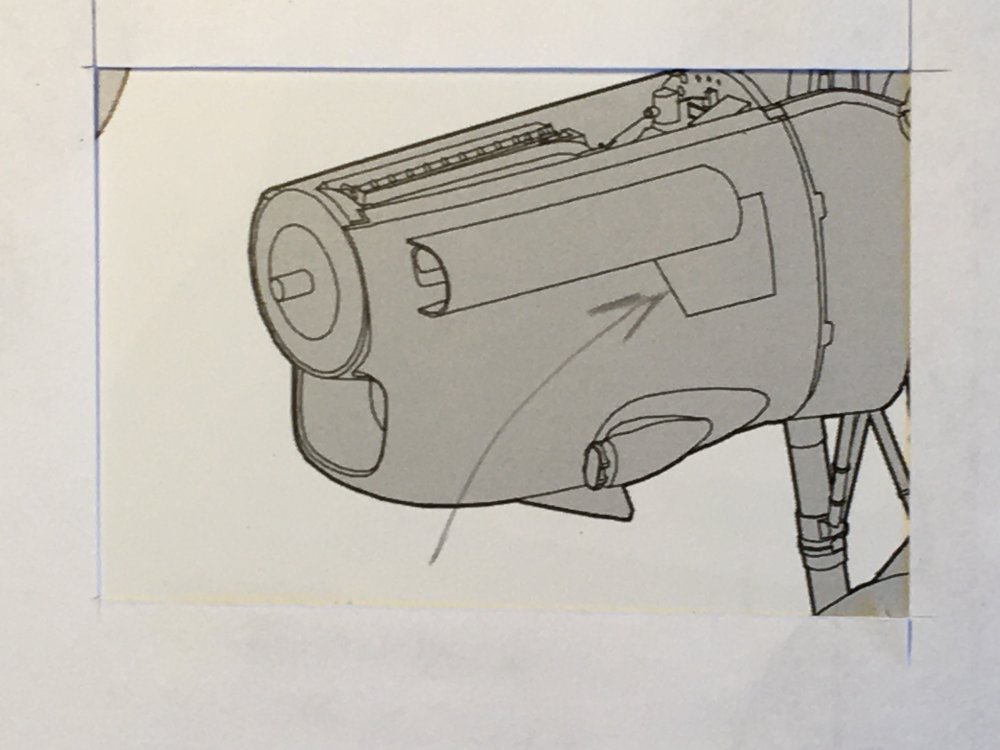
So, I have had look at the external parts of the kit and TWO obvious errors. There is a second dinghy stowage hatch in the PORT wing and also on the starboard wing, underneath so not so obvious, there is a Second set of landing lights. To eliminate these I have masked and applied some 'Mr. Surfacer'. These will be left for a couple days to cure . . . One other item to be eliminated is the trailing aerial outlet on the starboard side just near to the bomb-bay. I have known about this for some time and none of my previous Lancaster builds carry this . . . Looked also into the bomb bay racks, they are covered with ejector pins marks. I intend to have the bomb doors open so its inevitable that they will need to be removed, SOME have been highlighted . . . I'm back to work tomorrow so more progress reports as I get these things done . . . Ian -
Lancaster ND644 in 32nd scale
FME erk replied to FME erk's topic in LSM 1/35 and Larger Work In Progress
You are so right John and you echo the thoughts of many, for the price of the thing there shouldn't be so many errors within the kit . . . Its my goal to put them right as I see fit . . . Ian -
Lancaster ND644 in 32nd scale
FME erk replied to FME erk's topic in LSM 1/35 and Larger Work In Progress
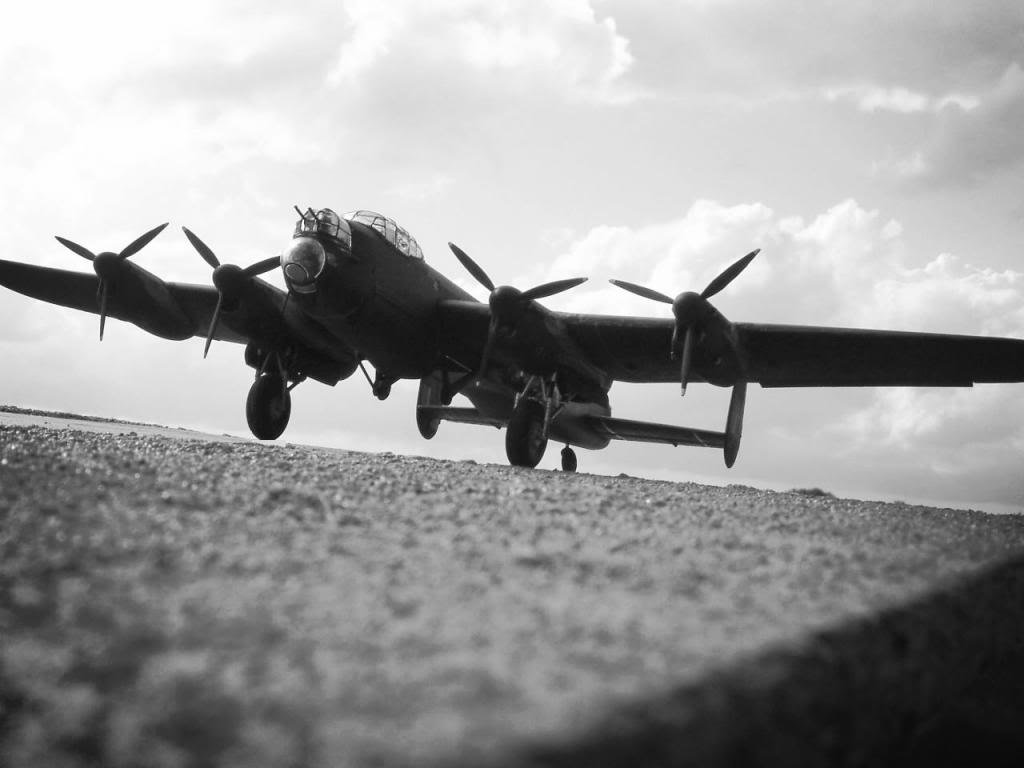
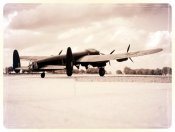
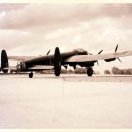
Where to start . . . the box comes compact with sprues The comprehensive instruction book containing 44 pages, I will photo each page as I build to point out amendments etc Some of the after-market bits, my choice again to improve the overall appearance. Sadly the aircrafts instrument panel is just a molded representation of the dials, there is no decal to place upon it Just to give you an idea of the size of the fuselage, this is it on my shelf measuring a full 25 inches and excluding the bomb-aimers nose blister Research over many years has resulted in the superb book and the aircraft profile . . . The aircraft was one of two lost from 100 Squadron based at RAF Station Grimsby in Lincolnshire during a sortie to Nuremburg 16/17th March 1945 making it the last aircraft lost flying from the airfield. The crew comprised: Pilot: F/O George Dauphinee RCAF F/Eng: F/Sgt.Mervyn Jefery RAF Nav: F/O Bruce Douglas RCAF - POW B/A: F/O William Vale RCAF W/Op: P/O Roy Bailey RAF - POW Mid-gun: William Harvey RCAF Rear gun: Lyle Bedell RCAF I knew both Bruce and Roy, I have their stories of the night the aircraft fell to the guns of a night-fighter. The aircraft ND644 Its going to be a journey . . . Ian- 225 replies
-
- 10
-
-

-
Scratch build 1/35th 6W AEC Matador refueller
FME erk replied to FME erk's topic in LSM 1/35 and Larger Work In Progress
I have virtually finished this, need to do the PE for the front windows but as I promised myself I would start the HK Lancaster in the new year I present a couple of photos of the vehicle . . . next time you see this, it should be dispensing fuel to the Lancaster . . . Thanks to all who looked in . . . Ian.thumb.JPG.2005f66429afa5f16ea6fd011732385b.JPG)
.thumb.JPG.84c7e01e63b064aff8f0ed8944199ee7.JPG)
-
Lancaster ND644 in 32nd scale
FME erk replied to FME erk's topic in LSM 1/35 and Larger Work In Progress
Jeff It was a Canadian that was the navigator on this aircraft and only one of the two survivors after being shot down by a night-fighter. -
Lancaster ND644 in 32nd scale
FME erk replied to FME erk's topic in LSM 1/35 and Larger Work In Progress
Thanks Carl for that. I am watching that and I have already had some info from Pete . . . Ian -
Lancaster ND644 in 32nd scale
FME erk replied to FME erk's topic in LSM 1/35 and Larger Work In Progress
There have been numerous photos and reviews of the sprues so unless somebody wants to see specific parts i shall just dive in and start the build, not necessarily in the order of the instructions . . . For me personally, this will be the ultimate Lancaster kit and as such I shall endeavour to produce the best I can. It will be time consuming and no doubt there will be little progress at times but please bear with me . . . I am looking forward to putting the plastic together Ian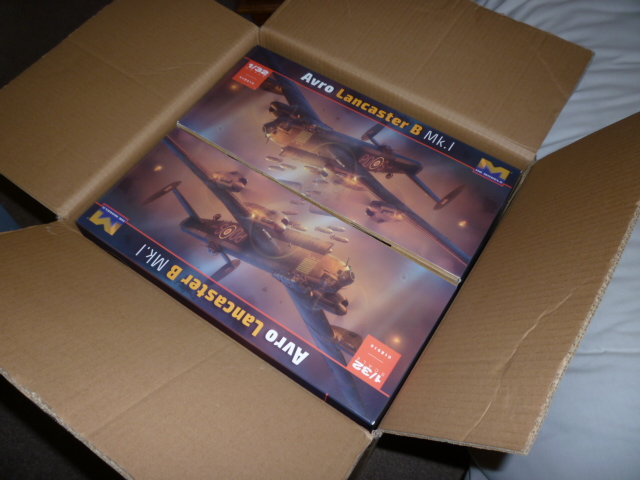

.JPG.92b82da3d97b3289bacc3ad2e62f83c4.JPG)
.JPG.40100588a9ac2fe17111534b356a50d3.JPG)
.JPG.171059562cf8b2c1ba1c70856703e178.JPG)