FME erk
-
Posts
518 -
Joined
-
Last visited
Content Type
Profiles
Forums
Events
Gallery
Everything posted by FME erk
-
Lancaster ND644 in 32nd scale
FME erk replied to FME erk's topic in LSM 1/35 and Larger Work In Progress
Can anybody help who might have done this ? I am trying to work out how to mount the radiator in the engine nacelle without the engine . . . HK have provided the 'dummy' fitting, which they dont mention, but a great idea for fitting the exhausts out of the cowling but I think they forgot about fitting the radiator at the bottom. The rad is fitted with two pins that secure into the bottom of the engine, Y8, but there is no location/slot for the rad to fit into securely by itself within the bottom cowling itself . . . Ian.thumb.JPG.07263512f591b6281b8da5b58b2489b2.JPG)
-
Lancaster ND644 in 32nd scale
FME erk replied to FME erk's topic in LSM 1/35 and Larger Work In Progress
Another mod that is a personal choice is the opening of the bottom cowling on the engines so that you can see the radiator from the rear. The flap fits onto the kit with no issue but I think it just looks better to have it open as per the real aircraft . . . Here is my take on the modification, pretty straight forward Ian -
Lancaster ND644 in 32nd scale
FME erk replied to FME erk's topic in LSM 1/35 and Larger Work In Progress
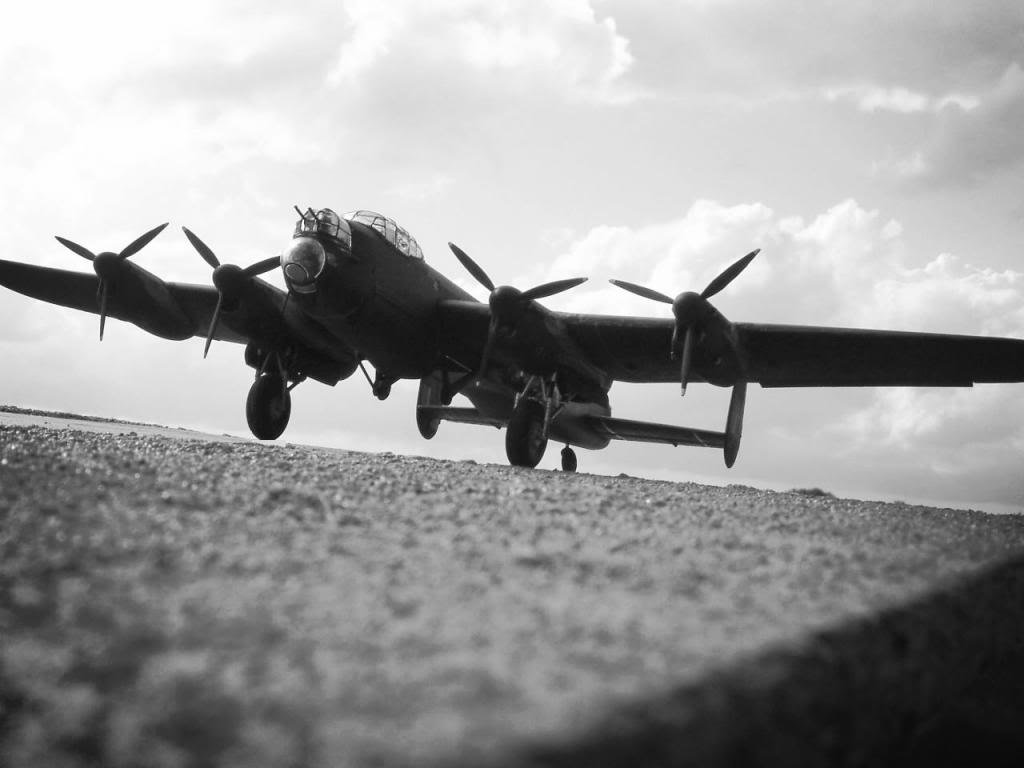
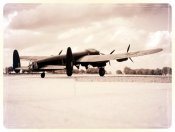
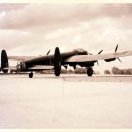
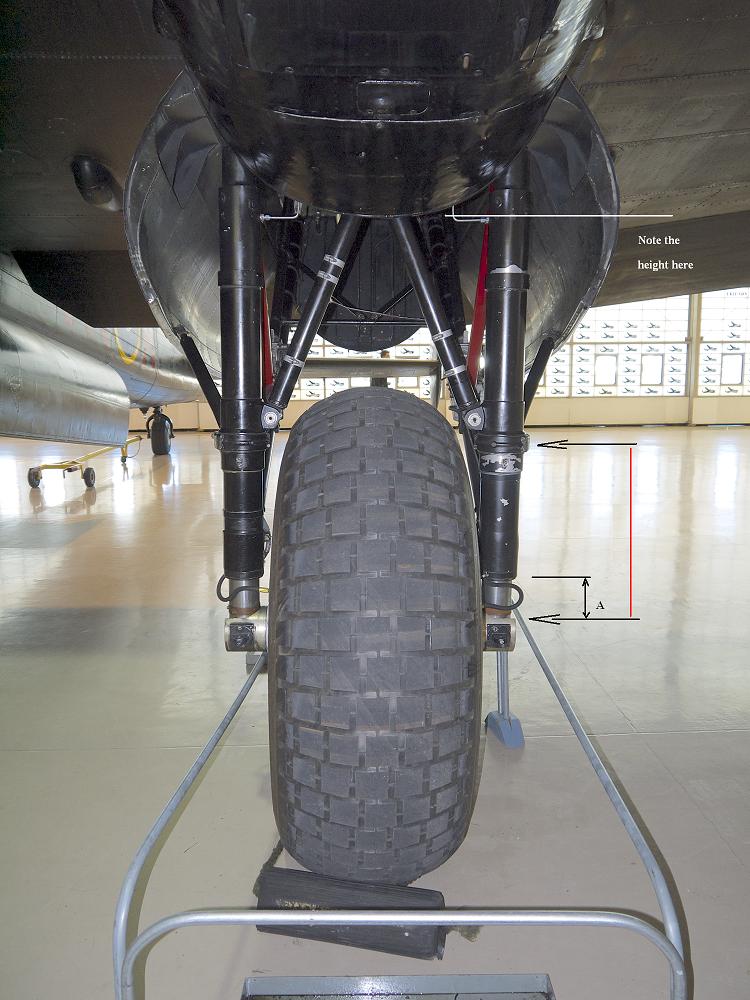
I haven't shortened the legs yet so cant give details but if you look at the actual aircraft and see where this is compared to the bottom of the cowling then compare to kits that have been made you will see that it does need to be shortened . . . . Note the central brace, you cannot see the horizontal cross bar at the top of that brace . . . I hope that helps ??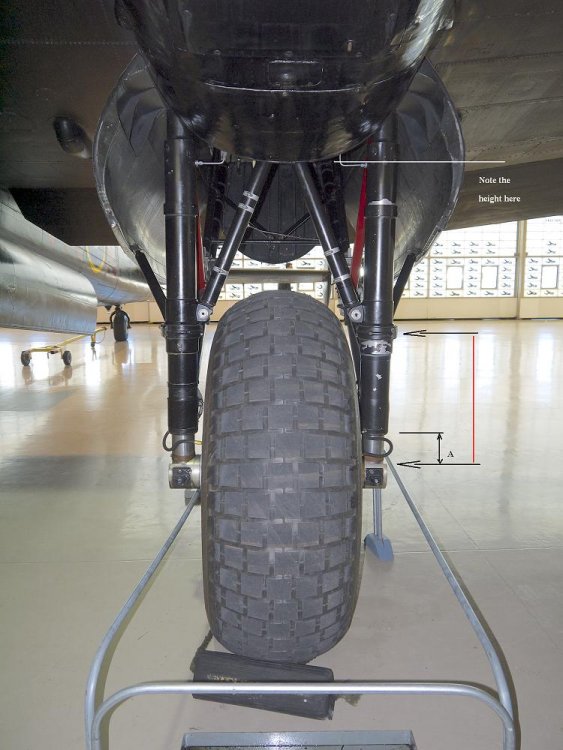
-
Lancaster ND644 in 32nd scale
FME erk replied to FME erk's topic in LSM 1/35 and Larger Work In Progress
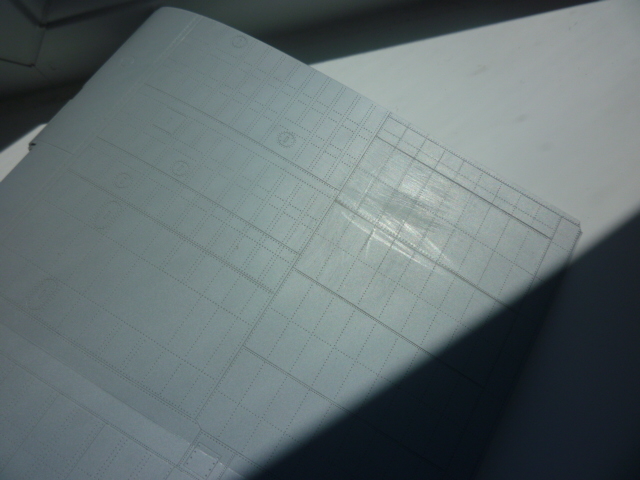
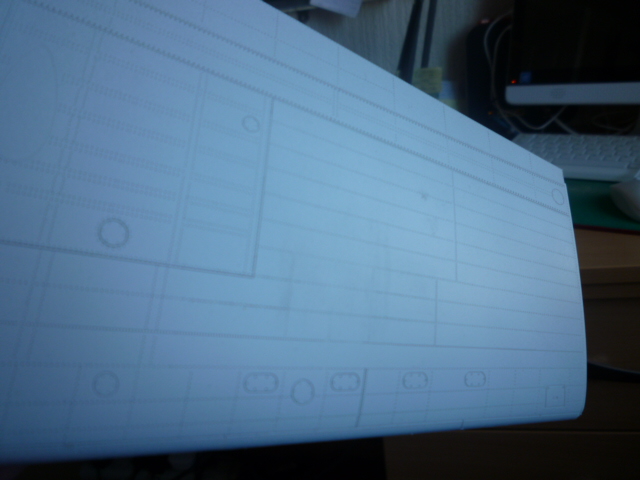
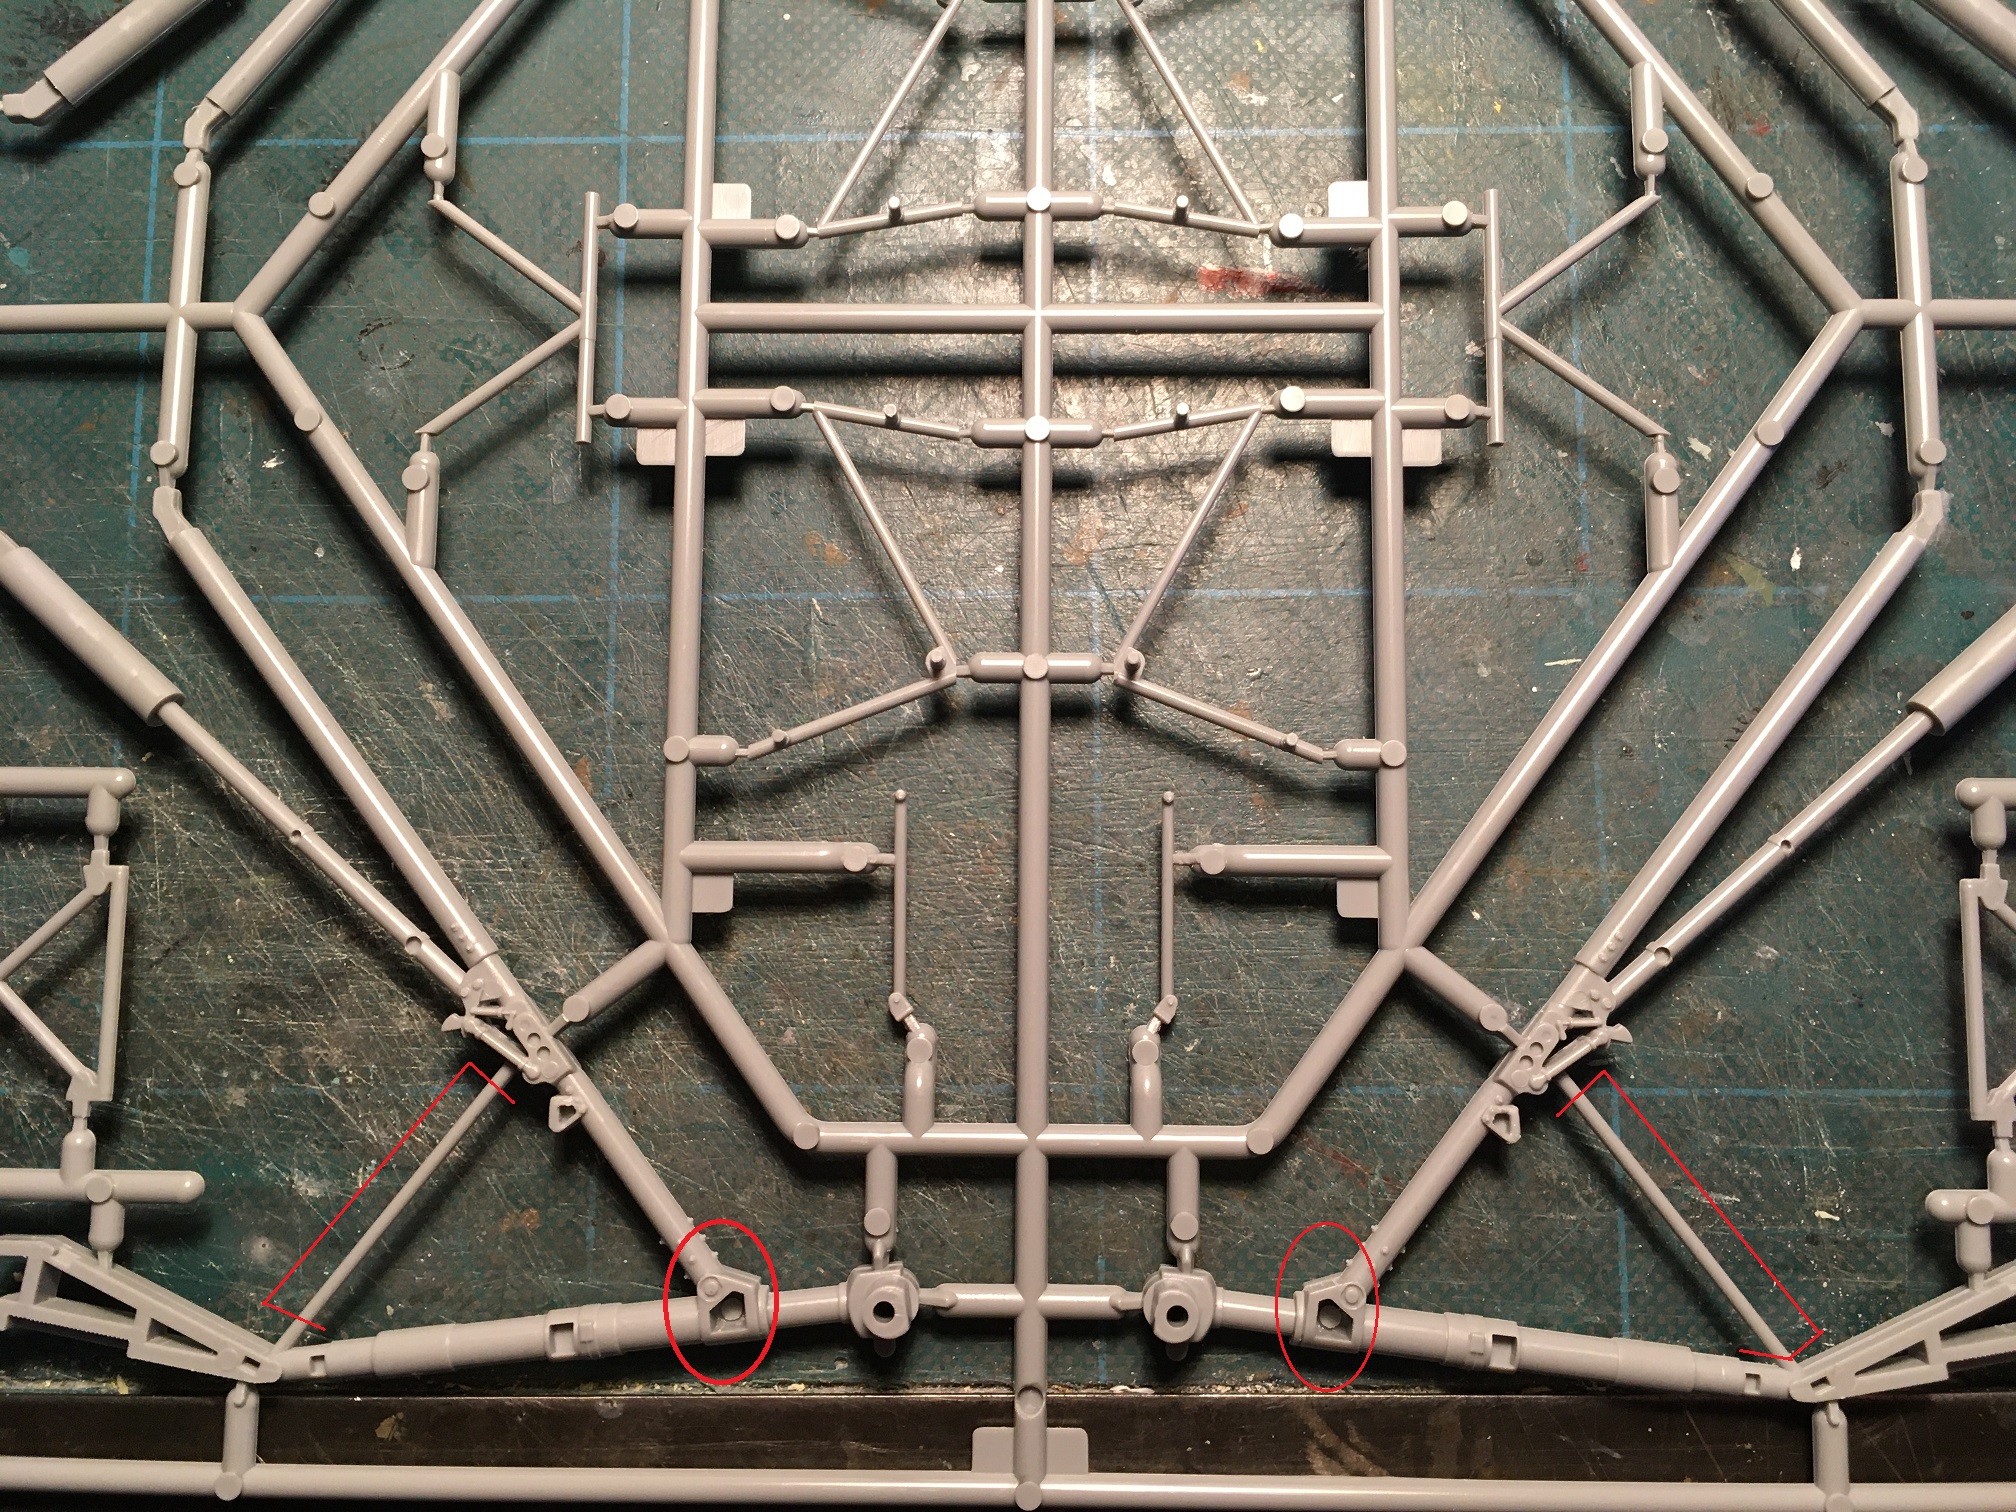
As previously mentioned on the first page, two defects on the wings, the Port upper side had a second Dinghy stowage hatch and the starboard underside has landing lights . . . After applying Mr. Surfacer some weeks ago I have now eliminated both issues and hopefully you will be able to see the results as I hold the pieces in the correct light to photograph them . . . The next thing that wants attention are the undercarriage legs. In the photo you can see the 'hole' in the vertical strut. It would probably support the kit no problem but there shouldn't be such a hole therefore I shall be sinking some sprue glue in there to make good. Also, the 'Non-retracting bar needs removing for I have not seen any photos of this in place on a wartime aircraft, I suspect its used on todays flying examples . . . More to come best regards Ian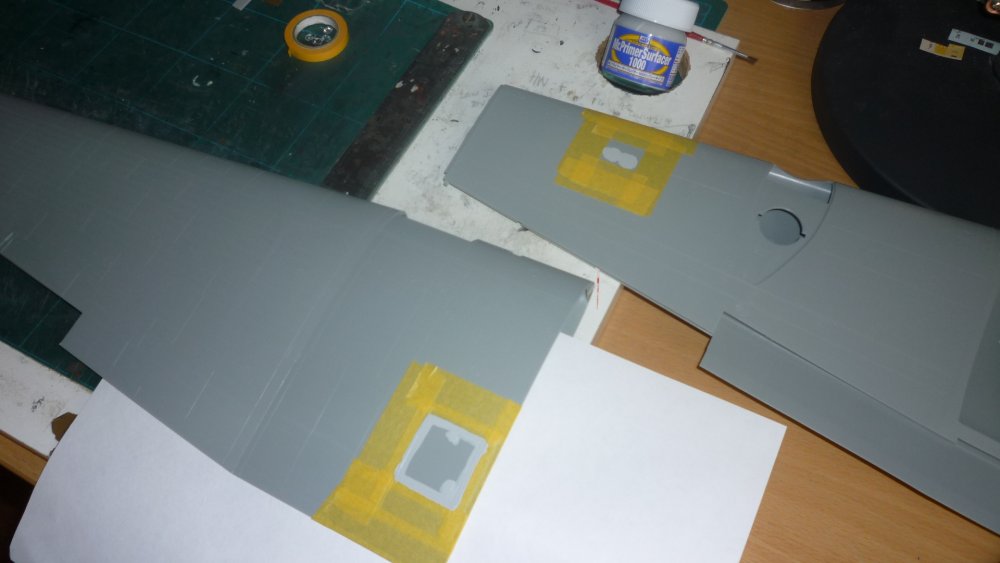

-
Lancaster ND644 in 32nd scale
FME erk replied to FME erk's topic in LSM 1/35 and Larger Work In Progress
Thanks Carl. I look forward to receiving the parts in good time . . . Ian -
Scratch build 1/35th 6W AEC Matador refueller
FME erk replied to FME erk's topic in LSM 1/35 and Larger Work In Progress
Thanks Tom I just hope MY expectation of the complete scene will be as good as I imagine it to be . . . I have a number of 'Erks' to paint up to help set the scene cheers Ian -
Lancaster ND644 in 32nd scale
FME erk replied to FME erk's topic in LSM 1/35 and Larger Work In Progress
Carl Thanks for the comparison photos. The Eduards bottom section has more detail for sure but if the Mossie super fits then I will take that. Many thanks again Carl cheers Ian -
Look forward to seeing some colours on her . .. Ian
-
Lancaster ND644 in 32nd scale
FME erk replied to FME erk's topic in LSM 1/35 and Larger Work In Progress
Last night I was busy re-sizing the exhaust shrouds and placing fixing brackets to fit on the cowlings. Drying overnight, I cut them so they look more appropriate for fixing . . . . First photo shows the actual 4 tabs for fixing the shrouds Making up the brackets In situ on the kits cowling . . . another little modification to improve the appearance Ian.thumb.JPG.53eb3a64b6988cda88b07ea5ea394d84.JPG)
.thumb.JPG.8ee403460cb06a560c3cf5687245aee1.JPG)
.thumb.JPG.2dcf28967905102f607400a1f41b7d37.JPG)
.thumb.JPG.01f7fdb22ff39535d5eb5124825f0234.JPG)
-
Lancaster ND644 in 32nd scale
FME erk replied to FME erk's topic in LSM 1/35 and Larger Work In Progress
Morning Carl I have sent you a PM many thanks Ian -
Lancaster ND644 in 32nd scale
FME erk replied to FME erk's topic in LSM 1/35 and Larger Work In Progress
Carl Many thanks for your suggestion . . . would the parts make up a complete engine ? If so I would consider placing it in the engine space . . . I would have to bow to your knowledge as to fitting it but I would certainly give it a try Cheers for that Ian -
Lancaster ND644 in 32nd scale
FME erk replied to FME erk's topic in LSM 1/35 and Larger Work In Progress
Evening all . .. I have managed to assemble the mock-up exhausts with the cowling cover, I dont think they look to bad . . . There are three points to which the box of exhaust stubs fixes inside the engine cowling A goes into Aa and B is the centre fixing point. Next up will be to make the fourth engine position very soon to display an engine . . . cheers Ian -
Lancaster Diorama Accessories
FME erk replied to Kaireckstadt's topic in LSM 1/32 and Larger Aircraft Ready for Inspection
The pastel chalks are the last thing really and I have all my Lancasters and a few other in a display cabinet so they dont get handled . . . -
Lancaster Diorama Accessories
FME erk replied to Kaireckstadt's topic in LSM 1/32 and Larger Aircraft Ready for Inspection
Kai Have a look in here . . . https://www.tapatalk.com/groups/airfixtributeforum/tamiya-1-48th-lancaster-ed583-wings-for-victory-10-t46830.html The crew bus was scratch built. I dont use anything once I have applied the pastel chalks ! I did spray a matt varnish but it all disappeared ?? I haven't use any after that experience Hope it helps cheers Ian -
Lancaster Diorama Accessories
FME erk replied to Kaireckstadt's topic in LSM 1/32 and Larger Aircraft Ready for Inspection
Kai Its the Tamiya Lanc in 48th scale. Many alterations were made which included moving the W/op.'s window, enlarging the second escape hatch along the fuselage and removing the wing section joint lines to name but a few. The back drop is from Australia used in the railway modelling world, it comes in a 7ft roll if I remember. AS for the powders, I use these chalk sticks that I scrape into a small container and then apply with a brush across the wing flow . . . I hope you like Ian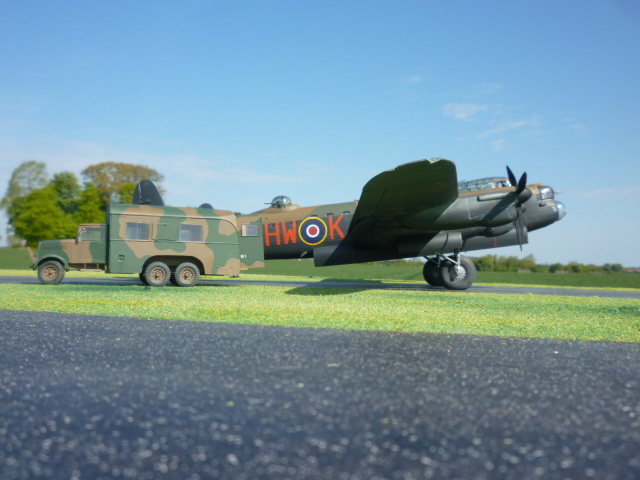


-
Lancaster Diorama Accessories
FME erk replied to Kaireckstadt's topic in LSM 1/32 and Larger Aircraft Ready for Inspection
Many thanks for those Kai I shall certainly look to those or reference . . . I usually applied powders to try and get that effect Cheers Ian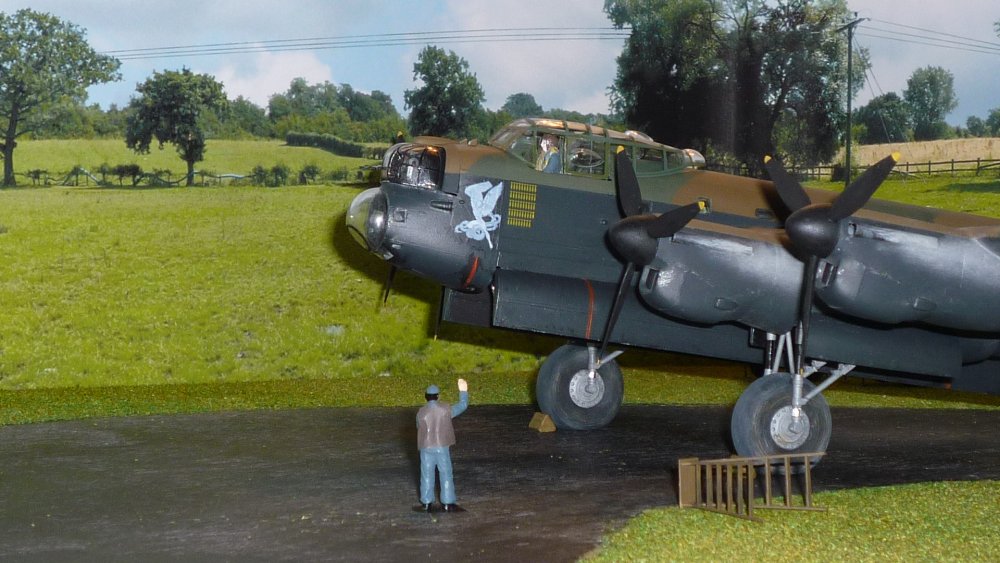
-
Lancaster ND644 in 32nd scale
FME erk replied to FME erk's topic in LSM 1/35 and Larger Work In Progress
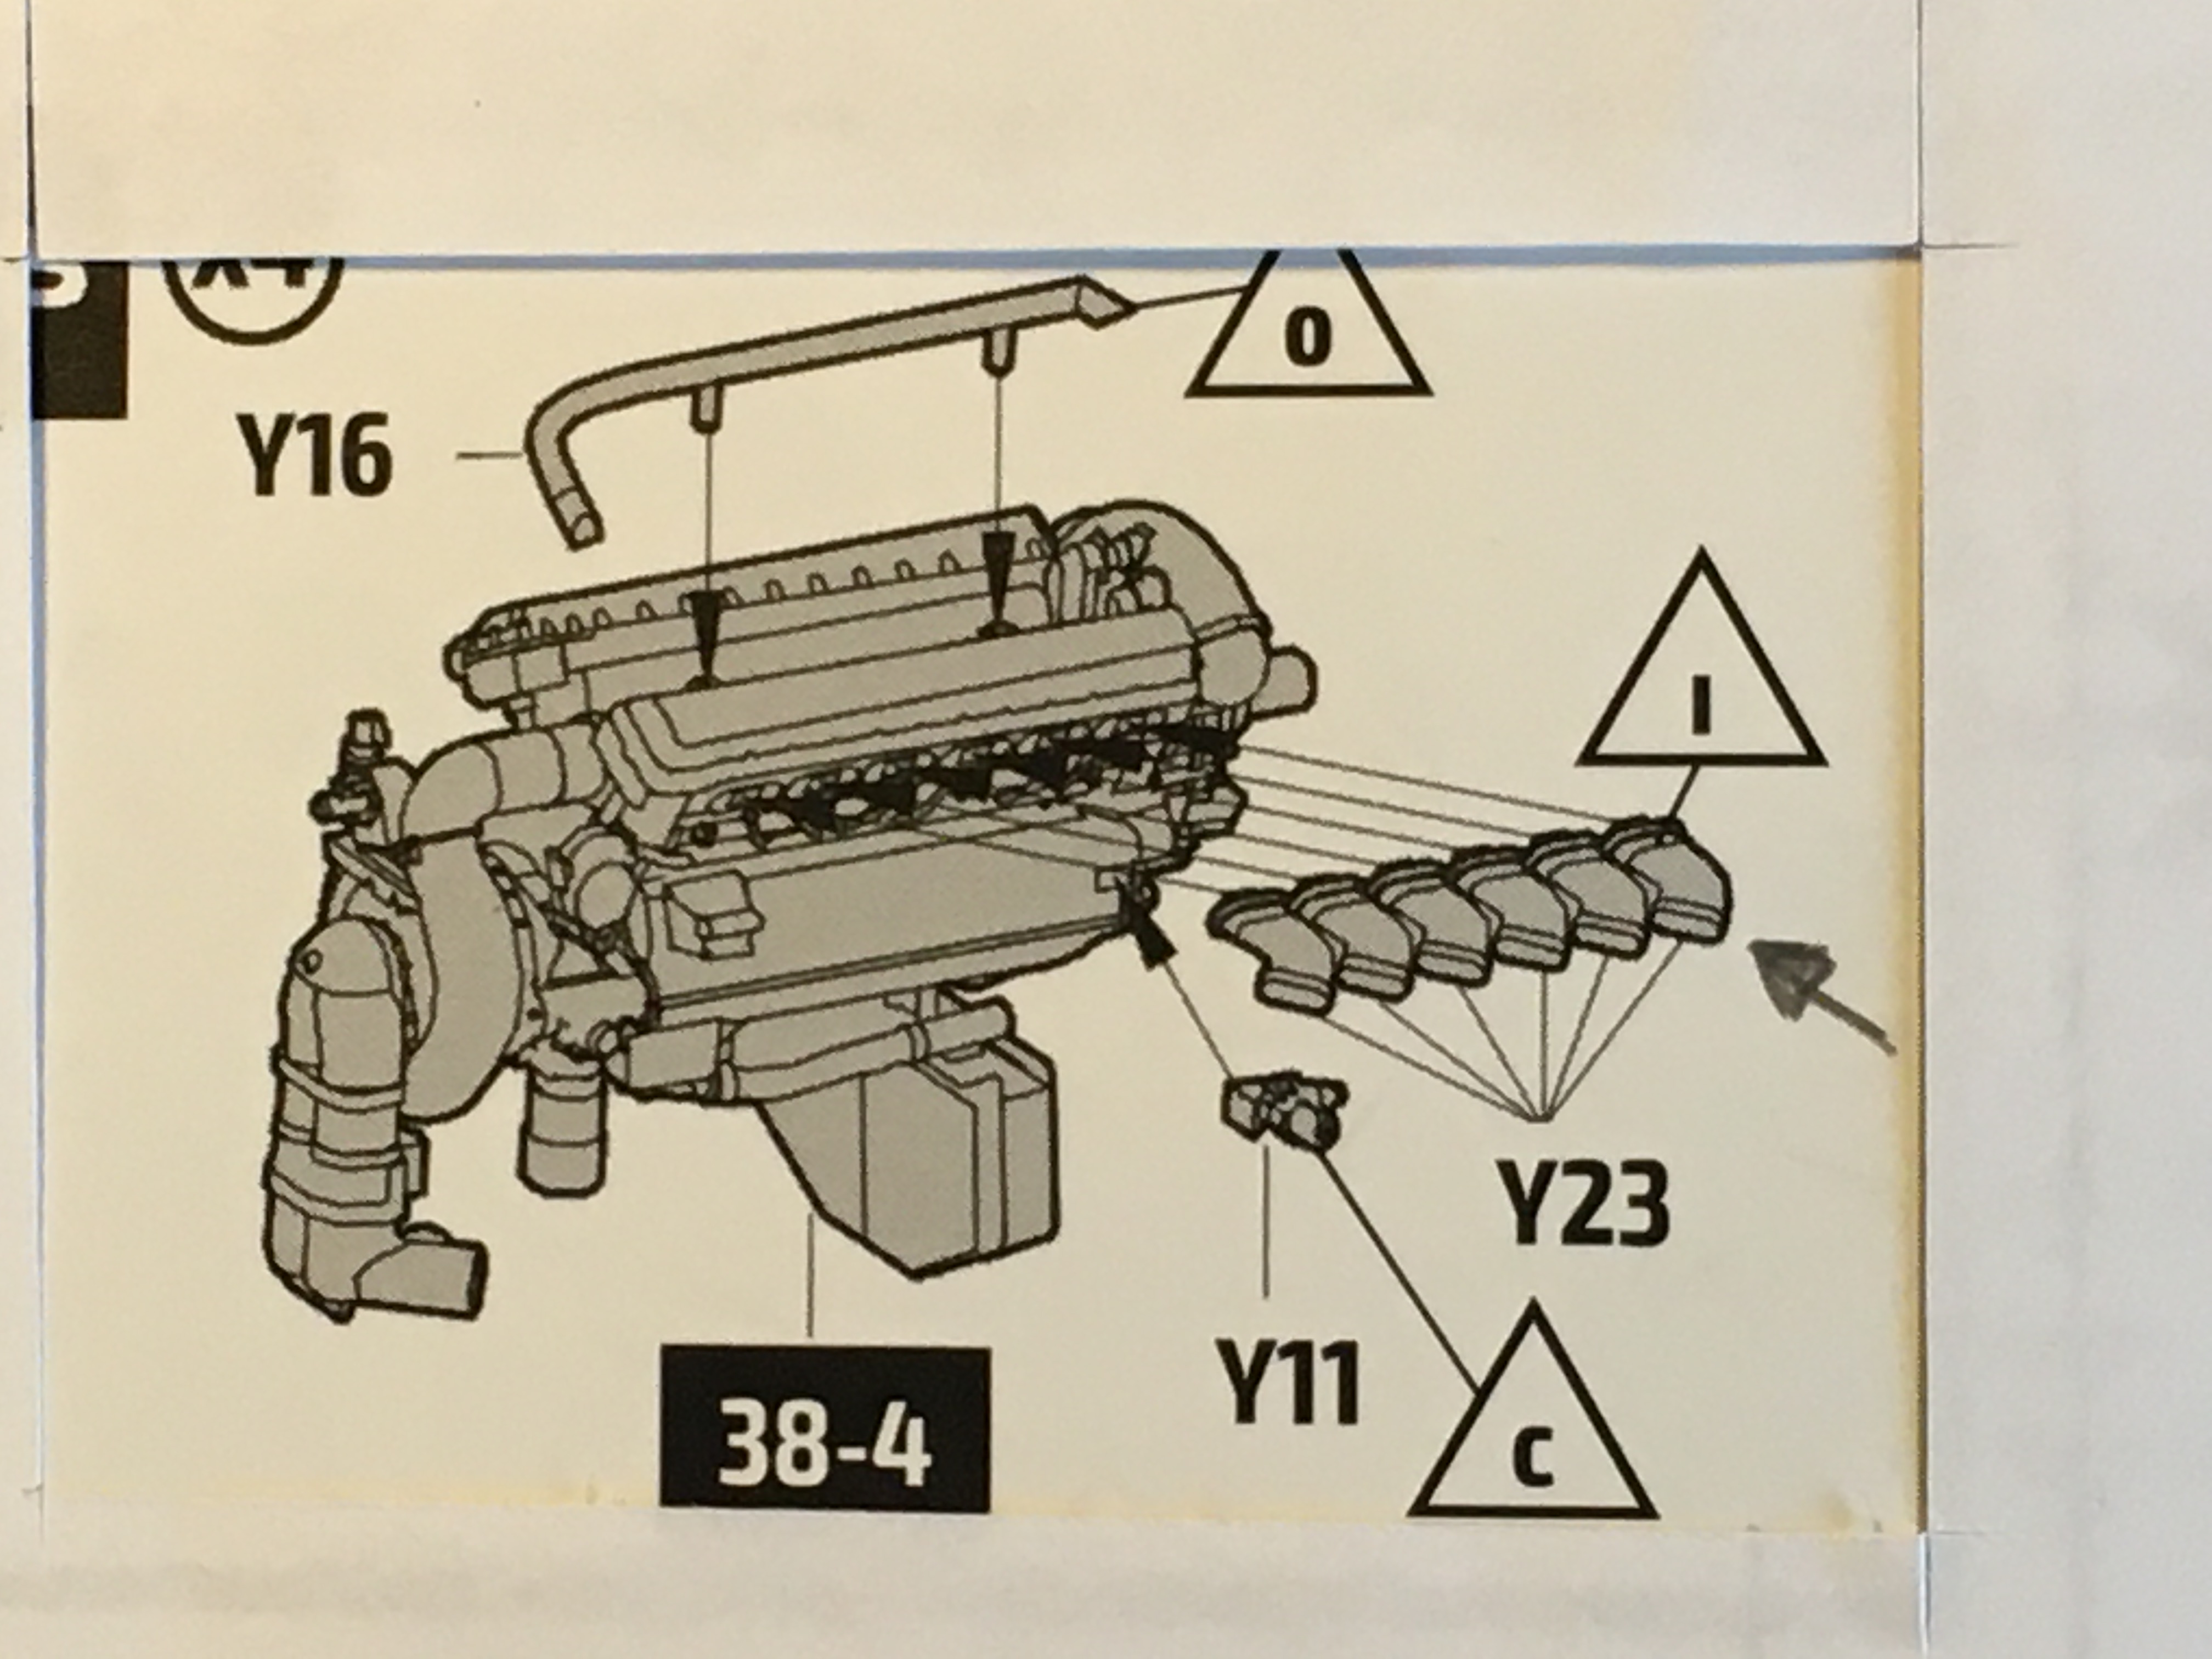
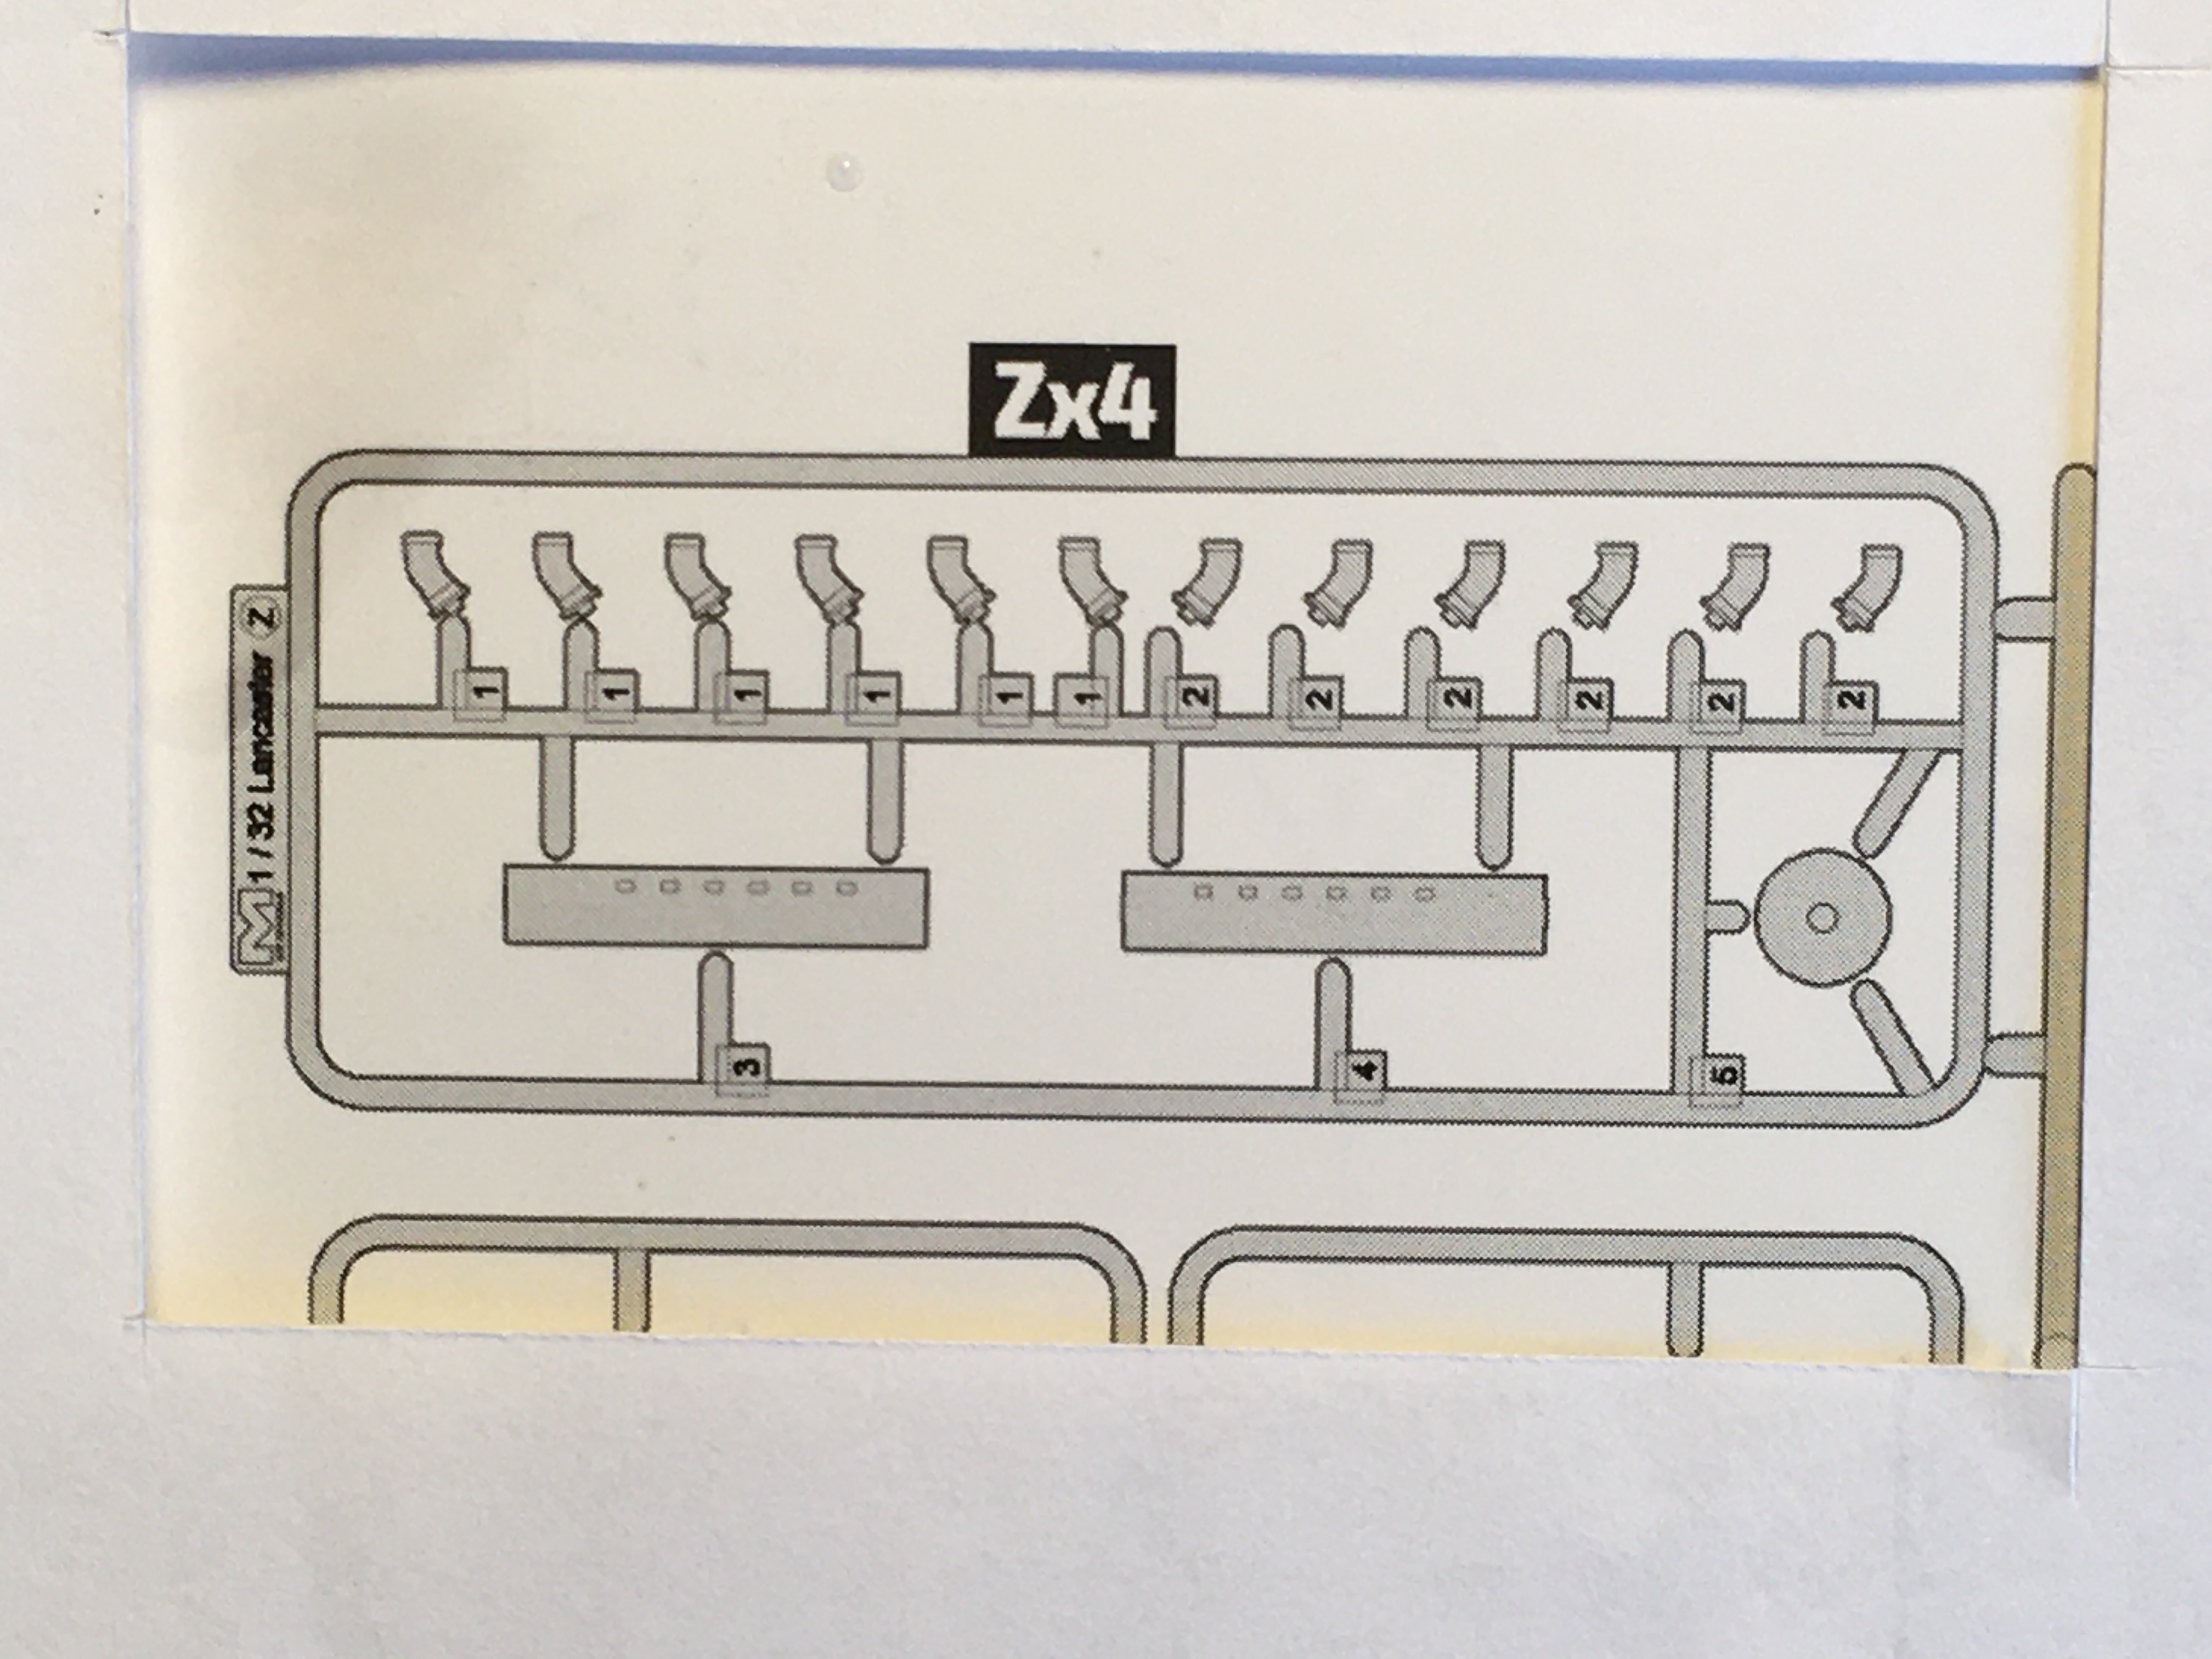
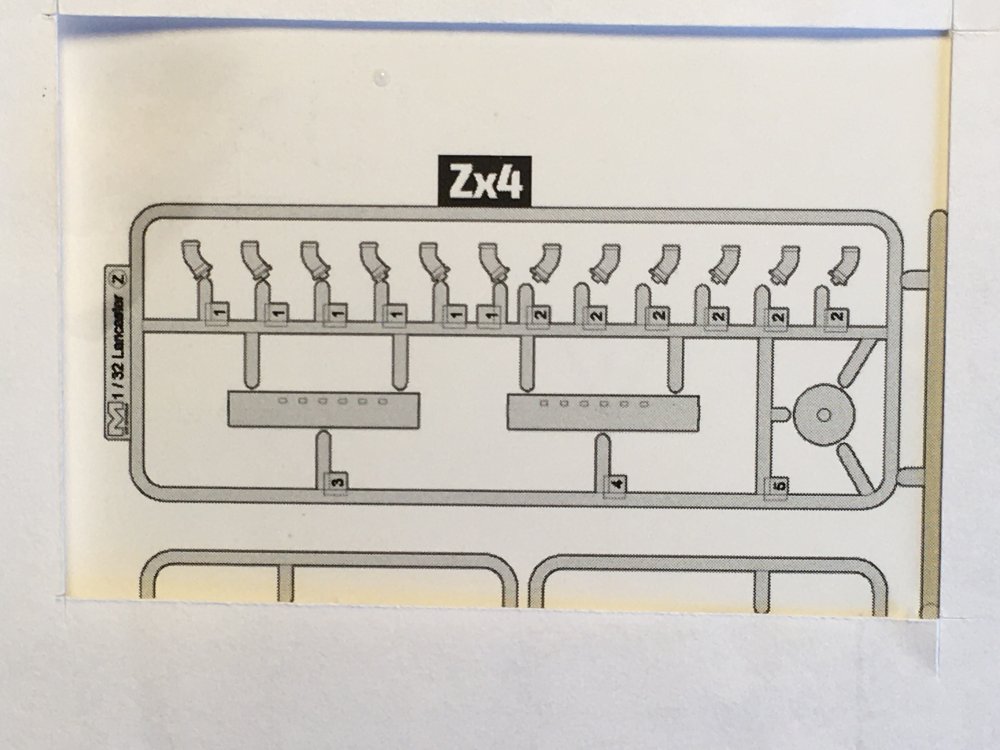
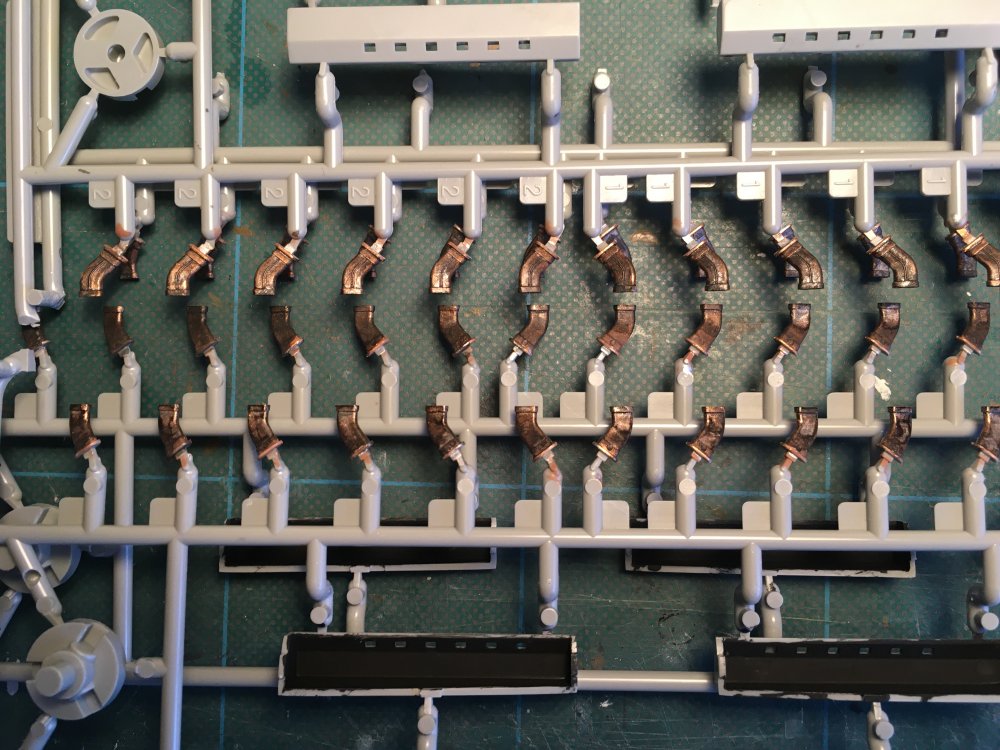
I looked at the engines and their construction. I only anticipate building One to show it off and considered it for display in the diorama setting . . . The engine assembly is quite straight forward but as I said I only want one complete engine but there is a short cut that is not illustrated in the Instruction booklet. First photo is the almost final assembly where you add the individual exhaust onto/into the engine block . . . As mentioned, there is a short cut if you dont want to build ALL the engines and I cannot understand why the instructions dont even offer the alternative ? the sprue required is lettered 'Z' . . . The two long box items at the bottom have three tabs that slot into the back off the engine cowling so you can then just add the individual exhausts . . . Shown are my sets painted up, you only need to paint inside the box . . . Another reason for assembling these 'false' exhaust outlet is because, in my opinion, the exhaust shrouds, are way to large and to that end, once the exhausts are fitted I will be able to see just how far they extrude from the engine cowling. Only then will I be able to cut the shroud(s) down to size. Have a look at a number of those already built, they stick out to far then look at an actual aircraft, the difference IS noticeable. Thanks for looking in Ian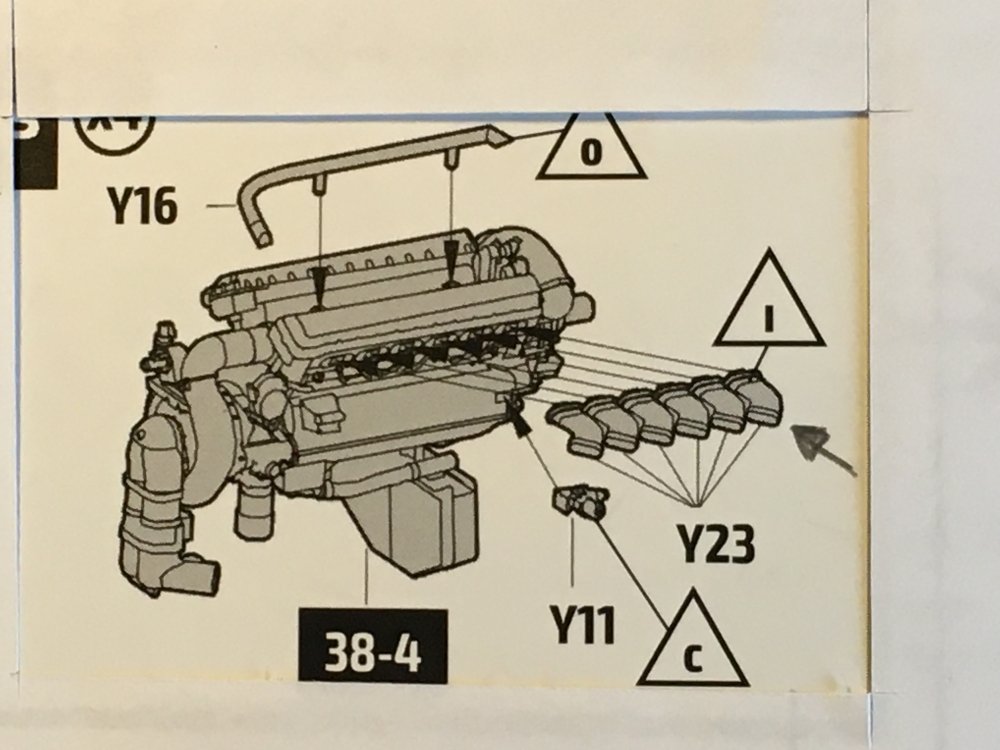
-
Lancaster Diorama Accessories
FME erk replied to Kaireckstadt's topic in LSM 1/32 and Larger Aircraft Ready for Inspection
I certainly appreciate the efforts you have gone to there Kai. All the item certainly add to the scene. Historically the vehicle should be Brown or a green base, RAF Blue came post-war. I like the ladder as well and the only 'true' example I saw was that of a former ground crew member who had acquired one and it was painted aircraft interior green. Can I ask what you used for the exhaust staining ? ? my example was heavily stained and your painting looks spot-on. rgds Ian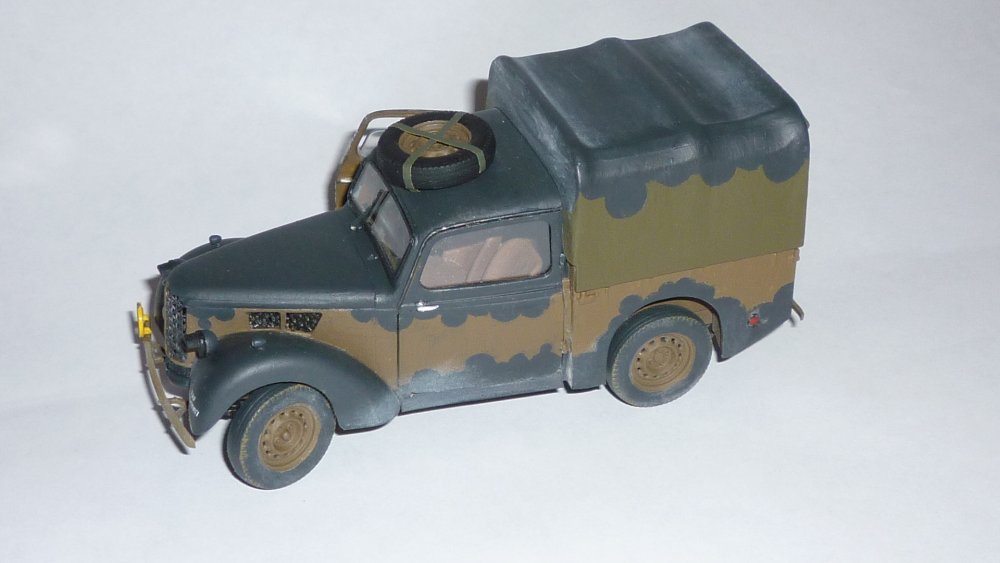
-
Lancaster ND644 in 32nd scale
FME erk replied to FME erk's topic in LSM 1/35 and Larger Work In Progress
Kai Most of it is first-hand accounts but the quotation is from the official Air Ministry document 'Air 14' My, (awaiting publication), new book contains many many first-hand accounts mixed in with the official records from the Operational Record Books, better known as the ORB's . . . Ian -
Lancaster ND644 in 32nd scale
FME erk replied to FME erk's topic in LSM 1/35 and Larger Work In Progress
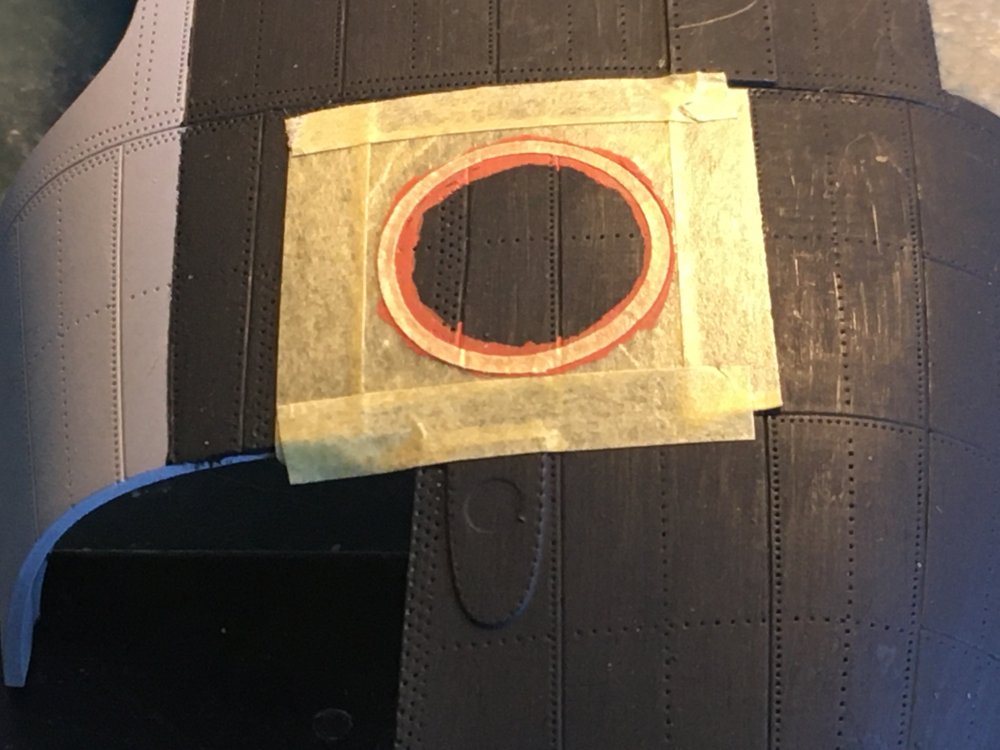
142 Squadron was trained to deliver Gas. They had a facility at RAF Grimsby and they stored the canisters in a Robin hangar over the far side of the airfield. Air14/2738 states: " 5th May 1942 a hangarette be erected at Grimsby for the purpose of storing SCI's (Service Chemical Installation) the name given to bombs containing gas ". It goes on to say . . . "The covering is Uralite, which would shatter in a blast but the building would not collapse". Strangely I have never seen a photo of a squadron Wellington with a gas circle but after they transferred out in November 1942 the Lancasters didnt have the gas patch on their nose until October 1943 at the earliest that I am aware . -
Lancaster ND644 in 32nd scale
FME erk replied to FME erk's topic in LSM 1/35 and Larger Work In Progress
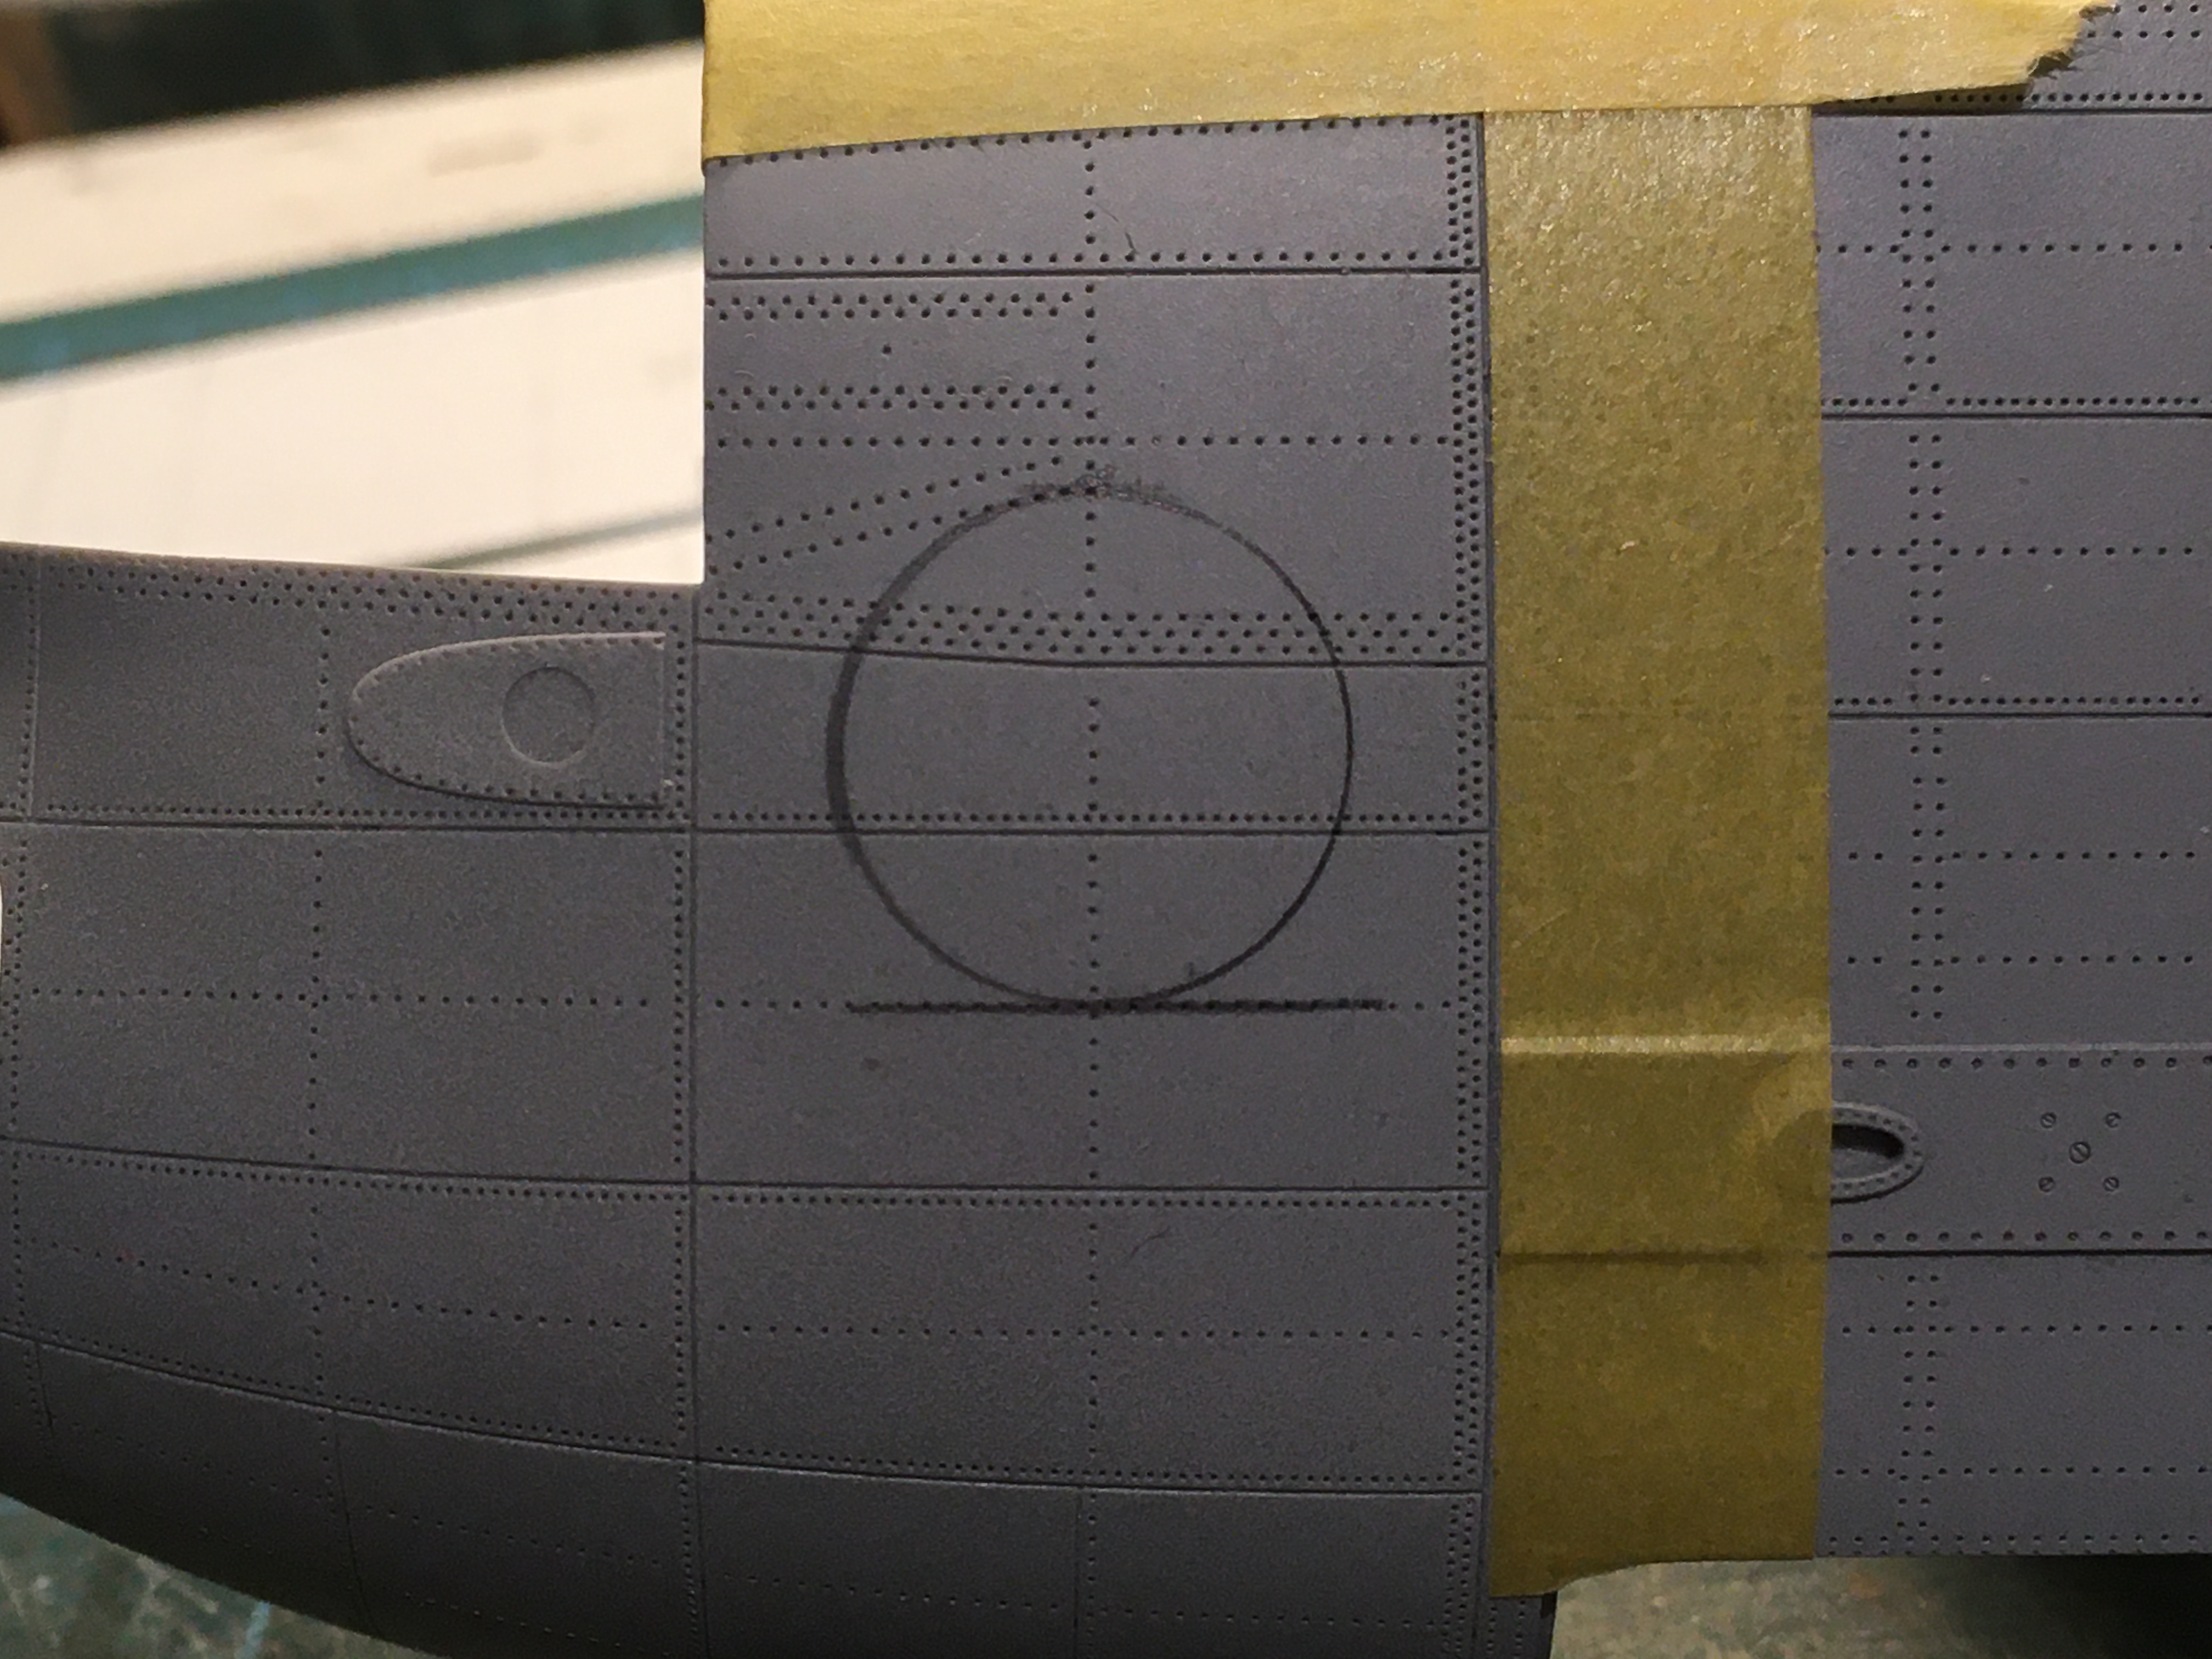
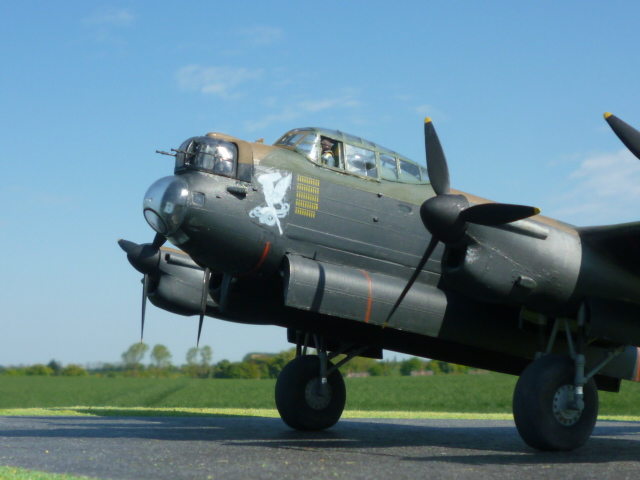
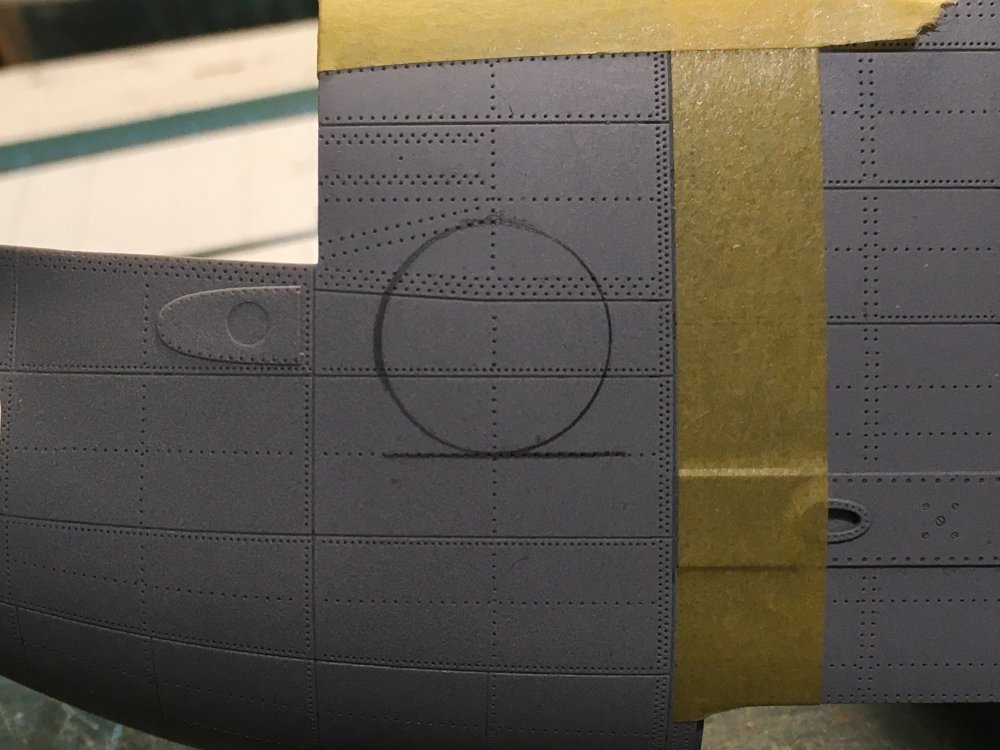
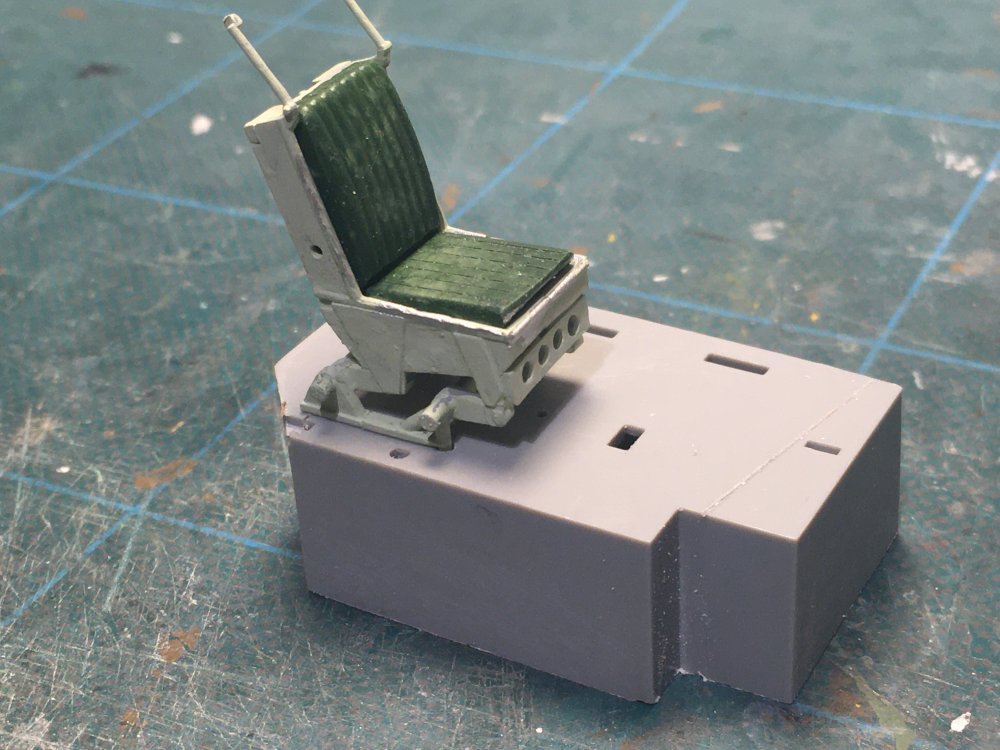
Kai If you trawl the first page you will see the actual aircraft I am going to model and you can see the gas patch circle on her nose. The yellow circle on the head rest of the pilots seat, also seen on the armour head rest of the Mosquito navigator, is to indicate that its armour and could affect the aircrafts compass and not for the same purpose as the yellow circle on the nose . . . Thanks for the compliment , always appreciated Ian -
Scratch build 1/35th 6W AEC Matador refueller
FME erk replied to FME erk's topic in LSM 1/35 and Larger Work In Progress
Thank you Hubert, It will be a worlds first I believe . . . Ian -
Lancaster ND644 in 32nd scale
FME erk replied to FME erk's topic in LSM 1/35 and Larger Work In Progress
Sorry Phil The Gas detection circle was to detect gas in the air or even when the aircraft was at dispersal . . . . -
Lancaster ND644 in 32nd scale
FME erk replied to FME erk's topic in LSM 1/35 and Larger Work In Progress
While waiting for Mr. Surfacer to dry through I cracked on with a few other small jobs . . . Decided to put down a riveted floor . . . ND644 carried a No.1 Group gas circle on her nose so . . . and finally I modified the pilots seat . . . its time to go out so more next week Ian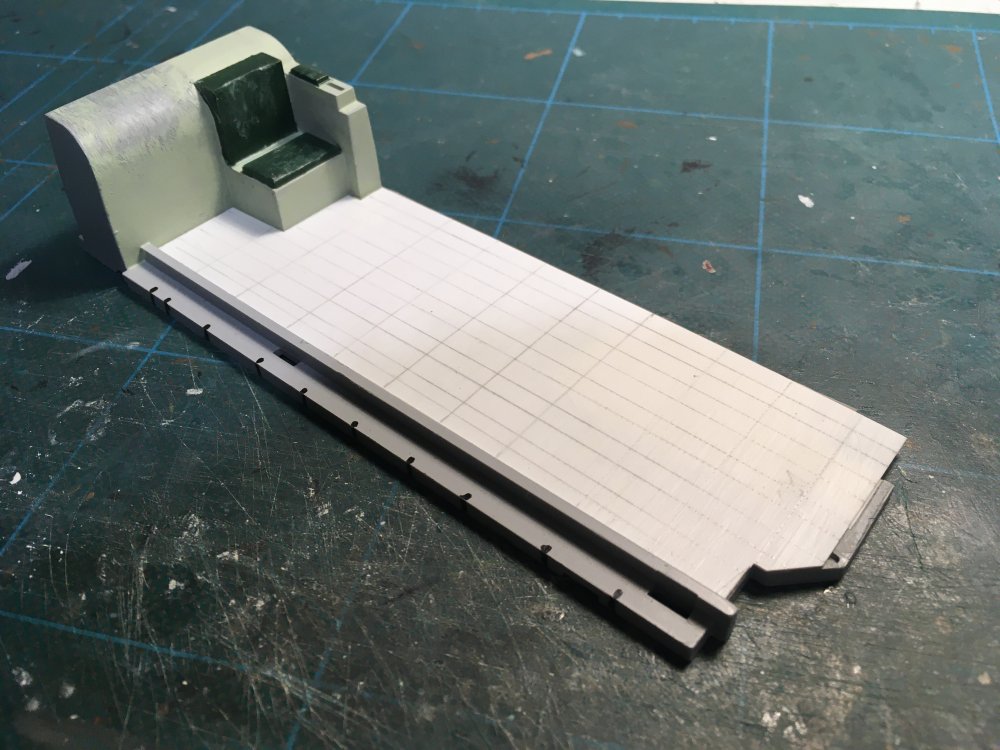
-
Really pleased for you . . . I trust there is a full article inside giving the details of the build . . .
.JPG.c62ae5bf2508fe09fdfdaa34d7a068d8.JPG)

.JPG.177e234384c64cbb308799713ad9bba4.JPG)
.JPG.c99ee318c6c08f4e2502570d864cd5fb.JPG)
.JPG.5ea3e41f759d9820c0c4e8ea86637926.JPG)
.JPG.c1e8a5728ff1ba25d722c1768c3d521c.JPG)