


CrankyCrafstman
-
Posts
1,350 -
Joined
-
Last visited
Content Type
Profiles
Forums
Events
Gallery
Everything posted by CrankyCrafstman
-

1/25 Mack DM800 logging truck
CrankyCrafstman replied to CrankyCrafstman's topic in LSM 1/35 and Larger Work In Progress
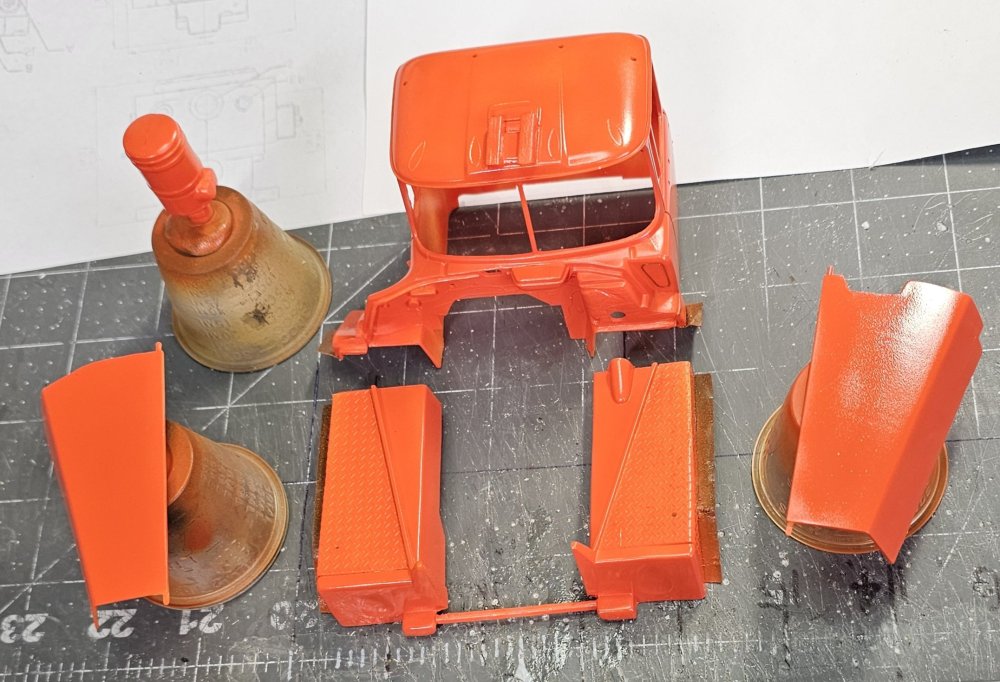
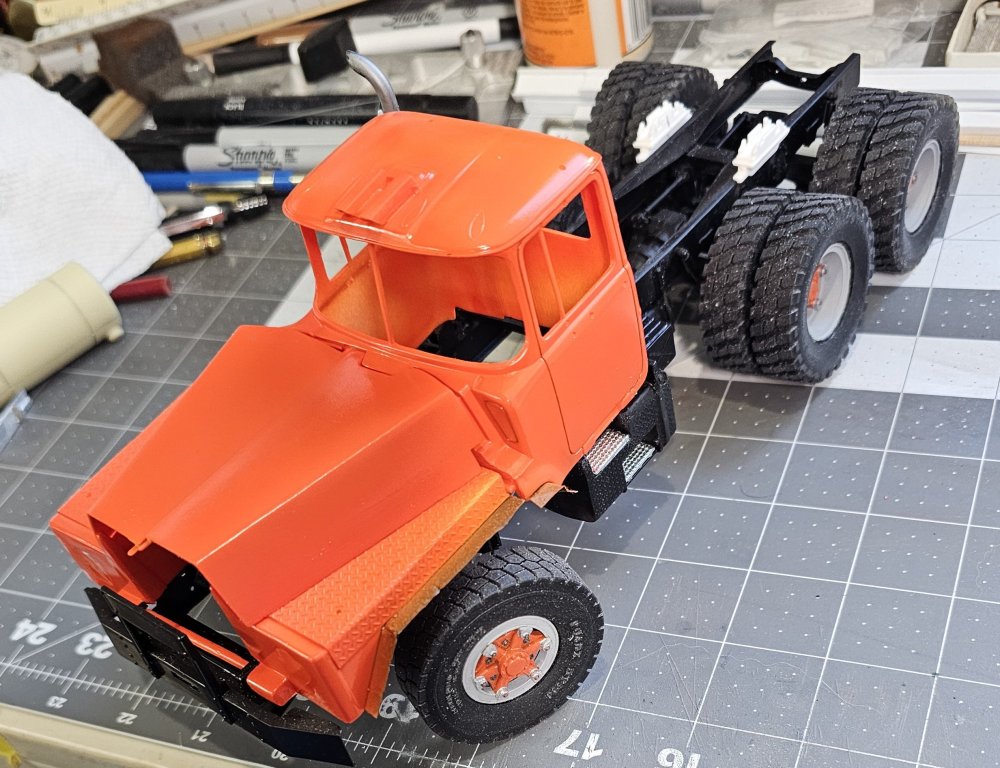
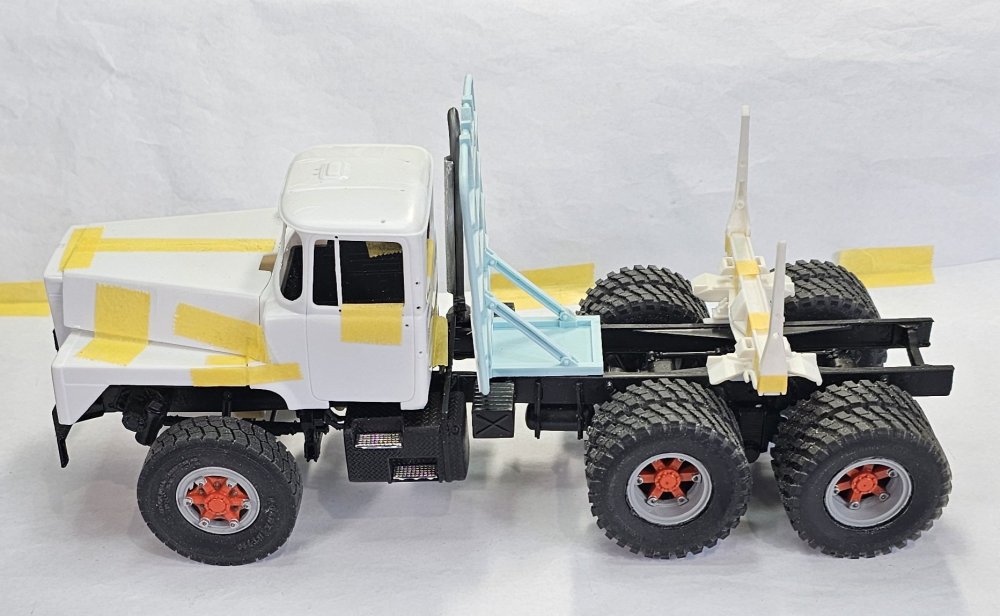
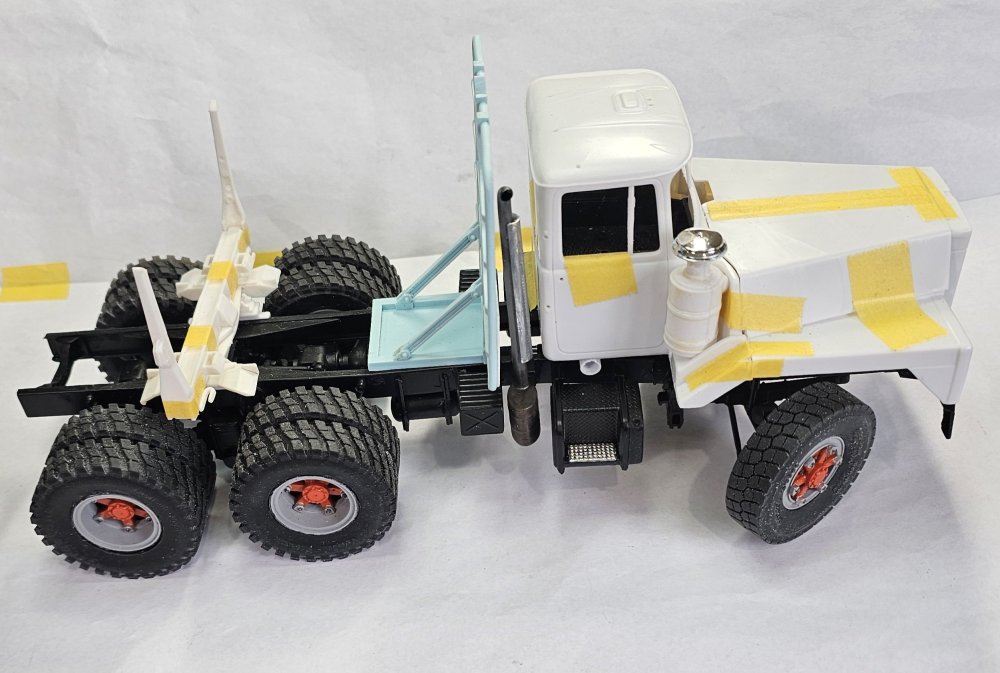
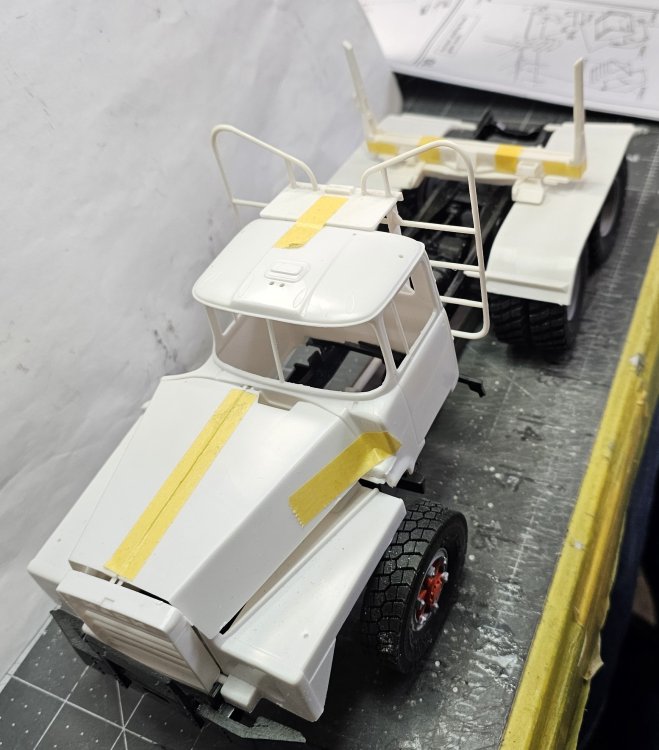
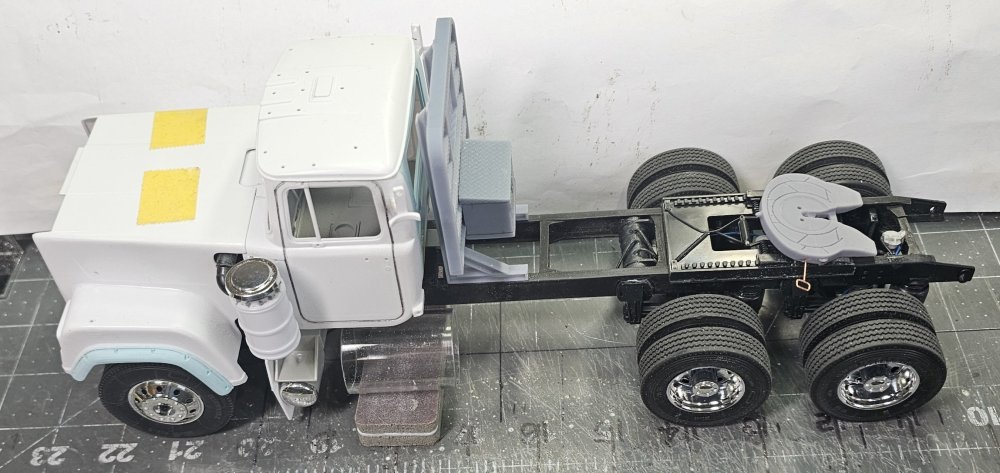
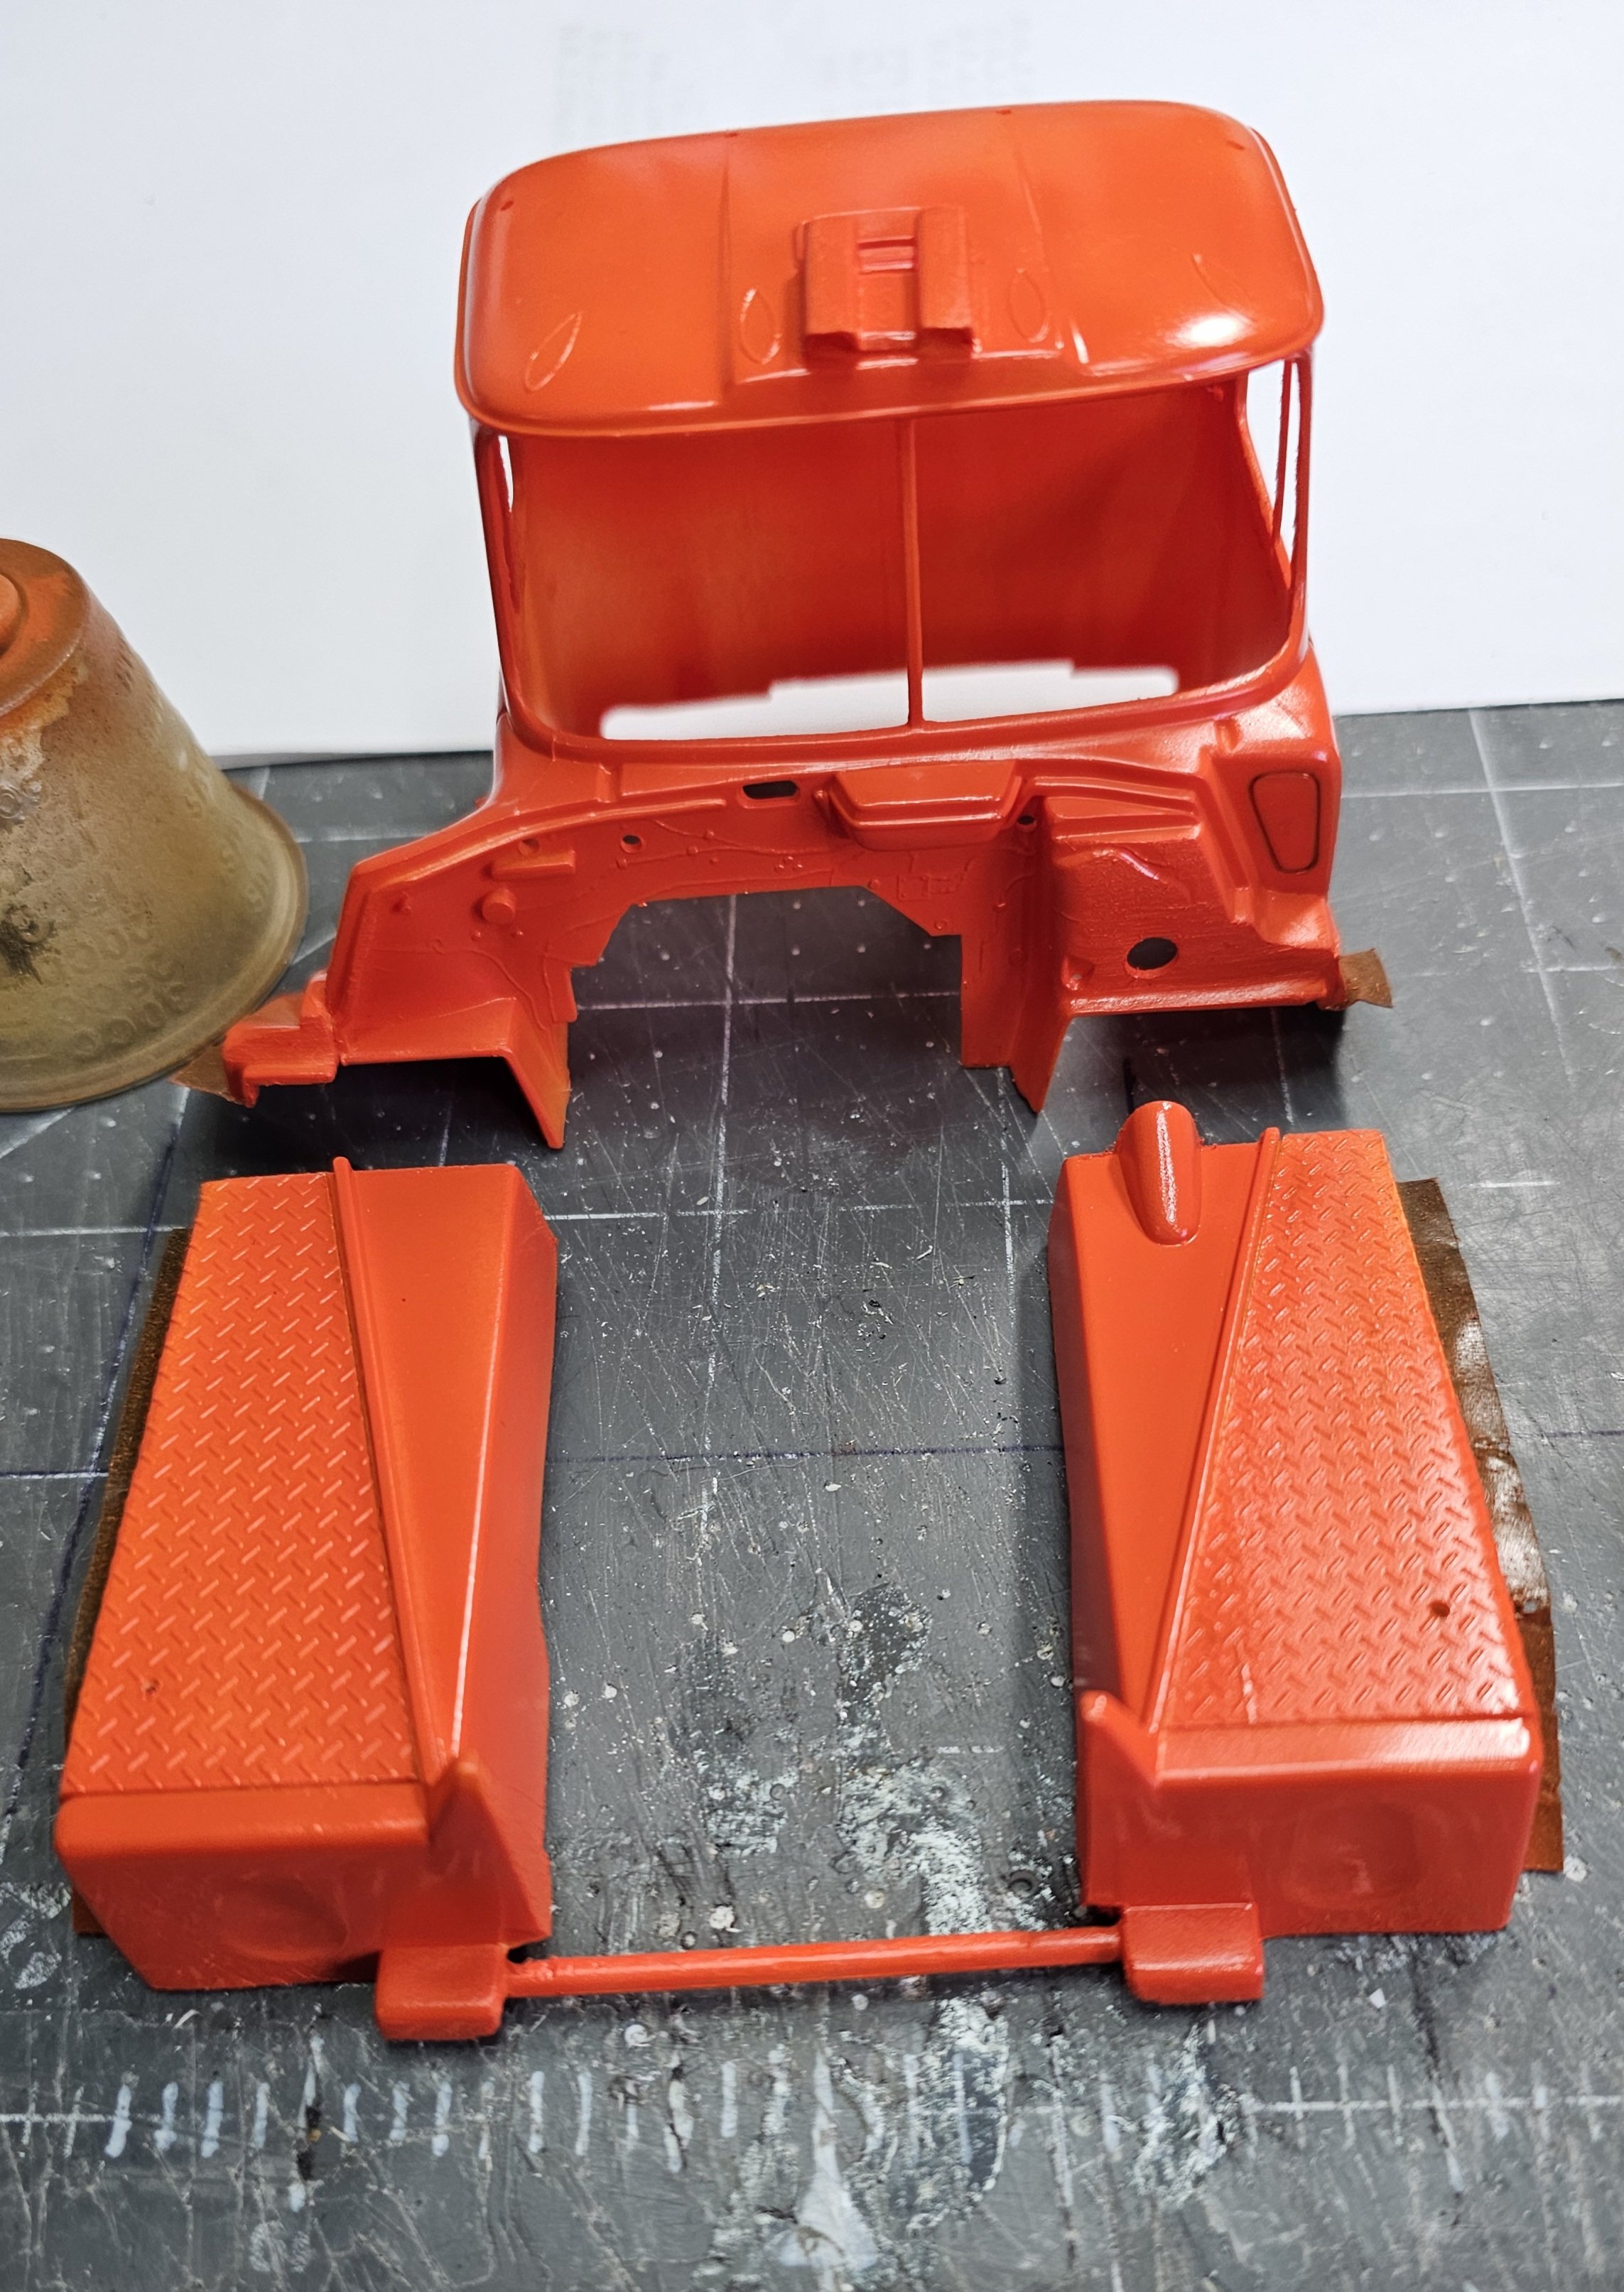
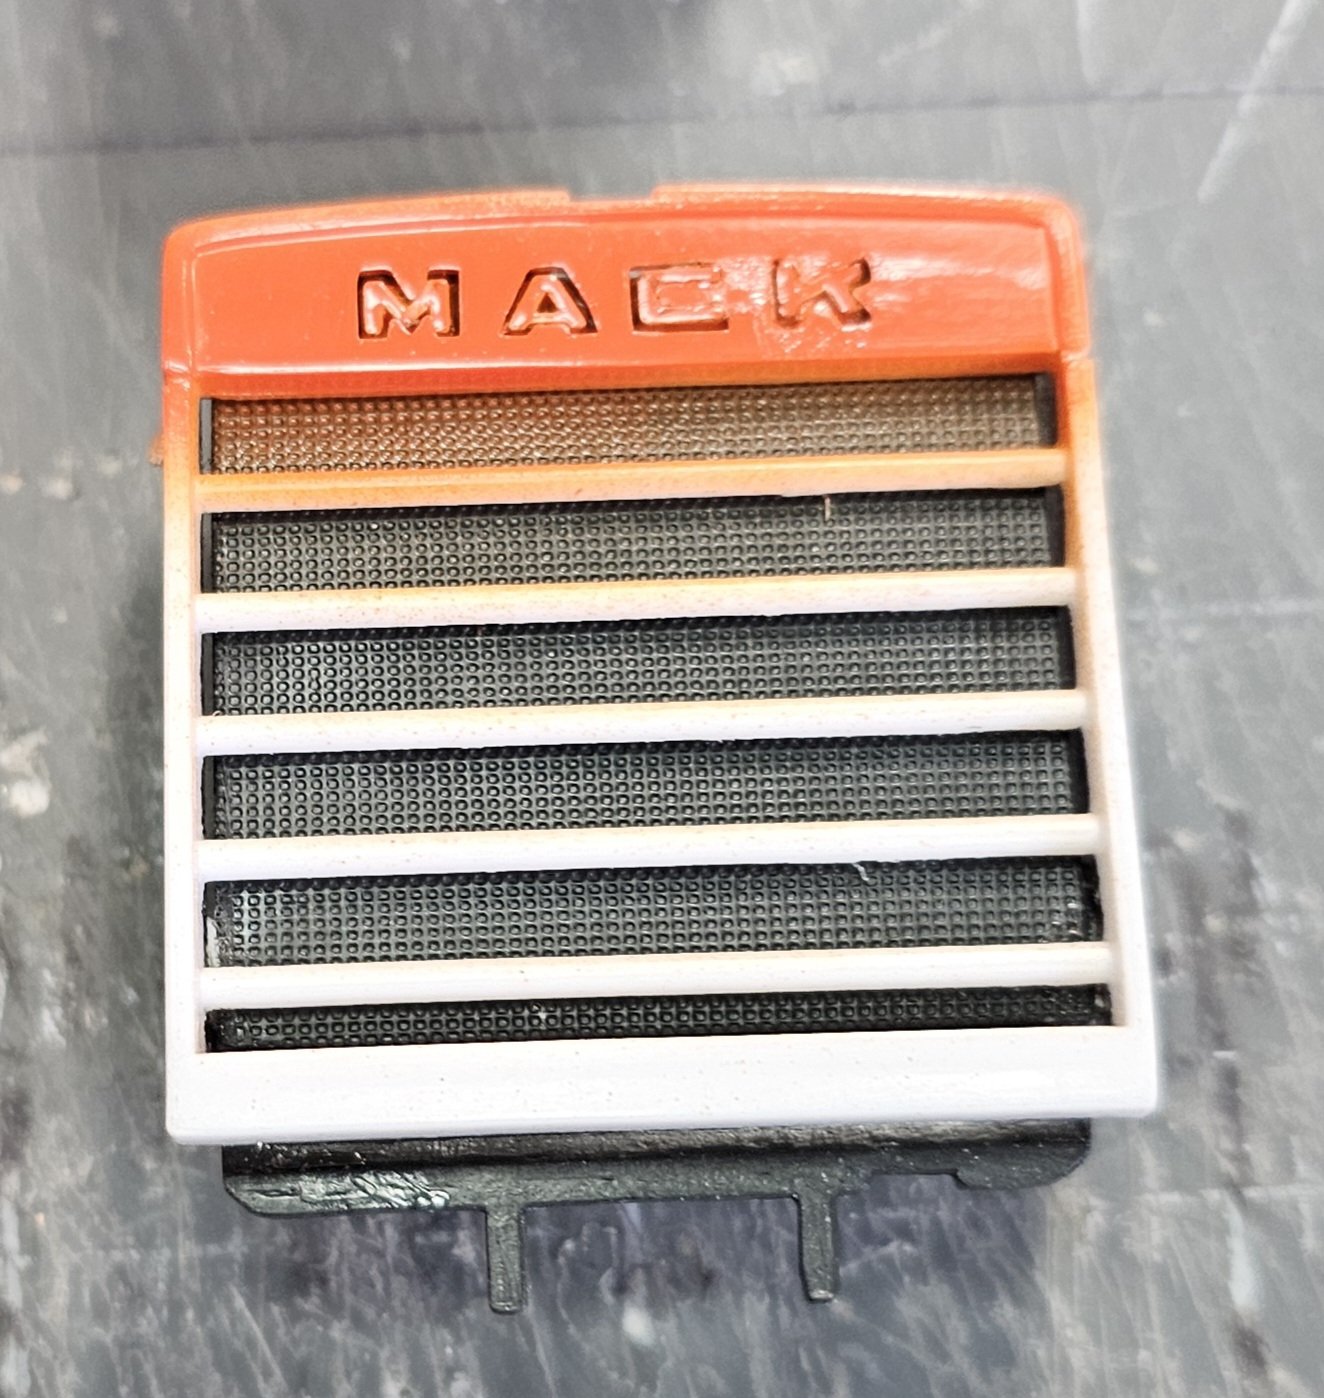
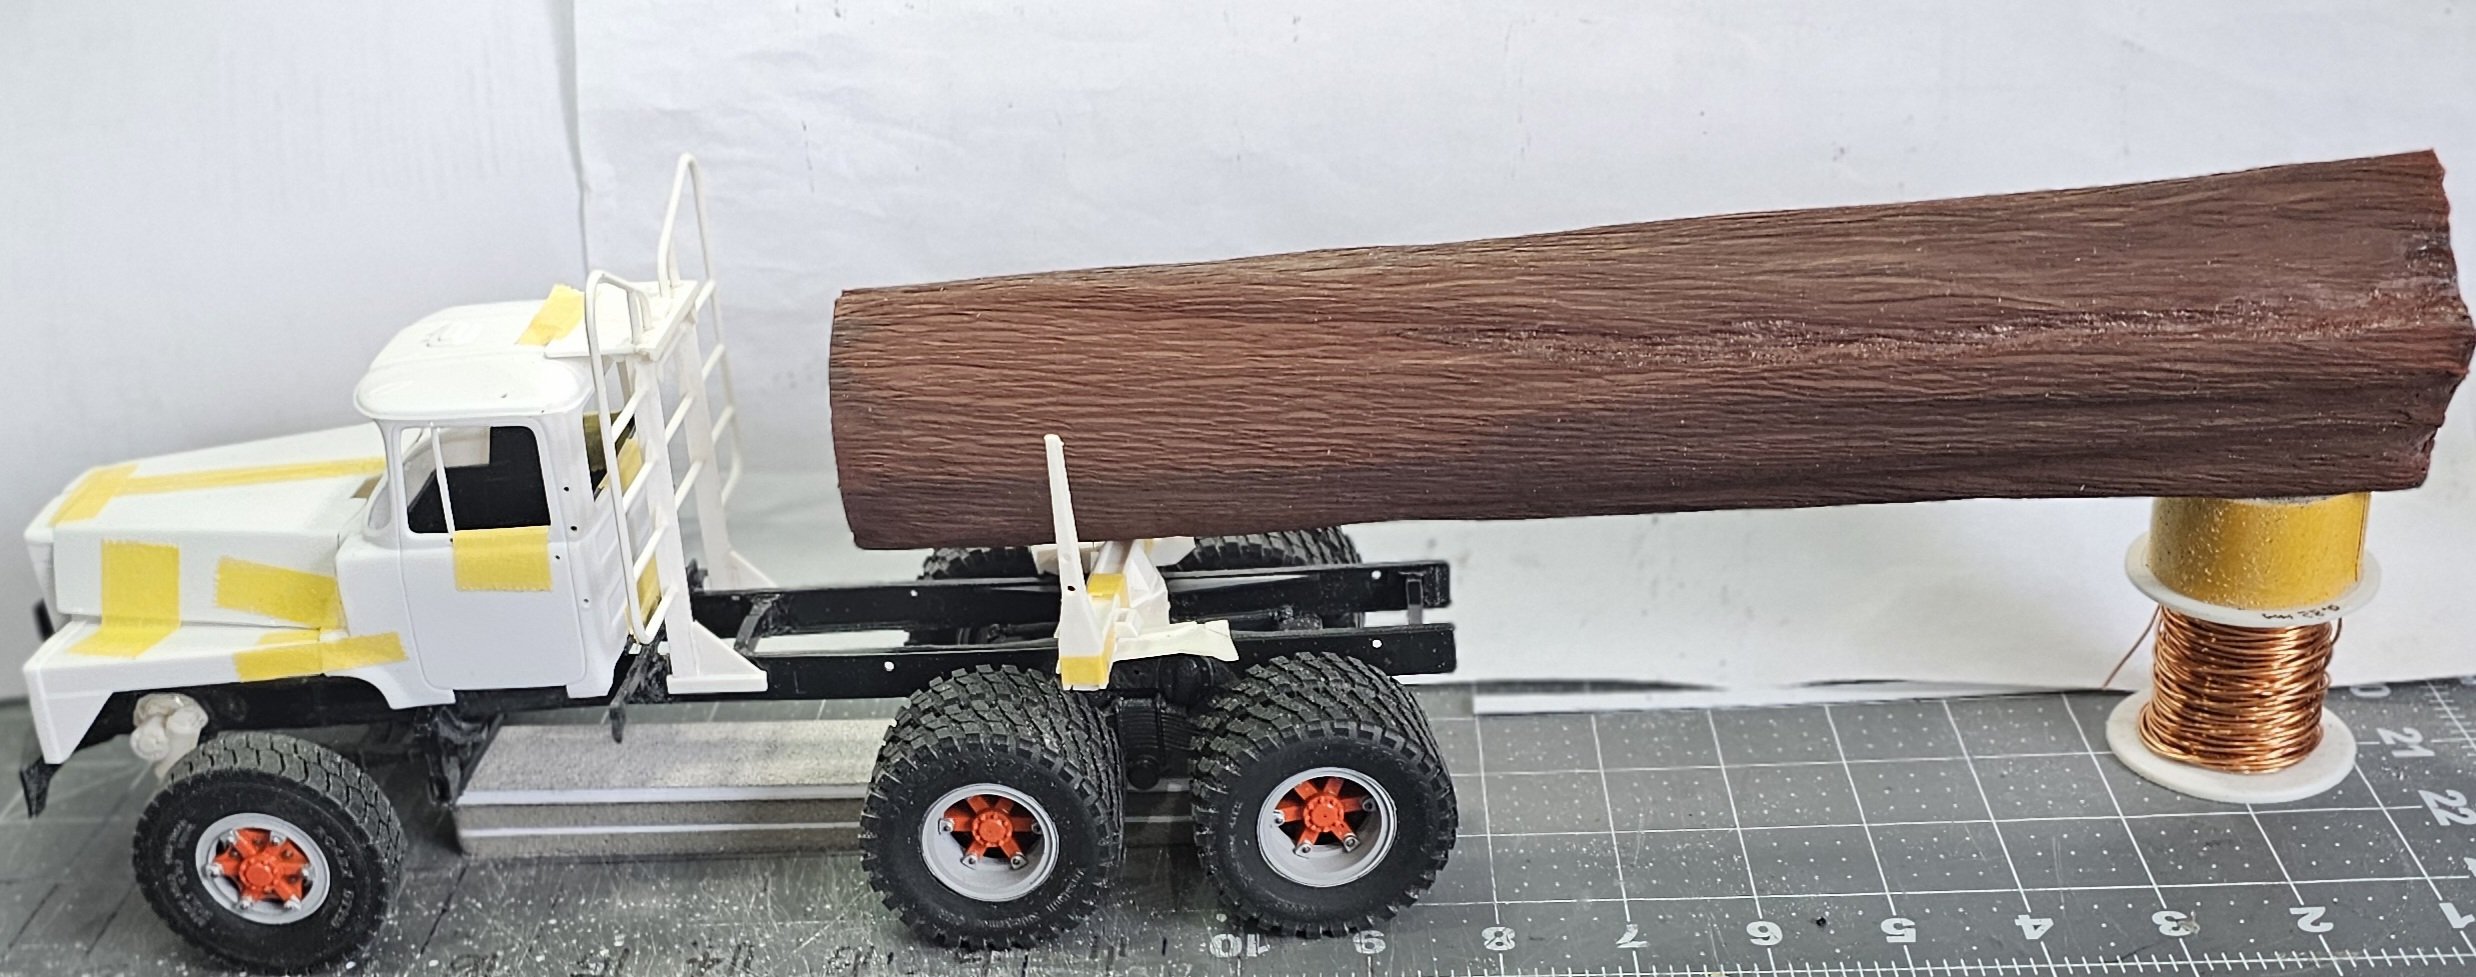
Hey all I made some progress on this build. I have the cab, fenders, air cleaner and grill painted orange. I added some rubber flares to the fender edges, real rubber. There flexible so look like the real thing. Flares on the other side. I also added some diamond plate to the fenders. Here it is in a fresh coat of Tamiya gloss orange. Another veiw of the rig. I'll have to mask off the areas that won't be painted black. Then I'll spray on the Tamiya semi-gloss black. The grill will be black with this orange insert. The letters will be painted with green stuff world chrome paint. This is a mock-up of the truck. Still have alot to do on this build. Plumbing, detailing and weathering, also need to make the 18" or 36' foot long scale logs. I make them from balsa wood and when I've carved them to the shape I want I cover them with brown creape paper. Well that's it for now be back with more updates soon. Ron G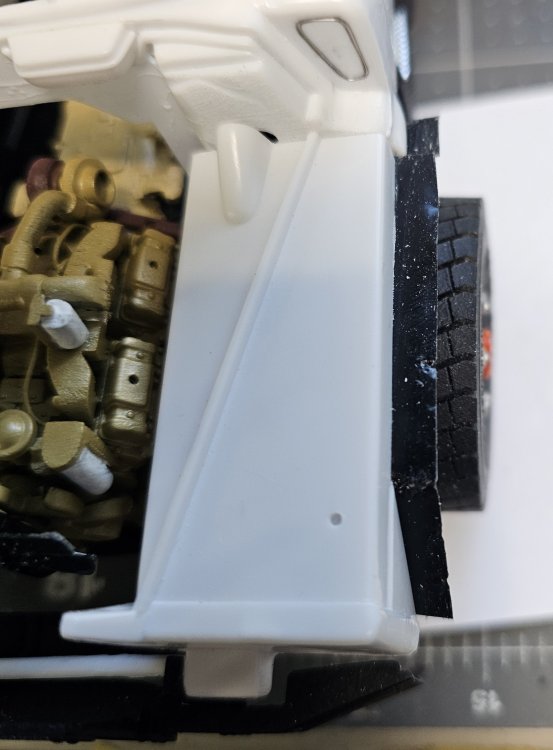


-
1/25 Mack DM800 logging truck
CrankyCrafstman replied to CrankyCrafstman's topic in LSM 1/35 and Larger Work In Progress
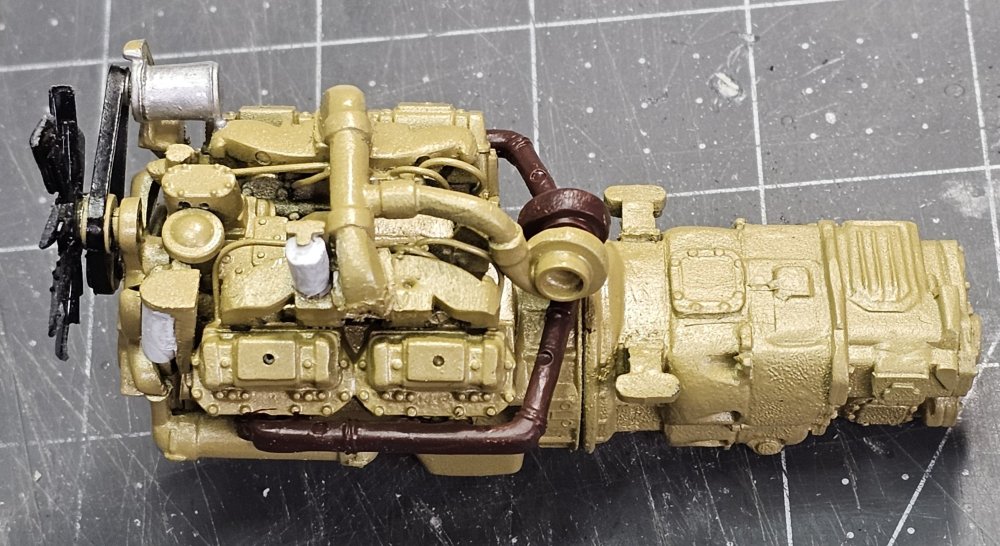
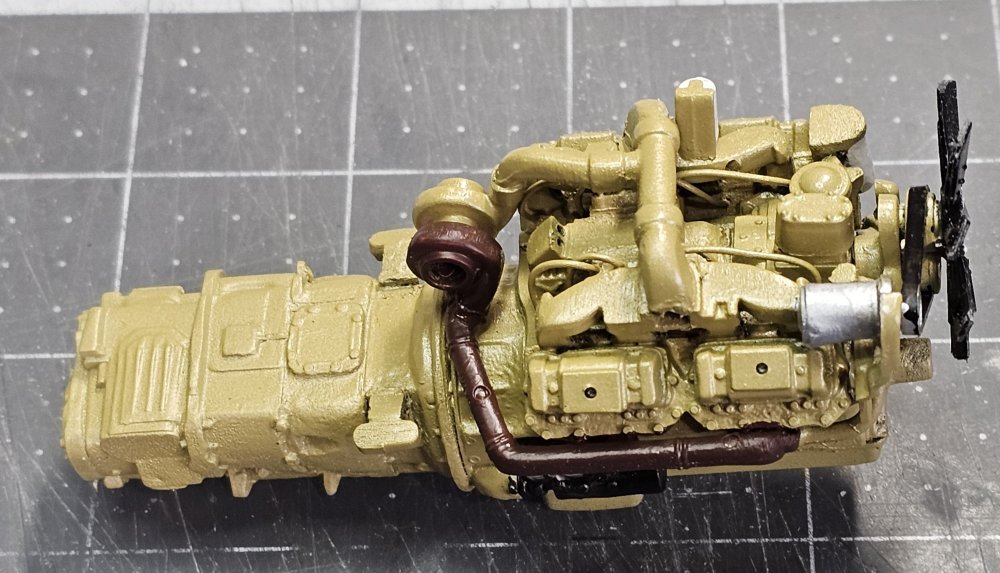
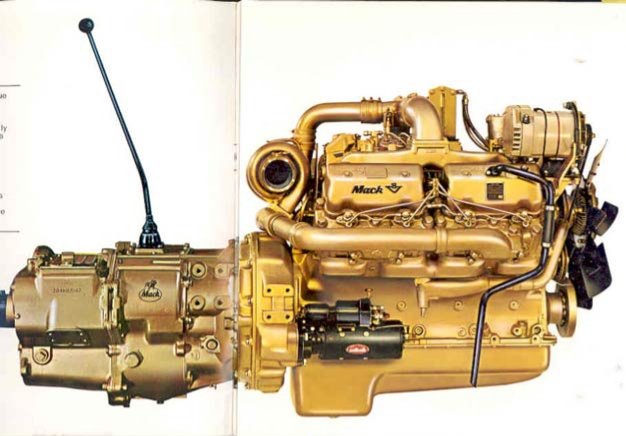
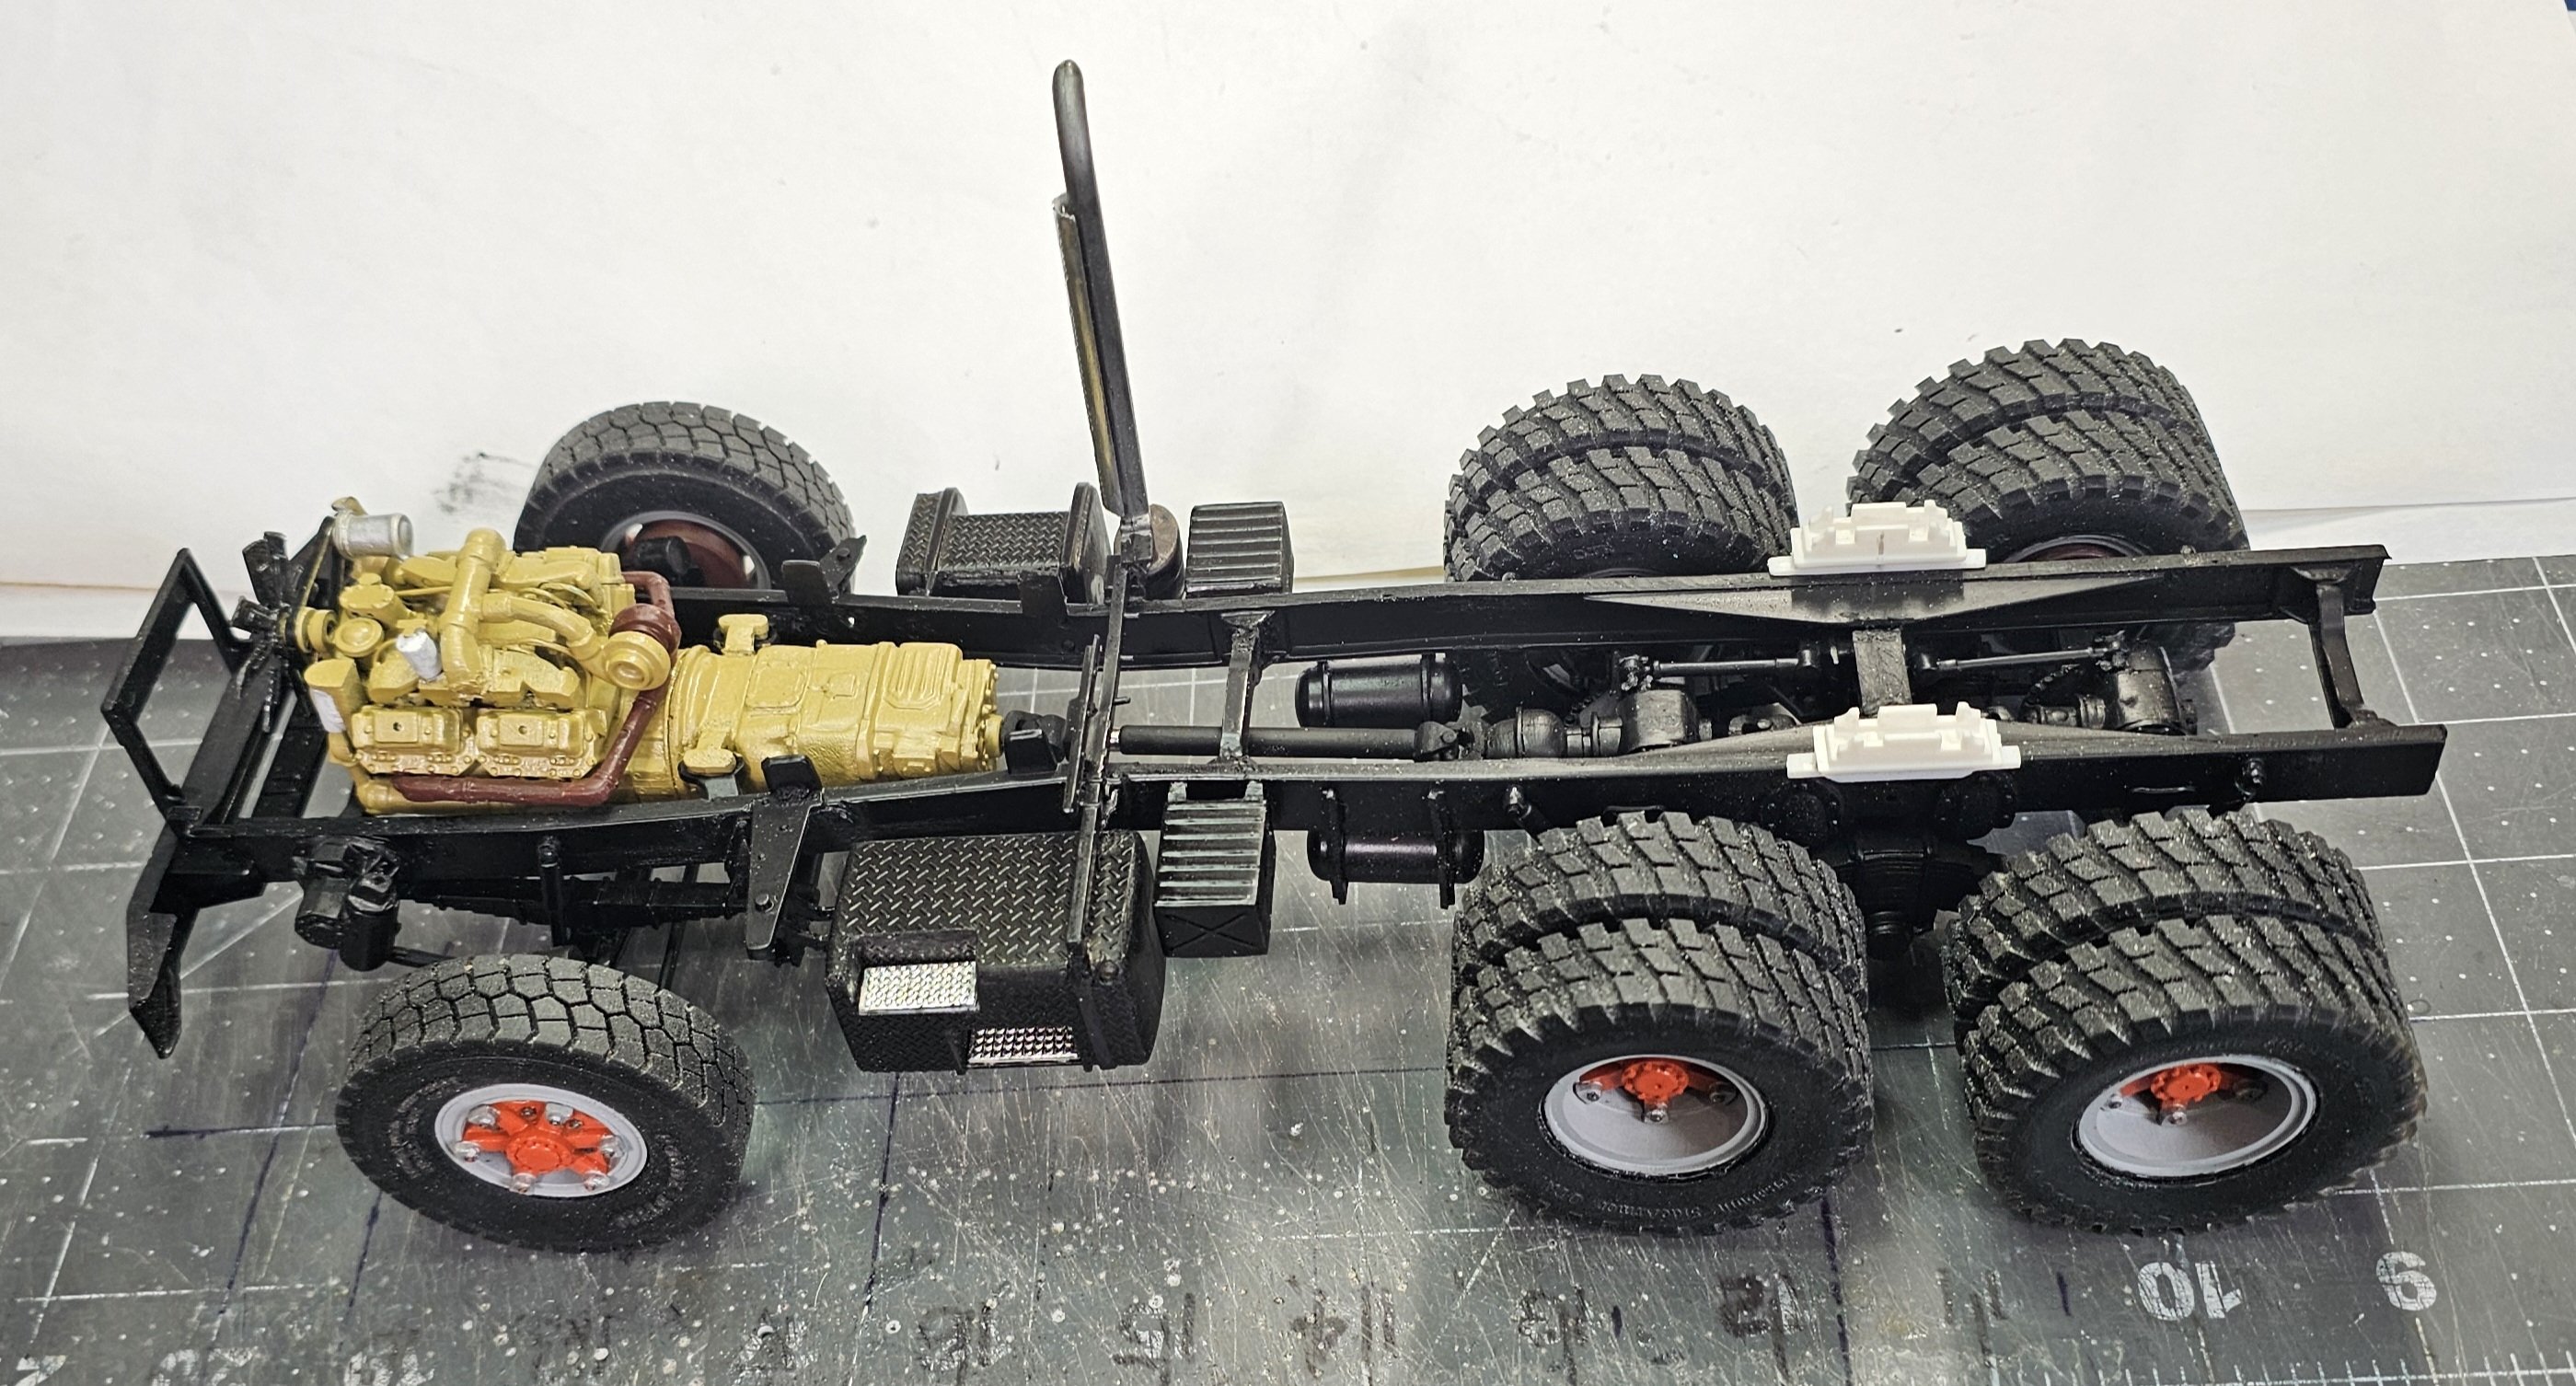
Hey all A little more done on this build. Drive shaft painted black and the slip yoke painted with Green Stuff World chrome paint. Engine painted Mack gold. Detail painting of exhaust, starter and filters. This view shows the engine mounted in the painted chassis. This is a mock-up of the truck. The headache rack is from PAUL at ST Supply. Log bunk is from the AMT Peerless logging trailer kit. View from the other side. Just need to paint the rest of this and she will be done. That's it for now be back soon with more. Ron G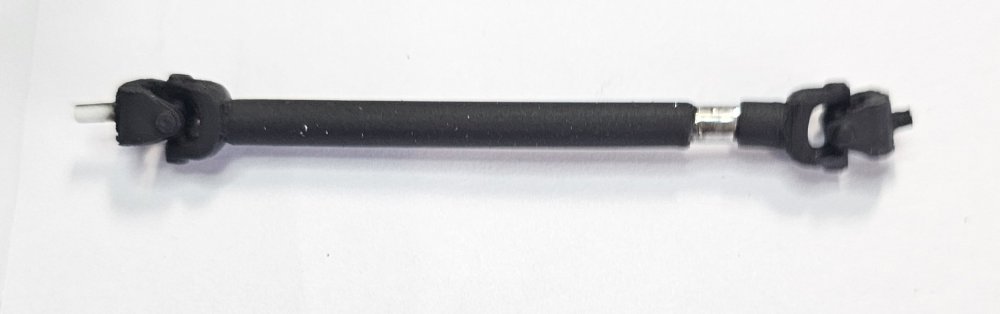

-
1/25 Mack DM800 logging truck
CrankyCrafstman replied to CrankyCrafstman's topic in LSM 1/35 and Larger Work In Progress
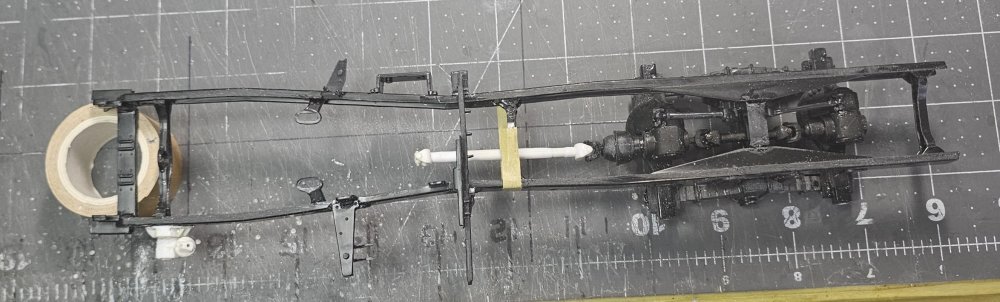
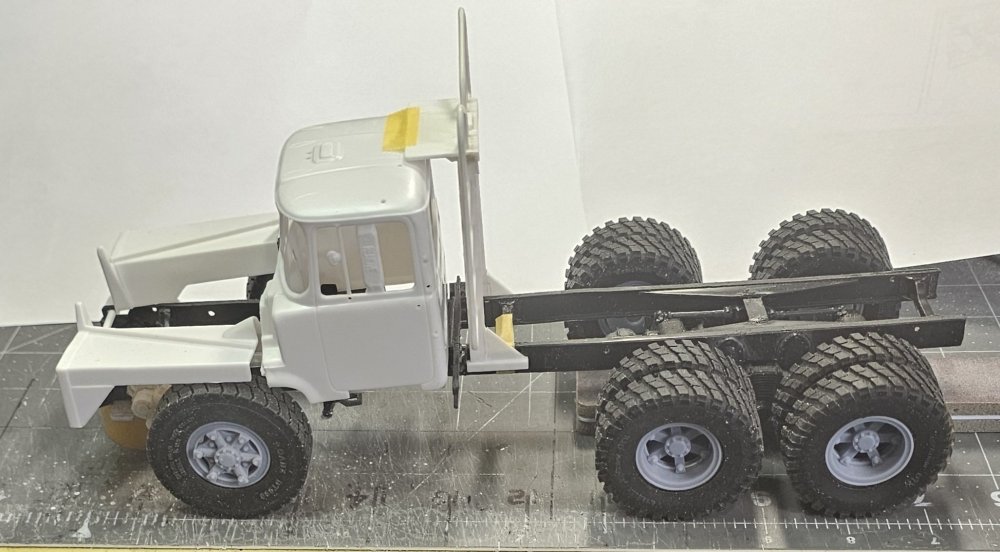
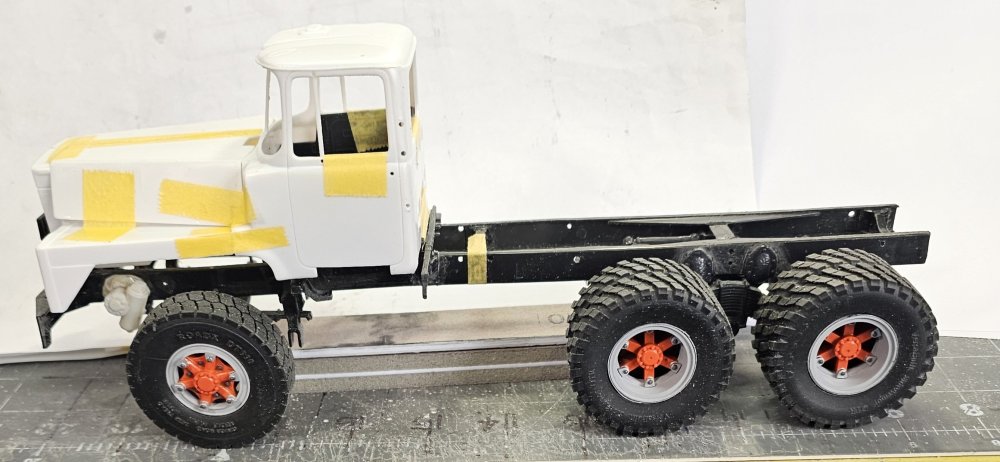
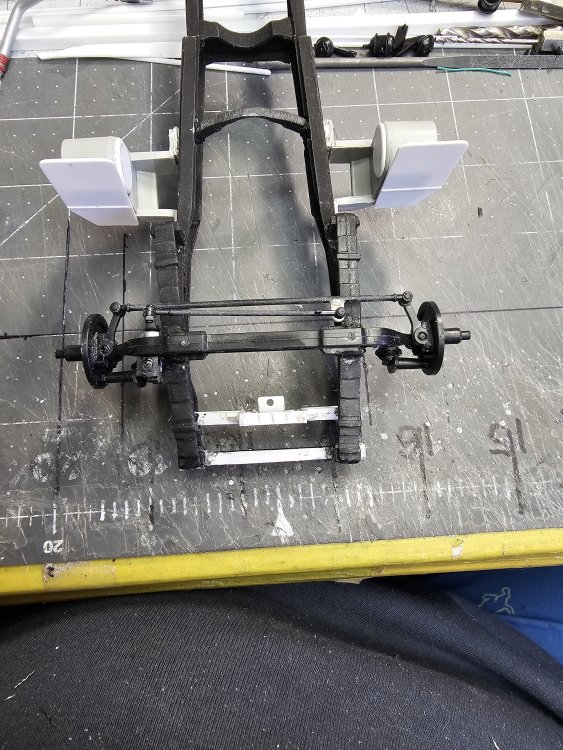
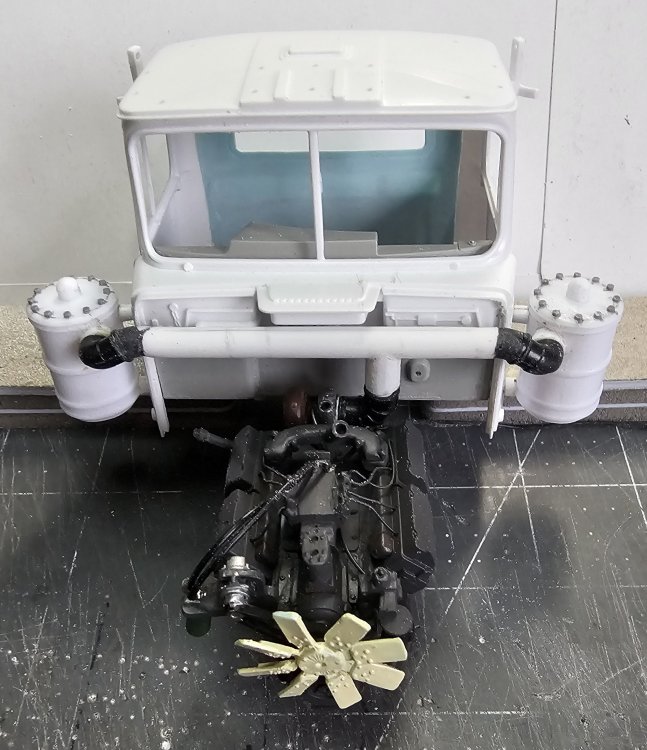
Hey all I now have everything mounted to the frame that goes on it. It's now ready for paint. Ron G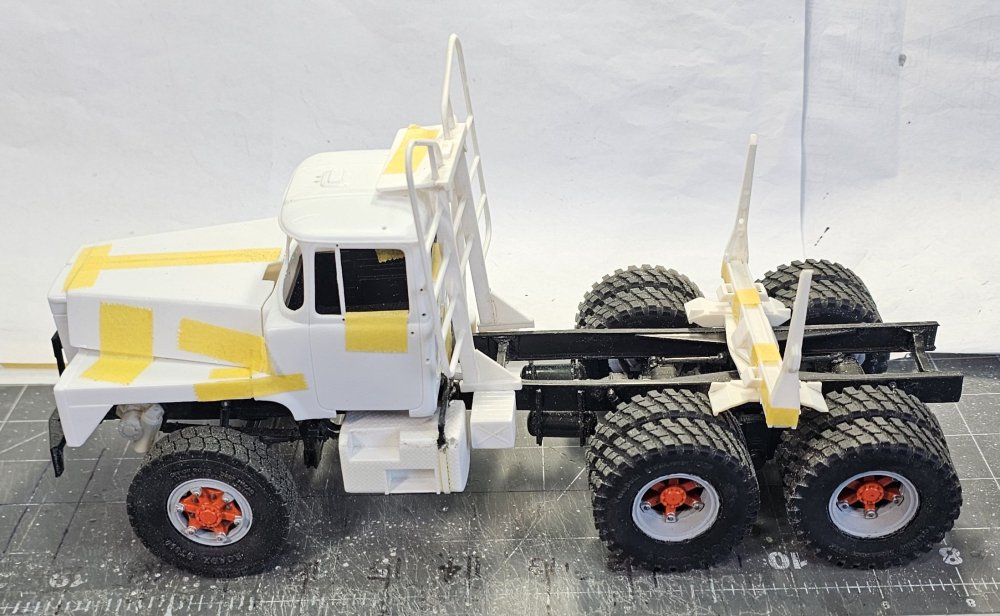
-
1/25 Mack DM800 logging truck
CrankyCrafstman replied to CrankyCrafstman's topic in LSM 1/35 and Larger Work In Progress
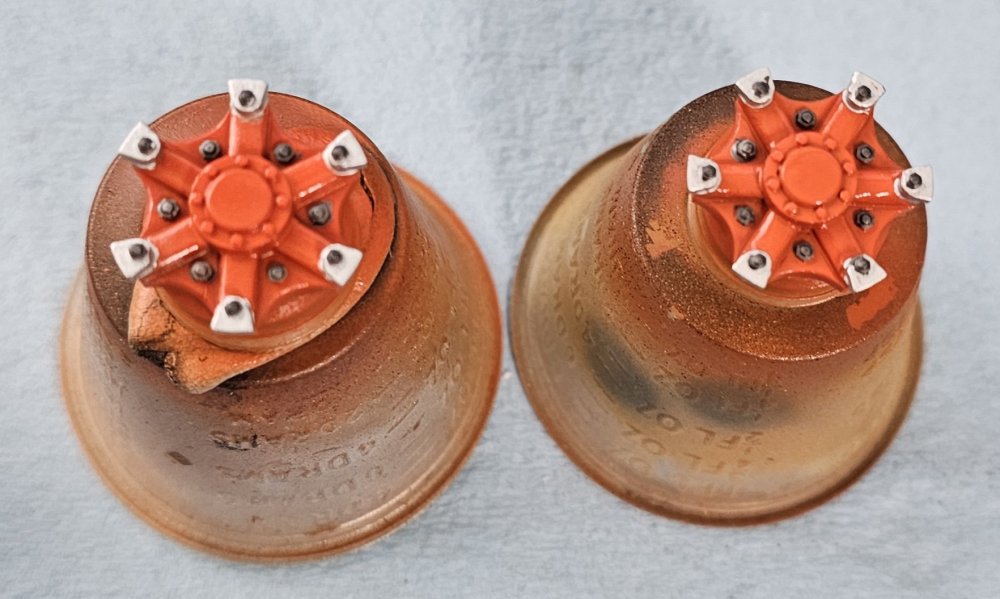
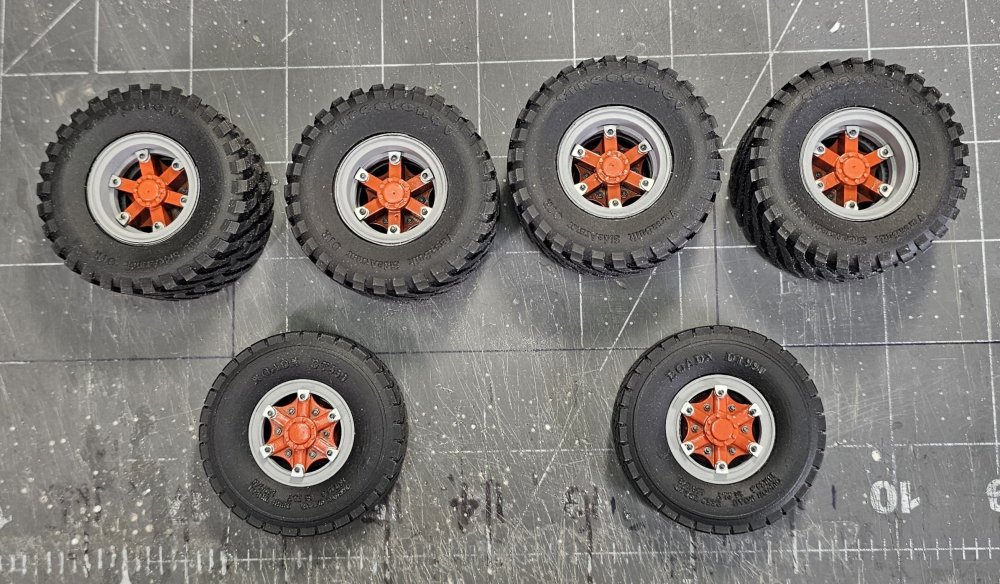
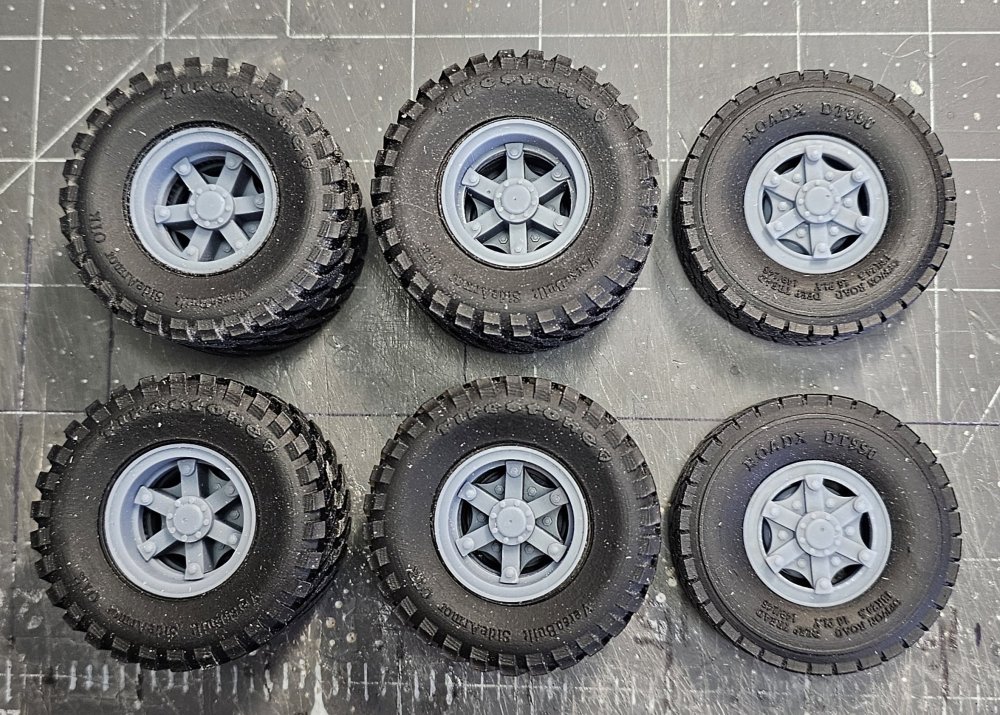
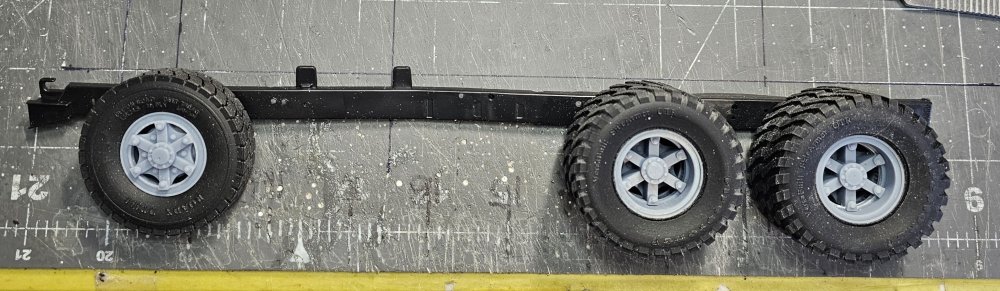
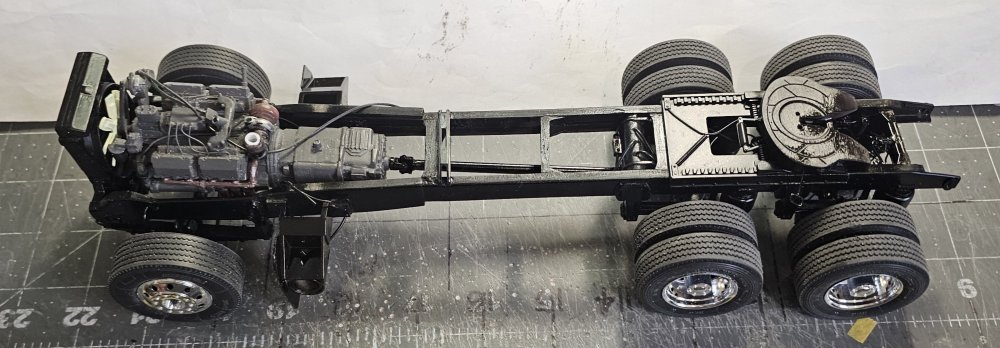
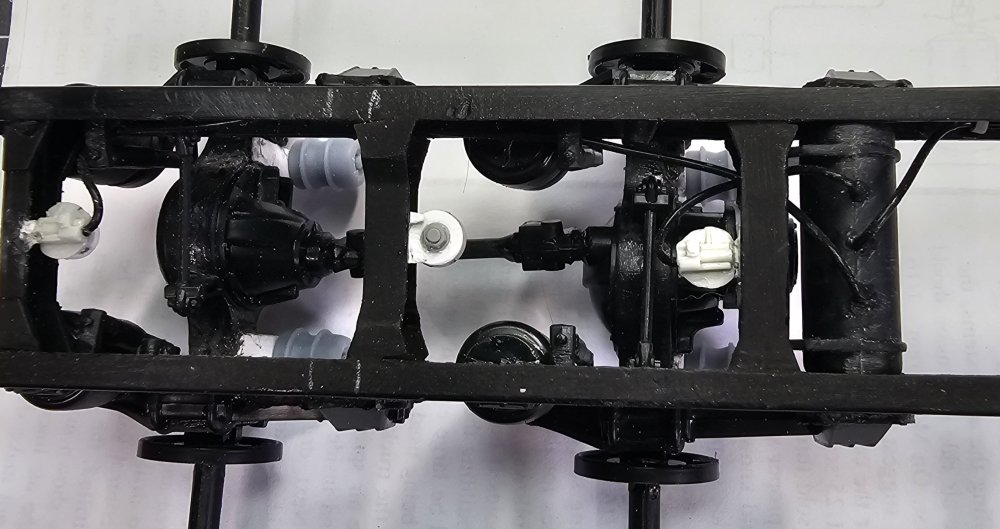
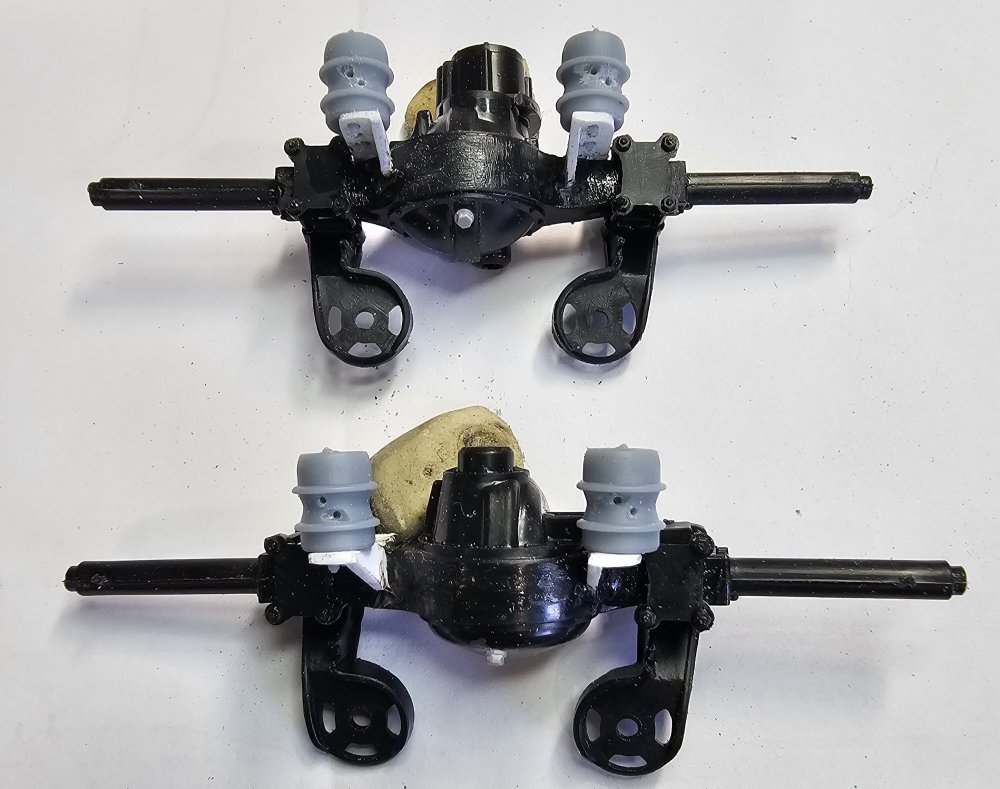
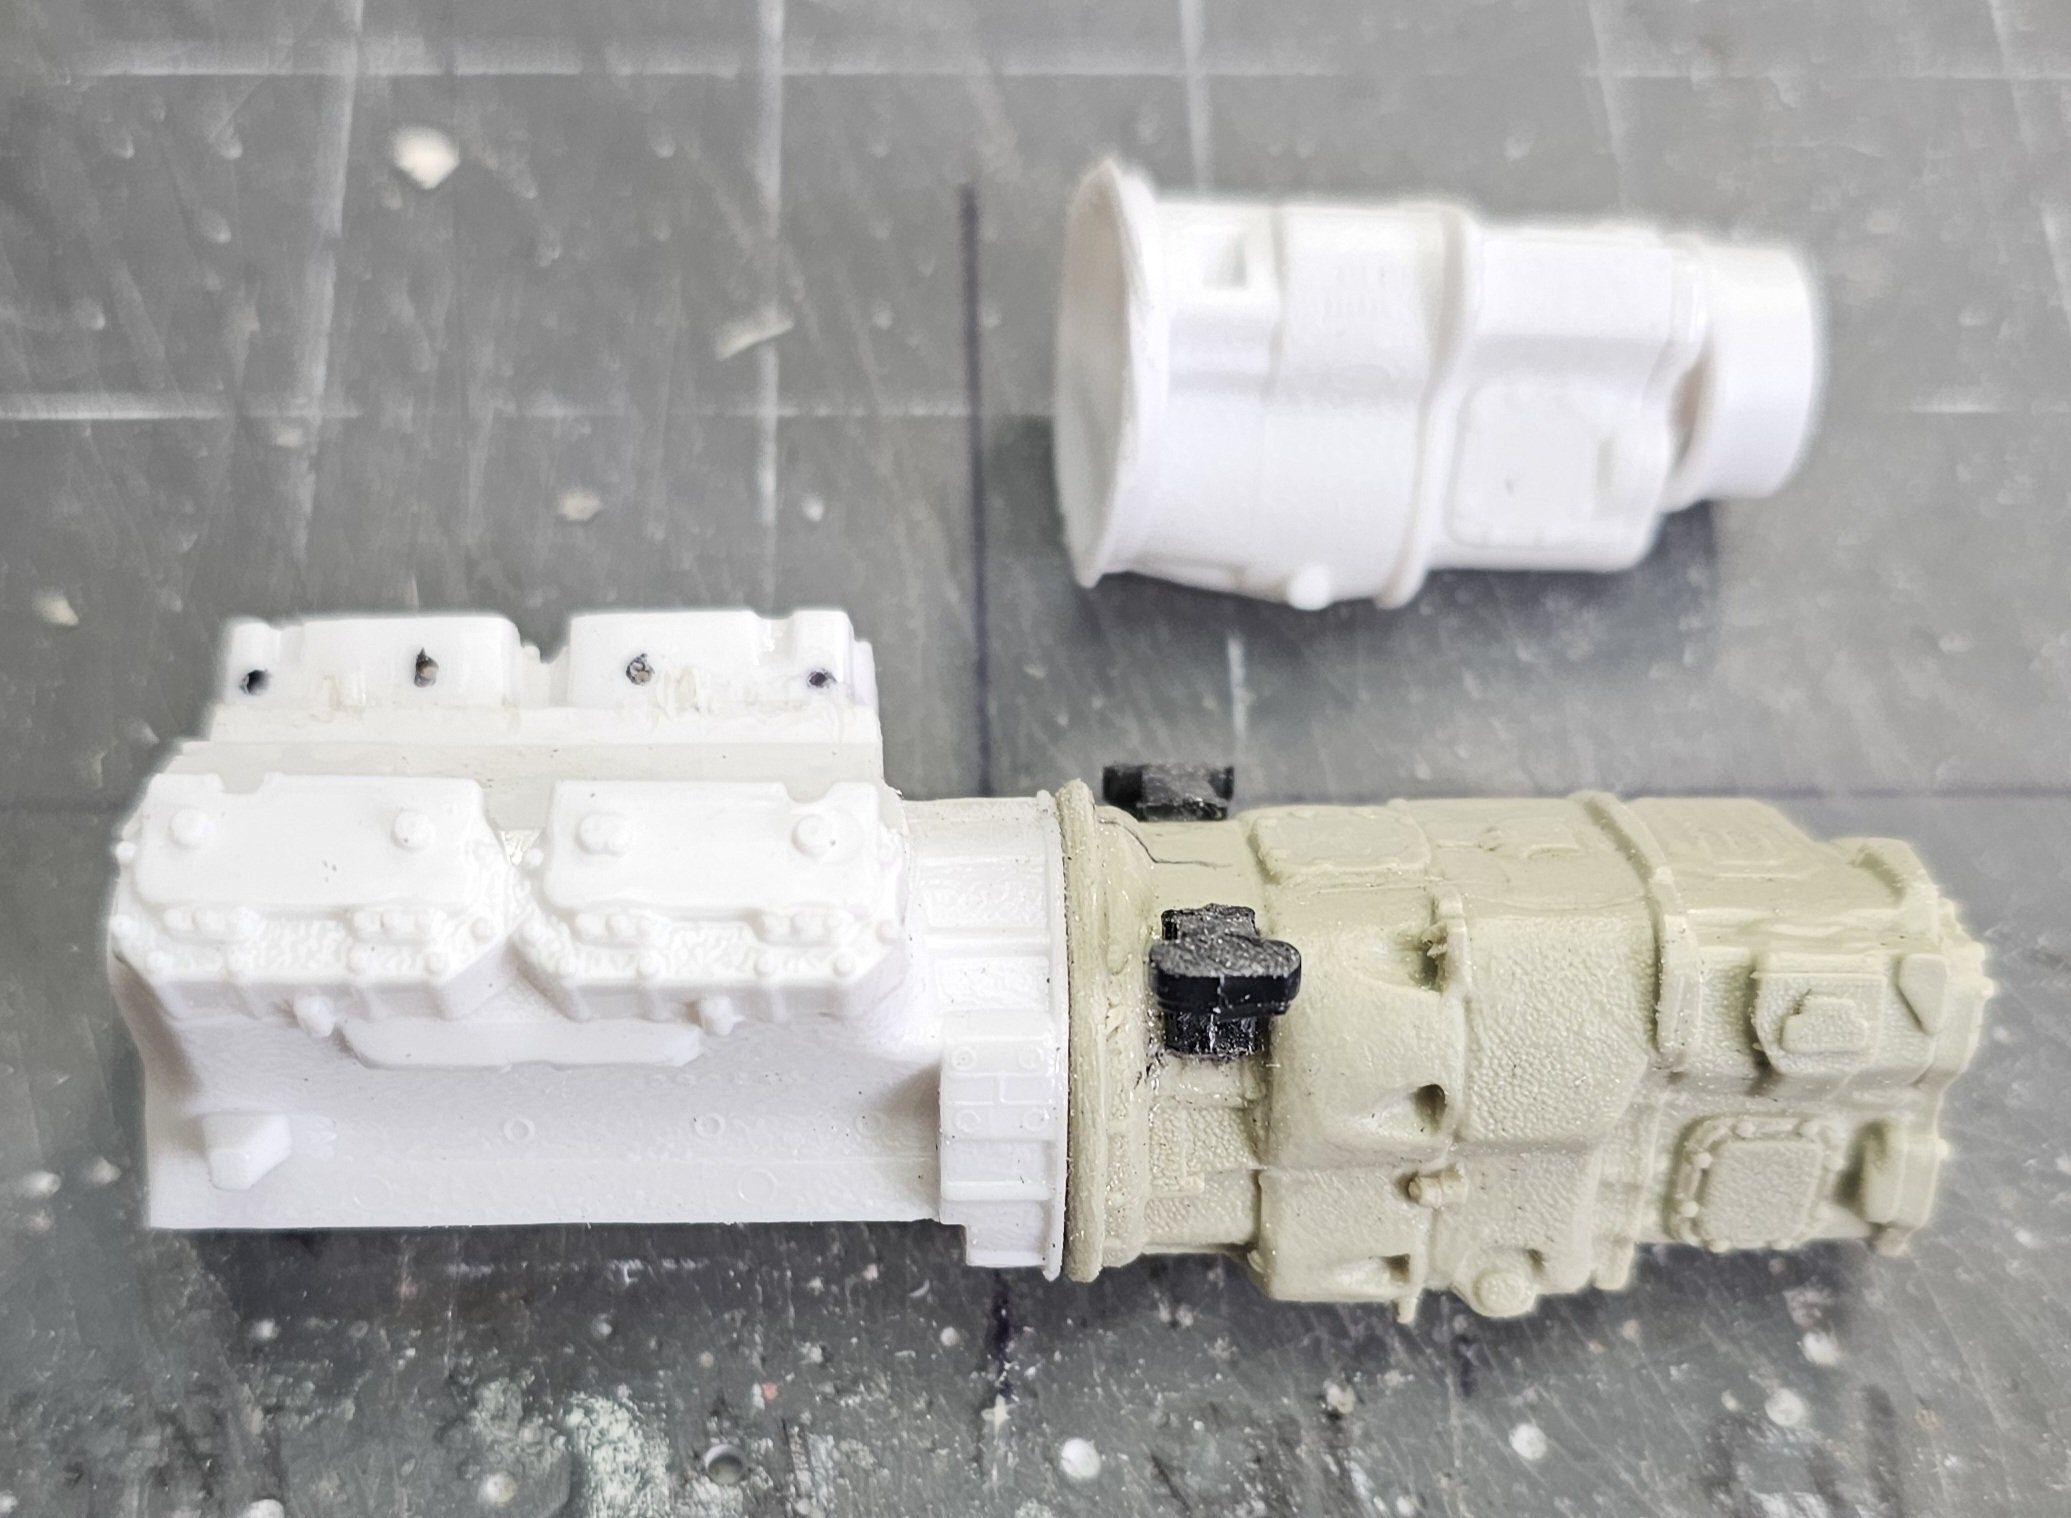
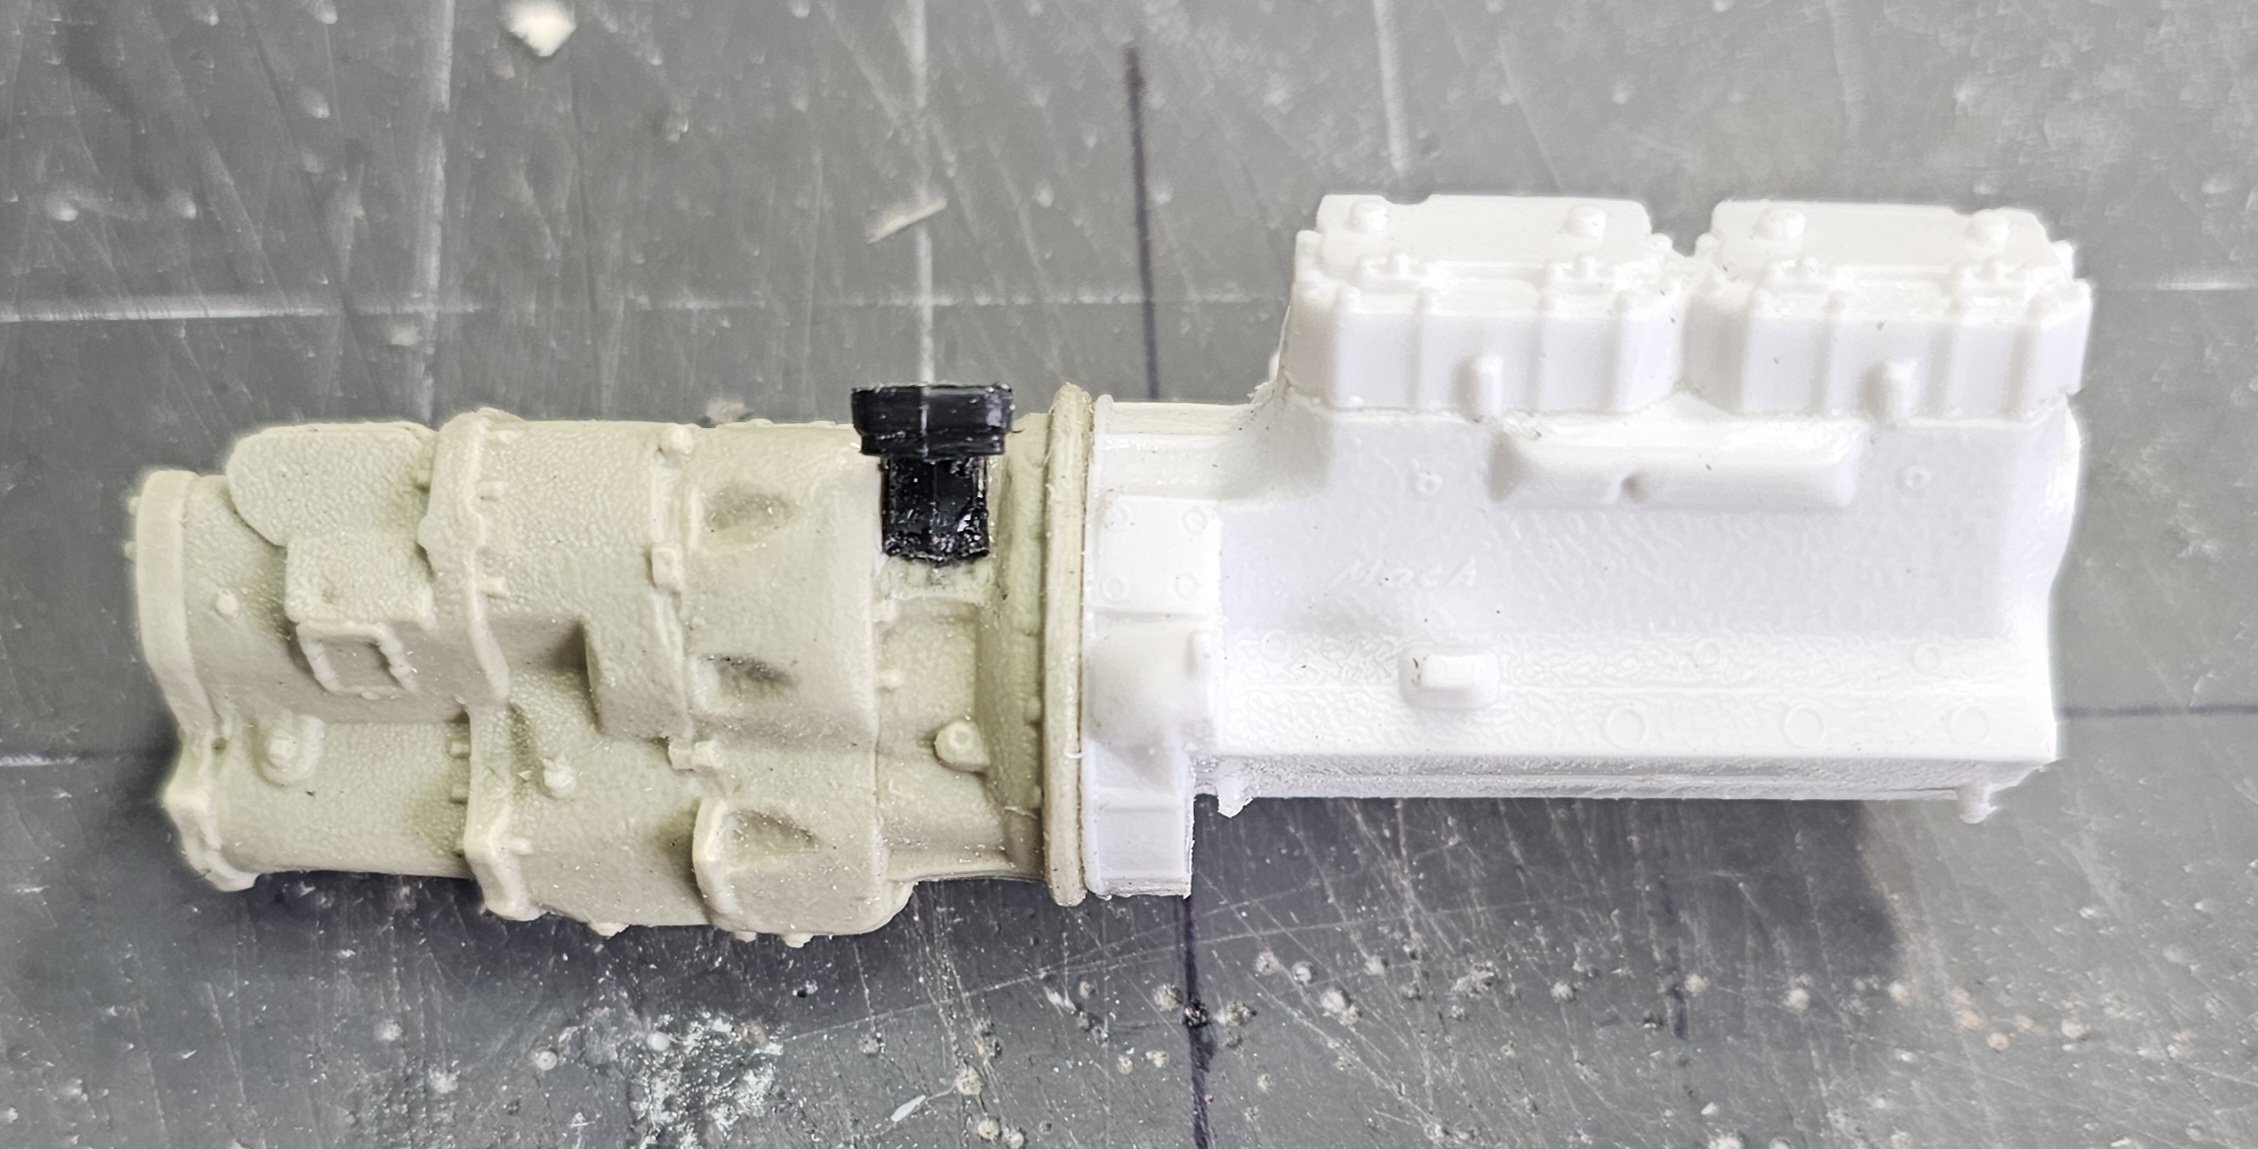
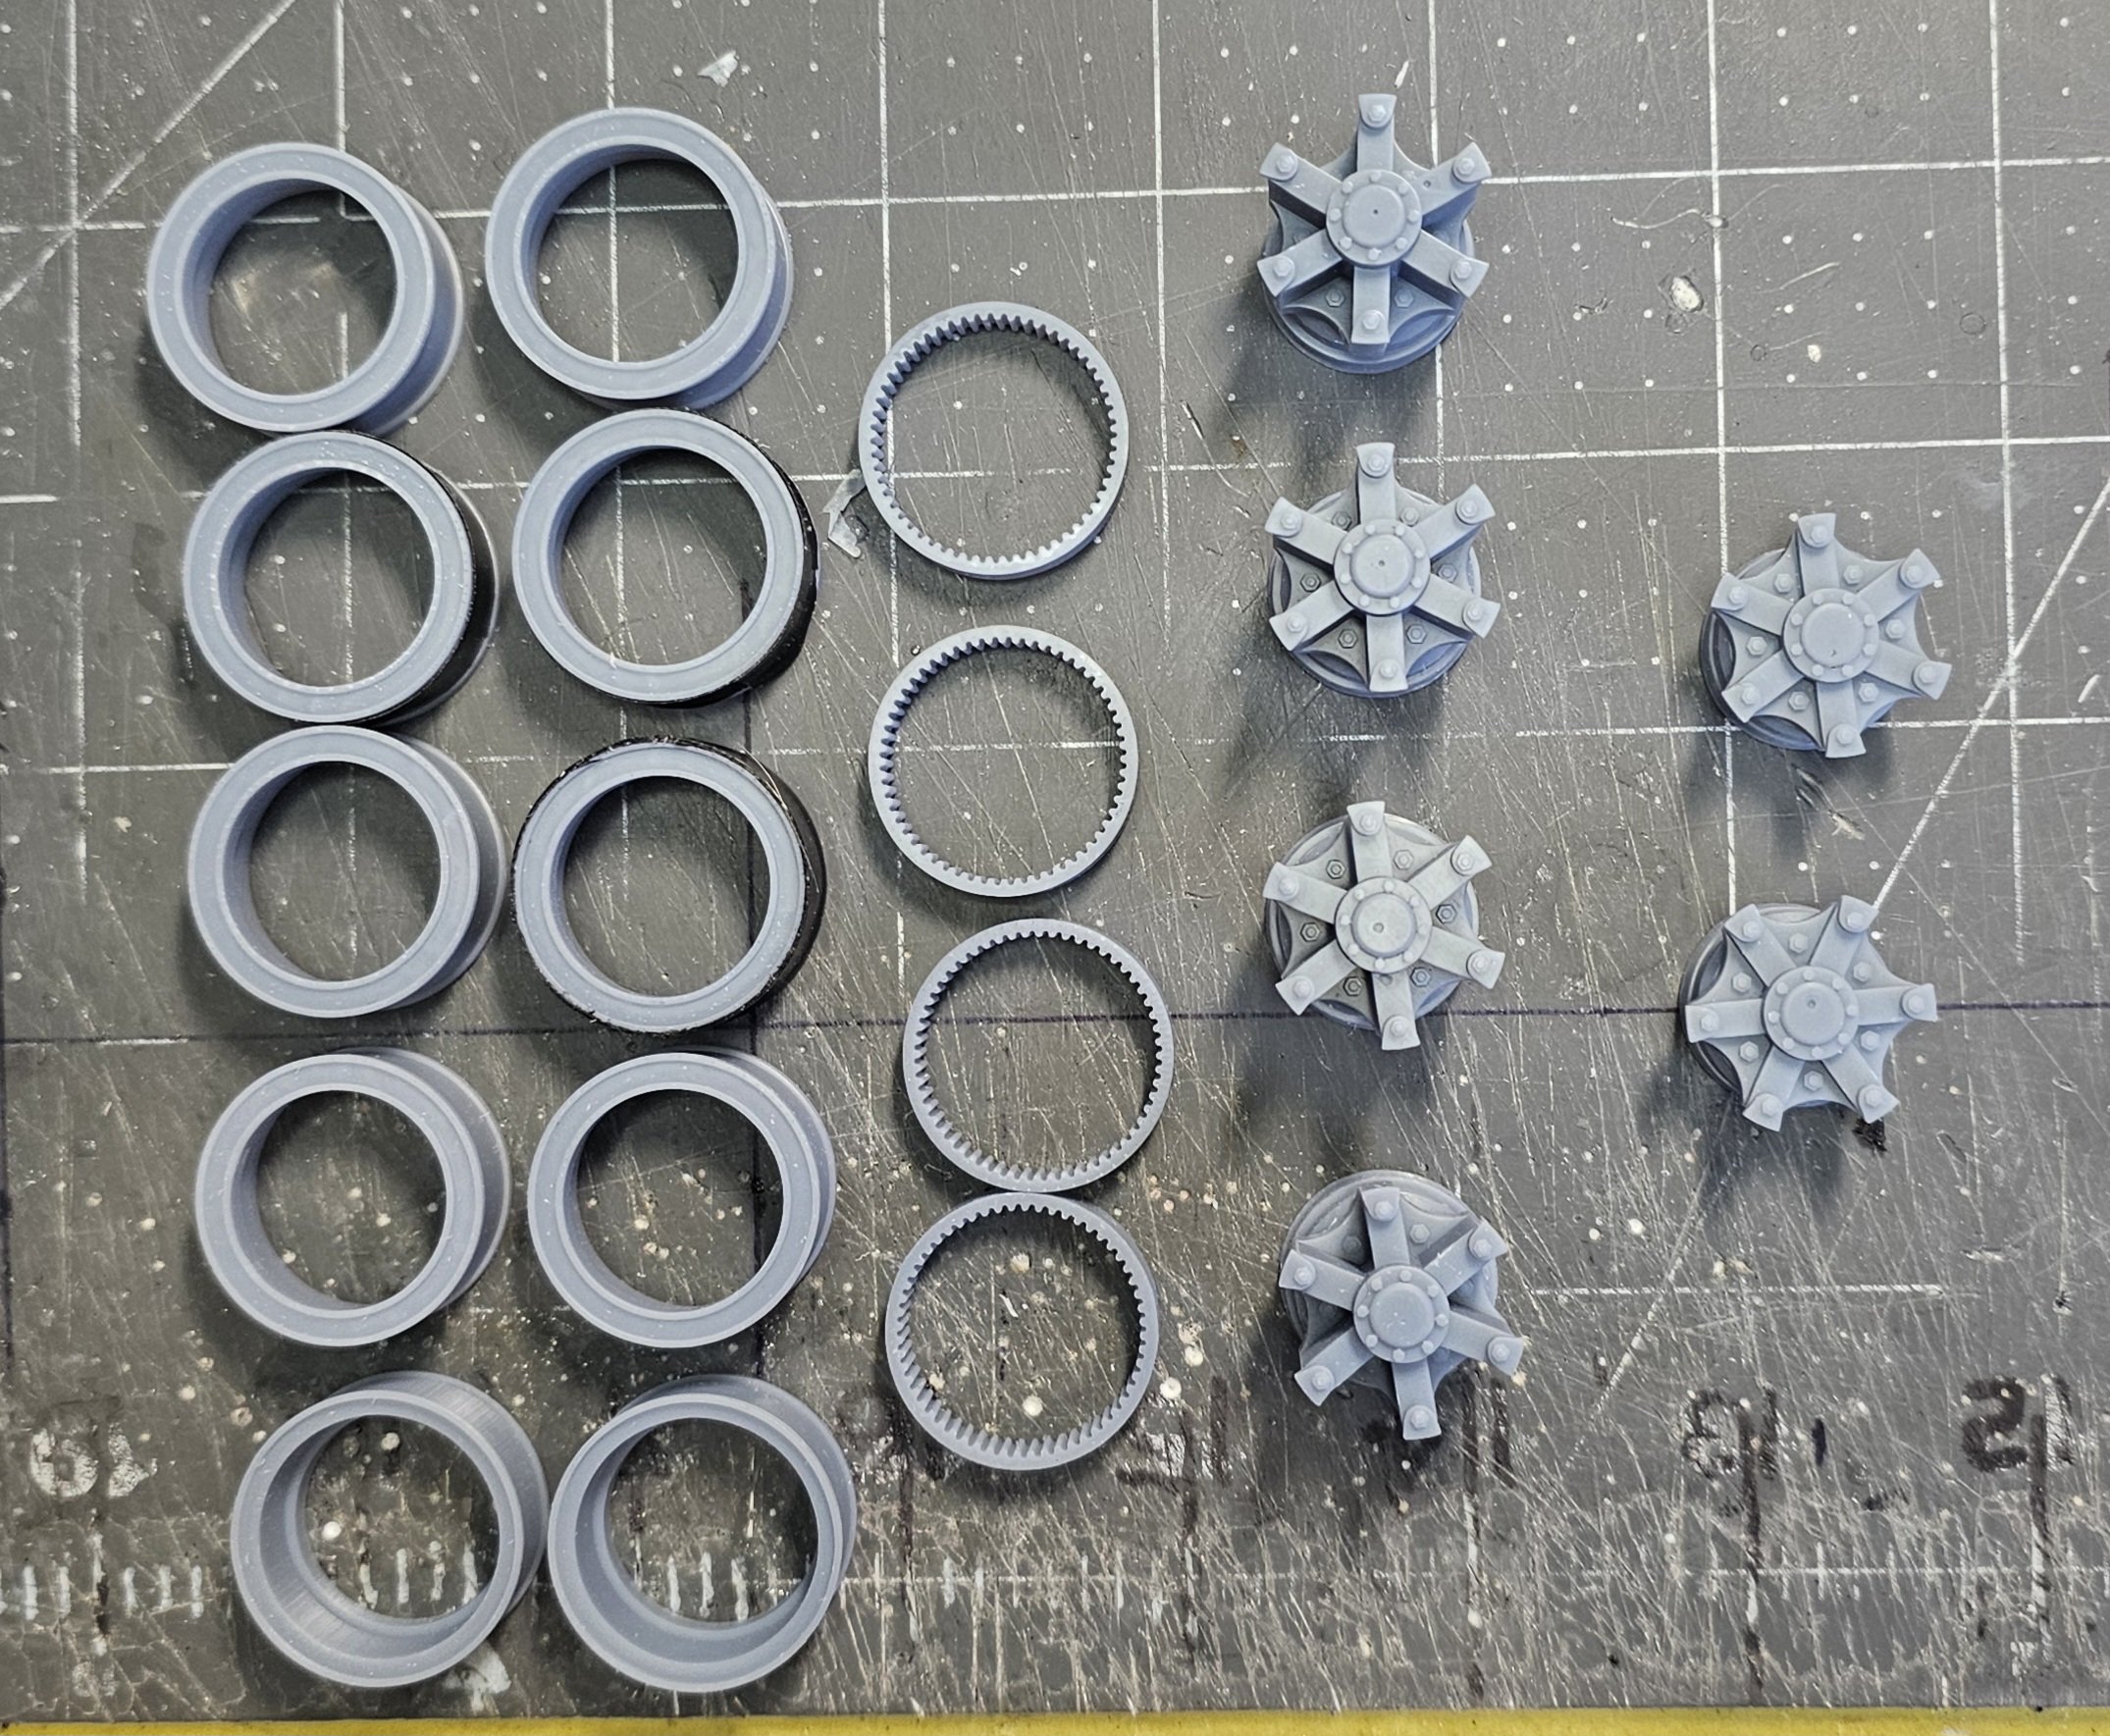
Hey all Here are some more pictures for you to look at. This is the kit engine. I cut off the transmission and replaced it with one from Jamie at Mo'luminum. Another veiw of the engine and trans. This is the frame for it. Bottom veiw of the rear suspension. I added drain plugs to the rear ends. This is a mock-up of the truck. This is the front wheel centers just after I painted them. This is the wheels and tires all ready to mount. This is the rear wheels and tires with the kit chrome center caps. This view shows the mock-up after i moved the front axle forward 6" it is now 13' 6" W.B. another veiw of the truck, I'm not going to use the rear fenders. This shows kinda what it will look like. The log I made from 2" square 12" peice of balsa wood carved and covered with brown creape paper. I'm going to make longer logs for this about 18" or 36' scale.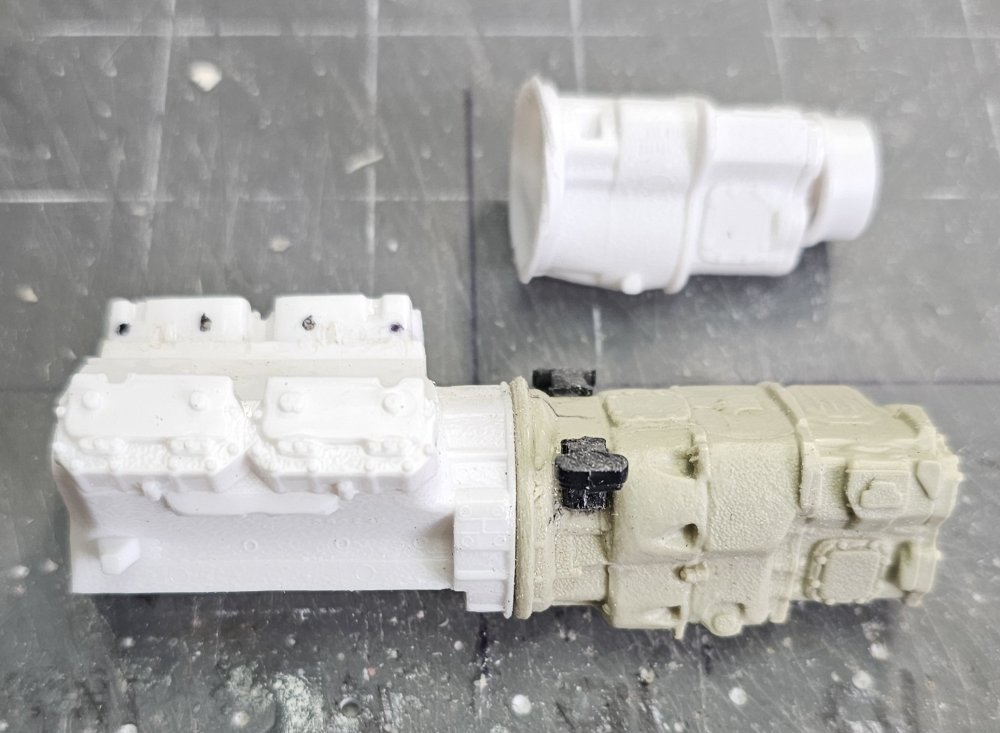


-
1/25 Mack DM800 logging truck
CrankyCrafstman replied to CrankyCrafstman's topic in LSM 1/35 and Larger Work In Progress
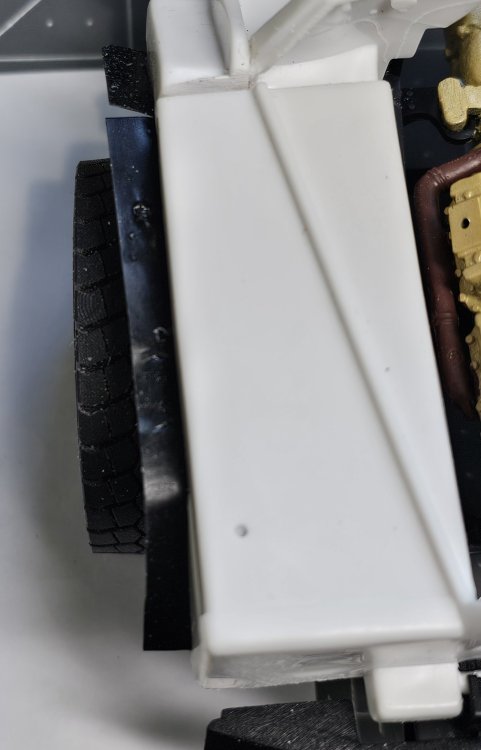
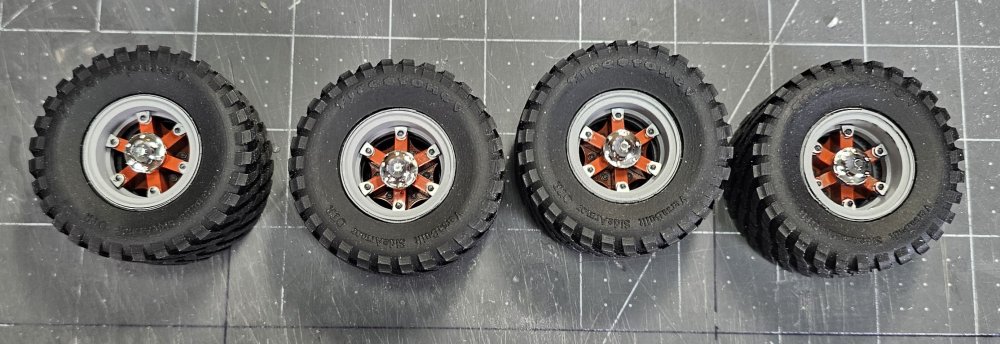
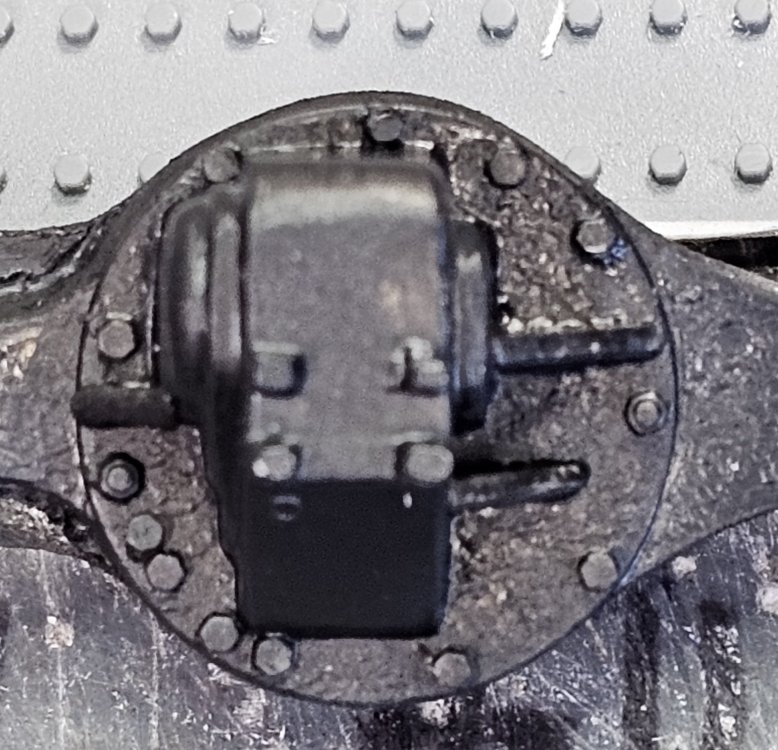
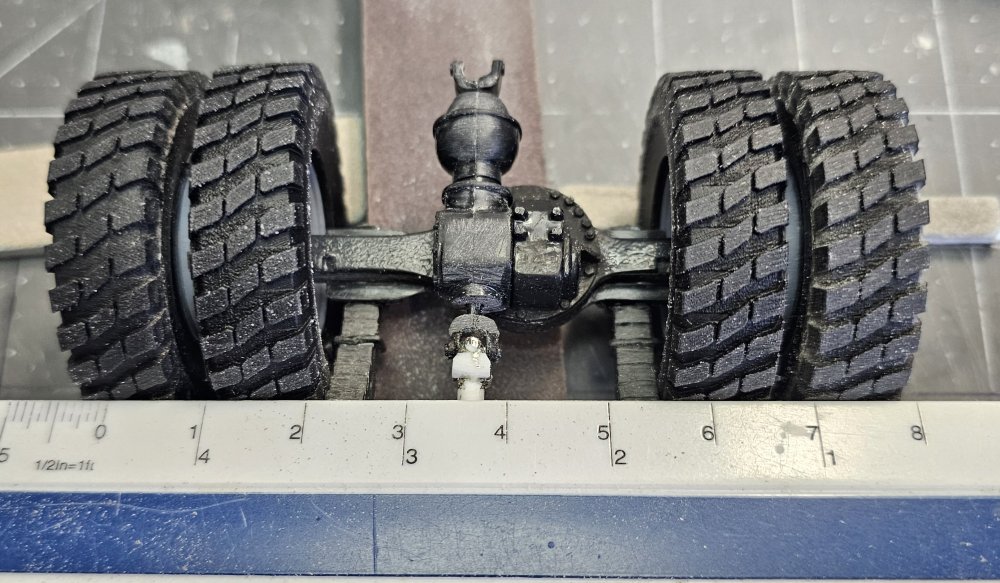
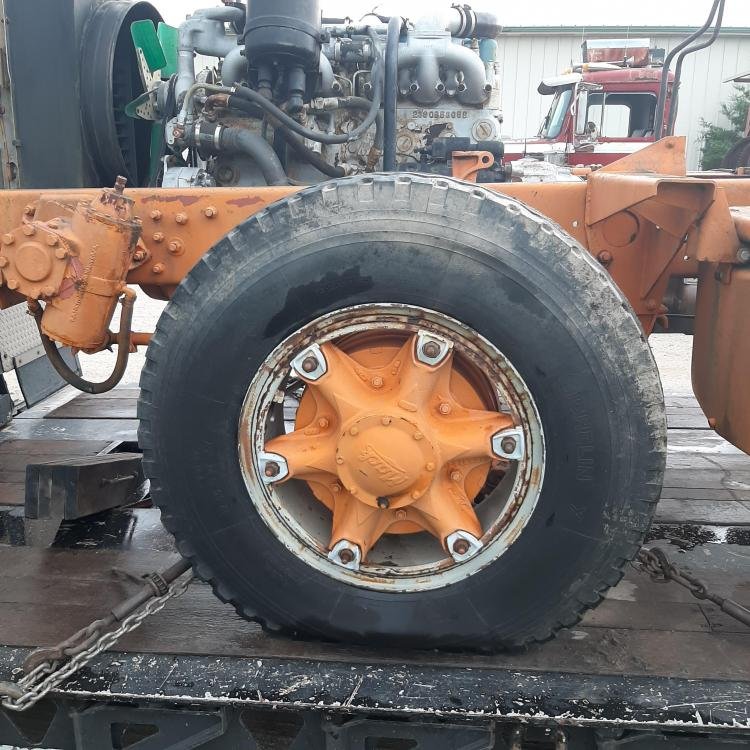
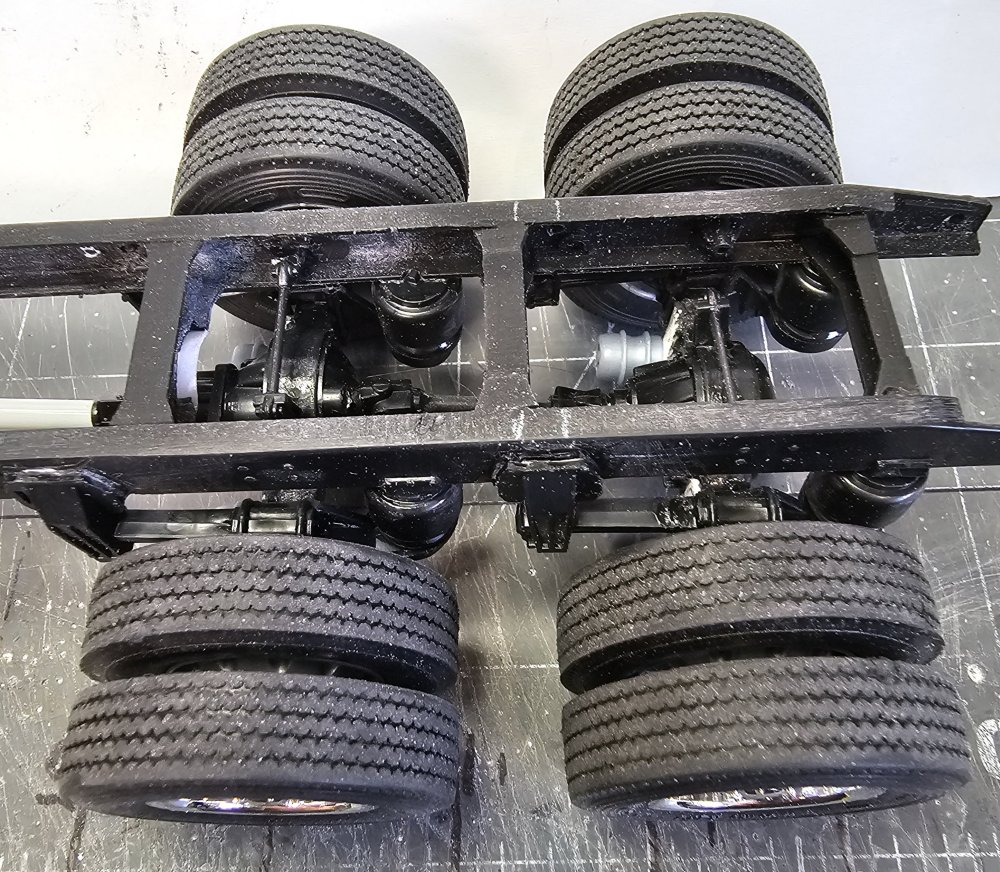
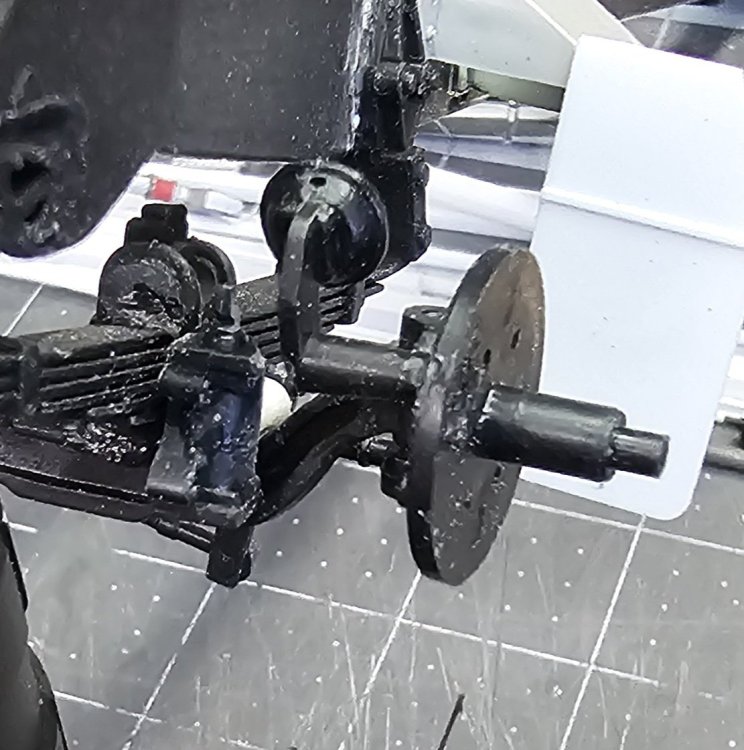
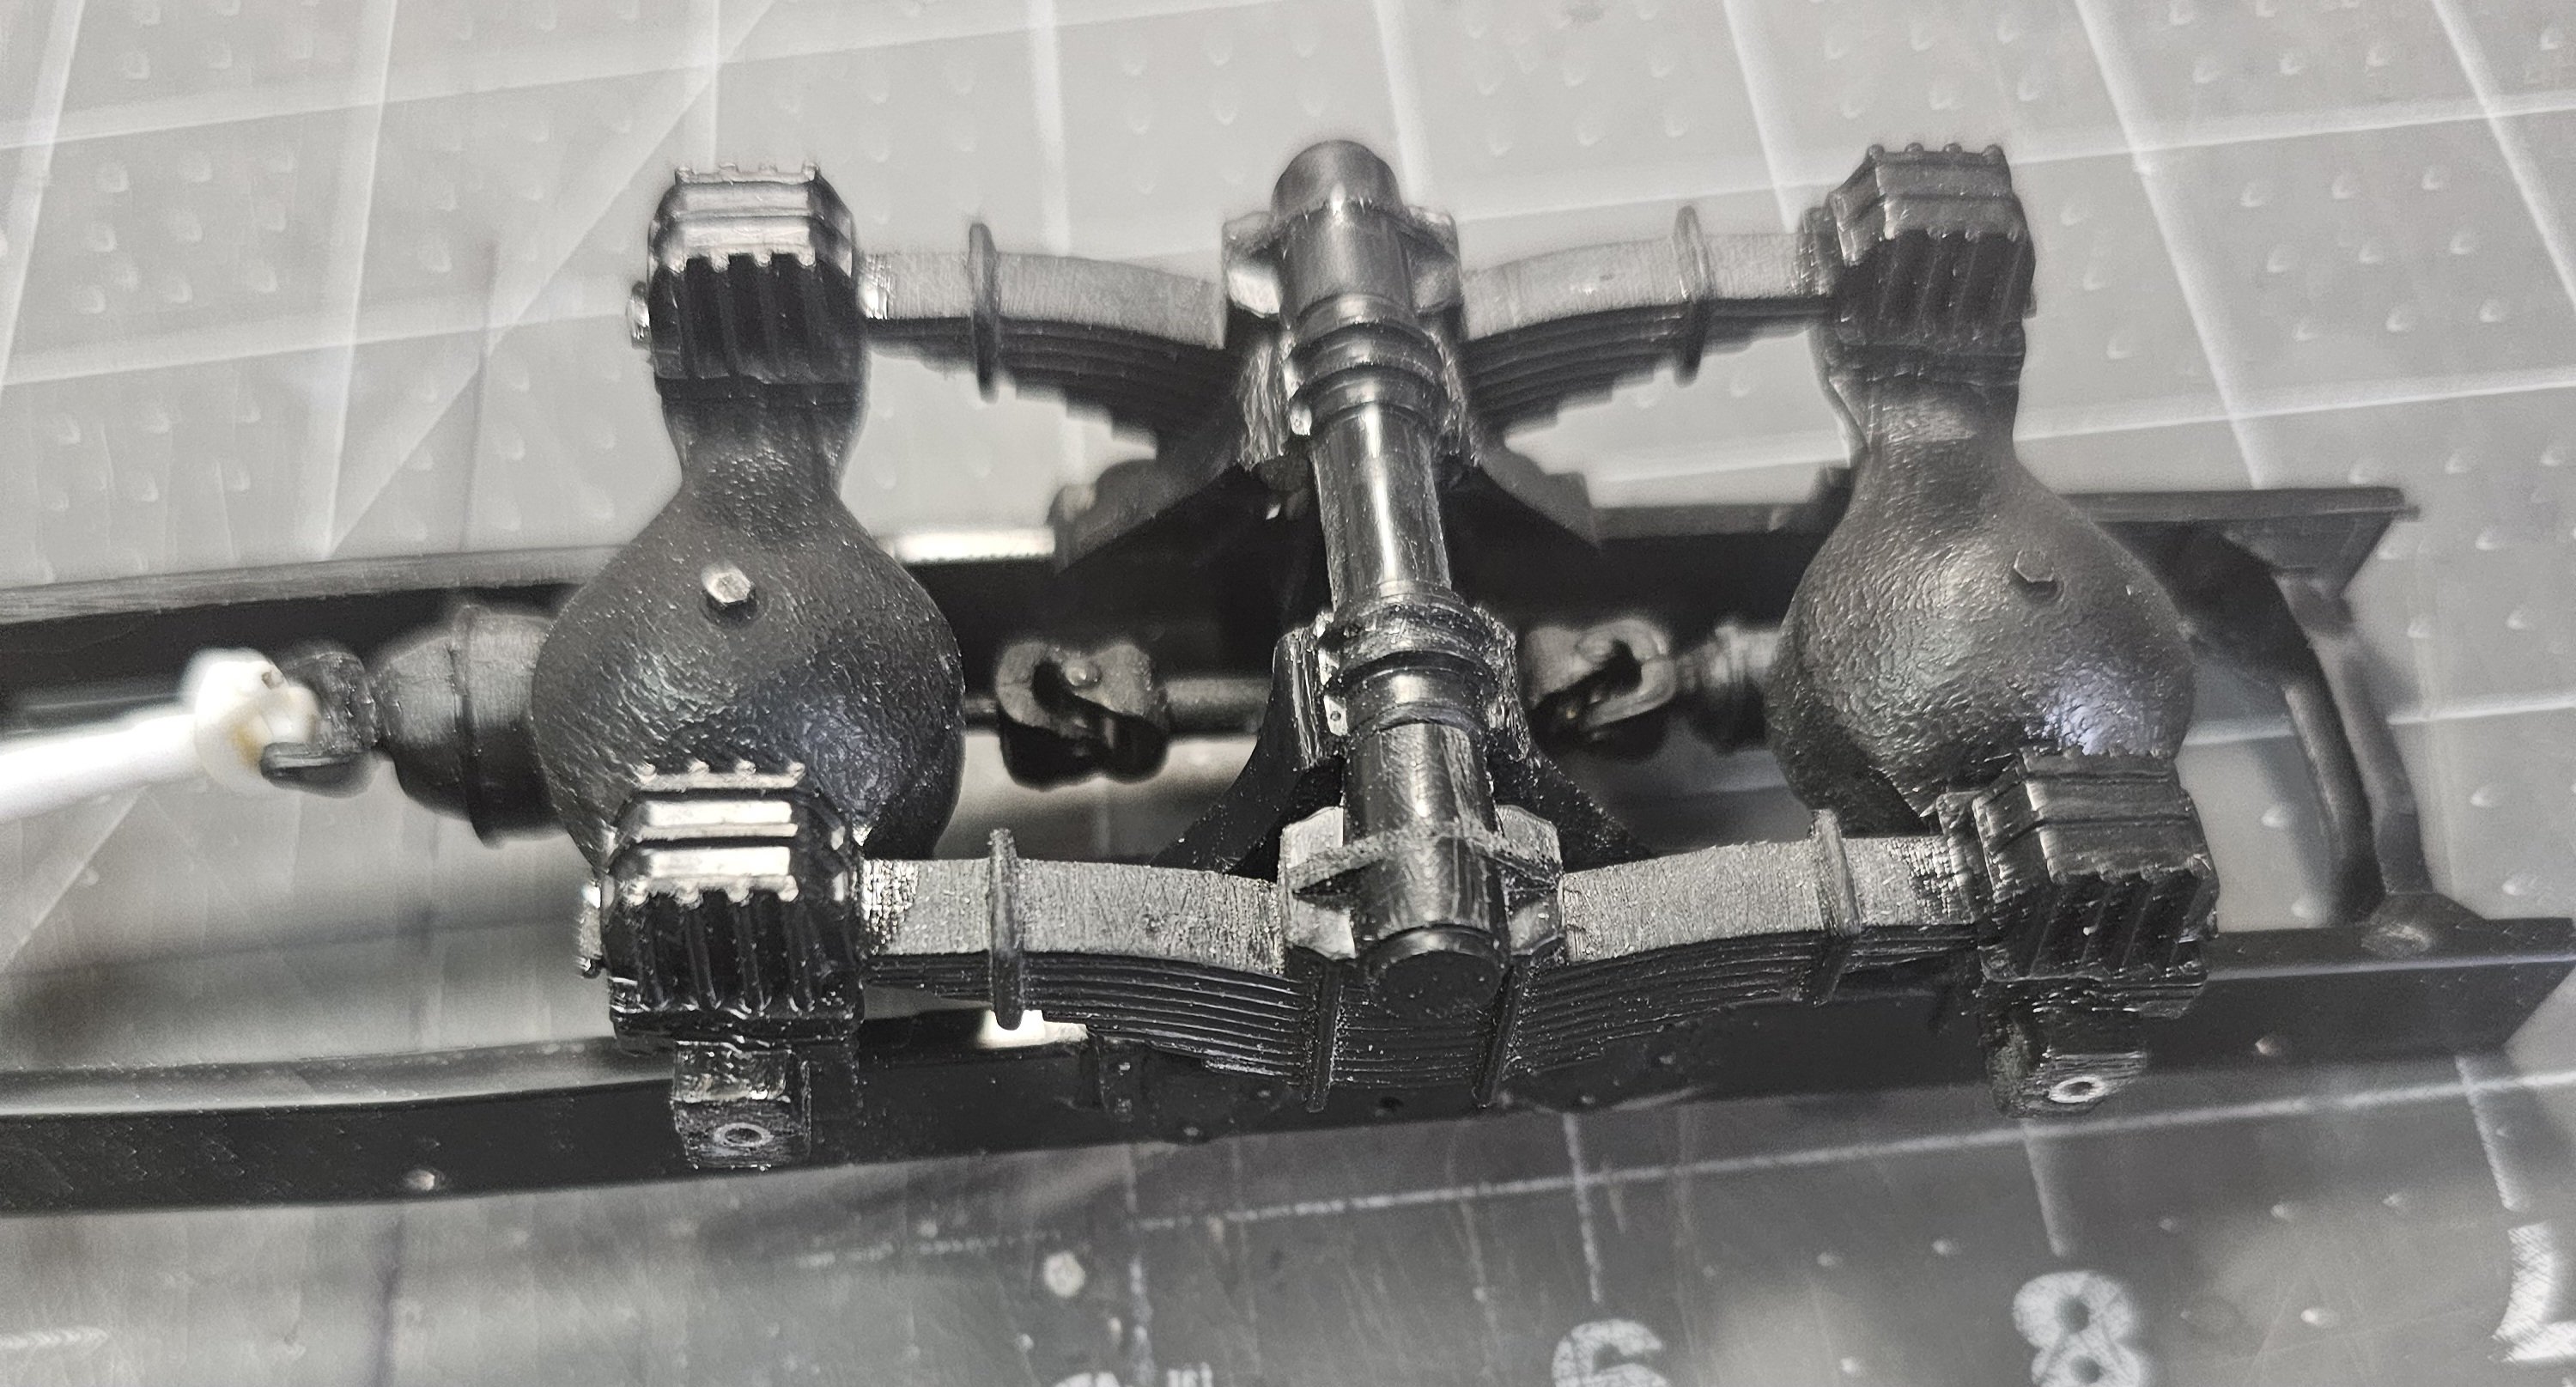
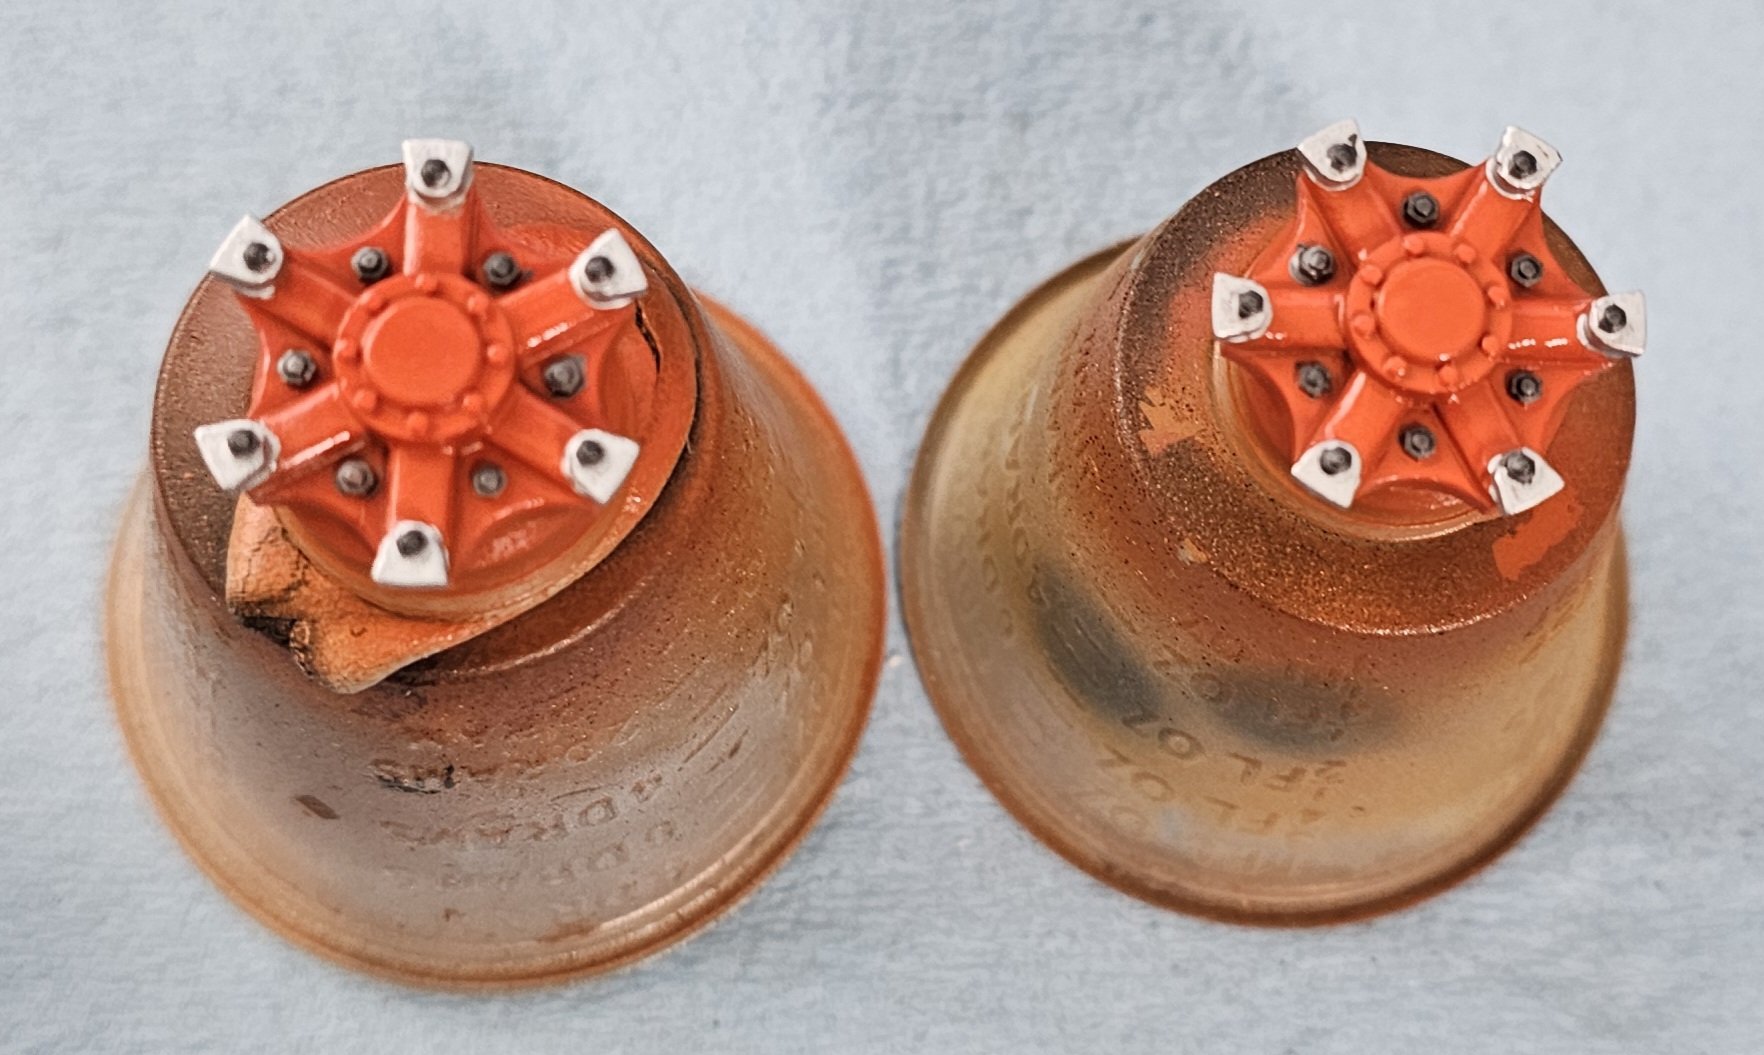
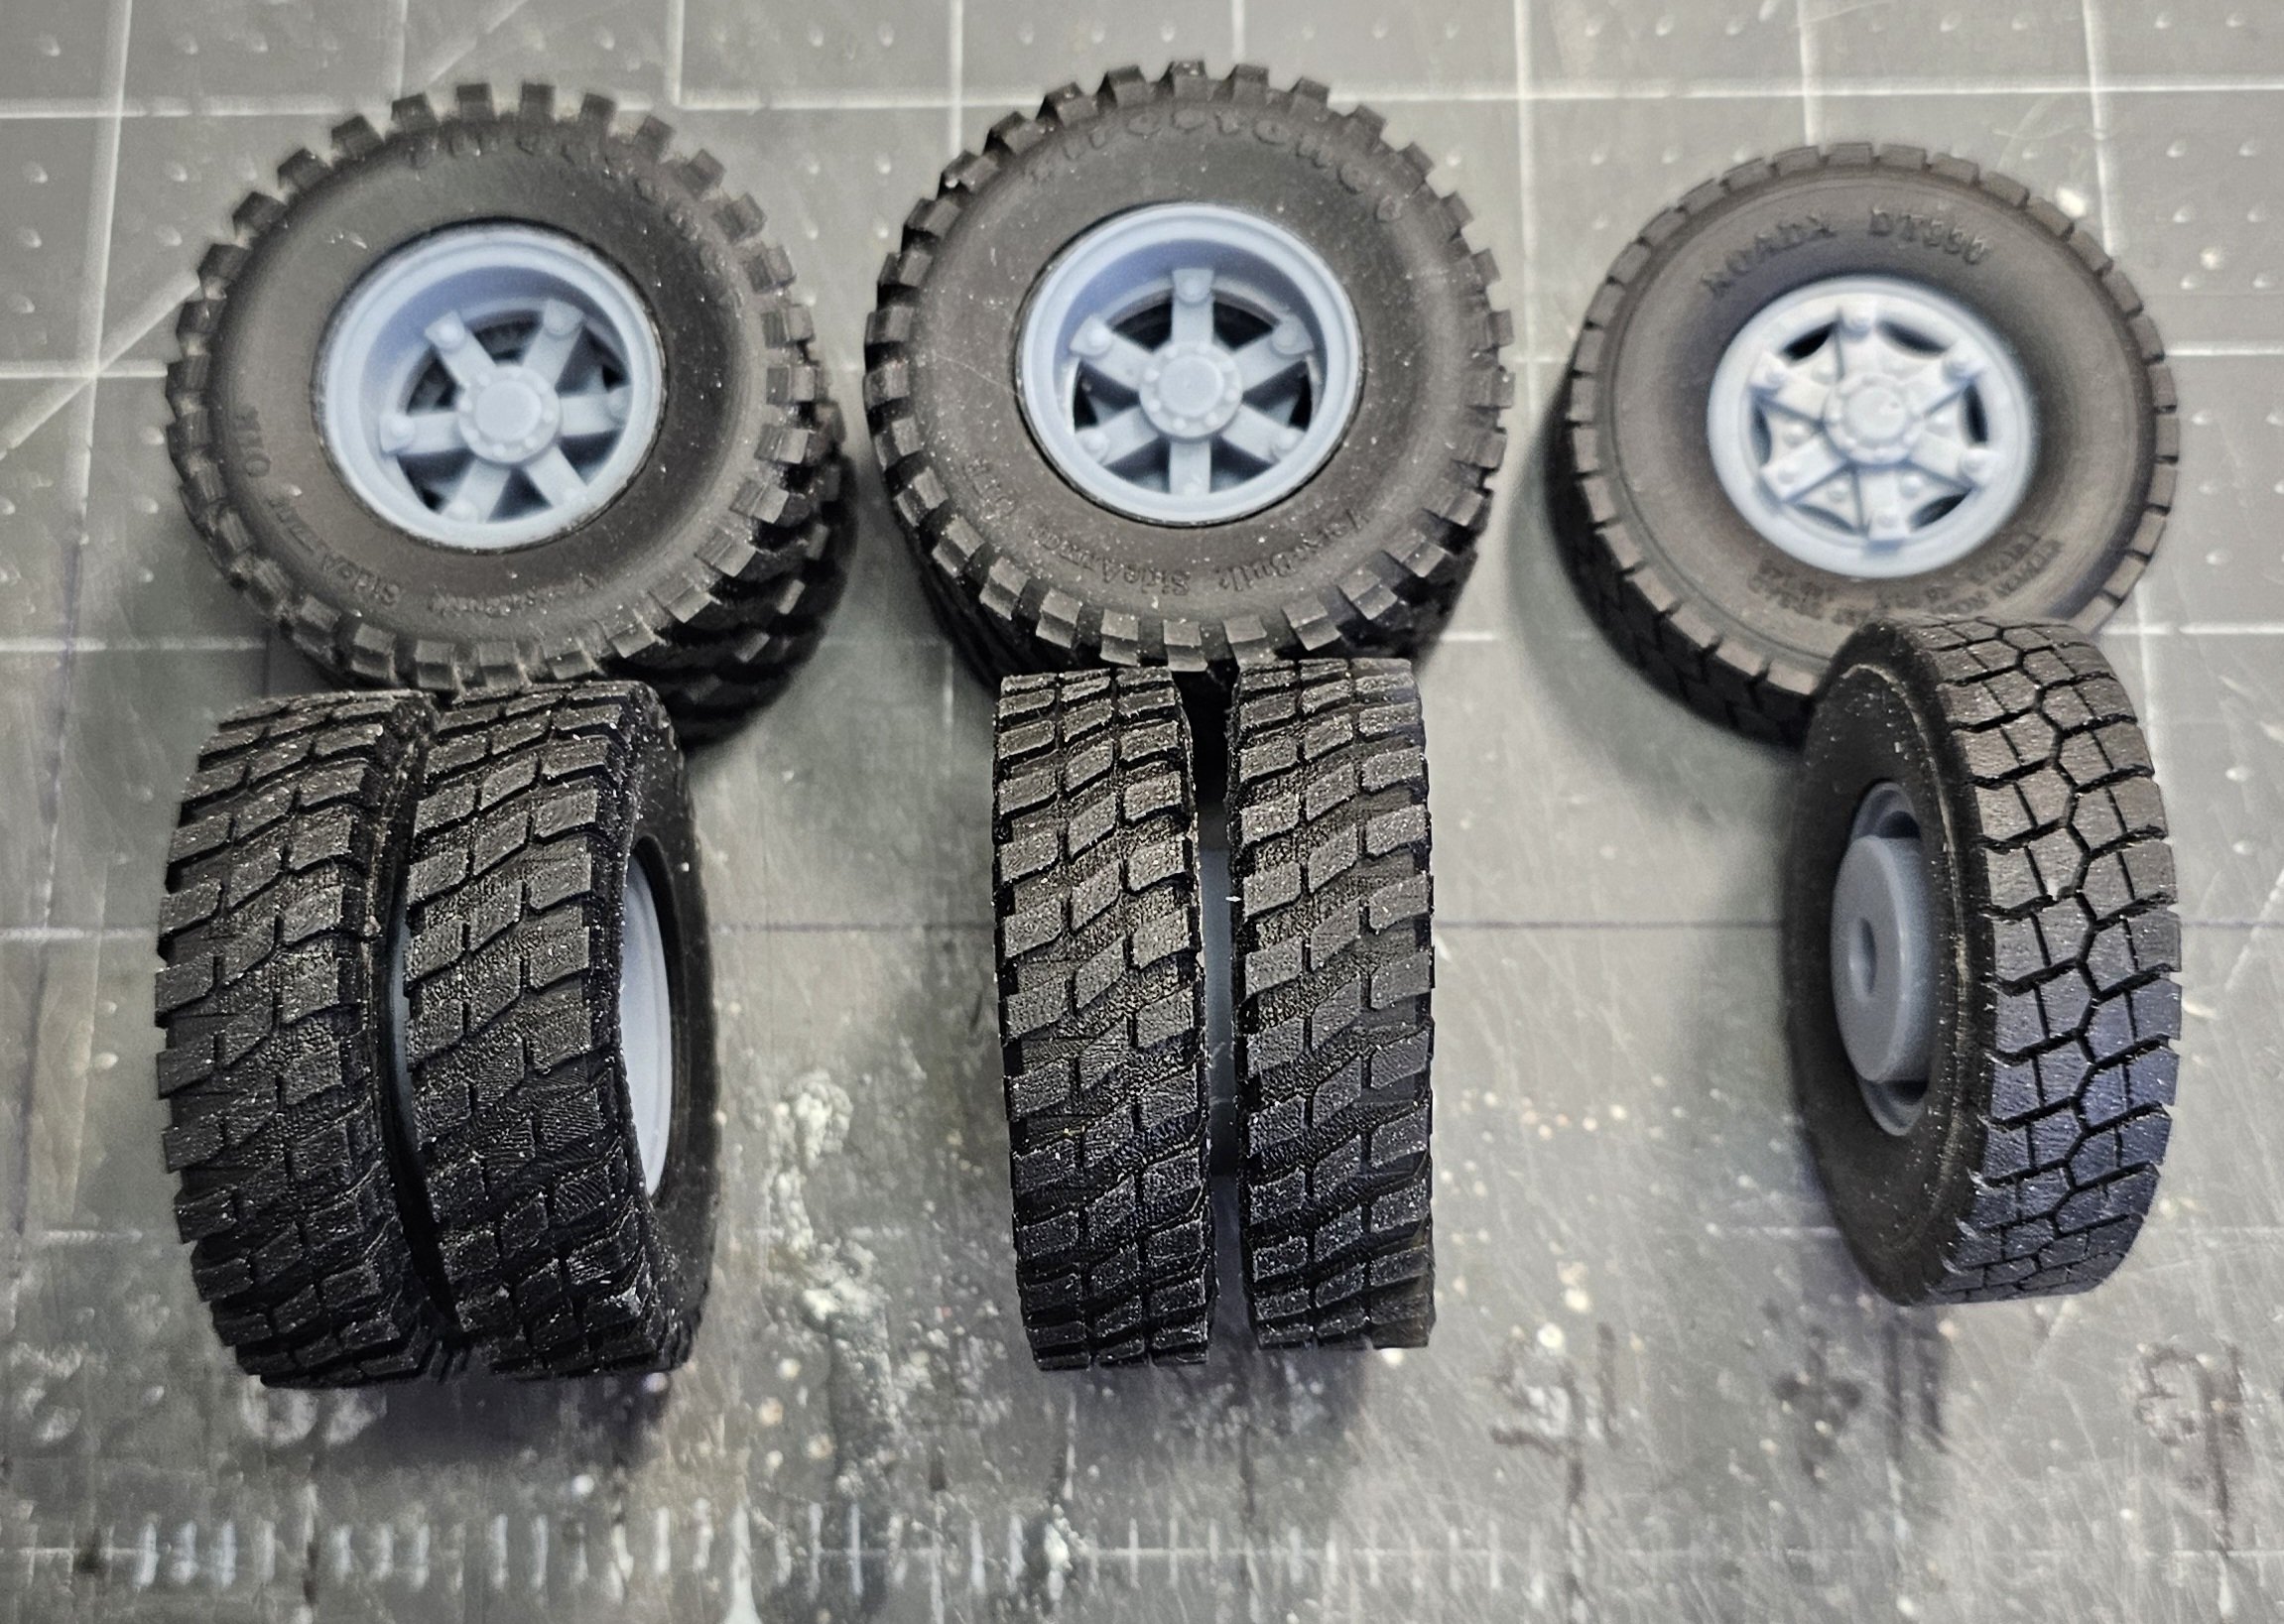
Hey all Here are some more pictures of my DM800 build. The bolts on the differentials looked weak, so I replaced them with Meng bolts. After a coat of flat black. These are the wheels that I'm using for this build. They are 6 spoke Mack Daytons from Paul at ST Supply. Here they are with the tires mounted. The rear ones didn't fit there tires, tires had larger hole then the wheels, so i rapped them with black electrical tape to get them to fit. Another veiw of the W/T's. This veiw shows what they look like on the axle. This view shows the rear suspension and the brake chambers. The chrome parts are the slack adjusters from the kit and the brake cans are from Kootenay in Canada. This is a mock-up of the W. B. she's pretty short because those switch backs up in the mountains are pretty tight. Be back soon with more updates. Ron G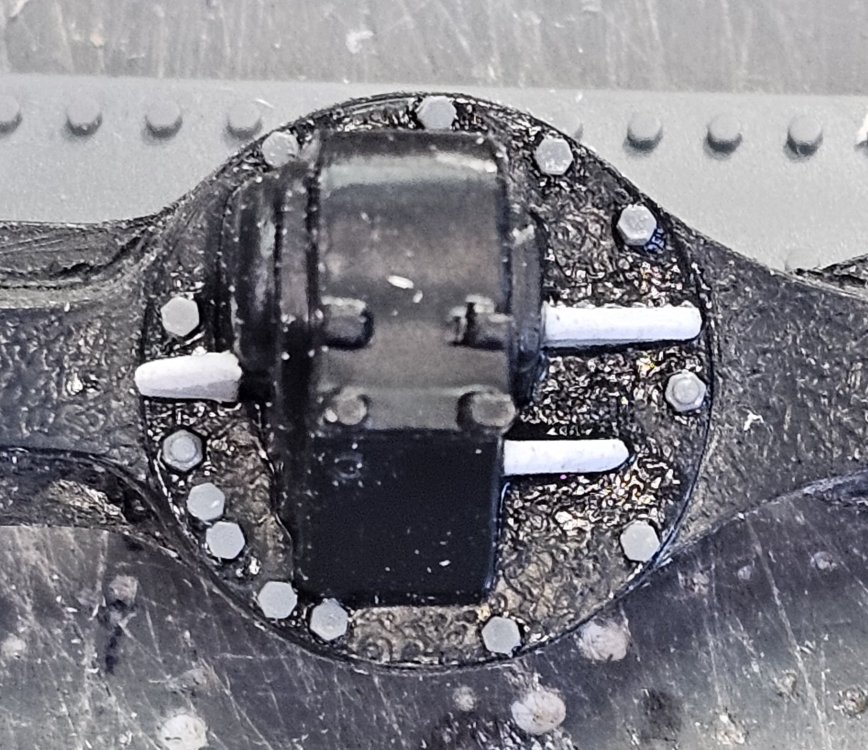


-
1/25 Mack DM800 logging truck
CrankyCrafstman posted a topic in LSM 1/35 and Larger Work In Progress
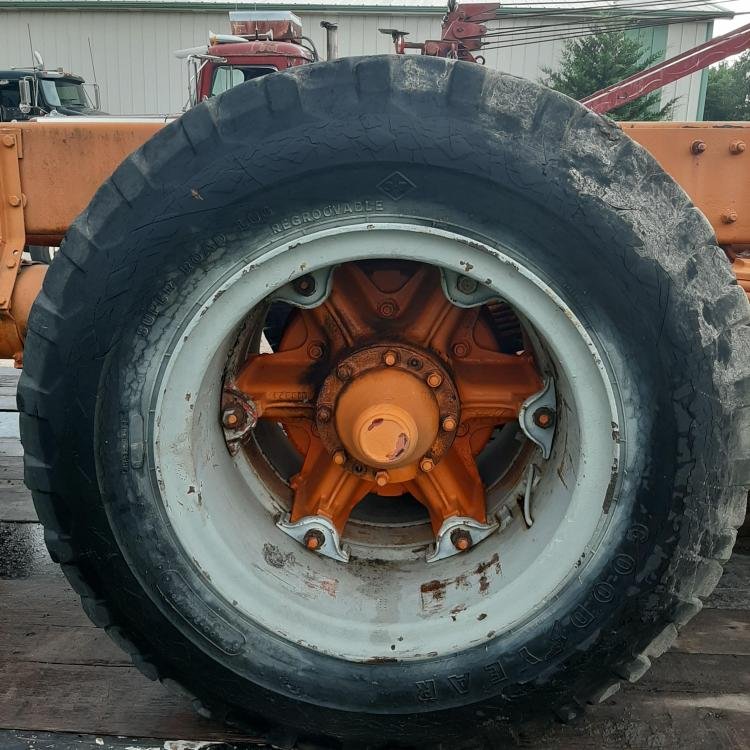
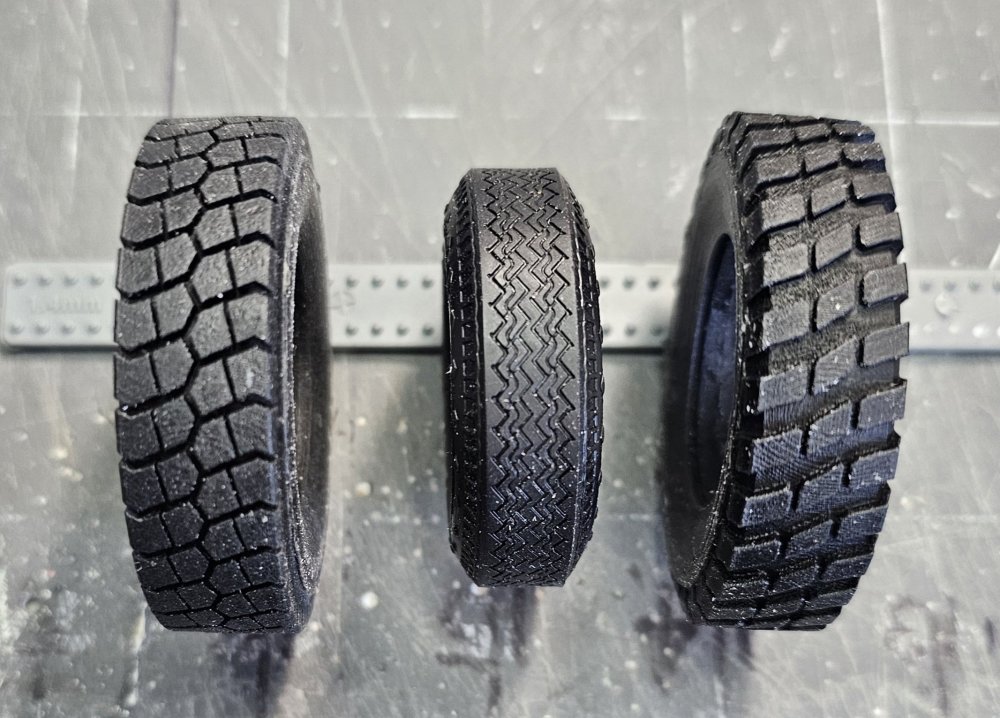
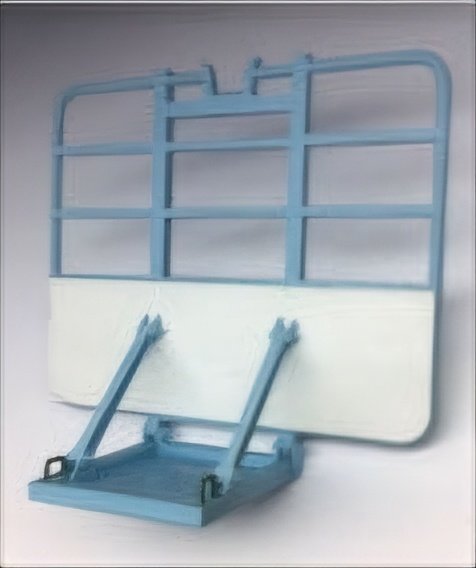
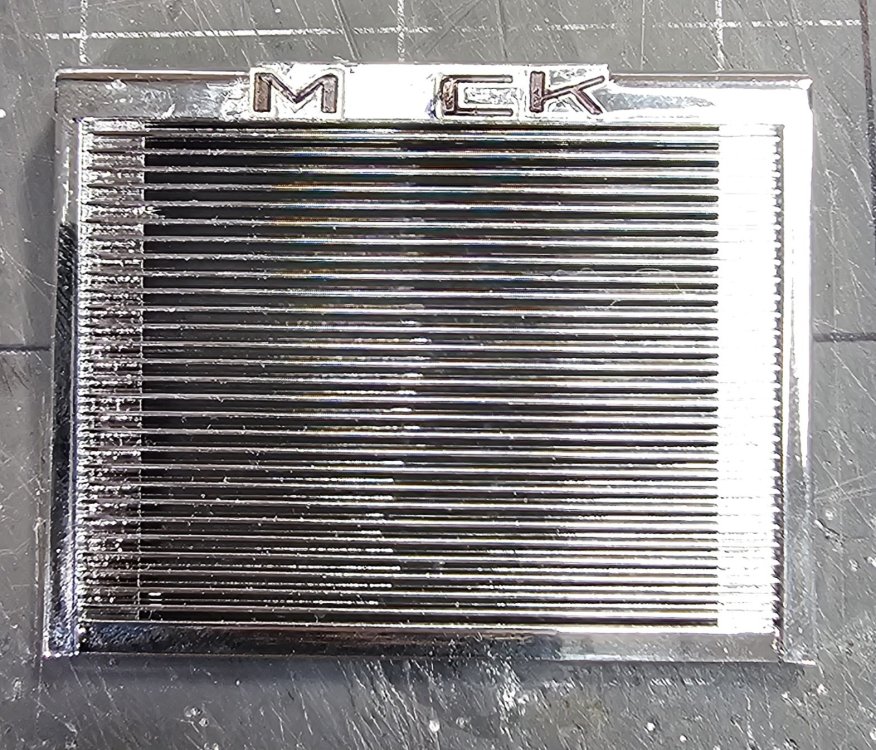
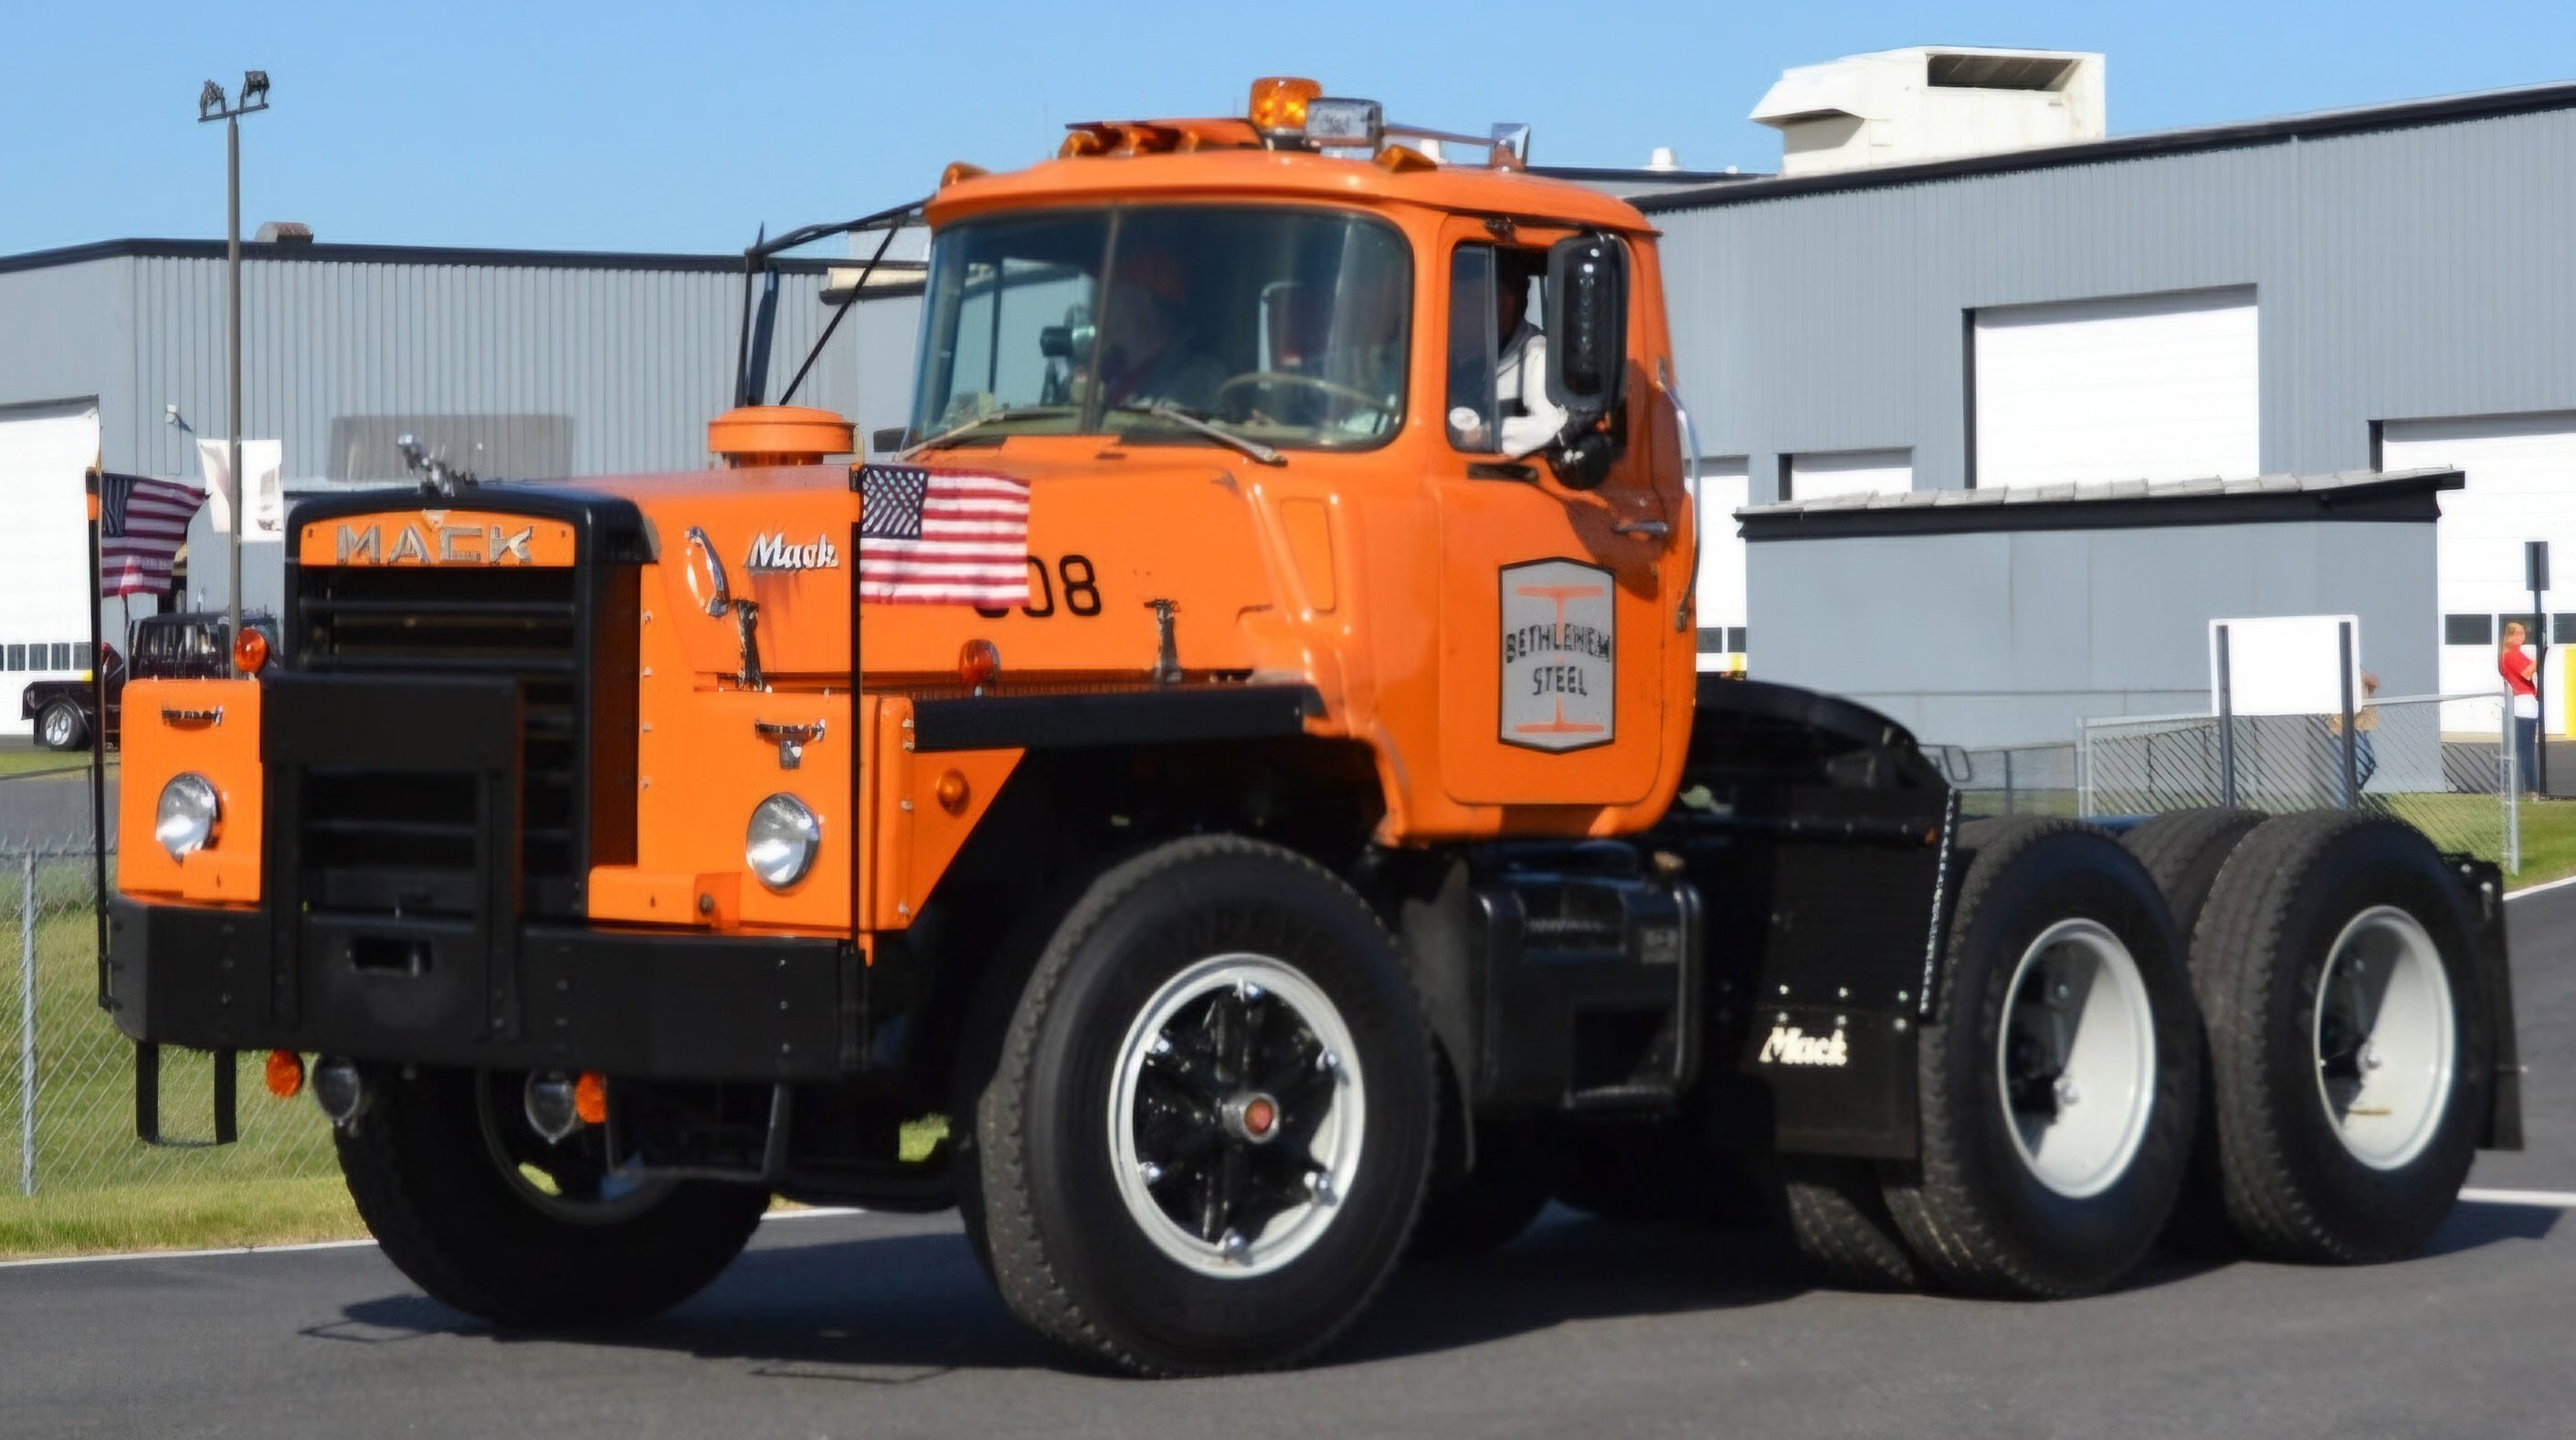
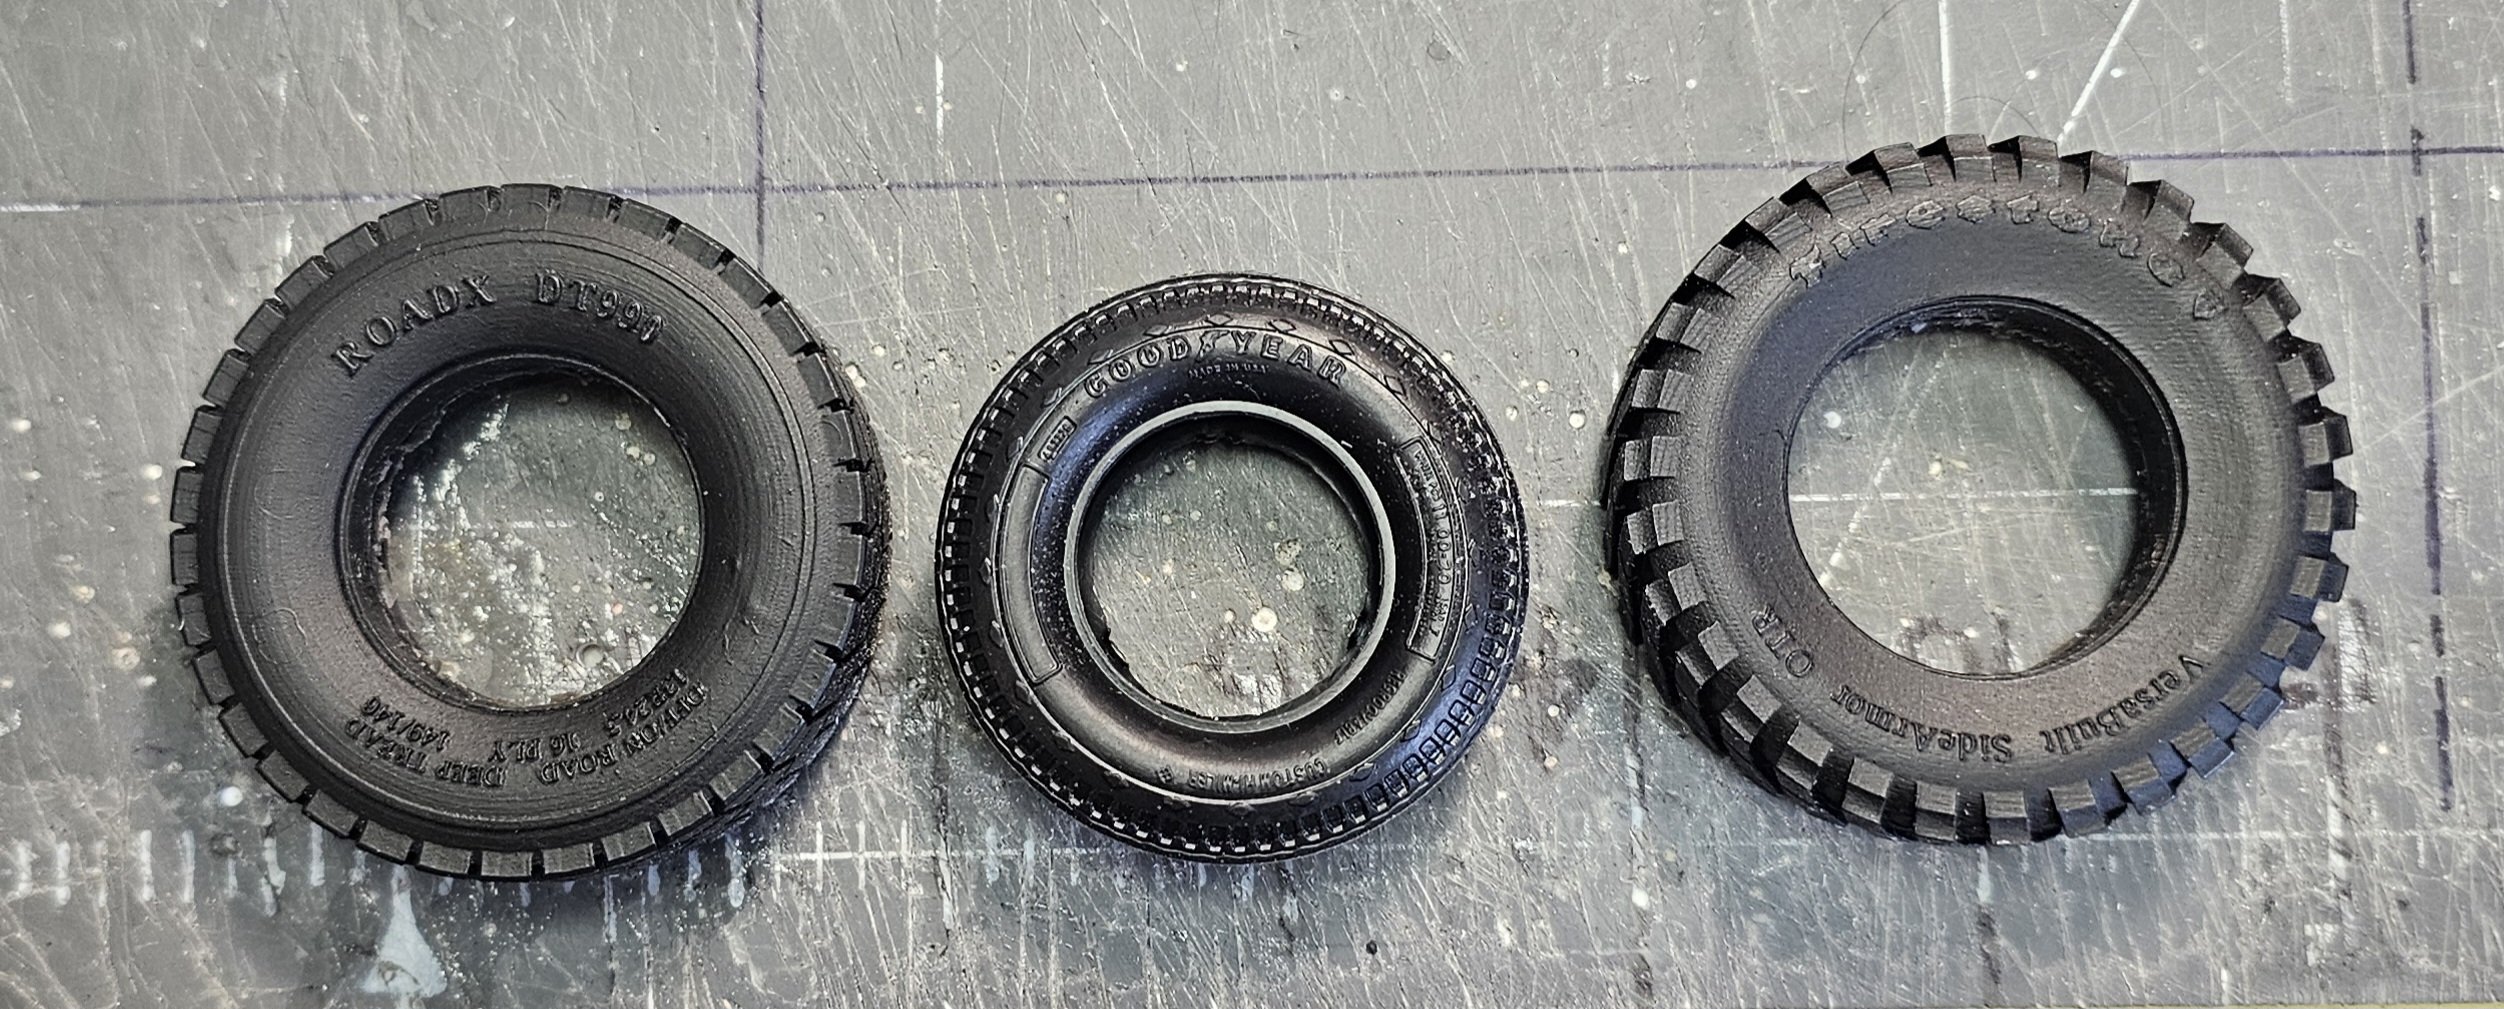
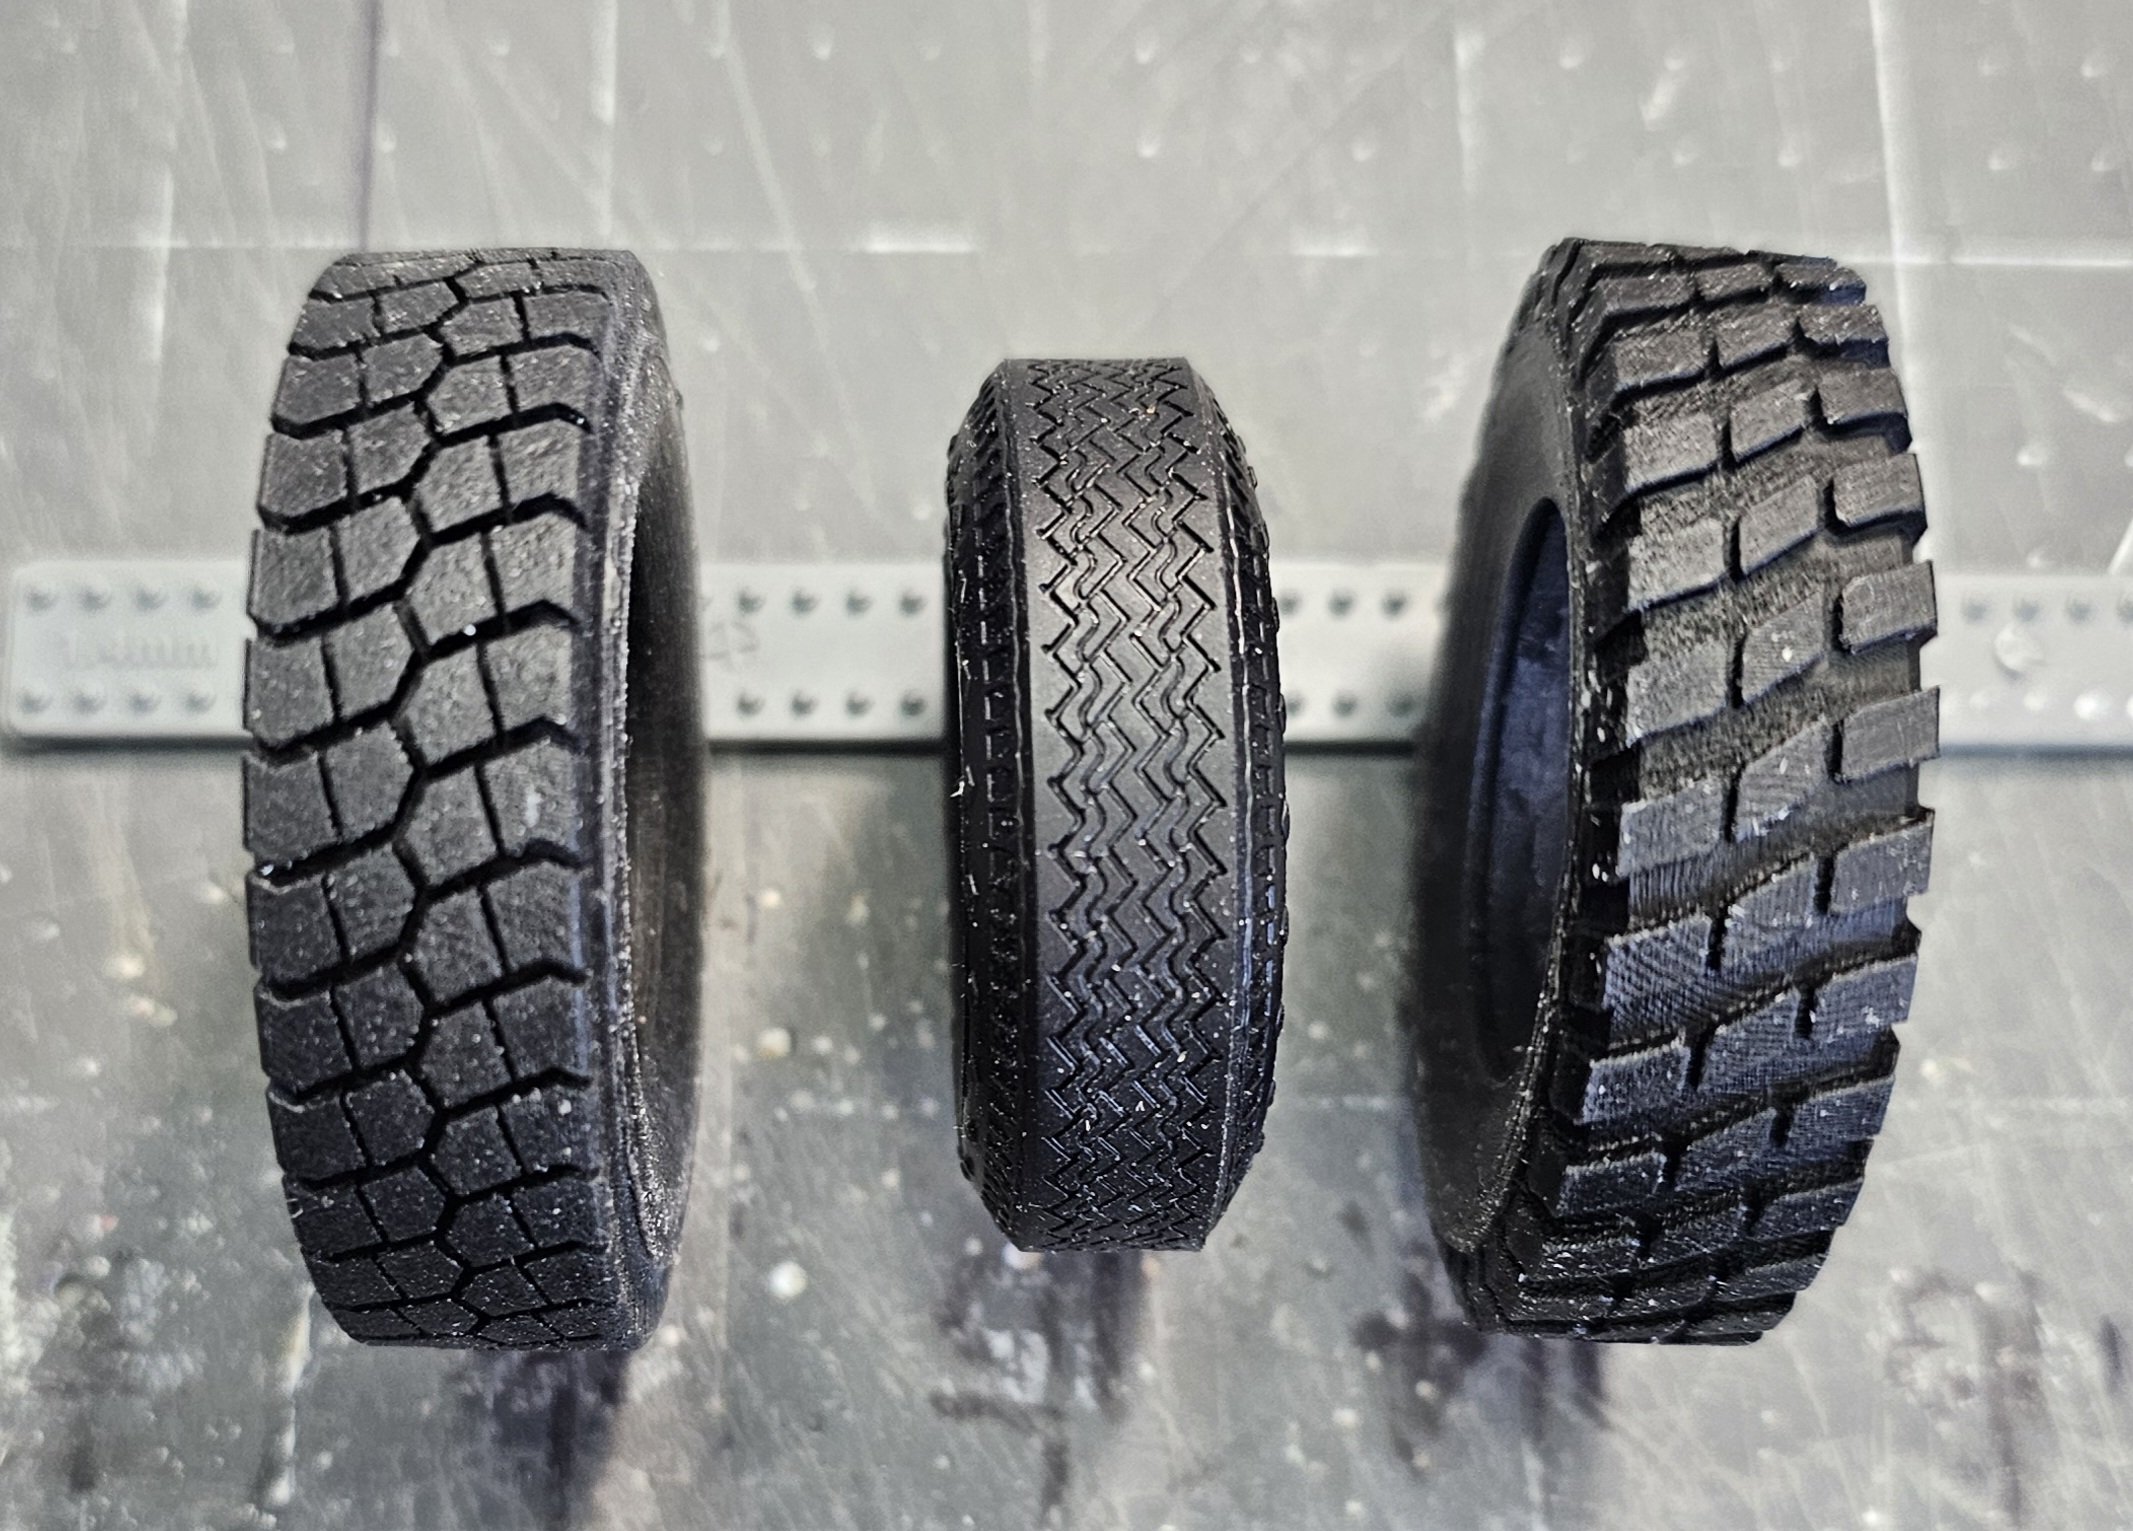
Ok, Jeff said I had to post this build. It's a MPC 1/25 Mack DM800. I'm converting it into a very heavy off road logging truck. As some my know this kit is a REAL challenge. There are tons of fit issues. The cab, the front axle, the hood parts, etc. So here we go again another truck build. This is the kit I'm using. this is the engine in the kit ENDT 865 V8. This is the paint scheme I'm shooting for. Inspiration for front wheels. Inspiration for rear wheels. The tires that I'm using the tire on left is the front, middle is from the kit, right is the rear. These are 4' in diameter! Scale. Another veiw of the tires. Front is a 13:00 R 24.5 RoadX the rear is a Firestone 13:00 R 24.5 side armour. This is the headache rack I'm using. It's from Paul at ST Supply. This is the hitch for the truck for the AMT Peerless logging trailer. That's it for now be back with more soon. Ron G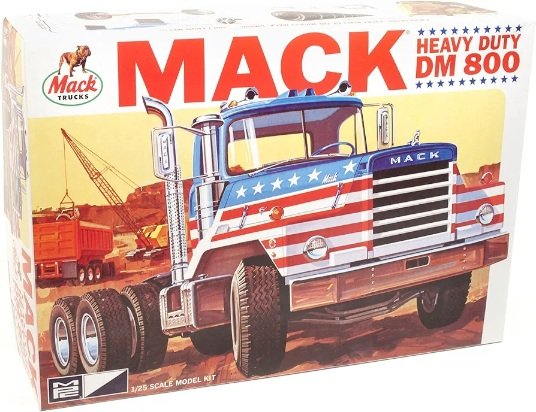


-
Thanks everyone Ron G
-
Small update. I got the frame painted. Tamiya semi-gloss black.
-
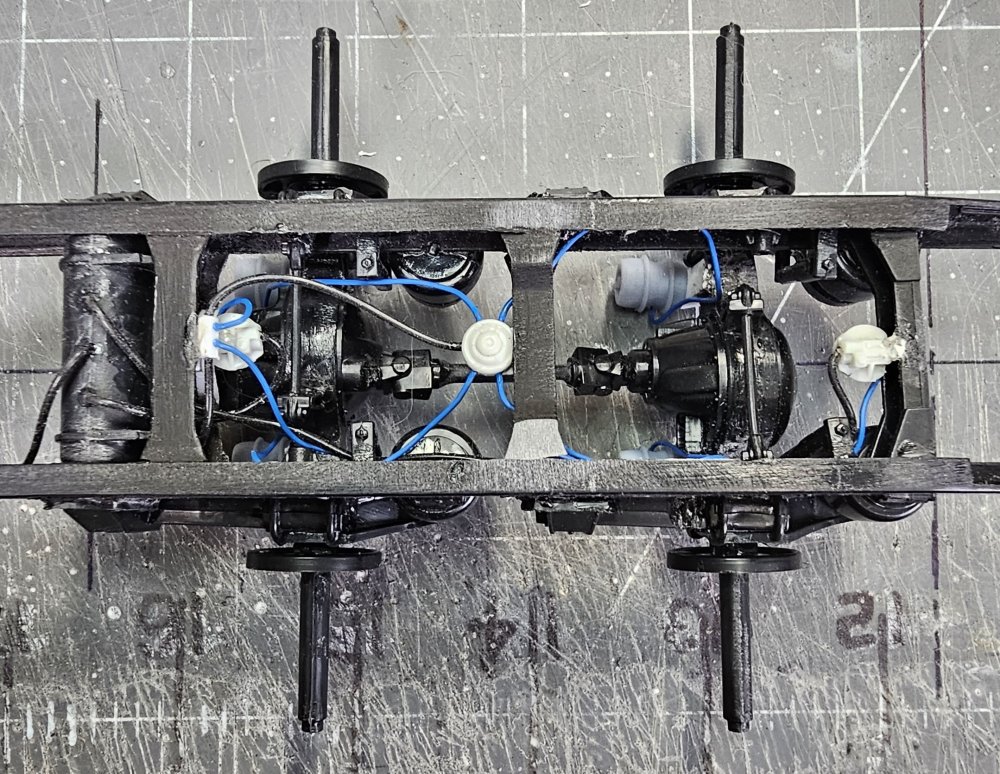
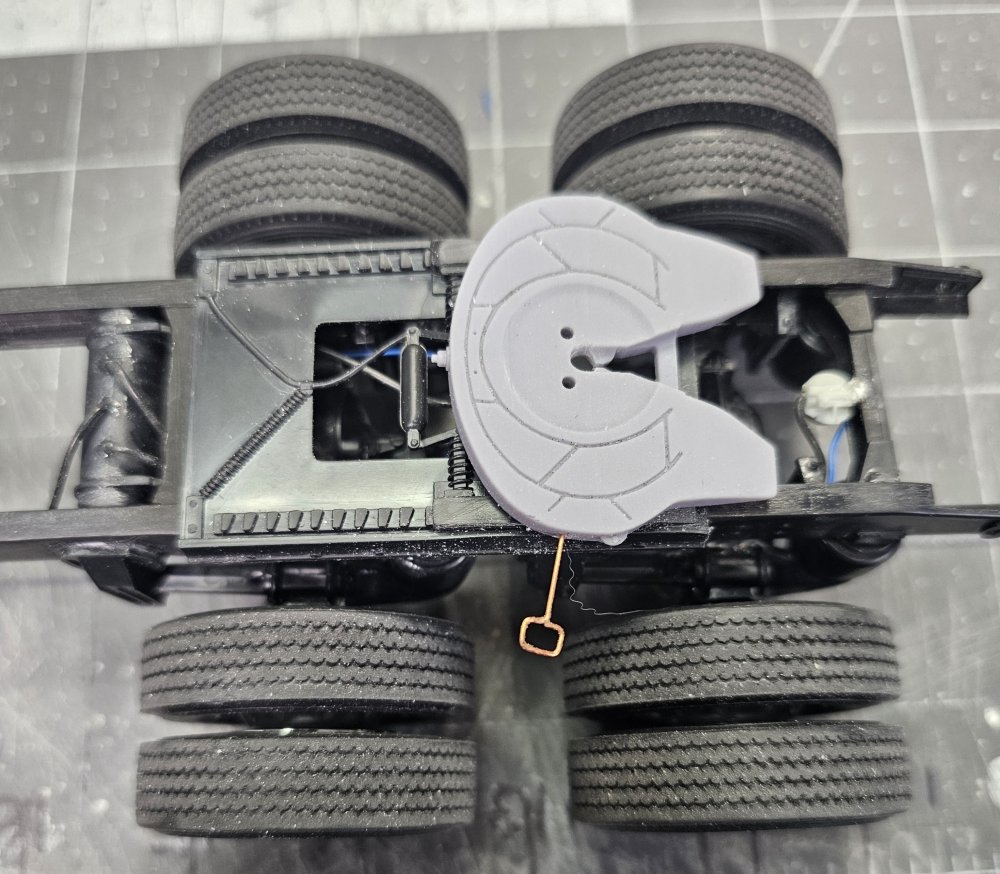
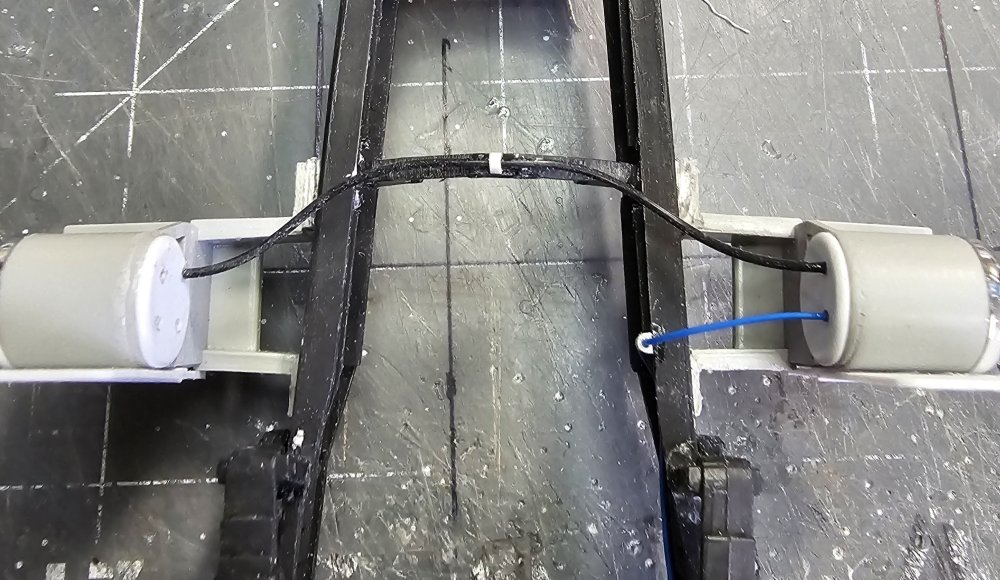
Hey all More work done on the Superliner. This view shows the plumbing for the air bags. This view shows the fifth wheel in place. This view shows the rear air bag lines. This view shows the front sir bags lines. All for now be back with more soon. Ron G

-
HobbyBoss T-34/85 | No. 82602 | 1:16
CrankyCrafstman replied to FullArmor's topic in LSM 1/35 and Larger Work In Progress
Hey FullArmor I use the tip of my soldering iron pushed in to the plastic, makes it melt kinda like steel does when hit by a shell. Ron G -
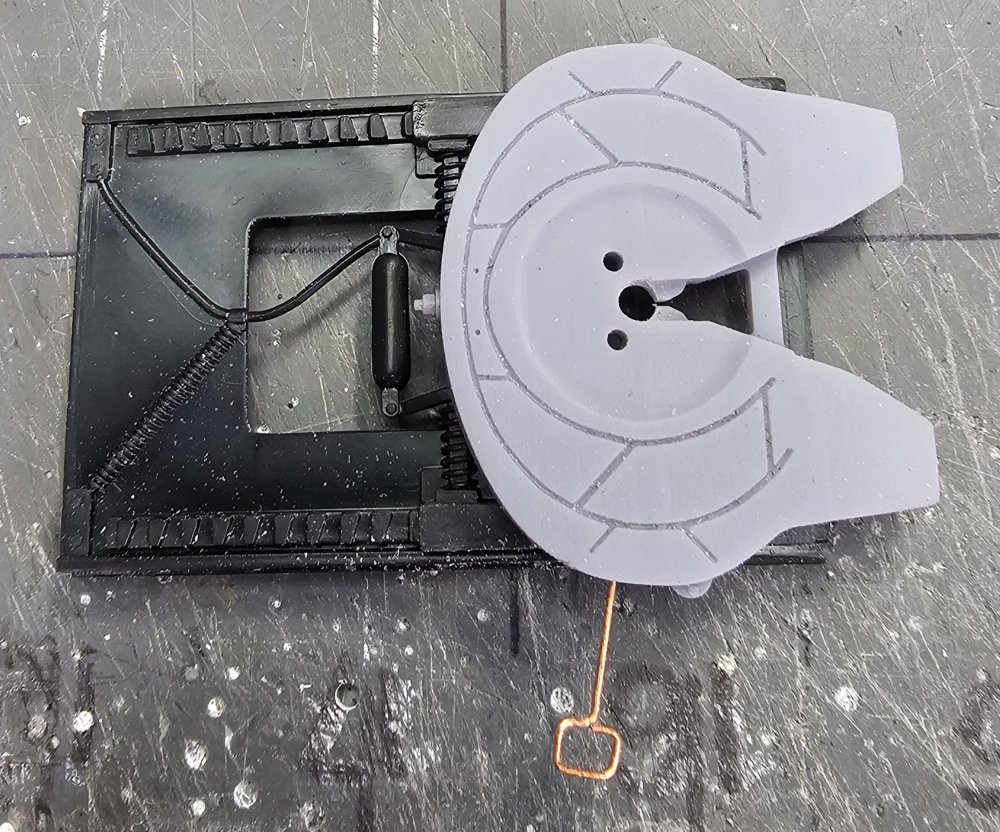
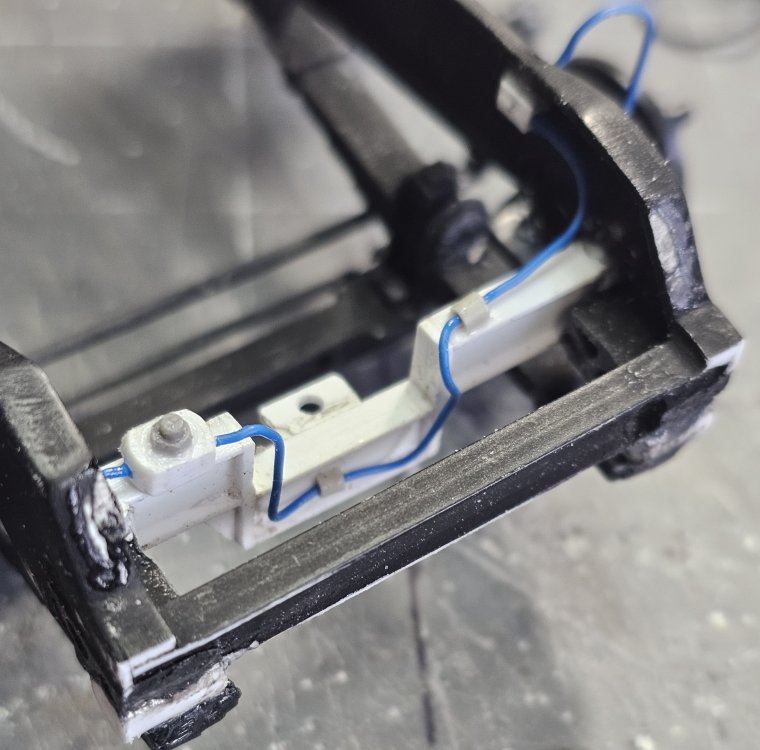
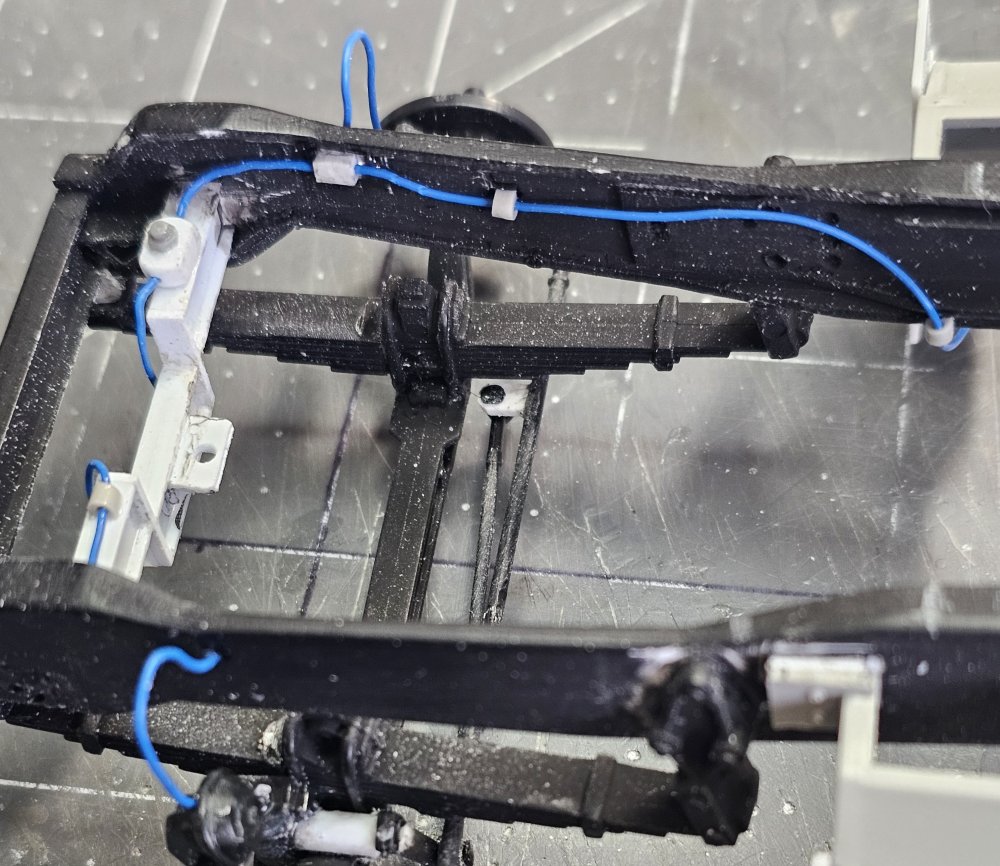
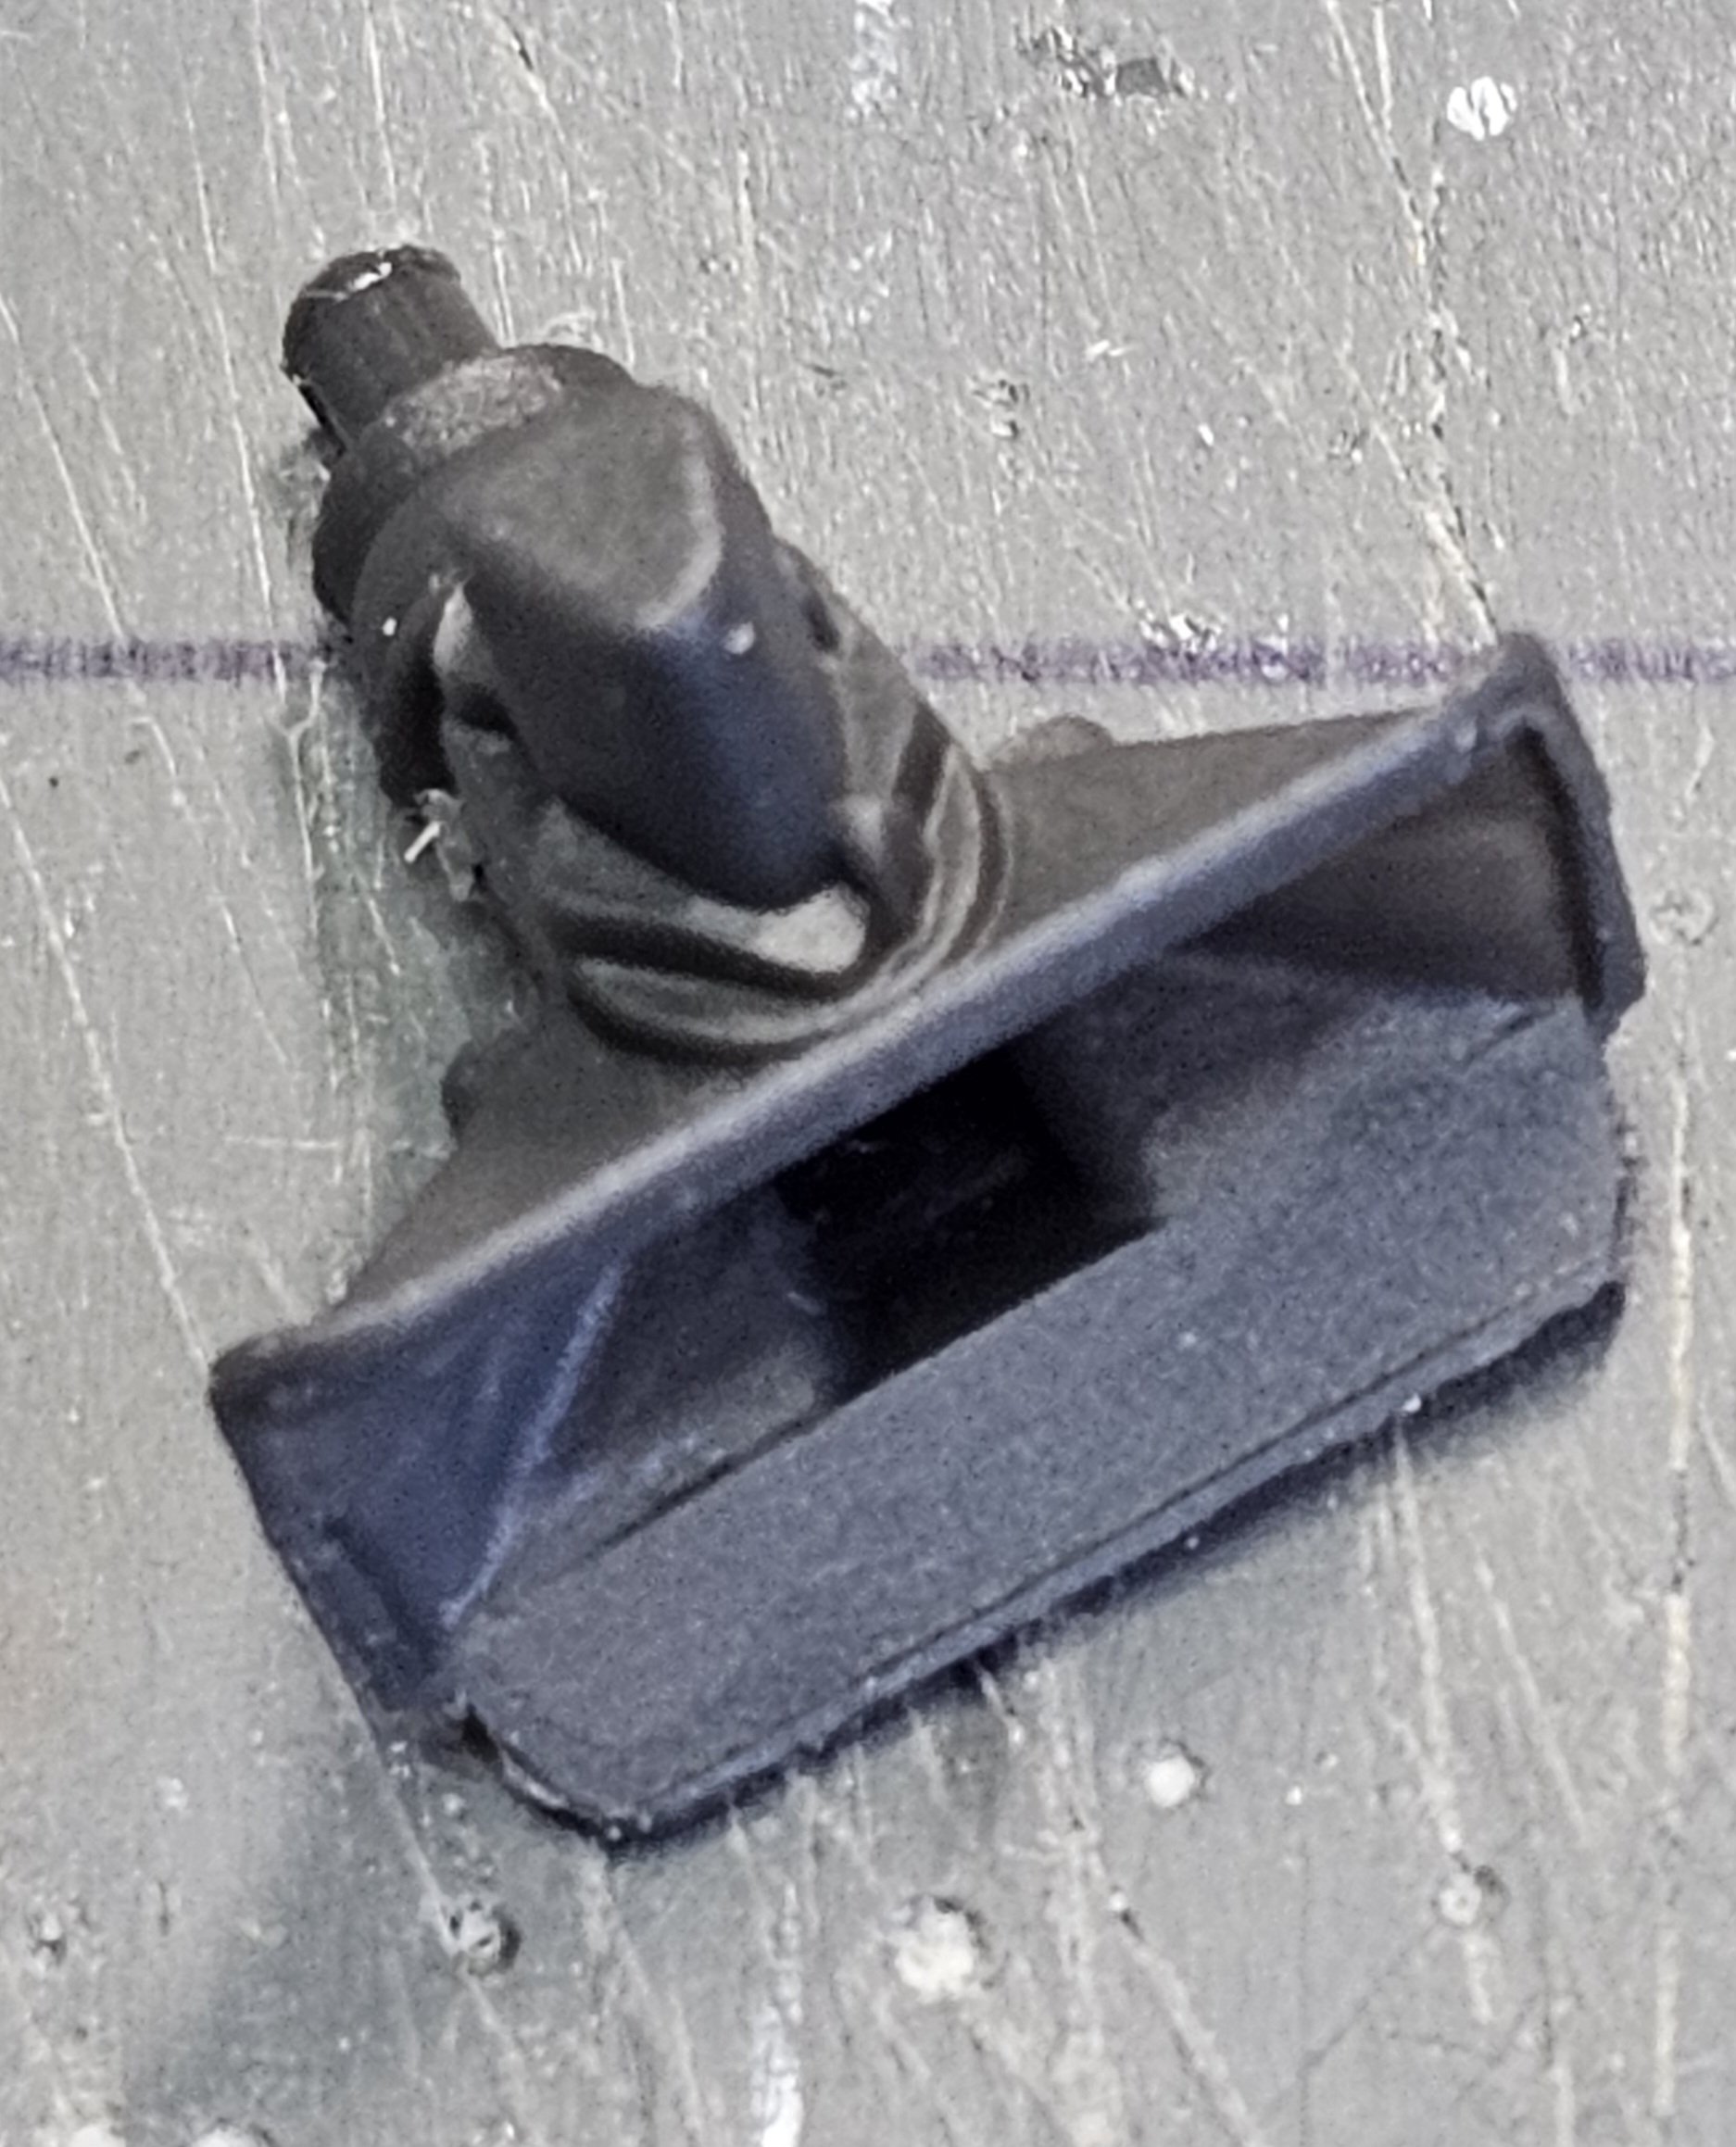
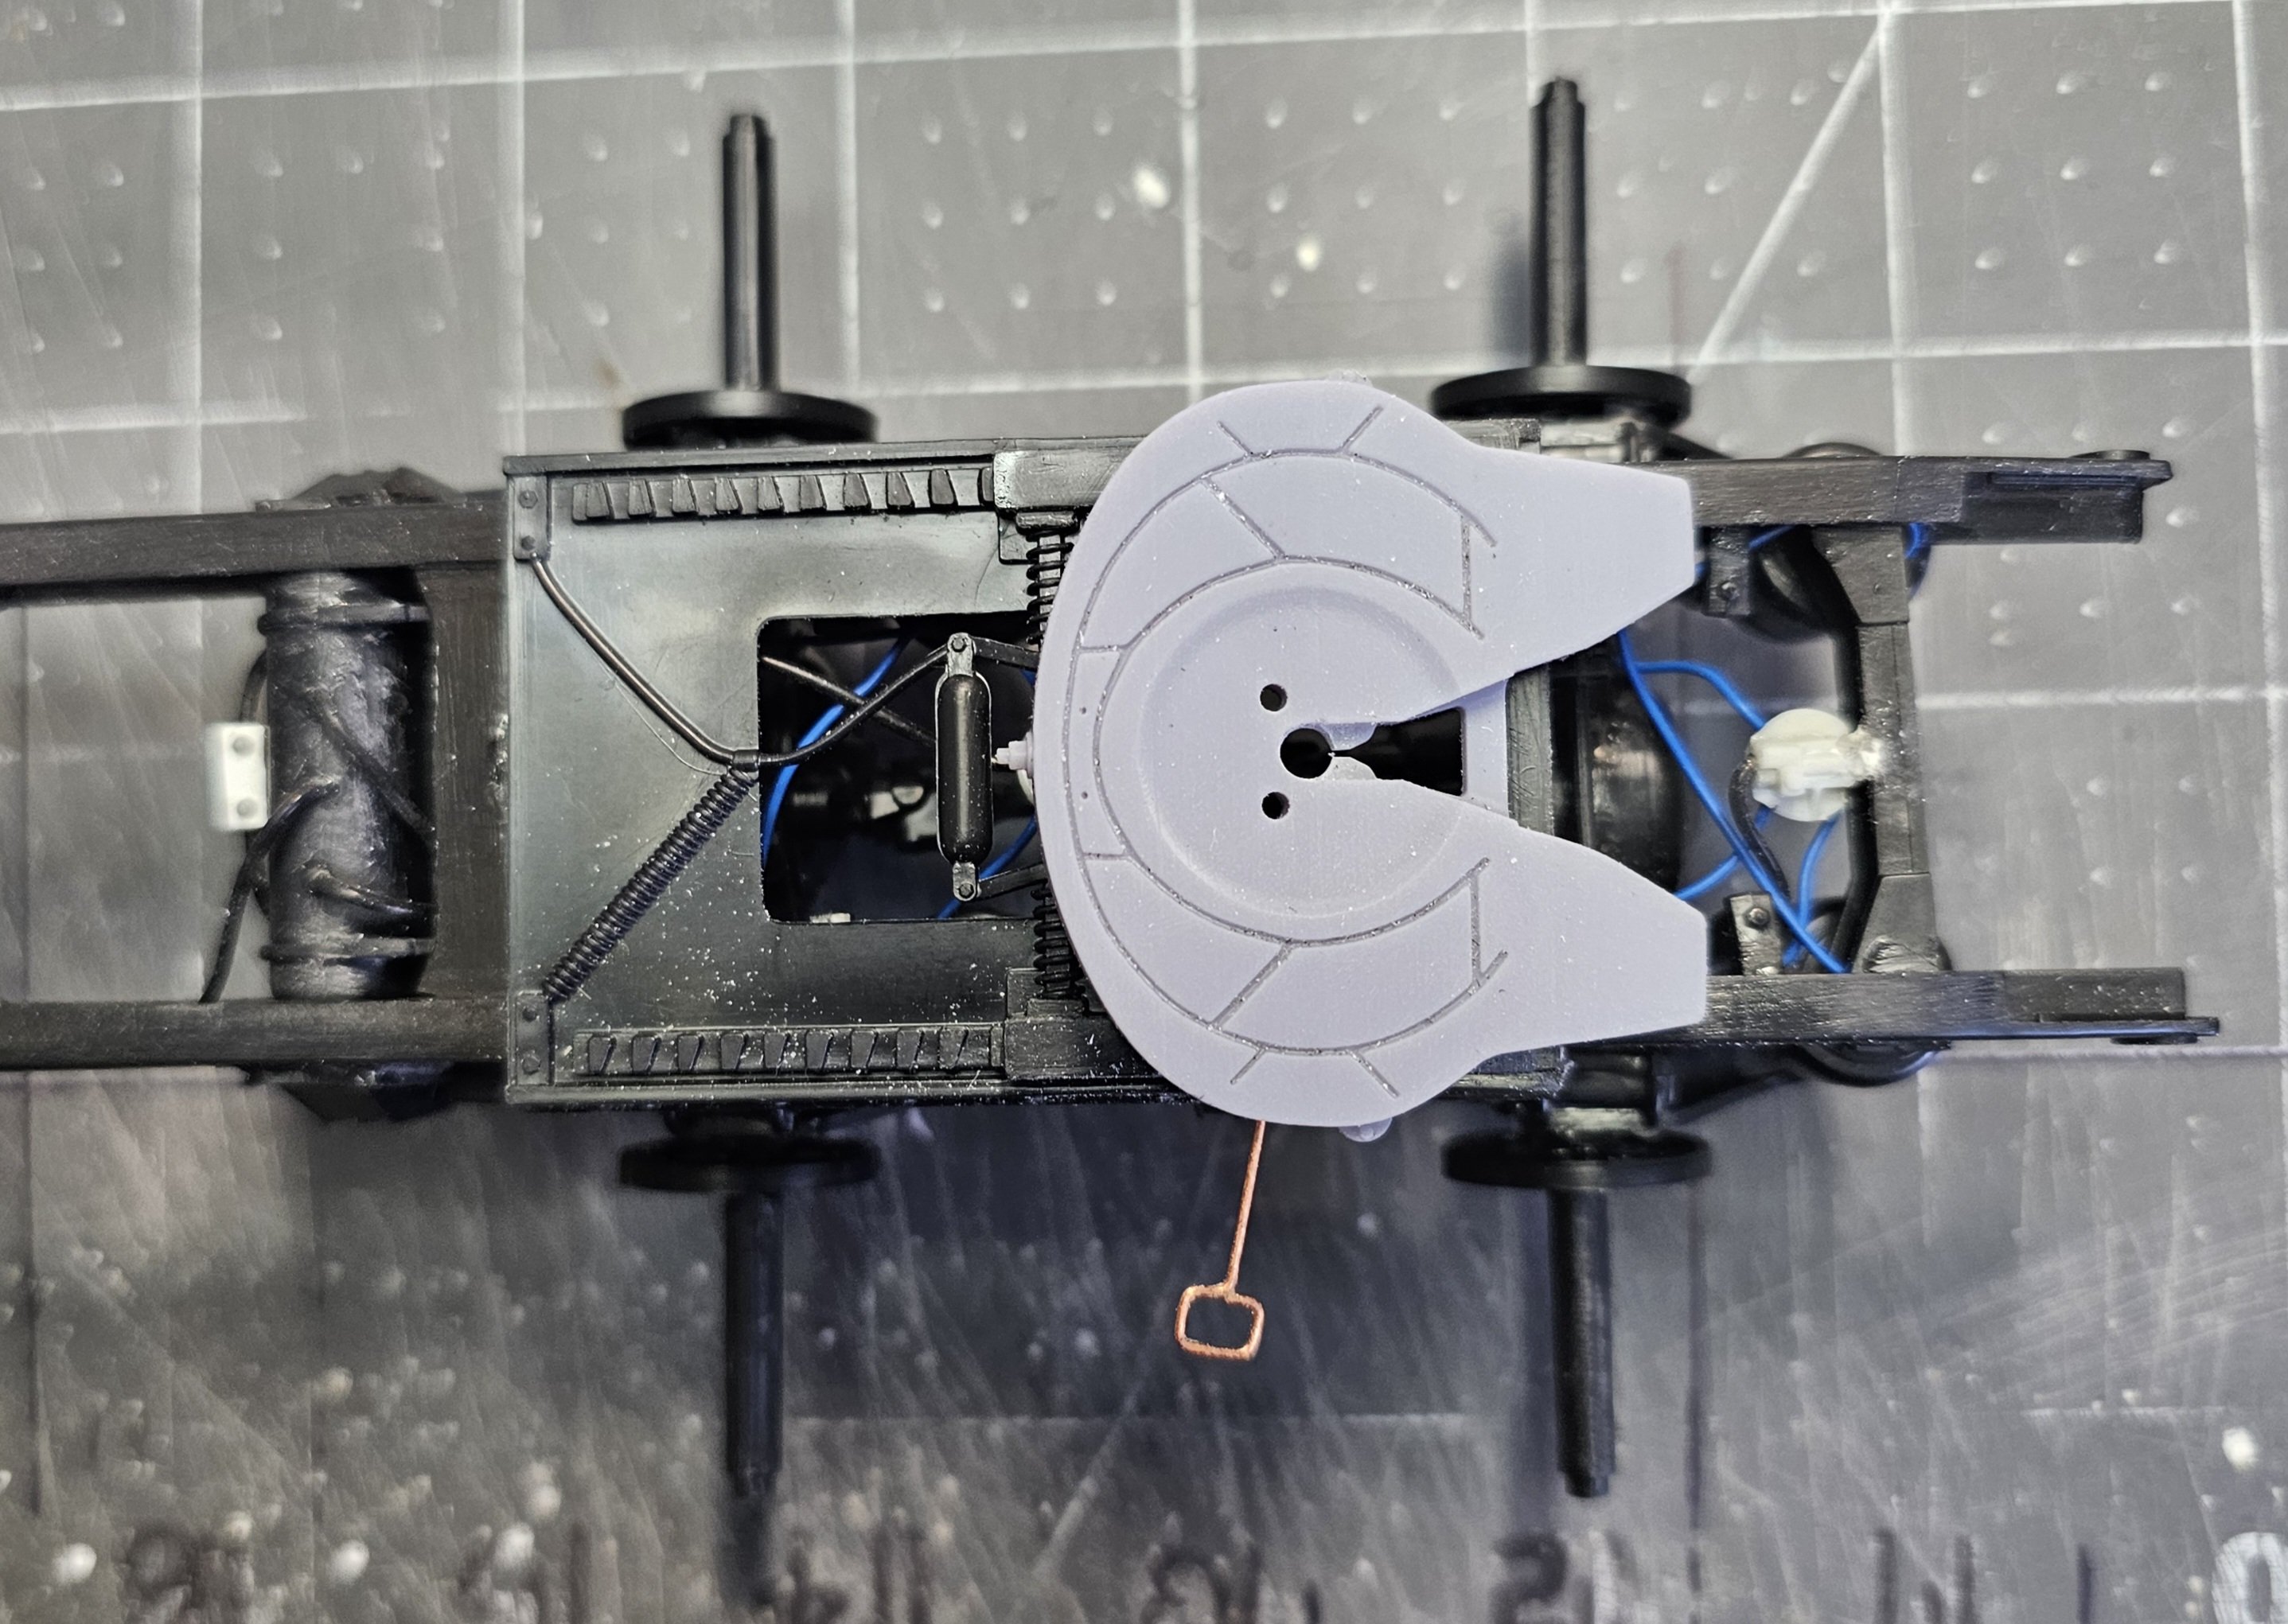
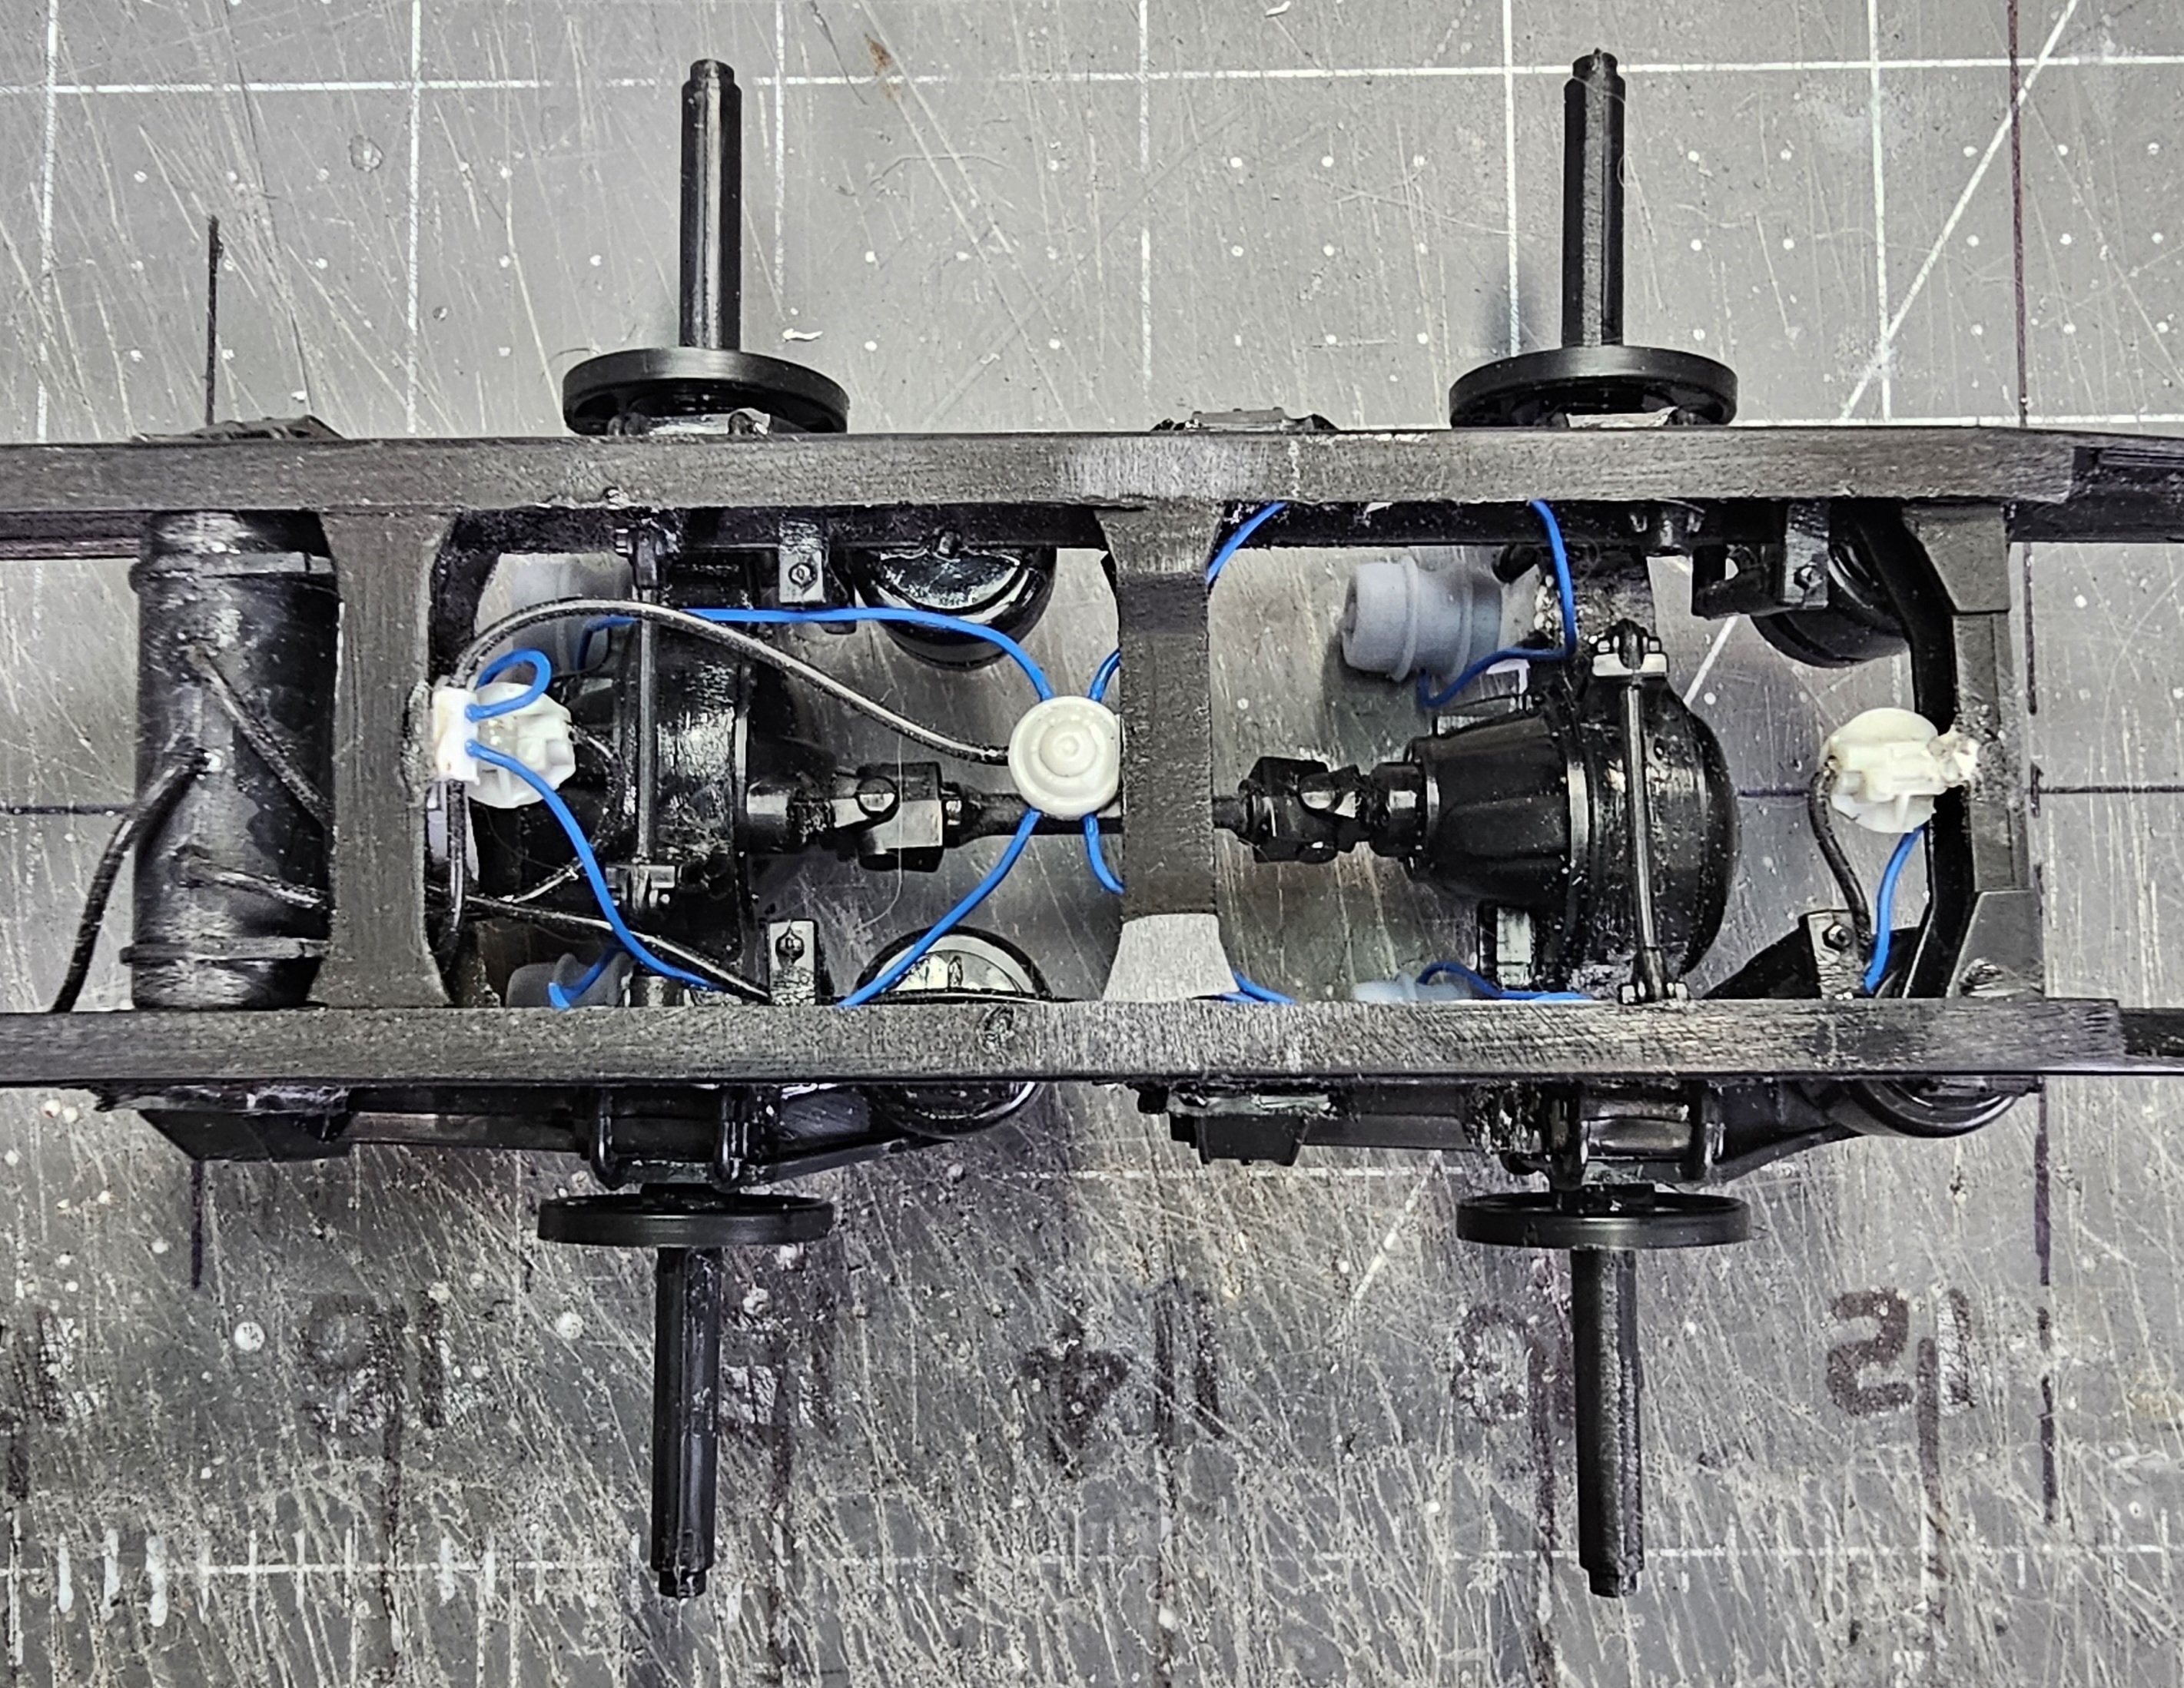
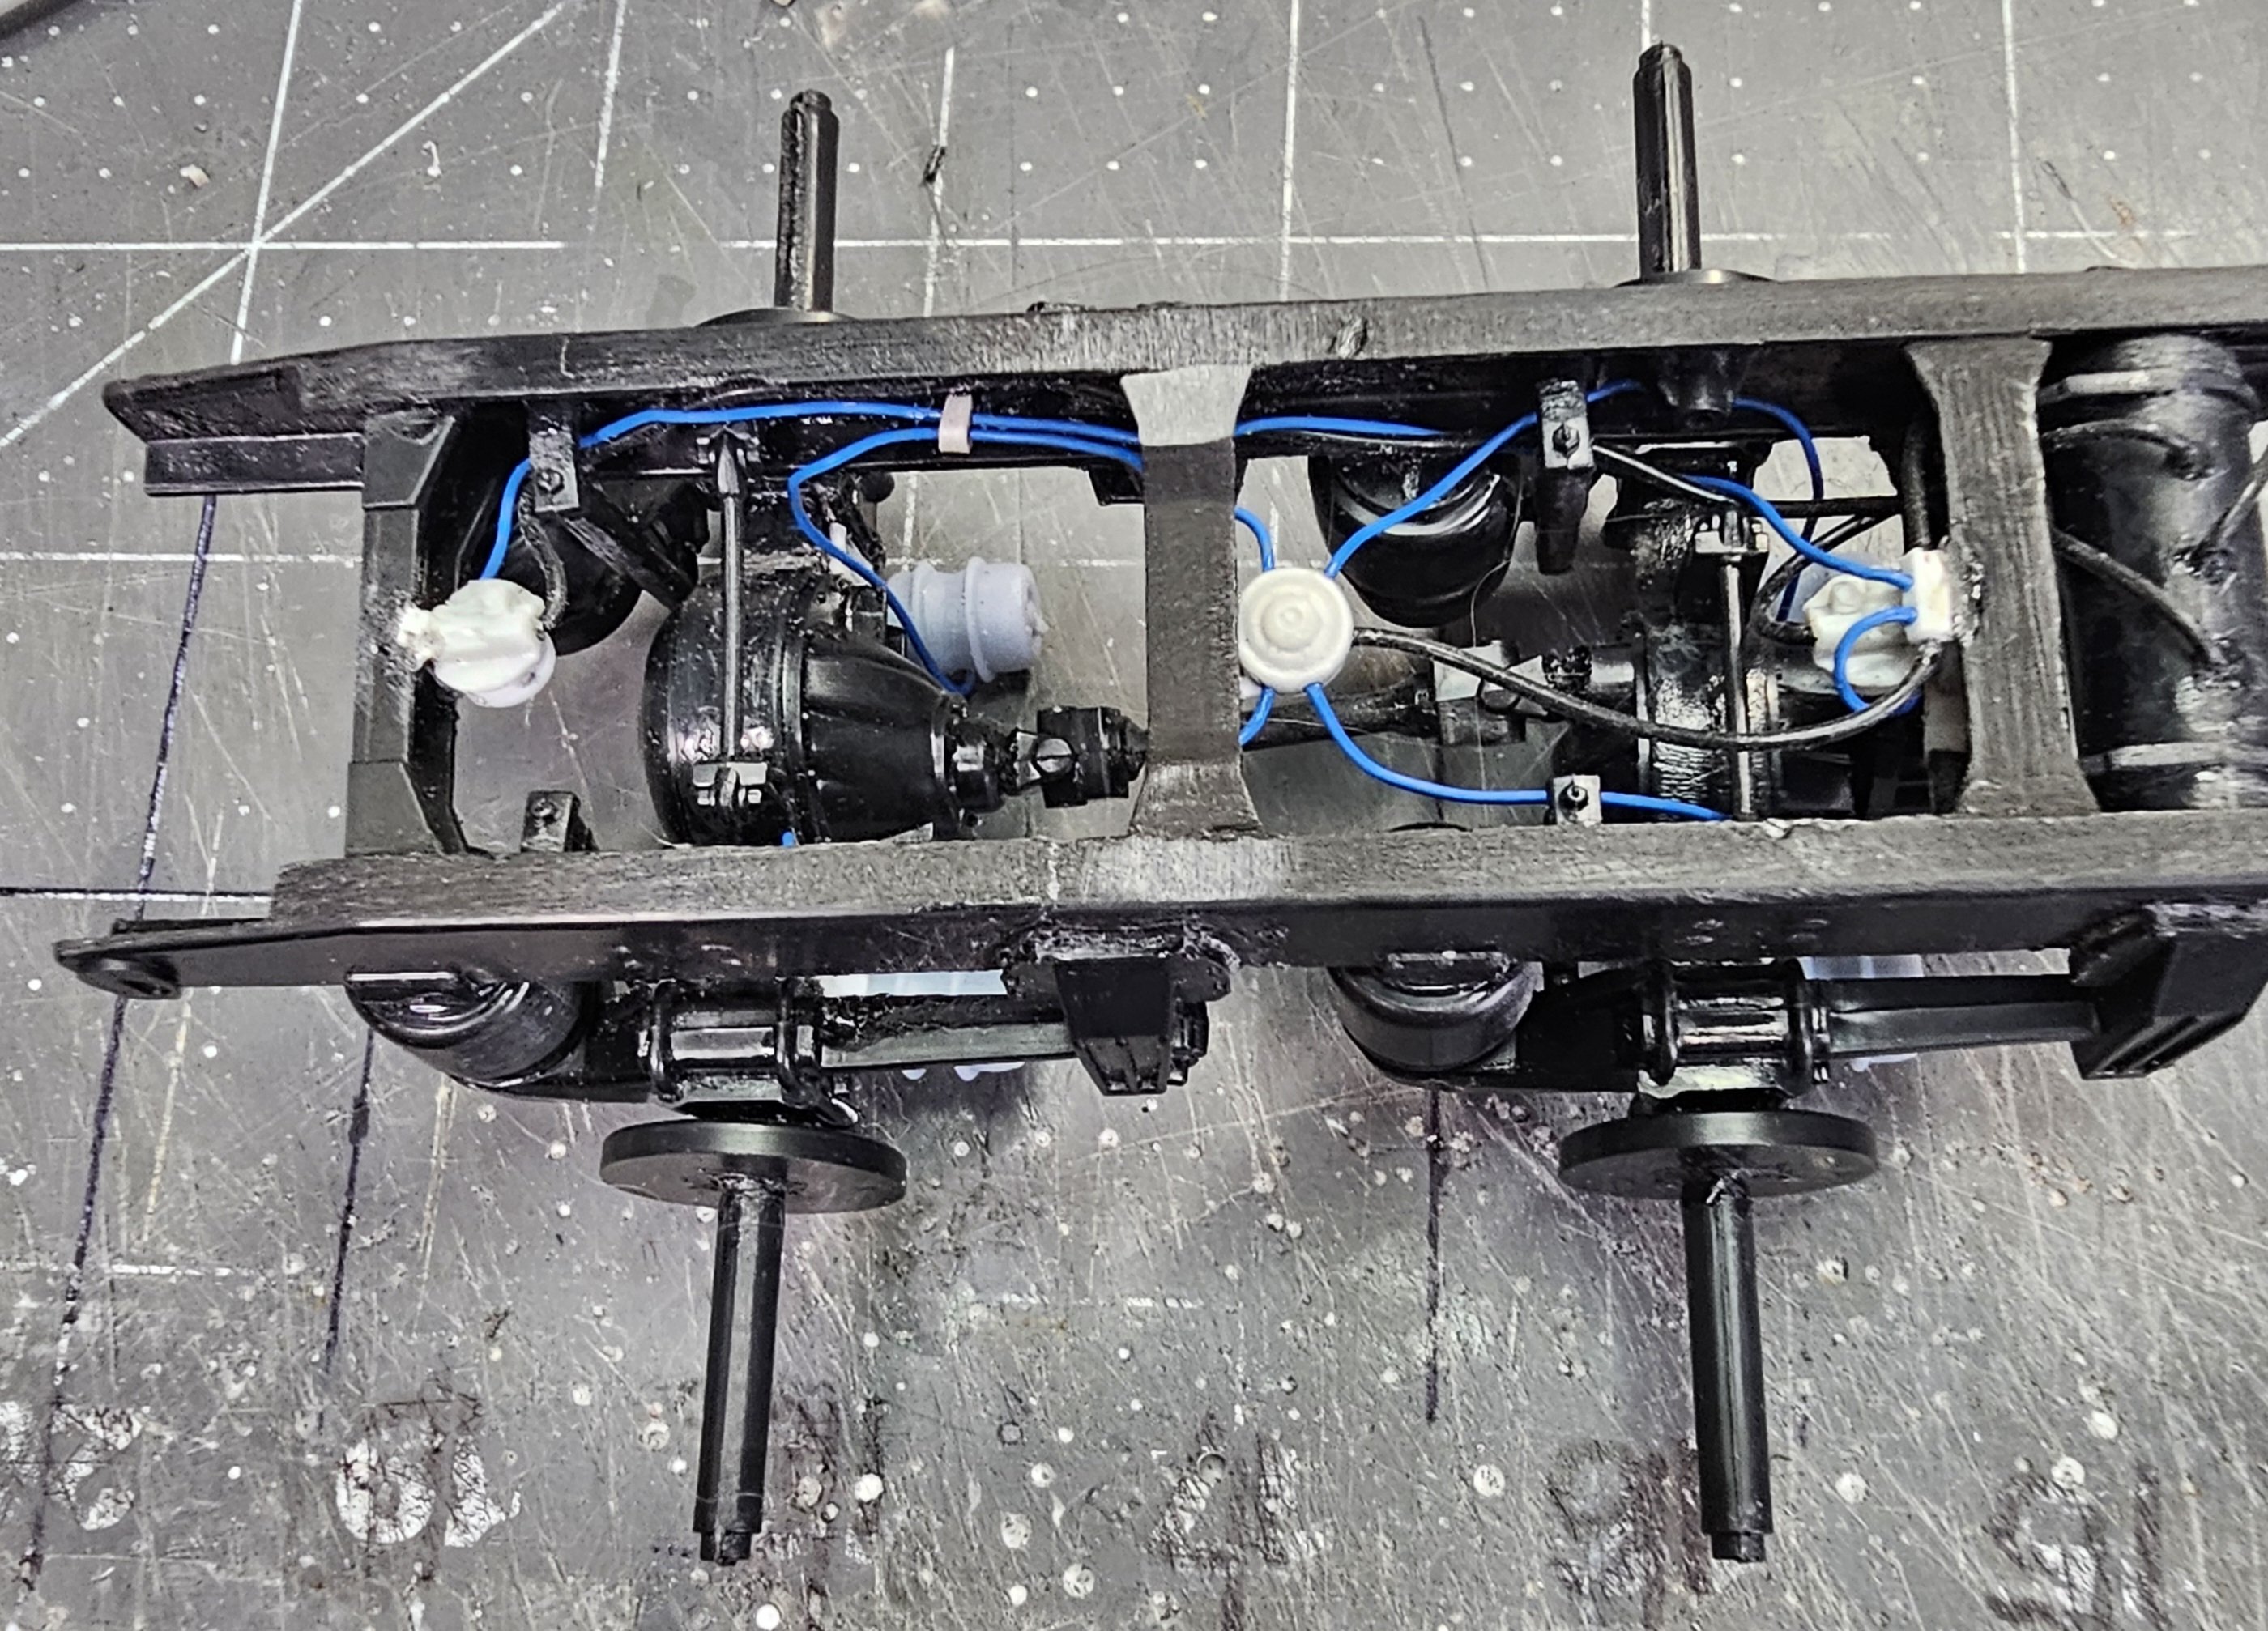
Hey all Here's some more pictures of the Superliner build. This view shows the rubber line from the #1 service tank to the rear brake control valves. This view shows the line from the wet tank to the # 1 service tank. This view shows the rubber lines running to the rear control valves from the #1 service tank. This is the fifth wheel. The grey part is from PAUL at ST Supply. It's a more accurate American style then the European one that comes in the kit. I scratch built the pull handle from copper wire. This view shows the air lines from the control valves to the rear brake cans. Another view showing the rear air lines. Also the lines from the control valves back to the wet tank. View of the fifth wheel on the frame. View from the bottom of the air lines to the brake cans. Still have some more lines to run. Mock-up of the Mack. Well that's it for now be back soon with more updates. Ron G
-
Hey all Got some more detail done on this build. This view shows the front control valve that I scratch built. Also the lines to the front brakes. This view shows the cross over line from the wet tank on the right to the #2 service tank on the left. The blue line is from the front brake control valve. Another view of the front control valve and lines. This is the rubber solid tube I'm using on the rear brakes it works out to about 7/8" scale. Ron G
-
Thanks everyone.
-
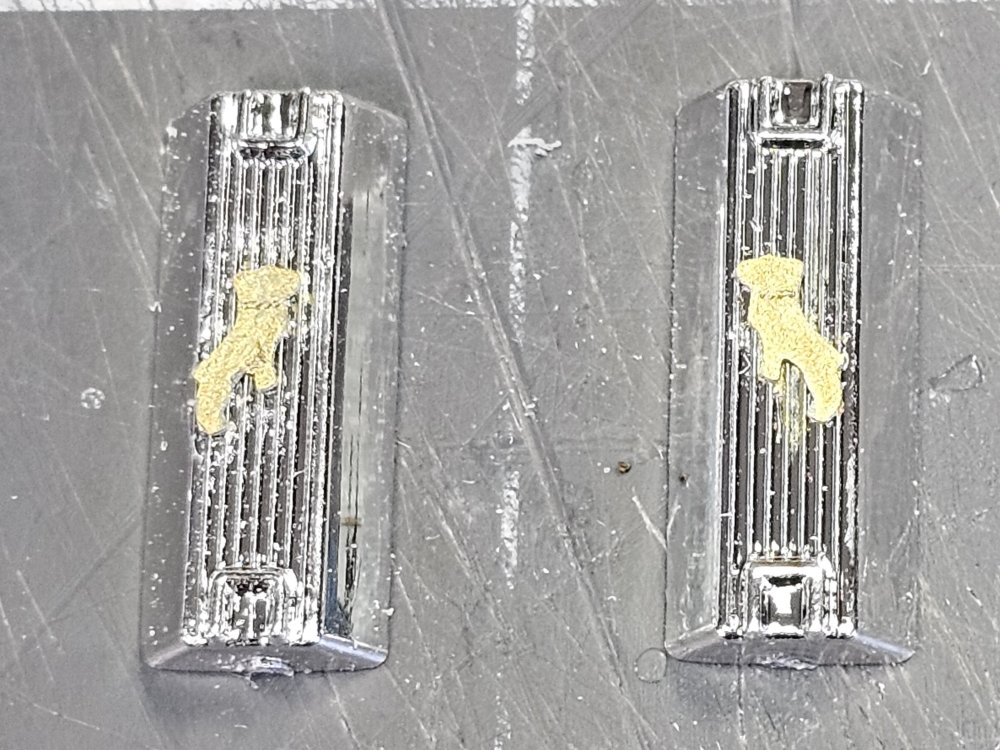
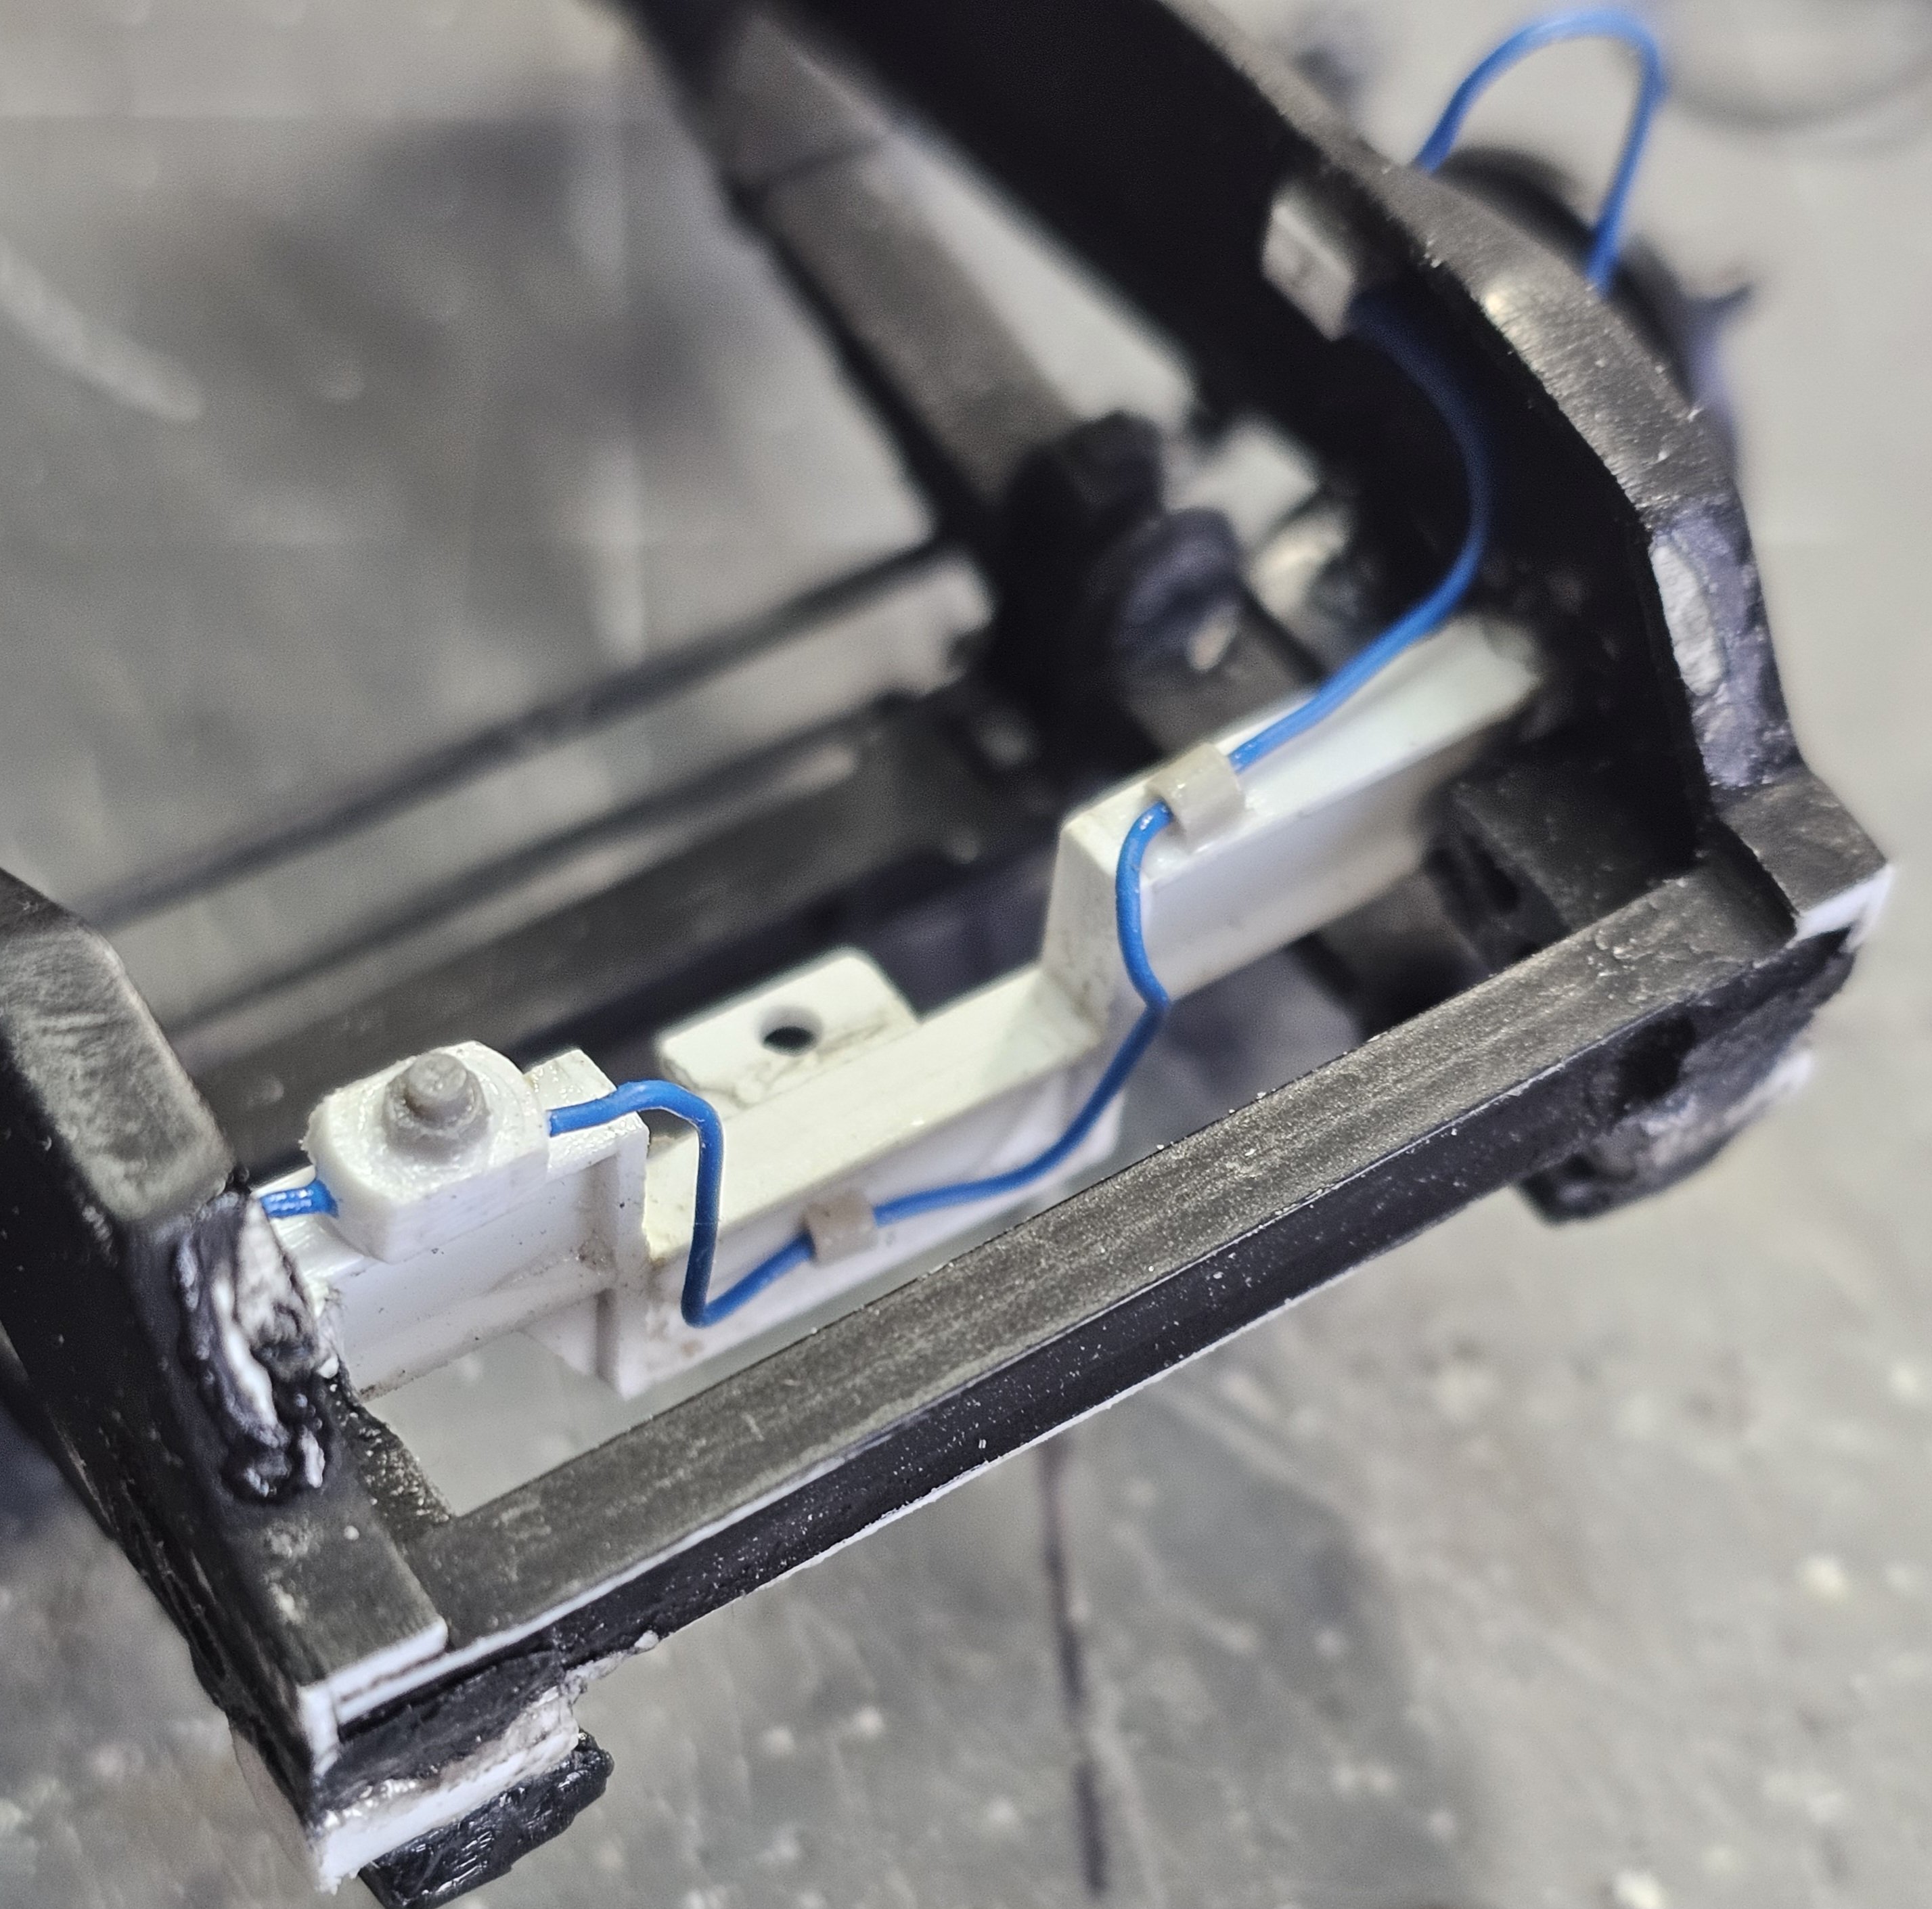
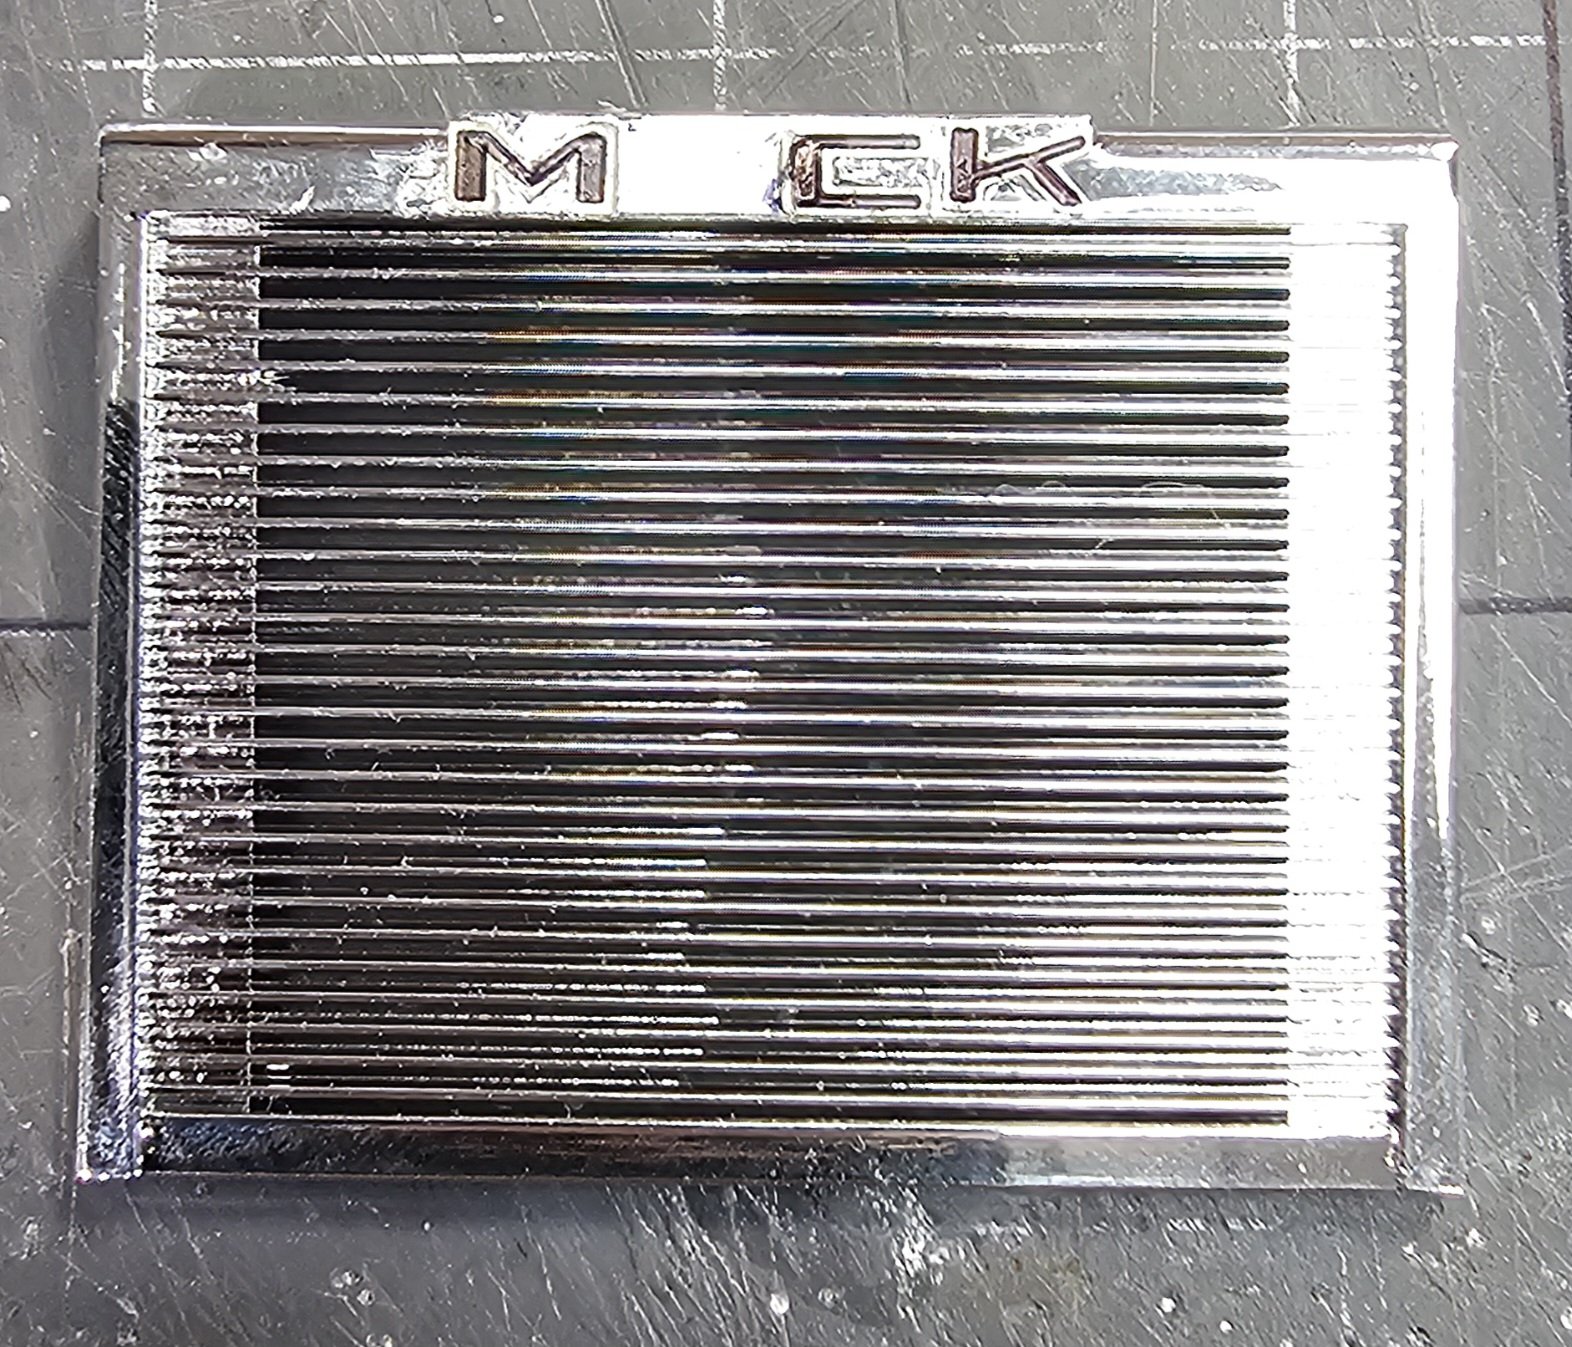
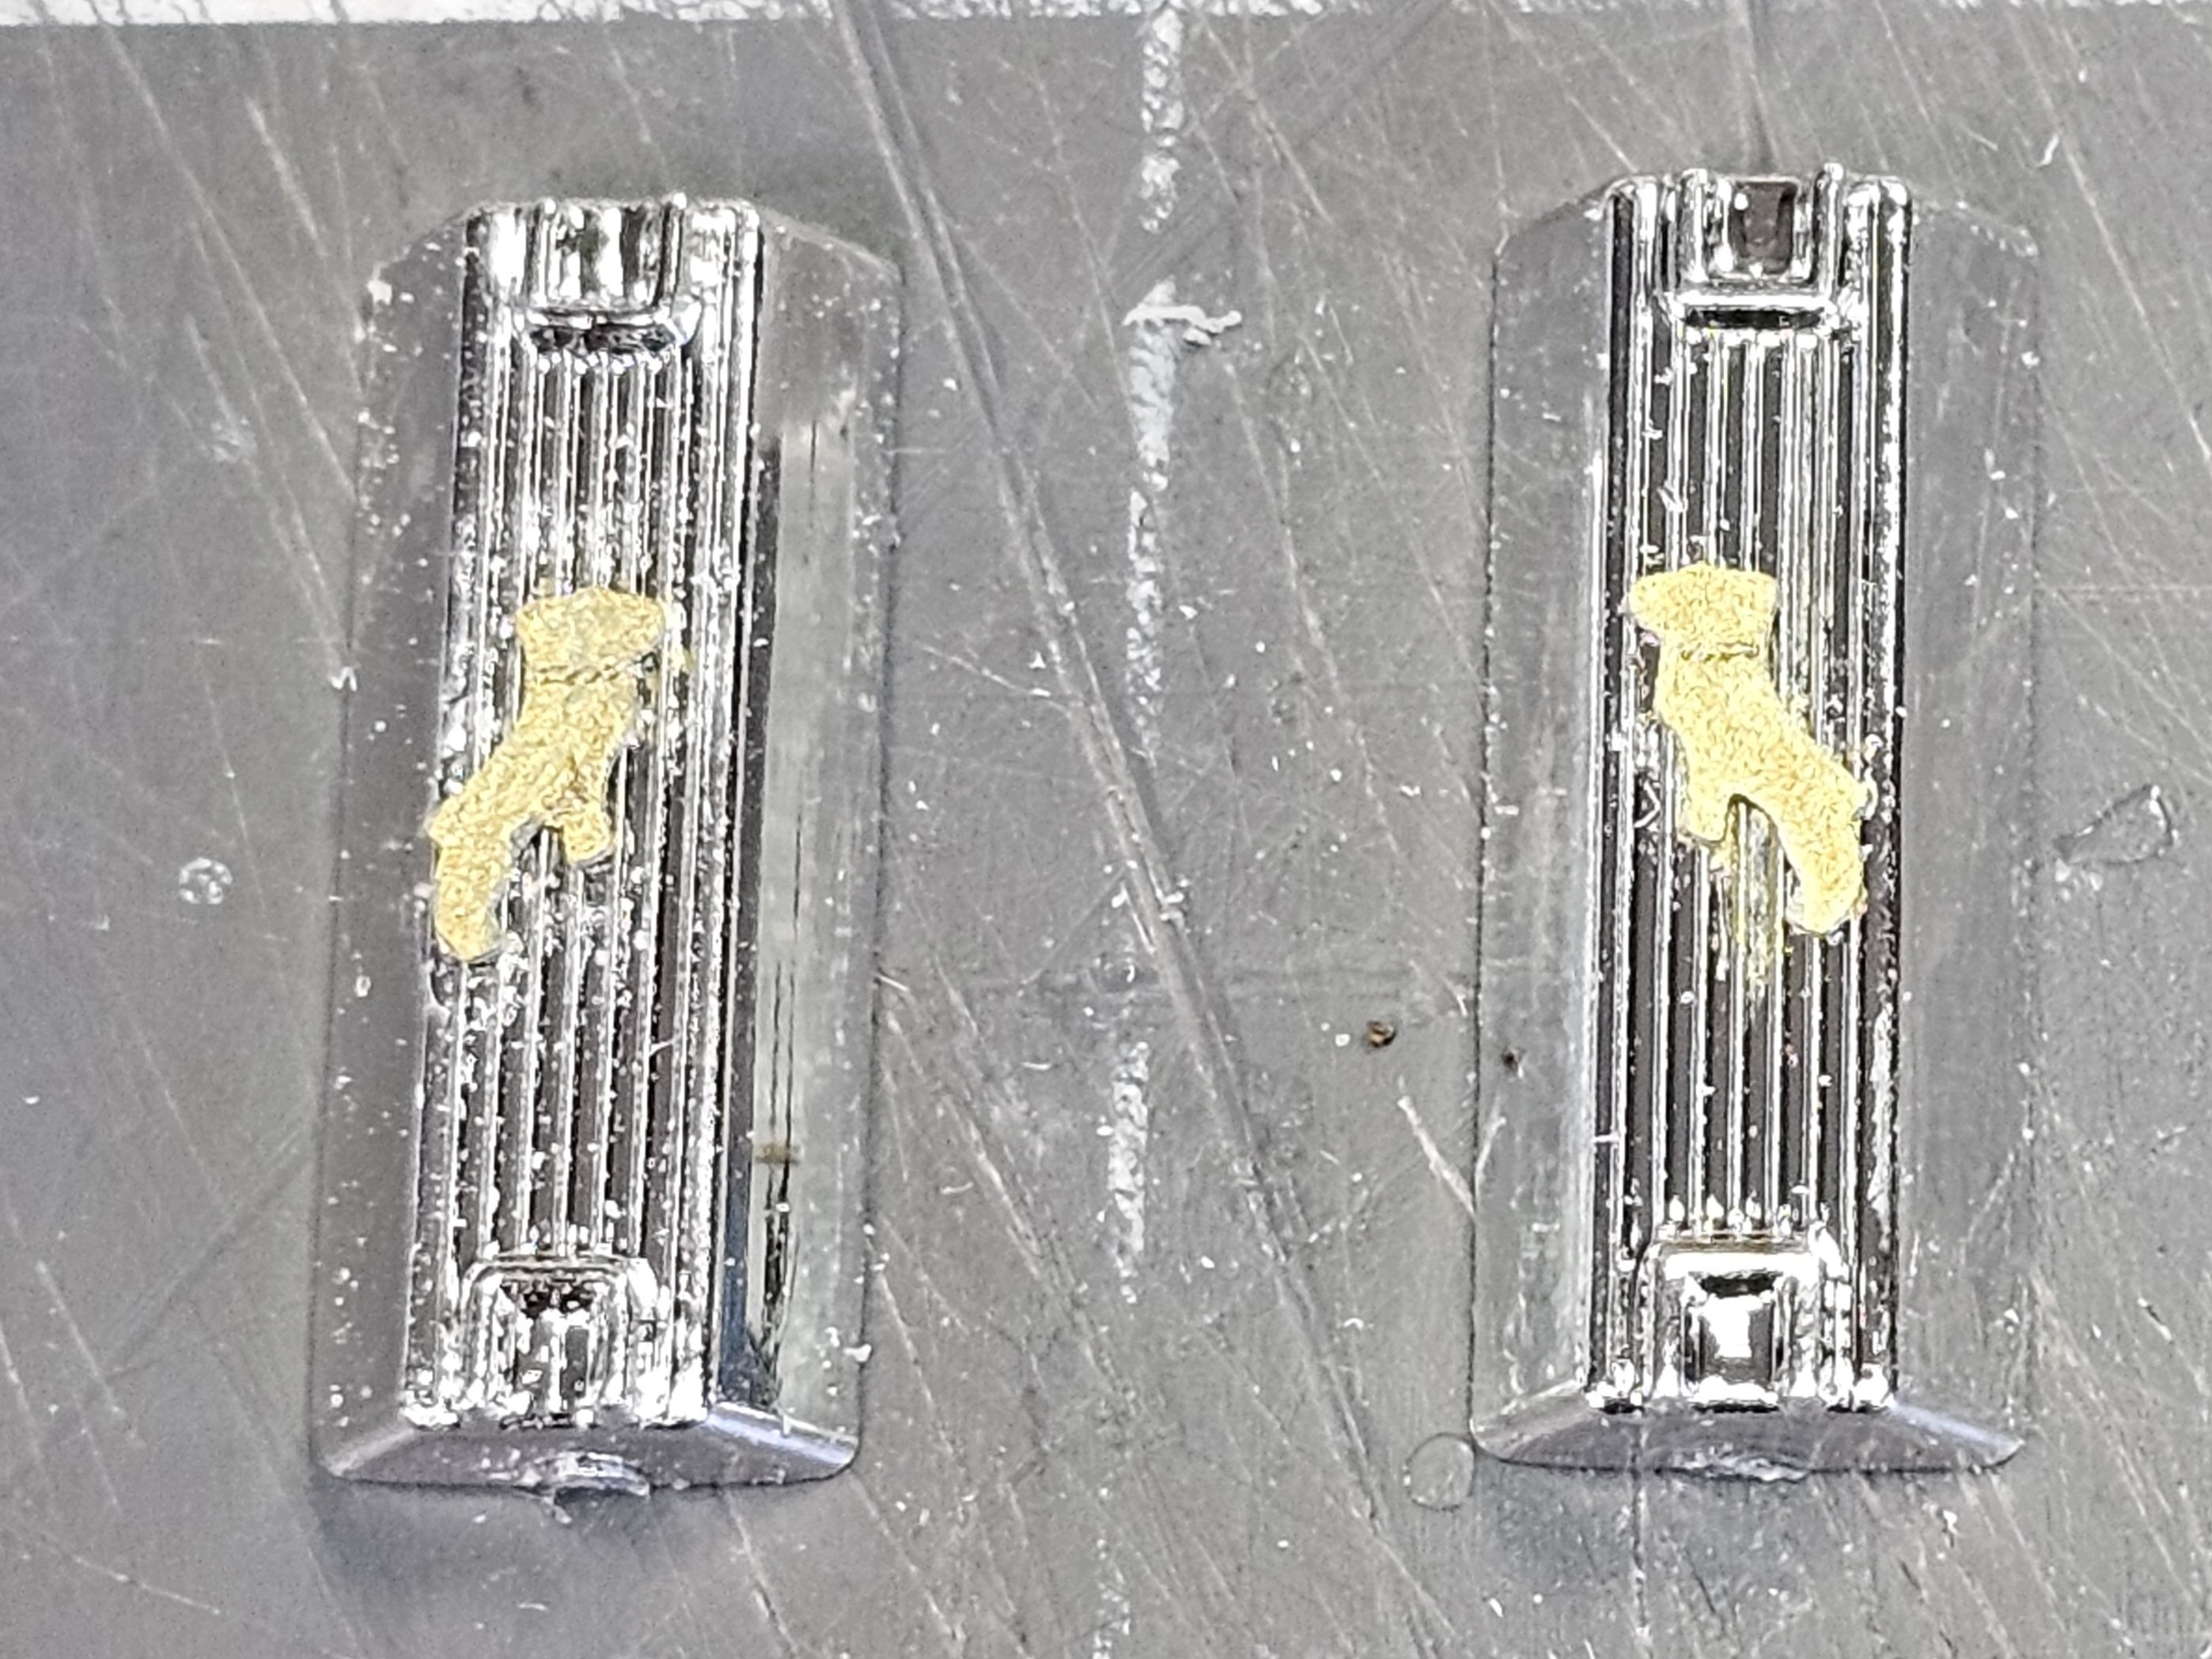
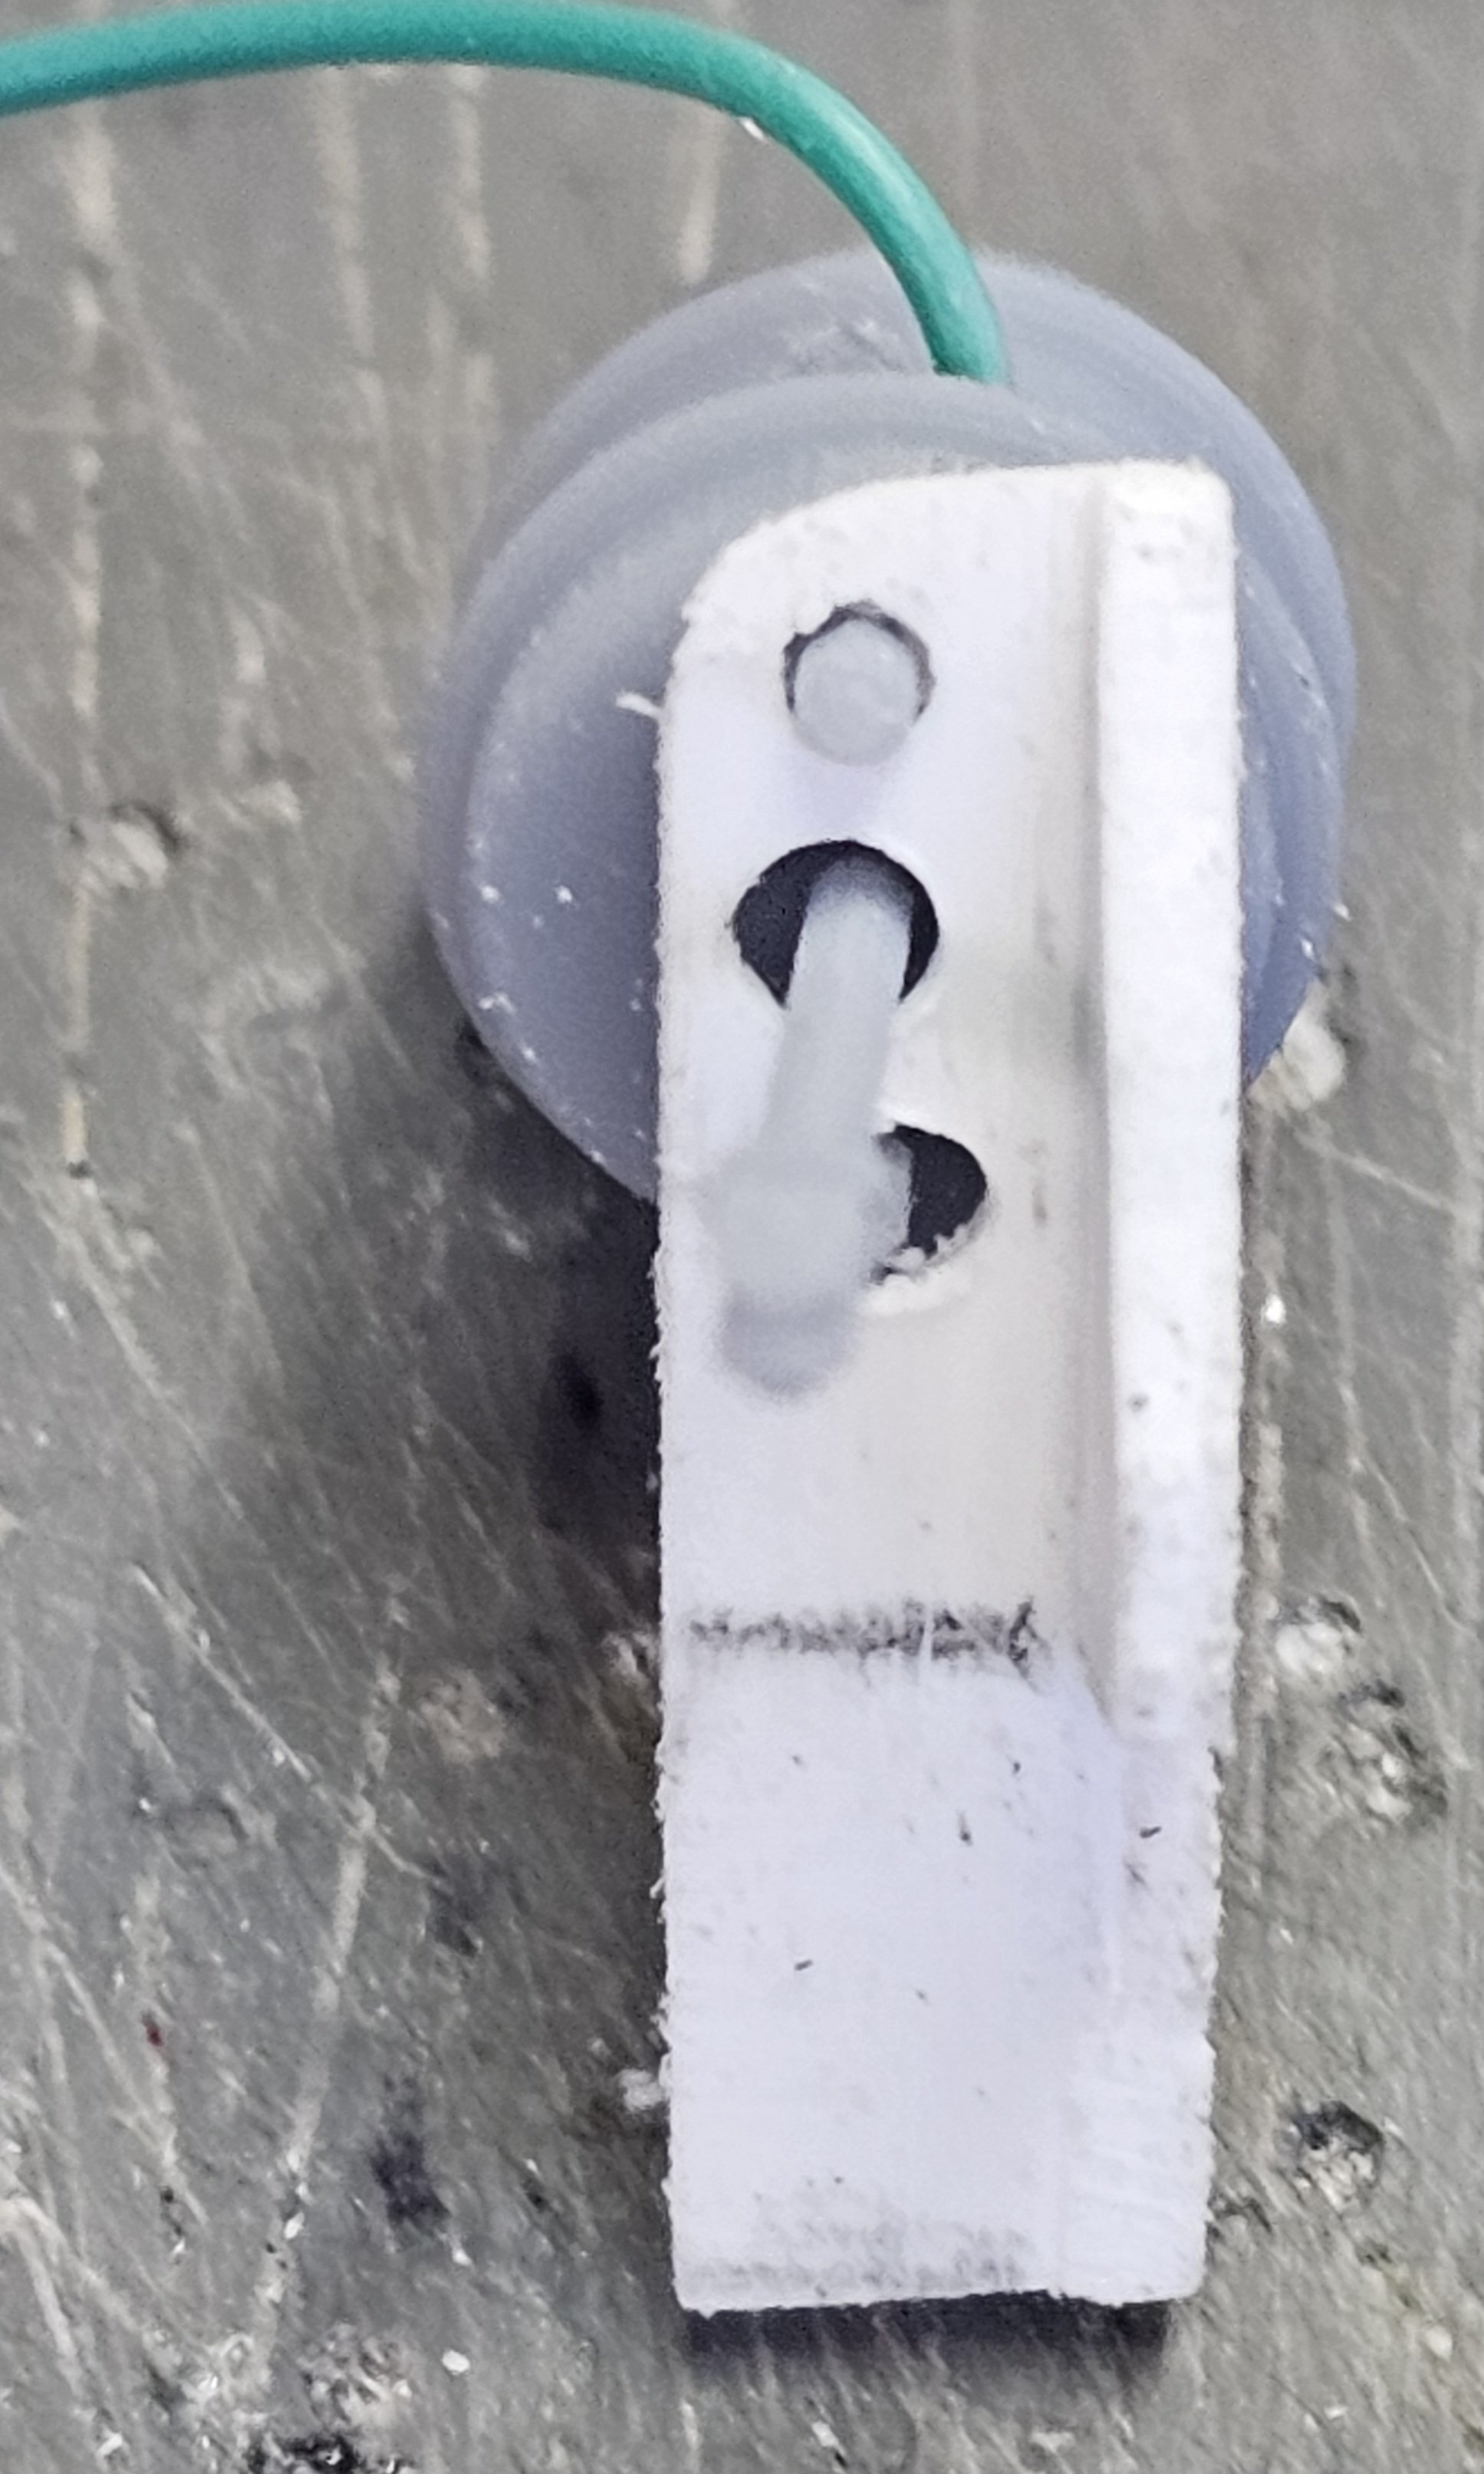
Hey all Not everything is going smooth. I lost the "A" from my Mack emblem.🤬 I had to order another one from Paul at ST Supply.😡 I did get the bulldogs mounted on the mirror backs. V8 Mack's got gold dogs. I made some scratch built air brake control valves. Just need to add the air lines. I have the front brake lines installed just need to add the valve and lines. Ron G

-
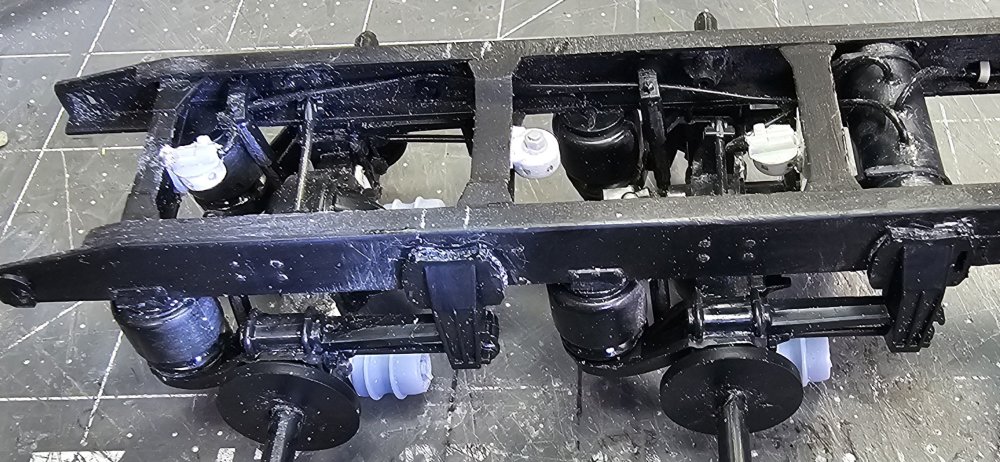
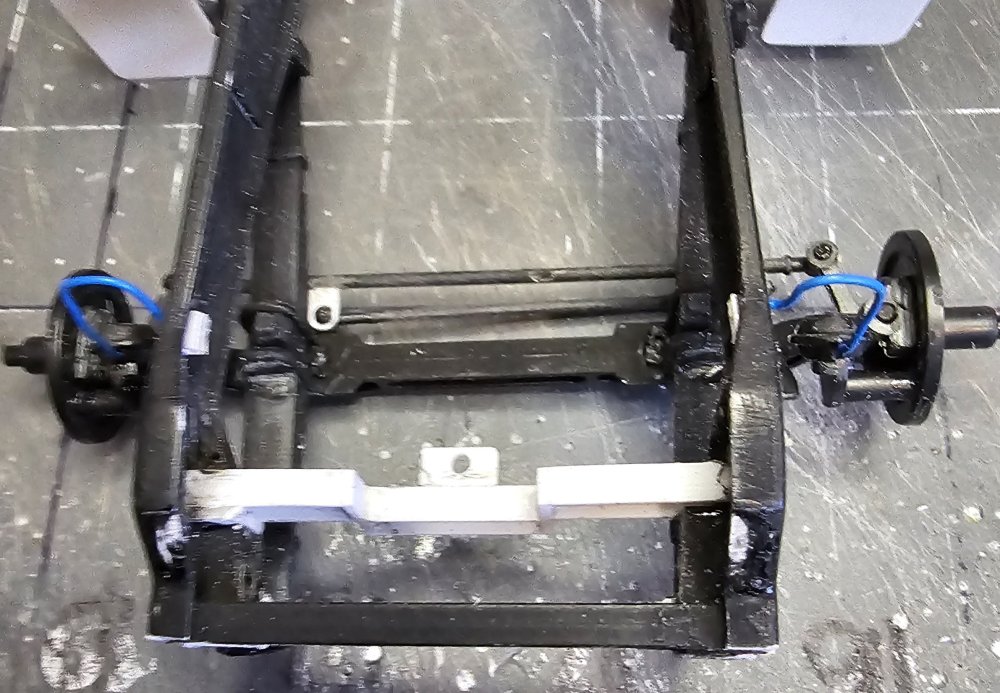
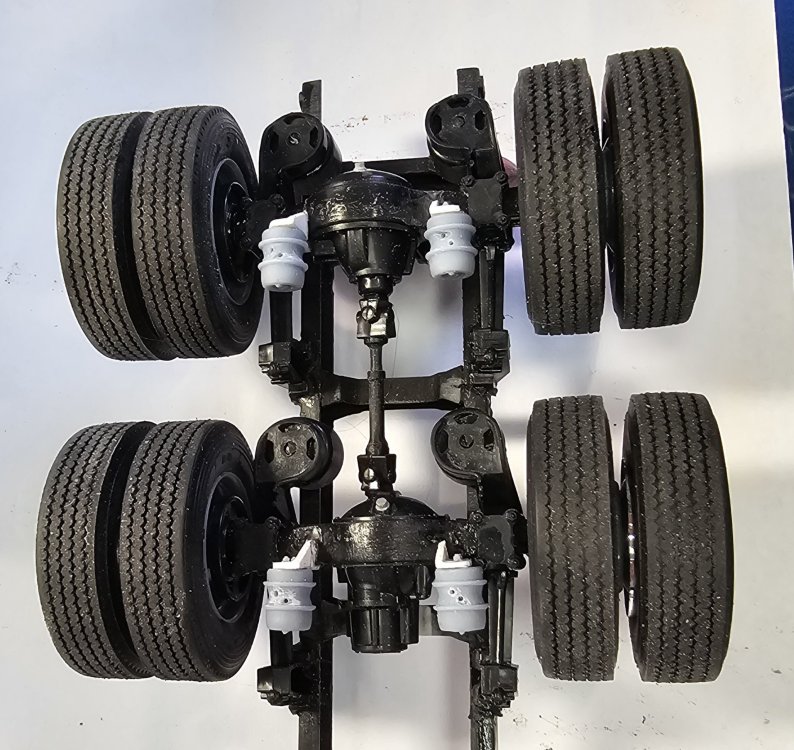
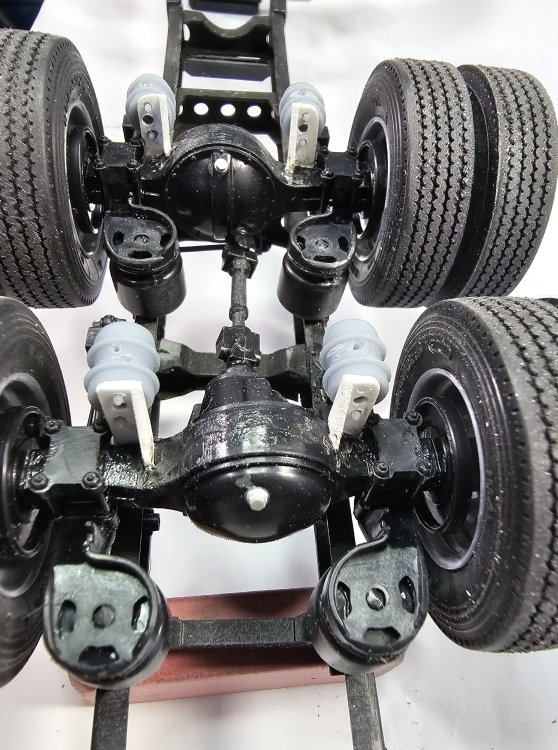
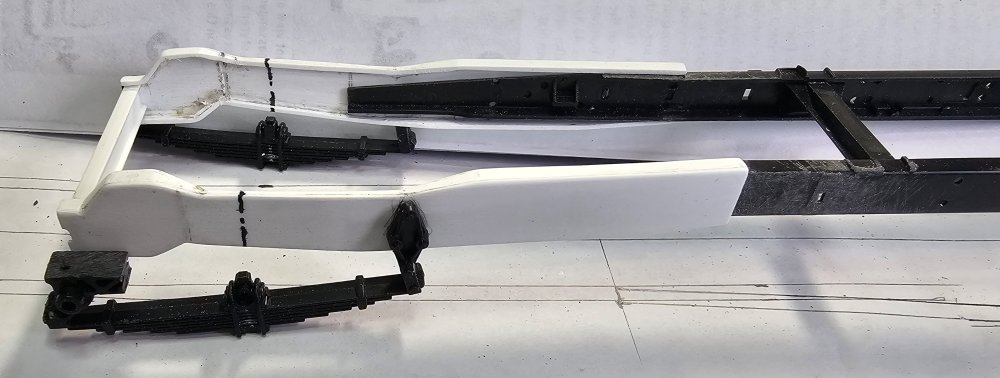
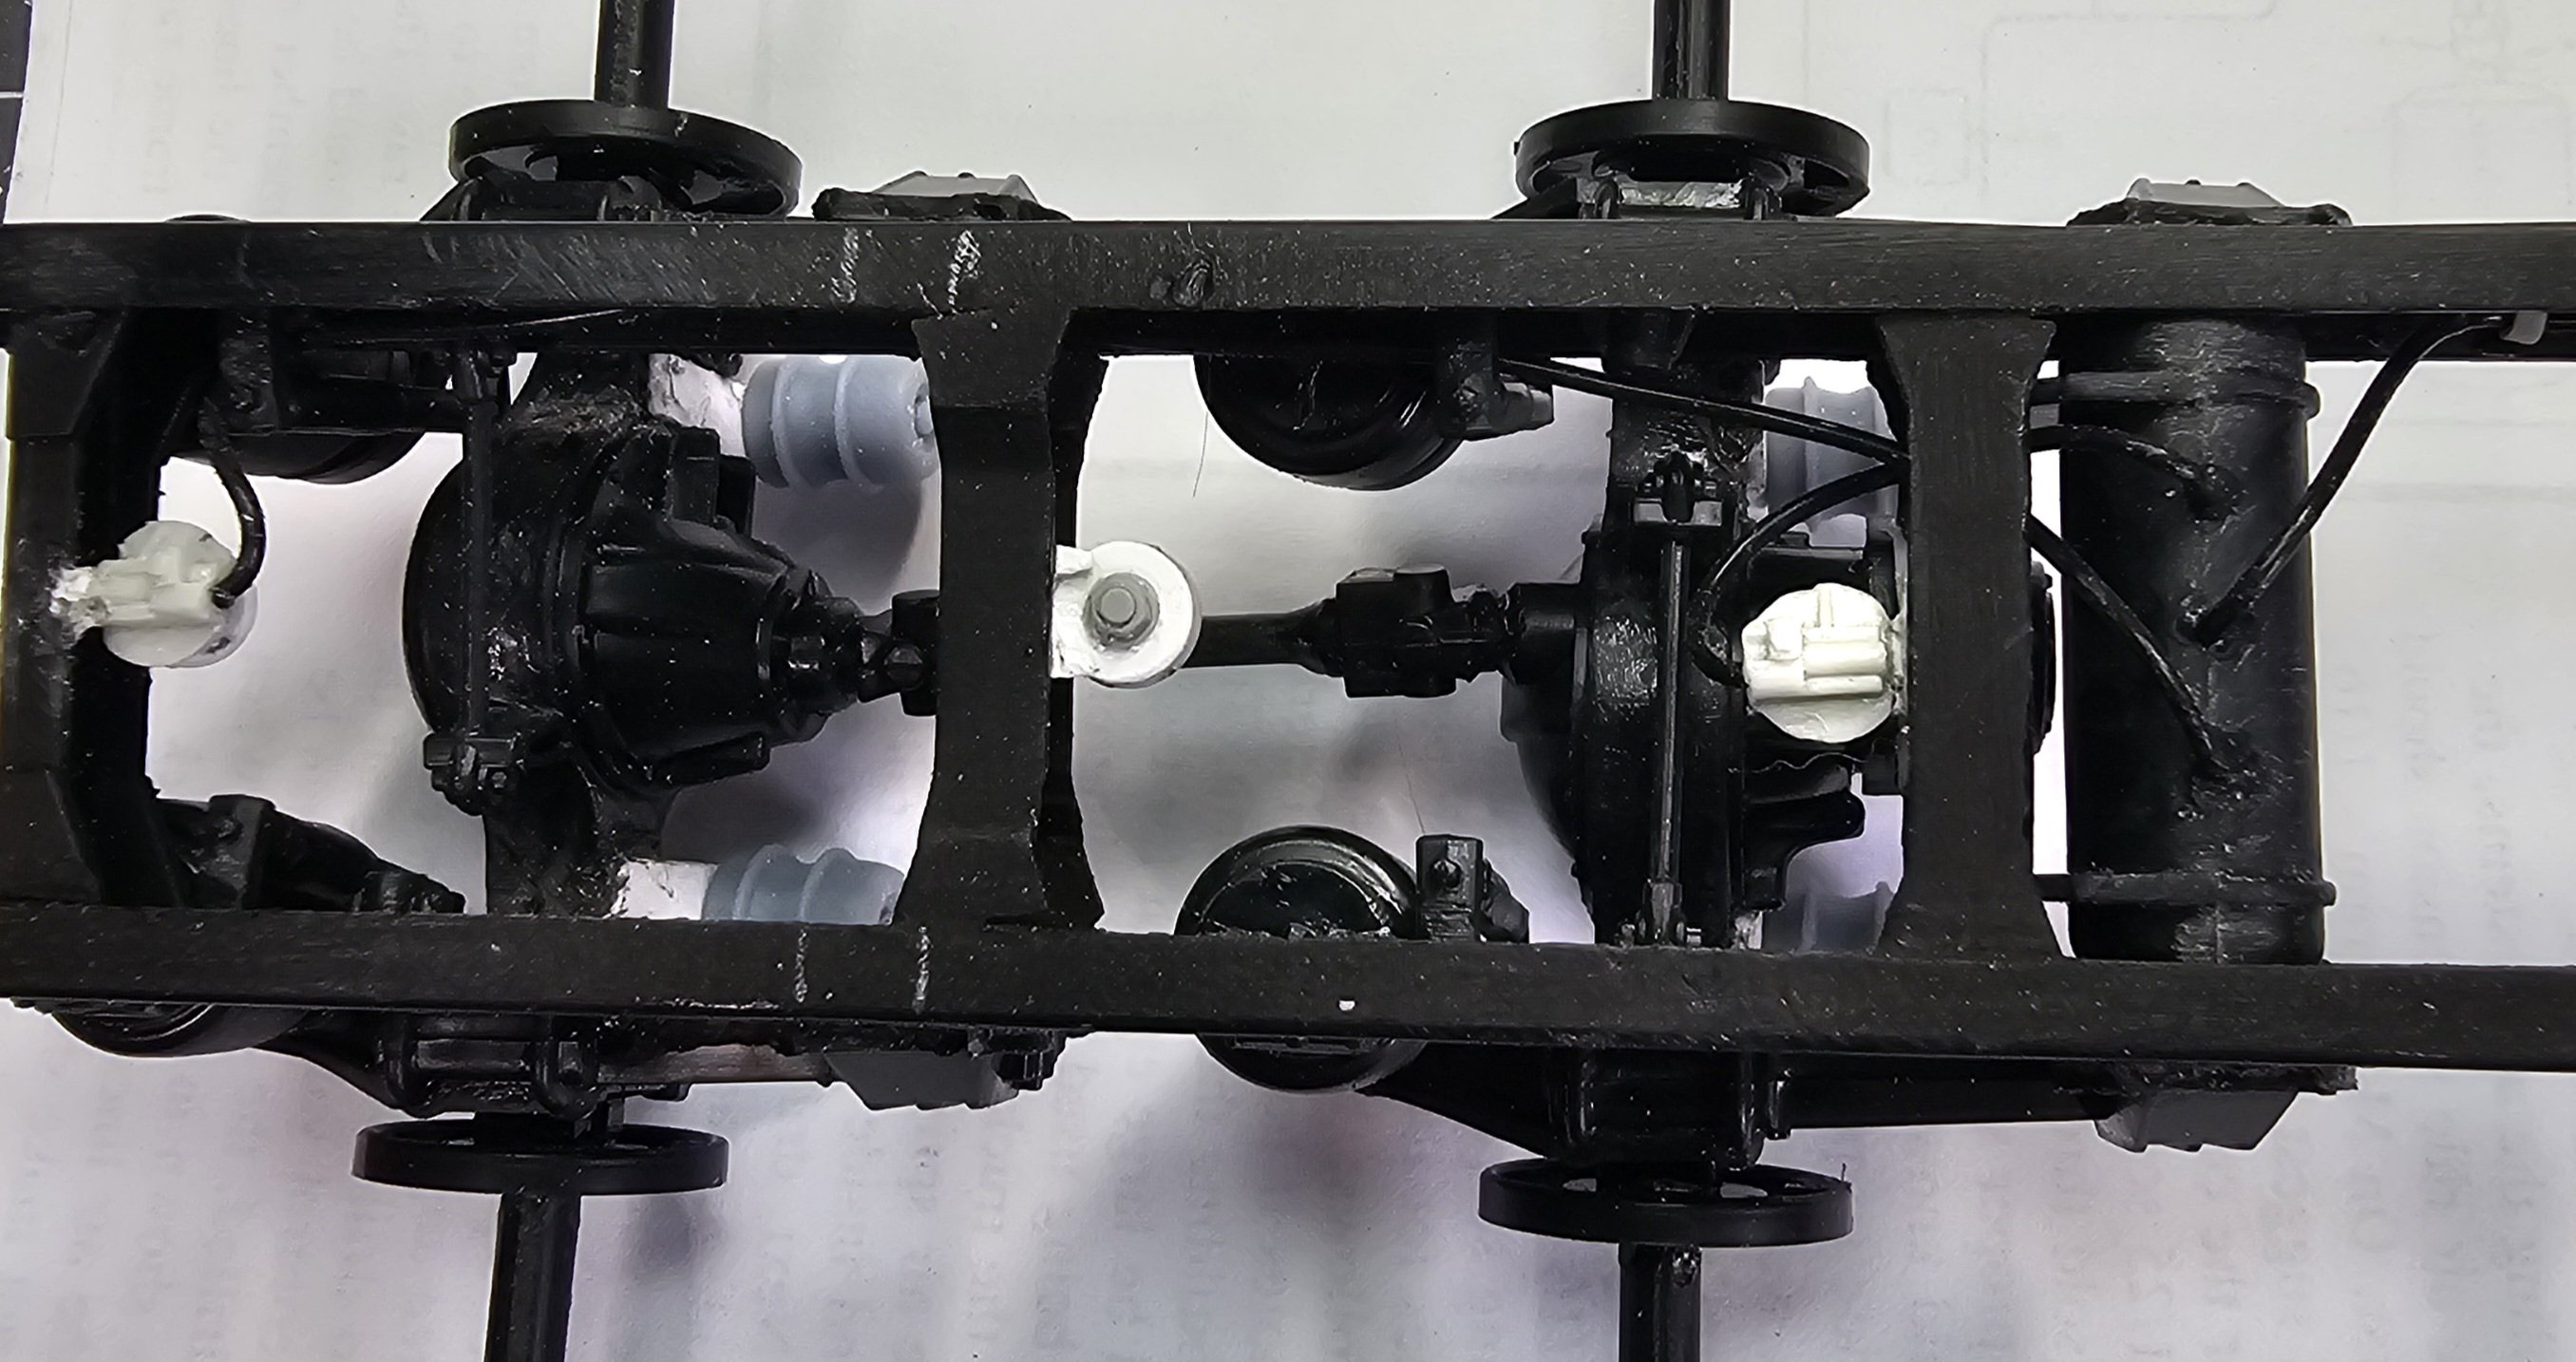
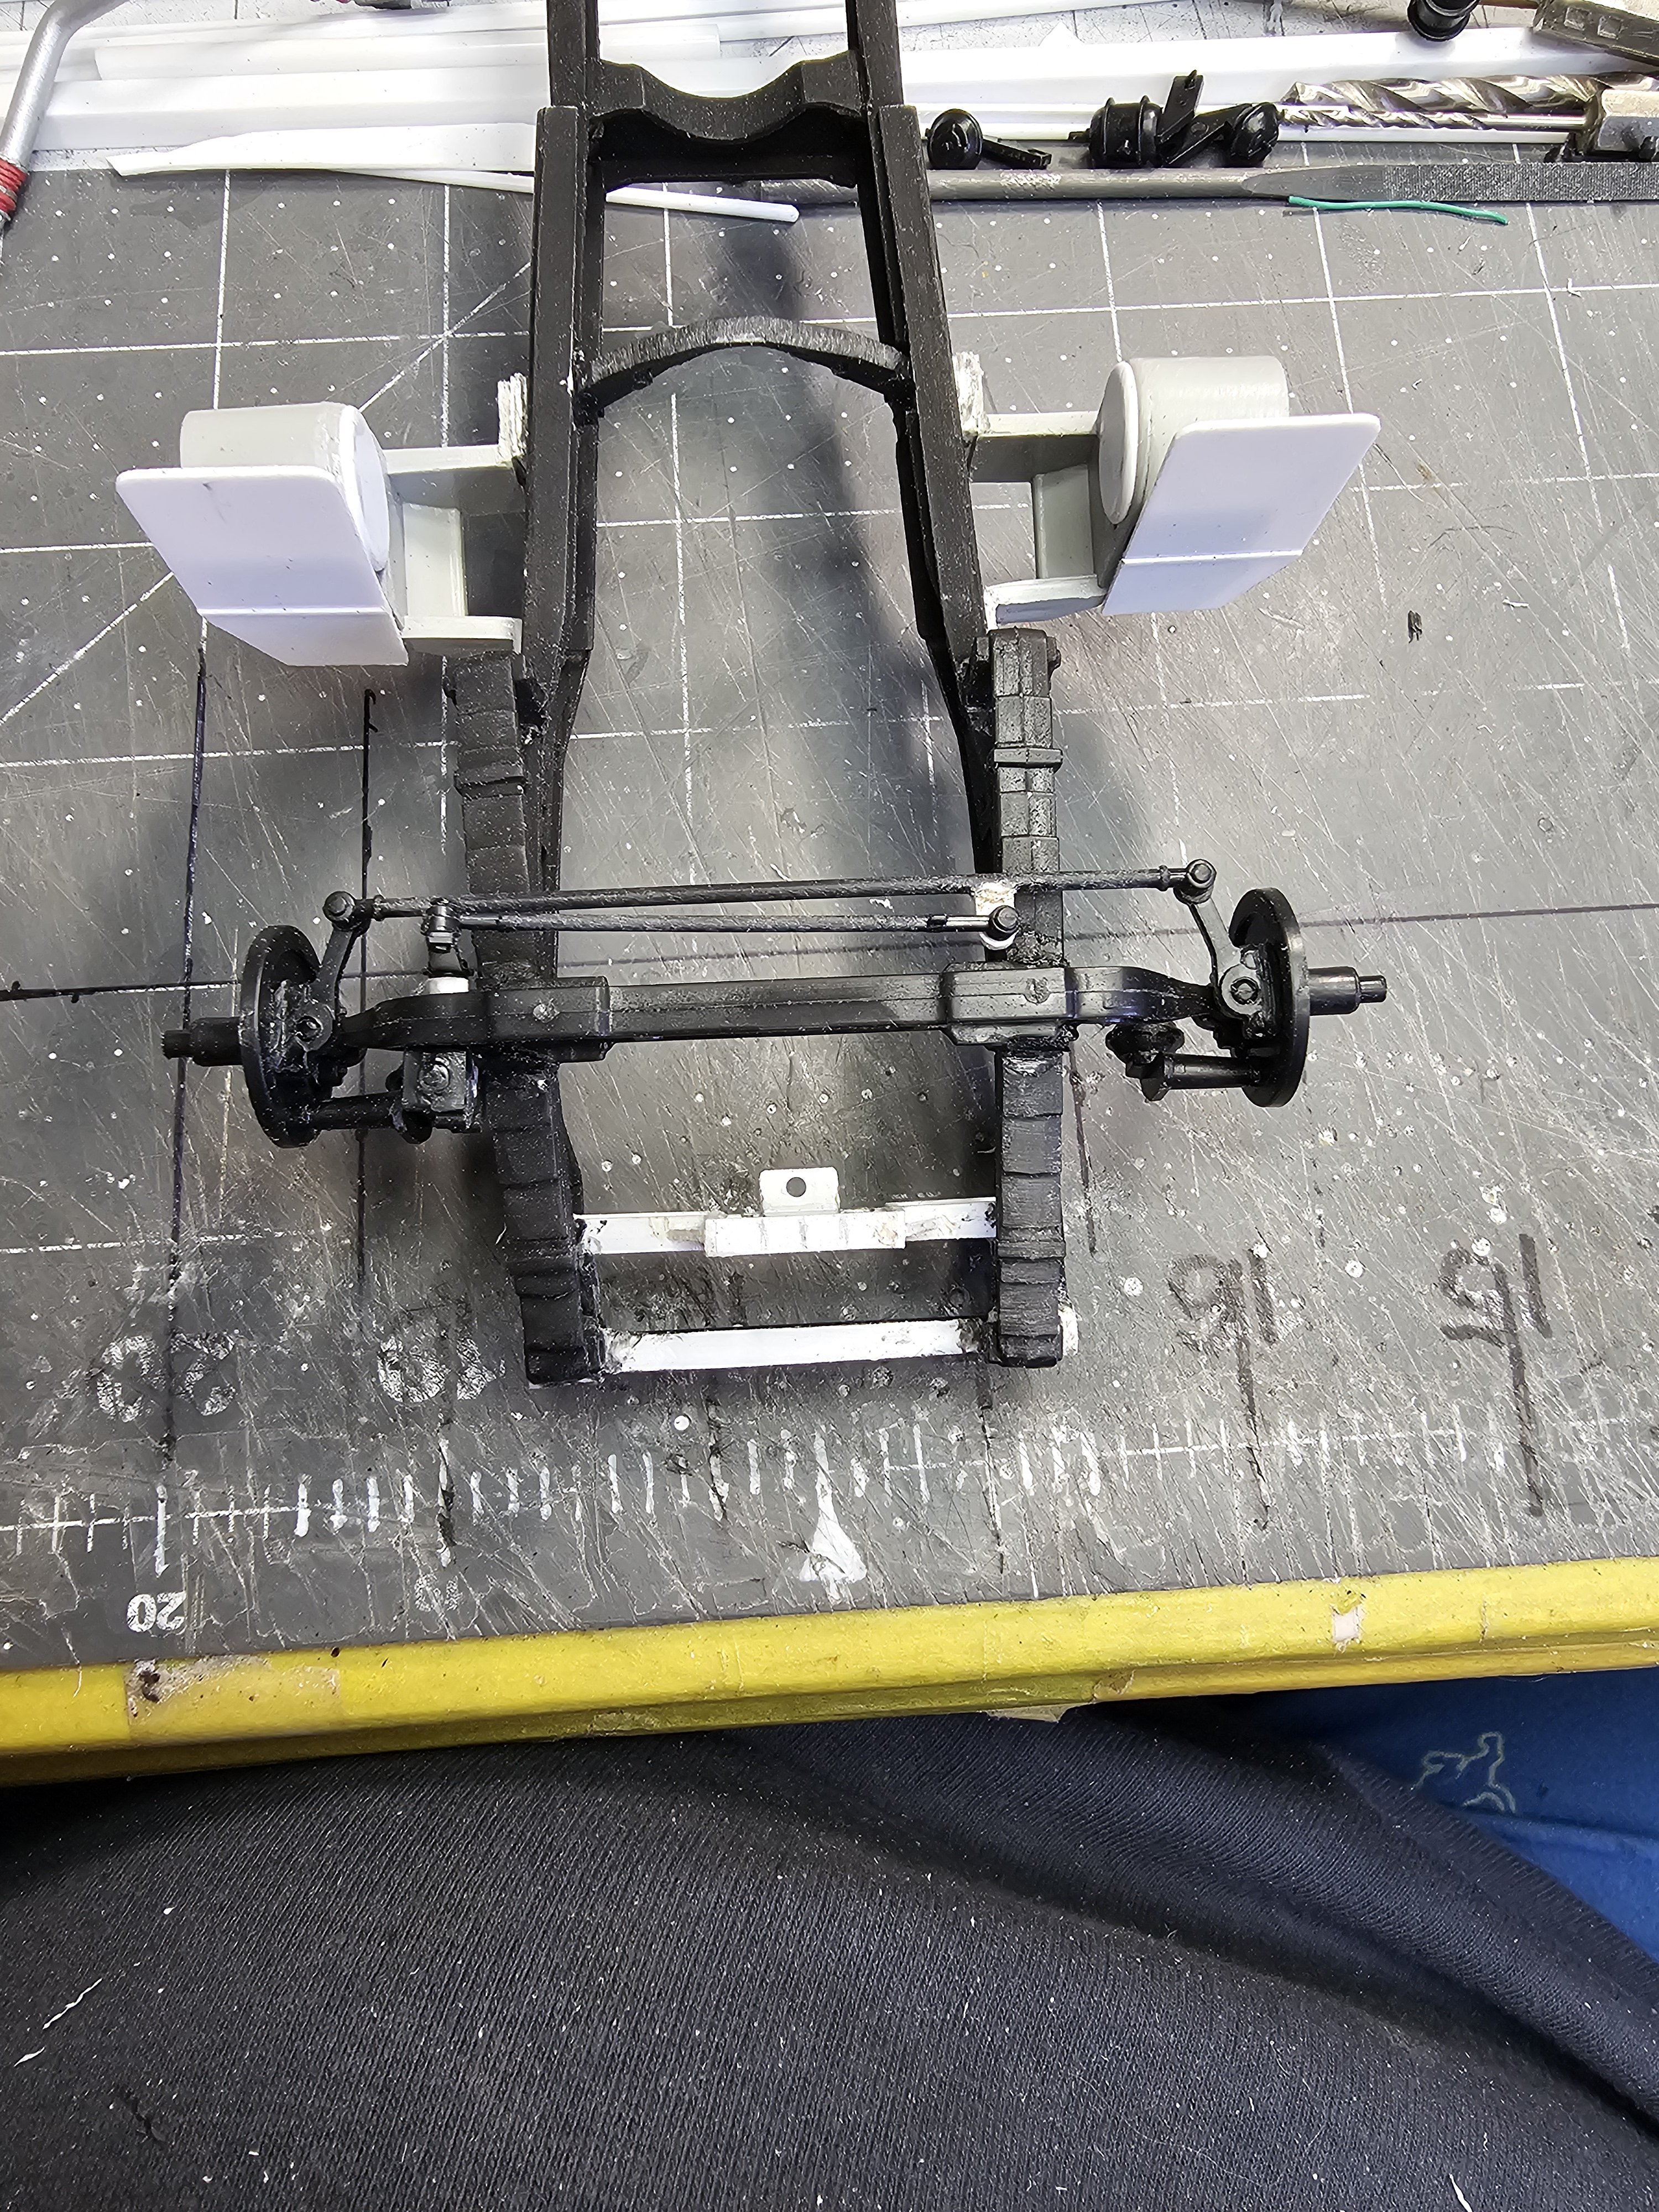
Hey all Here is the rear suspension. It is a representation of a Peterbilt rear air suspension grafted on to a Mack frame. Top view of rear suspension. This view shows the scratch built drive shaft I had to make because this was shortened to a day cab. Bottom view of rear suspension. Another view showing the brake chambers and air suspension. View from the rear showing the brake chamber brackets. Mock-up of the Mack Superliner day cab. Well that's it for now be back soon with more updates. Ron G
.thumb.jpg.dc14d276763403ef306e3916a8d08e2a.jpg)
-
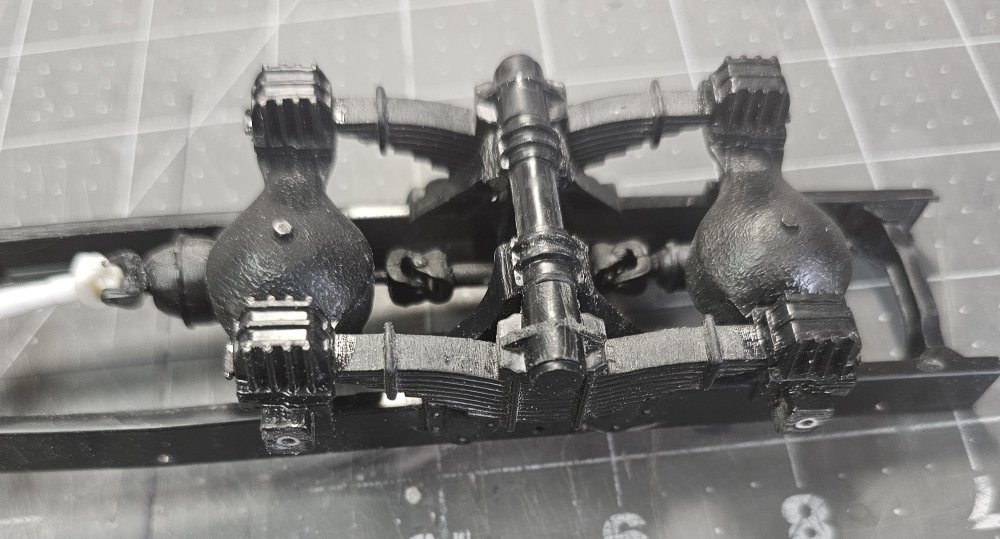
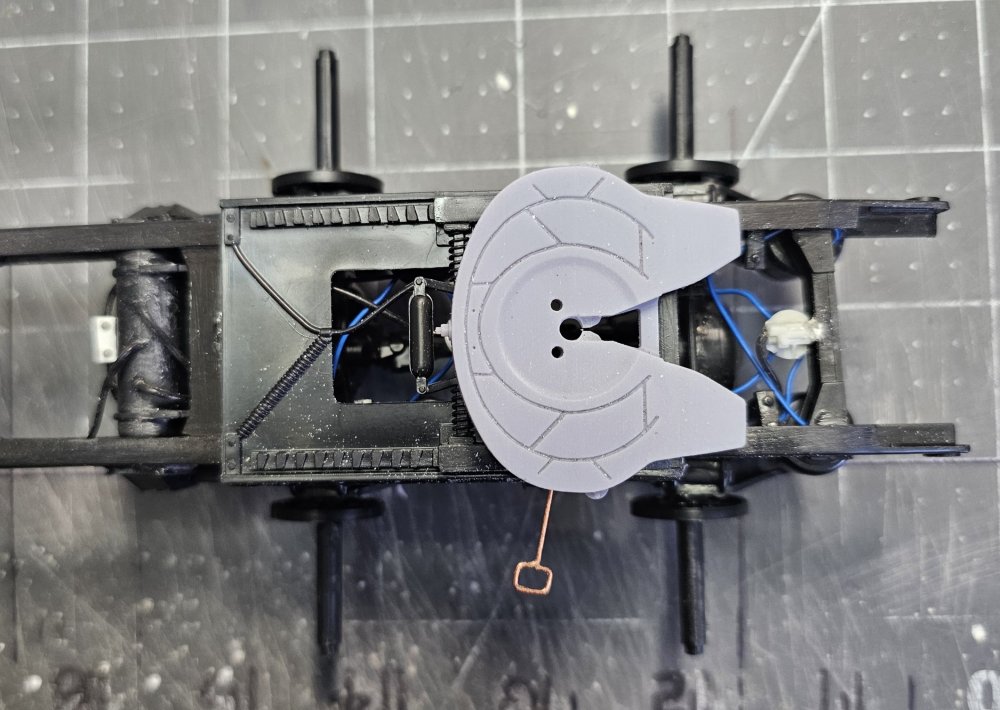
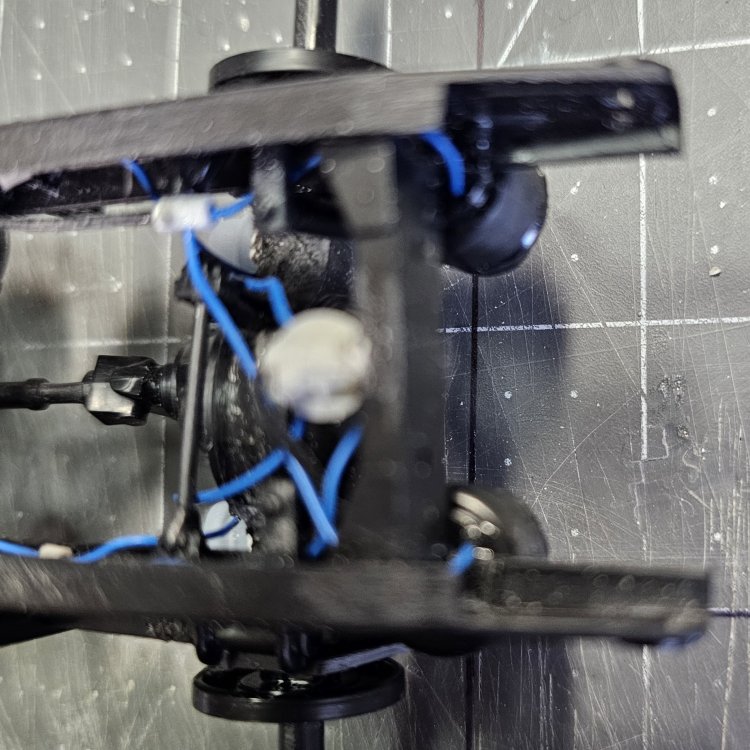
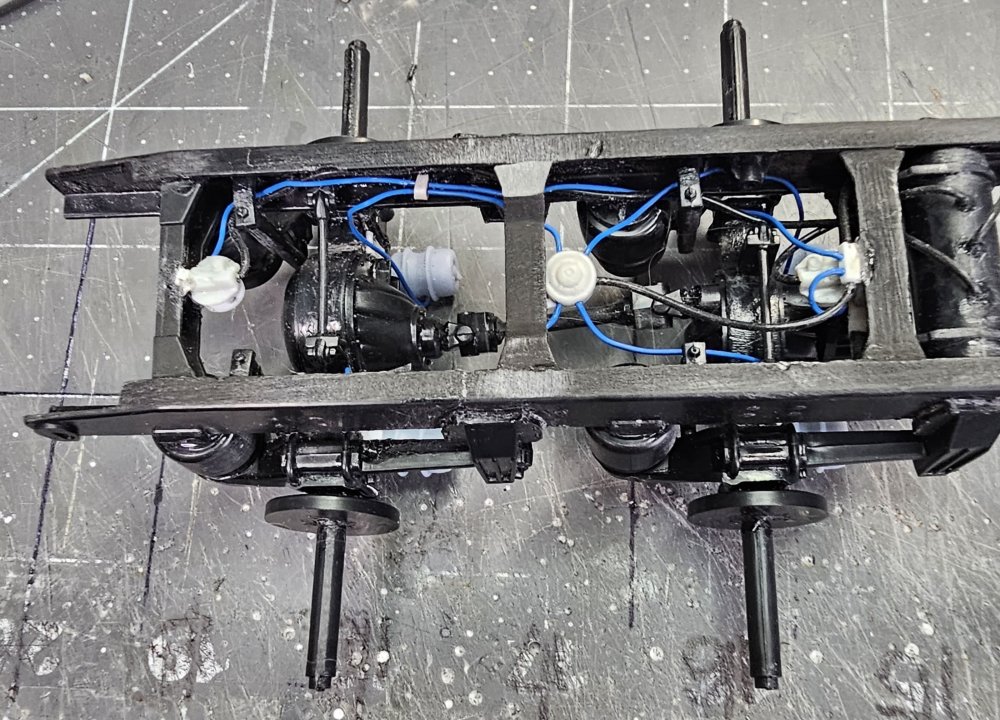
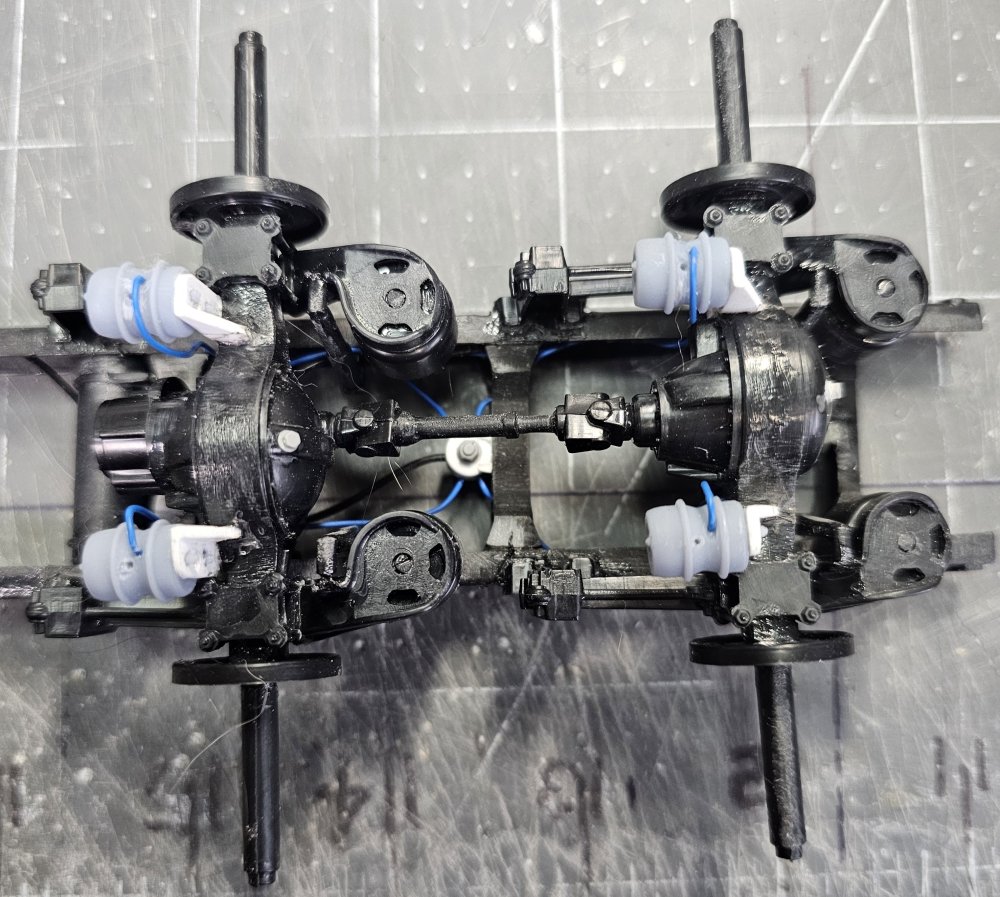
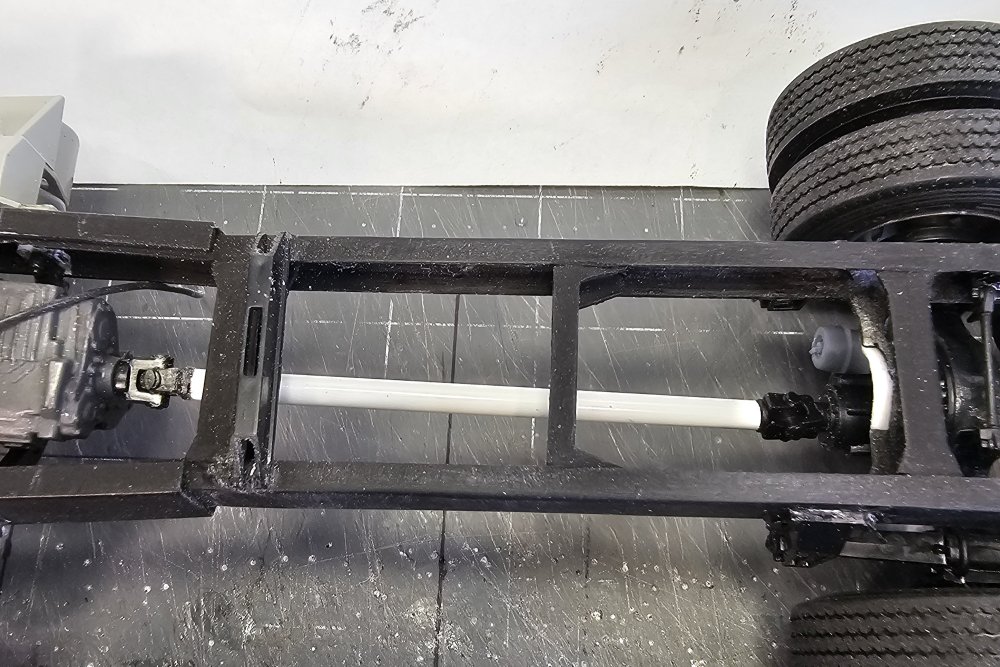
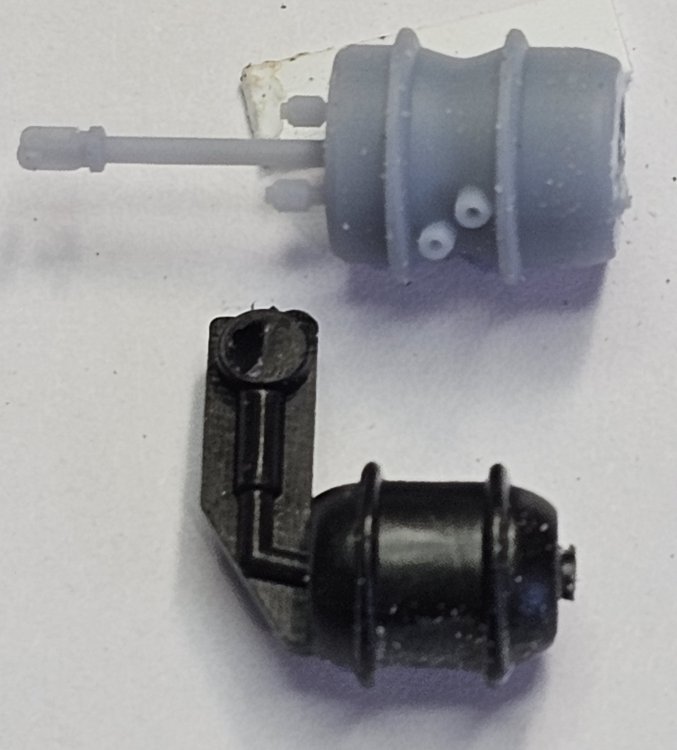
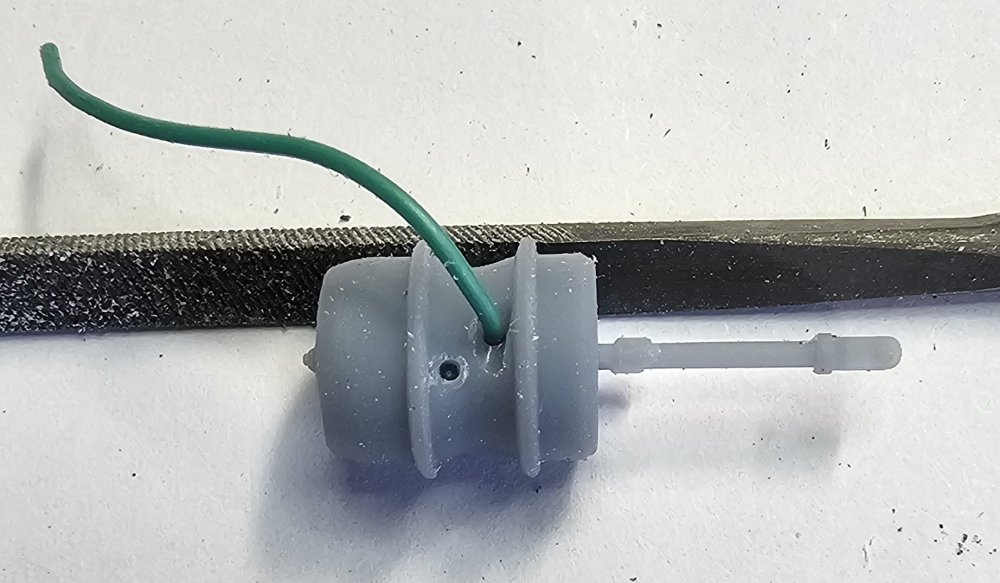
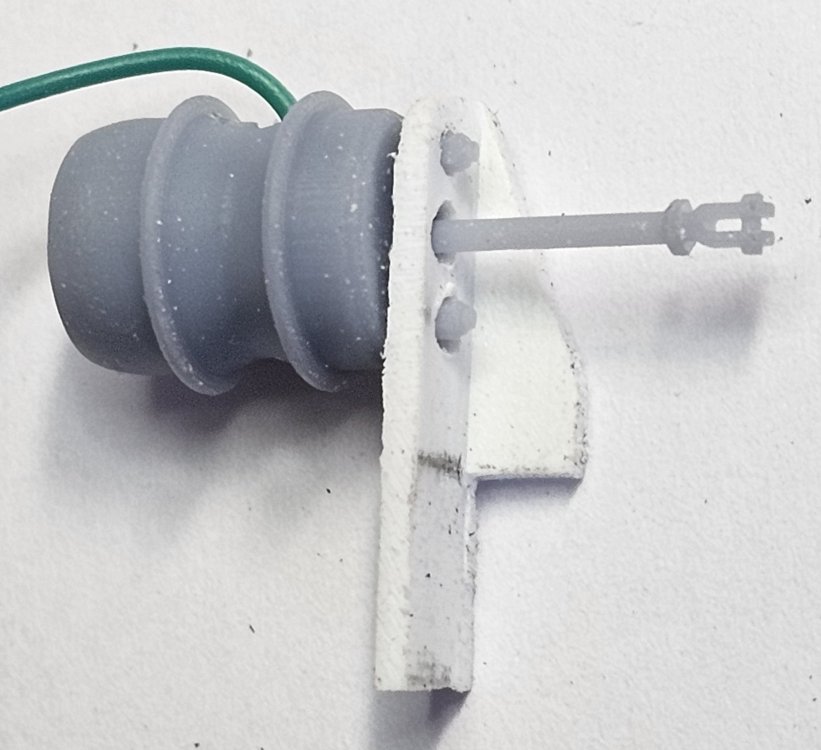
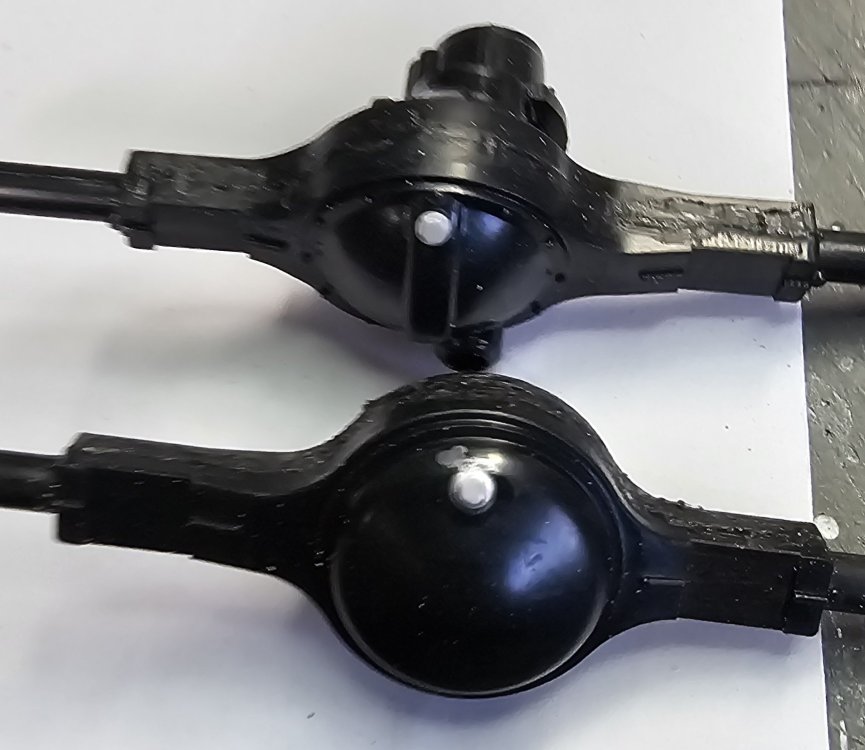
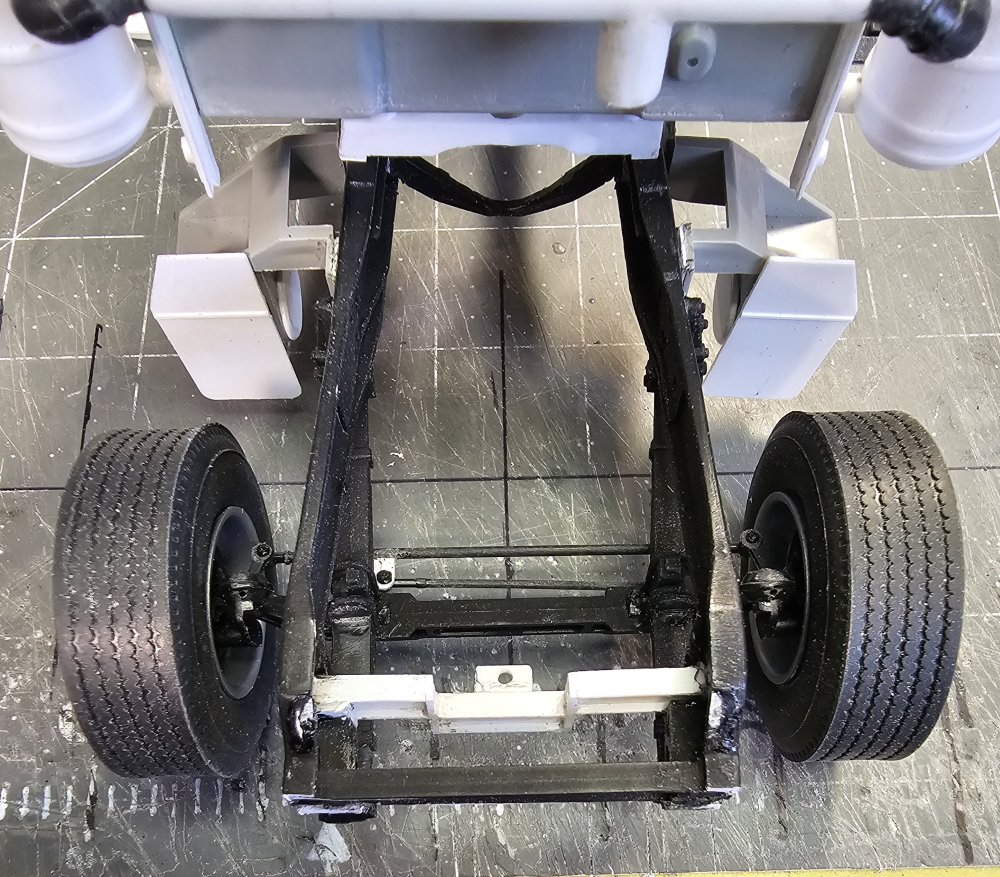
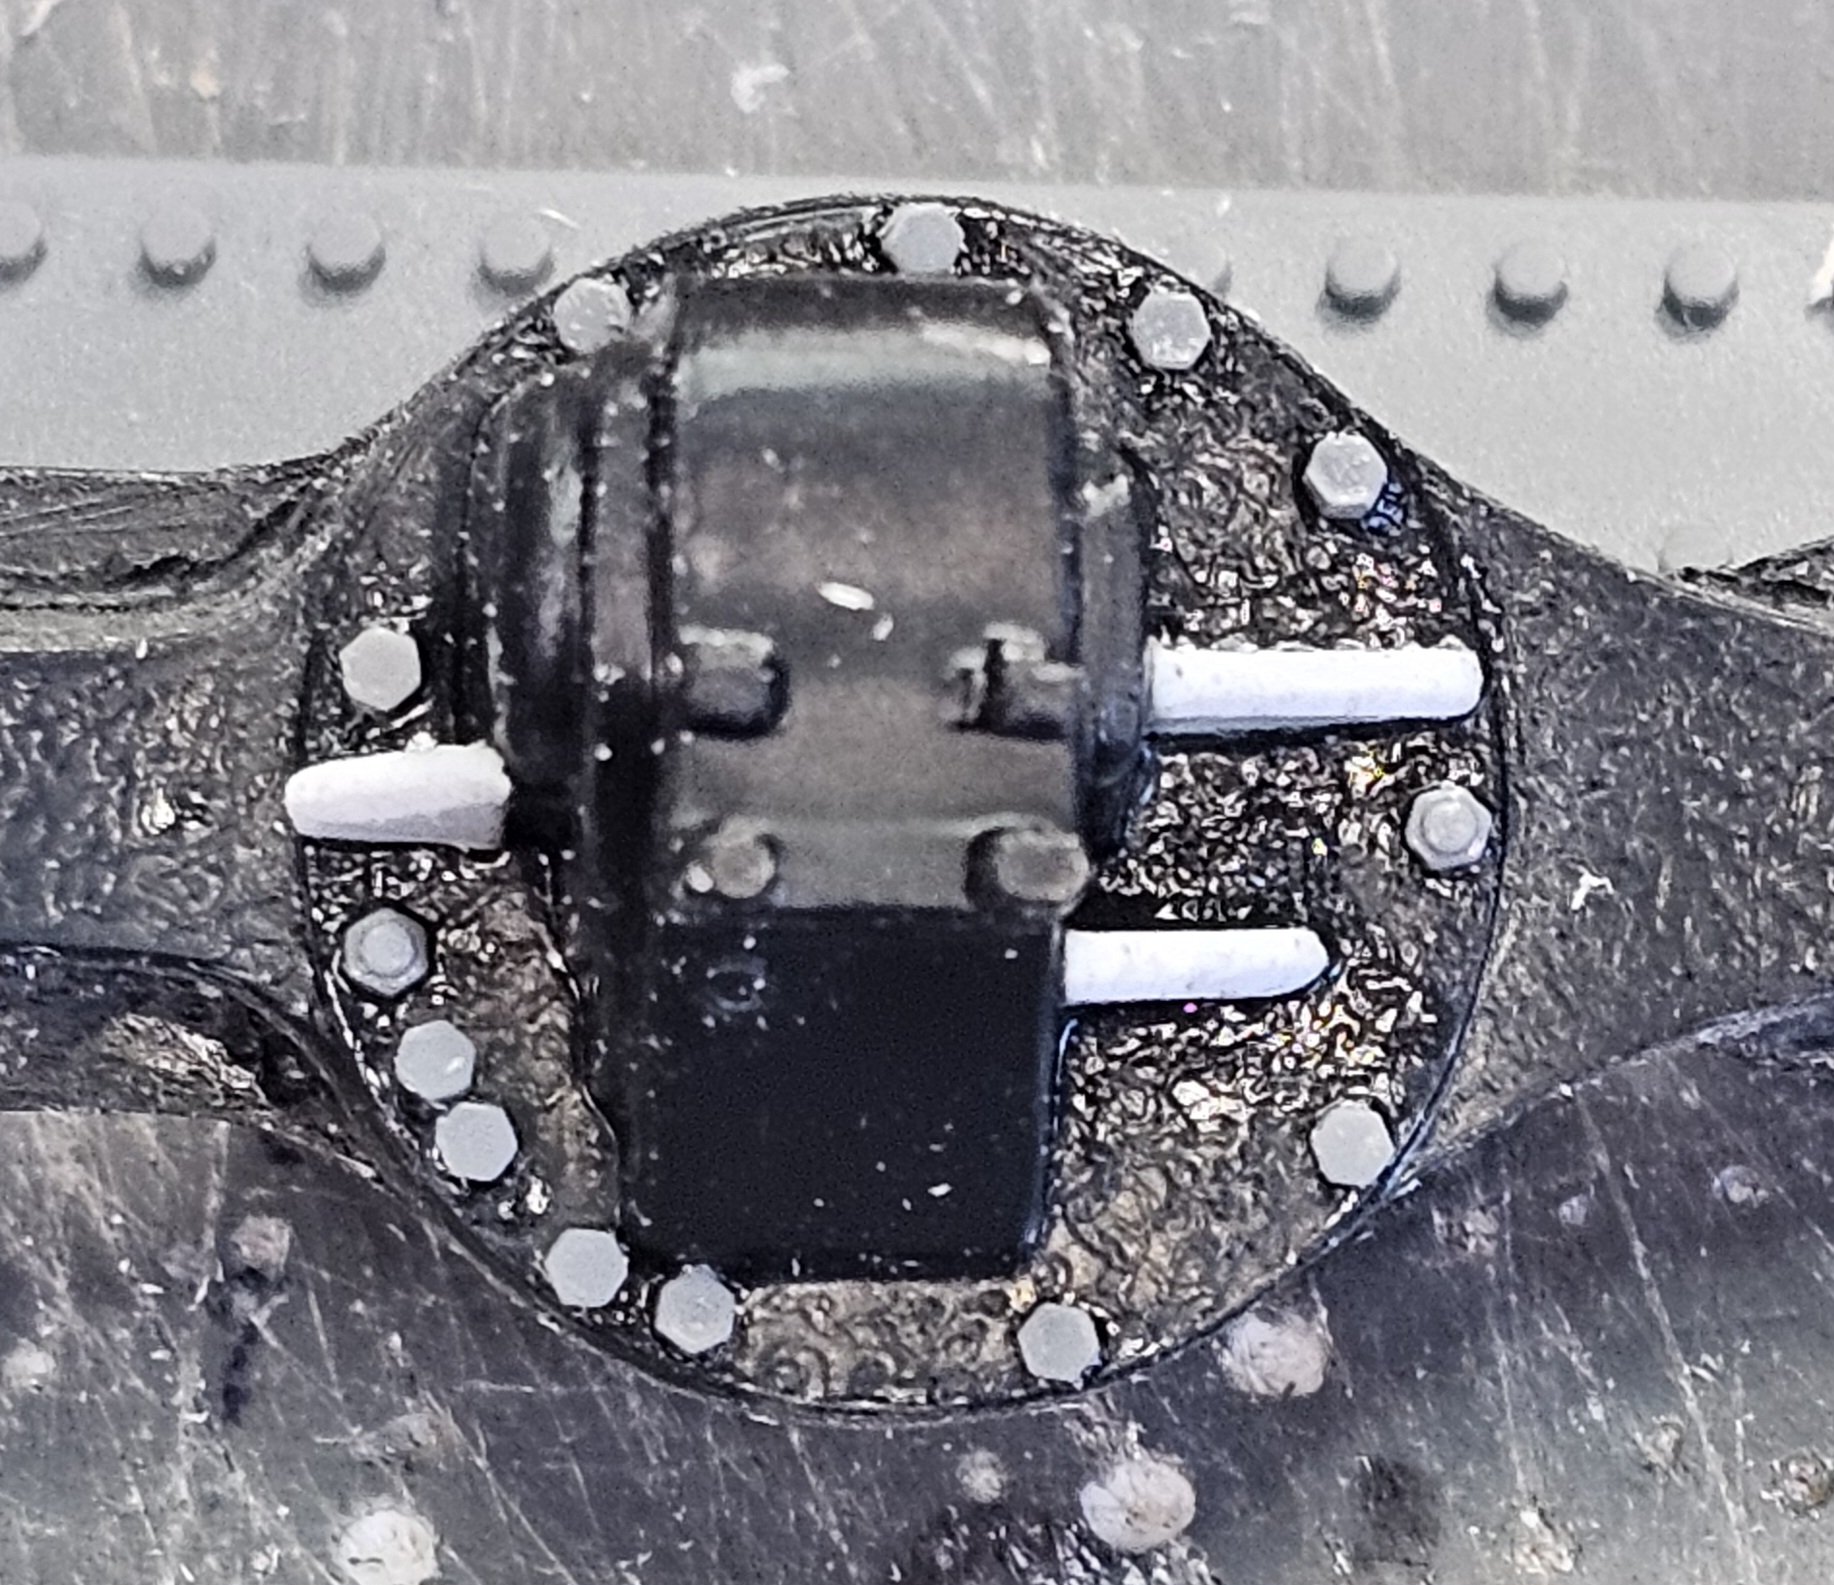
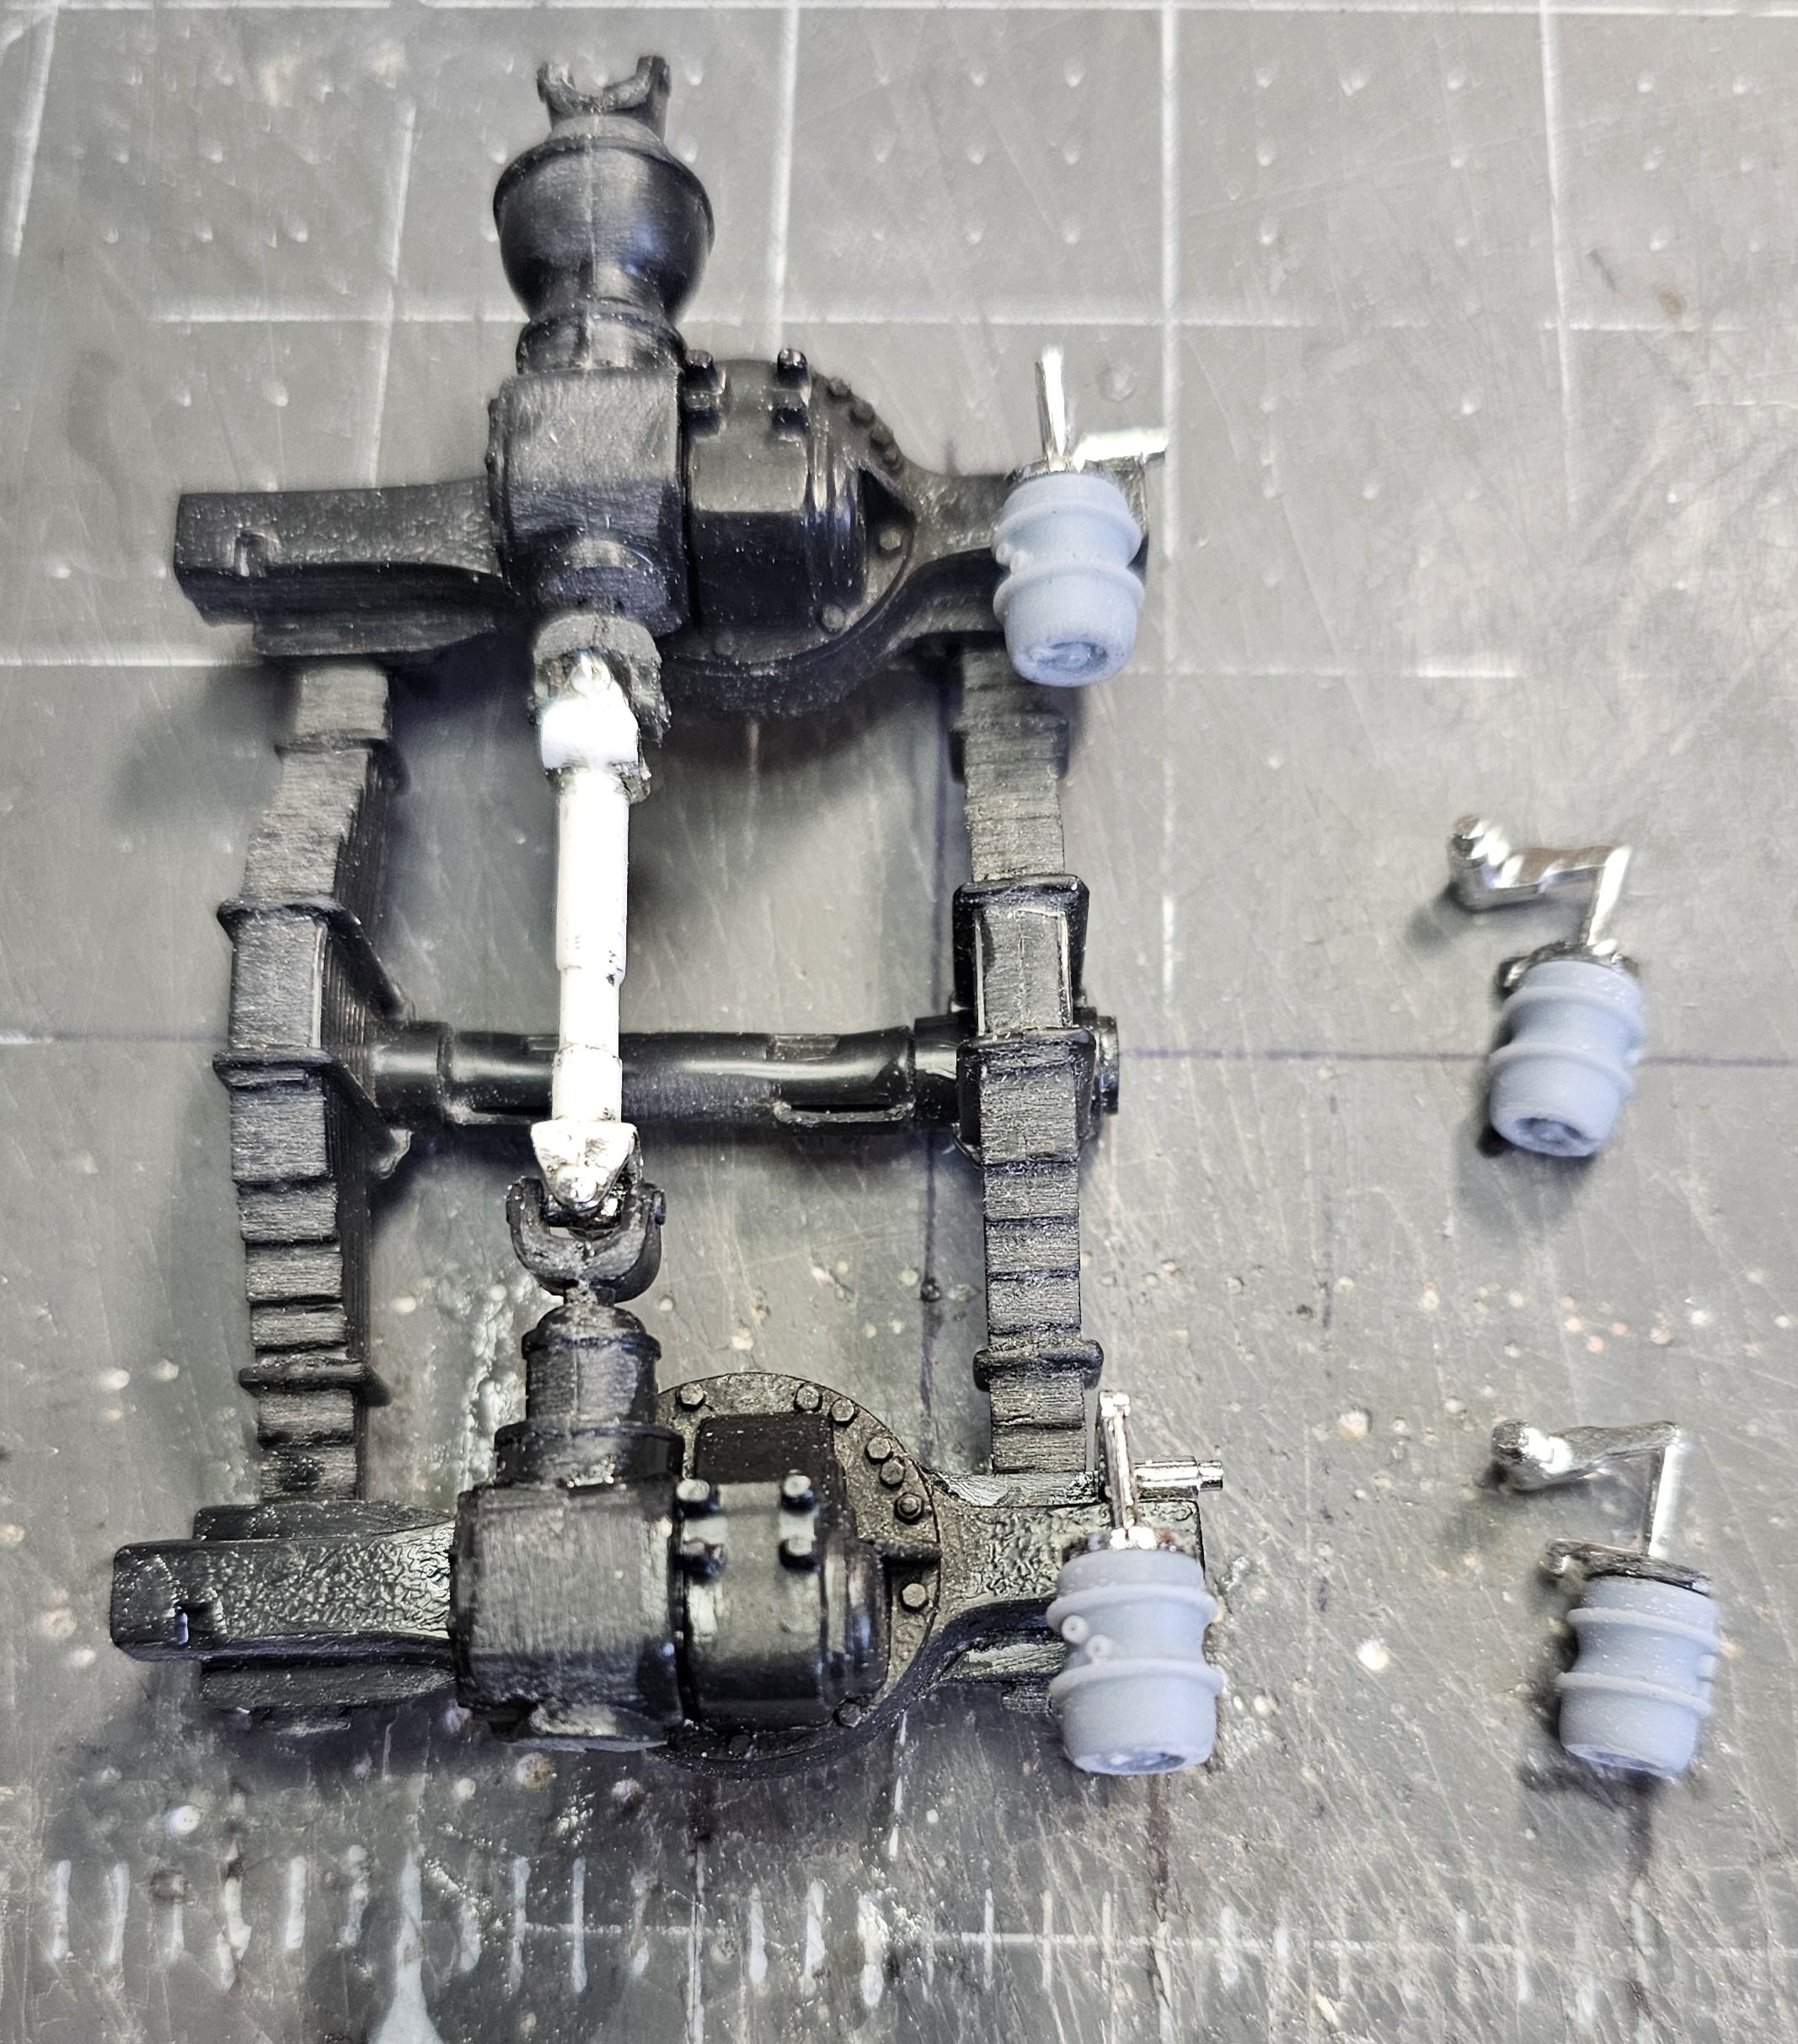
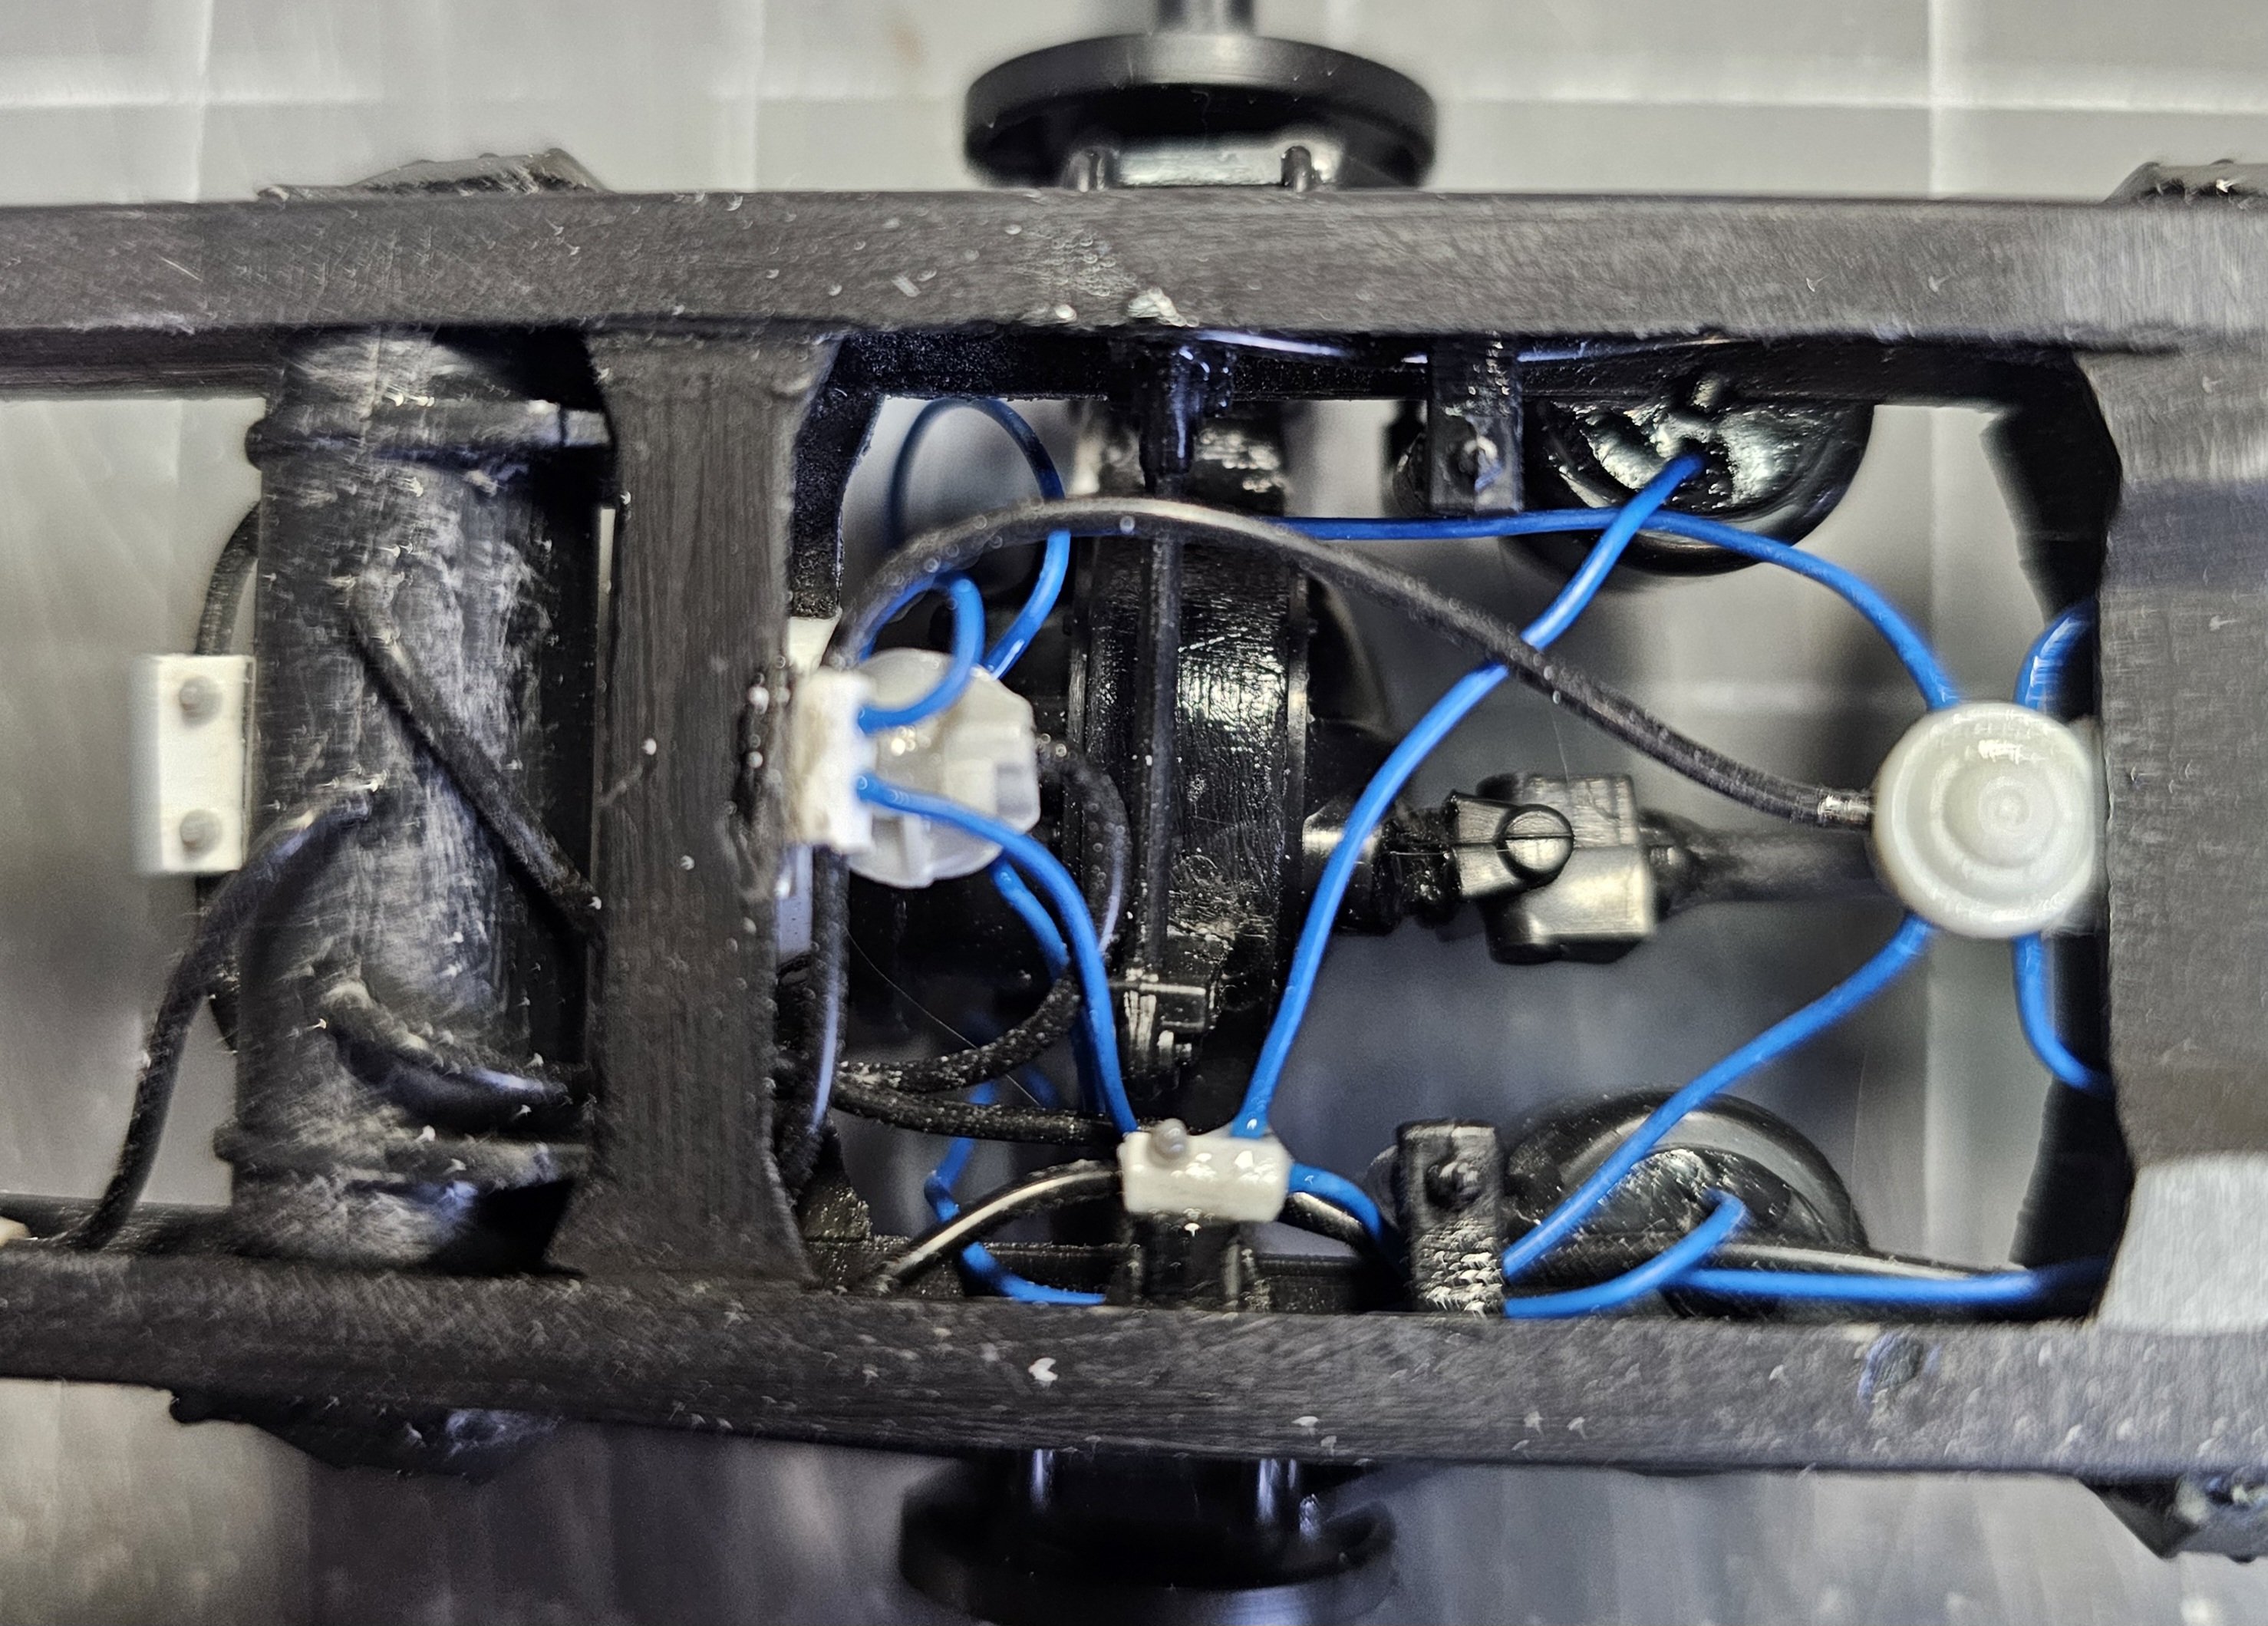
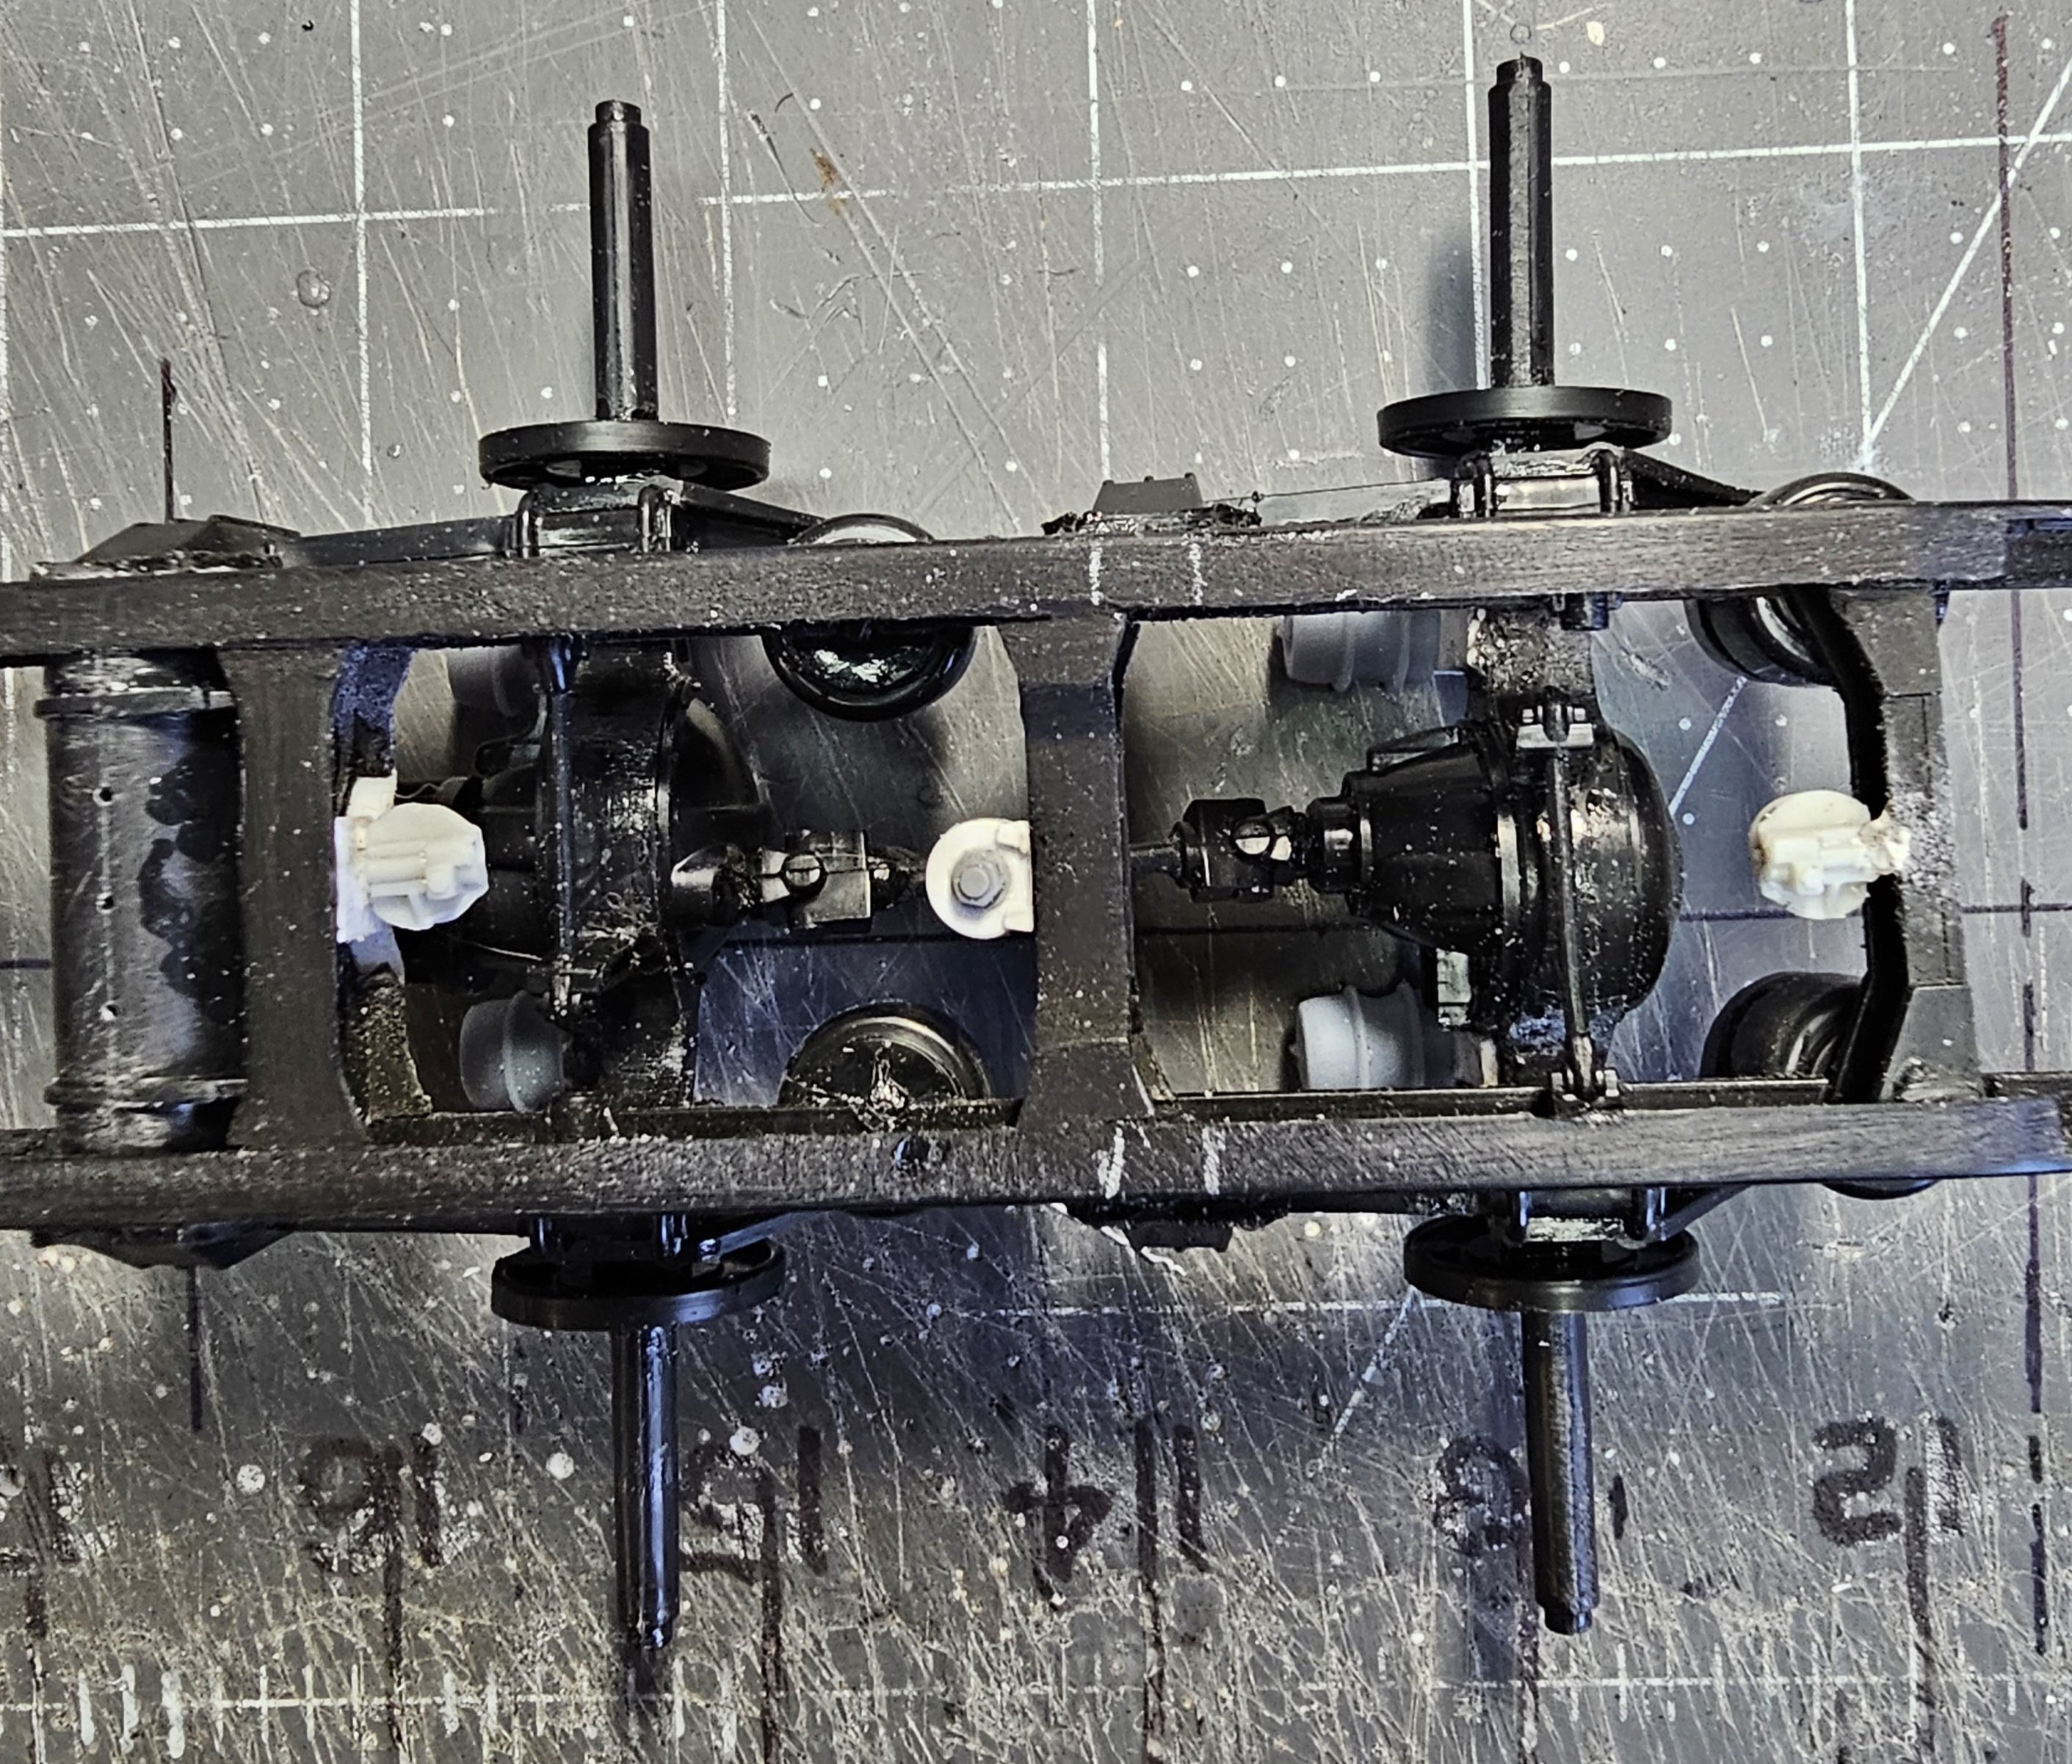
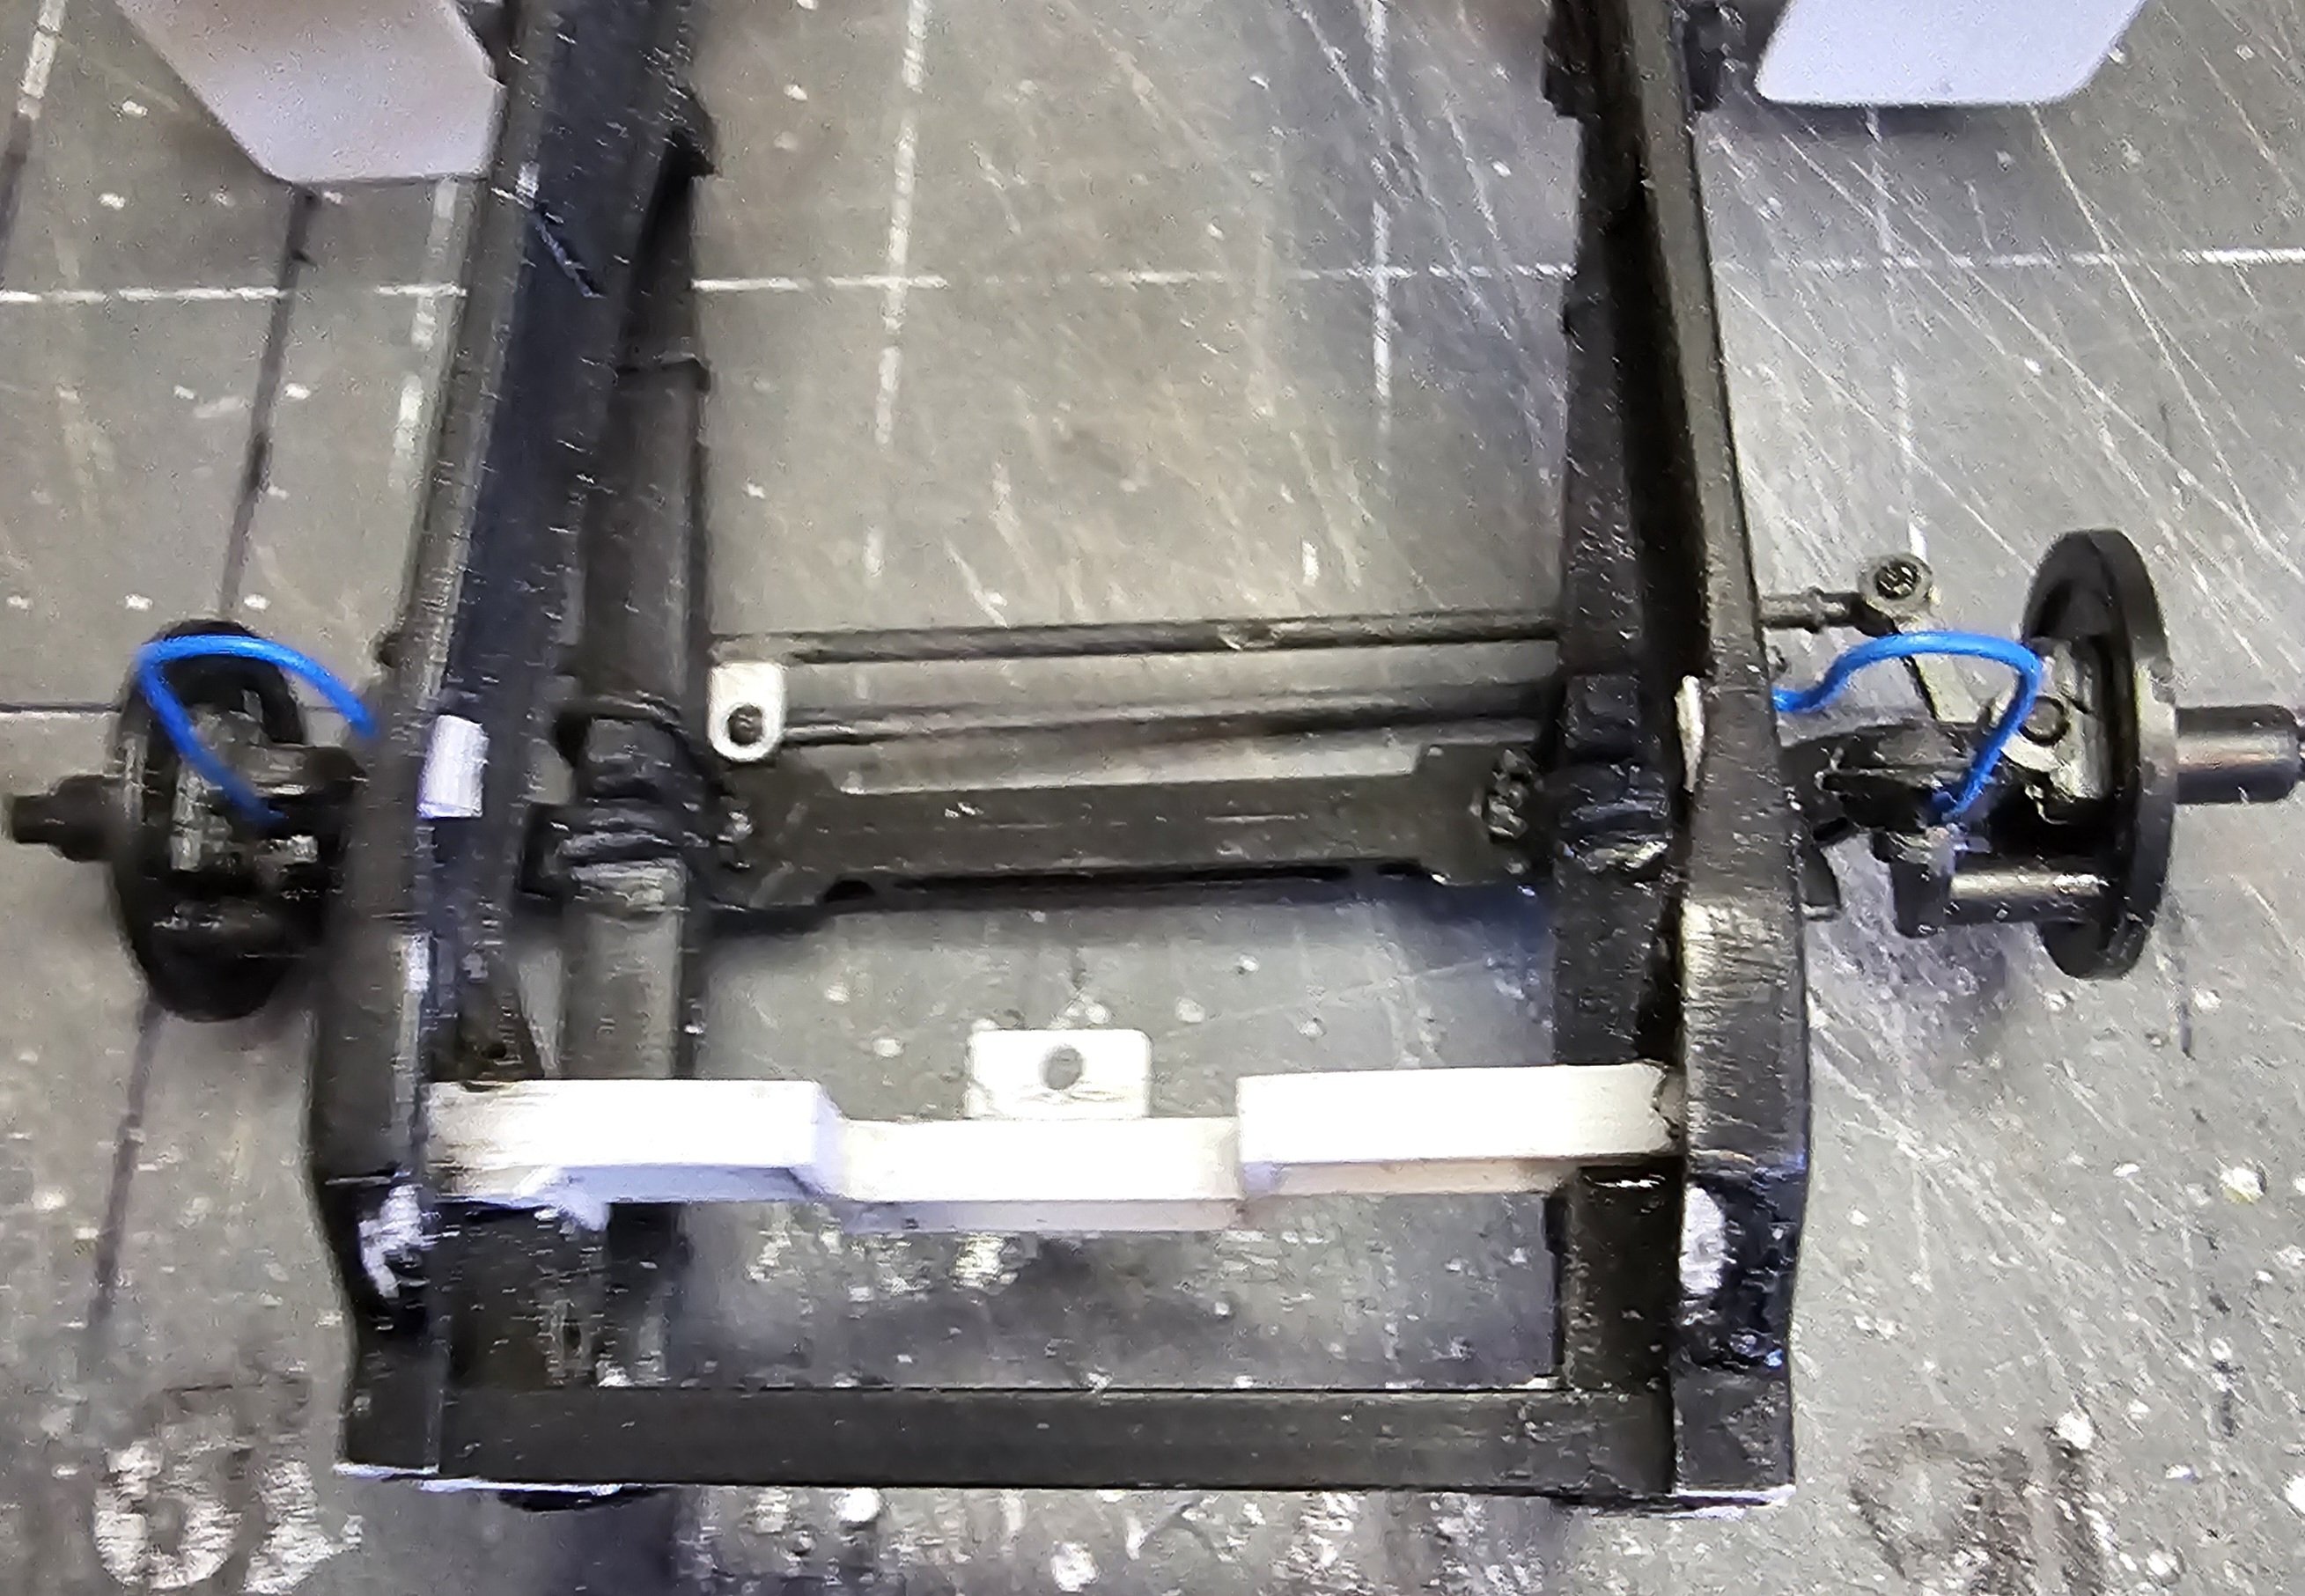
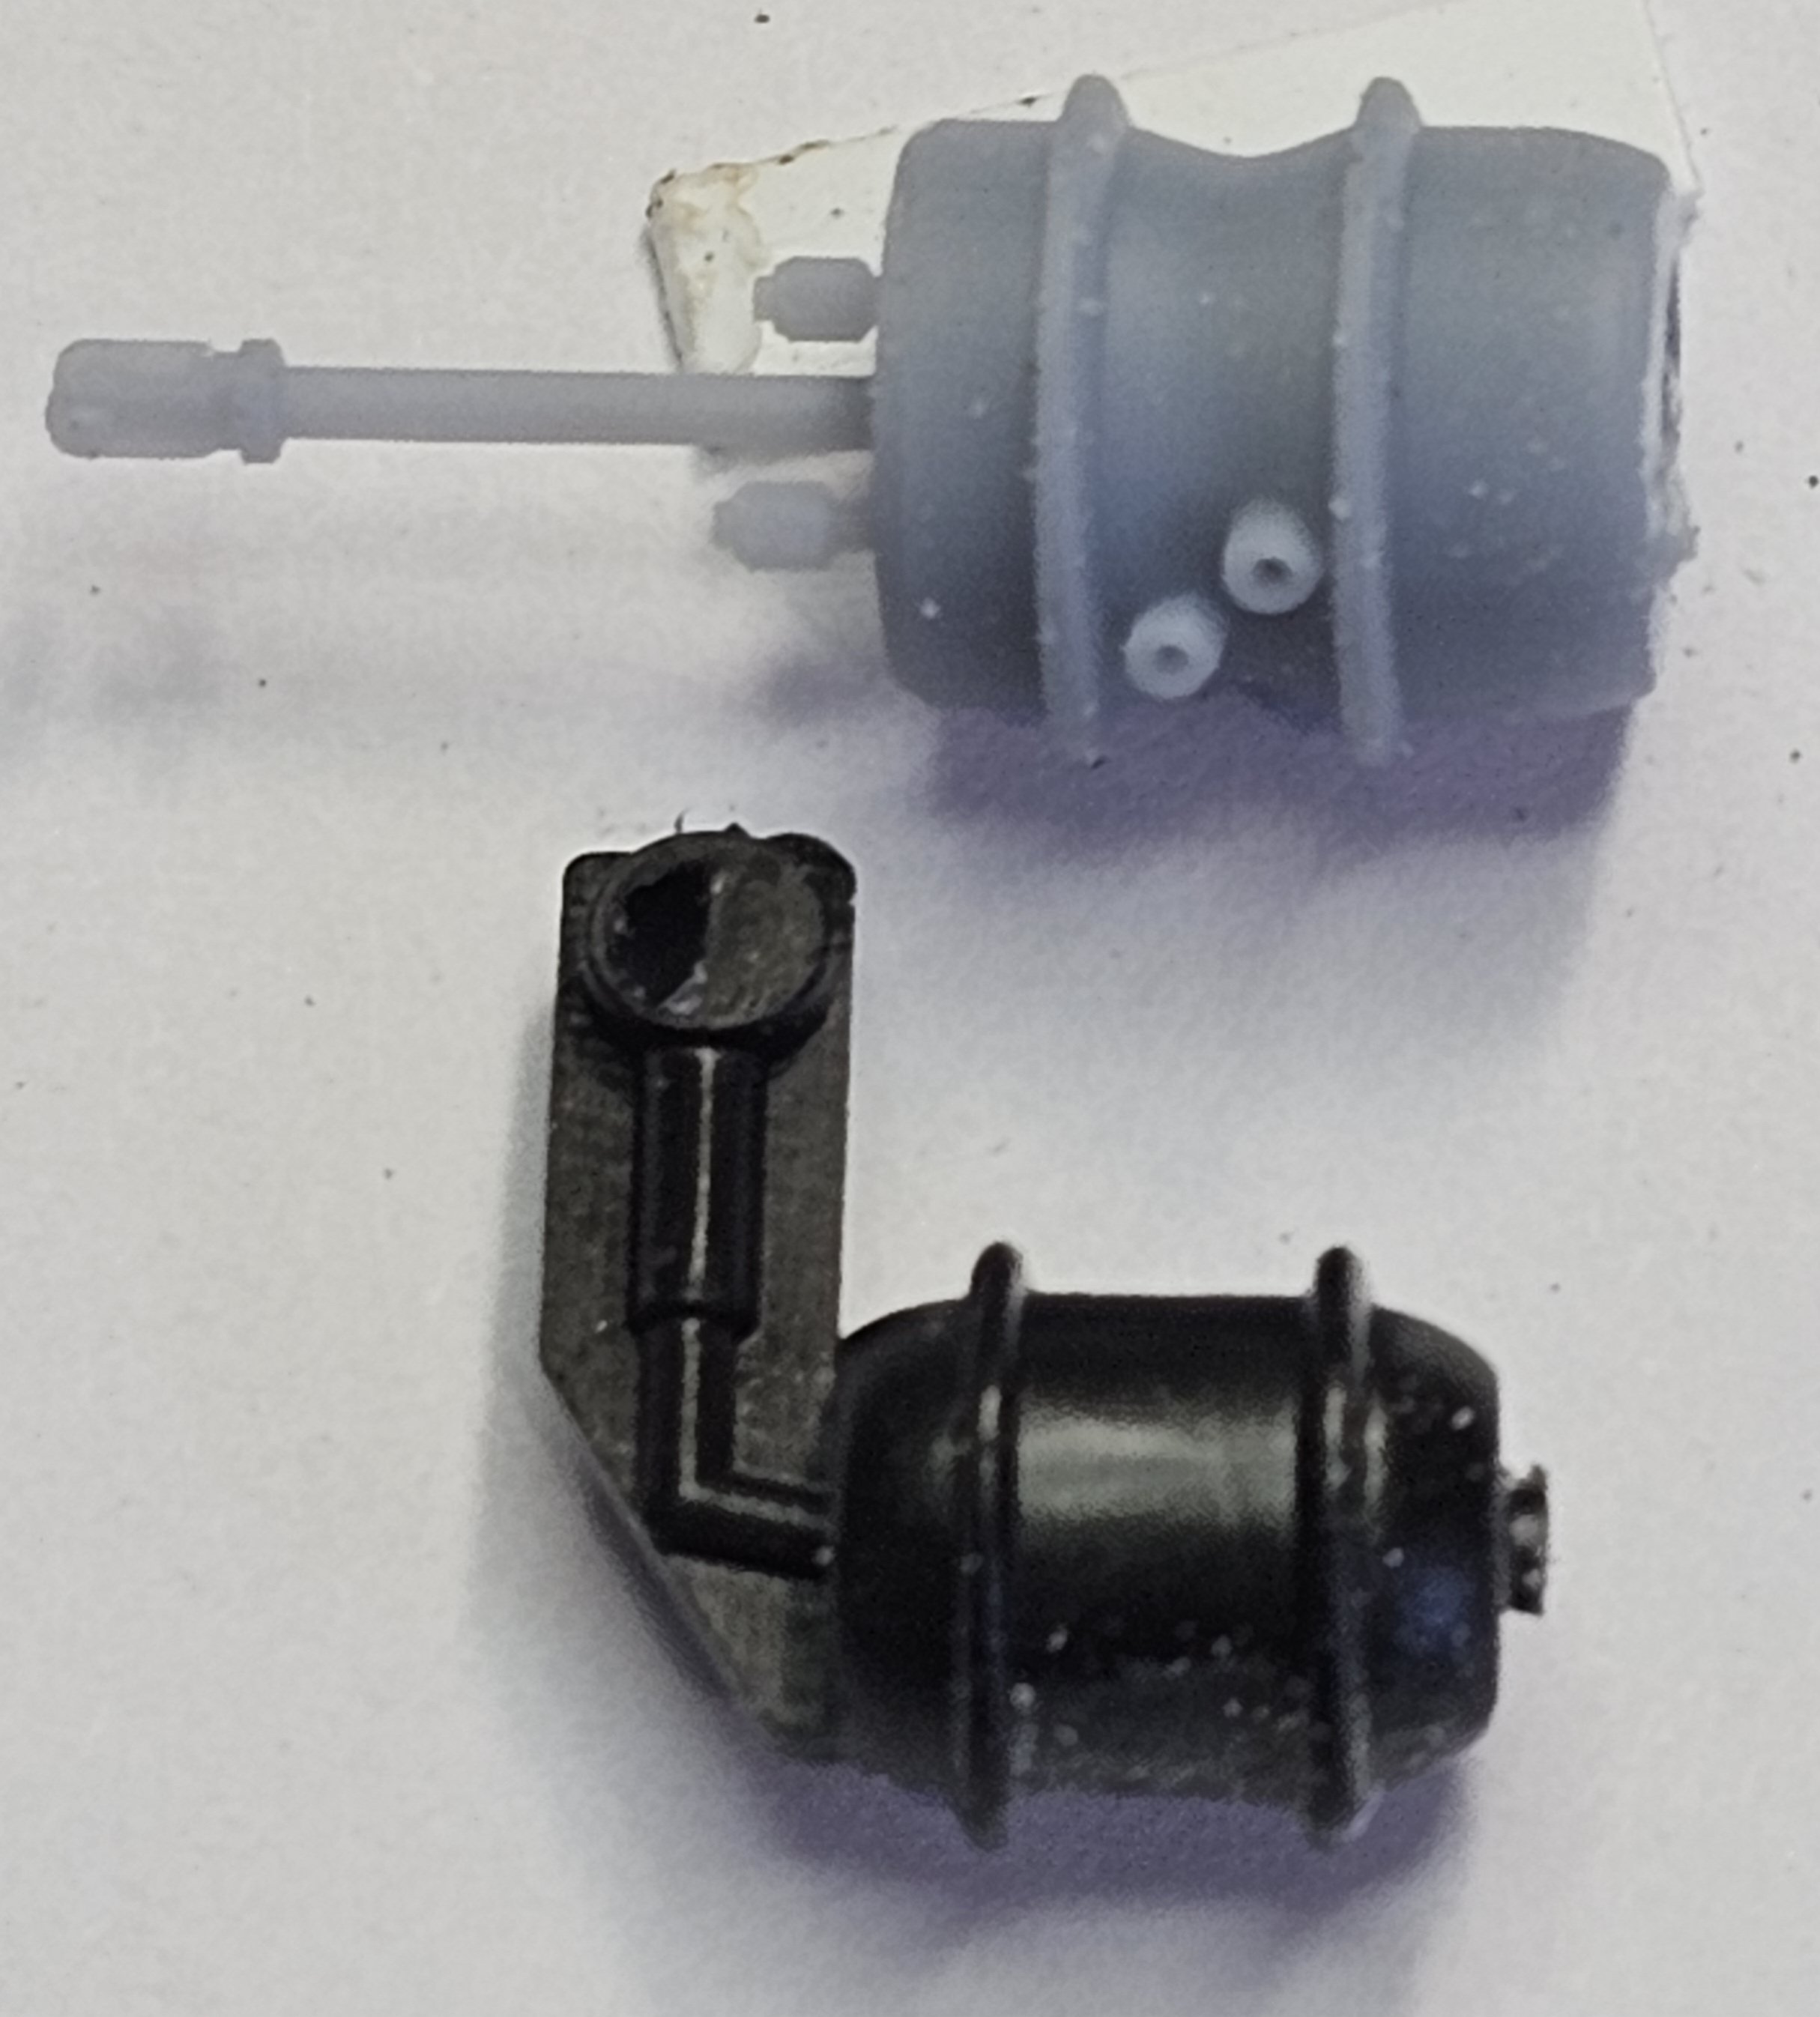
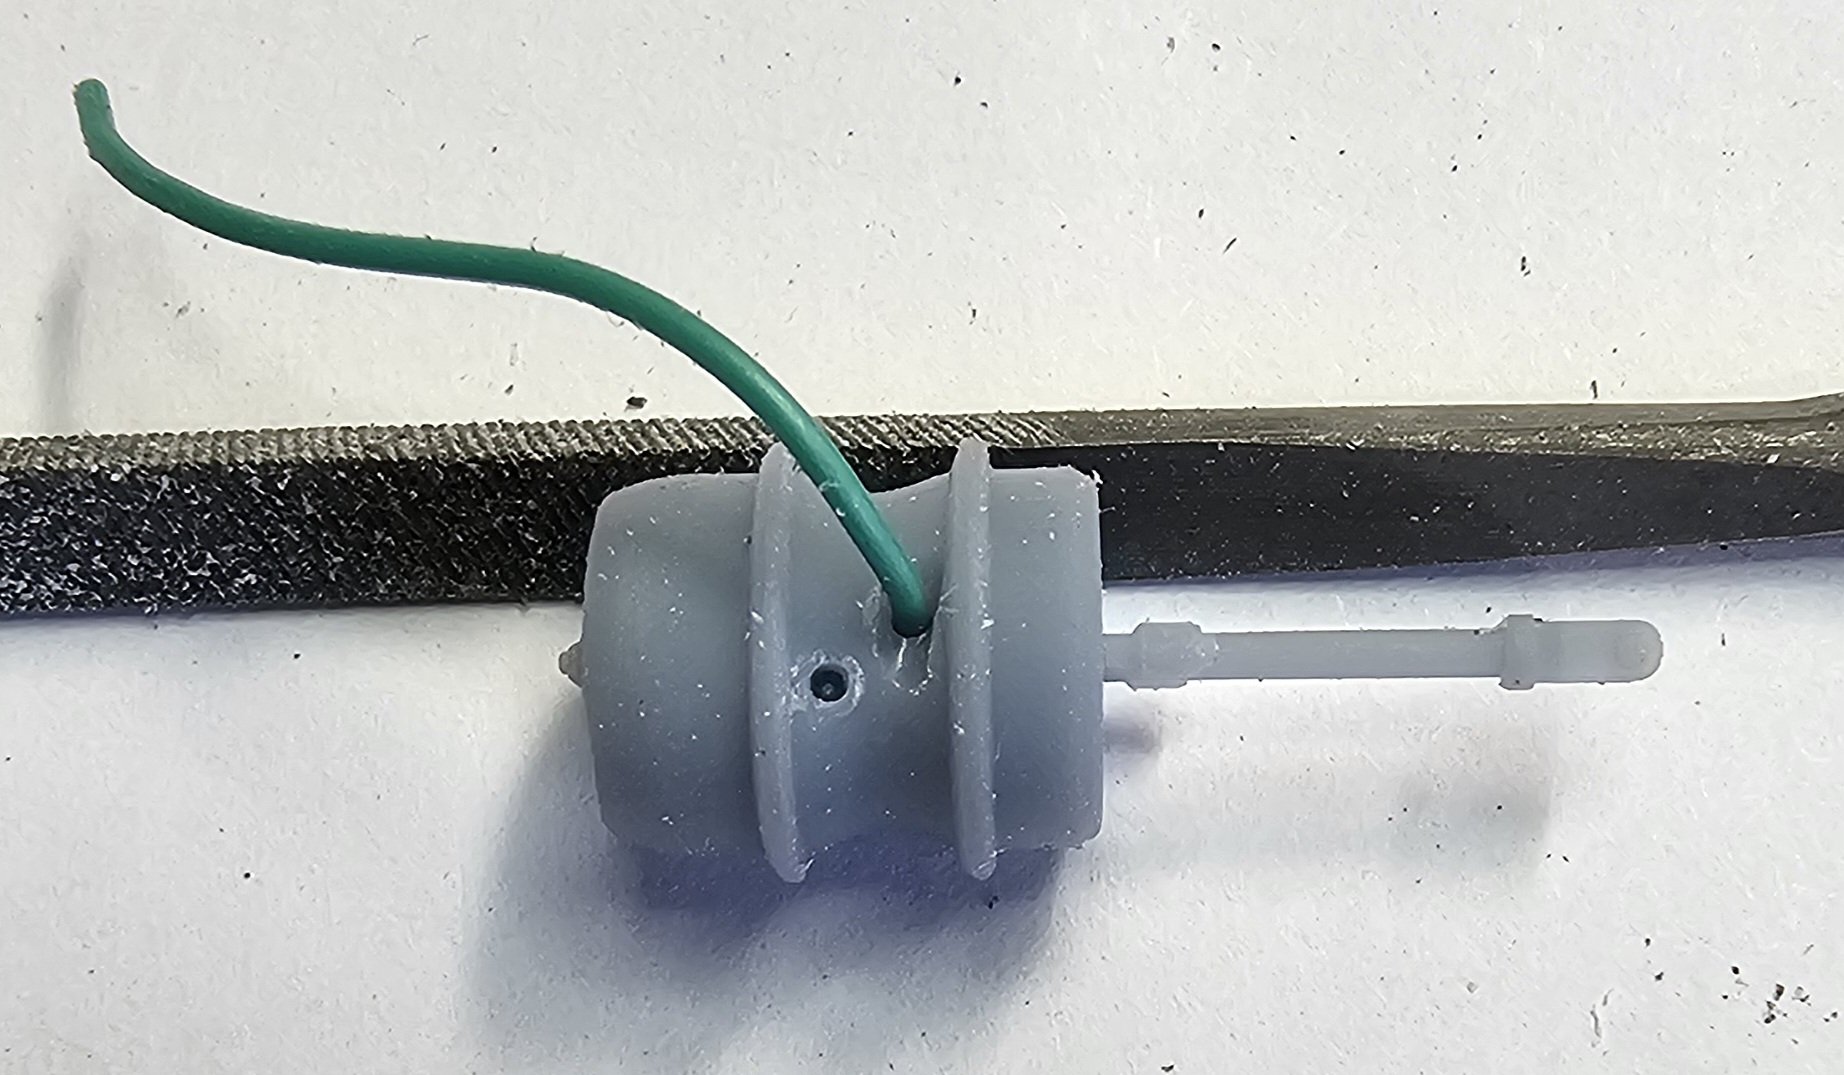
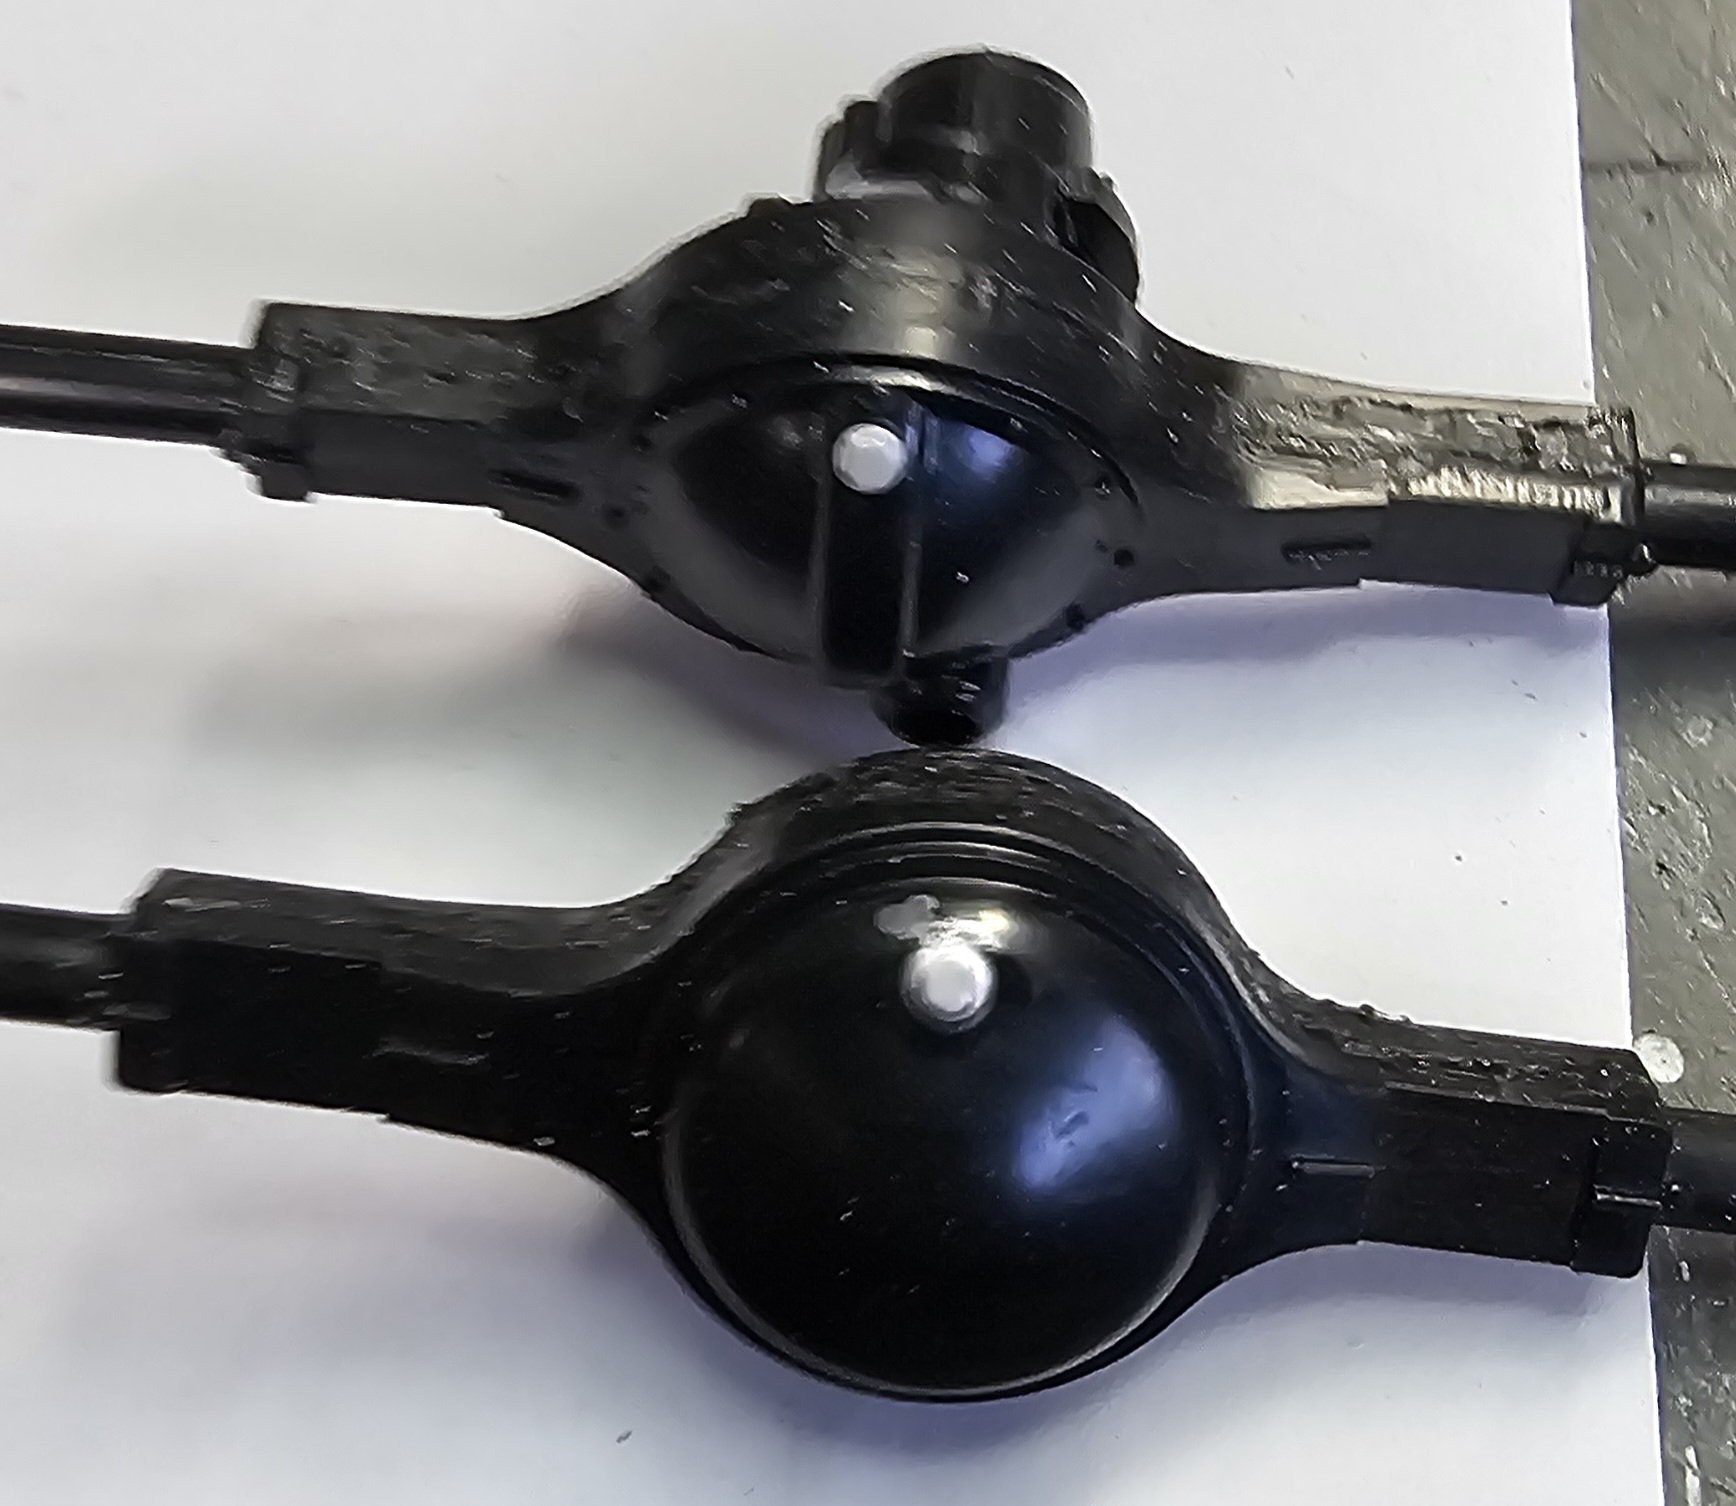
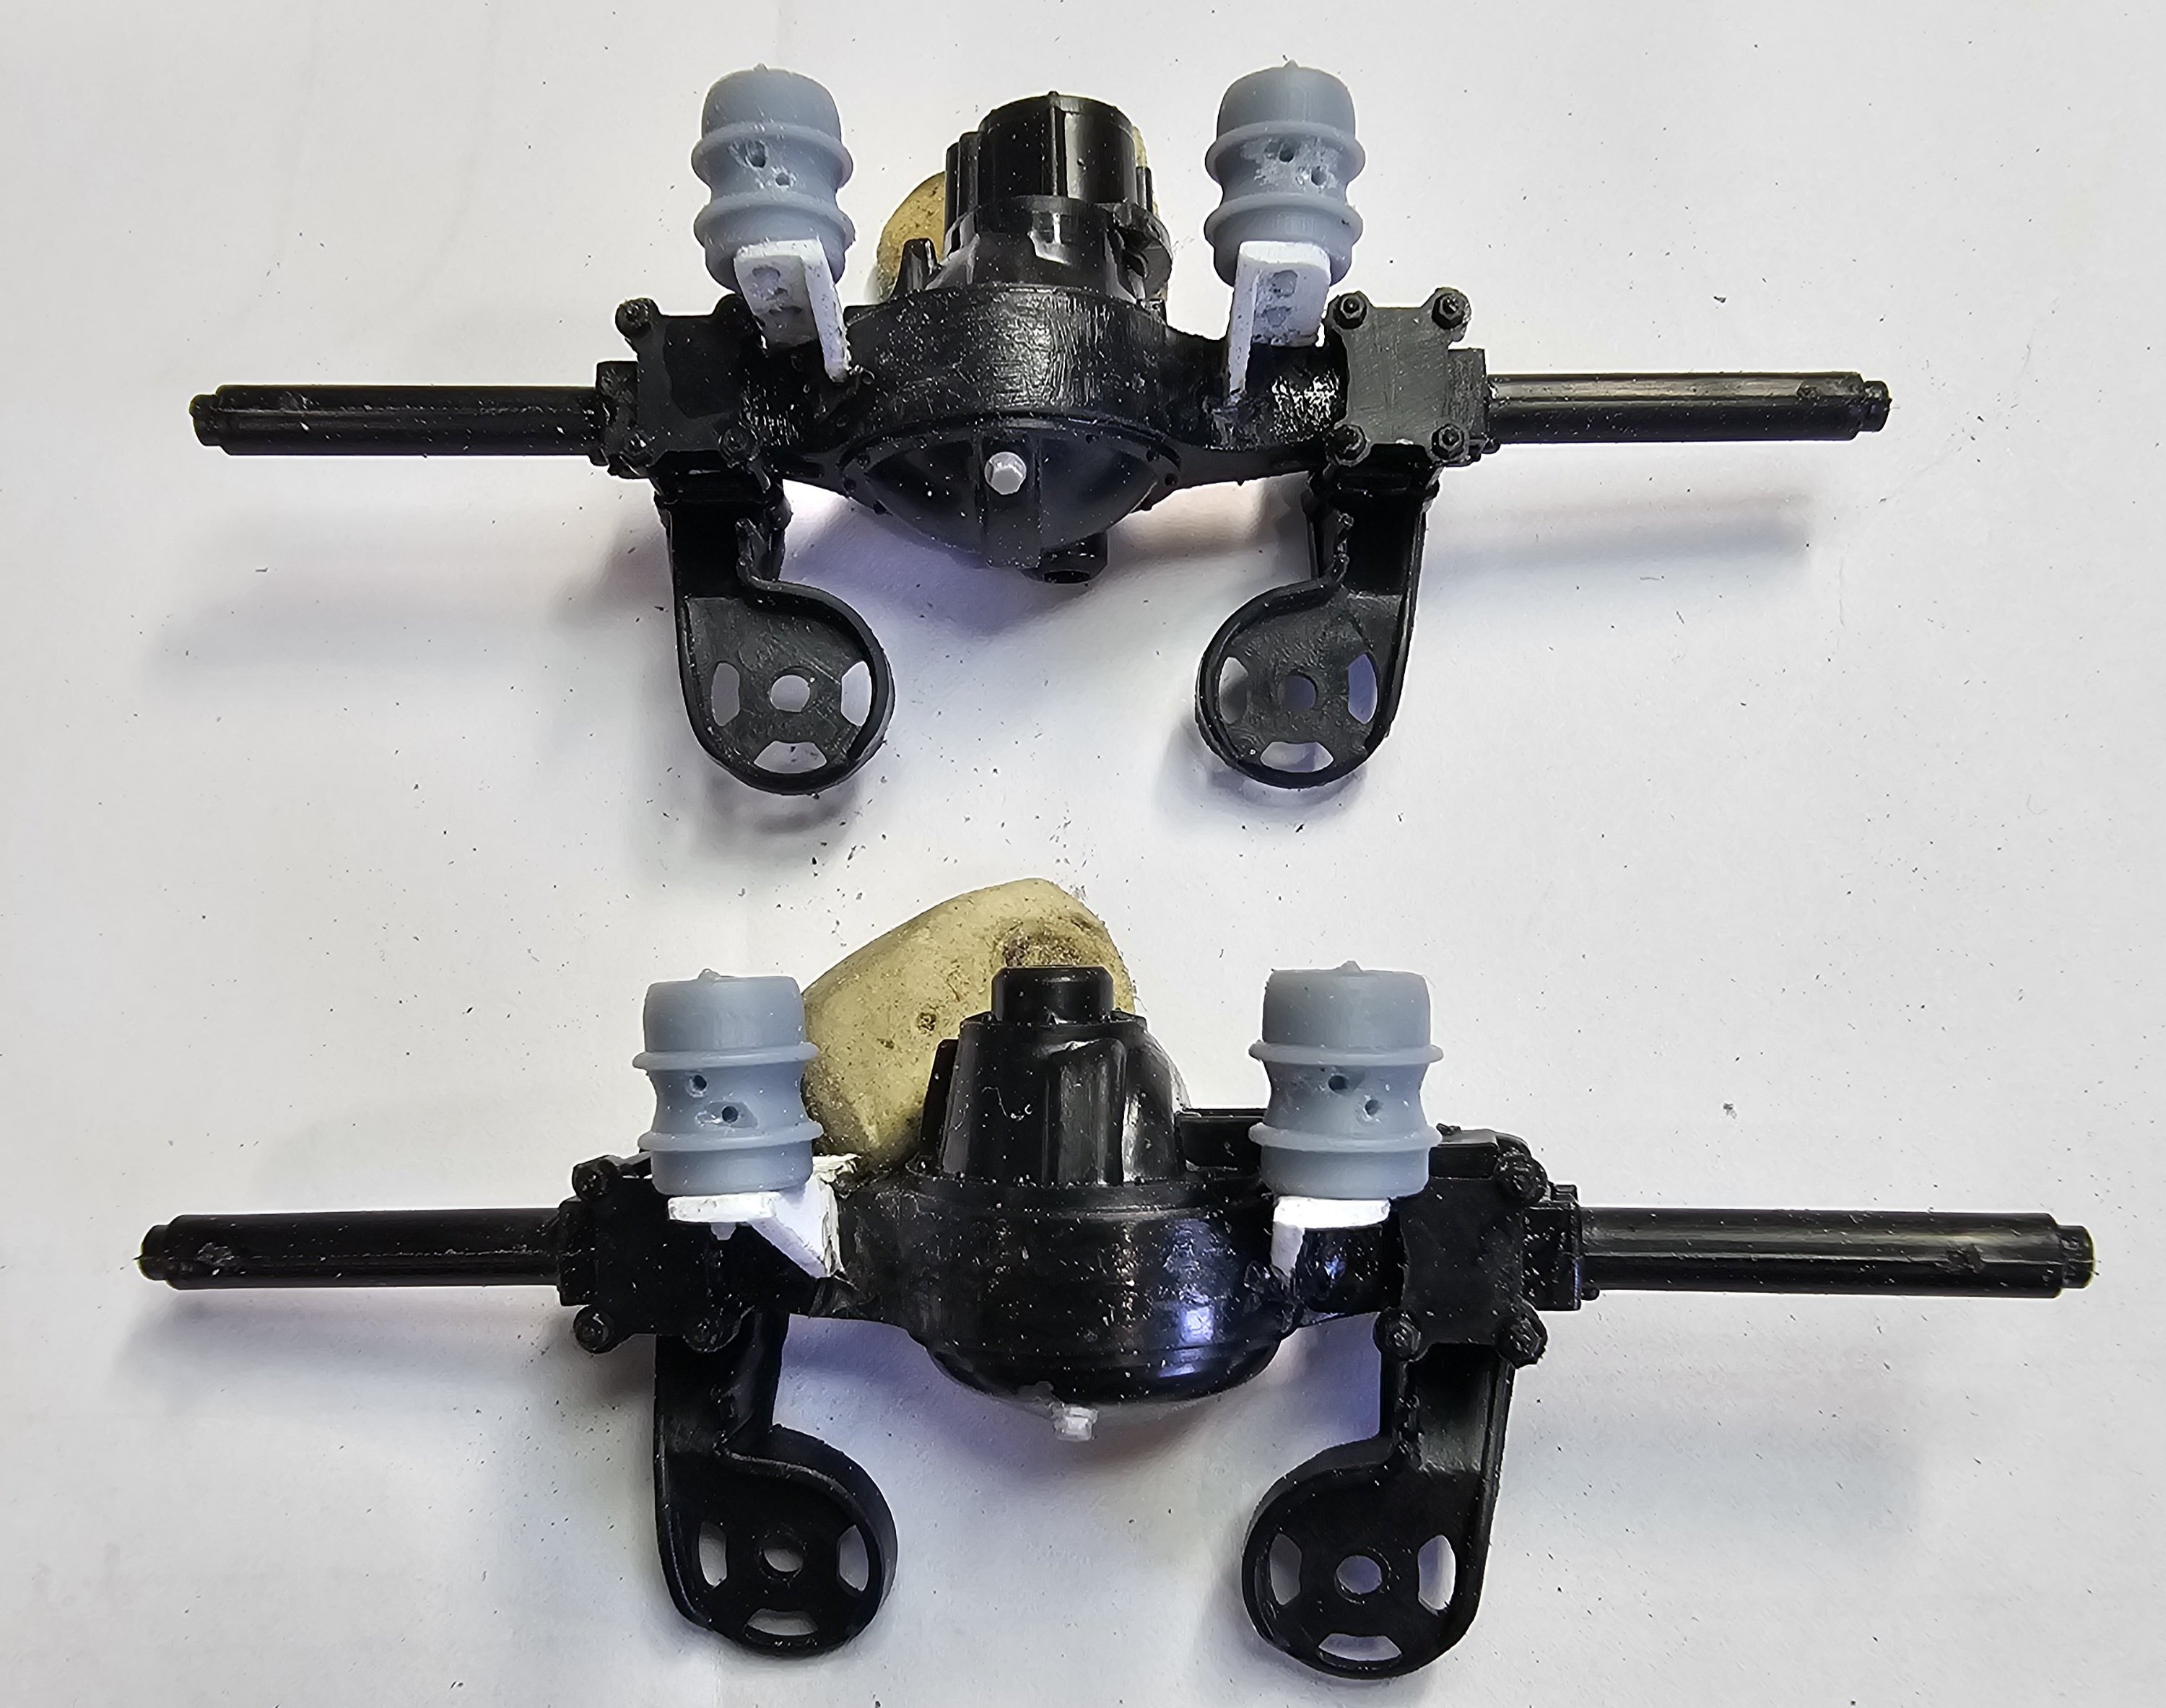
Hey all Here are the rear axles and brakes. This view shows the kit brake chambers on the bottom. The one on the top is from Branden at Kootenay in Canada and it is amazing in accuracy. This view shows the holes I drilled out for air lines. This view shows the mounting brackets I scratch built. Another view of the mounting bracket. This view shows the drain plugs I added to the rear axles. This view shows the brake chambers mounted to the rear axles. I still have to scratch up some slack adjusters. Ron G

-
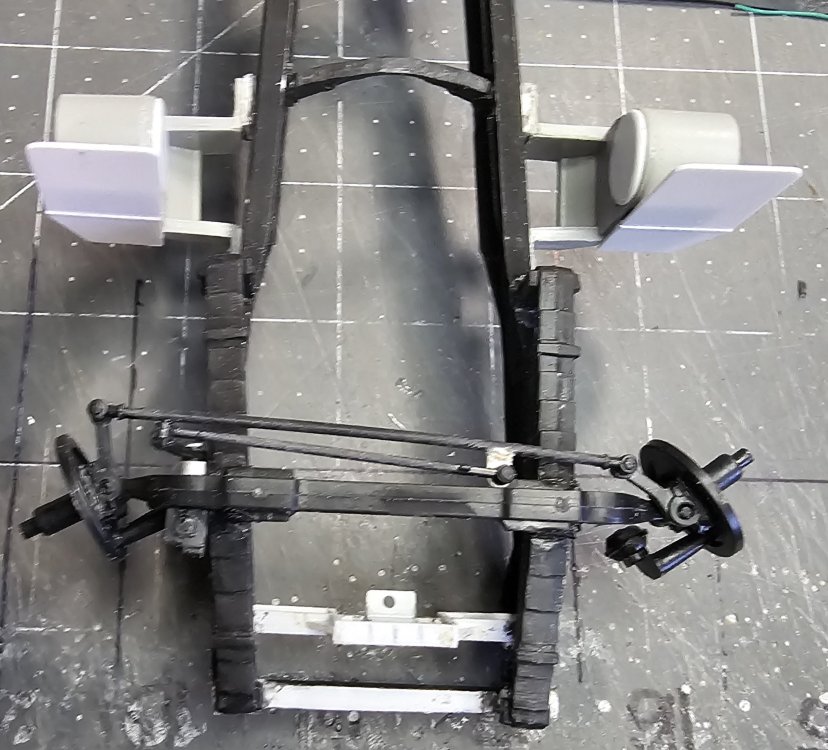
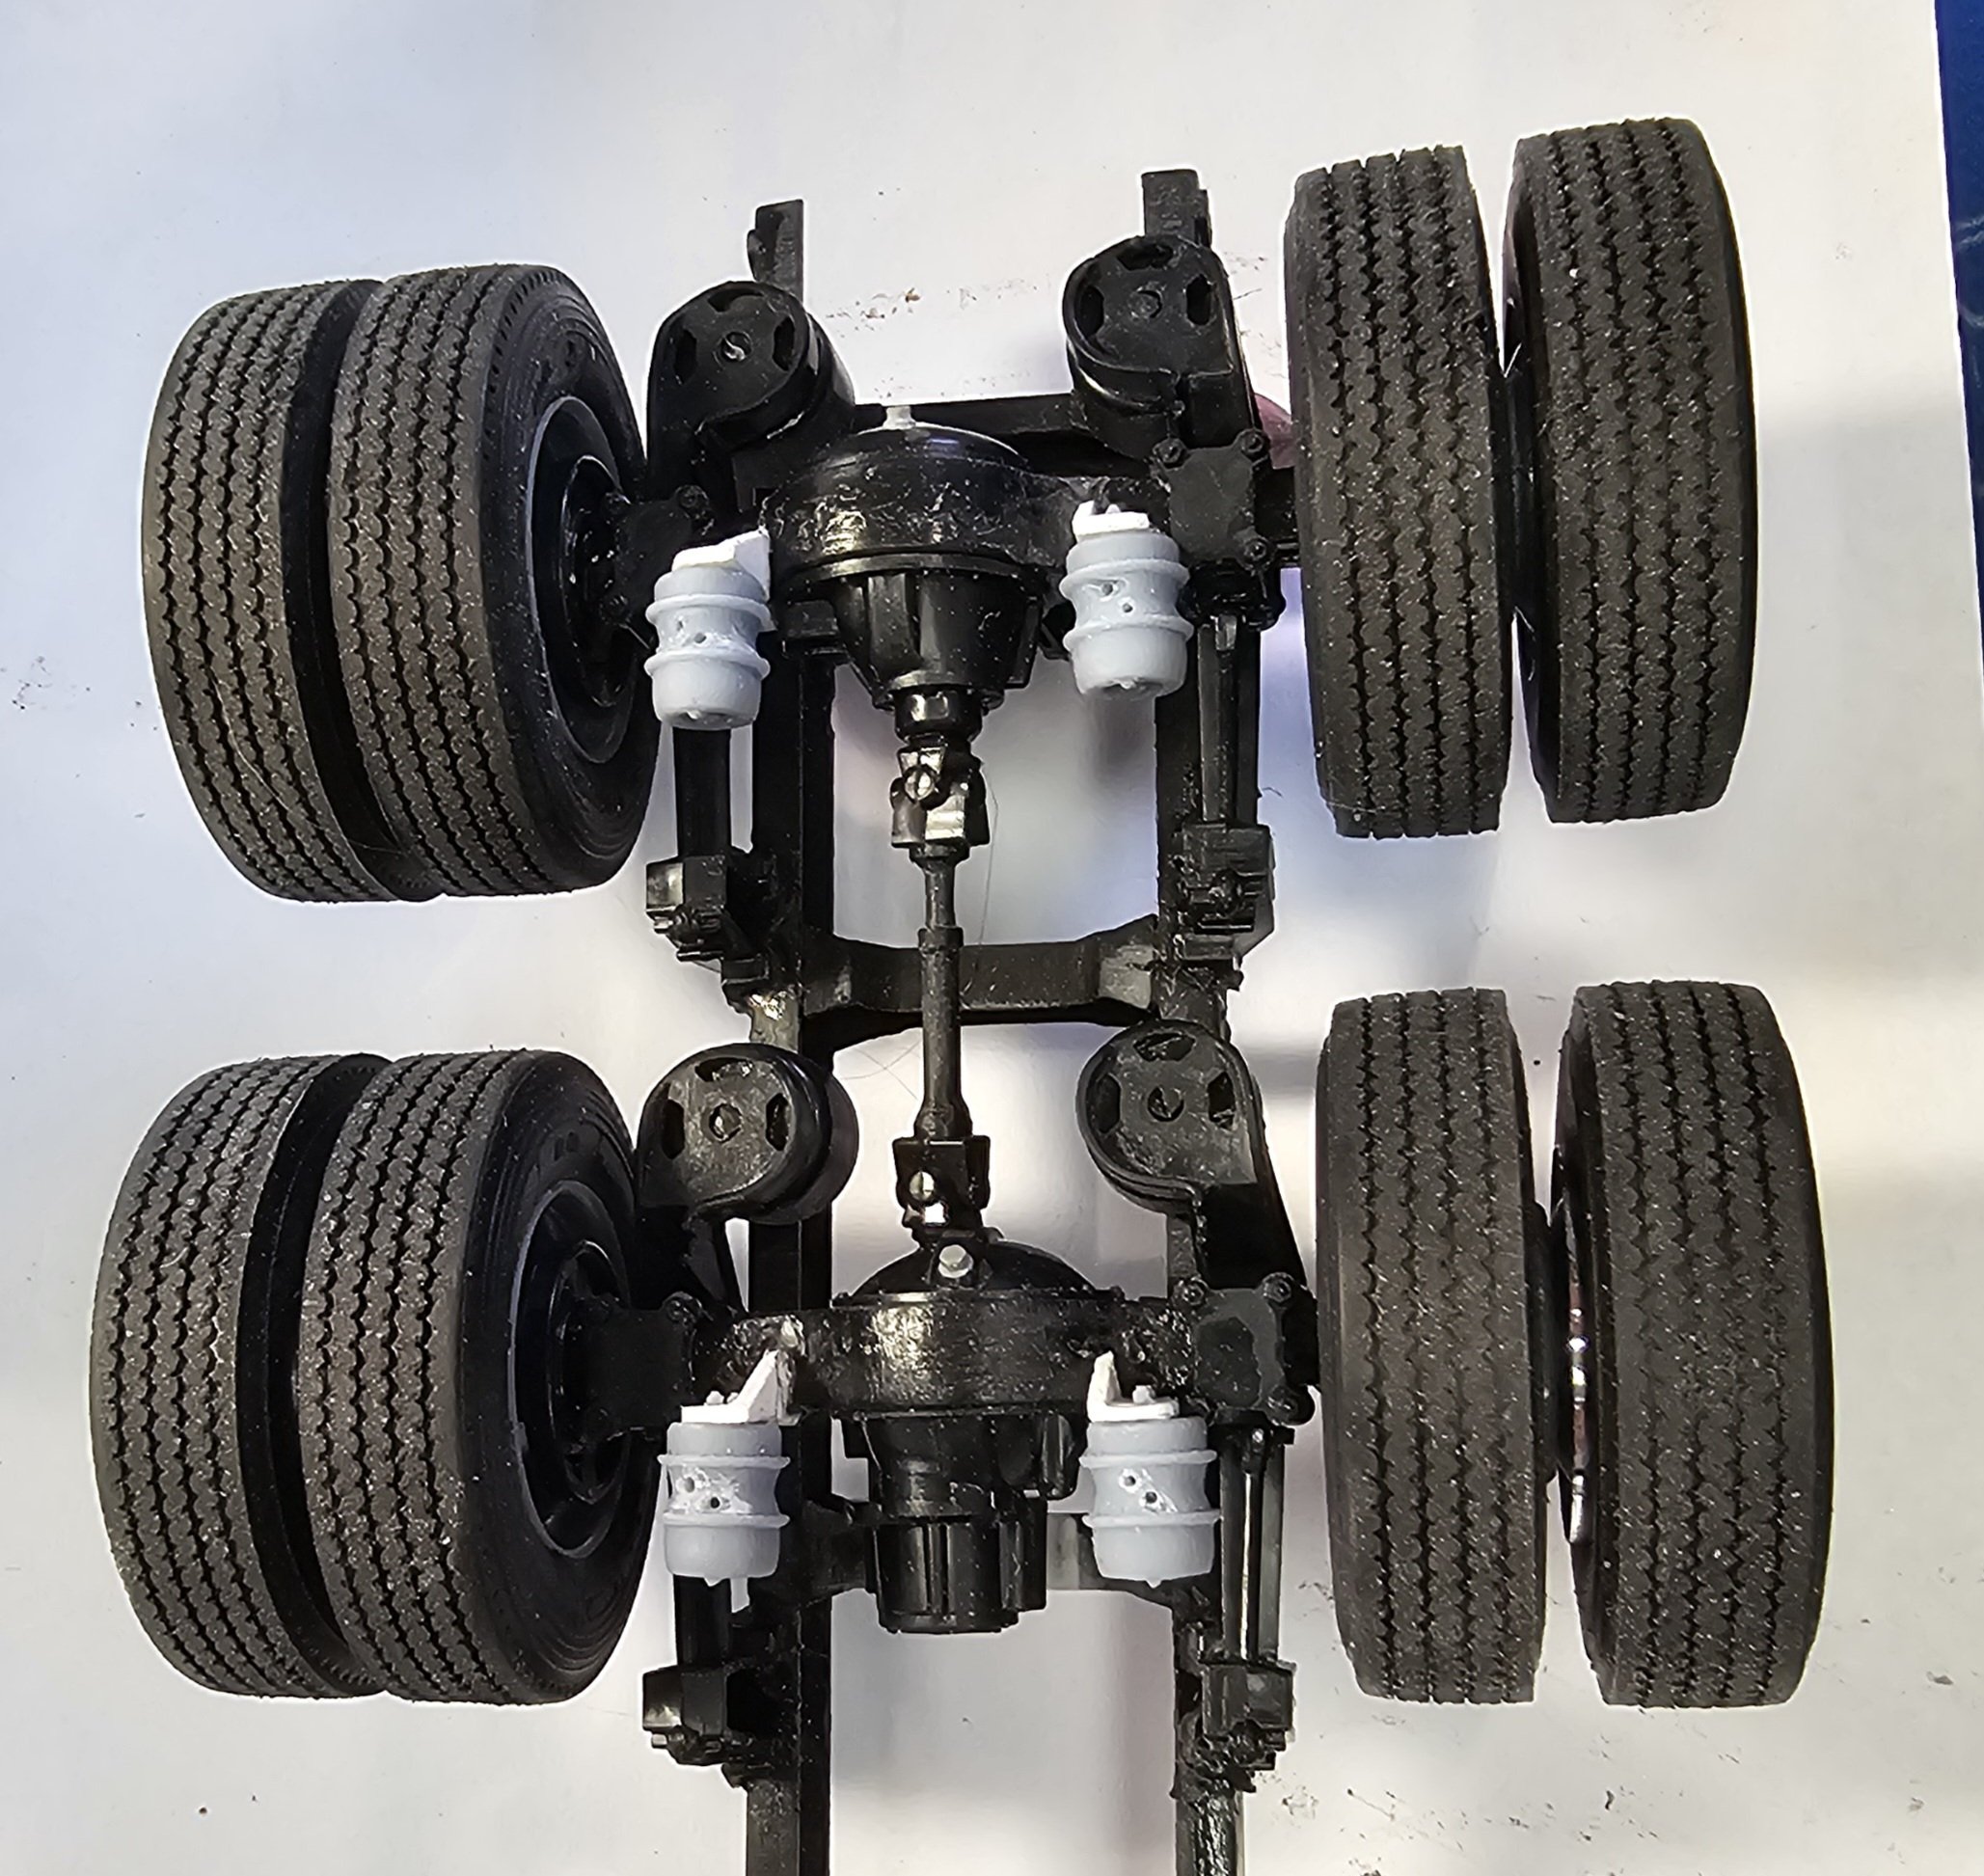
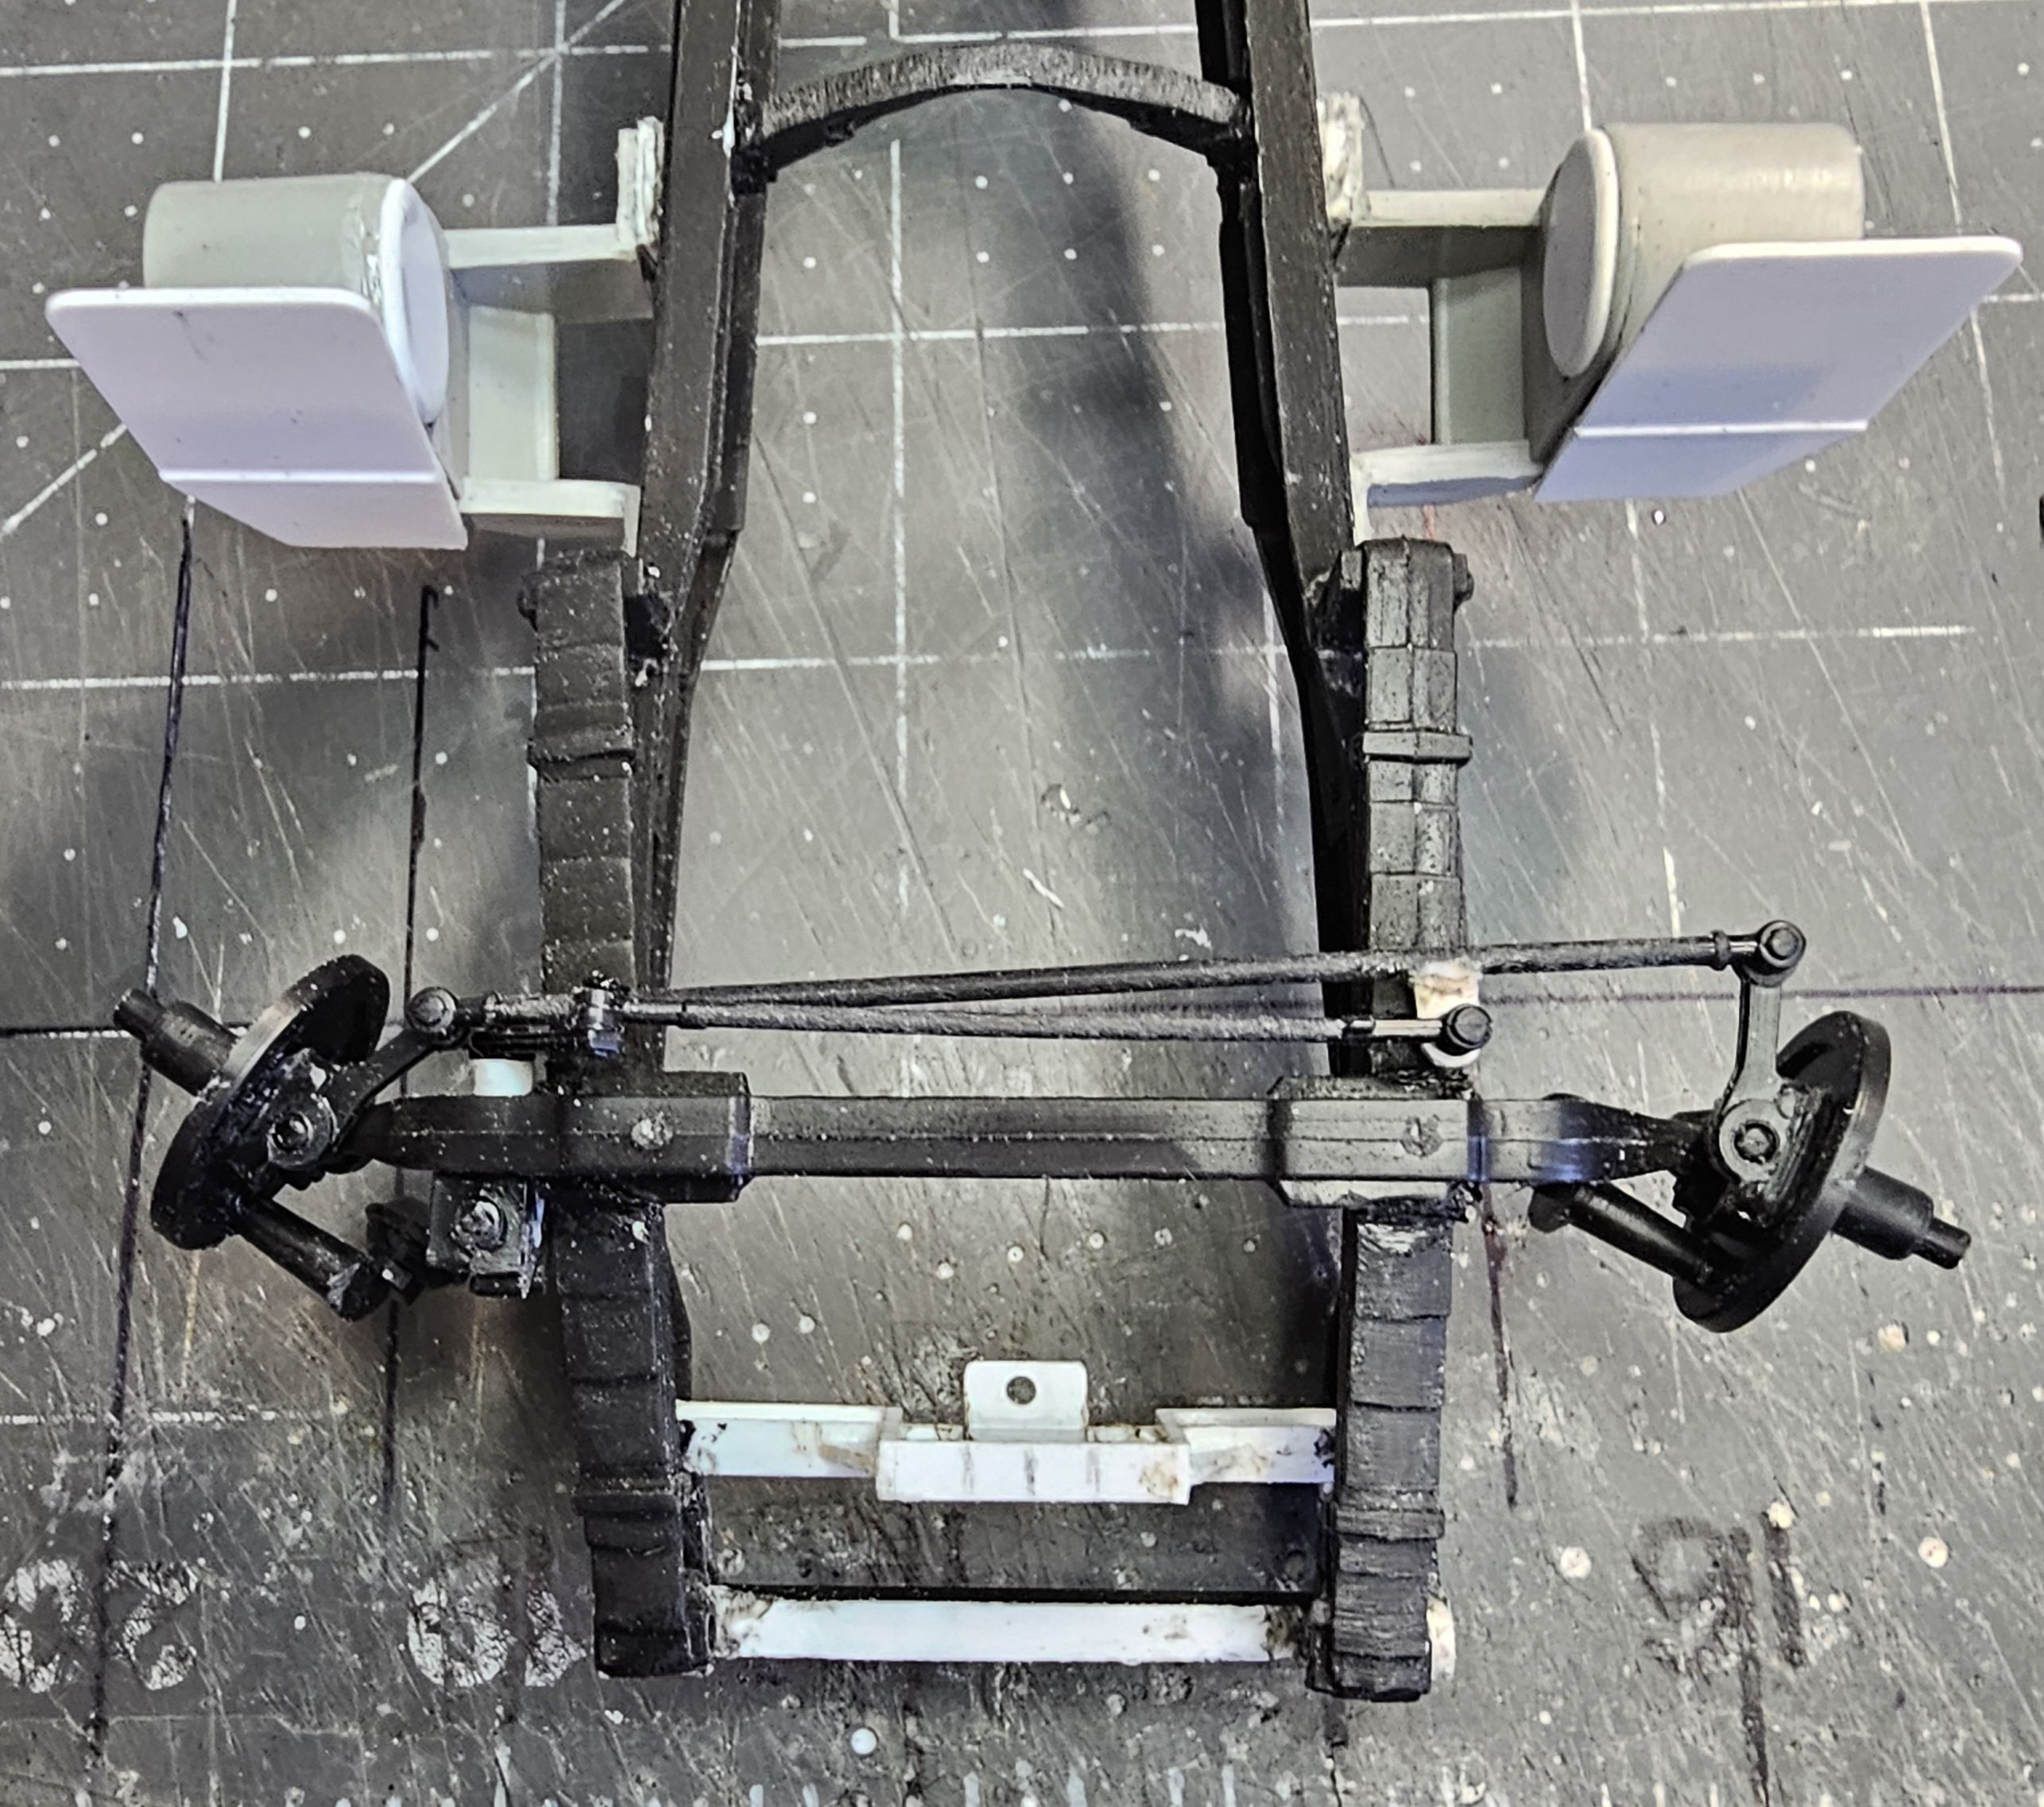
Hey all Here is the customized front suspension and steering. Mack Superliners had their steering box mounted on the front axle. Here's how I did it. This view shows the modified steering box that I mounted to the front axle. Another veiw of the front steering box. This view shows the bottom of the front axle. You can see the cross link to the drag link. This view shows it steering to the left. This view shows it steering to the right. This view shows the front 385/65 22.5 front float tires. Ron G

-
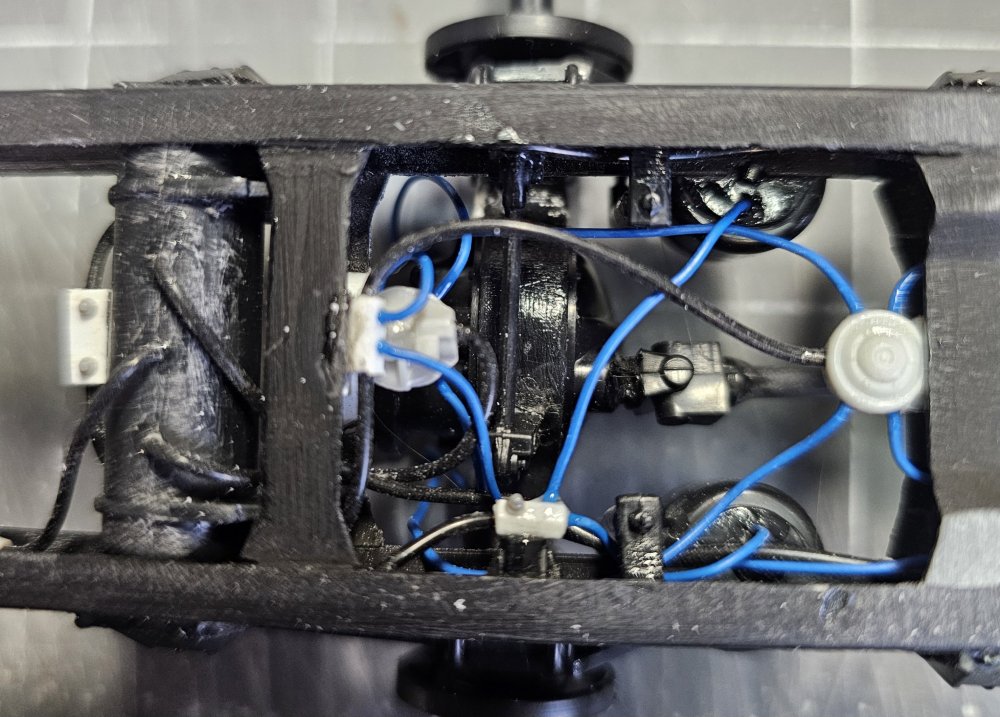
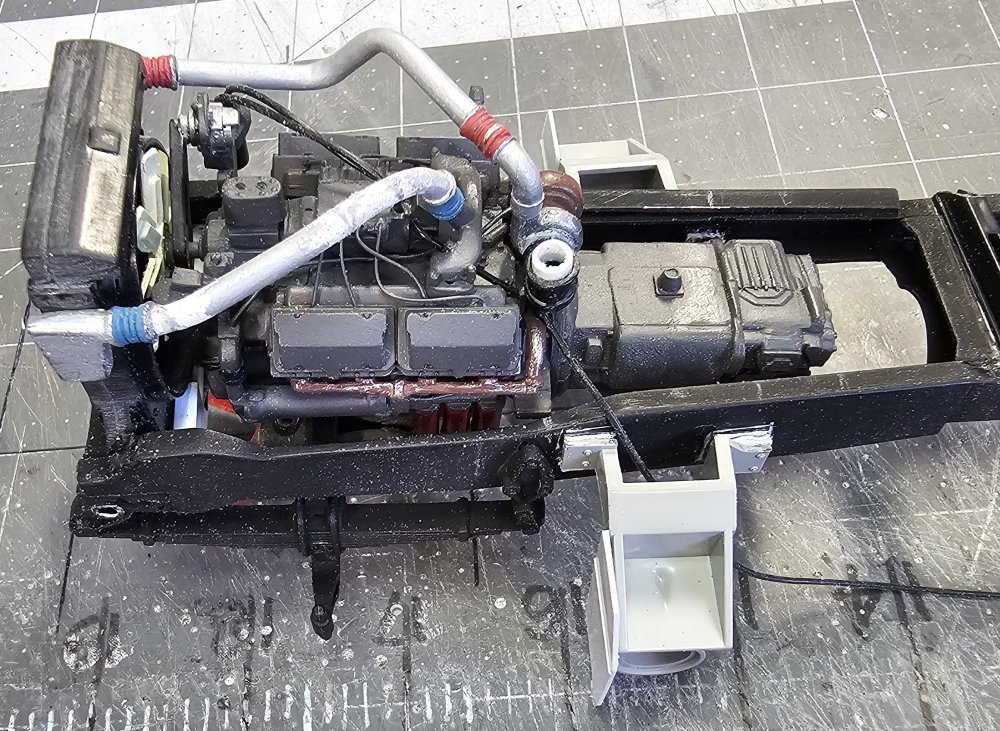
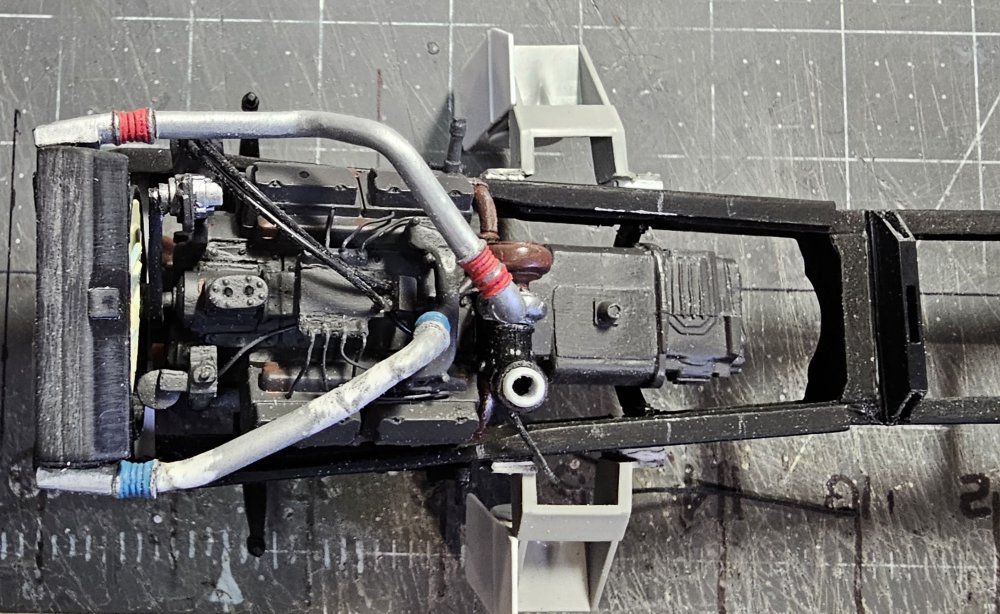
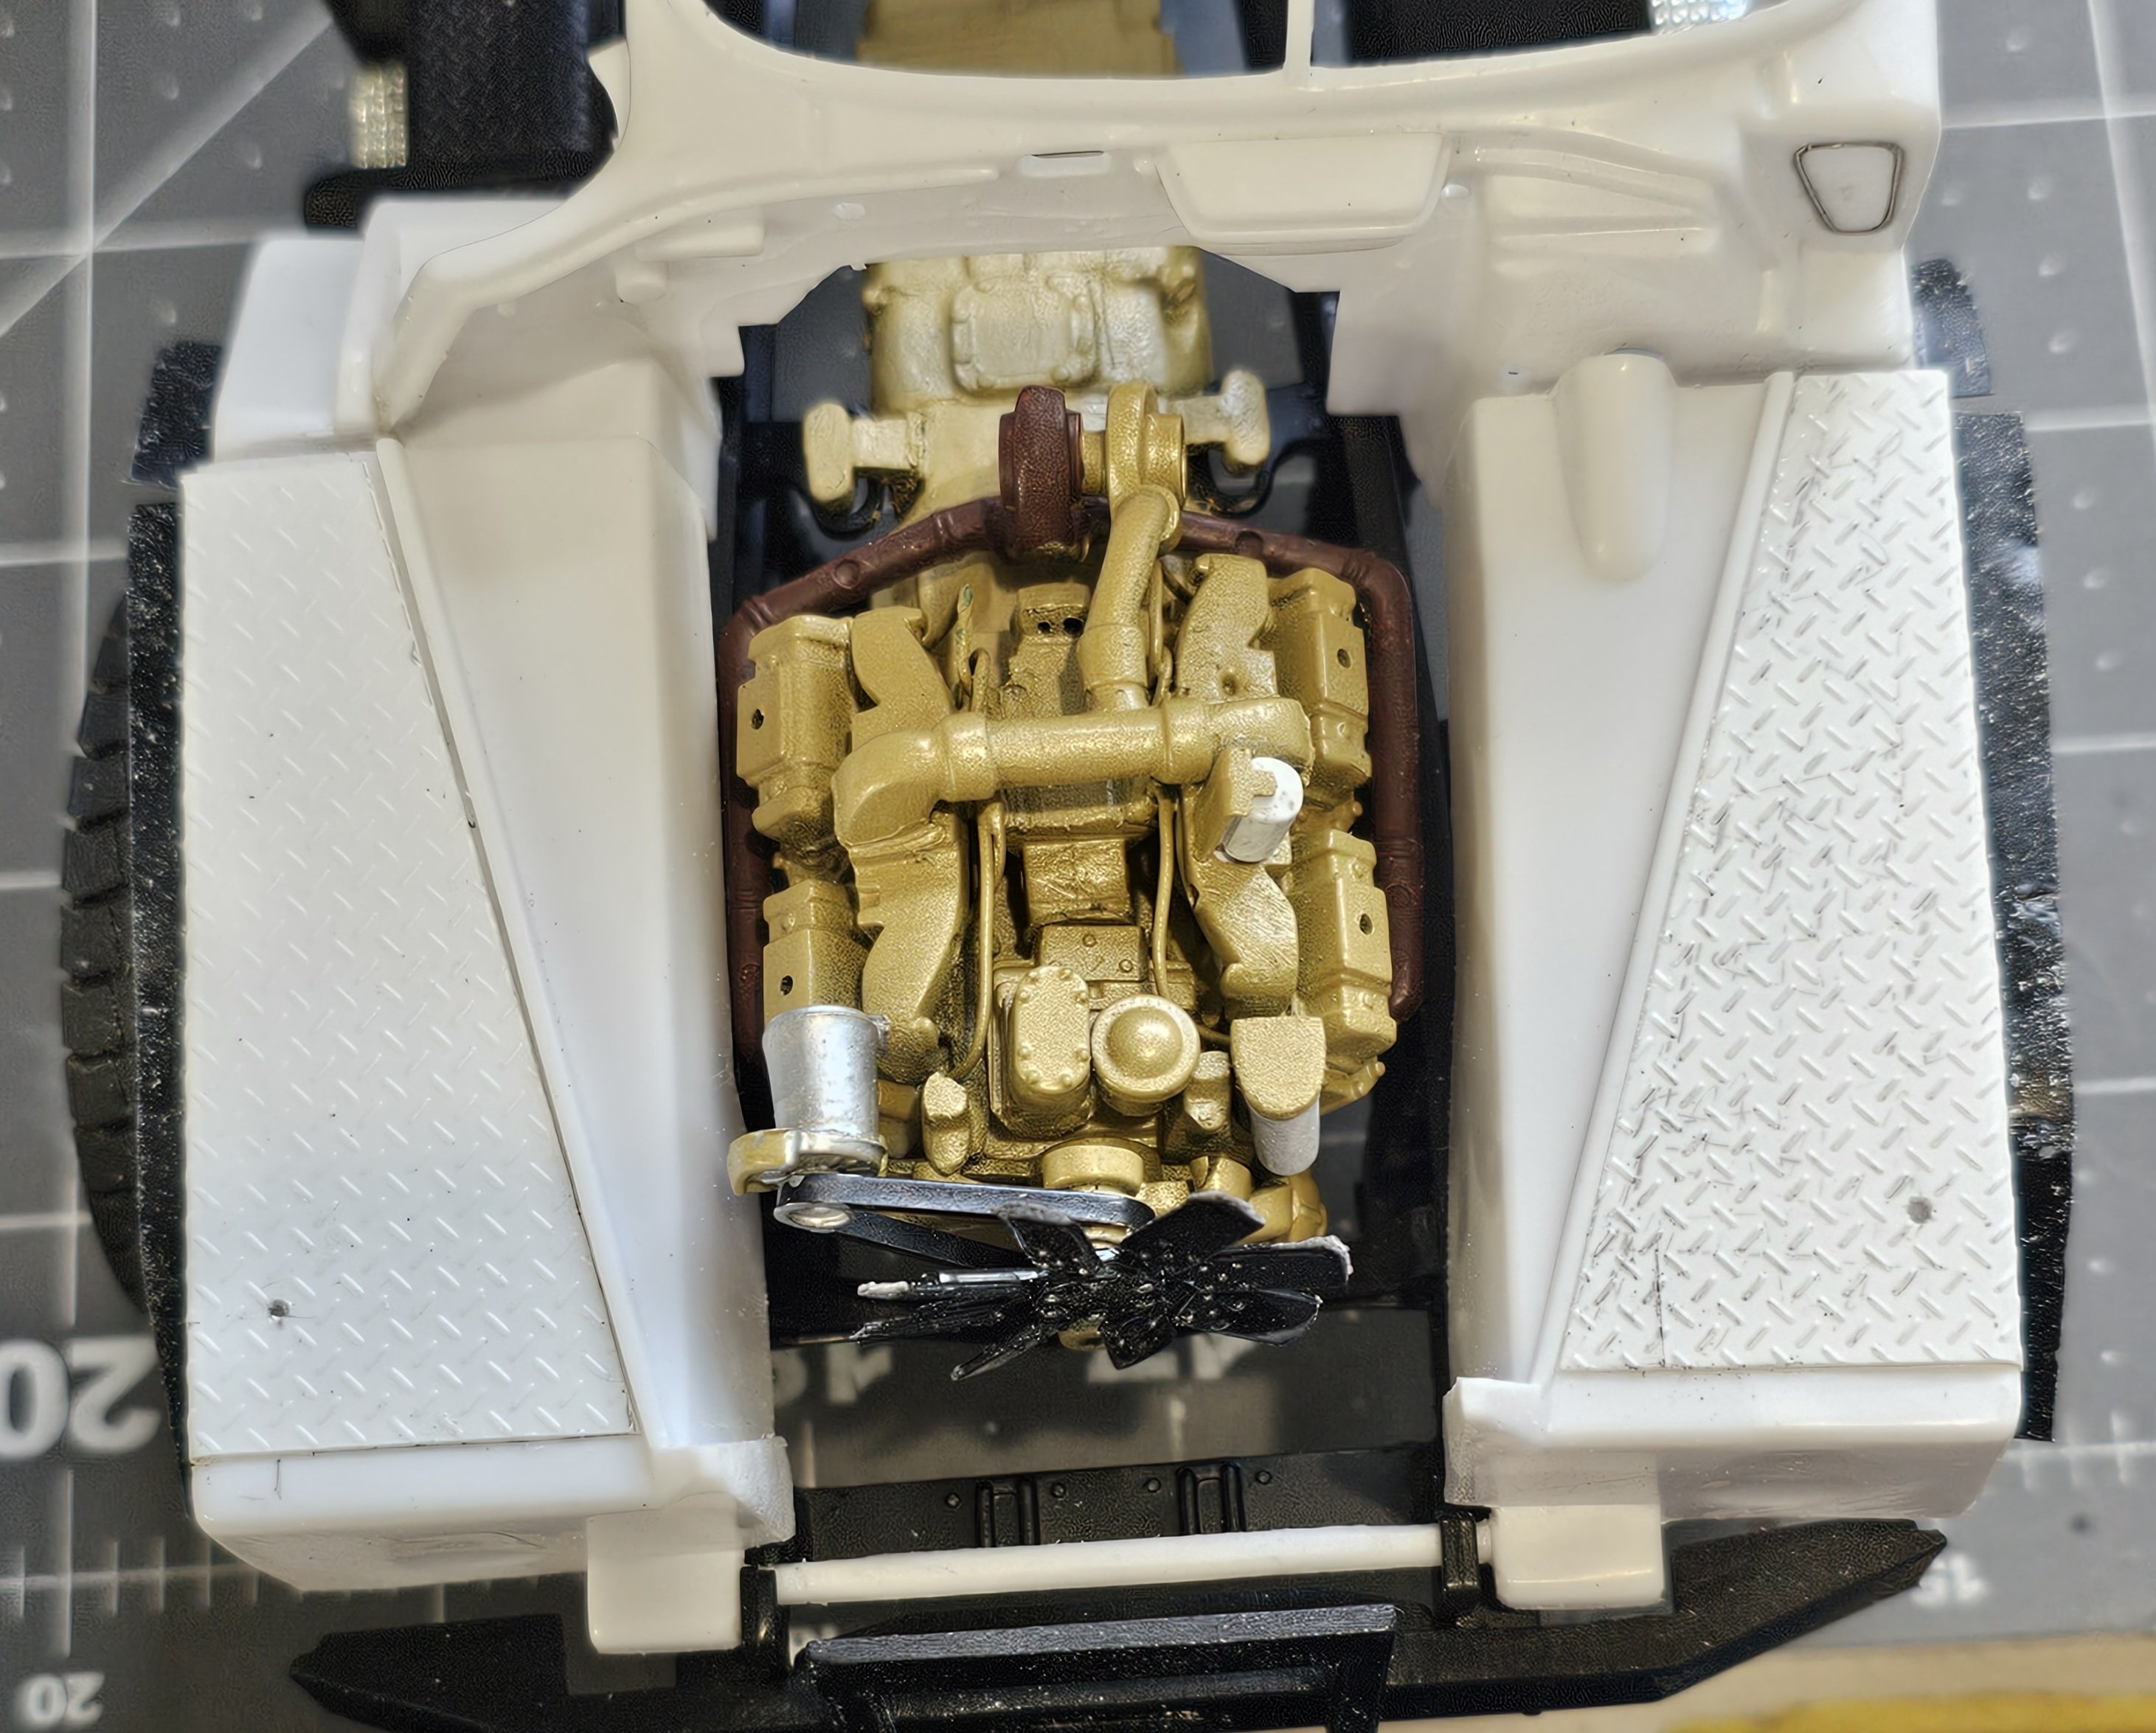
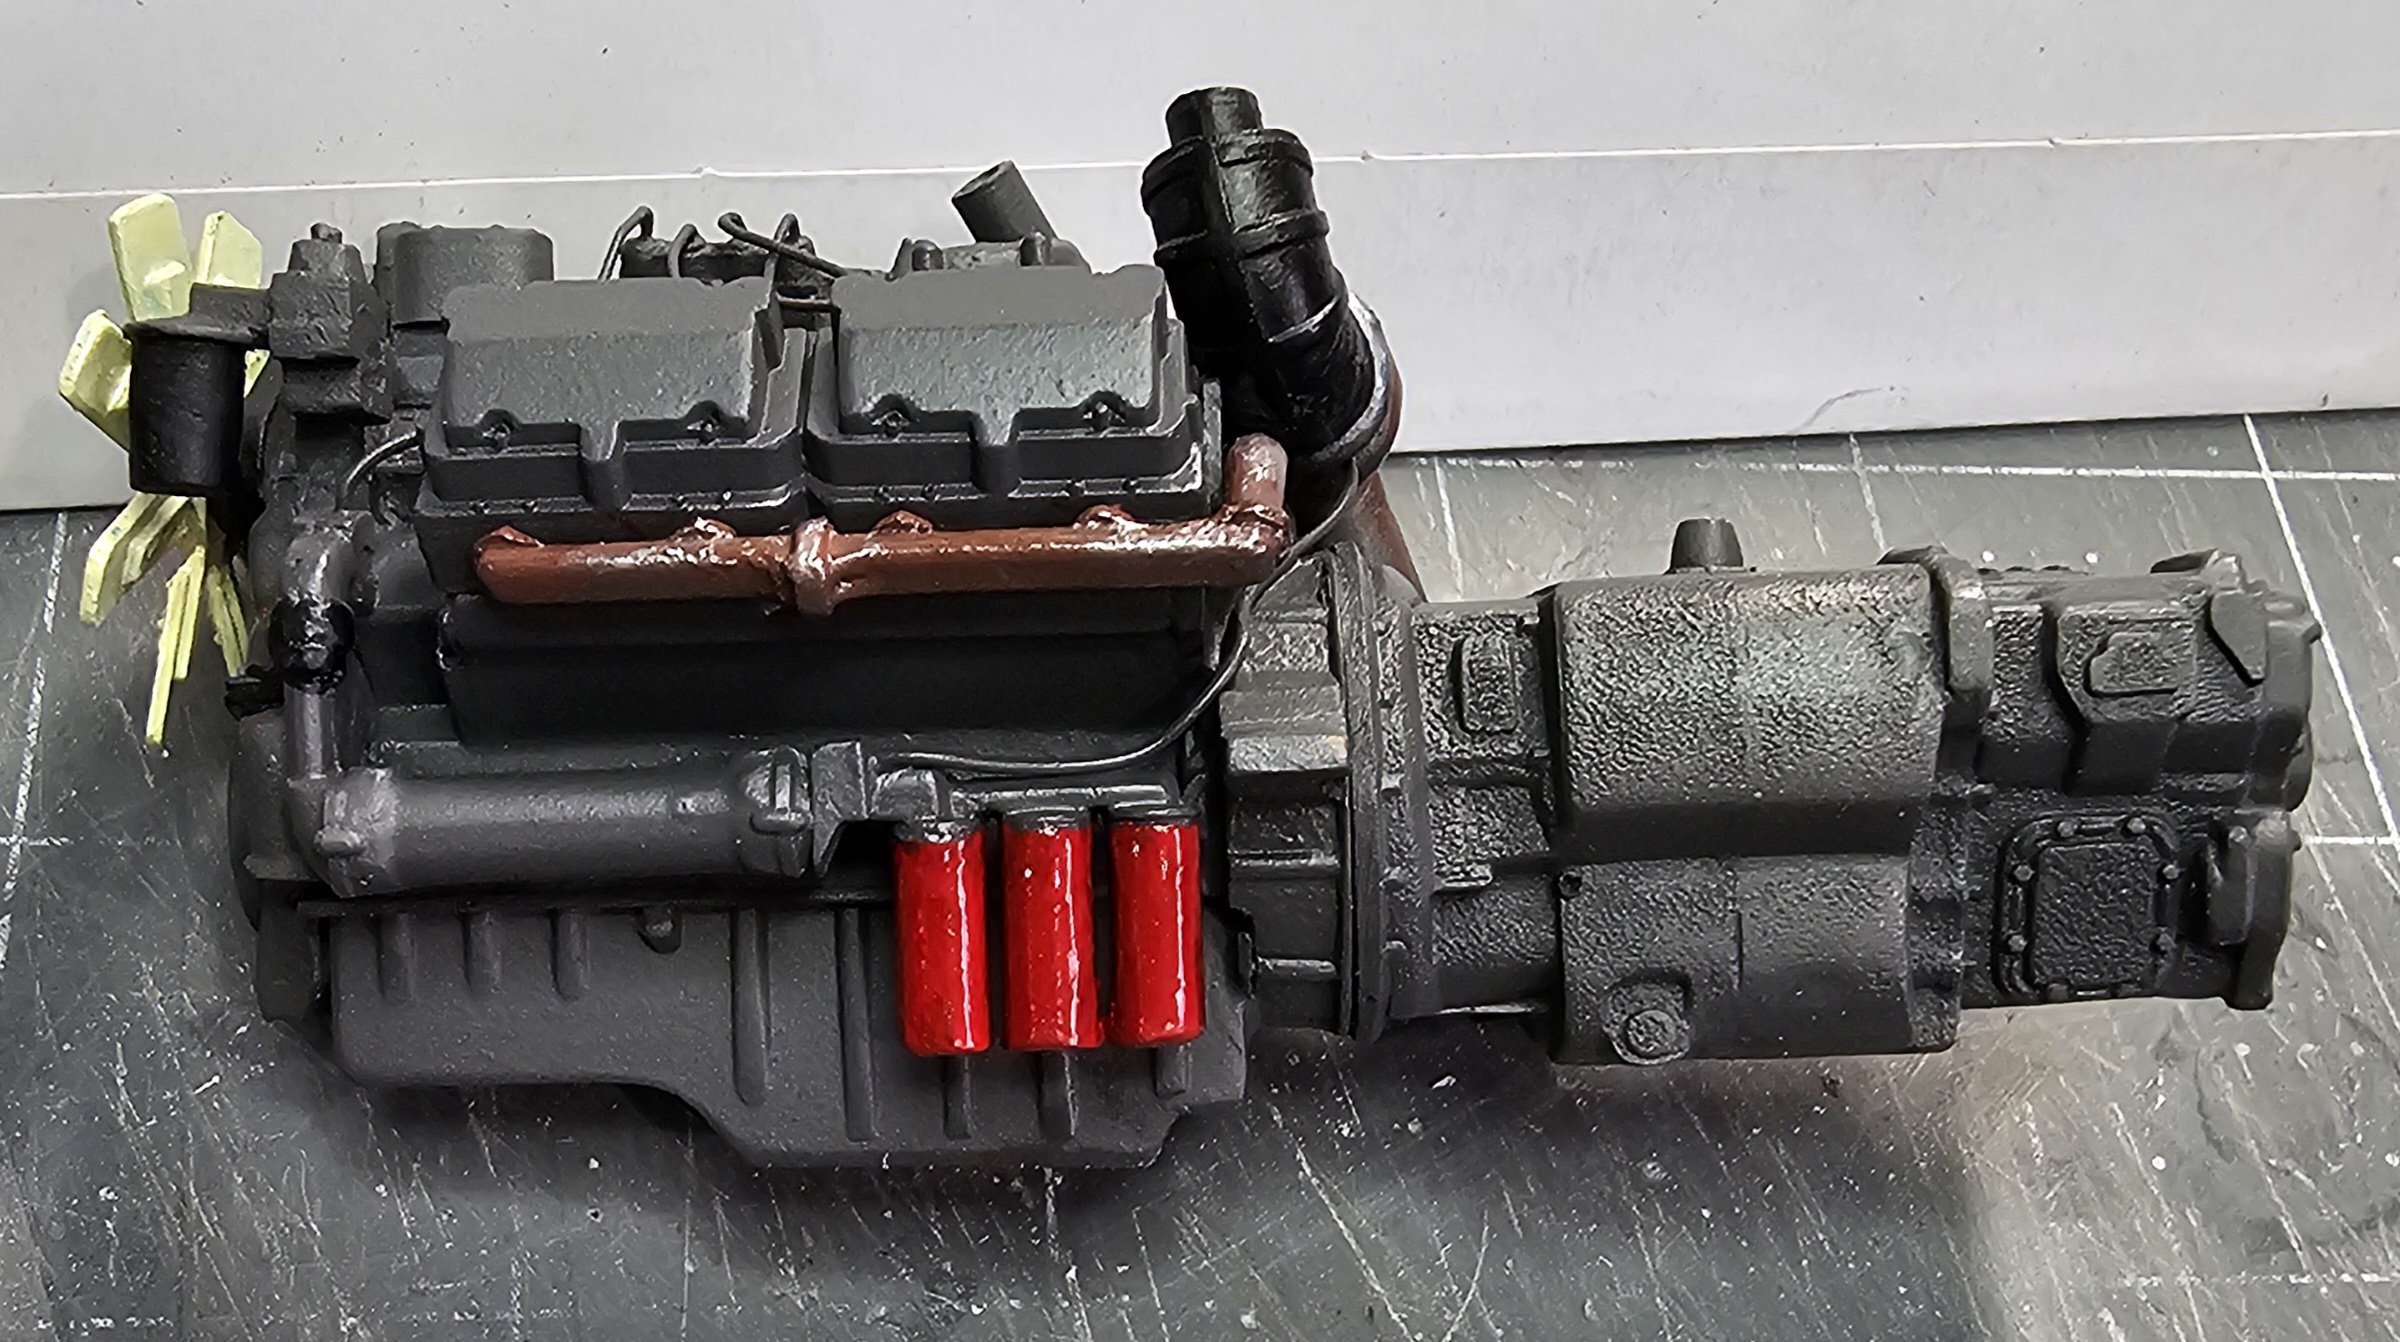
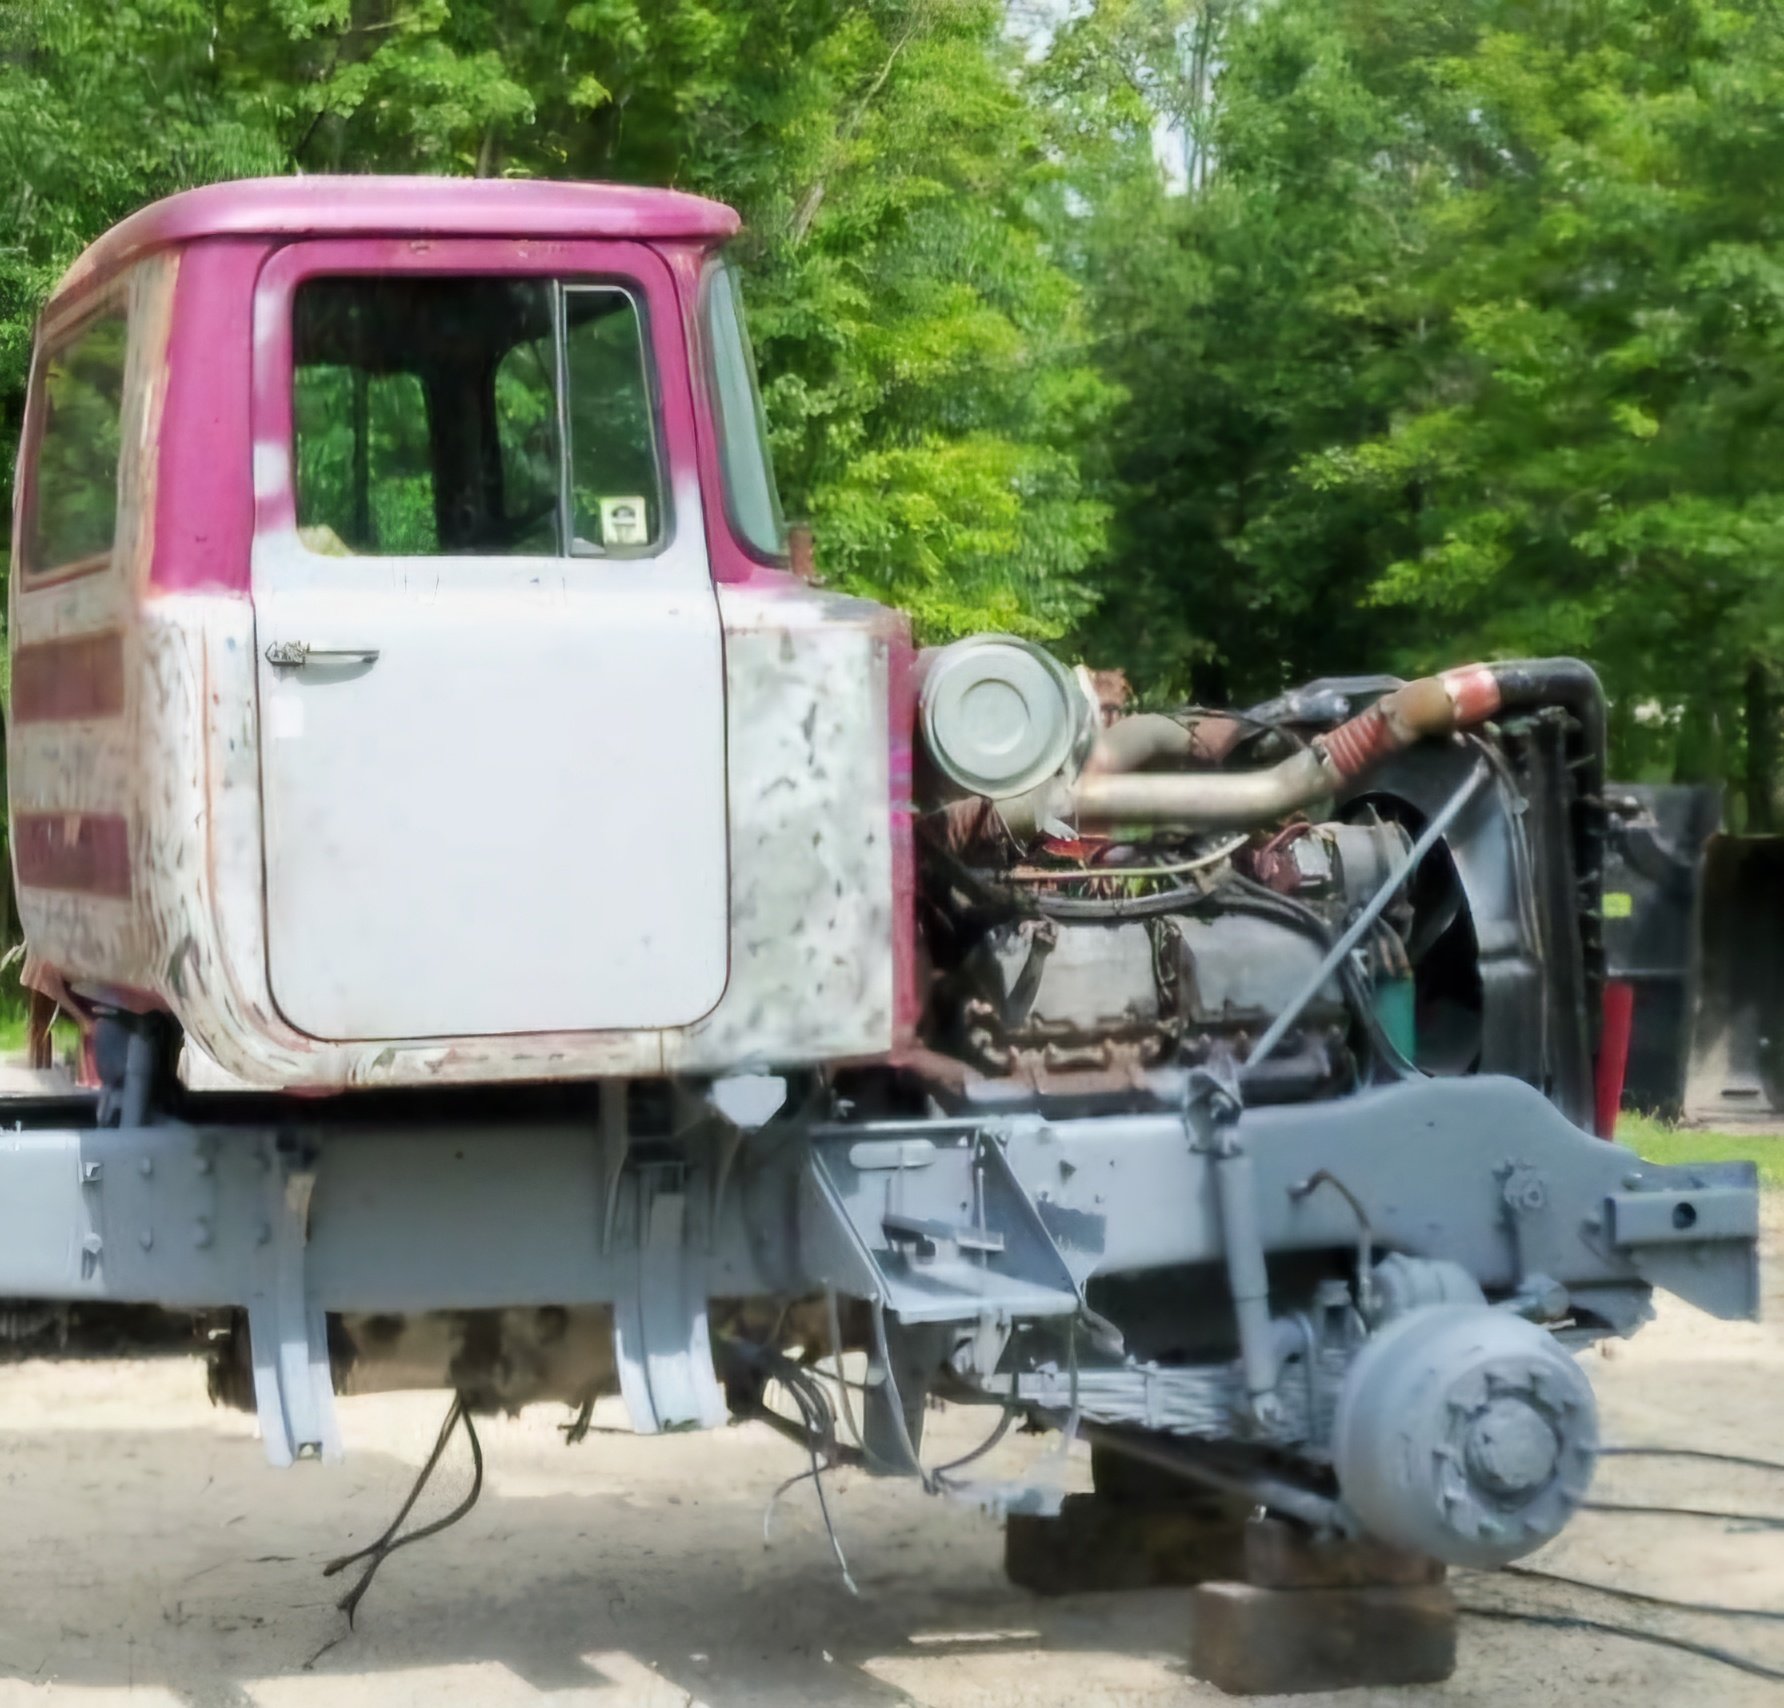
Hey all Here is the engine, radiator and air intake plumbing. This view shows the engine sitting in the frame. This view shows the radiator and air intake plumbing. Another view of the engine and intakes plus the battery boxes and air tanks. This view shows the front engine cross member, radiator and front axle. This view shows the engine and transmission mounts. bottom view showing the front axle, springs and air tanks. Ron G

-
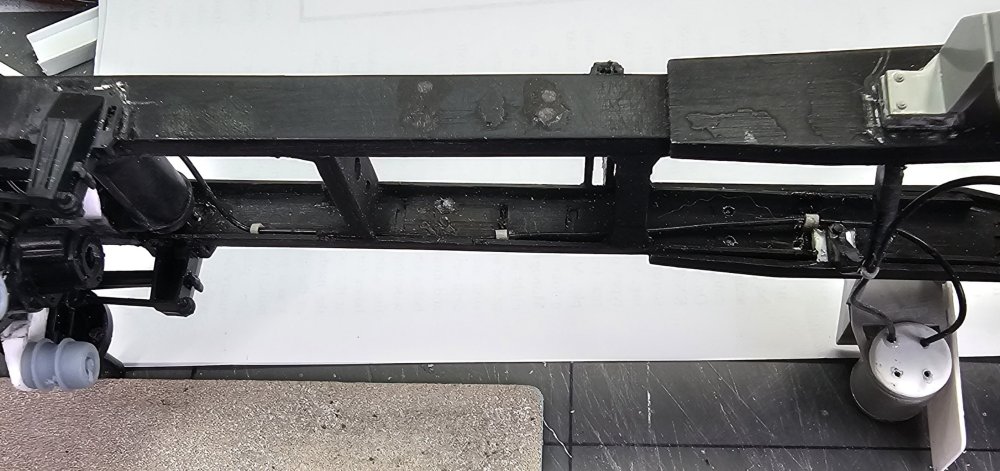
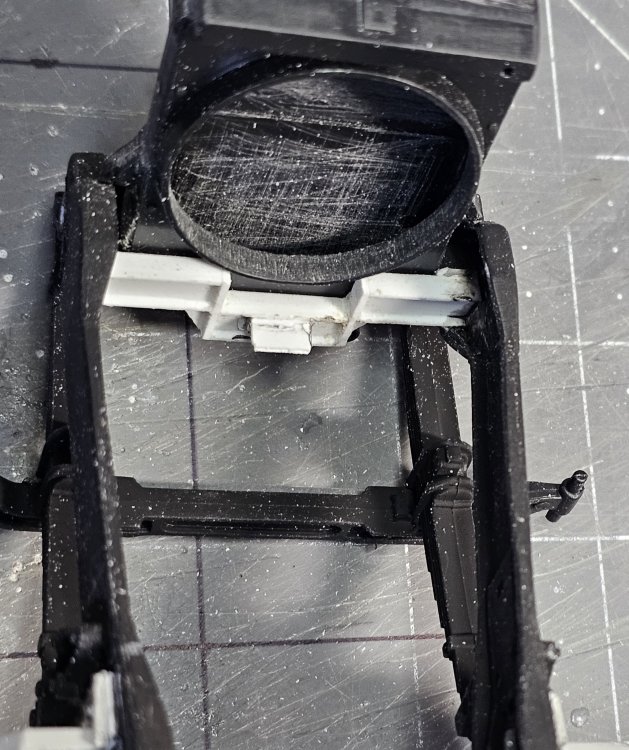
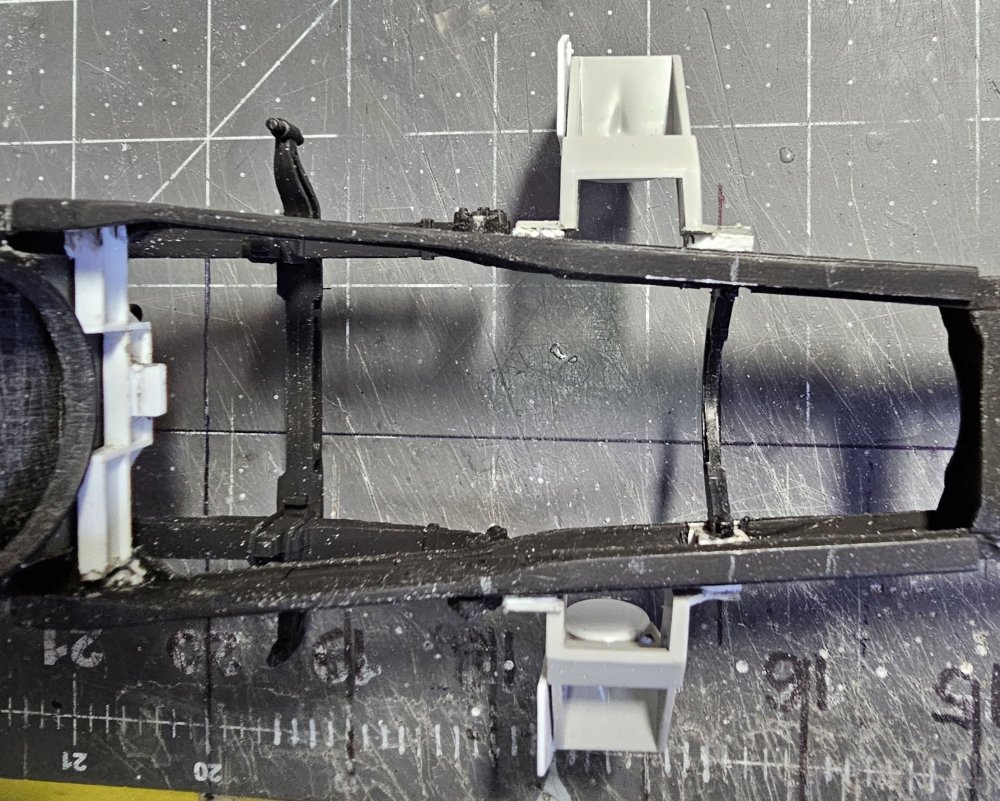
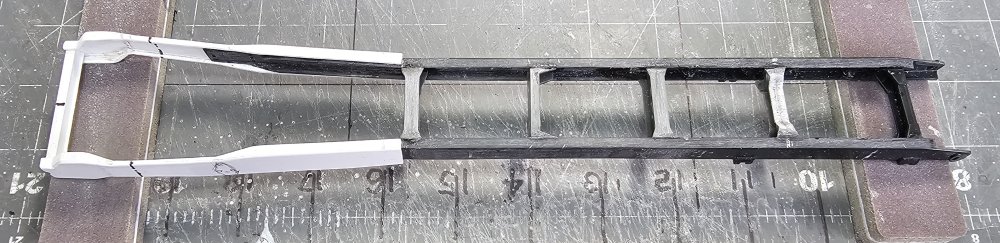
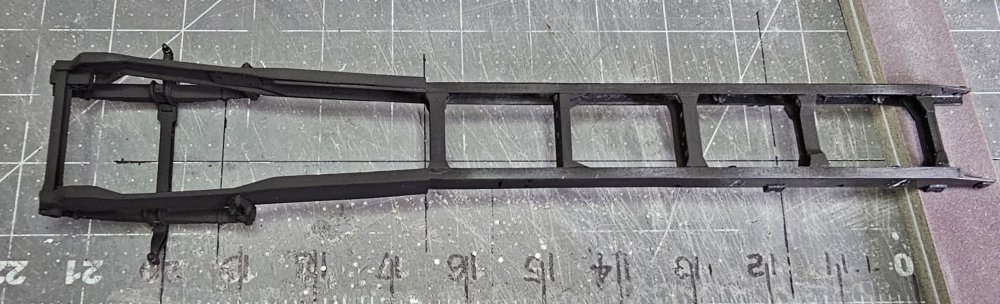
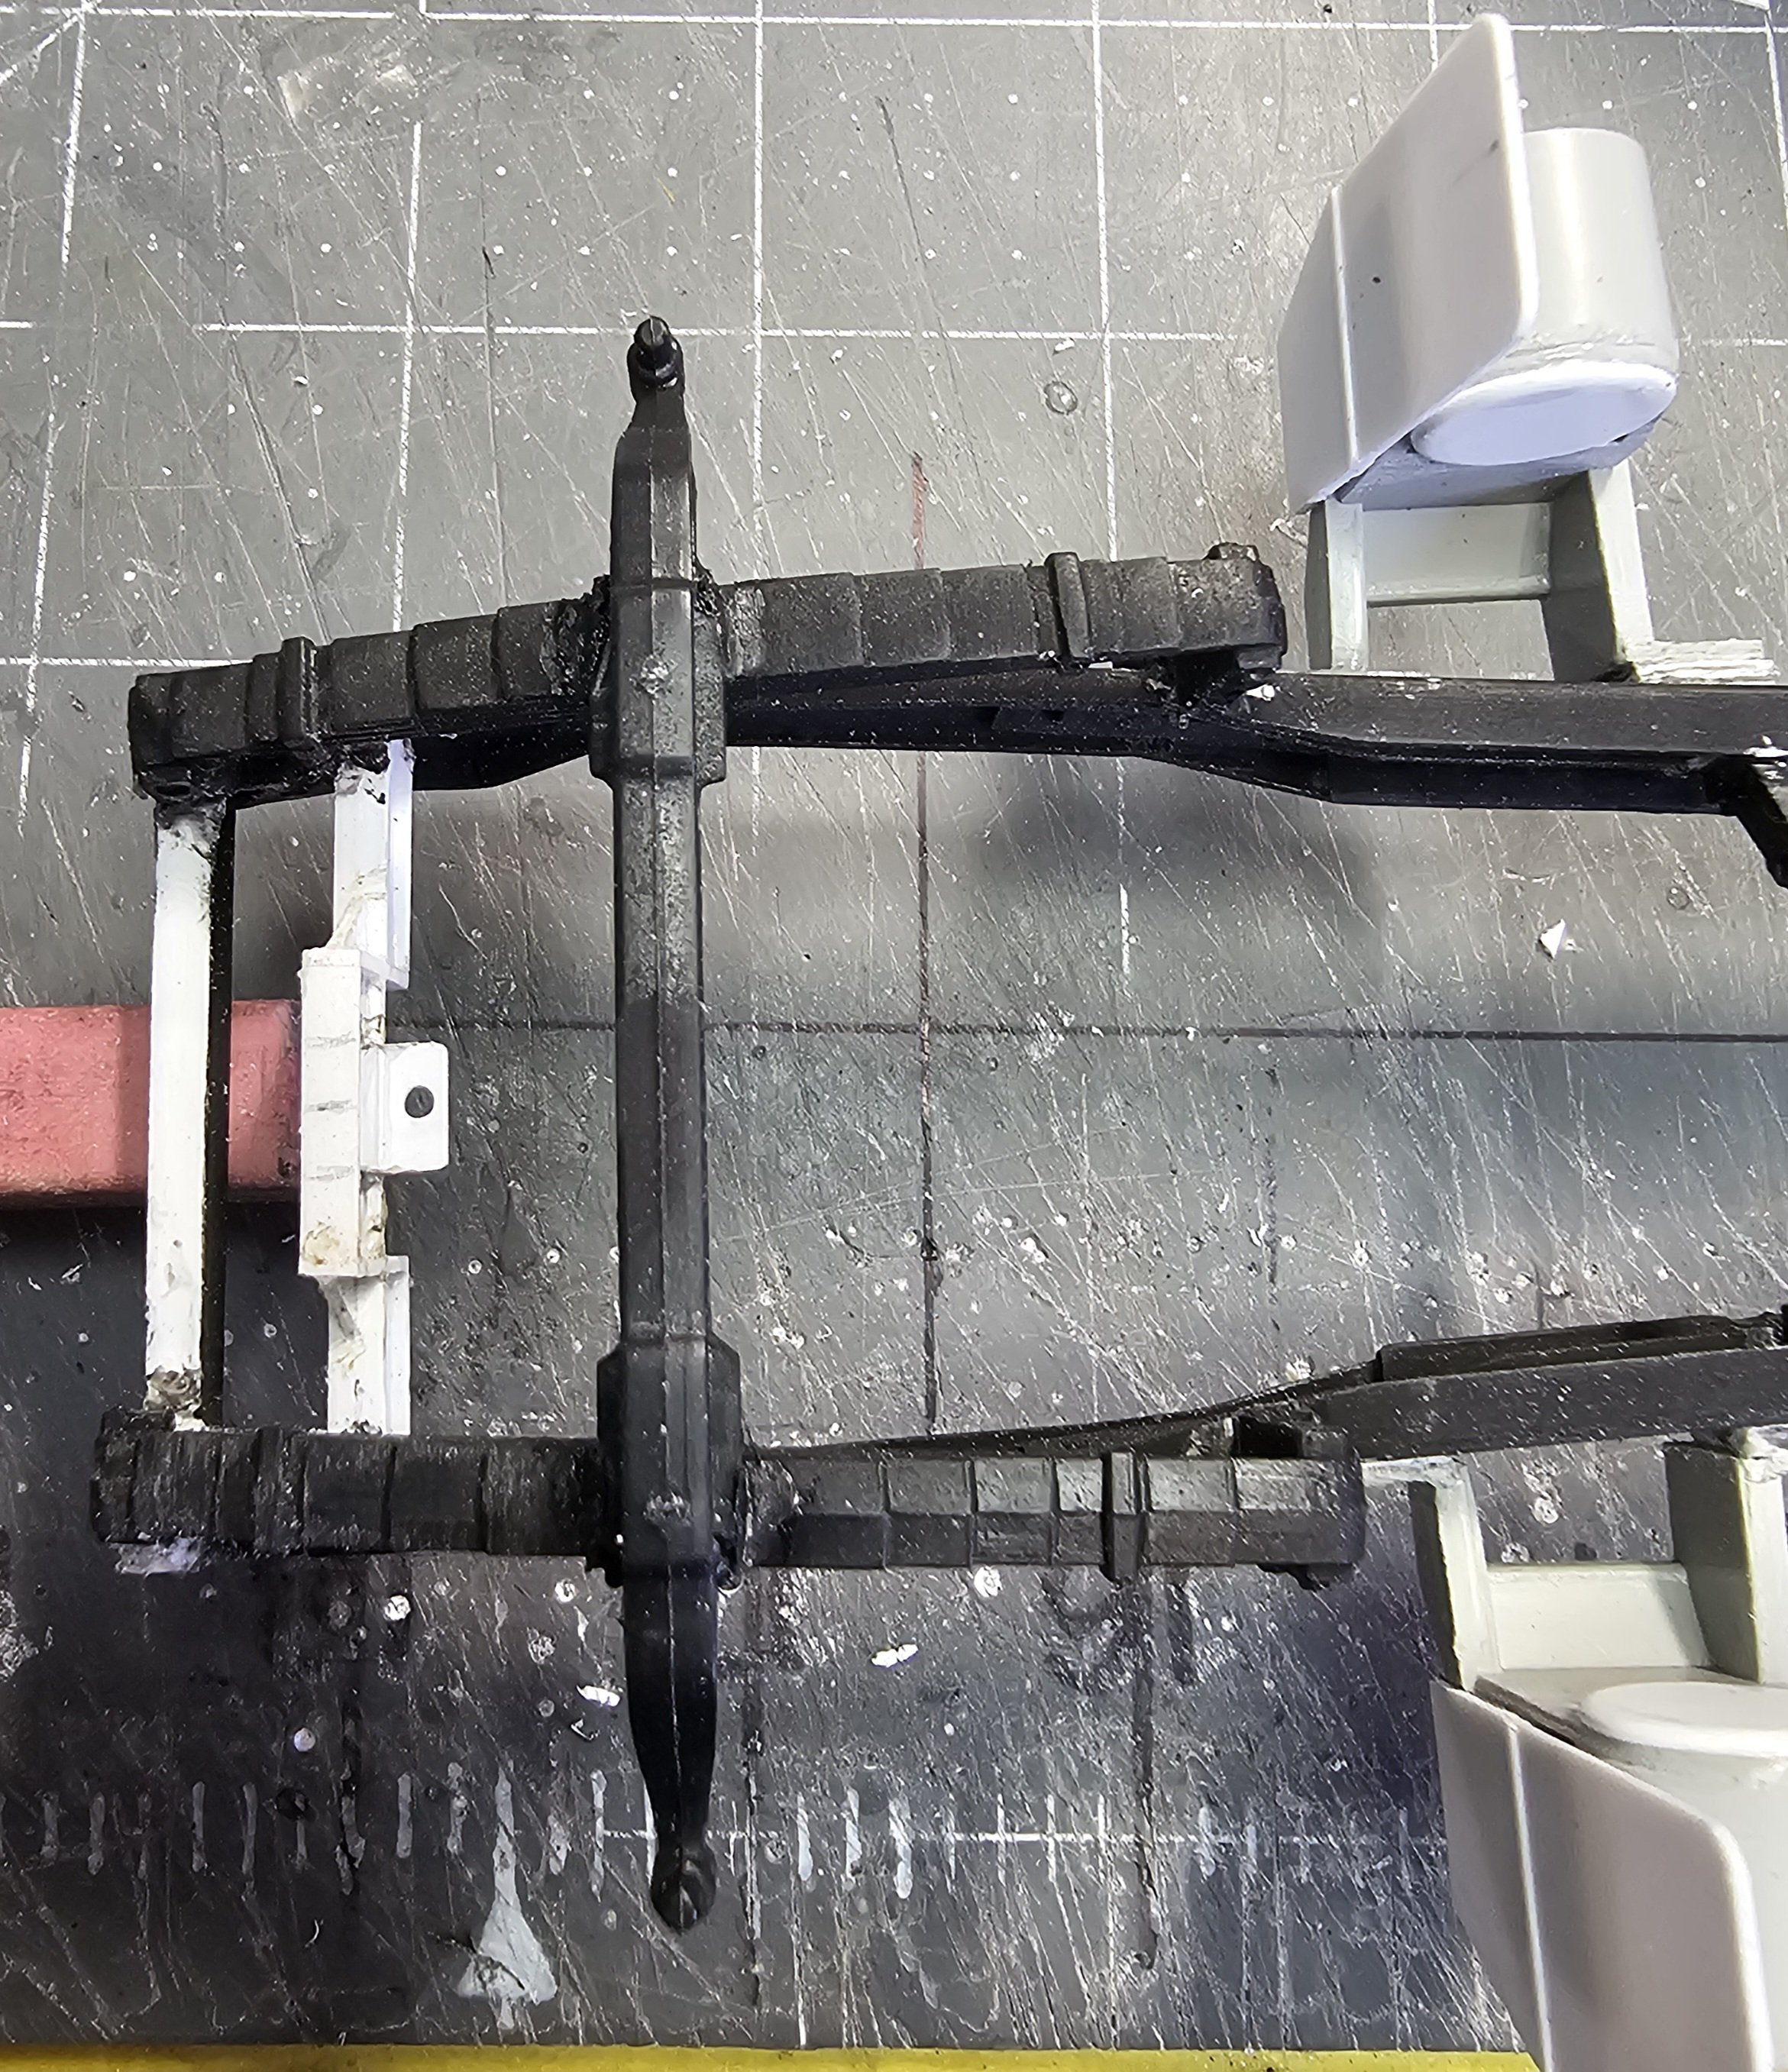
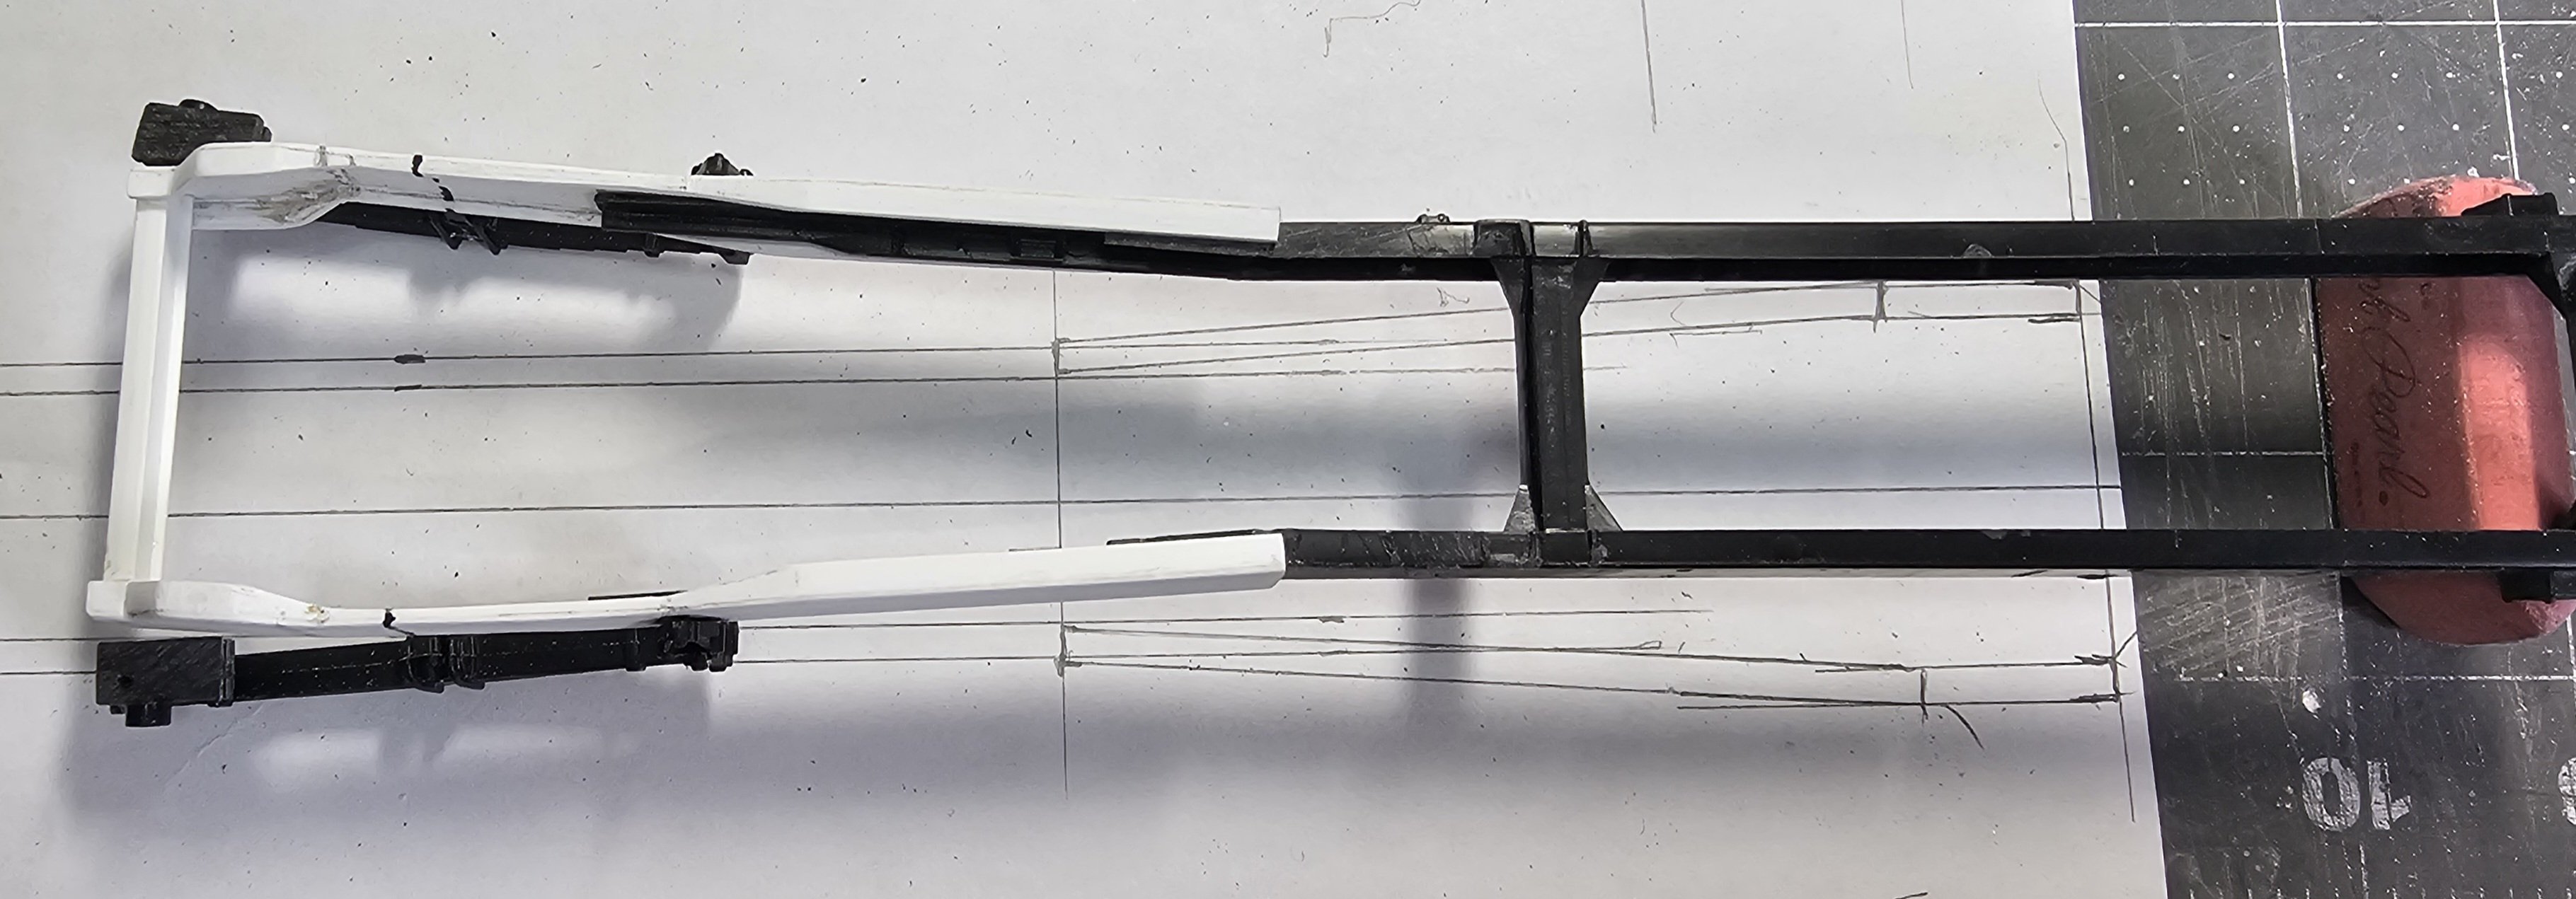
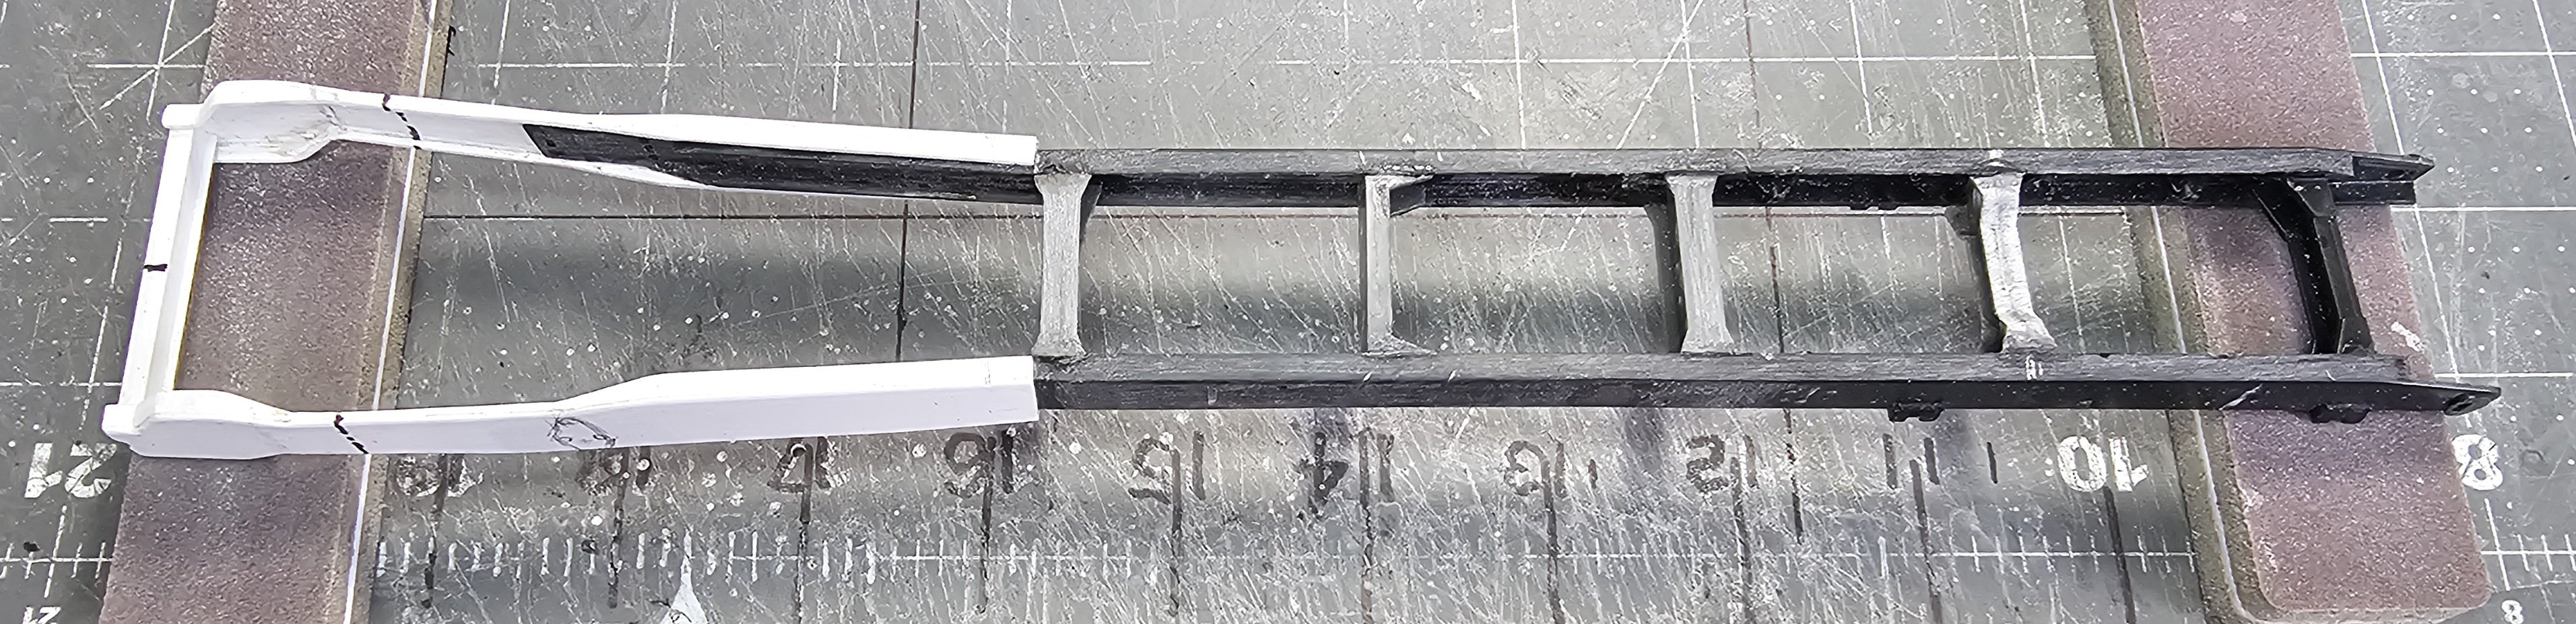
Hey all Have the frame made. mock-up of cab on frame. Top view of frame. Side view of frame showing front suspension. Top view of frame showing that it is 41.5" wide at the front and 36" wide in the rear. This view of frame front profile. Front frame cross member. Frame before paint. Frame after a coat of Tamiya flat black. Ron G


-
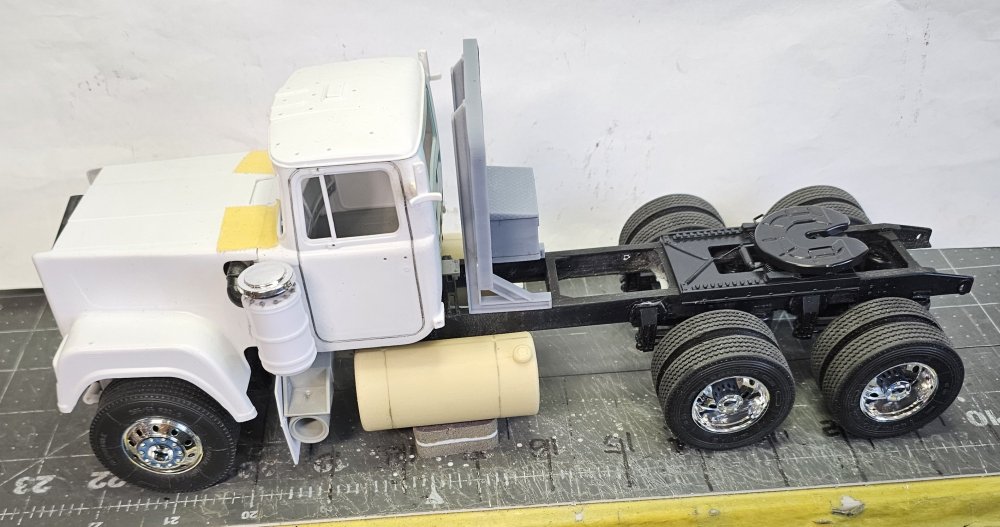
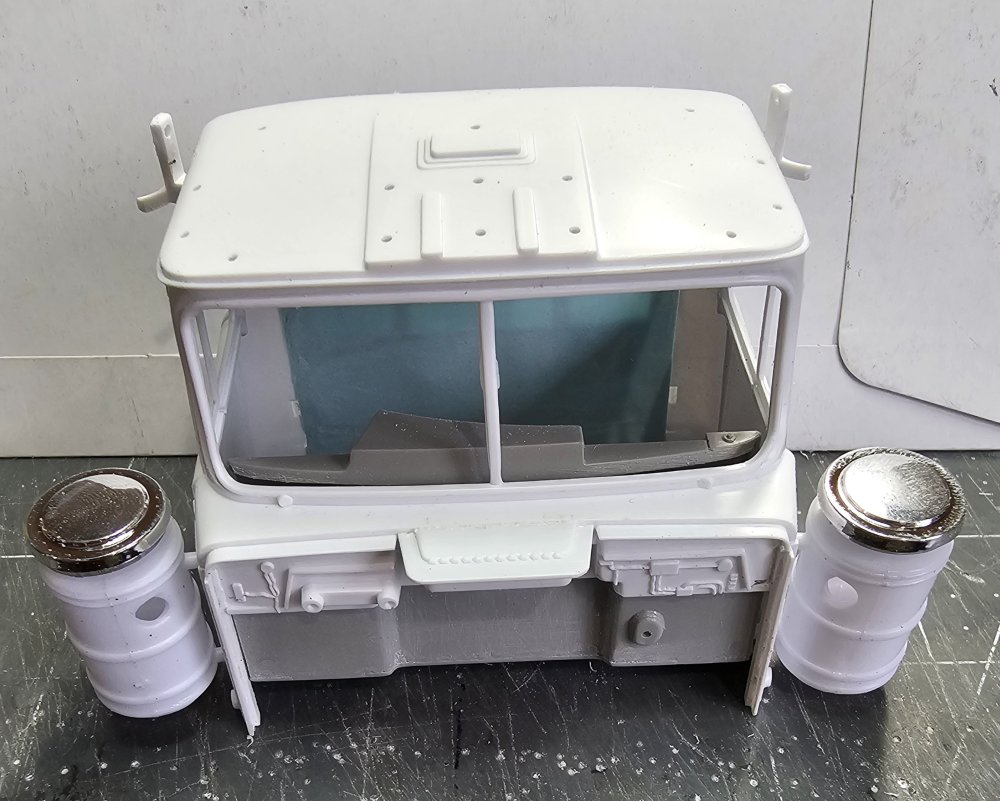
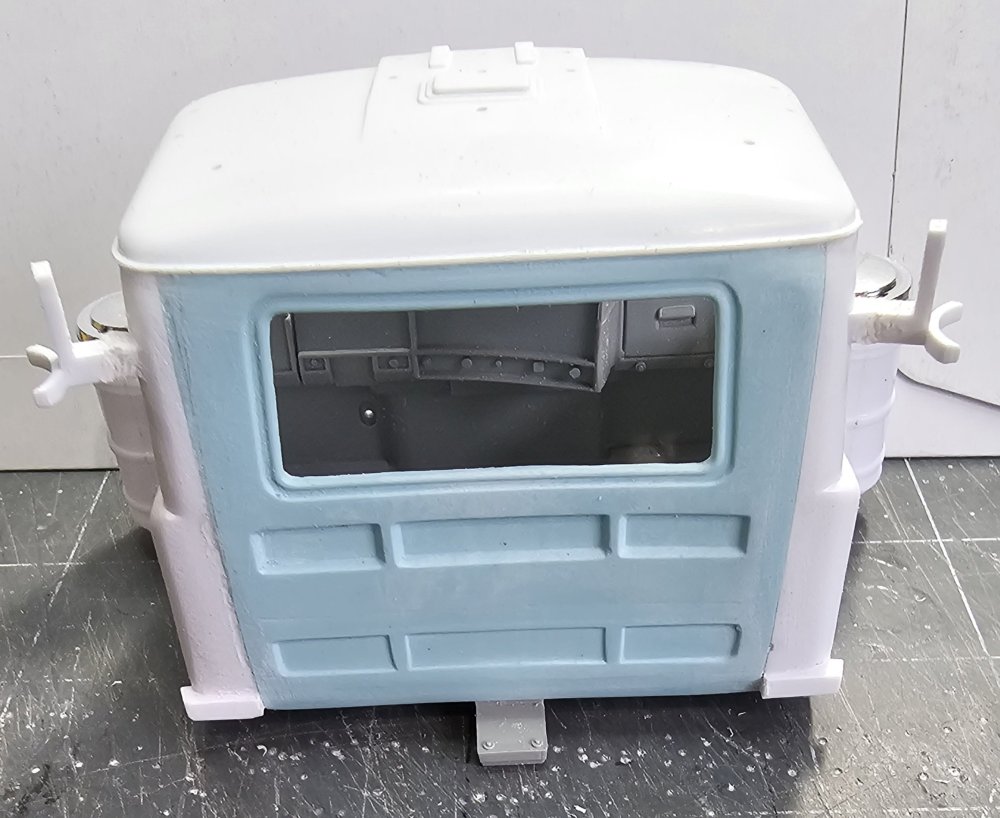
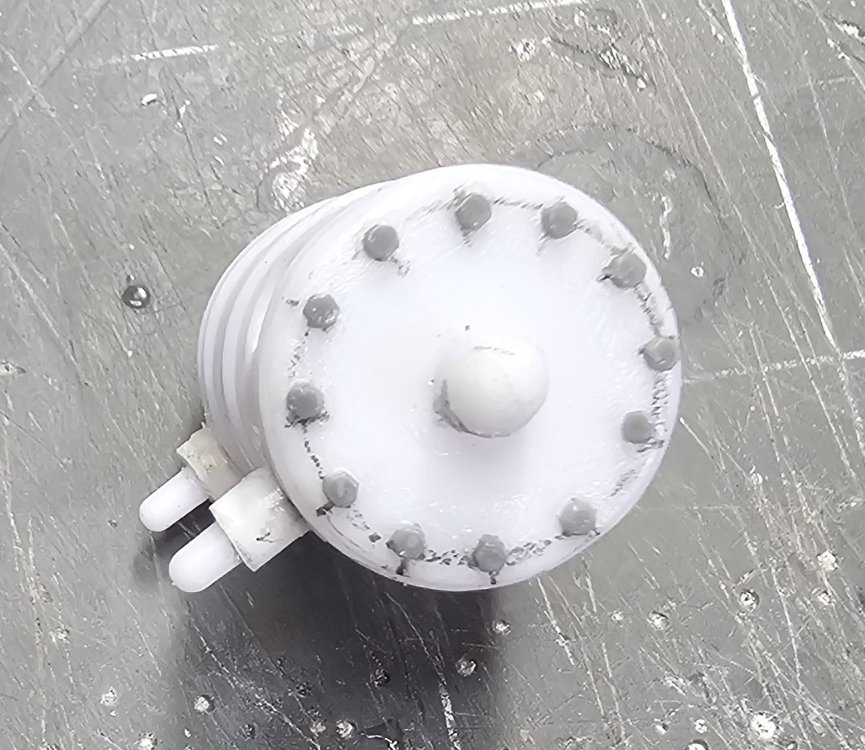
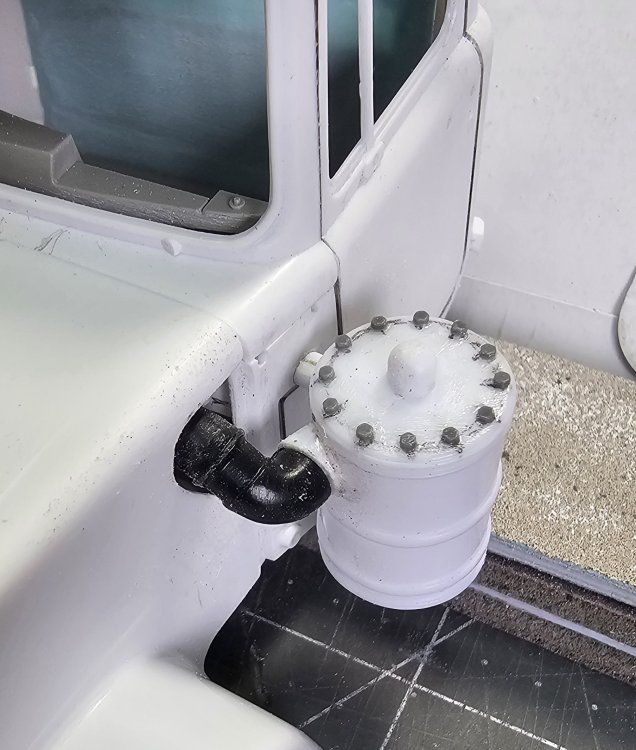
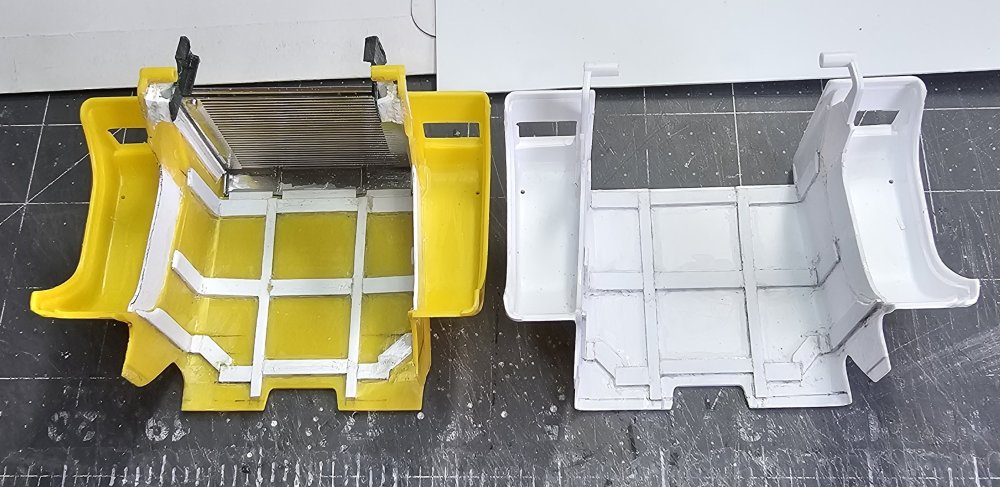
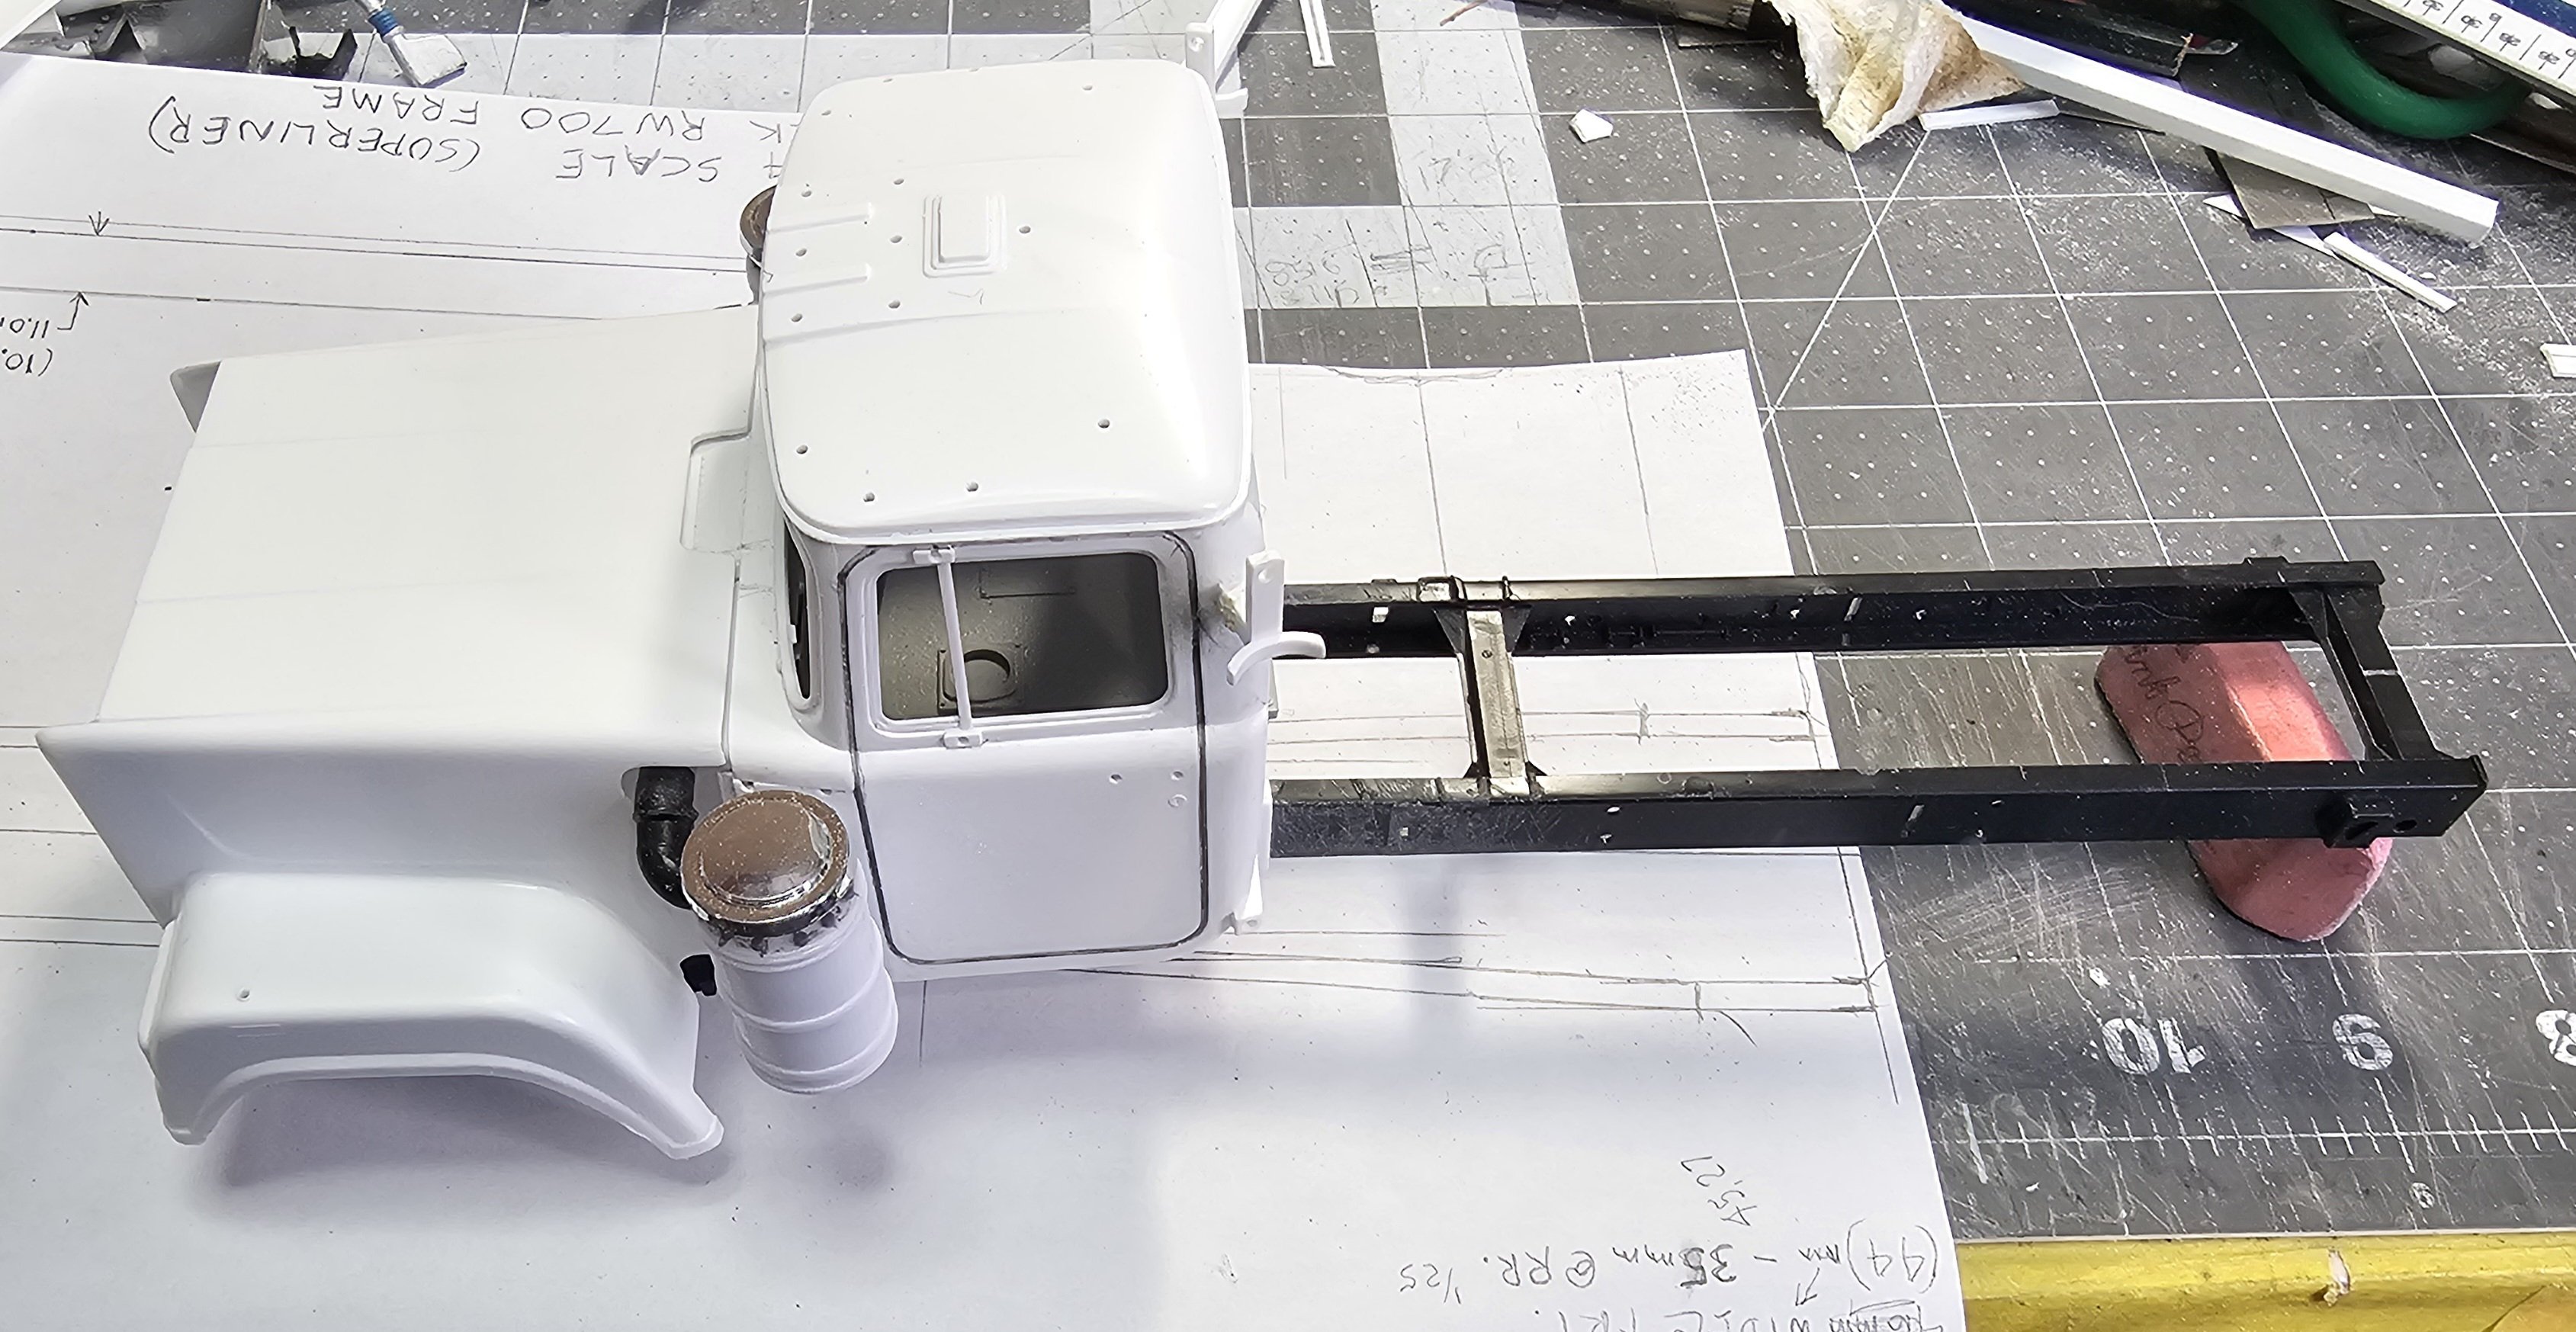
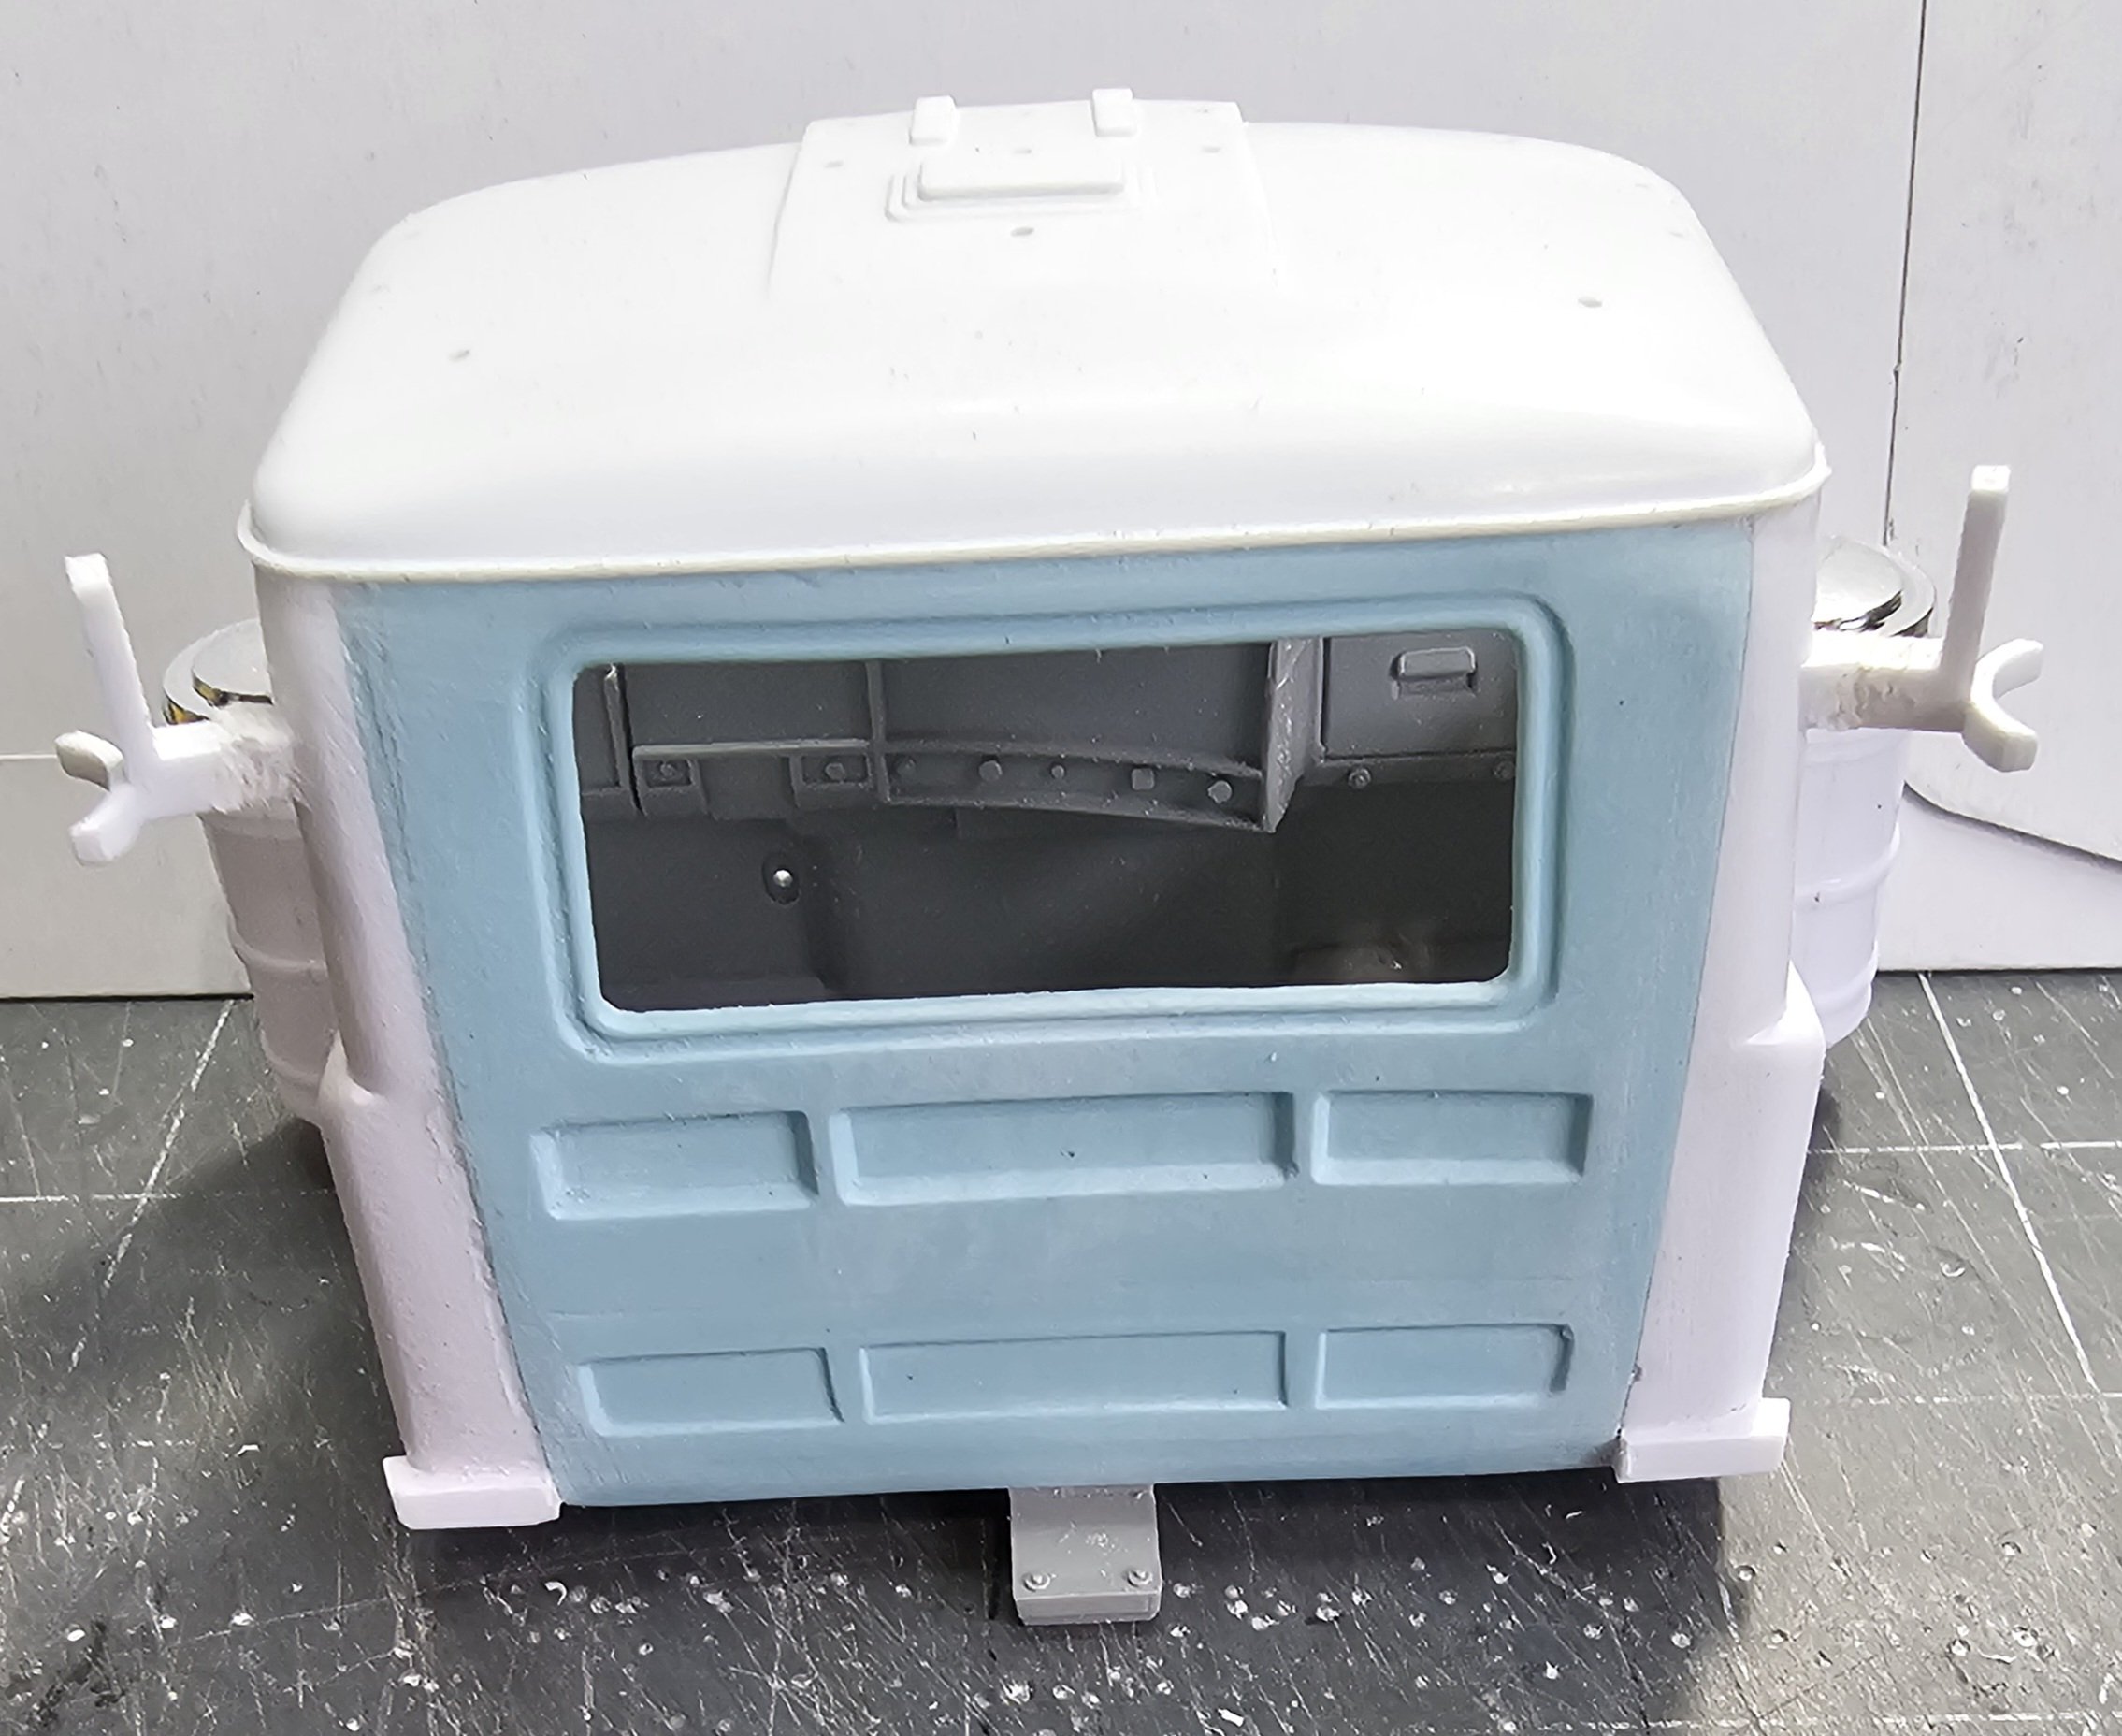
Hey all This build is going to be a day cab, probably used by someone in a local hauling operation. He bought it as a wreak and rebuilt it using the rear half of a Peterbilt air ride. This is the look and paint scheme I'm going for less the sleeper. This view shows the air cleaner cans that I added. This view shows the day cab rear resin panel from ST Supply. Meng bolts added to air cleaner tops. Left air cleaner installed. Right air cleaner installed. This view shows the air cleaner cross tube and engine. This veiw shows the day cab hood on the right. The left one is for my Australian Mack Superliner. Ron G
.jpg.e39dc1a5a7a8f97cff7aaae0a48faffa.jpg)

-
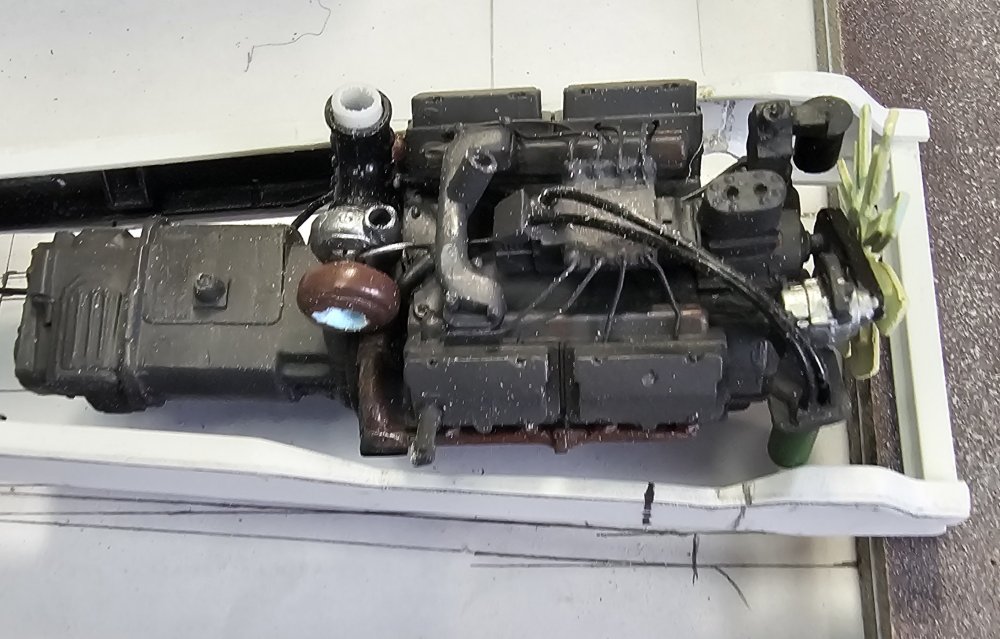
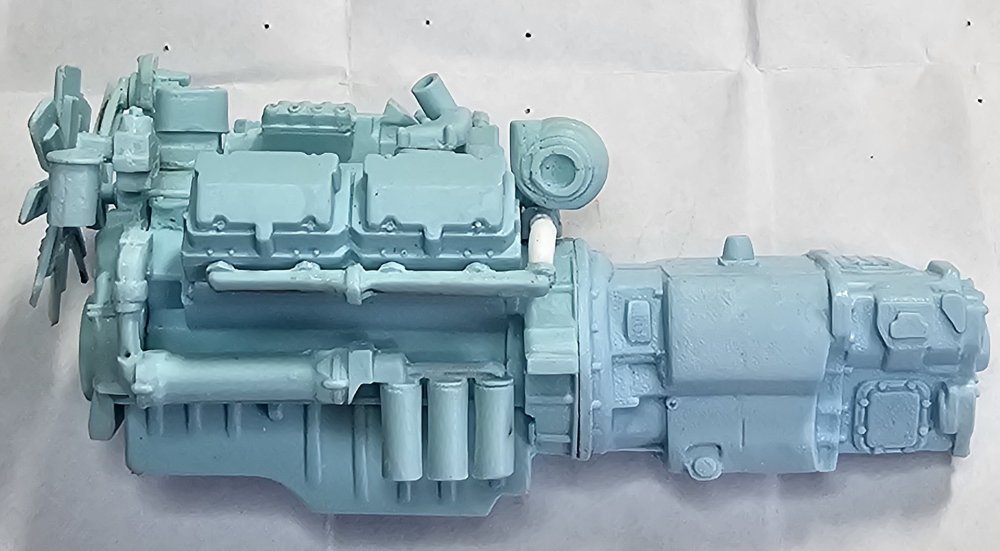
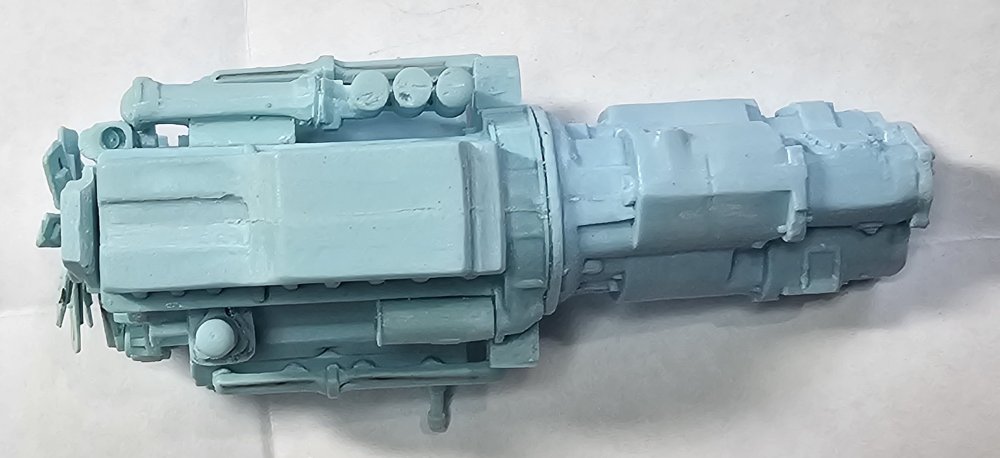
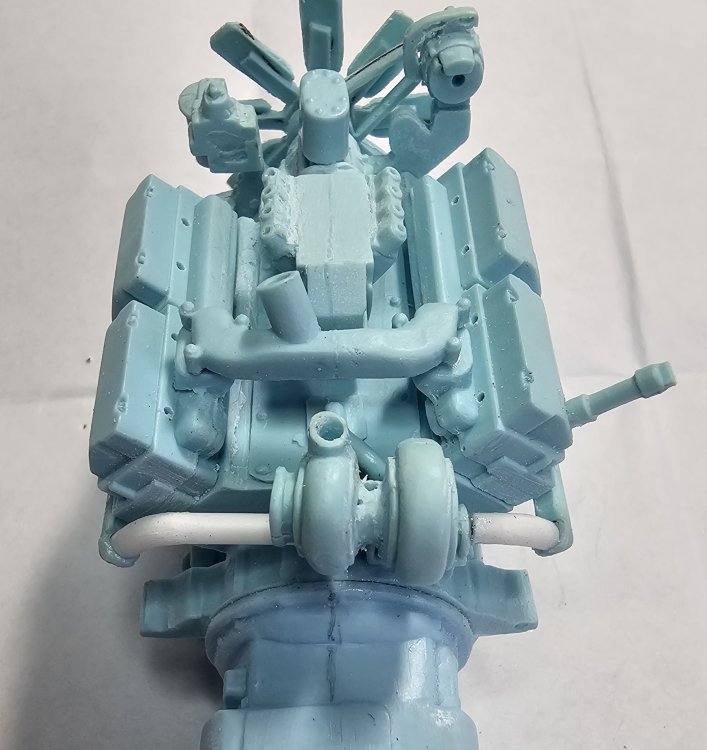
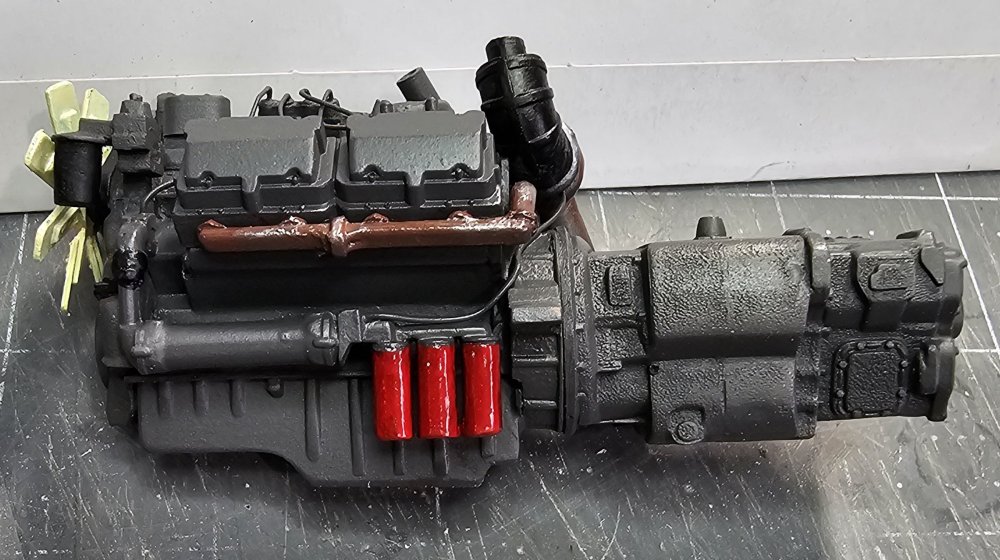
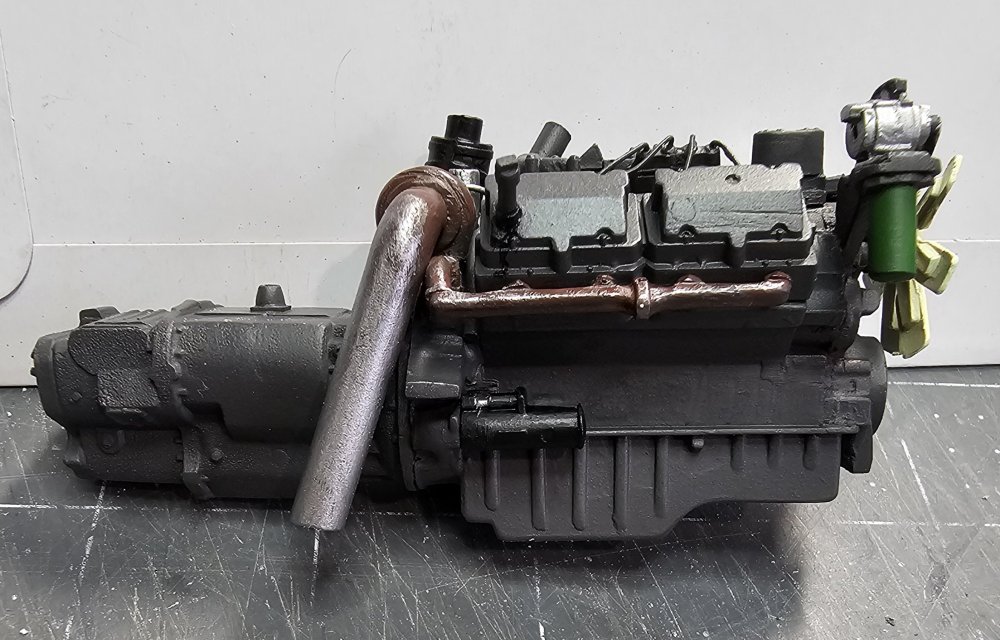
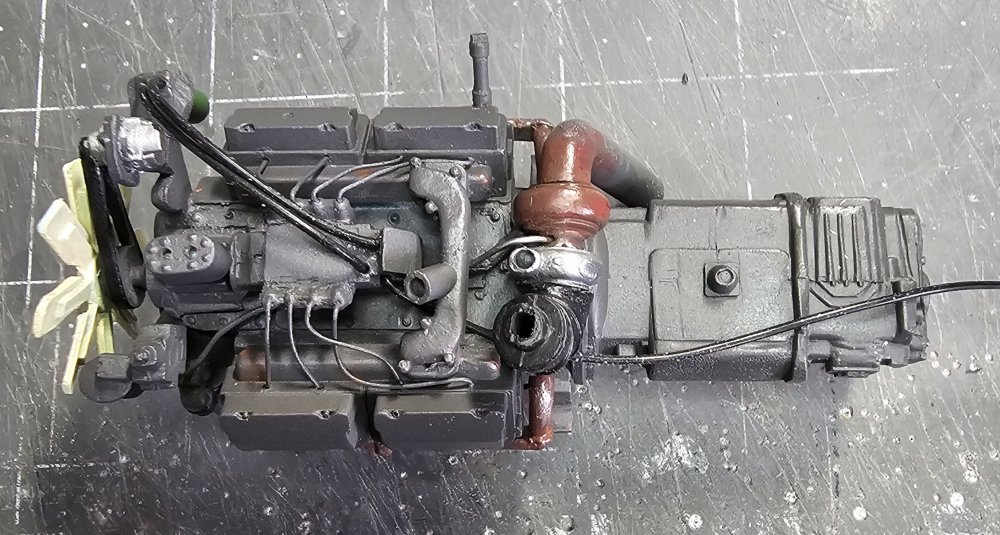
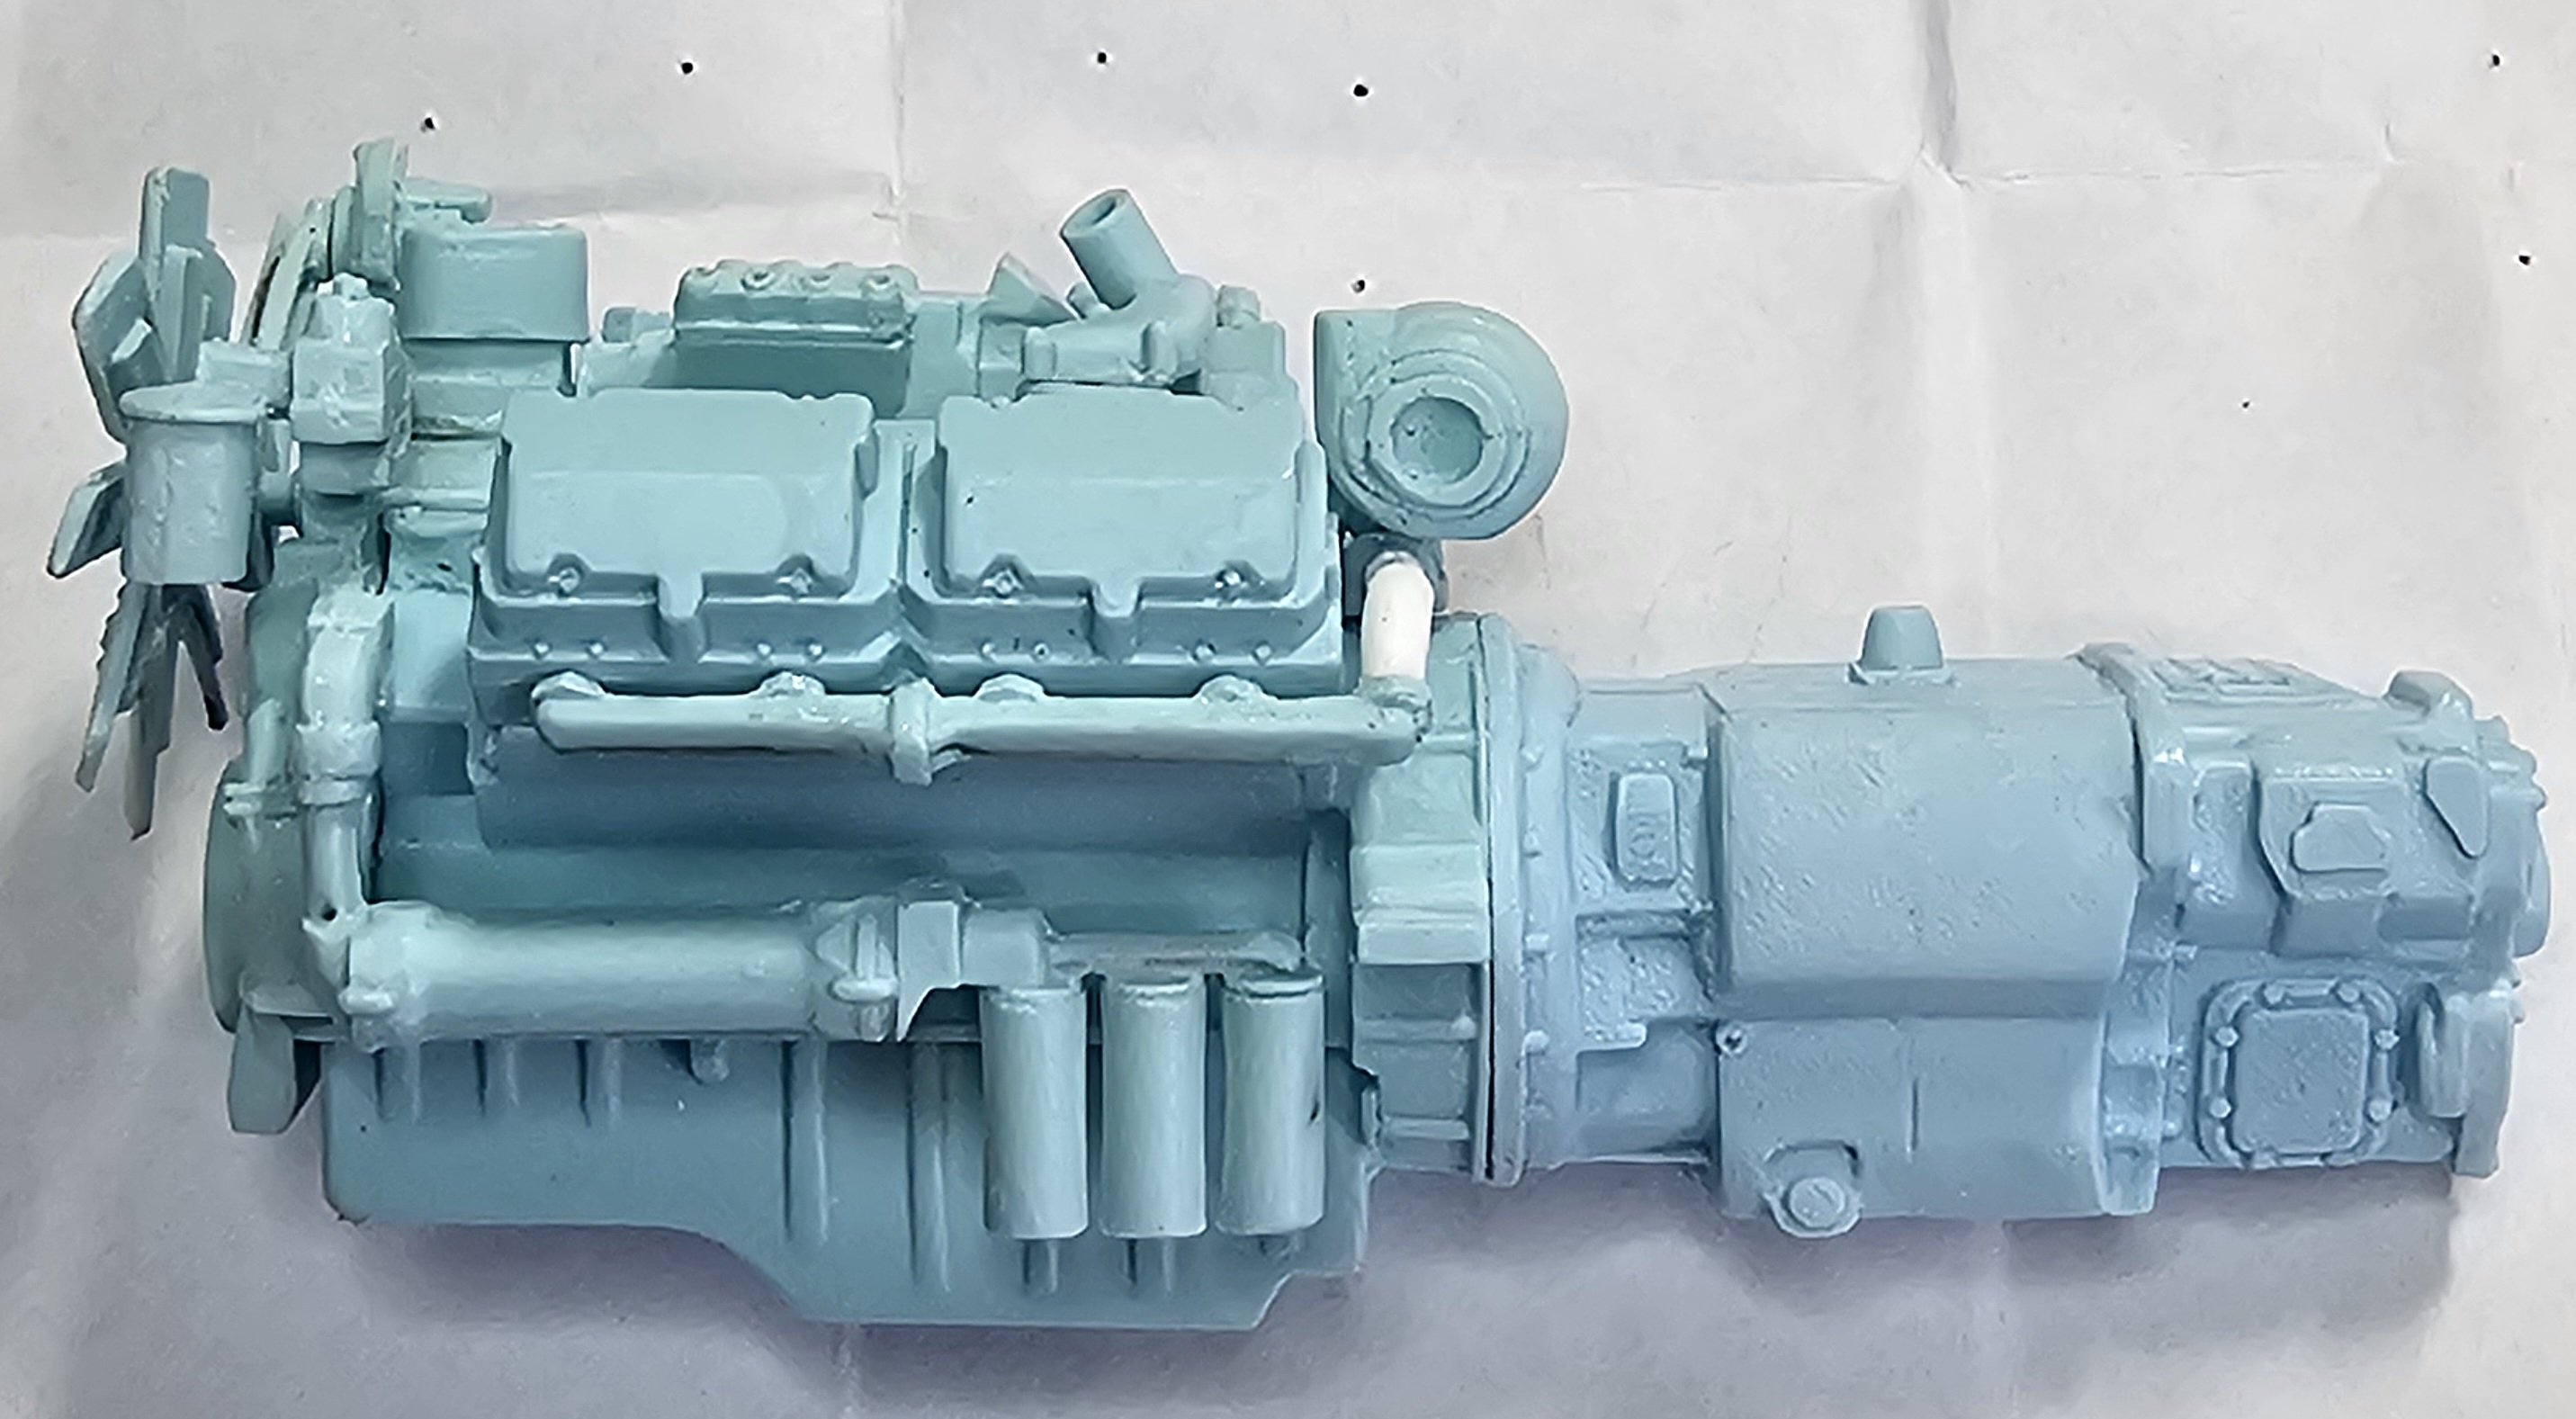
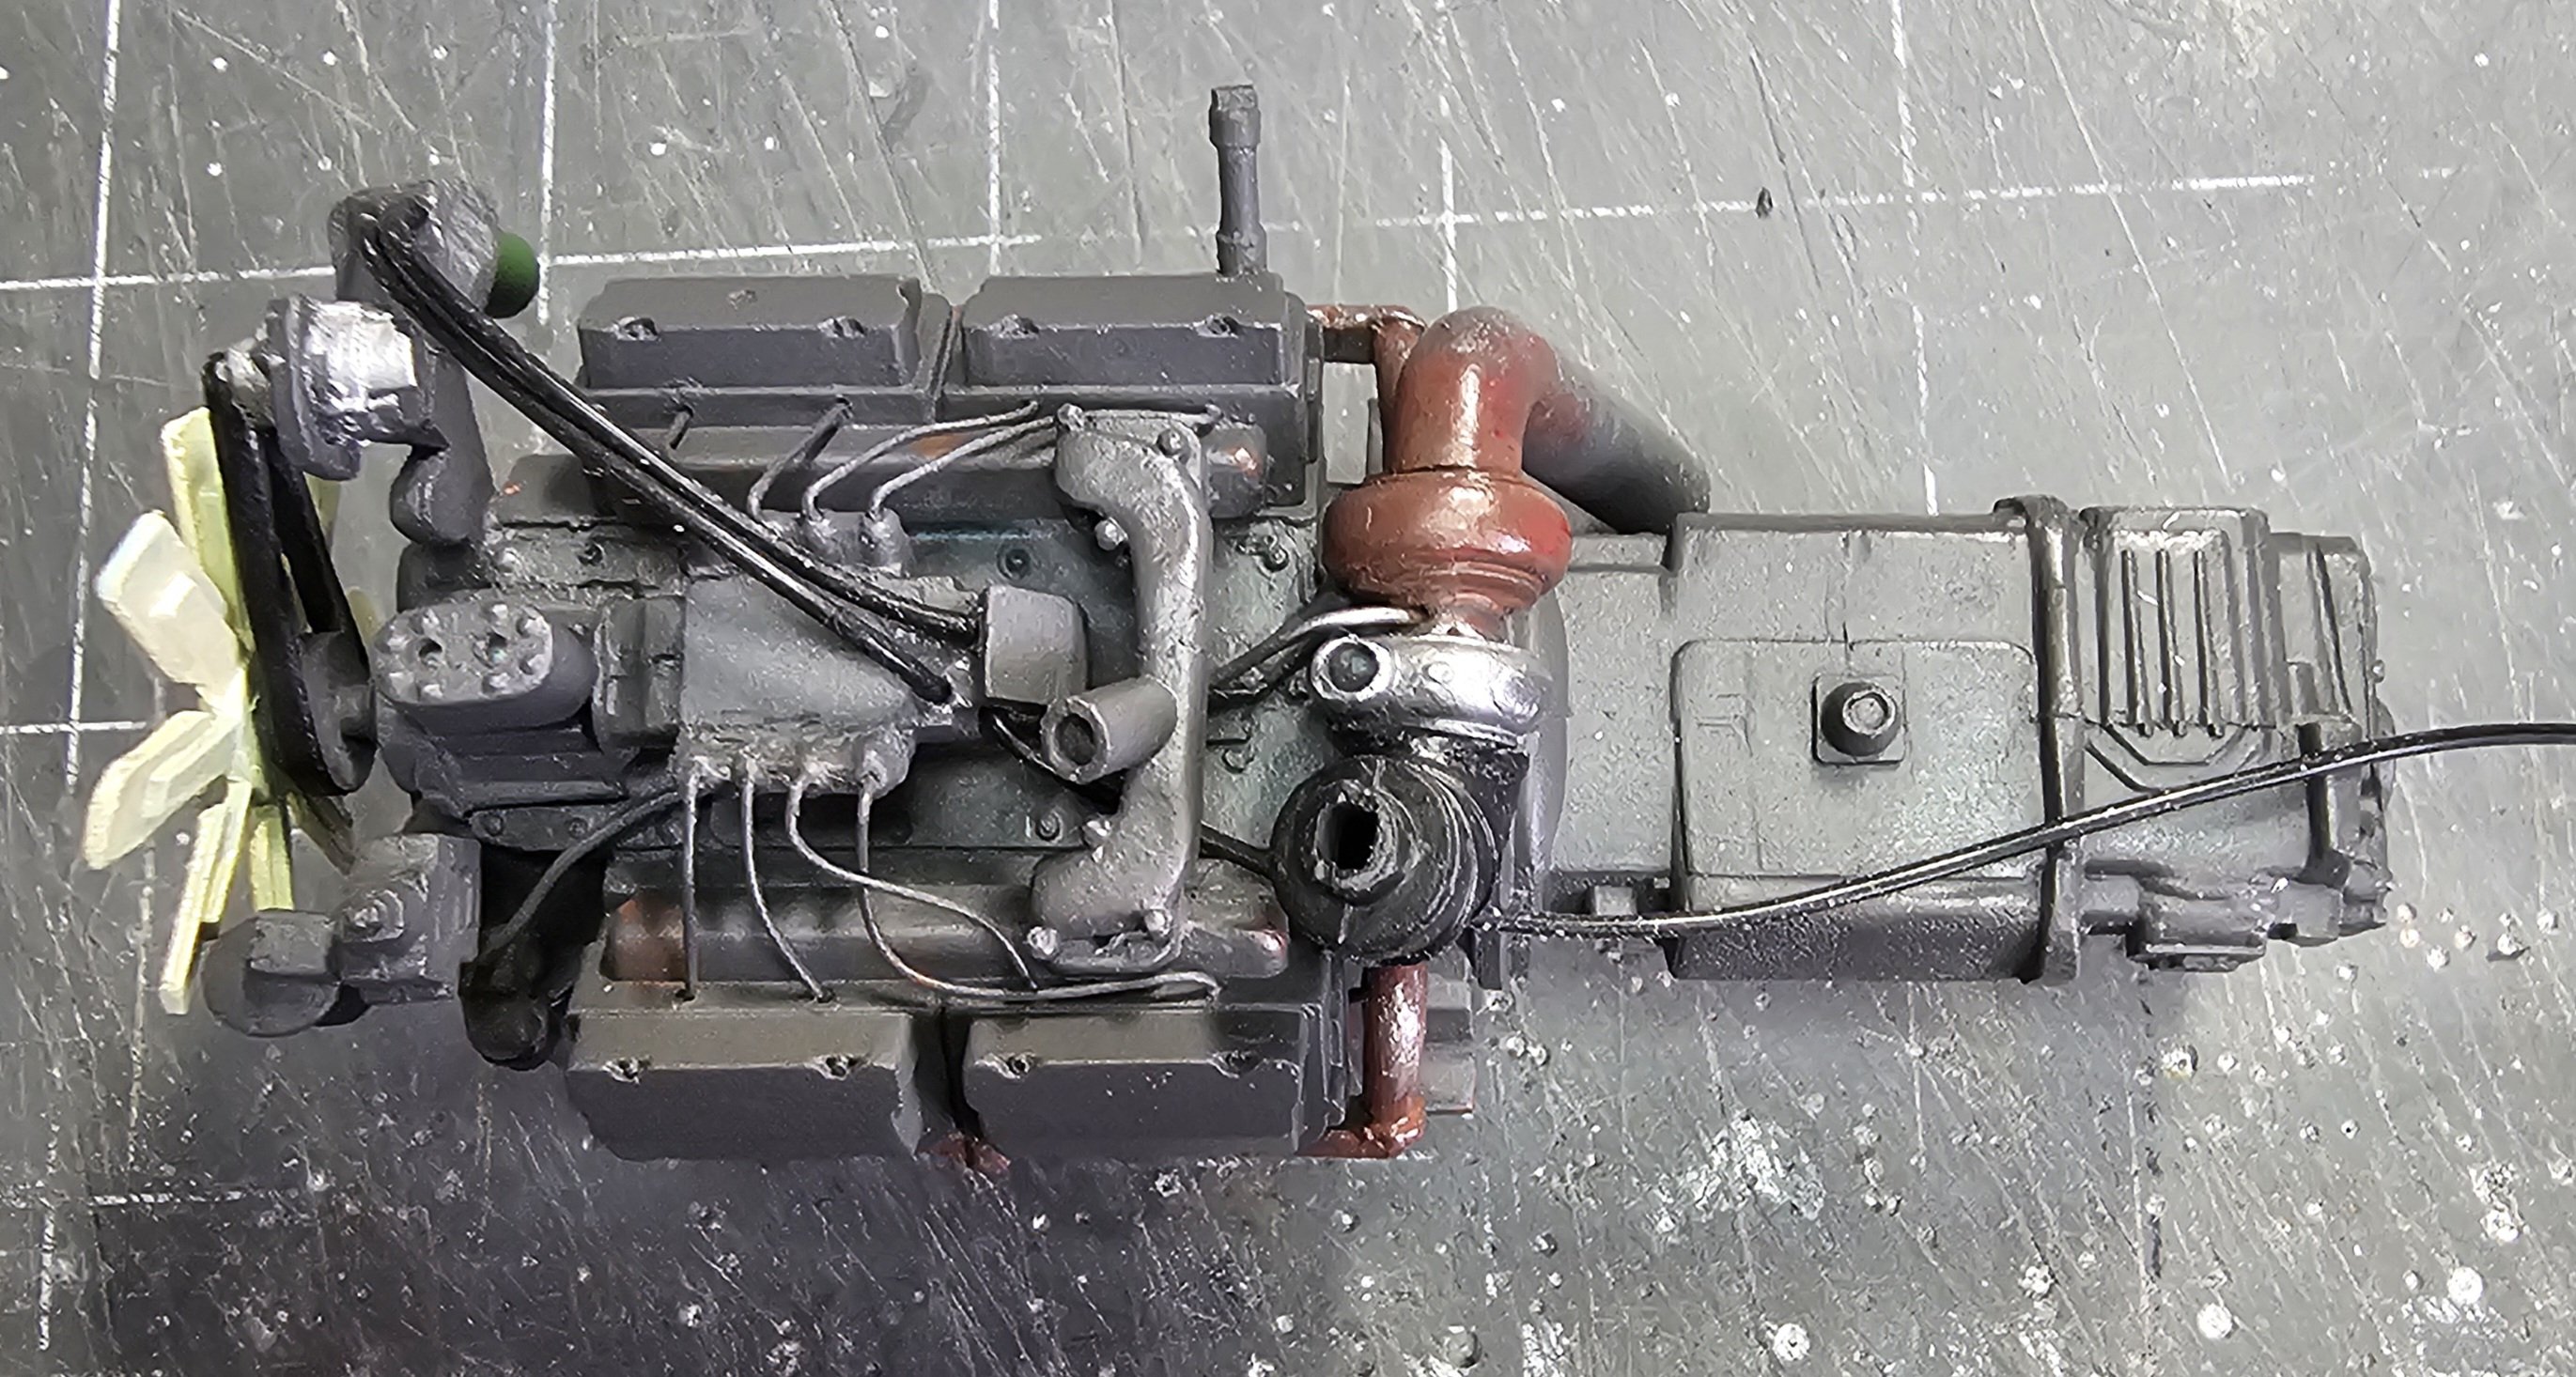
Hey all I also used a resin Mack E9 V8 and 12 speed transmission. Left side view of resin E9 and trans. I got this from Paul at ST Supply in Canada. Top view of E9. Bottom view of E9. This view shows the pipes I had to add because the resin ones were to short and misformed. This picture shows the E9 painted in Mack dark grey. This view shows the exhaust pipe I made for the turbo. This view shows the fuel injection lines I added. Also the fuel lines from the fuel filter to the fuel pump. Ron G

-
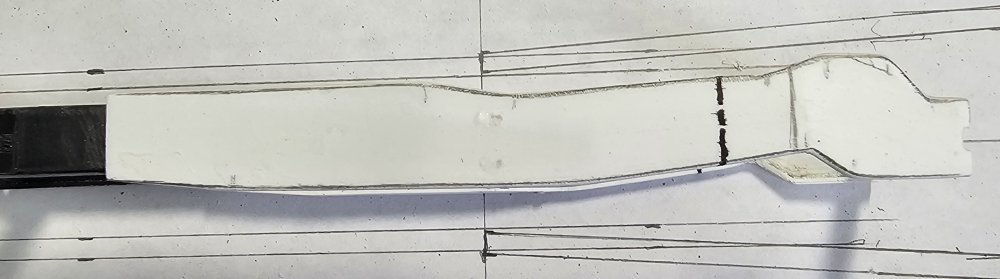
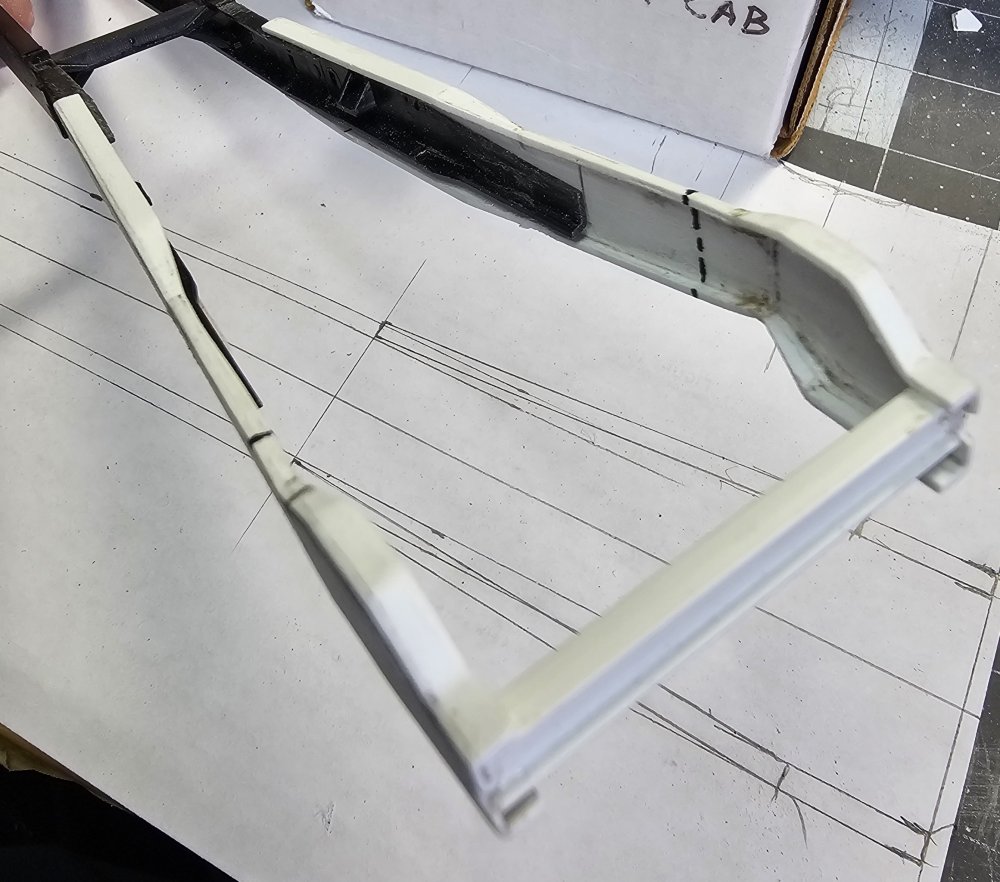
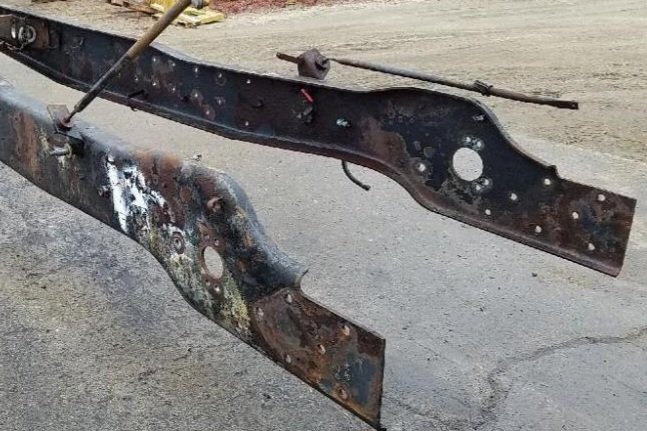
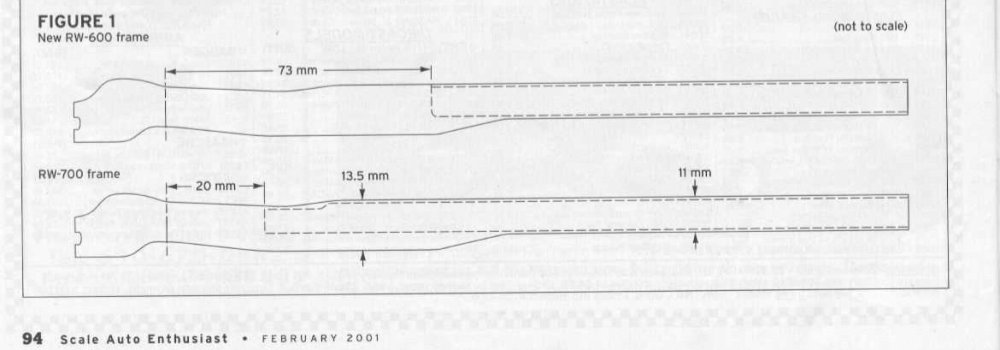
Ok, Jeff said I had to post this so here we go. It's an AMT (Italeri) Mack Superliner. The kit has a Freightliner FLC/FLD frame. All of Italeri 1/24 scale trucks have a Freightliner frame, except the Peterbilt 378 and 377 & tge European trucks. I made a scratch built set of front frame rails. I used the kit frame rails for the rear half. I also used aftermarket resin frame cross members & and some scratch built ones. Real Superliner front end. Front frame rails. Front frame rails. This is the drawing I used to scratch build my frame rails. This is the article I used to accurize the AMT kit. Ron G

.jpg.693d3a6c395762c782d1eee098231dfa.jpg)
x.thumb.jpg.3fefecc38ff23de922cf1a93aba9e9f2.jpg)
-
Works great at getting at those pesky sink marks between ribs😁
-
Those David Union sanders work great!
-
Autocar 9964 B conversion to heavy haul...
CrankyCrafstman replied to Jeff's topic in LSM 1/35 and Larger Work In Progress
You pulled off a superior build my friend. And you should post the Peterbilt 378 your working on to. Ron G- 56 replies
-
- 2
-

-
- hevy haul off road tractor
- b.c. logging
- (and 1 more)


.jpg.a842fde72ac1ef4e19810c3ea35ecf2e.jpg)


x.jpg.cd5a953f87220acfeb8e9a489c6a7078.jpg)
