CrankyCrafstman
-
Posts
1,358 -
Joined
-
Last visited
Content Type
Profiles
Forums
Events
Gallery
Everything posted by CrankyCrafstman
-
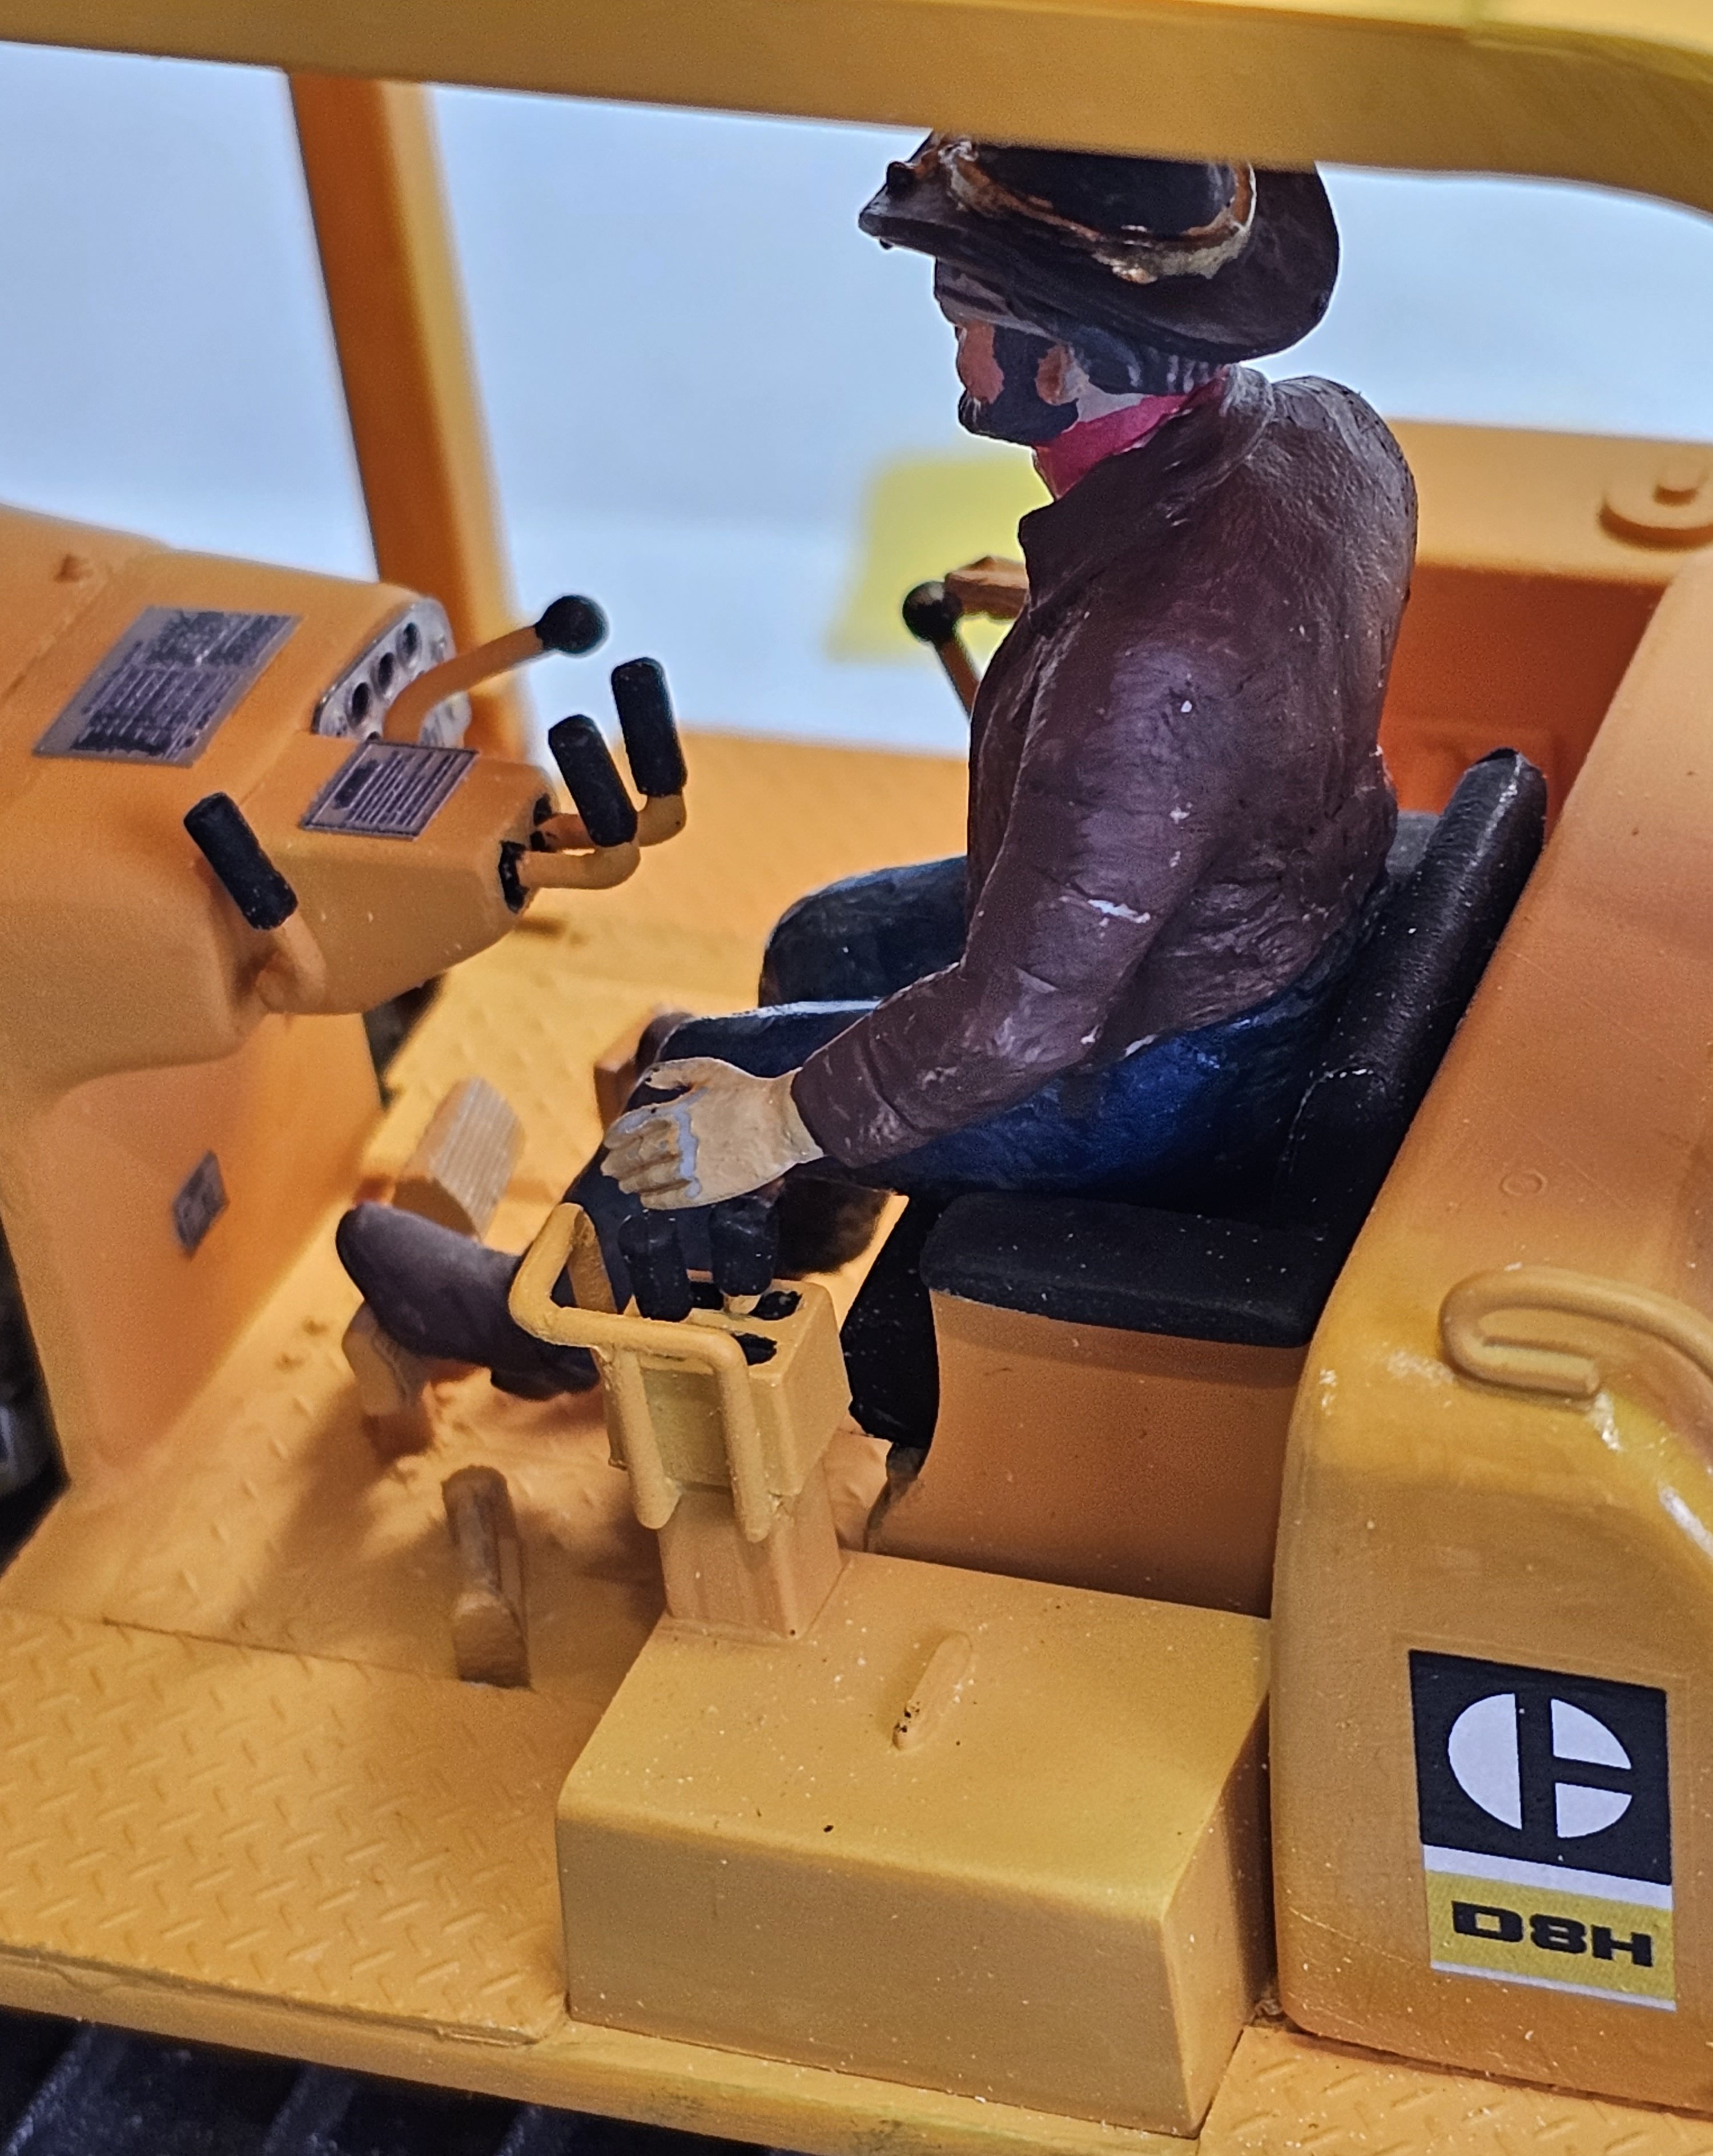
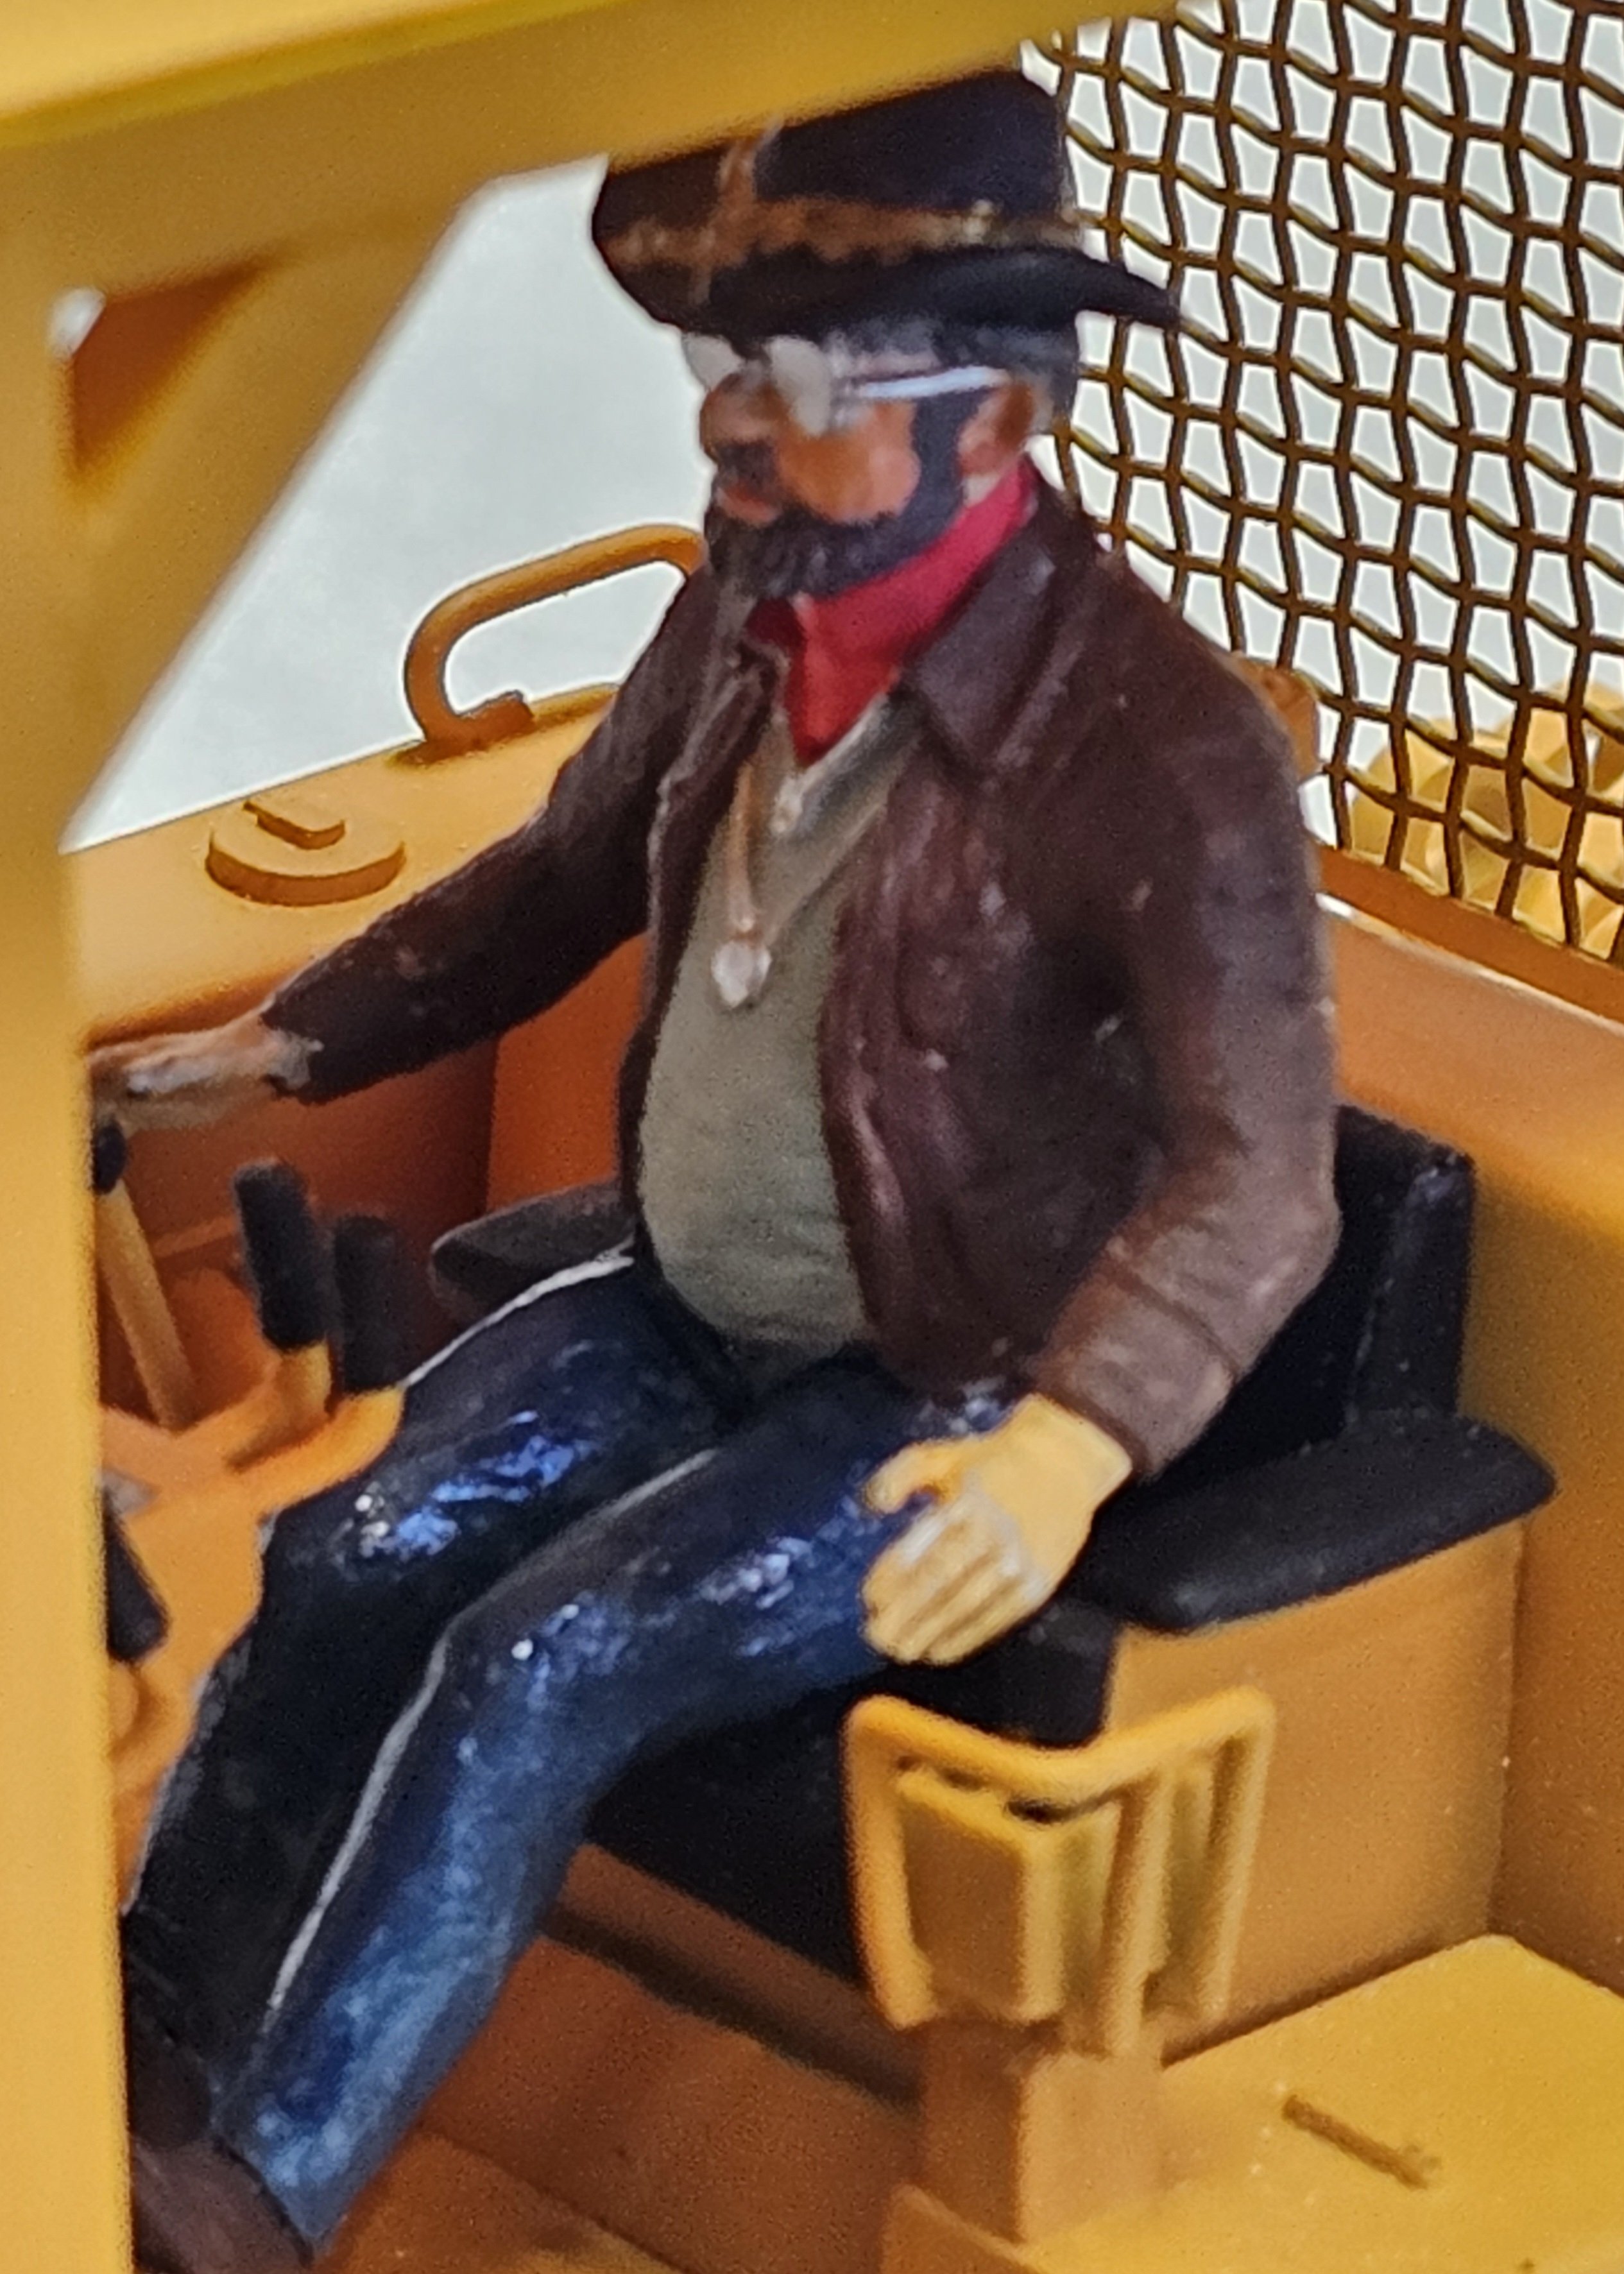
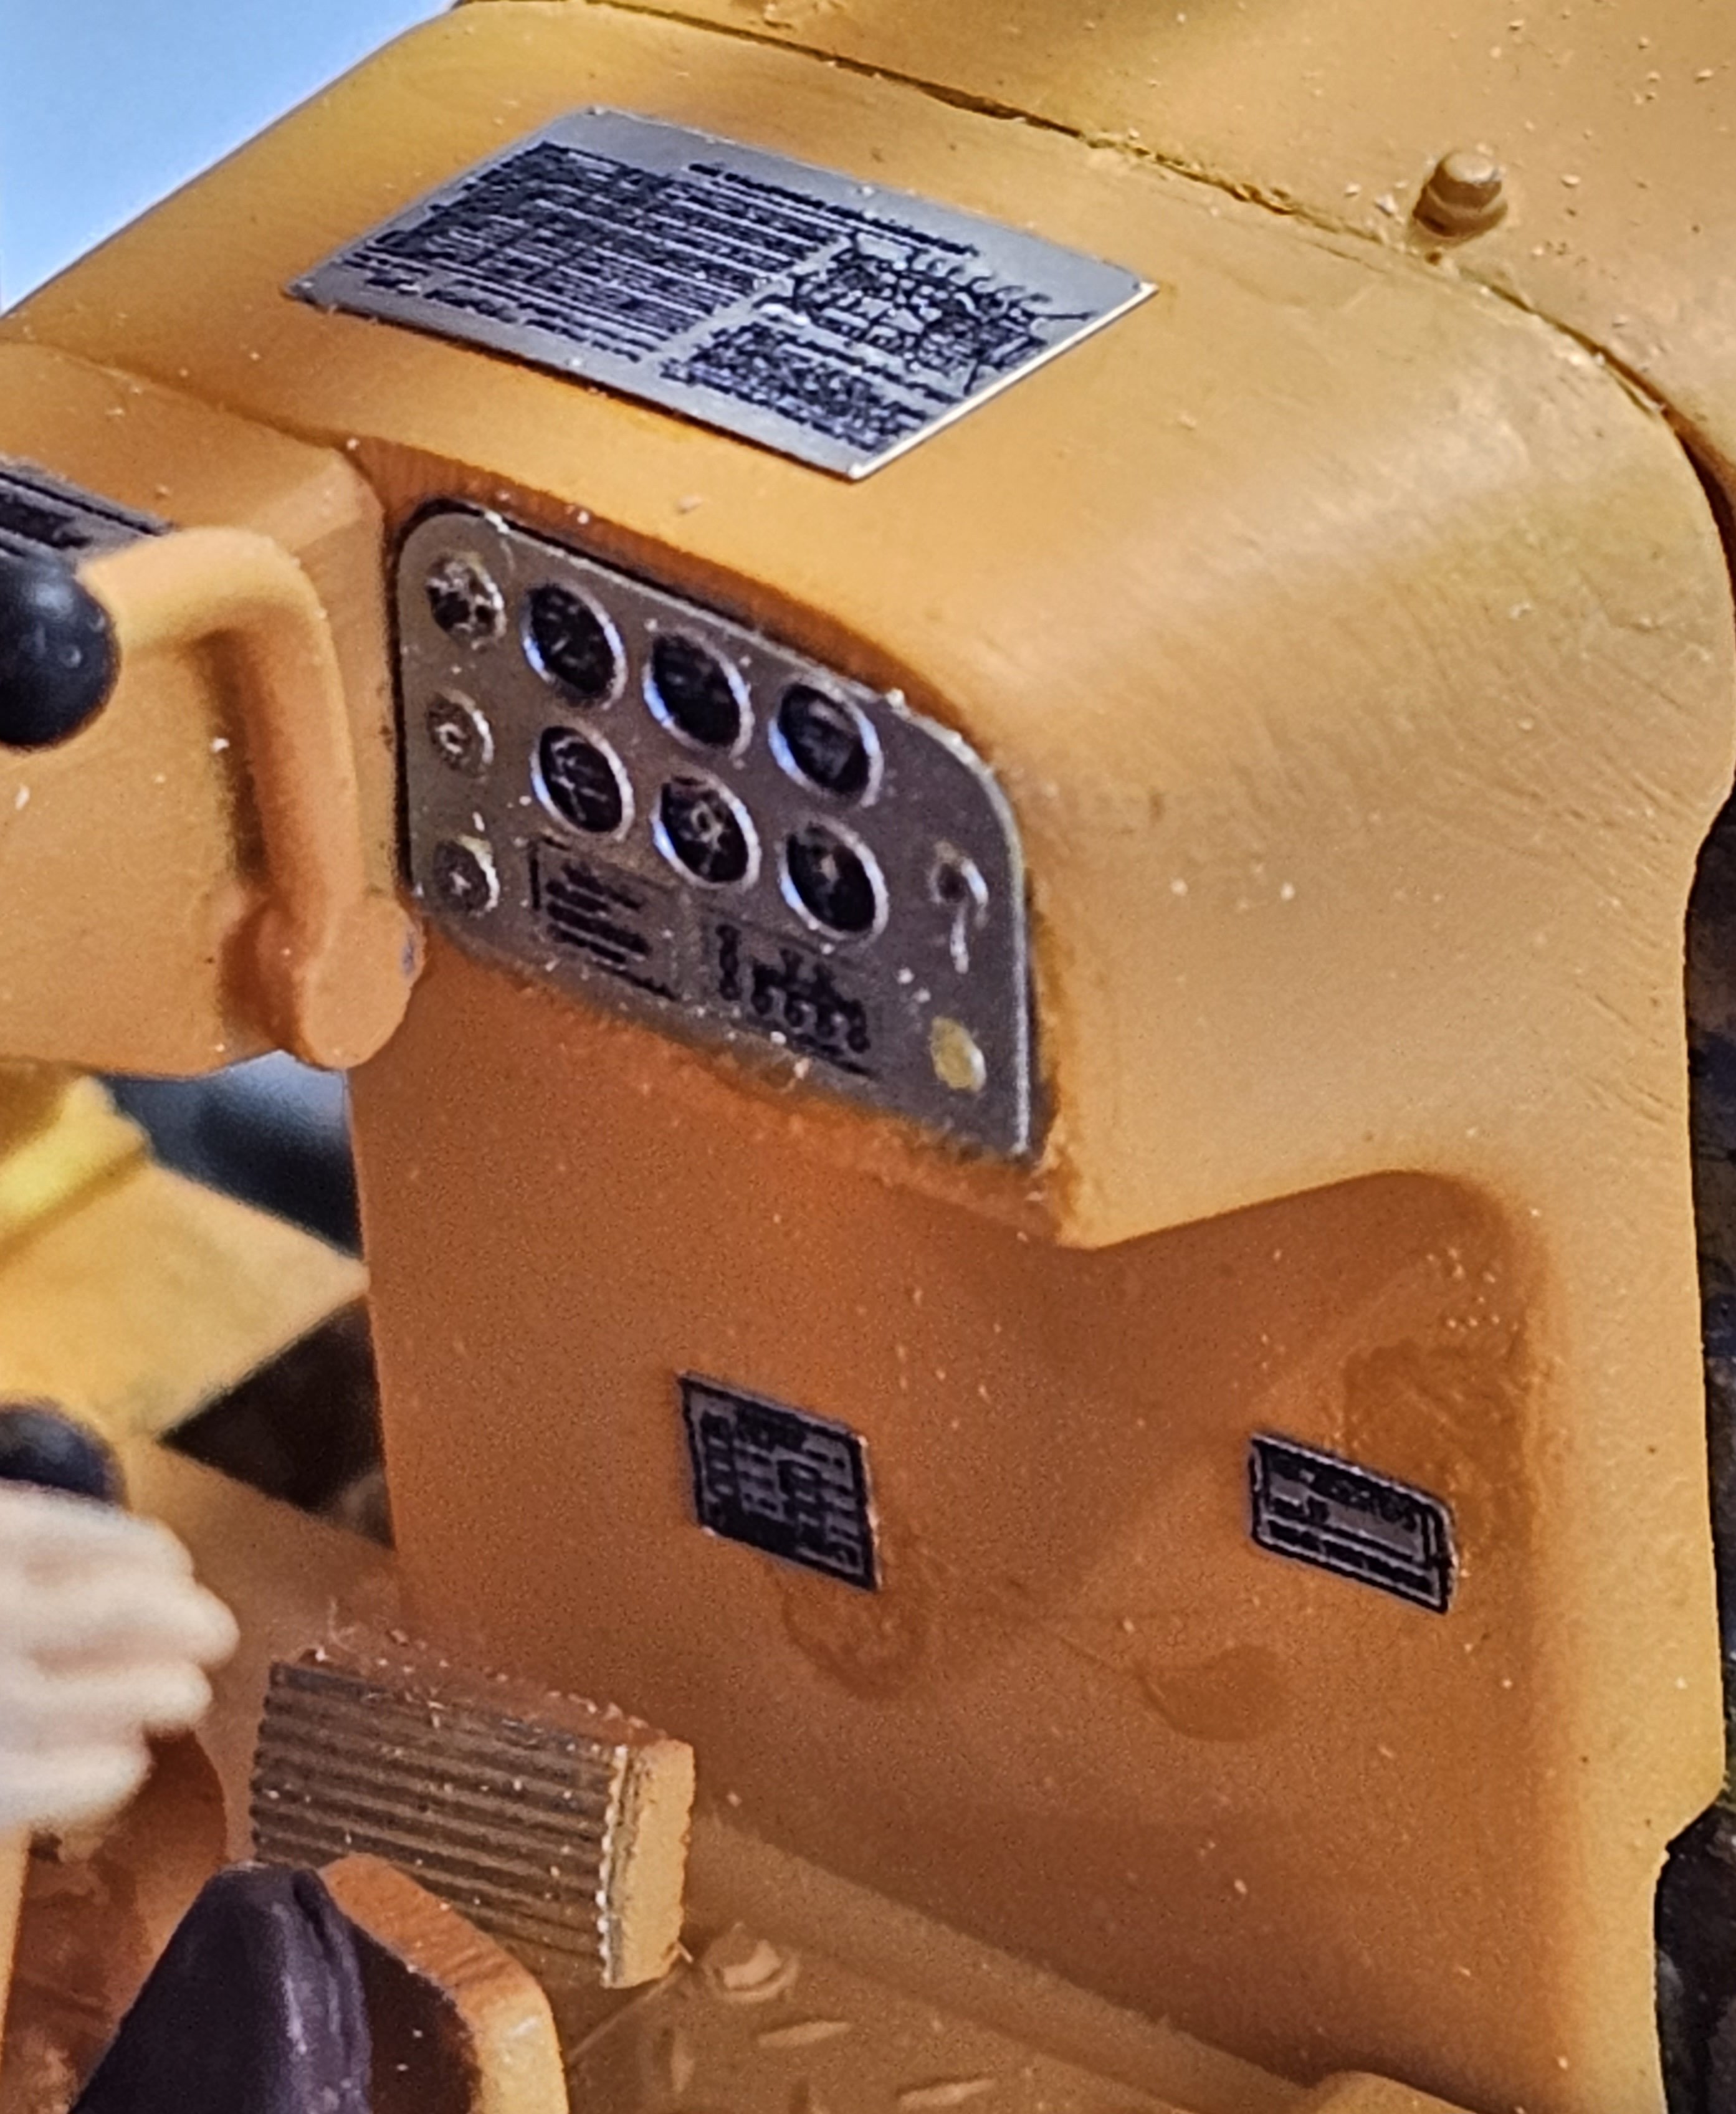
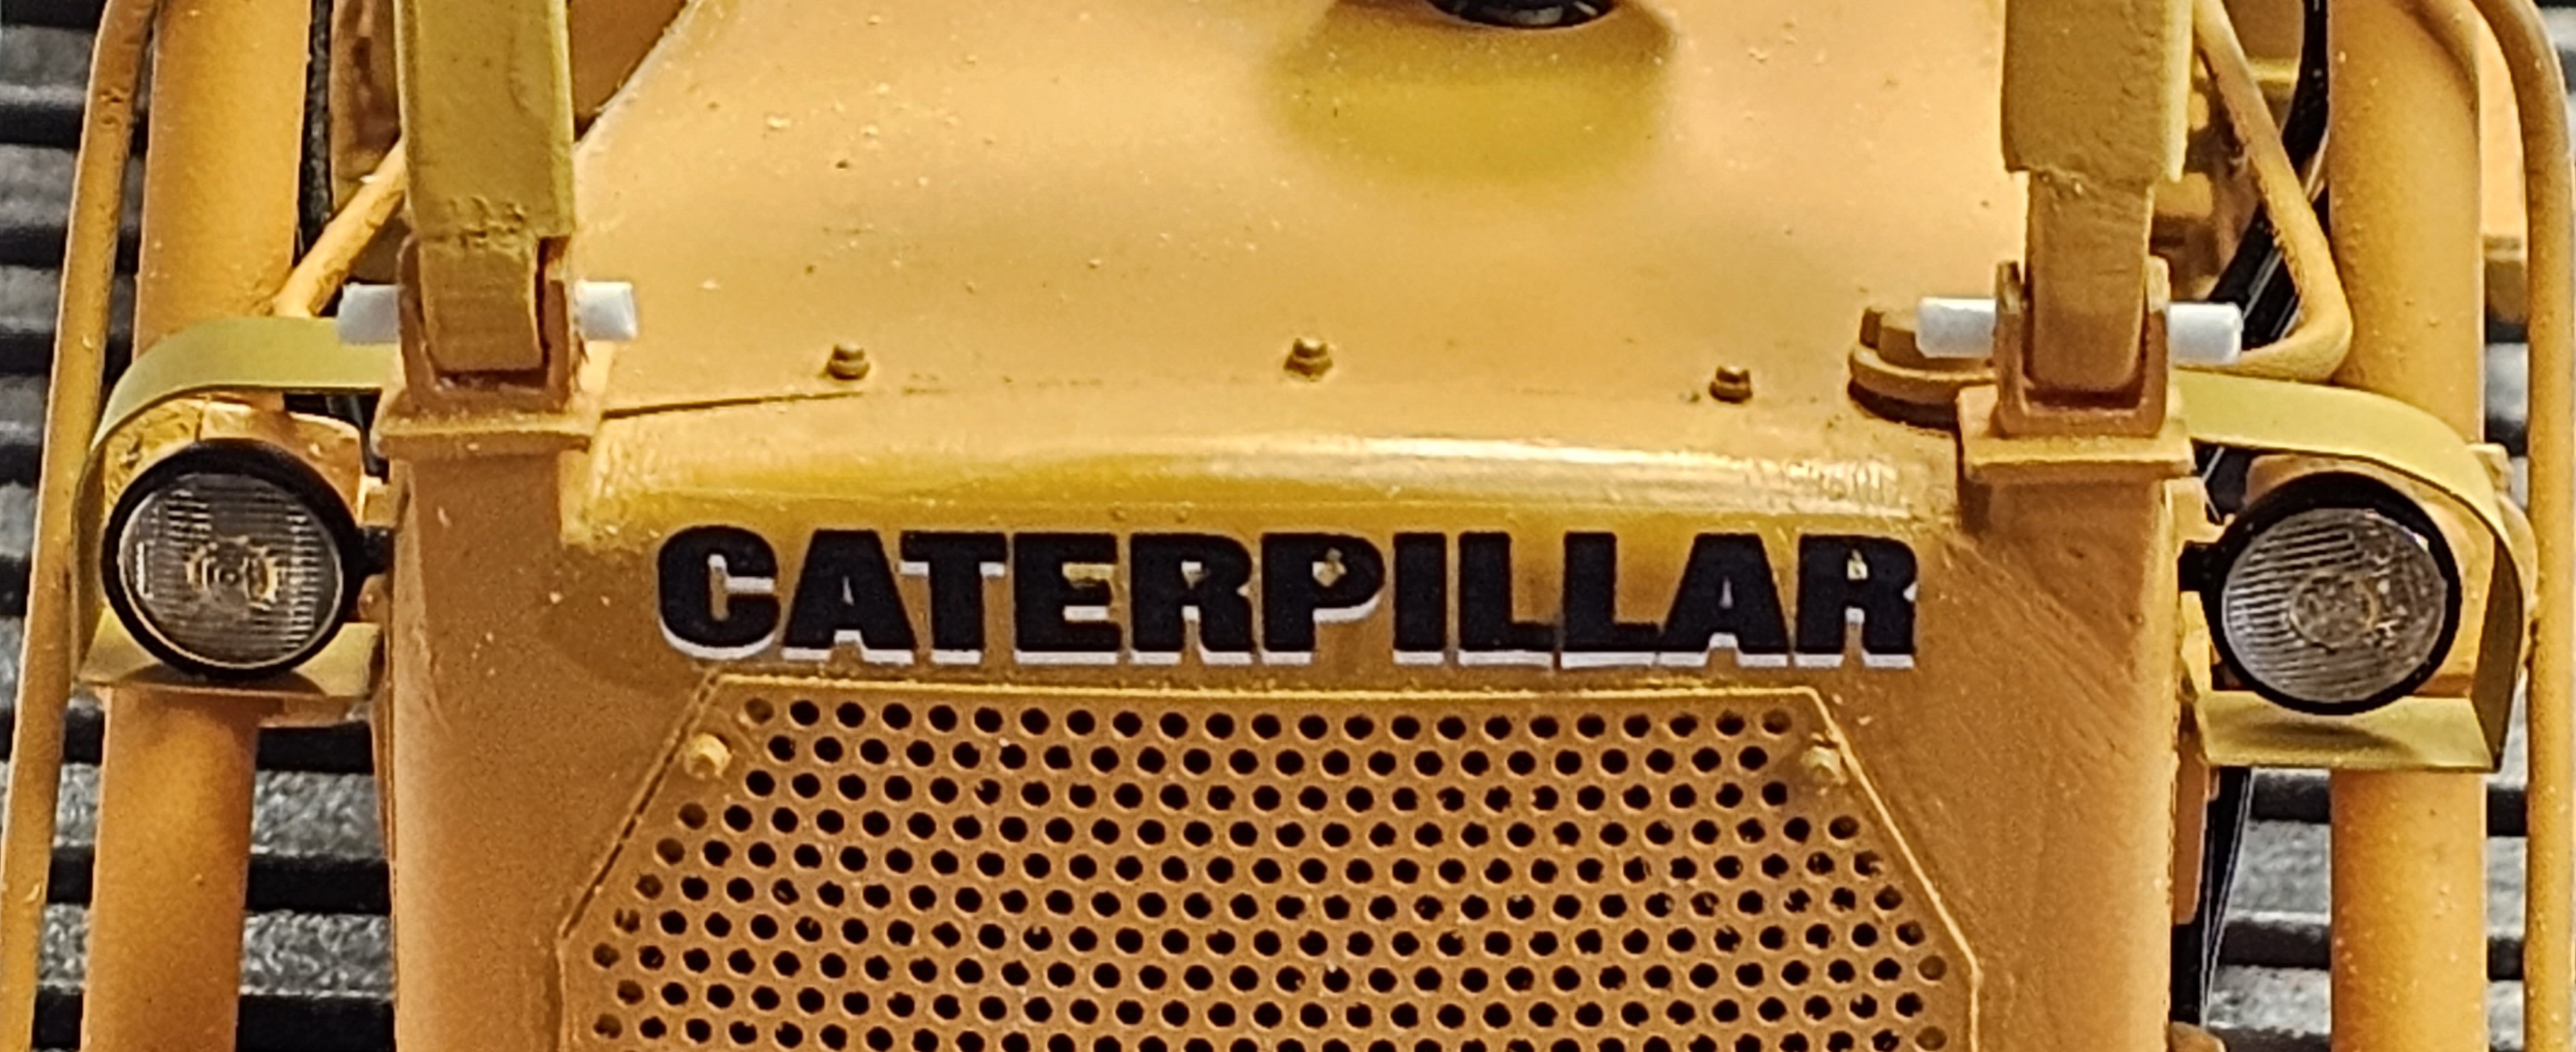
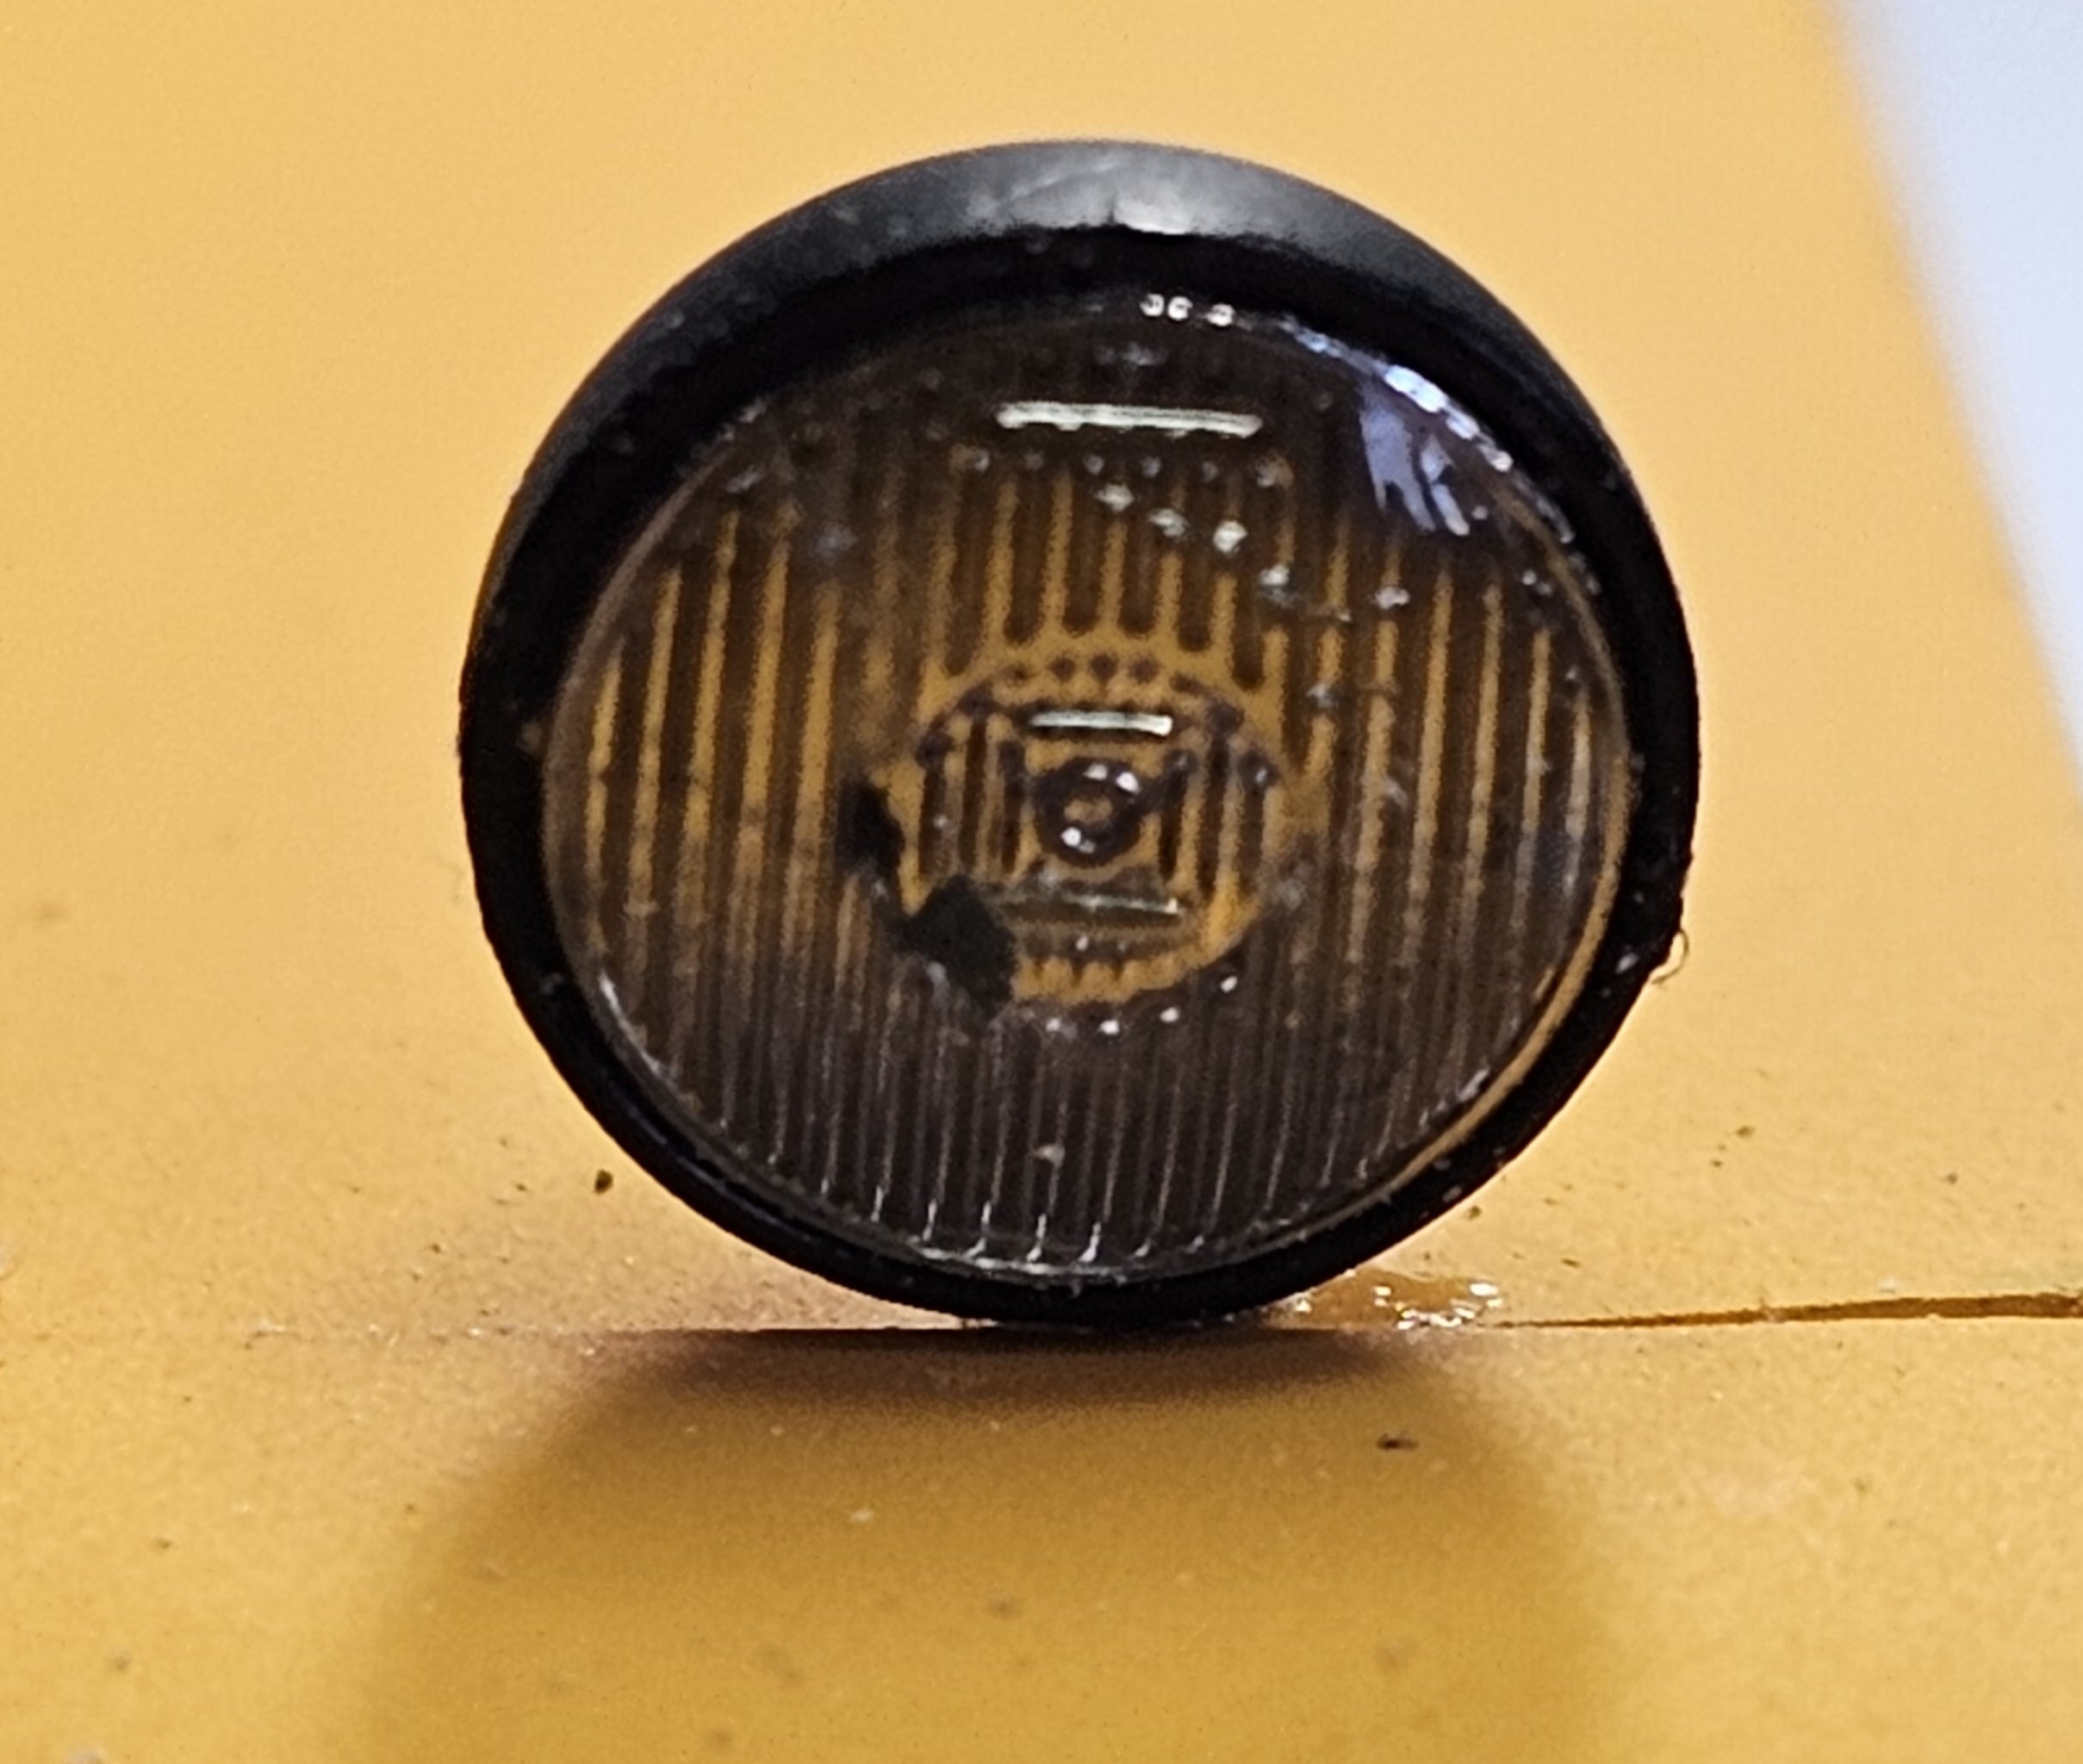
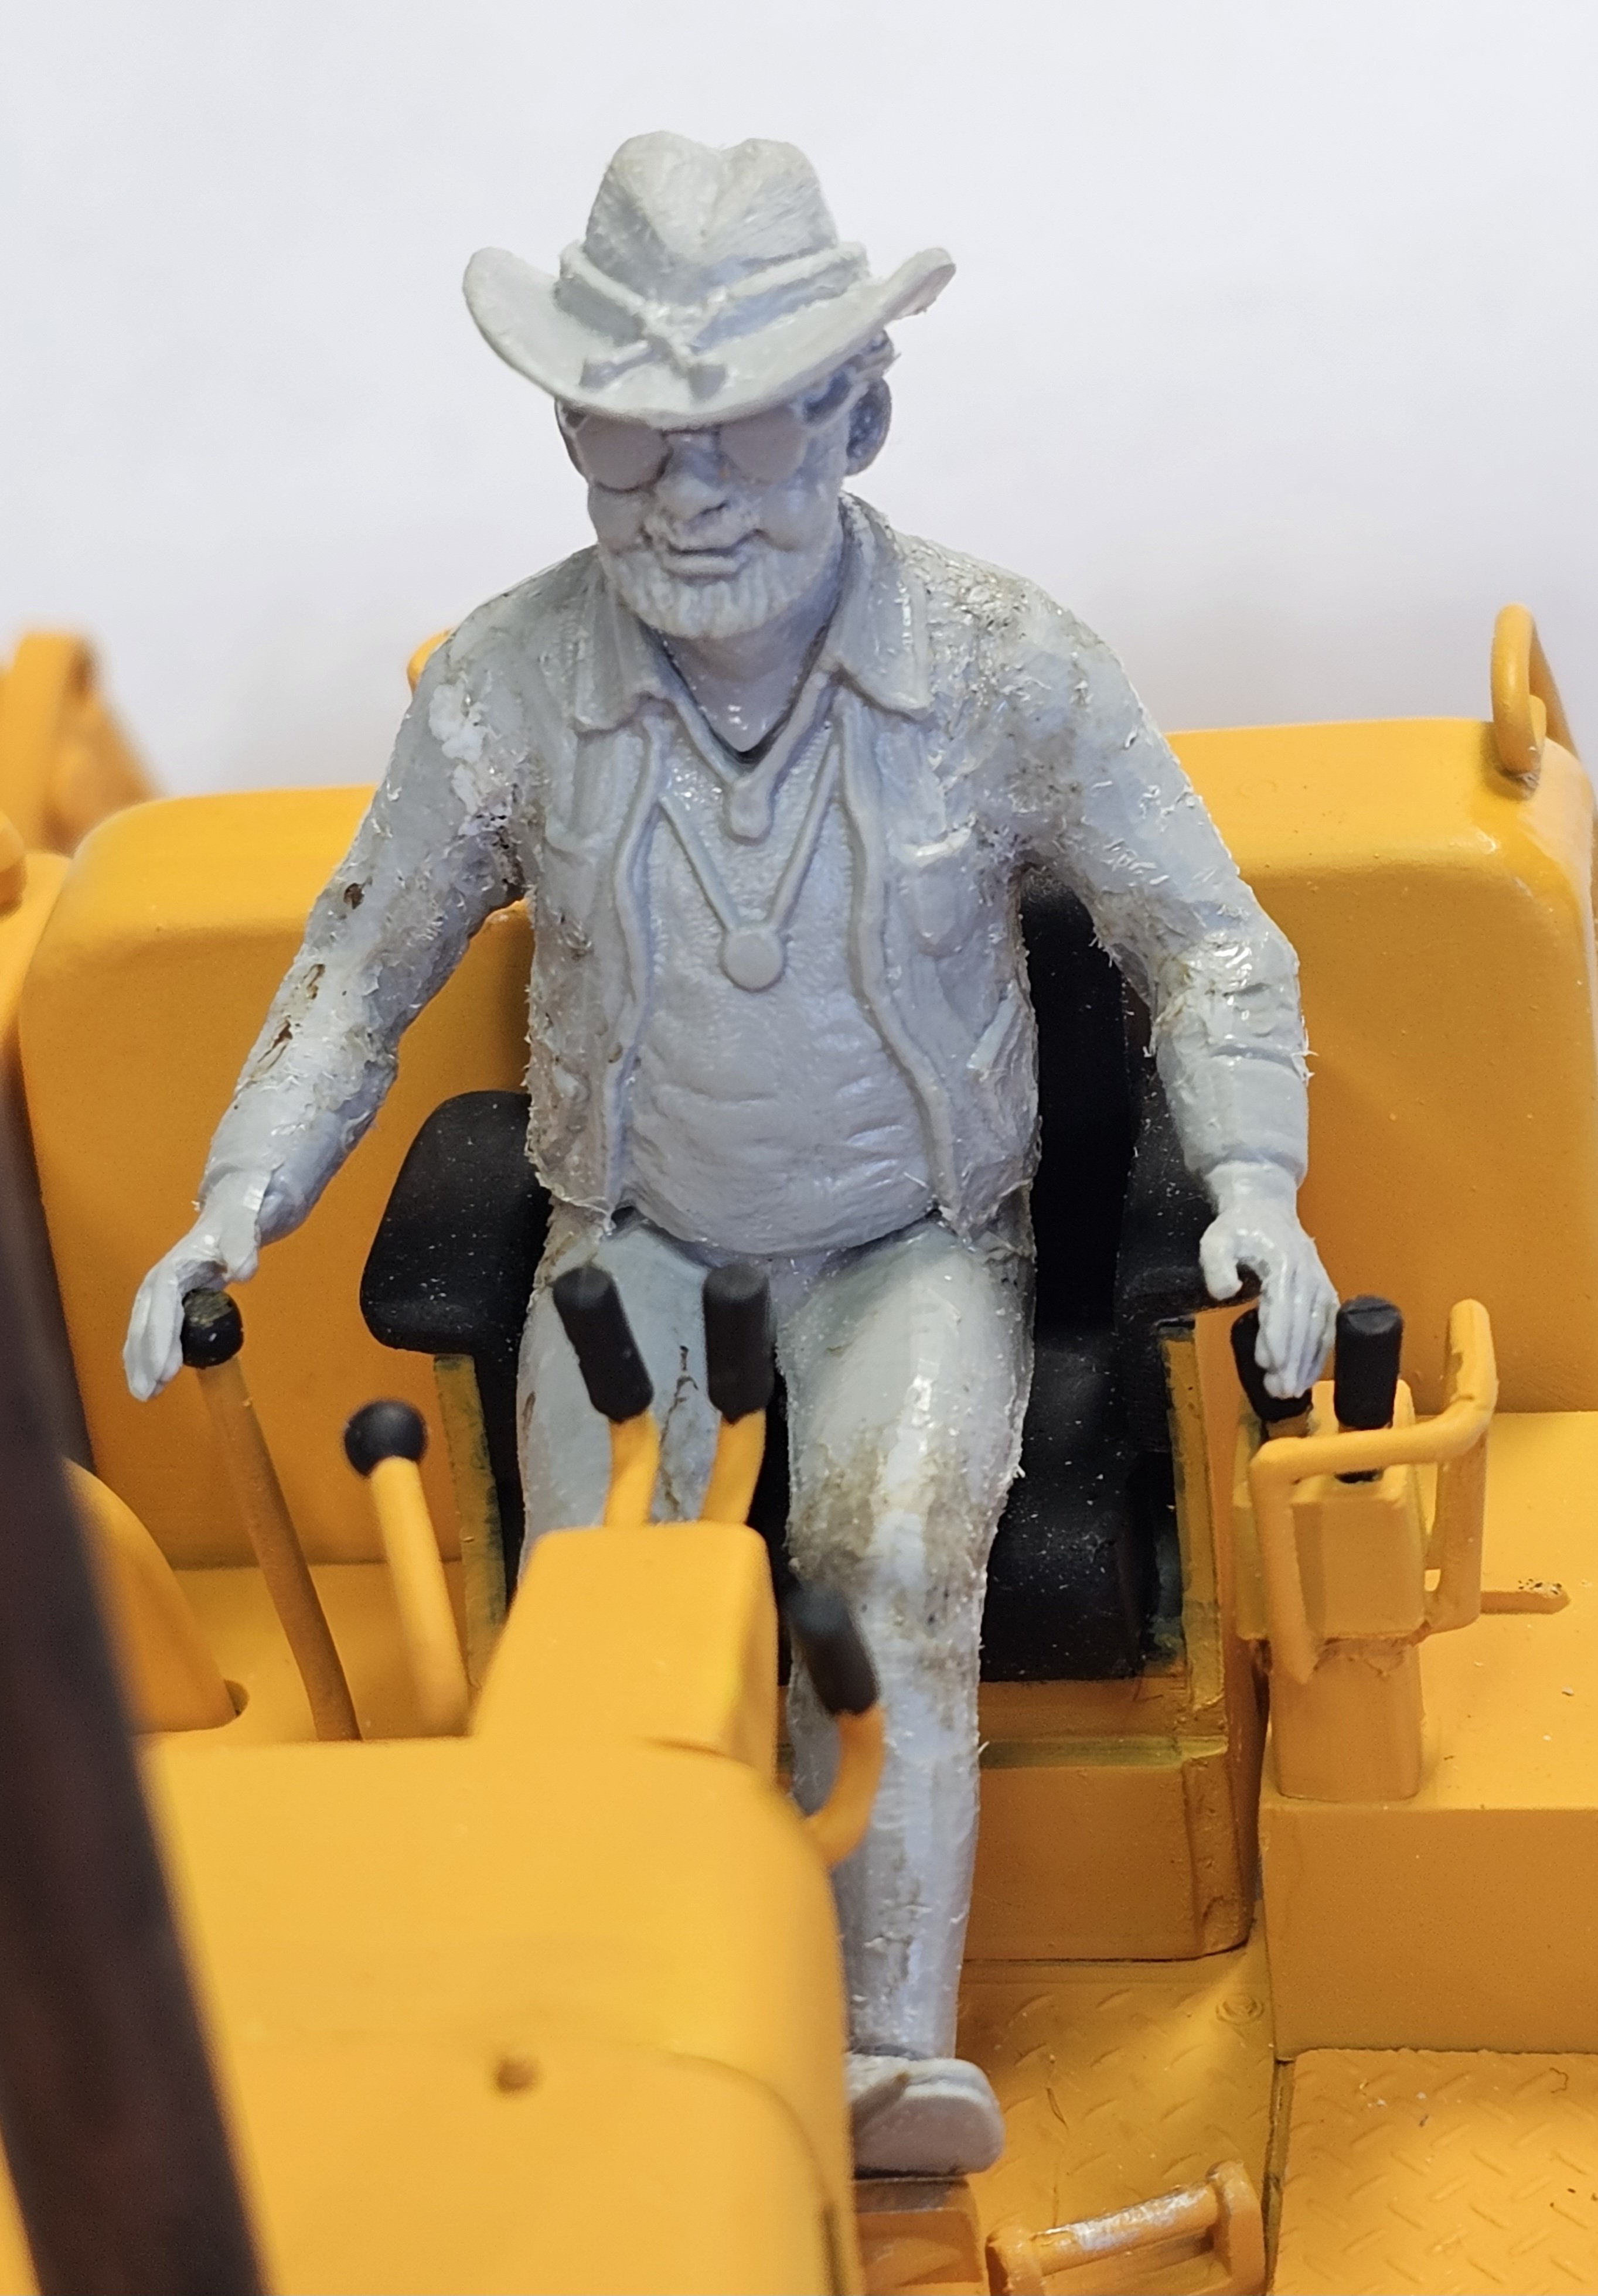
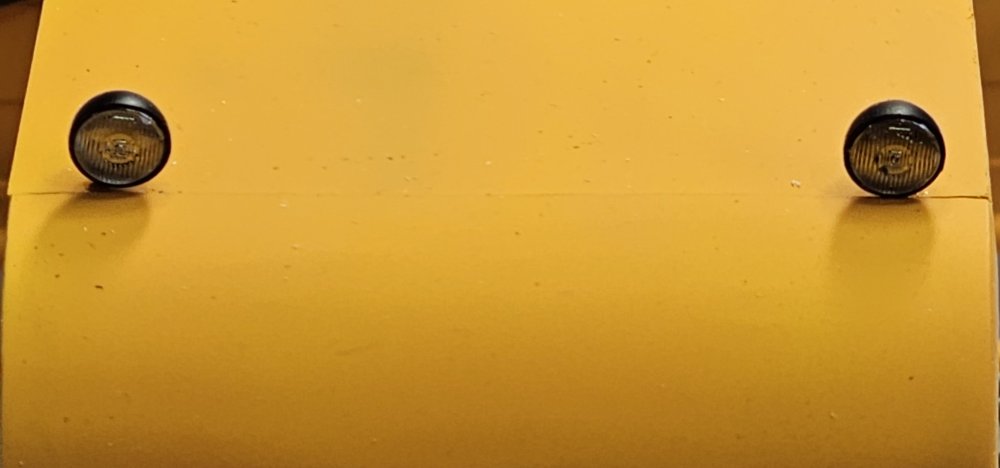
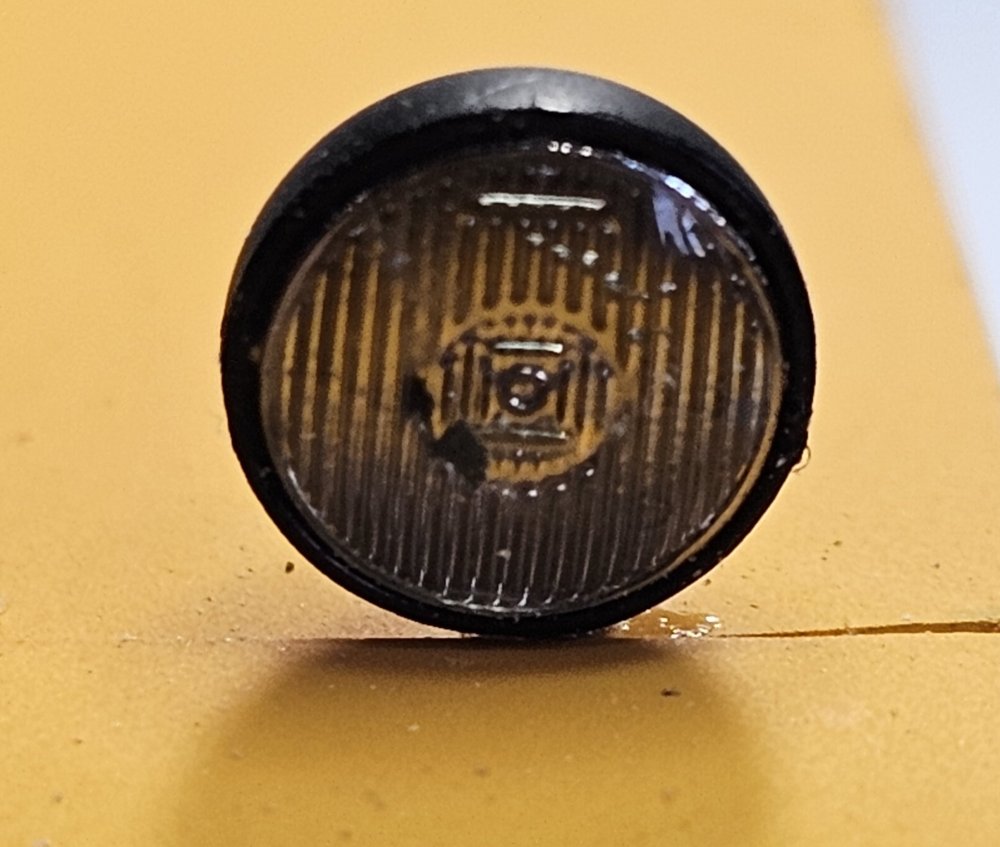
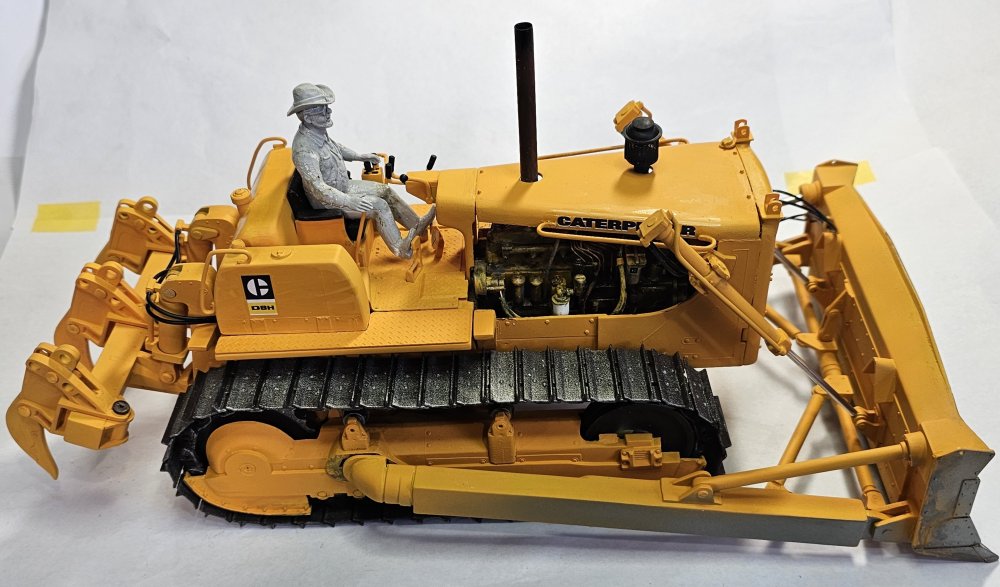
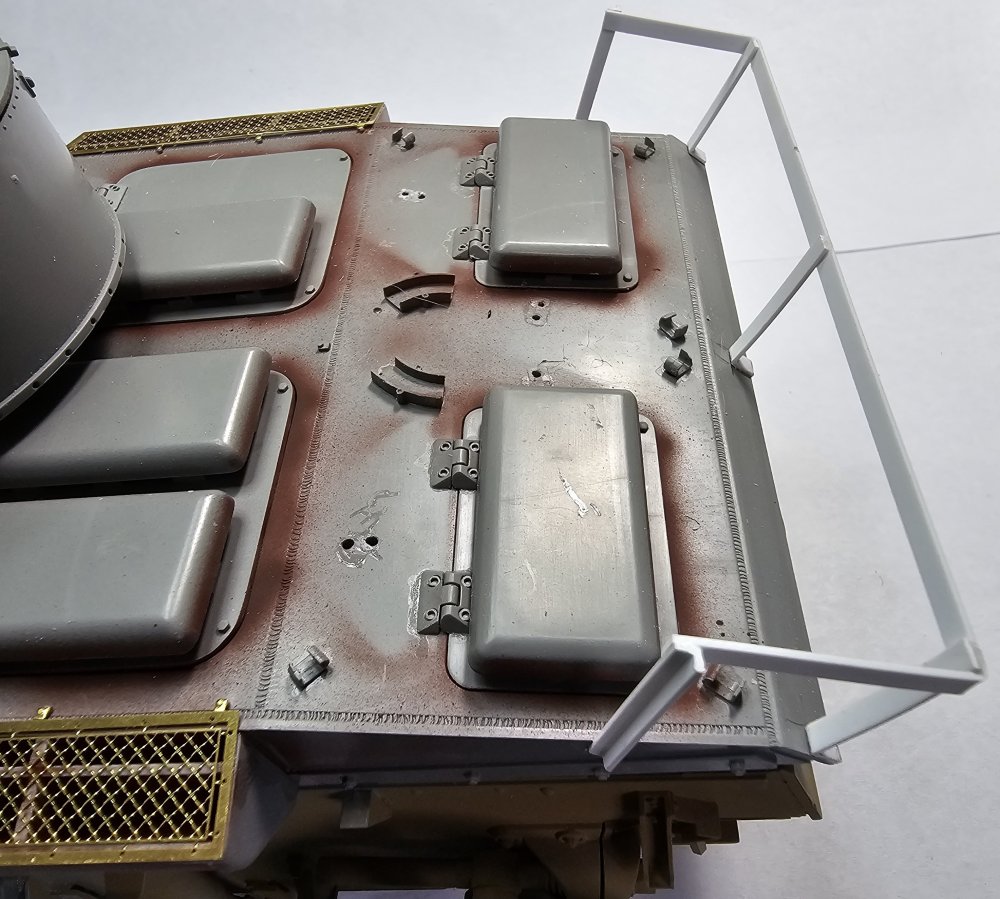
 Hey all OK, I believe that she's done, all except the rust and weathering. View showing the operator and some of the placards. Another View of the operator. View showing the placards. This View shows the lower placards and the dash panel. This view shows the front head lights and there guards. View of the rear lights. Close up View of the lights. Well that's it for now be back with more soon. Ron G


-
Thanks everyone
-
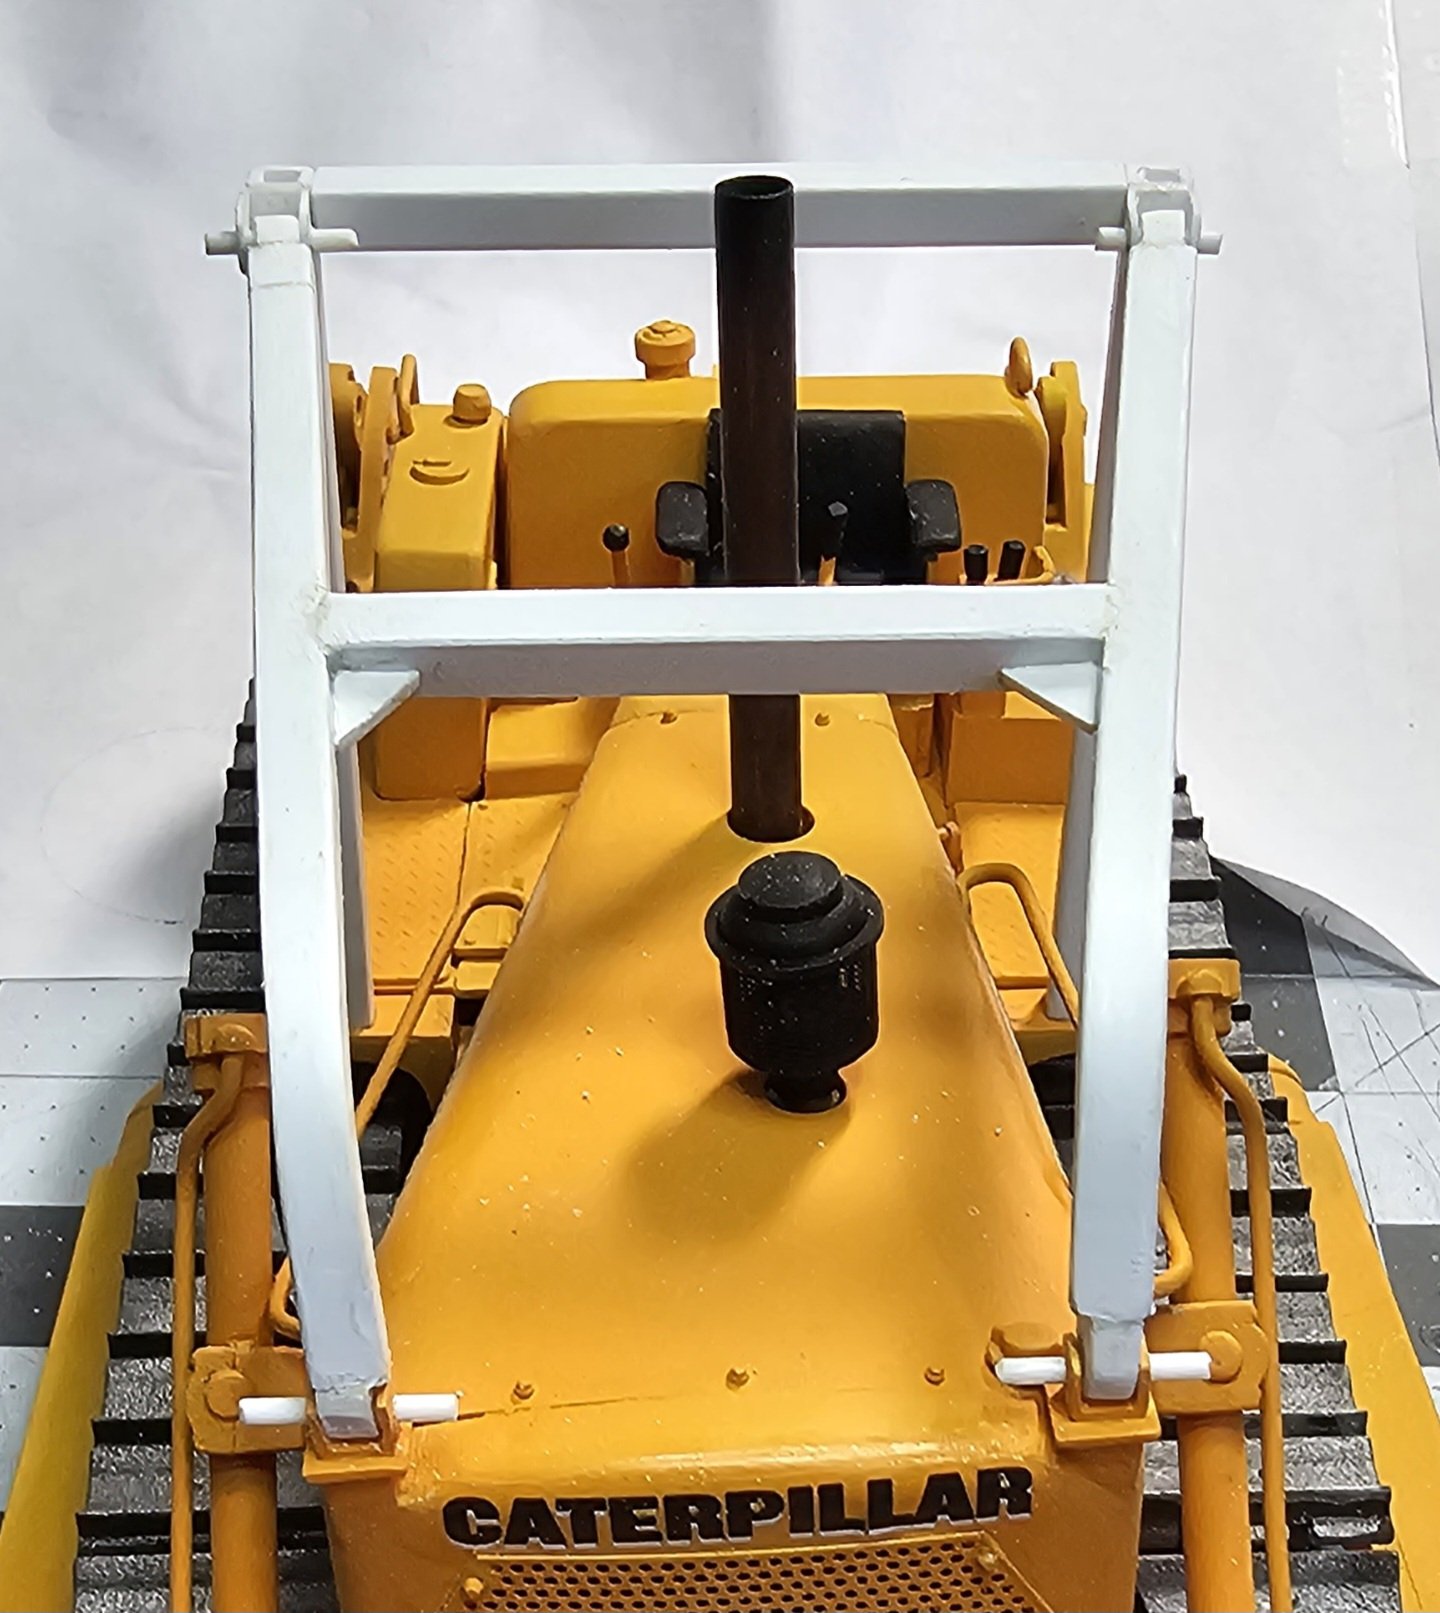
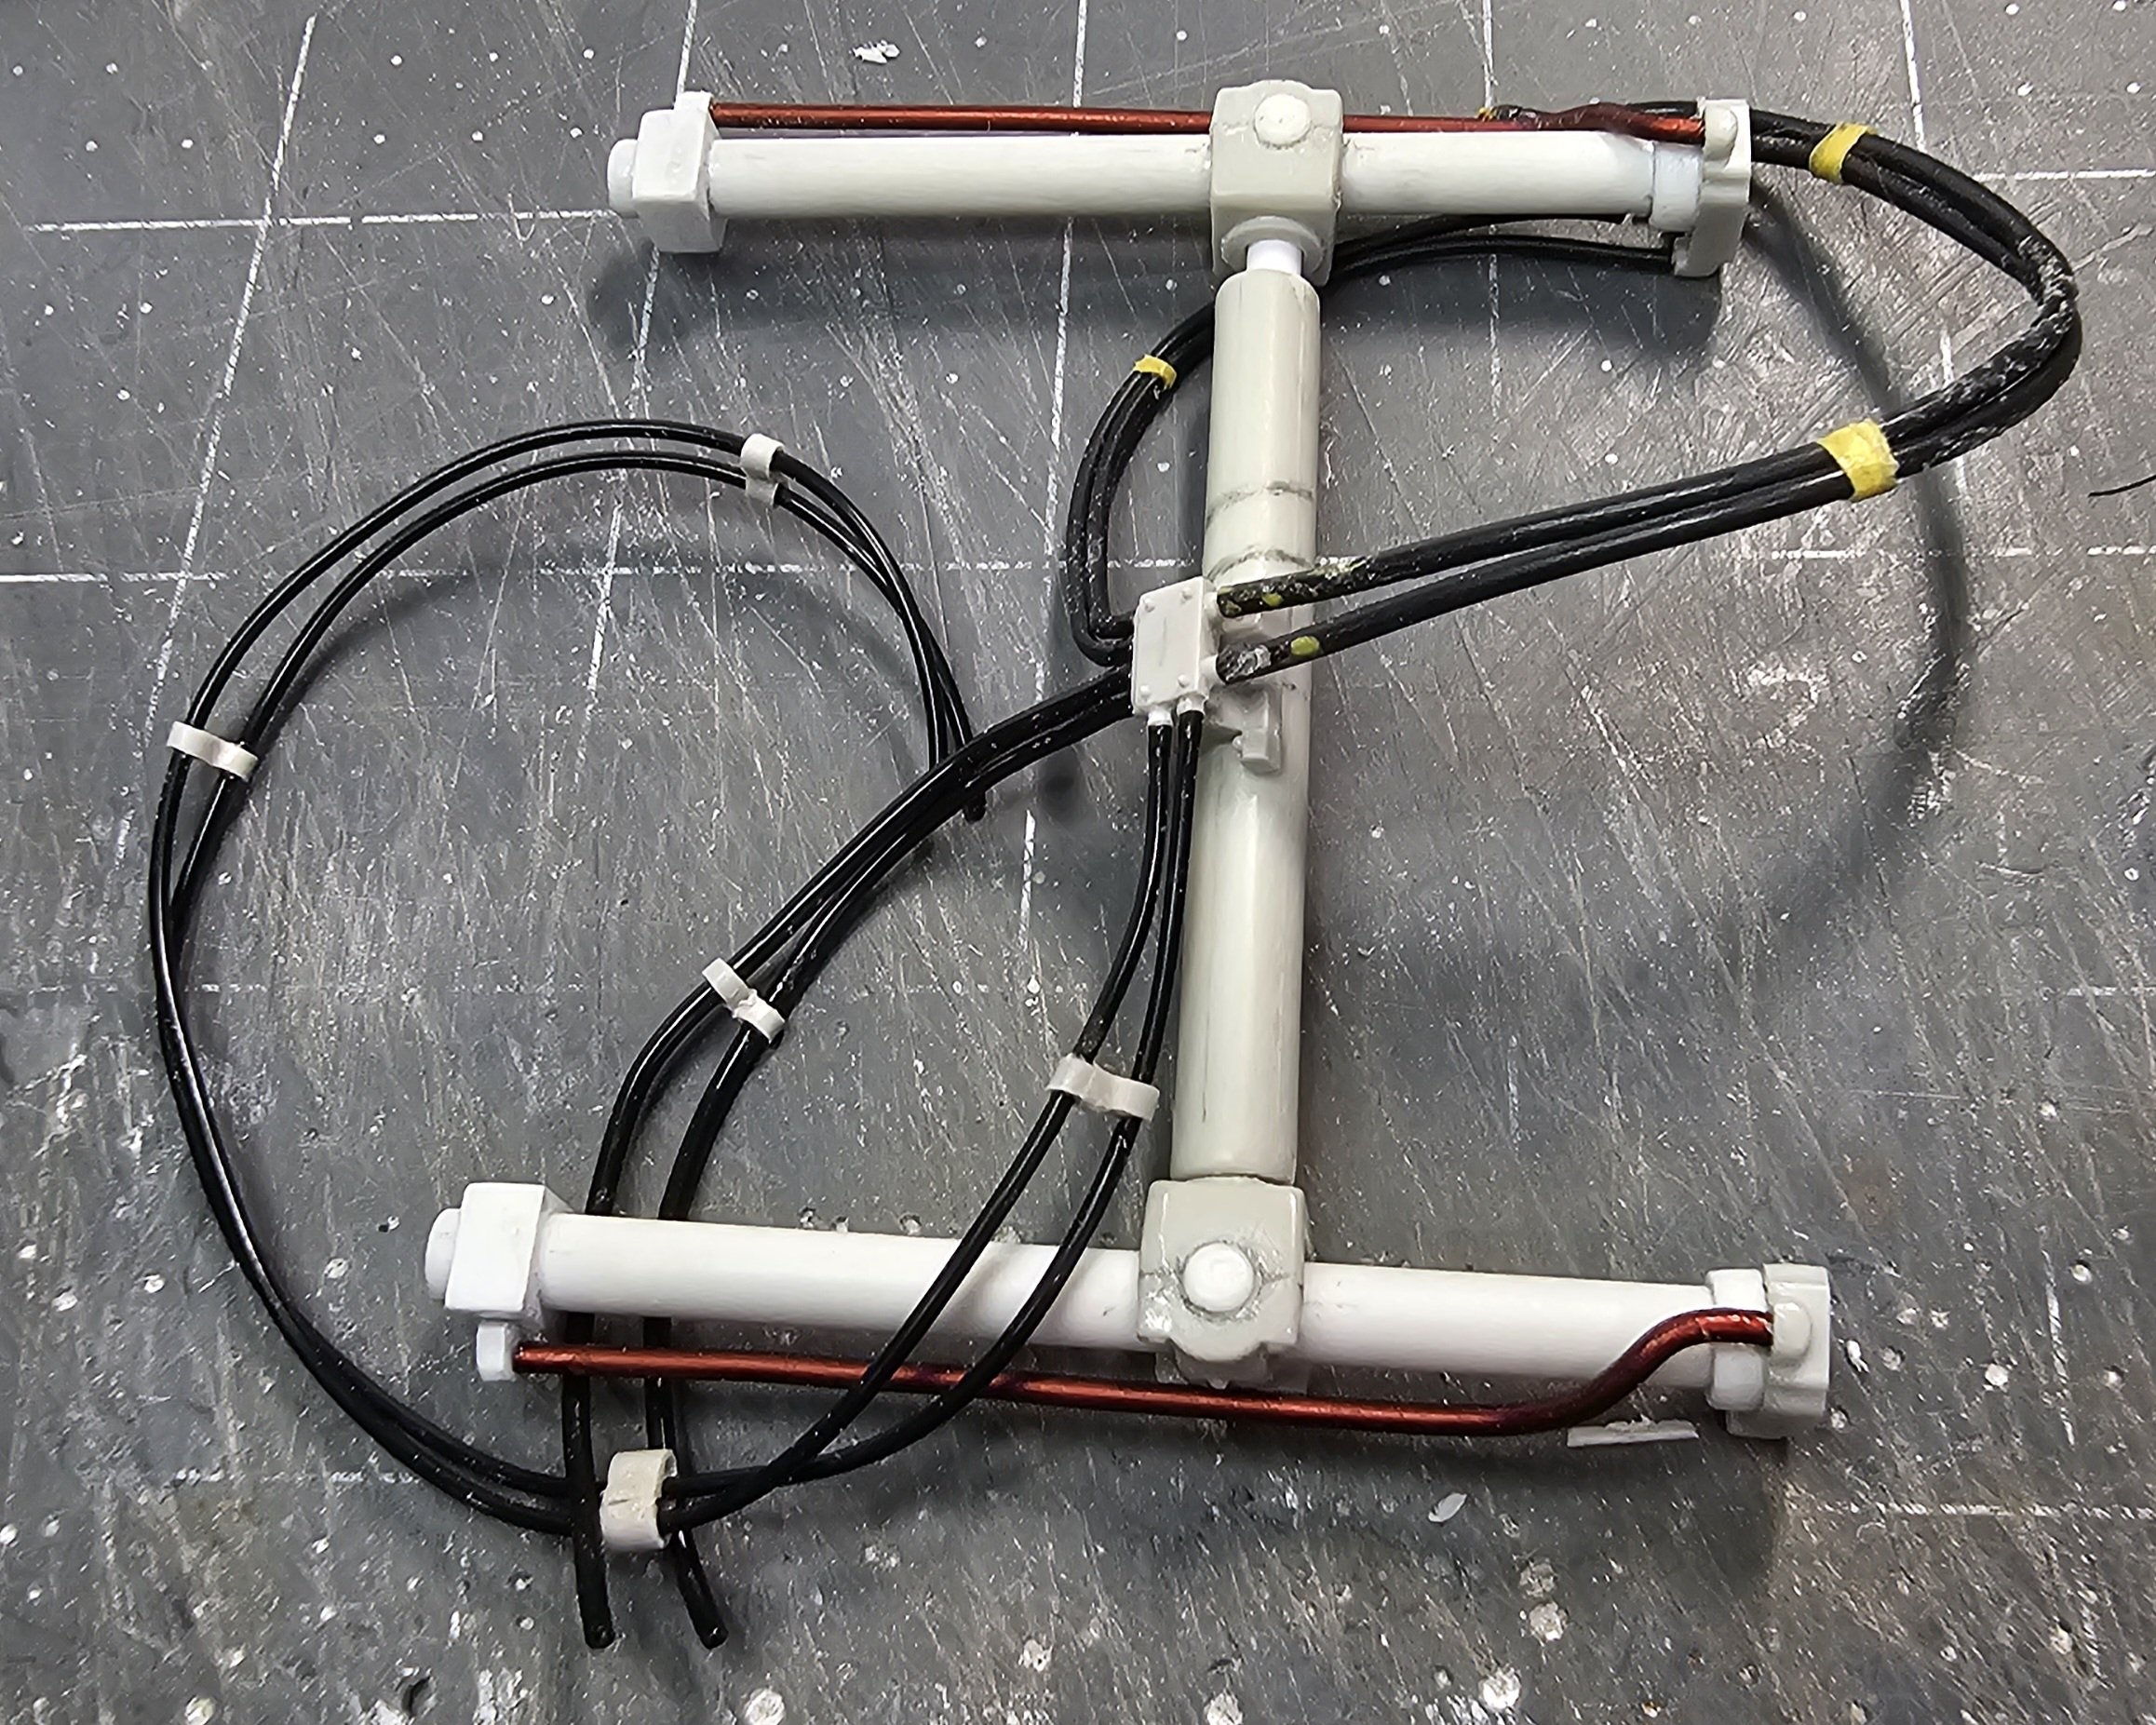
Hey all Ok, the R.O.P.S. is finished and painted. Left side view. Rear view. I got the screen off of the internet. It's stainless steel wire about 0.04" dia. & 1/8th inch spacing. Right side view. Front view. The brass head light shields are from ST Supply in Canada. I have there head lights and rear lights. I need to add them and wire them. Ron G


-
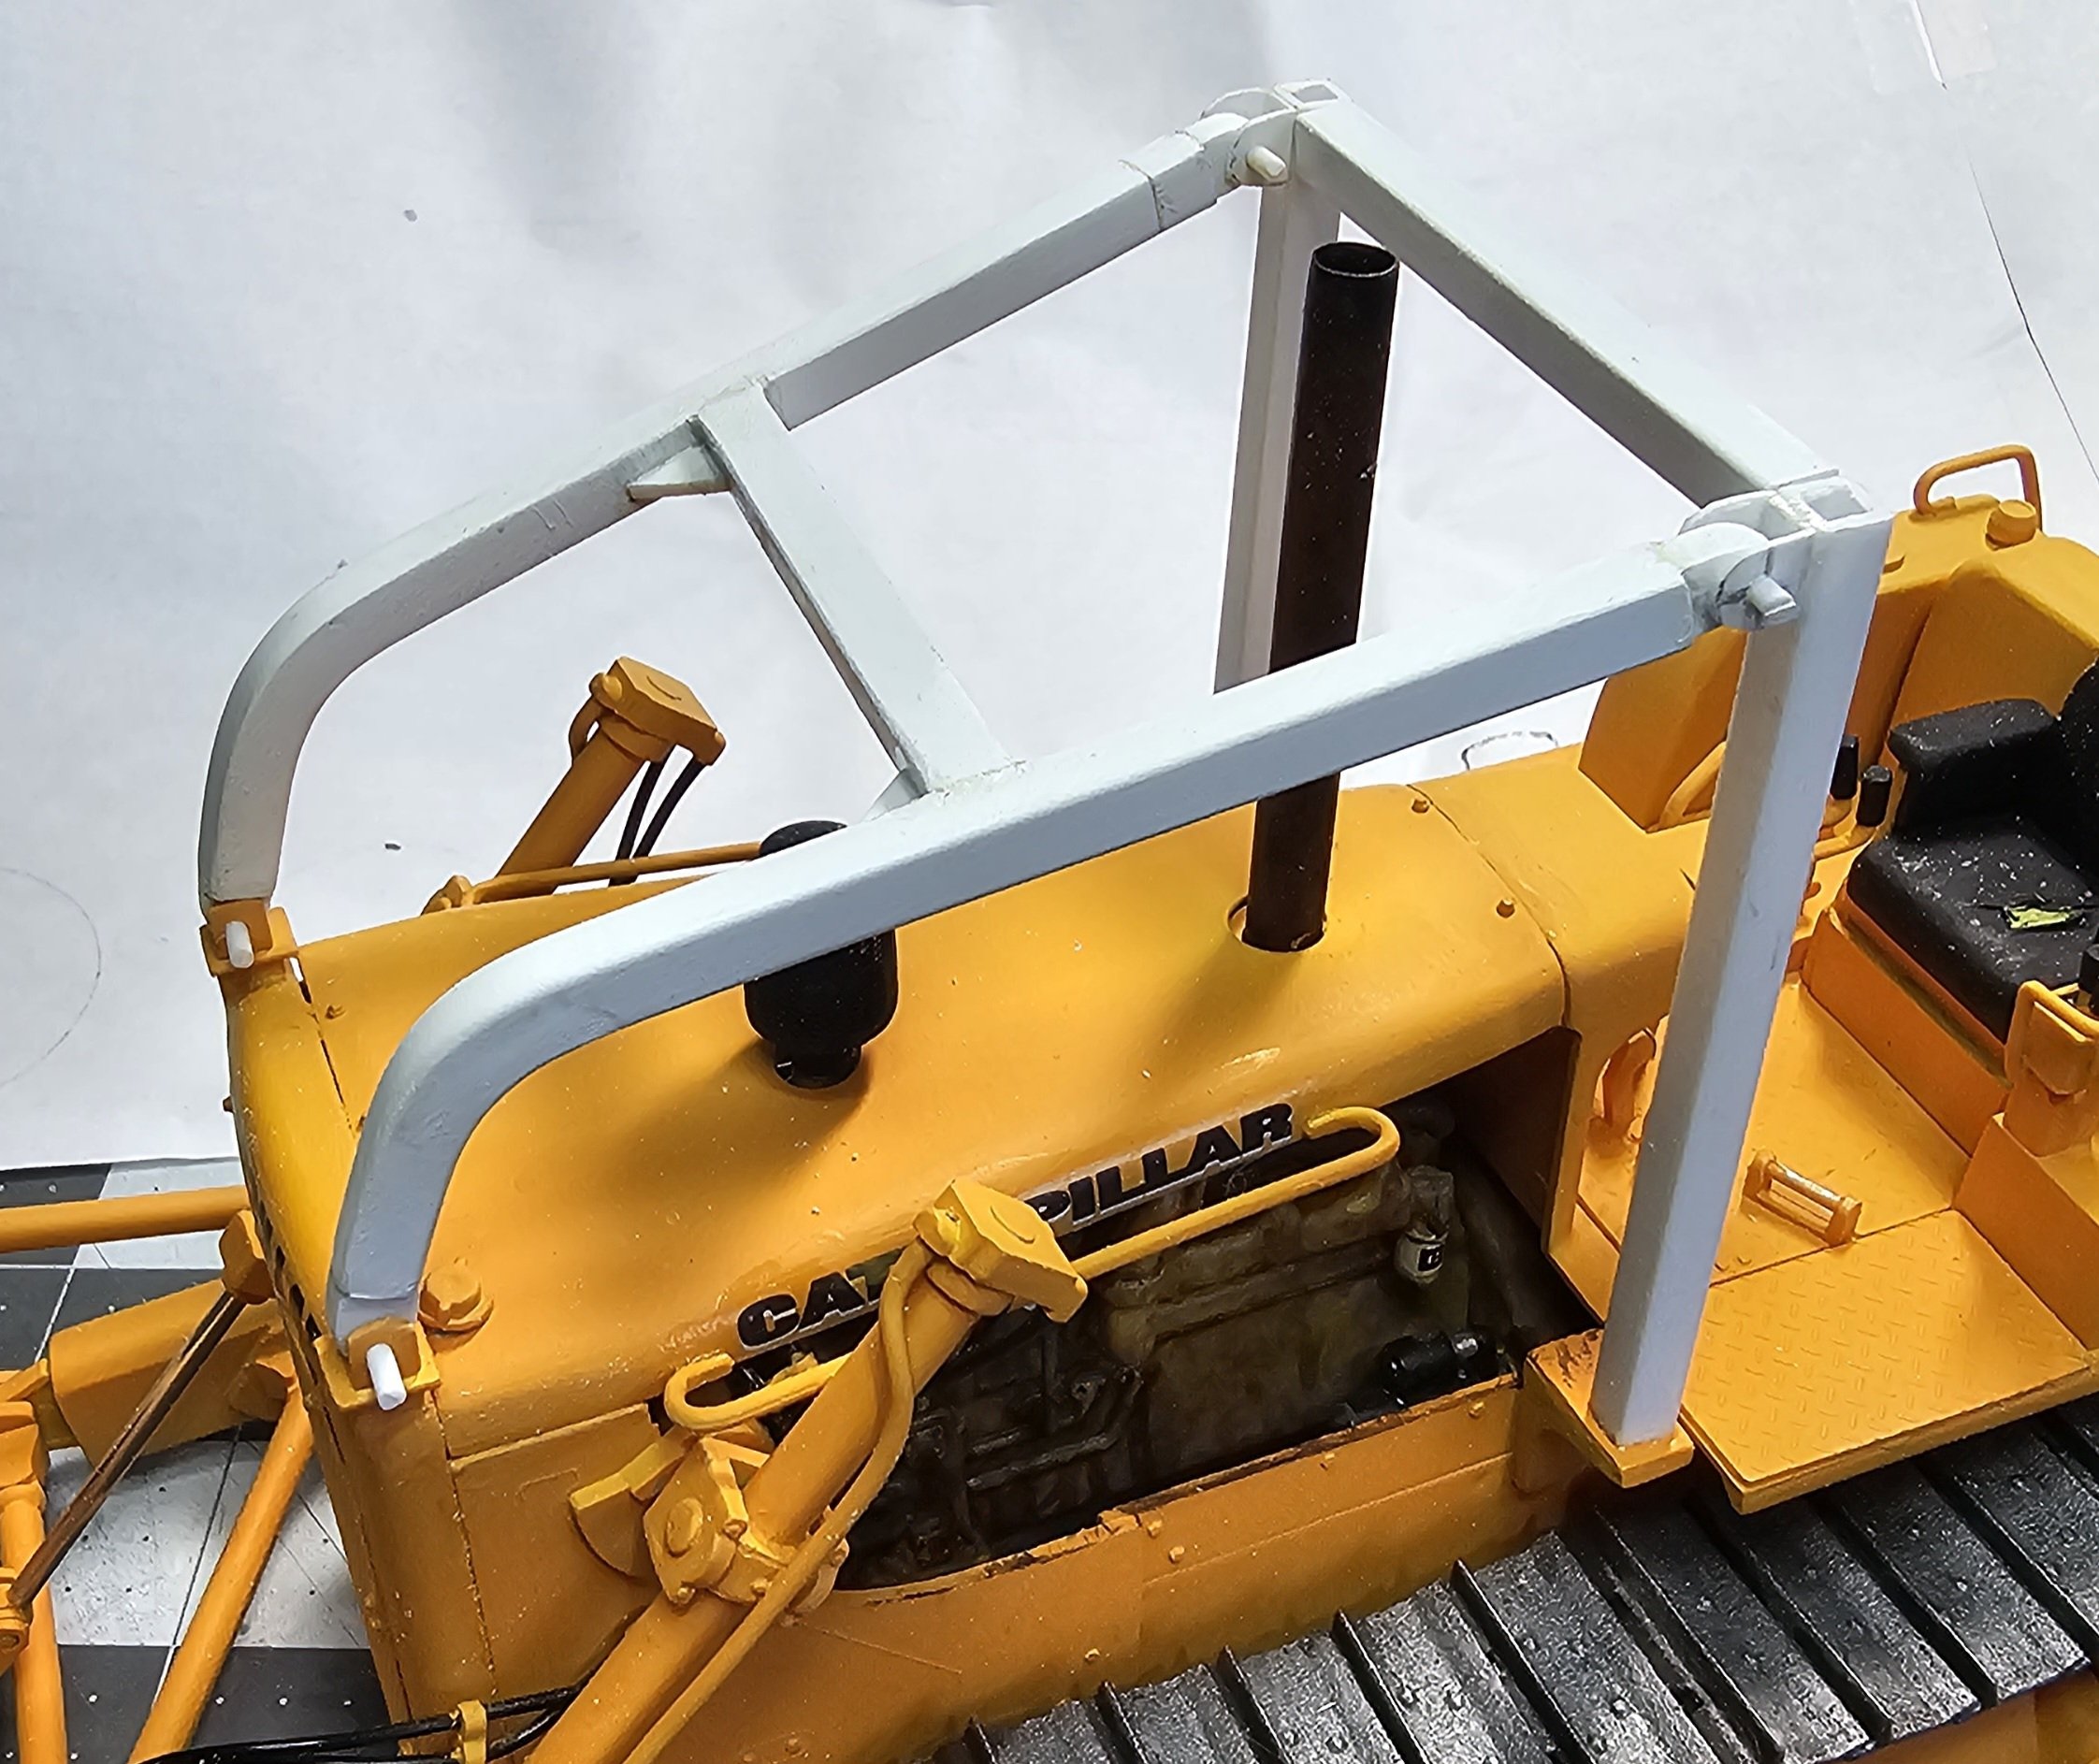
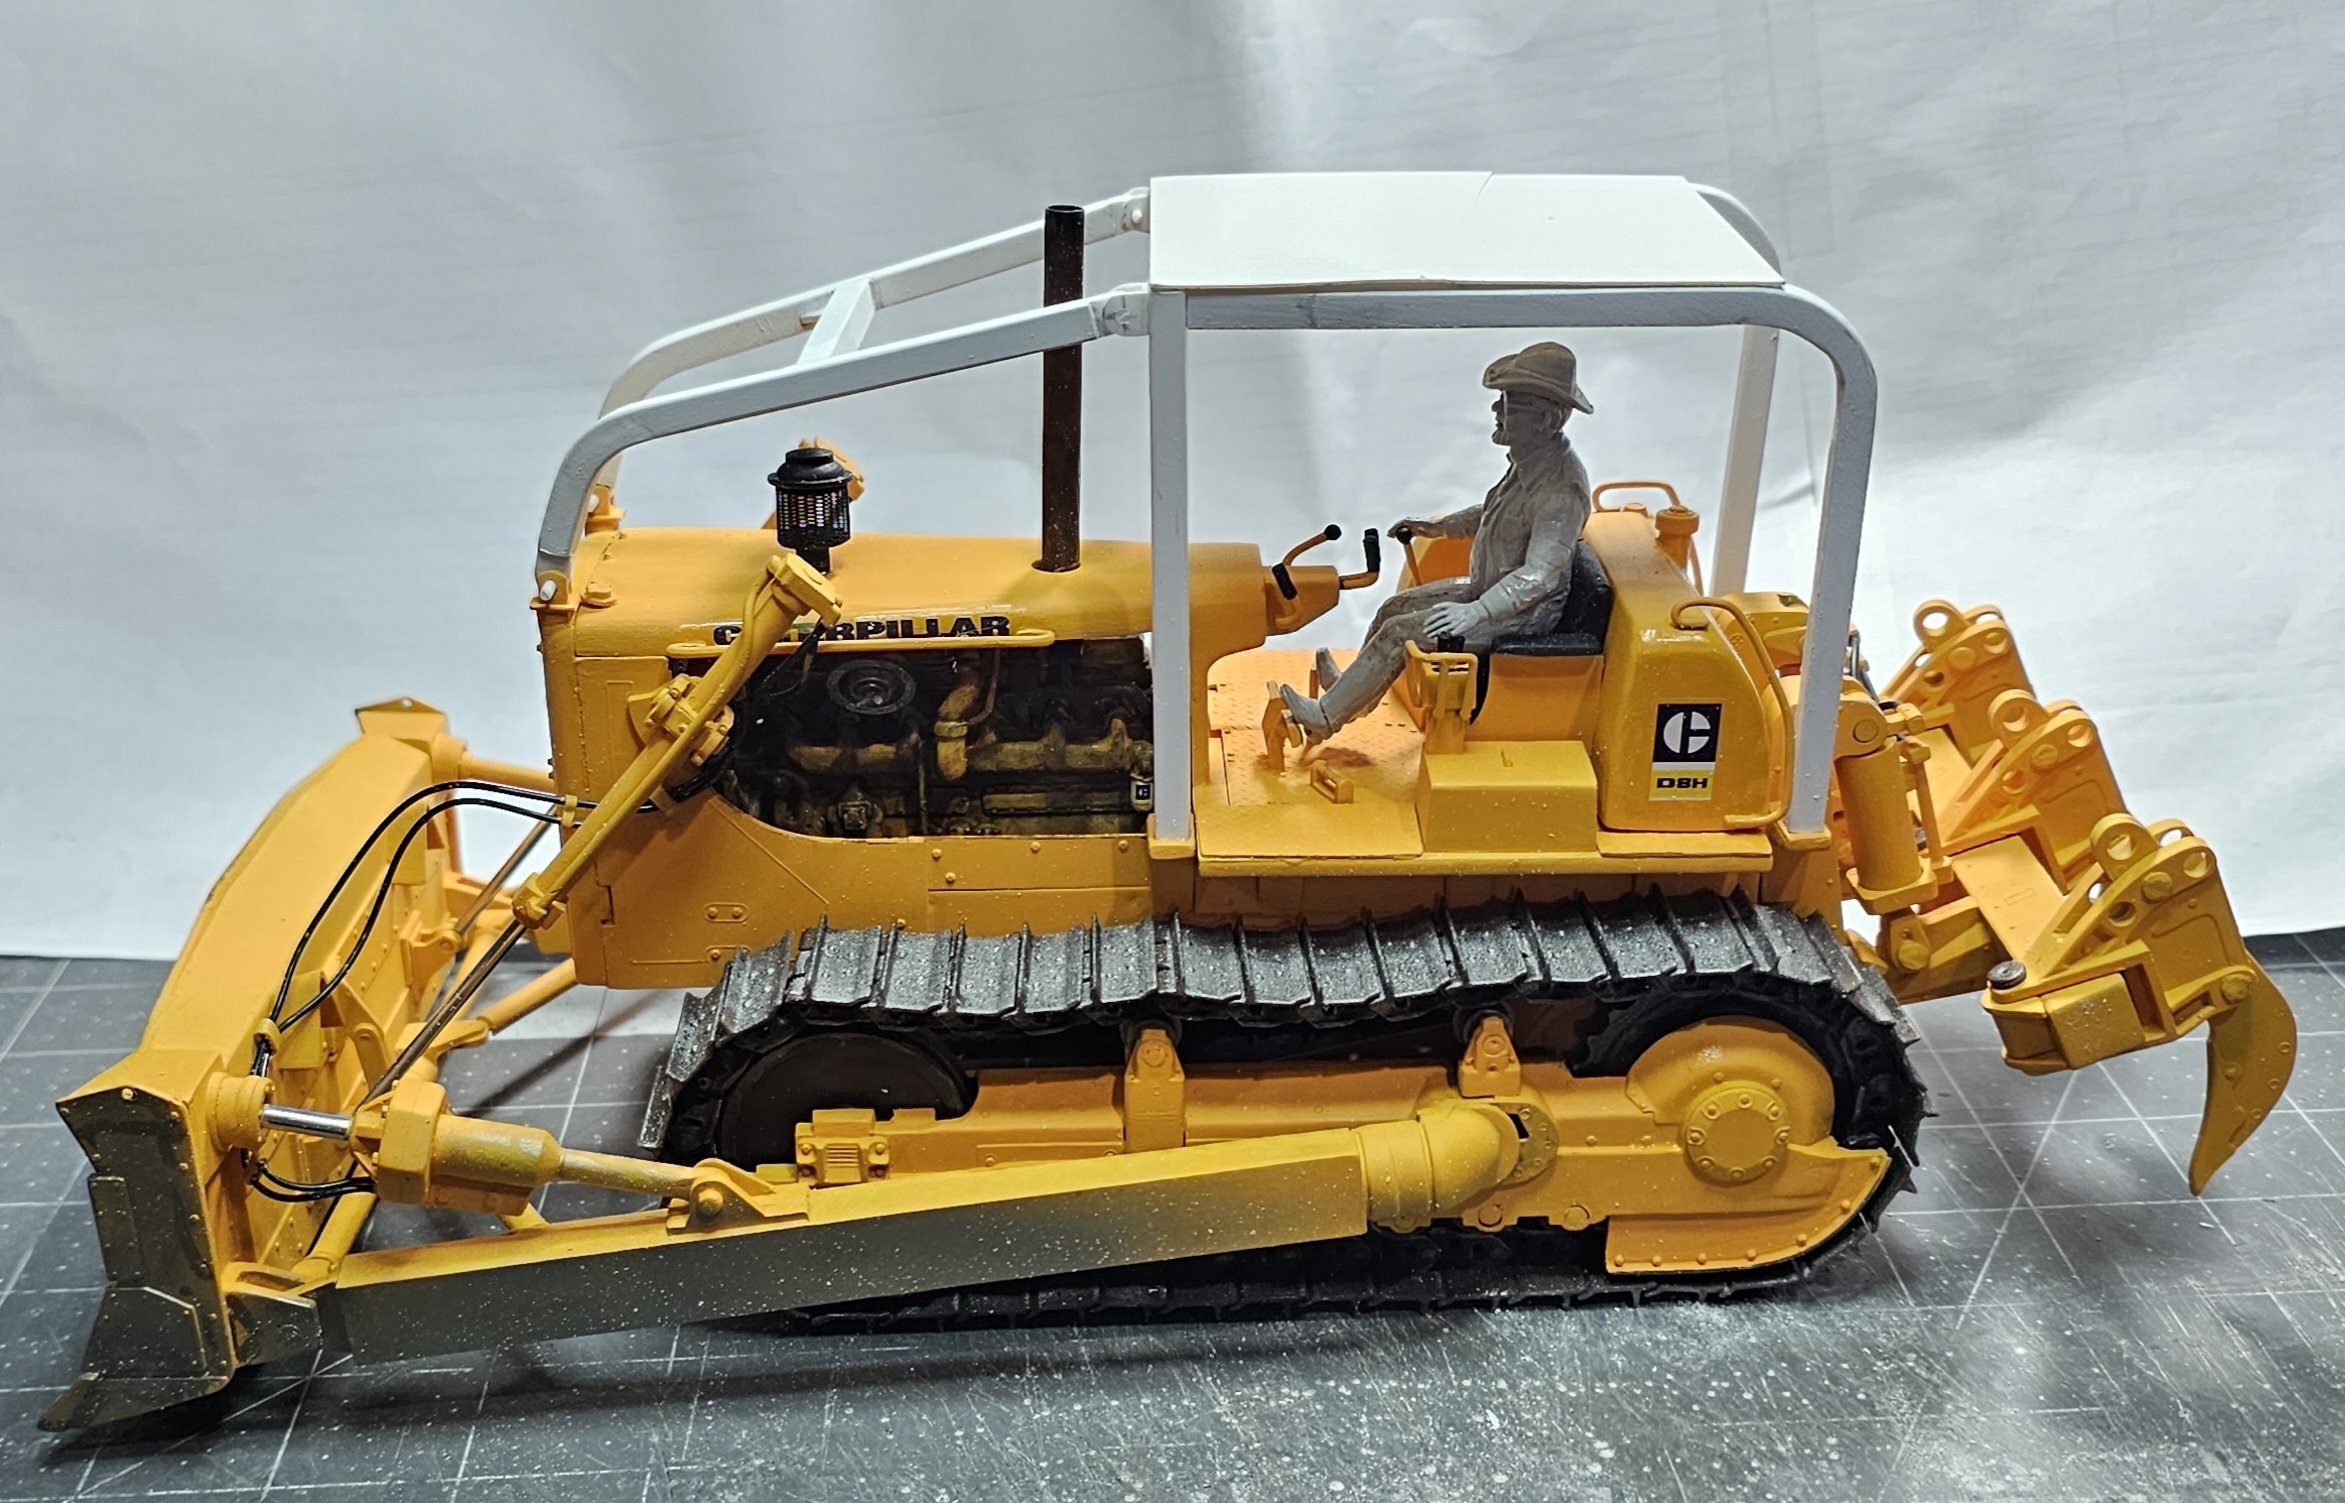
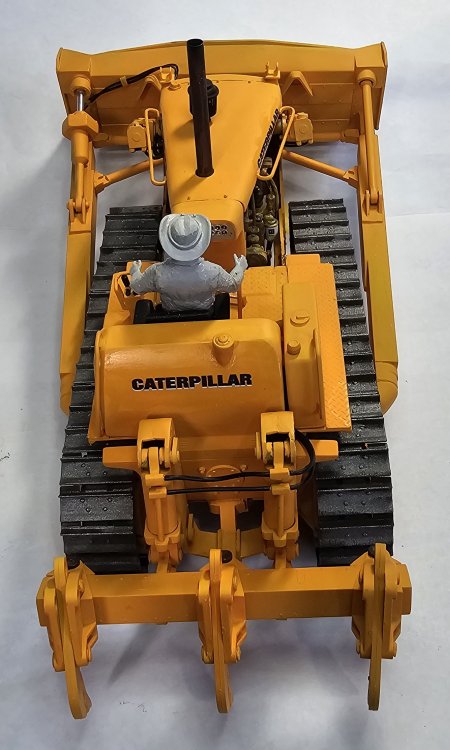
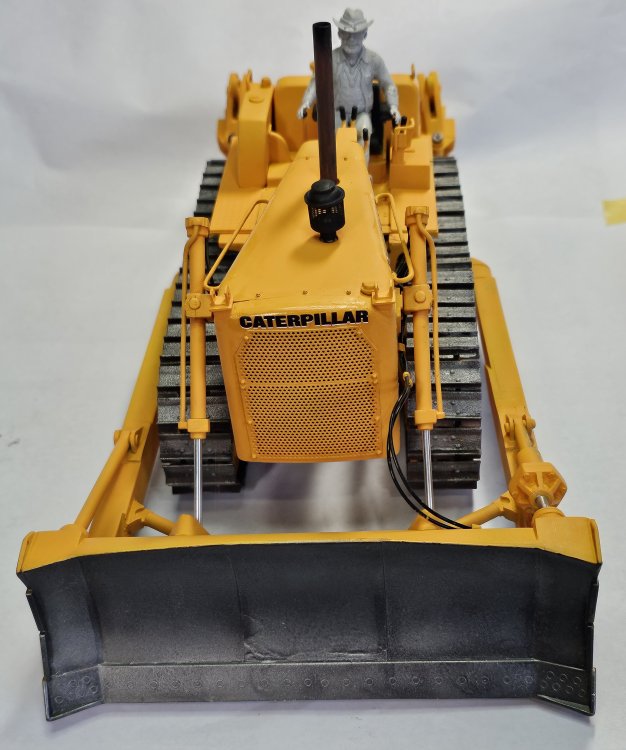
Hey all Ok this one's for Jeff. Way back when he requested a R.O.P.S. and a R.O.P.S. it is. Left side view showing the decals added. Same view with the operator in place. Rear view showing the decals. Right side view showing the decals. Front view of the D8H with the decal. Close up view of the operator. Ok this view shows the front part of the R.O.P.S. Another view of the front part of the R.O.P.S. This view shows the rest of the R.O.P.S. I still have more to add to it. Well that's it for now be back with more soon. Ron G


-
Land Rover Defender 110 from Spectre
CrankyCrafstman replied to BlrwestSiR's topic in LSM 1/35 and Larger Work In Progress
Nice project Carl. 🍿😁 Ron G -
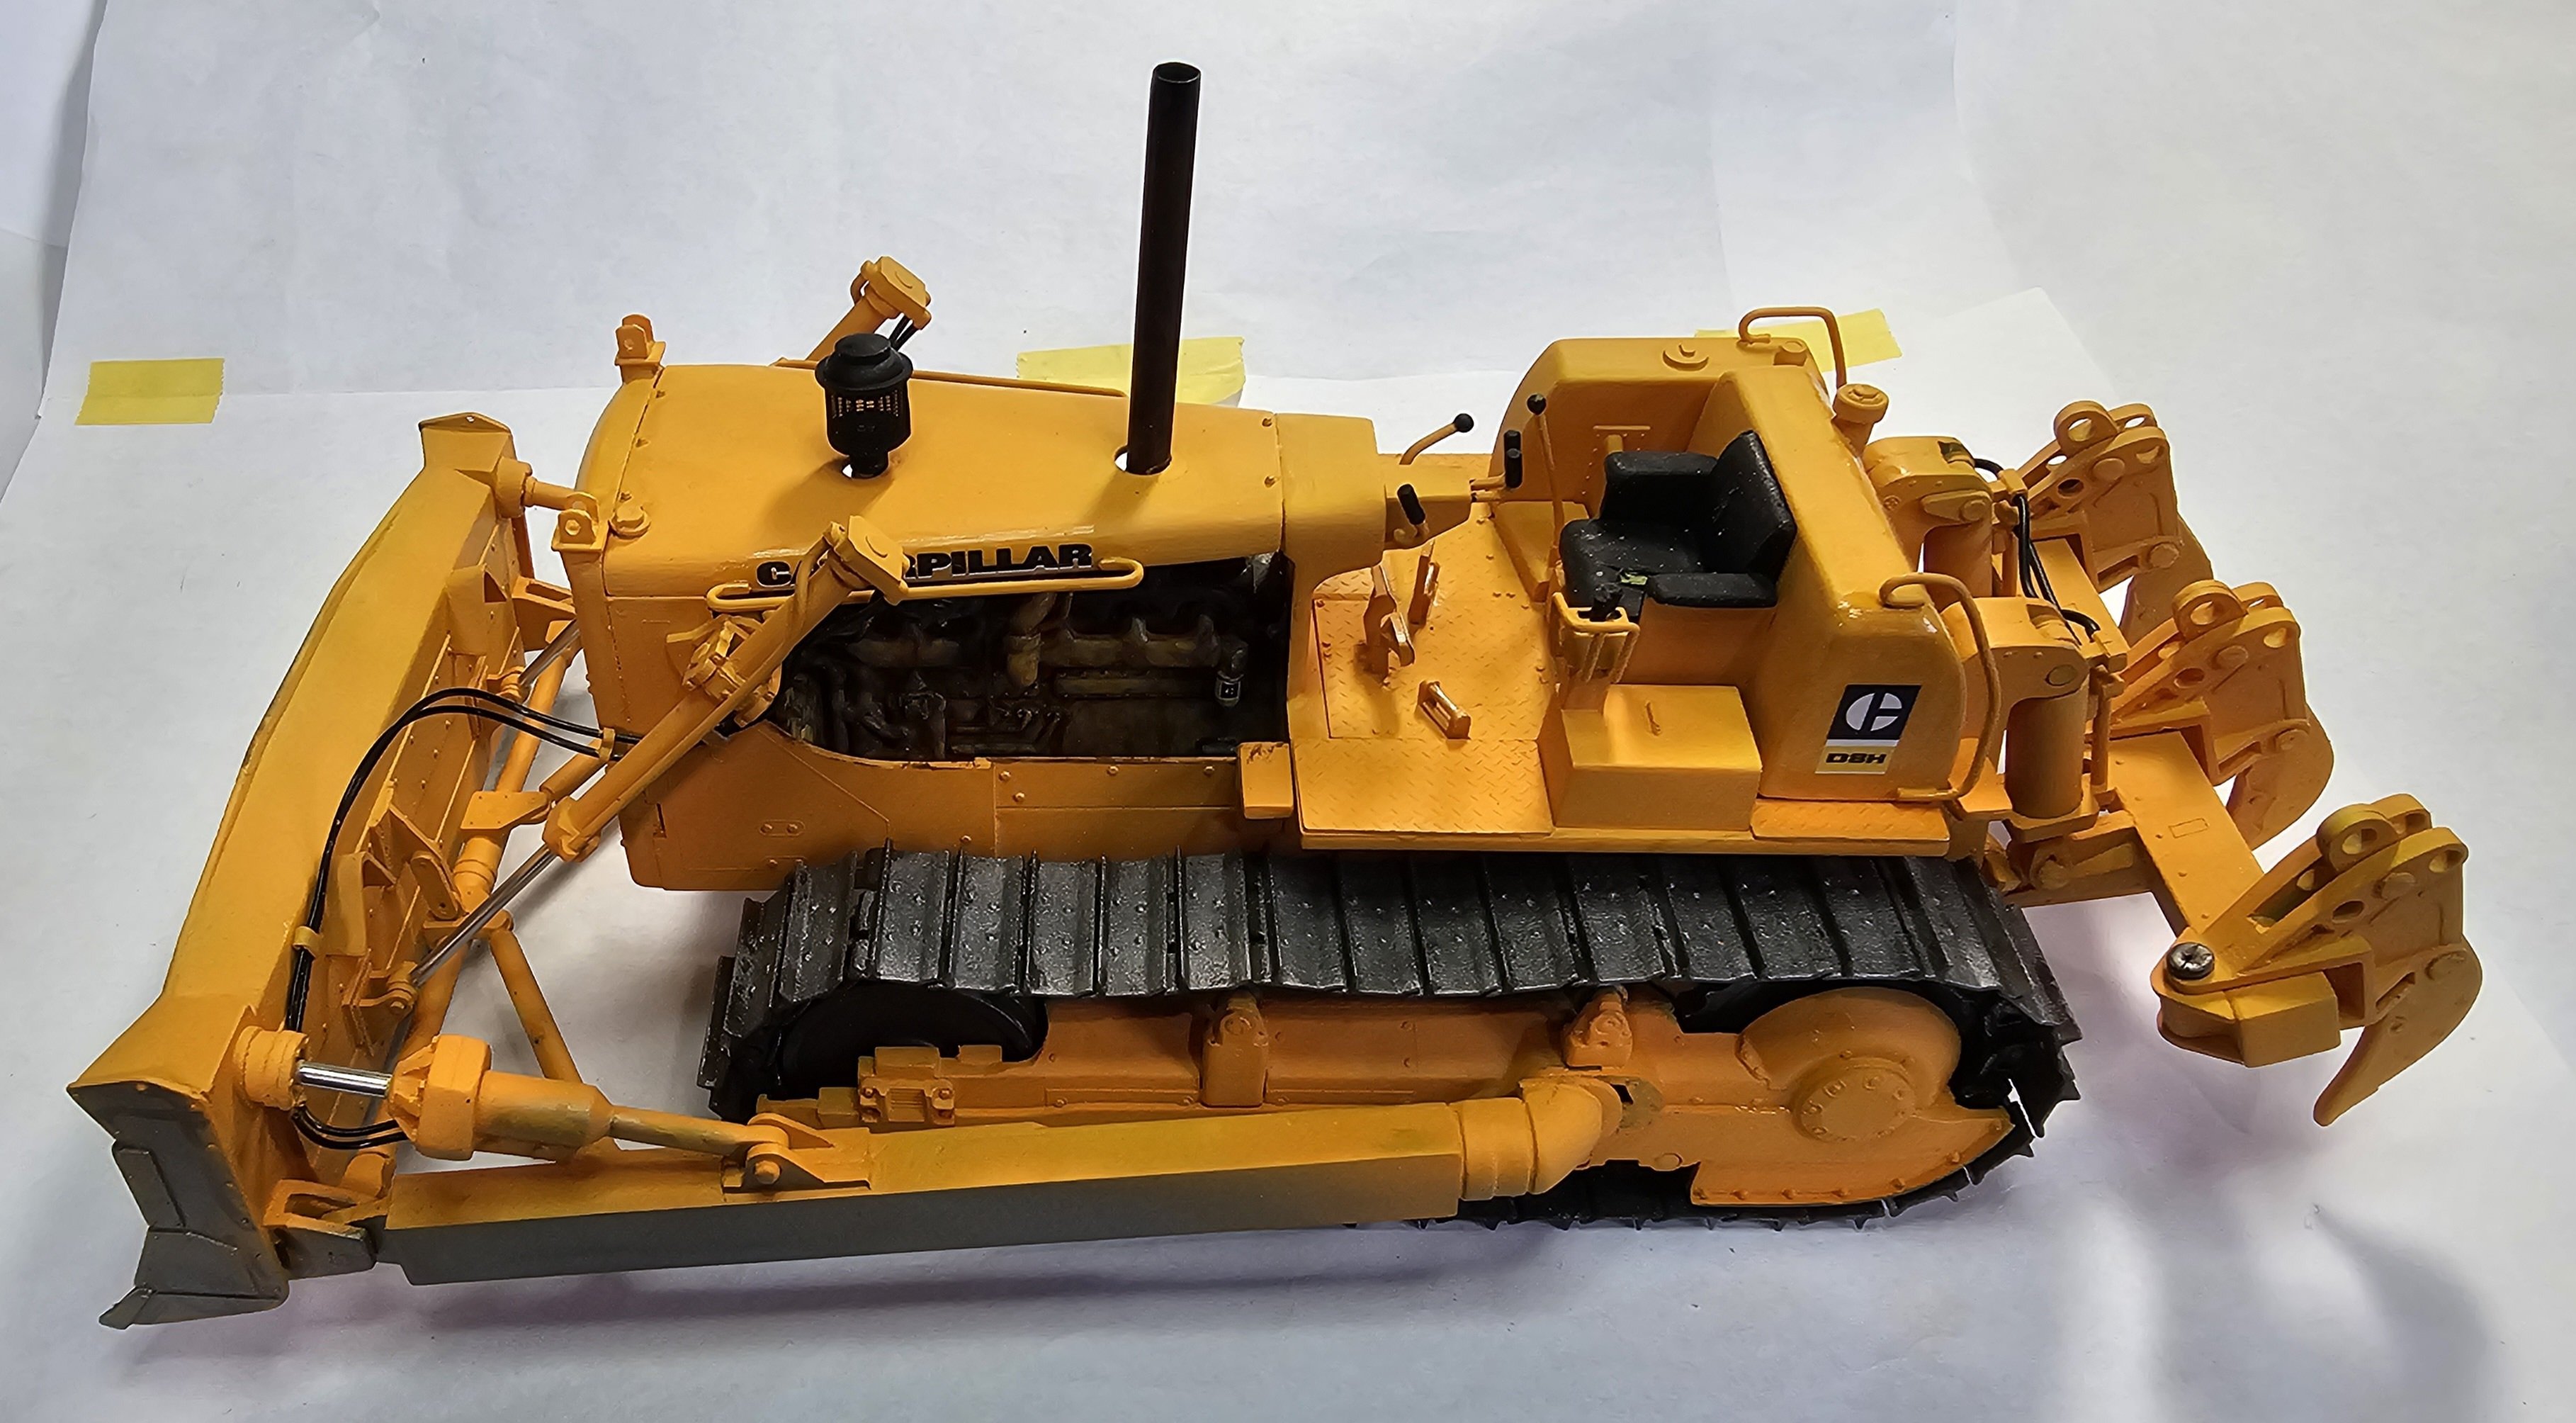
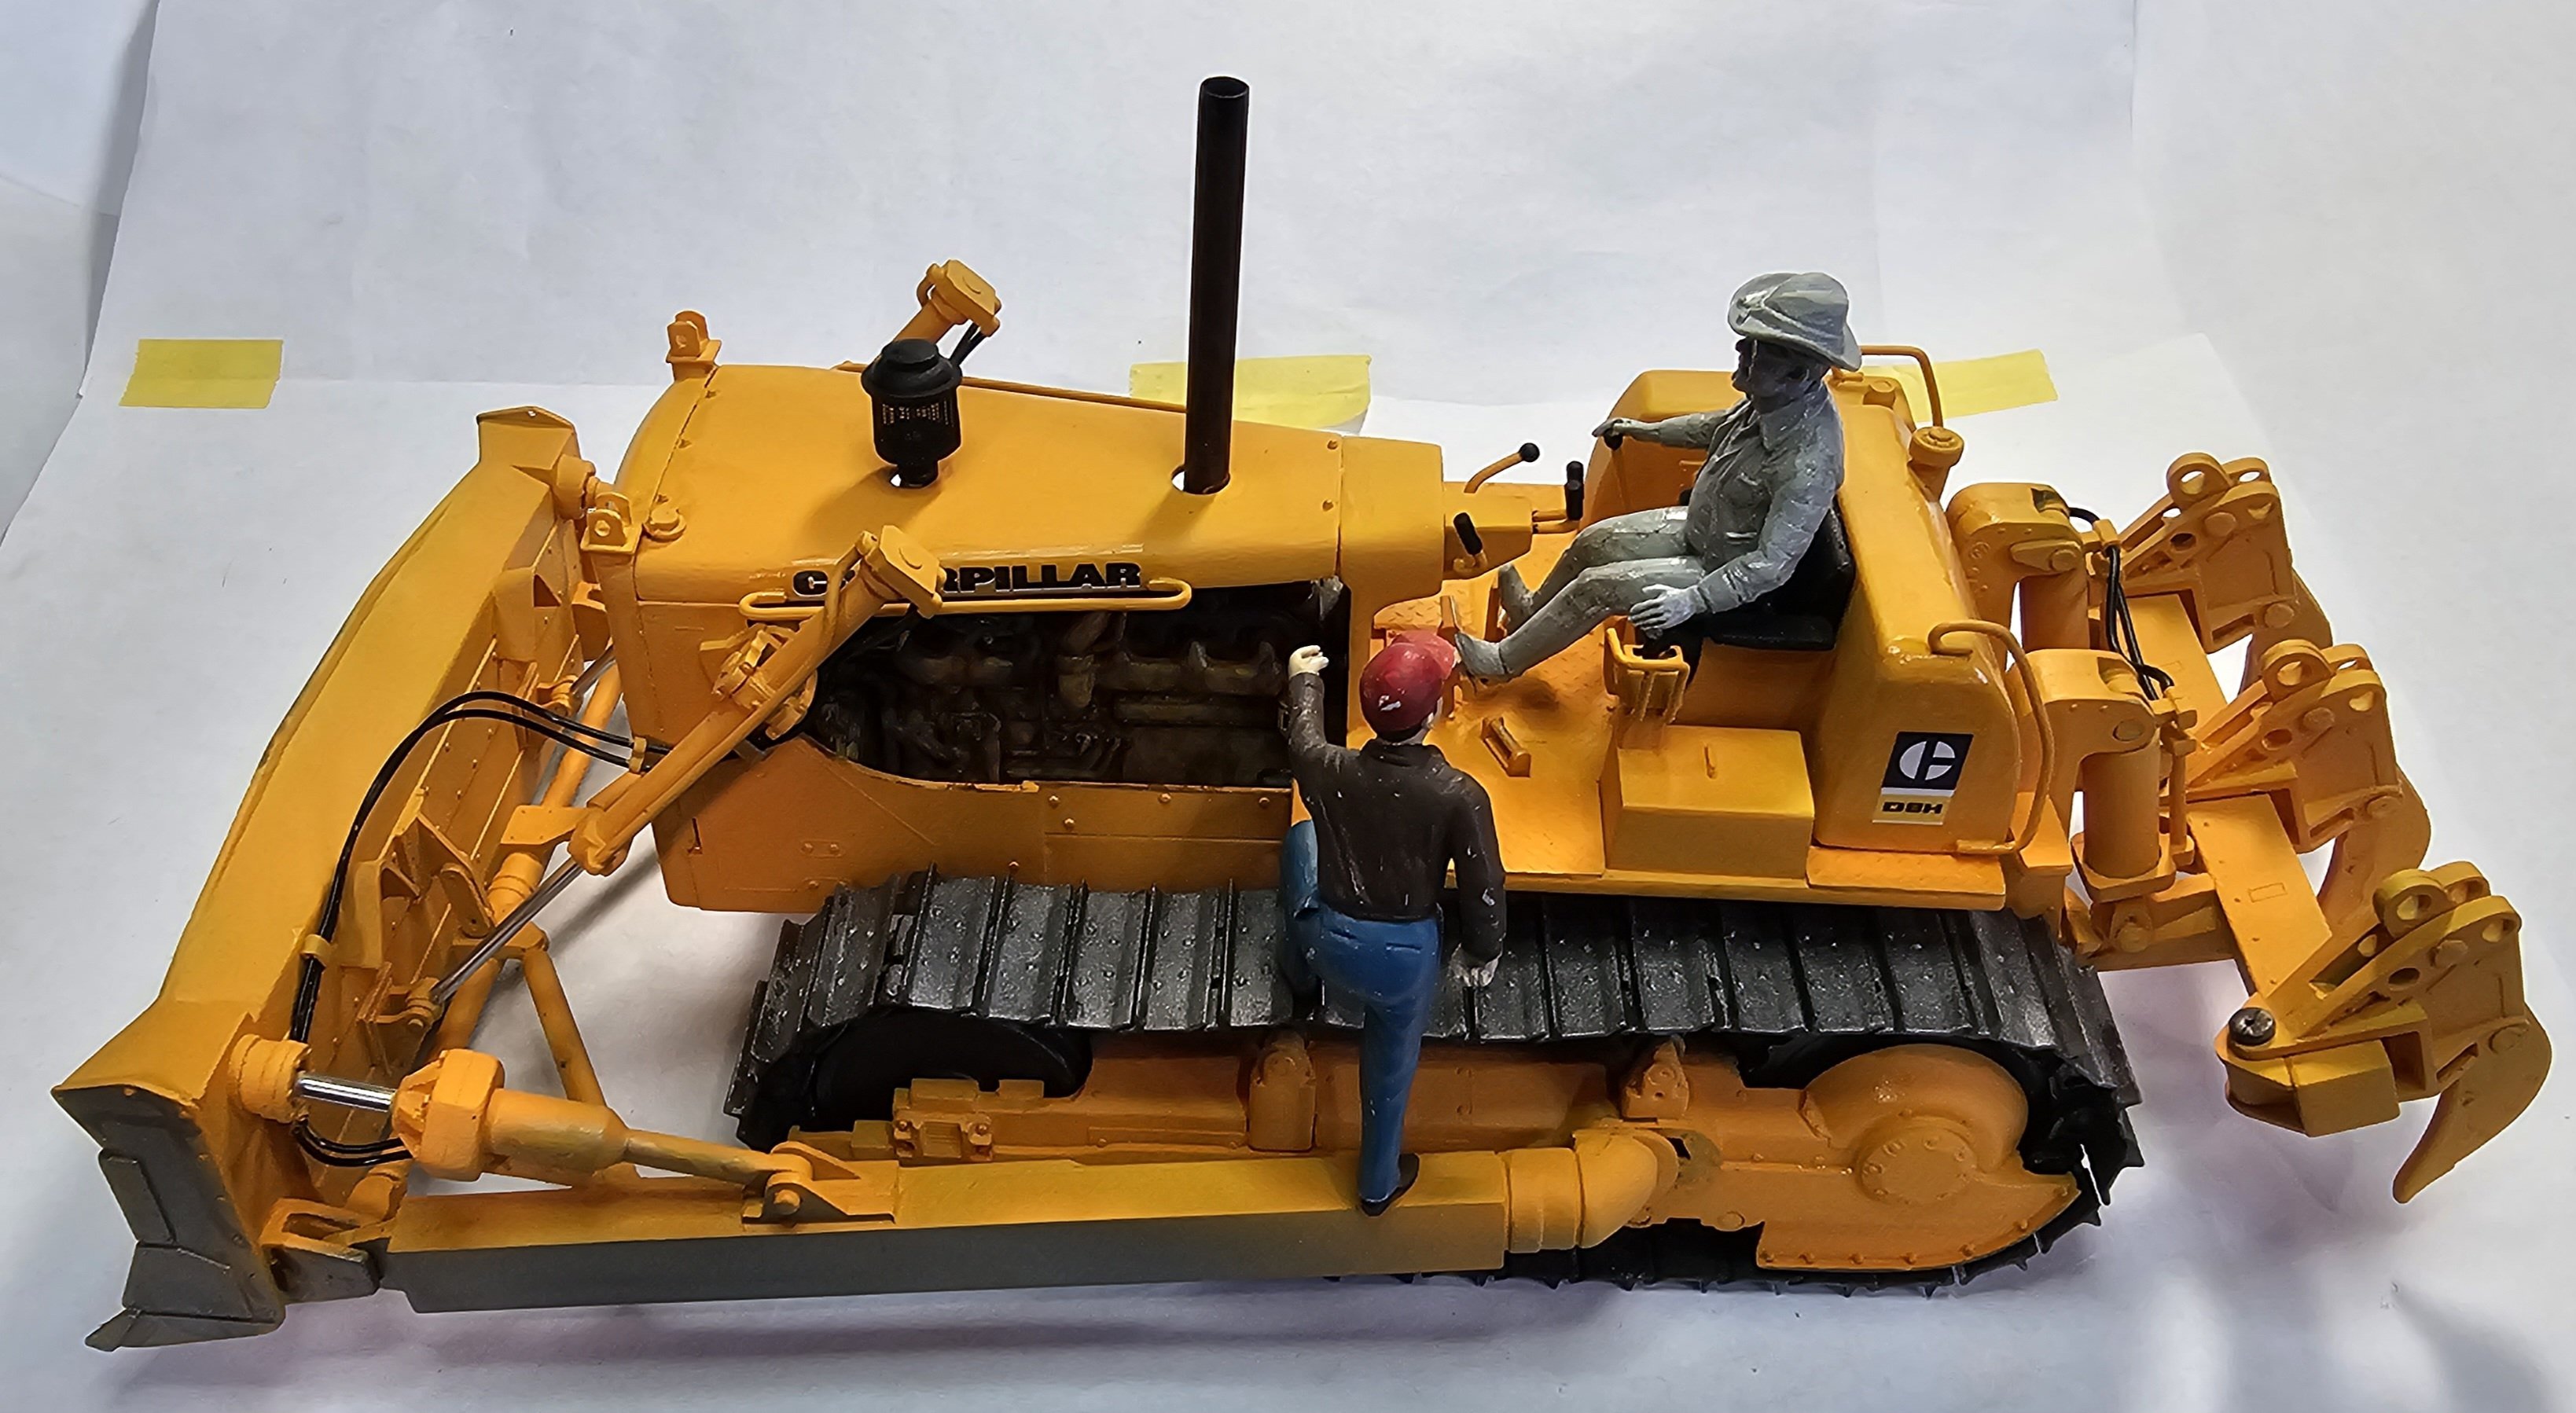
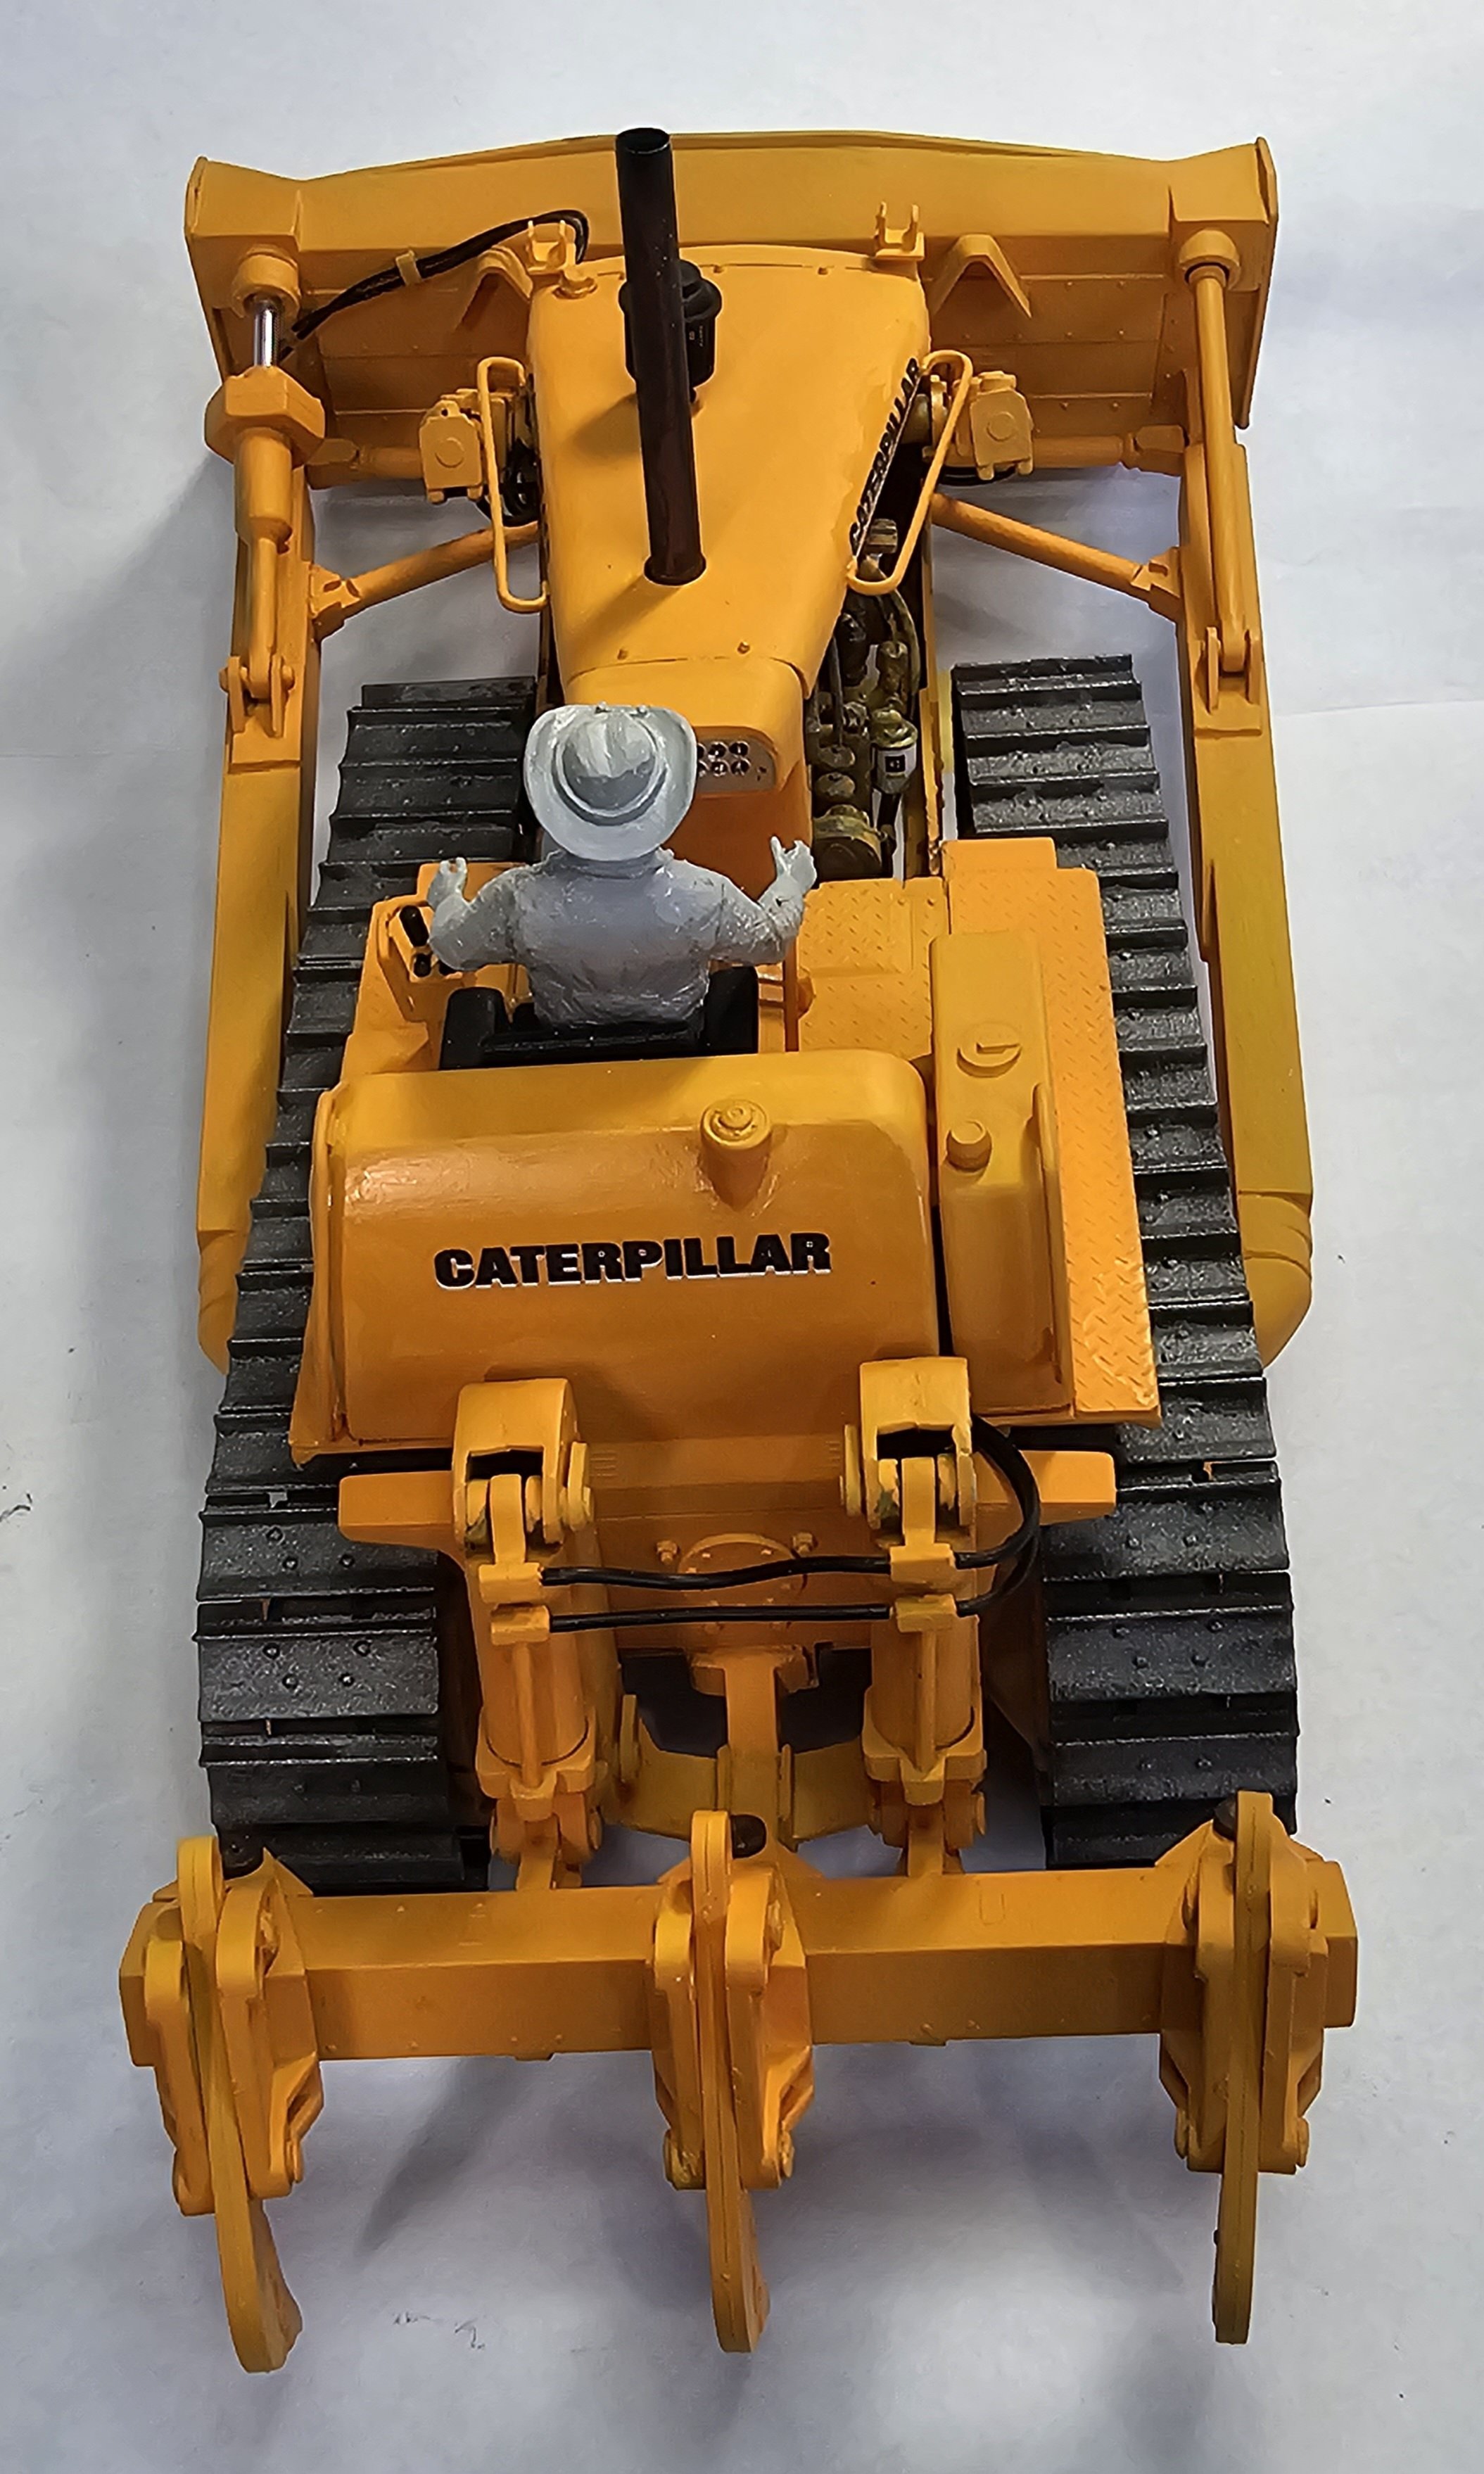
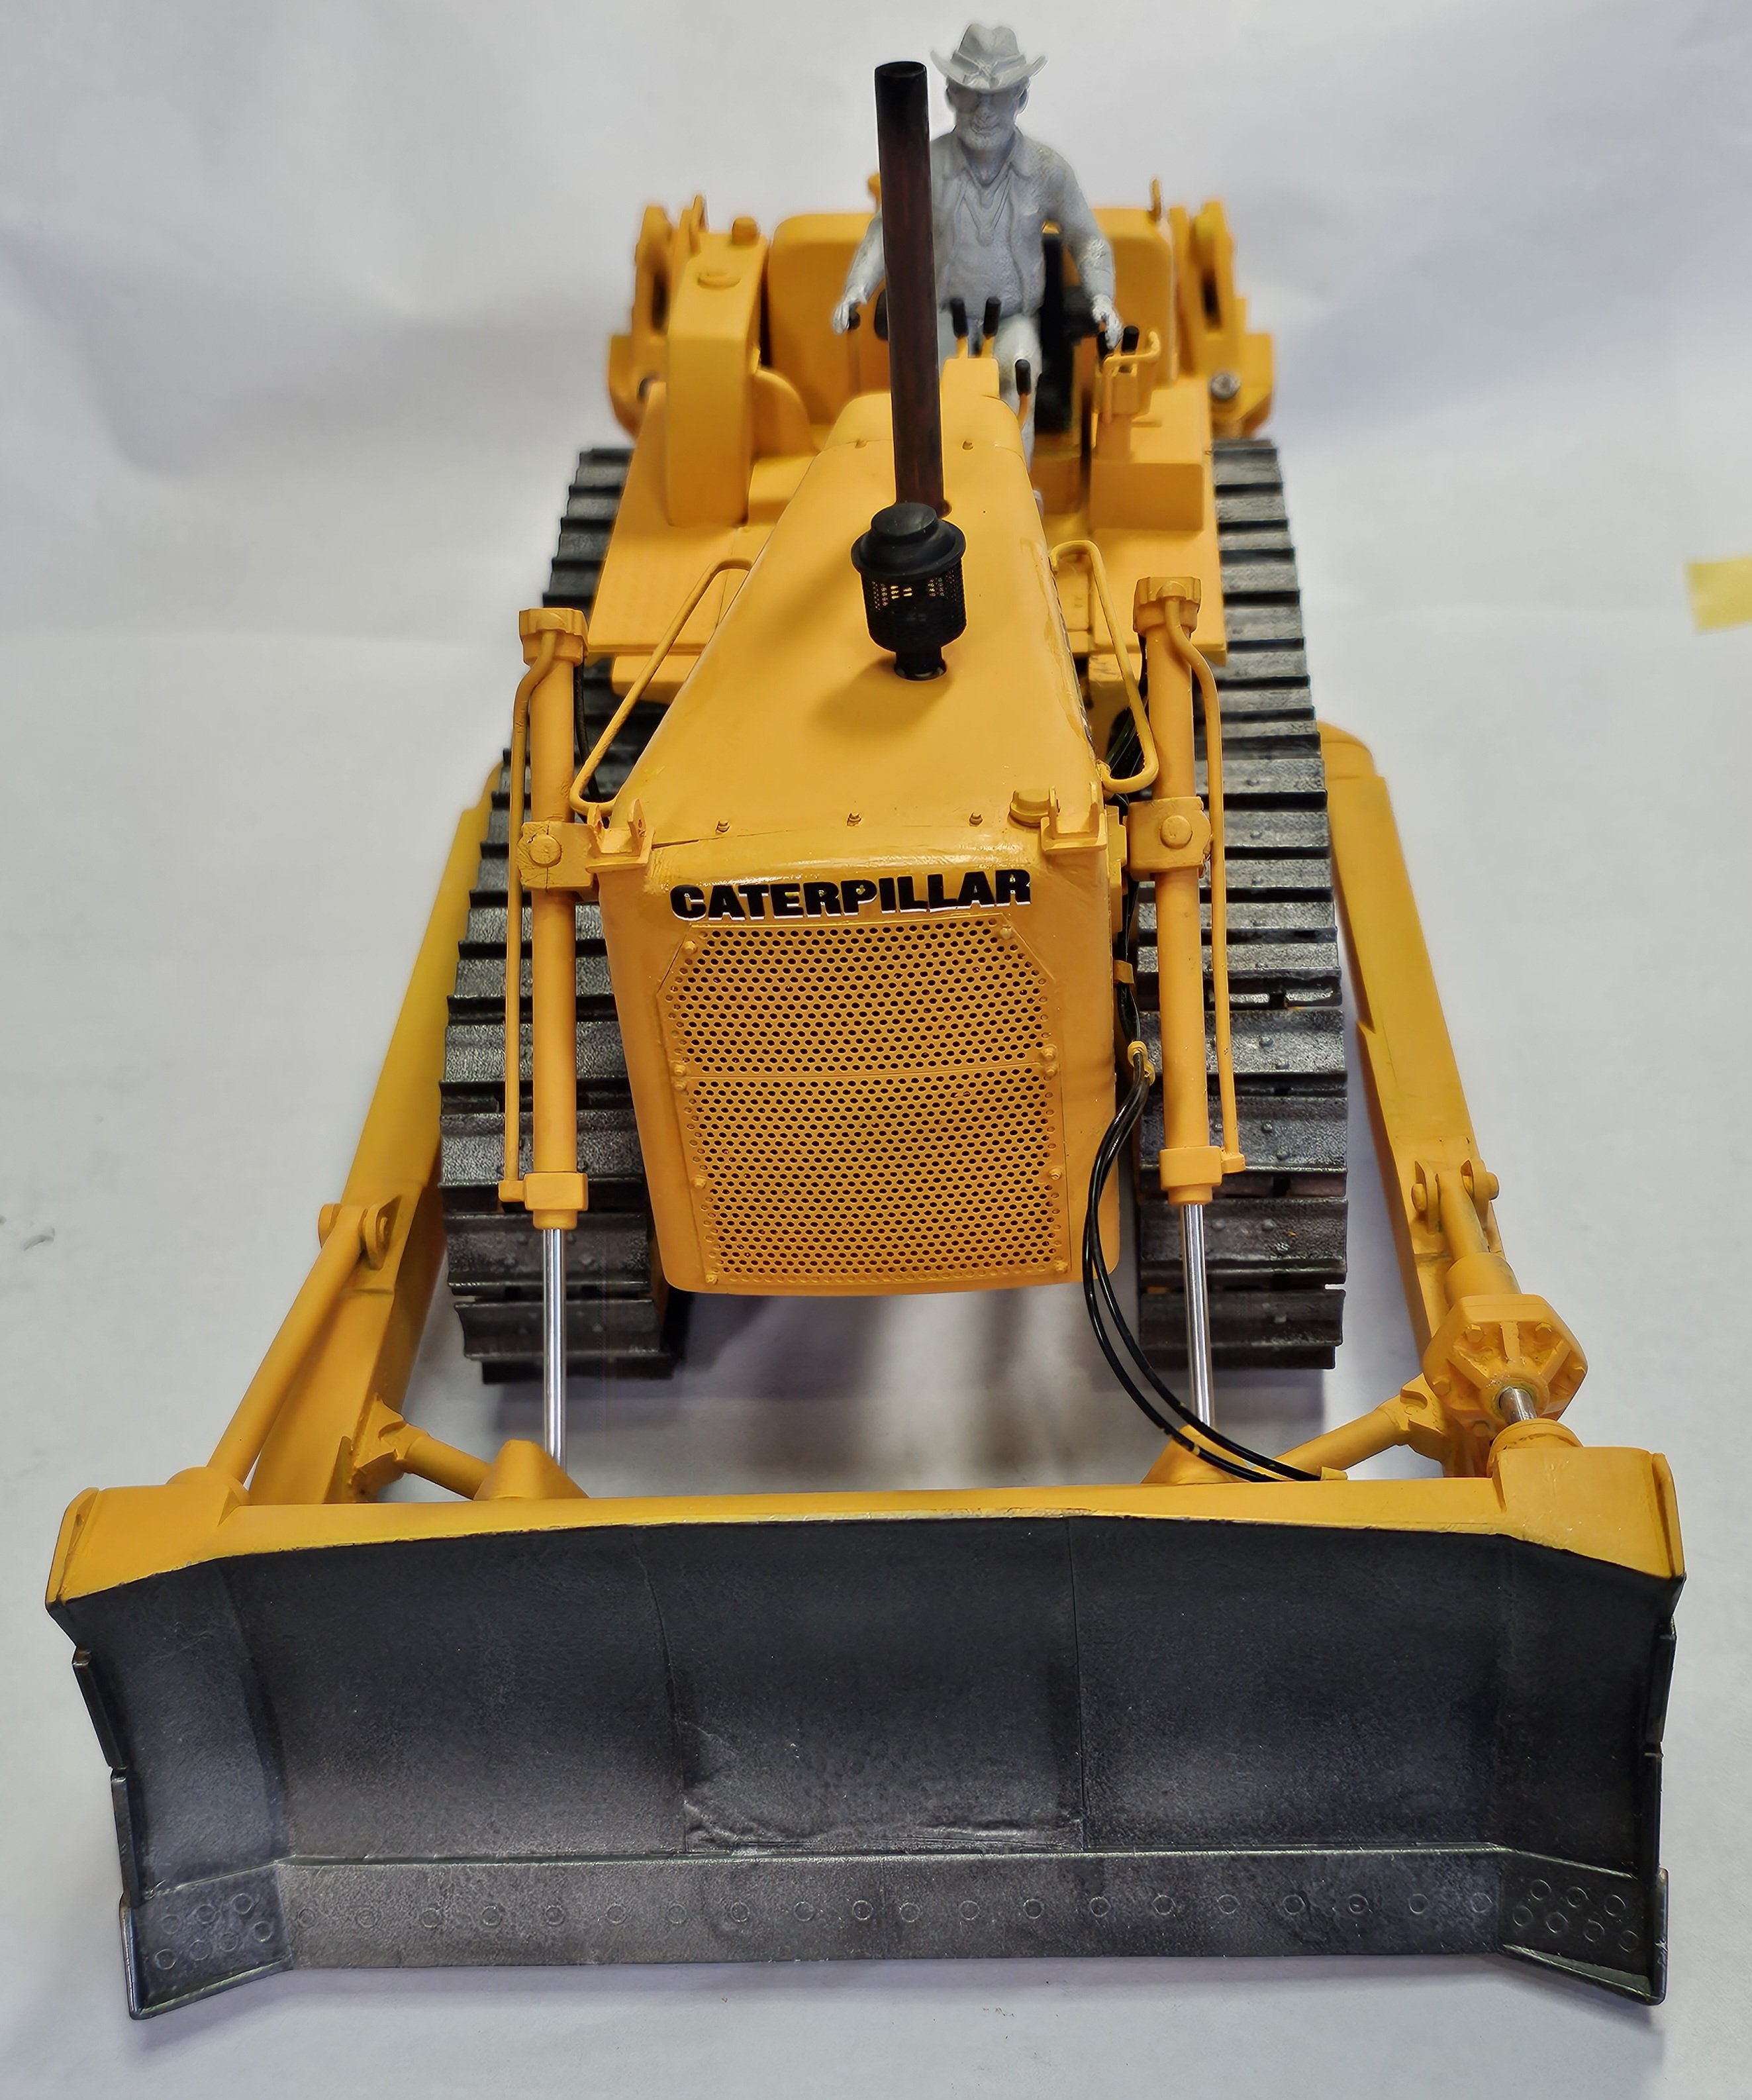
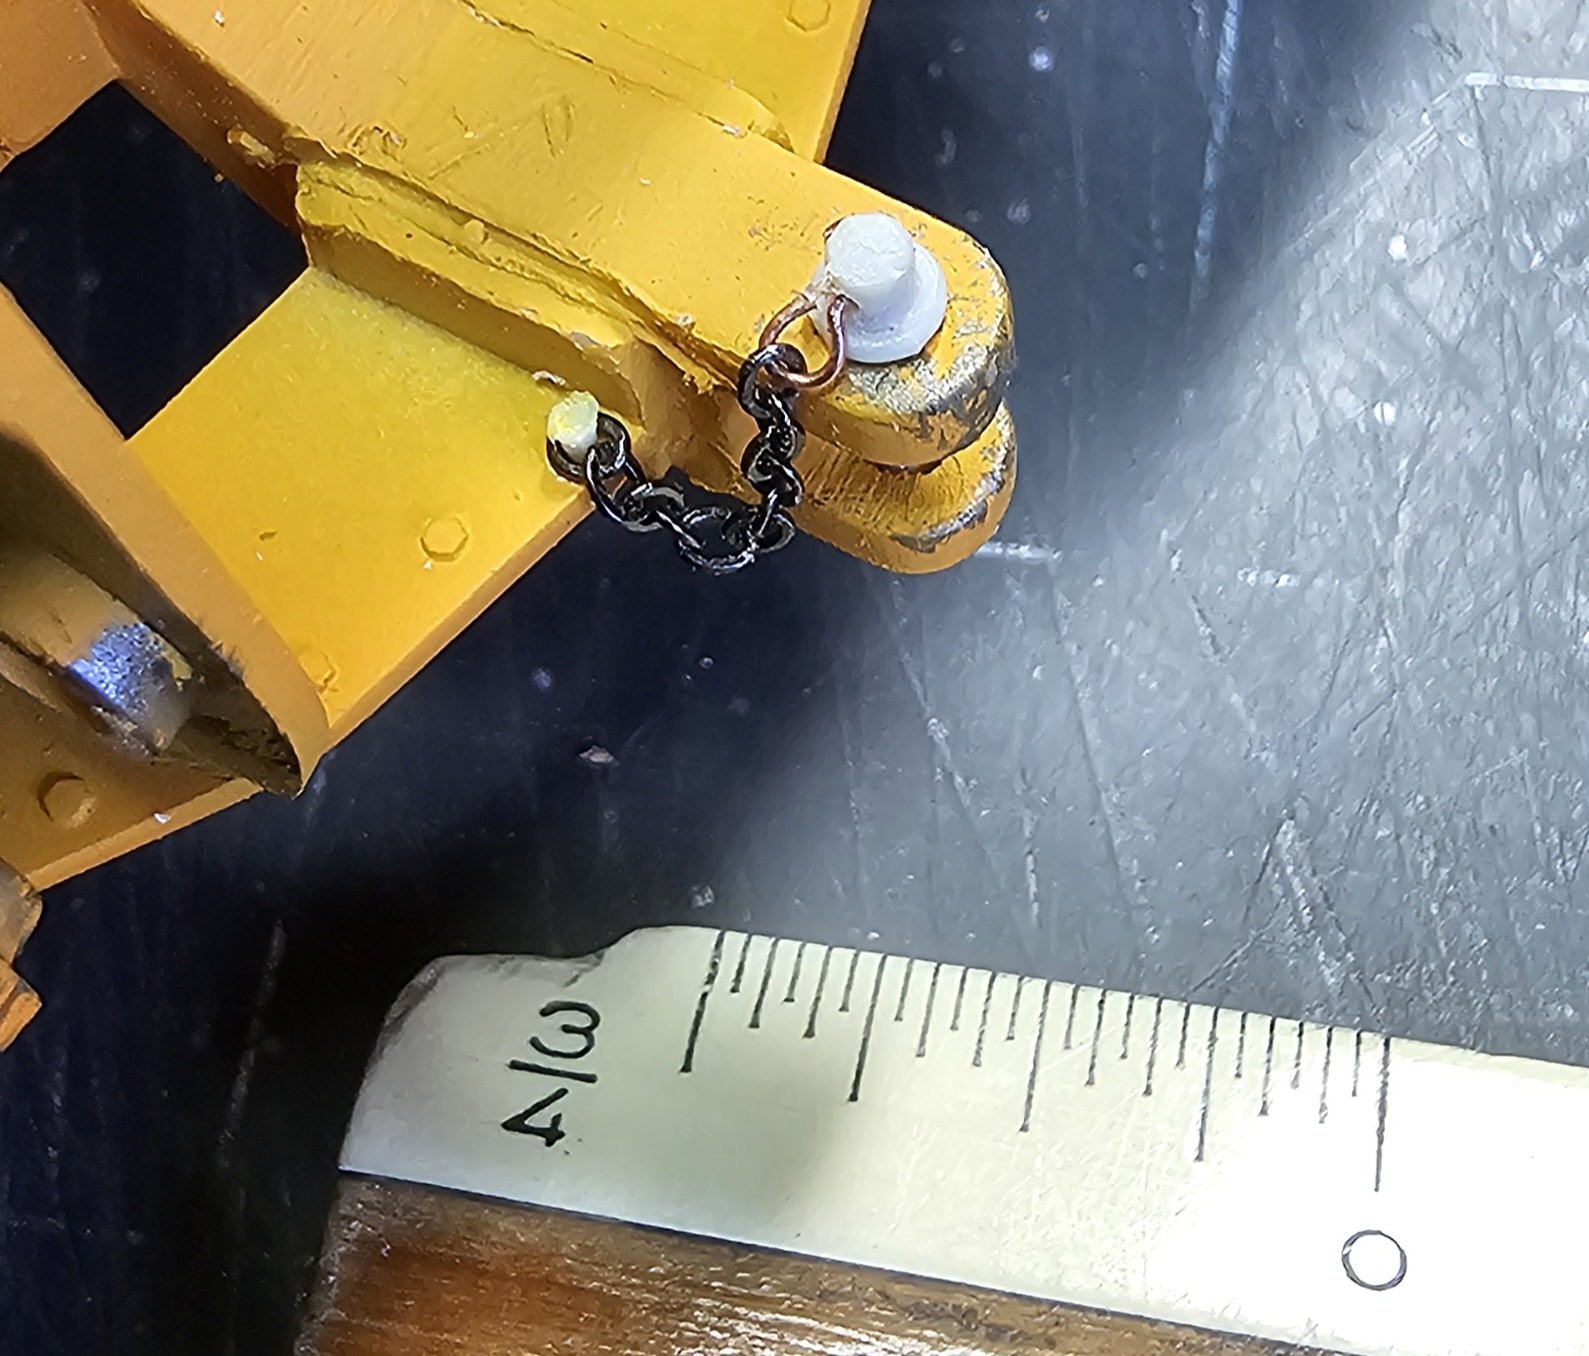
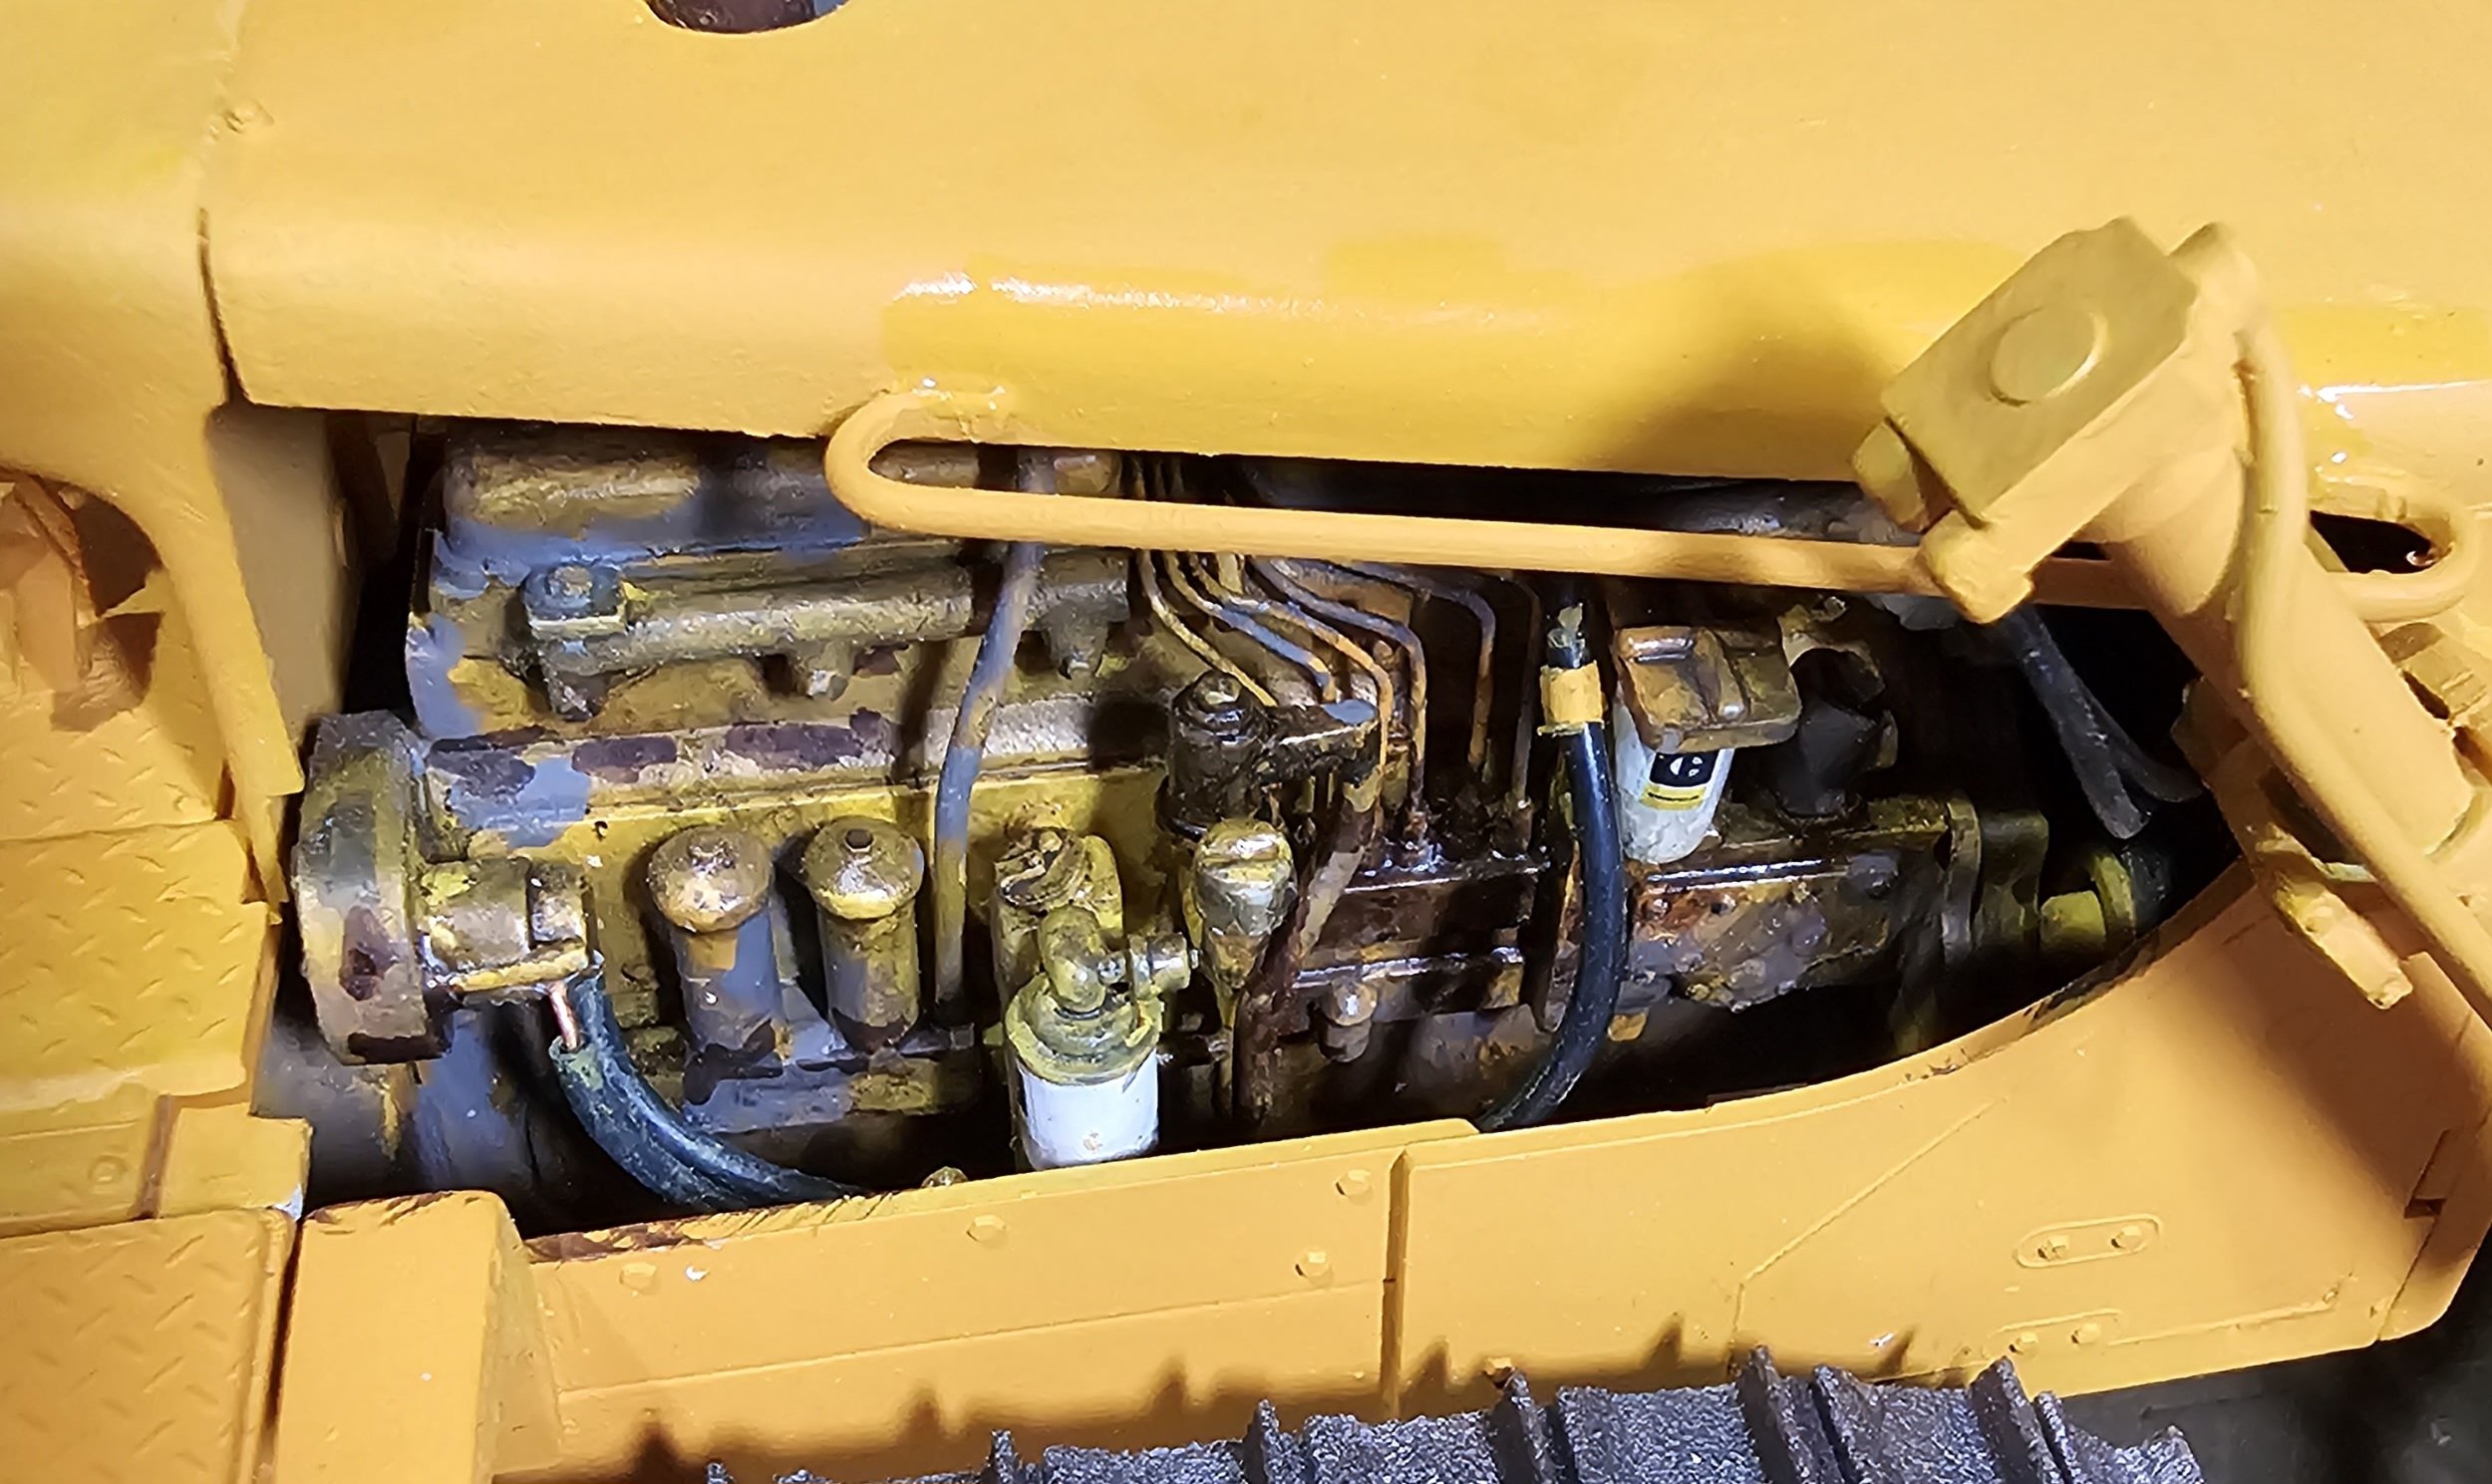
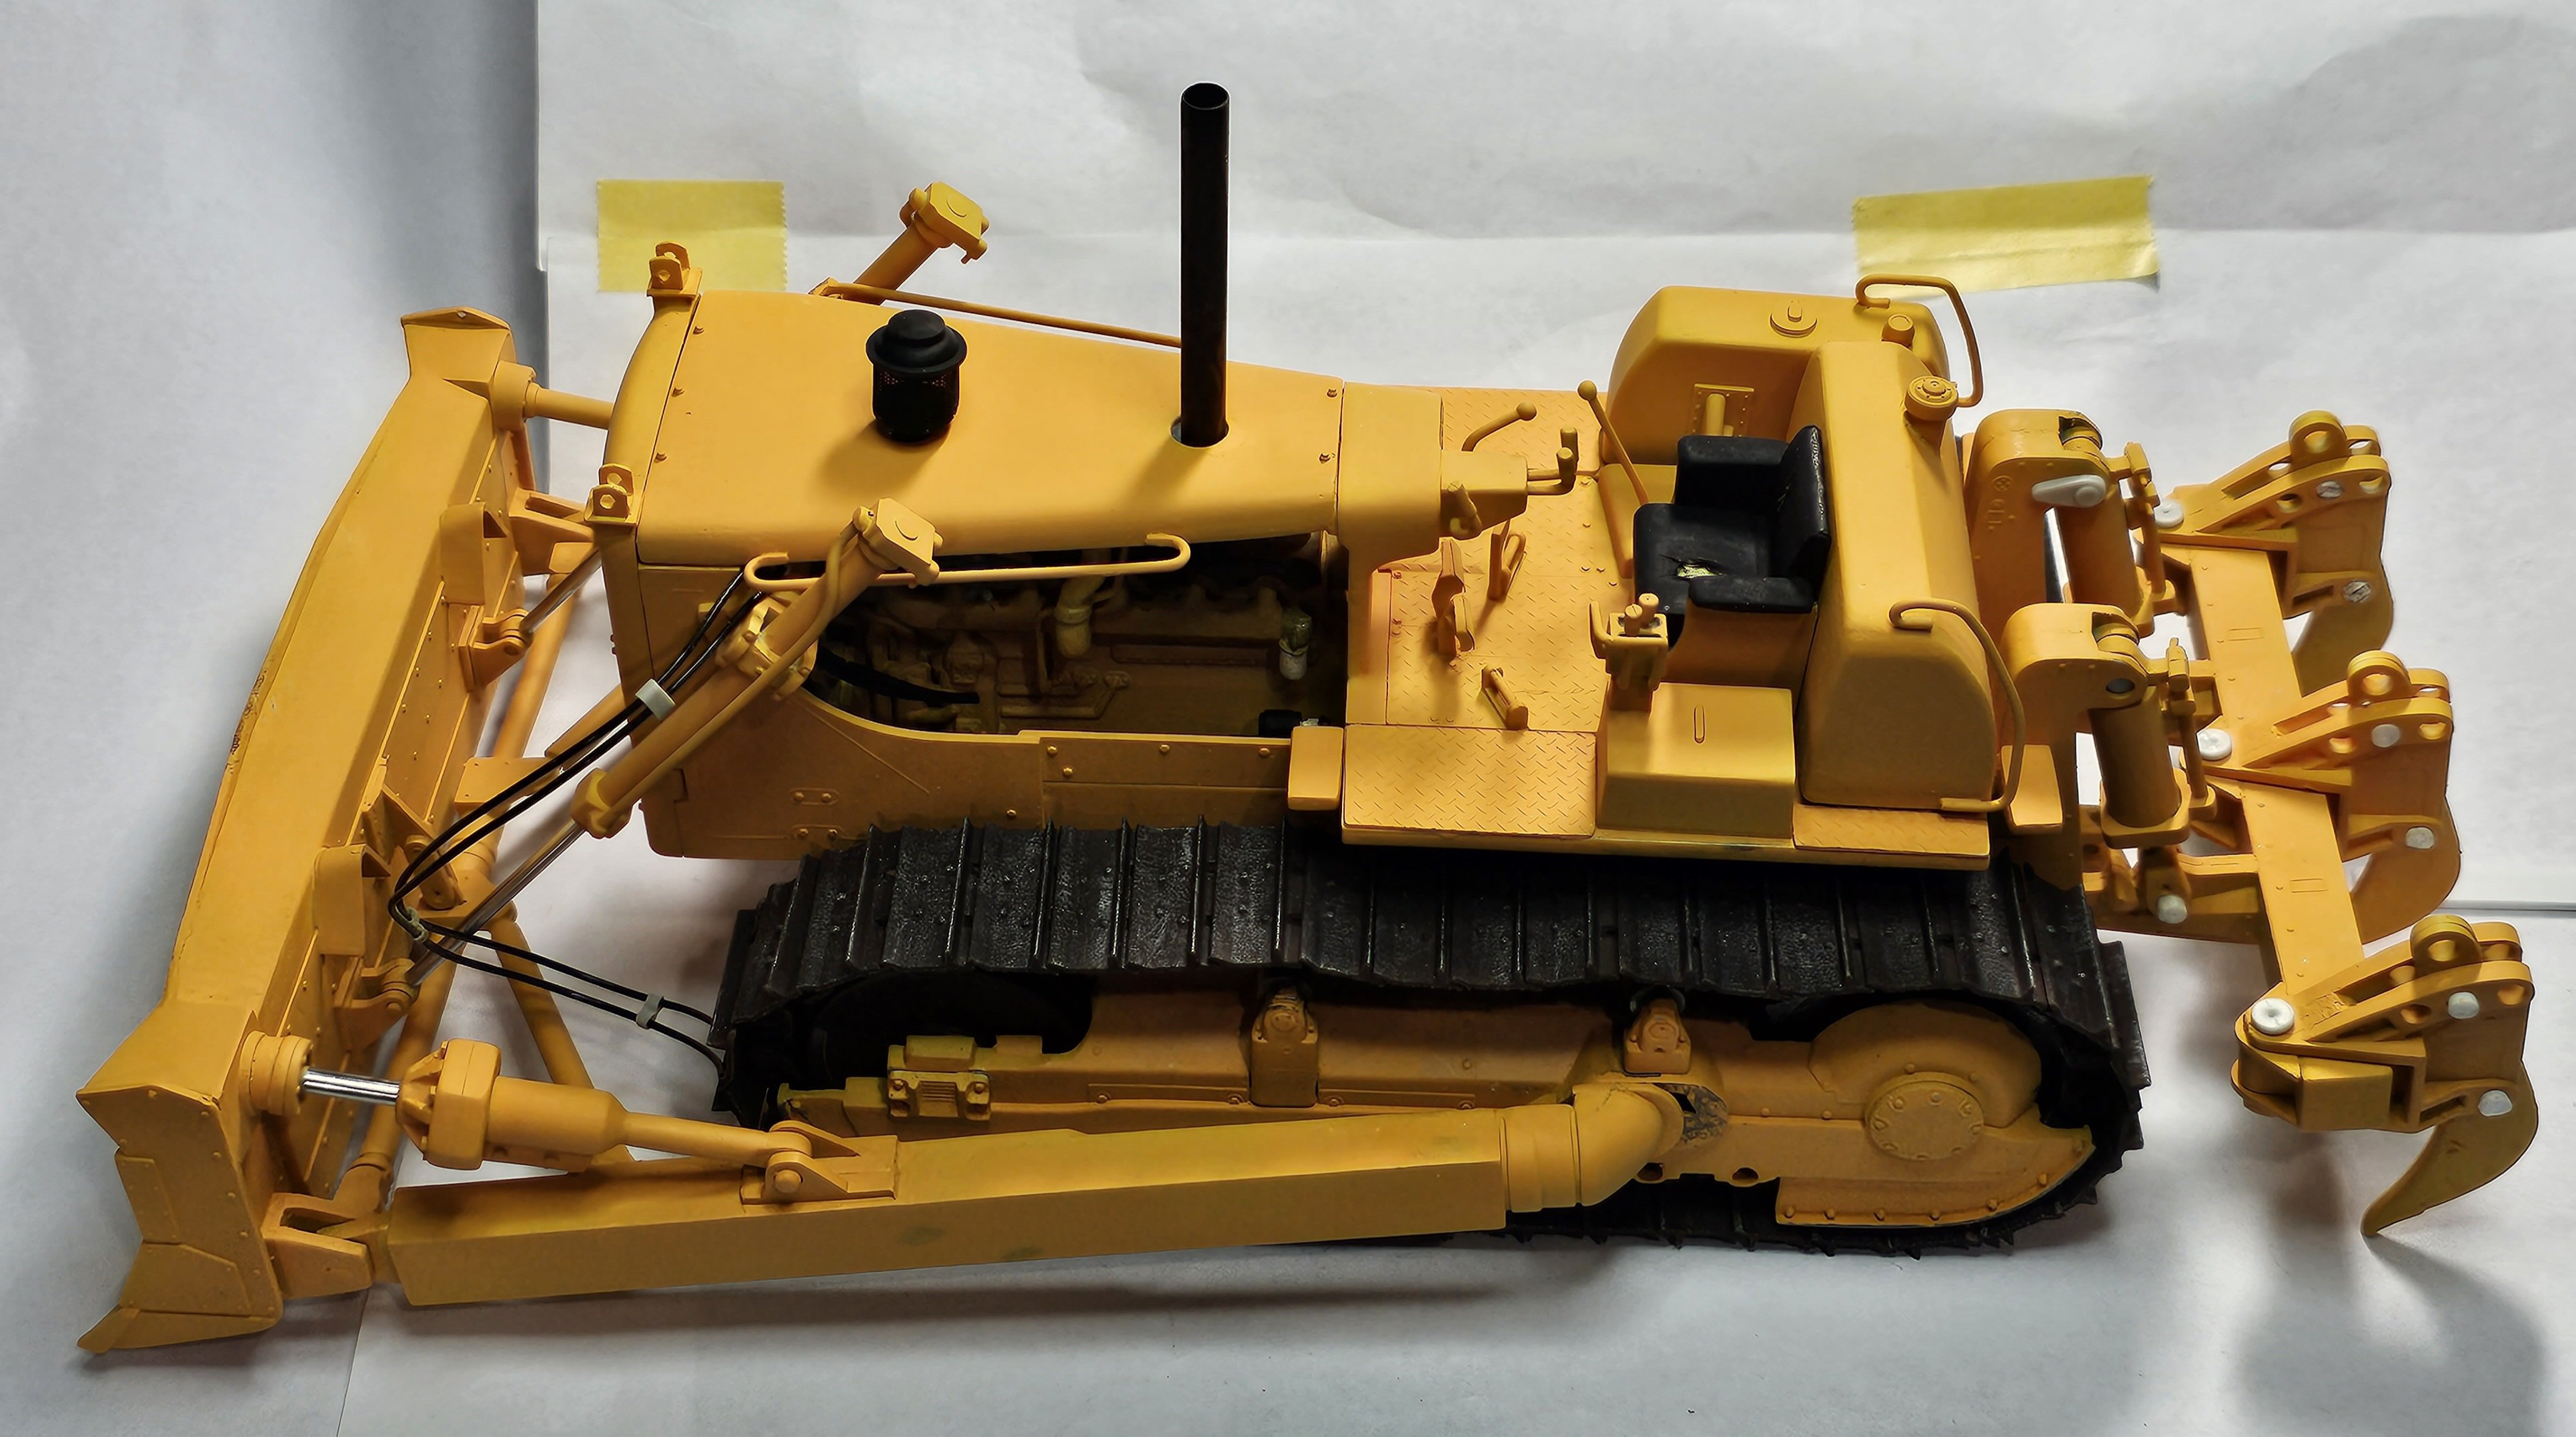
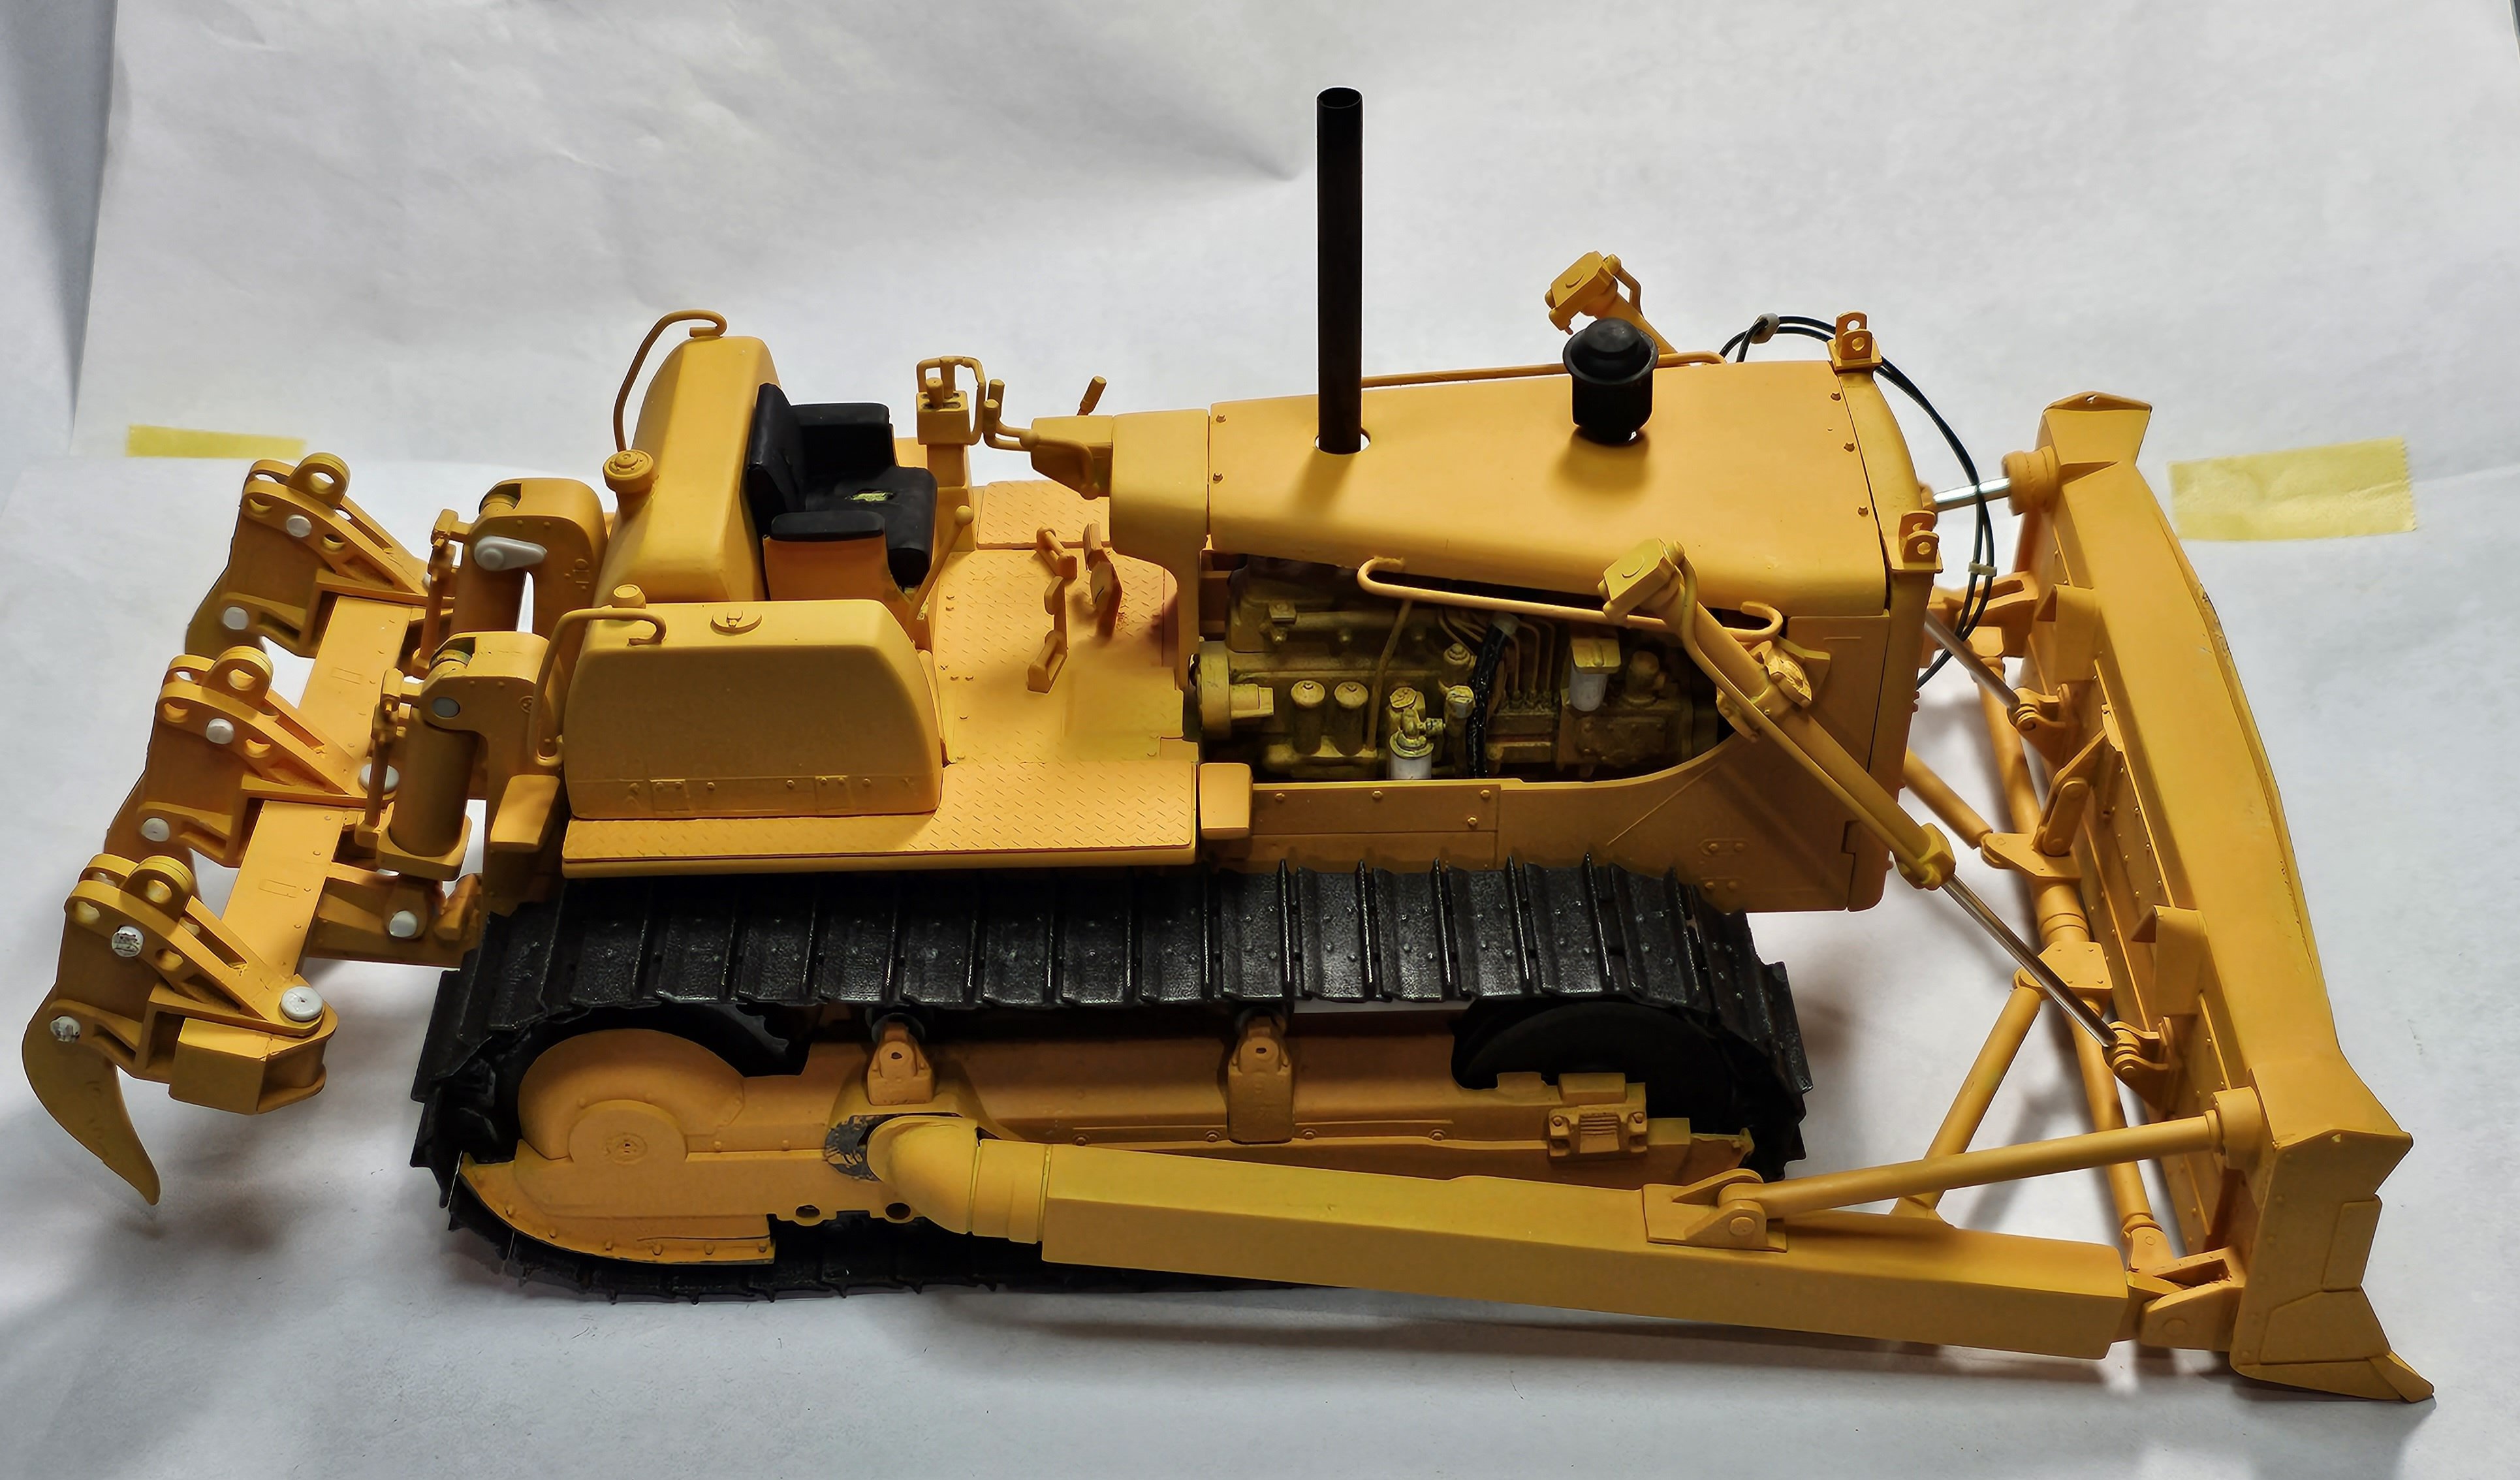
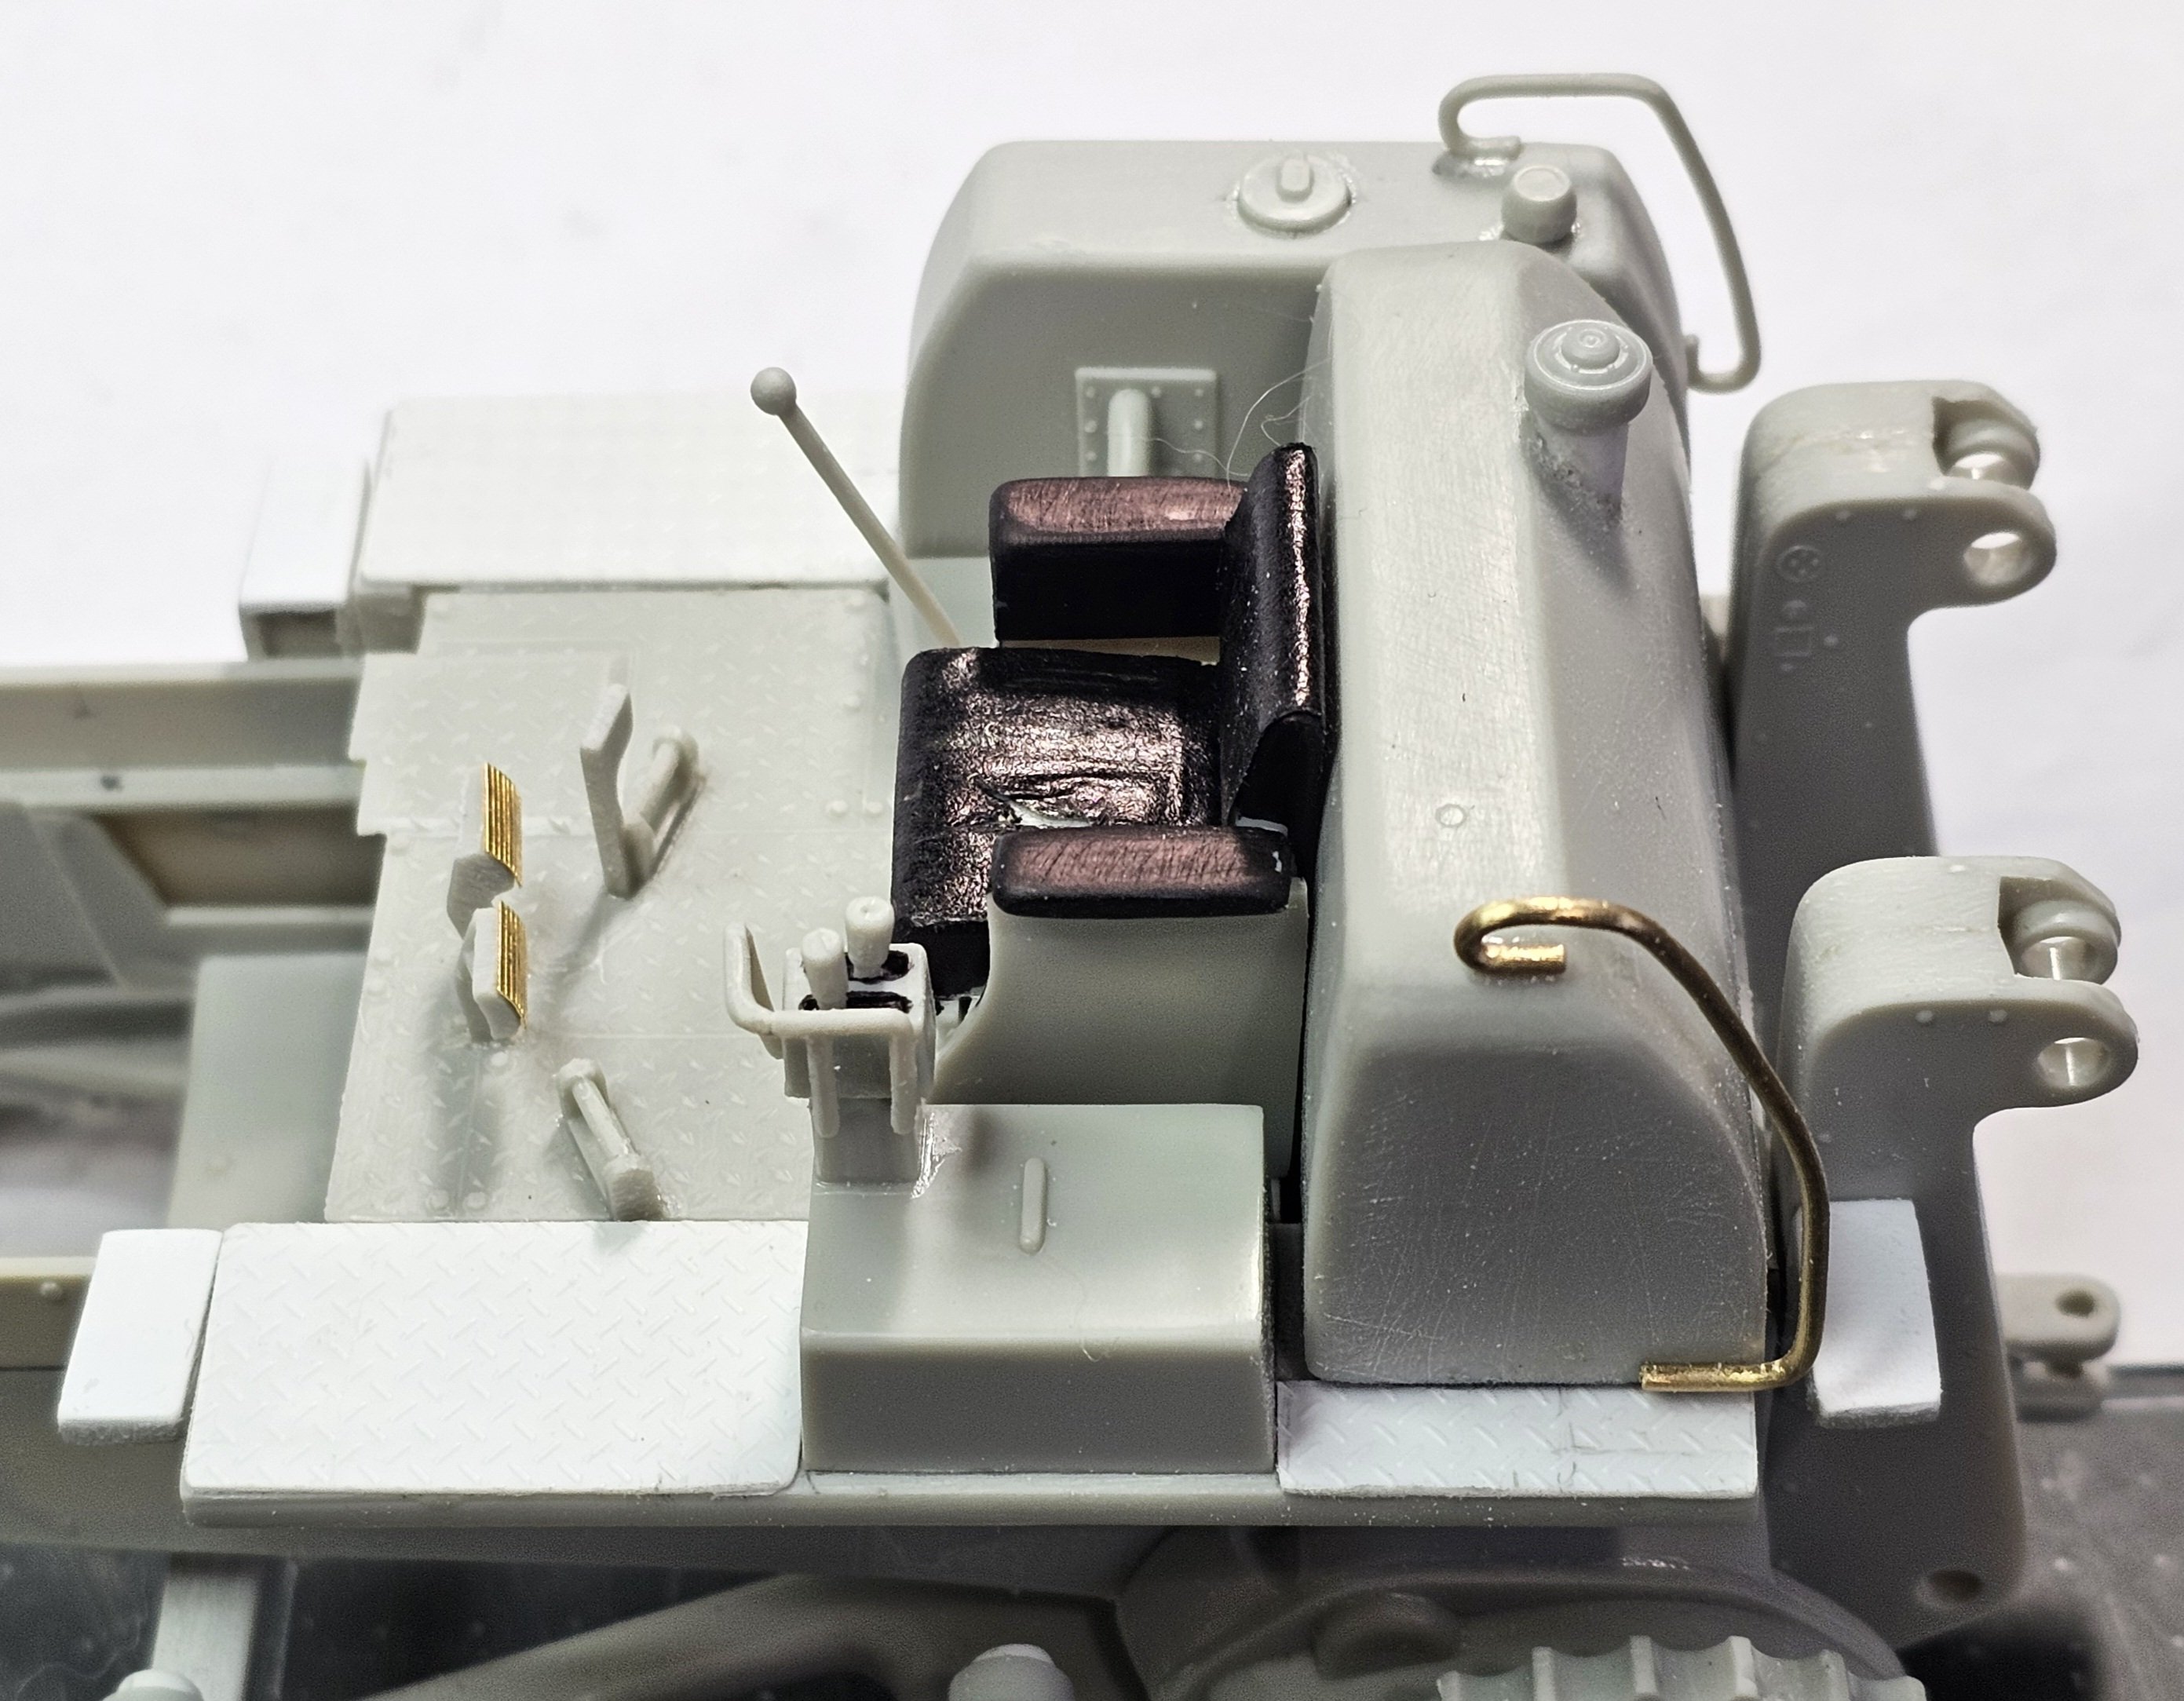
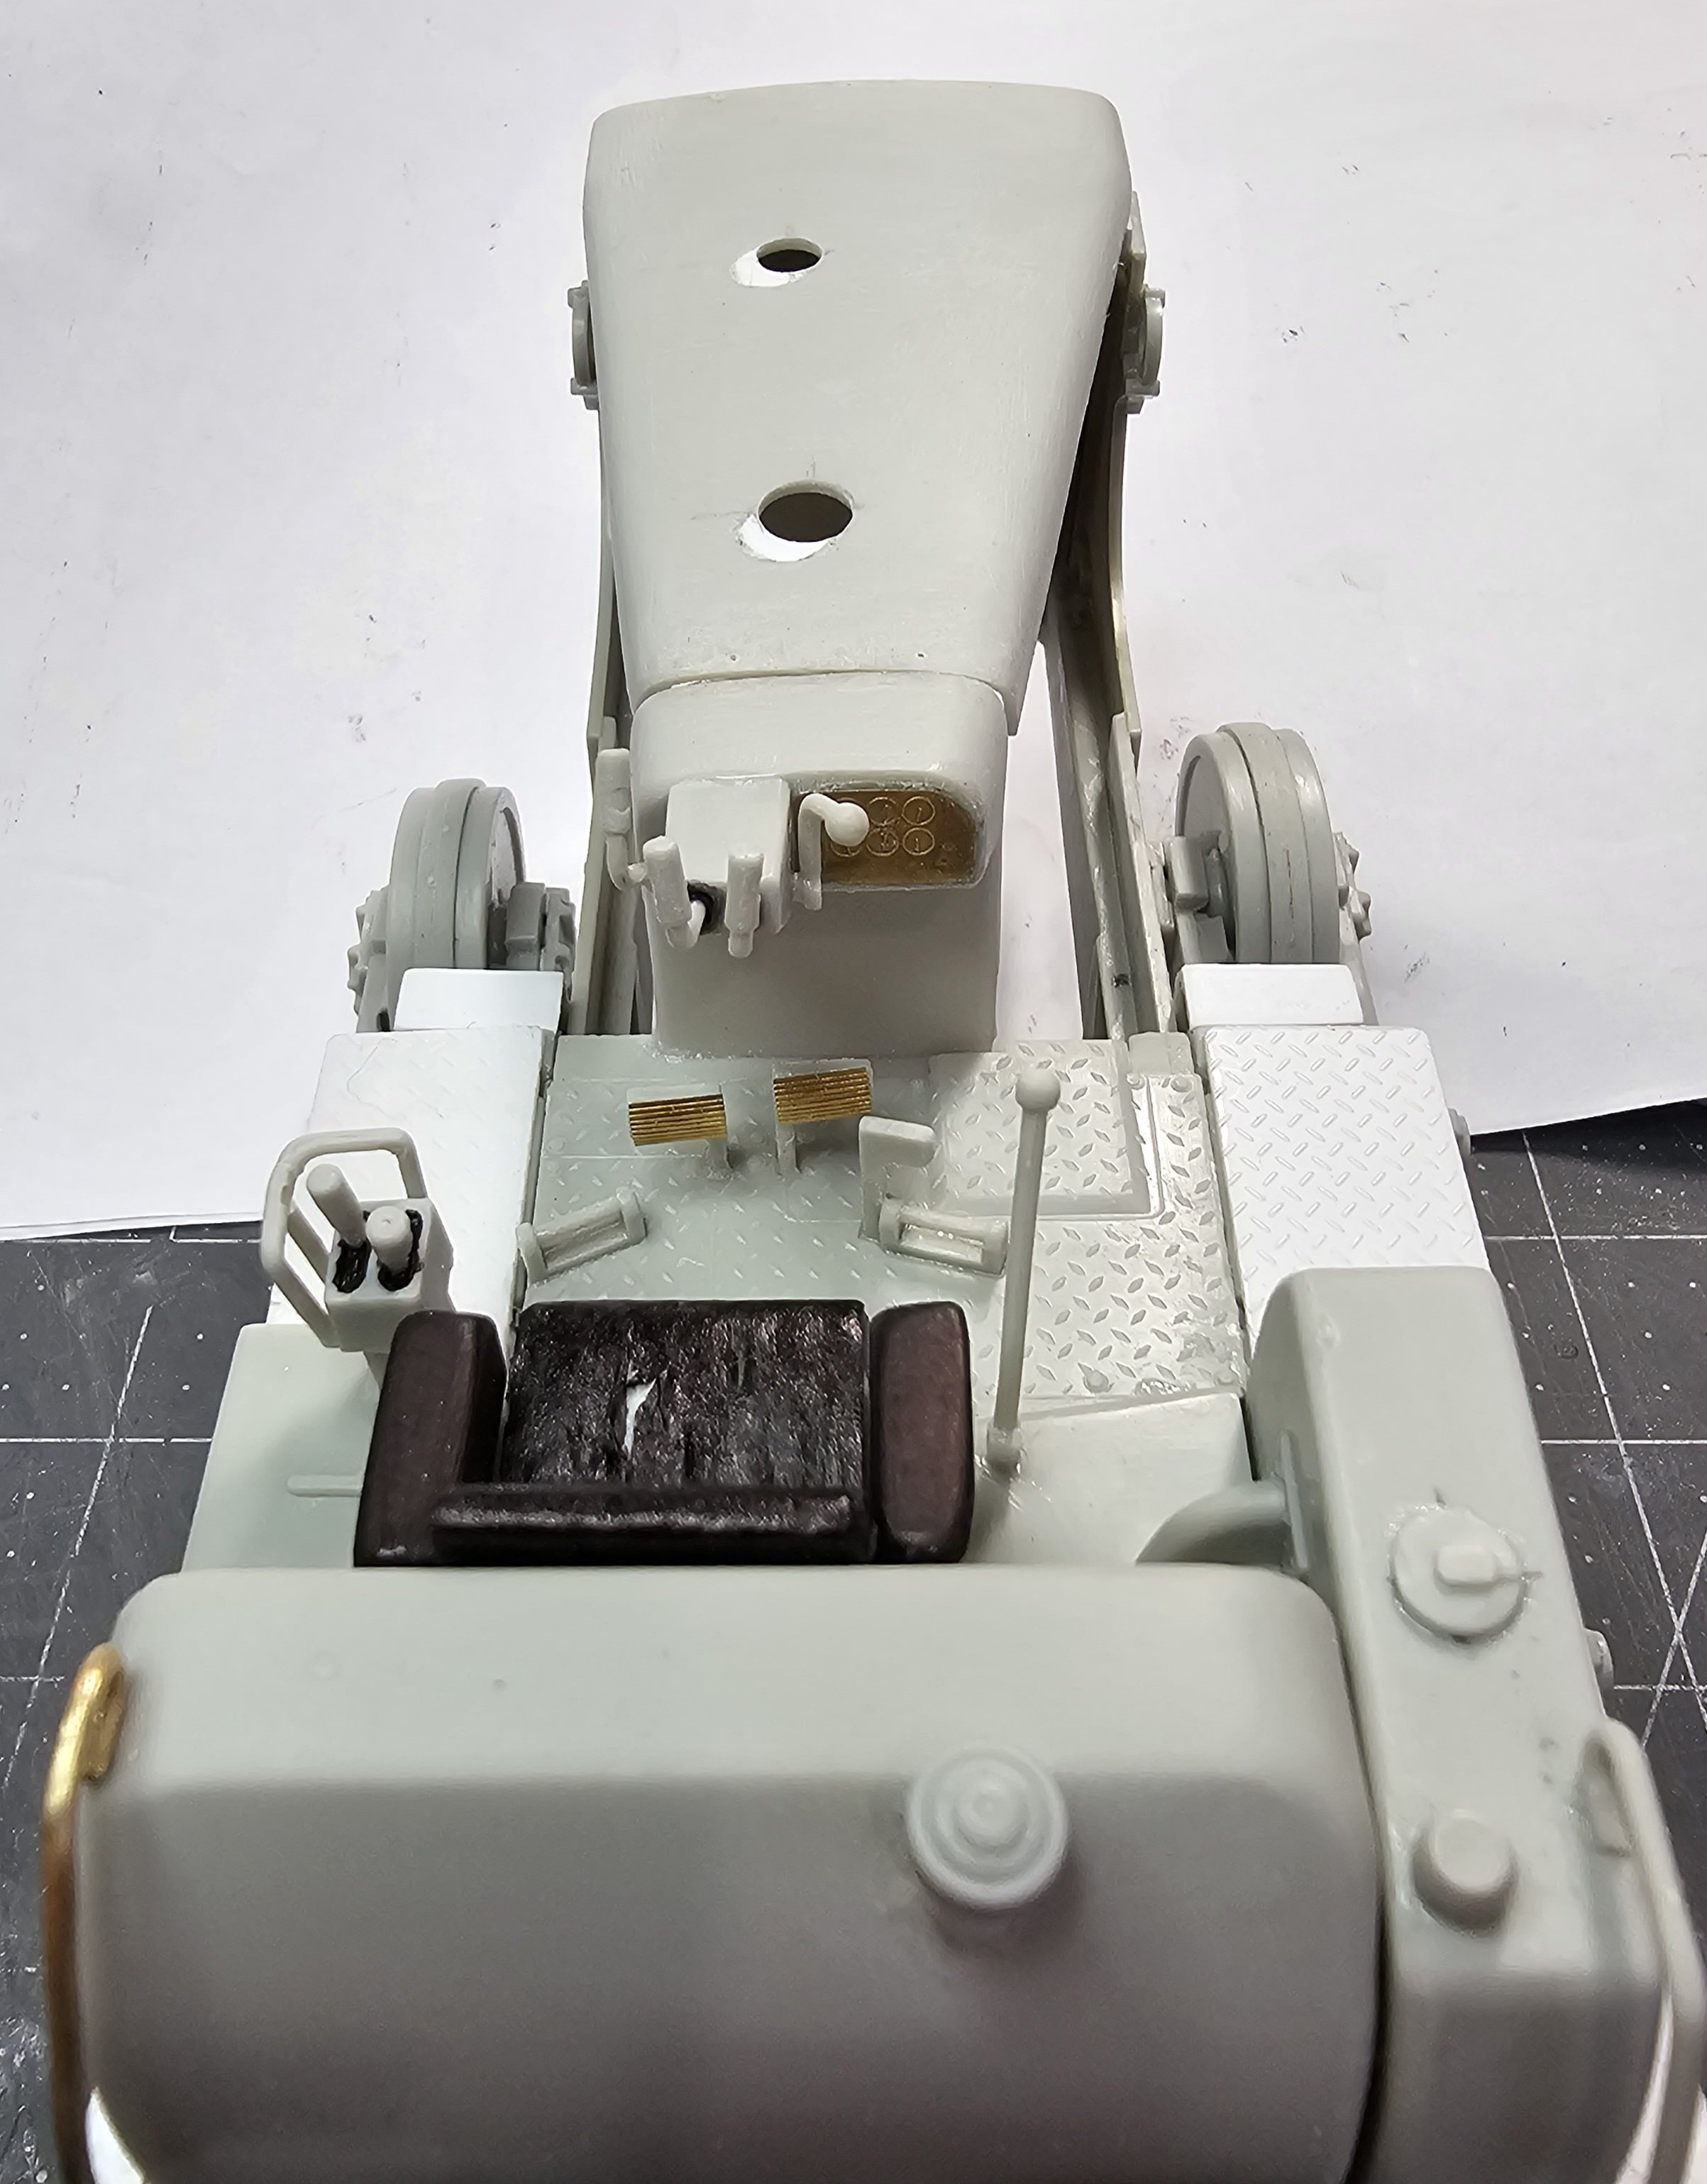
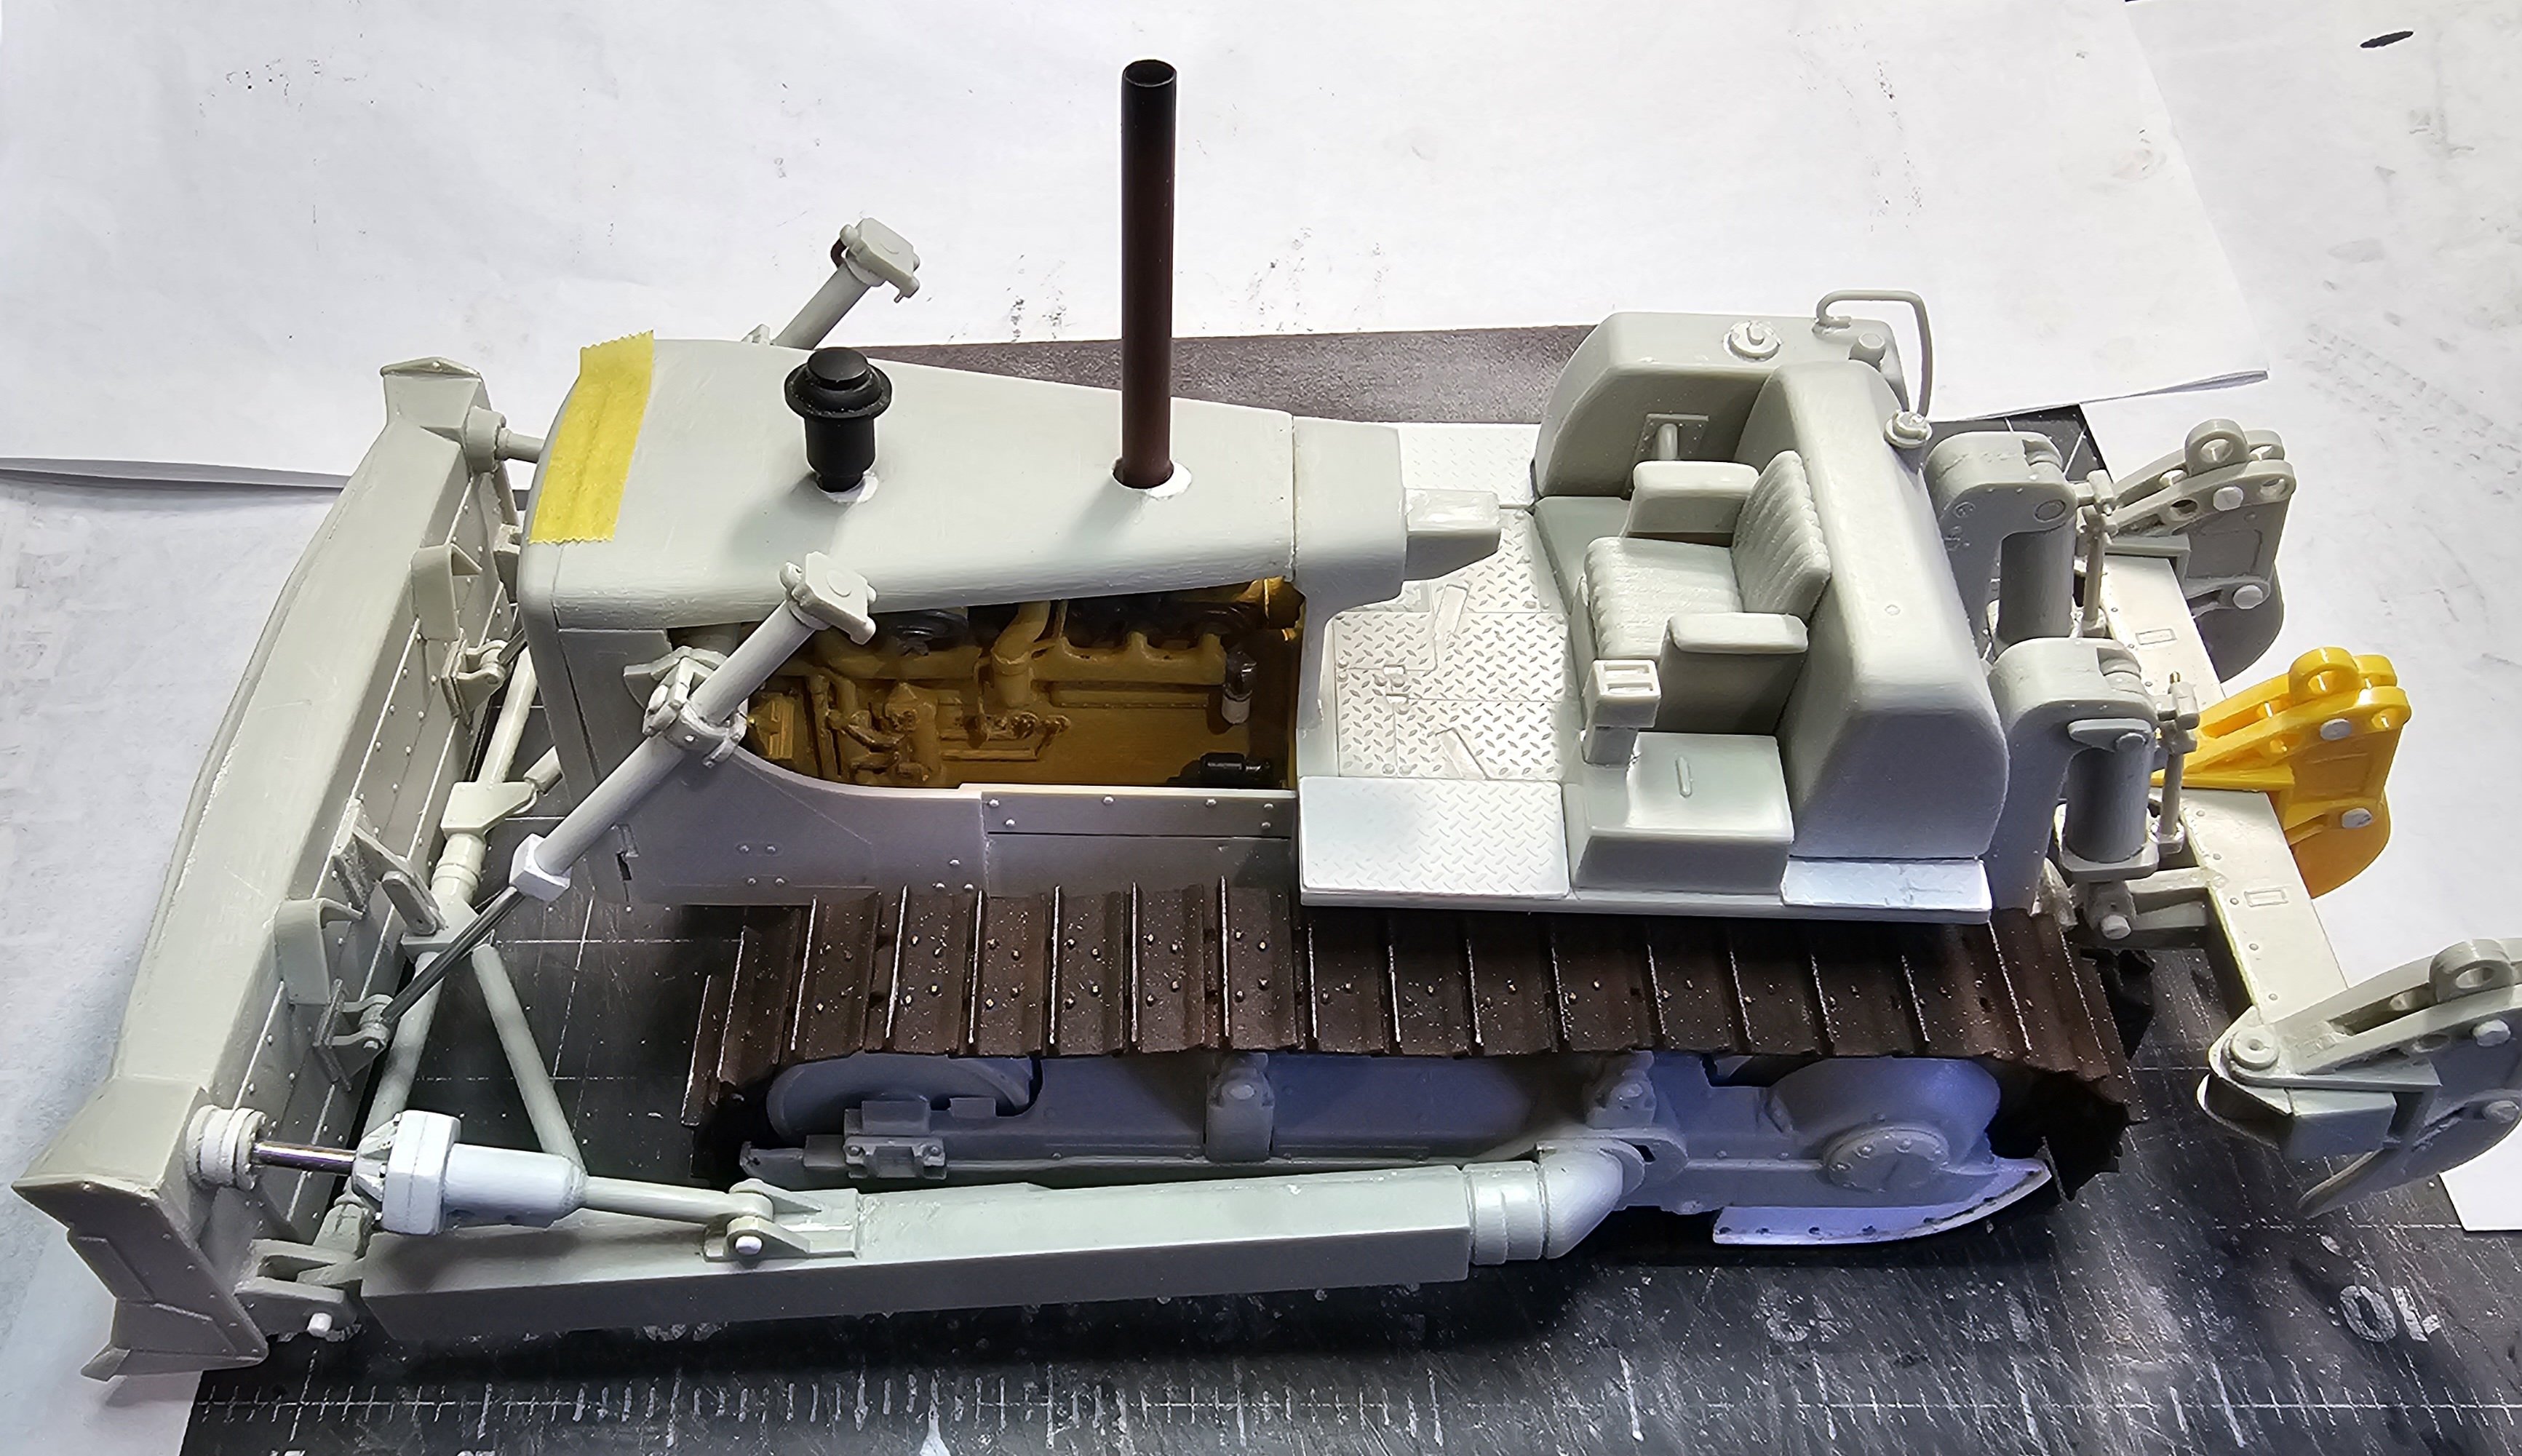
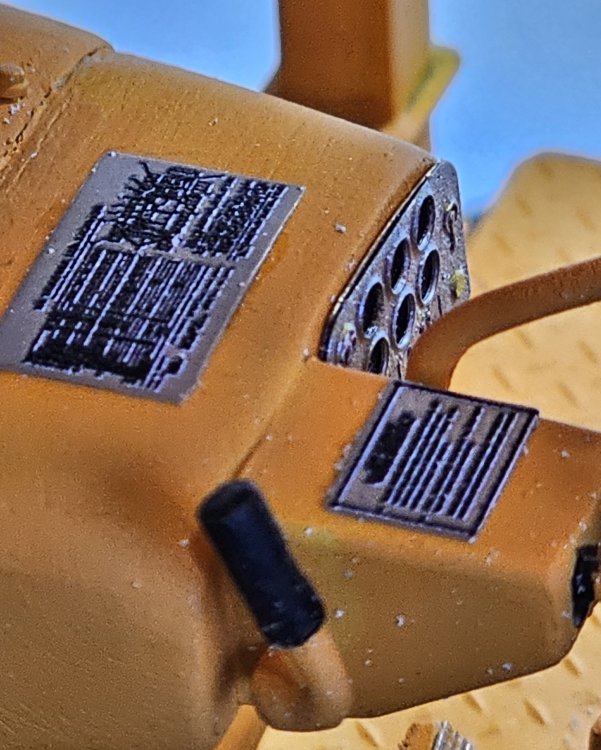
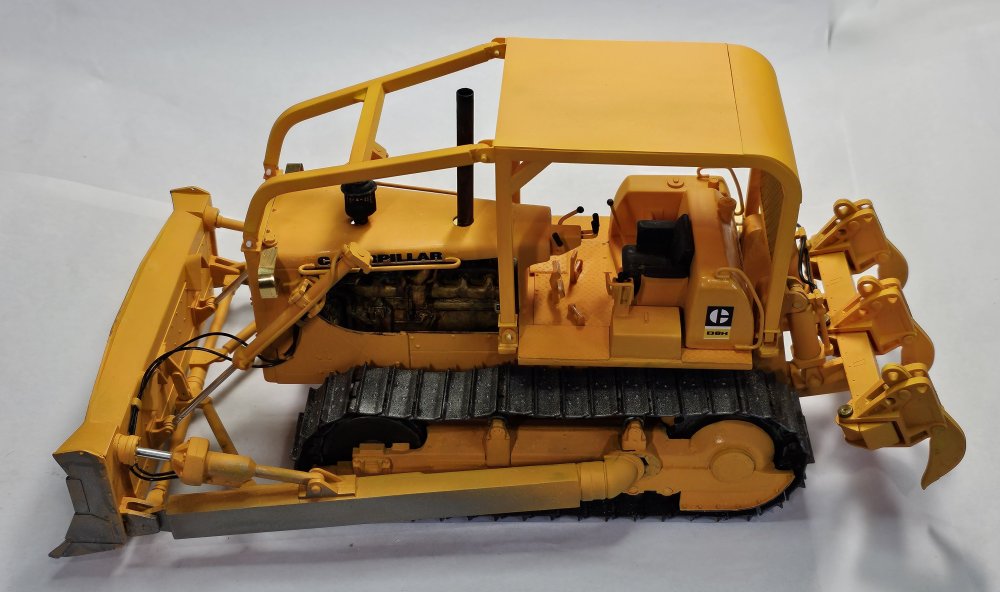
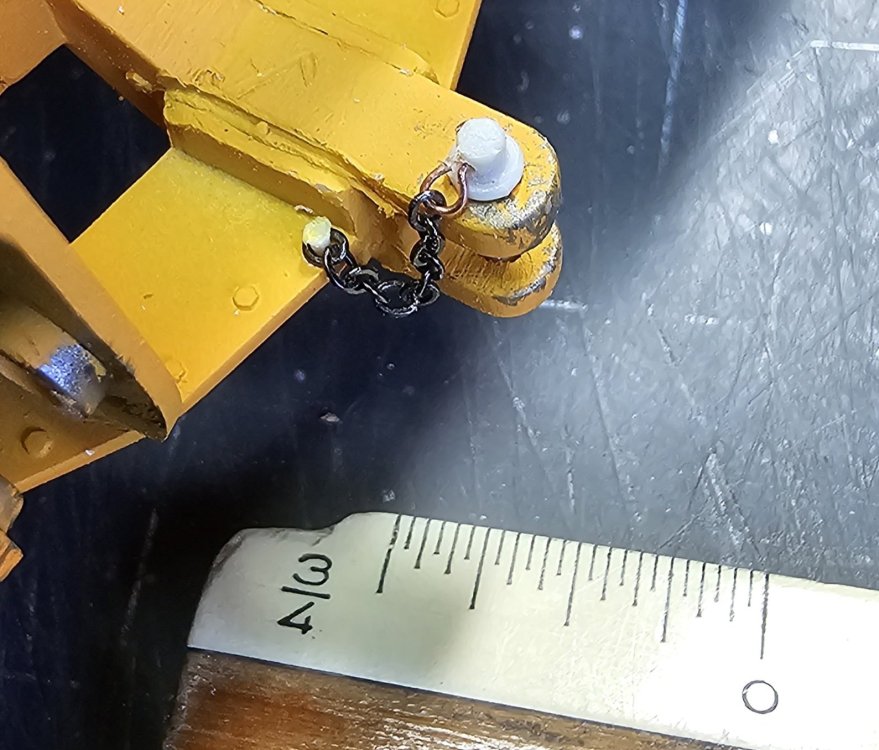
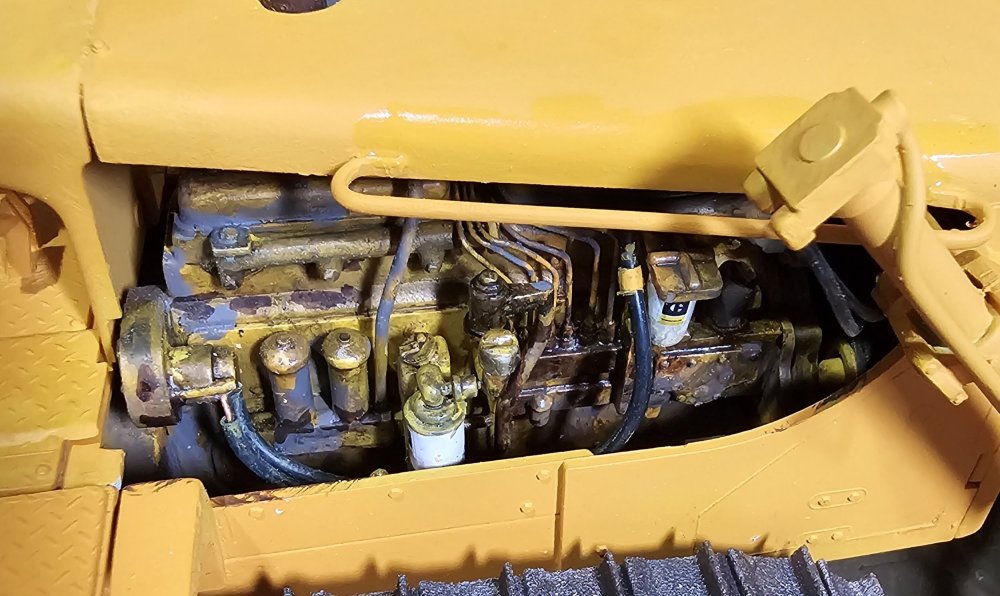
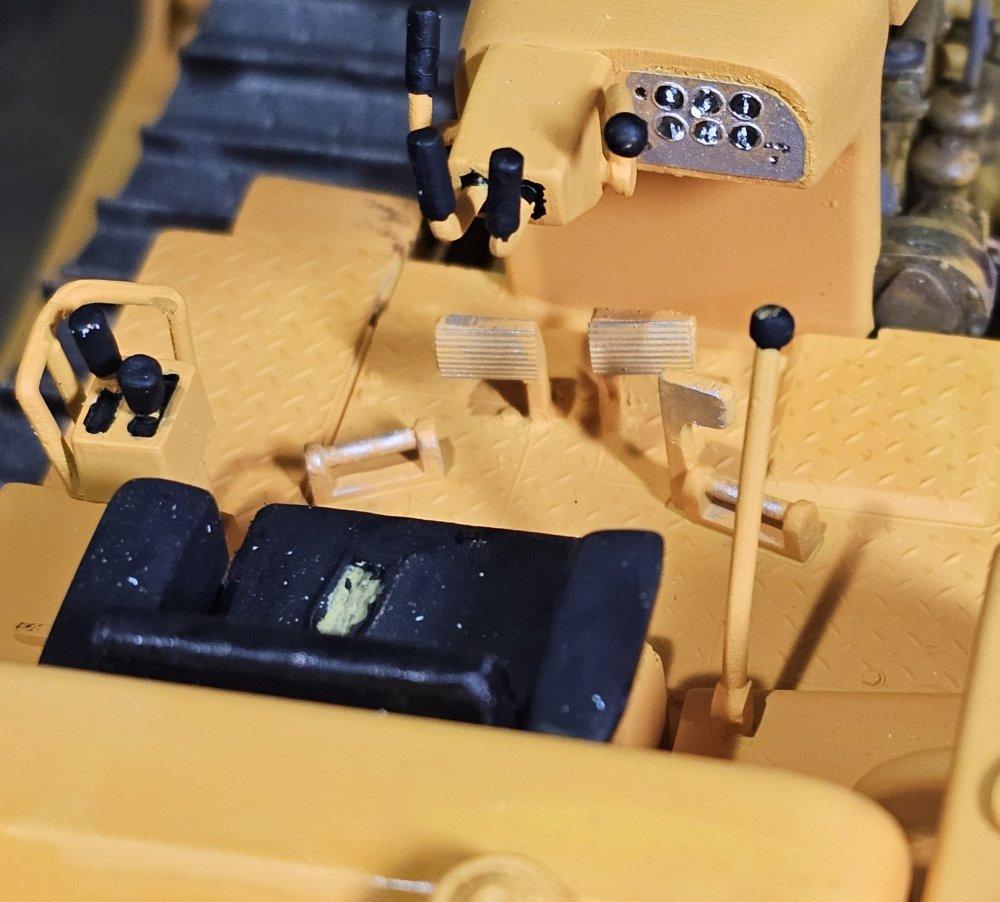
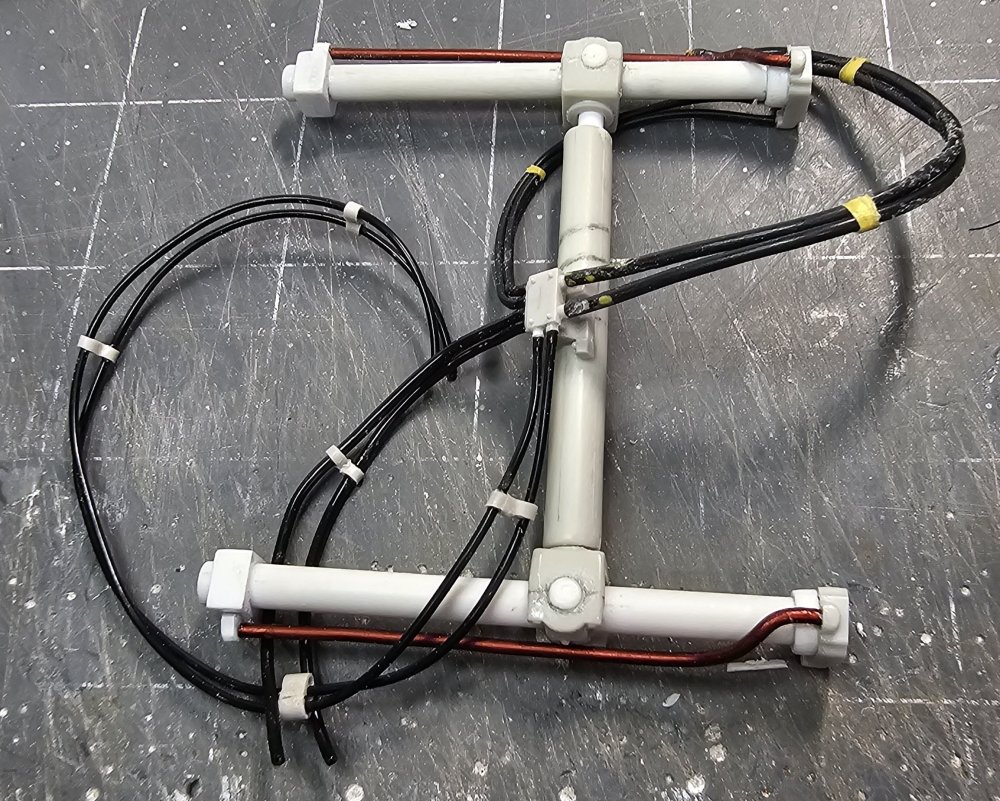
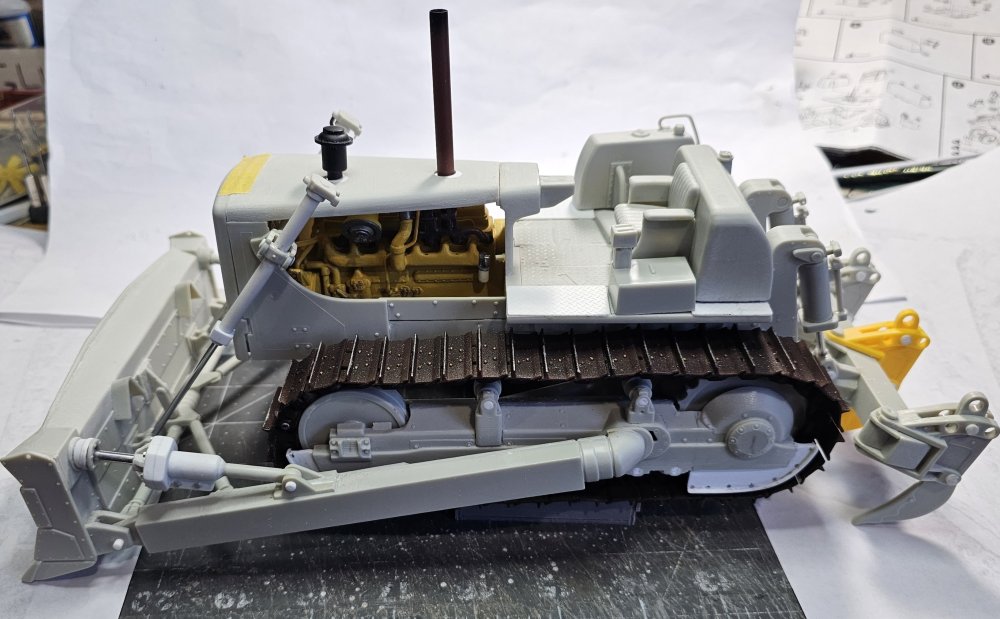
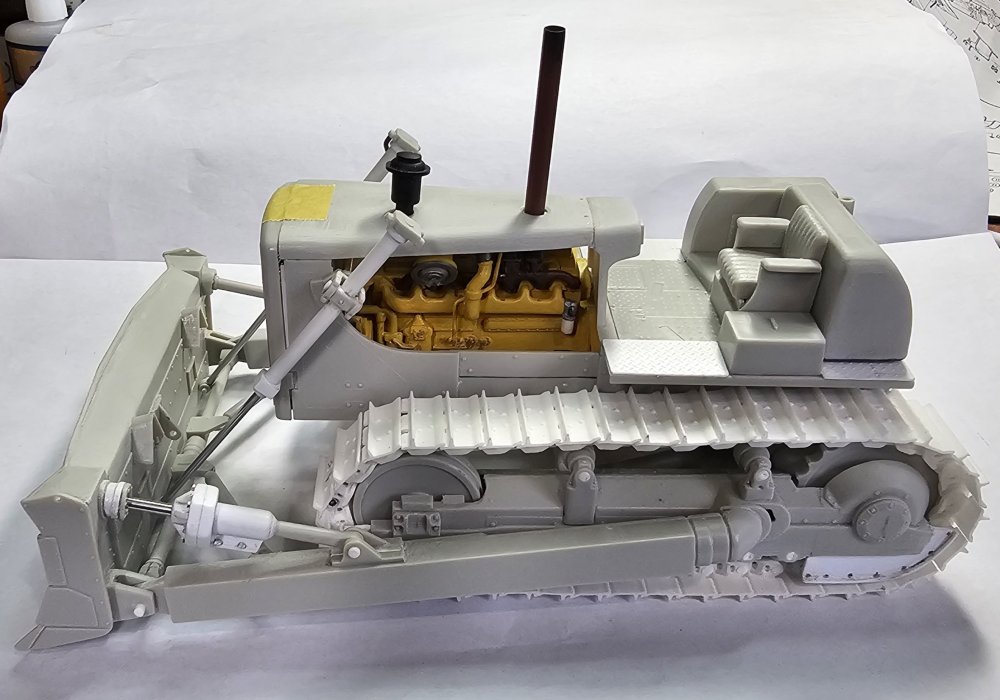
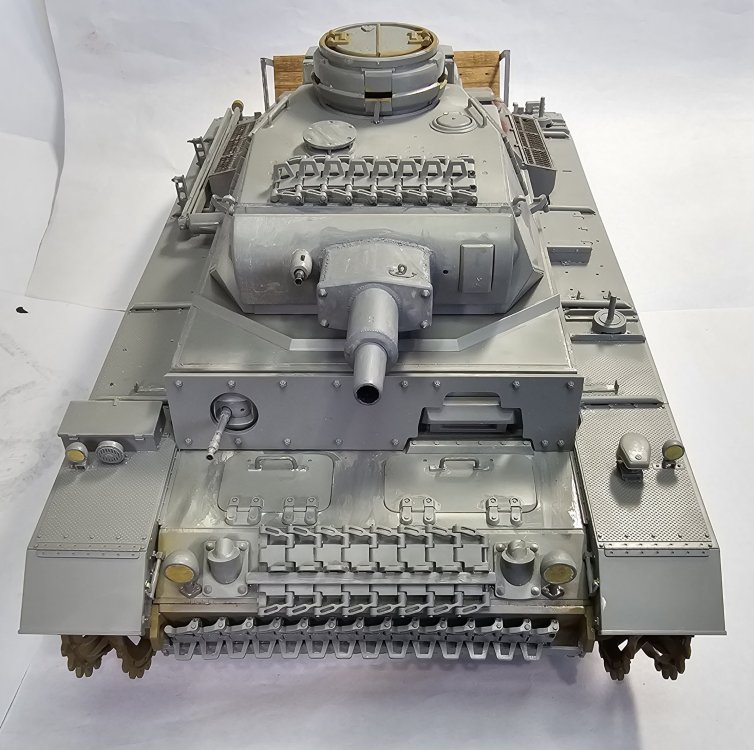
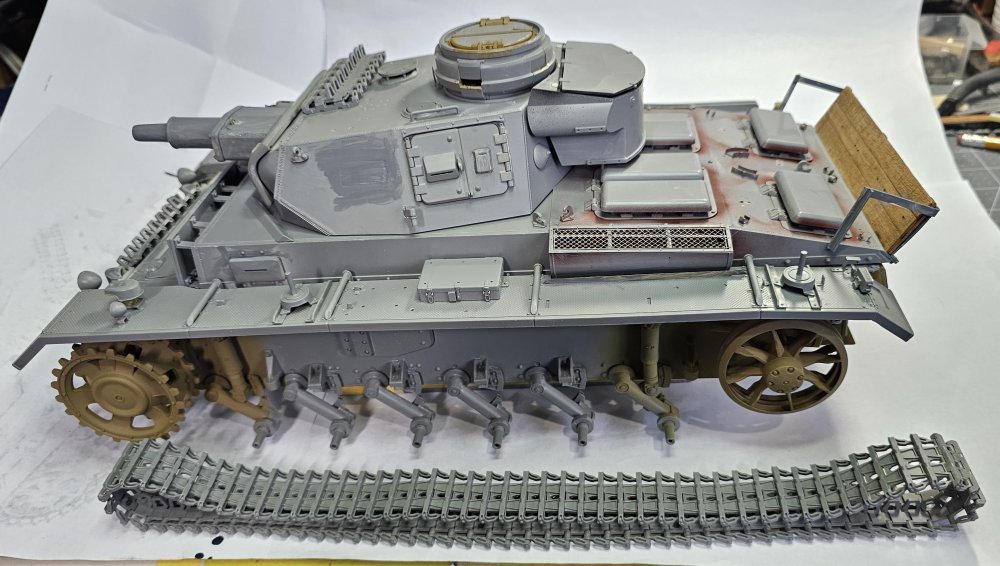
Hey all A little more done on the AMT Caterpillar D8H. I have it assembled, everything and the blade, I still need to do the rippers. This view shows the tow pin with chain. This view shows the blade painted steel/silver. I added some more steel paint to the tracks. This view shows the blade tilt cylinders hydraulic hoses, also the hoses for the blade lift cylinders. This view shows the hydraulic feed hoses from the hydraulic pump to the hydraulic manifold. Also the right lift cylinder hoses. I added some more weathering to the engine. This view shows the finished operators position. I have some detail items for this area coming in the mail, placards and a better dash panel. Adding the decals is next. This still needs alot of weathering. Well that's it for now be back soon with more. Ron G


-
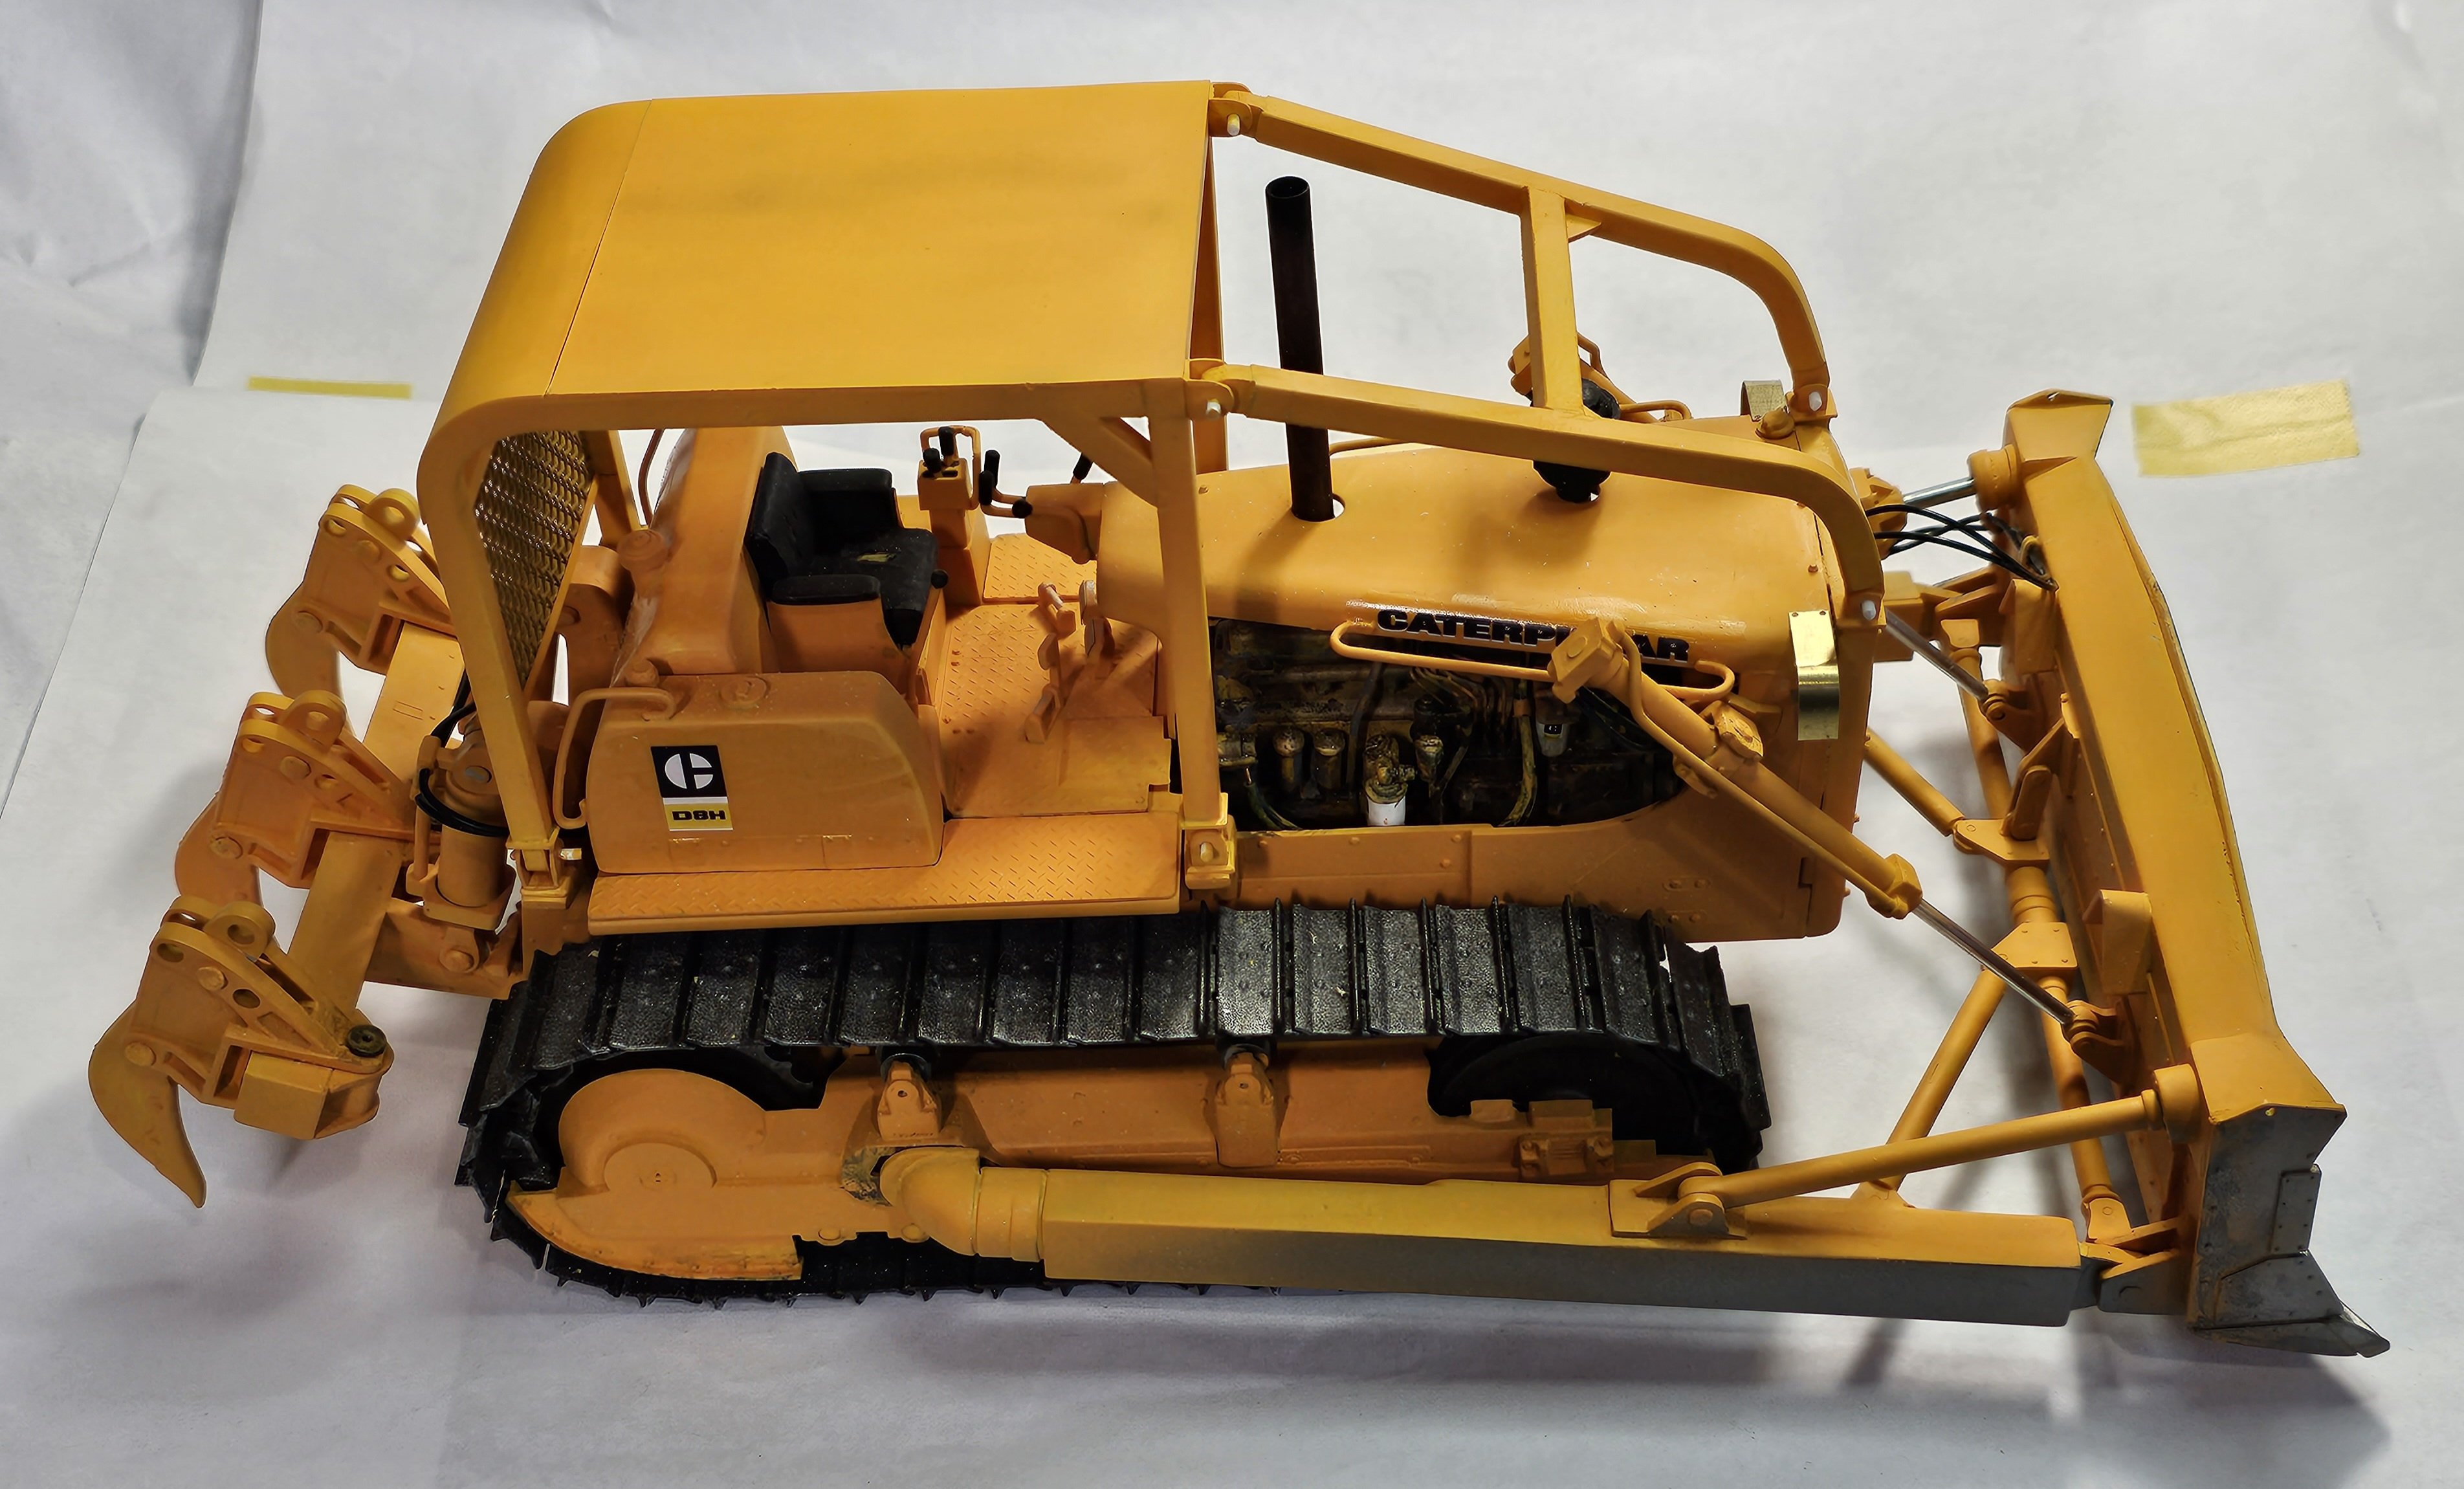
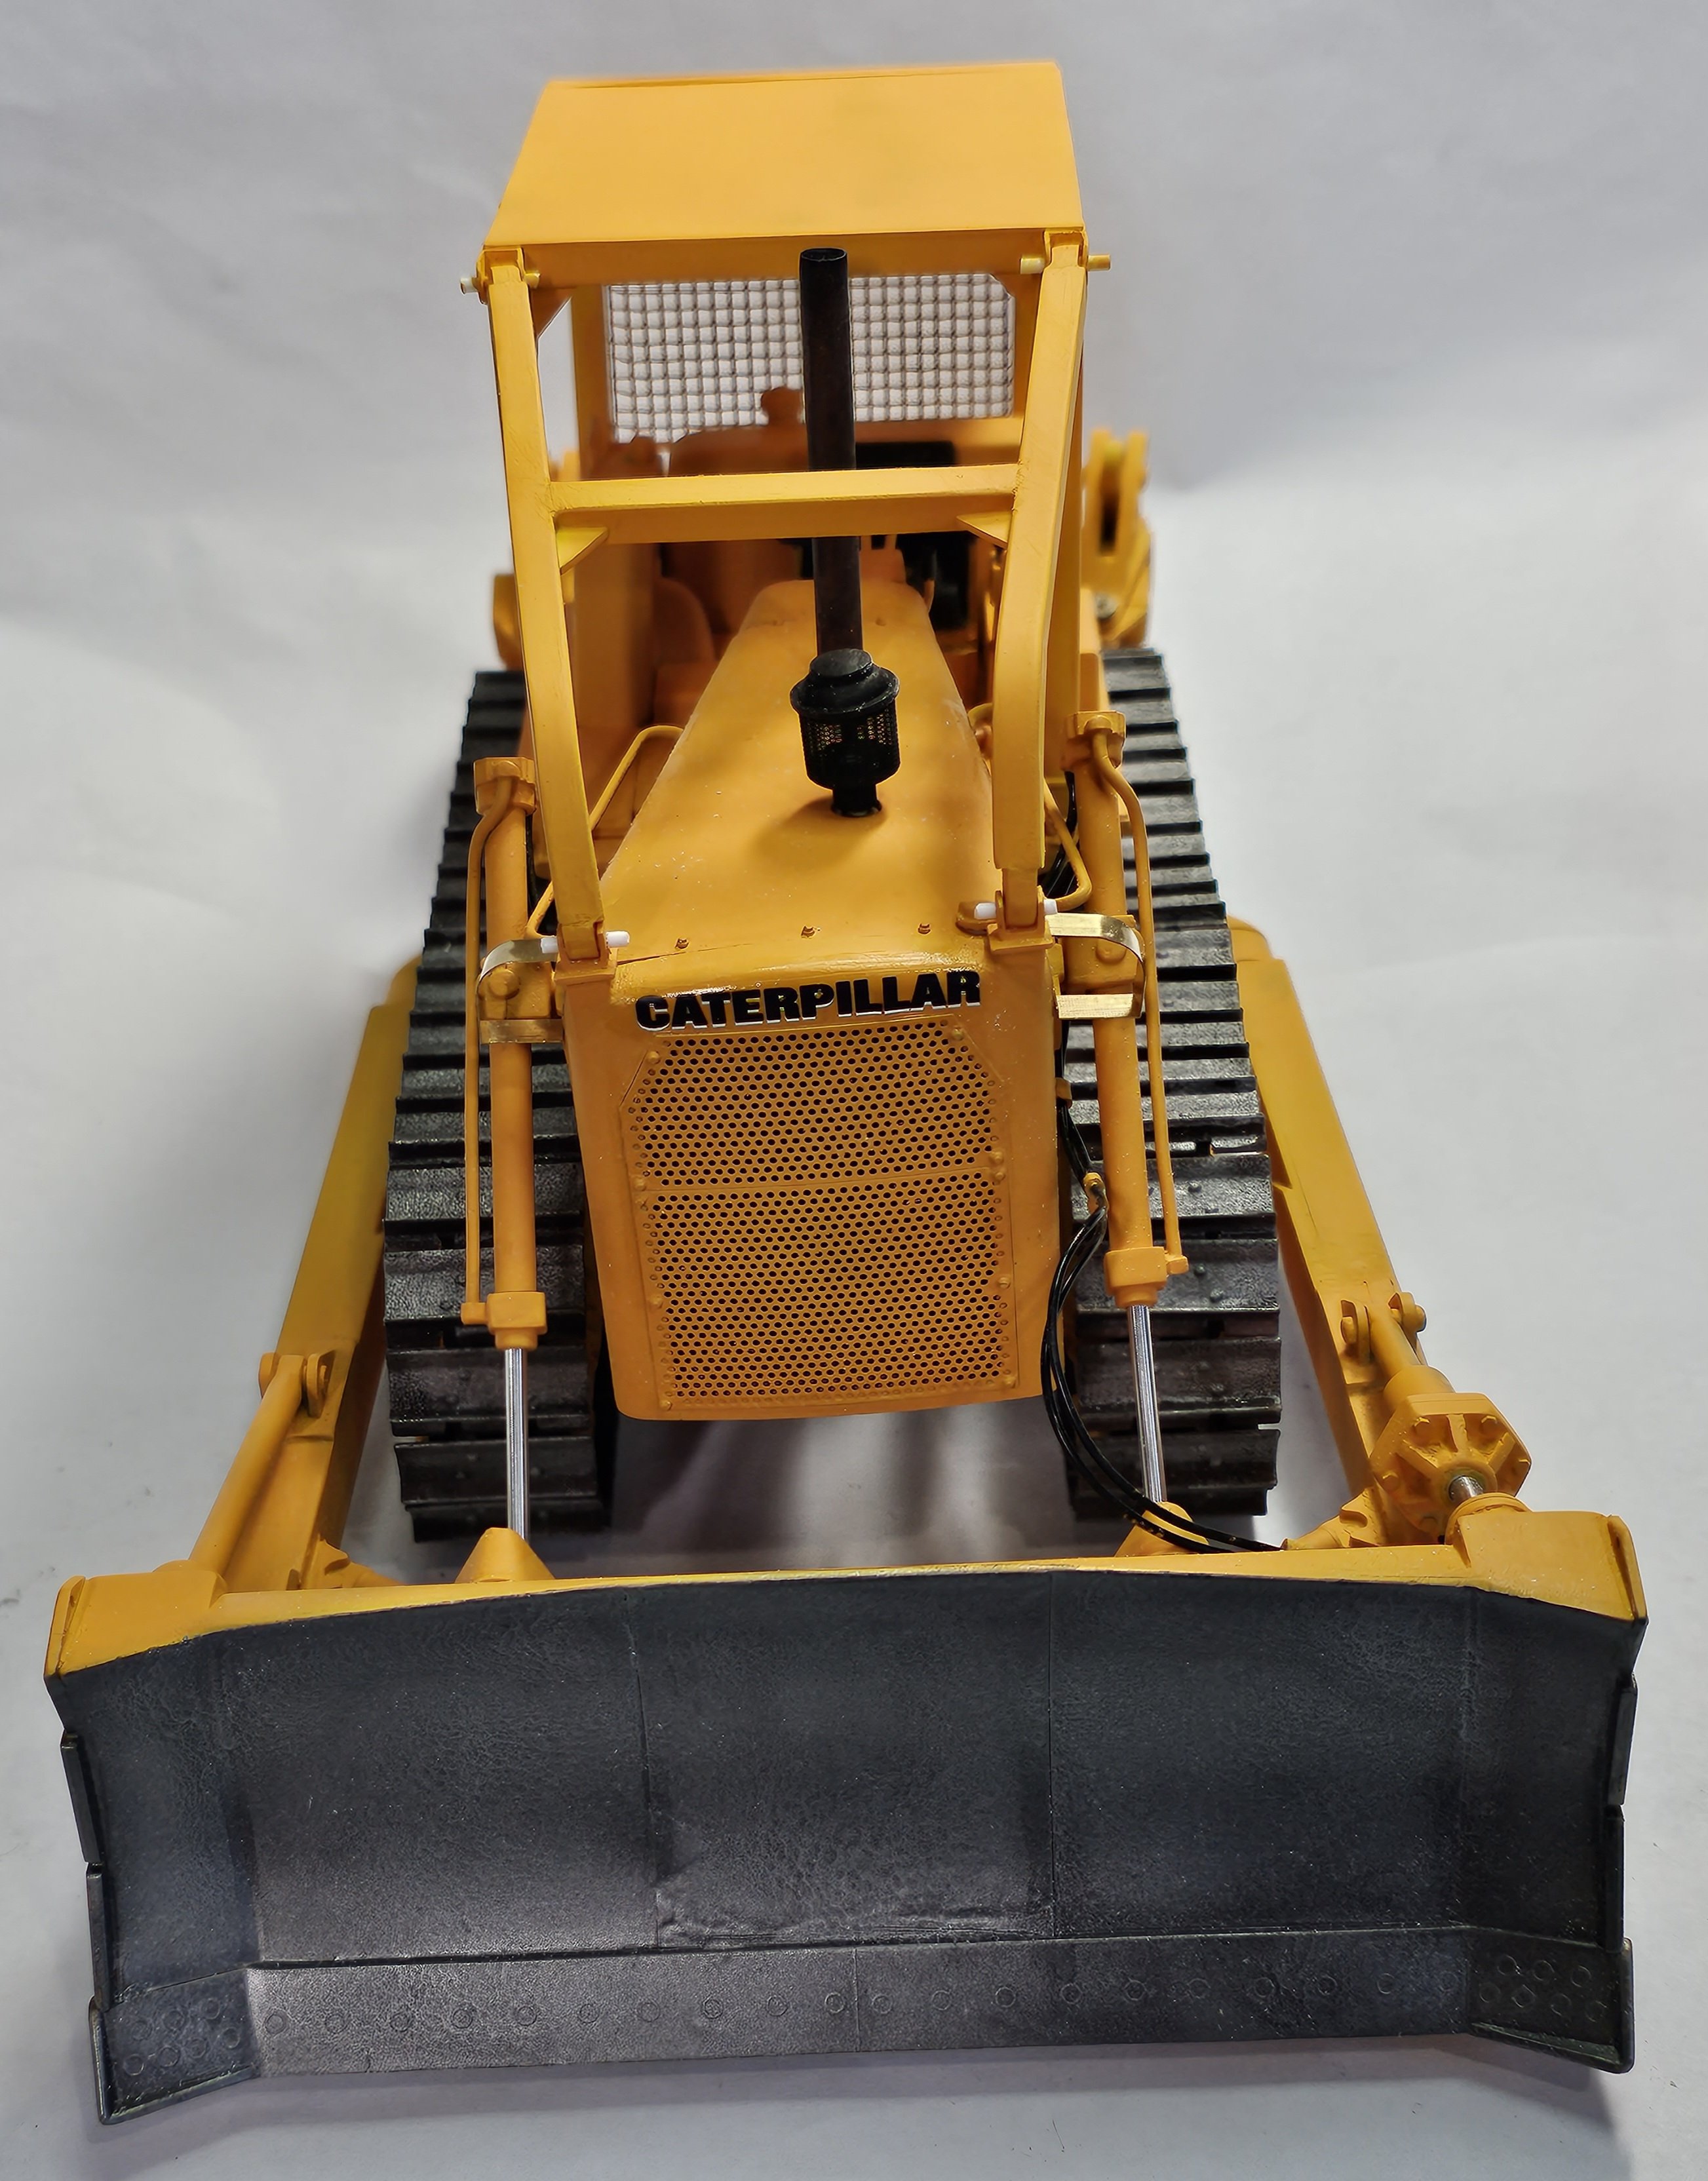
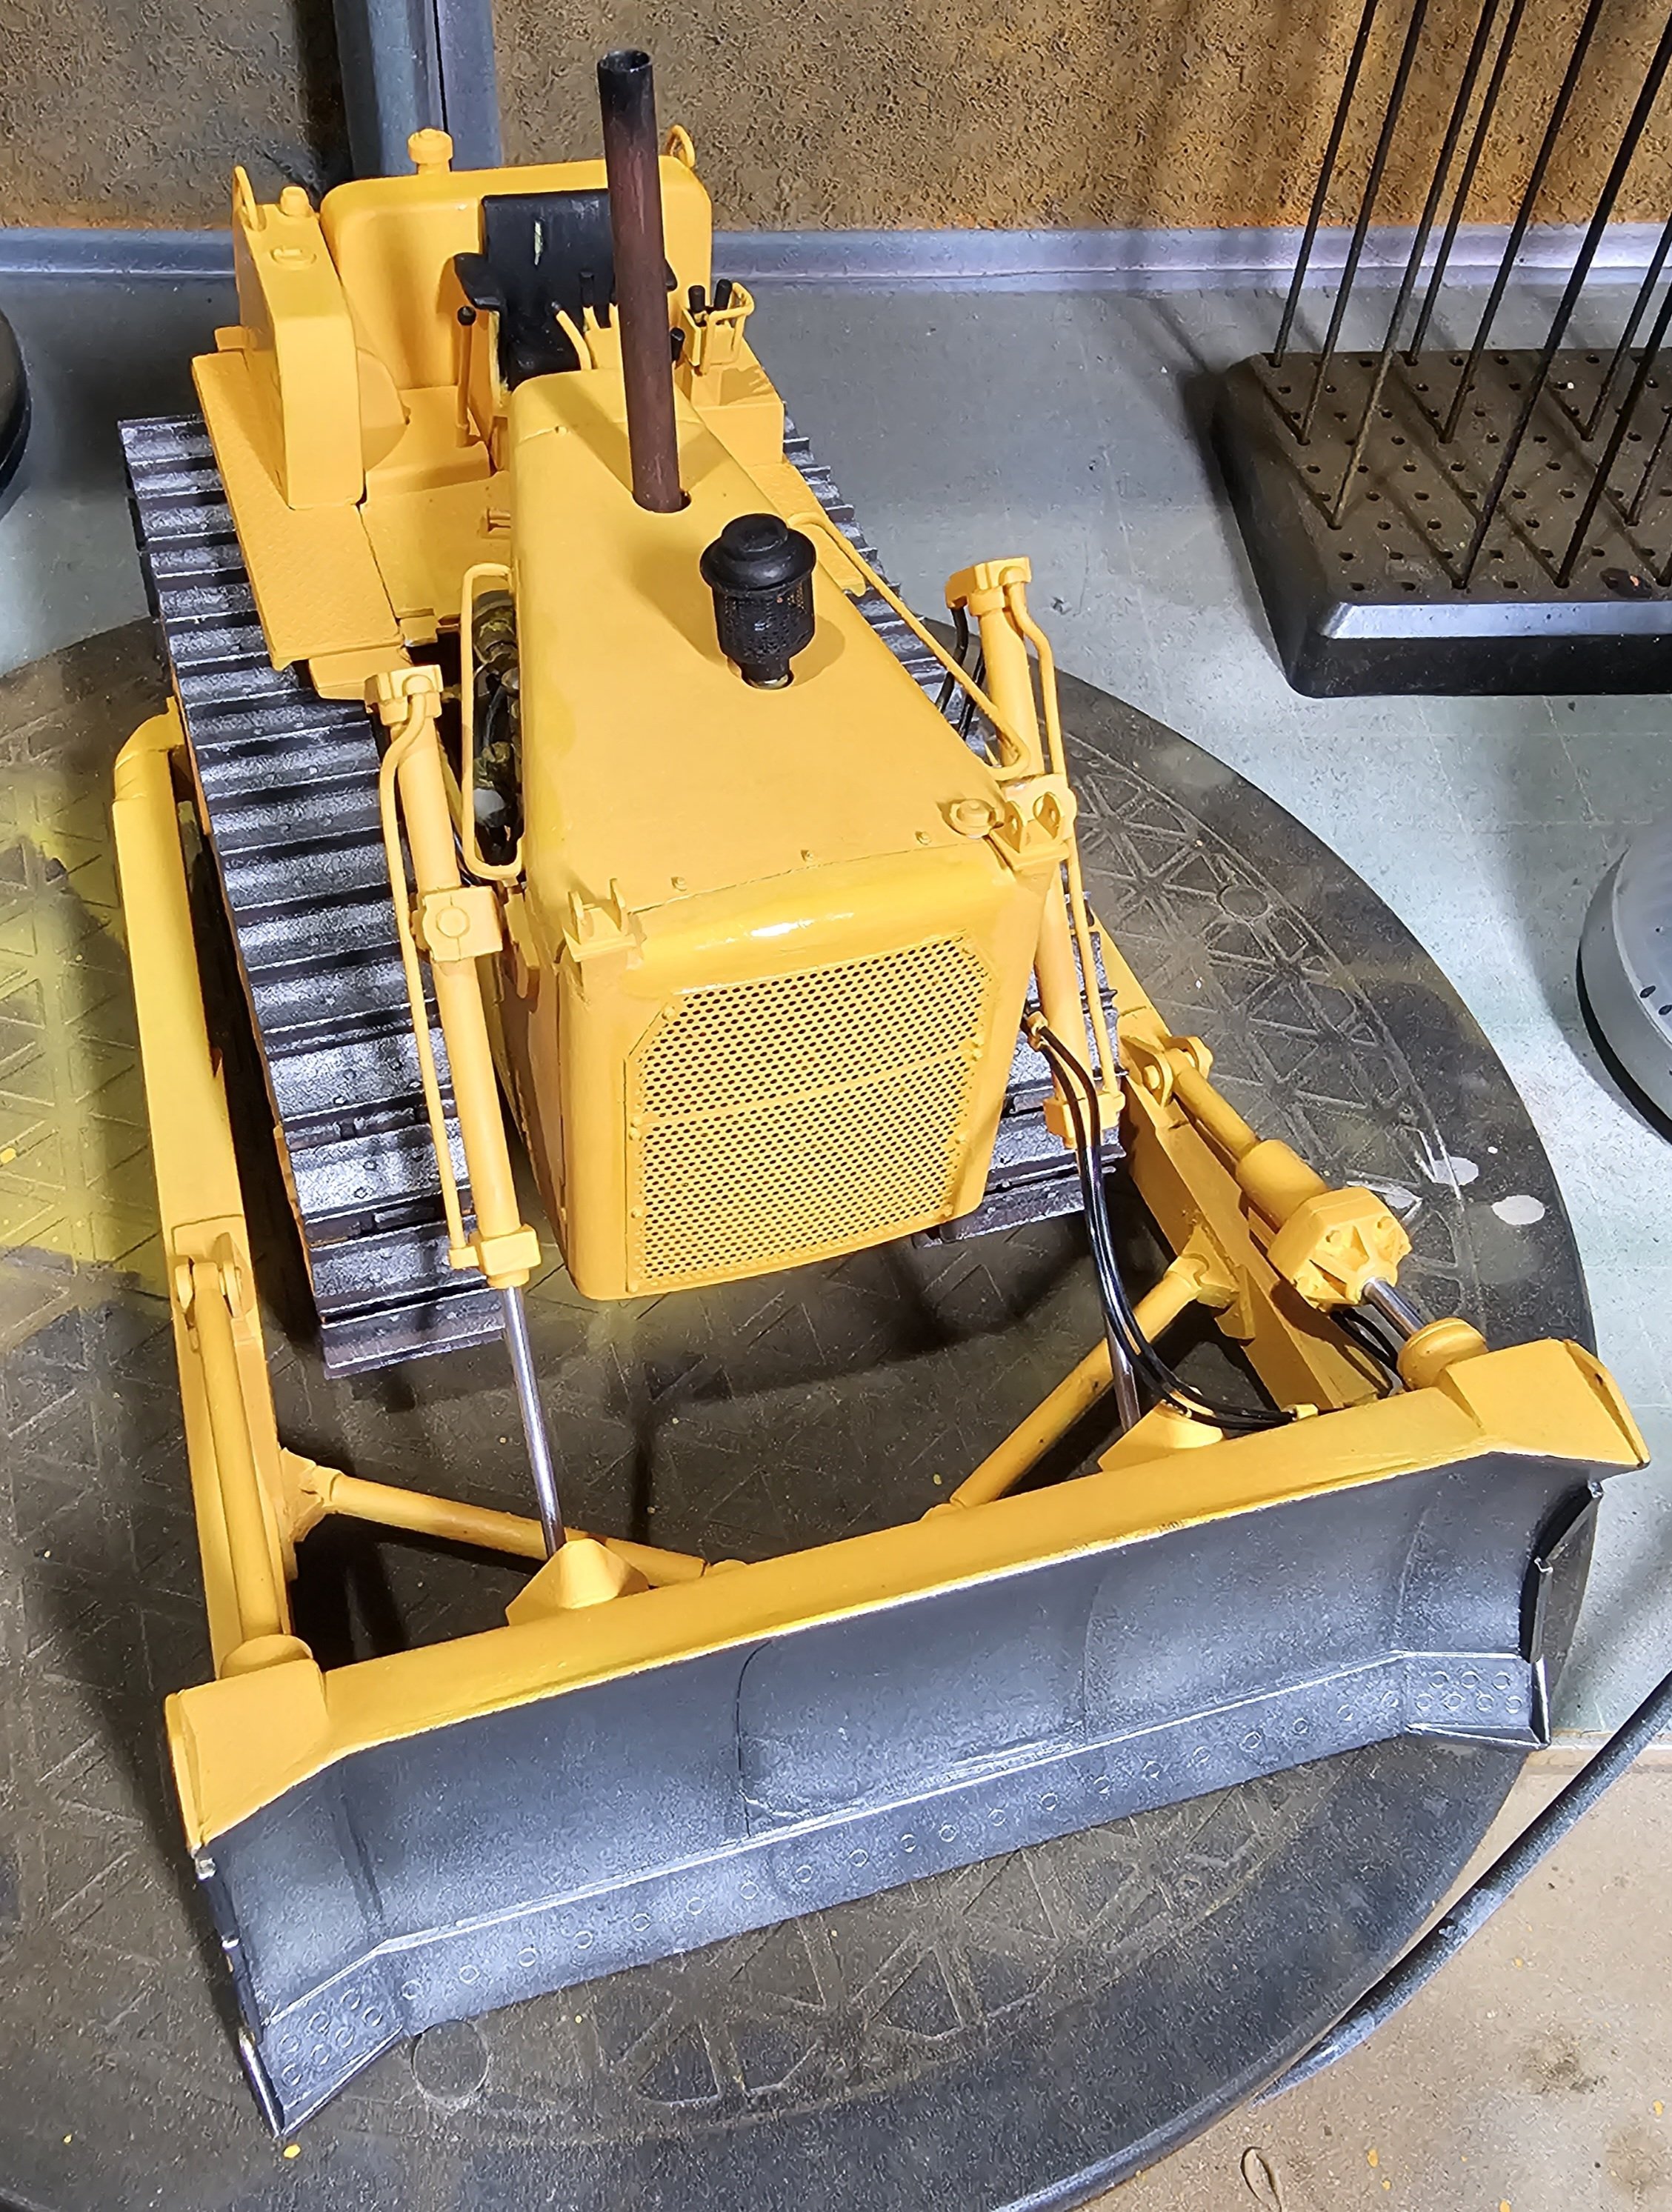
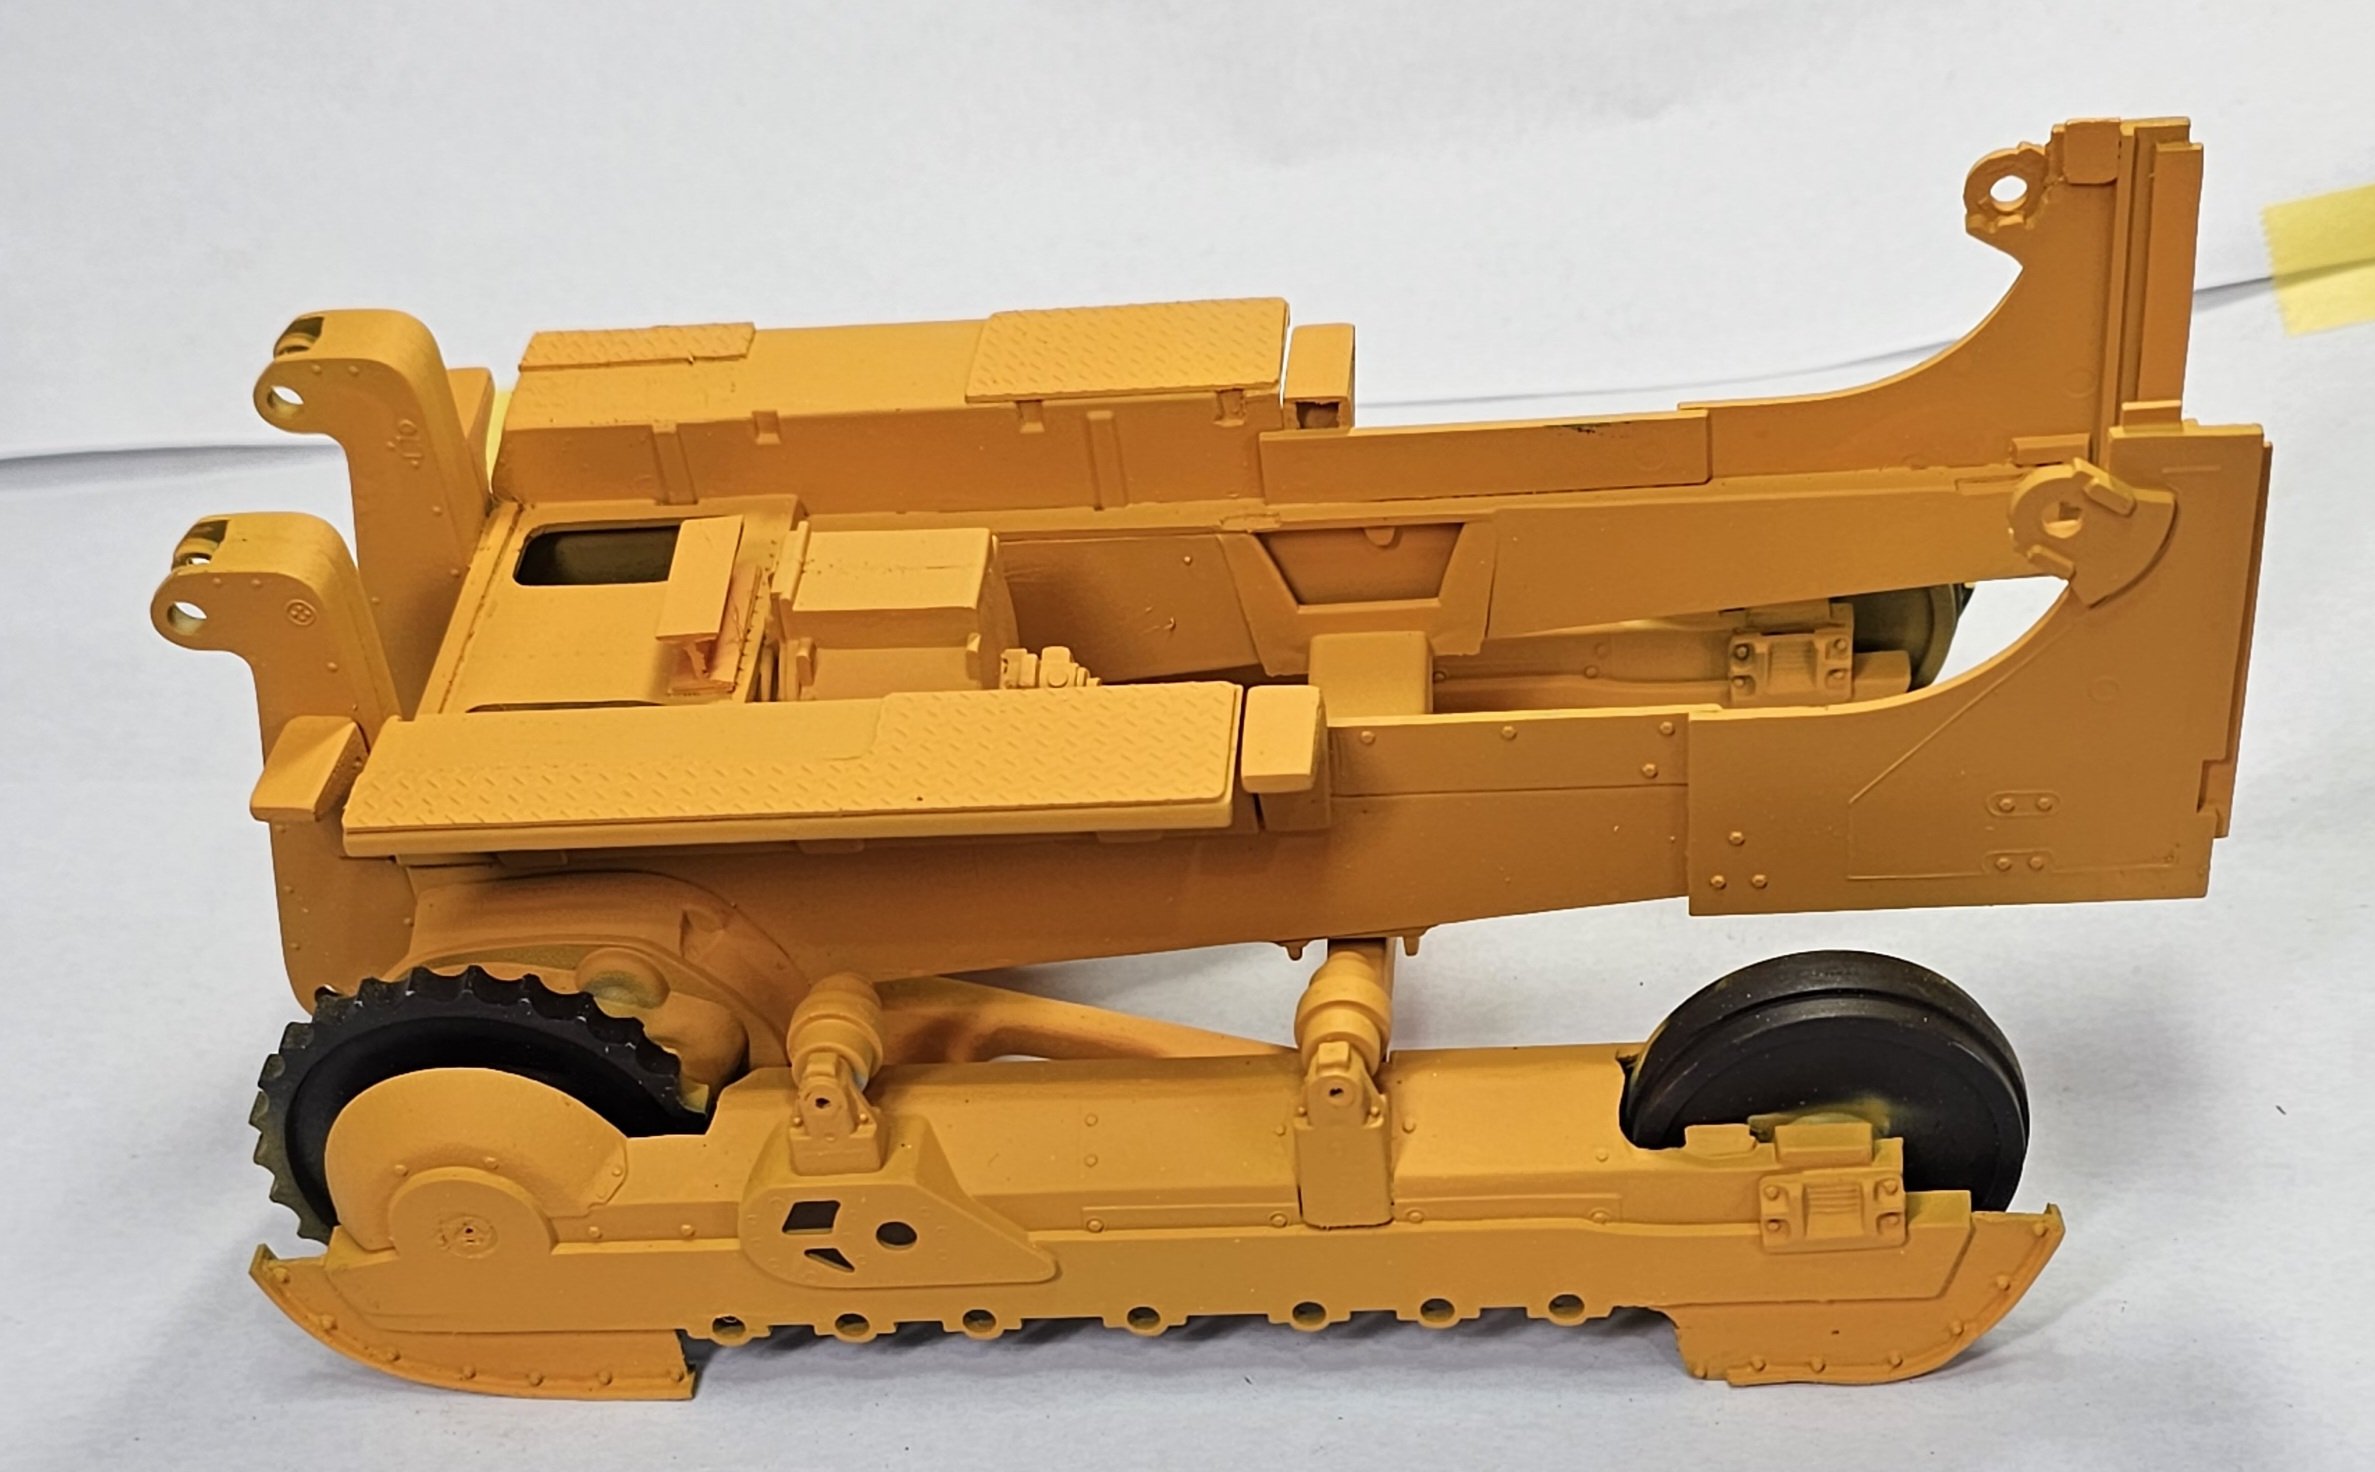
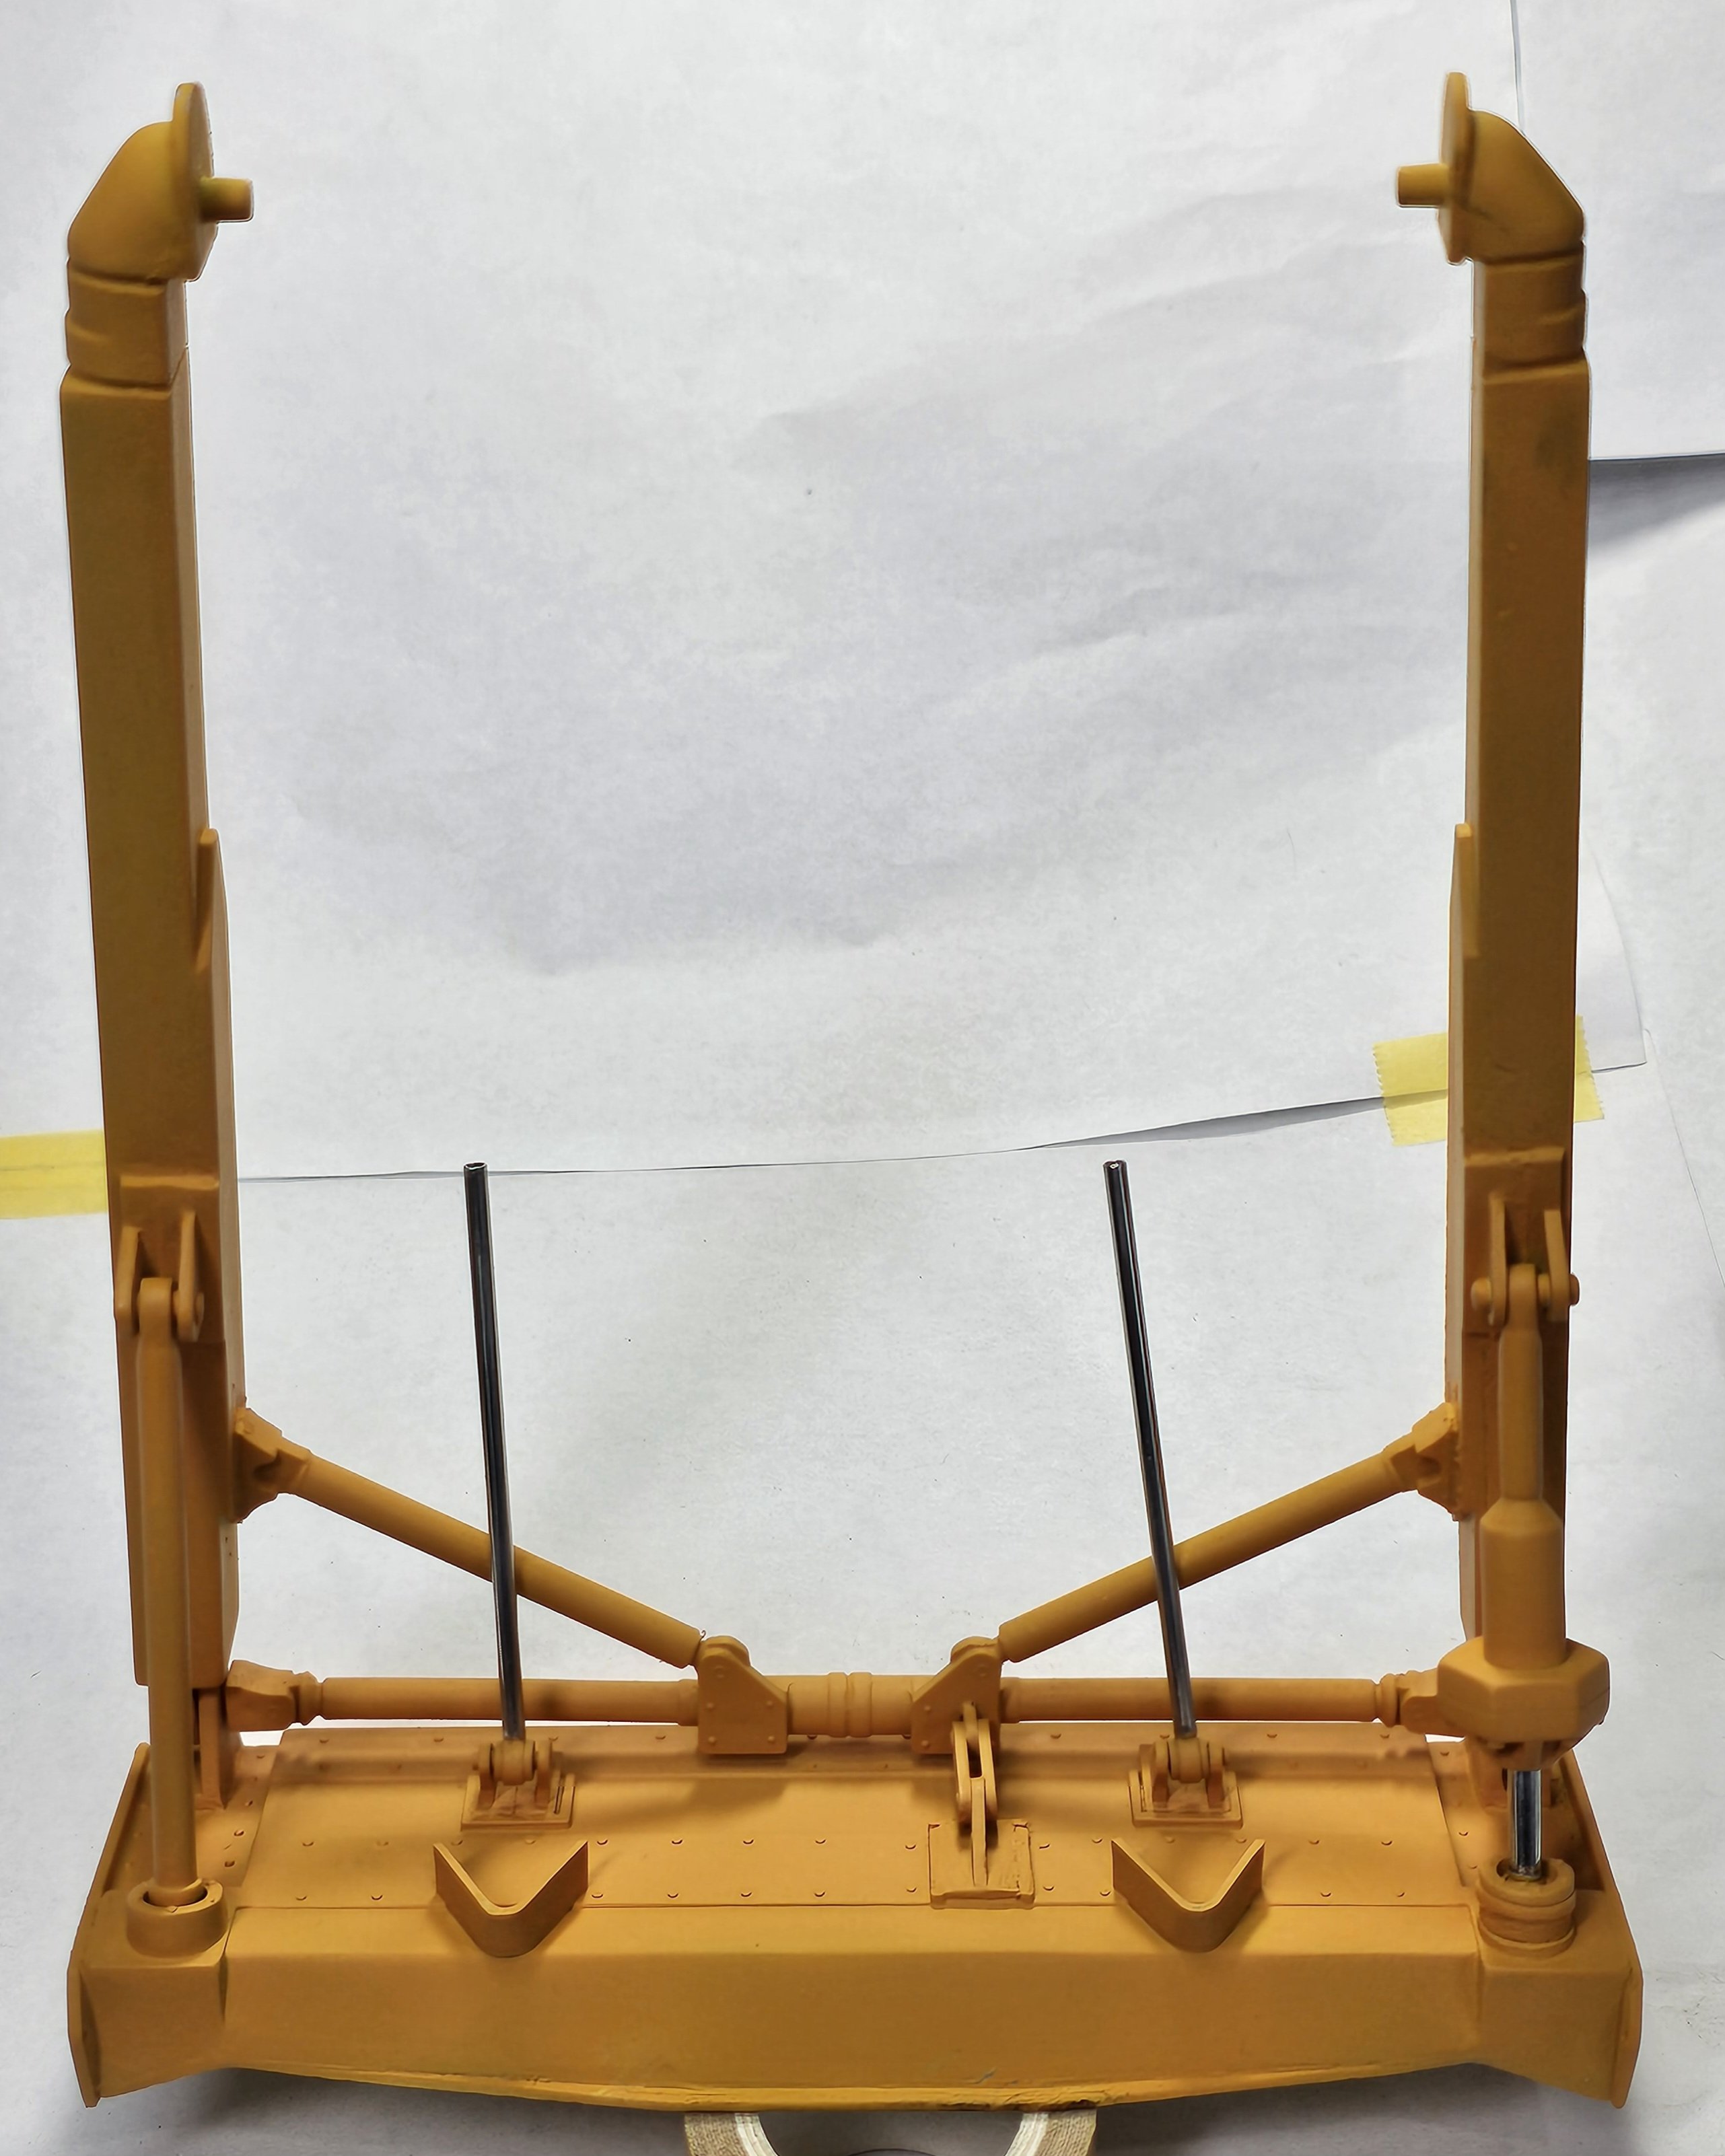
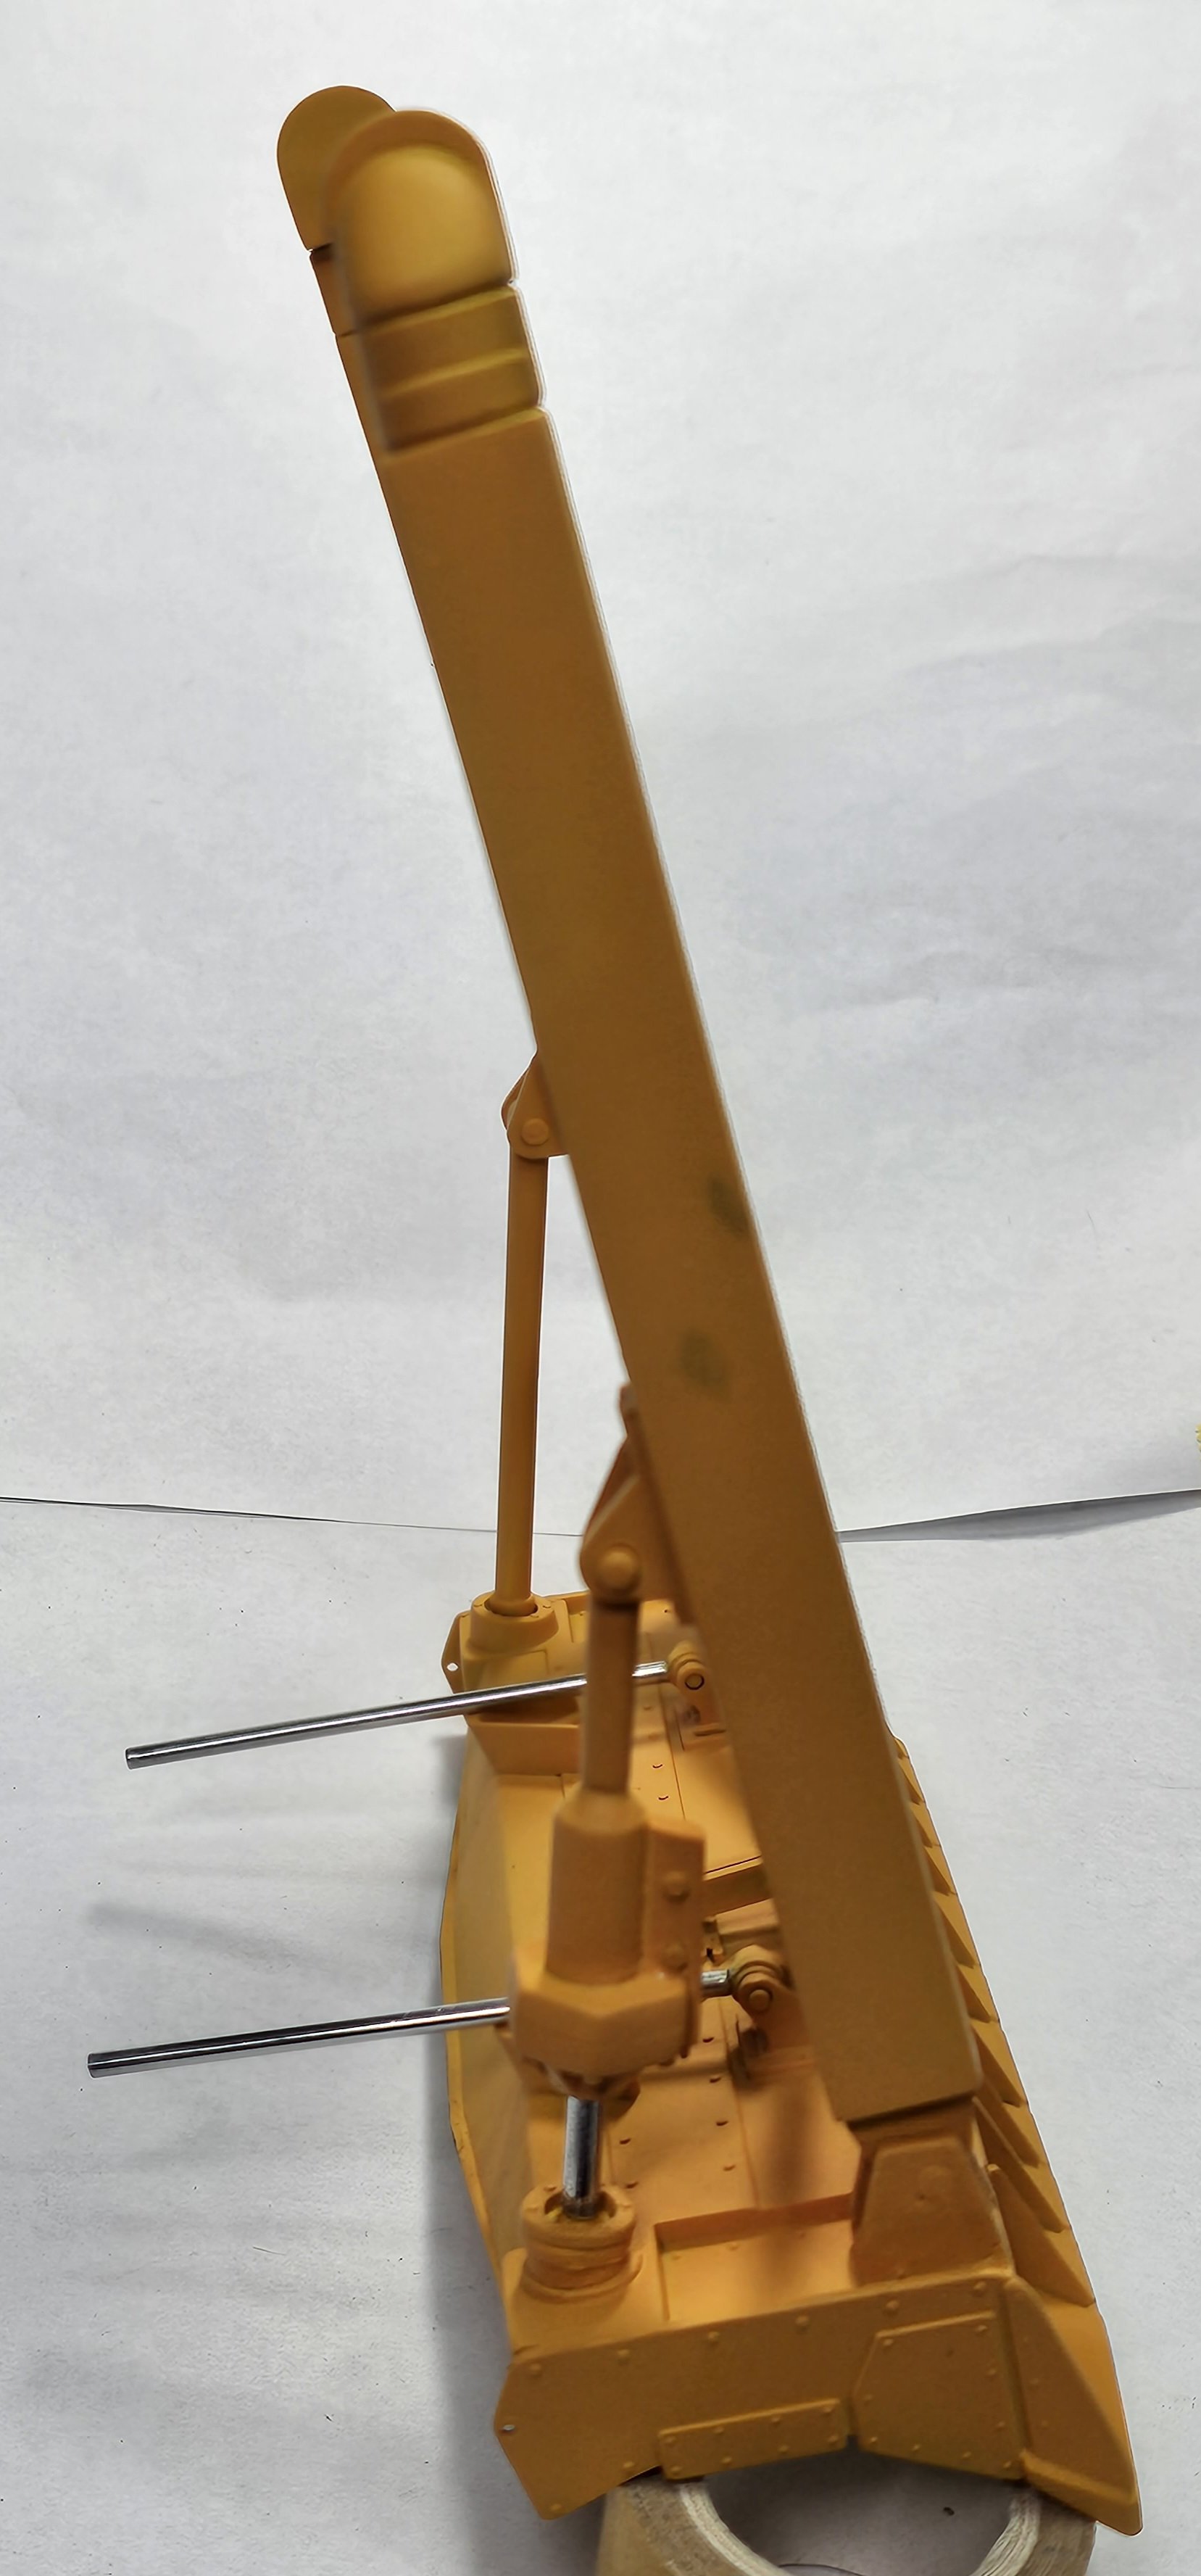
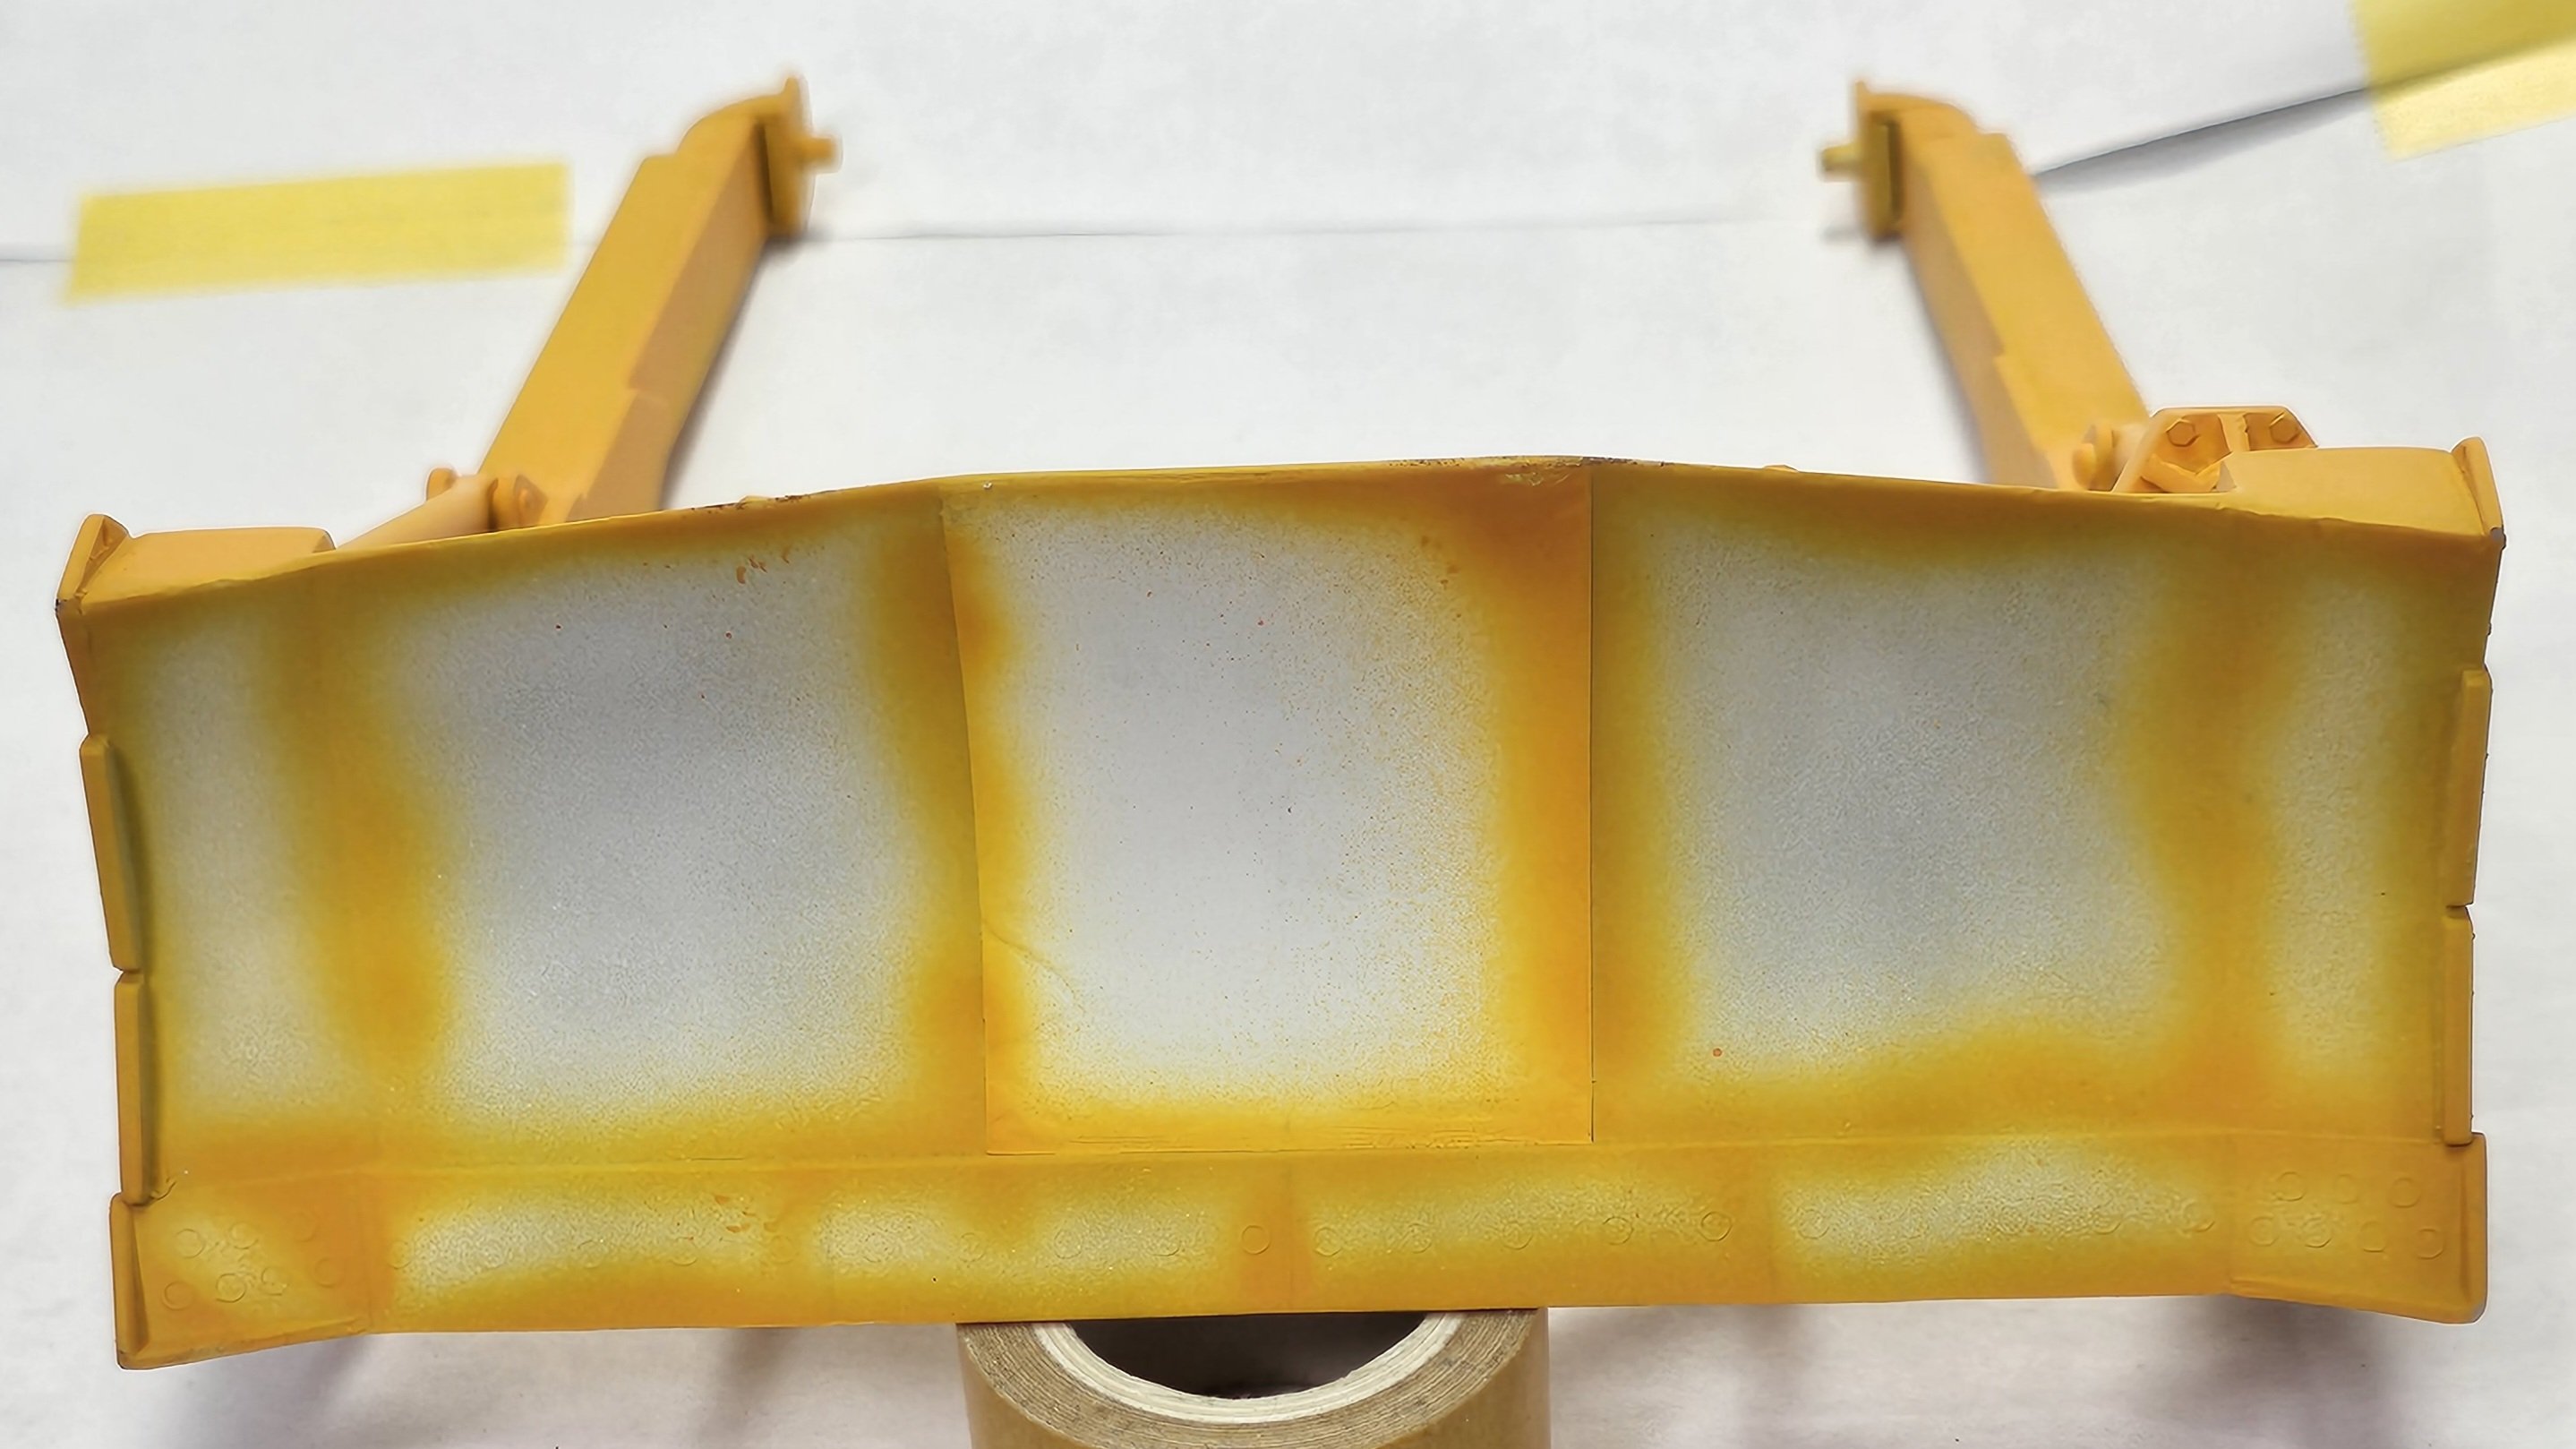
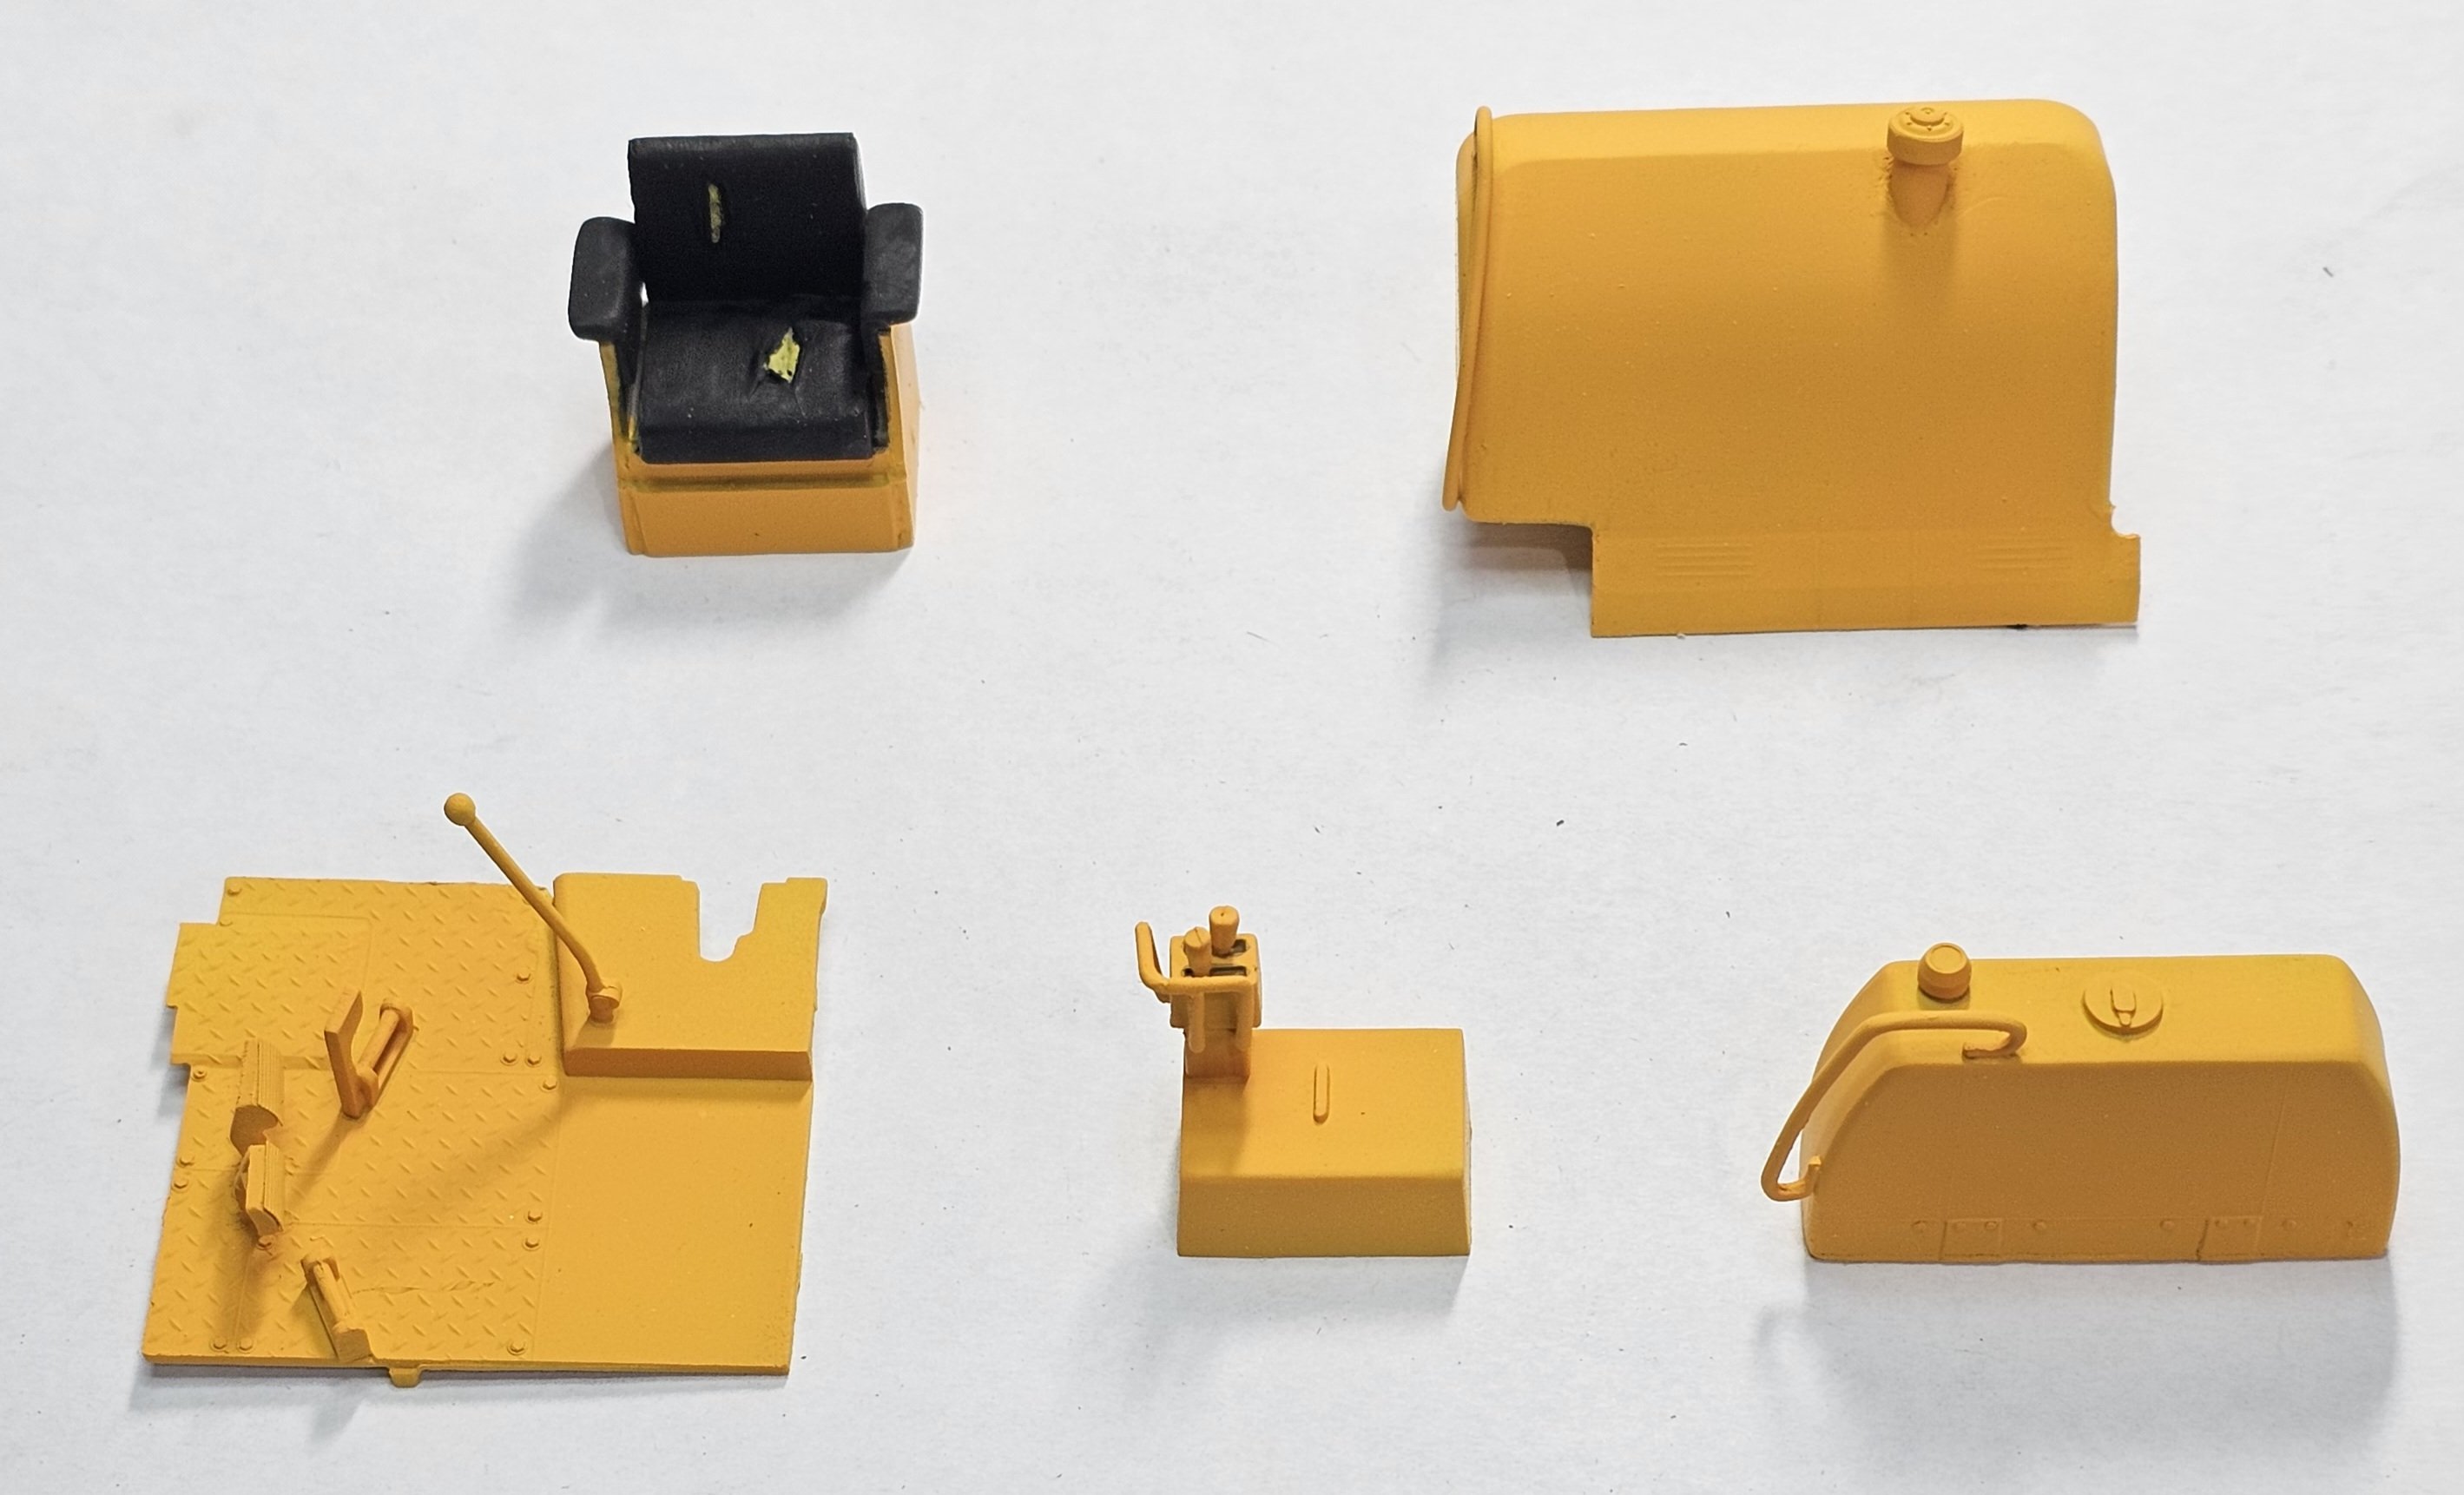
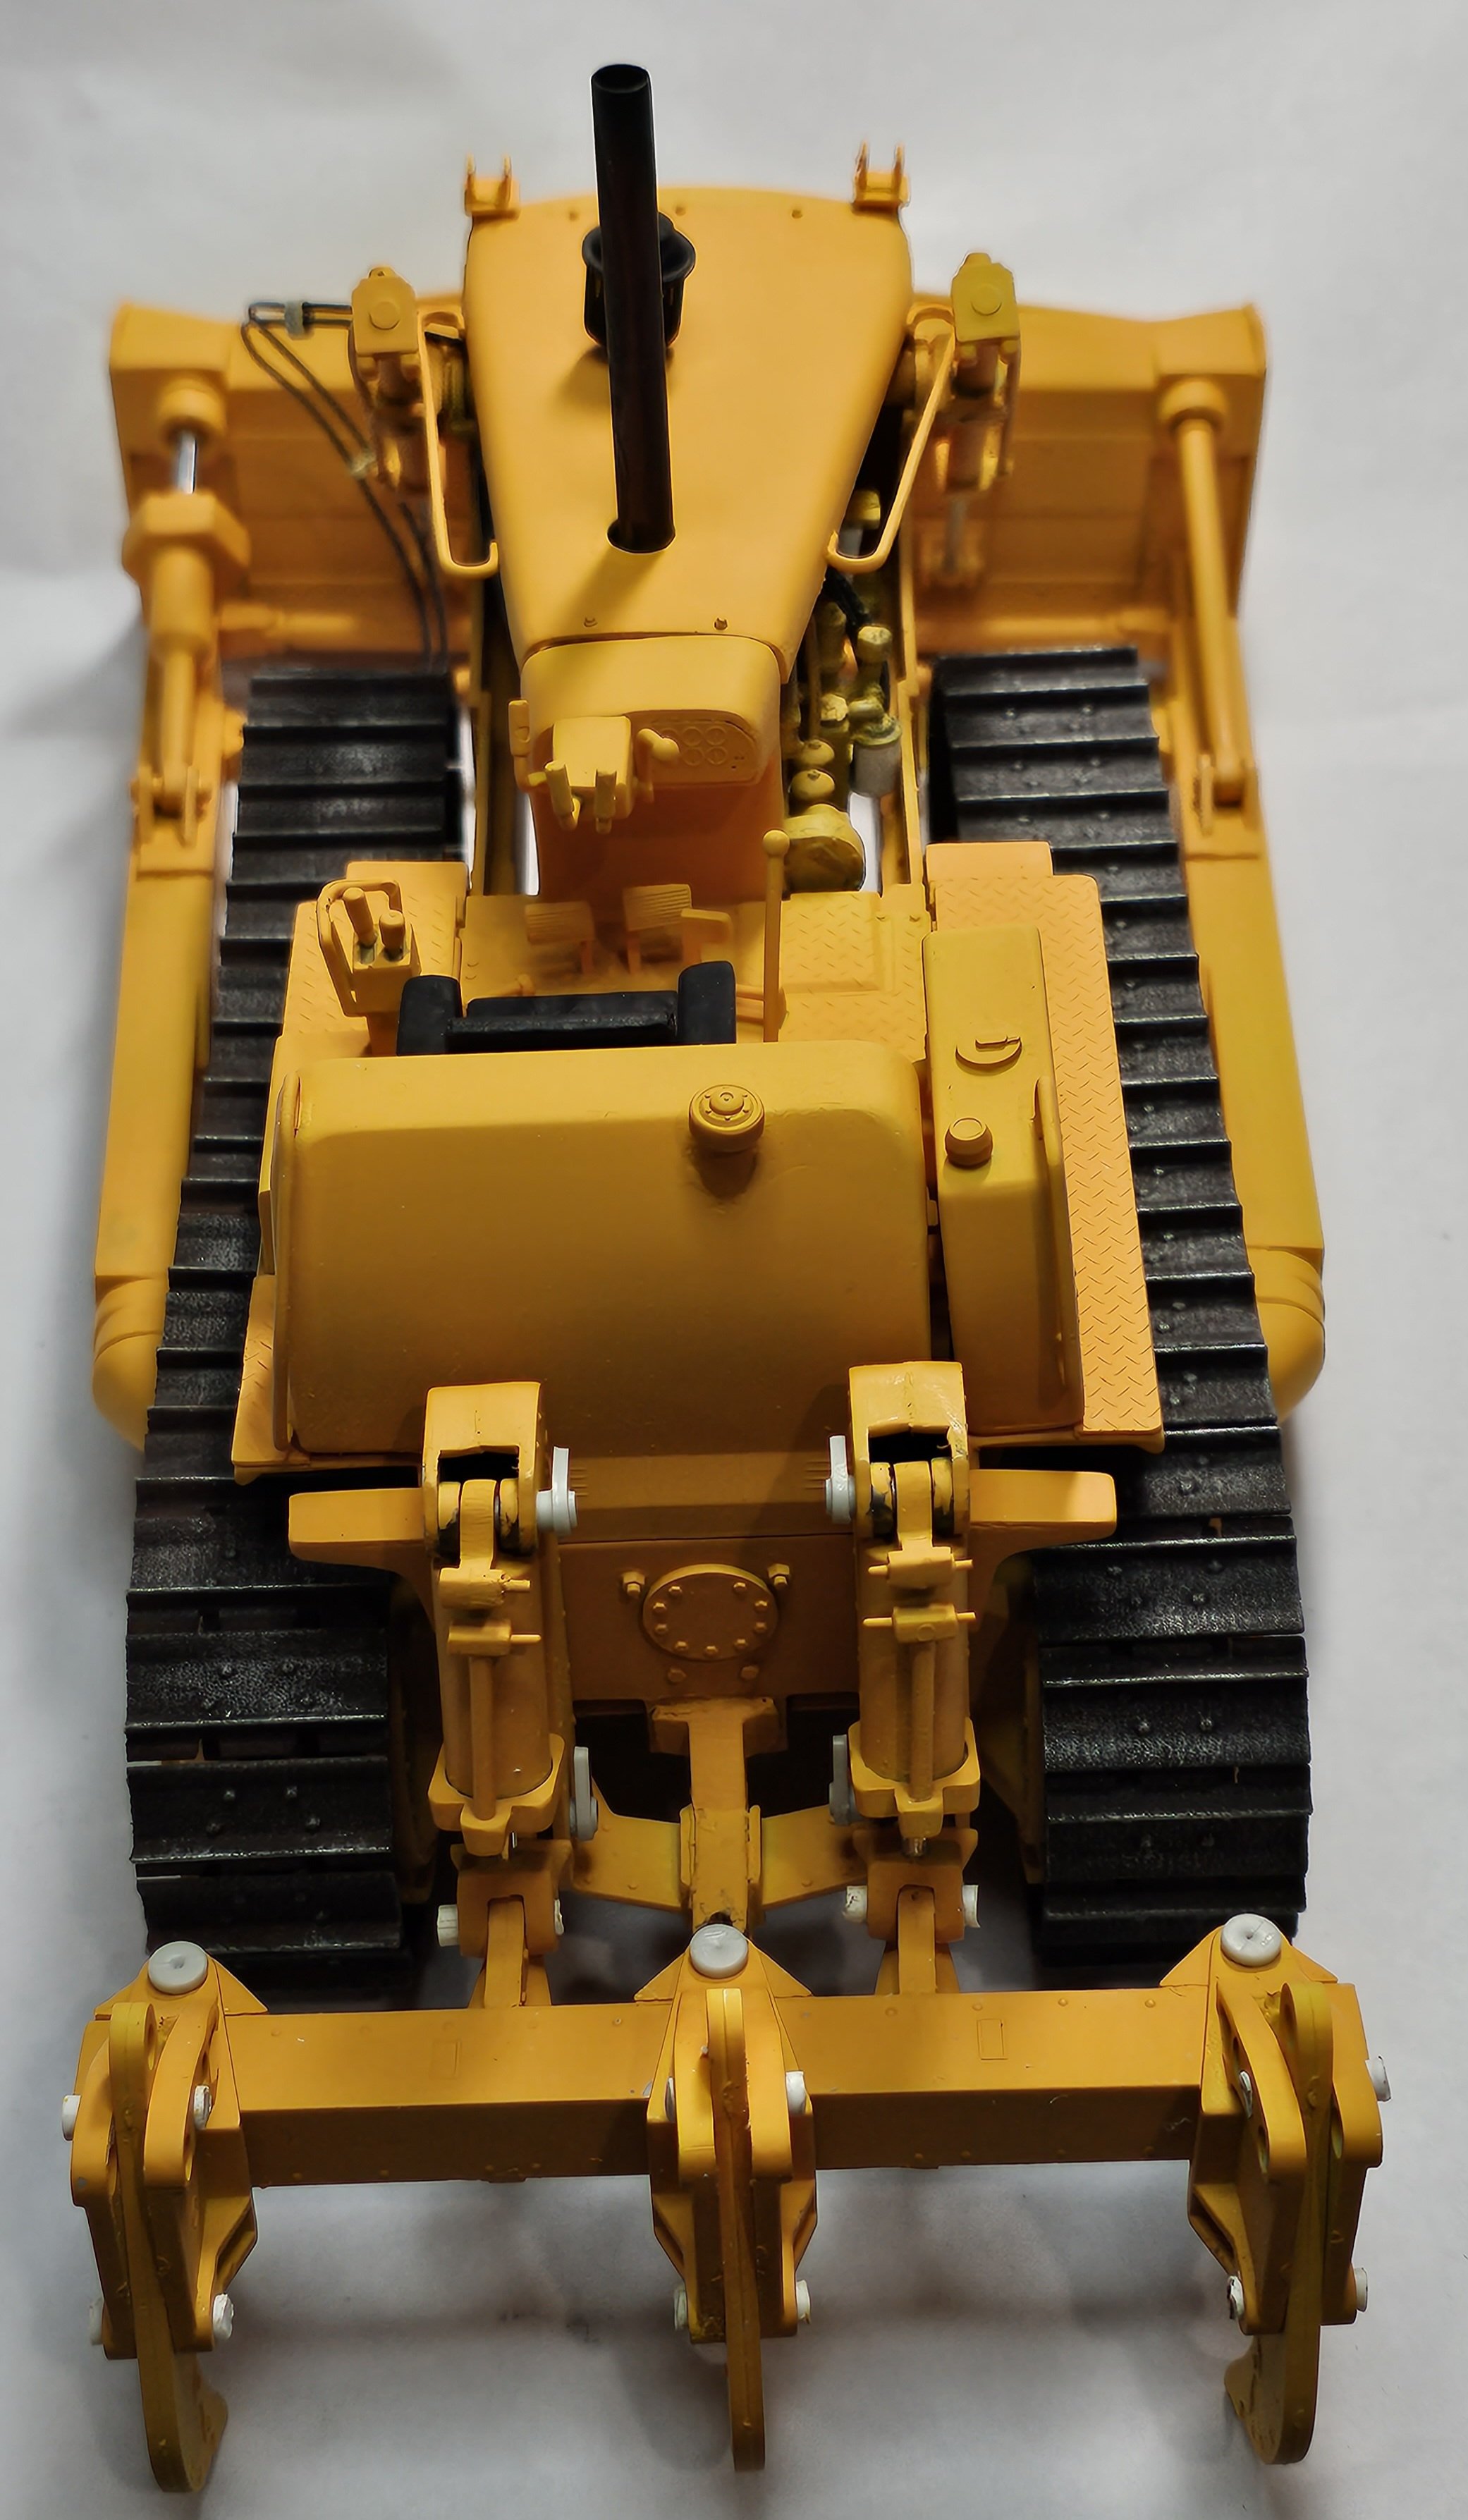
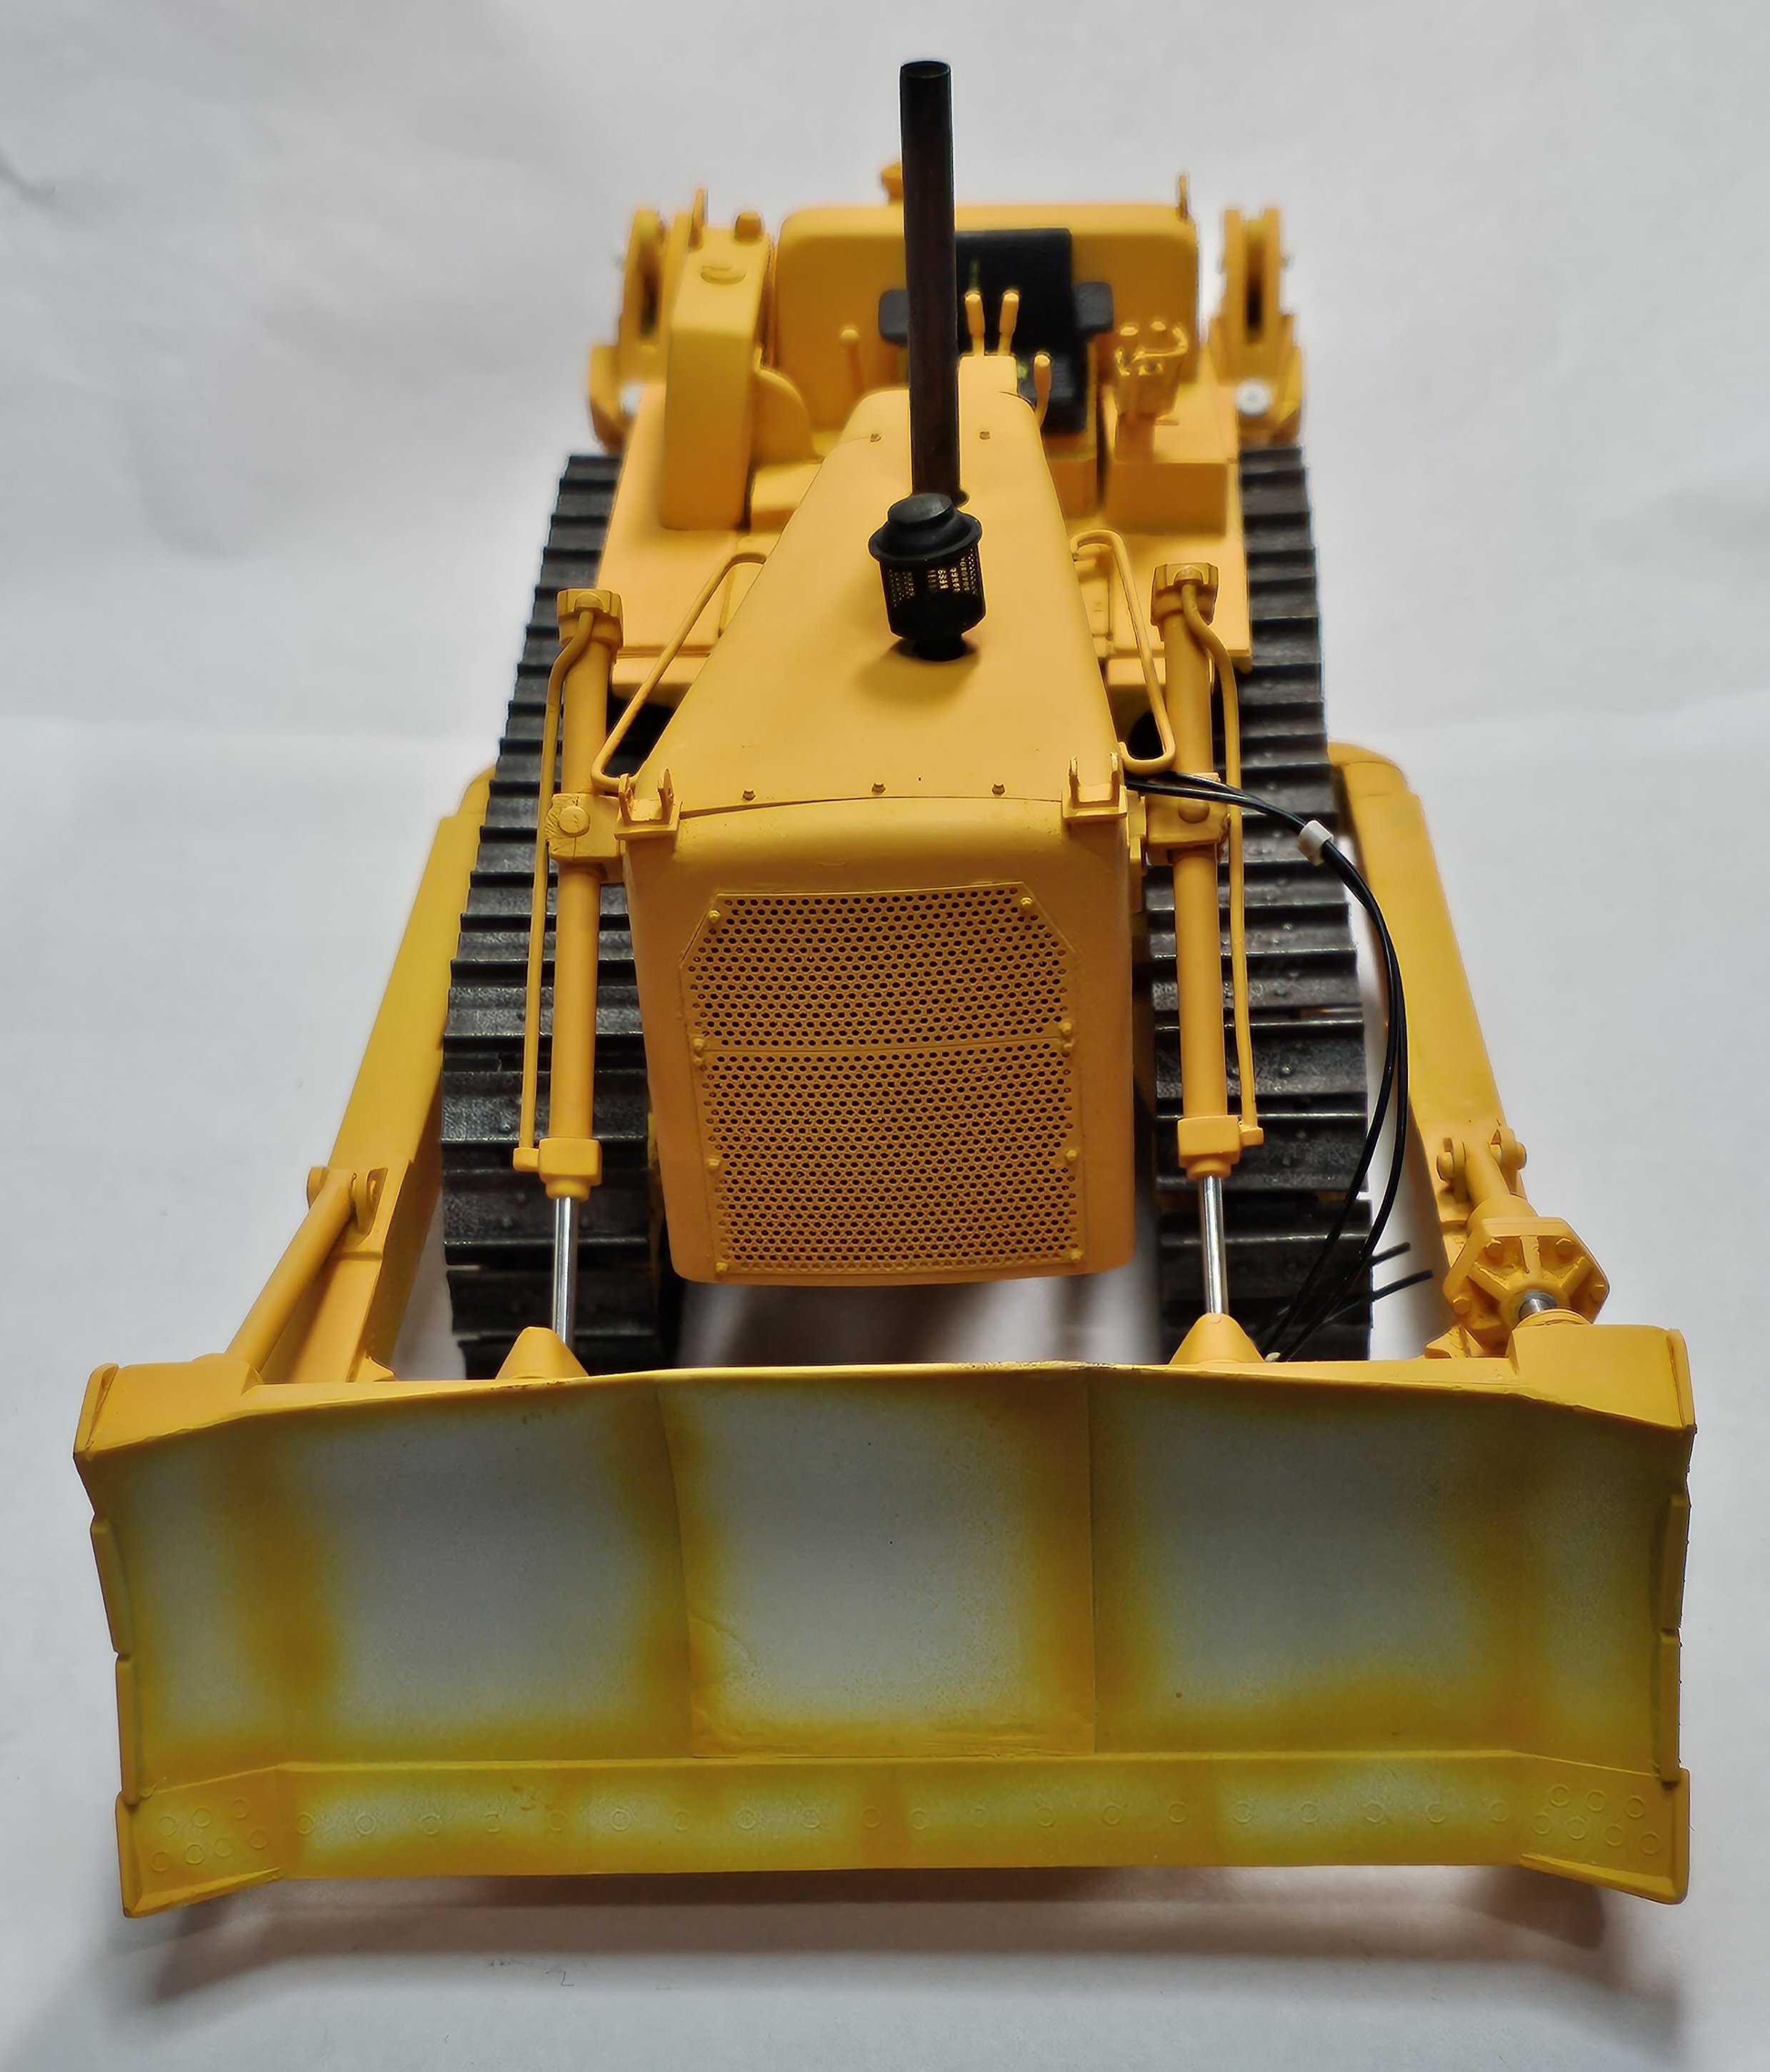
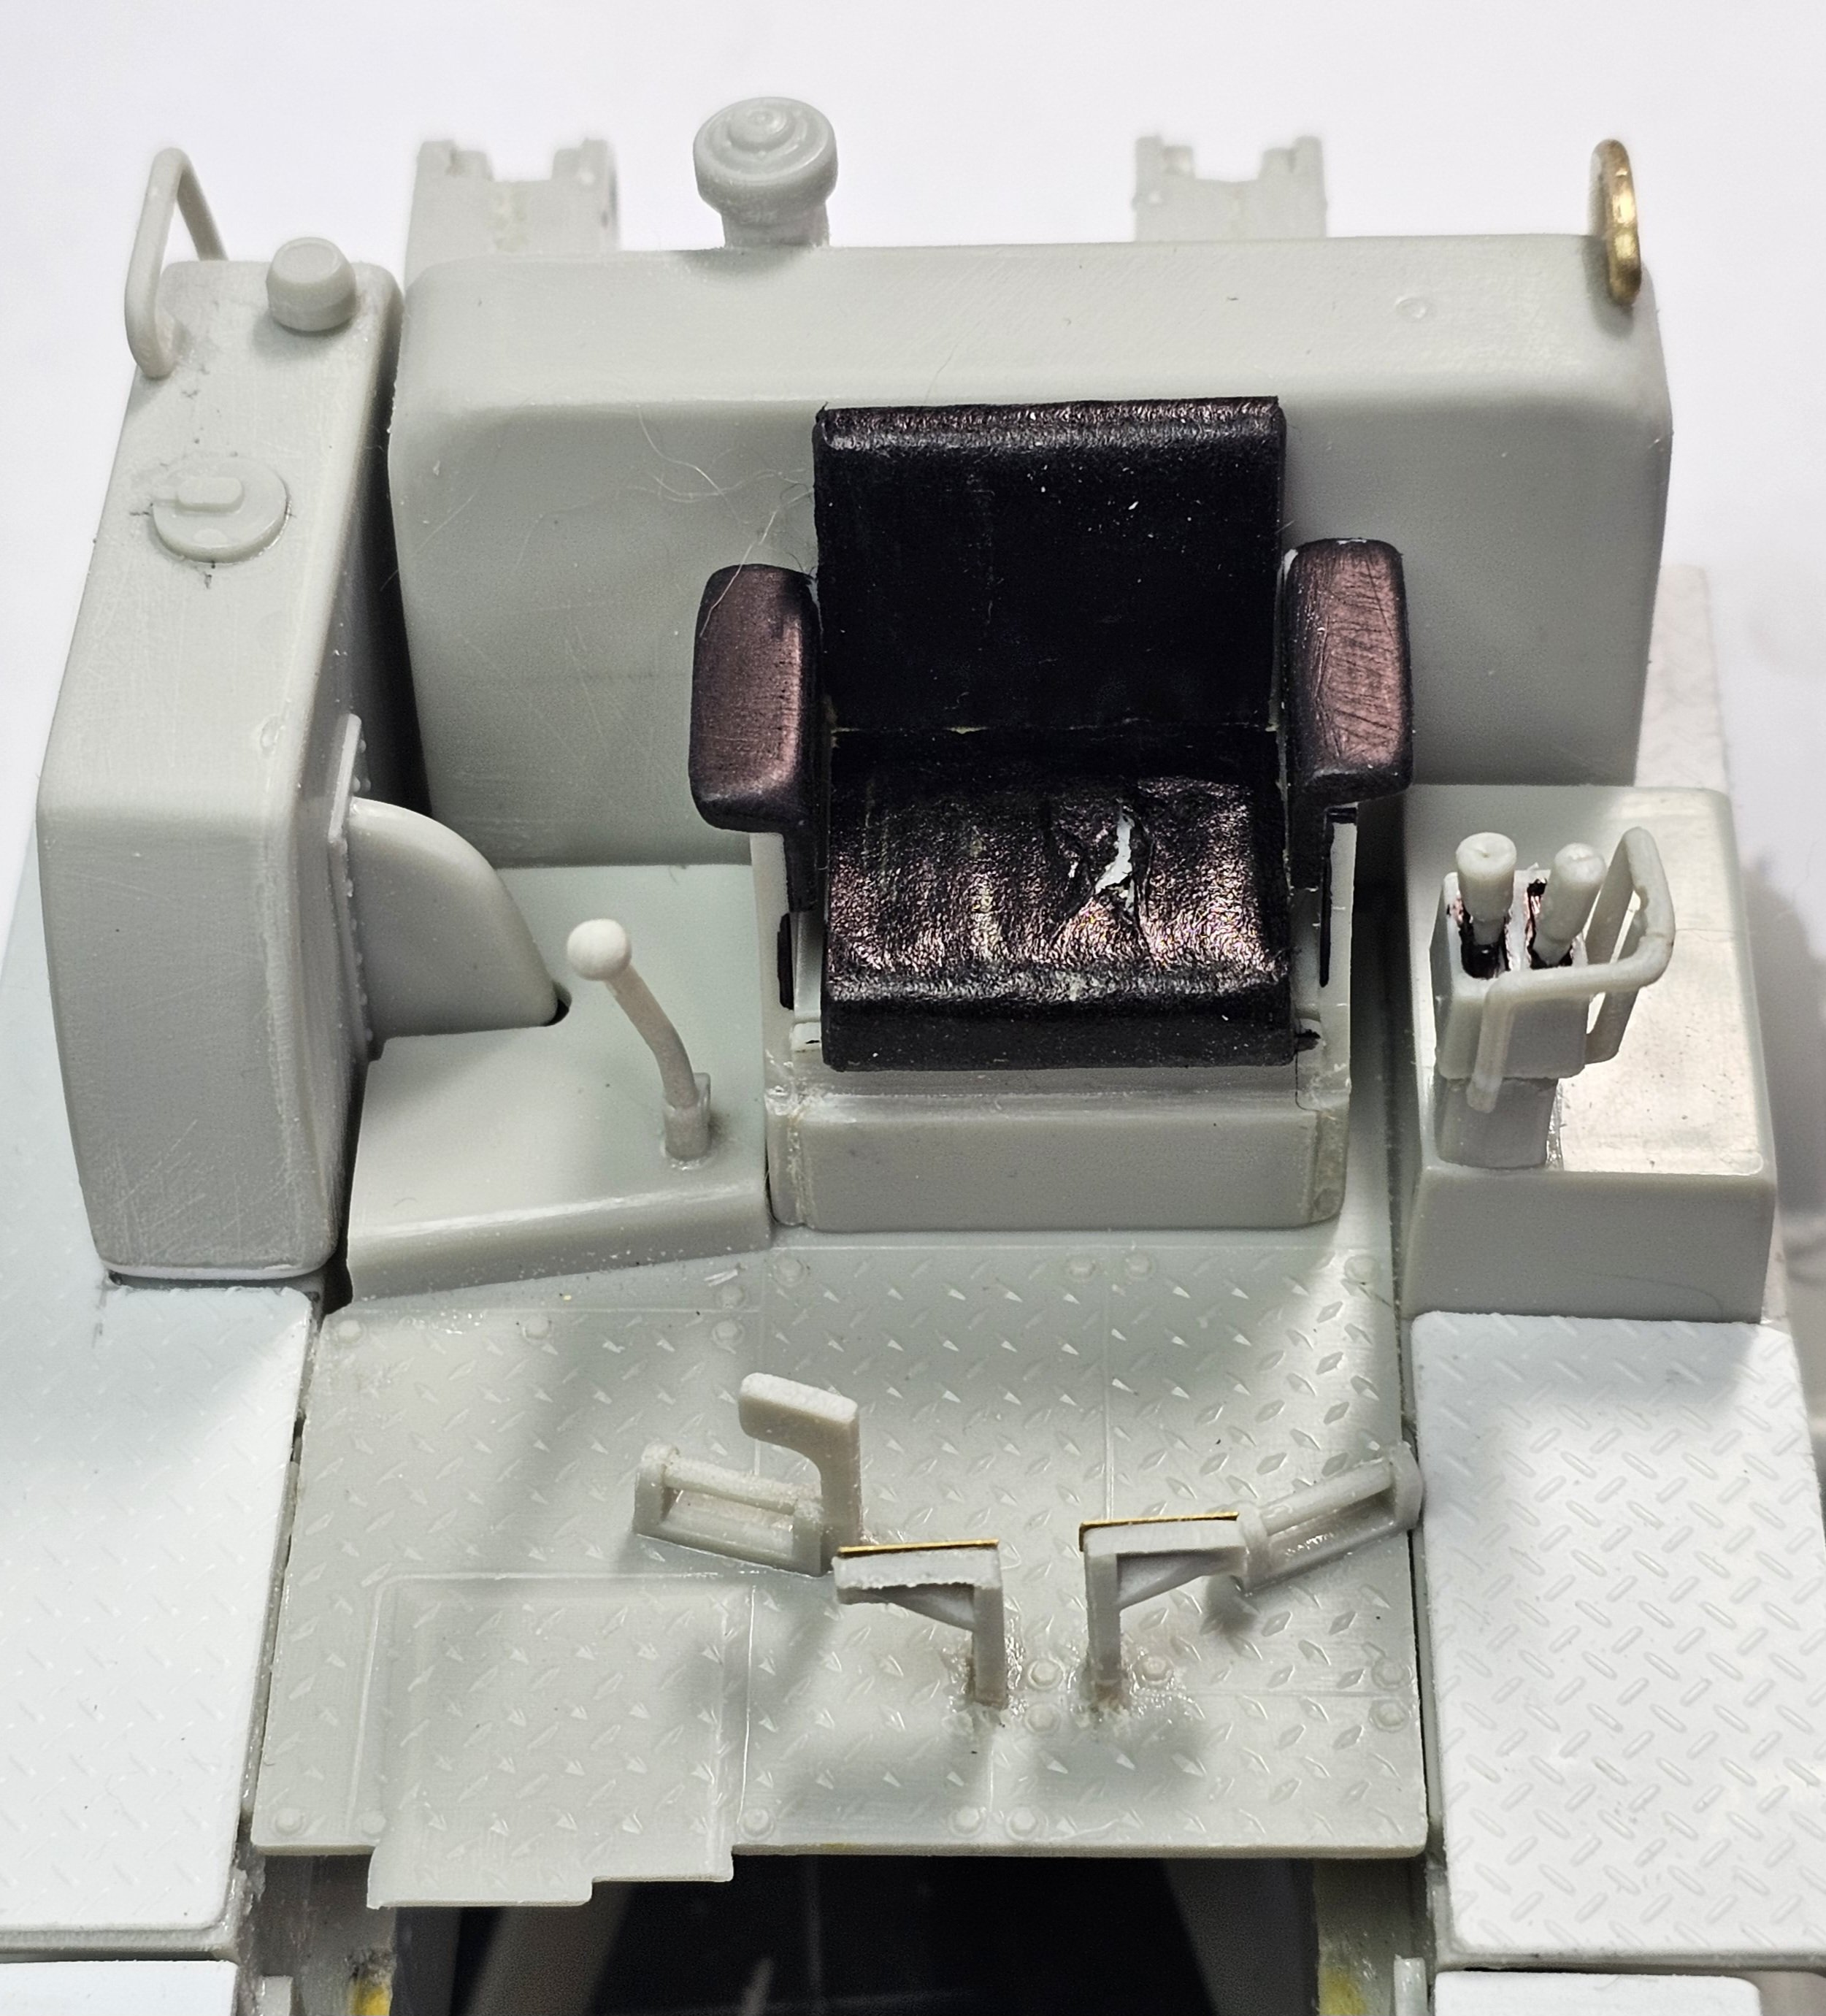
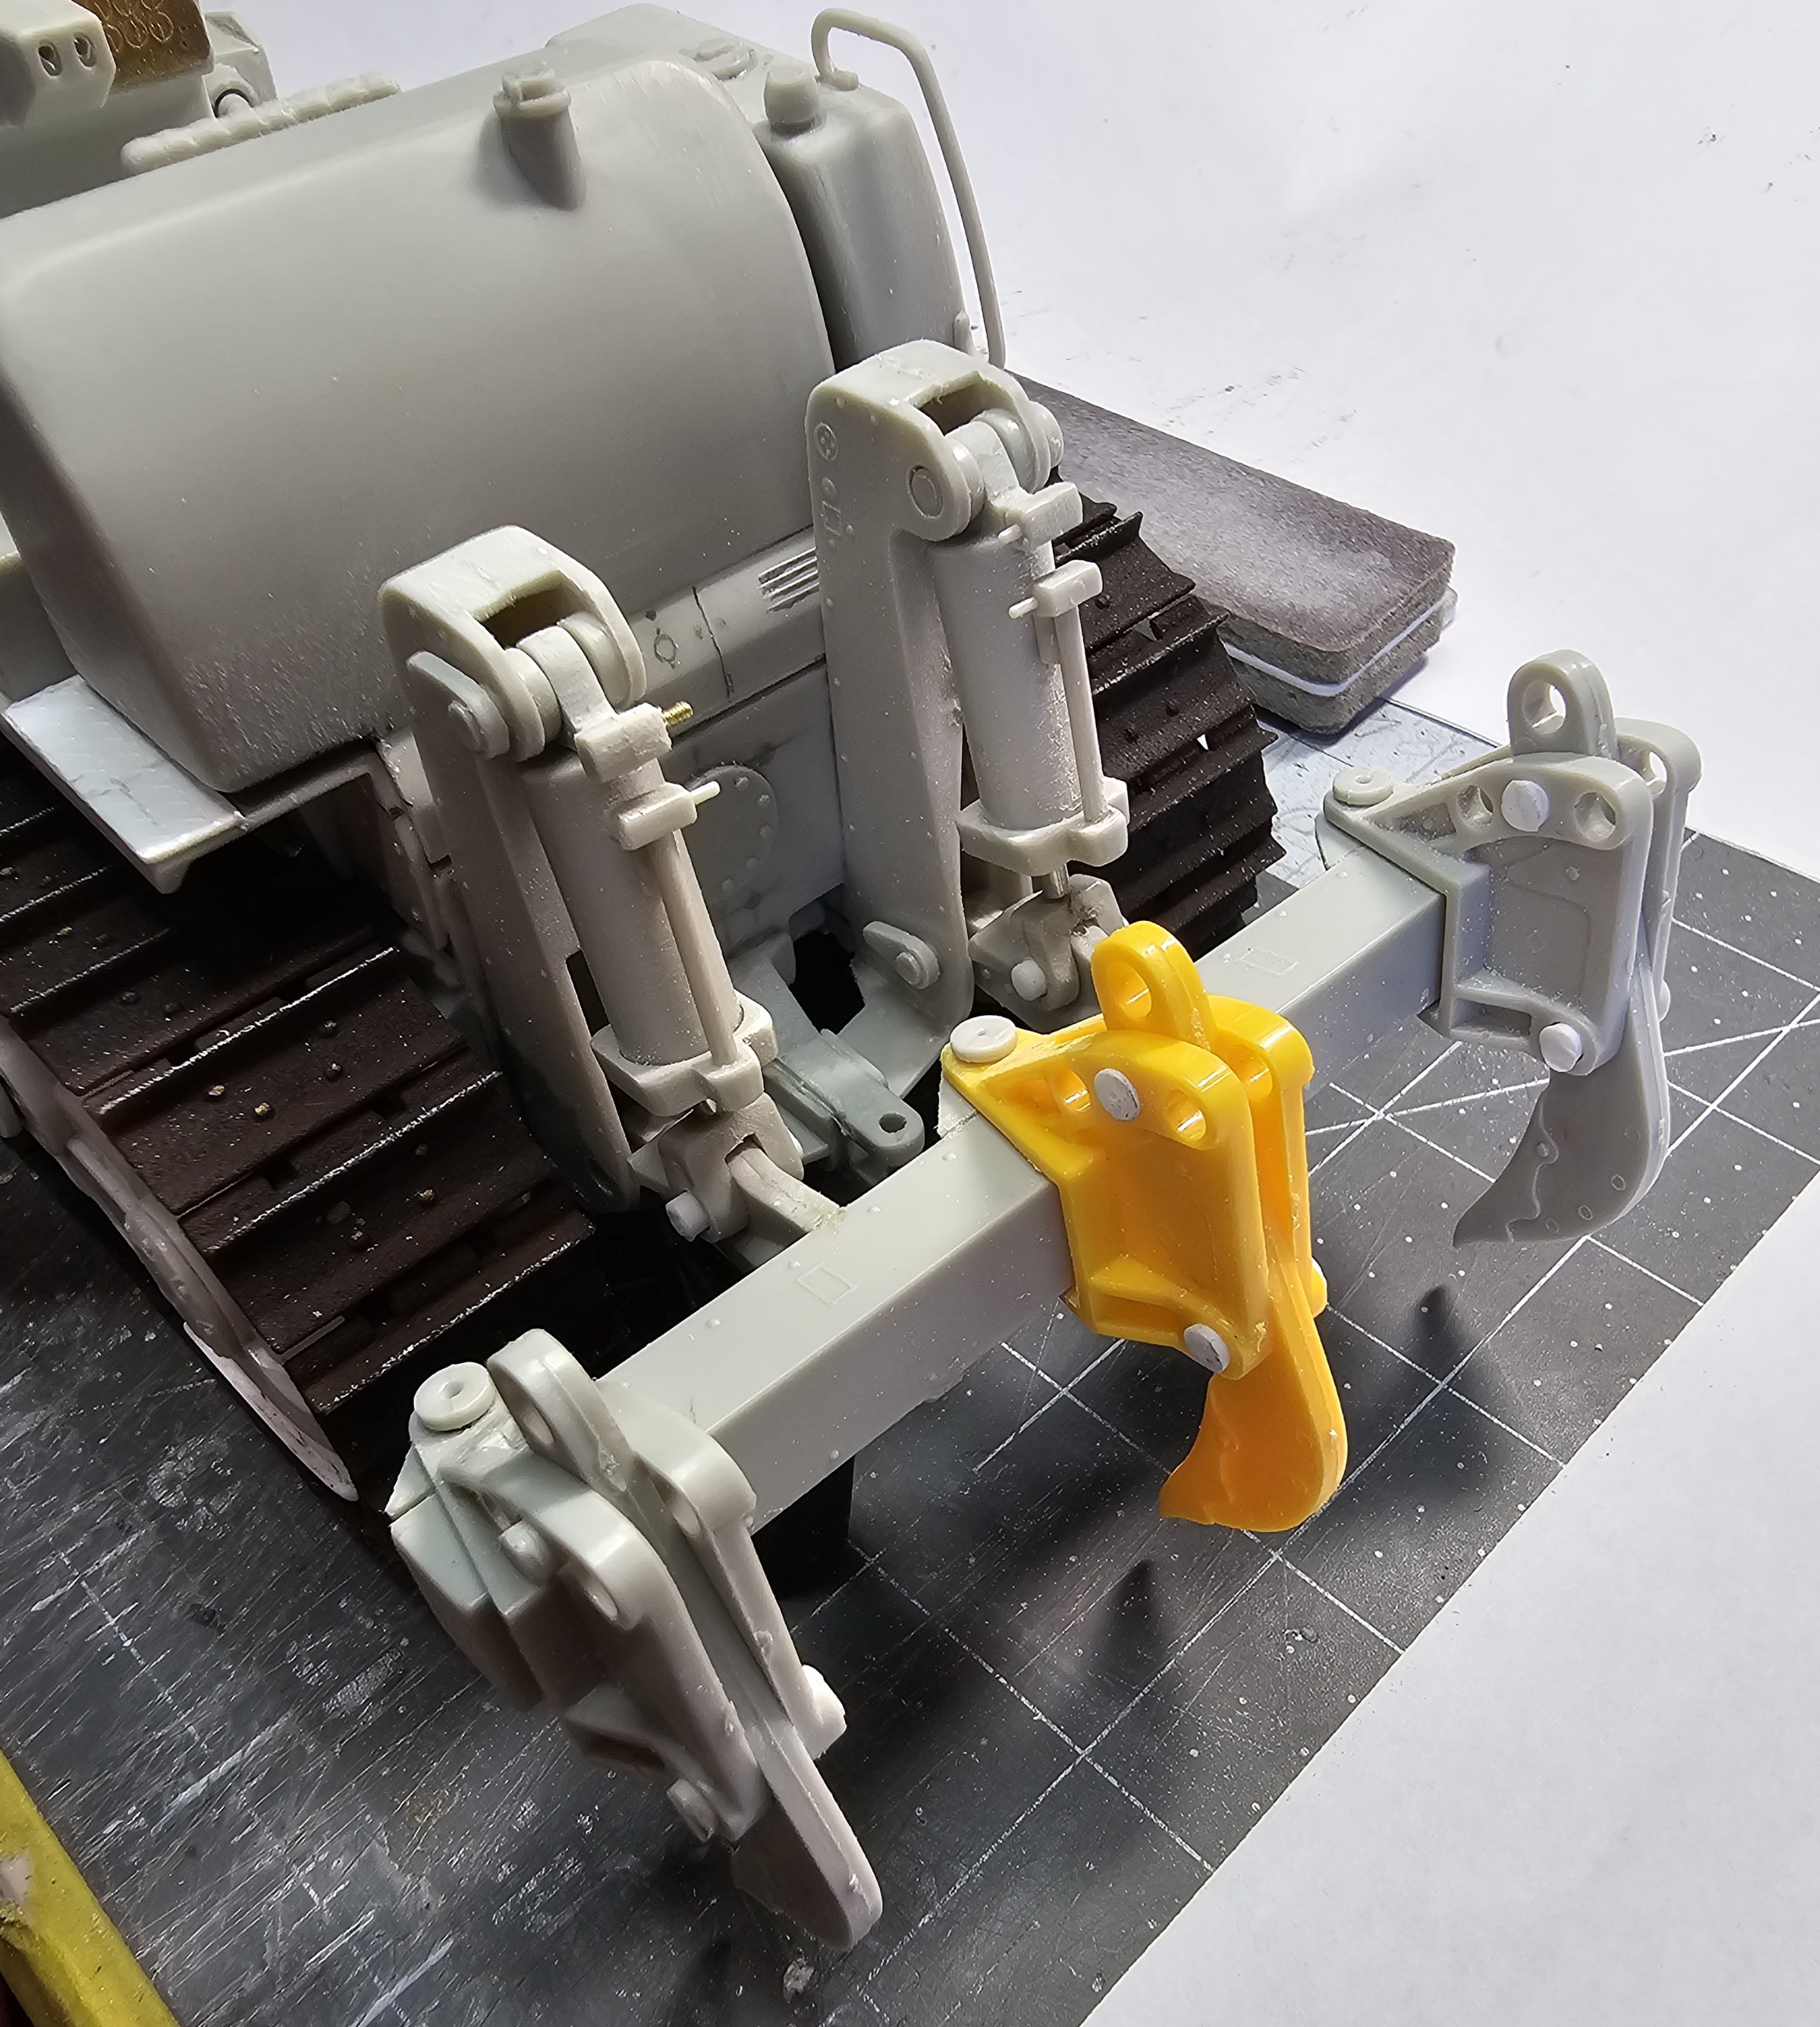
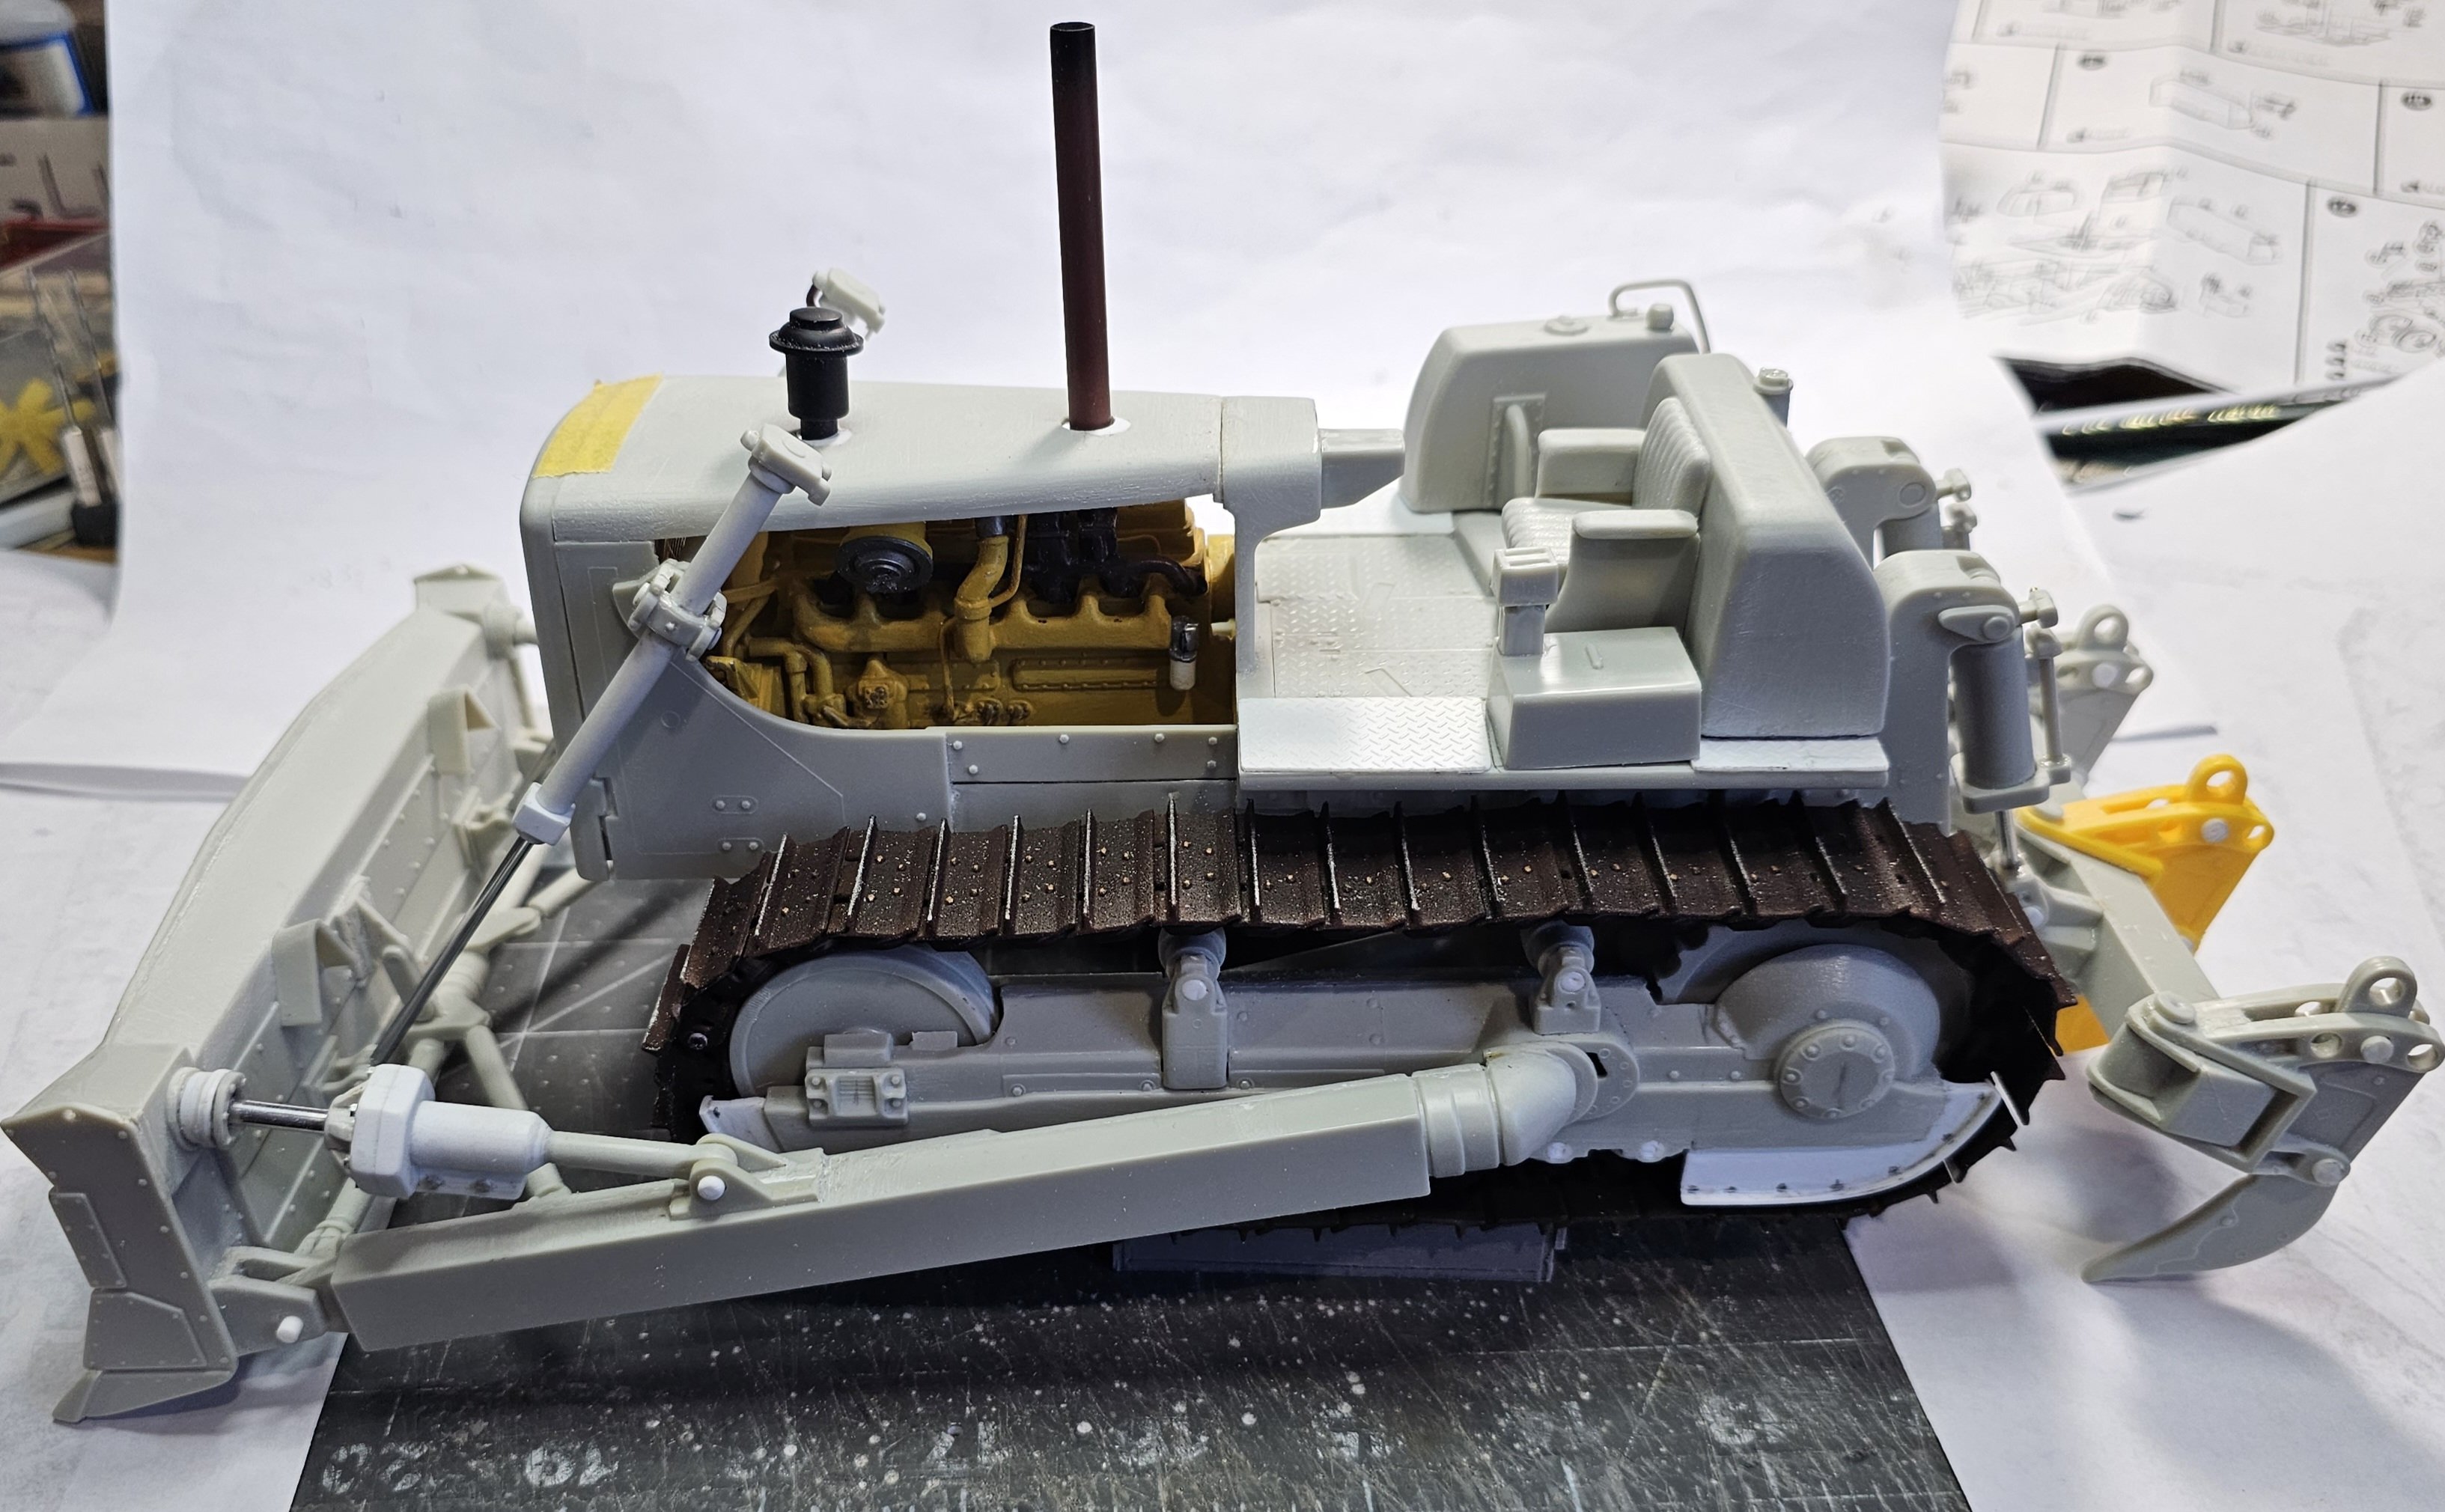
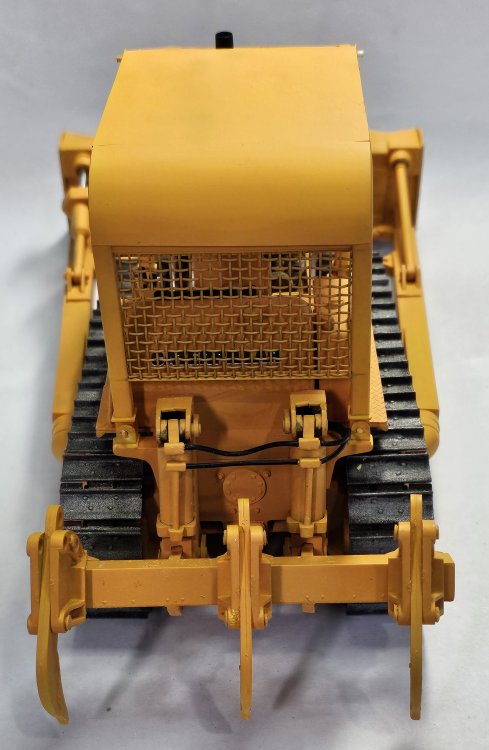
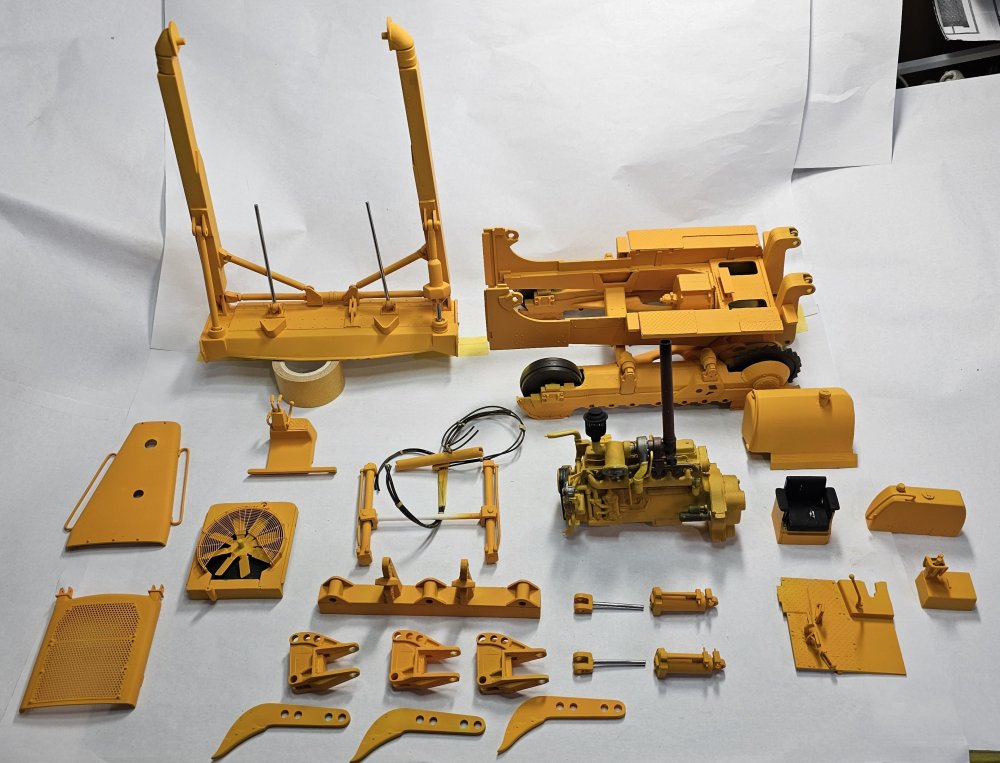
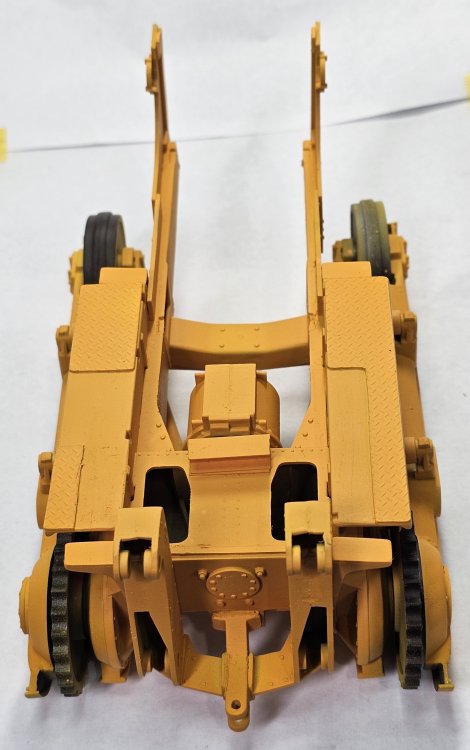
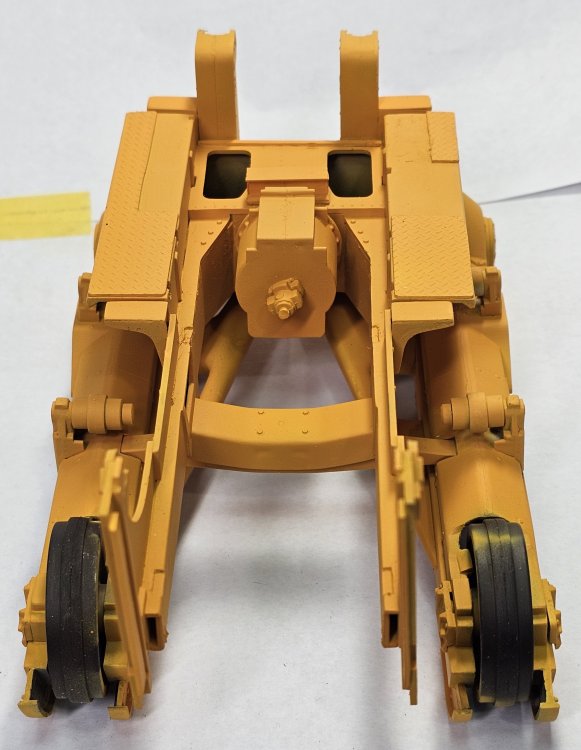
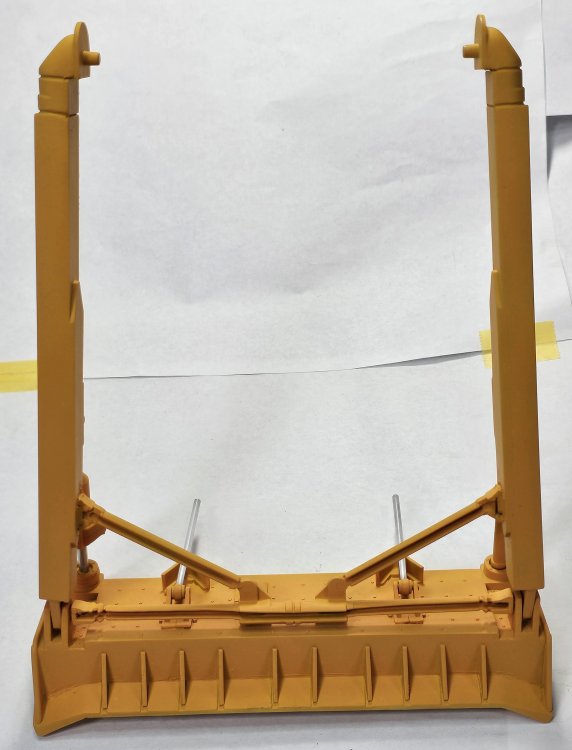
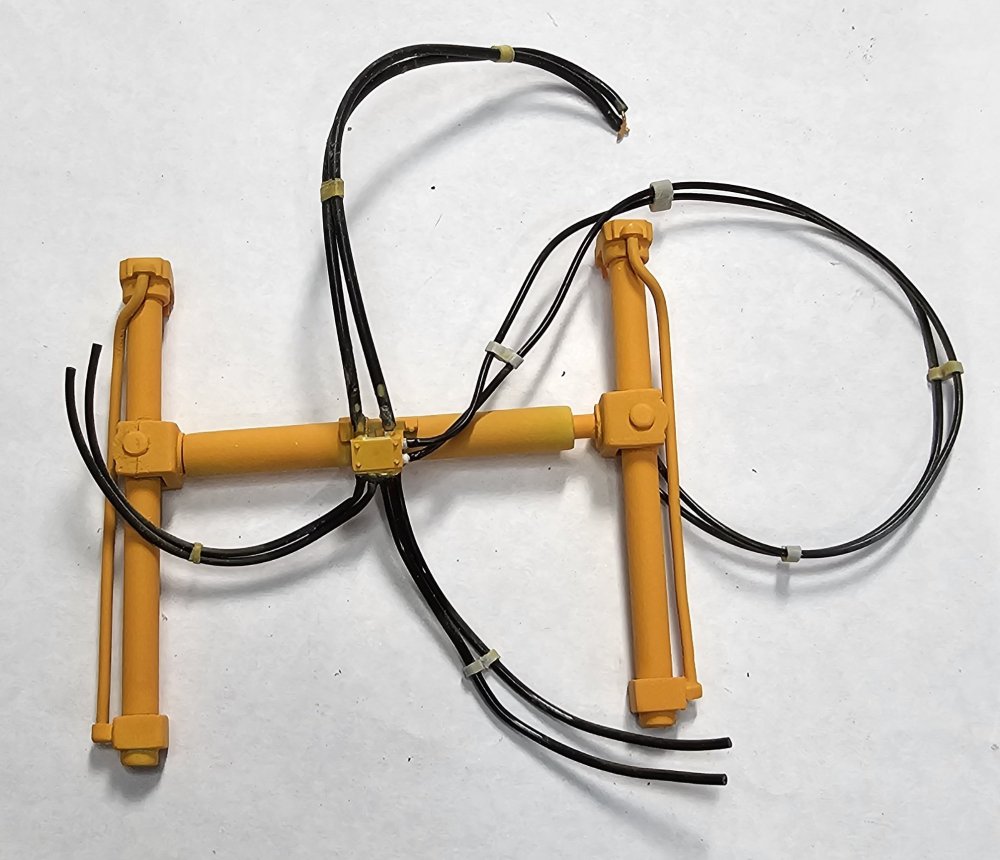
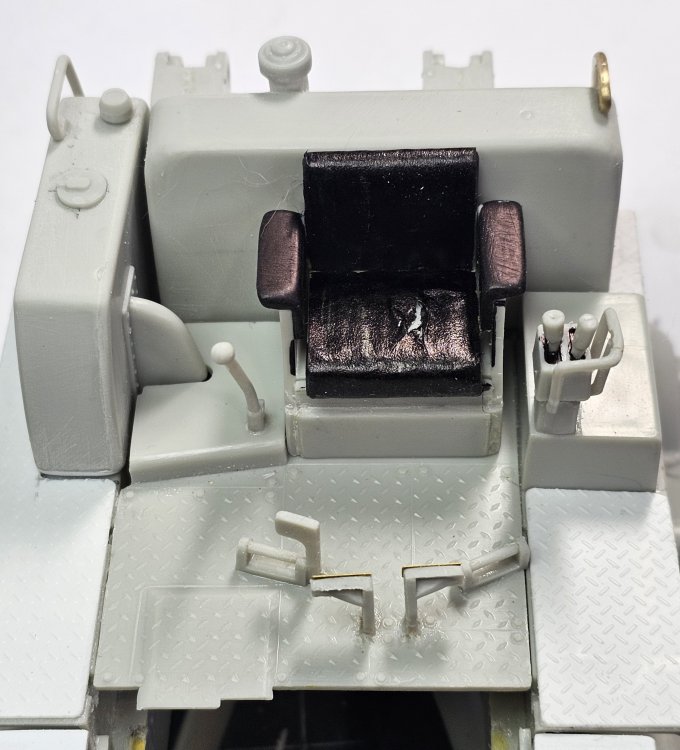
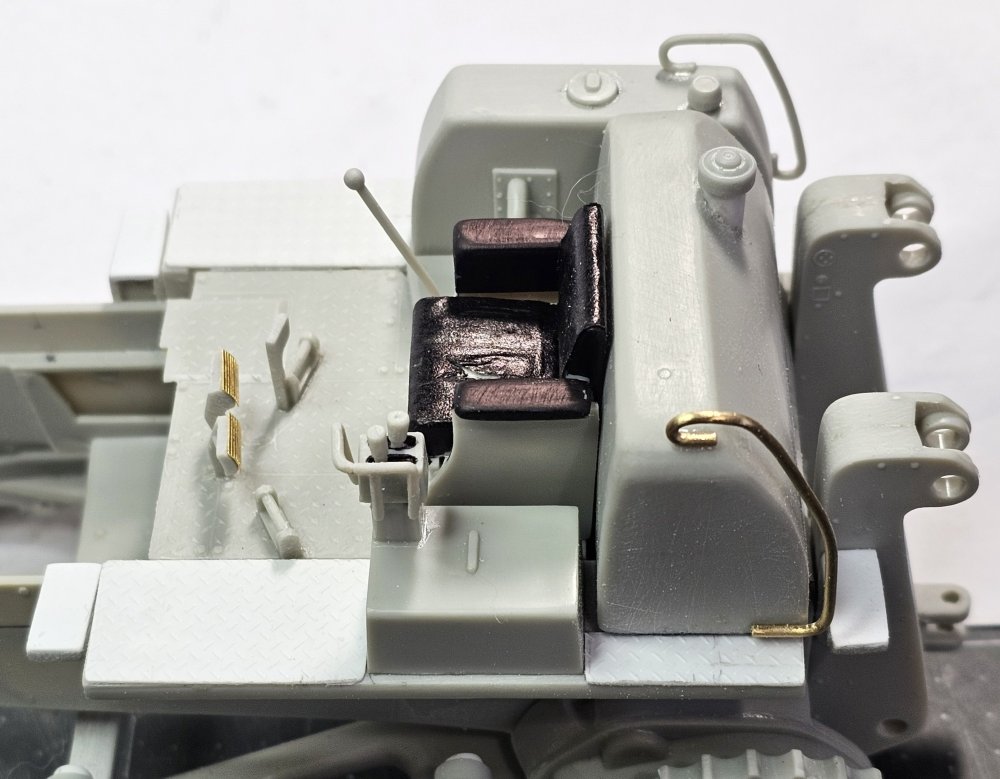
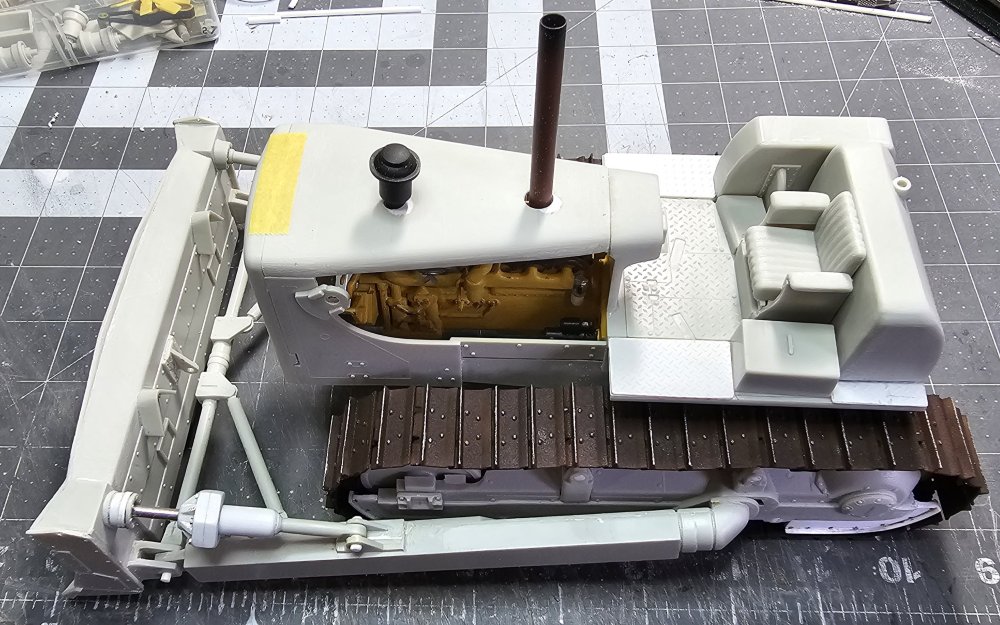
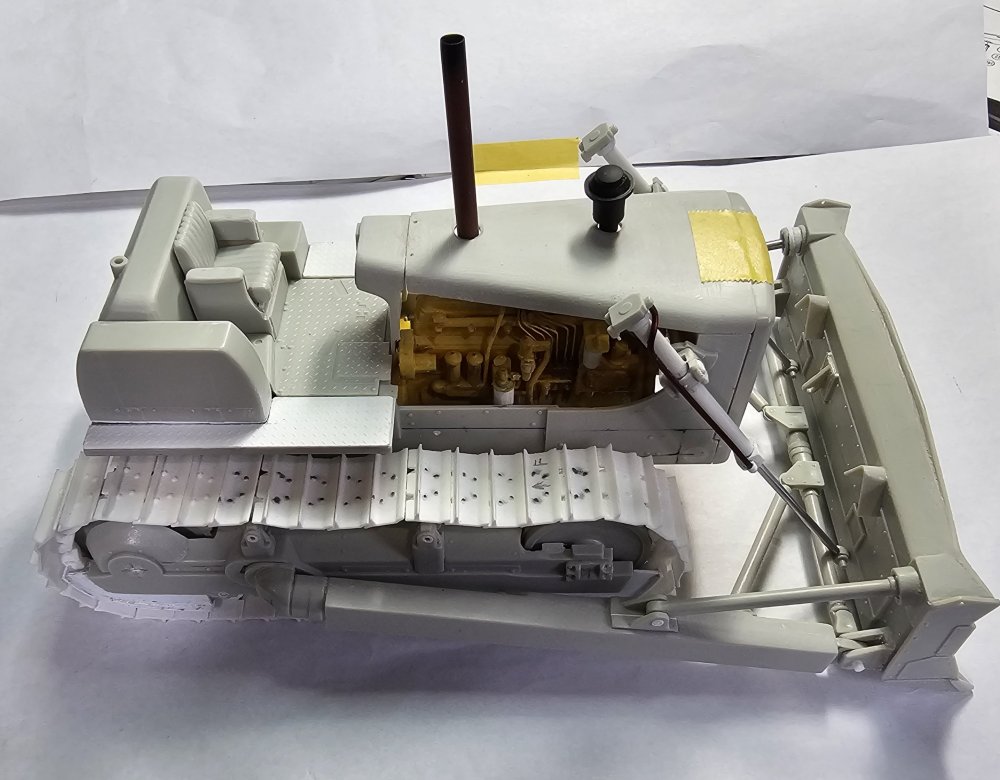
Ok, I said I would be back when she was painted yellow and she's now YELLOW! This view shows all of the parts painted yellow. This view shows the main body of the D8H looking forward. Right side view. View looking rearward. This view shows the top of the blade and support arms. Right side view of the blade. Bottom view of the blade. Left side view of the blade. You can see the blade lift cylinders and the tilt cylinder. Front view of the blade, I need to paint this steel/silver. This view shows seat, I added some rips in the leather and you can see the foam padding showing through, fuel tank, hydraulic tank, transmission control tower and the floor plate. This view shows the engine cover, dash board & controls, radiator with the fan in place and front radiator cover. This is a view of the other side of the previous parts. This is a view of the blade lift cylinders and the cross support tube with the hydraulic cylinder manifold. This view shows the all the ripper parts. Left side view of the D8H. Rear view of the rippers for the D8H. Right side view of the D8H. Front view of the D8H. All of this needs to be chipped, rusted and weathered. Well that's it for now be back soon with more updates. Ron G


-
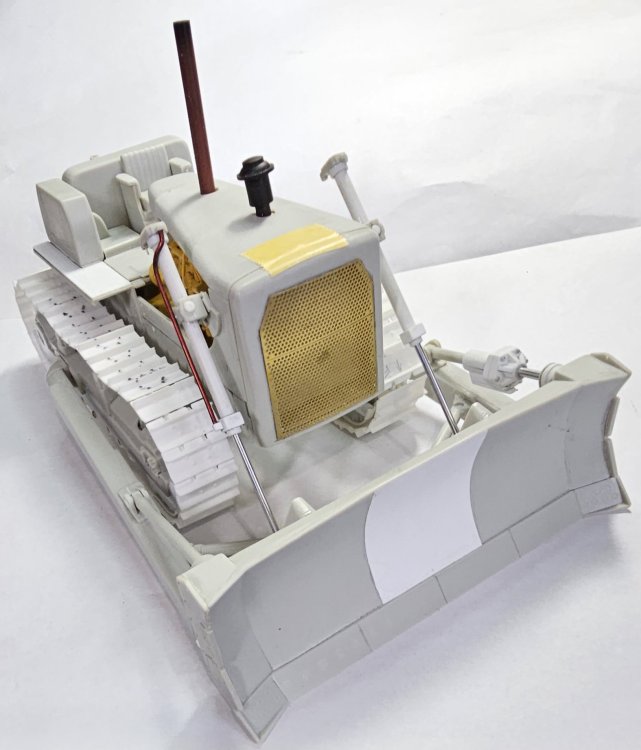
Hey all Well everything is primed in white. I'll finish painting this tomorrow. Ron G
-
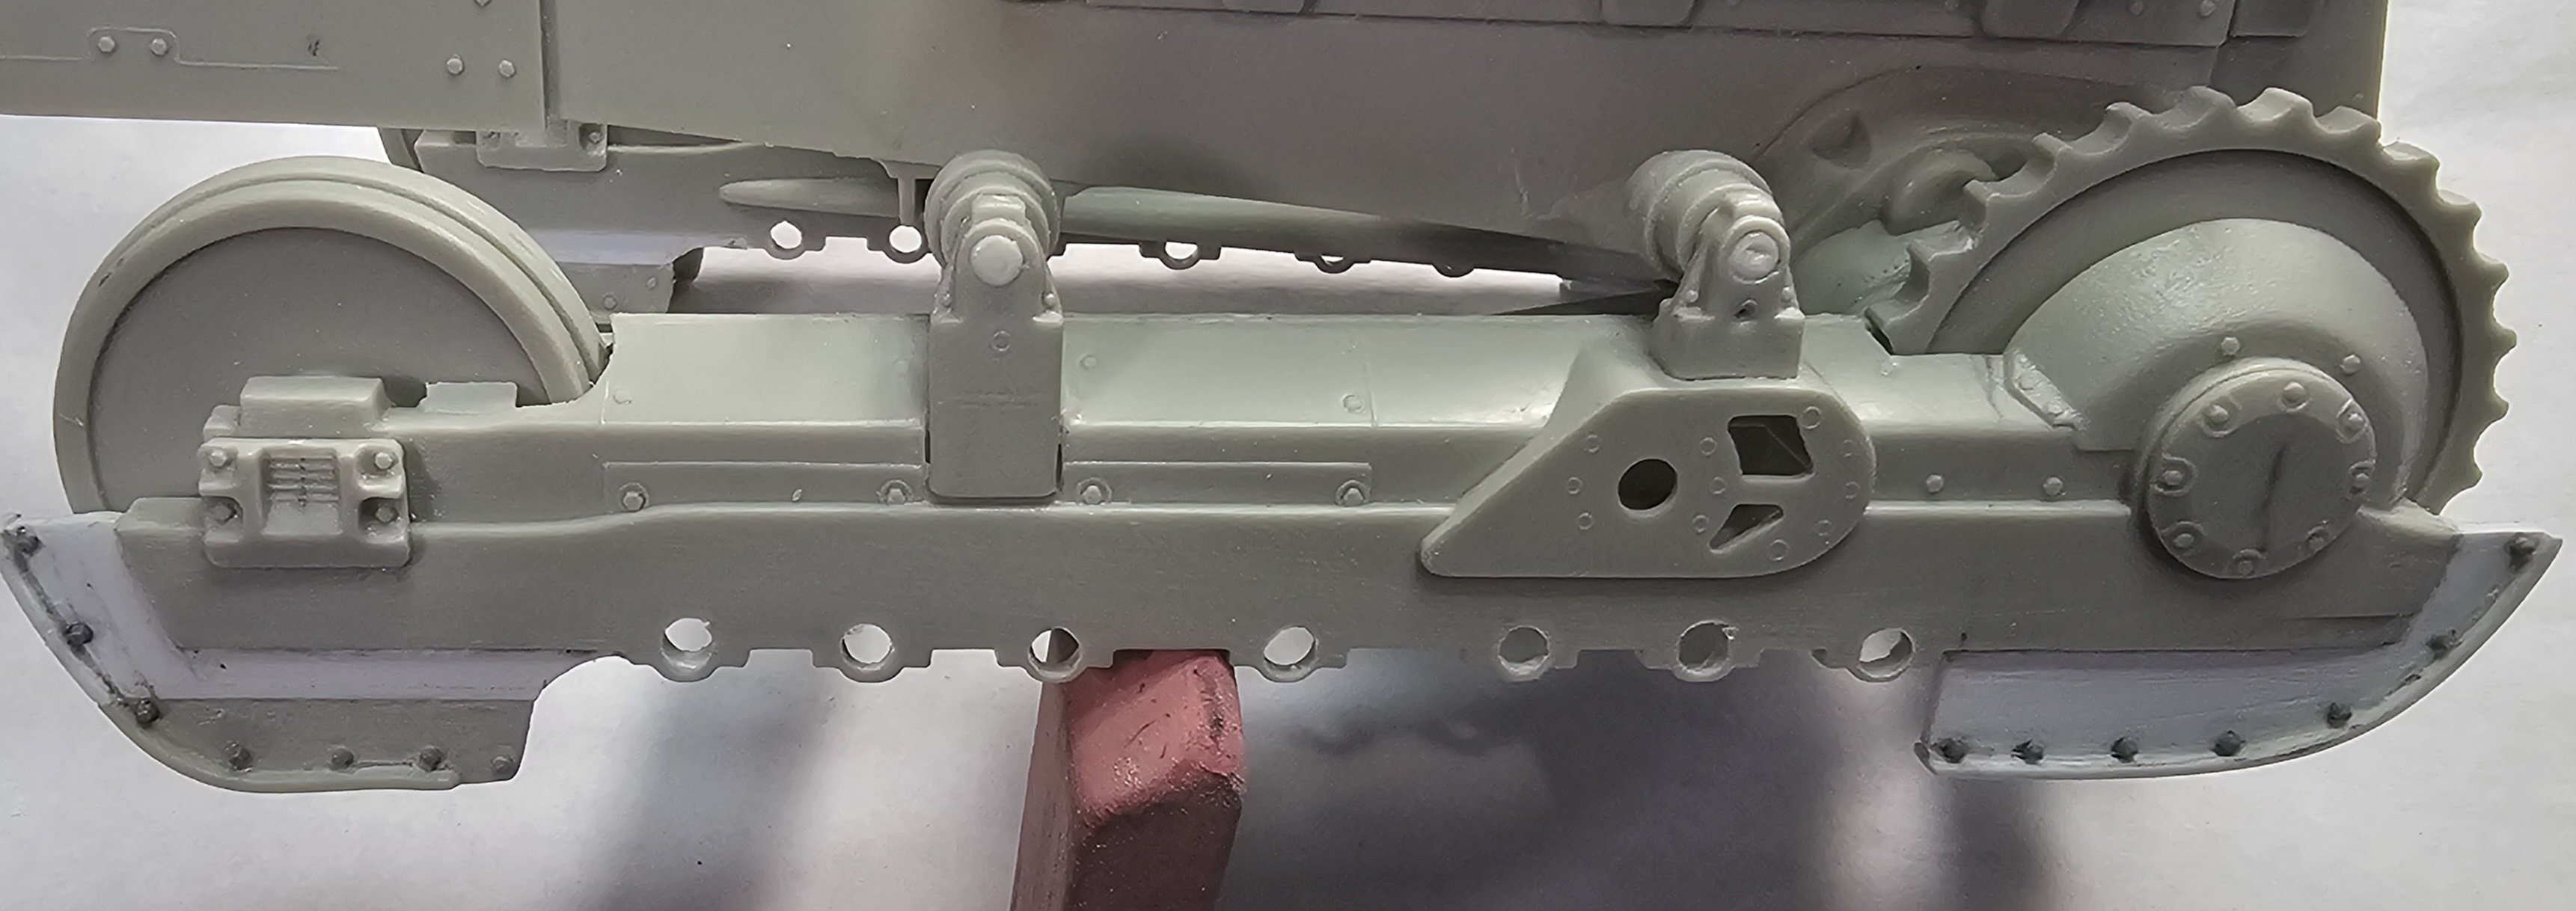
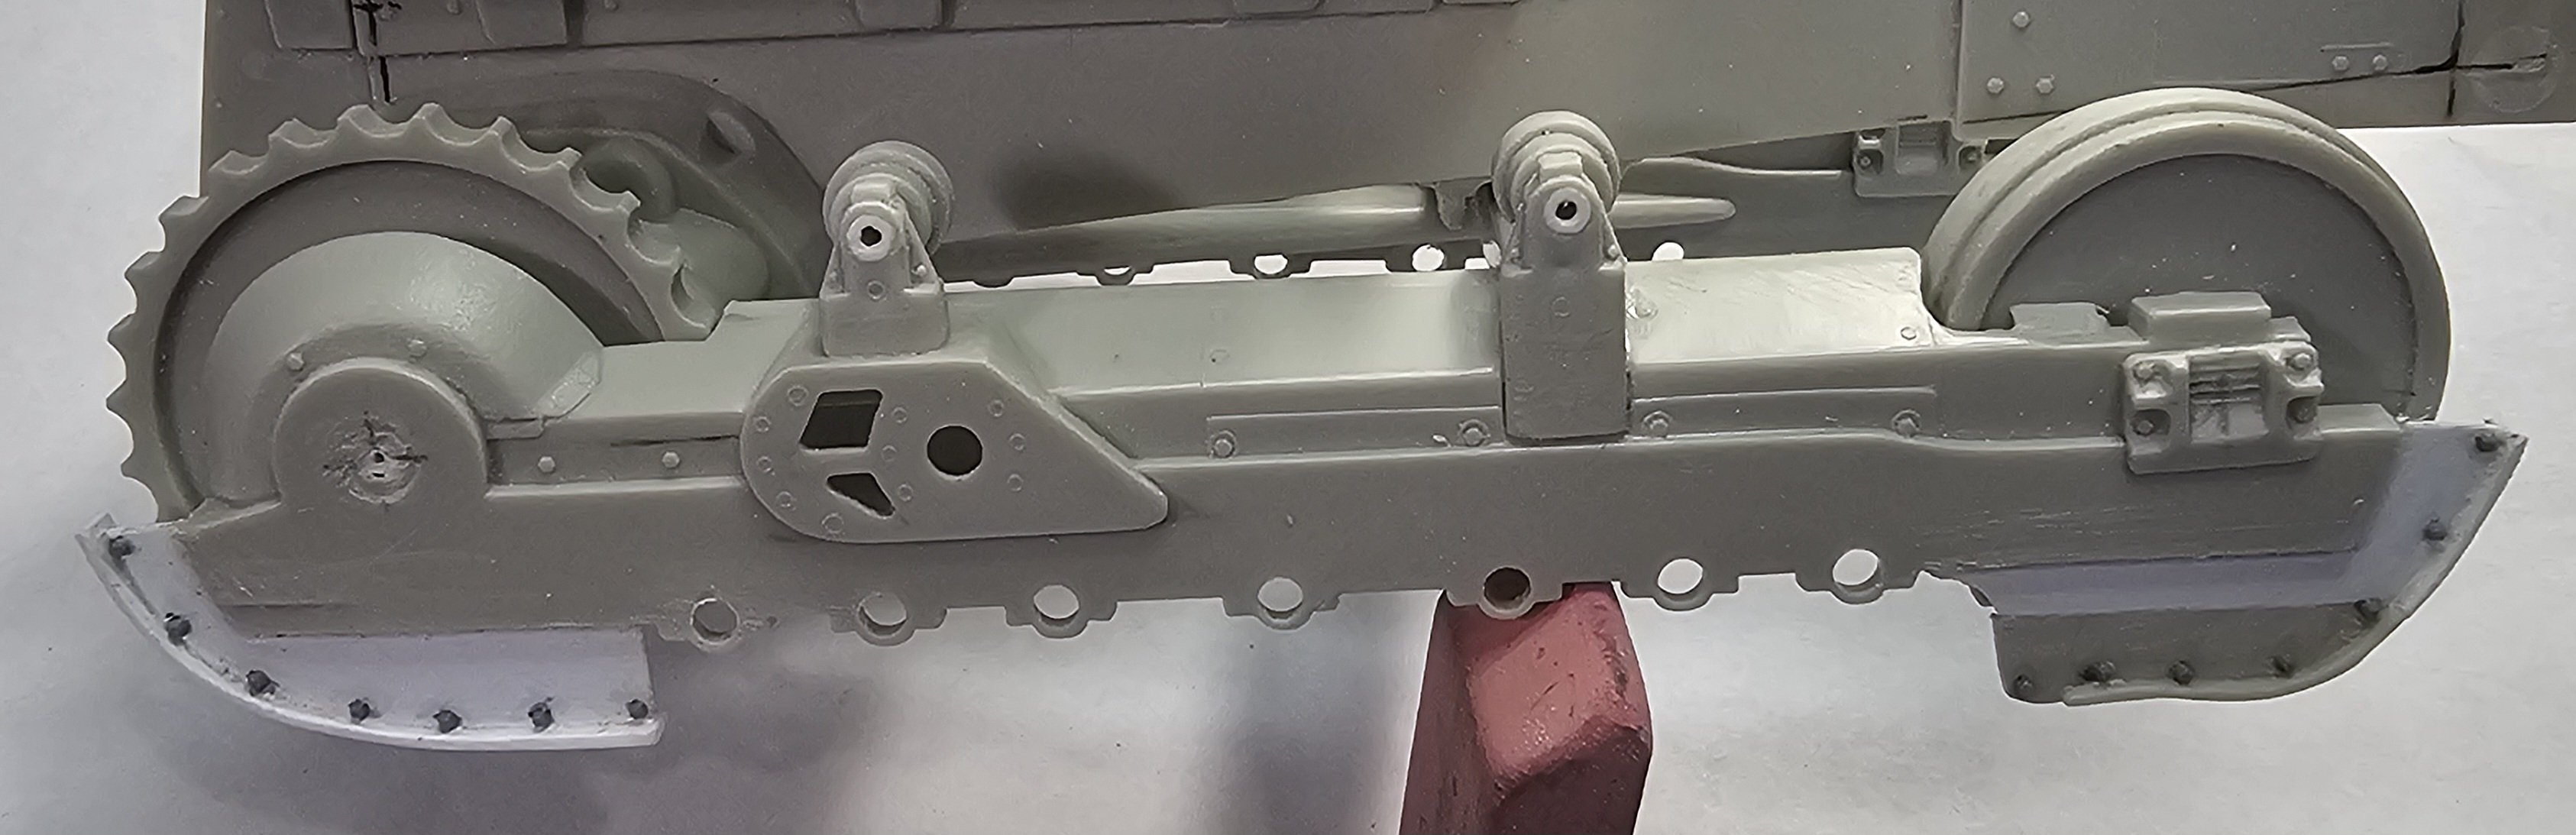
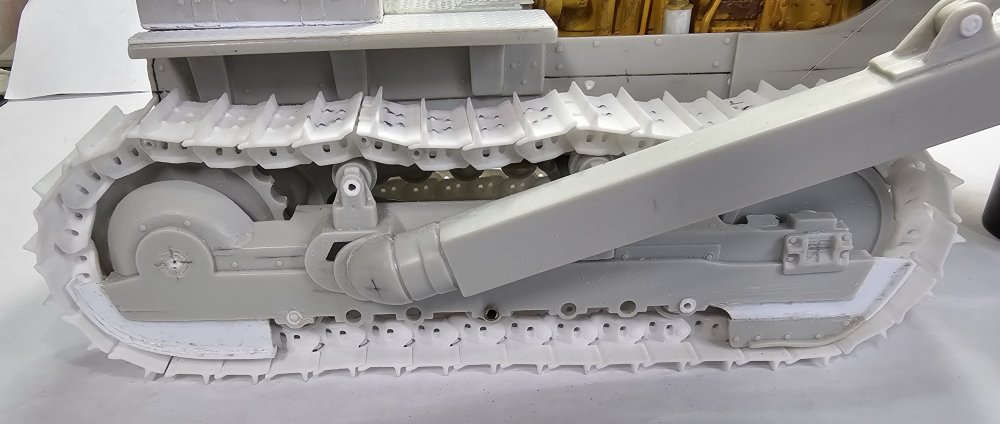
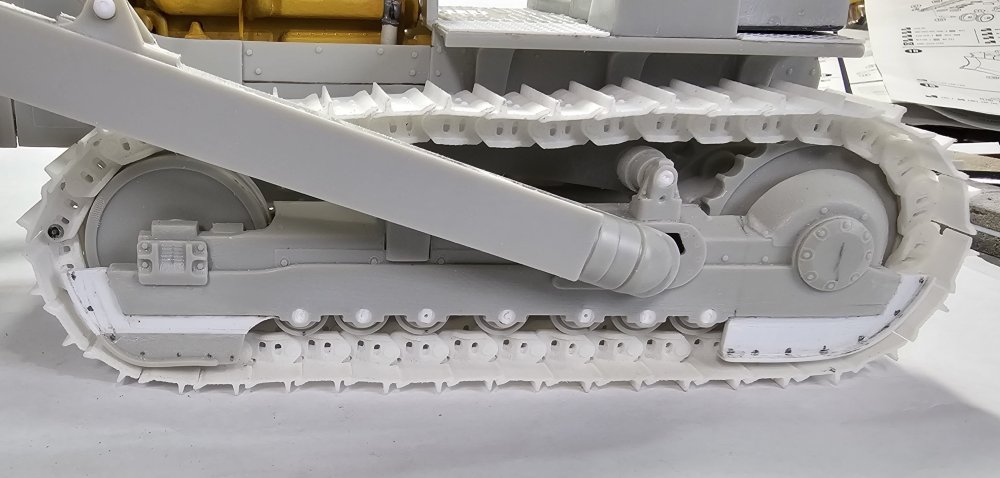
Hey all More work done on the AMT Caterpillar D8H. This view shows the scratch built air cleaner intake. This view shows the left side drive frame with the bolt heads I added to the lower track guides. This view shows the right side drive frame with the bolt heads I added to the lower track guides. This view shows the bolt heads added to the rear panel. I have the Cat yellow paint mixed up and I'm ready for paint. I pulled everything apart so I could paint it. I think I'm going to prime it with Tamiya flat white, then I will do the yellow. Well that's it for now be back when she's all yellow...lol Ron G

-
Thanks everyone
-
Hey all Some more work done on the AMT Caterpillar D8H. This view shows the seat that I modified with masking tape to represent leather and I ripped it to look worn. This view shows the floor control pedals and the transmission control box. I made the grab rail out of brass wire. I also added the support brackets for the R.O.P.S. on both sides. This view shows the dashboard, steering controls and throttle lever. I ordered a detail set with dash and gauge faces and build placards. I'll show pictures of it when they get here from Canada. This view shows the blade cylinders and the crass brace tube with the hydraulic manifold for all the cylinders and tgere tubes. Well that's it for now be back with more soon. Ron G

-
Hey all Some more work done on the AMT D8H. This view shows the triple ripper mounted and the blade cylinders in place. Closer view of the triple ripper. This view shows the blade cylinder rods connected to the blade. This view shows the blade and ripper in the down position. I think I'm about ready for some yellow paint. Well that's it for now be back soon. Ron G


-
Small update. I have the tracks primed in a rusty undercoat. Ron G
-
Thanks everyone
-
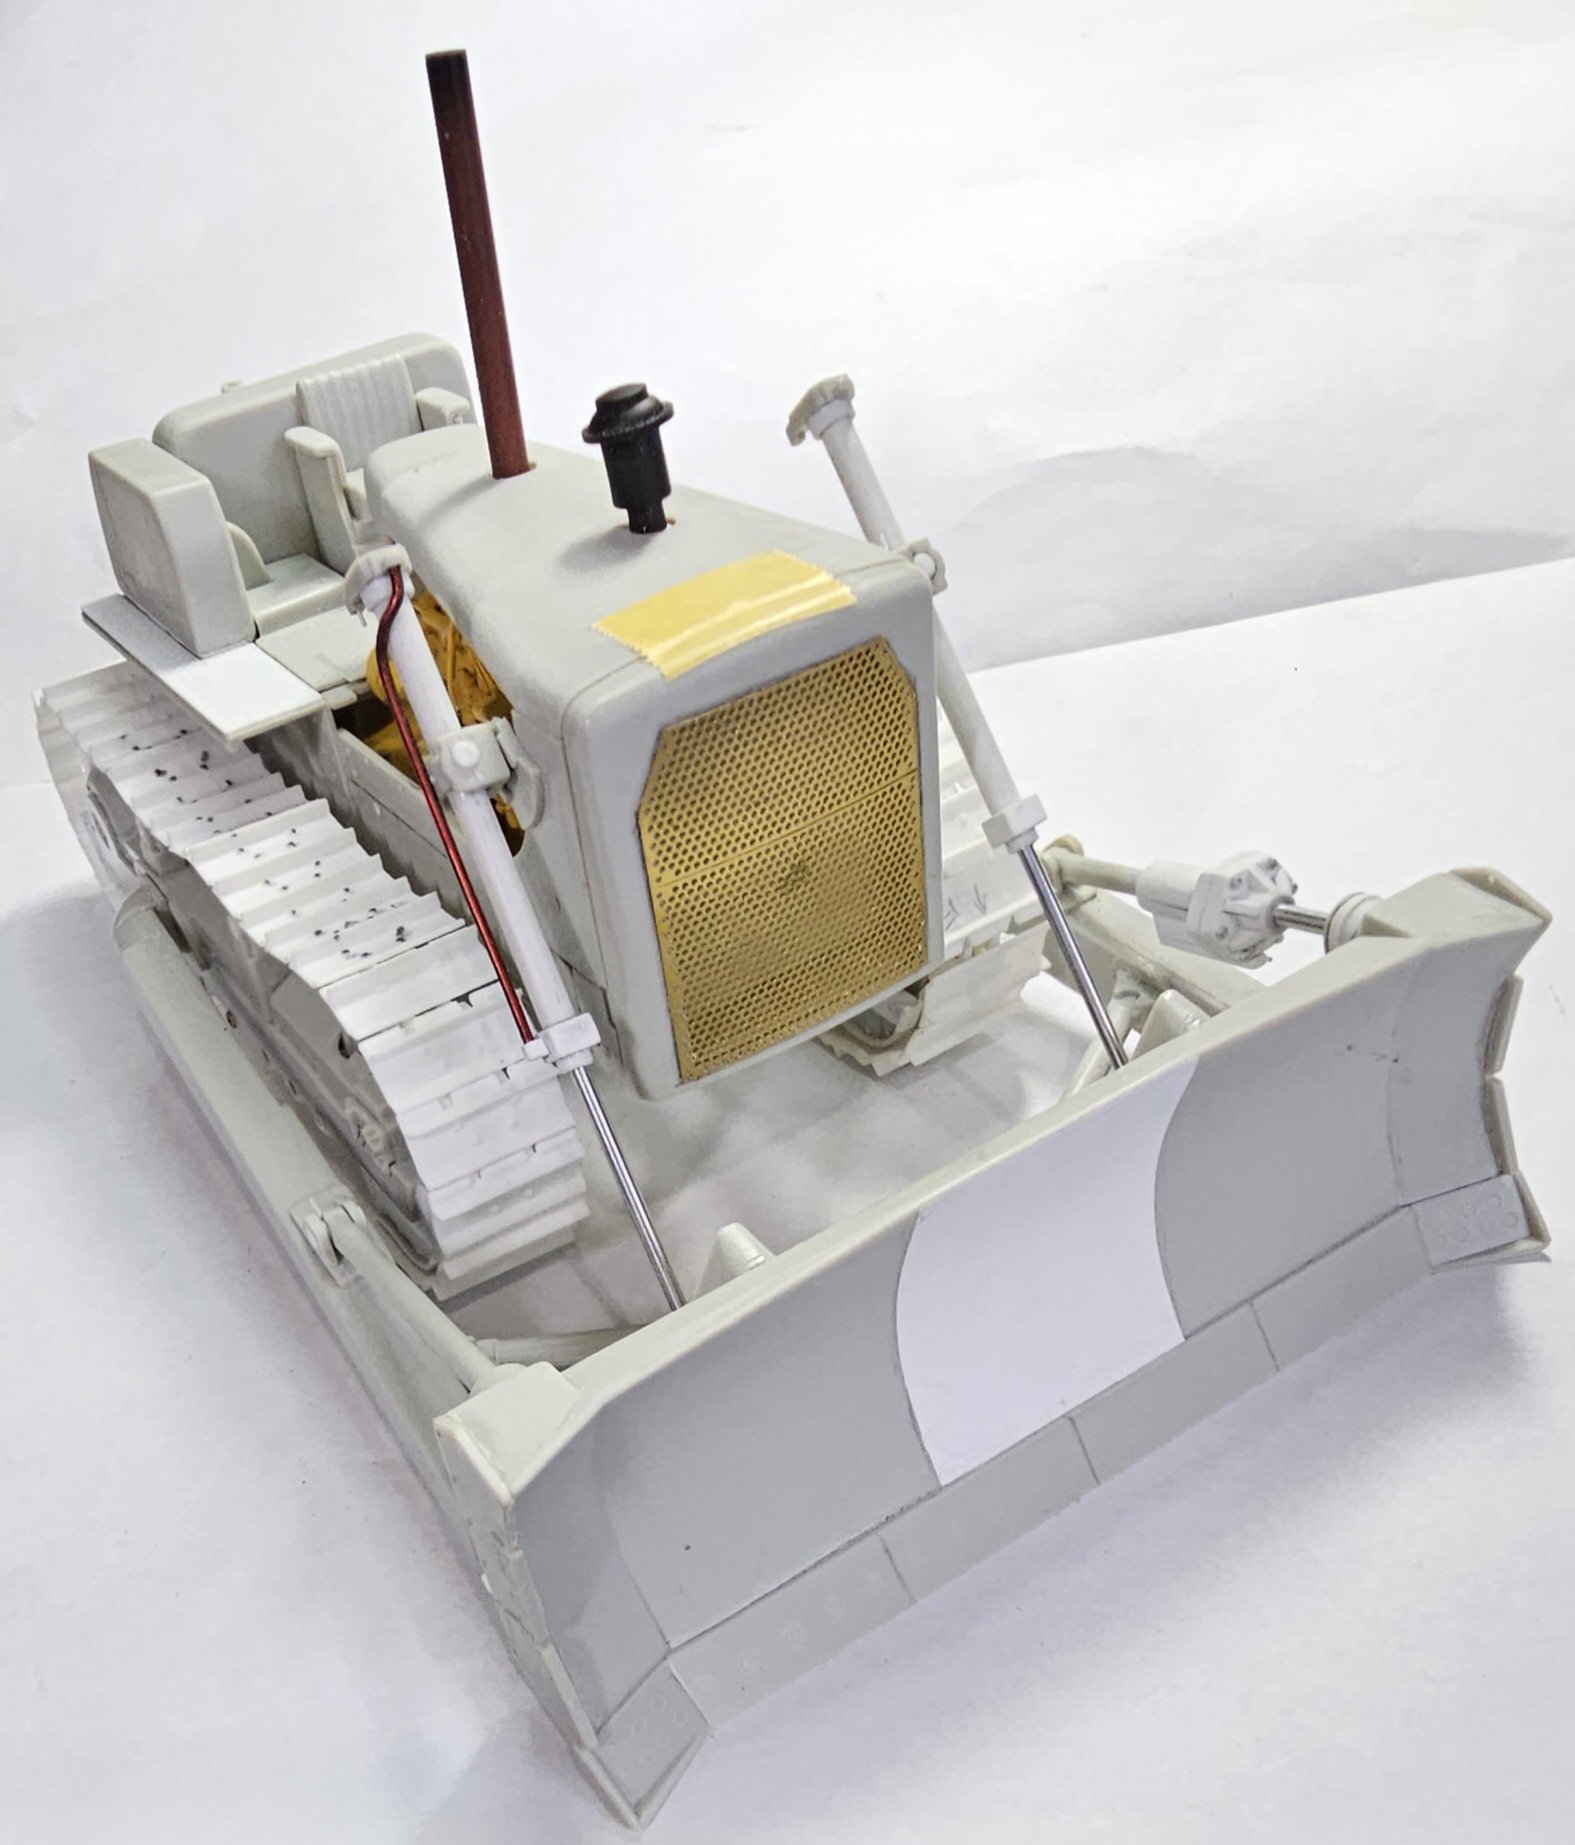
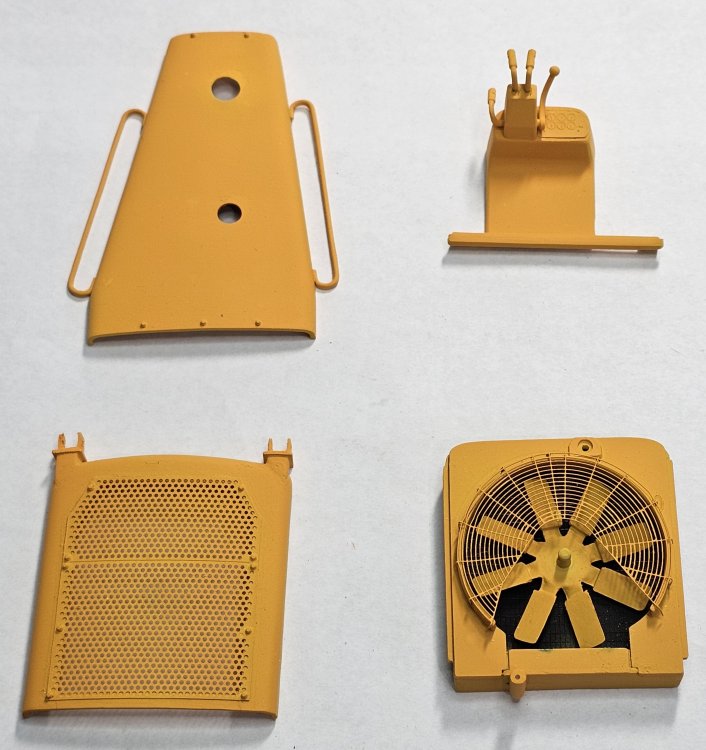
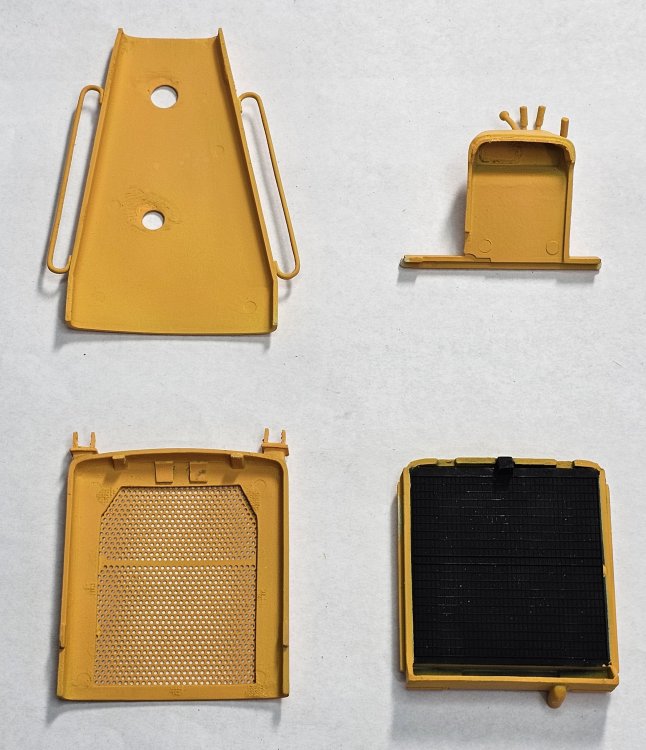
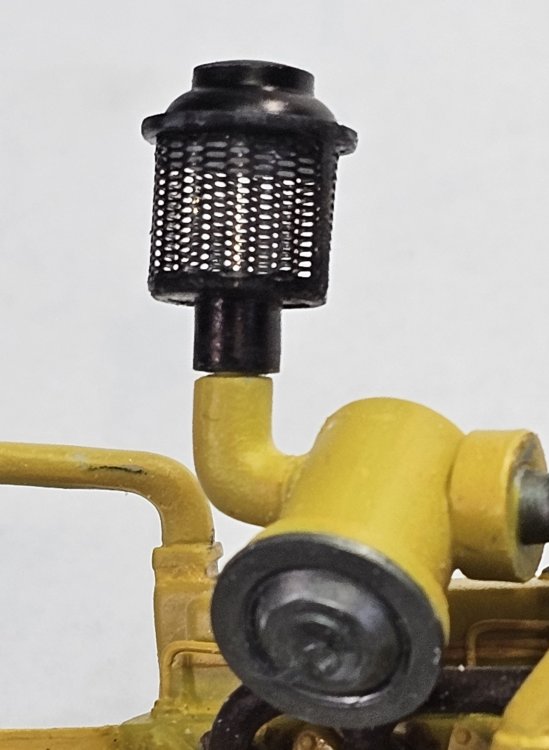
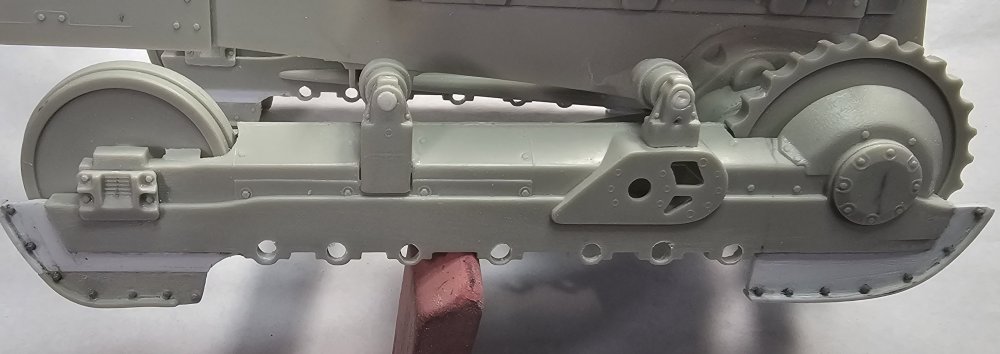
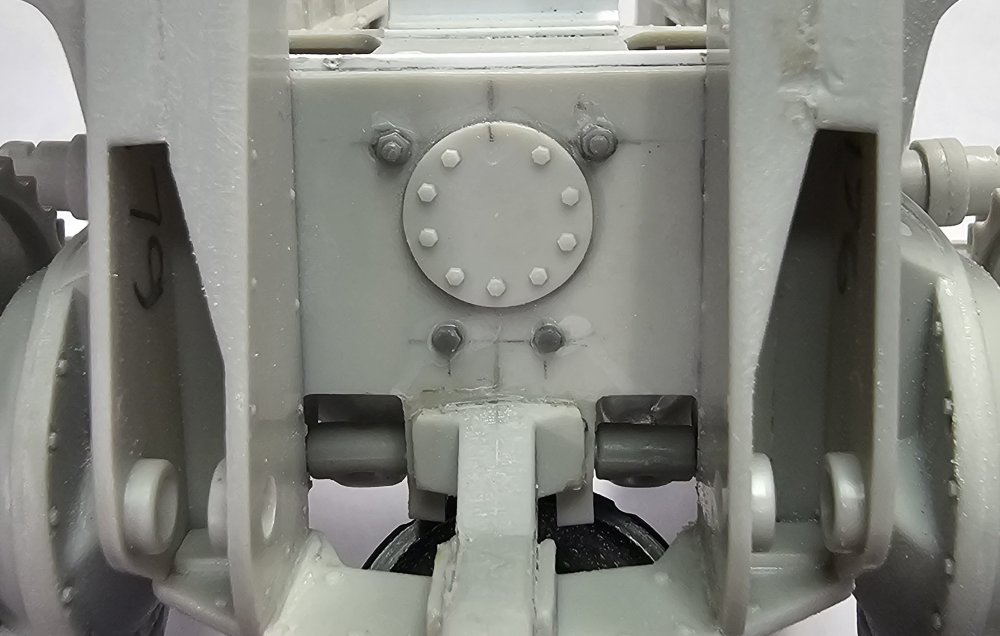
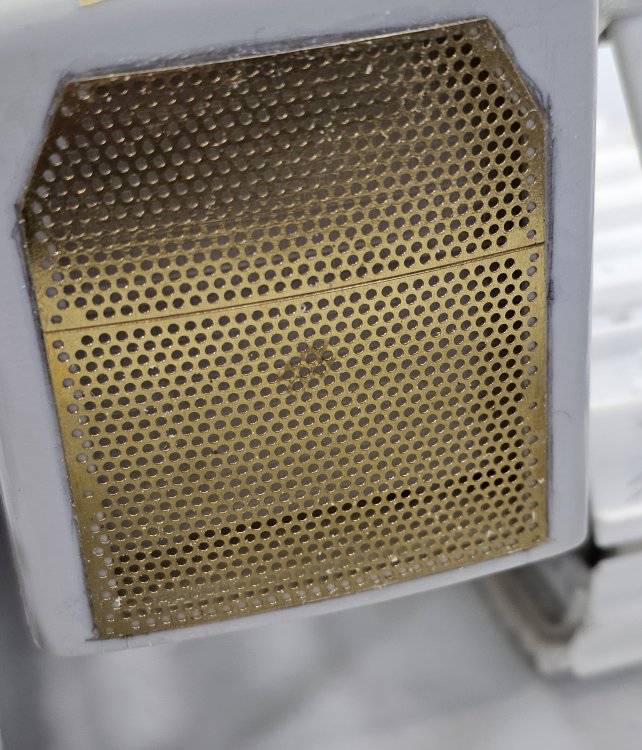
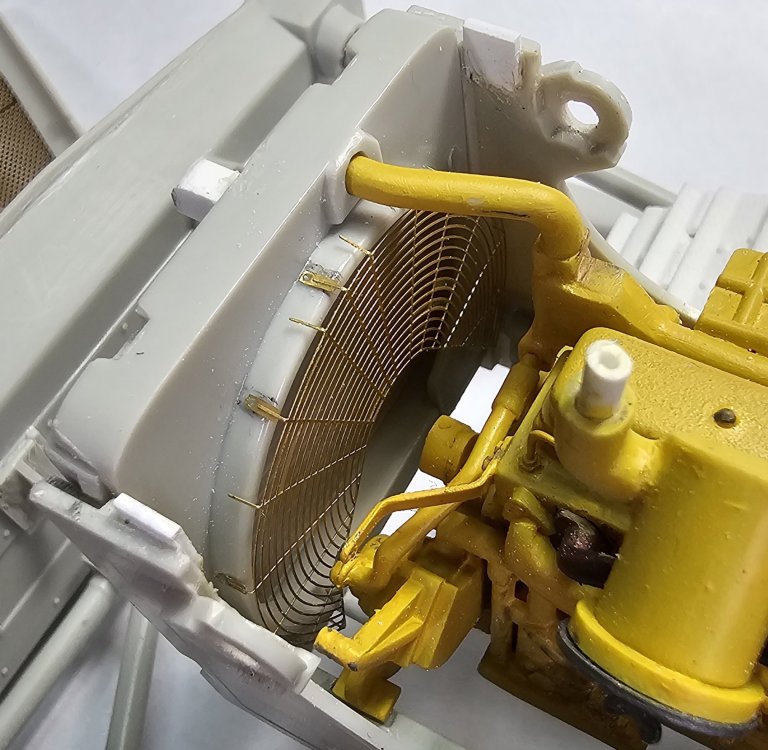
Hey all I took a break from the Panzer and Tiger. I needed to clear my head from tanks. Ssoooo.... I dug this out from the "I'll get to it later" shelf. Yes I'm back on the AMT 1/25 D8H Caterpillar dozer. Overall view of the Cat D8H. I added some anti-slip tread plate to the cab area. I have the right side reworked to fit the 3D printed tracks. I'm waiting for some Evergreen plastic rod and tube for shafts so I can finish the drive train. Left hand side of the drive train. Need to add bolt heads to this area on both sides. Left side view, everything is only temporarily mounted for pictures. I also need to scratch build a R.O.P.S. for this. This view shows the photo-etch front grill. Closer view of the grill. I need to add some bolt heads to this. This view shows the photo-etch fan shroud. A better view of the fan shroud, this is going to be a real chore to get the fan, fan belt and motor mounted with out ripping the shroud off! Well that's it for now be back soon with more updates. Ron G

-
Nothing new, but I just saw that Trumpeter is releasing a 1/16 late Tiger 1 and a Sdkfz 251/22 75mm. 😁 Ron G
-
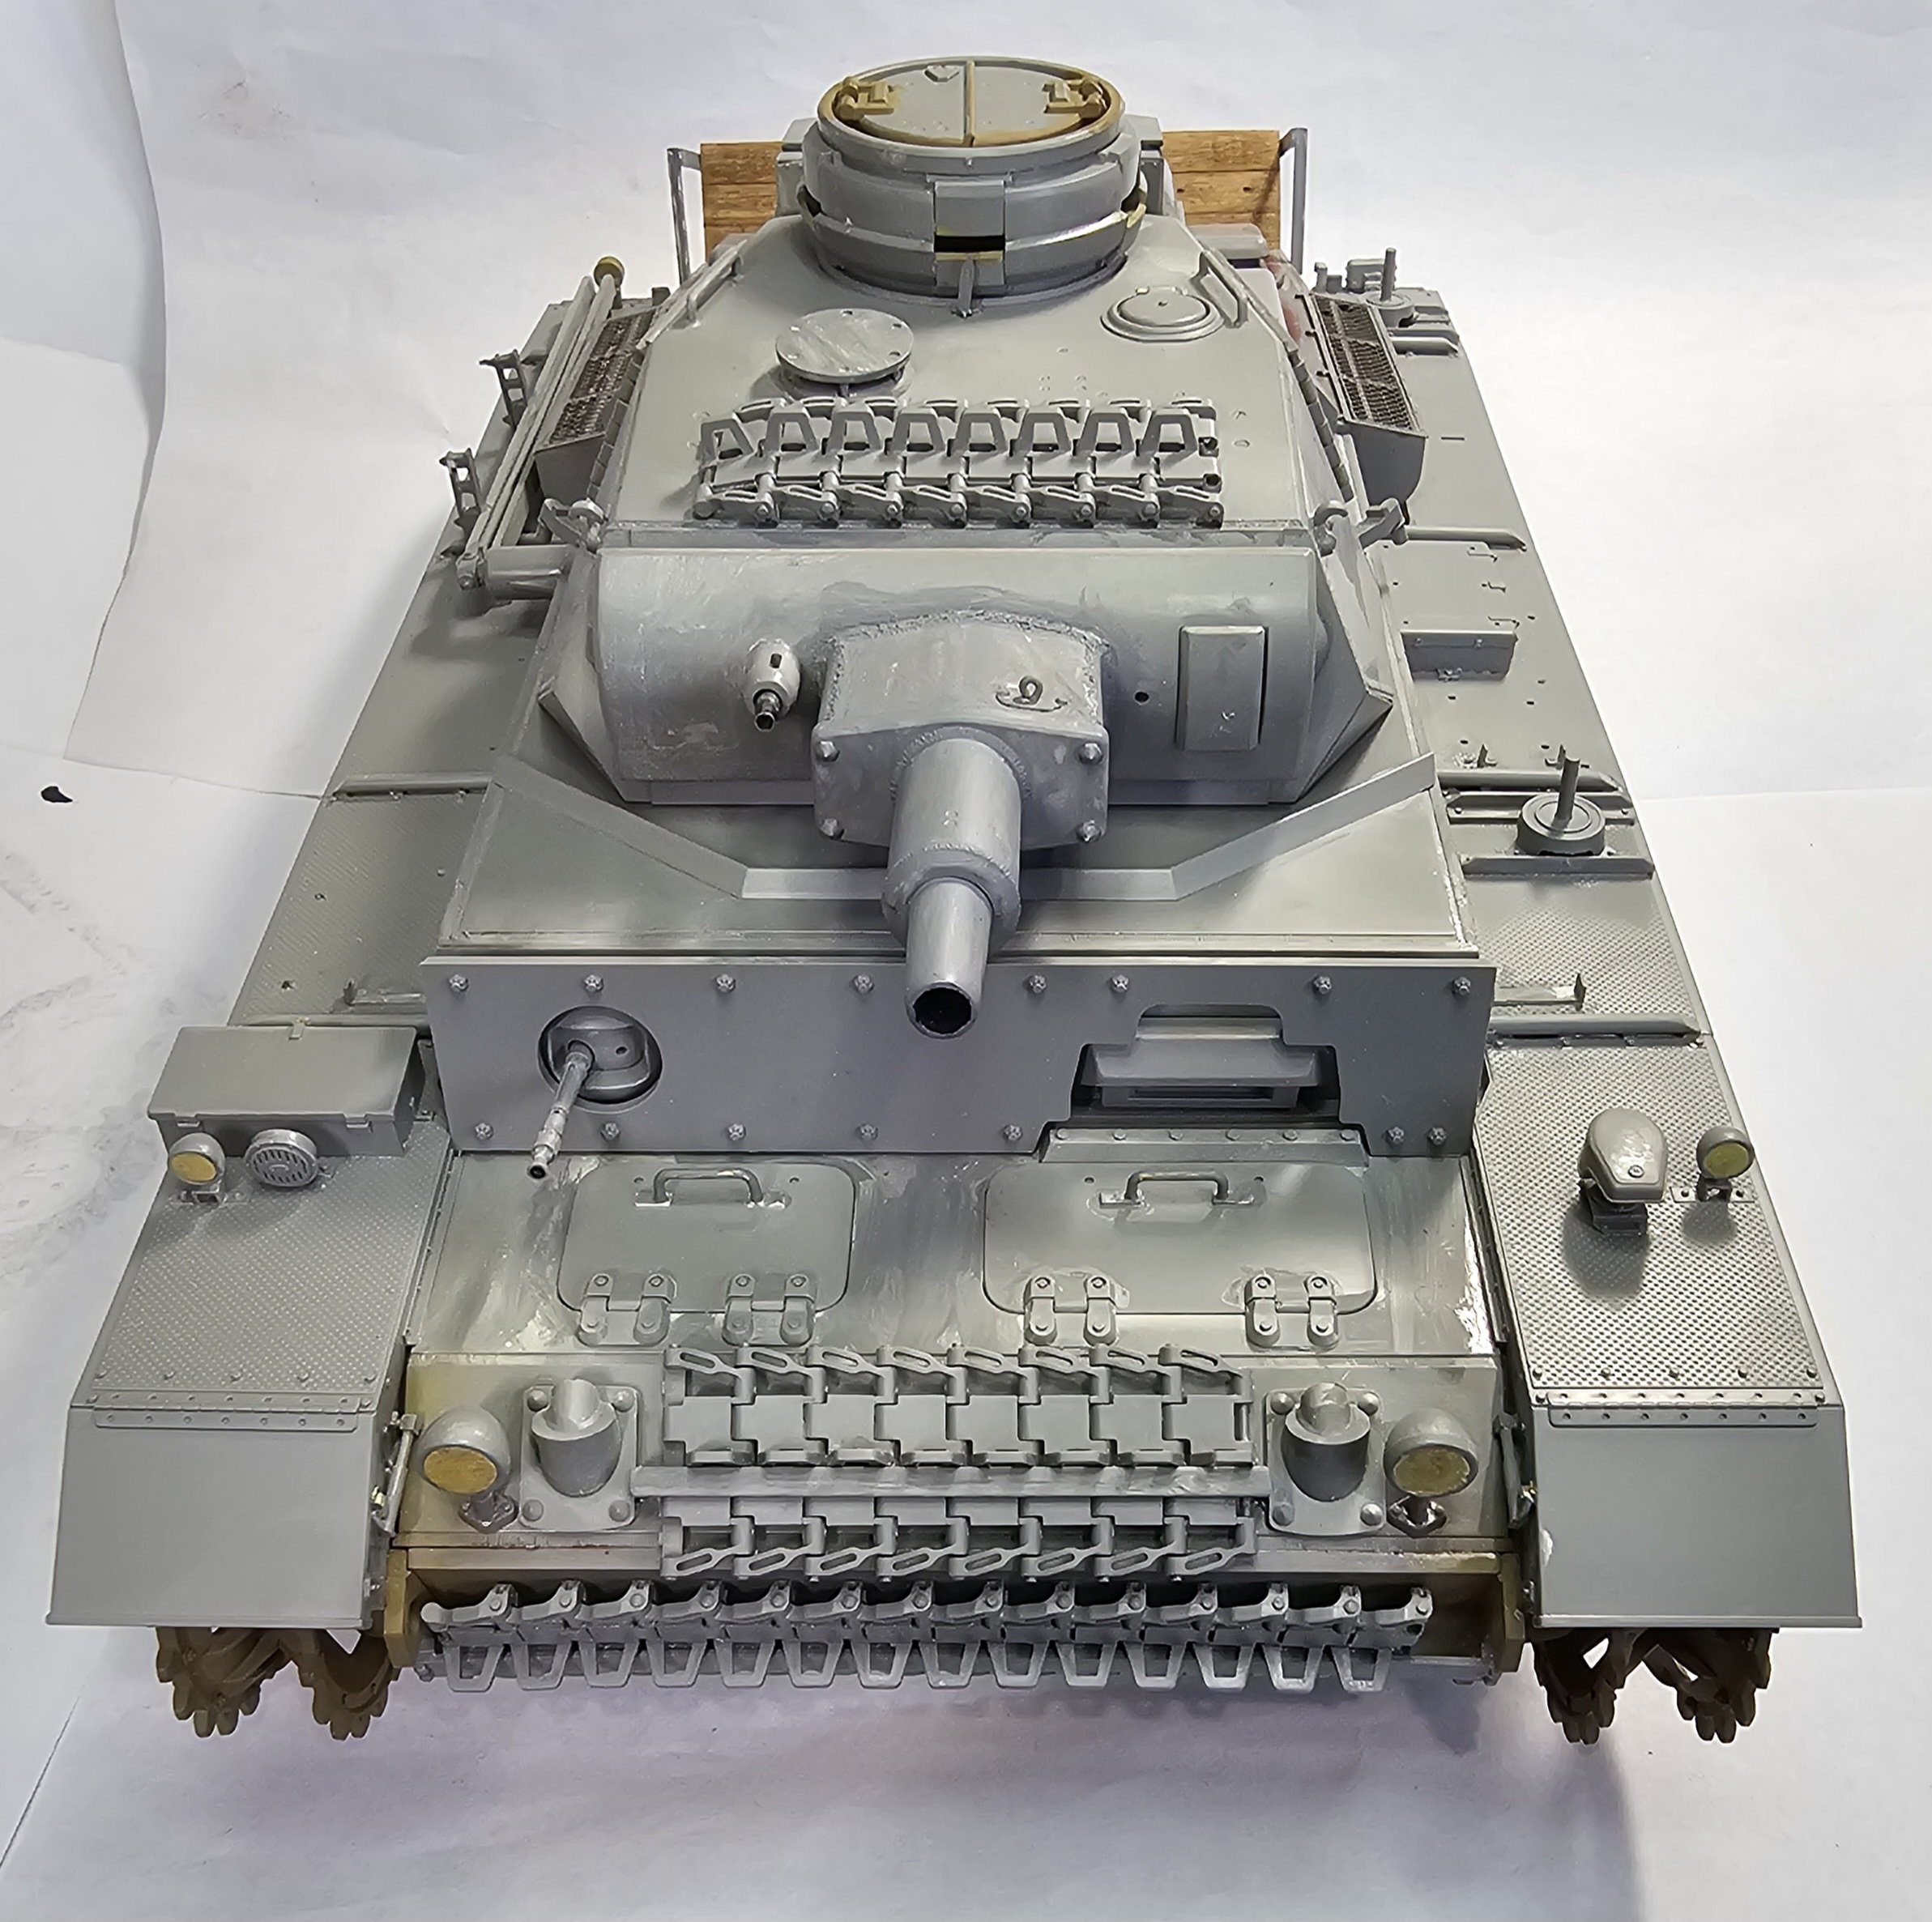
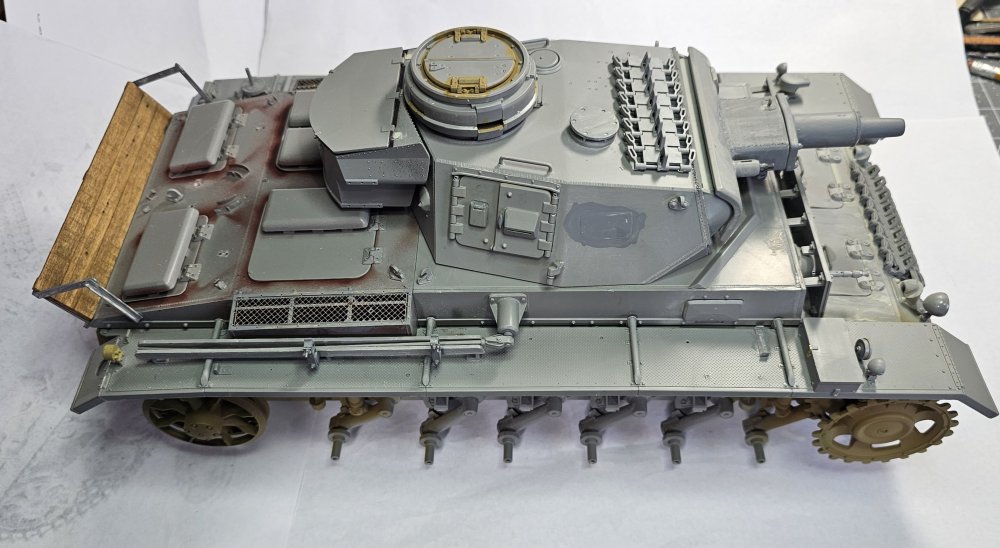
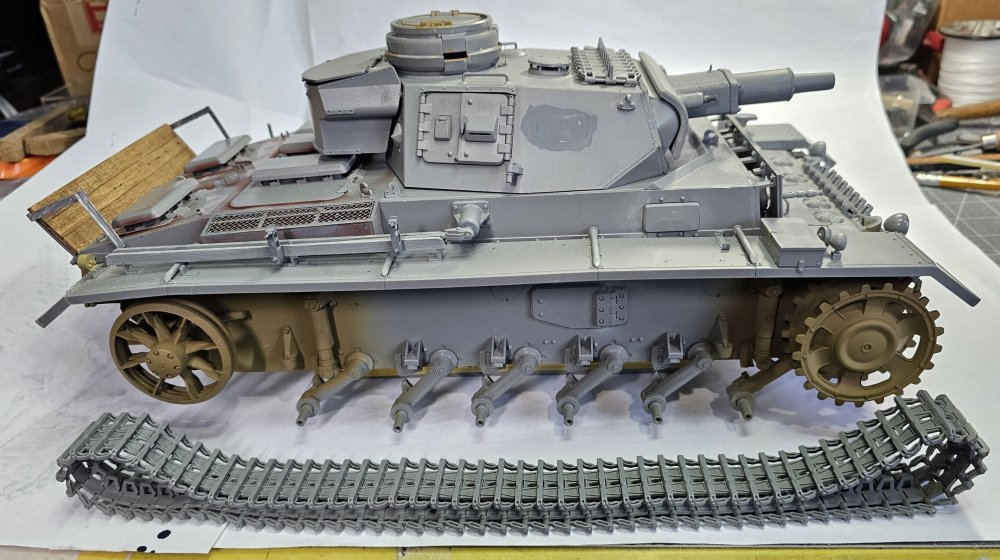
Hey all Some more work done on the Panzer III Ausf N. top down view. Radio operators side view and tracks. I still need to make all of the wheels and tires. Front view showing the spare track links. Drivers side view and tracks. It's almost ready for the Ral 8000 paint. I need to do the weathering on the interior before I button her up. That's it for now be back with more soon. Ron G
-
Thanks everyone
-
Hey all Small update to the Panzer III Ausf N. This shows the barrel cleaning rod stoage that I scratch built from plastic bits. Ron G

-
I have the Despaie ones also. I give them about a 9 &1/2, but I mostly just use my Tamiya ones.🤔🙂 Ron G
-
Hey all More work done on the Panzer III Ausf N. This view shows the extras from Value Gear that I am adding to the Panzer III. Another view of the added stoage. This view shows the storage rack that I scratch built from plastic stripes and wood. This view shows the storage rack without the boards. That's it for now be back soon. Ron G


-
The only WW2 Shermans in 1/16 scale are RC versions from Heng Long, Torro and Tigon. You could take Andy's 1/16 easy 8 and either the 1/16 Achilles or M10 and combine them into a M4A3 (76) W VVSS Sherman. You could get SOL models 105mm turret conversion to make a 105 Sherman, but this is a expensive option at $139.99 for the Sherman & $149.00 for the Achilles/ M10. I'm not sure what the 105mm conversion is. But it's close to $100.00.😵💫😱 Ron G
-
Hey Harv Hope you are doing better. Remember both those AHHQ Shermans are late, very late WW2 & Korean Shermans. I'm hoping that now that Andy has both the M10 & Achilles he will be coming out with an early M4A3 either the 75mm or the 76mm with the VVSS suspension. These would be more what you would have seen during the majority of the war. Ron G
-
Thanks everyone
-
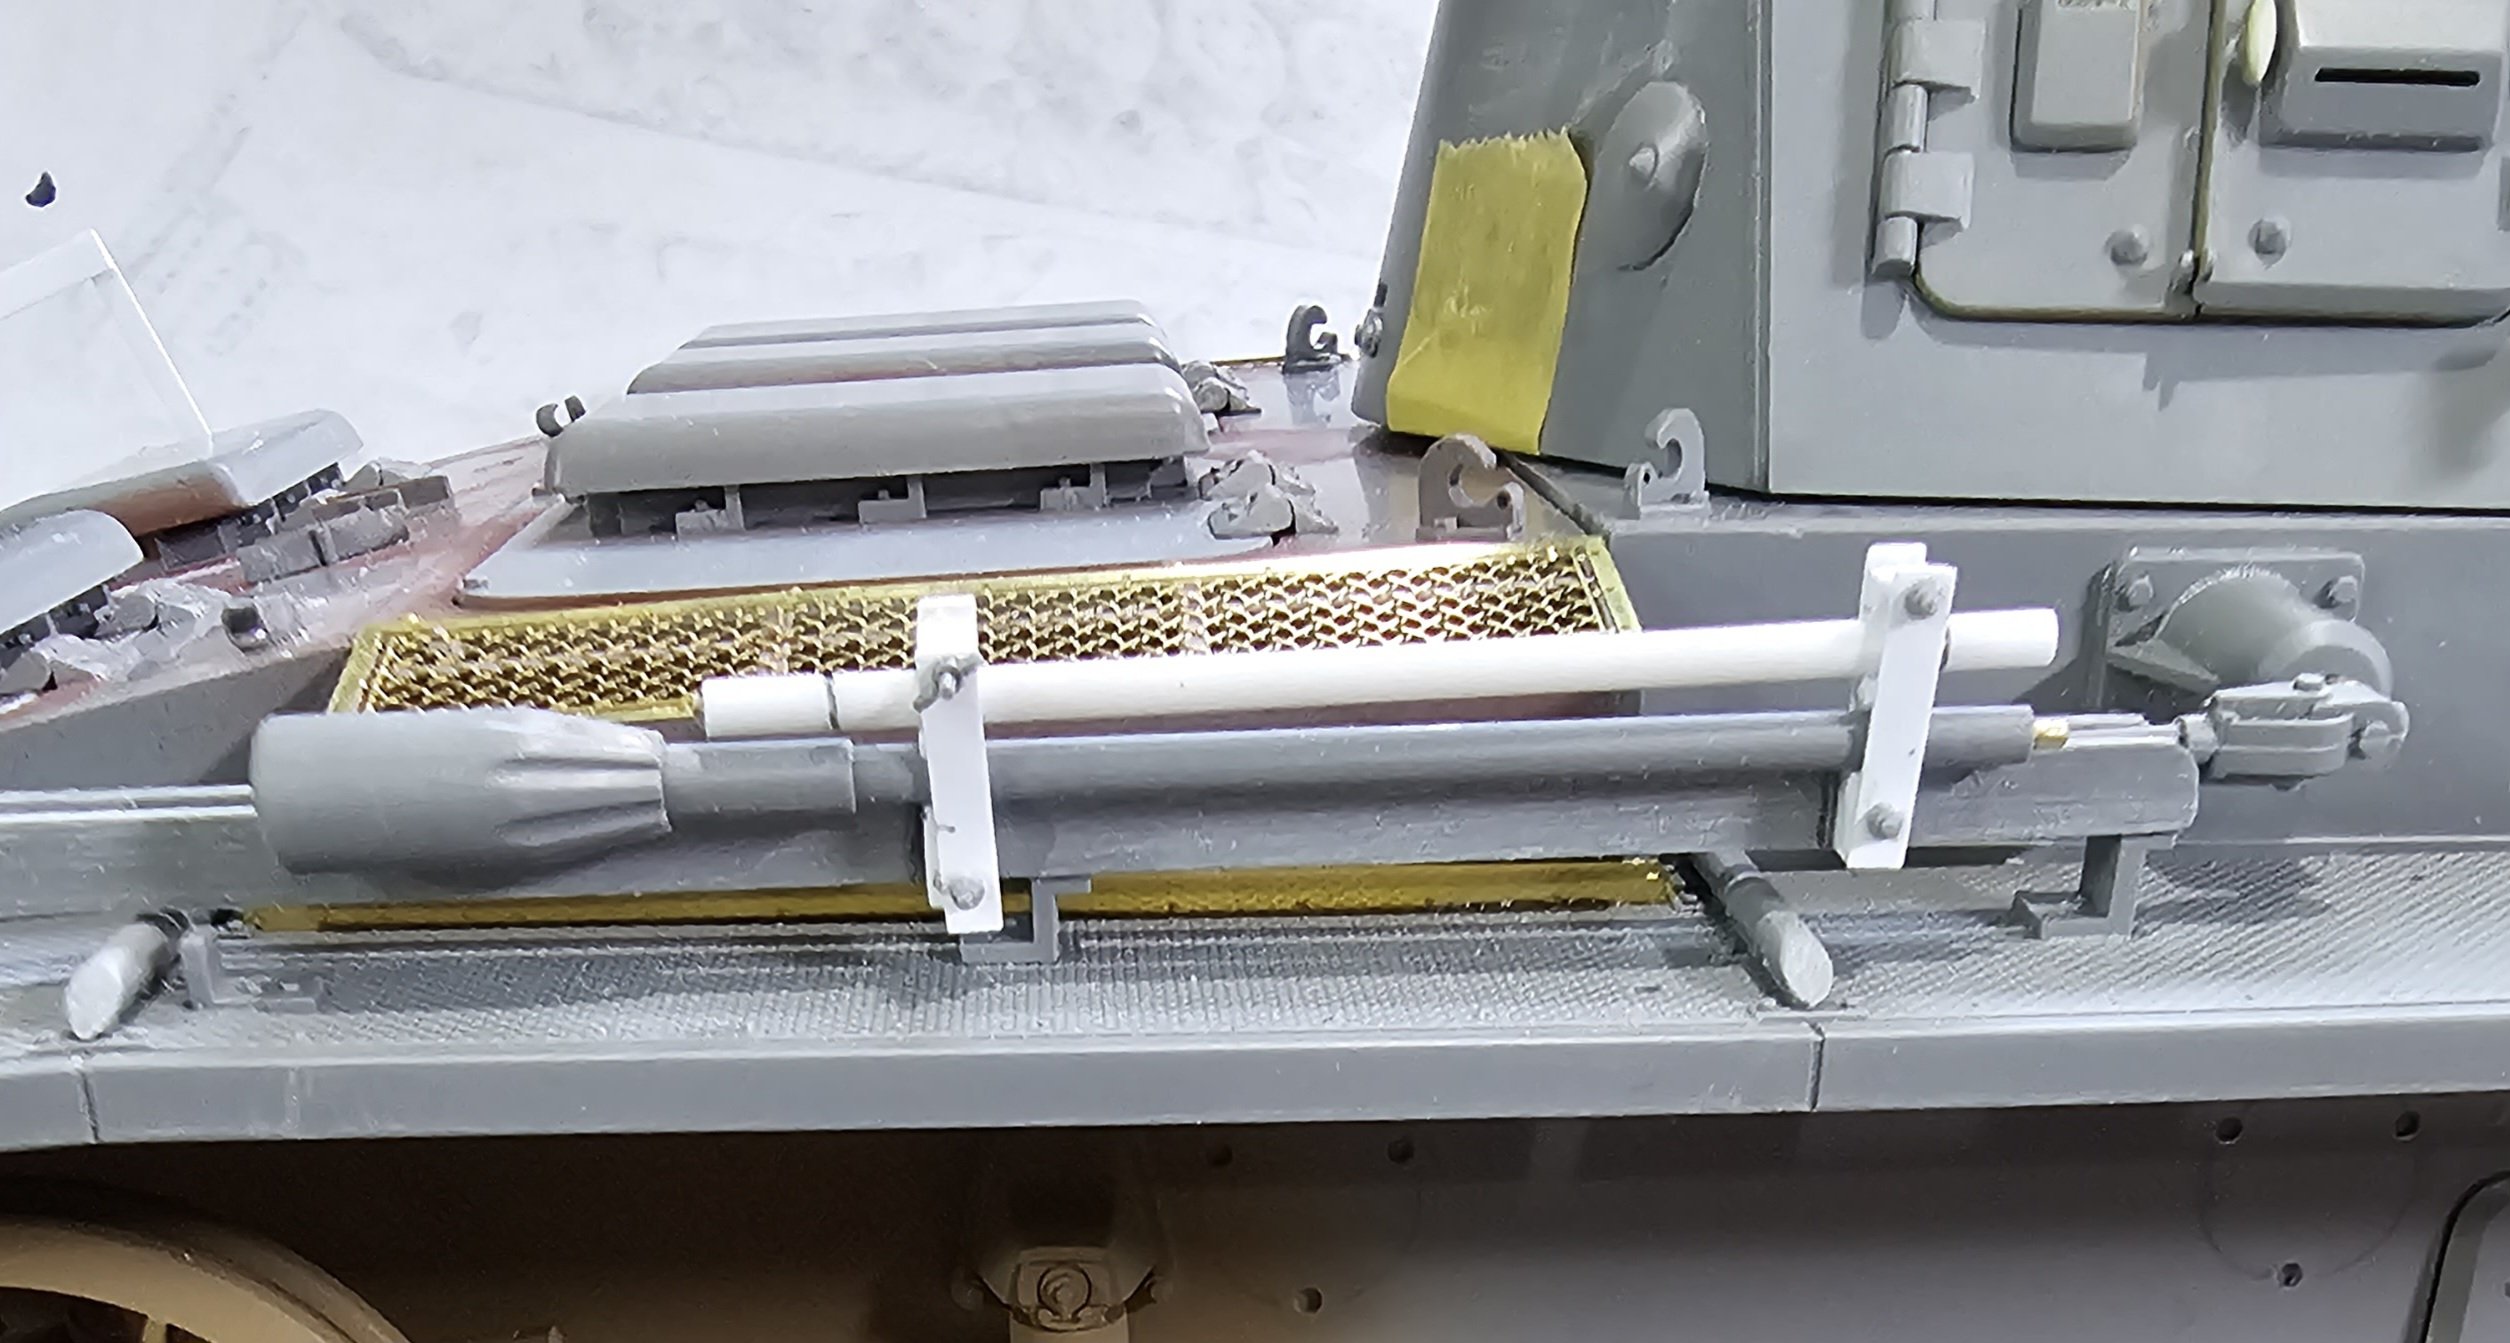
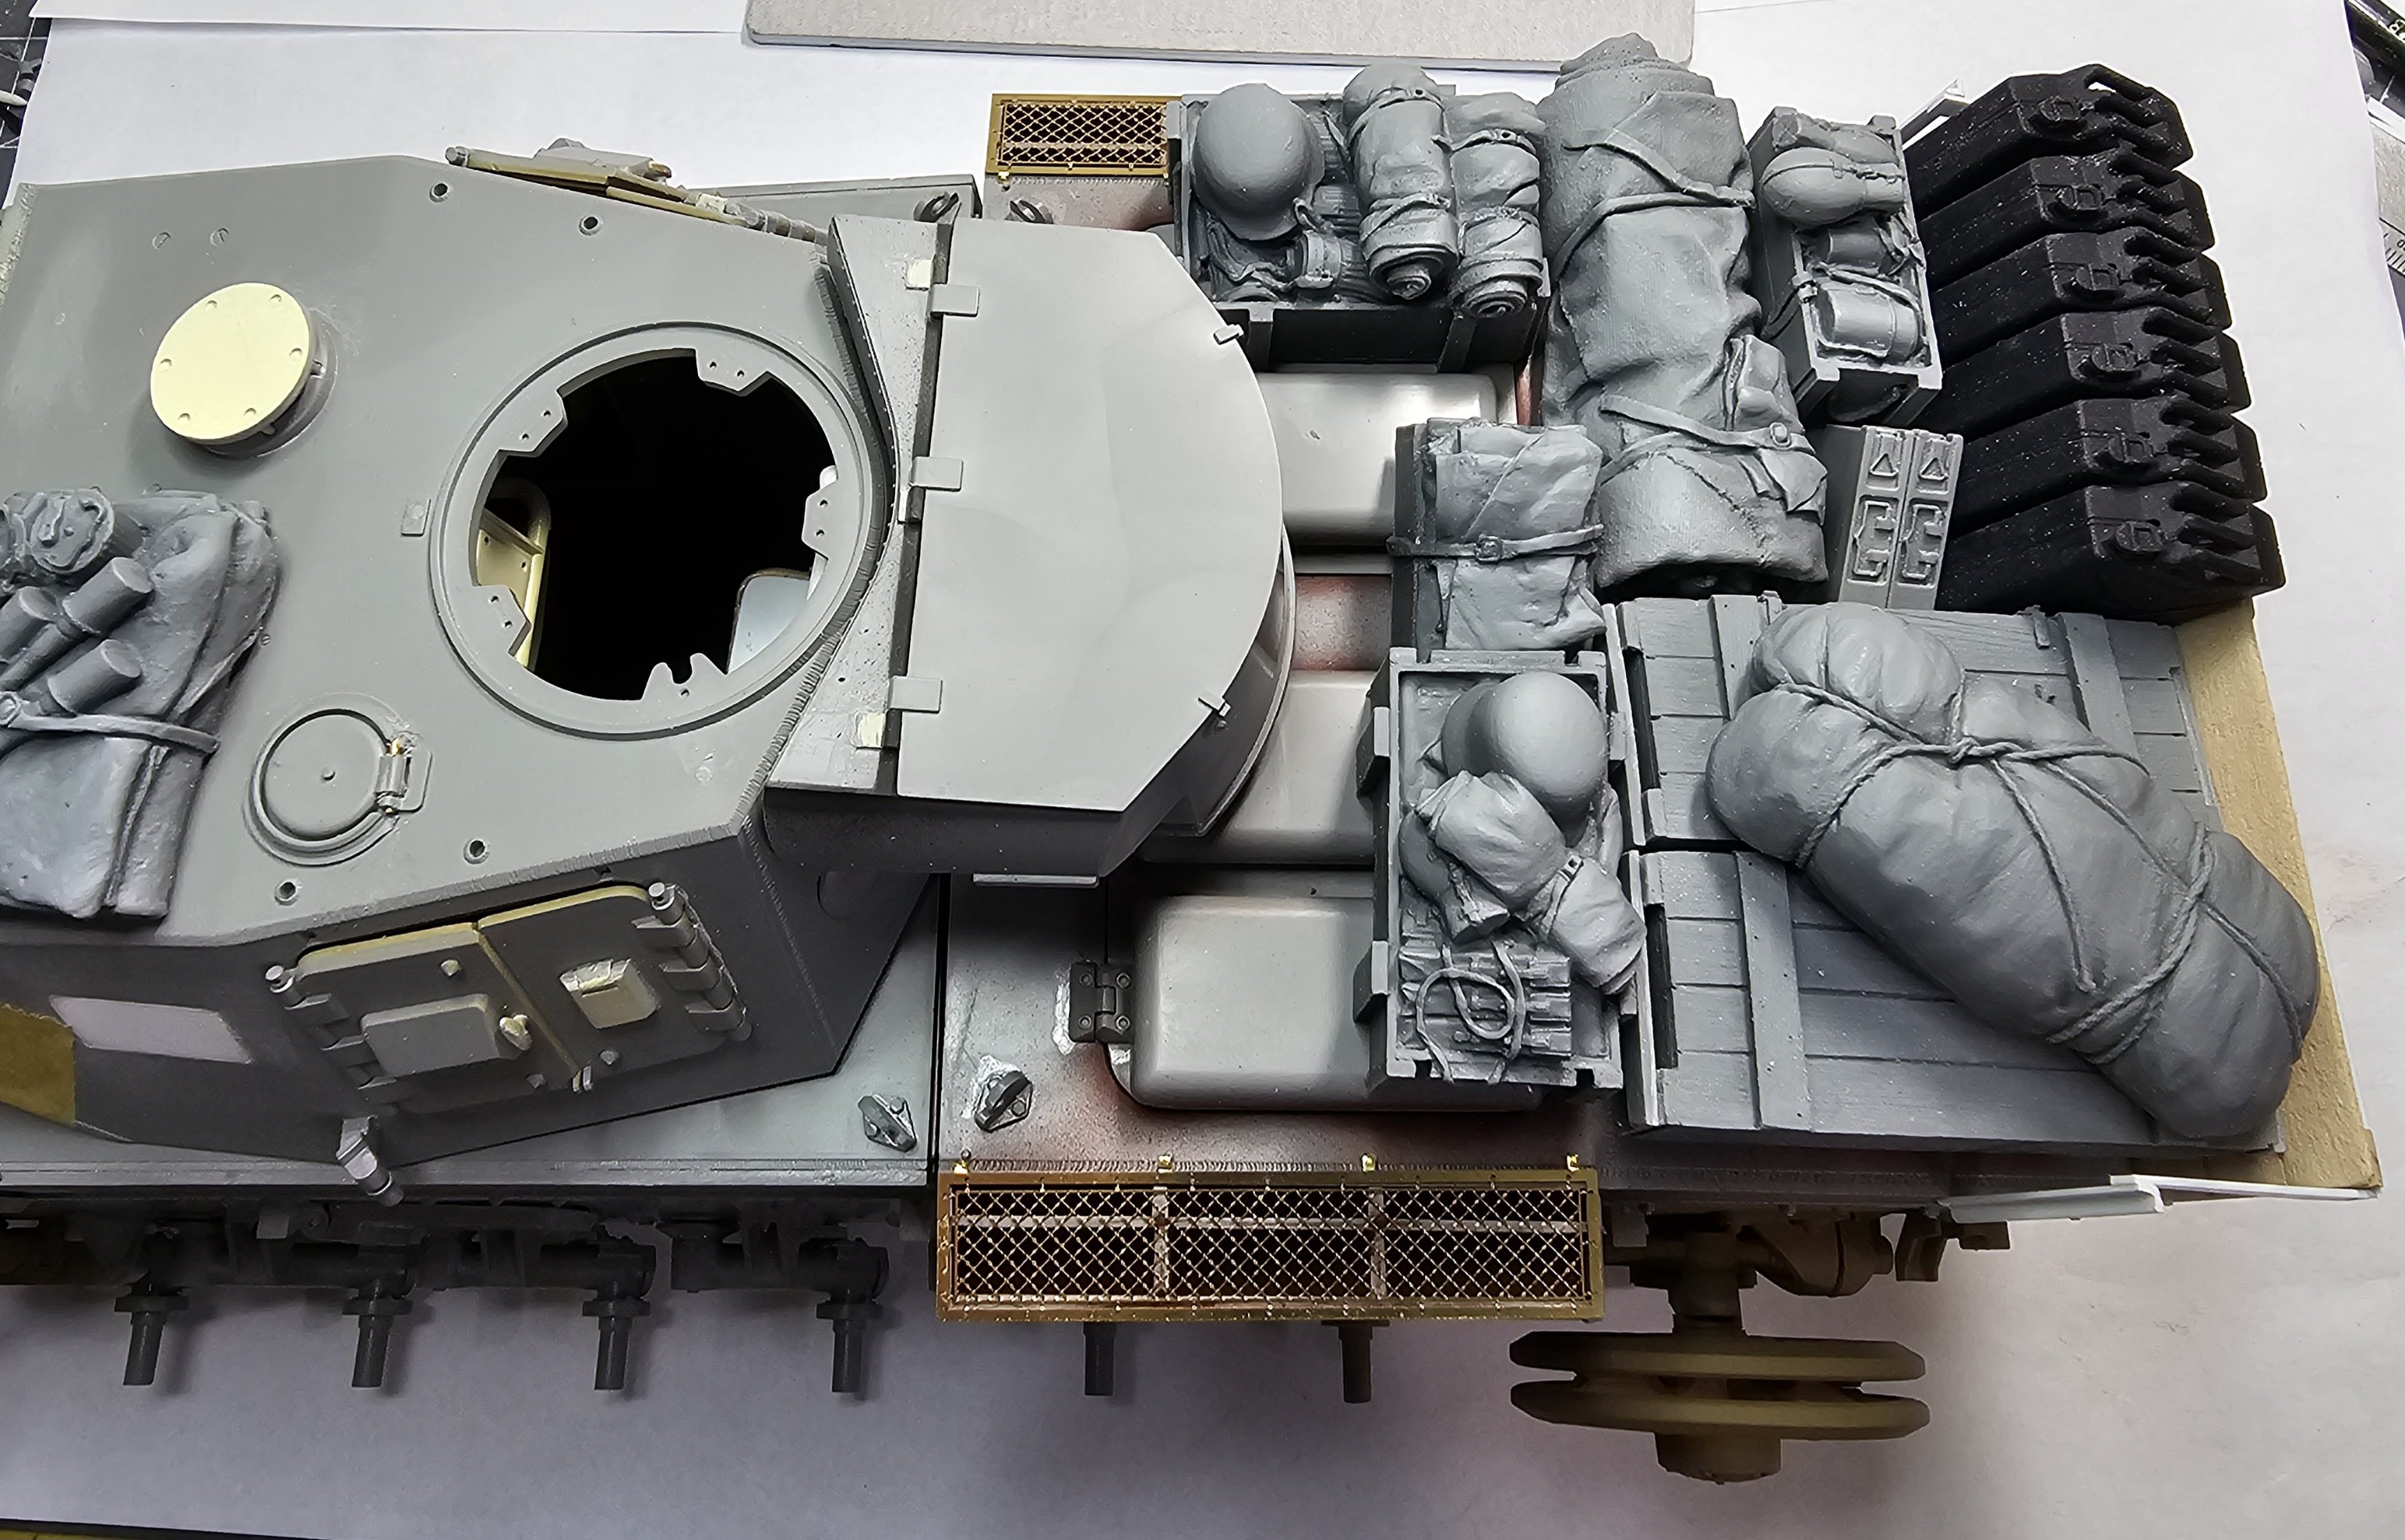
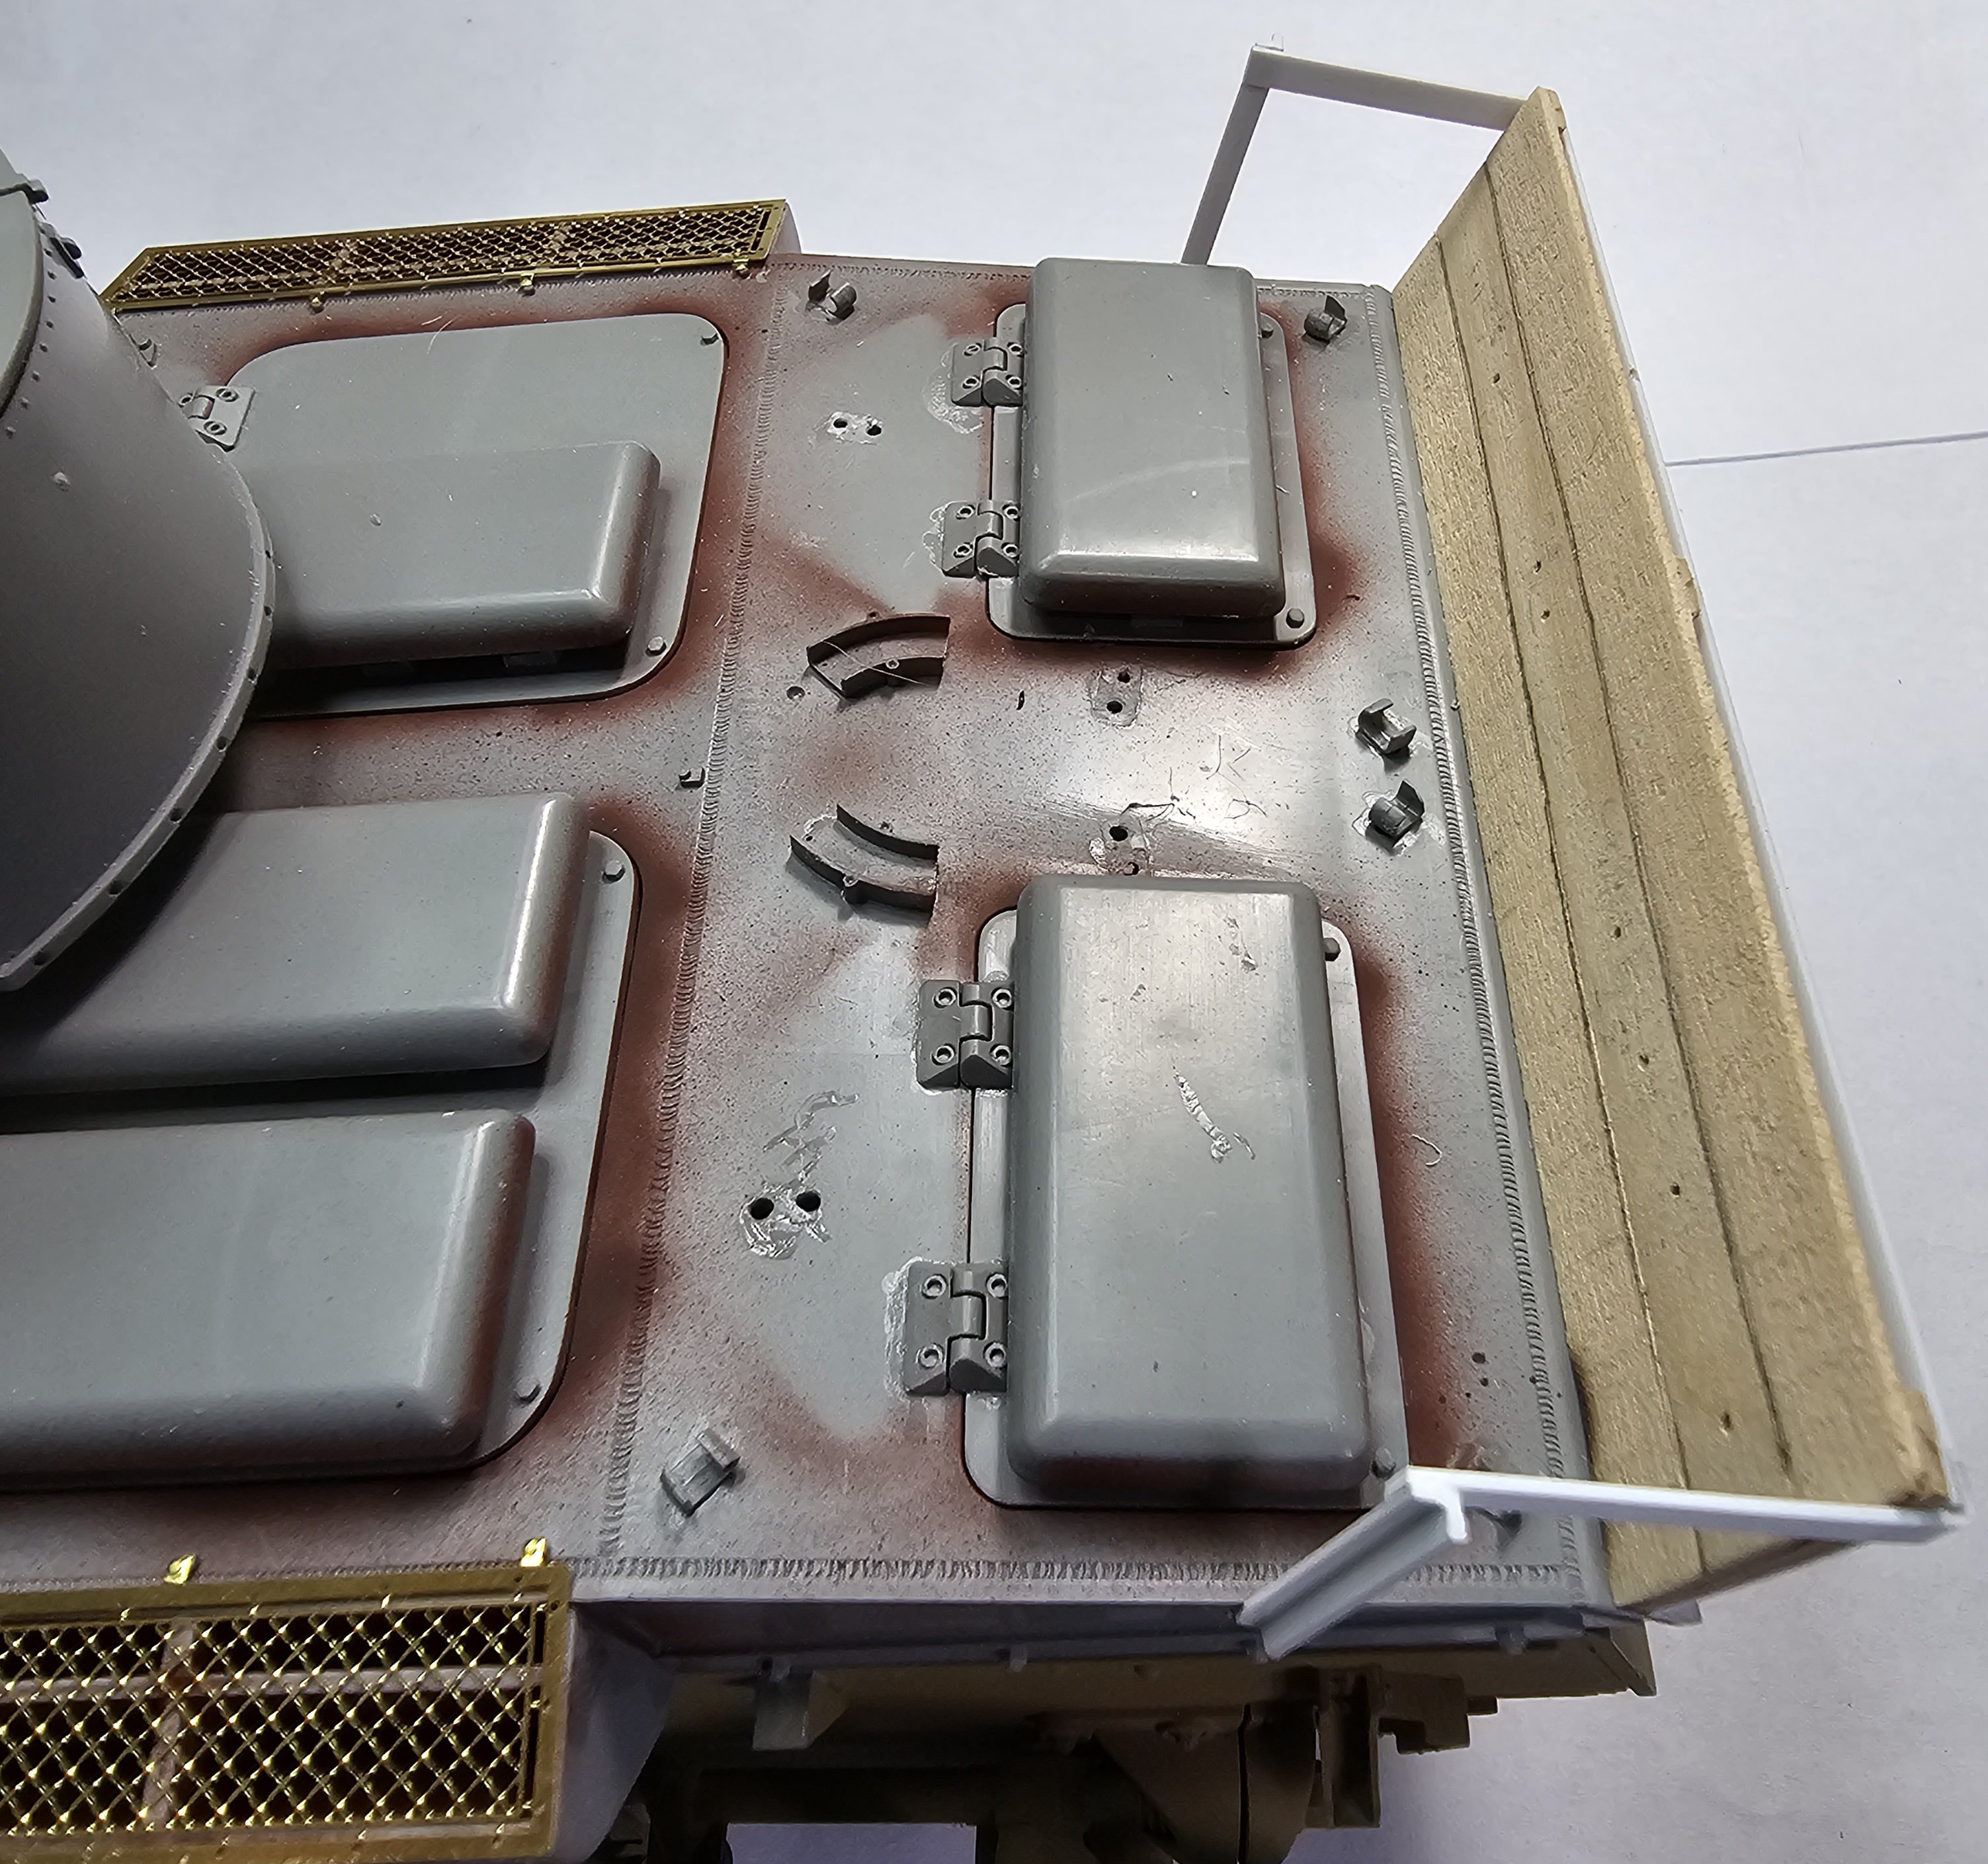
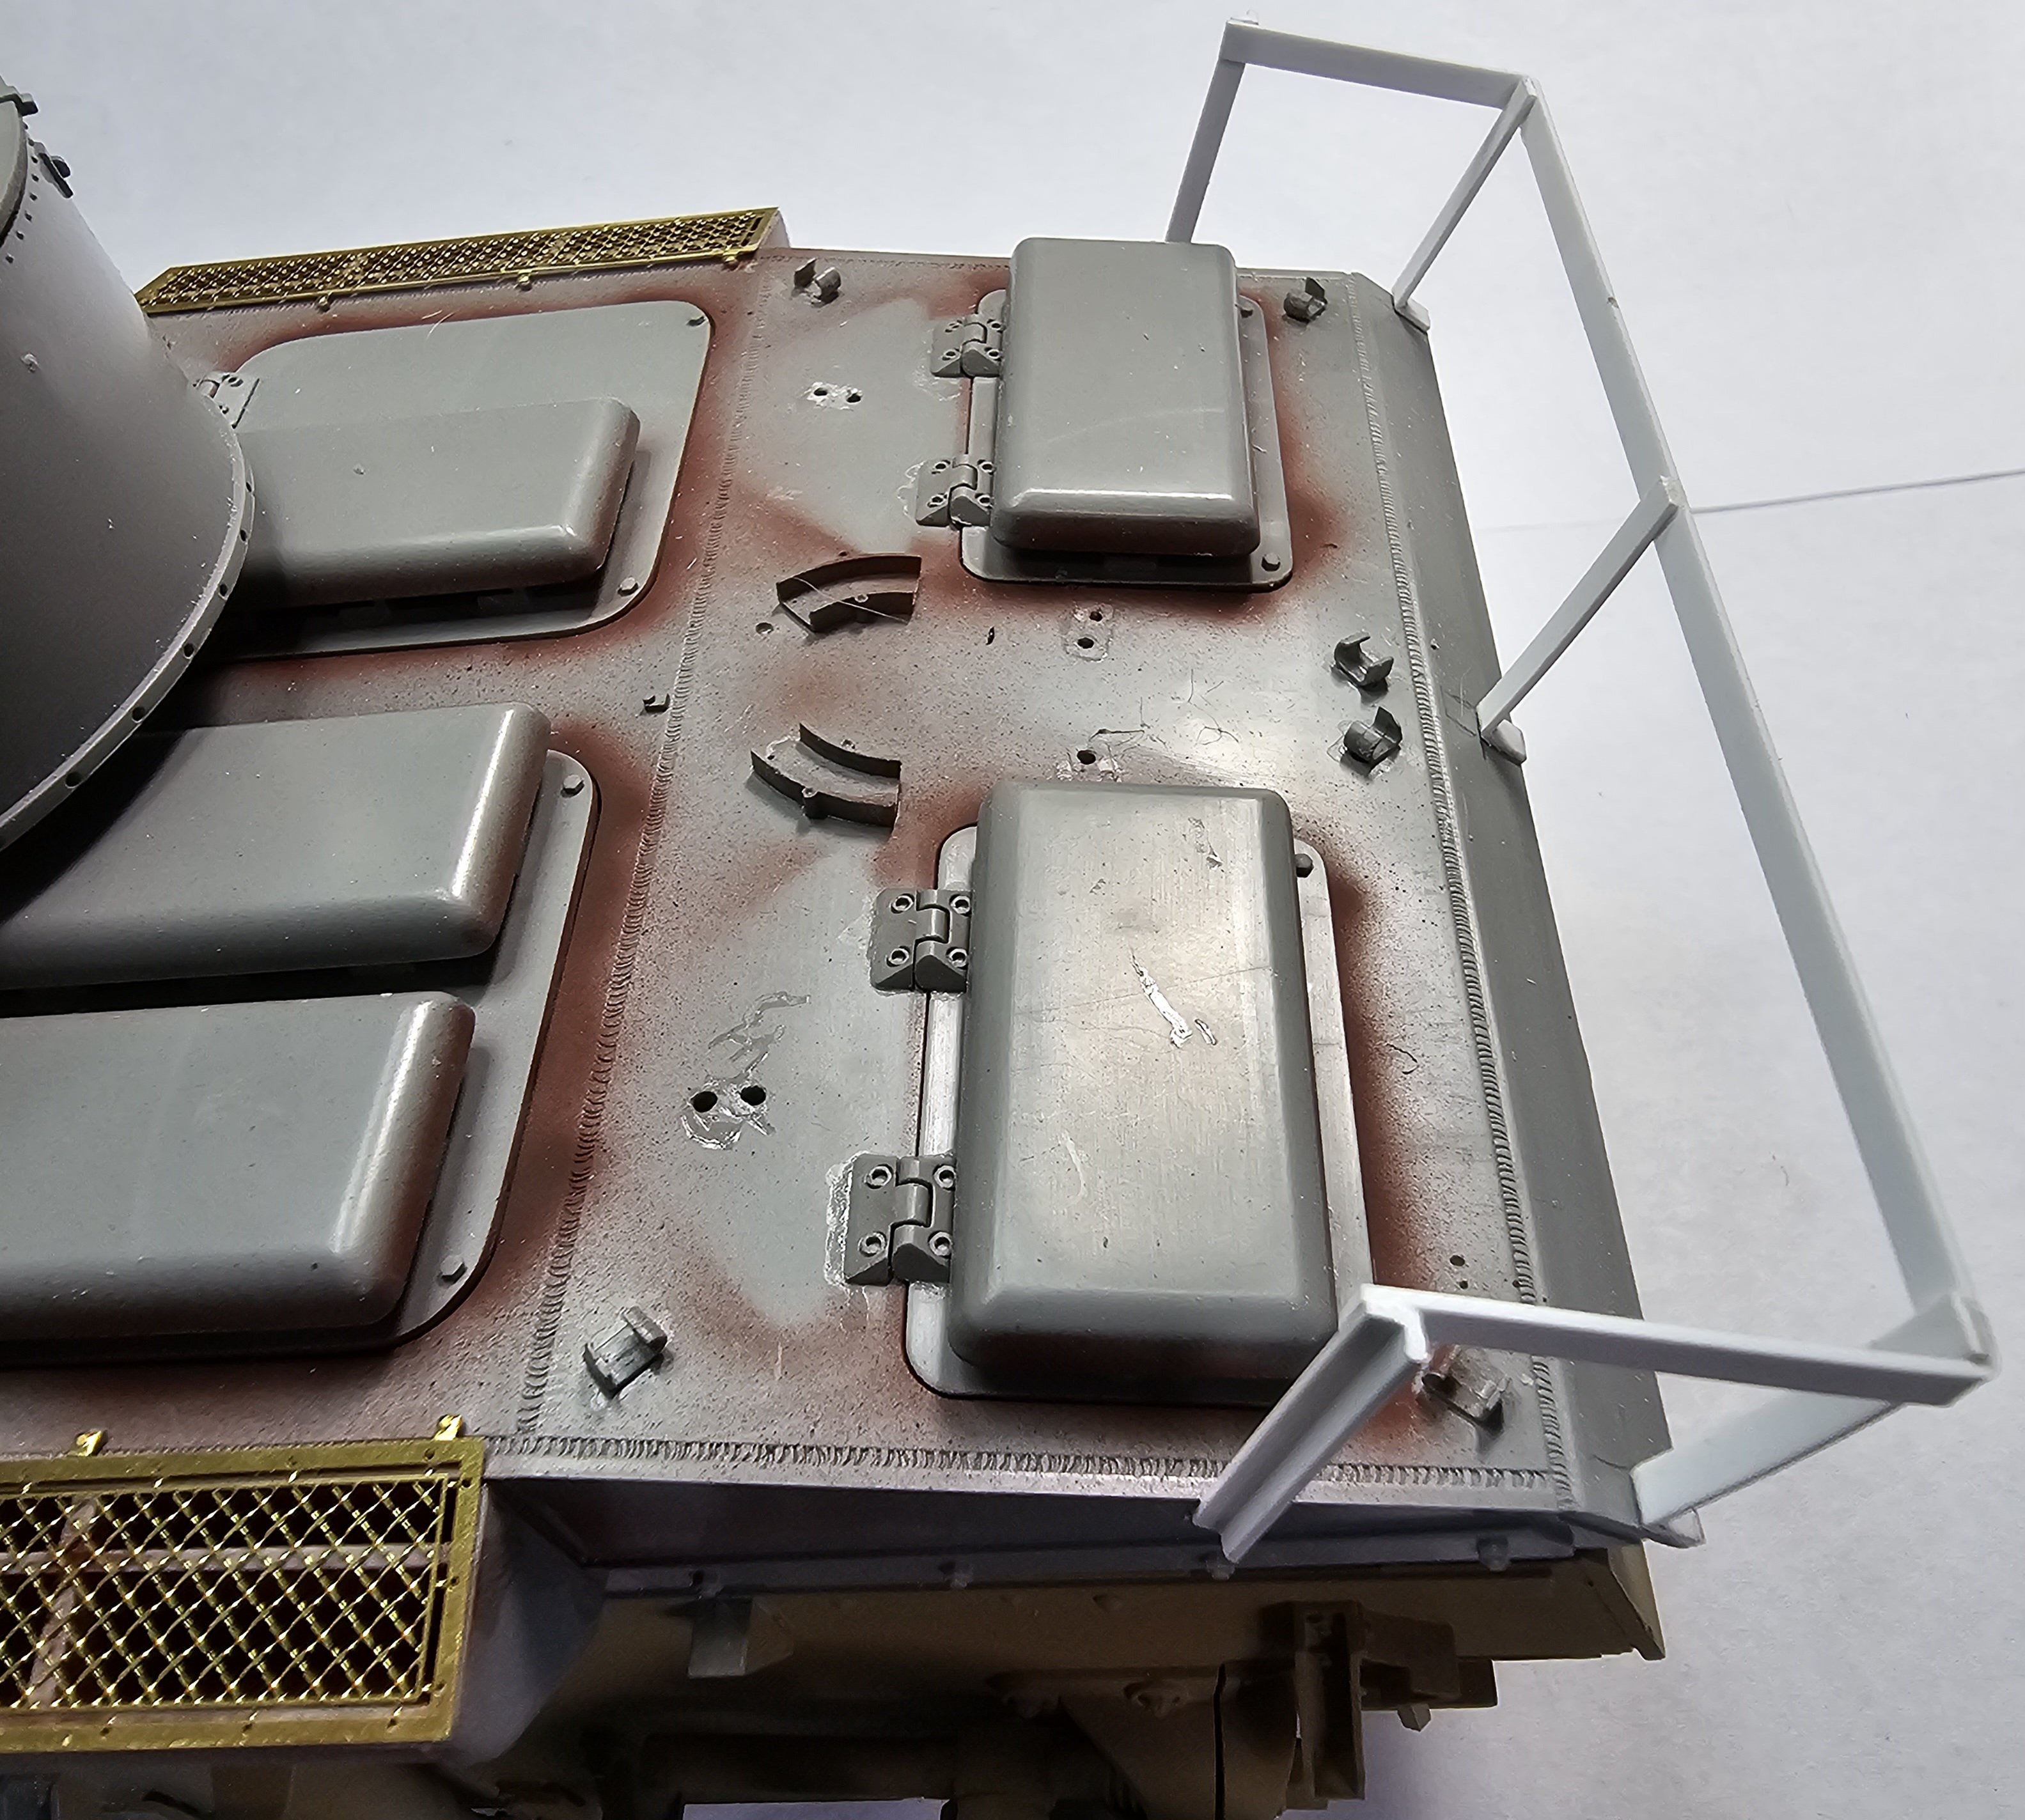
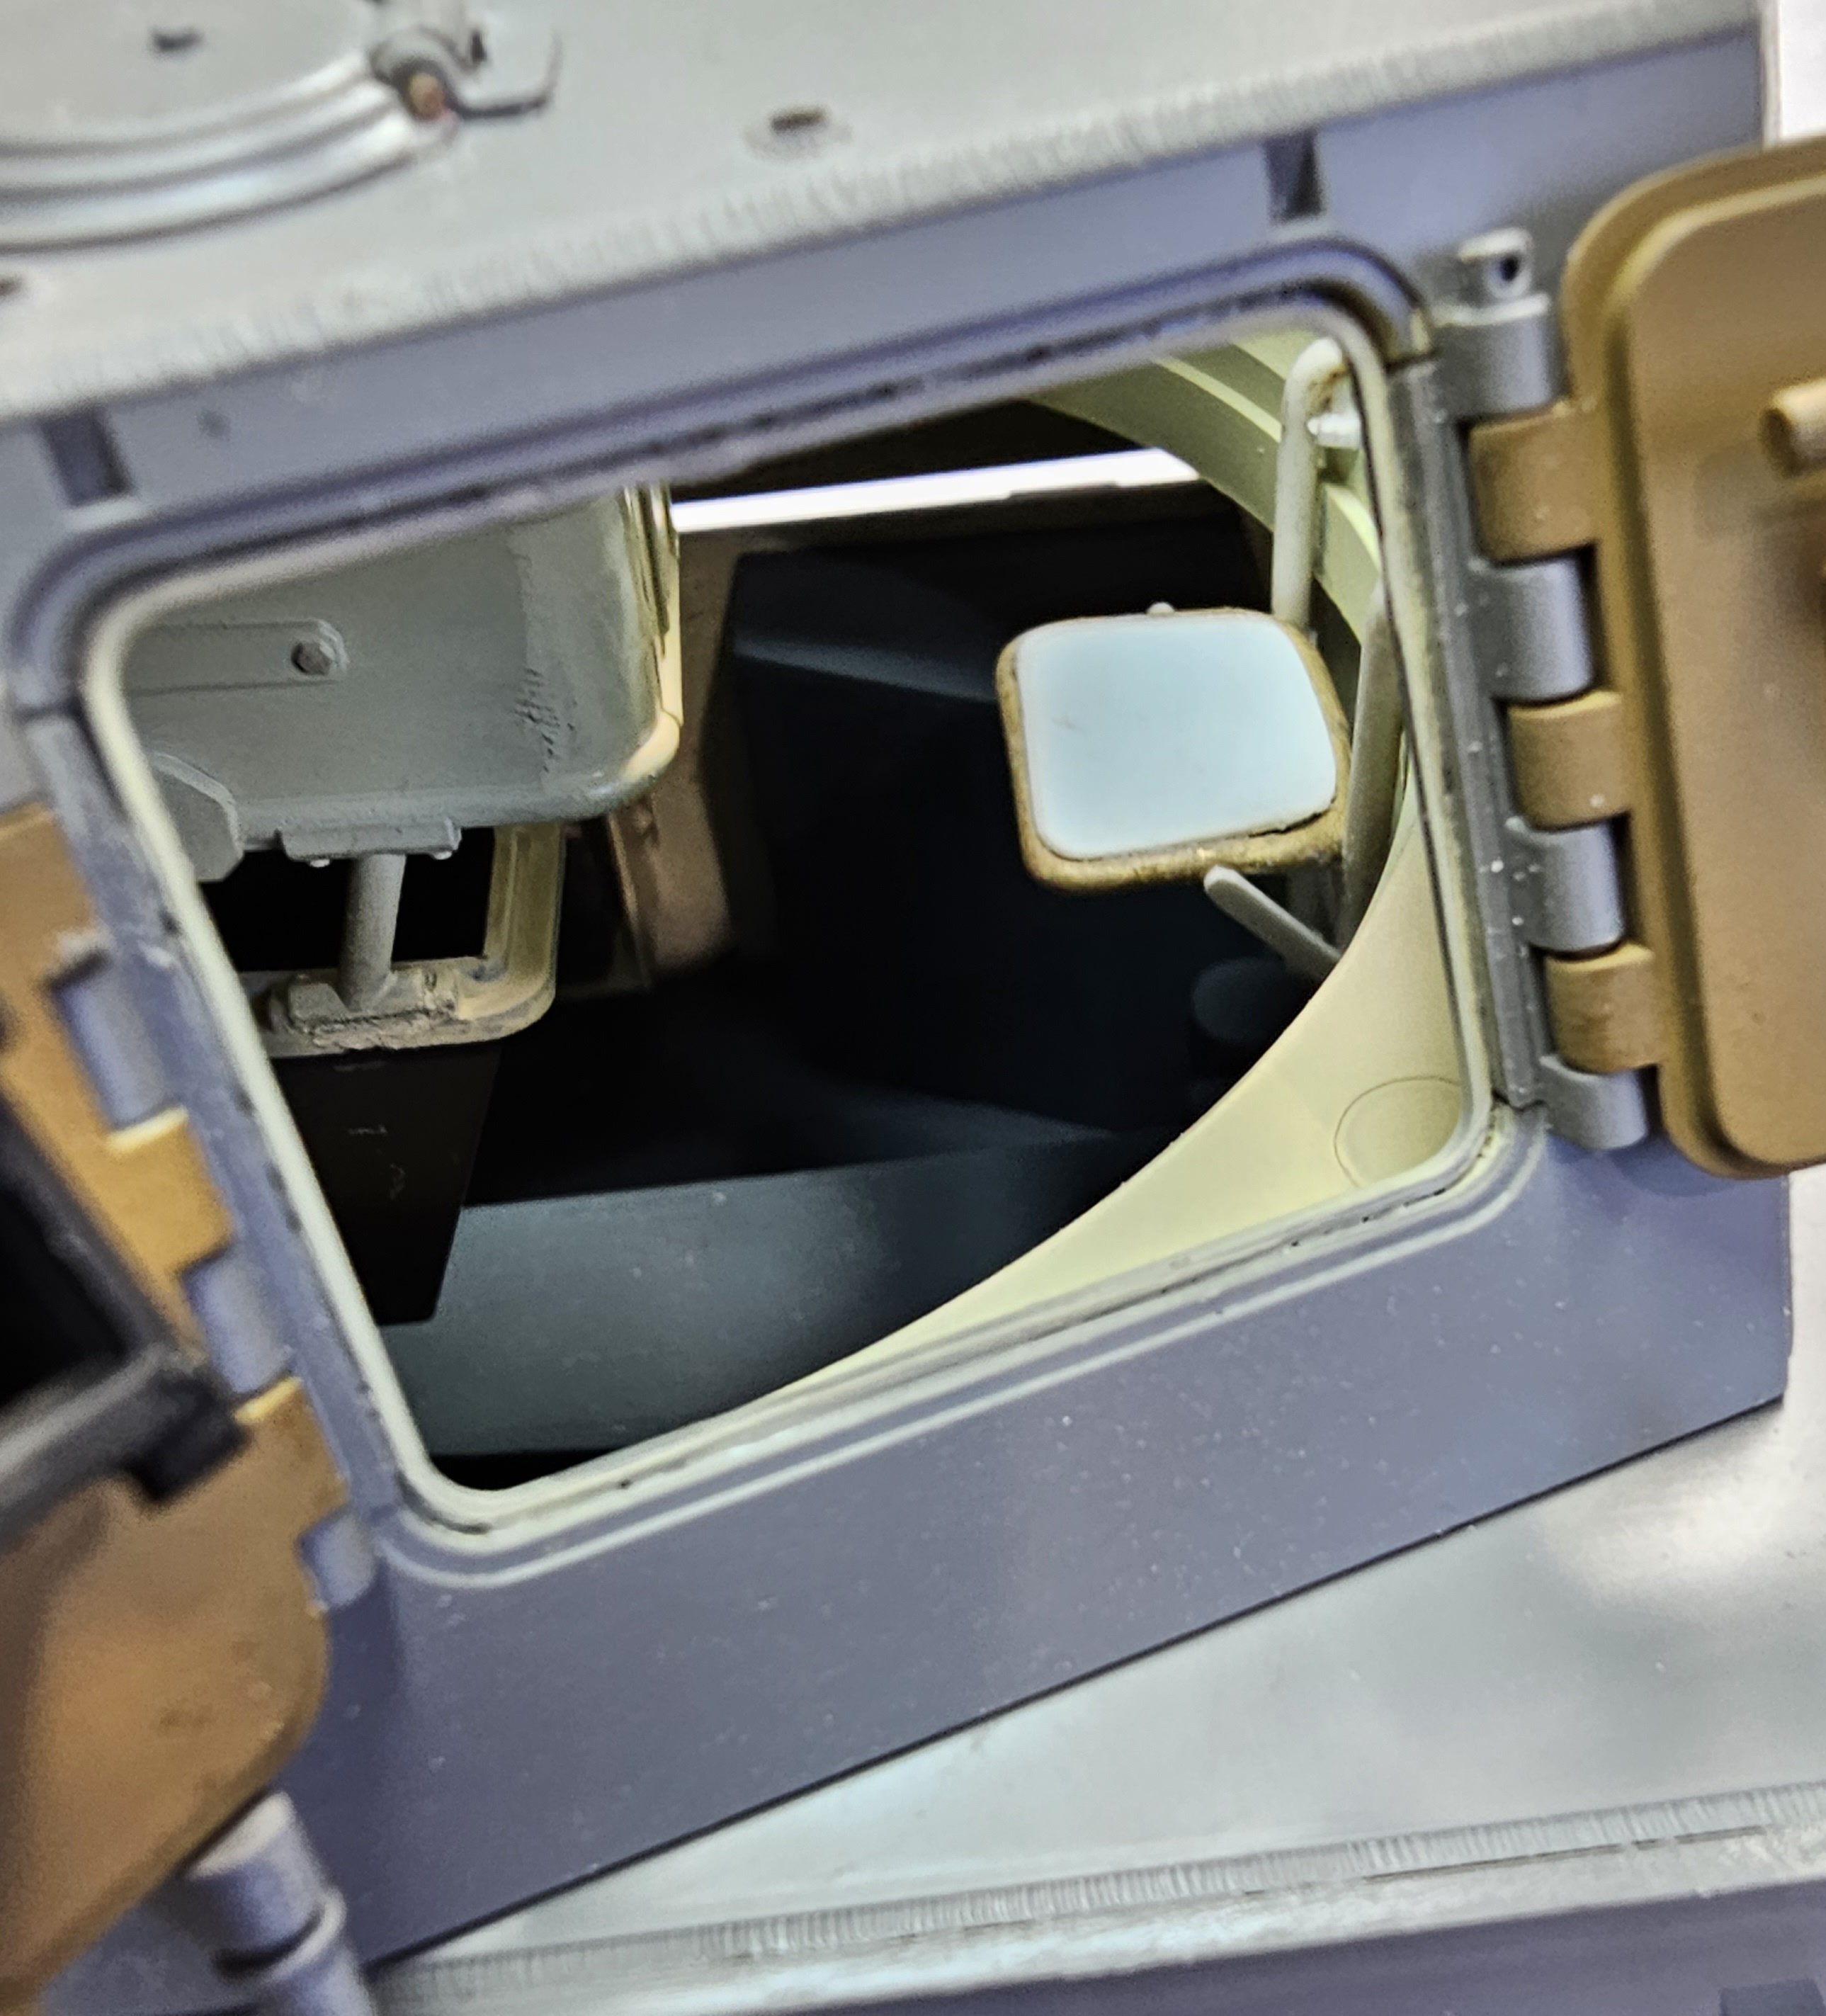
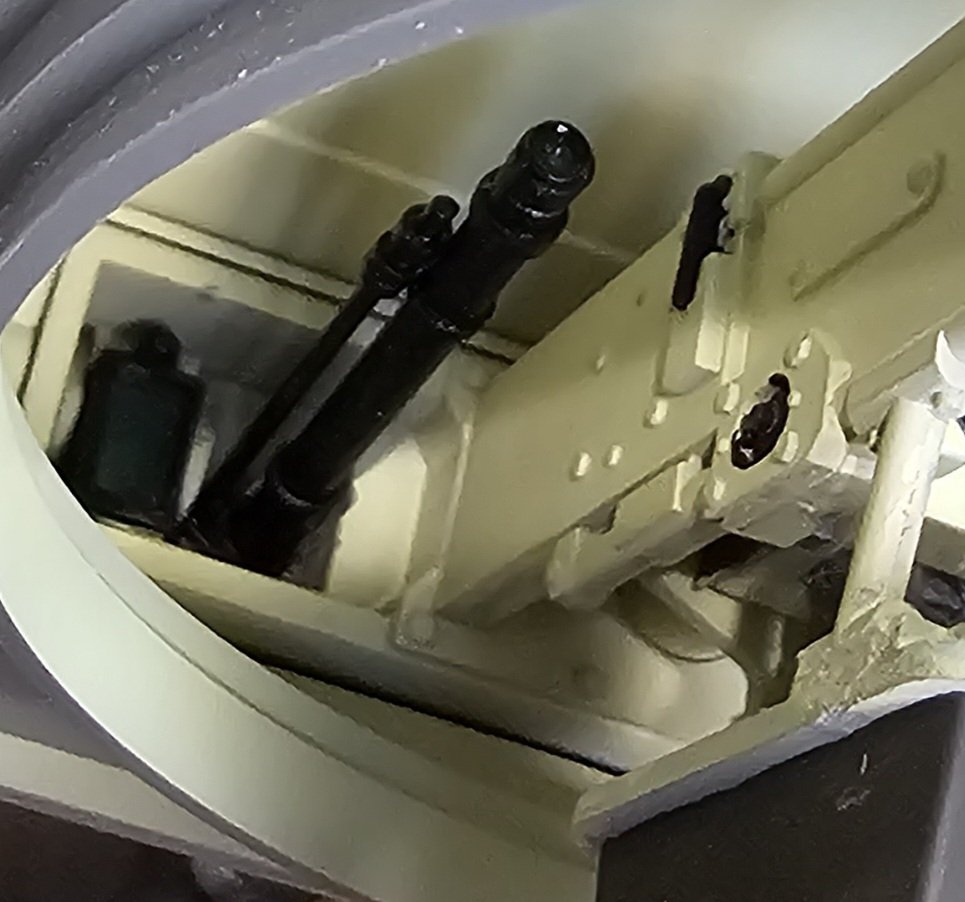
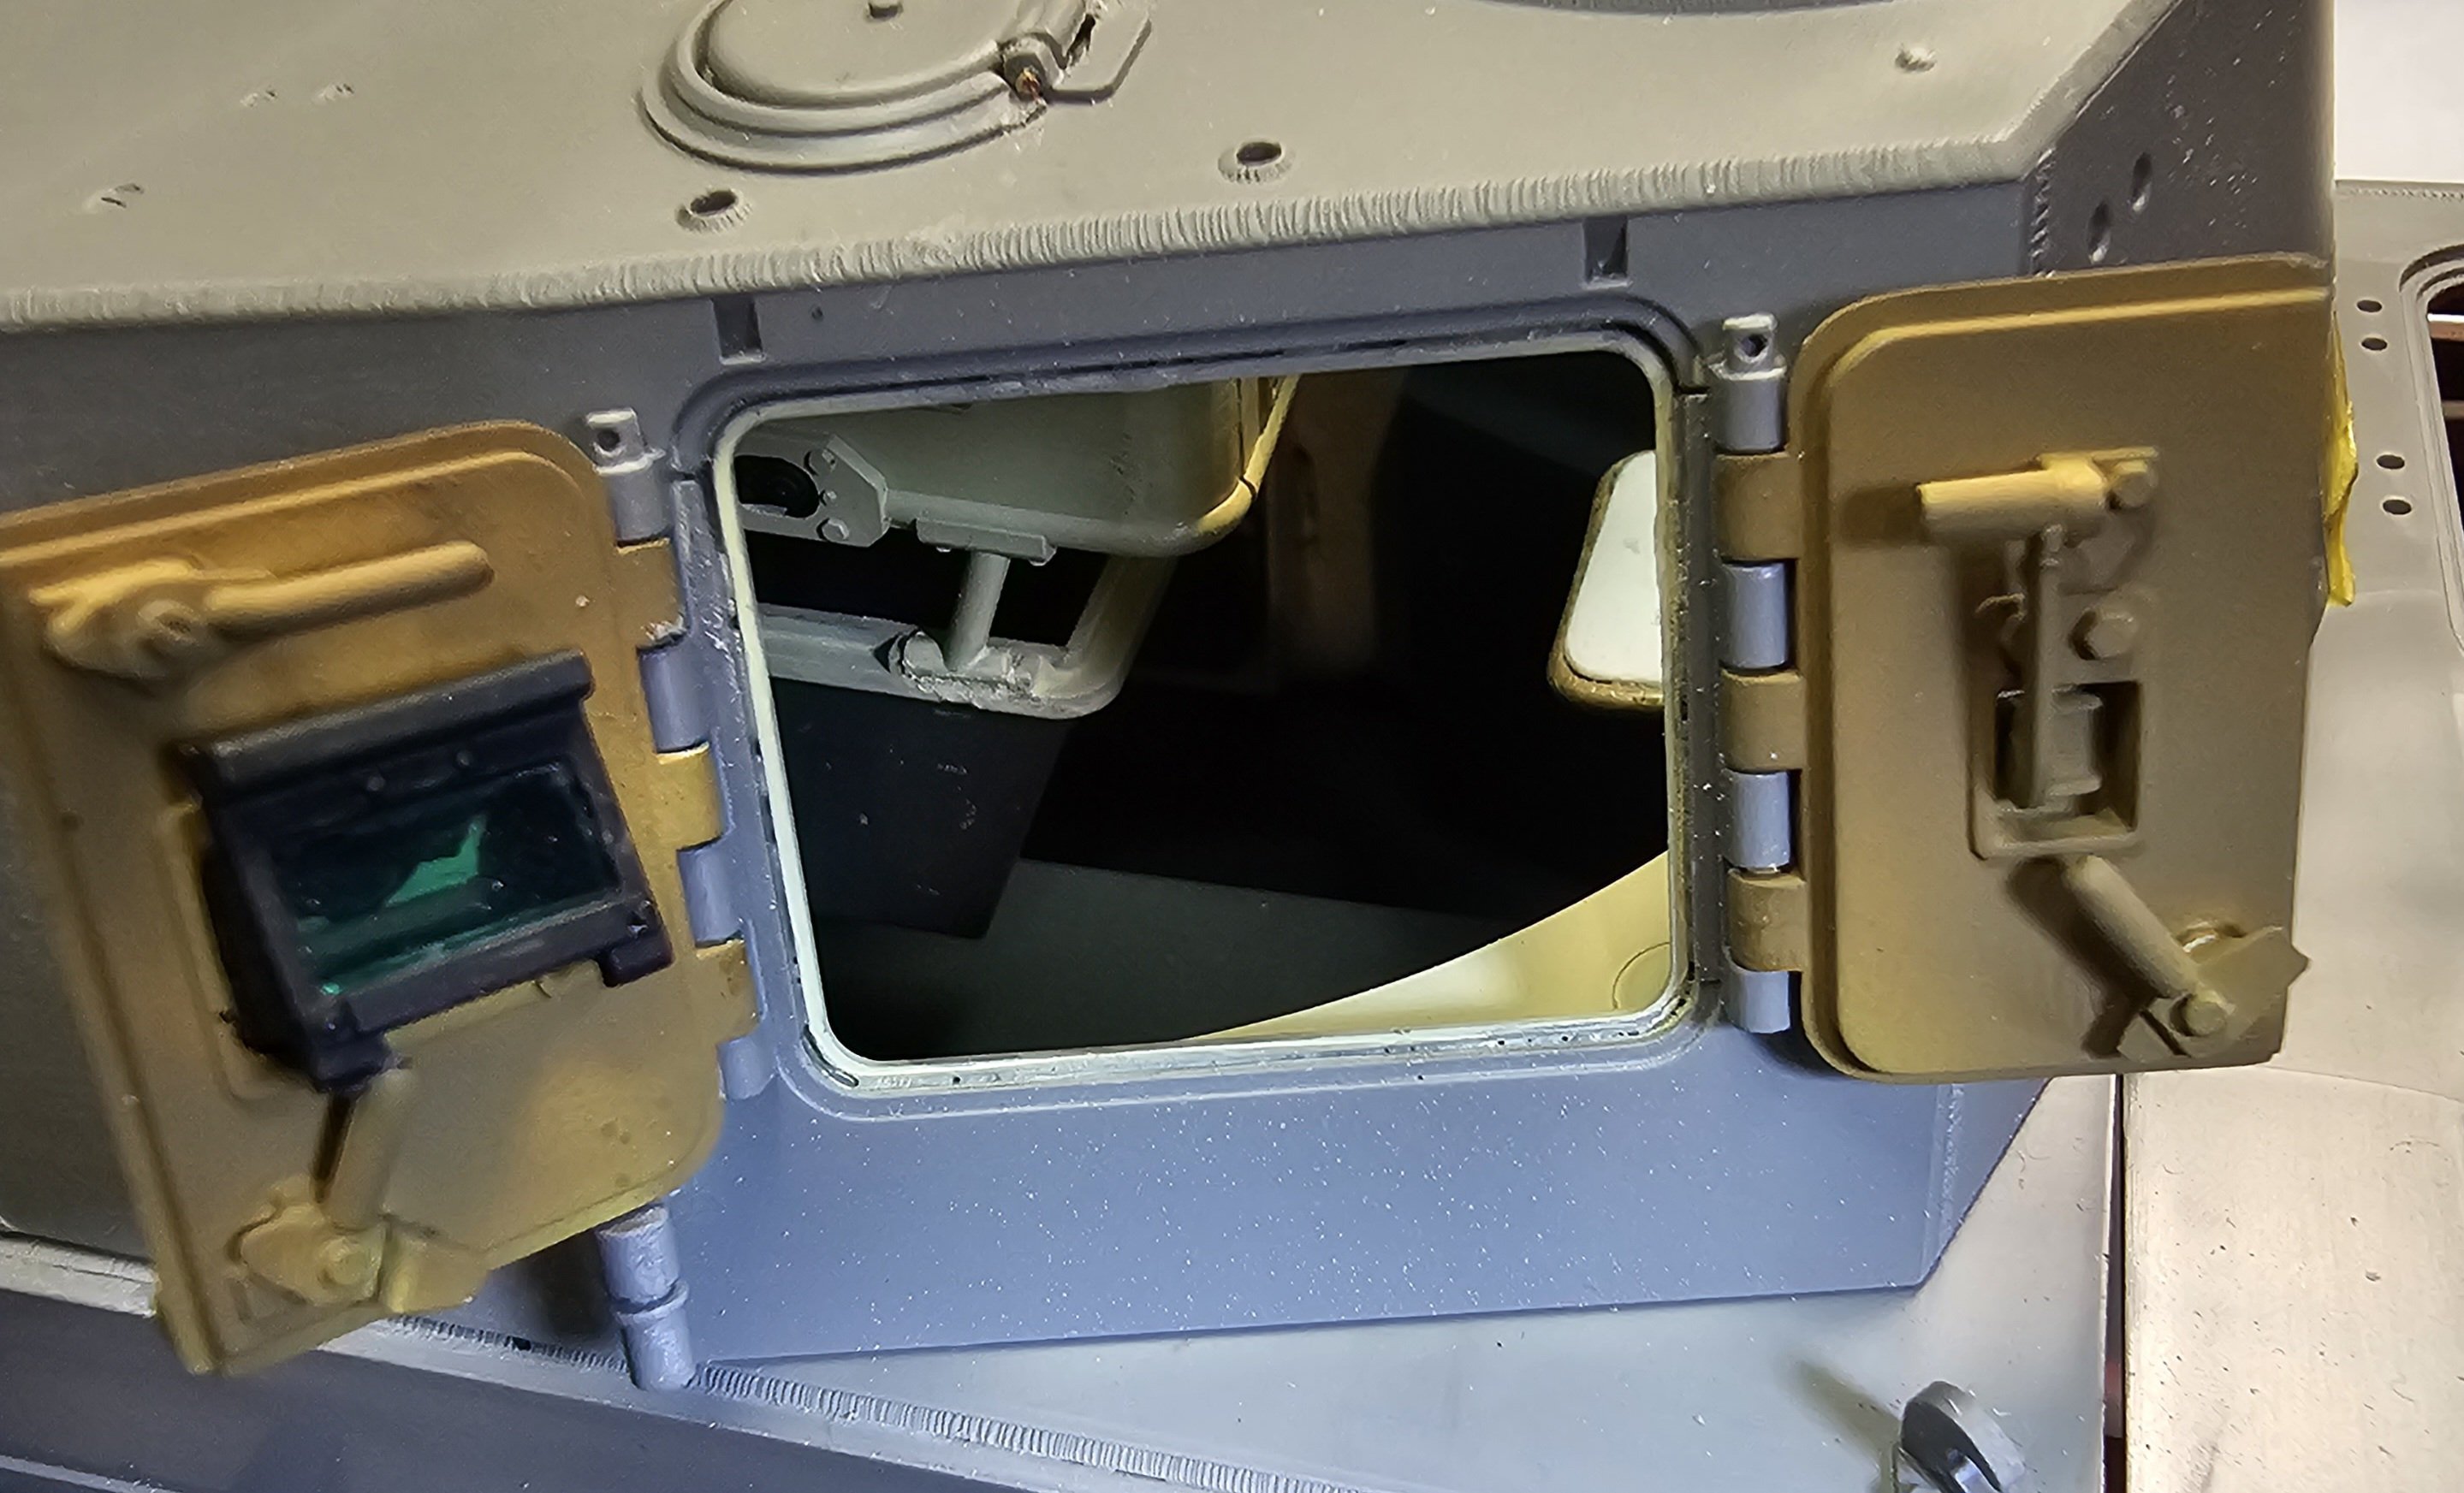
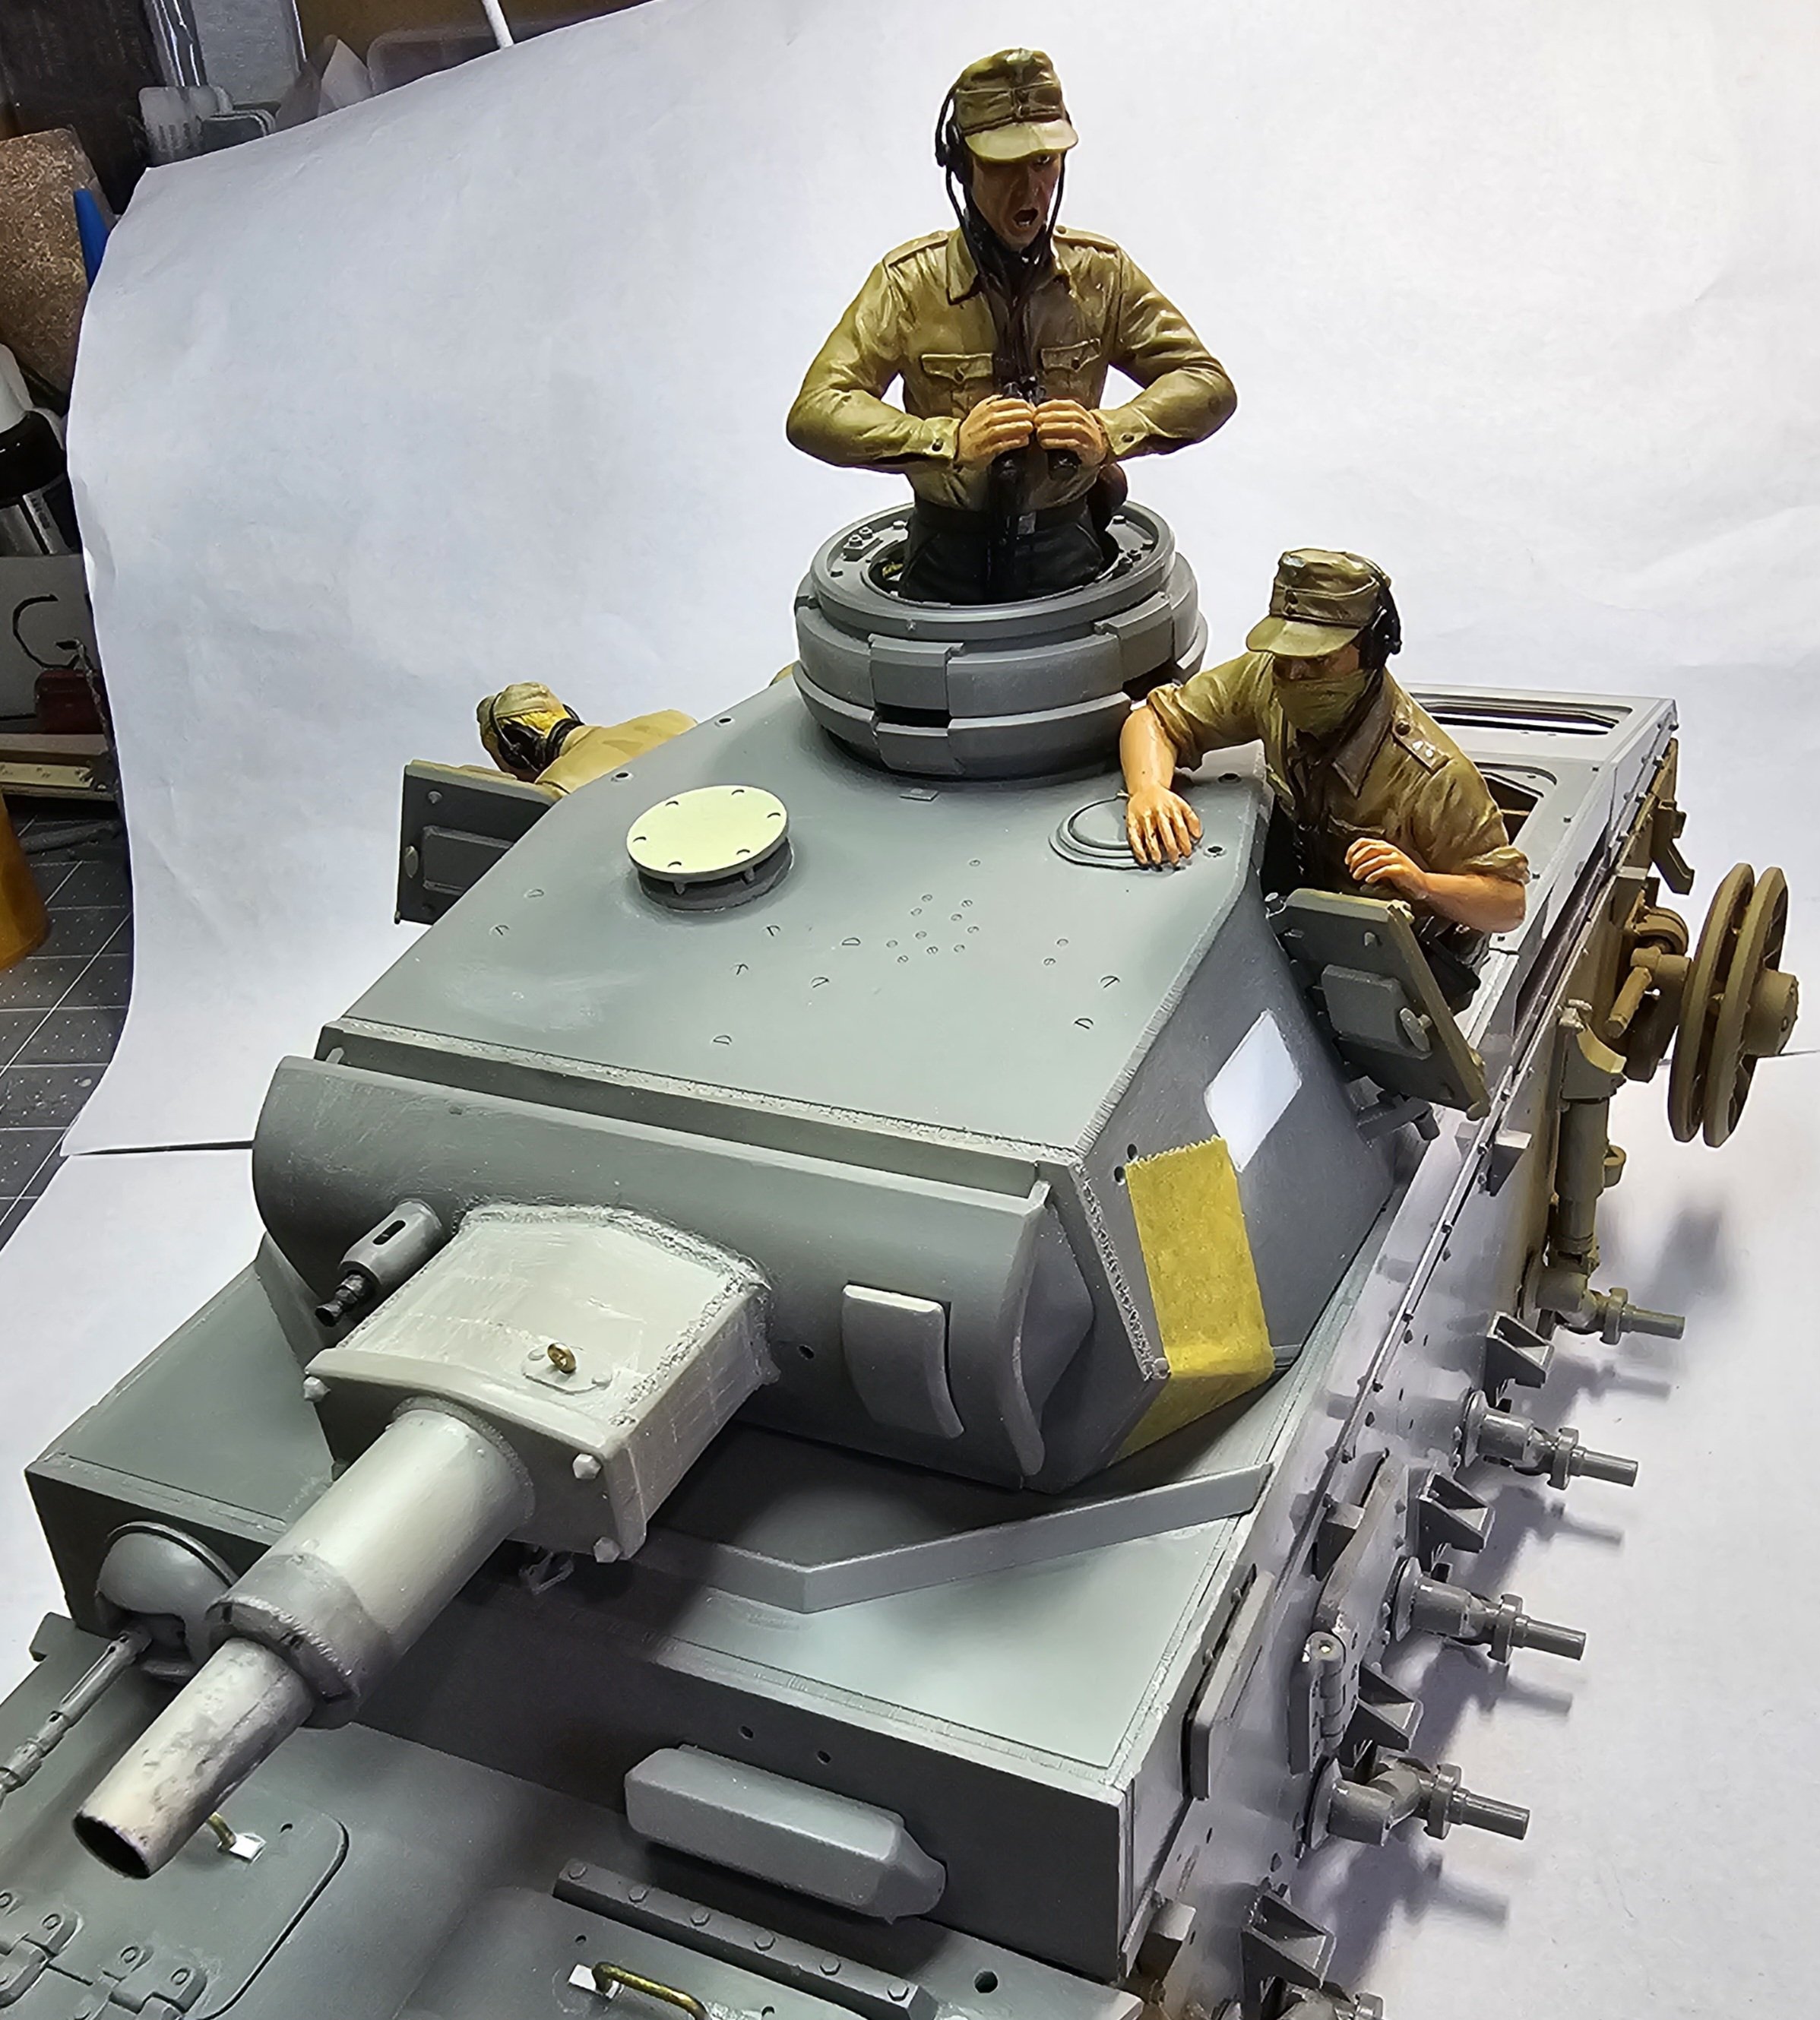
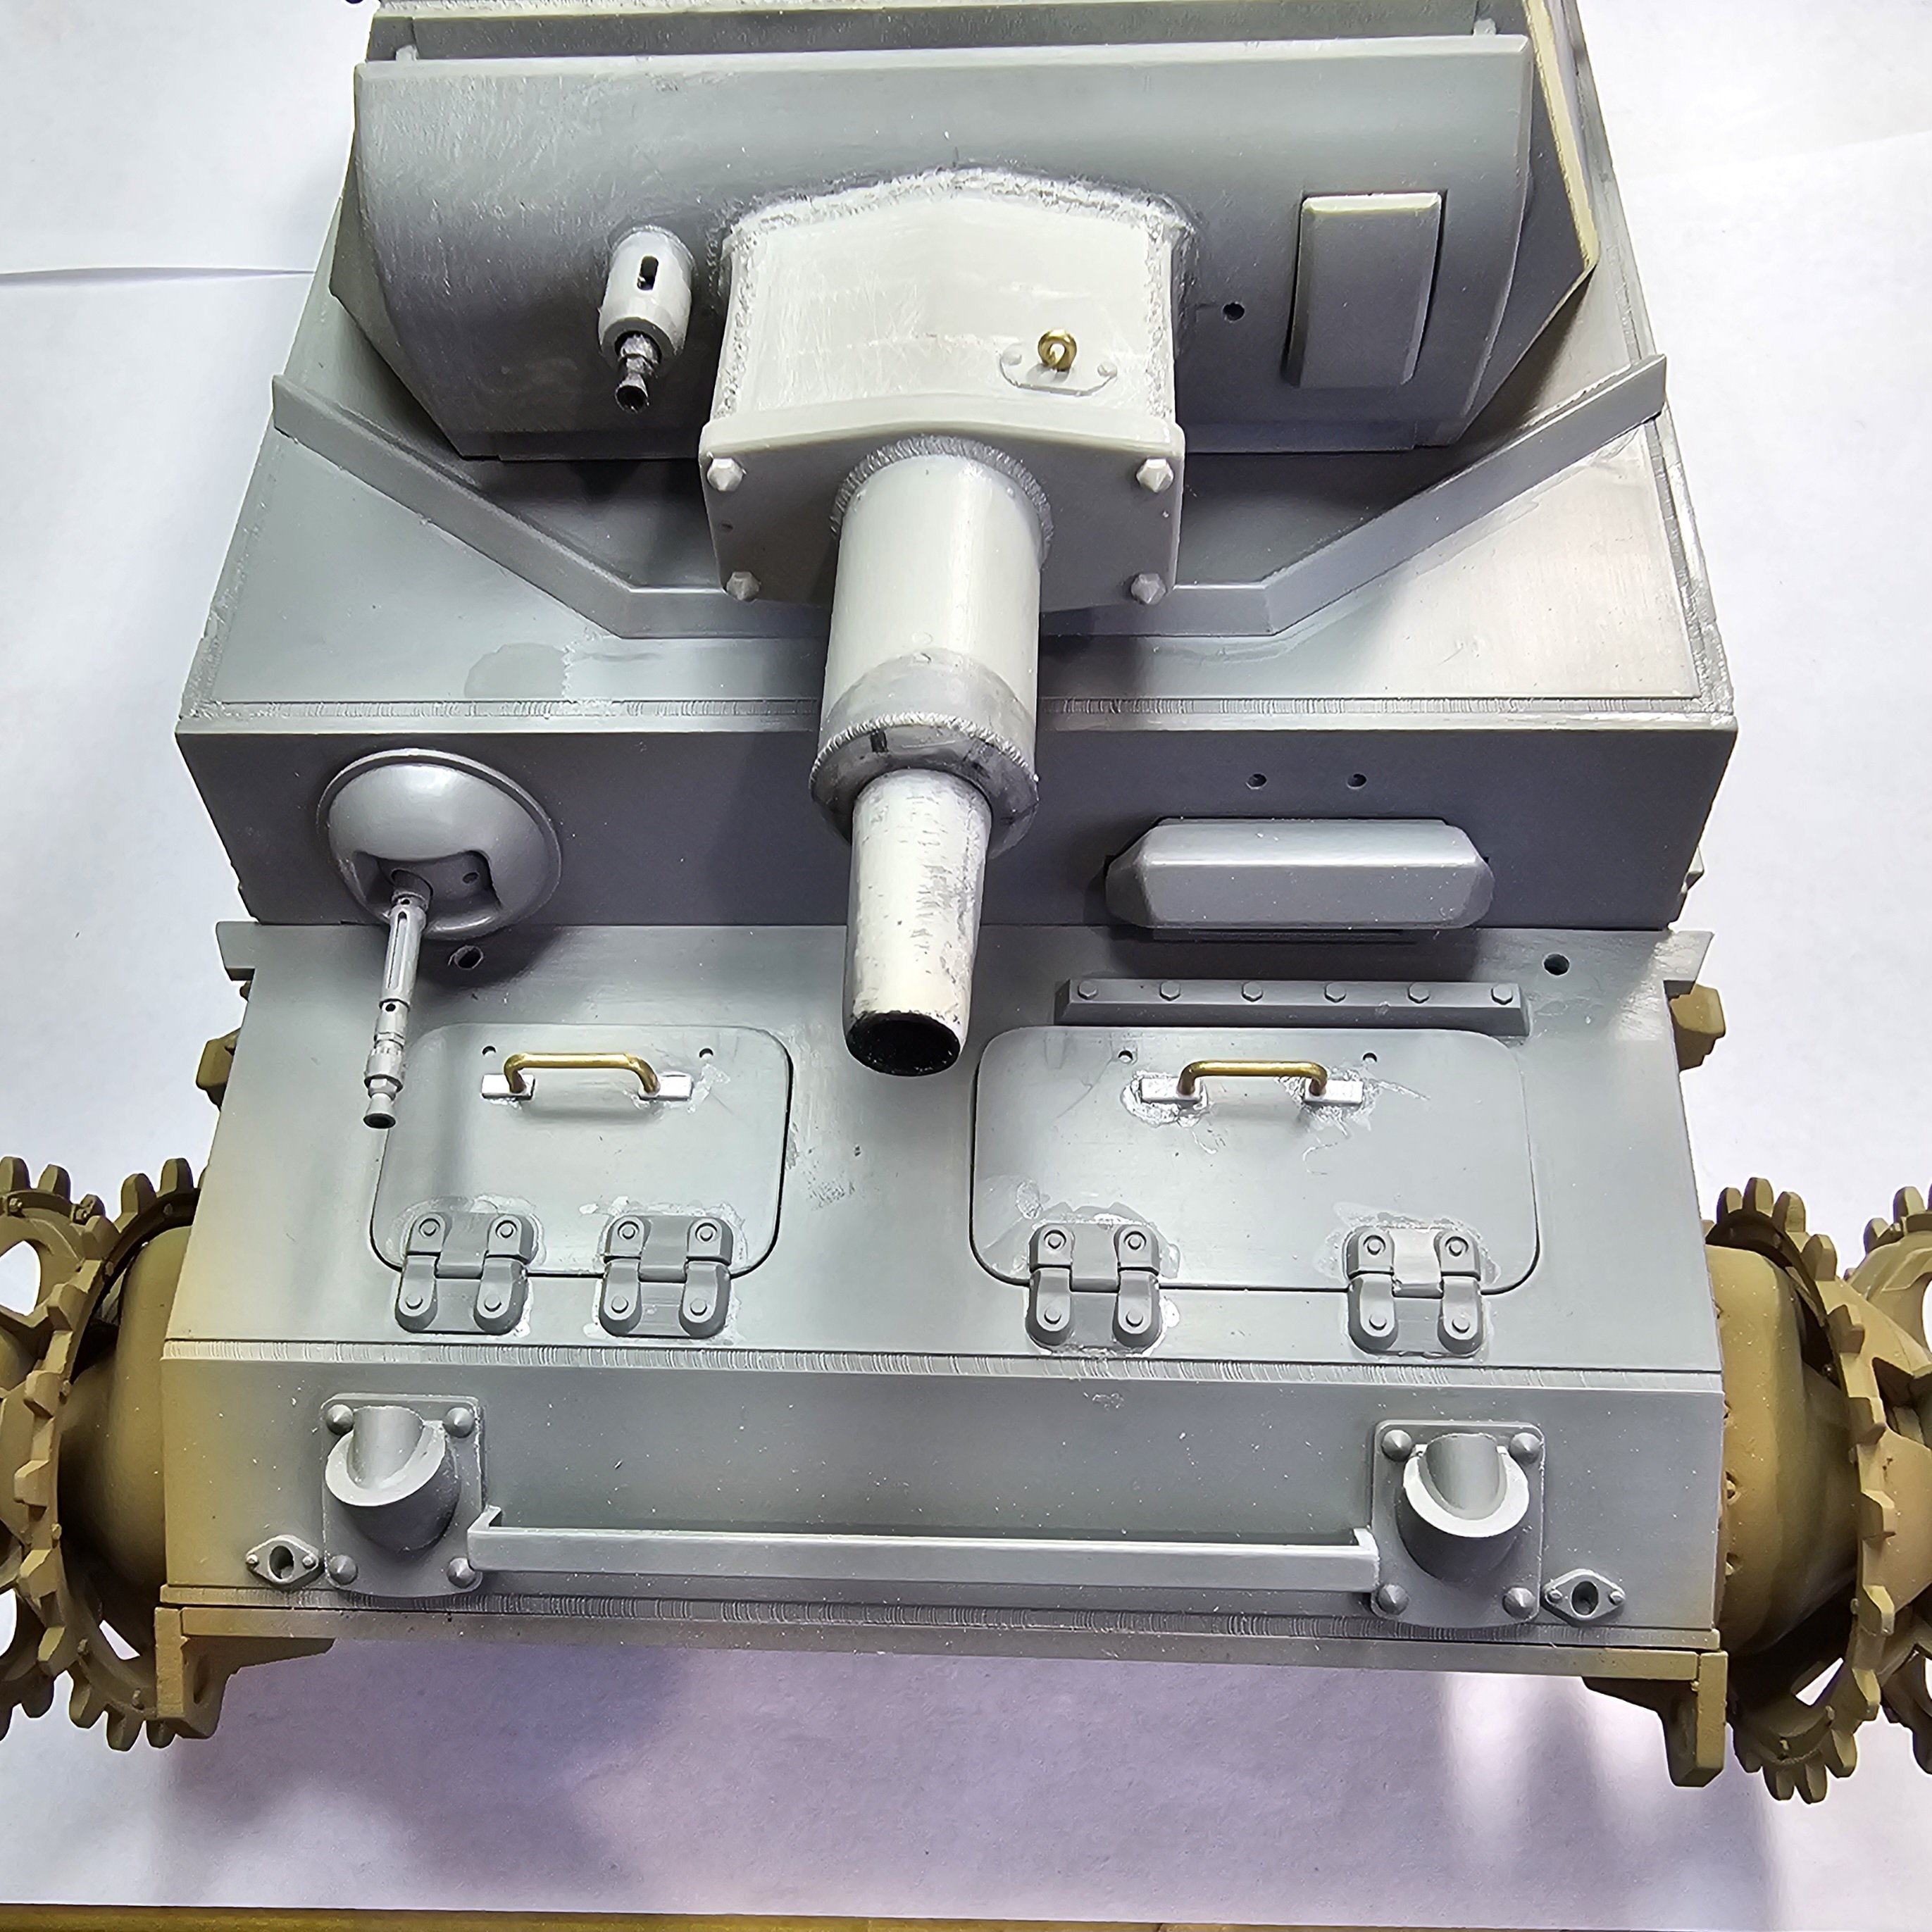
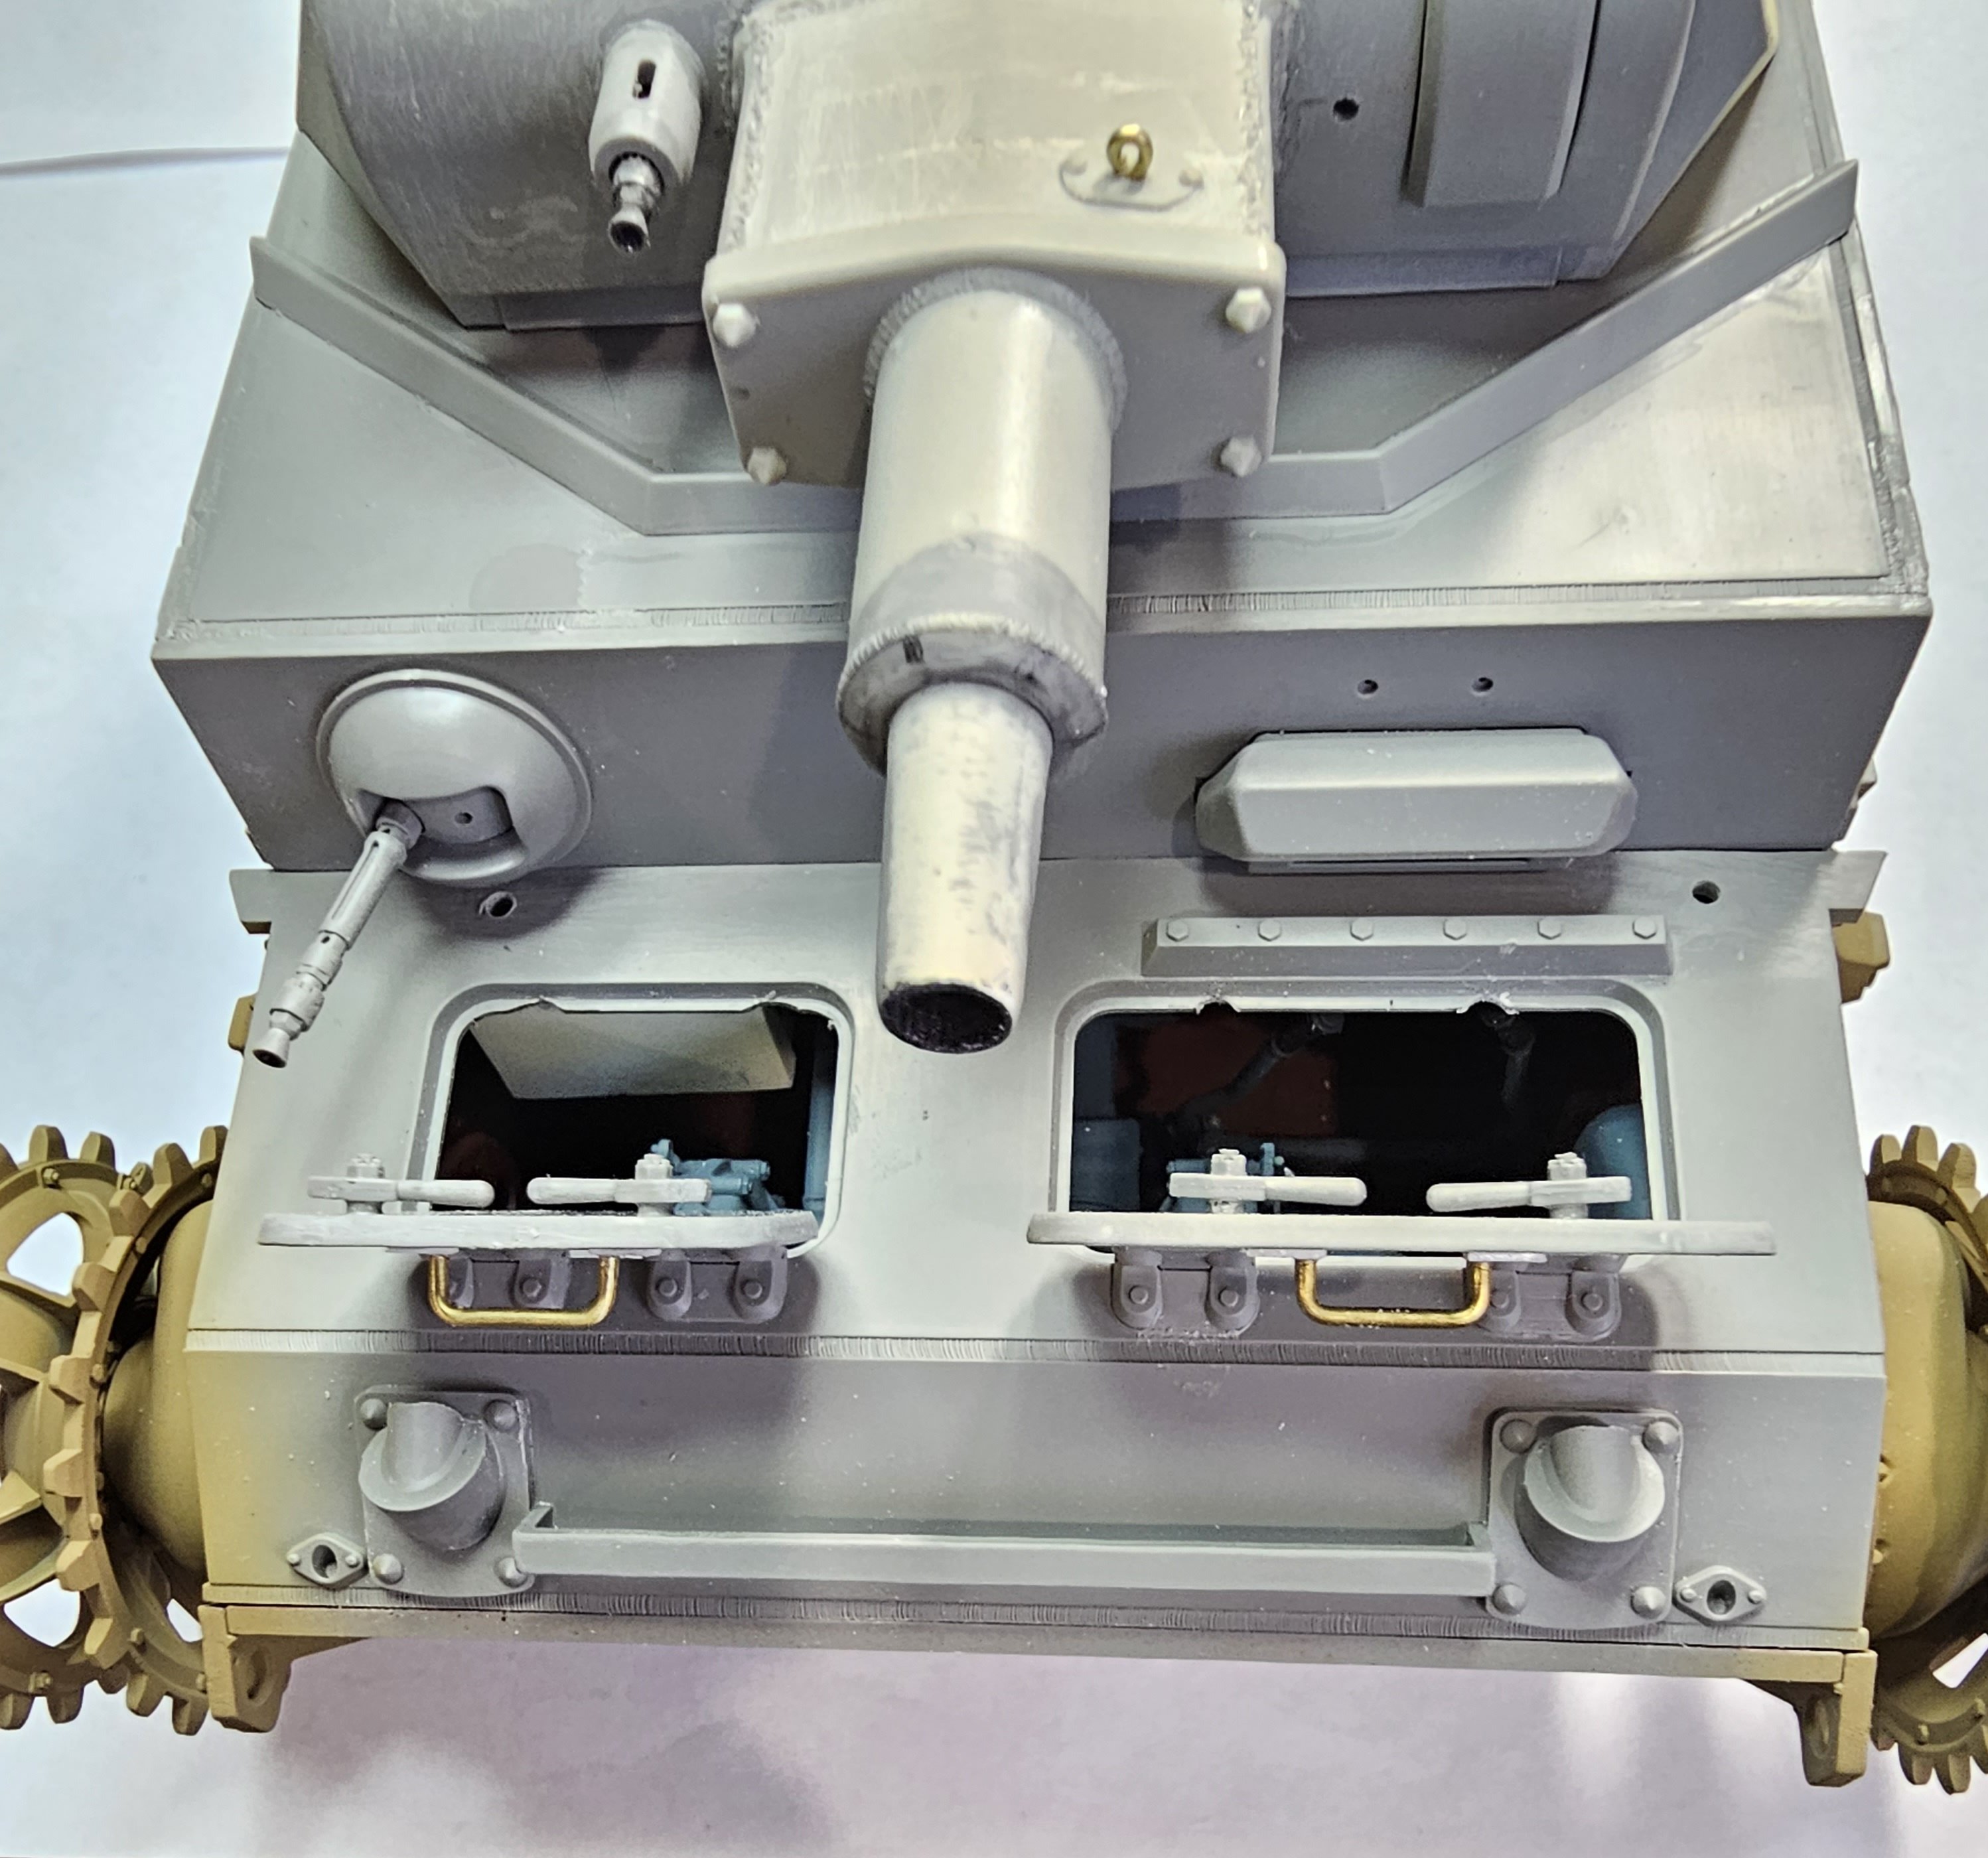
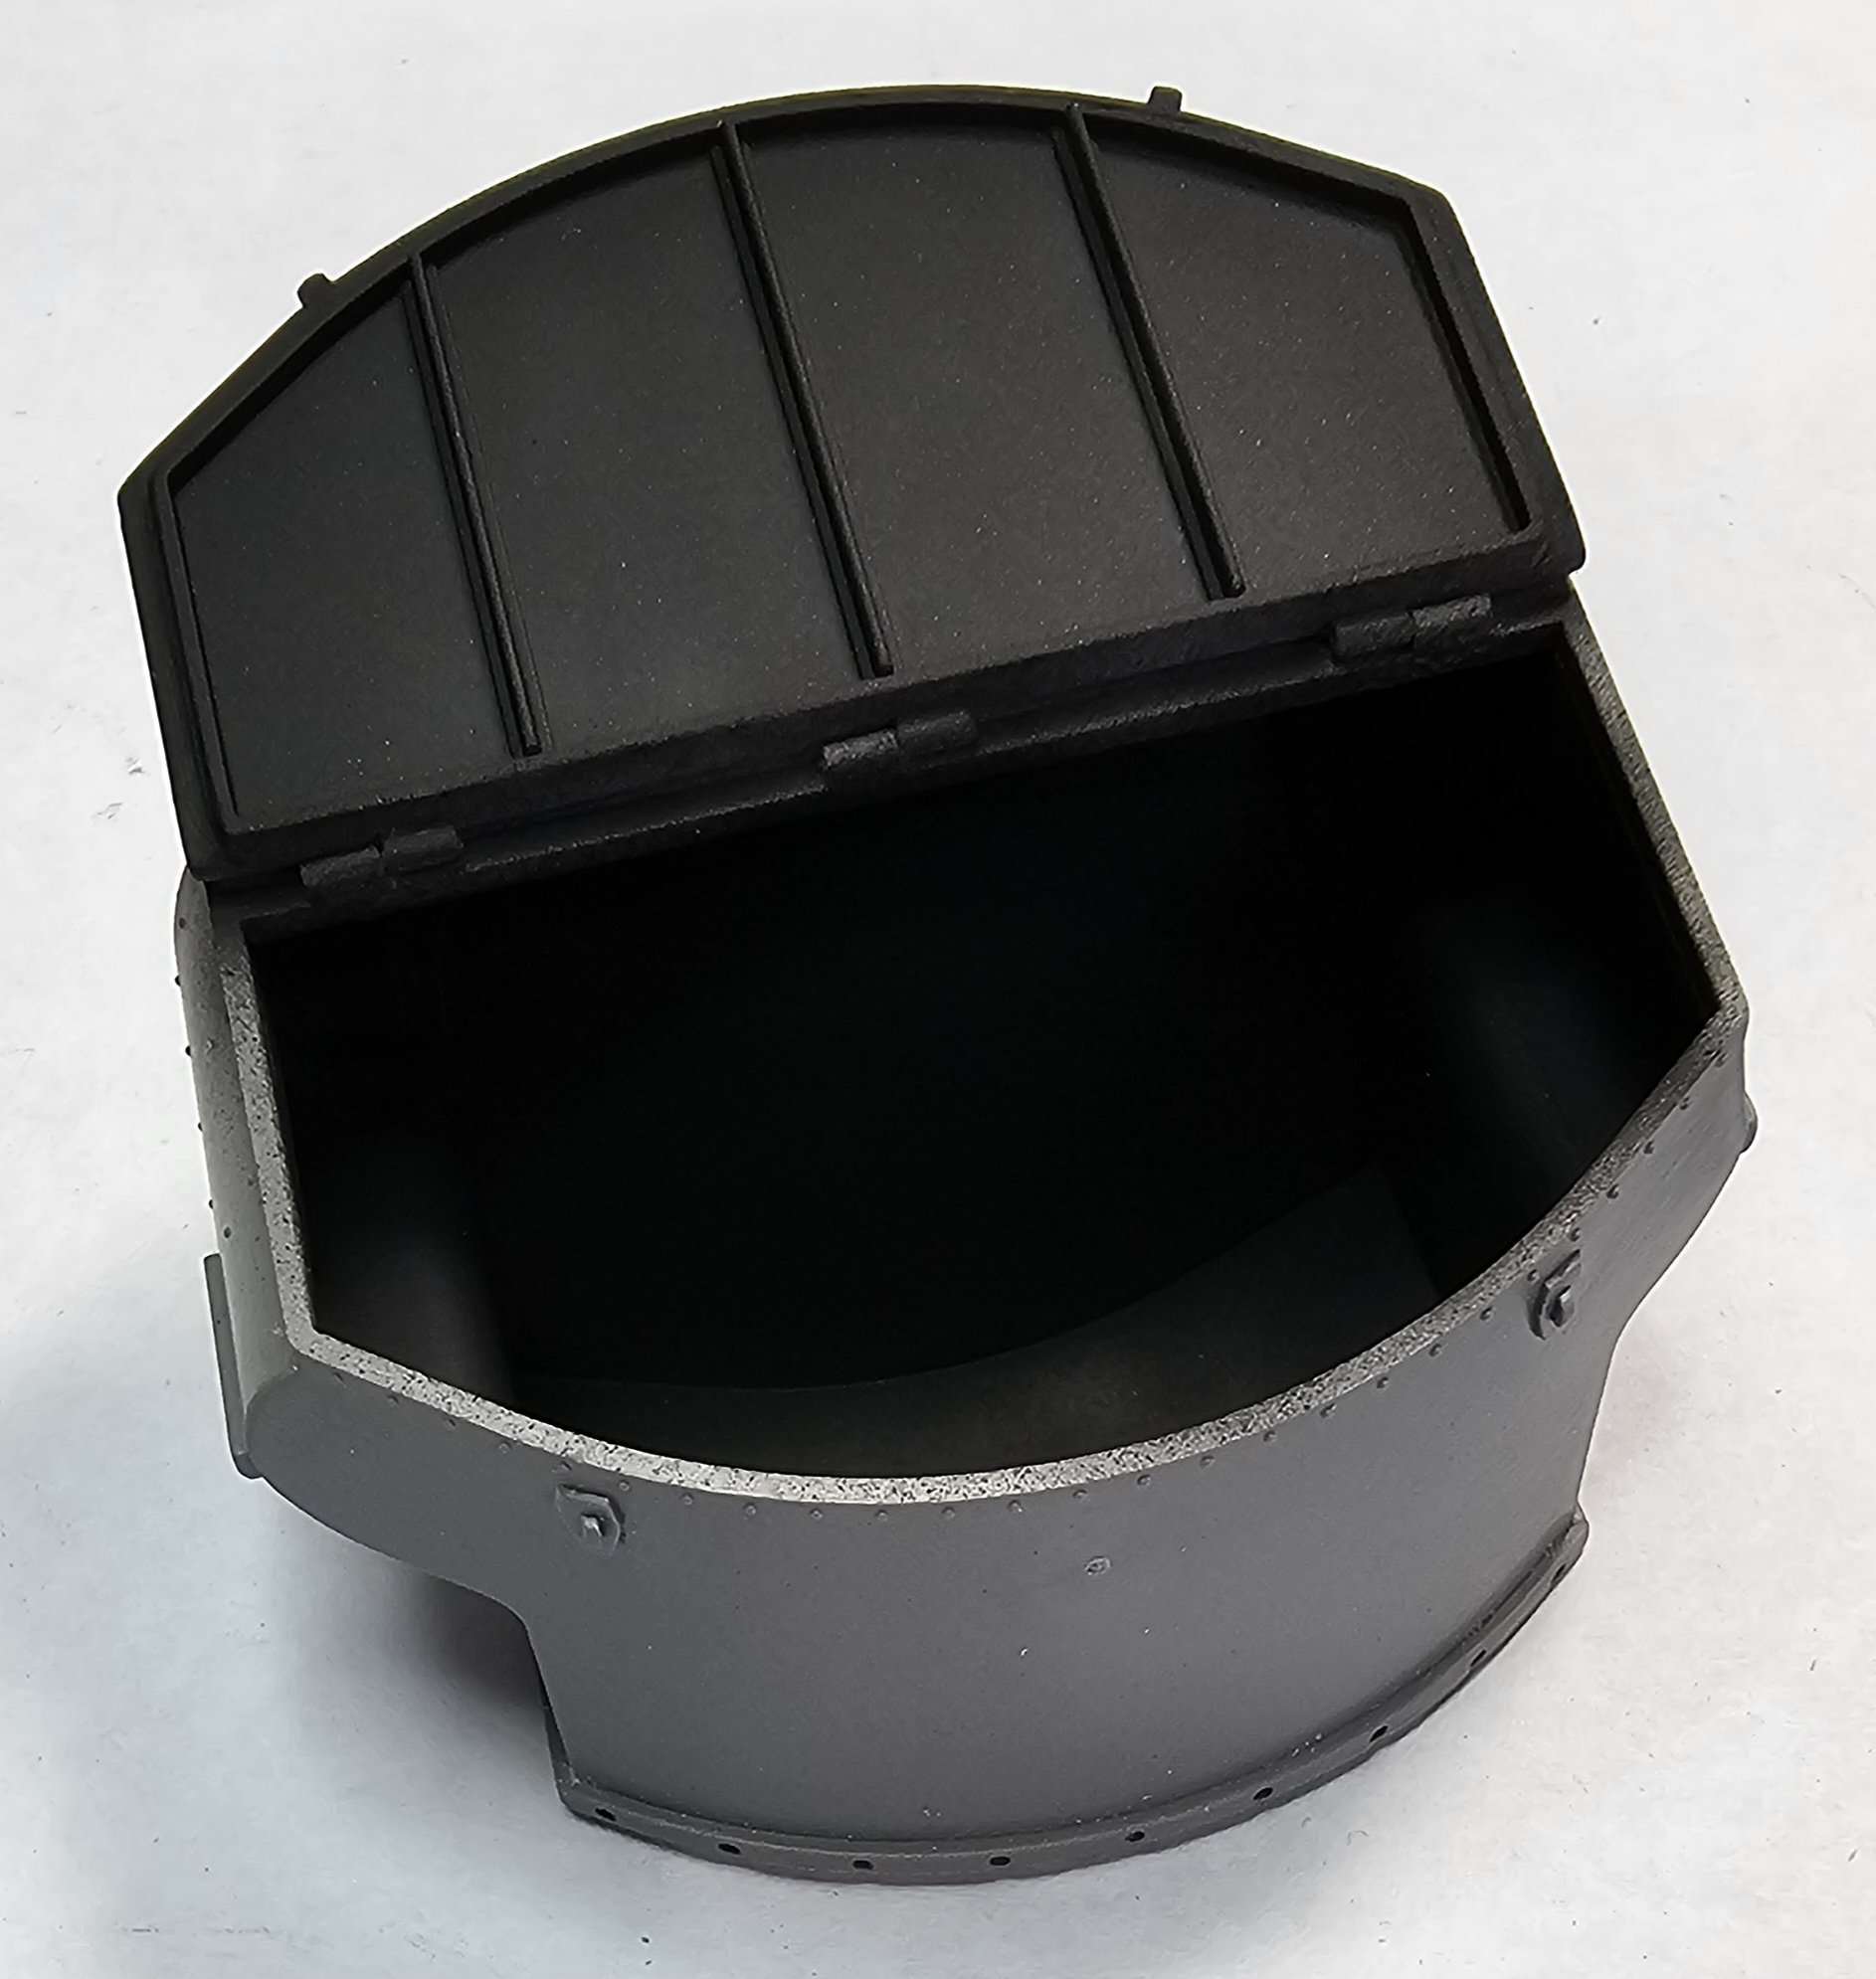
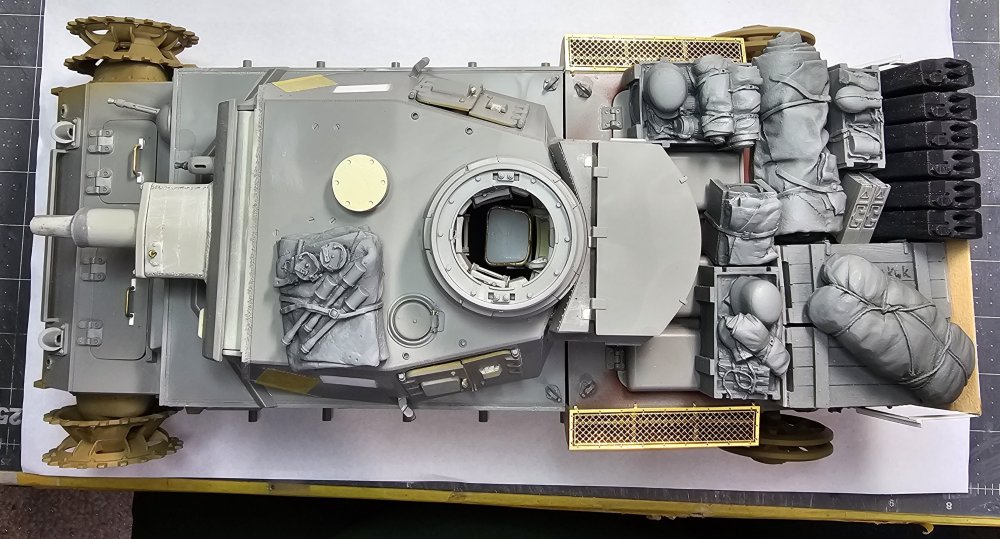
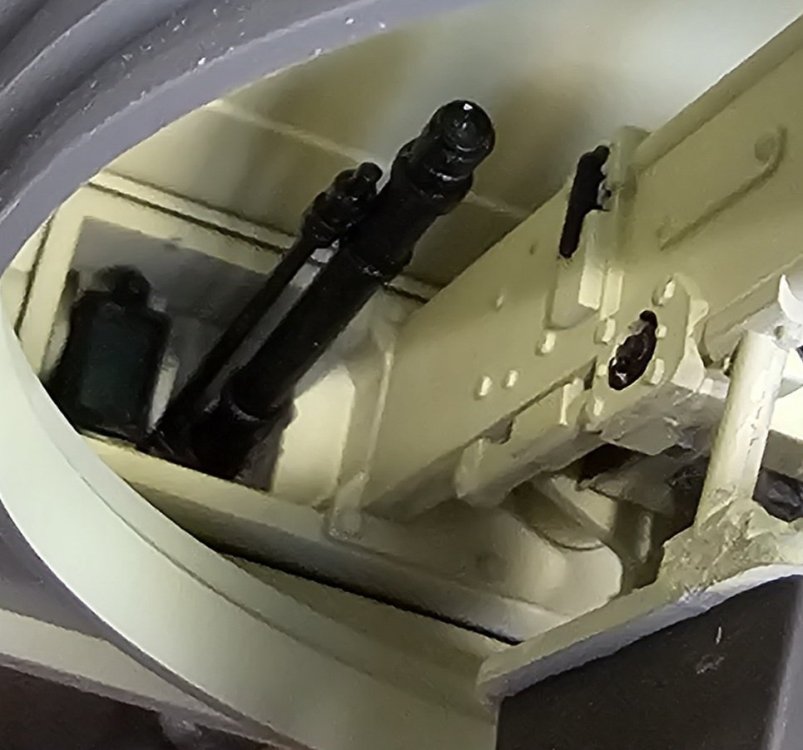
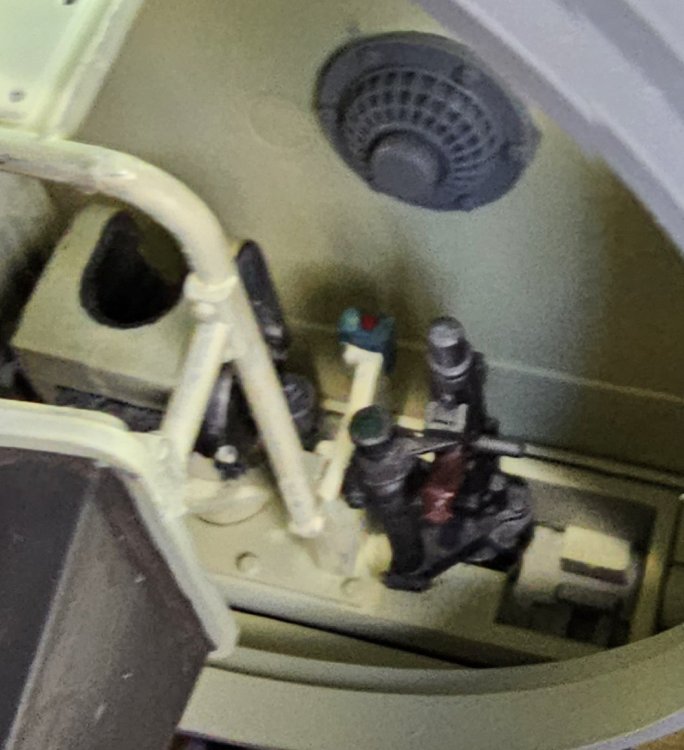
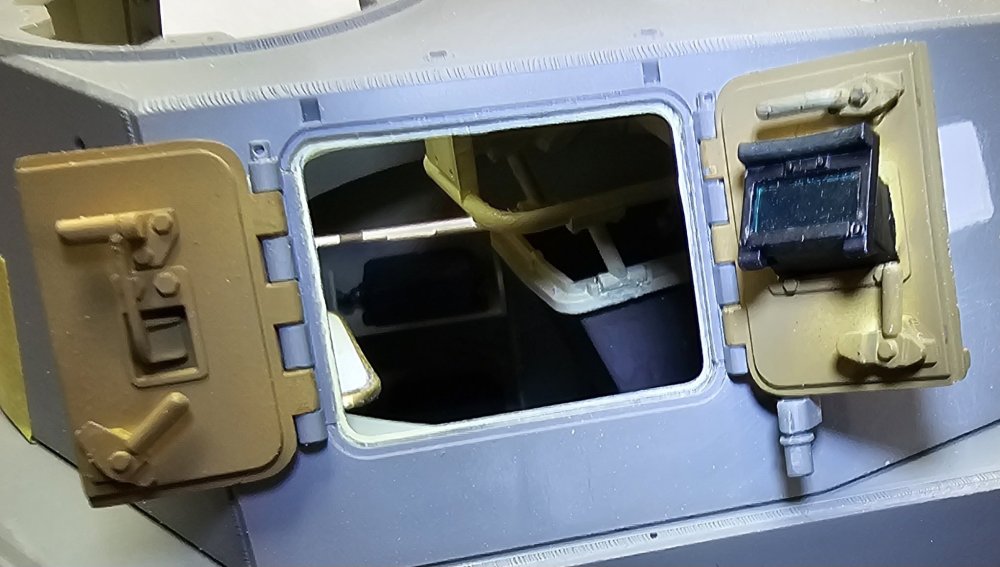
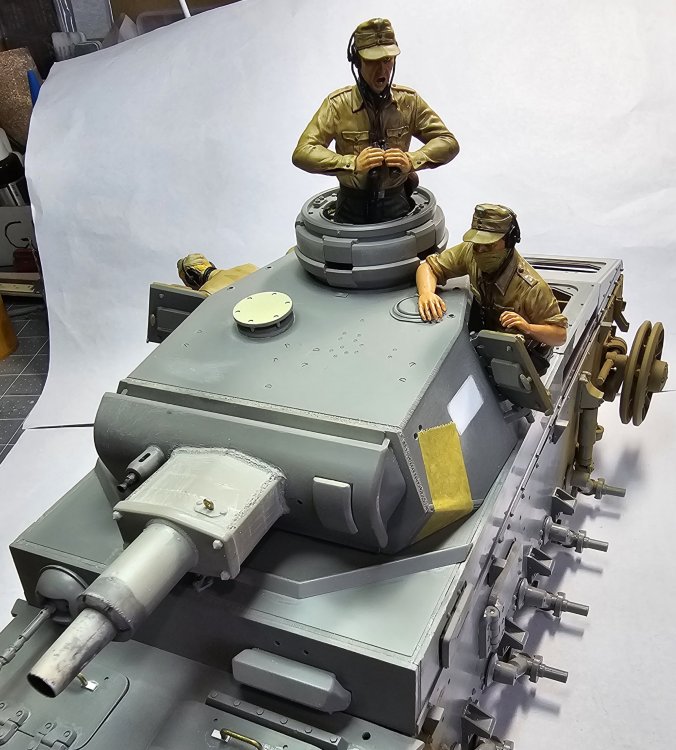
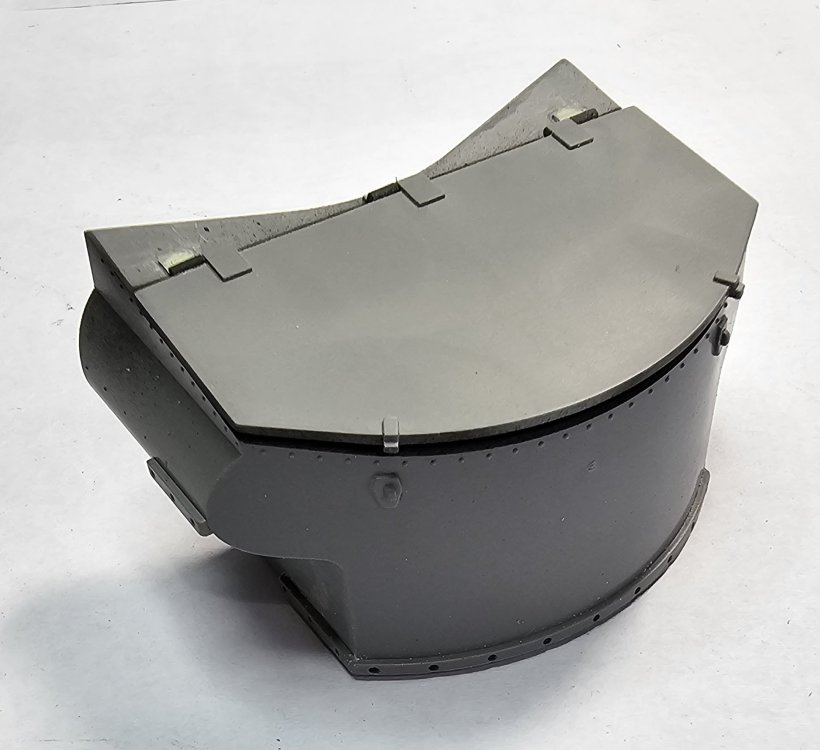
Hey all More work done on the Panzer III Ausf N. Some painting, some assembly so here are some pictures for you to look at. This view shows the commanders seat that I scratch built. This view shows the gunners optic that I scratch built. This view shows the machine gun in place. This view shows the gunners hatches and periscope. This view shows the loaders hatches and his periscope. This picture shows the crew in there respective hatches. The commander doesn't fit with all five of the periscopes installed, so I removed the two rear ones (I lost one to the carpet monster anyway 🤬). This view shows the front access hatches for the steering brakes. This view shows the hatches open. Also I scratch built the handles from brass wire. This view shows the rear storage bin. This view shows the storage bin open and the inside painted black. Well that's it for now be back soon with more updates. Ron G


- 38 replies
-
- 10
-

-