CrankyCrafstman
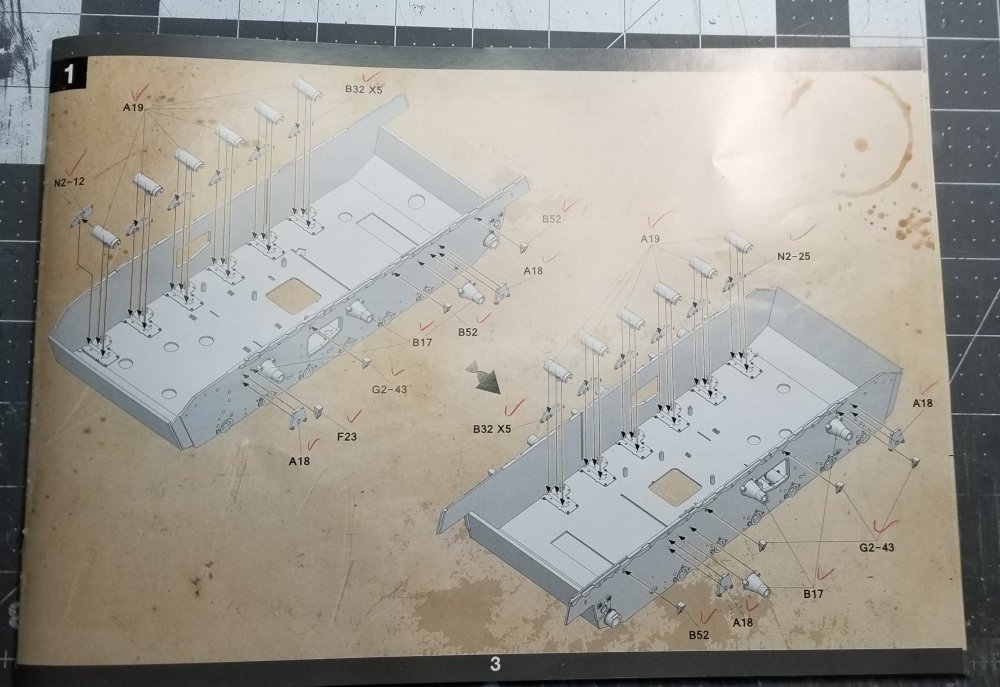
-
Posts
1,350 -
Joined
-
Last visited
Content Type
Profiles
Forums
Events
Gallery
Everything posted by CrankyCrafstman
-
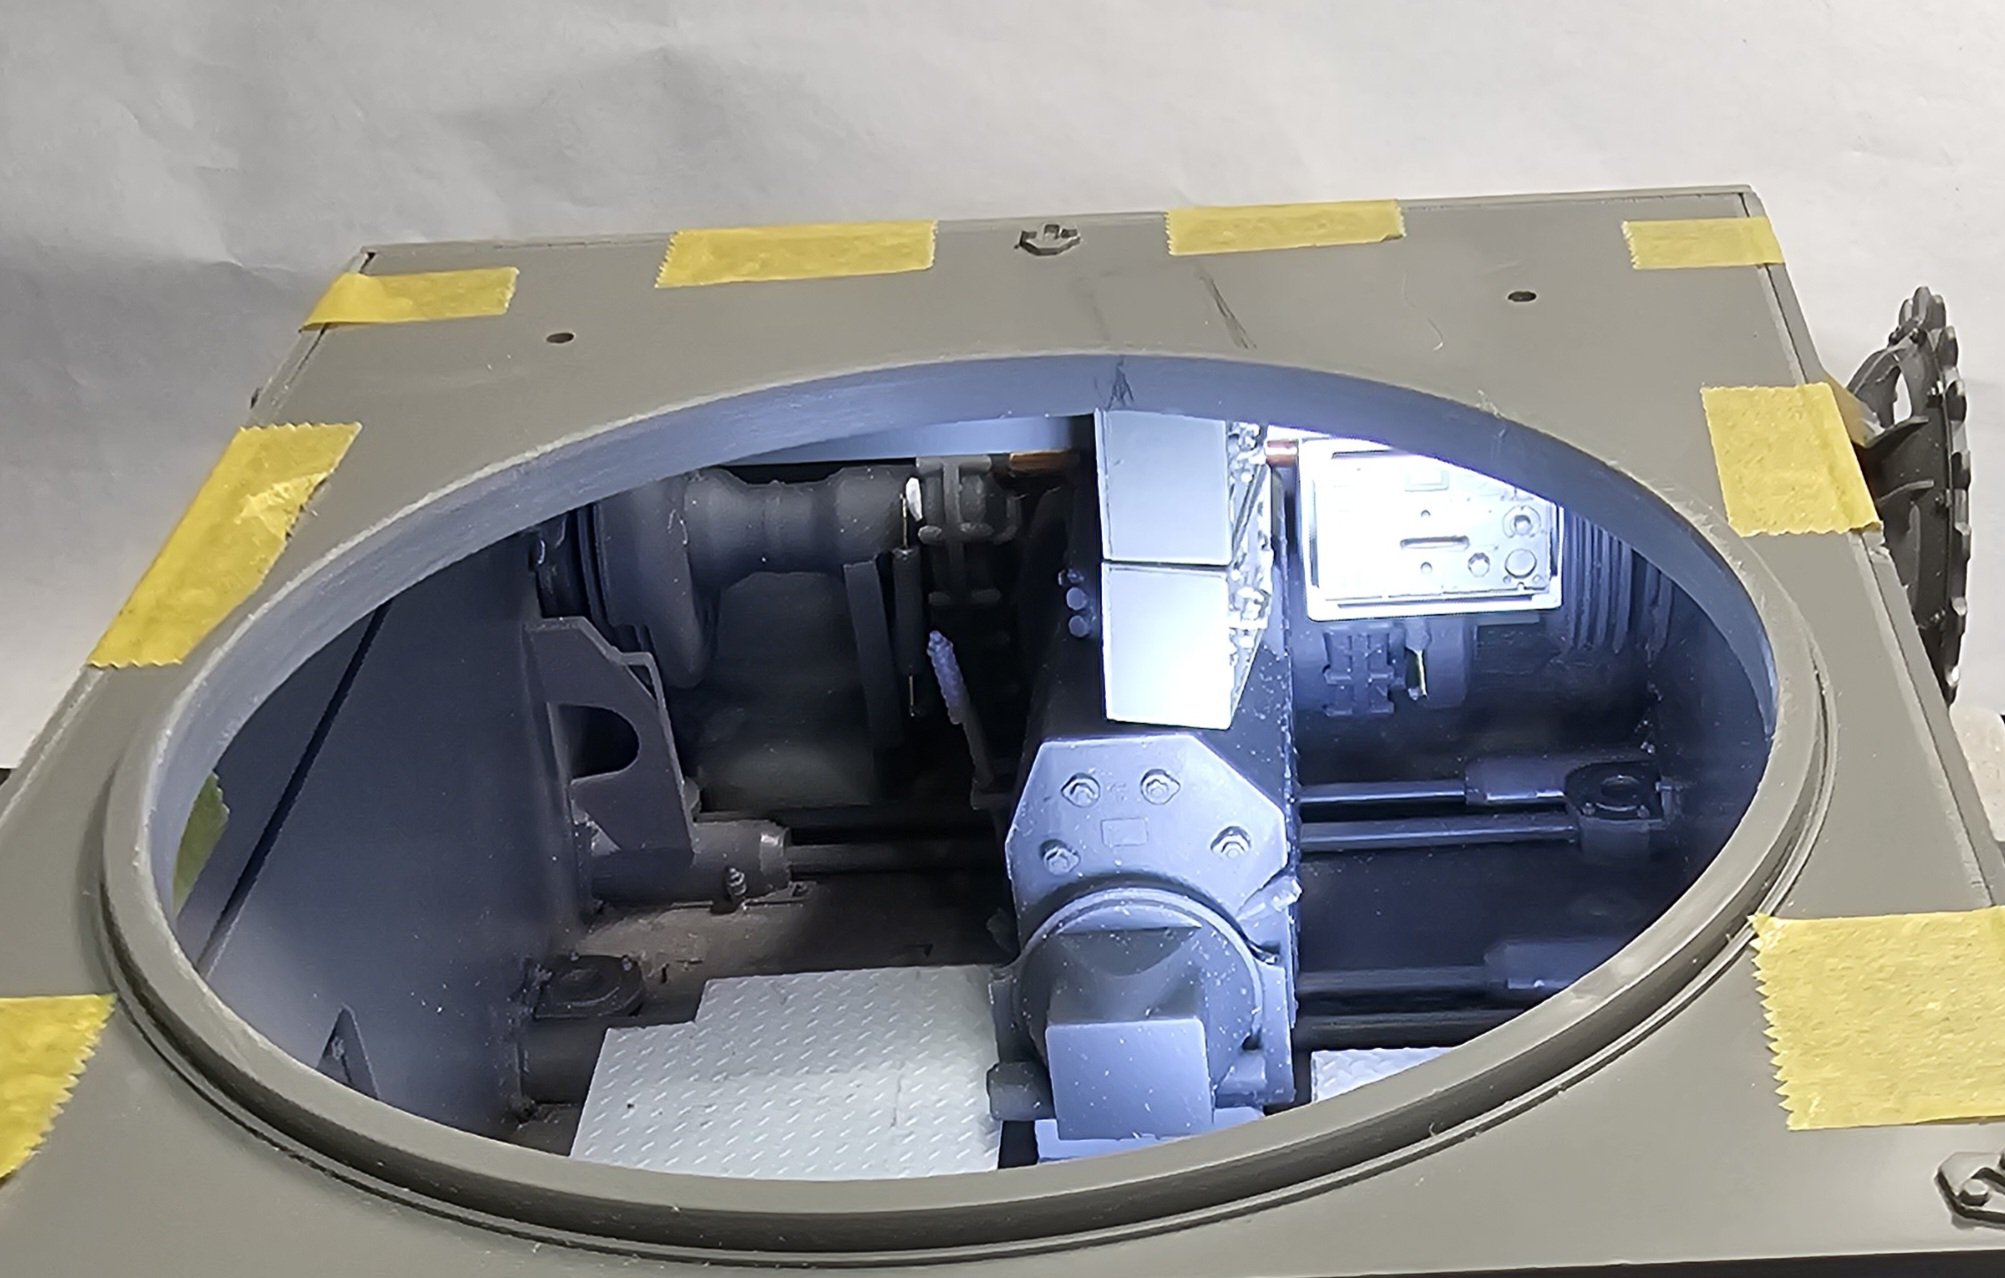
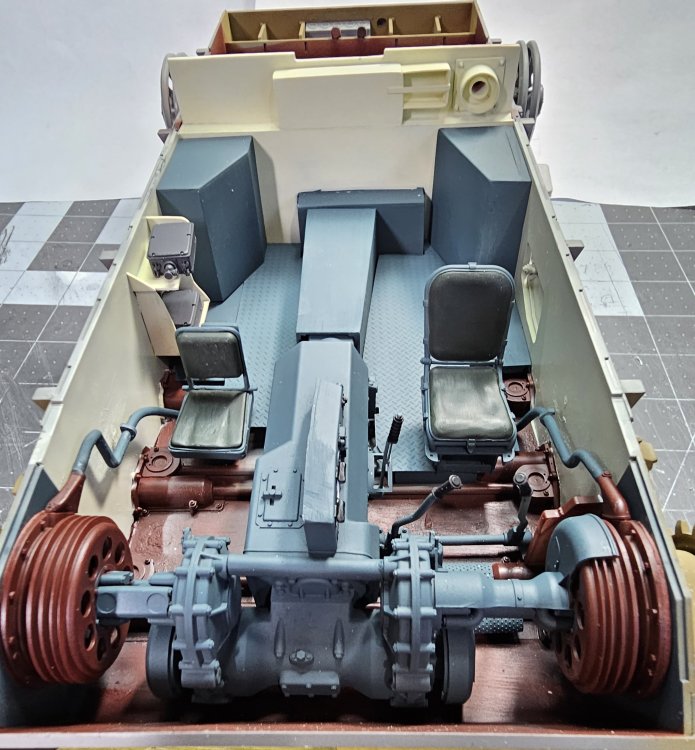
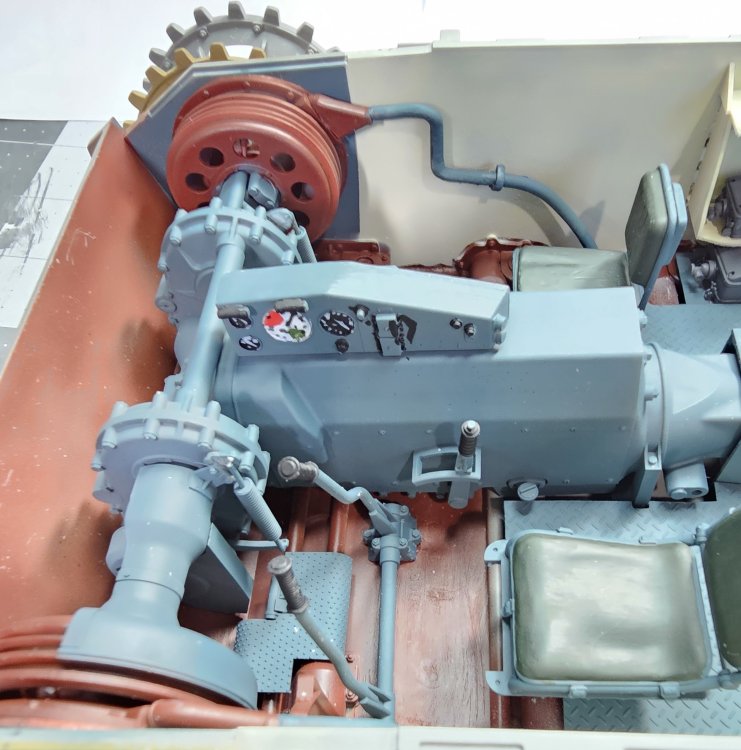
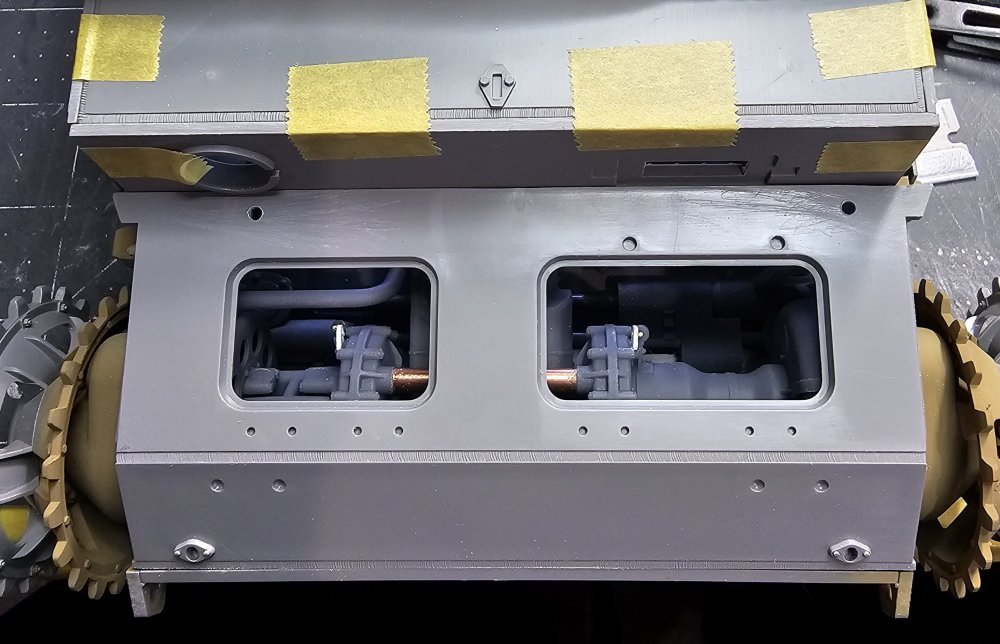
 Hey all More work done on the Panzer III Ausf N. I have the interior painted. This view shows the mostly complete interior. Same thing from the other side. View looking forward at the drive mechanism. I see there's a spot that I missed while painting. I'll get it tomorrow. This view shows the firewall and ammo bins. On the left behind the radio operators seat mounted to the hull side are the radio transformers. This view shows the hand painted gauges This view shows the two receiver's and the transmitter. I sfill have alot of detail painting to do yet. Well that's it for now be back soon with more updates. Ron G
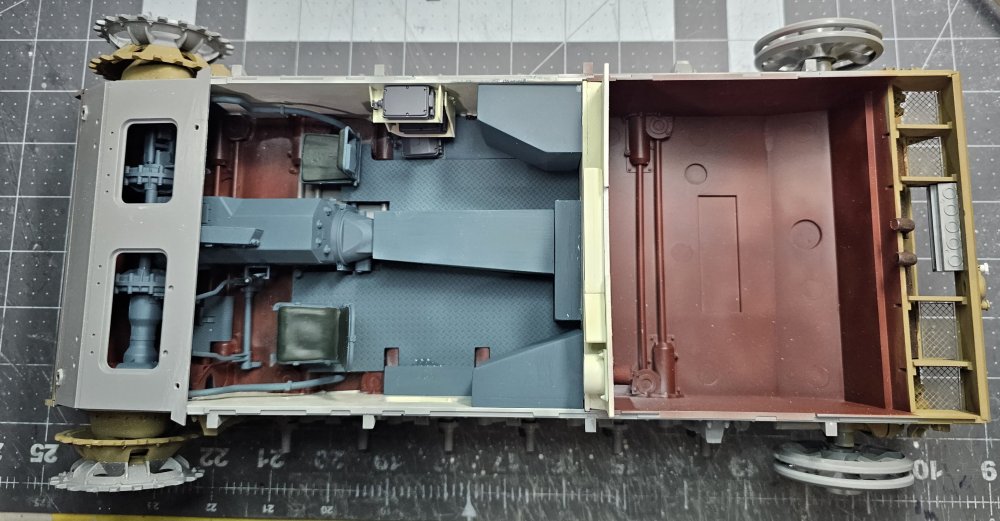

-
Hey Carl I've been toying with the idea of crossing AHHQ Sherman easy 8 with the Achilles in order to make a M4A3 (76) VVSS Sherman, but there $149.00 dollars each! The wife would kill me, castrate me and burn me alive if I spent that much right know.😳 Ron G
-
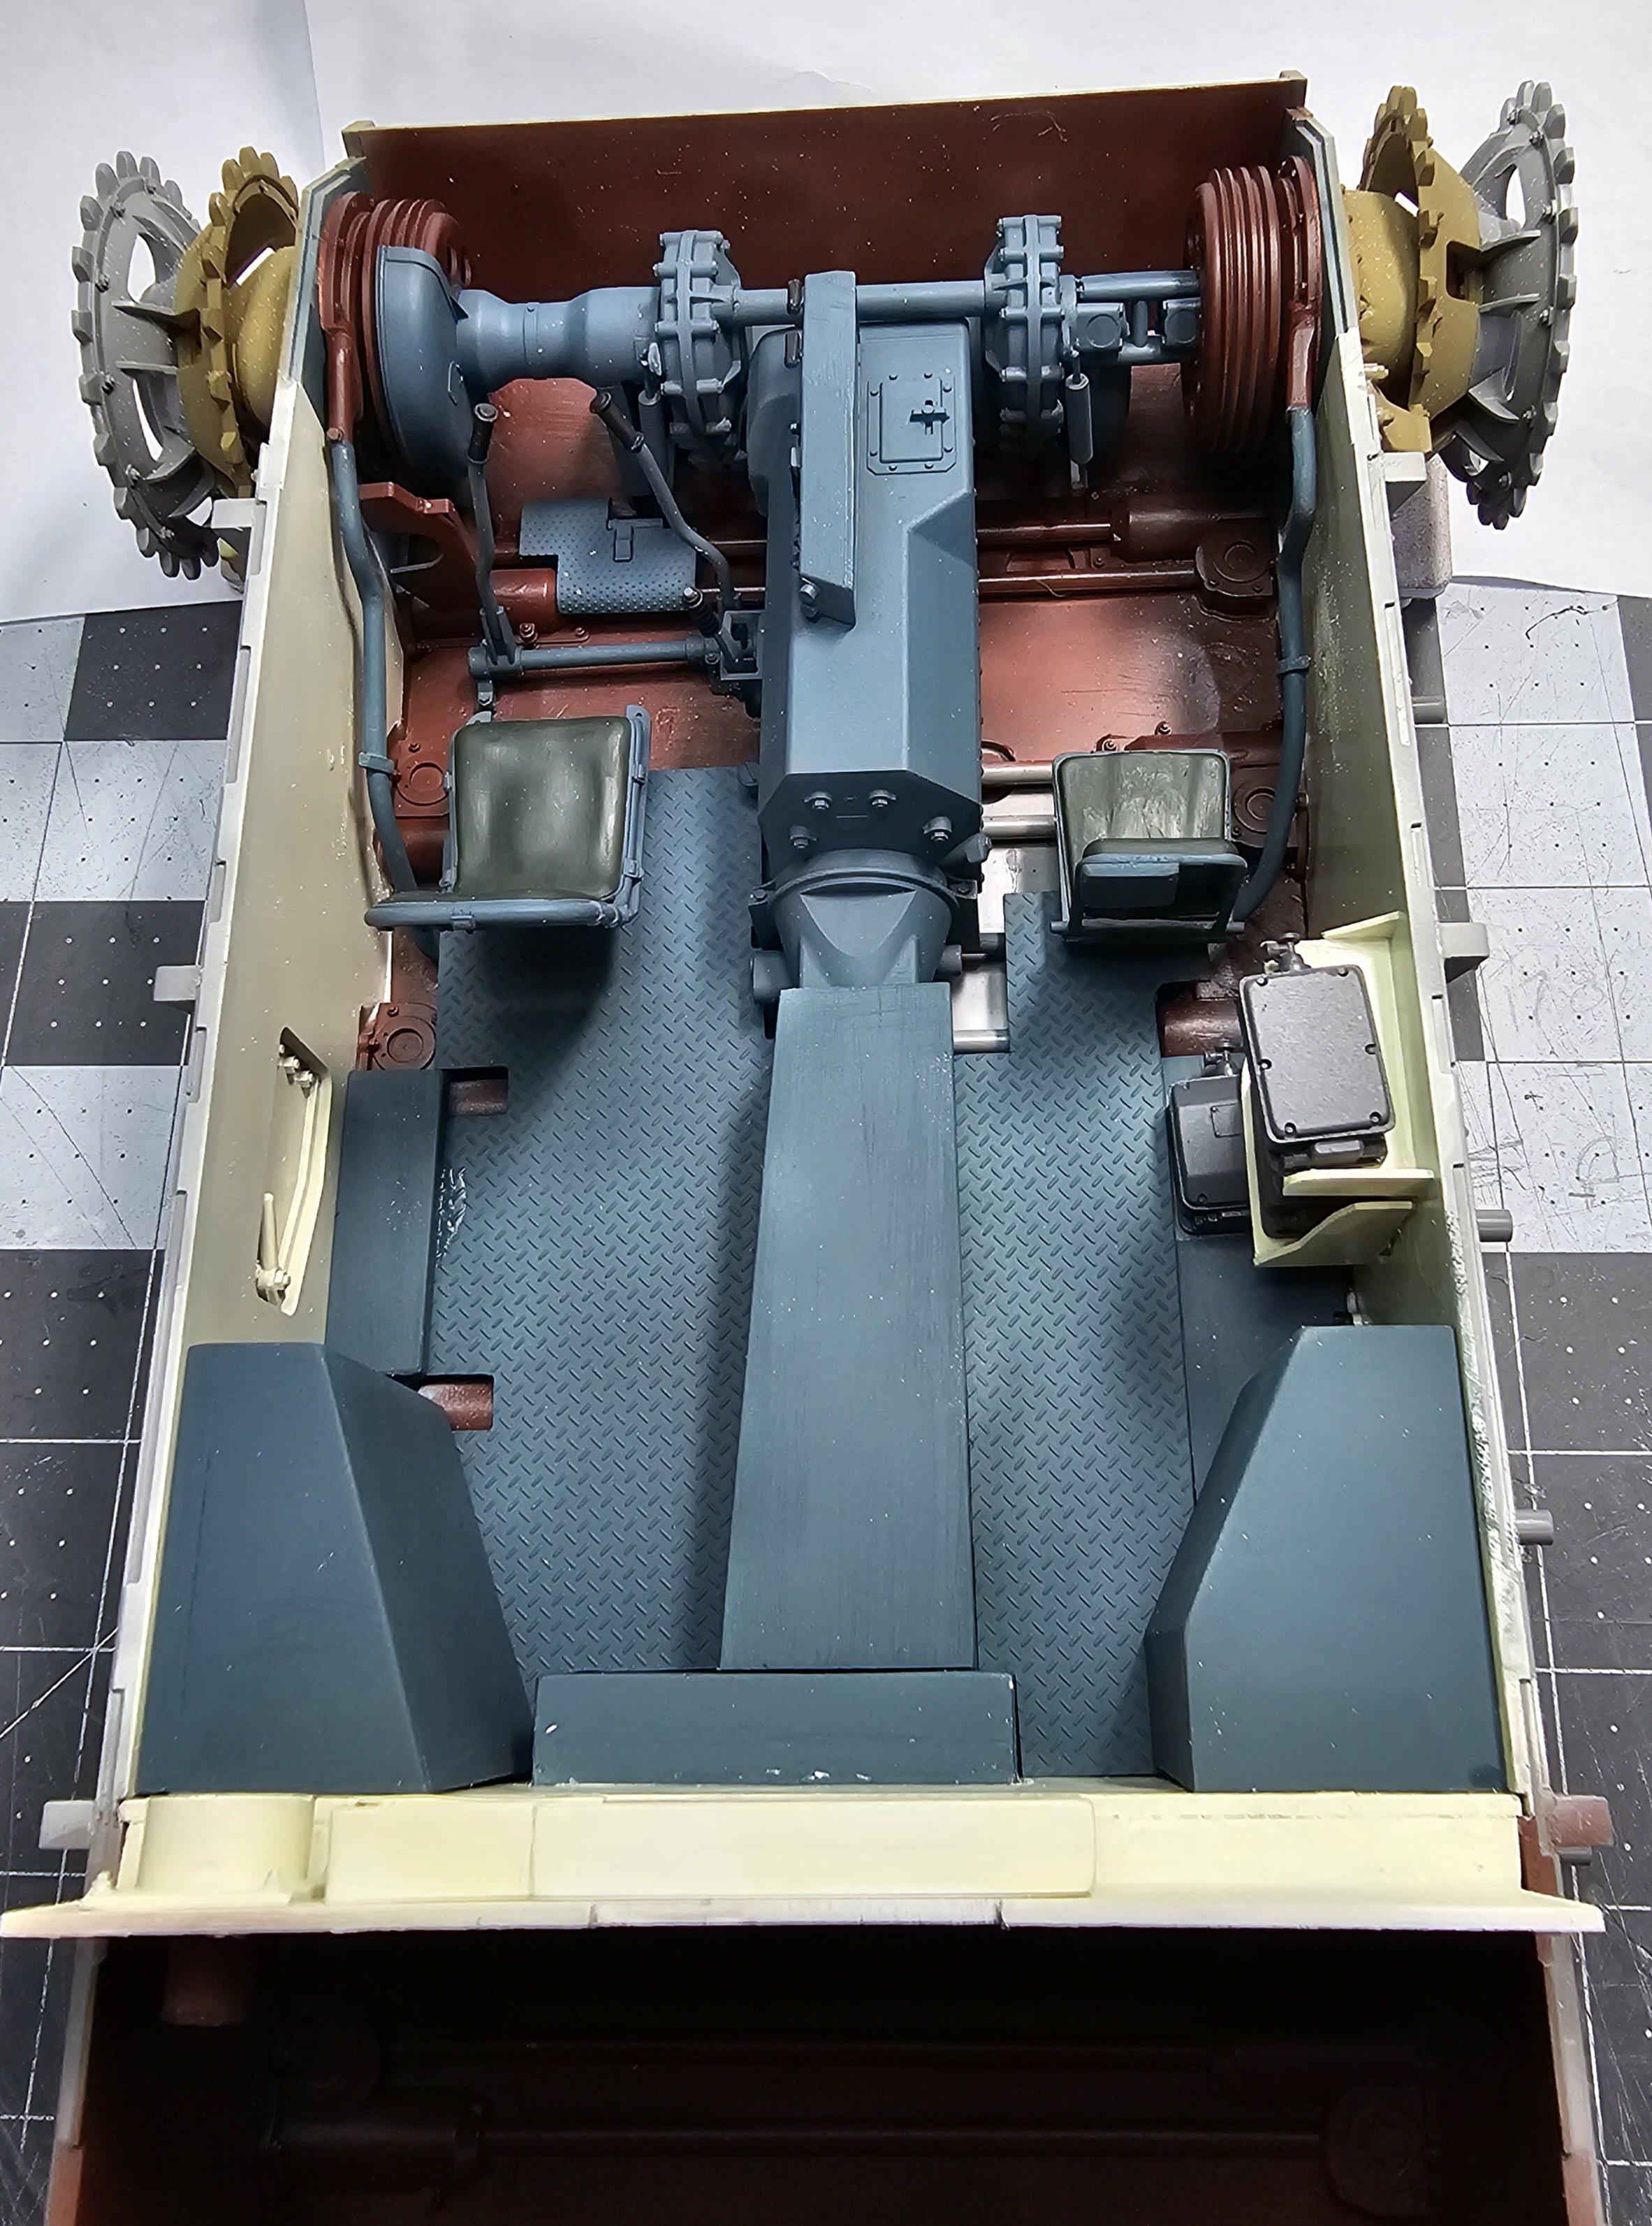
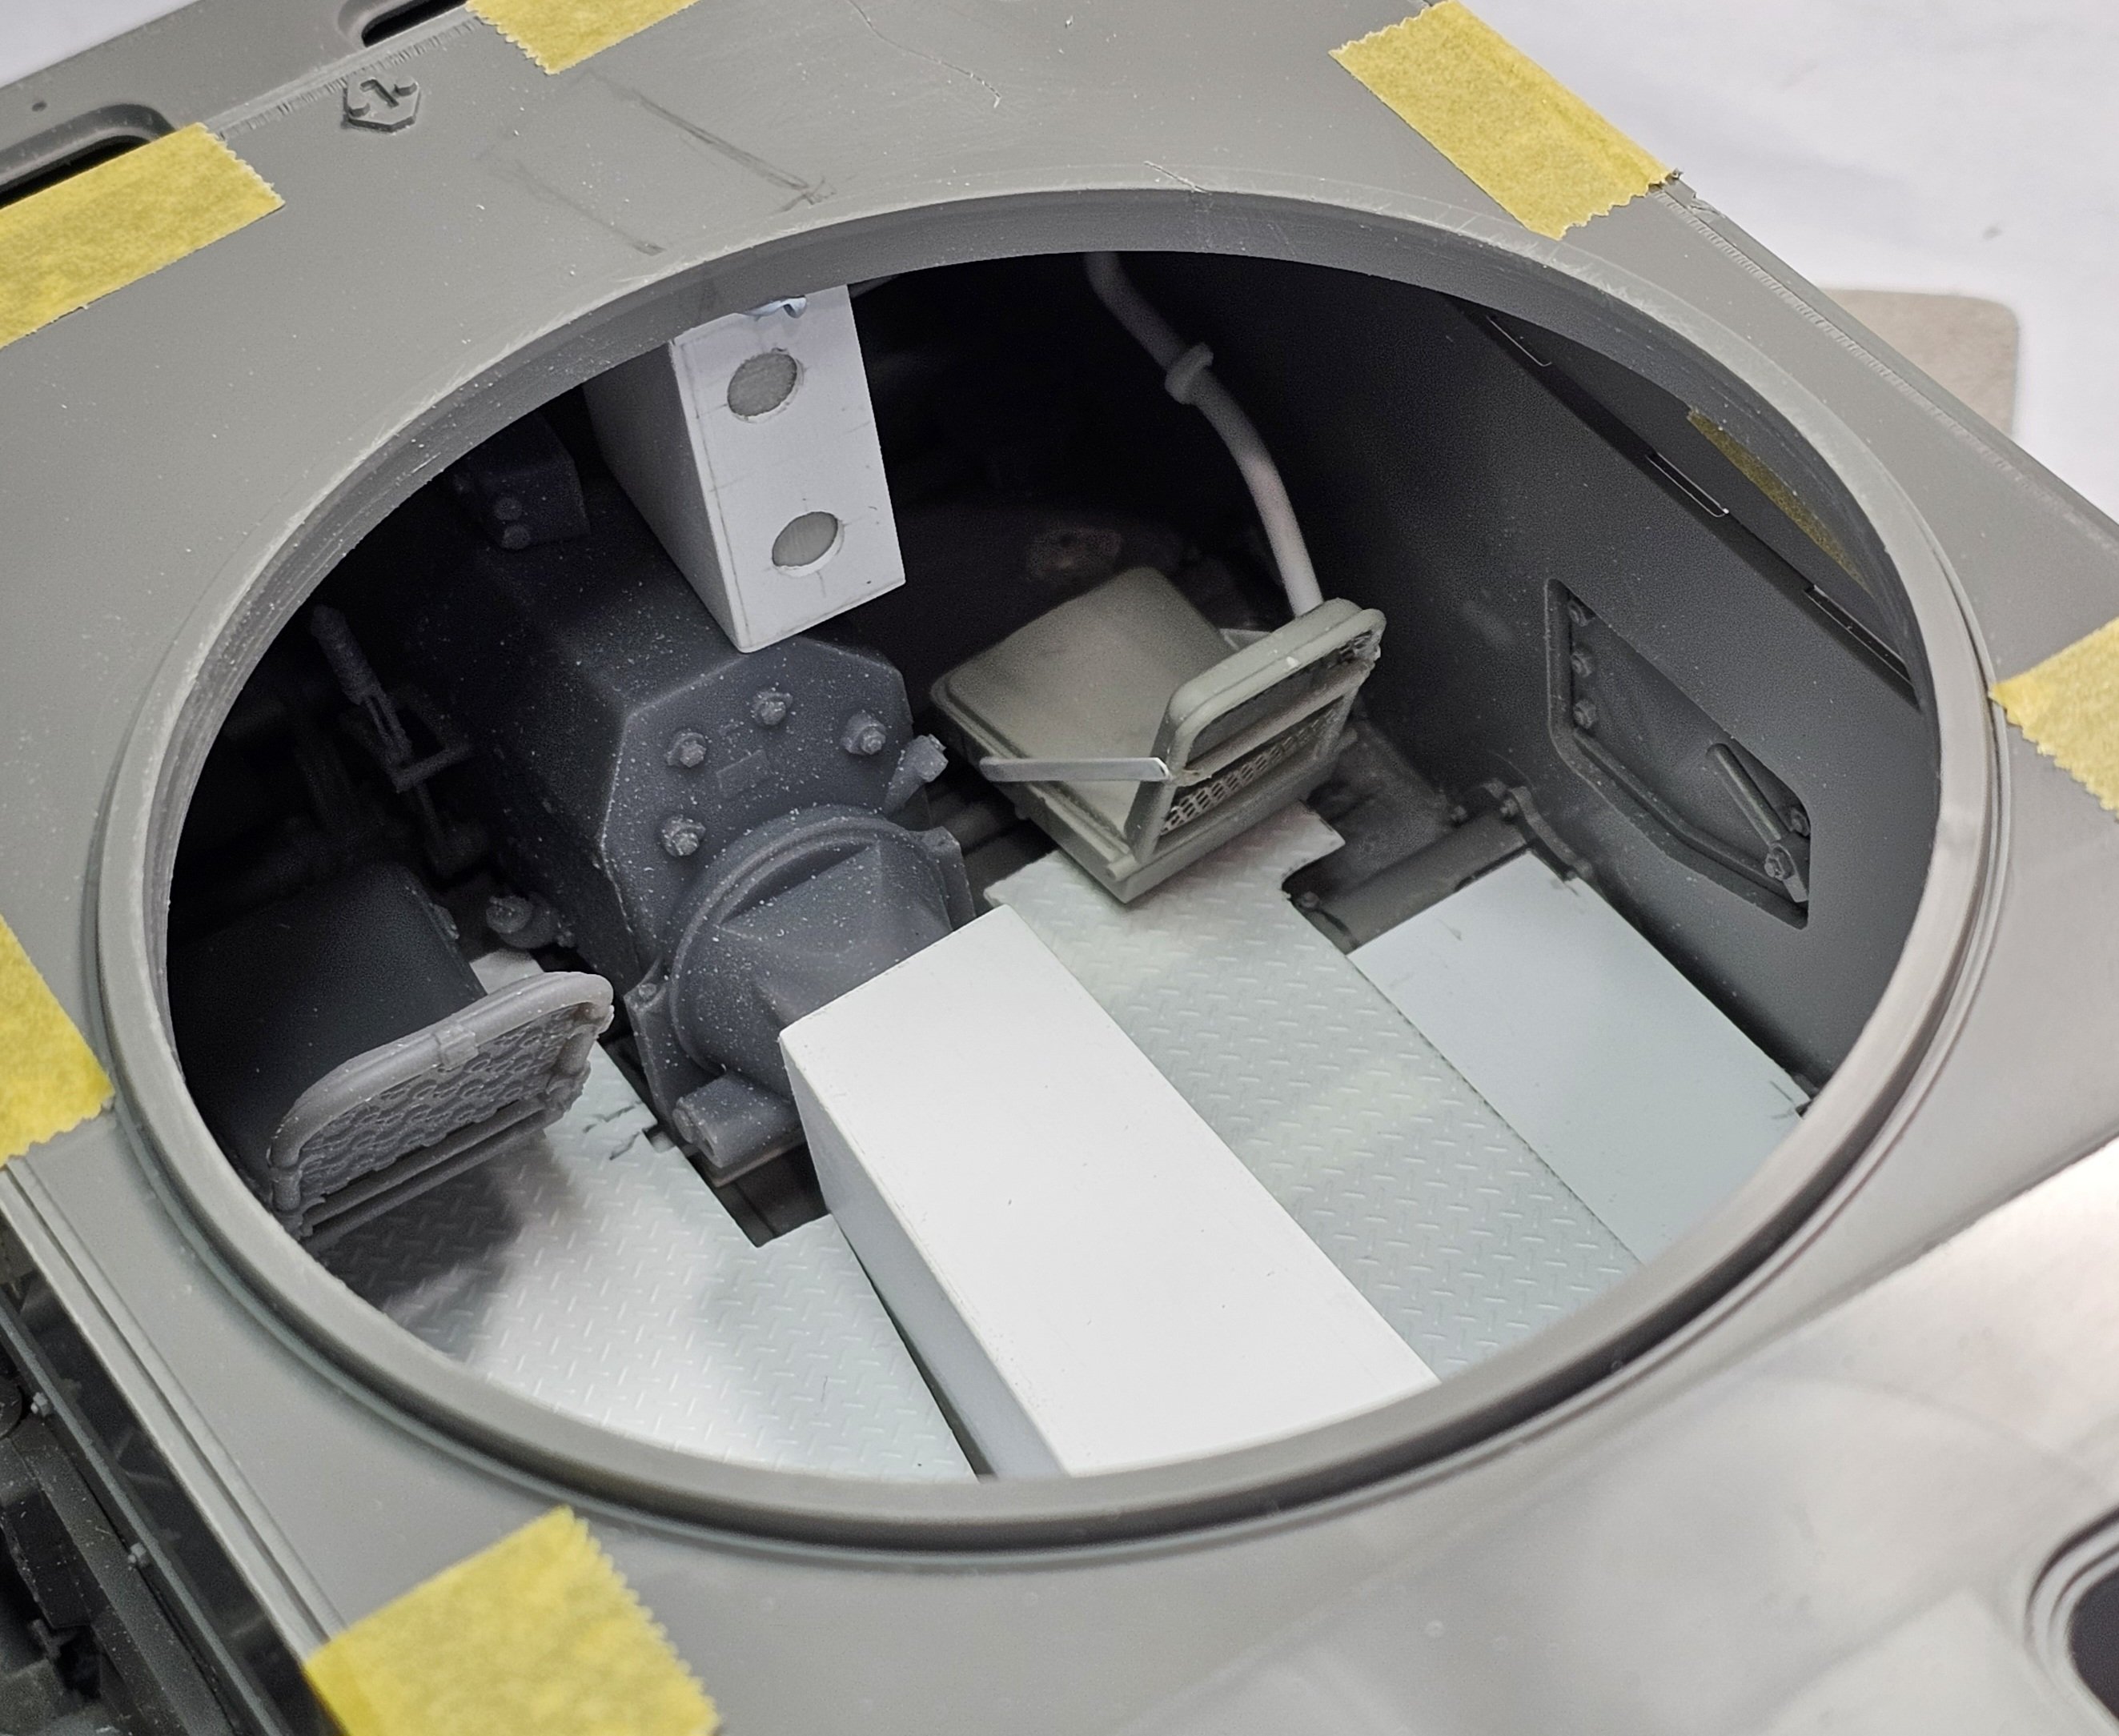
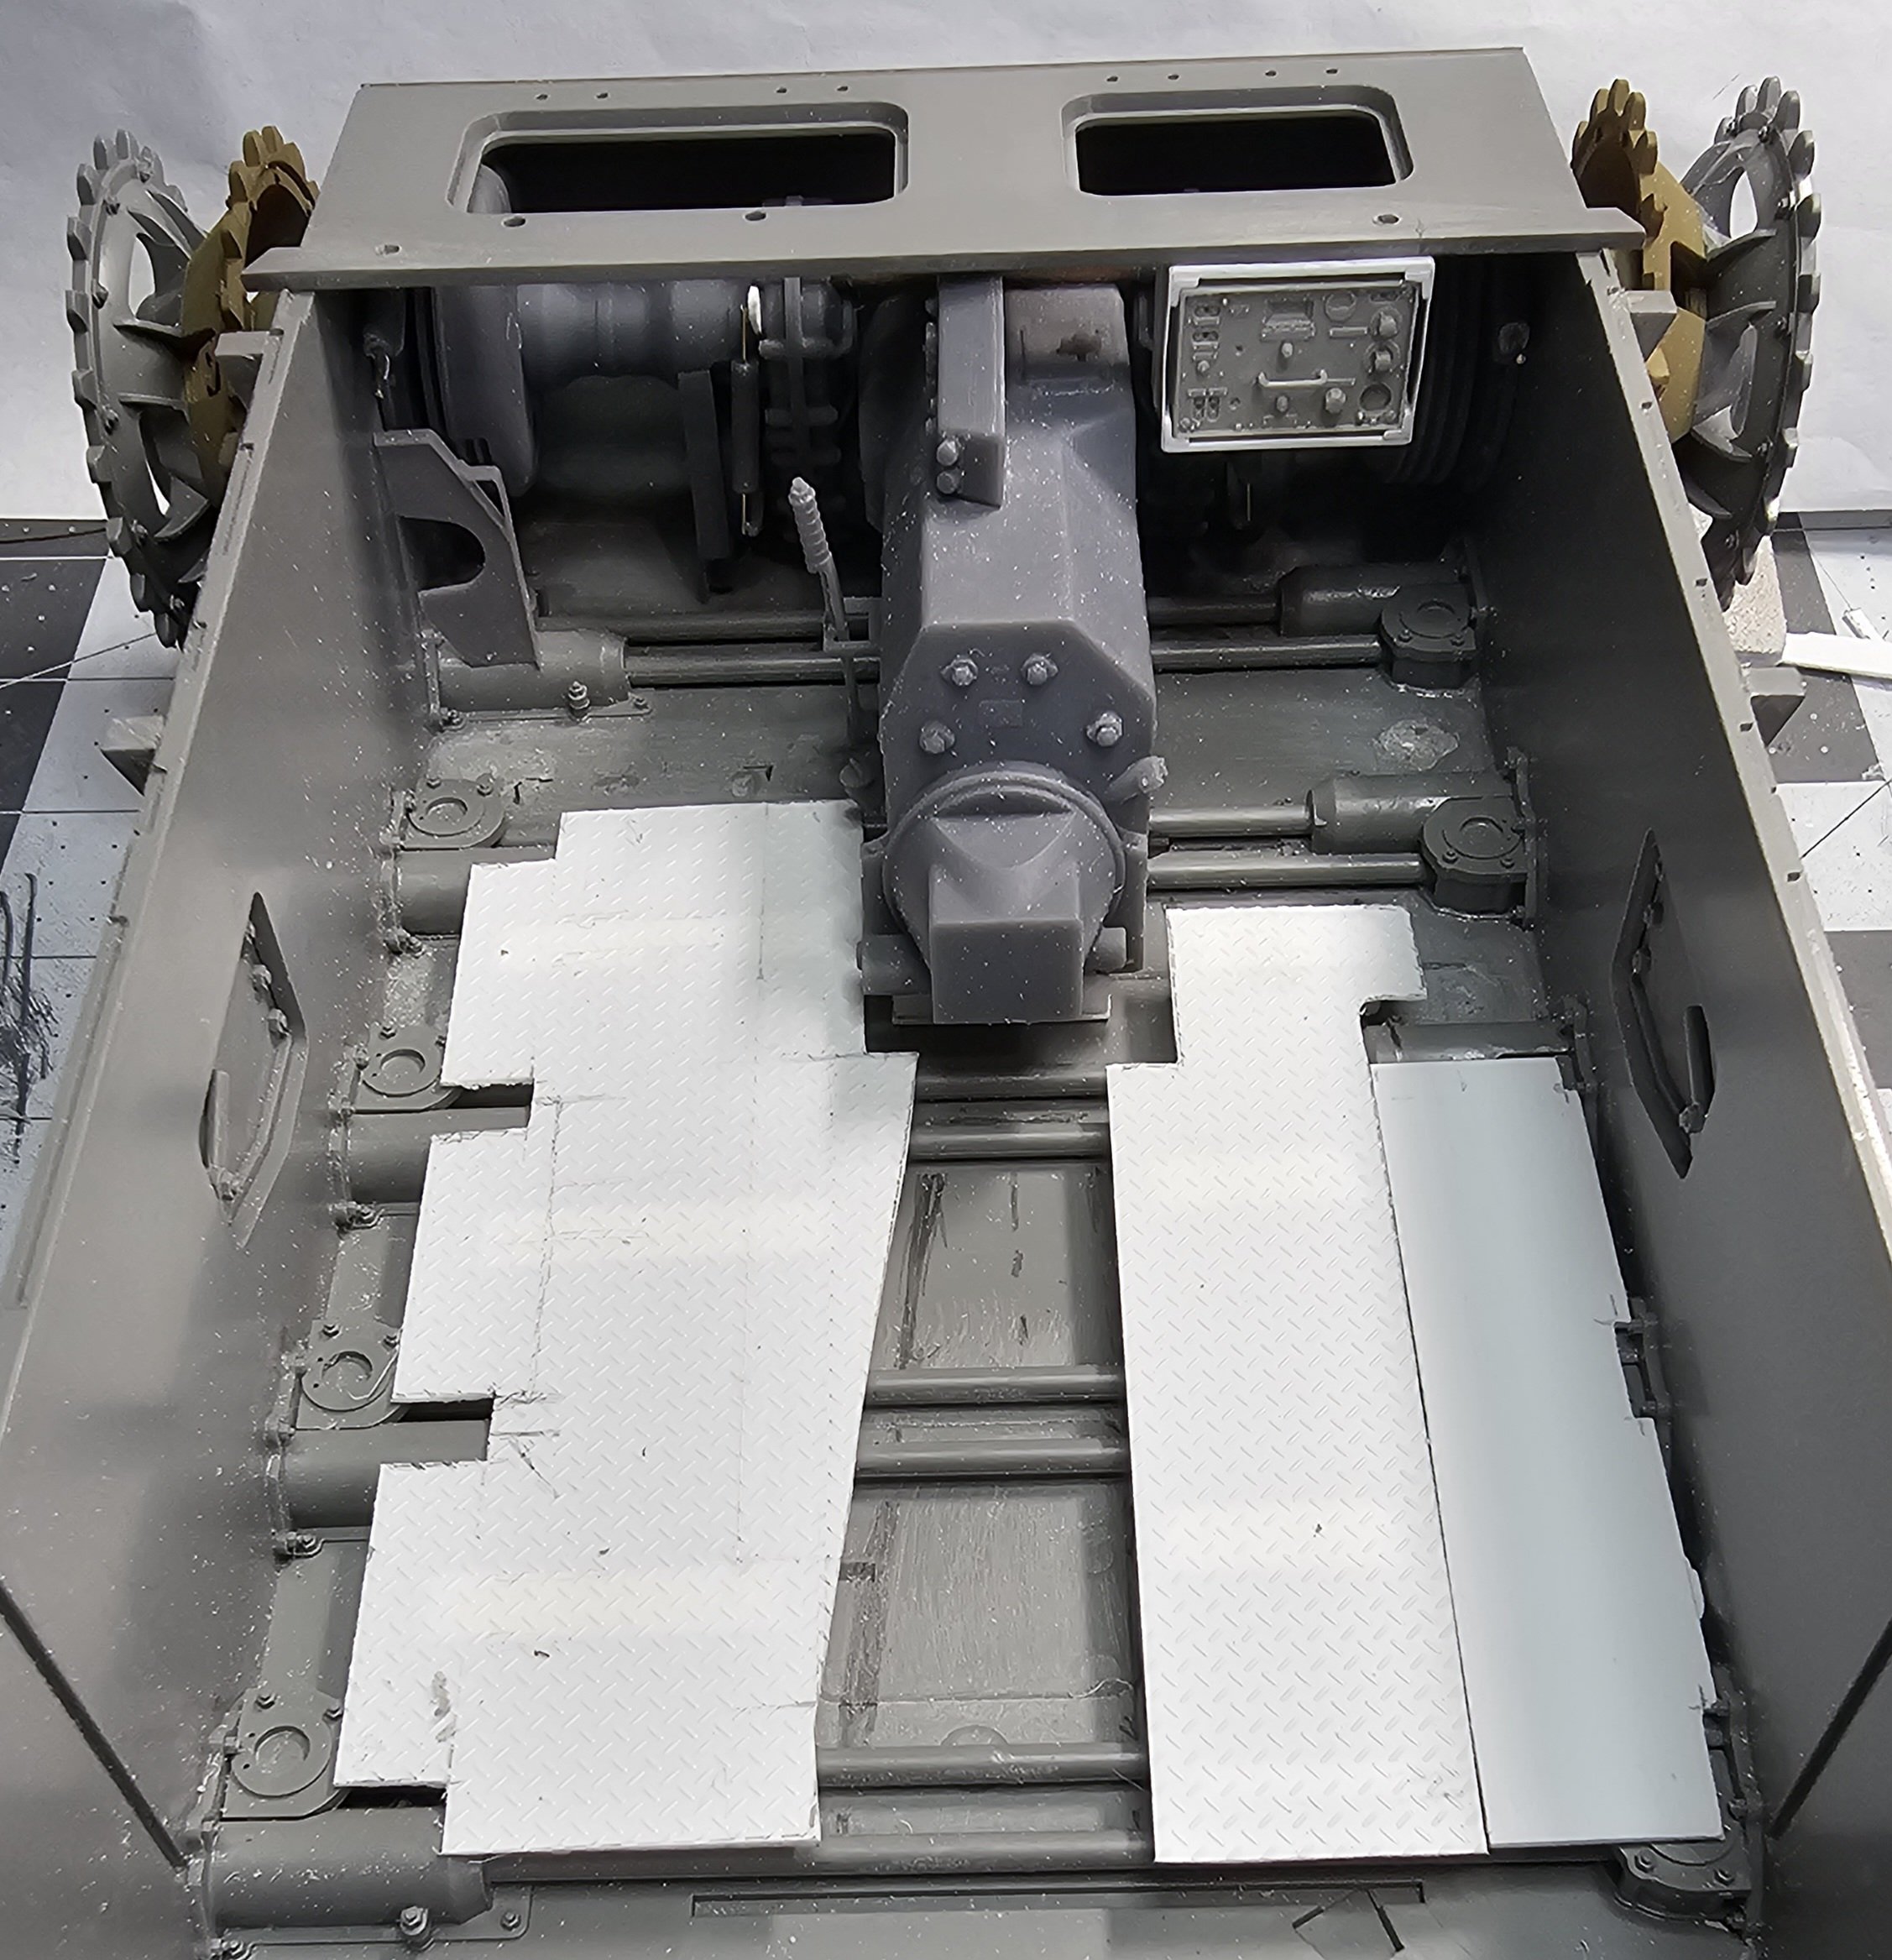
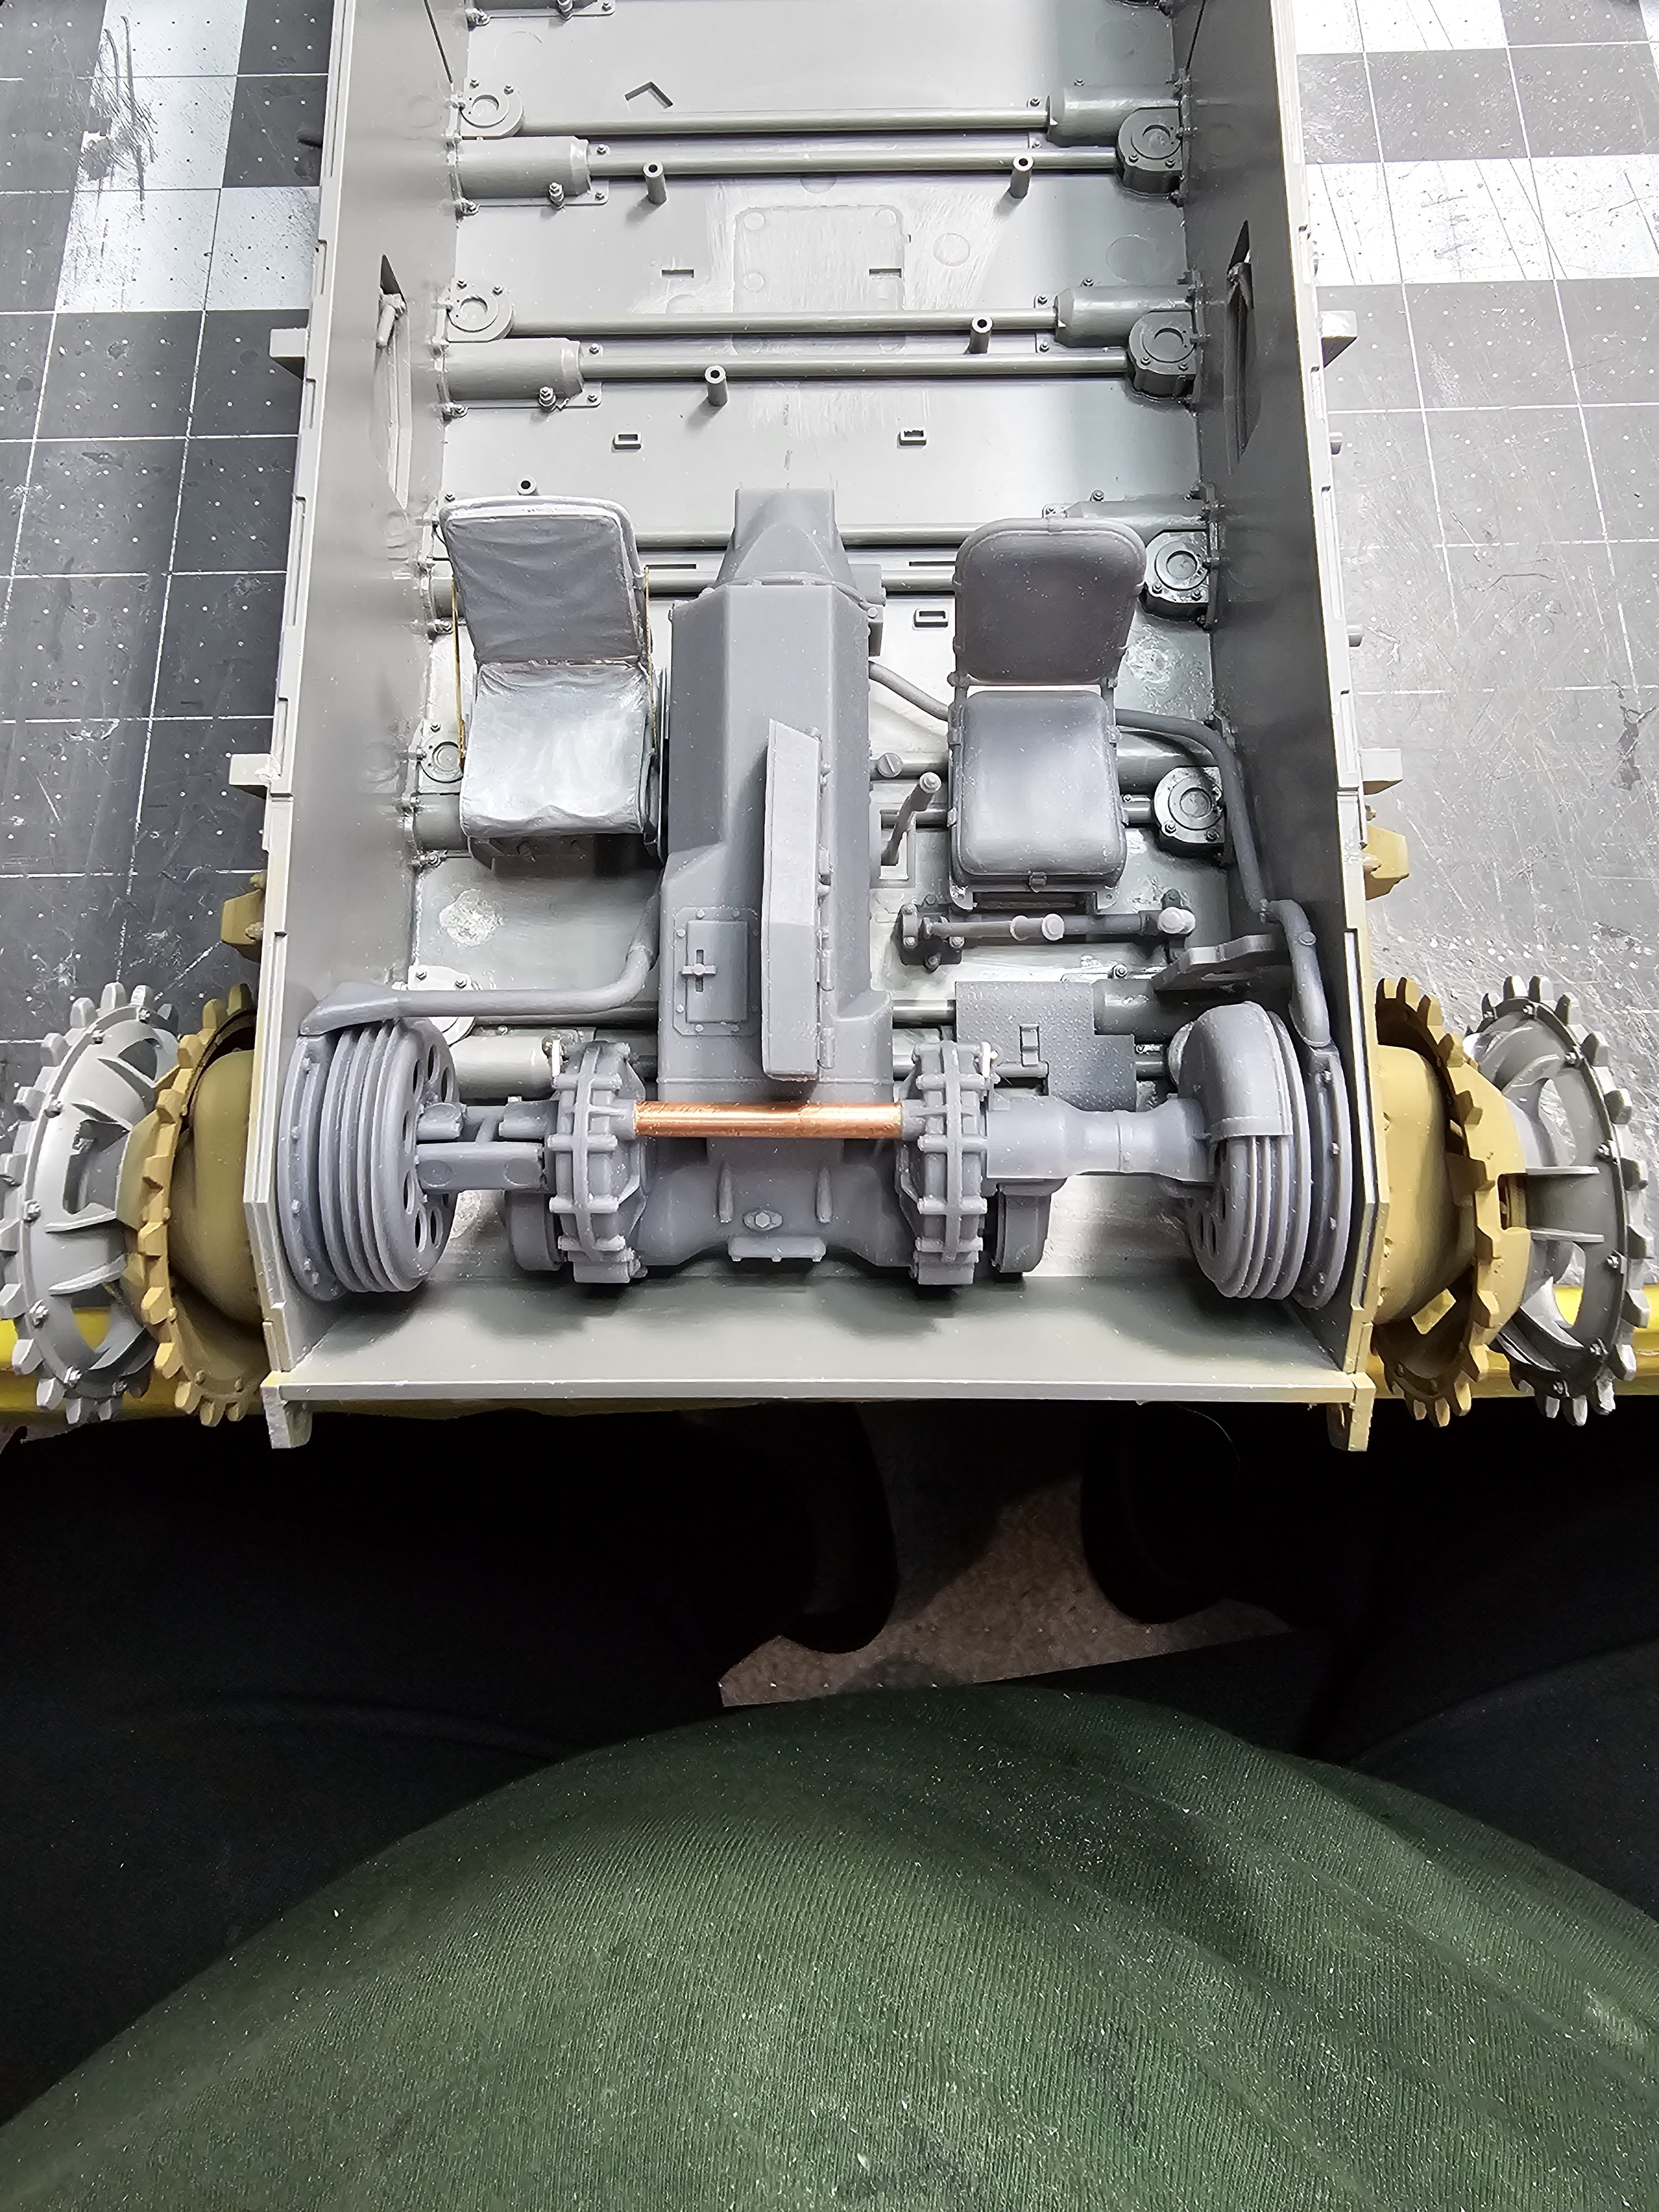
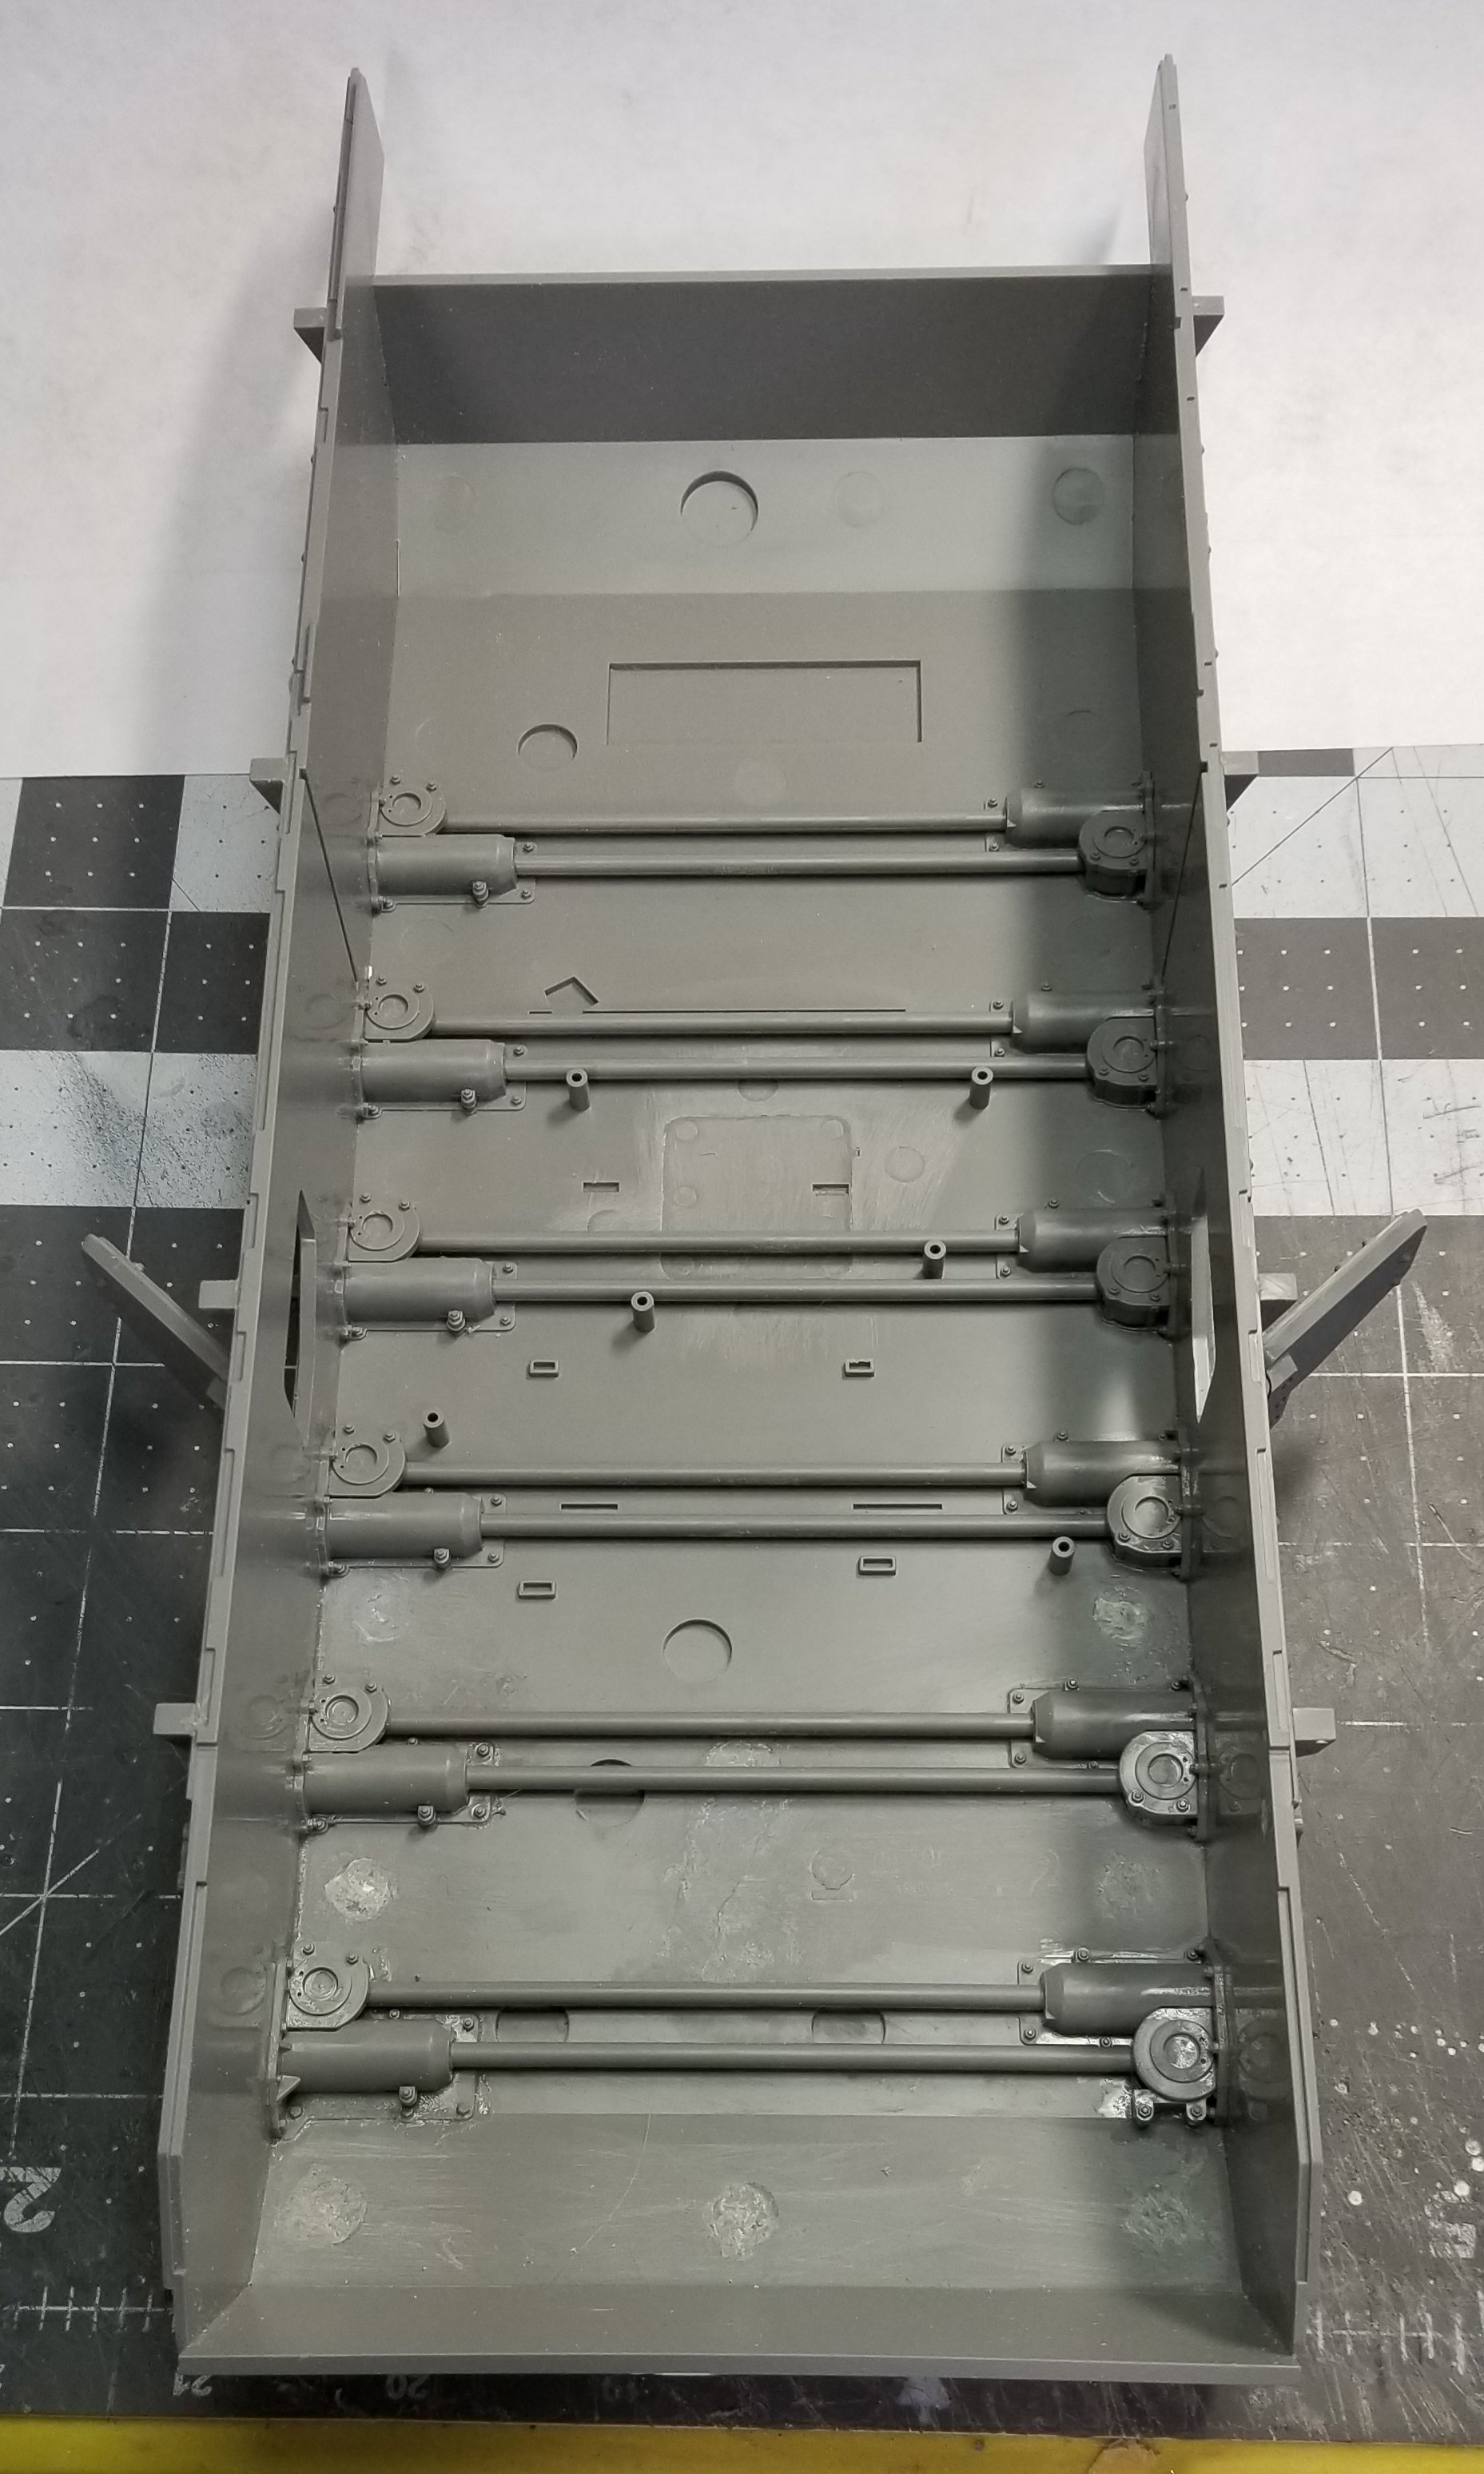
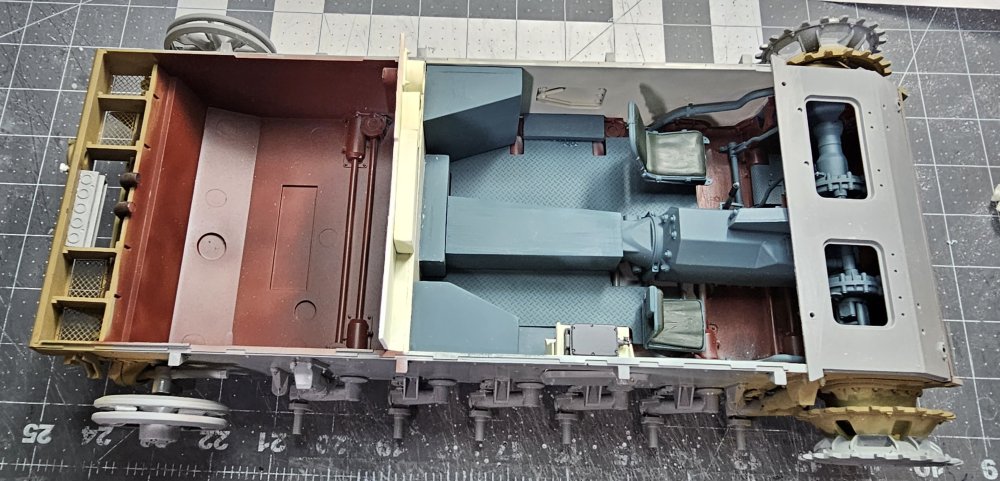
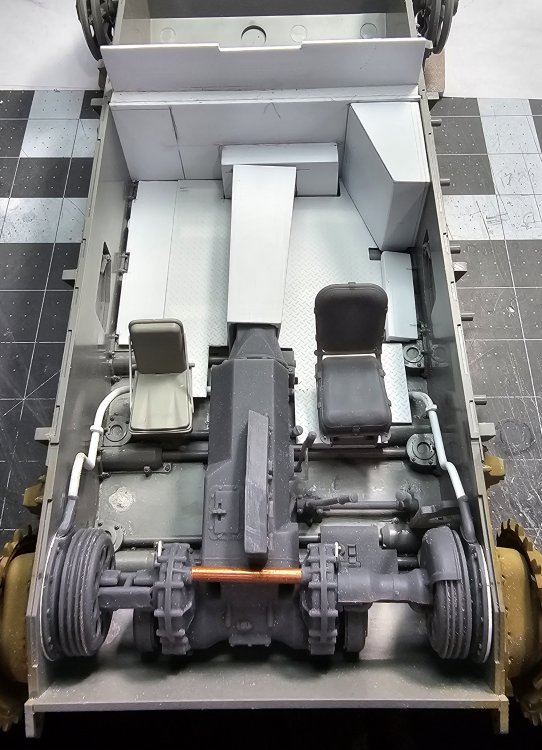
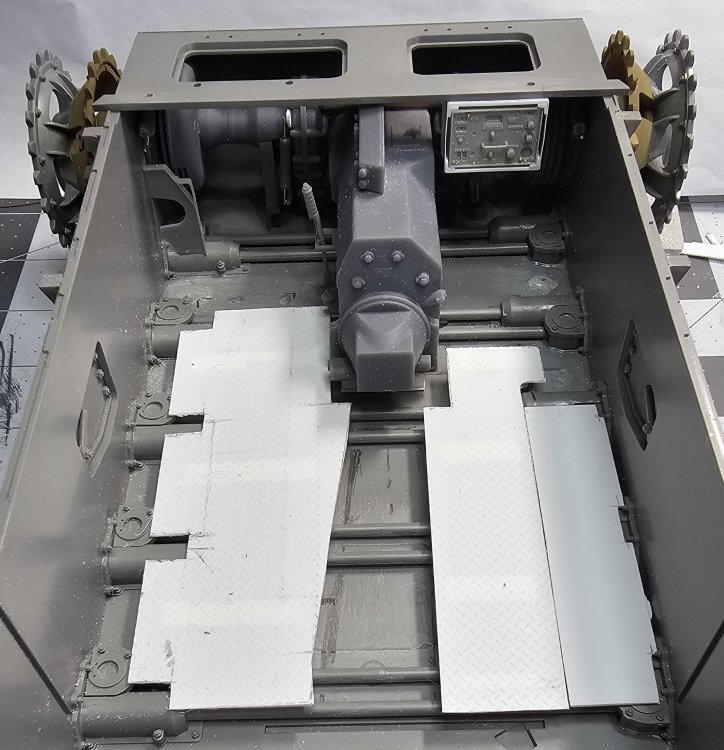
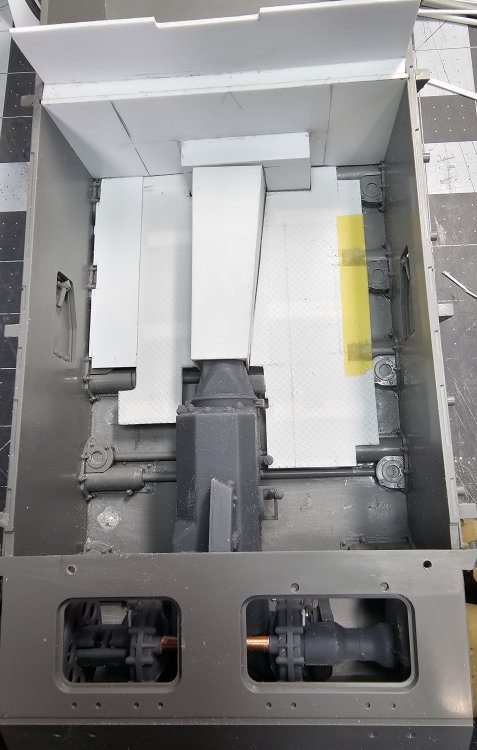
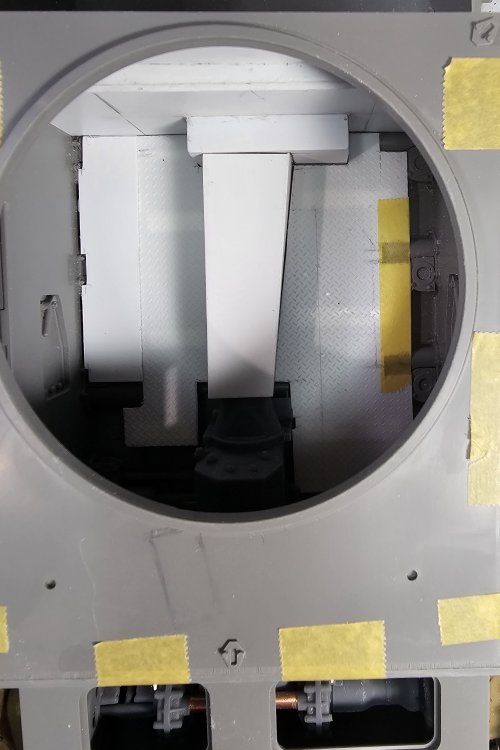
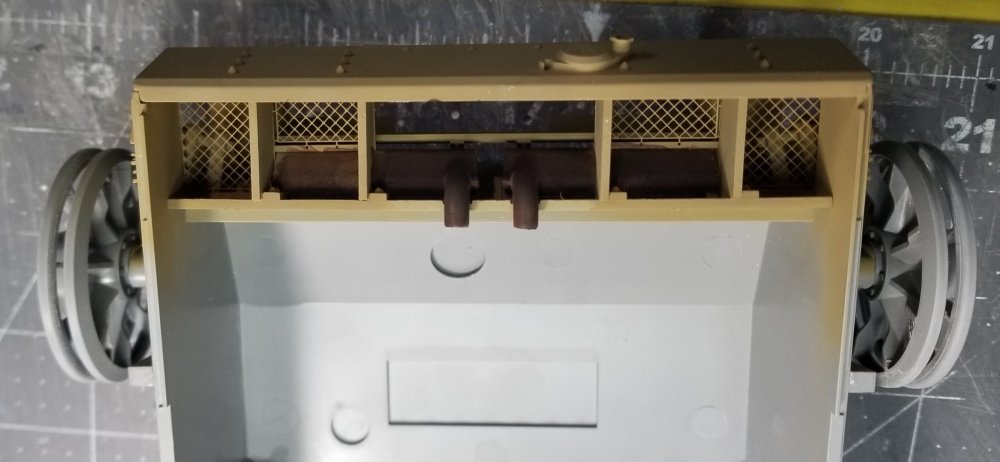
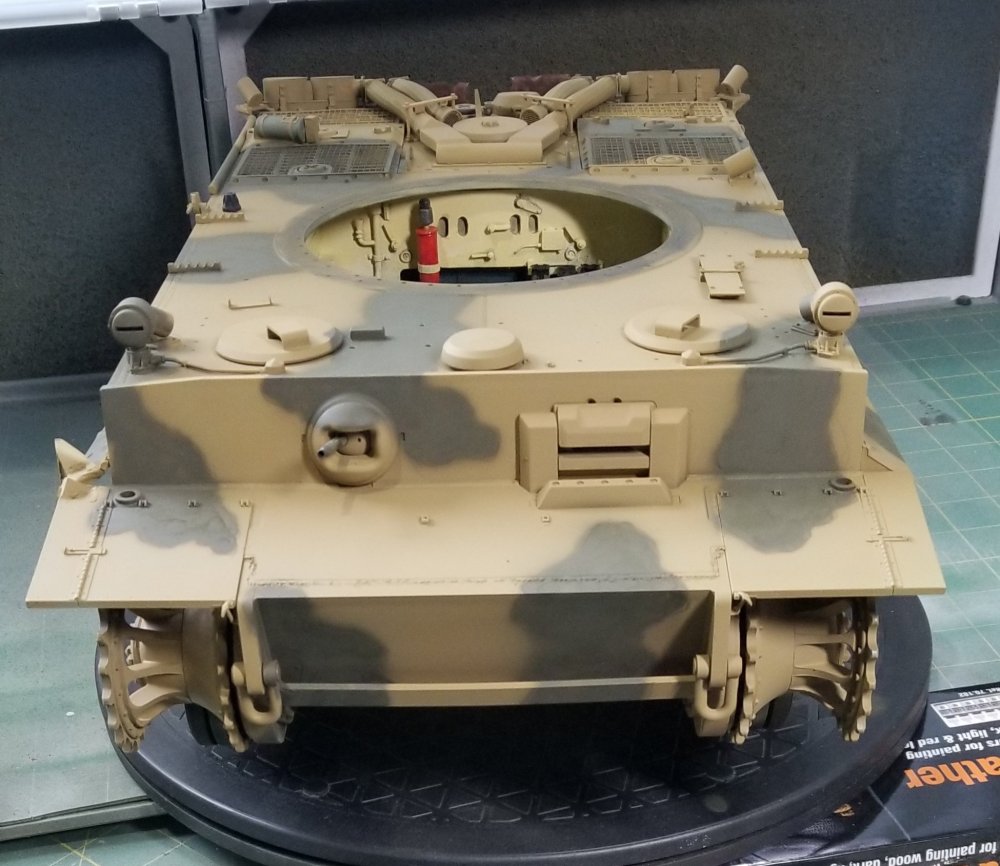
Hey all Small update for you to look at This view shows the seats in place temporarily. It also shows the reworked pipes that exhaust the heat from the steering brakes. This view shows pipe on the drivers side. This view shows the parts in place temporarily. I still need to make the ammo bin on the radio operators side. I'm just making shapes so when I paint them and you look through the hatches you will be able to see something, instead of an empty hull. Ron G
-
Hey Carl Actually the driver and radio operator entered through the turret hatches. They had to crawl down into there seats. There's a video on YouTube by the "Cheften" of the Bovingtons Panzer iii of the 5 different positions in the Panzer iii, have a look it's pretty interesting. Ron G
-
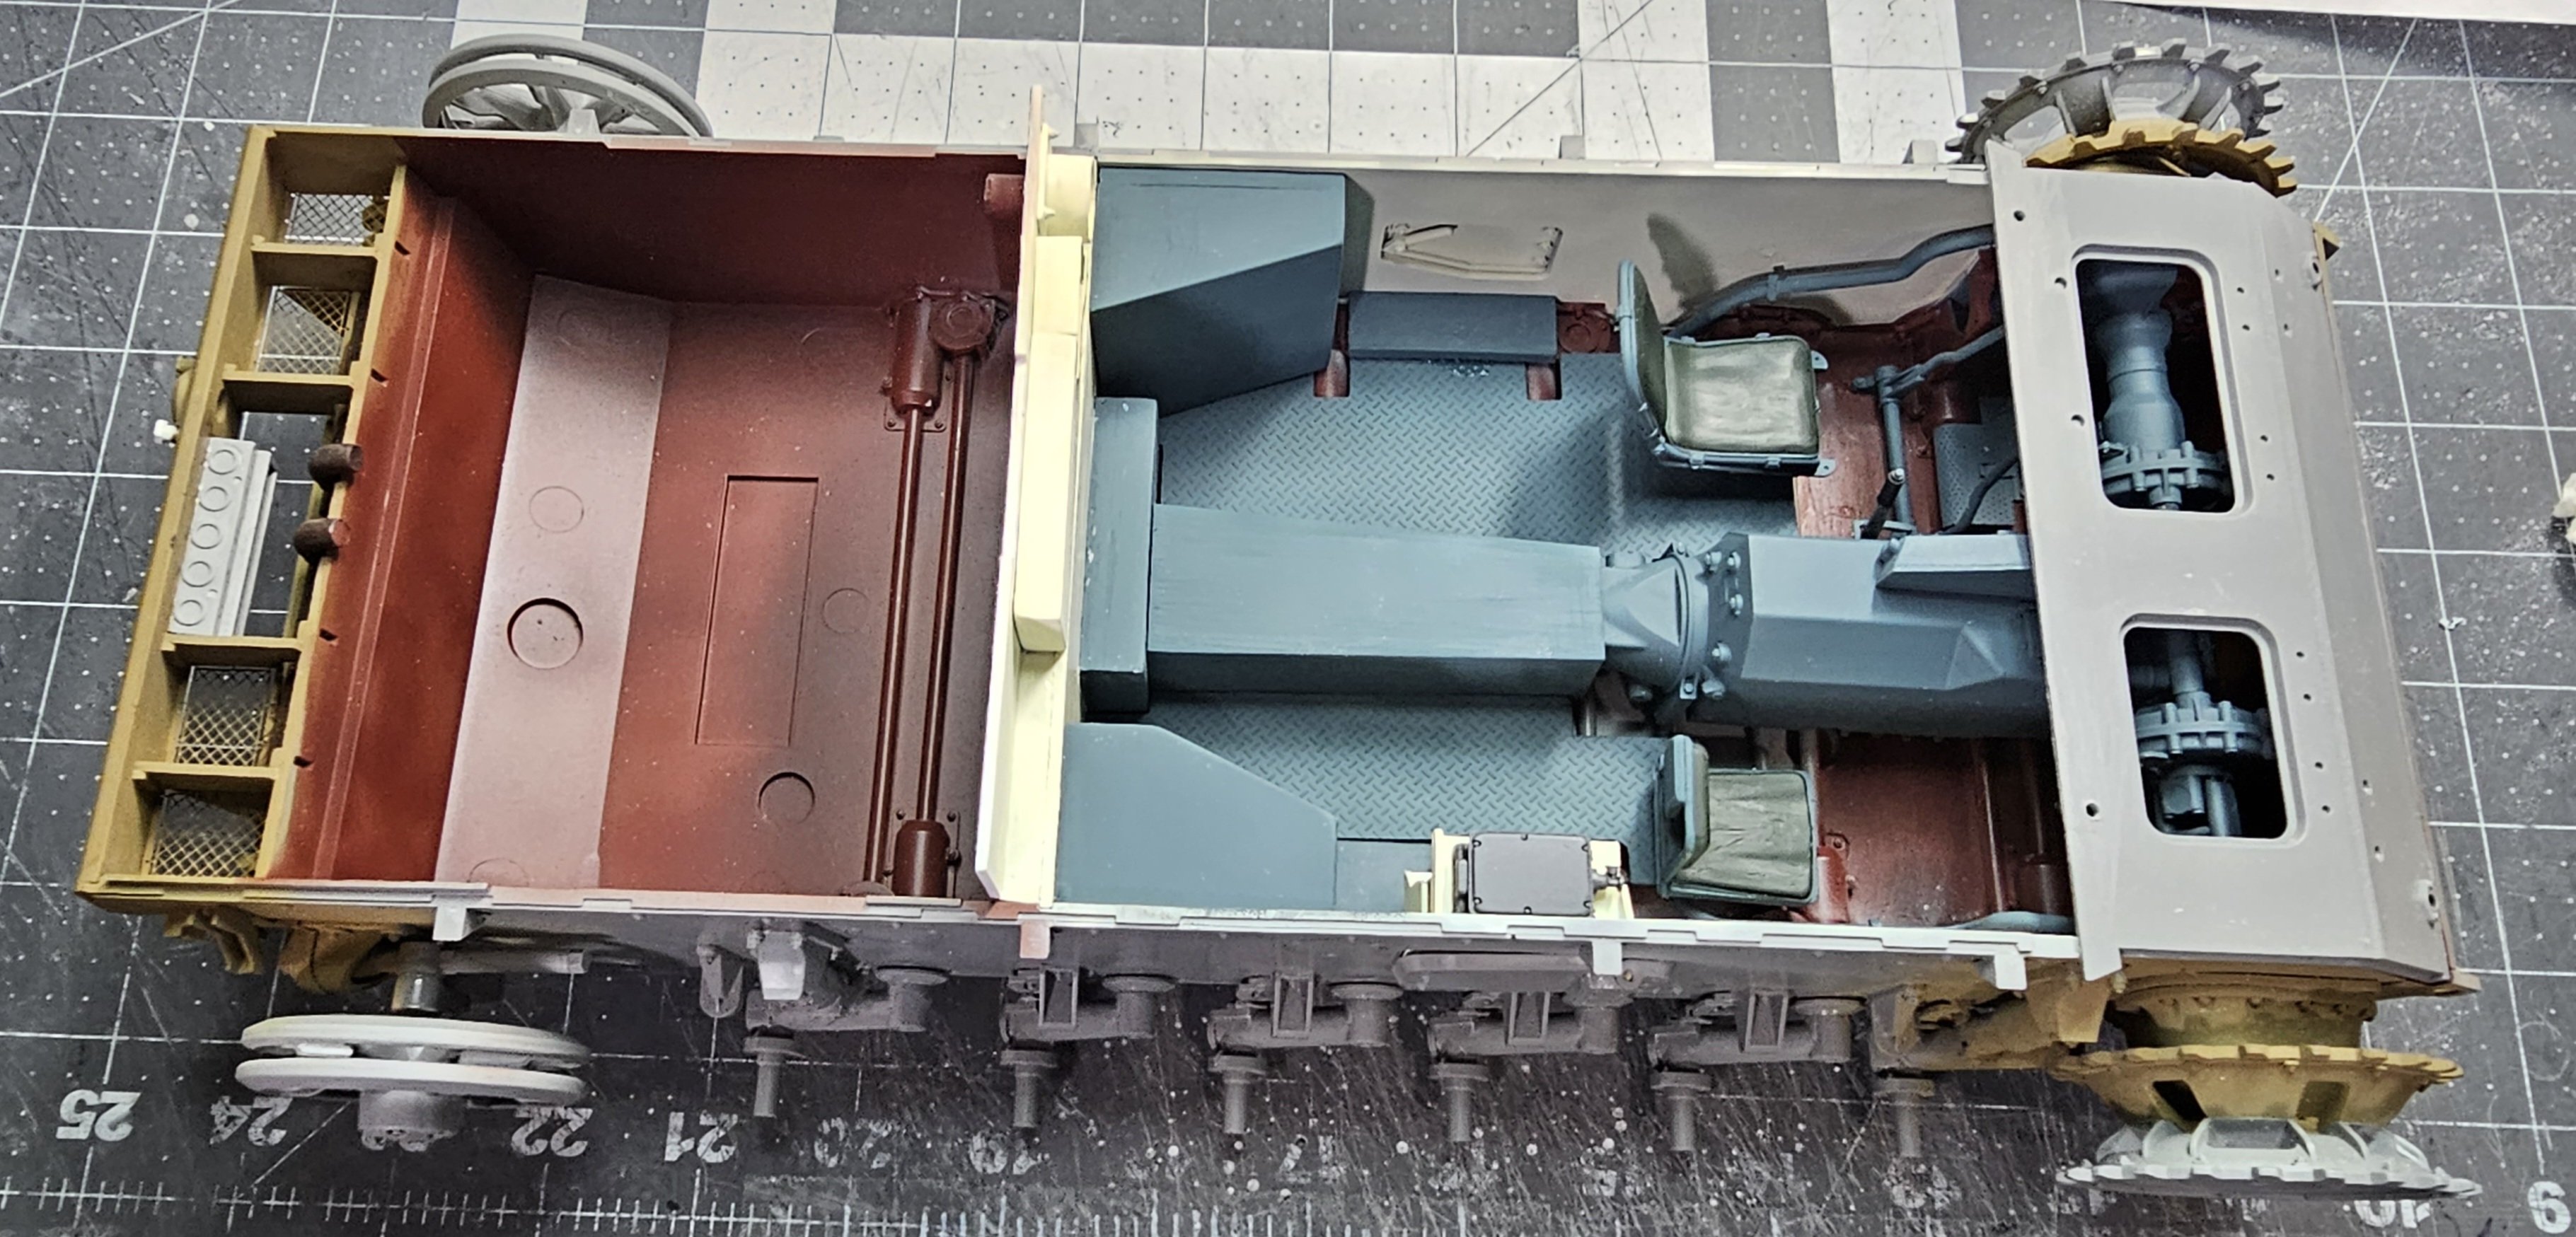
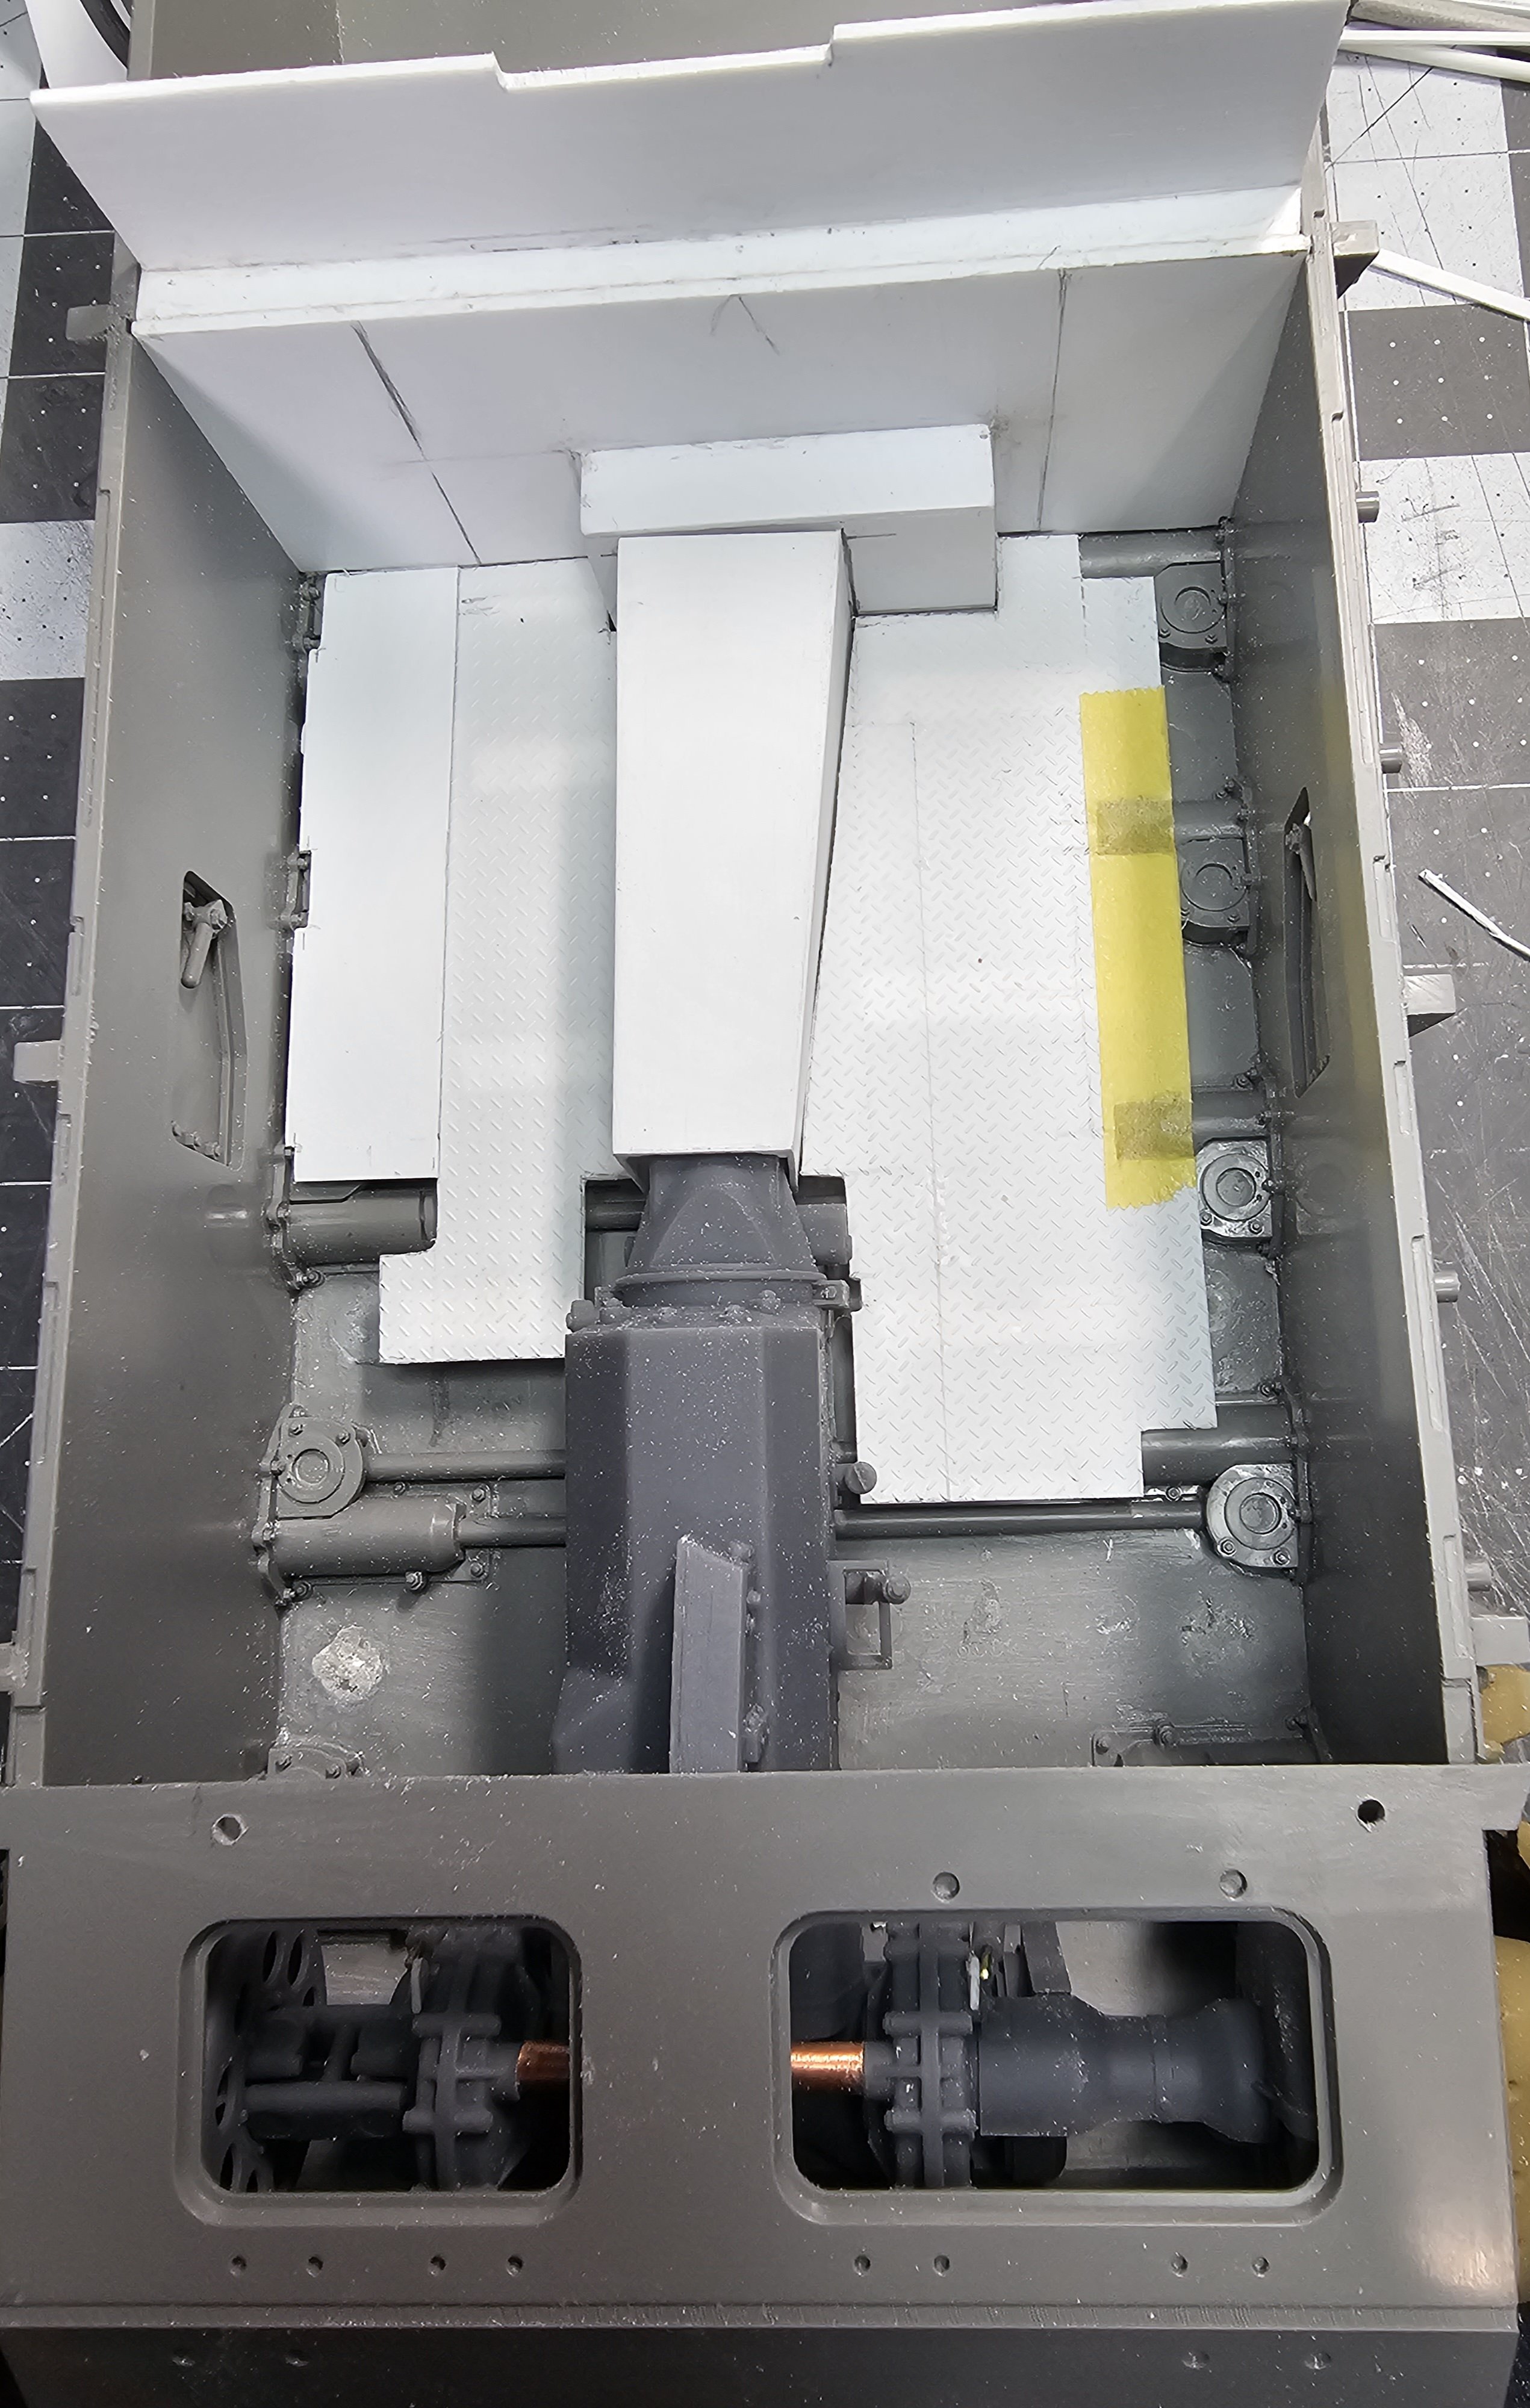
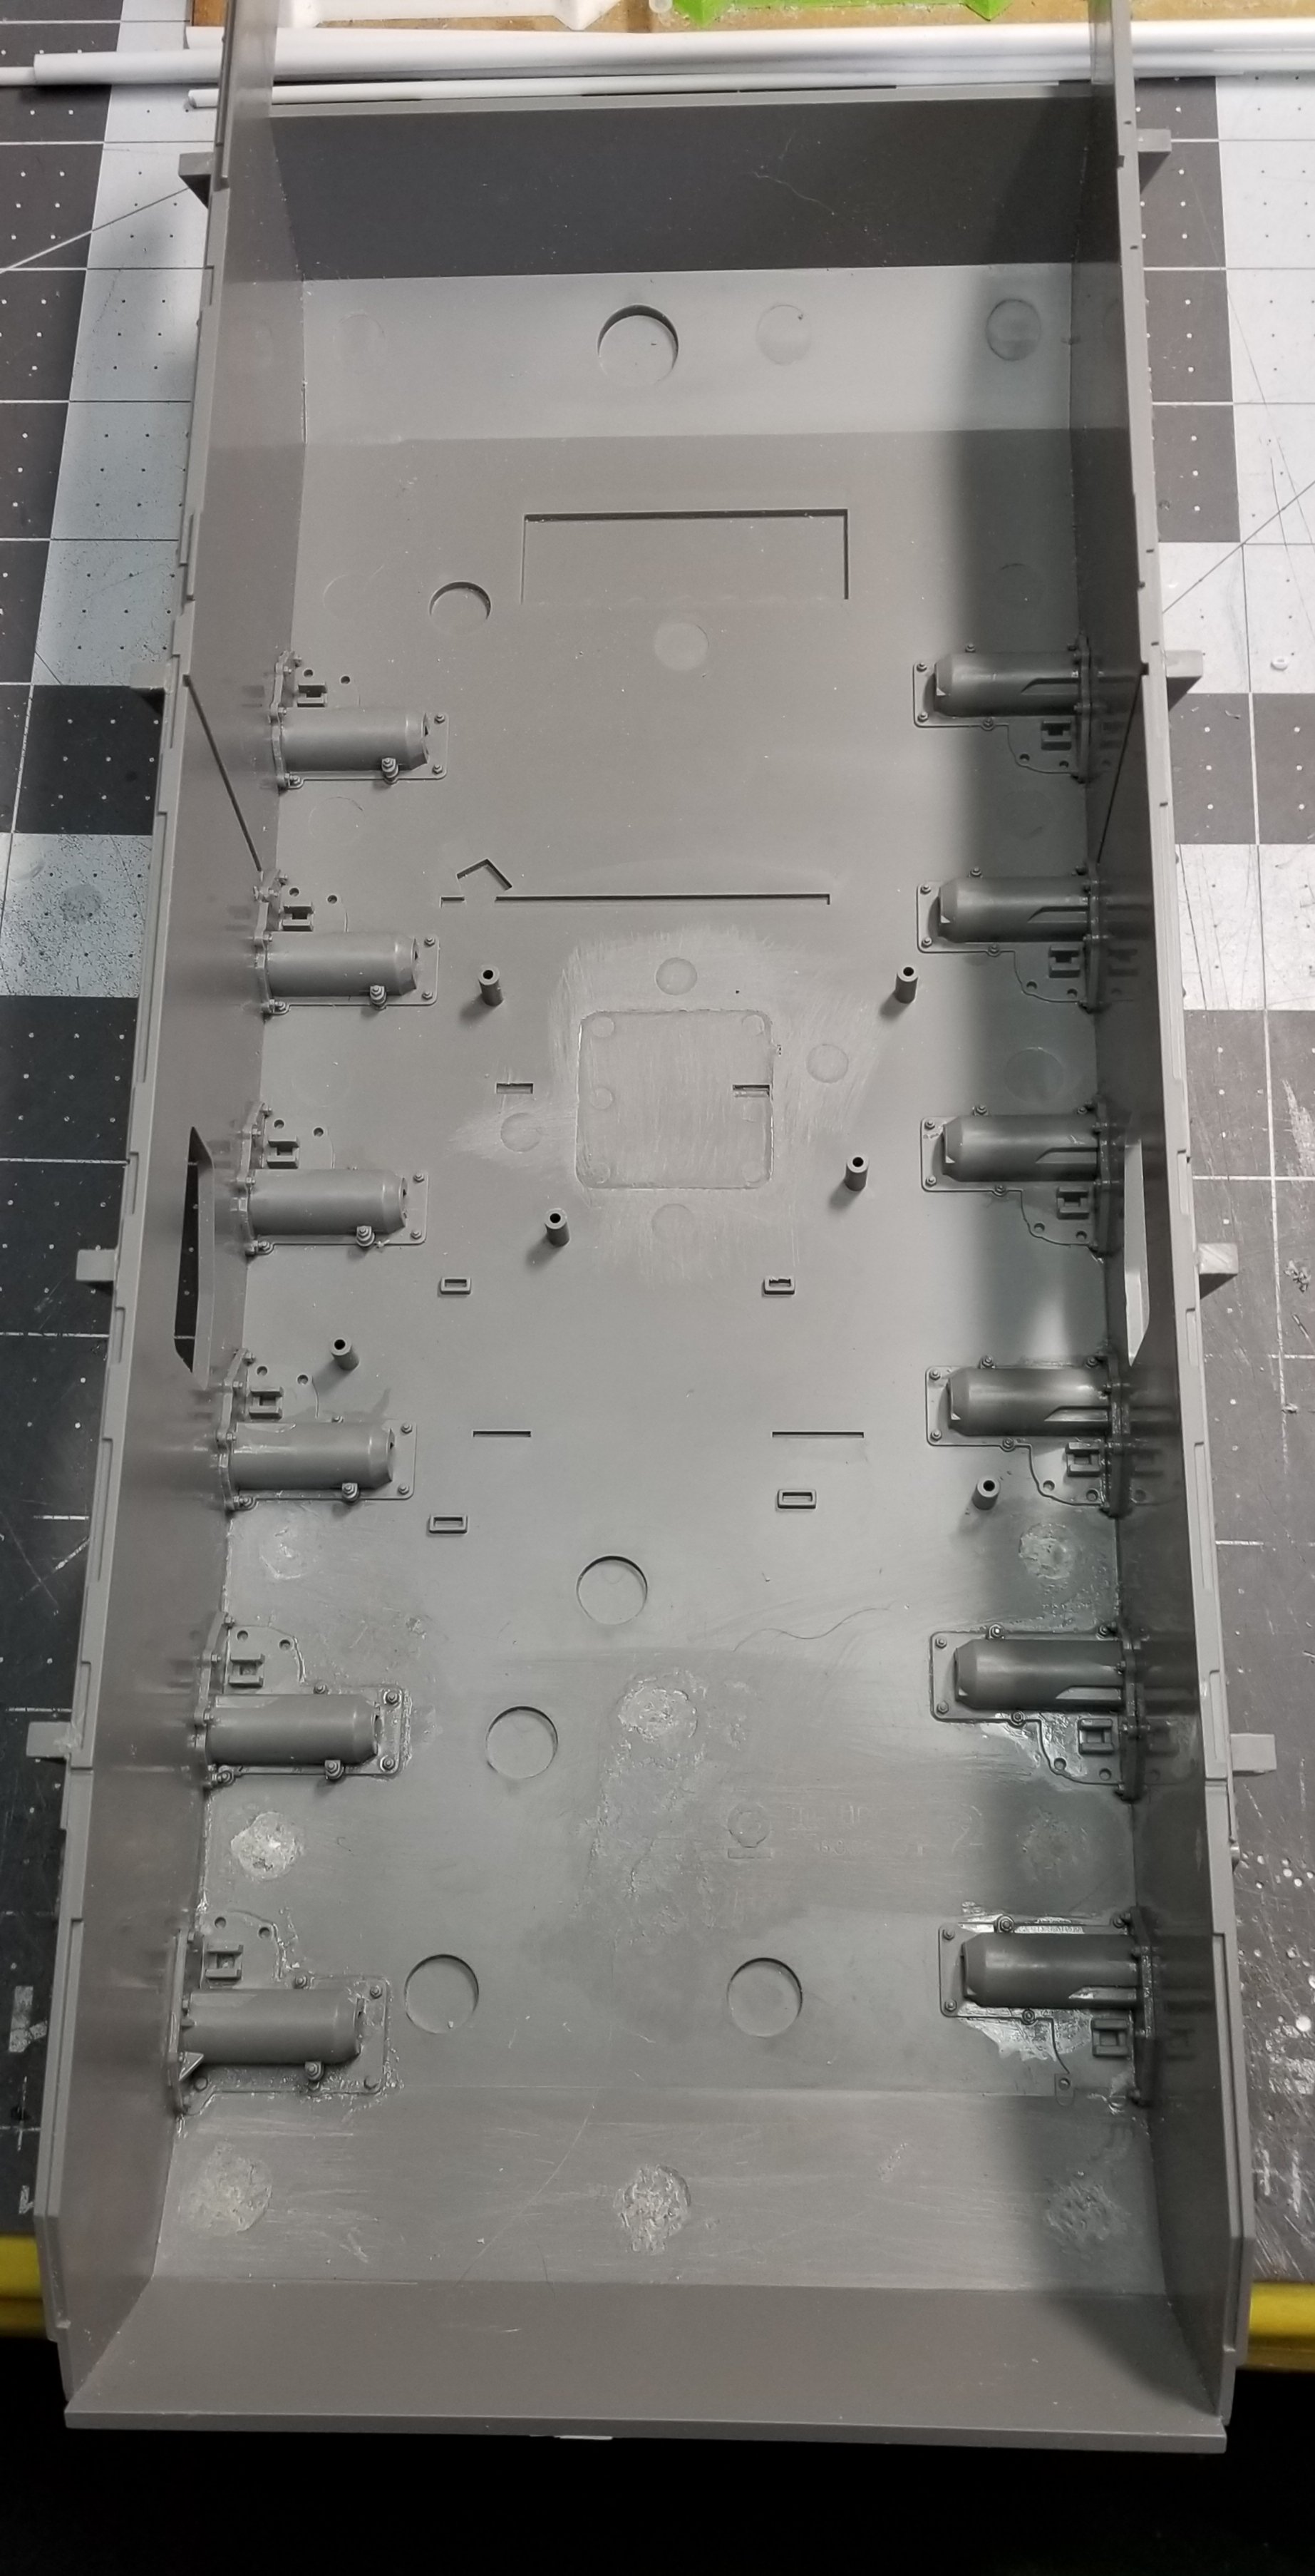
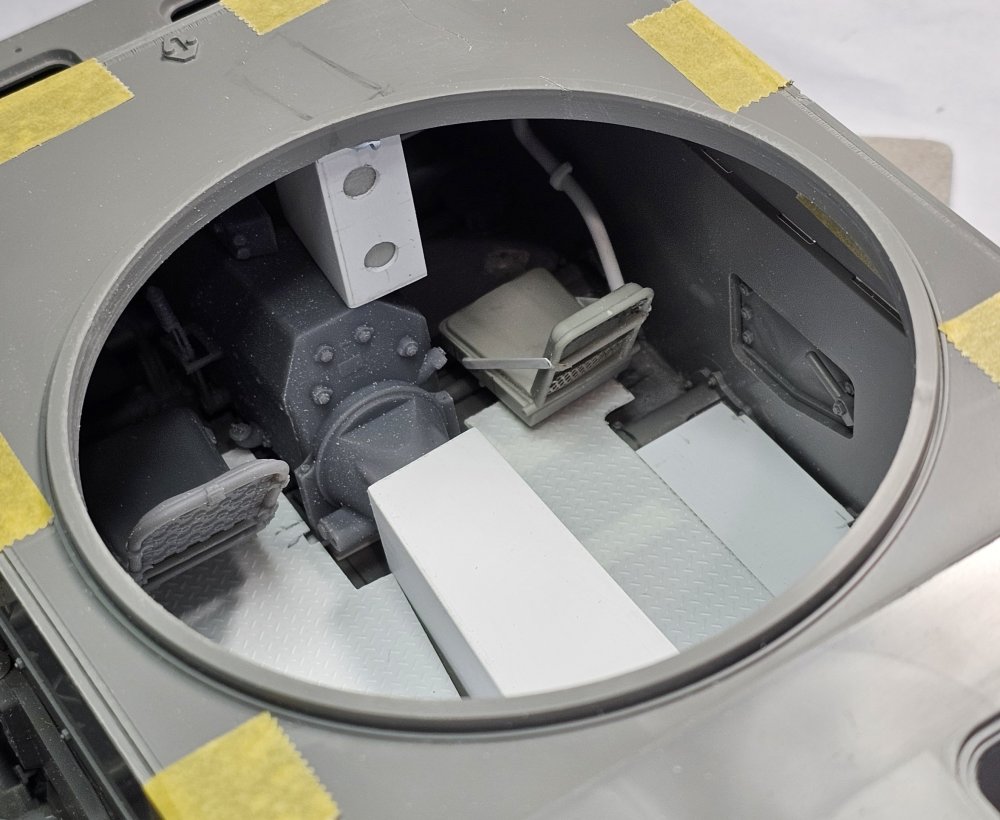
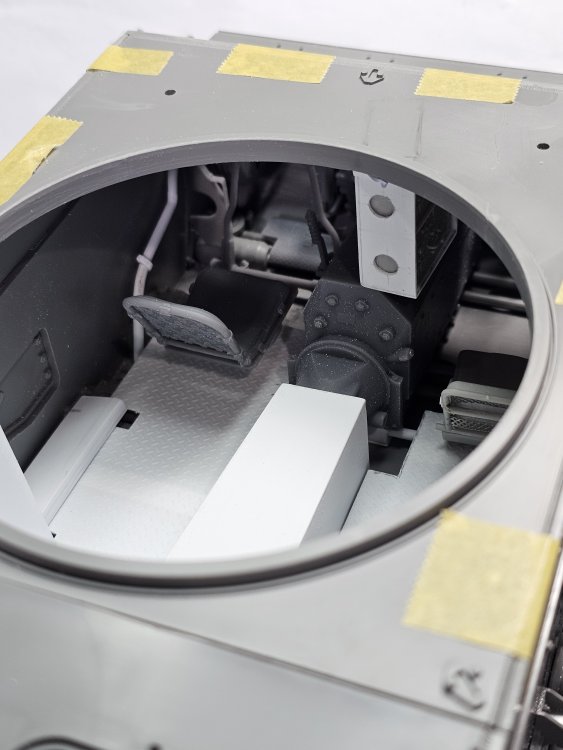
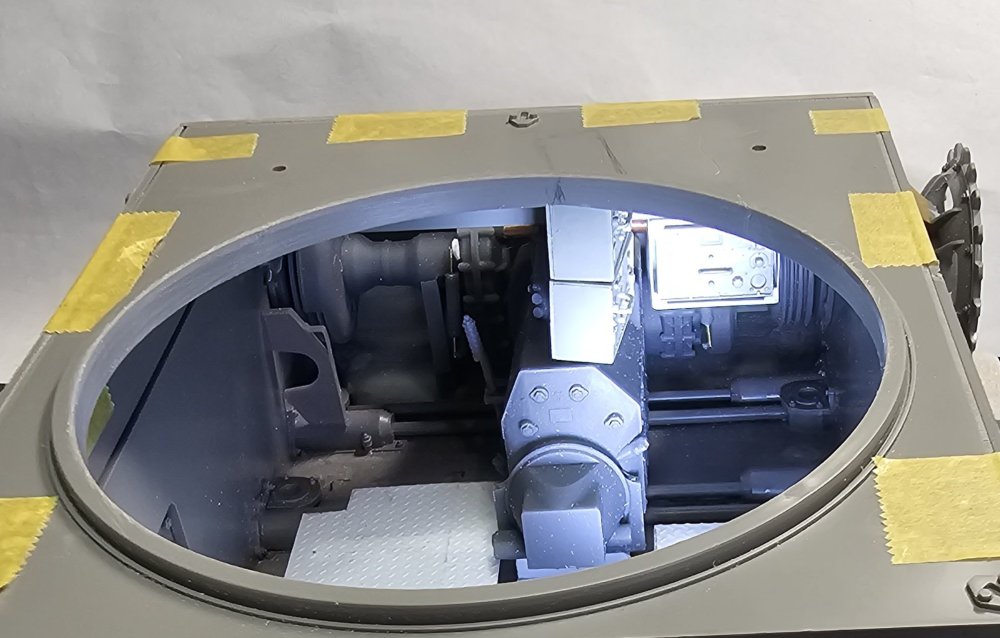
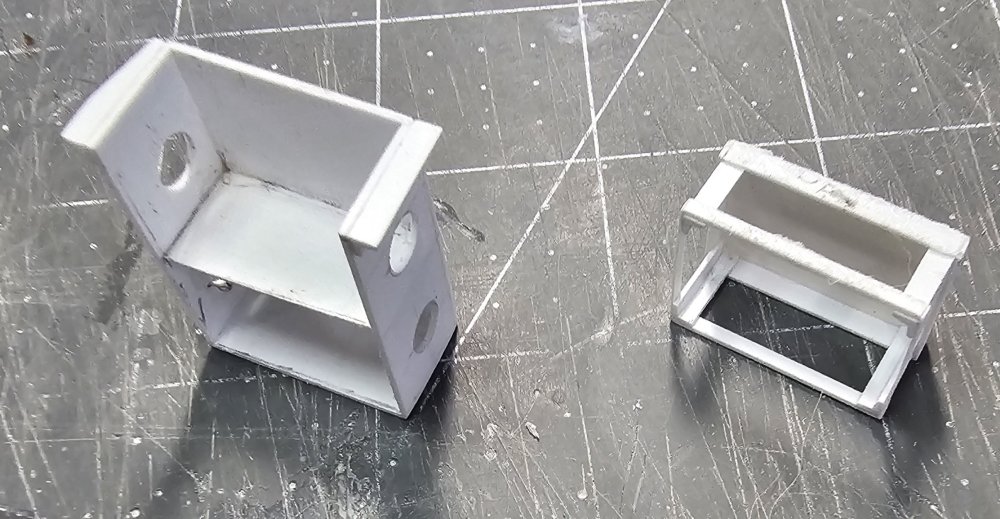
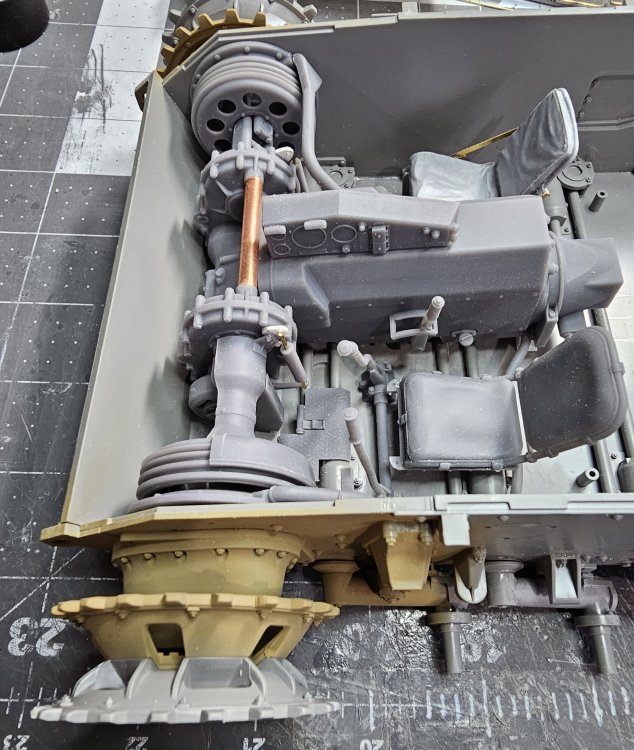
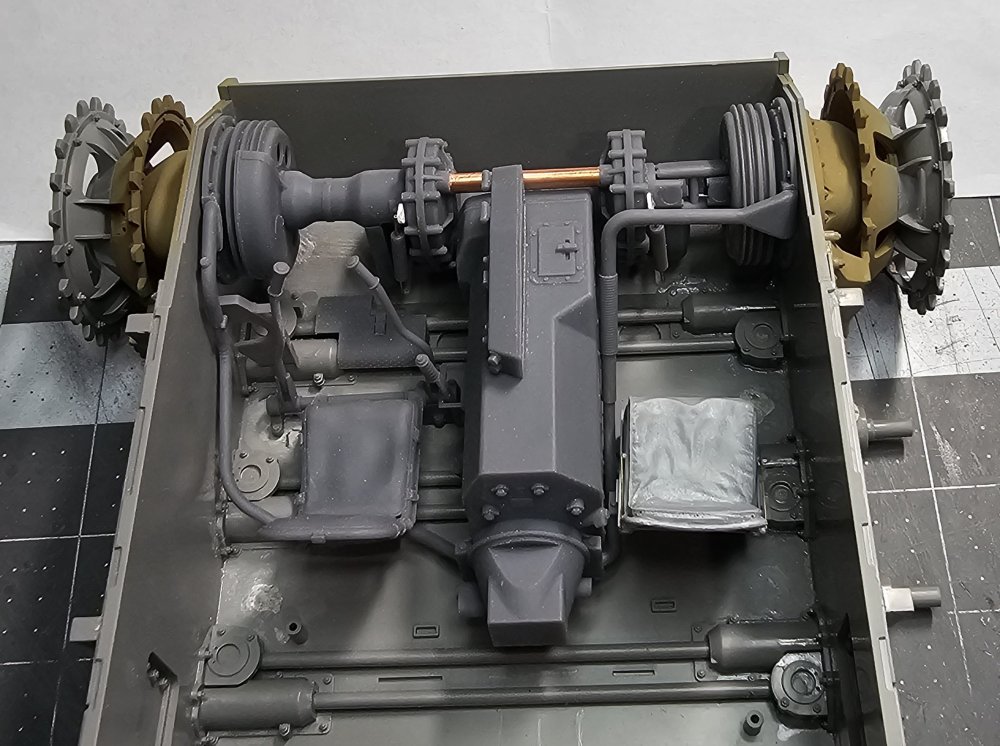
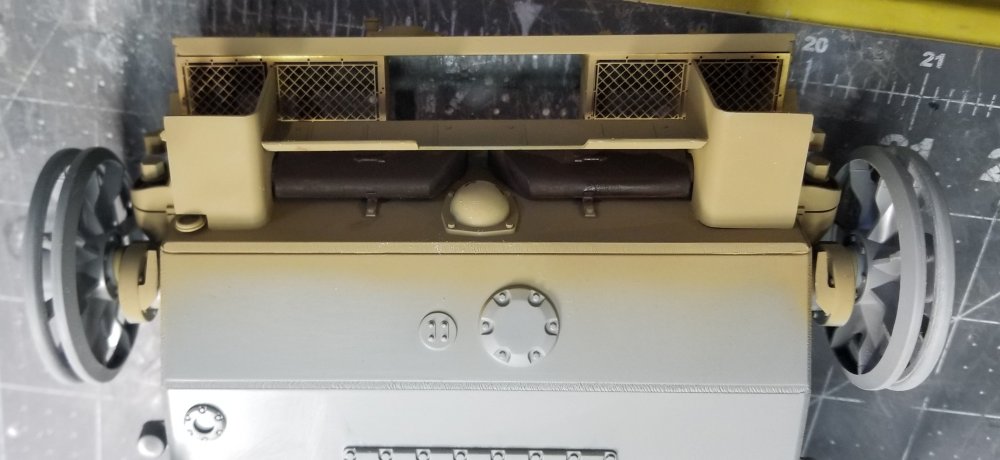
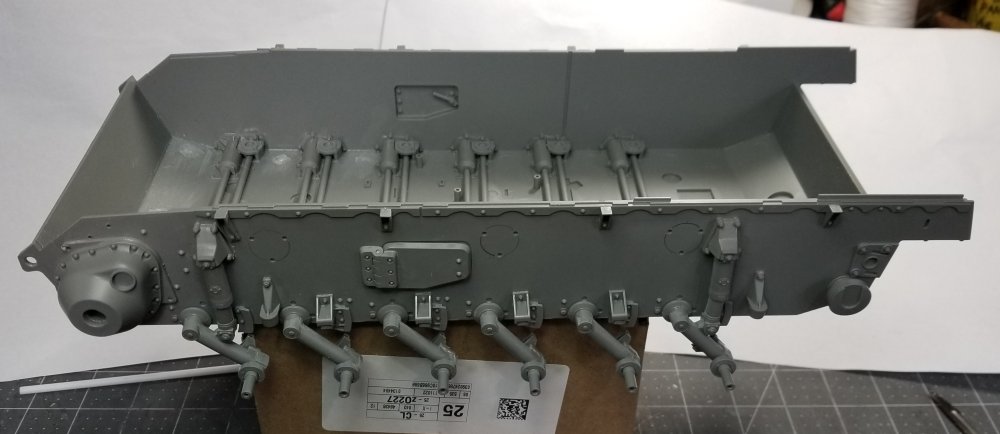
Hey all Got some more work done on the Panzer today. This view shows the radios temporarily installed in the hull. This view shows the radios. I took these from my Panzer IV Ausf H I'll replace them when I get back on building it. This view shows the scratch built radio mounting brackets. Another view of the same thing. This view shows the floor plates and the transmitter radio. This view shows the floor plates and the transmission tunnel and modified firewall. Another view of the interior. Well that's it for now be back soon with more updates. Ron G


-
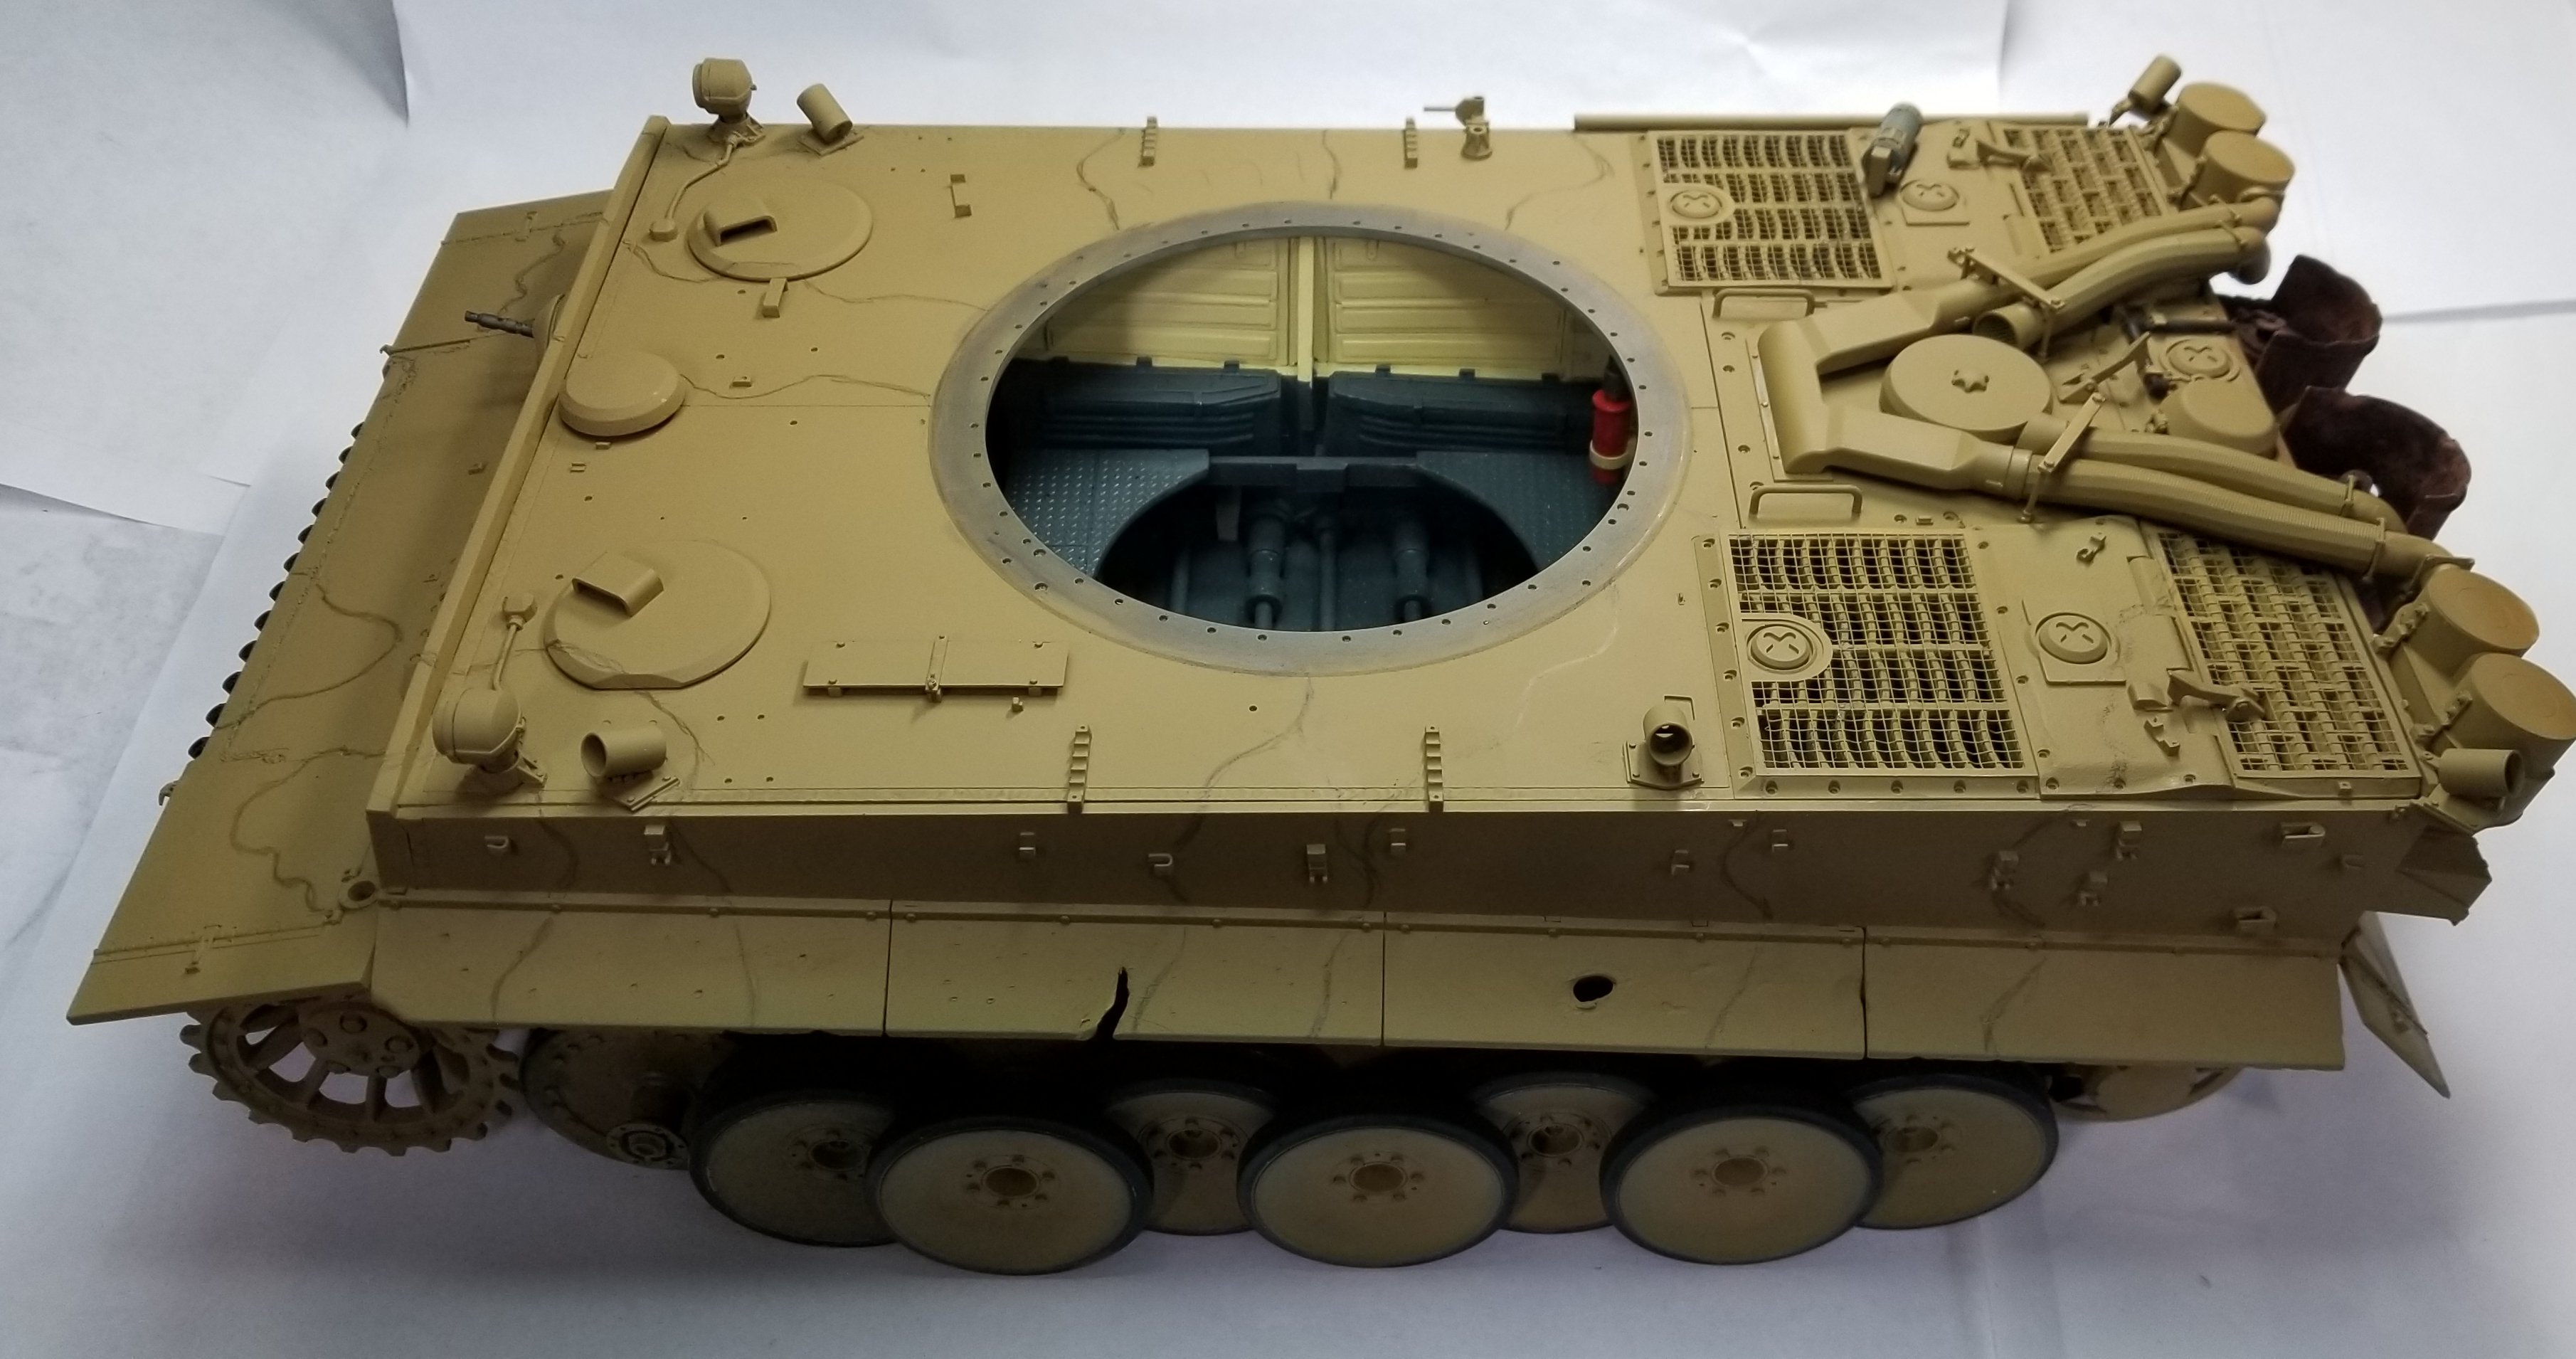
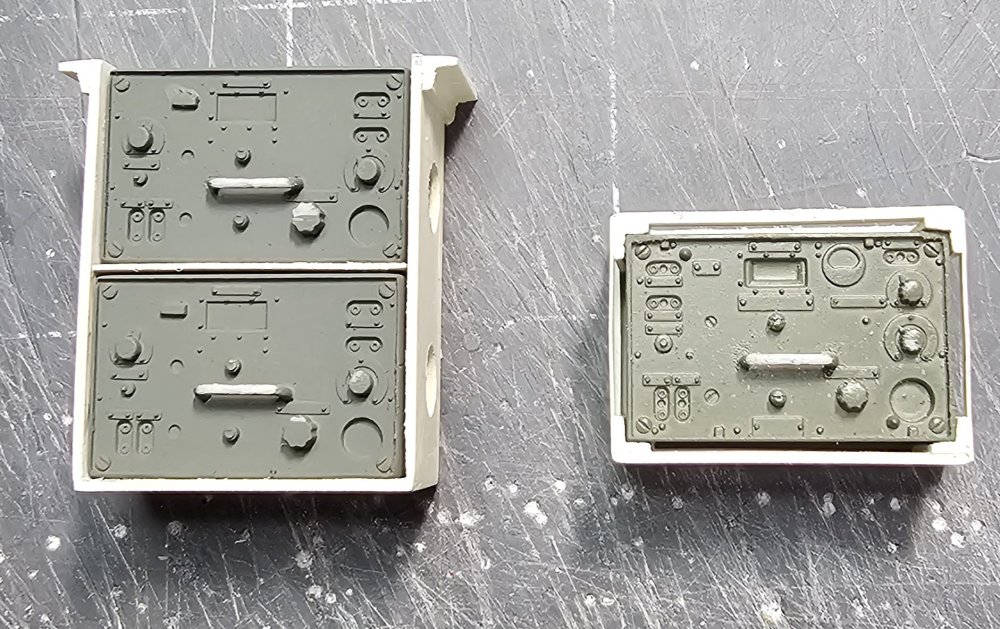
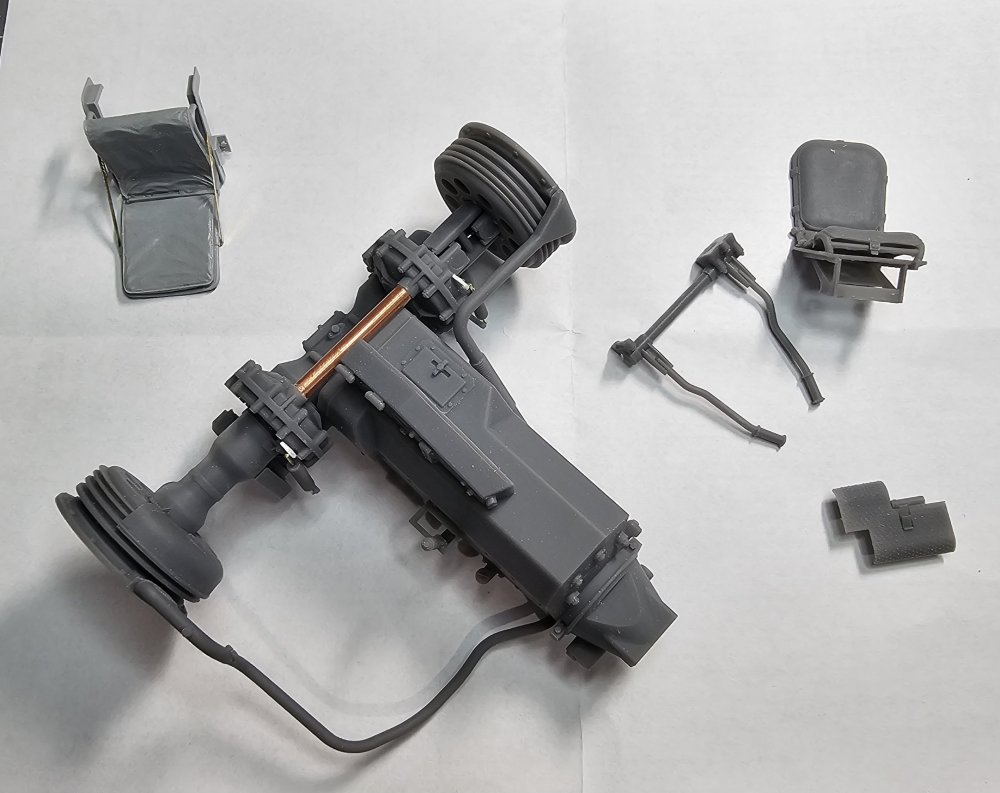
Hey all Well the interior peices from AFV Modeler showed up today. They took alot of clean up but they look really cool. I'm not going as far as I did with the Tiger, just enough so when you open the front hatches there's something there. The seat on the top left is from a Panzer IV and I'm using it for the radio operators seat. This view shows the parts from AFV Modeler. I forgot to take pictures of the individual parts. Soory. This view shows the parts in the hull. I'm going to scratch up a floor and tunnel for the transmission. Same thing from the drivers side. This is a view looking forward from inside the tank. This picture shows the view through the front hatches. Well that's it for now be back soon with more updates. Ron G

-
Hey Paul I know that the tiger suspension arms kept me on pins and needles, l would keep hooking them on everything. So far the Panzer III's not to bad. I think I'm probably going to be gluing them in place, they sit way to low, same as the Tiger.🤬 Ron G
-
How much did they have to stretch that cupola so you could fit Gary?...lol🤣😁 just kidding I'm bigger than you. Ron G
-
Thanks guys
-
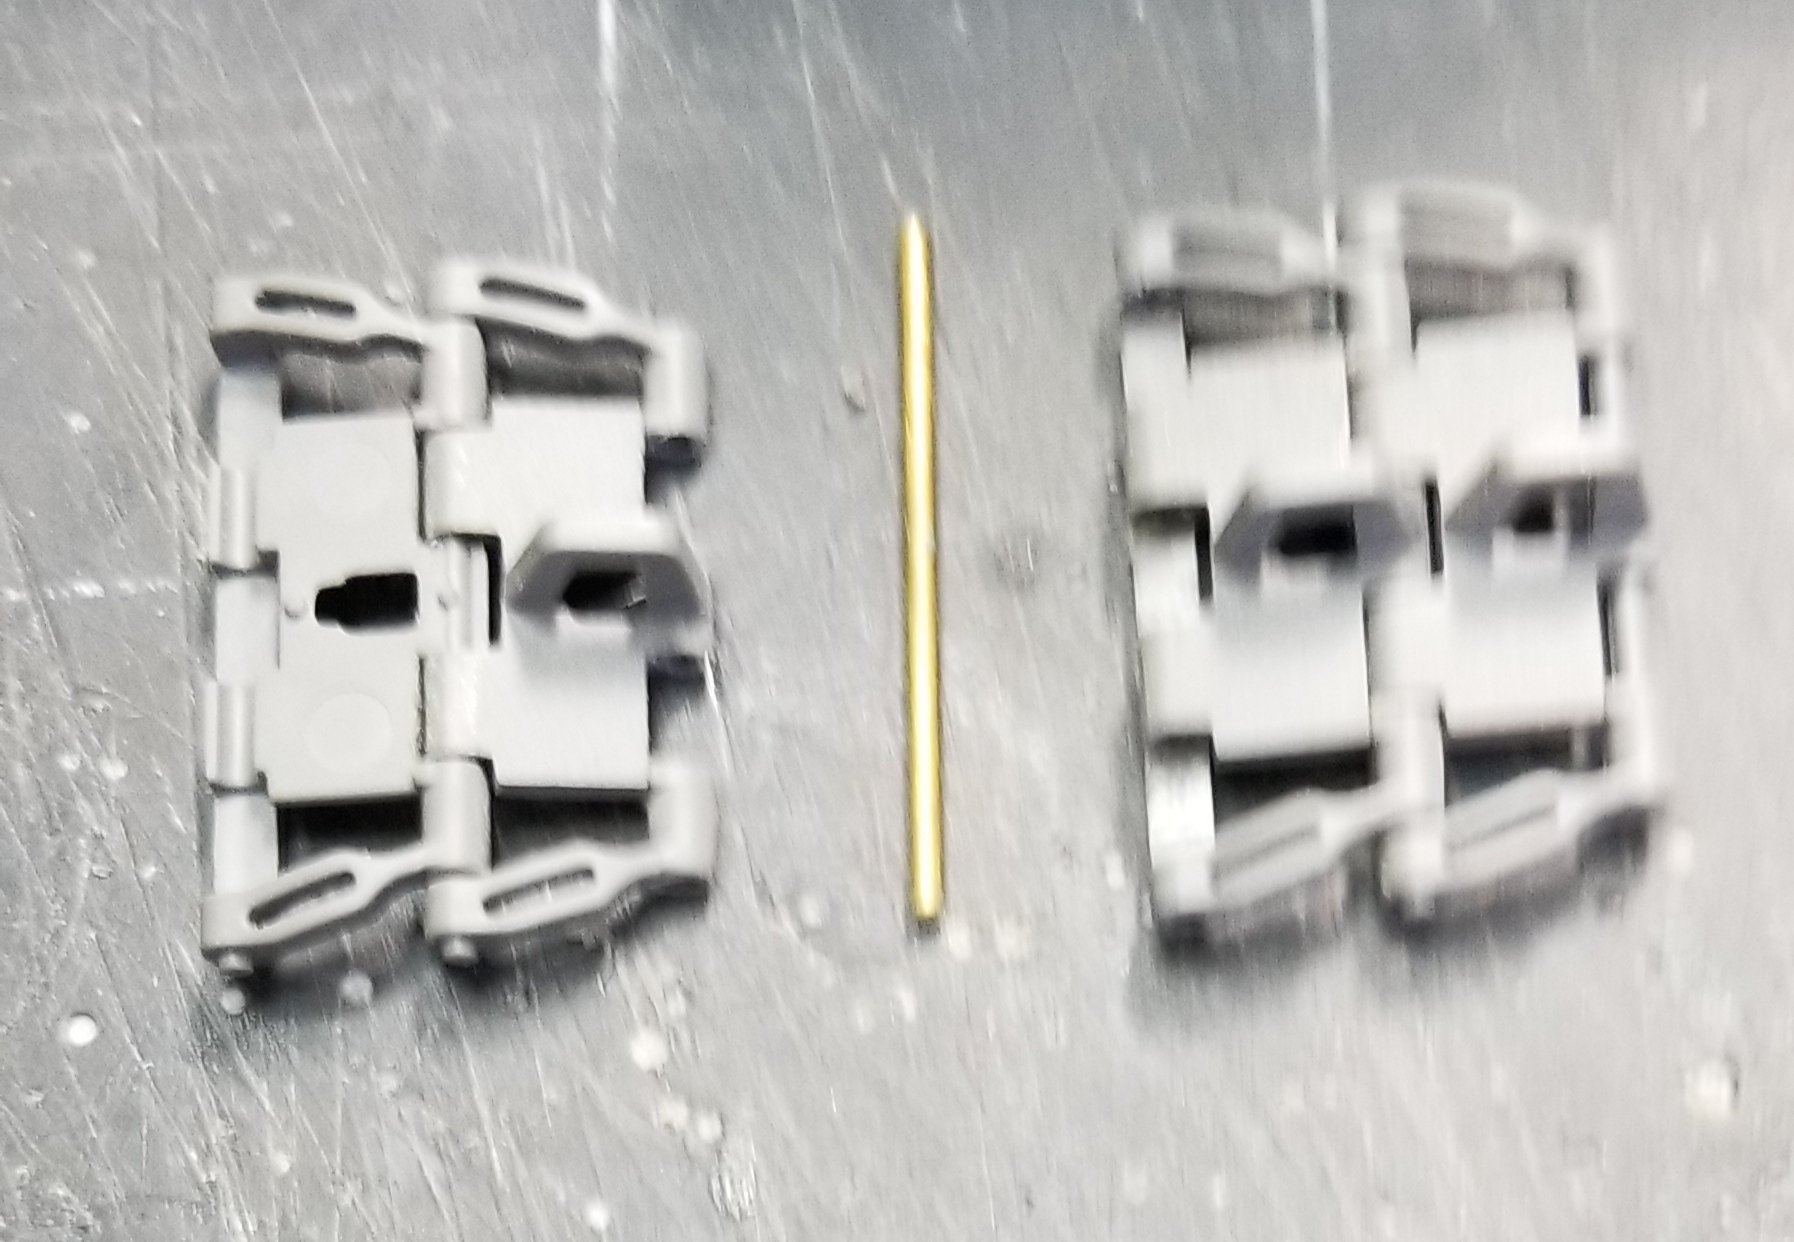
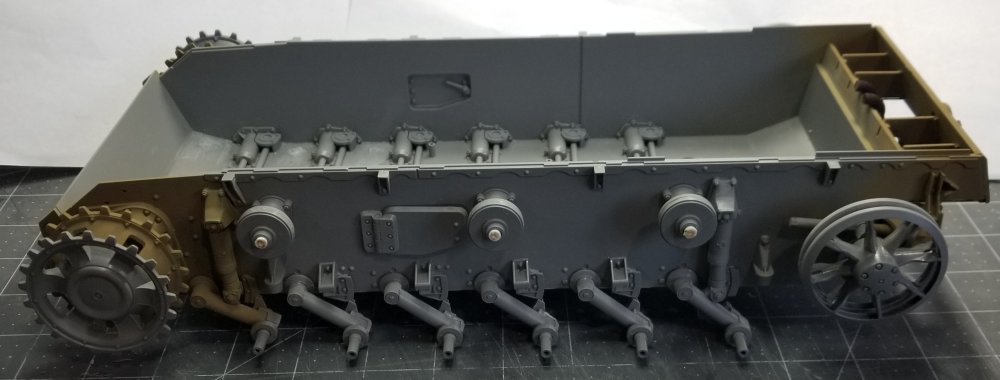
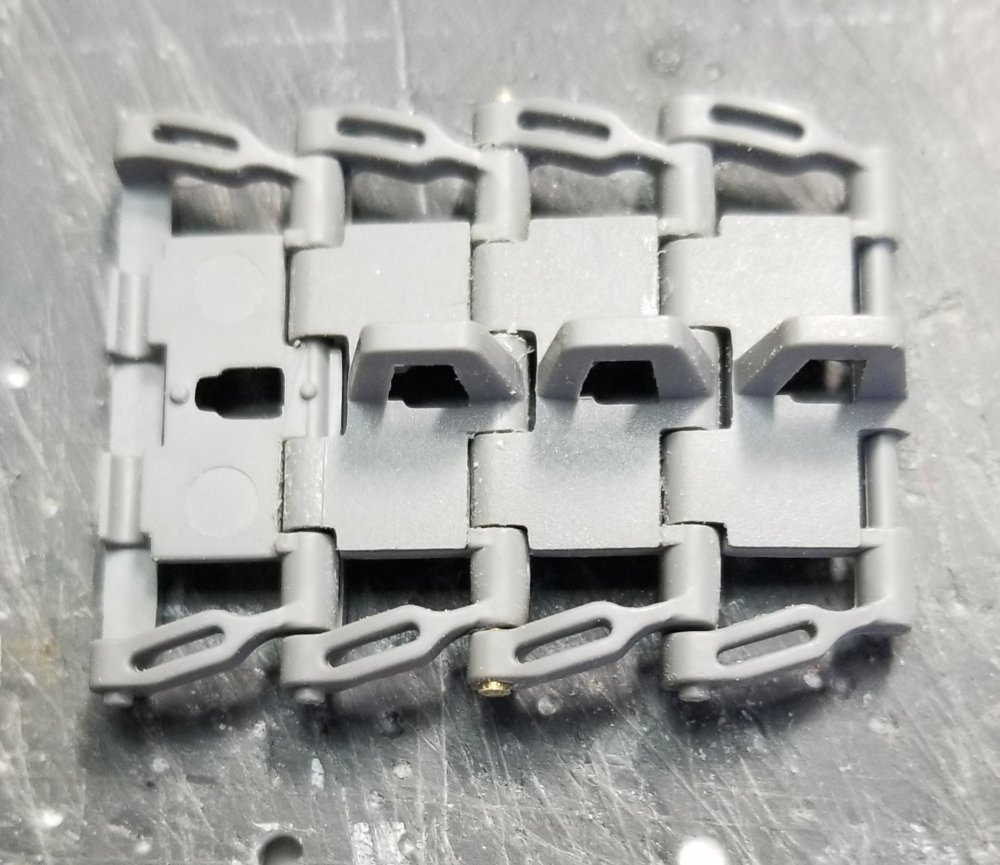
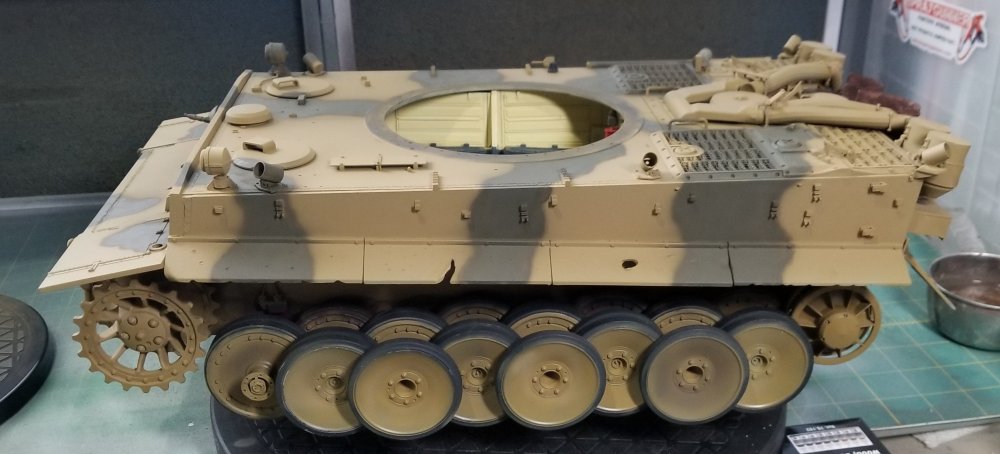
Hey all Got some more work done on the Panzer III. I now have the sprockets and idler wheels installed, I temporarily attached the return rollers for this picture. This view shows some preliminary painting done to facilitate assembly. Same thing from the bottom. This view shows a section of the track assembled. Because I modified them with a pin. I can attach the rest of the tracks to either side and the pin will allow for disassembly. This view shows the modifications I did. I drilled out two links so that I could but in a brass pin, this will allow me to attach & remove the tracks once I have them painted & weathered. Well that's it for now be back soon. Ron G

-
Thanks guys
-
My bad, should read closer Ron G
-
Hey Paul It's a nice kit, I have it in my stash. There are alot of tiny parts on it so take your time Takoms Panzer III's tracks don't have pins. There are two pieces to each link, by assembling them you trap one to the other therefore making them workable, kinda neat idea, WAY better than the tracks in AHHQ's Tiger kit by Takom. Ron G
-
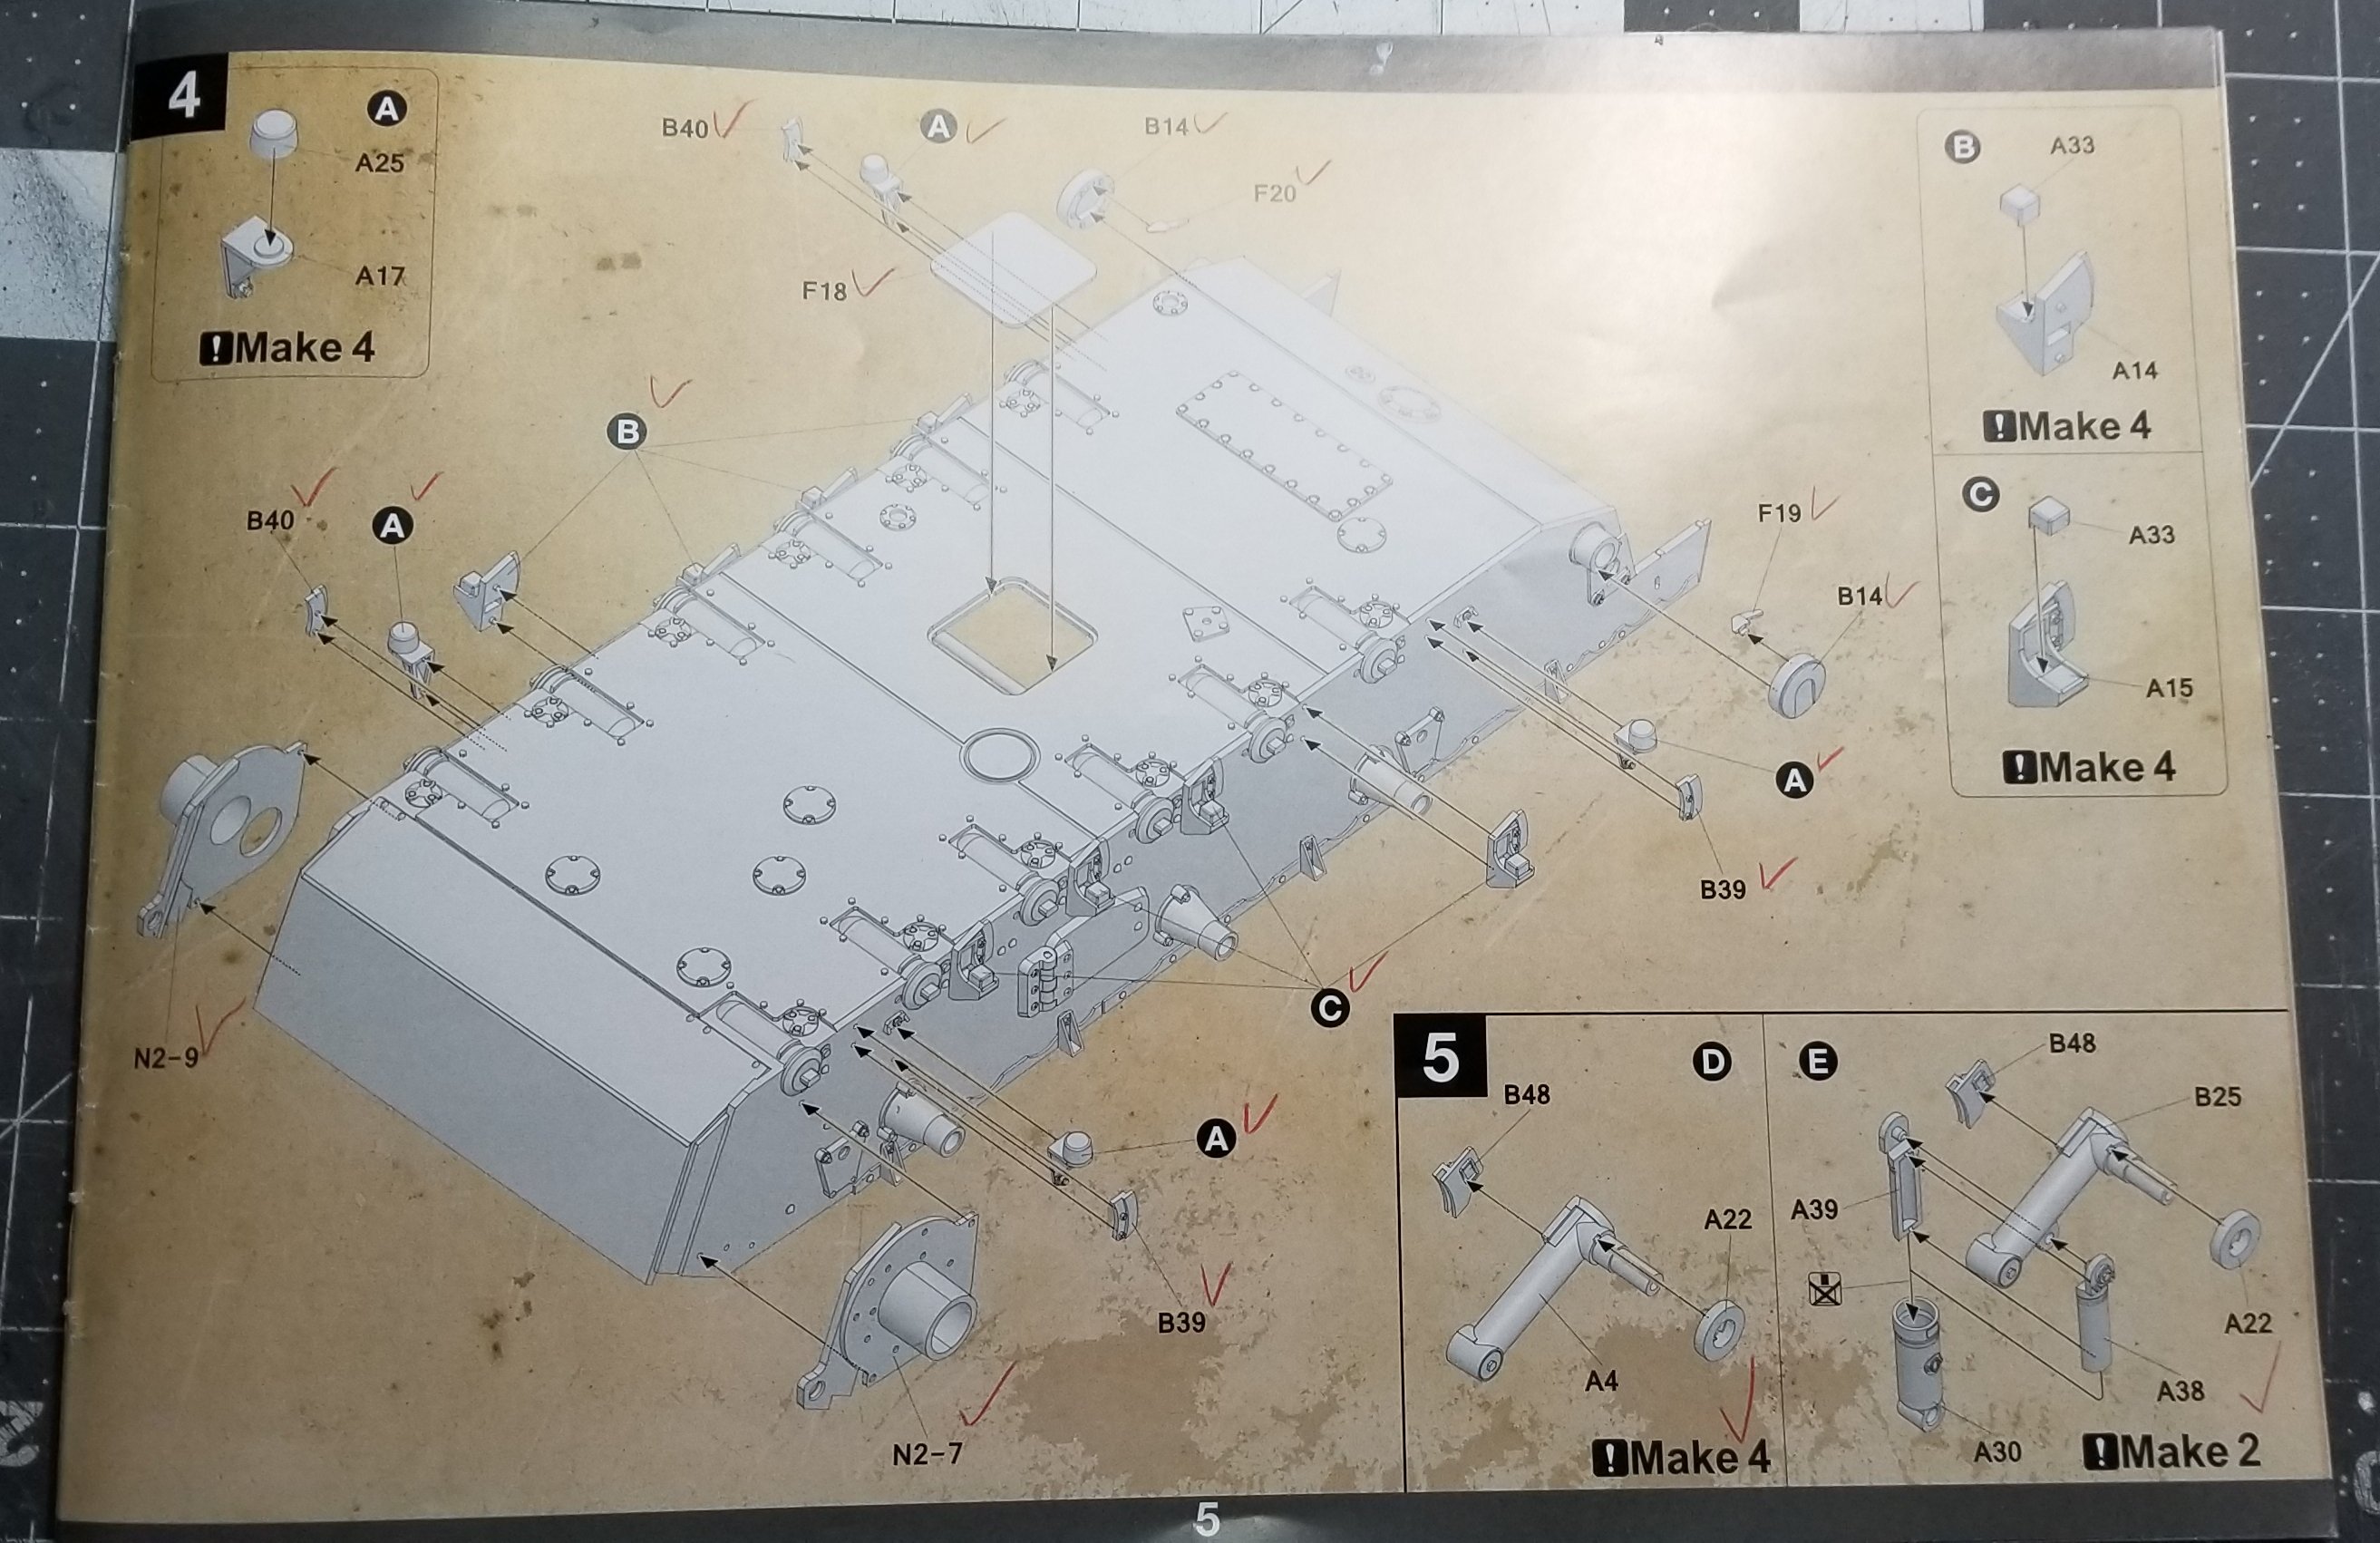
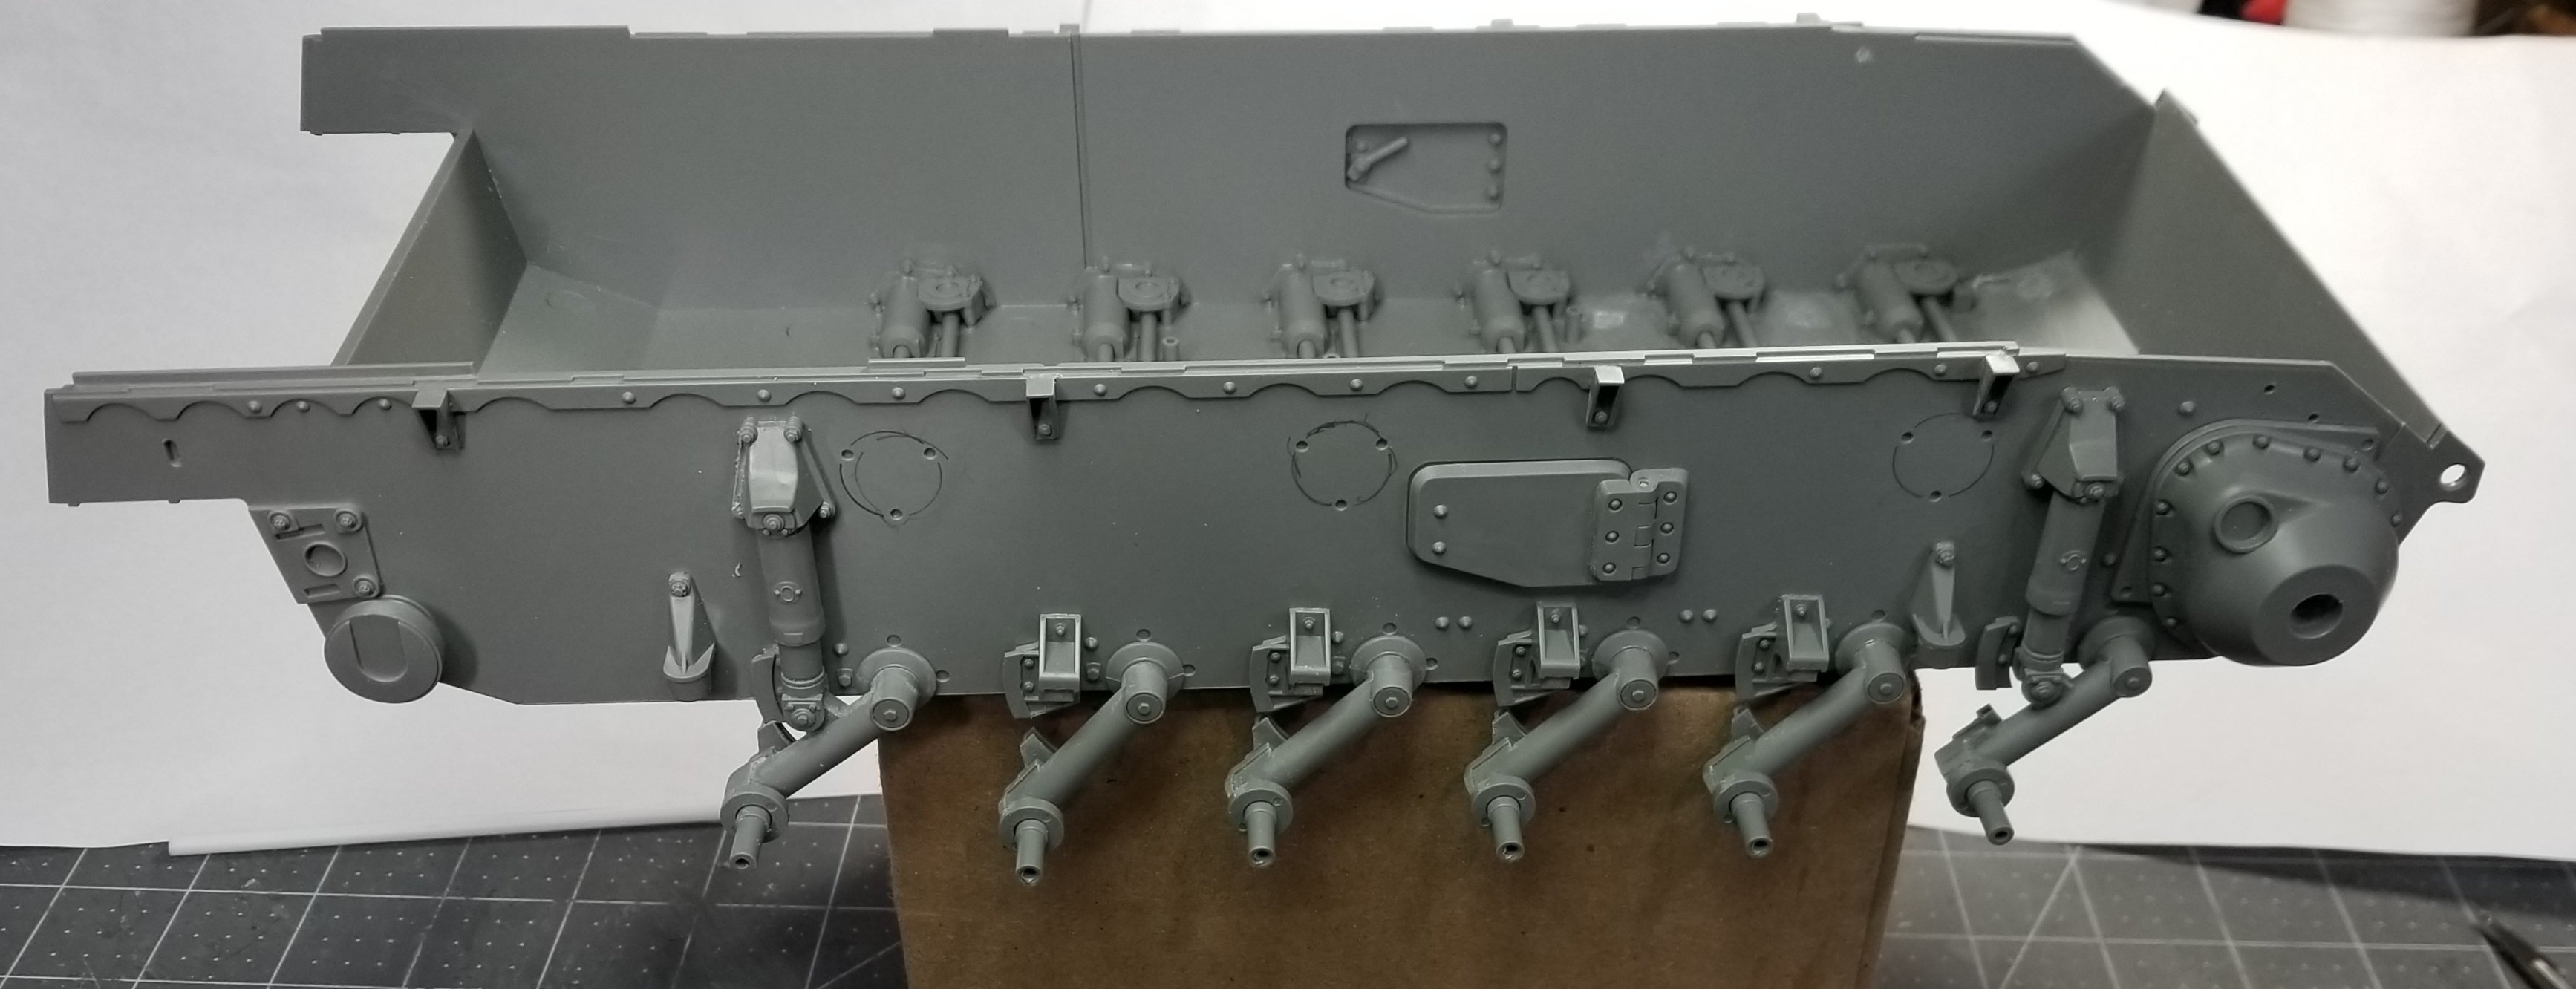
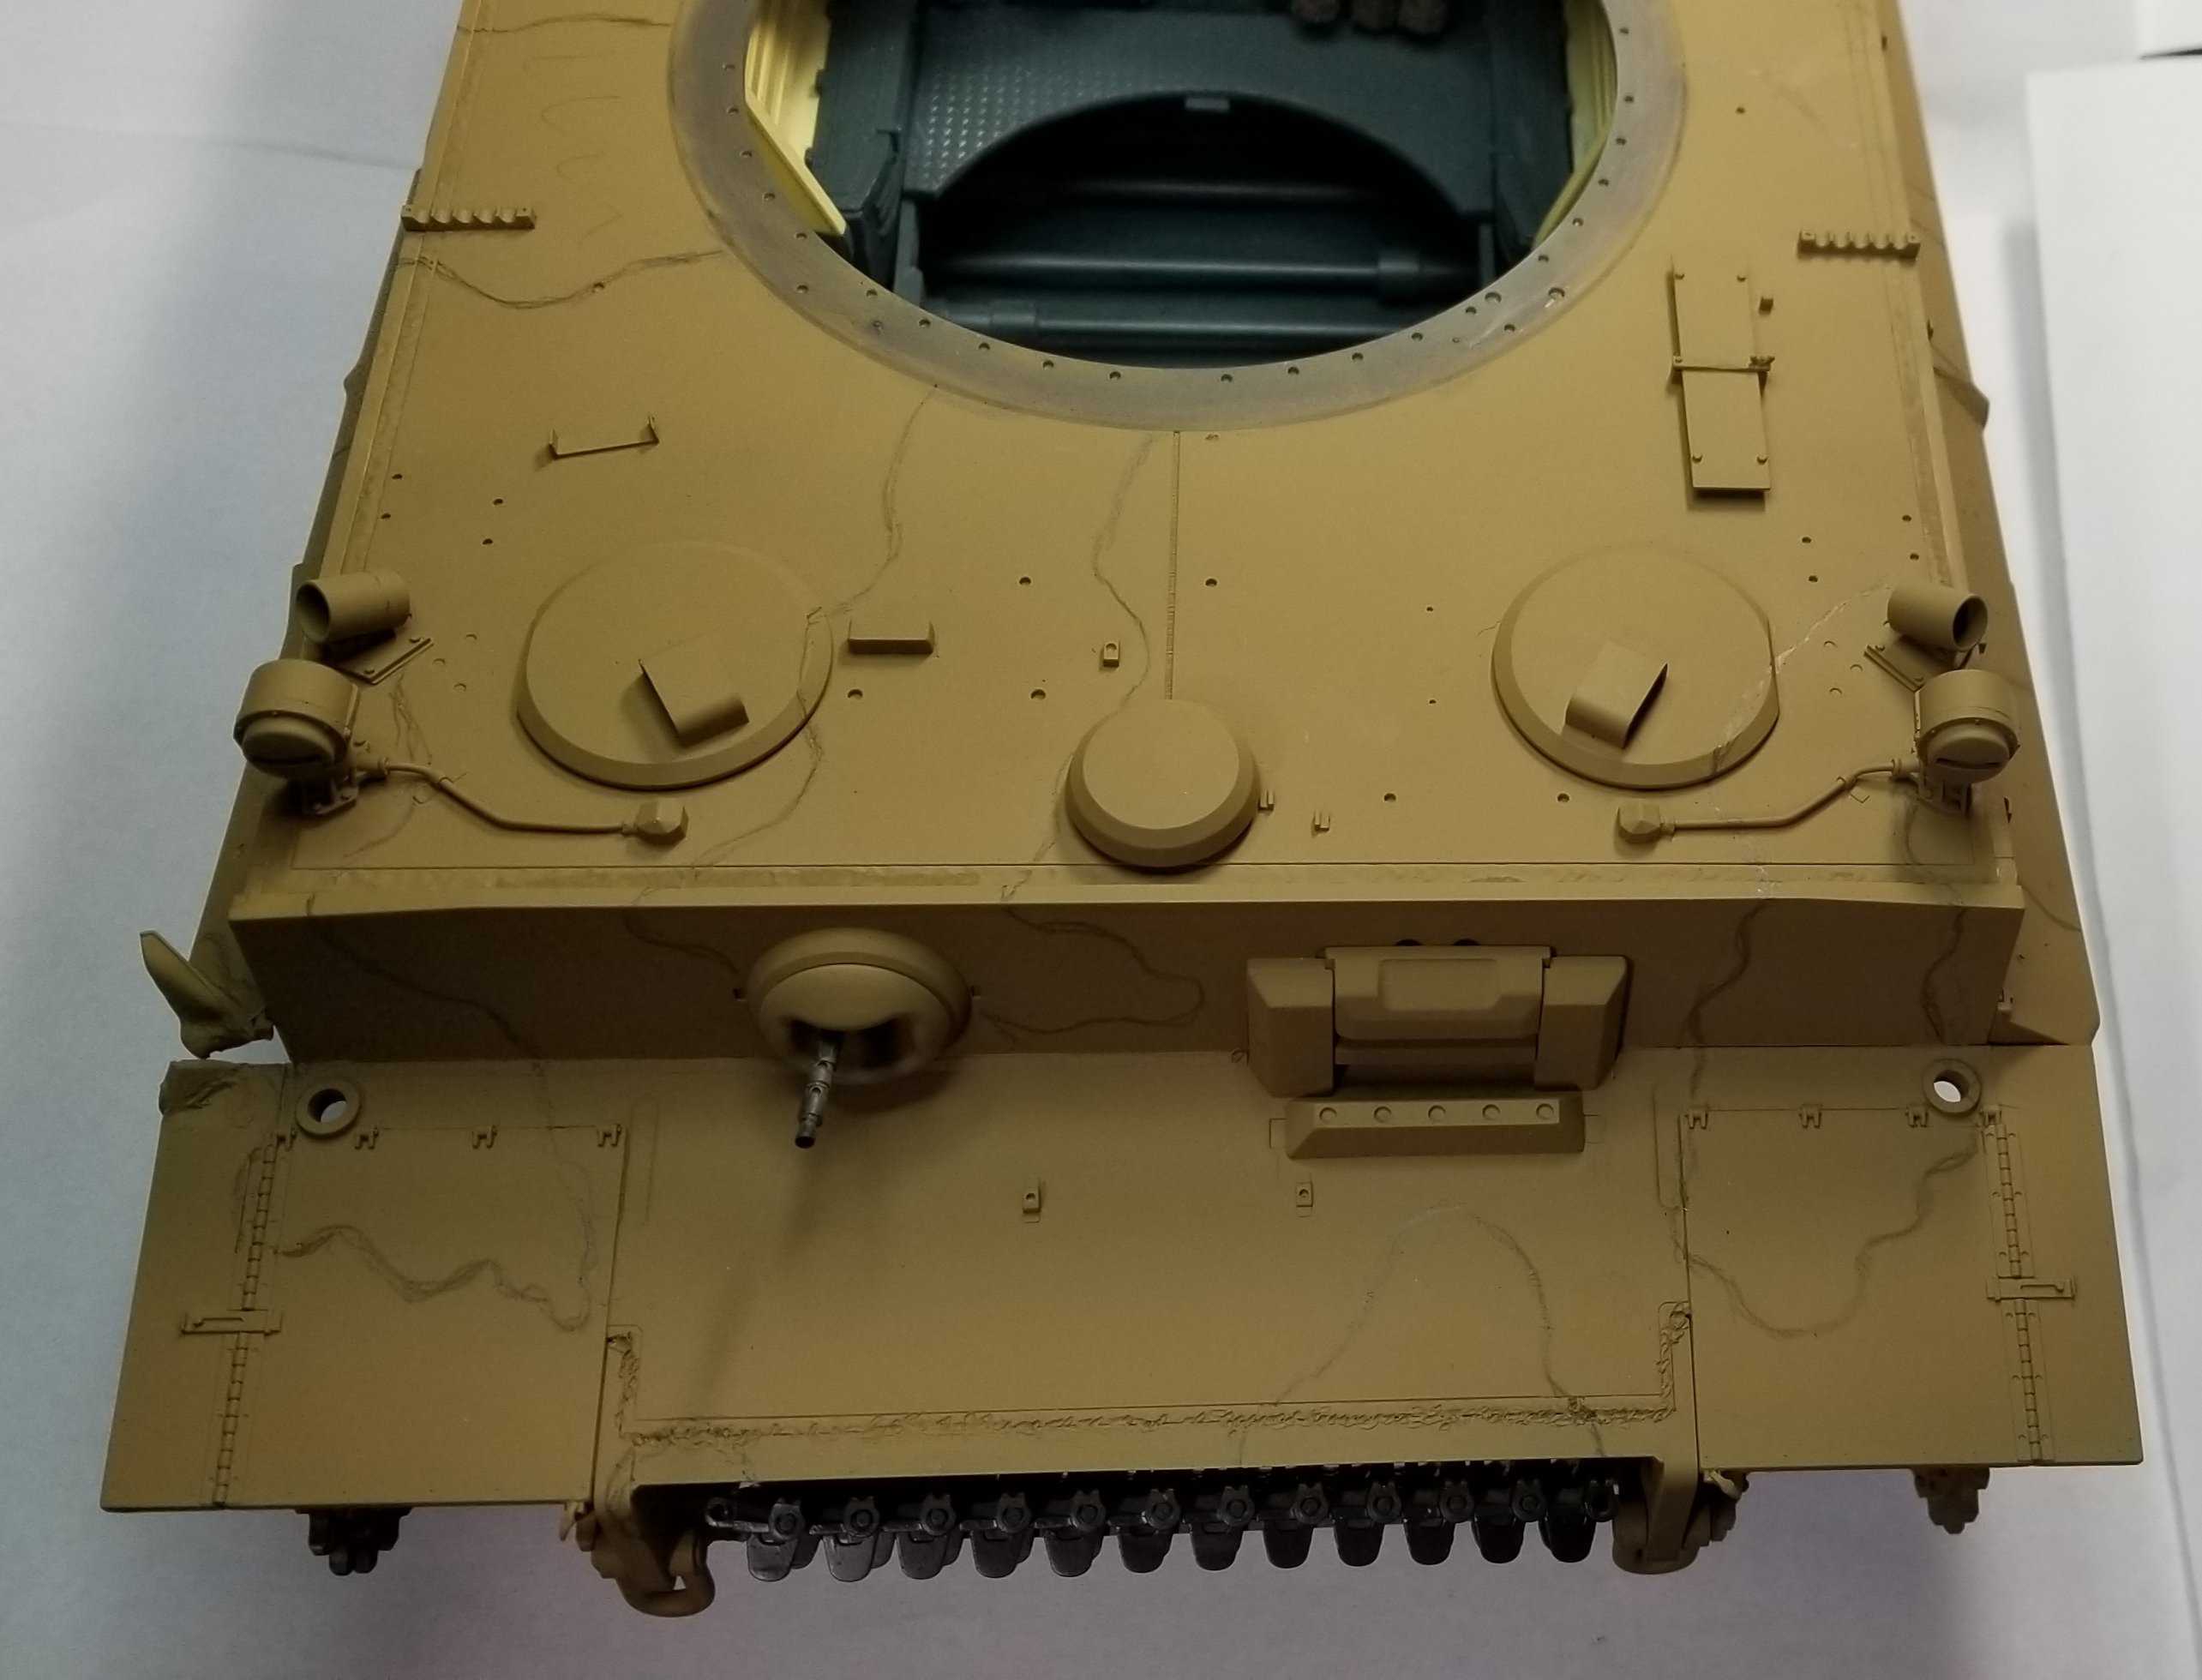
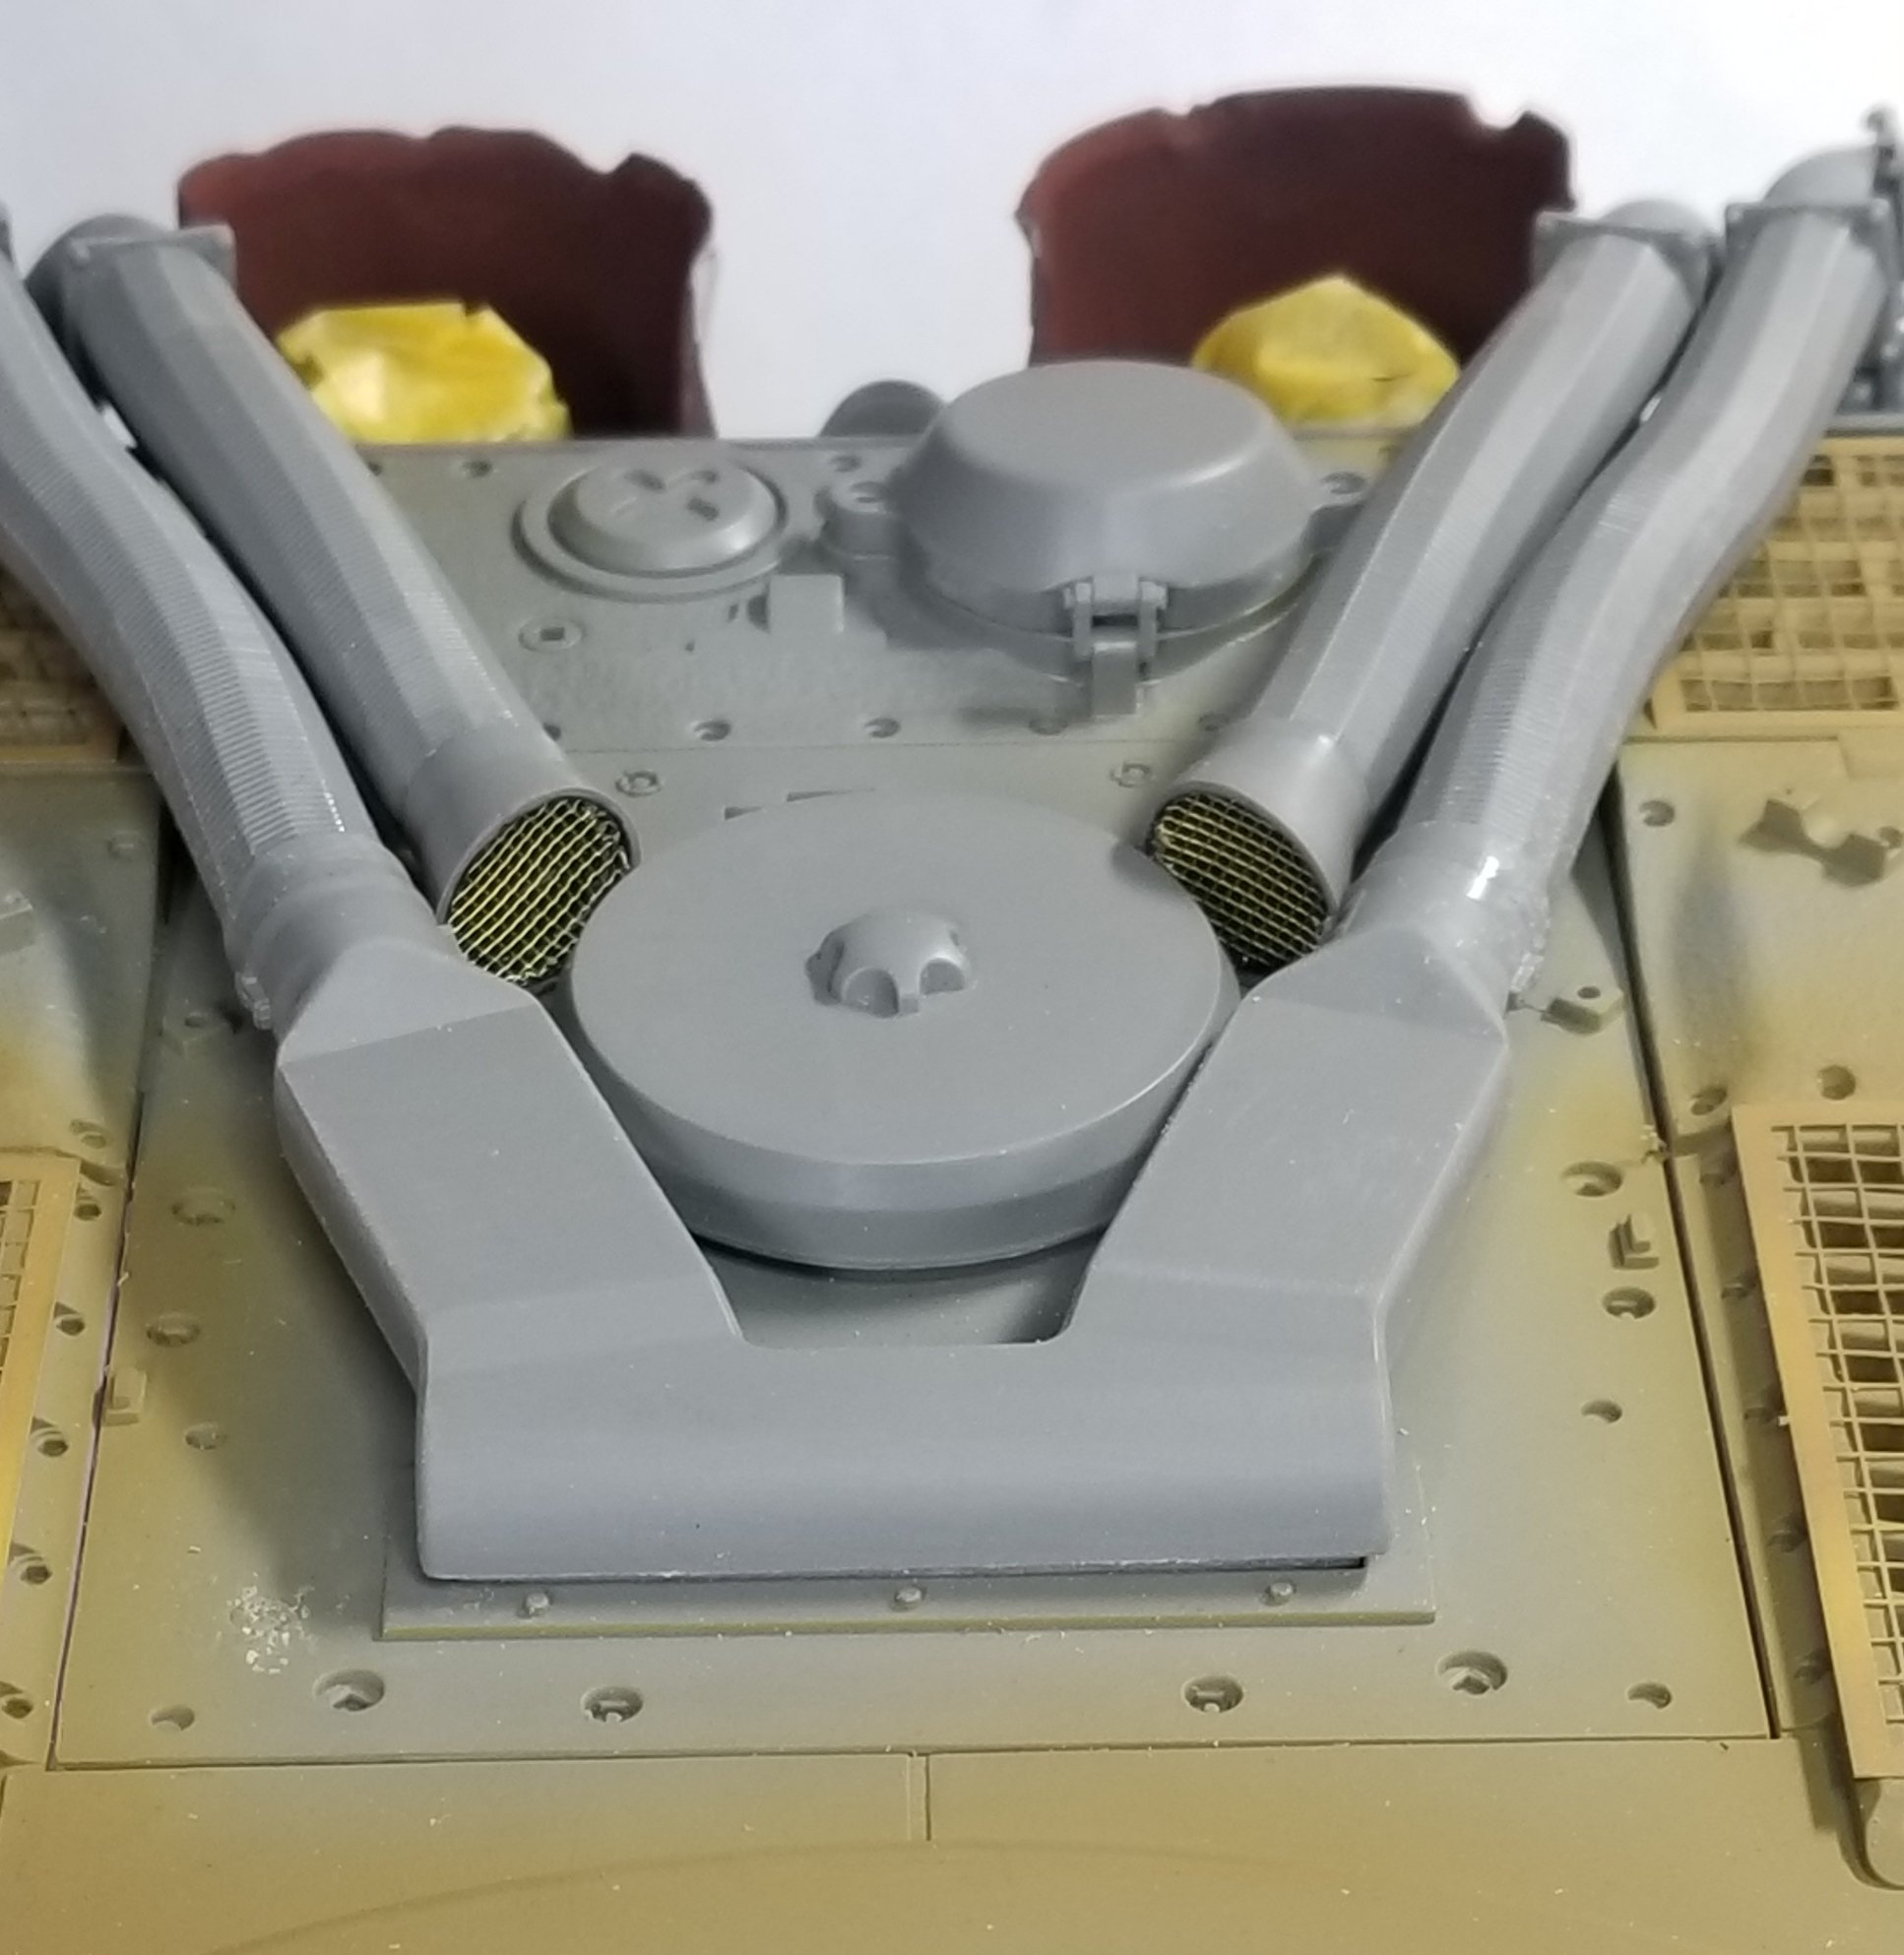
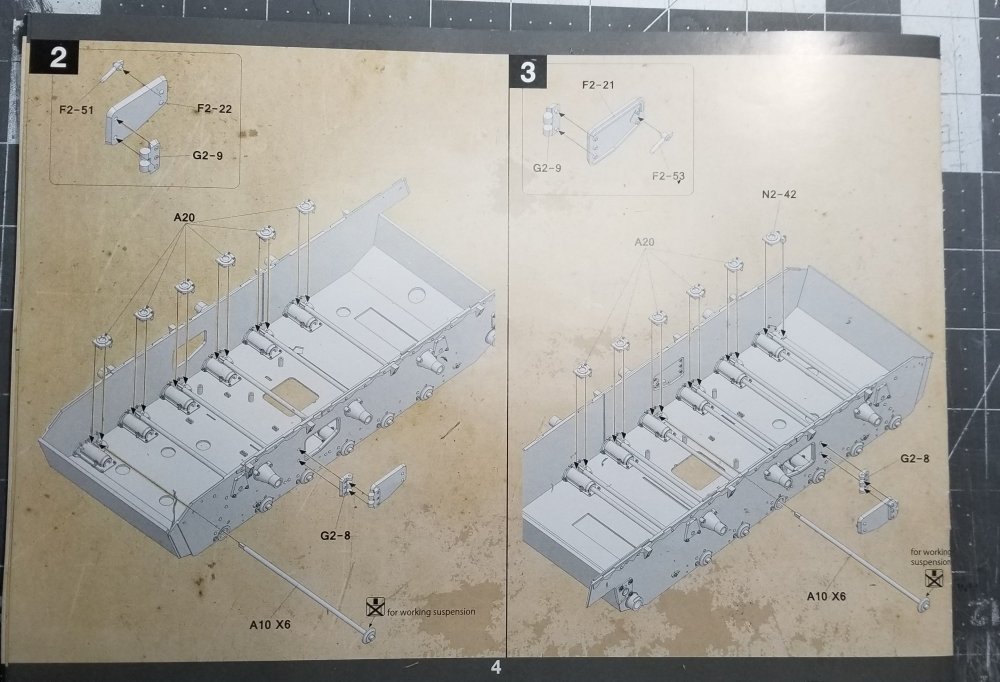
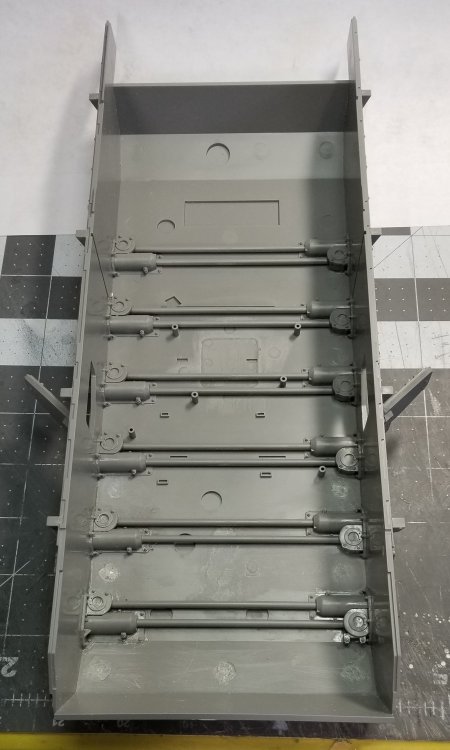
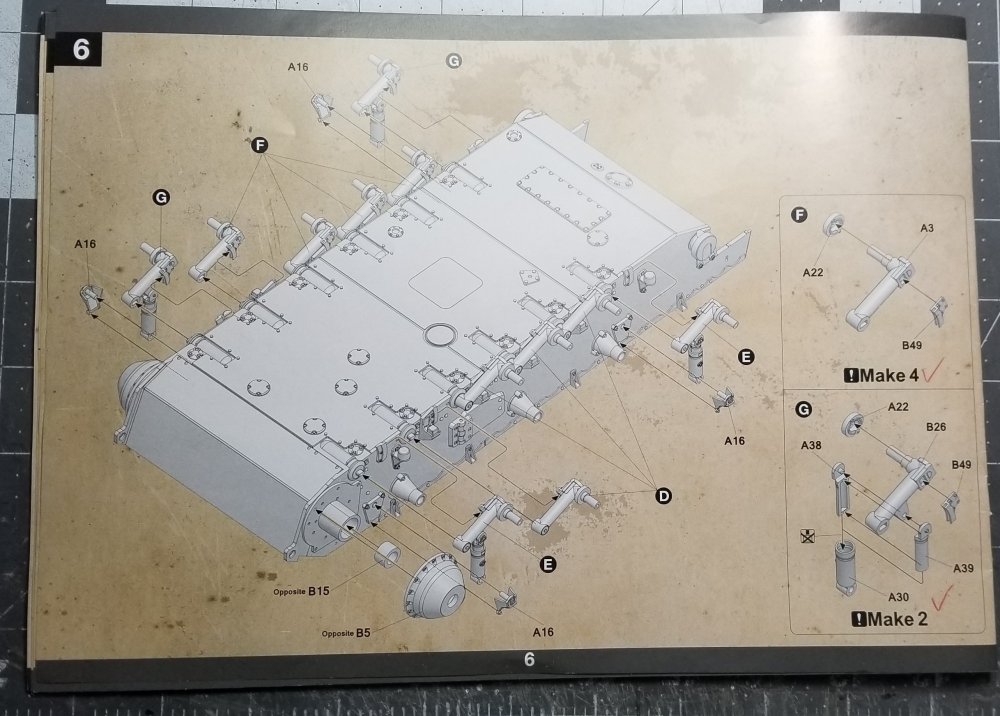
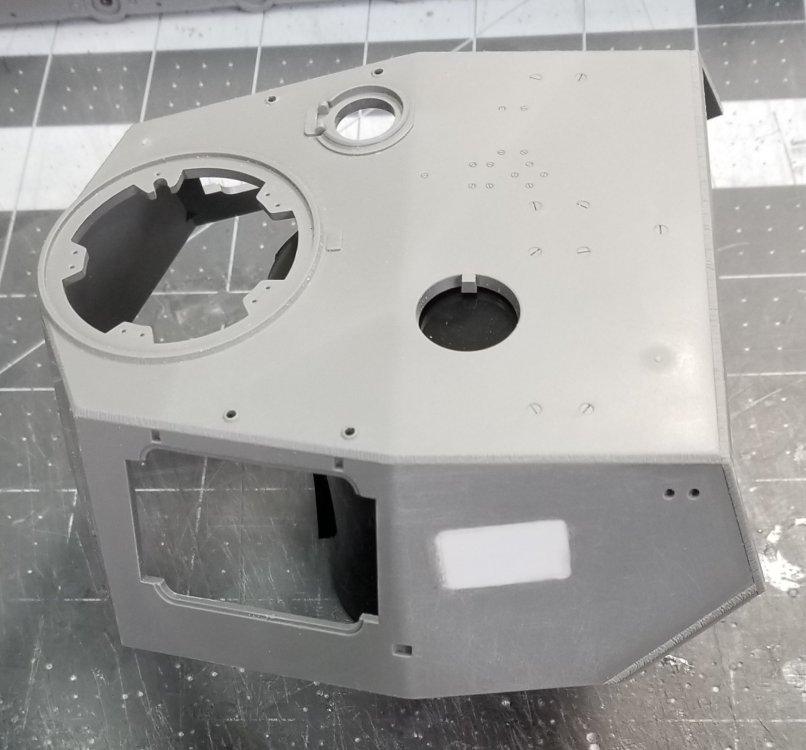
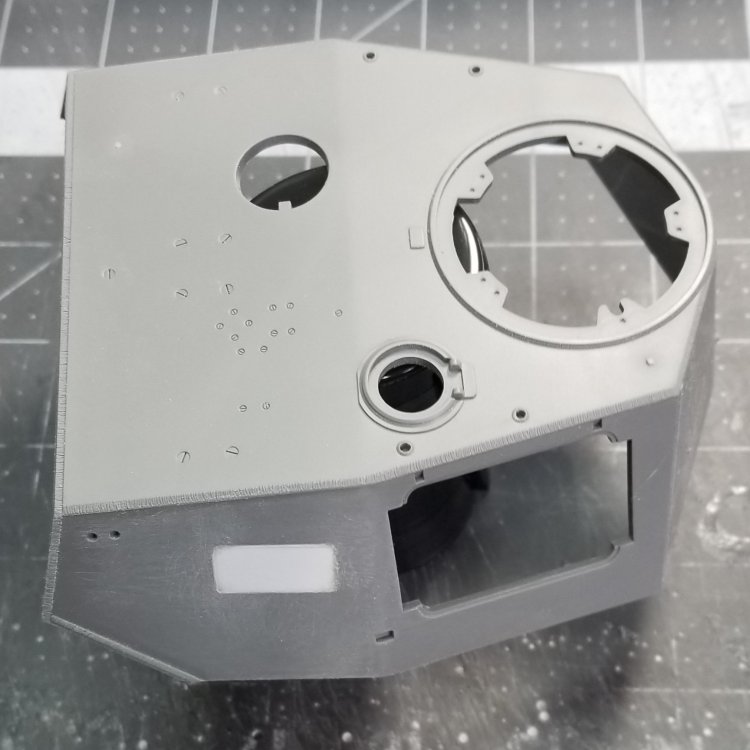
Hey guys I got some more work done on the Panzer III. Steps 2 and 3 done. Steps 2 and 3, note the open escape hatches on each side. I drilled out the hinges and added some brass pins. Steps 4 and 5 done. Step 6 done. Right side view of the suspension. Left side view of the suspension. This view shows the modifications I needed to do to convert the turret into an Ausf N. I filled in the hole, no vision port here anymore. This view shows the other side. I have a somewhat front hull interior on order from AFV Modeller so that there will be something in the hull when you open the front hatches. Well that's it for now be back soon. Ron G


-
Hey Paul Actually it was pretty easy. You can do it, no problem. Ron G
-
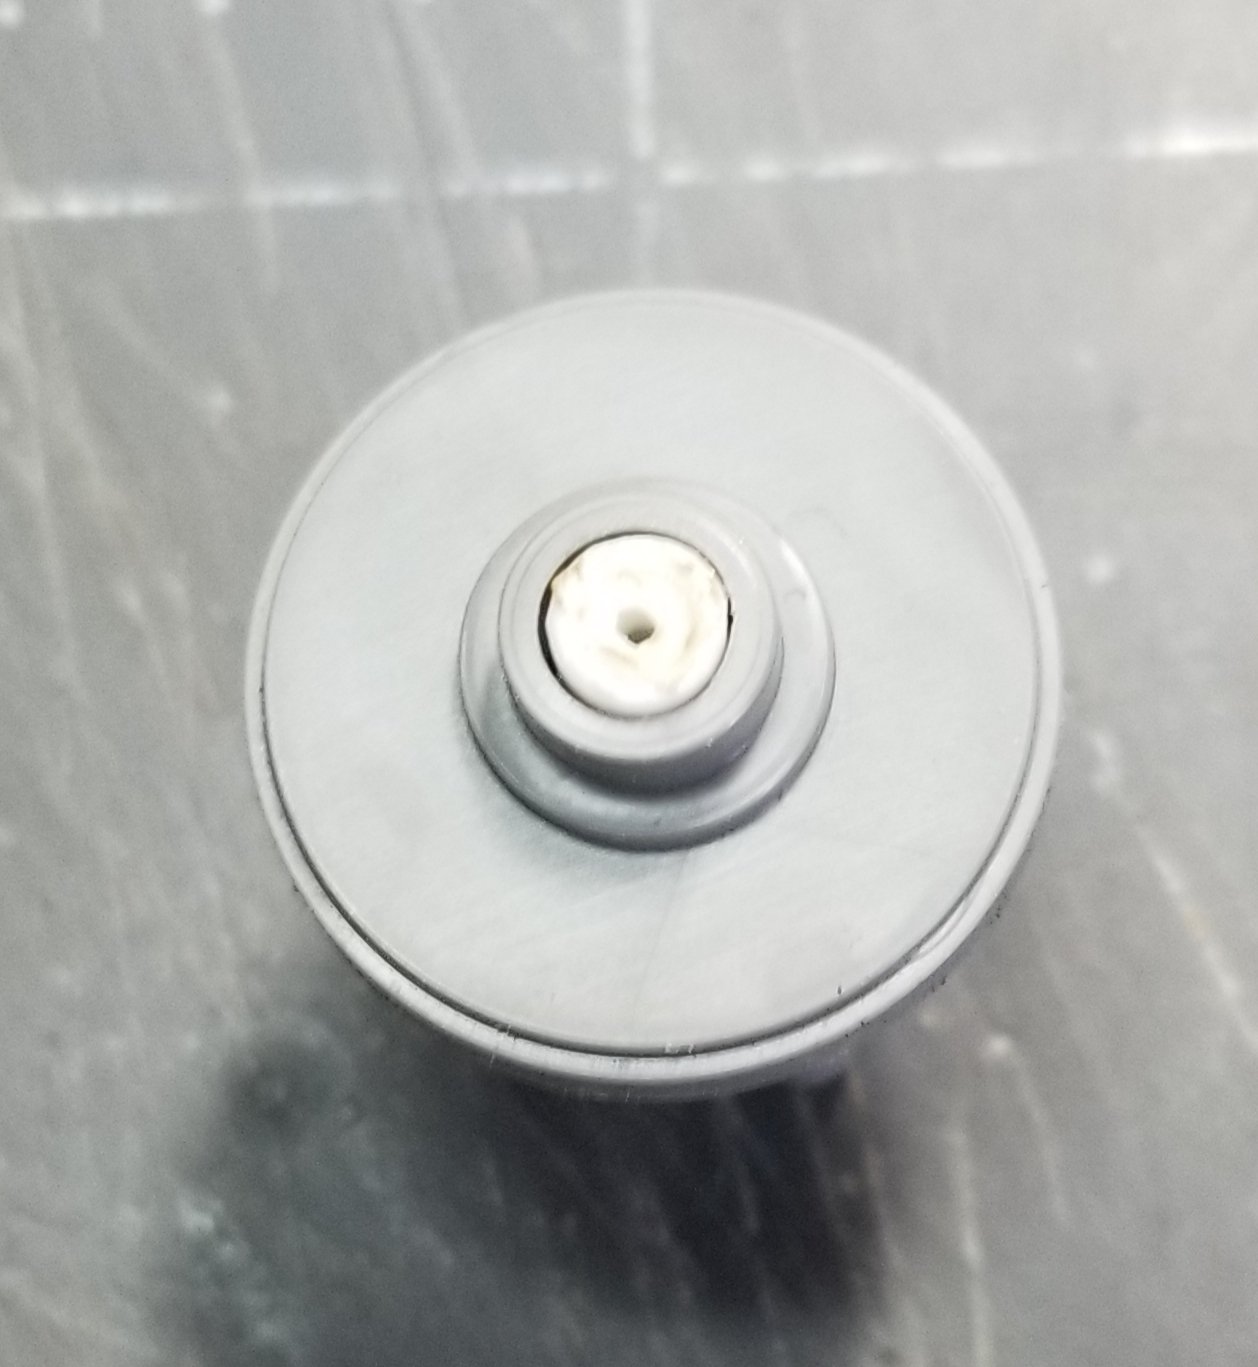
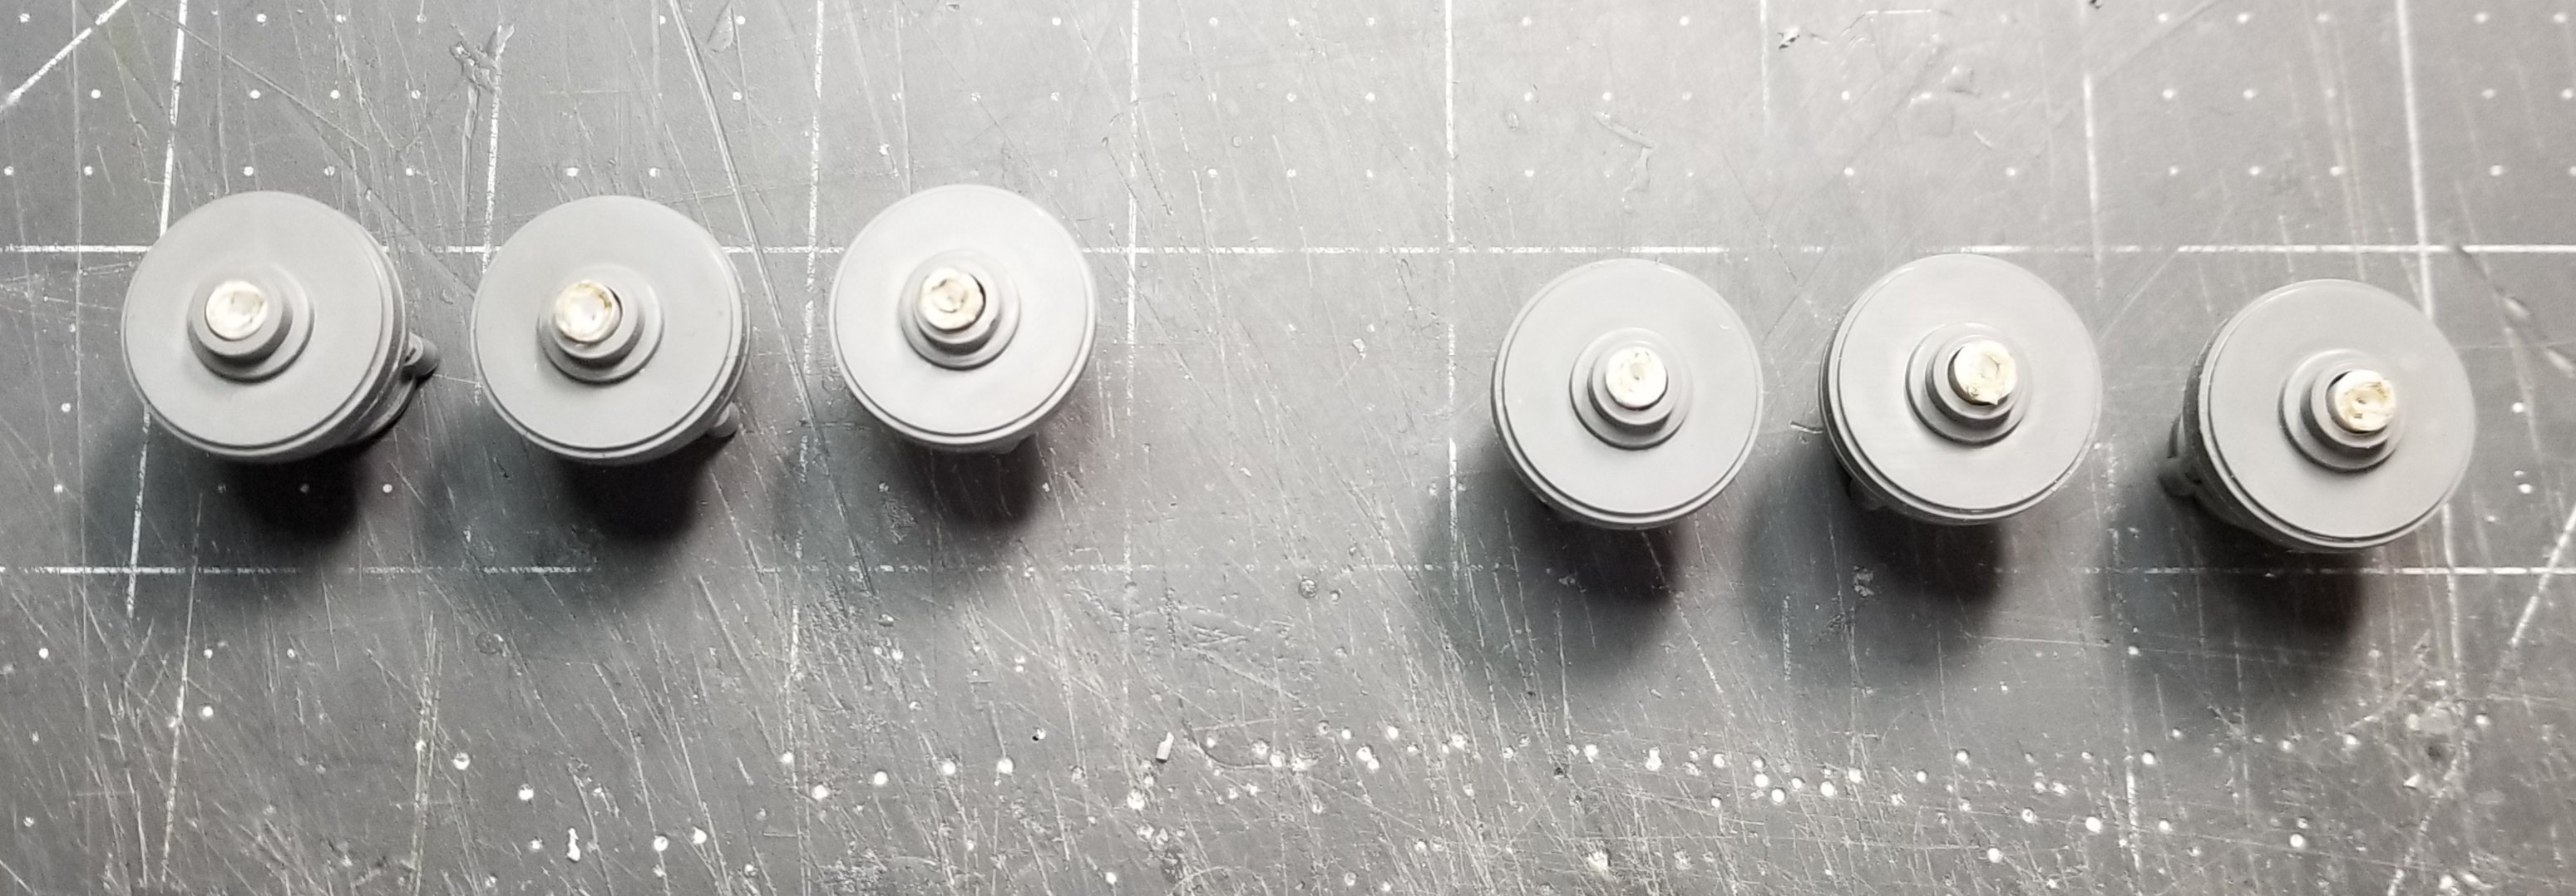
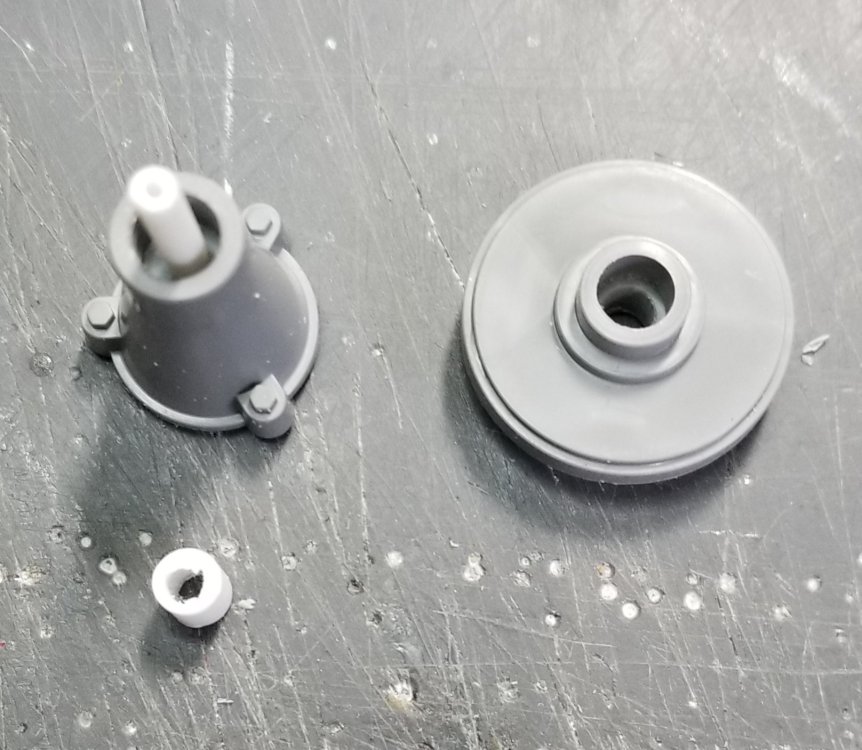
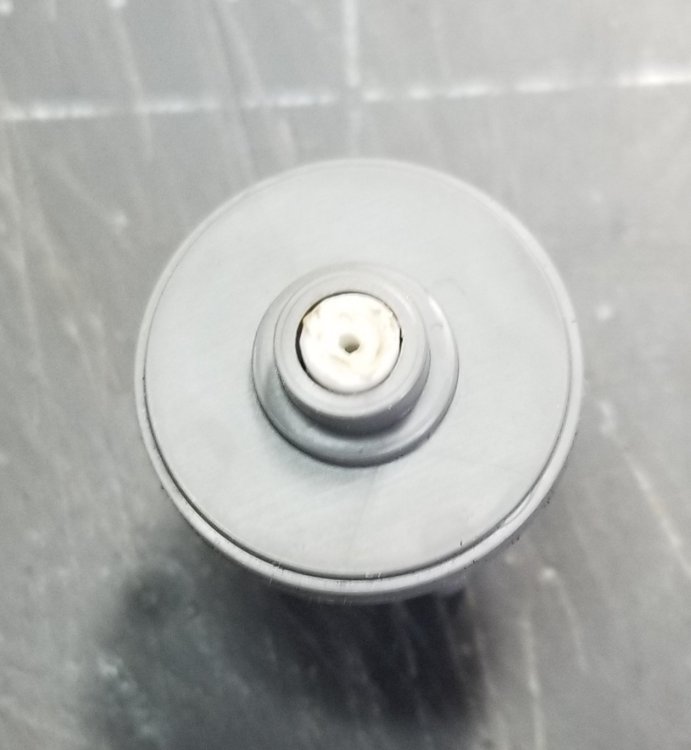
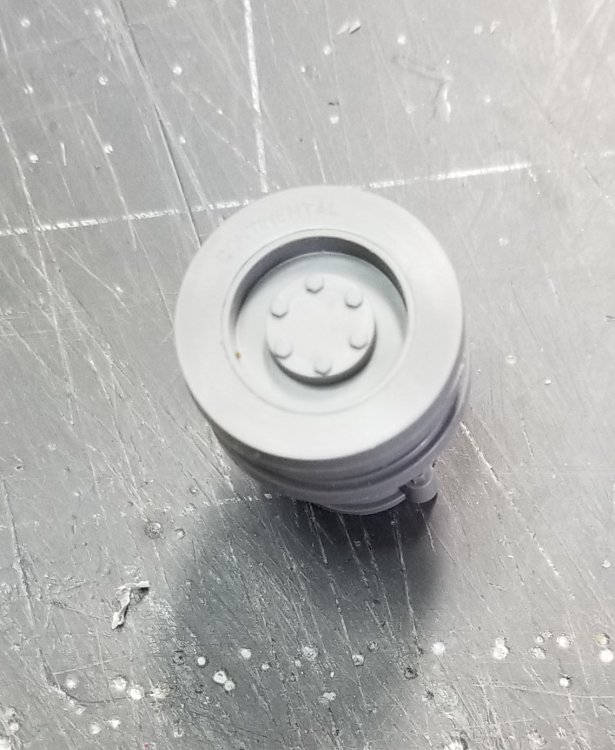
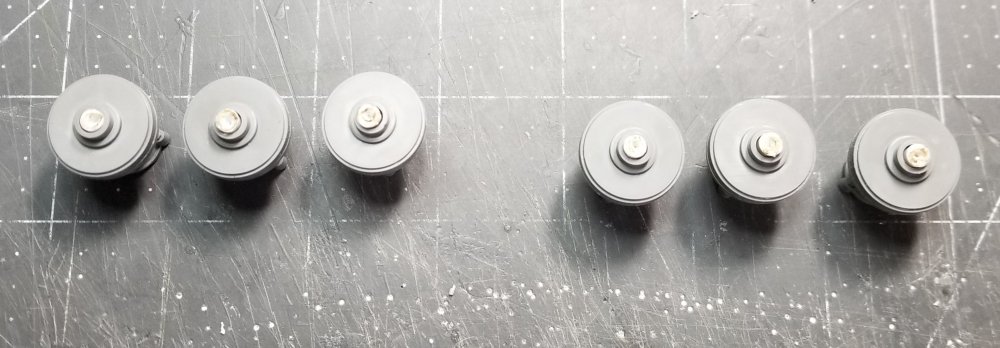
Hey all Ok here's the start of a new project. I have step 1 done. I also modified the return rollers so that they can spin. This is step 1. Step 1 done. This view shows the return roller parts, at least some of them. I added the white plastic rod to the return roller mounting bracket. I drilled out the wheels. The white tube on the bottom left is a kinda poly cap, my version. This view shows the parts assembled. This view shows the outer return roller on the assembly. This view shows all six of the return rollers. I need to paint all of these before I can attach them to the hull. Well that's it for now be back with more updates soon. Ron G

-
Yeah that's what I was thinking. Thanks Carl. Ron G
-
Hey Carl Thanks for the response. I was thinking of doing a light 60/40 thinner to buff (Tamiya) before the clear coat what do you think? I'm thinking it will tone down the camo and help blend the colors a little more. Ron G
-
Hey all I'm getting ready to start a new build. It's the Takom 1/16 Panzer III Ausf J that I'm converting into a Ausf N. I'm kinda in the planning stage, you know figuring out the build sequence I want to use, that kinda stuff. I have a few reference books and pictures. This will be going in a North African, Tunisian diorama along with the Tiger and a Tamiya Kubelwagon. Well that's it, I'll be back when I actually get started on the build. Later Ron G
-
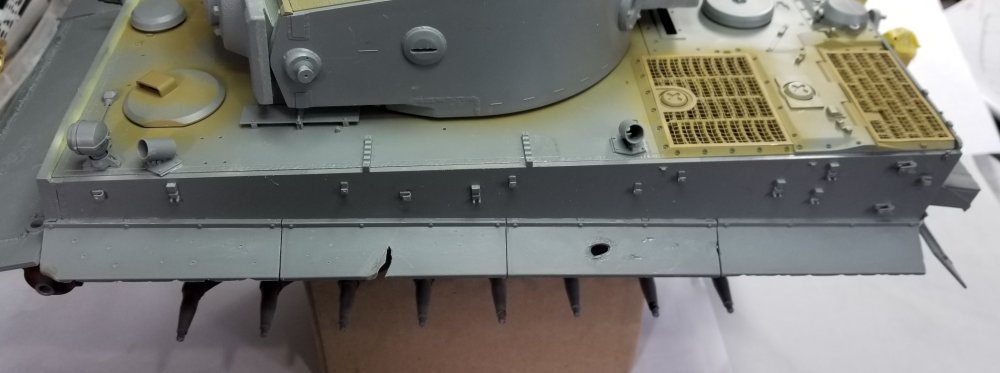
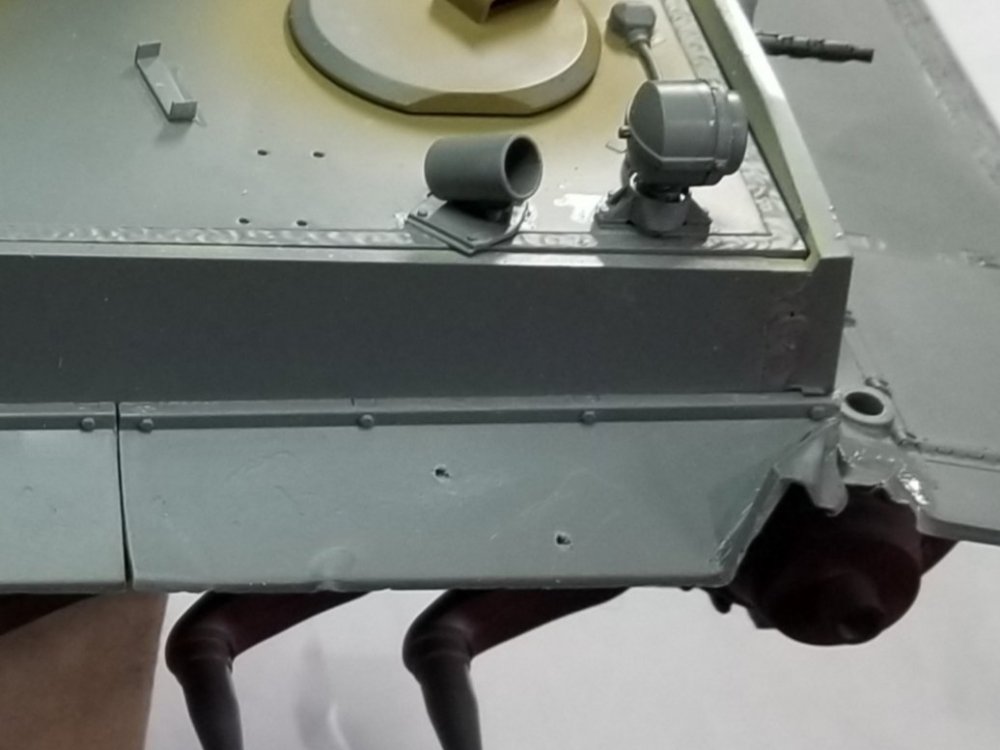
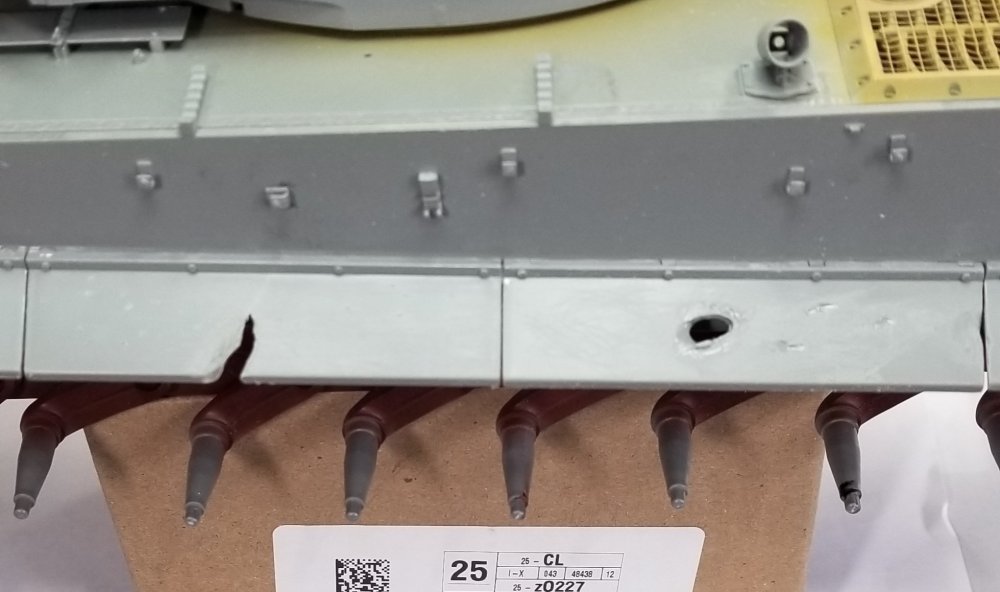
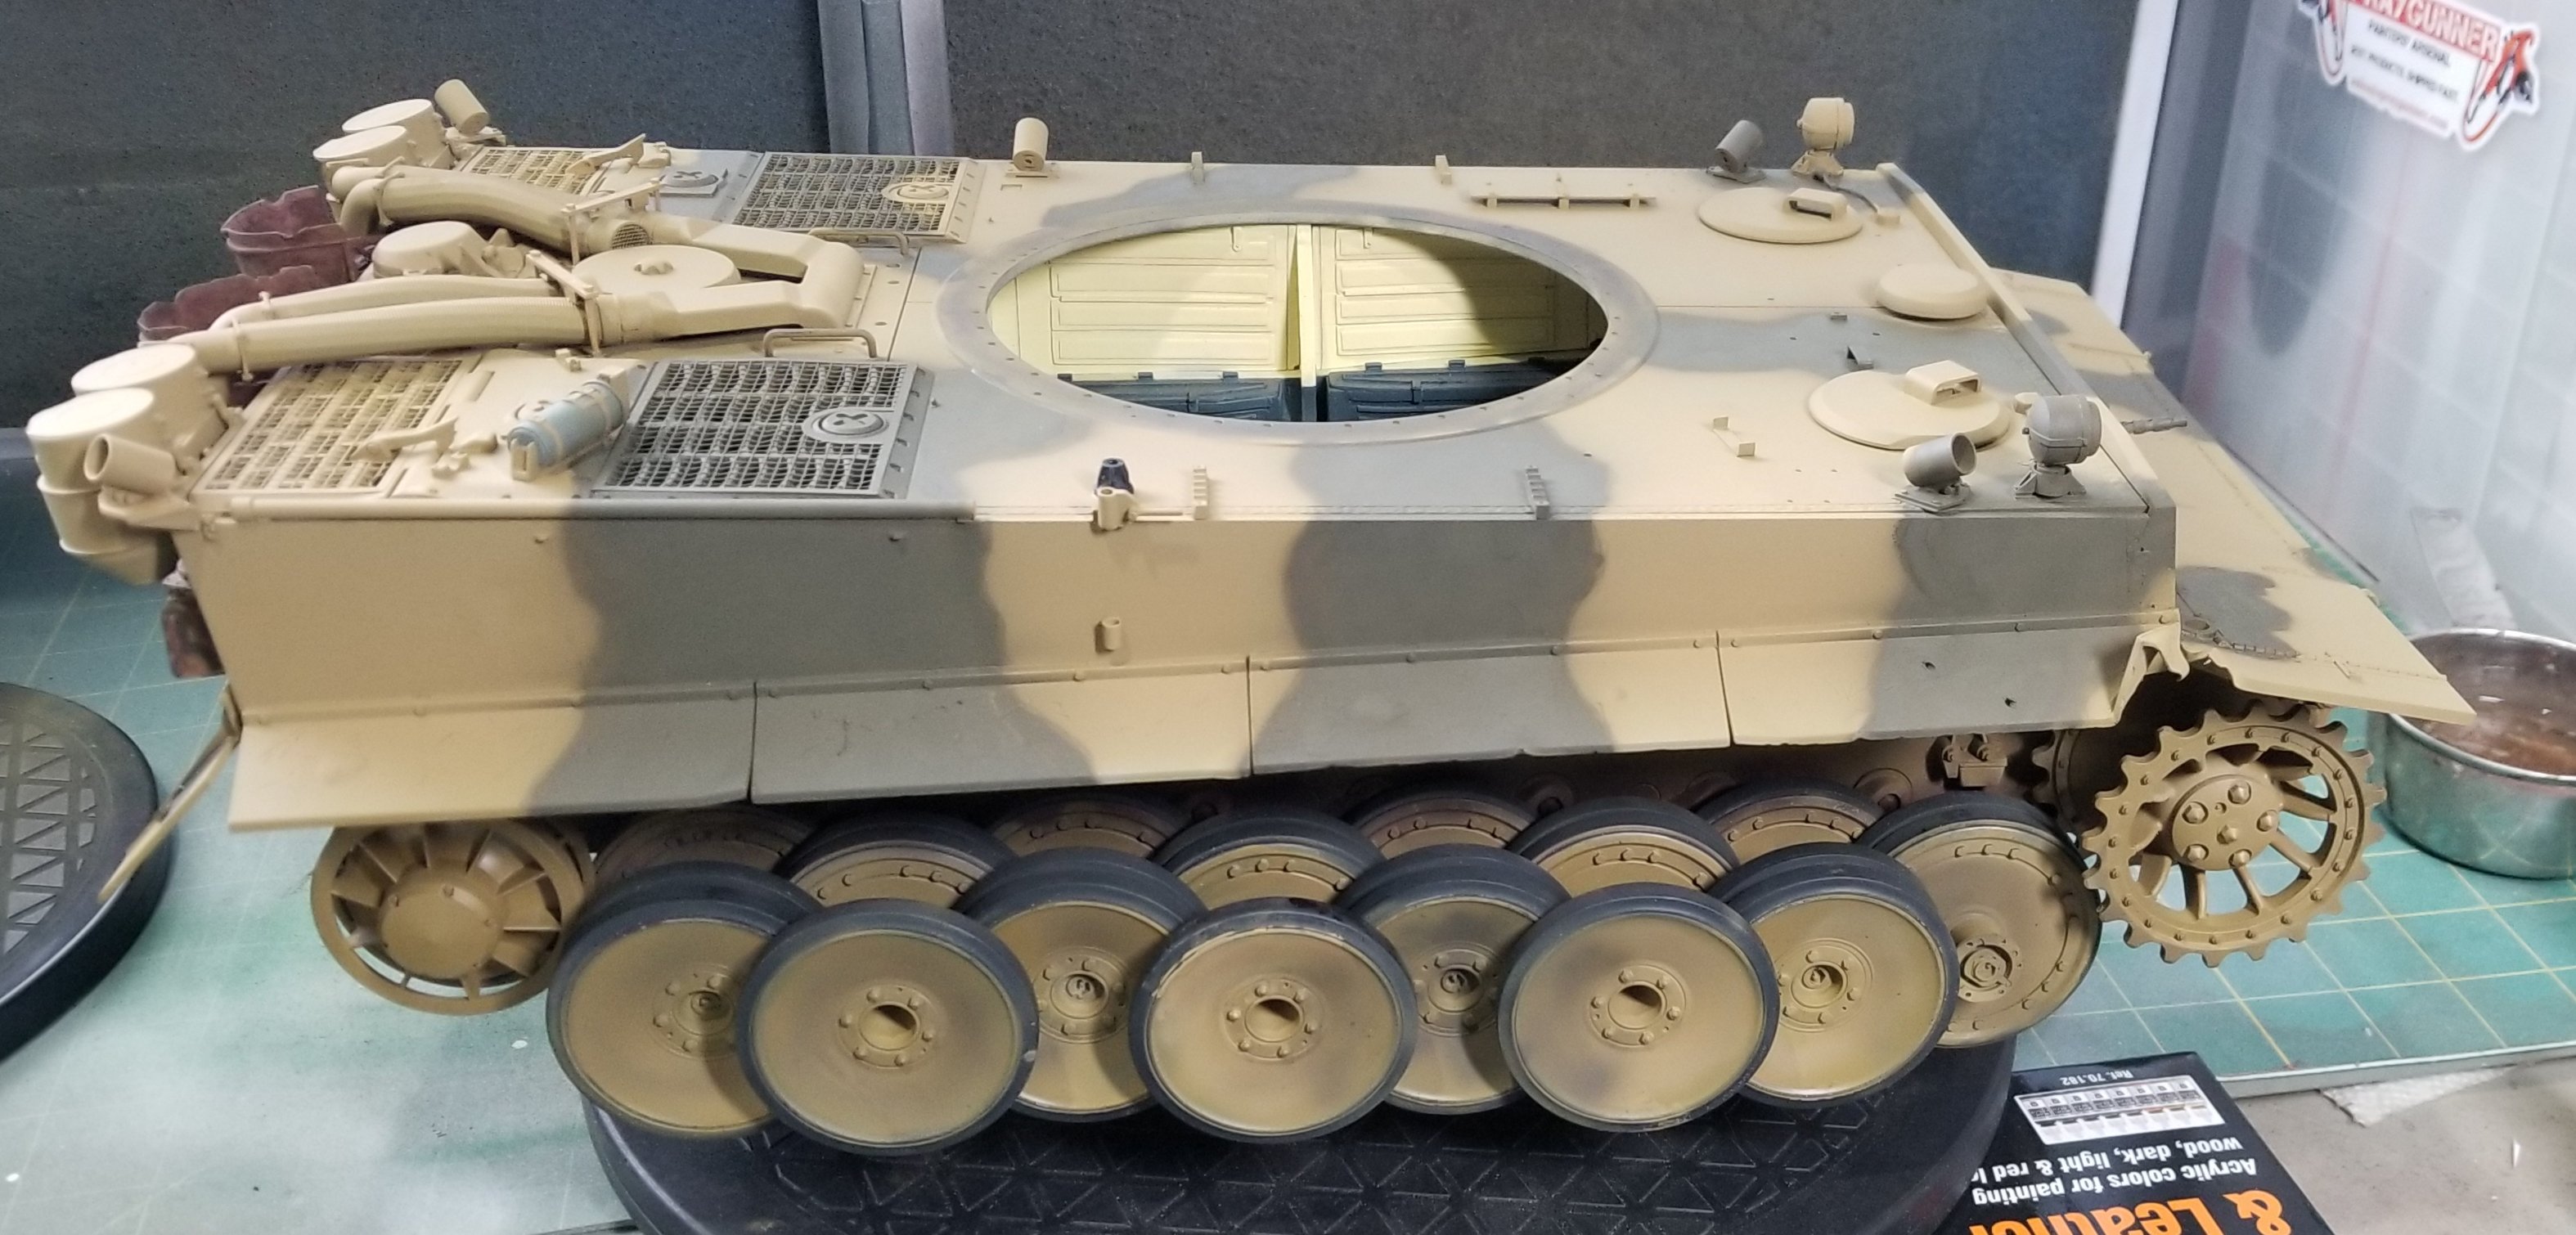
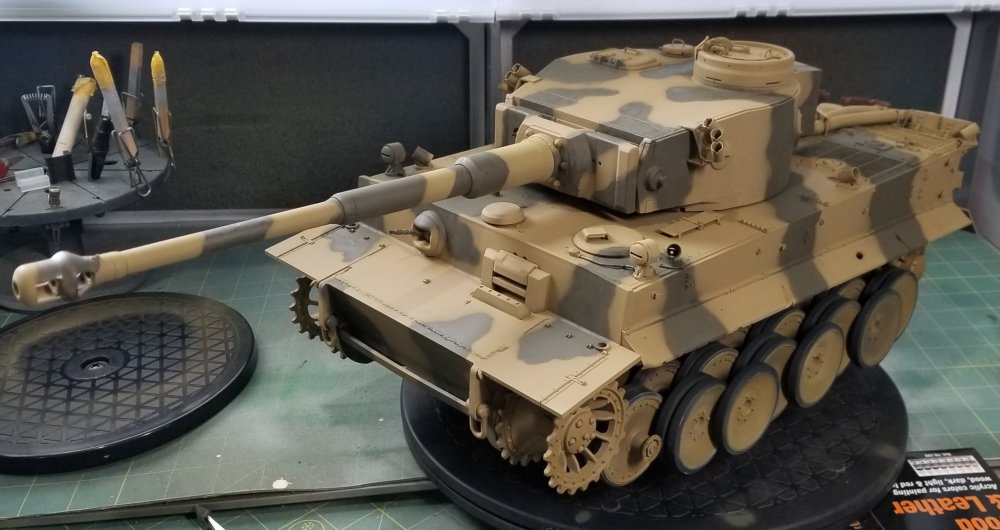
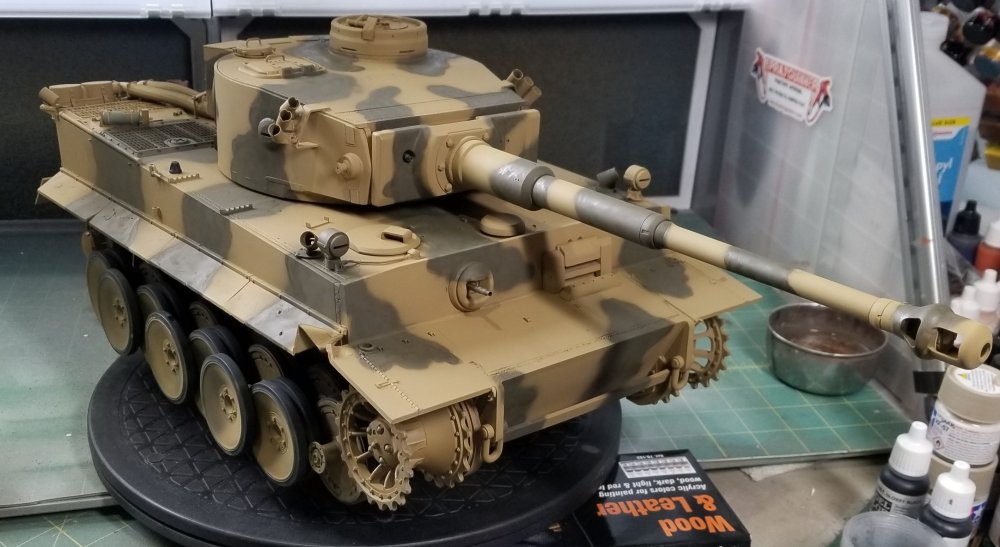
Thanks guys OK, it's finally done, at least its painted, both colors. I have the tow cables mounted, all the tools mounted and the Whitman figure assembled...Whew! I think everything is done, I just need to apply a clear coat before I start the weathering. Right side view of the turret. It looks a lot grayer in these pics then in person. Left side view of the turret. Right side view of the hull. Front view of the hull. Left side view of the hull. Rear view of the hull. Left front view of the tank. Right front view of the tank. I know that there are no tools or cables in these pictures, because I haven't added them yet (I forgot to take some pictures). Now comes the scary part, at least for me, "The Weathering". I haven't built a tank model since I was 8 years old, a LONG time ago. I'm not sure how to proceed now. Should I do any other stuff before I clear coat it? Should I do the washes first, chipping first? How about some help from the knowledgeable tank builders on here. Thanks Ron G


-
Thanks everyone Ok, it is now painted in gelbbraun RAL 8000. I also have all of the tools painted. Right side view showing the outlining I did for the RAL 7008 graugrün. Front view showing the outlining. Left side view showing the outlining. Rear view showing the pre weathering rust work to the exhaust covers. This view shows the front of the tank with the tools added. Same thing of the other side. The tools are only sitting there for pictures. Well that's it for now be back soon. Ron G


-
Thanks everyone, your comments are much appreciated. Ron G
-
If I use my 1/16 Panzer IV Ausf H, it has opening rear engine hatches, does that count? Ron G
-
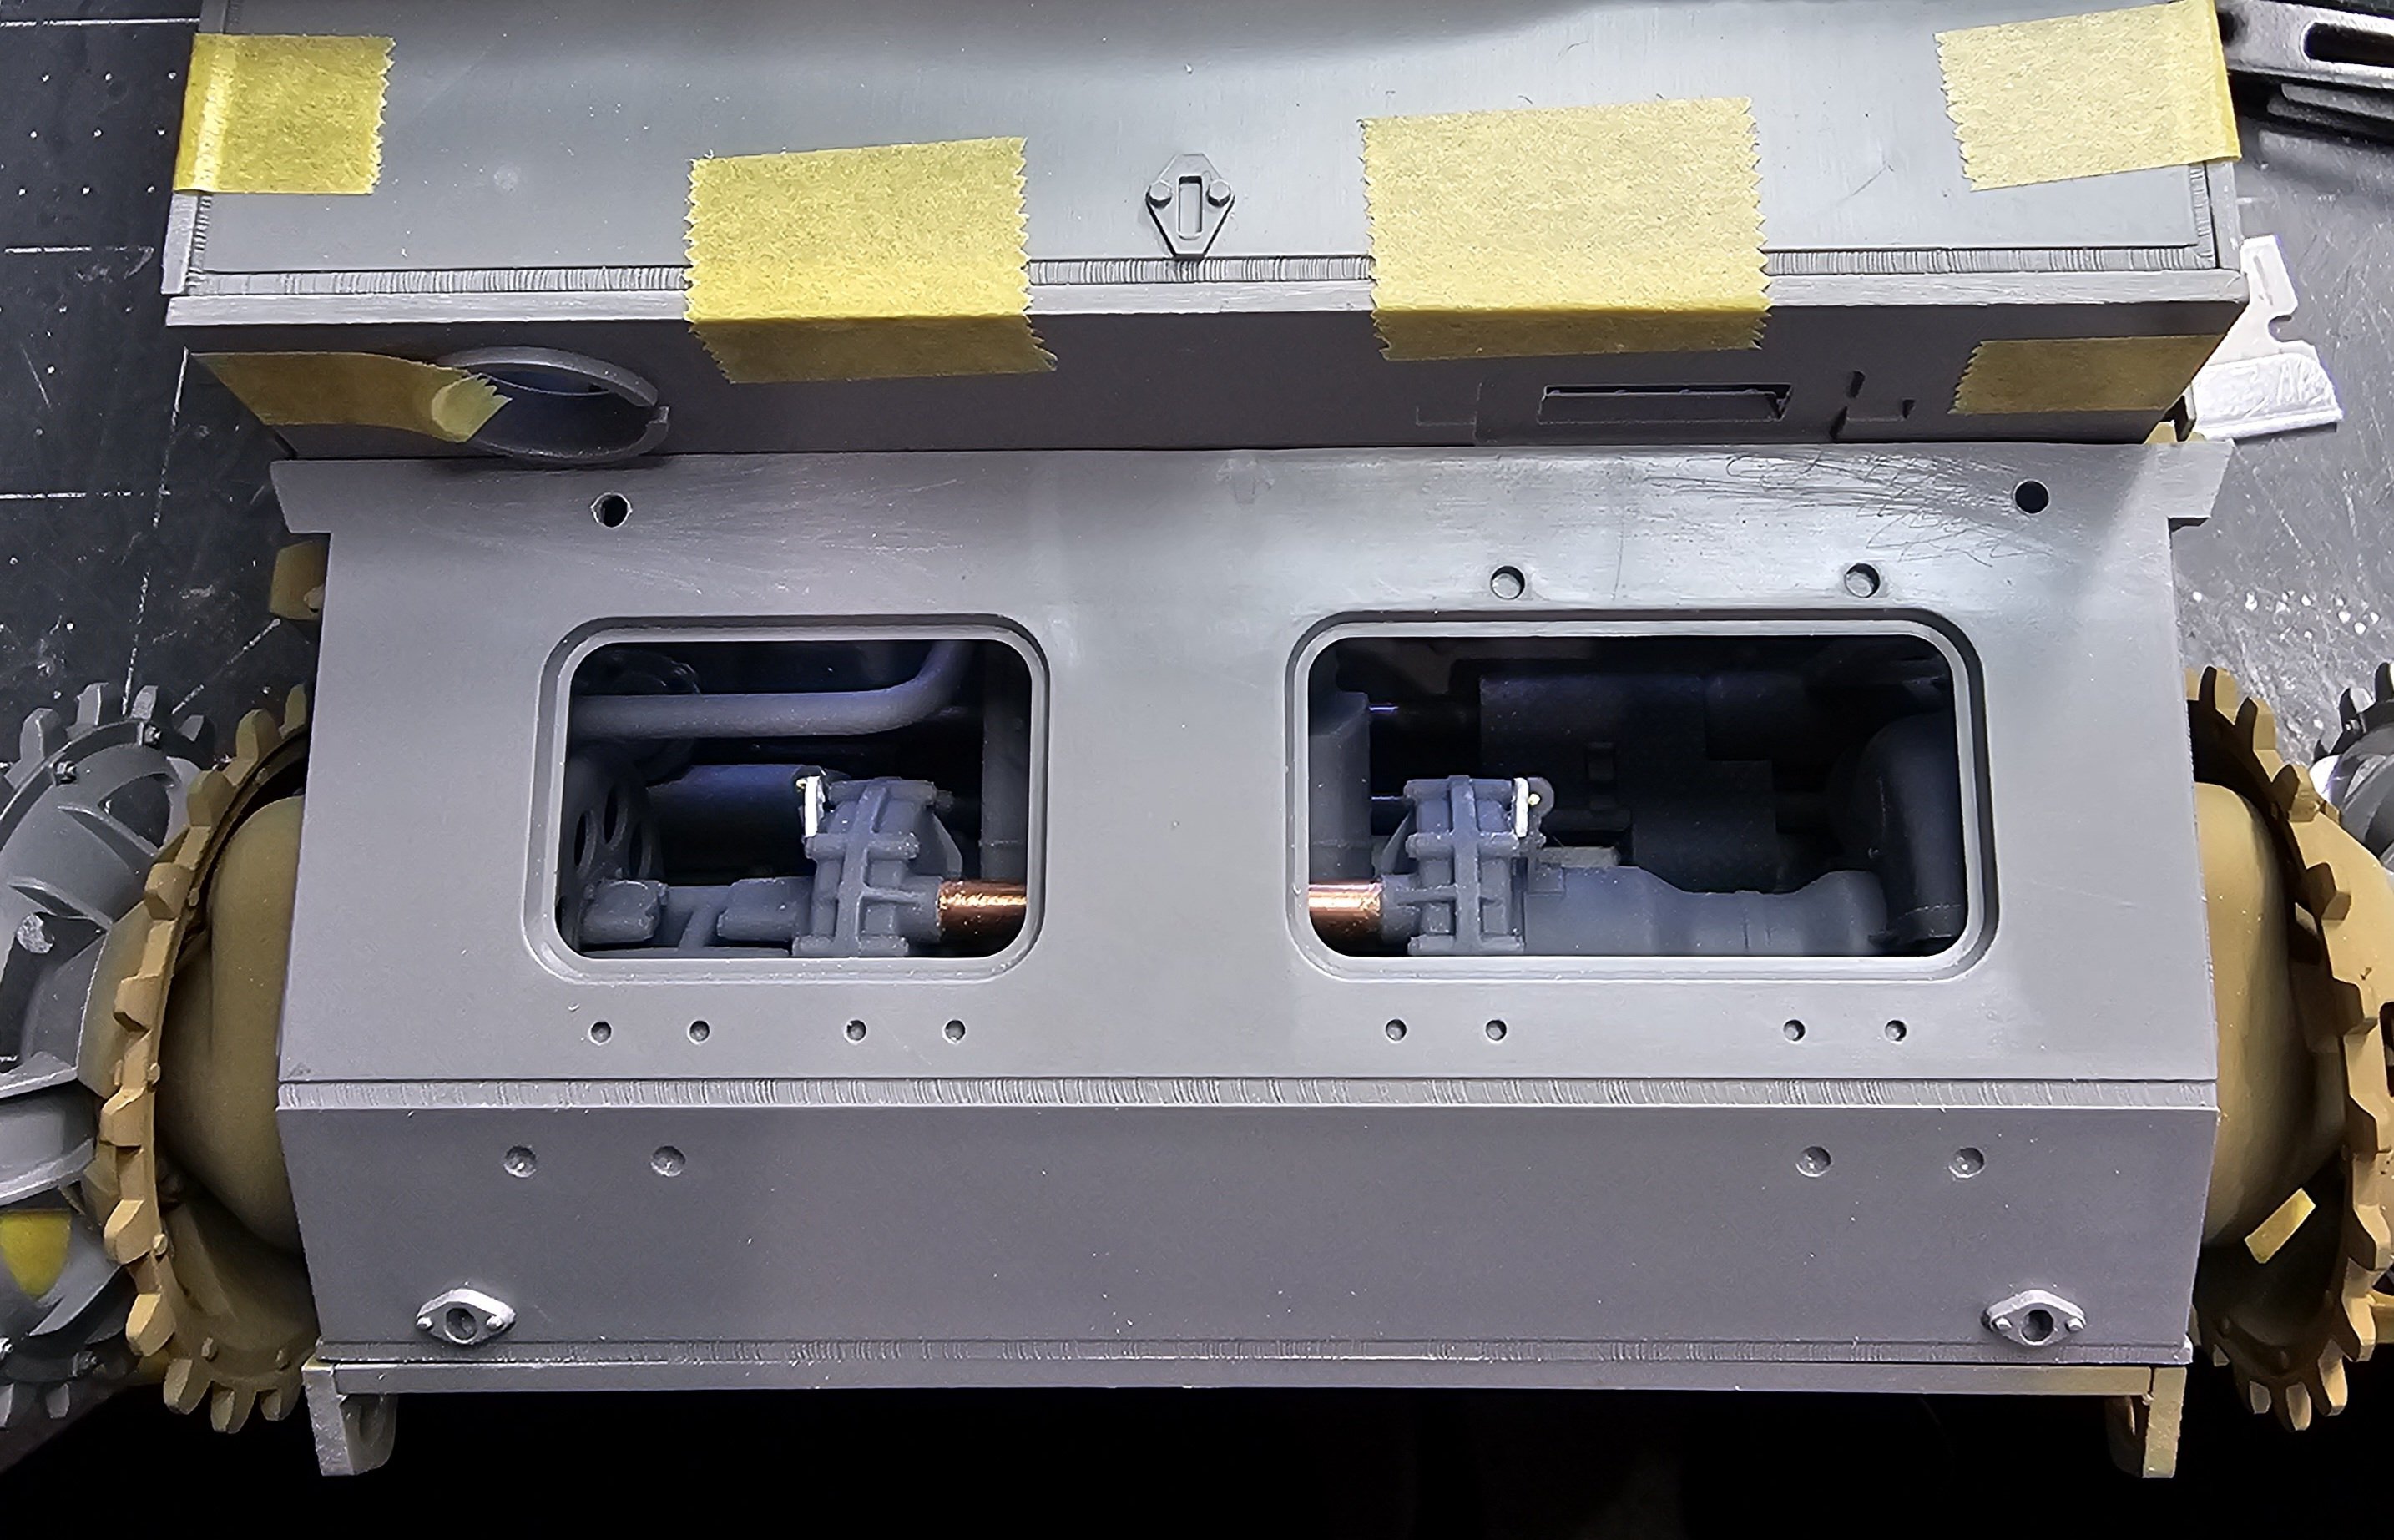
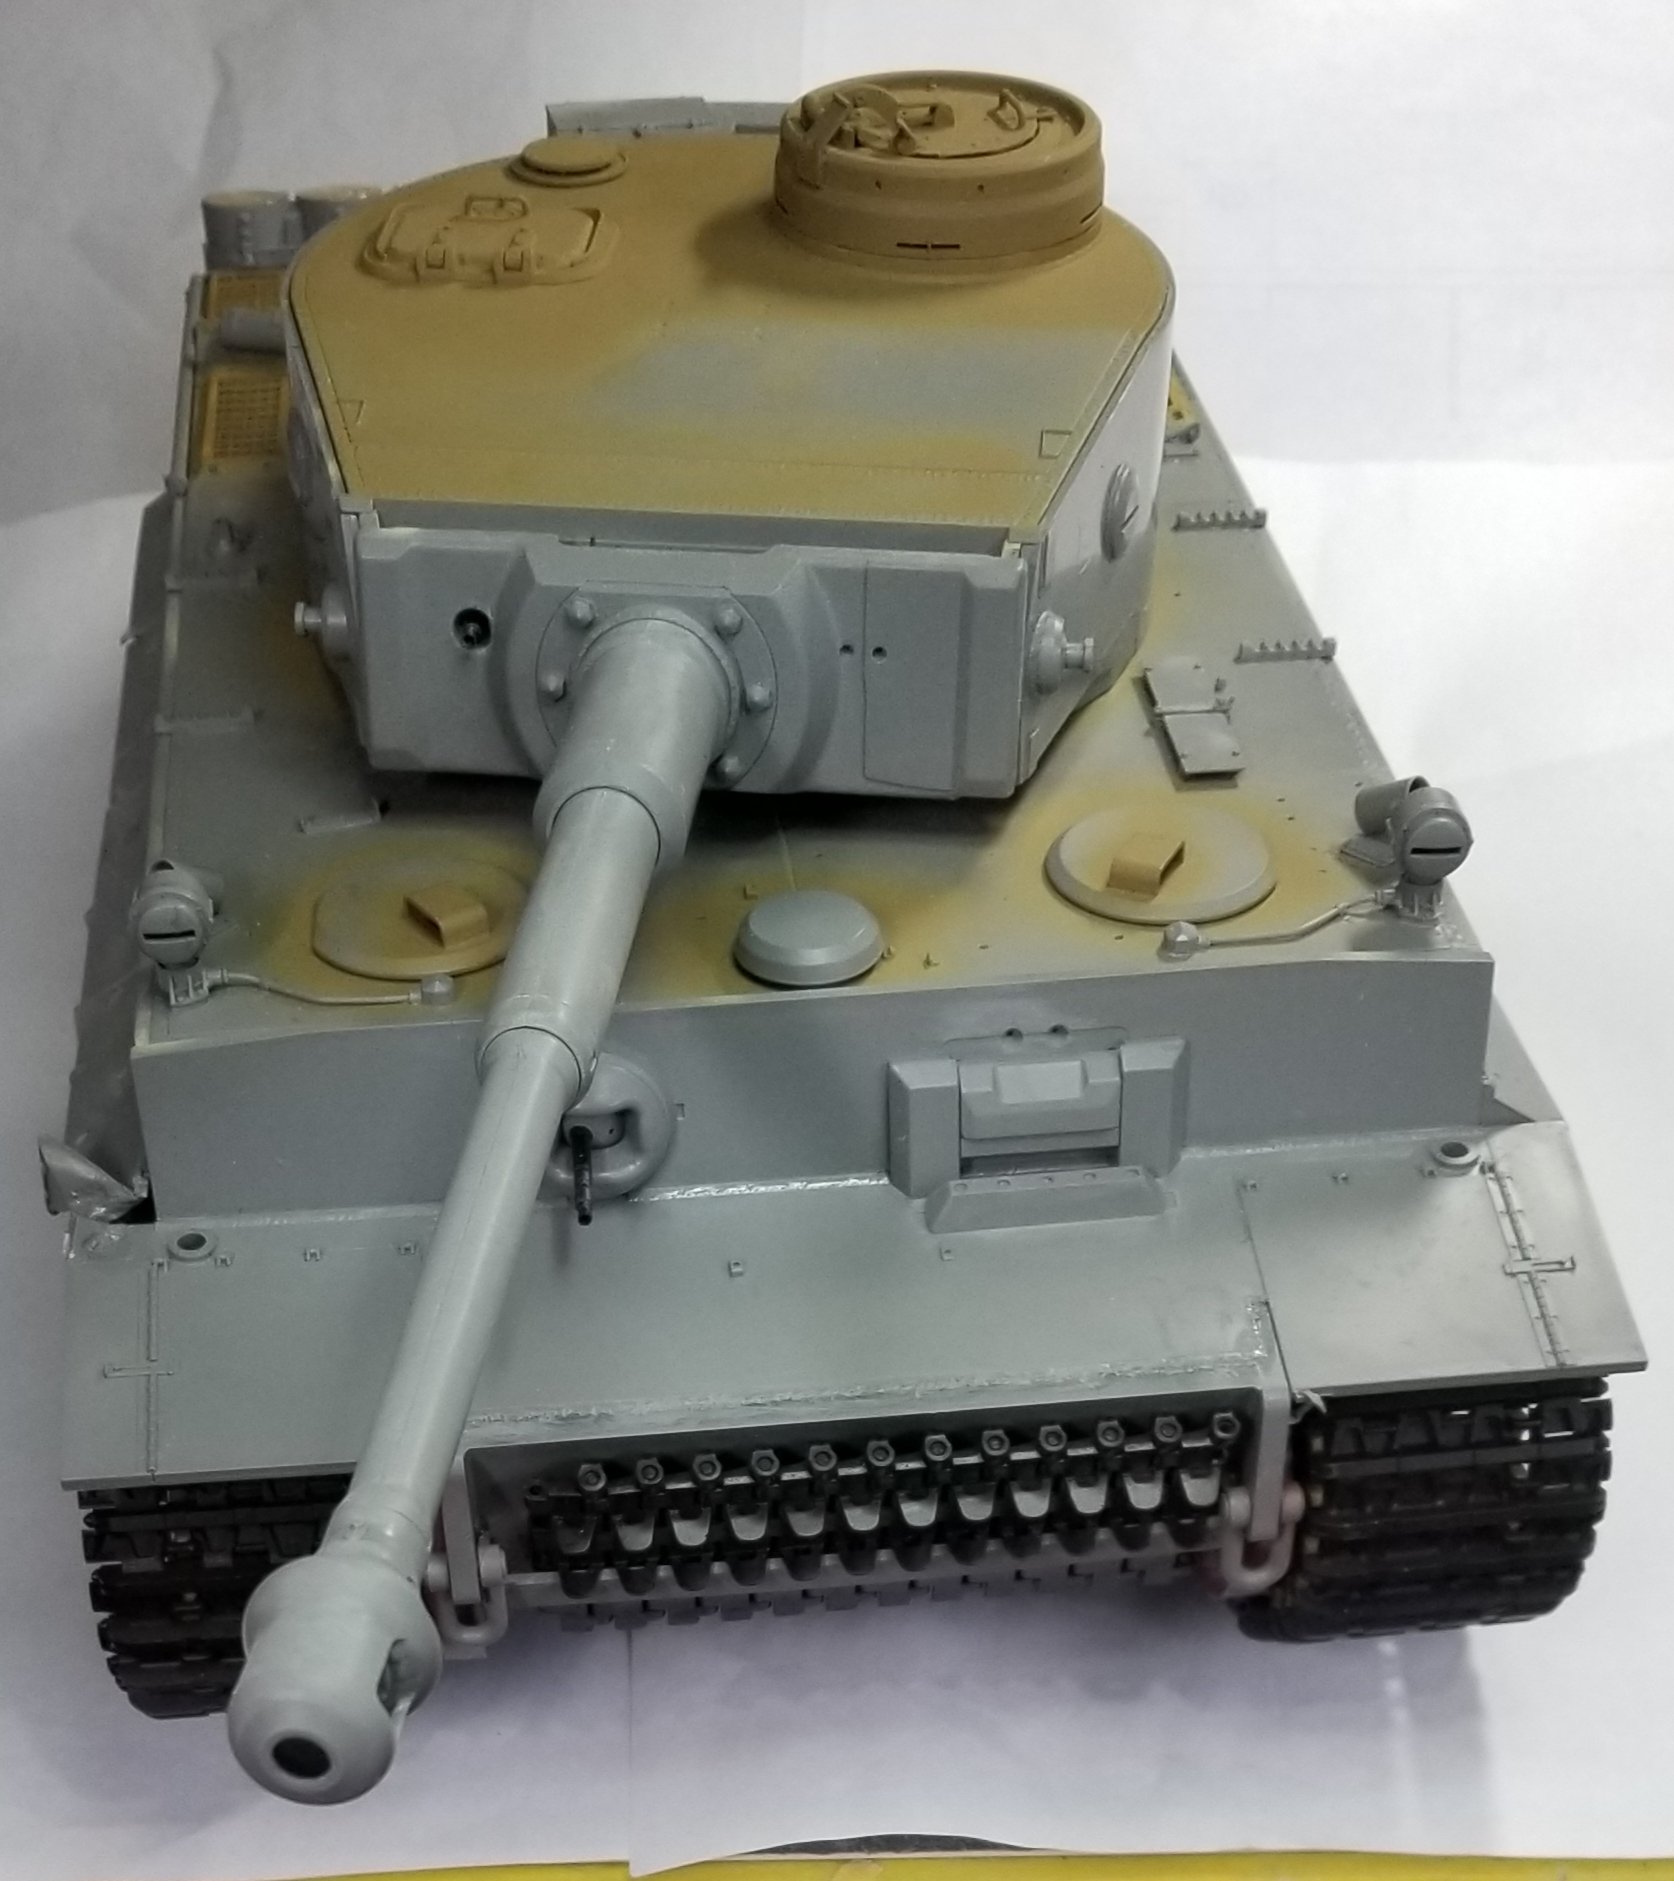
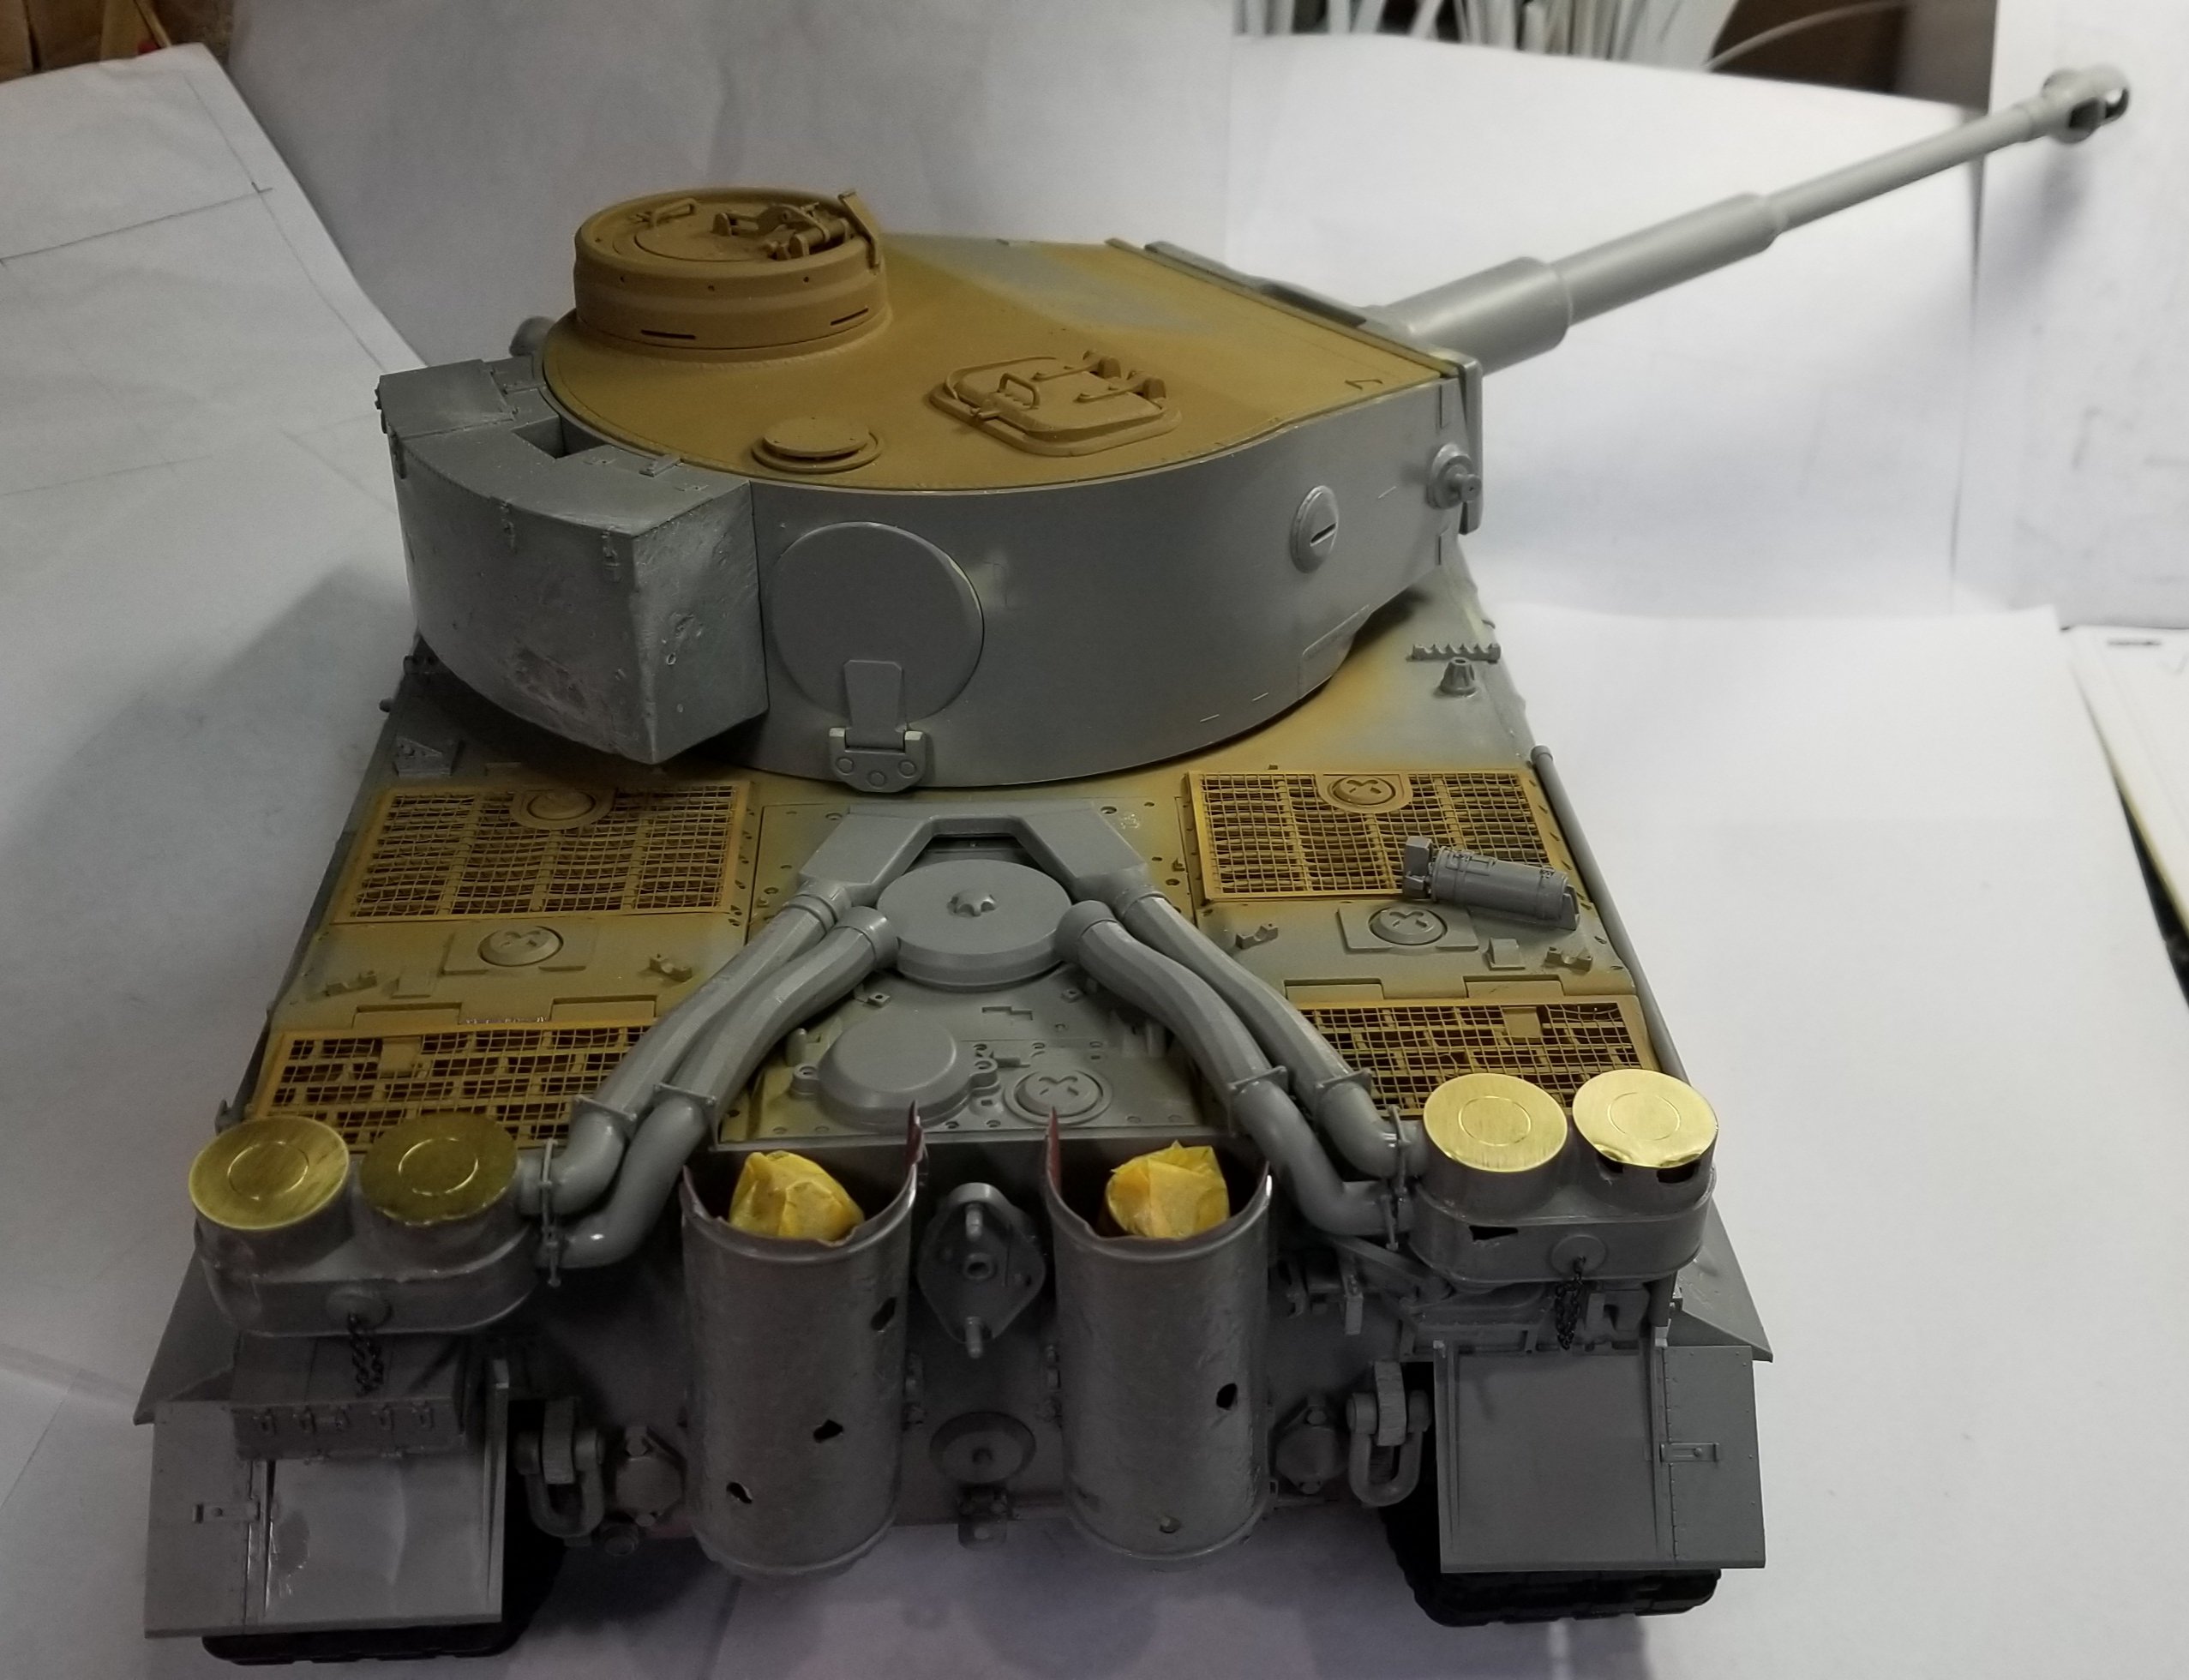
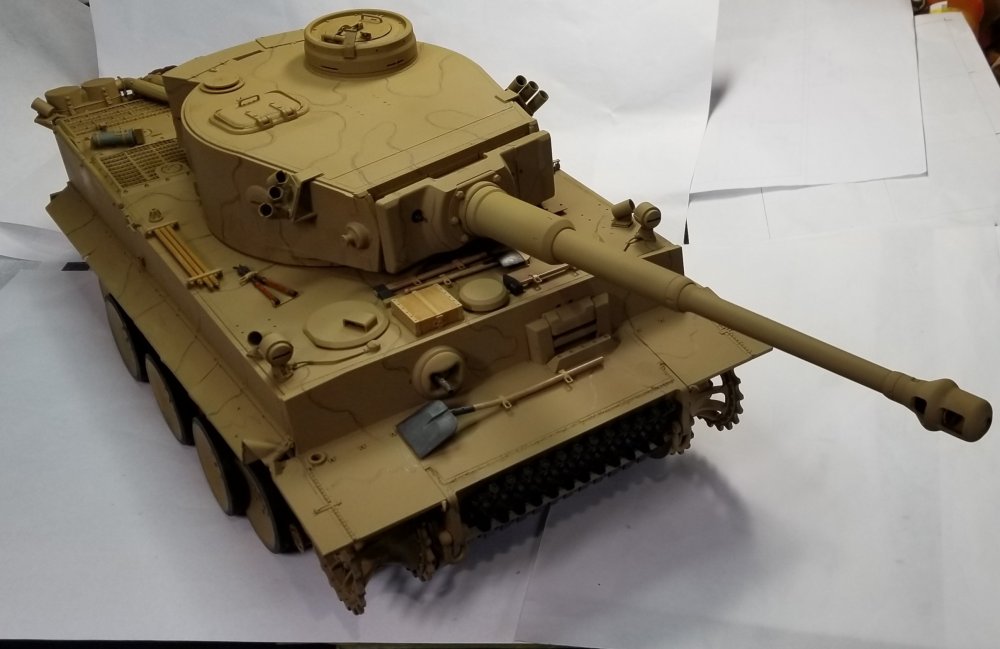
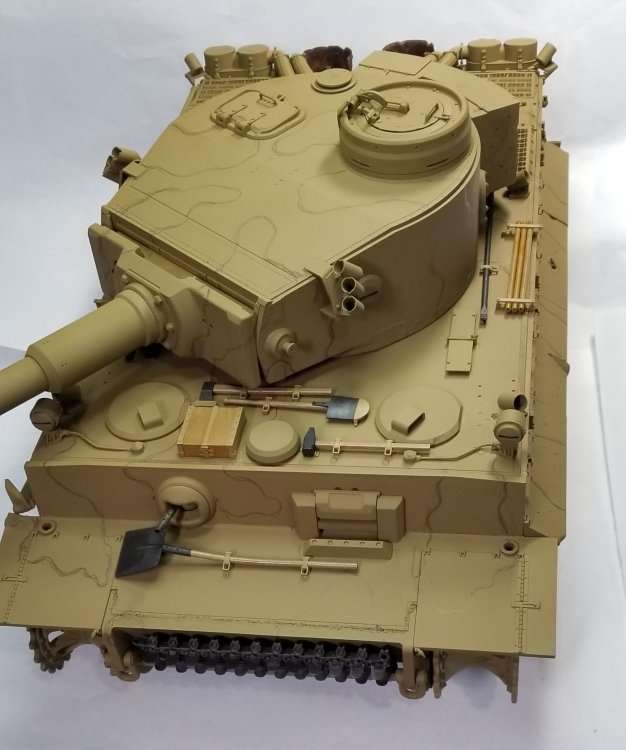
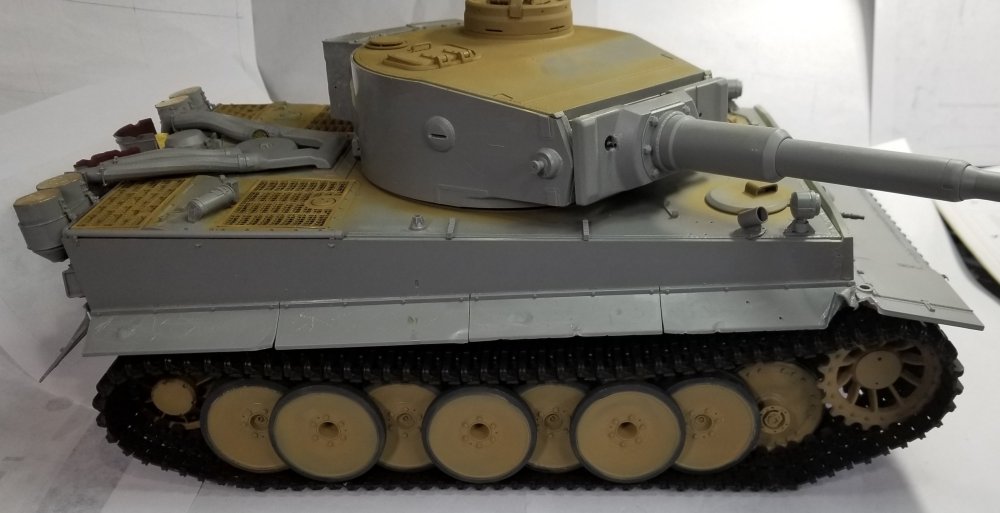
Hey guys OK, It's officially a tank (kinda) I have the wheels and sprockets on permanently, the idler is still loose. The tracks are on only for pictures. i posted this picture to show the screens that I added to the intake pipes for the fifels. Front view of the tank, HEY it actually looks like a Tiger! Top down view from the front. Right side view of the tank. Left side view of the tank. Rear view of the tank. I still need to remove the tracks, paint the base color RAL 8000, weathering, etc., etc. So that's it for now be back soon with more. Ron G


-
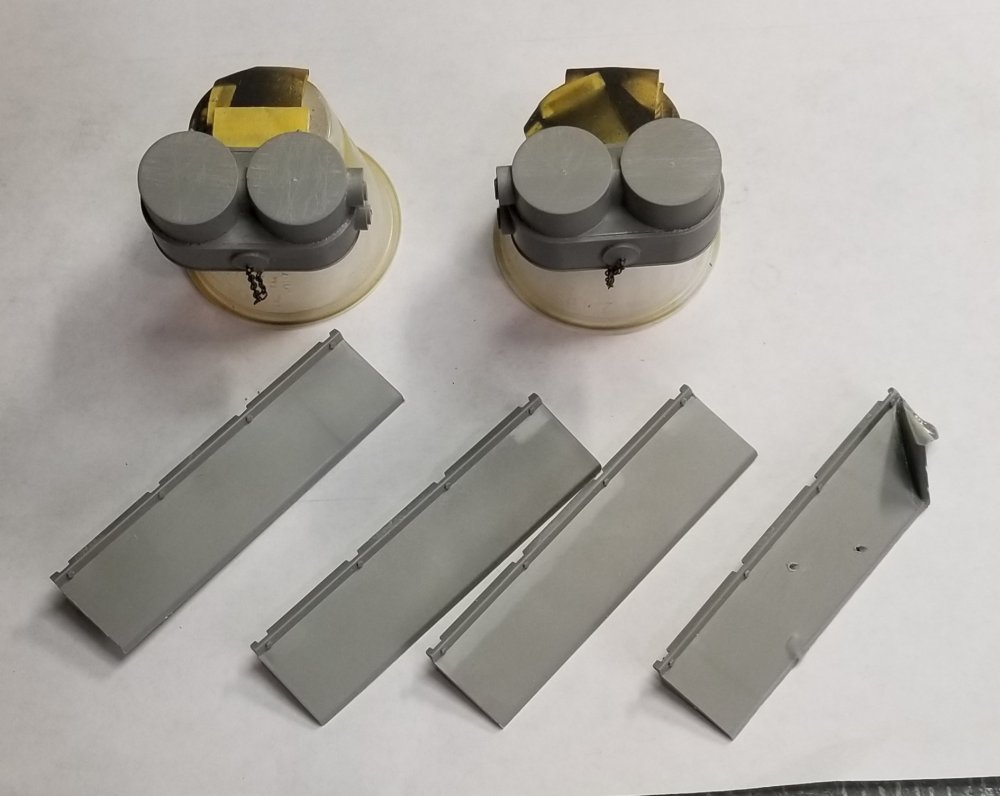
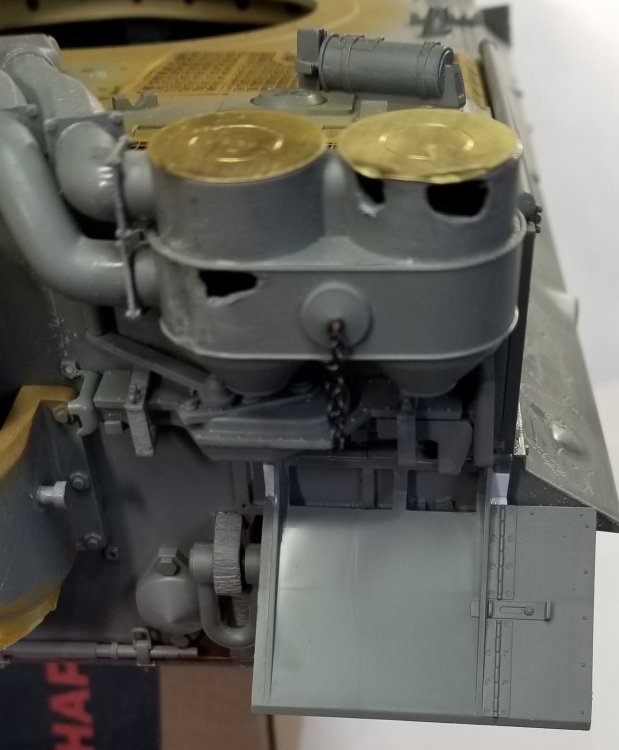
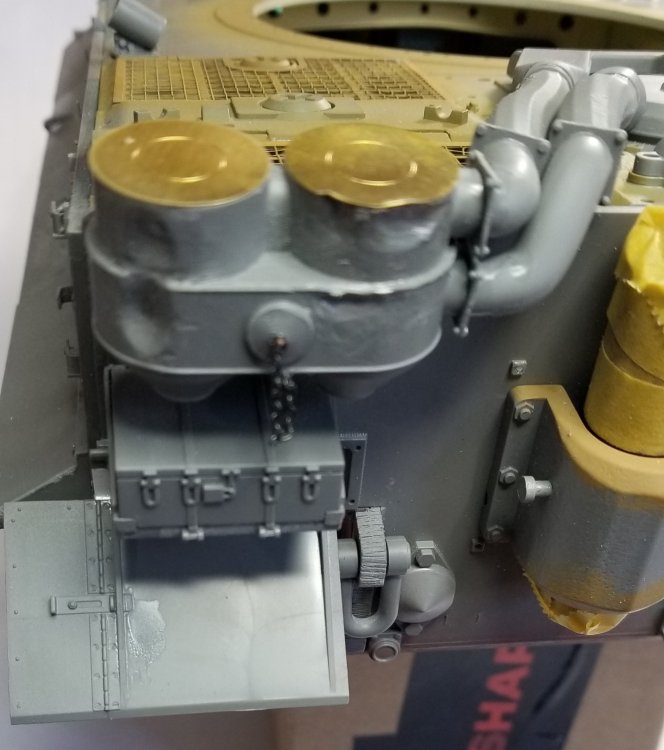
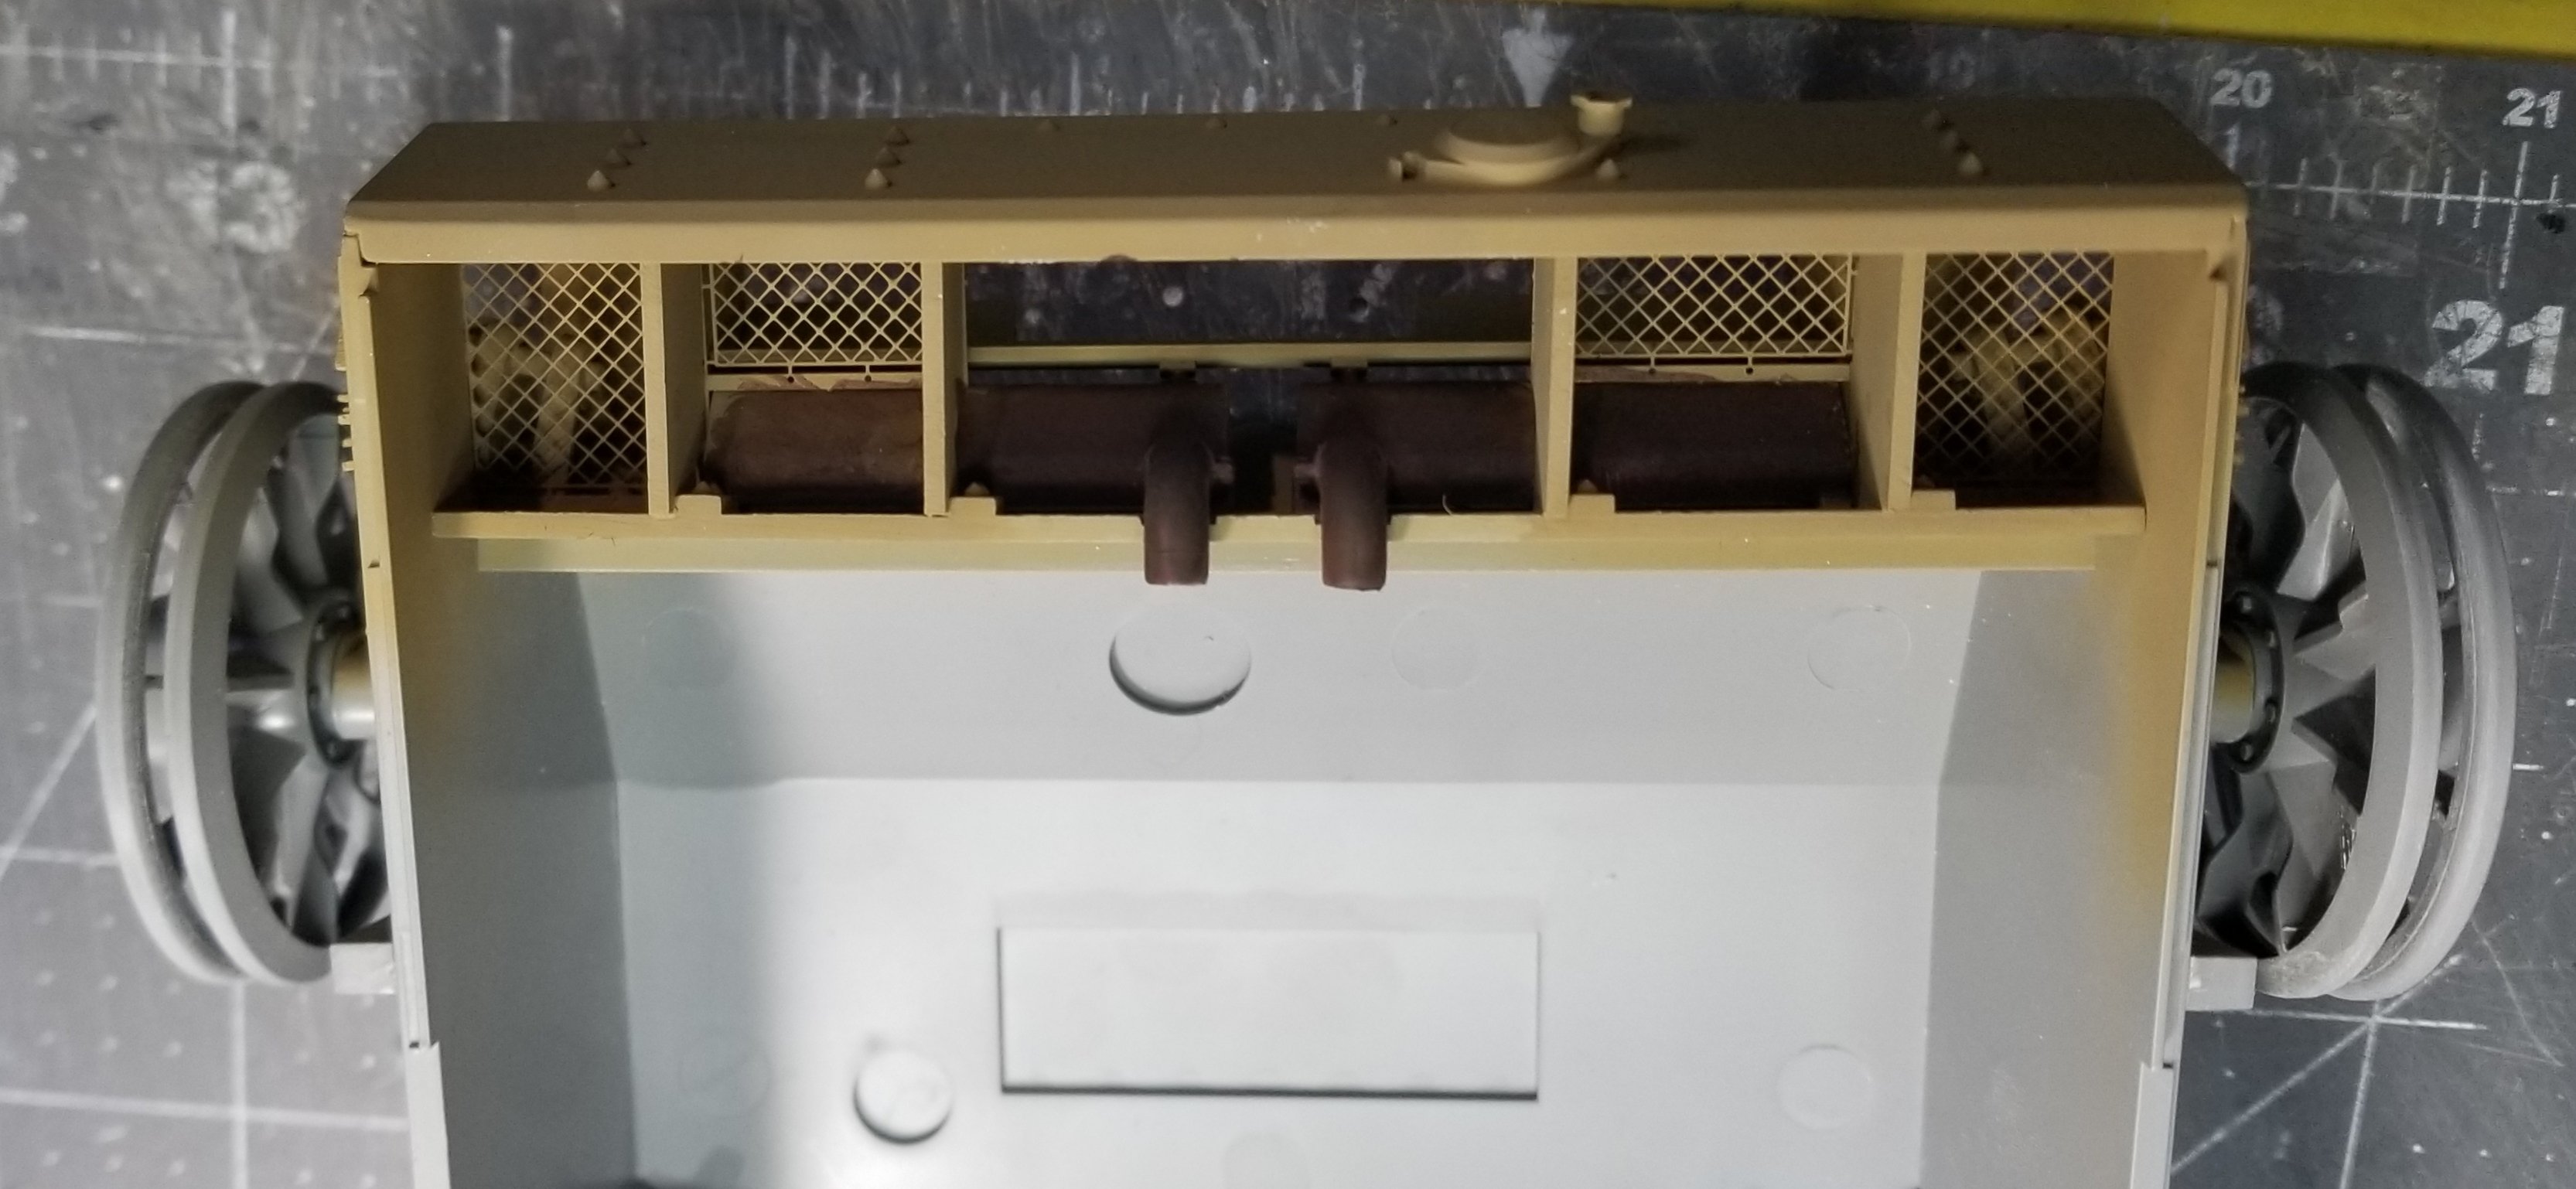
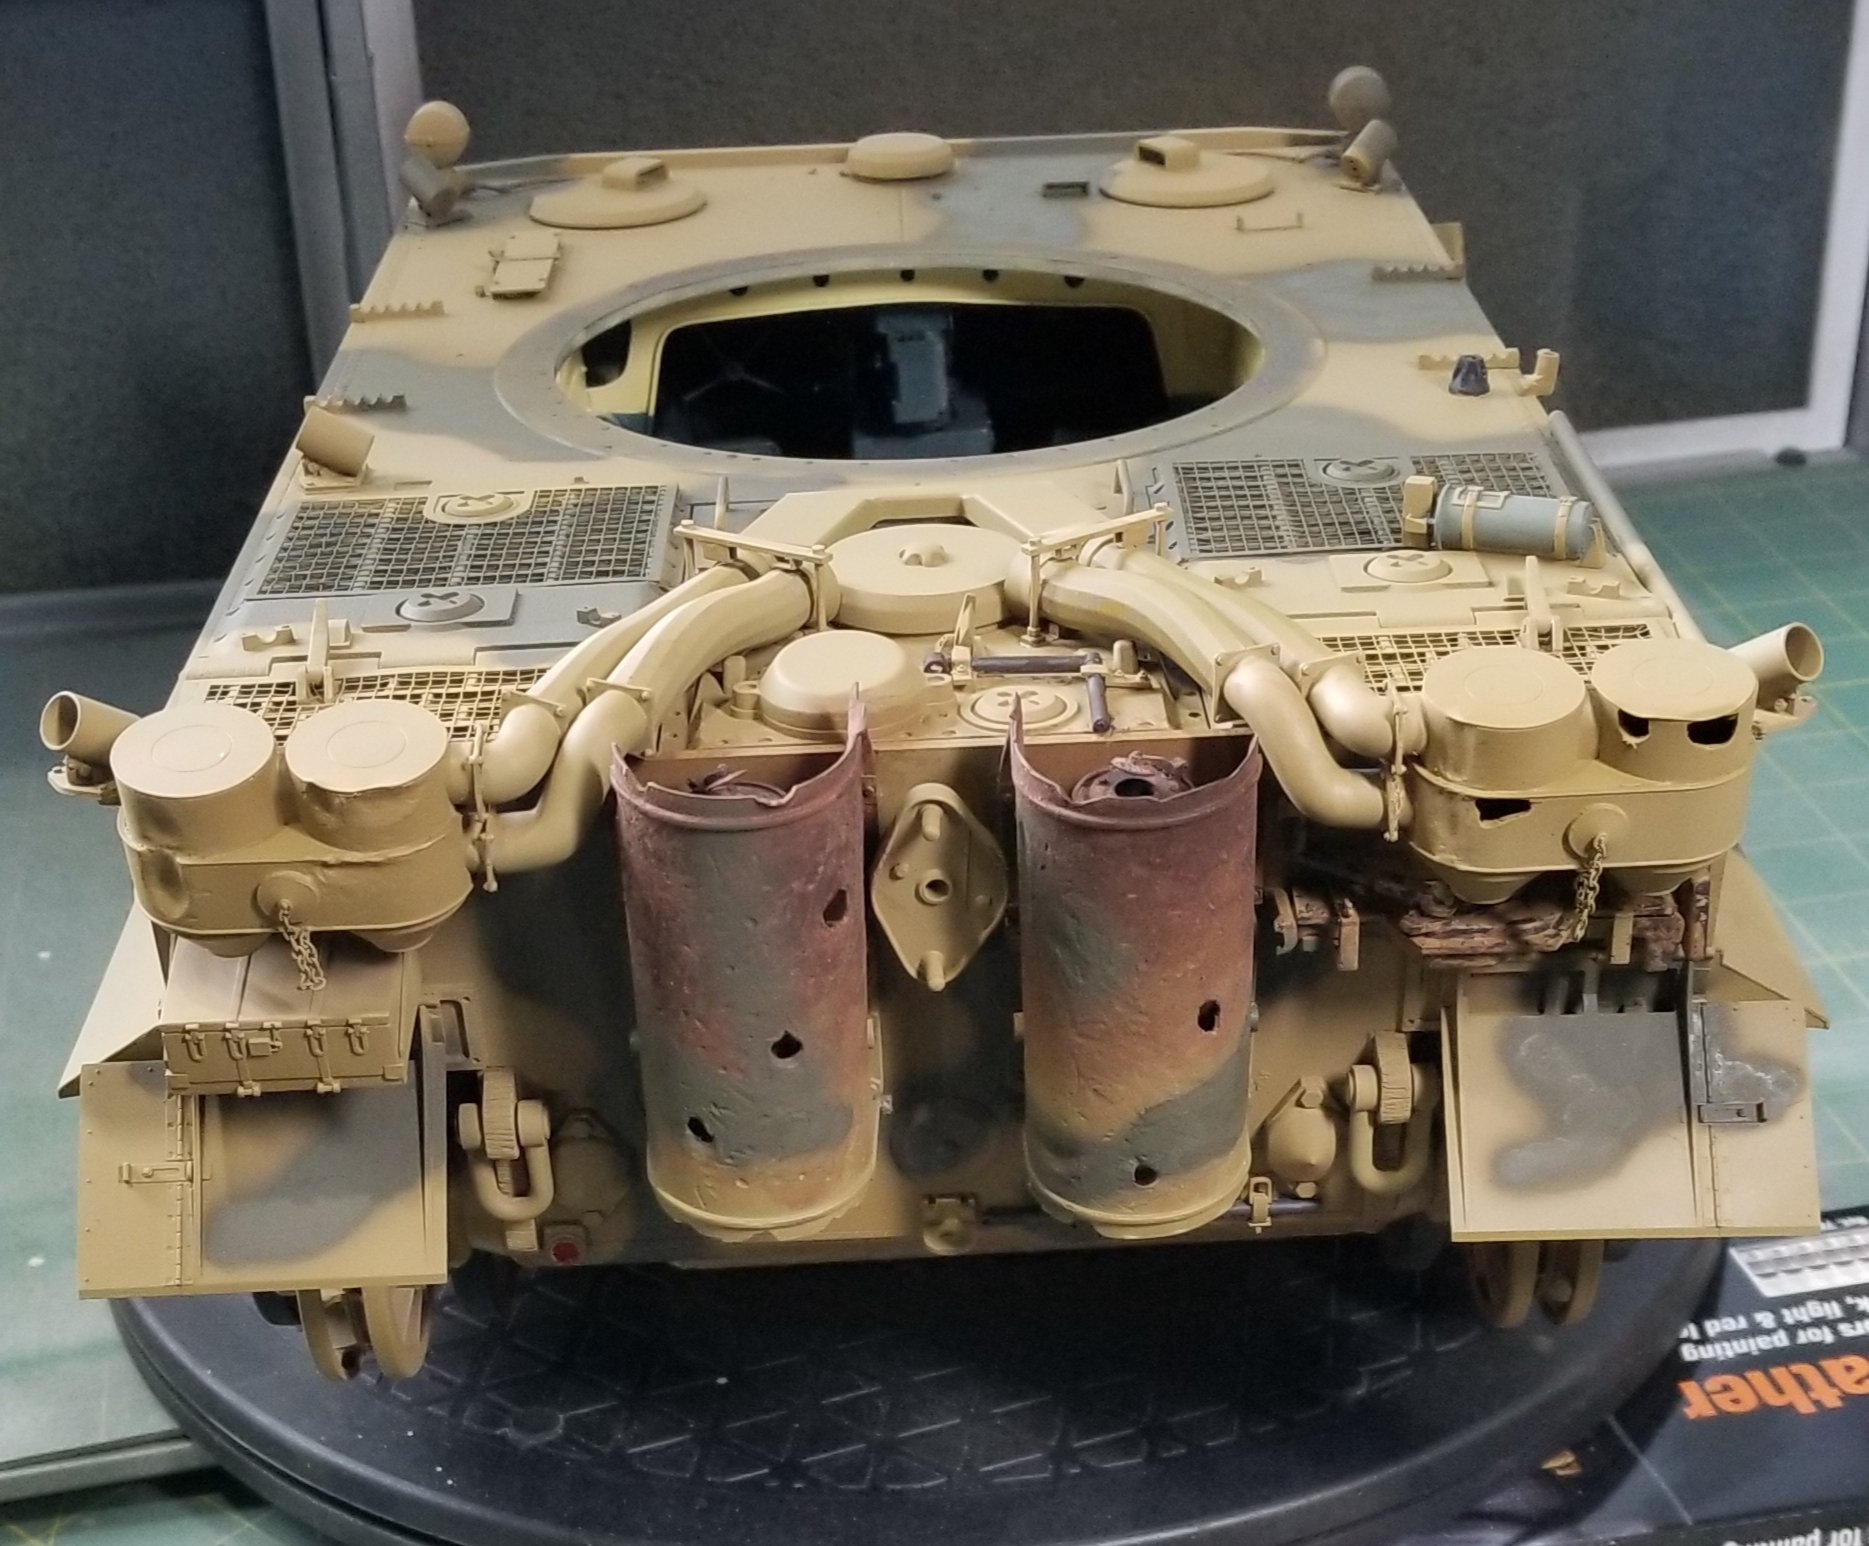
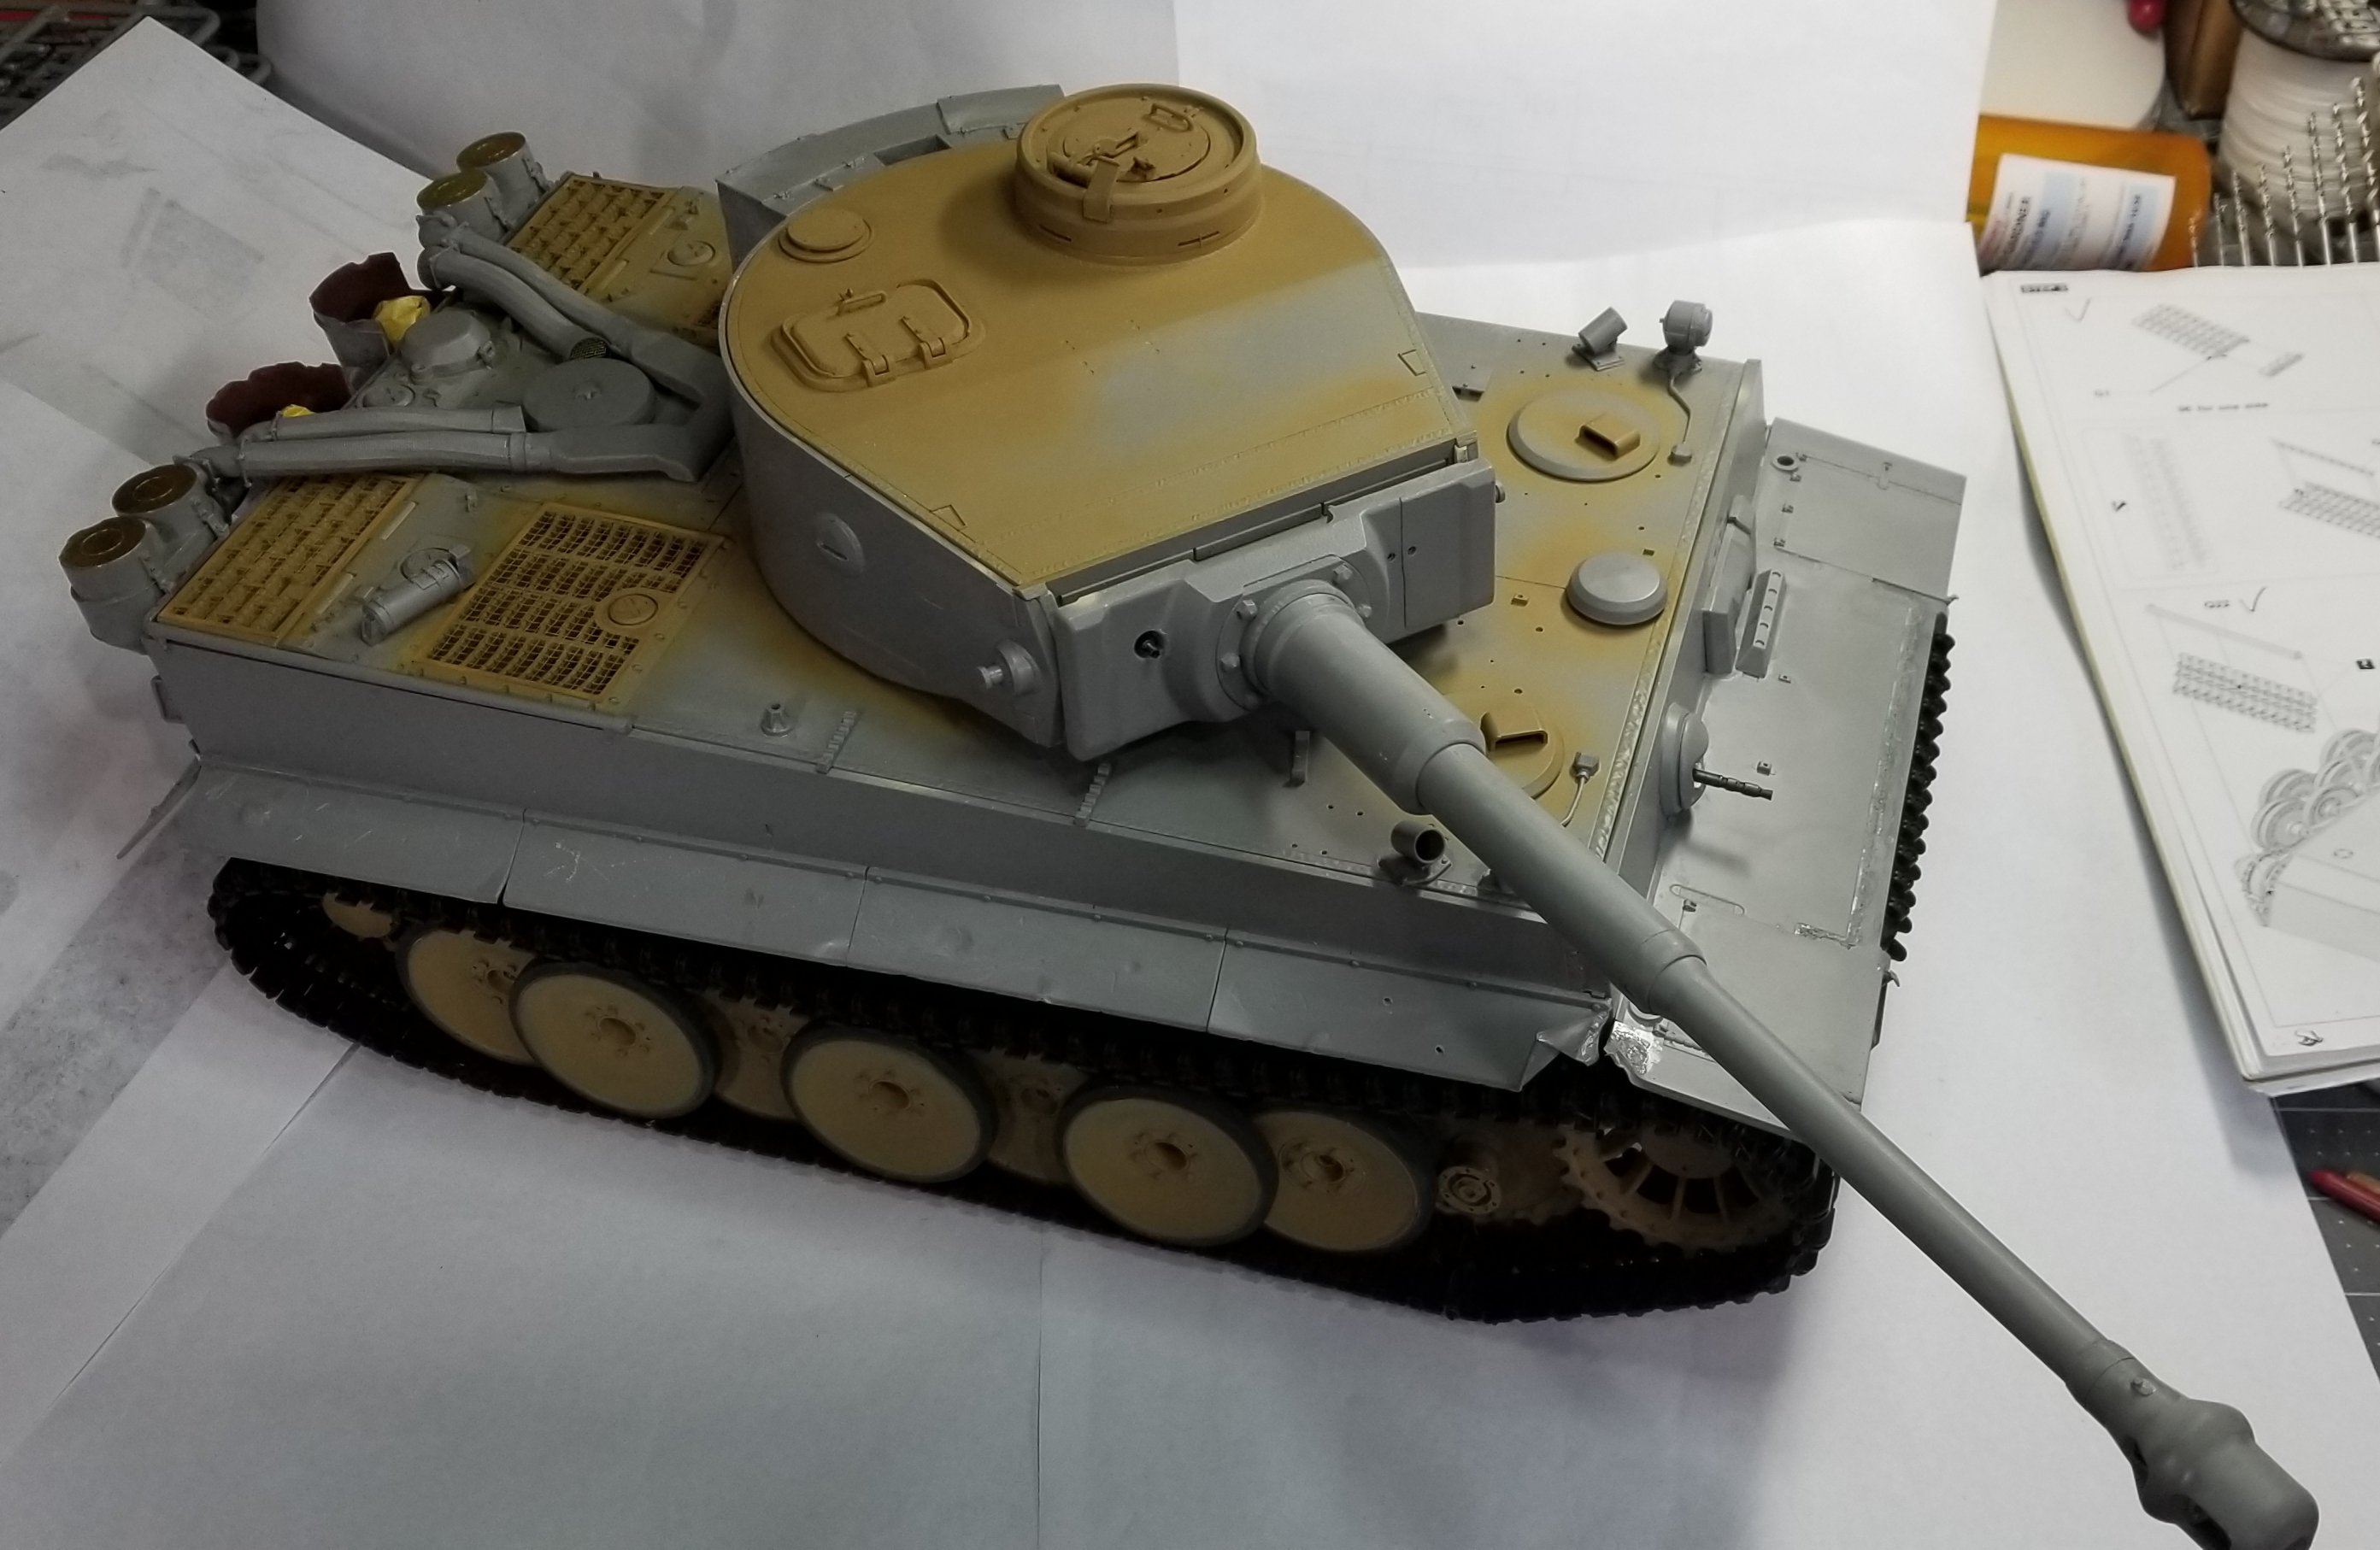
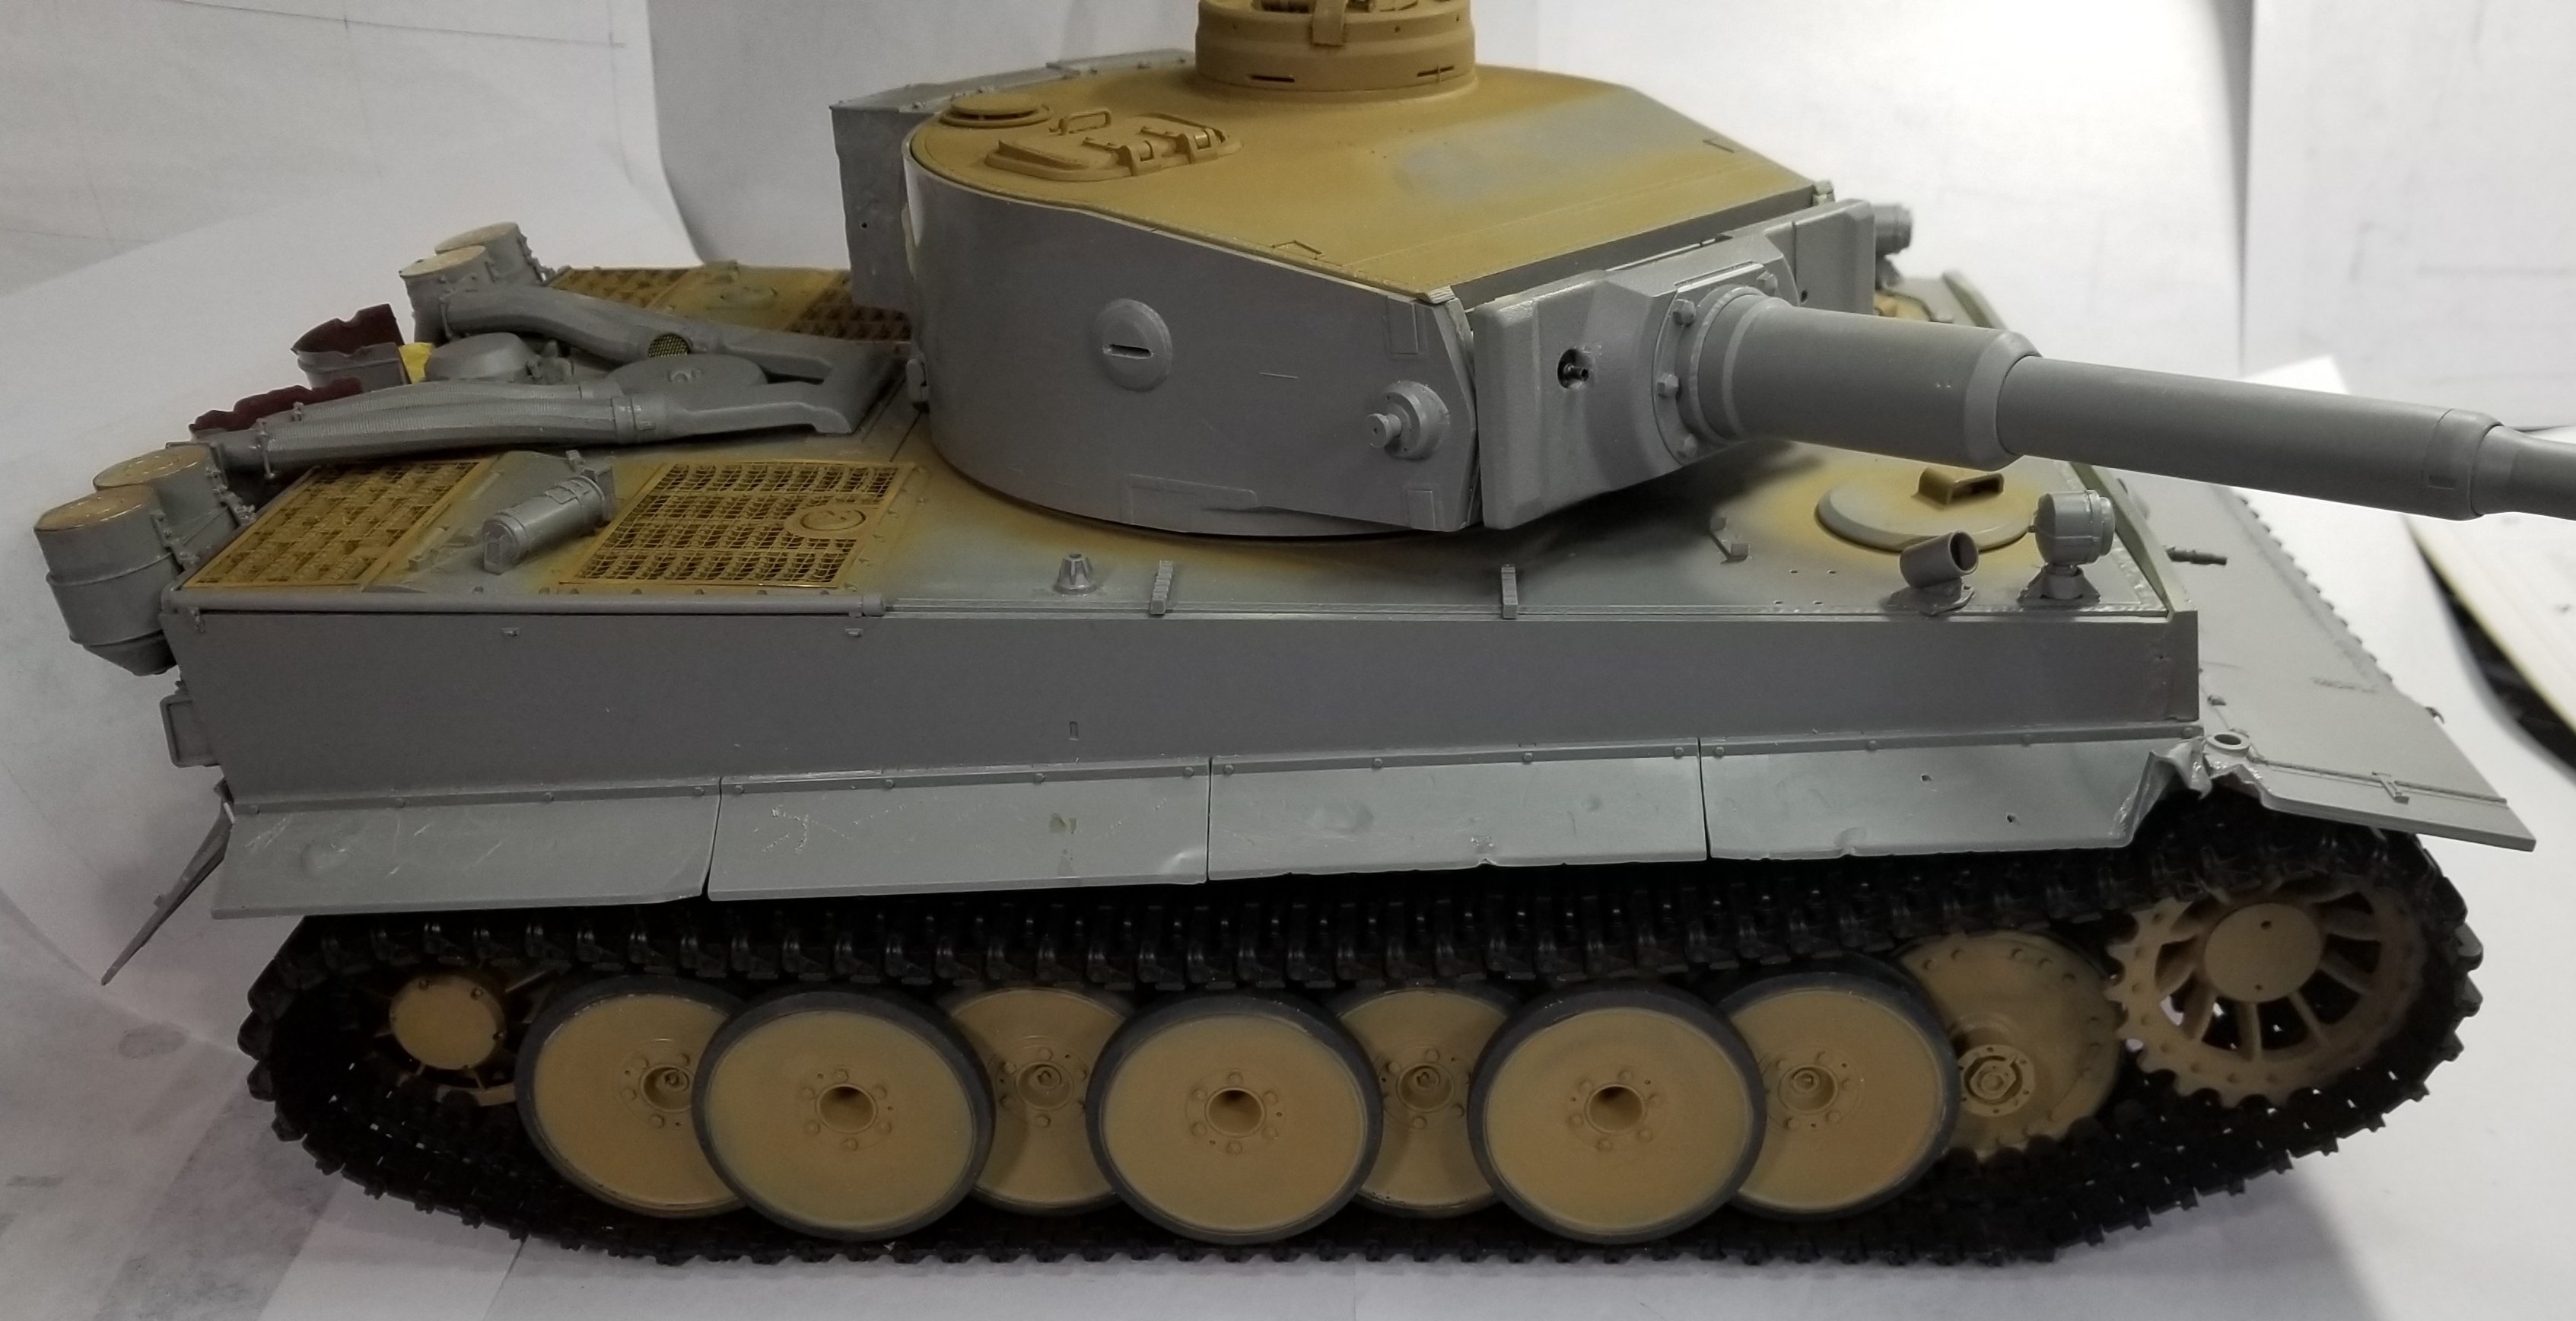
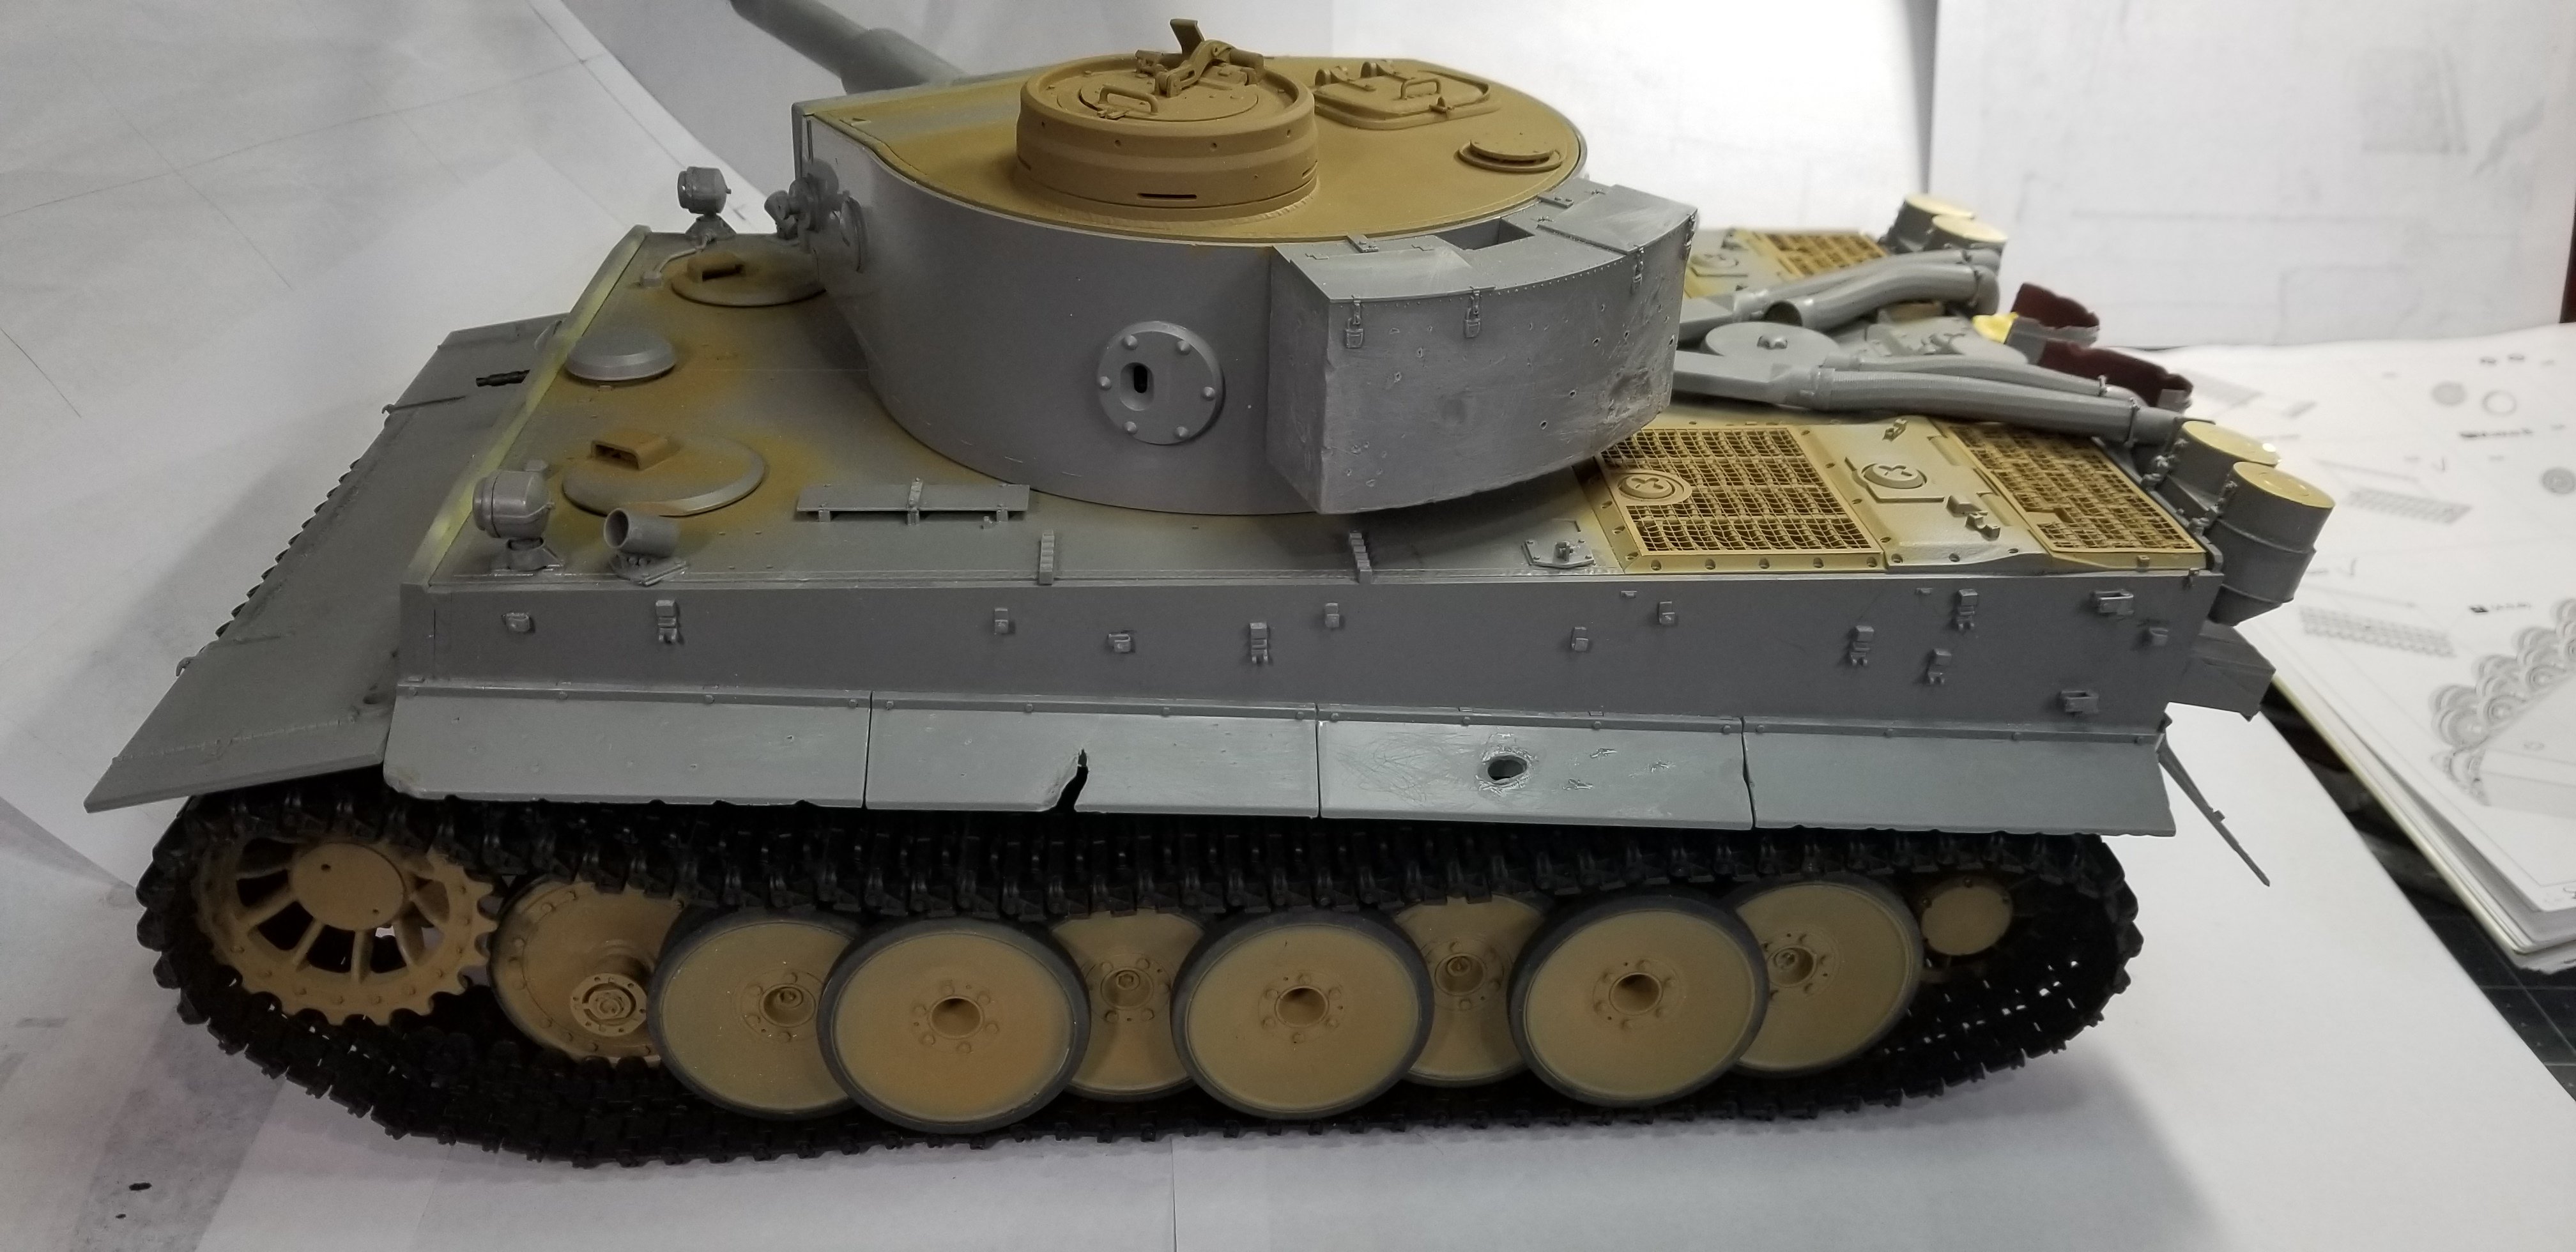
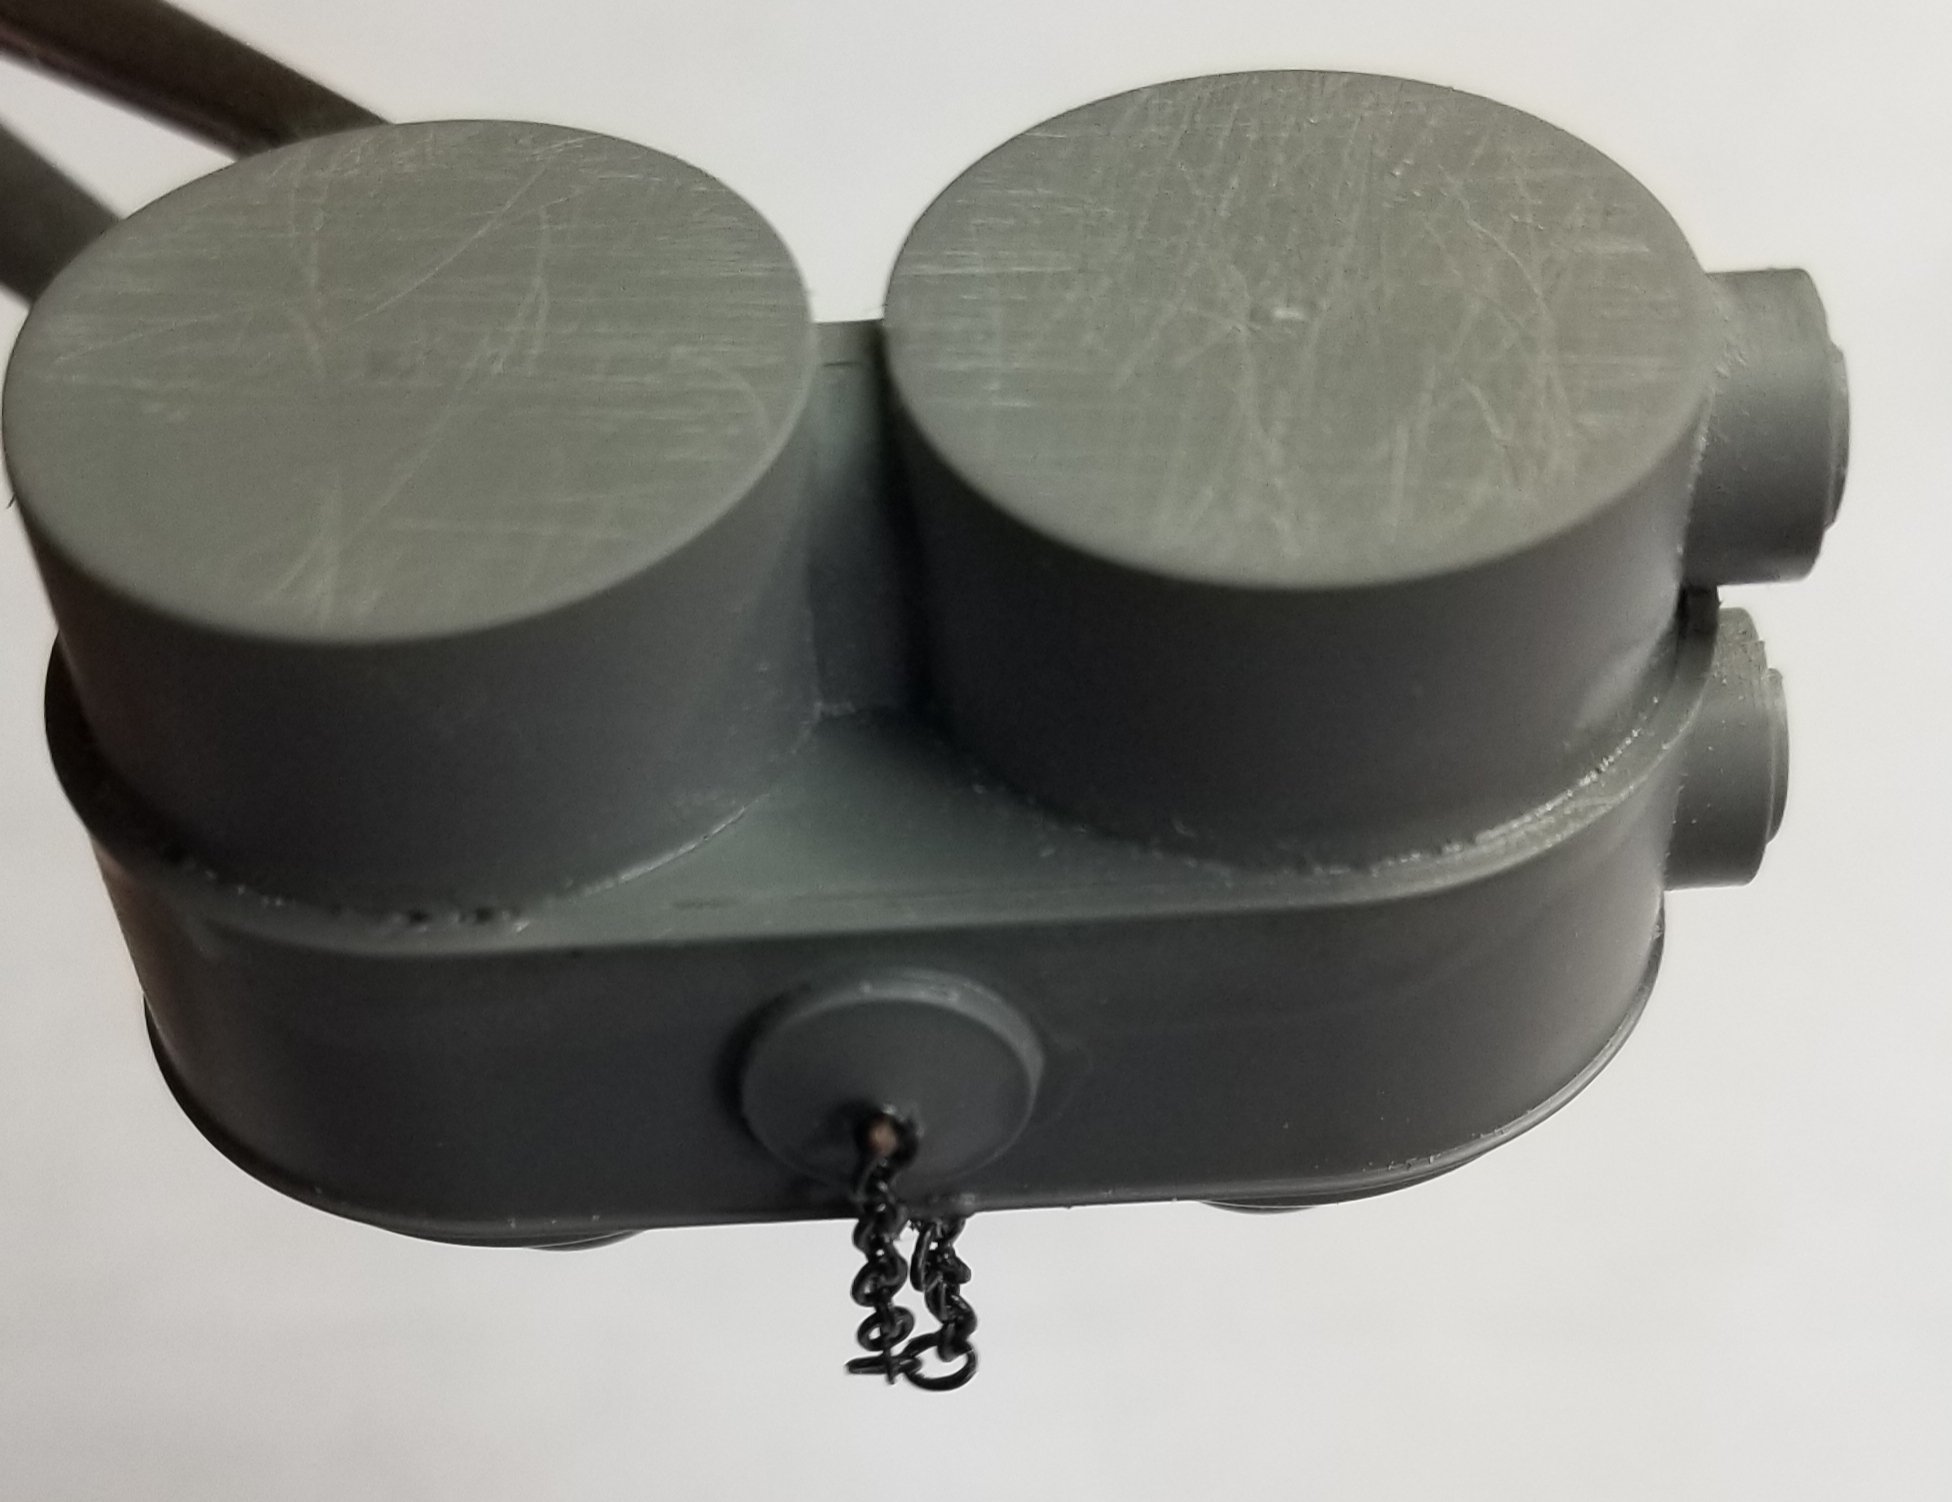
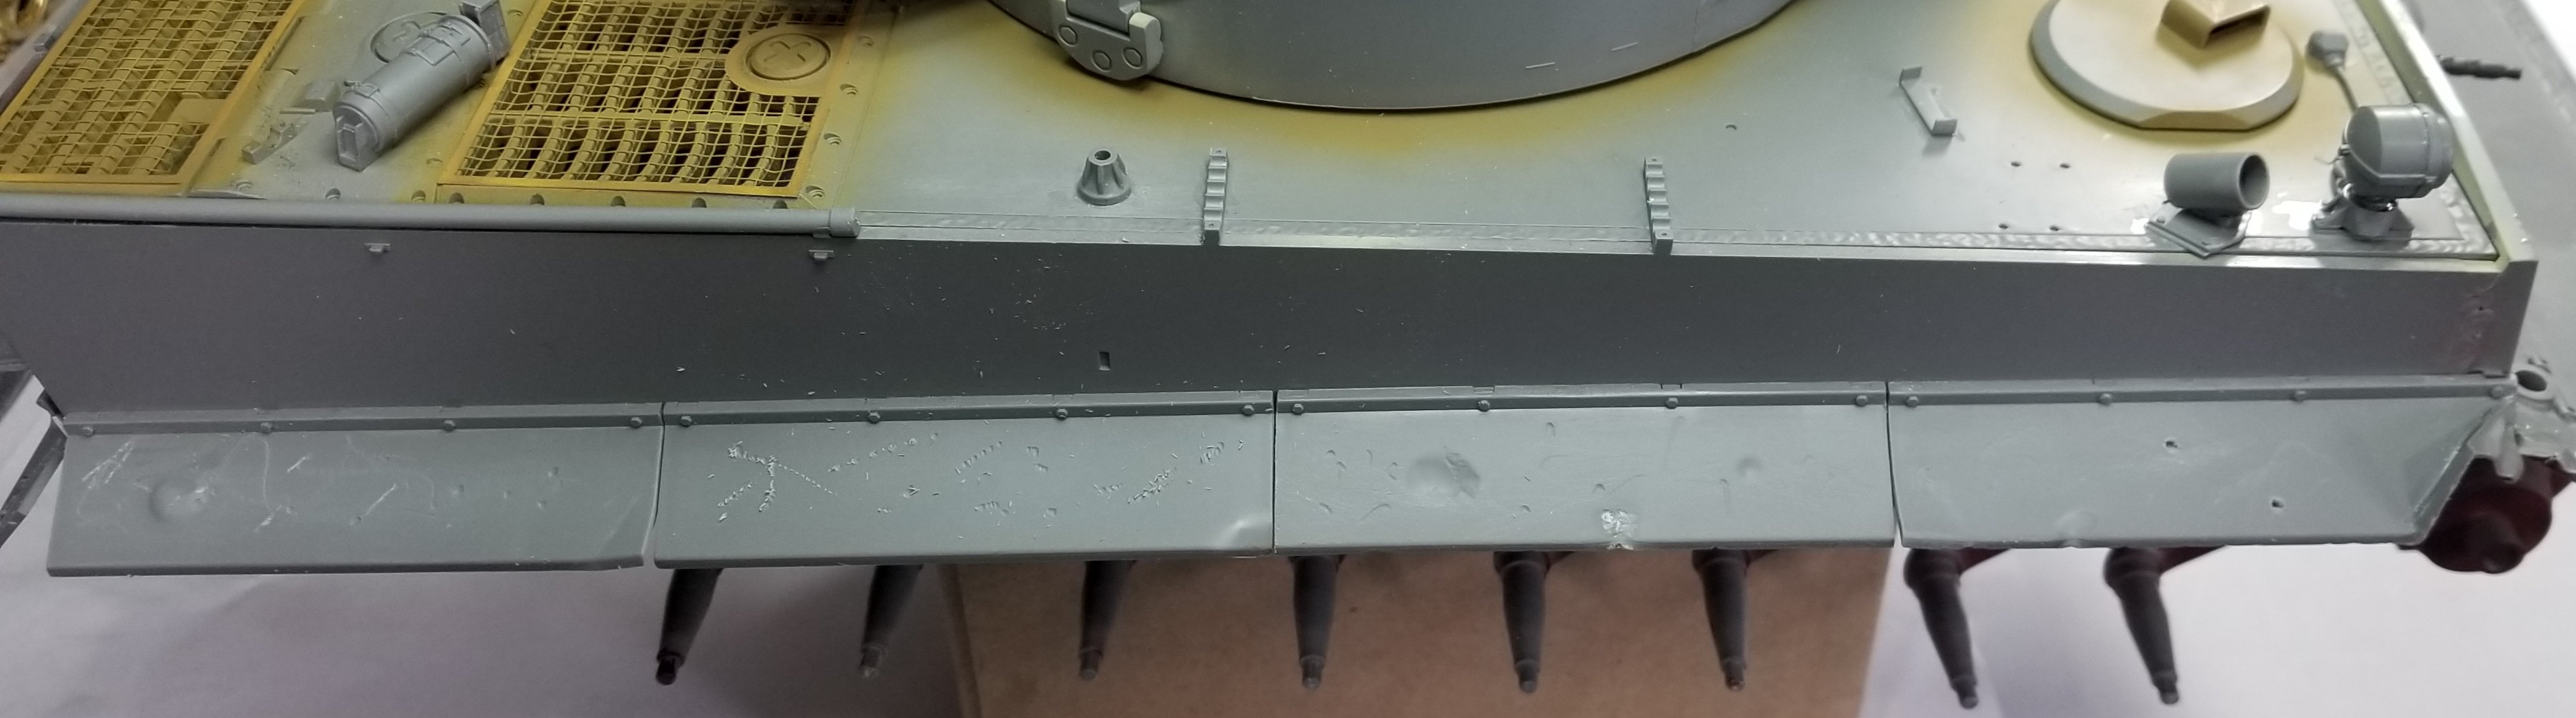
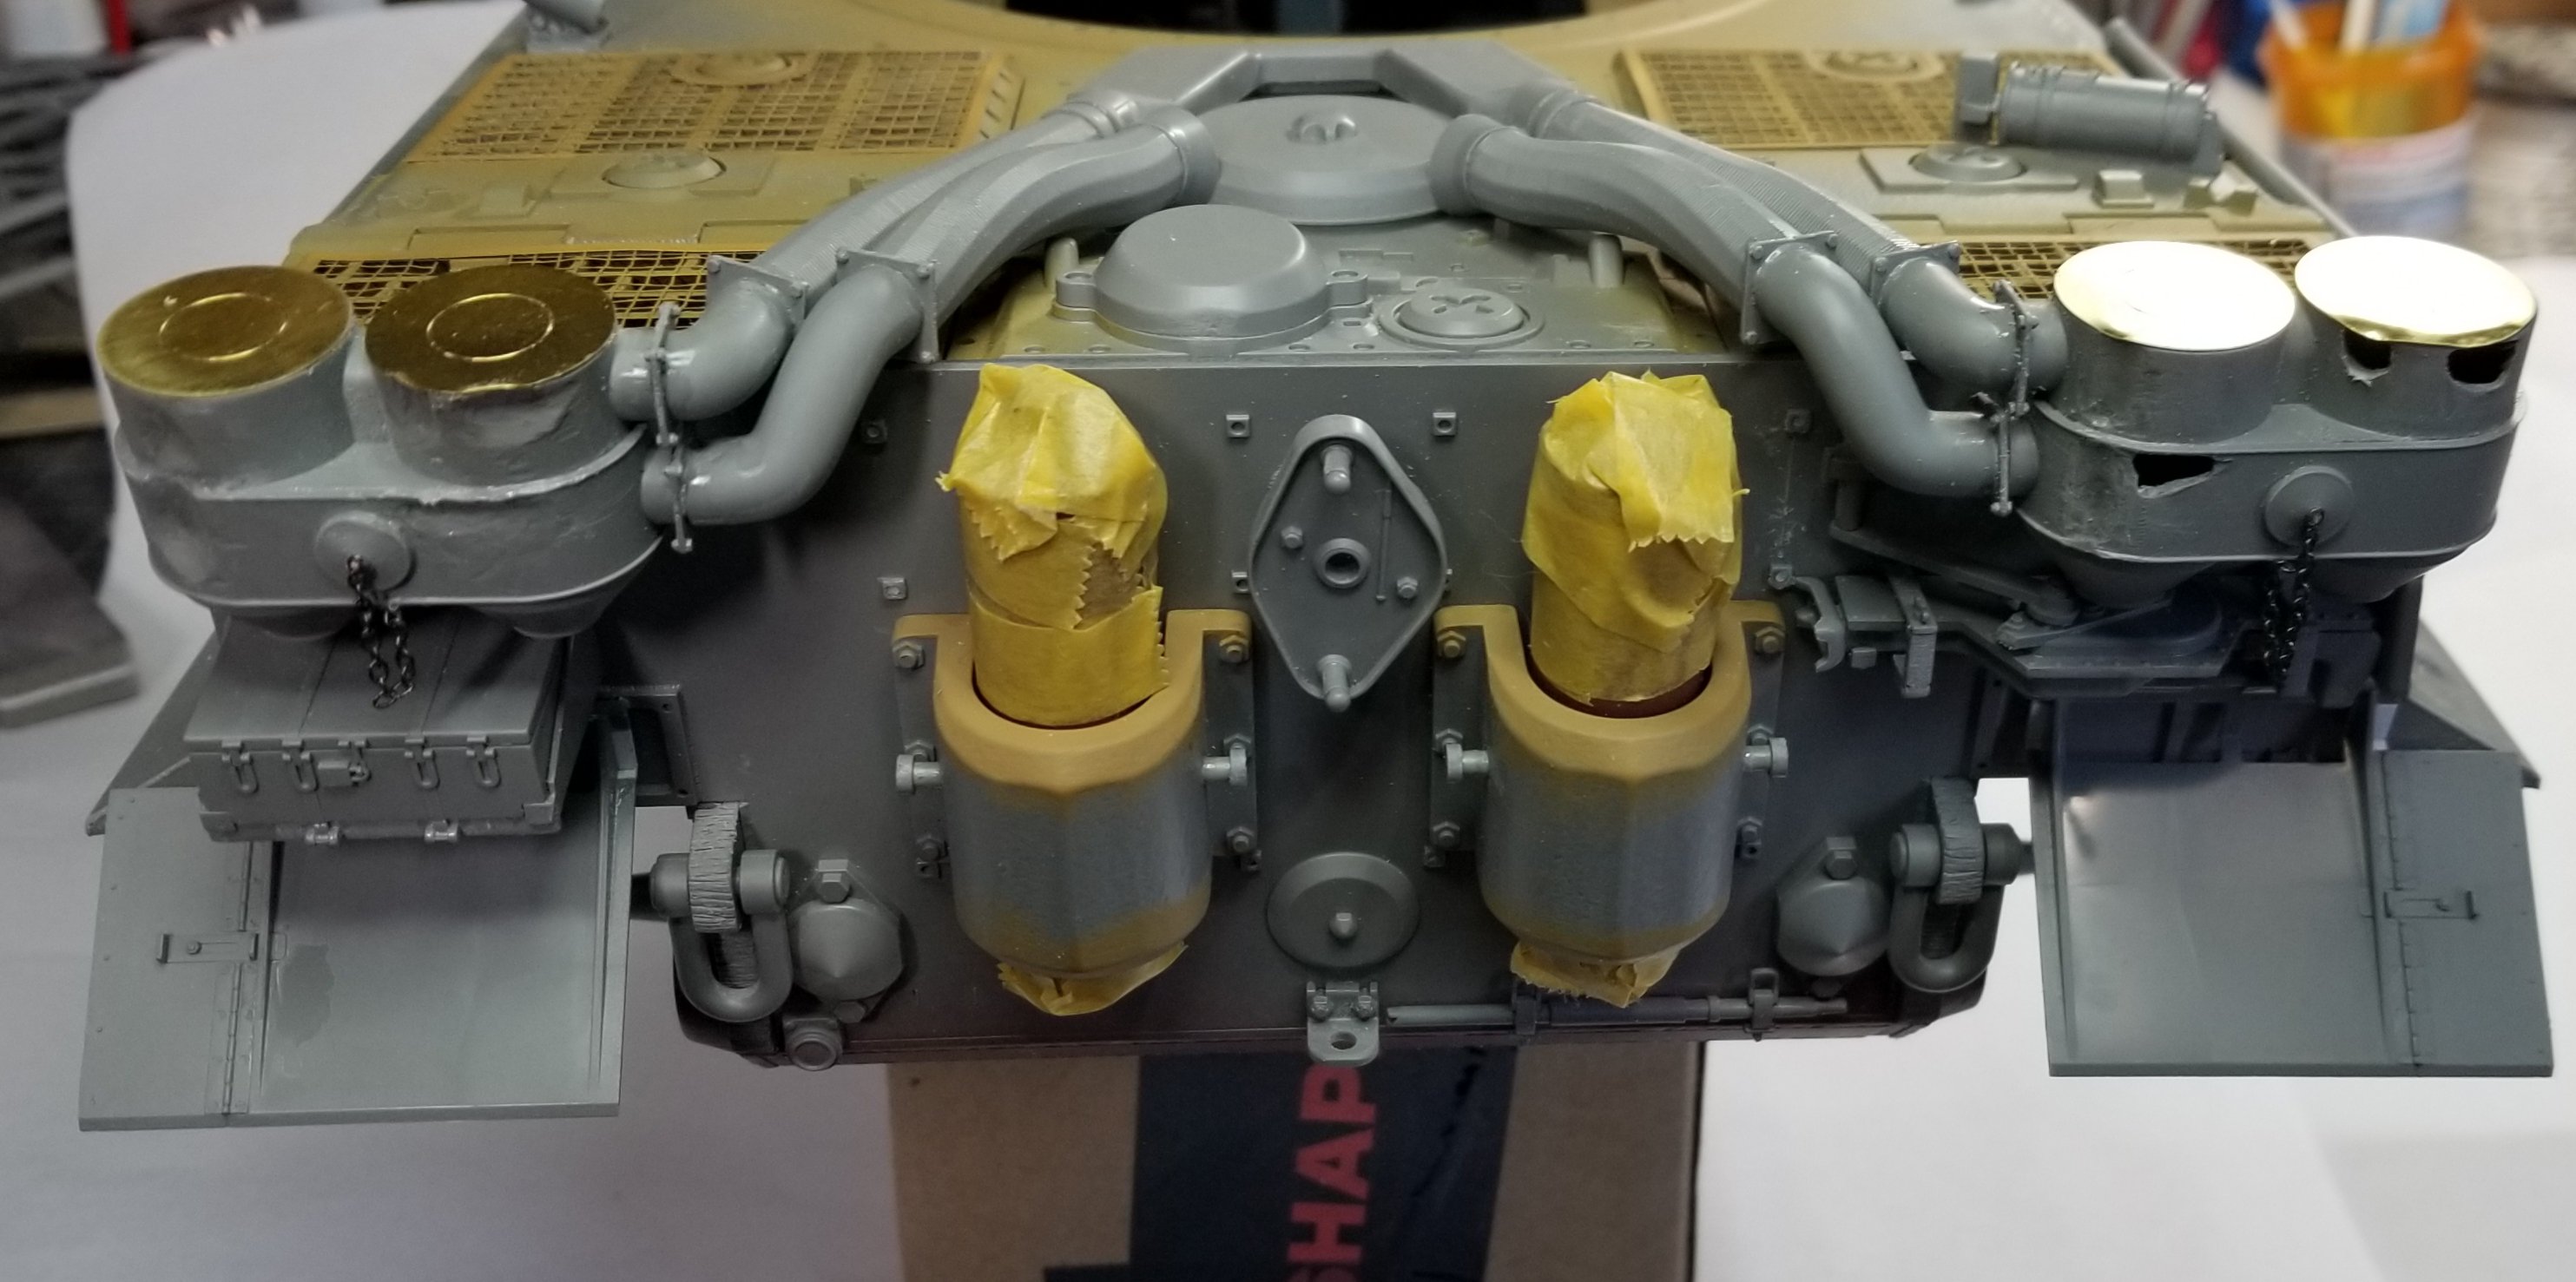
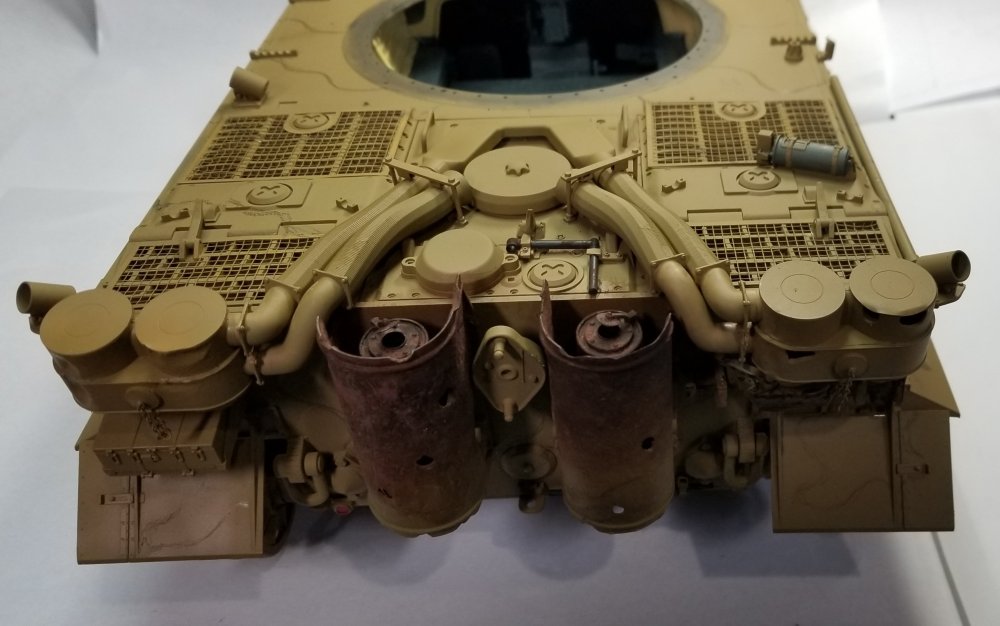
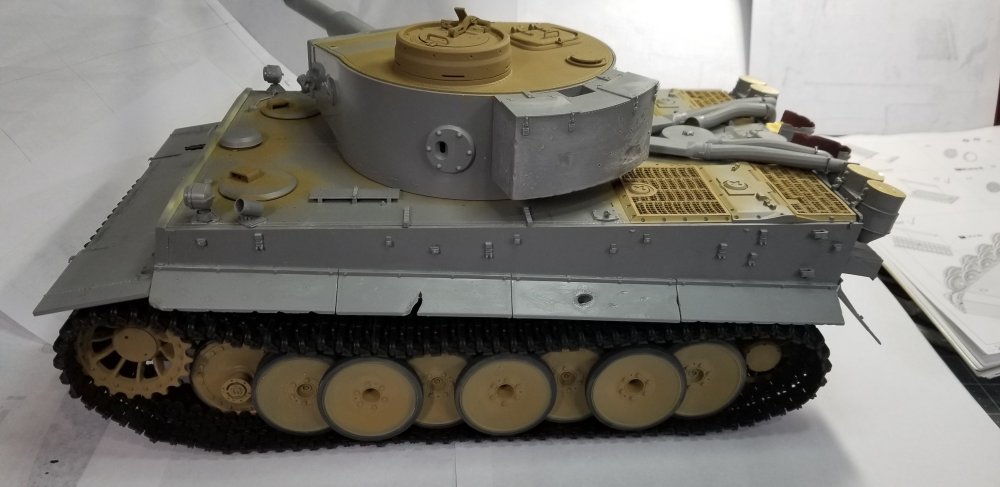
Thanks guys Ok, more work done on the Tiger. I've been working on the fenders and the fifels. This view shows the left and right fifel air cleaners and the right side set of fenders. Cut apart and beat to crap! This view shows the left side fifel with the chain that I added. This view shows the left side fenders and the battle damage that I added. This view shows the right side fenders and the battle damage. This is a closer view of the right front fender damage. This is a closer view of the left side fender damage. This view shows the fifel air cleaners and tubing. These are just put together temporarily for pictures, I still have to remove the hull roof so I can weather the interior. This view shows the right side fifel and it's damage. I cheated a little I copied Tiger 131's damage. This view shows the left side fifel and it's damage. Well that's it for now be back soon with more updates. Ron G