CrankyCrafstman
-
Posts
1,350 -
Joined
-
Last visited
Content Type
Profiles
Forums
Events
Gallery
Everything posted by CrankyCrafstman
-
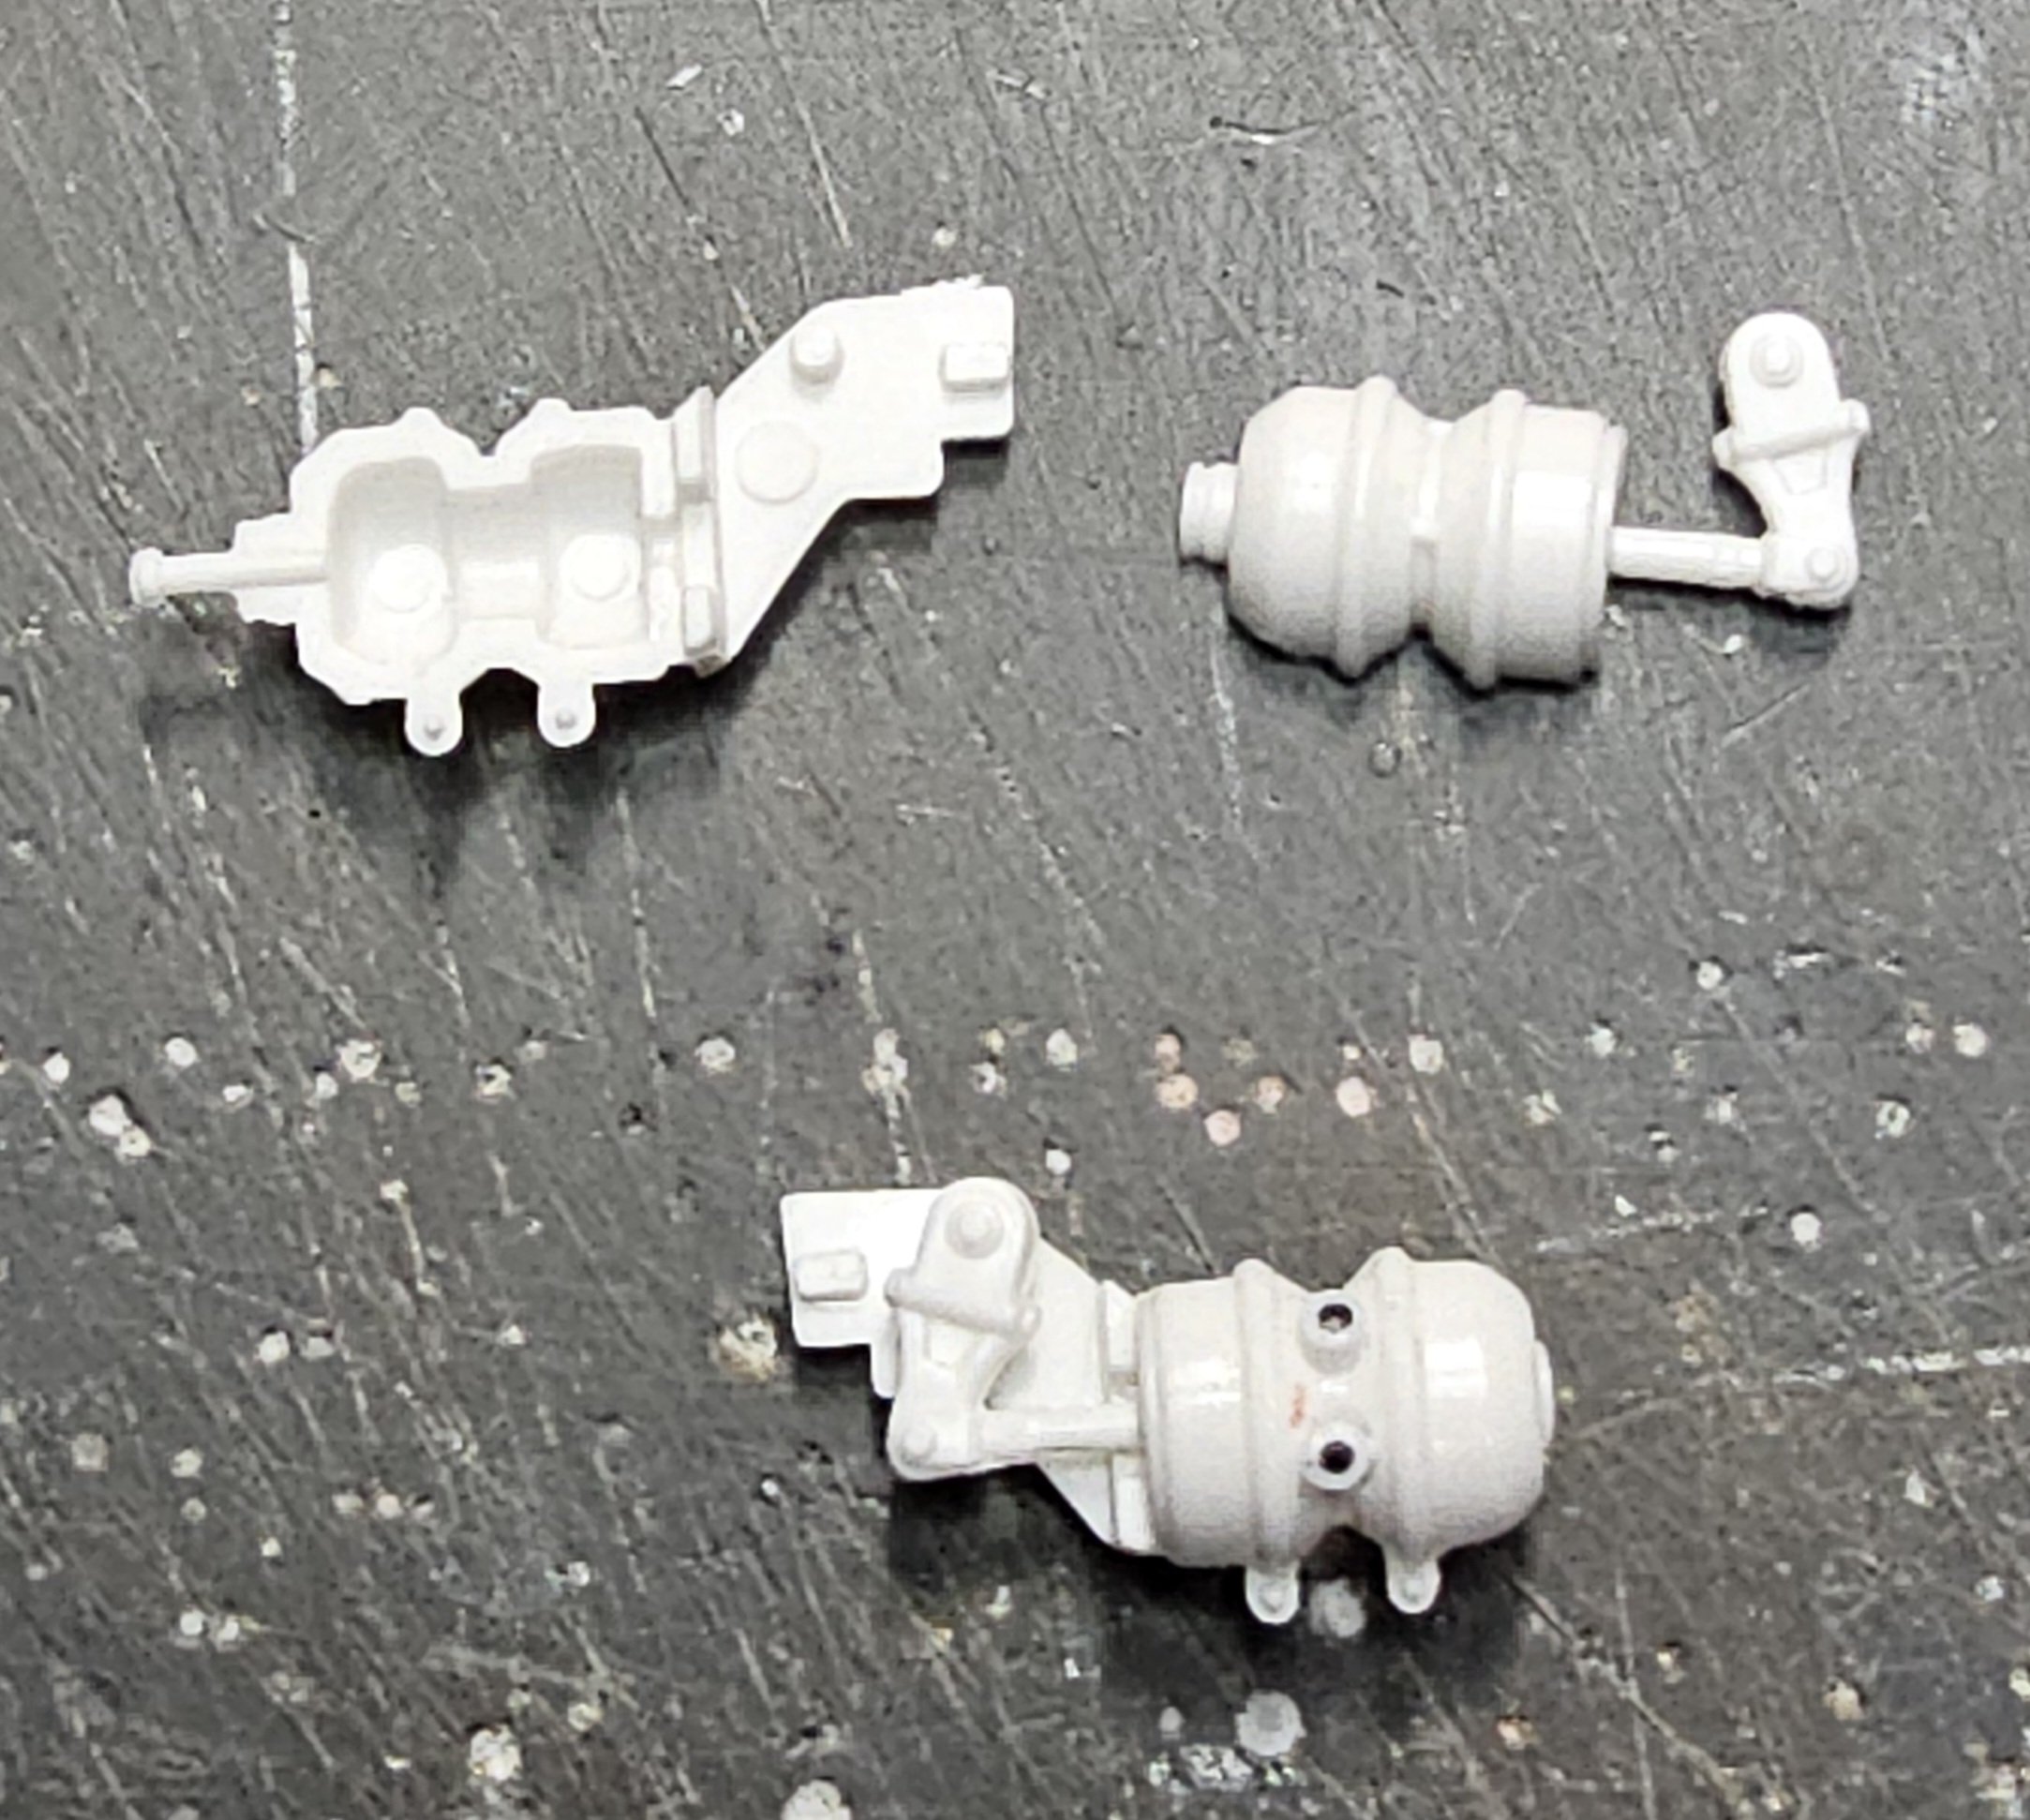
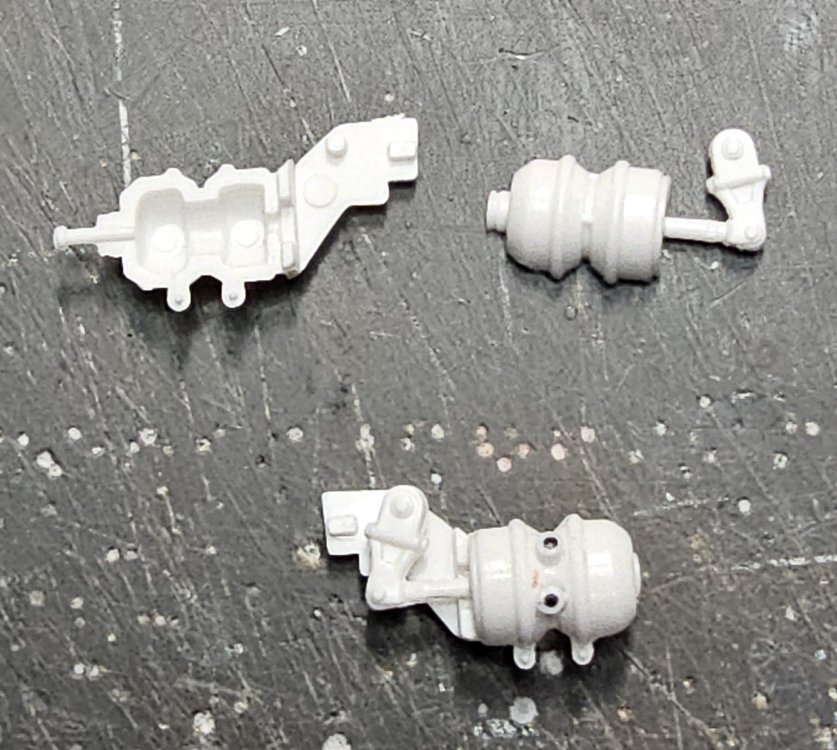
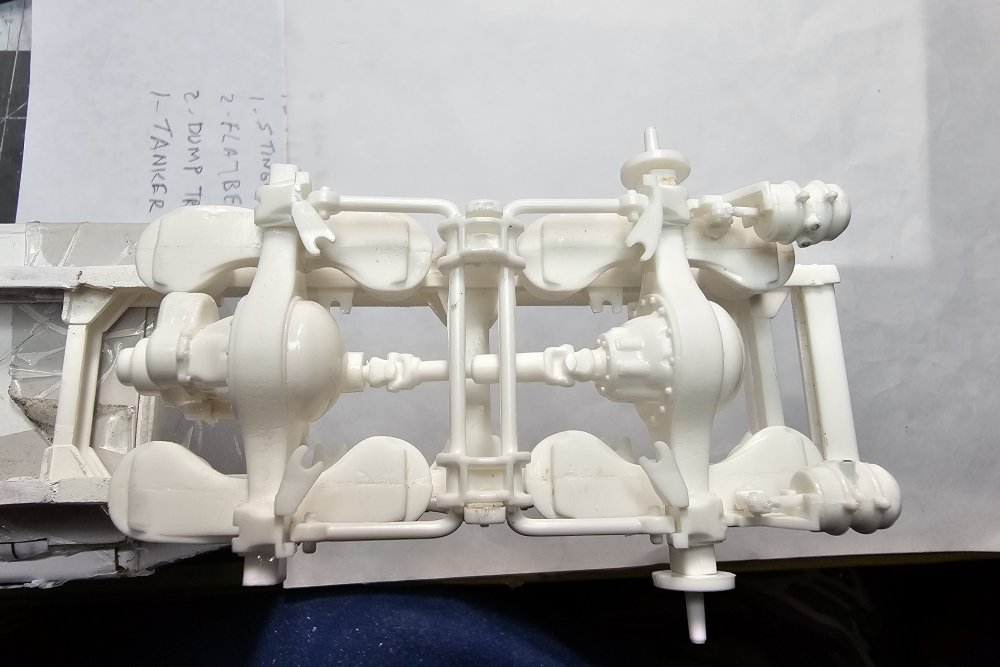
 Hey all Small update on this build. This view shows the photo-etch instrument panel I got from Jamie at Moluminum..there's alot more that comes on this photo etch piece for the interior. This view shows the rear brake chambers from this Revell kit. The bottom one I modified by adding the air line inlets and removing the caging bolts from the rear of the cans. This view shows both rear axles in place. The rear one has the brake chambers mounted in place. Well that's it for now be back soon. Ron G
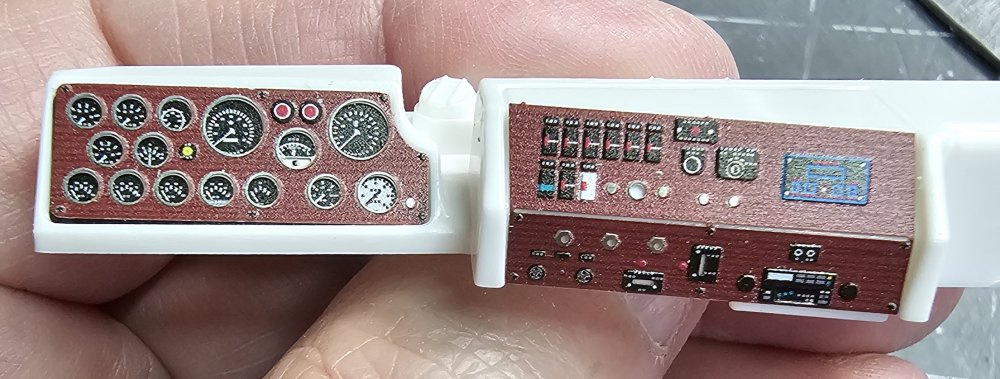
-
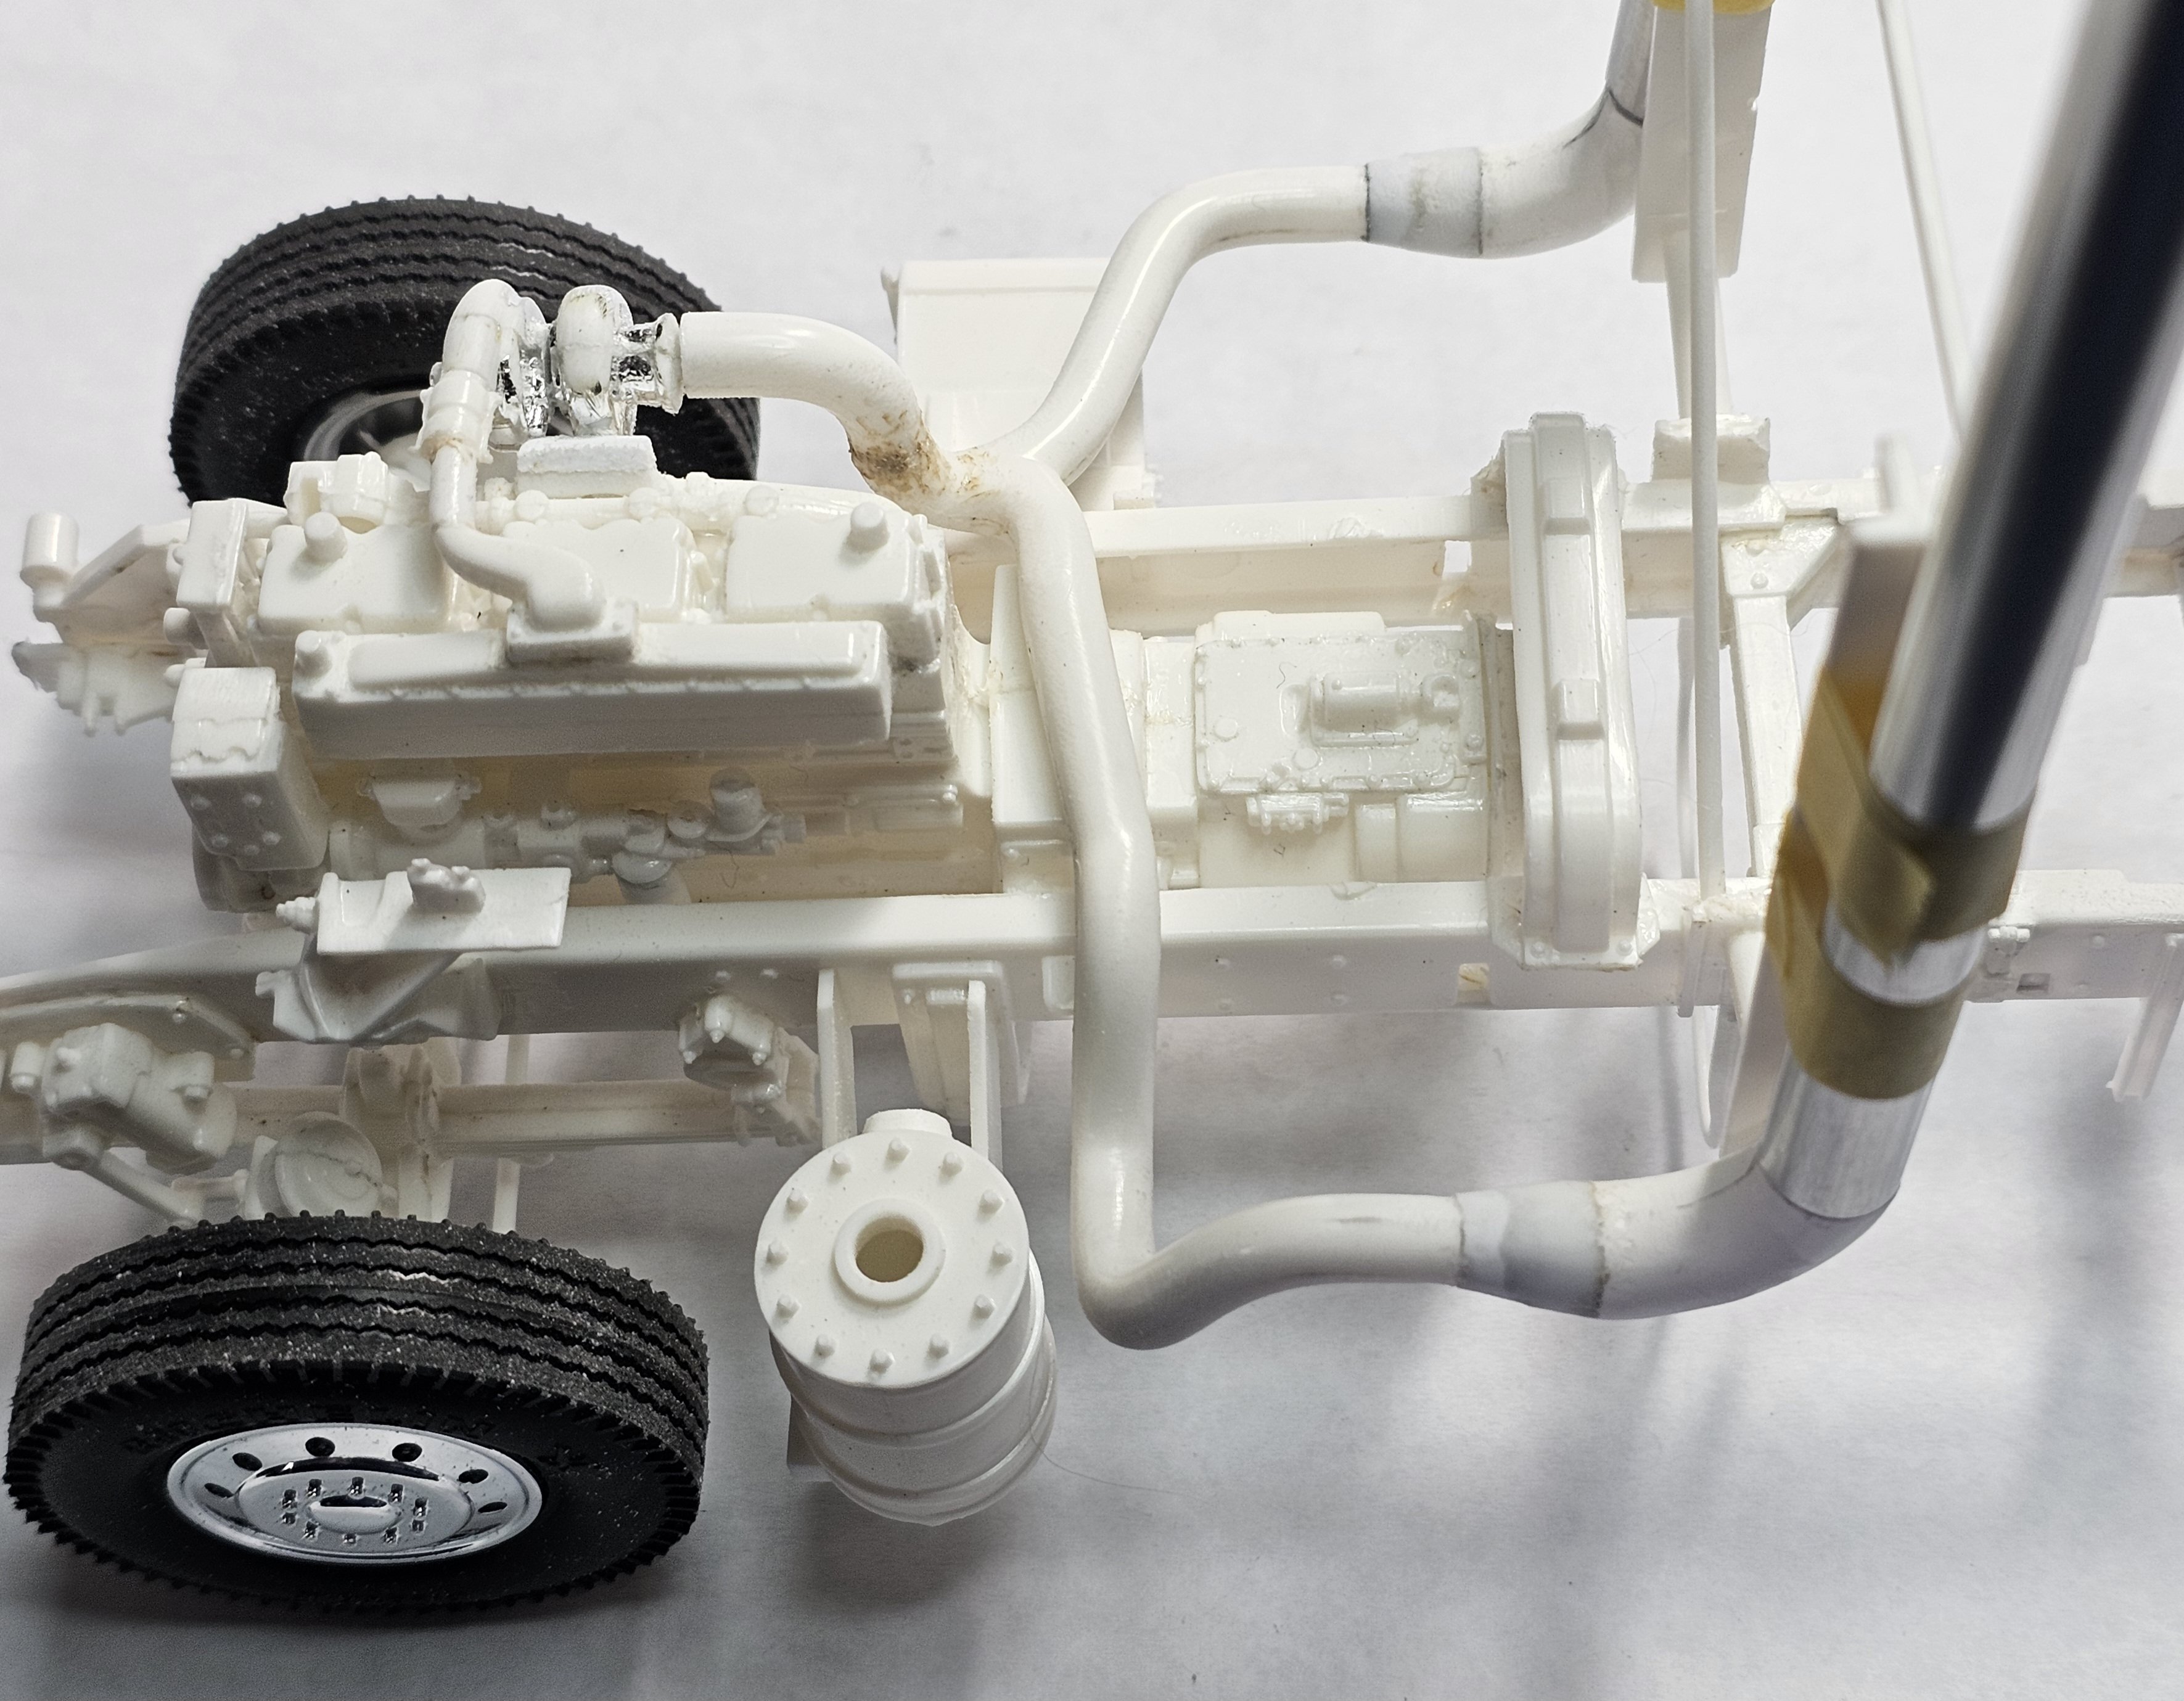
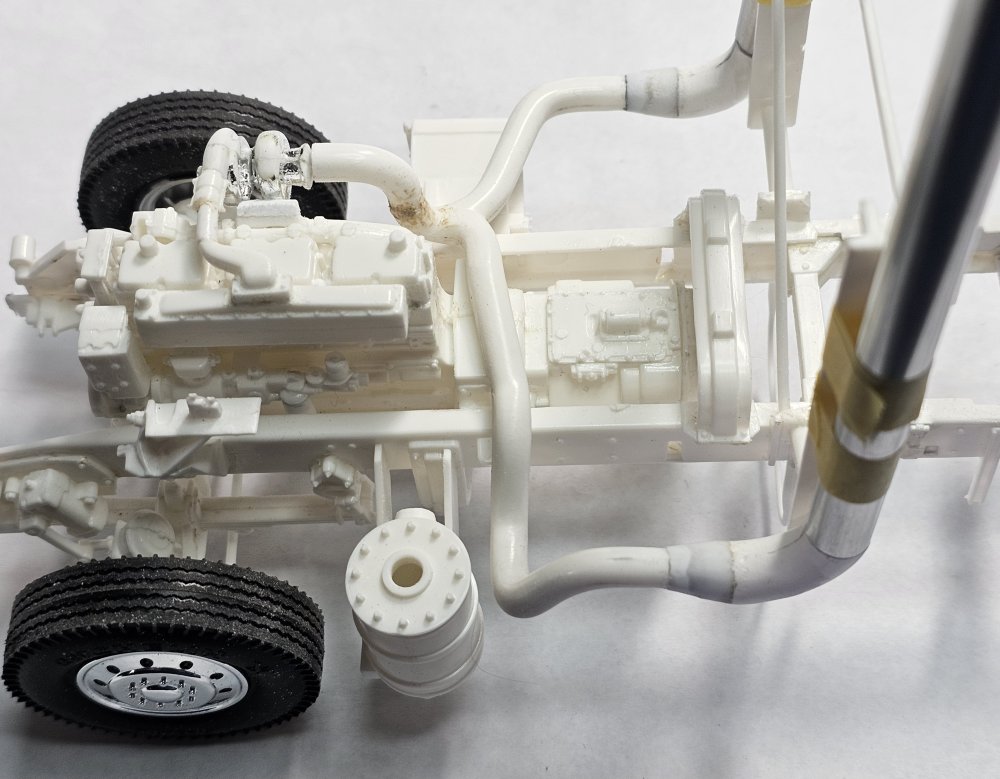
Hey all Small update on this build. This view shows the exhaust temporarily mounted. This view shows the exhaust from the turbo to the exhaust stacks. The elbows are Plastsruct 5/16" diameter. The adapters from 5" exhaust to the 8" stacks I scratch built. These will be painted with chrome/silver paint. I also converted the twin turbo Cummins to a single turbo. Well that's it for now be back soon with more updates. Ron G
-
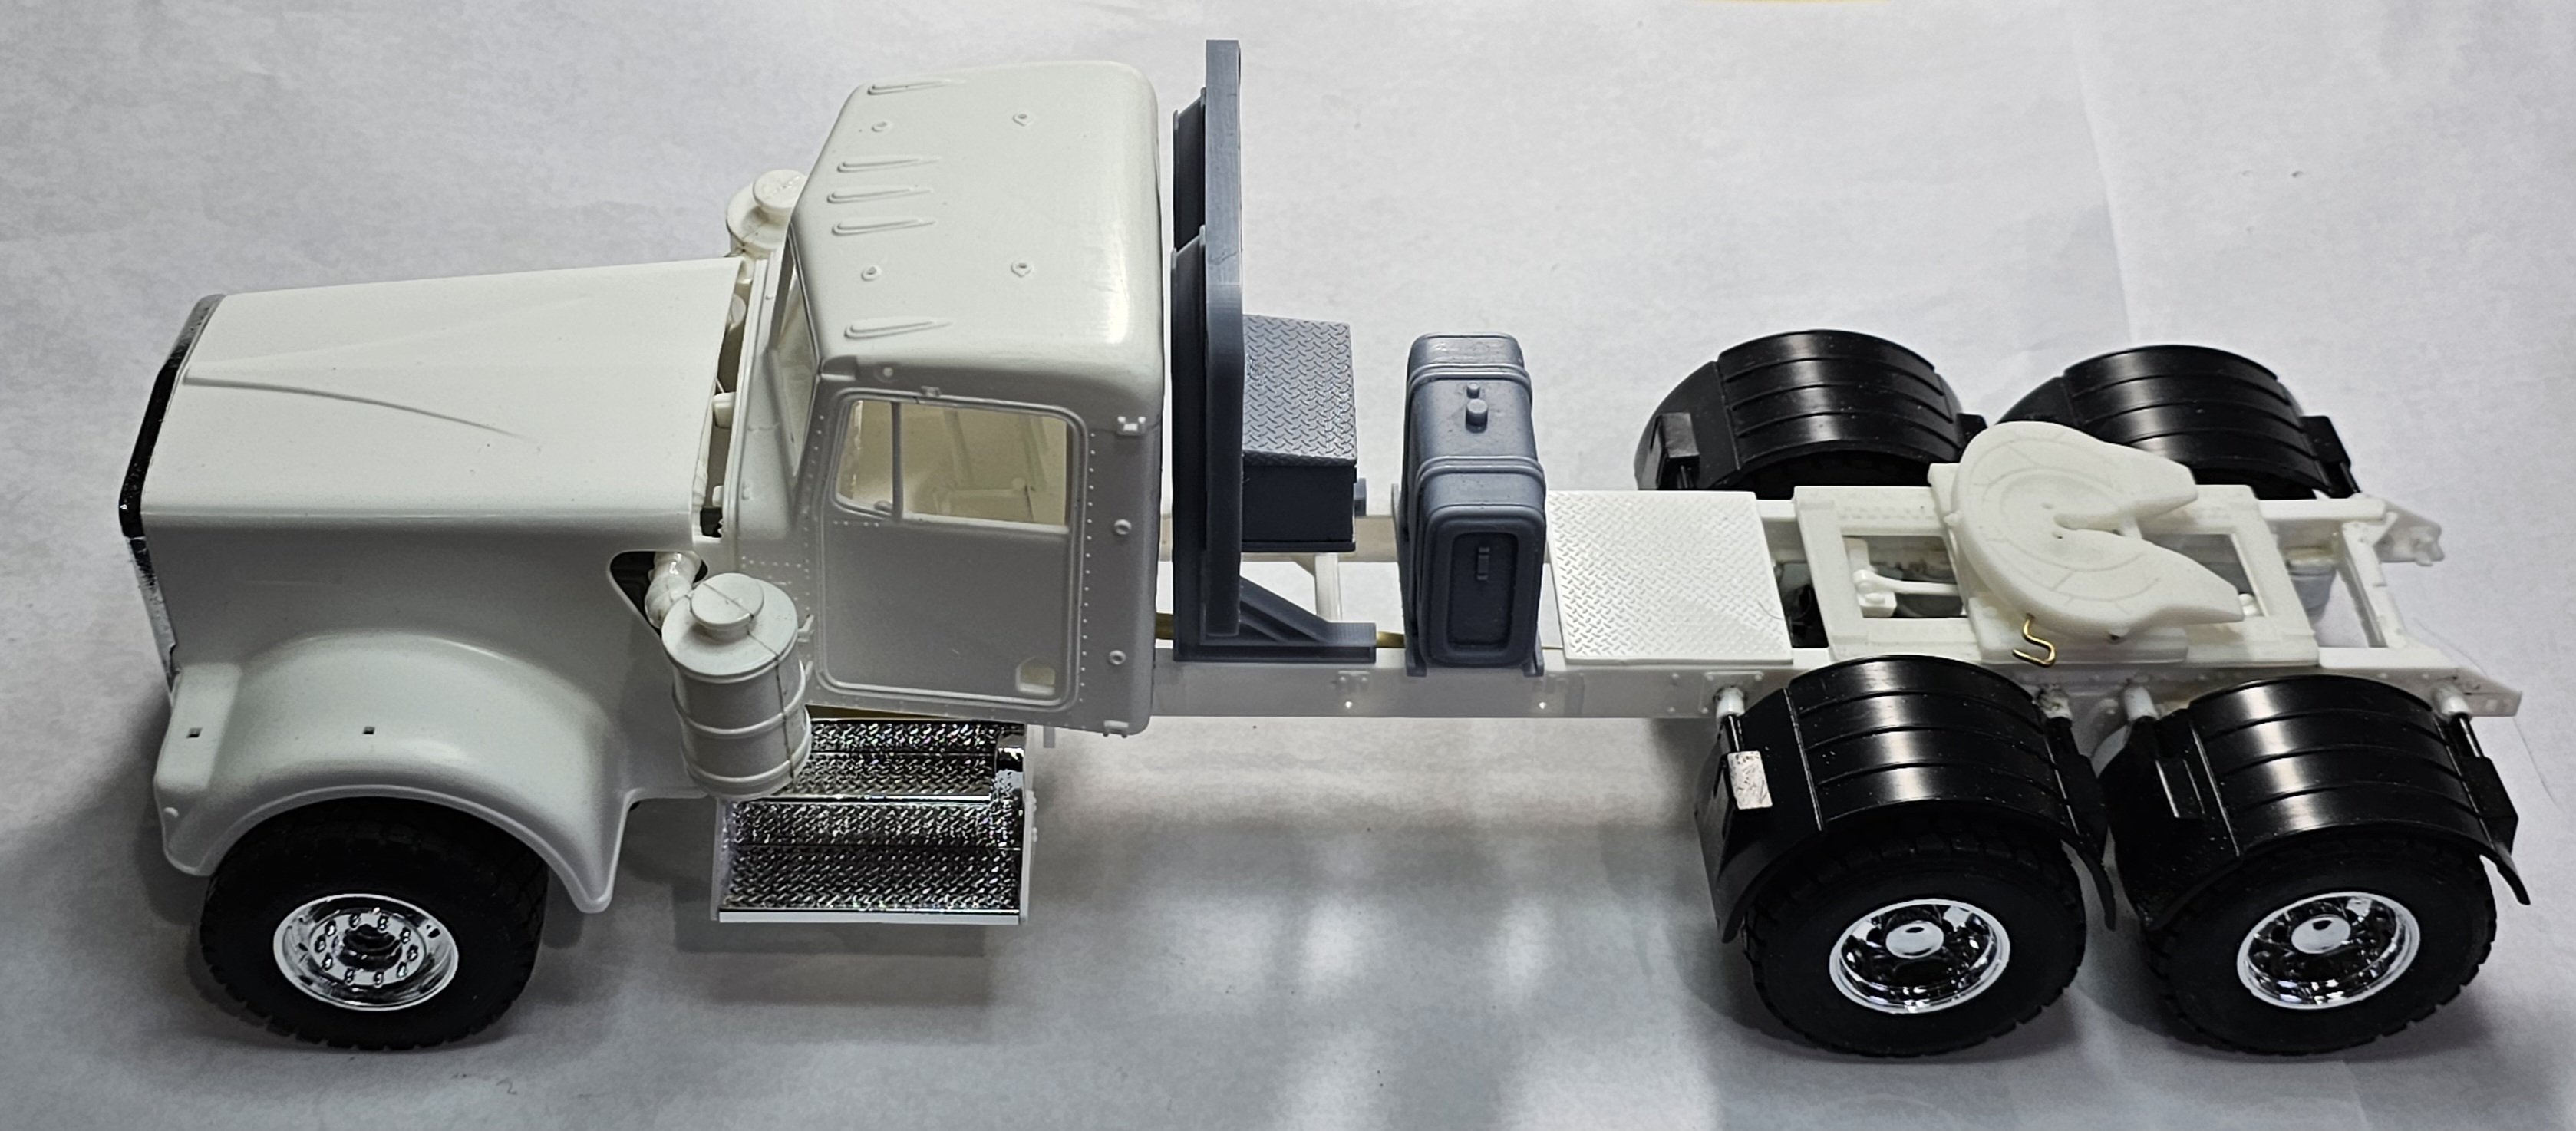
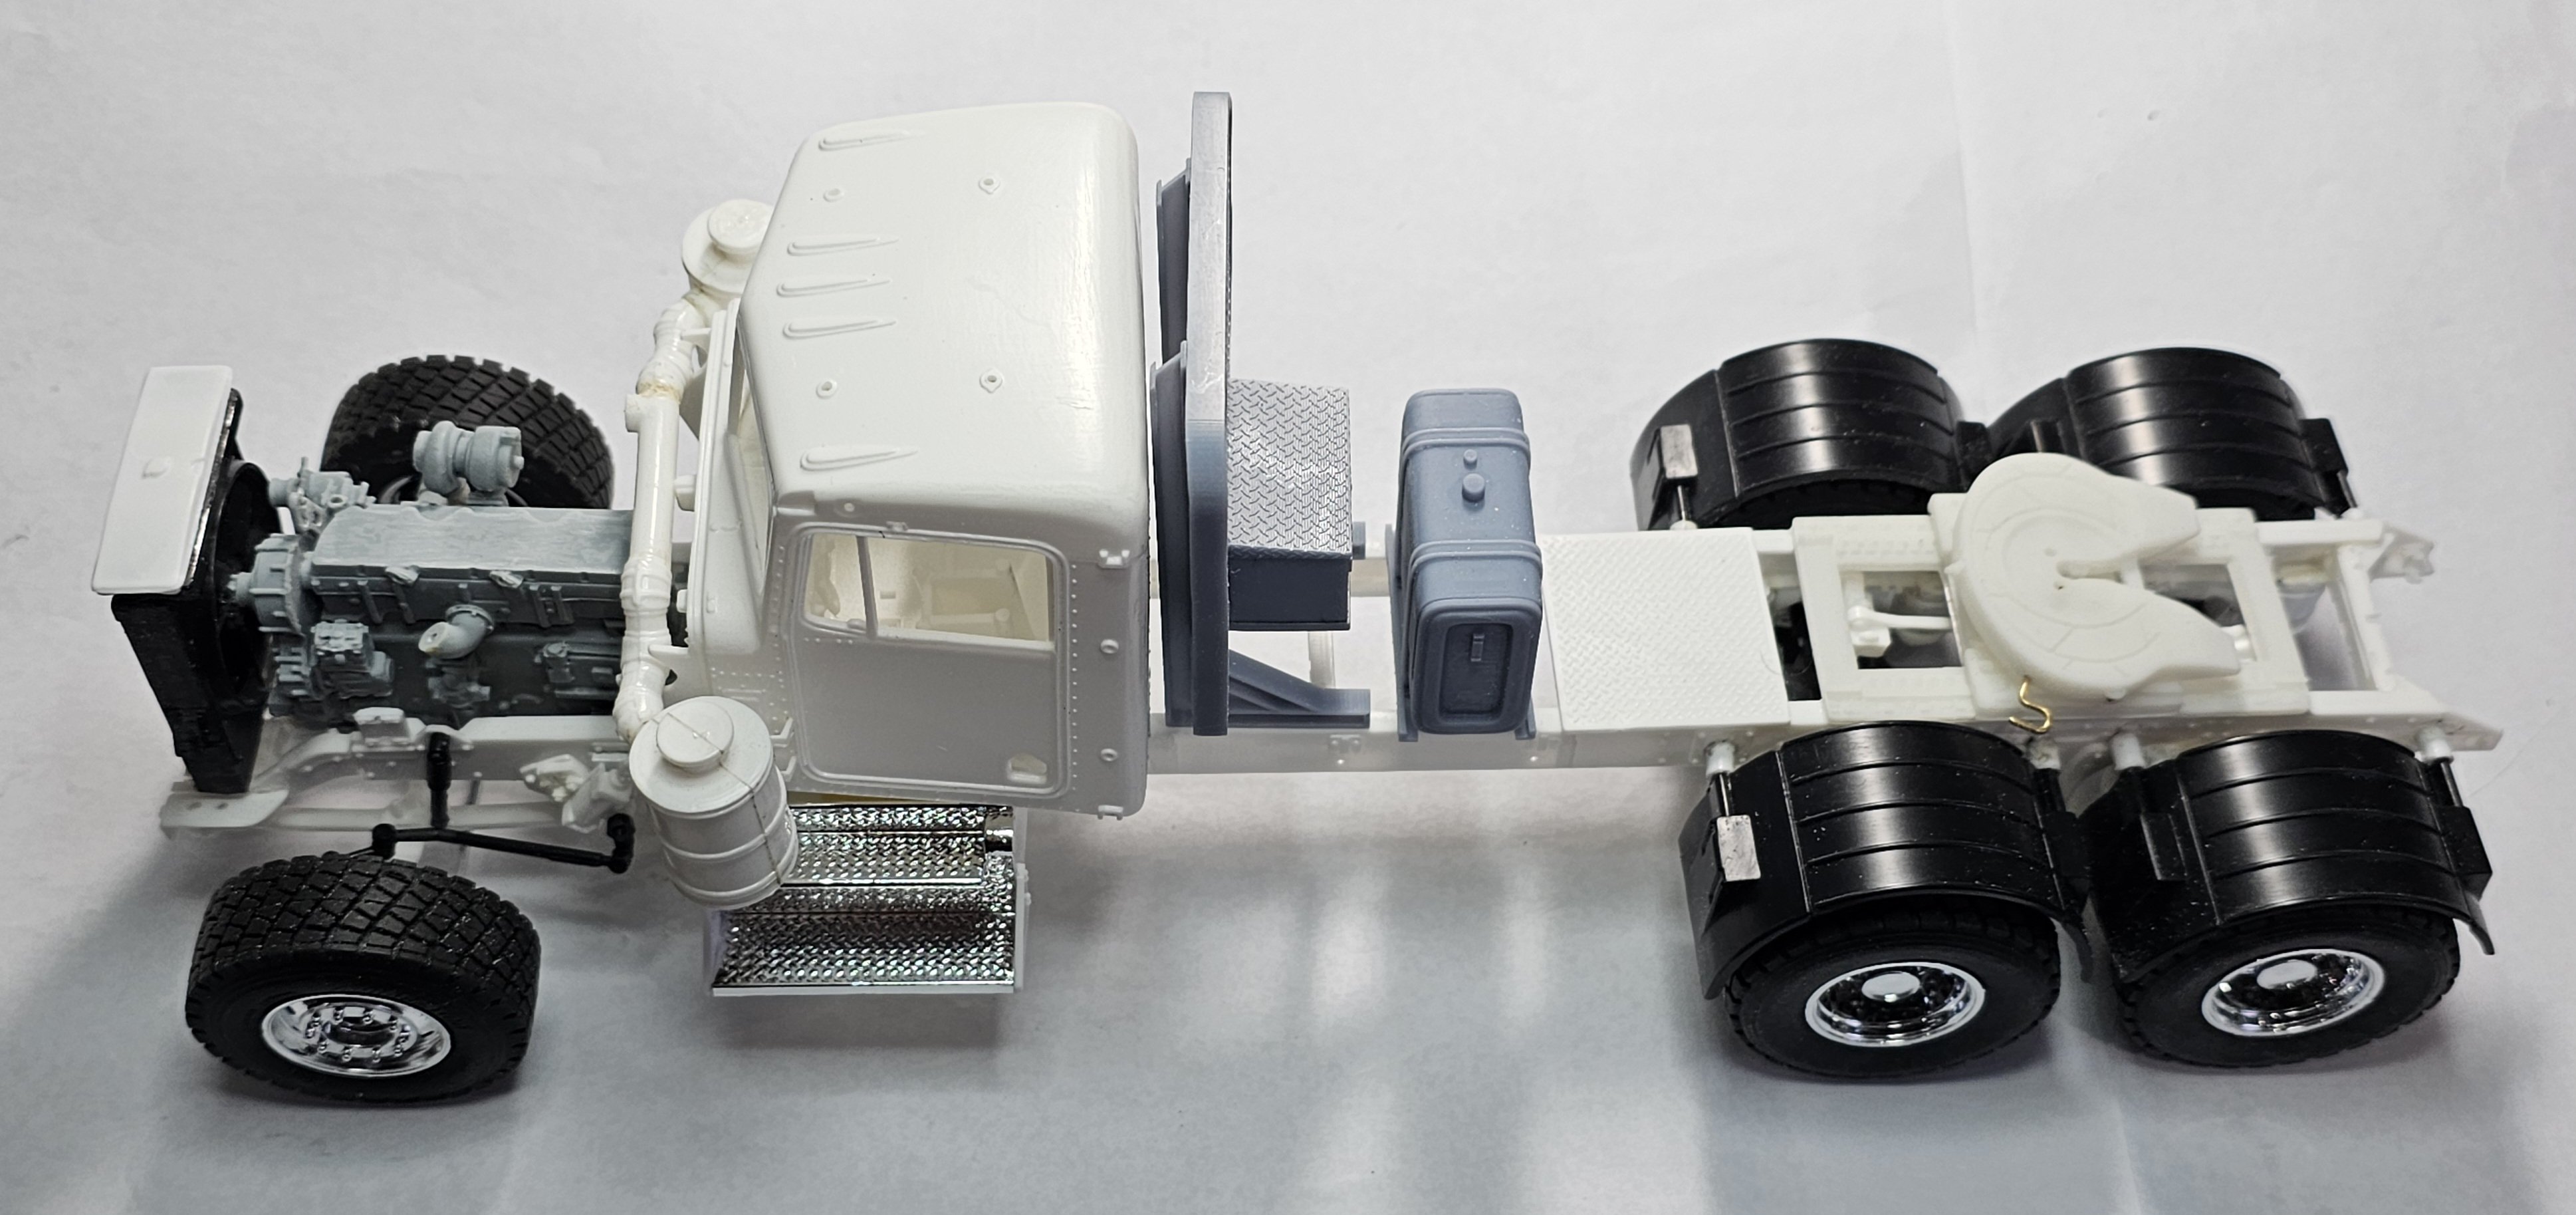
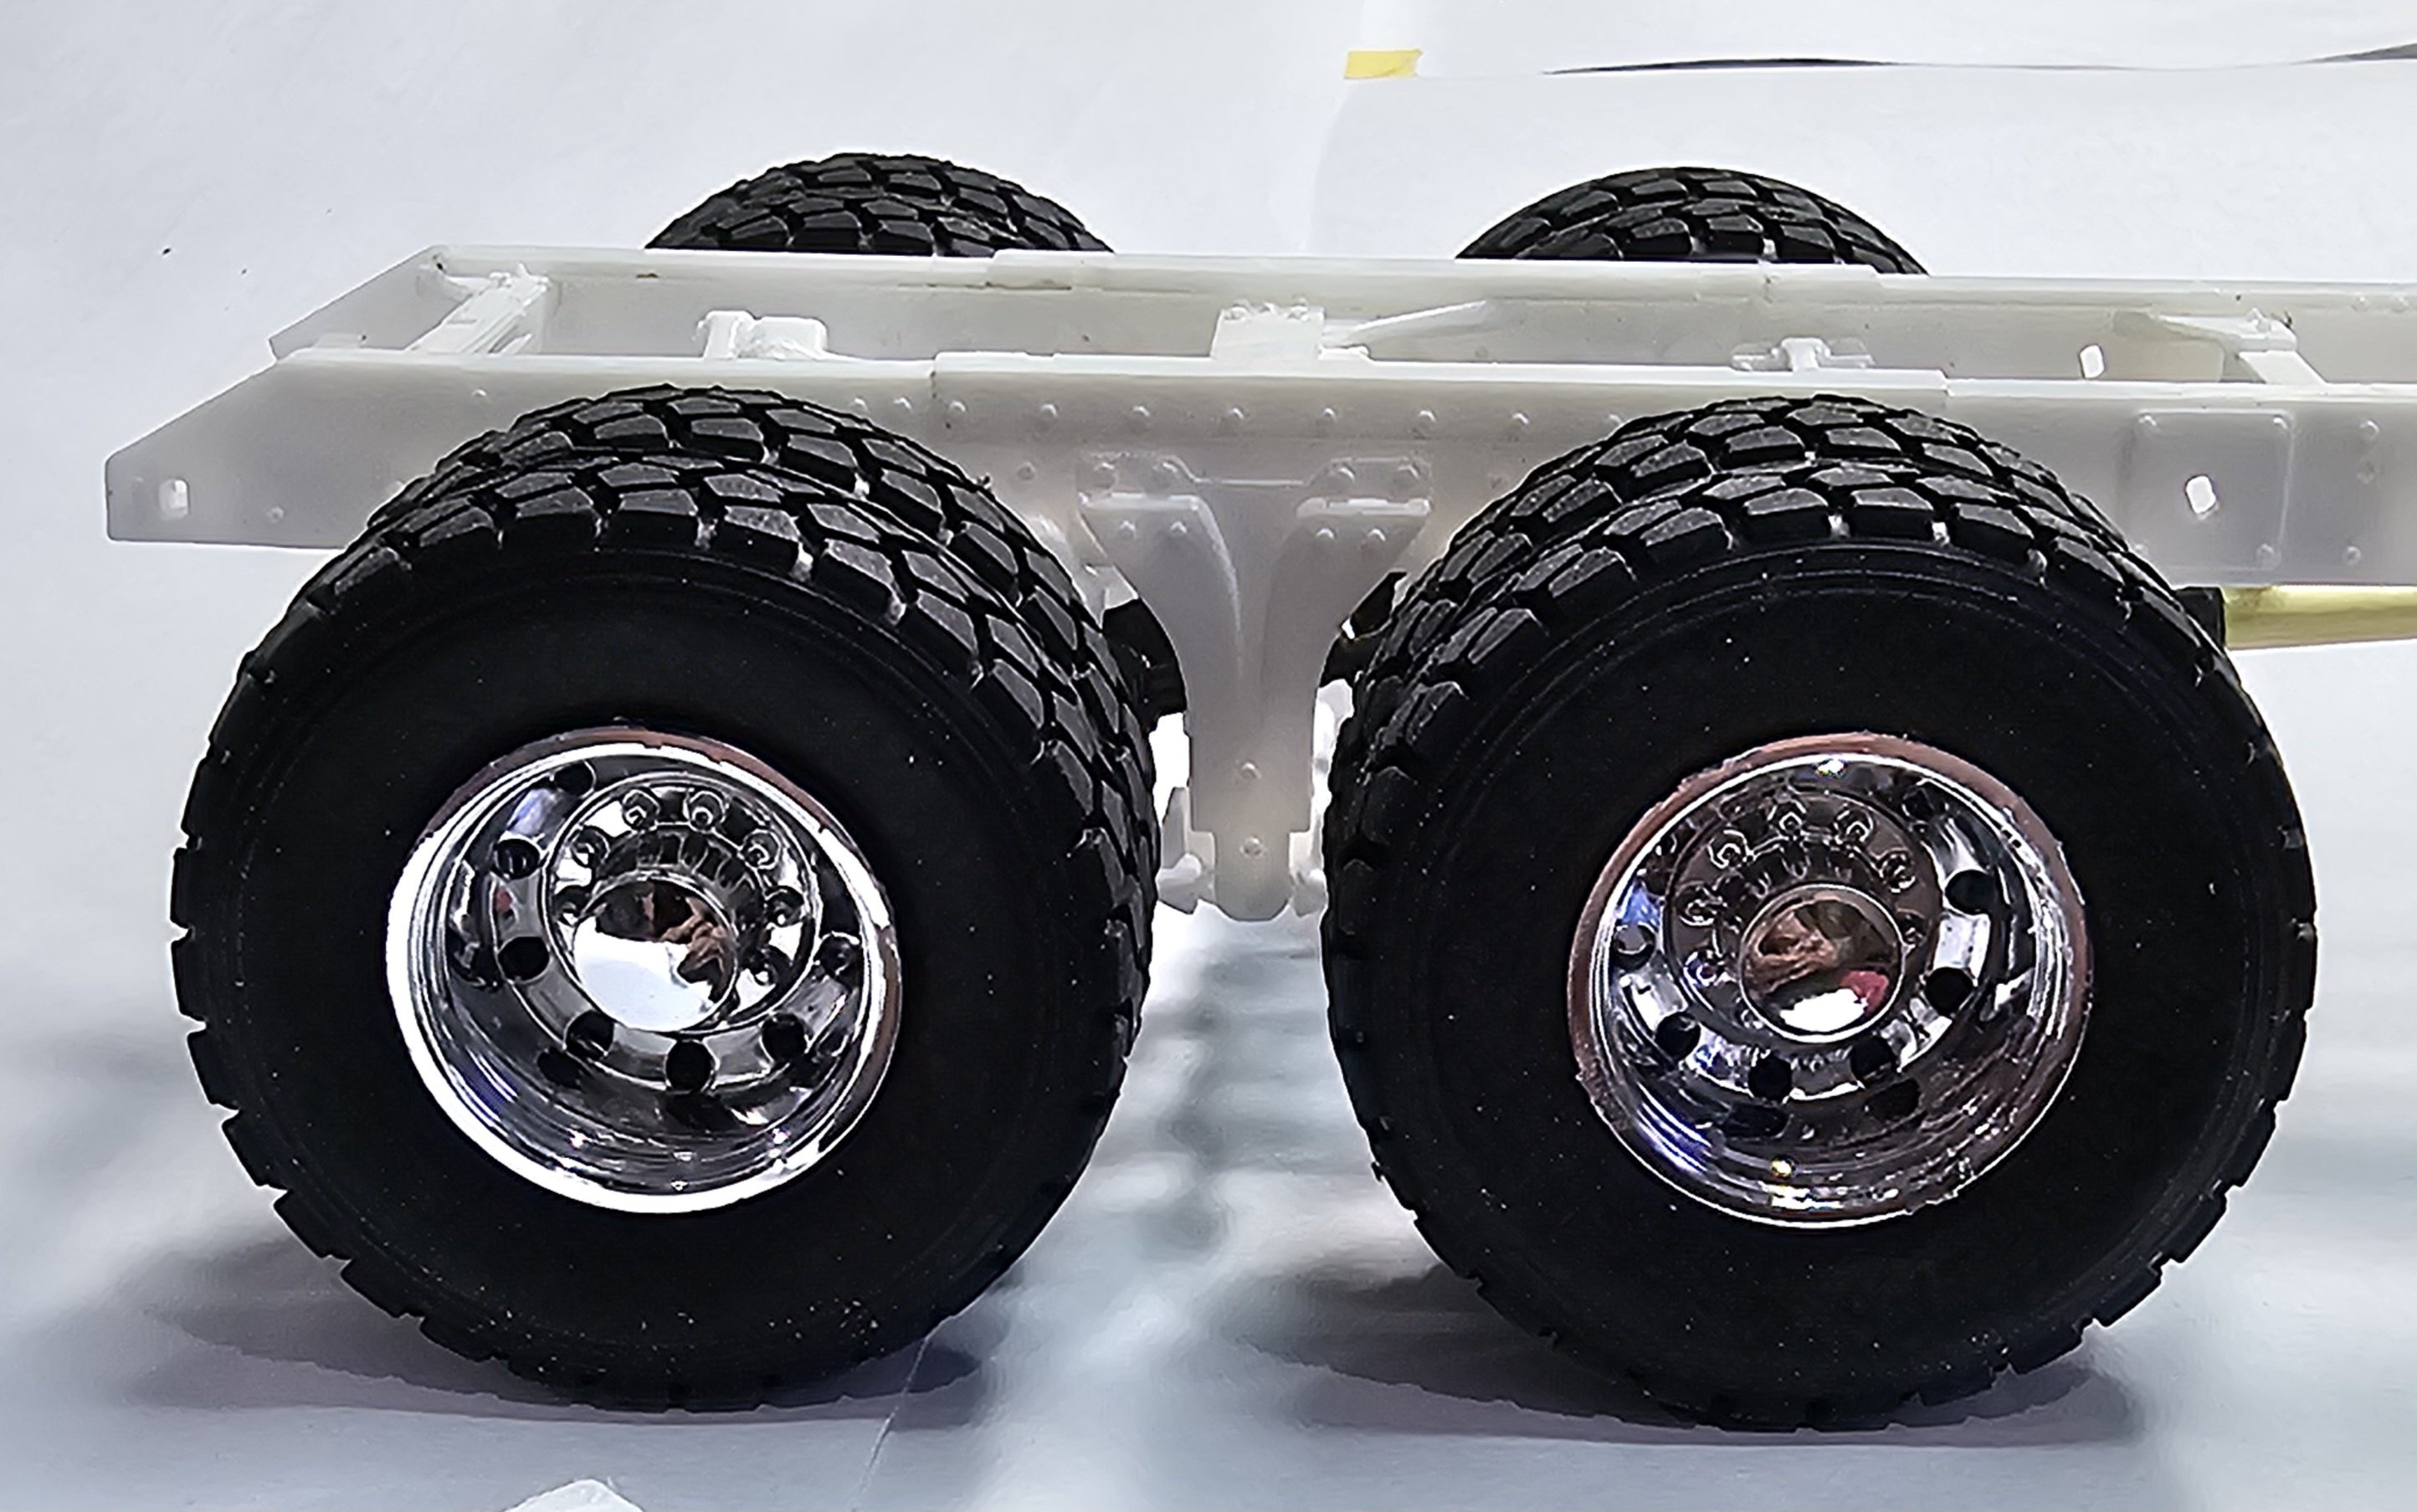
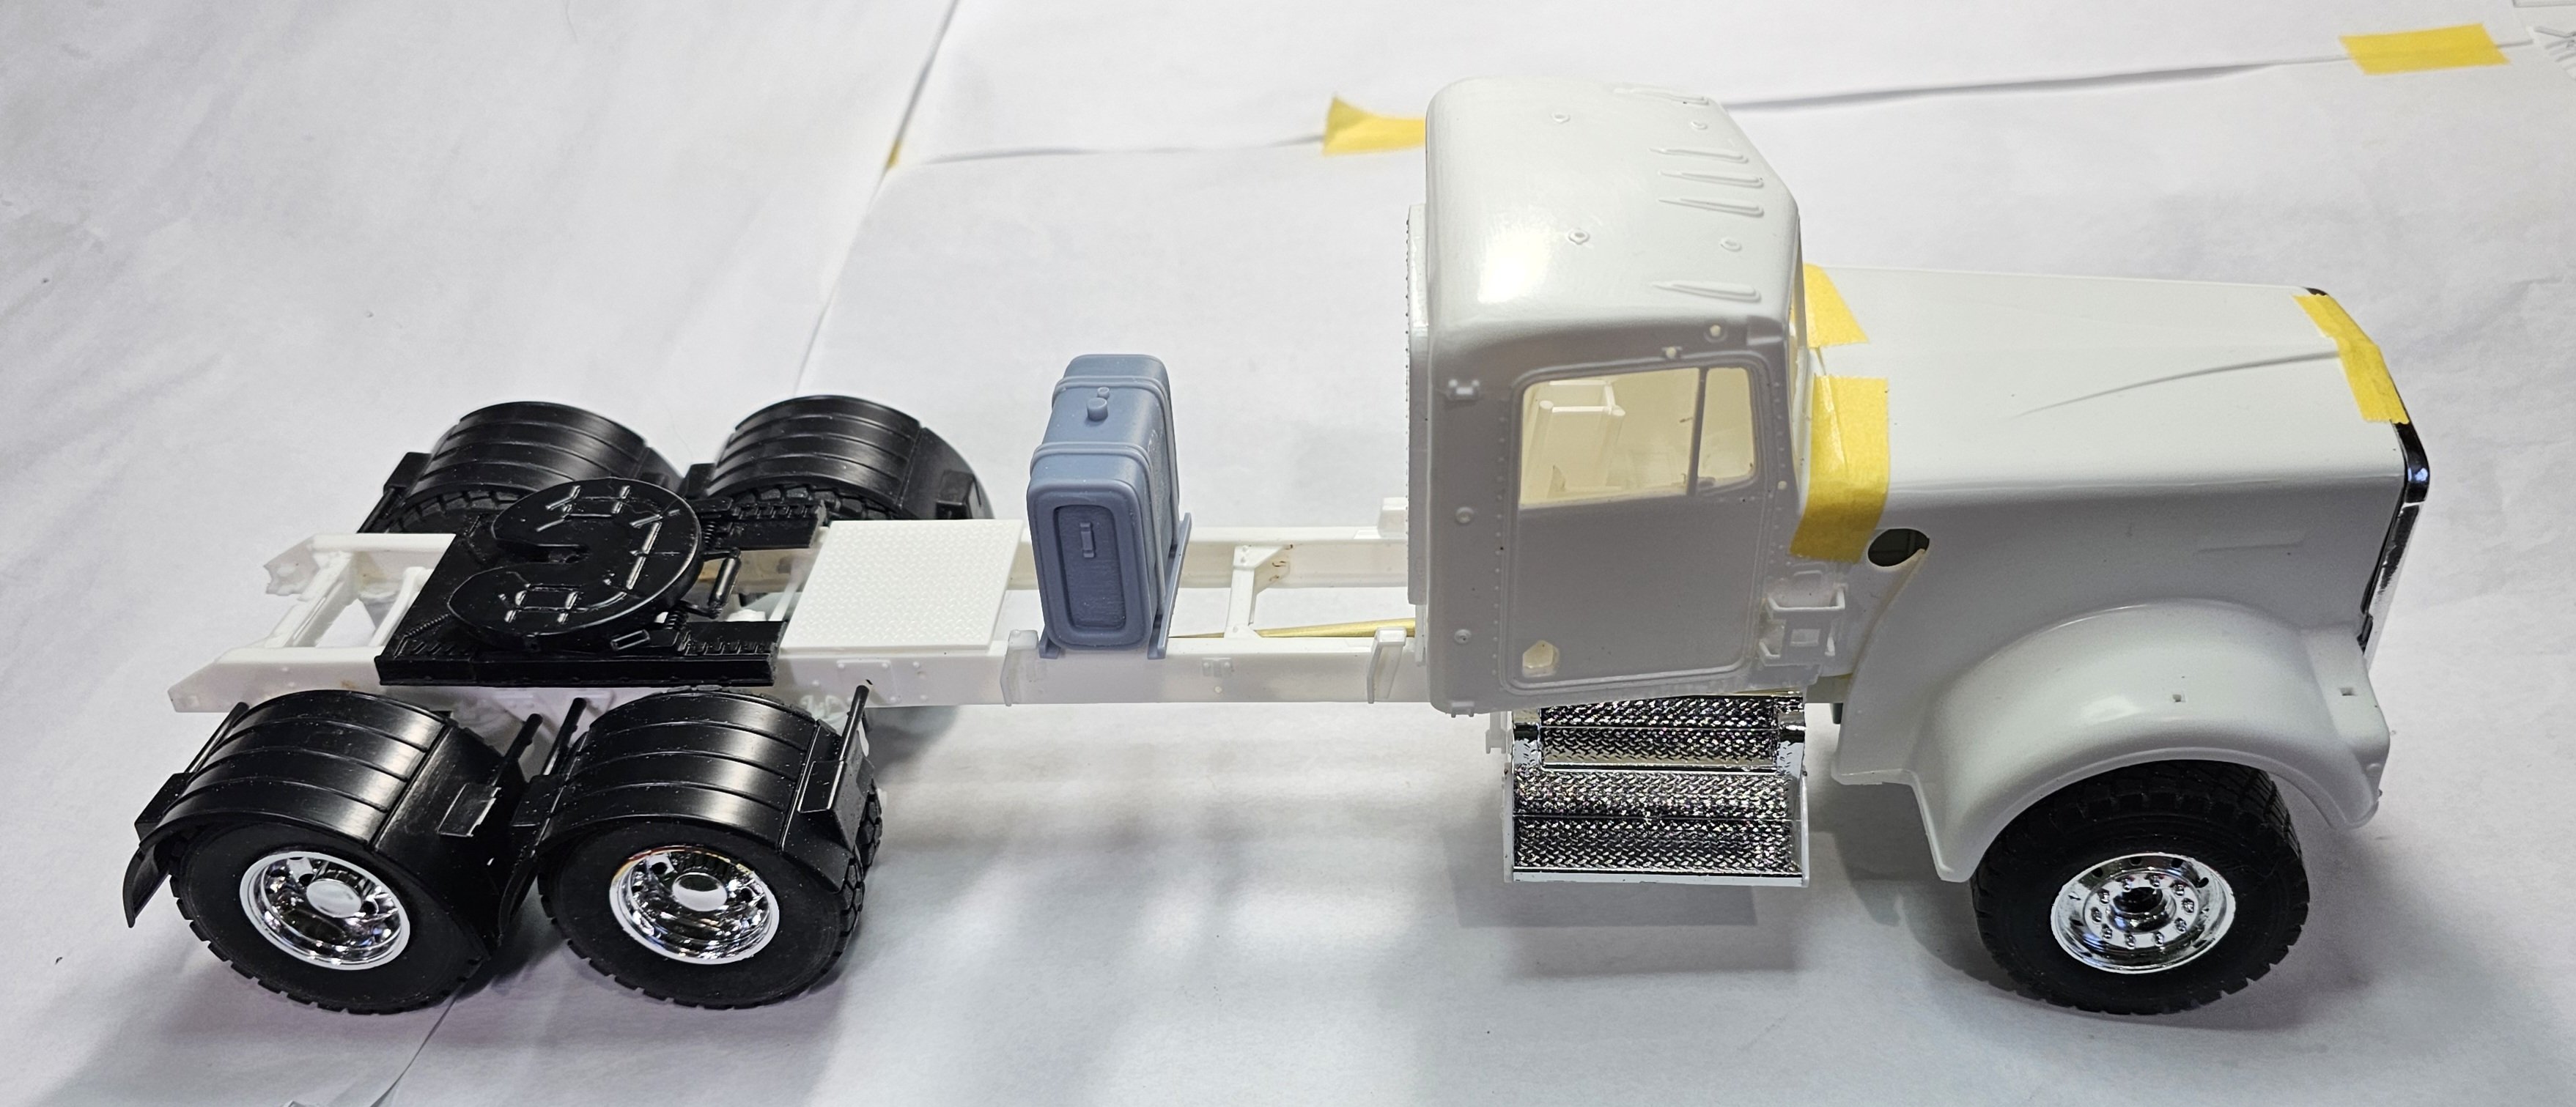
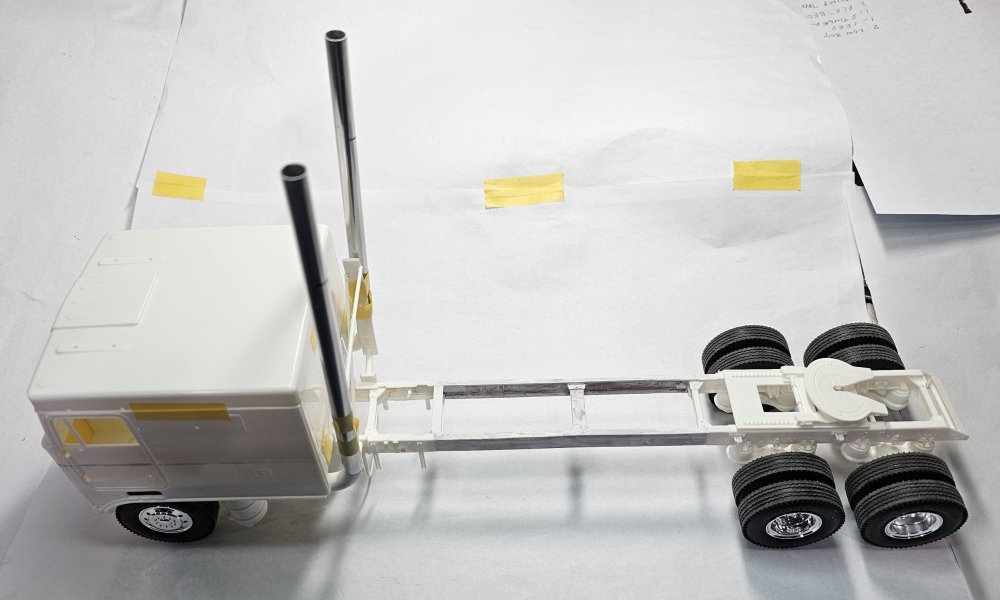
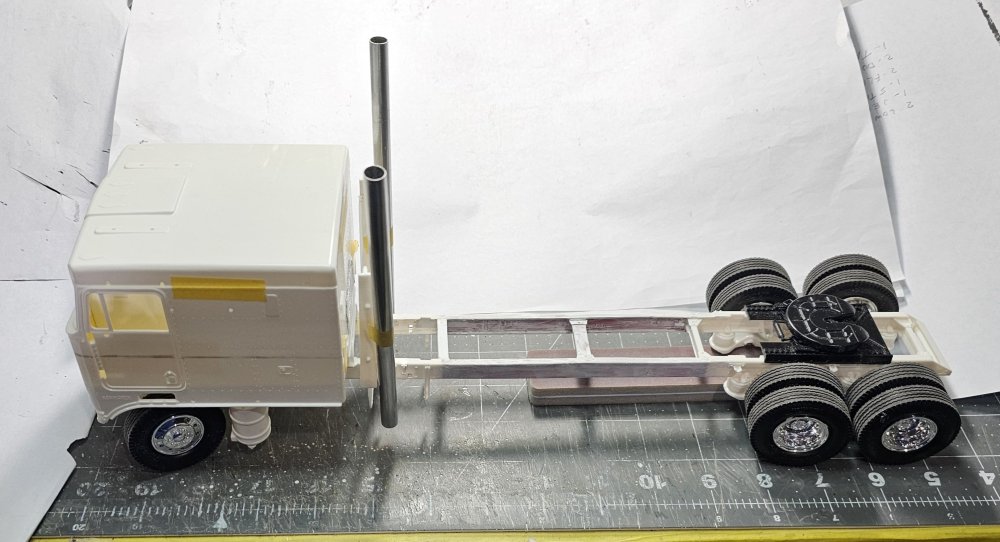
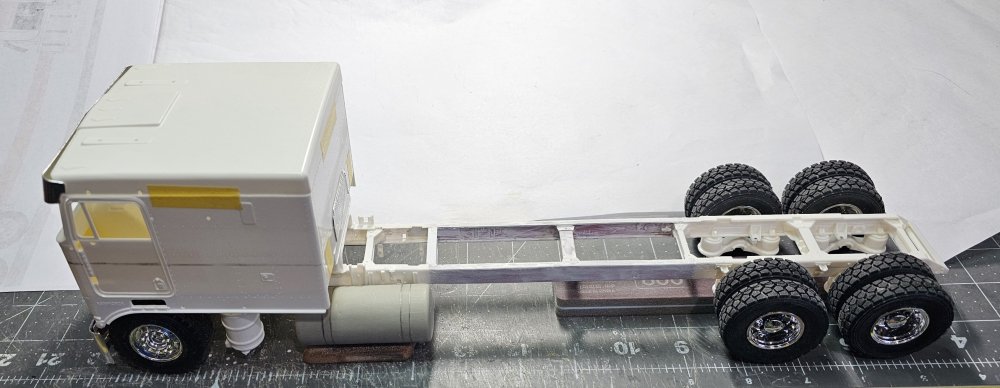
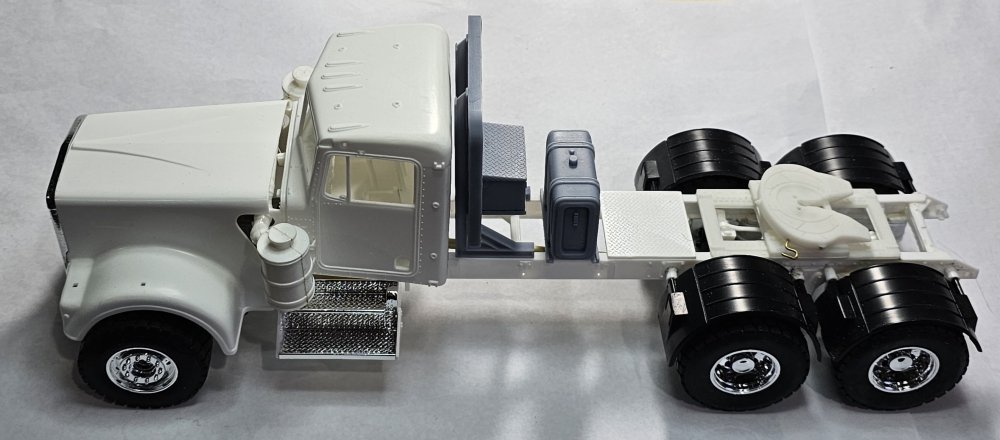
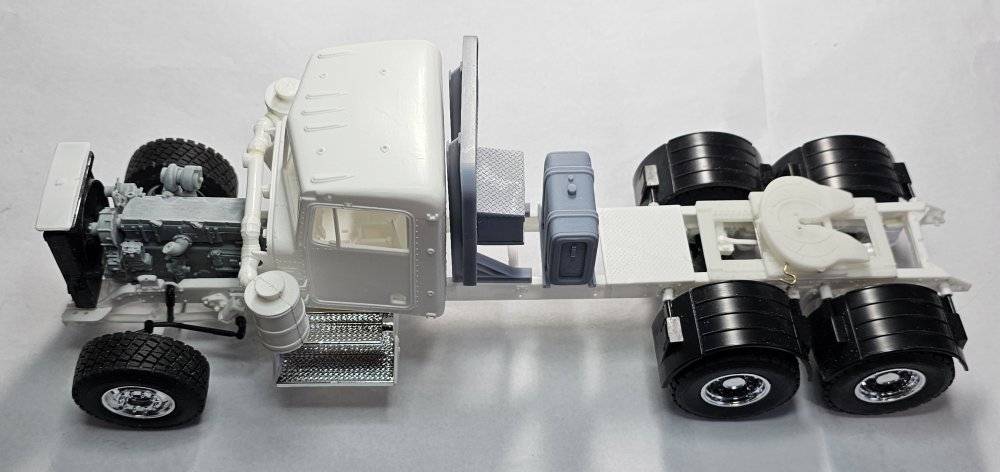
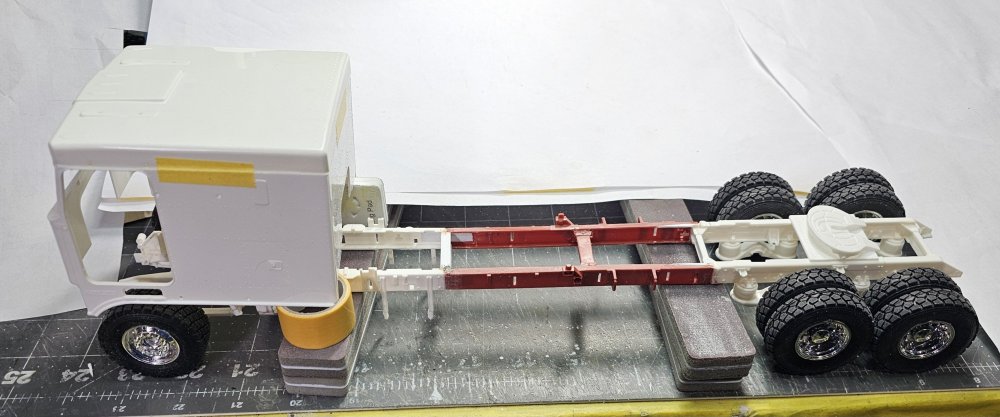
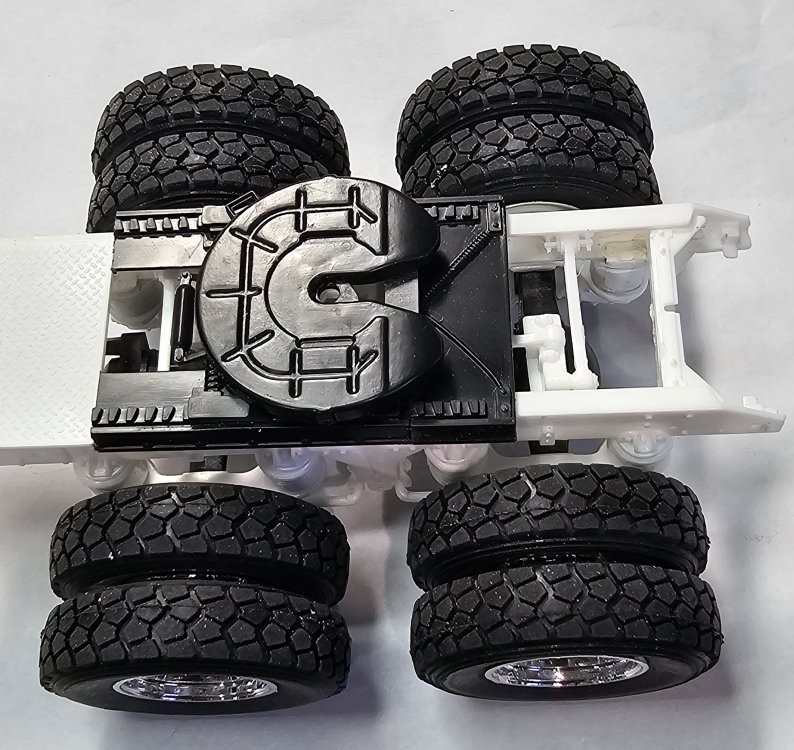
Hey all Did some more work on the K100. I have all of the parts mounted on the frame, except for the rear suspension that need to be painted. And all of the wheels/tires assembled. Ron G
-
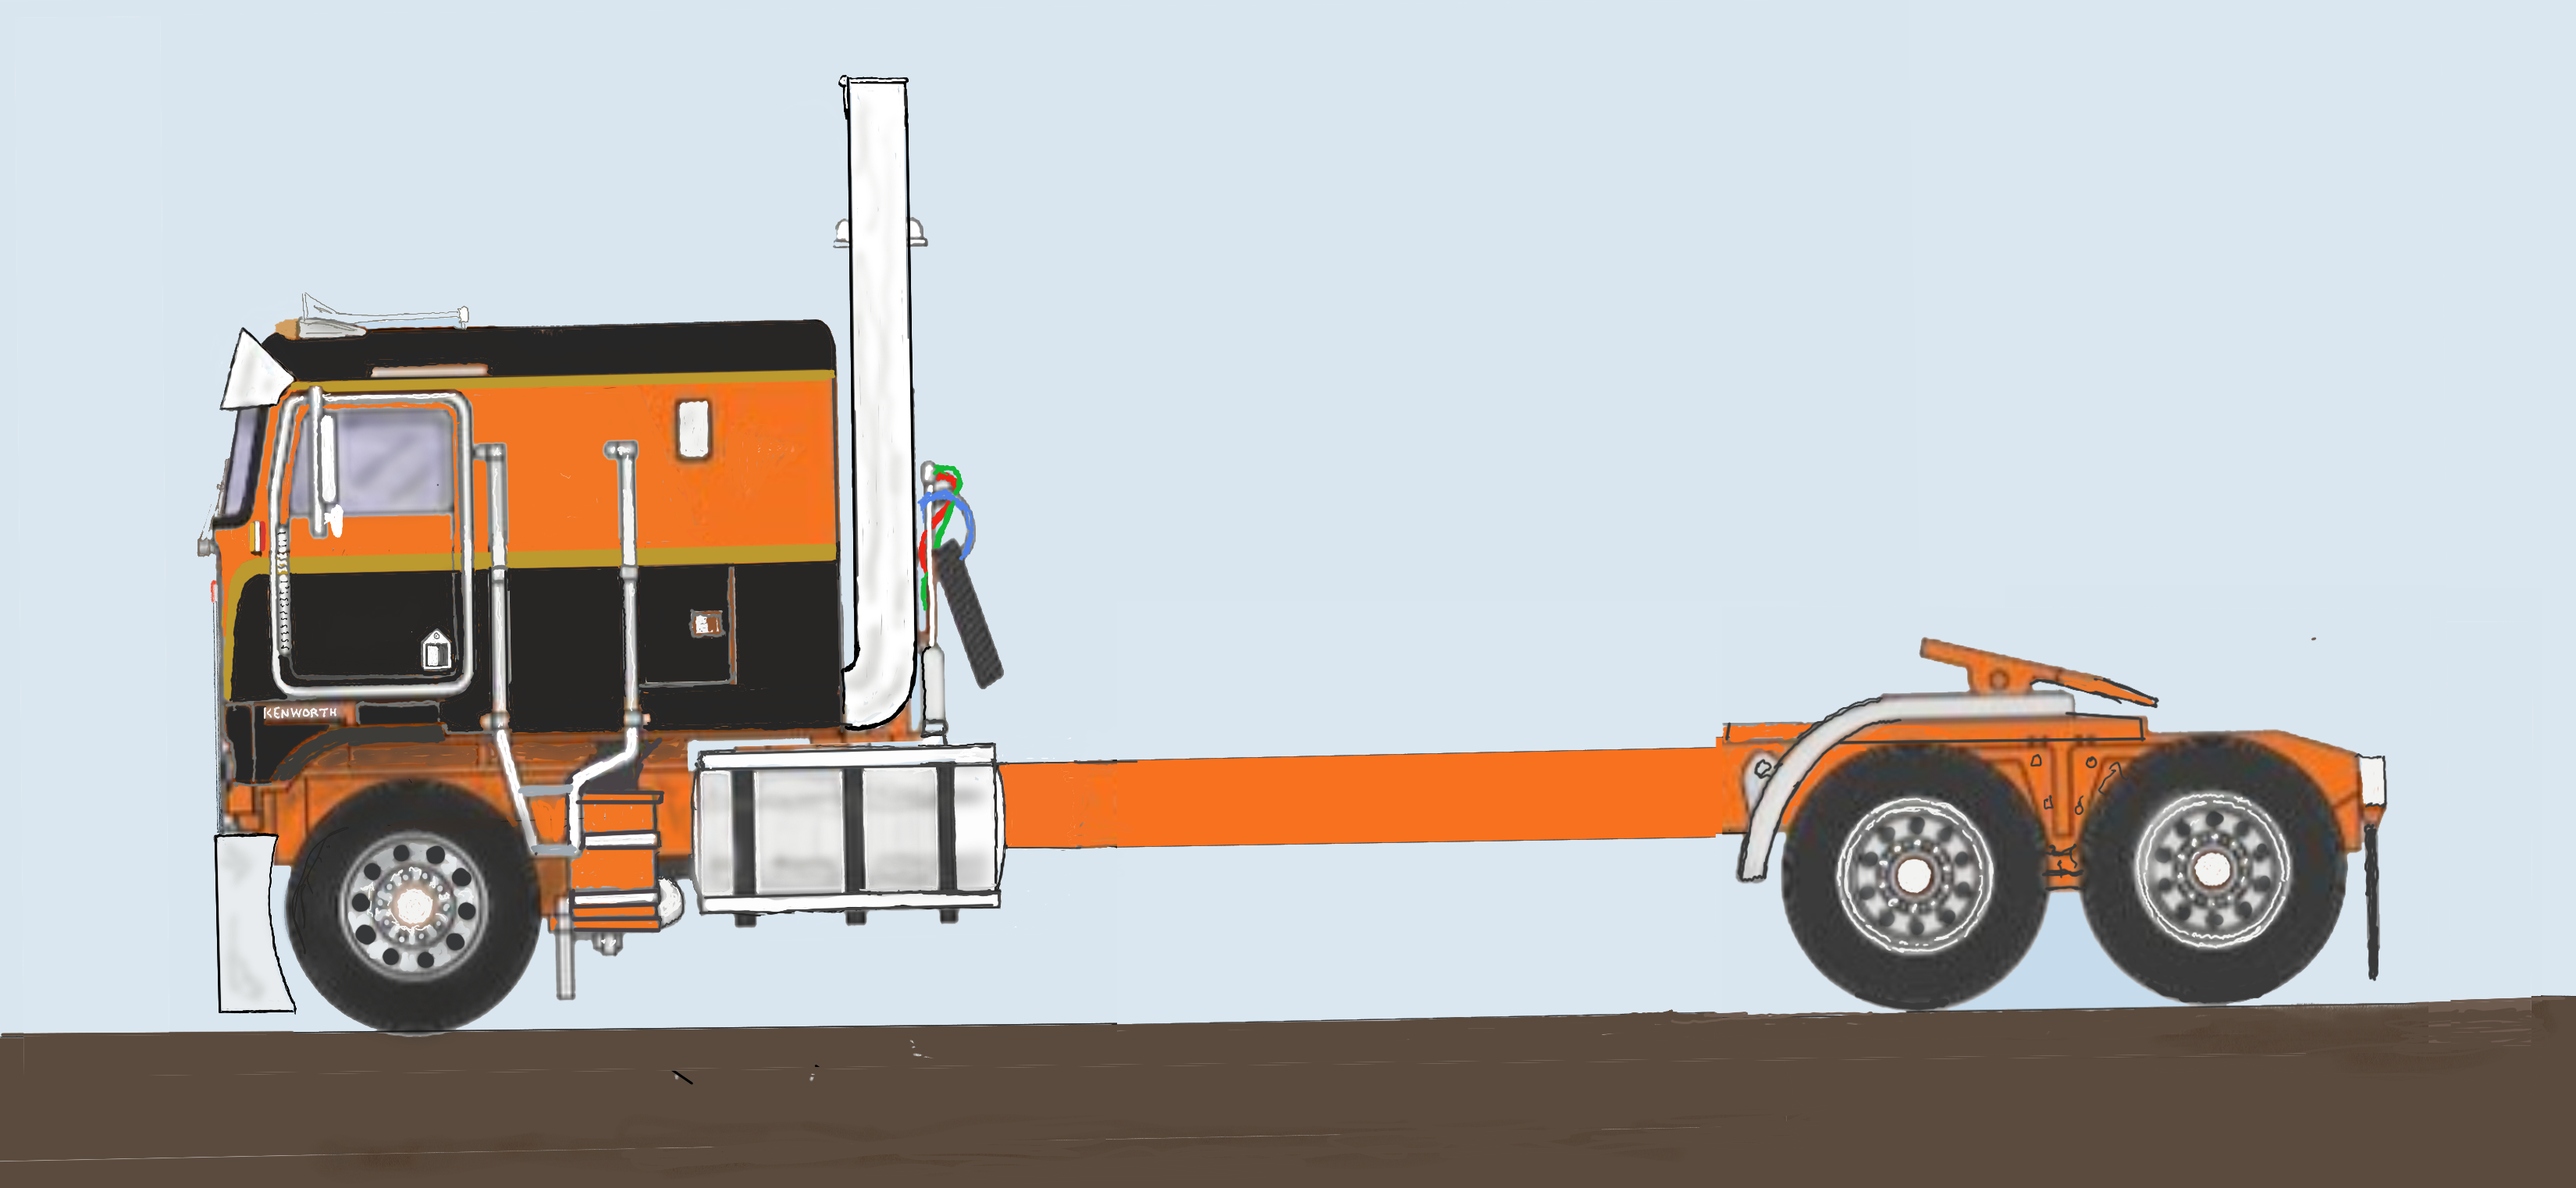
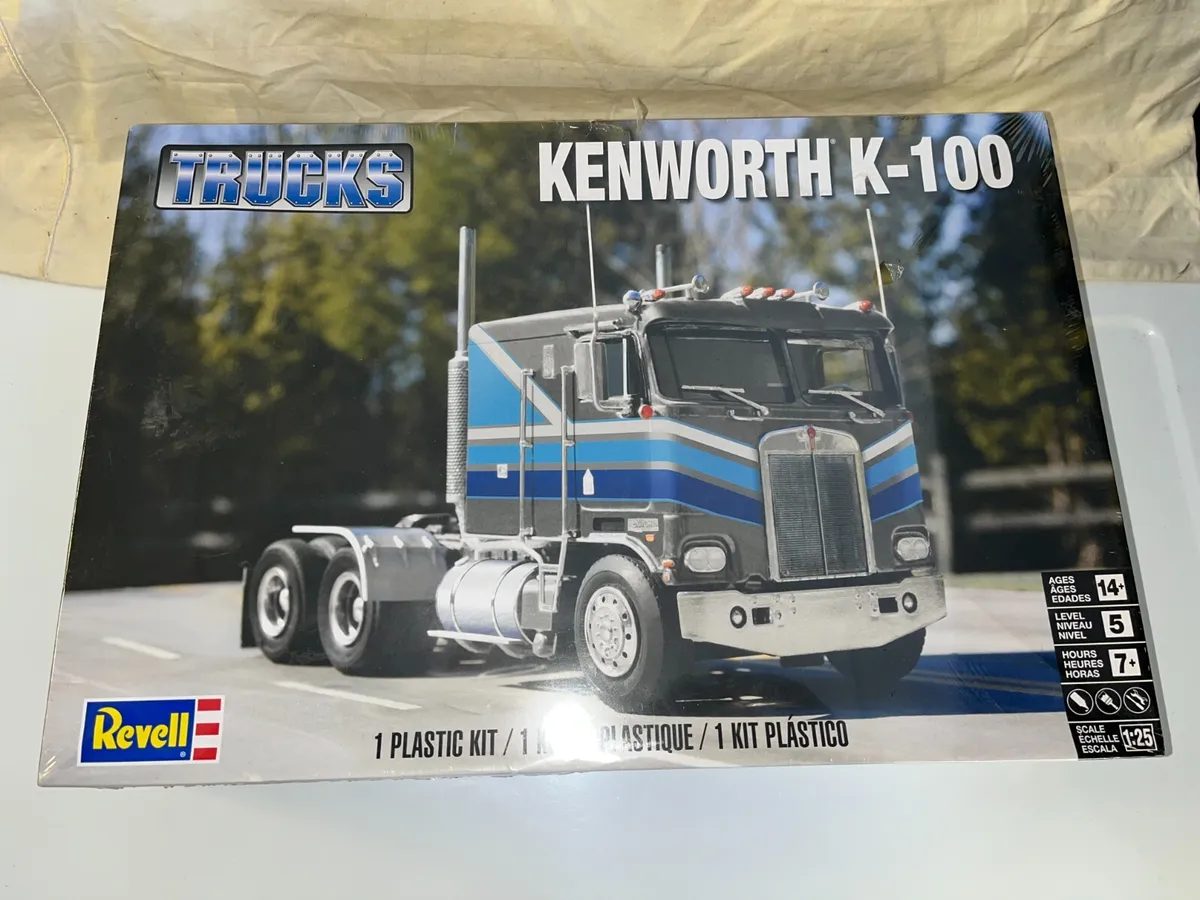
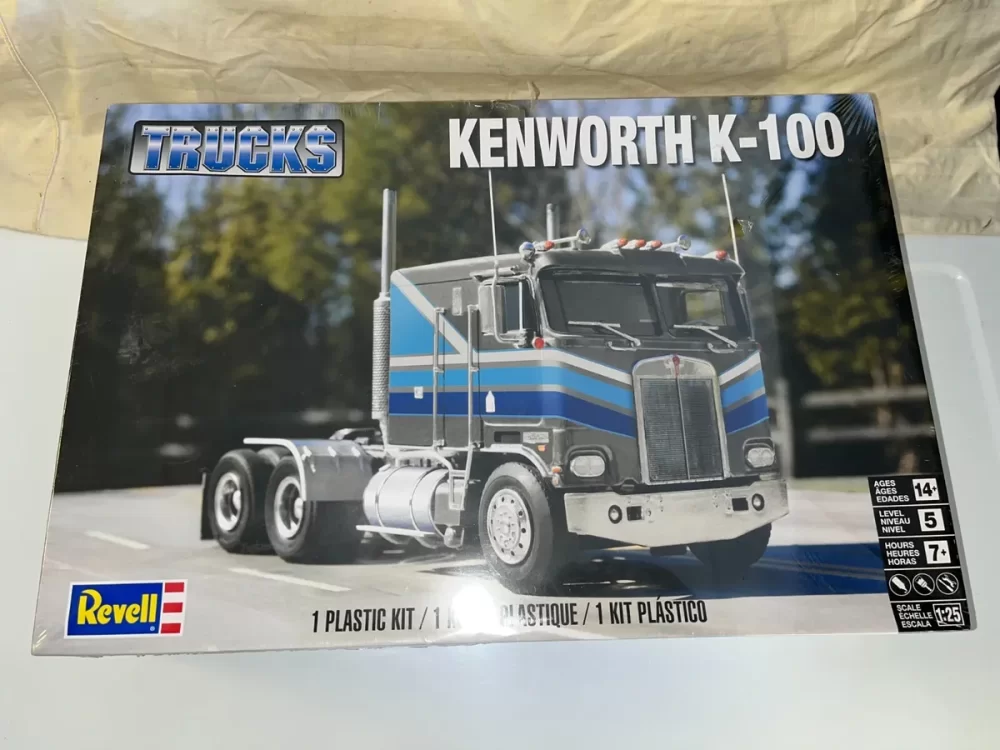
Hey all Yeah, I know, another build! Yupp, I figured it needs it's own build thread. So here are some mock-up pictures. This side view shows how long this is. Almost 16 inches! View looking rearward. In this view you can see the after market drop visor & Texas front bumper. I got these off of Ebay. This drawing shows what the finished truck will look like. That's it for now be back with more soon. I almost forgot, this is the kit I'm using for this build. Ron G

-
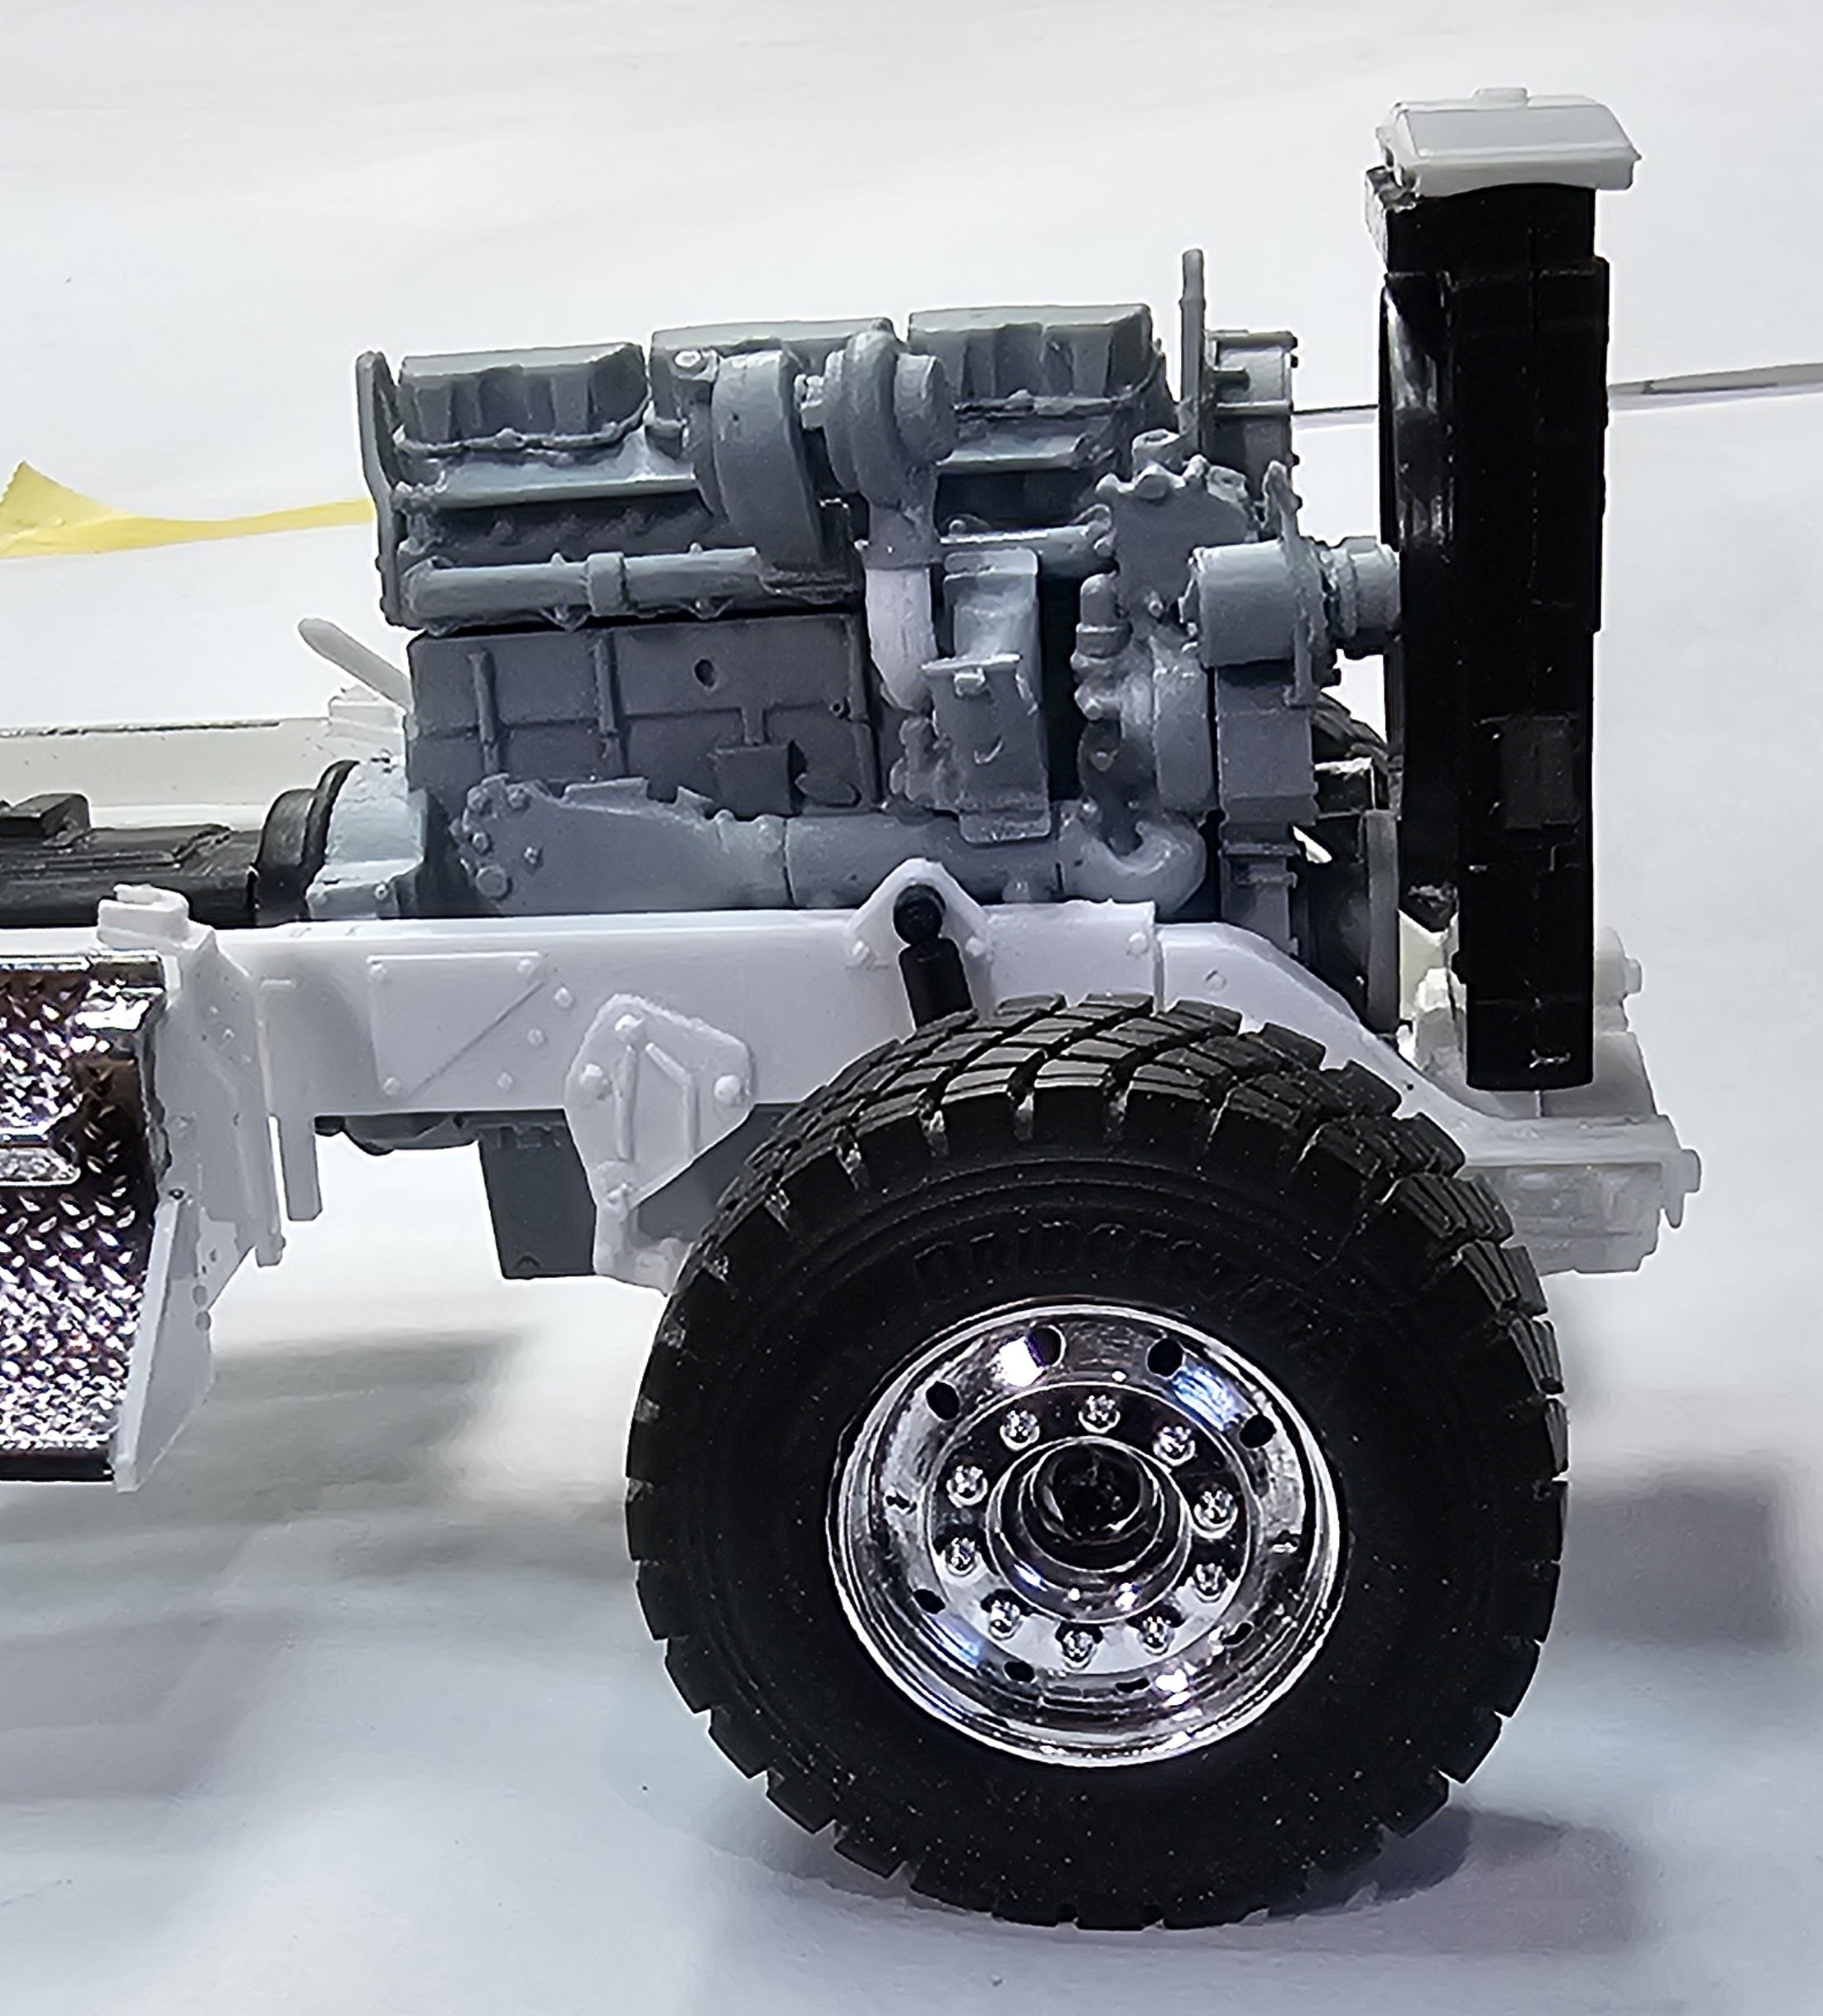
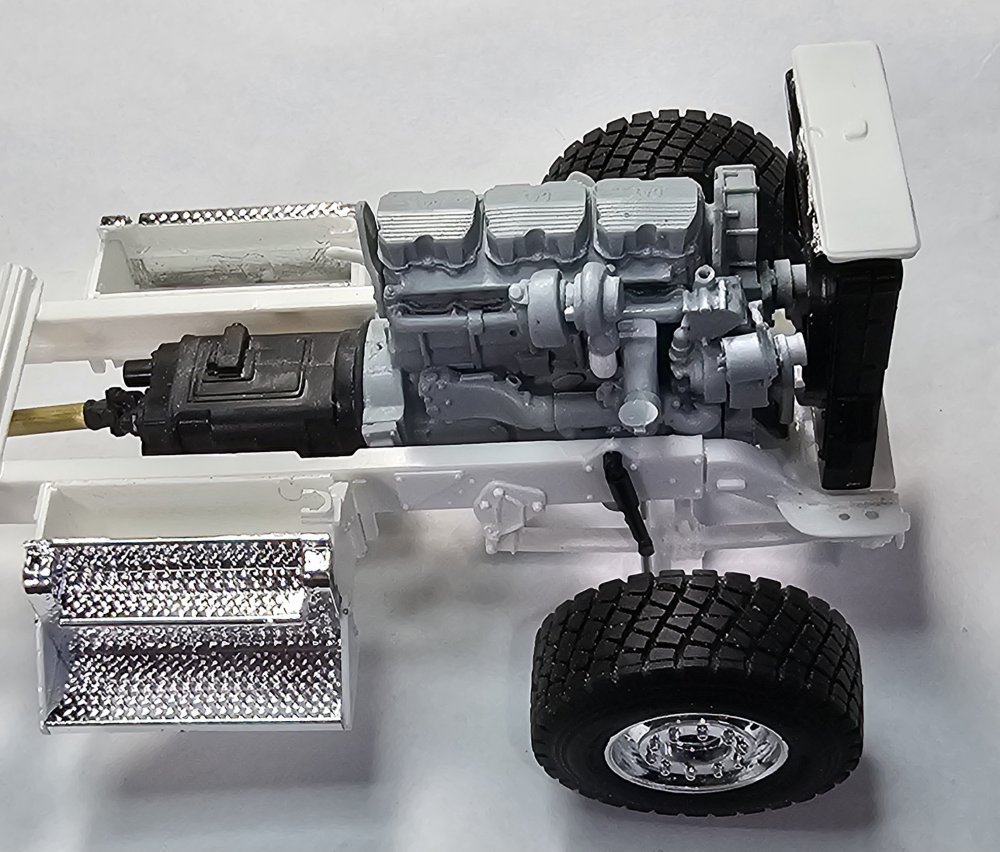
Hey all Got a few things from ST Supply for this build. This view shows the headache rack, hydraulic tank and the fifth wheel assembly. Another view showing the engine. Still trying to figure out what color to paint it. That's it for now be back with more soon. Ron G
-
Hey Jeff This is ASSUME! You really hit the realism on the head. Great detail work. I used to drive, about 45 years ago! I drove a old Diamond T Reo with twin sticks (4 x 4). It would move along on the flat, but if I hit any kind of hill or rise, she would drop down to almost a stop...lol. I'm planning on doing all the bells and whistles on the Kenworth K100. Ron G
-
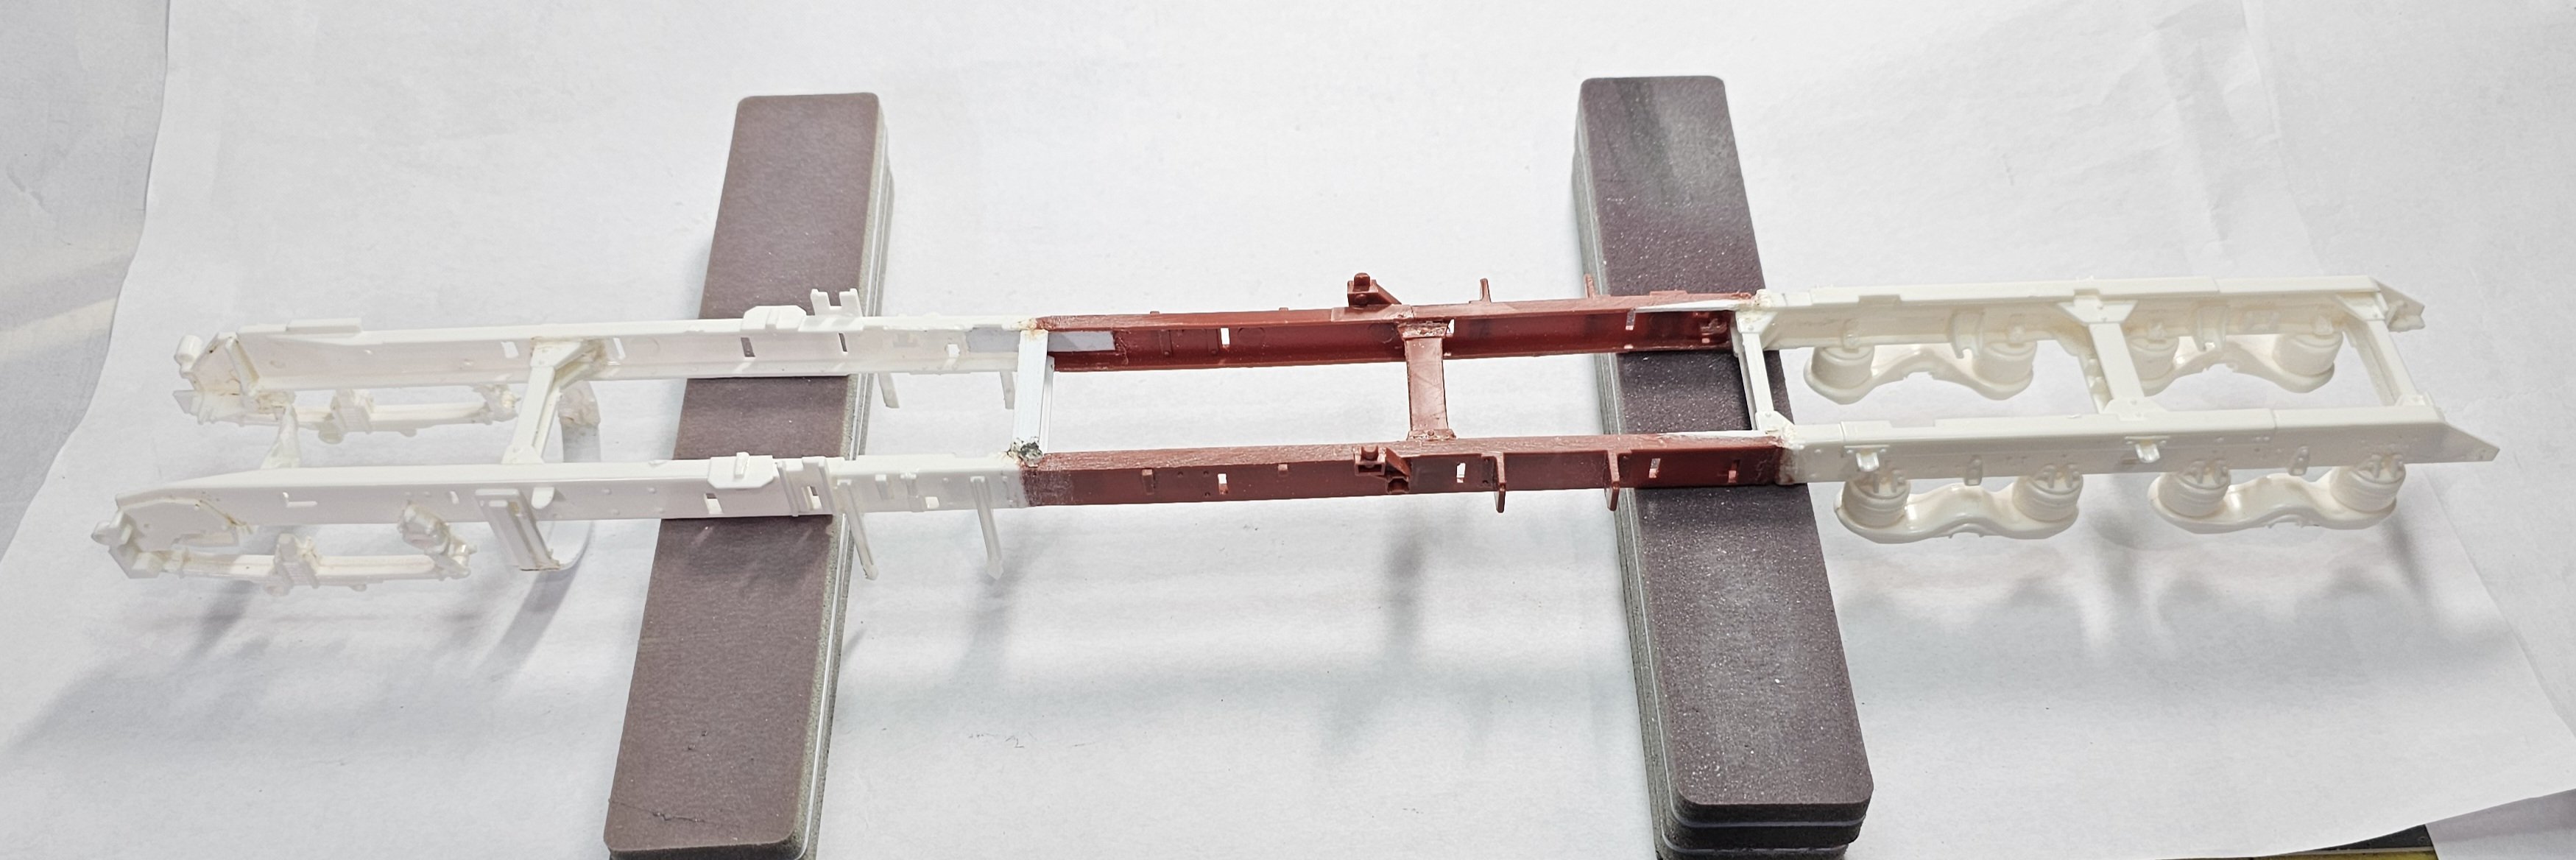
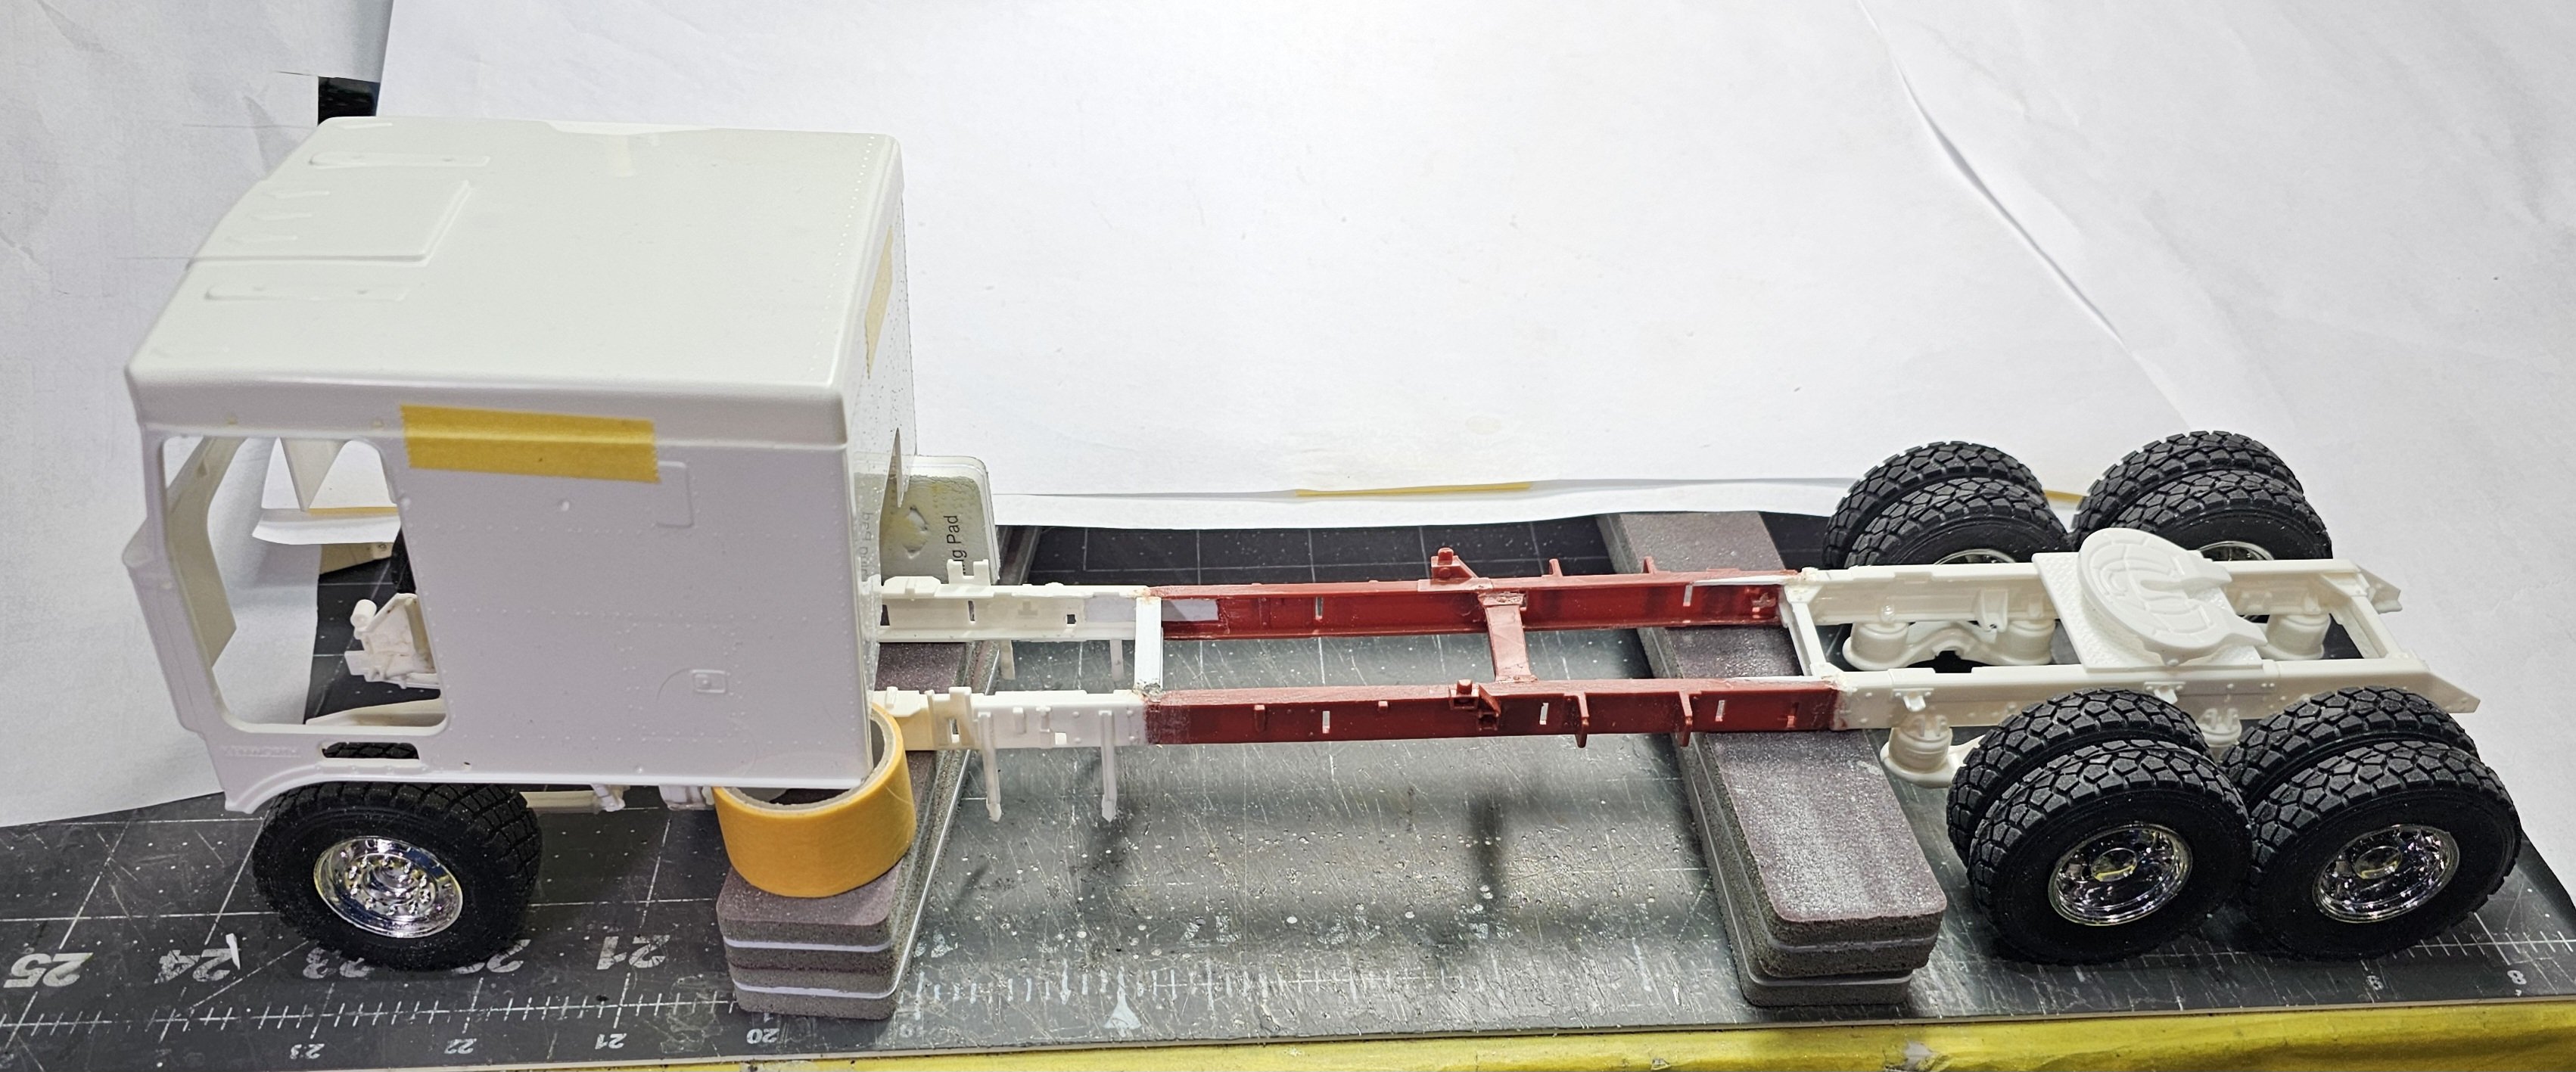
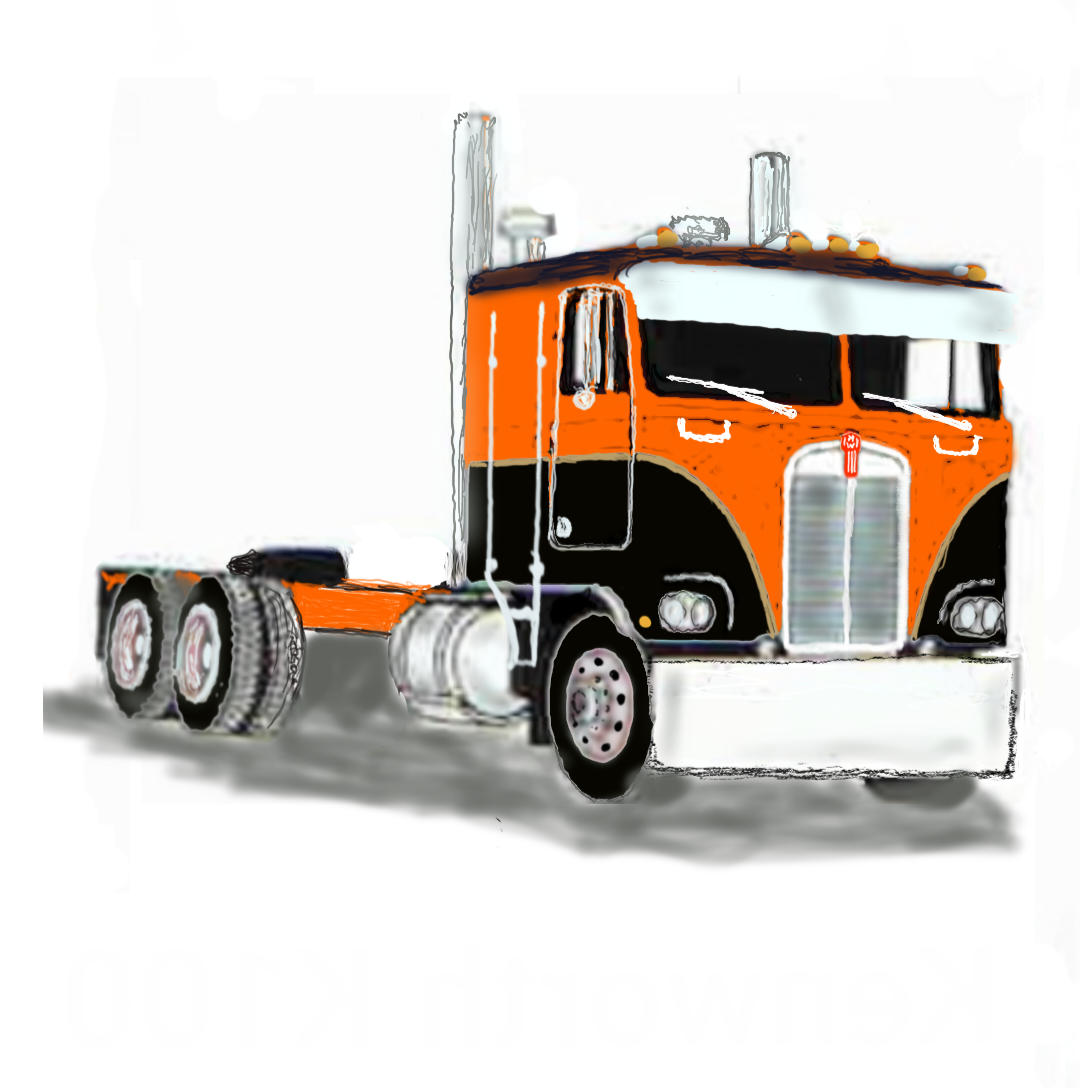
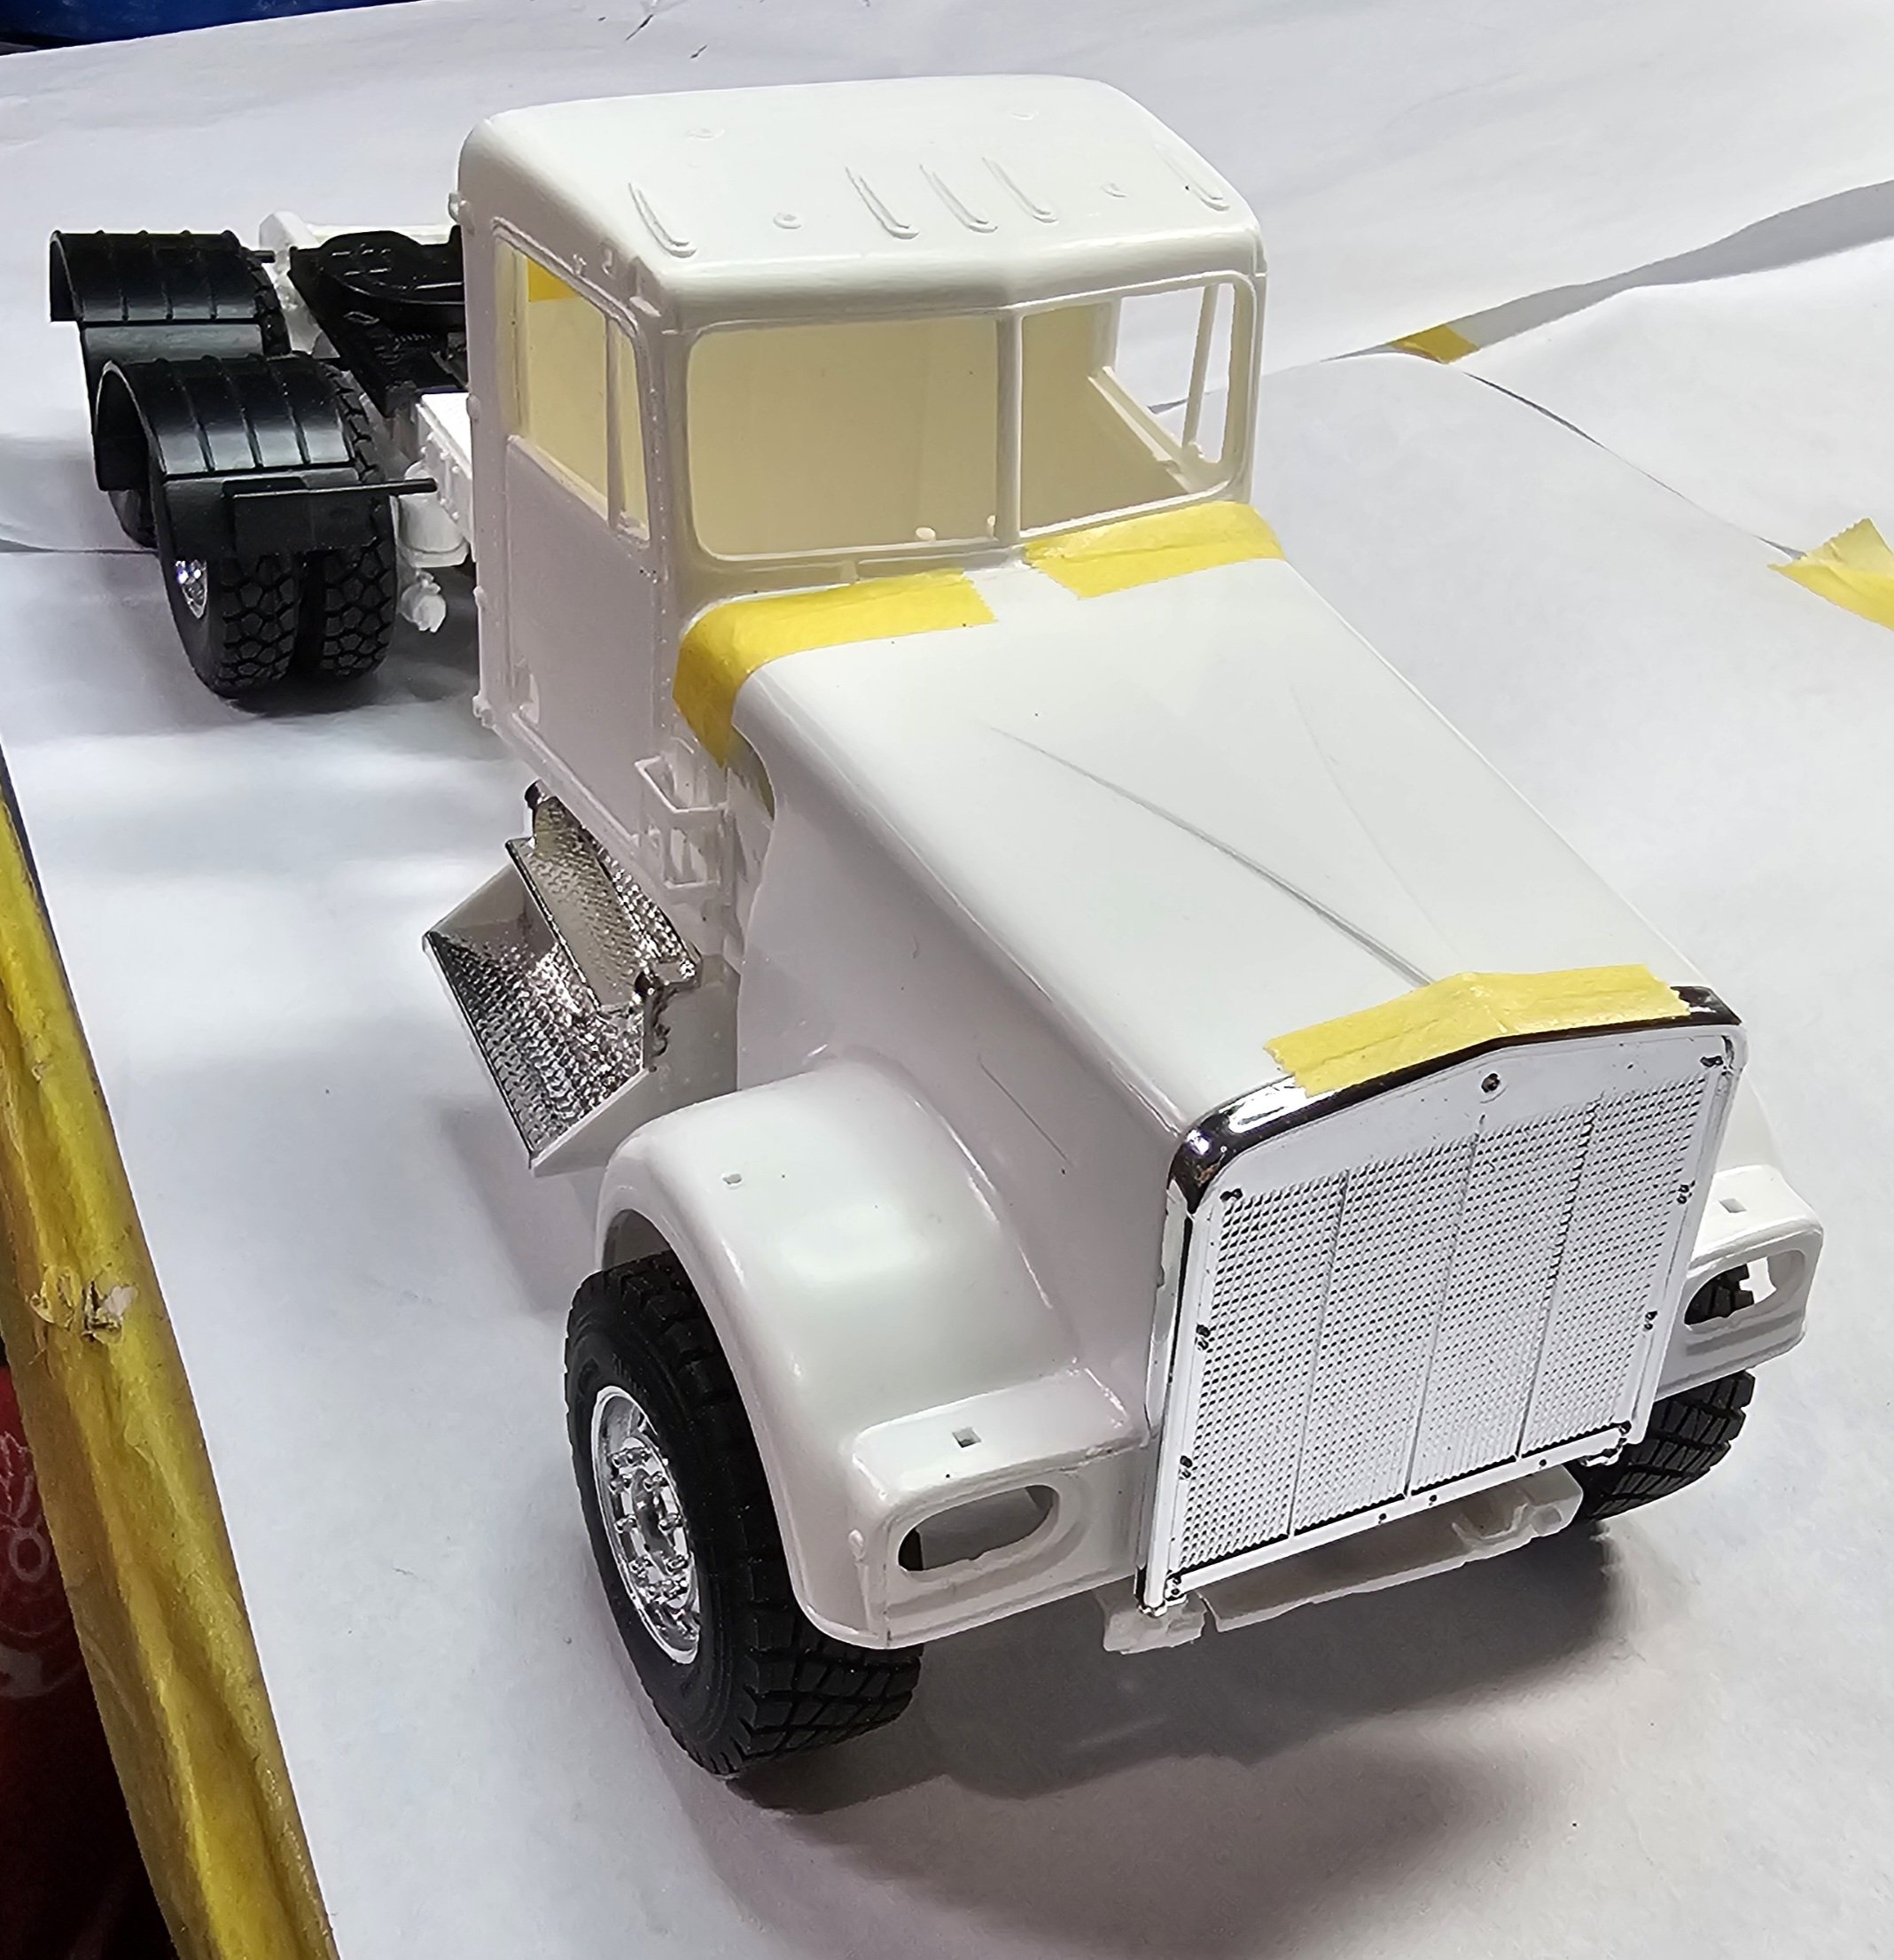
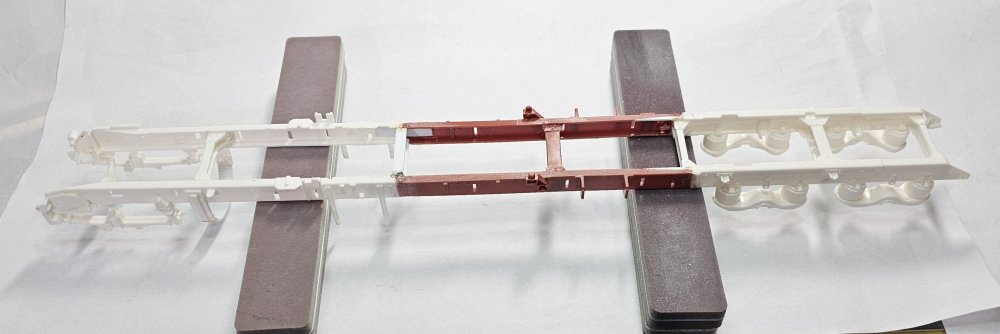
Hey all Nothing new on this, I'm trying to figure out what color to paint it?🤔 So I did a little work on the 1/25 Kenworth K100 with 300" W.B. I stretched it out to 300" wheel base. I used some extra frame rails from my "Can do" wreaker. It came out ok, but I have to do alot of filling in. This view shows it with the cab and some wheels/tires for perspective. This is the paint scheme I'm going for. Ron G

-
Nope got it cheaper off of Ebay. Ron G
-
Hey all Just got this today, very rare old kit.. Going to stretch this out to 300" wheel base total custom. Ron G

-
Hey all A little inspirational update, ha...ha. This is the XL Specialized HD130 RGN Lowboy from my Cat 374d excavator build. The RGN lowboy for this is going to be a Talbert 50 ton tri axle that I still have to scratch build. This gives you guys a glimpse of things to come...lol. Ron G
-
No problem buddy, anytime. Ron G
-
Hey Jeff I used plastic stock and some filler, alot of grinding with my Foredom tool and sanding. I had to fill in the rear brake chambers too because they are hollow as well. I need to remove the wheels, that are on temporarily, so I can paint the frame and engine. I would really like to detail this build with air lines and fuel lines, etc., but my eyes just aren't up to the task.😢 So this will be done as best I can to make it look as real as possible. The trailer will be next (RGN Lowboy). Ron G
-
Thanks Jeff They are from Moebius, the ones from there super single kit for a tractor. The Cat C15 is from Jerry at Moluminum. Ron G
-
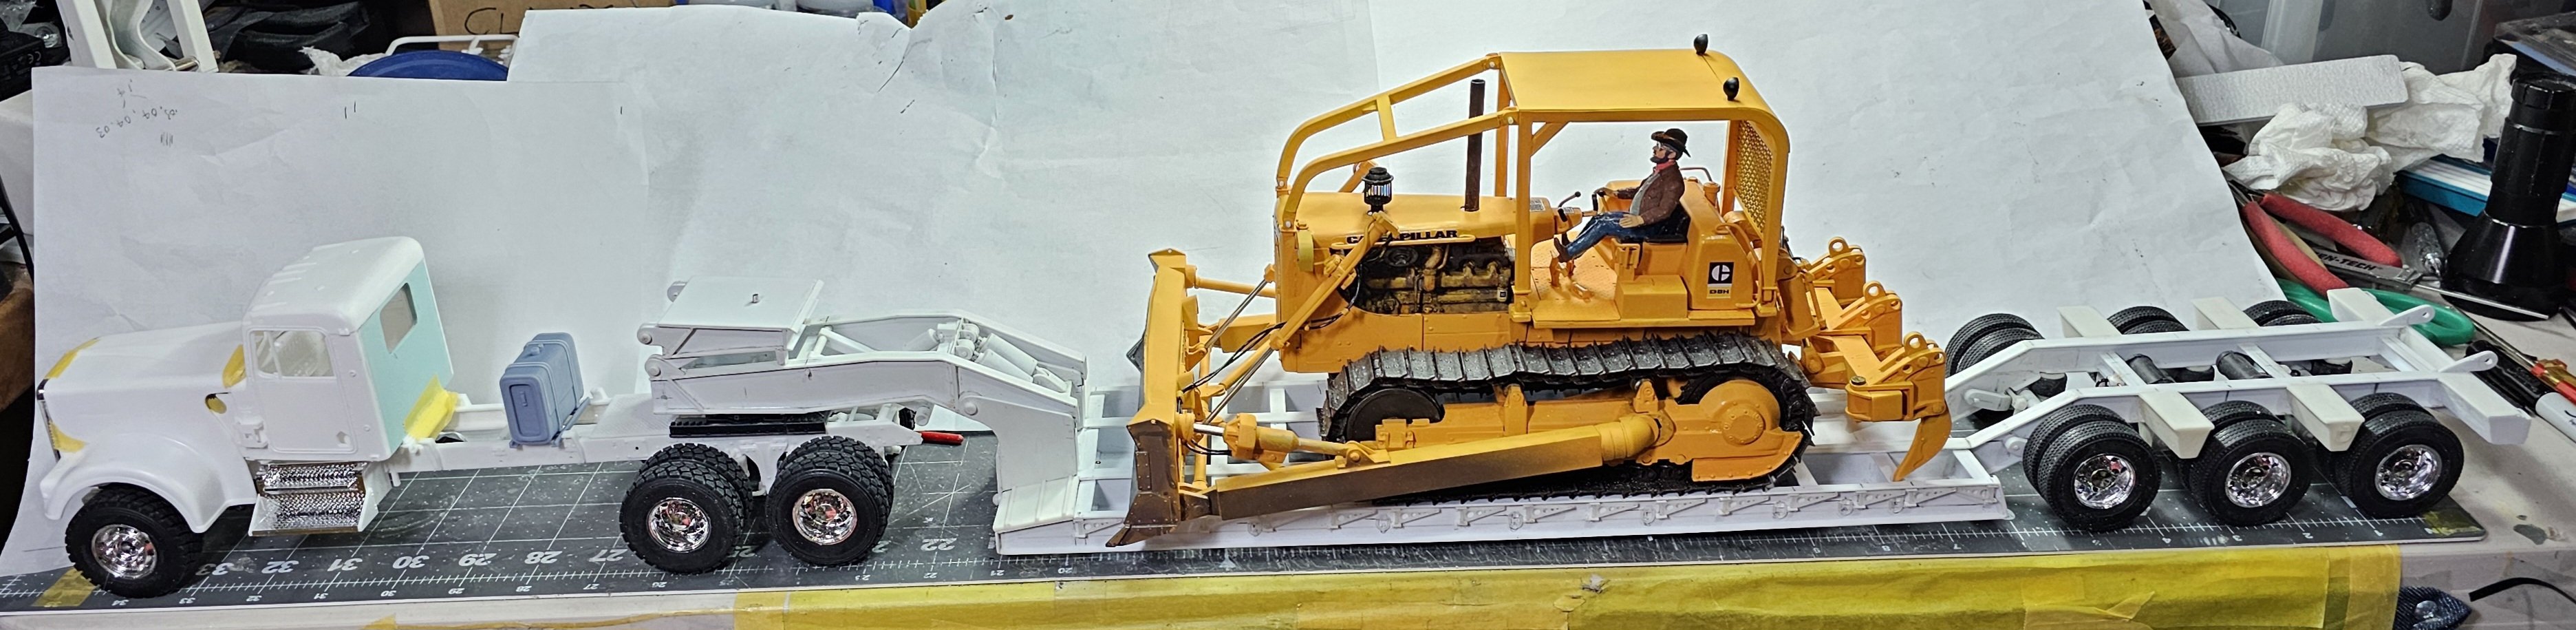
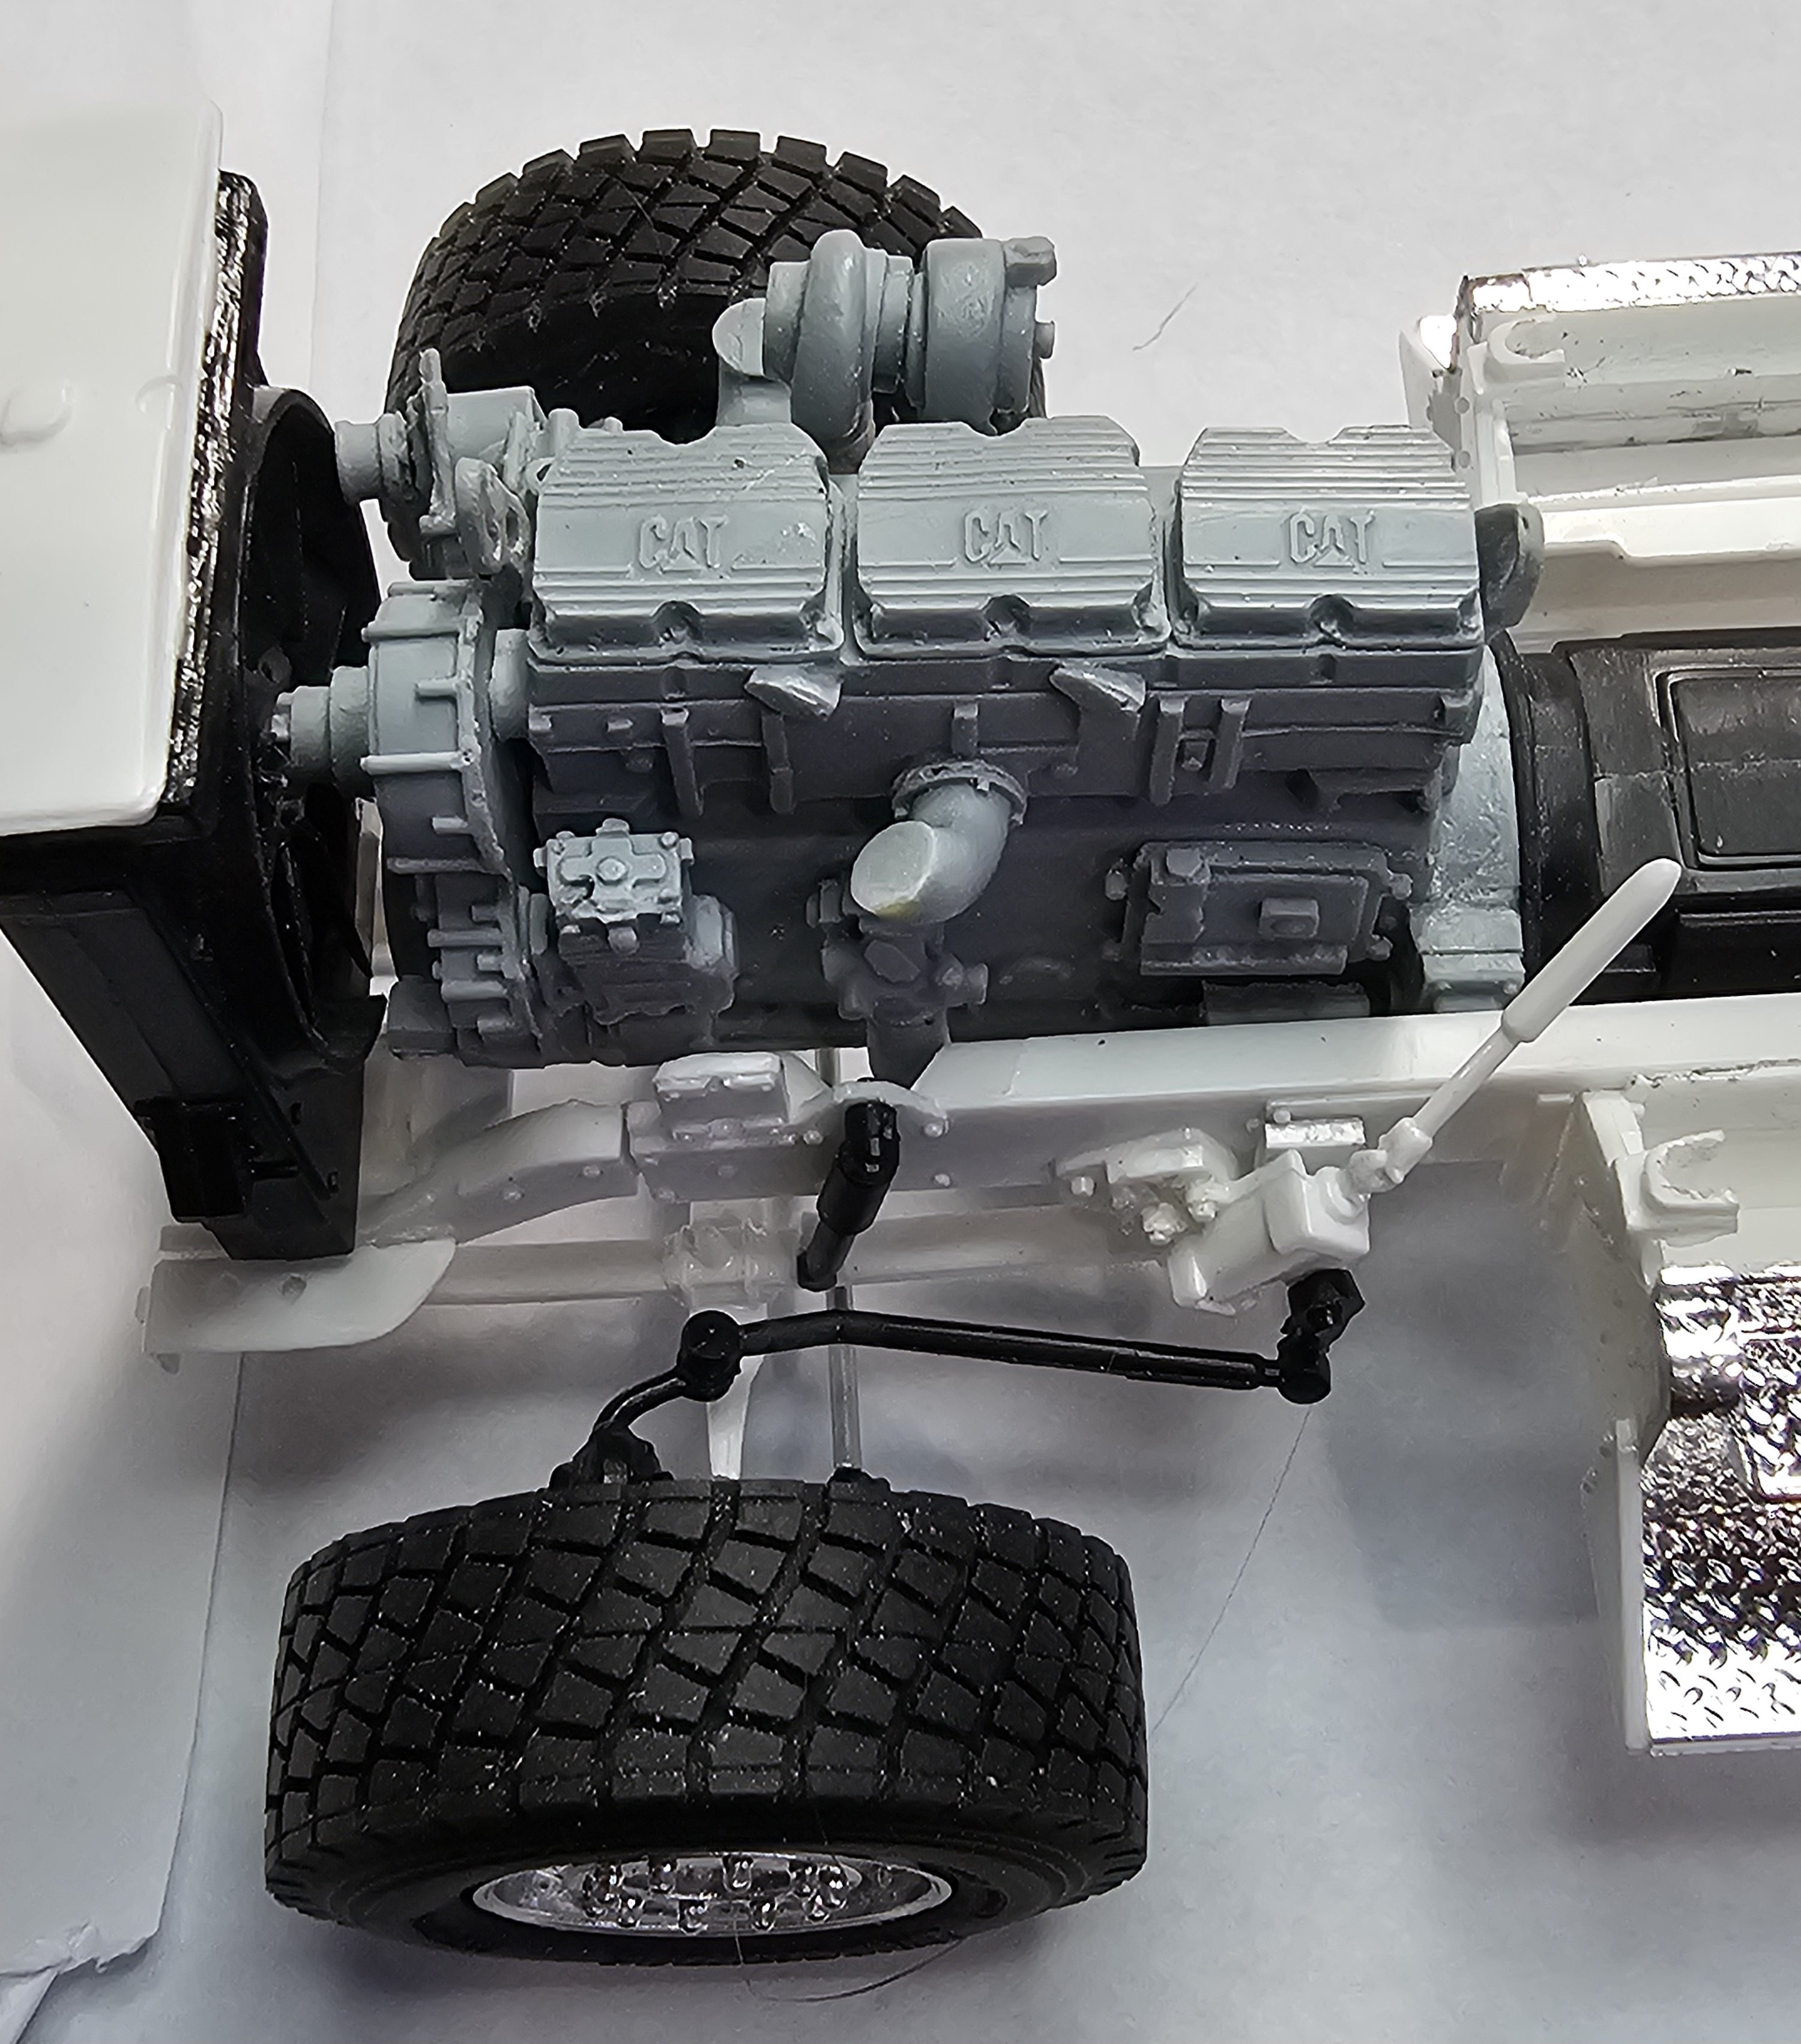
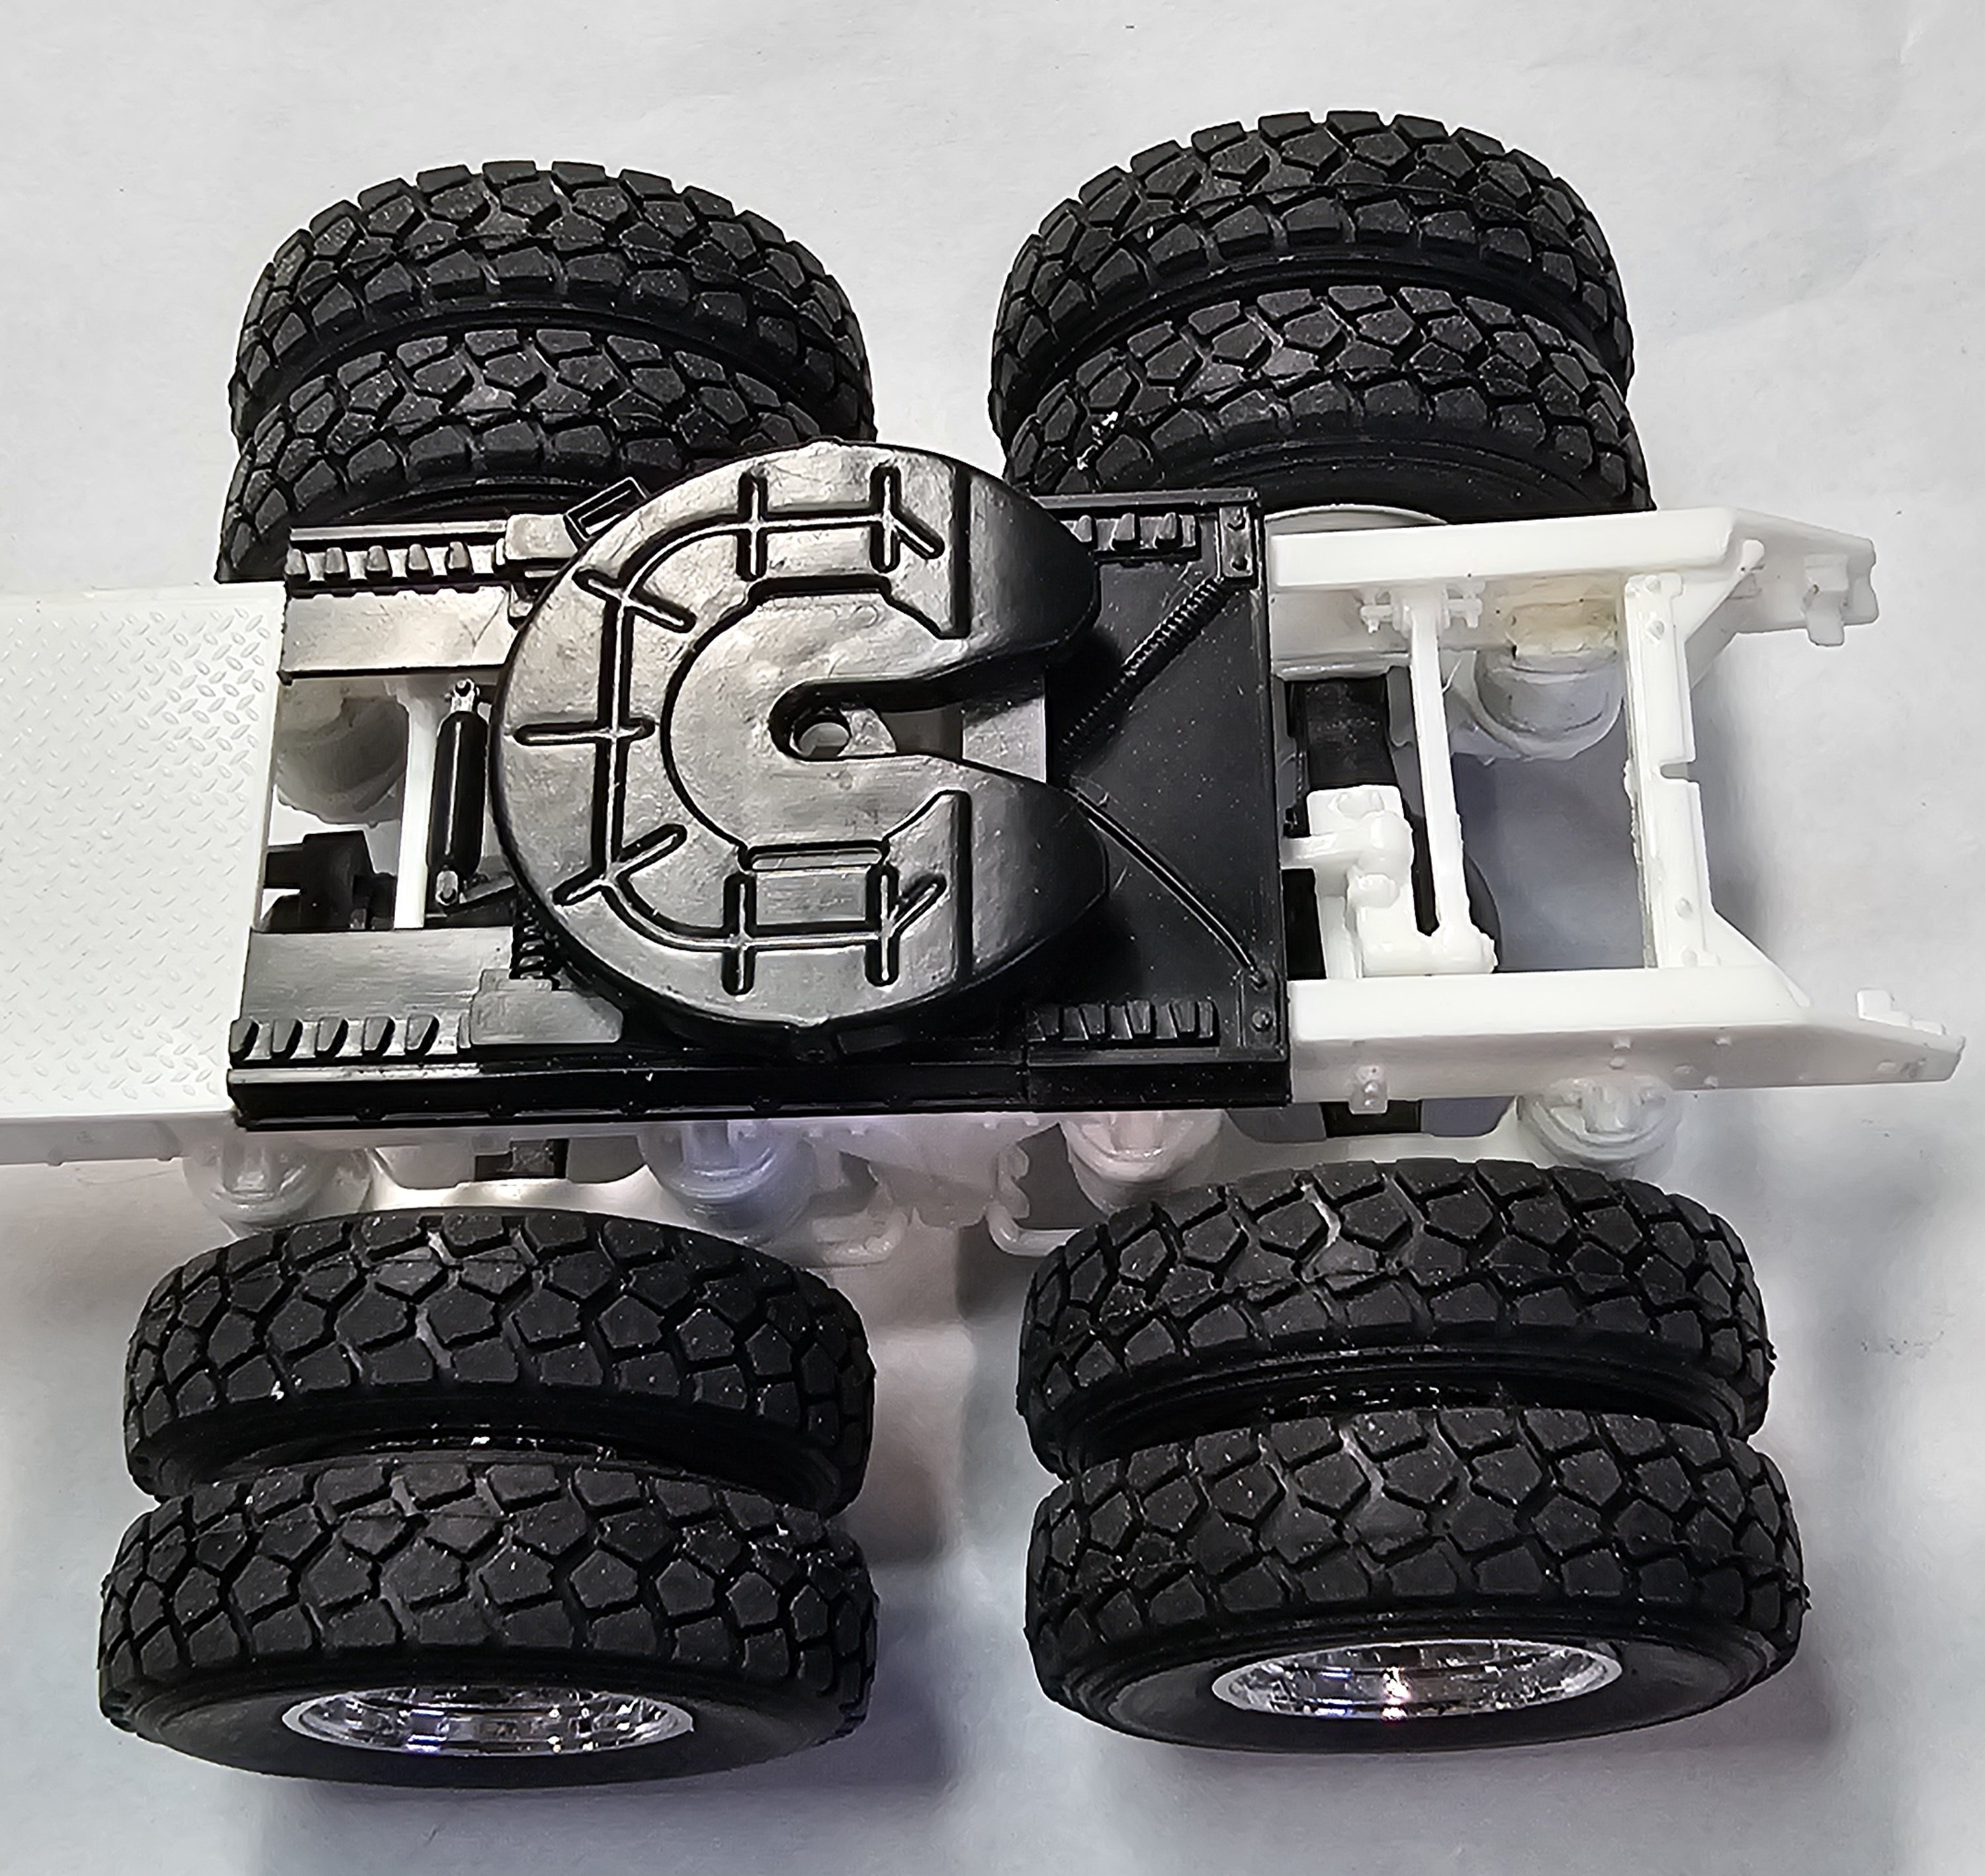
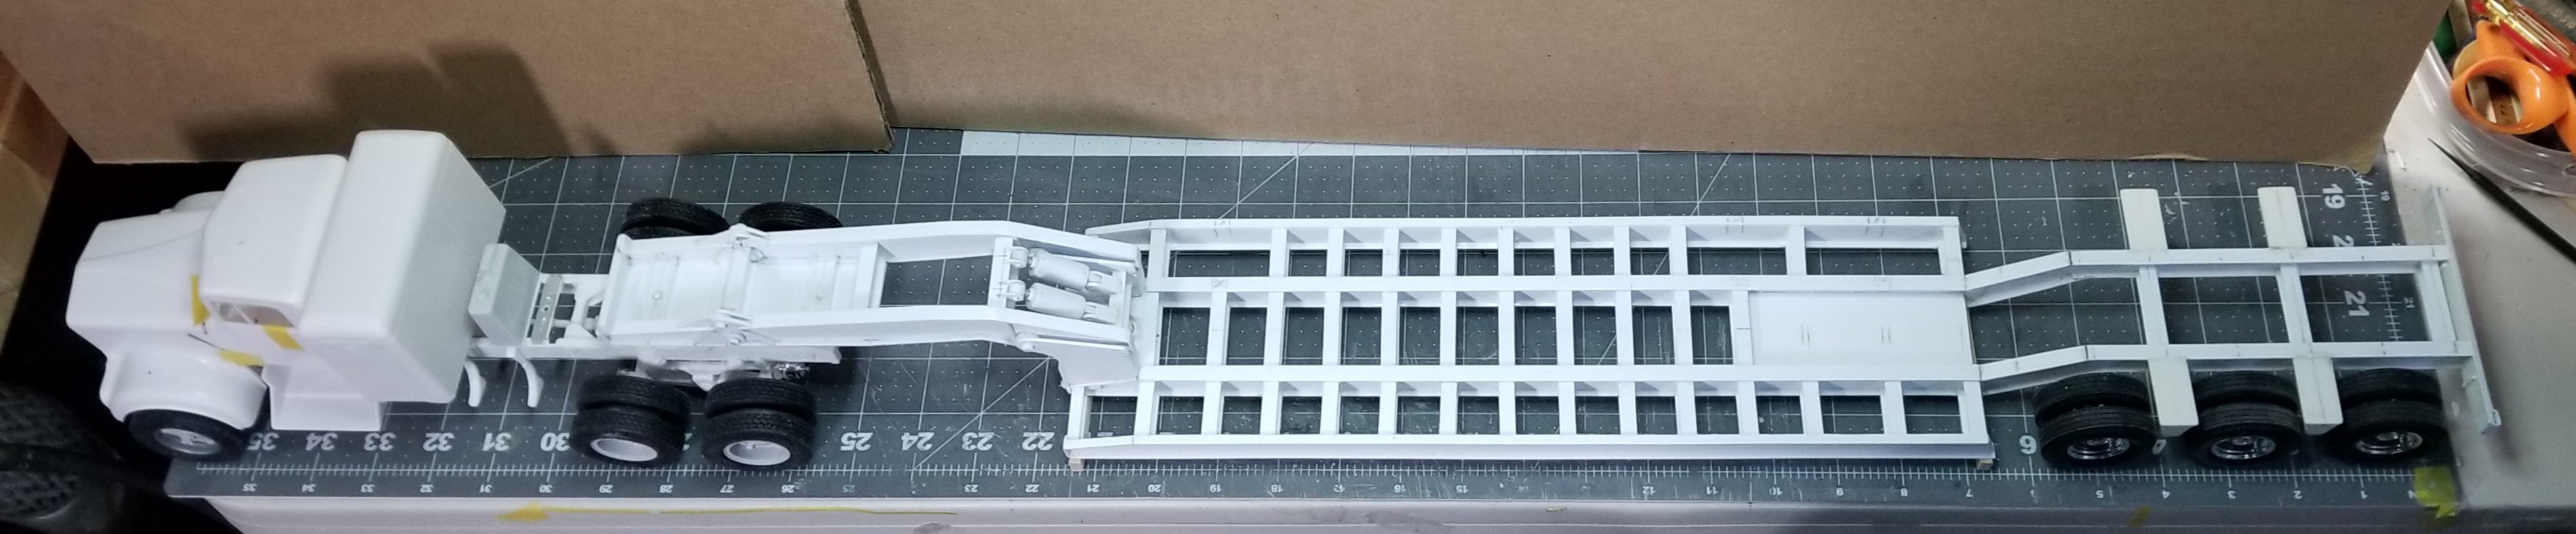
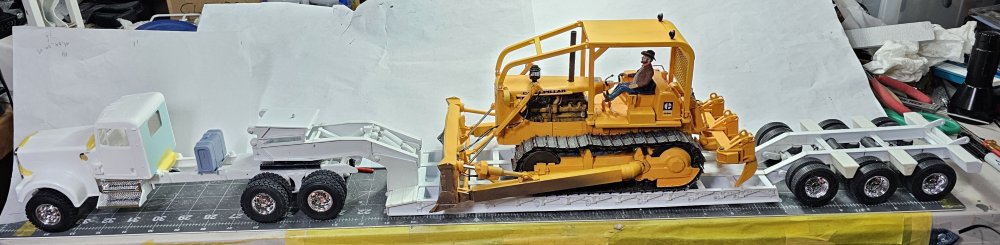
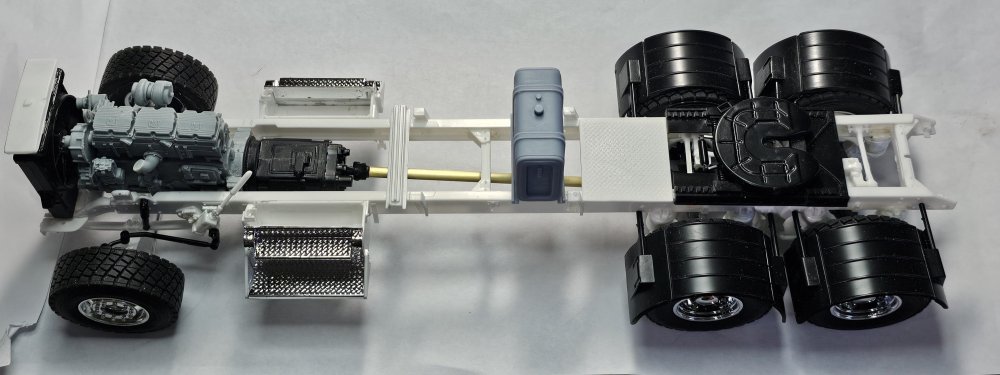
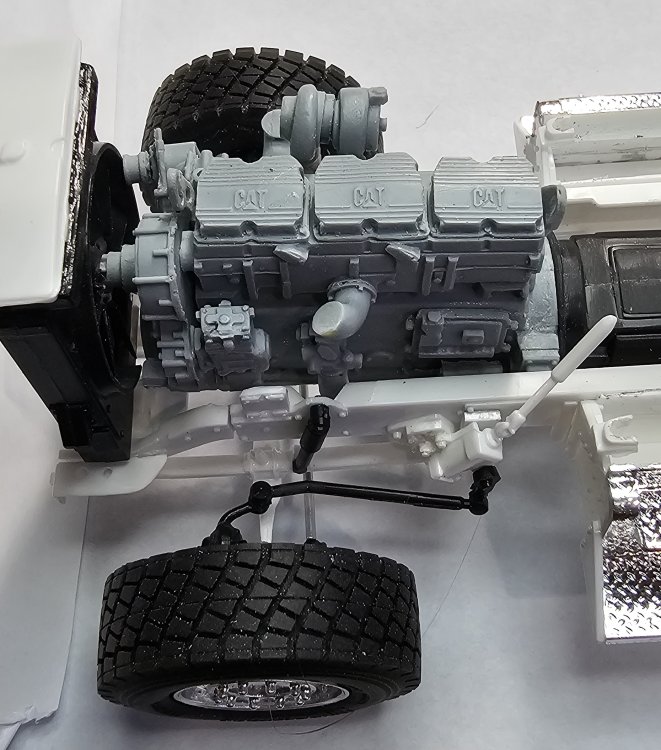
Hey all This is the truck that will be pulling the D8H Caterpillar that I am almost finished with on a custom made RGN lowboy. It is a Revell 1/25 Kenworth dump truck that I'm converting to a tractor. This view shows the rear fenders, hydraulic tank and Caterpillar C15 that I added to this rig. Closer view of the Cat C15, radiator and front floats. This view shows the fifth wheel and rear drive tires that I got from ST Supply in Canada. Turbo side view of the Cat C15. Closer view of the Cat C15 and front floats. I had to fill in the inside of the rear air bags on this kit as they come hollow. Side view of the rear drive tires This view shows the cab and hood sitting in place. View from the front looking rearward. I have a long way to go but I'll get there eventually. Well that's it for now be back with more soon. Ron G


-
Pappy does have some great stuff, just remember it takes a long time to get it from him. Also you can only get a hold of him on facebook. Ron G
-
Hey all Andy just released a vidio on his NEW 1/16 scale M8 greyhound. Ron G
-
Hey you guys remember this. I'm making a two axle 35 ton version for the Cat D8H. I'm also making a 1/25 Revell Kenworth w900 to pull it. Everything will be rusted, dirty and weathered, like it just came off of the work site. Ron G


-
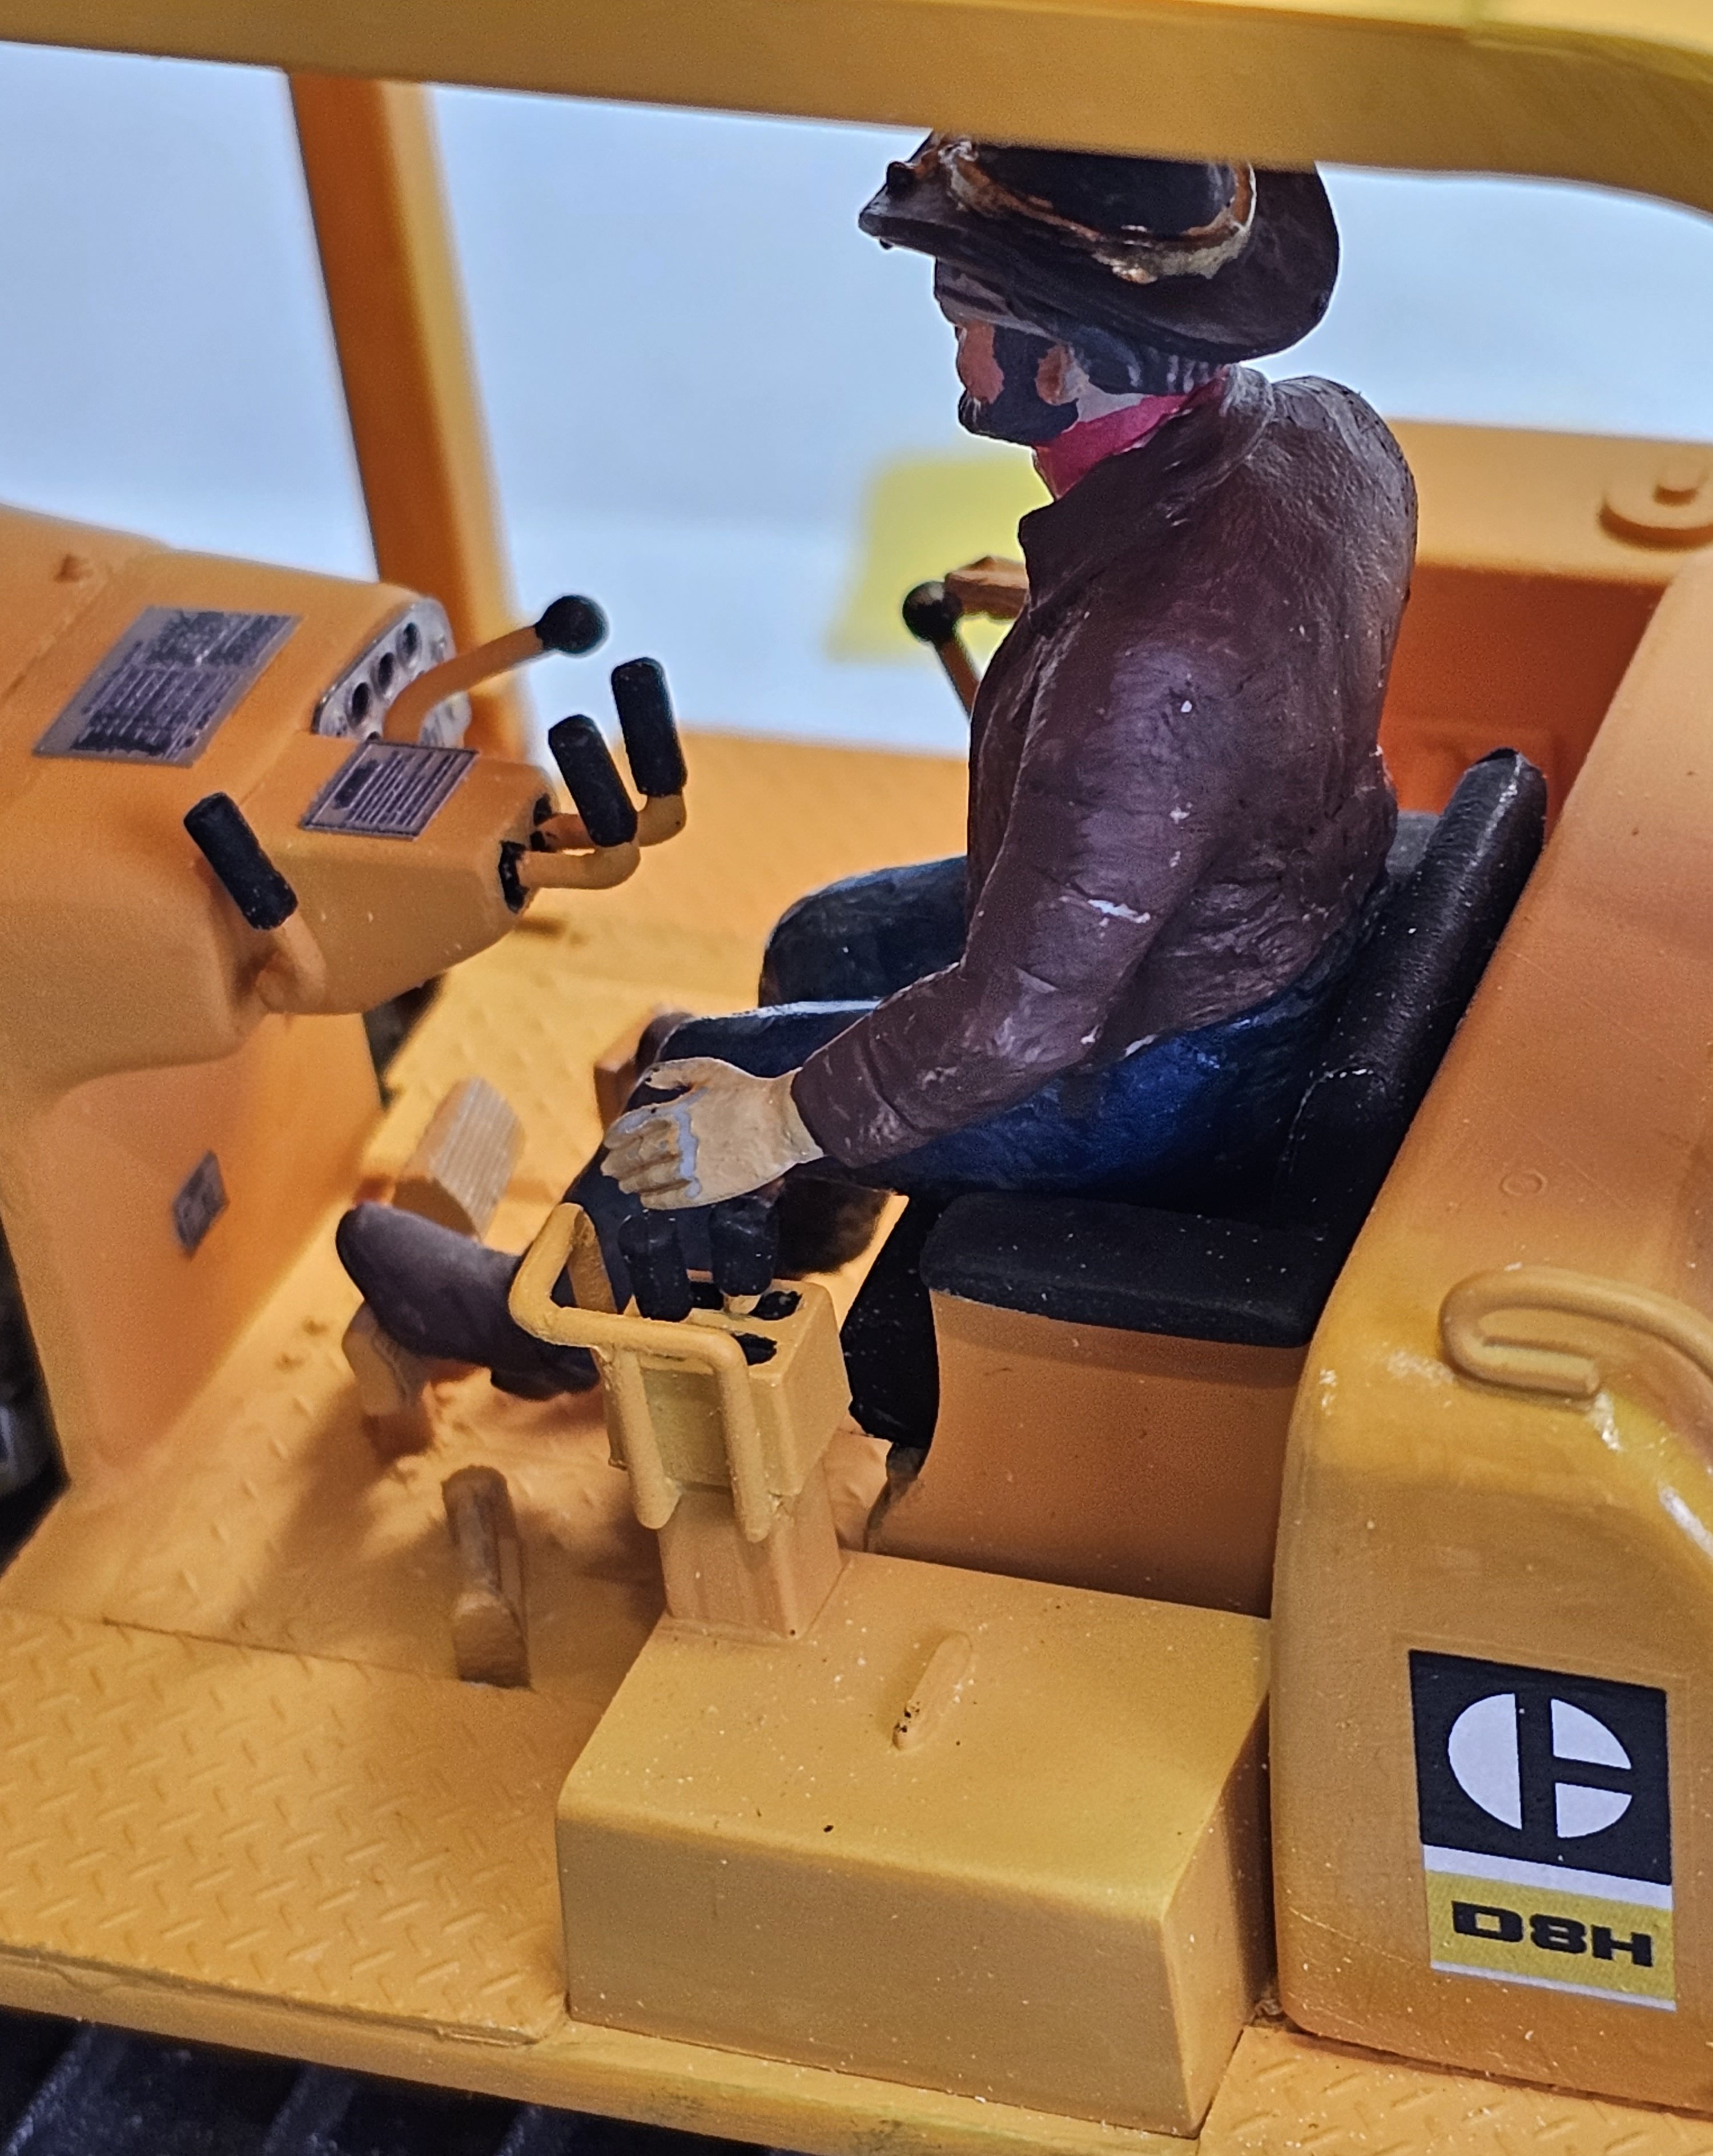
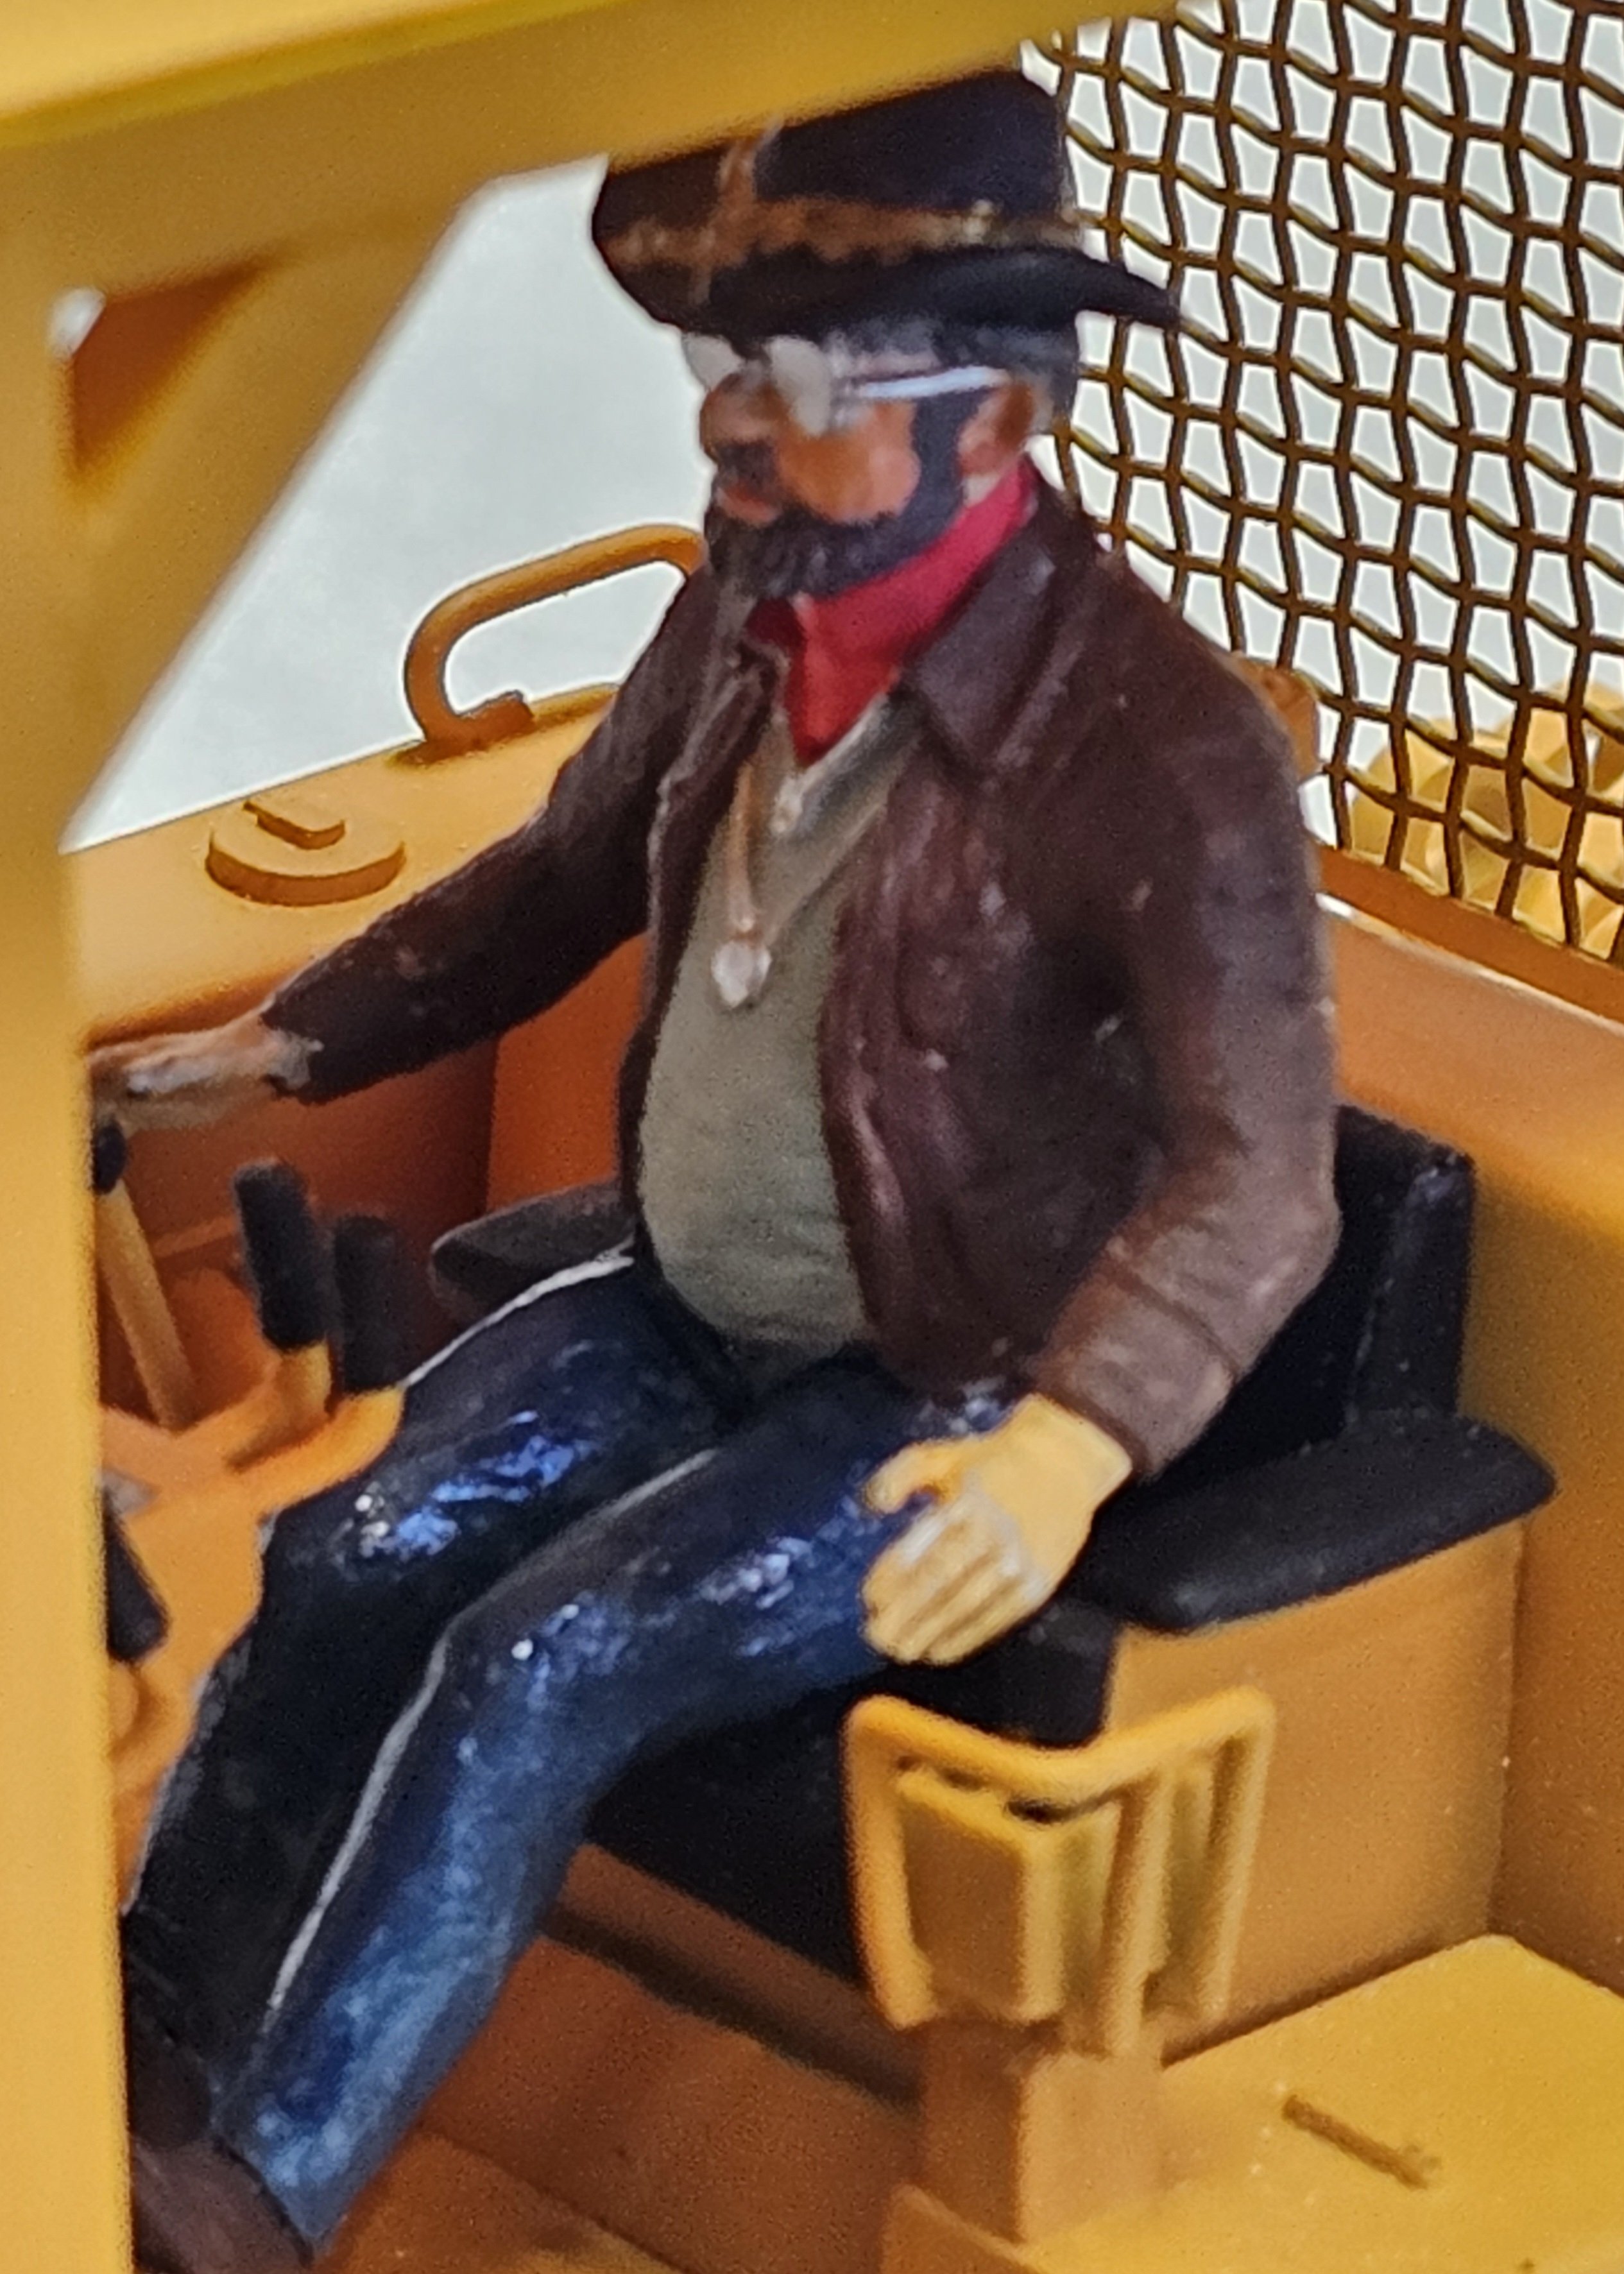
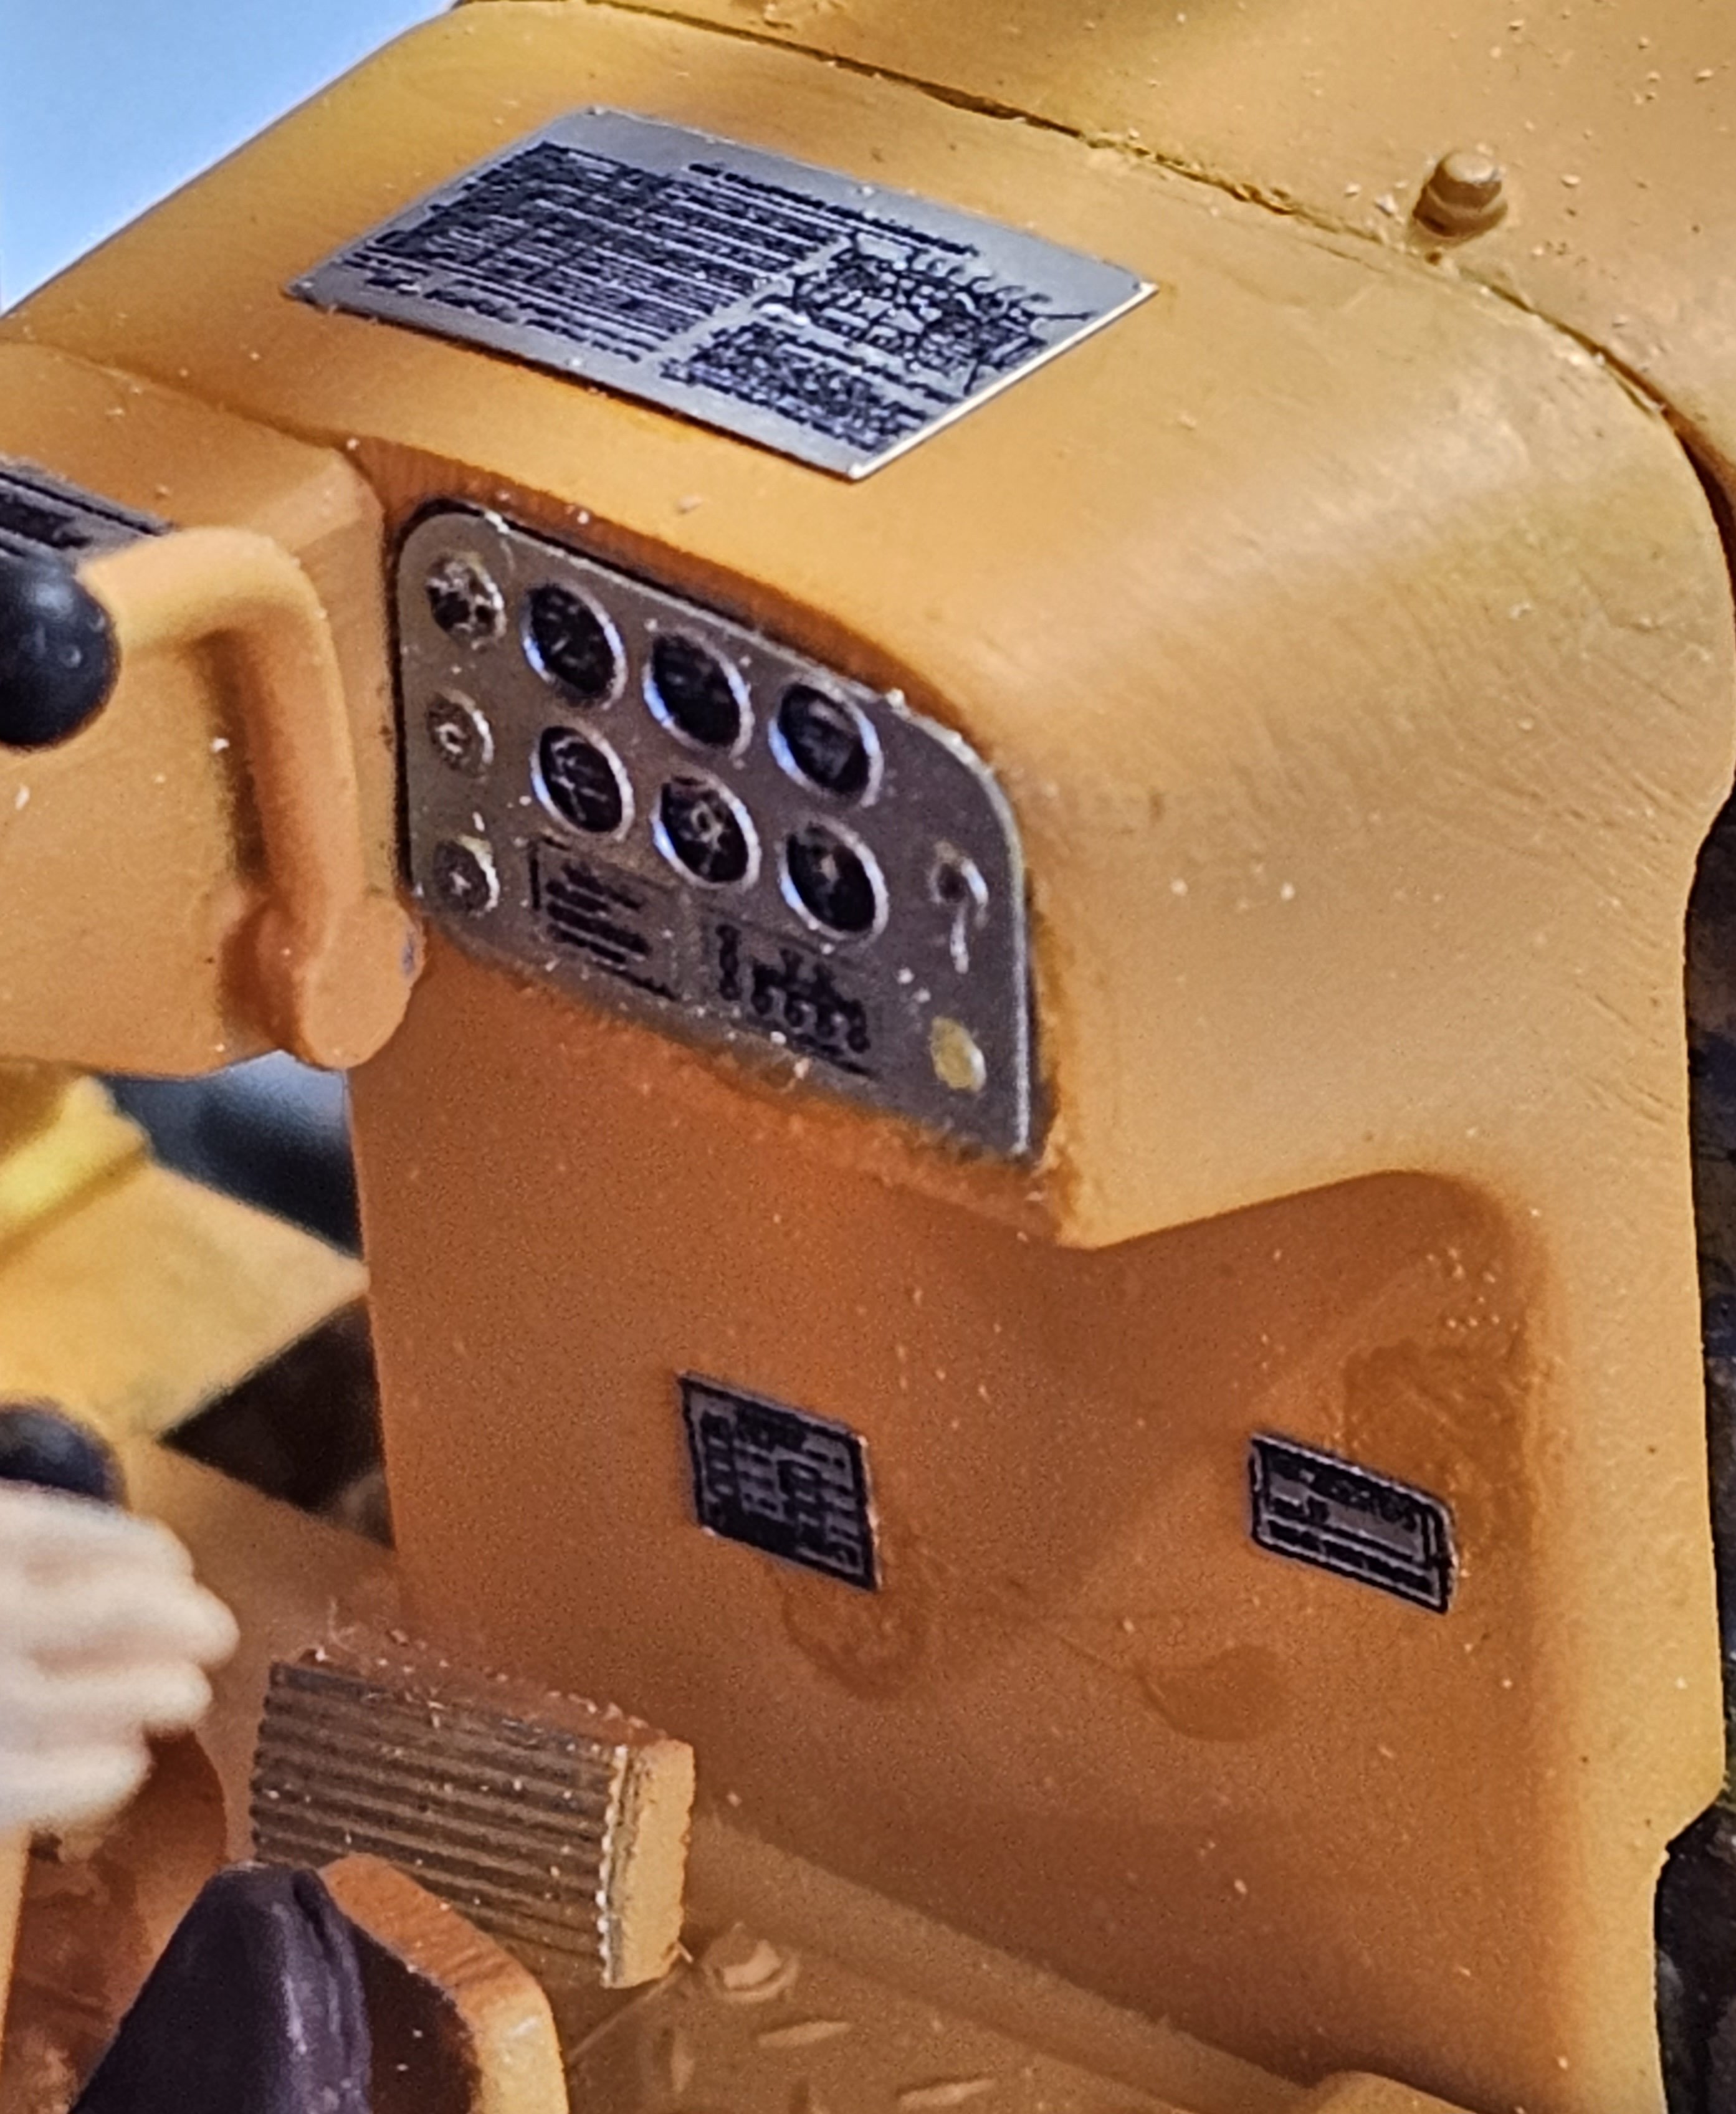
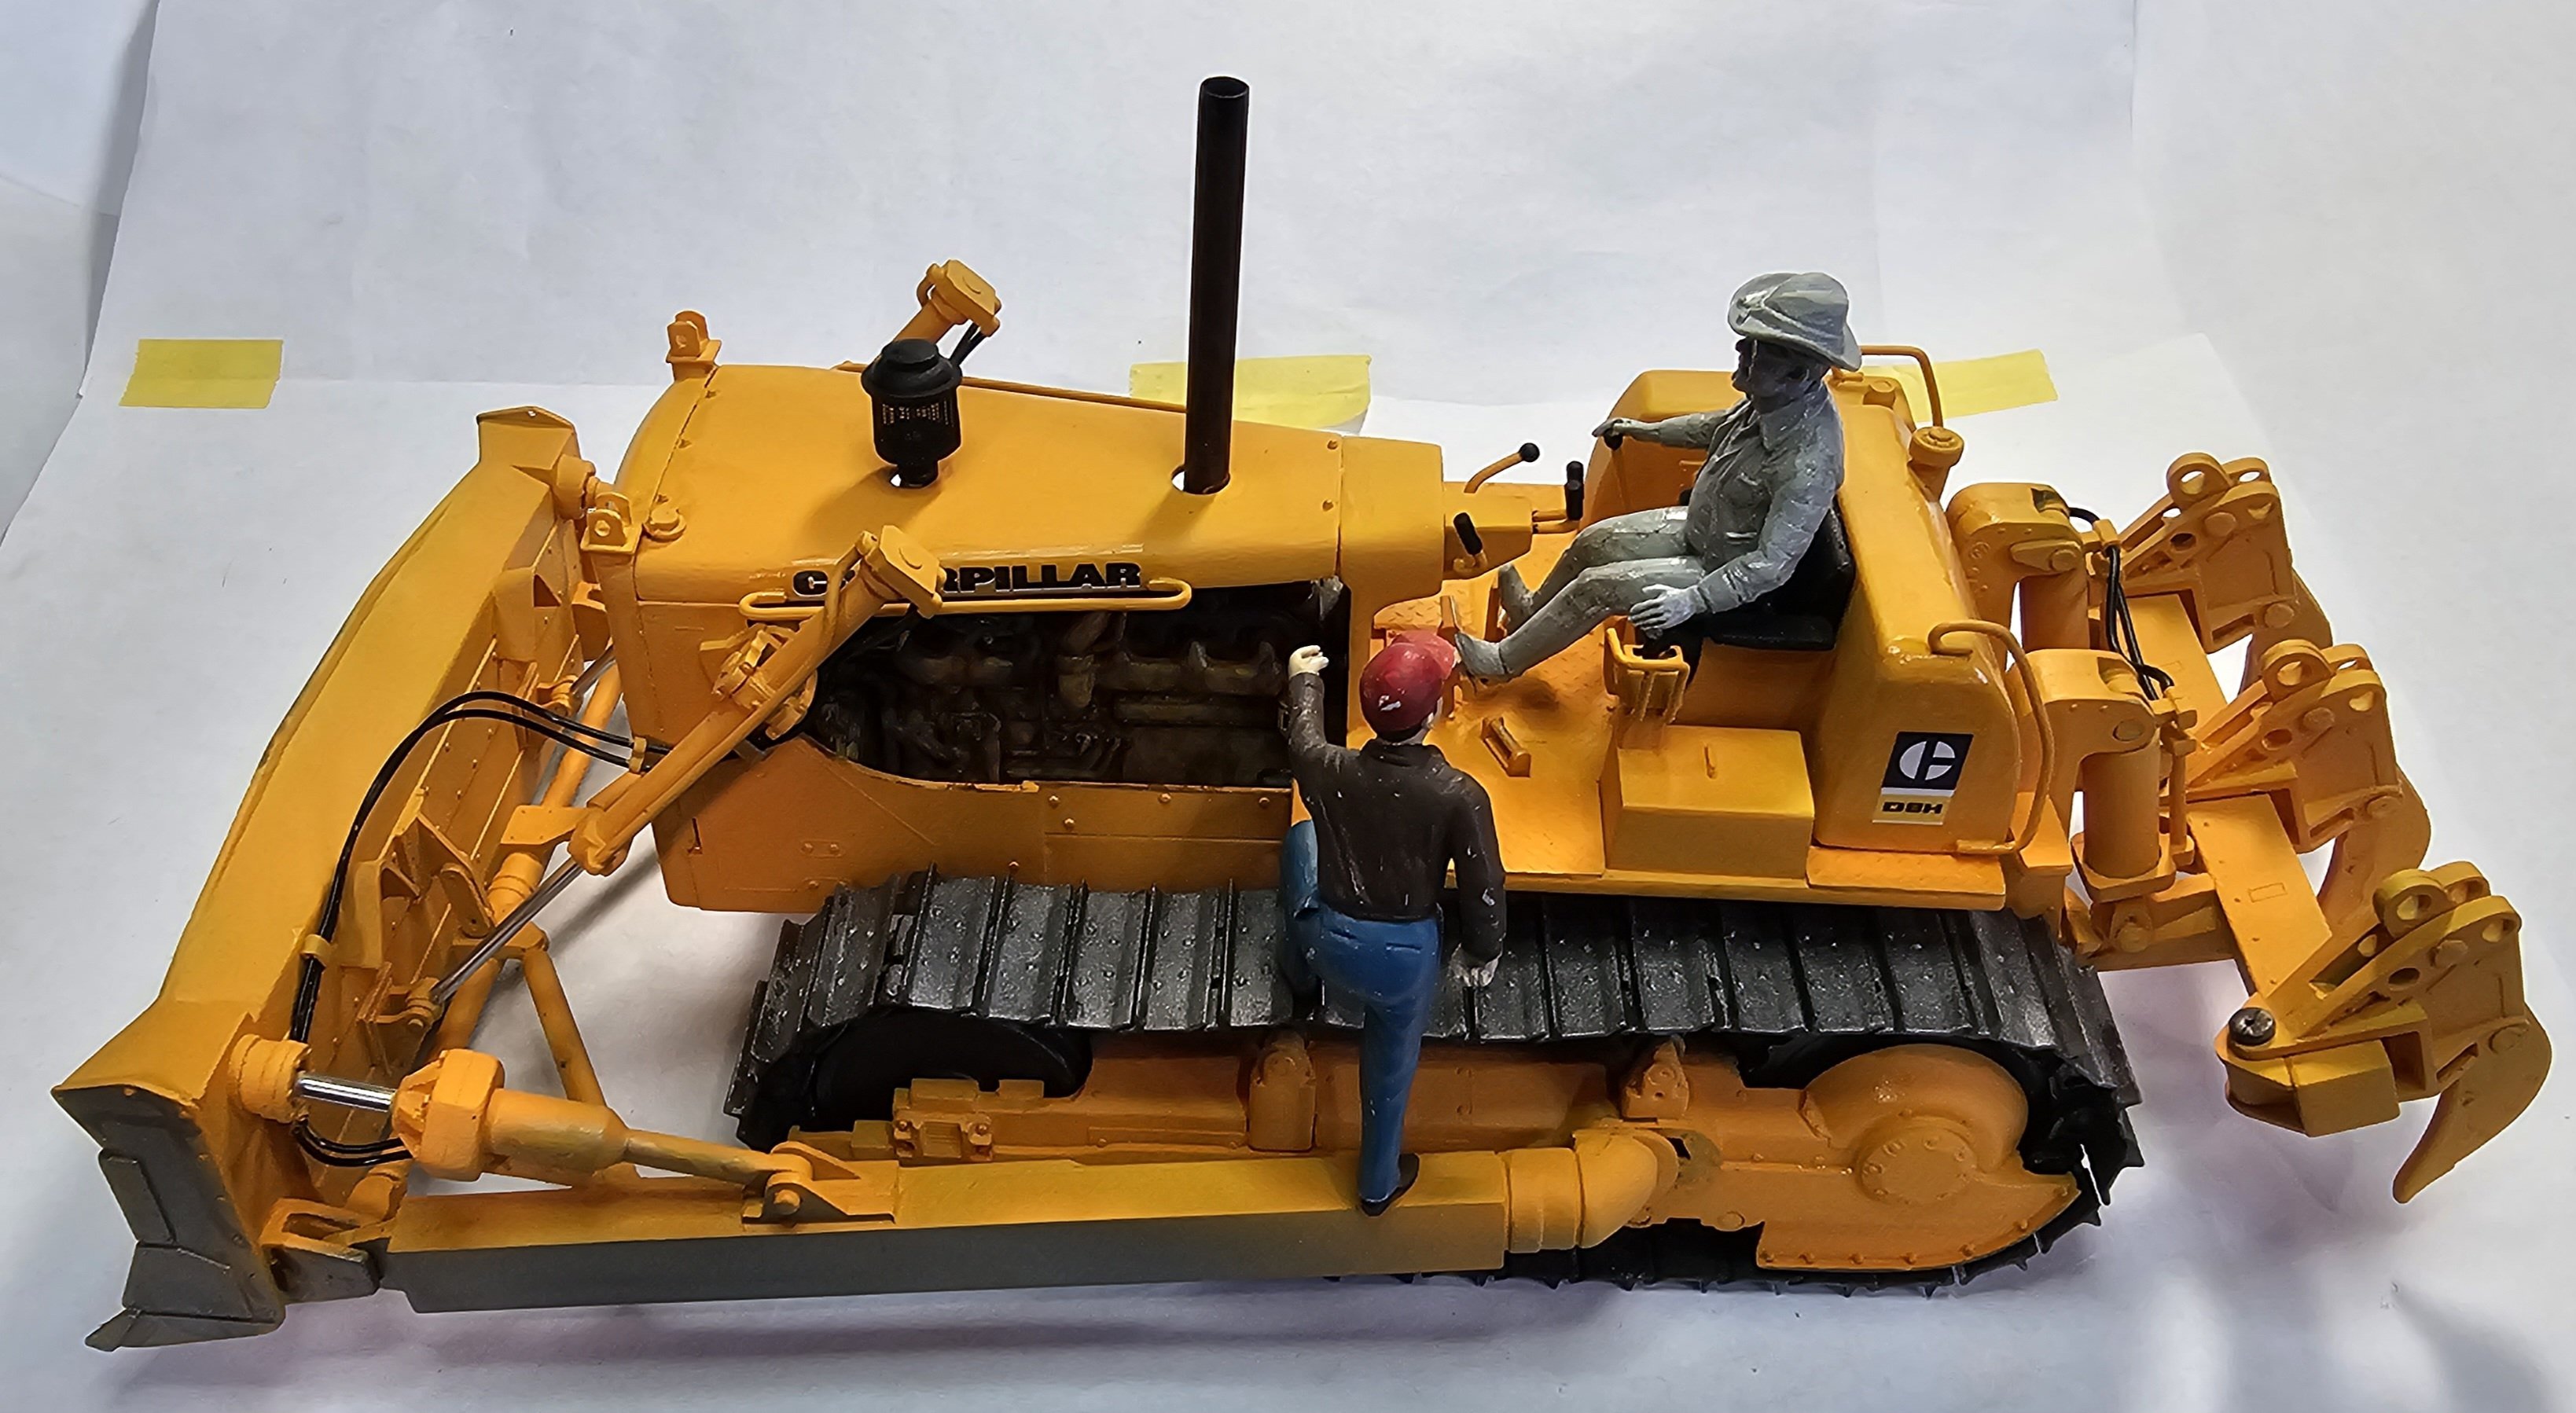
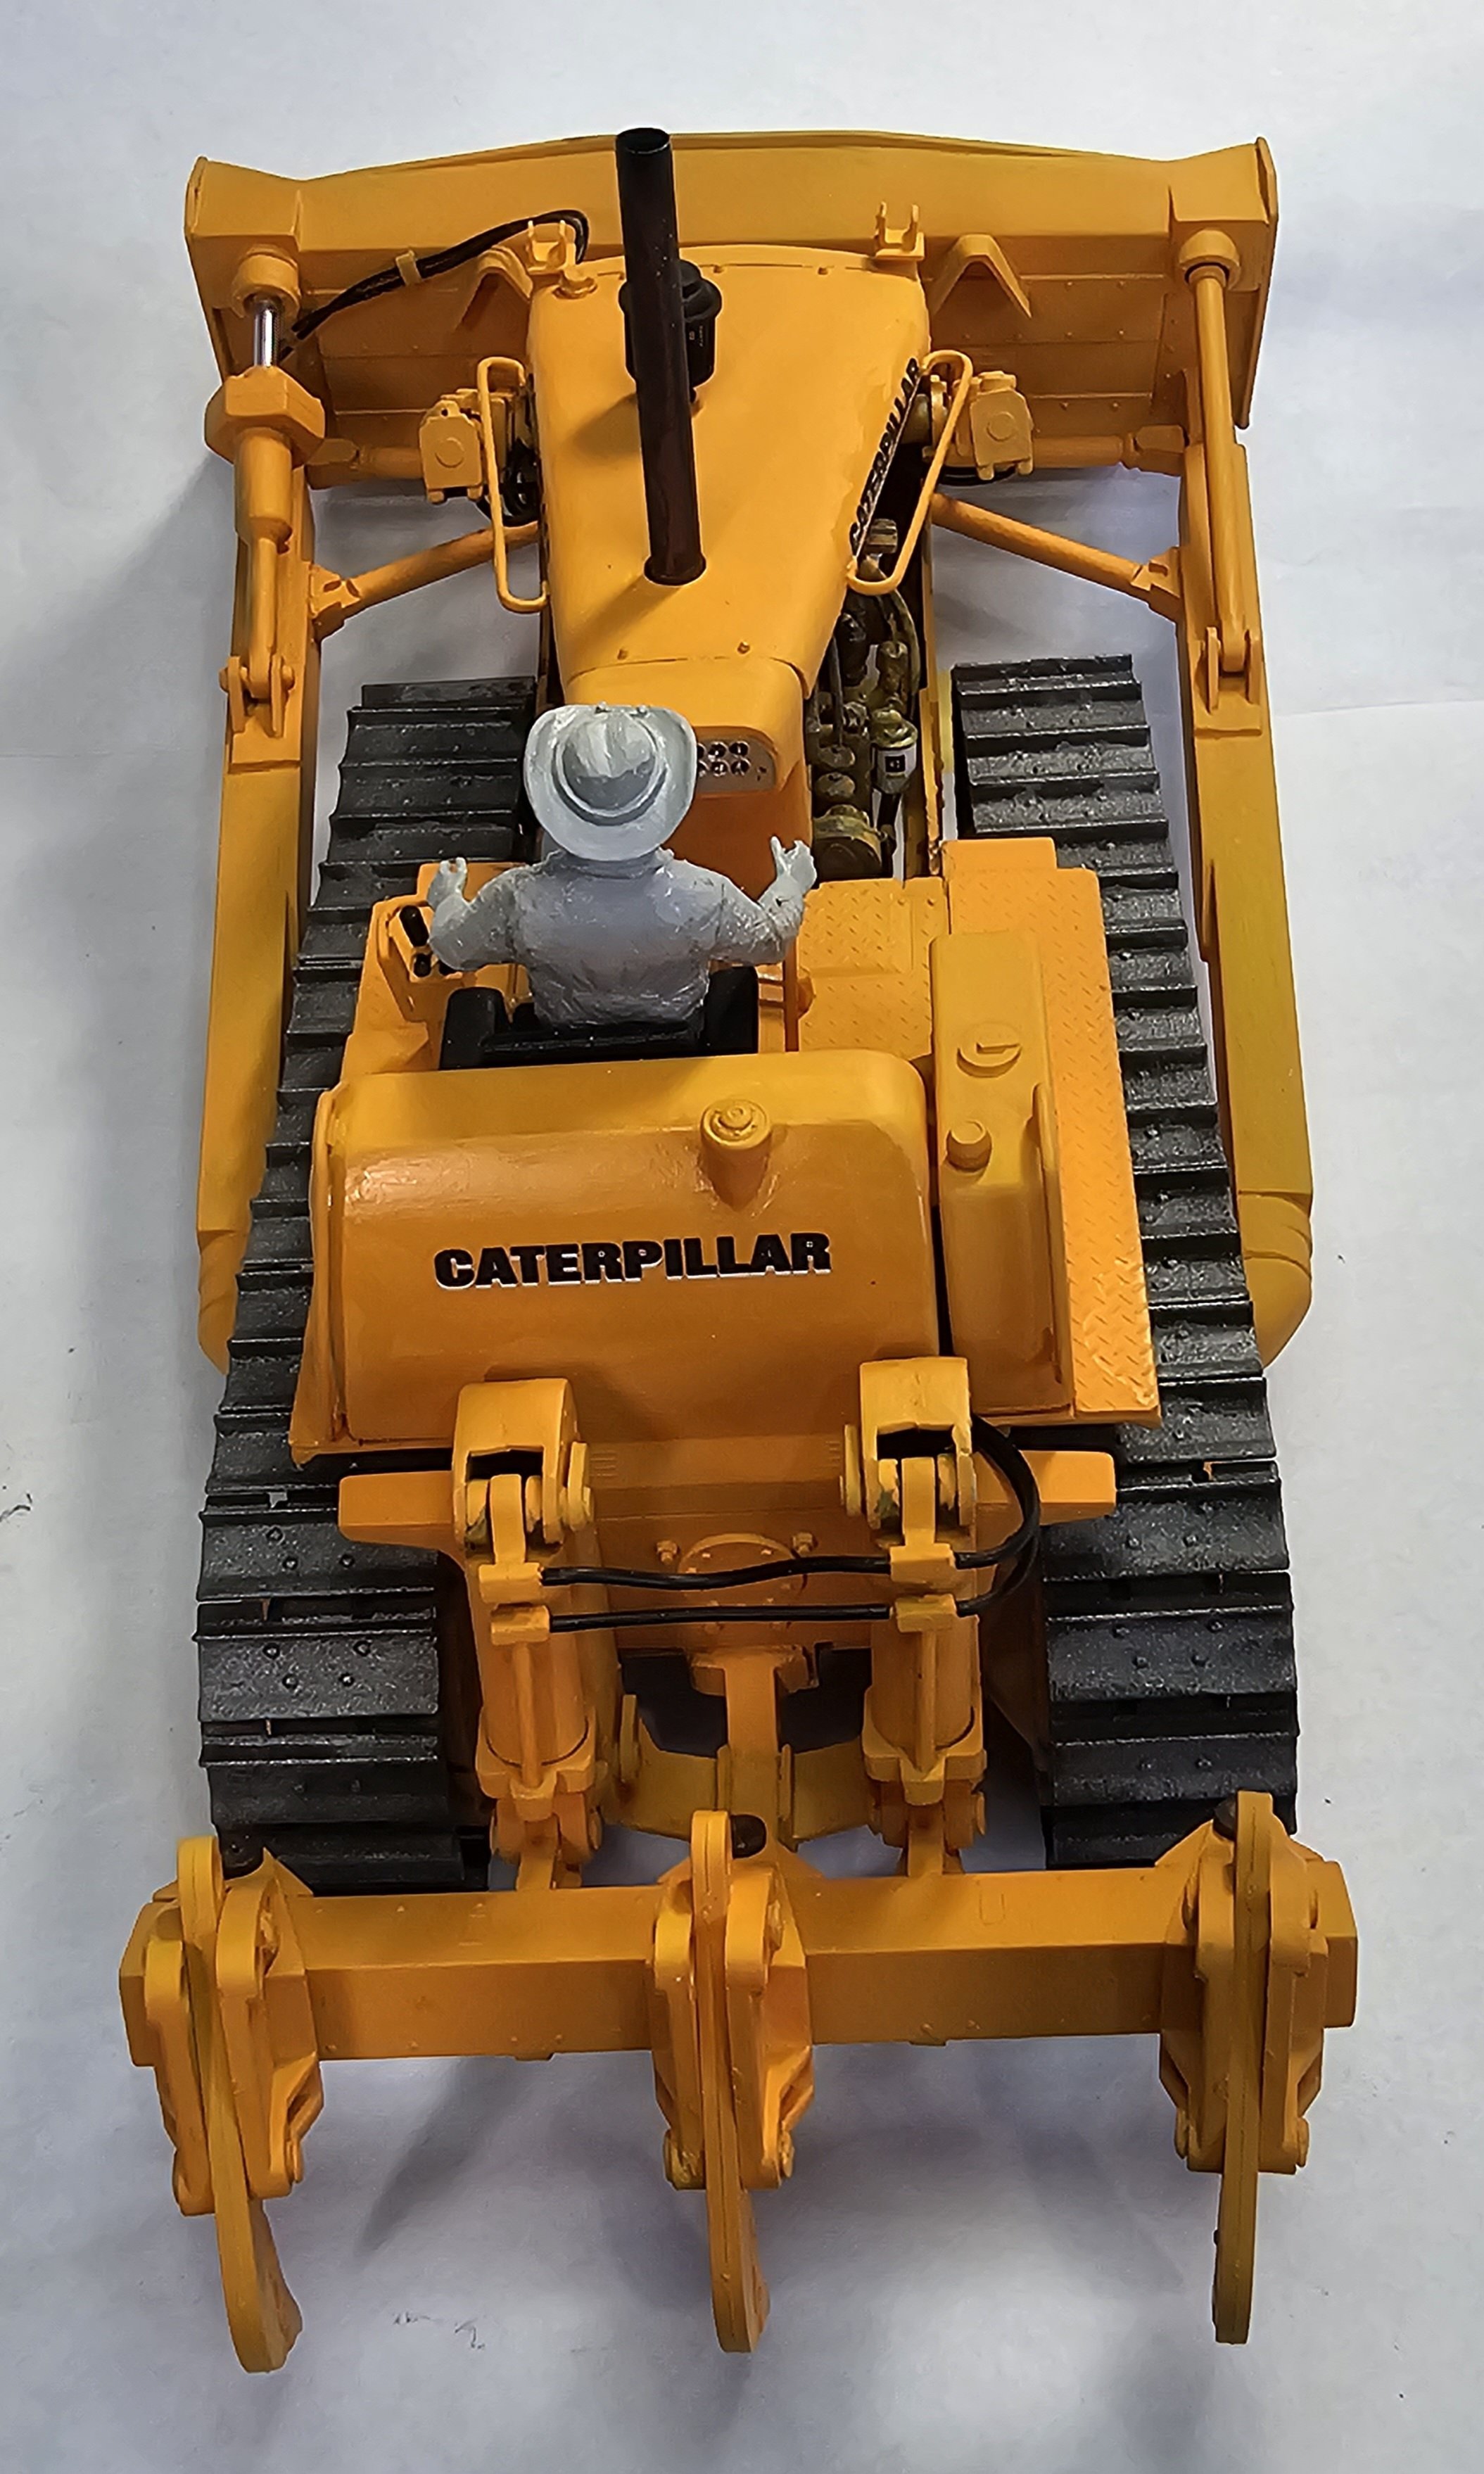
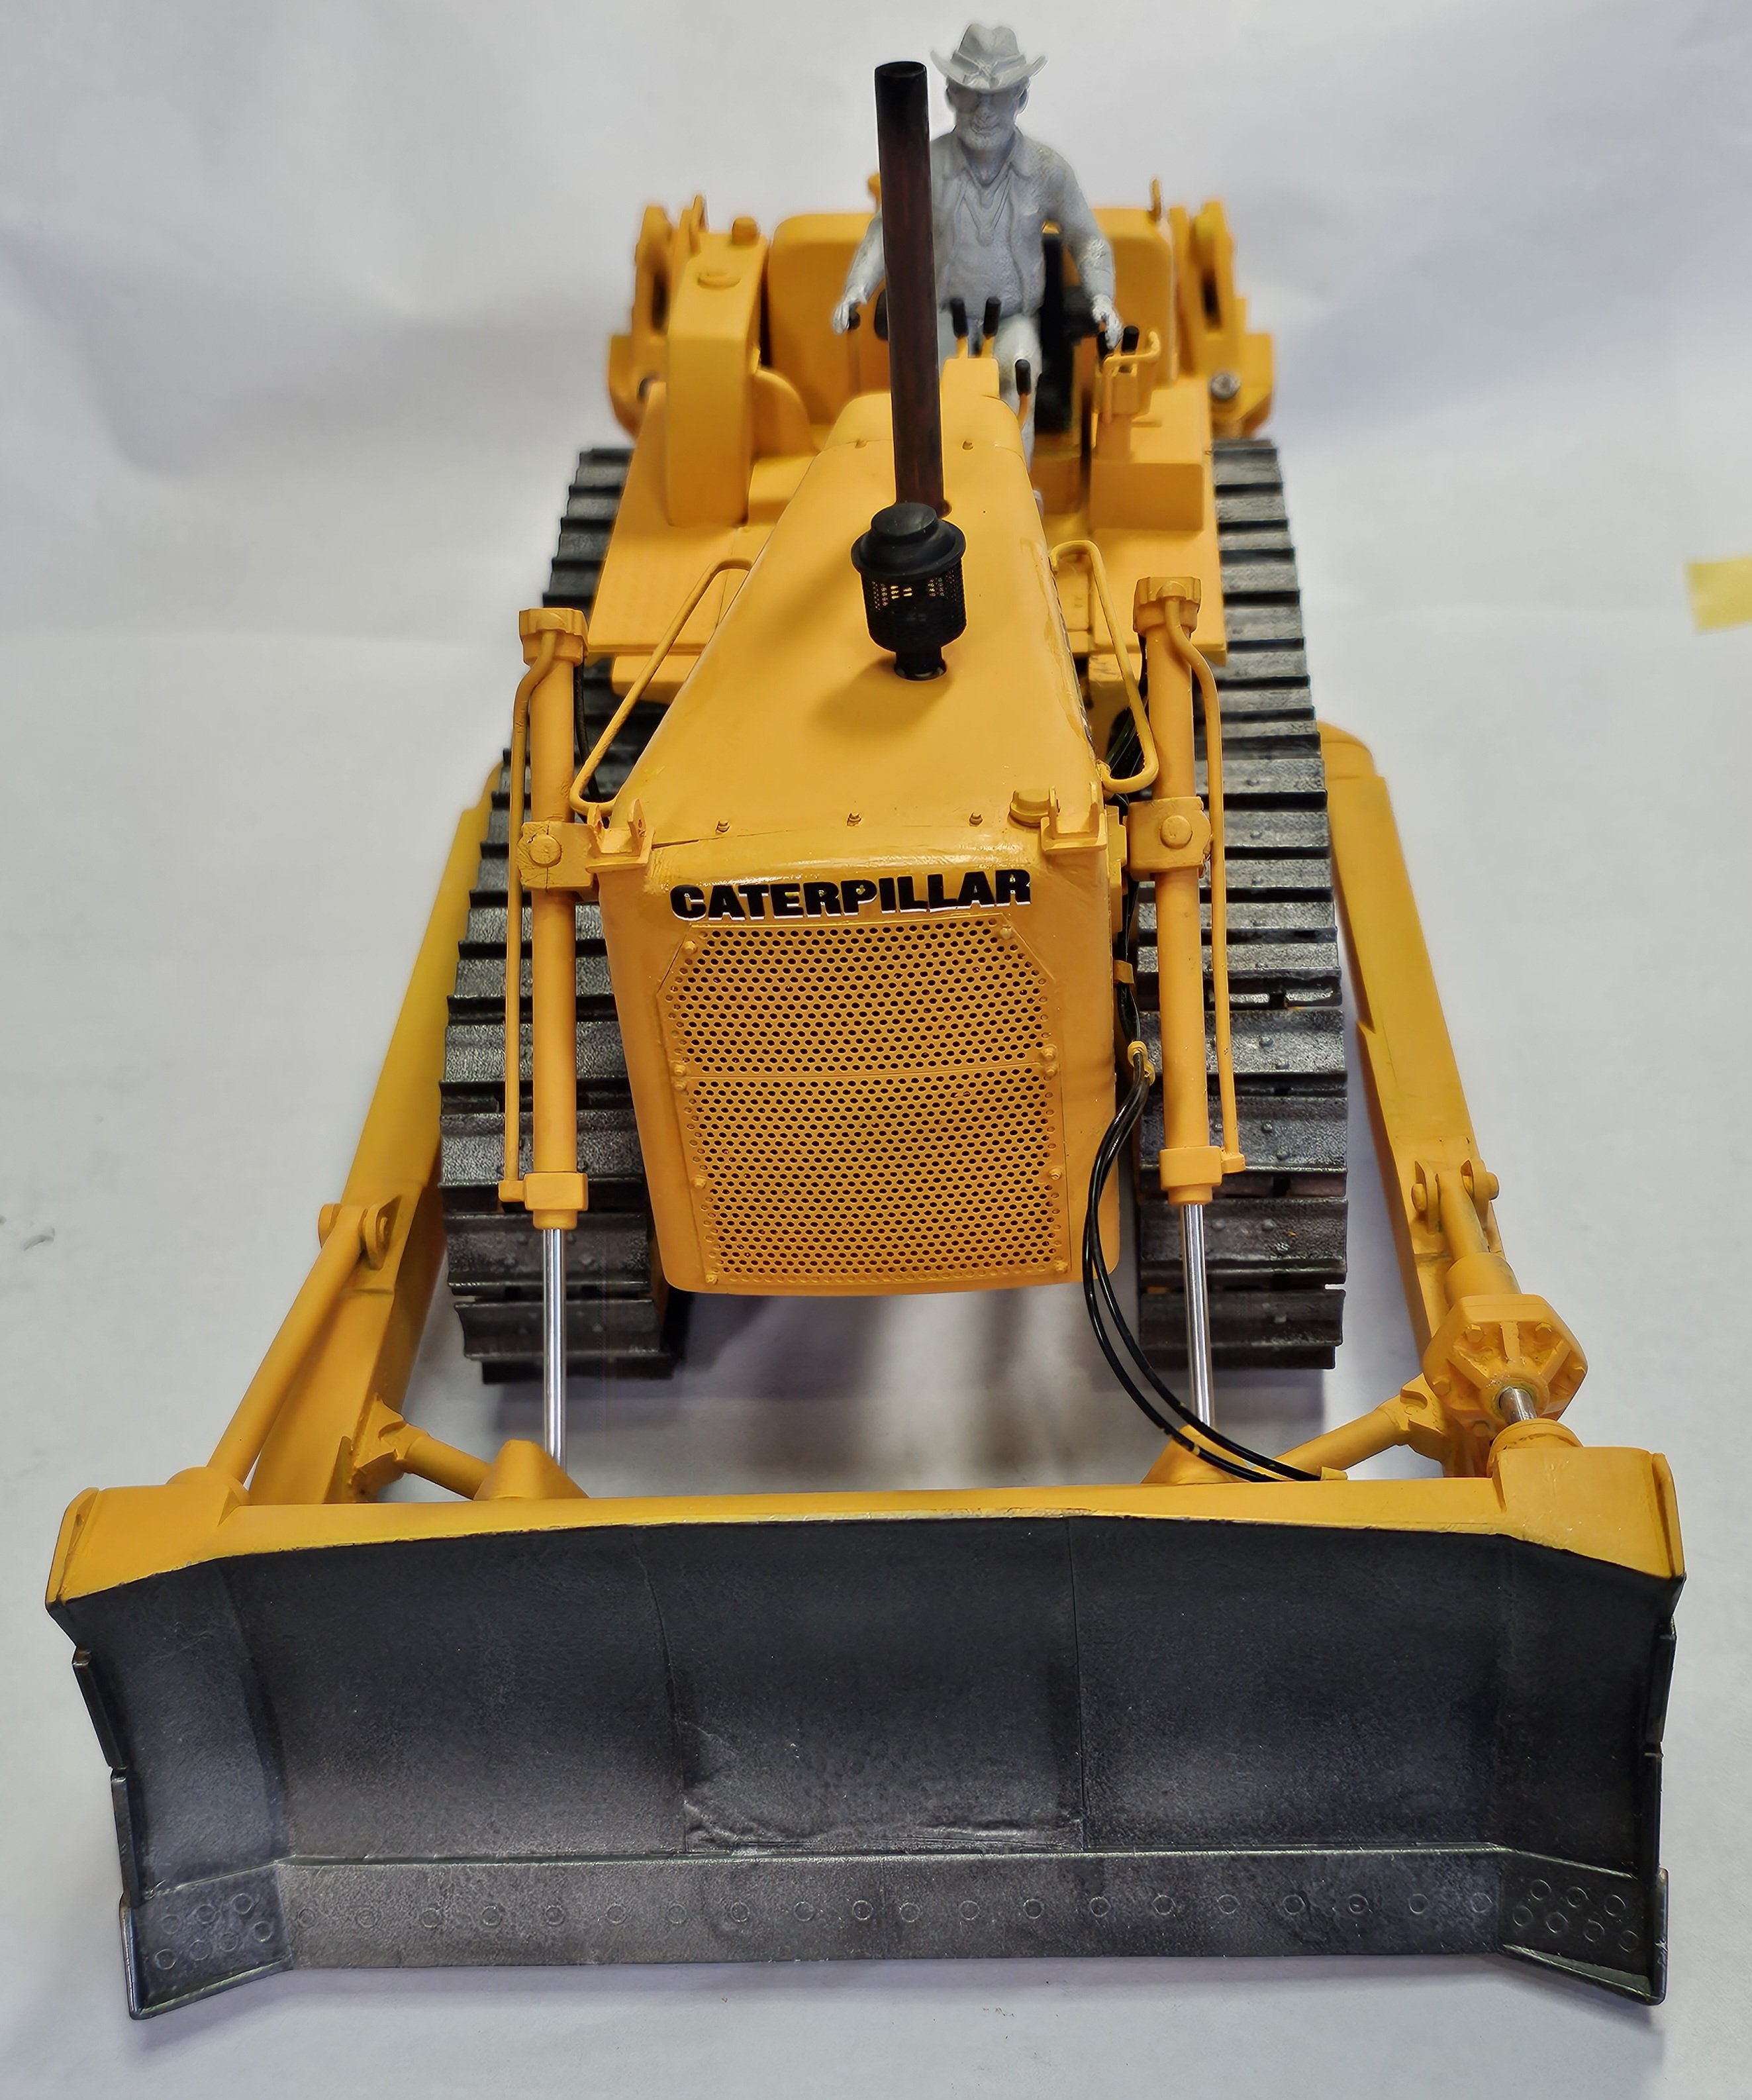
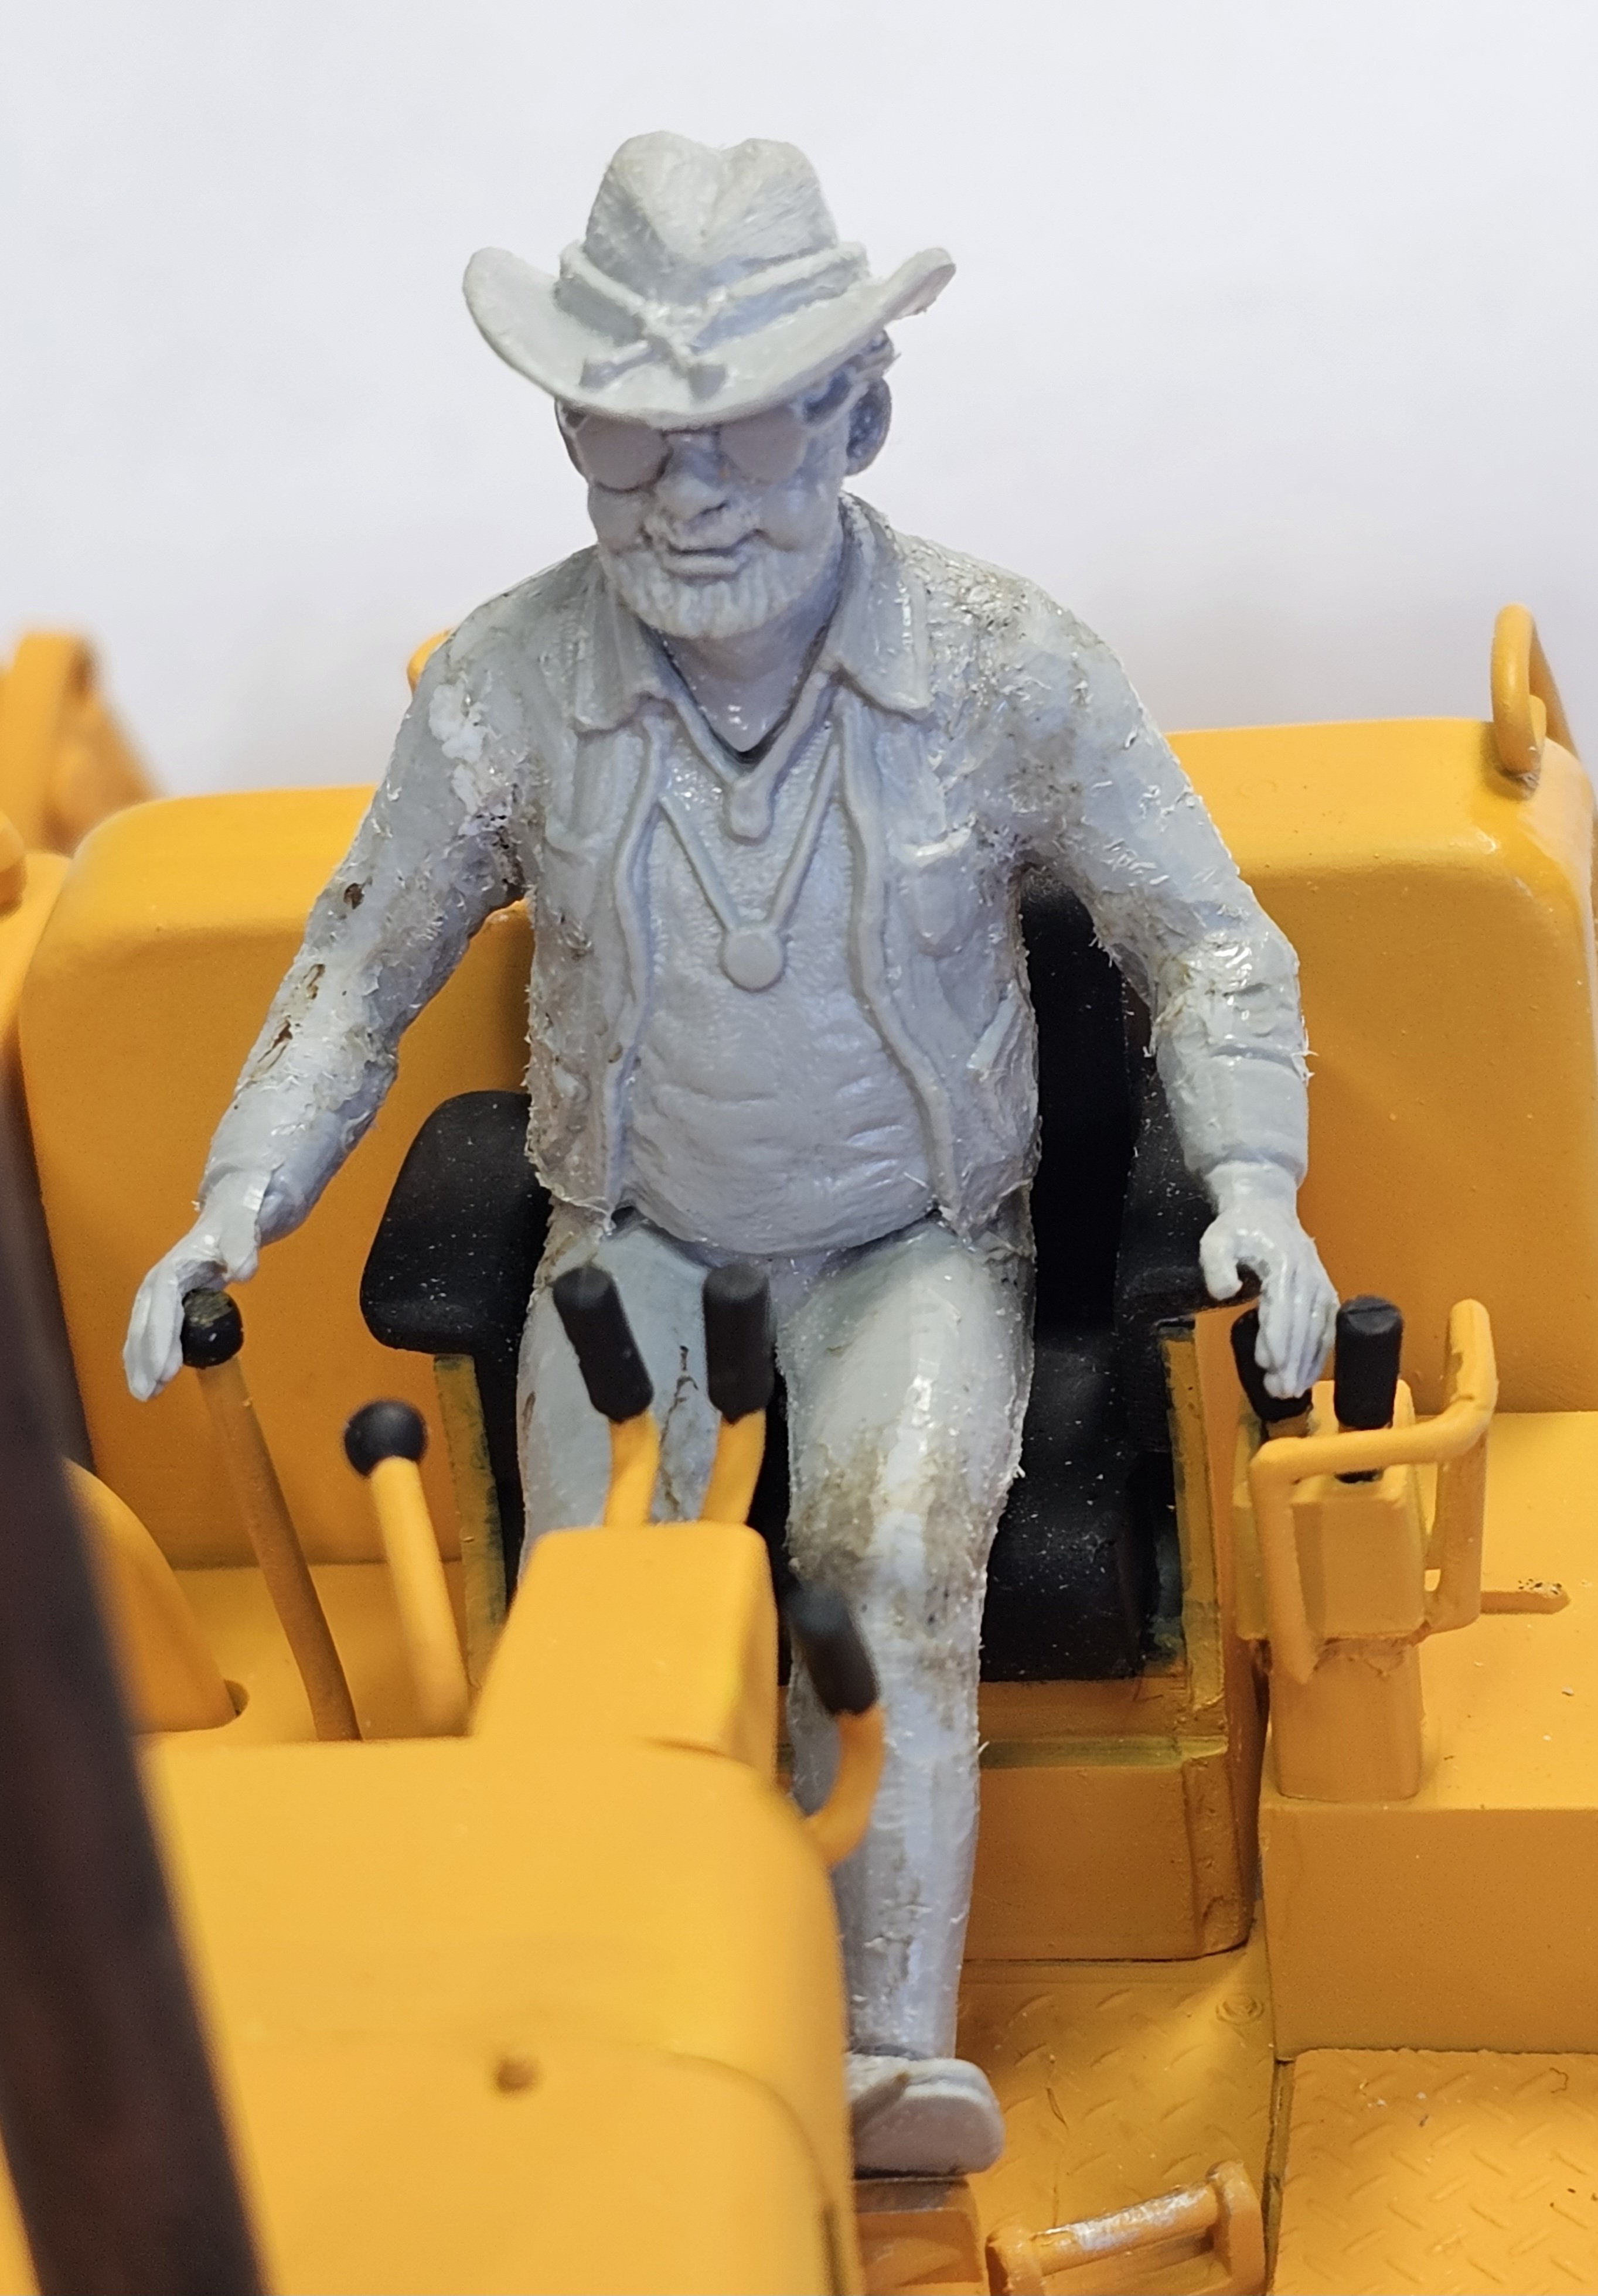
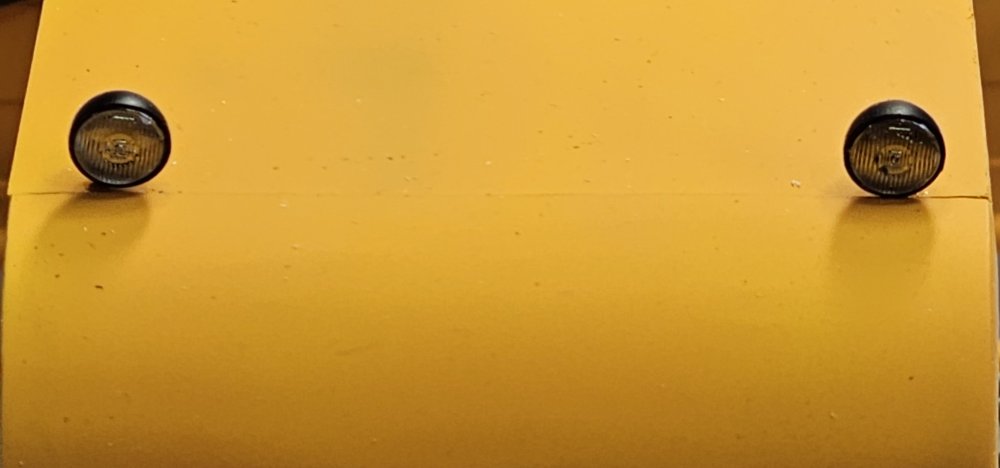
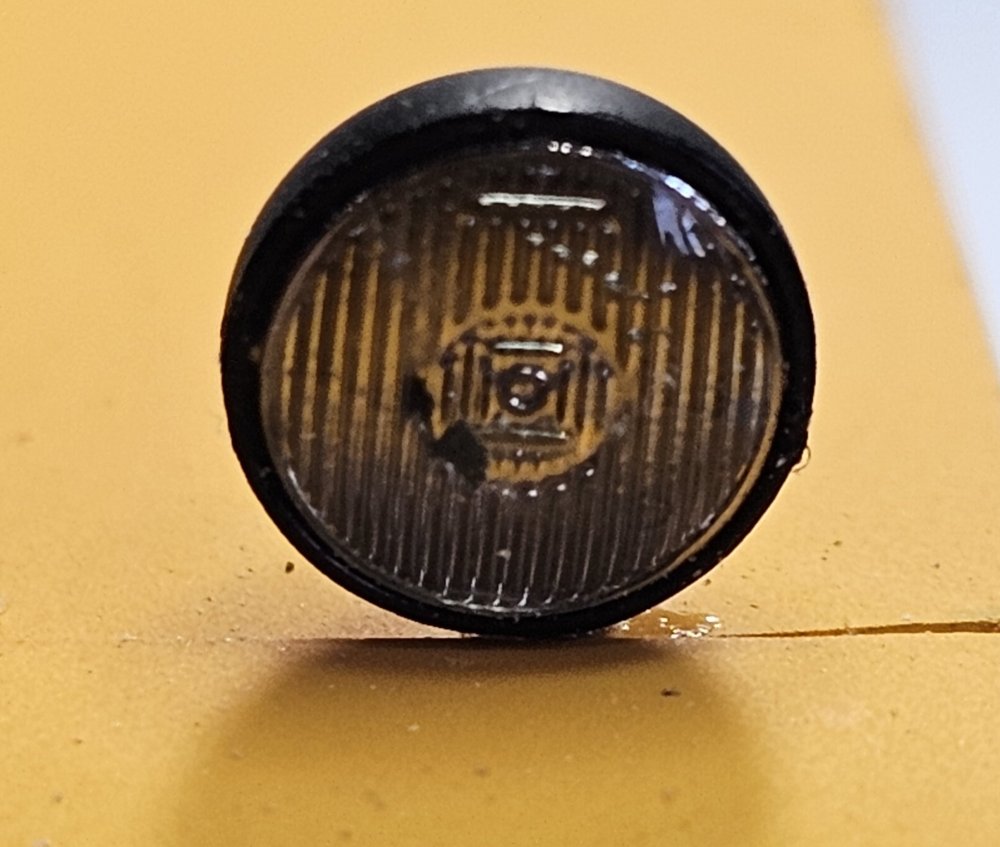
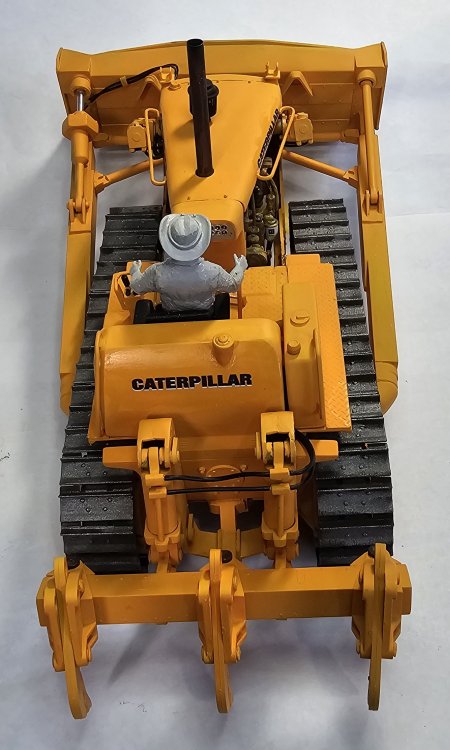
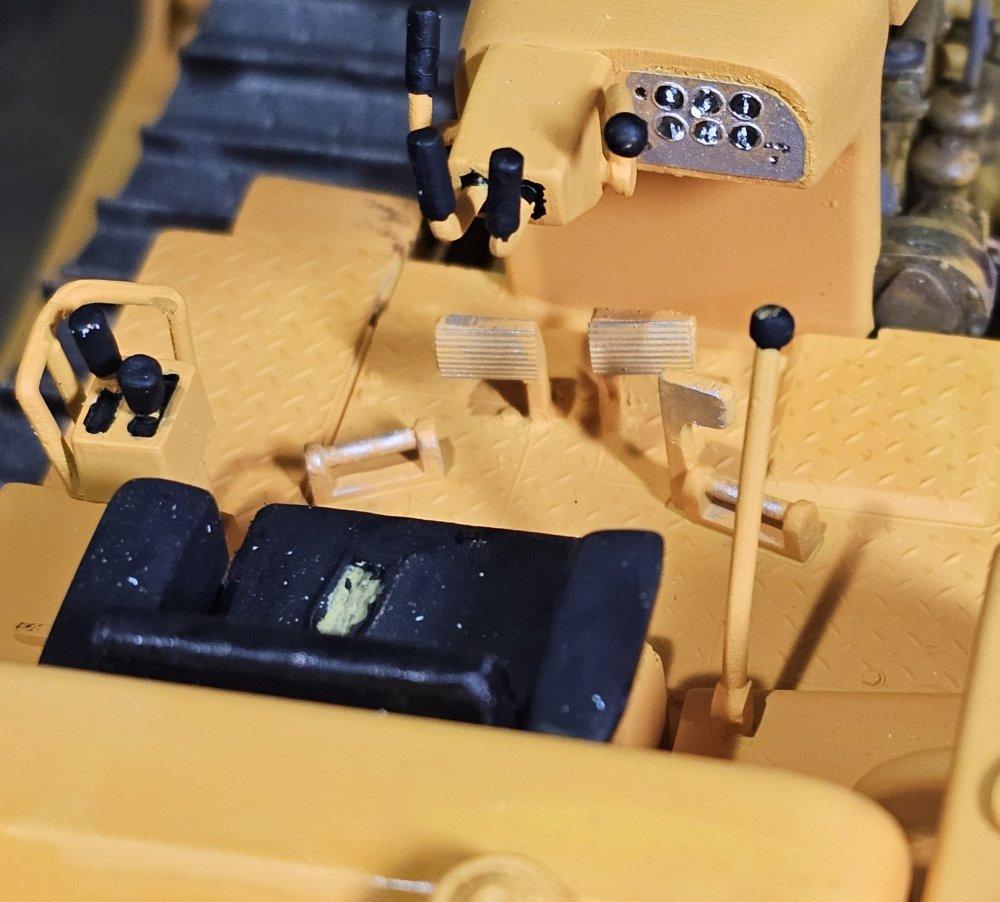
Hey all OK, I believe that she's done, all except the rust and weathering. View showing the operator and some of the placards. Another View of the operator. View showing the placards. This View shows the lower placards and the dash panel. This view shows the front head lights and there guards. View of the rear lights. Close up View of the lights. Well that's it for now be back with more soon. Ron G


-
Thanks everyone
-
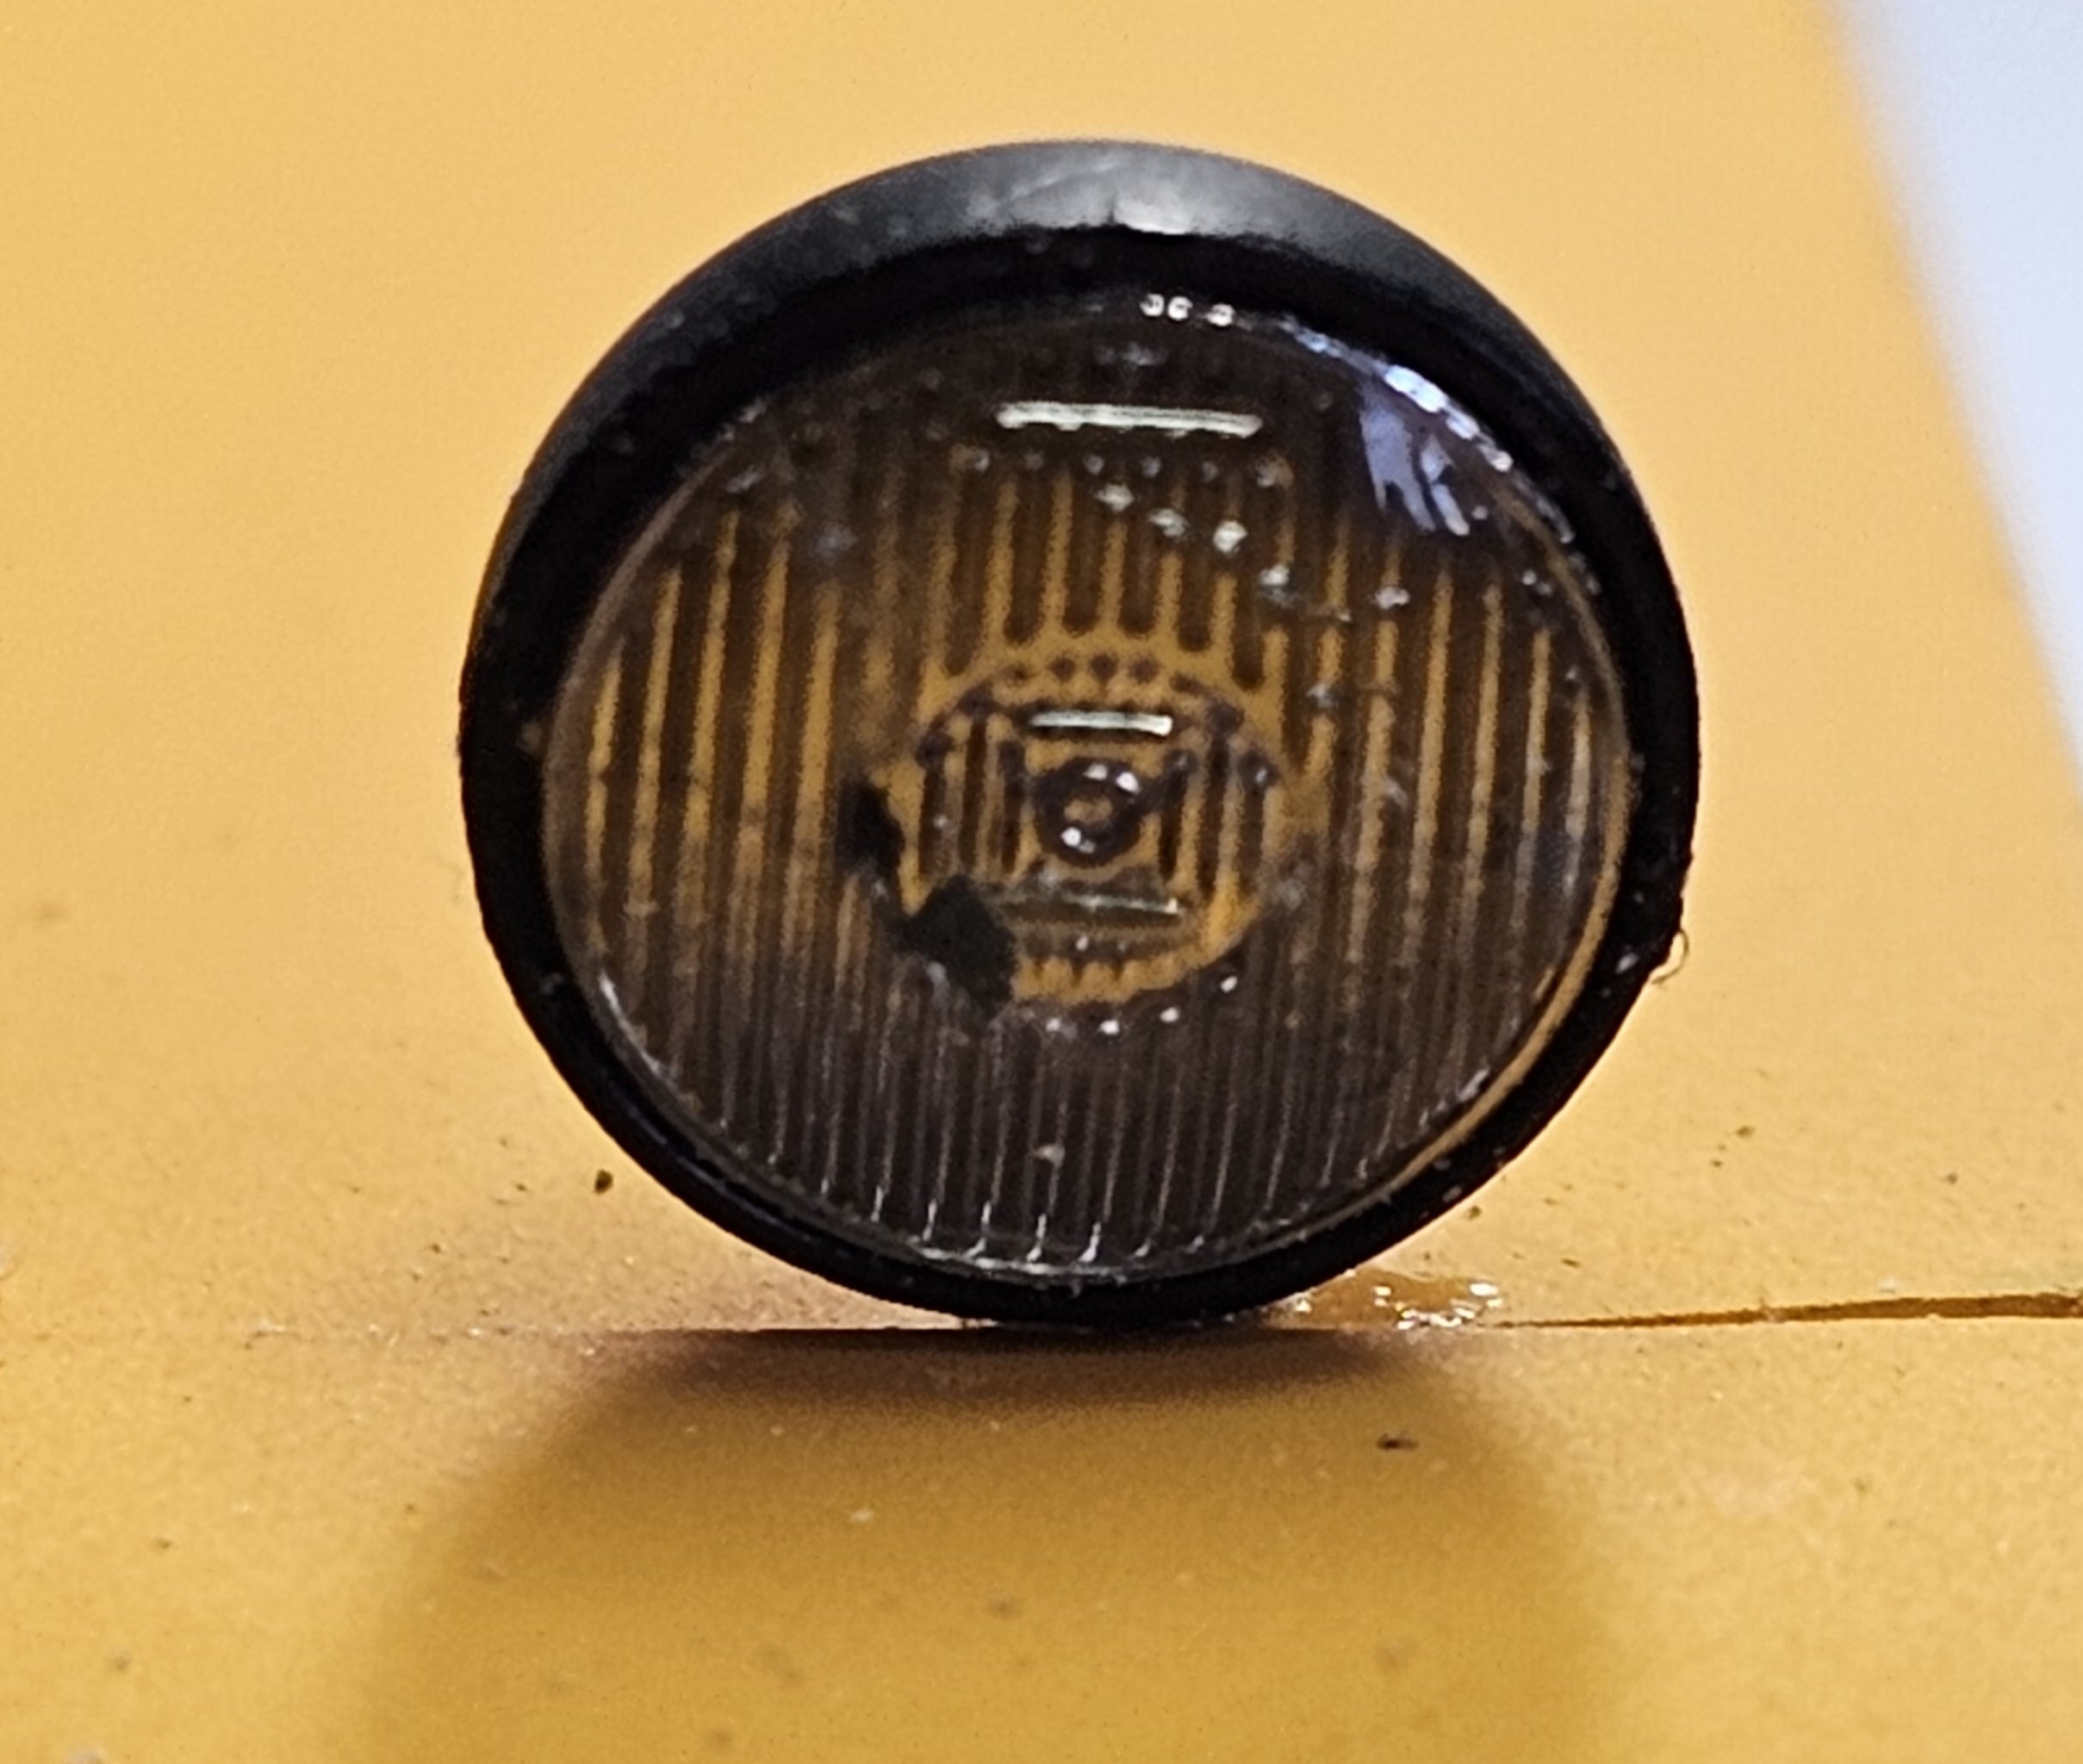
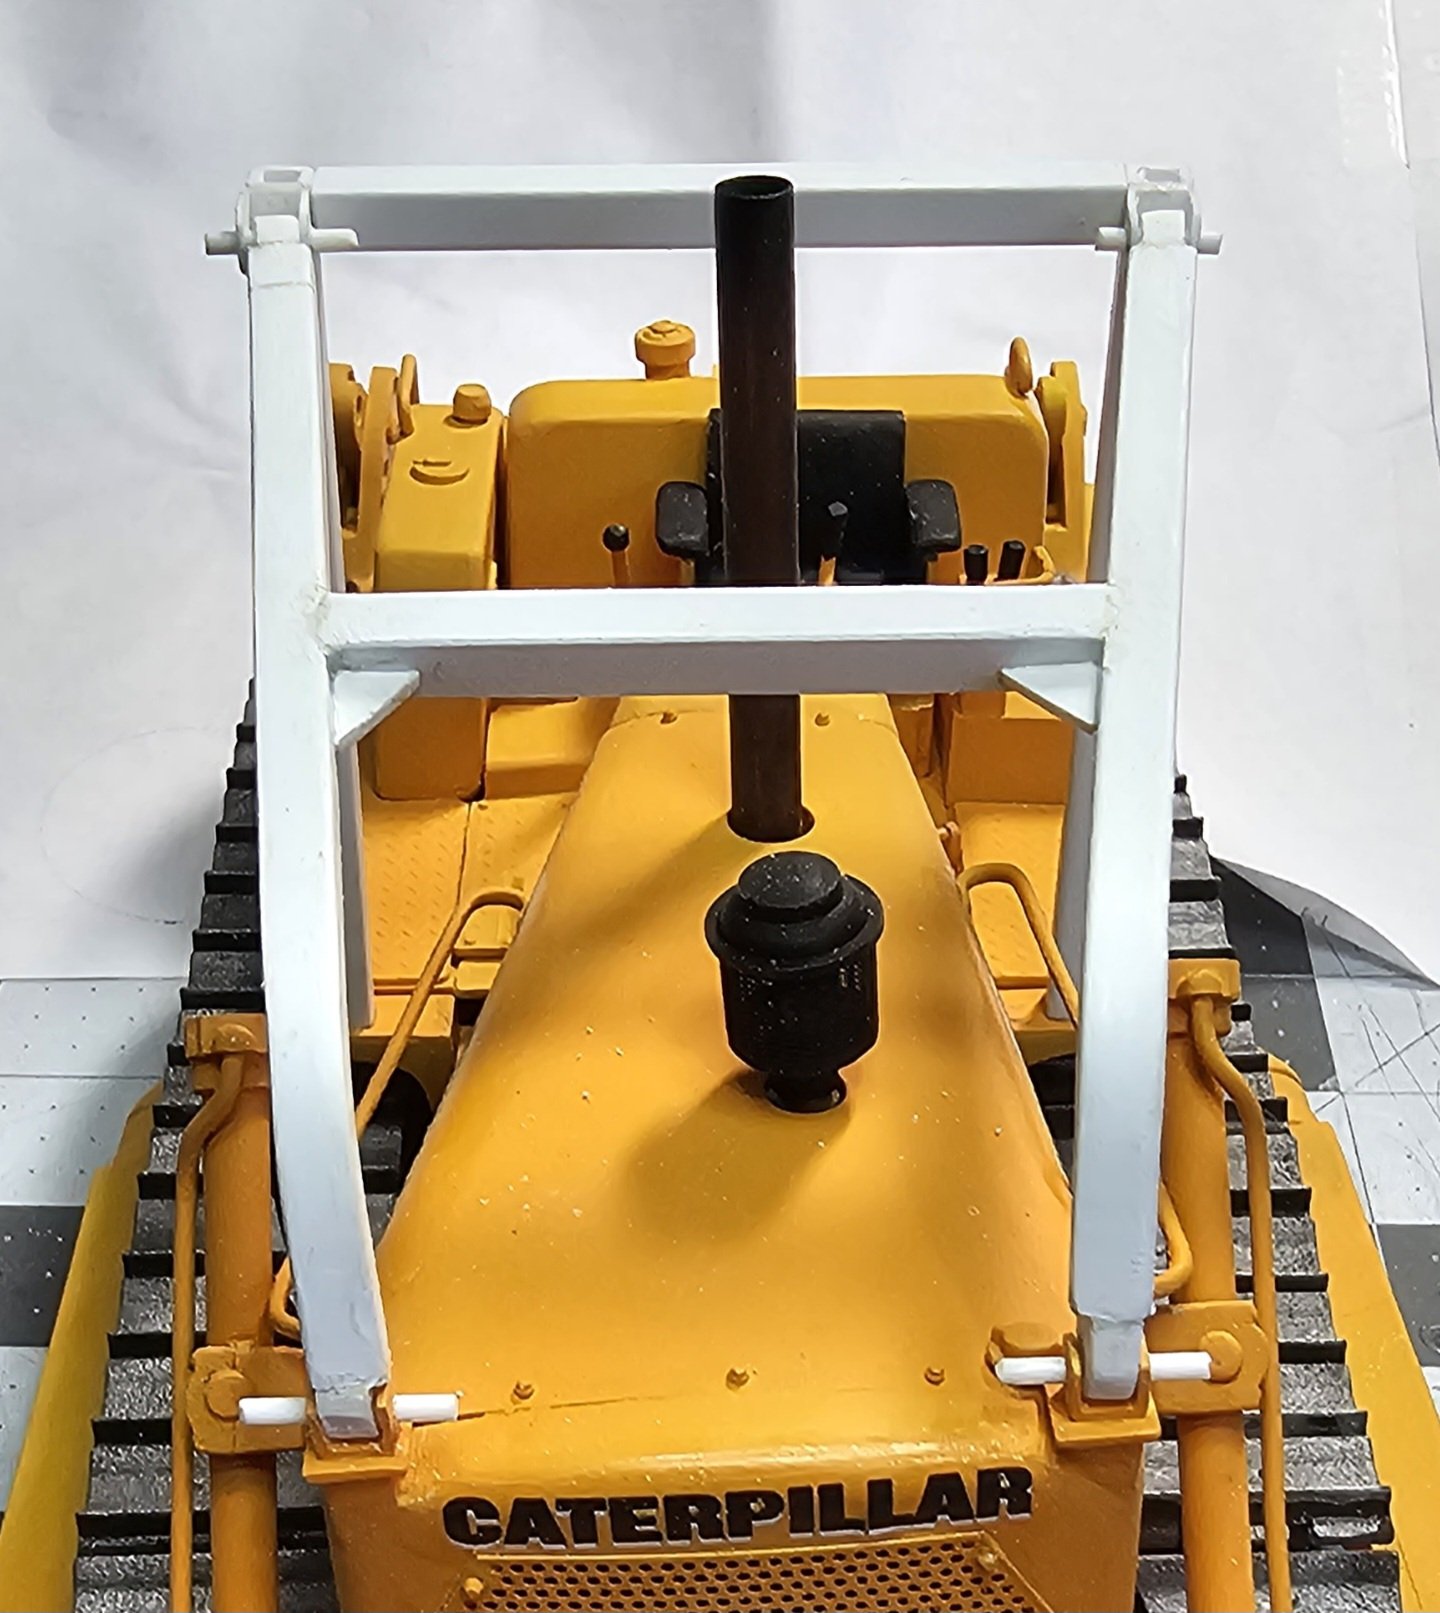
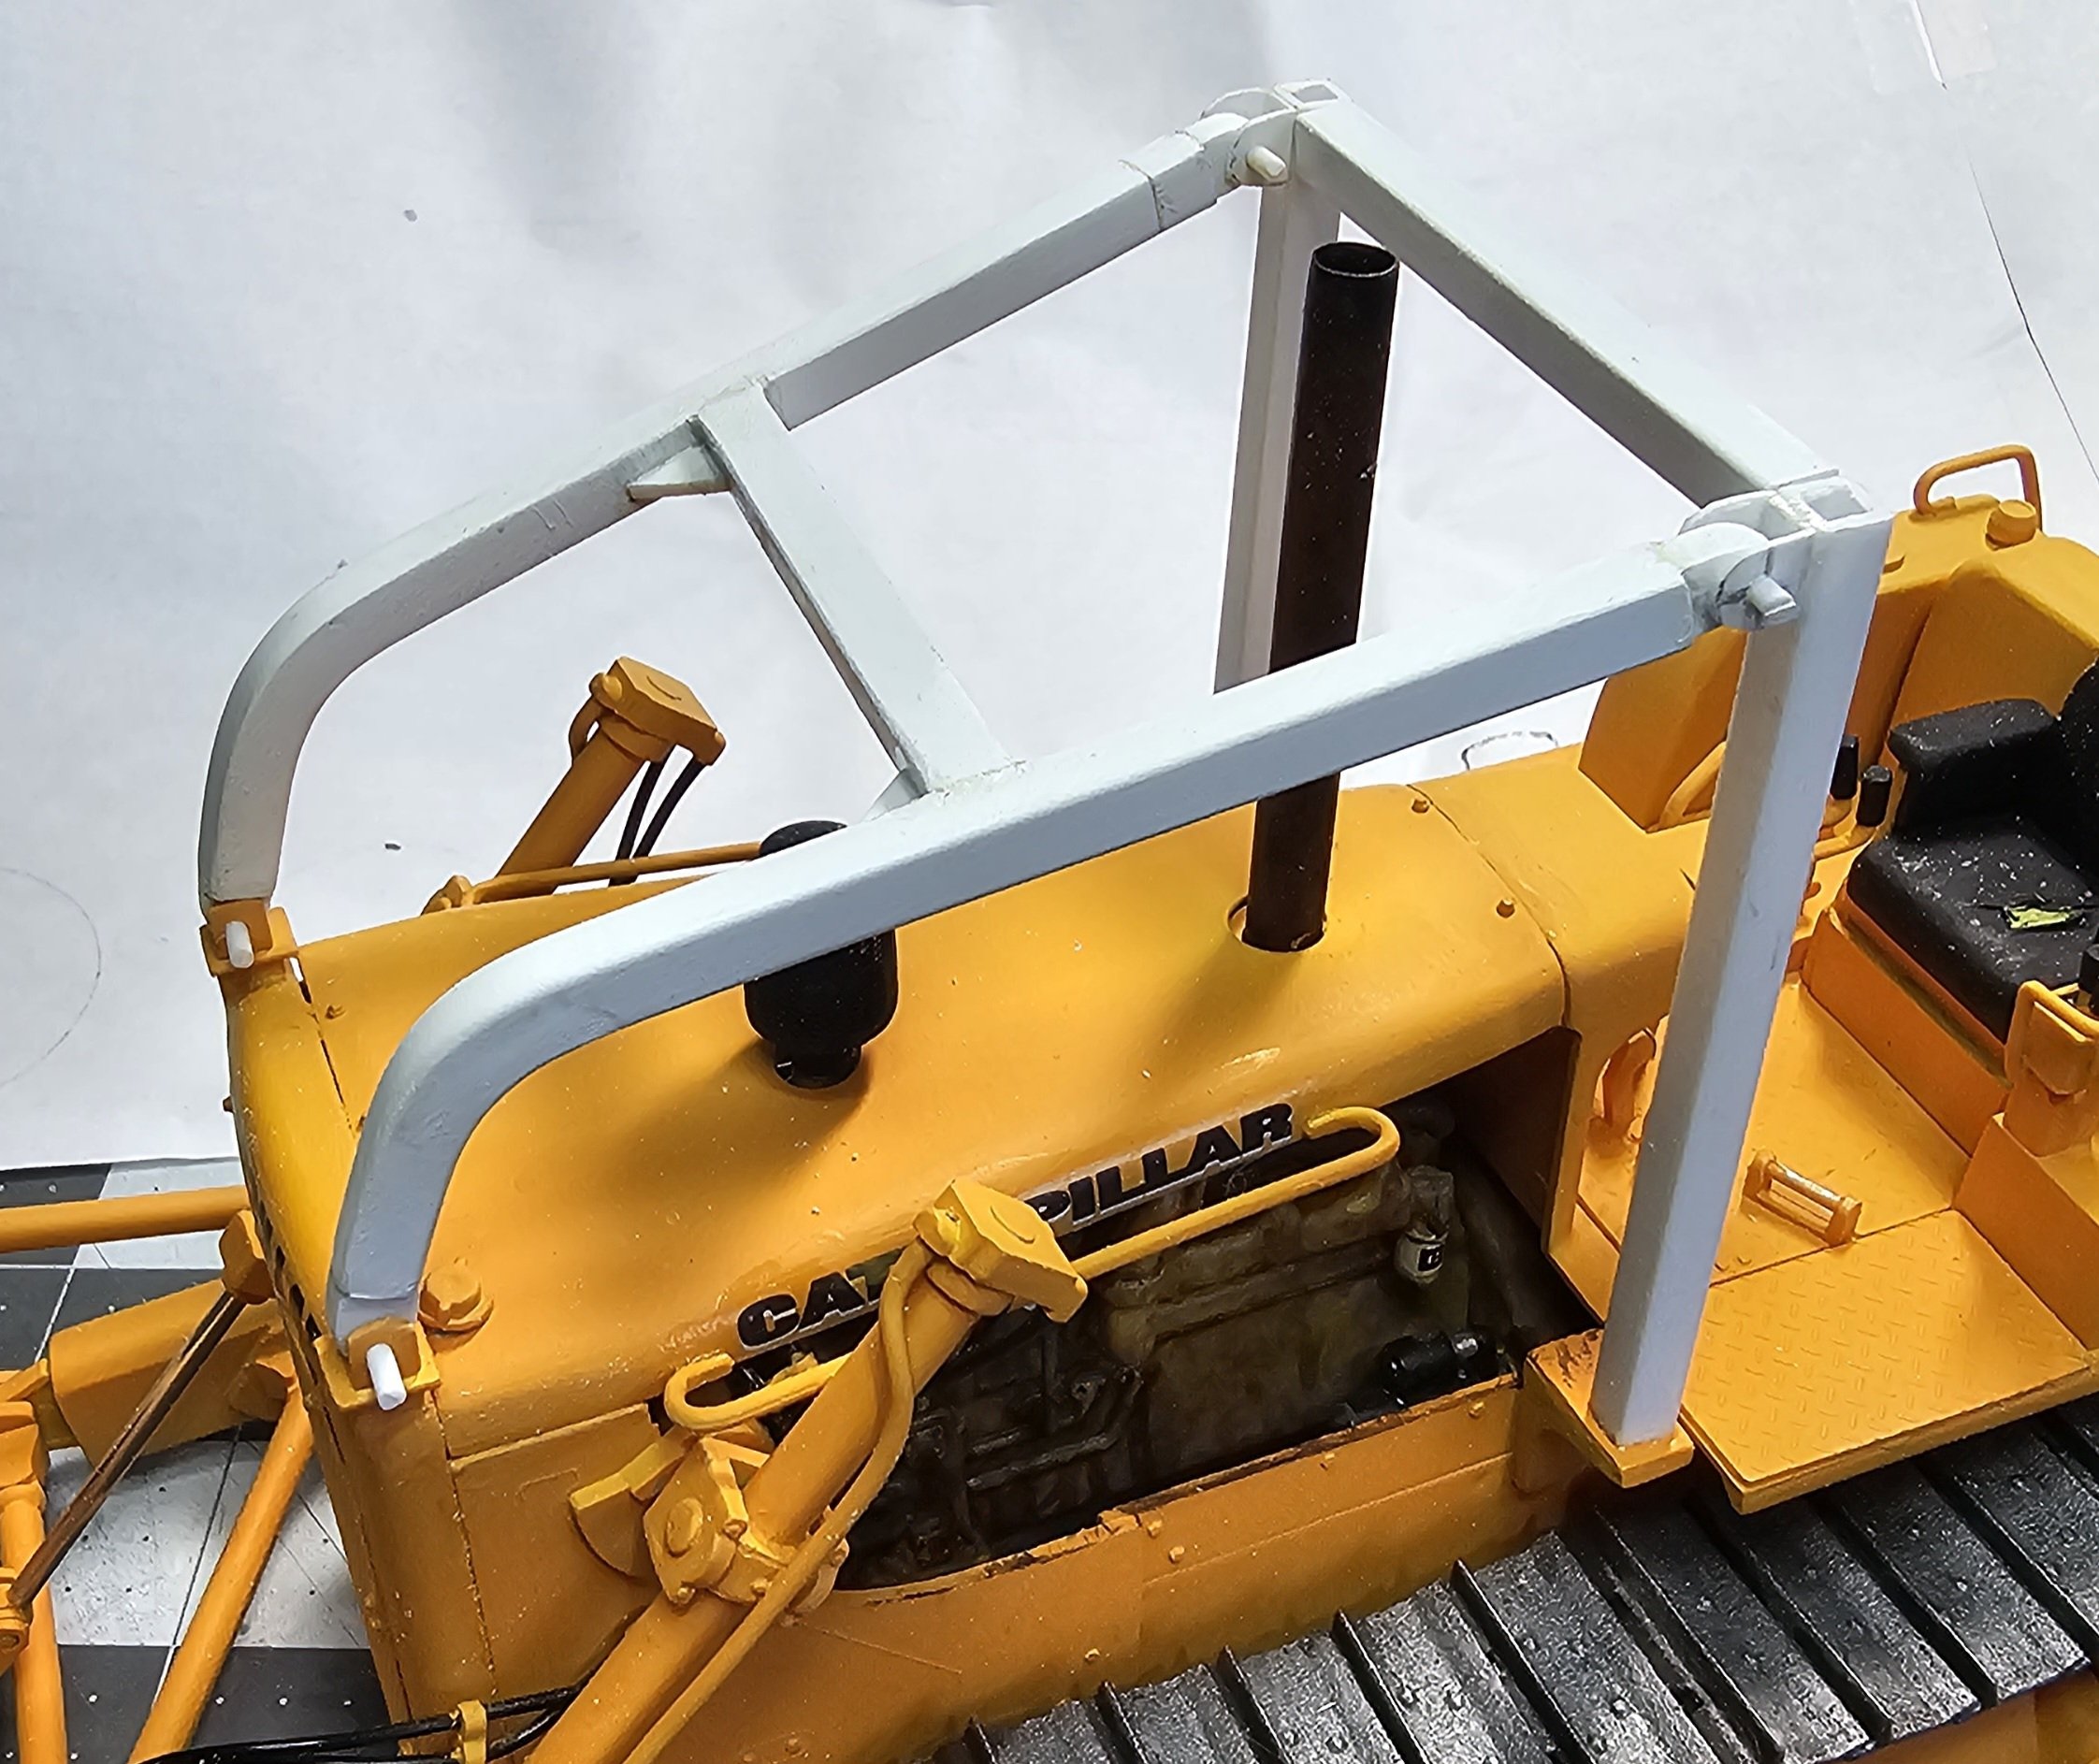
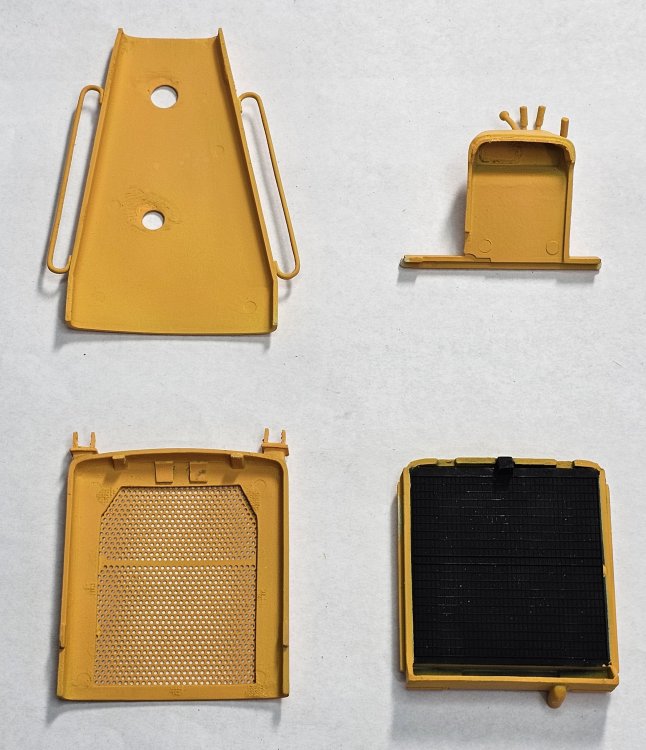
Hey all Ok, the R.O.P.S. is finished and painted. Left side view. Rear view. I got the screen off of the internet. It's stainless steel wire about 0.04" dia. & 1/8th inch spacing. Right side view. Front view. The brass head light shields are from ST Supply in Canada. I have there head lights and rear lights. I need to add them and wire them. Ron G


-
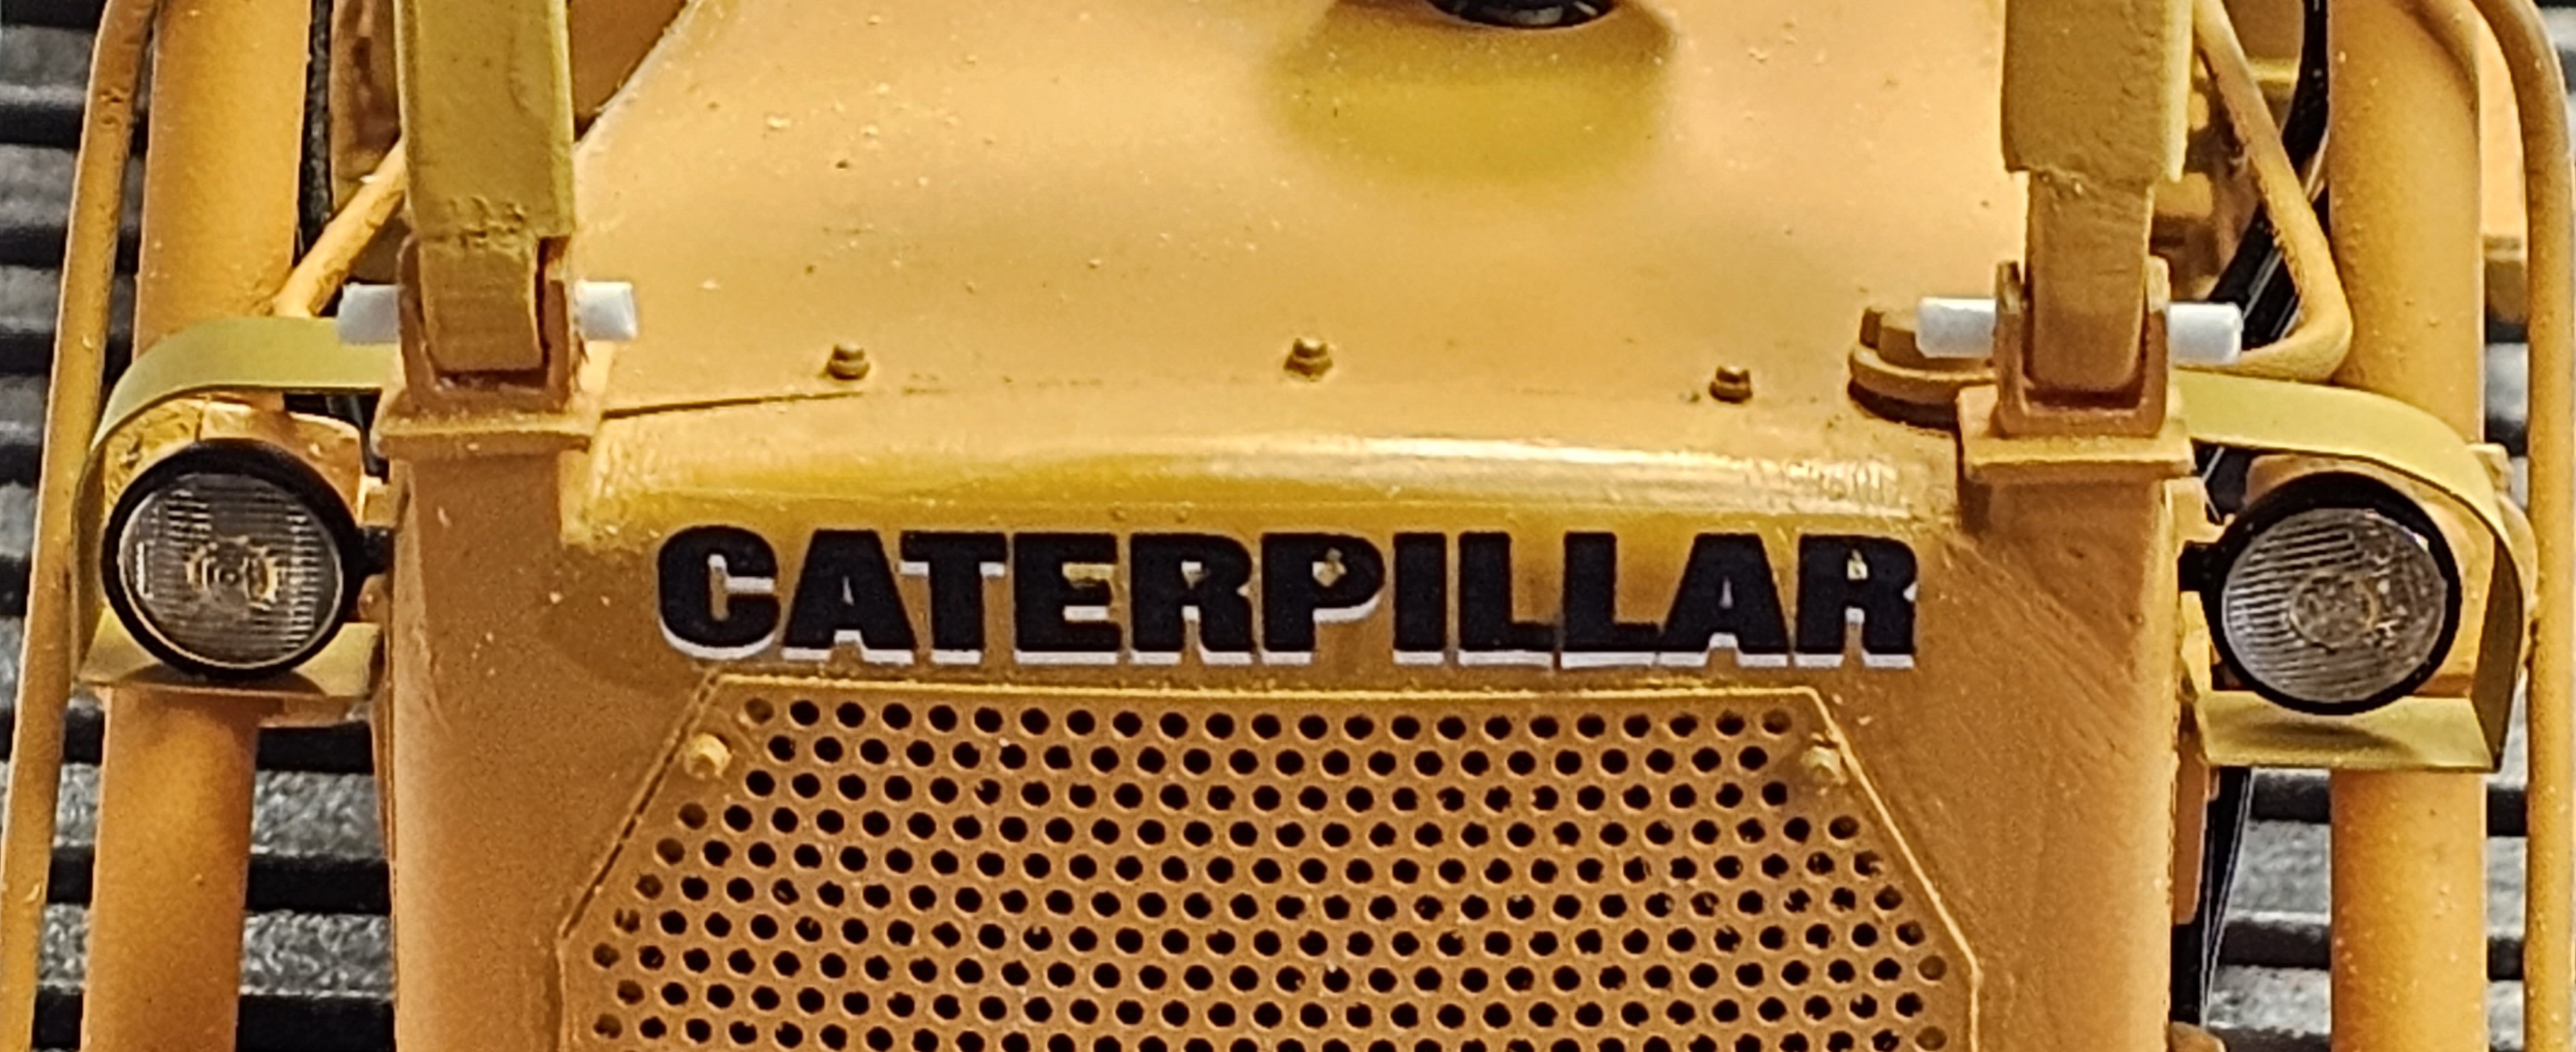
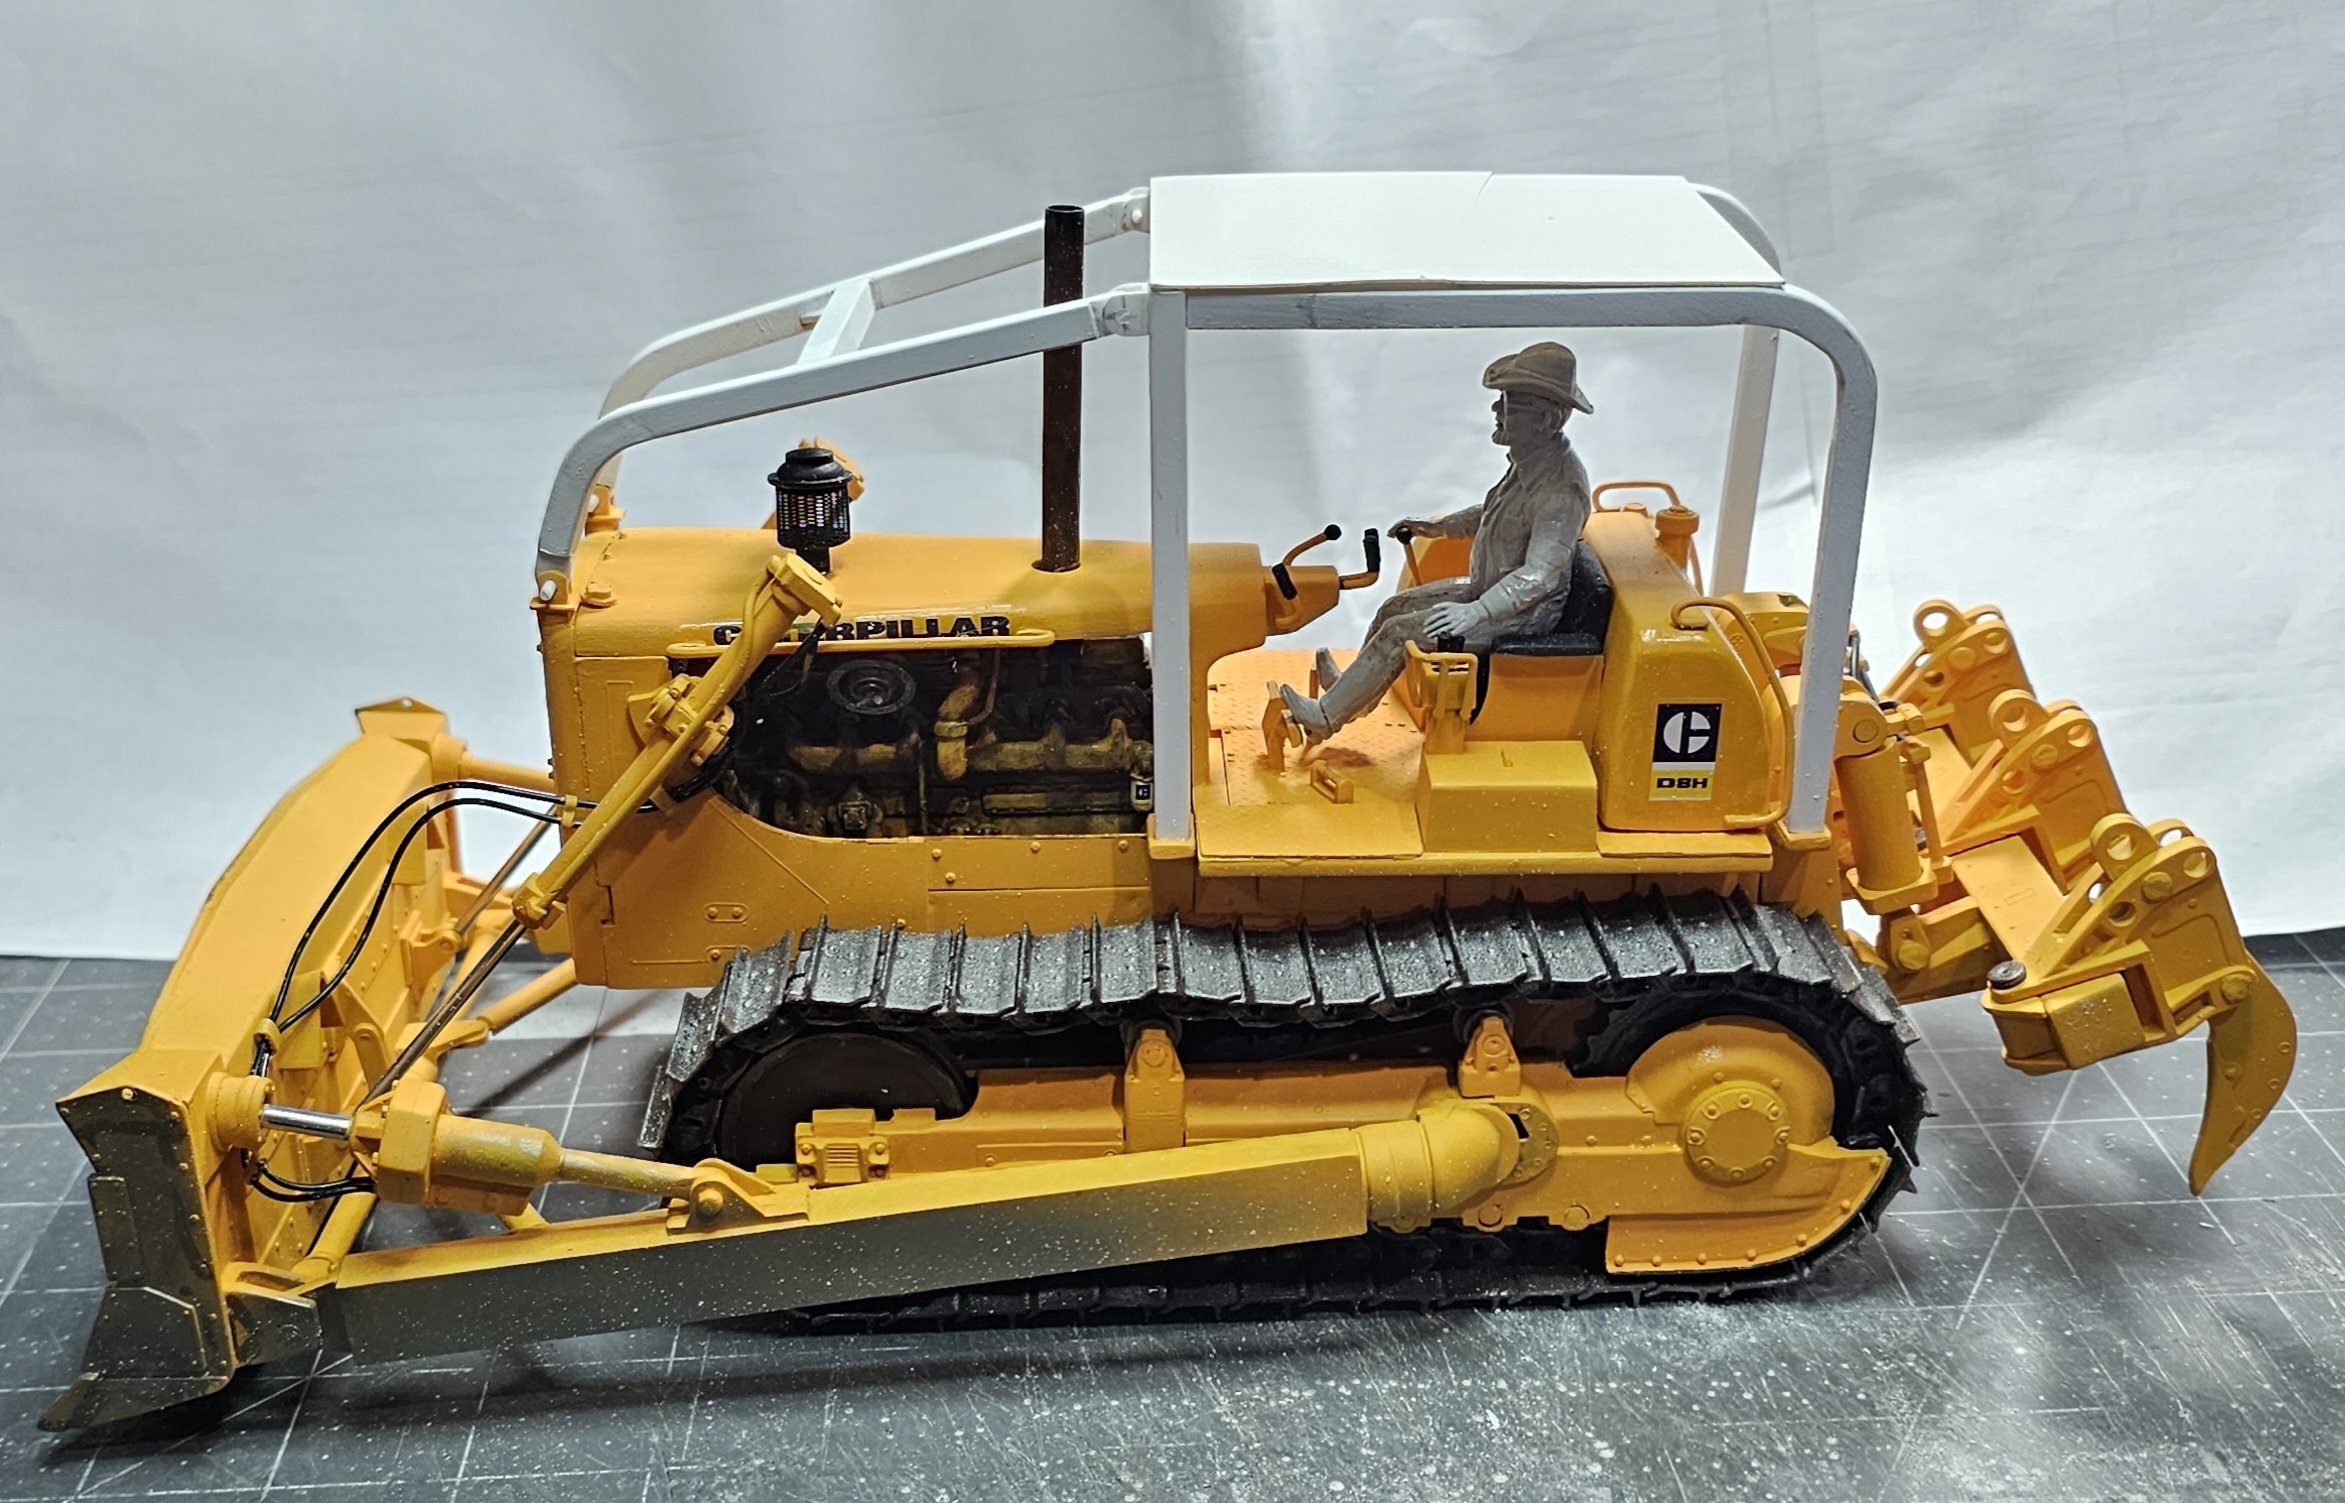
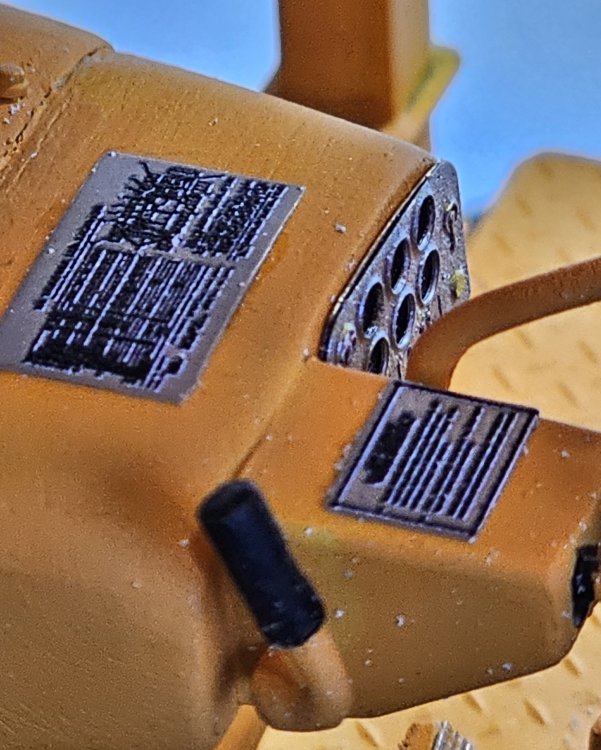
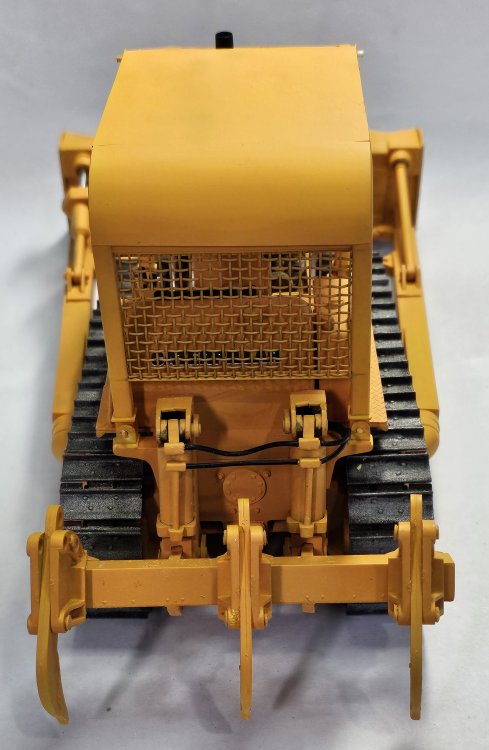
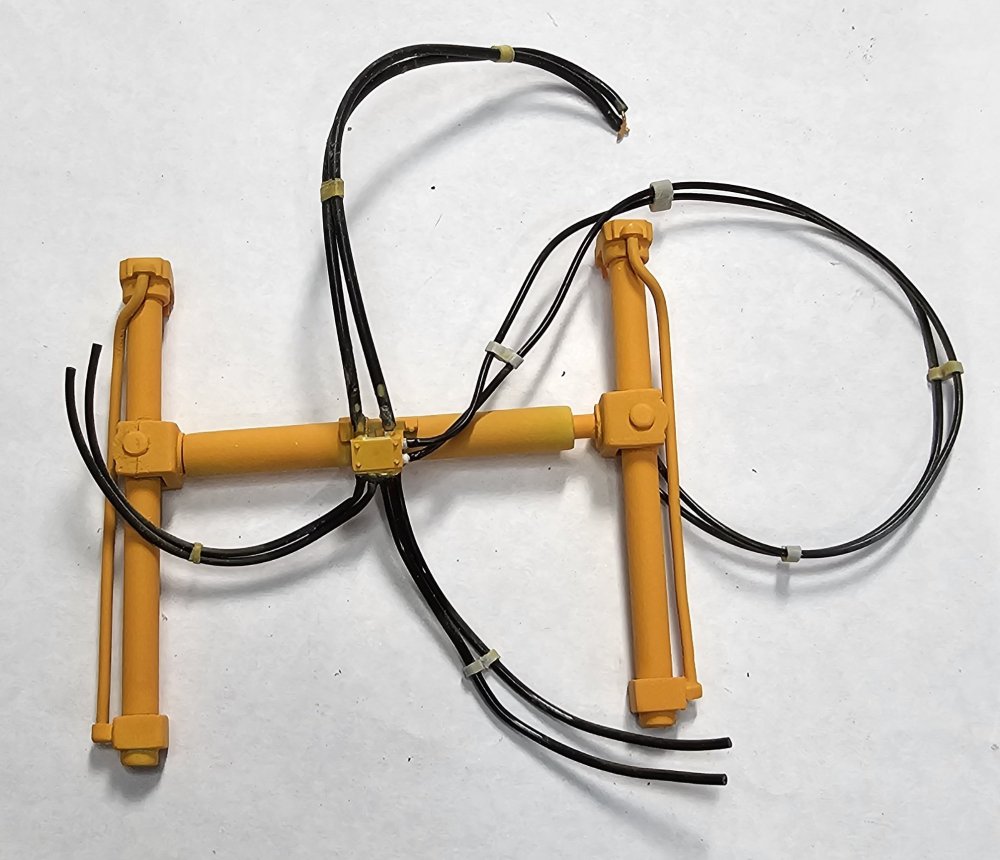
Hey all Ok this one's for Jeff. Way back when he requested a R.O.P.S. and a R.O.P.S. it is. Left side view showing the decals added. Same view with the operator in place. Rear view showing the decals. Right side view showing the decals. Front view of the D8H with the decal. Close up view of the operator. Ok this view shows the front part of the R.O.P.S. Another view of the front part of the R.O.P.S. This view shows the rest of the R.O.P.S. I still have more to add to it. Well that's it for now be back with more soon. Ron G


-
Land Rover Defender 110 from Spectre
CrankyCrafstman replied to BlrwestSiR's topic in LSM 1/35 and Larger Work In Progress
Nice project Carl. 🍿😁 Ron G -
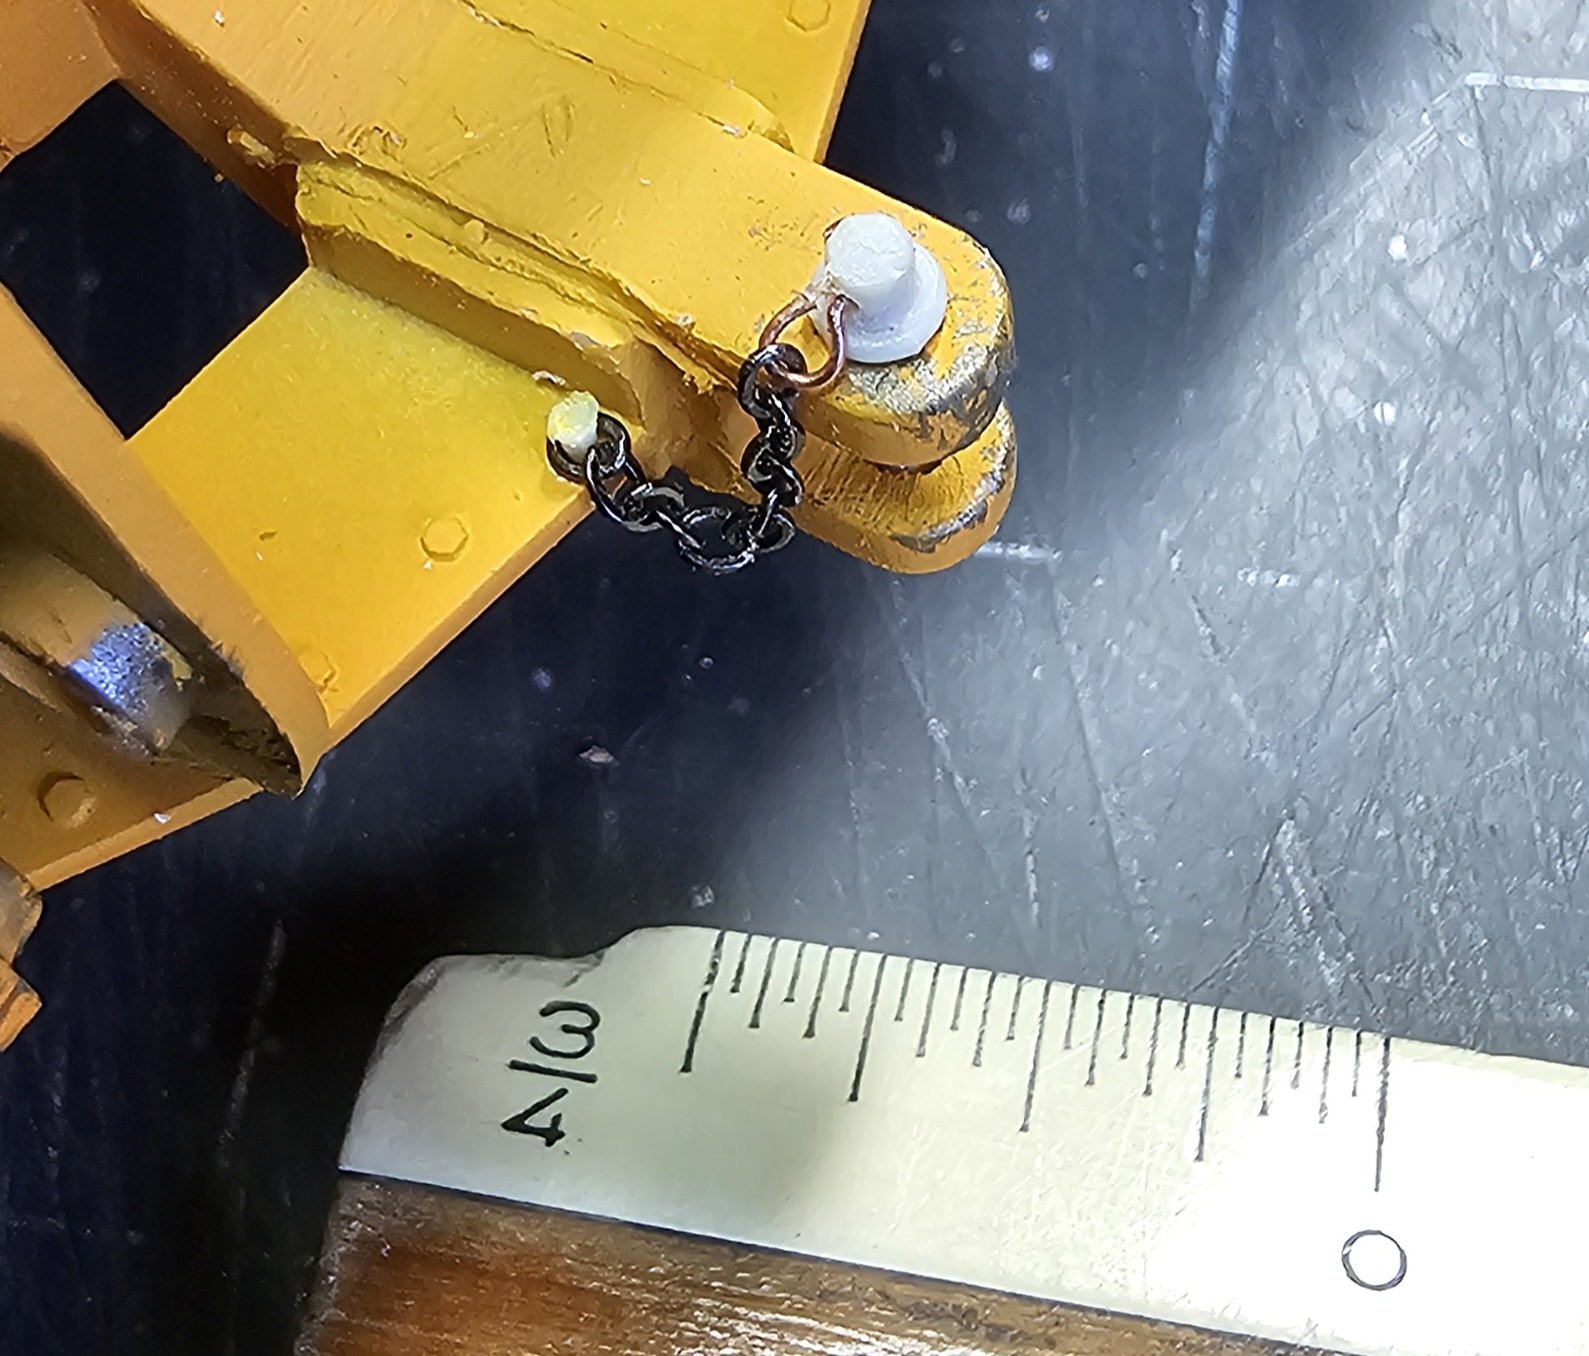
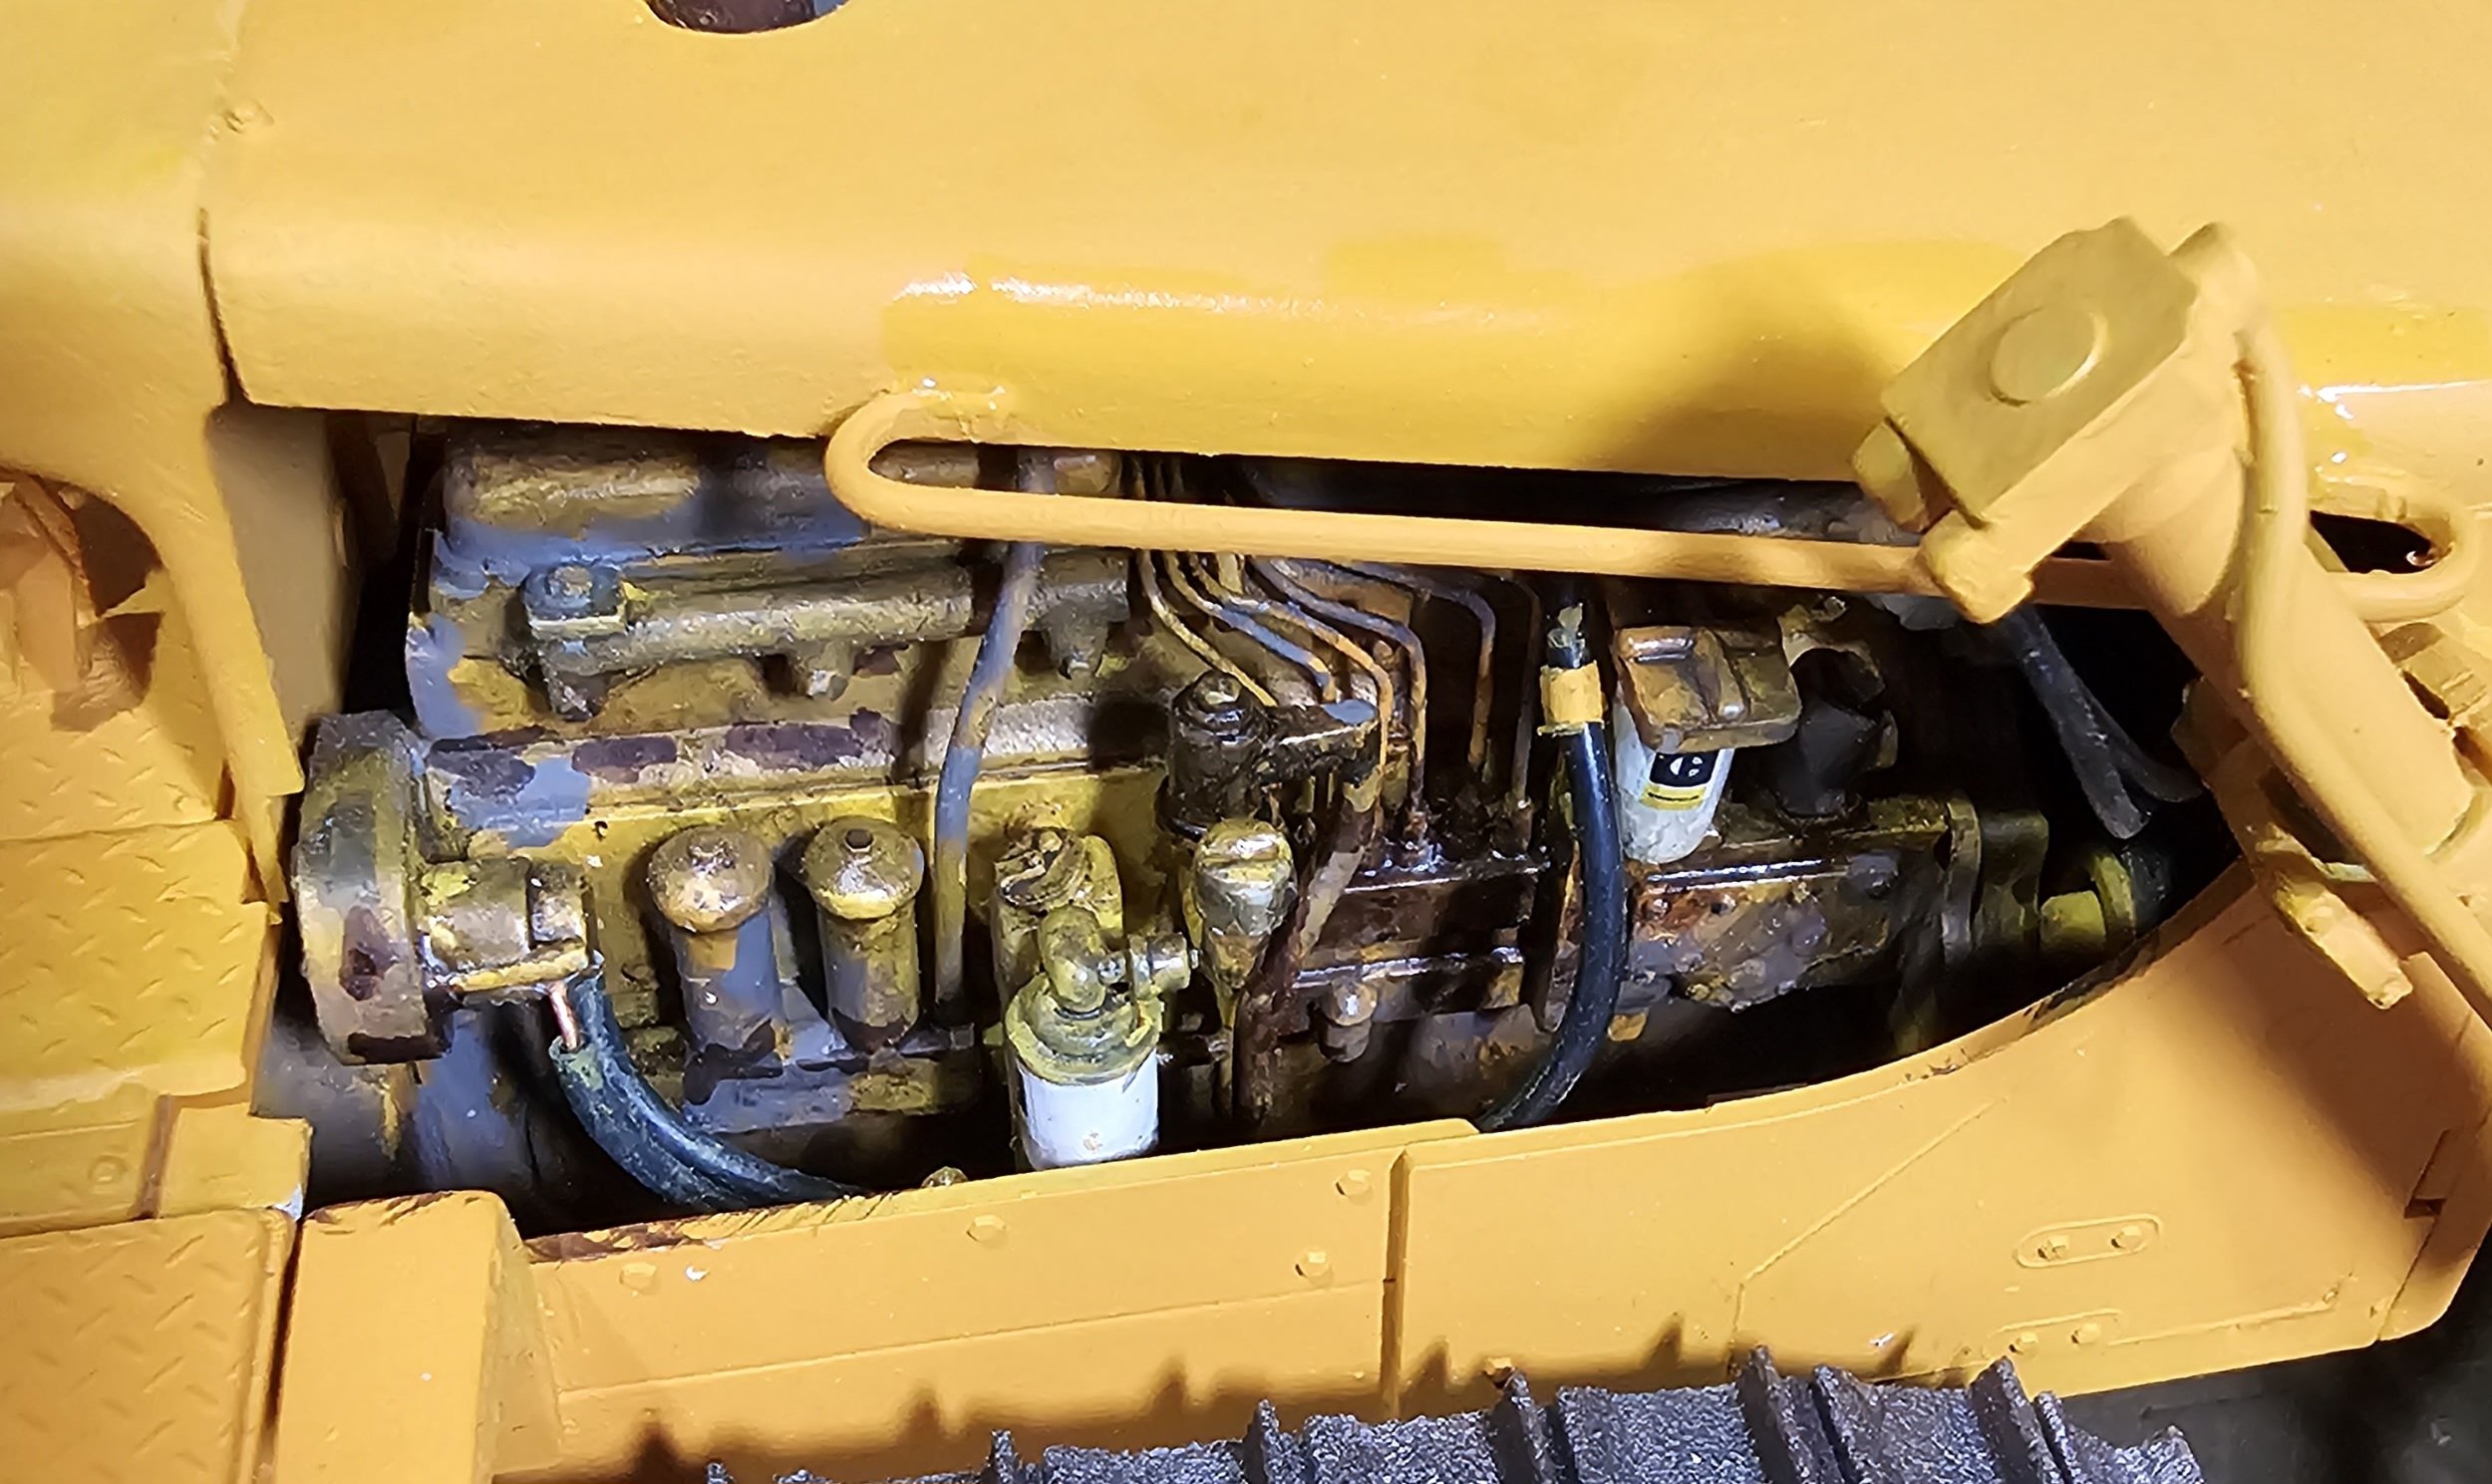
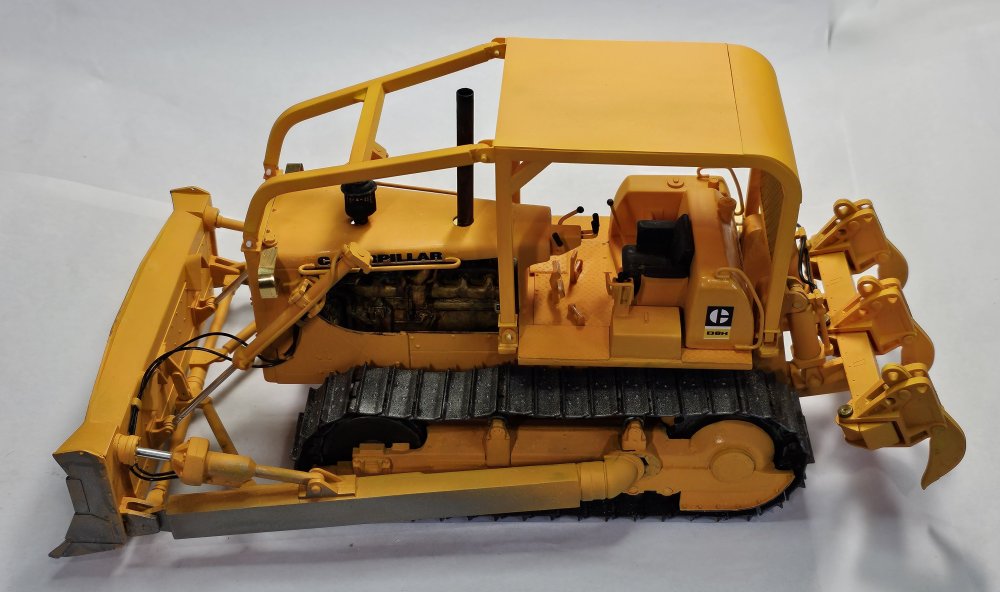
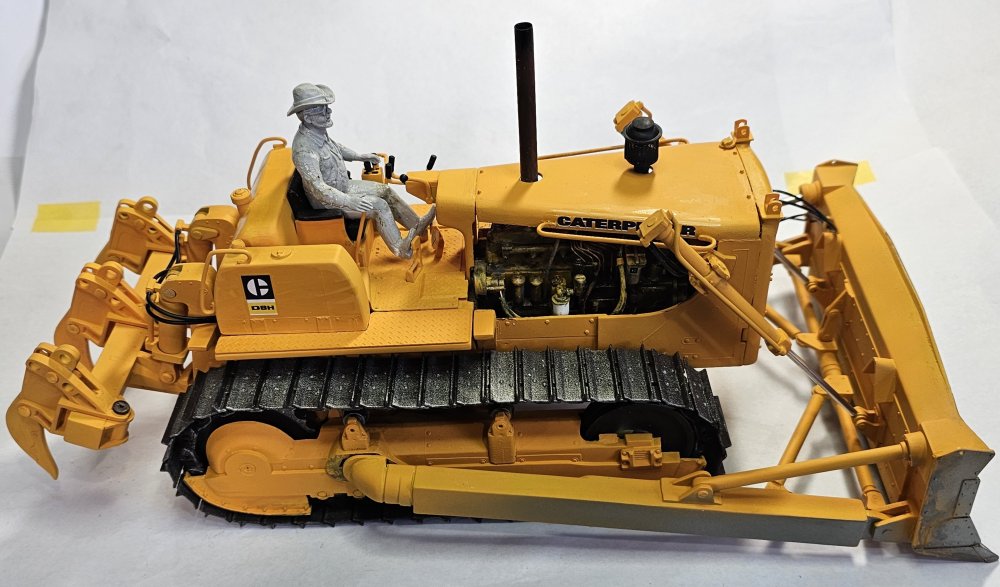
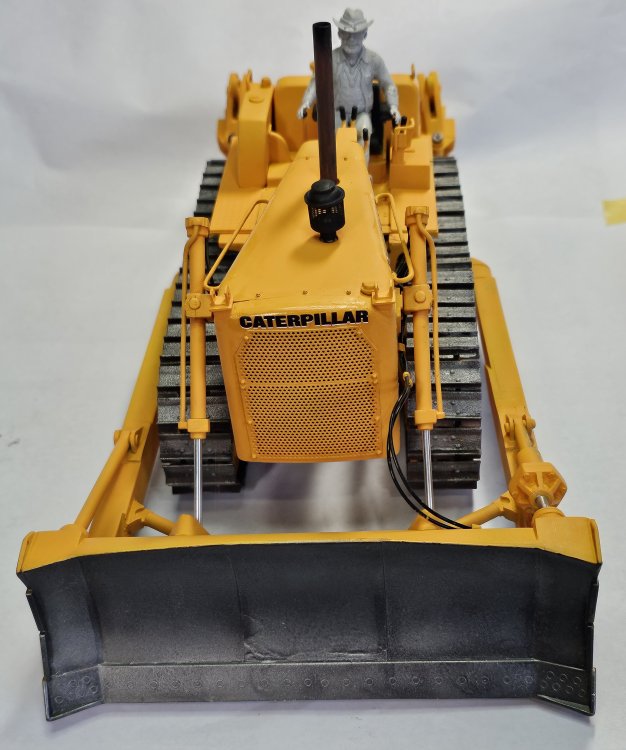
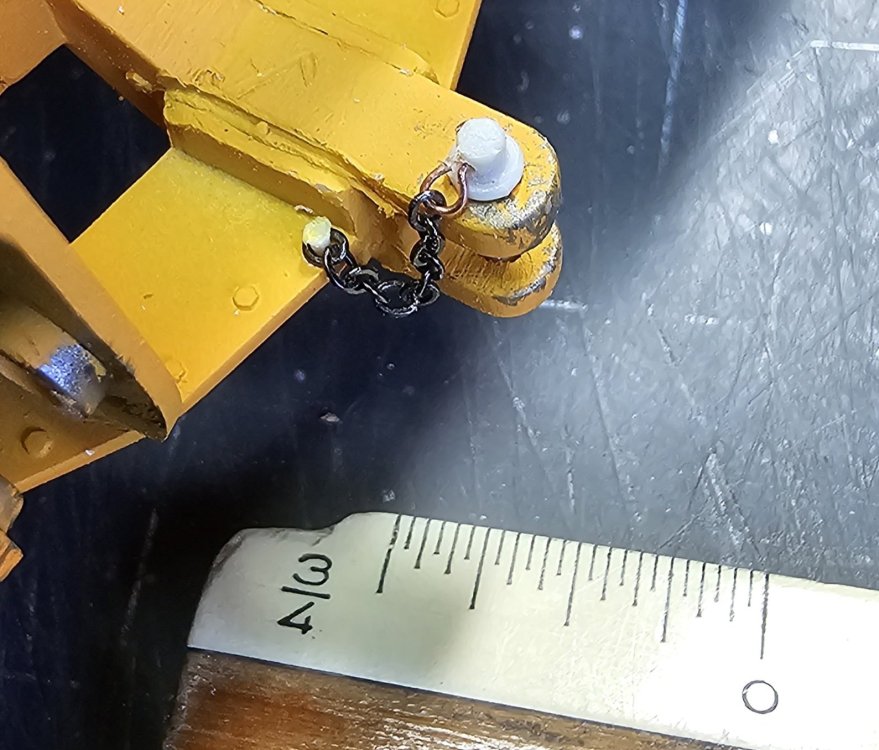
Hey all A little more done on the AMT Caterpillar D8H. I have it assembled, everything and the blade, I still need to do the rippers. This view shows the tow pin with chain. This view shows the blade painted steel/silver. I added some more steel paint to the tracks. This view shows the blade tilt cylinders hydraulic hoses, also the hoses for the blade lift cylinders. This view shows the hydraulic feed hoses from the hydraulic pump to the hydraulic manifold. Also the right lift cylinder hoses. I added some more weathering to the engine. This view shows the finished operators position. I have some detail items for this area coming in the mail, placards and a better dash panel. Adding the decals is next. This still needs alot of weathering. Well that's it for now be back soon with more. Ron G


-
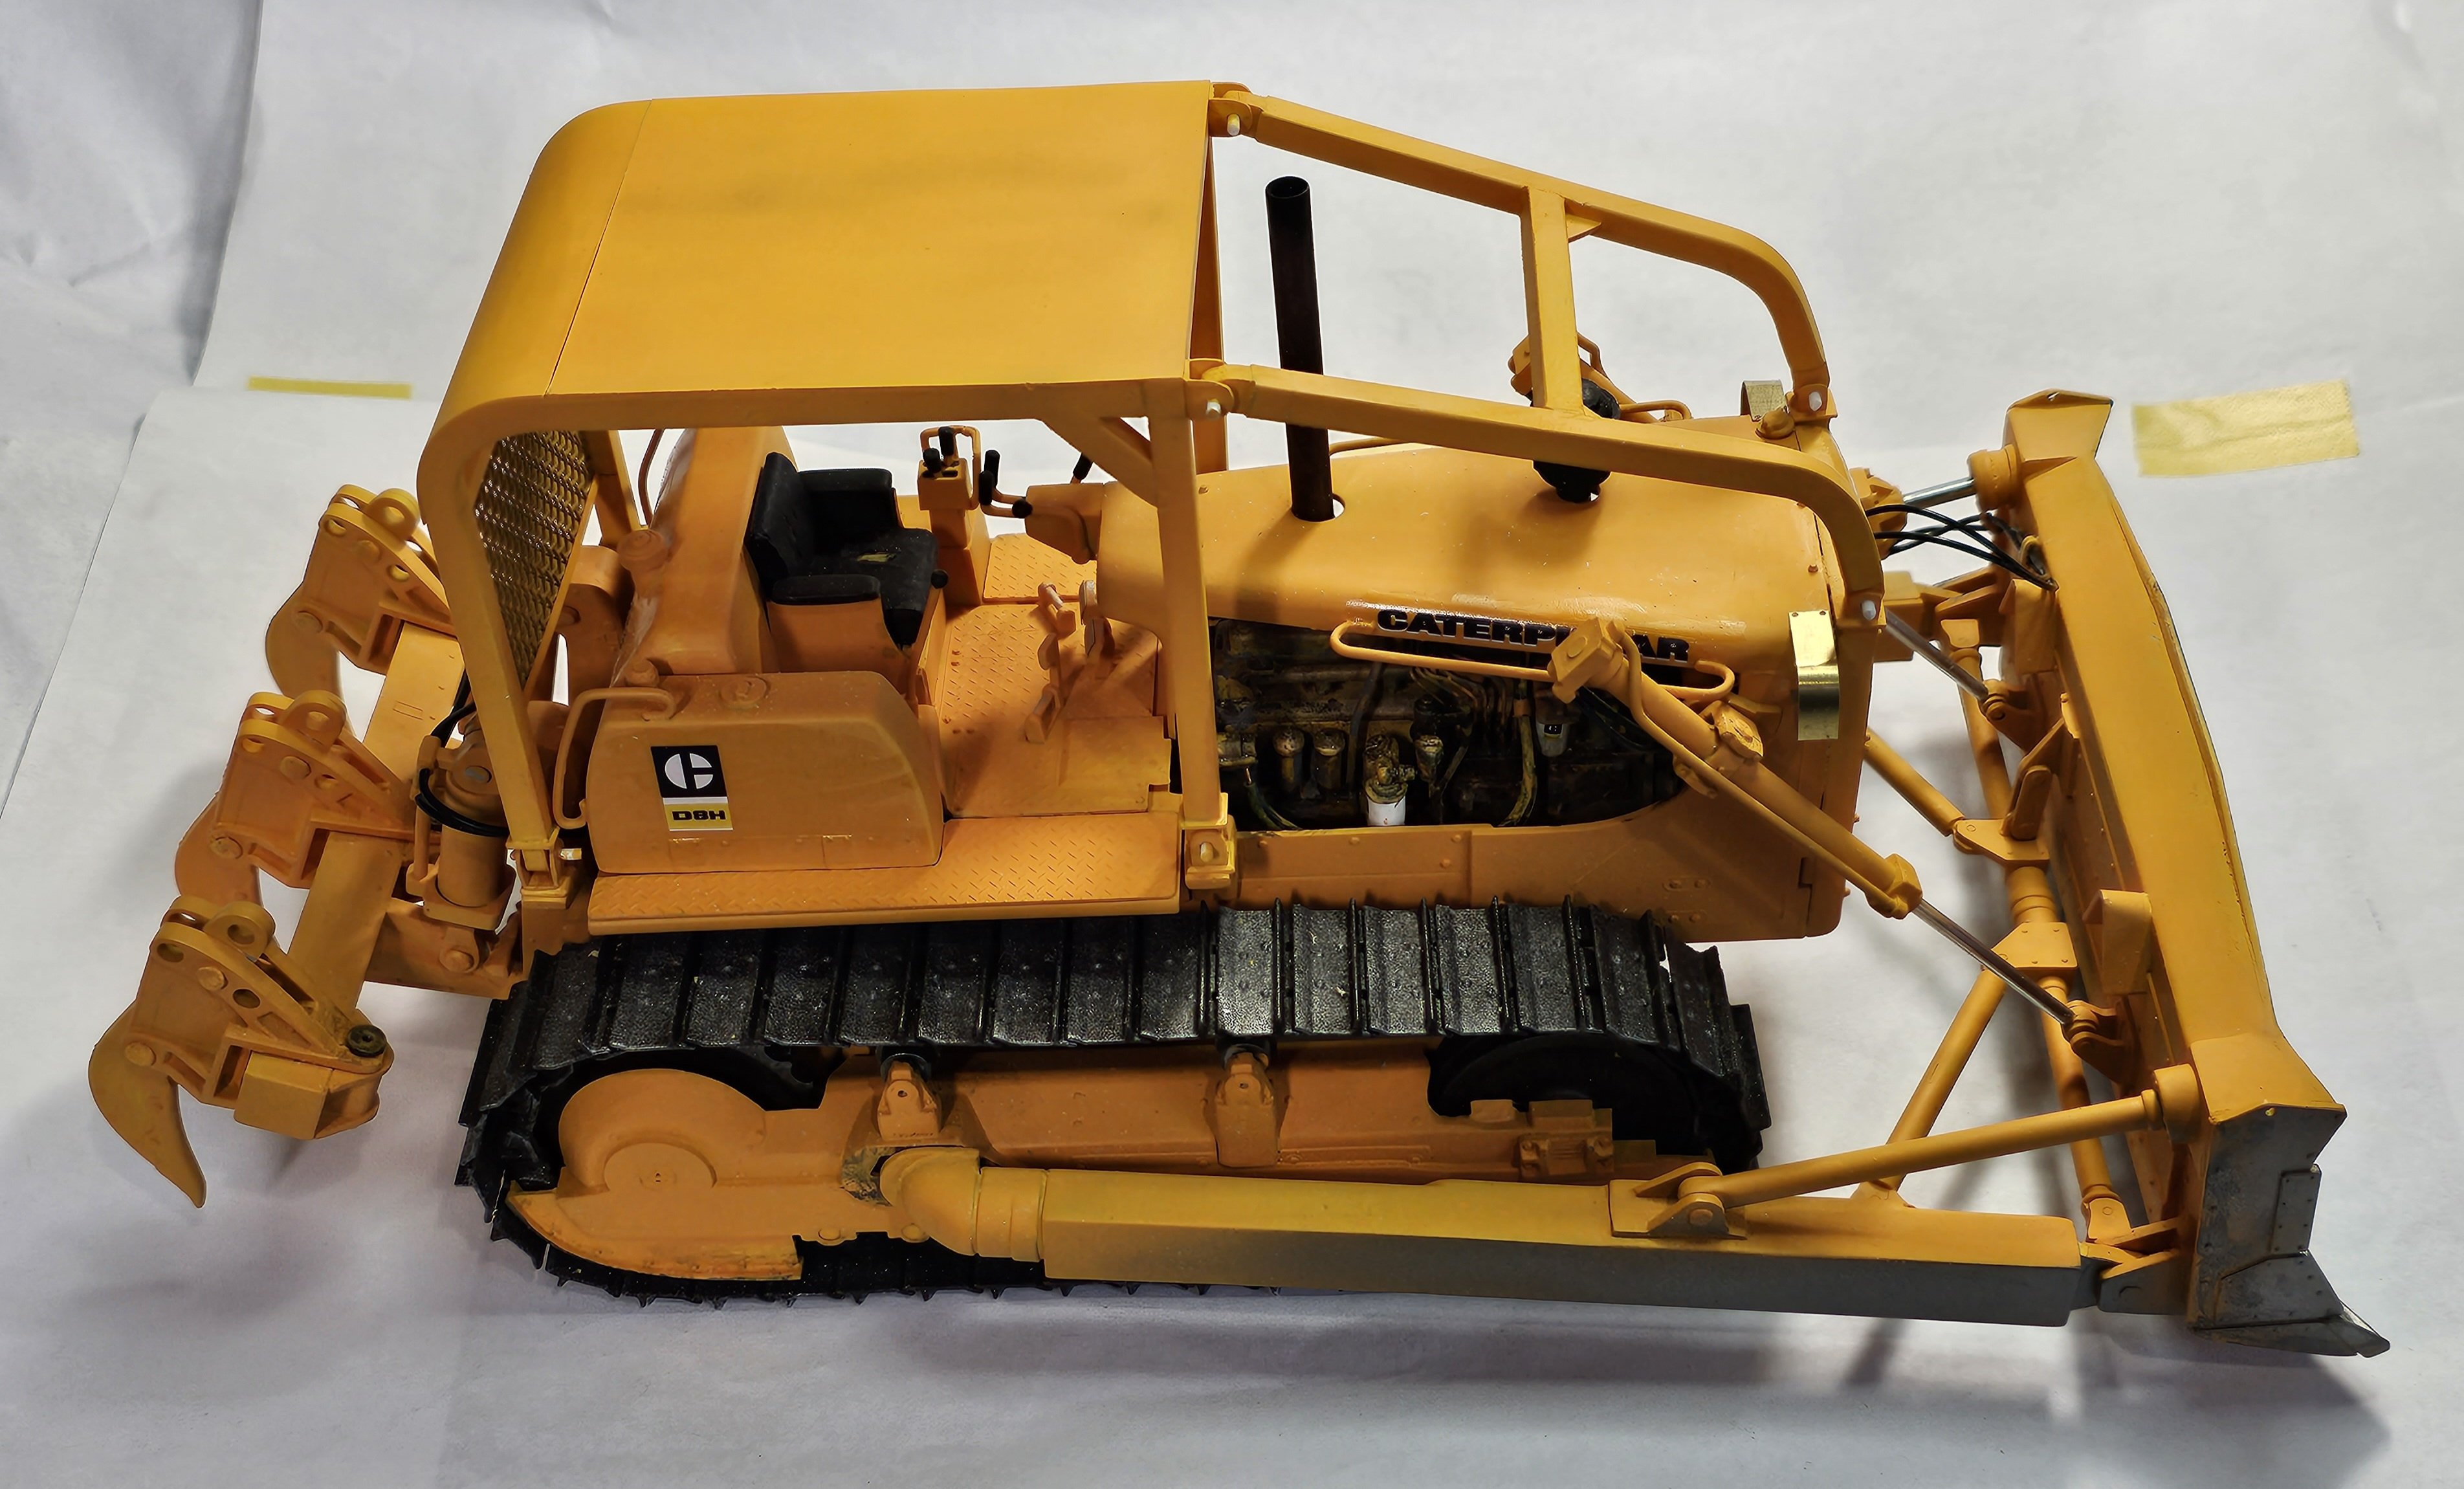
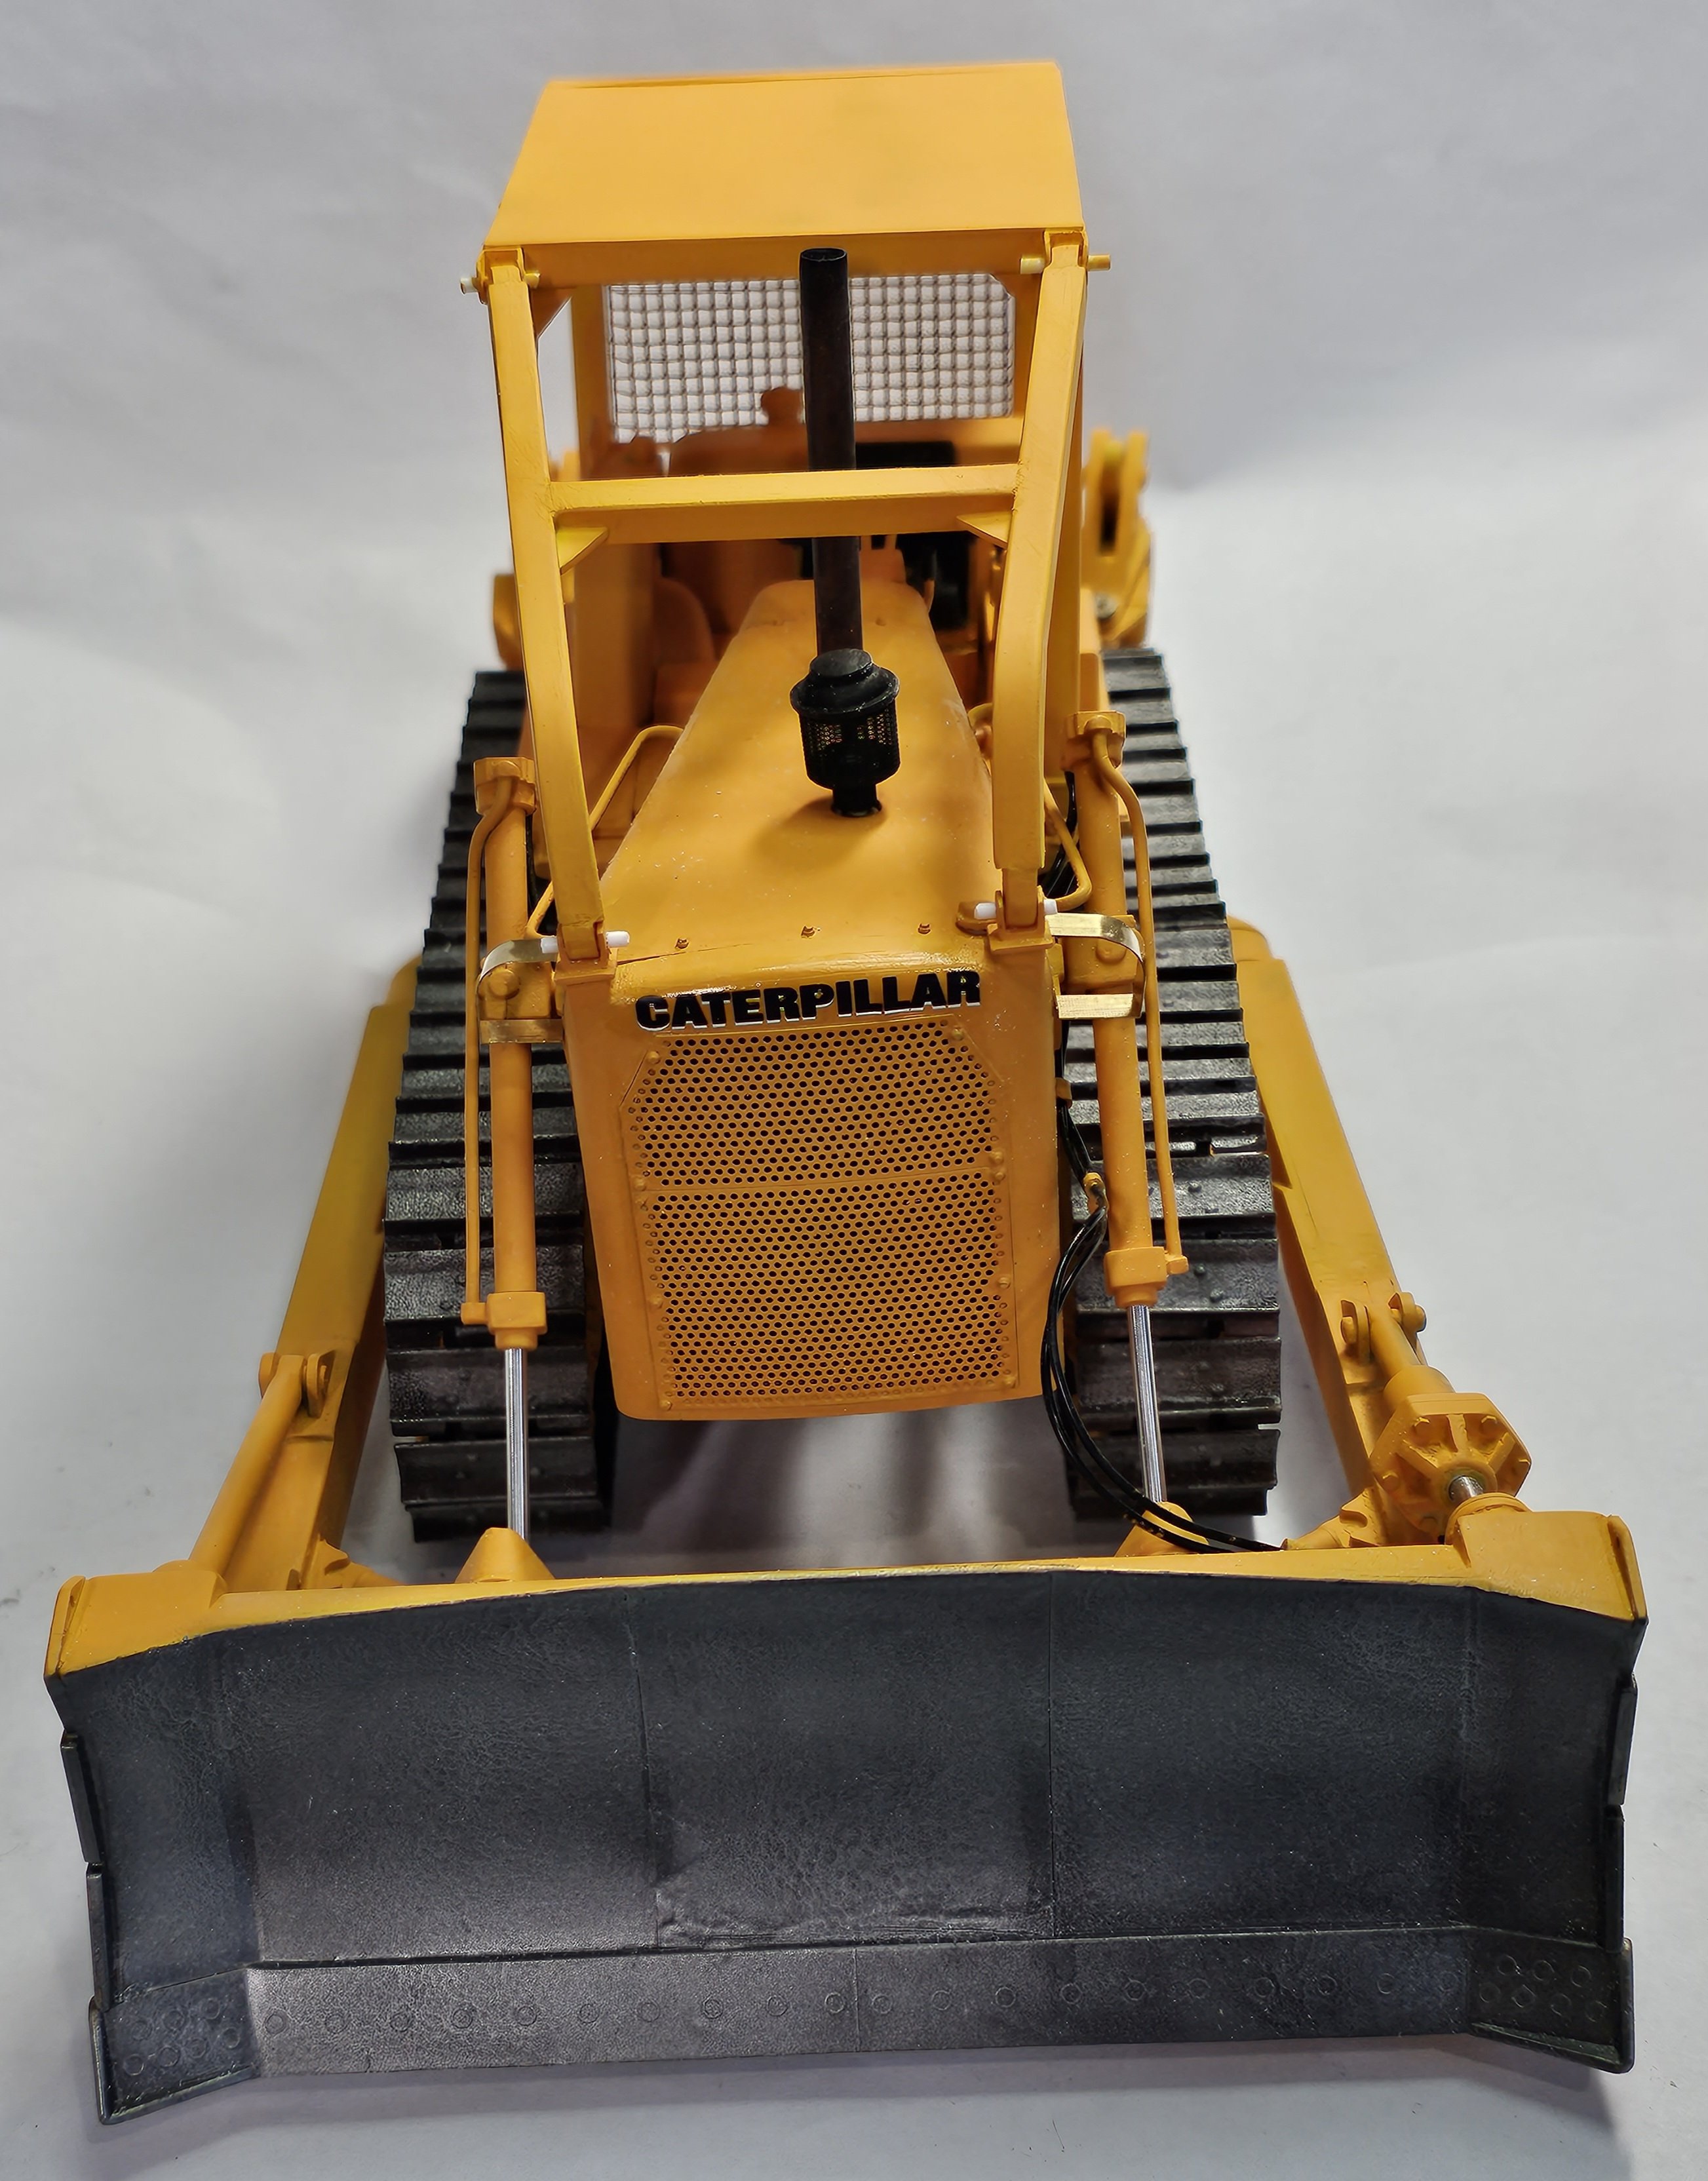
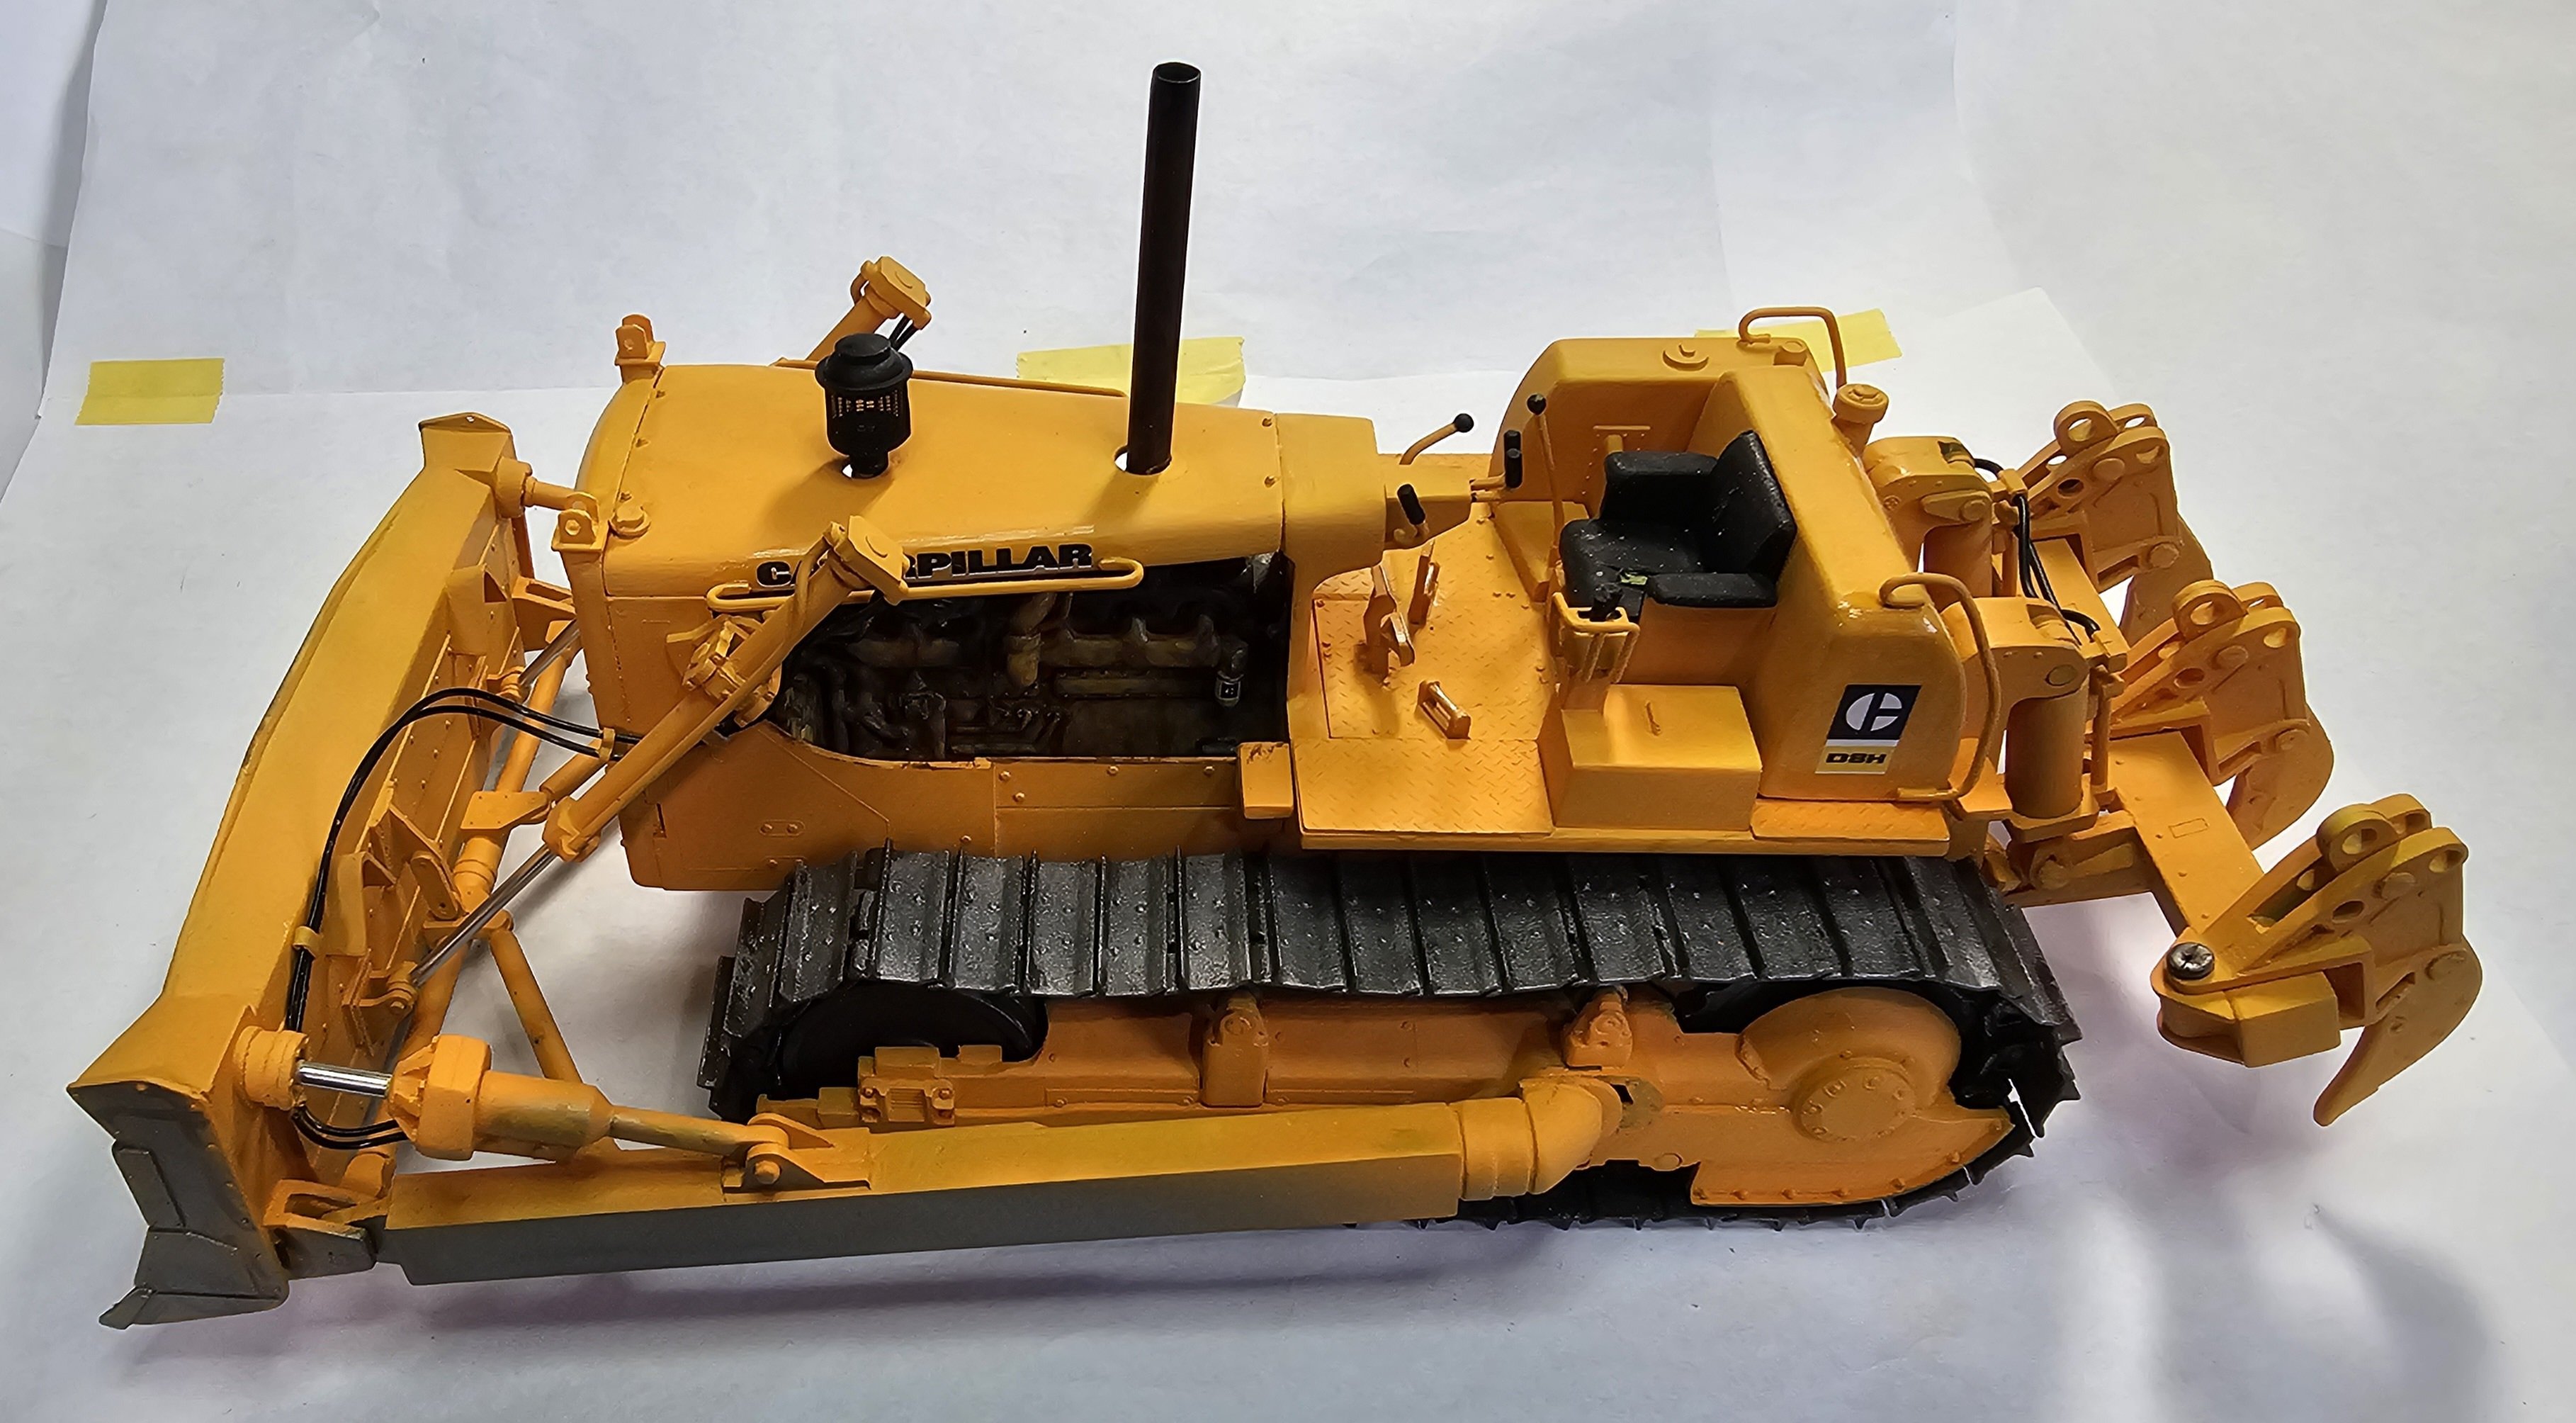
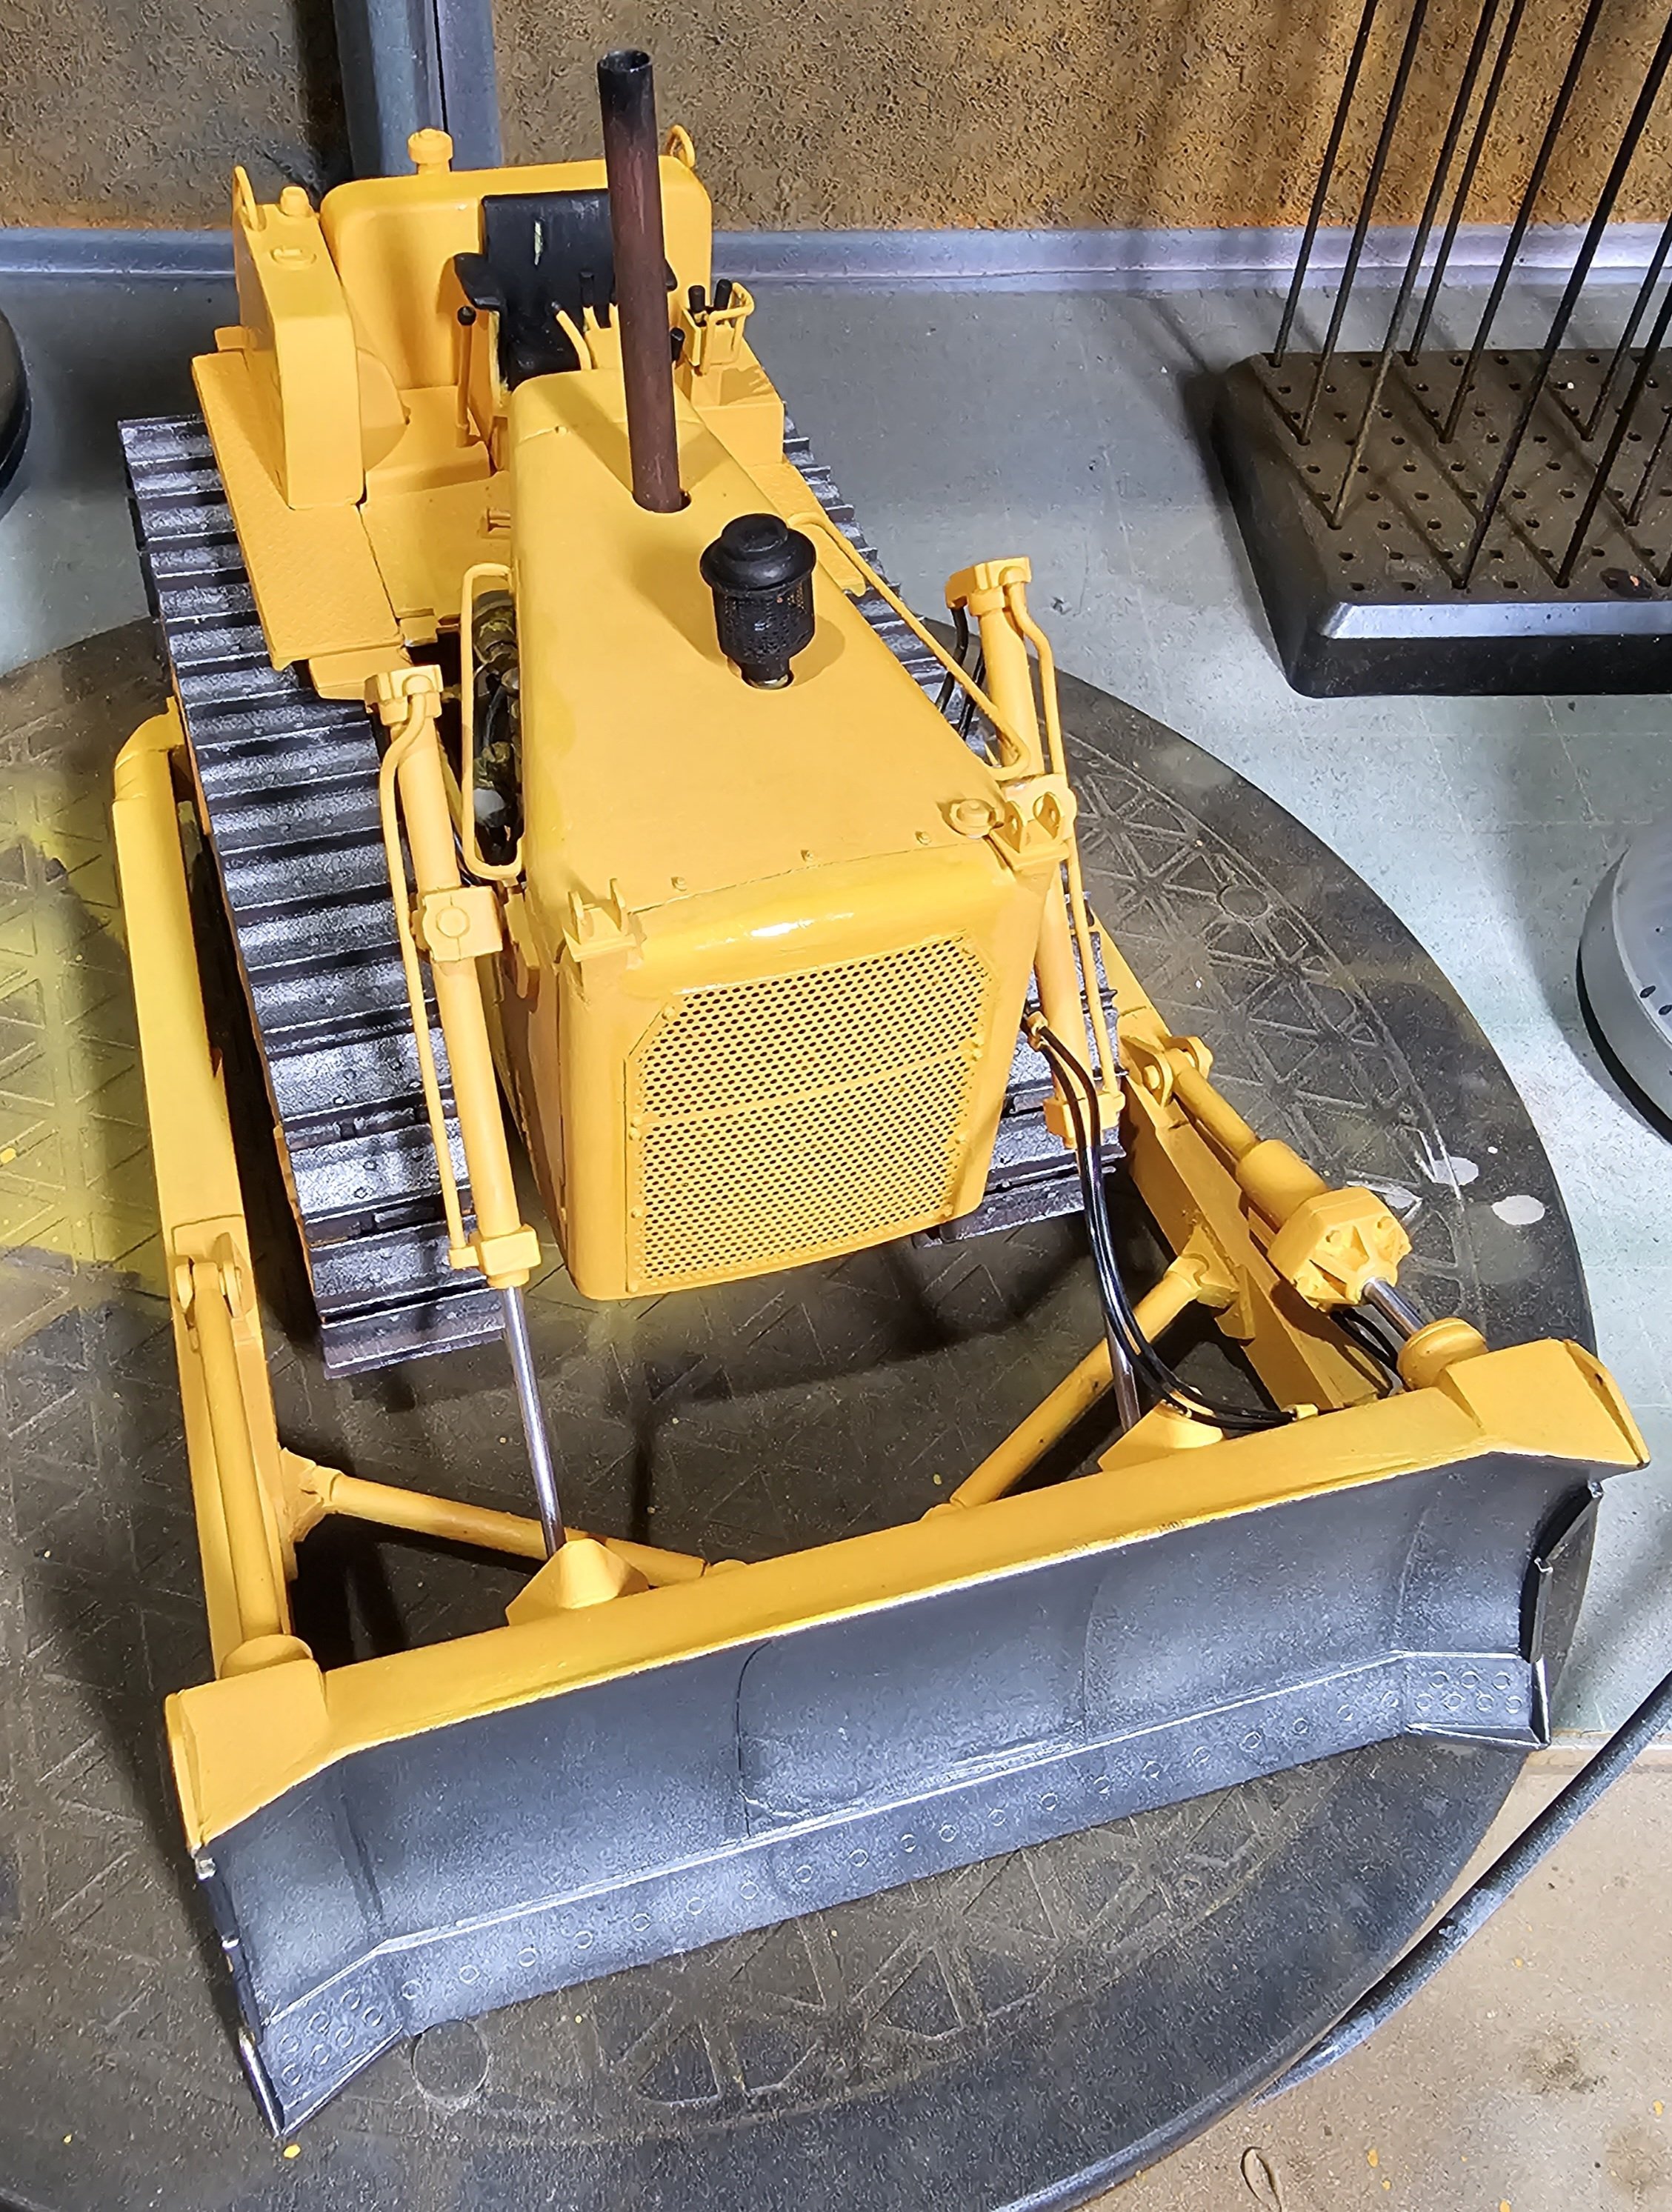
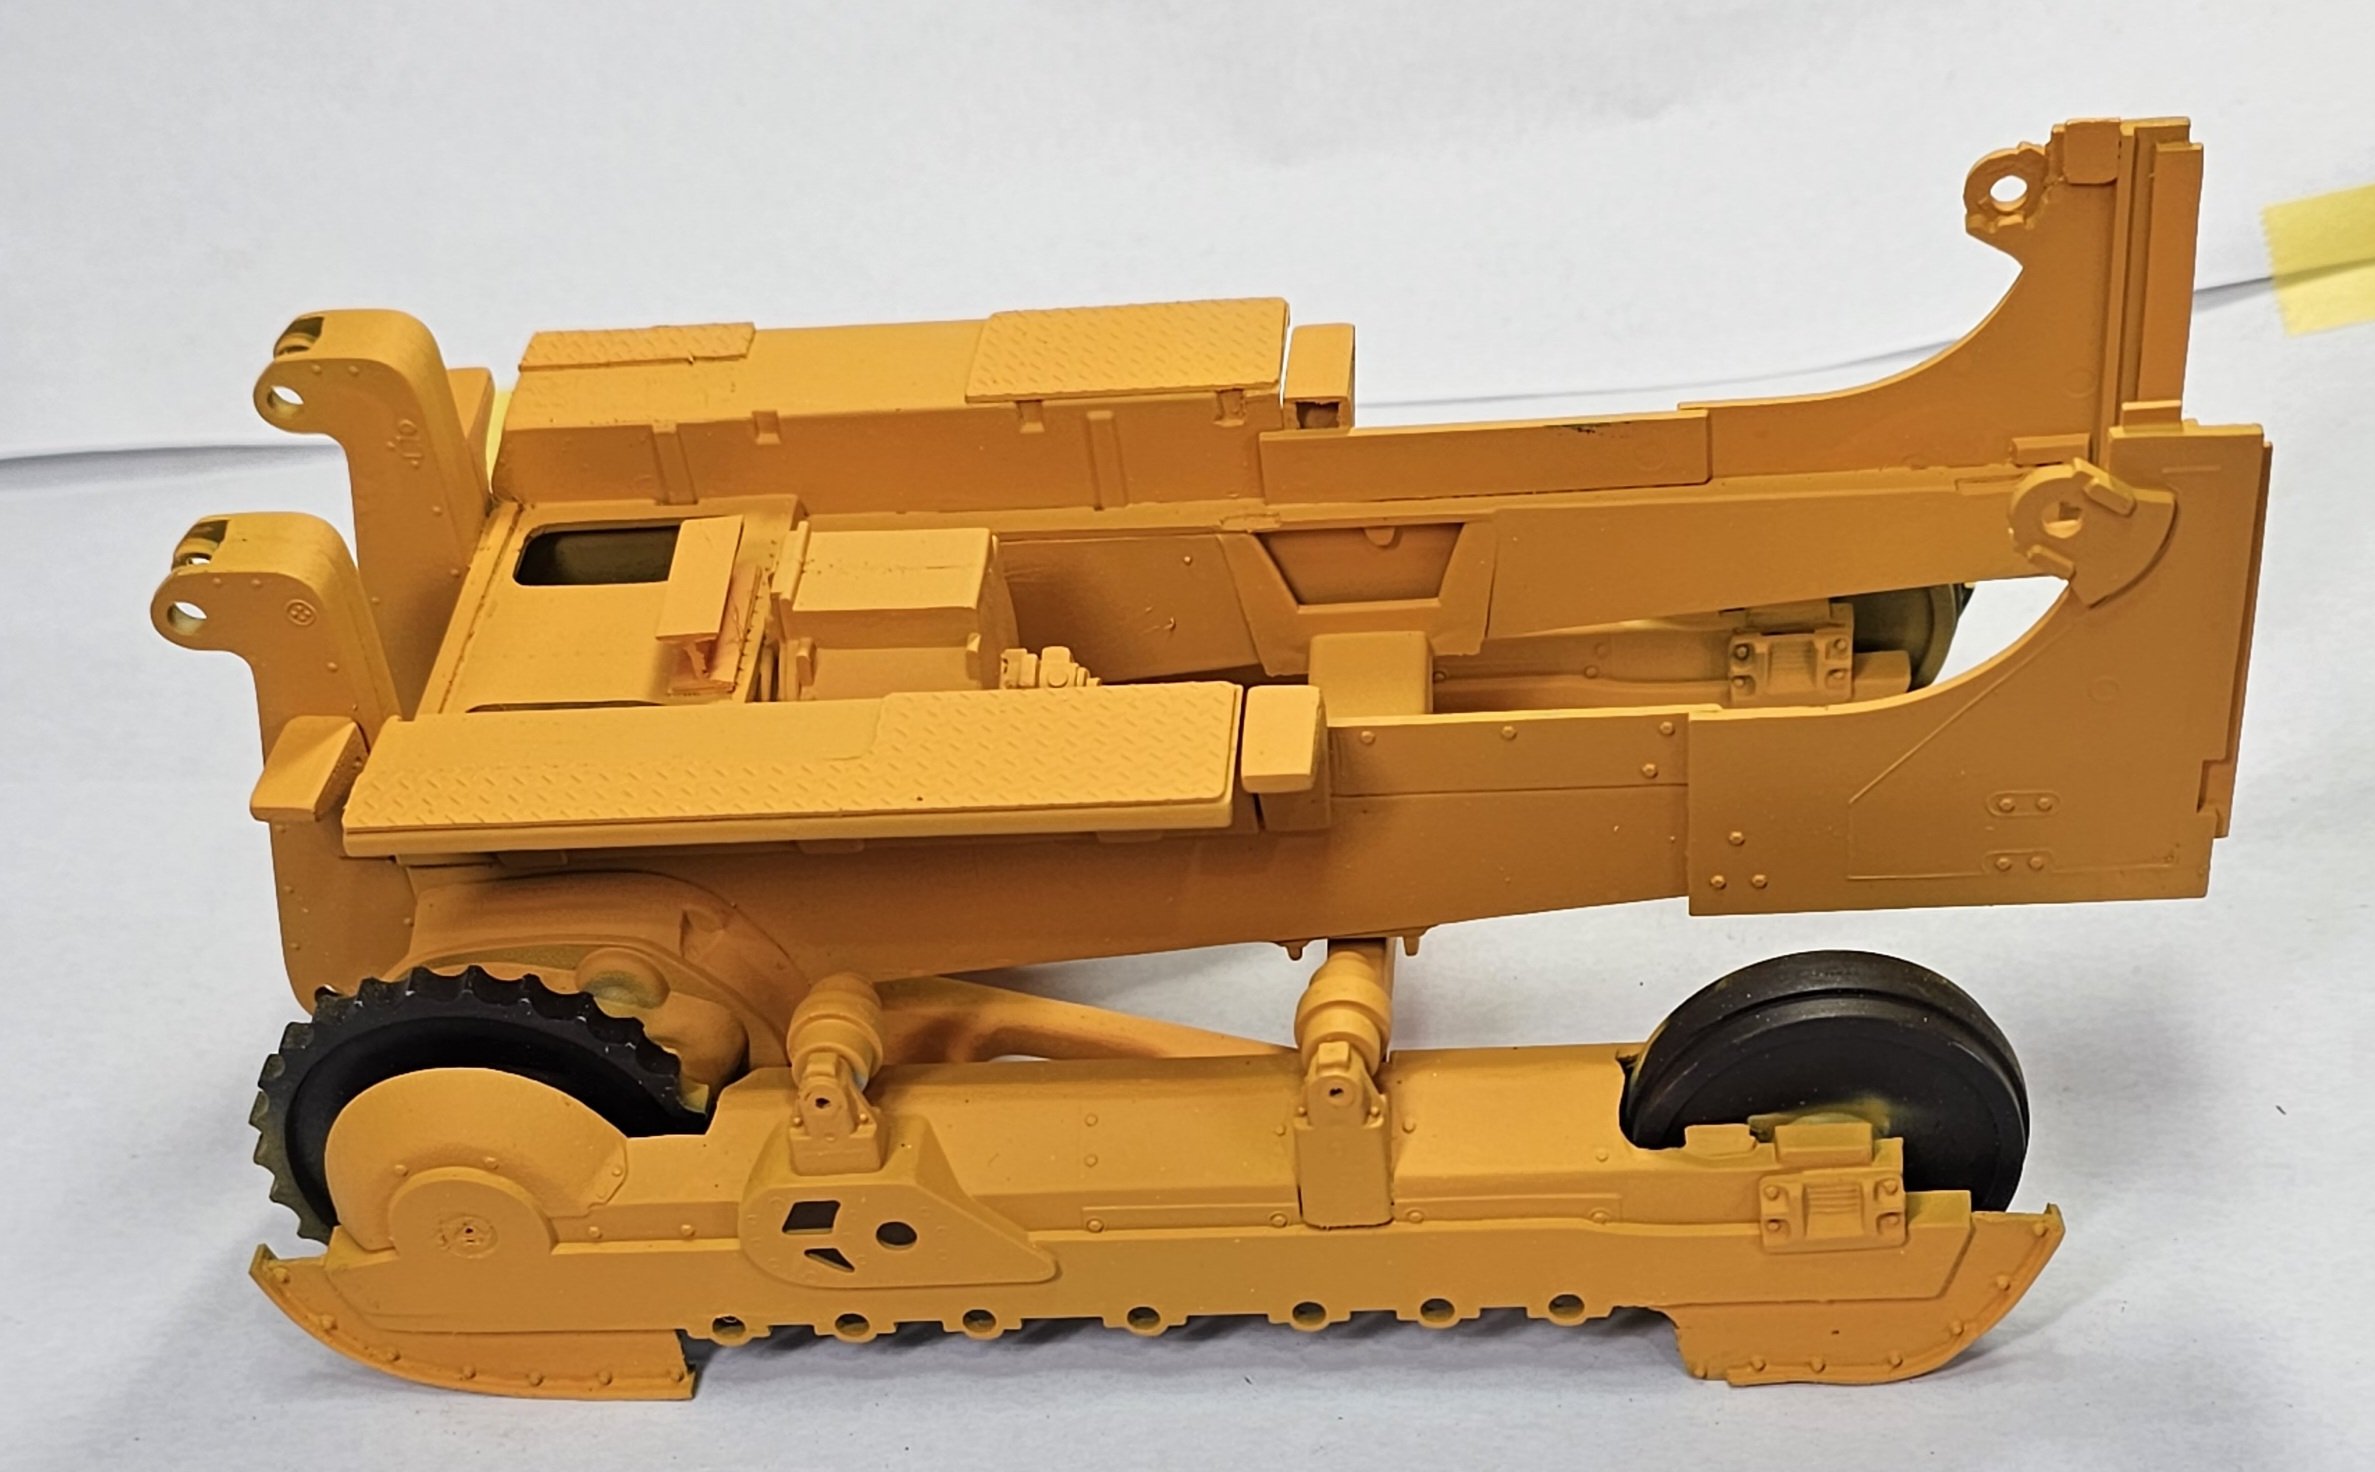
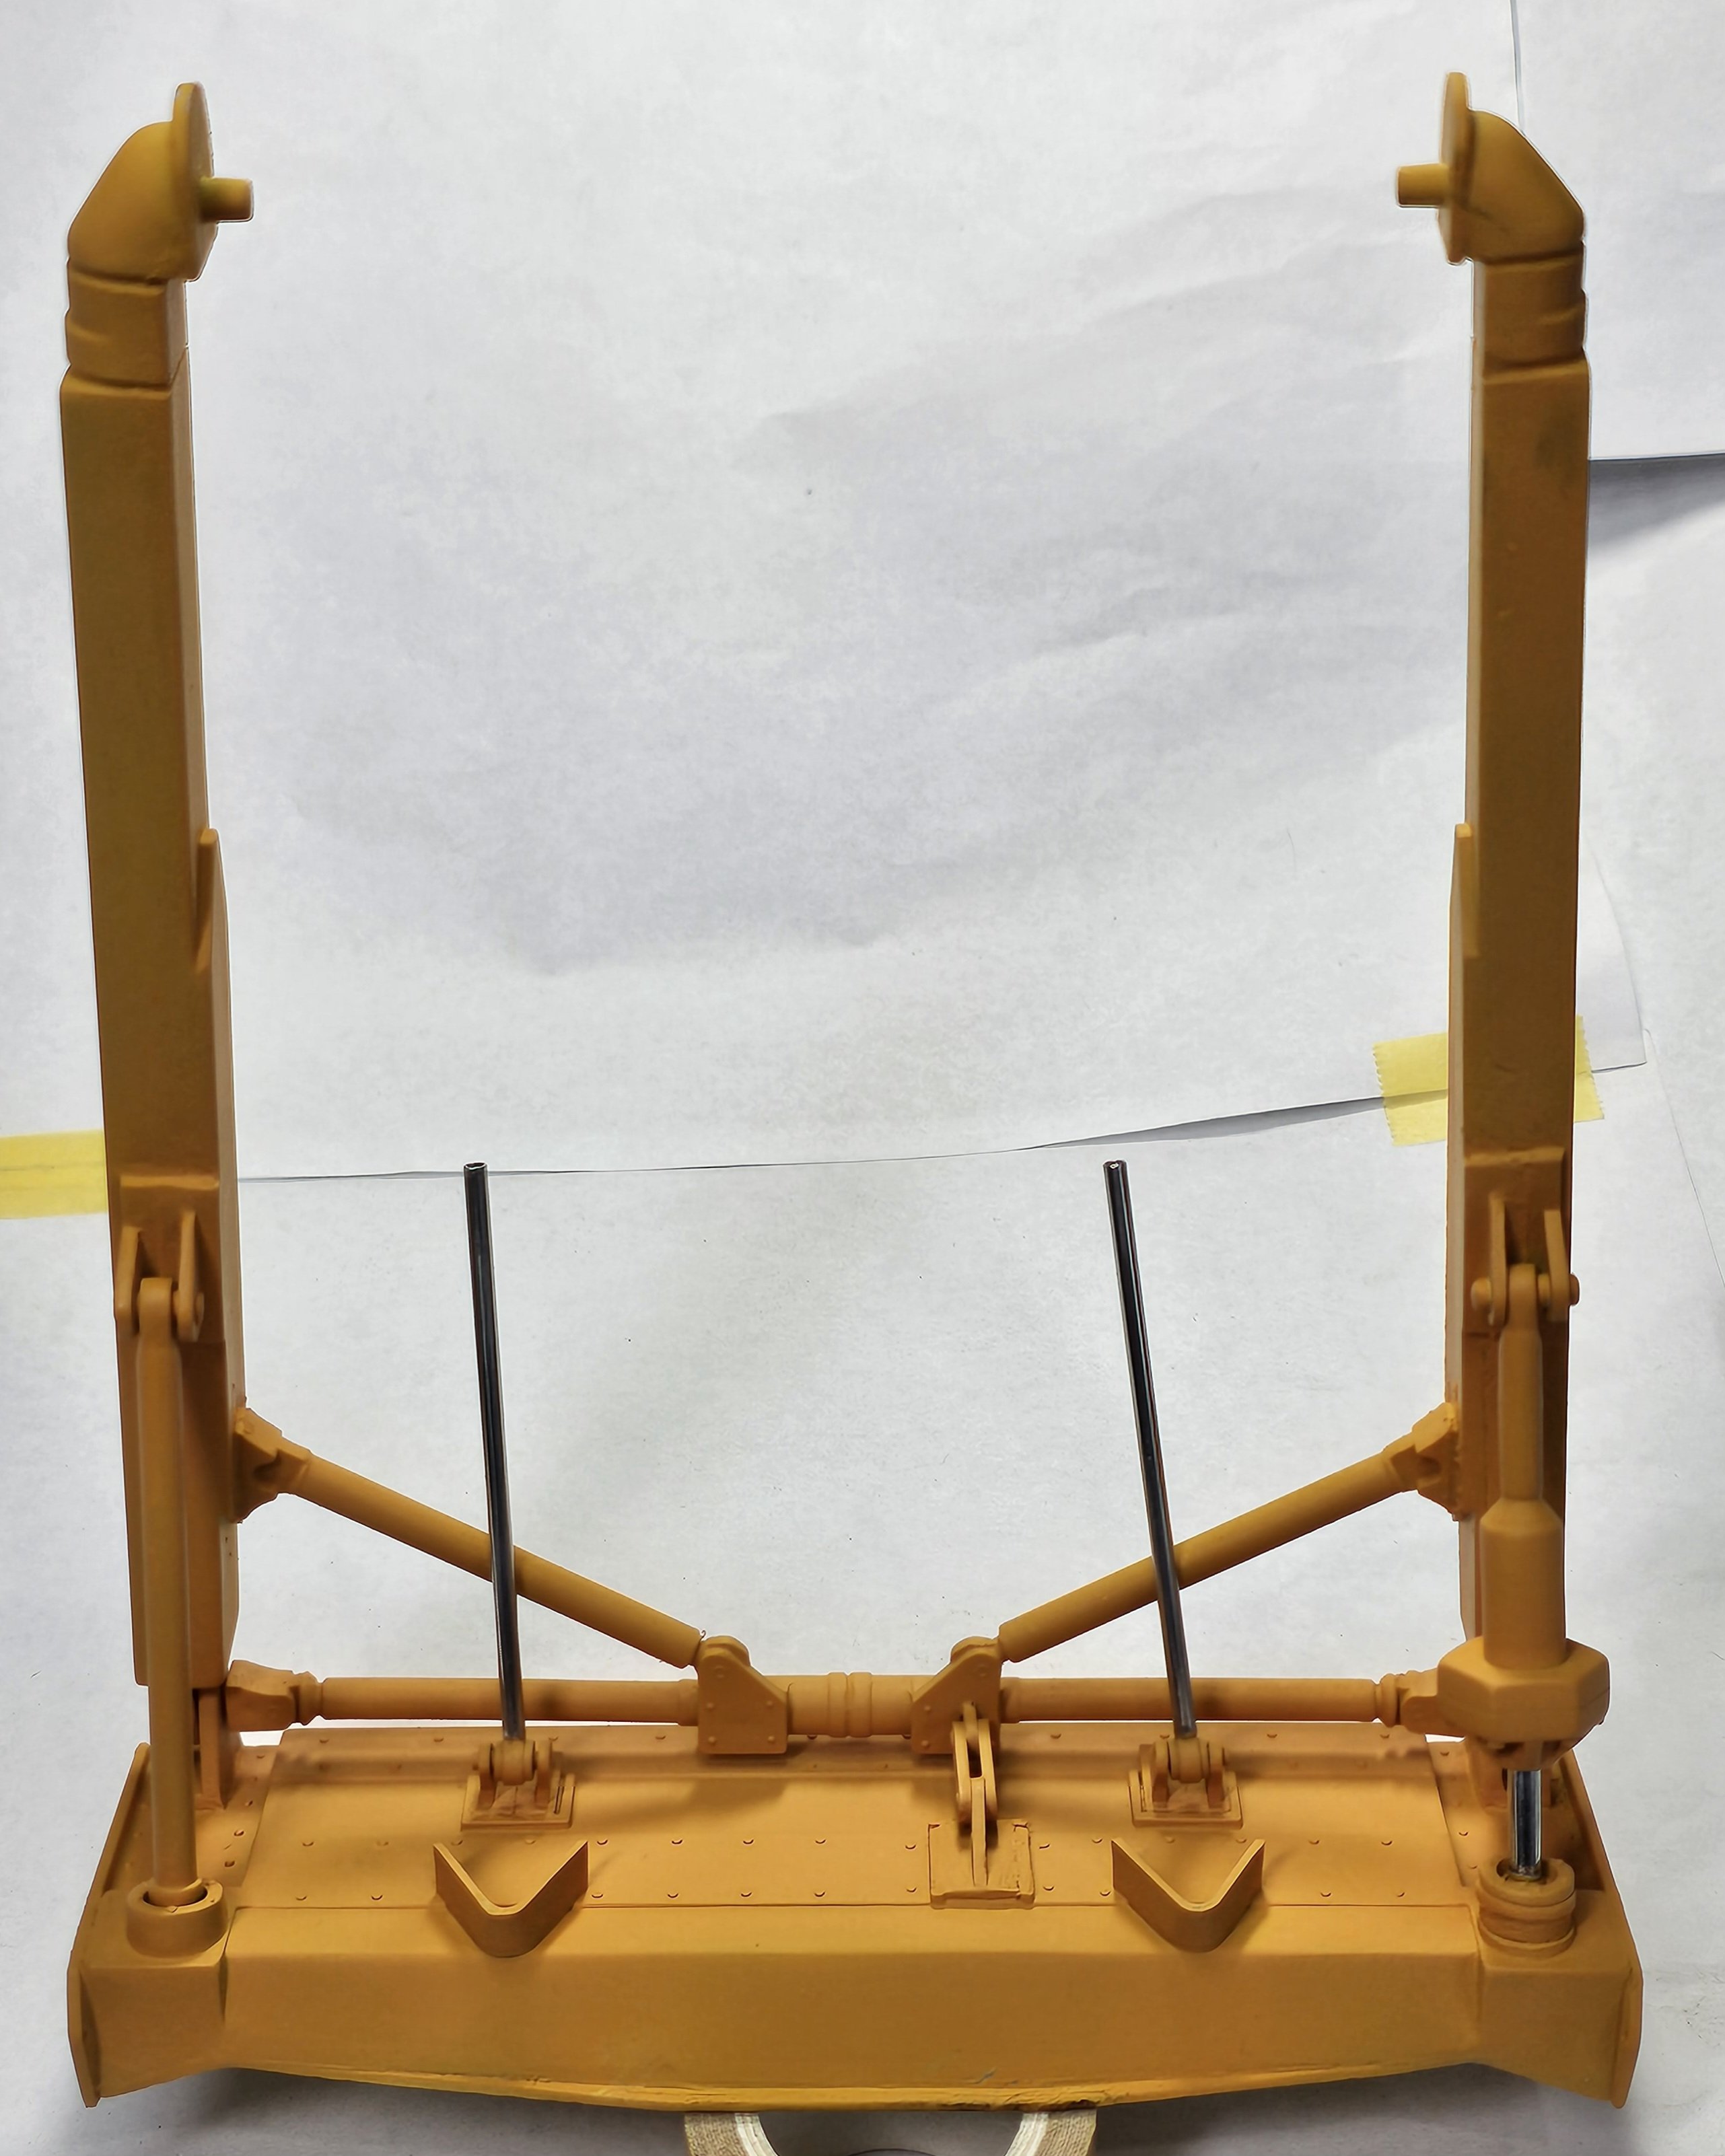
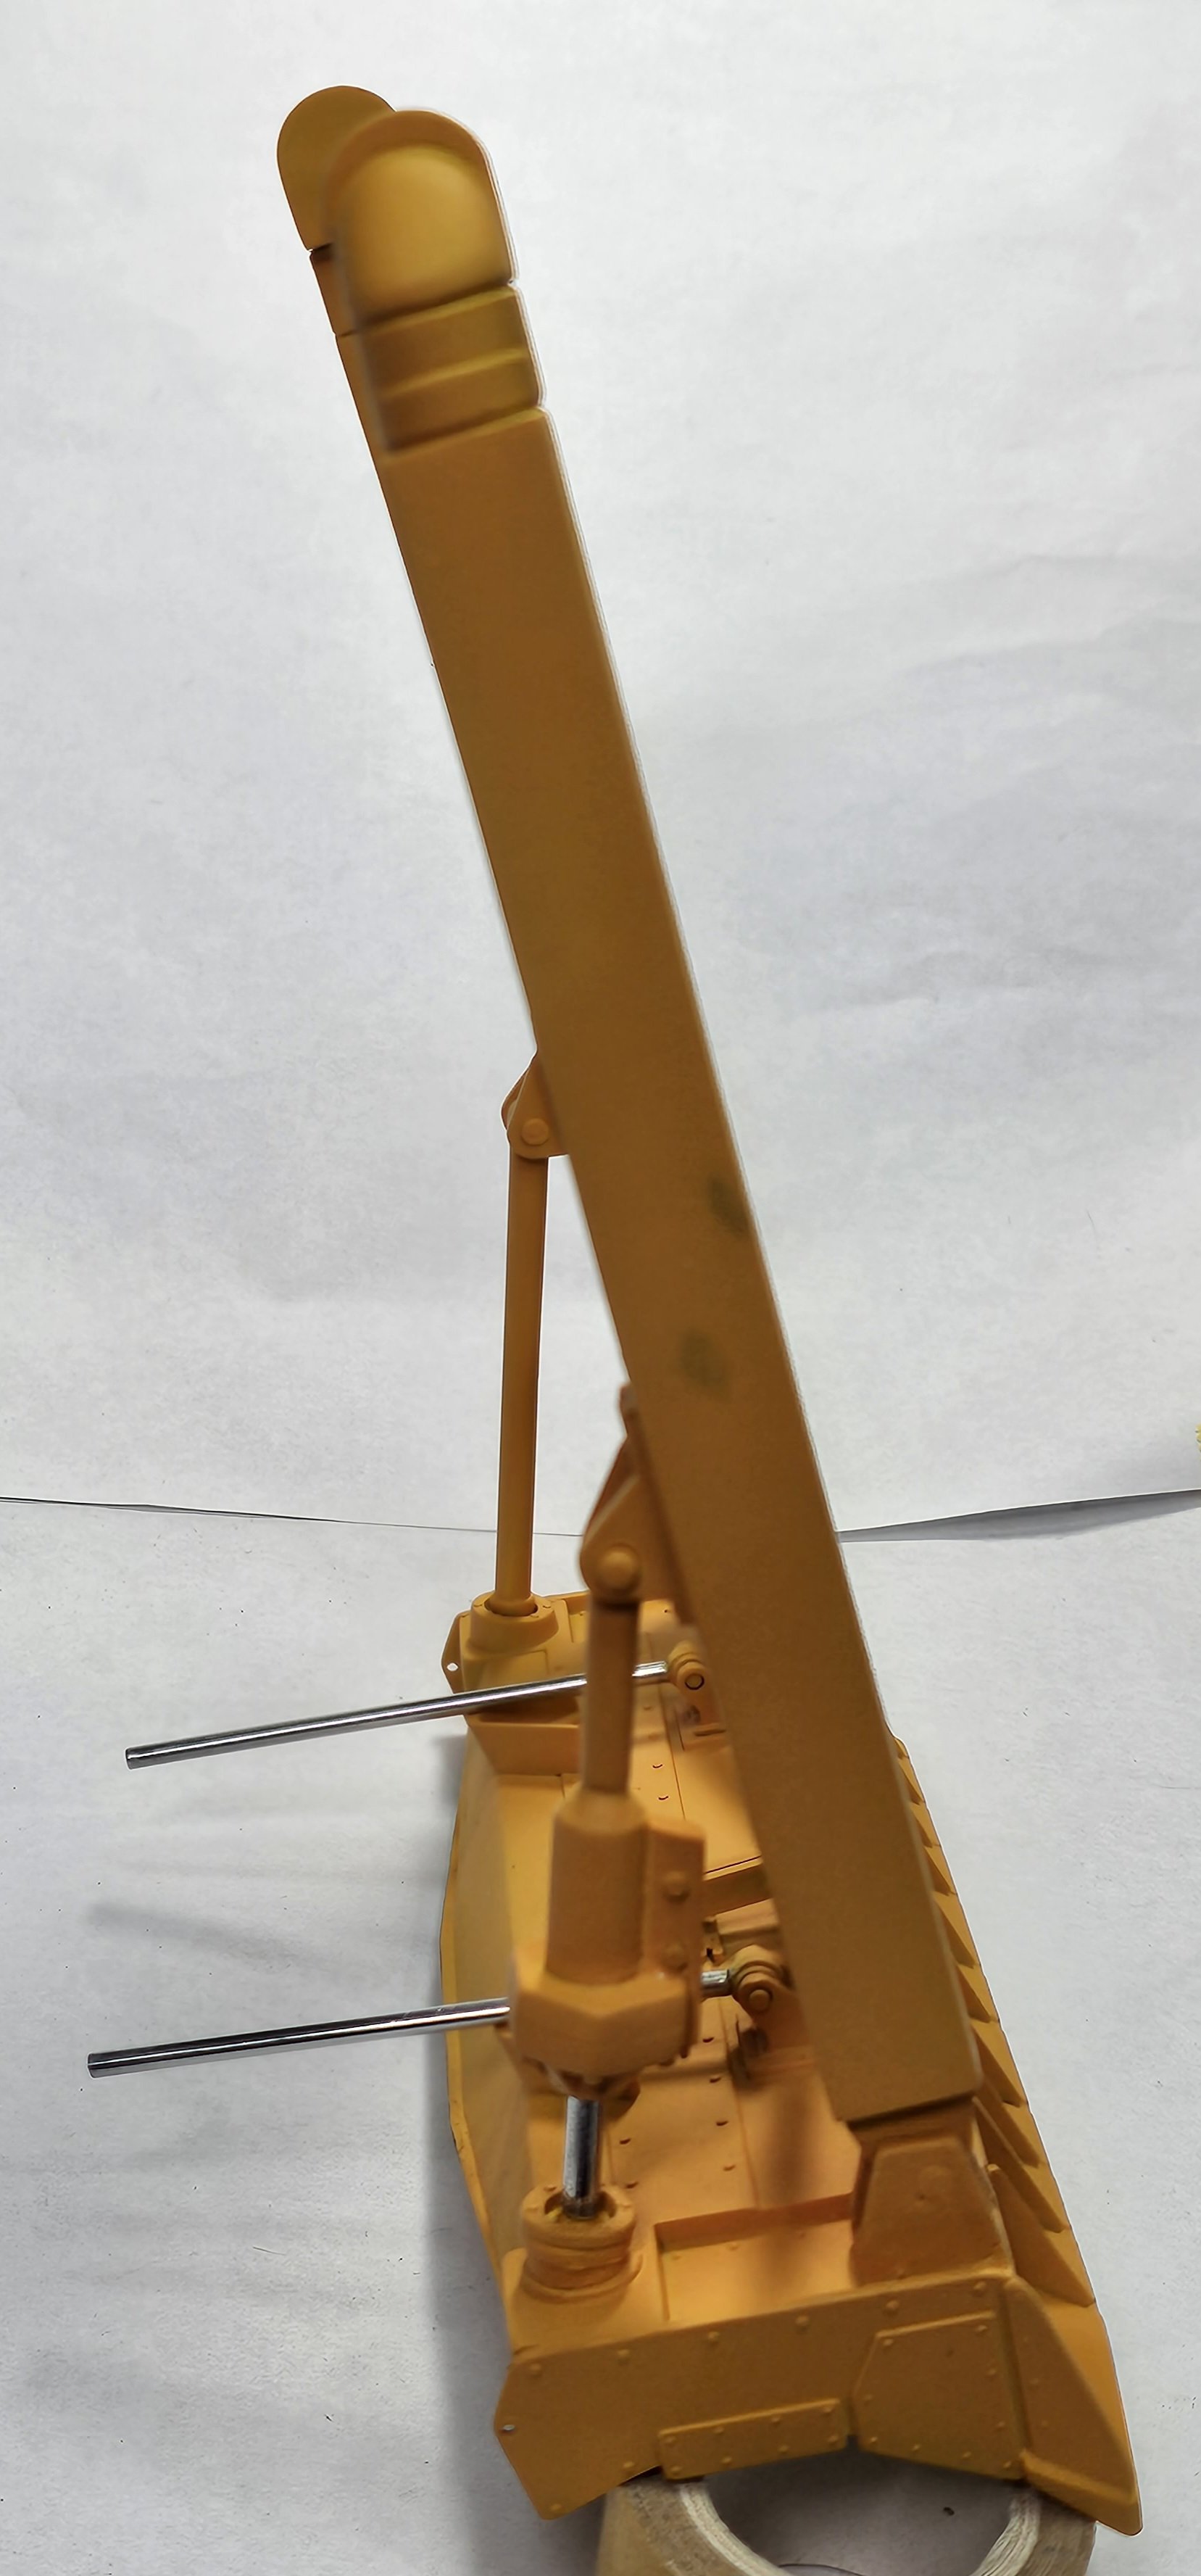
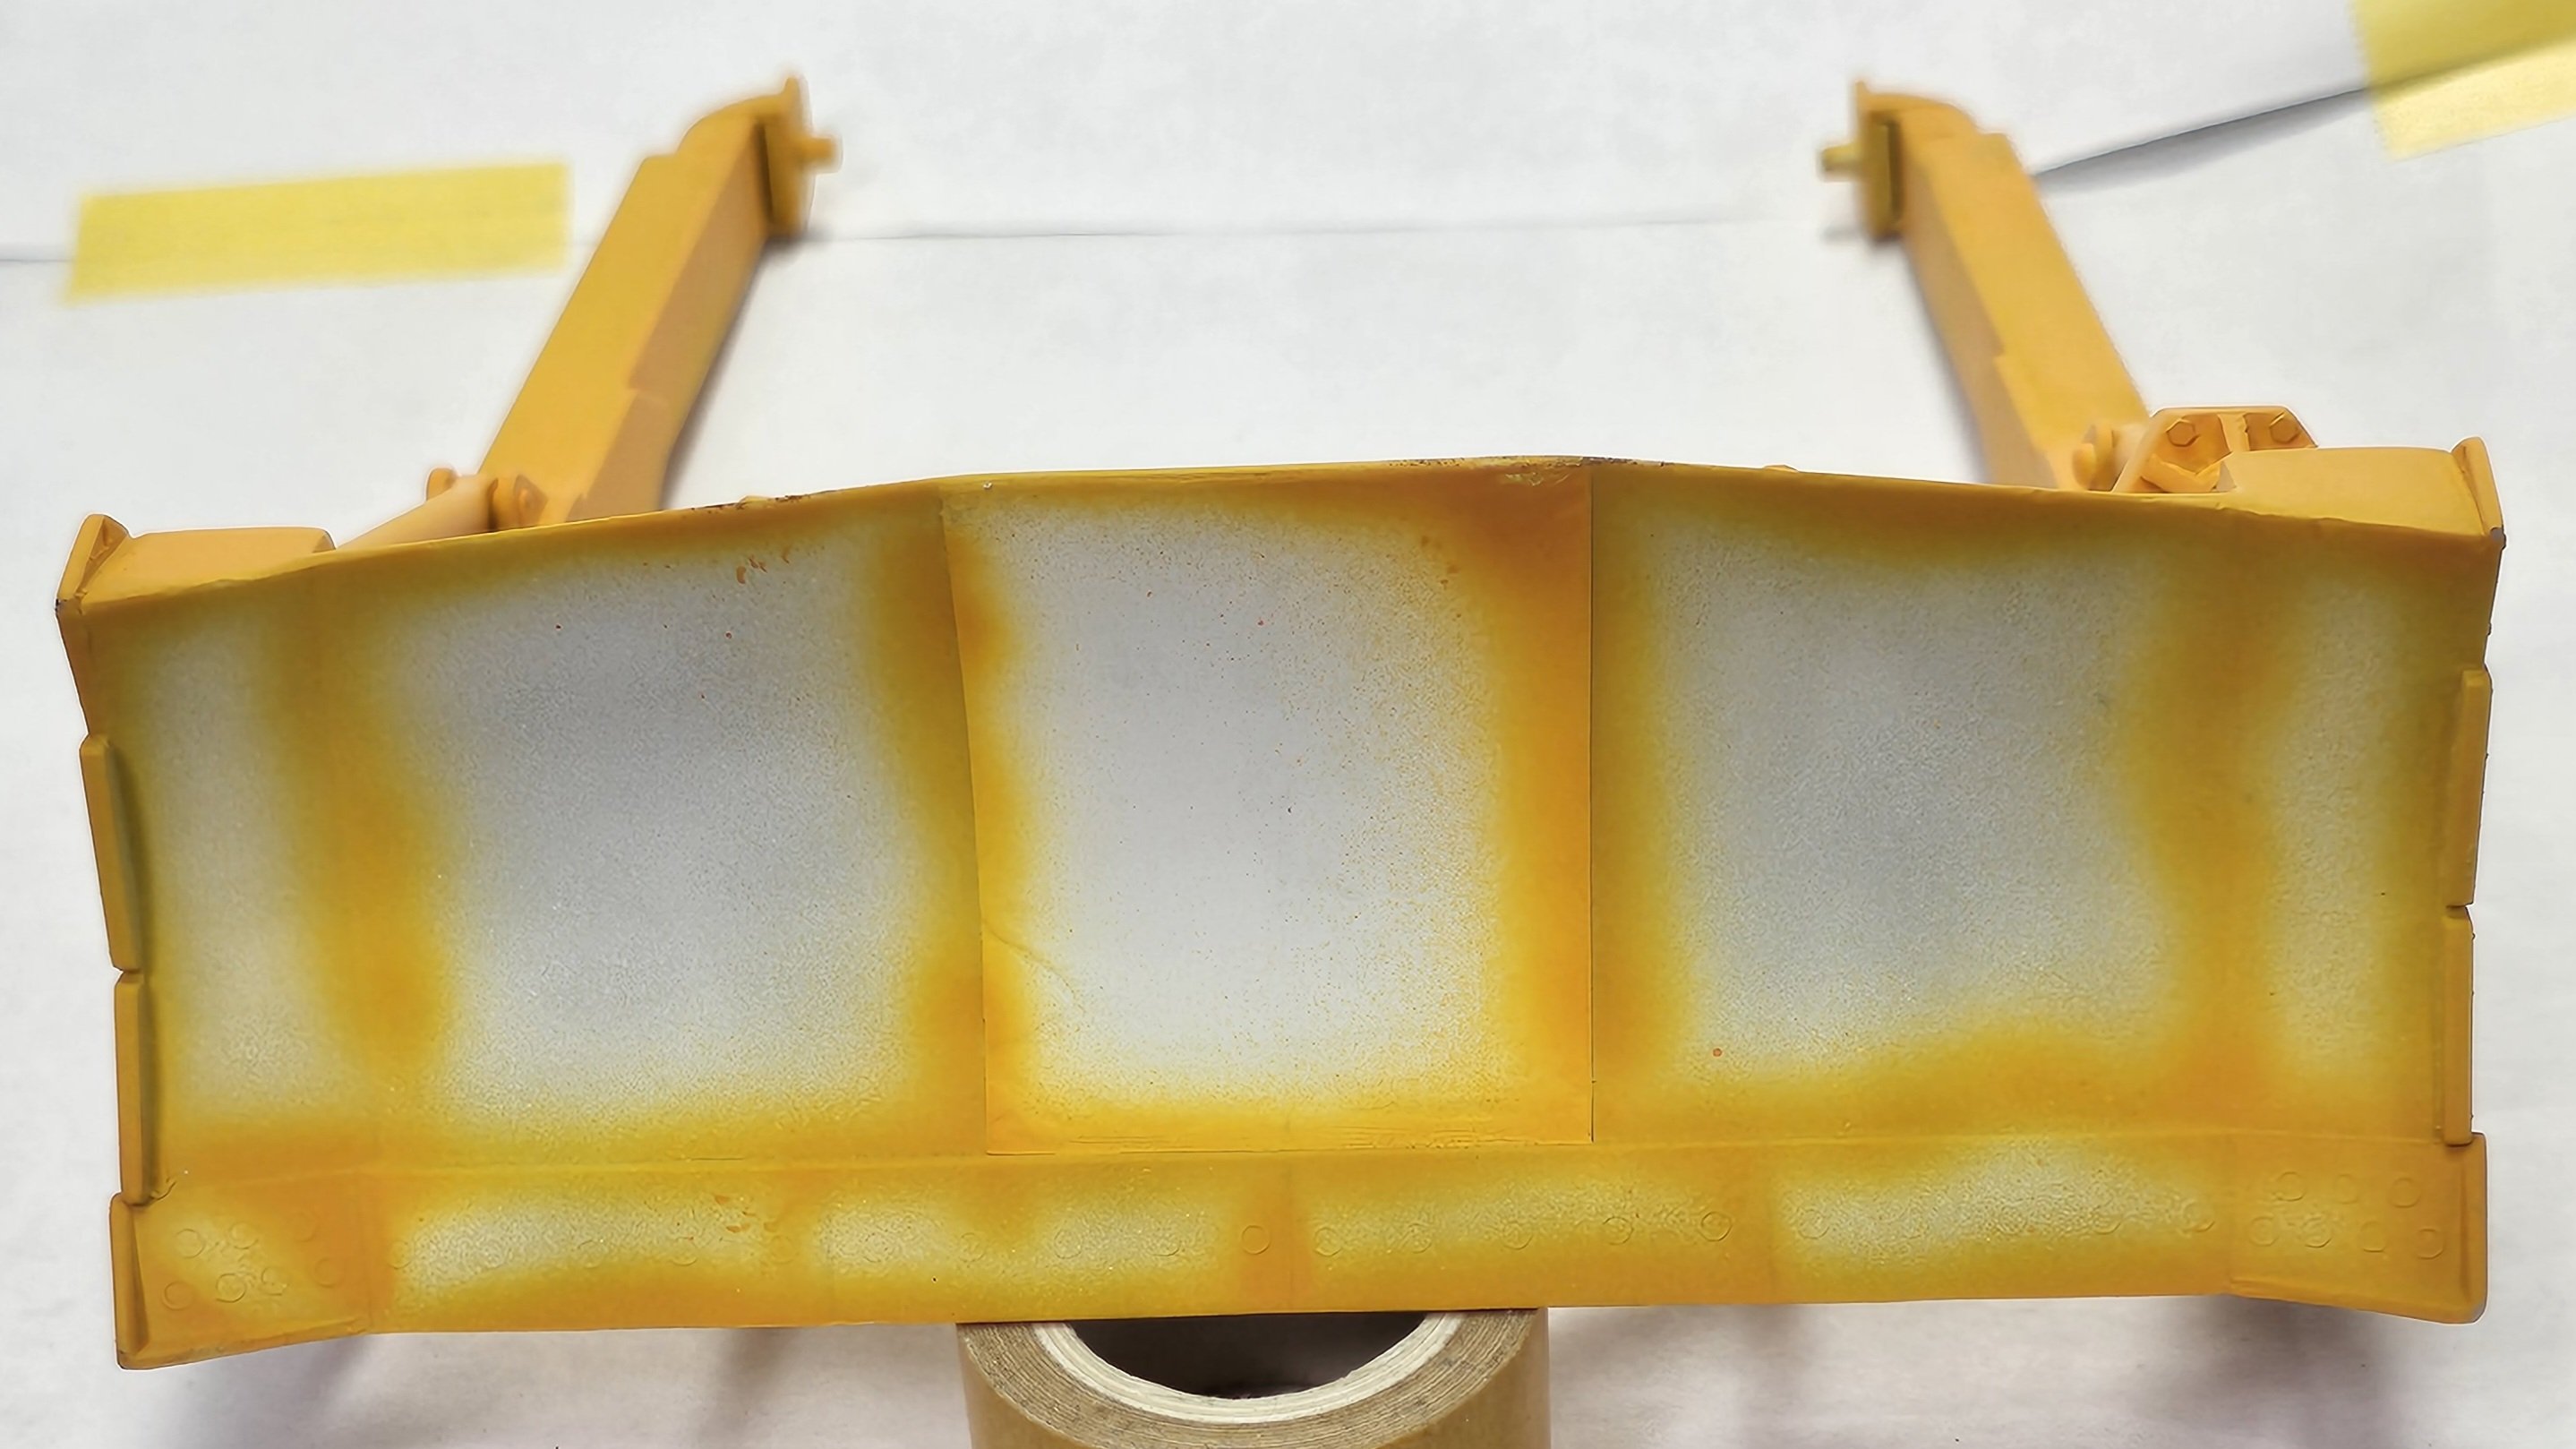
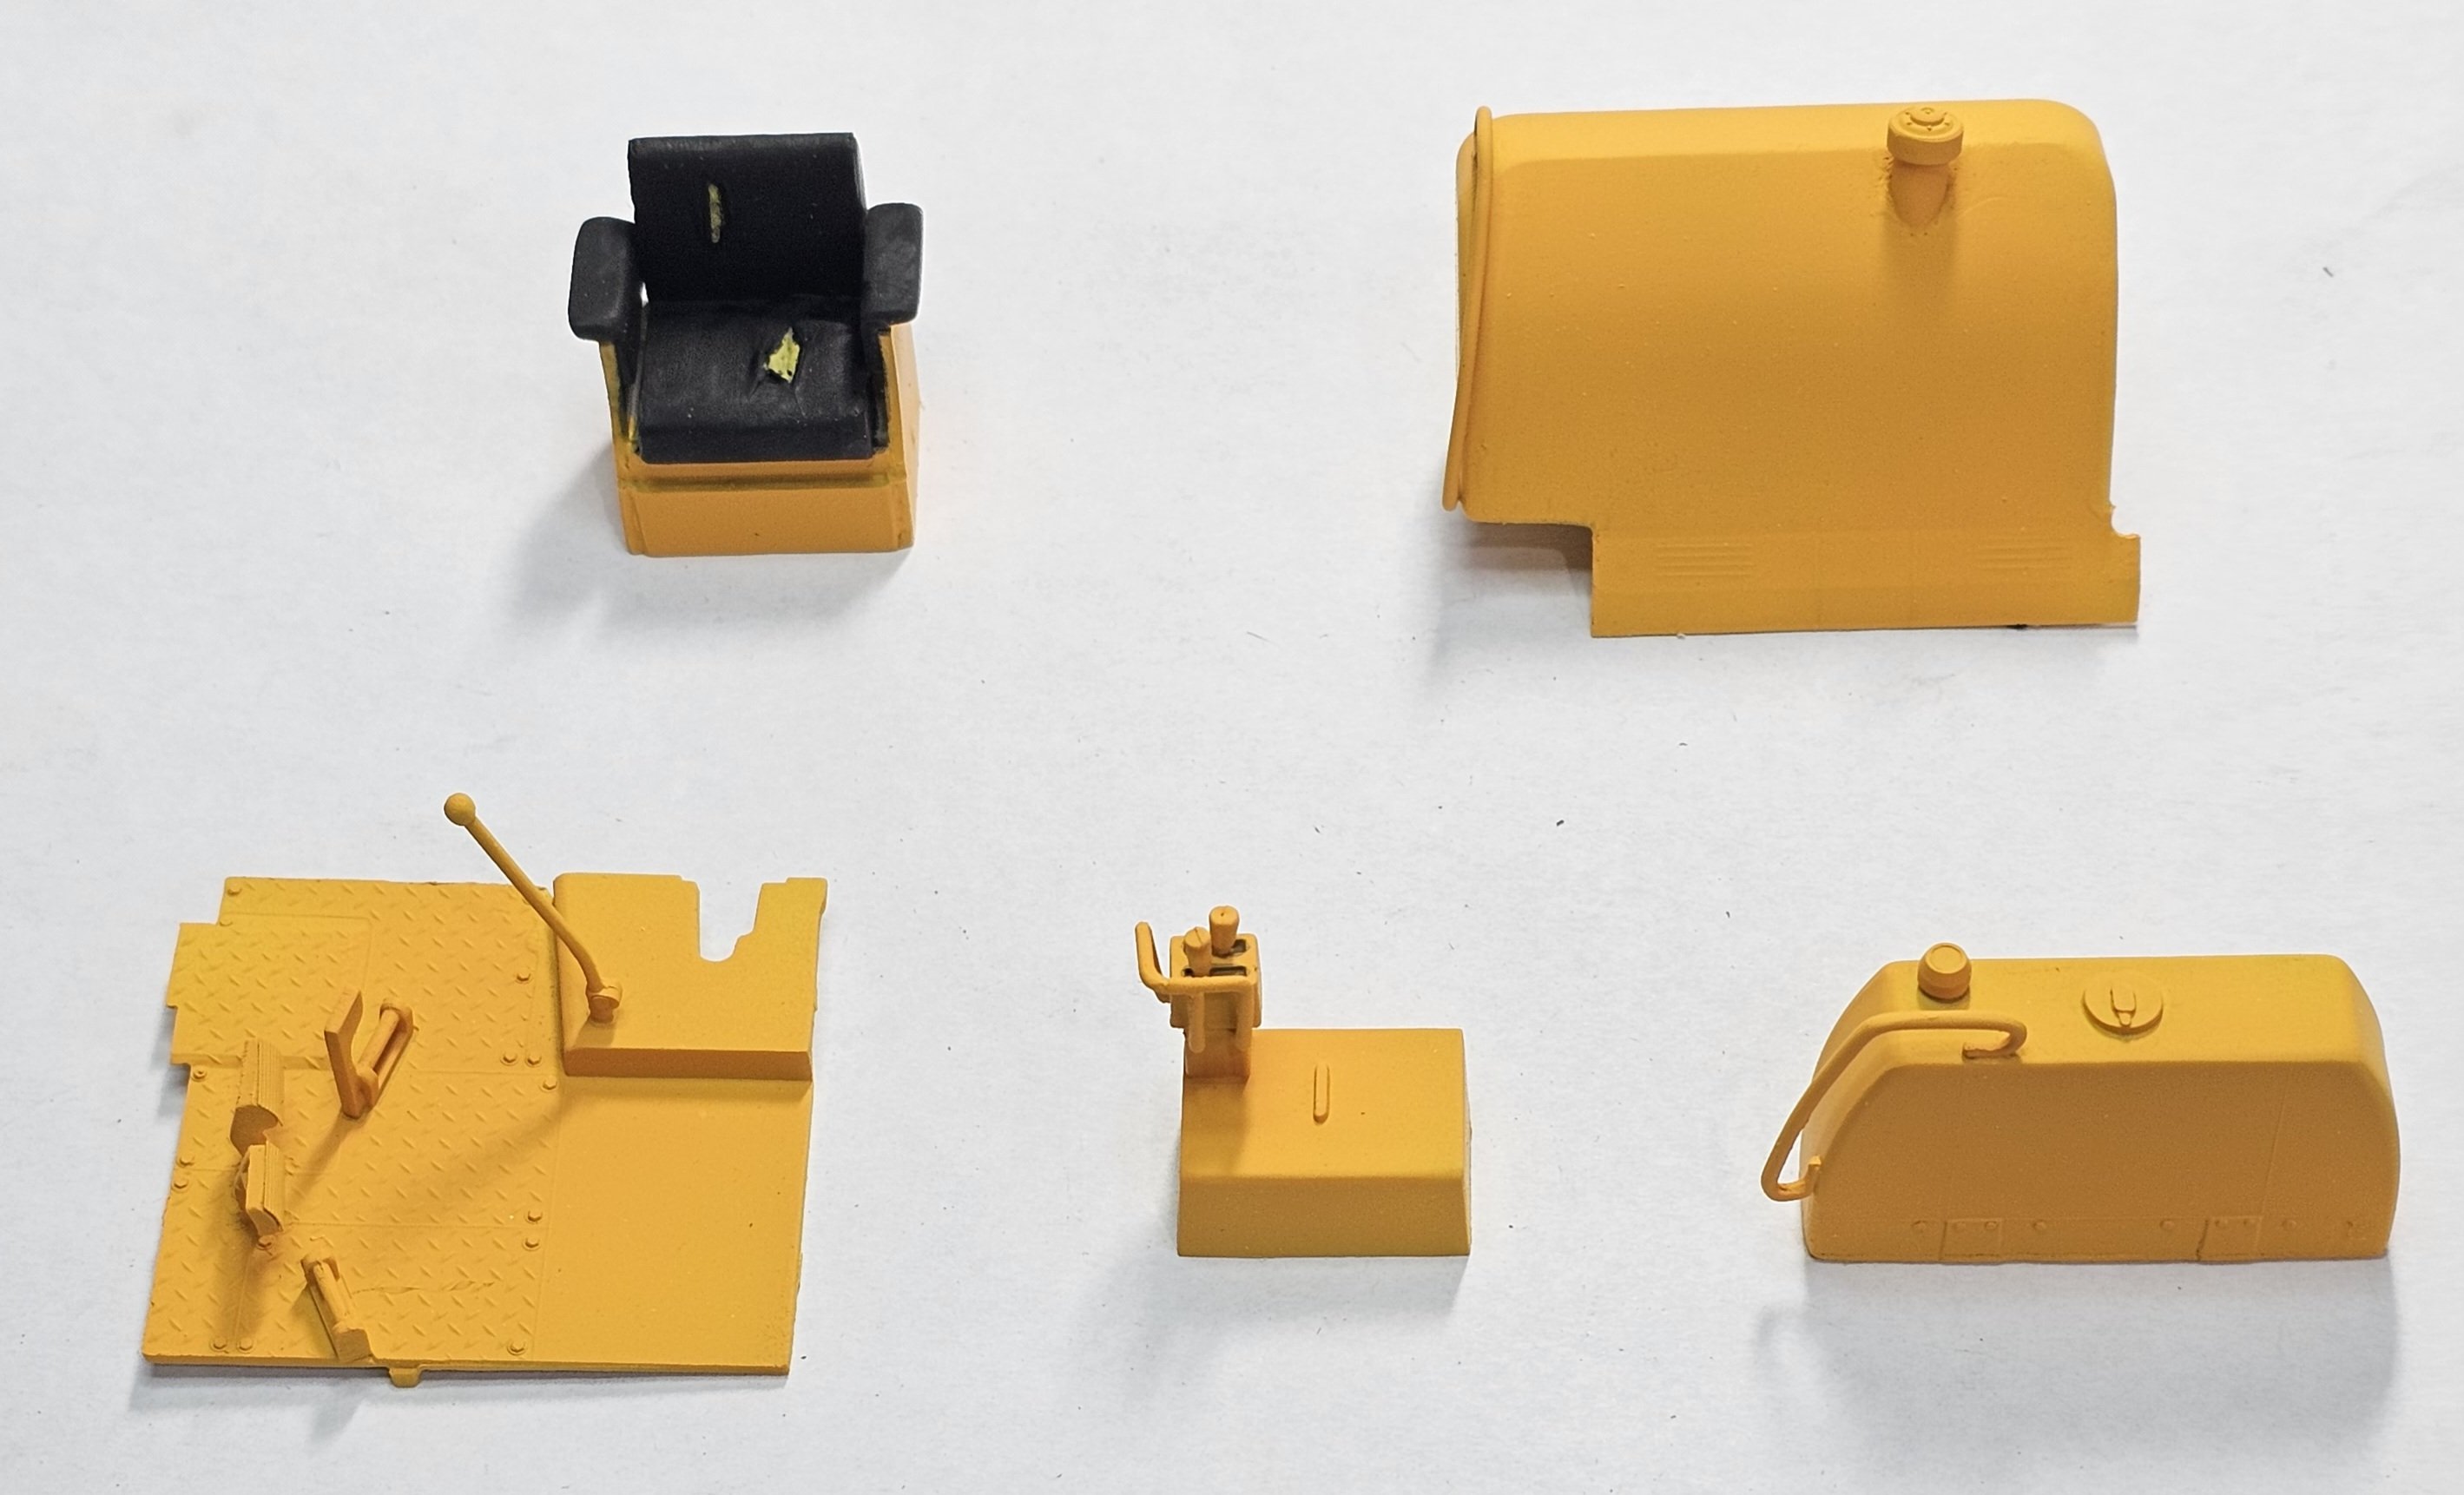
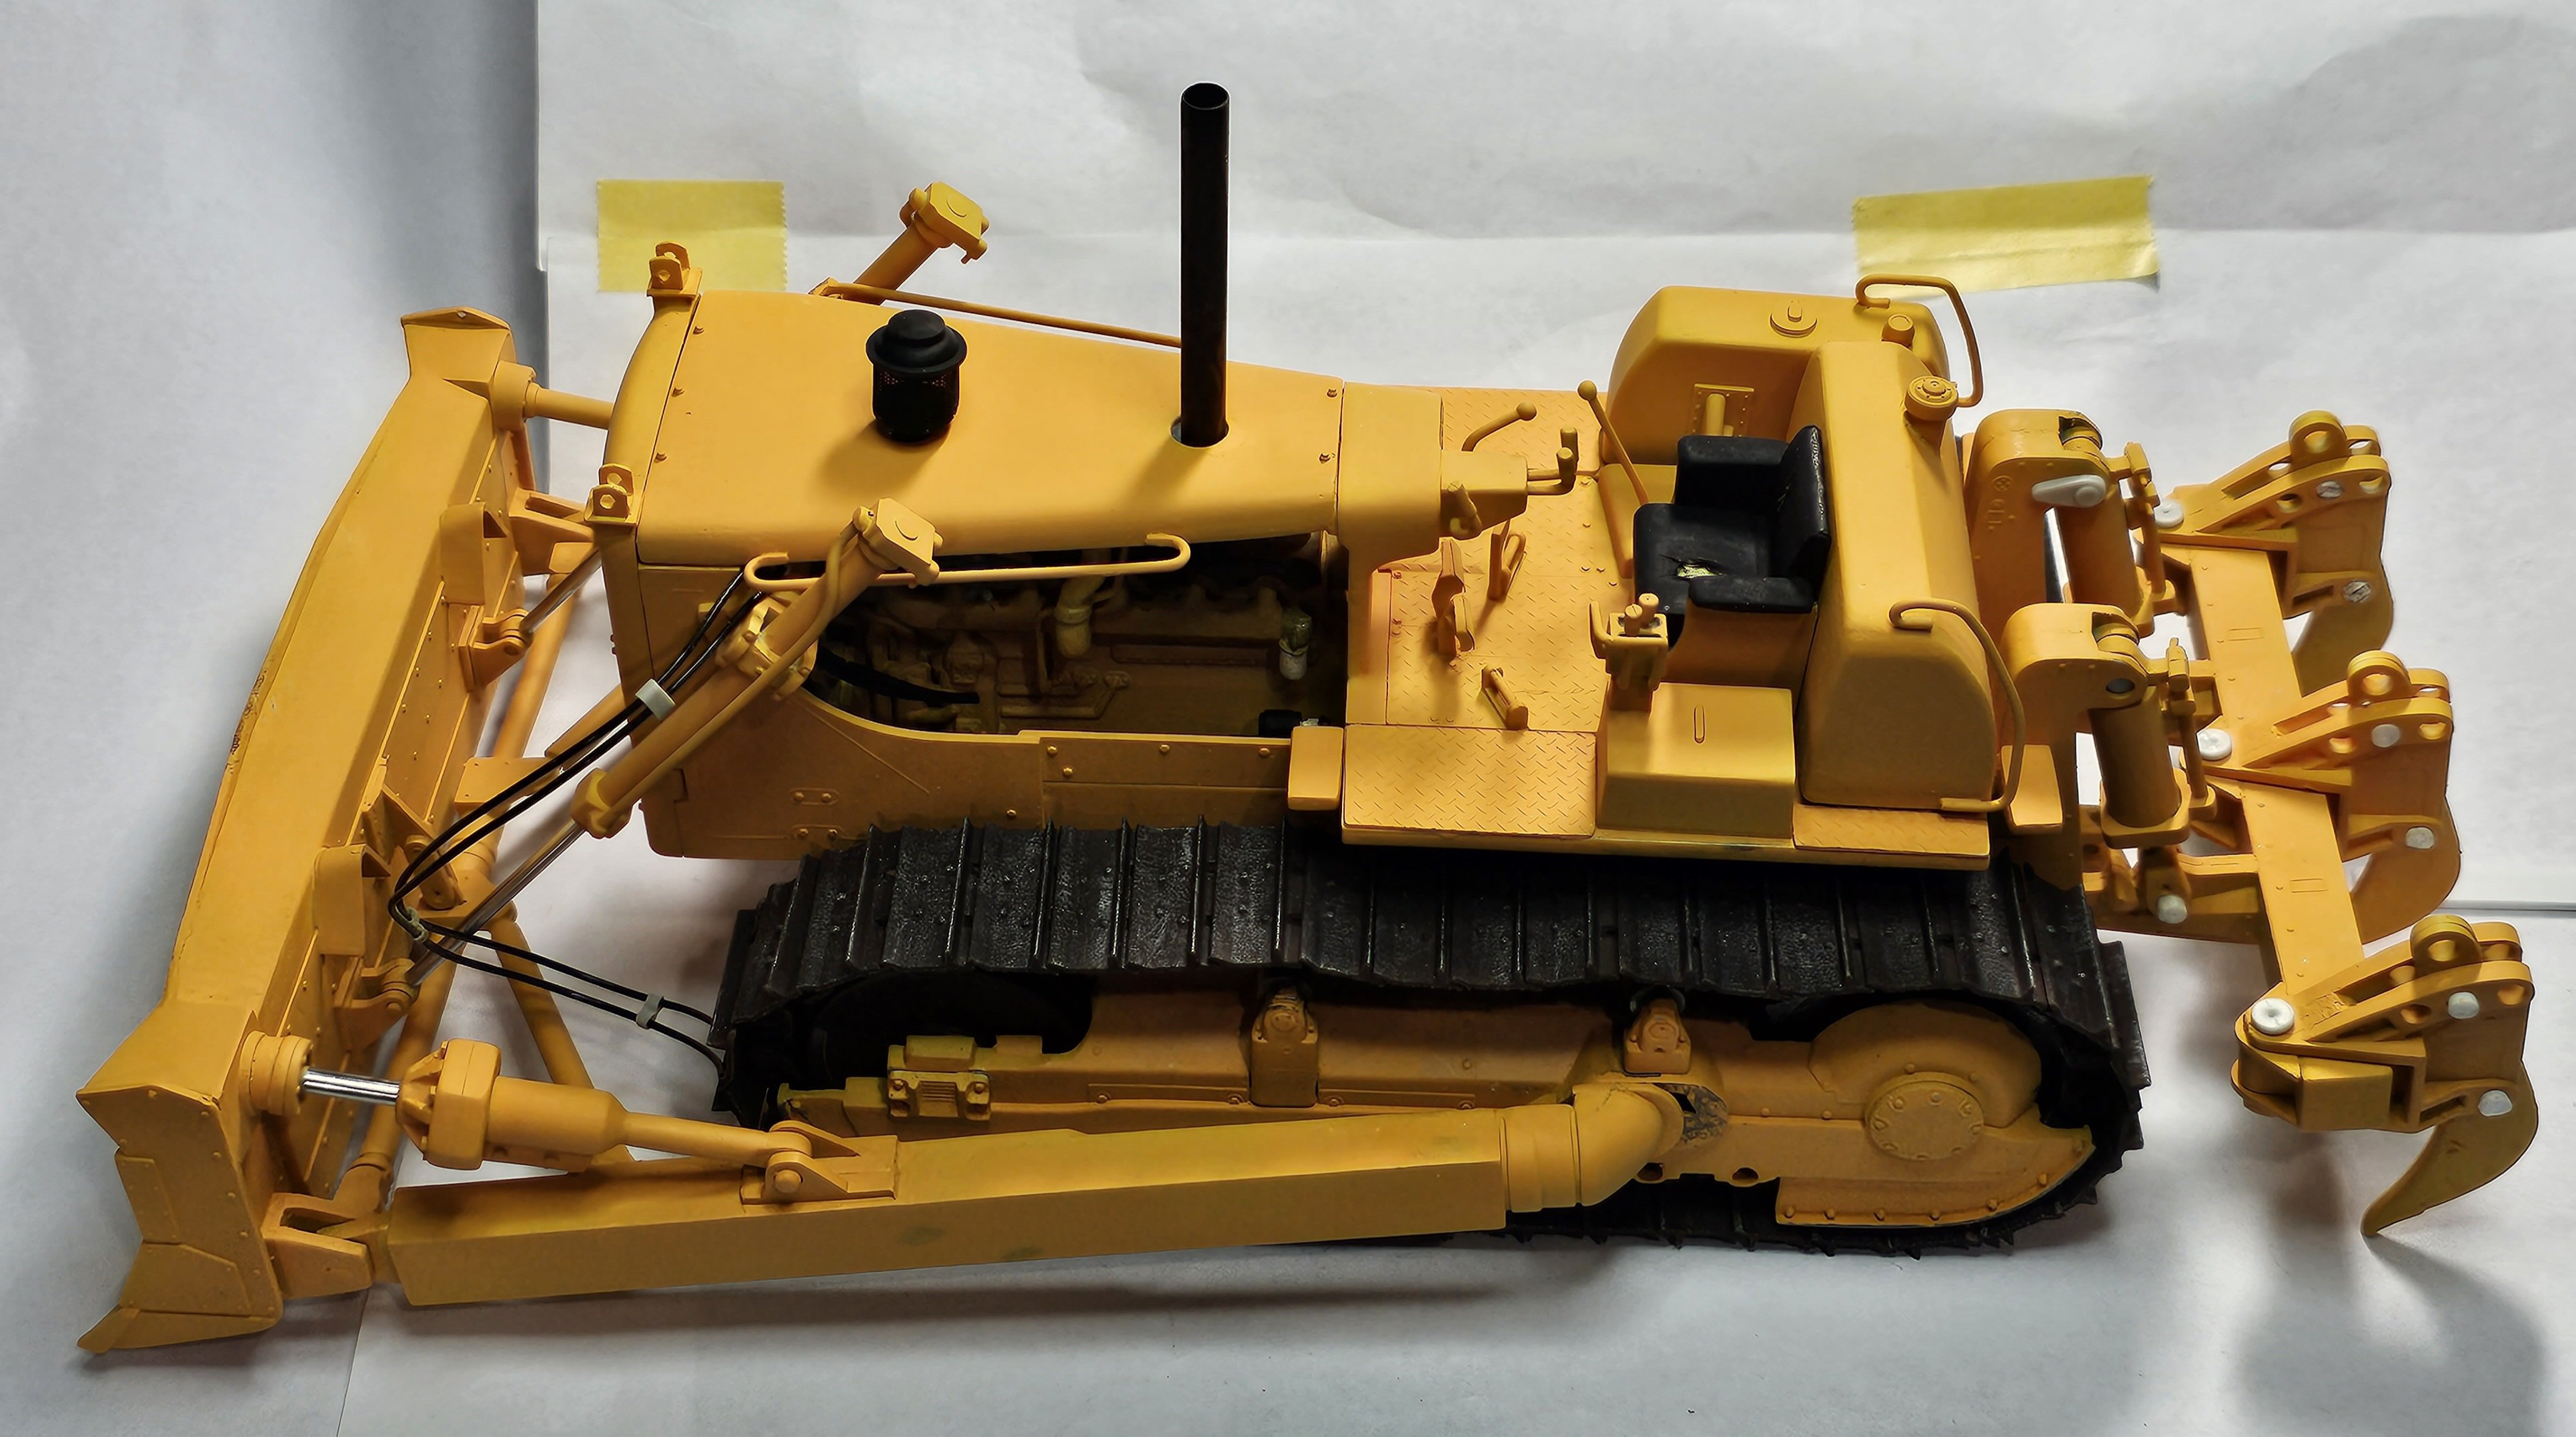
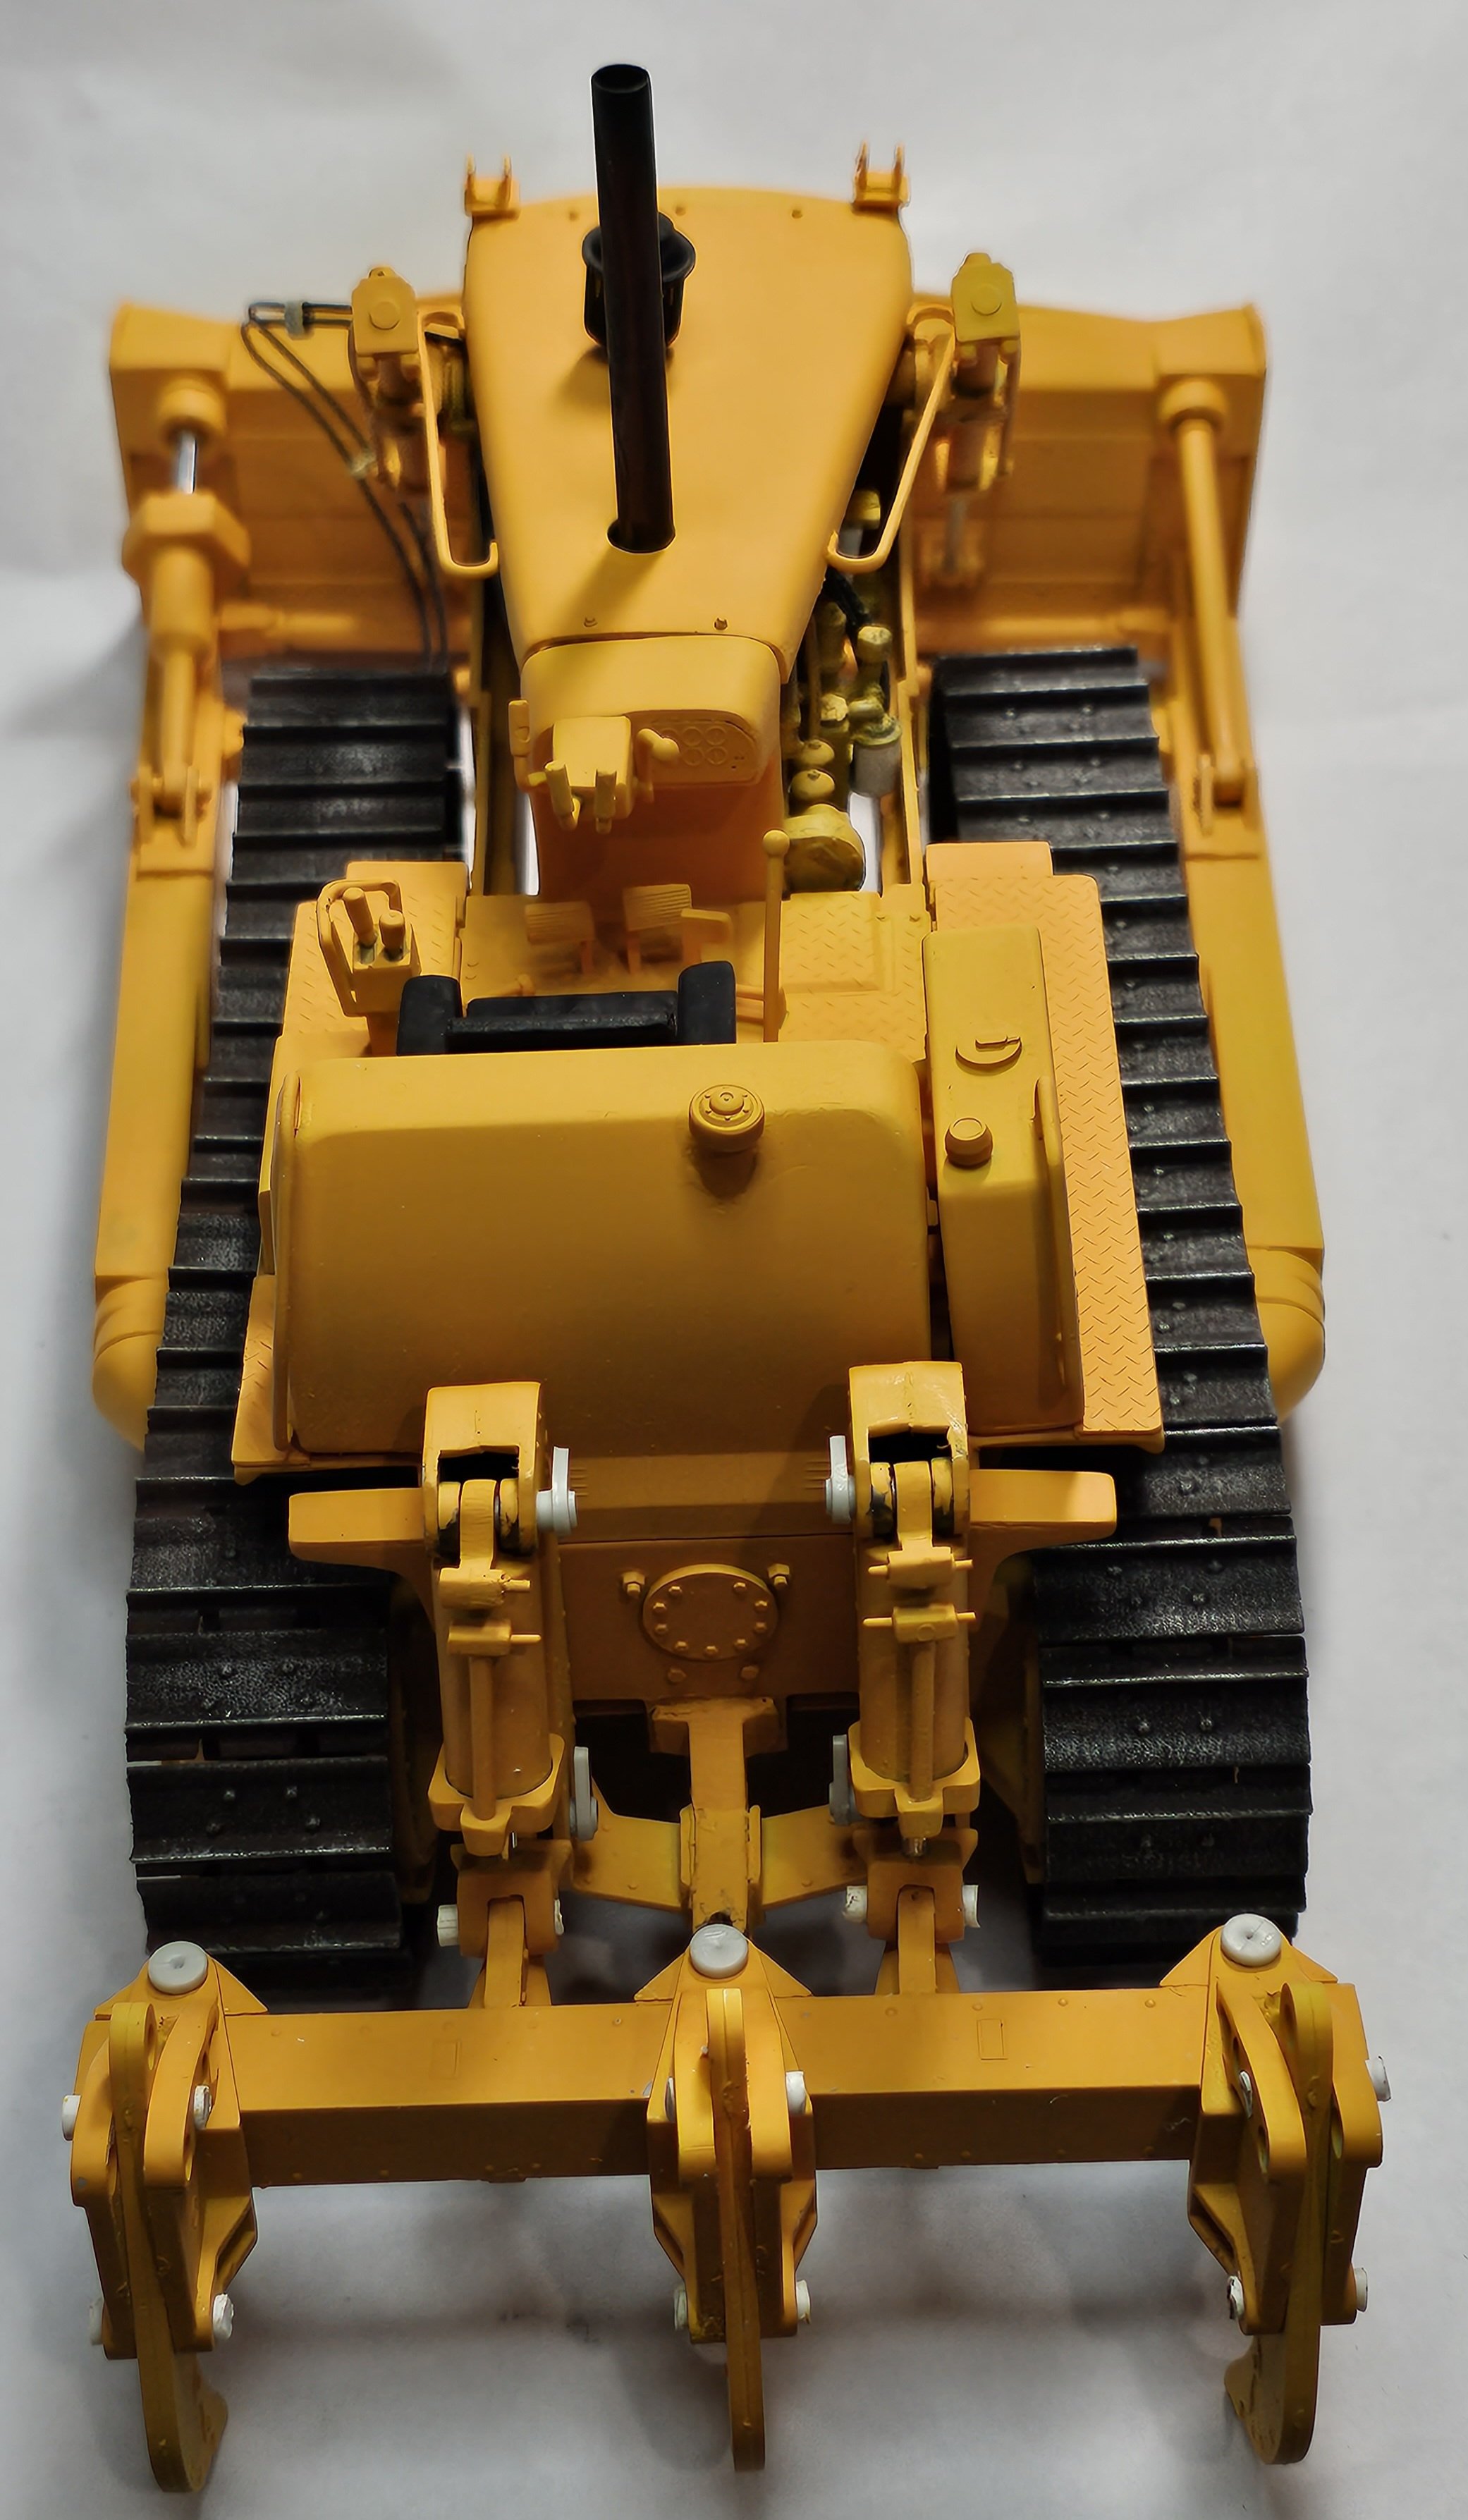
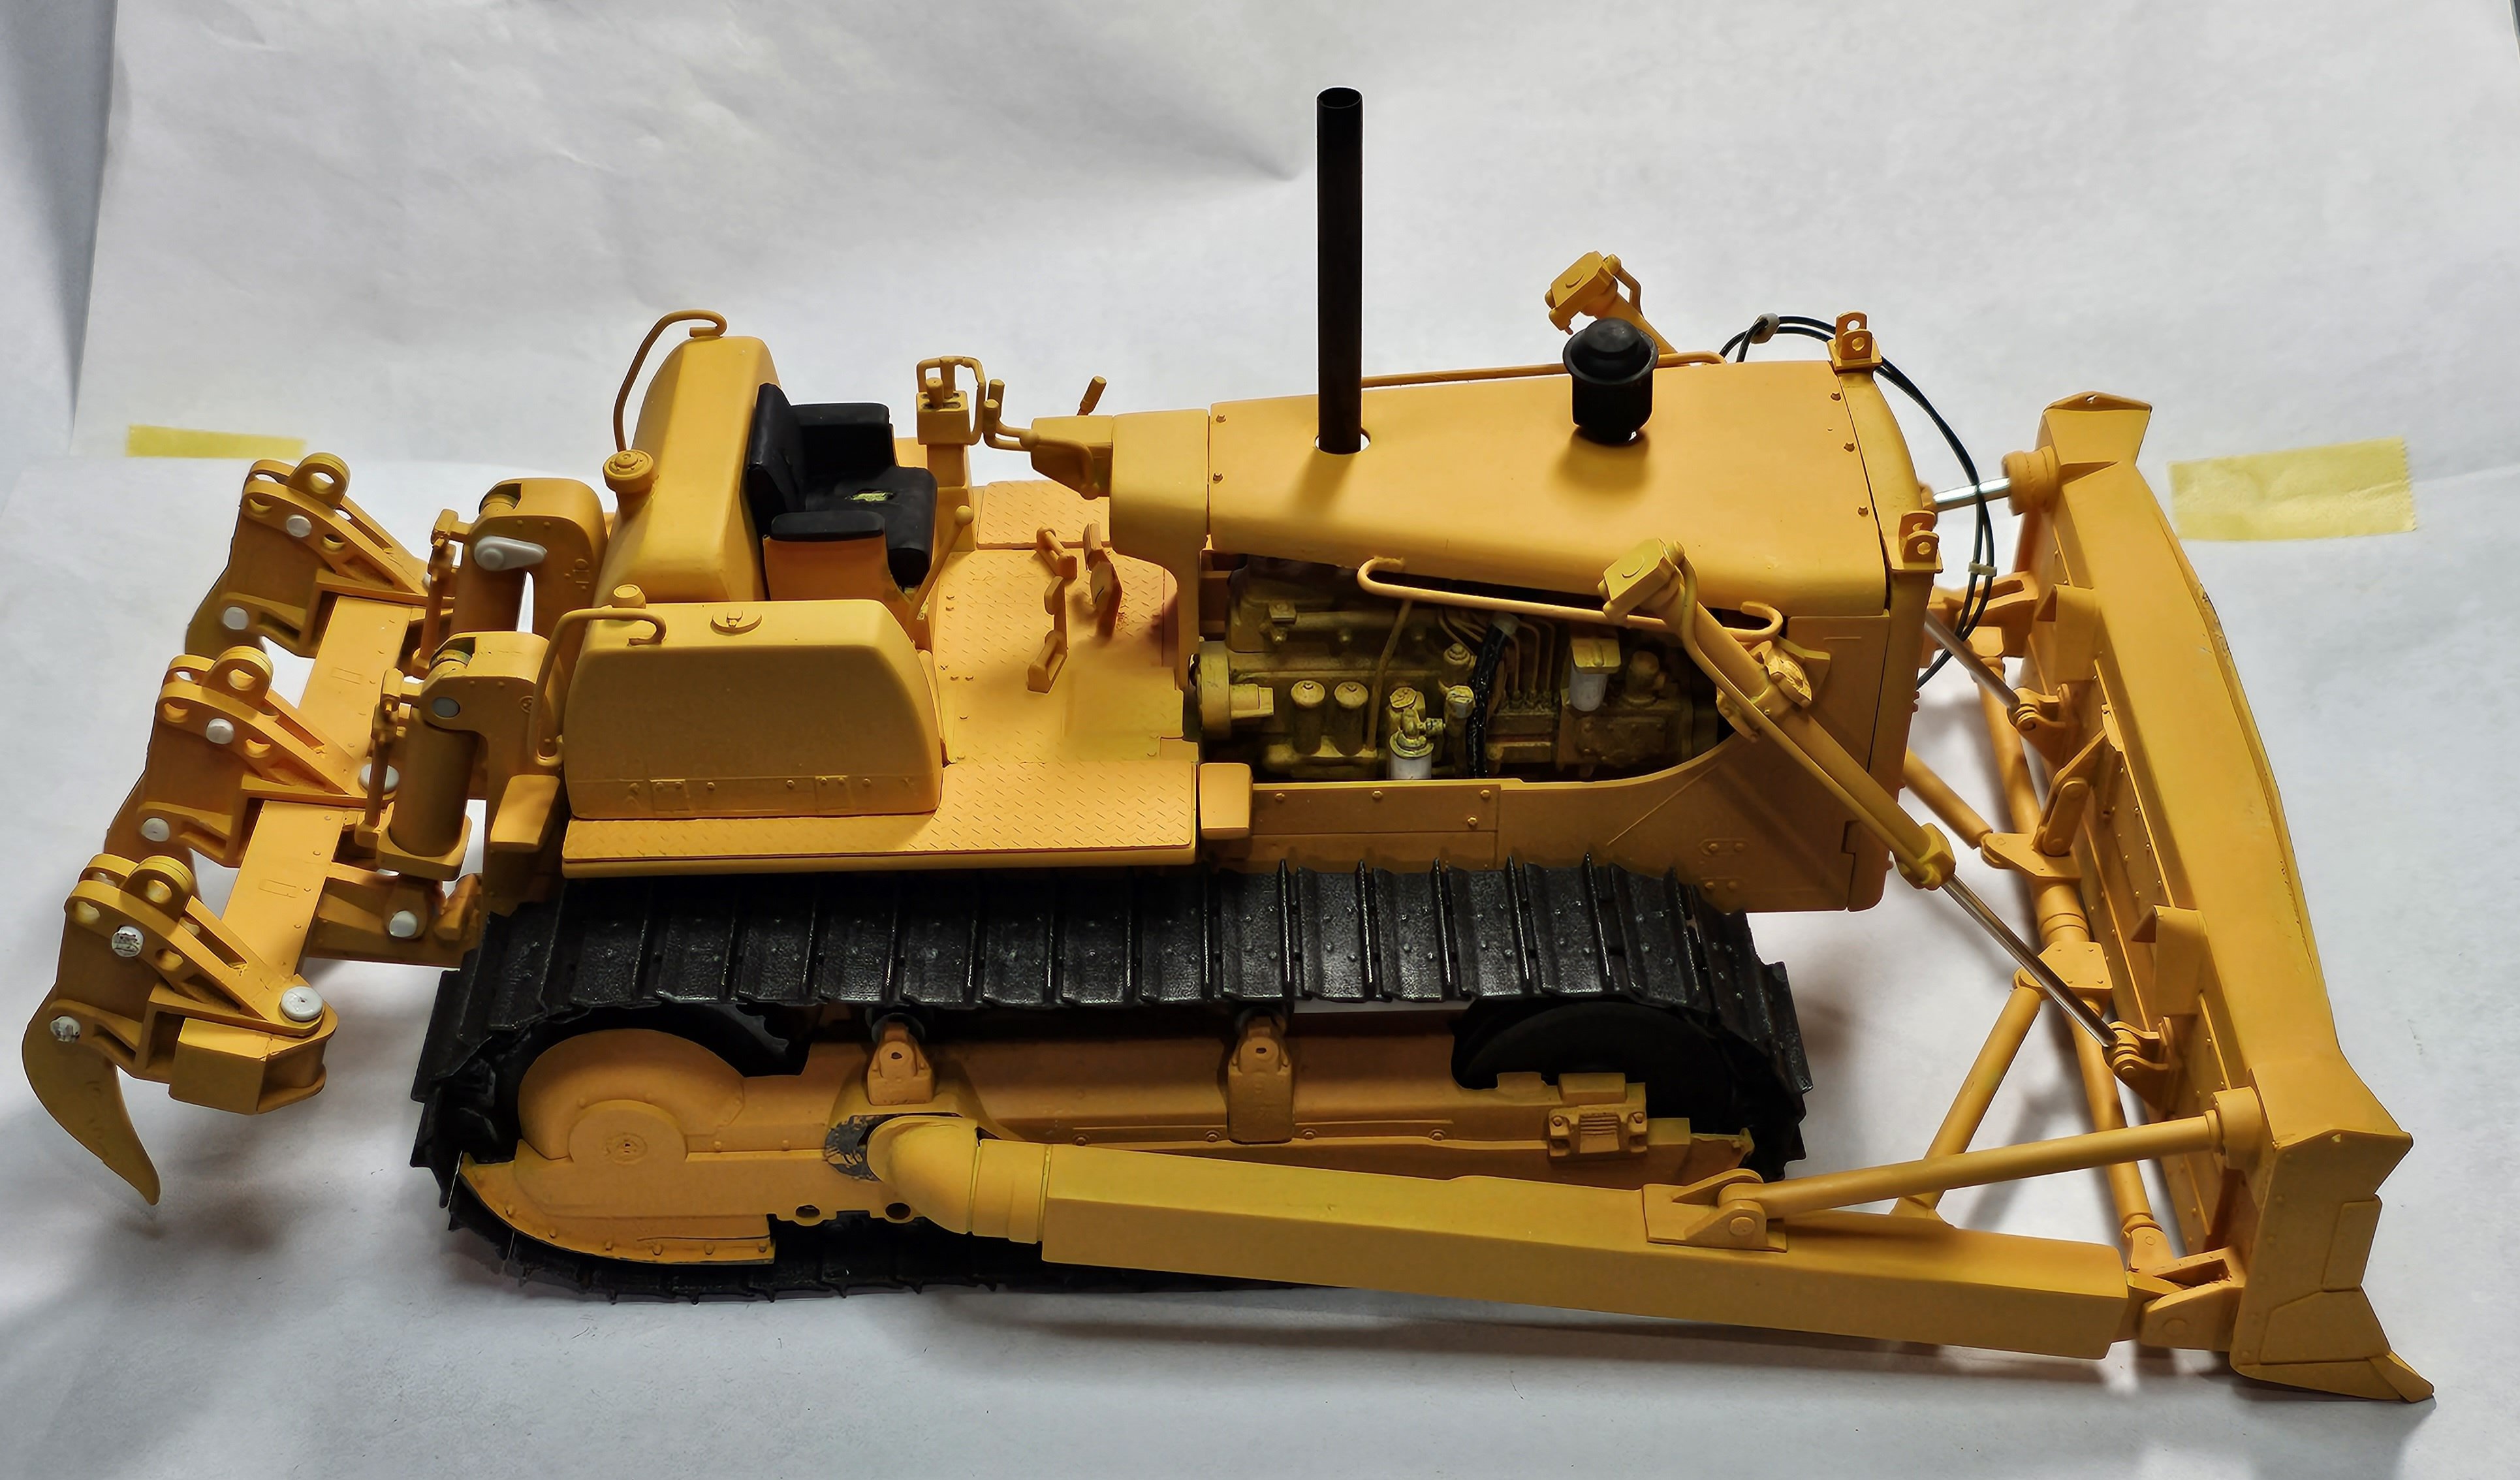
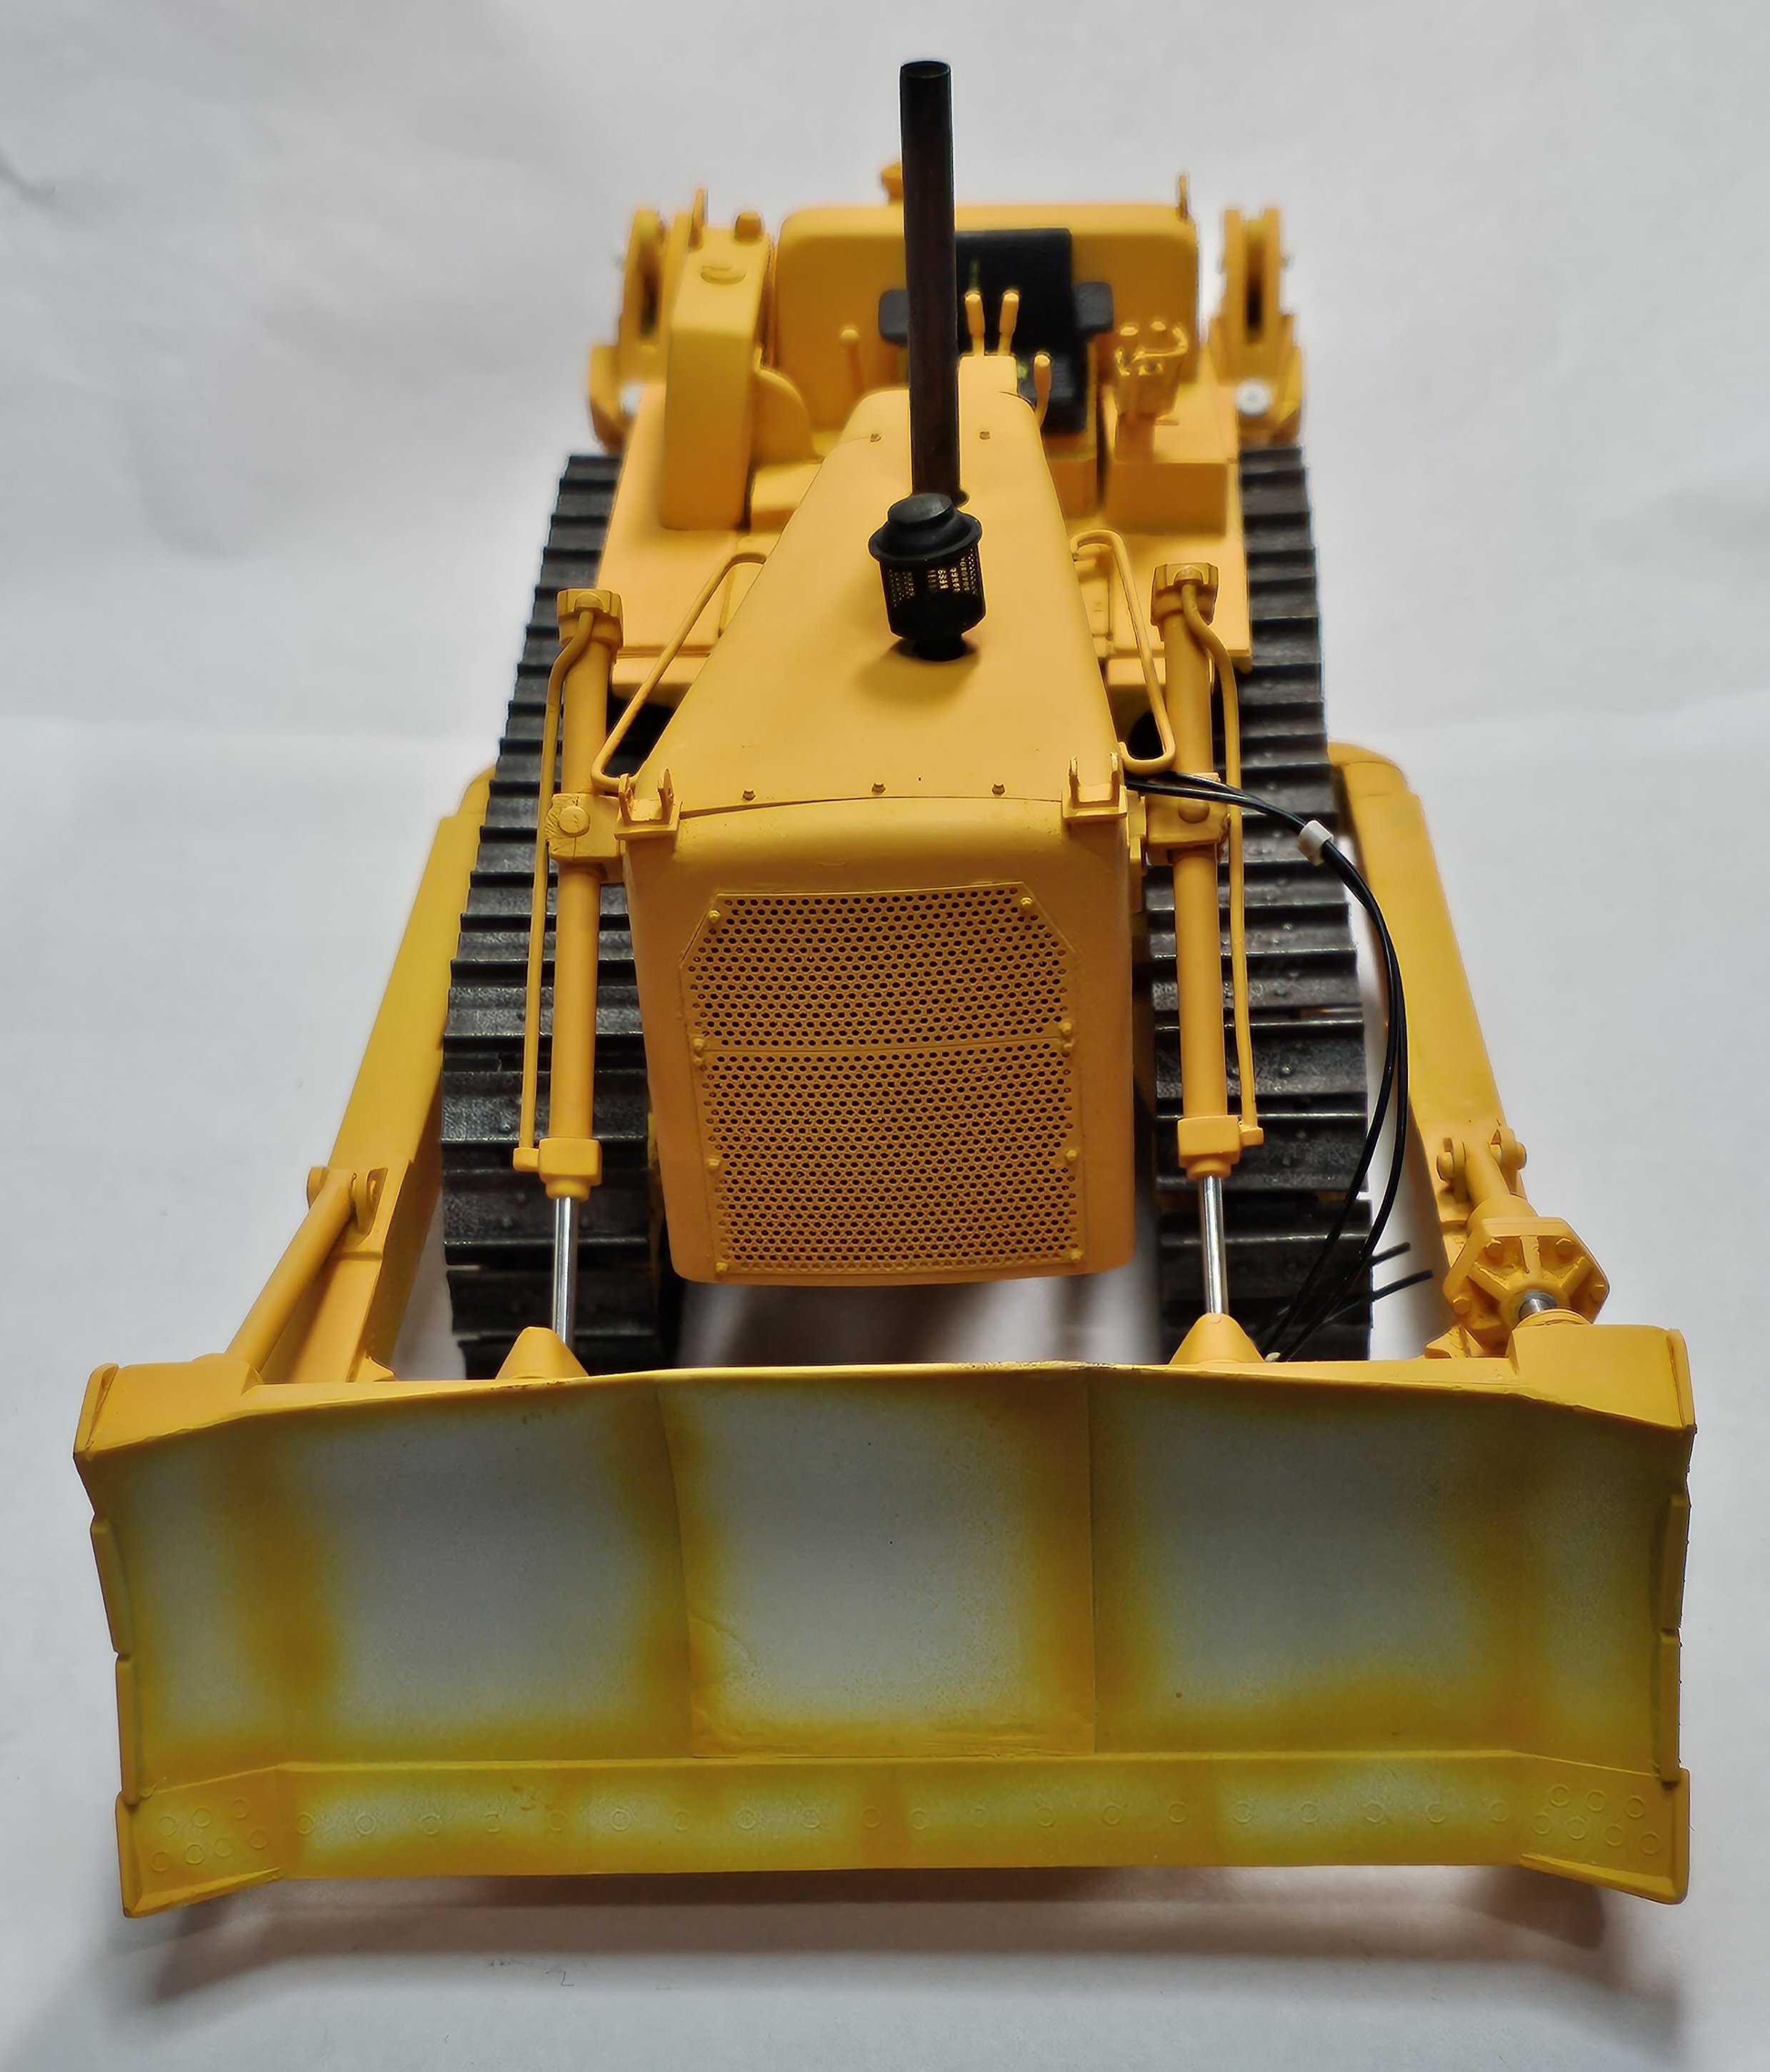
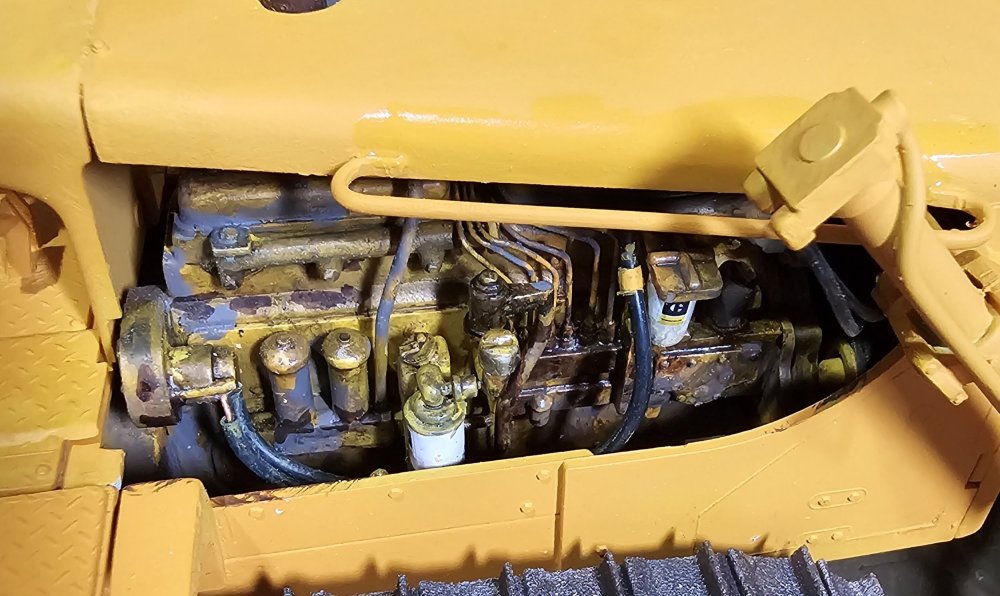
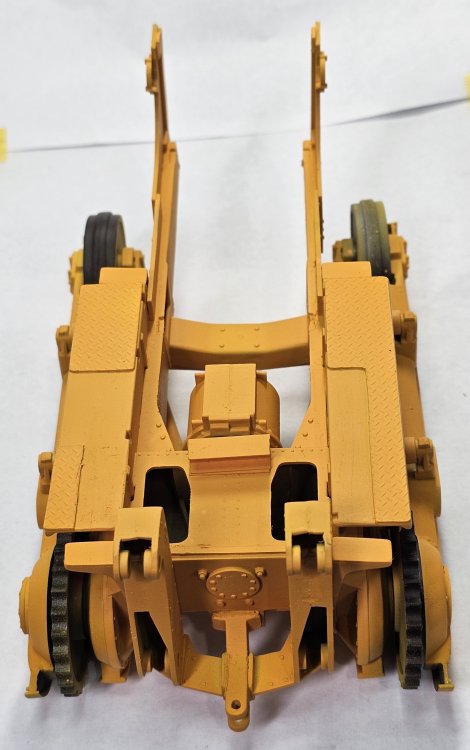
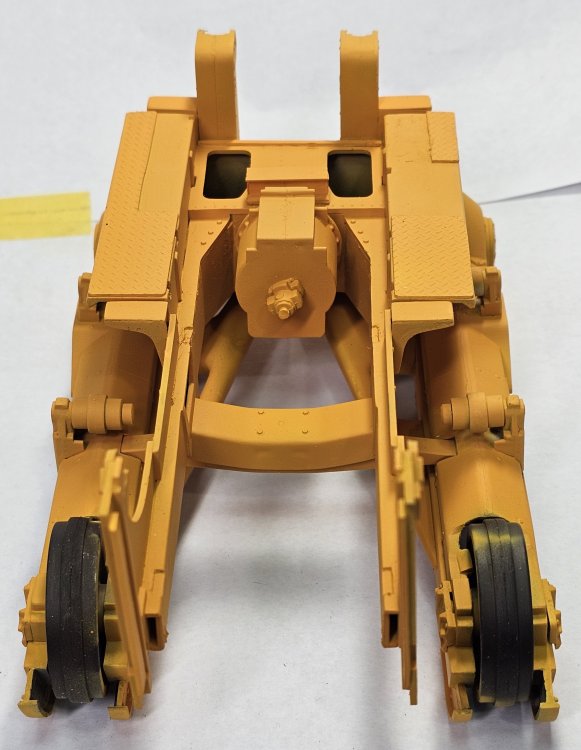
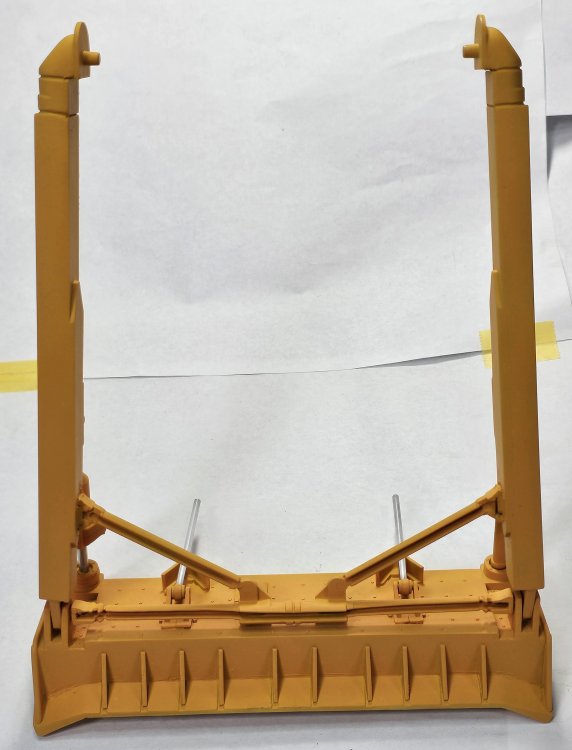
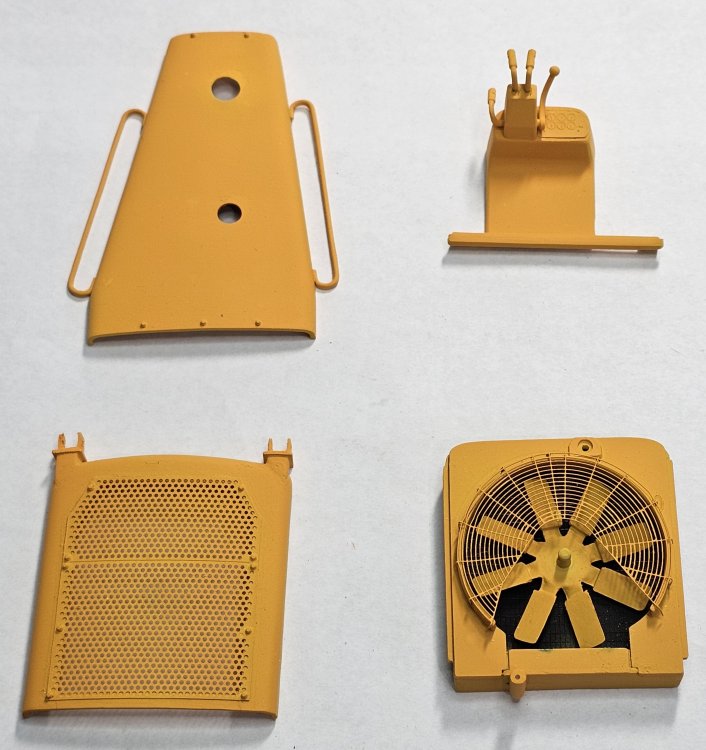
Ok, I said I would be back when she was painted yellow and she's now YELLOW! This view shows all of the parts painted yellow. This view shows the main body of the D8H looking forward. Right side view. View looking rearward. This view shows the top of the blade and support arms. Right side view of the blade. Bottom view of the blade. Left side view of the blade. You can see the blade lift cylinders and the tilt cylinder. Front view of the blade, I need to paint this steel/silver. This view shows seat, I added some rips in the leather and you can see the foam padding showing through, fuel tank, hydraulic tank, transmission control tower and the floor plate. This view shows the engine cover, dash board & controls, radiator with the fan in place and front radiator cover. This is a view of the other side of the previous parts. This is a view of the blade lift cylinders and the cross support tube with the hydraulic cylinder manifold. This view shows the all the ripper parts. Left side view of the D8H. Rear view of the rippers for the D8H. Right side view of the D8H. Front view of the D8H. All of this needs to be chipped, rusted and weathered. Well that's it for now be back soon with more updates. Ron G


-
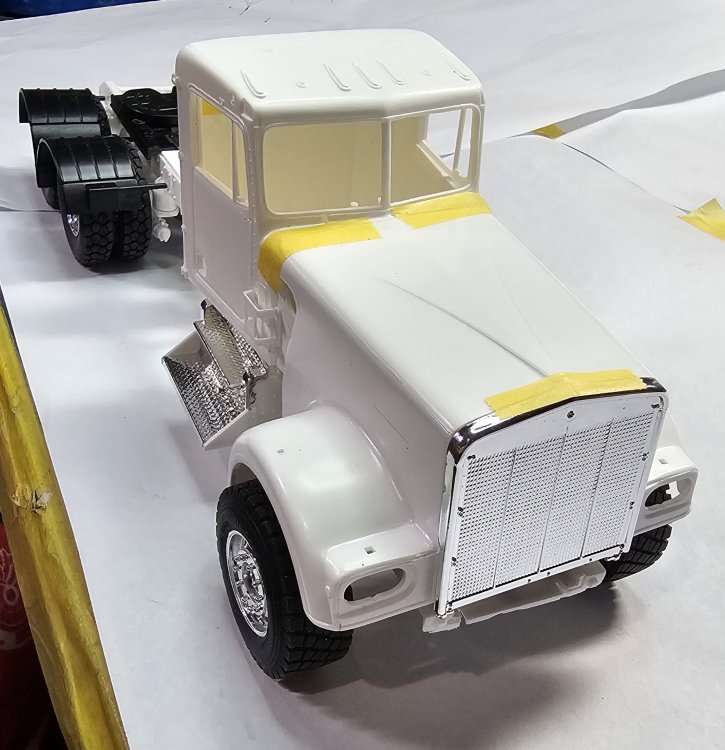
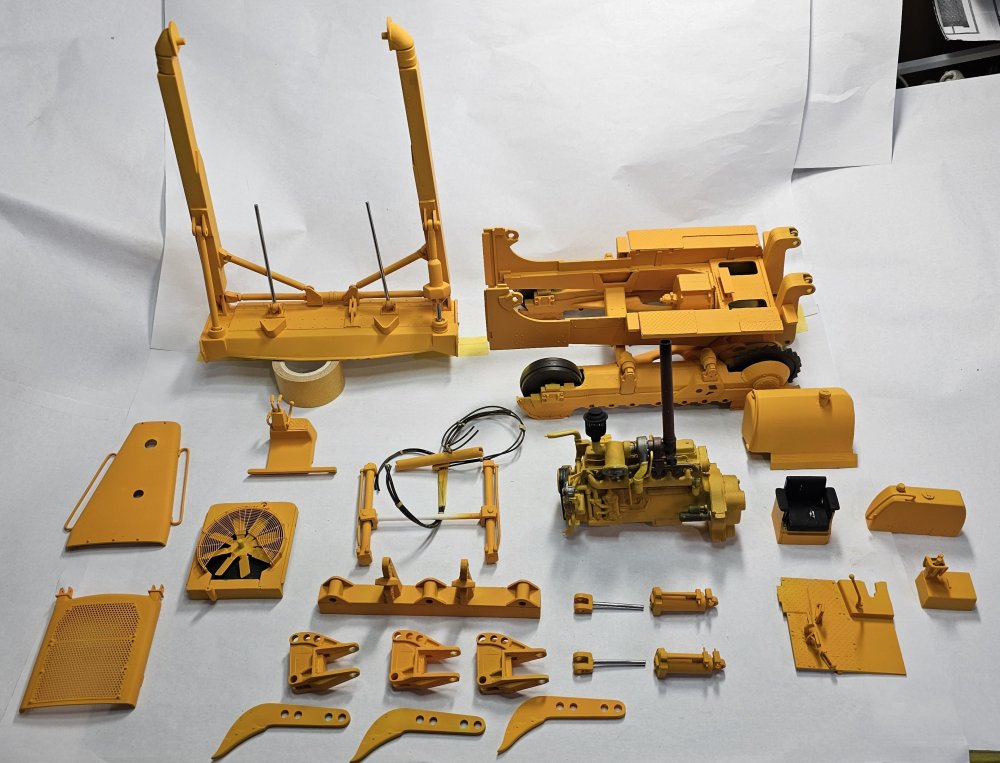
Hey all Well everything is primed in white. I'll finish painting this tomorrow. Ron G