CrankyCrafstman
-
Posts
1,350 -
Joined
-
Last visited
Content Type
Profiles
Forums
Events
Gallery
Everything posted by CrankyCrafstman
-
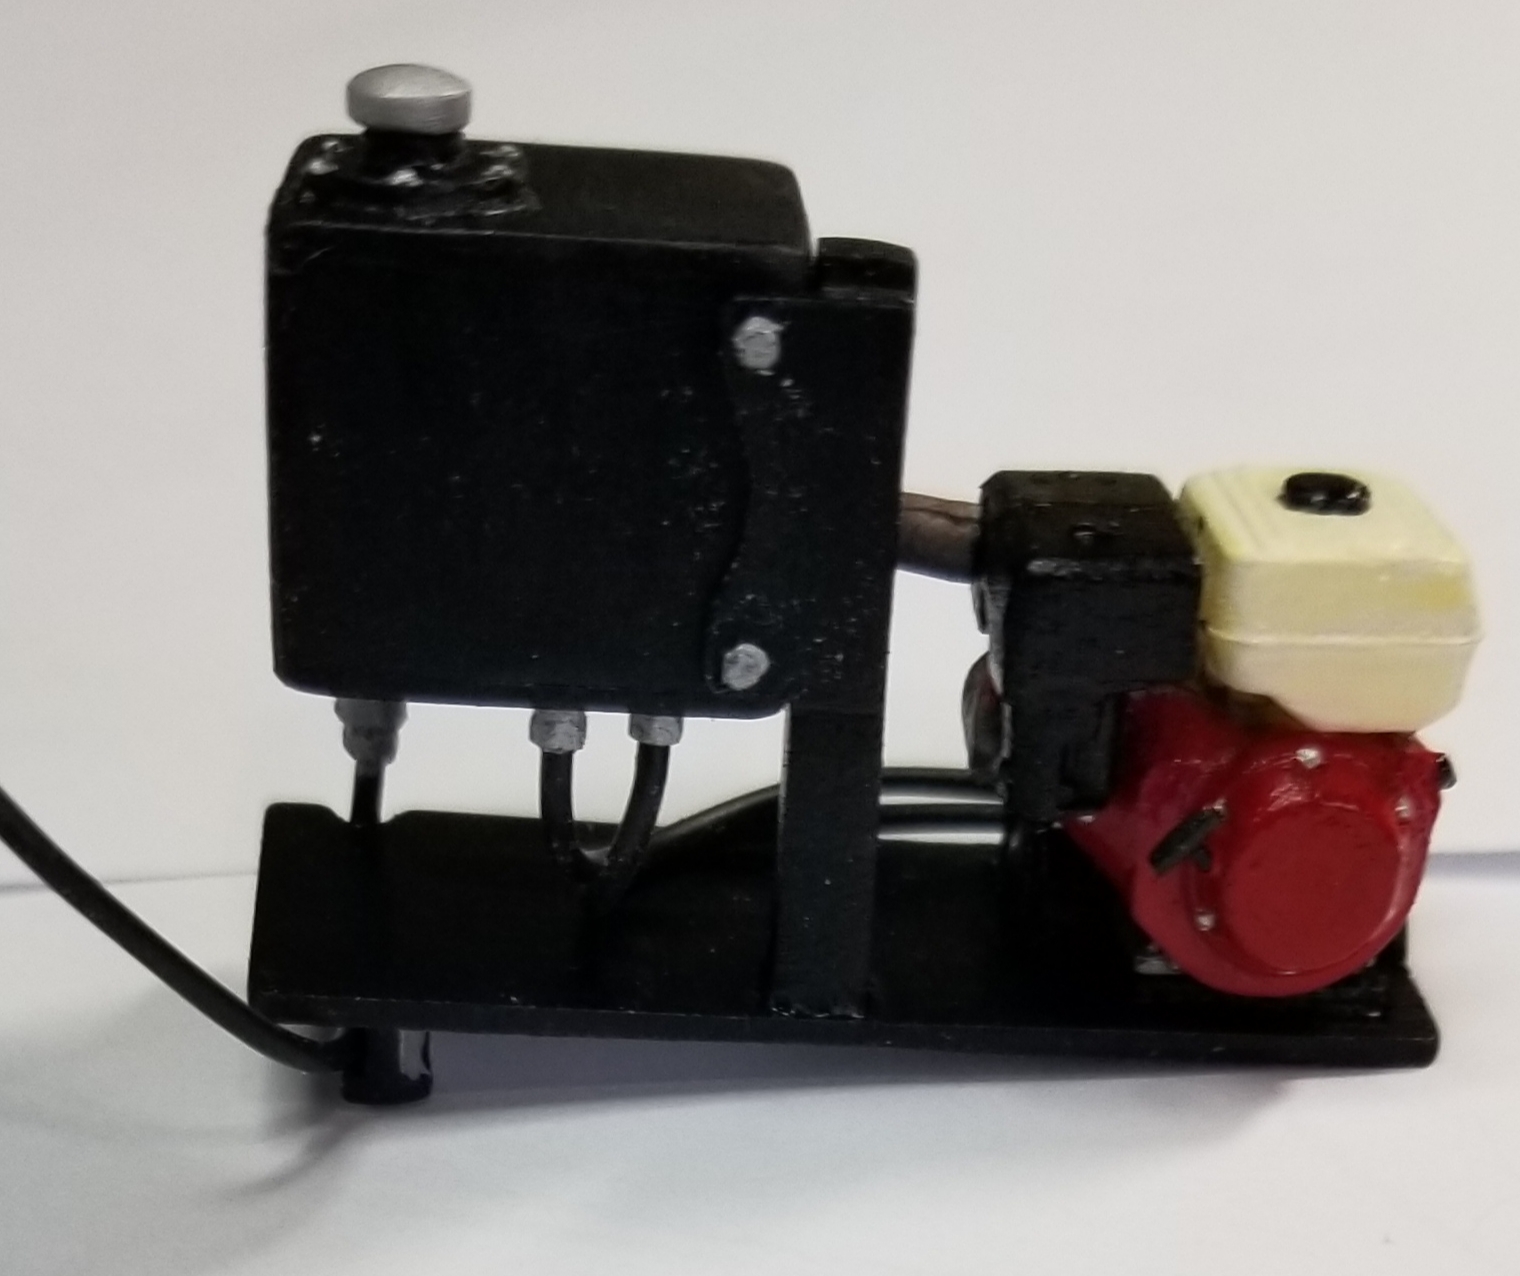
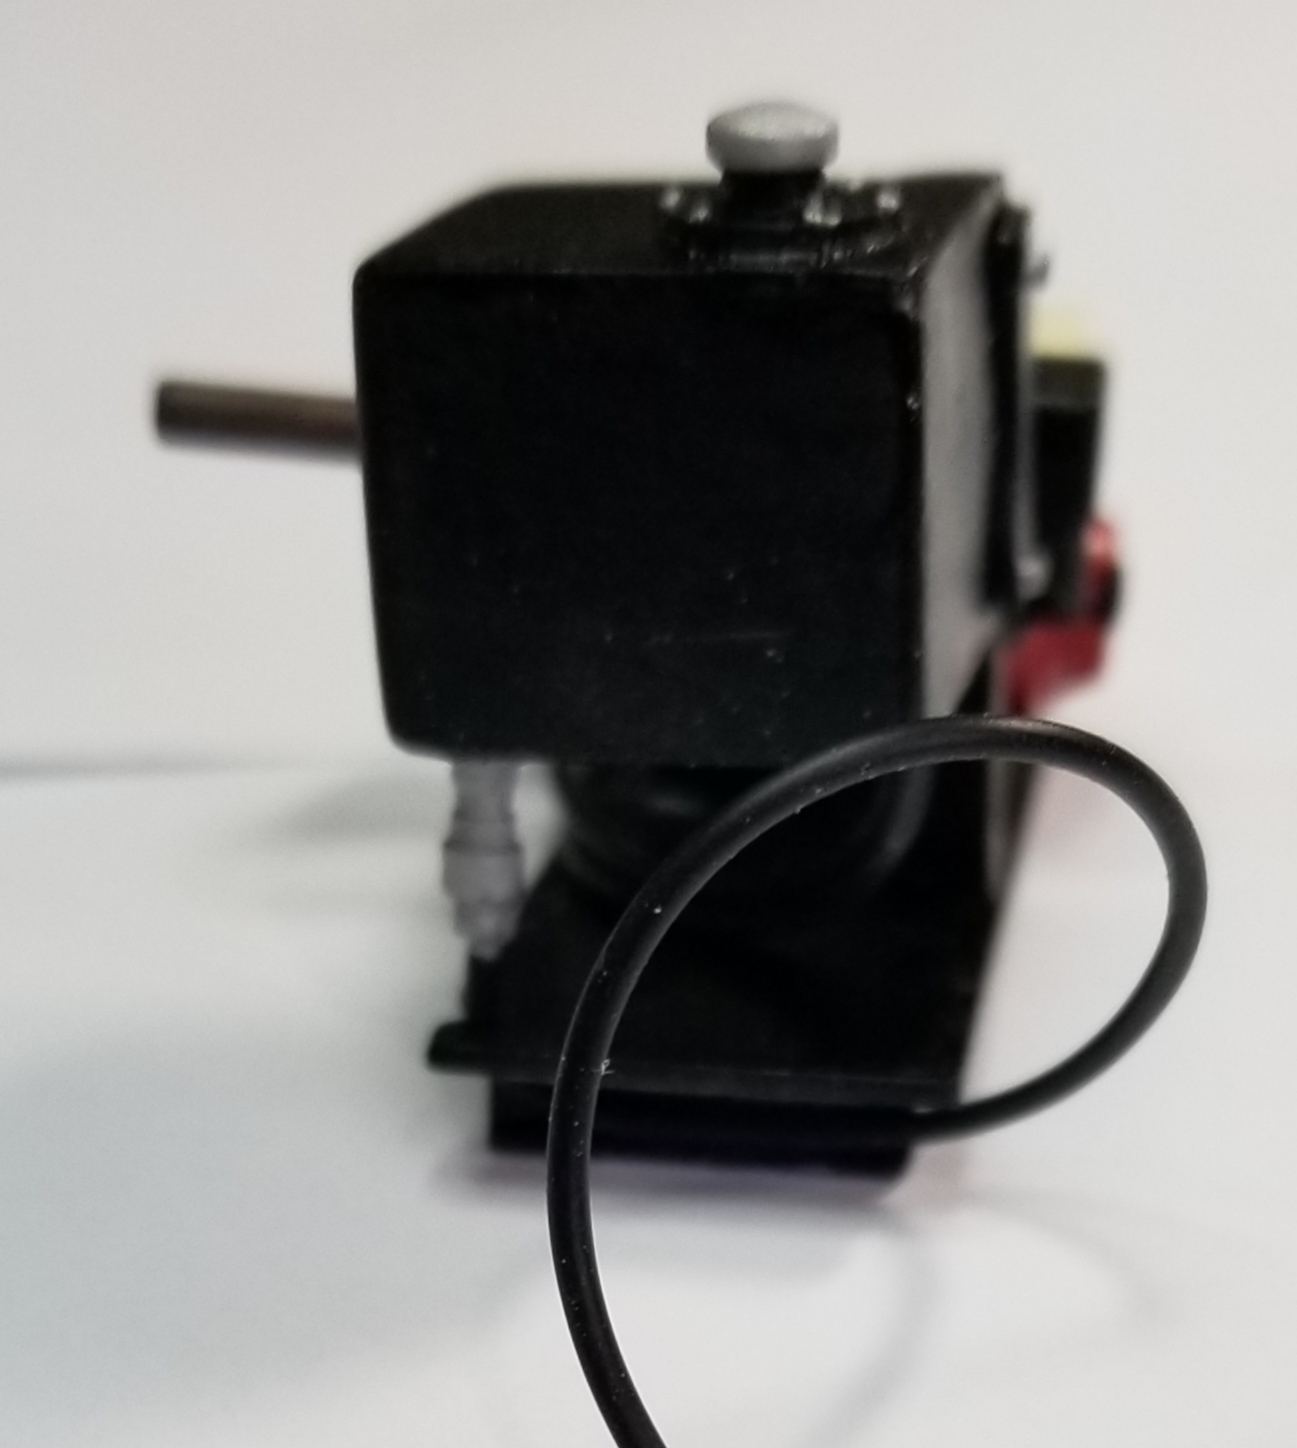
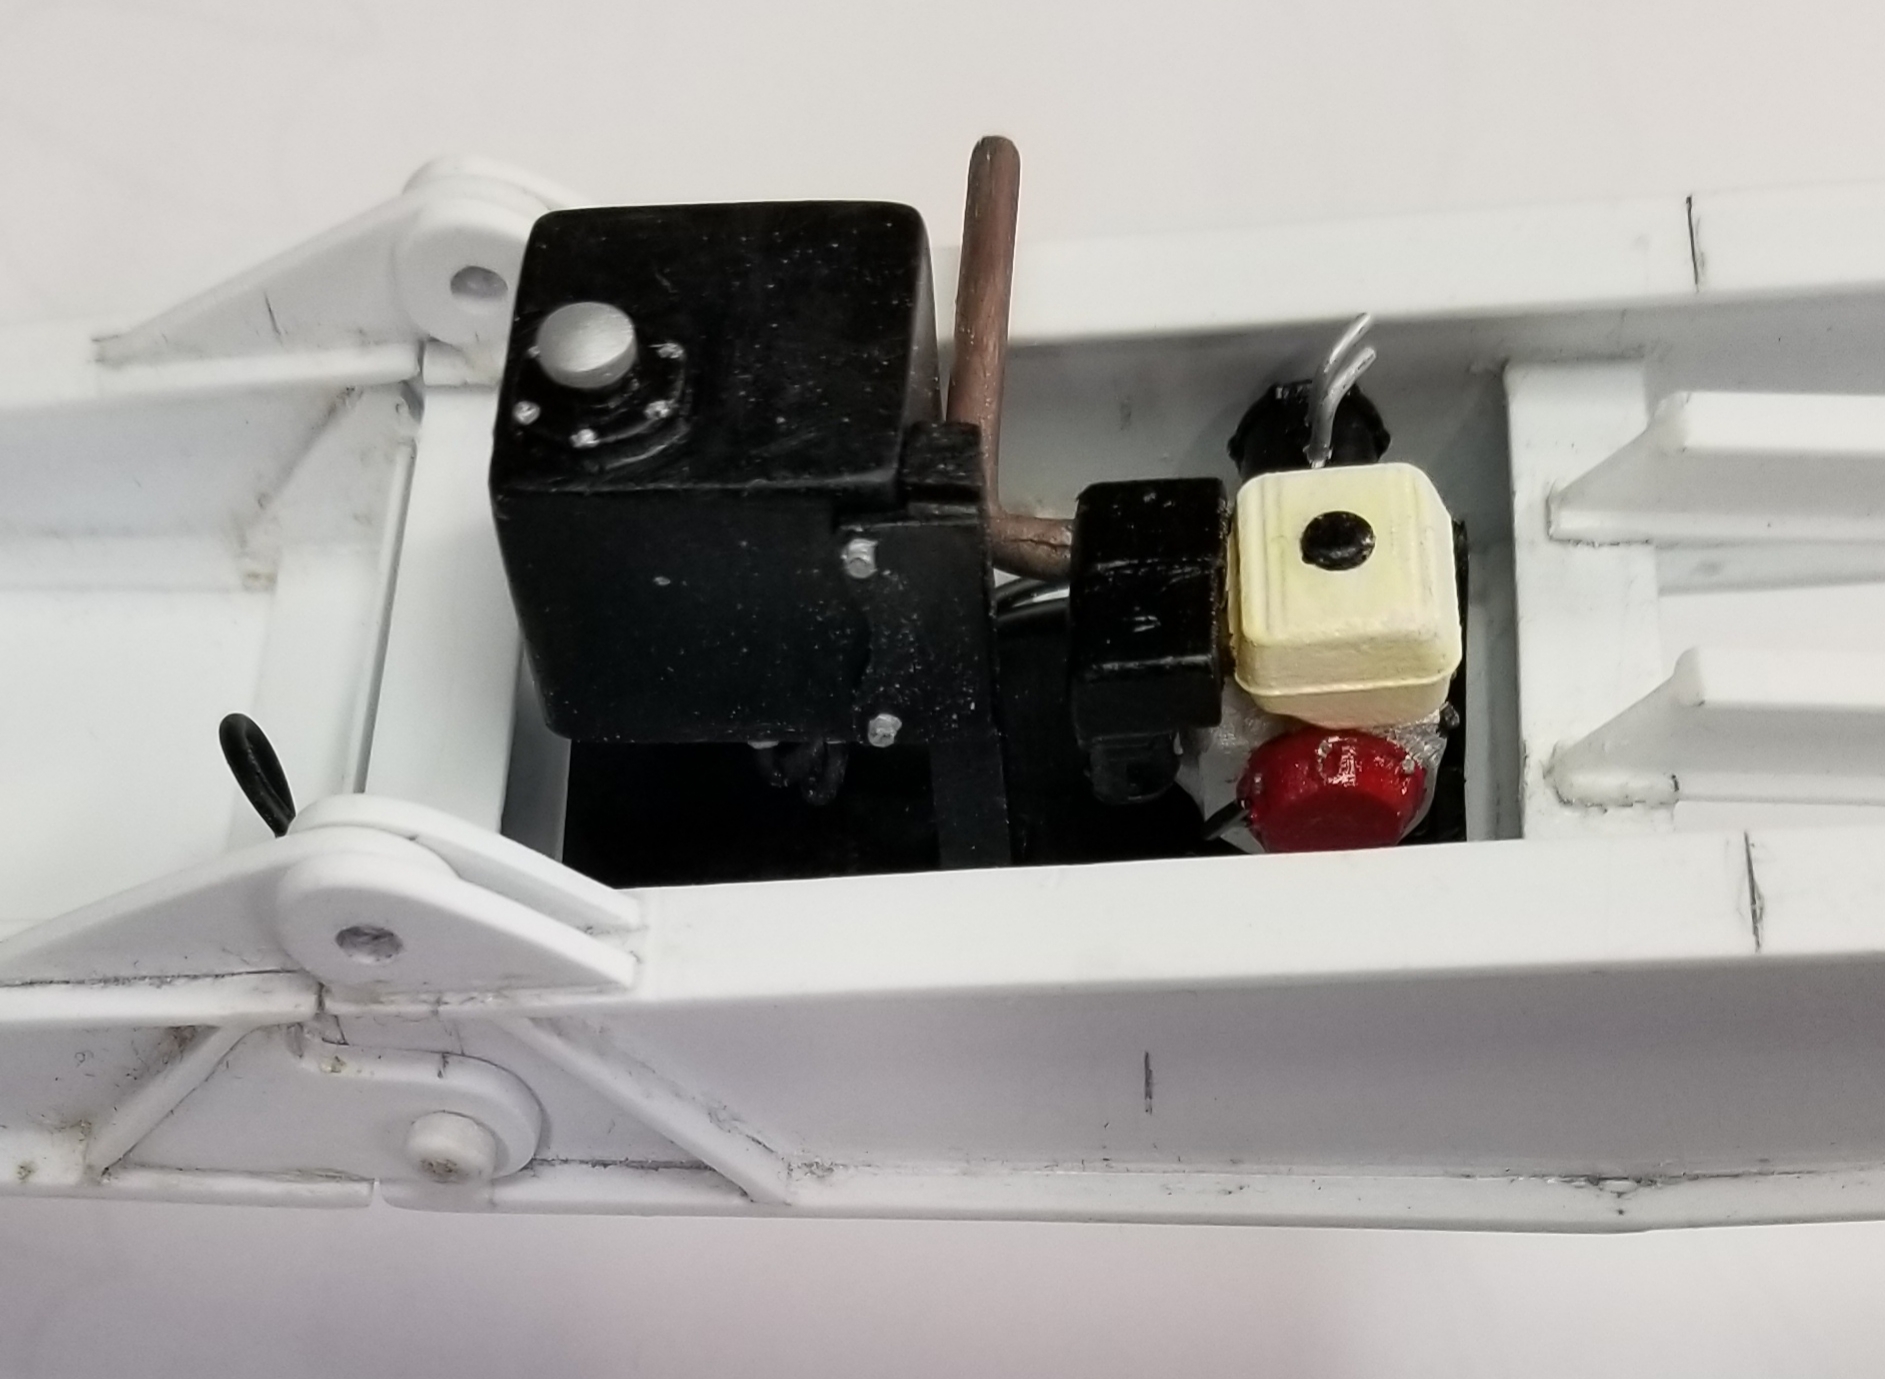
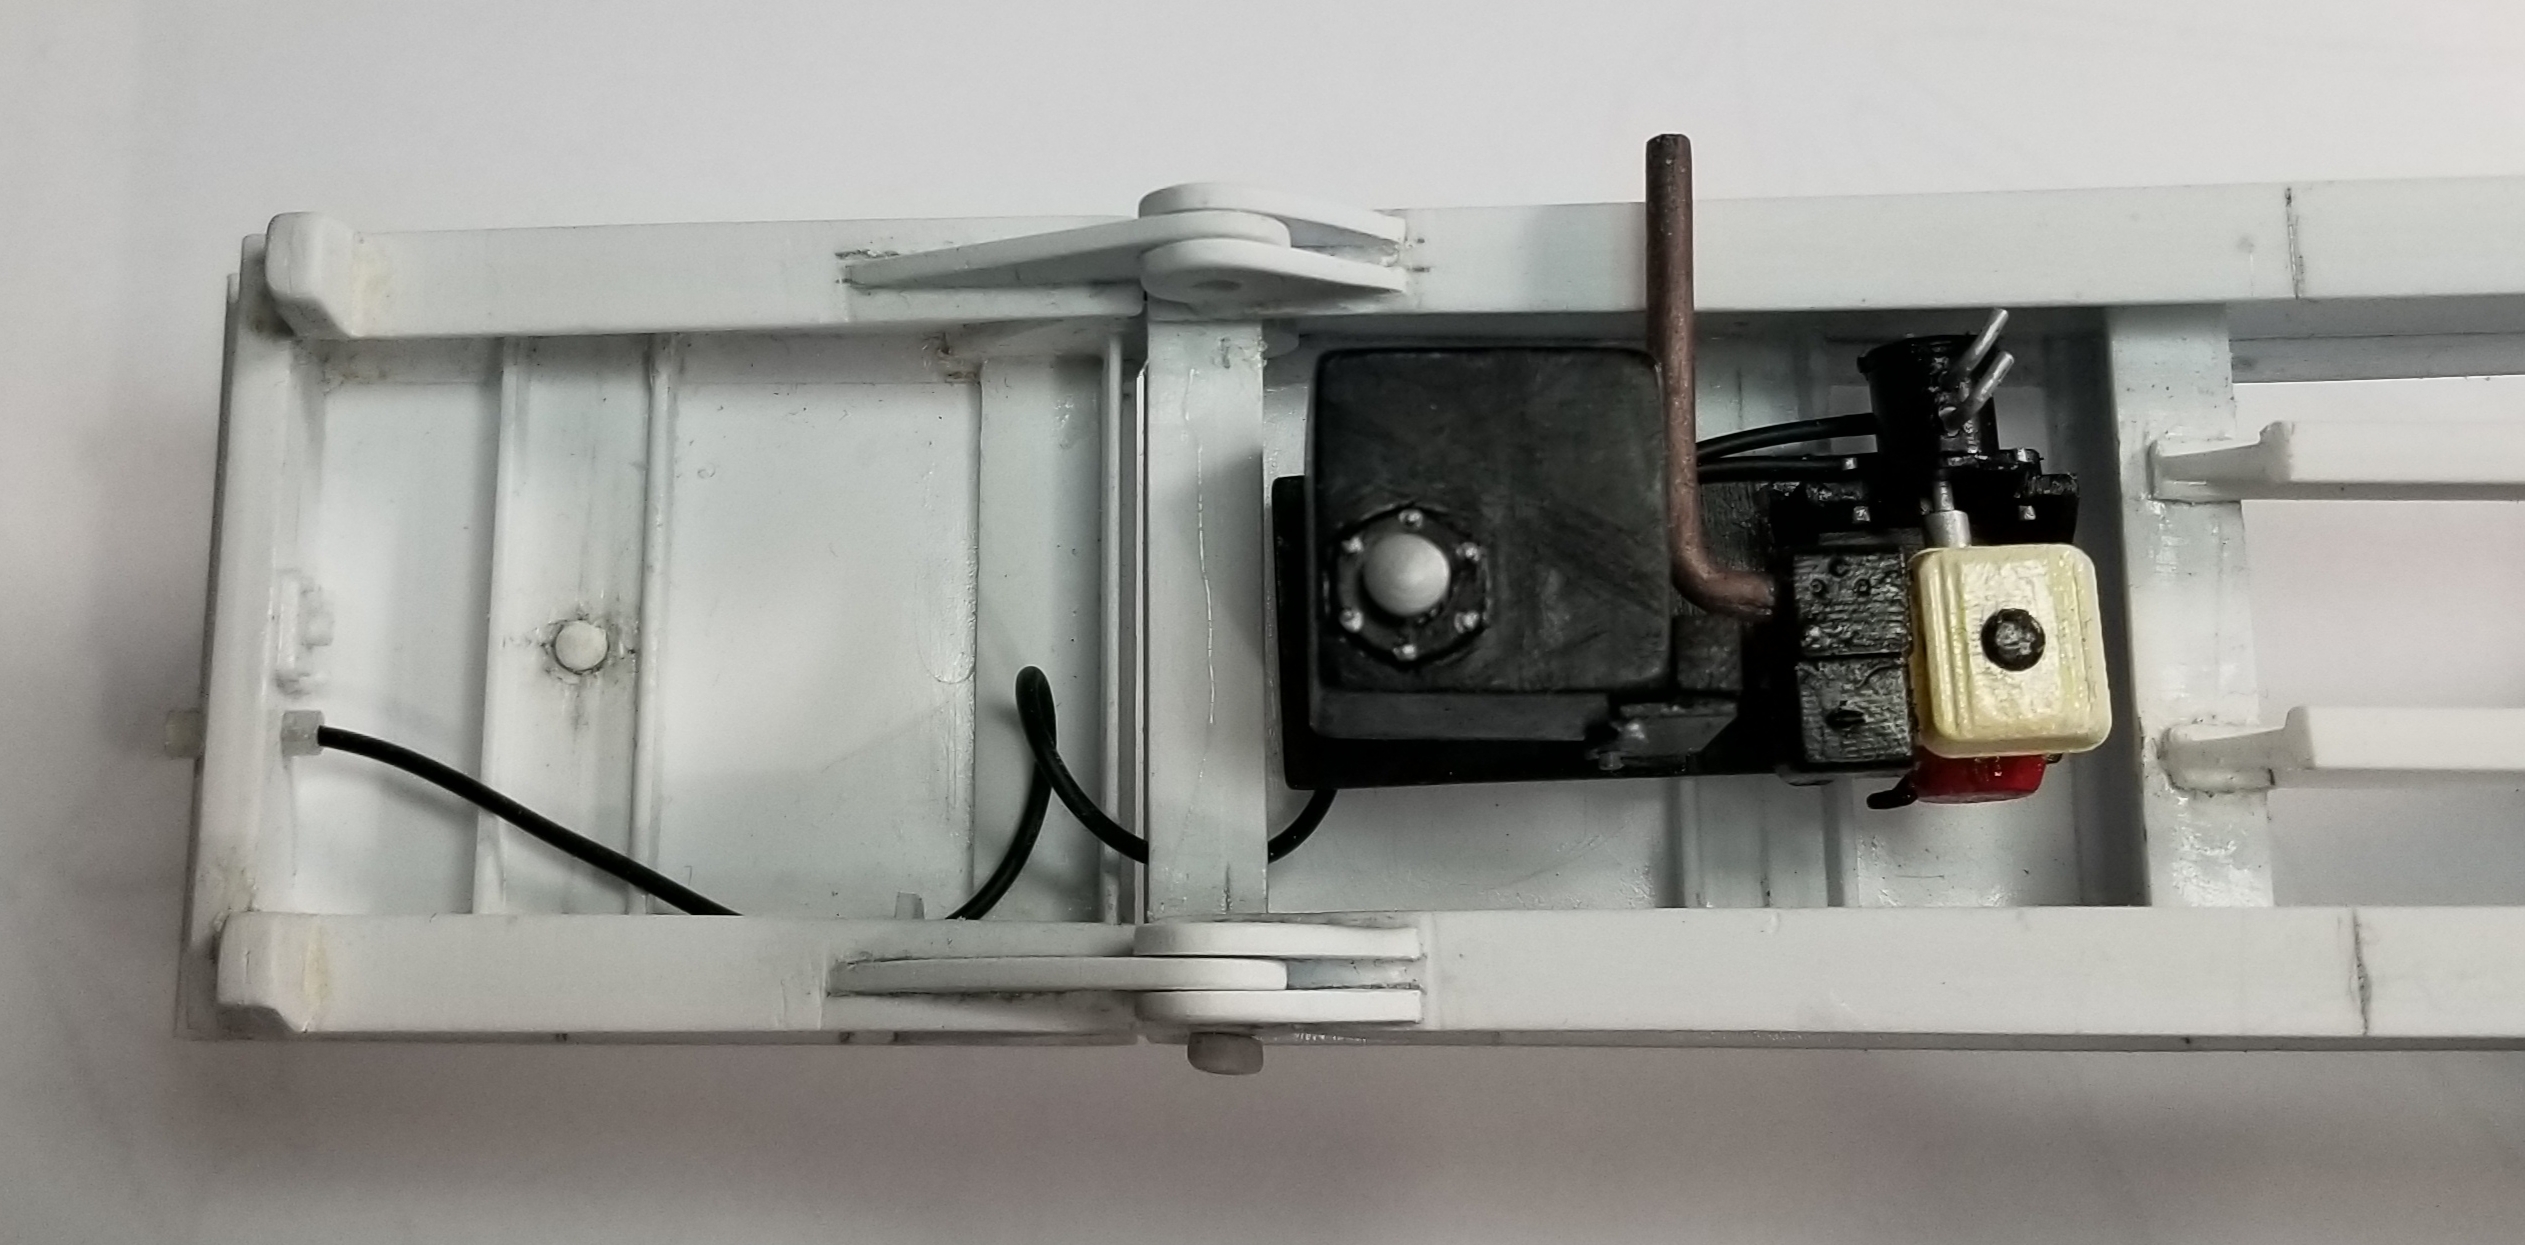
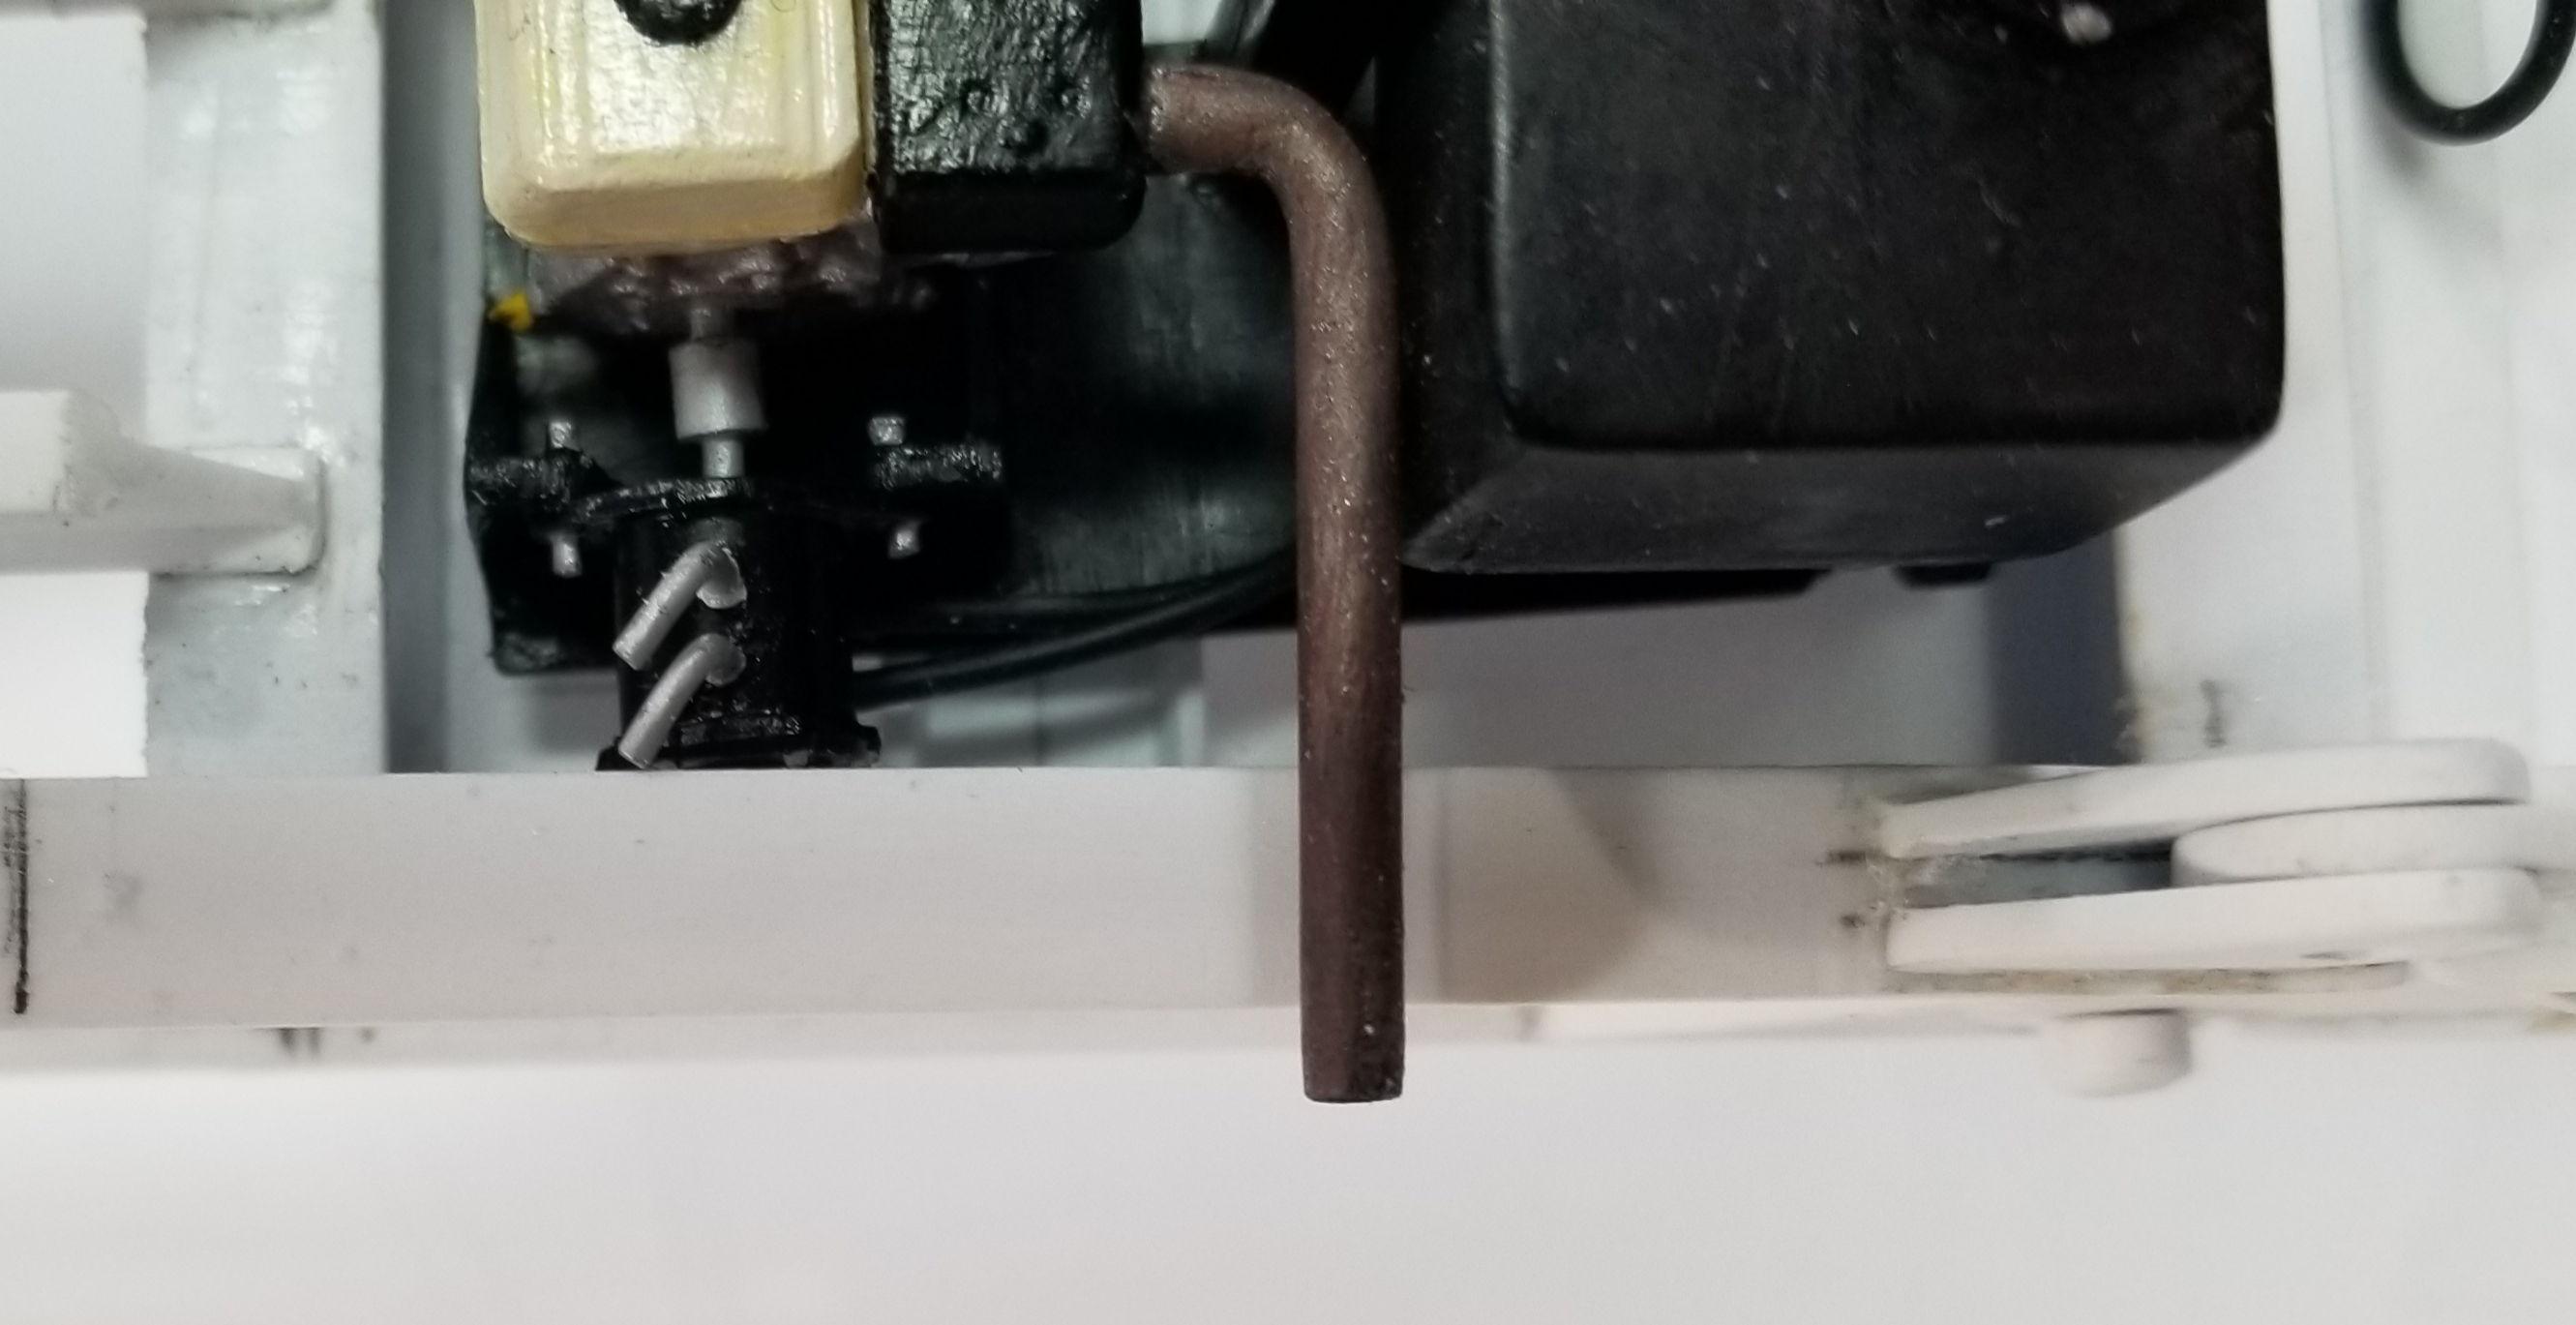
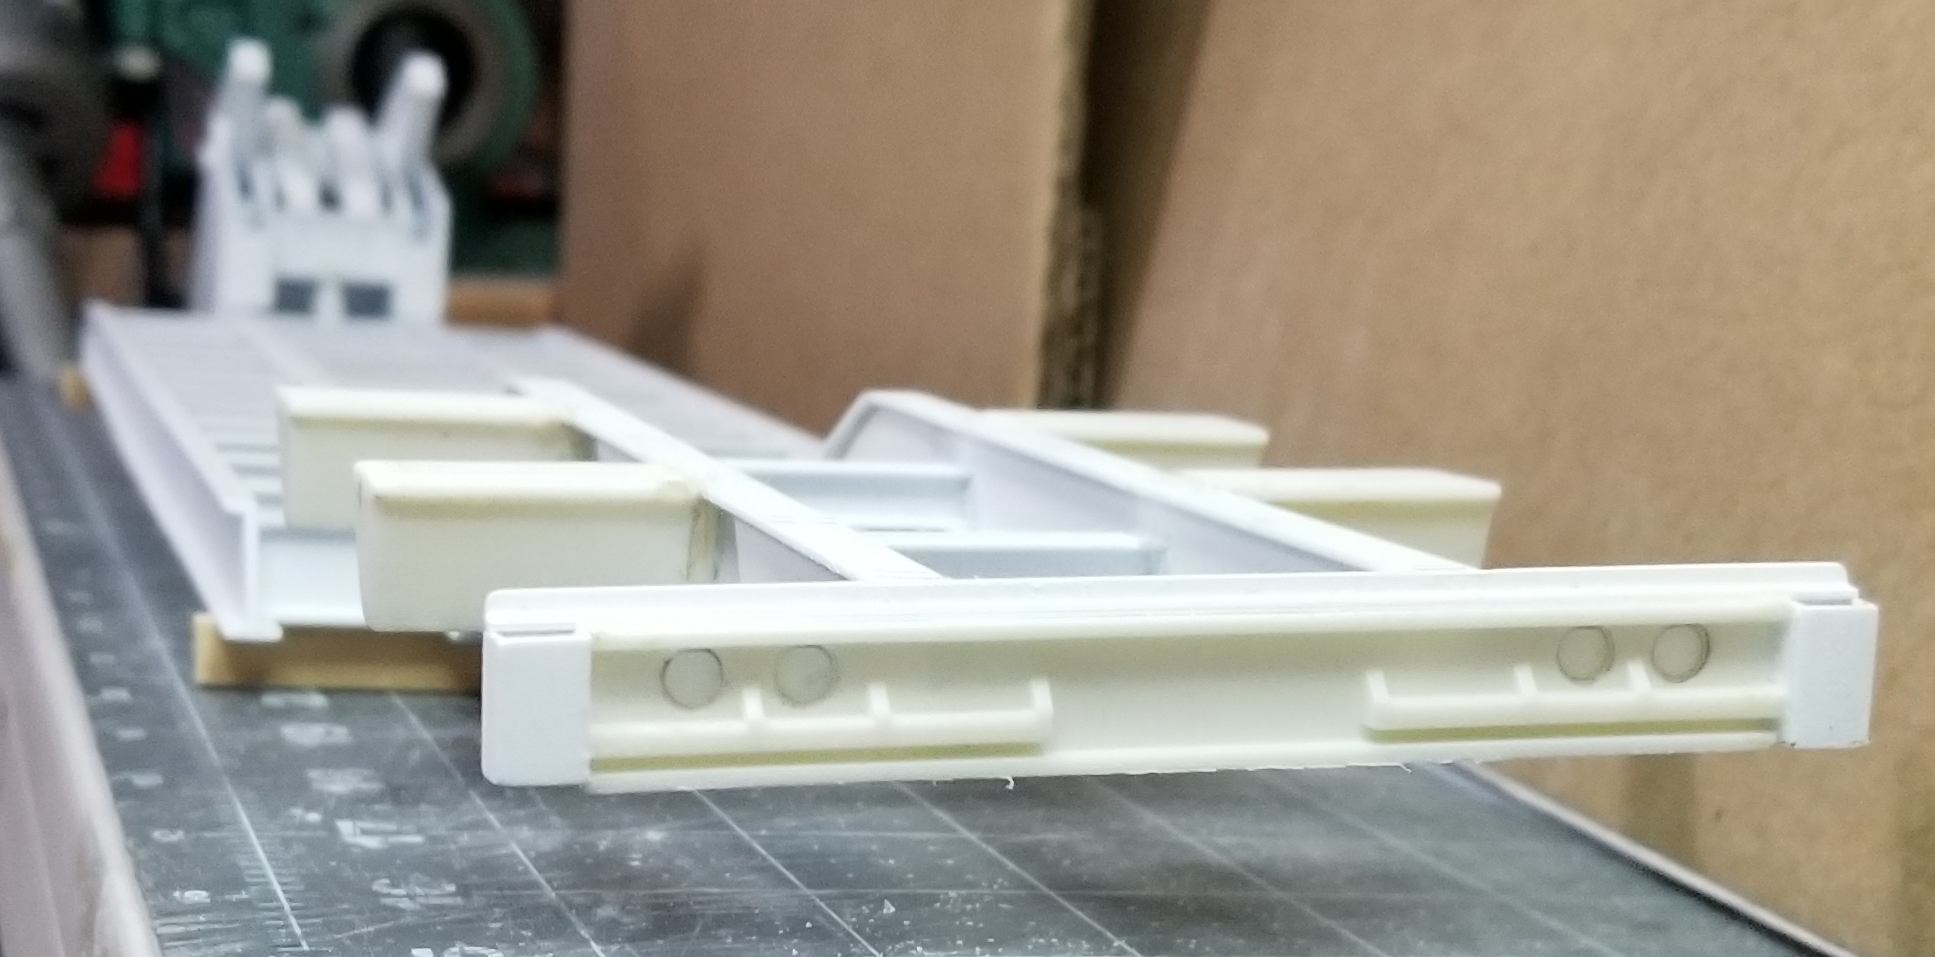
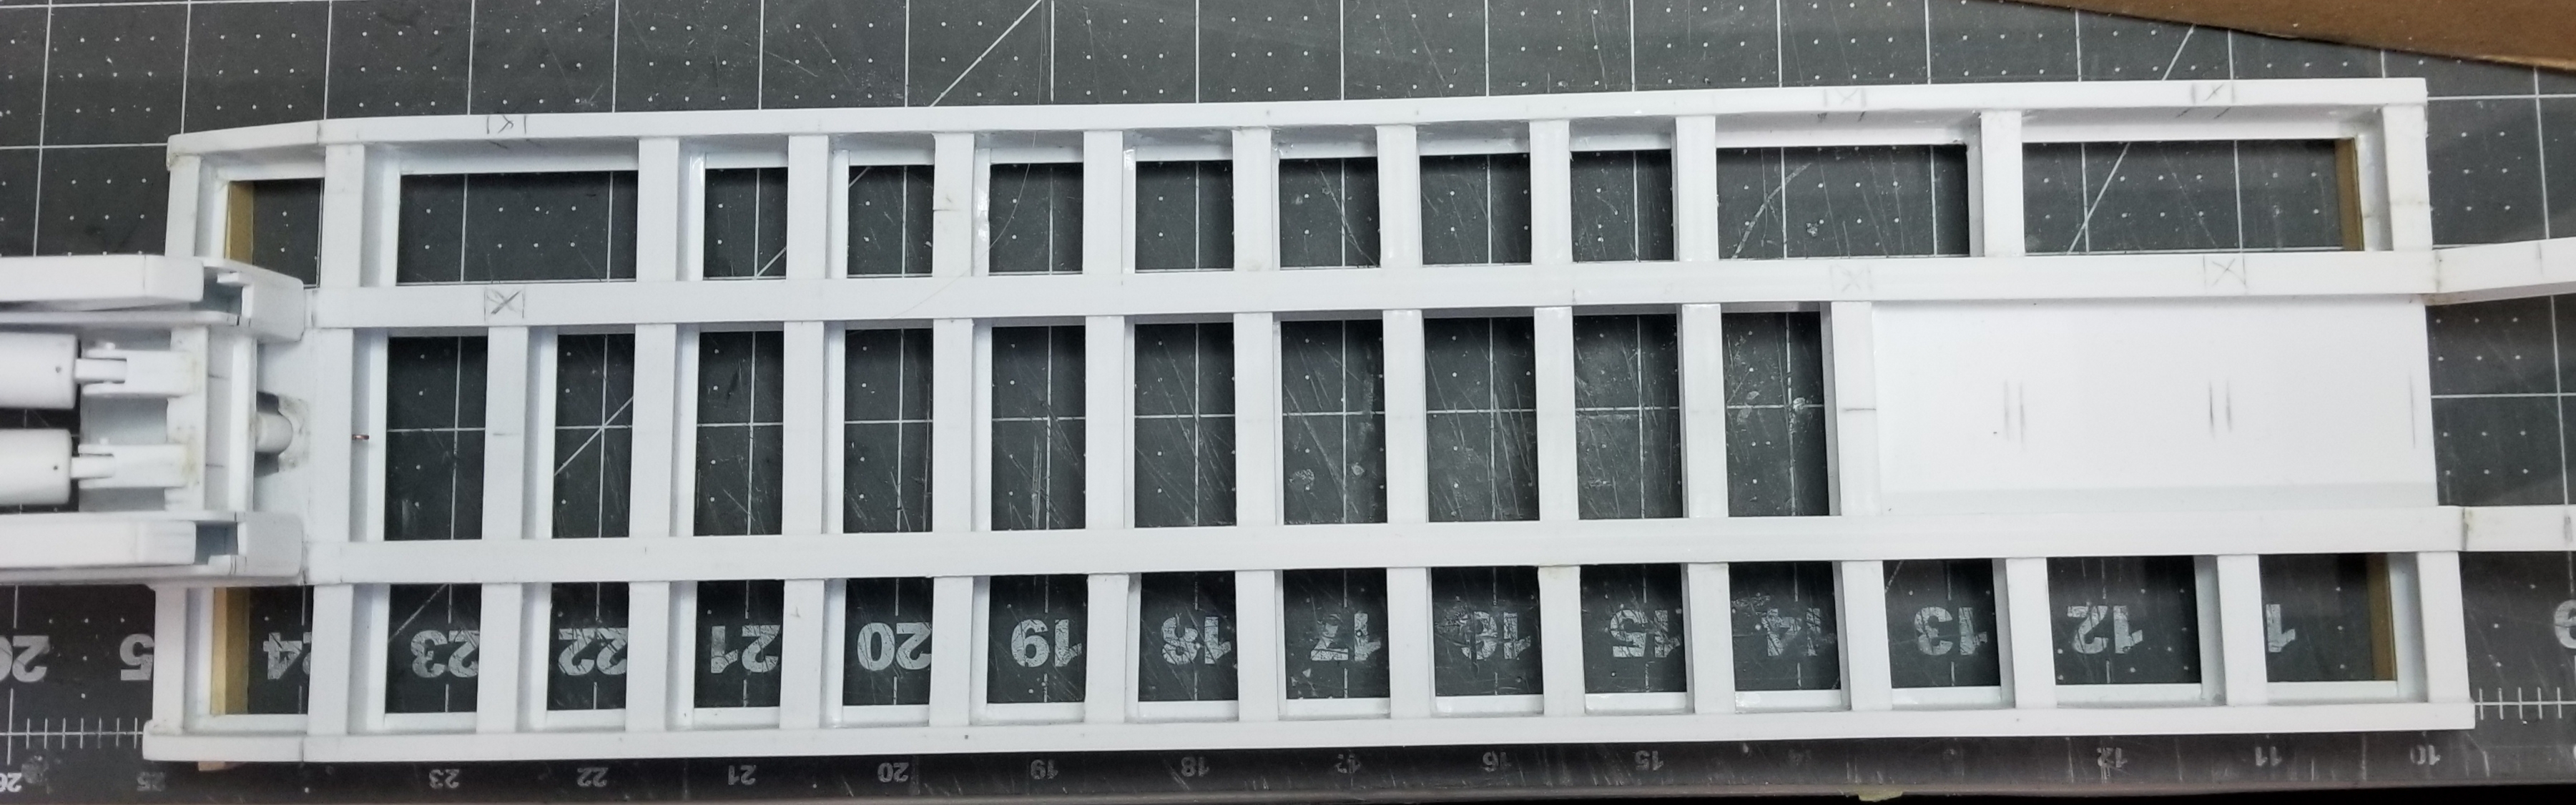
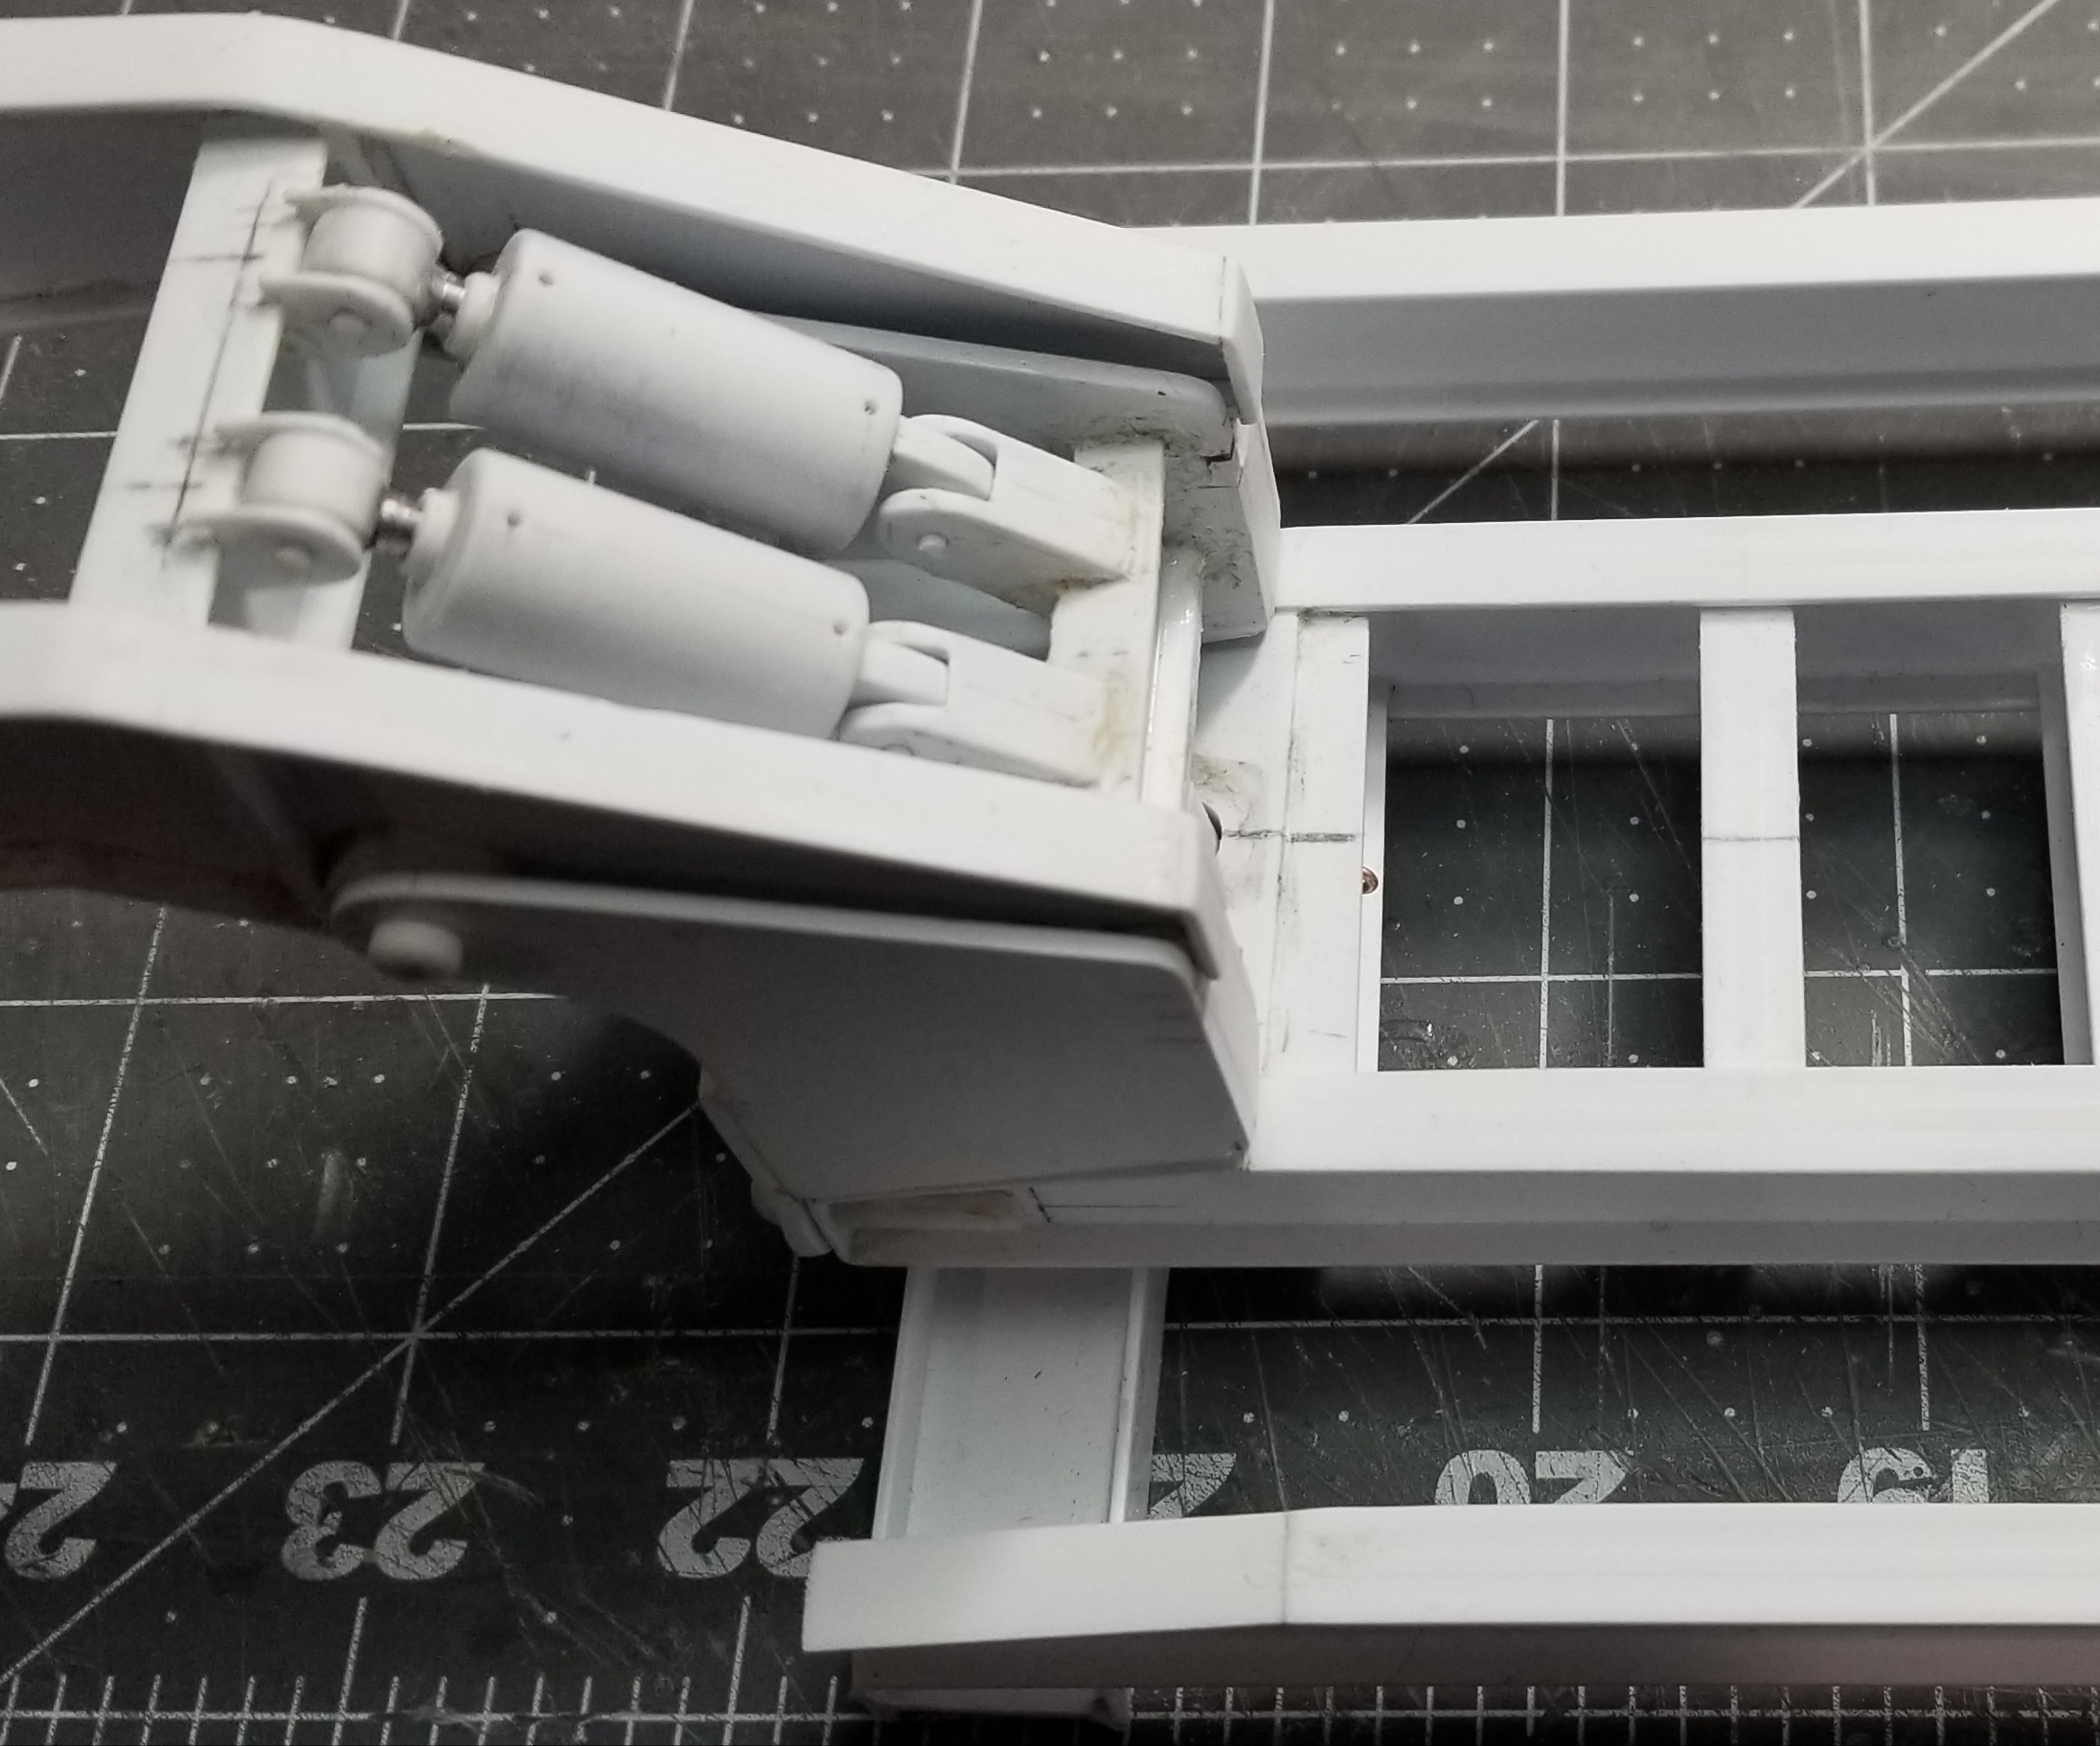
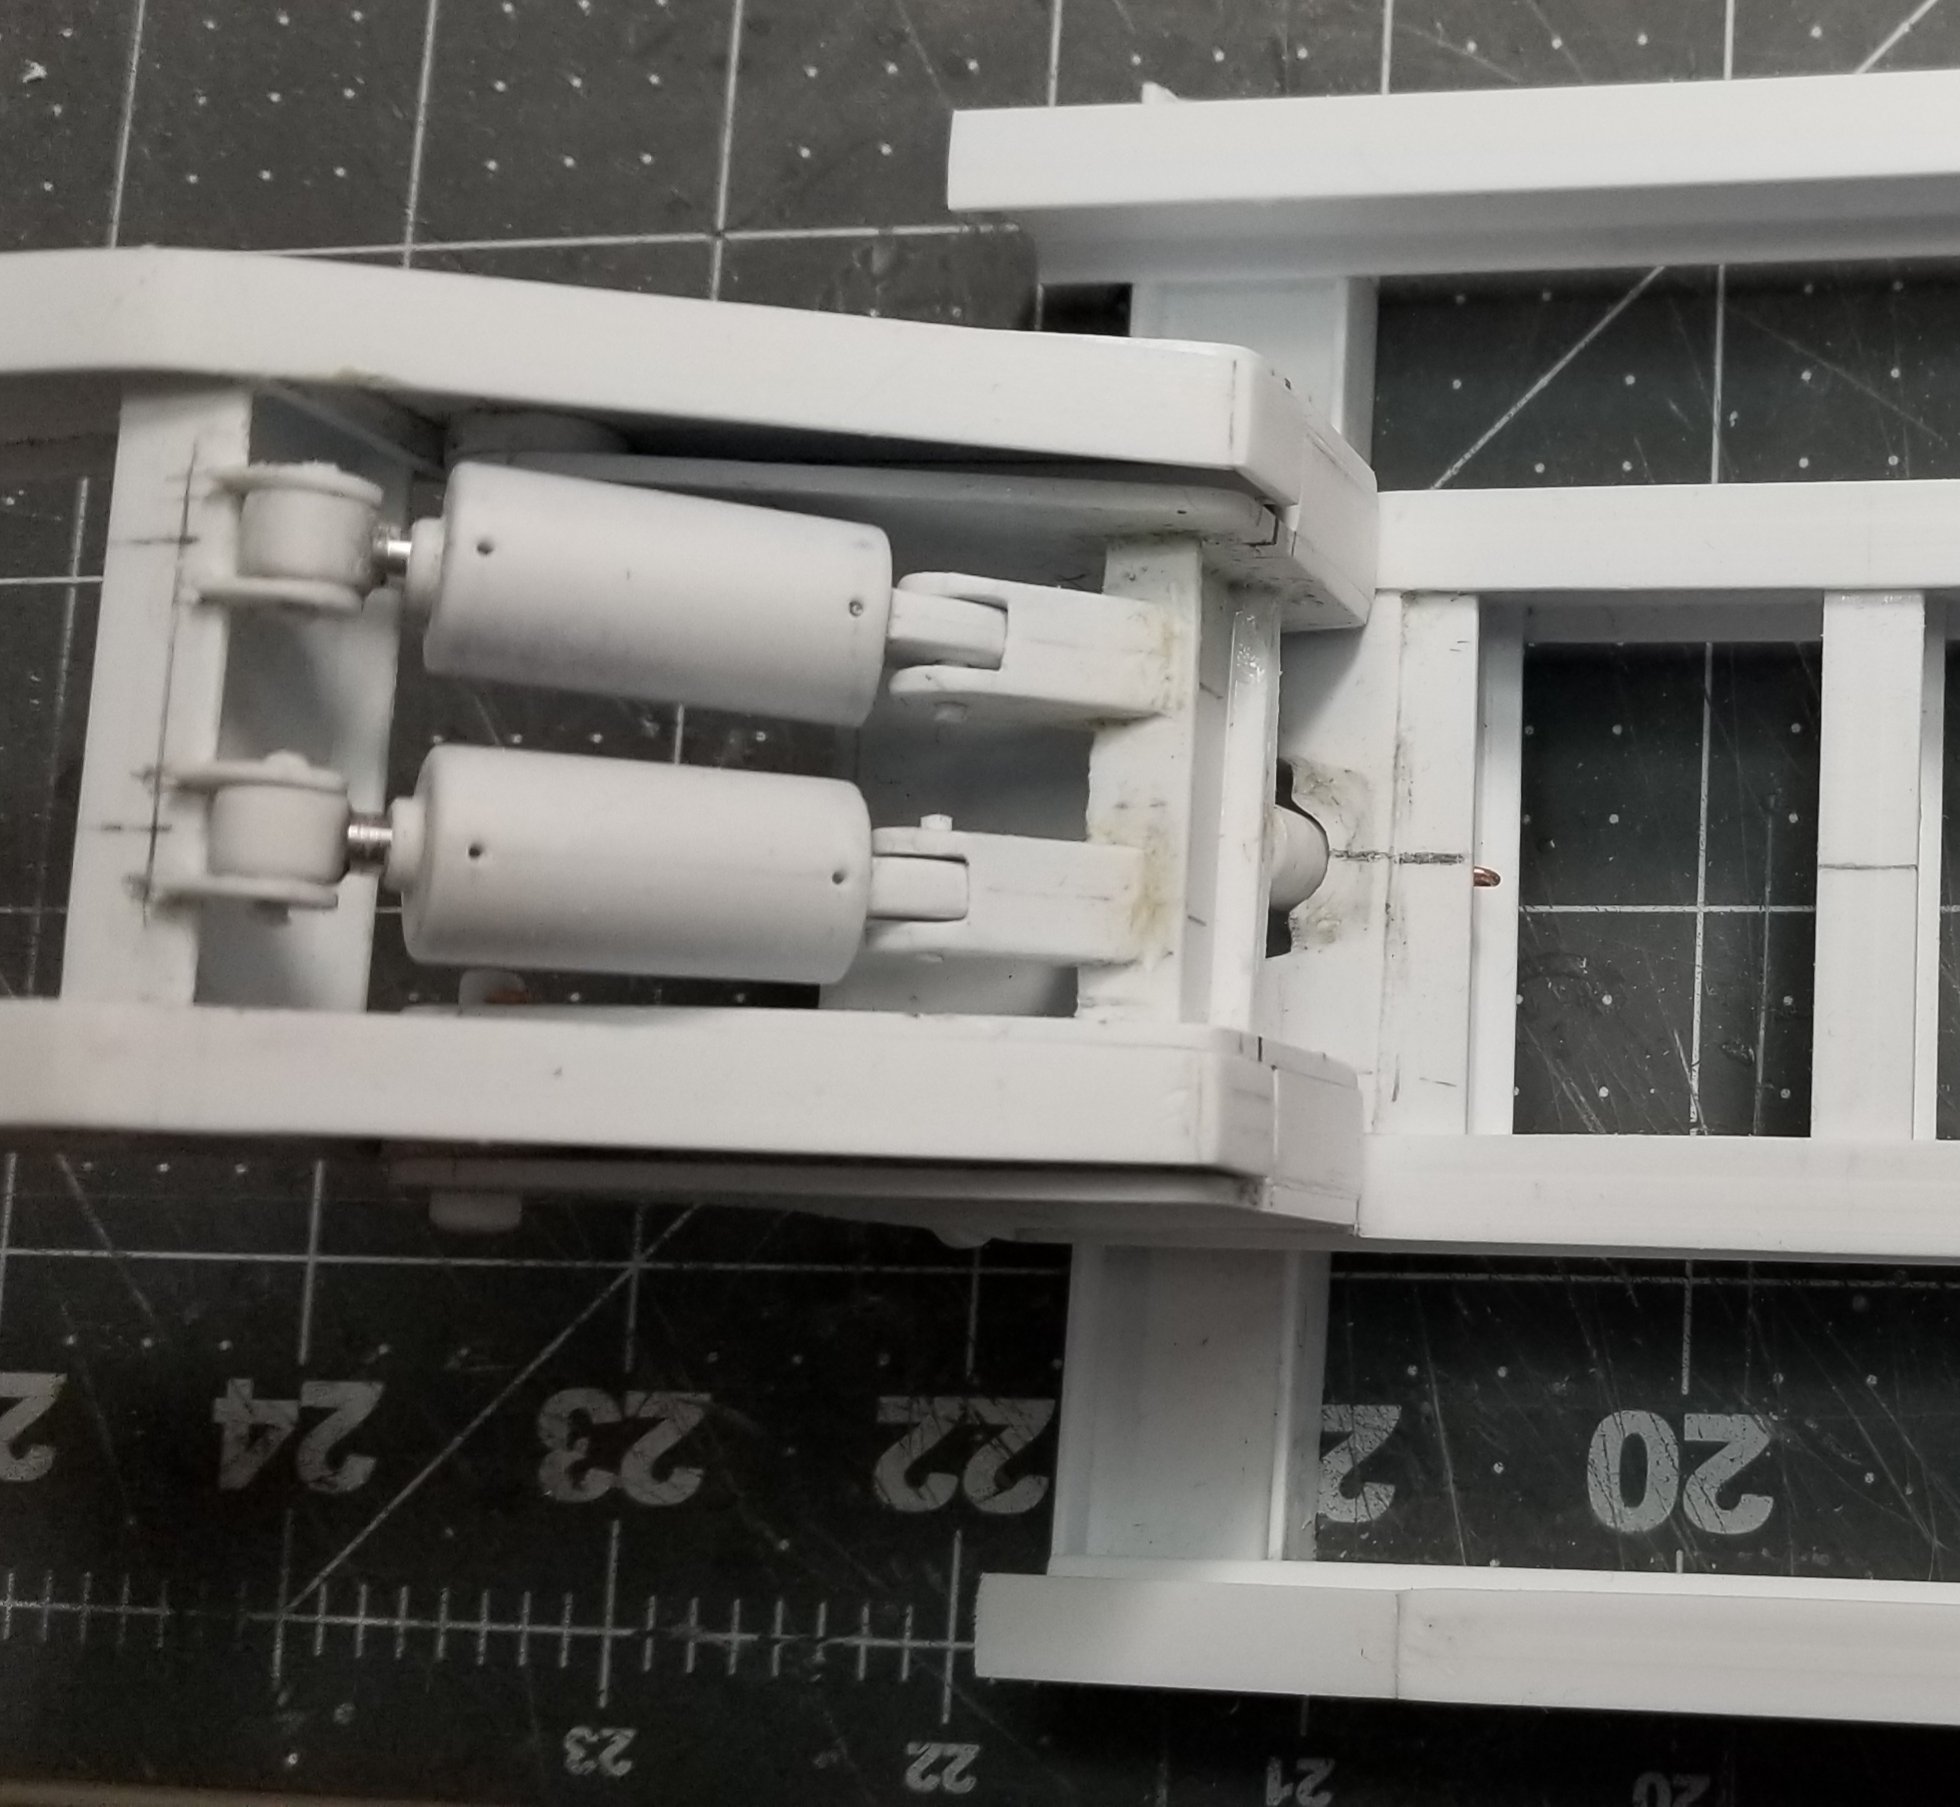
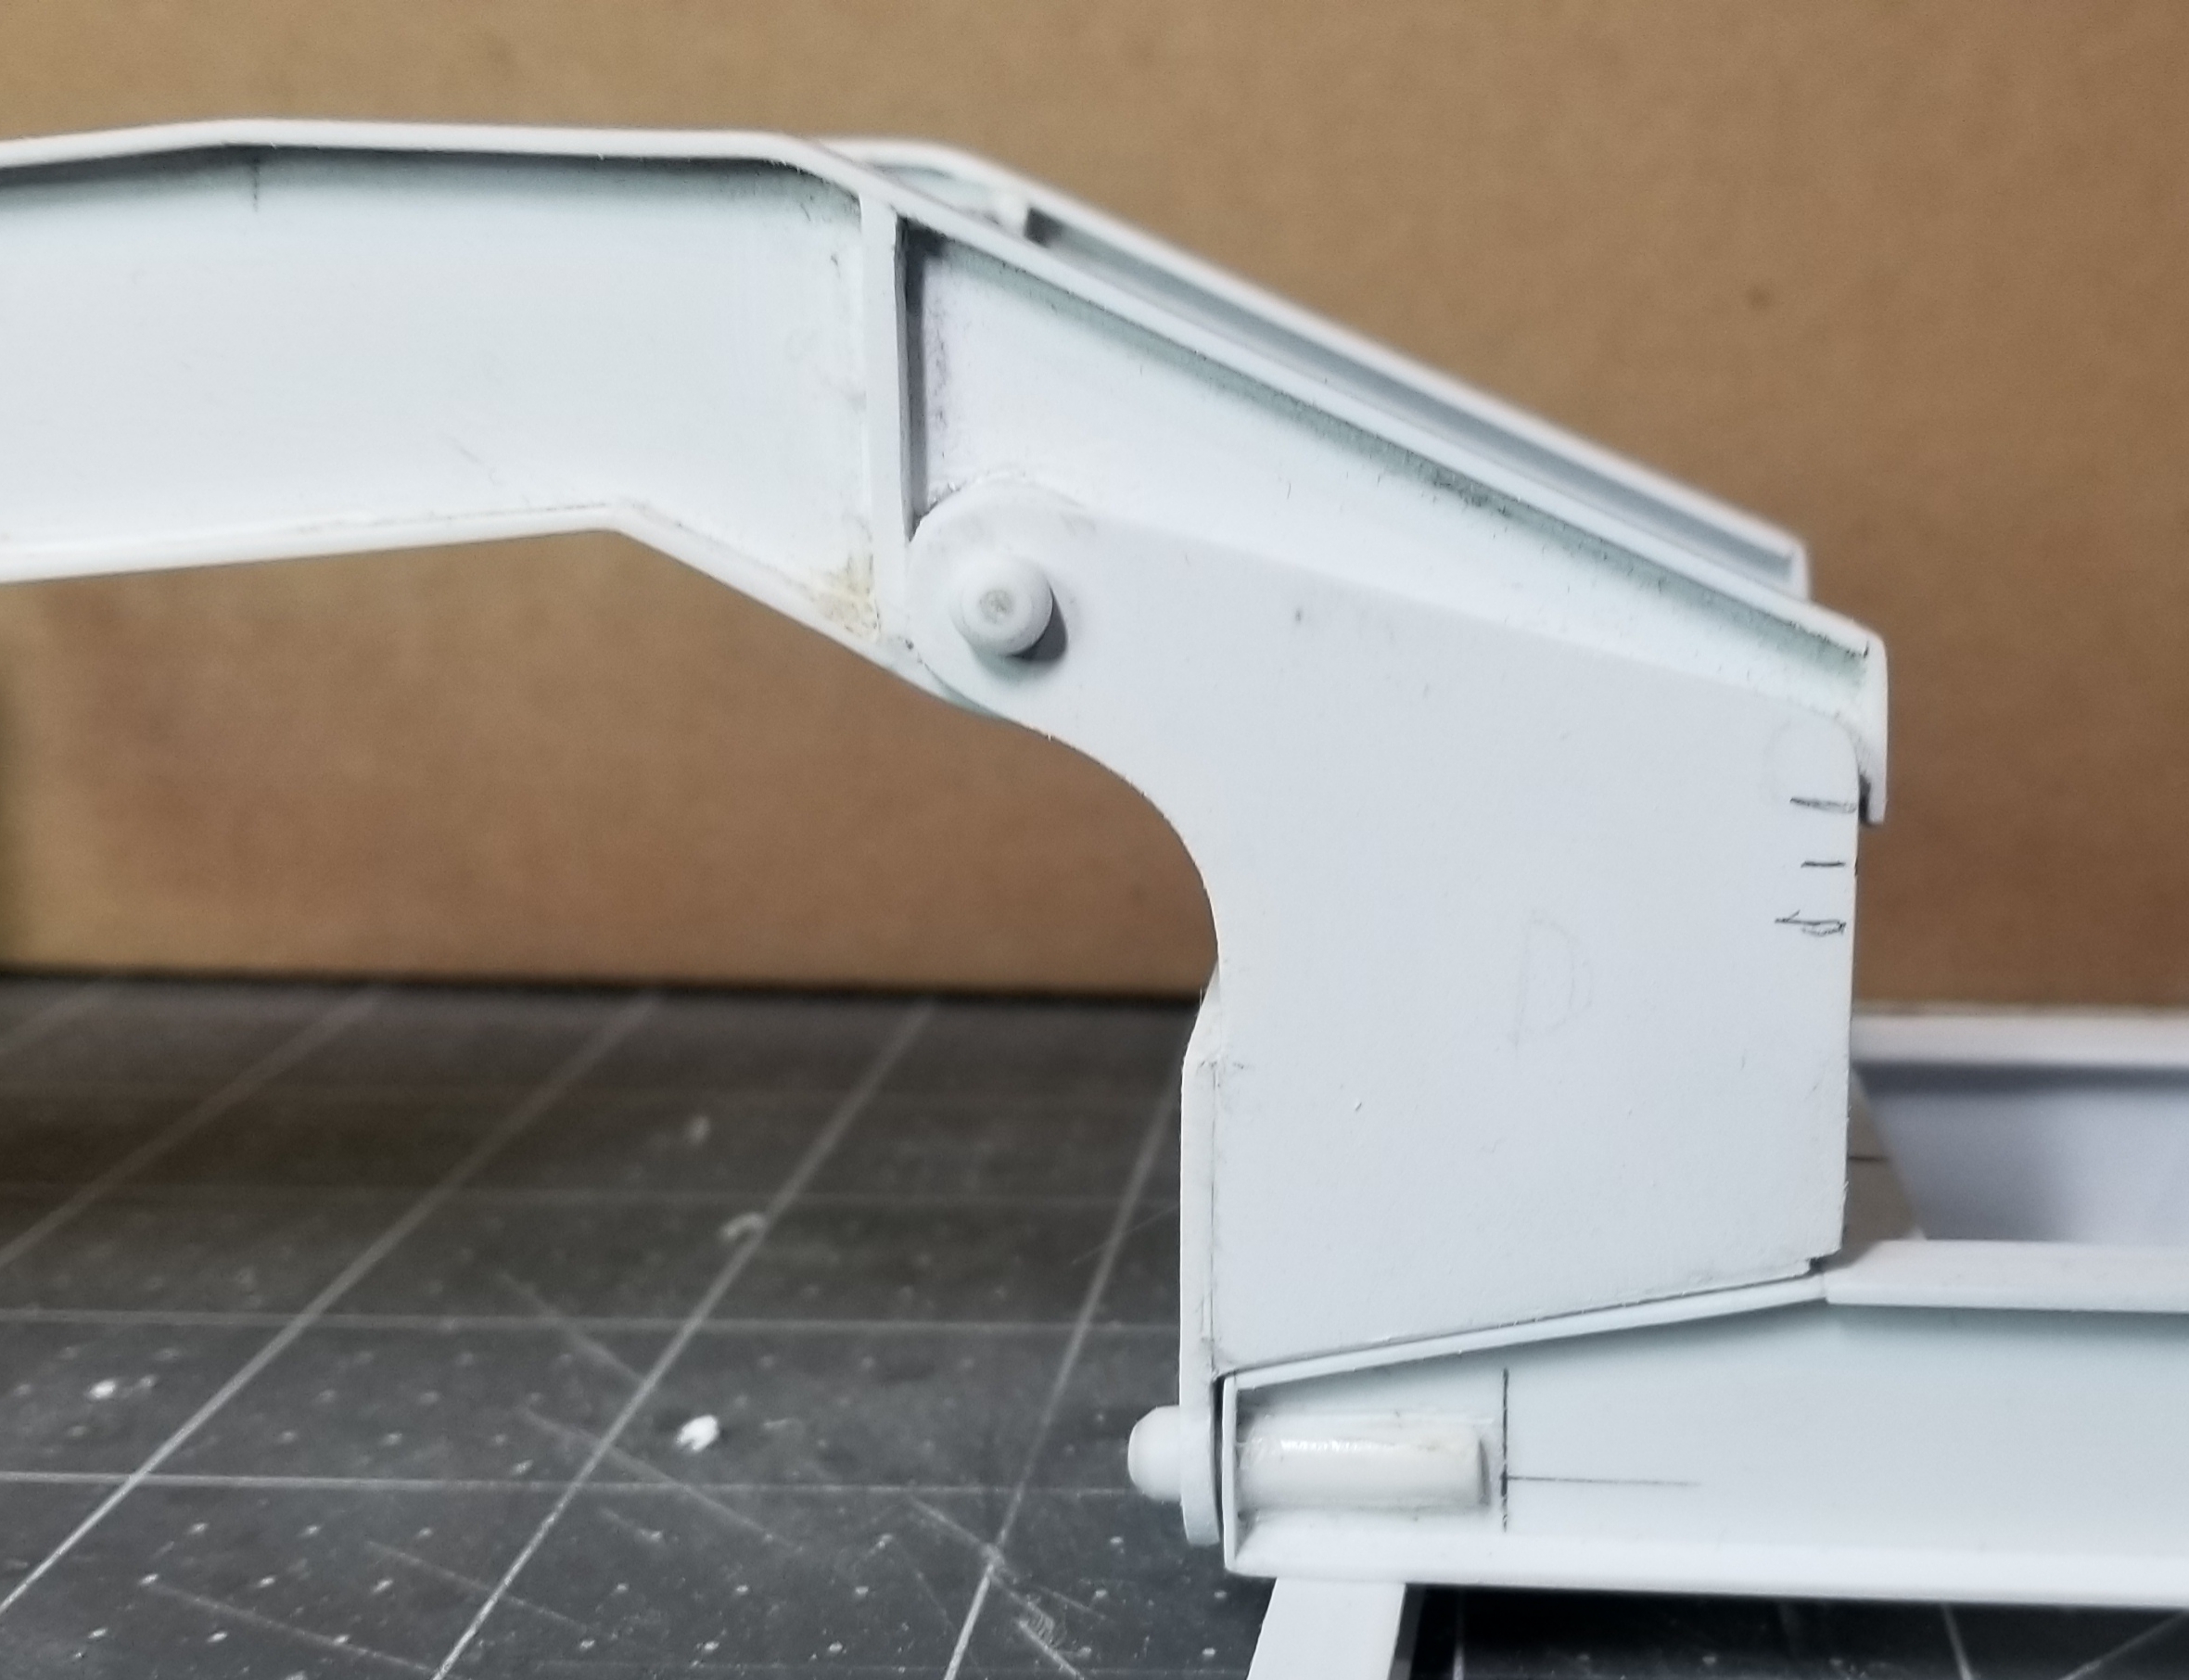
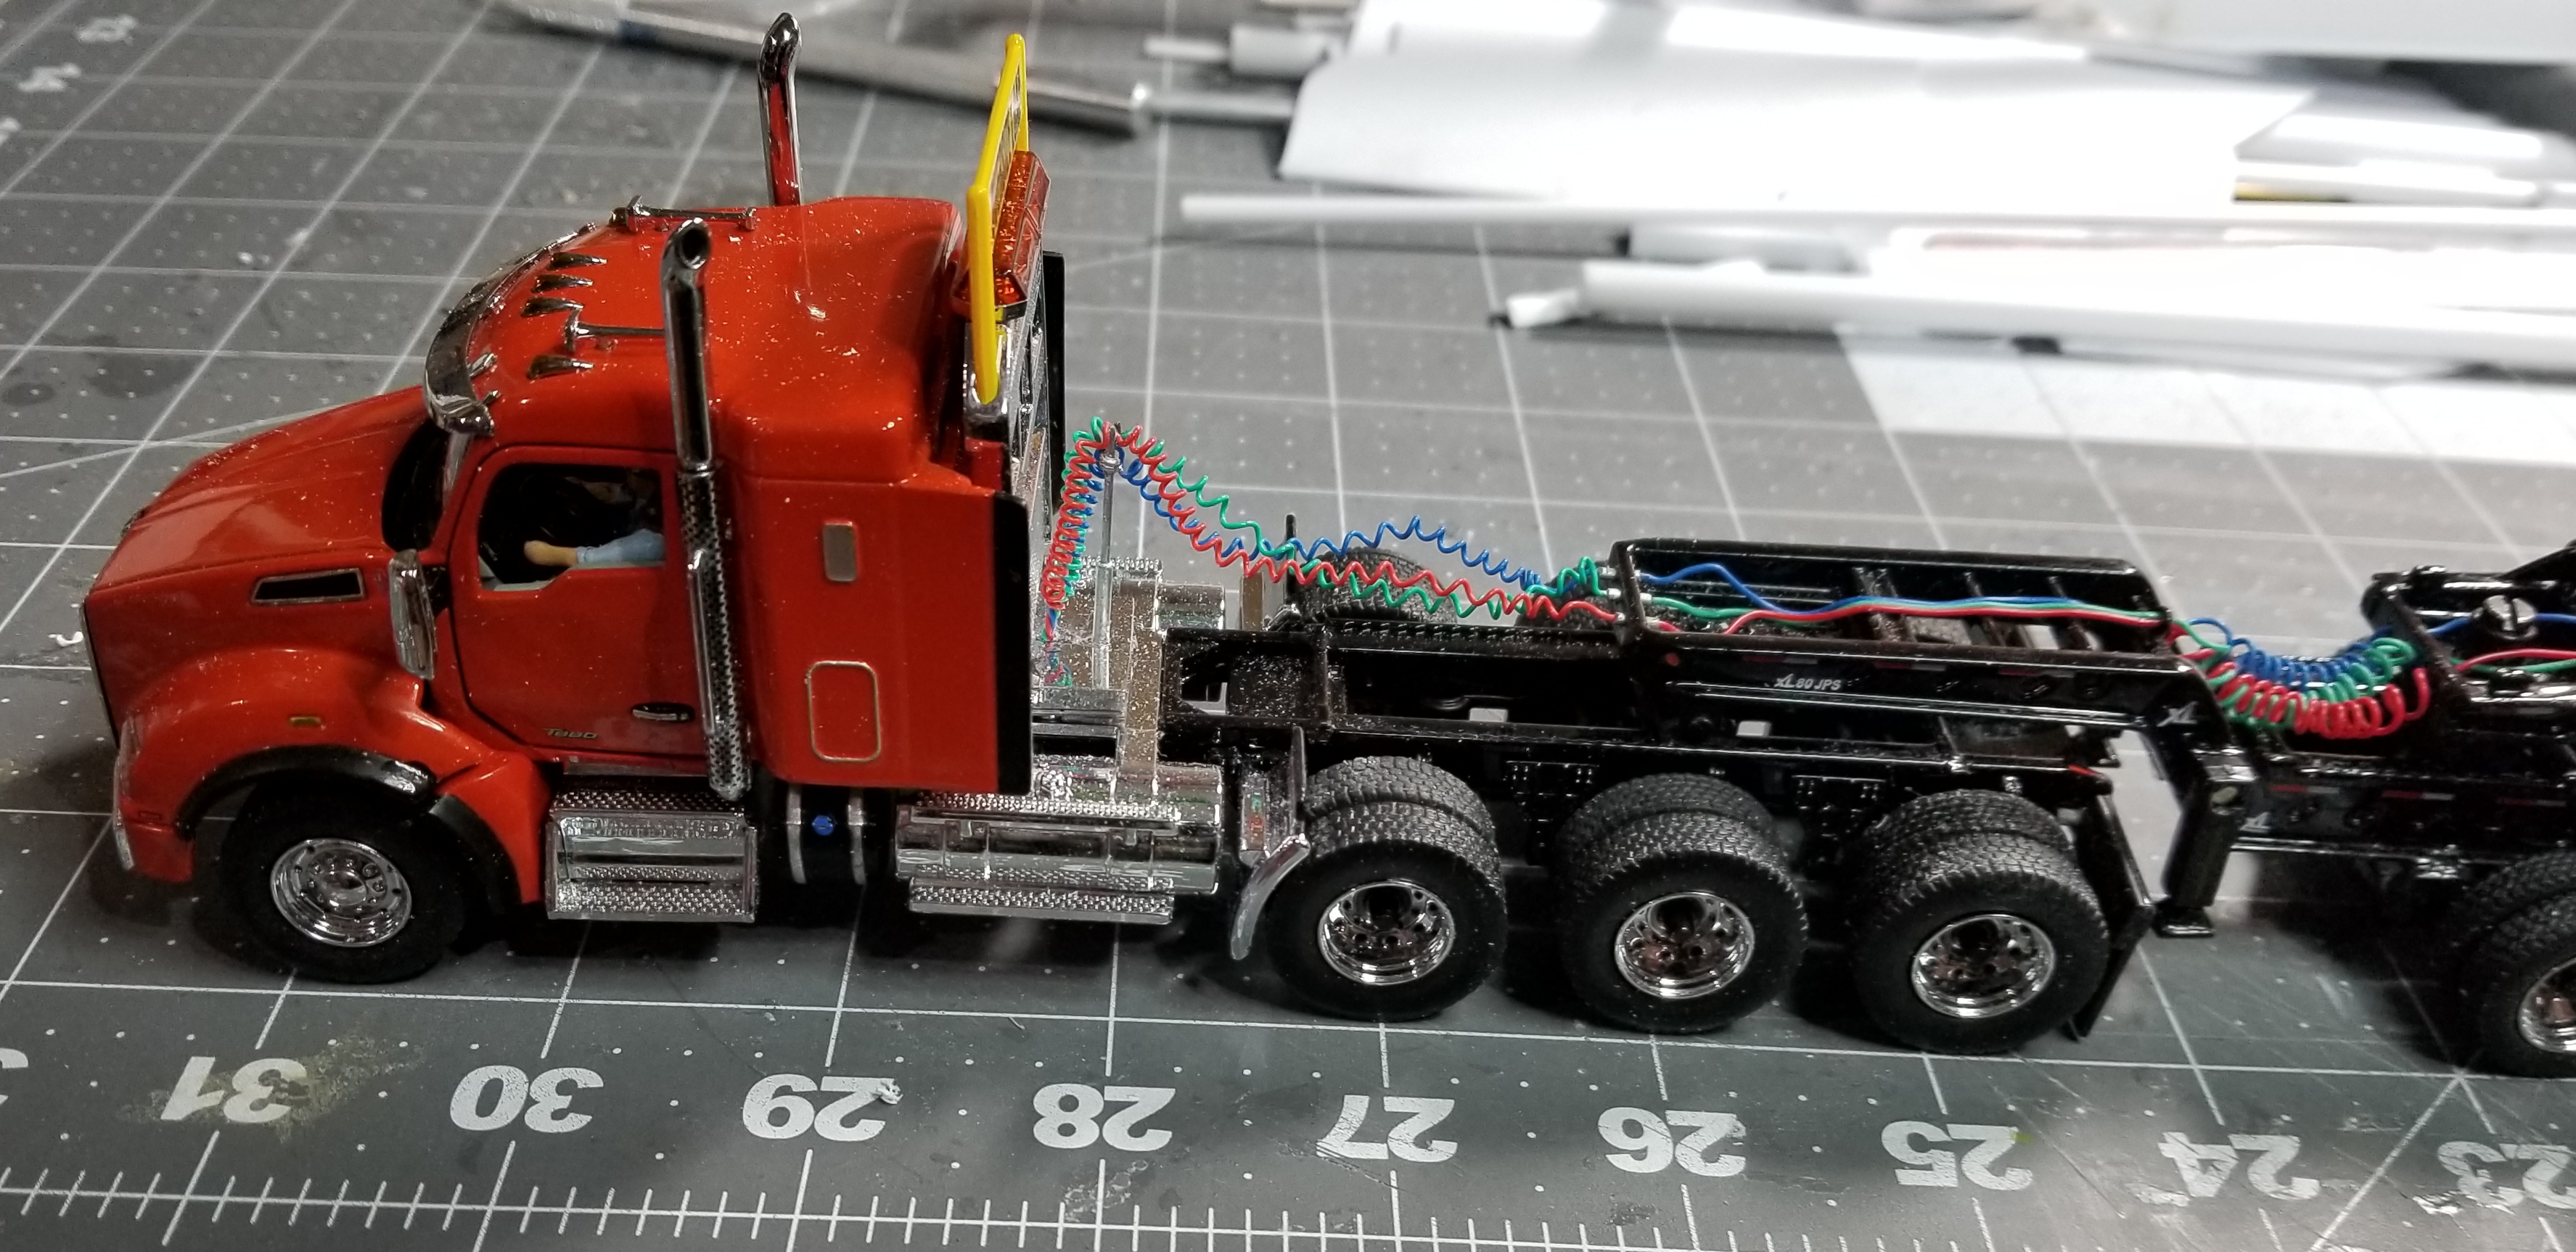
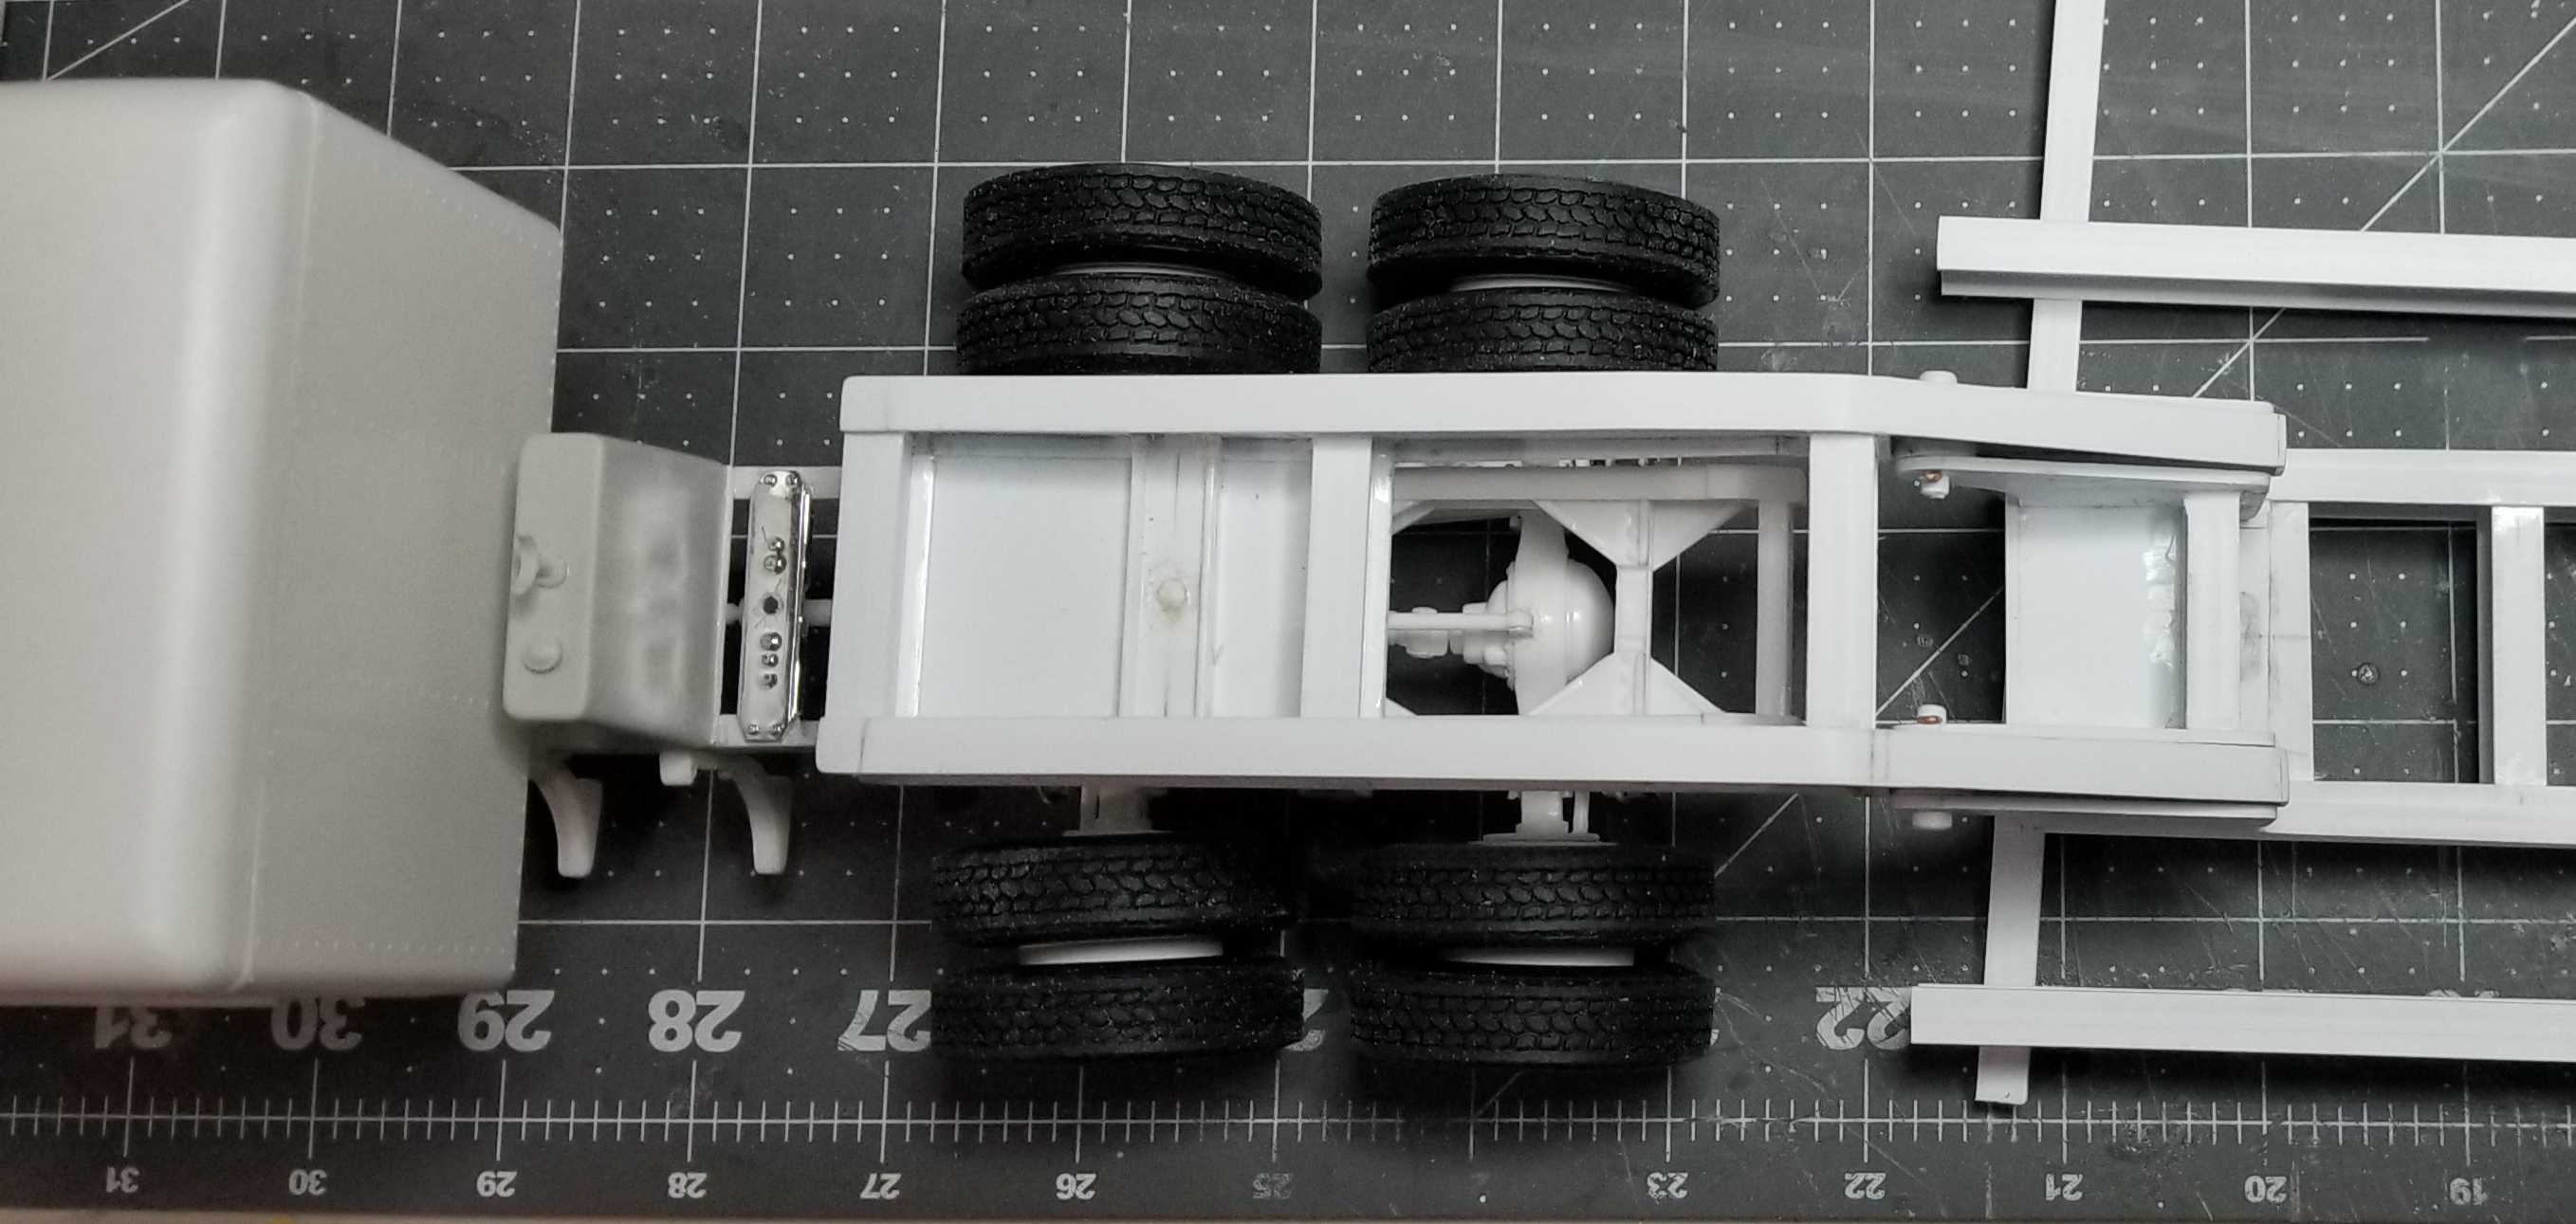
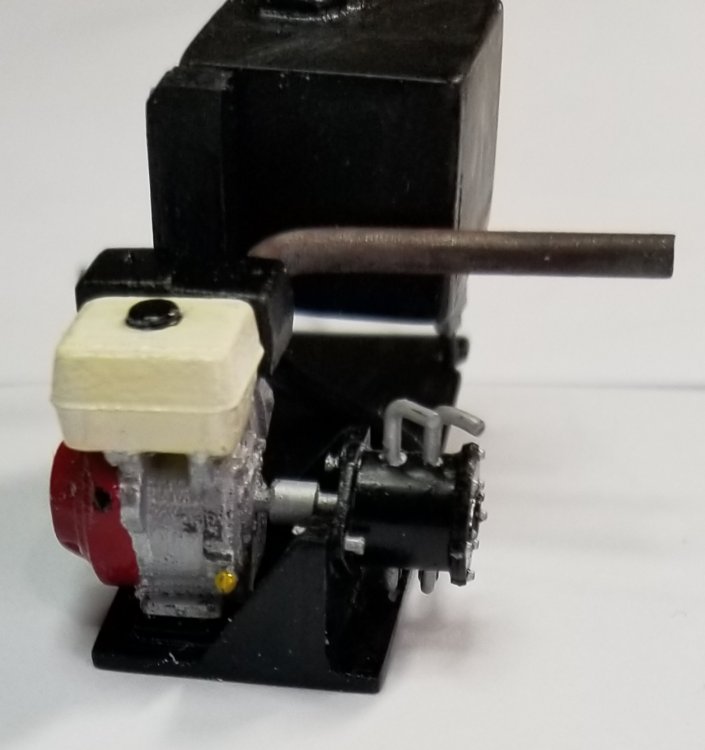
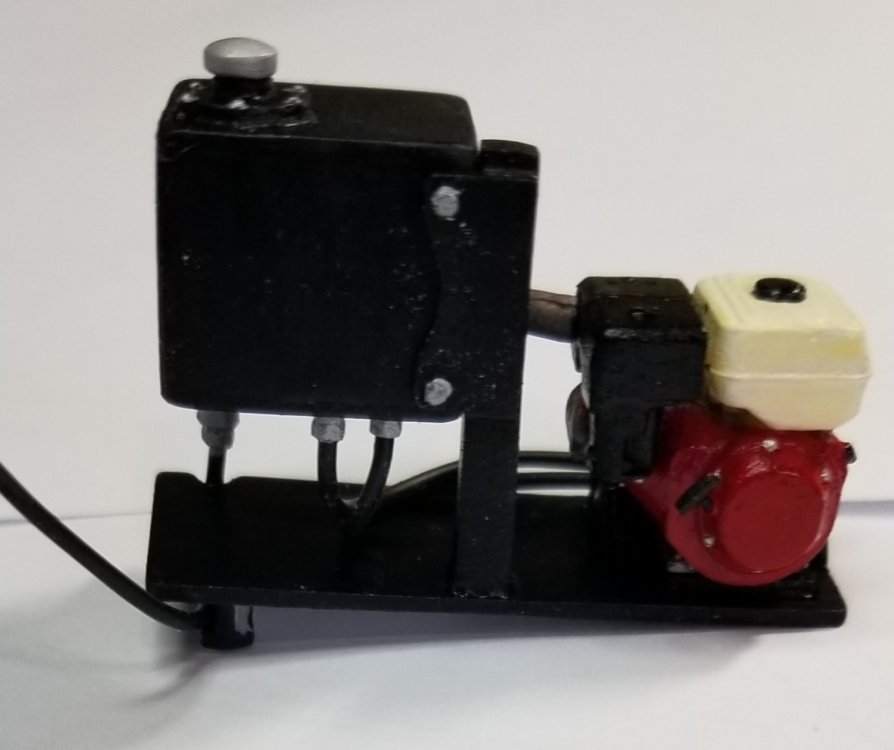
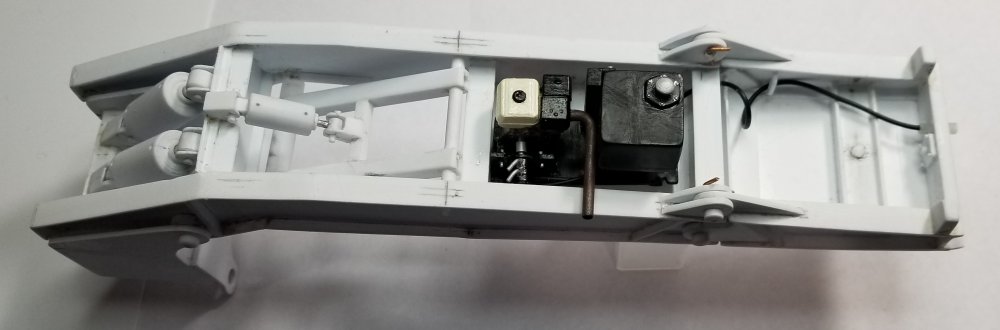
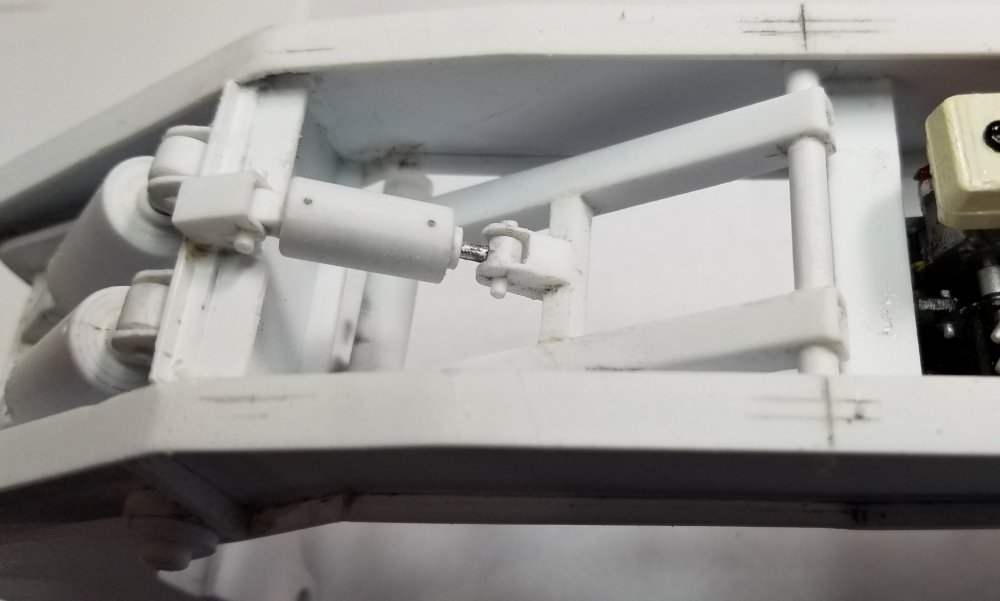
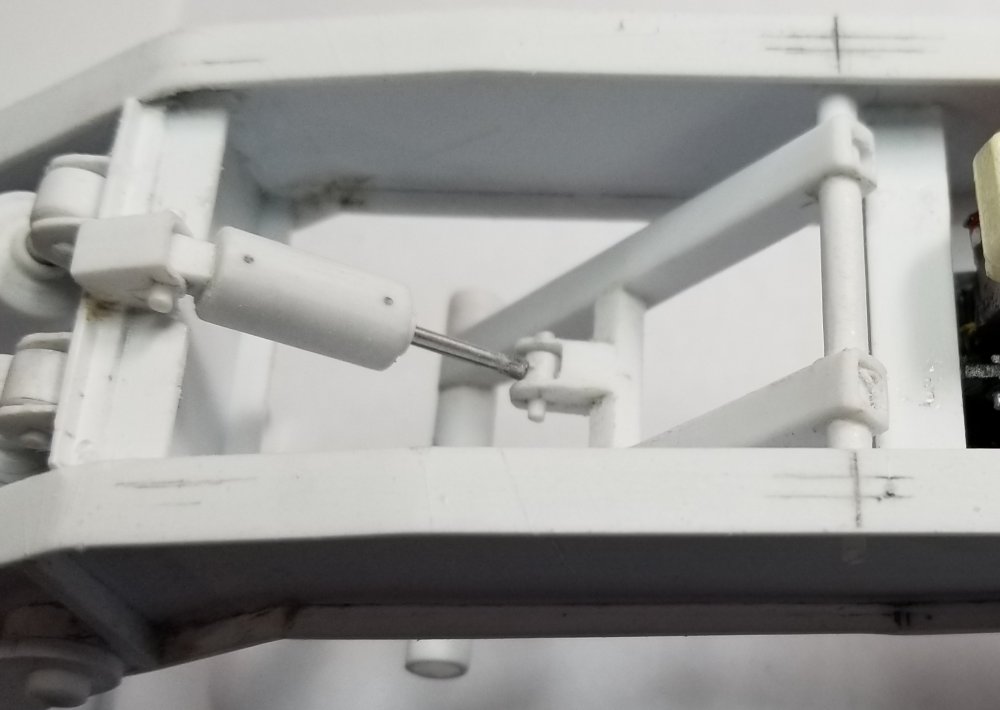
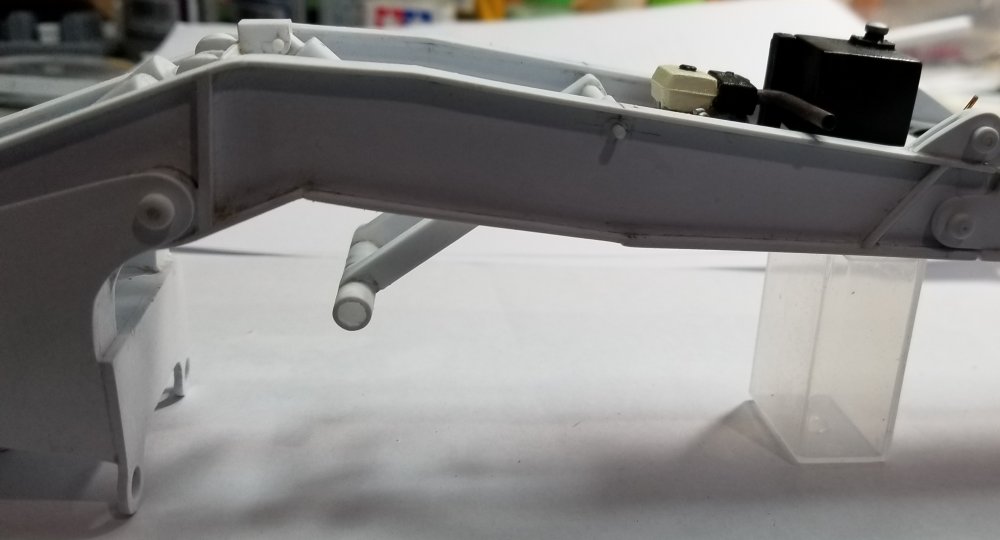
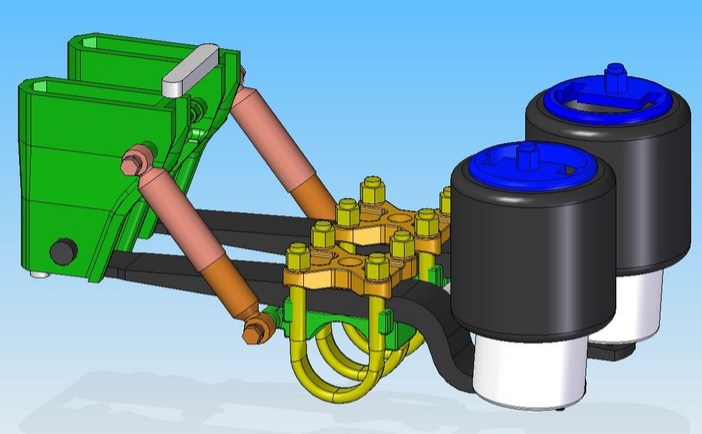
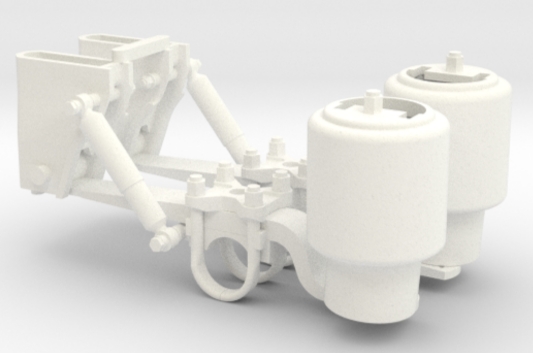
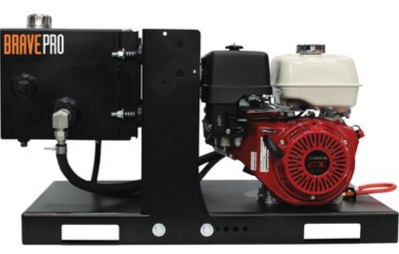
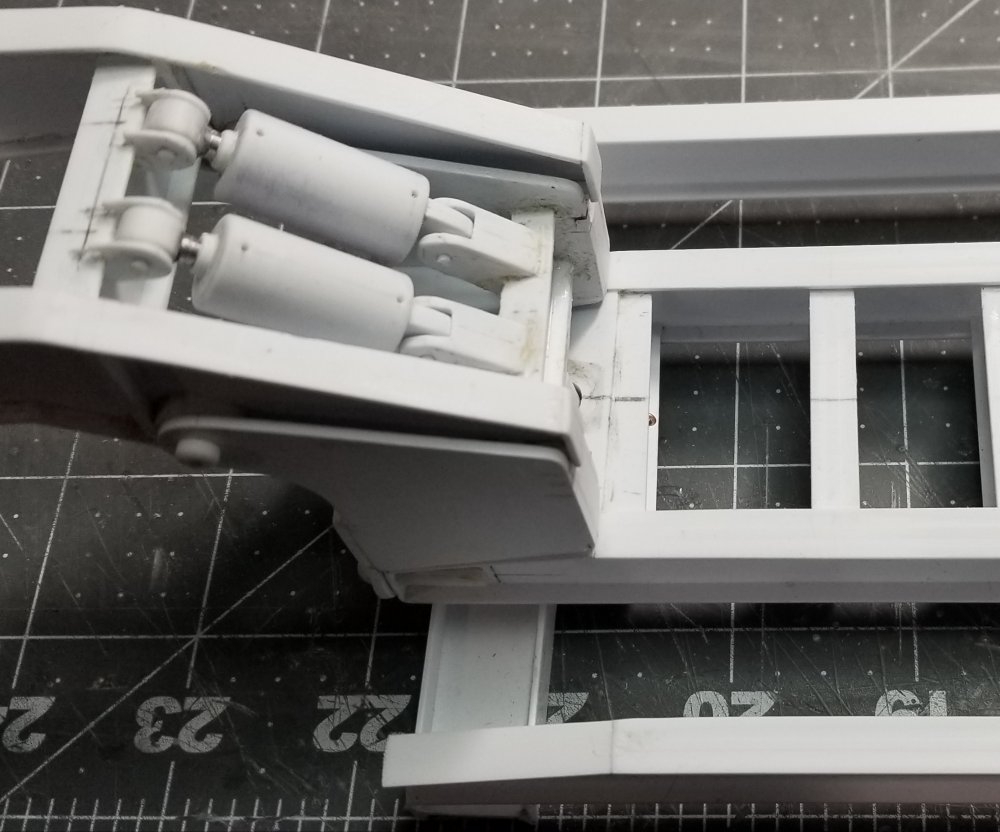
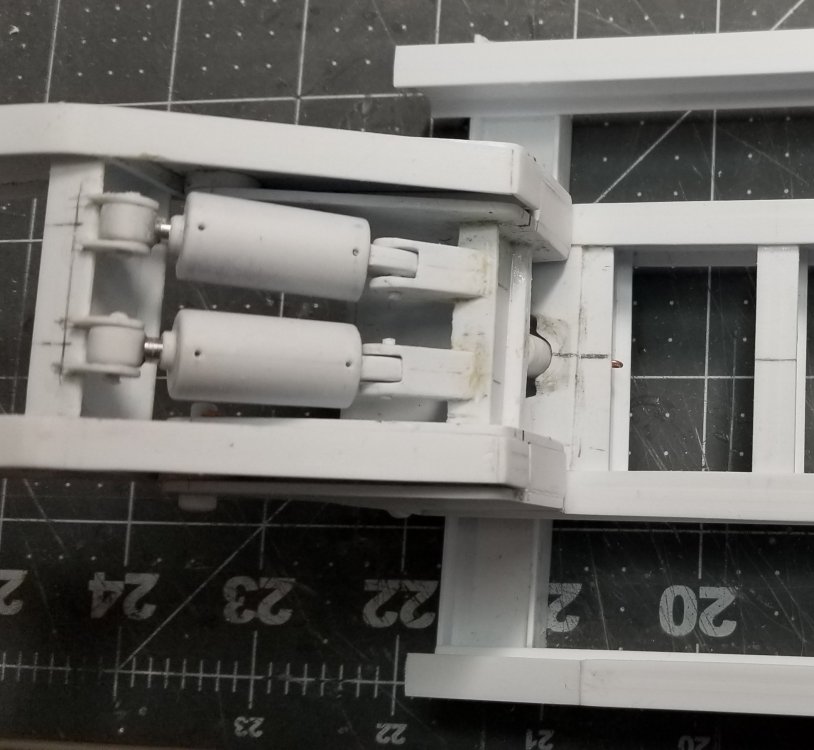
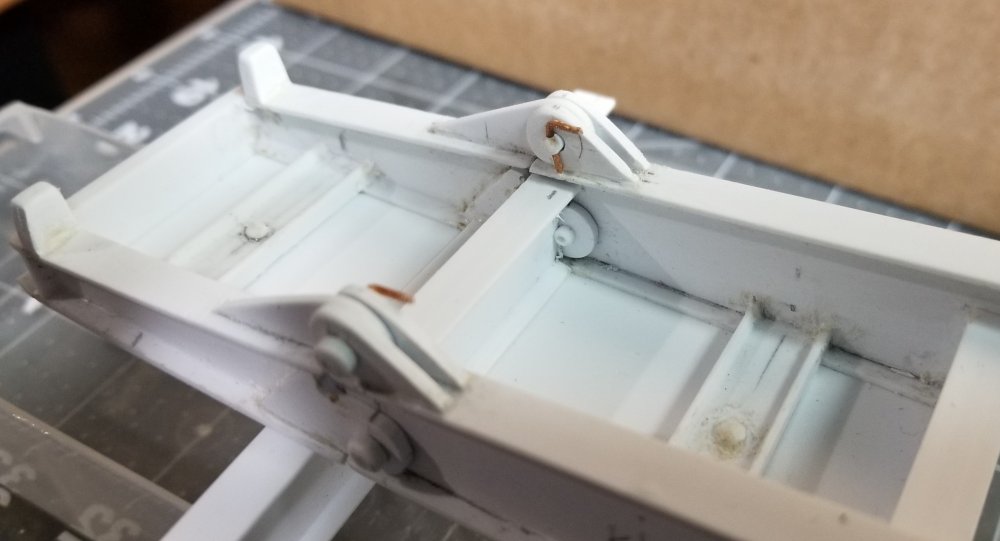
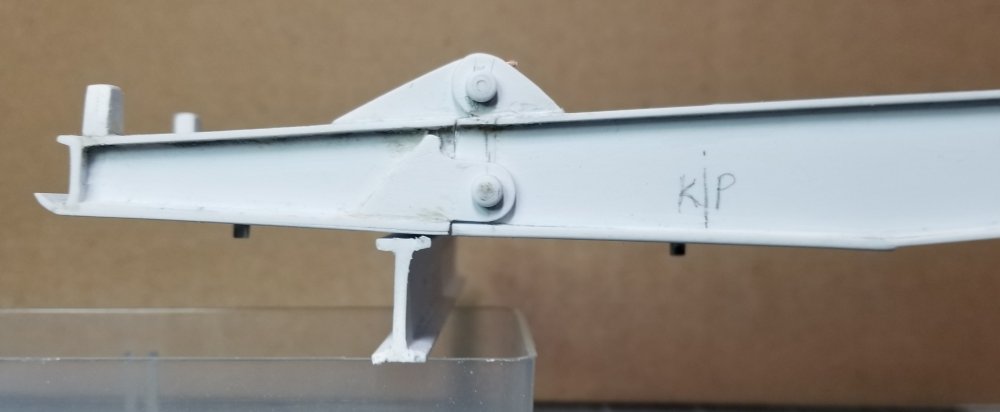
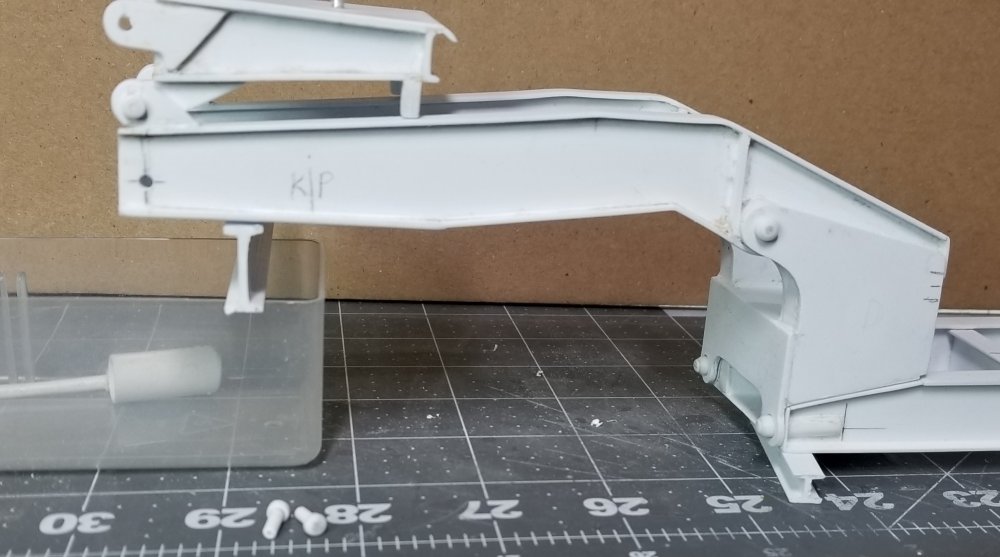
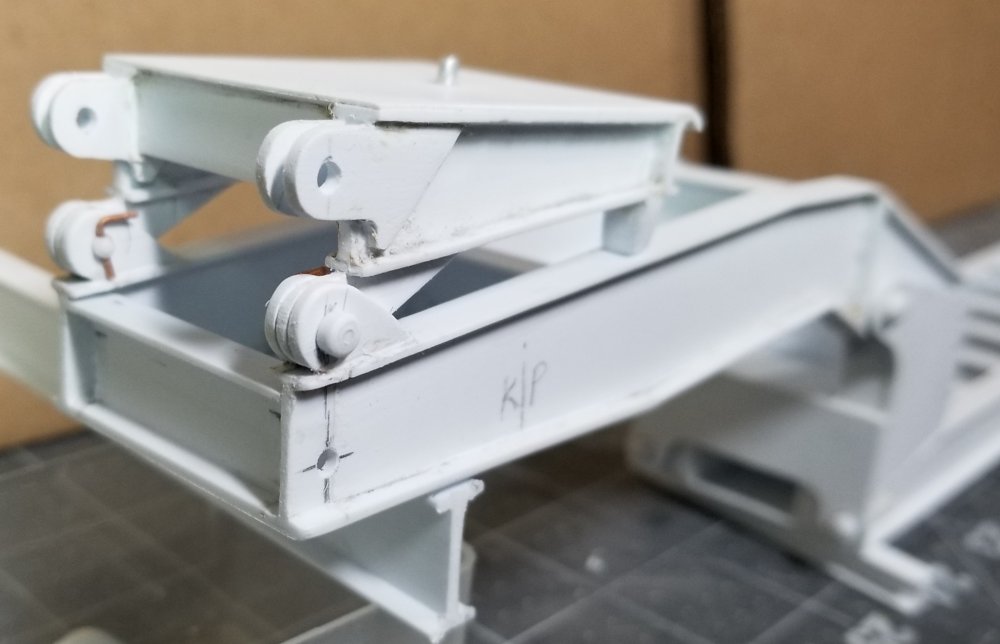
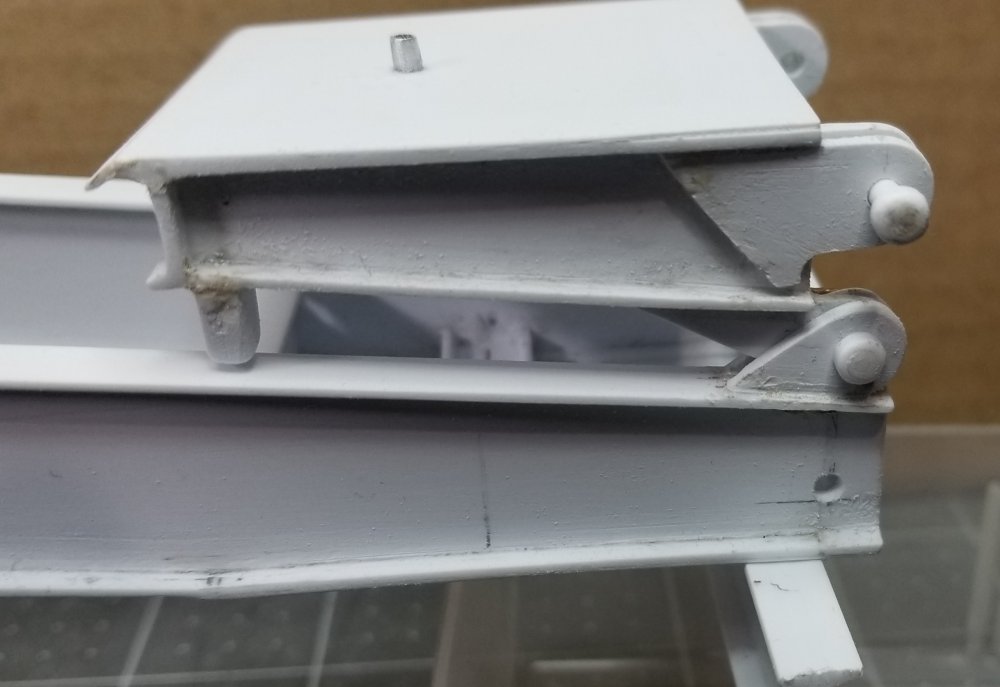
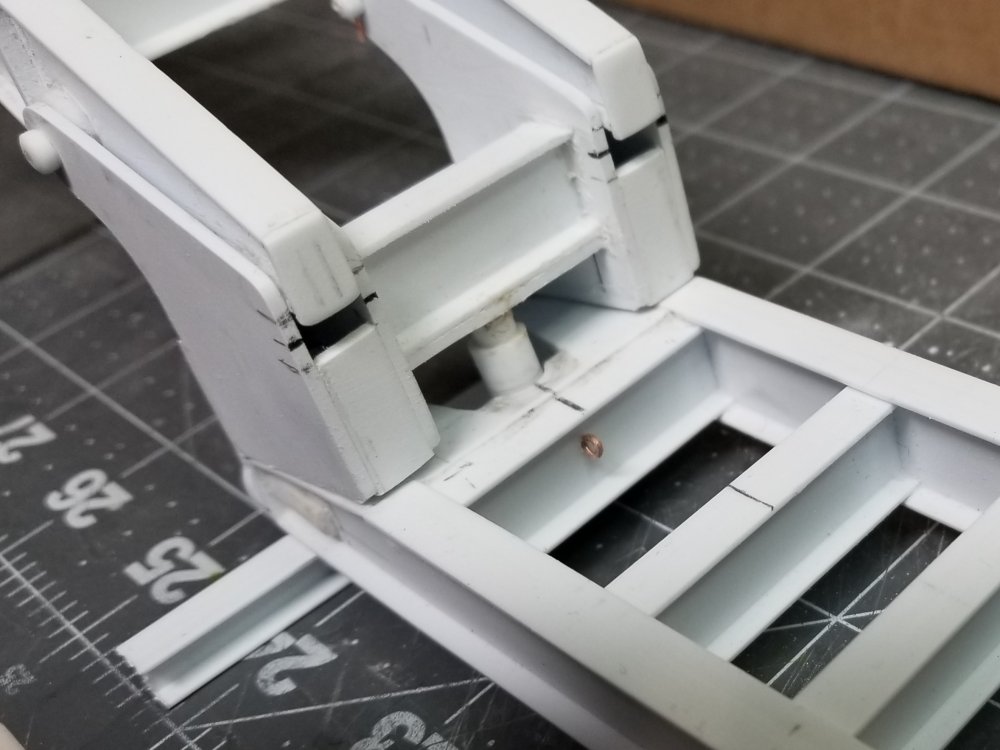
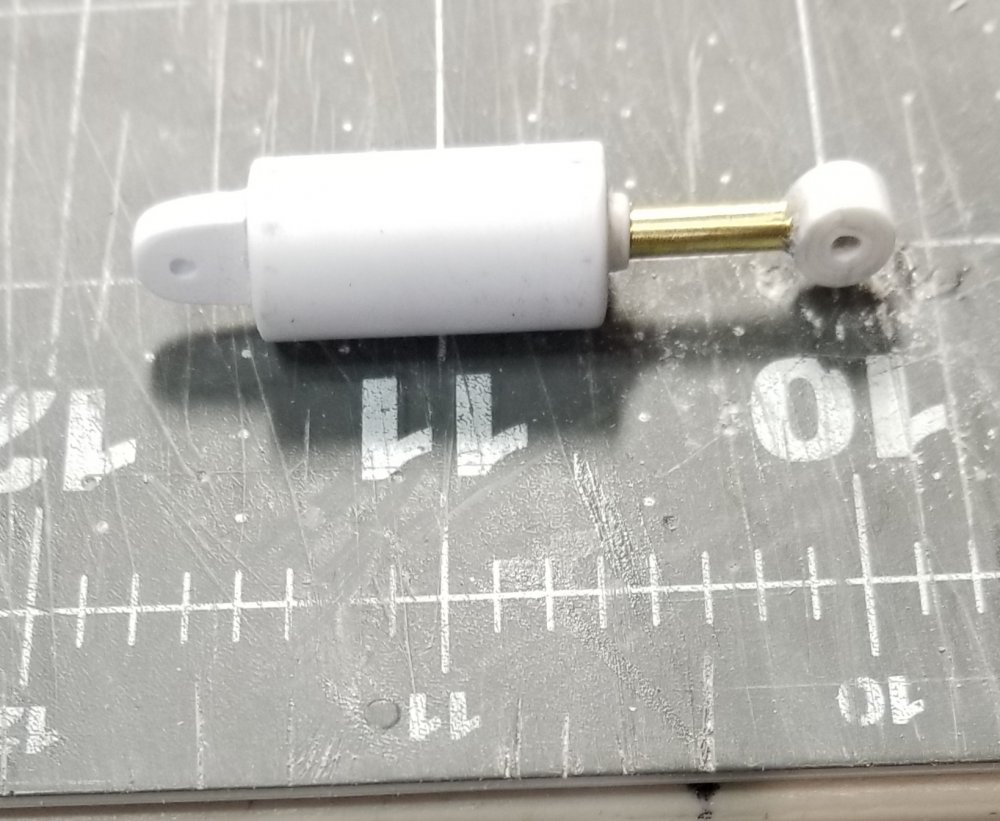
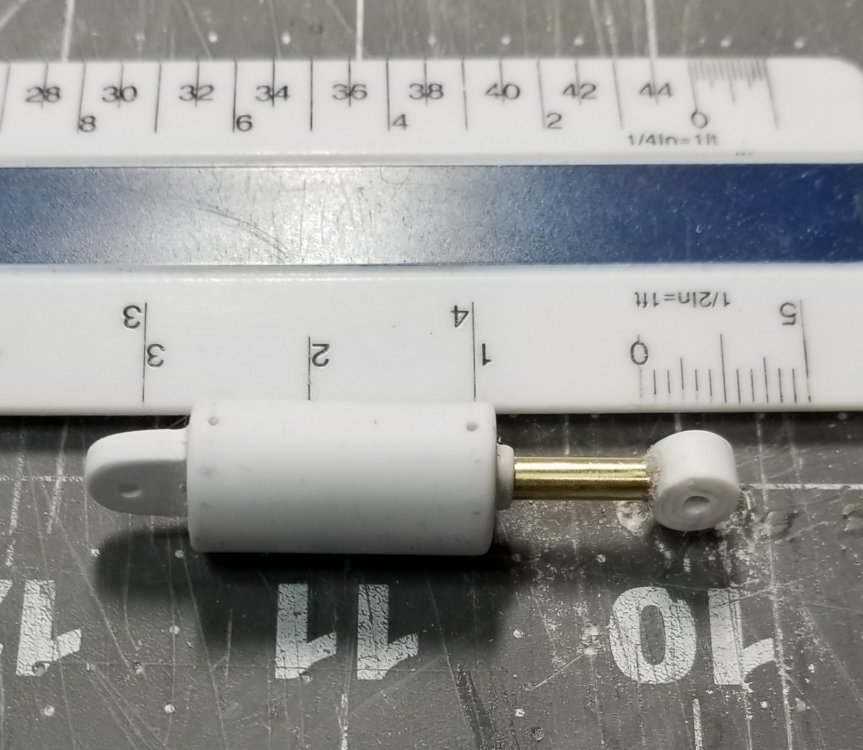
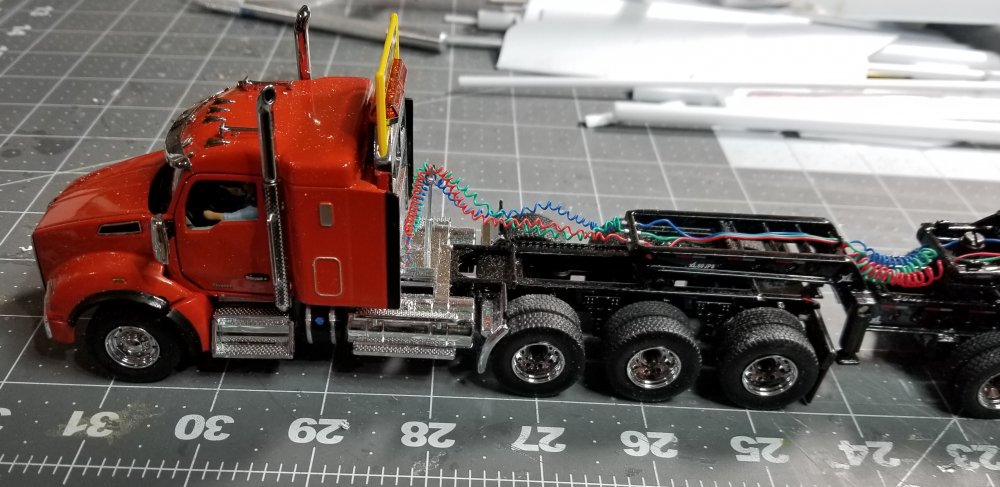
 Hey guys I've done some more work on the gooseneck of the drop nose RGN trailer. I have the power pack done and painted. this view shows the complete power pack. It's kind of hard to see the hydraulic lines because they are black and so is the power pack. The line to the right is the feed line to the tank, if you use the tractor hydraulic system, the pump and motor are to the left. this view shows the Honda 13hp engine and the hydraulic pump. The two silver lines/fittings are the feeds for the main hydraulic cylinders. You can also see the exhaust pipe I added to the engine. this view shows the tank and the feed lines this view shows the feed line fitting from the front flip section, which is connected to the tractor hydraulic system. this view shows the power pack sitting in place in the gooseneck. this view shows the feed line from the front flip section to the hydraulic tank. The loop in the line allows the flip section to work. this view shows the exhaust pipe clearing the frame. I also created from plastic and aluminum tubing the gooseneck support system and hydraulic cylinder. this view shows the support system in the up/retracted position. this view shows the support system in the down/extended position. another view showing the support system in the down position. Well that's it for now be back with more soon. Ron G
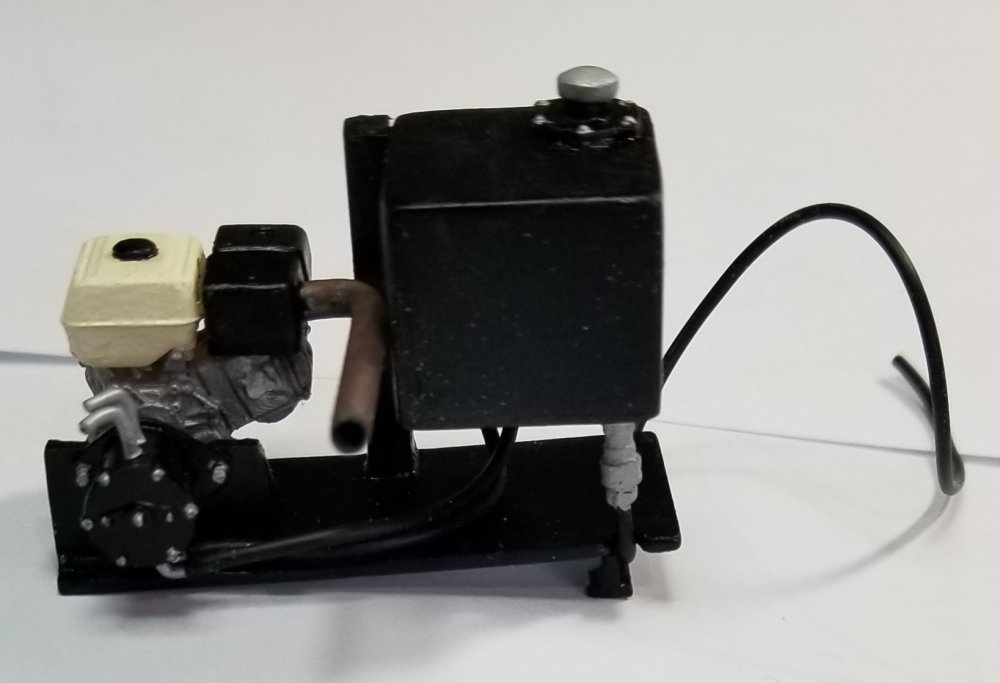


-
Hey guys I'm in the process of figuring out how much to shorten it. Going to make some 72" long custom tanks and custom made headache rack, and want the steps on the drivers side to work with the headache rack. It's probably going to be around 280" - 288" W/B. Ron G
-
Thanks buddy Ron G
-
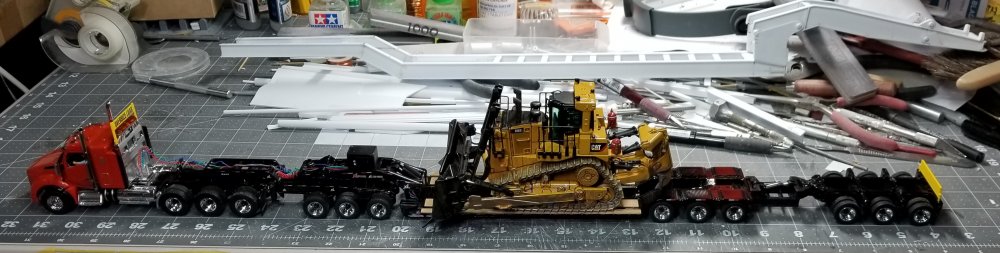
Hey Jeff I just measured it and works out to be approximately 5.00 feet long!!! Tractor is 17.0" total length, 13.875" frt. Bumper to king pin.(this is at the 310.0" W/B) Jeep is aroind 13.0" total length, 6.50" king pin of jeep to king pin on flip section of trailer. Trailer is 29.0" total length, 28.25" from flip section king pin to rear of trailer. Stinger (booster) is 11.00" total length. So 13.875" + 6.50" + 28.25" + 11.00" = 59.625" almost 5 feet. So you would definitely need permits. ...lol Ron G
-
Hey Jeff When I first started building the Revell Peterbilt 359 I wasn't up on what was really practical, I just thought that it would be cool and wanted it to have enough fuel to go, say 2500 miles. I wasn't thinking about permits and restrictions I found out about all that by doing some research, watching YouTube videos and from you my friend. I'm actually considering redoing the tractor to a more practical length, right now it's 310.0" wheelbase. What do you think would be appropriate, keeping in mind I want it to be a tridem (two drive axles, one lift axle) large tank/tanks and headache rack, three axle jeep and stinger. I believe that it might be over 53', I will measure it and let you know. Thanks for the comments and all your help. Ron G
-
Hey Jeff Yeah, wait till I add the jeep and booster(stinger) Ron G
-
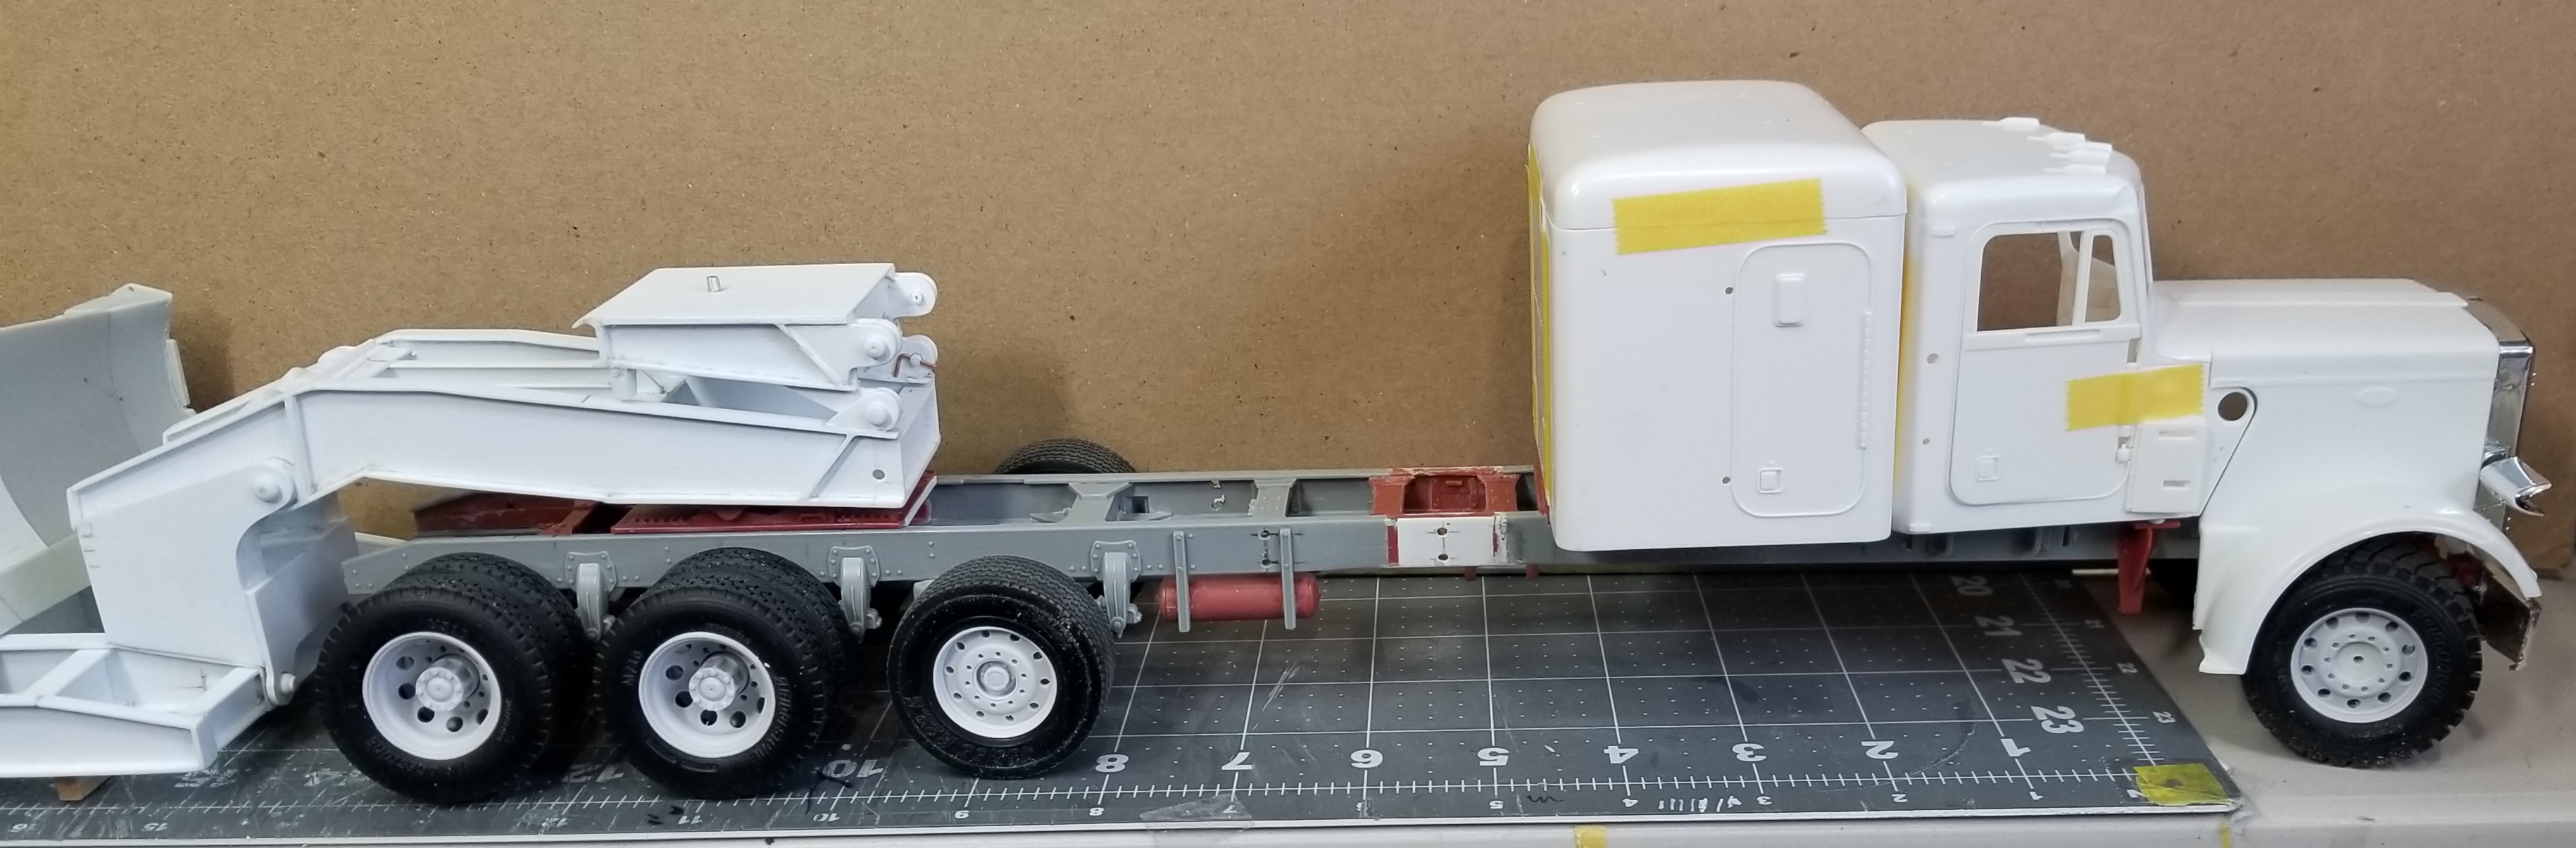
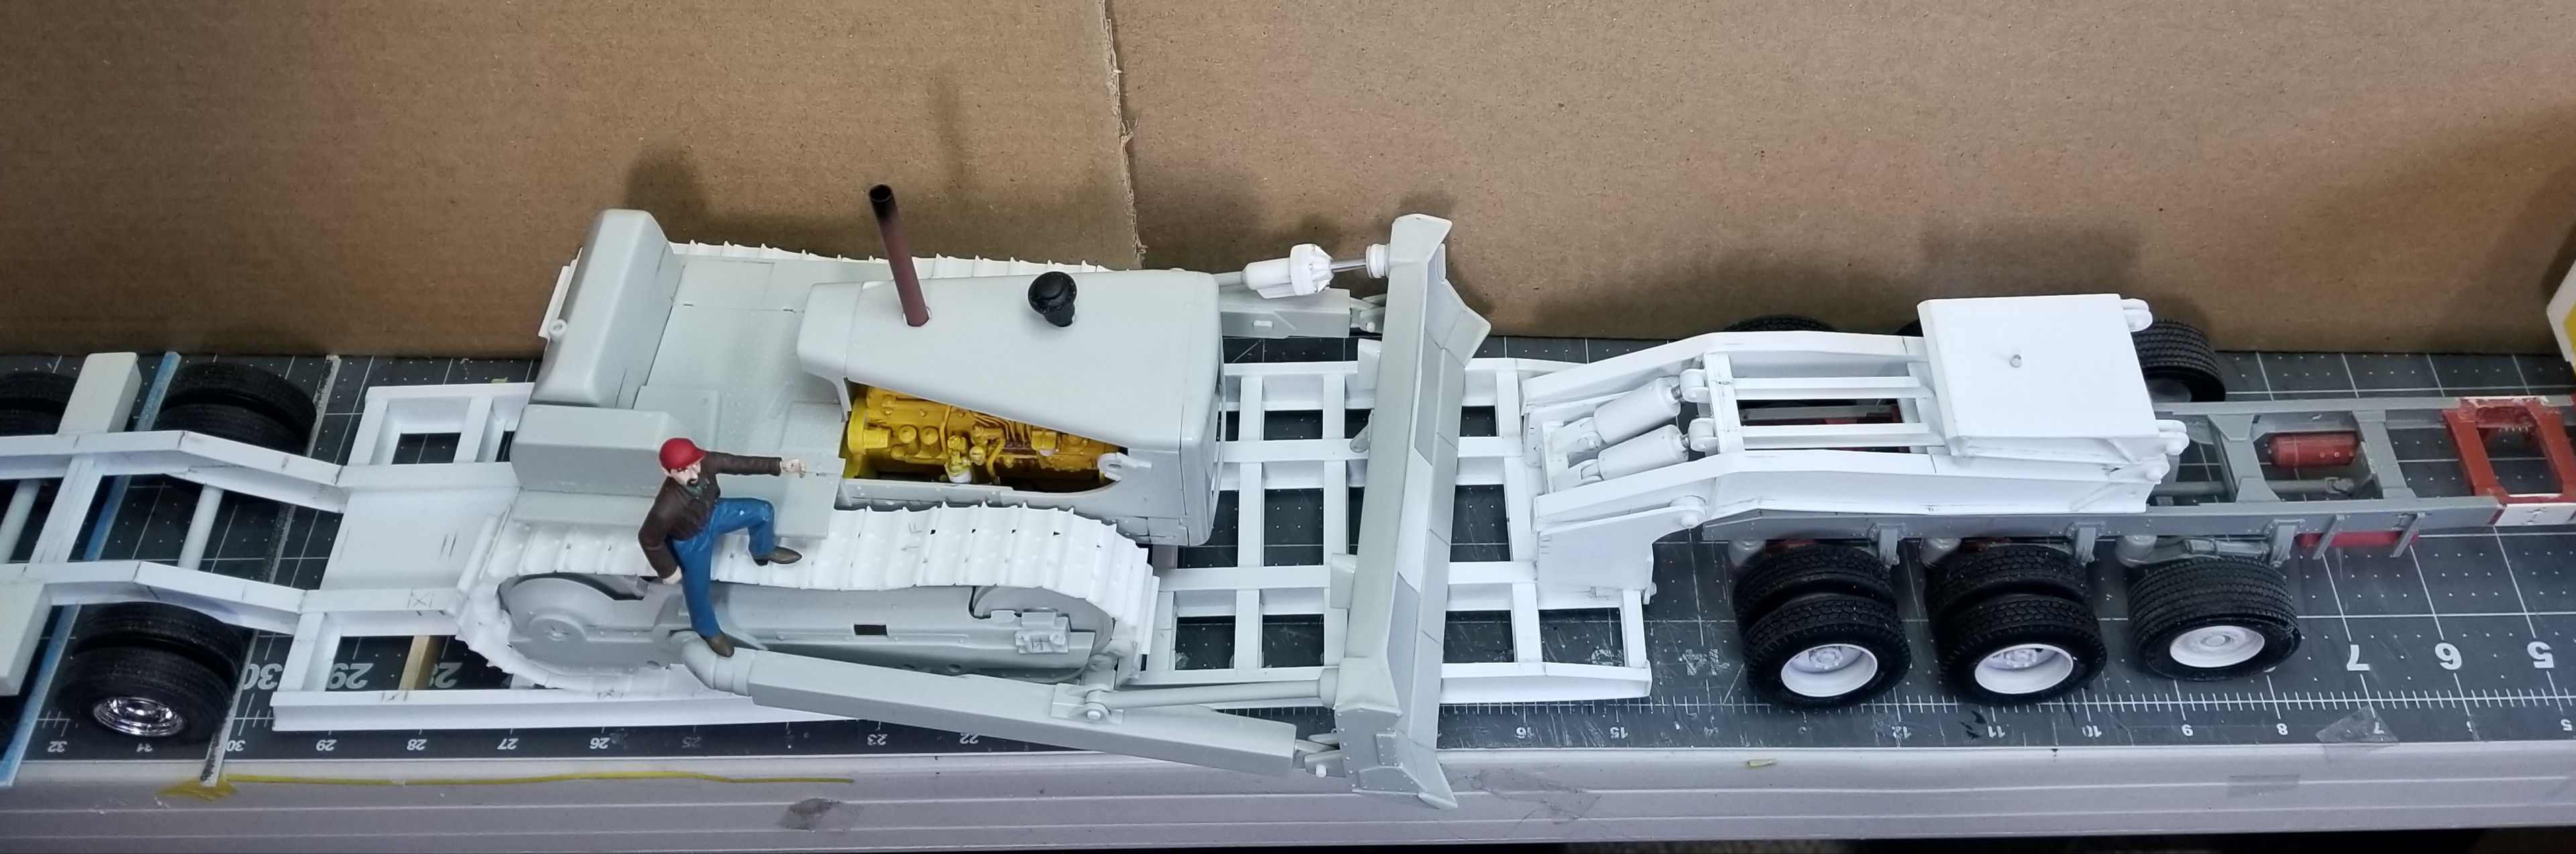
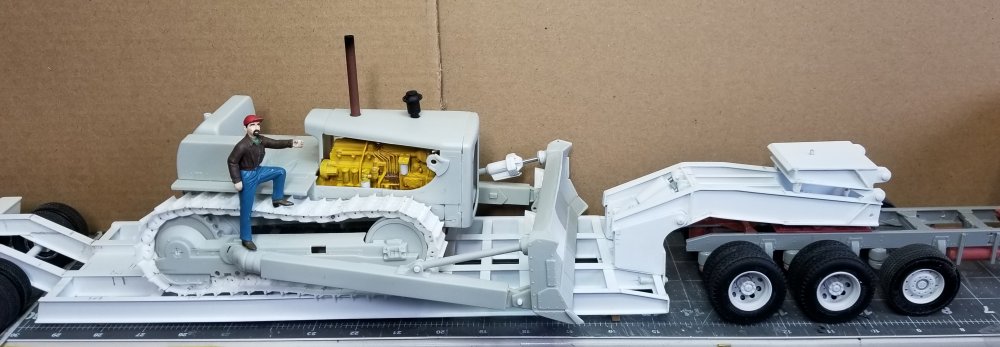
Hey all Thanks for the comments. I did a little work on my Revell Peterbilt 359 custom heavy haul tractor. I have the wheels/tires pretty much done, ready for paint. I temporarily put it together to see how it fits with the lowboy trailer. here it is with my AMT D8H dozer. I think it looks assume together. What do you guys think? close up view of the tractor. closer view of the D8H dozer. view looking down on the D8H and trailer. Well that's it for now be back soon. Ron G


-
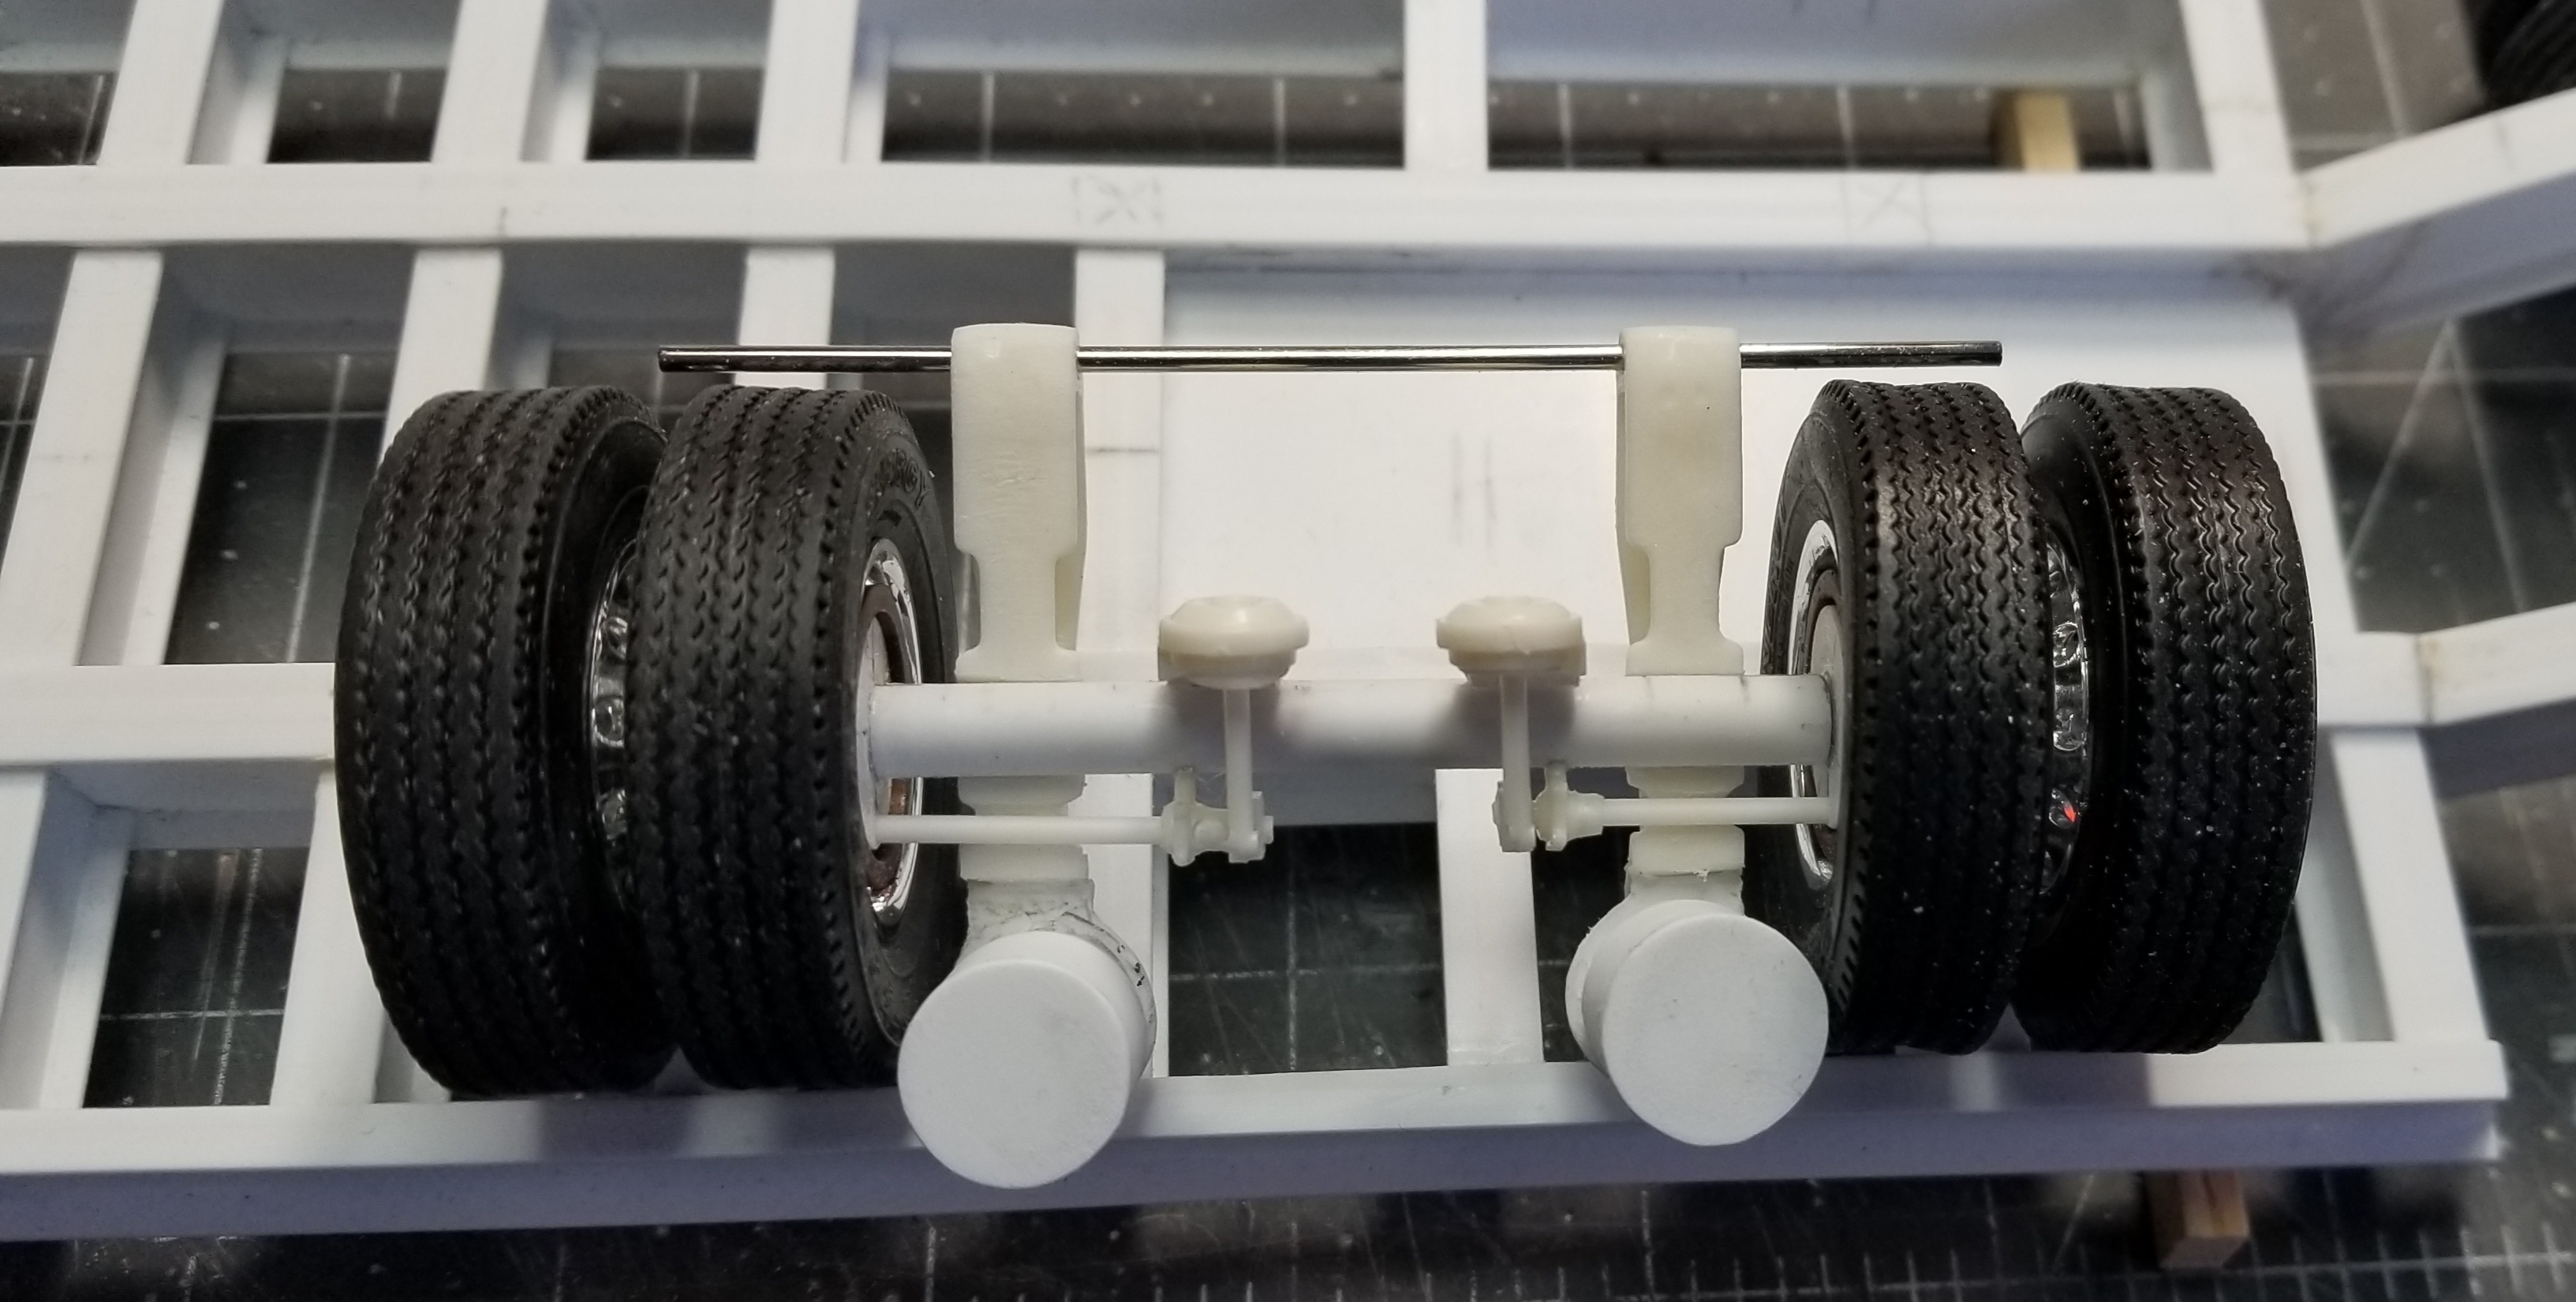
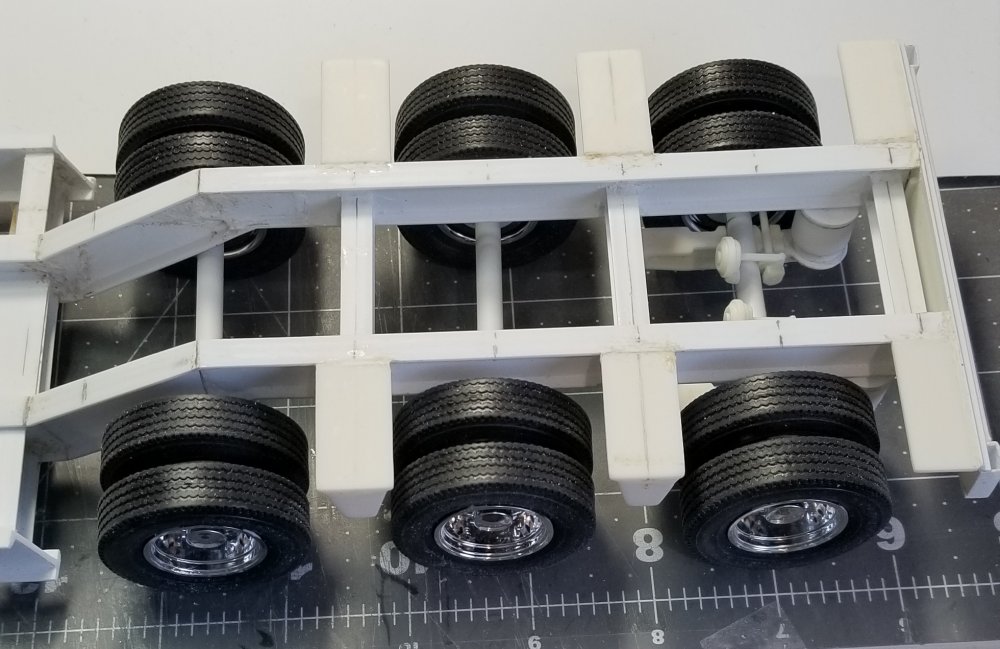
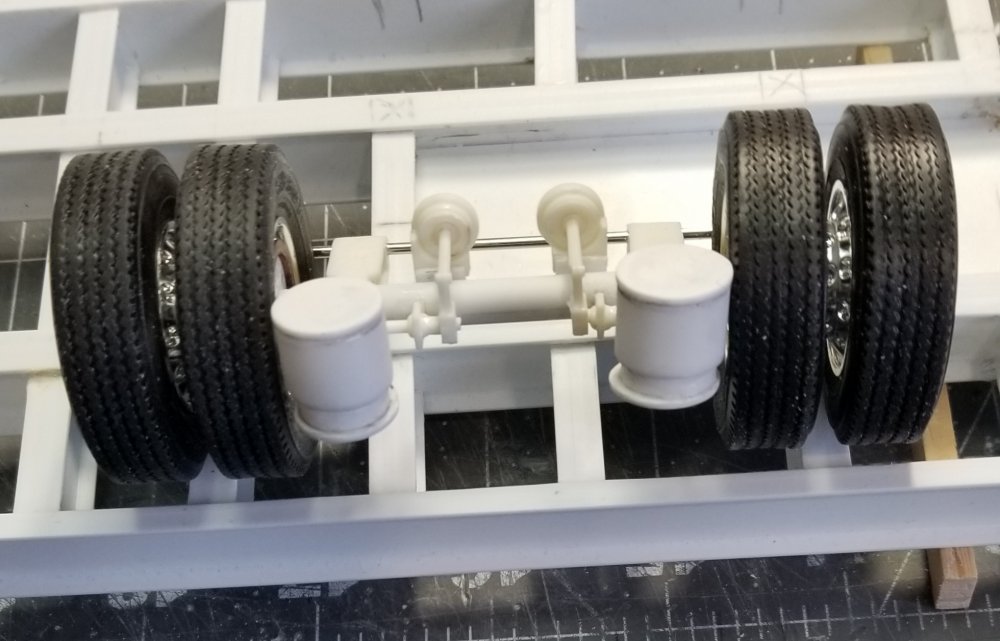
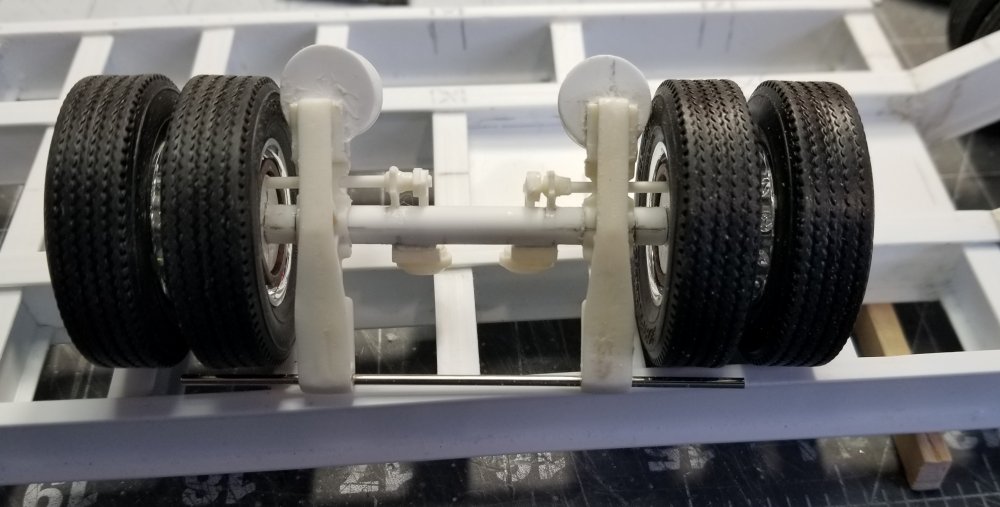
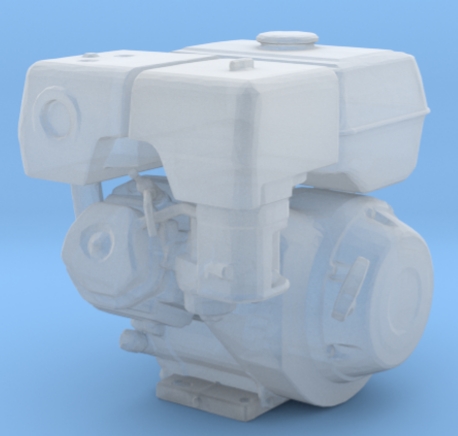
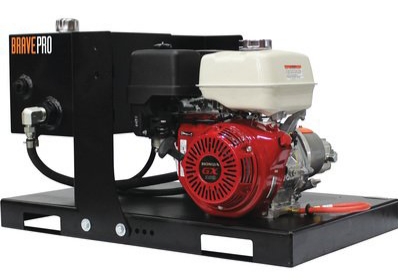
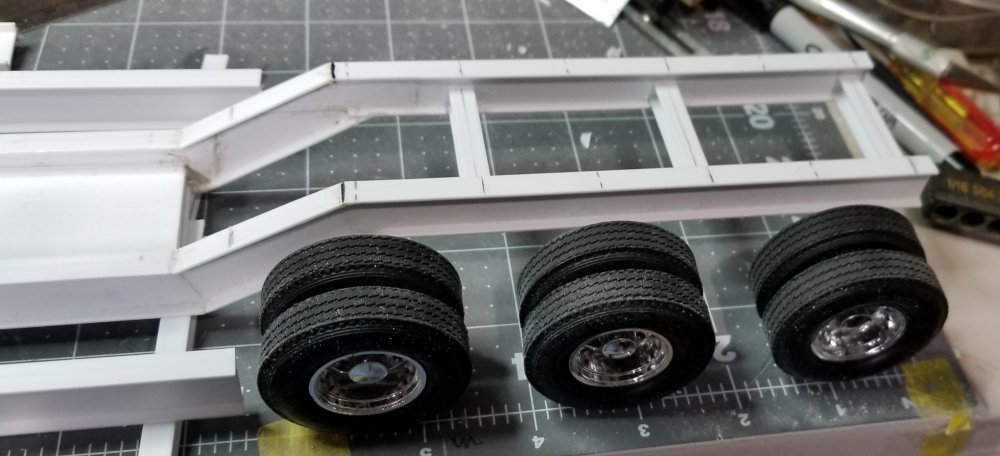
Hey all I got some more work done on the trailer. I've been working on the suspension, axles and brakes. this view shows the three axles sitting in place. this view shows the rear axle that I made from parts of the AMT lowboy kit and some plastic tube and card stock. here is another view of the rear axle. bottom view of the rear axle. I'm not really satisfied with this, so I think I'm going to replace it with som 3D printed ones I ordered from Shapways. this view shows the 3D printed axle set up. this view shows the actual 3D printed part. I'm really hoping that these work out ok. We'll see when they get here in a week. I have also been working on the hydraulic power pack set up. It will consist of a hydraulic tank (scratch built), a hydraulic pump (also scratch built) and a 3D printed 13hp Honda engine. this view shows the 3D printed Honda engine. thisi s what I'm talking about. another view of the power pack. Well that's it for now be back with more updates soon. Ron G

-
Hey Hjorleifur that would work but right know FCA is upgrading to a new version of NX and nothing is working, IT problems. Ron G
-
Hey Hj]orleifur I'm using Unigraphics NX16, my wife works for FCA (Chrysler) and is furlowed at home because of the Covid crisis. So ive been using her laptop setup to do my designs. Sad thing is once she goes back to work it's all gone Ron G
-
Well, almost all scratch built, I purchased the wheels and tires from Moebius...lol Ron G
-
Thanks Harv
-
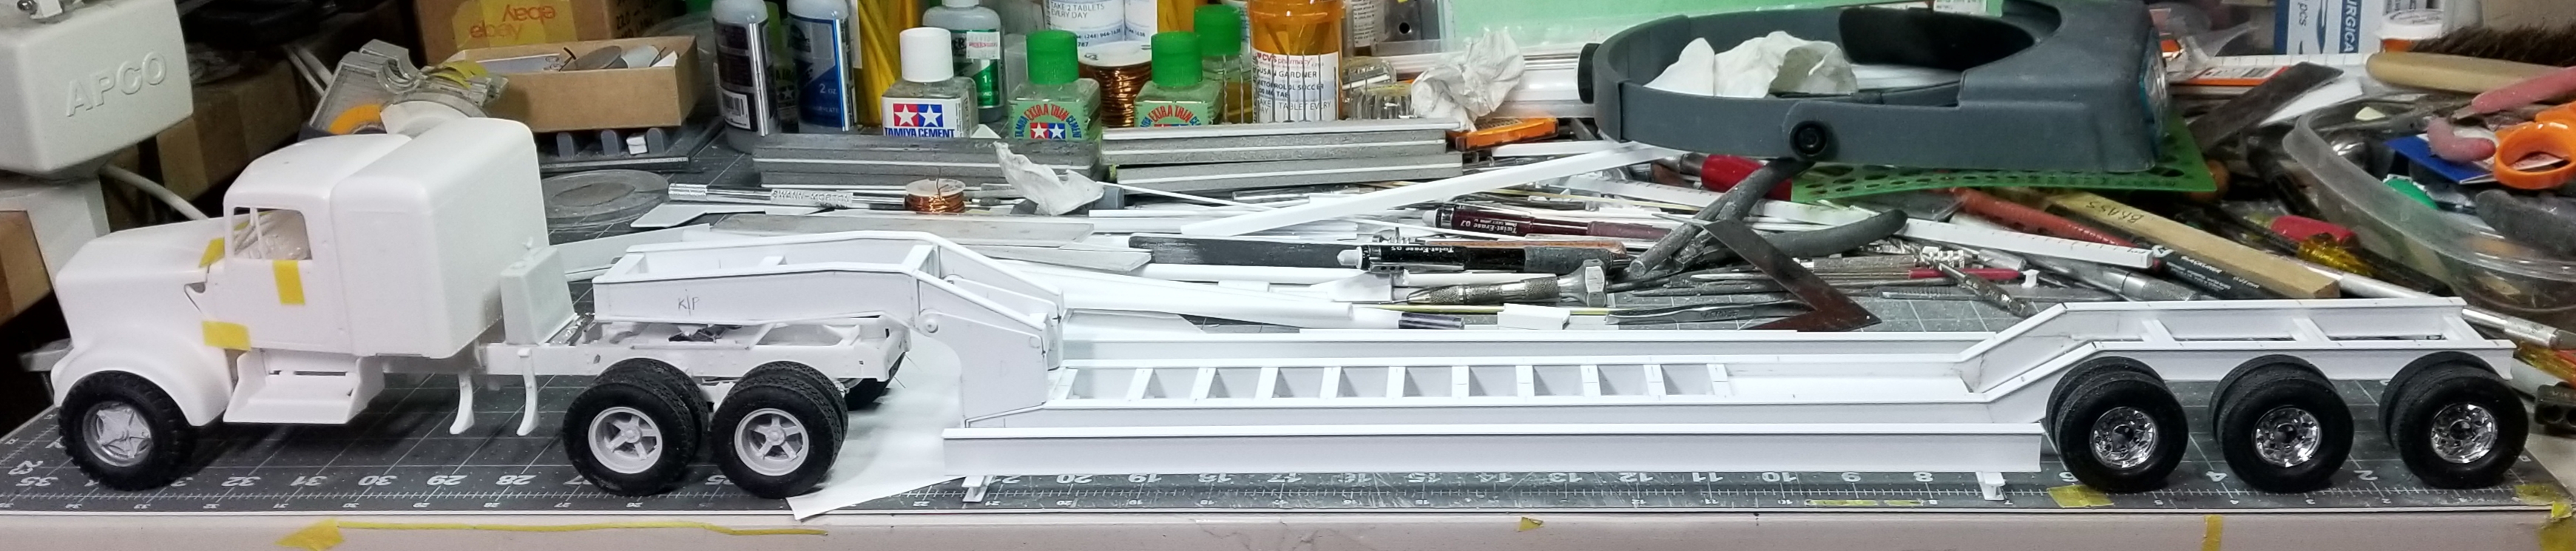
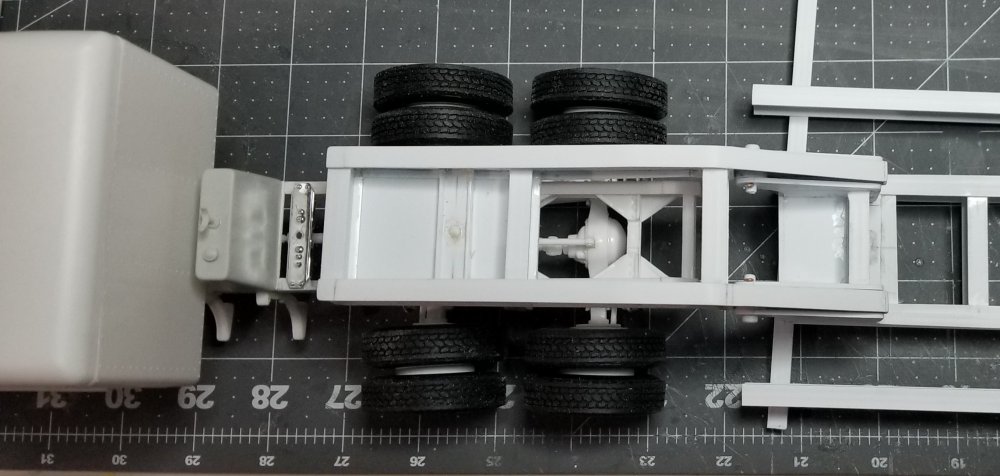
Hey all Got more done on the lowboy trailer. side view showing the lowboy trailer and my Kenworth W925. top down view of the trailer. this view shows the rear of the trailer. The yellower white plastic is from the AMT lowboy trailer kit modified to fit. side view of the rear area of the trailer showing the AMT parts added on. rear view of the trailer showing the tail light area. Still need to do more work on this. top down view of the trailer bed. I ran out of 1/2" 'I' beams, need to go to the hobby store for more. It's getting there but still alot more needs to be done. Well that's it for now be back soon with more updates. Ron G


-
Thanks guys Ron G
-
Thanks Harv There's still a whole lot to do yet. Ron G
-
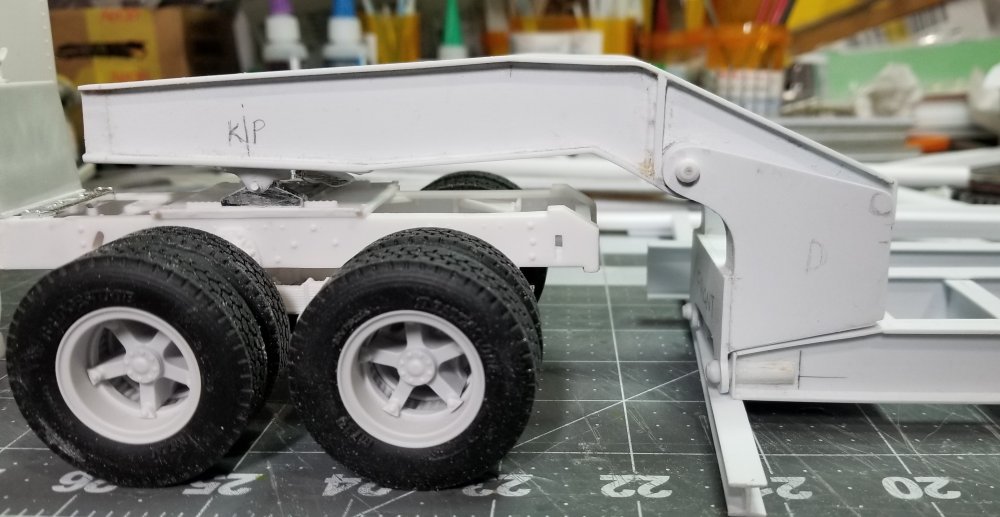
Hey all Just a small update, I have the lift cylinders done now. I started on the outer trailer frame, deck boards, outriggers and "D" rings...etc. this view shows the main lift cylinders, and you can see the outer deck rail. view looking down at the lift cylinders and beginnings of the deck. Thats it for now be back with more soon Ron G
-
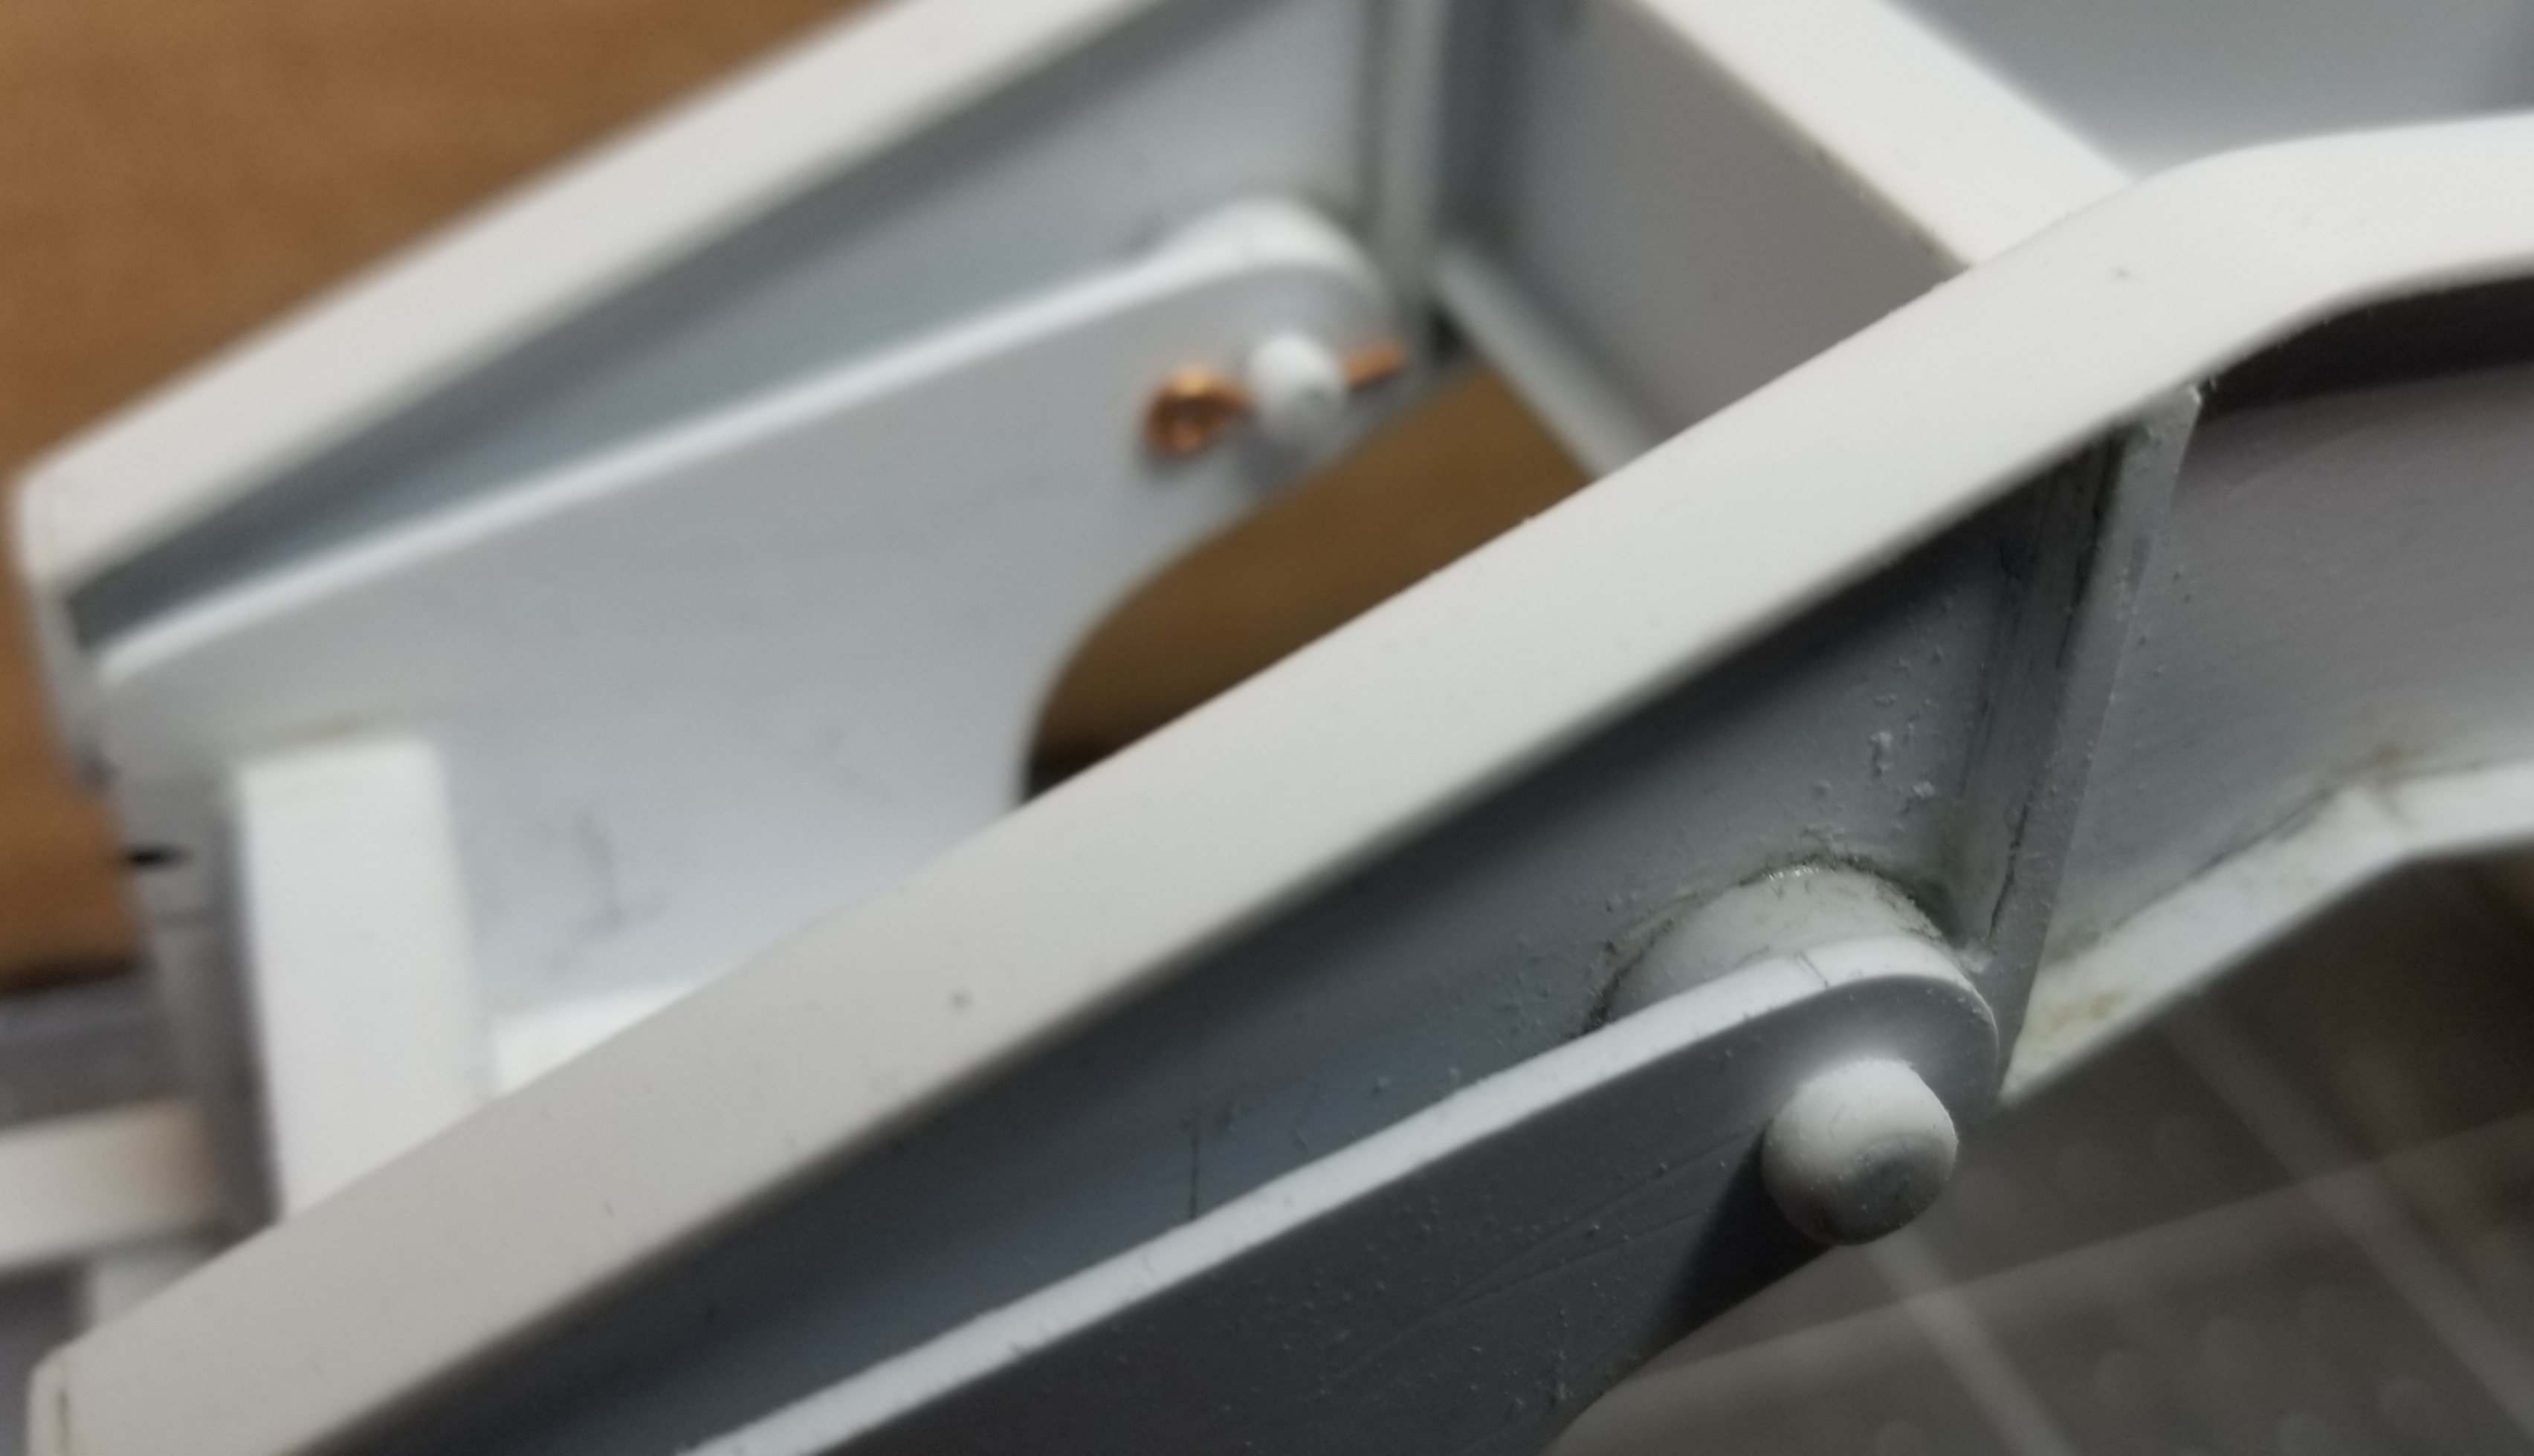
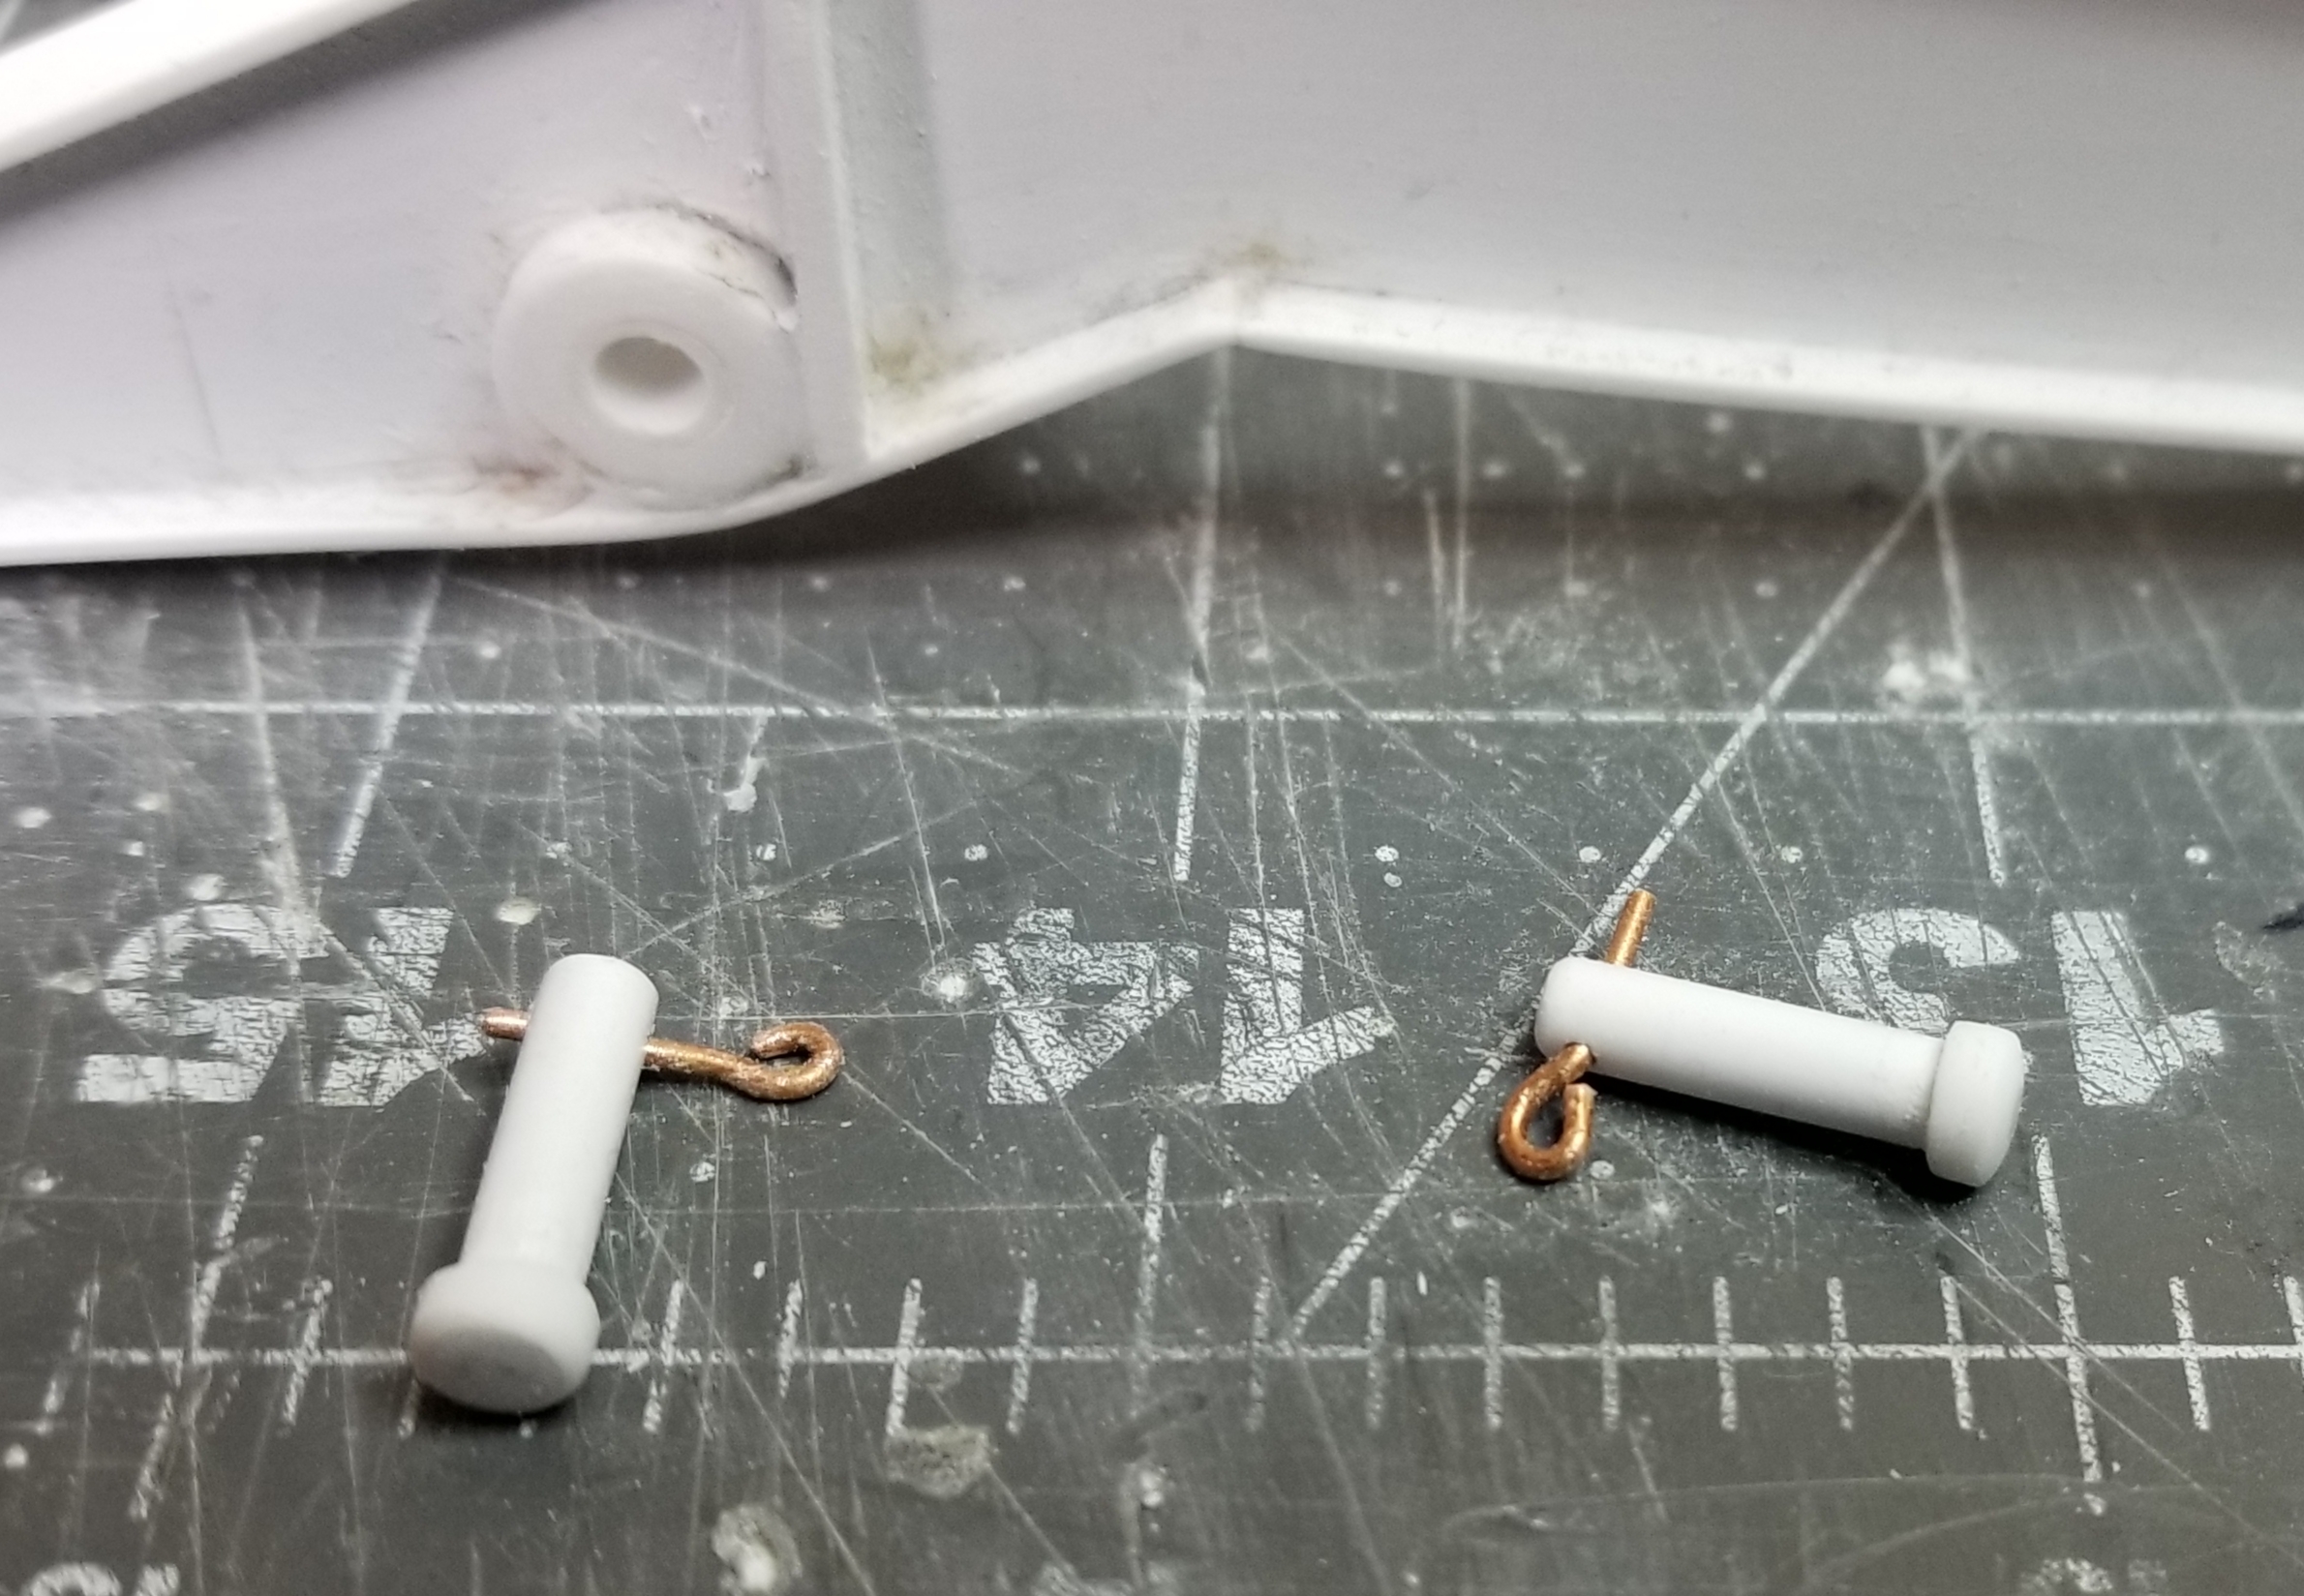
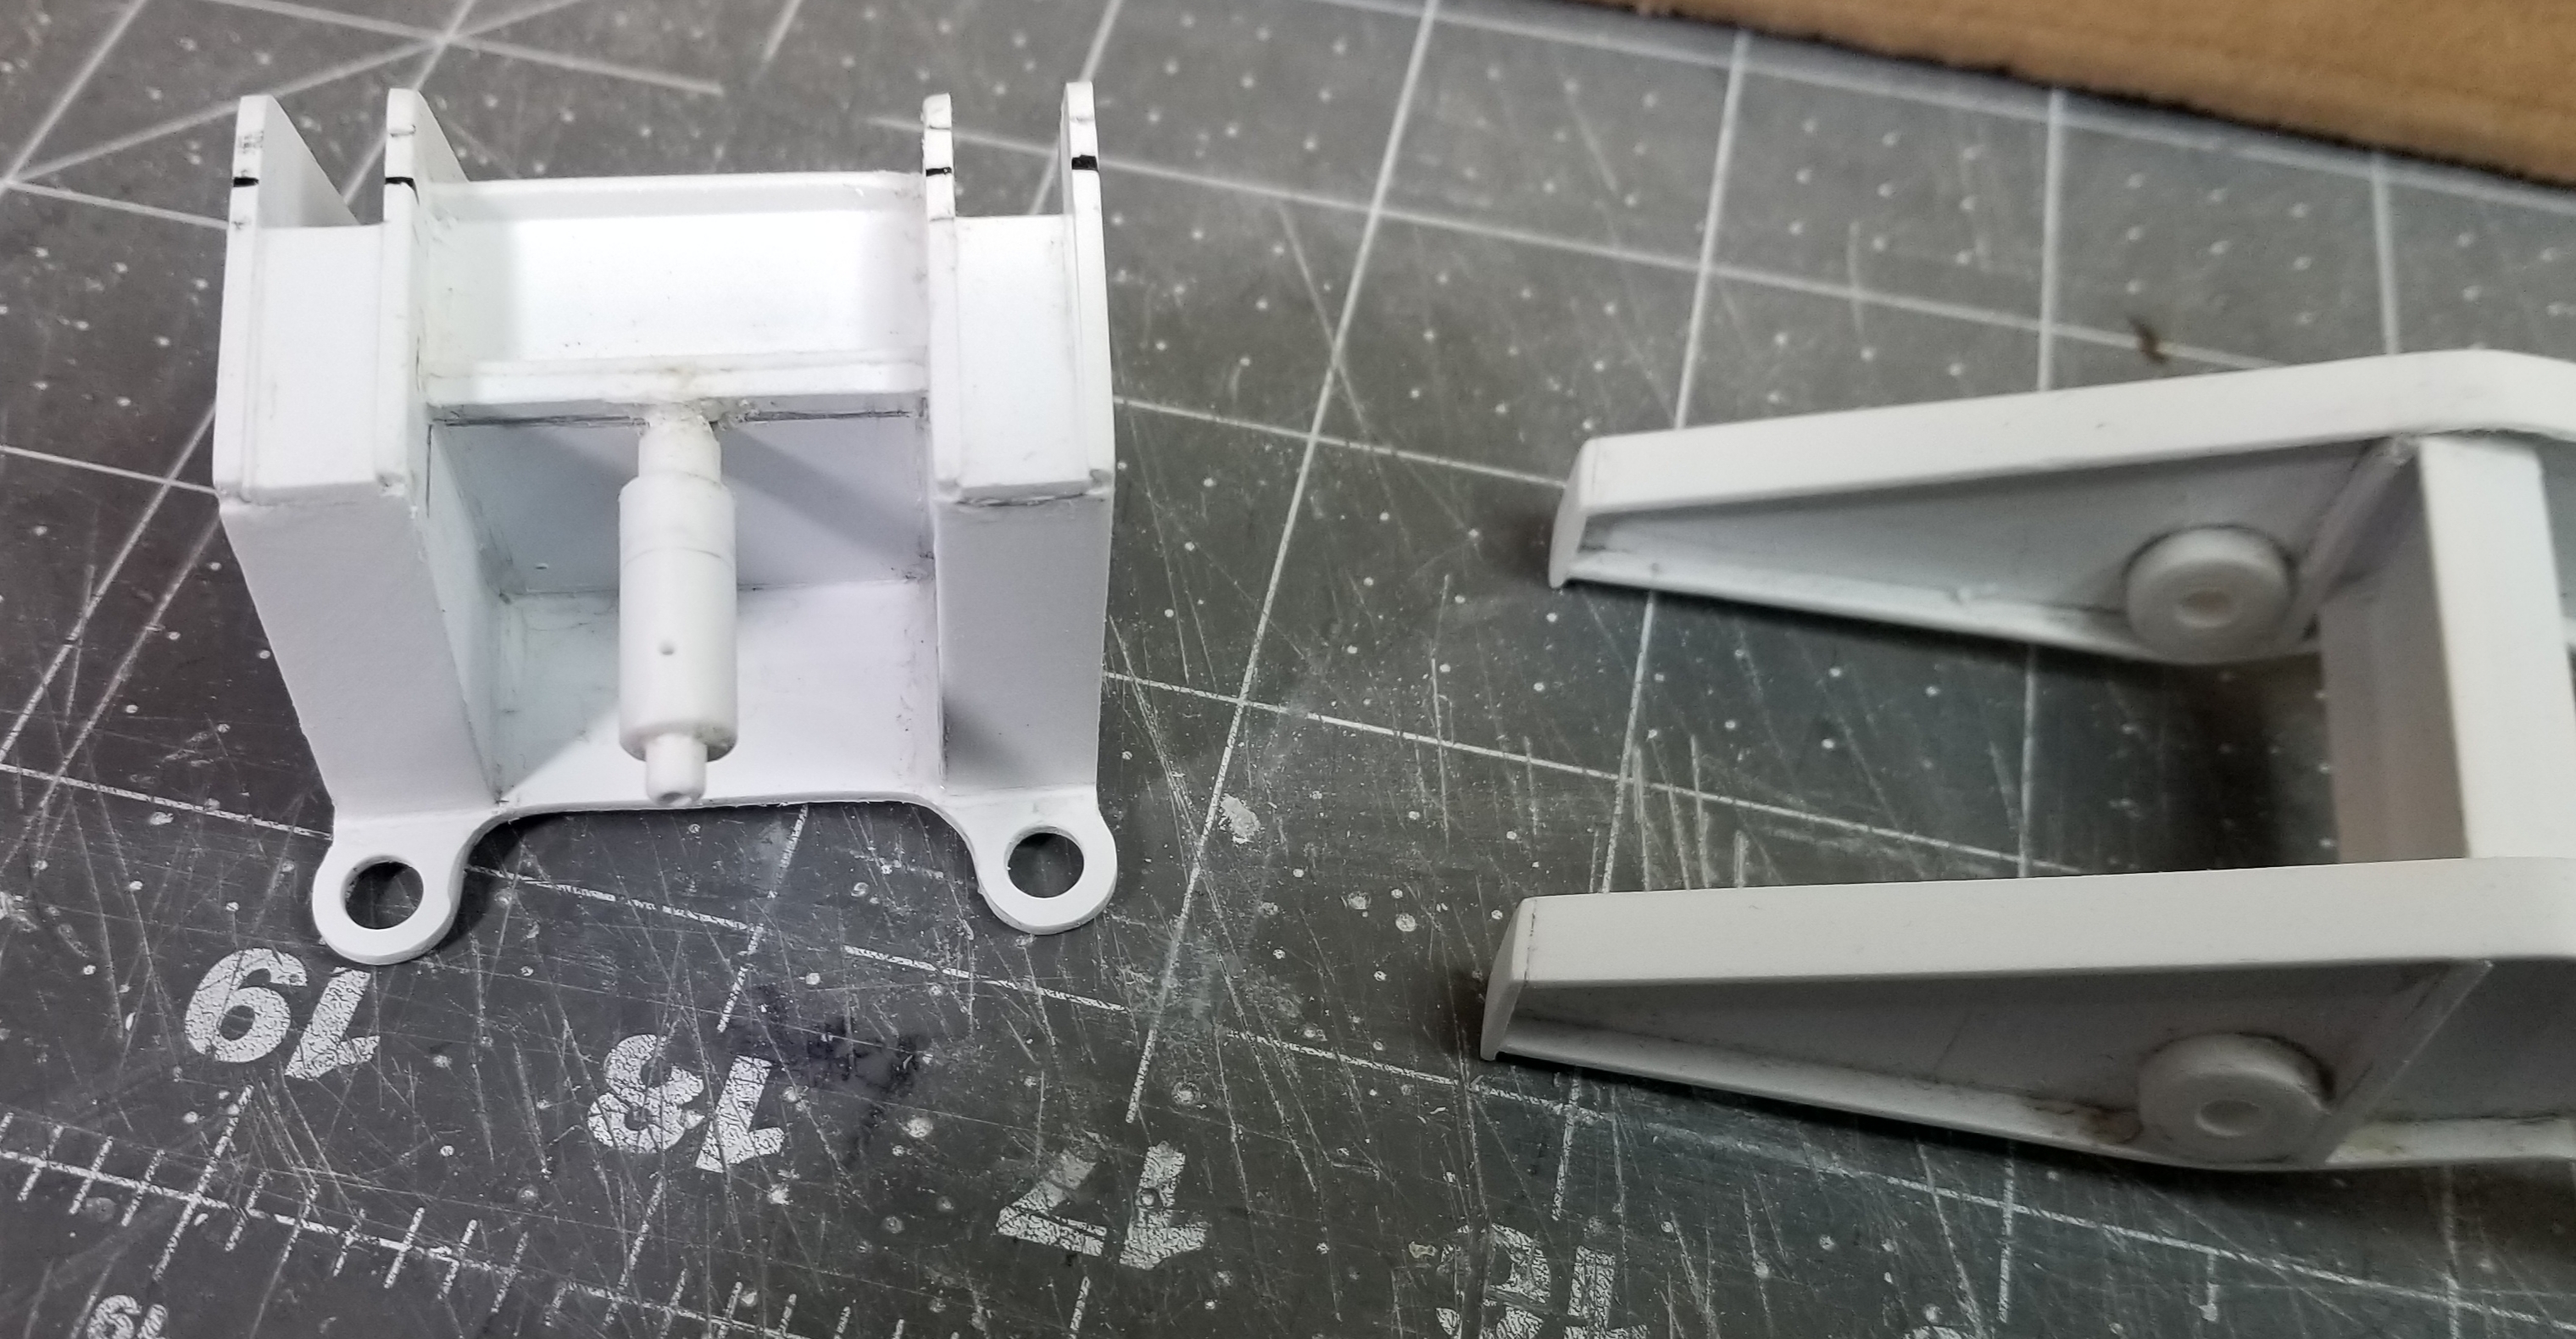
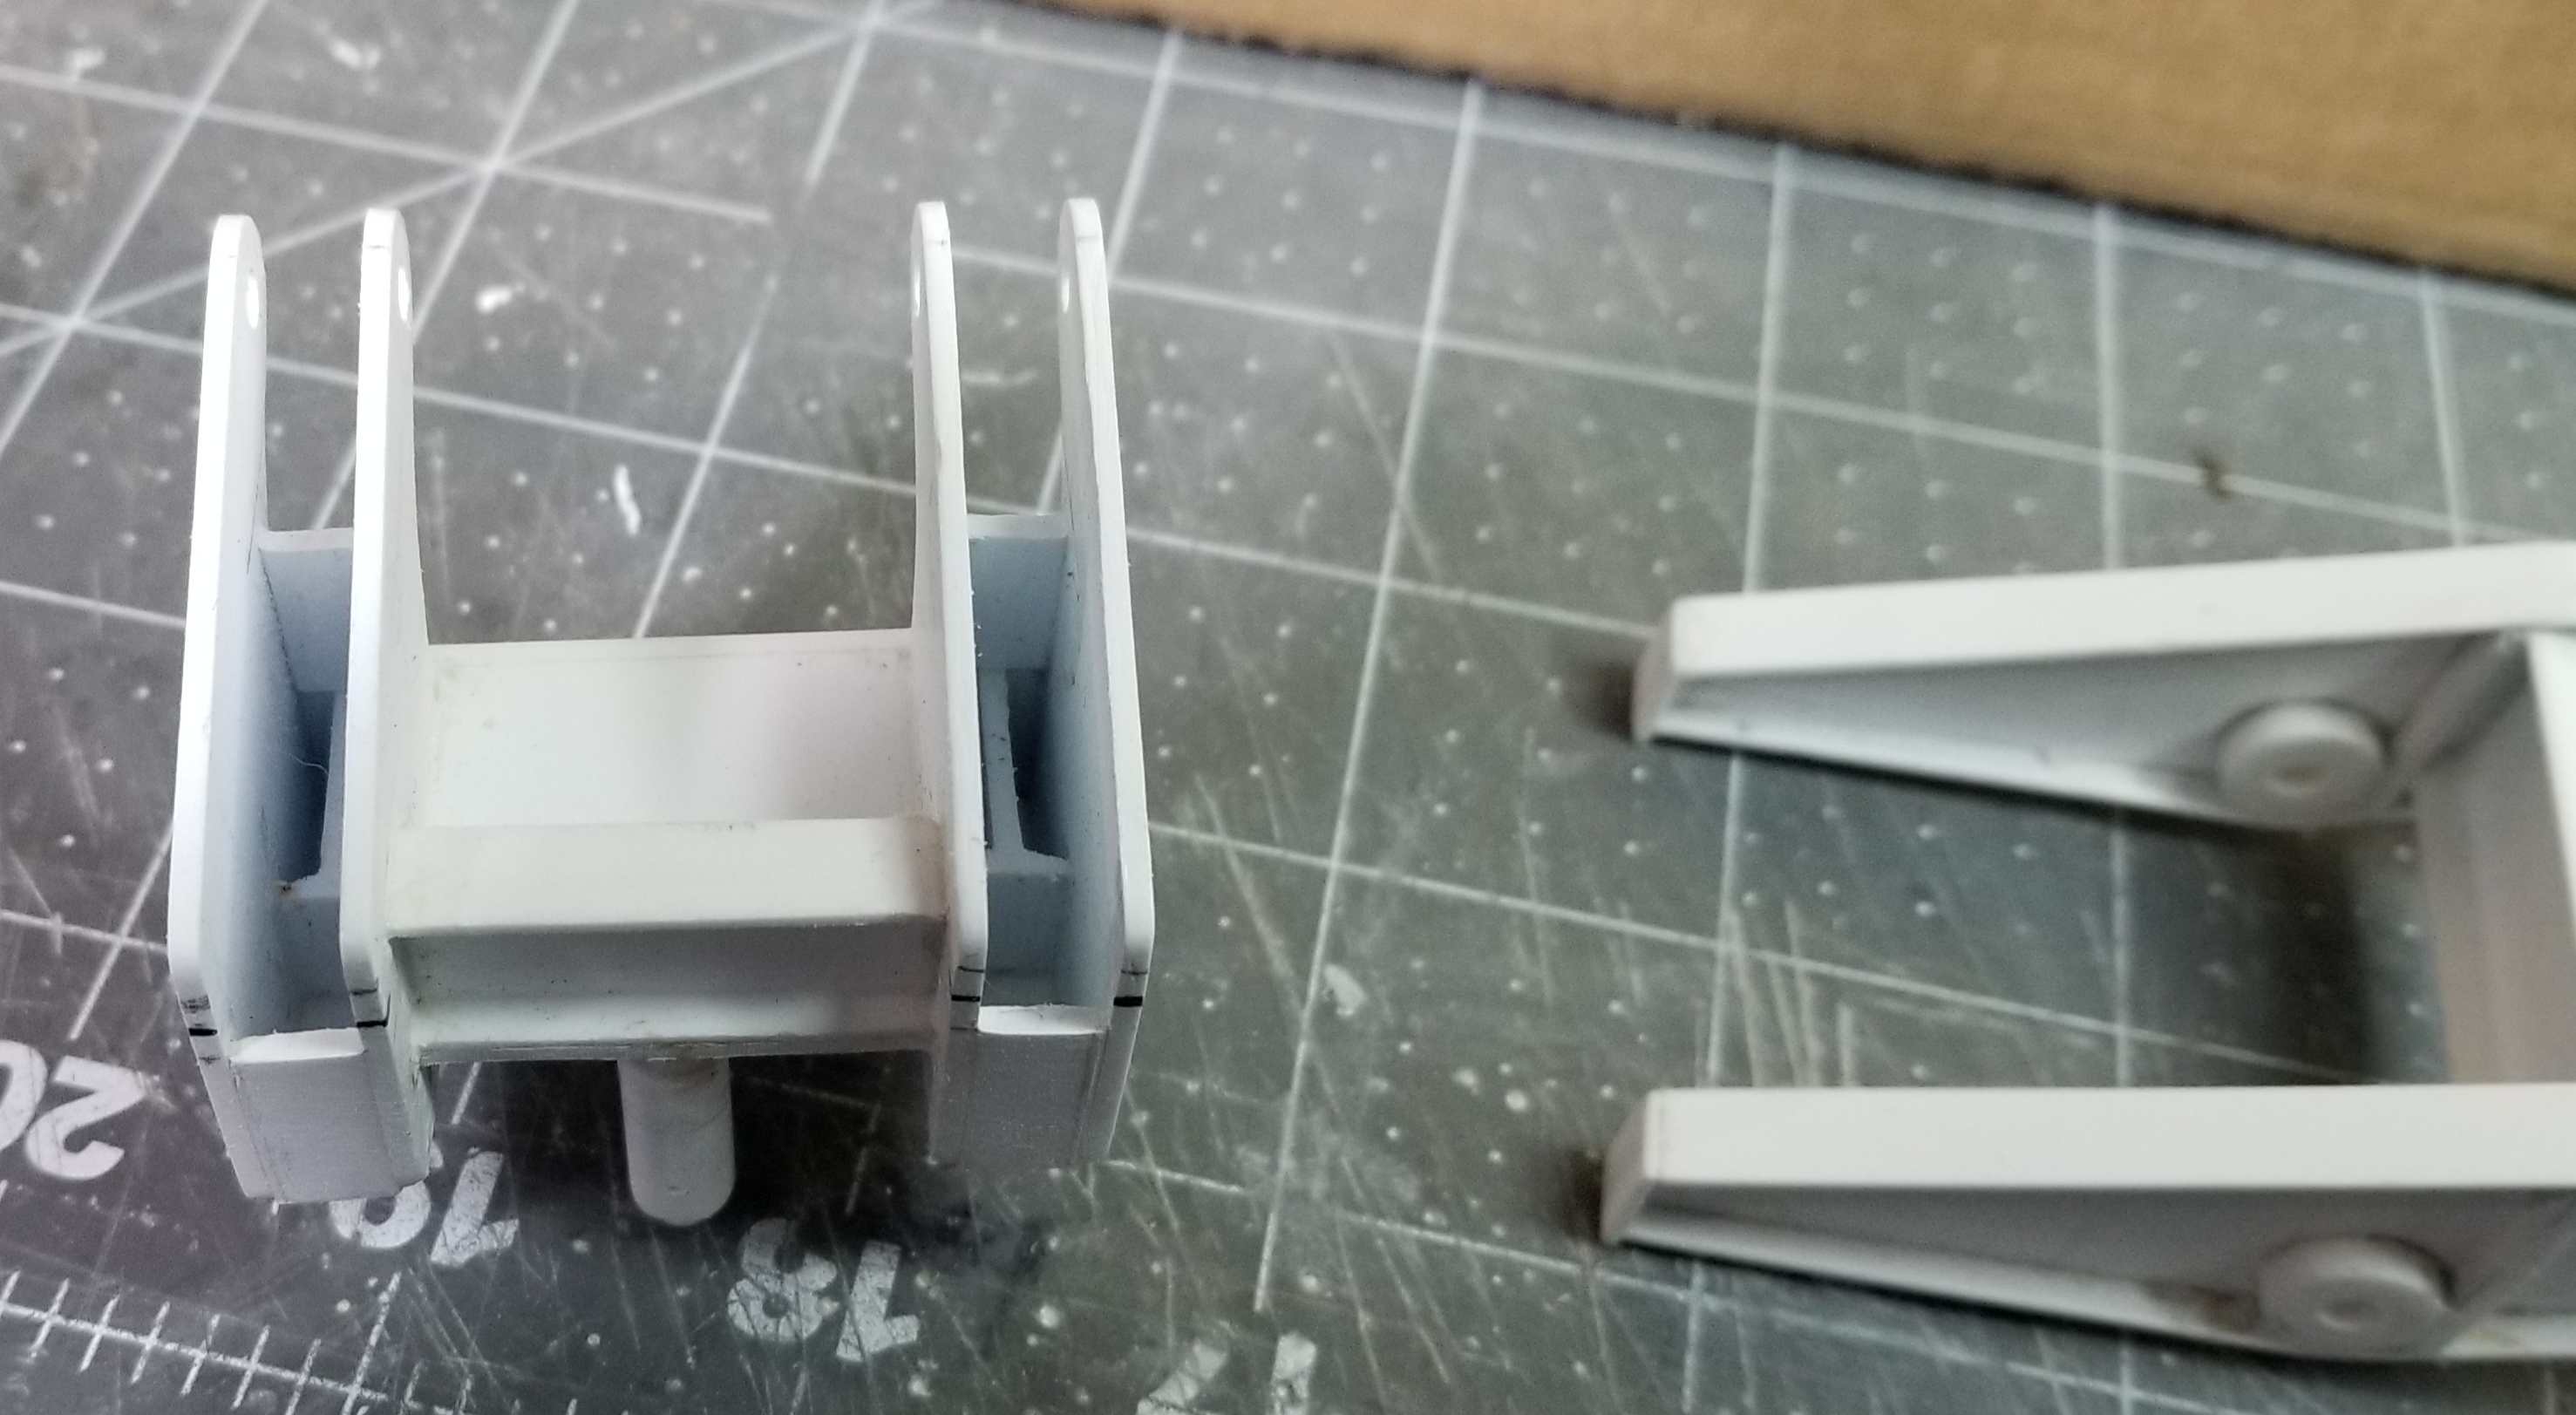
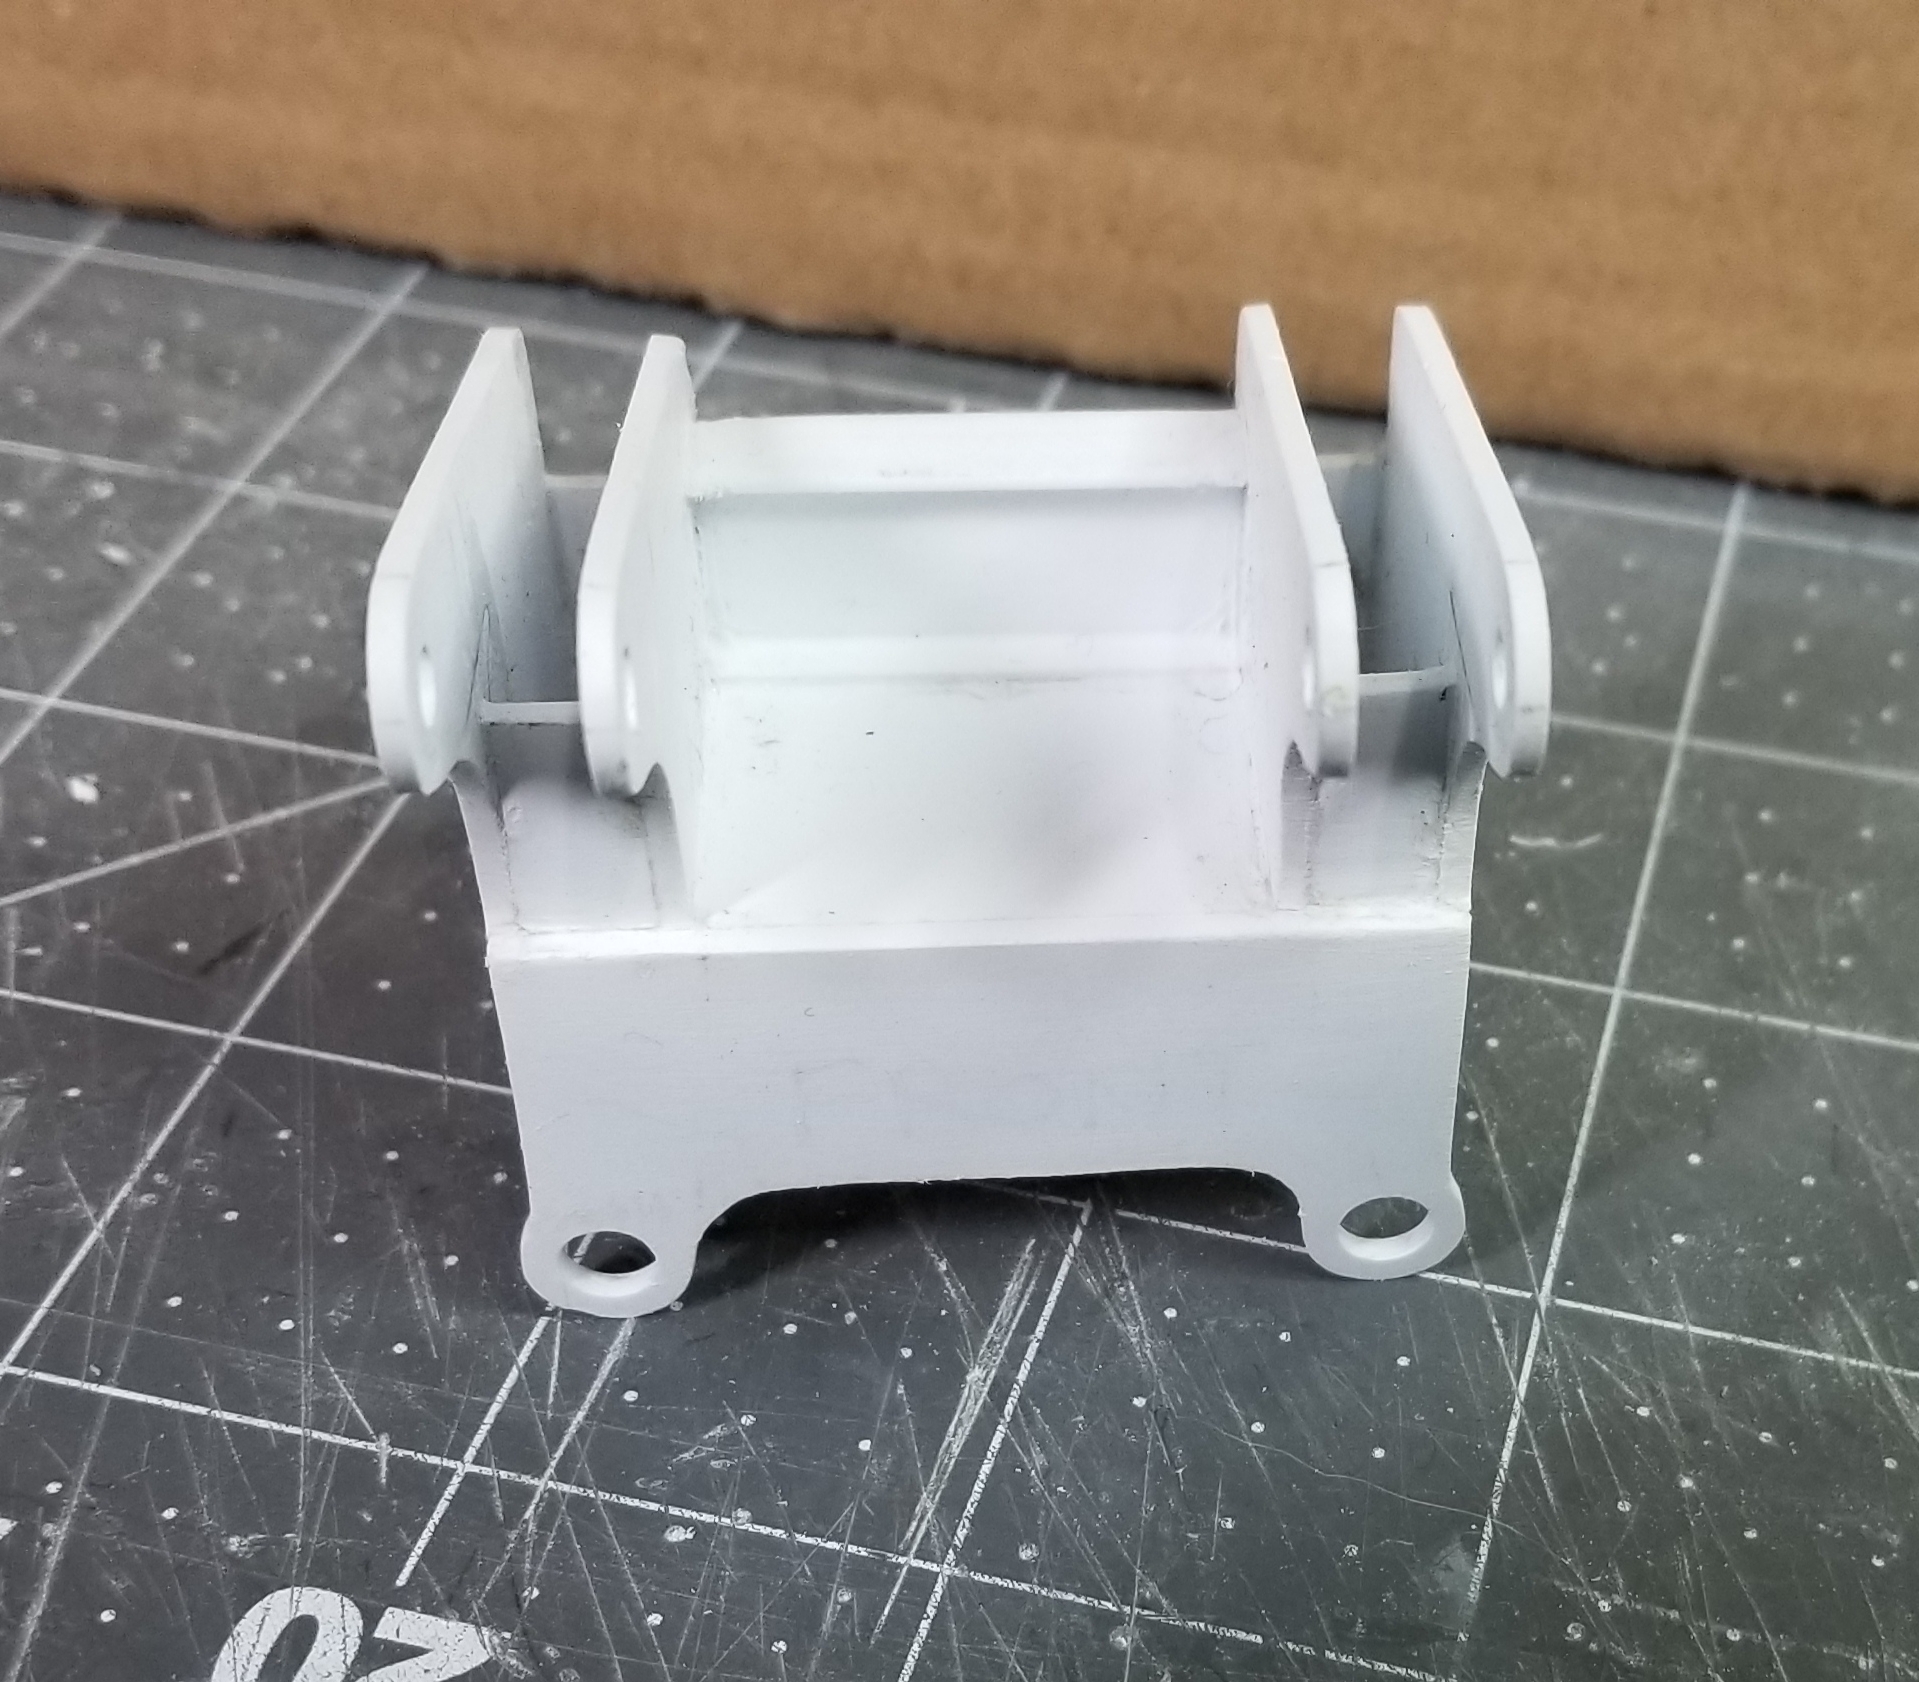
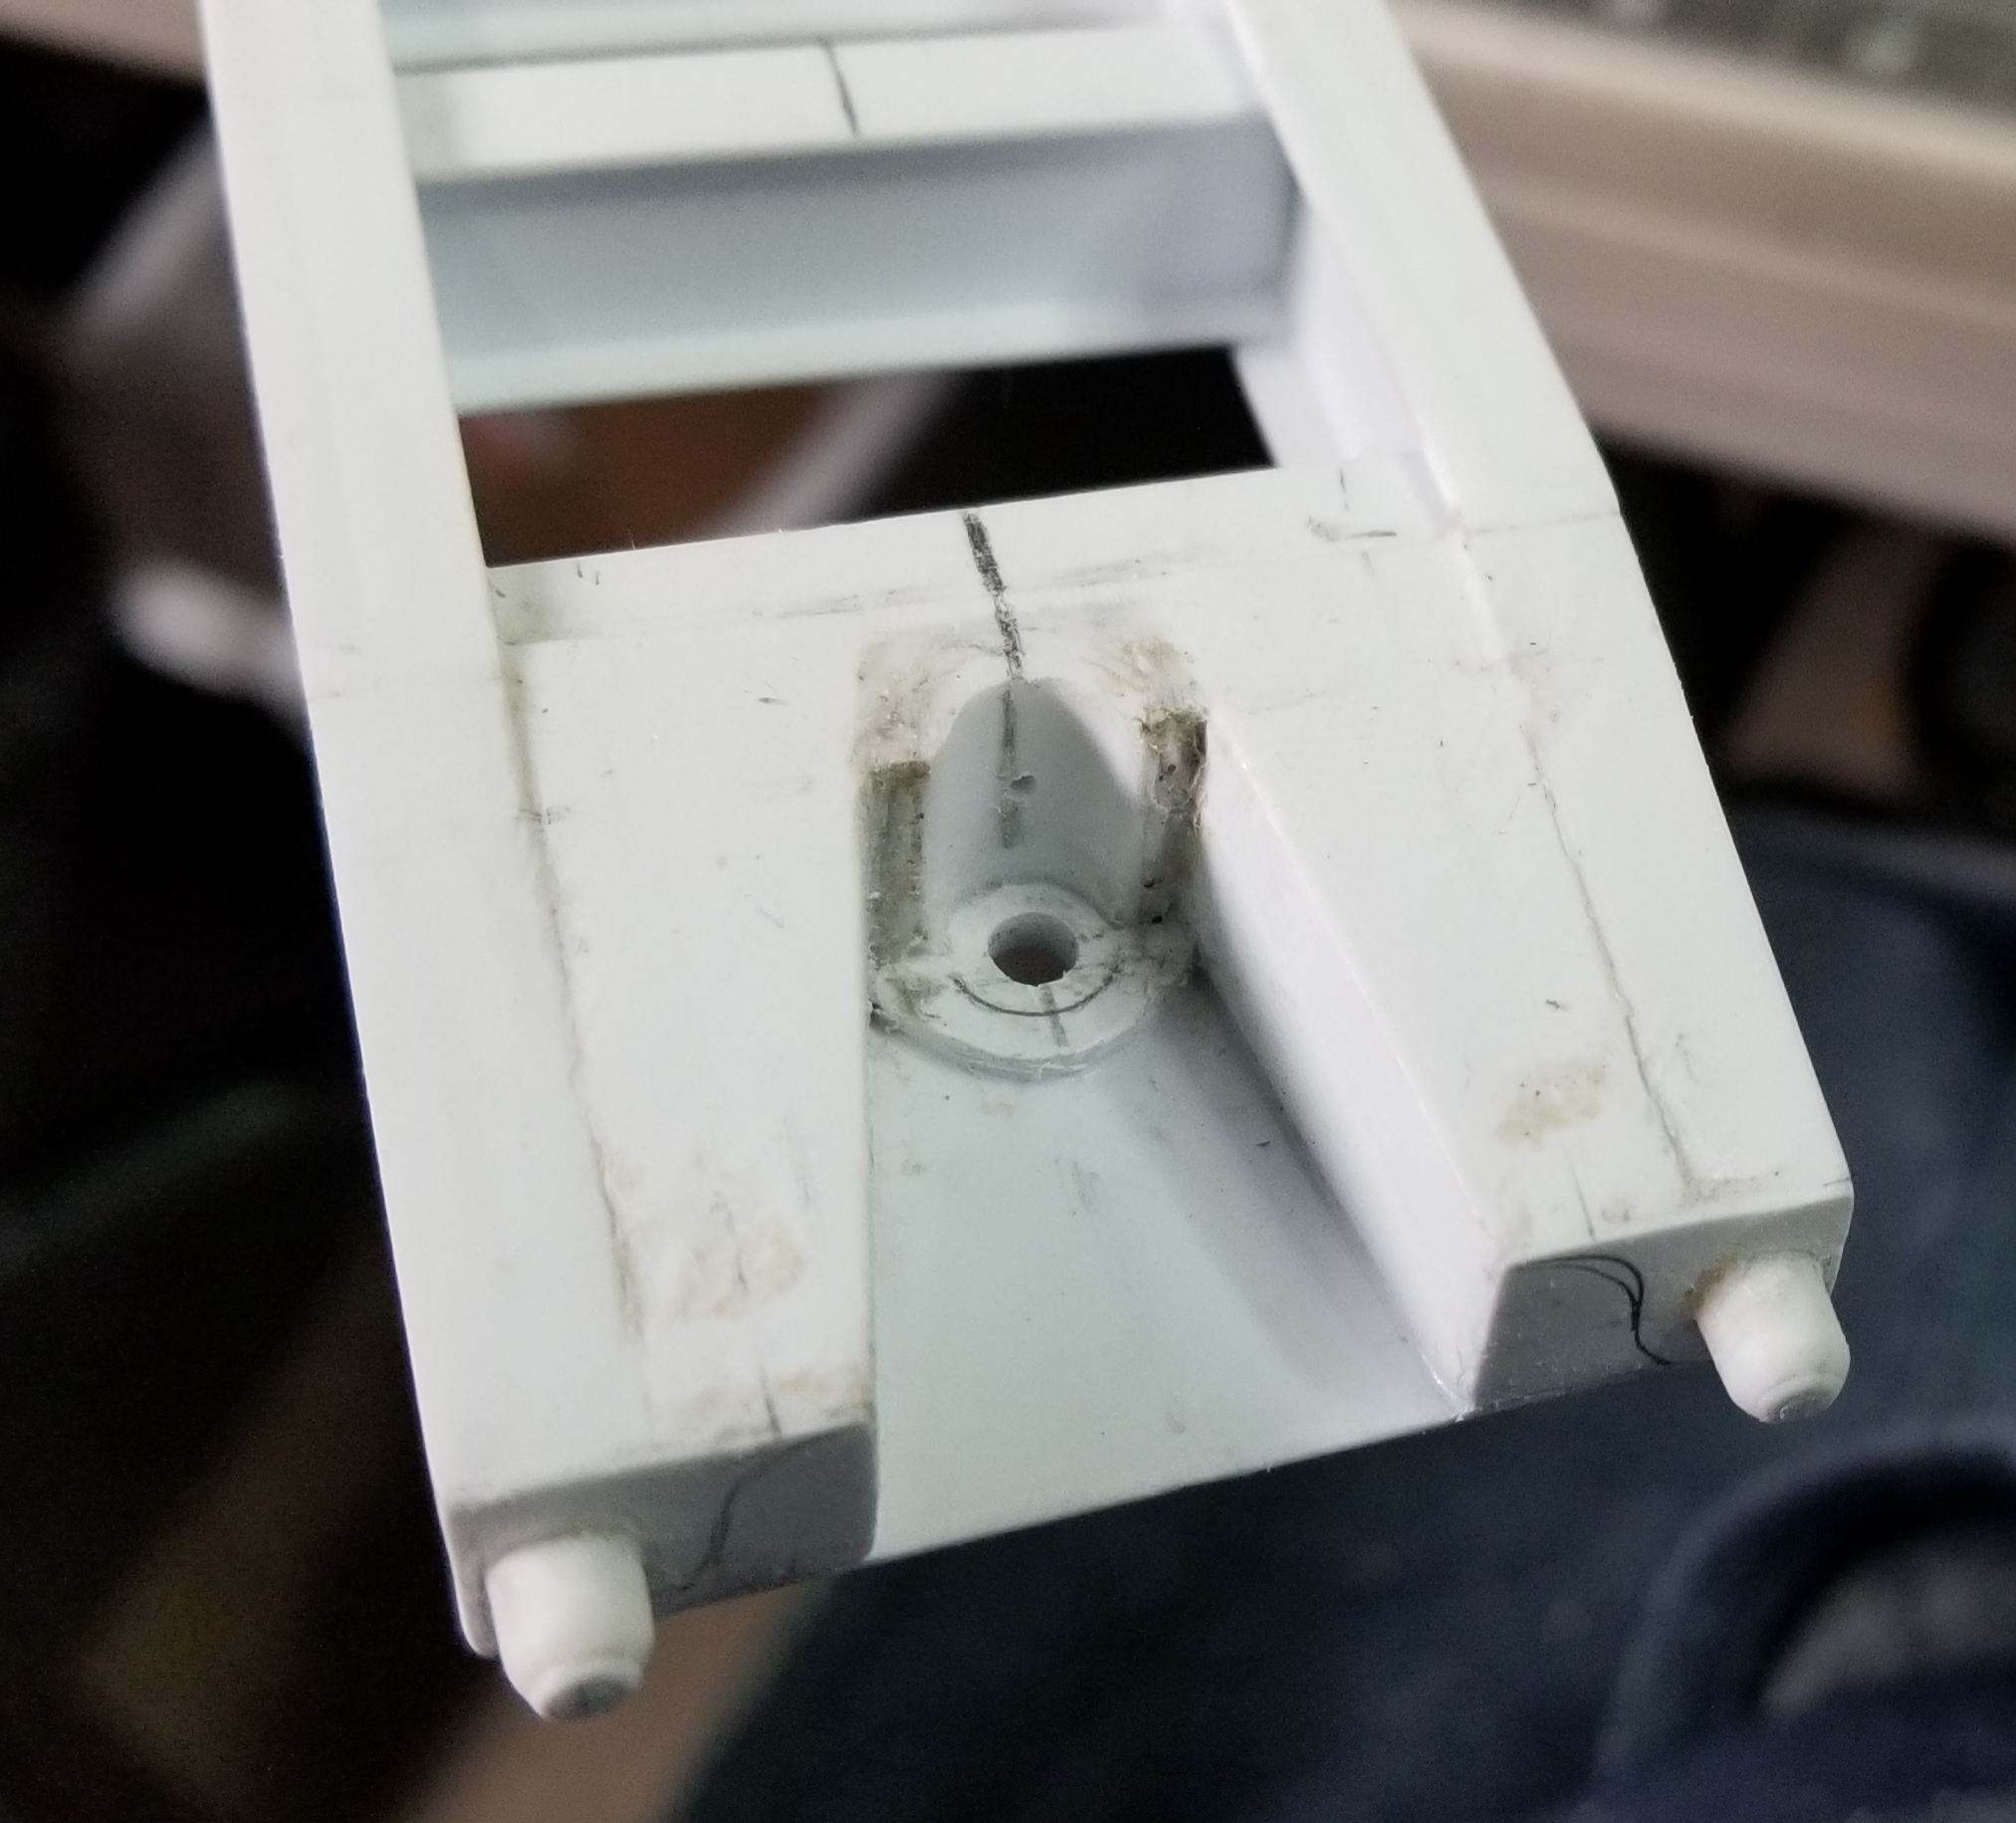
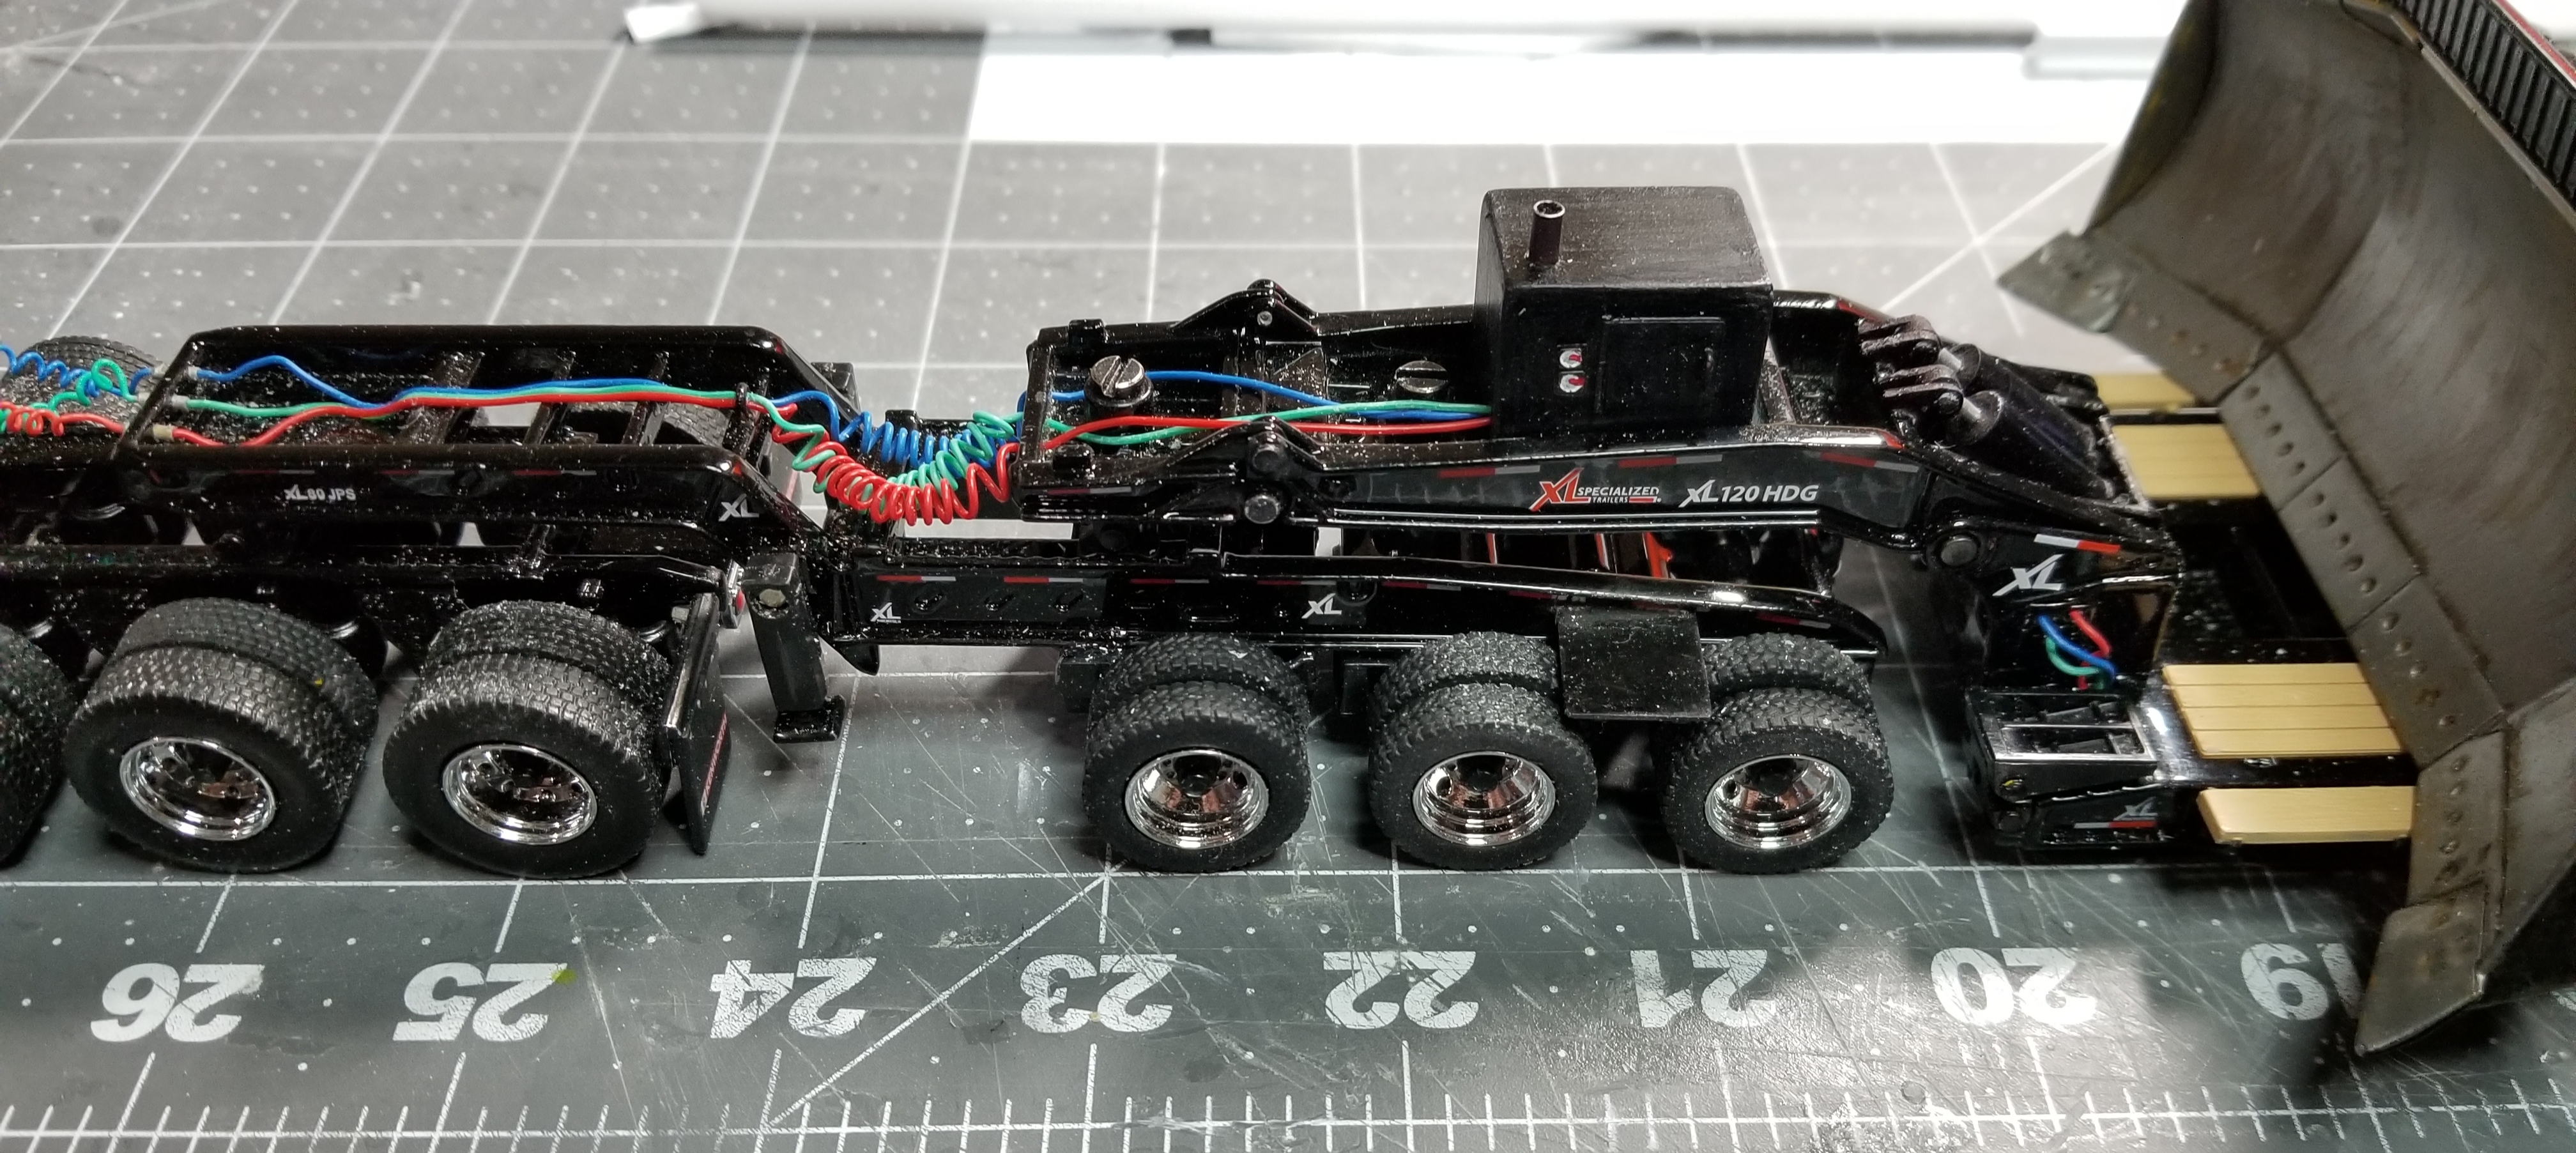
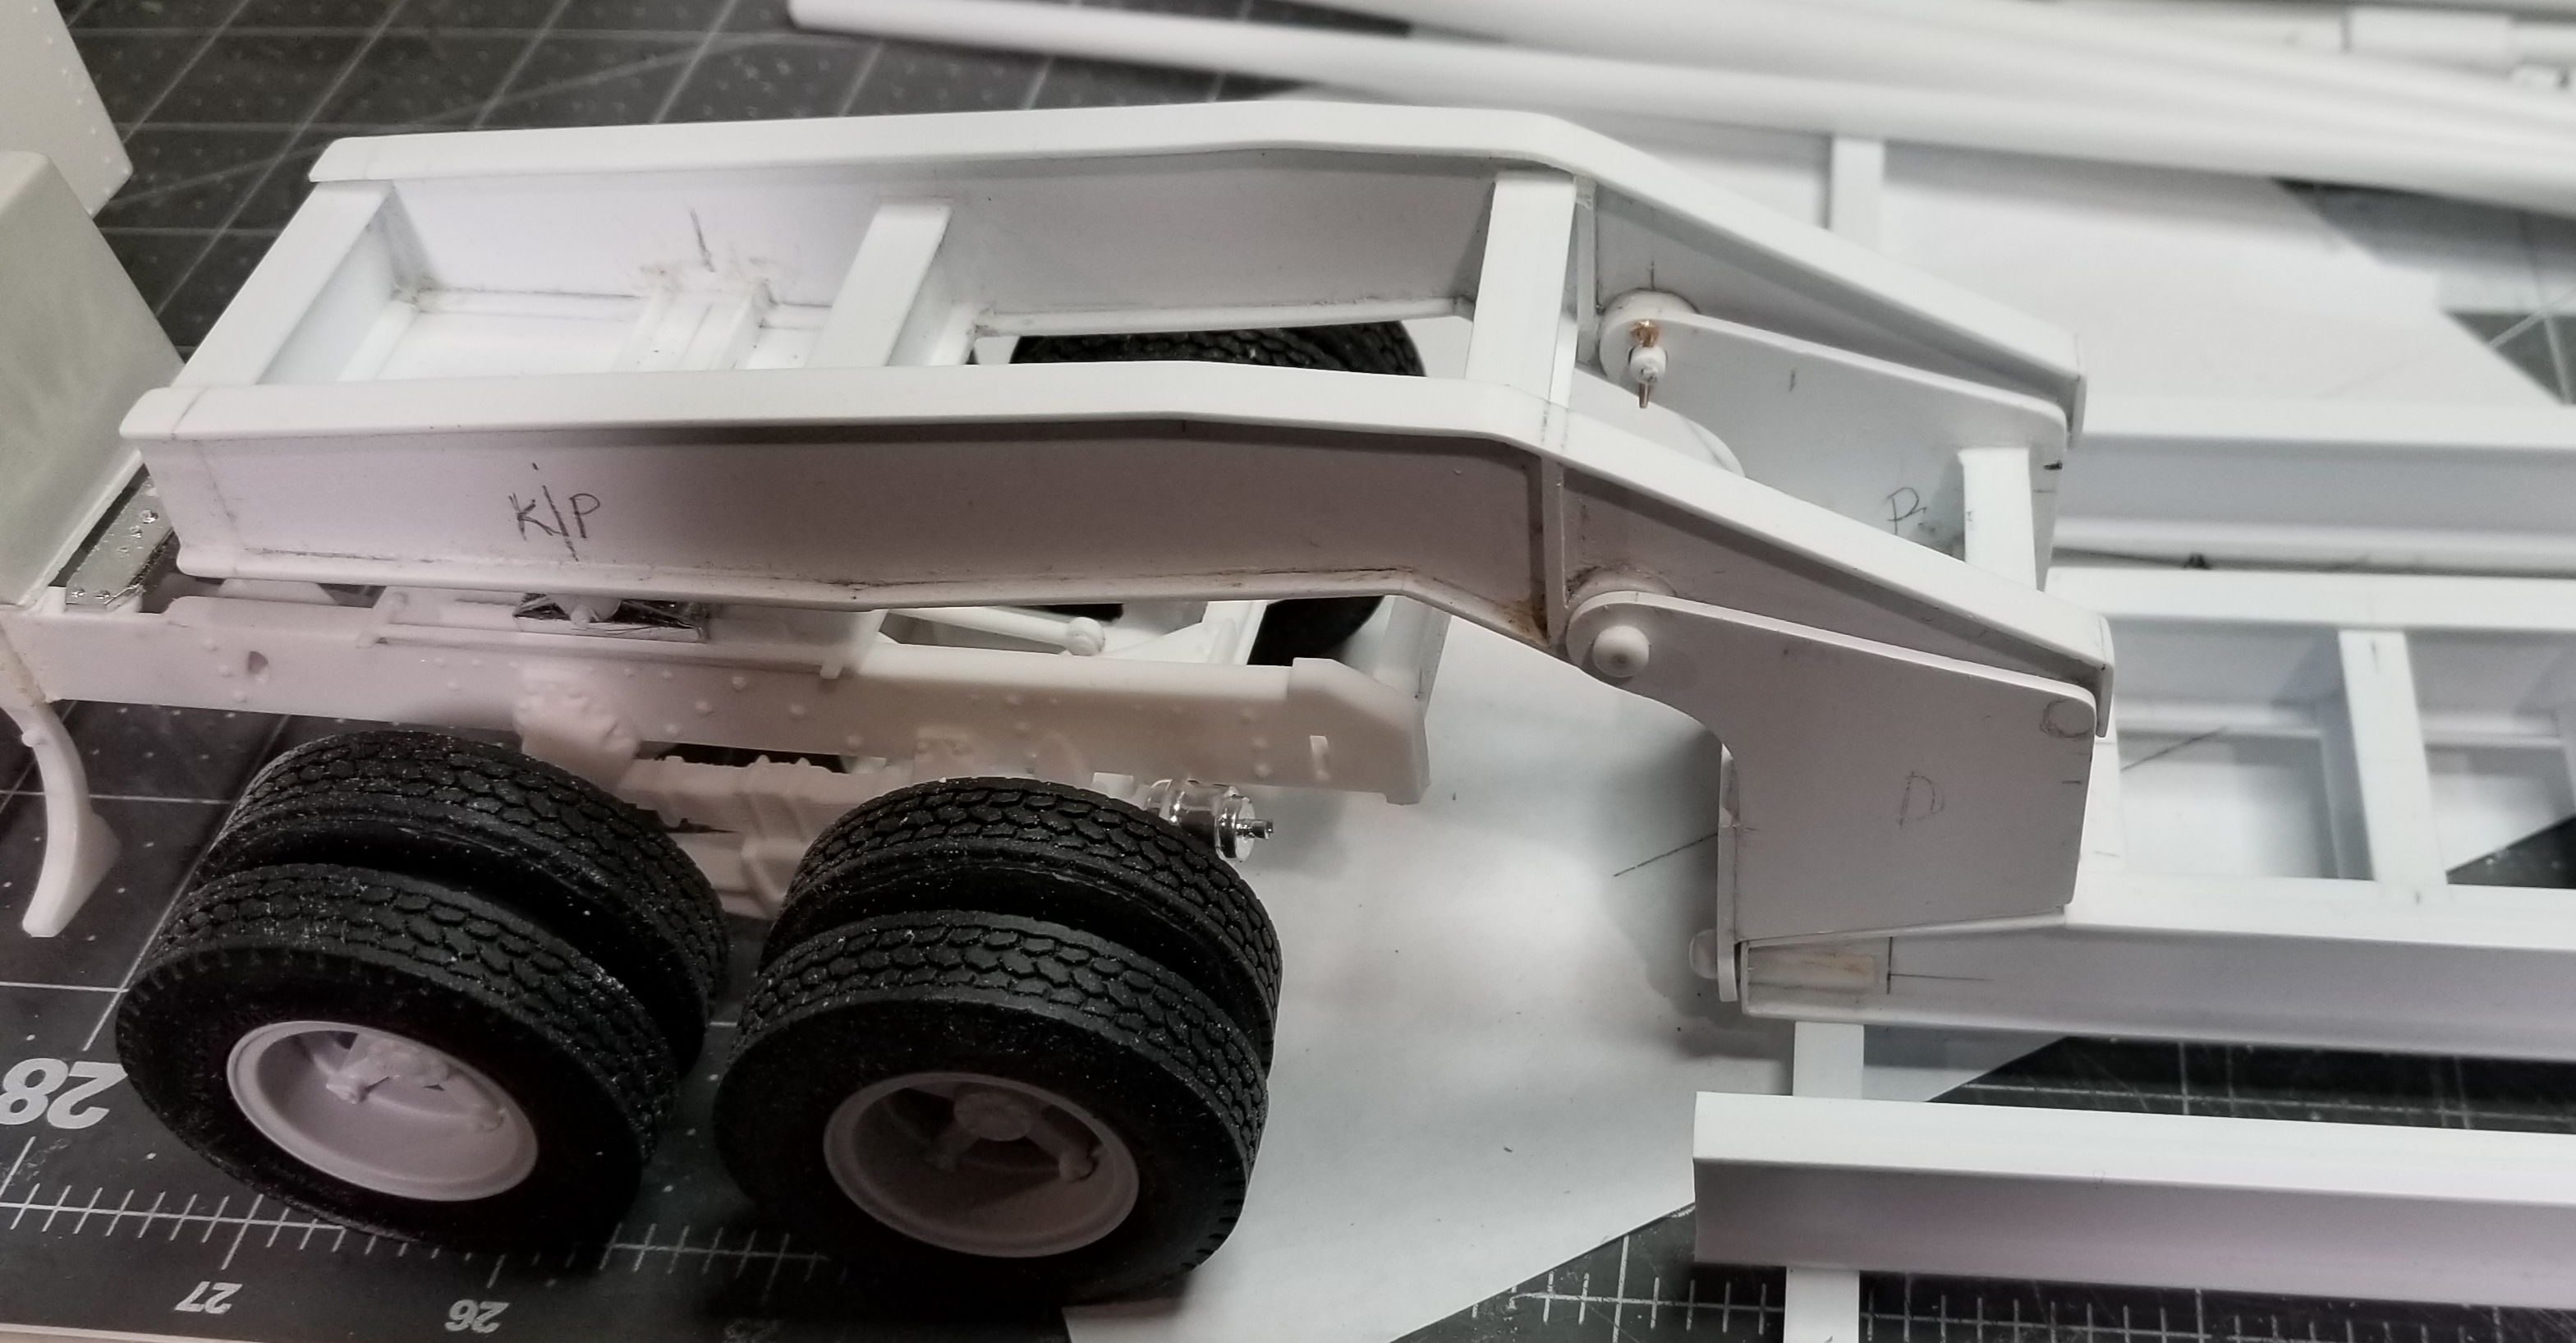
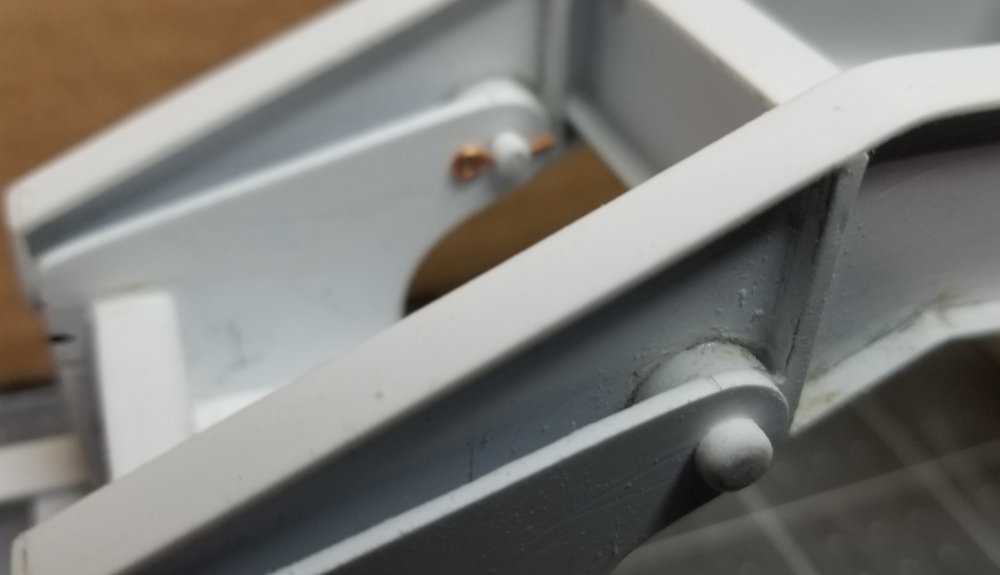
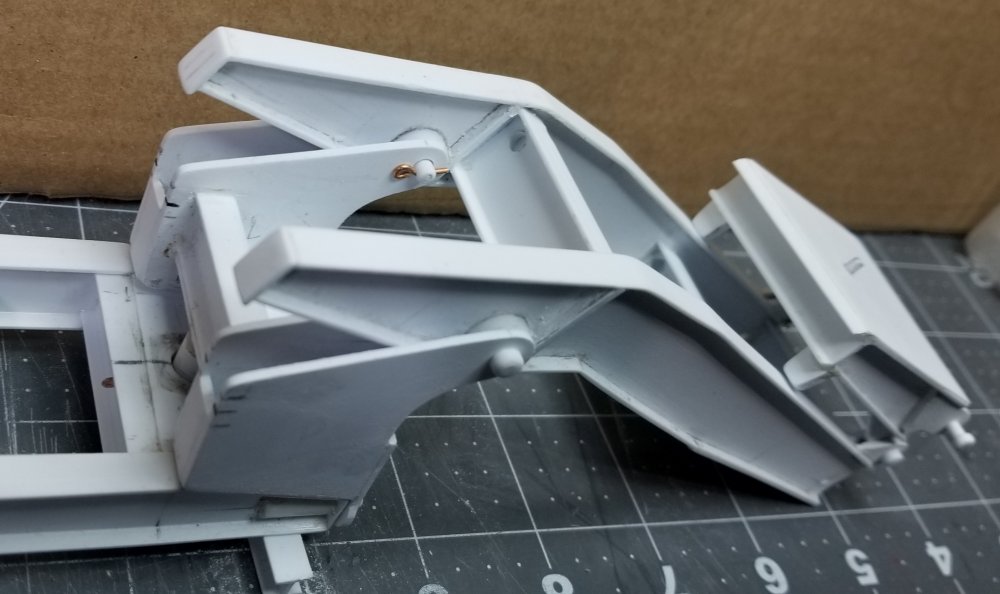
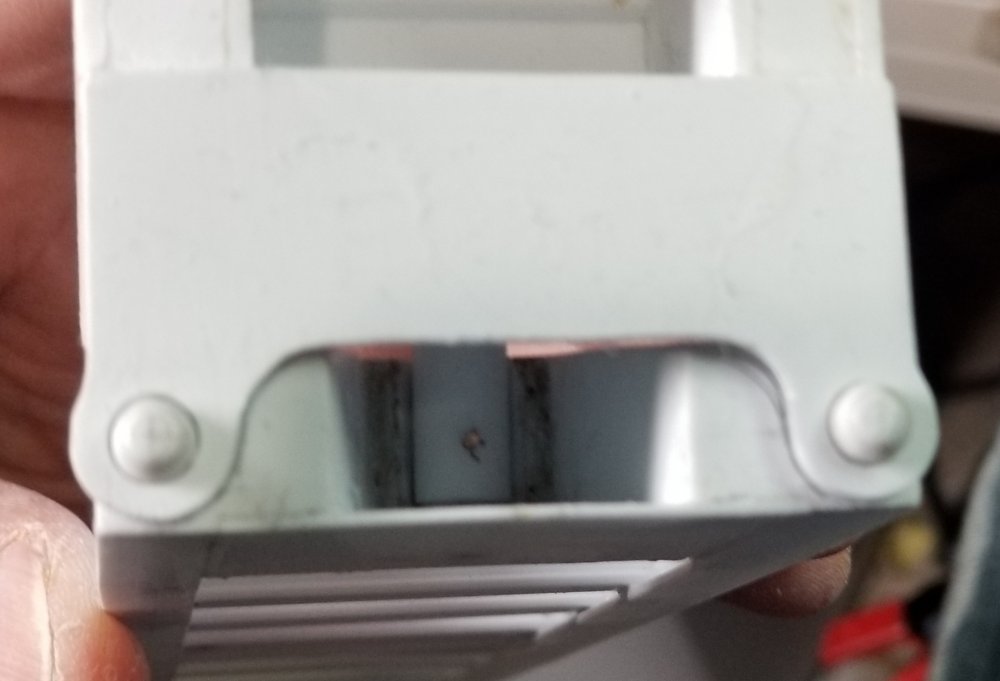
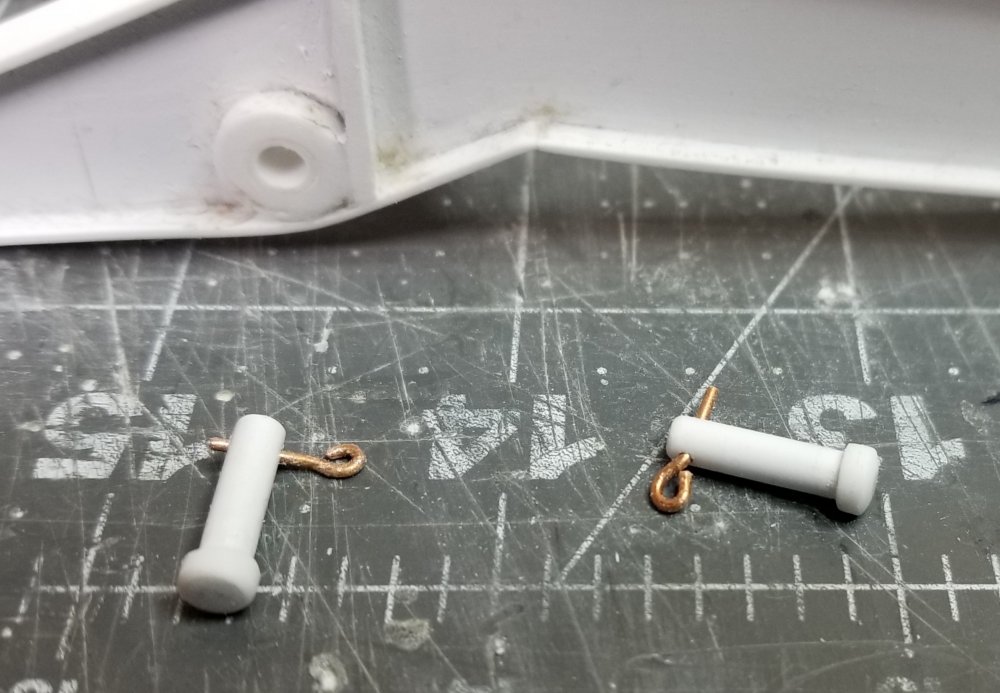
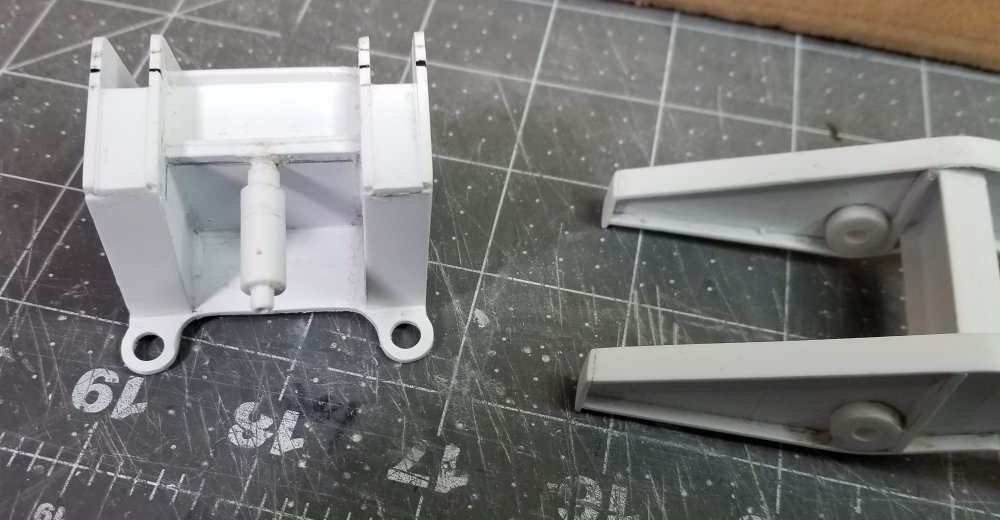
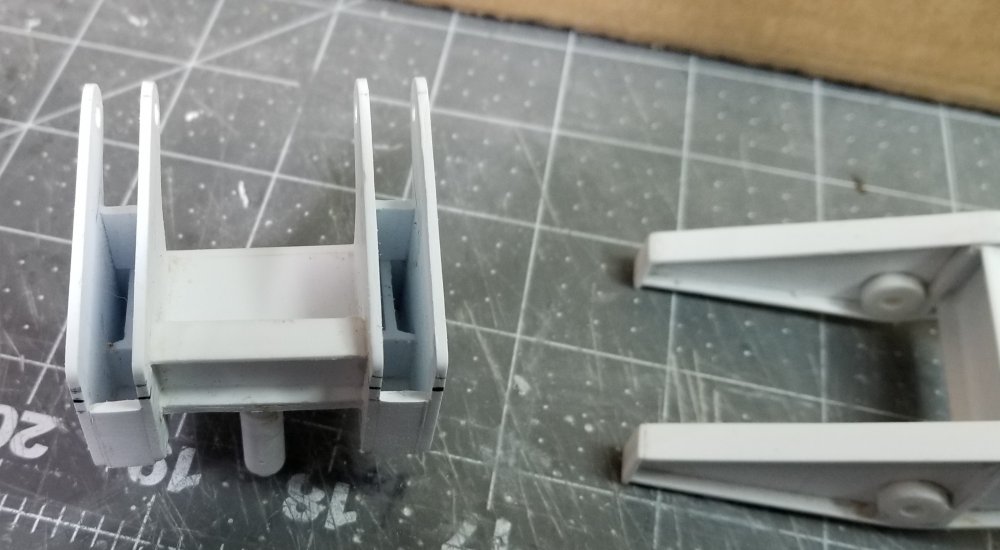
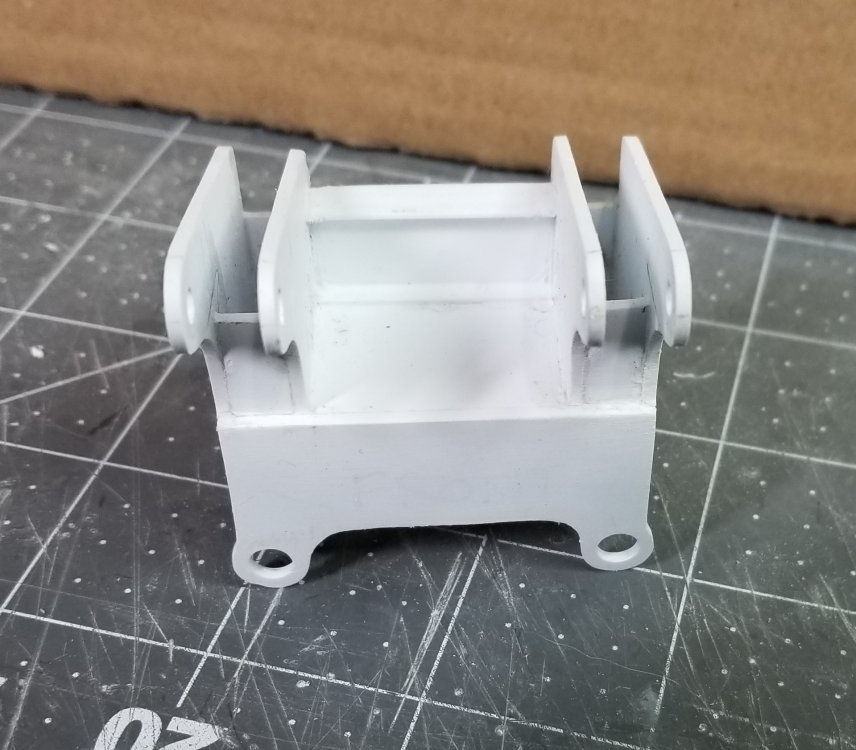
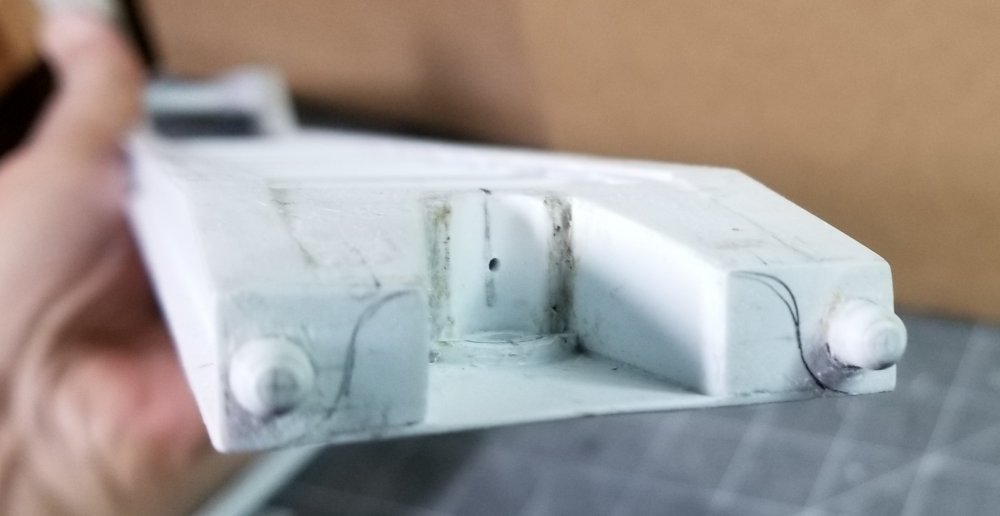
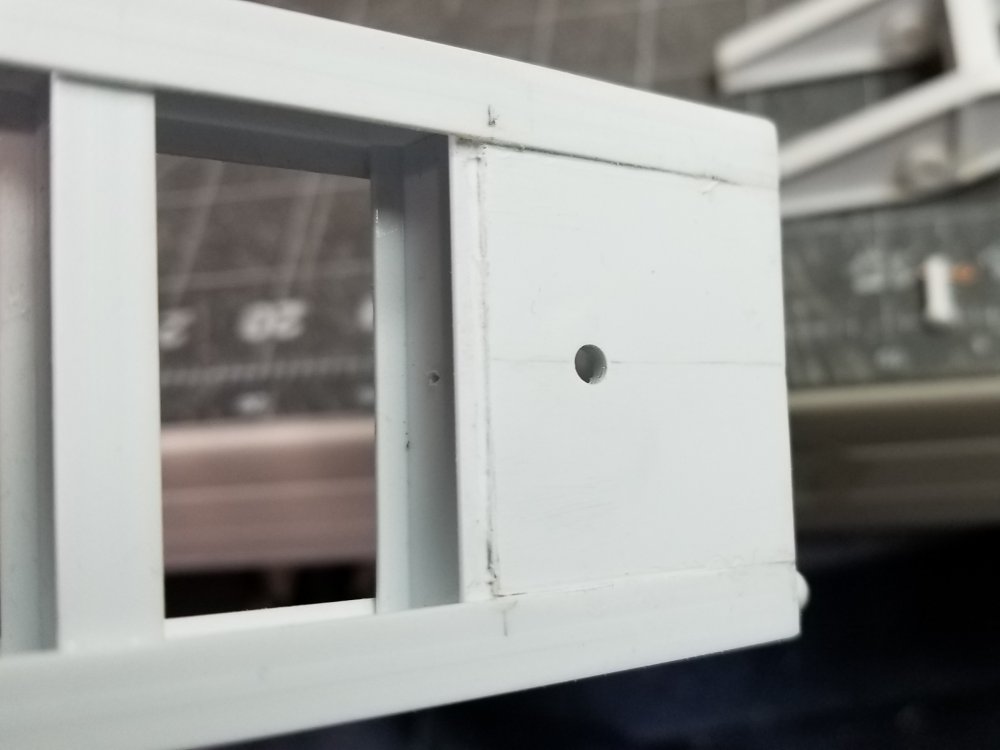
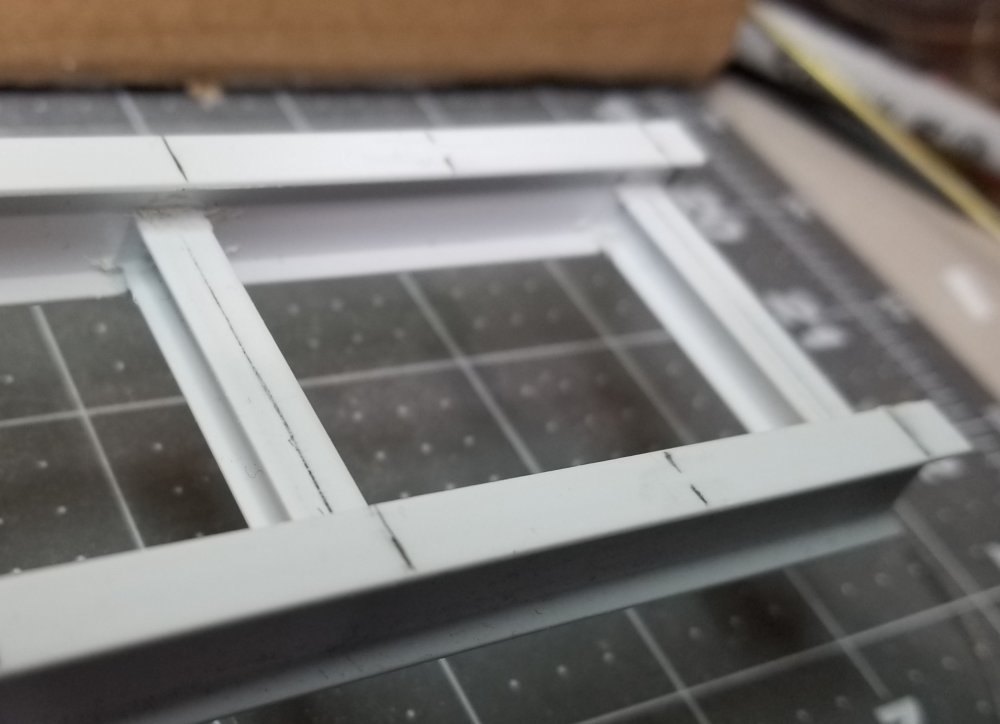
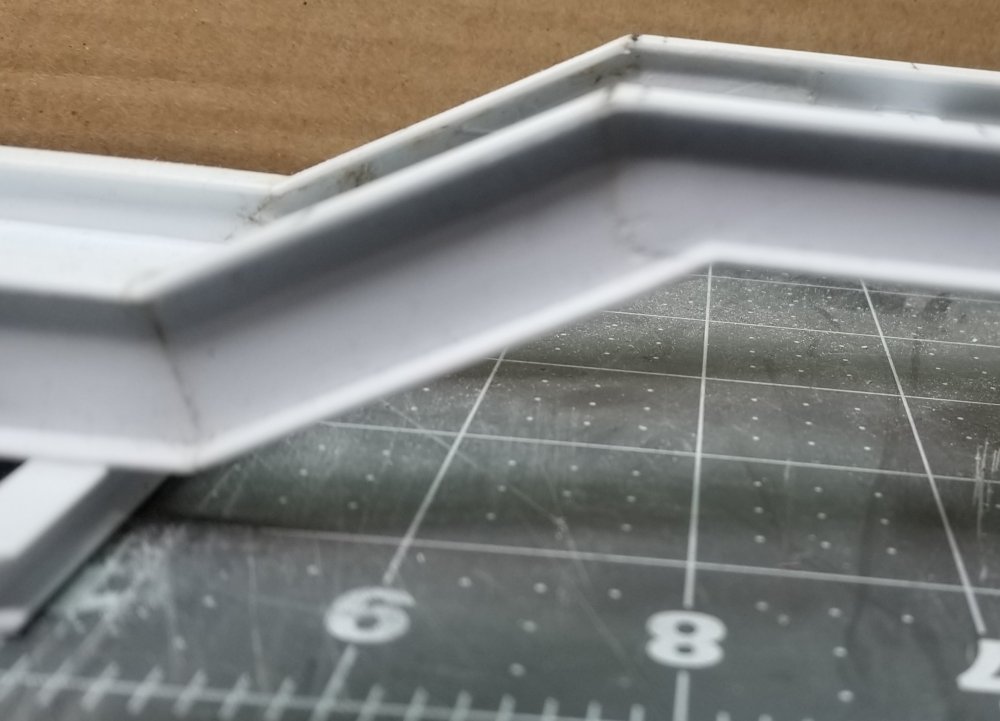
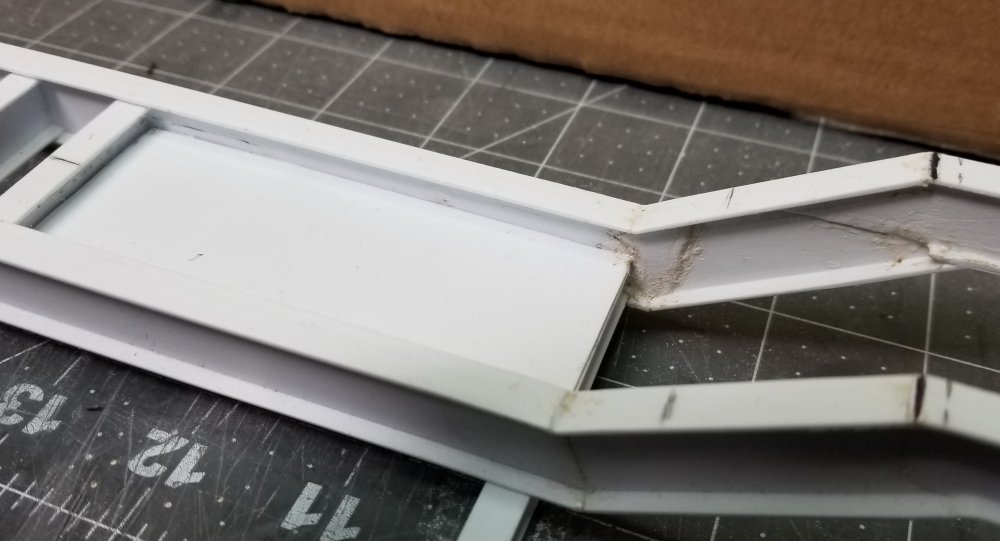
Hey all I have done some more work on the gooseneck. I added the front flip extension and all the pins. this view shows the front flip extension, flip extension upper pivot pins and lower lock pins. this view shows the main gooseneck pivot pin and how the gooseneck base attaches to the front of the trailer. this view shows the front flip extension pivot and lock pins. You can just see the two king pins on the bottom side. this view shows the flip extension flipped up. another view of the front flip extension in the flipped position. another view of the front flip extension. Here are some more pictures of the trailer and all the individual parts. this view shows the drivers side main pivot pin & lock pin. this view shows the gooseneck in the down position and flip extension flipped up. this view shows the attachment pins for the gooseneck to the trailer. You can just see the locking cylinder. this is the whole gooseneck and the main pivot pins. this close up view shows the main pivot pins. this view shows the rear of the gooseneck and the locking cylinder. another view of the gooseneck base. front view of the gooseneck base. front view of the trailer gooseneck attachment area. another view of the gooseneck attachment area. bottom view of the gooseneck attachment area. Here are some pictures of the rear of the trailer. this view shows the 1/4" 'H' beam cross braces. this view shows the transition from the 5/8" 'I' beam to the 1/2" 'I' beam to make the rear of the trailer frame. this view shows the excavator bucket well. this view shows the 1/2" 'I' beam cross braces. this view shows the gooseneck base and locking cylinder area. I started on the hydraulic lift cylinders, I have one done need to make the other one. this view shows one of the lift cylinders, I need to replace the brass tube with an aluminum one. this view shows the cylinder with a 1/24 scale (ruler) for comparison proposes. Here are some pictures of a 1/50 scale diecast Kenworth t880 truck, XL Specialized 130 HD trailer, jeep, stinger and Cat D10T2 dozer. this view shows the complete set up, you can see my scratch built trailer in the background, it's as long as the whole set up...lol Kenworth T880 tridem tractor. 3 axle custom jeep. Cat D10T2 dozer and 130 xl hd trailer. 3 axle custom nitrogen stinger. This is what I'm going to be trying to make in 1/25 scale. Well that's it for now be back with more soon. Ron G


-
Thanks guys
-
Thanks guys I'll try to post some more pictures tomorrow showing more details. Ron G
-
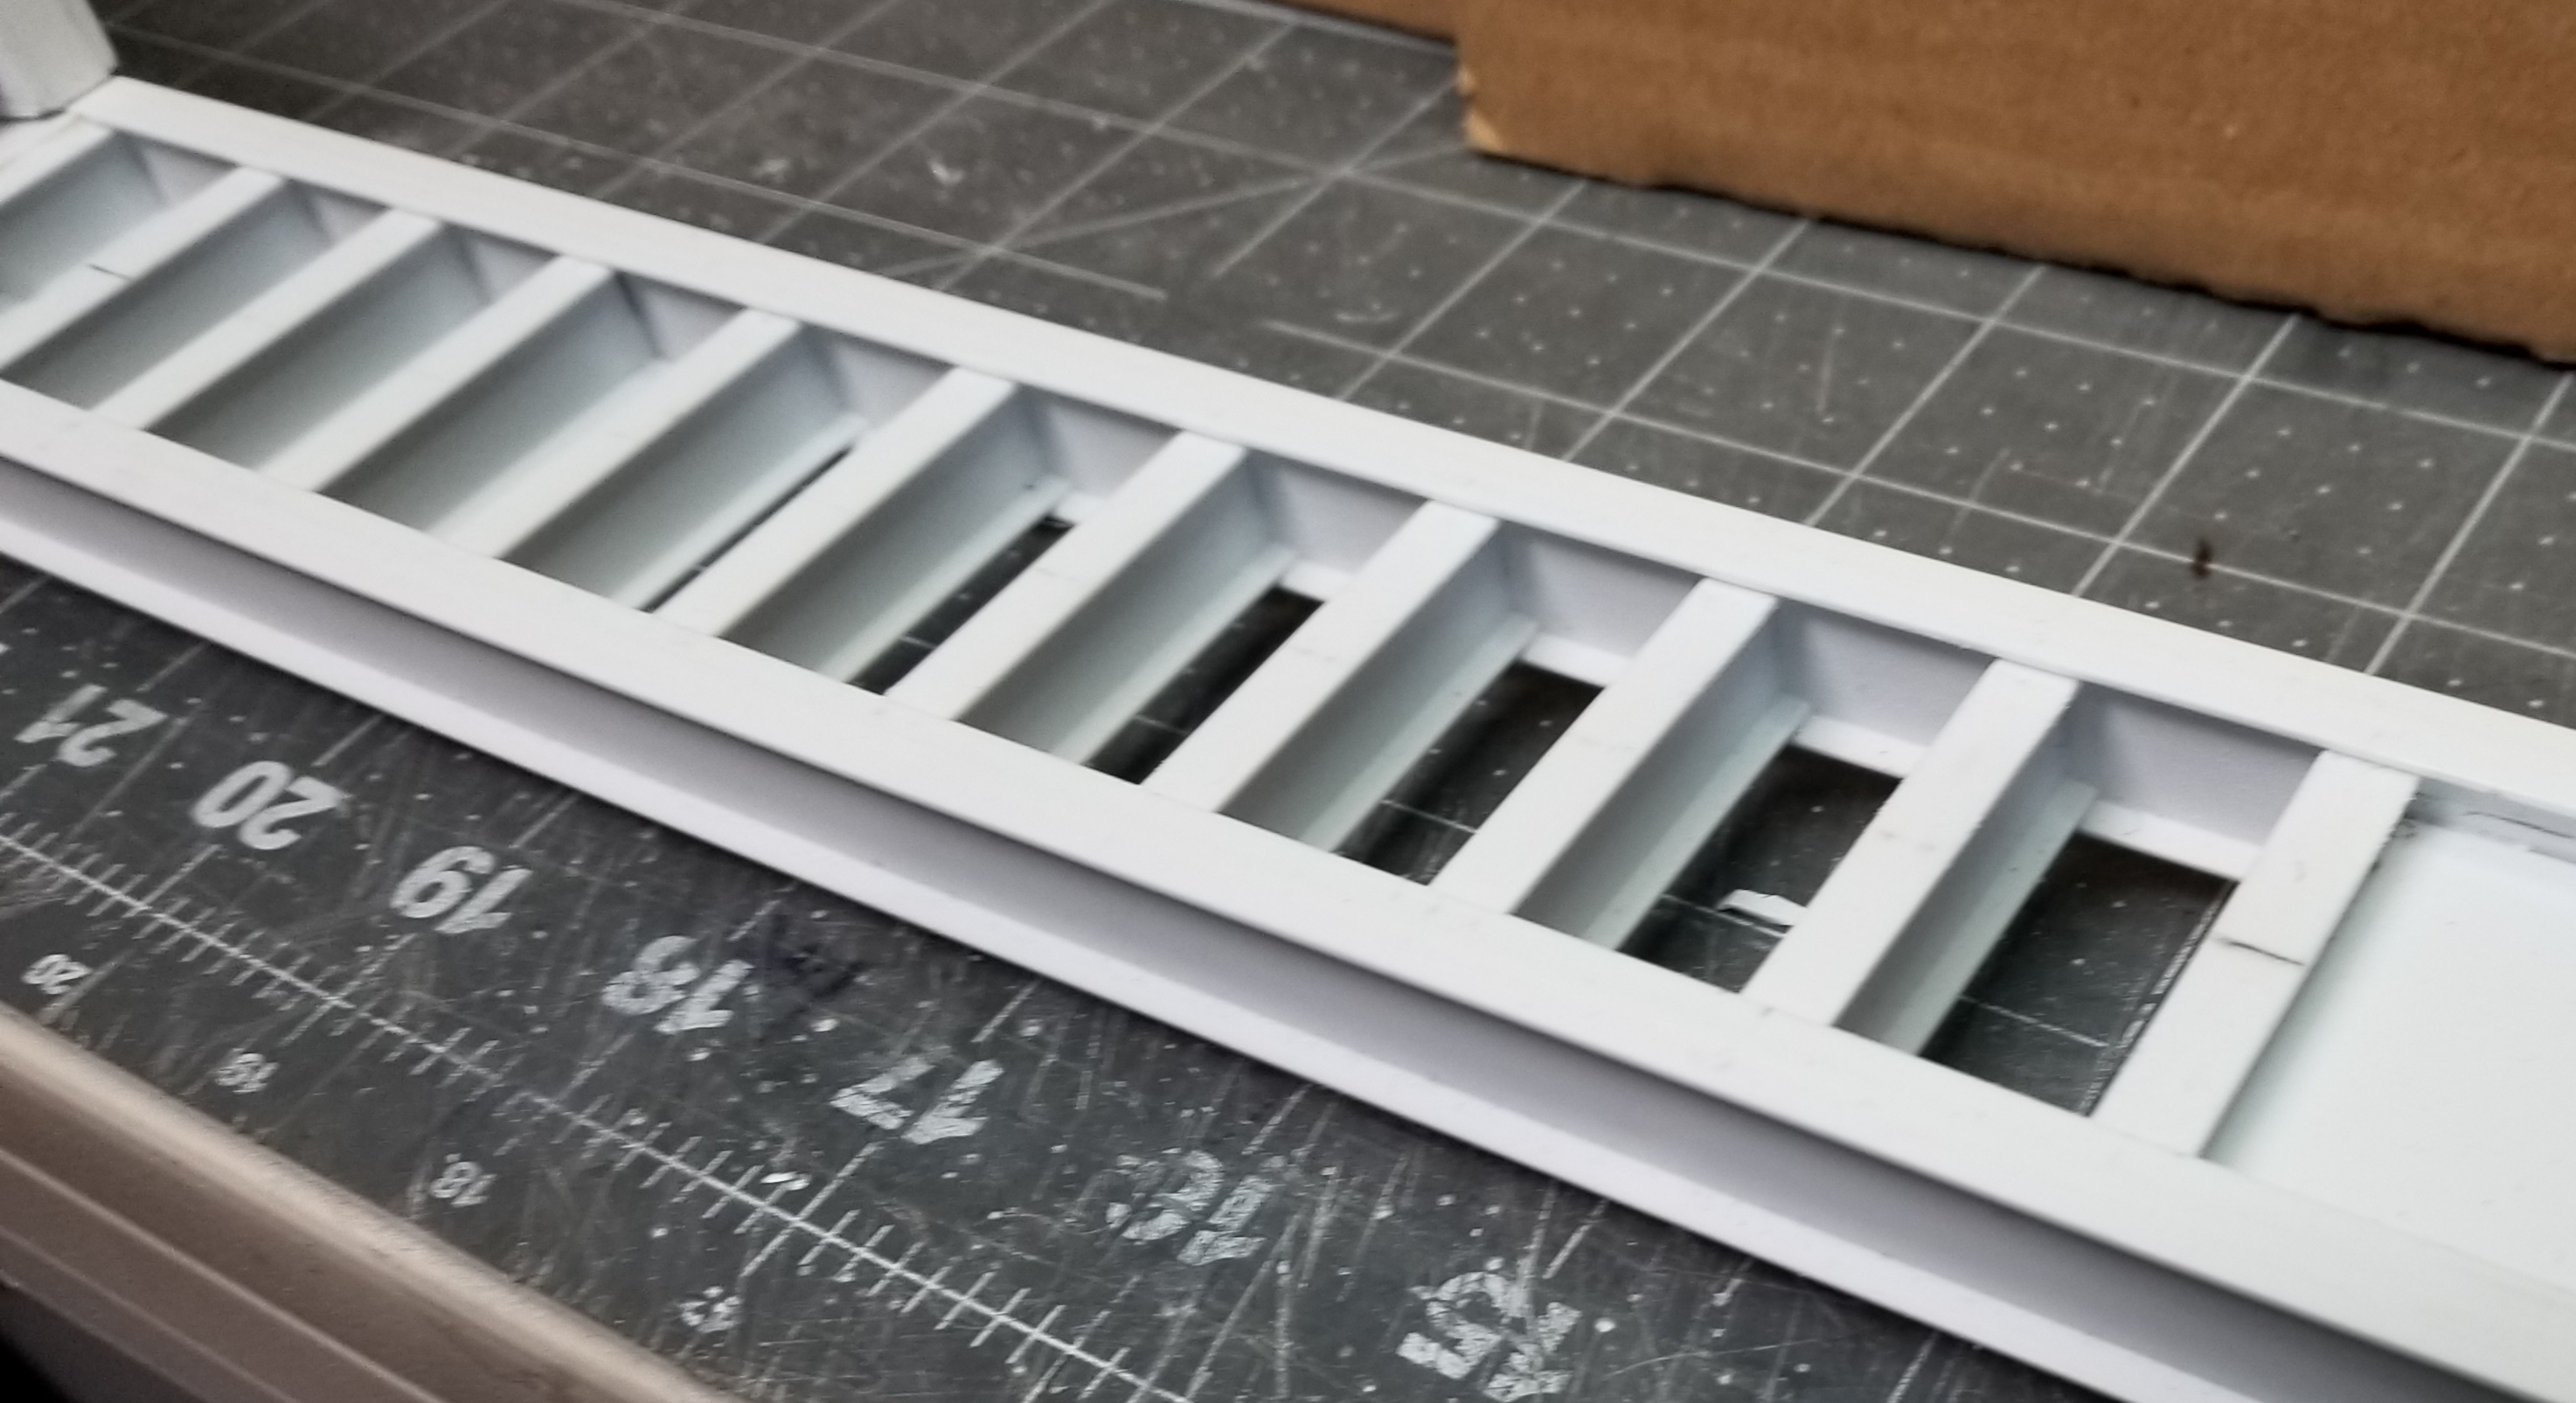
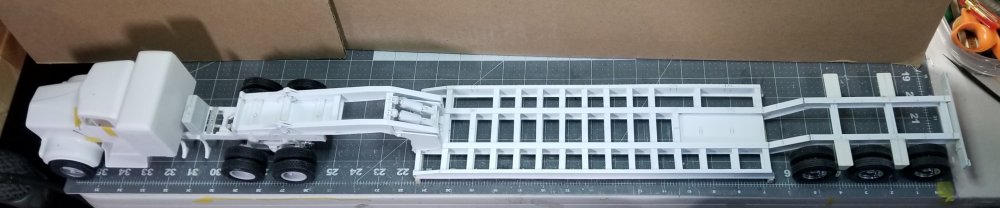
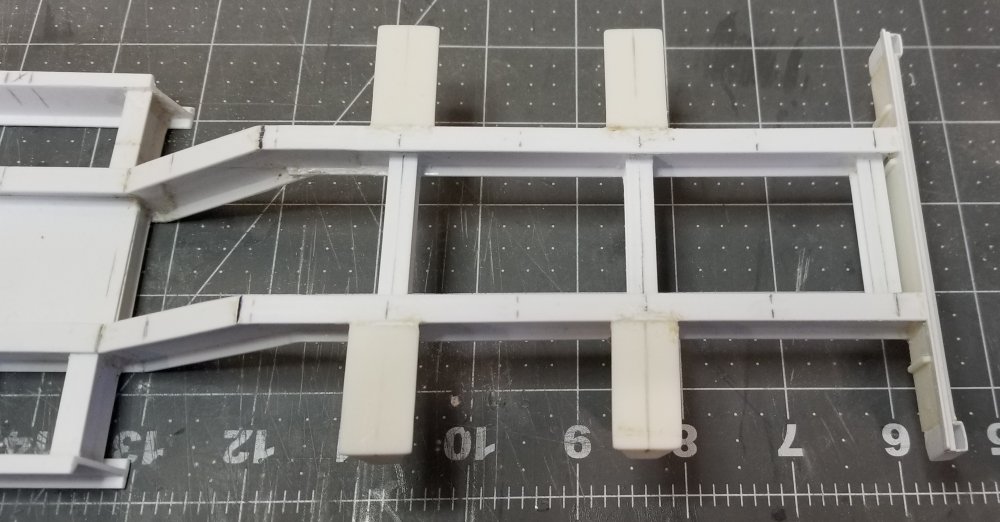
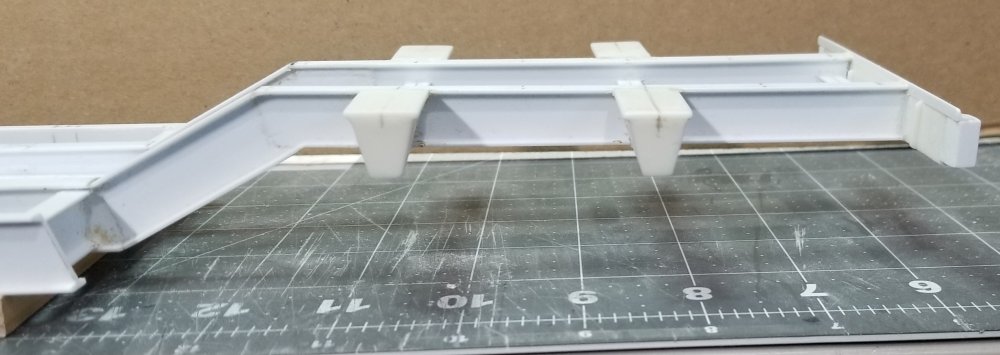
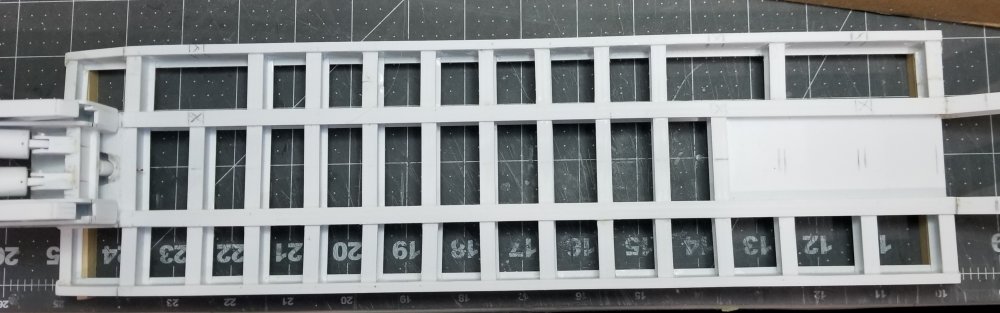
Hey all I guess it's been a while since I posted anything. I started work on a 1/25 scale XL Specialized HD130 drop nose lowboy trailer. I have this modelled up on Unigraphics NX16 as seen in other posts. I my add some 3D printed stuff we'll see as I go along. This one is completely from scratch, so here are some pictures of where I'm at. I have the two main beams, all the braces and the gooseneck built. I used 5/8" 'I' beams for the main beams and 1/2" 'I' beams for the cross beams. I used 1/4" 'I' beams at the rear for the cross beams under the bucket well. I used 5/8" & 1/2" beams to make the rear frame. this thing is 36" long with the Kenworth 925 it will be a lot longer with the Peterbilt 359. I made the gooseneck from 1/16" thick flat stock and 0.03" x 1/4" strip stock, also I made the pivot from 3/8" down to 3/16" telescopic plastic tube from Evergreen plastics. The pivot pins are made from 1/8" plastic tube with copper lock pins. The part of the gooseneck that attaches to the trailer is made from 1/16" thick plastic stock and various sizes of 'I' beams. King pin is a piece of 1/8" aluminum tube. this is a side view of the gooseneck area. I have the trailer posed with my AMT Kenworth 925 for the gravel train for pictures only.this will be pared with my Revell Peterbilt 359 heavy haul tridem tractor. this view shows the rear of the trailer. Wheels & tires are from Moebius. this view is looking down at the gooseneck. I still have to make the front flip portion of the gooseneck, add all the lines, finish the lift cylinders, etc., etc.... This has changed a little from my original TrailerKing concept, it's now a XL Specialized HD130 with s 28' well. I plan on making a three axle 'jeep' for this also and possibly a three axle 'stinger' too! Need to order more wheels & tires. Well back to it, be back soon with more updates. Ron G


-
HK Models 1/32 Lancaster Hints, Tweaks and Tips,
CrankyCrafstman replied to NigelR32's topic in Modelling Discussion
He's to busy doing YouTube videos. Ron G -
Short Sunderland MkII
CrankyCrafstman replied to ThomasProbert's topic in LSM 1/35 and Larger Work In Progress
Ok I'm ready I got my wayders on...lol Ron G -
Thanks Jeff, now I just have to finish building it, the kit that is...lol Ron G
-
Hey Hubert Actually the D8H just barely fits on the 3 axle trailer with the rippers on it. I'll post some pictures of it on the trailer tomorrow. Ron G
-
American trucks......my soft spot......
CrankyCrafstman replied to a topic in LSM 1/35 and Larger Work In Progress
Yeah, you're right about that.