CrankyCrafstman
-
Posts
1,350 -
Joined
-
Last visited
Content Type
Profiles
Forums
Events
Gallery
Everything posted by CrankyCrafstman
-
 The lights and gun sight are made by Brengun. The plastic strips are from Evergreen plastics. You'll have to search the internet for them, thats what I did. Ron G
 -
I'm working on them as we speak. Ron G
-
Thanks Micko Yours is looking good also. Ron G
-
I never knew that it was so short and stubby.
-
Happy birthday Crazypoet Ron G
-
- 1
-

-
Hey Bill Yeah when I switched from the board to the computer I started on Autocad then we switched to Unigraphics 6 on Unix machines. Eventually they moved it to PC based machines. Now that I'm retired I really don't miss it. I do wish I had a copy of UG for my home PC but it's way to expensive. Right now I'm working on my Wifes laptop with extra monitor that she is working on at home from FCA (Chrysler) and eventually its going to go away, so I'm going to have to do what I can while I can. Ron G
-
Hey Anthony I ran Unigraphics before, that was my job. Its just that I haven't run it for almost 8 years and it changed a bit. It was weird going back to it, but it's like riding a bike it comes back...lol. I just hope that the boxes come out of the printer without a lot of hassel. Ron G
-
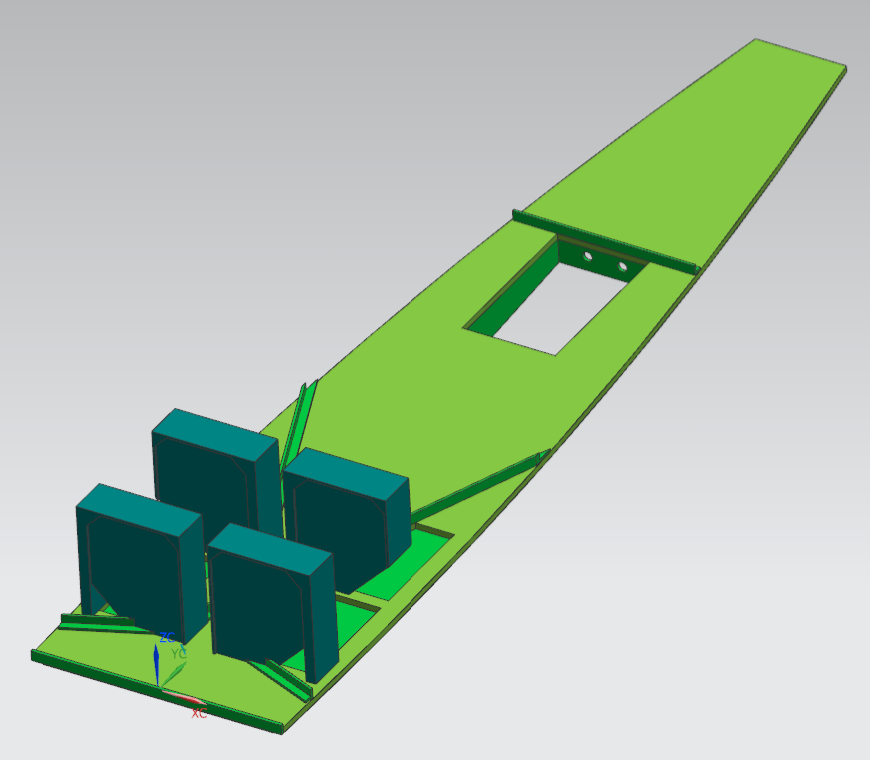
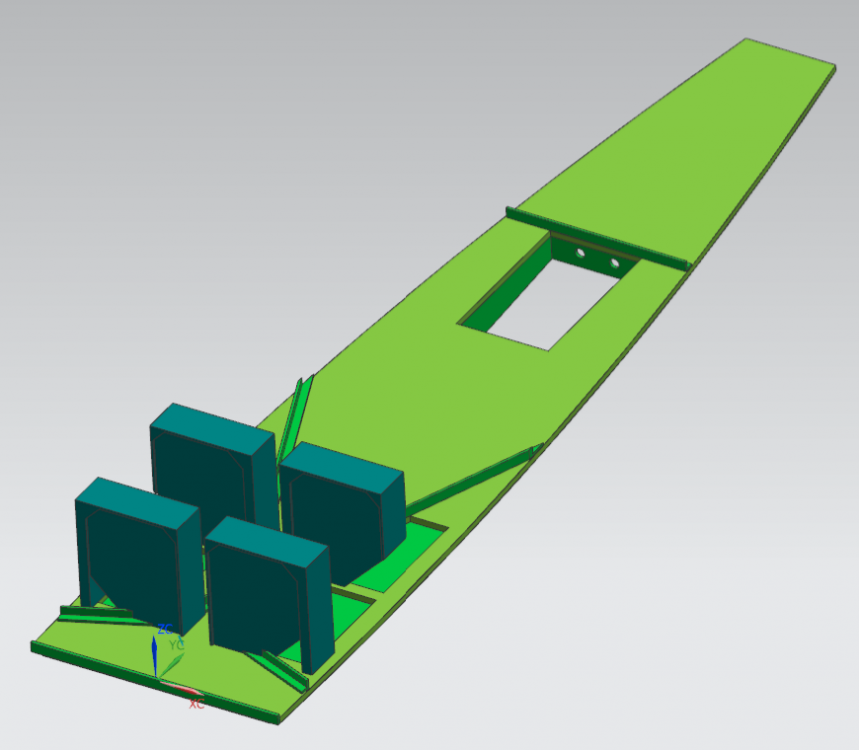
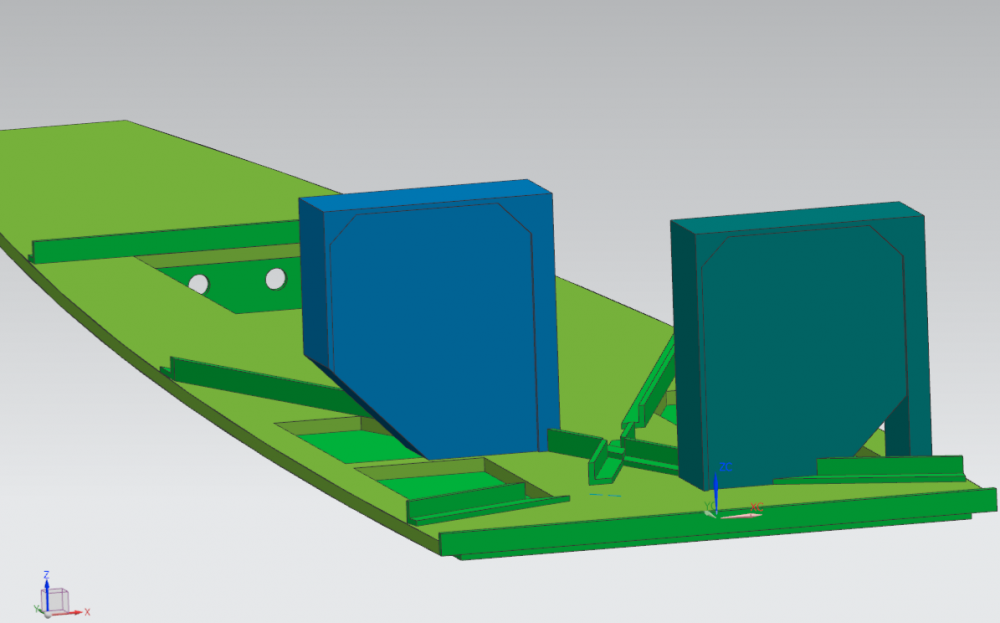
Small update I have the 20mm ammo boxes completely modeled up in Unigraphics NX. UG has really changed since I've been retired now for 8 years. It was alot more difficult to model then it used to be, but I persevered and got it done. I my do more of the Observer/gunner's station, that is if the boxes come out of the resin printer ok. I made everything full size so that I could print them off in different scales if anyone was interested. Here are some screen shots from the computer. I modeled up the rear floor area using the scratch built piece that I made as a reference. This gave me a platform, so to speak to work with. this view shows the front and rear boxes sitting in place on the floor. this is a view of the floor that I made out of plastic card. That's it for know I'll be back soon with more updates. Ron G

-
Well I have the front 20mm ammo box modelled up on Unigraphics. I have to figure out how to change them into the rear boxes, not as easy as it sounds. I might have to completely remodel them, I'm not sure as of now, I'll look at it tomorrow as I have to quite now, my back is killing me and I'm going cross eyed. Also my son said I might need to modify them so that they are easier to print. Ron G
-
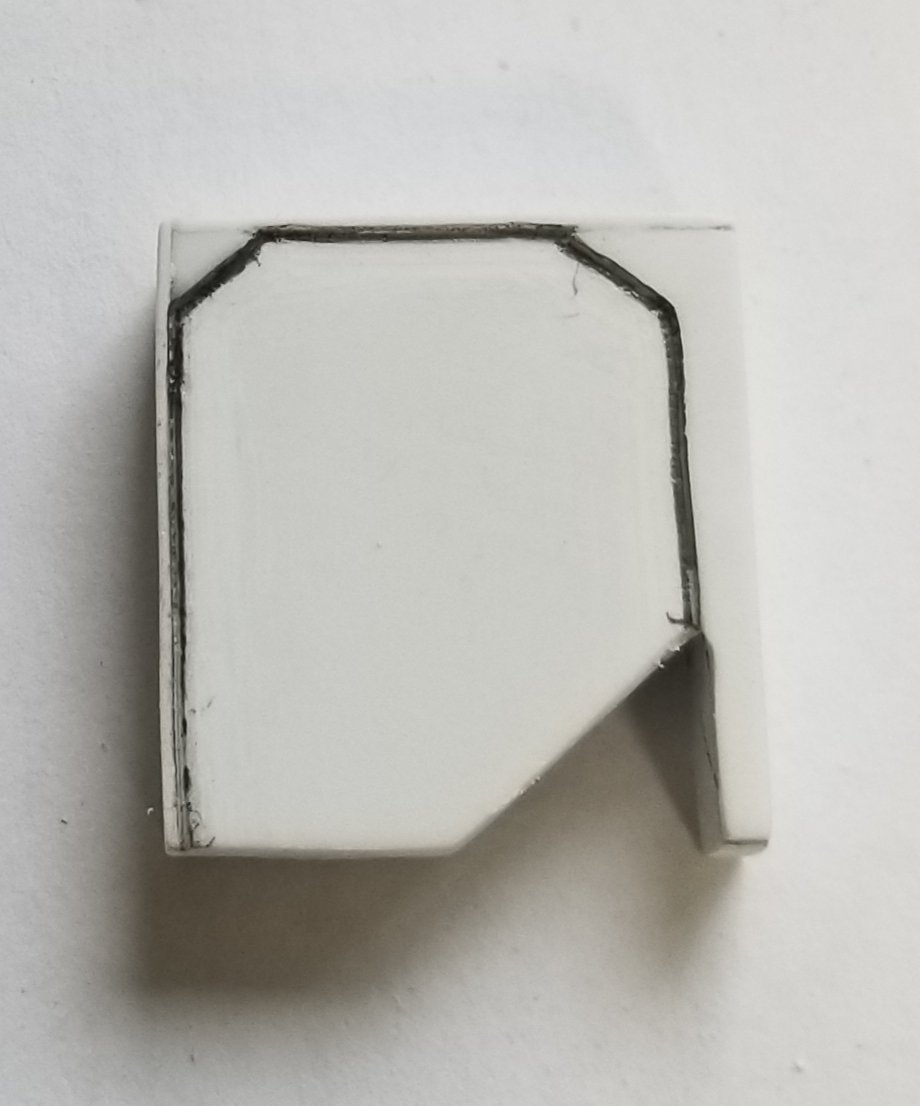
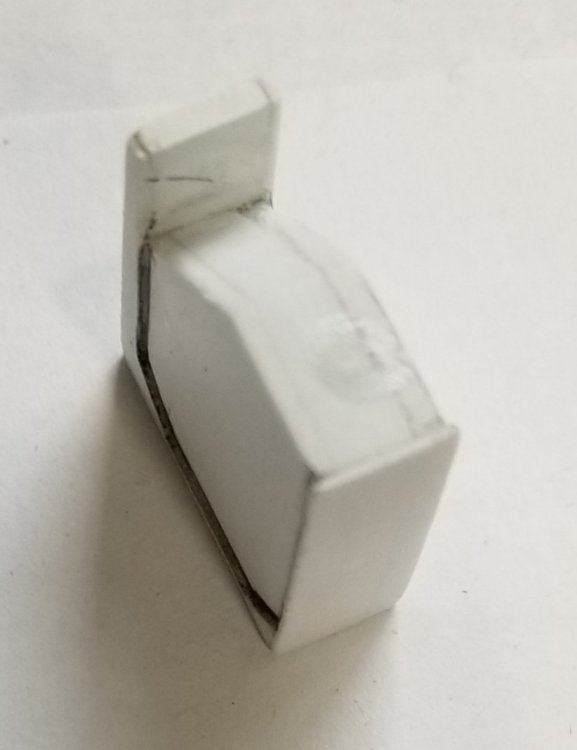
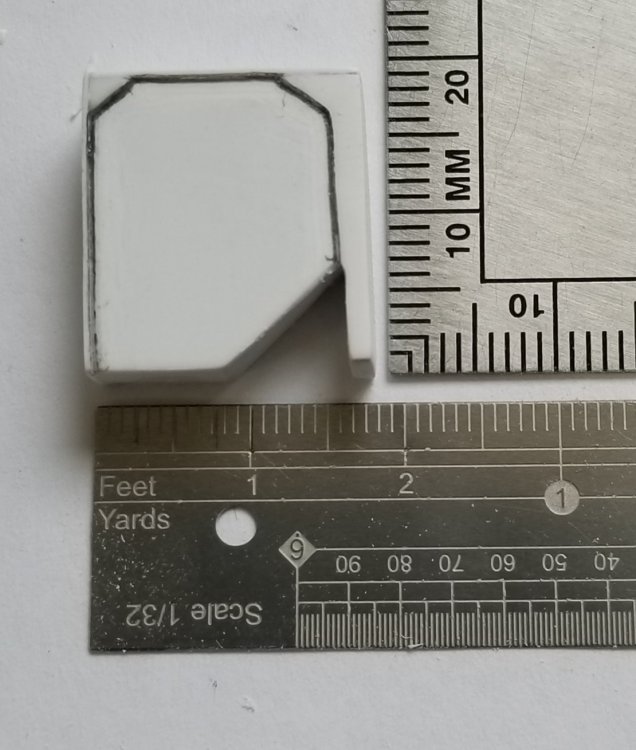
Hey all I've done a little more work on the 20mm ammo boxs. I've got one done but it was very tedious, so I think I'm going to try and model them up in CAD, then print them off on my sons resin printer (wife's home on furlough from FAA and has to work at home on NX, Unigraphics). So now that I have access to UG I'm going to do some cad modeling for my Beaufighter. It feels weird working on cad after 8 years off. Well here are some pictures of the one I made out of plastic card stock. view showing it mounted on the floor. side view. bottom view. just a view next to a 1/32 scale scale/ruler. Ron G


-
Keeping an eye on this one Ron G
-
IBG models PZL P.11c. Finished
CrankyCrafstman replied to Clunkmeister's topic in LSM 1/35 and Larger Work In Progress
She's a real beauty Ernie Ron G -
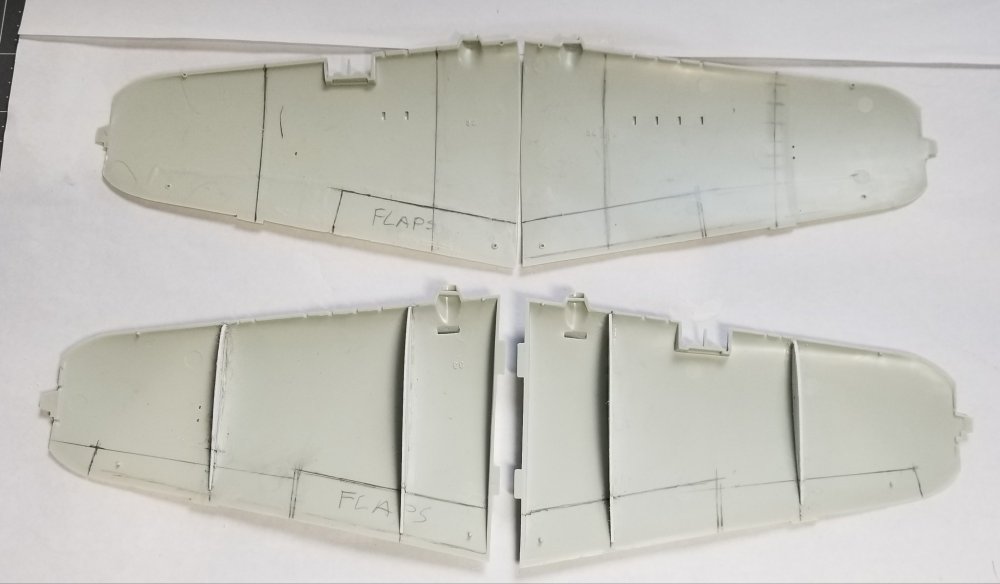
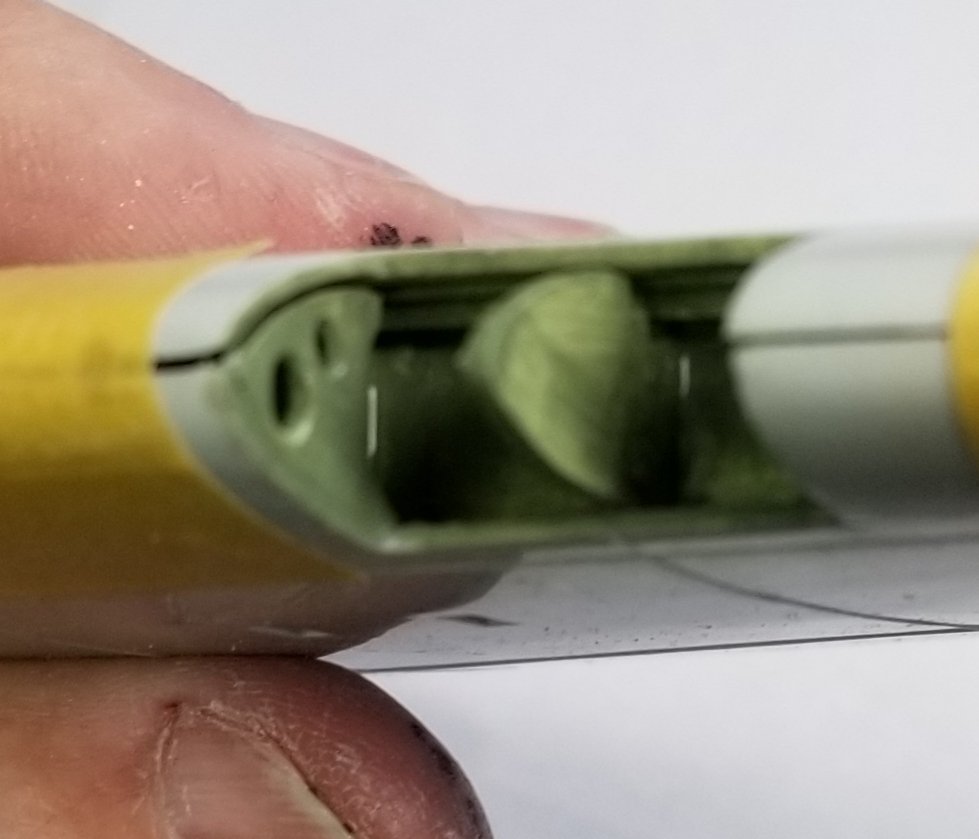
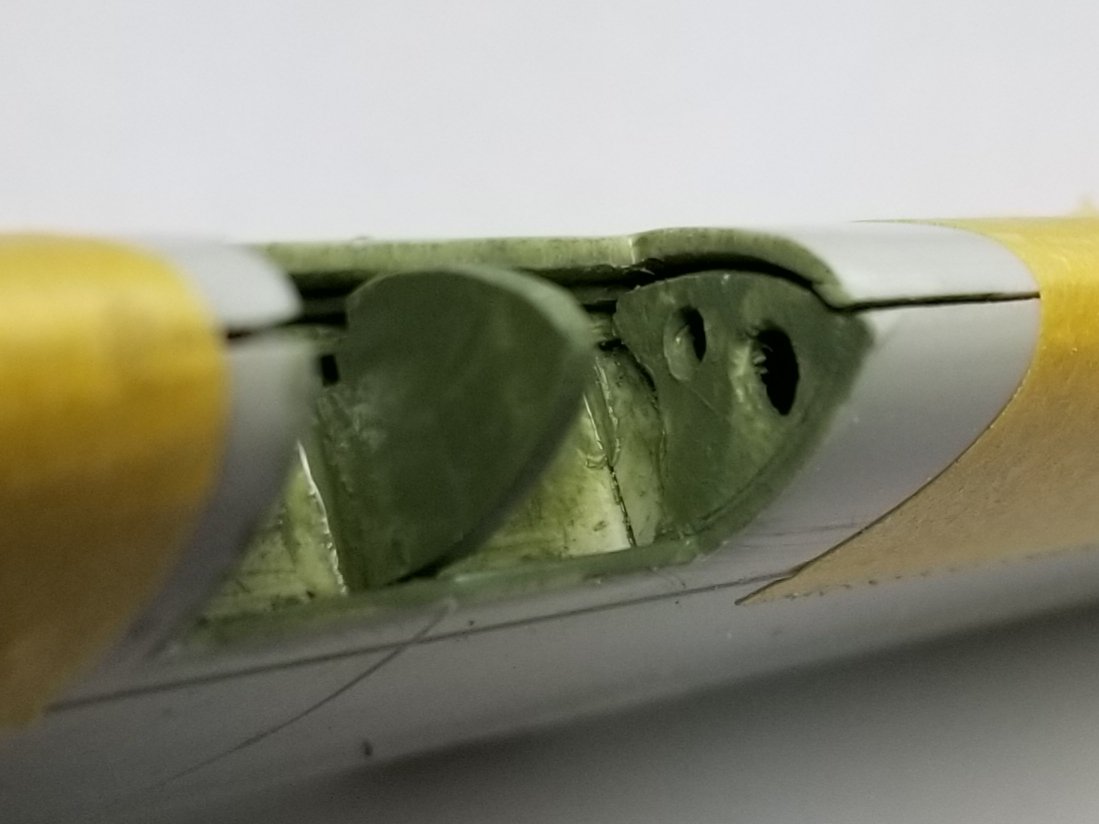
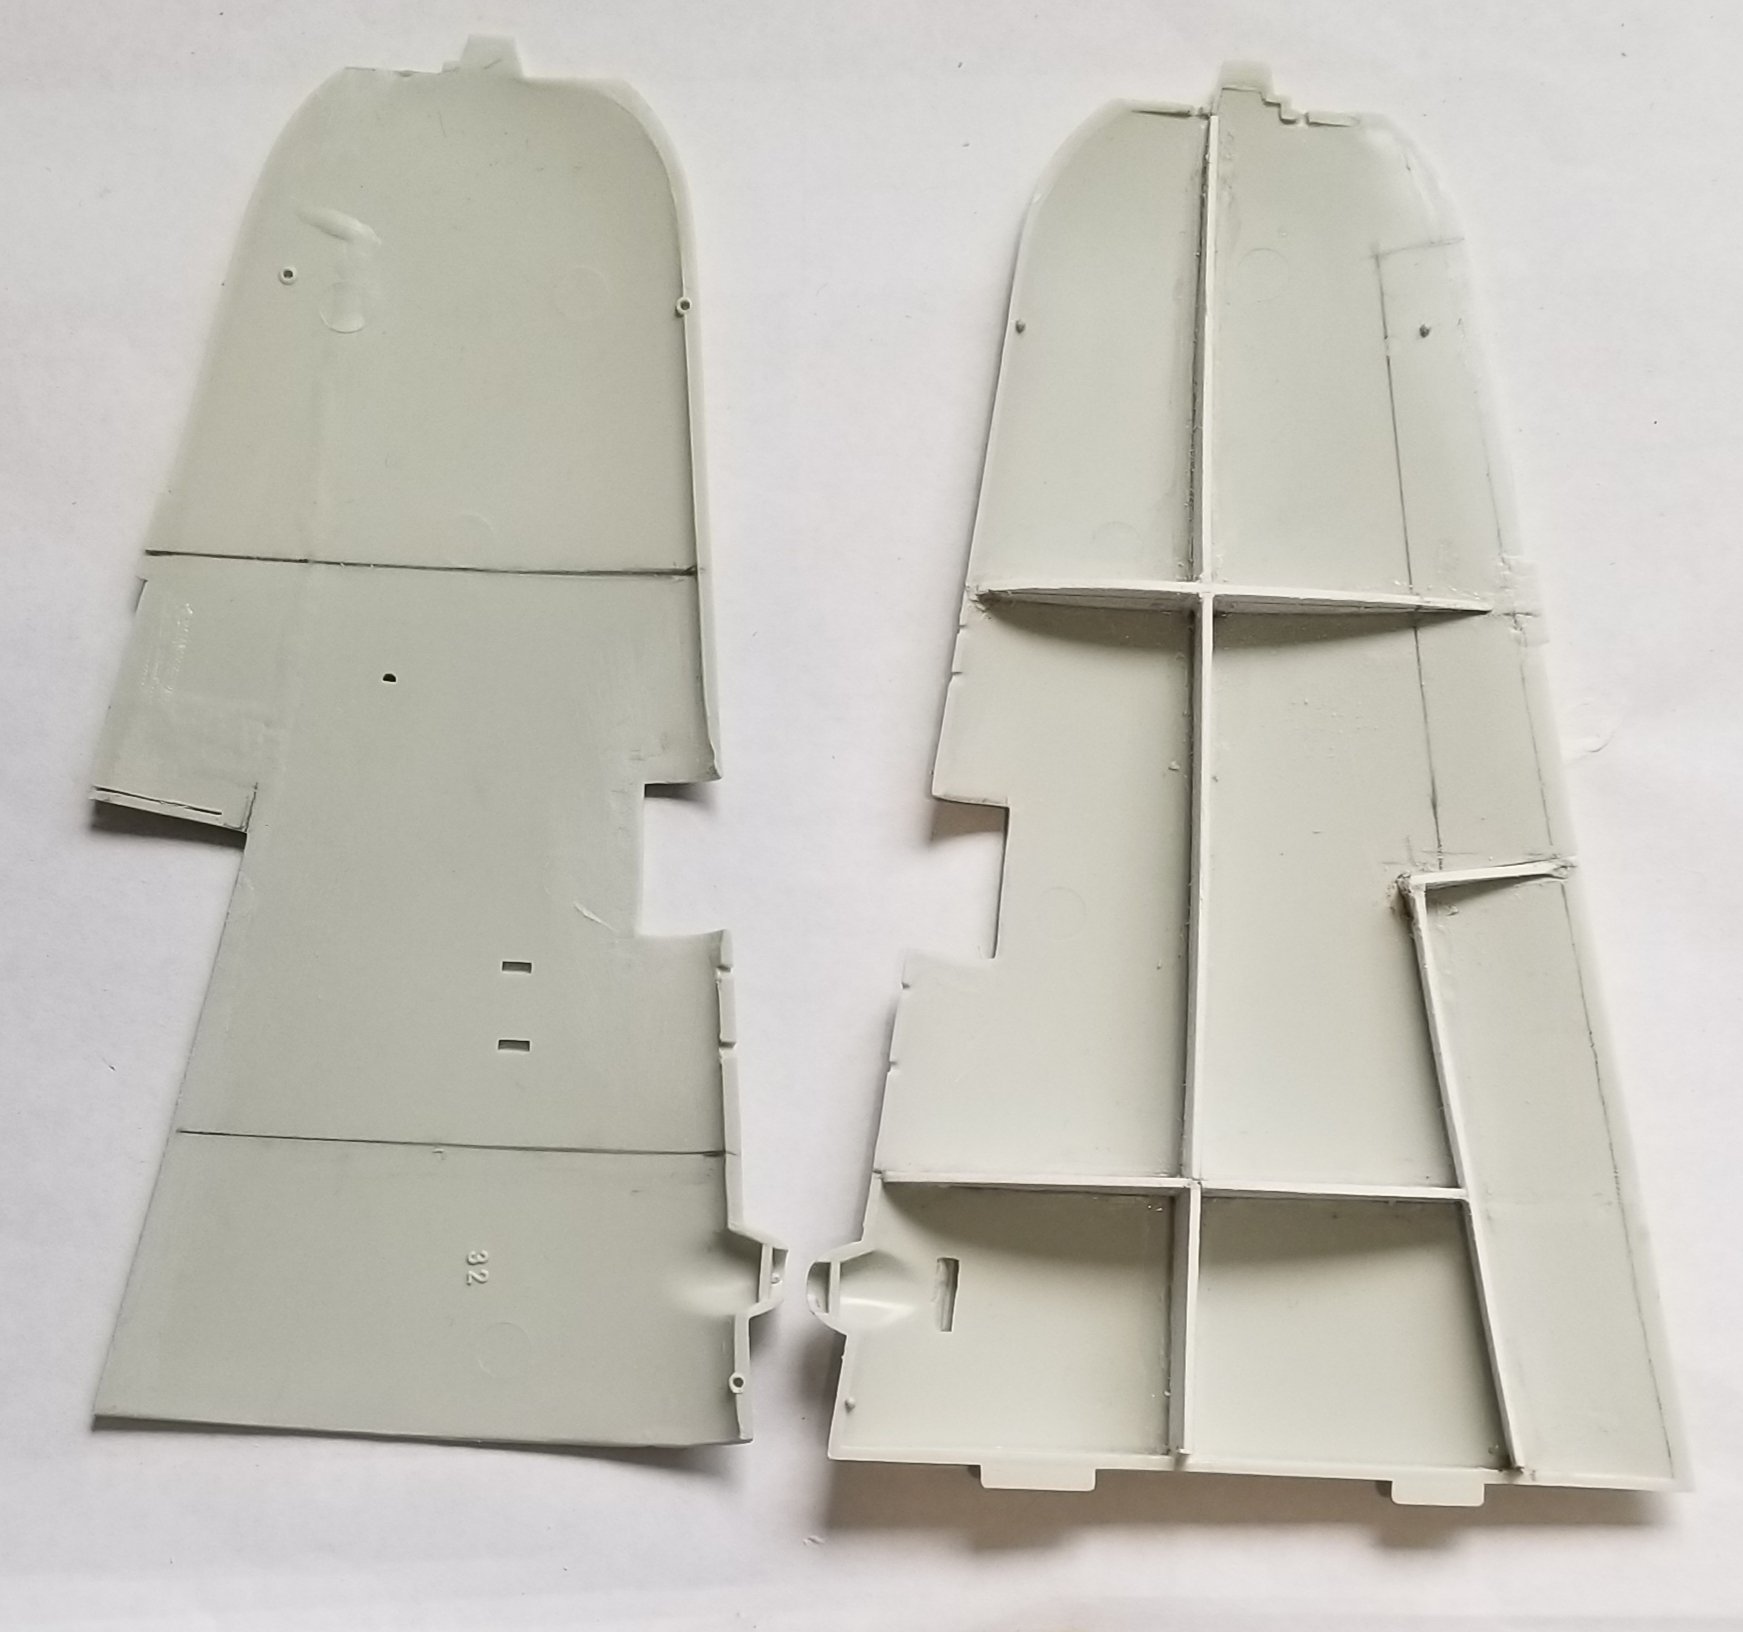
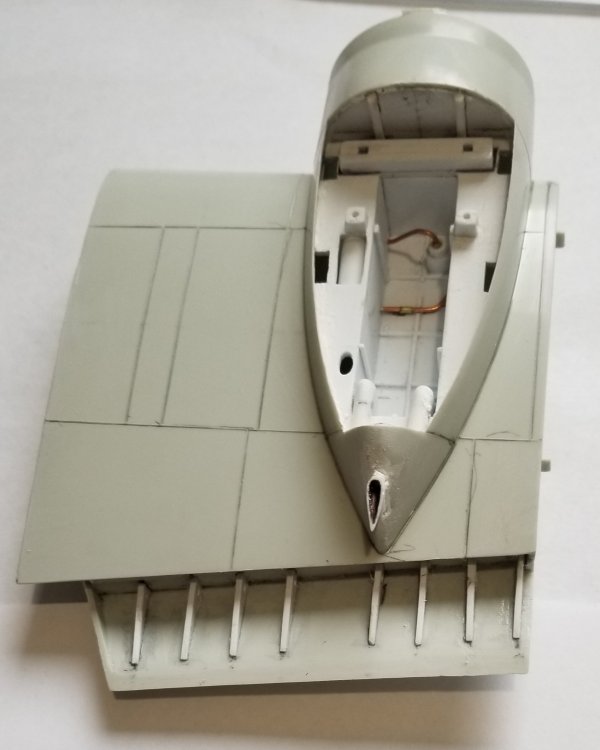
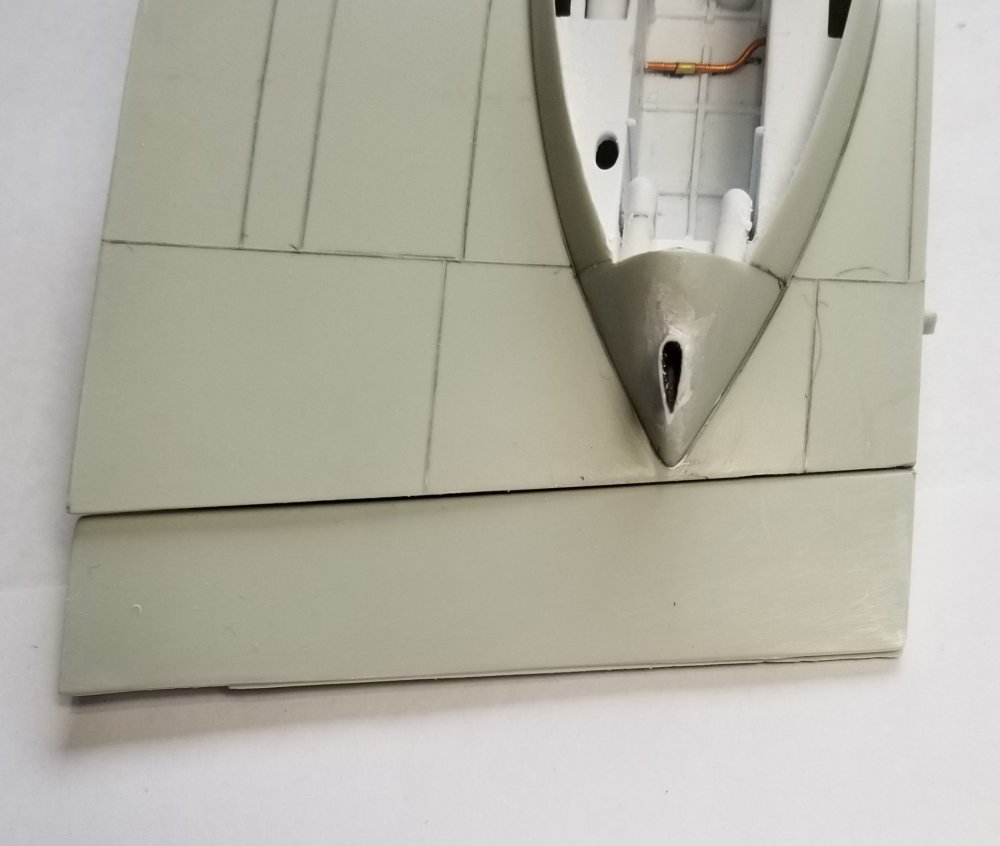
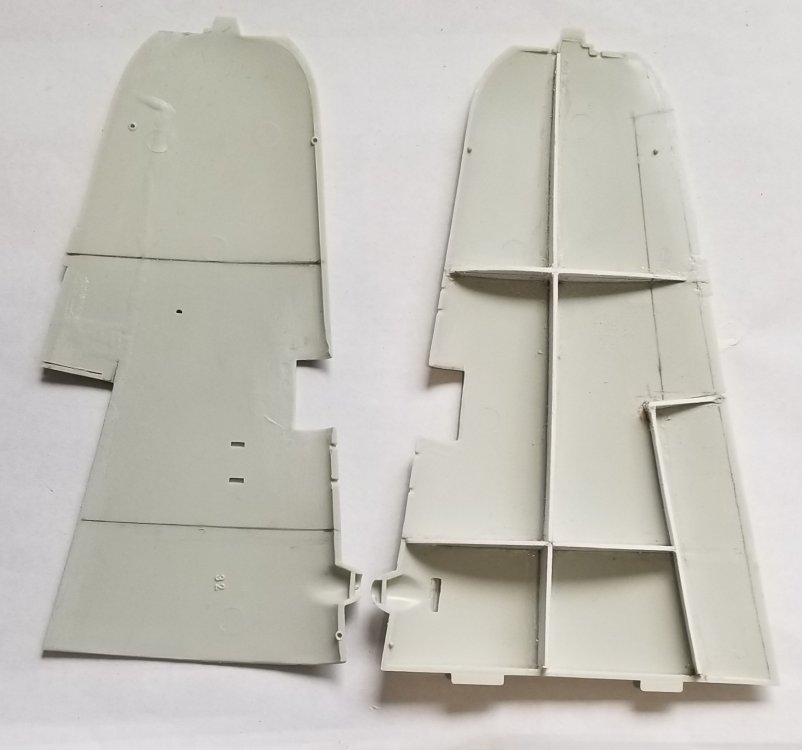
I'm back. Small update, I did some work on the inner flap area, not much but it took quite a while to cut out all of those ribs and make sure they were all the same size, plus drill the holes in them for both the port and starboard sides. view of the port flap area. Both the port and starboard sides are glued together now. view showing the holes. view with the flap just sitting in place. These will be installed in the down position. Well that's it for know be back later with more. Ron G
-
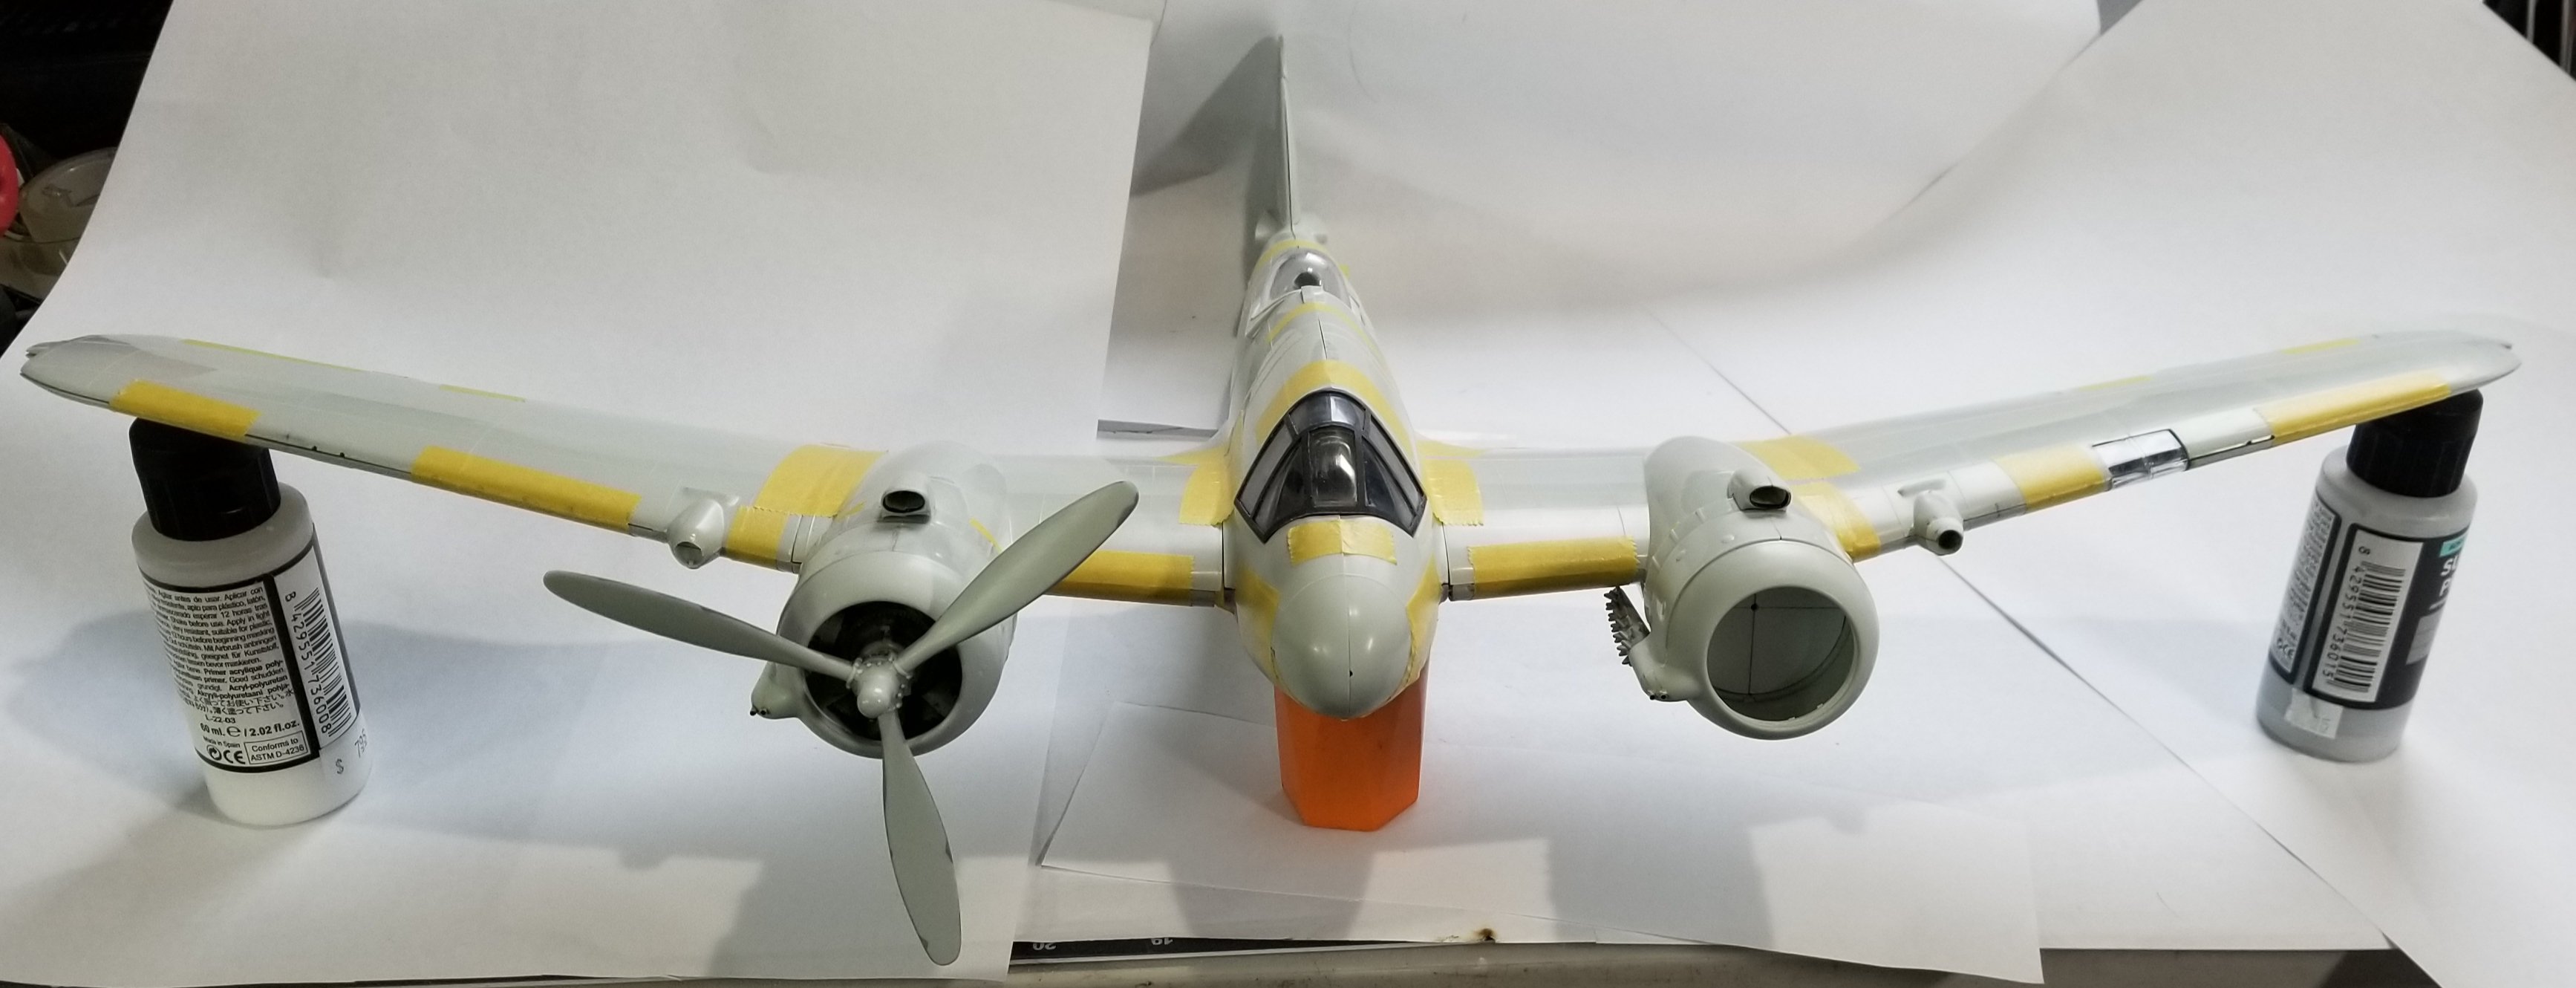
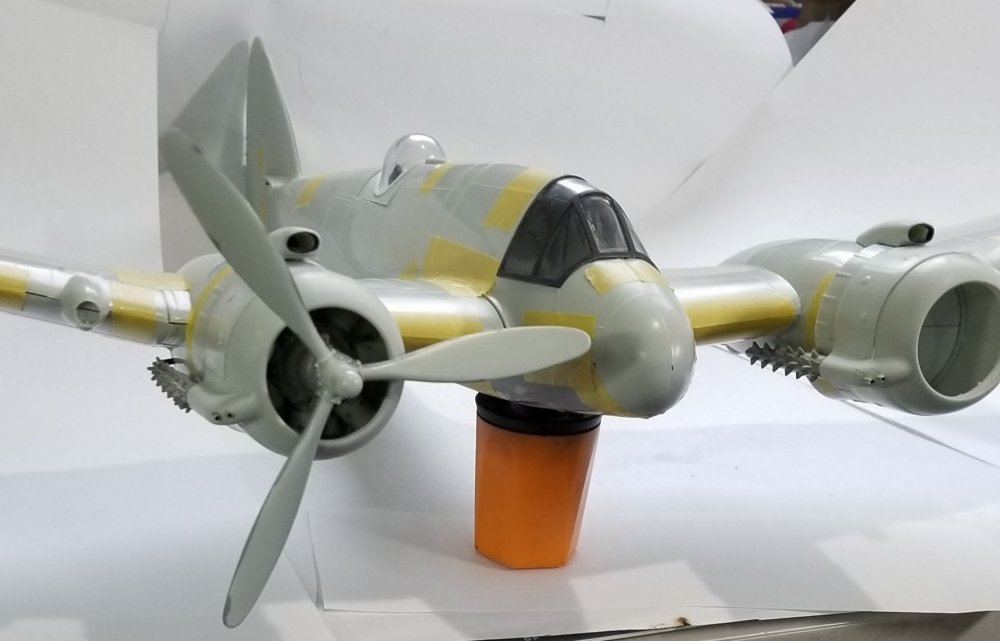
Hey all I just had to do it. I wanted to see what it would look like all together. just another view. Enjoy. I'll be back soon with more updates. Ron G

-
Tamiya F4U-1 Birdcage redux
CrankyCrafstman replied to JohnB's topic in LSM 1/35 and Larger Work In Progress
Thanks John -
Tamiya F4U-1 Birdcage redux
CrankyCrafstman replied to JohnB's topic in LSM 1/35 and Larger Work In Progress
Wow great work John. How did you do the white tape marks on the upper fuselage for the fuel tank? I've been wondering how to accomplish this when I get around to doing mine. Ron G -
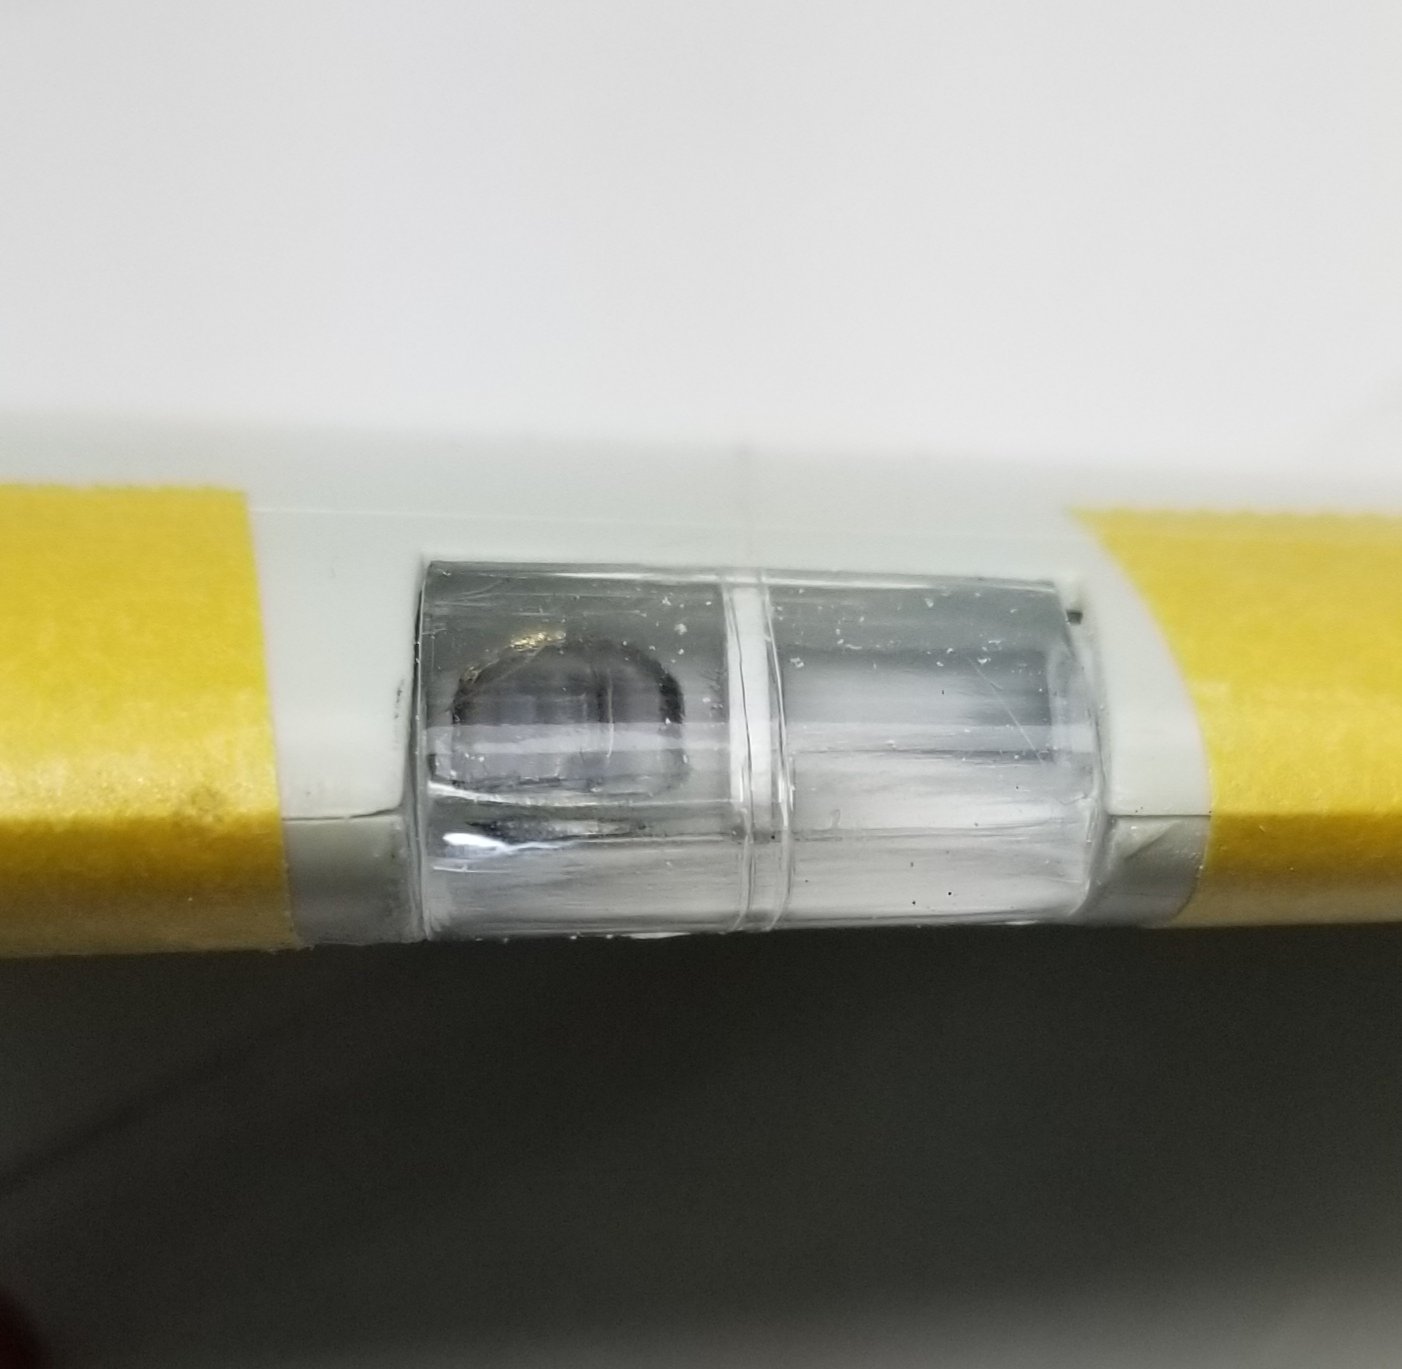
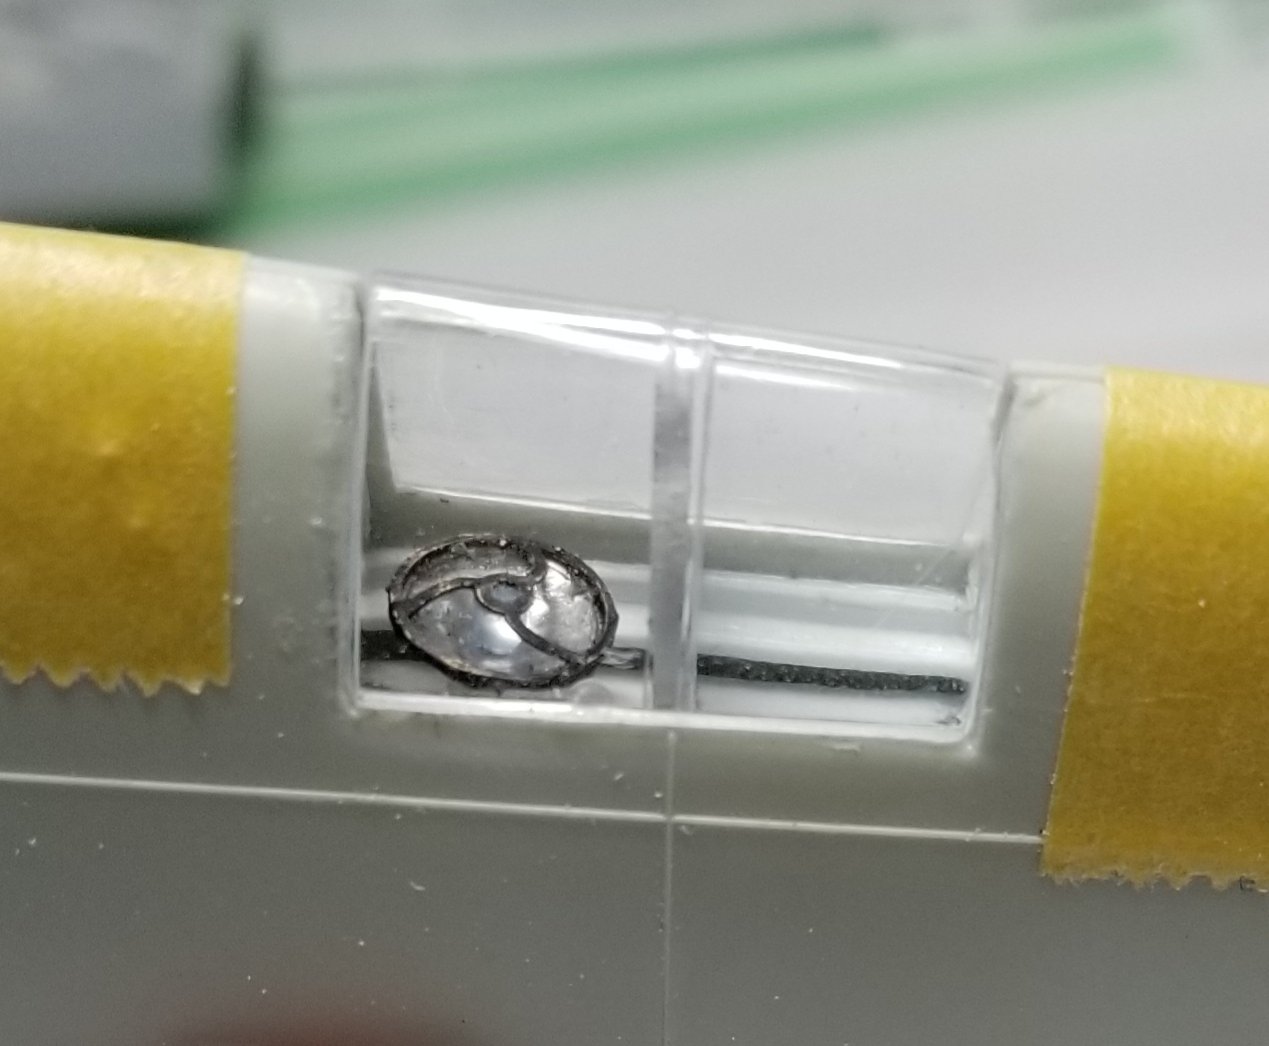
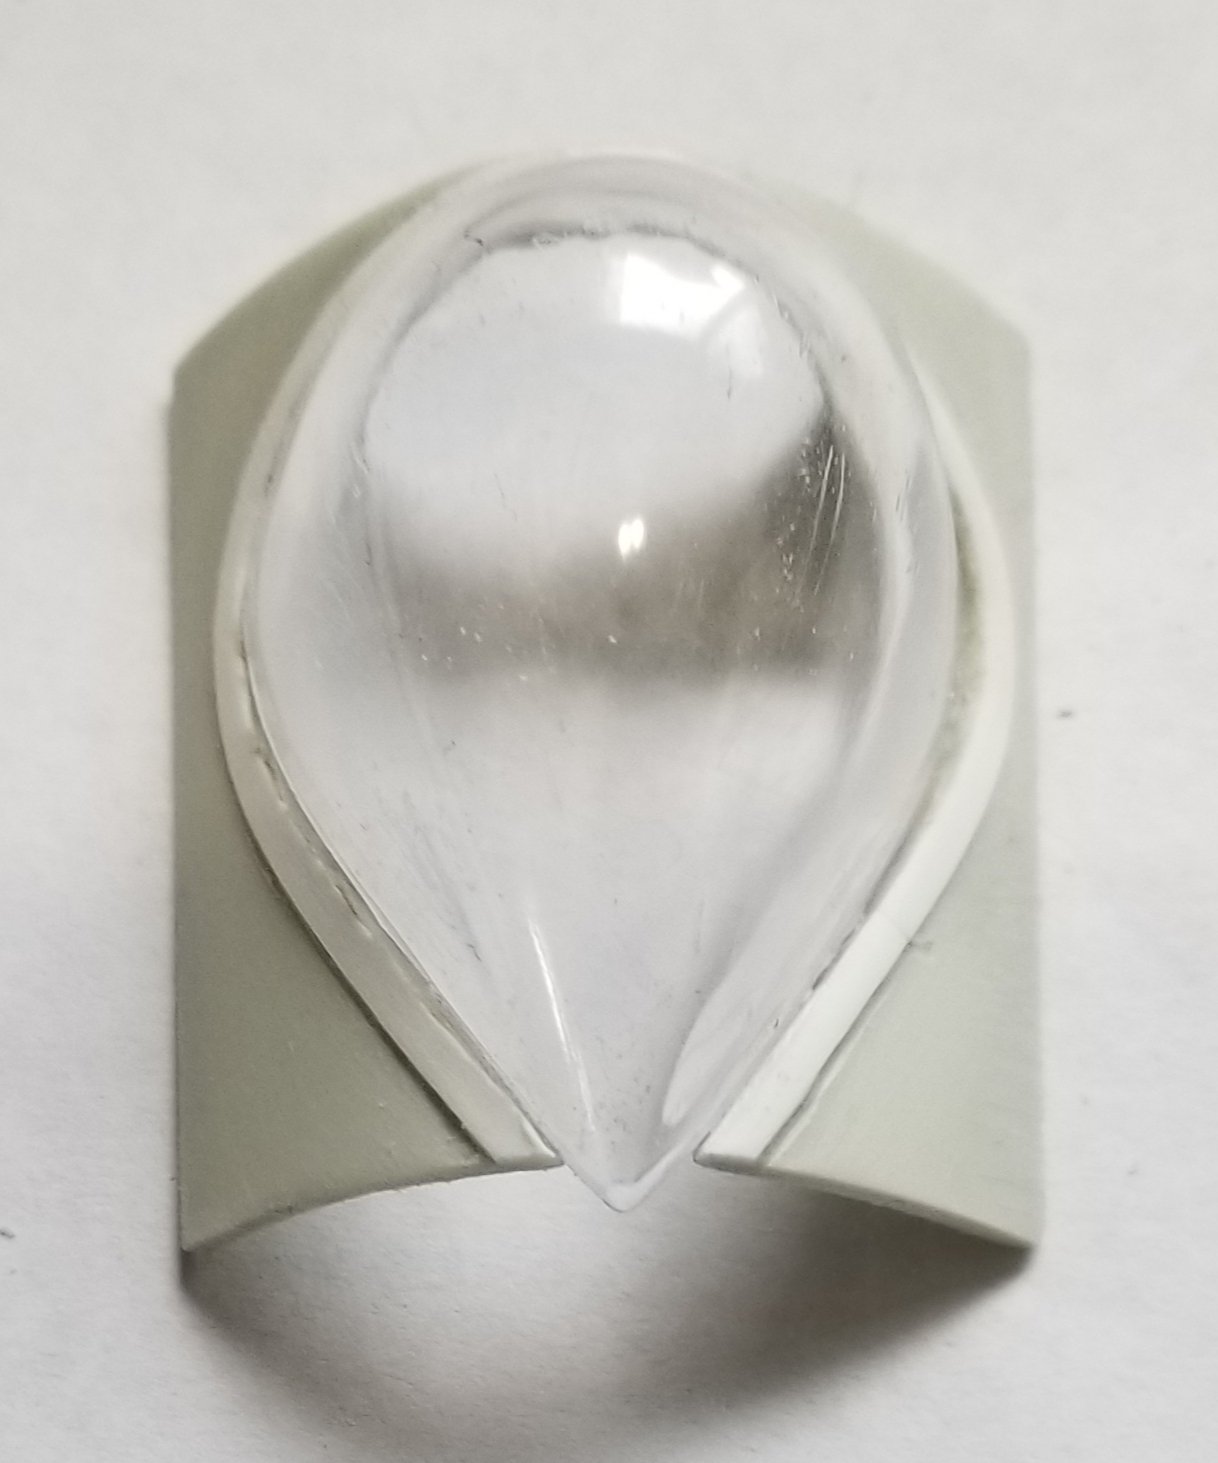
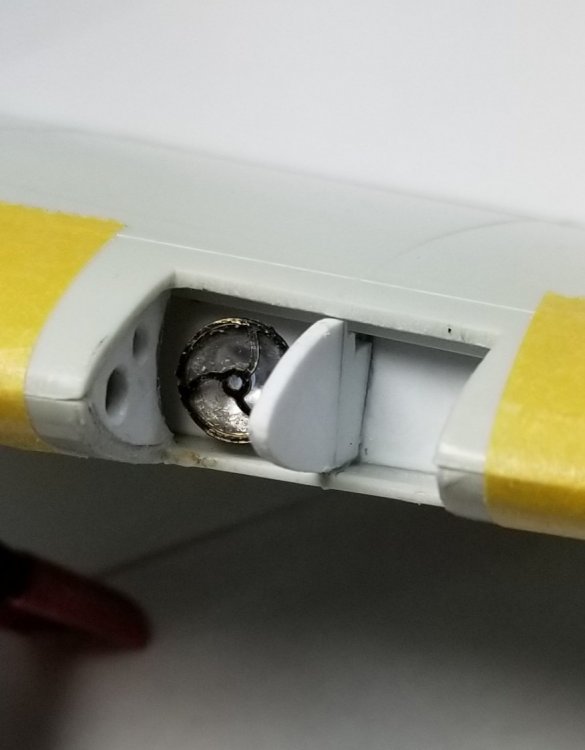
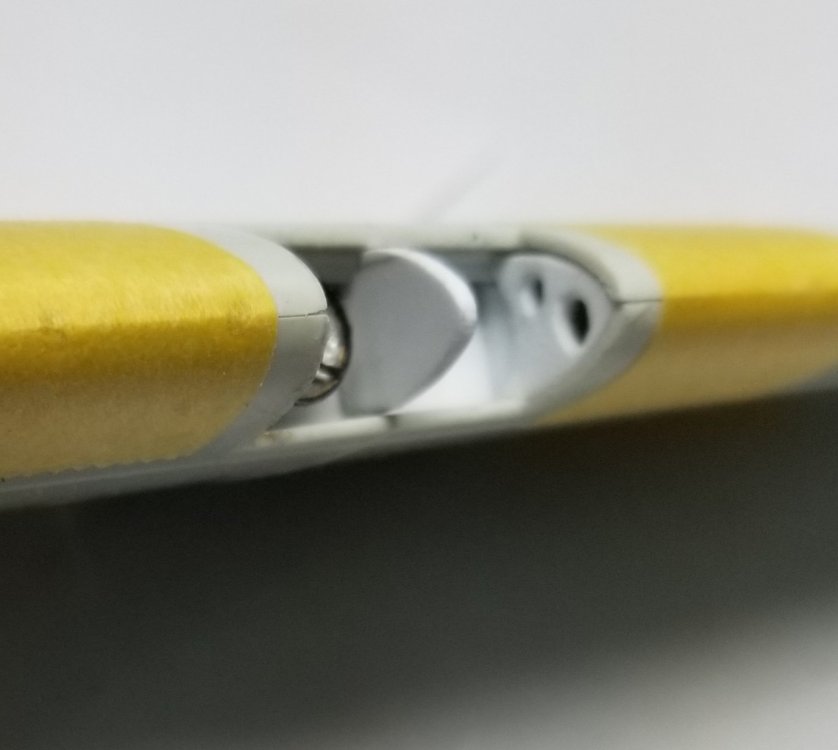
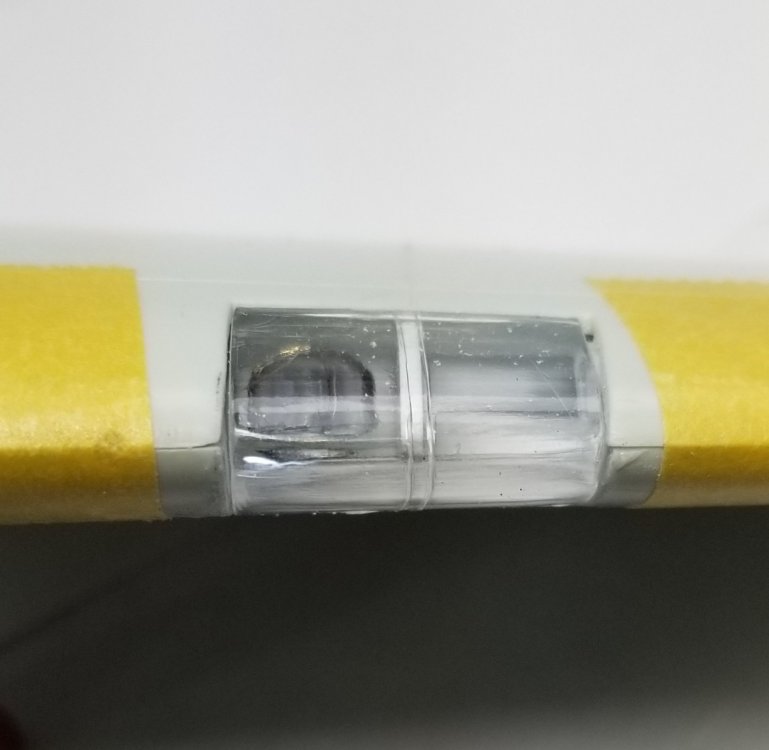
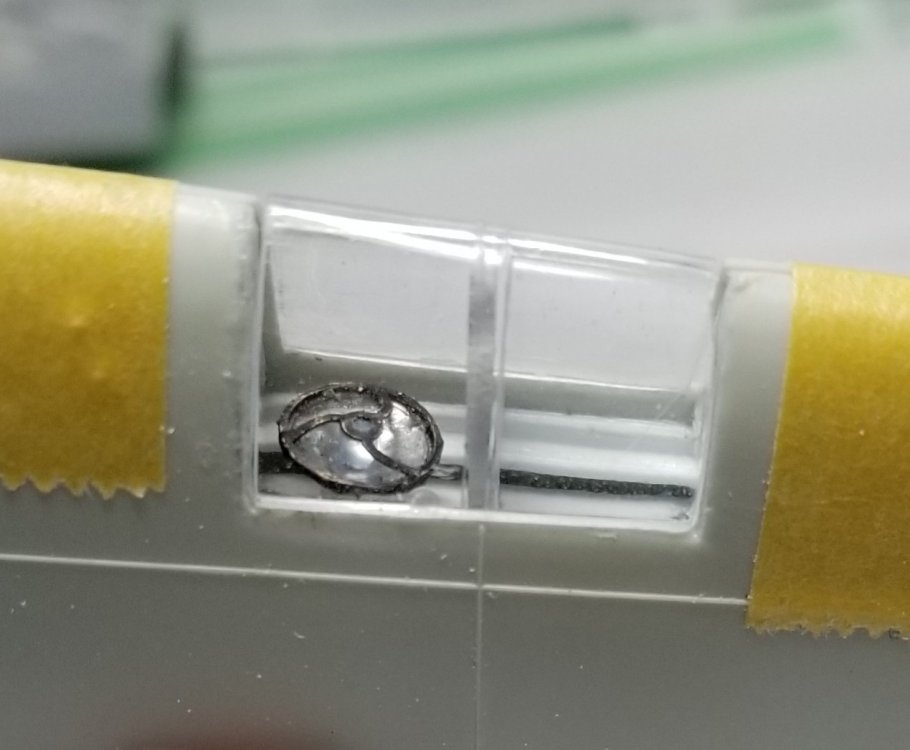
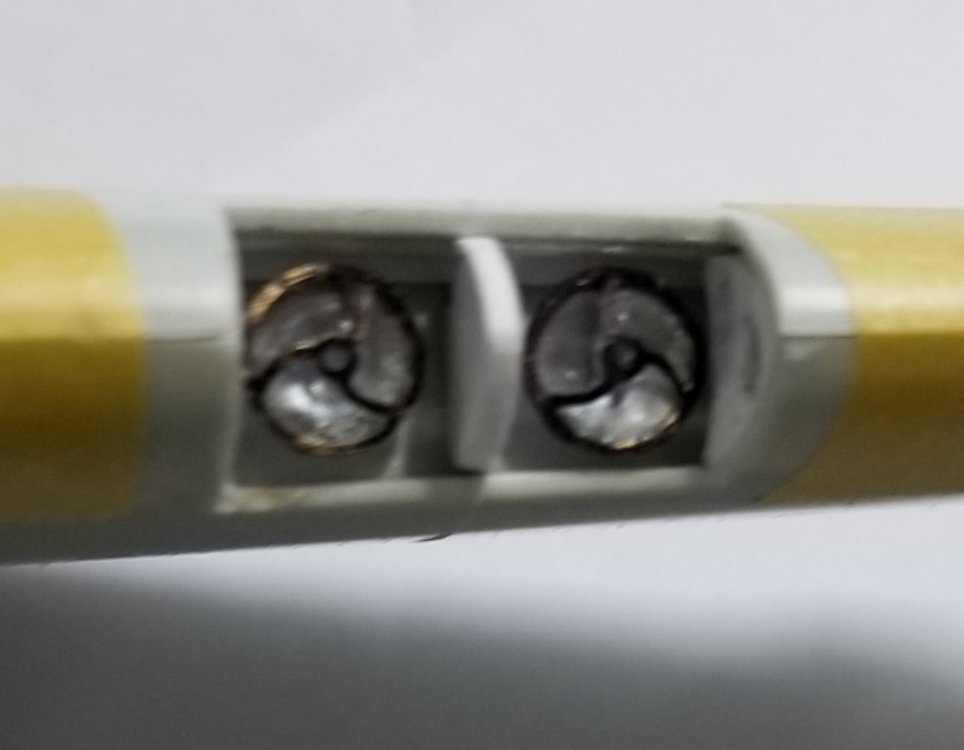
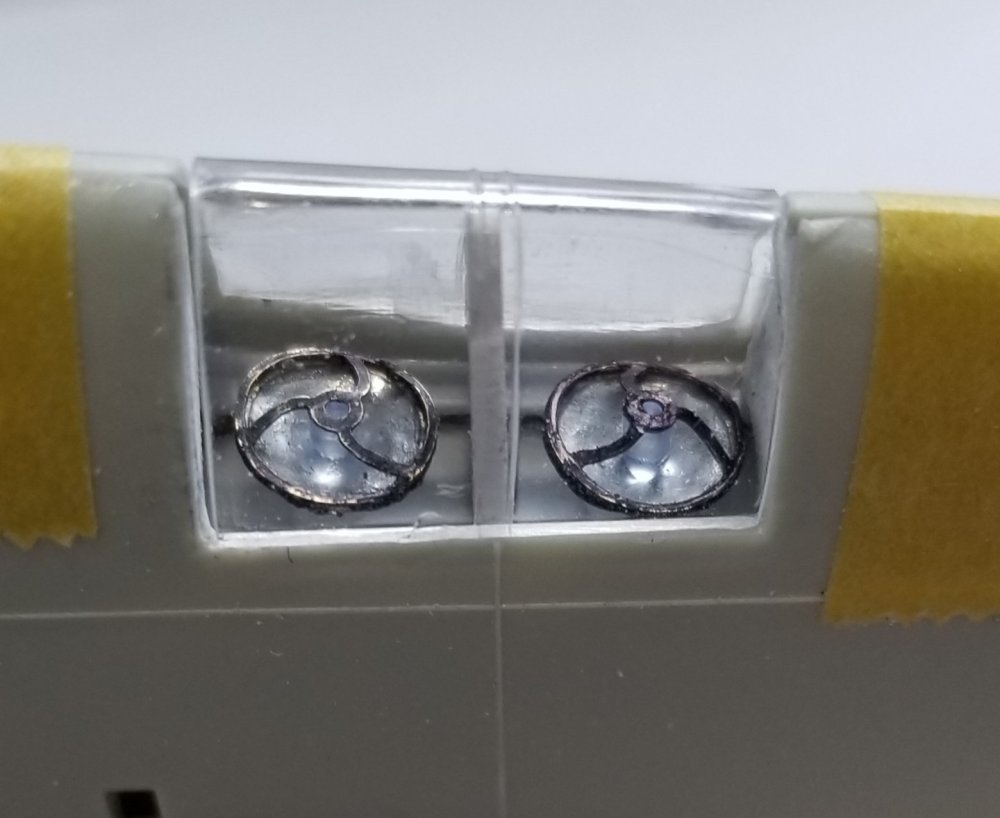
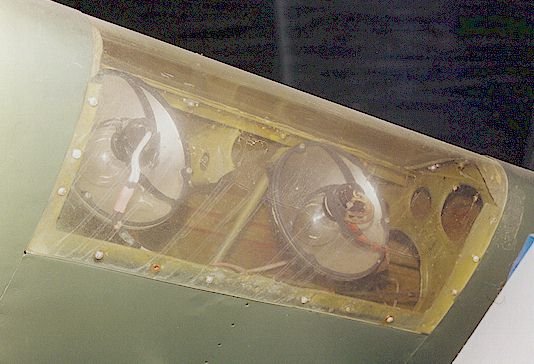
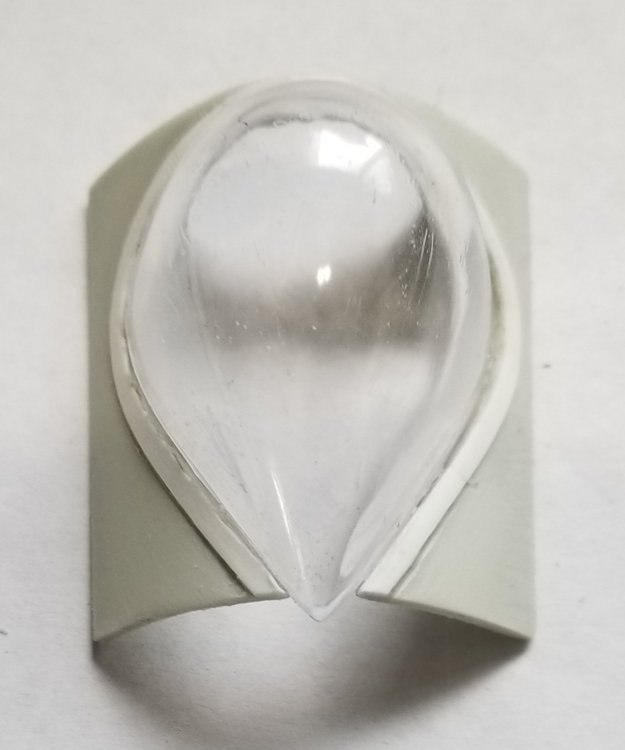
Hey all I did a little work on the twin landing lights. I used brenguns British landing lights photo etch set #BRL32015. You have to create a dome shape in one part of the light (the reflector) and I made a dome, kinda in the tri-ribed part in order to hold a small bulb, just like the real thing, that I made out of a piece of clear acrylic 0.06" dia. rod. I will run wires to these when I do the finish work on them. I cut the kit lights off and ground the area smooth. I then replaced them with parts made out of 0.04" thk. card stock. I did this based off of a phito I got from the interweb. So here are some pictures for you to look at. view of one of the Brengun landing lights. If you look close you can just see the bulb. Idid the reflector with a chrome Molotow pen and the black is just done with a sharpie. view looking directly at the light. view showing one of the lights in place. Also some holes and detail. another view showing the holes added. view with the glass cover on. view of the light through the bottom of the cover. view of both lights in place. view of both lights and the cover. view with the area painted grey/green.another view of the landing light area painted. It's a lot of work that you won't be able to see very well, but I know it's there. Here is a picture of the real thing. Well all for know be back with more soon. Ron G


-
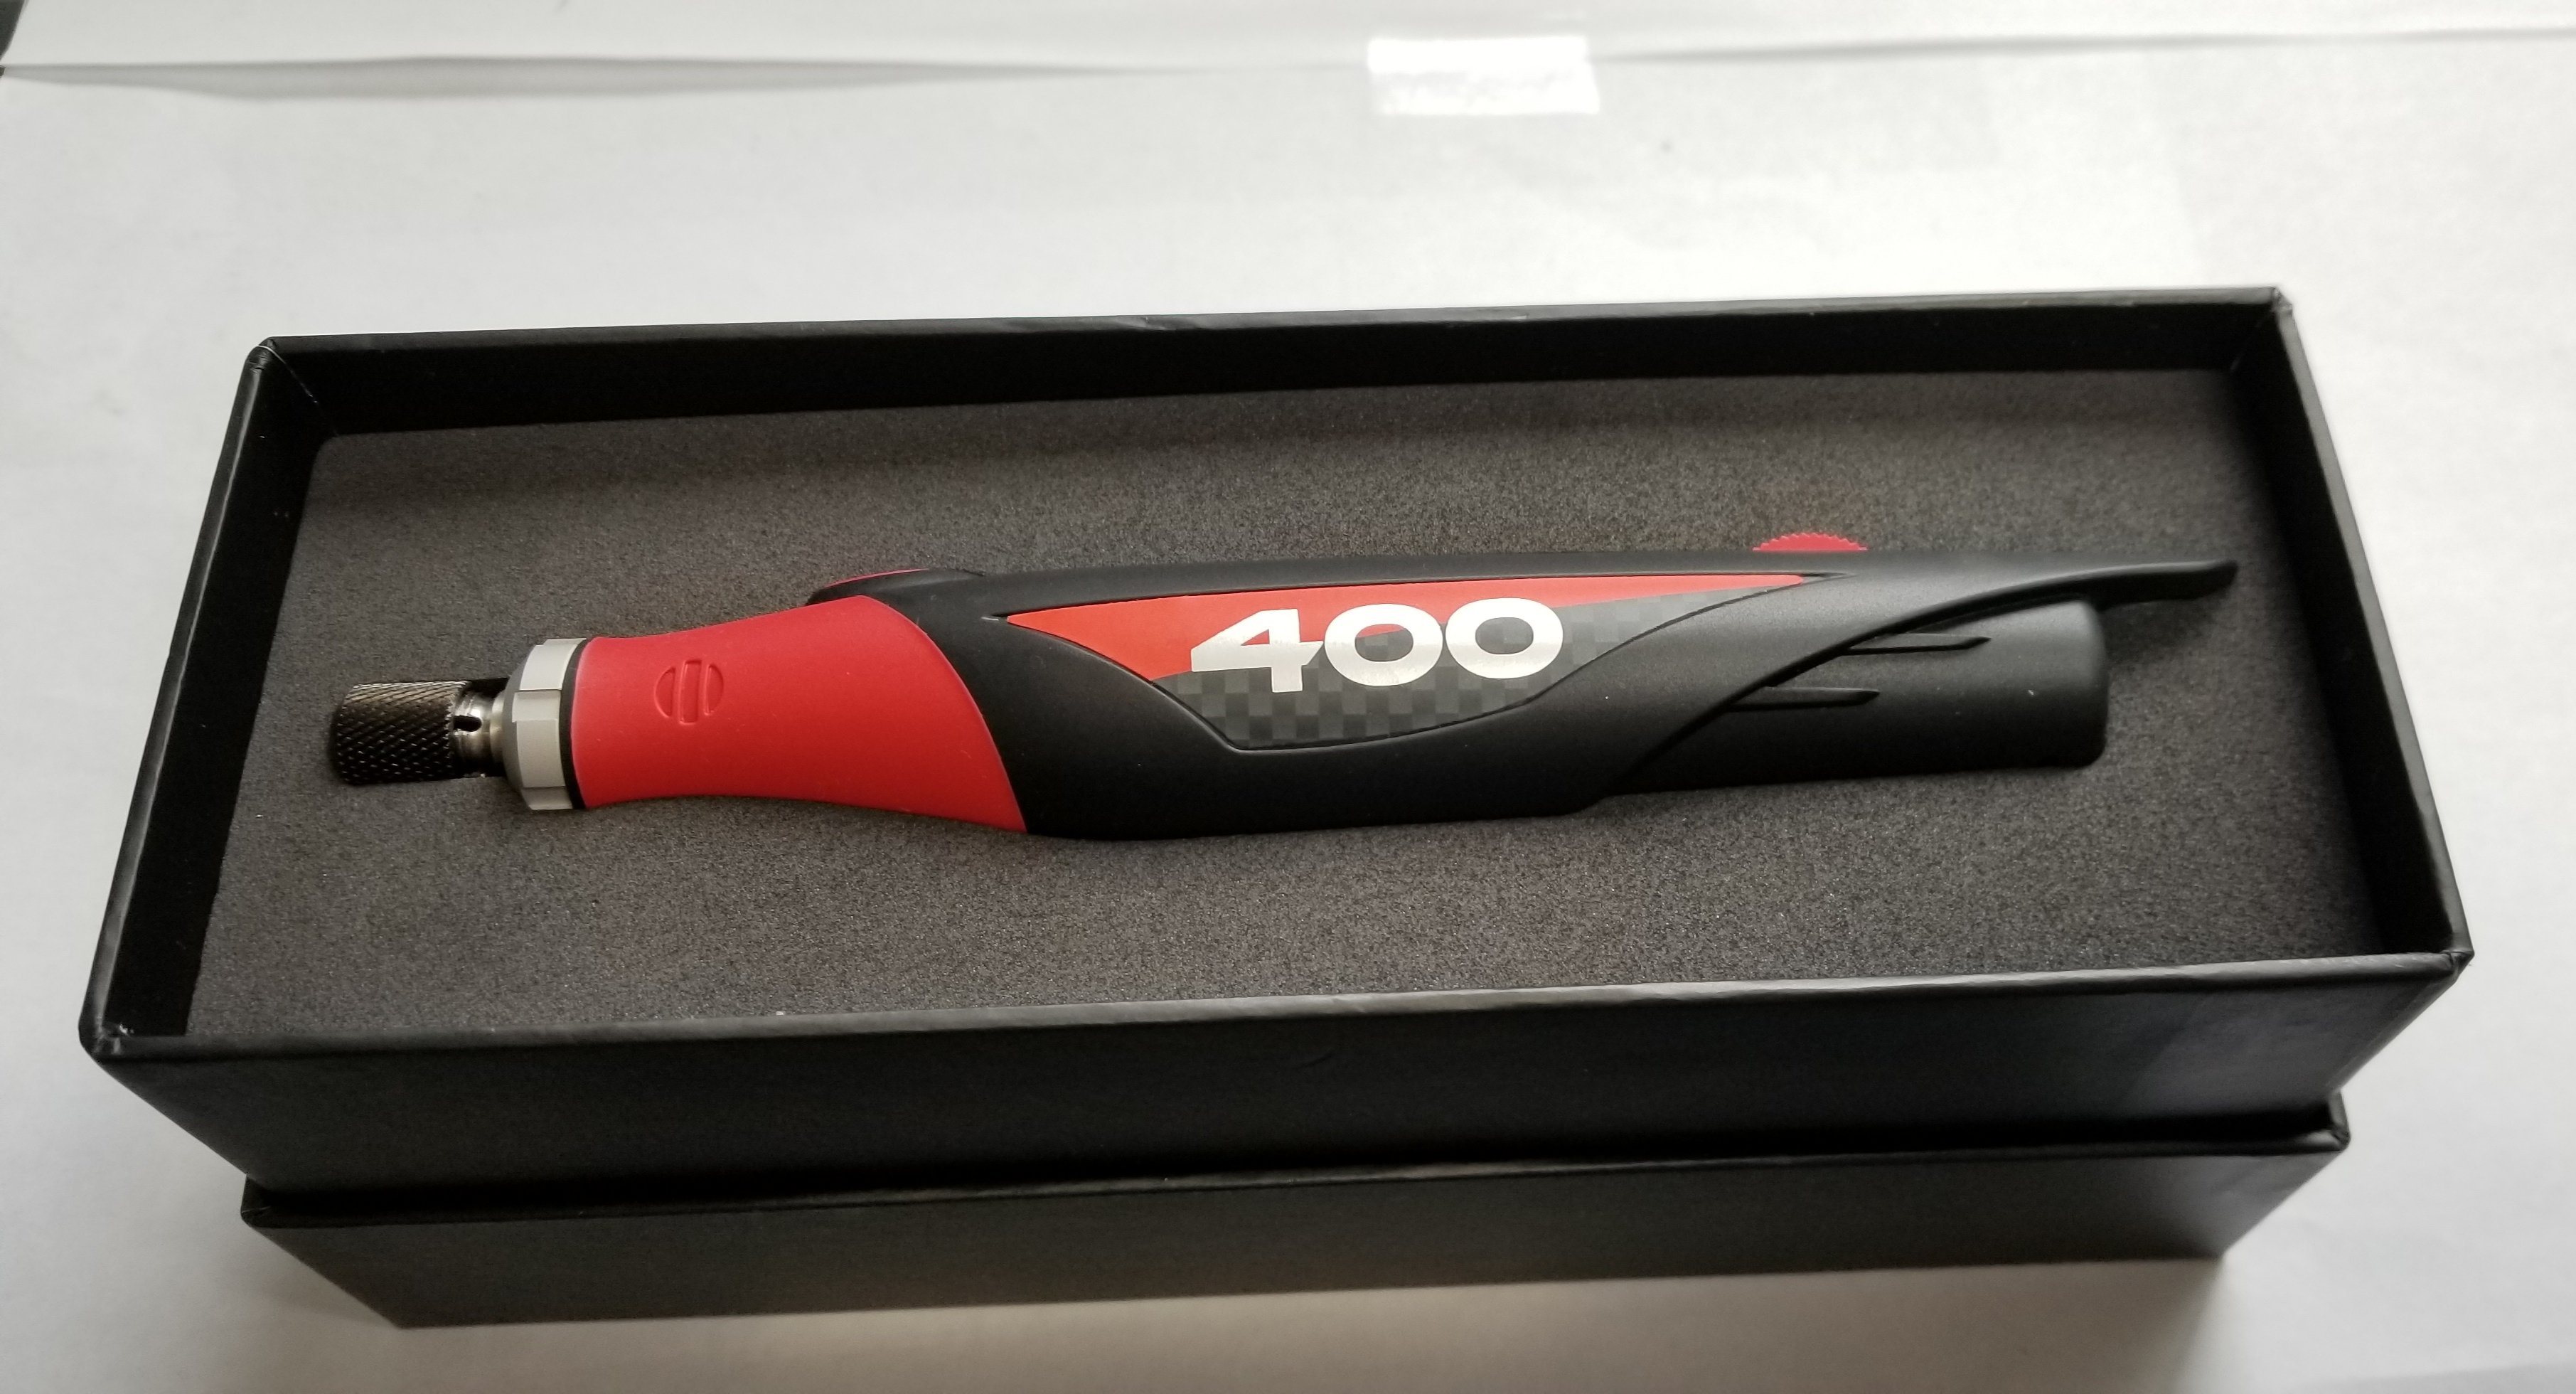
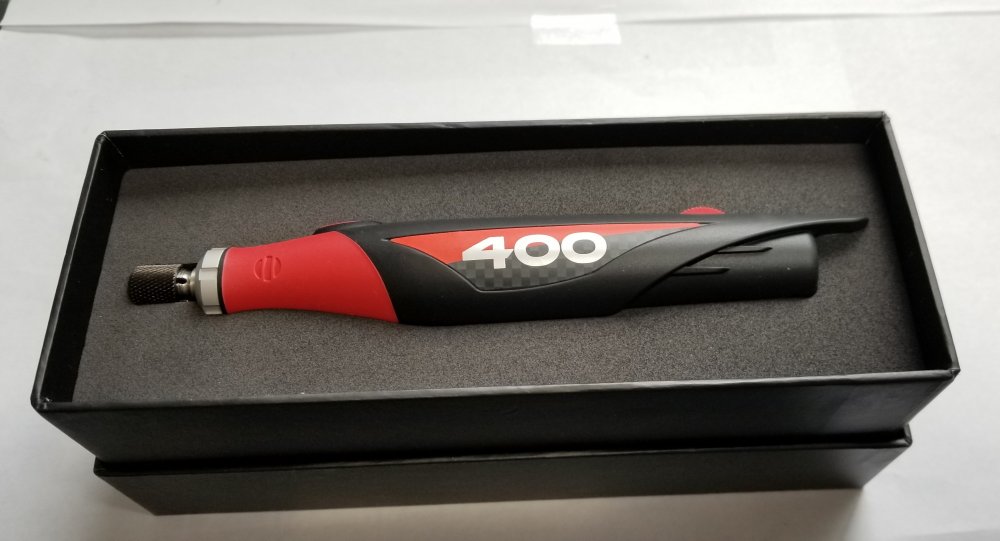
Hey GazzaS Check out my post in the tools section on the David Union 400 sander. It's smaller, has all the same attachments and is variable speed and it's only $99.00 + $15.25 shipping. Ron G
-
Tried Harv they didn't have them.
-
Thanks guys I ordered some rockets from Profimodeler, but with this Covid lock down who knows when they will get here. I'm not sure if I want to do a torpedo equipped Beaufighter or rocket equipped one. The rockets would be alot easier to do, but I'm kinda leaning towards the torpedo one. I have the 1/48 scale Revell kits torpedo to go by plus a scale drawing. I have a piece of brass tubing for the main body of the torpedo. I will have to scratch build the front, rear and propellers and wooden fin. I have decals from Aviology, but there for Canadian ones with rockets, so maybe that's the one. I'll make my mind up later on in the build. Ron G
-
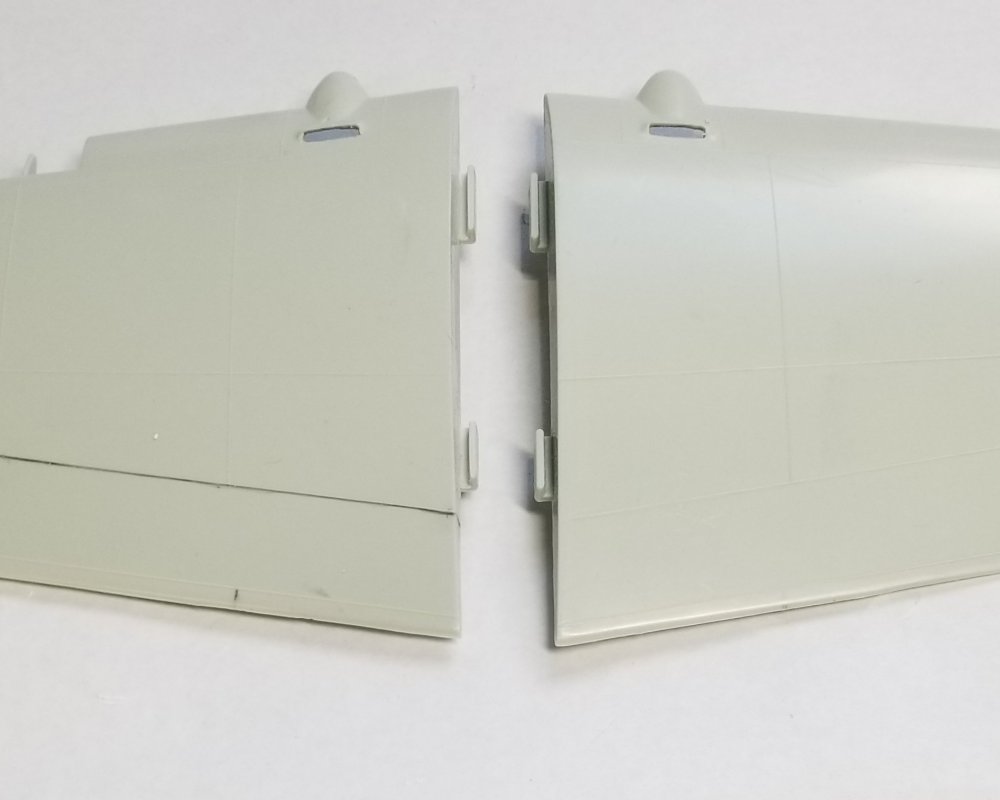
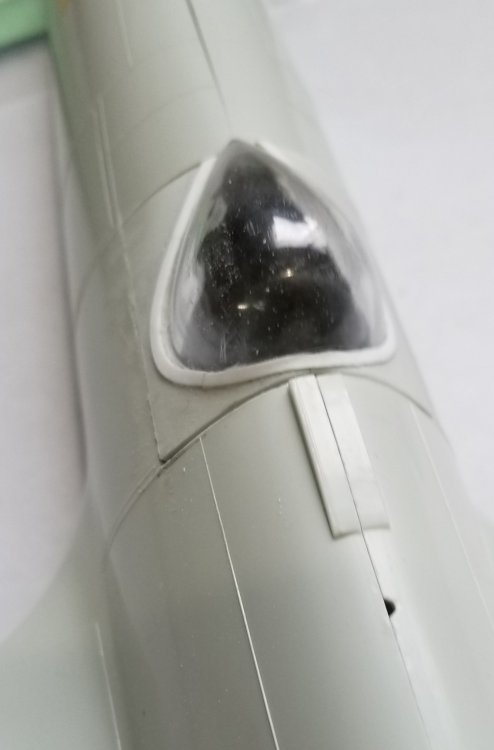
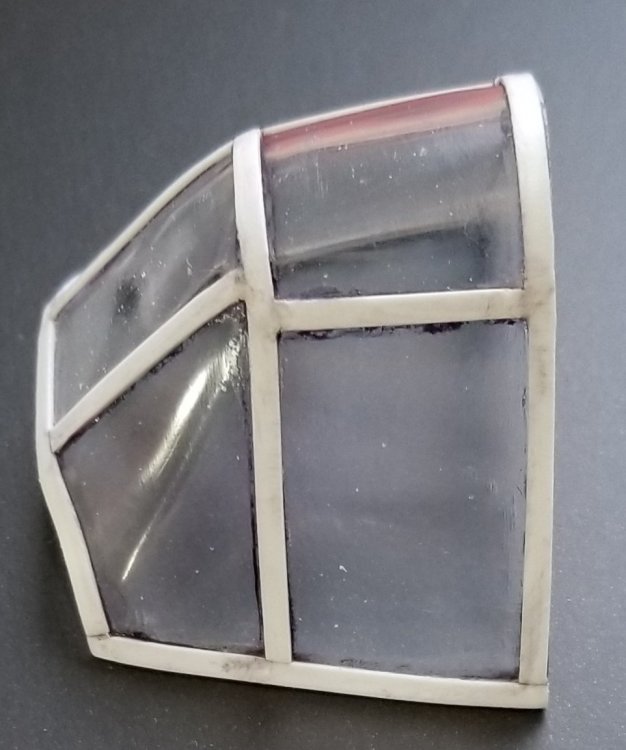
Got a little more done, not much but some. I decided to paint the canopy, inside and out. I hand painted the inside RAF grey/green and masked and sprayed the outside with RAF extra dark sea grey. I used Vallejo model air. I started on the rear canopy in preperation for converting it to the mk x style. Also I added some more stiffeners to the outer wing, and started to make the outer flap. outside of the canopy in EDSG. inside of canopy in grey/green. view of canopy on the fuselage. view of rear canopy. view of rear canopy sitting on the fuselage. view of the stiffeners on the wings and the start of the outer flap. All for know be back with more soon. Ron G

-
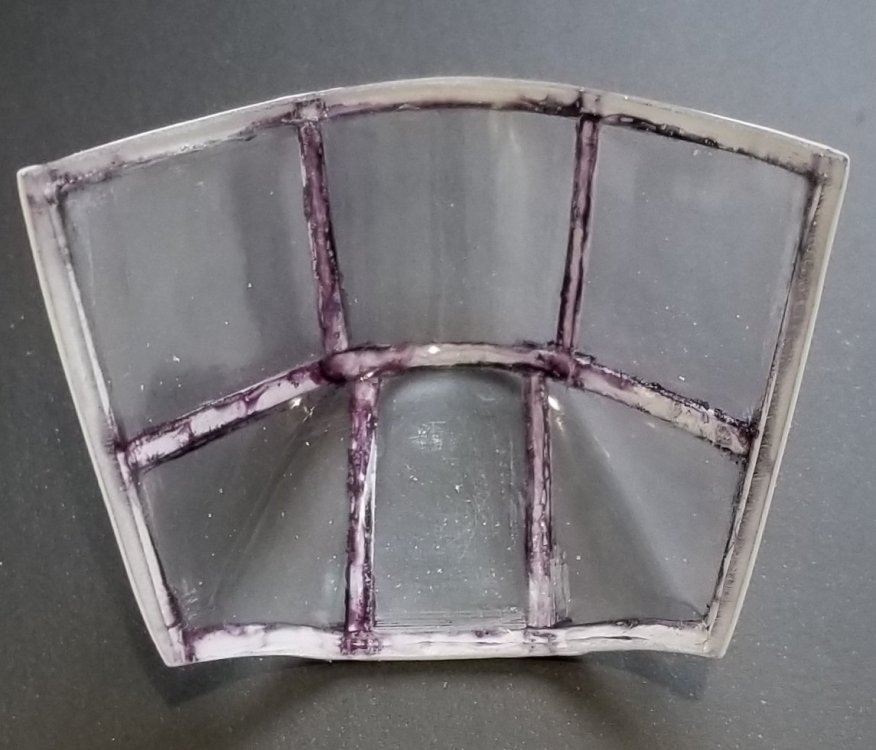
CA and a little extra thin. I should have removed the black sharpie marks before I glued it, because they are a PIA to get off.
-
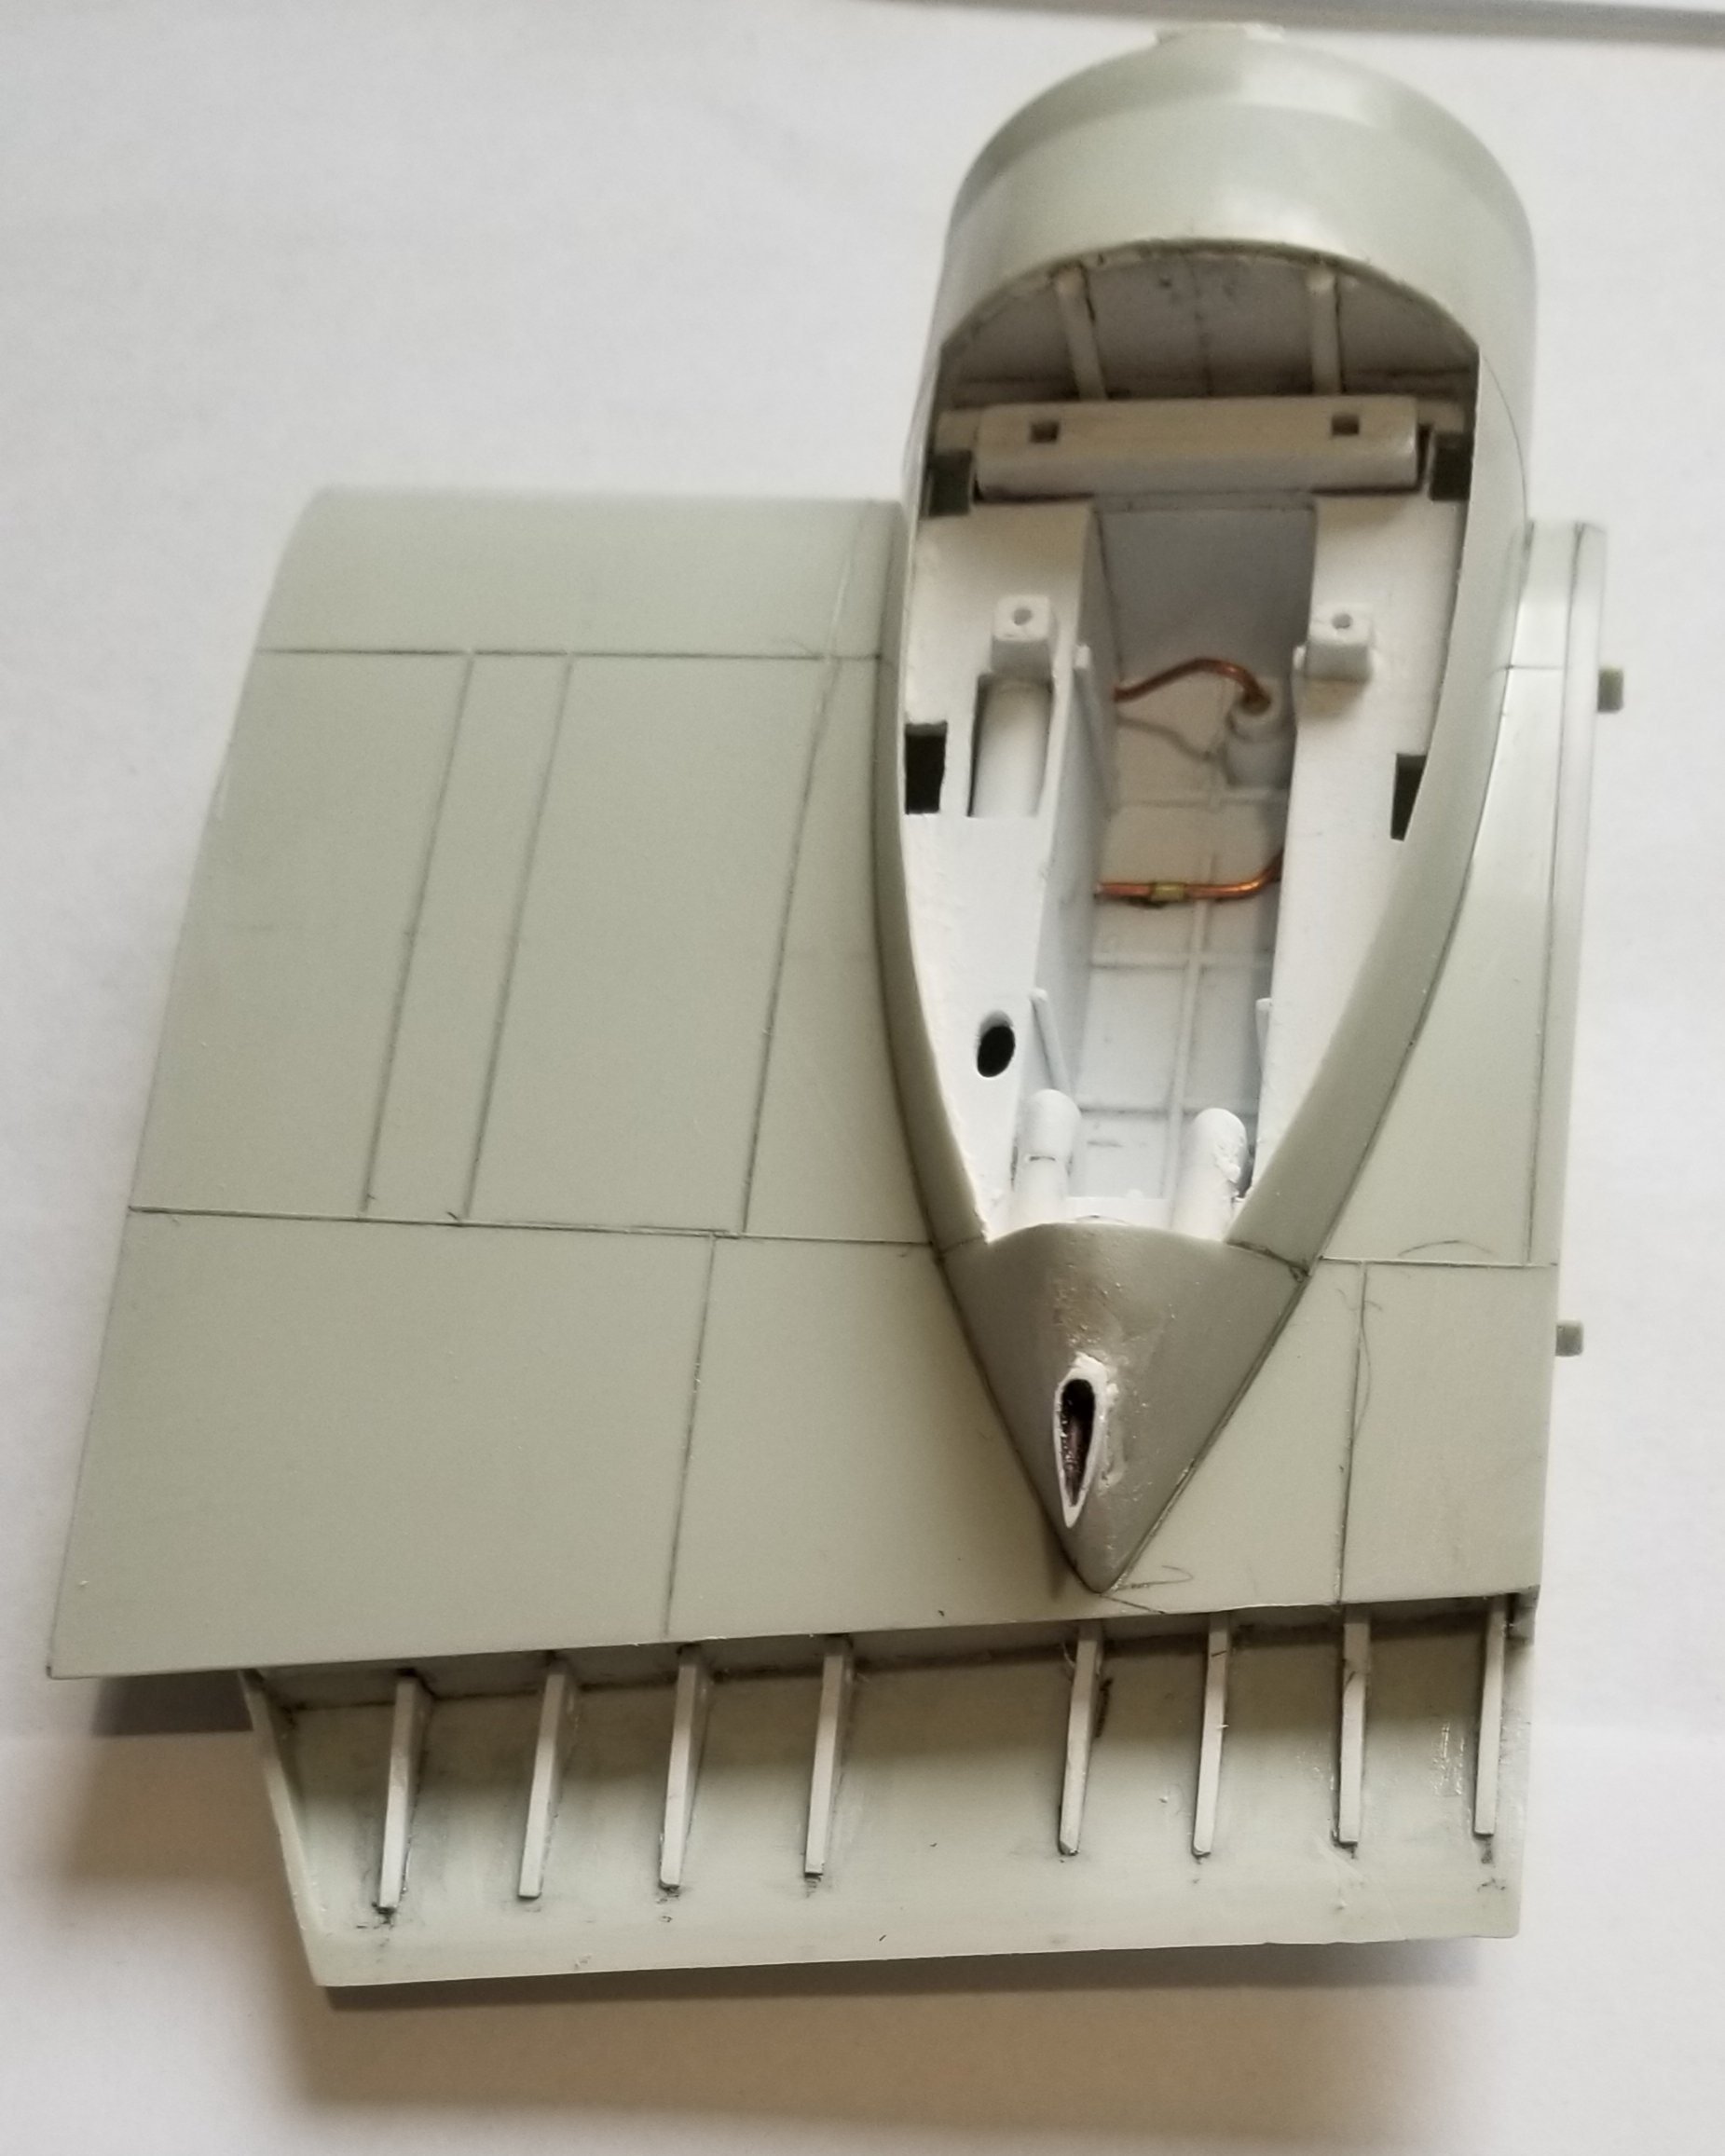
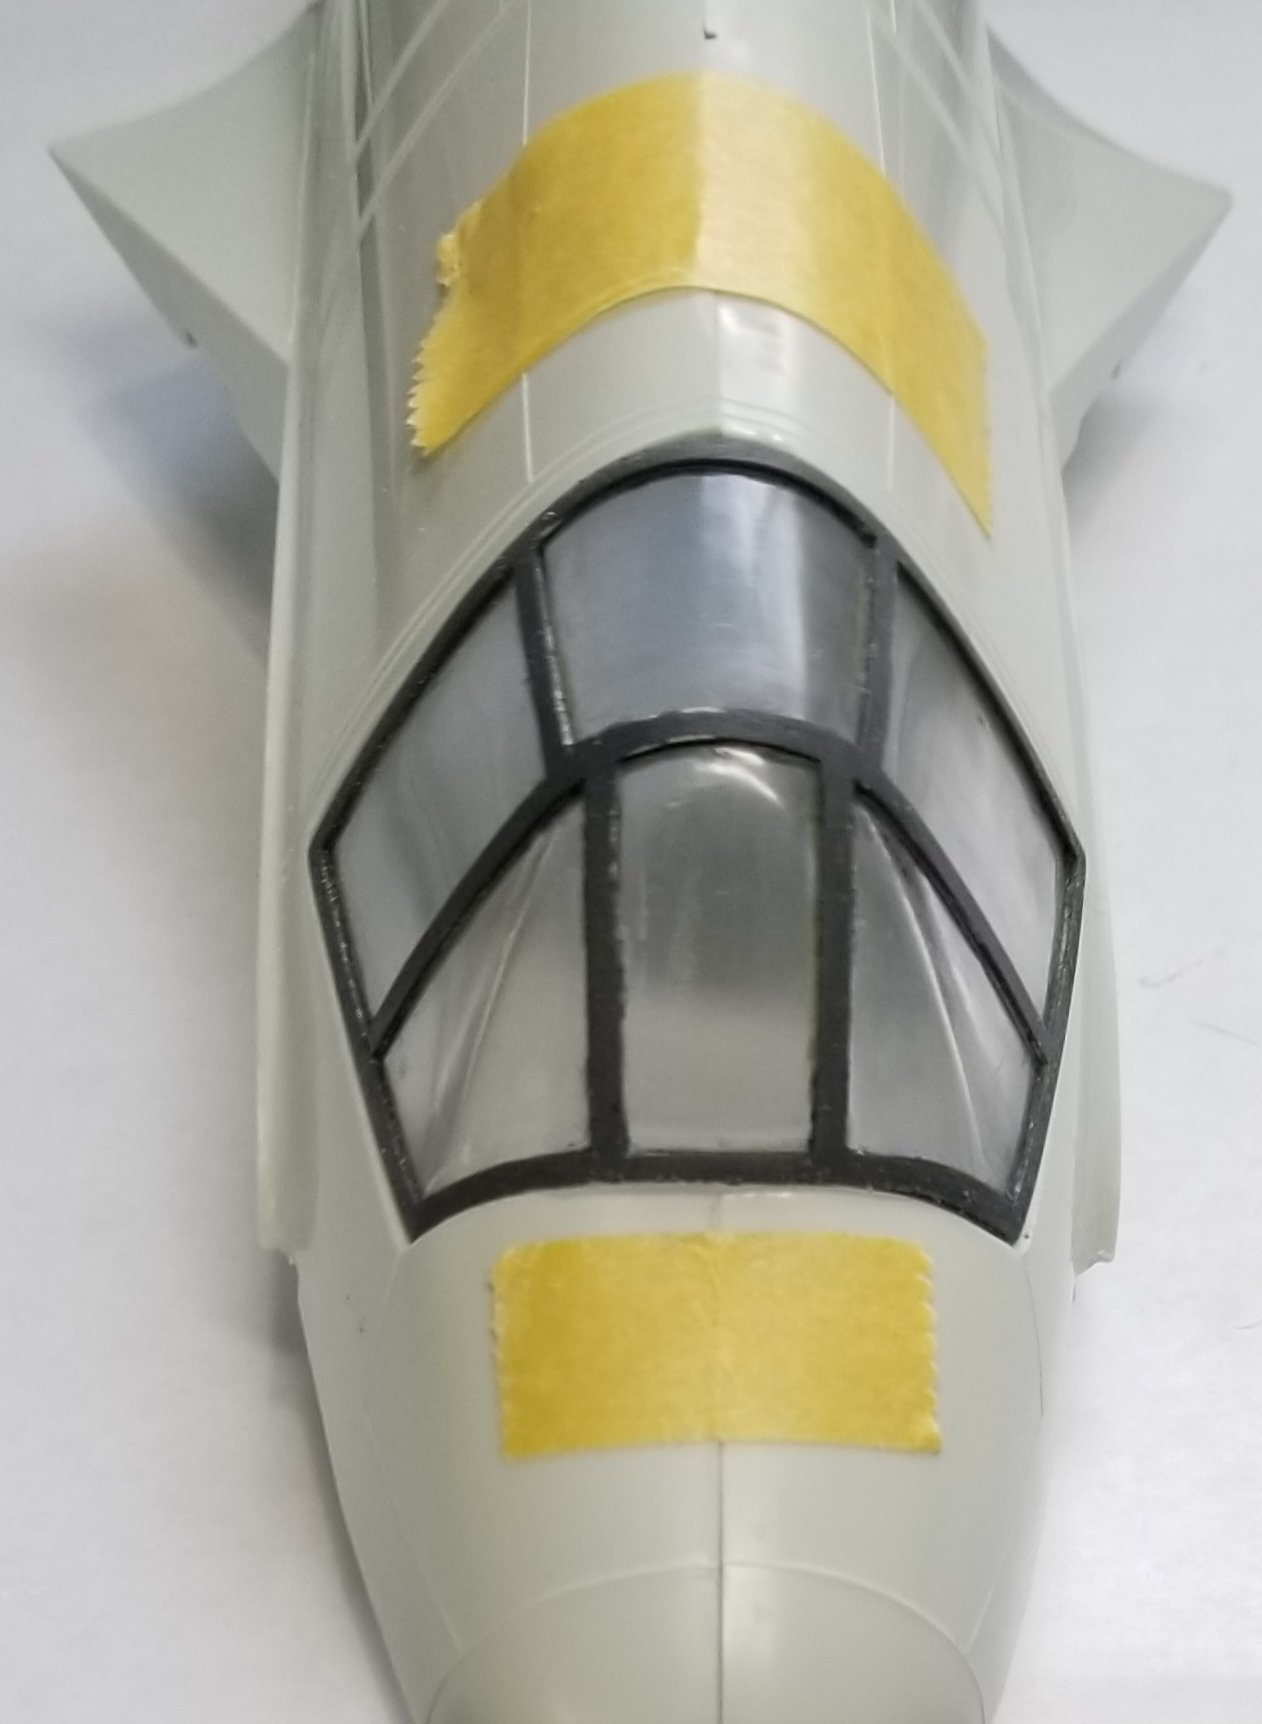
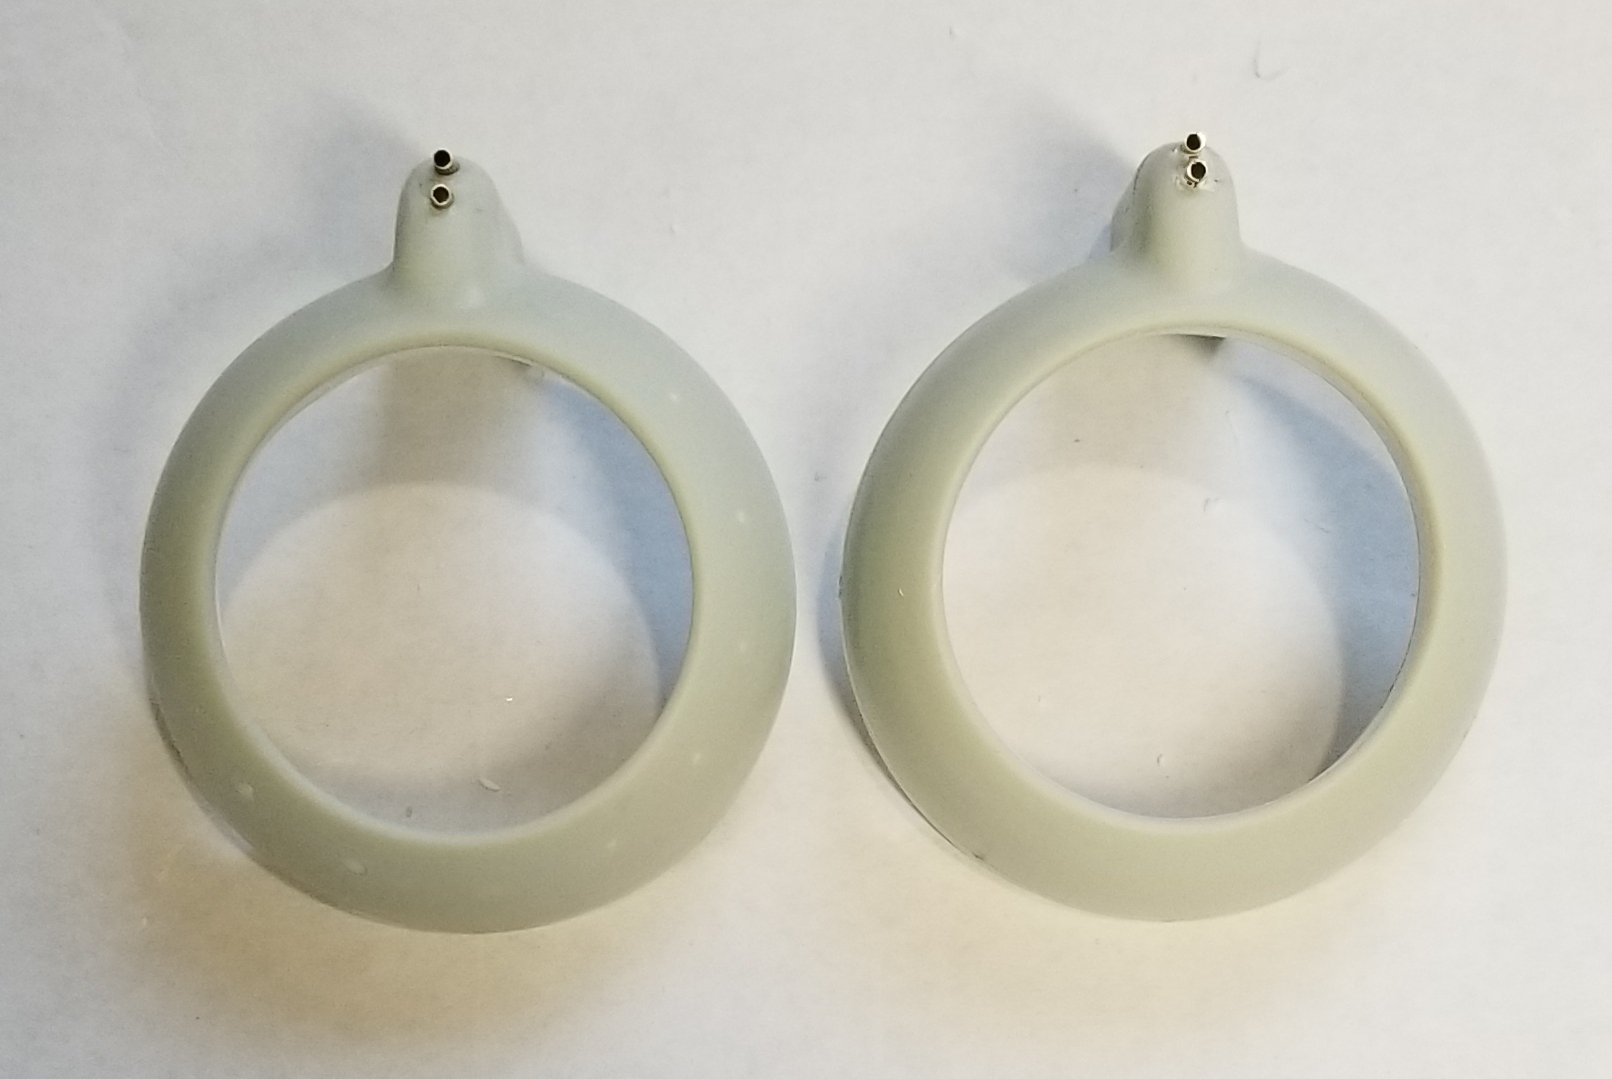
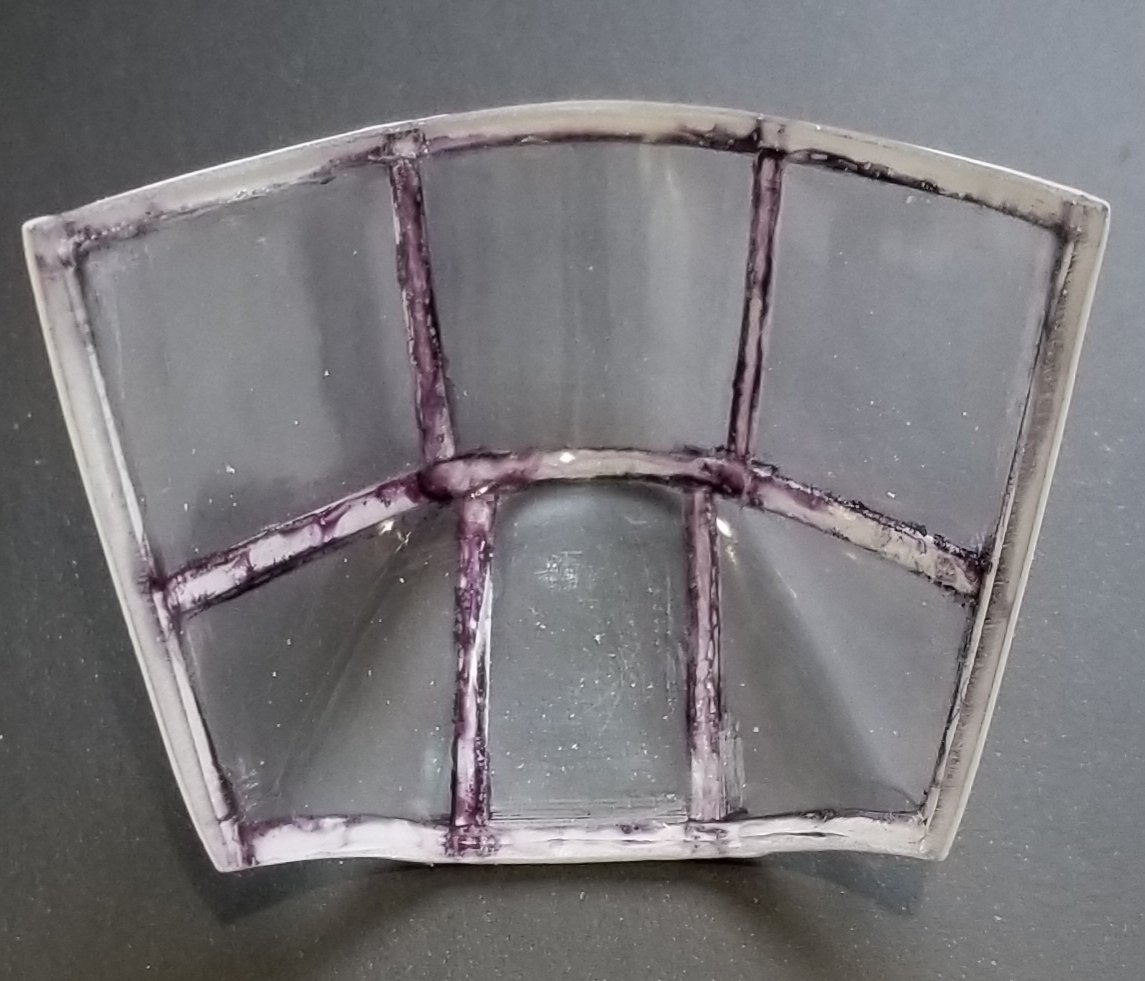
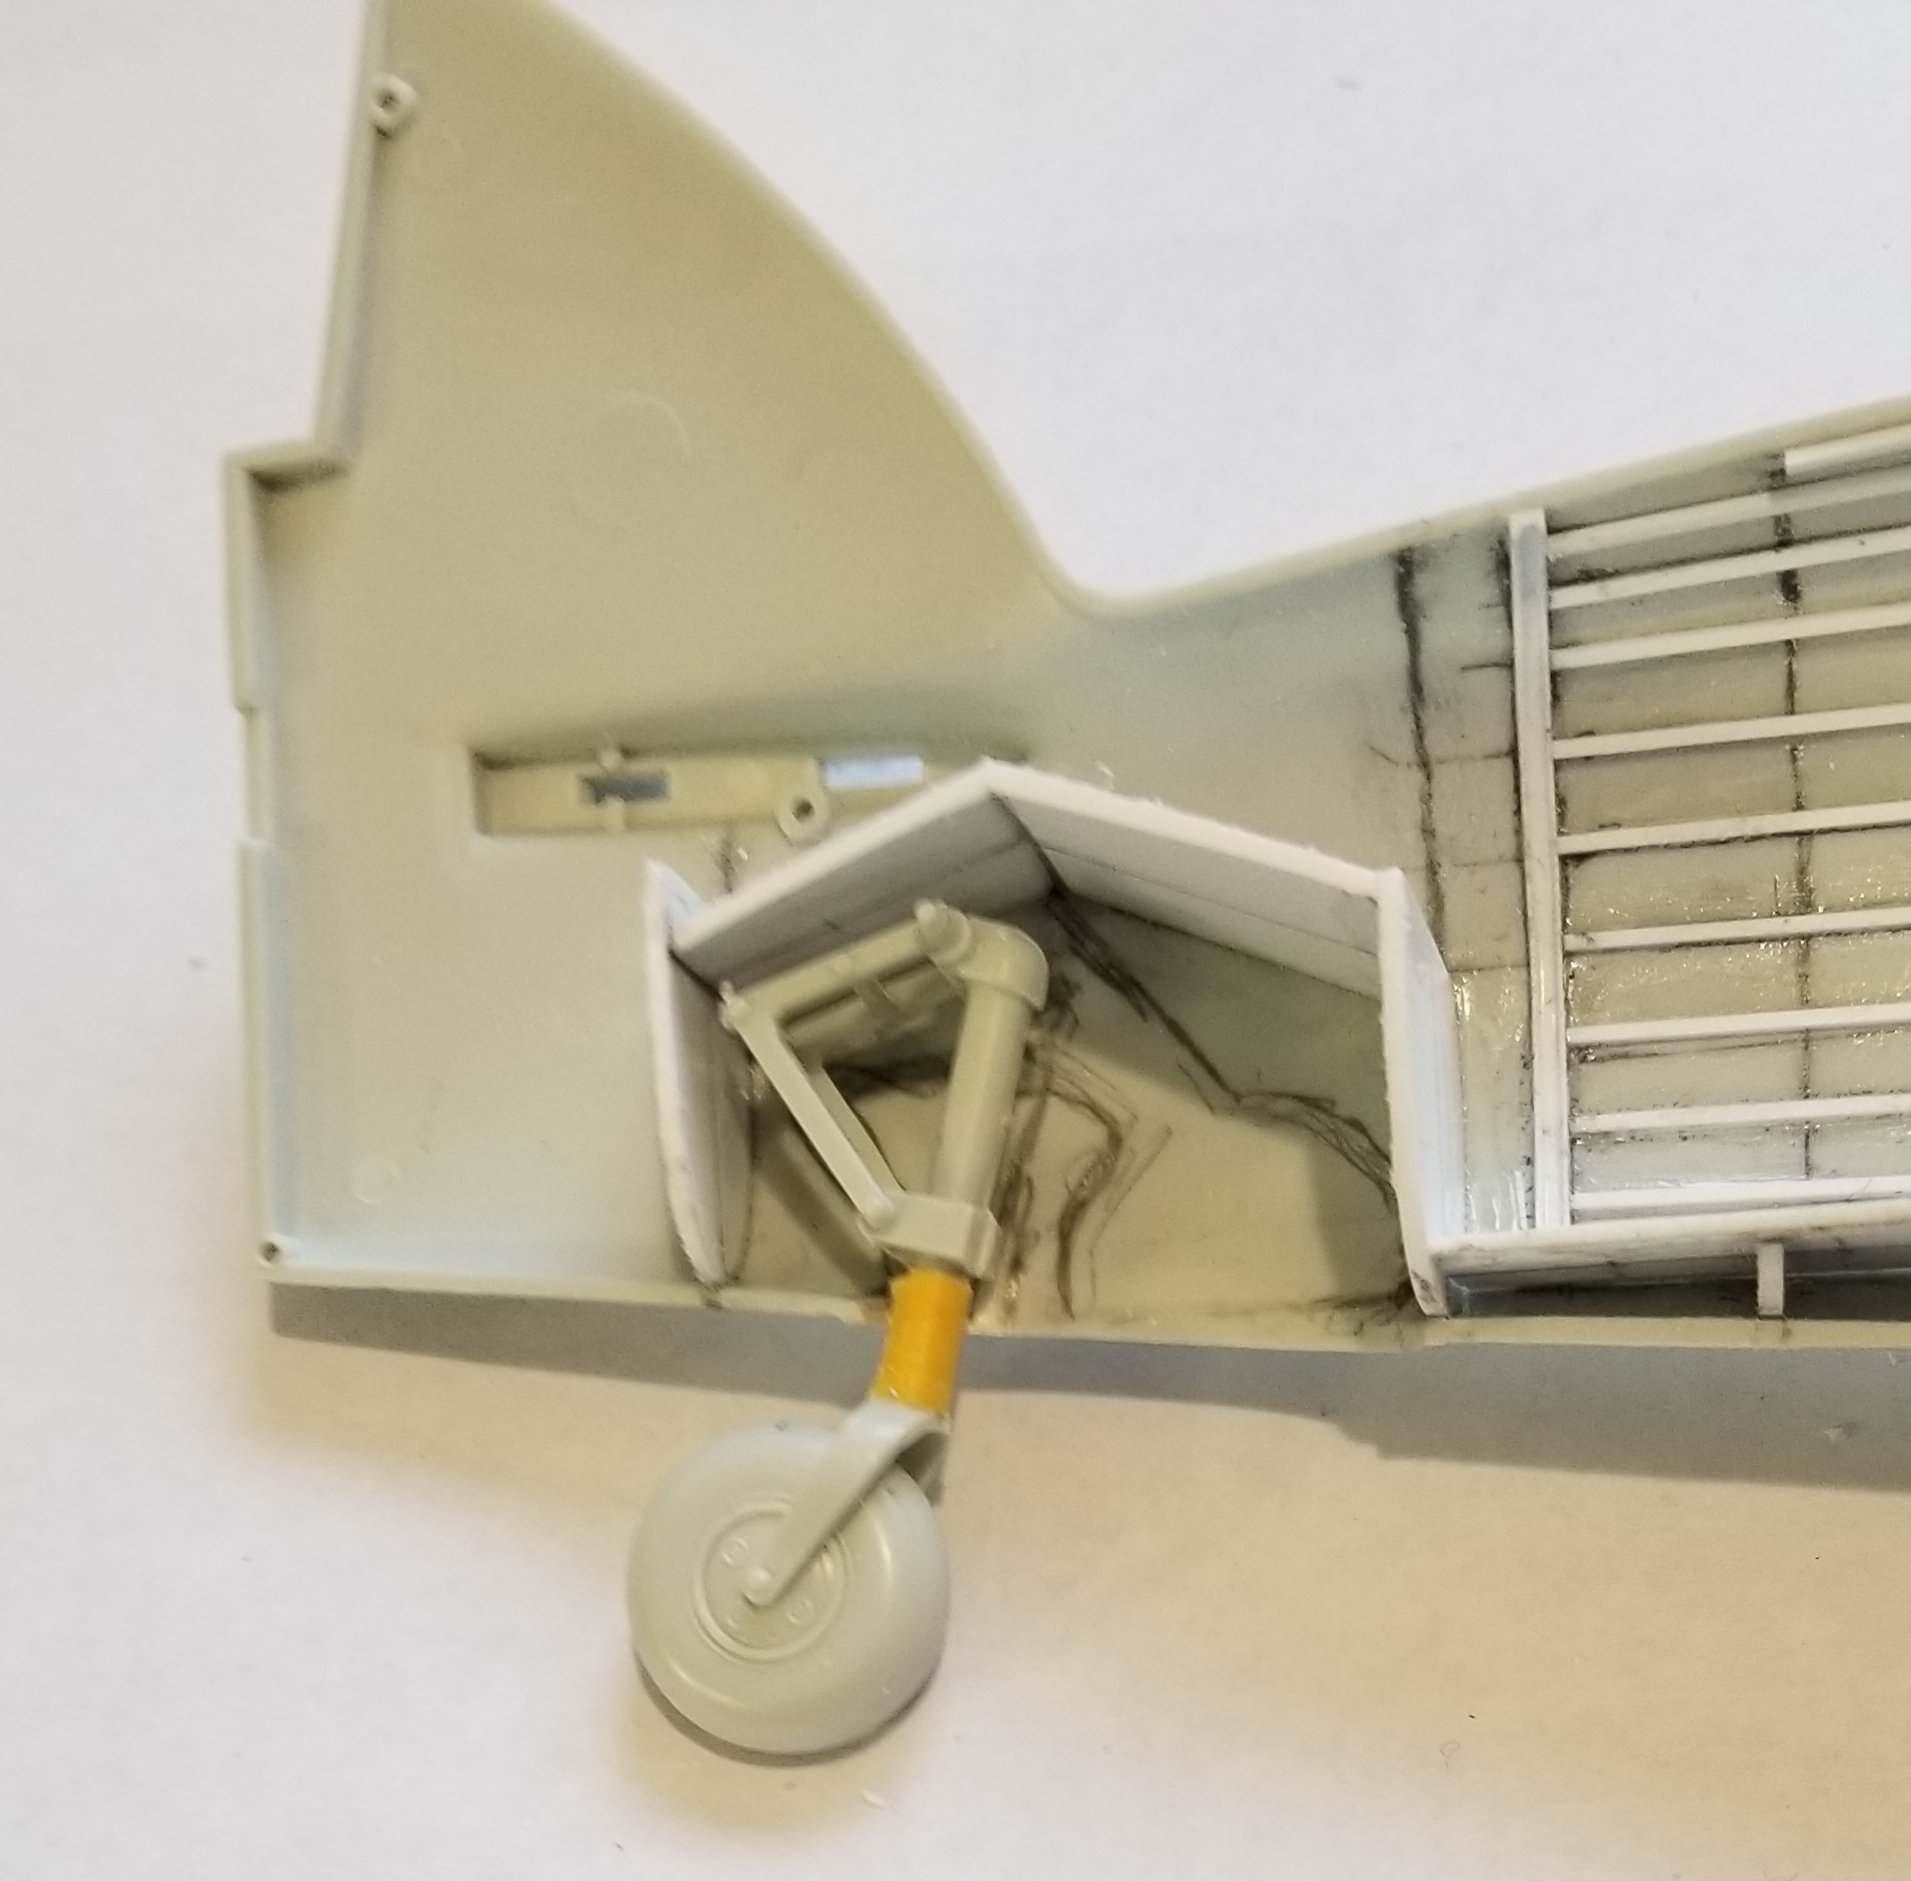
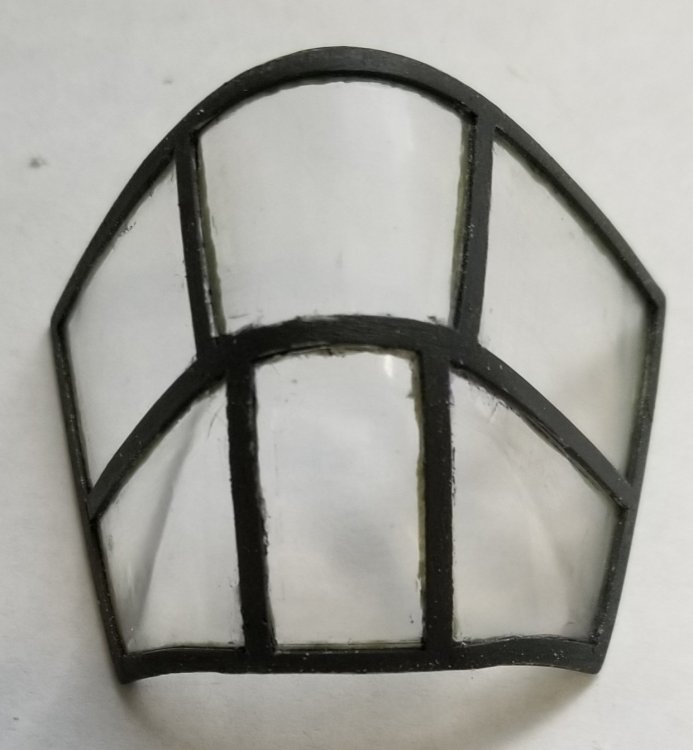
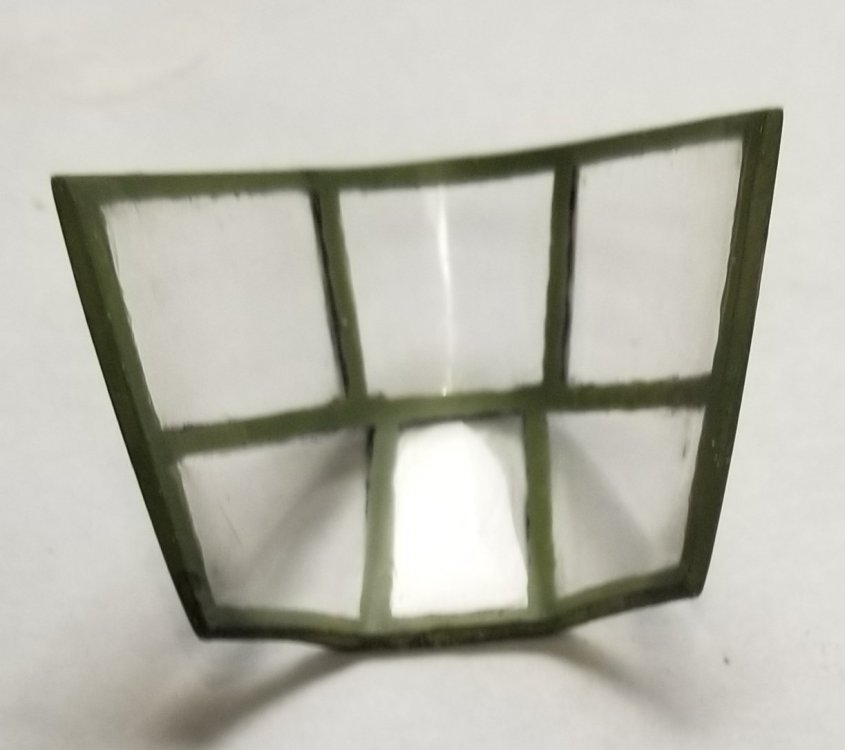
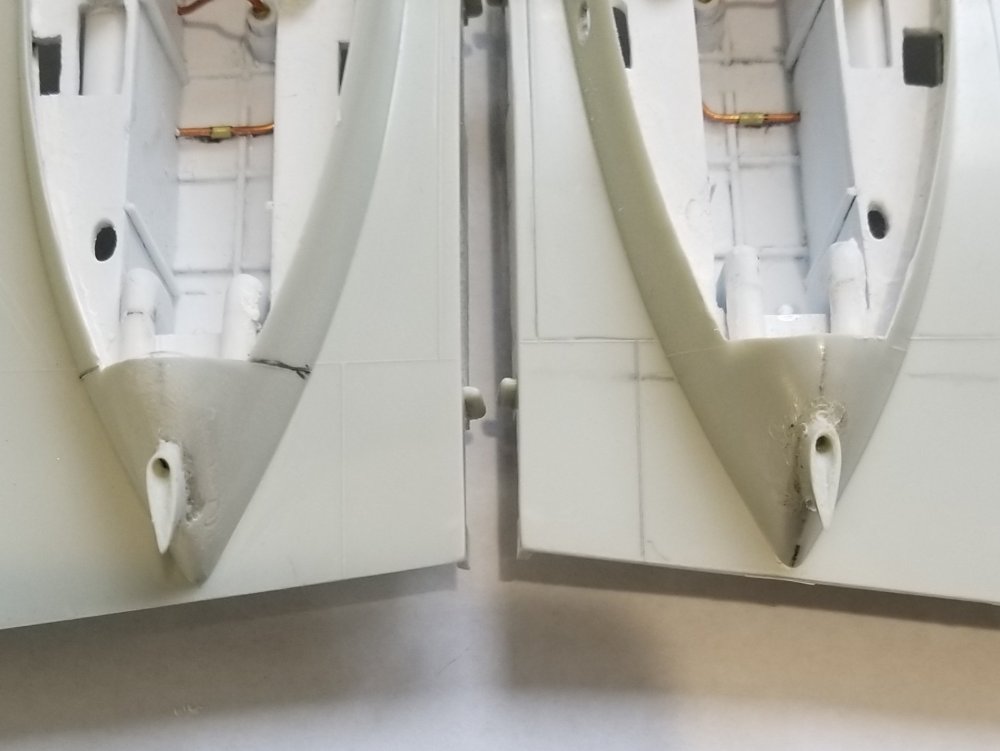
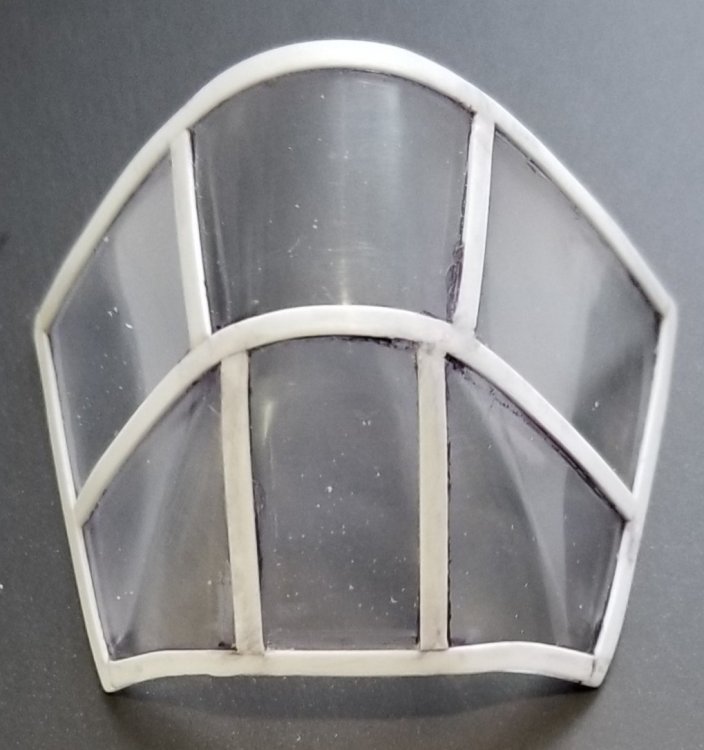
Hey all I'm back with another update. I did some work on the cowl fronts and the townend rings they are permanently attached now. I added the rear wheel well out of 0.04" card stock, I know it's not prototypical because I had to make it fit around the kits rear wheel/tire assembly. Also I glued on the fuel dumps and hollowed them out. Next I added the canopy framework out of 0.03" x 0.06" plastic strips. I know it's not perfect but it's going to have to do. I polished the s*^# out of it and I can't get it any clearer. Right now my thumbs and fingers are numb. So here are some pictures for you to check out. inside view of the townend ring and the 14 holes for the exhaust pipes to connect to. view looking into the cowl openings. view of the fuel dumps. view looking at the canopy. side view of the canopy. view of the inside of the canopy. view of the rear wheel well made from card stock. view showing the tail wheel assembly in place. Well that's it for know I'll be back soon with more updates. Ron G


-
Welcome Lutz I'll be keeping an eye on this one. If you haven't committed completely to the Quickboost gun barrels the Master brass barrels are far superior. Ron G
-
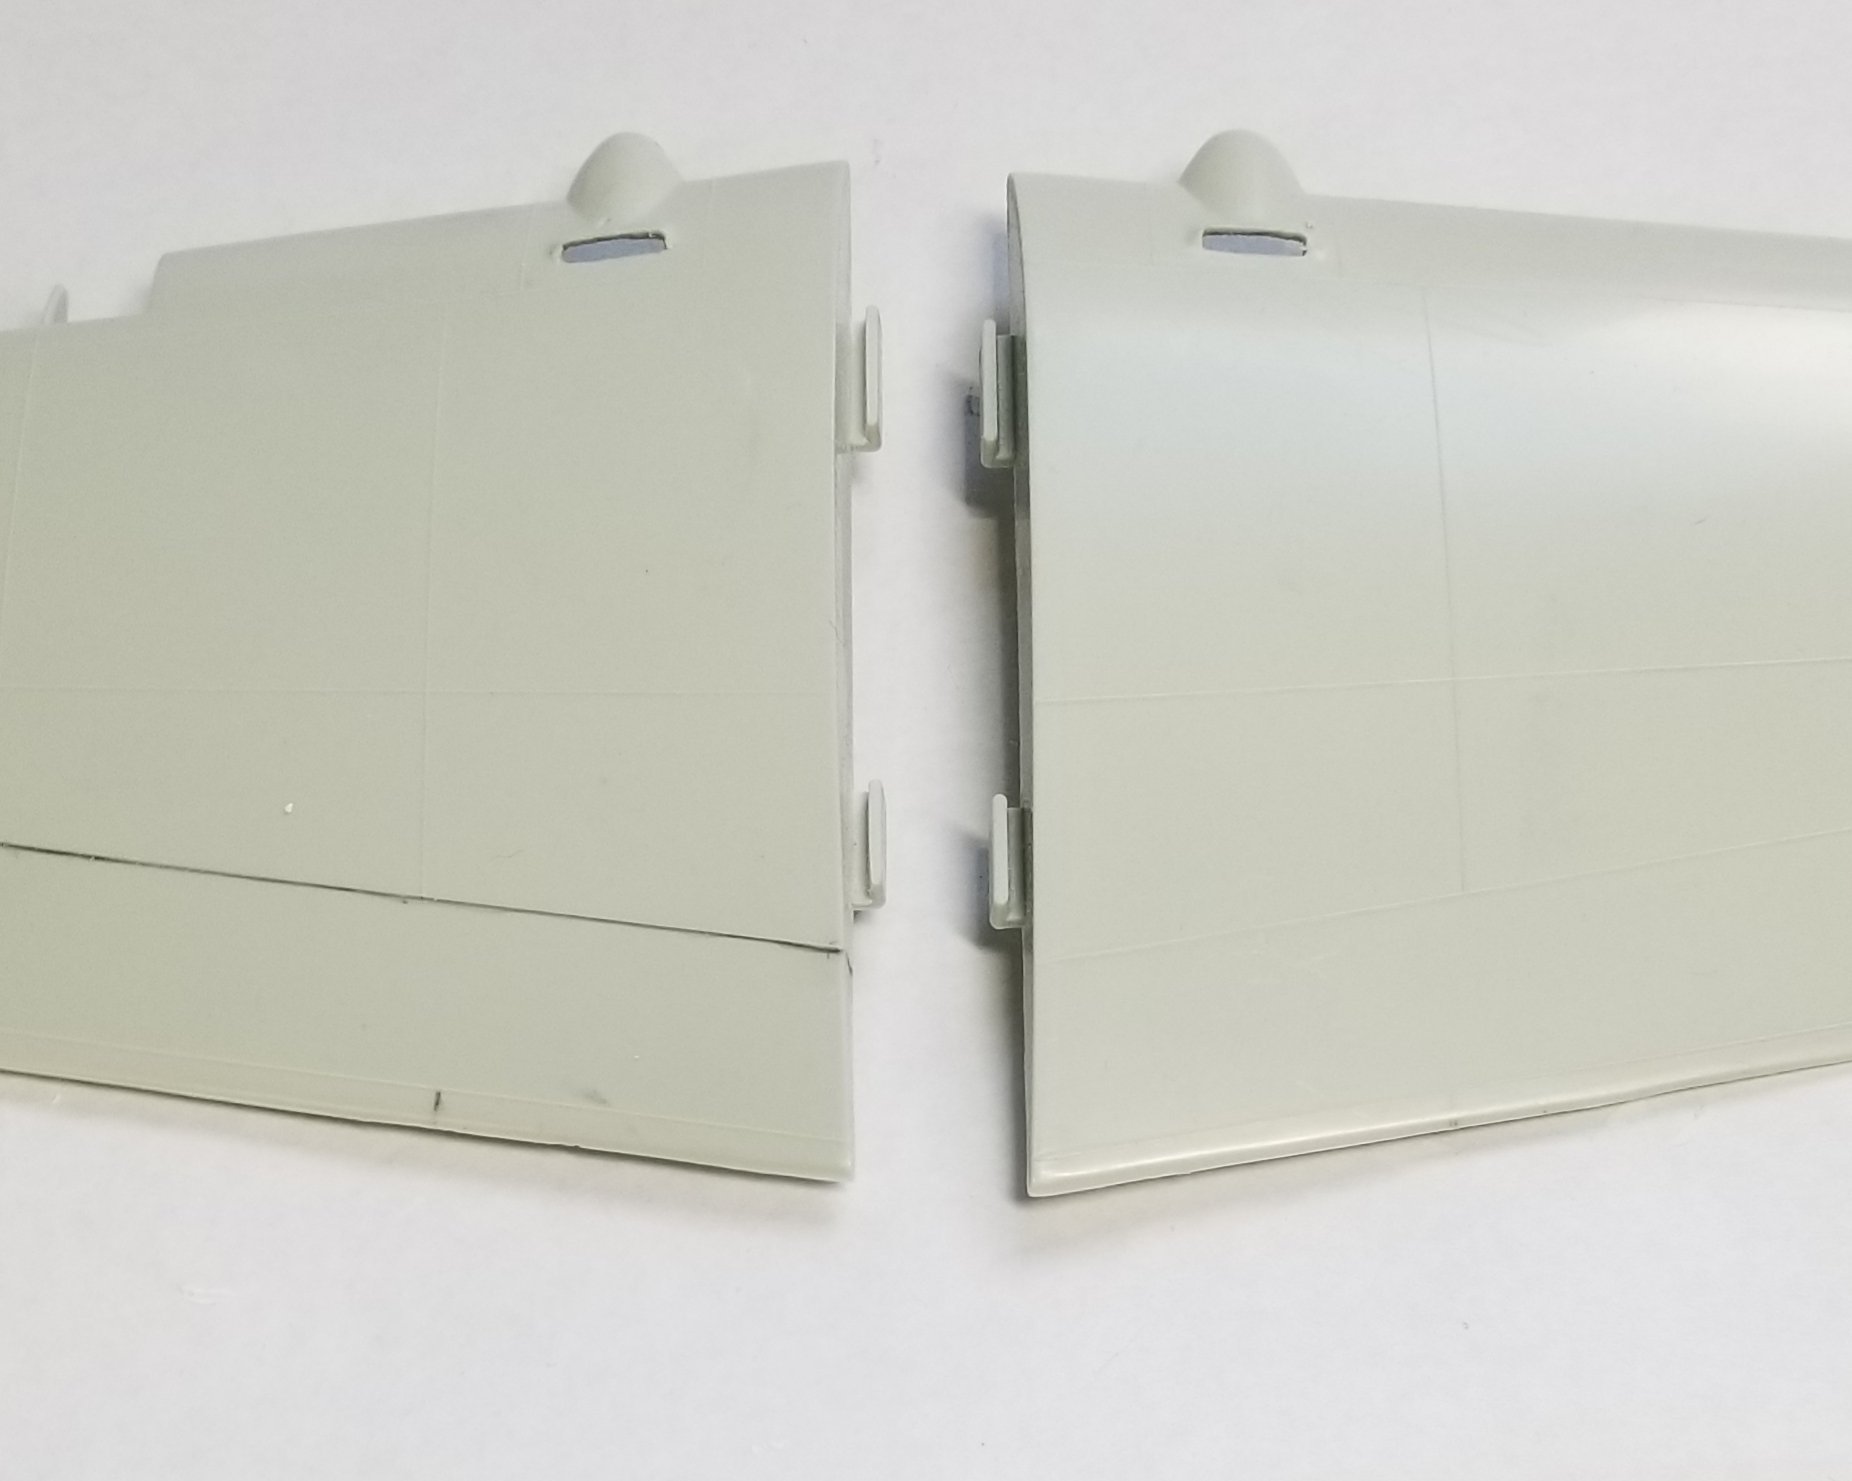
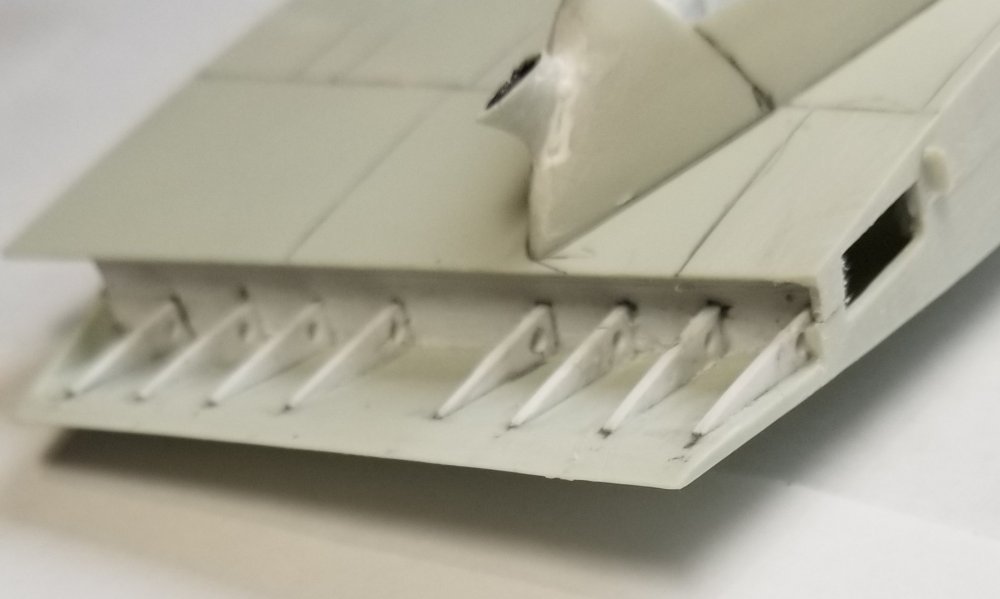
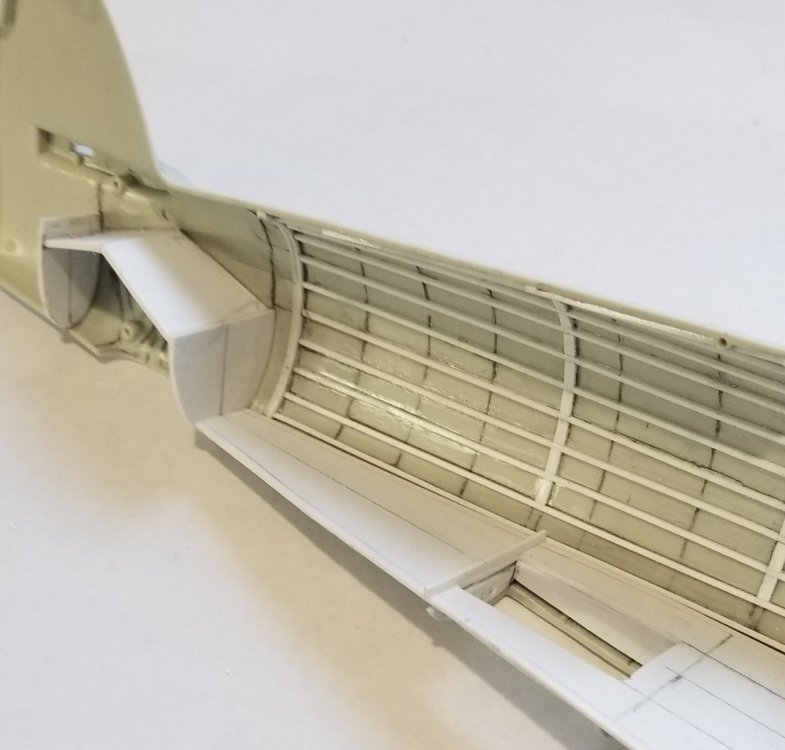
Hey all Very small update. I added some supports to the outer wings. They were very spongy when you pressed on them and they needed to be stiffened up so I have something a little more solid to push against when I get around to rescribing and reviting. I also cut out the rear vent for the oil coolers on the wings. Here are some pictures for you to look at. view of the supports. I made them out of 0.04" thick plastic card stock. It took me quite awhile to get the profile on them correct so that they would fit the wing properly. You know cut out sand, fit, sand, fit, sand, fit, etc. view showing the oil cooler vents cut out. Ron G