Axeman
-
Posts
172 -
Joined
-
Last visited
Content Type
Profiles
Forums
Events
Gallery
Everything posted by Axeman
-
Mitsubishi A6M5c Zero Type 52 1/32 Hasegawa
Axeman replied to Sturmbock's topic in LSM 1/35 and Larger Work In Progress
The Engine looks fantastic. Well done. -
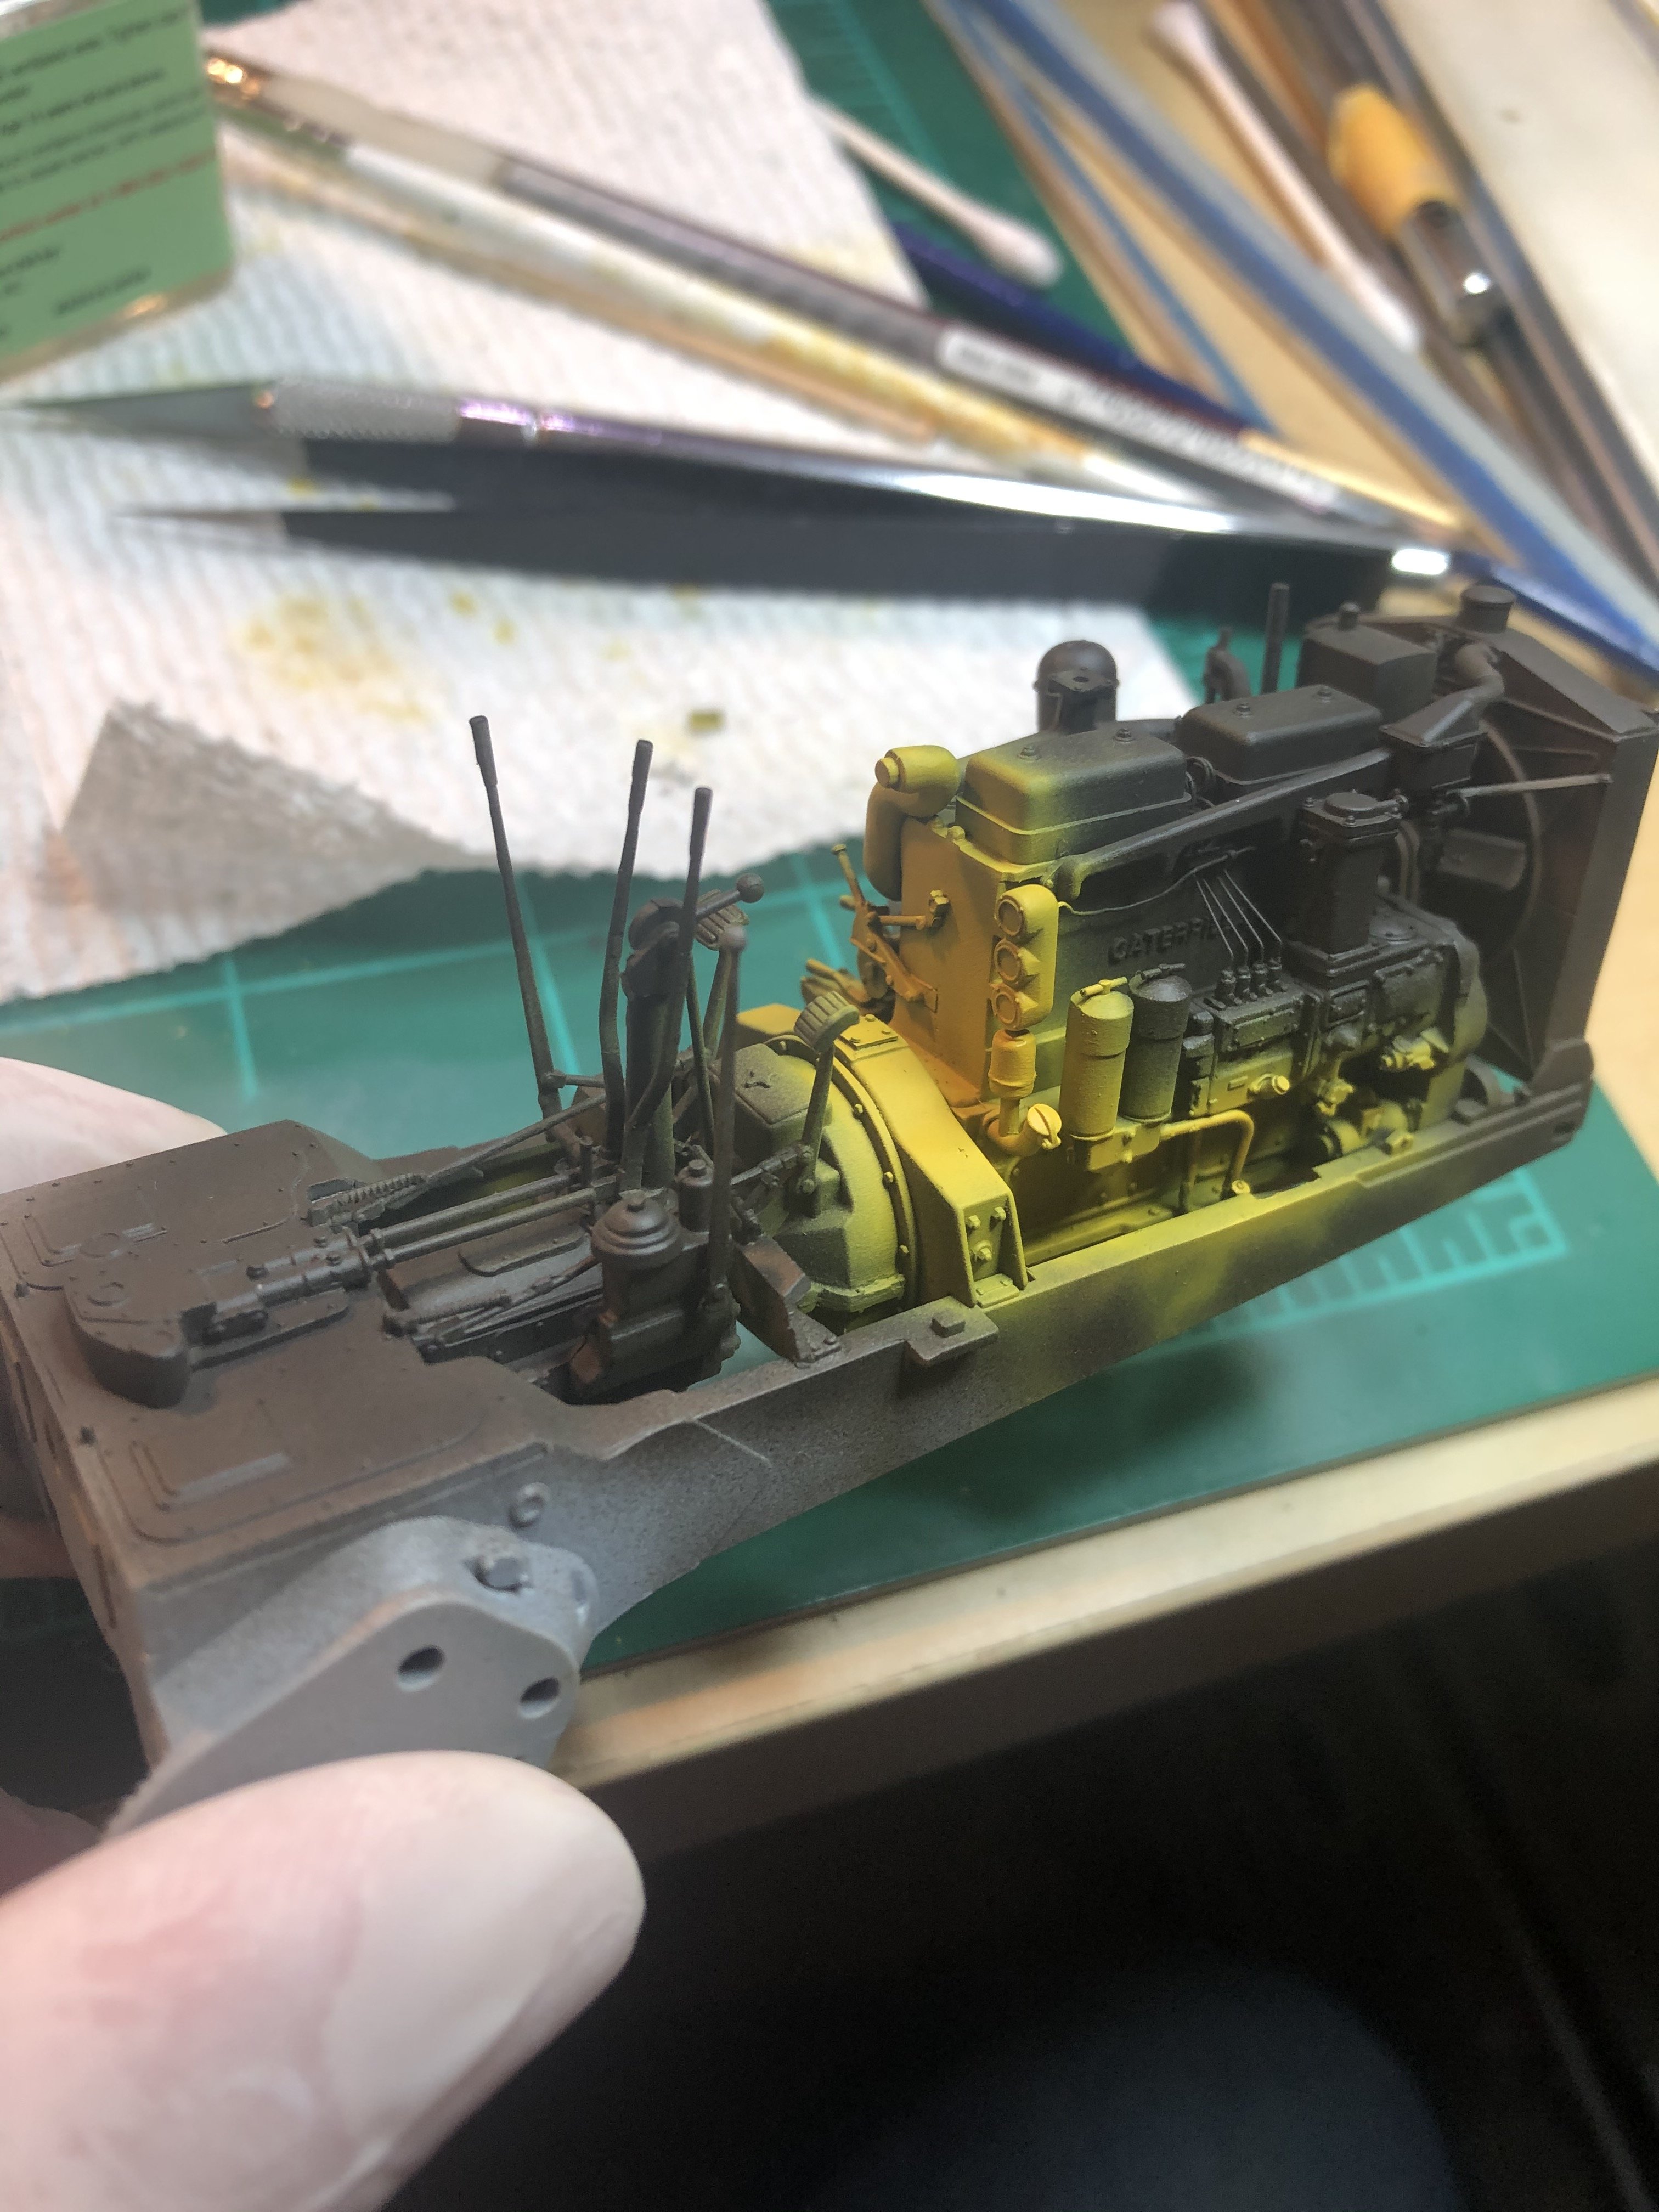
Ok. The one remaining gear shift (really not sure what it is for) I have broken and repaired 3 times. Hopefully that will be the last. Worked on the seats with a brown layer underneath, then hairspray and a coat of nato black, lighter on the raised areas. Pin washes on the cover and cable structures as well as installing the cabling on the rear. Applied engine dirt and grime on one side. More to come.


-
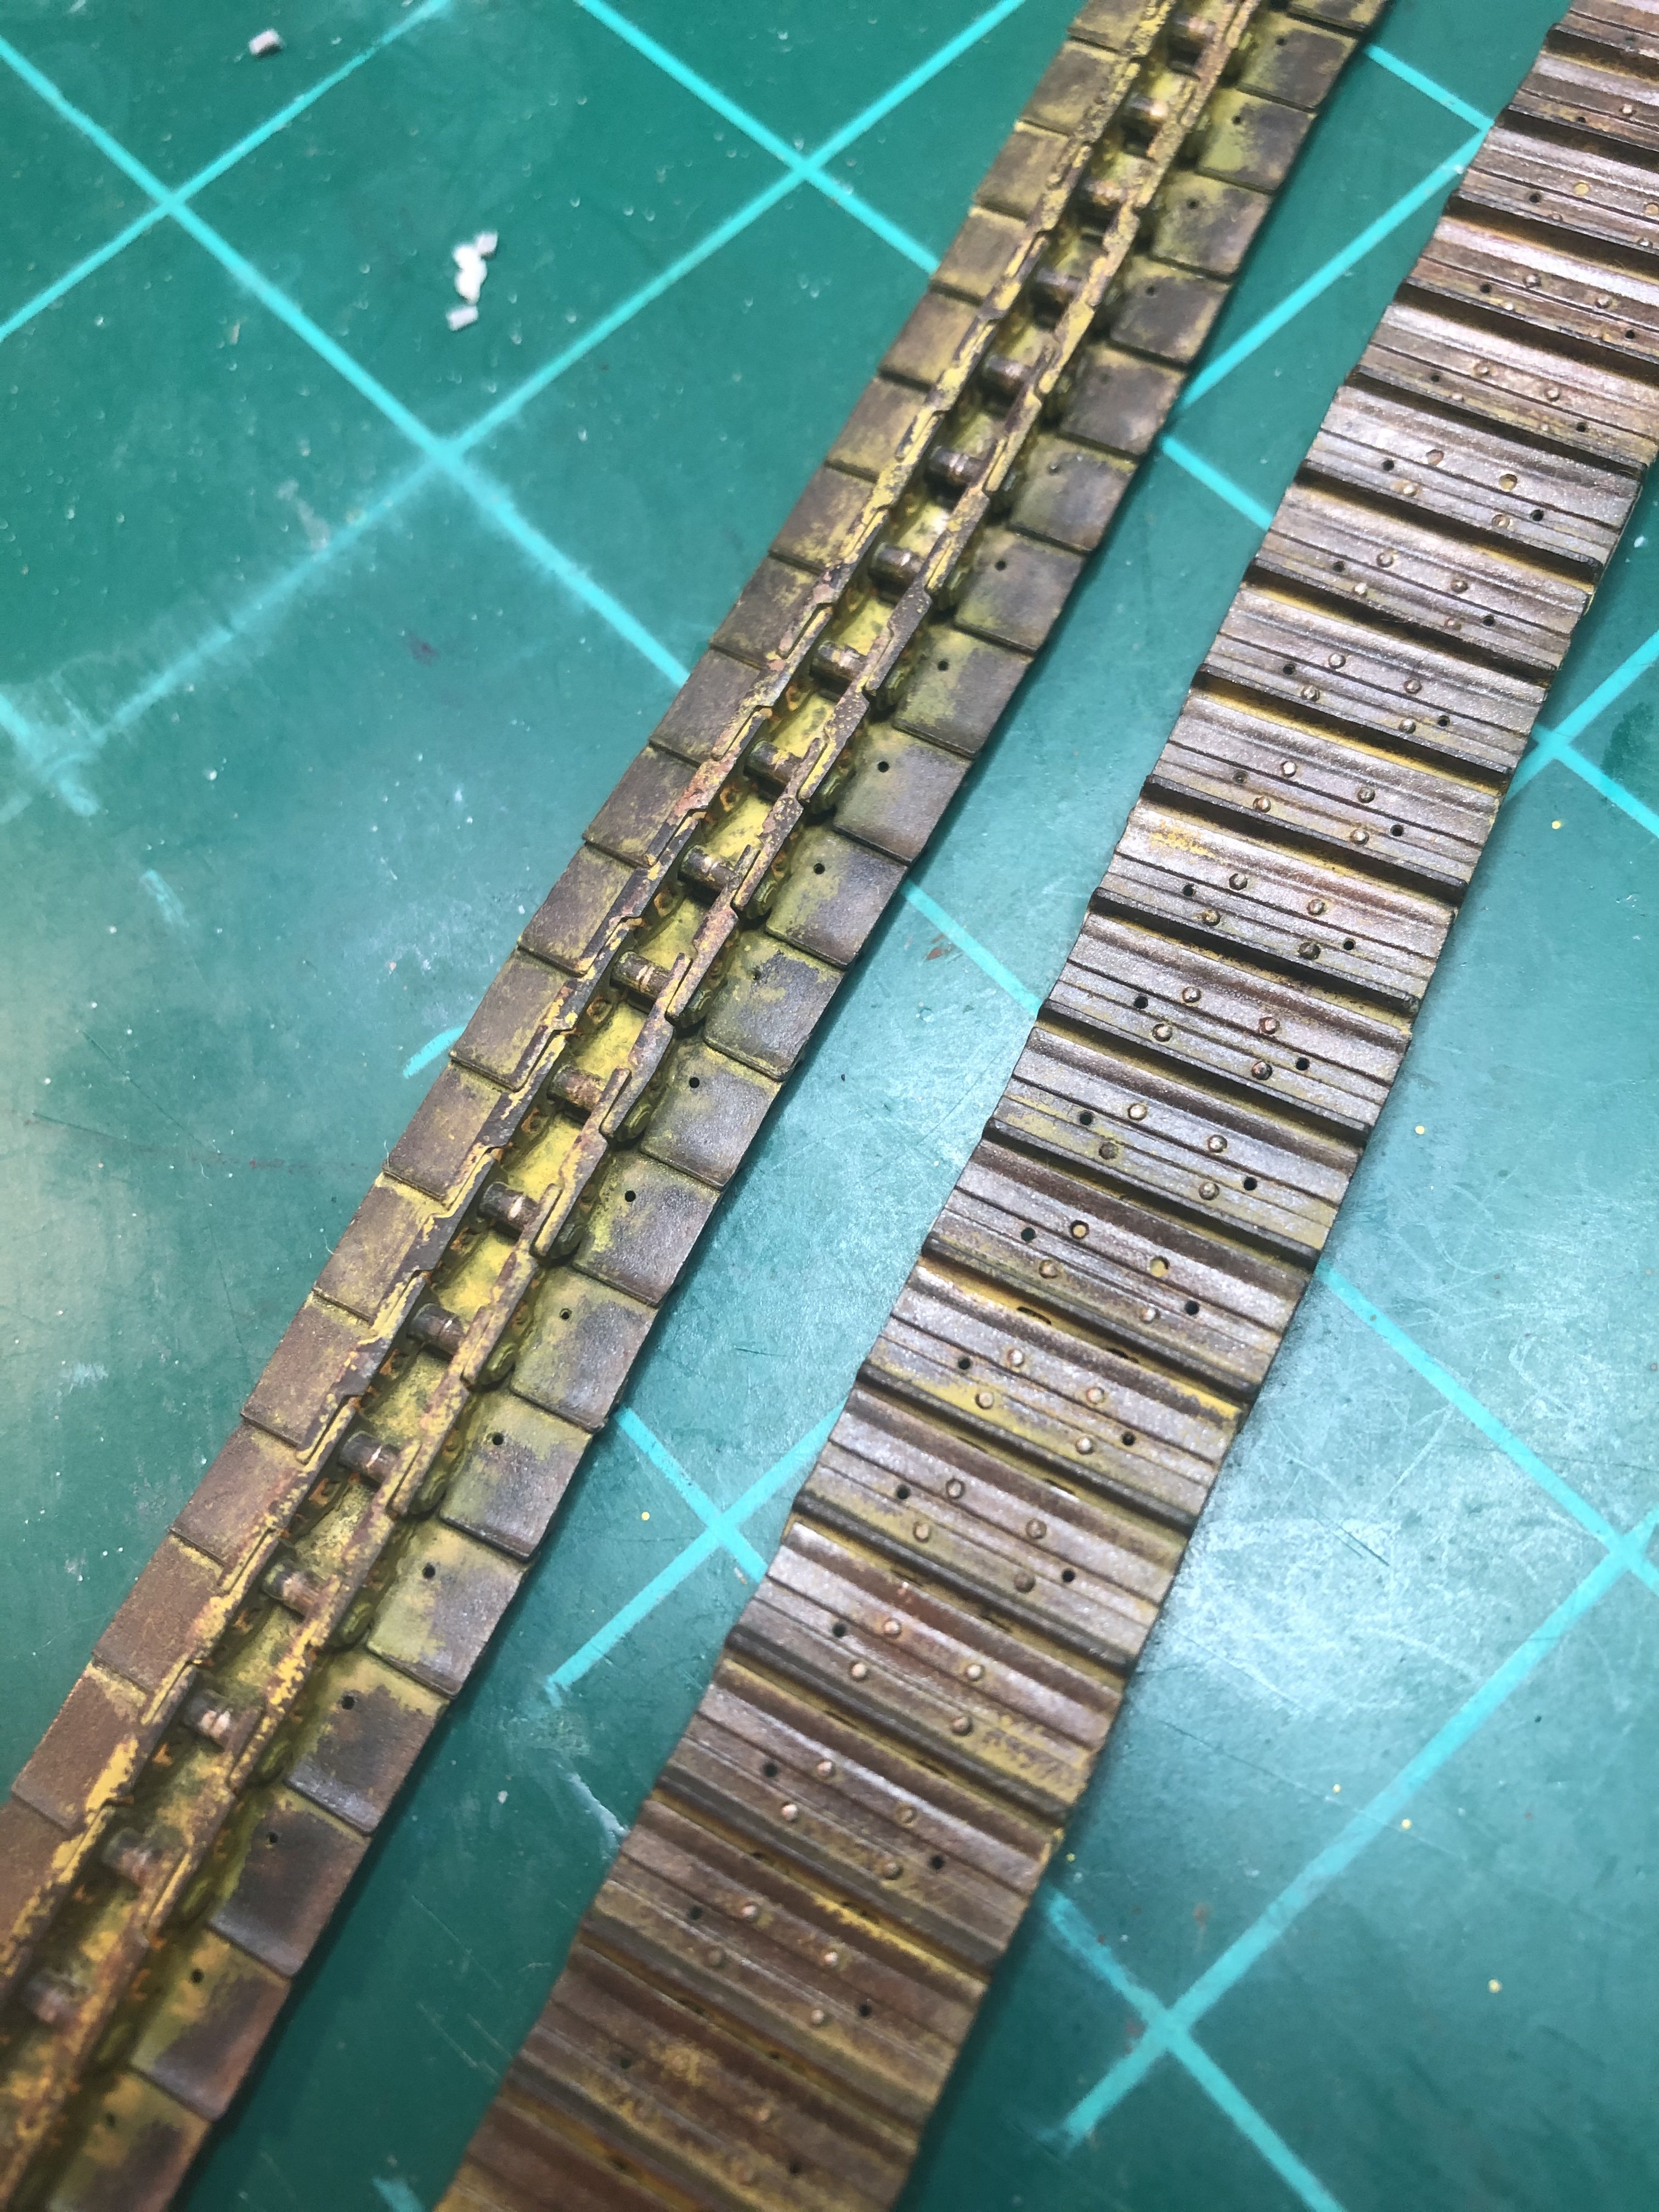
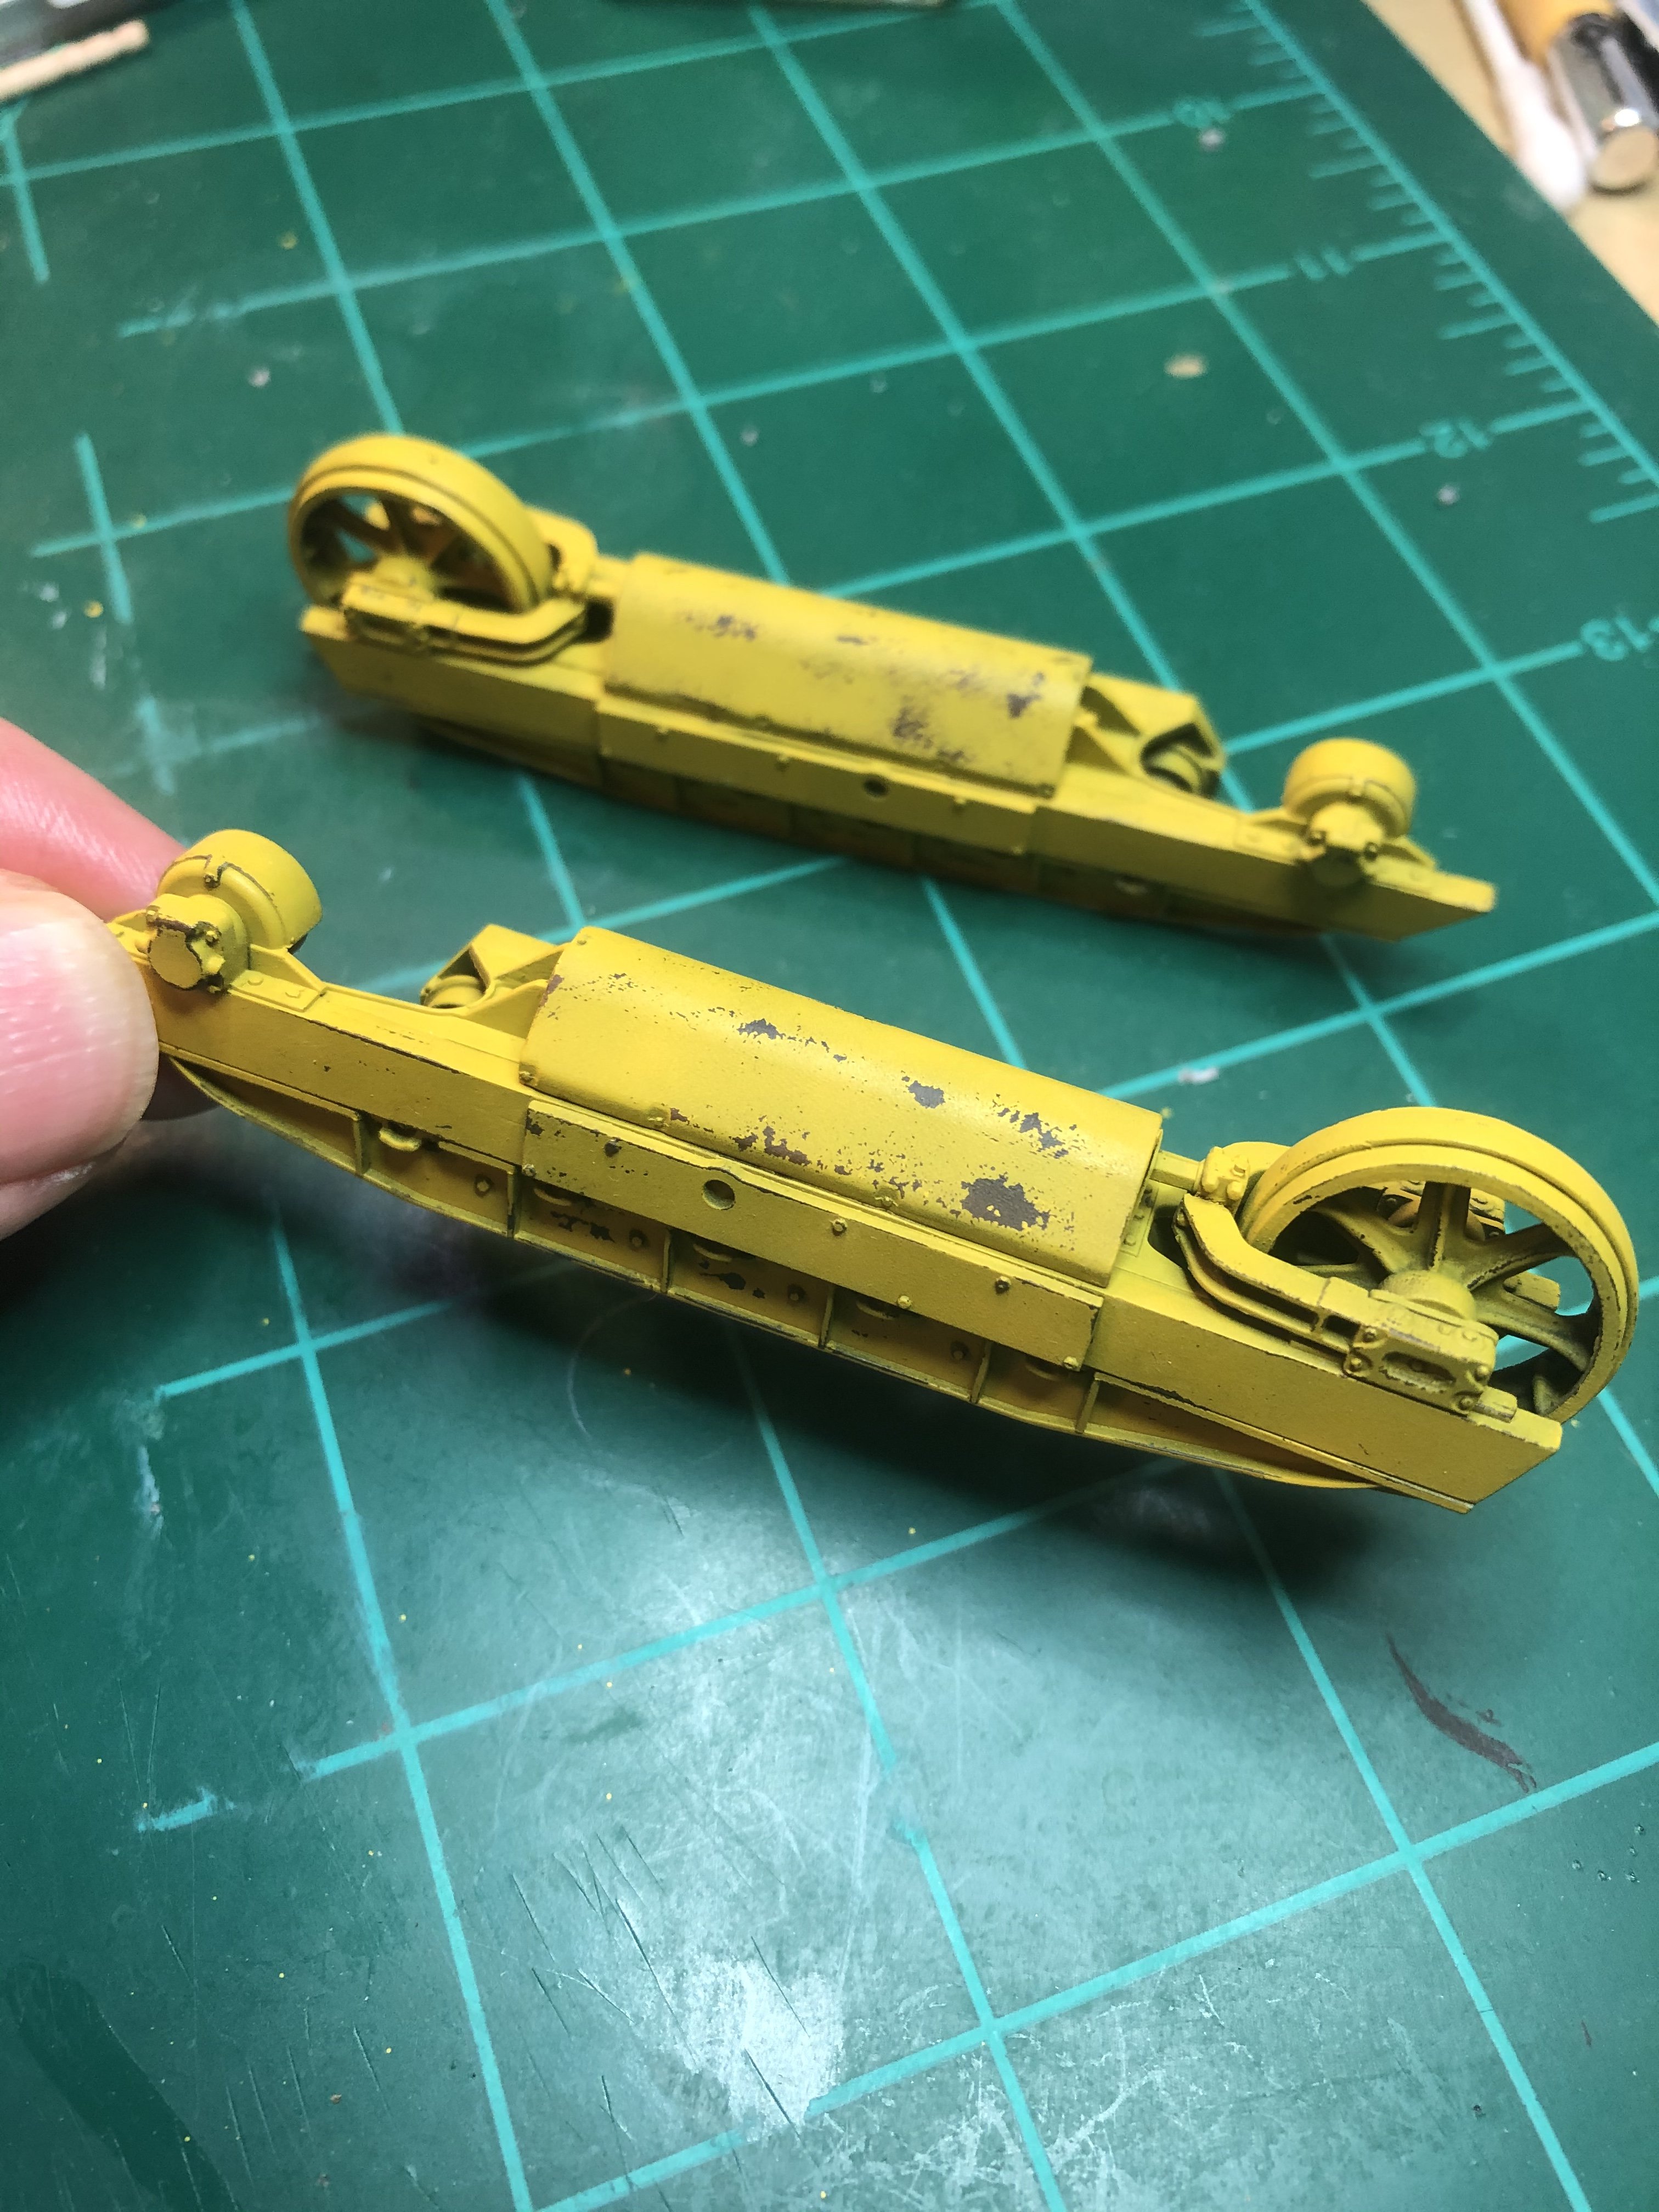
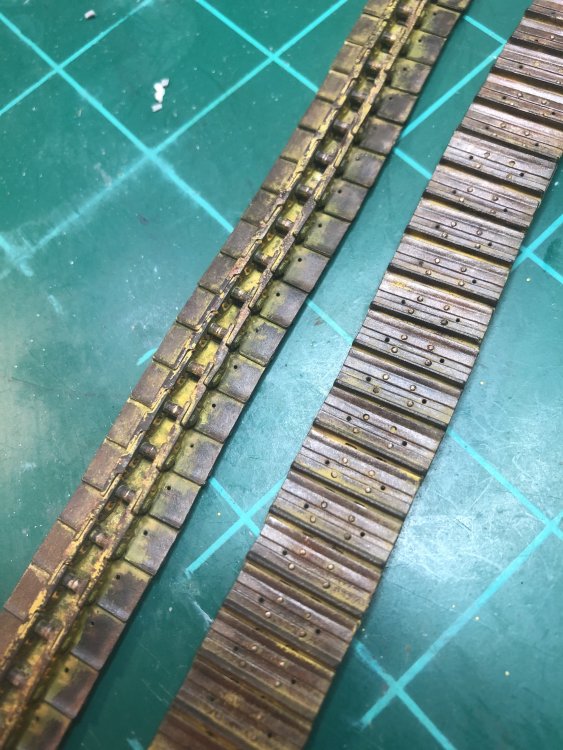
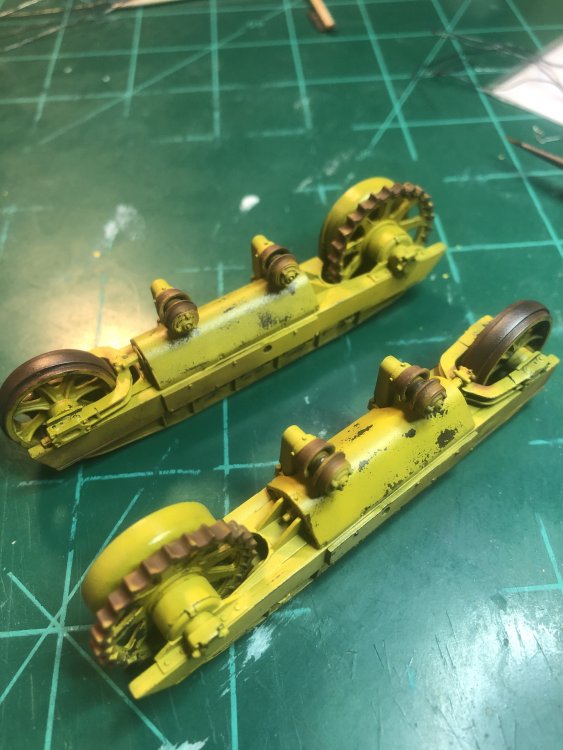
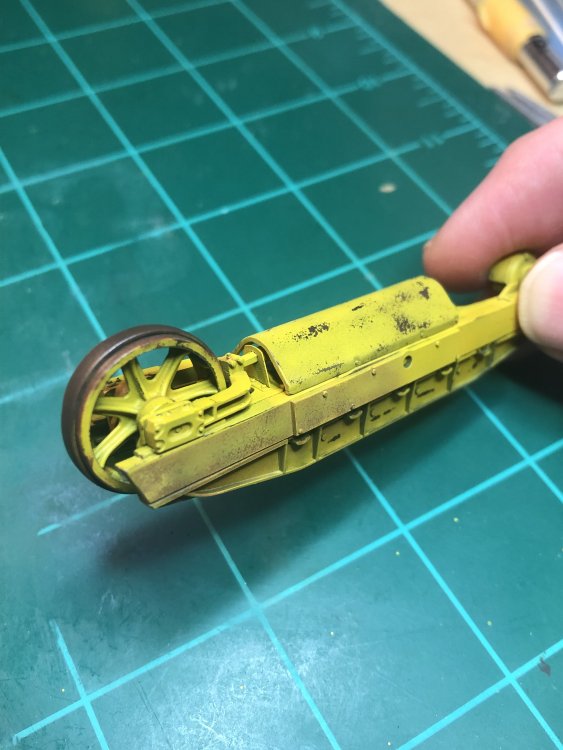
Worked on the tracks this weekend. I have seen pictures that the tracks are painted yellow. Most of it is worn way so you don’t see it. I tried to get the same effect. The inside tracks pads would have the yellow remain longer and worn from the outside of the pad inwards. The rust layer I had is not showing as much and will need to add light rust in some spots. I still have to add dust and dirt.

-
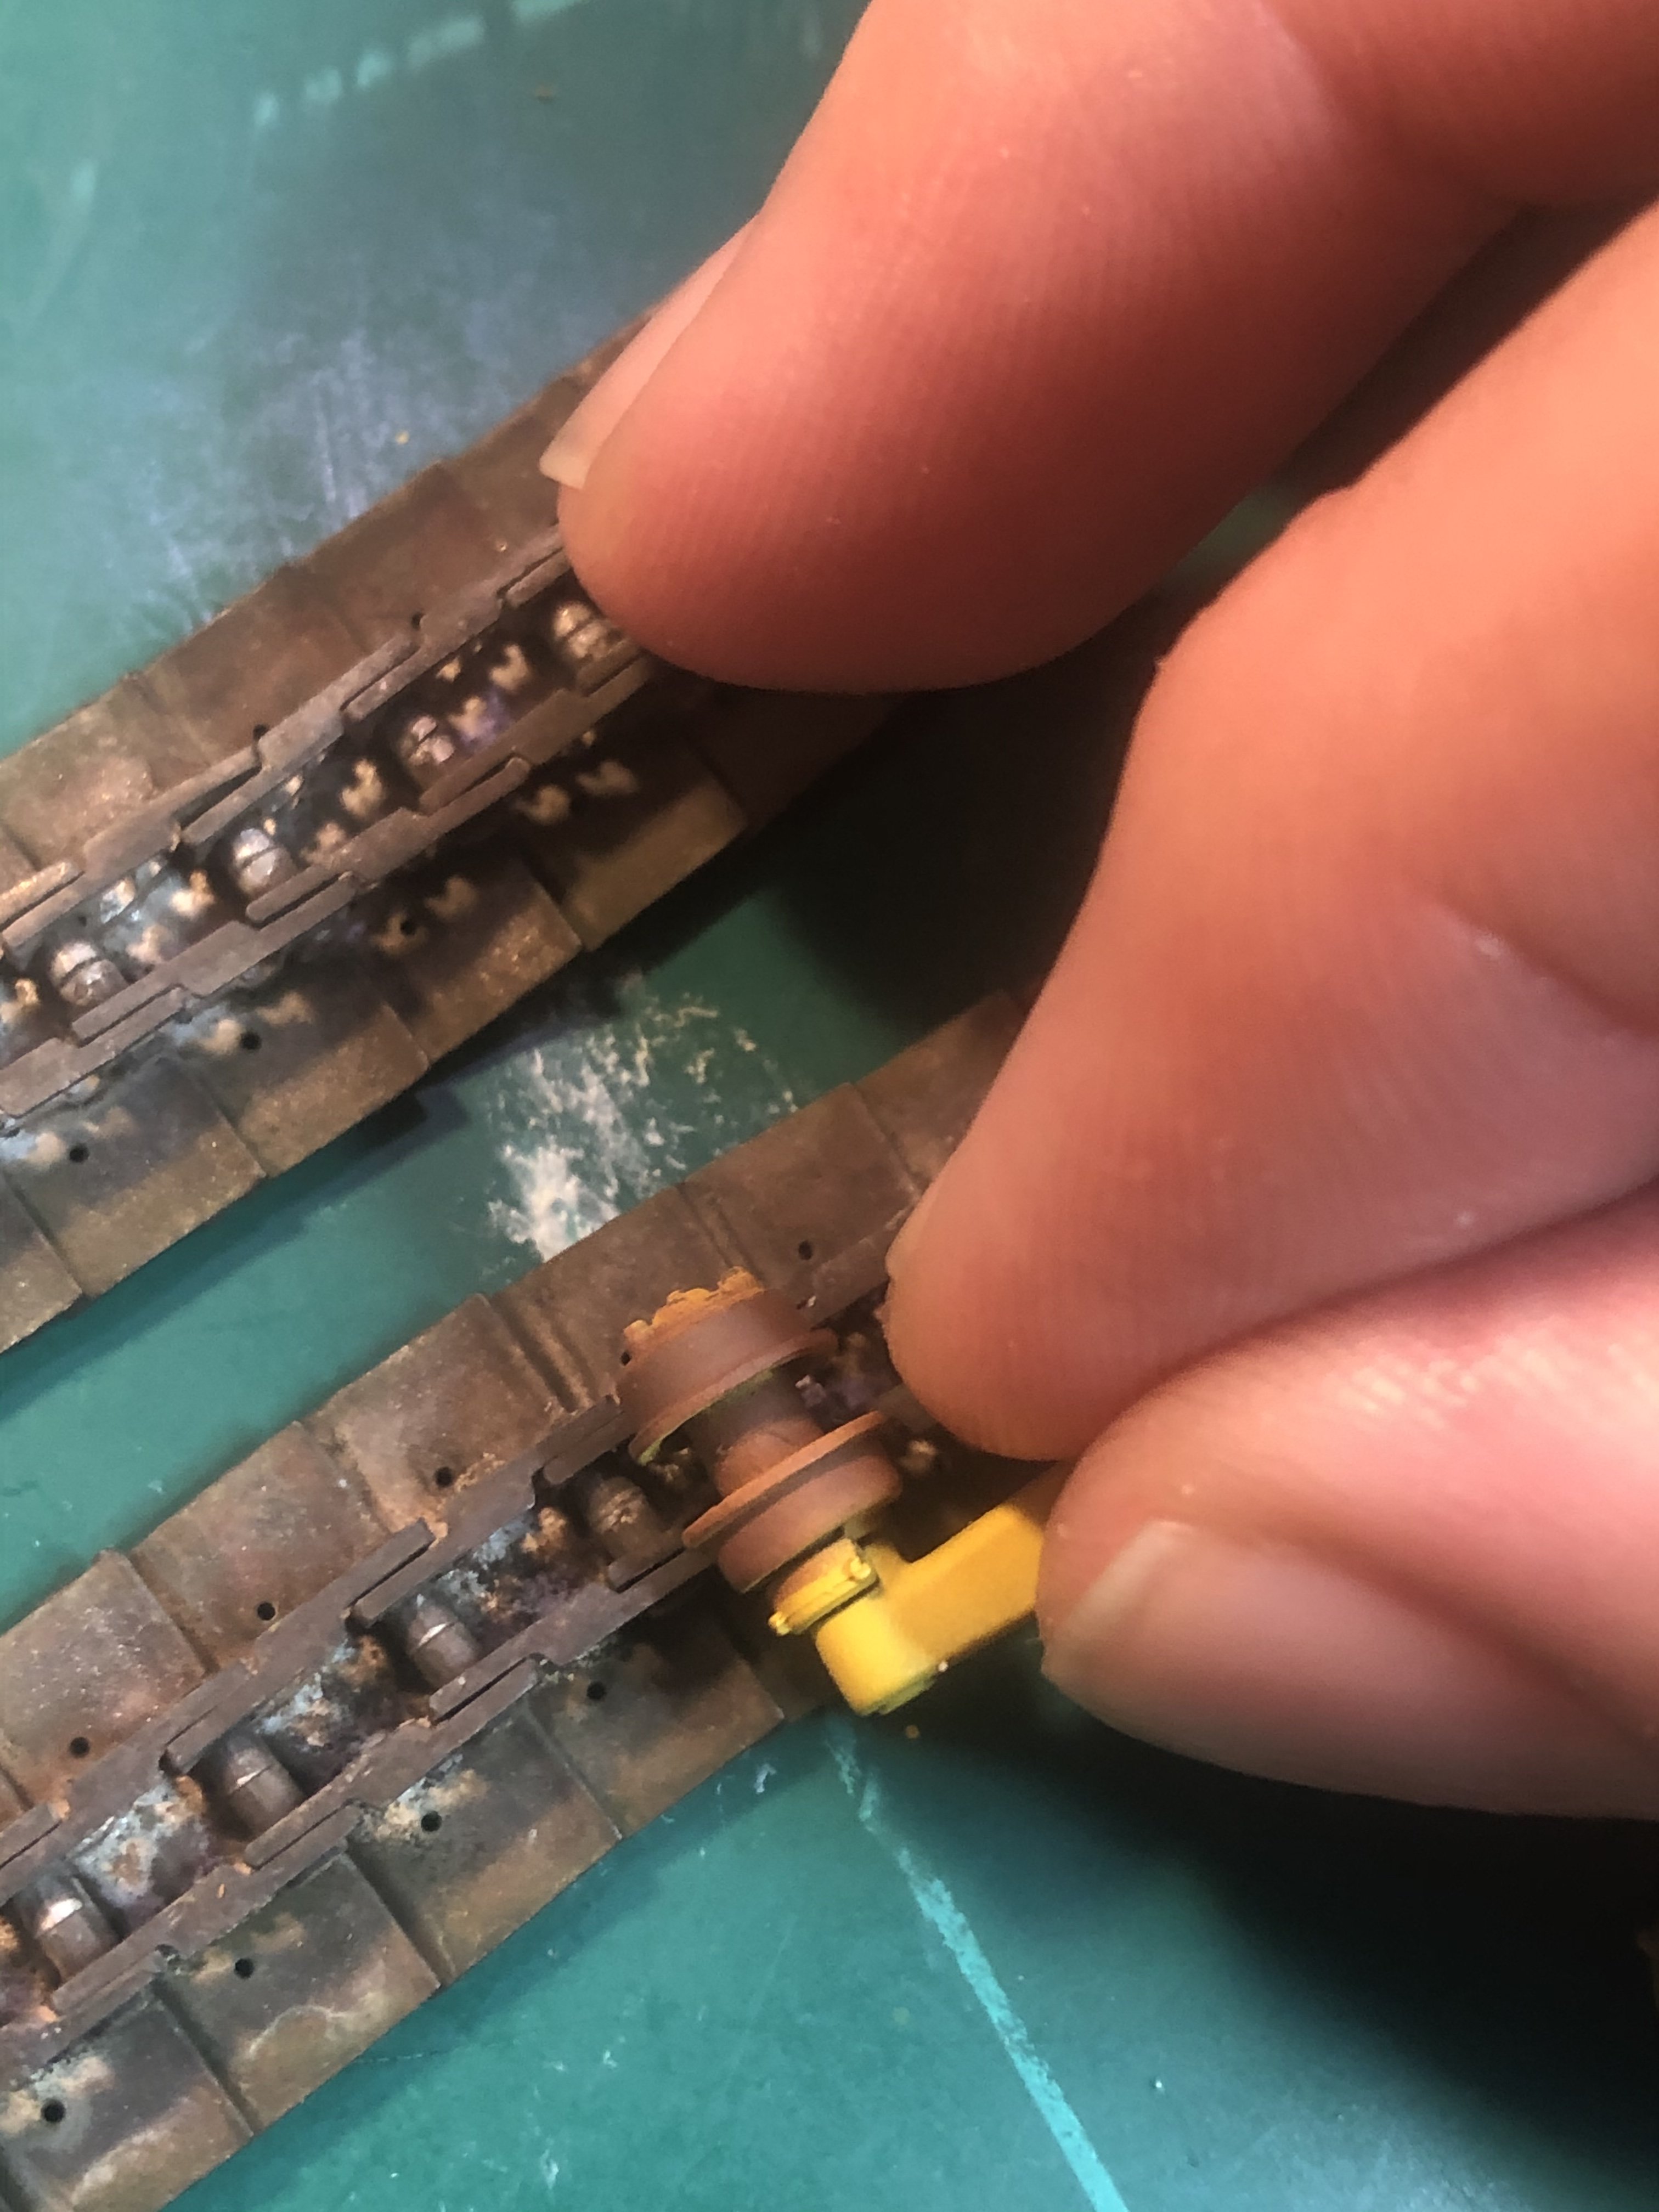
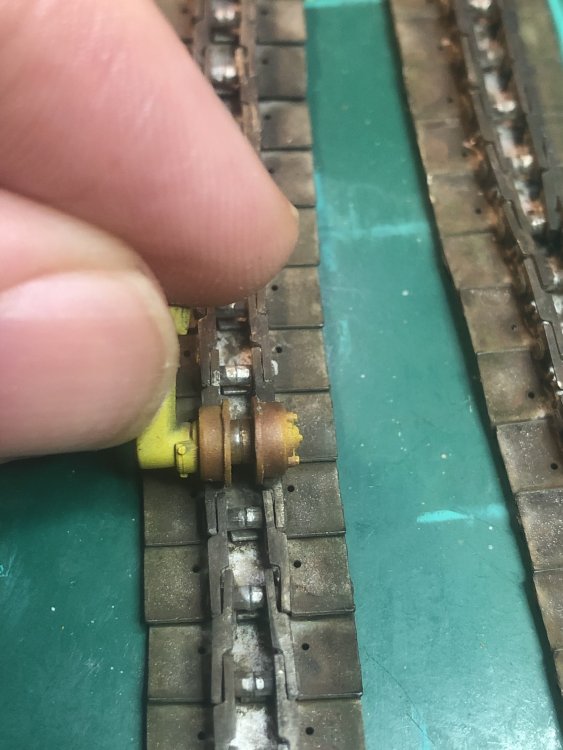
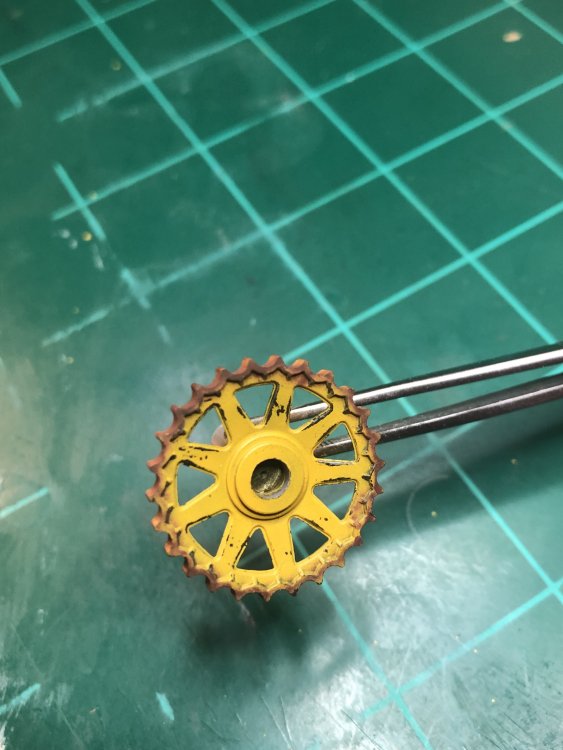
Well, I was test fitting the return rollers on the track assembly and found the track does not lay on the rollers flat. The rollers at two parts that the instructions say to remove 4mm from the end and the glue together. Don’t know why it is not the correct size to begin with. Mine were too wide So, I cut the rolls in half, sanded the ends down and test fitted to ensure they fit and the glued together. So, if you are building this kit, I recommend putting some of the tracks together and test fit. All done and attached to the track assembly.

-
Only was able to work on burnishing the metal tracks. Will use the hairspray chipping with the rust color and then more hairspray and then yellow. Limited yellow on top and a little bit heavier on the inside of the tracks. More to come.
-
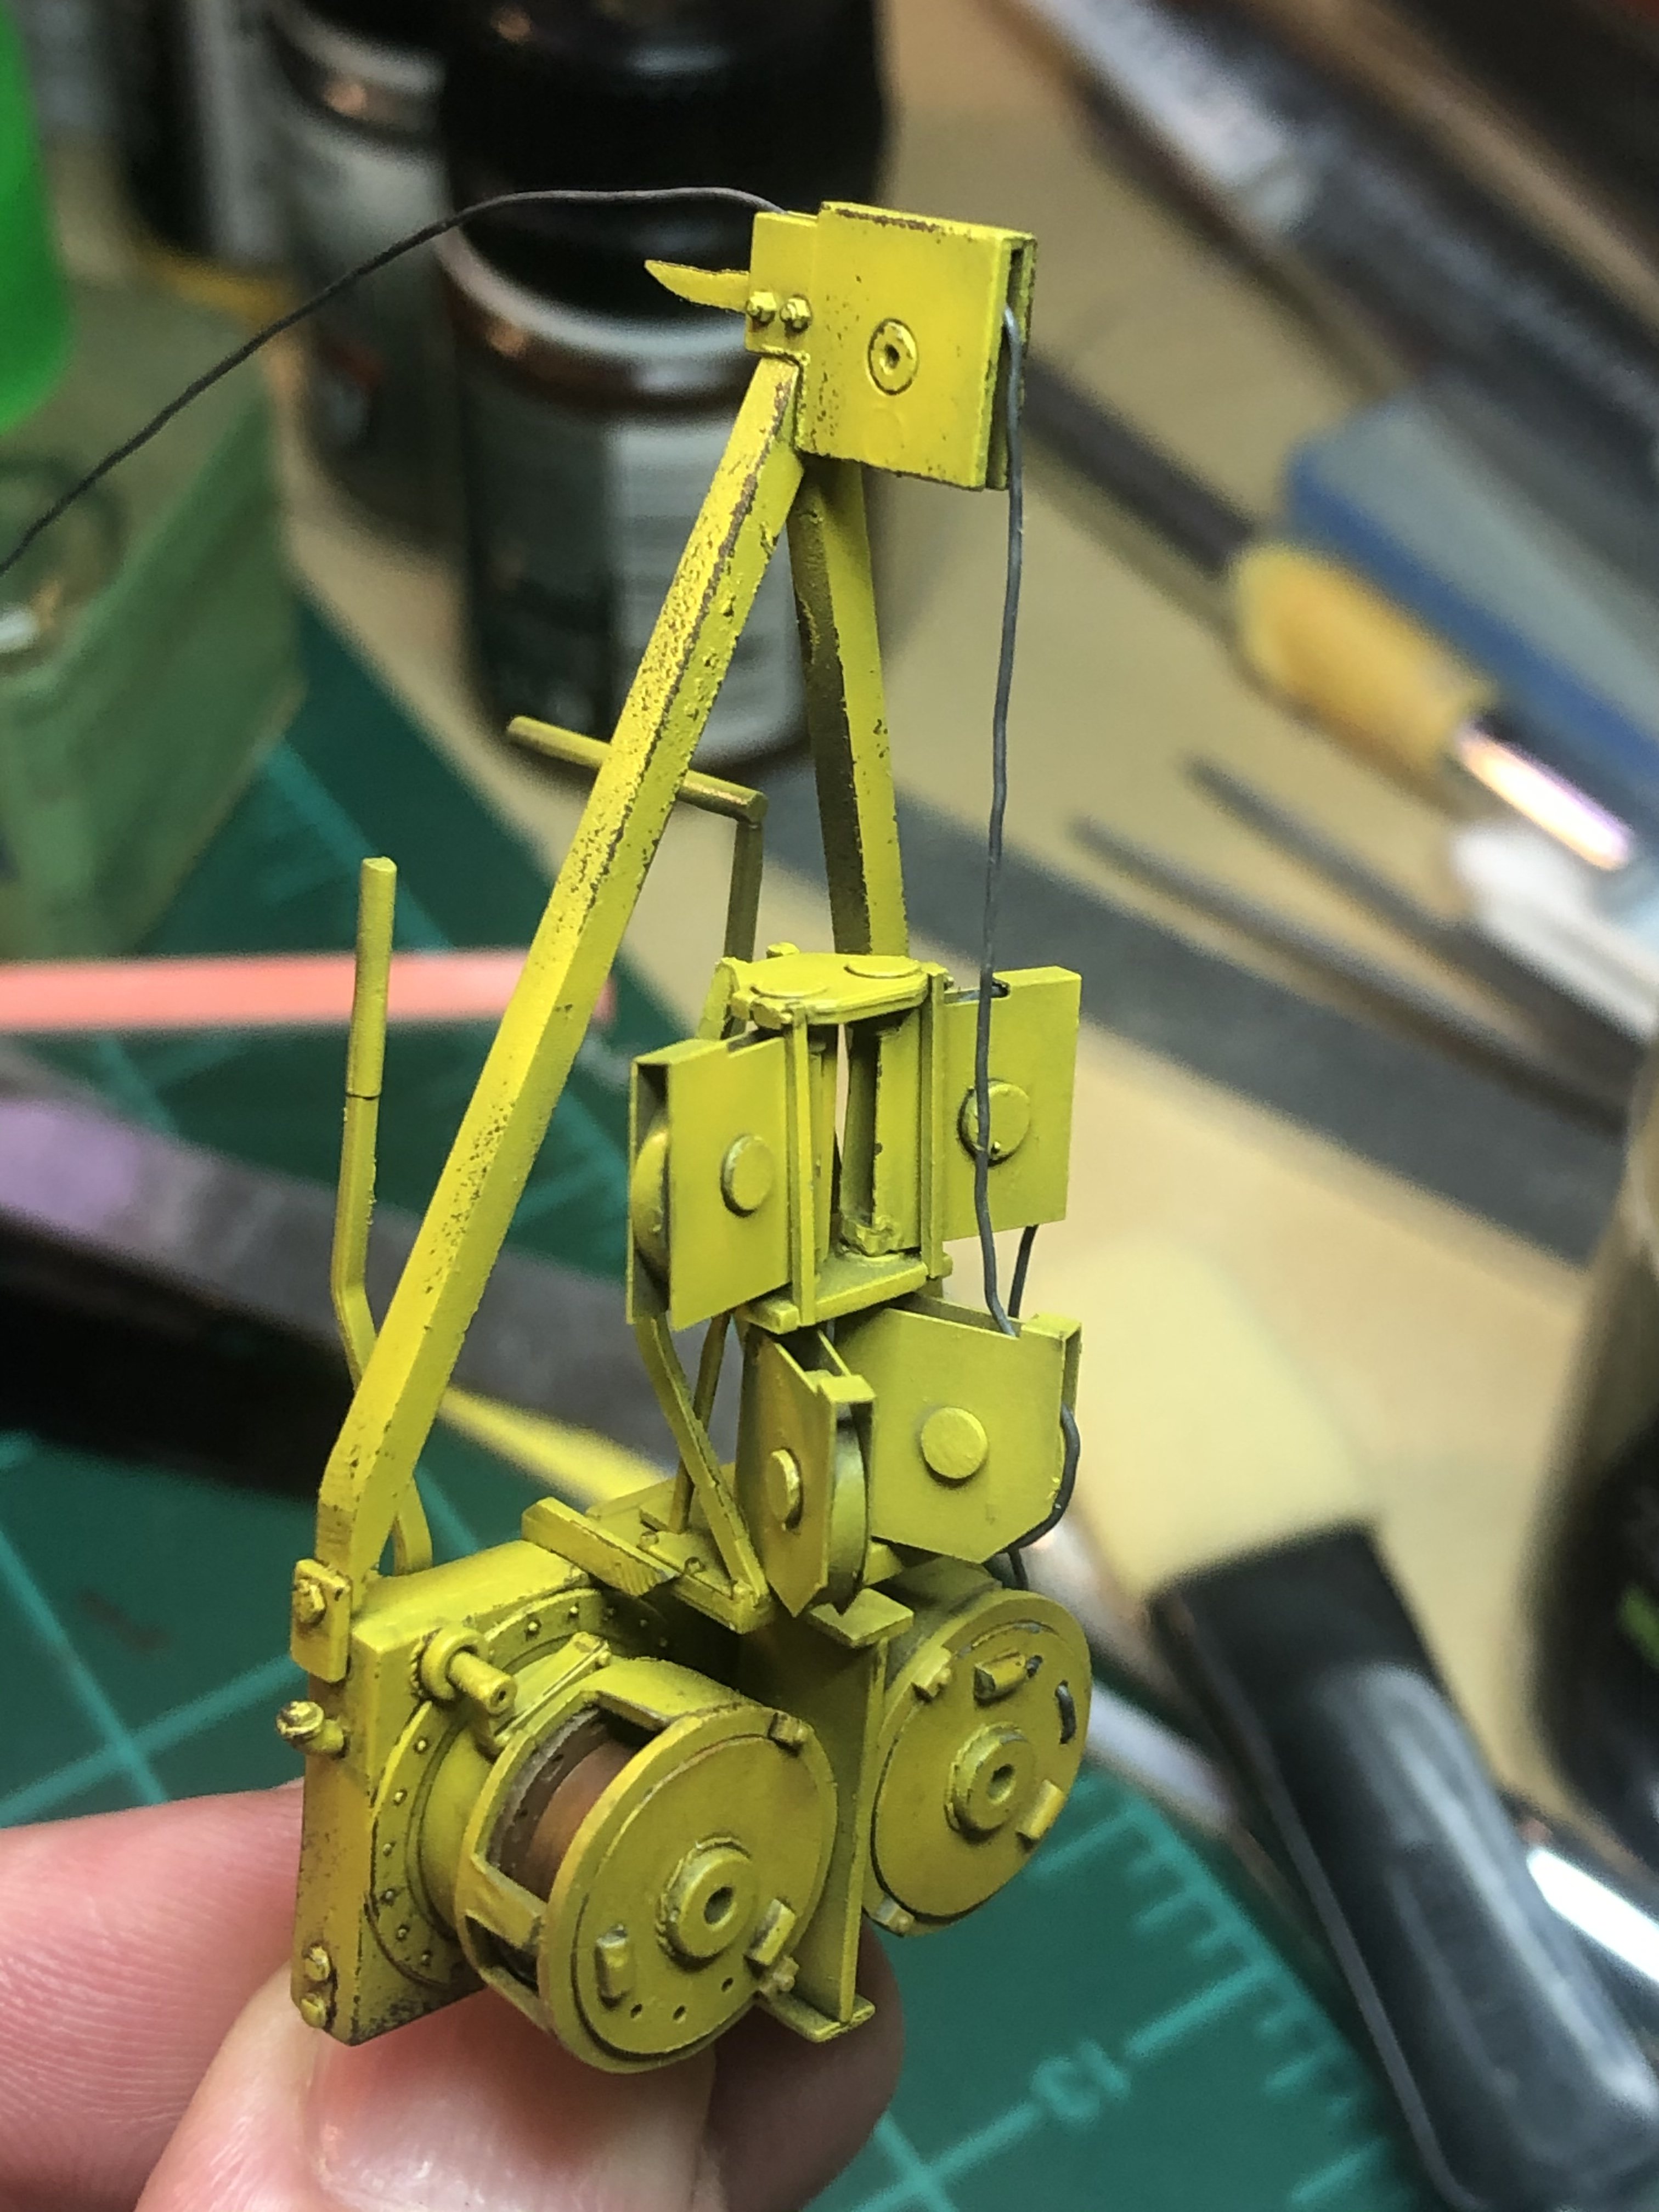
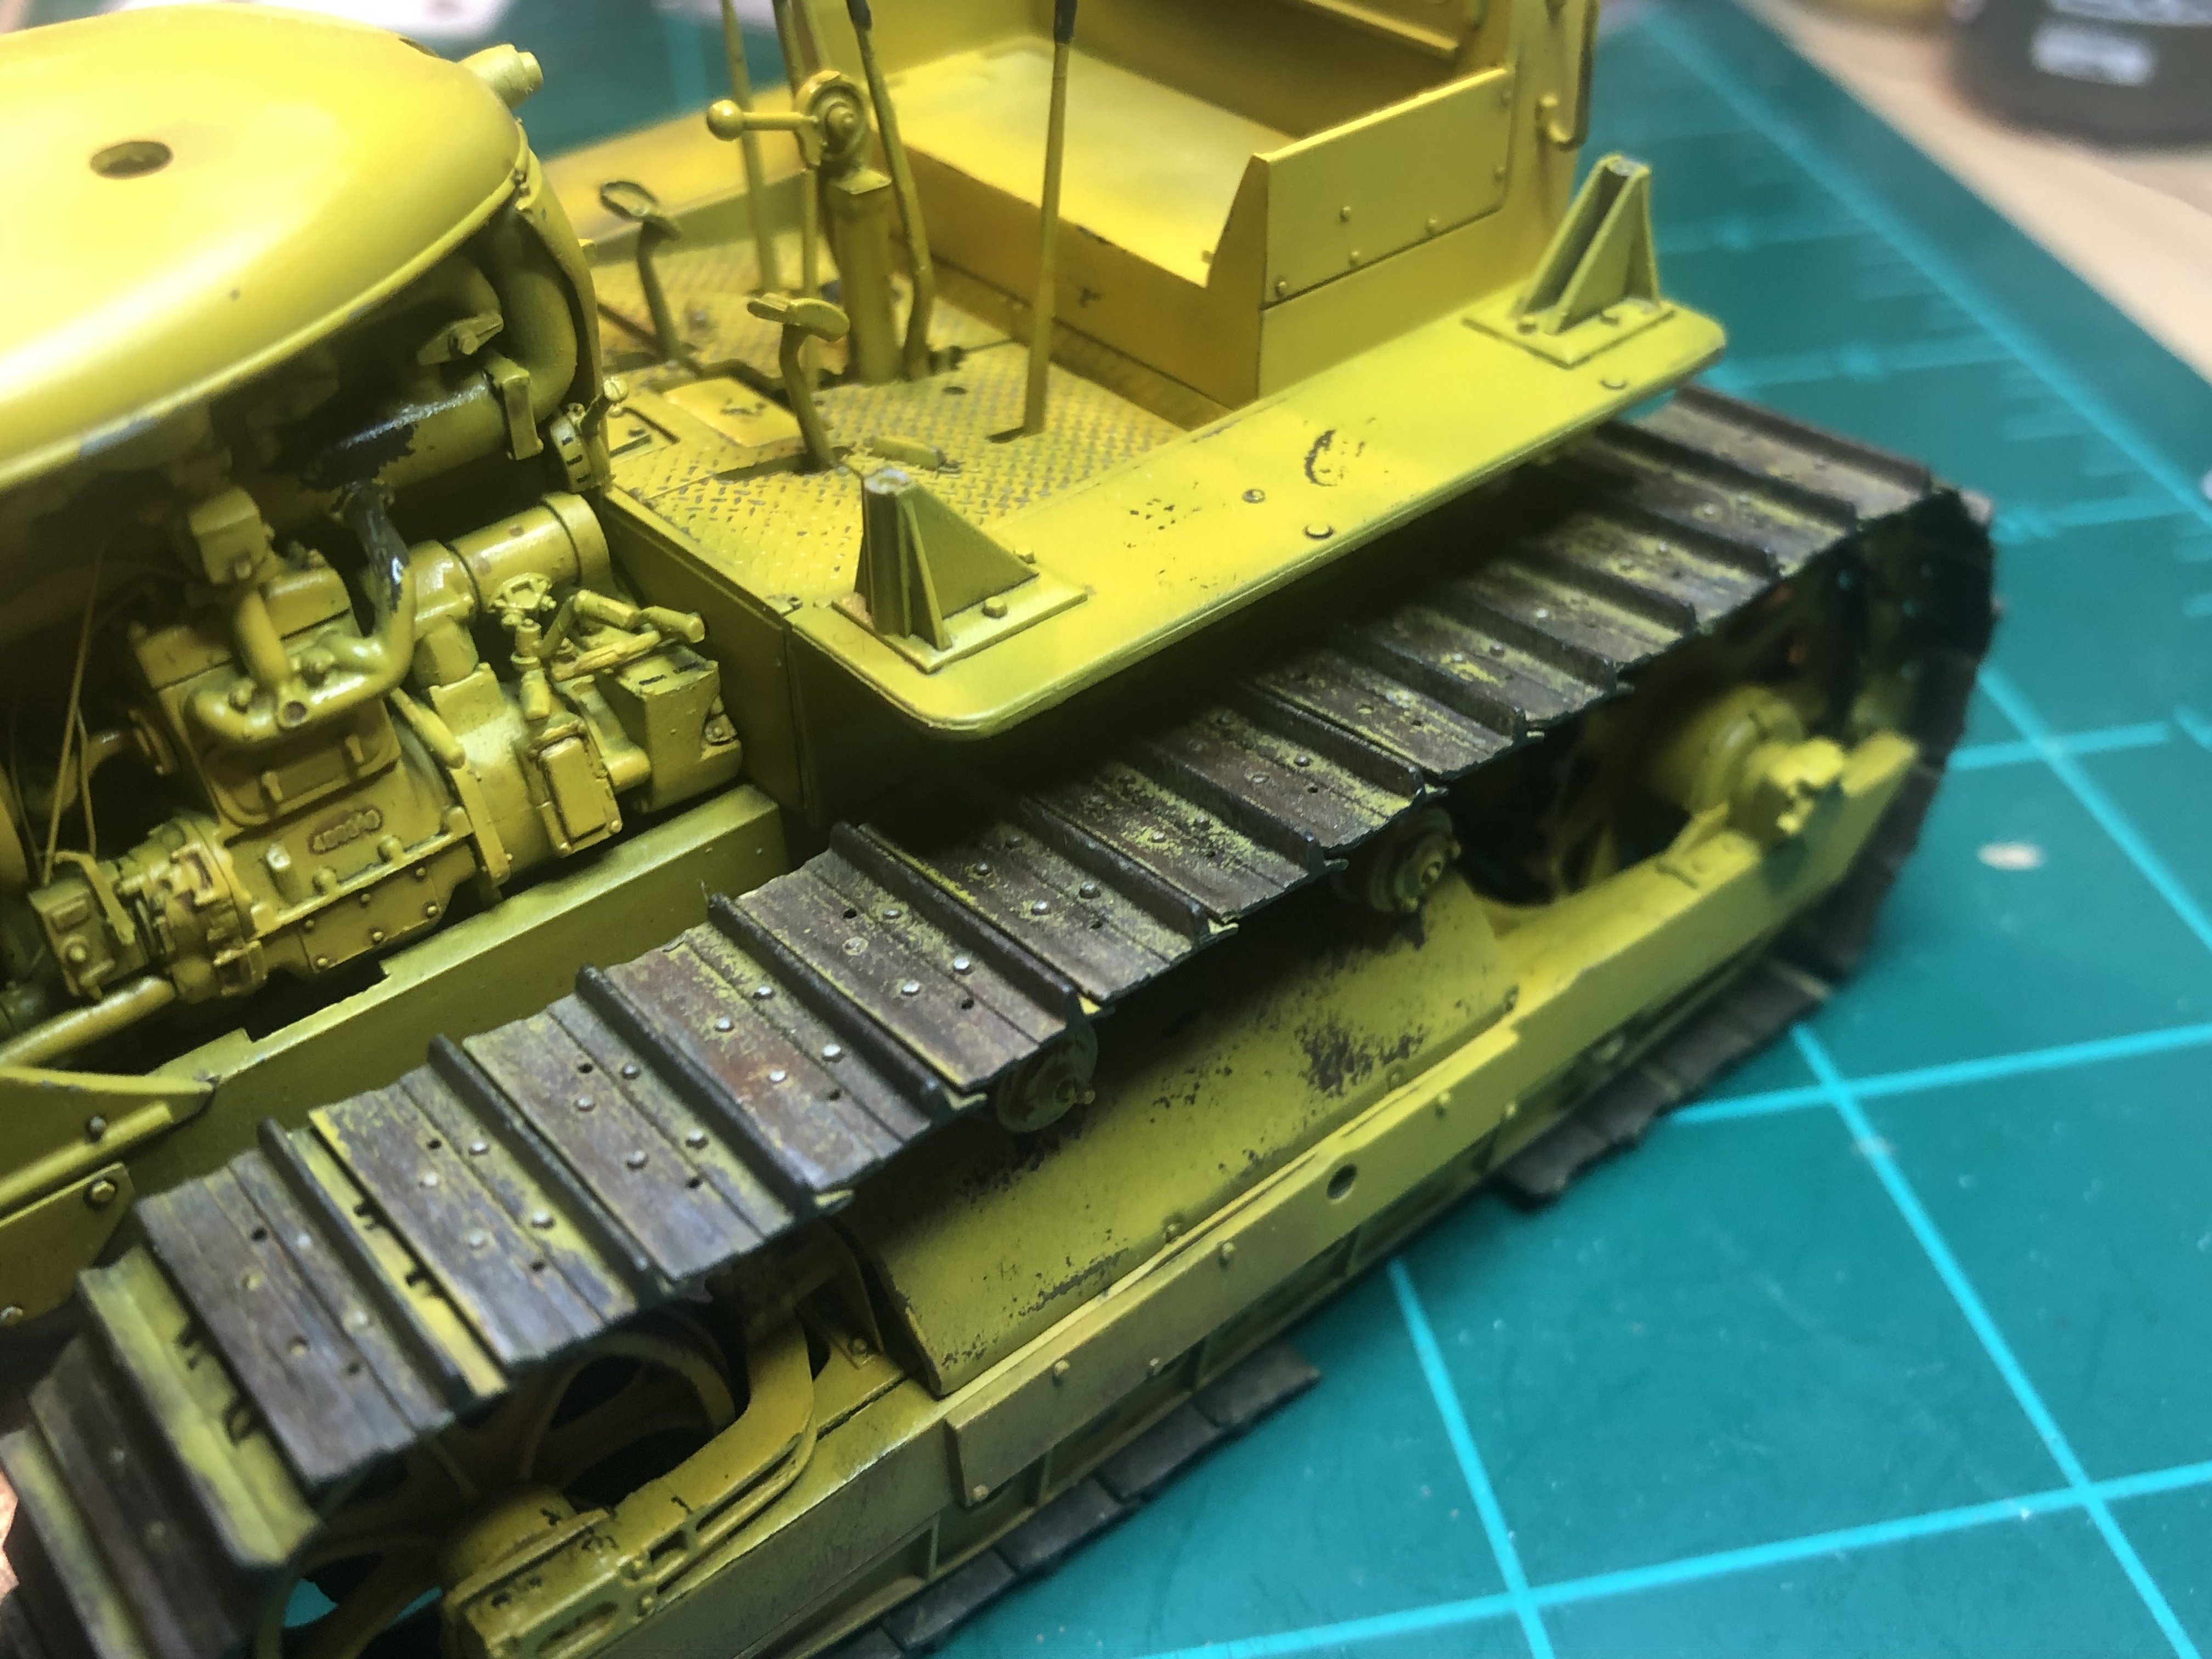
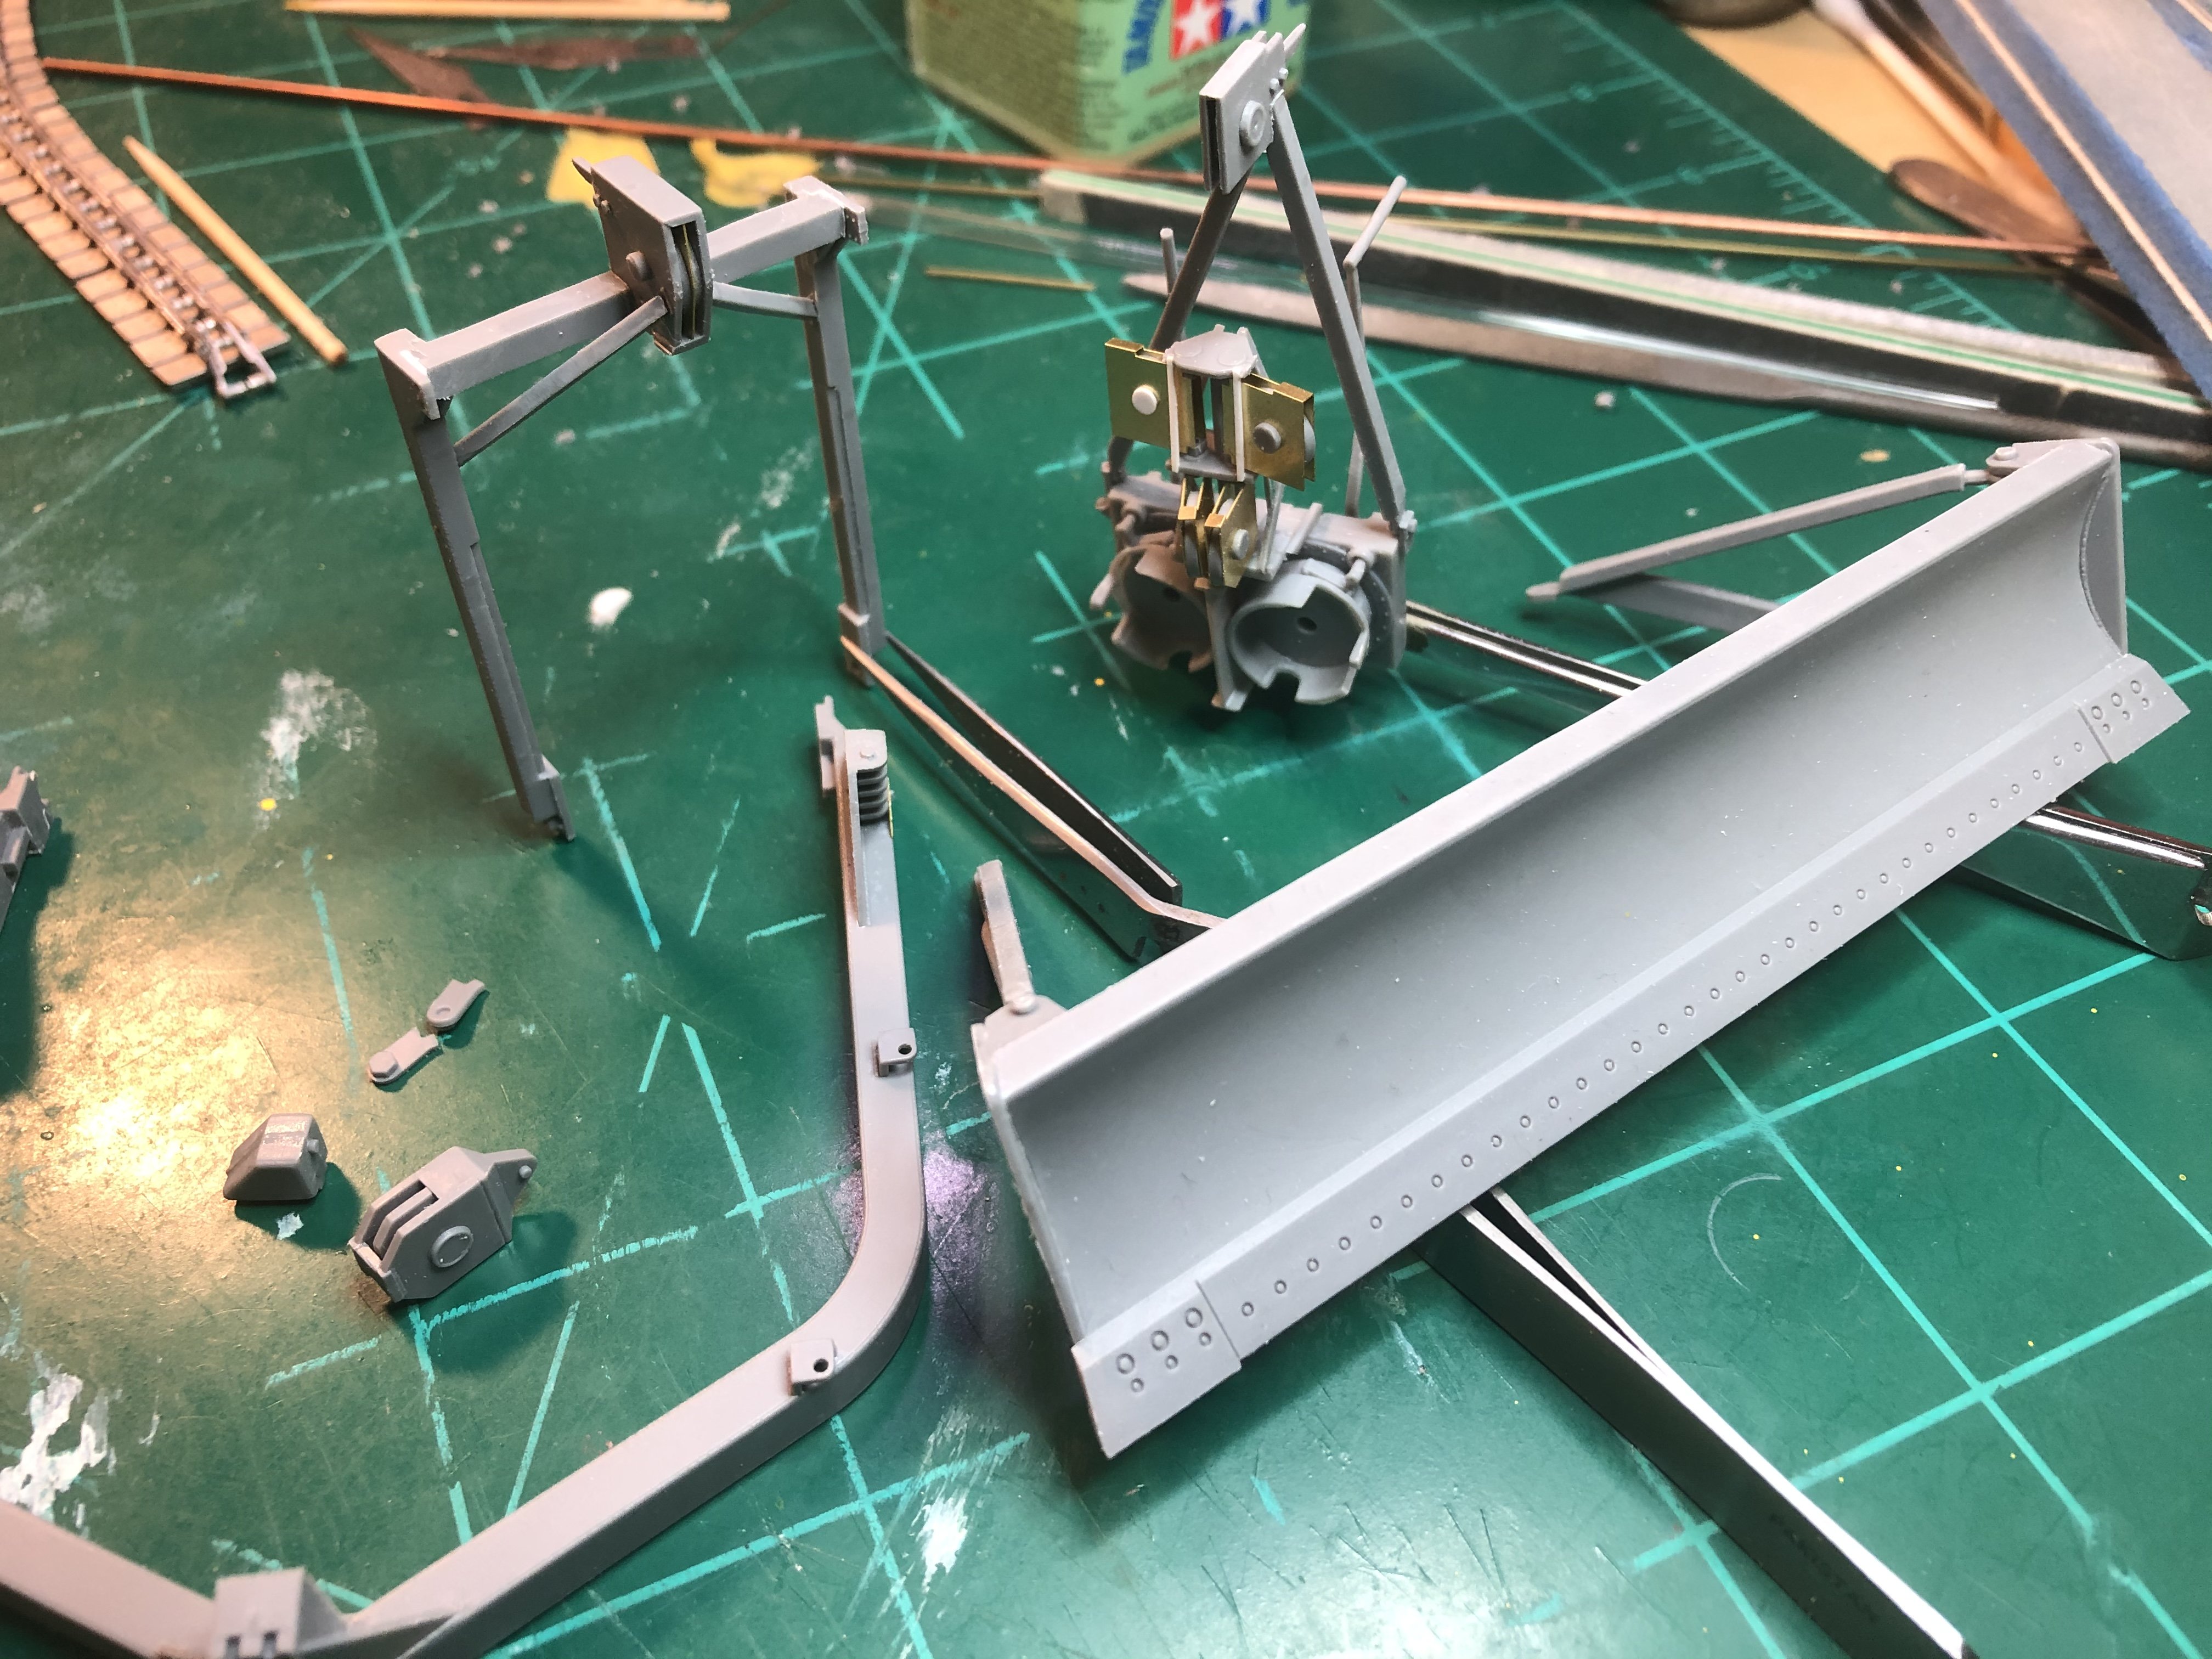
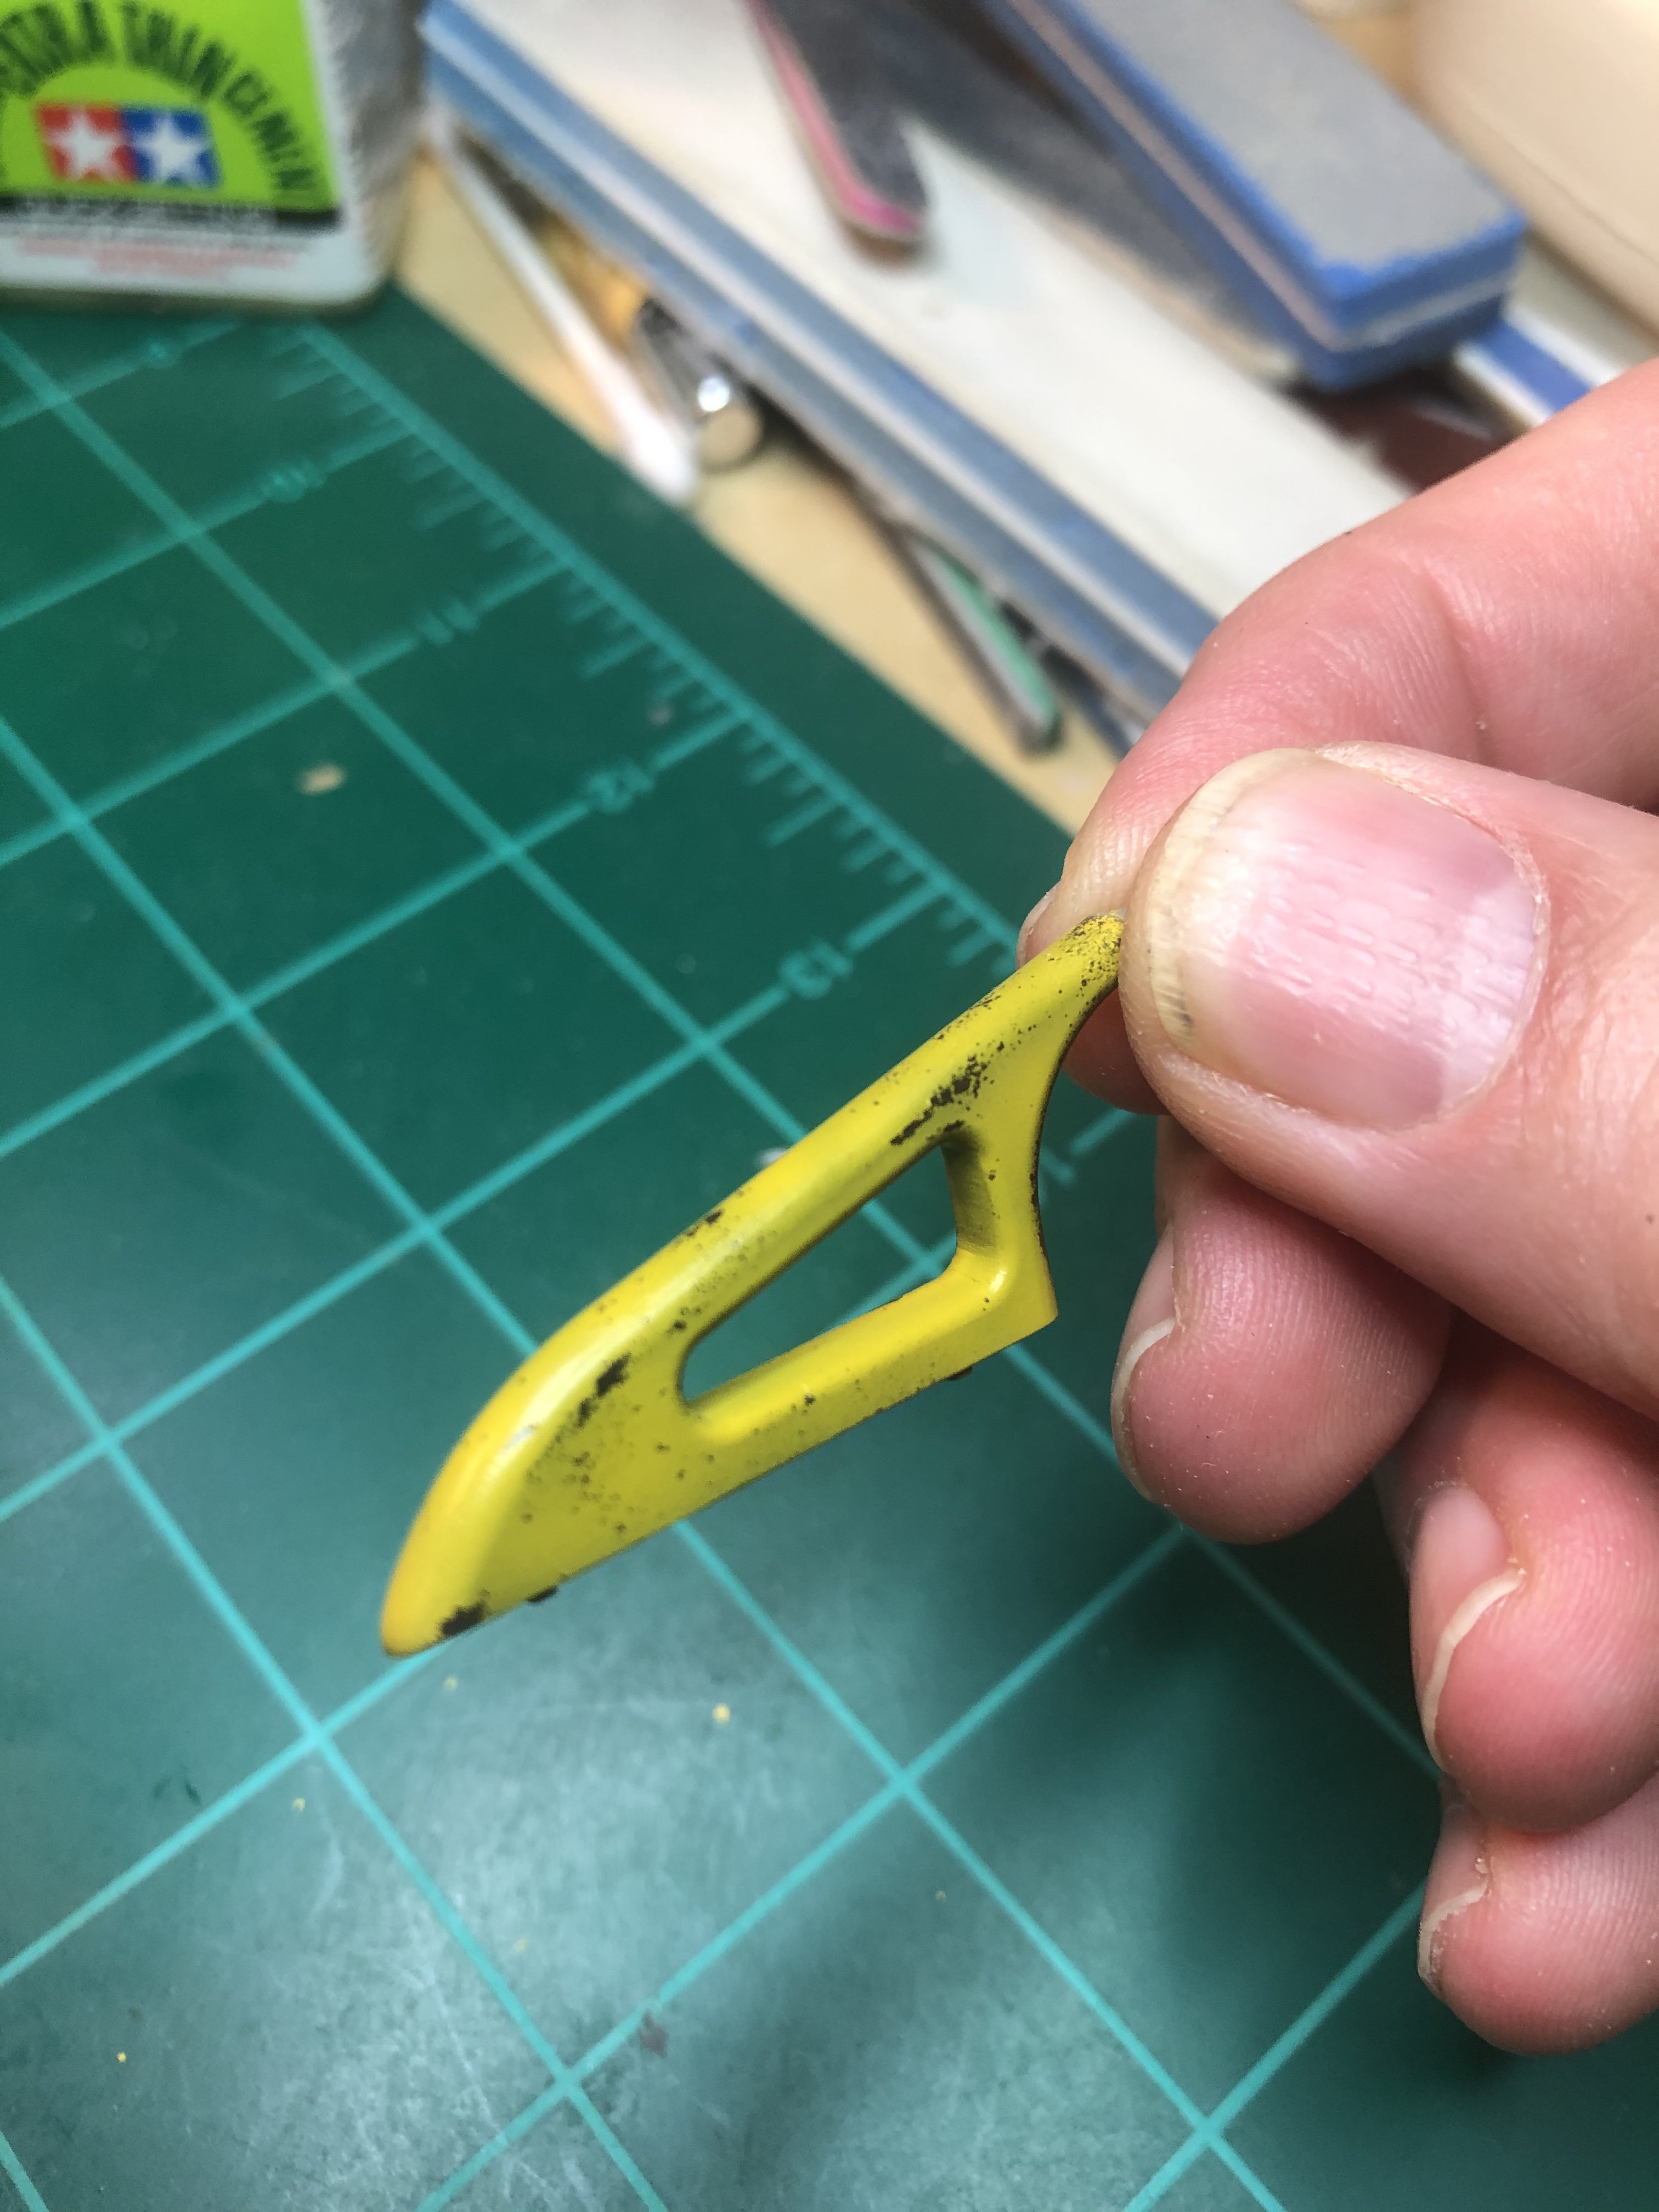
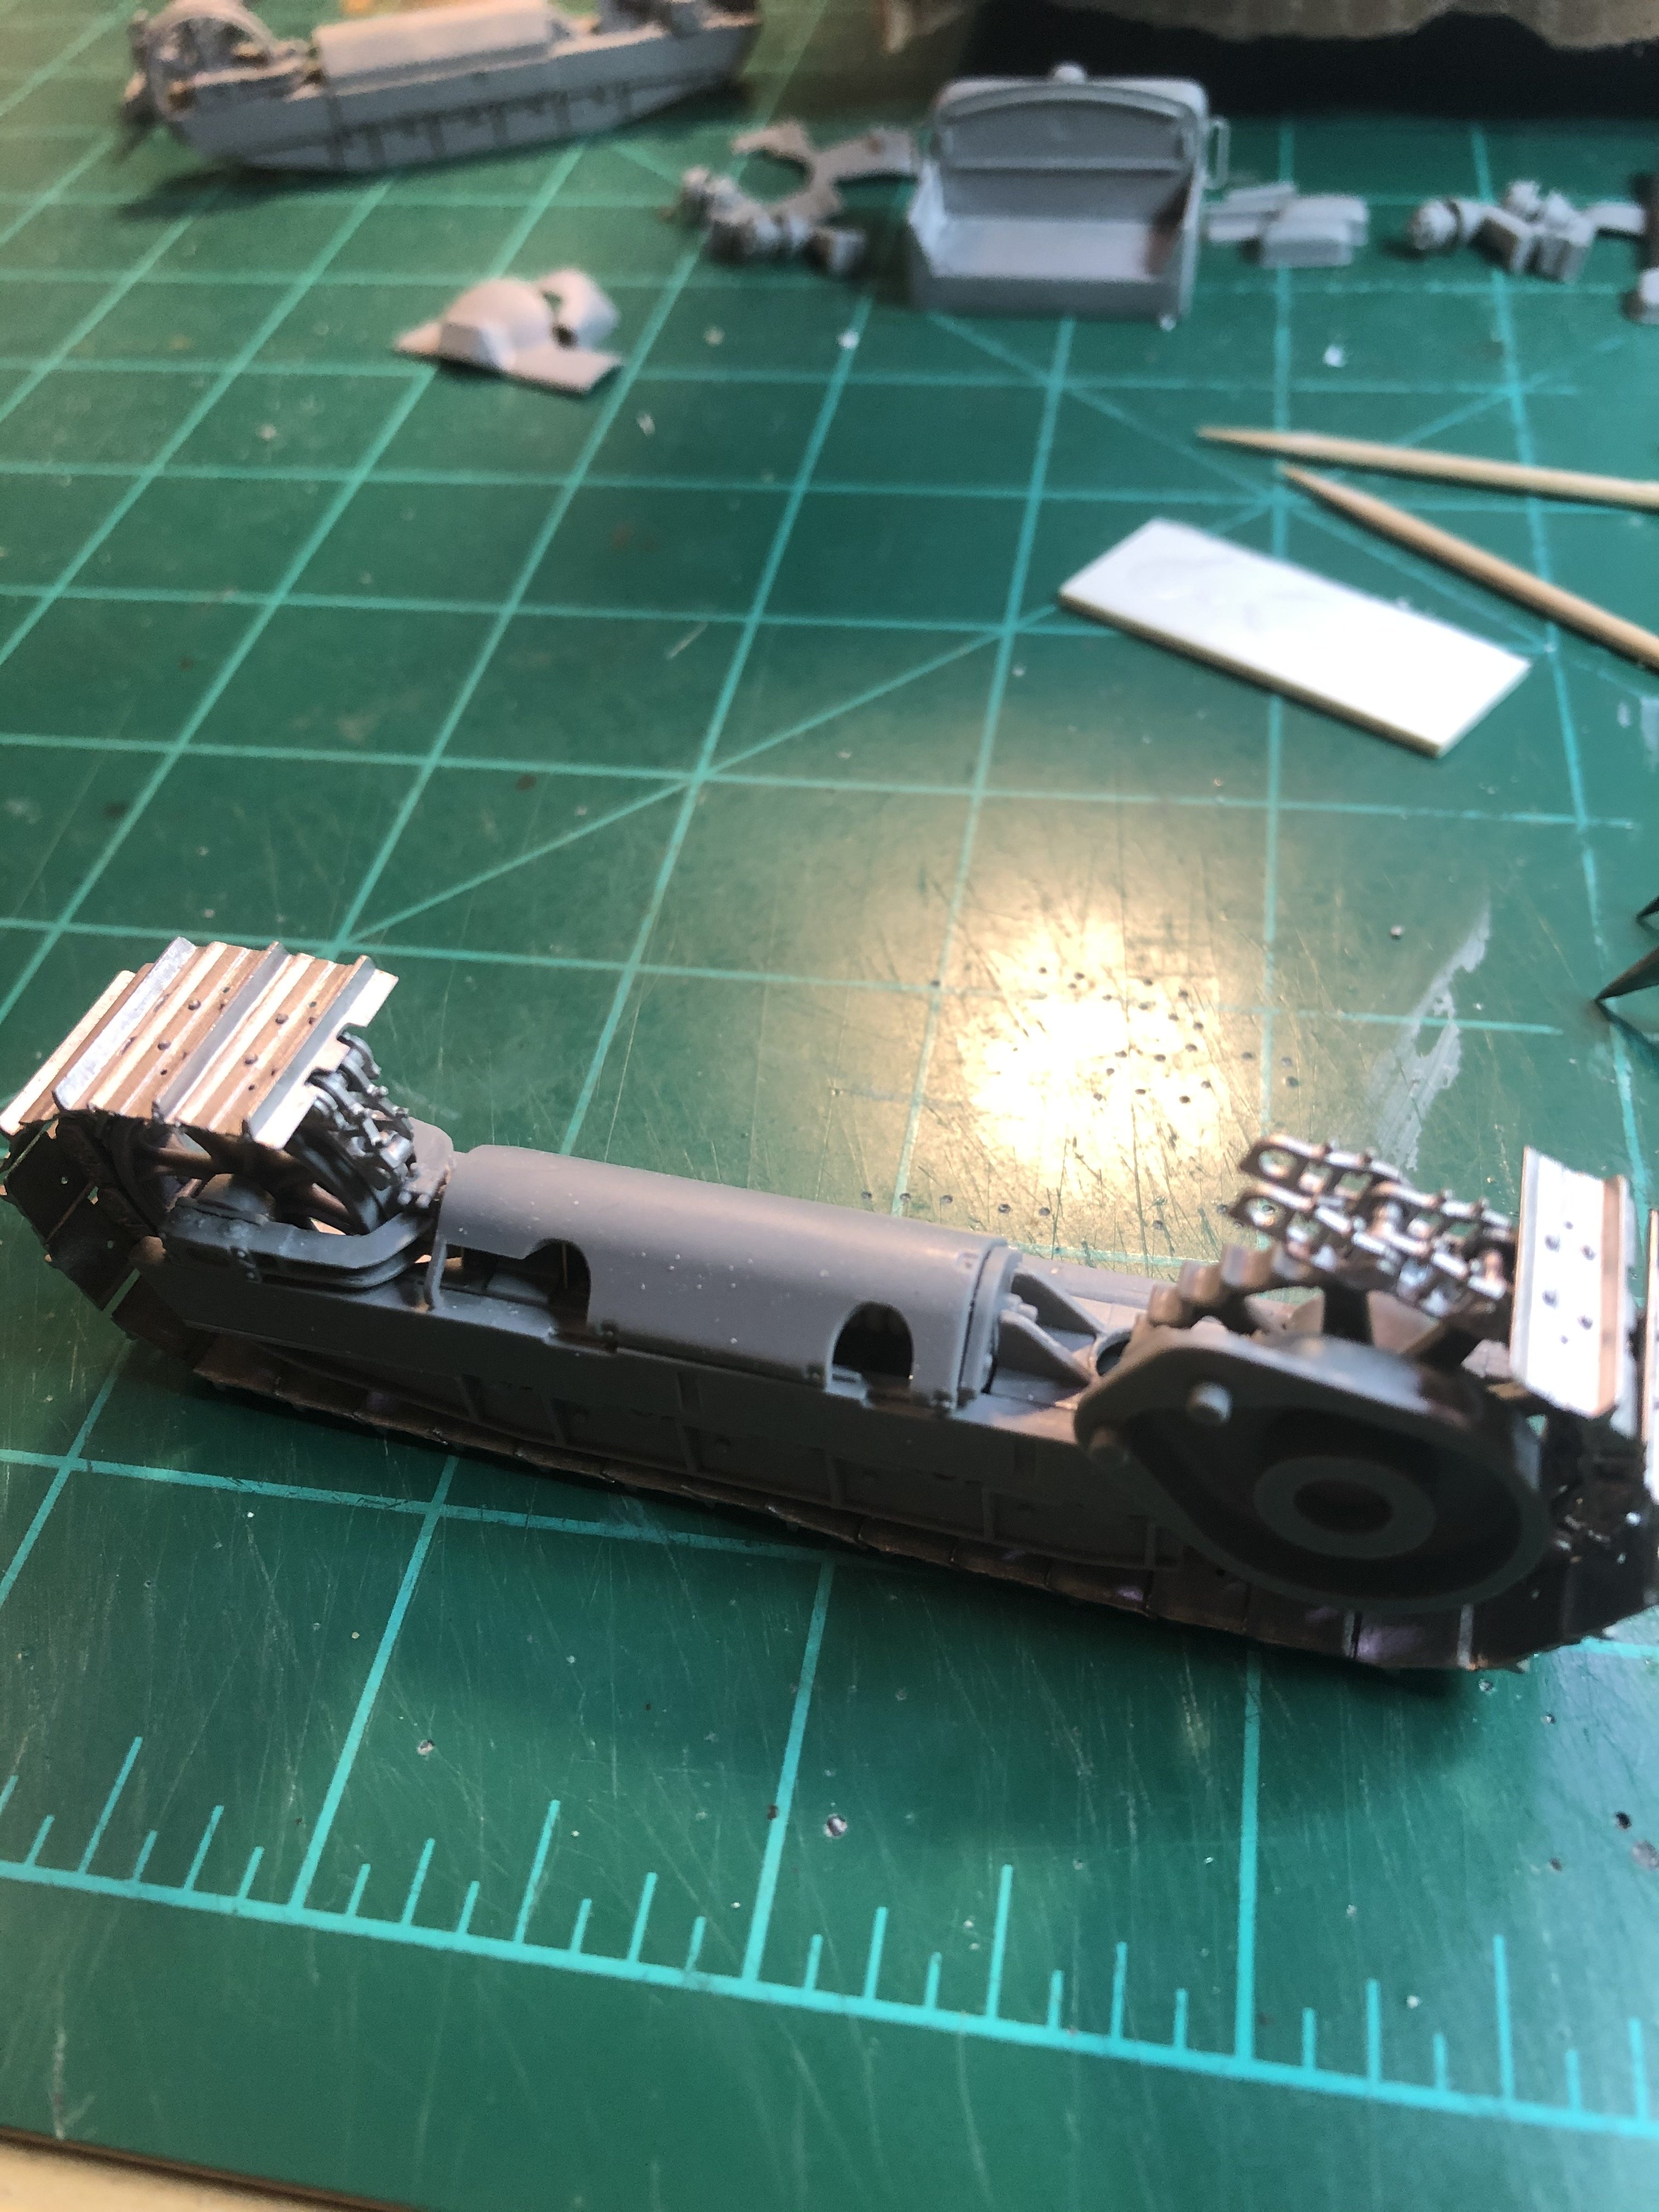
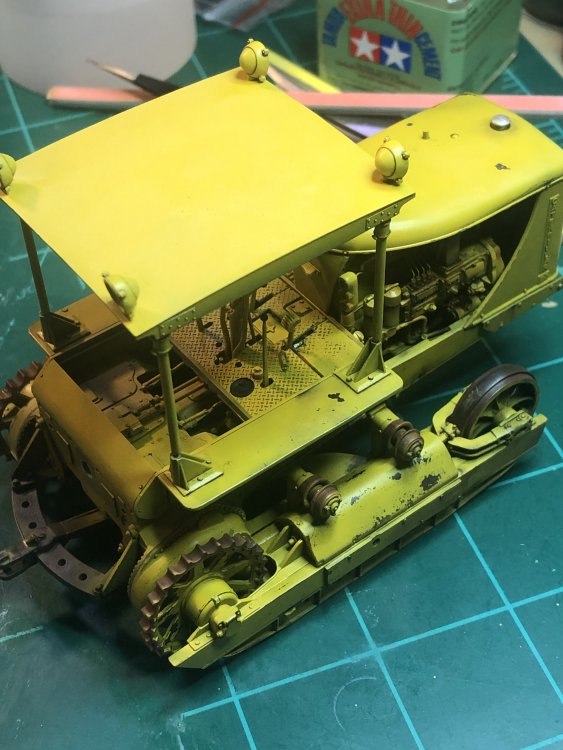
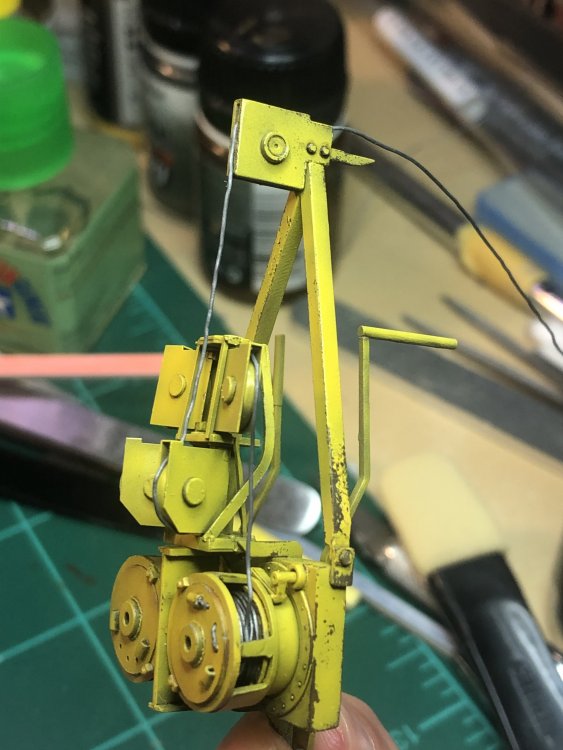
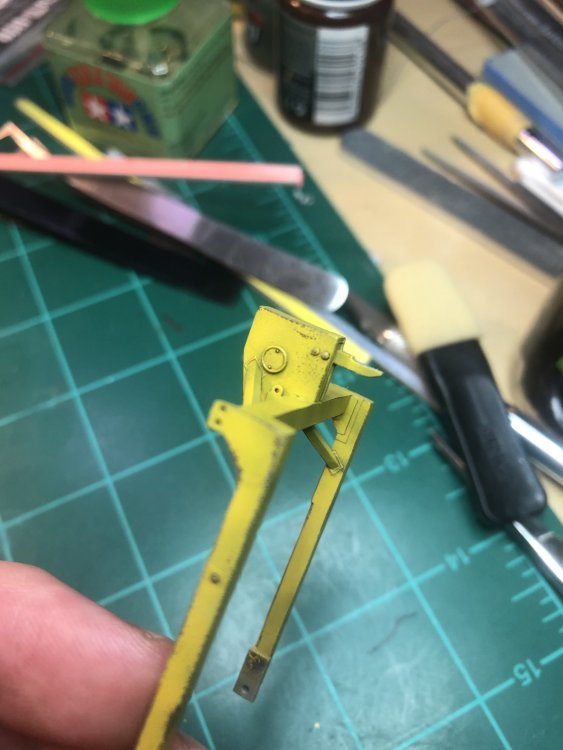
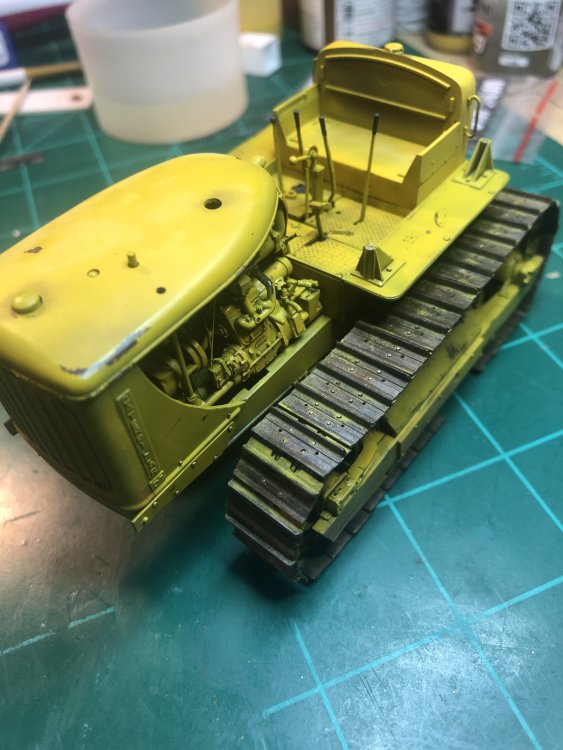
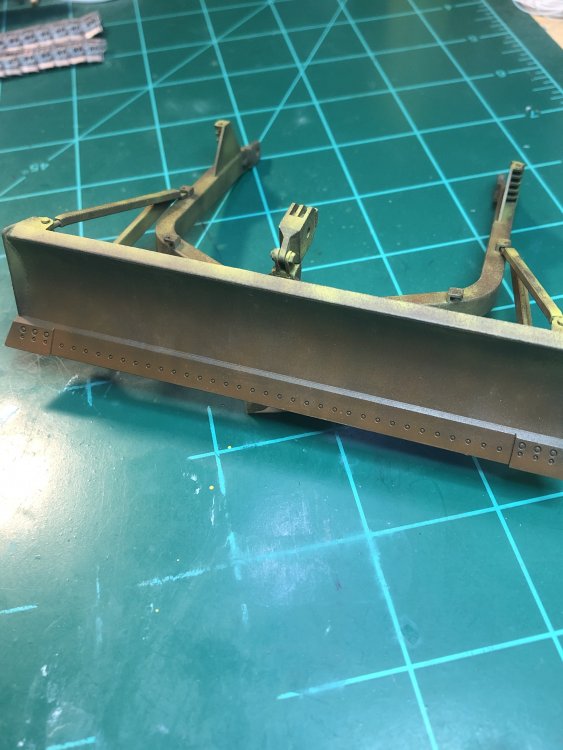
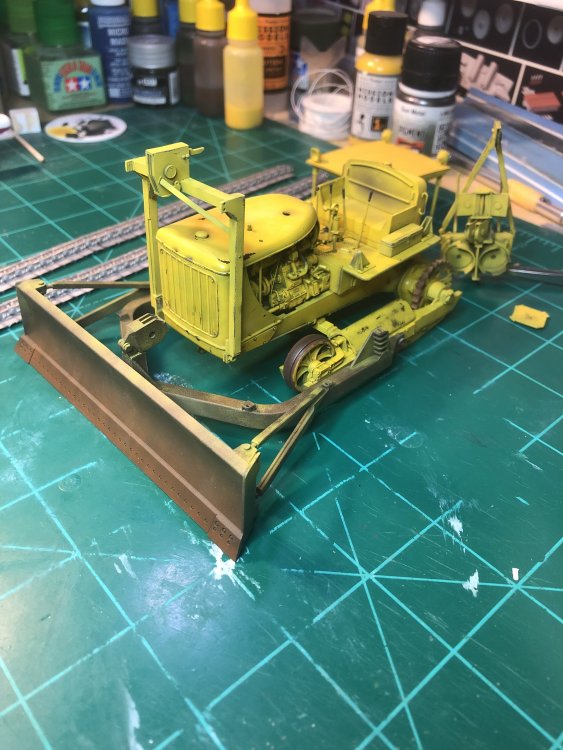
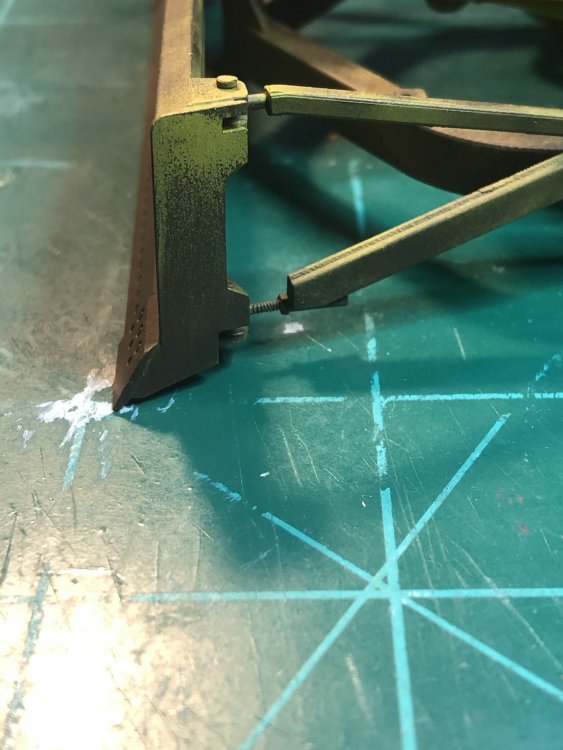
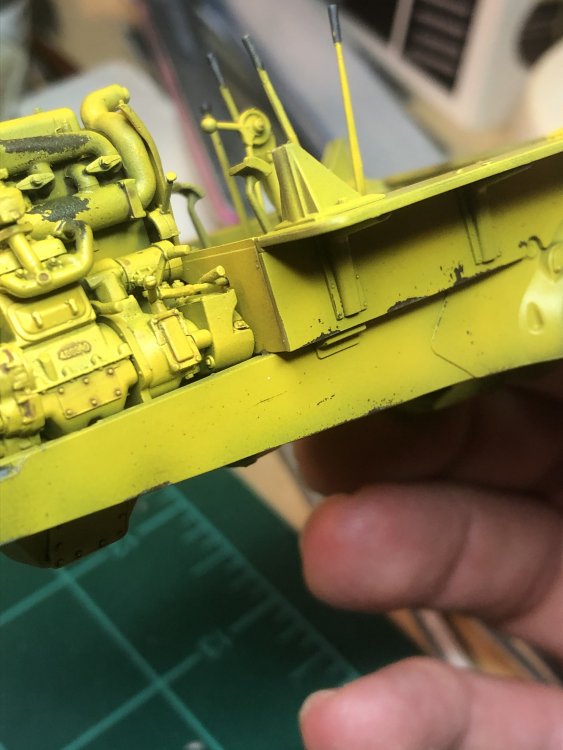
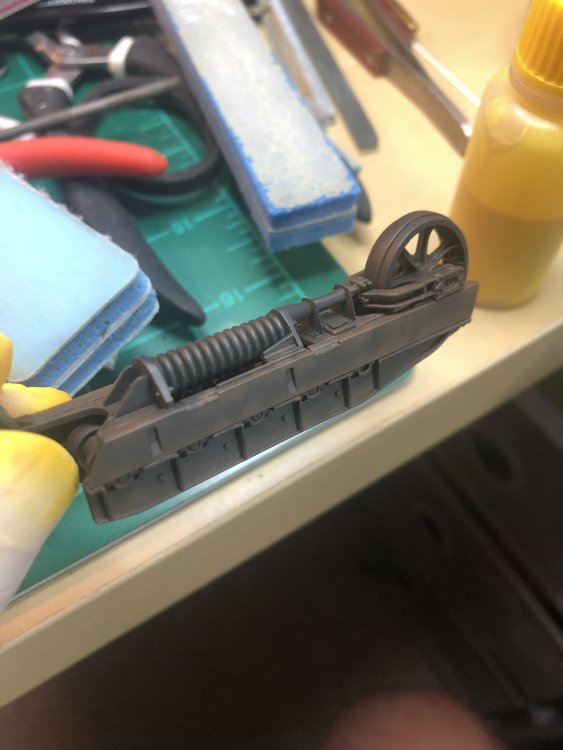
Painting this weekend. Kept the dozer blade rust colored. The back of the blade still has yellow at the top with the bottom worn. Added rust around wheels where the tracks would rub. Painted and chipped the pulley system. Did a little weathering on the sides of the main assembly. Test fitting of the major parts. Starting to look like a bulldozer.


-
Looking forward to seeing yours. Did you receive your kit yet?
-
Putting together the last major parts. Prime and paint next.


-
I like these type of models also. Nice change of pace but yet you can use the same modeling skills as for military armor. Did a little bit of chipping on the track assemblies. I have decided not to include the covers over back wheel. Leaving it similar to the photo of the dozer above. Gives it more interest to me.

-
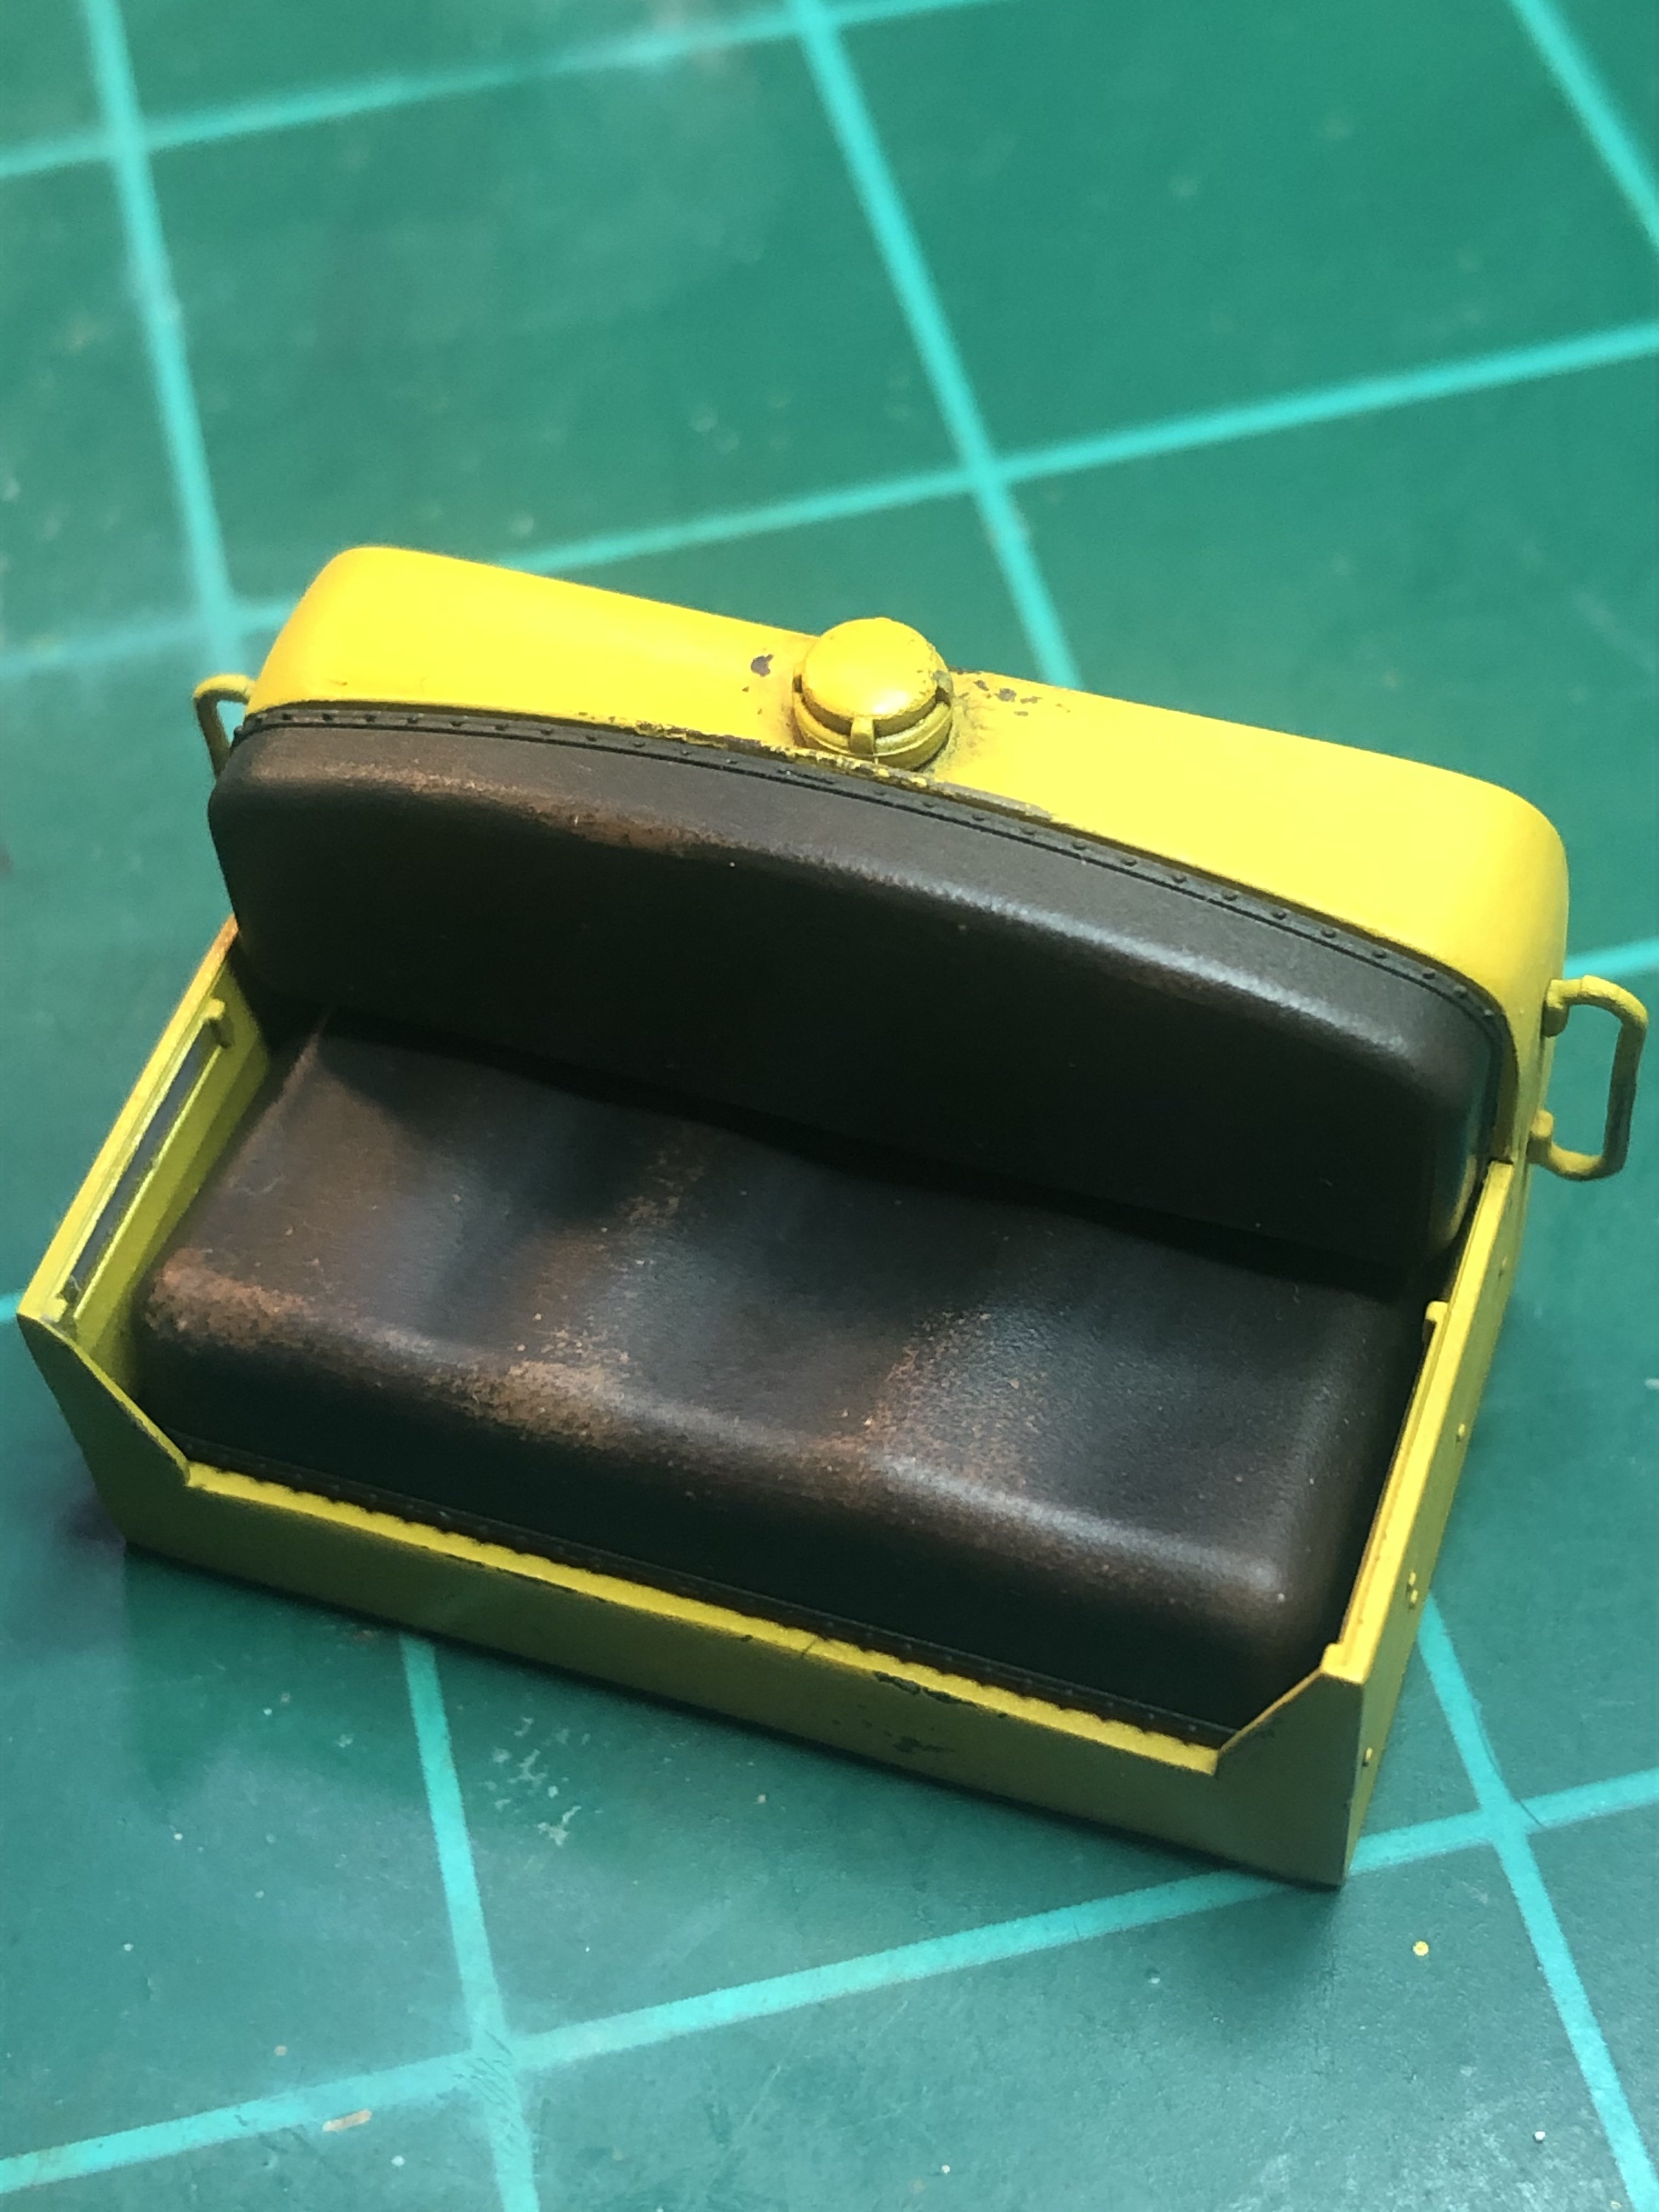
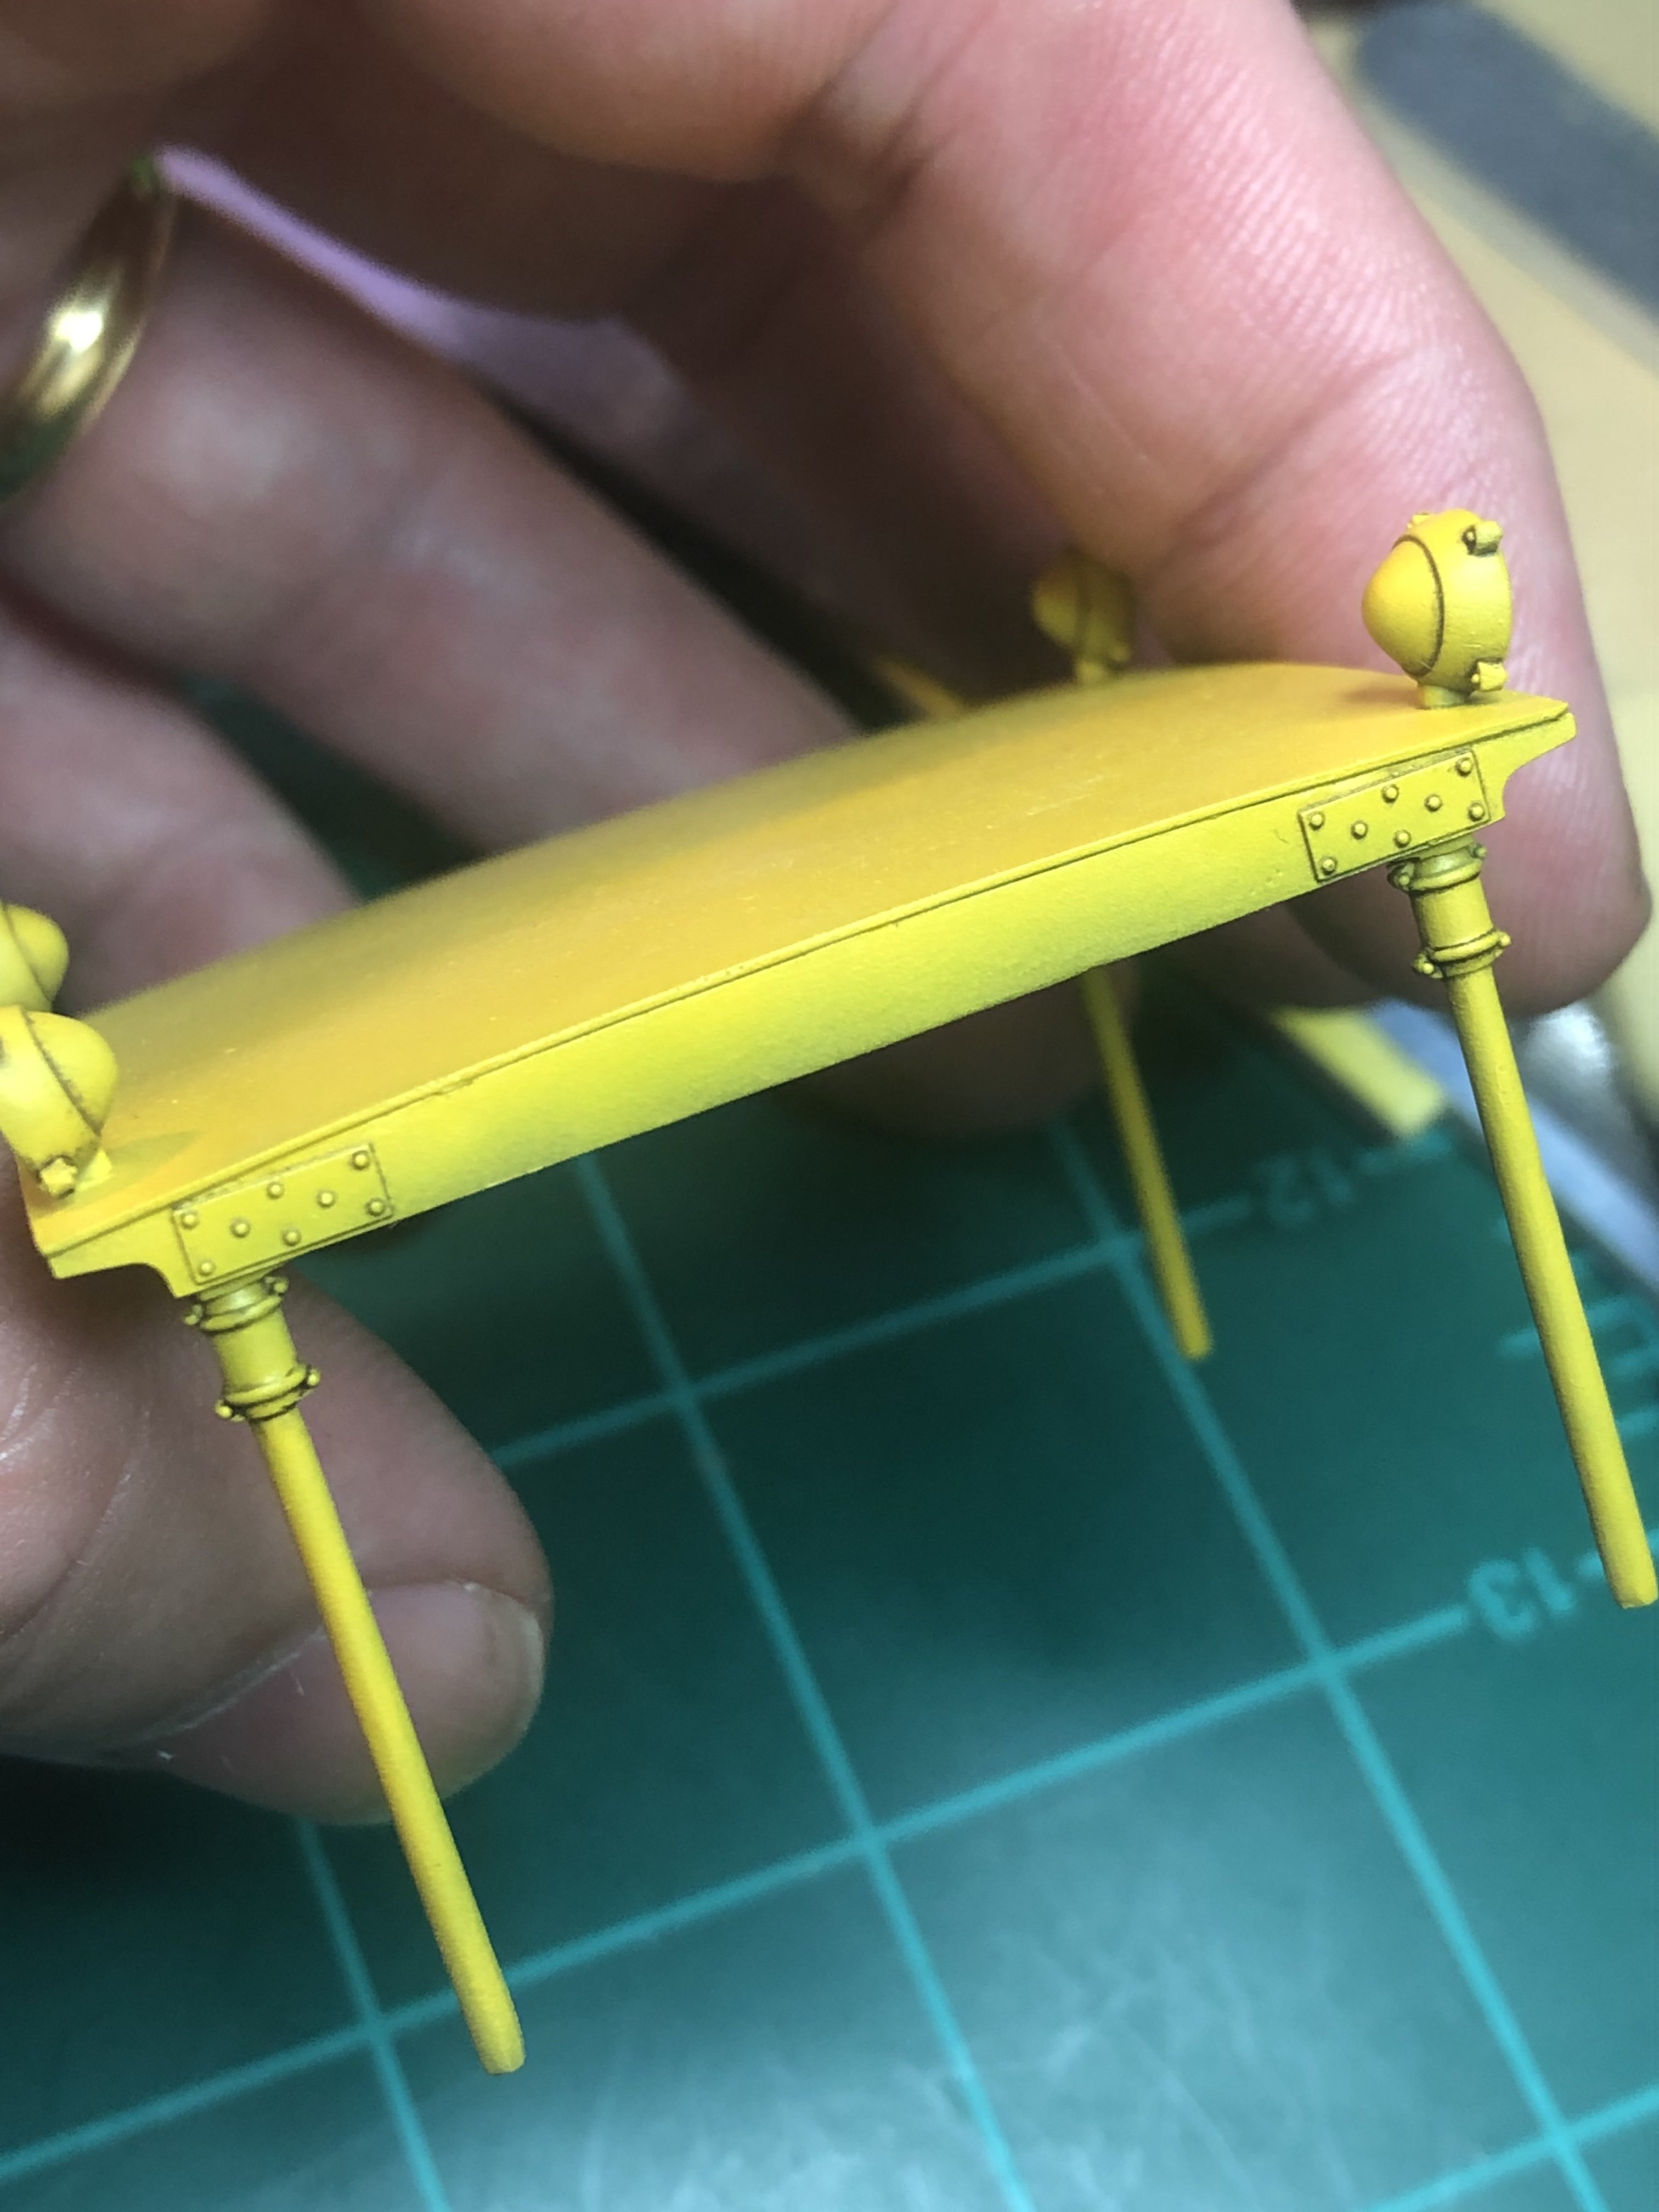
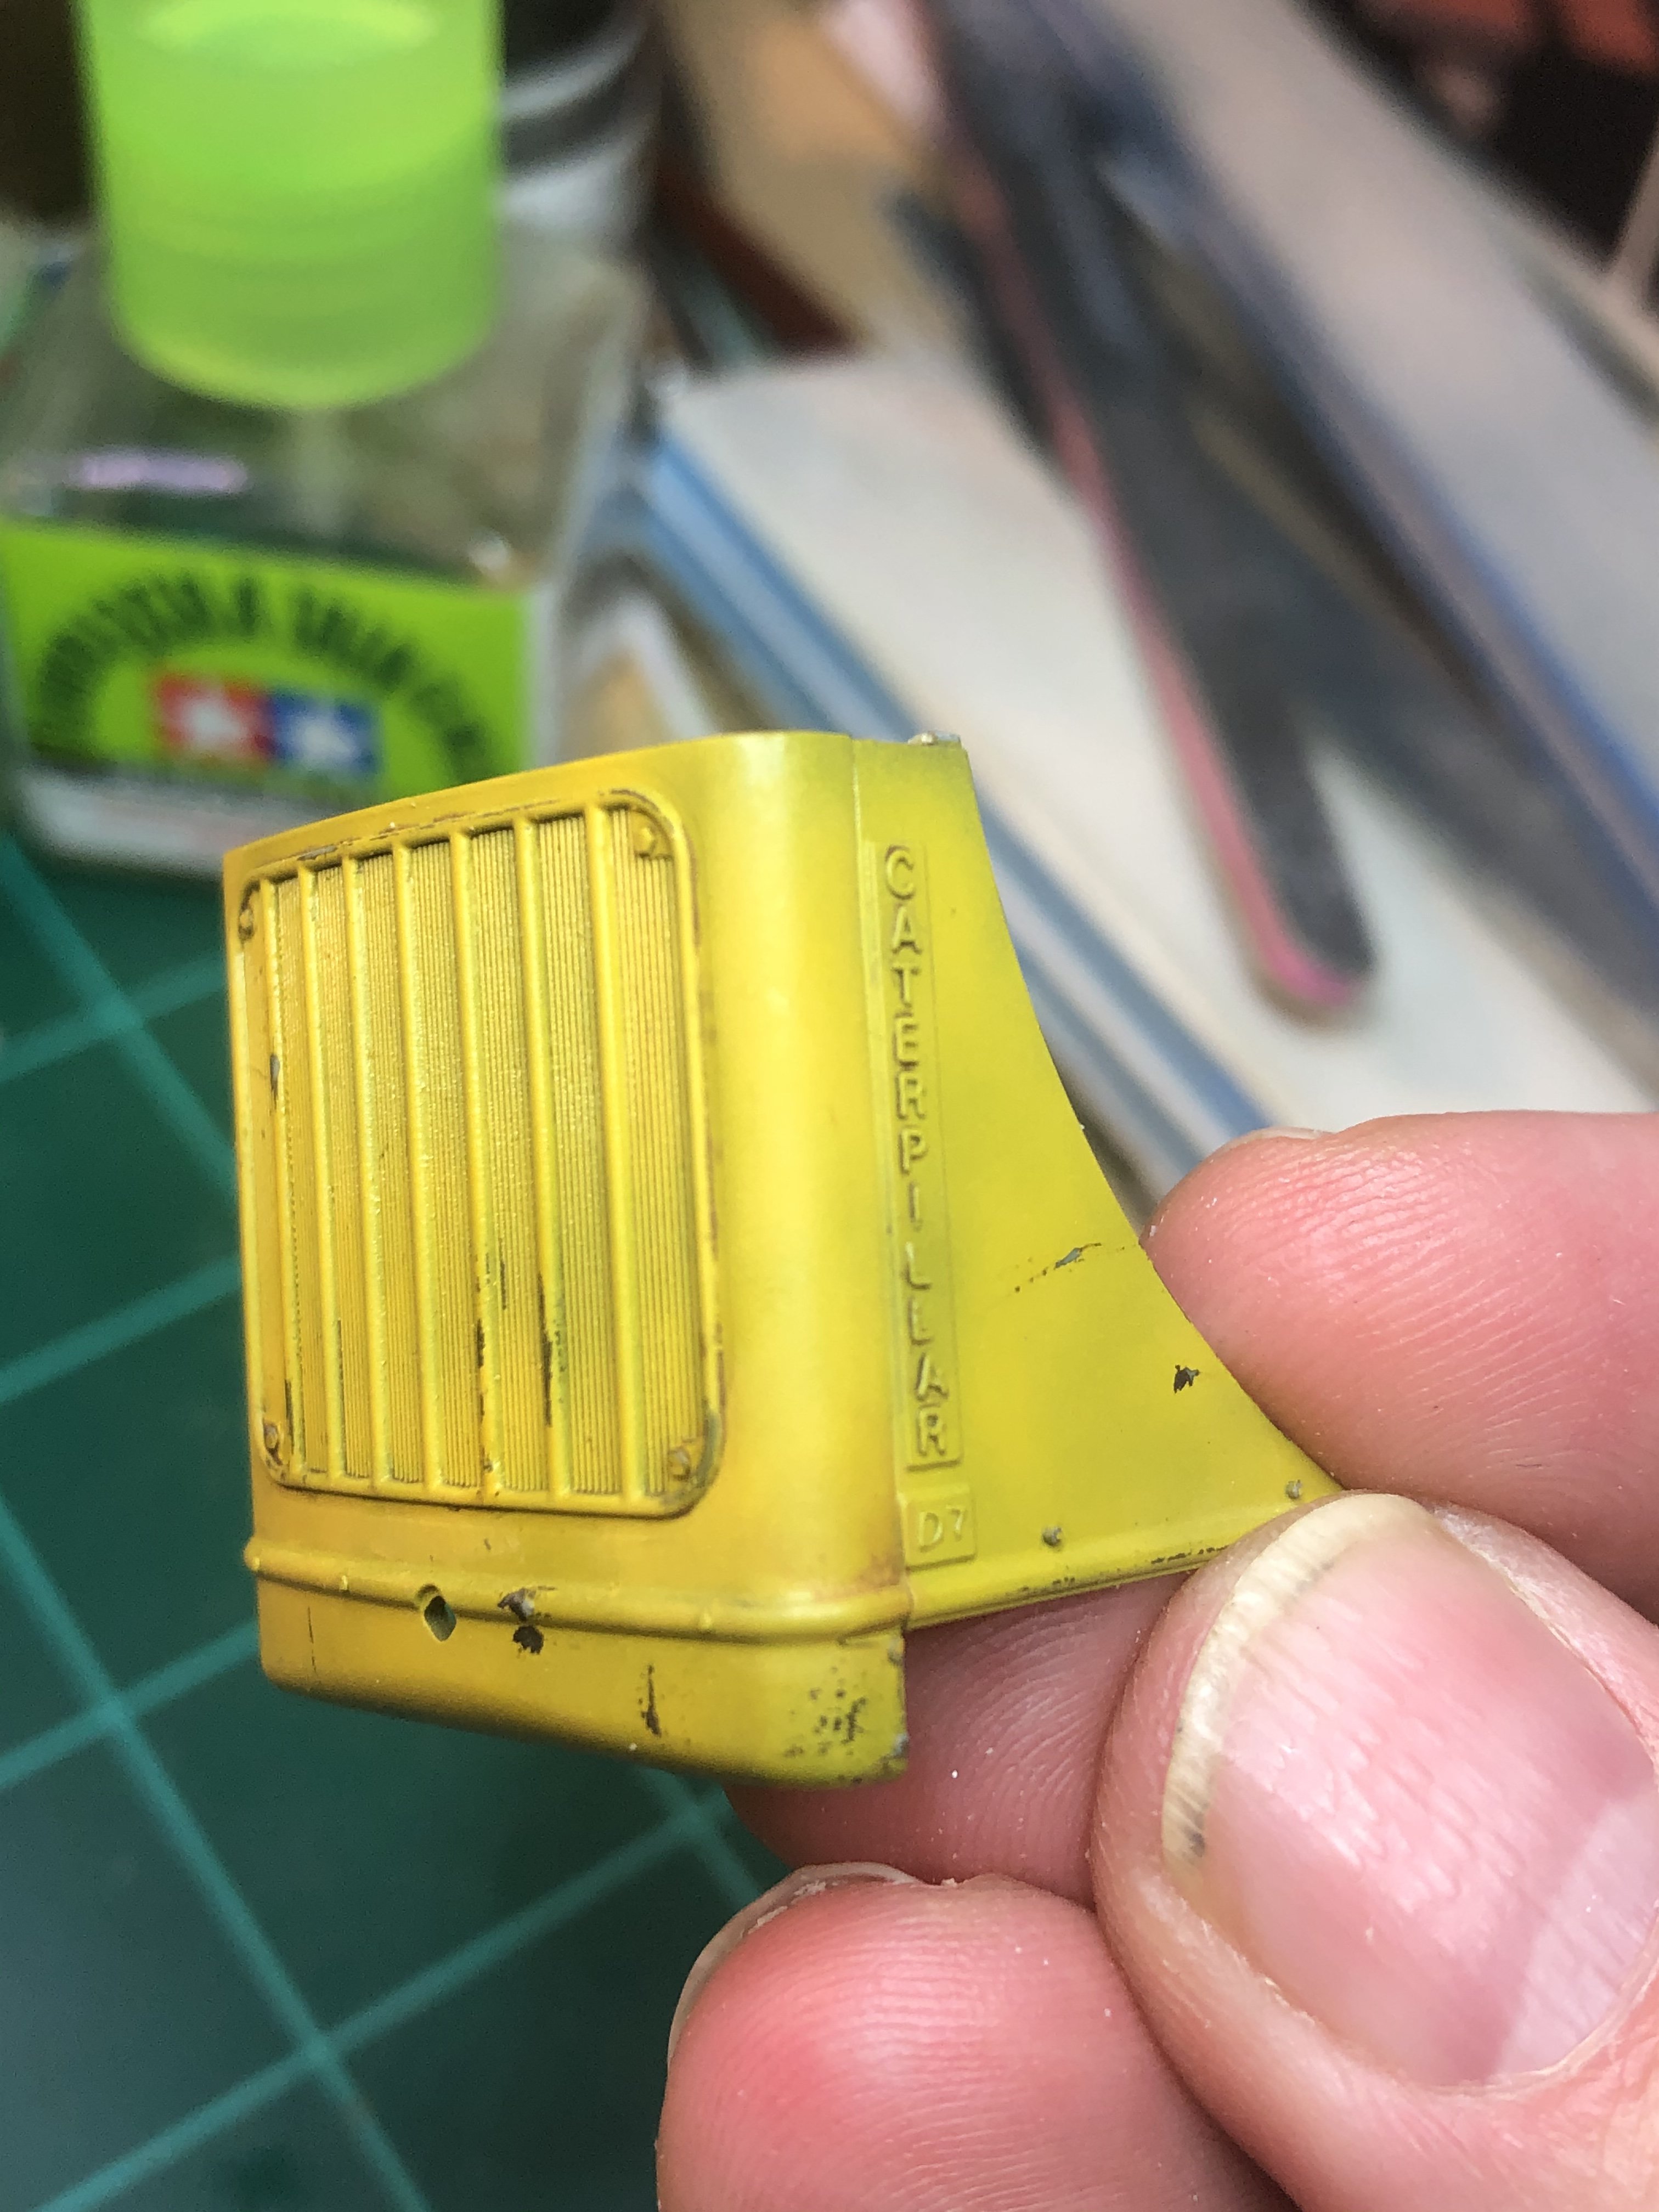
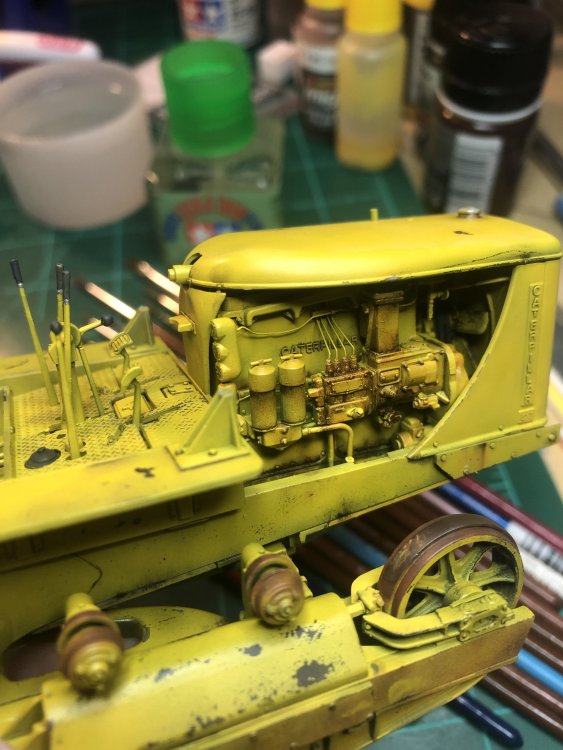
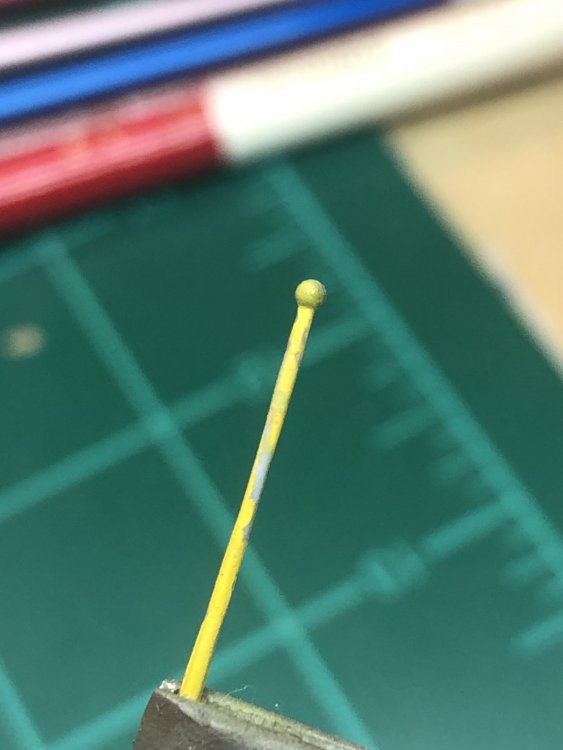
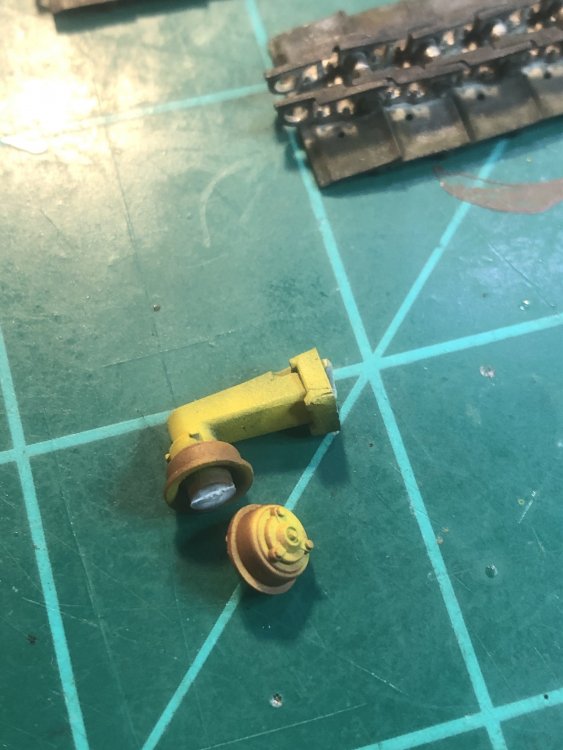
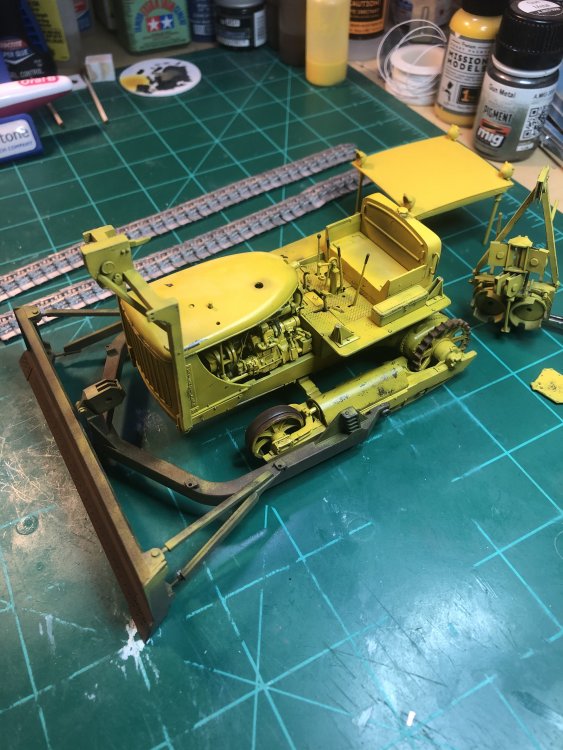
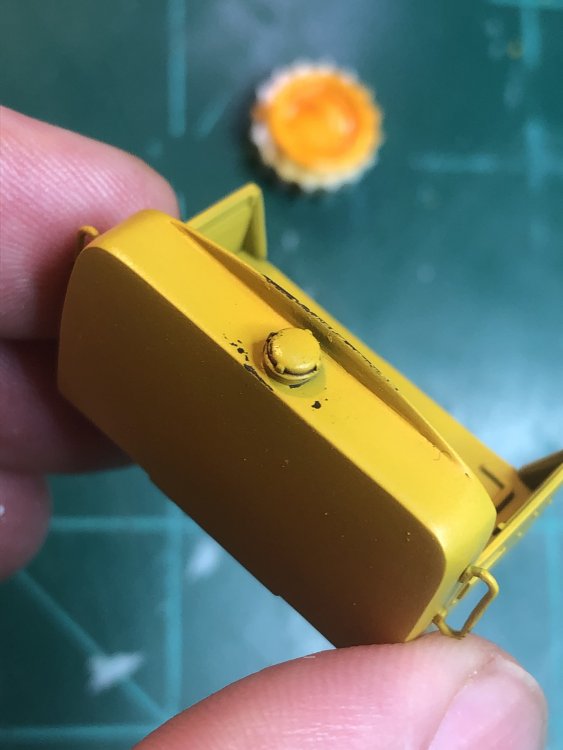
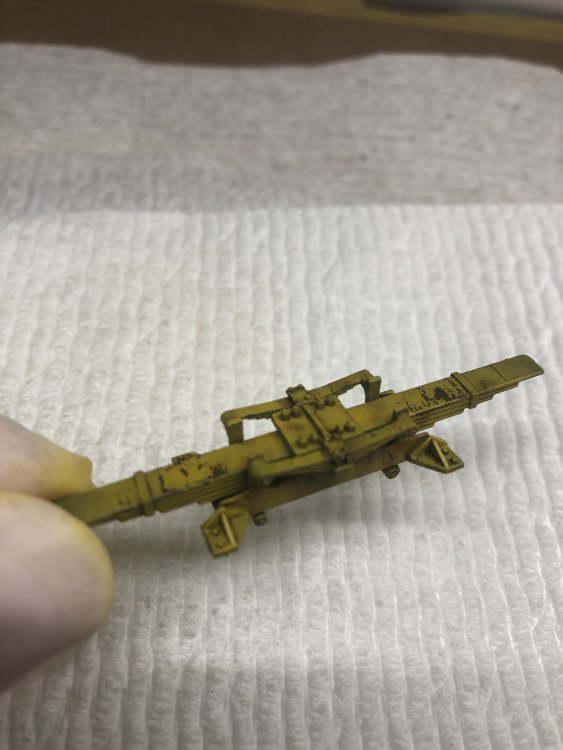
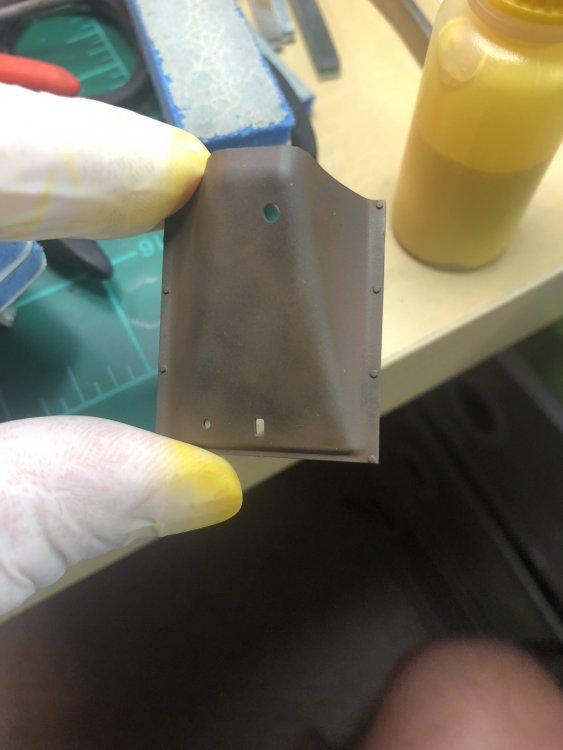
I had started to use Cadmium-Barium yellow deep oil paint in some areas. It tones down the yellow a little bit. I used it on the back of the seat lip and the cap. Not sure if it is noticeable in the picture but you can see a difference in person. Plan on using different shades of yellow oil paint to give it a faded and worn the picture I basing my color on was this one which is a brighter yellow but I do see others with a more orange look to the yellow. I love the discussion. Looking forward to more feed back. anyone know the best method to get a faded/worn black seat? Thinking of dry brushing a lighter brown color.
-
Hoping the oil paints I will use tone down the yellow some.
-
The plastic is not bad. Sanding is good but there is just so much of it due to the spruce gates. I did the chipping but I did not want it rusting, just used and worn Most of the painted parts have a clear coat. I like using Alclad Aqua gloss clear. If you put down thin layers it looks more like a satin or semi gloss look. Time for the washes and oil. Going to use different shades of yellow oil paint to get a faded look. We will see how it goes. Some more updated photos.


-
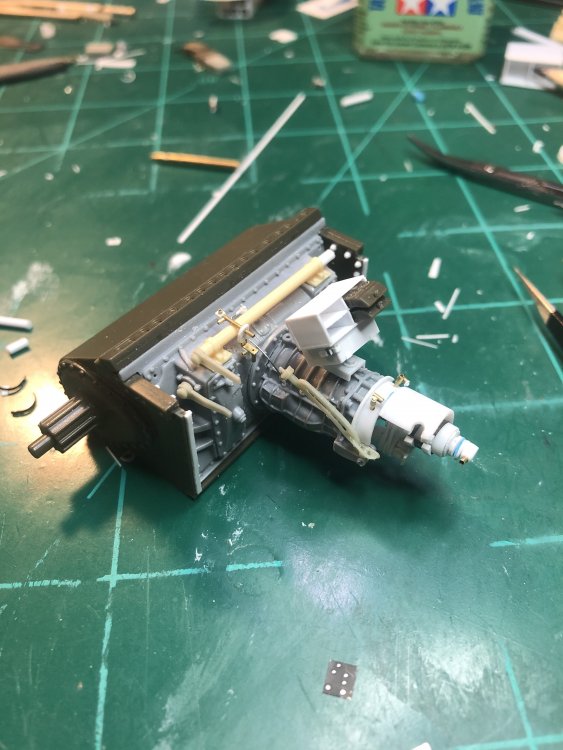
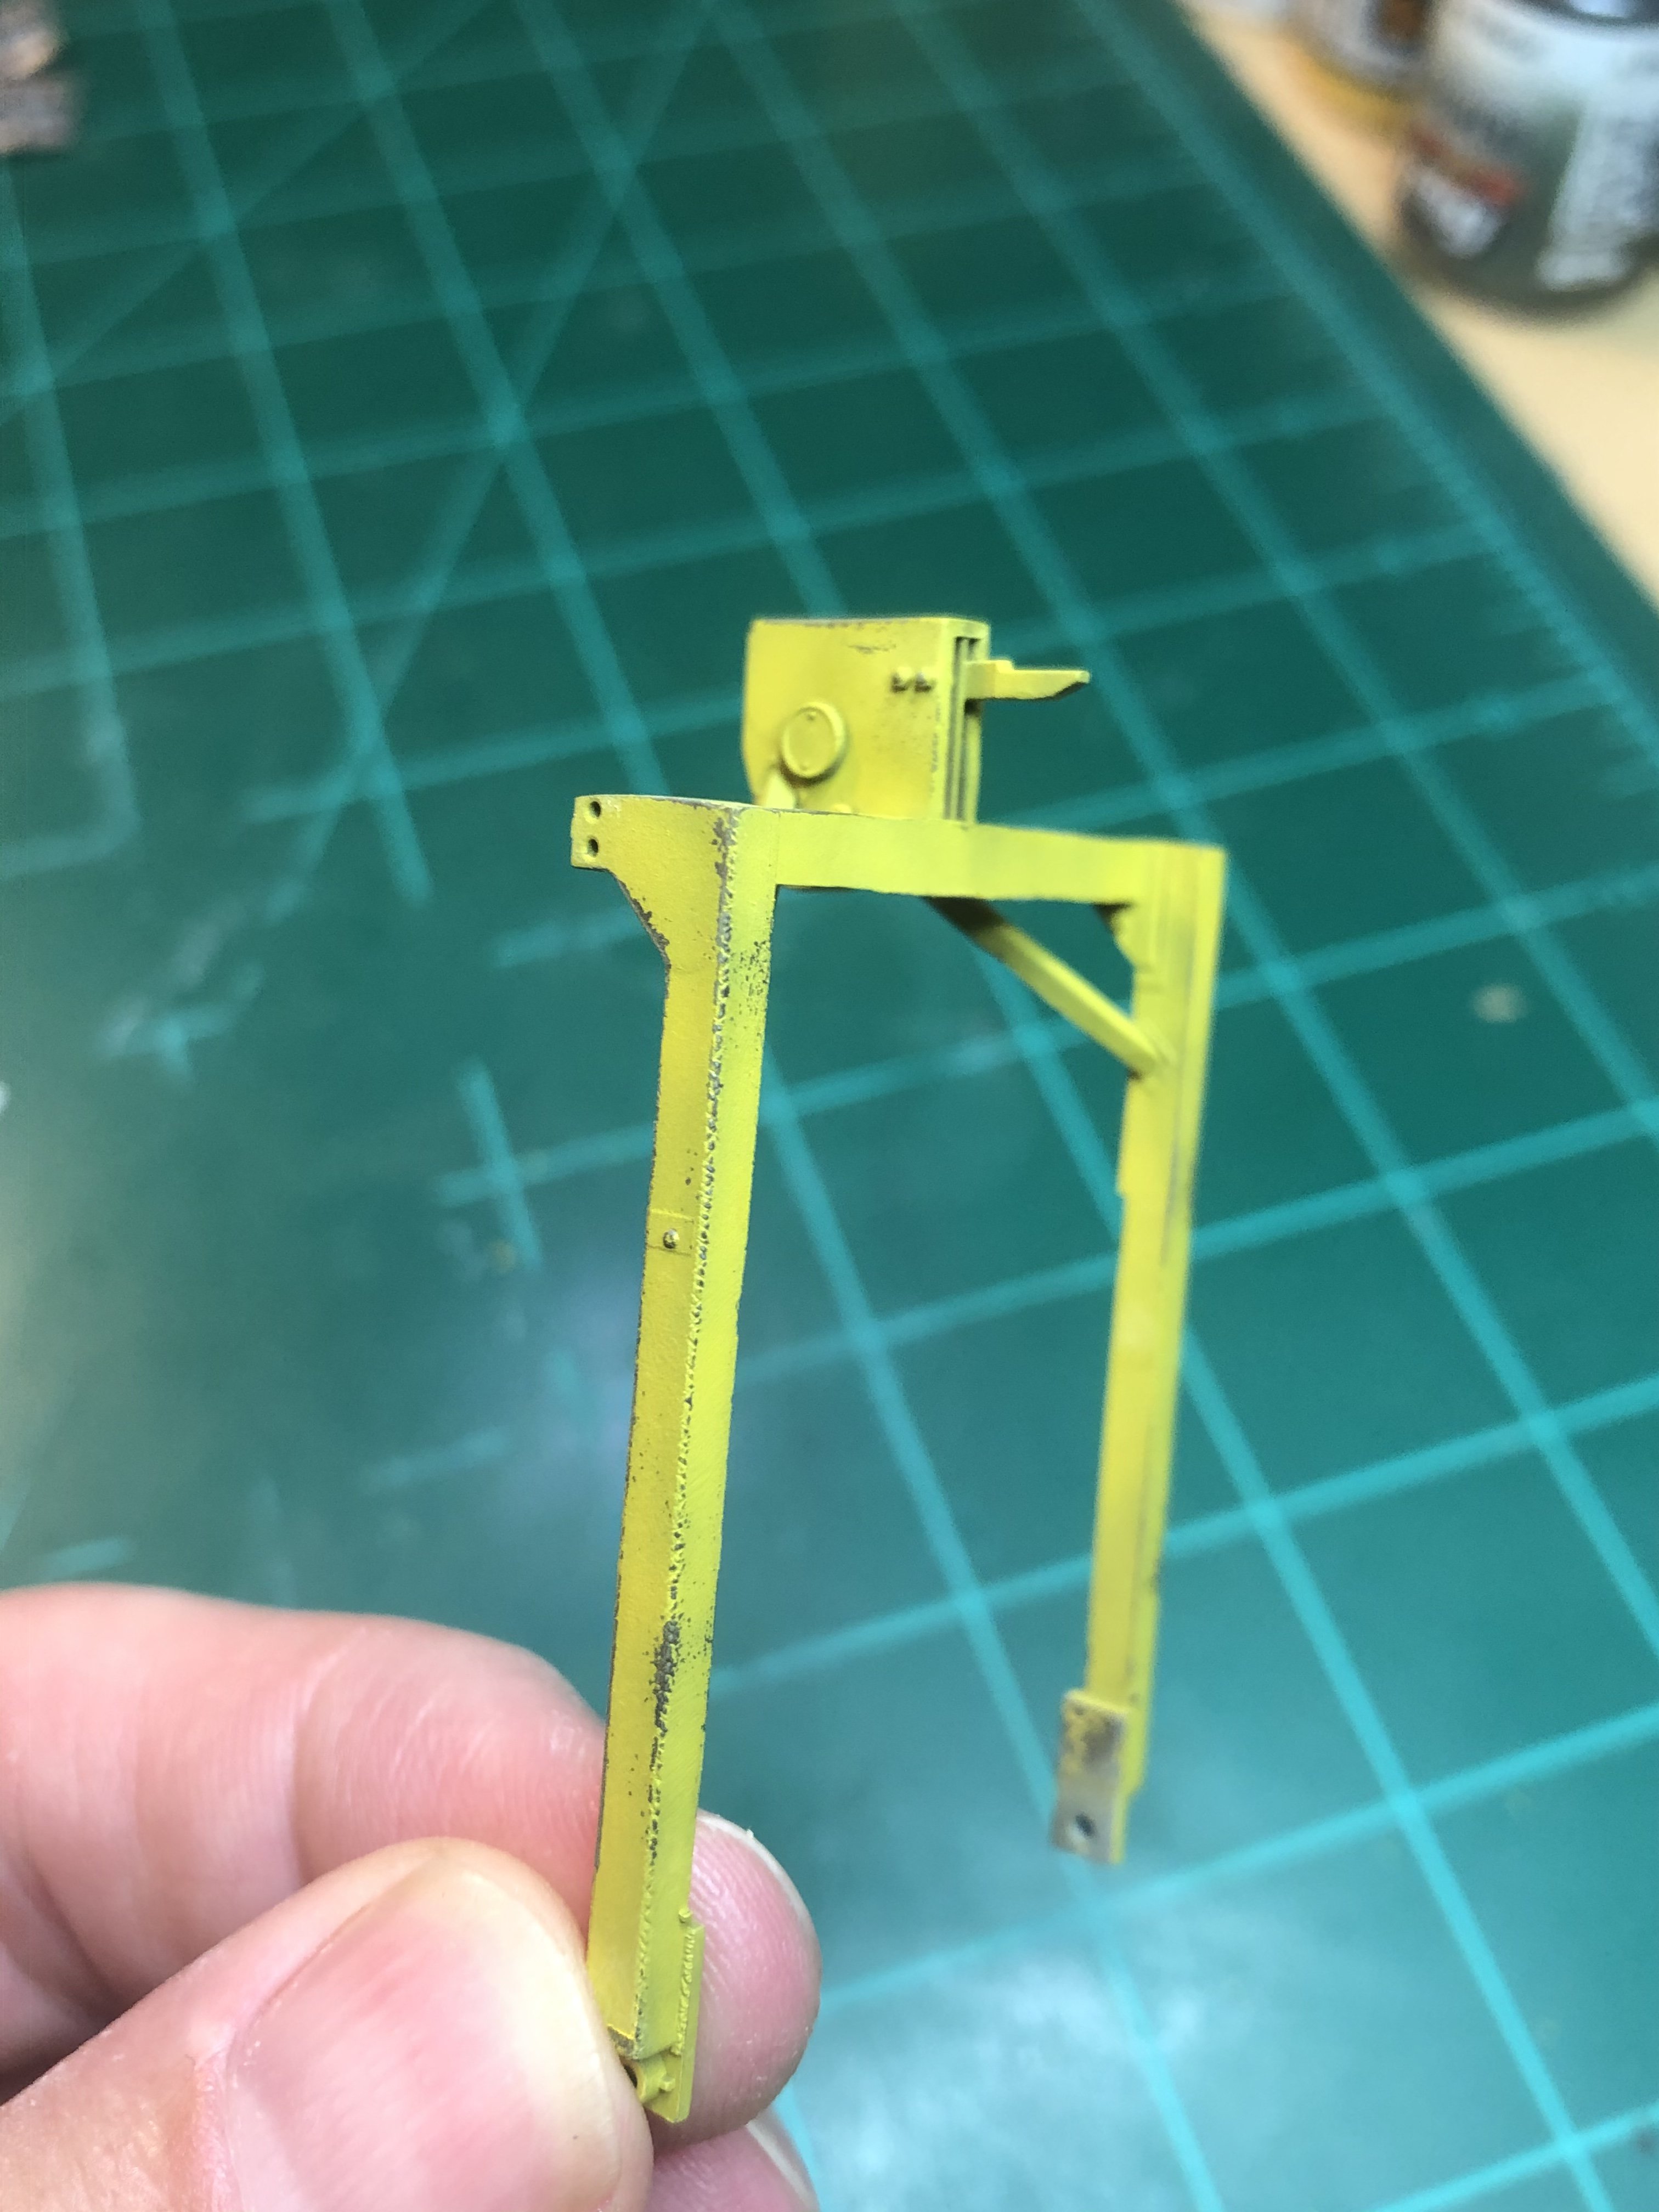
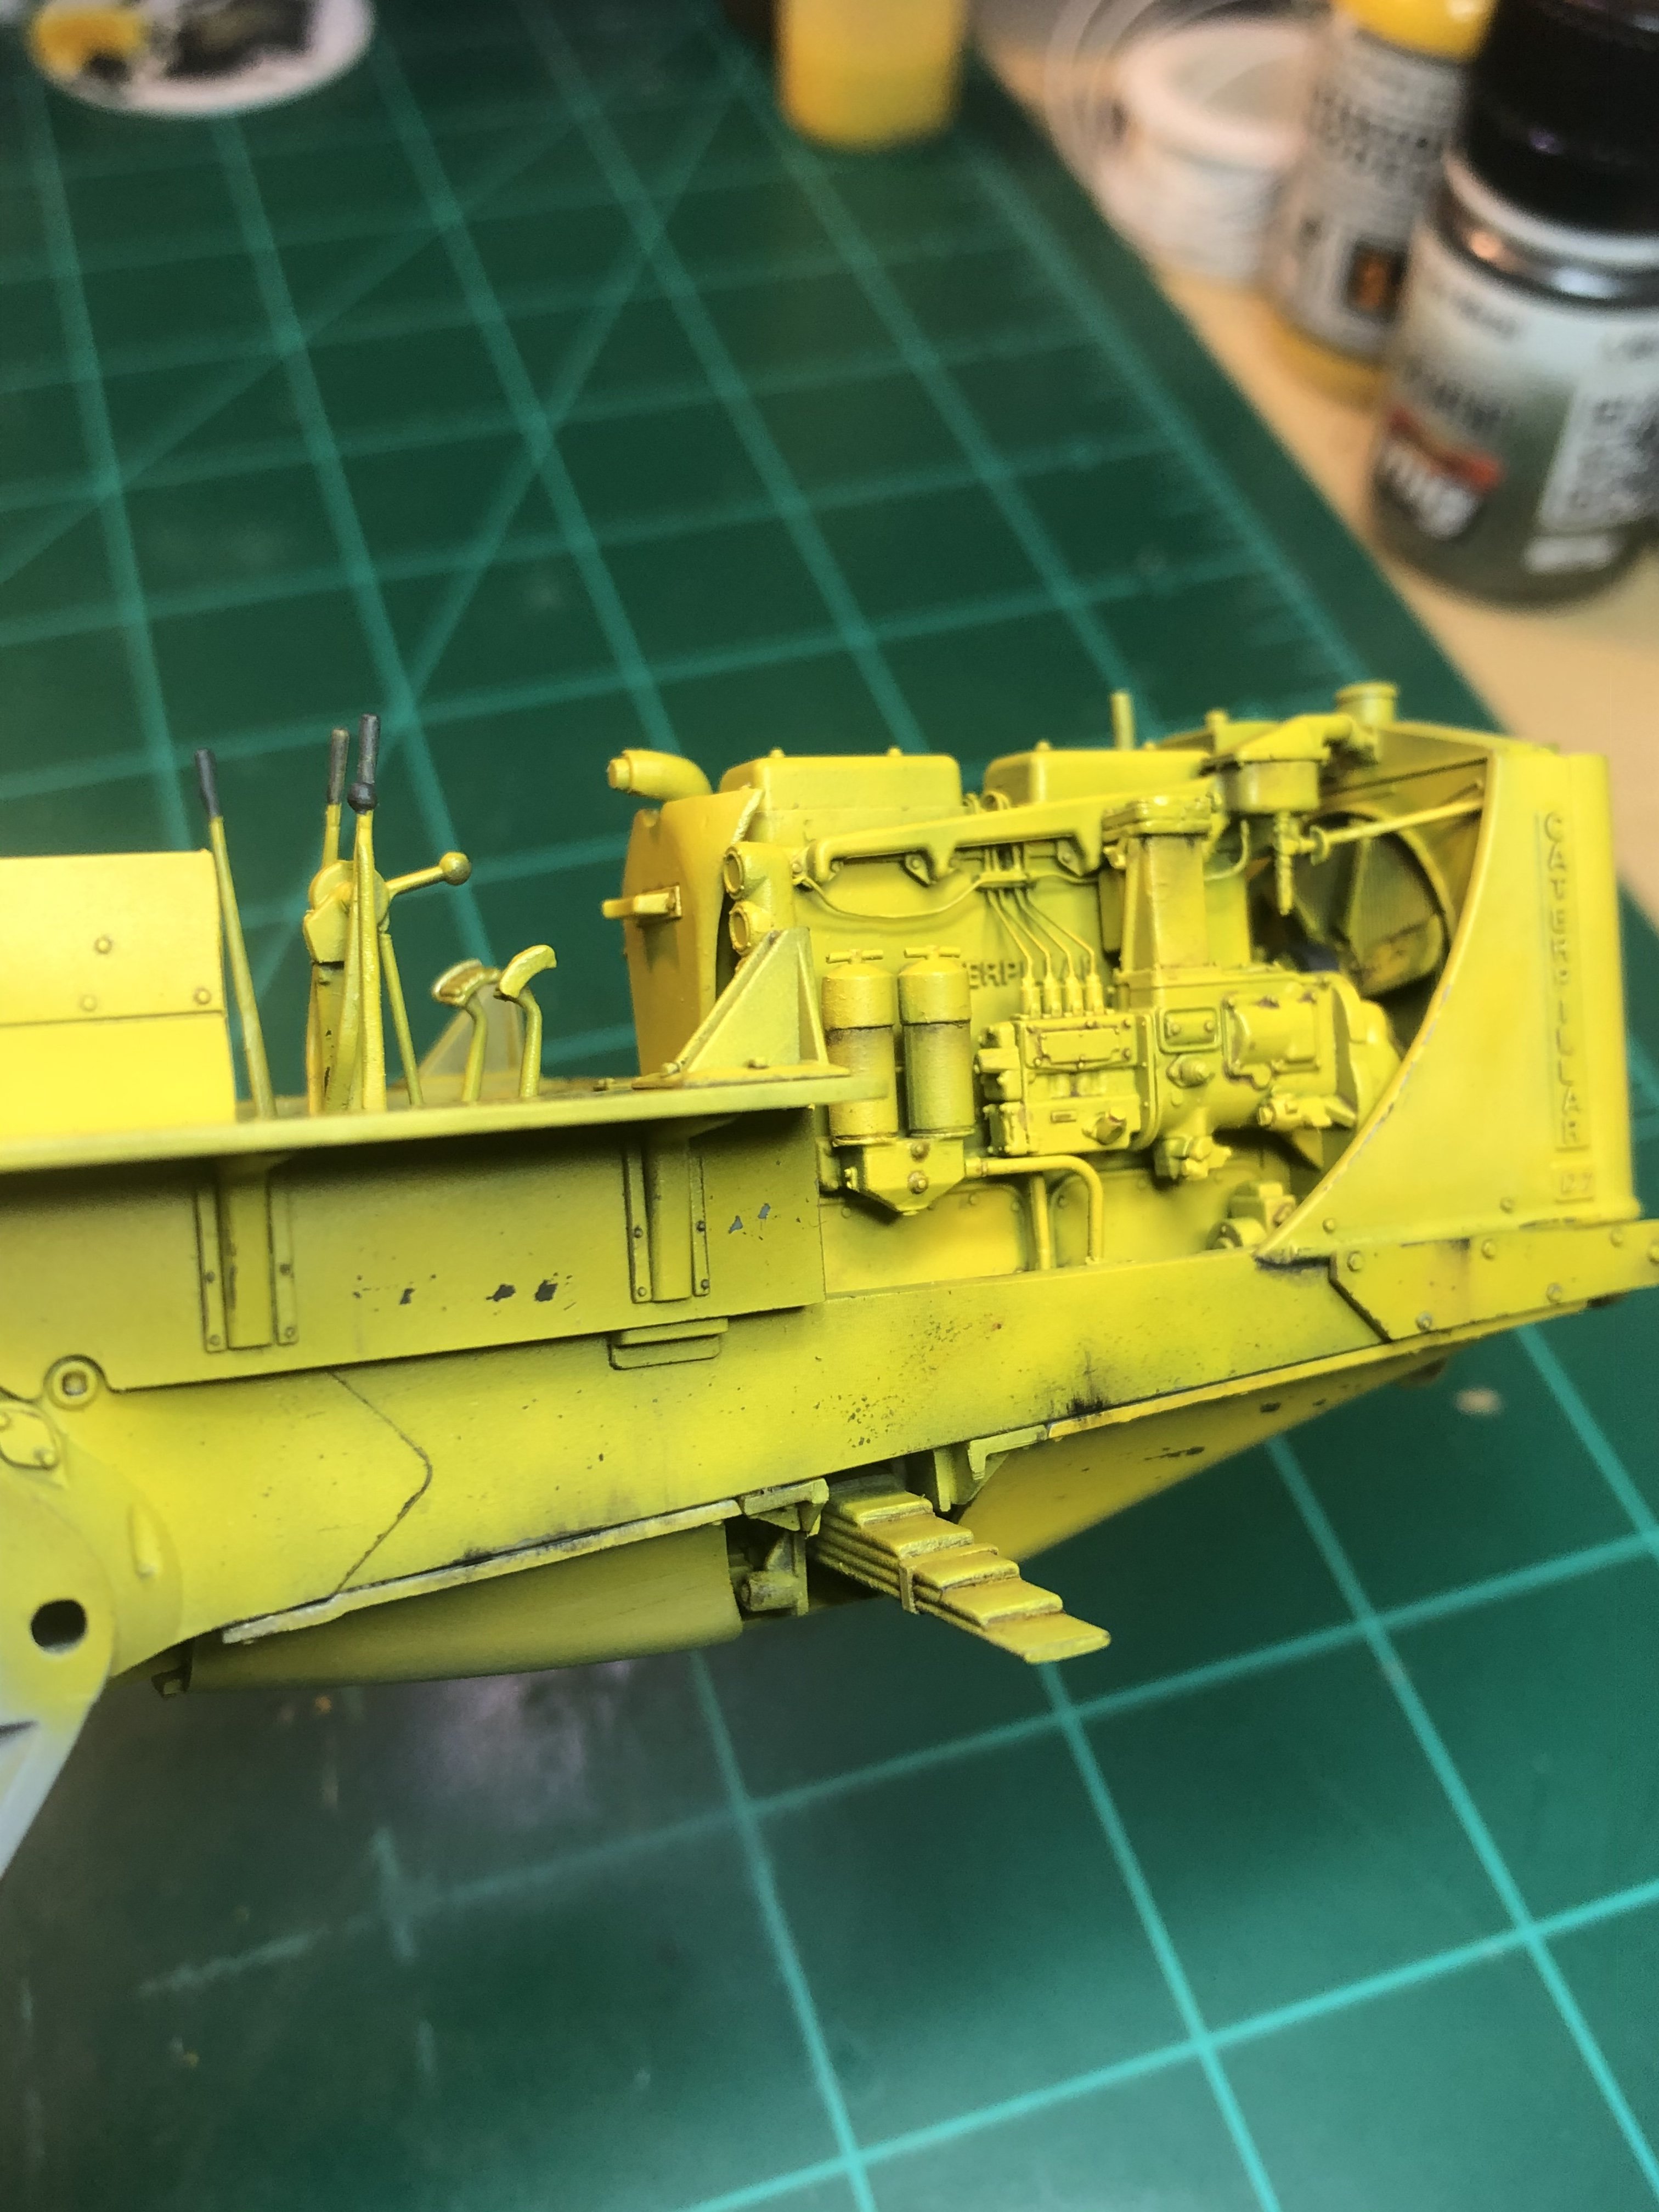
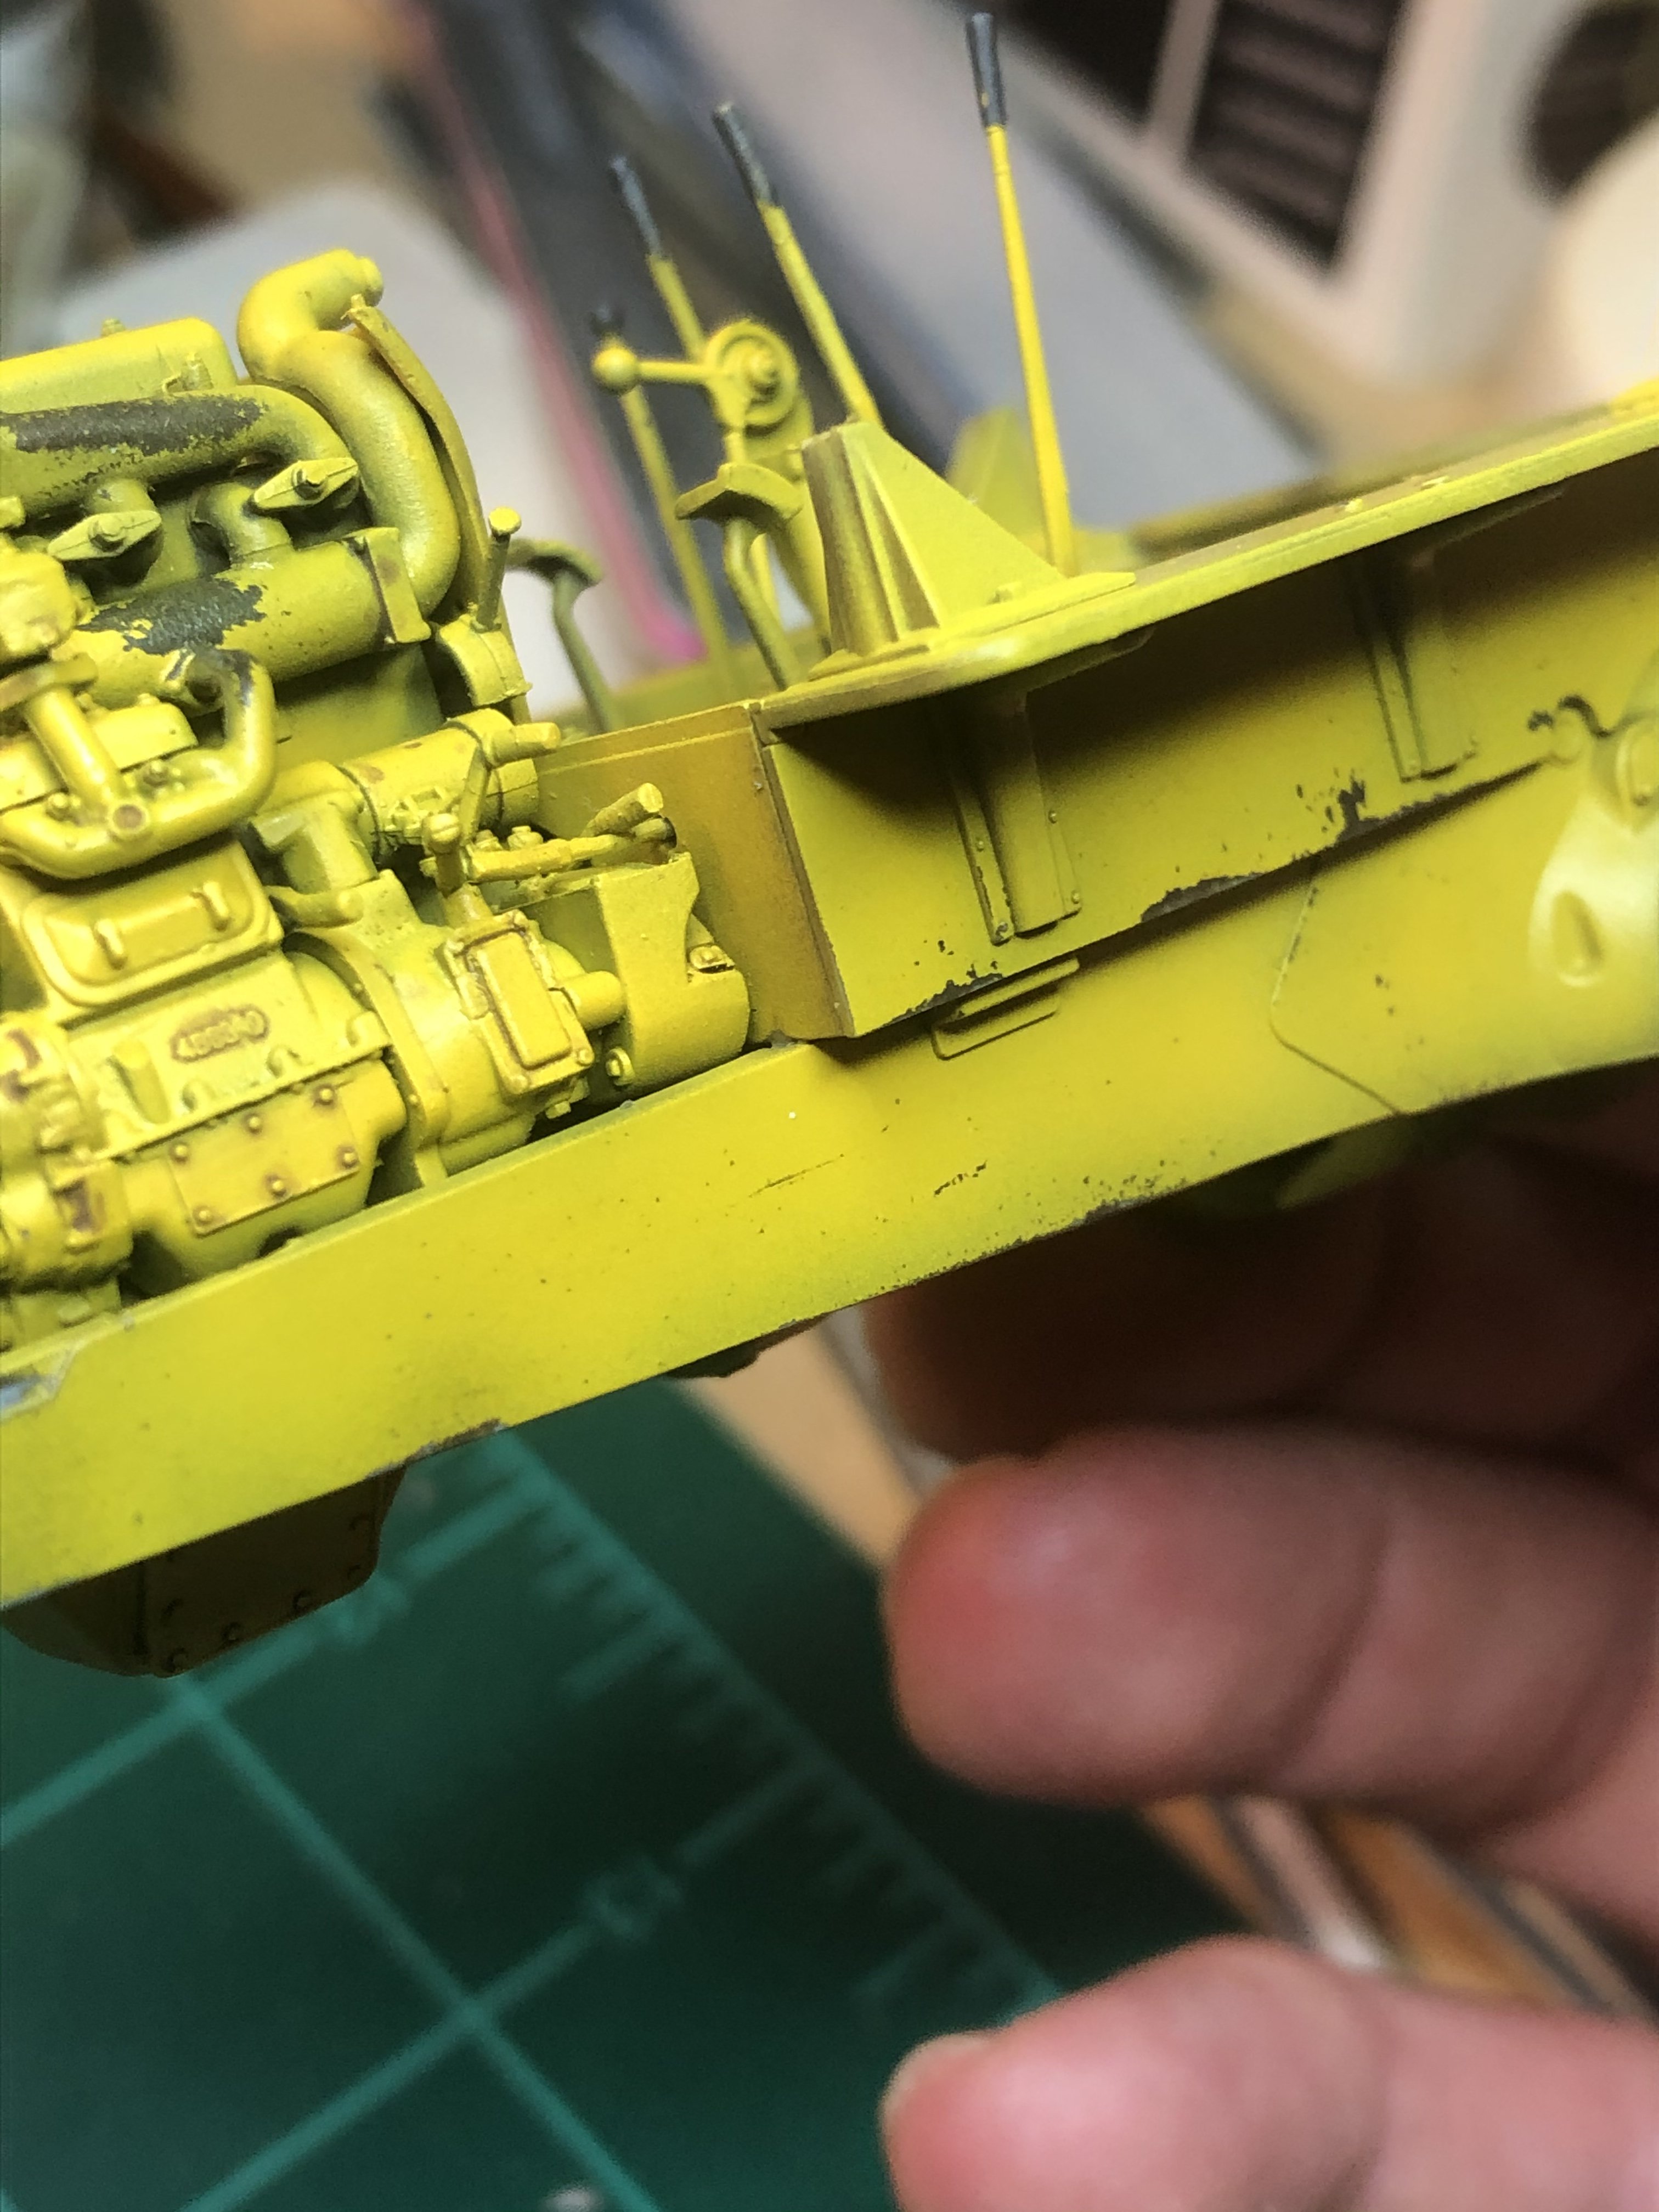
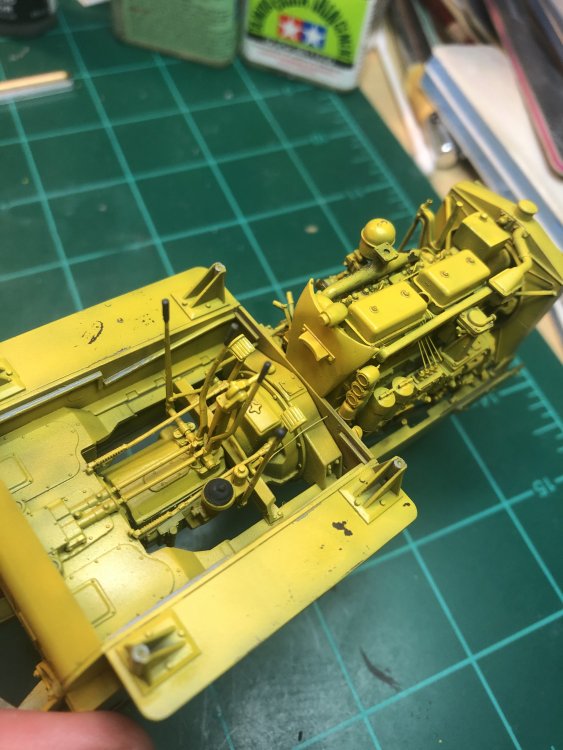
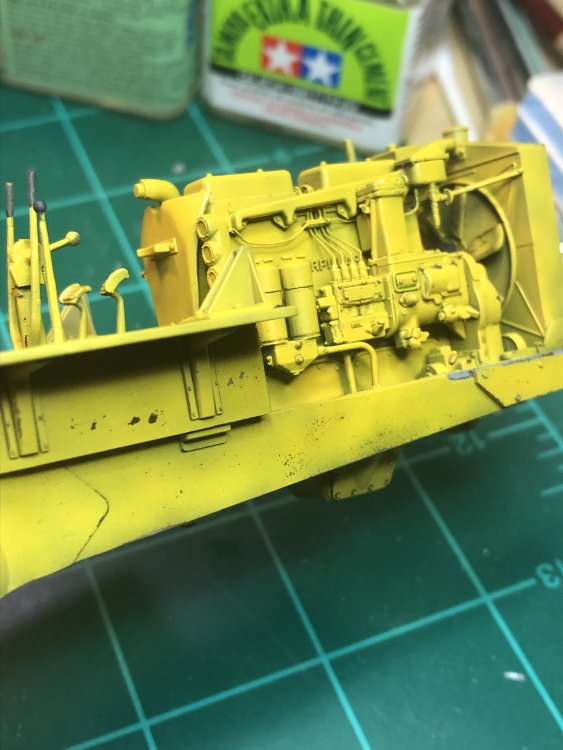
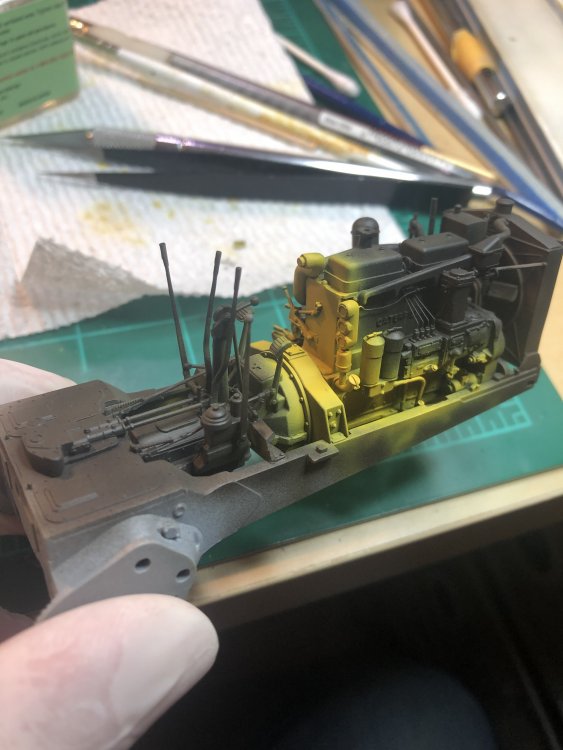
Most of the engine painted. Did a little chipping, especially the fan, but did not want it heavily chipped around the engine but will build up dirt and grime. The only section I have heavily worn is the tow connection at the back with most to the yellow paint worn off. Basically, only had a very light coast of yellow is spots and then slowly removed it. I have progress and will update with more.

-
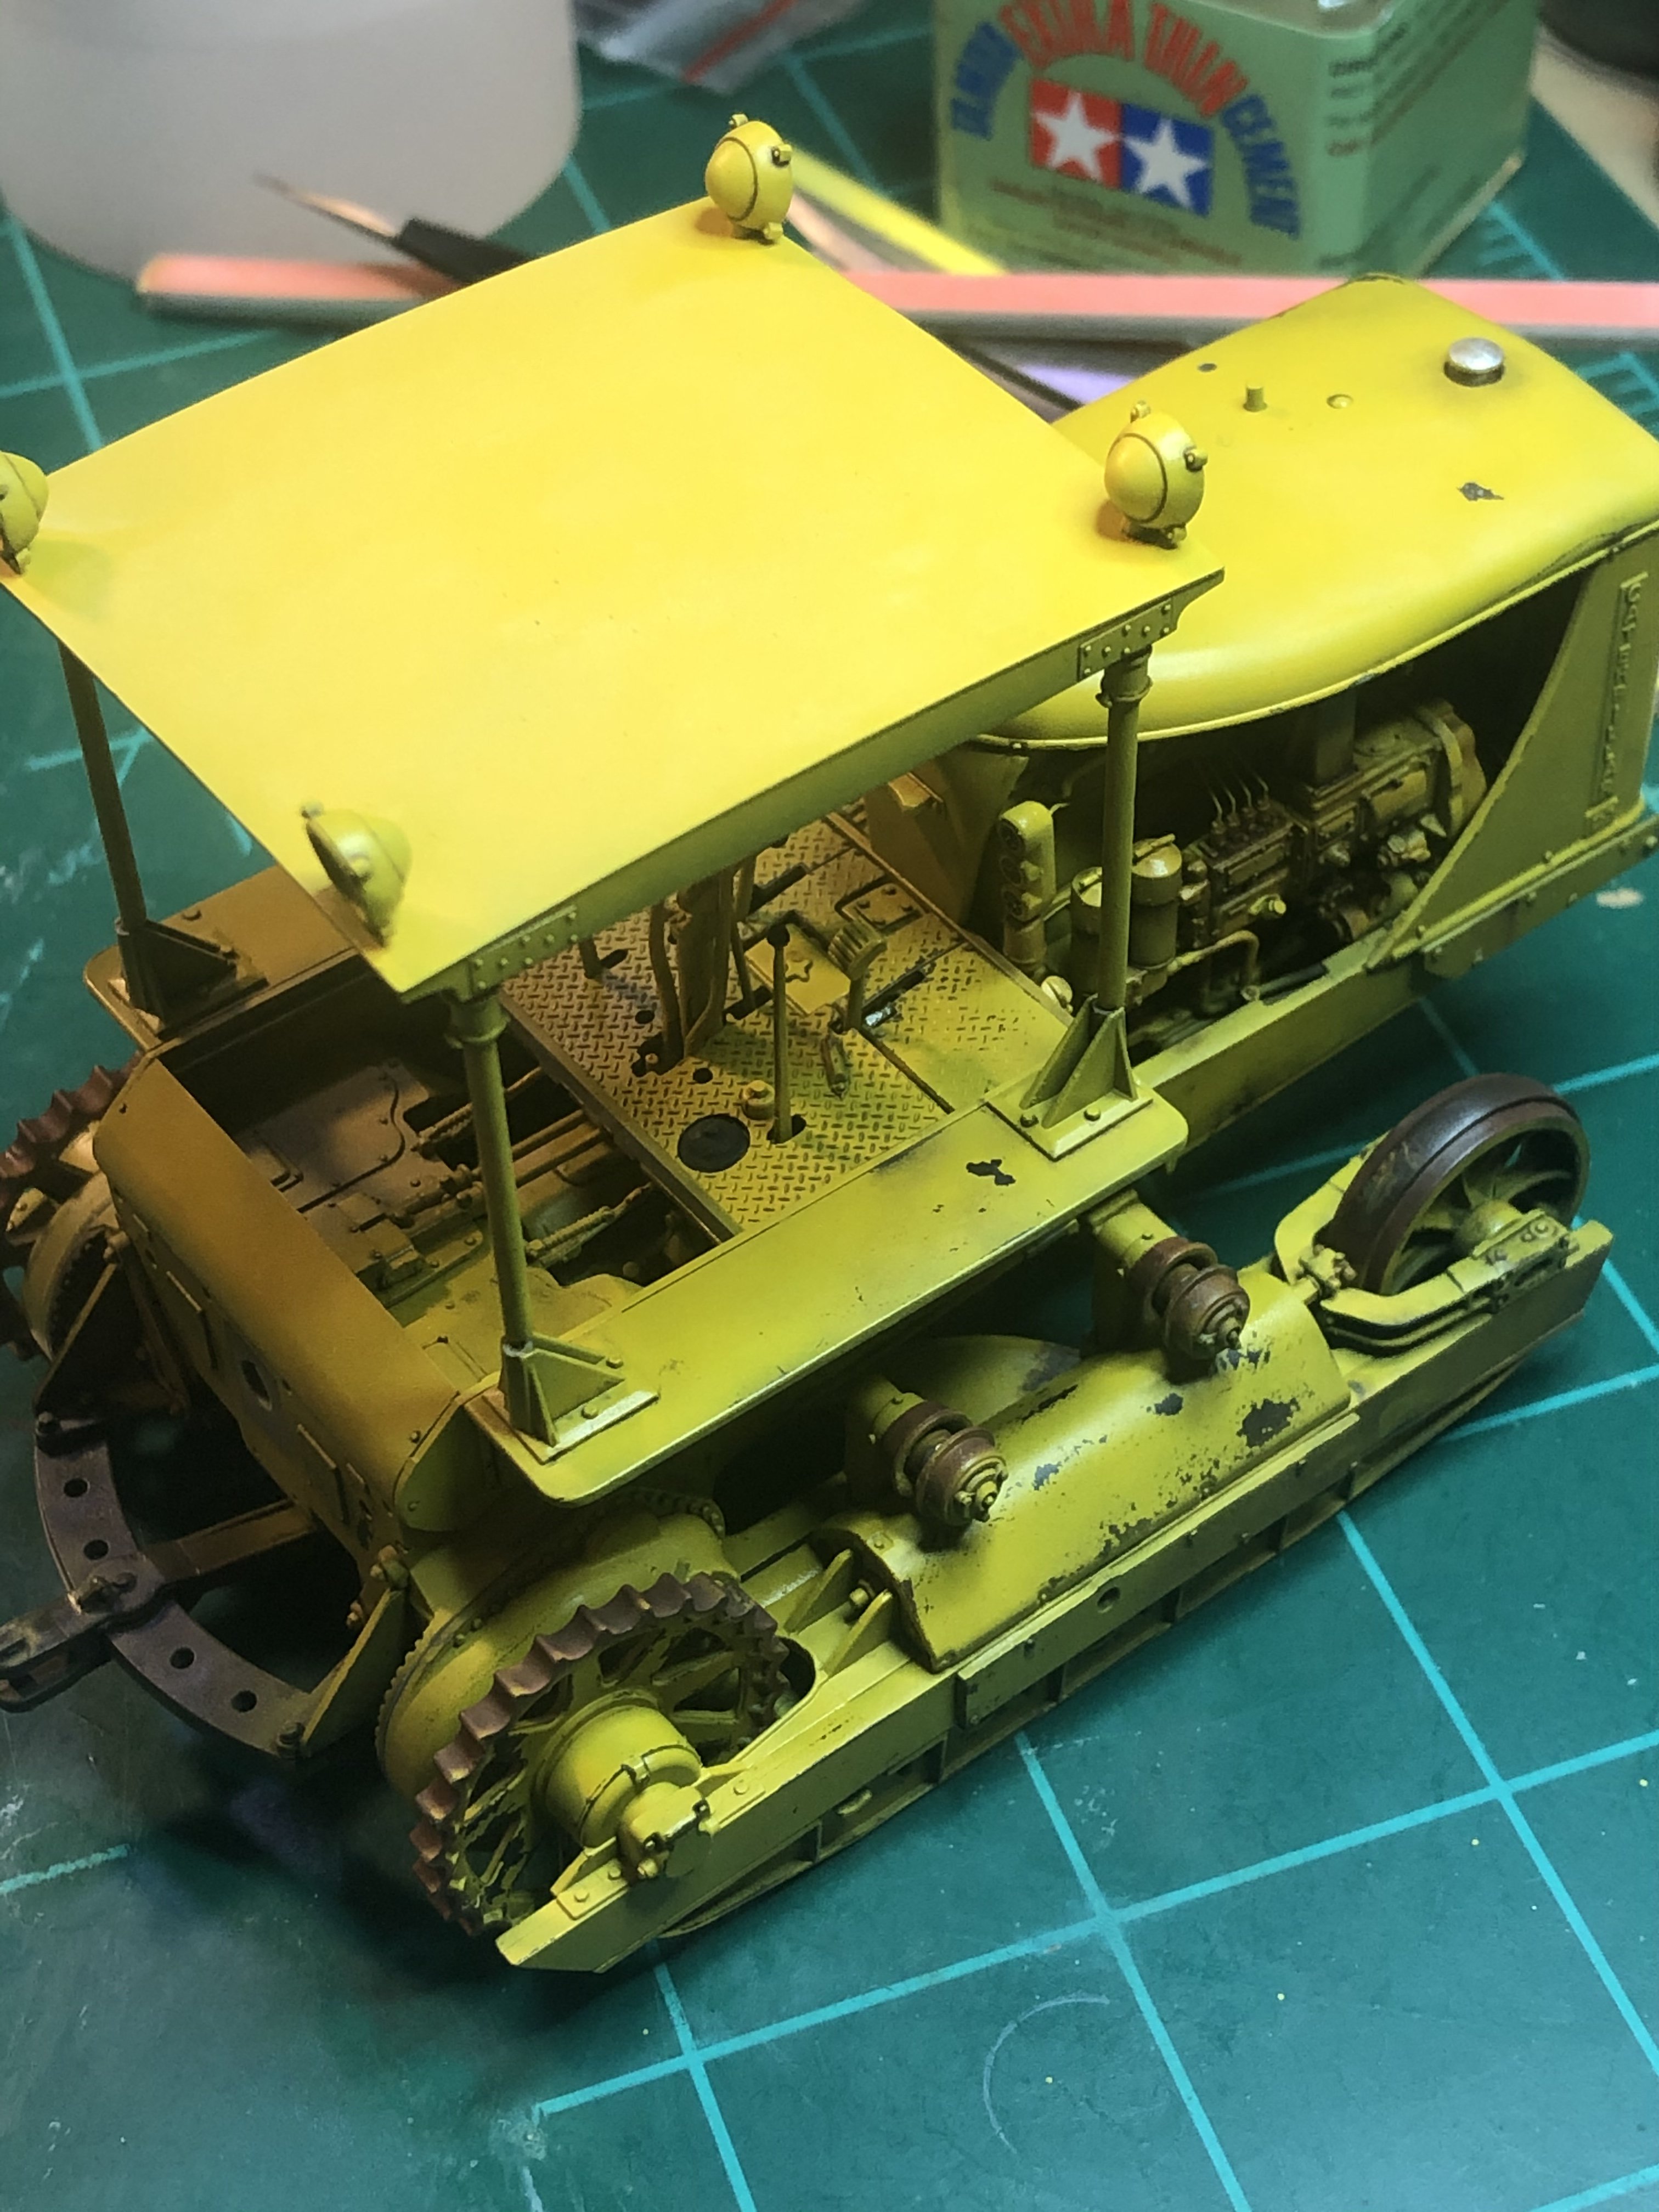
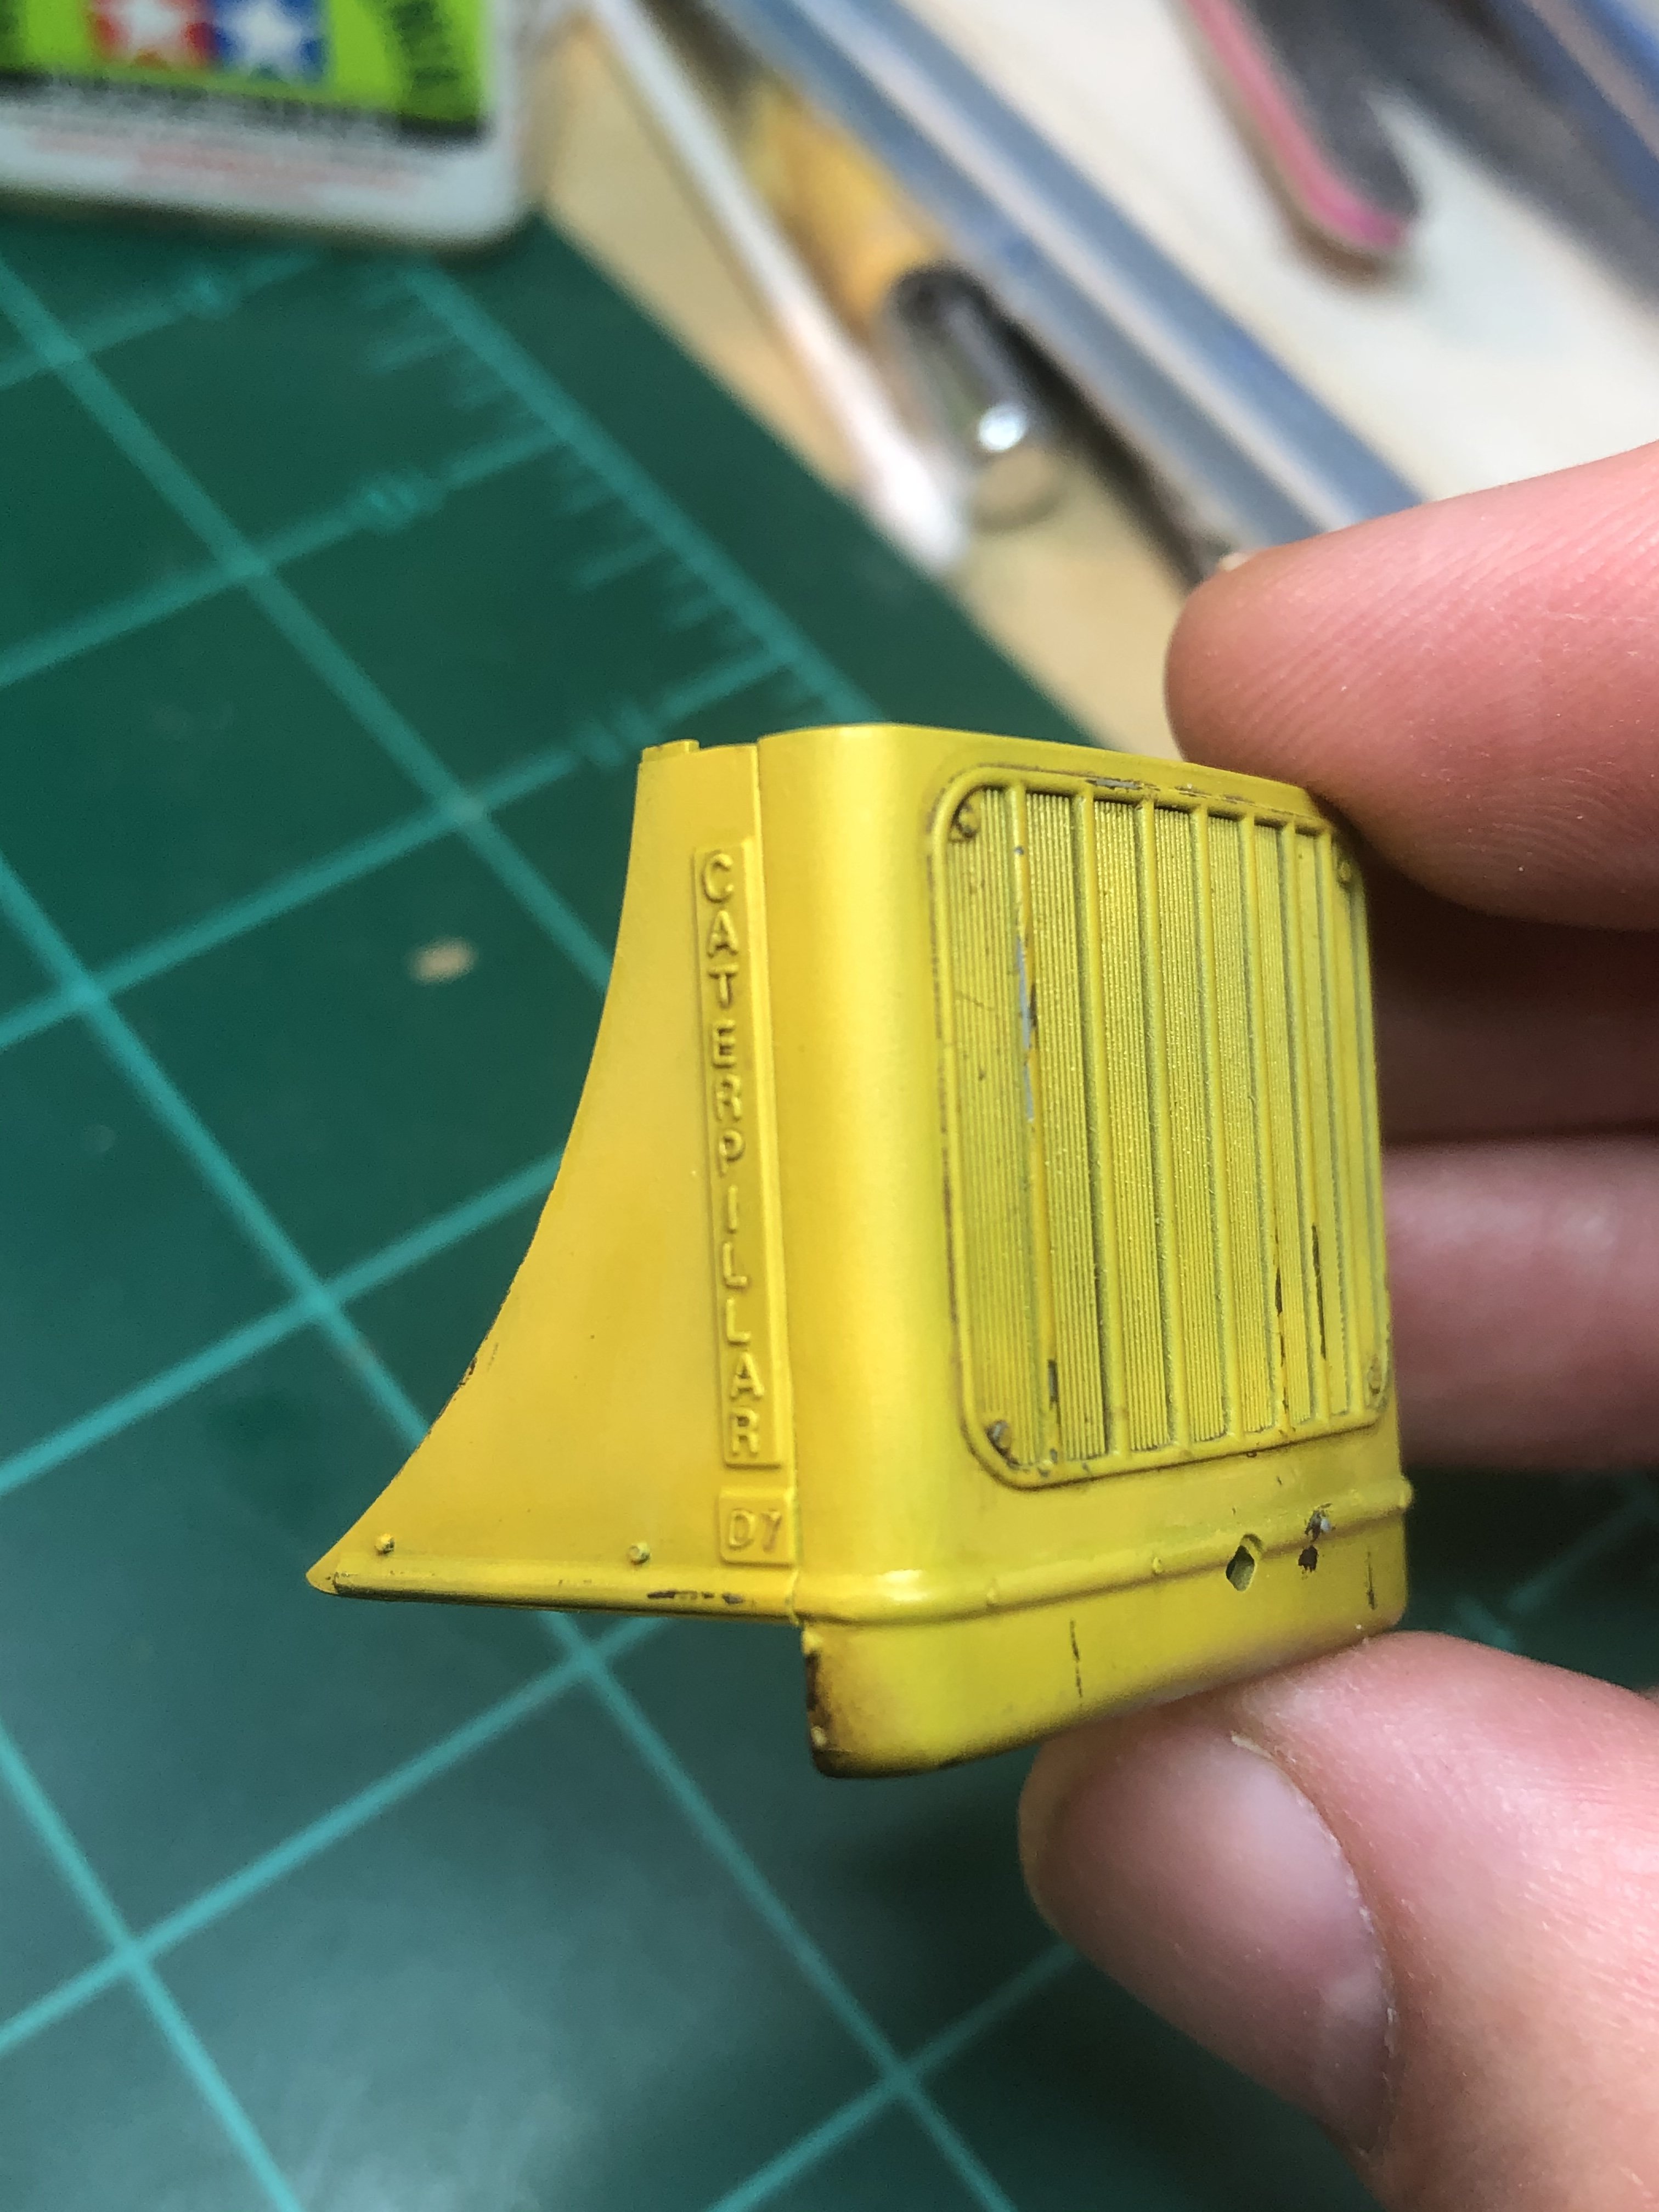
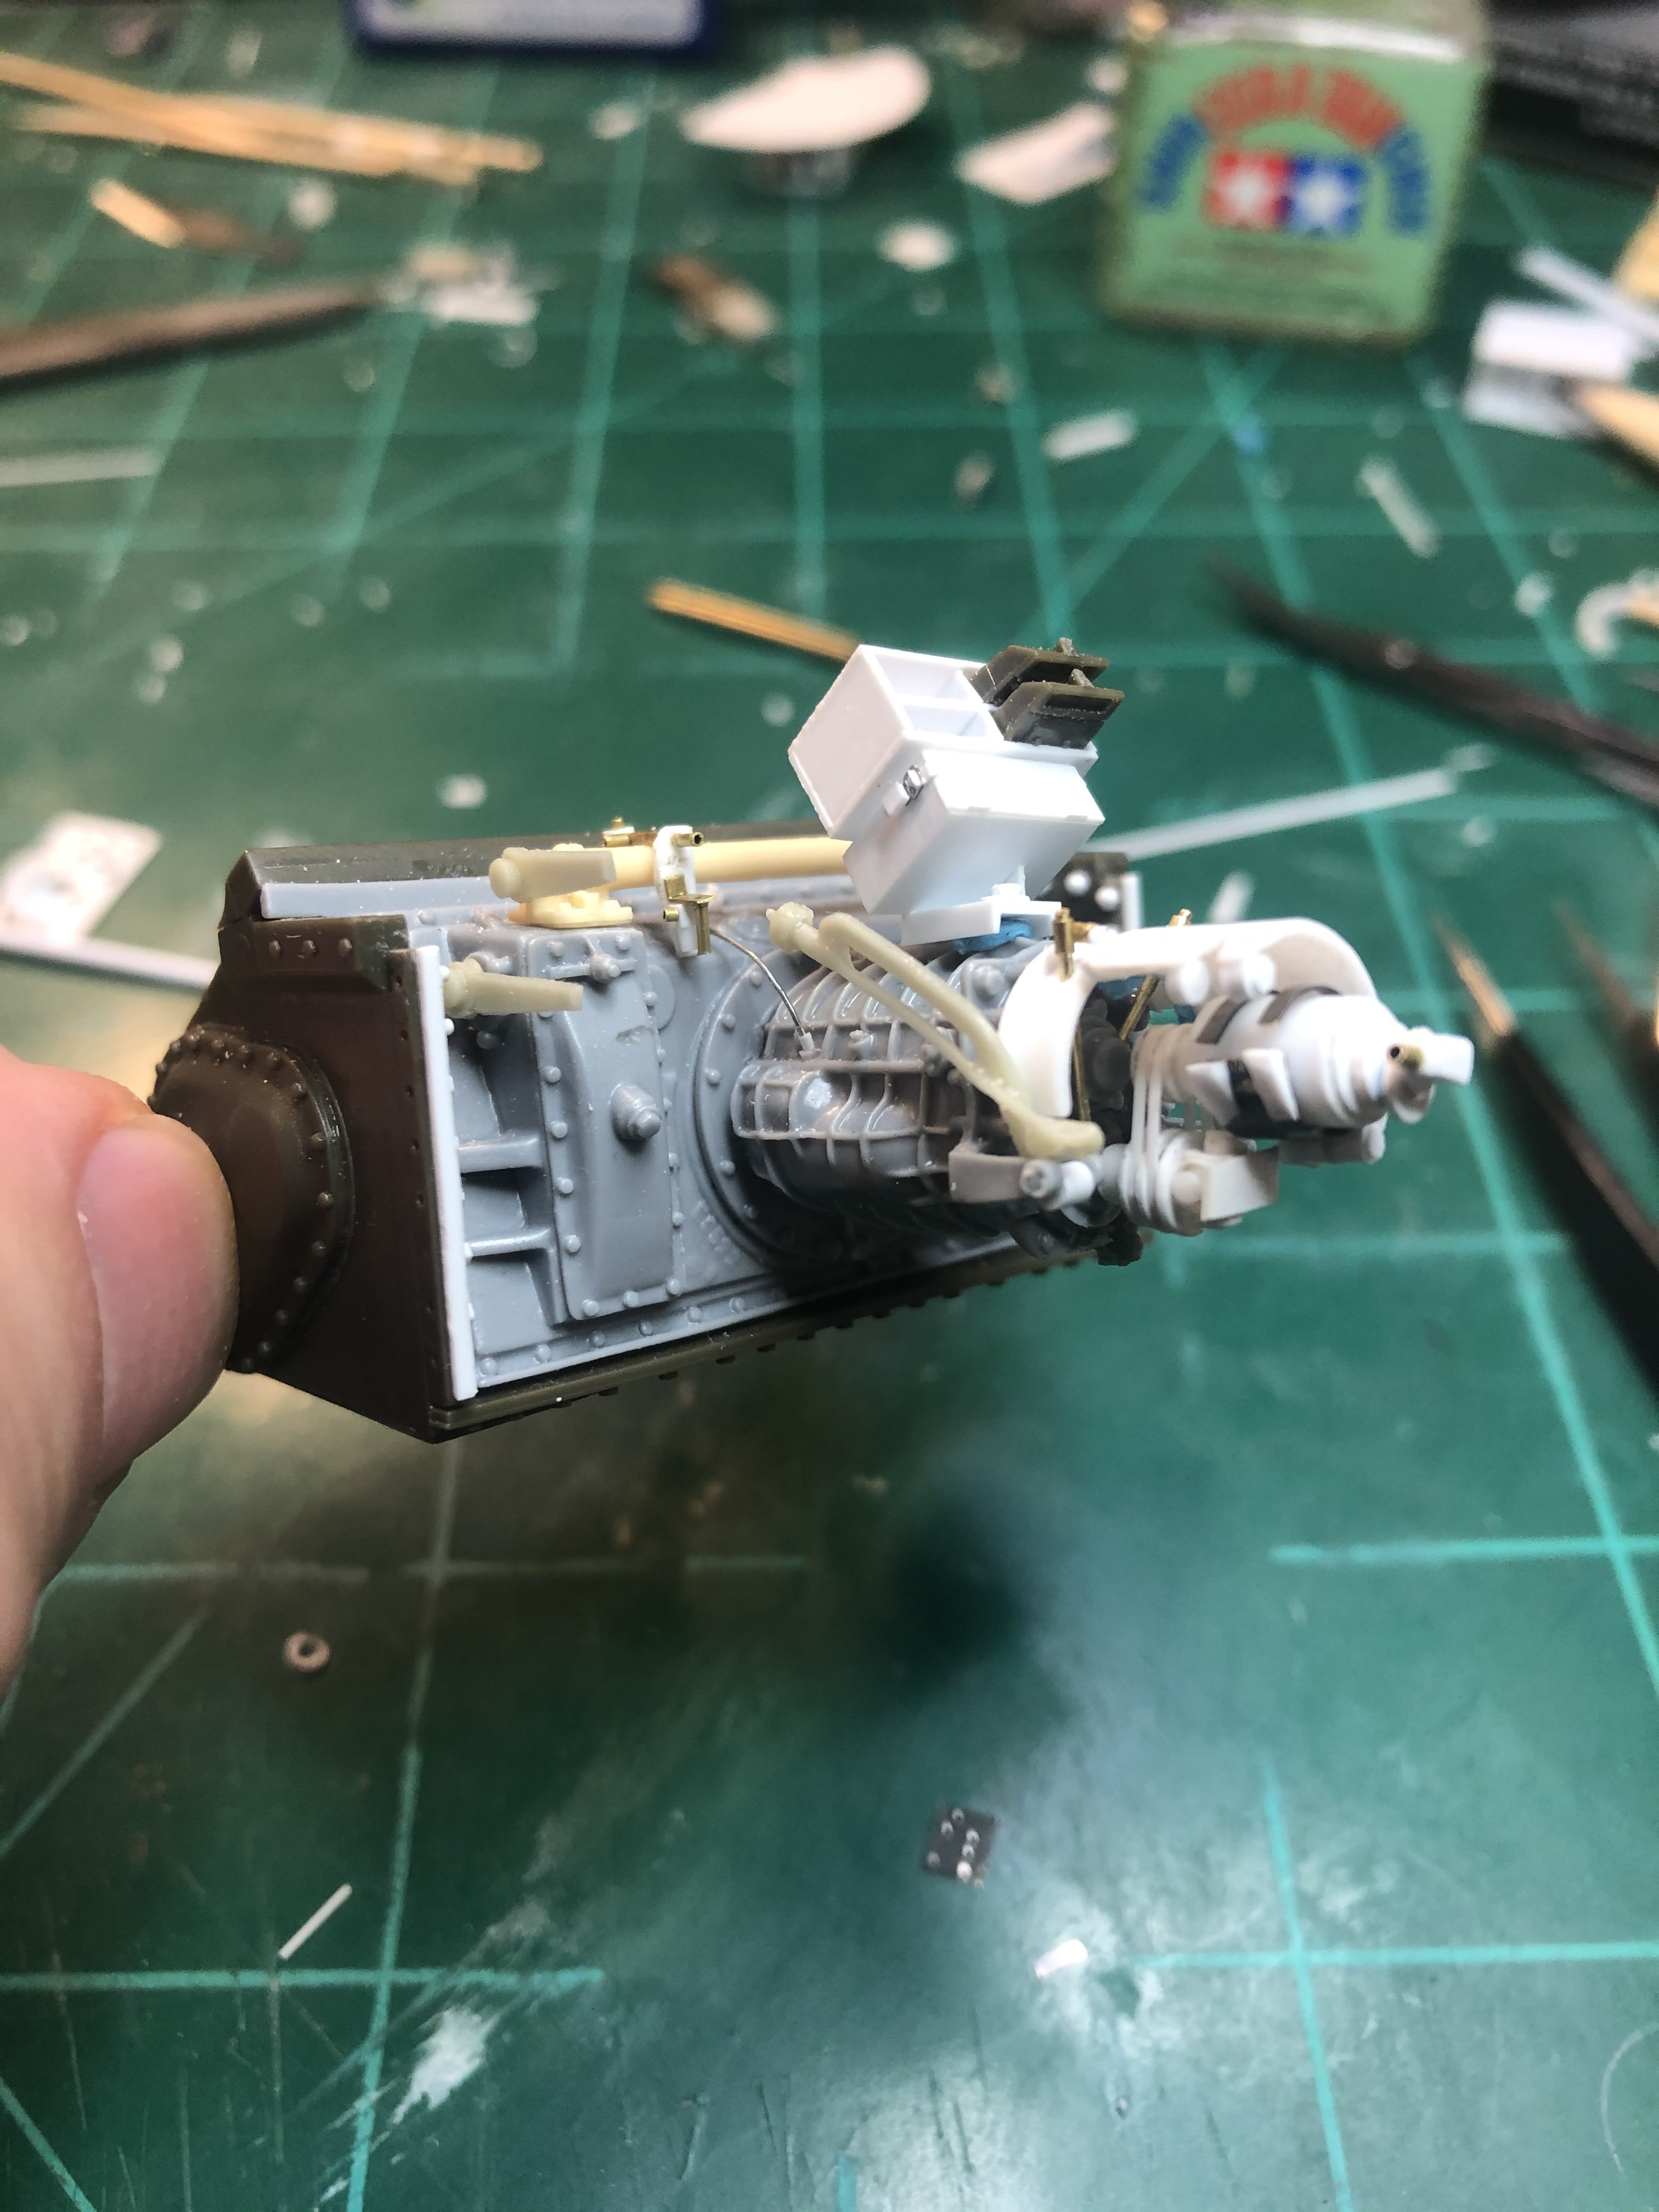
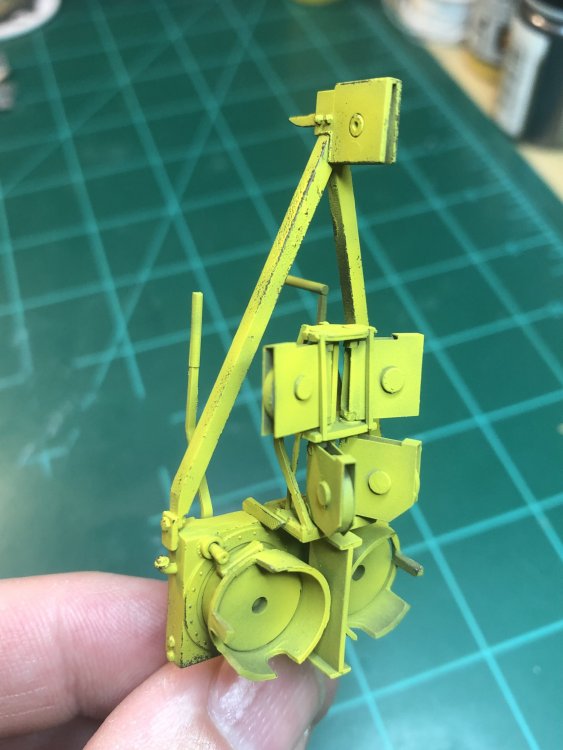
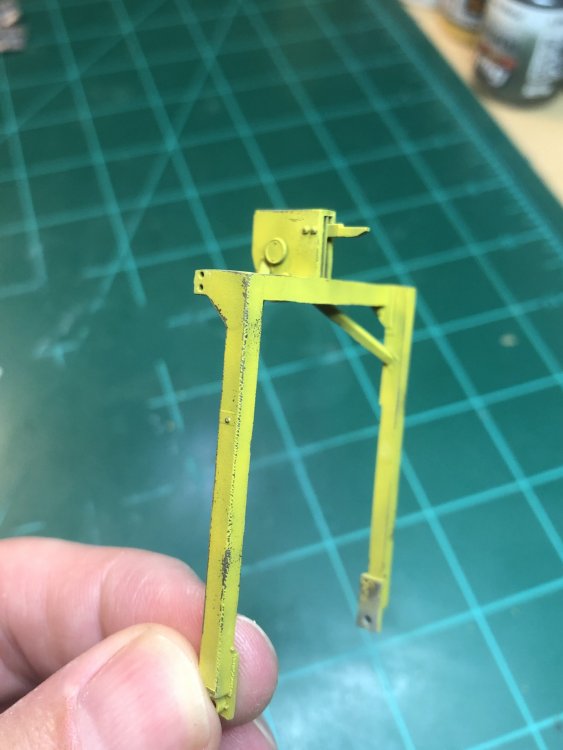
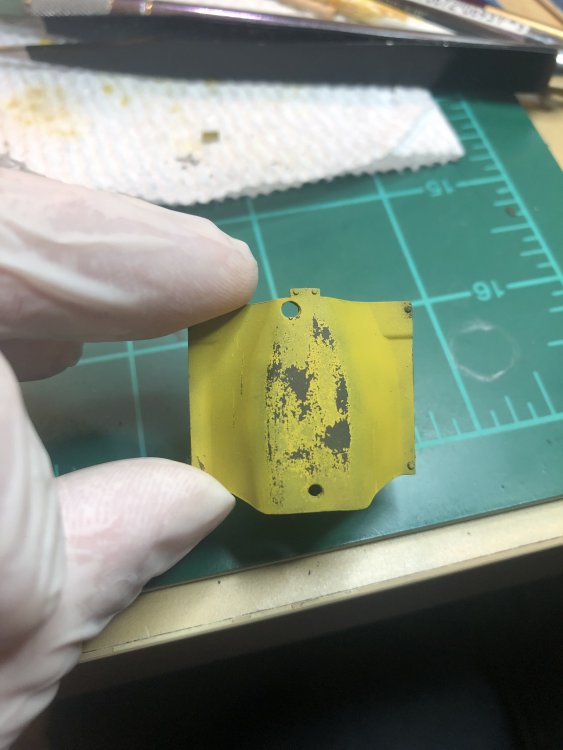
Now it was time for some yellow paint. and getting it into the small areas of the engine. Then started the chipping. The engine cover from underneath the bulldozer is chipped and worn figuring that would have the greatest wear. Also weathered the support bar/suspension. Not as chipped as I felt it would be protected some what by the engine plate.

-
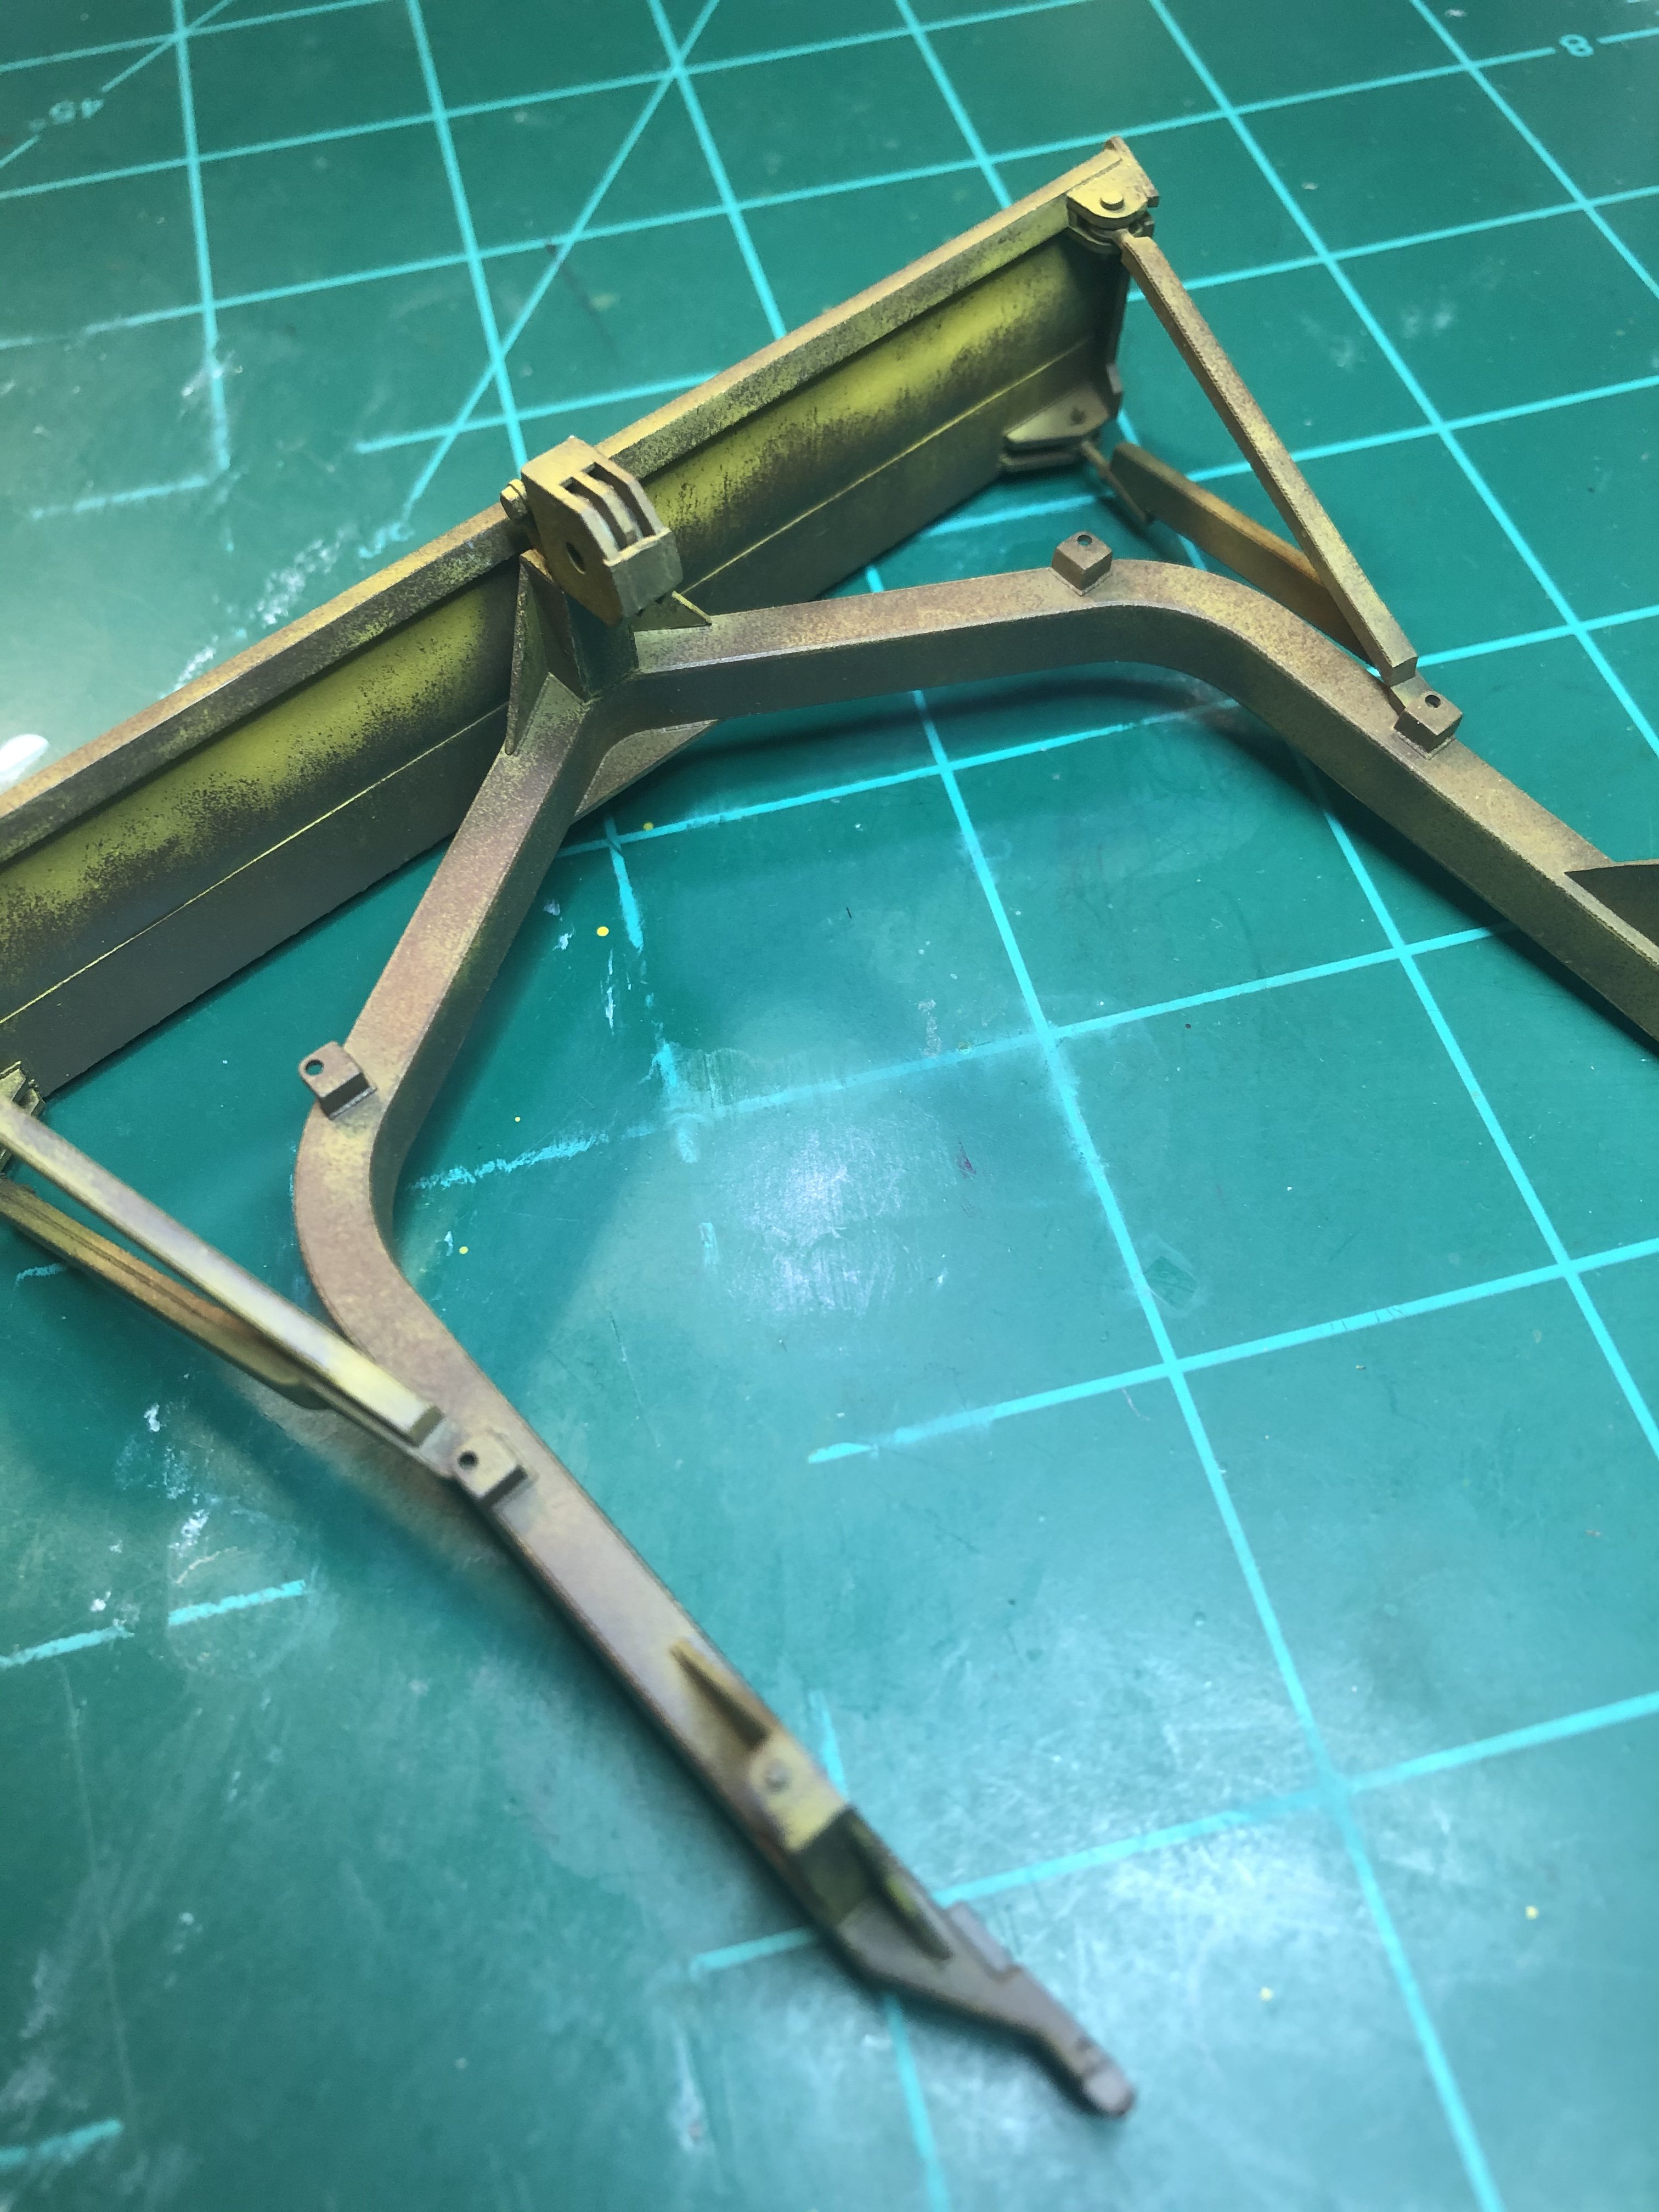
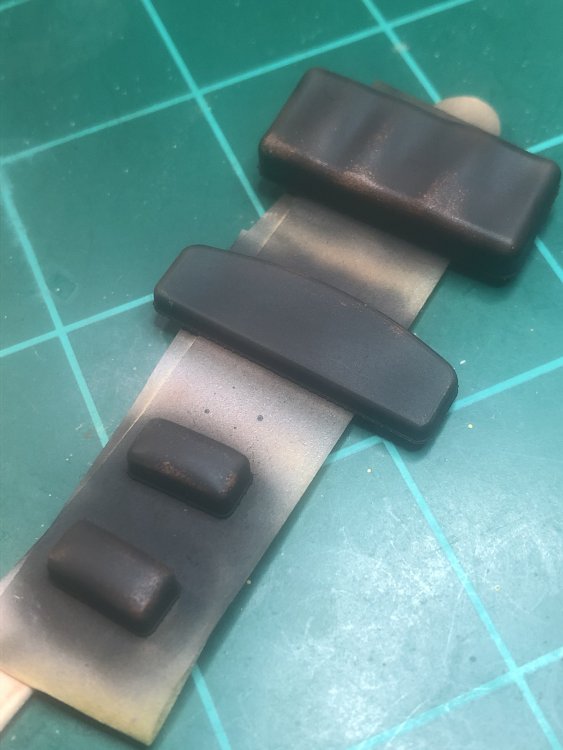
Started to add the base layer that will be seen after chipping. Used a combination of red brown and black mix as well as straight red brown. You can see it on the track assembly and engine plate cover (bottom of the bulldozer). Once sprayed, I put a coat of AK interactive worn affects.
-
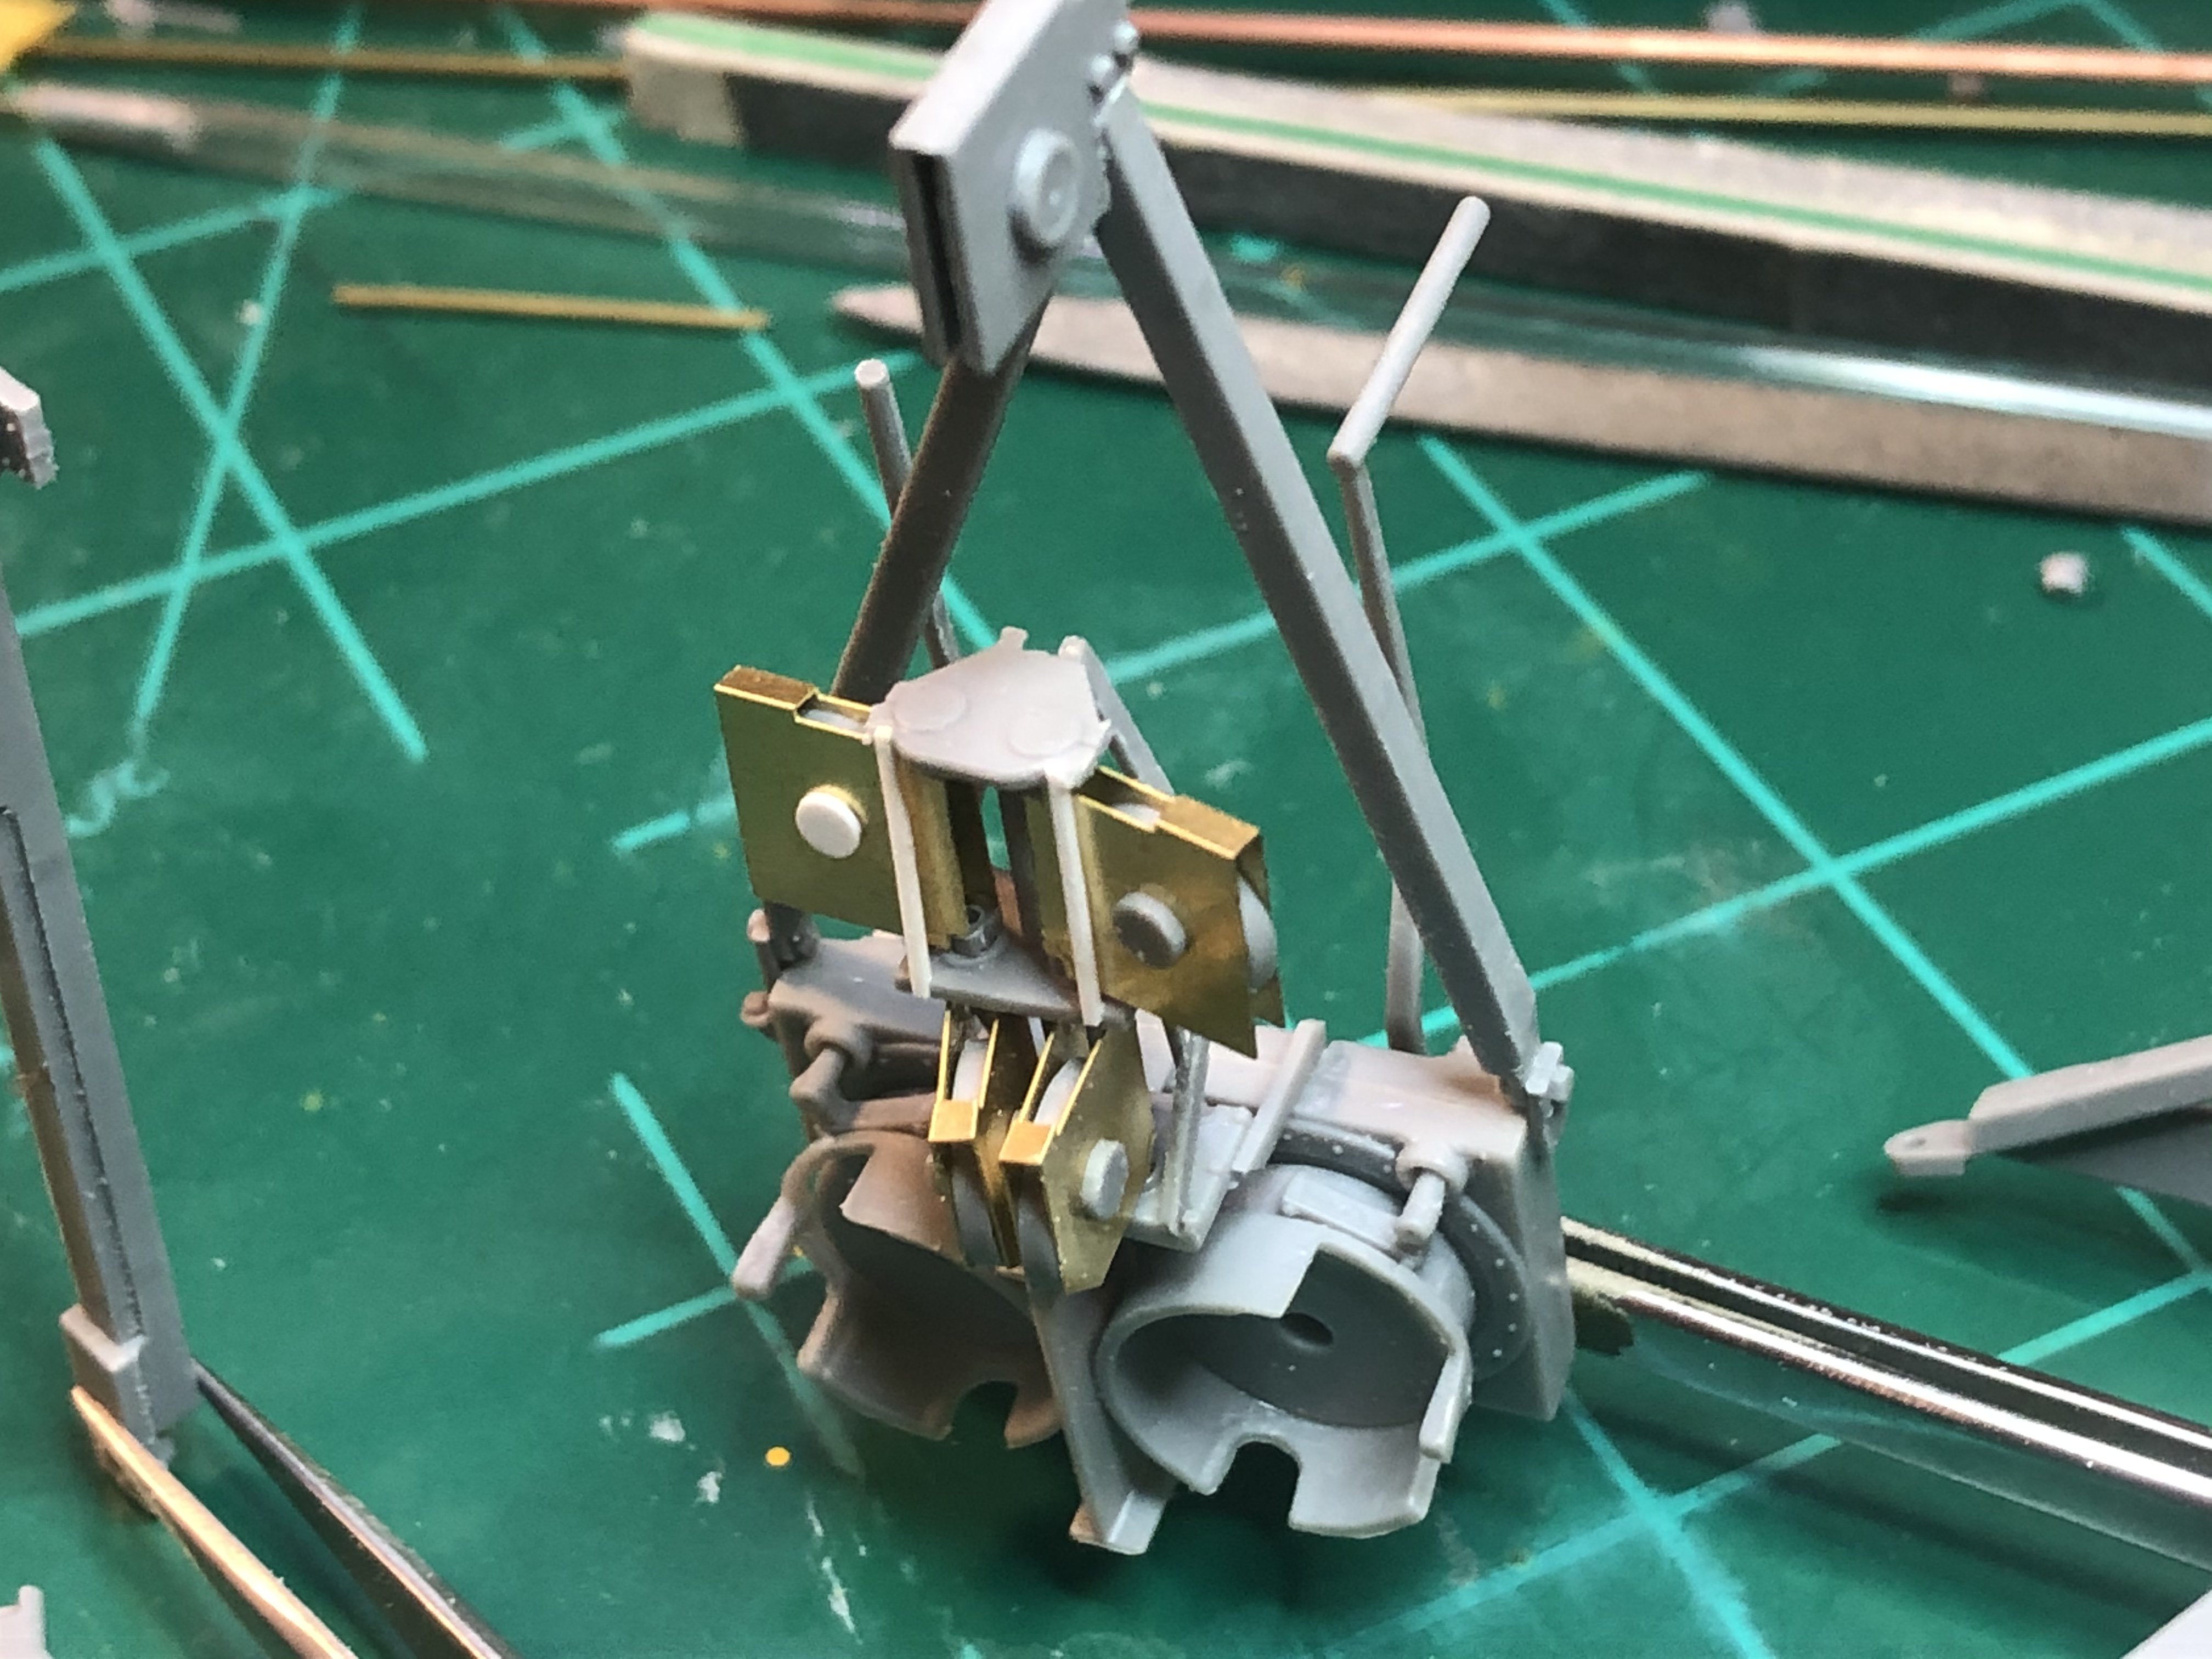
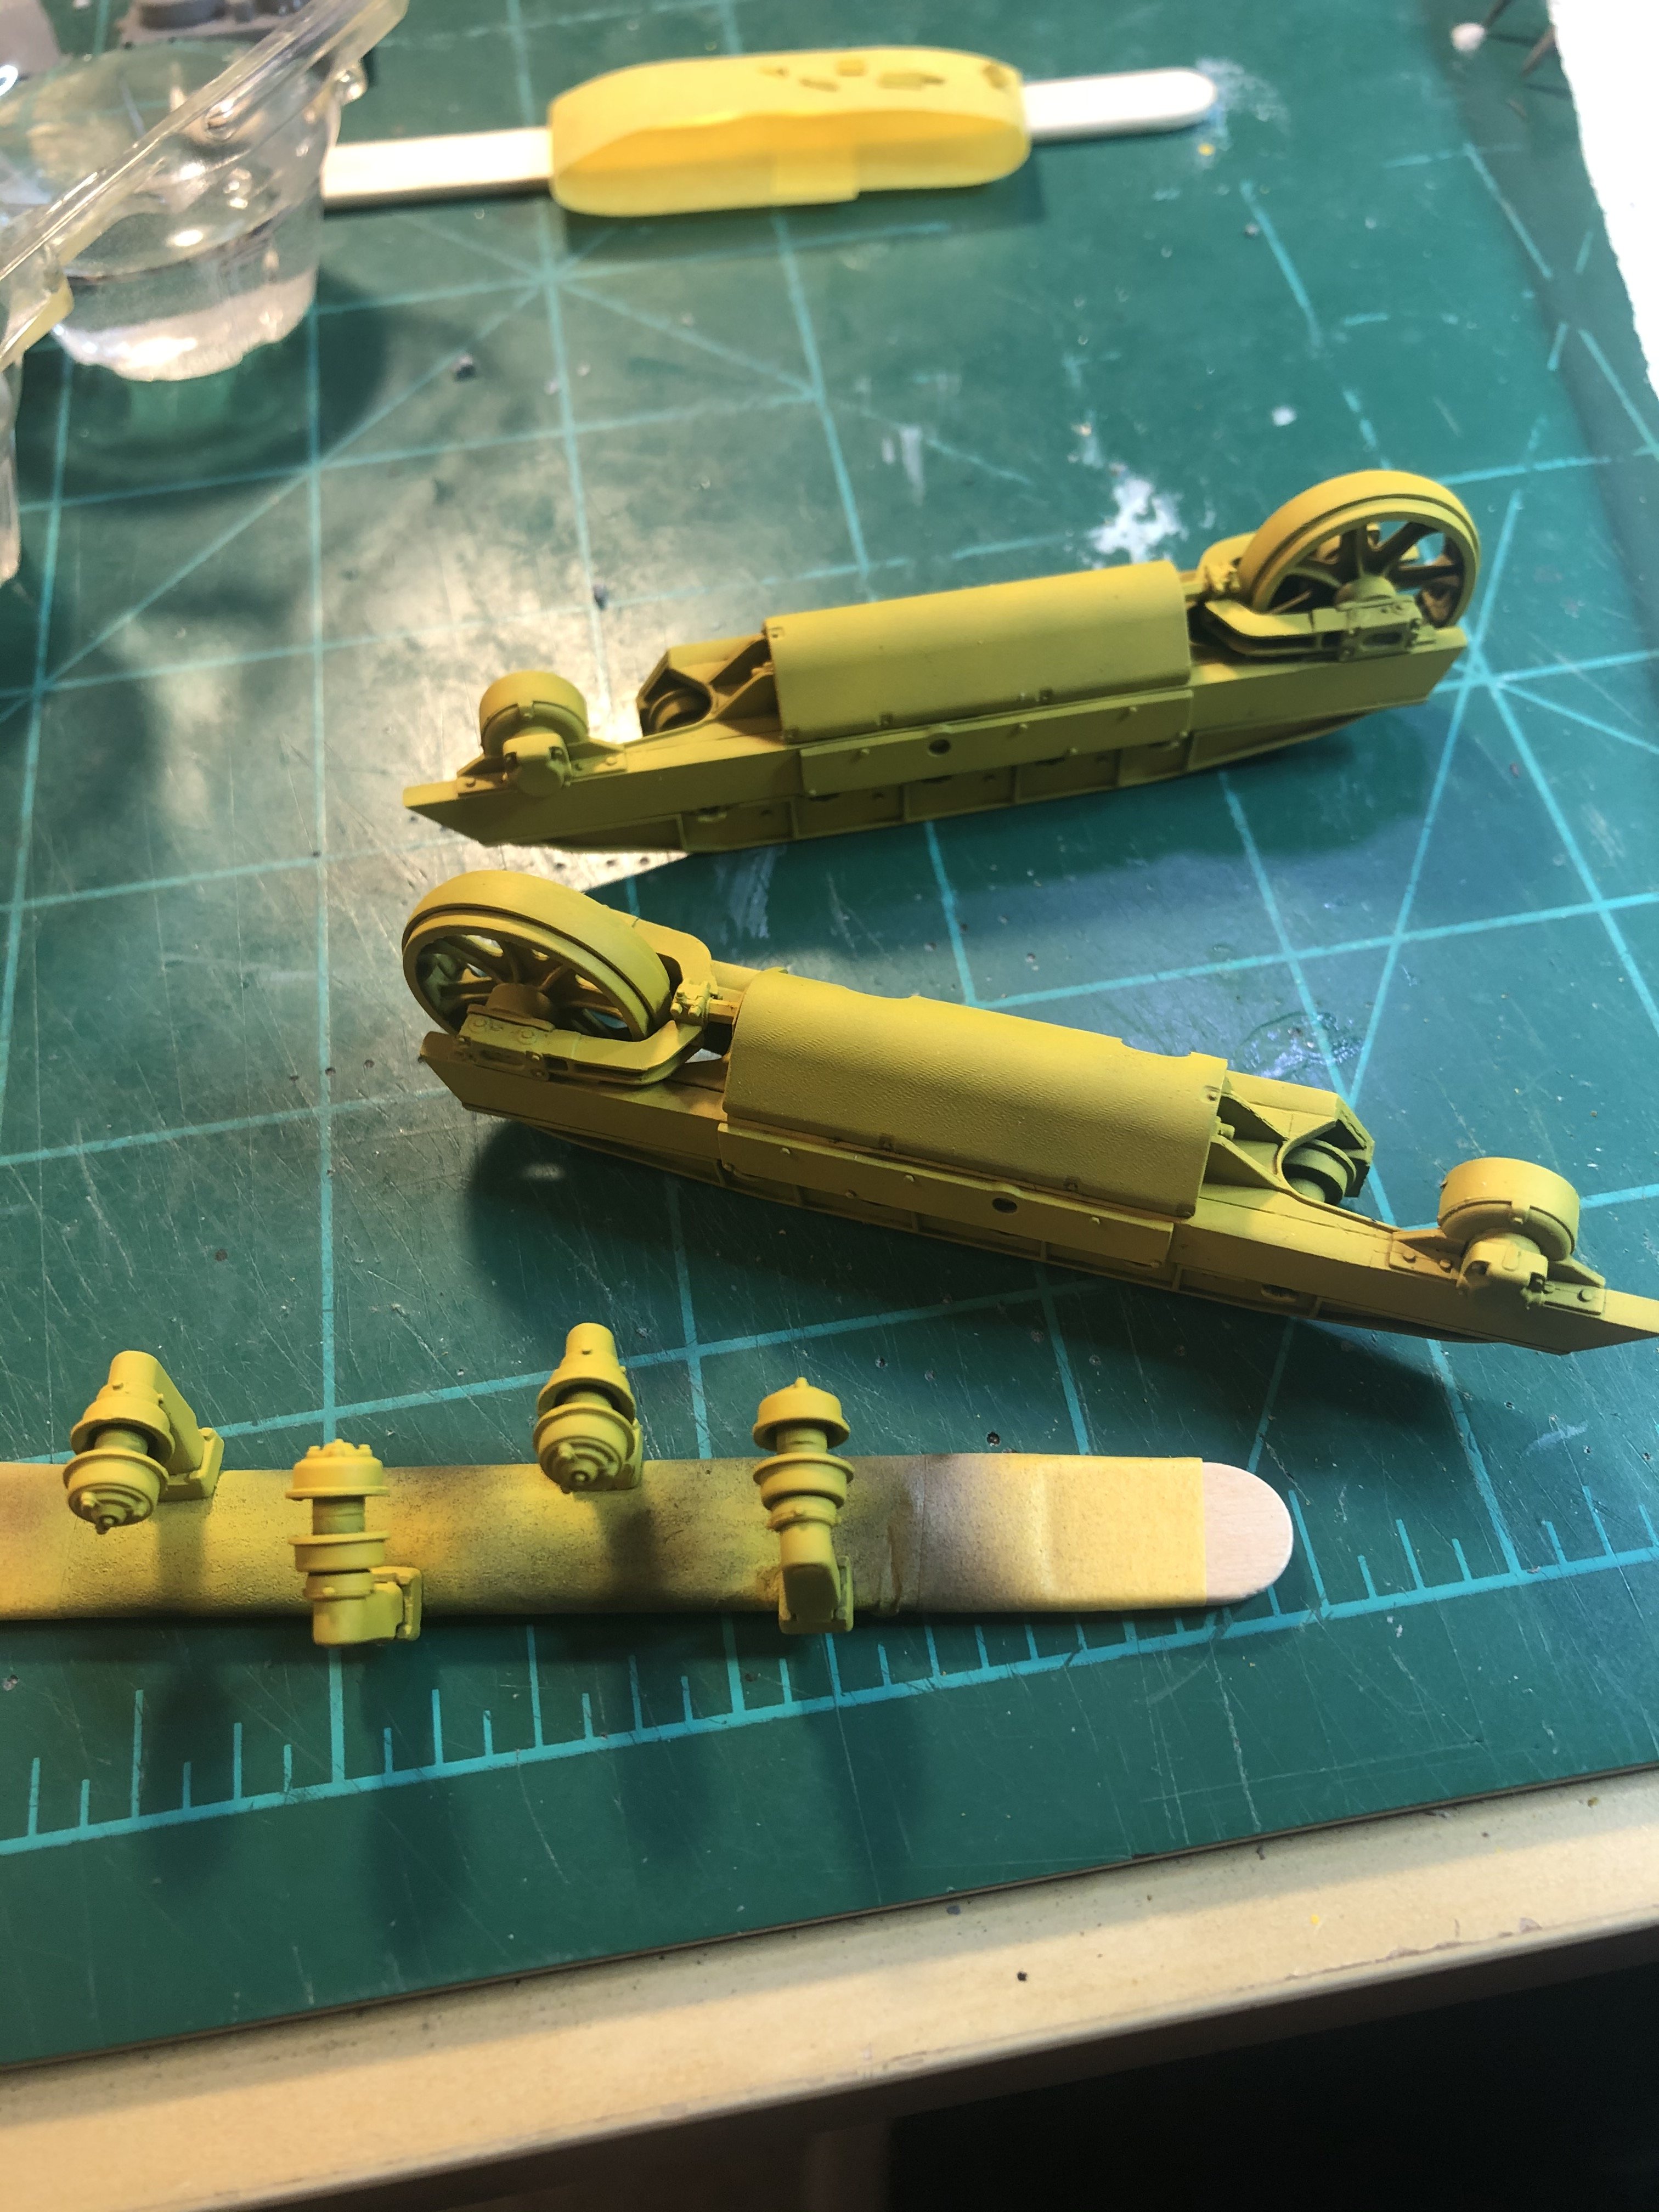
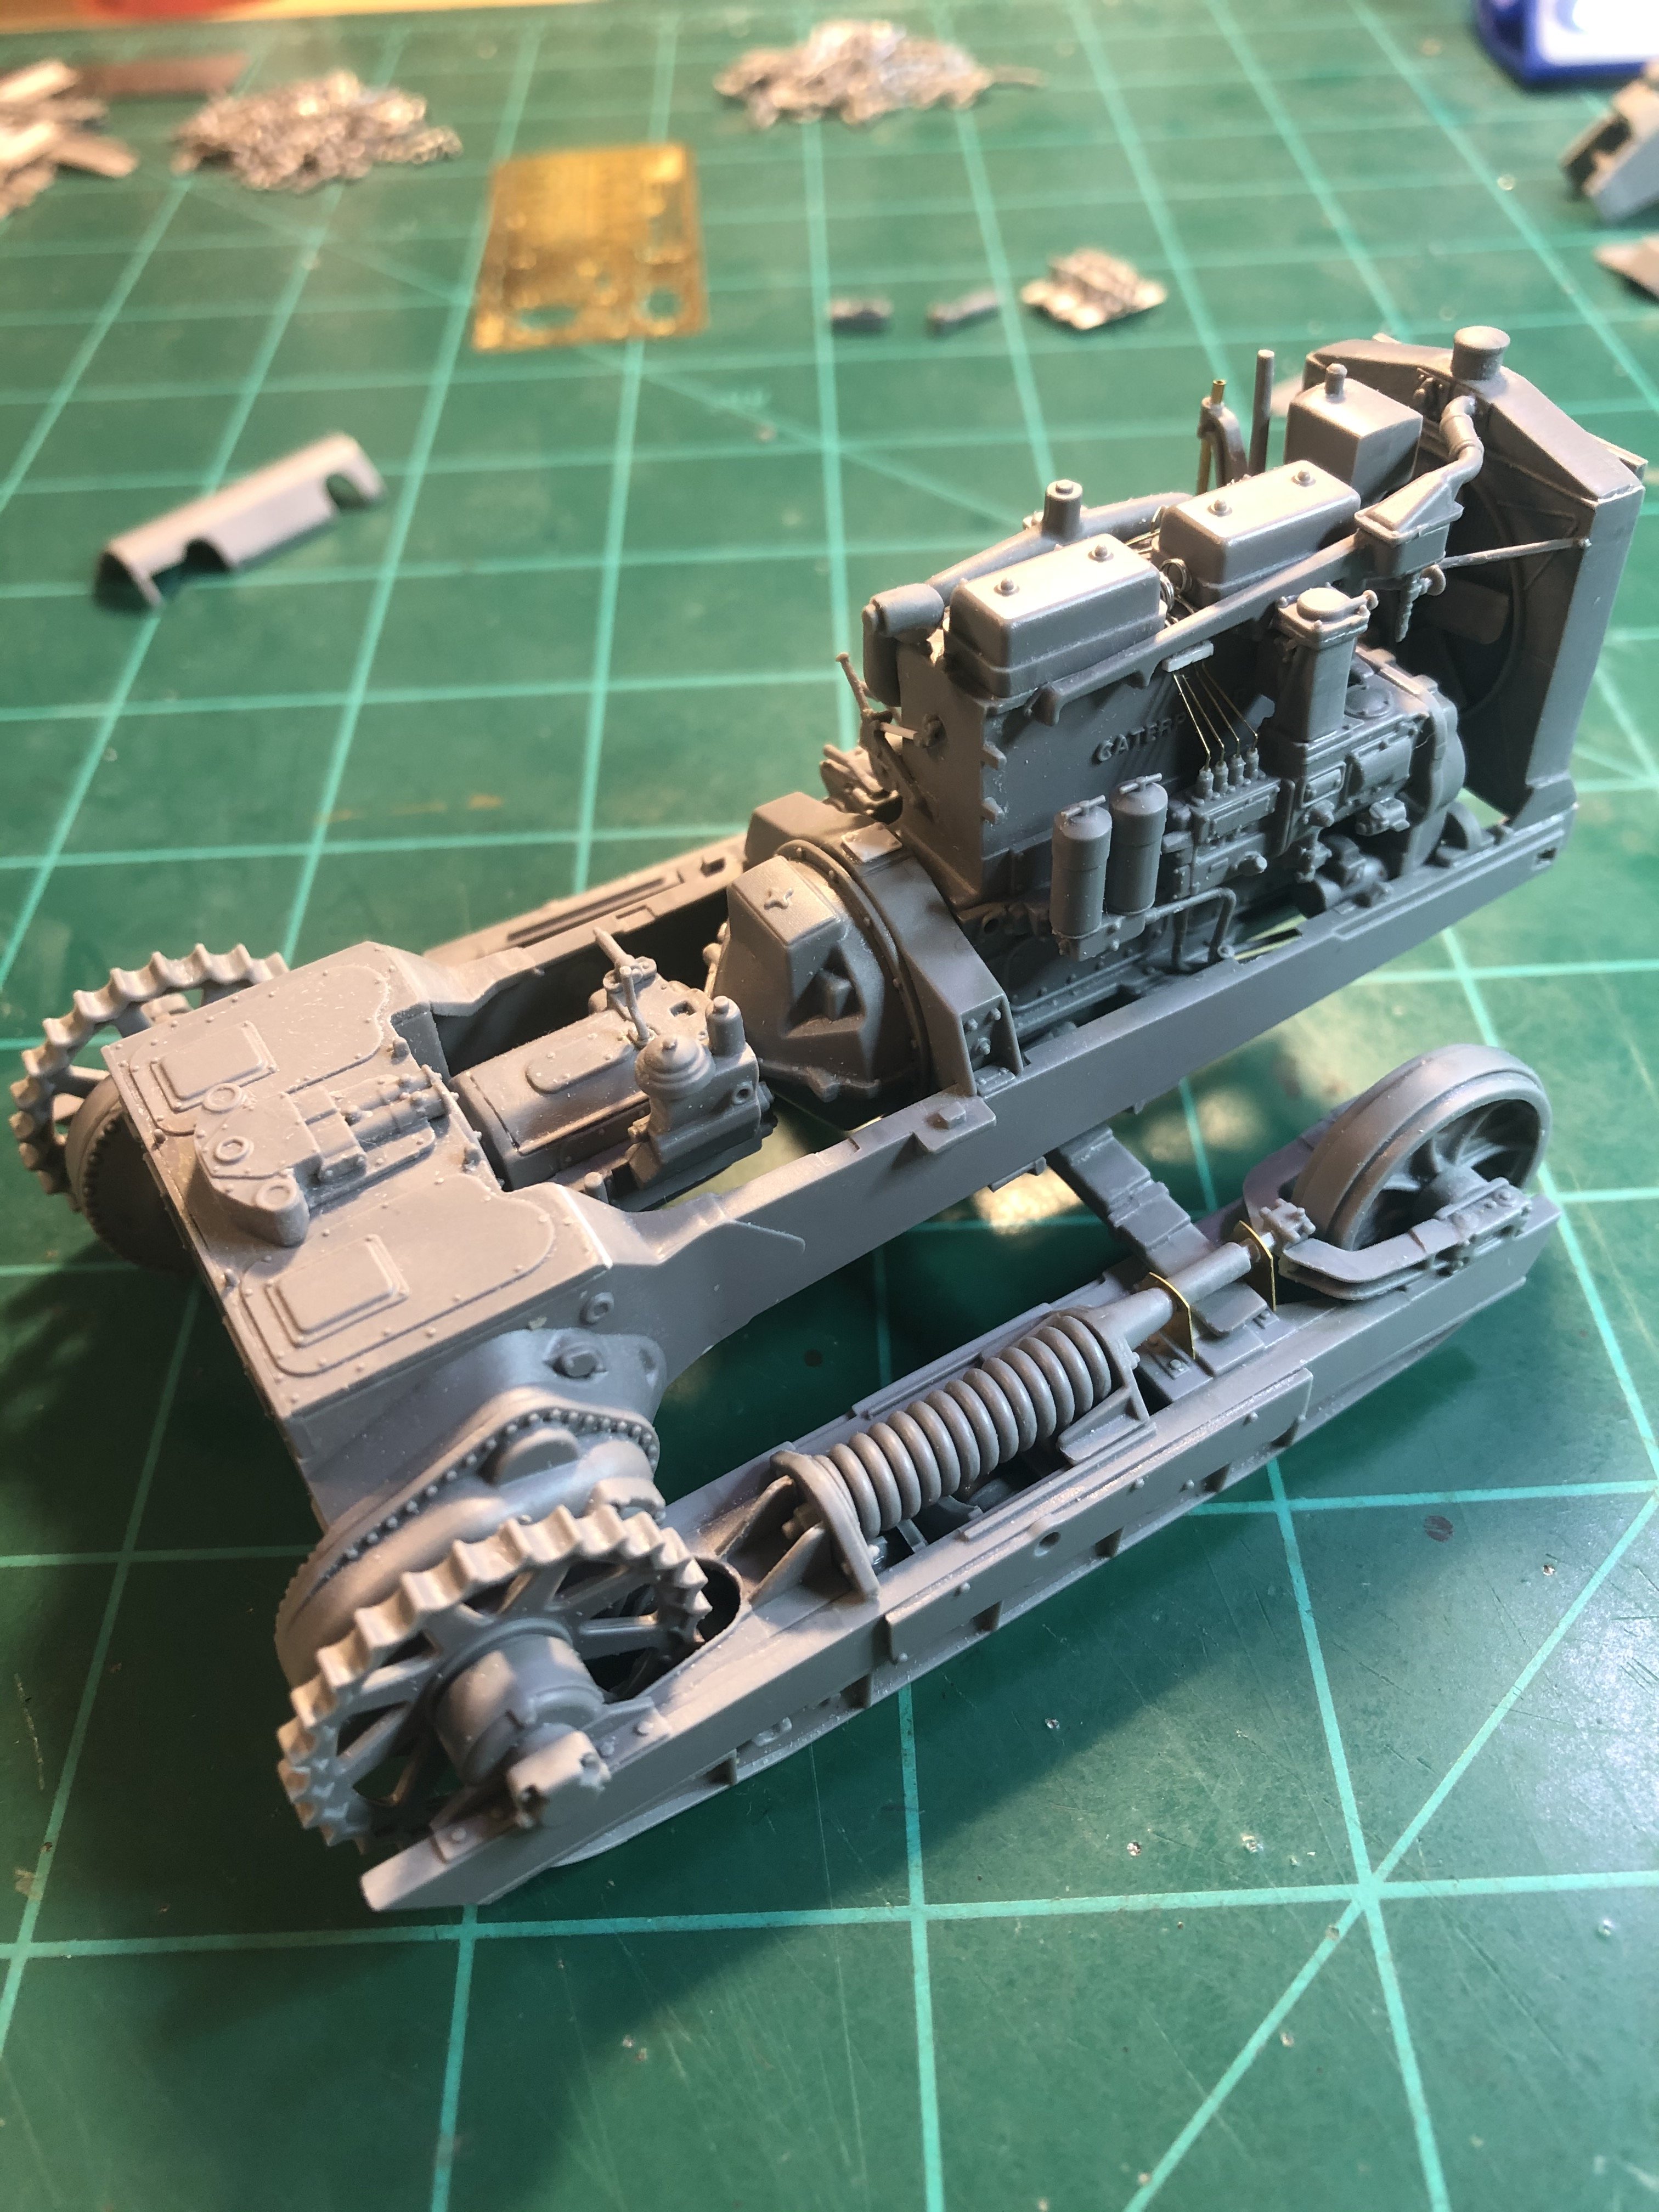
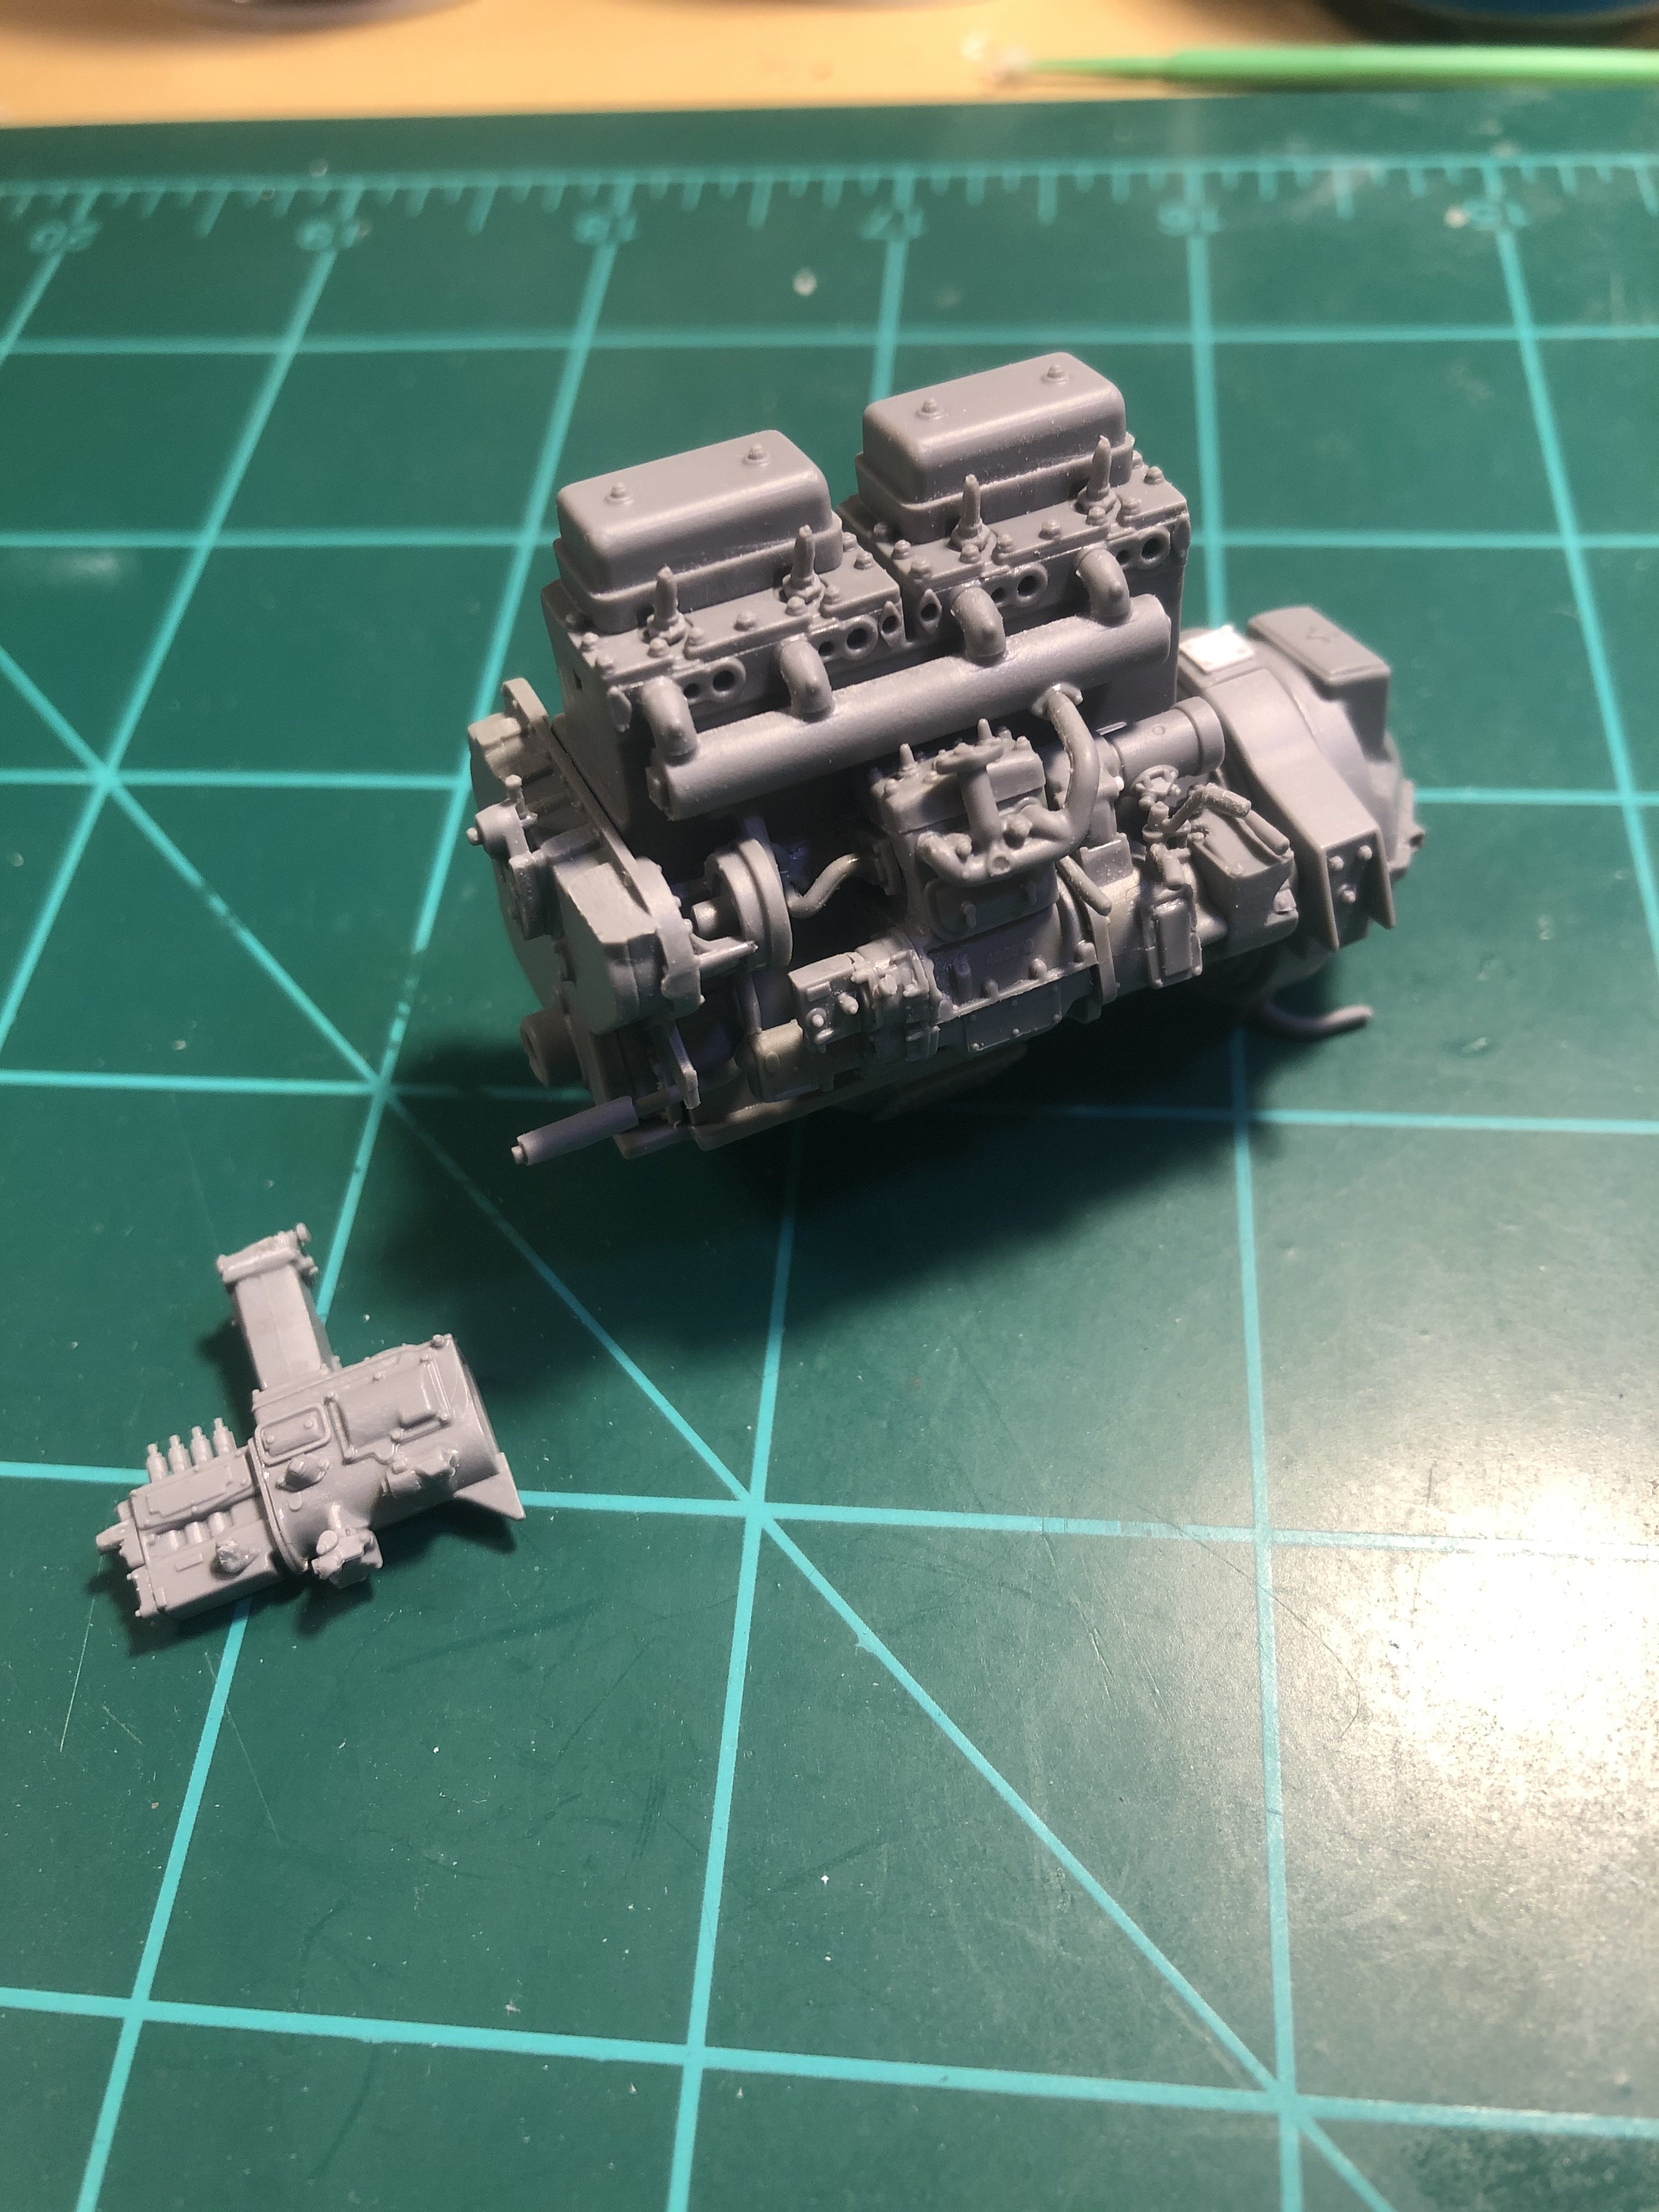
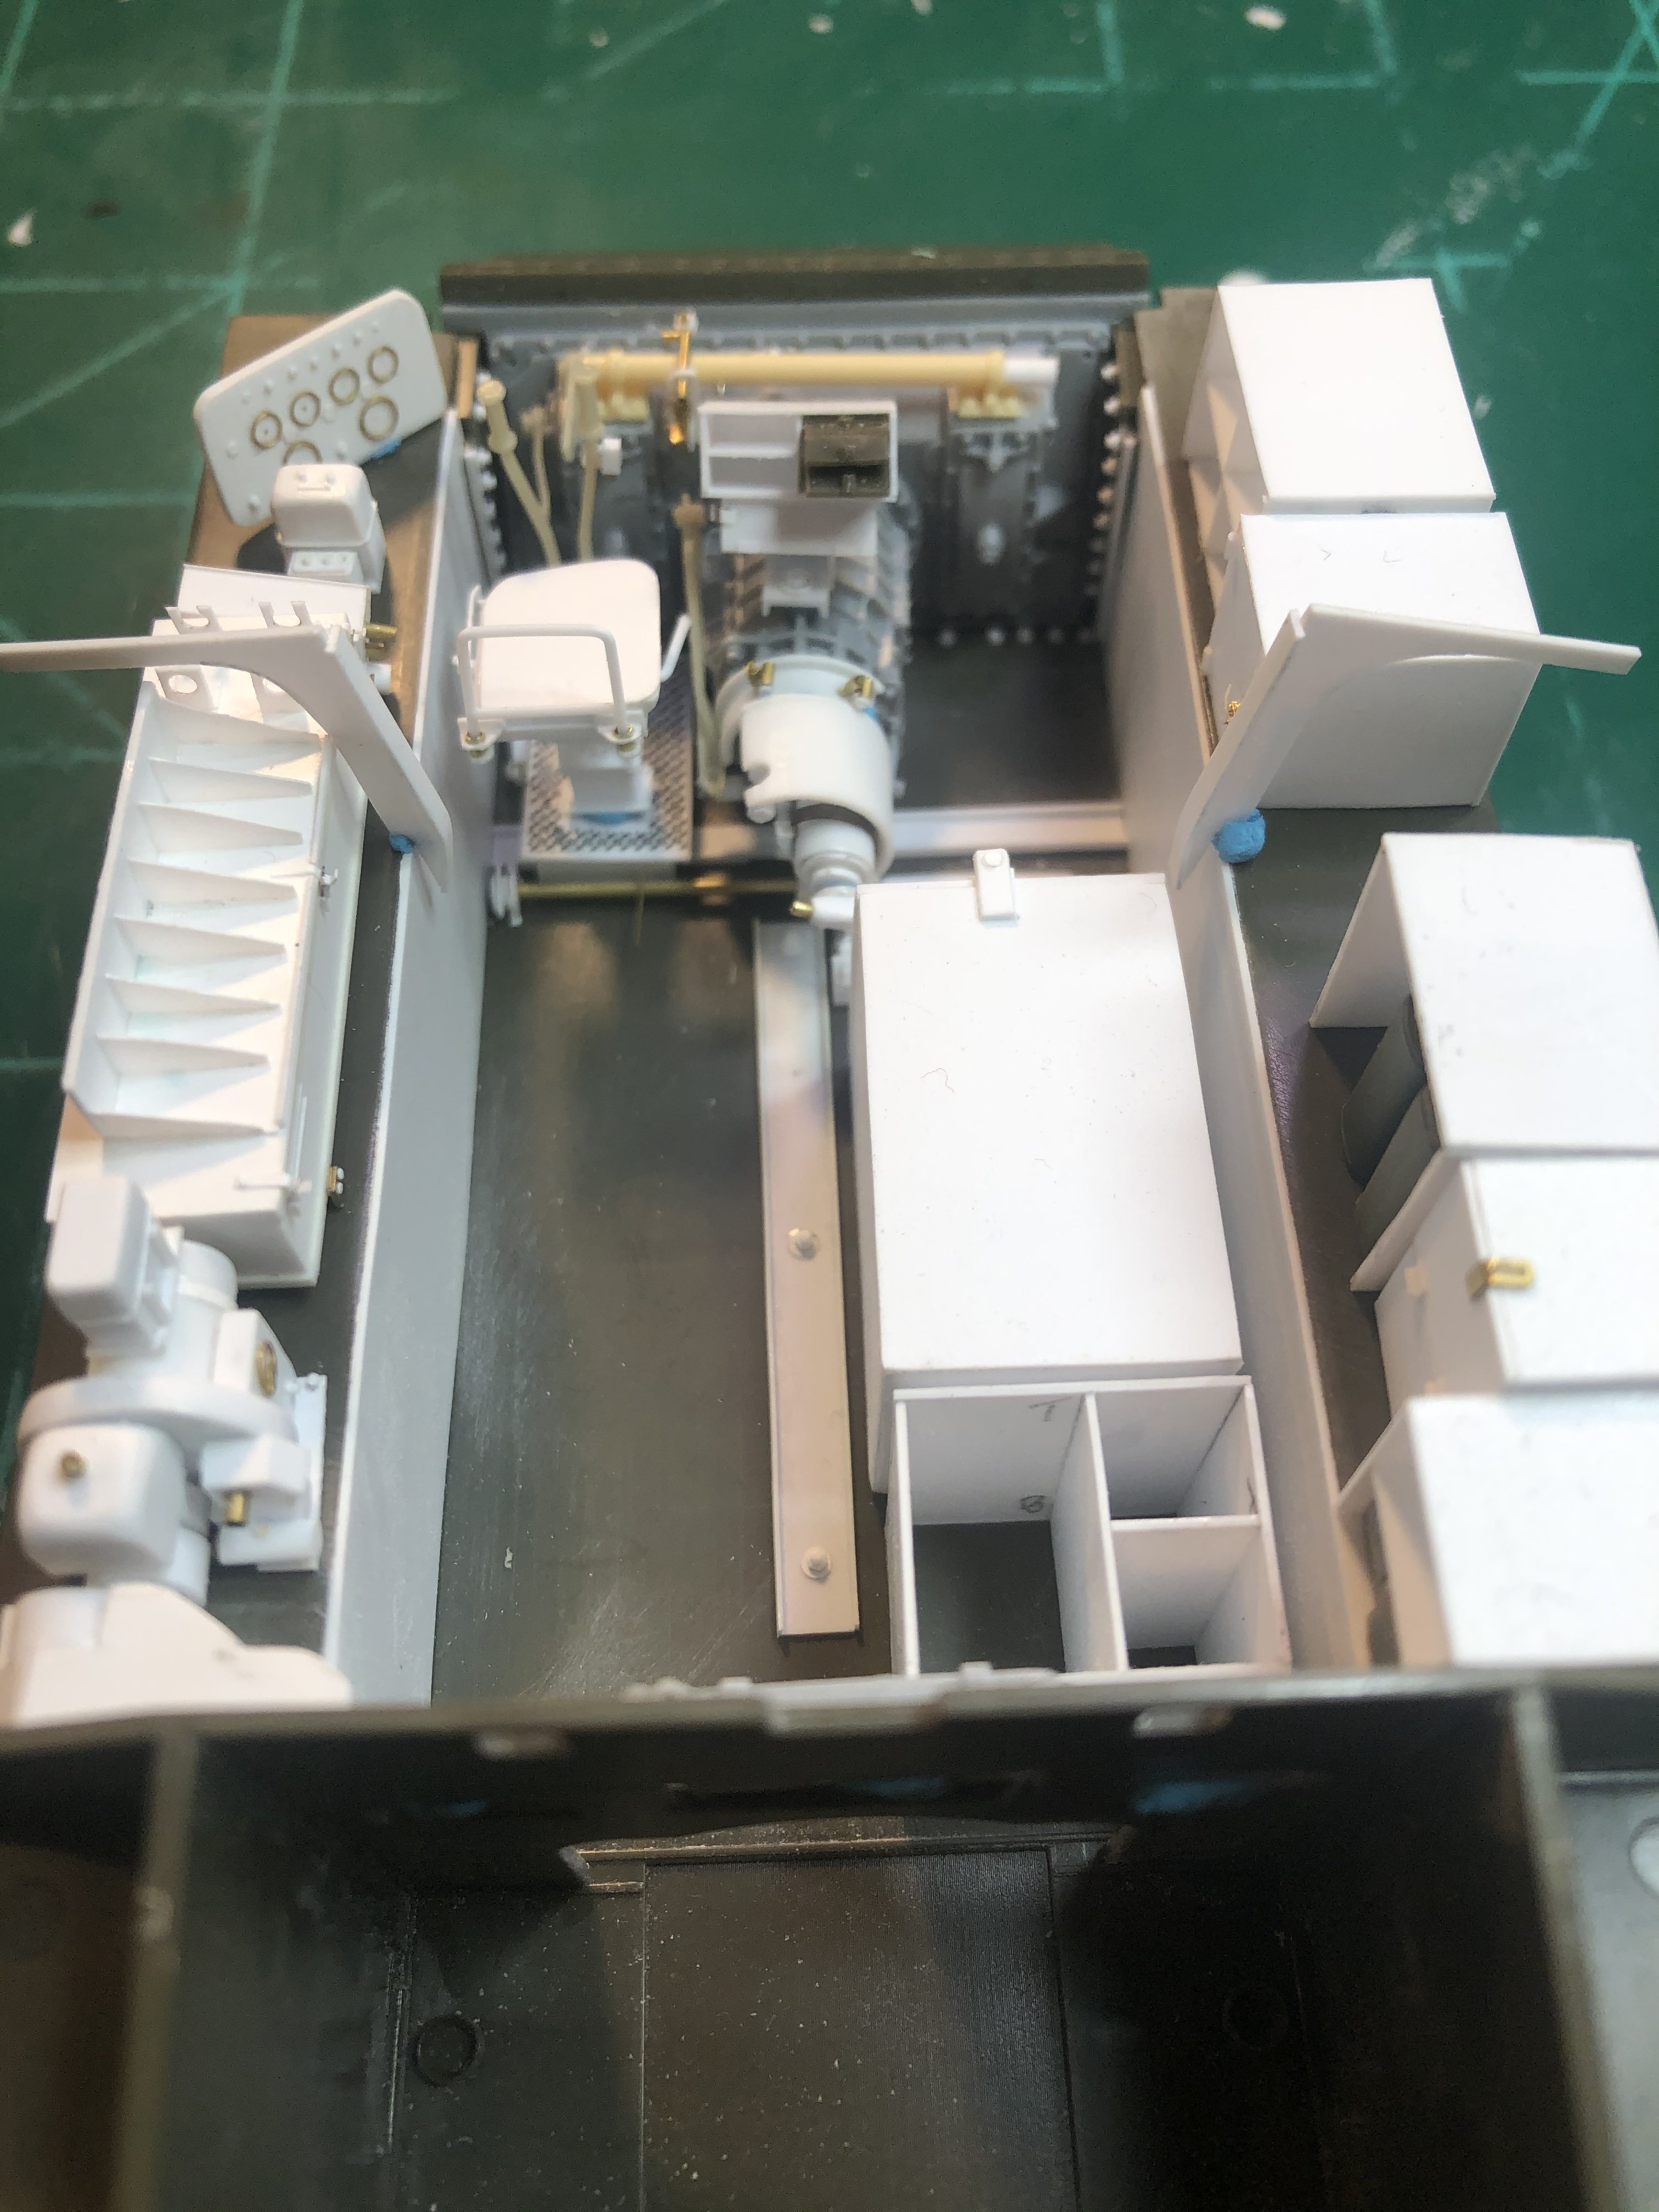
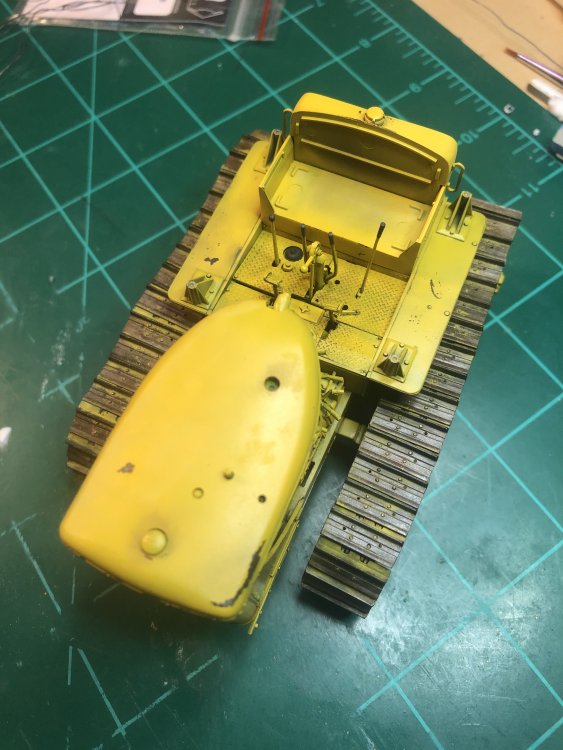
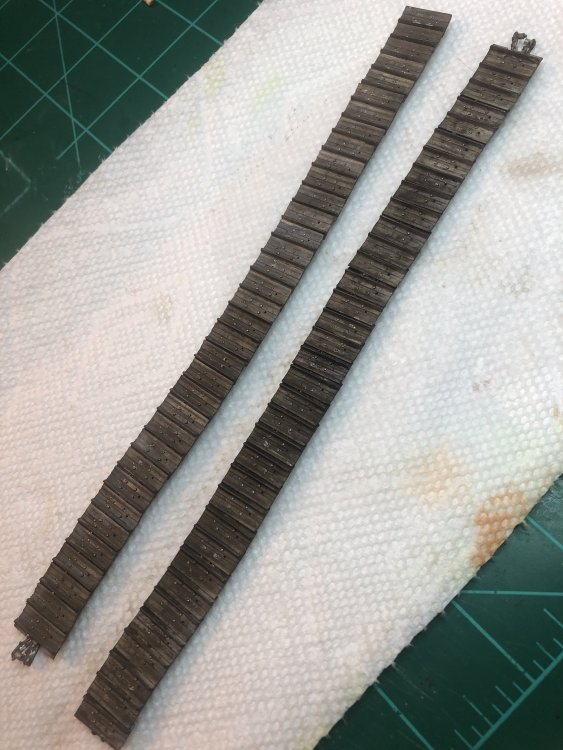
At this point I have the engine together and put it on it frame. Took me a while to figure out how to run the fuel injection wiring. During the building I was trying to determine the best time to put an initial coat of paint down as some of it will be hard to get at if you go any further. I had also put the together the track assemblies and placed the from on top of it. Starting to look closer to a bulldozer. At this point I assembled the fruilmodel tracks and checked the fit. They fit perfectly. You can see the seat assembly in the back ground along with the track rollers.


-
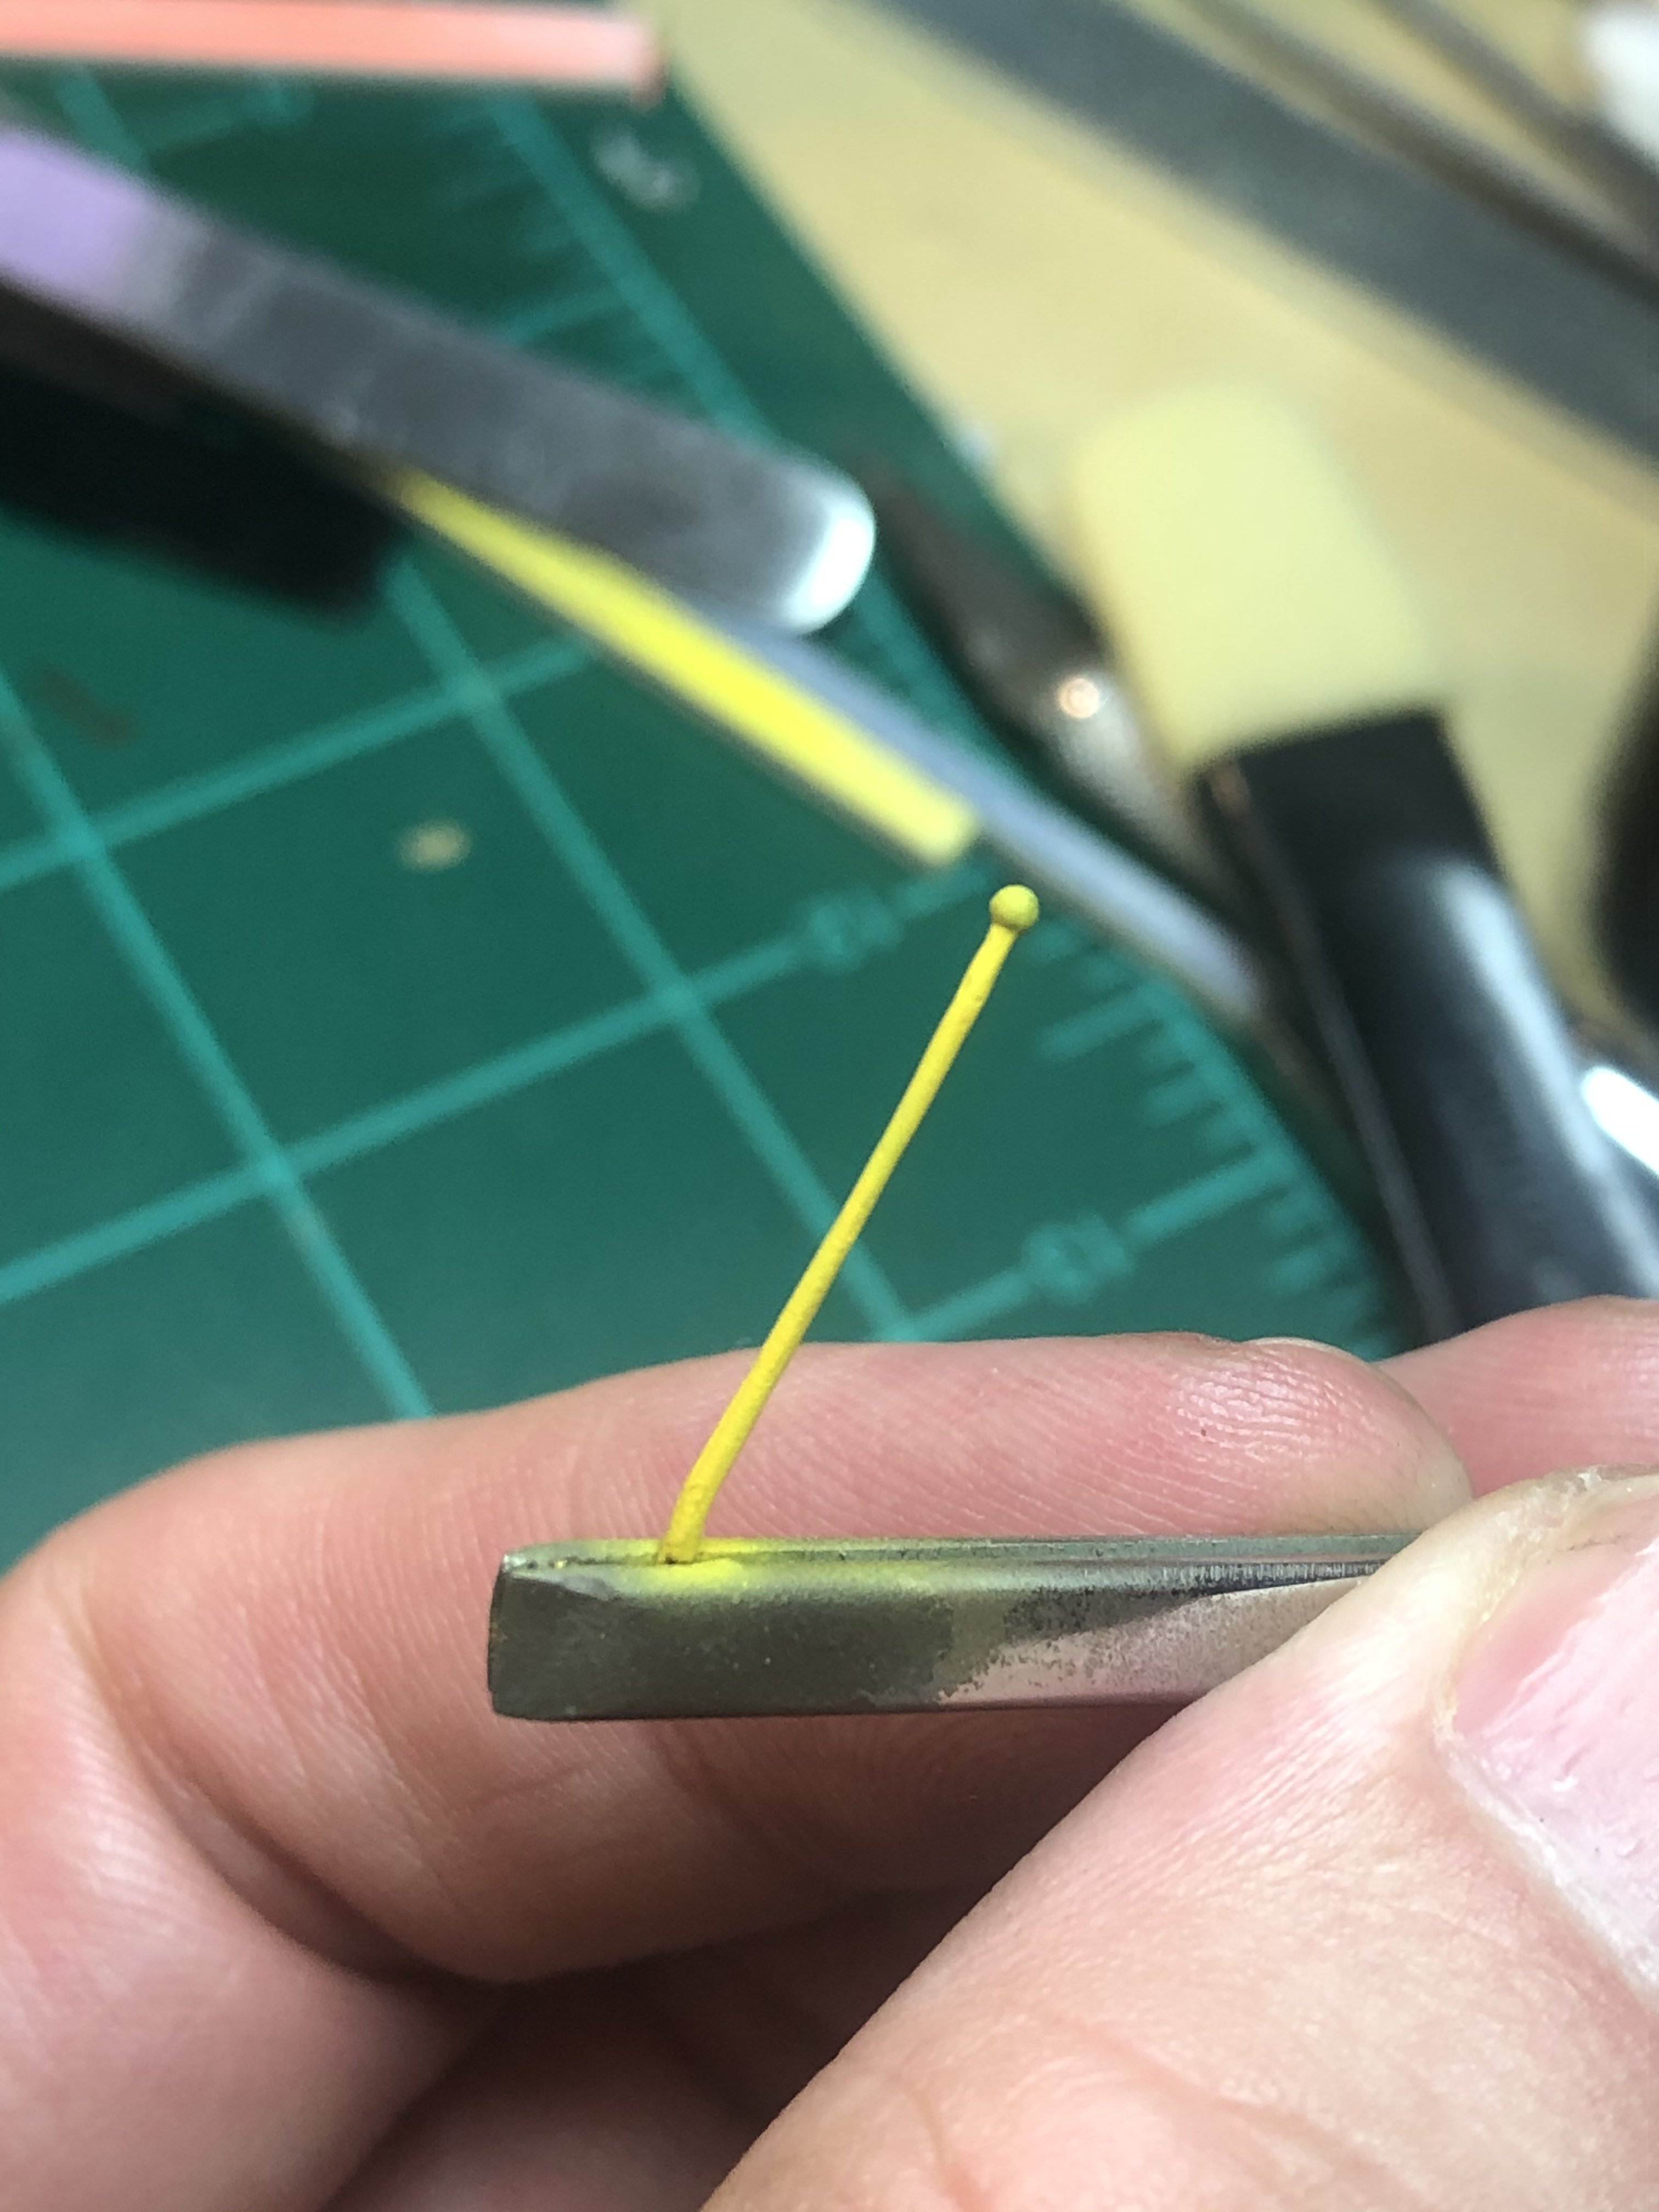
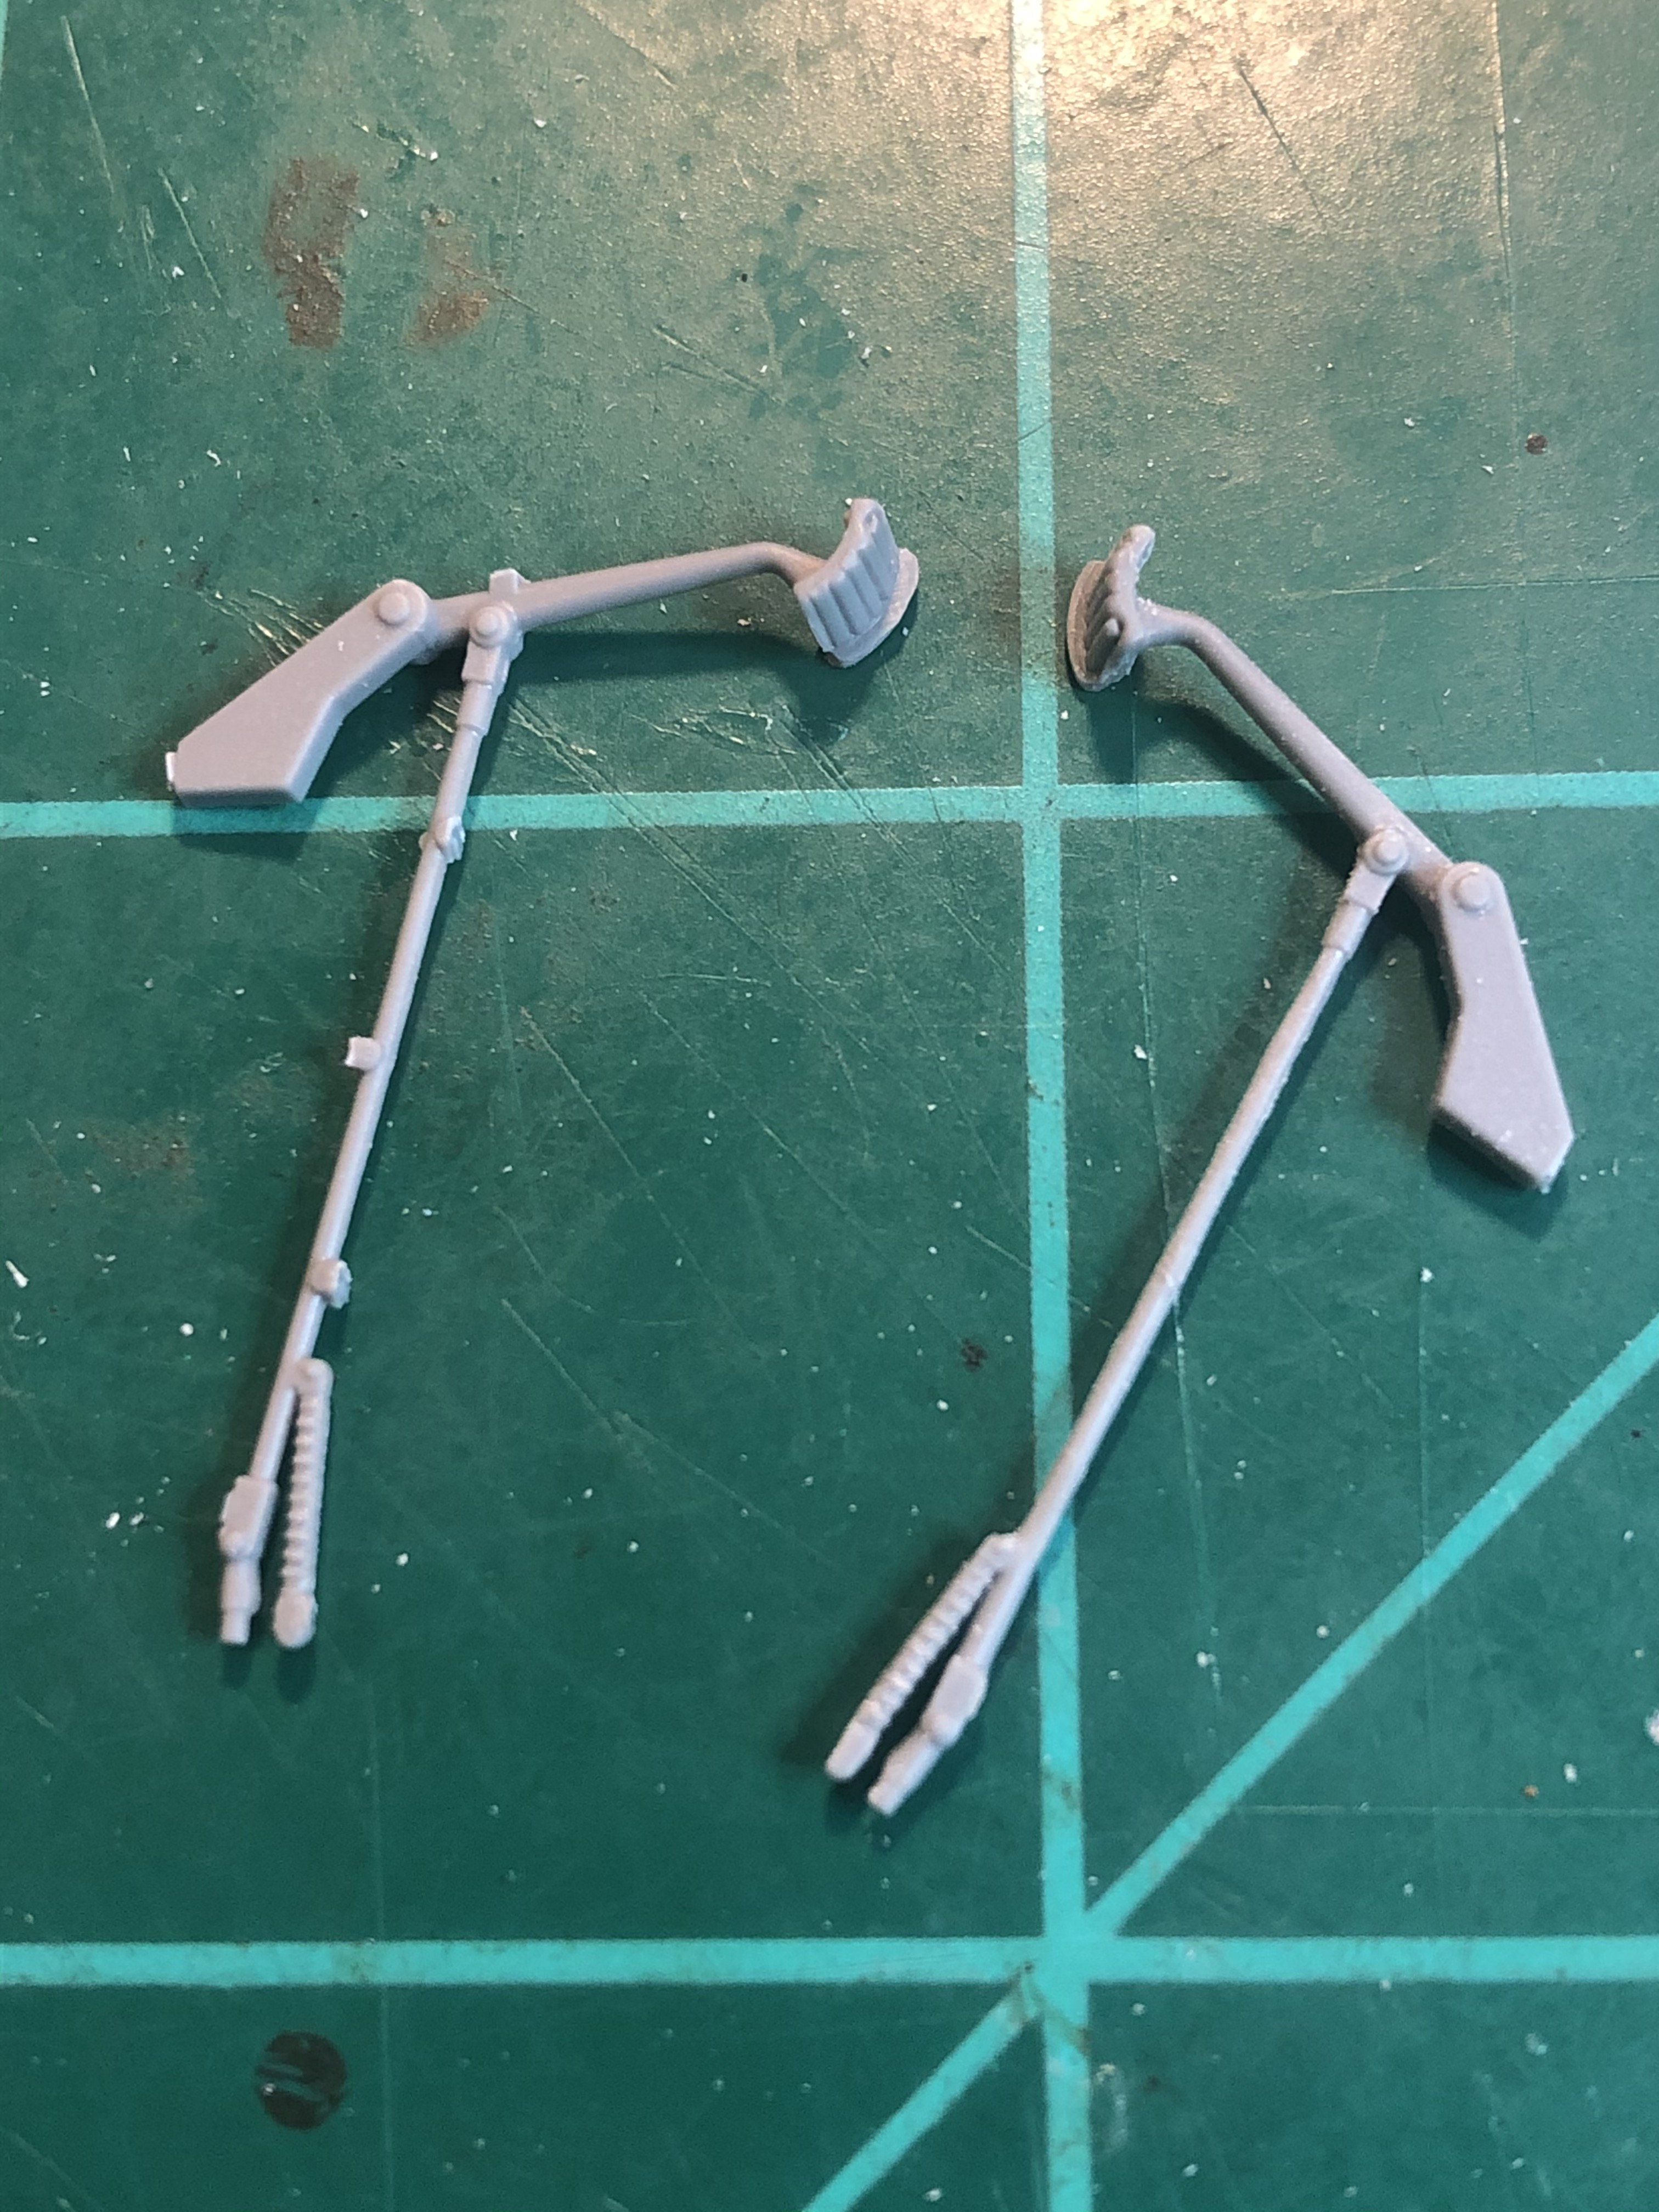
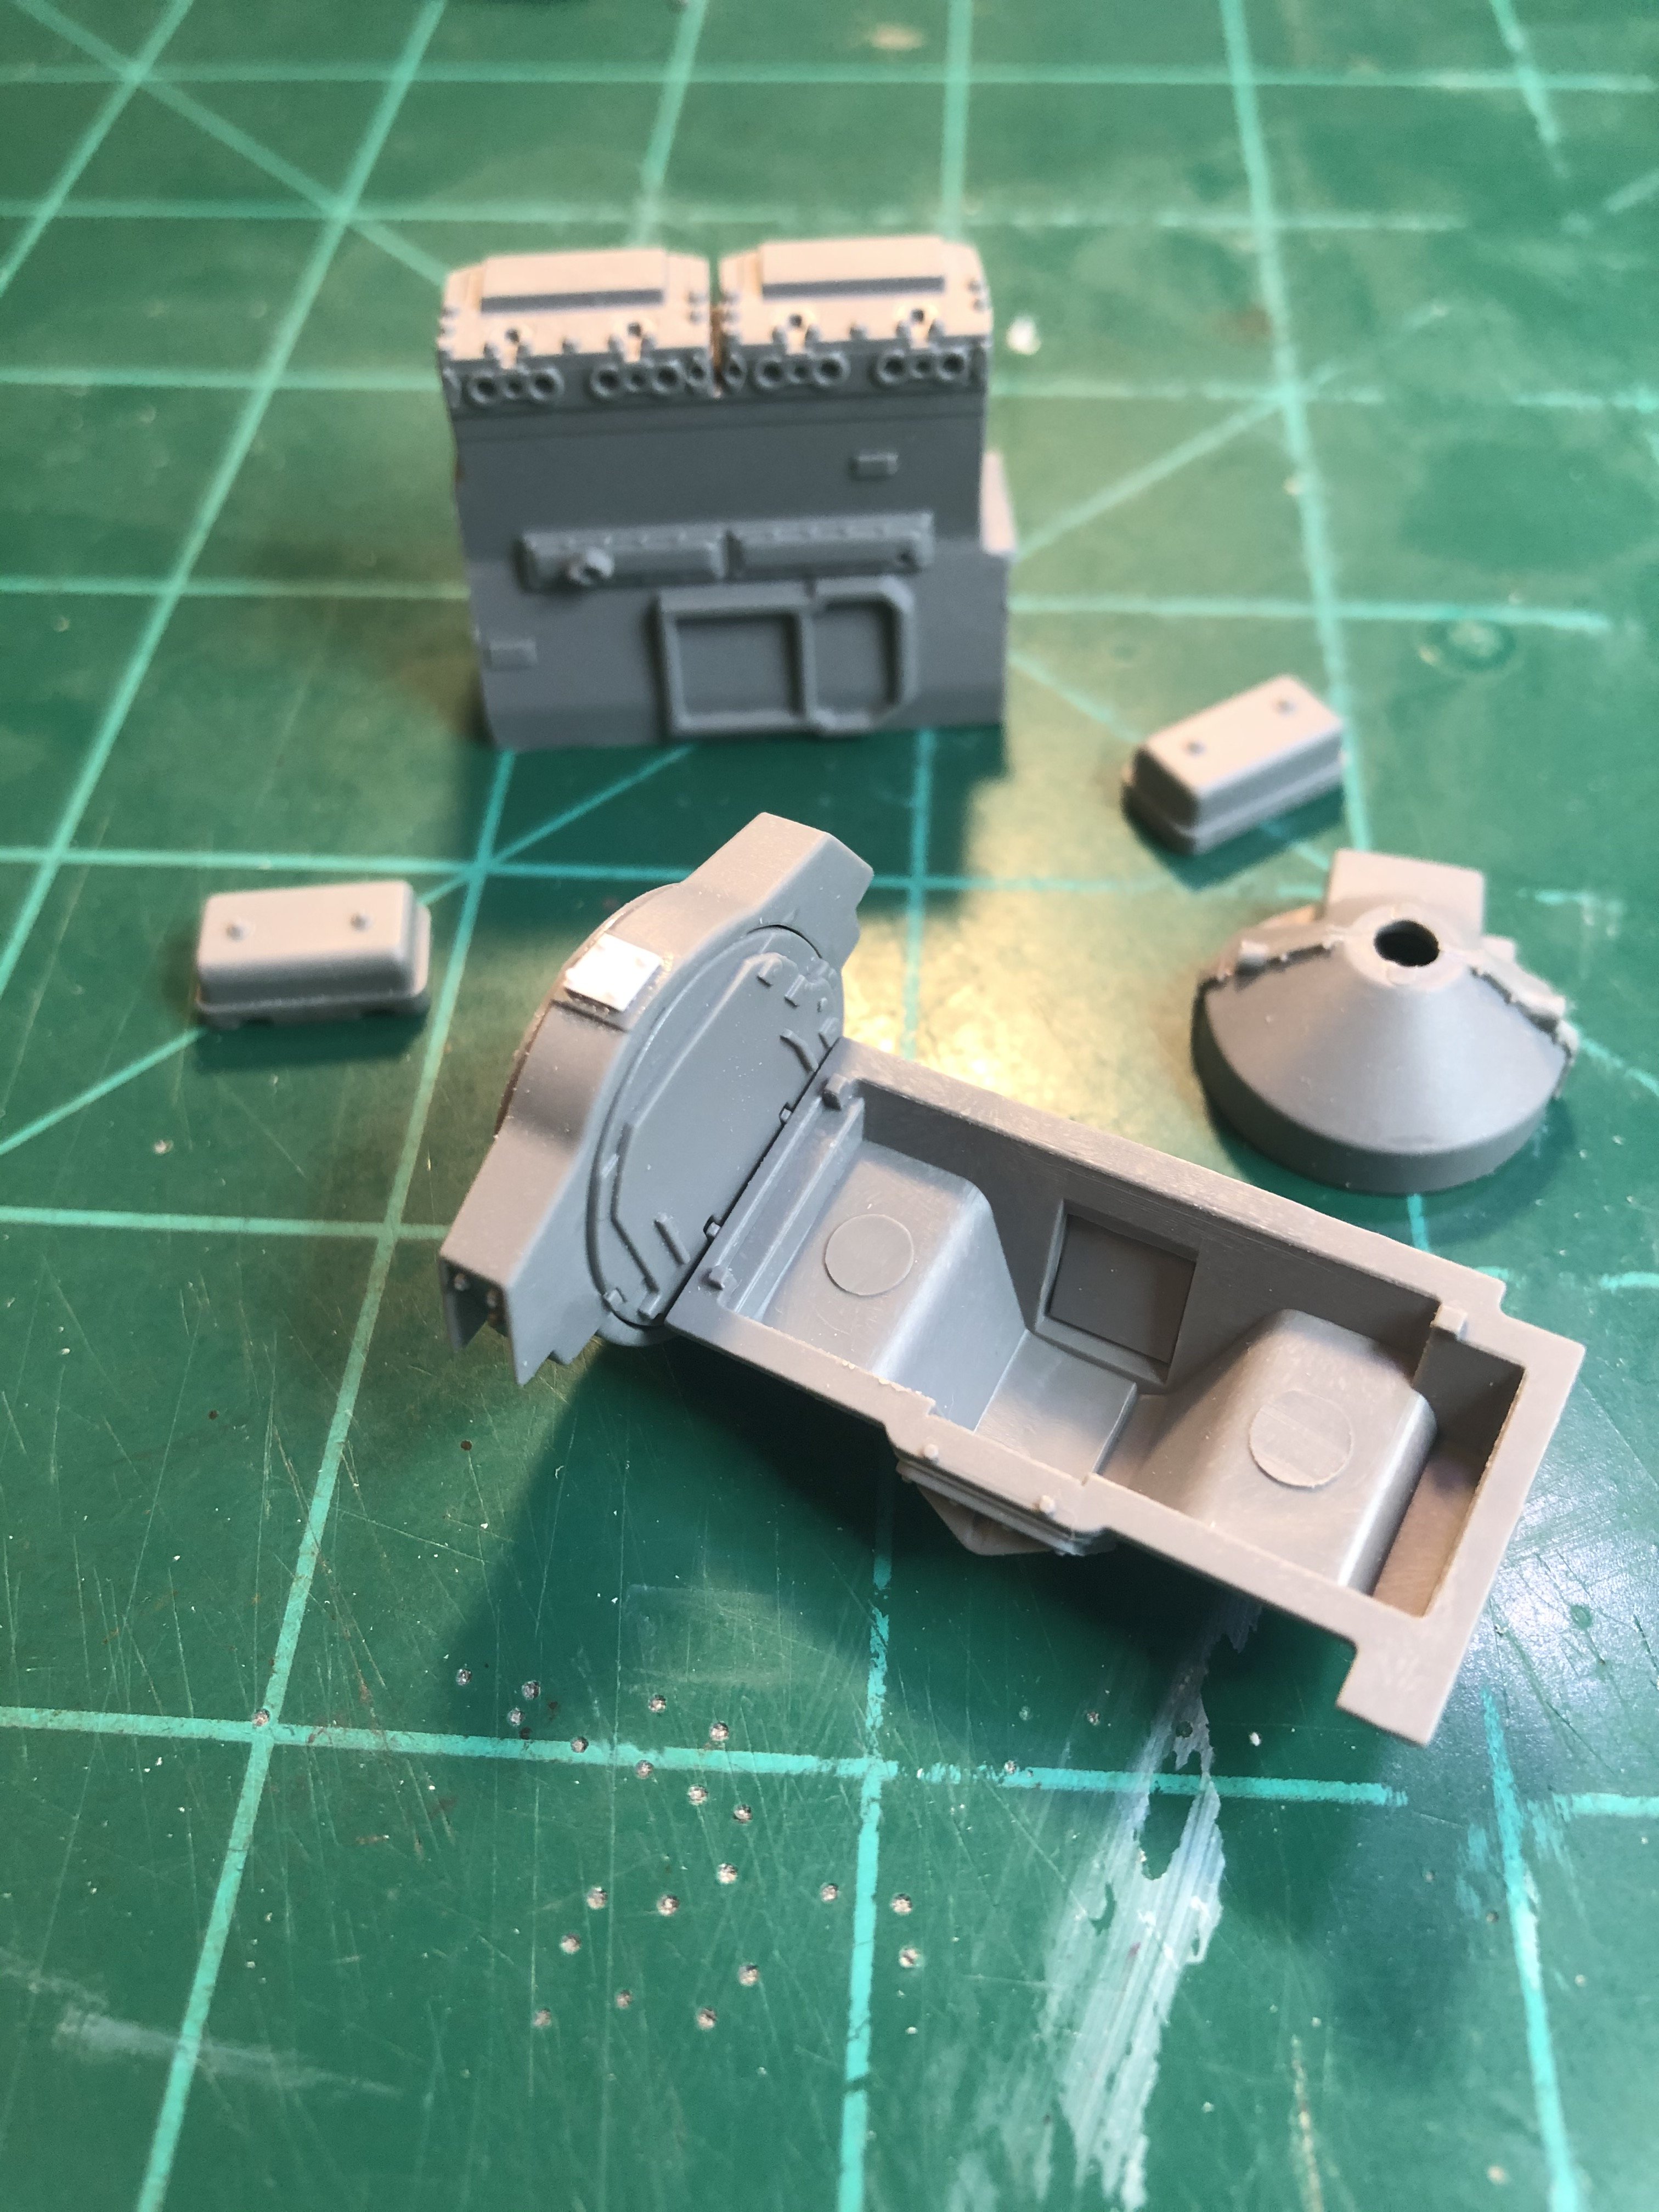
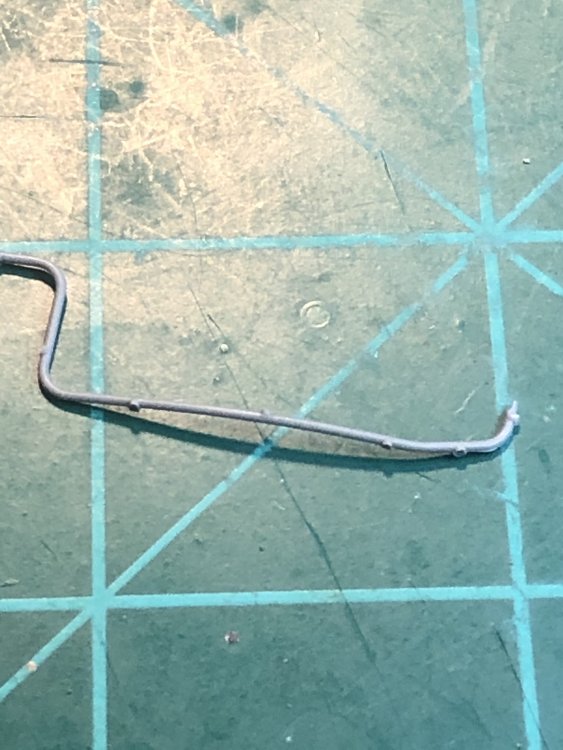
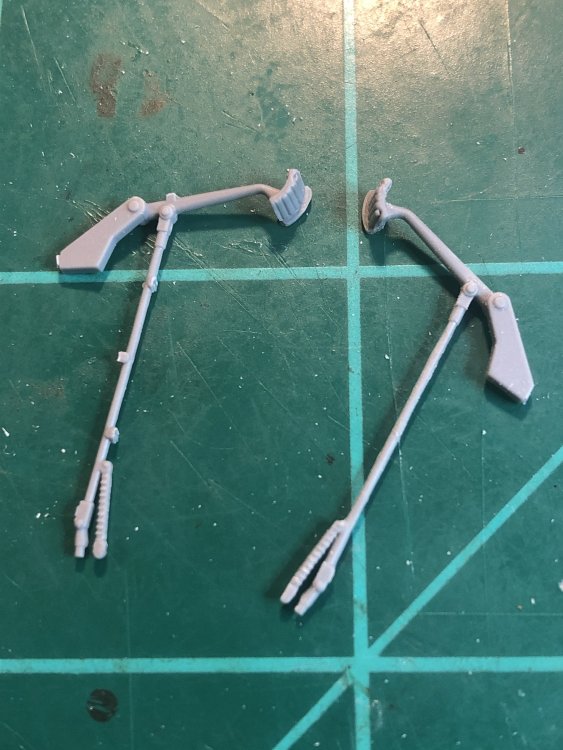
Here are two examples of the numerous sprue gates on thin parts. Most can be cleaned up by taking your time but over all I broke two while sanding.
-
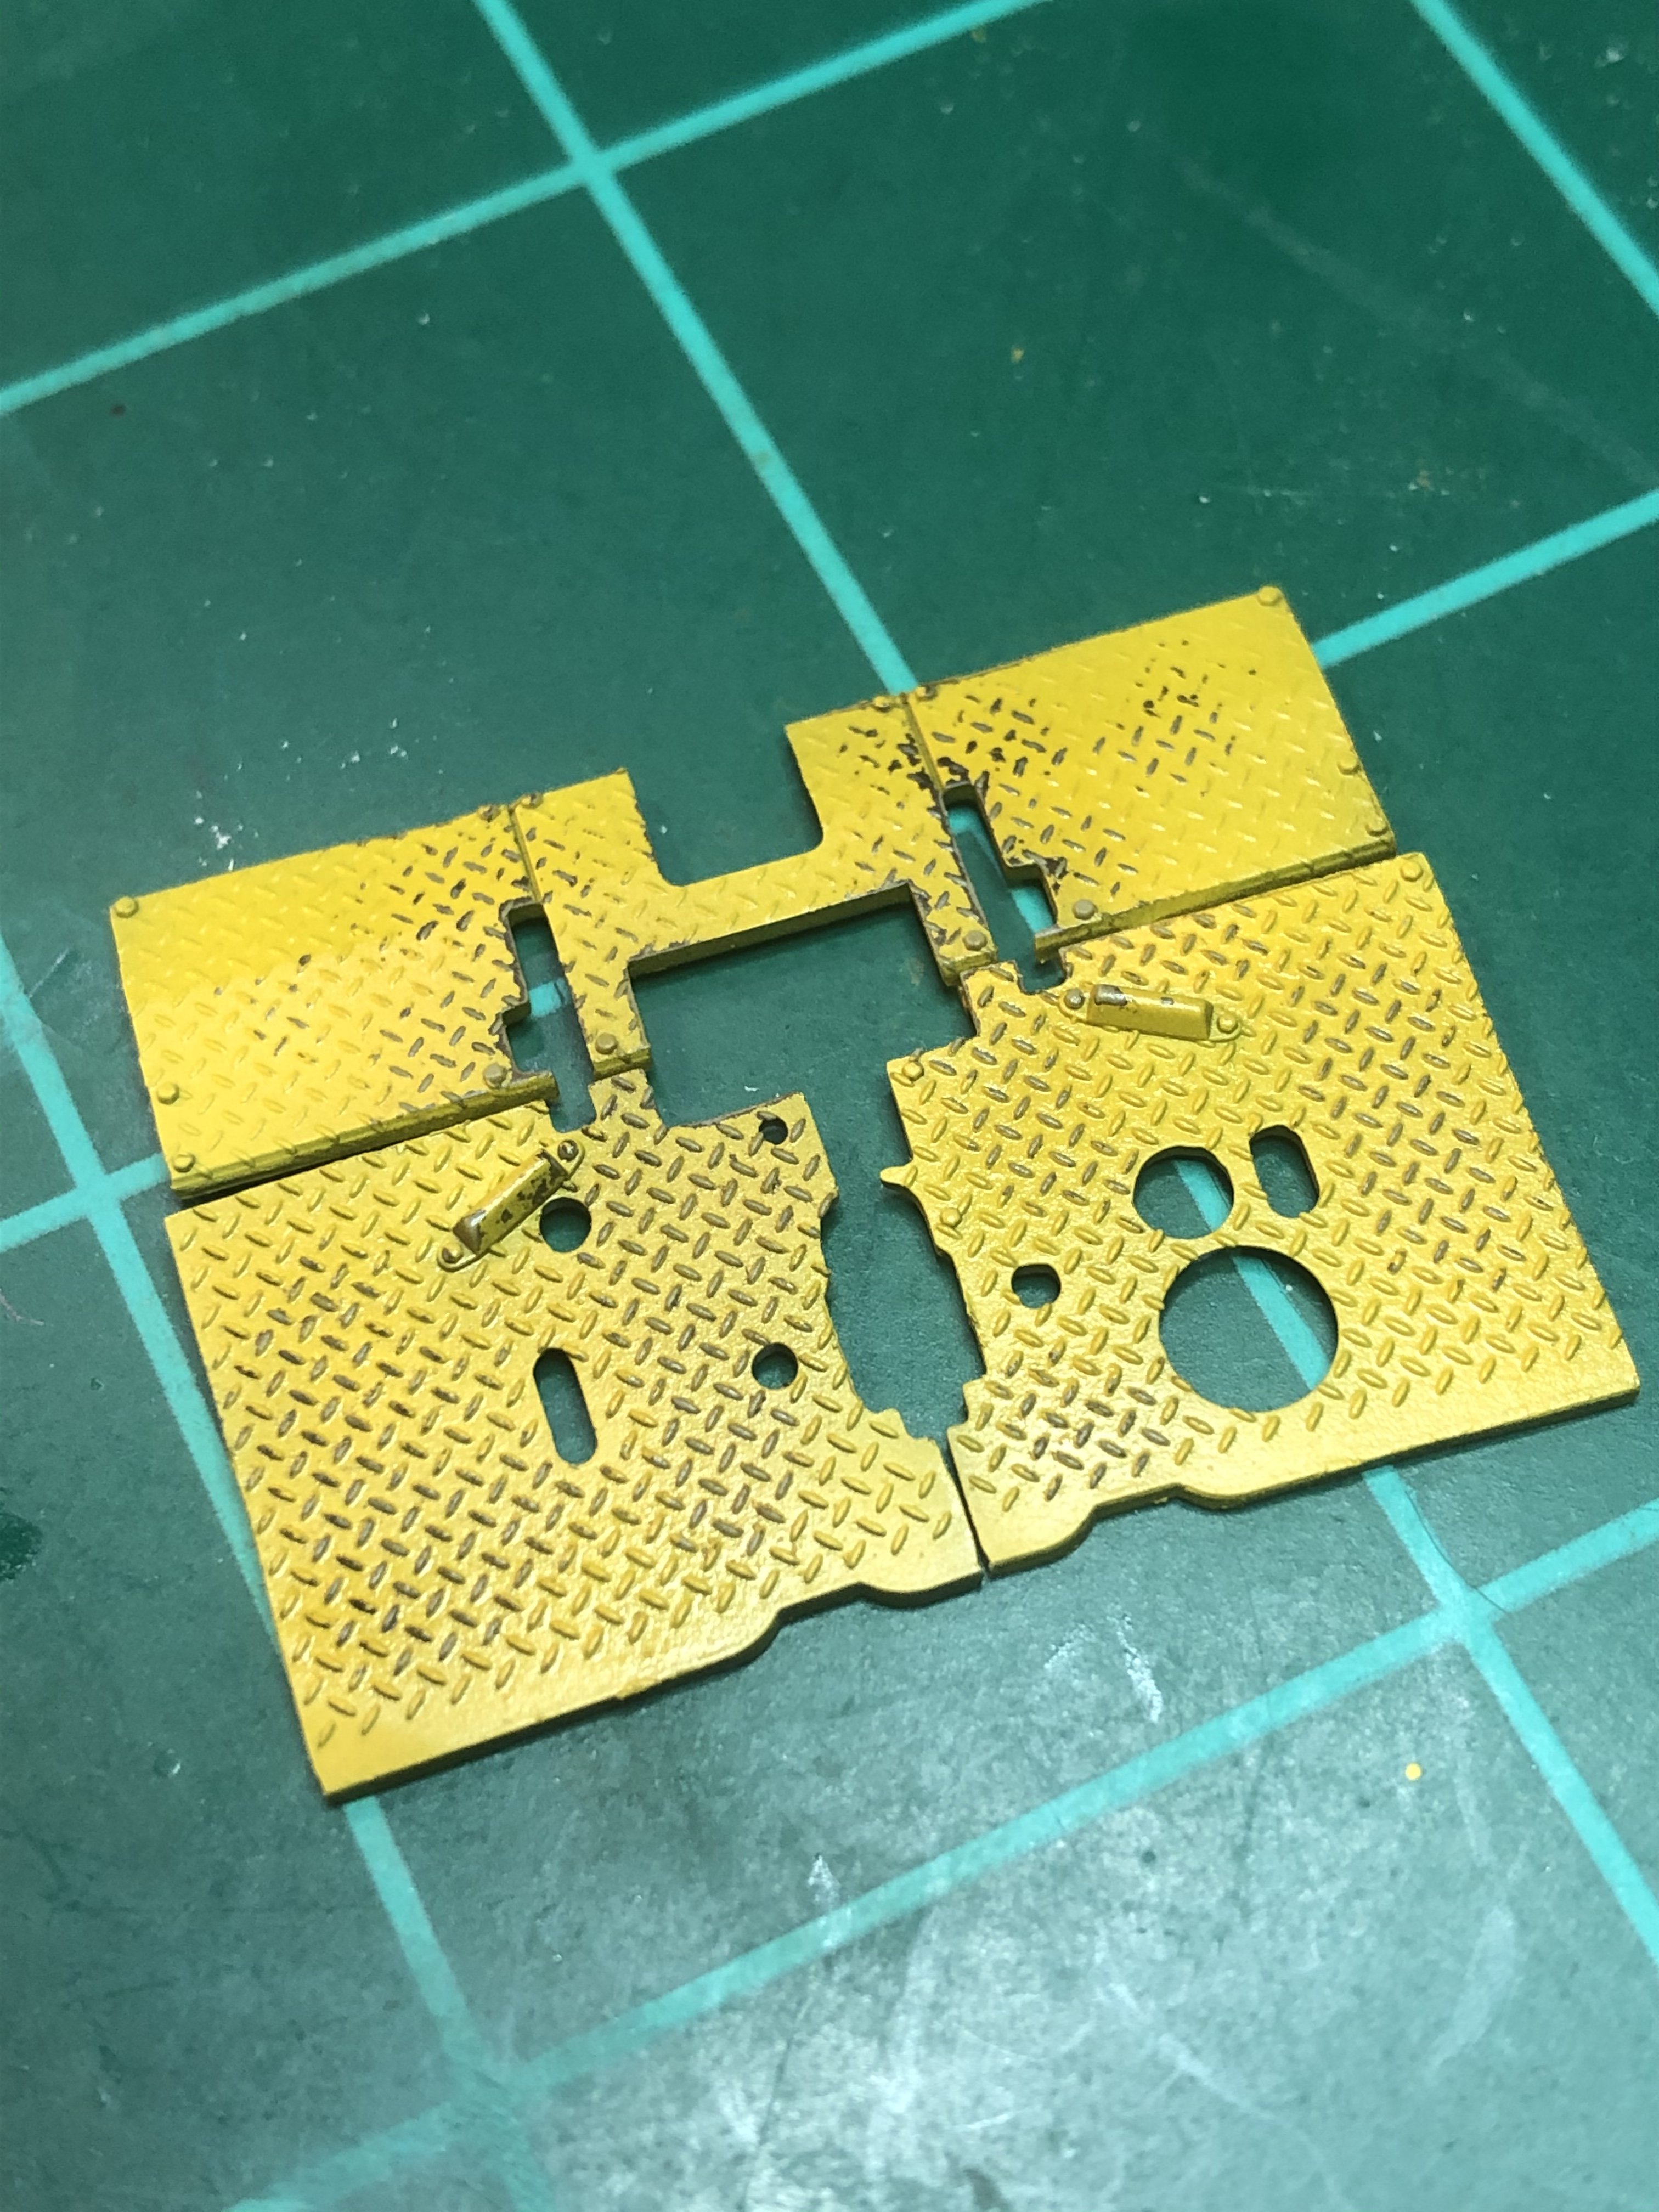
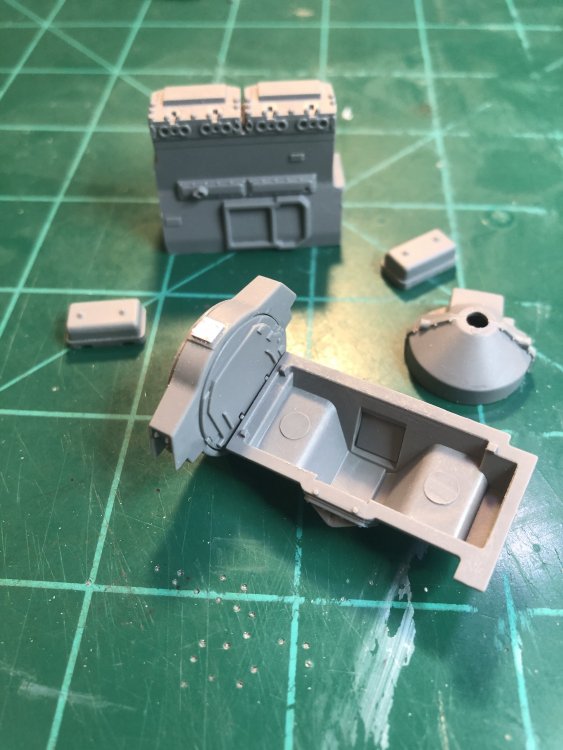
The kit starts with the engine. Replace the molded on plate, not sure what it is called, with plastic sheet and punched out bold. The seam went in between and was not easy to clean up. Well worth it as this is highly visible once the floor plates are put in. Progress on with most of the engine.

-
Back in February I put a hold on my M4A3 Sherman in an effort to finish a model for the local NJIPMS contest in the beginning of April. Figuring I would not be able to finish the Sherman in time. I already had the MiniArt US Bulldozer (civilian version) at home and thought why not, thinking I could finish it in time. Well, the contest was moved to August but I would not have been able to finish it on time. I under estimated the amount of time required to clean up the numerous and thick sprue gates on each part, even the thin cabling and levers. Reading some other reviews I decided to replace the kits track with fruilmodel tracks which I think look great and were easy to assemble. The only other thing added was some wiring. Let me show you some of the progress to date.
-
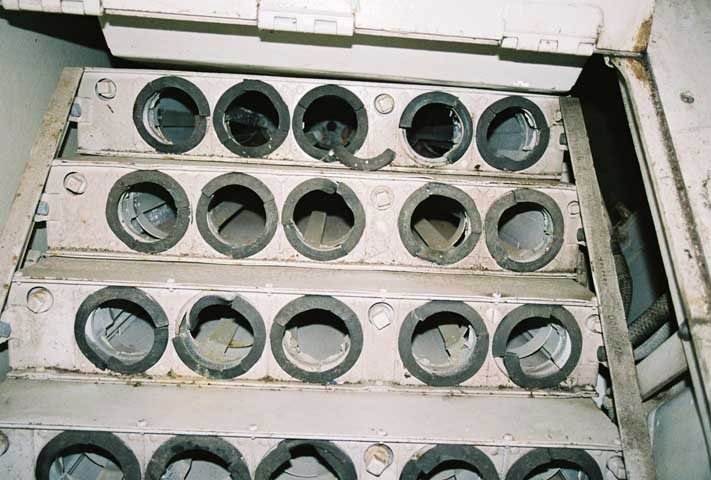
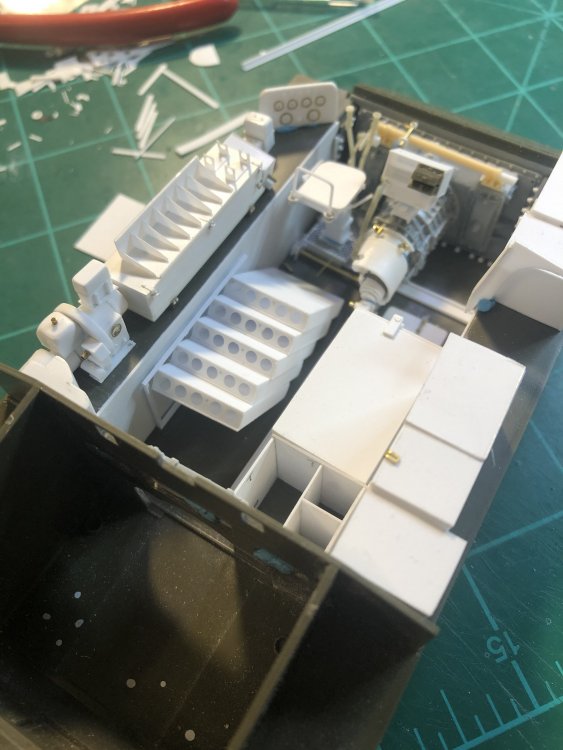
Did some work on the wet stowage. Seems to low of an angle but reference photos I have show it at that height below the sponson.
-
Great work so far. Love the scratch built bits. Looking forward to the rest of the build.
-
Looking great. As everyone has said, the engines are amazing.
-
Thanks. Just trying to get it done before the local IPMS contest in the beginning of April. It will be down to the wire.
-
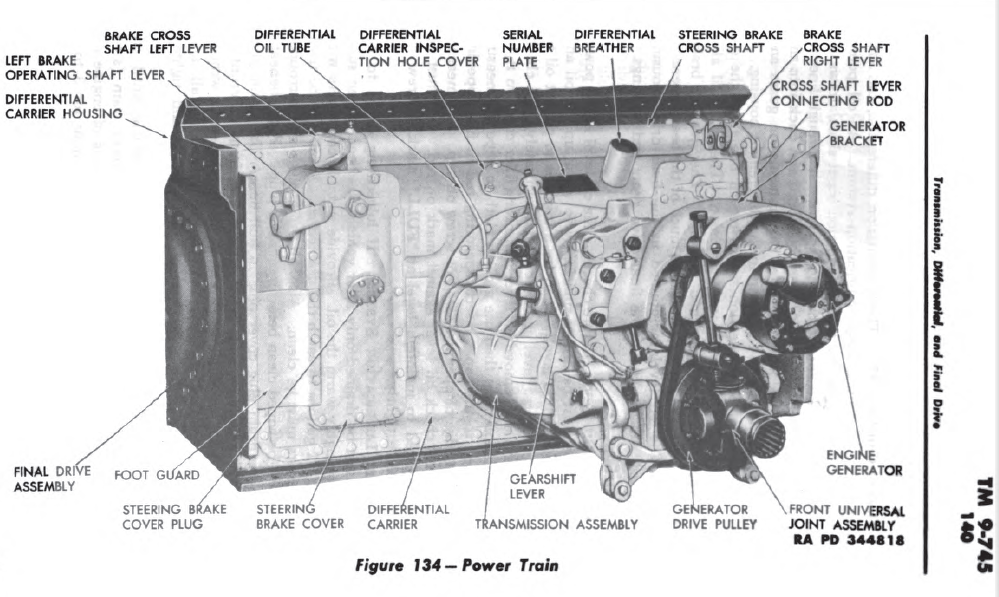
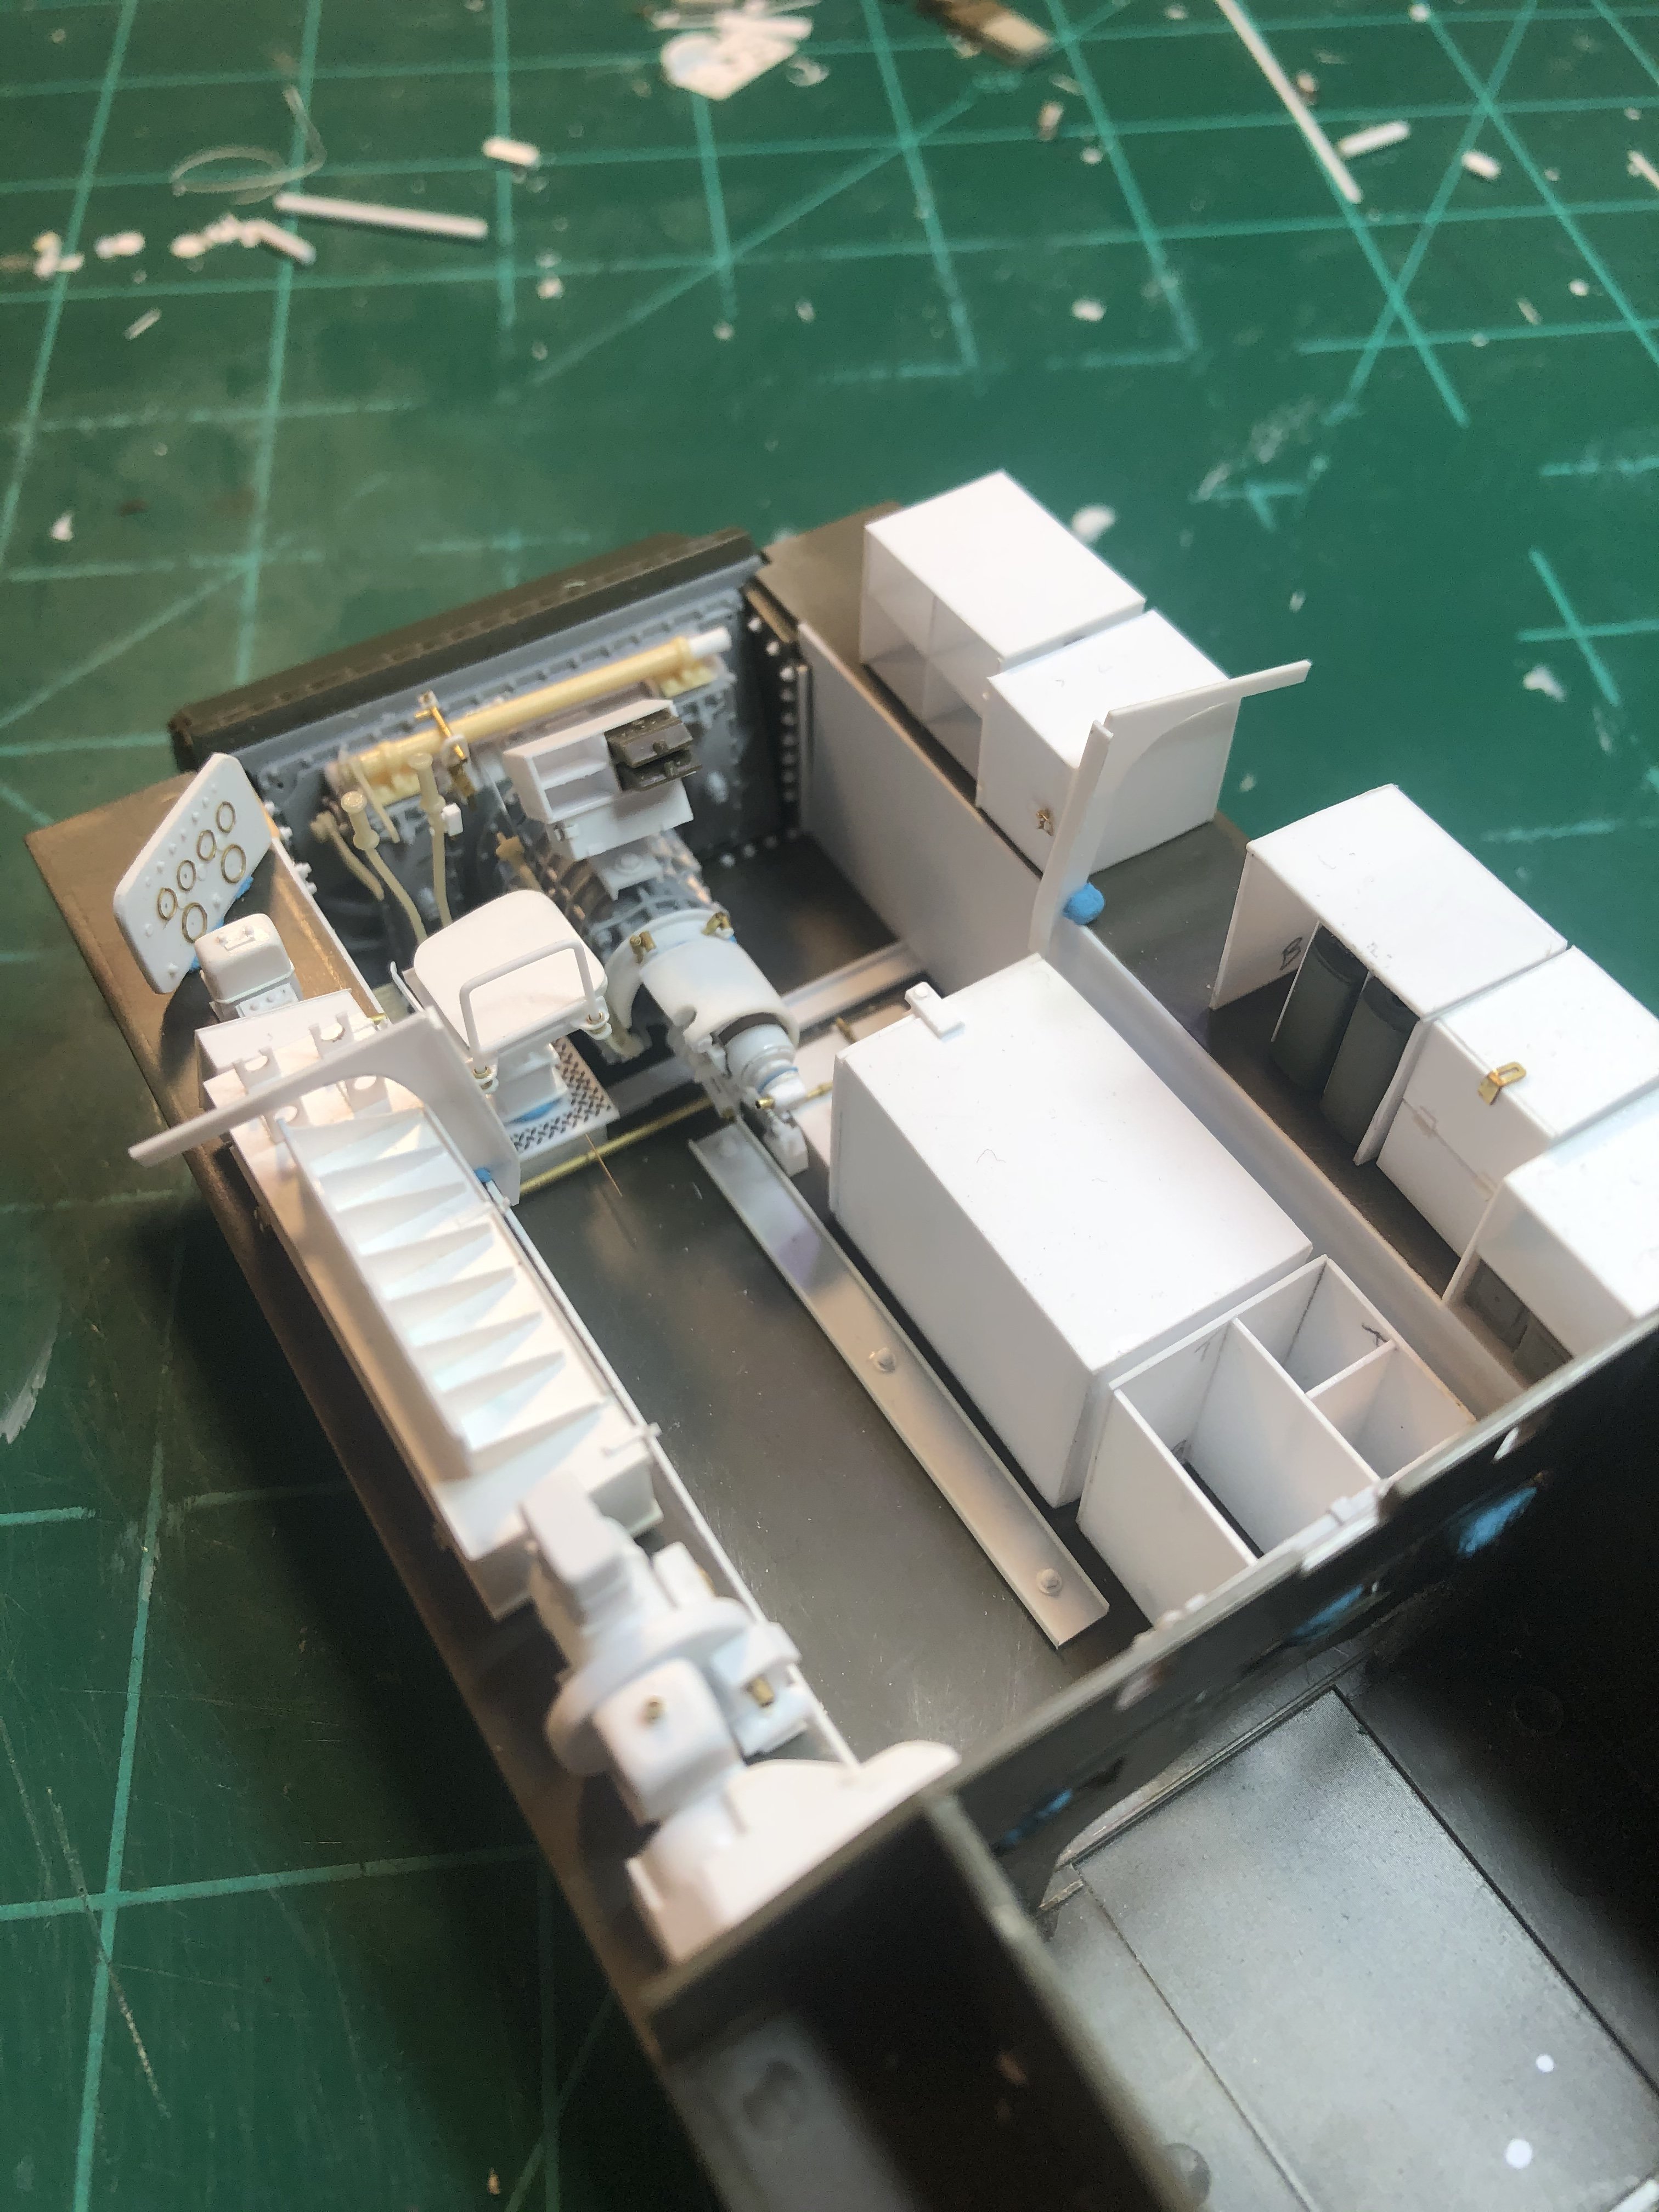
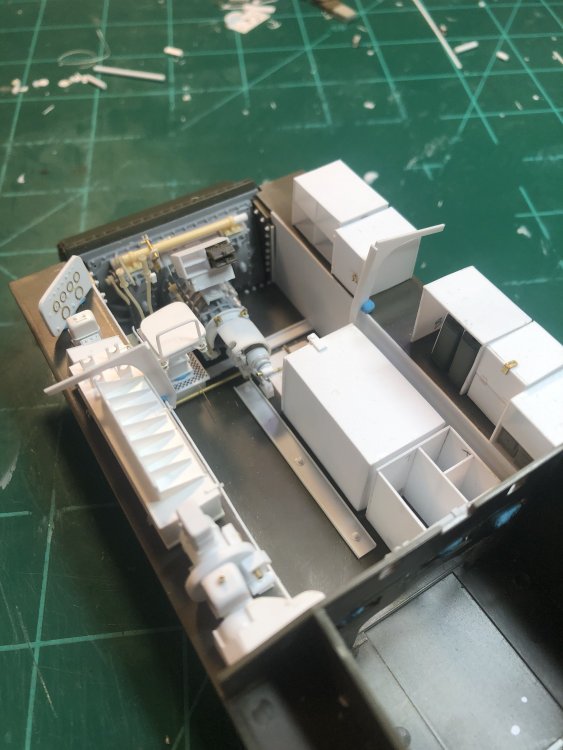
A couple photos of the transmission in place and the drivers seat added.

-
The Holidays are over and work has slowed down so I was able to get some more work done. Added the generator pulley system, generator, generator cover. The generator can be removed to make it easier to paint as it is black and the rest will be painted white. Trying to get this done by the beginning of April. A lot of work to do.