Axeman
-
Posts
172 -
Joined
-
Last visited
Content Type
Profiles
Forums
Events
Gallery
Everything posted by Axeman
-
Panther D Kursk 1943 [ Dragon 6299]
Axeman replied to PILOTE109's topic in LSM 1/35 and Larger Work In Progress
Amazing work. The photo etched is fantastic. It looks great -
Sorry. Ammo storage, not annoying storage.
-
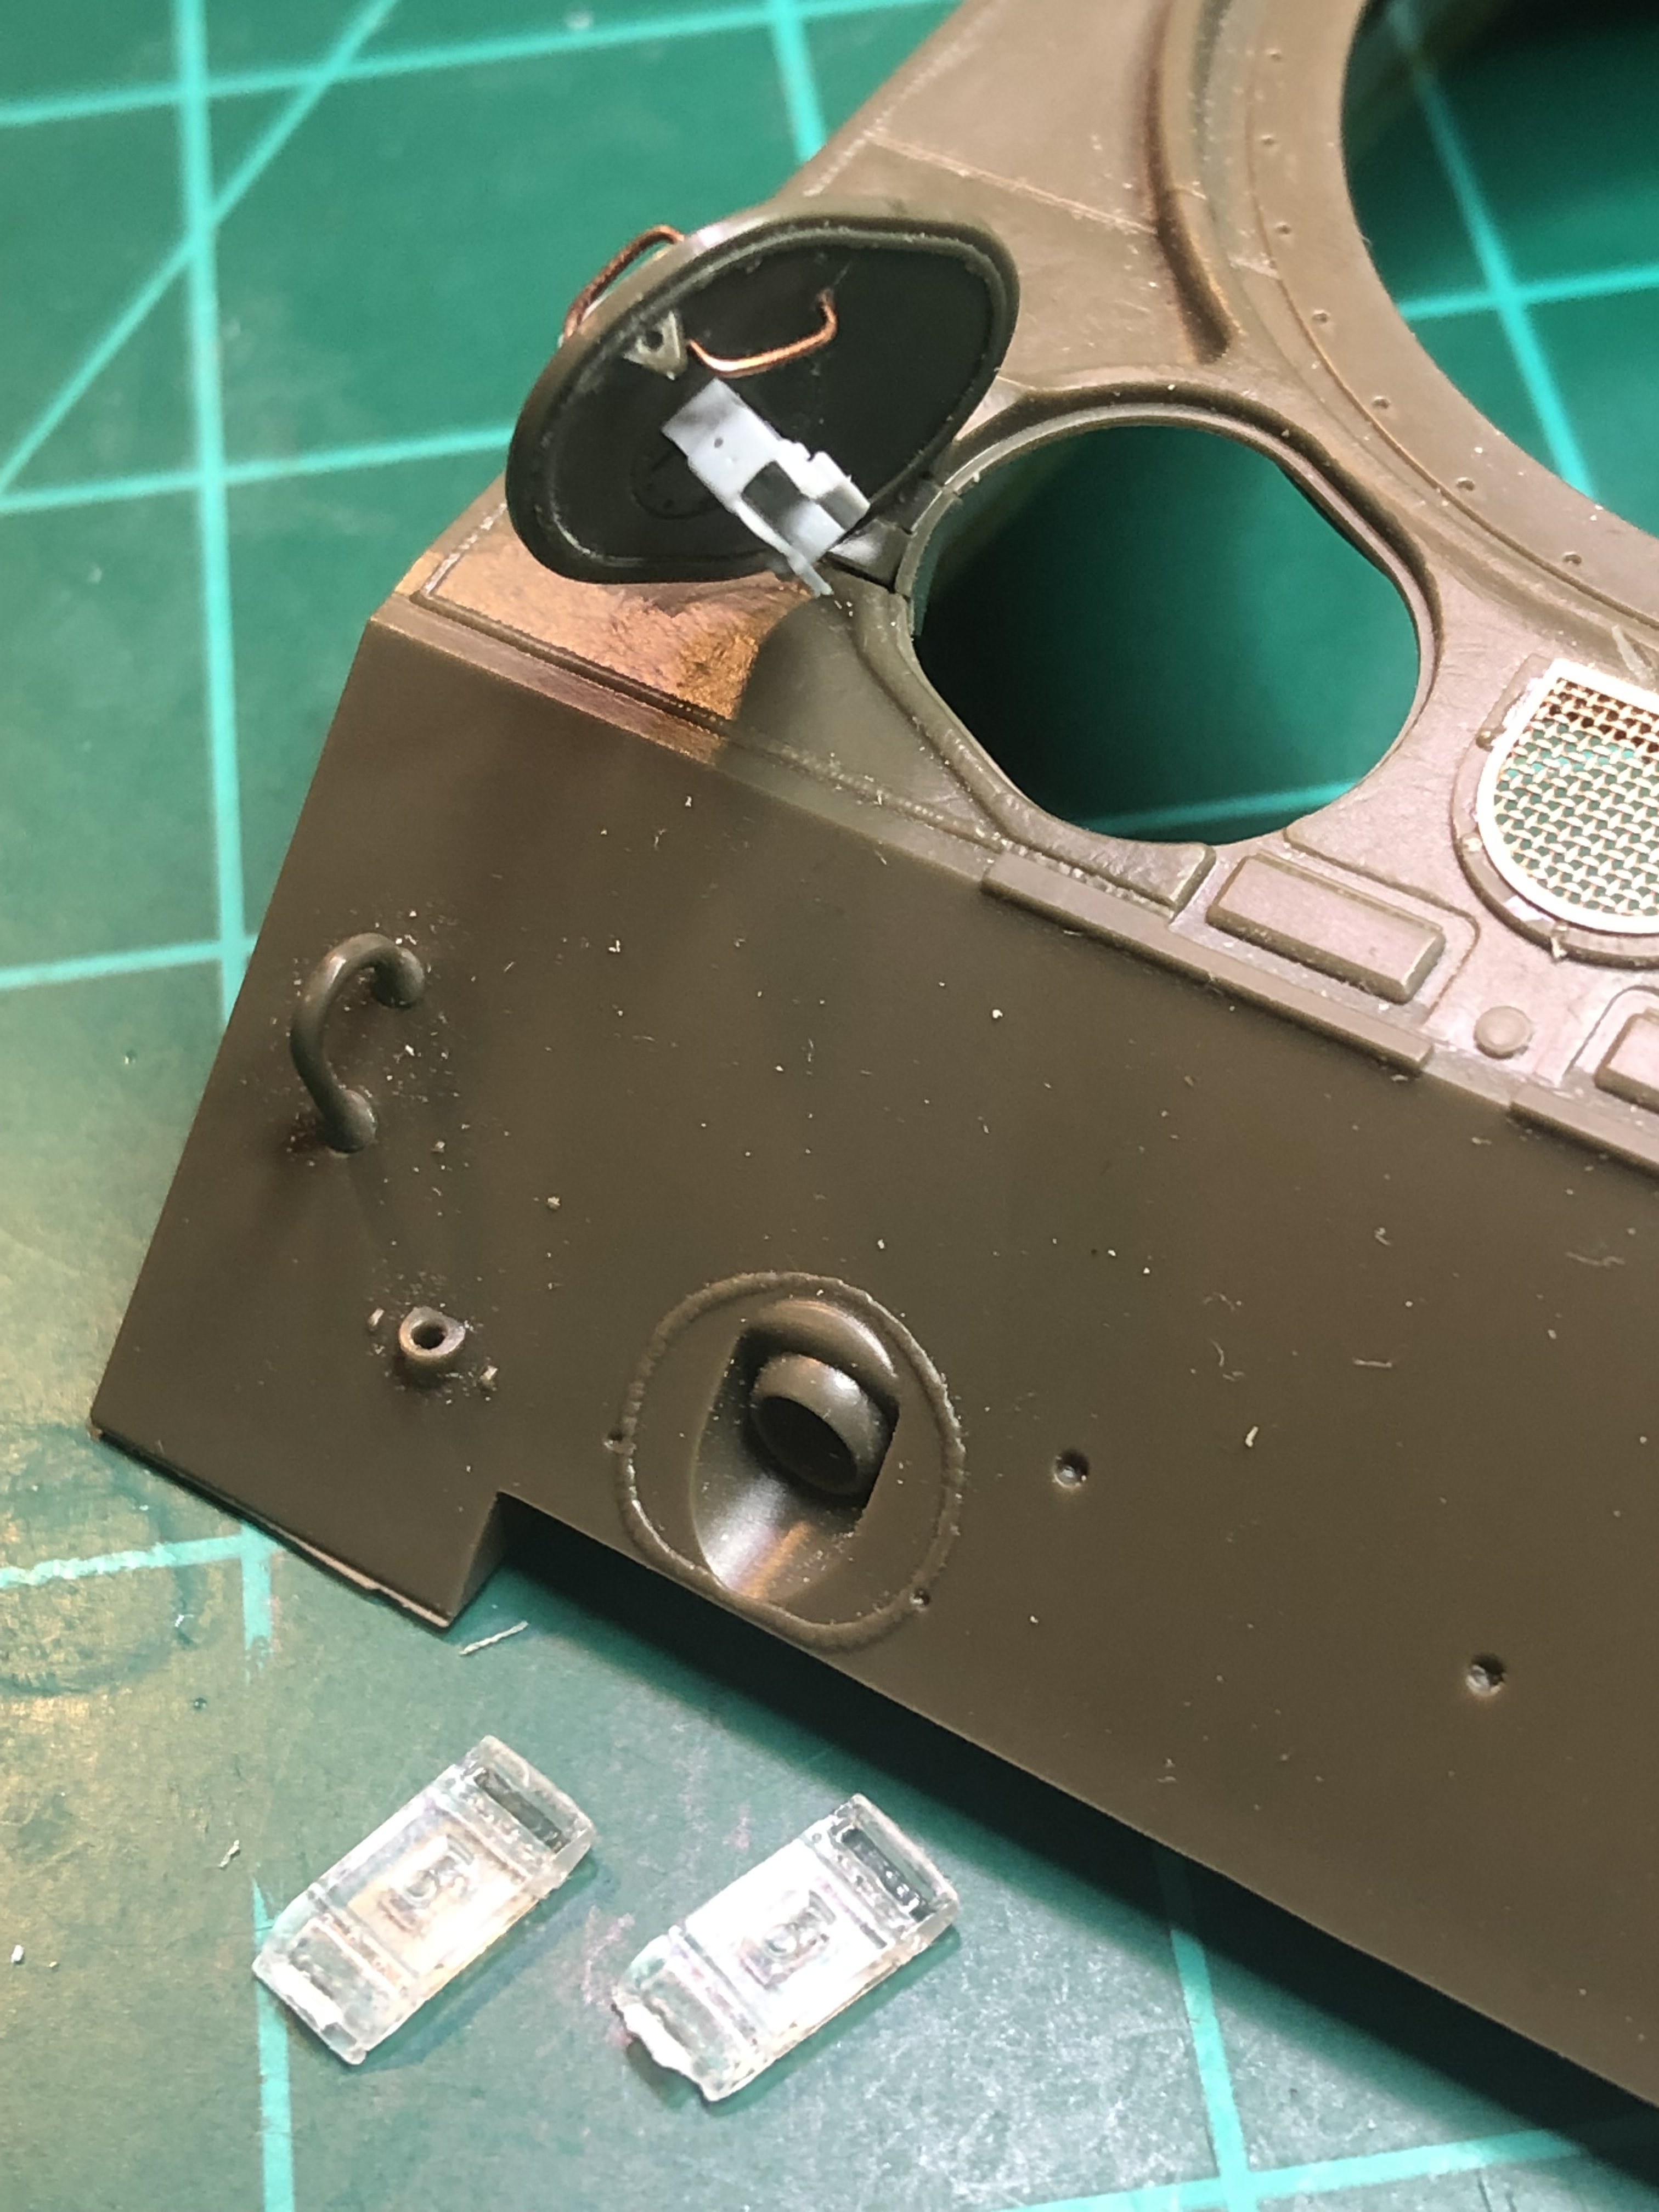
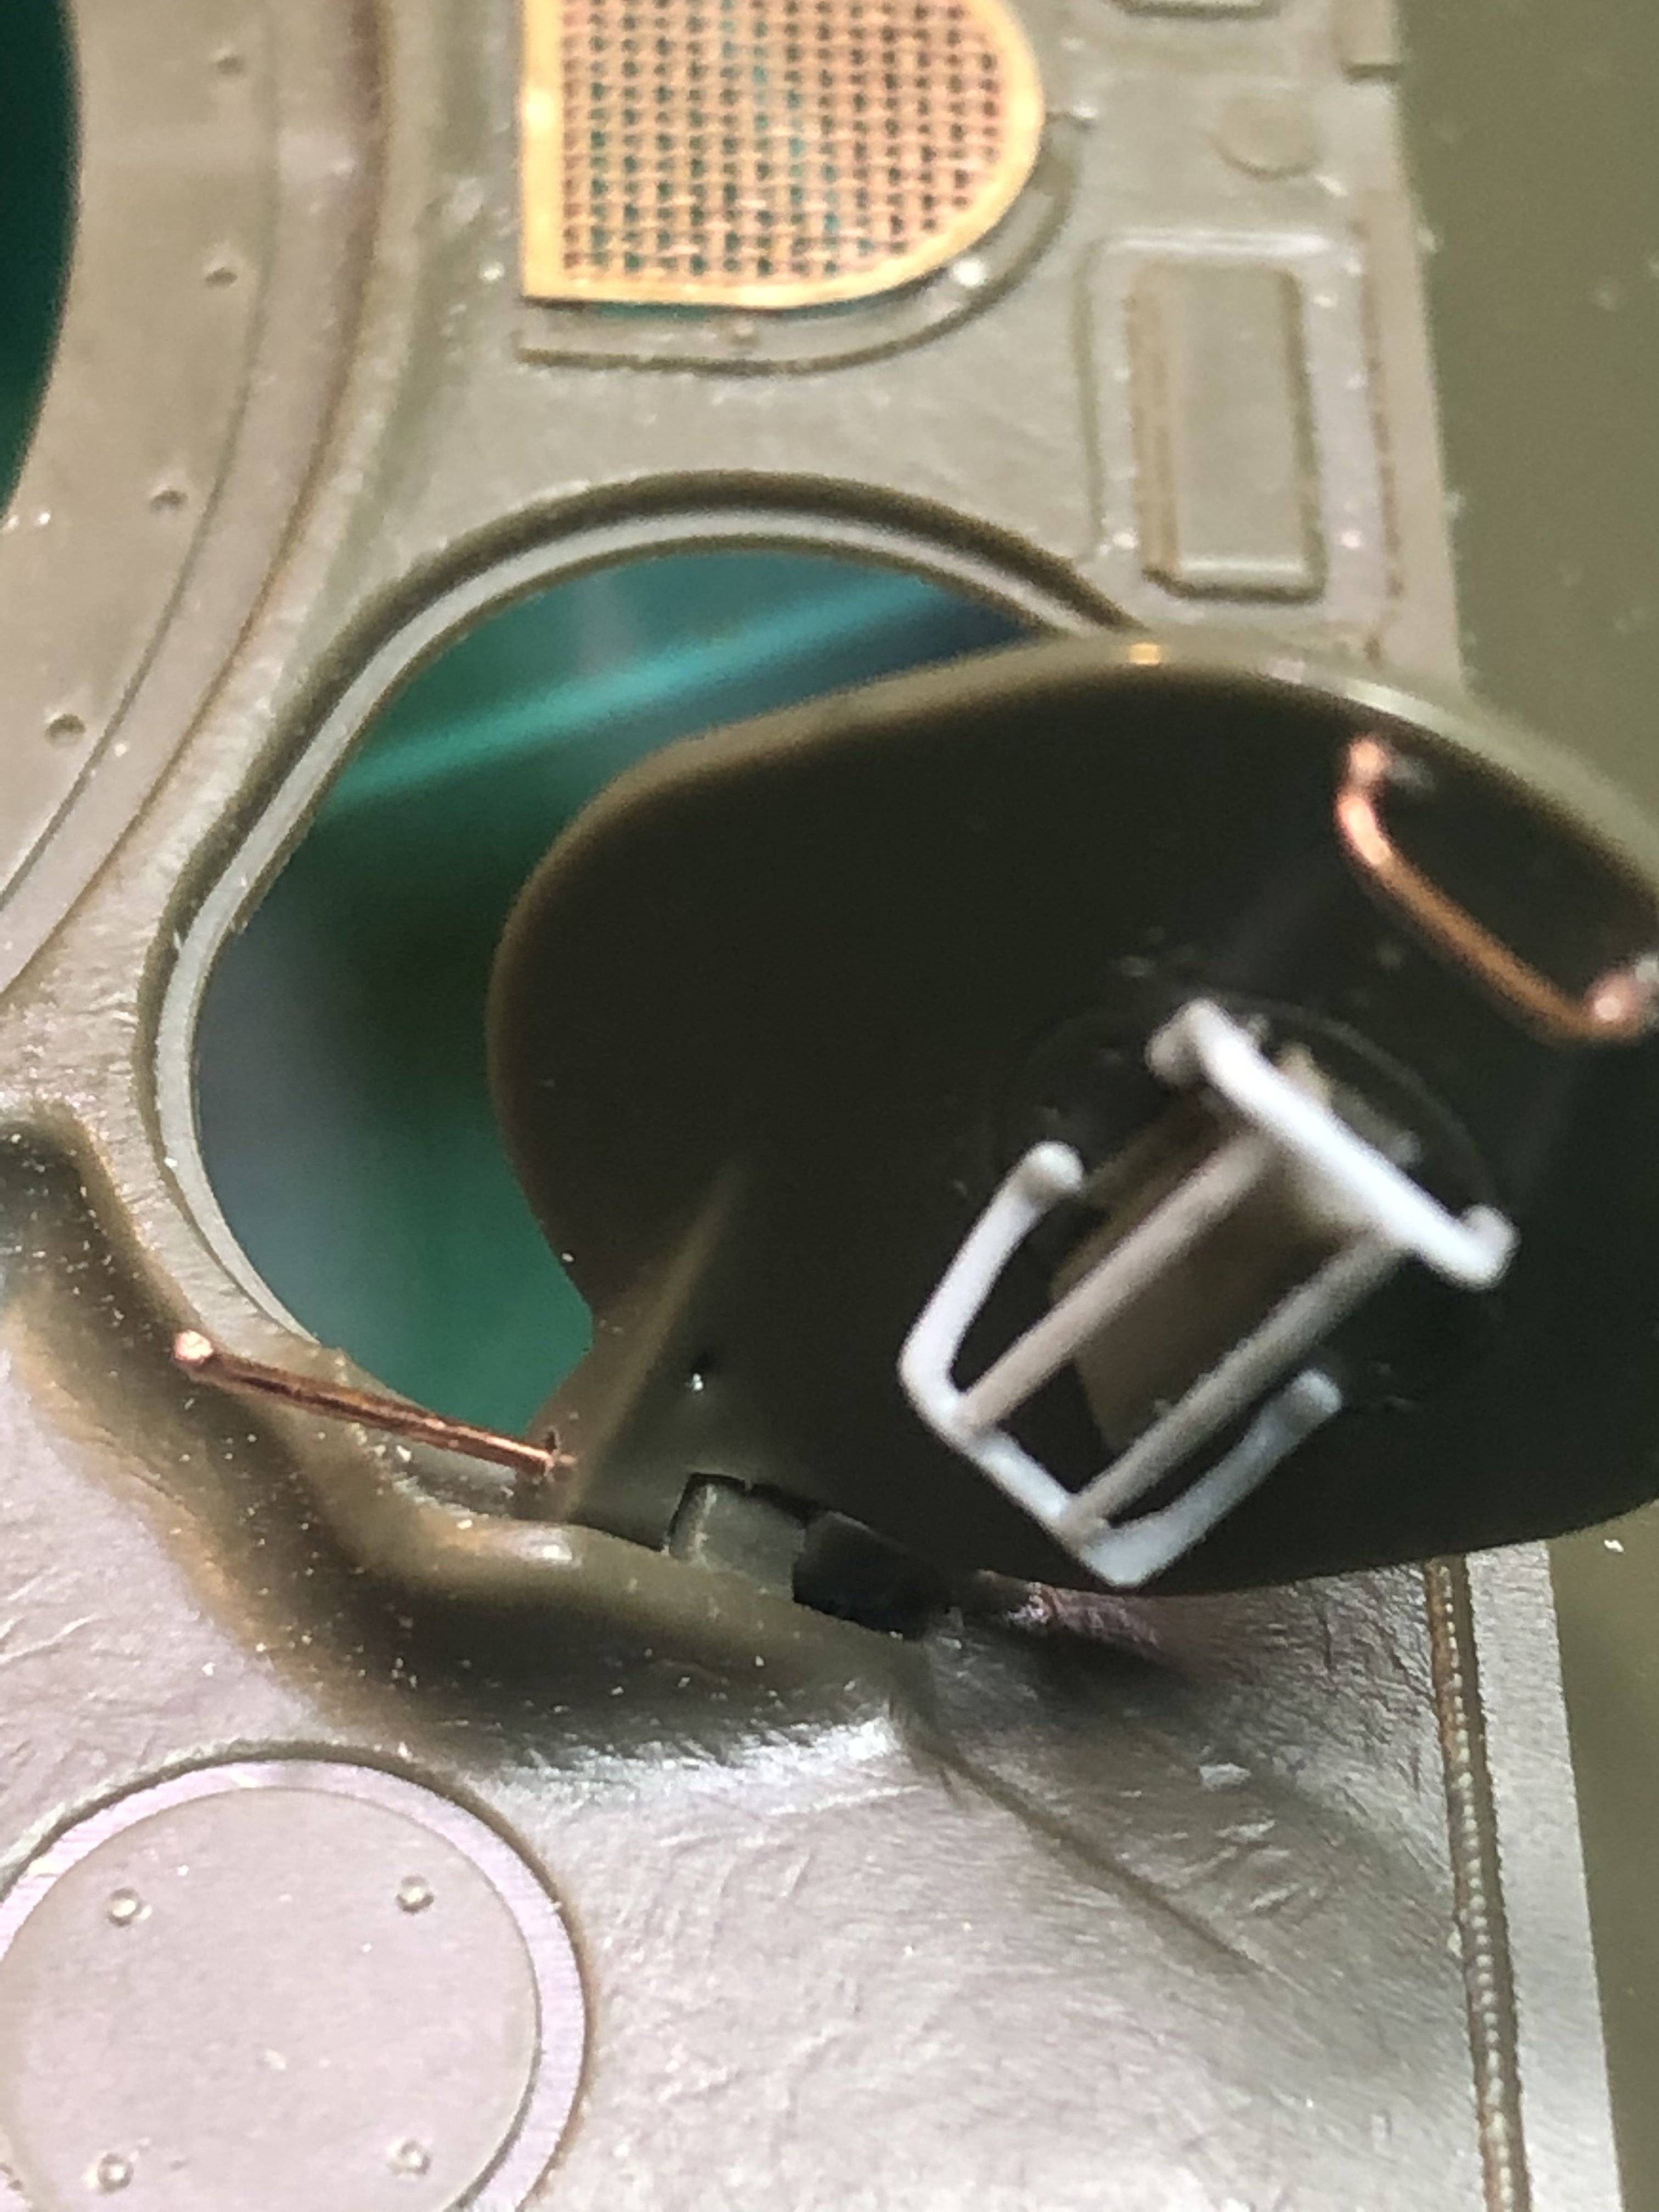
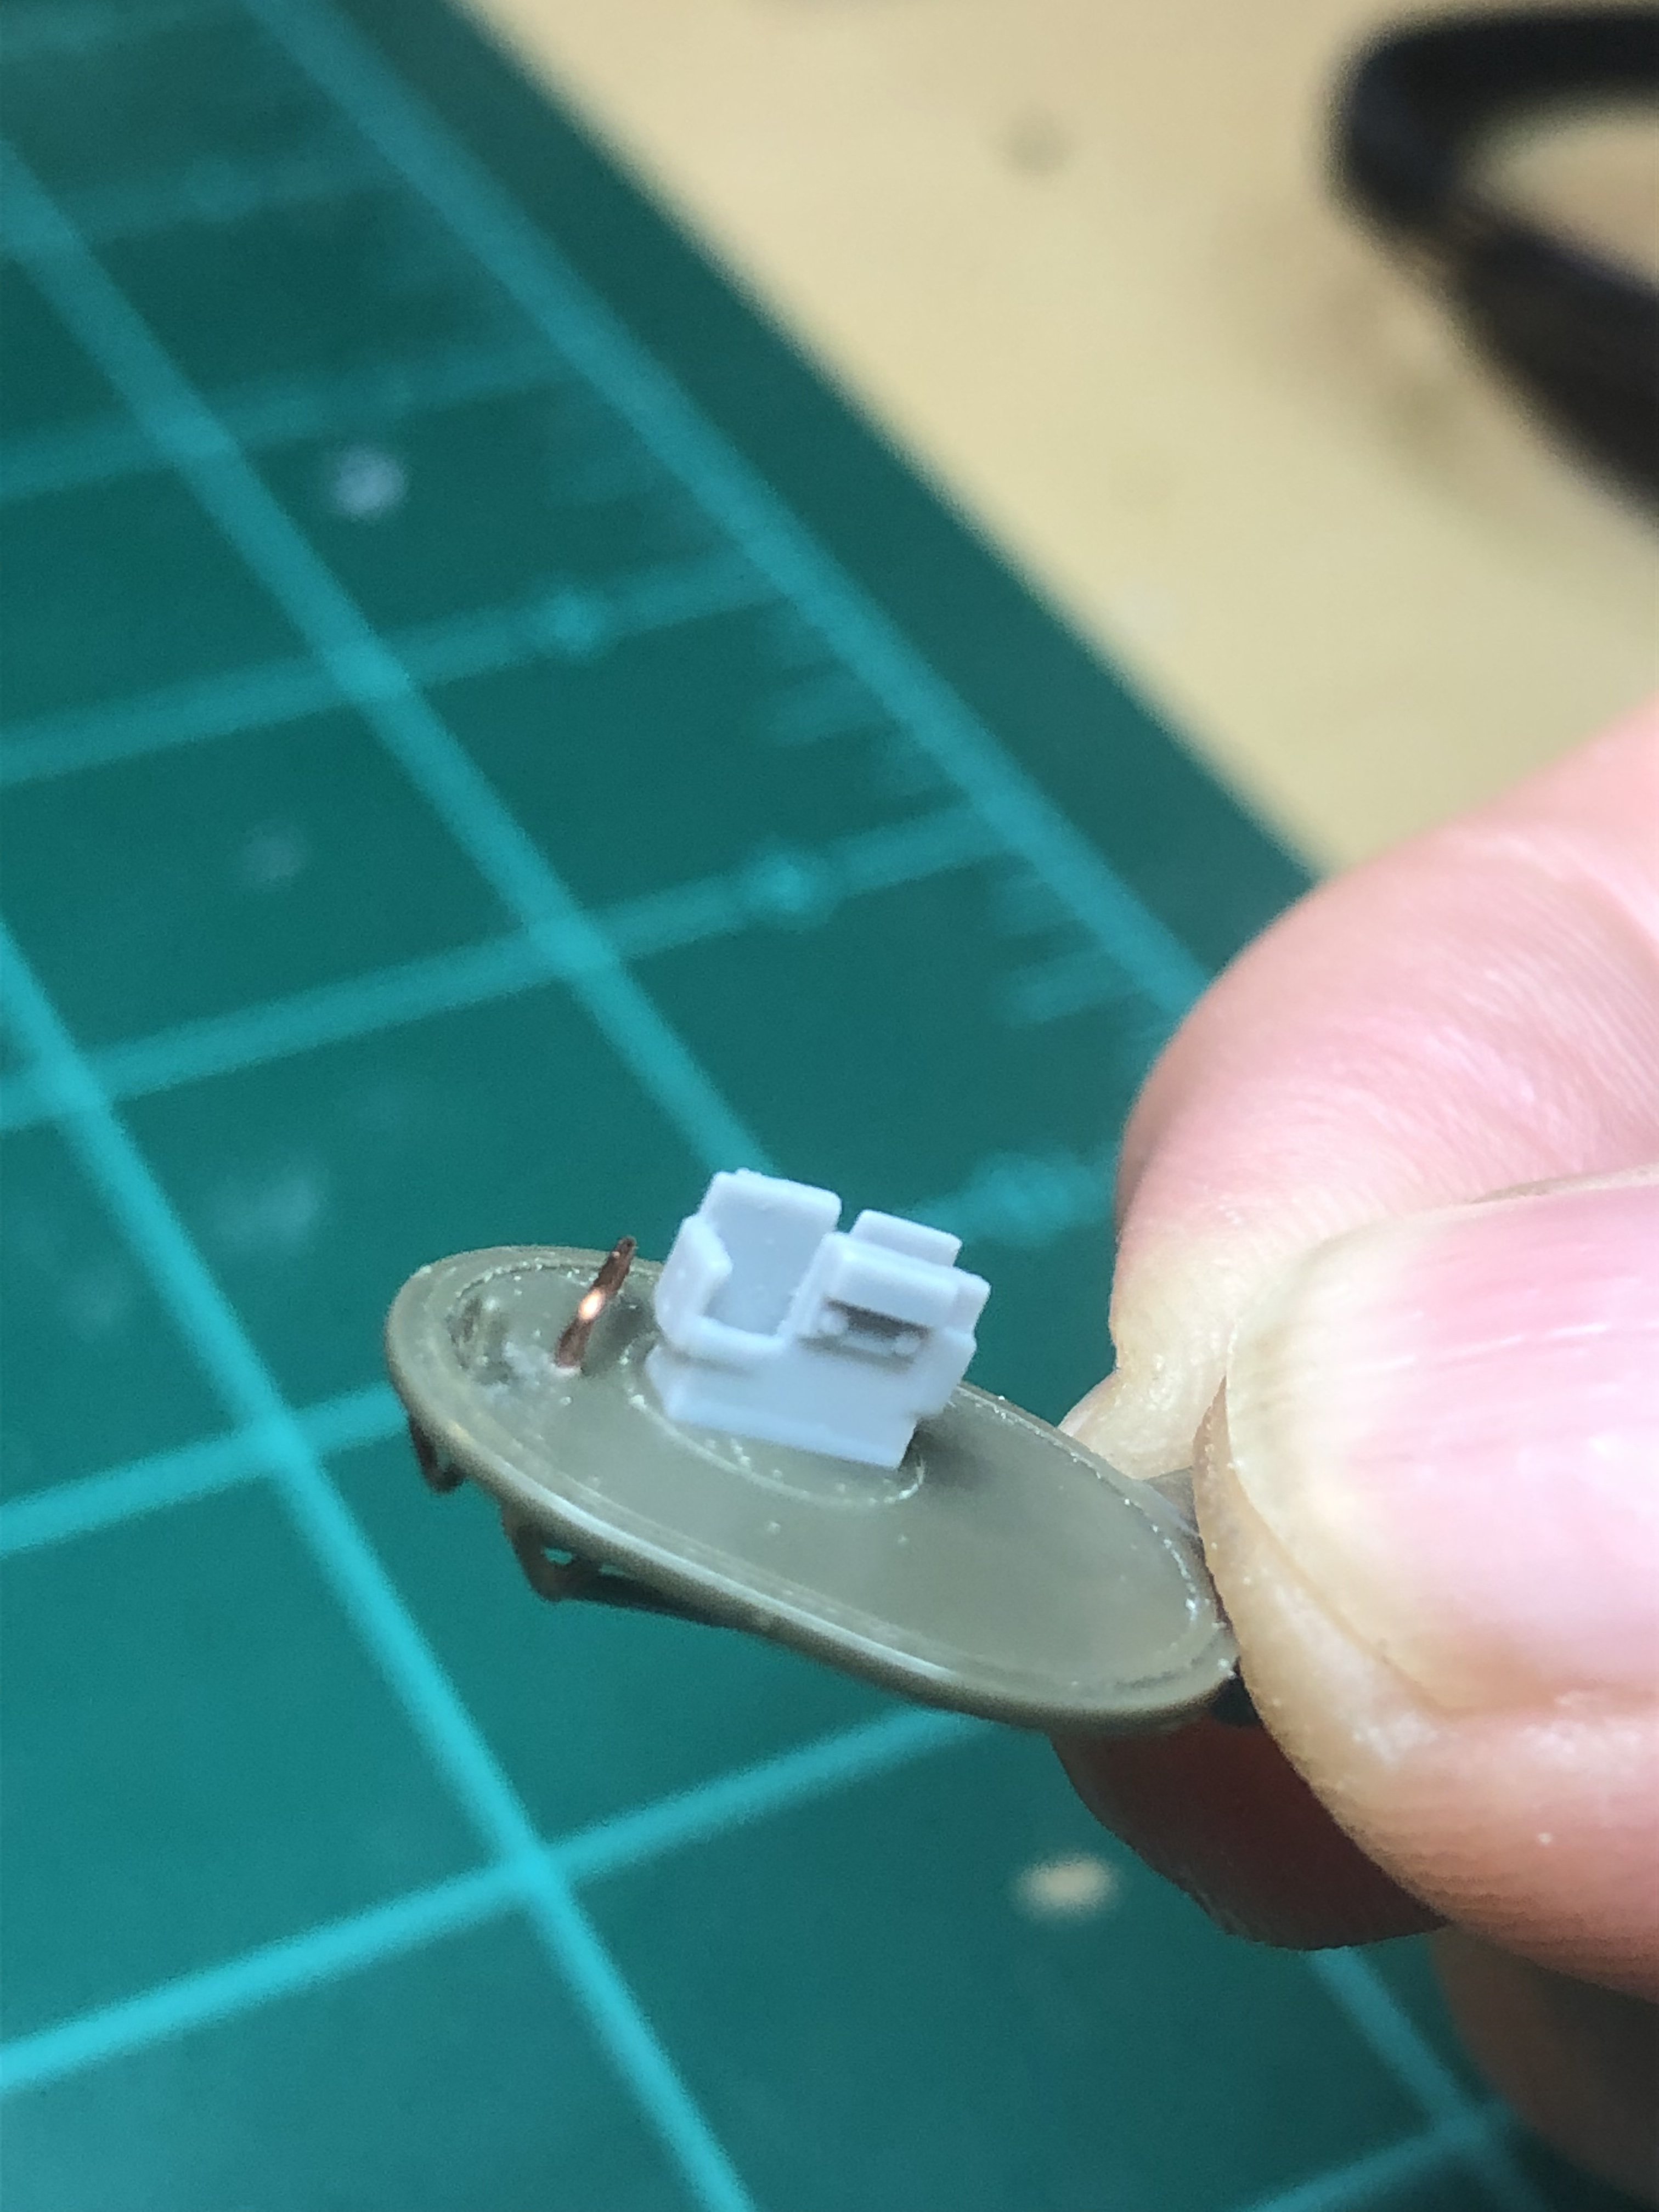
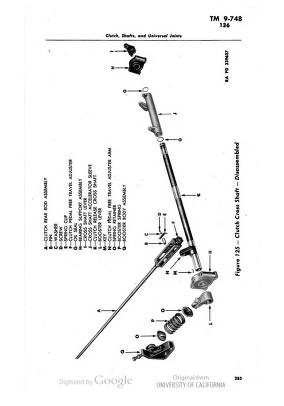
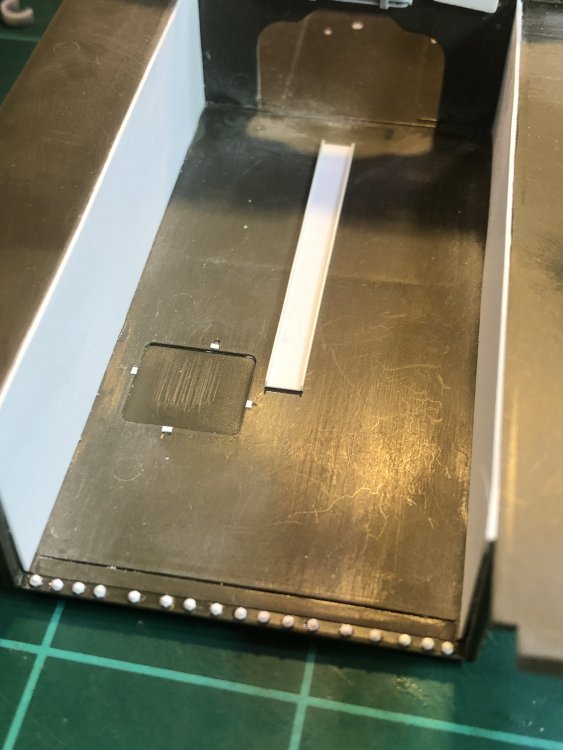
Only got a little bit done this weekend. Worked on the clutch cross shaft behind the drivers seat and before the ammo storage. Attempted the clutch pedal free travel adjuster ( the square framed box looking item on the left side of the bar but was not happy with it. Hopefully give it another shot this week. Once this is done I can start on the main annoying storage area.

-
MH 60 s Knighthawk Academy 1/35
Axeman replied to shark64's topic in LSM 1/35 and Larger Work In Progress
Just amazing work!!!!! -
Thanks Hubert. I will try the ochre.
-
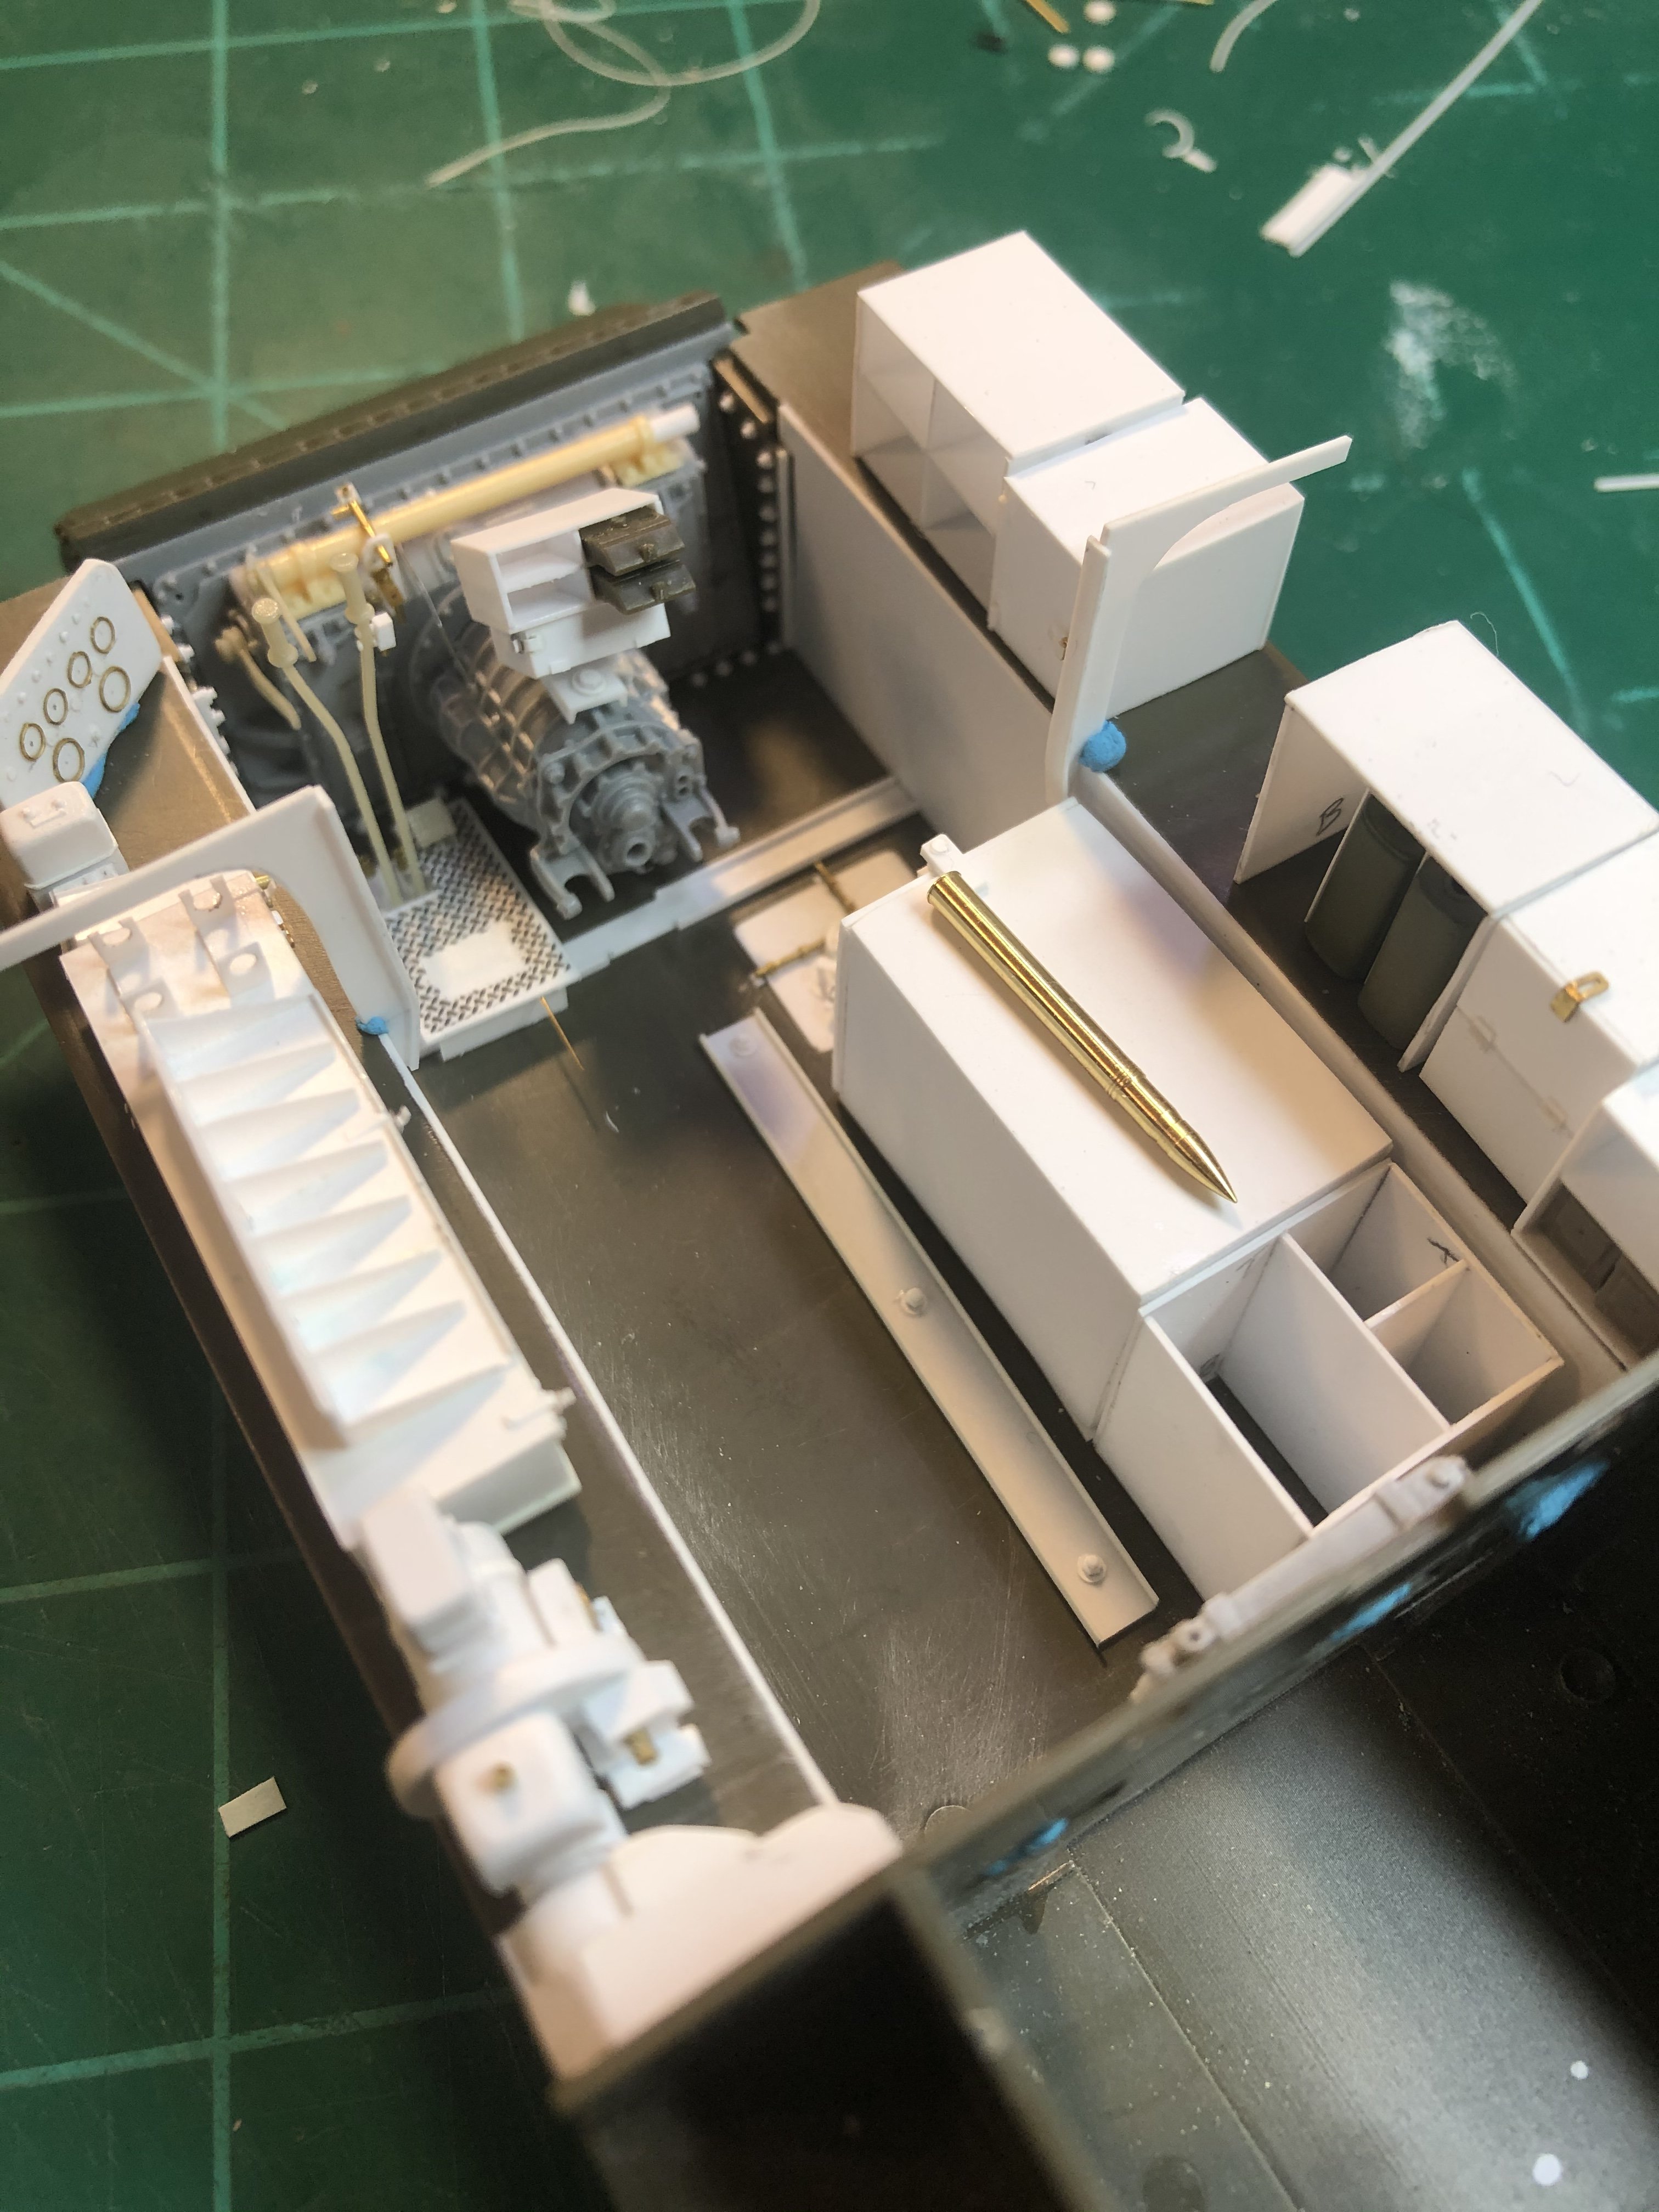
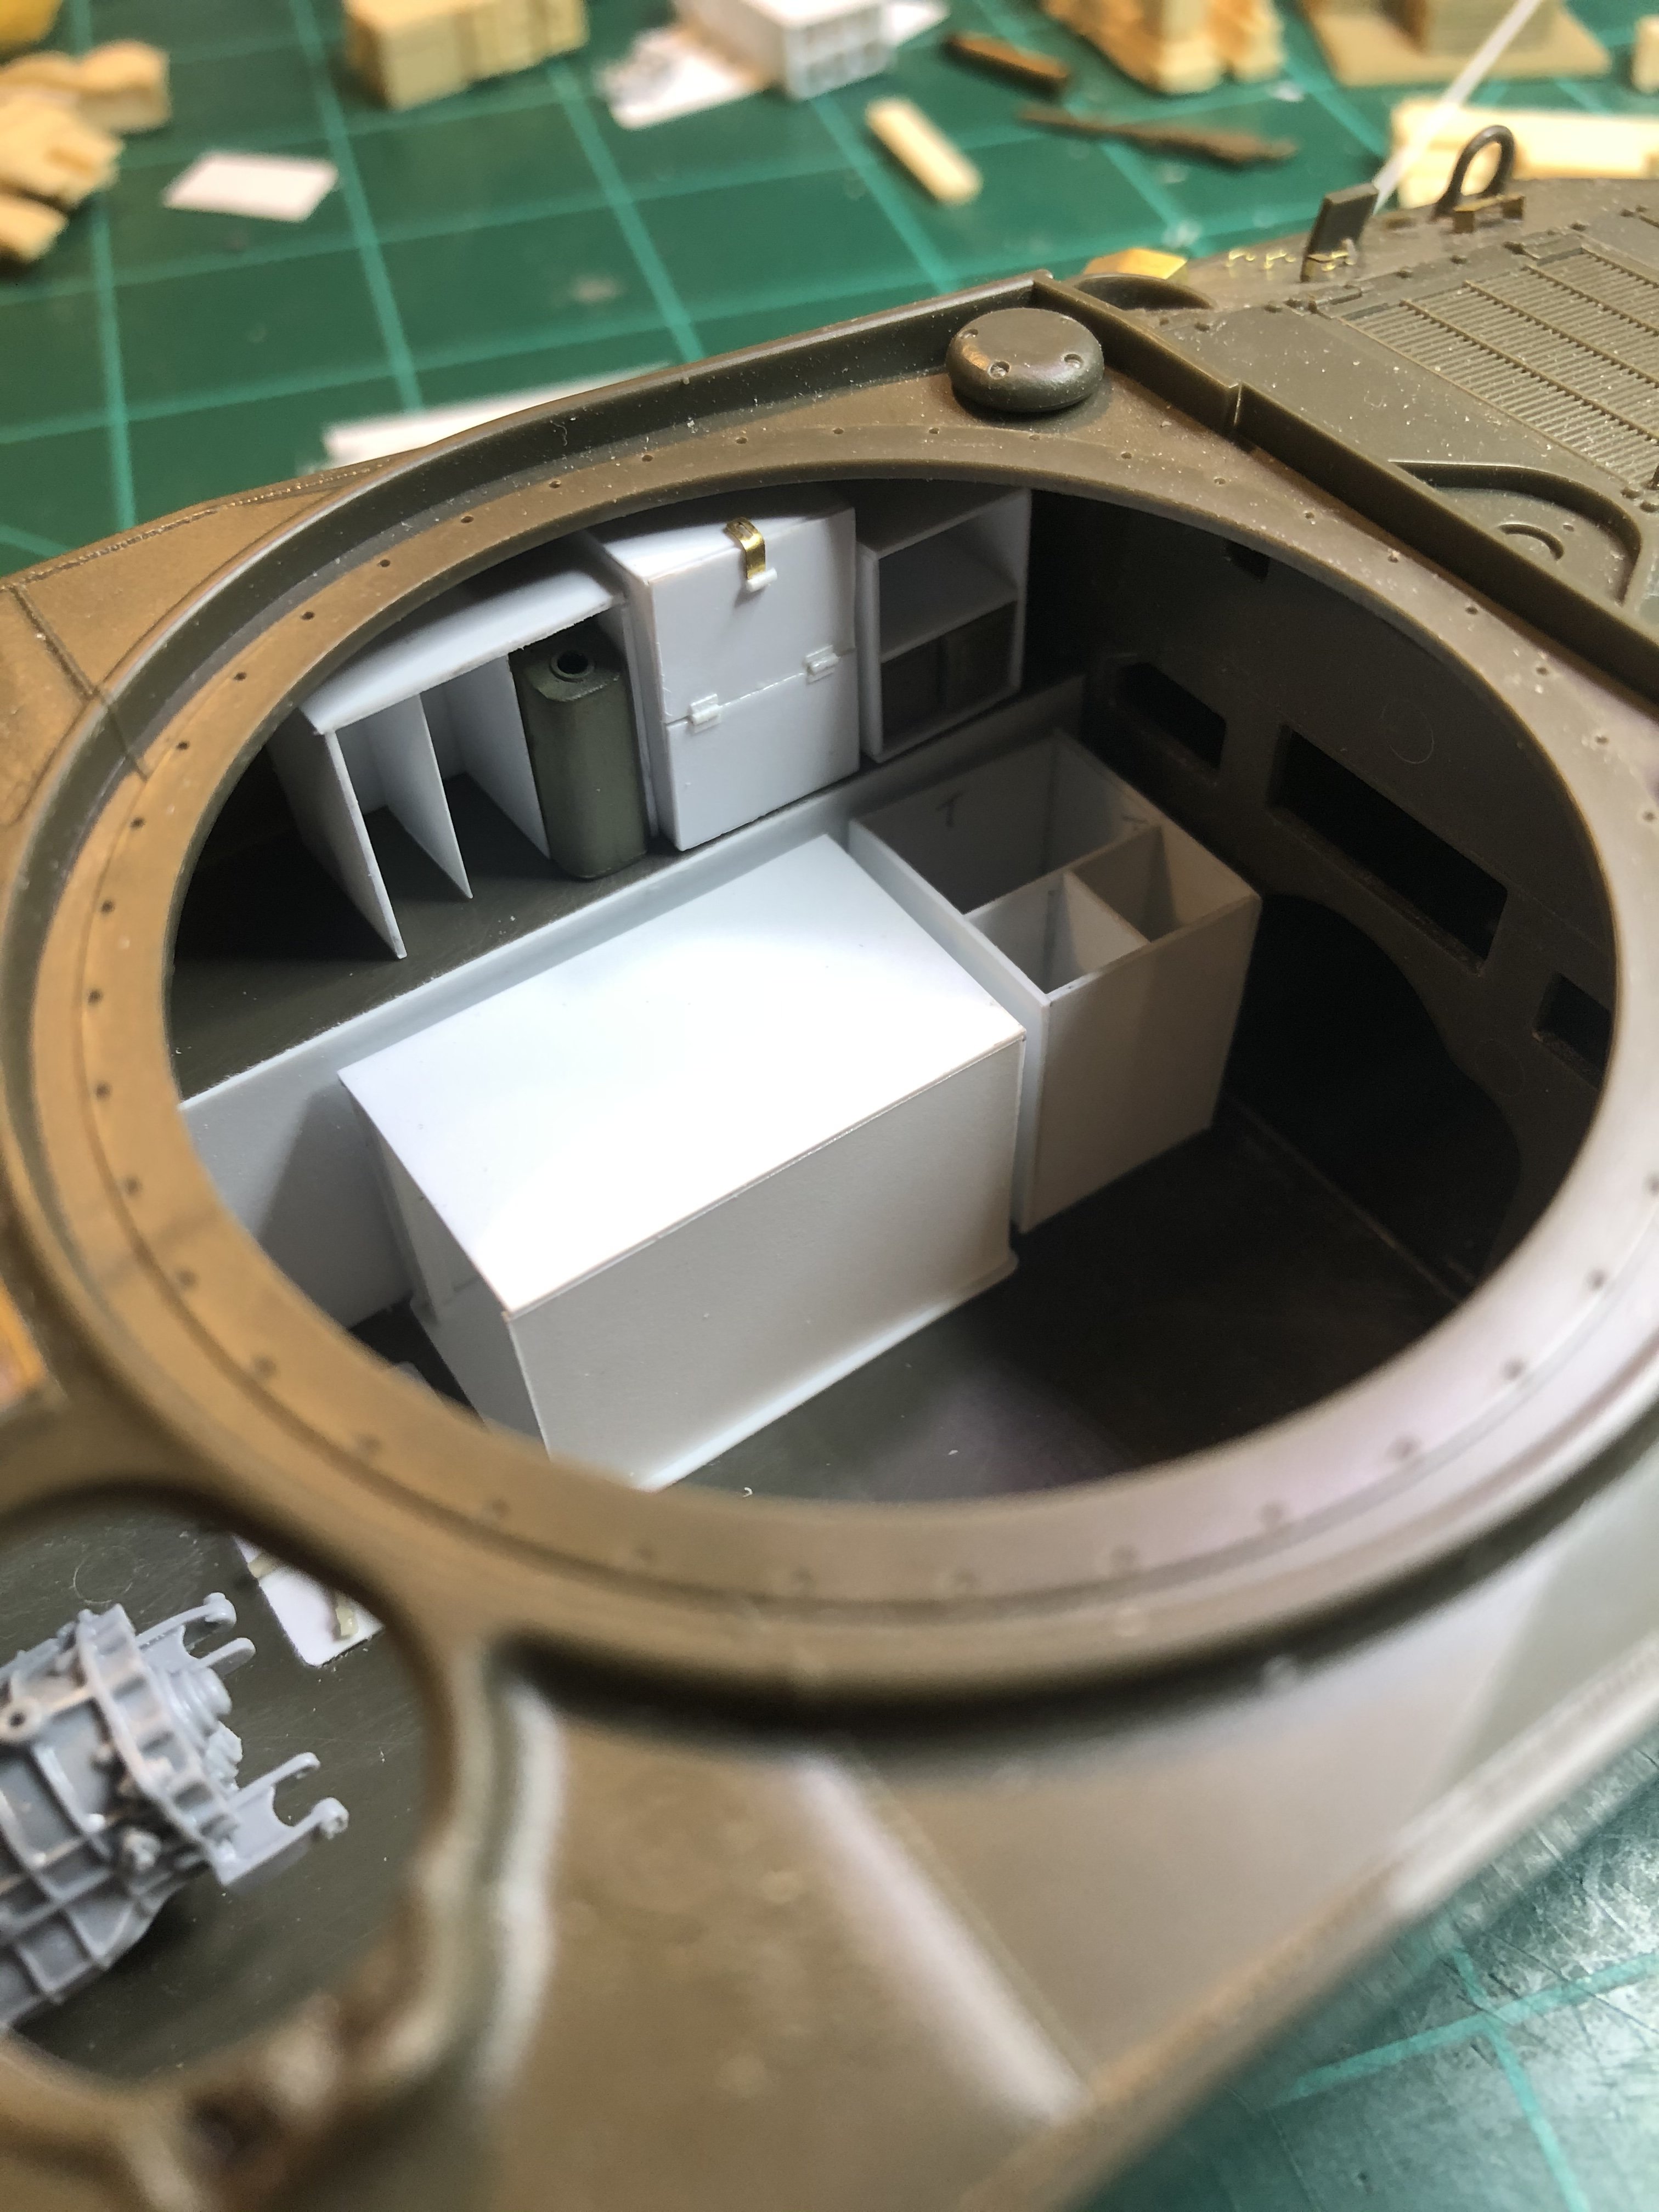
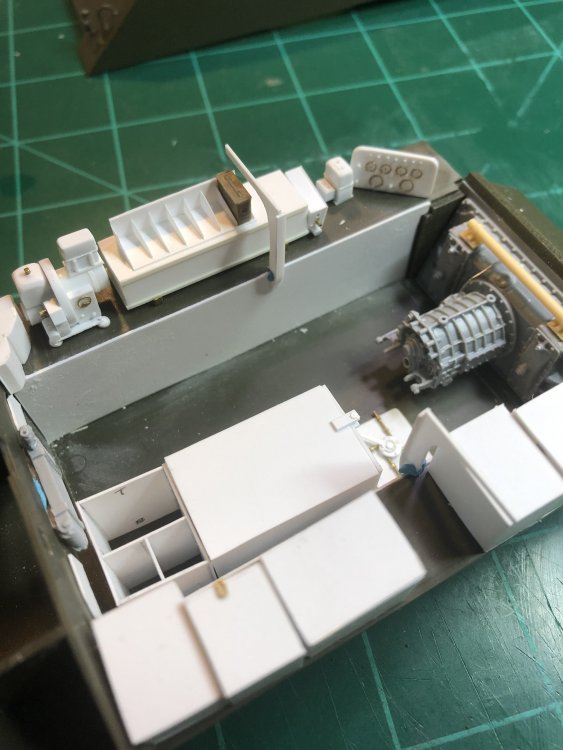
Did some work today. Finished the battery storage with latches, spare head light storage on top next to the .30 cal ammo storage. I have an extra pair of head lights from another kit to add once painted. Glued the floor plate to the steering controls and added anti slip marks (archer resin transfers). The square in the middle is for the drivers seat. Almost done with the seats, just got to add the cushions. In the over all interior picture is a 76mm shell I got, (2 bags of 20 shells) mainly for the ammo storage behind the driver which is still to be done but I put it on top of the other ammo storage box and the box is the right size. I was initially thinking it was too big. Any suggestion what color to add to white to make it a warmer feeling? Pure white seems too cold. Would Buff or a light tan work? Any suggestions?


-
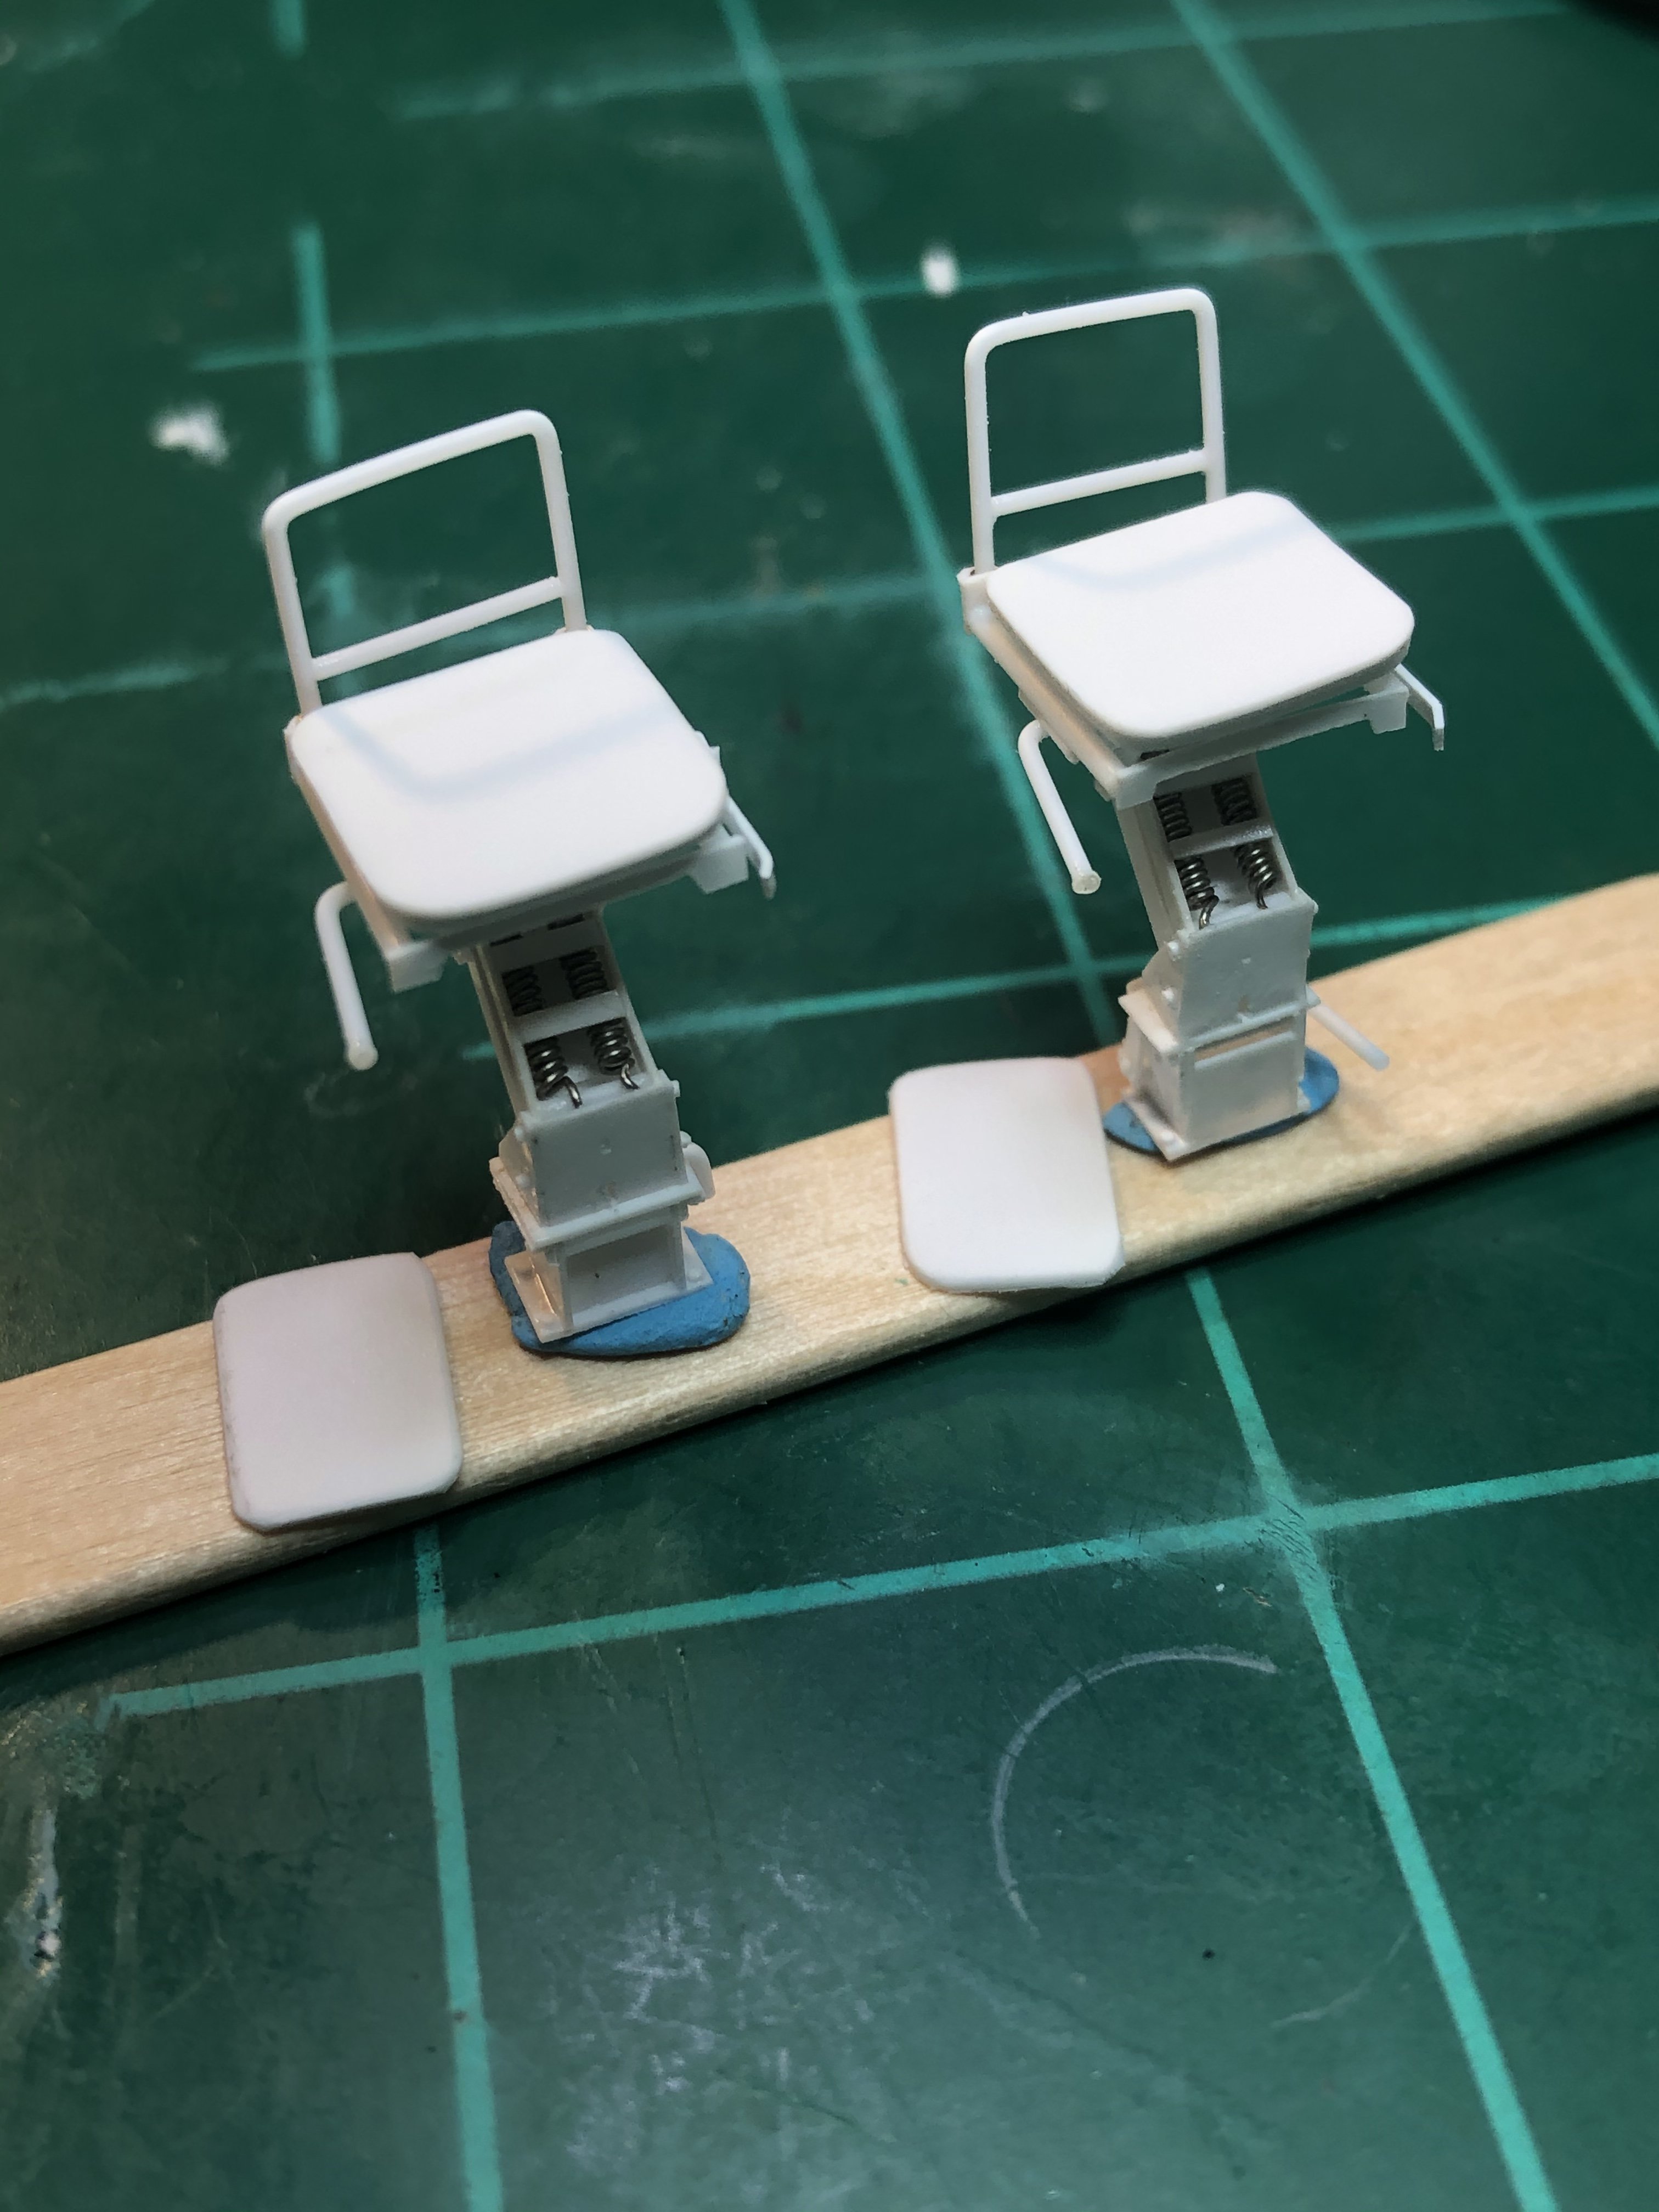
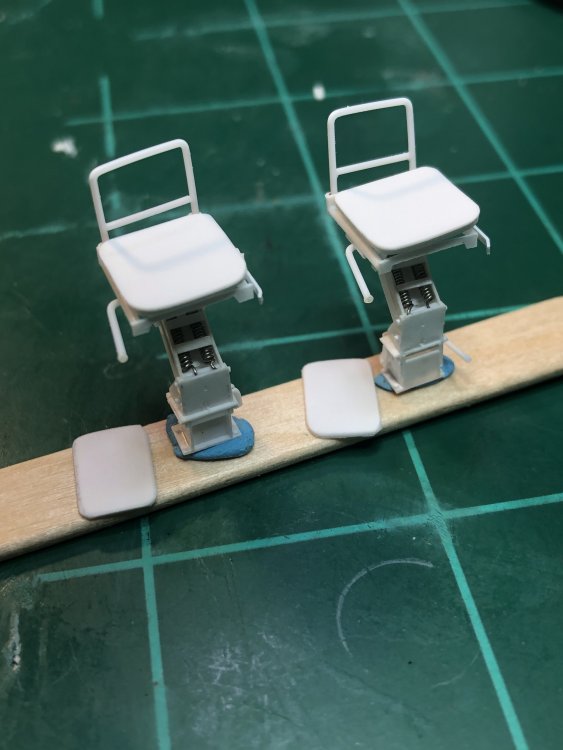
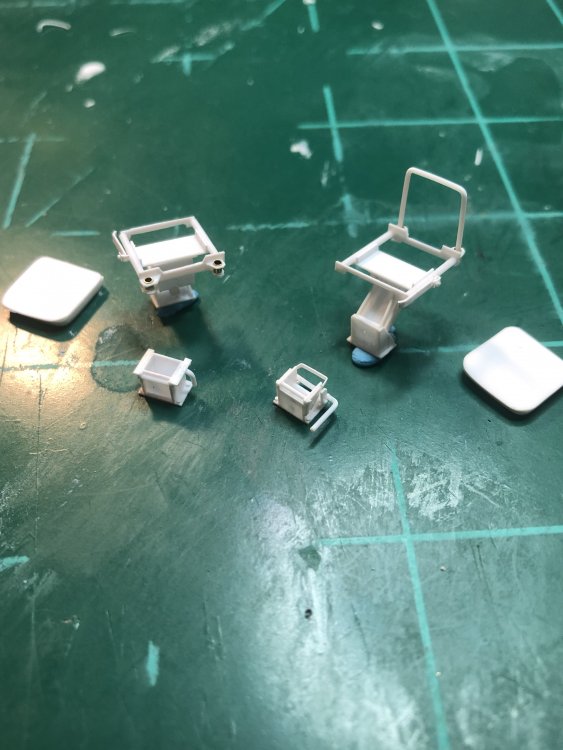
Worked on the seats in between Thanksgiving and Christmas shopping this weekend and taking my son back to school. In the front is the sub-base cushion with two different styles I found. The white squares are the seat pans which will be placed in the middle of the seat frame. The seat back frame can come out as it just slides into the brass tube. It was a test fit but seems a little low. Next is the cushions and some bolts. Plan on finishing the seats this week and next weekend hopefully start on the ammo storage behind the driver.
-
Nice work!
-
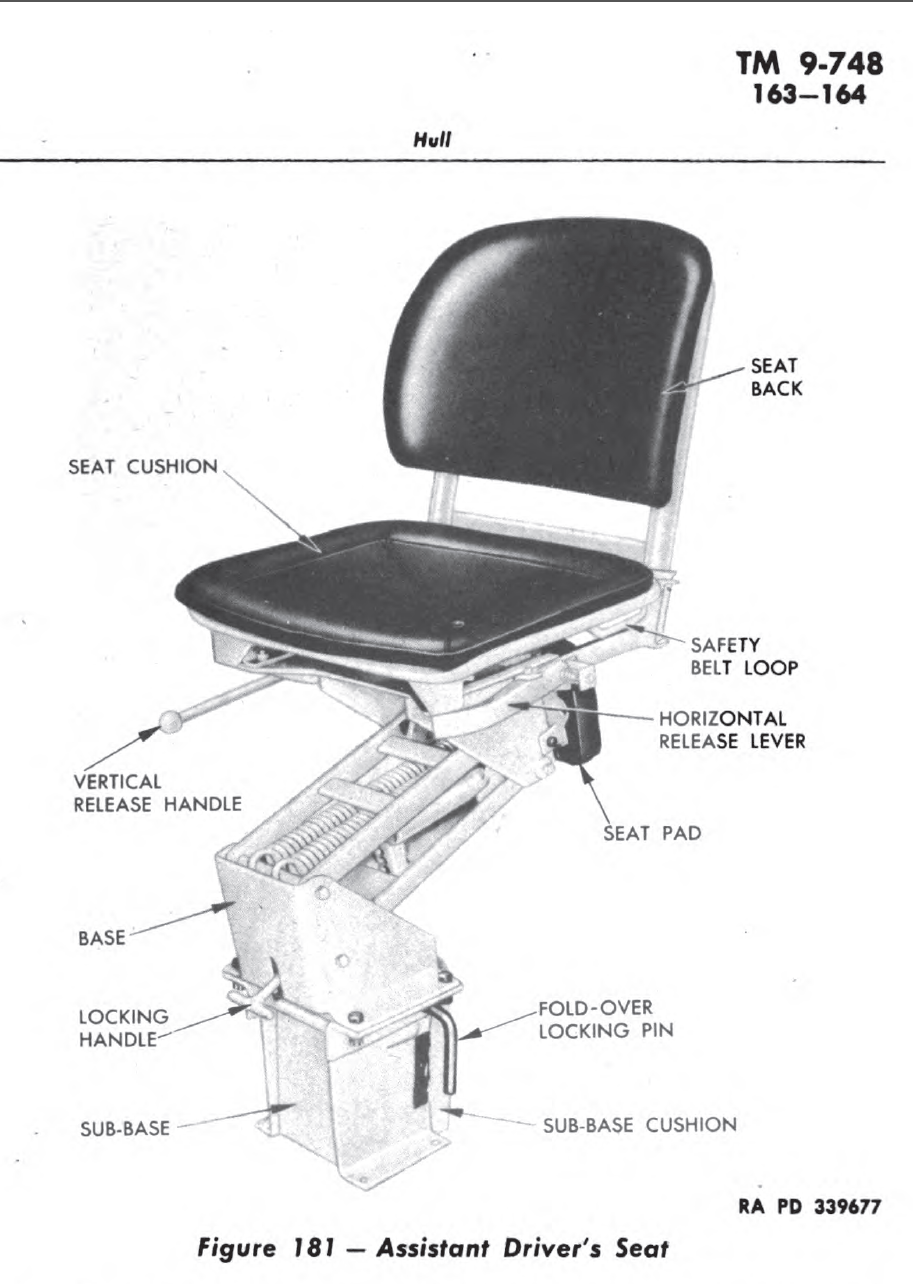
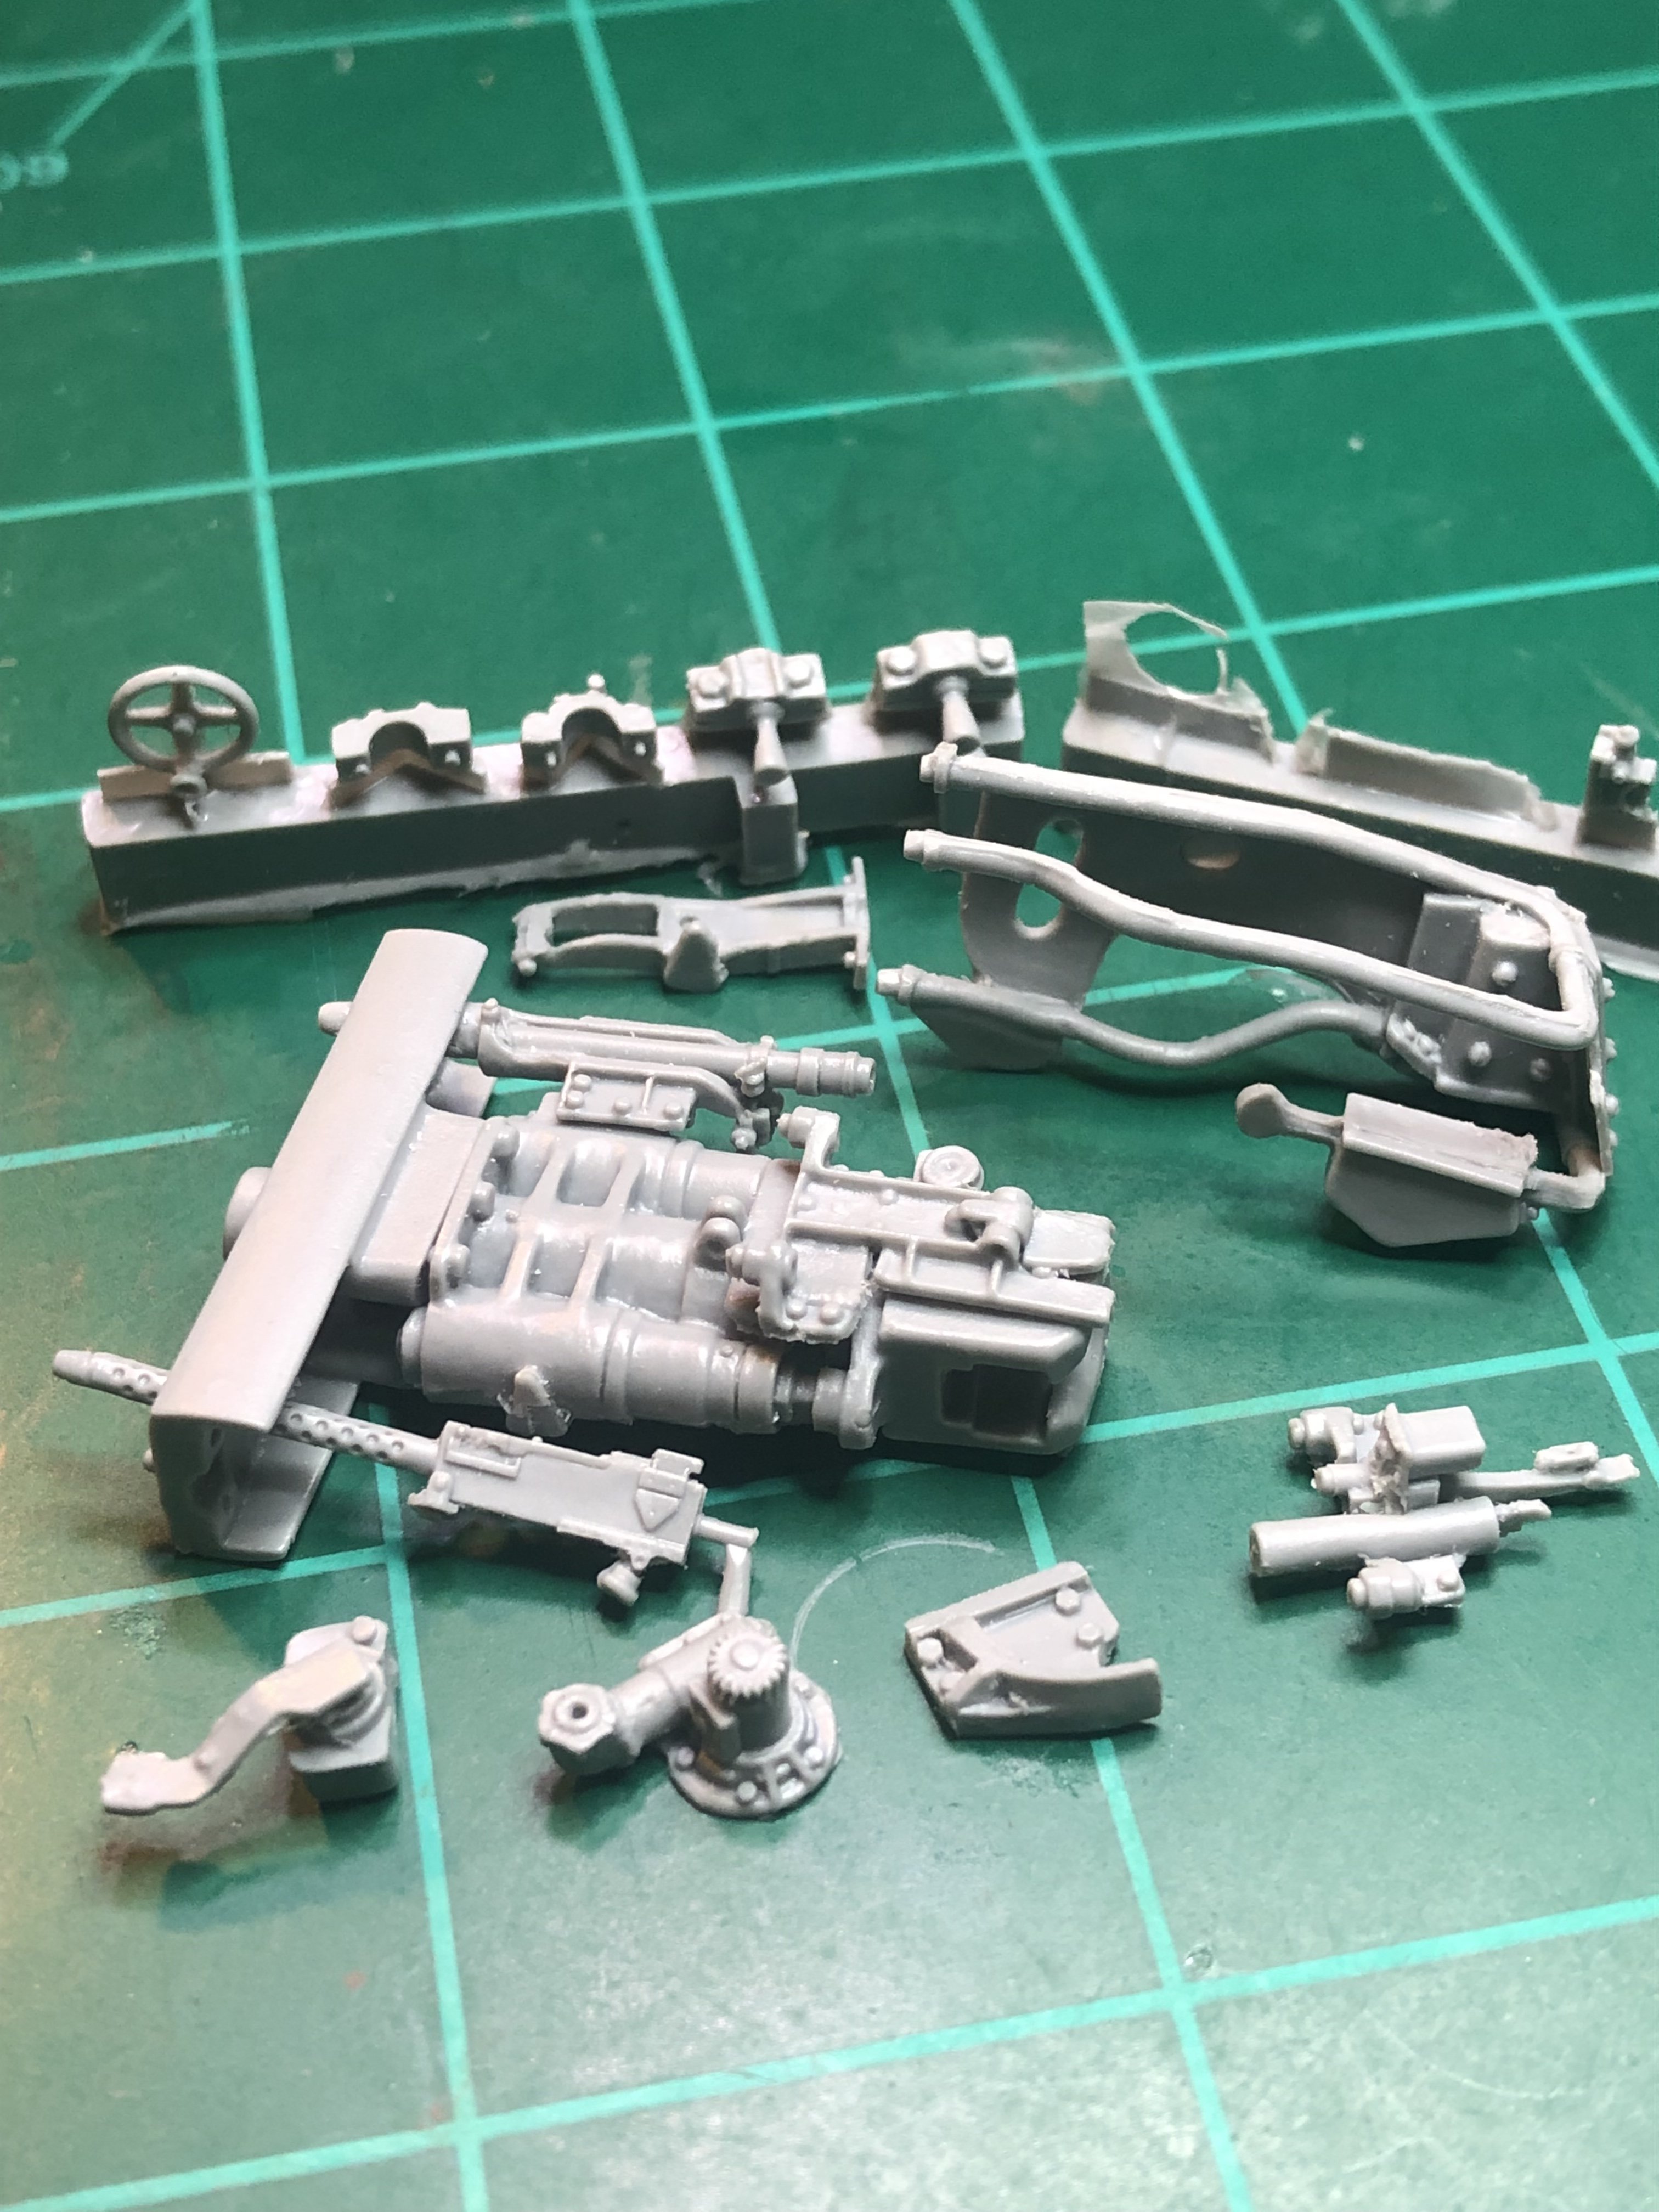
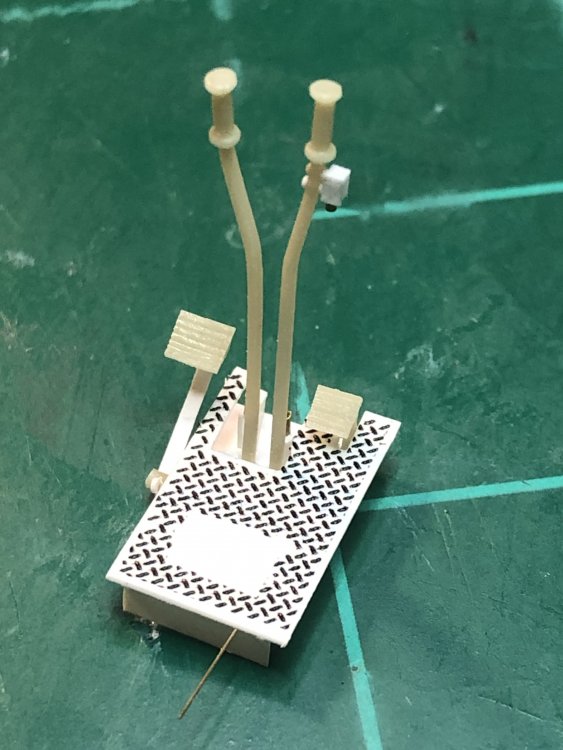
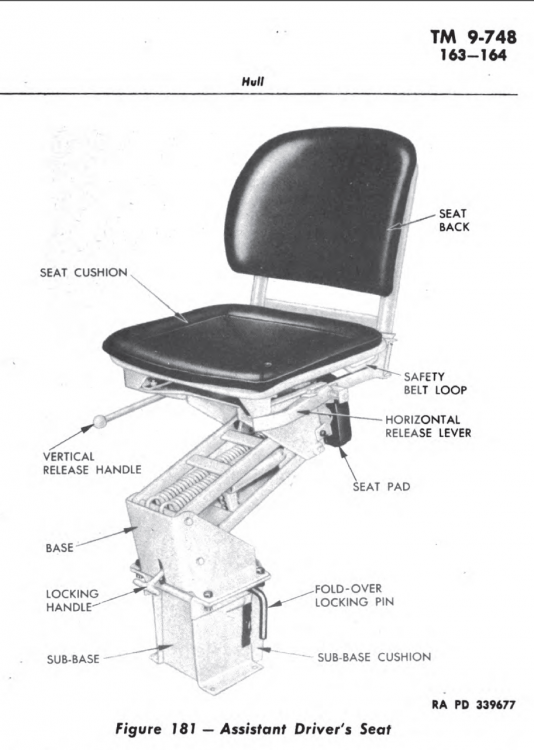
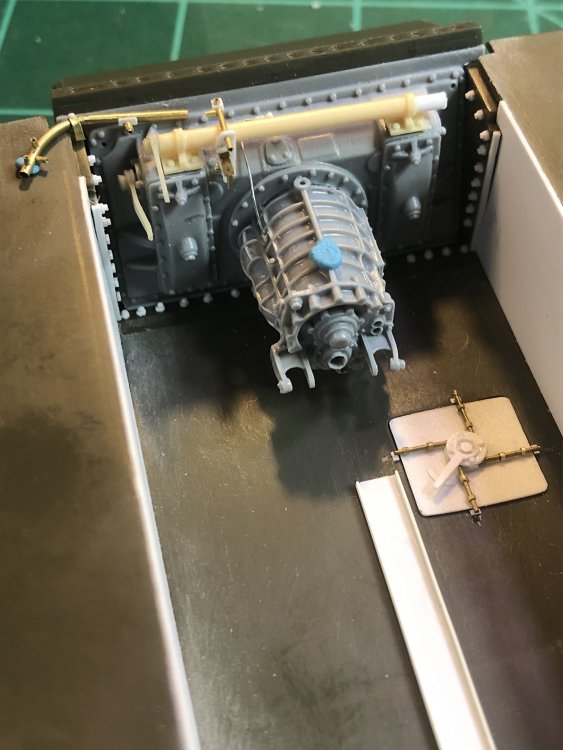
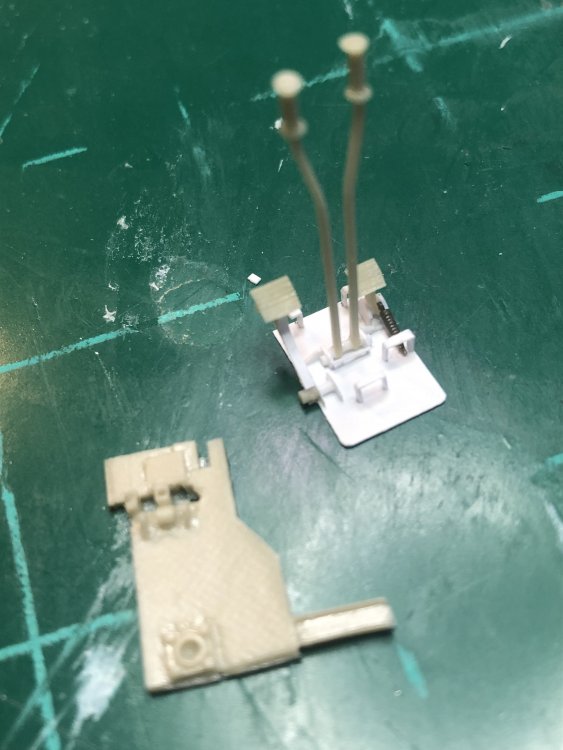
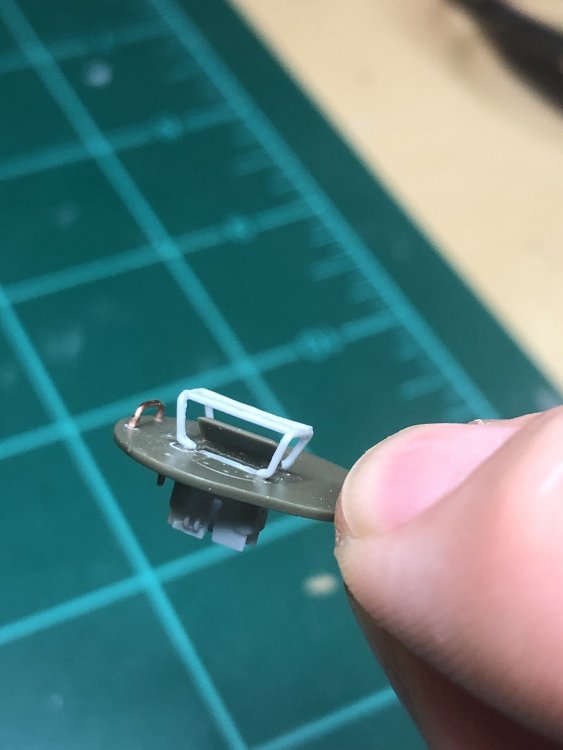
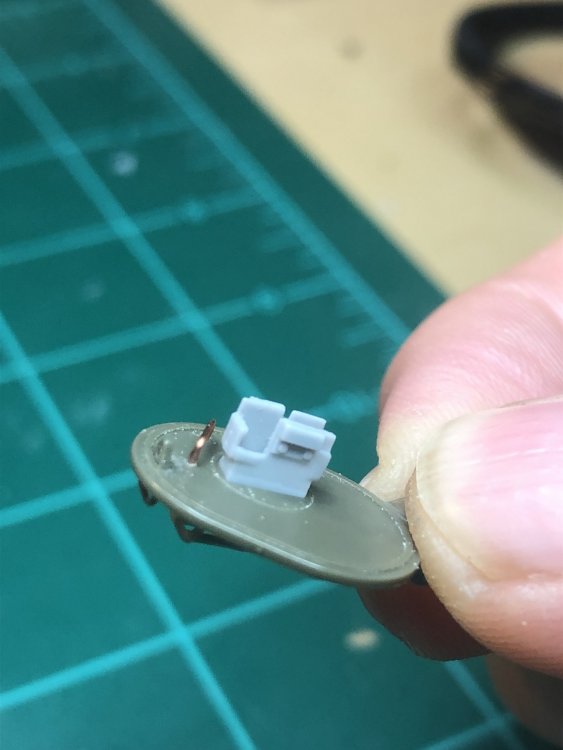
Update for the week. Added the break levers to attach to the cross shaft and at the base near the steering. Used brass tube as it is easier to install. Need to add the cabling. Installed the horn switch on the side of the steering. Still need to add the cabling to it. Started the base for the driver and asst. driver. Included a photo of the actual seat. Created the tubing that holds cabling above the drive shaft. Added bolts where the transmission section attached to the hull. Built and attached the priming pump and hand throttle attached to the housing. Wires still to be added. Finally put together the channel for cabling between the ammo storage. That is all for now.


-
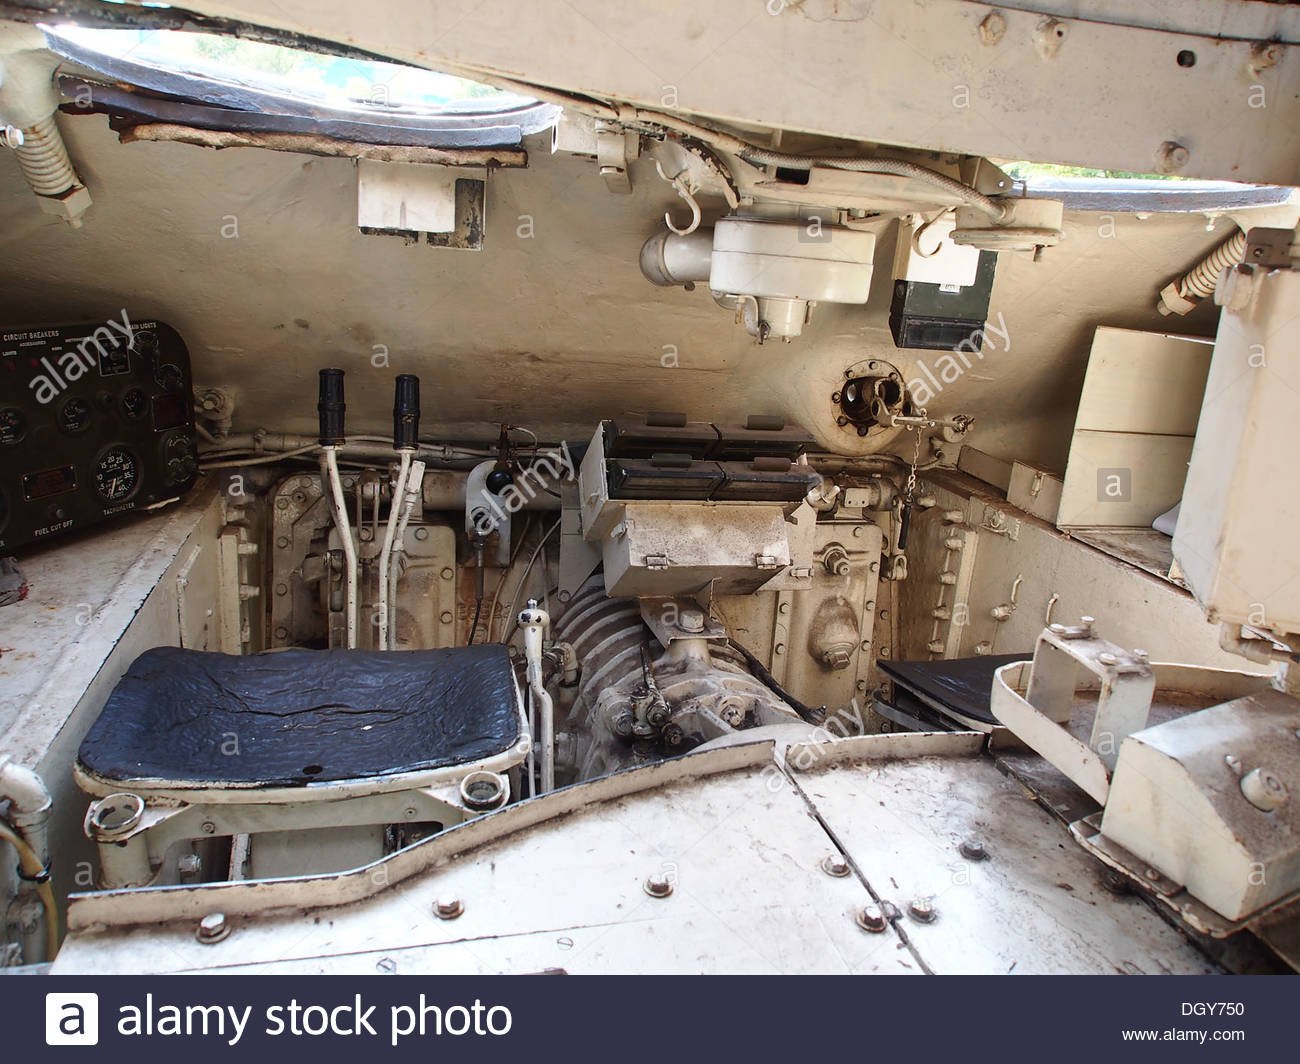
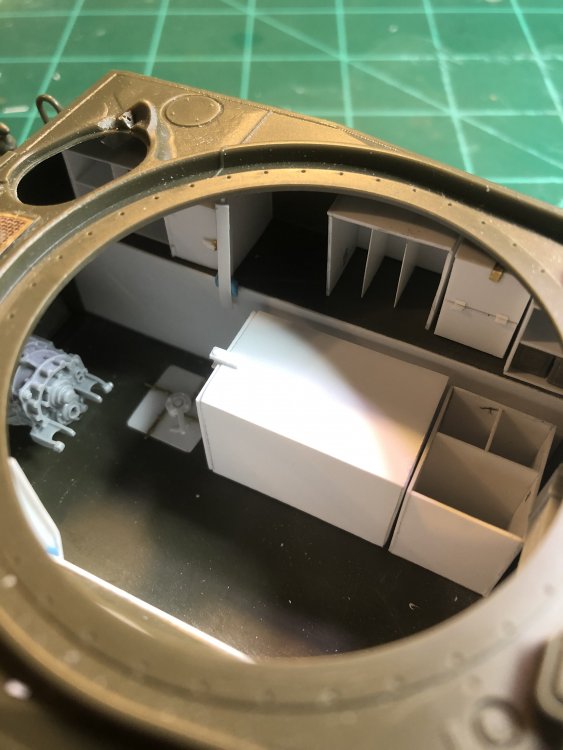
Weekend update. Put together the bottom portion of the steering and break area. Nearly all of it will be covered by a plate the drivers seat is attached to but gives access to add cabling which I will need to replicate. The one shot was what came with a resin kit compared to what I put together. I just need more detail, one of my downfalls. Also did the spare periscope storage area. Attached is a picture from the 1944 Tech Manual on the set up of the steering area. Also attached is the interior I am working towards and you can see the periscope storage in the middle. That is it for now.


-
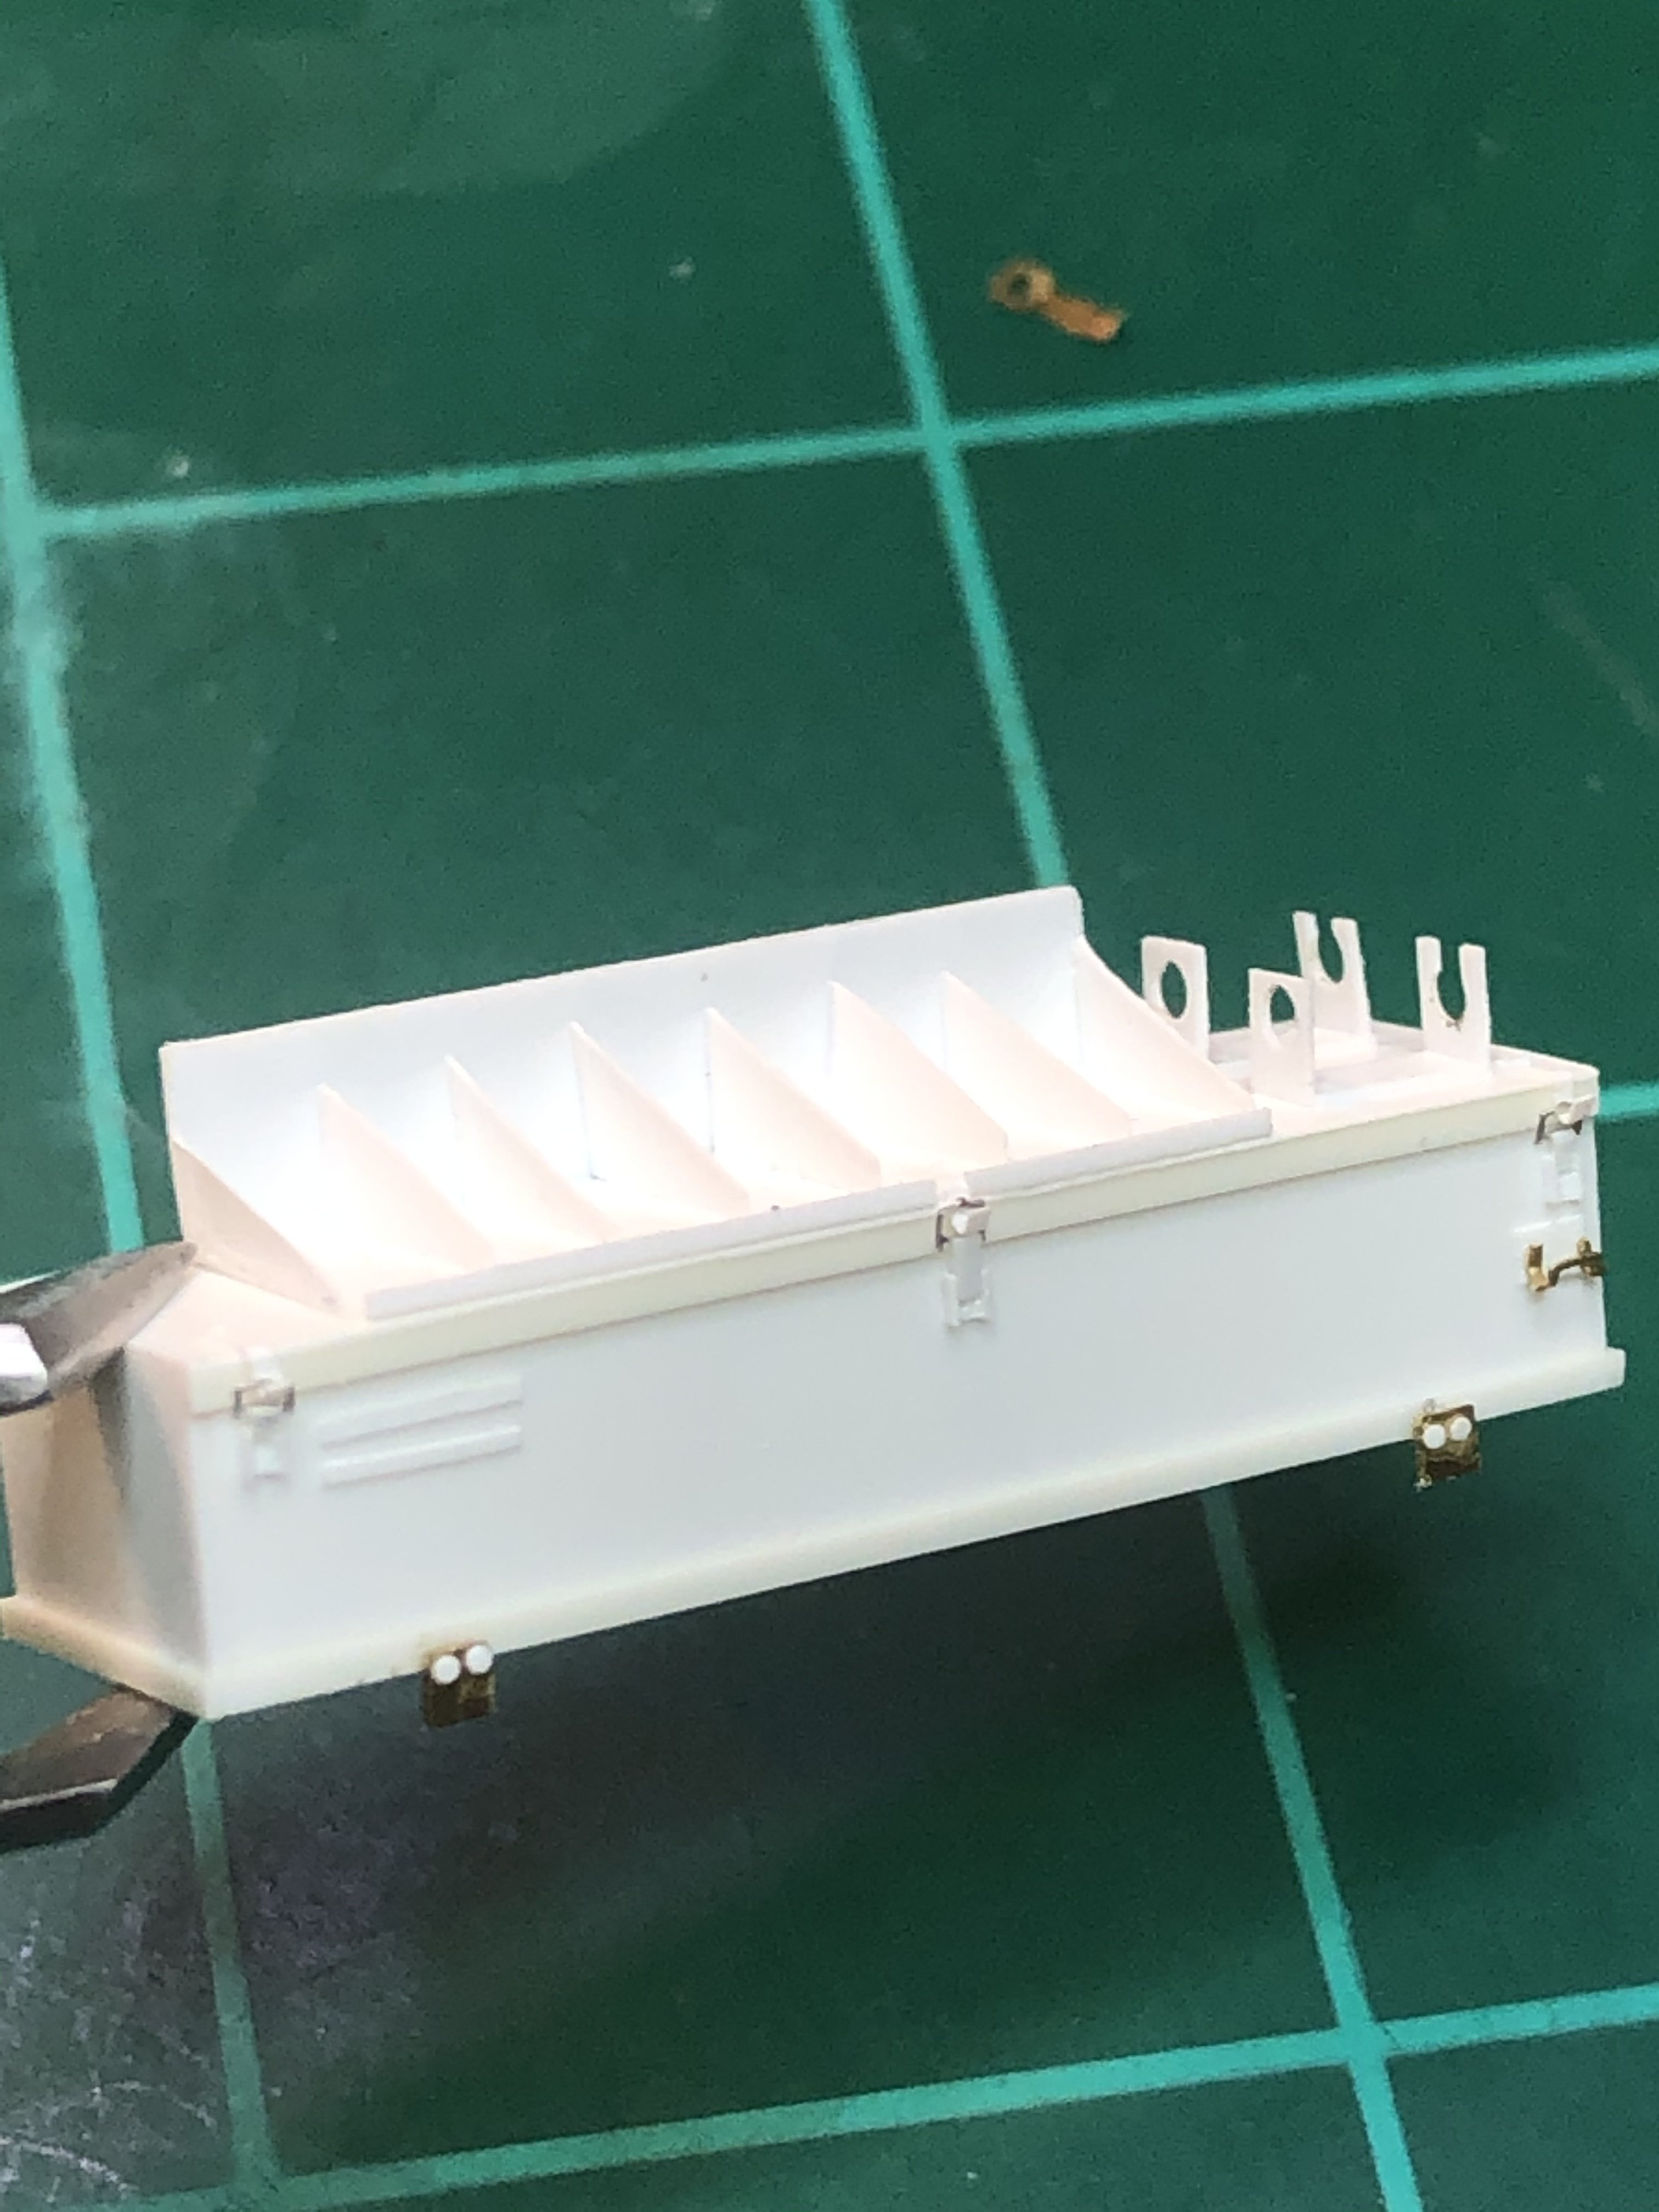
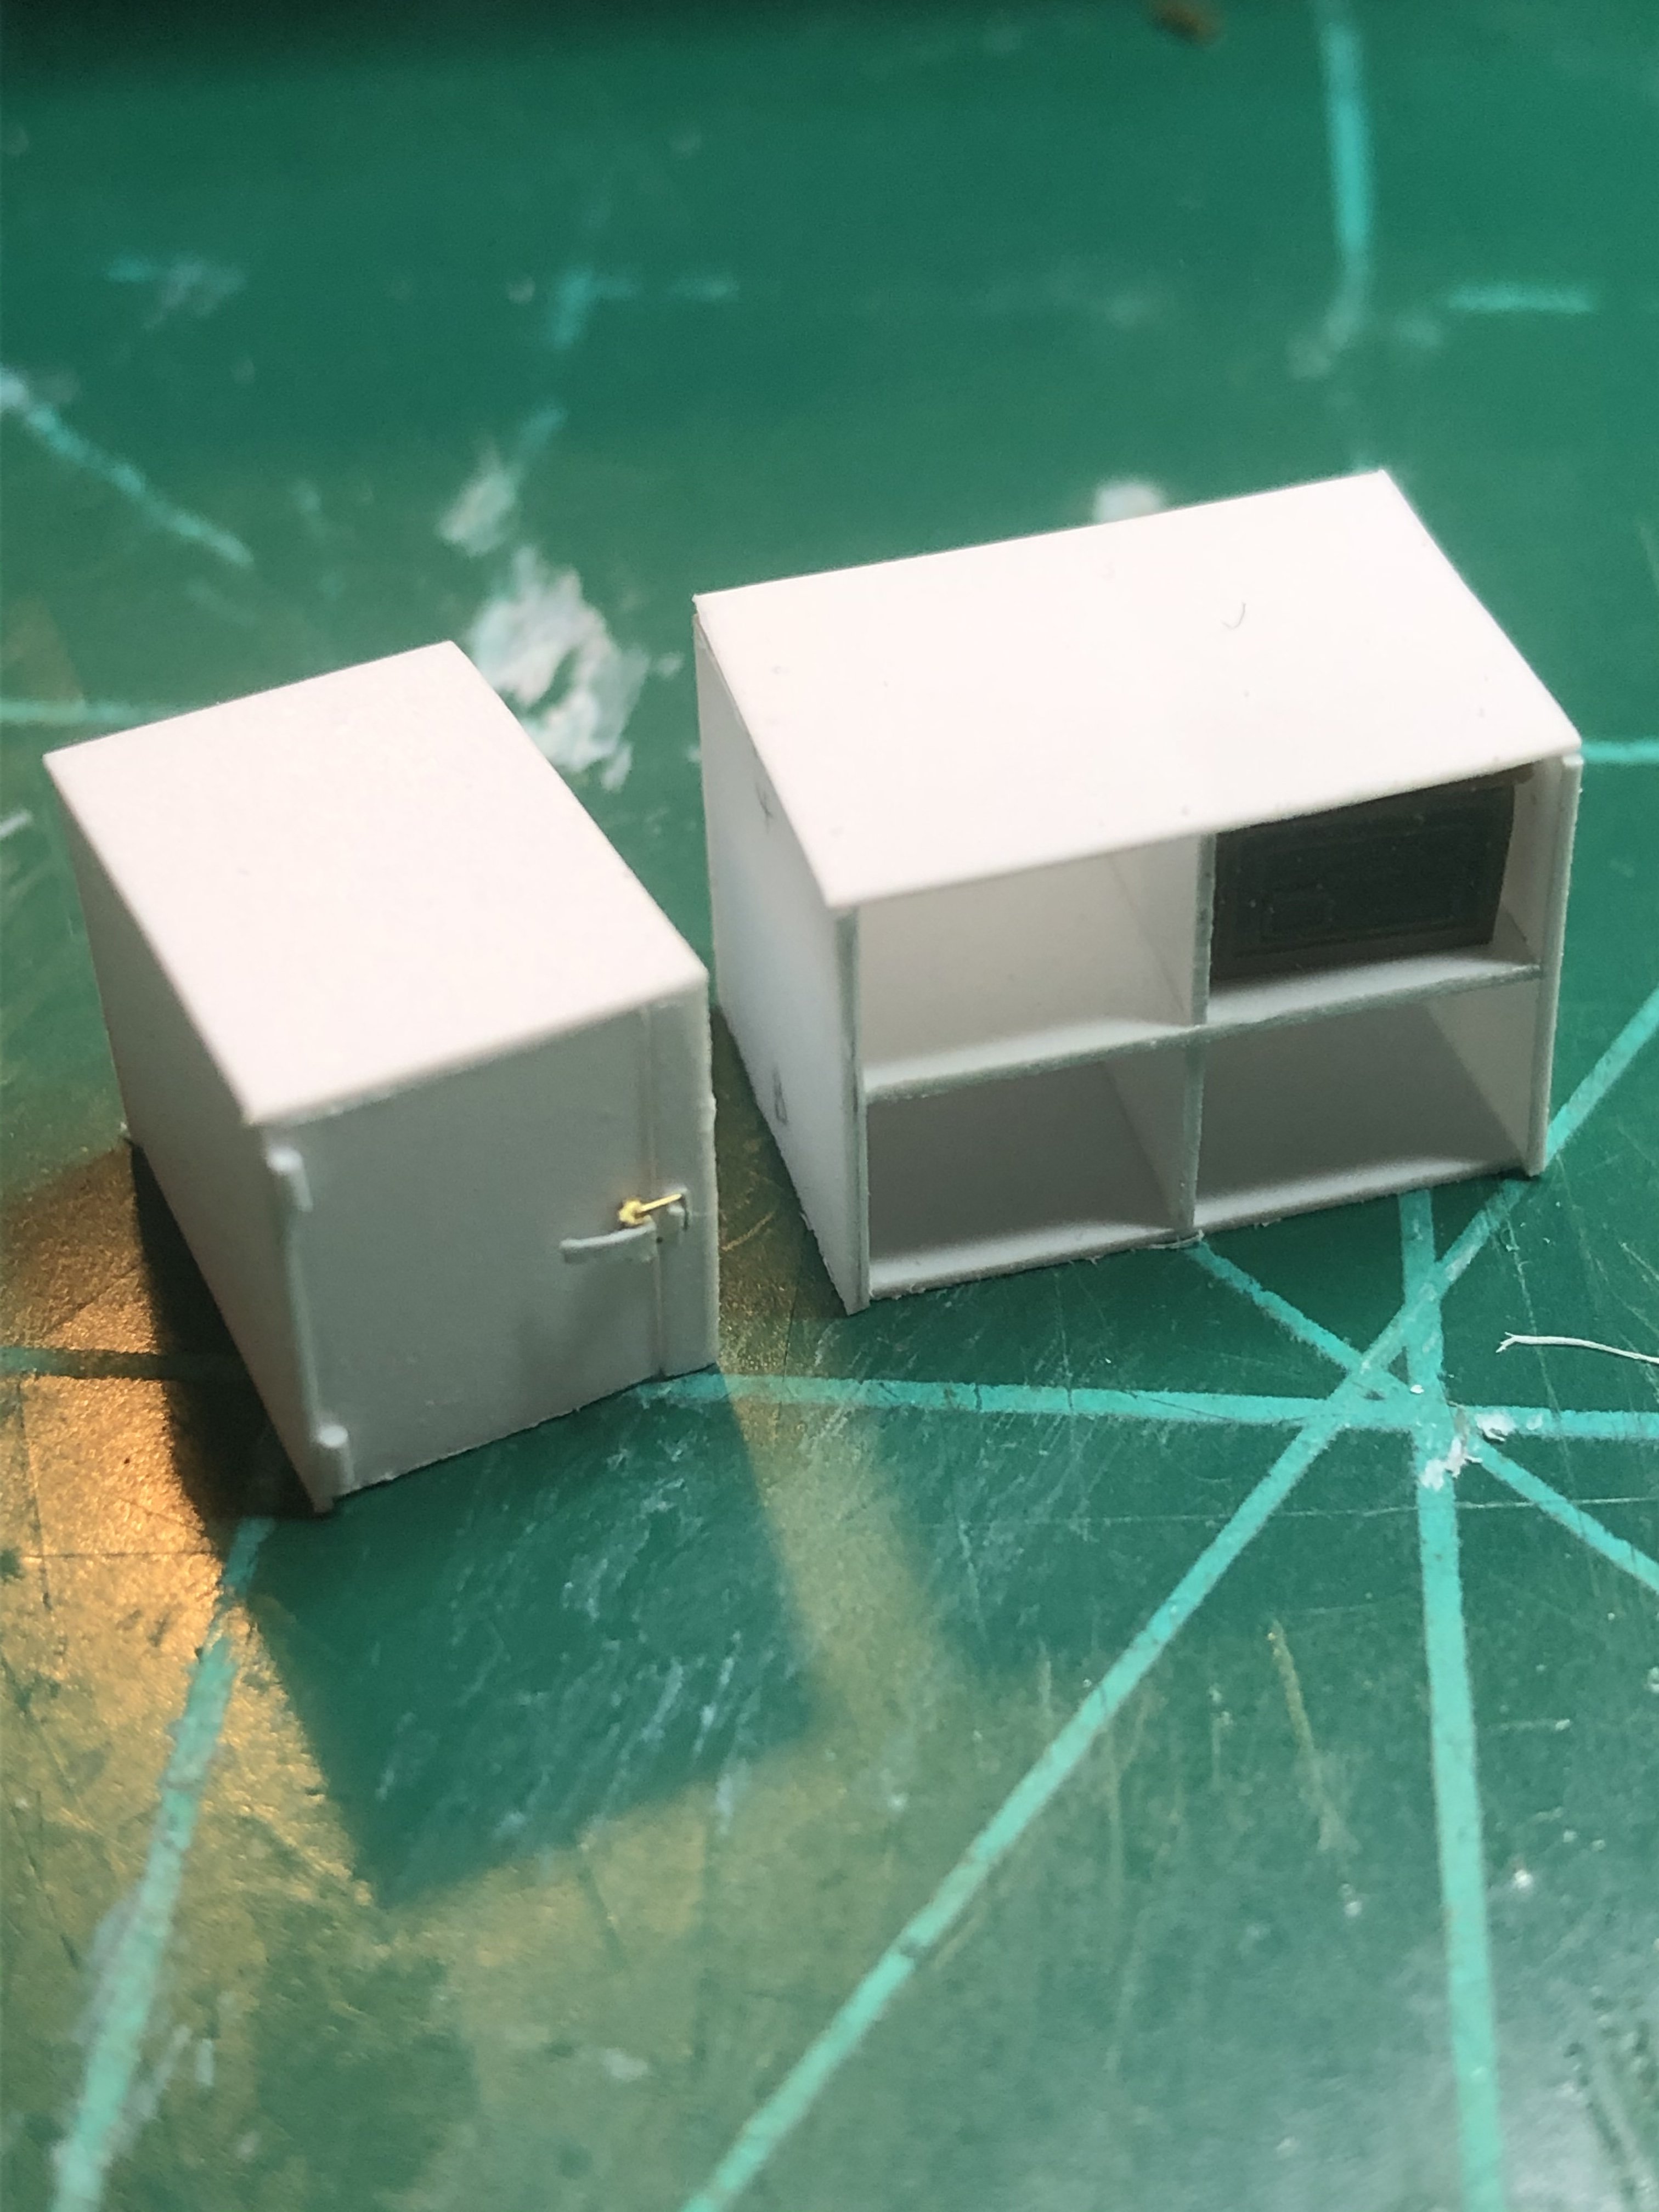
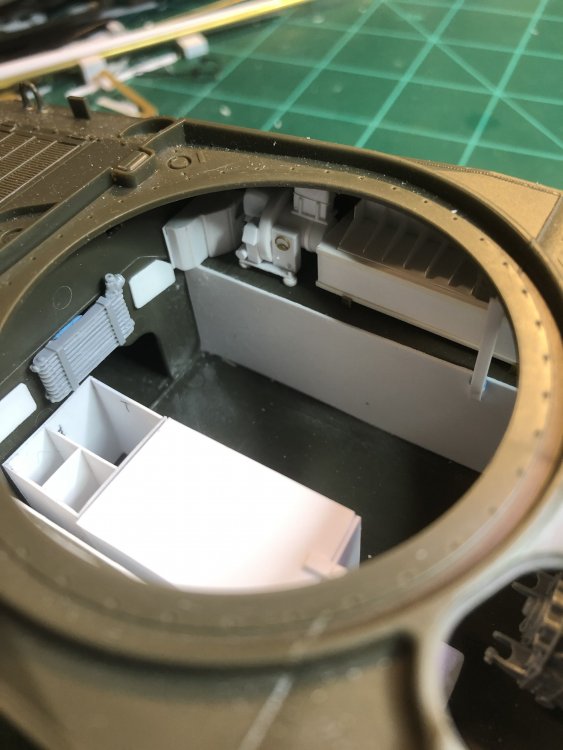
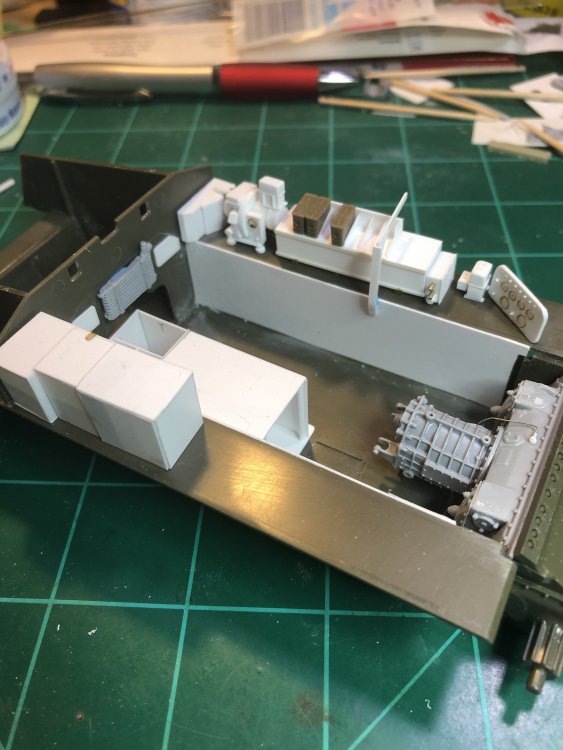
More work this week. Built the 30 cal storage and storage box on the Assistant driver side. Put the doors on the 76mm ammo storage behind the assistant driver. Includes some pics with everything done so far in place and with the top on. Not sure how I will display the floor as it will cover up the back storage on the floor and the 76mm ammo storage I am planning on adding in the open space. We will see what this week brings.


-
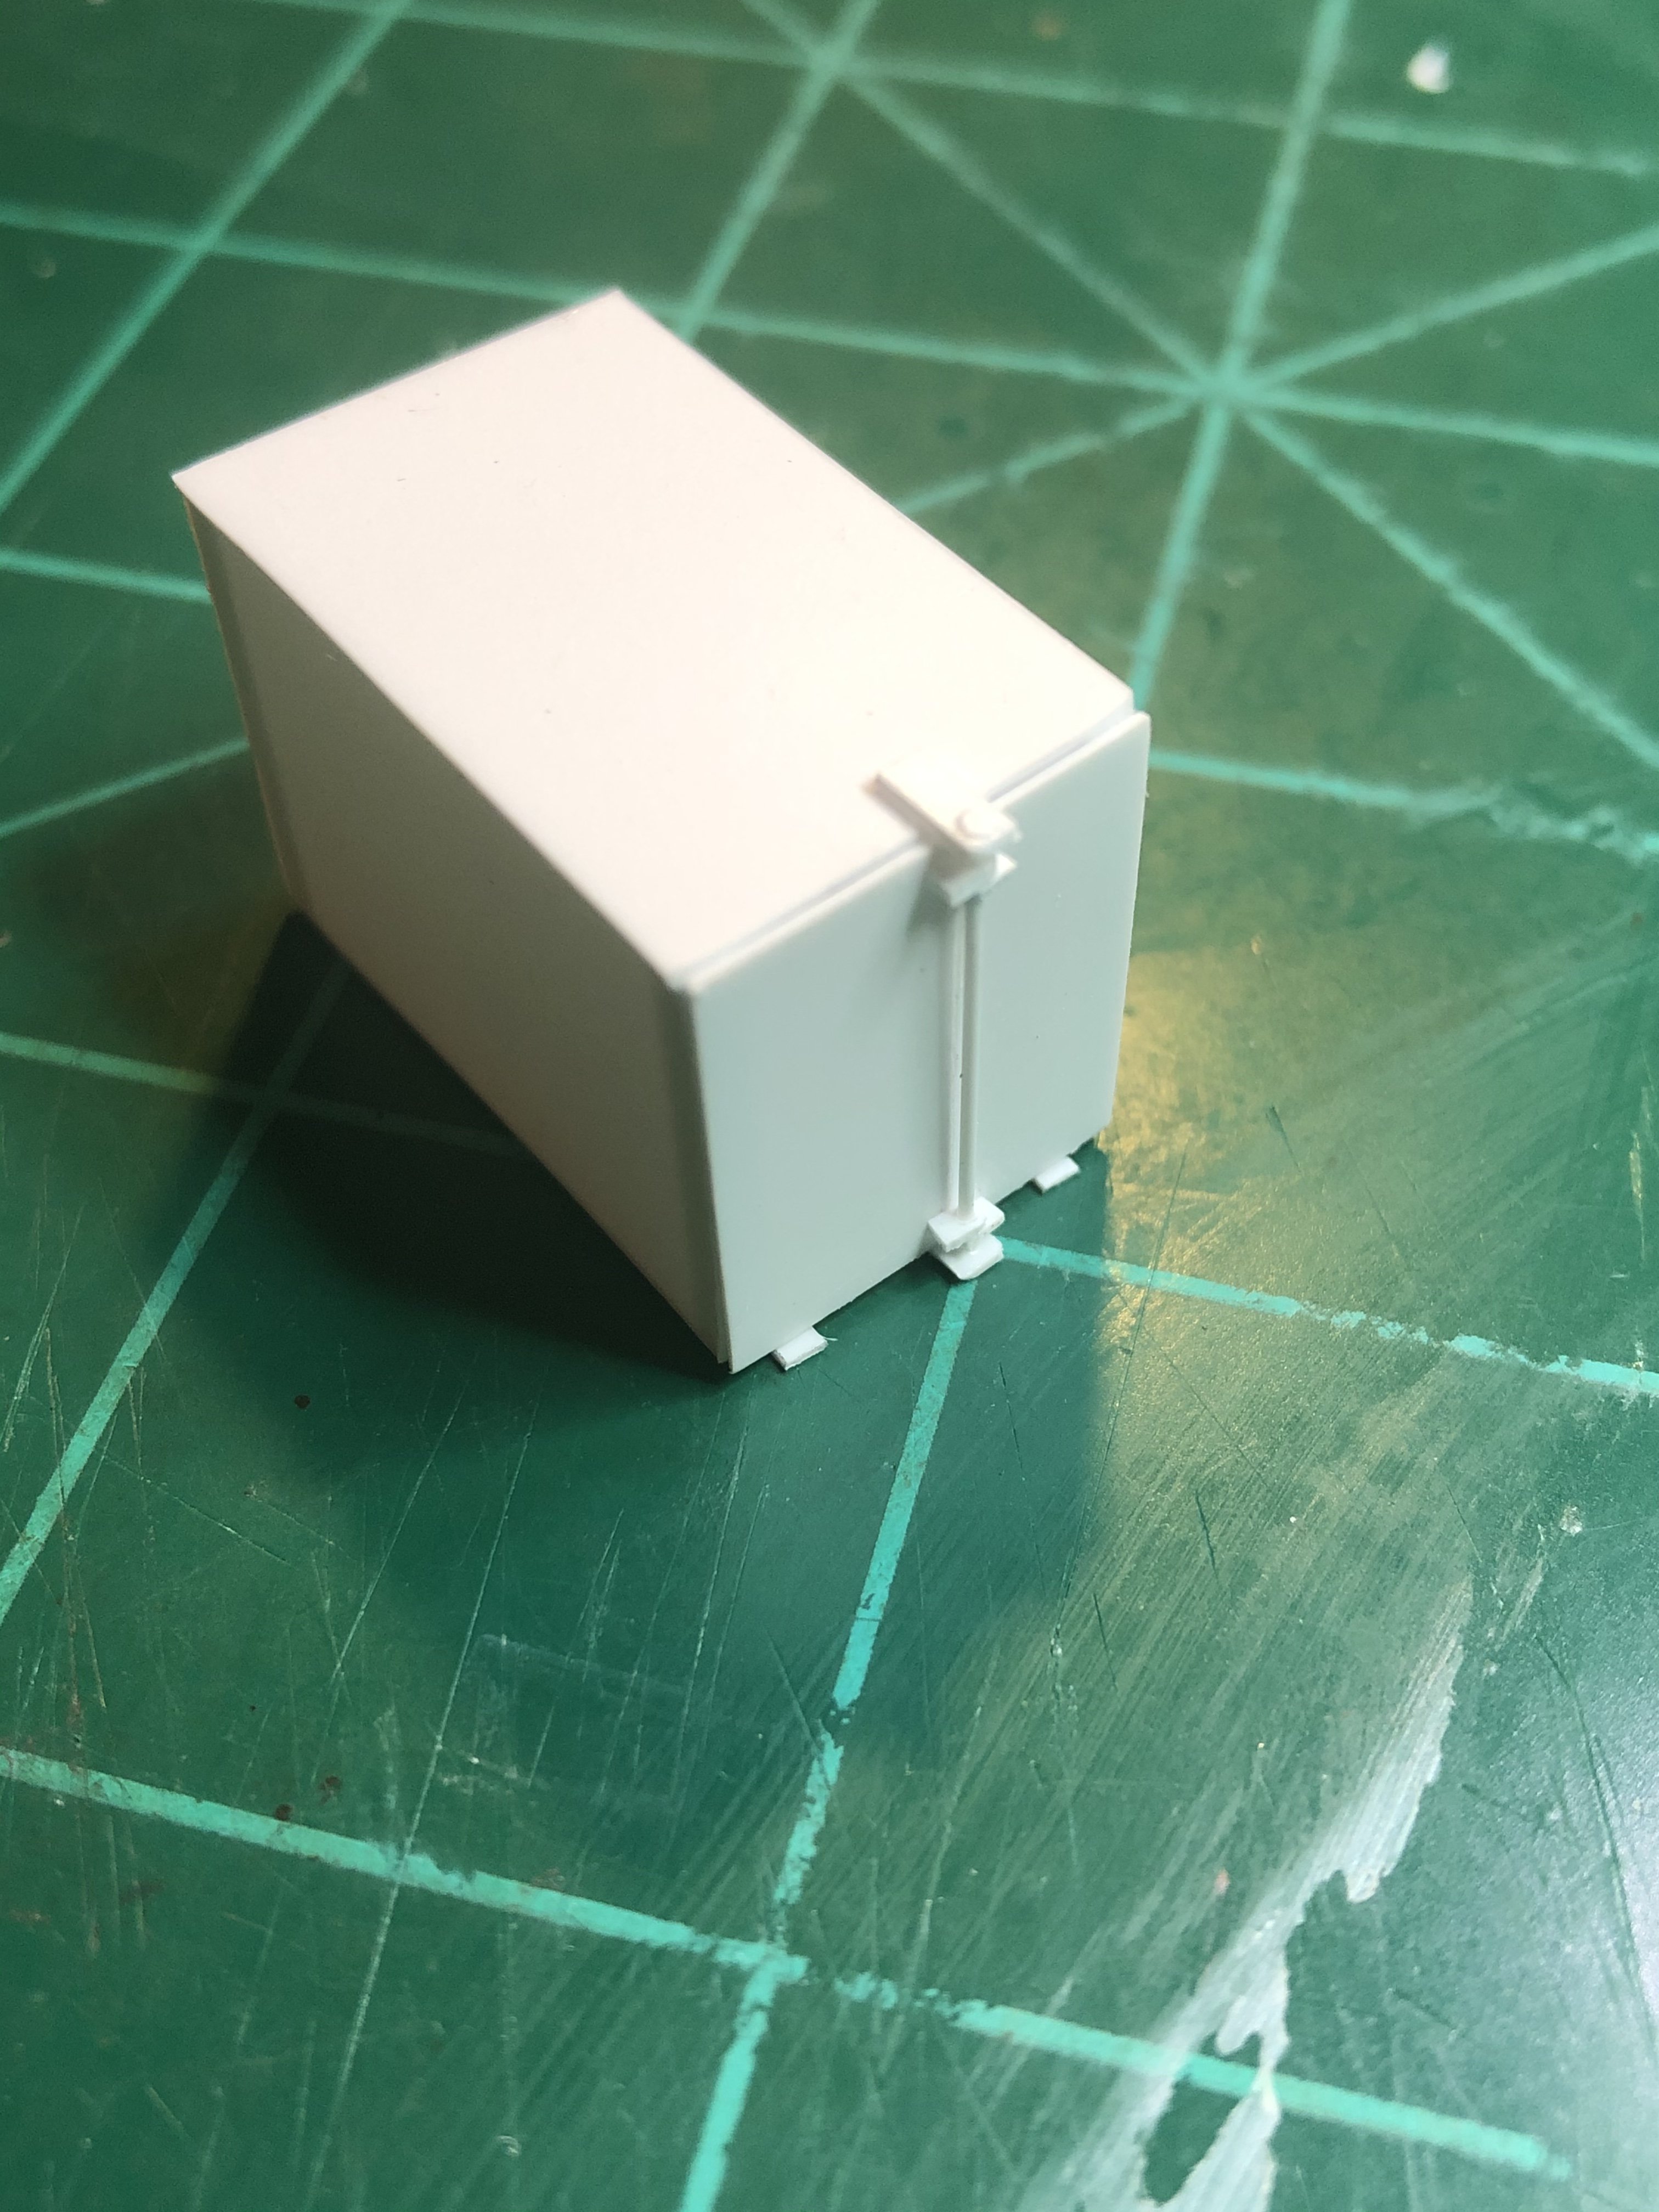
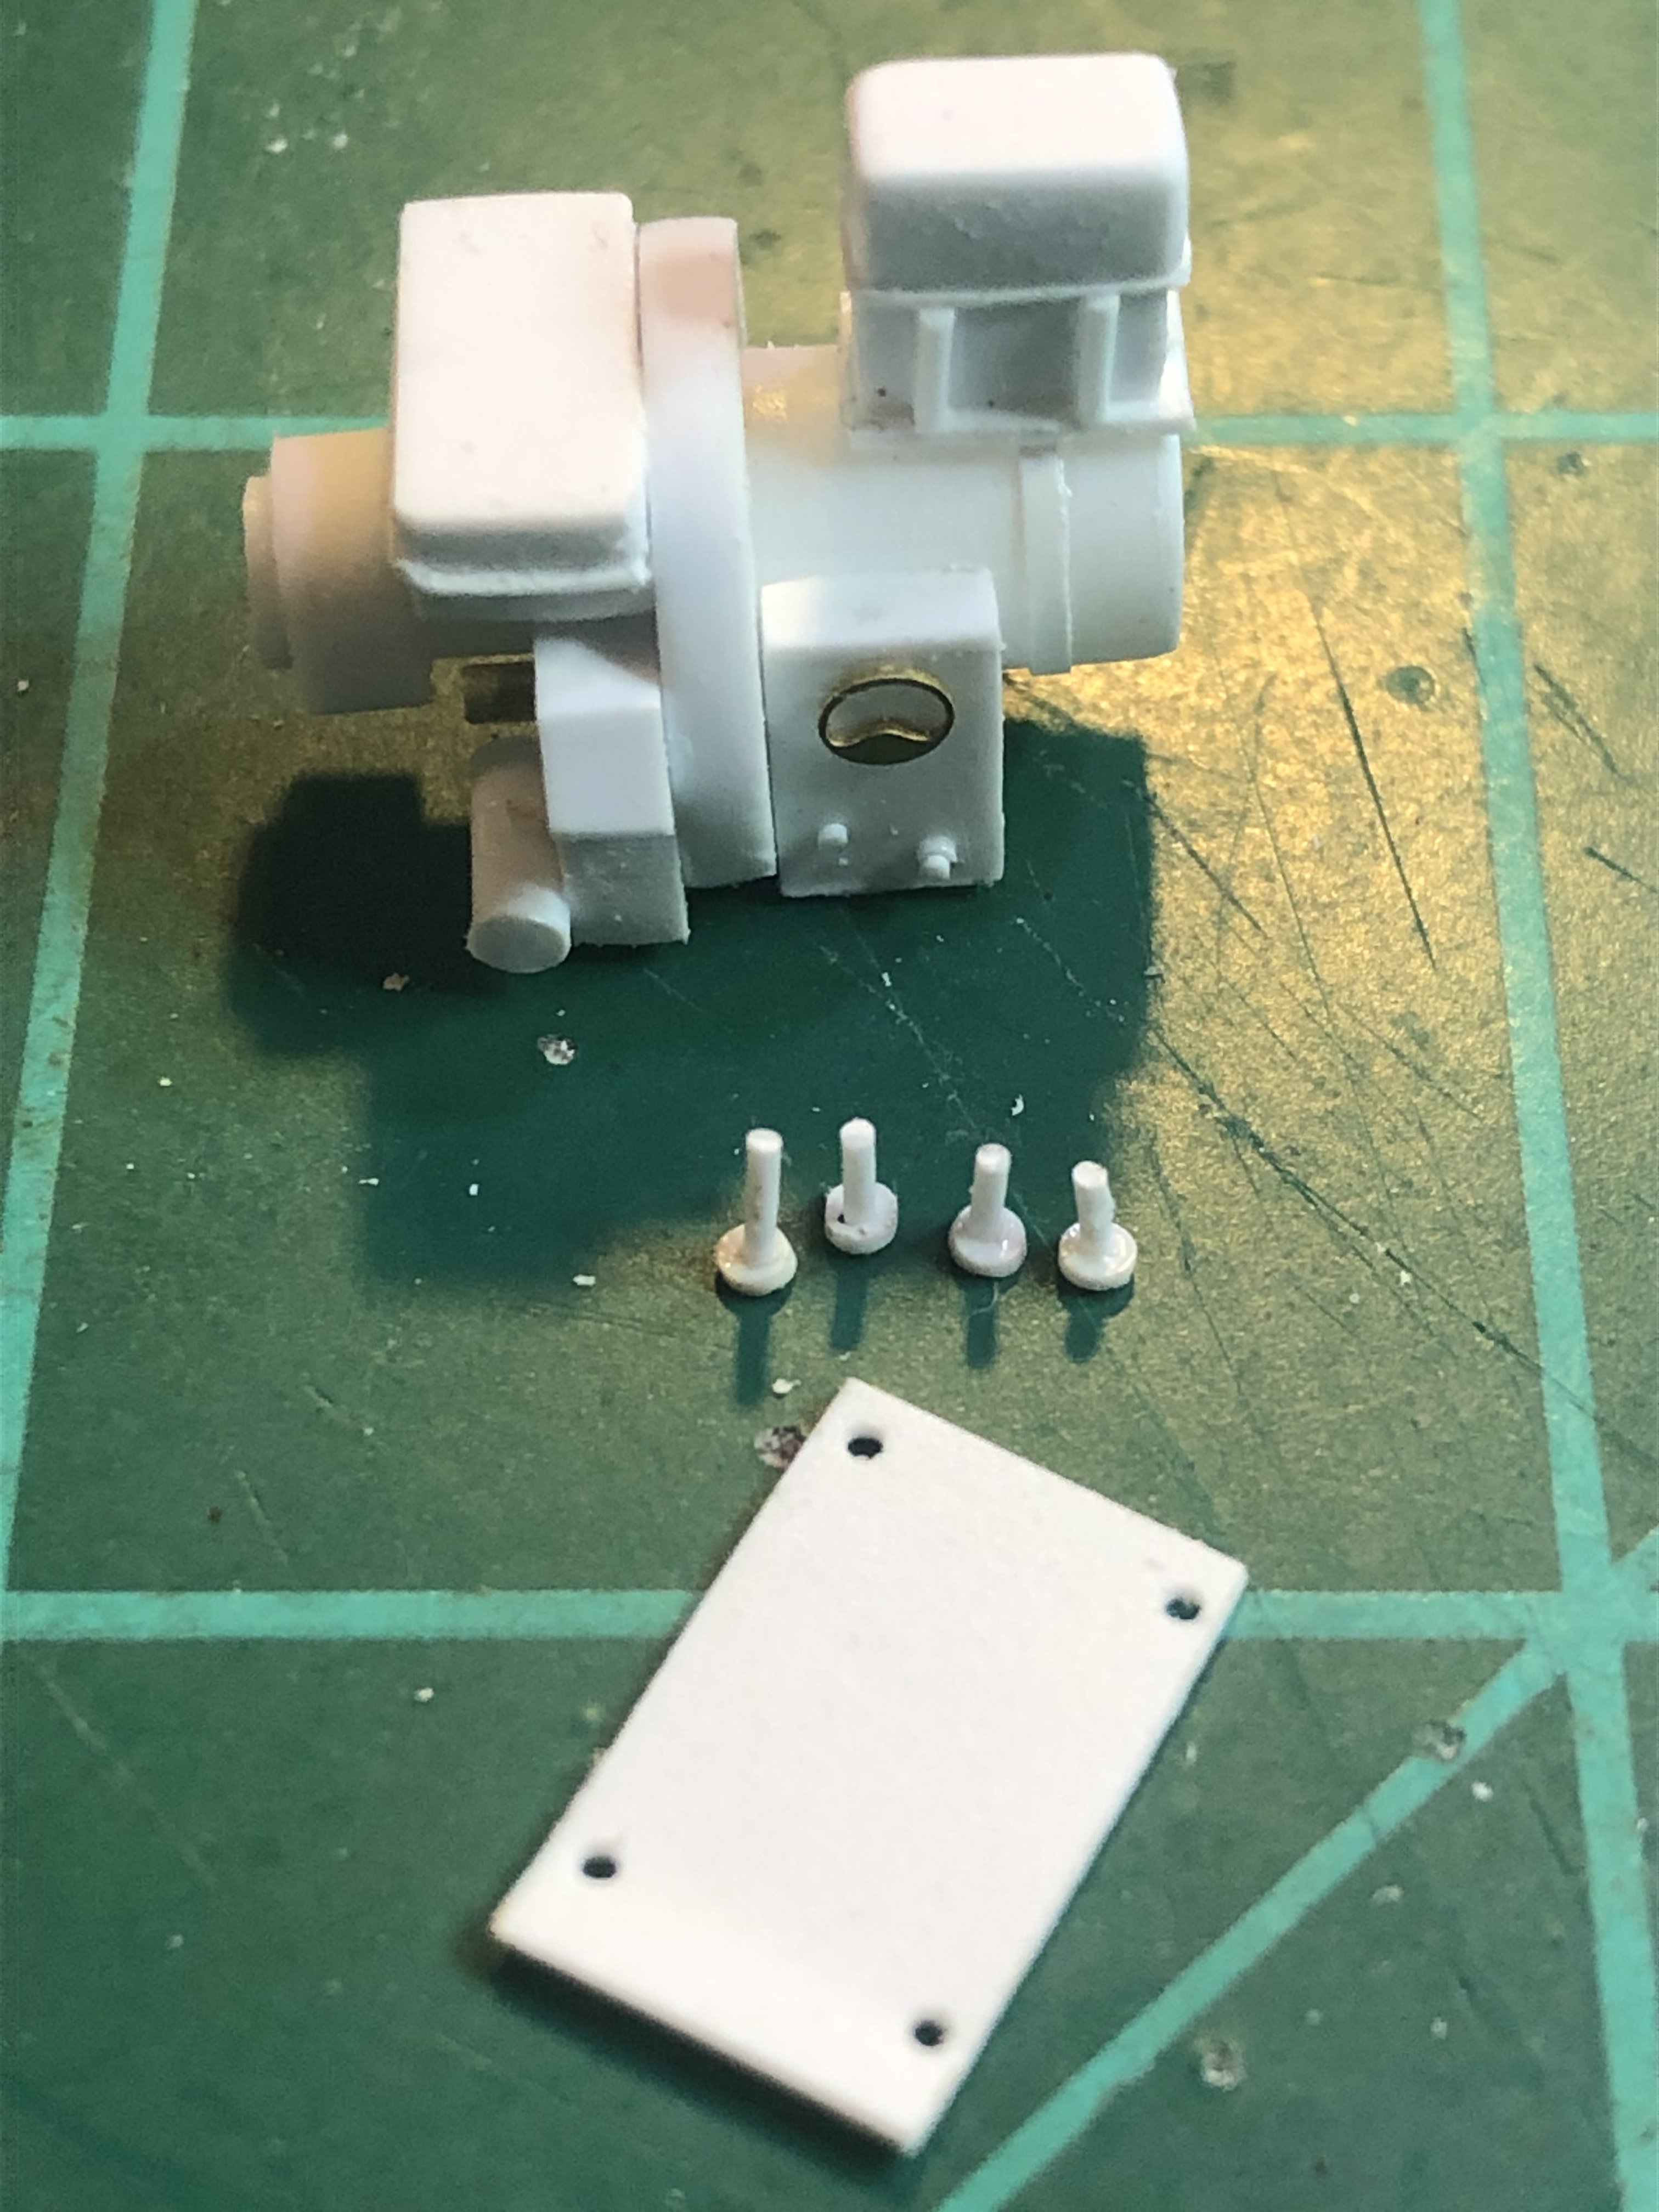
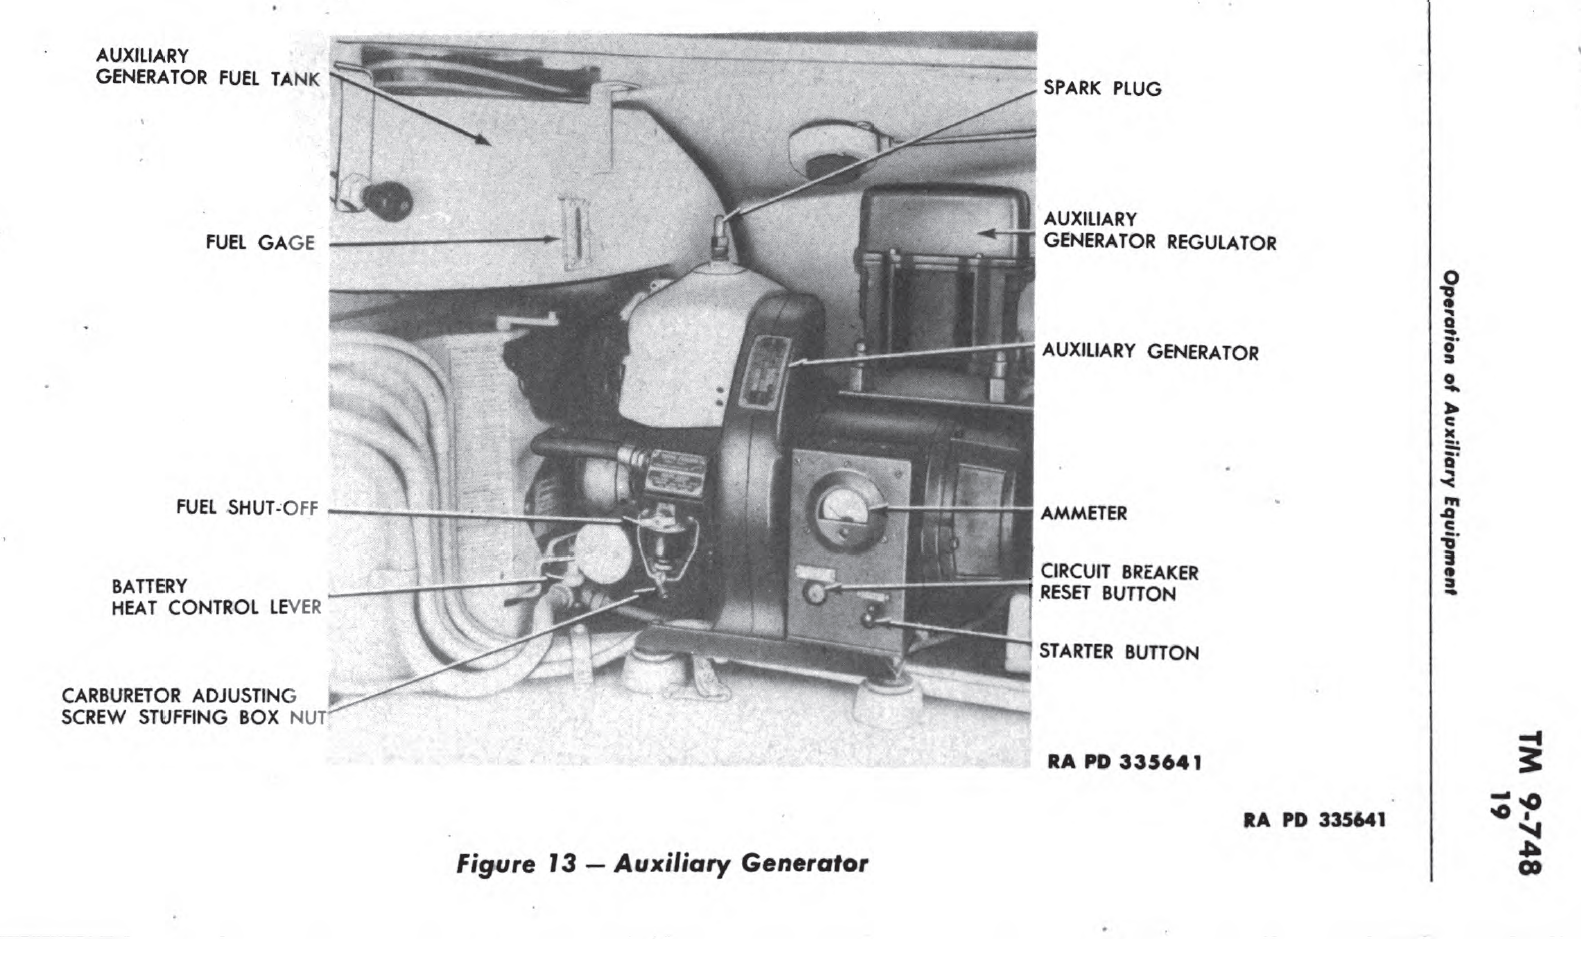
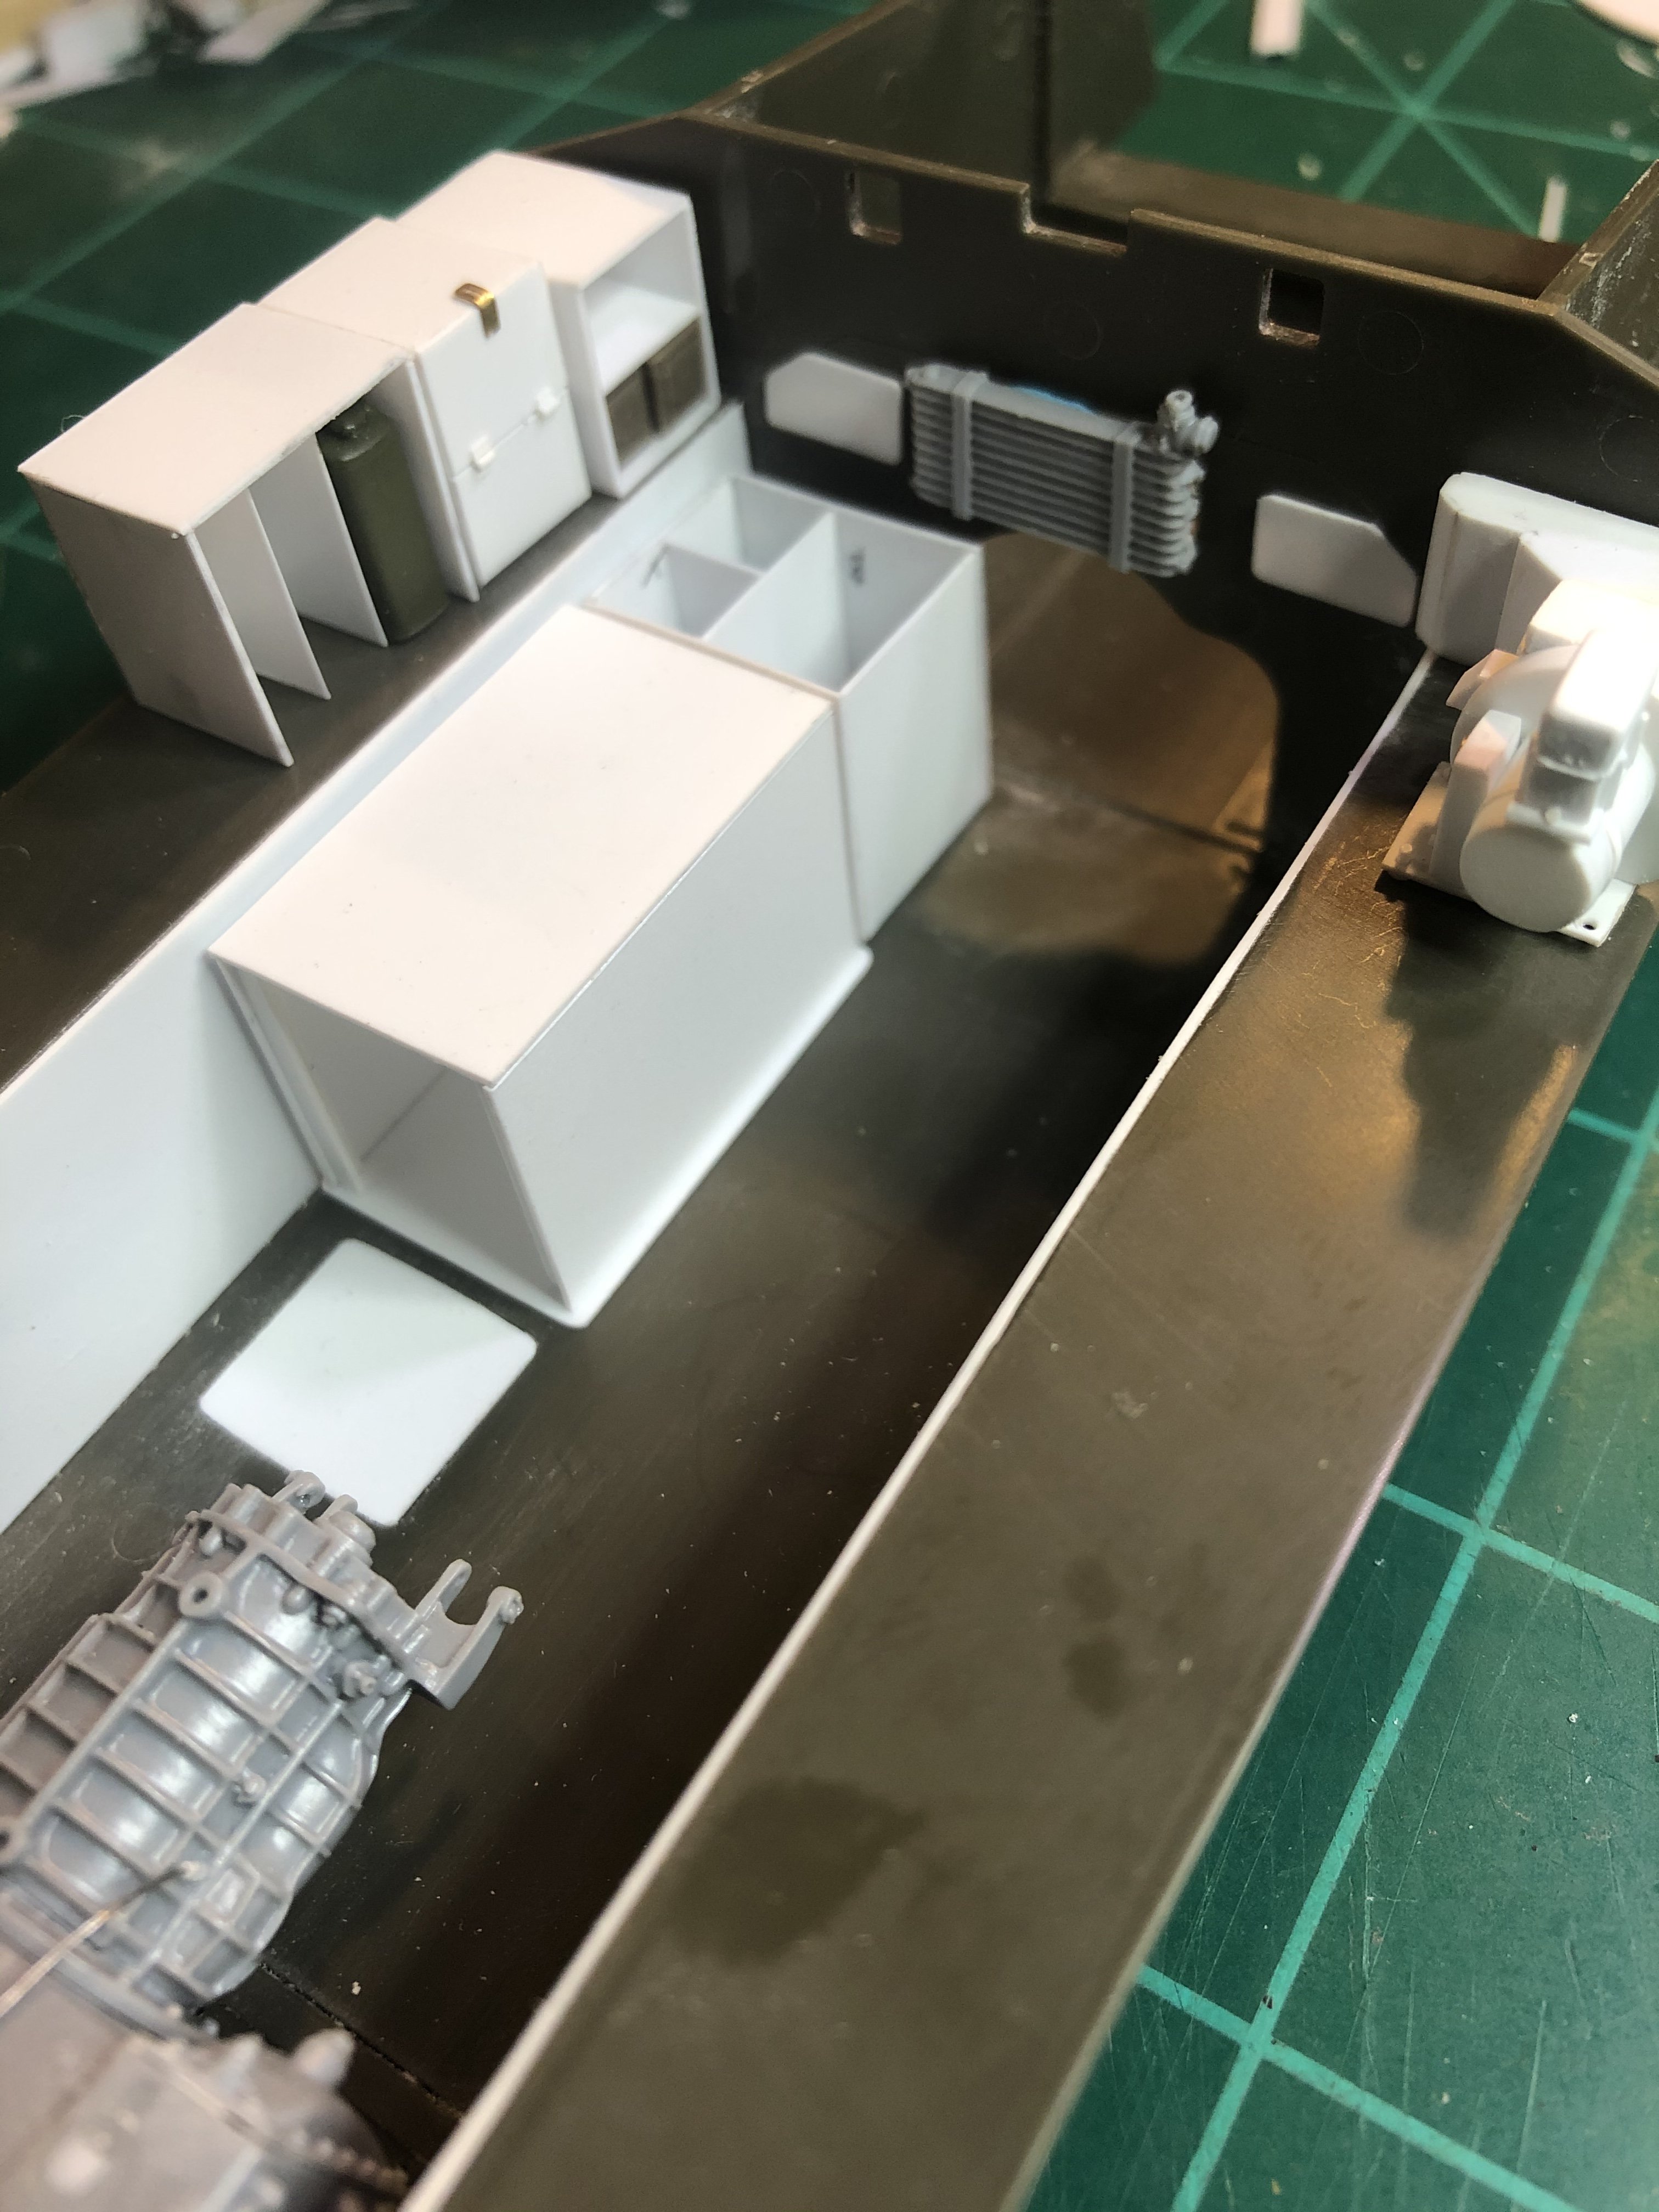
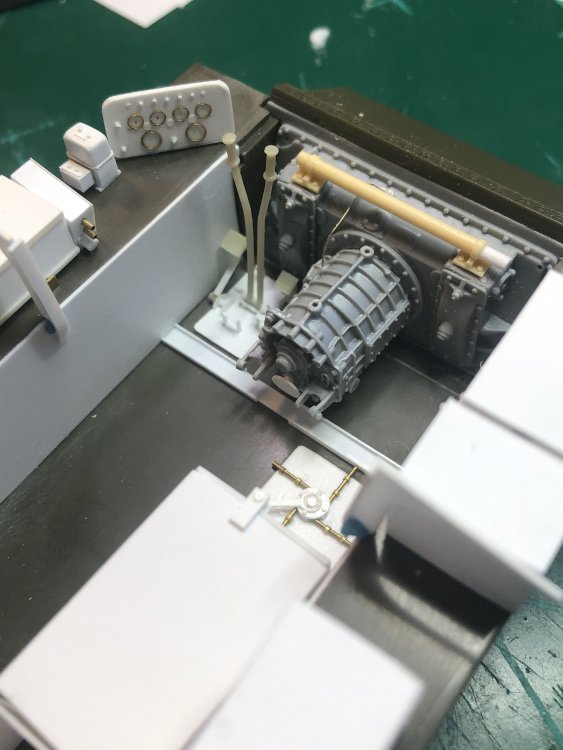
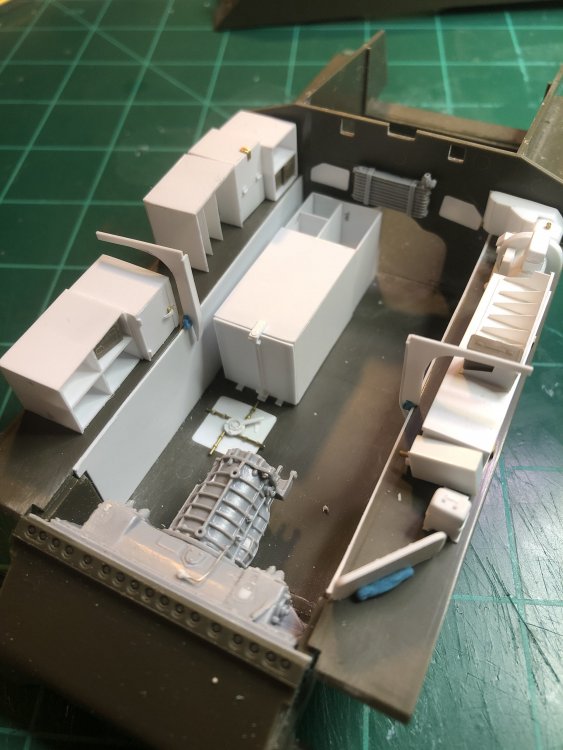
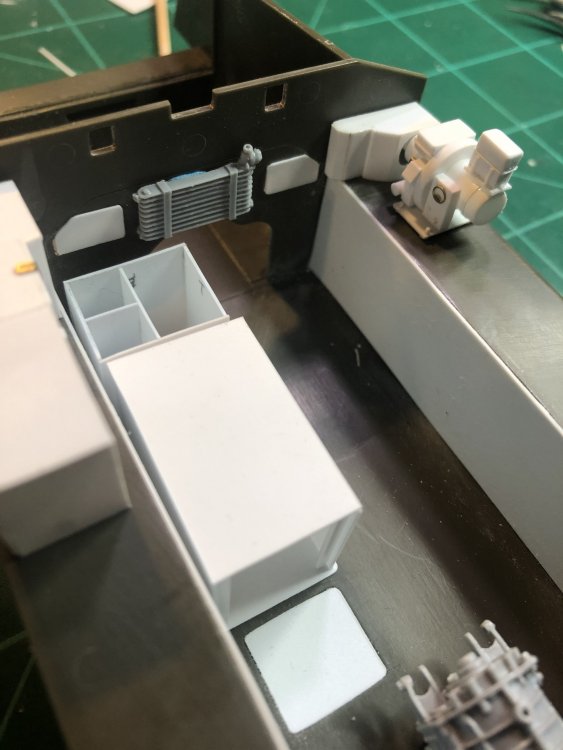
Got some more work done, but not as much as I would have liked. redid the box the auxiliary generator feeds into but now need to redo it again and make it a little higher. Added the base to the auxiliary generator. Put together the battery box/unit with 30 cal. Storage on top. Master switch box to the right of the batteries was done but I am not satisfied with it and will redo it. Completed the generator regulator next to the instrument panel. Realized the ammo storage on the floor will need to be redone and not as tall. Another week of work ahead.

-
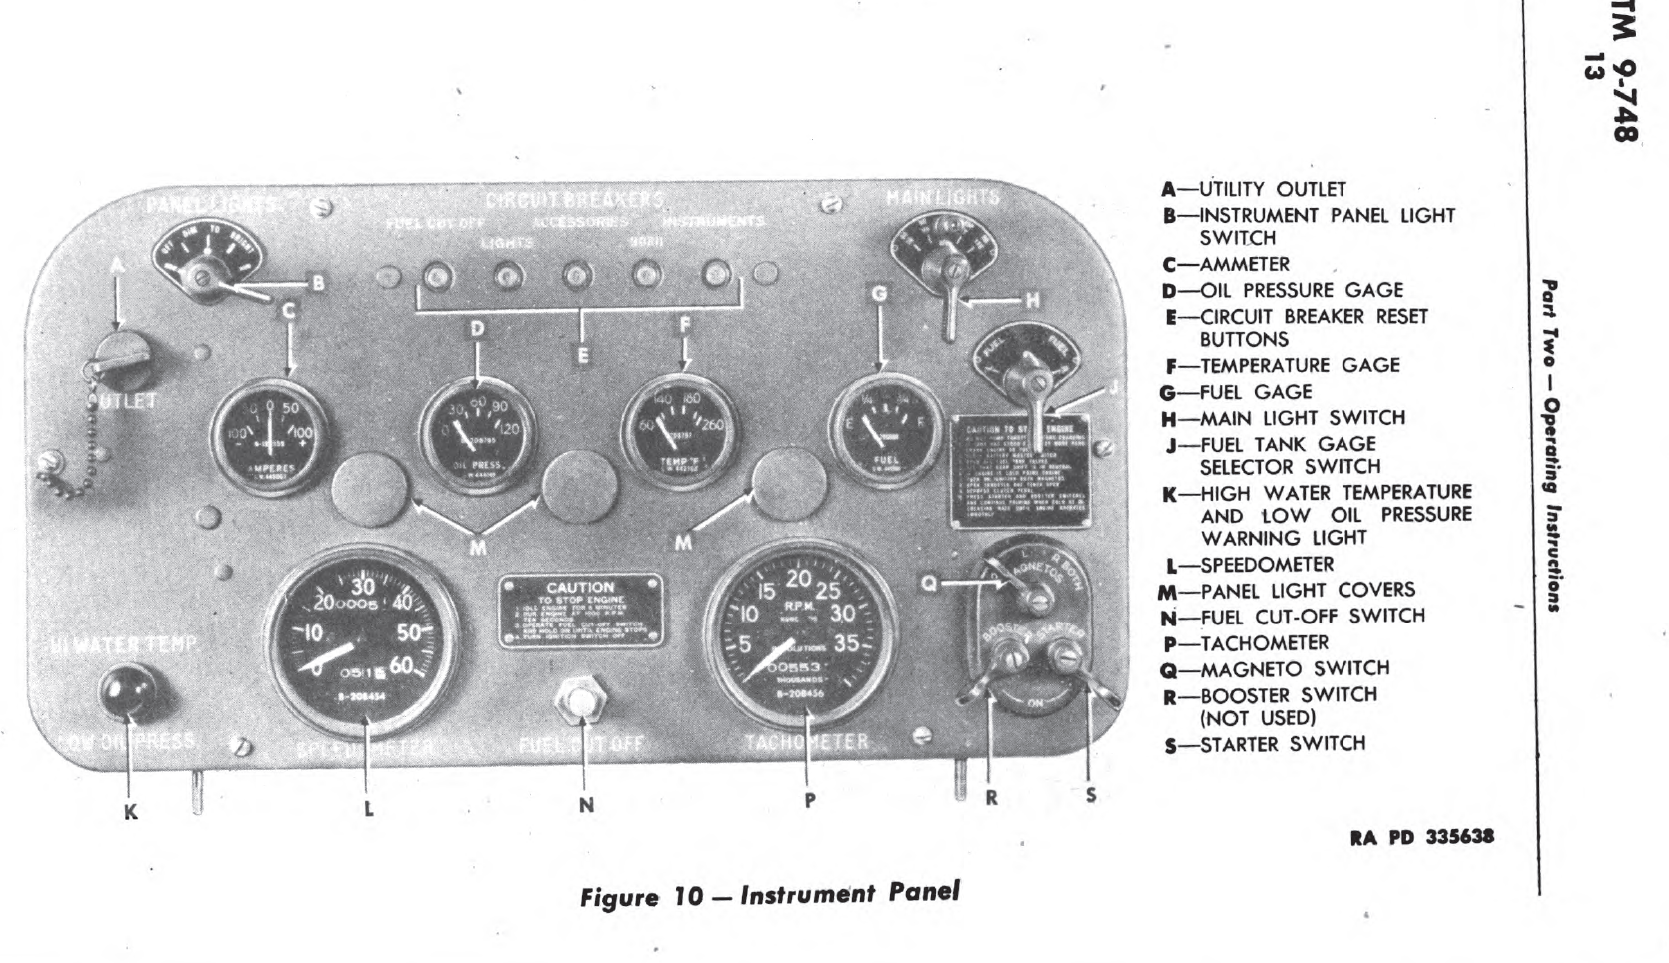
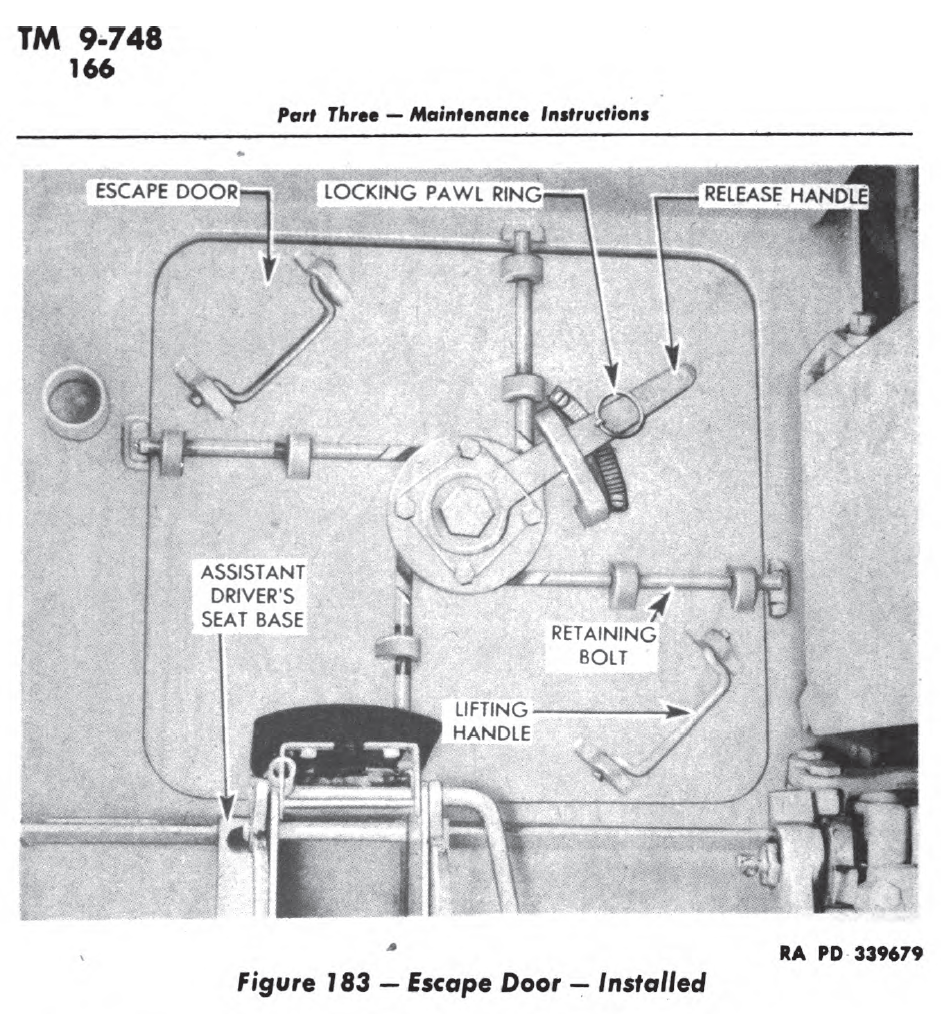
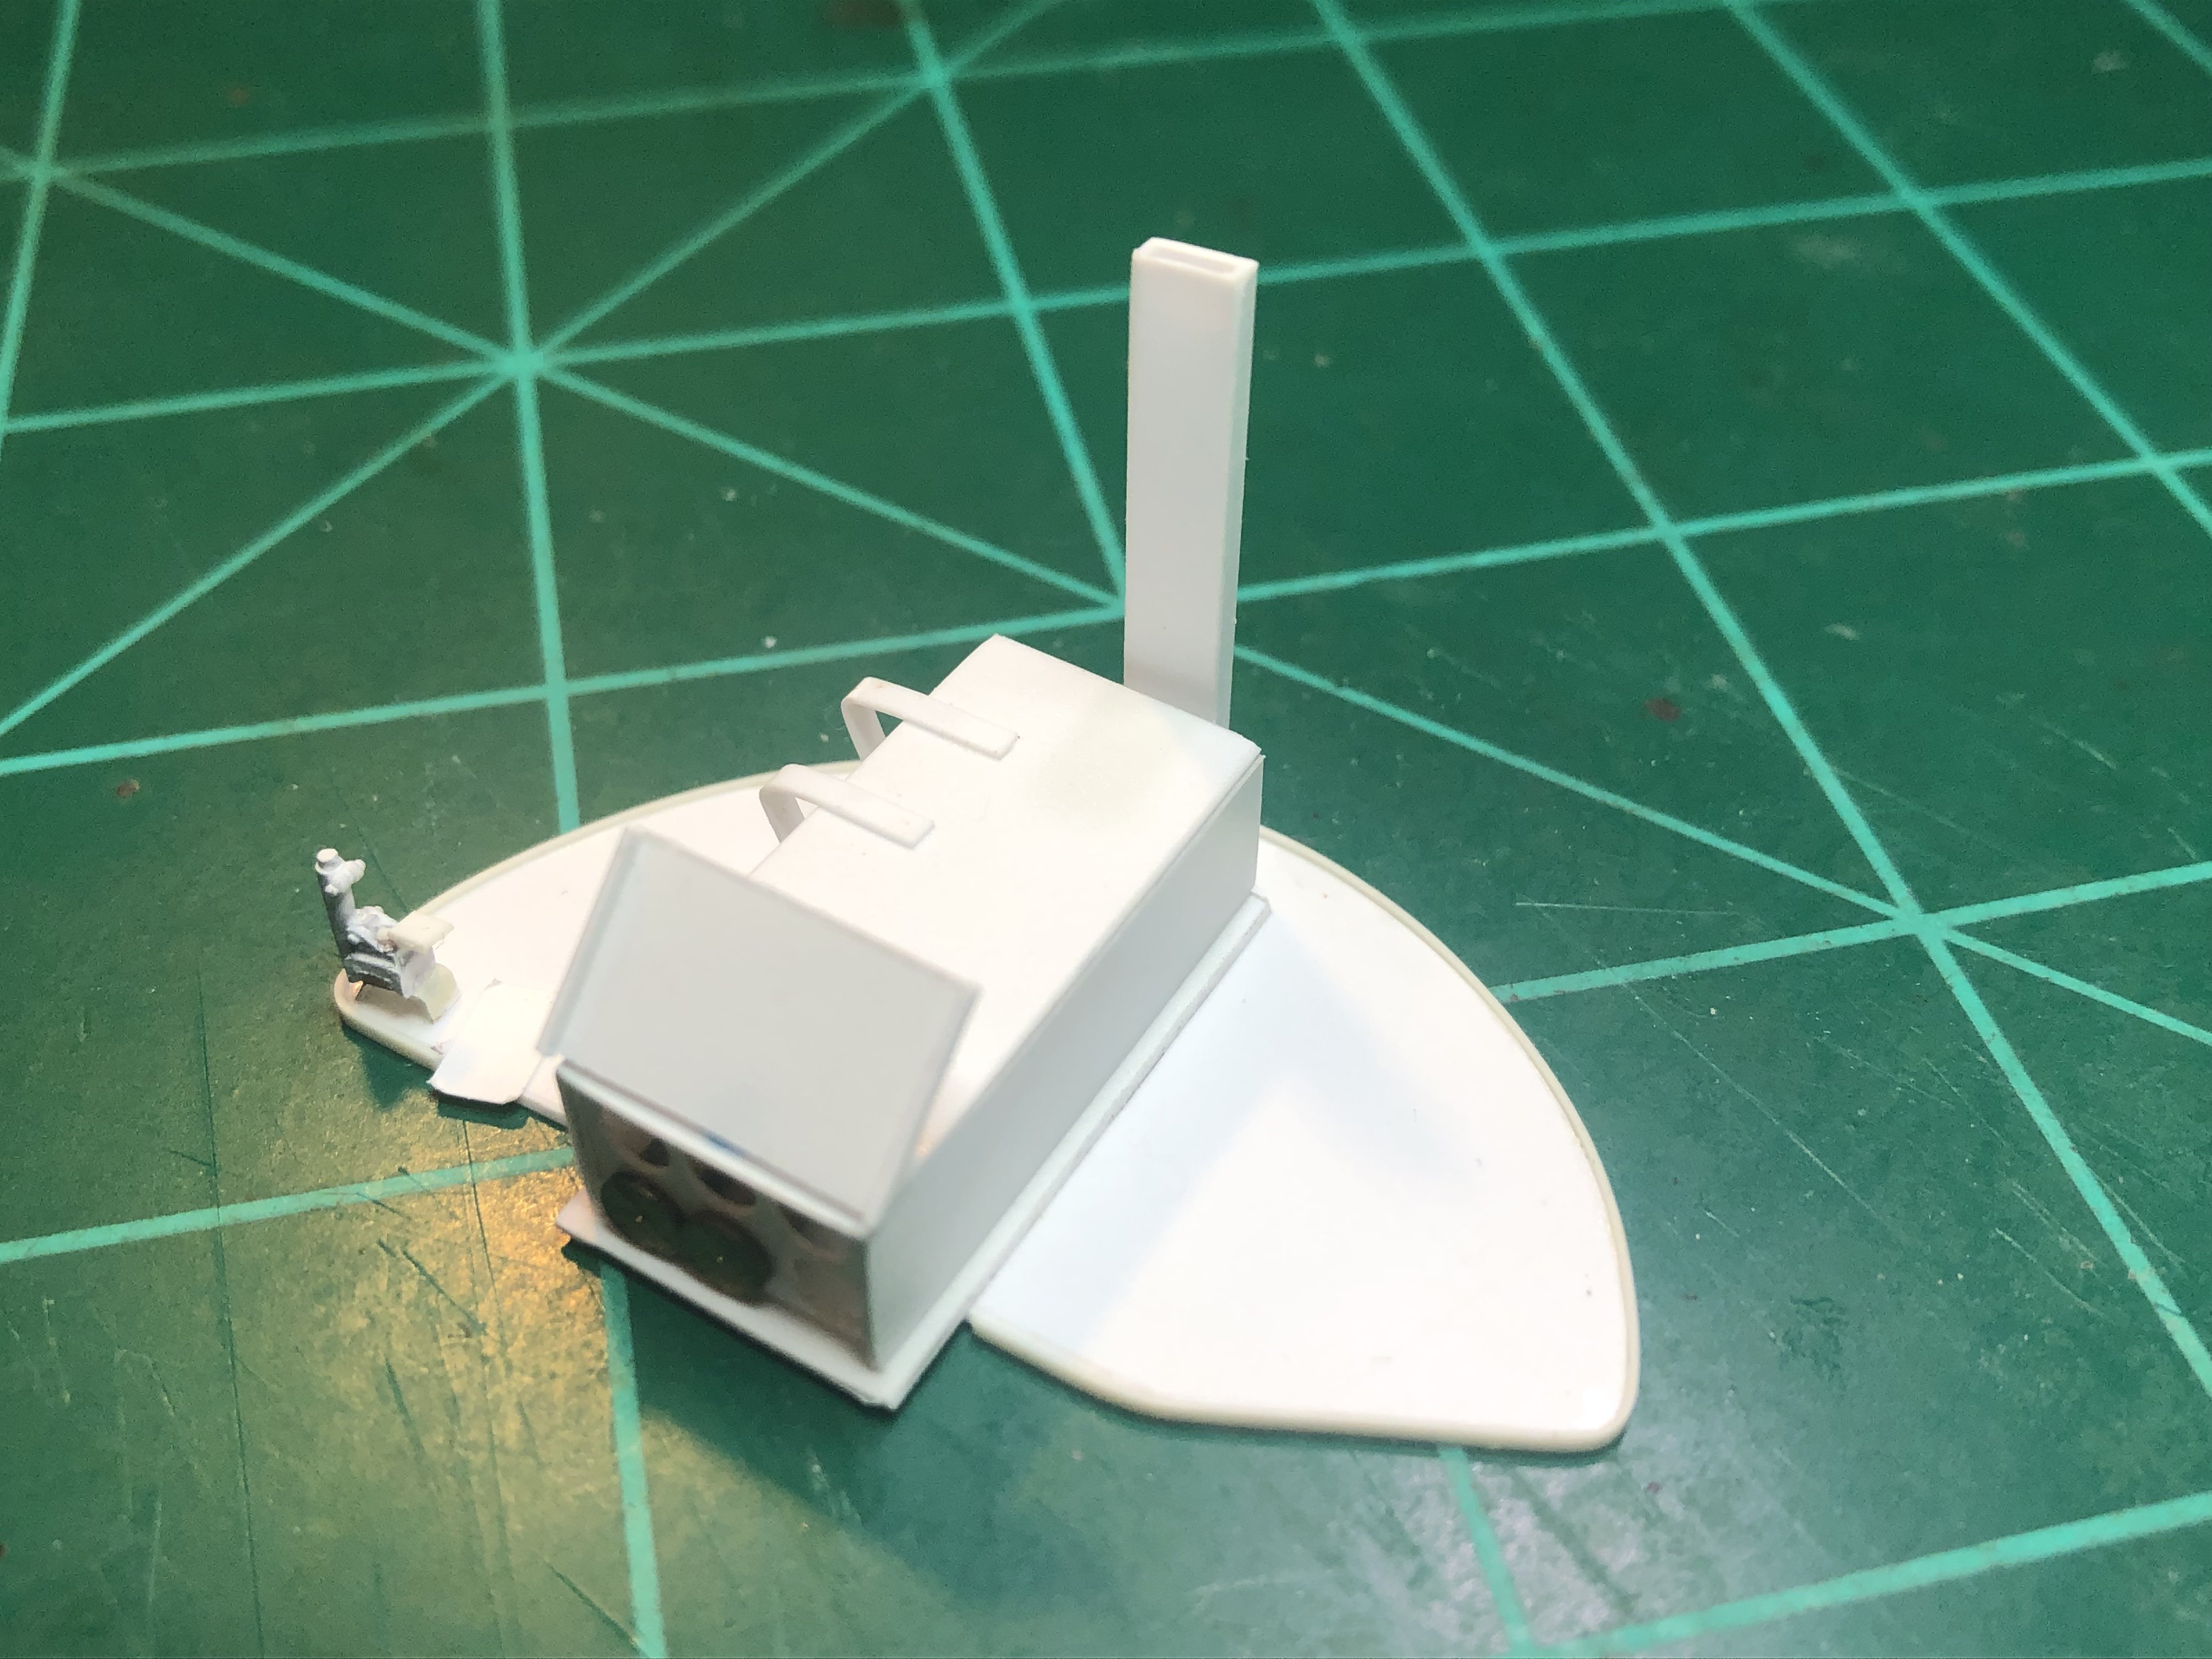
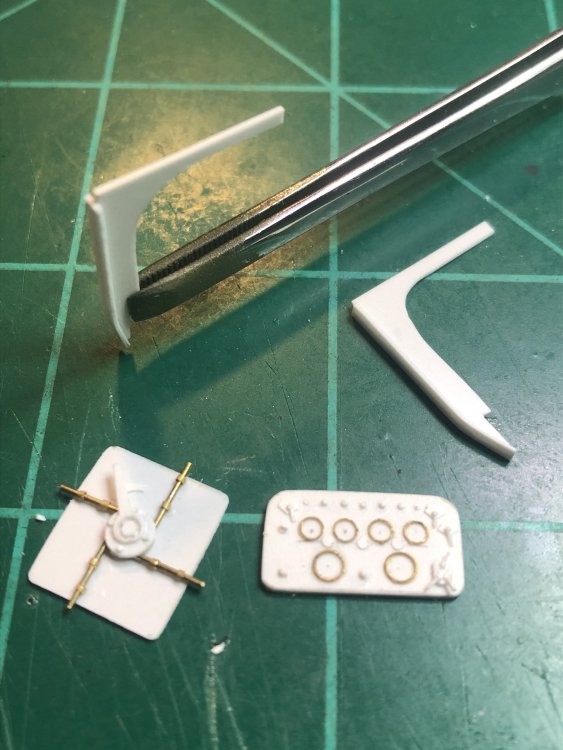
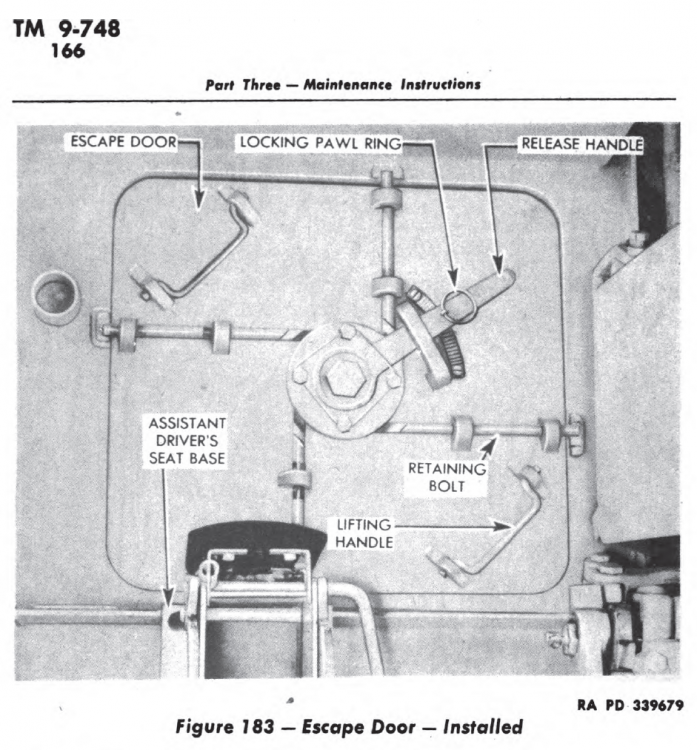
Did some more work this week but not fully done with each. Escape hatch just needs the handles and bar over the latch. The instrument panel has all the components but the switches around the outside are not glued to make it easier to paint. The support bars over each side of the sponsons just need a few casting numbers. Found that on one picture (not attached). More work this week.

-
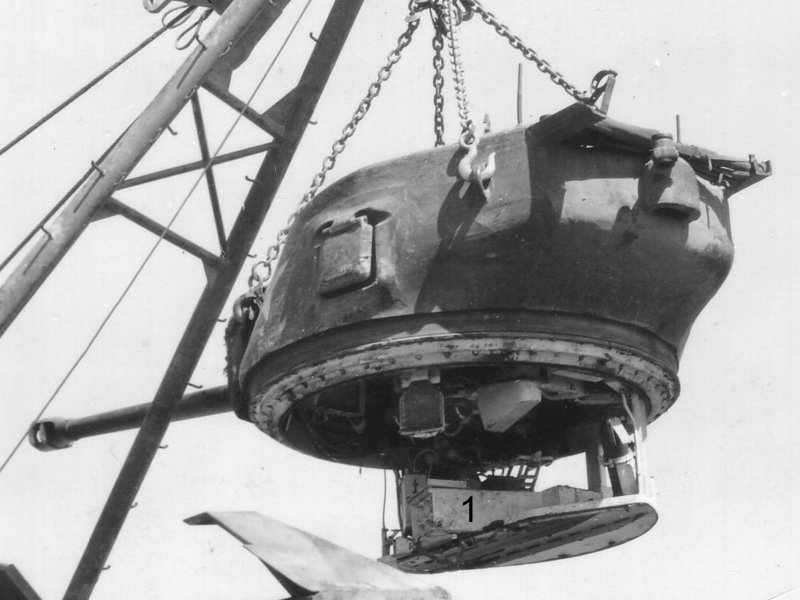
Great idea on the counter weight for the barrel. Still have not decided on the best way to display the turret but that is definitely an option. See the picture.
-
Trumpeter P-47D Razorback
Axeman replied to crazypoet's topic in LSM 1/35 and Larger Work In Progress
Great job on the cockpit! Looking forward to seeing more. -
The propeller shaft that connect the transmission and engine. Does anyone have a good picture of the attachment area by the engine wall below the oil cooler? I cannot tell from the picture I have if the area is hard material or soft/flexible.
-
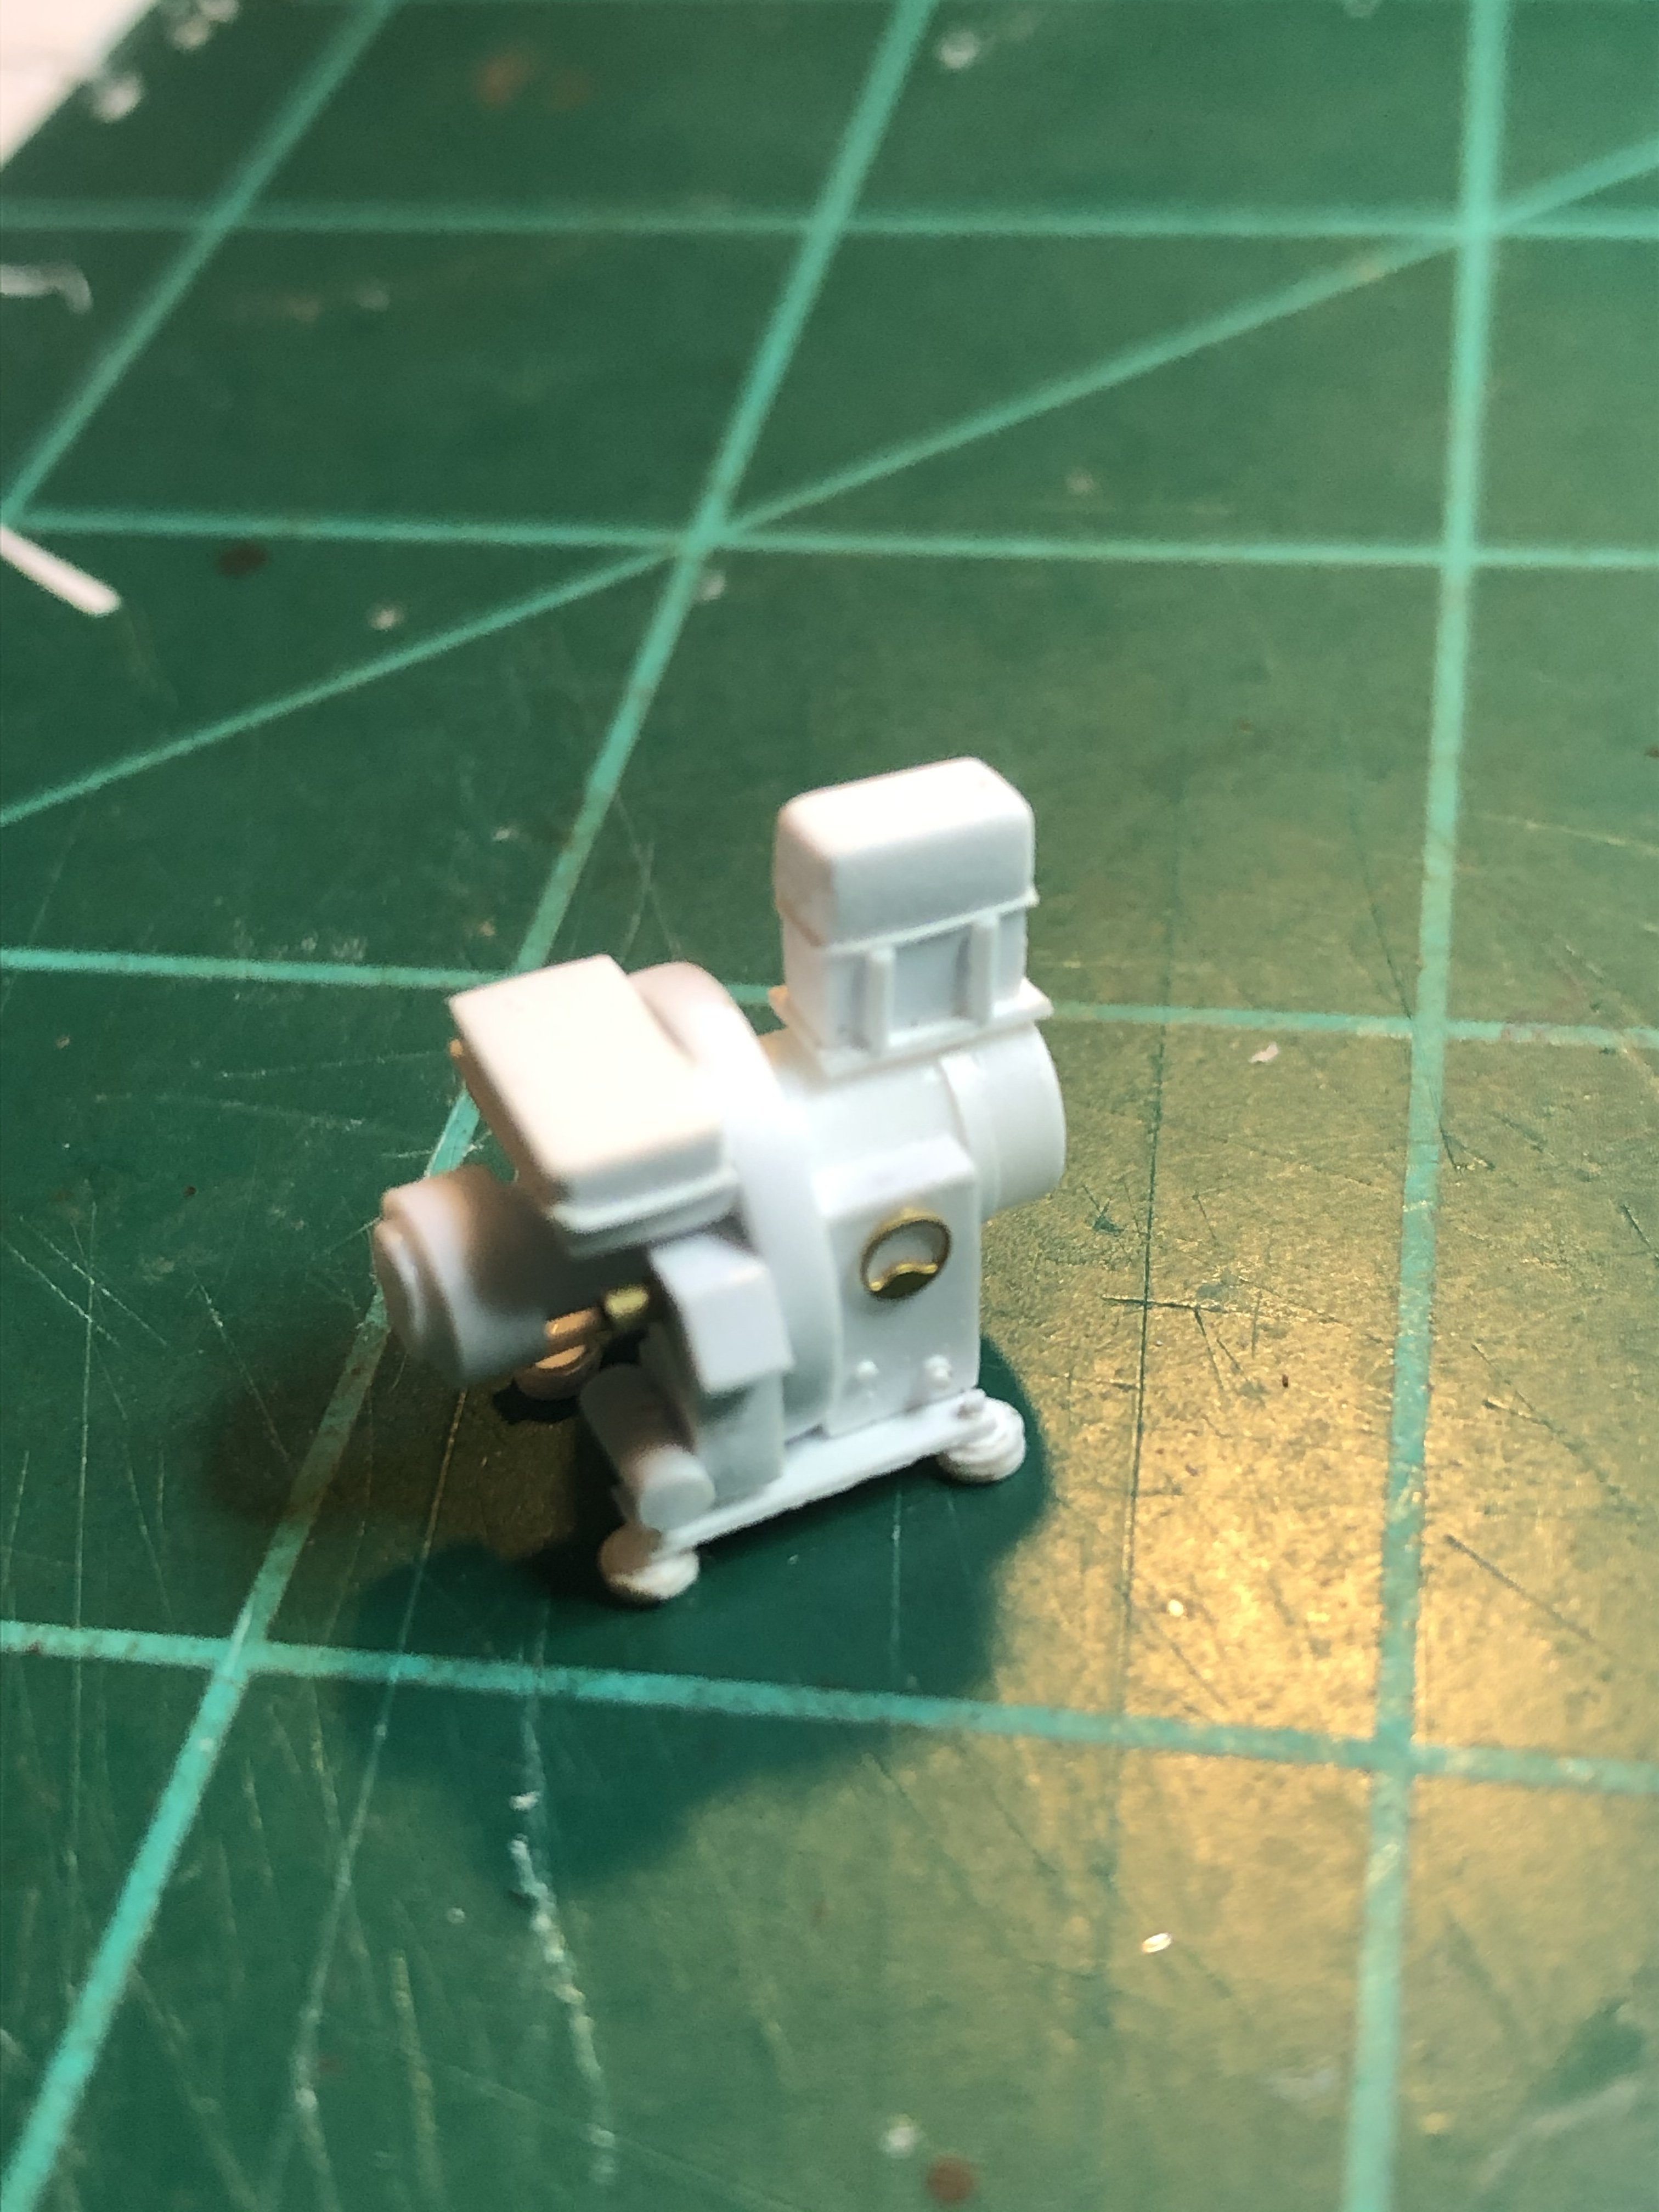
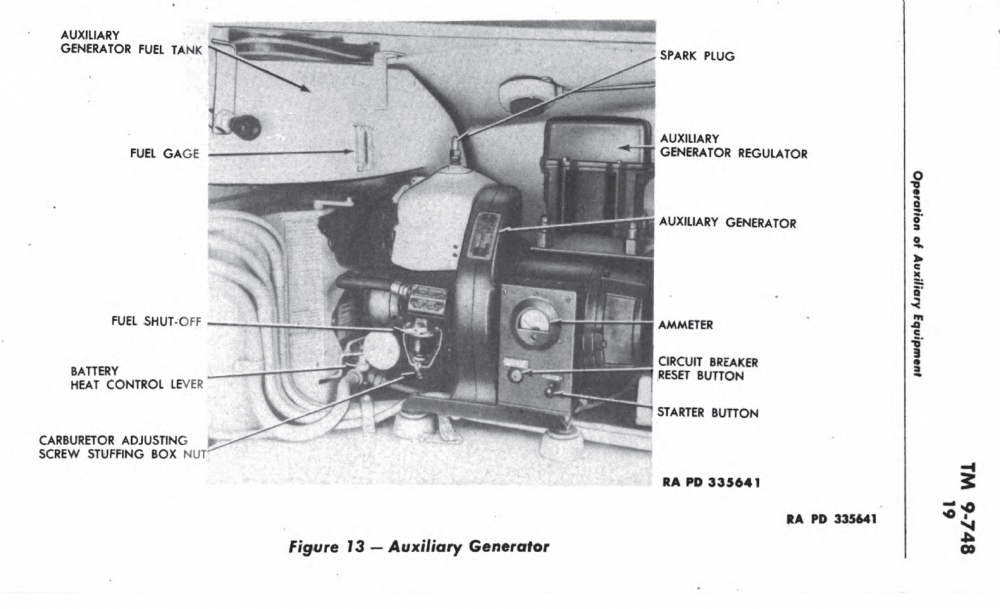
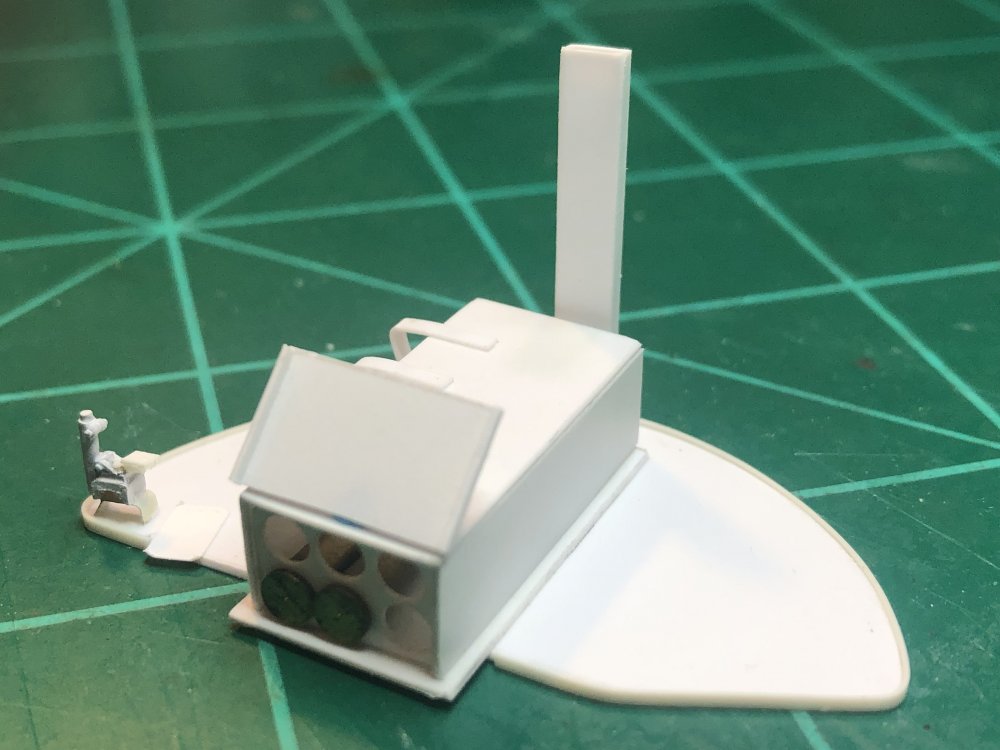
Also built the auxiliary generator. Here is a picture of the real one. Need to work on the battery storage next to the generator, the engine fire wall and the the wet stowage and flooring above the ammo stowage. Lots more to do.

-
It has been a while but work has kept me busy the last month. Finally back at it. Did some interior work. Added storage on the sponson and storage and ammo storage (still need to add the doors).


-
I don’t have any resin for the turret basket so I did some scratch building. Good start so far. Not sure if I will leave the ready ammo storage door open or closed. Had to do some research to confirm the M4A3 76mm turret floor configuration.

-
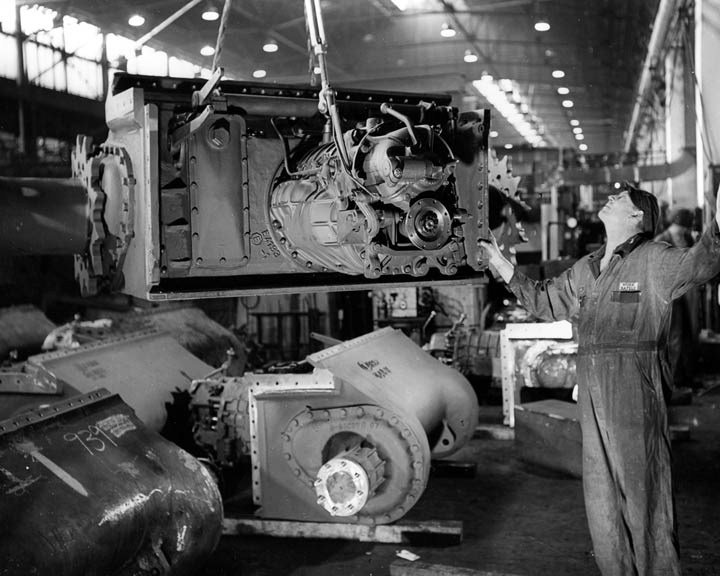
The grey is resin parts from The New TMD. I like how close it is to the actual. See the production line photo.
-
MH 60 s Knighthawk Academy 1/35
Axeman replied to shark64's topic in LSM 1/35 and Larger Work In Progress
Your work is amazing. But I have to ask, on such a long term project, do you take breaks and build other models? again fantastic job -
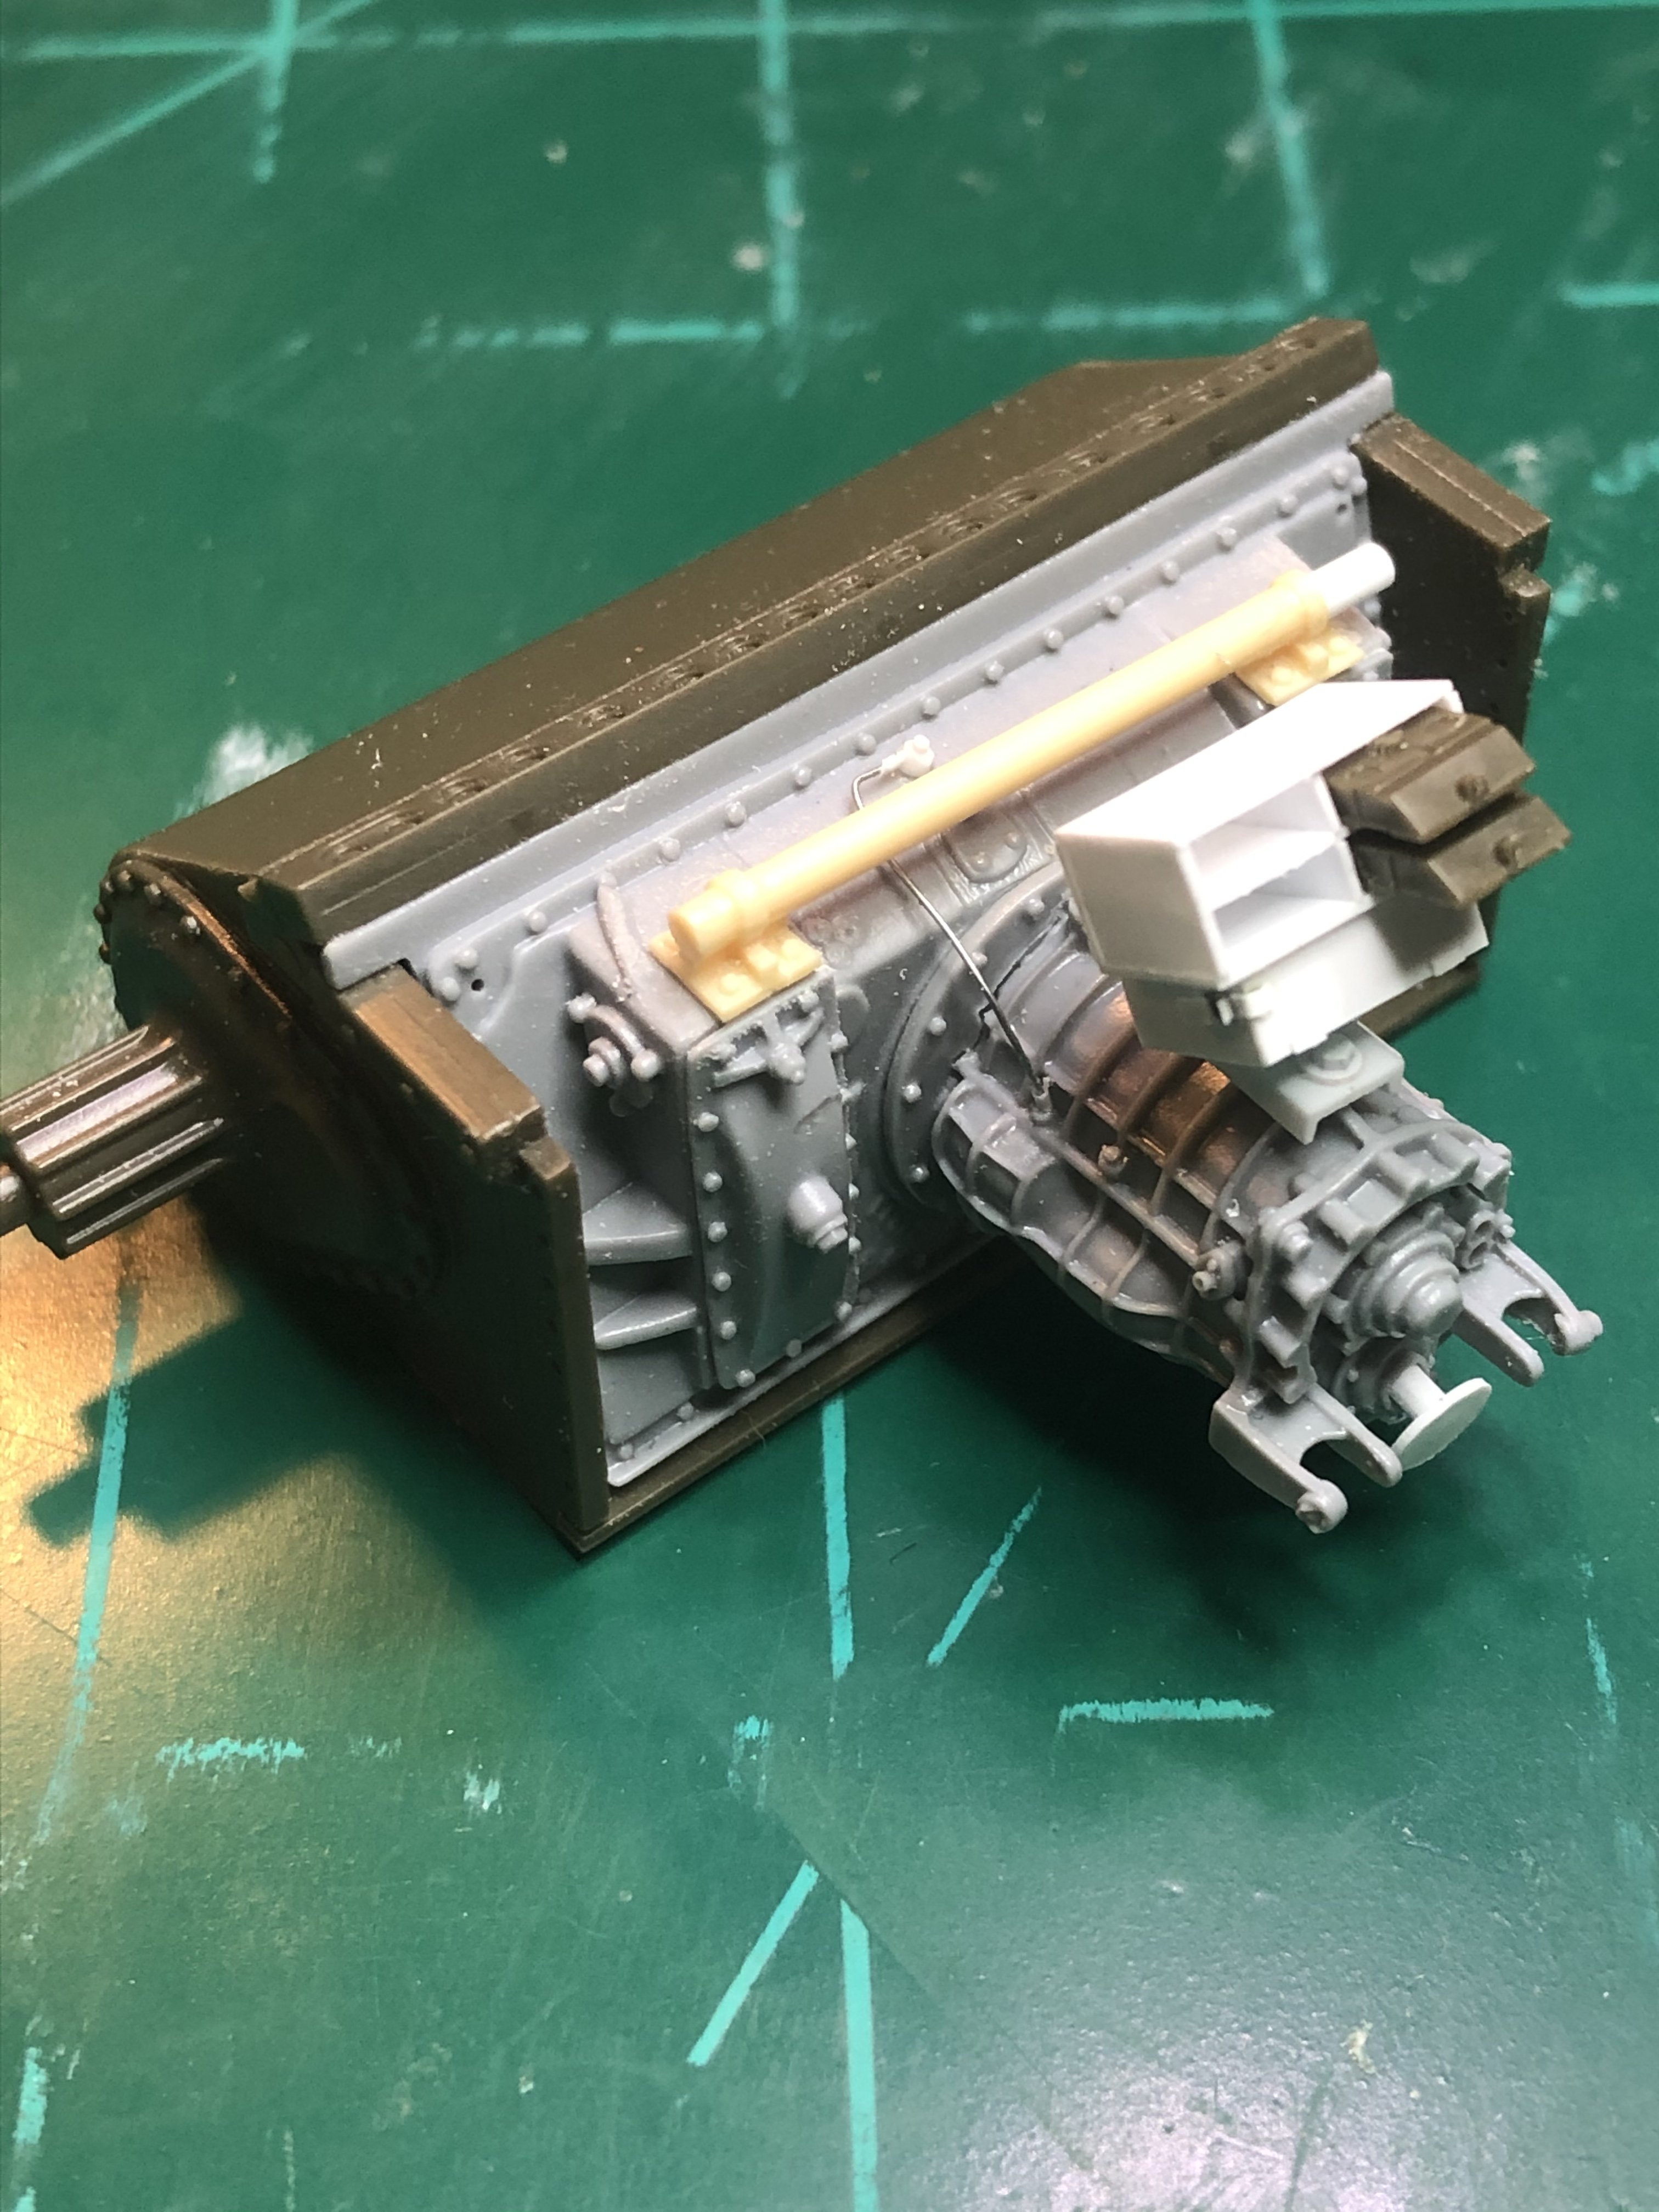
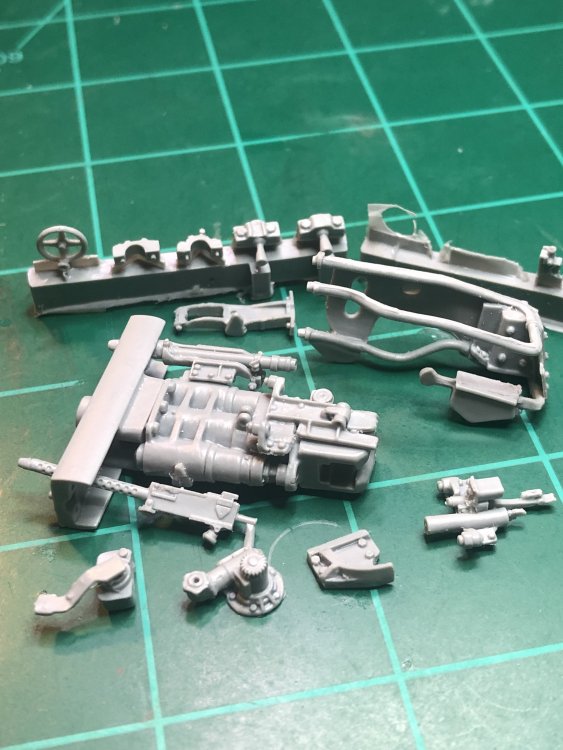
Started to do more of the interior with the transmission housing and differential. A few detail scratch built that did not come with the resin parts.
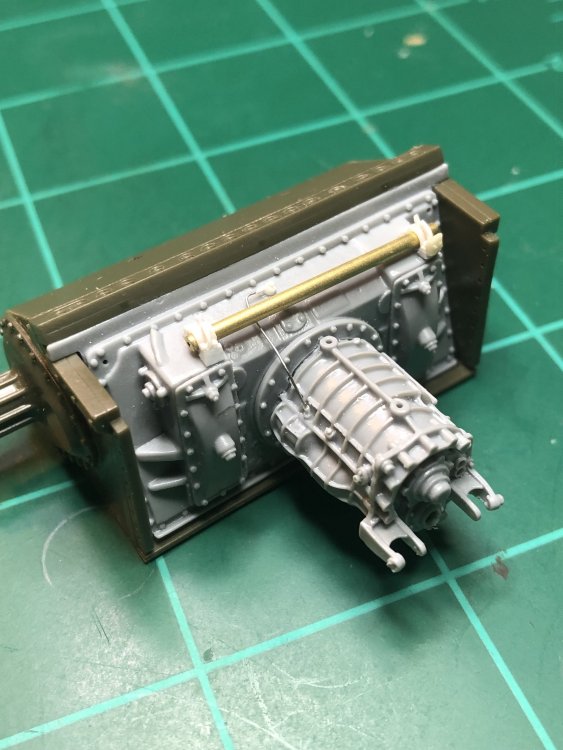

-
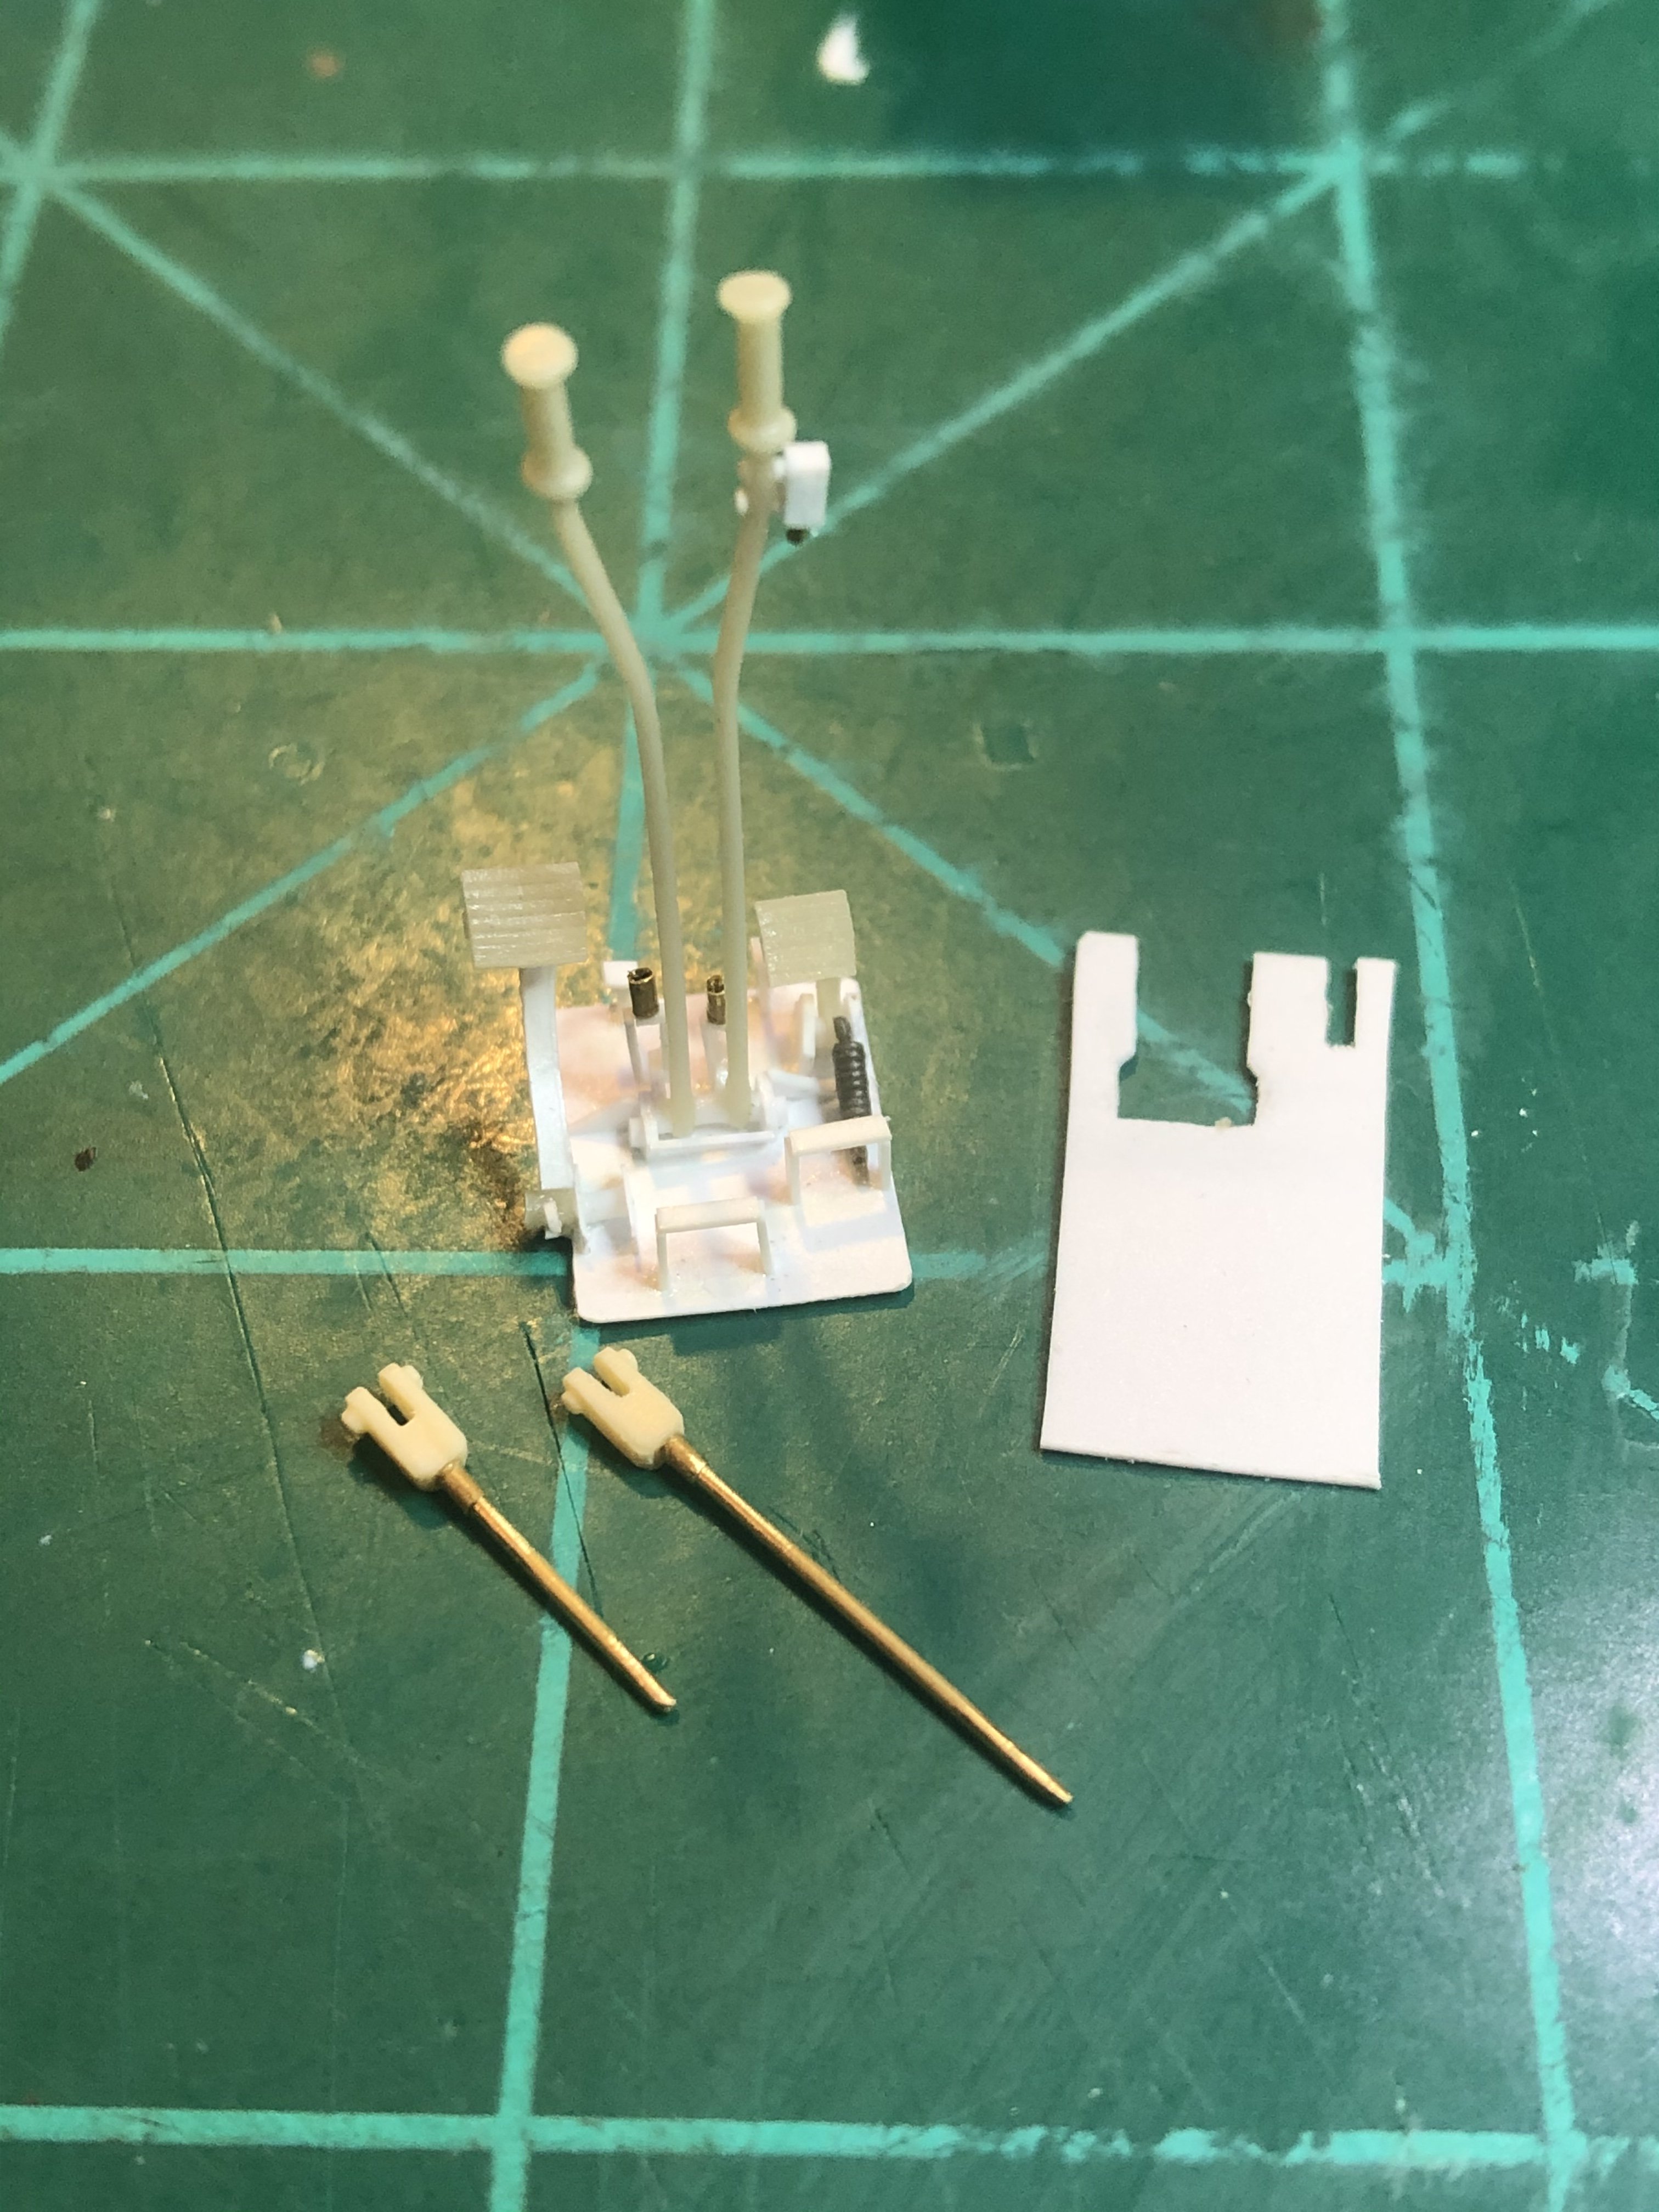
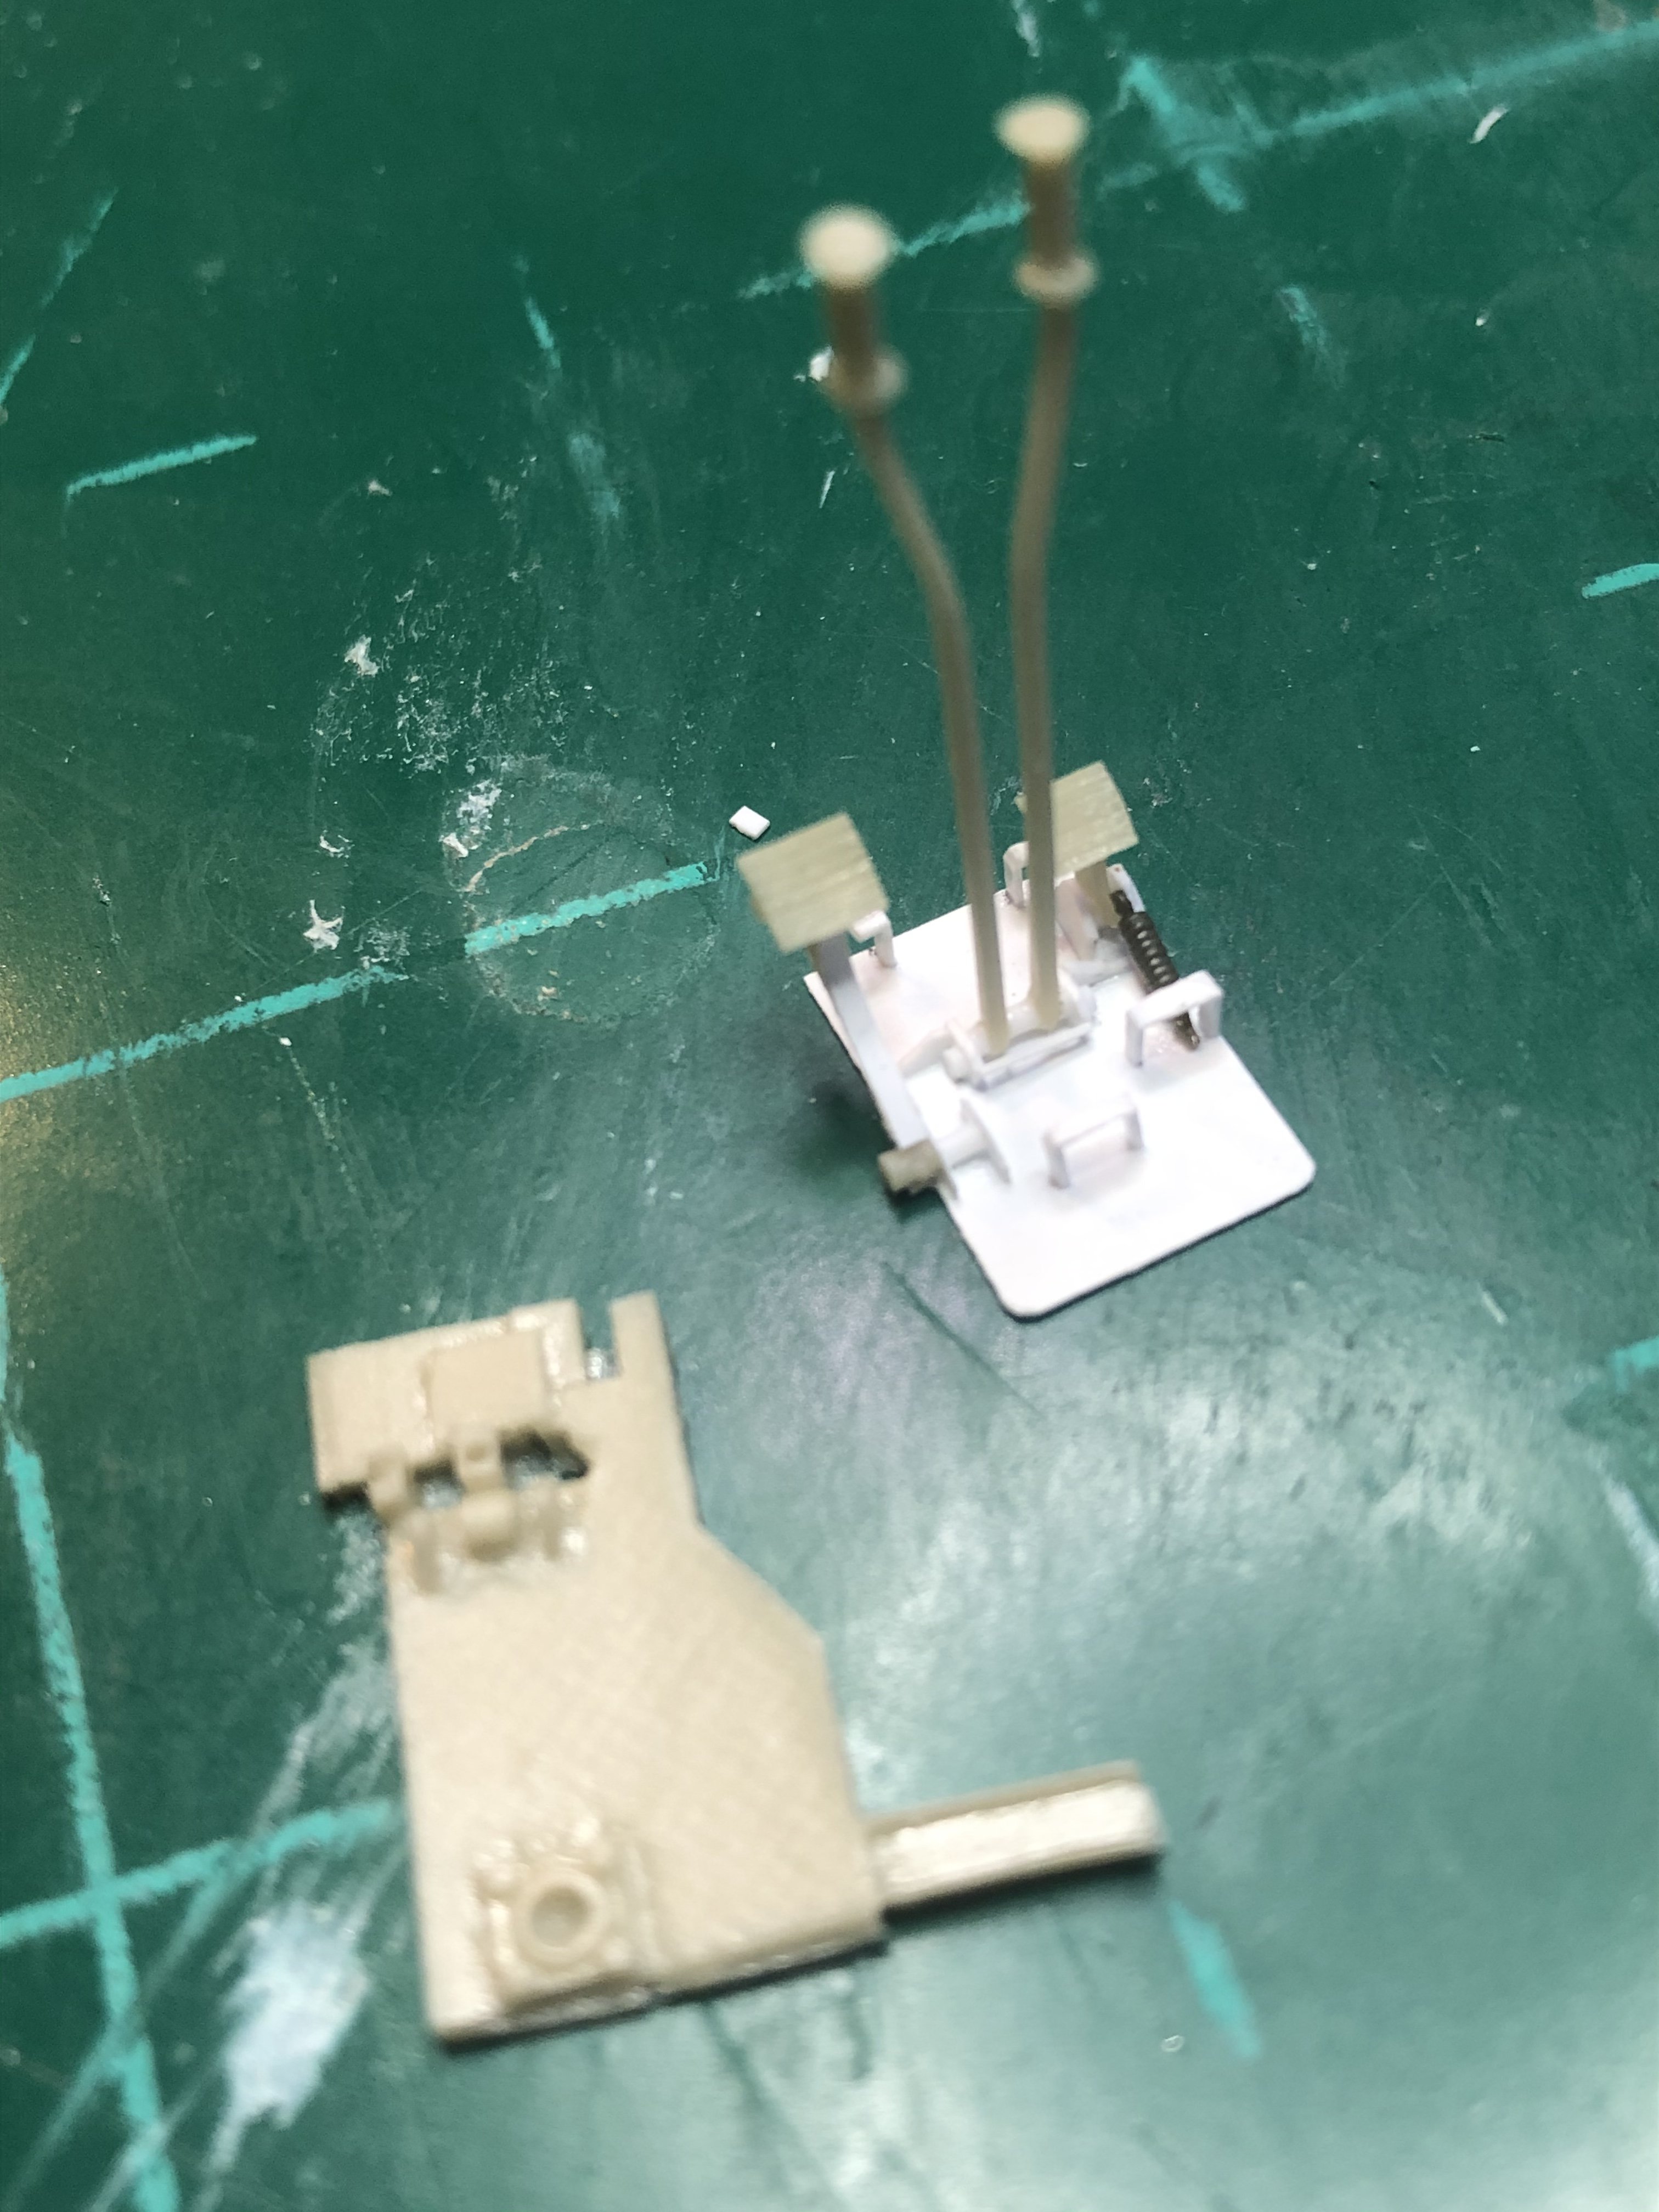
Next is the 76mm gun breach assembly. Another The New Tiger Model item. The plan is to add more detail to the interior of the turret including scratch building the turret basket. I like having the hatches open but hate the empty space inside. So I will be adding some interior items. More to come.
-
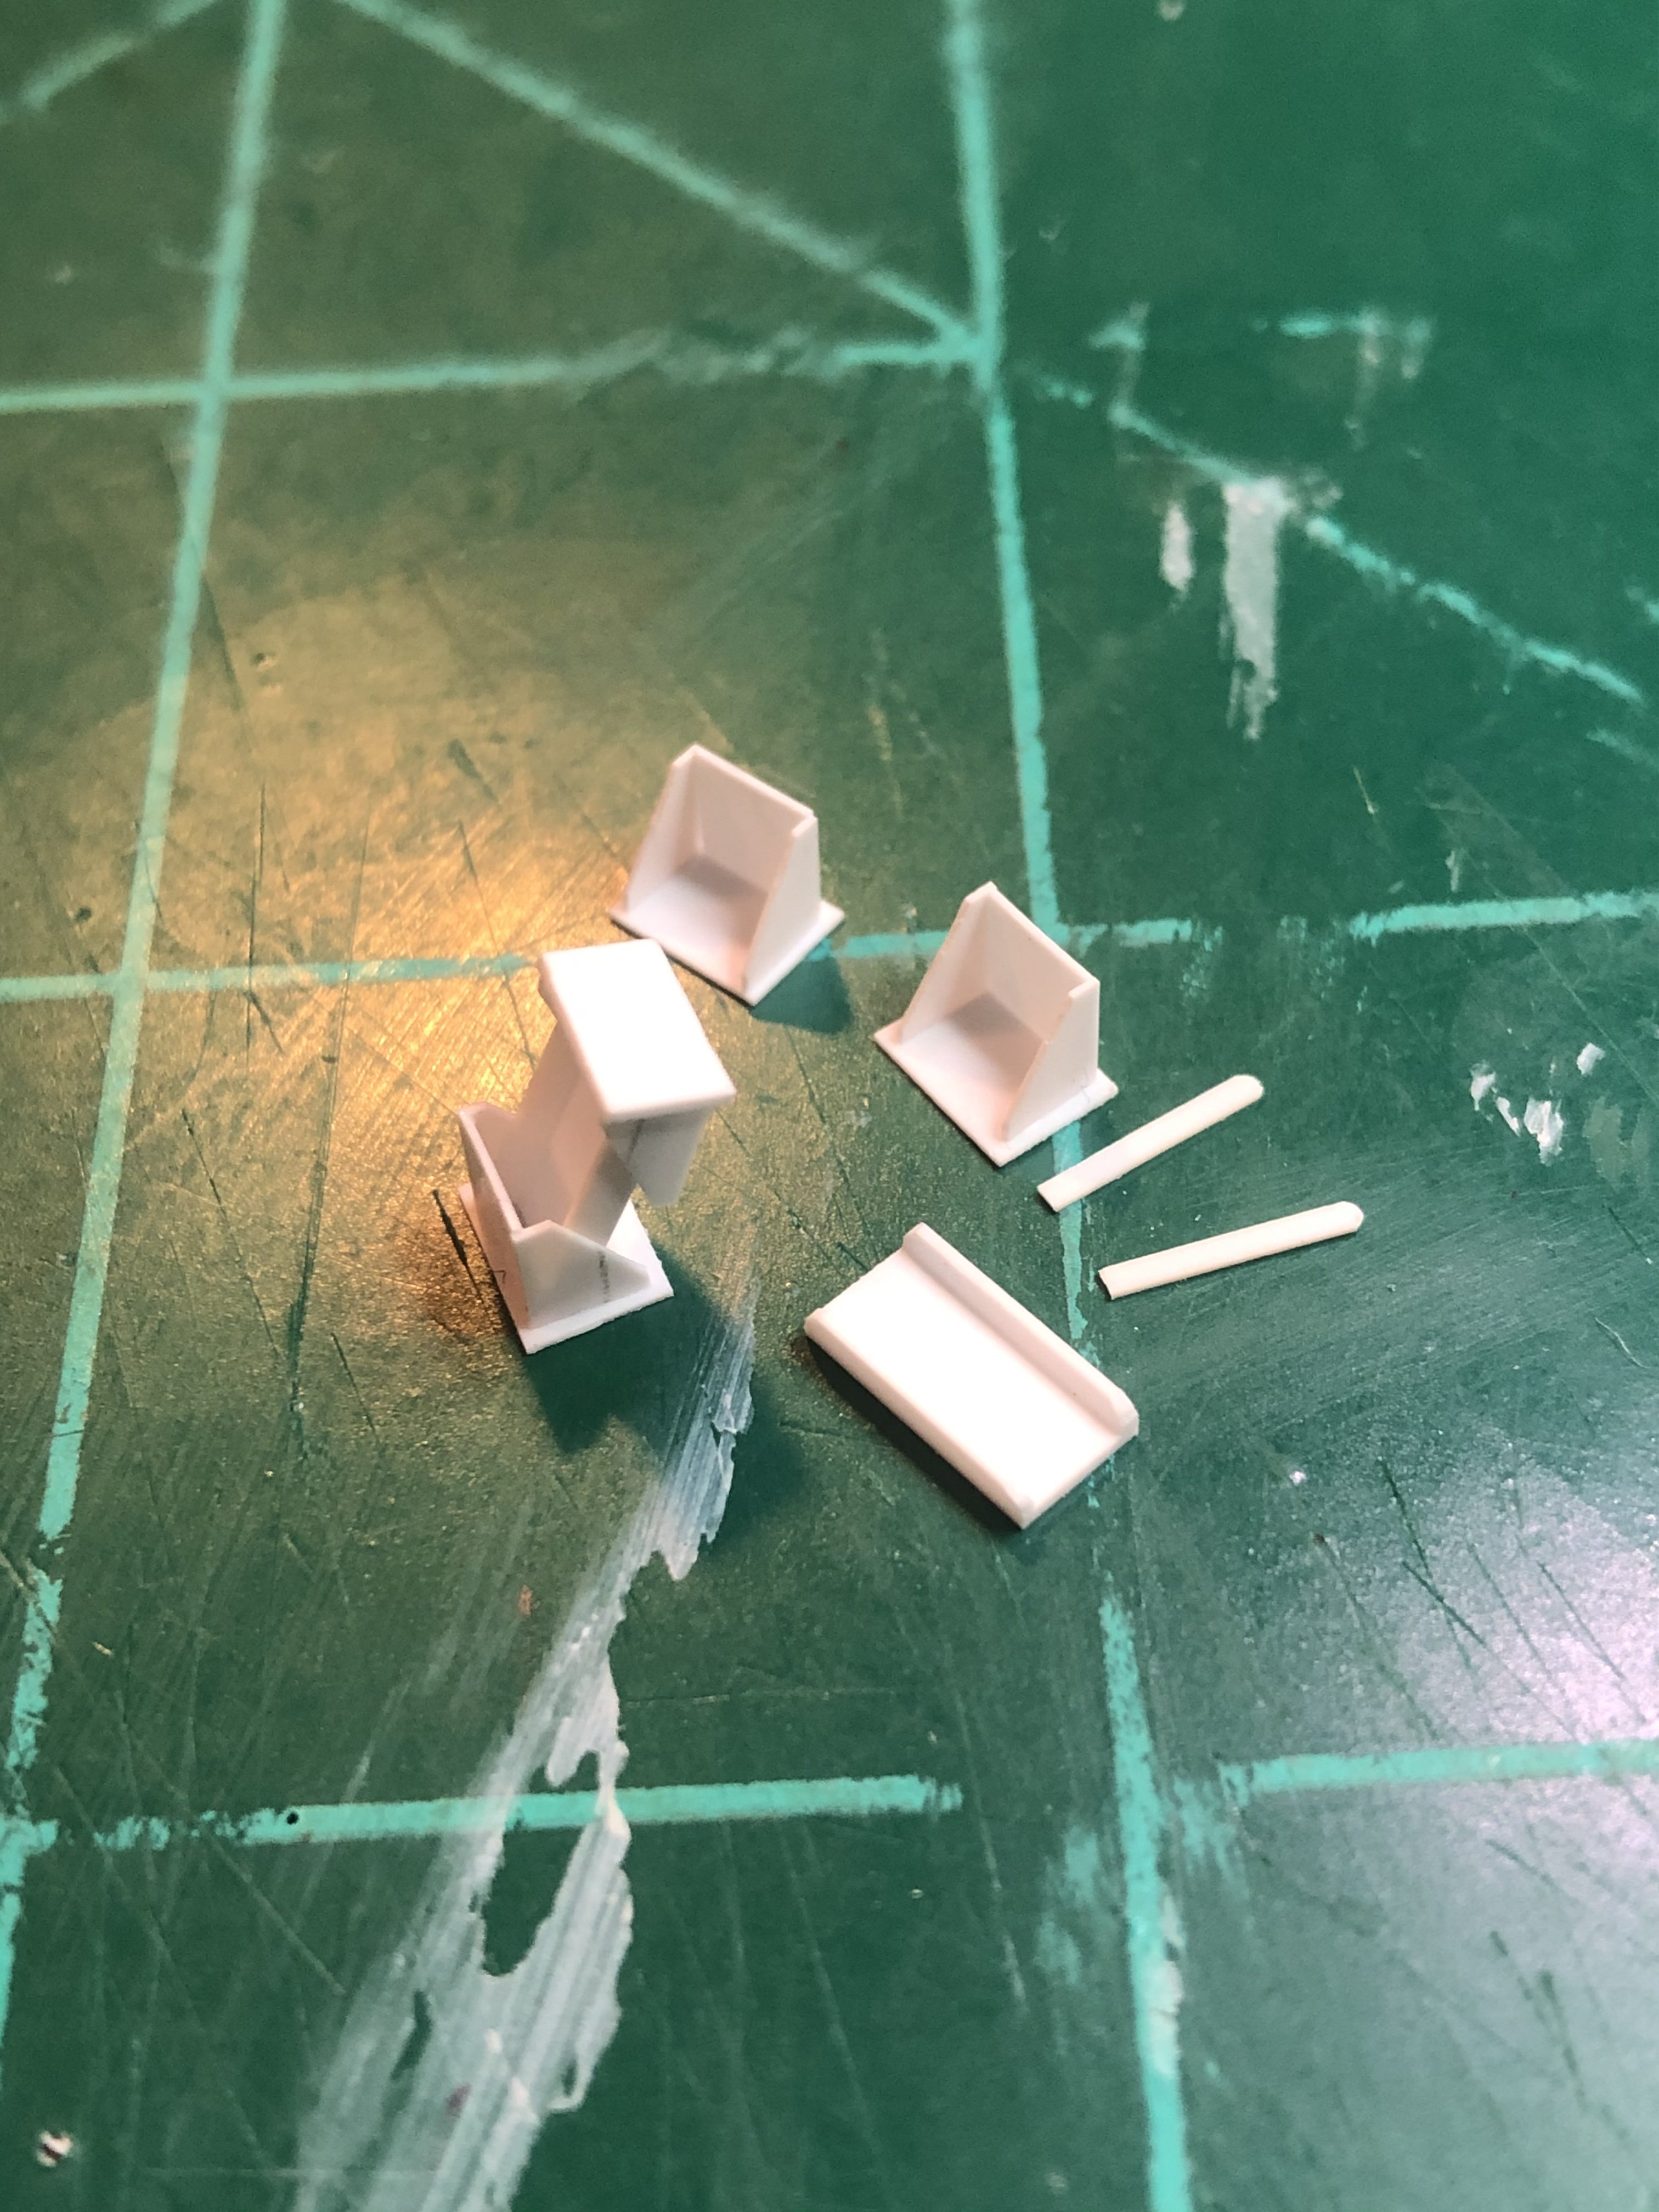
Got some great items from The New Tiger Models. First is the vision blocks, periscopes that fit inside which I can paint separate and the add to the hatch and the periscope guards. The resin parts fit together beautifully and the attachment point to the resin blocks support the piece but are almost paper thin and easy to remove. Also drill out holes so the hatches can move. You can see the temporary wire hold the hatch.


-
Amazing job on the wiring for the landing gear. Outstanding.