CANicoll
-
Posts
1,928 -
Joined
-
Last visited
Content Type
Profiles
Forums
Events
Gallery
Everything posted by CANicoll
-

1/32 Hawker Tempest
CANicoll replied to JeroenPeters's topic in LSM 1/35 and Larger Work In Progress
Masterful work! -
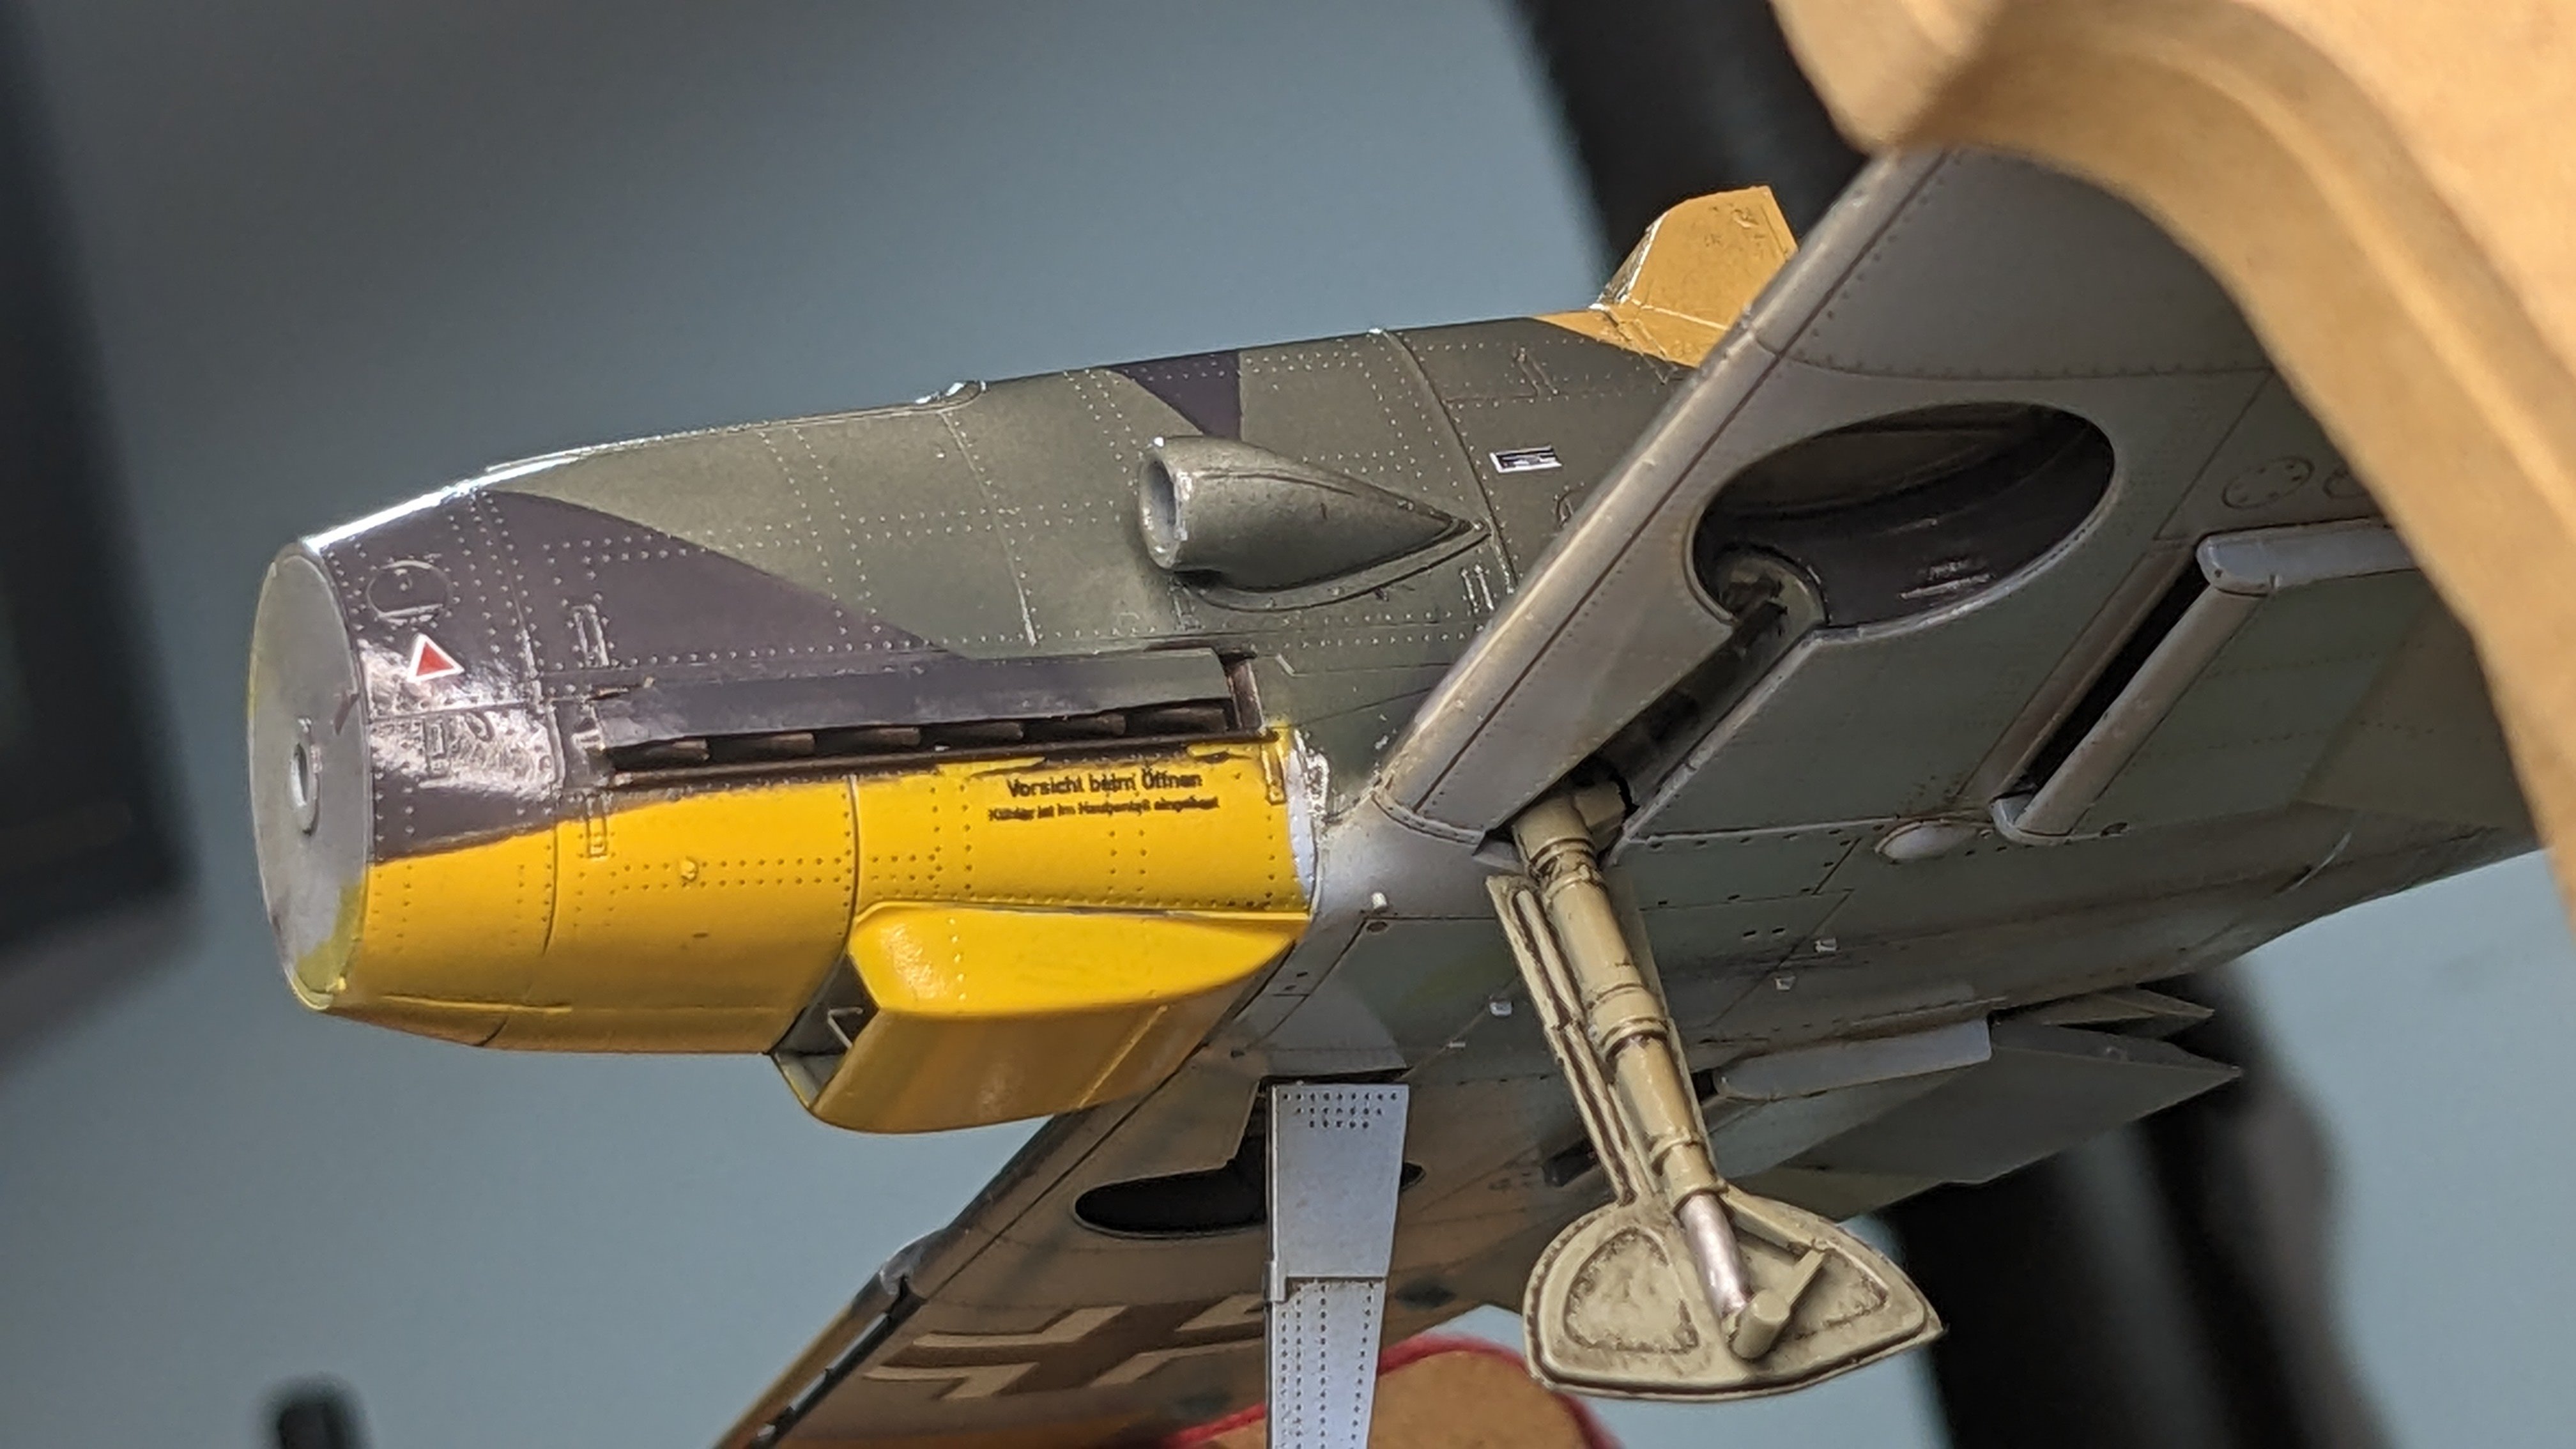
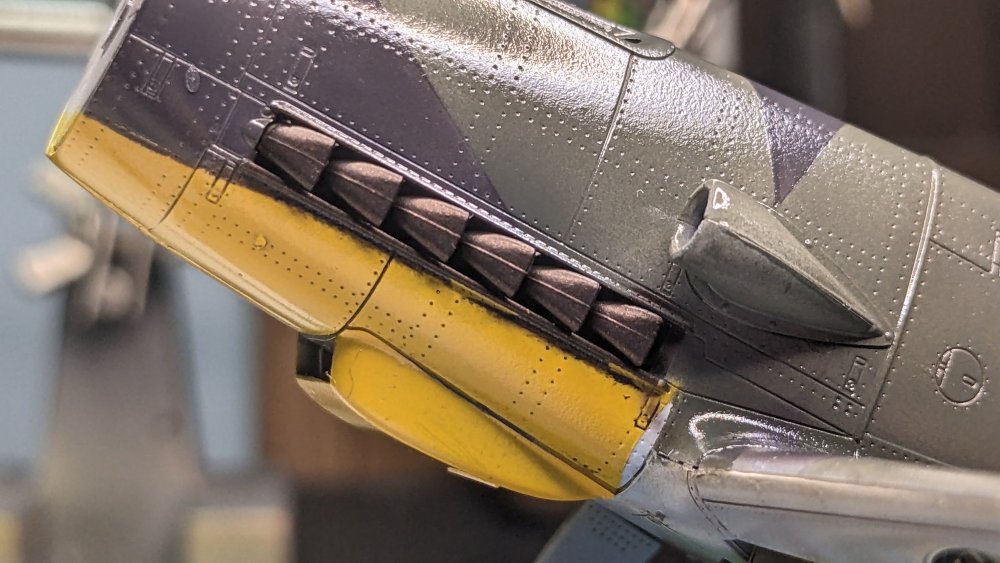
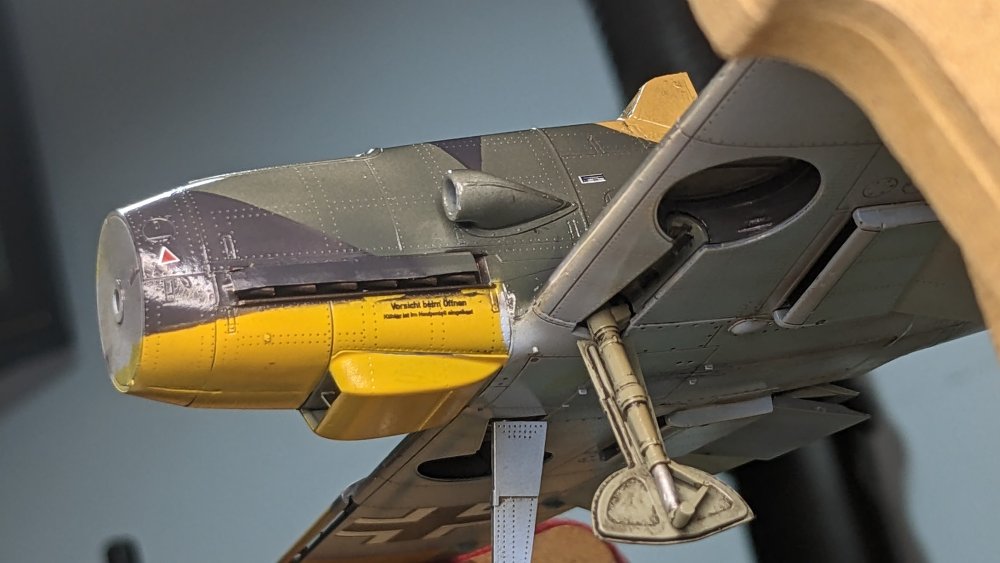
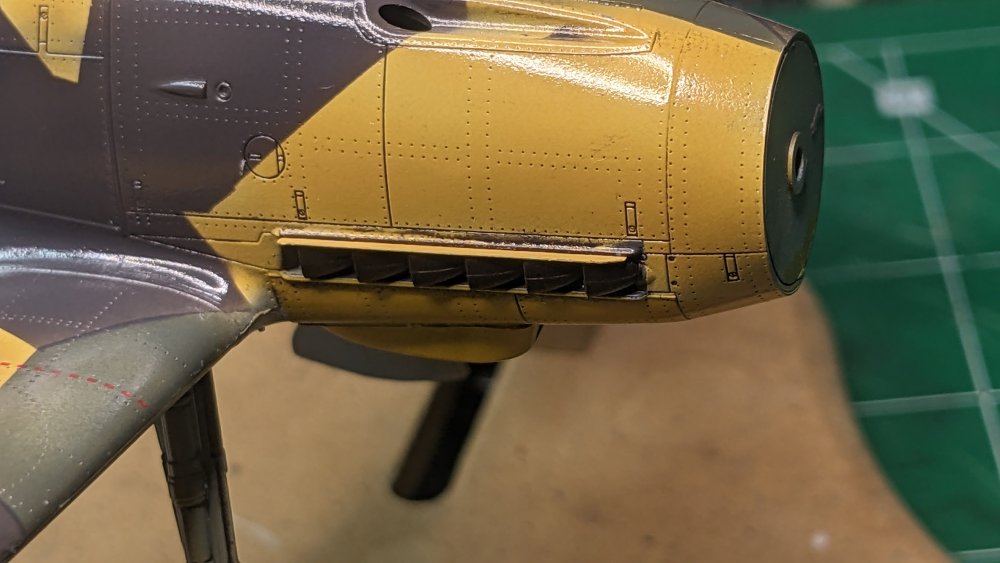
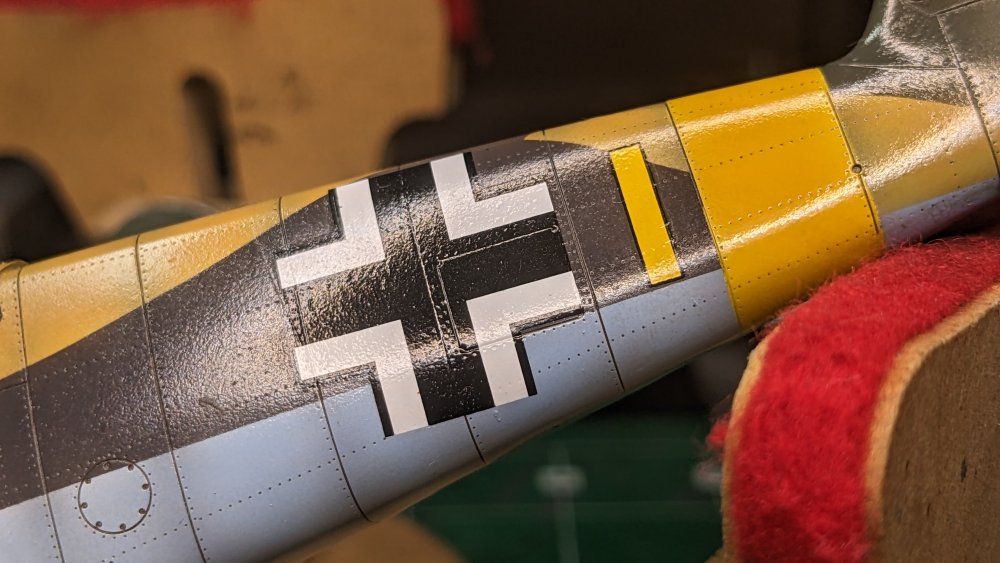
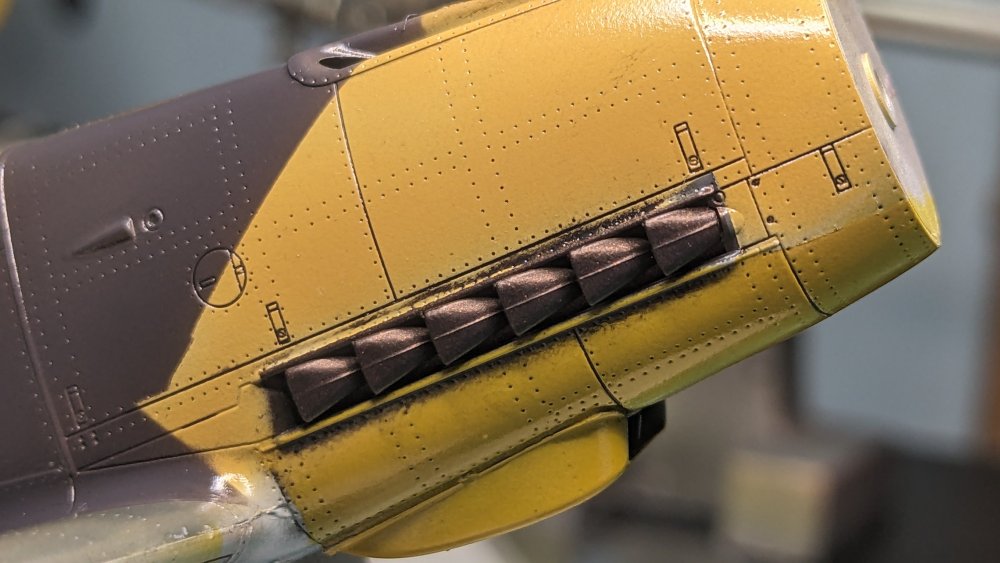
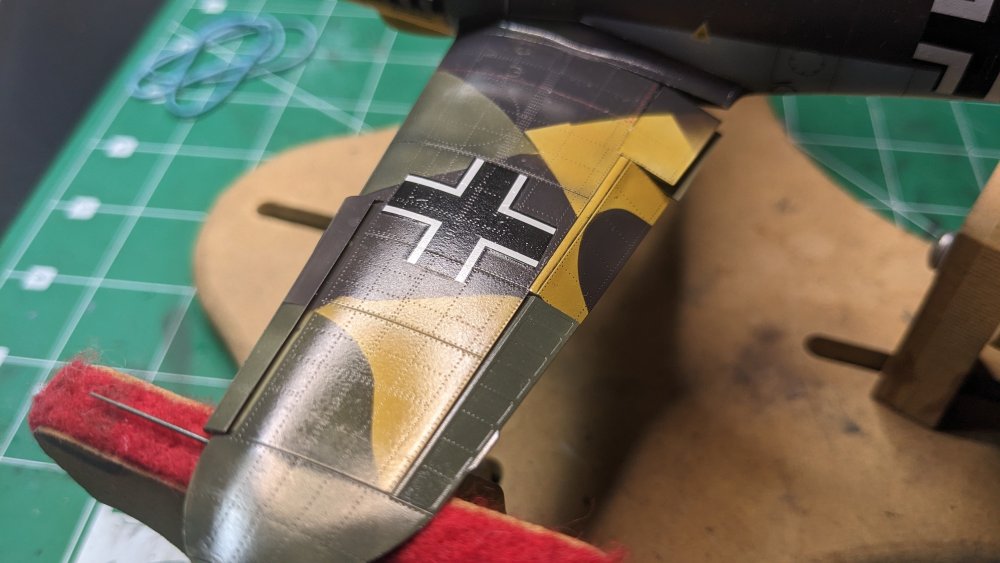
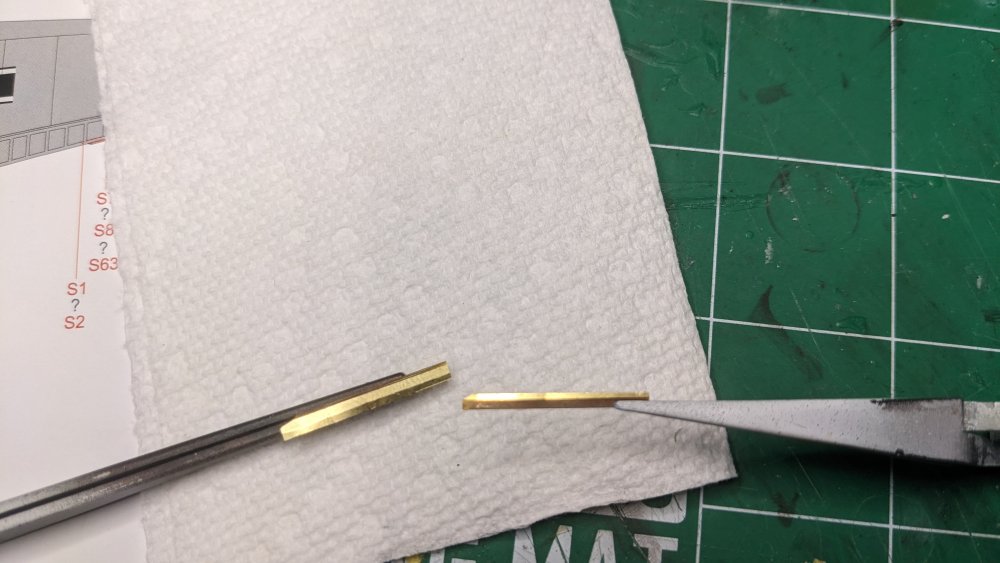
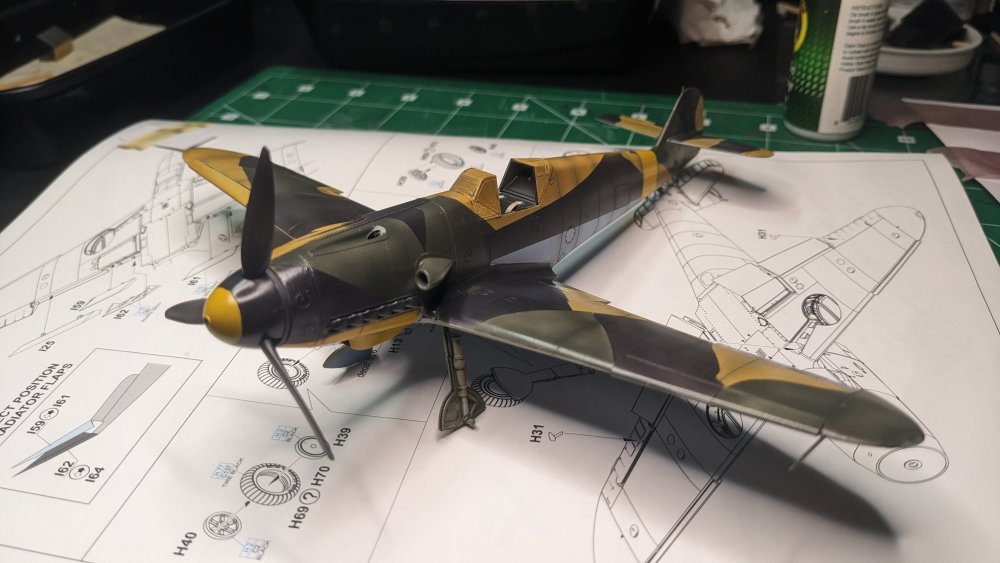
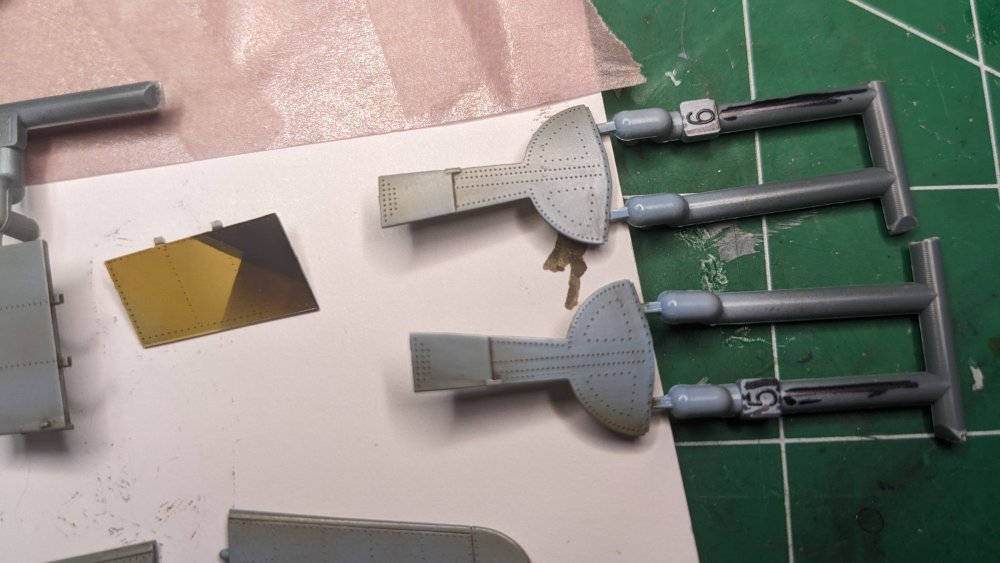
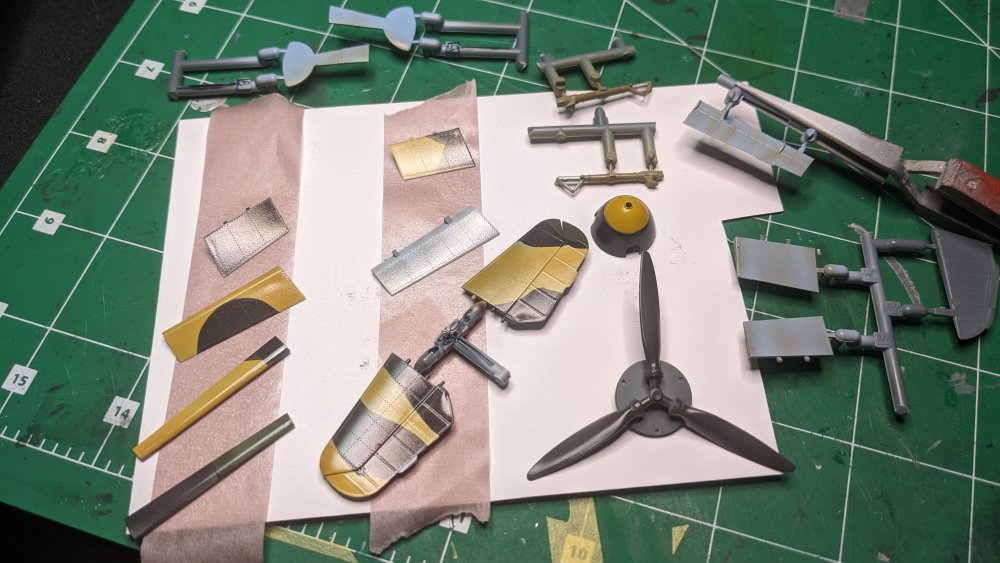
Started with some stencils which thankfully are far fewer on this aircraft than some of the others. However, it seems like very latch still has a stencil so will be coming back to that. Just was not up to it tonight. Had a worry that the Eduard decals would maybe not settle down into the extensive riveting on the aircraft. However, those fears were unfounded. Applied them over a base of MicroSet. Had to be somewhat careful as they settled into position fairly quickly. Close up shows a better view Also resprayed the exhausts with Model Master Burnt Iron Metalizer in preparation for the PE guards. The chin scoop is dry fitted at the moment. Attached the PE exhaust guards: The left side guide may need to be bent up just a bit.

- 164 replies
-
- 10
-

-
It will!
-
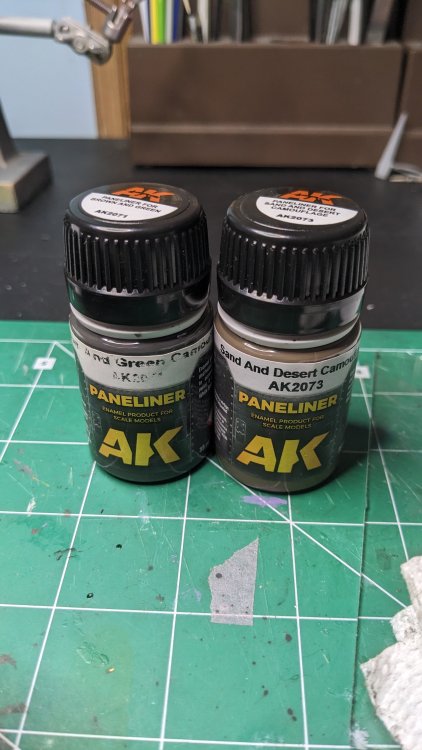
Thanks Peter! I'm happy with how this is turning out as the Tornado I was doing in Sand Pink was a disappointment. It's fun to 'dirty-up' a plane. I have several of the Flory Washes and what I like about them is the wide range of colors they offer. The AK washes are not hugely different in color (except the white!) but I think on the right base coat they probably turn out well. HobbyNut has the complete line but don't seem to have the set that I have and for th elife of me I can't remember where I got them from. I thought it was HobbyNut. And I have two MIG washes that I like - Dark and Neutral. If you want to try out the AK Paneliners, I'll send you my set and you can try them out. Kind of expensive to just test out at $8 a bottle.
-
Can't wait to see how you do the paint on this. Nice build!!
-
The Vallejo Gloss is so so, but I really like the matte. And like you I also use them from brush touch-up. They are brilliant for that. Funny. I have that same bottle of Dullcote, too. Have not opened it in probably 10 years! I do LIKE to do two builds at the same time for the same reasons you said - I hit a roadblock, or need a change of pace or, like tonight, I put a clear gloss over the washes, and painted the 2 PE exhaust covers, then I was done. Ugh. So much lost bench time. I did try and do two mustangs one time and ended up mixing parts as I got lost where I was in each build. Ooops! Now I either do the same aircraft or different scales. And yeah, I constantly have a battle with where I put parts 'for safe keeping'...
-
Mike: Thank you! I'll take some better pictures here soon. I actually have two bottles of the original Future (yes that old!) but have only used it lately for dipping canopies. I'm with you - once you put all the work into a paint scheme you hate to ruin it with a bad clear coat. I have not tried any rattle cans as I'm not sure of the controllability. I'm really happy with the X-22 and it seems pretty fool proof for the gloss. I do like the Vallejo for the Matte/flat, but I invested in some of MRP's Matte and semi-matte so will give them a go. I don't know how you keep up multiple builds! I can barely keep one going.
-
Hang in there...
-
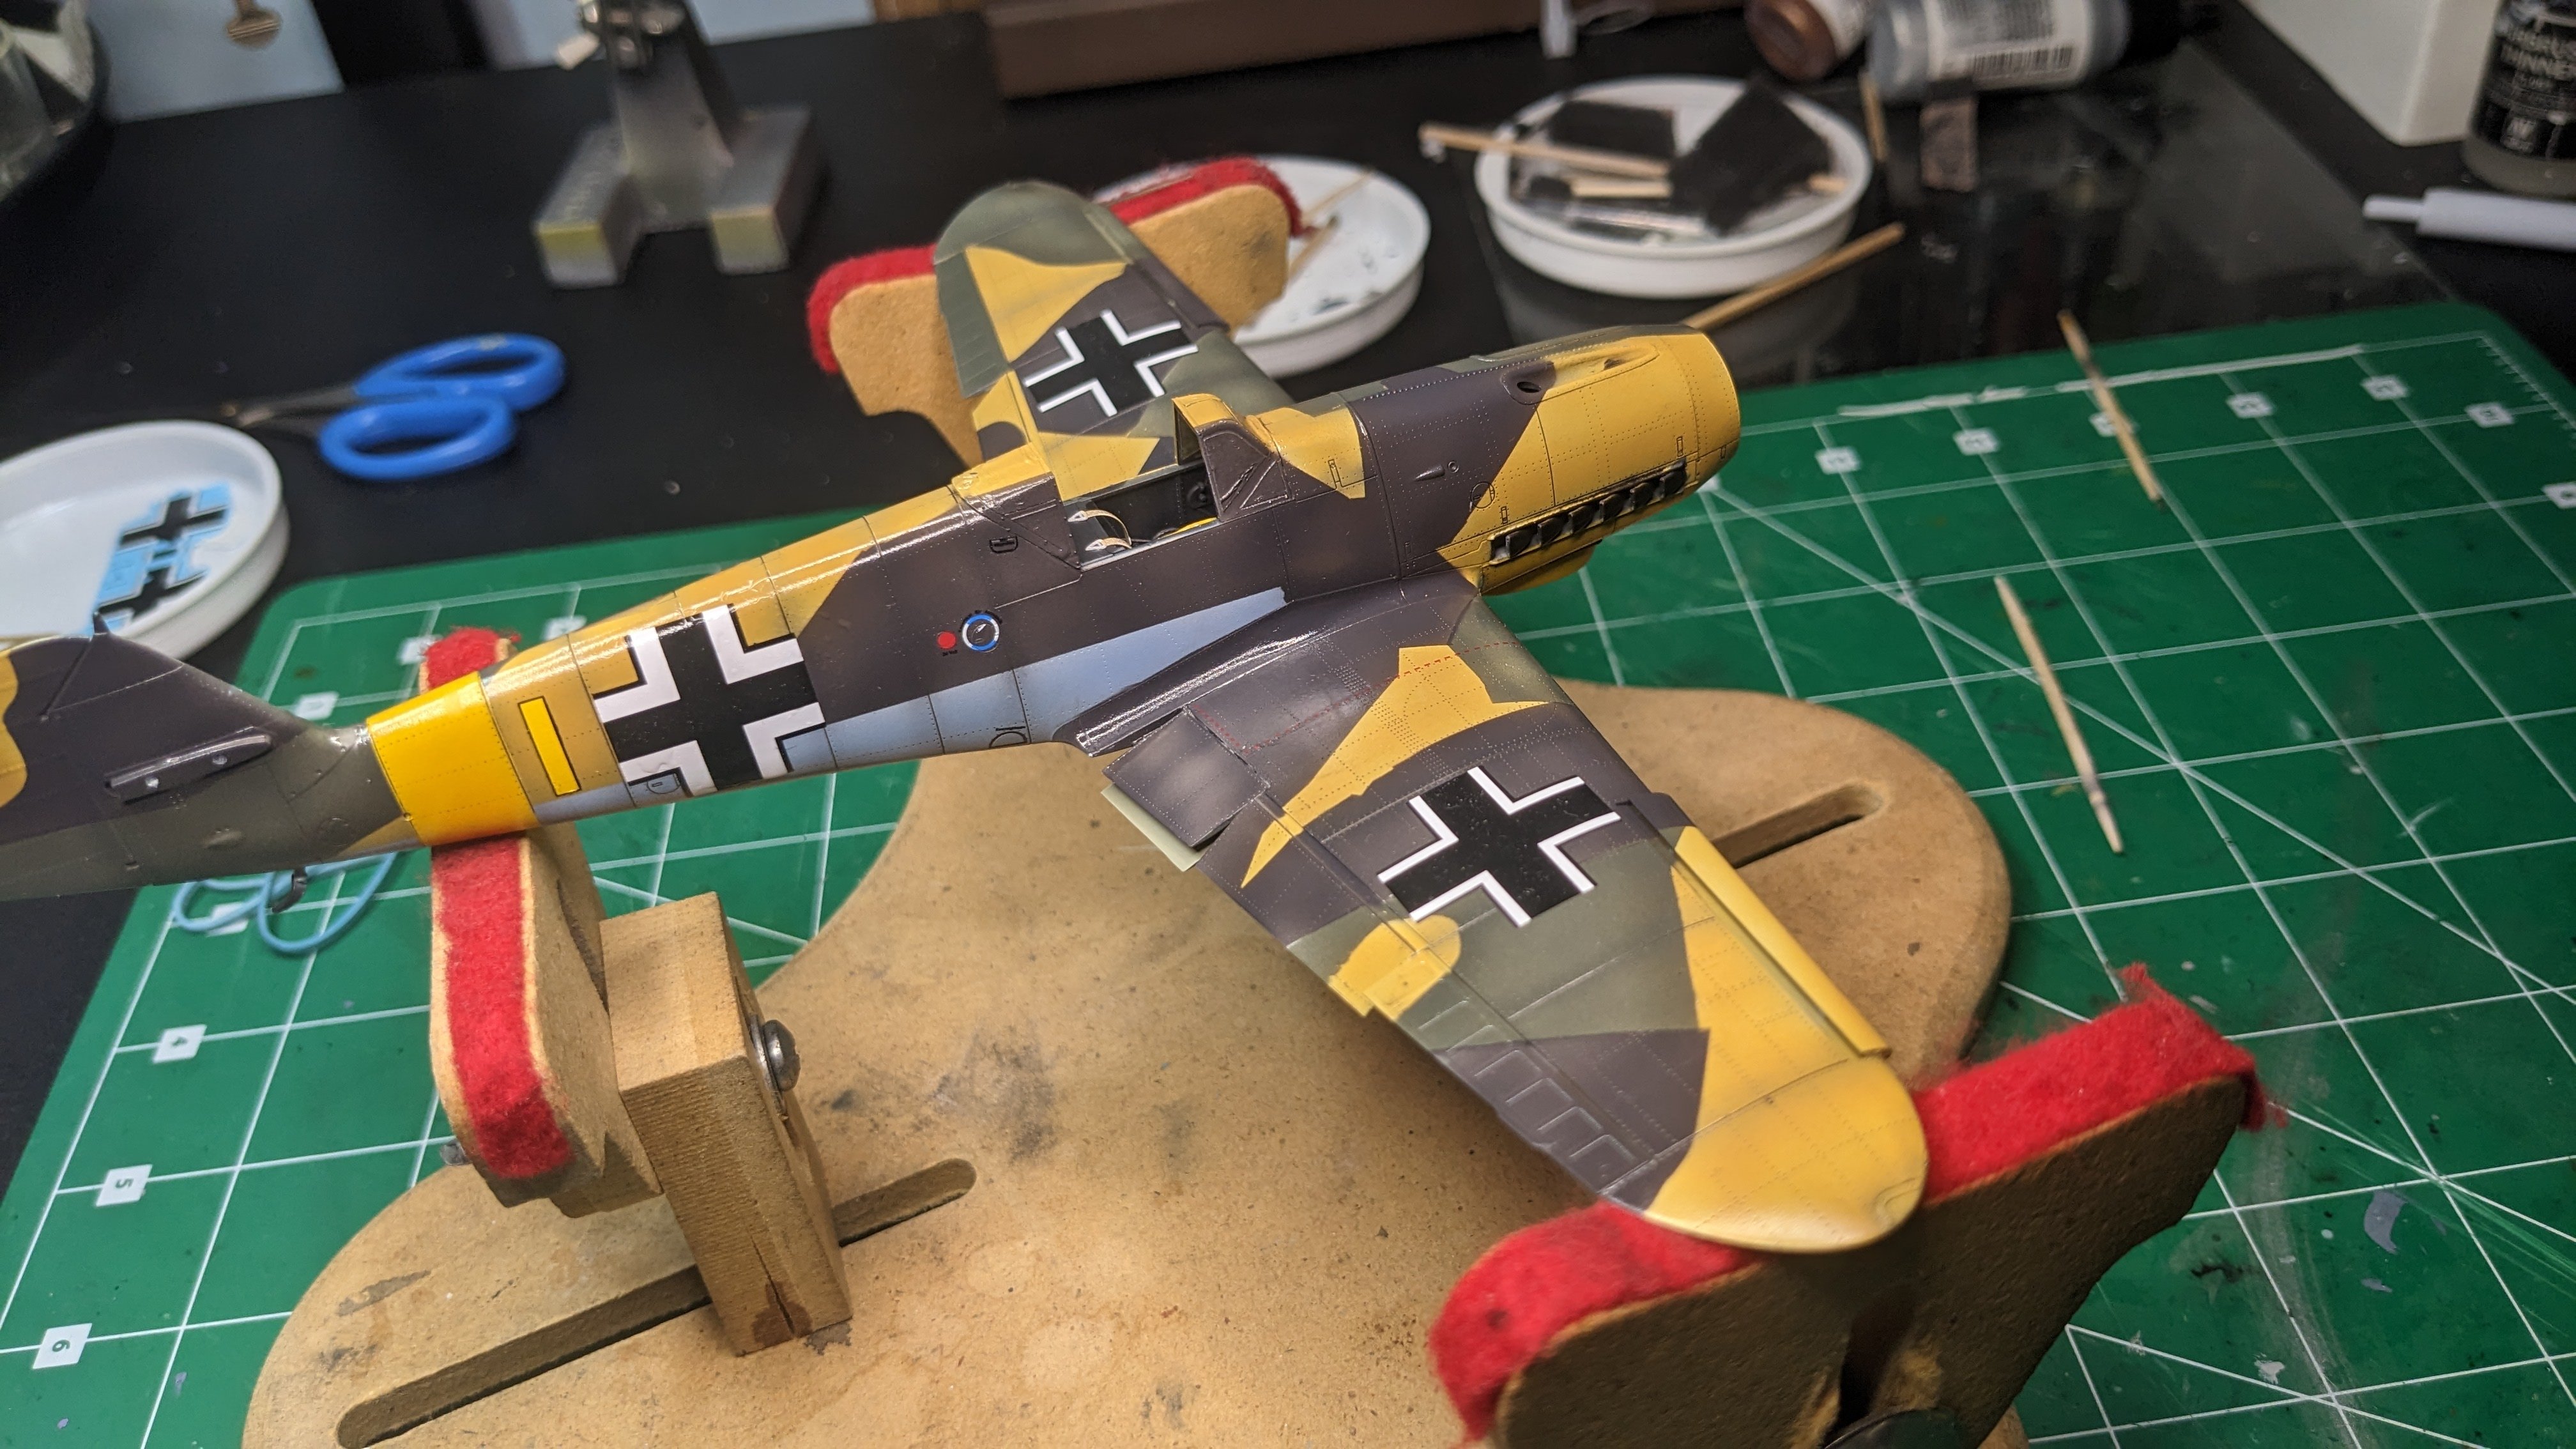
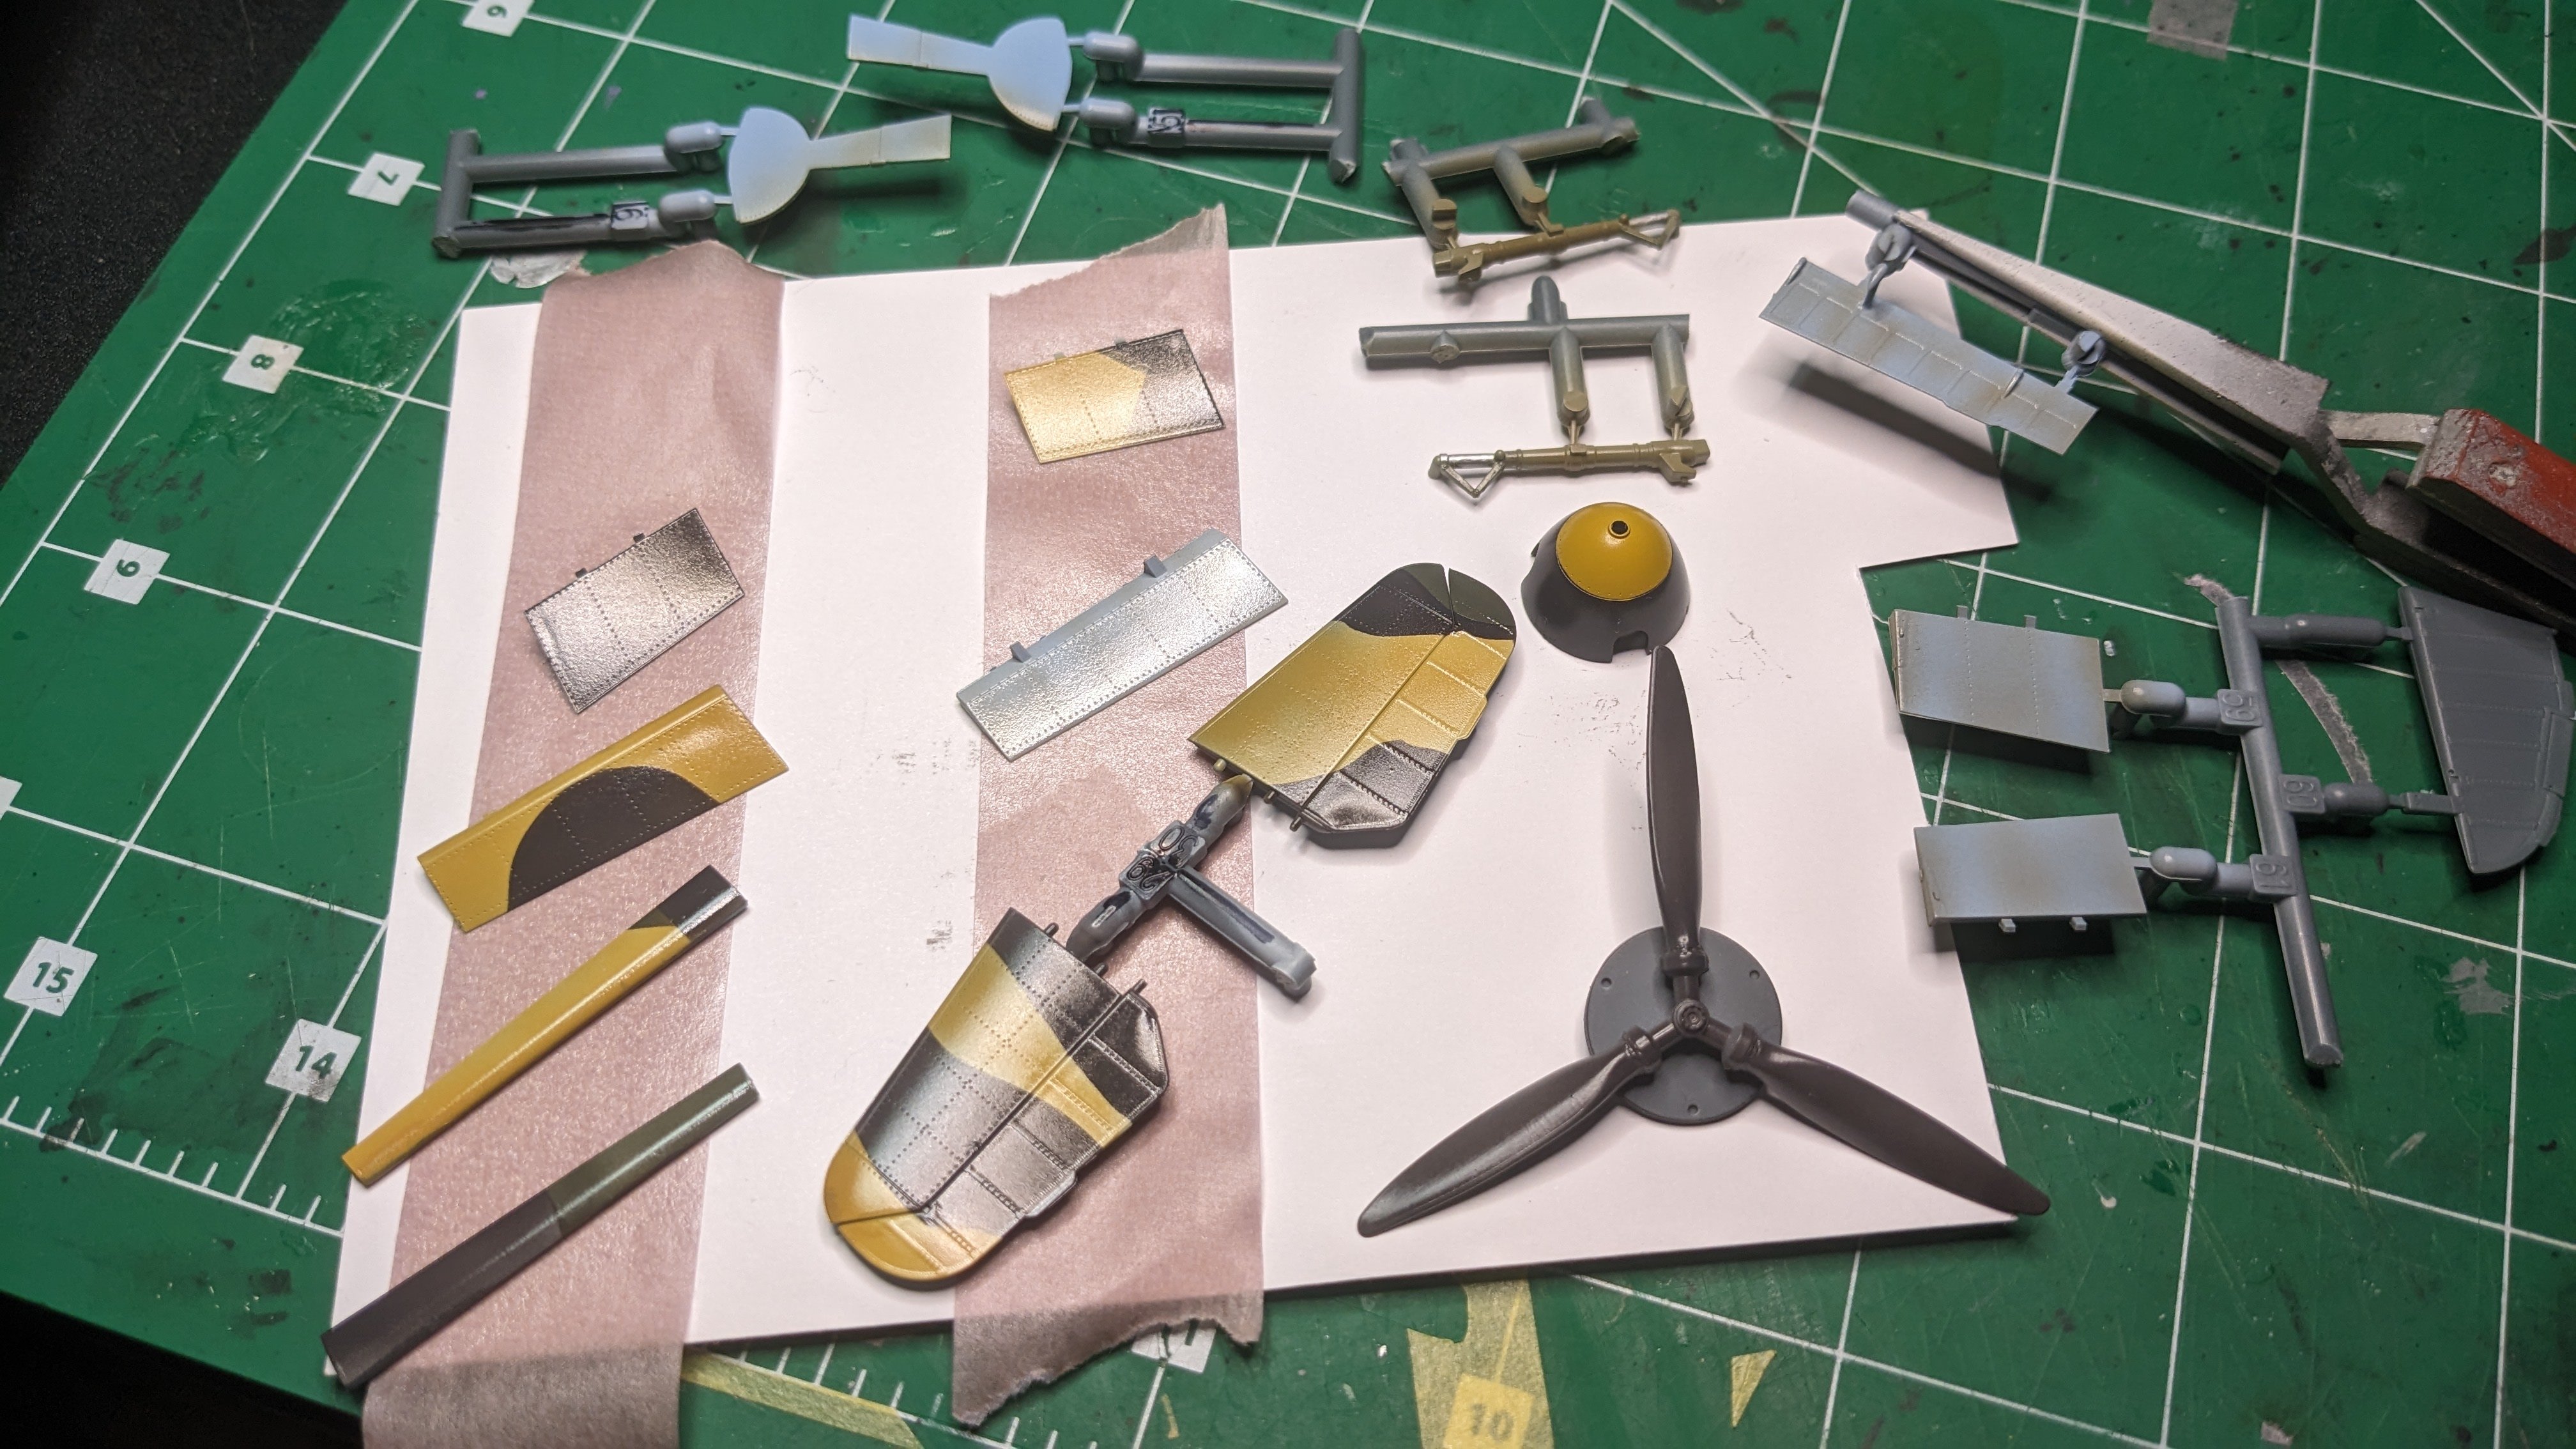
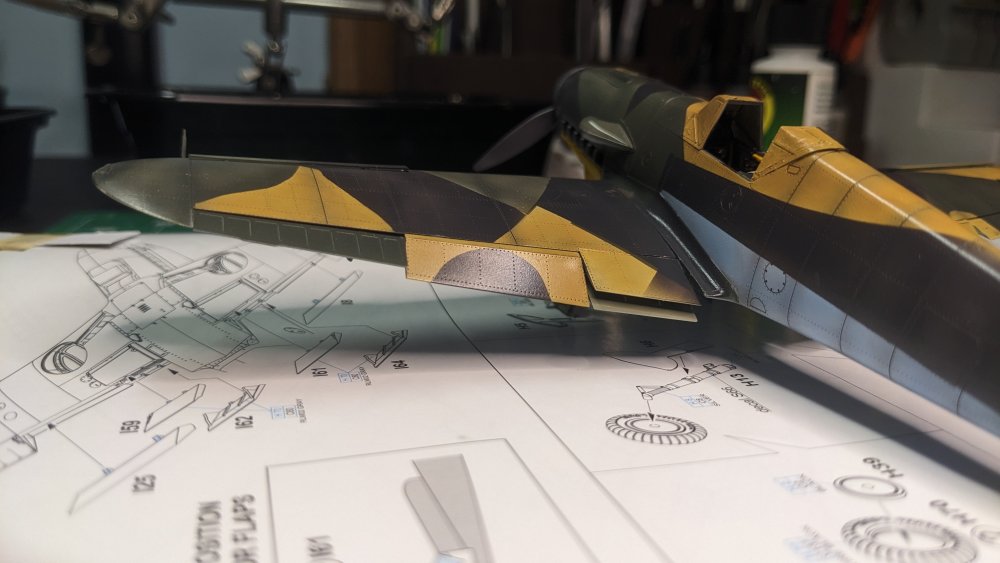
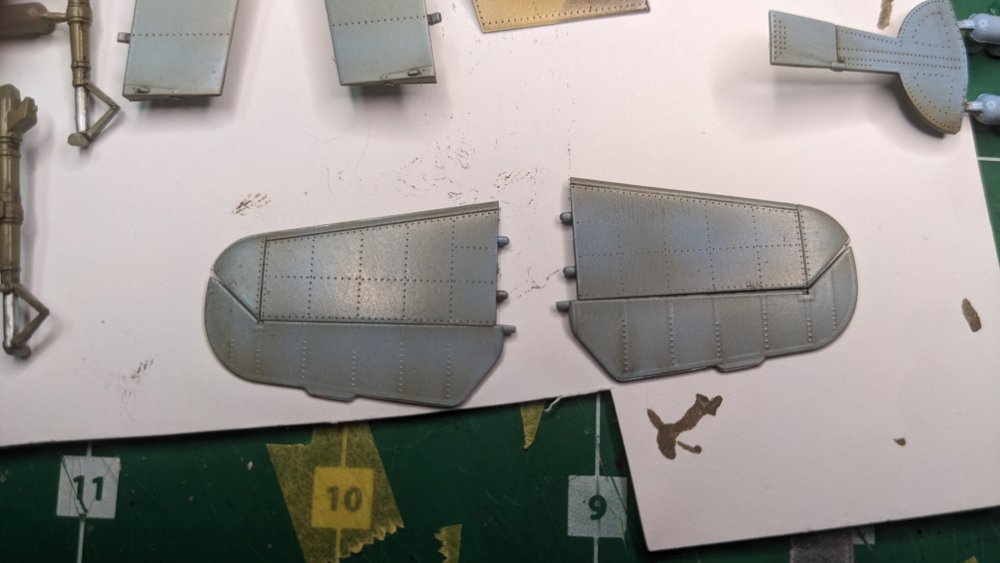
Making progress getting more bits together. First was getting the wash on the various flaps, Then clearing it off - wiping with a paper towel. Close up on the gear doors. Leading edge of the doors pre-shaded. Also remembered I needed to work with the PE exhaust covers - Folded here. Prime and paint tomorrow. \ The Eduard fit is REALLY good The ailerons and elevators are press-fitted here. Added the spinner Took a while but got the flaps in place. Underside, still have to attach the second aileron counterweight on the right side (left in the picture). Started on some of the oil stains.


-
I hear you on that. I used to use an old Monogram B-17 wing as a paint mule to try things out. I really like laying down a white base when I'm trying to fade a topcoat, or a black base when doing the same with a lighter top coat.
-
Mike, I am not a Tamiya Fan, but Peter swears by it (not at it.. LOL) so I tried it a while back and it definitely delivers better than any of my other clears. I have tried Vallejo (not bad but takes a lot to get a really glossy coat), Alclad - (I'm inconsistent with it), MRP (seems like I go through a whole bottle on a 1/48 aircraft) so Tamiya was kind of a last resort. I thin it about 50% with Leveling thinner. I love it the more I use it and am ordering another bottle. It does go on a bit splotchy when I do a wet coat, but if I just go away and leave it alone, I come back to a perfectly smooth, glossy finish.
-
Thanks Kevin!
-
Tamiya 1/32 F4U-1D/FG-1D Corsair
CANicoll replied to JohnB's topic in LSM 1/35 and Larger Work In Progress
Me neither! I had not heard of Hussar before anyway. -
All this talk about tracks and pins and stuff makes me want to run out and grab some armor models... Not....
-
Now that is intelligent engineering to have the joins being panel lines. Too bad about the electronics bays, but nice the doors fit so well. The engines look like they will come out nicely with your usual detailing.
-
Tamiya 1/32 F4U-1D/FG-1D Corsair
CANicoll replied to JohnB's topic in LSM 1/35 and Larger Work In Progress
John, First off, wow! Amazing job on the cockpit - stellar work. Regarding the decals, OMG. I also would have thought the checkers would have been on the sheet. What a pain. Good luck!! I did a quick search and did not come up with checkers quickly. -
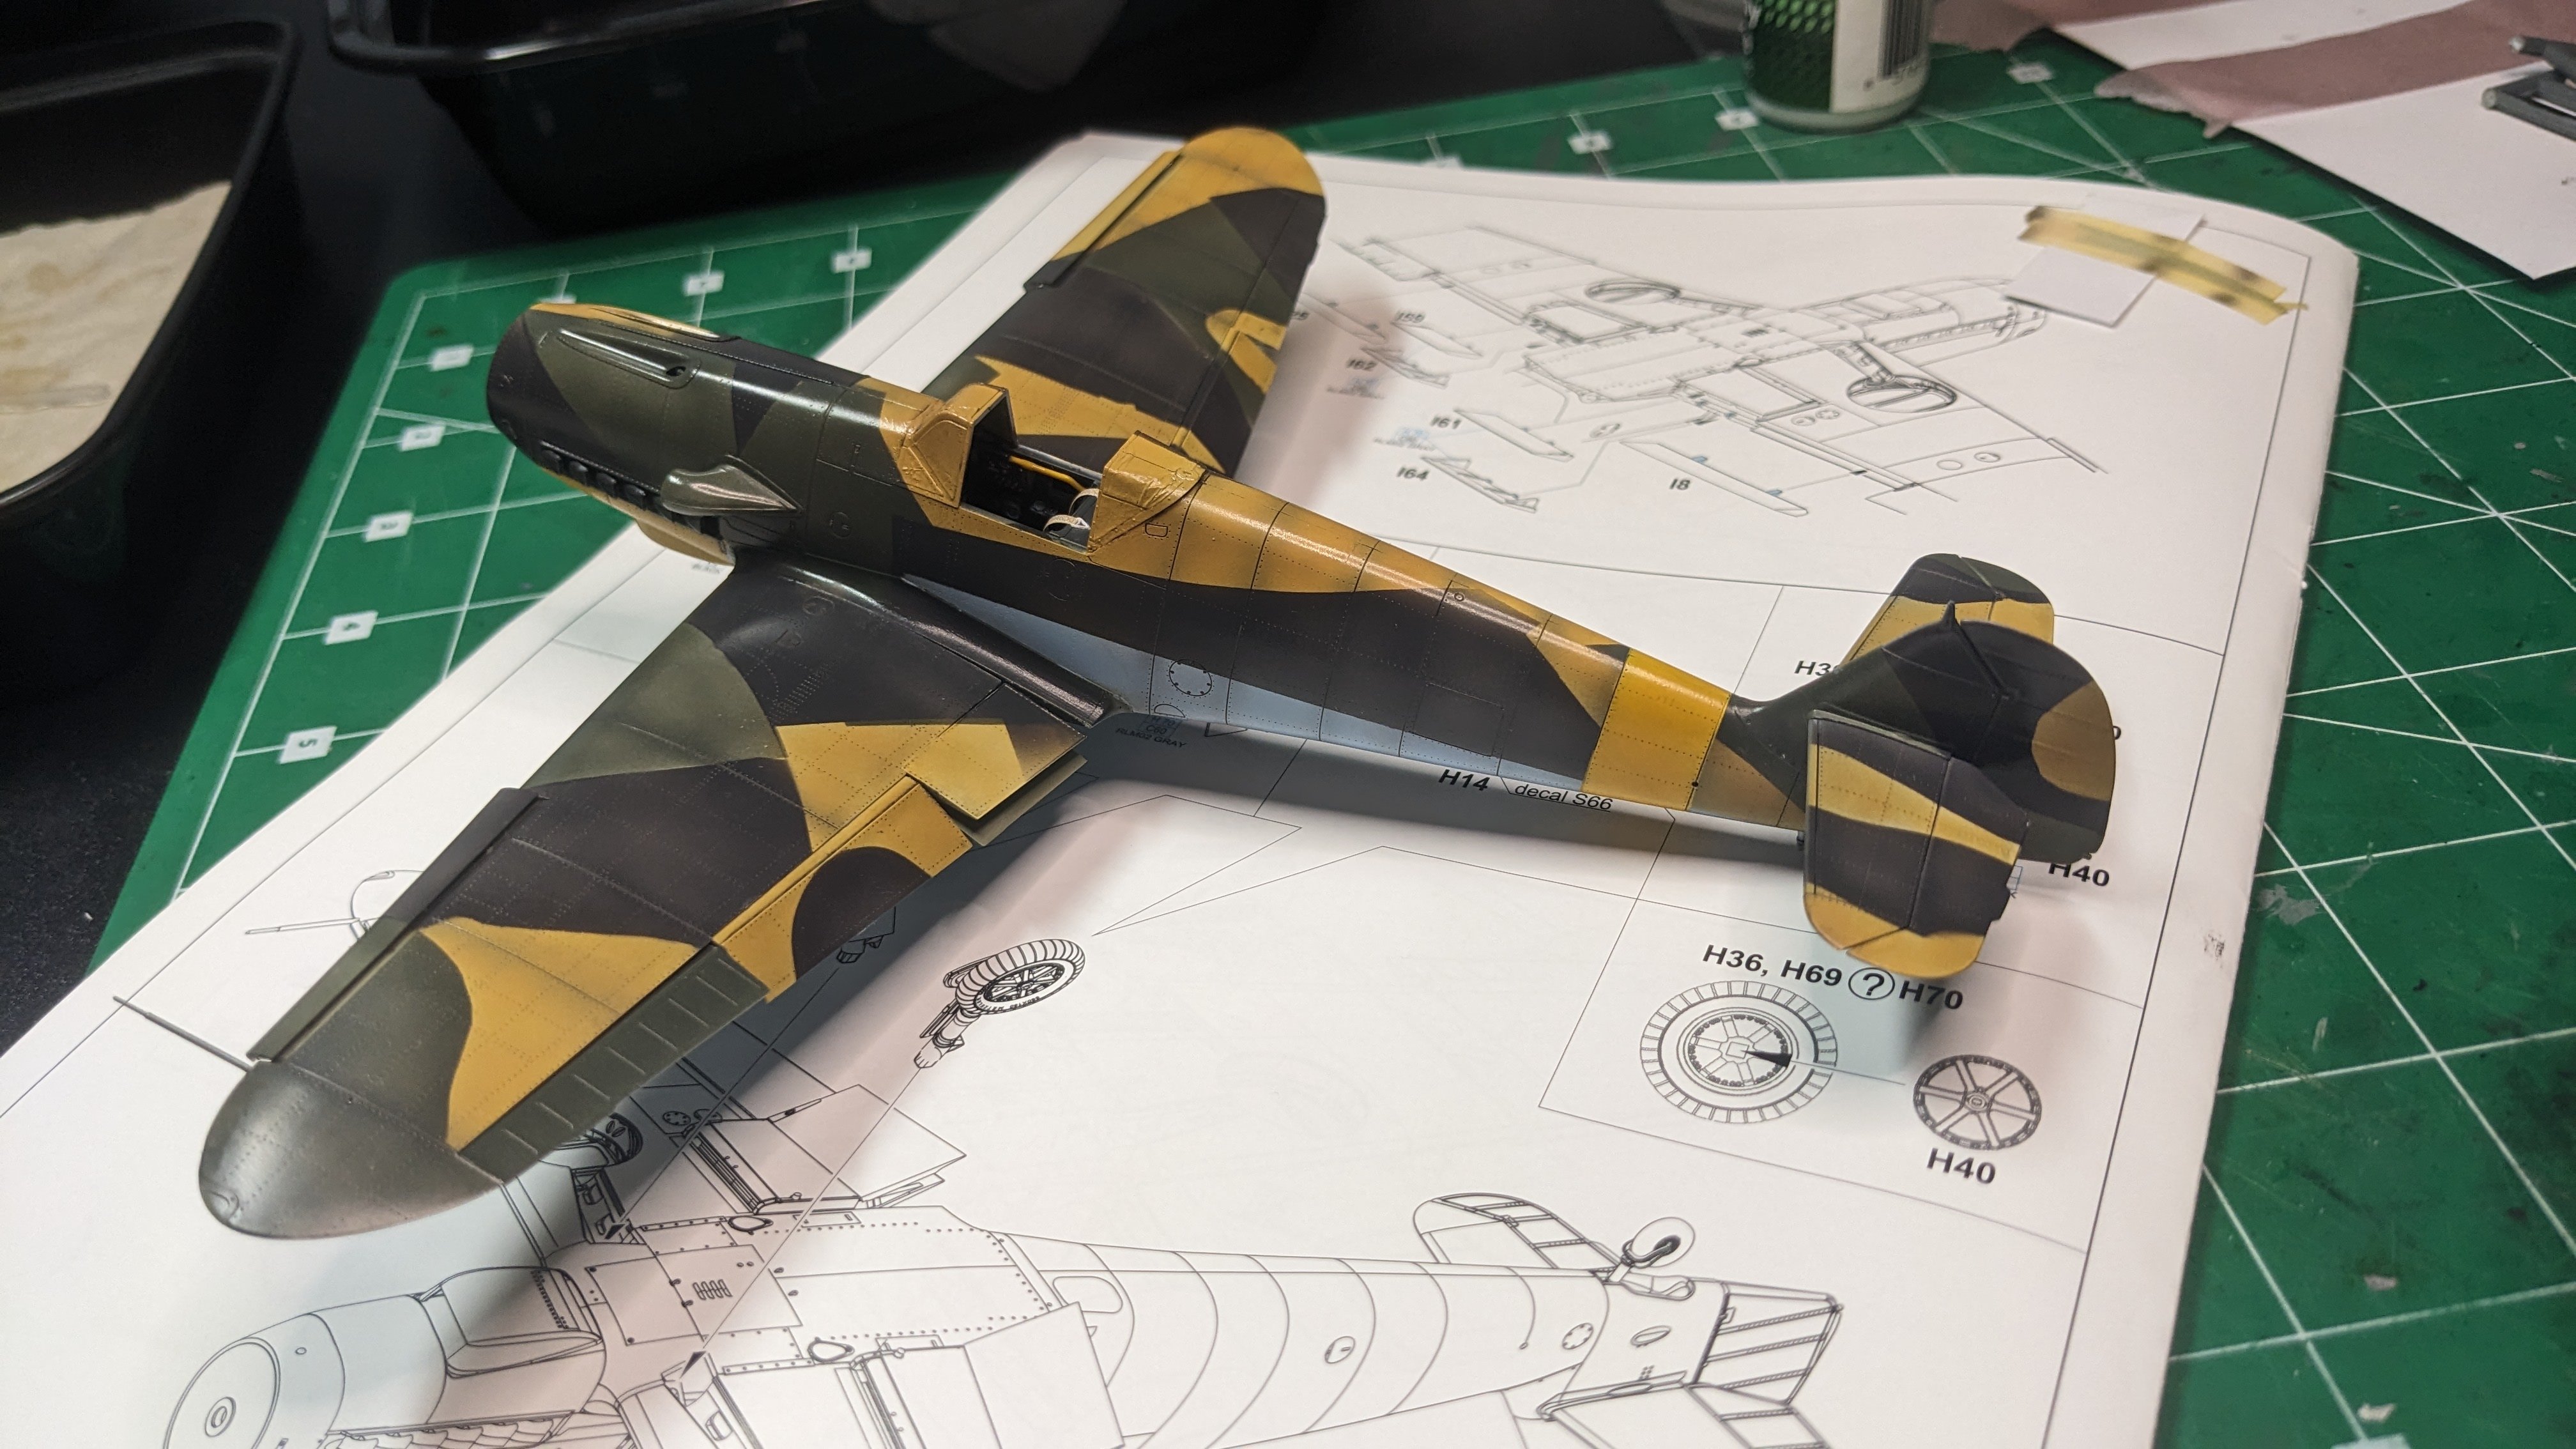
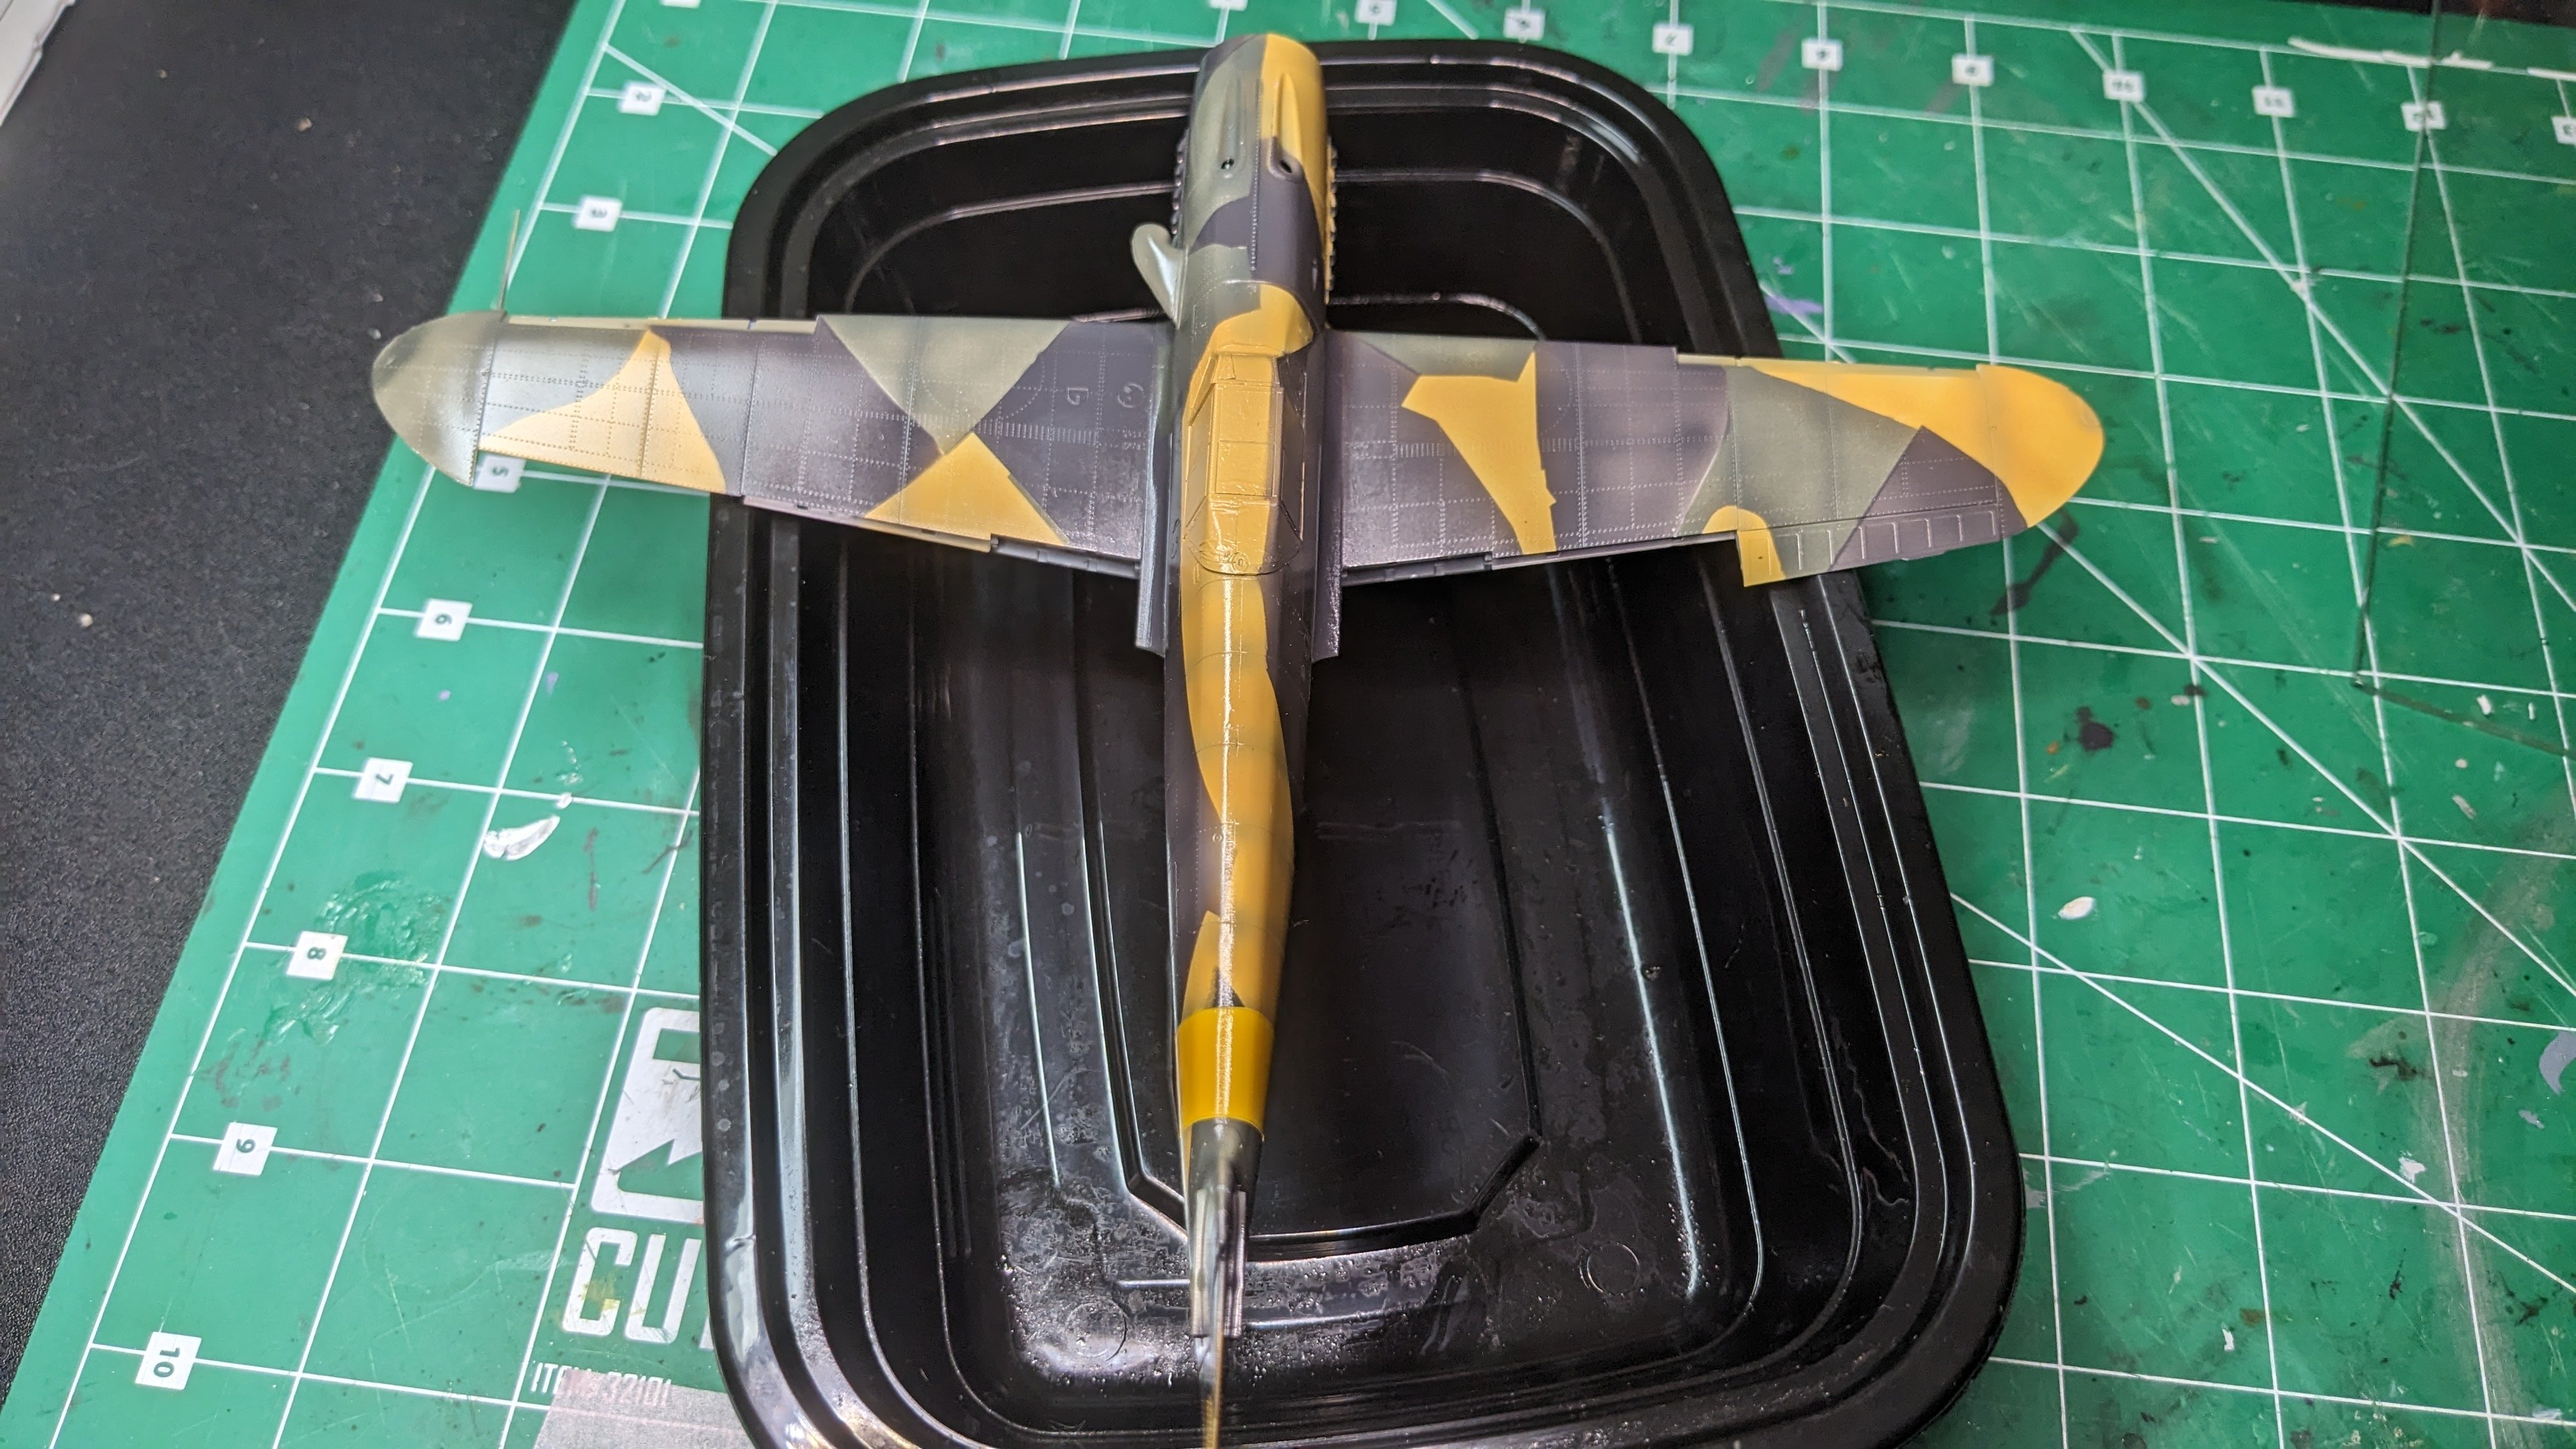
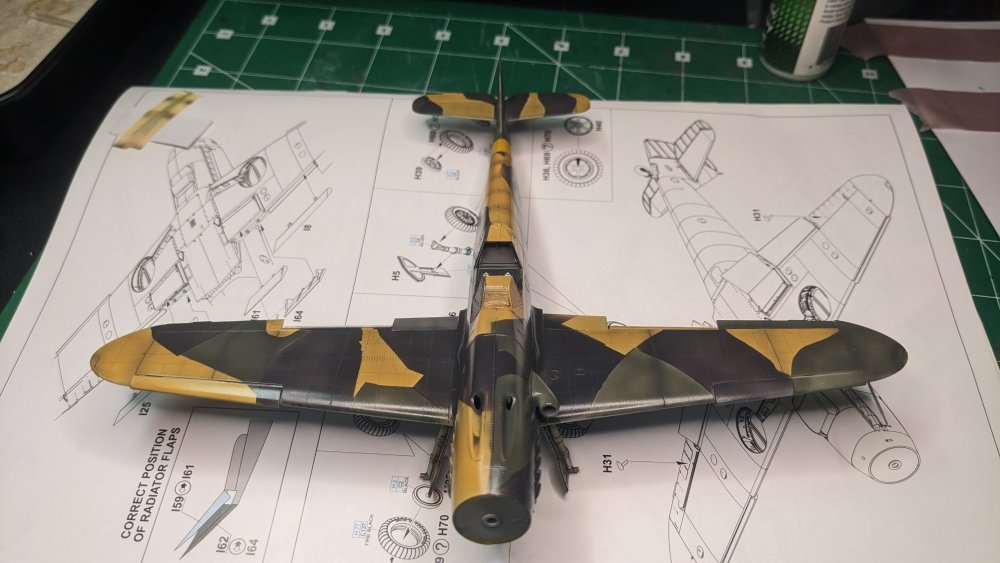
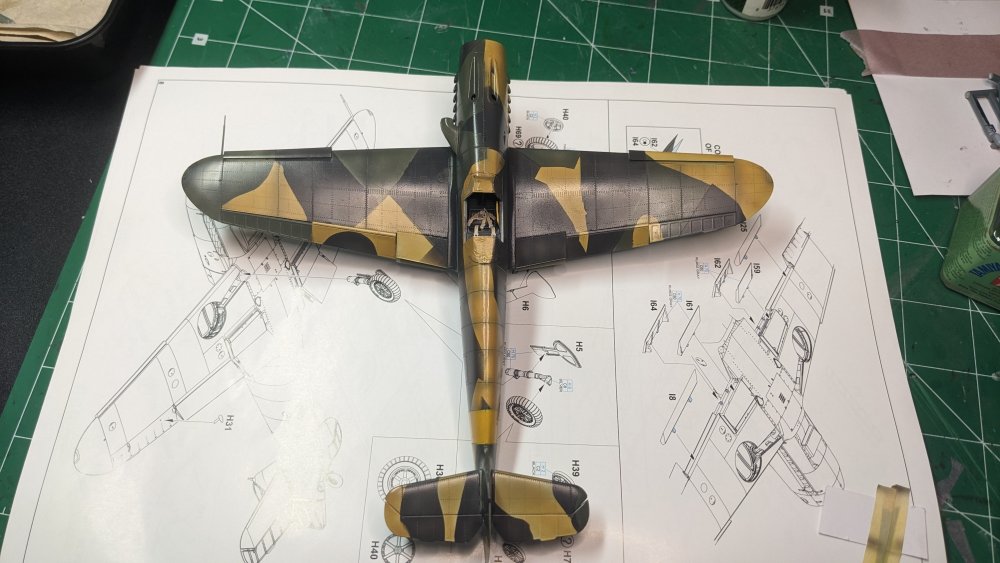
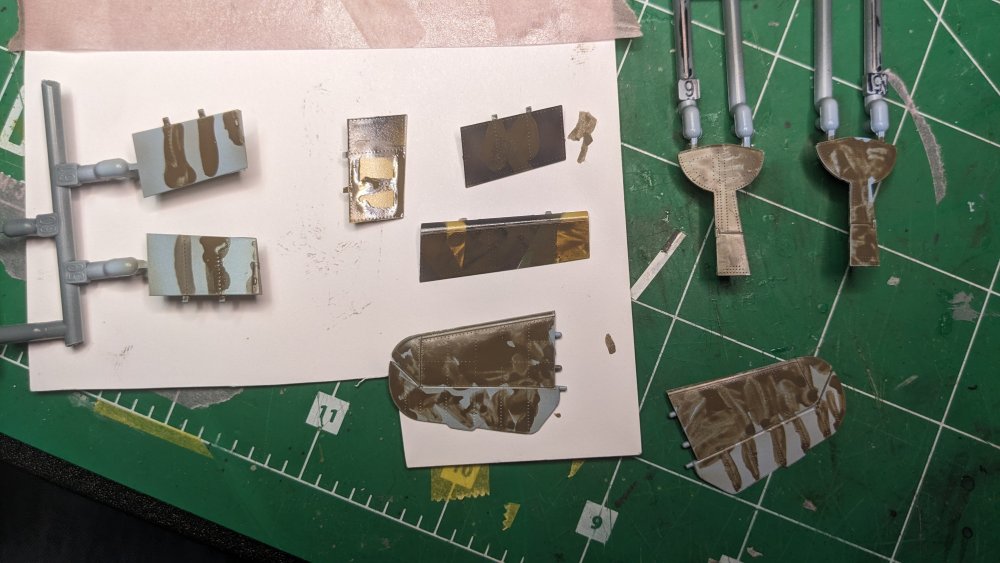
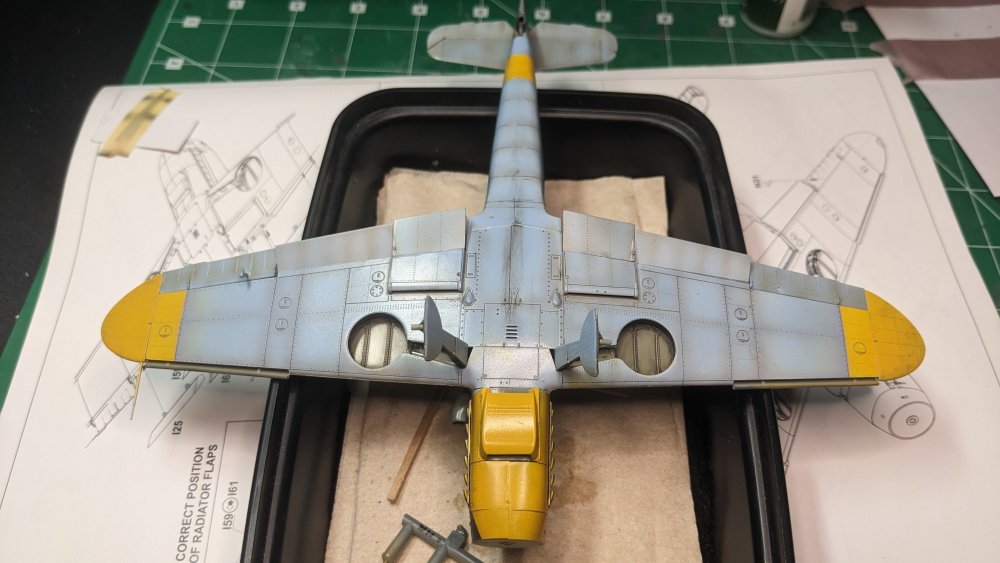
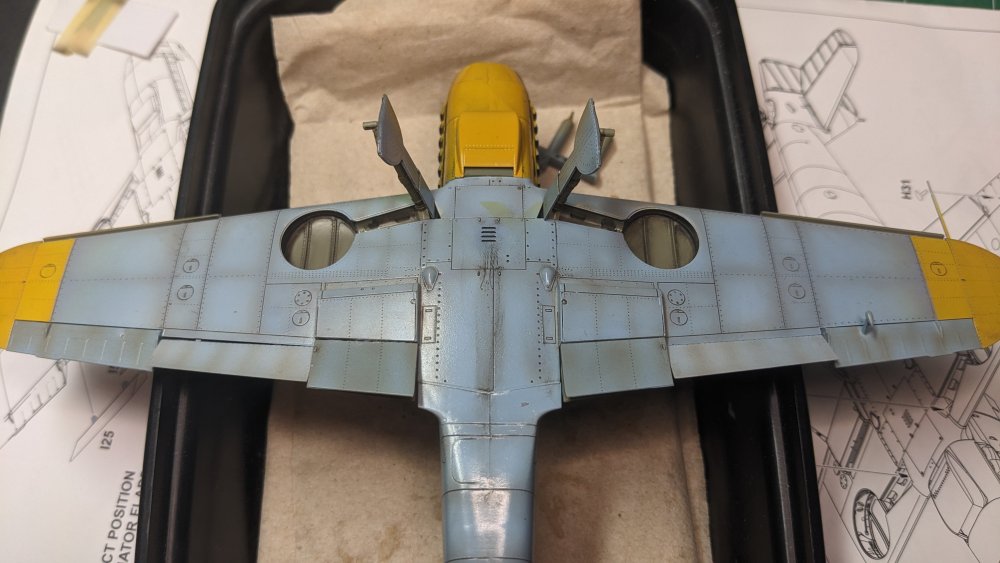
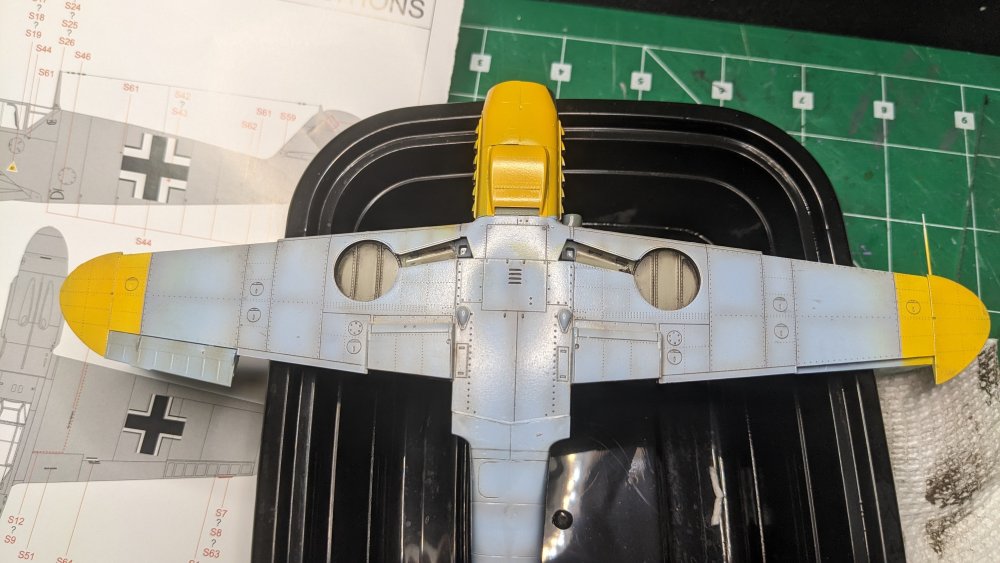
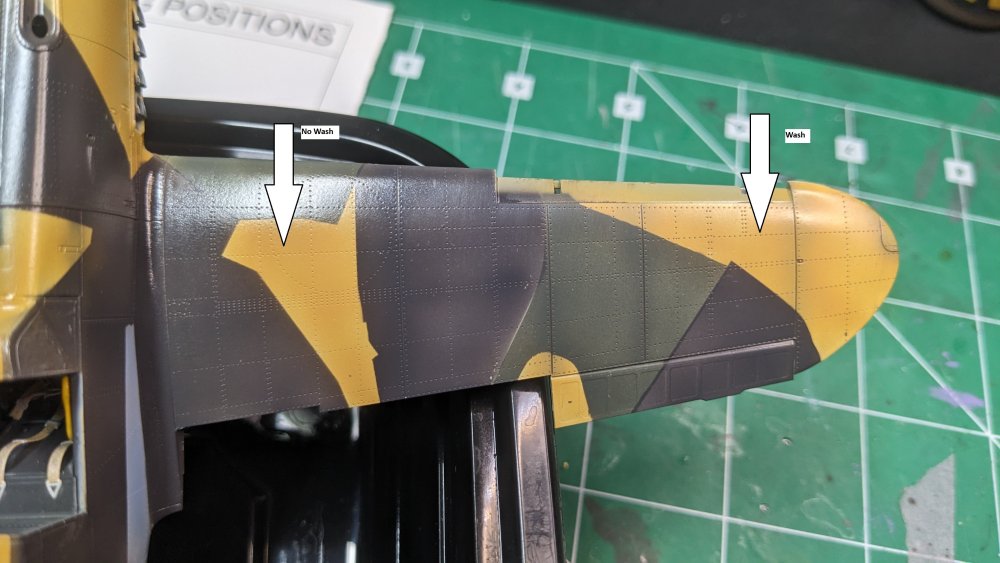
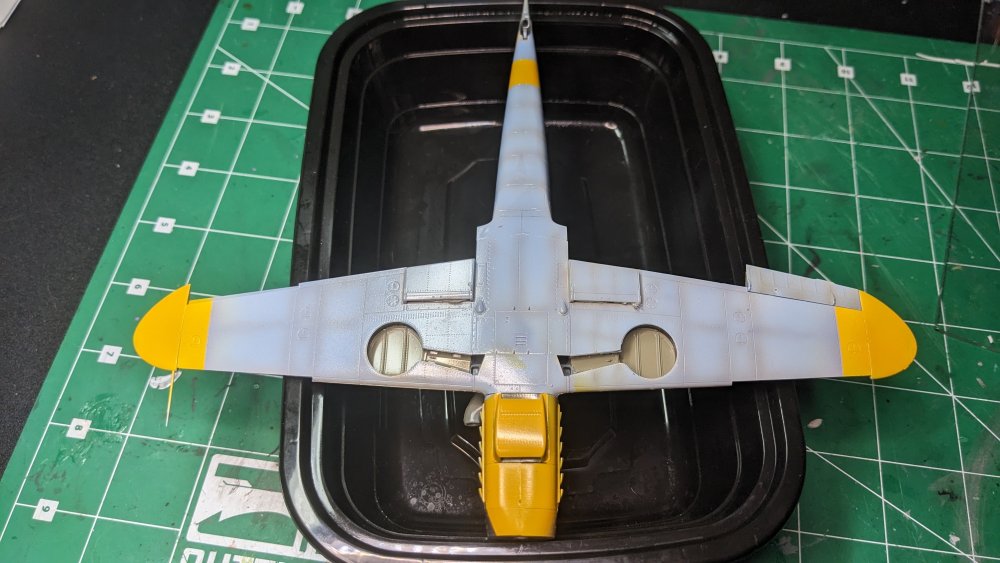
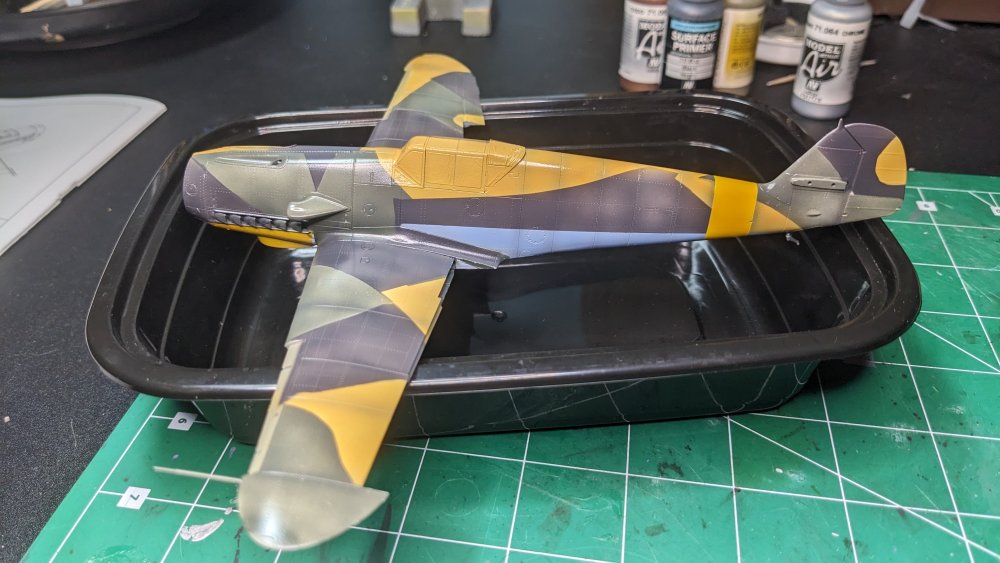
Well, took another look at the colors this evening and the pictures are actually very accurate. My bad, but the color really is a green shade. That one colorized picture which I noted had that green color may have been off a few shades, but definitely there is a green hue there. Spent some time this evening playing with some washes. Really like the AK Paneliners. They flow nicely over the Tamiya X-22 clear gloss. Sand and Desert on the bottom and Brown and Green on the topside. Topside, I wondered how the darker wash would turn out. Like this!: Next up is to try the sand/tan wash over the dark camo. The underside dirtied up nicely with the wash. The yellow got muted a bit but hard to see in the photos. The wash did not come off completely cleanly as I let it dry for longer than I usually do, which is the effect I was going for. The Wheel wells are washed with a dark gray AK Paneliner. Cleaned out with a cotton bud. Here is the overall effect on the wing: Have not touched the nose yet. Still have the oil stains to add, etc. Went with the washes rather than going after the stencils... SO MANY AND THEY ARE TINY.... Will seal with washes with another clear coat, then do the decals, with another round of washes over the decals. The stencils have a lot of clear carrier film that will be next to impossible to cut off, and I was not confident that even with Micro Set/Sol that they clear film would settle into the panel lines cleanly.


-
I've been going back and forth using my phone and my camera. Camera is shot in RAW so I need to just go back to that. A bit more processing, but worth it for the accuracy. The lighting is problematic as one is an LED bar light and the other is my magnifying ring light. I really do need to up the game on my bench lighting...
-
No wonder I have a headache...
-
1/35 Tamiya Tiger 1 RFI , paint trial mostly .
CANicoll replied to PanzerWomble's topic in LSM Armour Finished Work
Beautiful work, PW!! -
Finally getting caught up with your excellent work. The positioning of the figures is terrific and tells lots of different stories. The road surface is amazing but one of my favorite elements is the tree that is broken and fallen over. But the details are amazing. The bucket, tool box... the eye candy is everywhere!
-
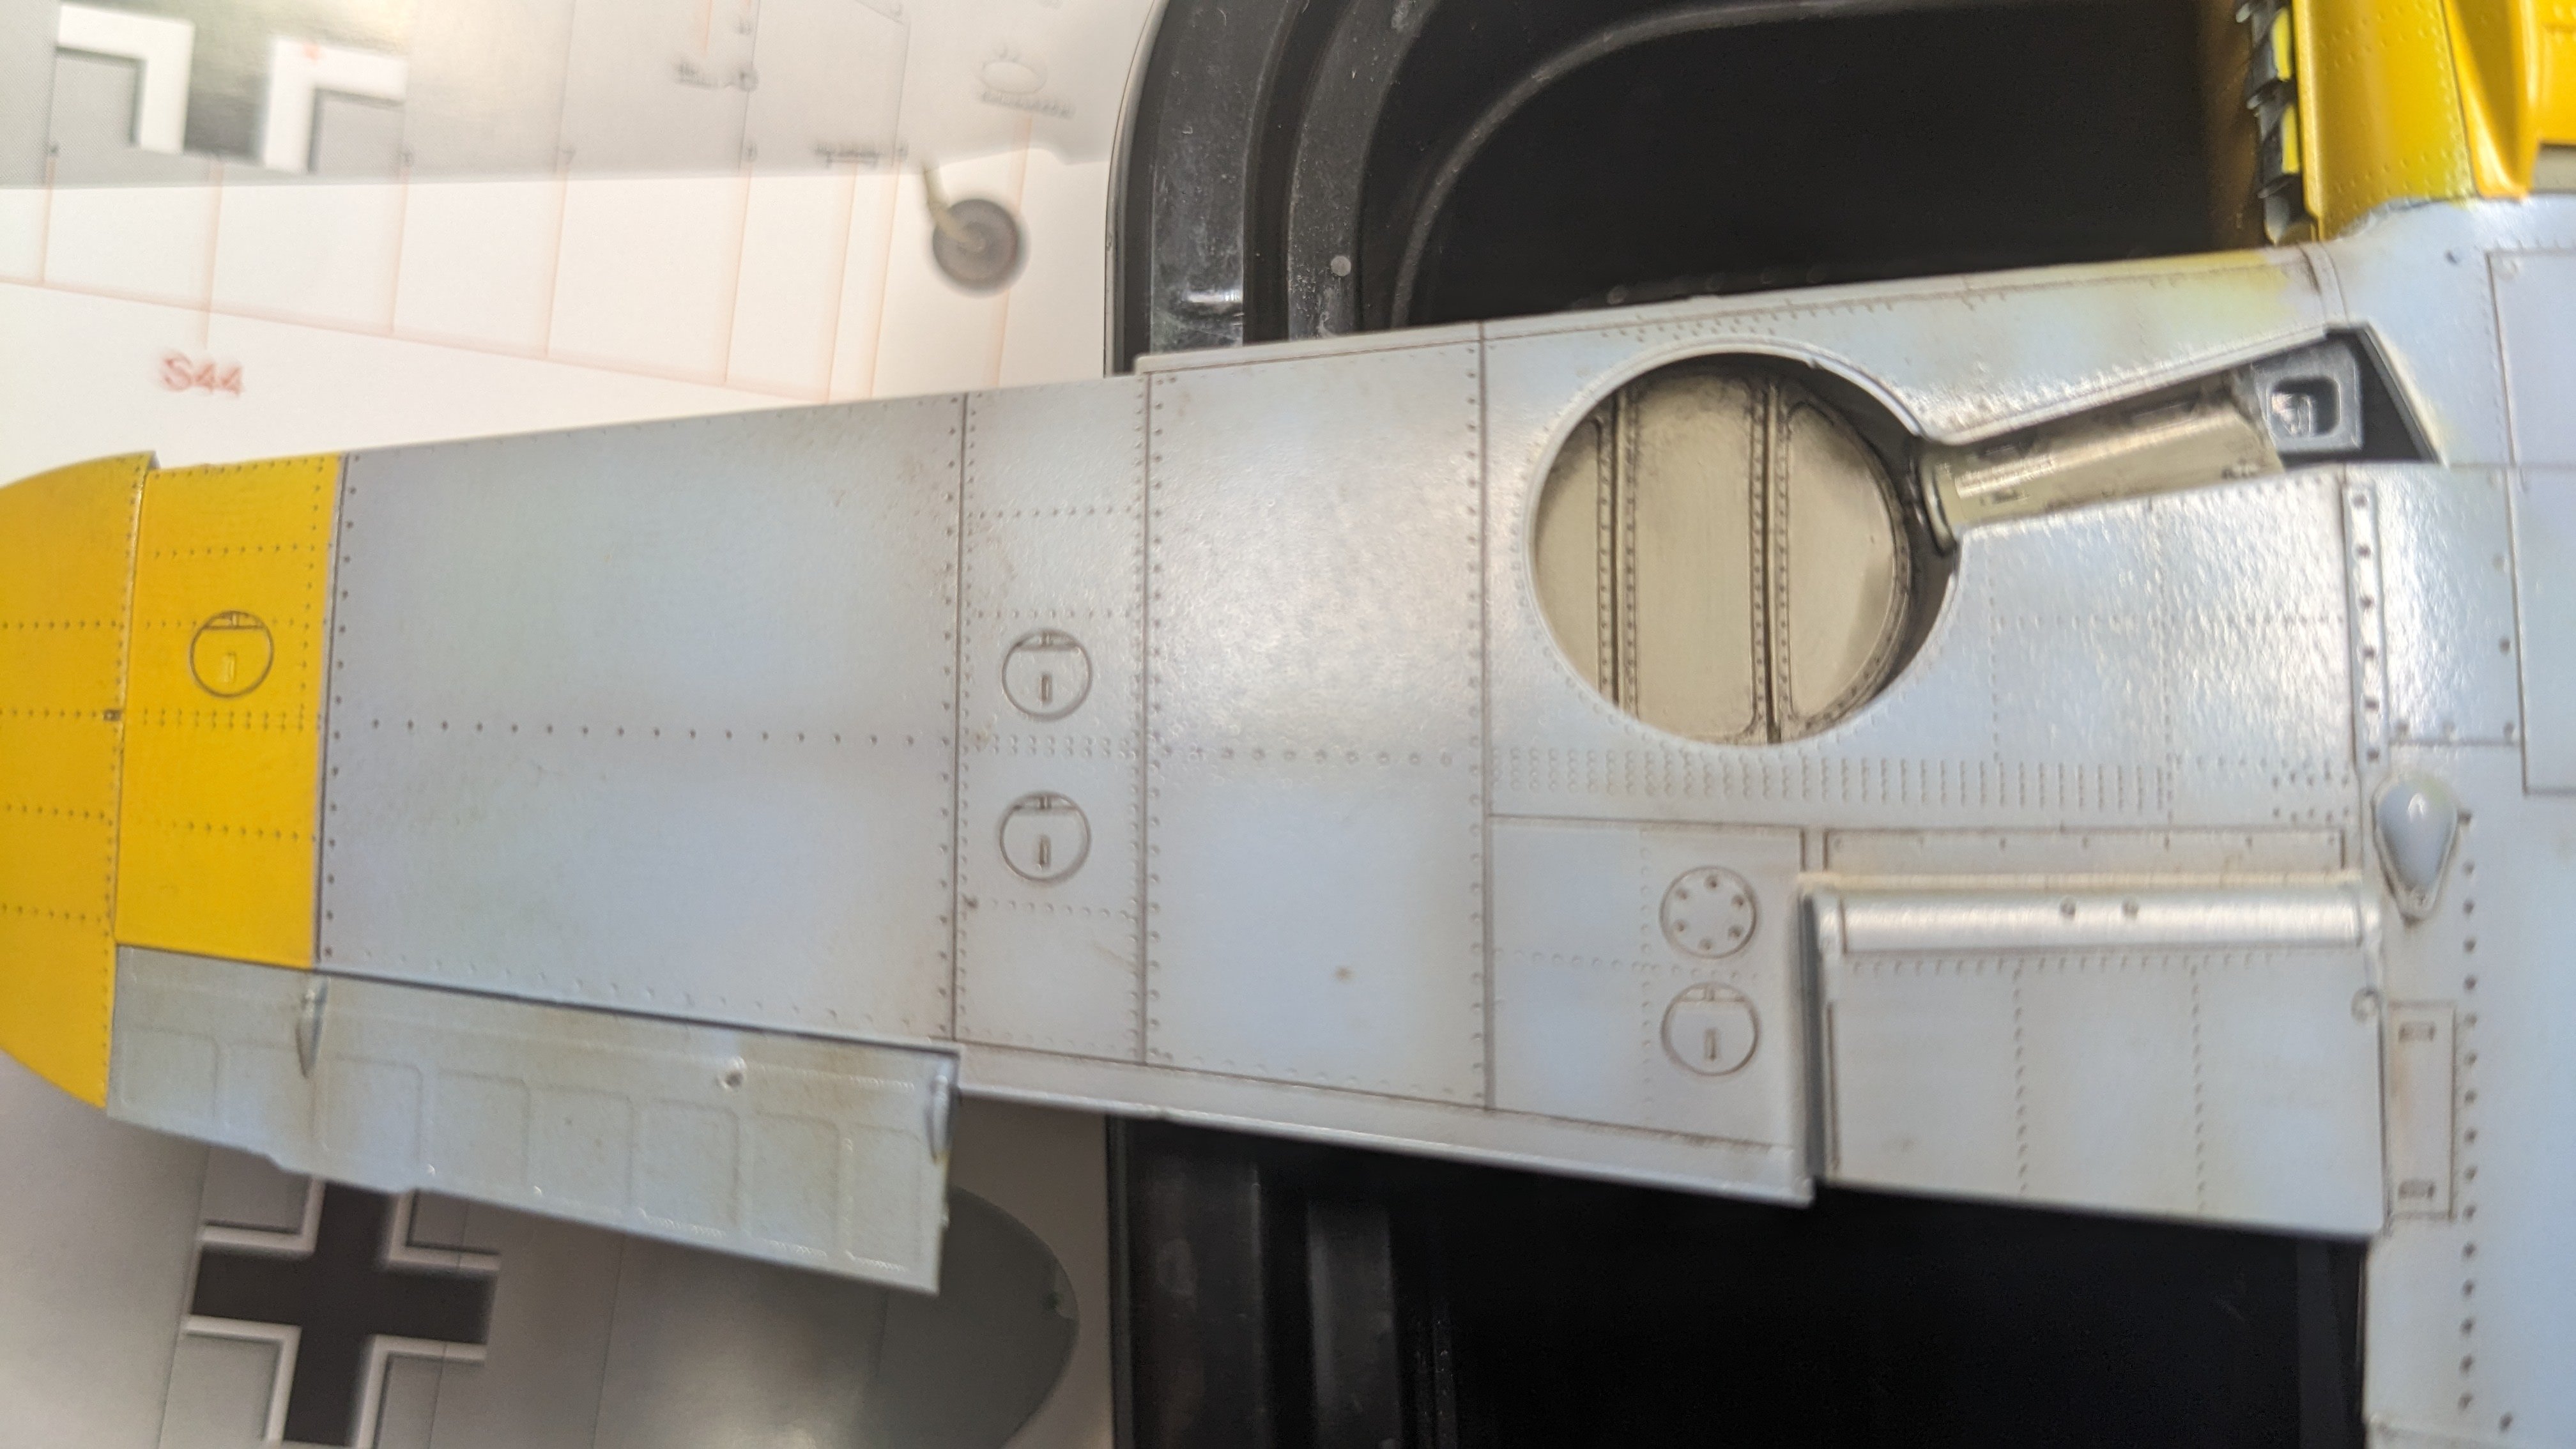
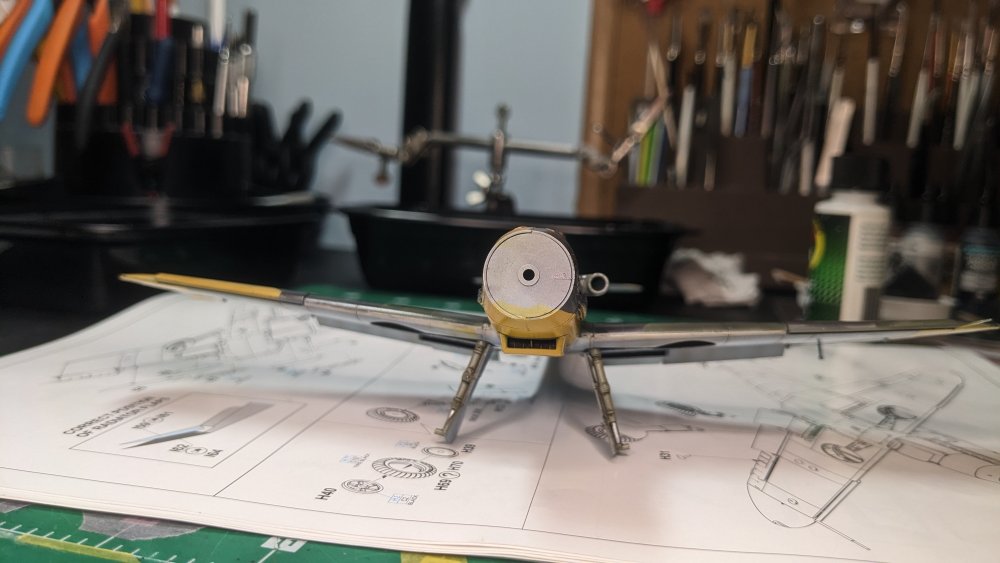
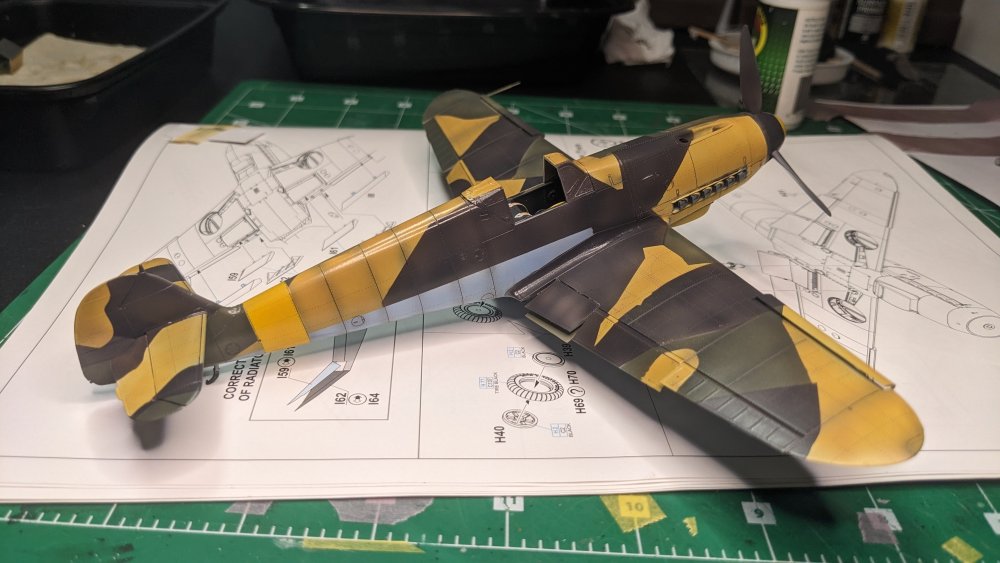
Continuing with the finish, Applied Tamiya X-22 which is my go-to clear gloss these days. Thinned about 50% with Mr. Color Leveling Thinner. It goes on a bit splotchy when I lay down a wet coat, but then it smooths out beautifully. Dries pretty quickly for handling too (couple of hours). Painted the yellow Fuselage band last night after ghosting it with a white base. What is interesting is that the colors here look yellow, black/grey and green. The 'green' is actually a light grey. I'll check my photo settings... Have a bit of overspray touch-up on the underside. And the bits and bobs as well. I have successfully hung on to both aileron counterweights, and have only knocked off one of them. And found that one.

-
Thanks Peter! Appreciate the kind comments.
-
Hasegawa 1/32 Bf-109 F-4-Finished
CANicoll replied to KevinM's topic in The Sandbox Ready for Inspection.
Kevin! My bad! Nice job, Kevin - the sand finish looks terrific. 👍