CANicoll
-
Posts
1,928 -
Joined
-
Last visited
Content Type
Profiles
Forums
Events
Gallery
Everything posted by CANicoll
-
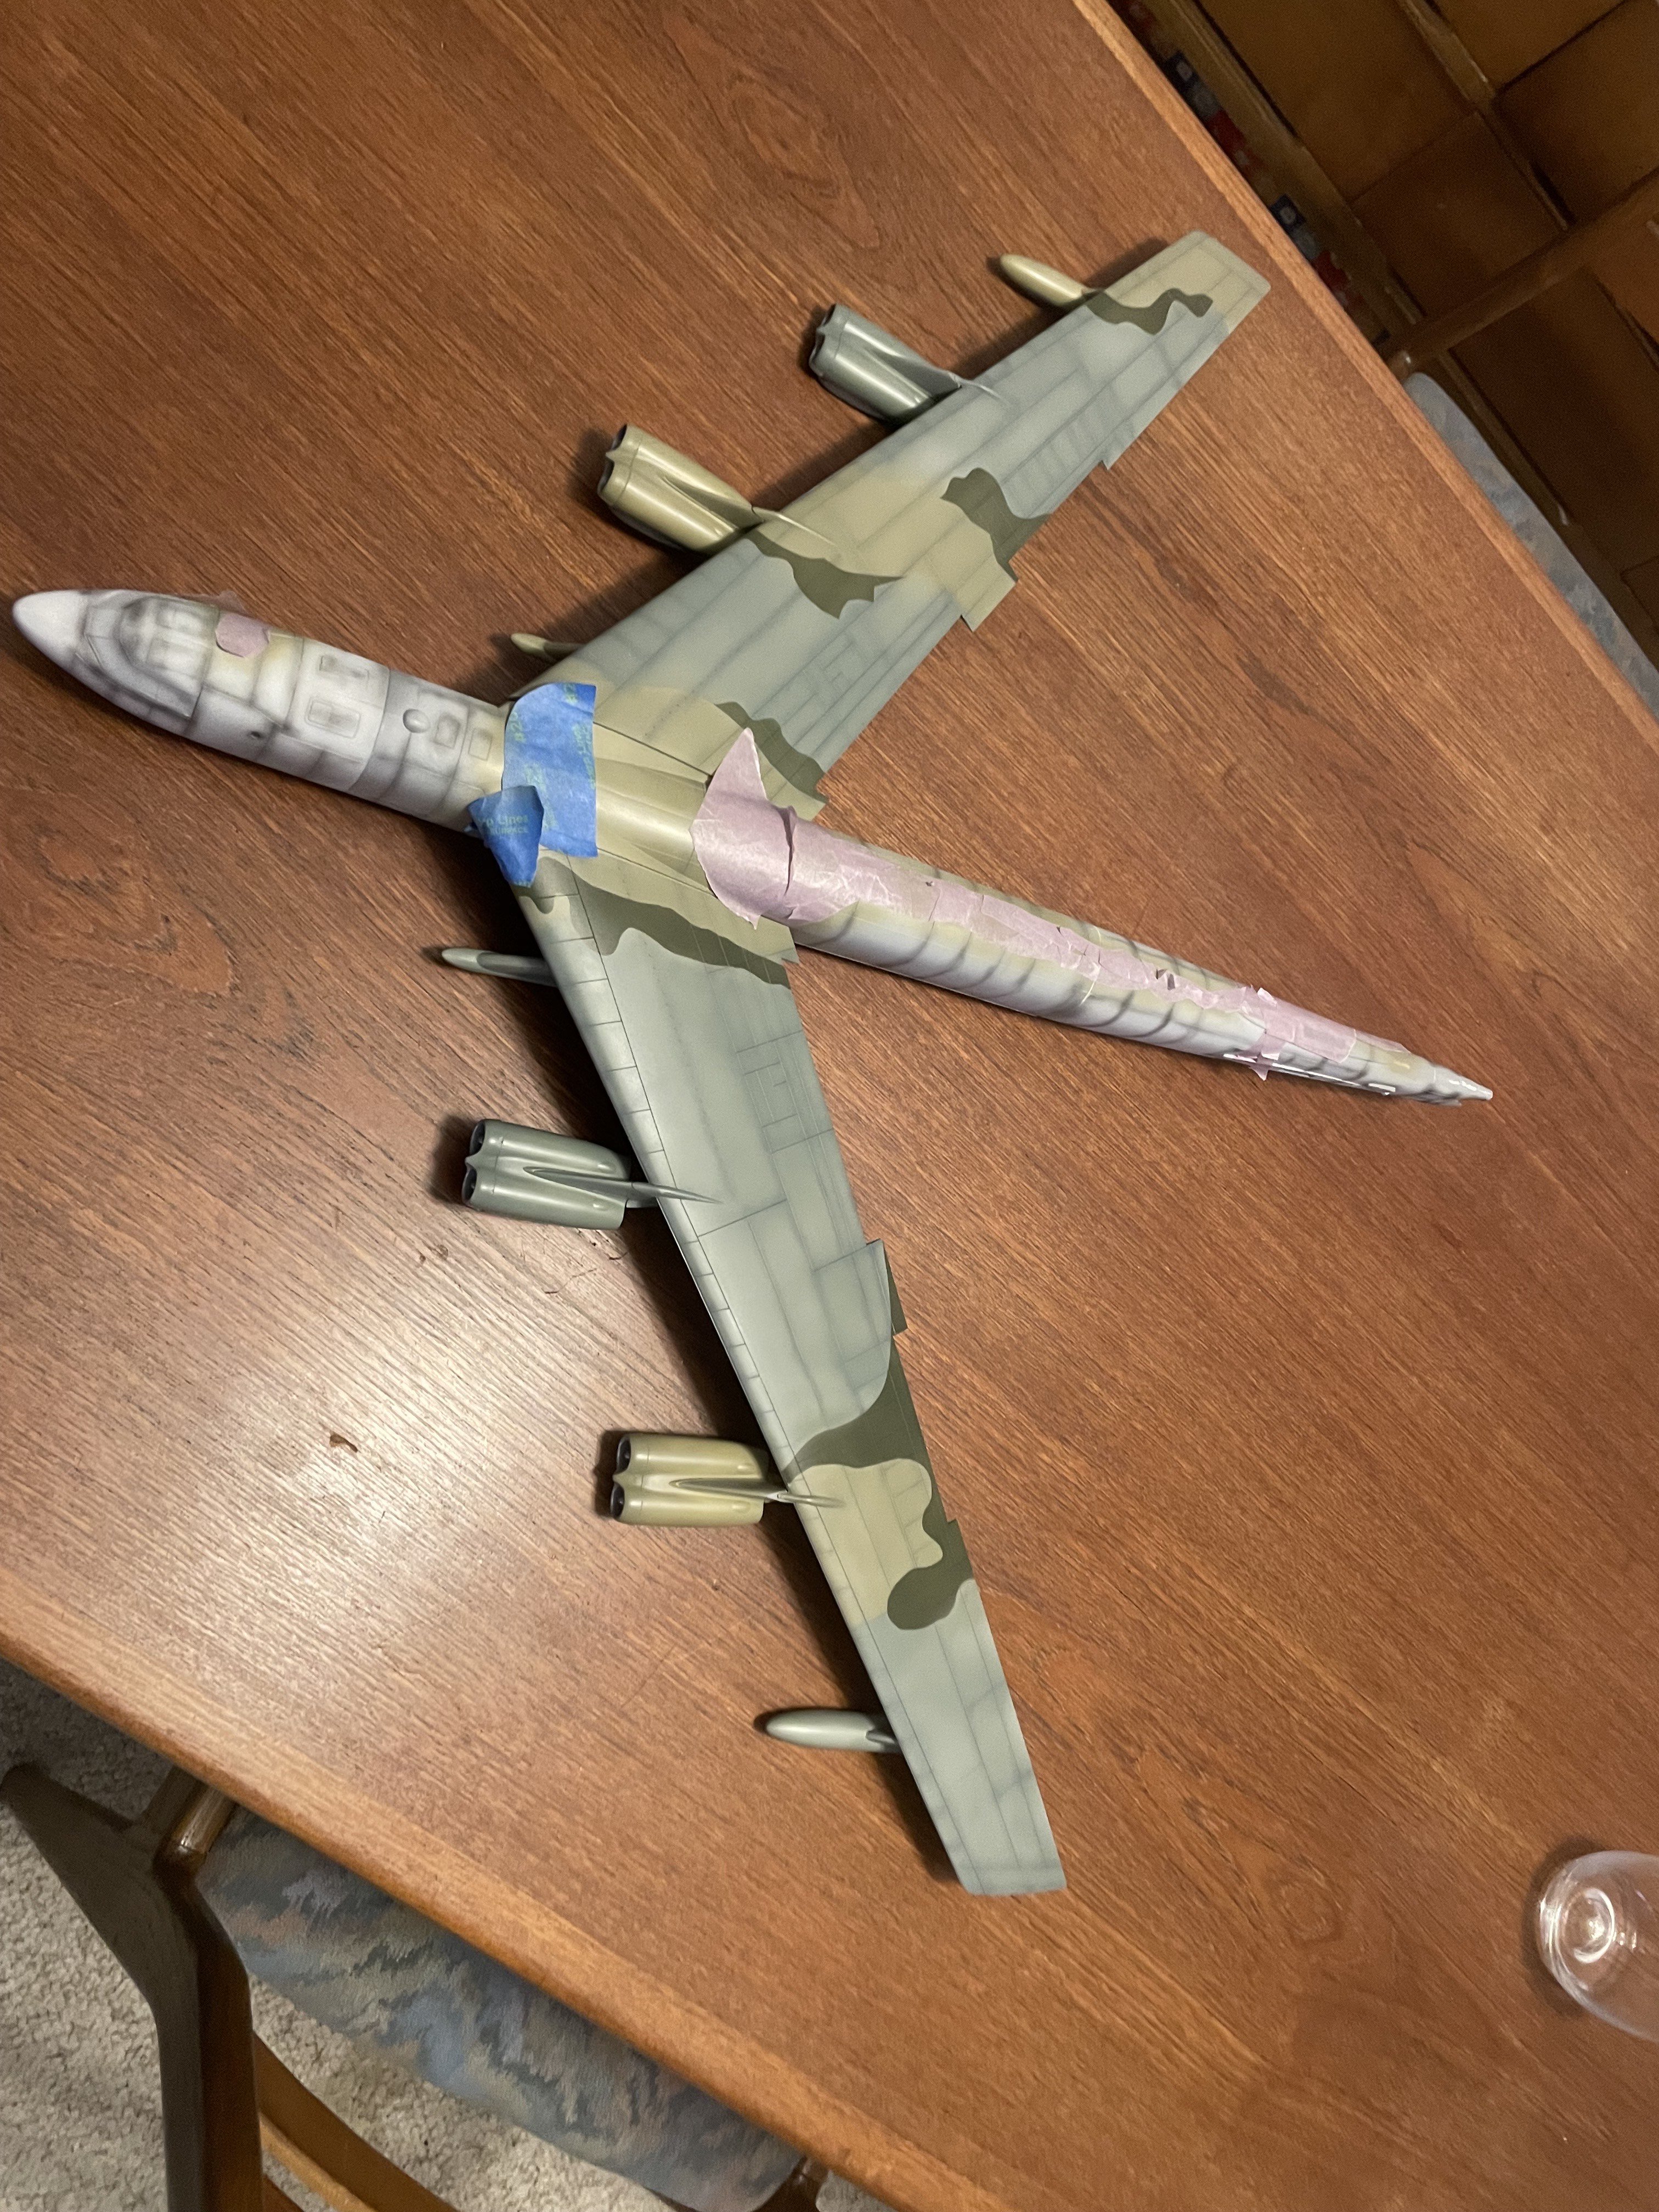
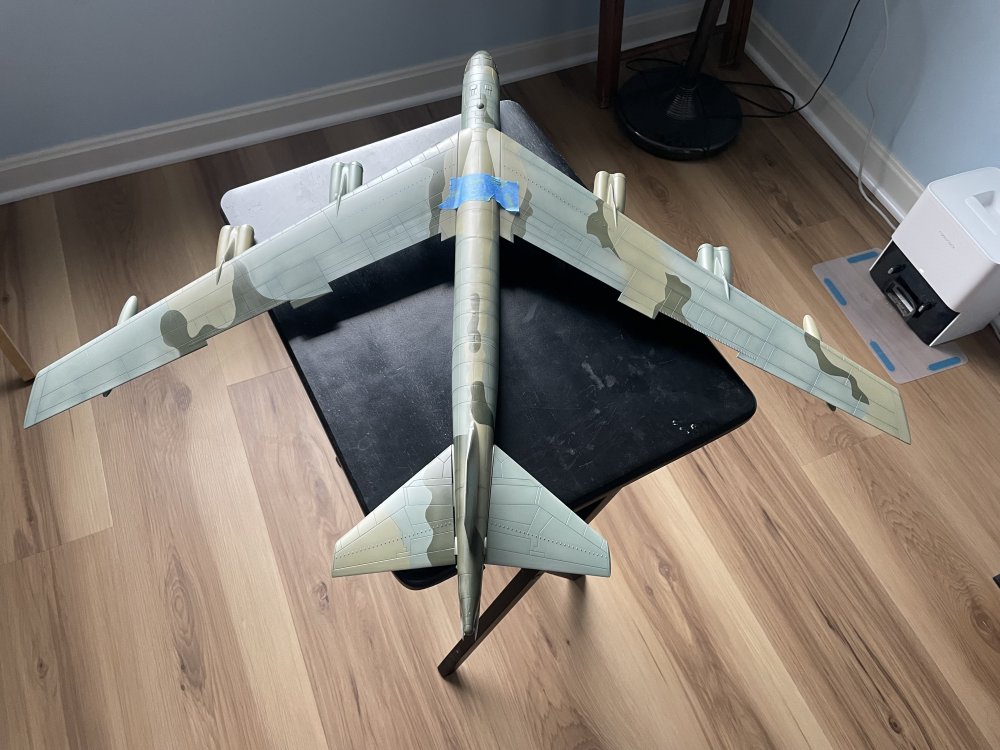
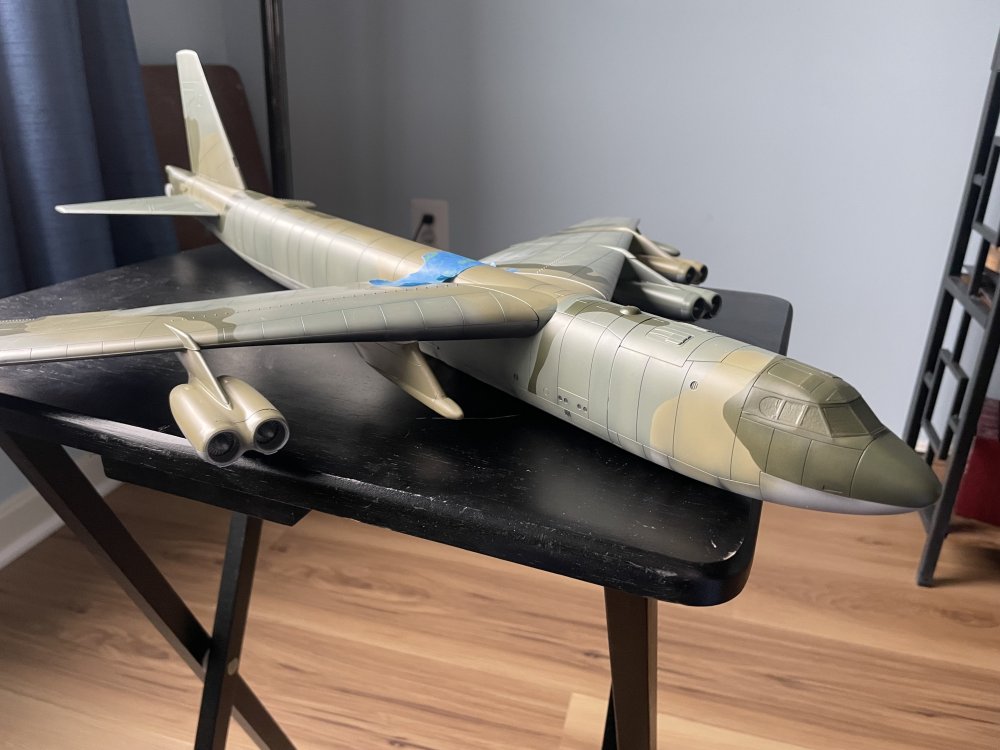
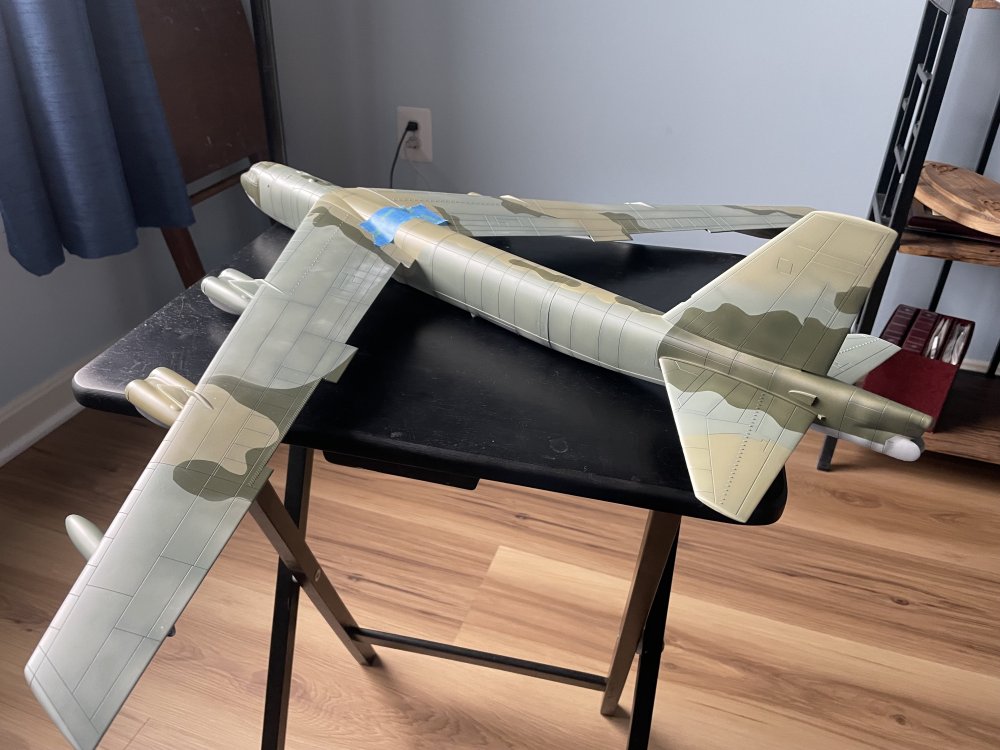
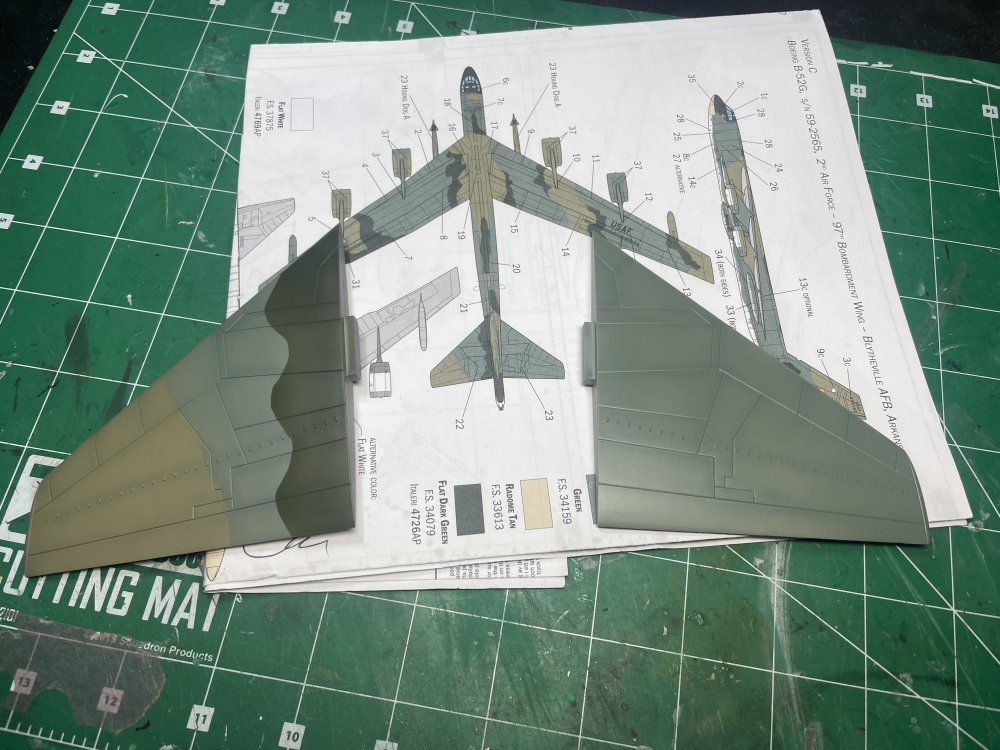
Very sorry to be gone so long. The flooring is in (Yay!) and got some new furniture, now its painting time. The project that never ends... And I tore two tendons in my wrist, on top of arthritis and tendonitis. However, did get the third camo color on the fuselage yesterday. FINALLY! But the painting starts tomorrow so another week or so of delay... Everything is dry-fitted at the moment.


-
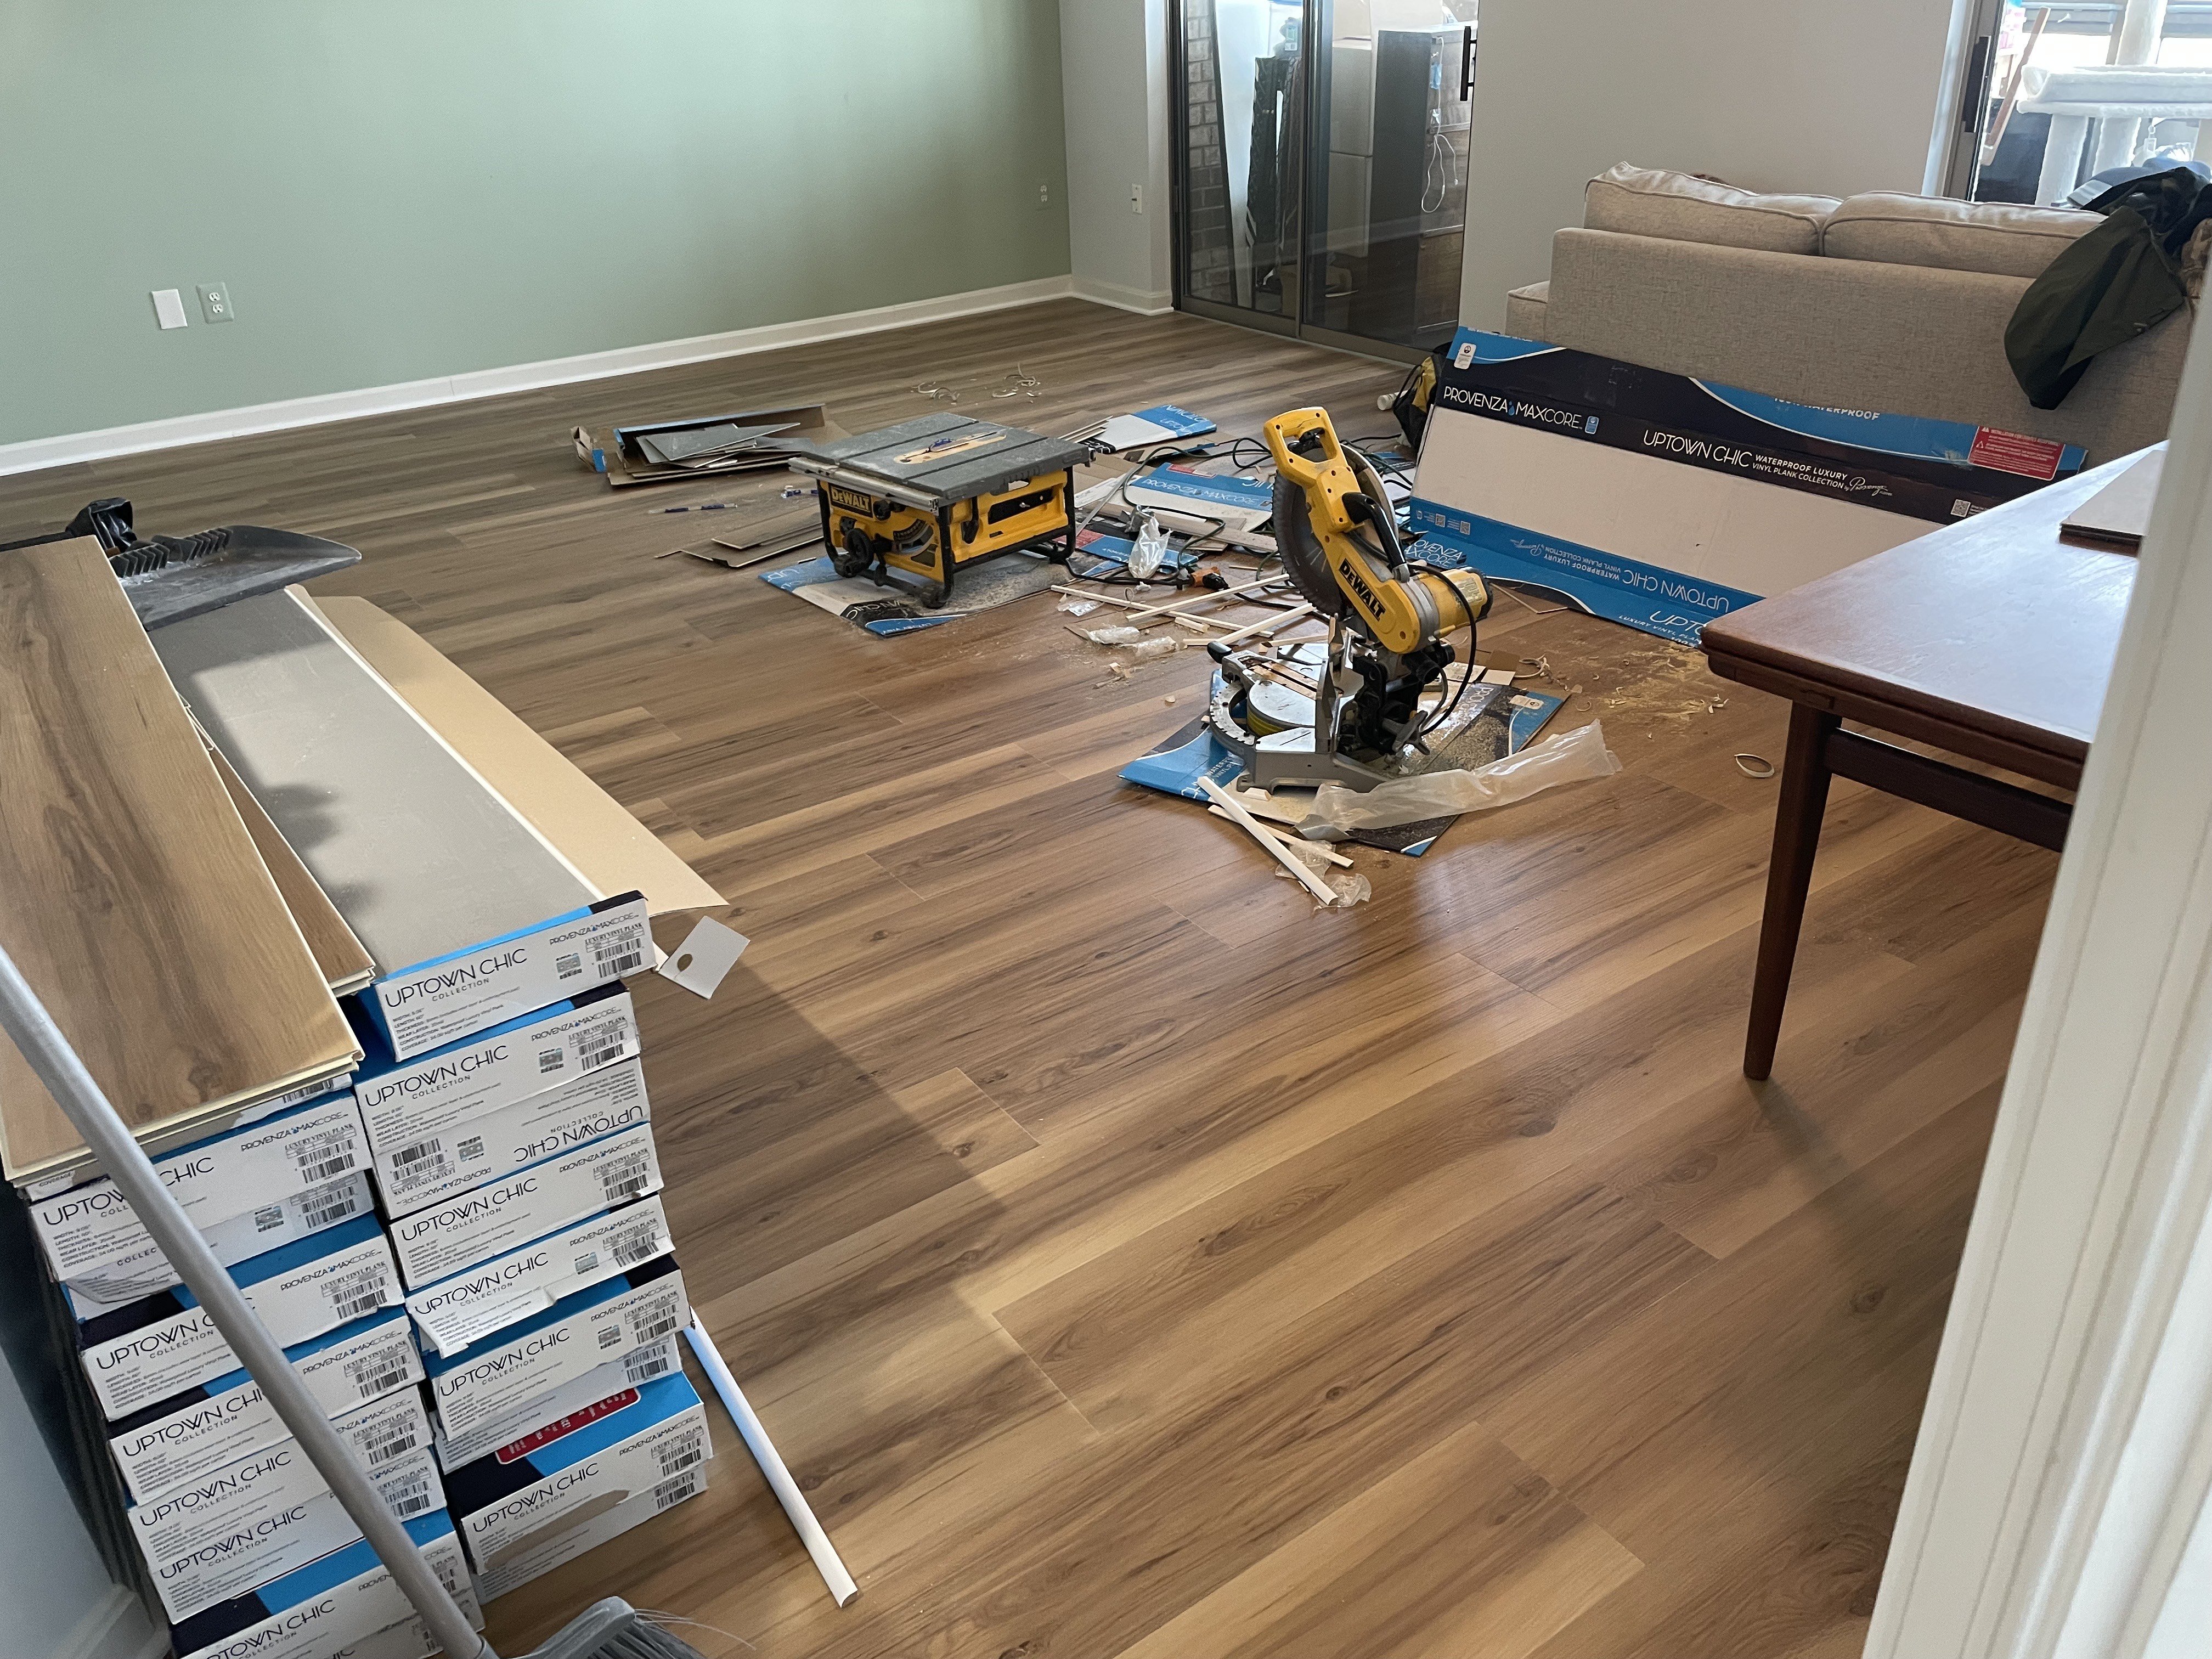
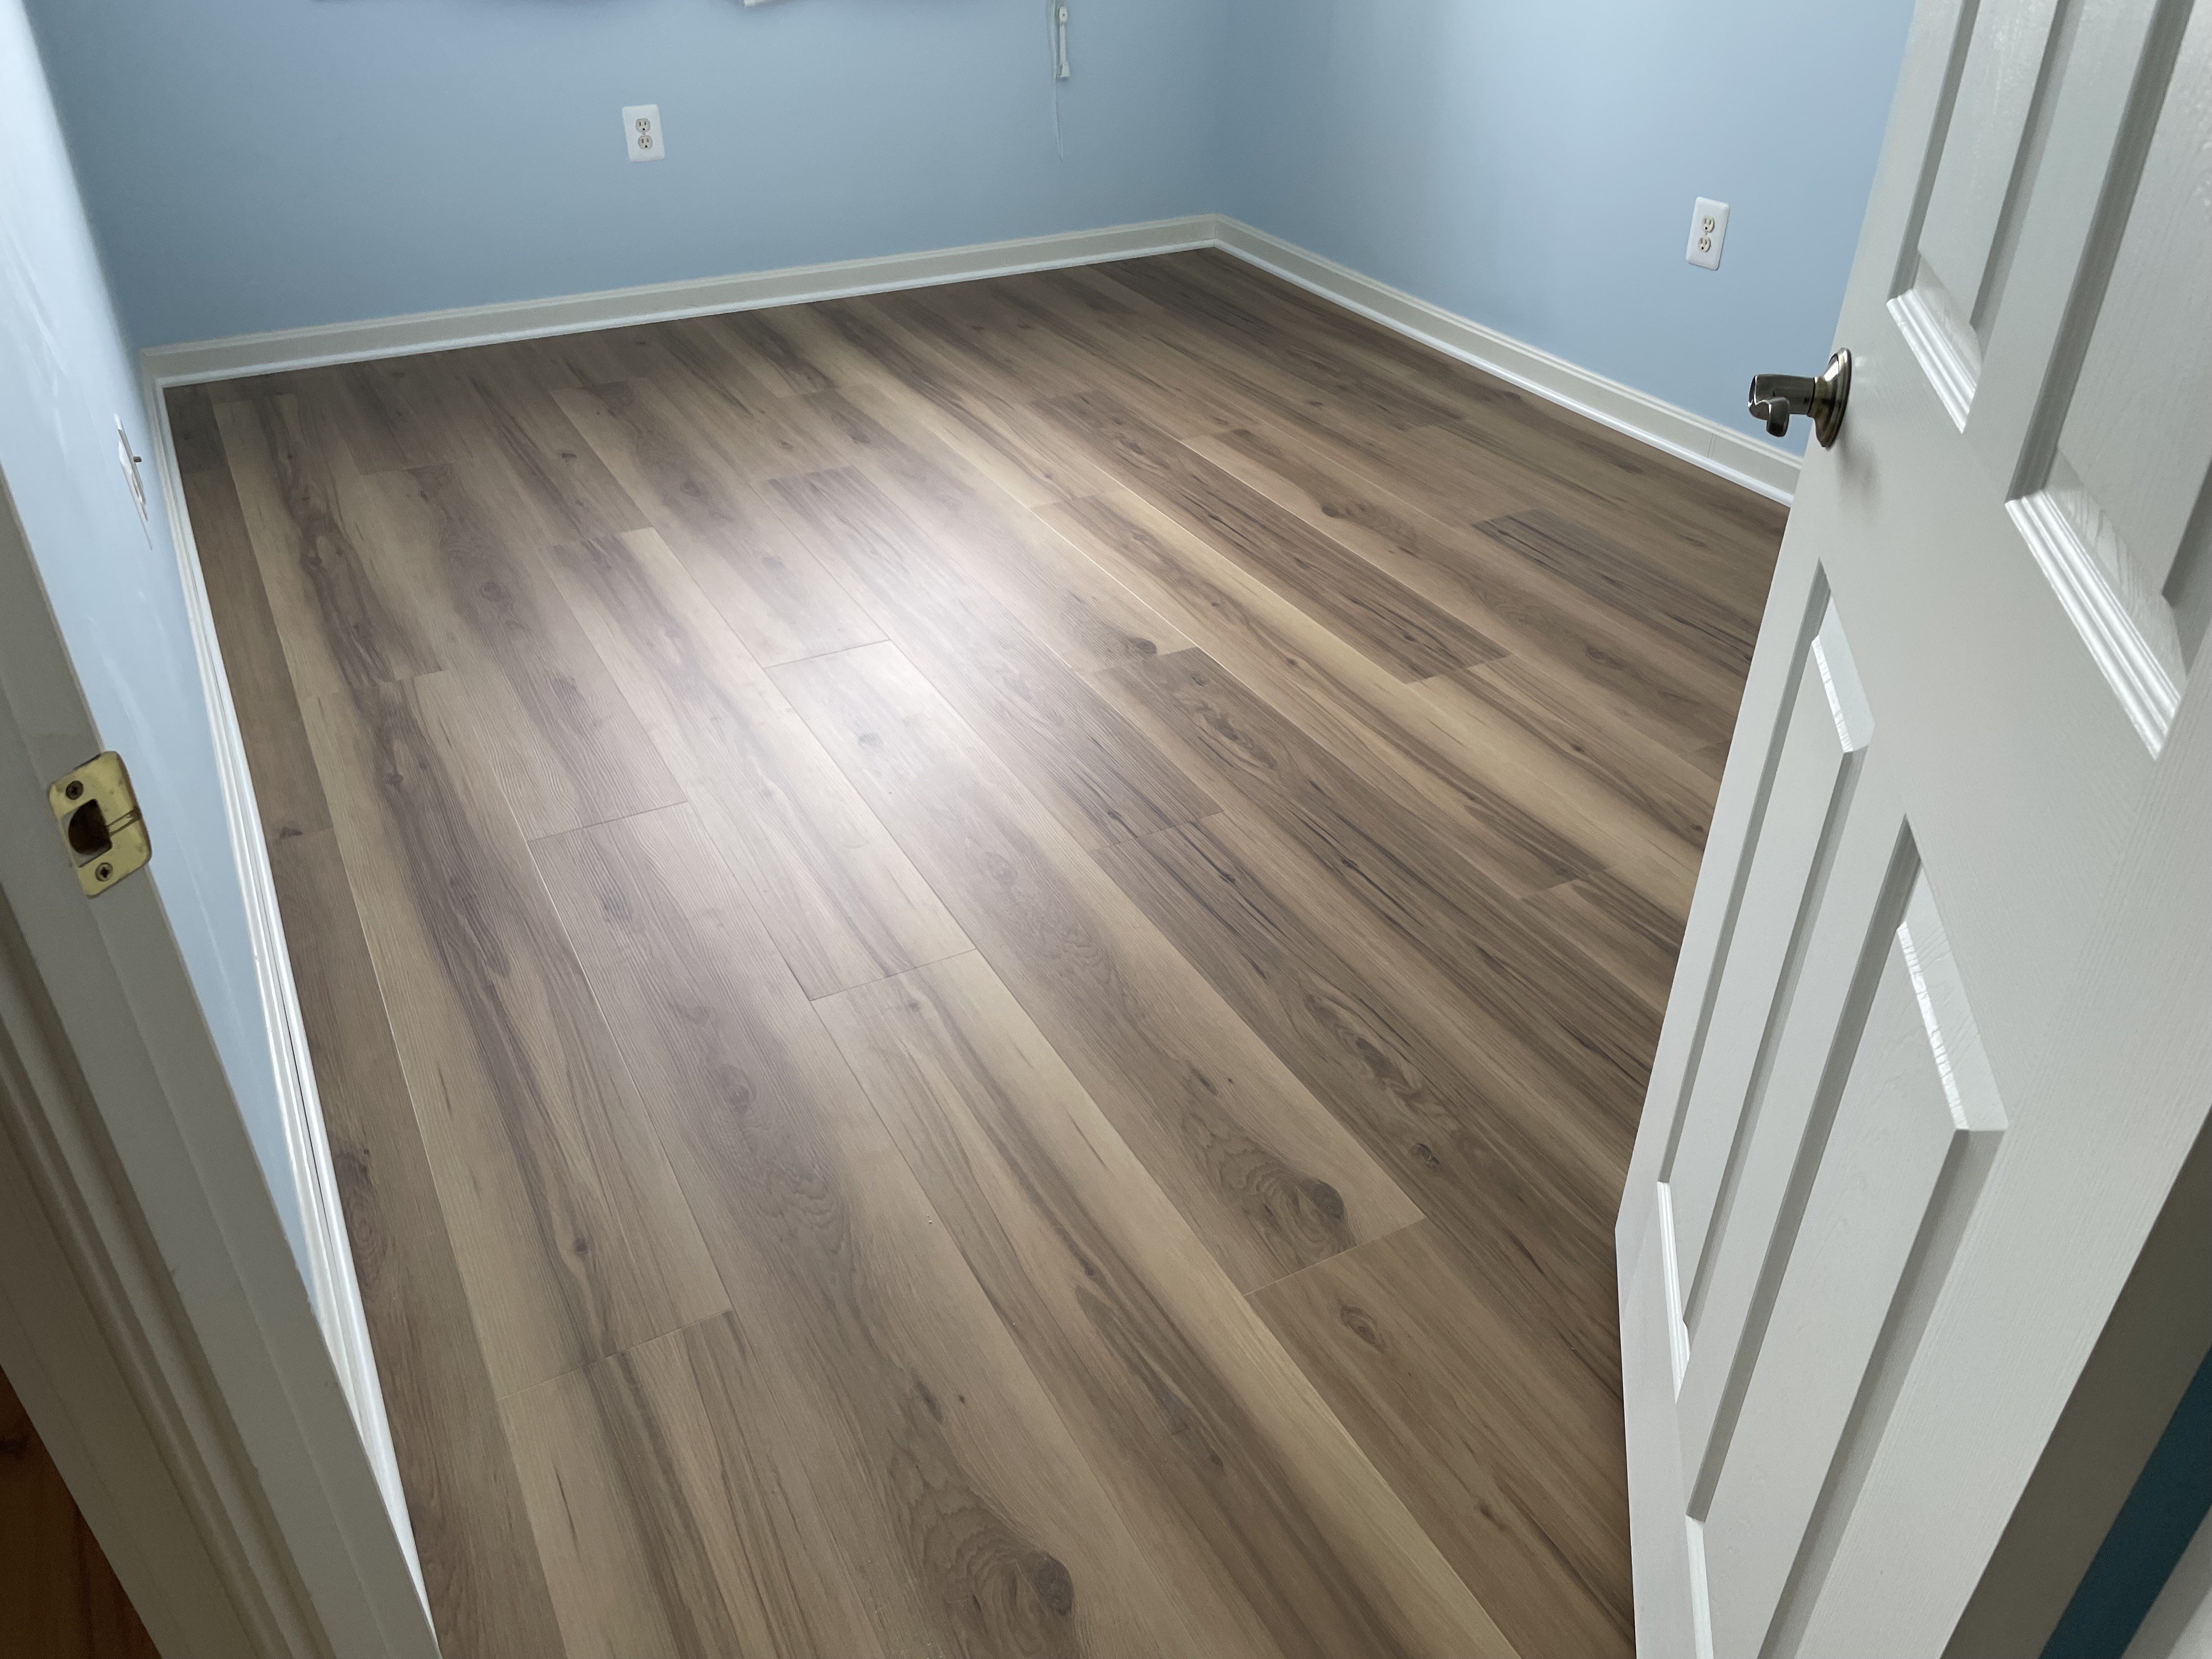
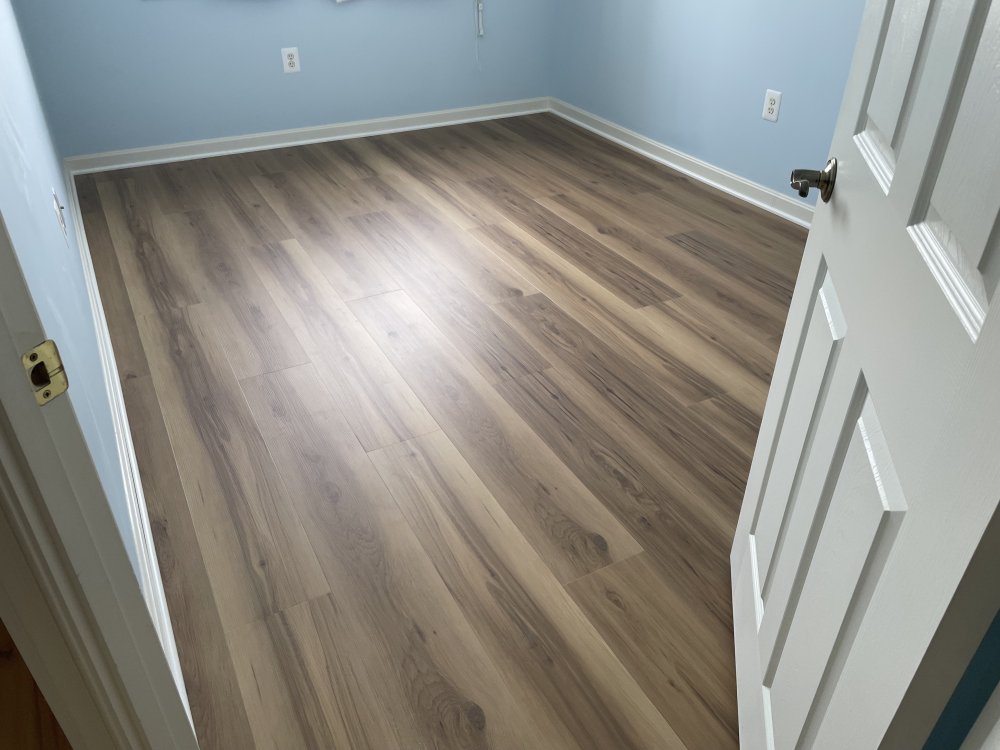
Thanks Carl and Martin! I'm currently sitting in the only available chair, in a dark bedroom which is half done. Takes me back to my younger days when I didn't have any furniture! The previous carpet was over 20 years old (I moved in 6 1/2 years ago) so it was time to do something else. Now I have to figure out how to protect the floor from my painting! I think I'll be putting down one of those plastic carpet protectors that go under your desk. That should do the trick...
-
Strange aircraft!!!
-
Here we go... Same Floor, different light!
-
Ahoy Sailor!!! I used the flooring as an excuse to clean out the closets, and even (gasp) my model case. But now I have more room to display new models!!
-
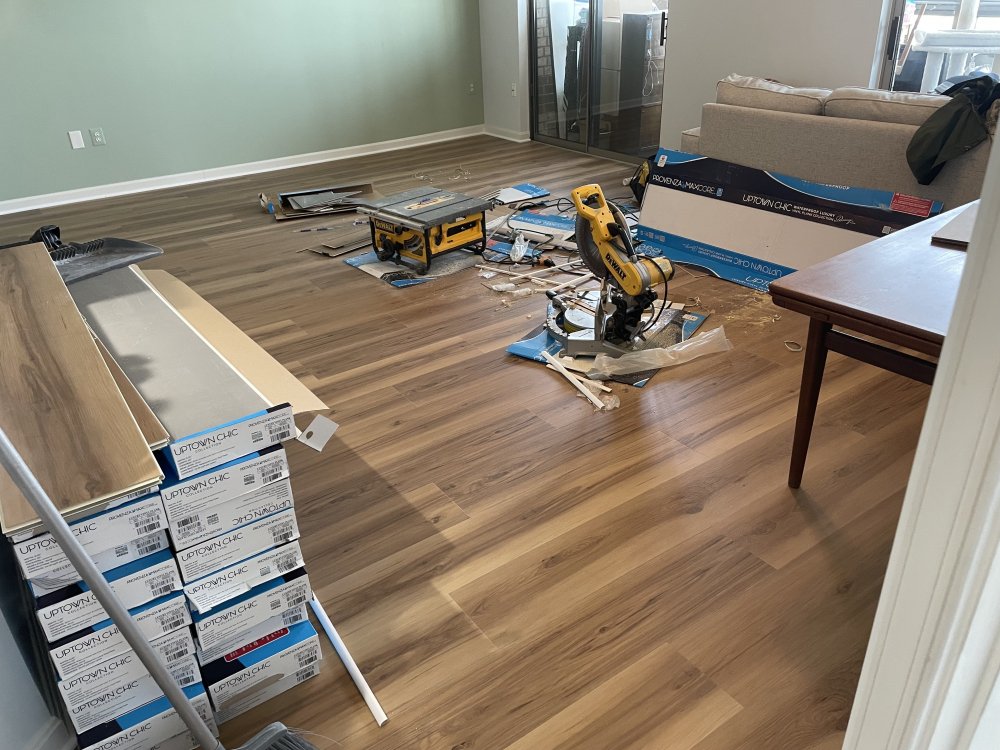
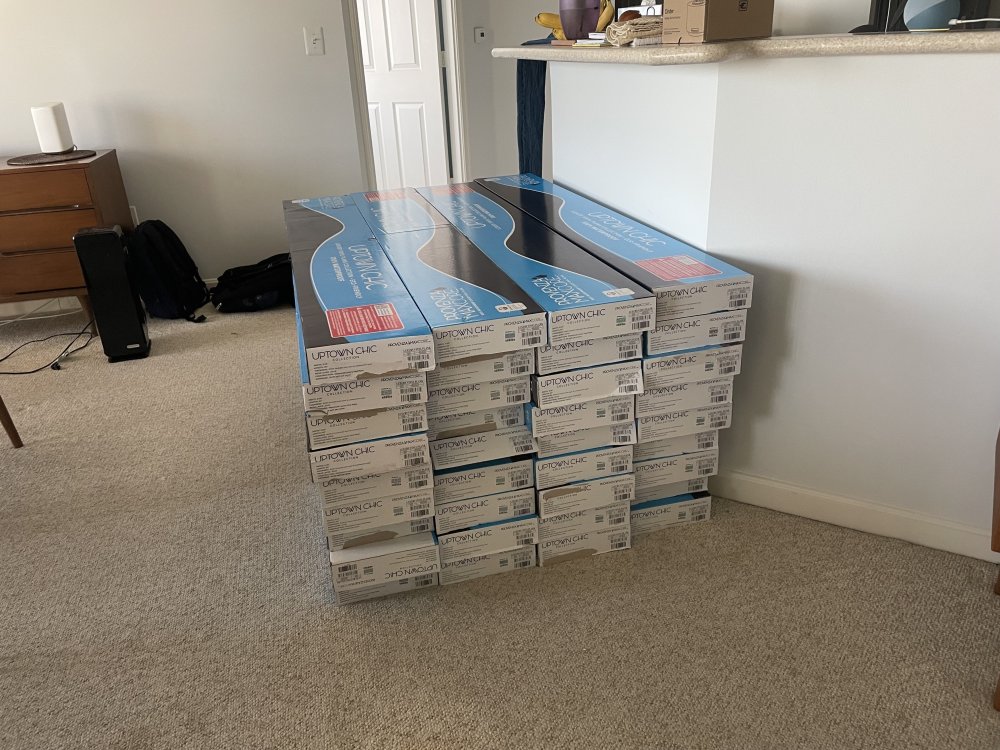
These arrived last Thursday for install this coming Wednesday and Thursday, with any luck! So I'm shut down for a couple of weeks on the B-52 which is a shame as I was just getting ready to put down the third camo colour, then finish with the underside and touch ups...
-
Thank you, Gentlemen!!! I'm kinda having fun with the camo and would like to get the dark green on the fuselage tonight, but am having flooring put down Wed/Thurs of next week and I need to keep clearing out my rooms. Esp the hobby room! I thought I'd take advantage of the snowy and Icelandic weather (see what I did there?? ) but cleaning house has taken precedence. But I can't wait to finish this big bird!
-
Carl, Thanks! Love the MRP paints just about fool proof. The flooring is supposed to be delivered Thursday, and installed next week. I have to clear out my Hobbyroom/Office however! We got about half what you did where I am, but not too far west they matched your snowfall. Supposedly we are getting another storm this week but I don't see it forecast. It was 16C this morning with no wind. Tonight we are supposed to see temps fall to -21C windchill... THAT has been brutal. The wind just cuts through you. Can't have any exposed skin for very long.
-

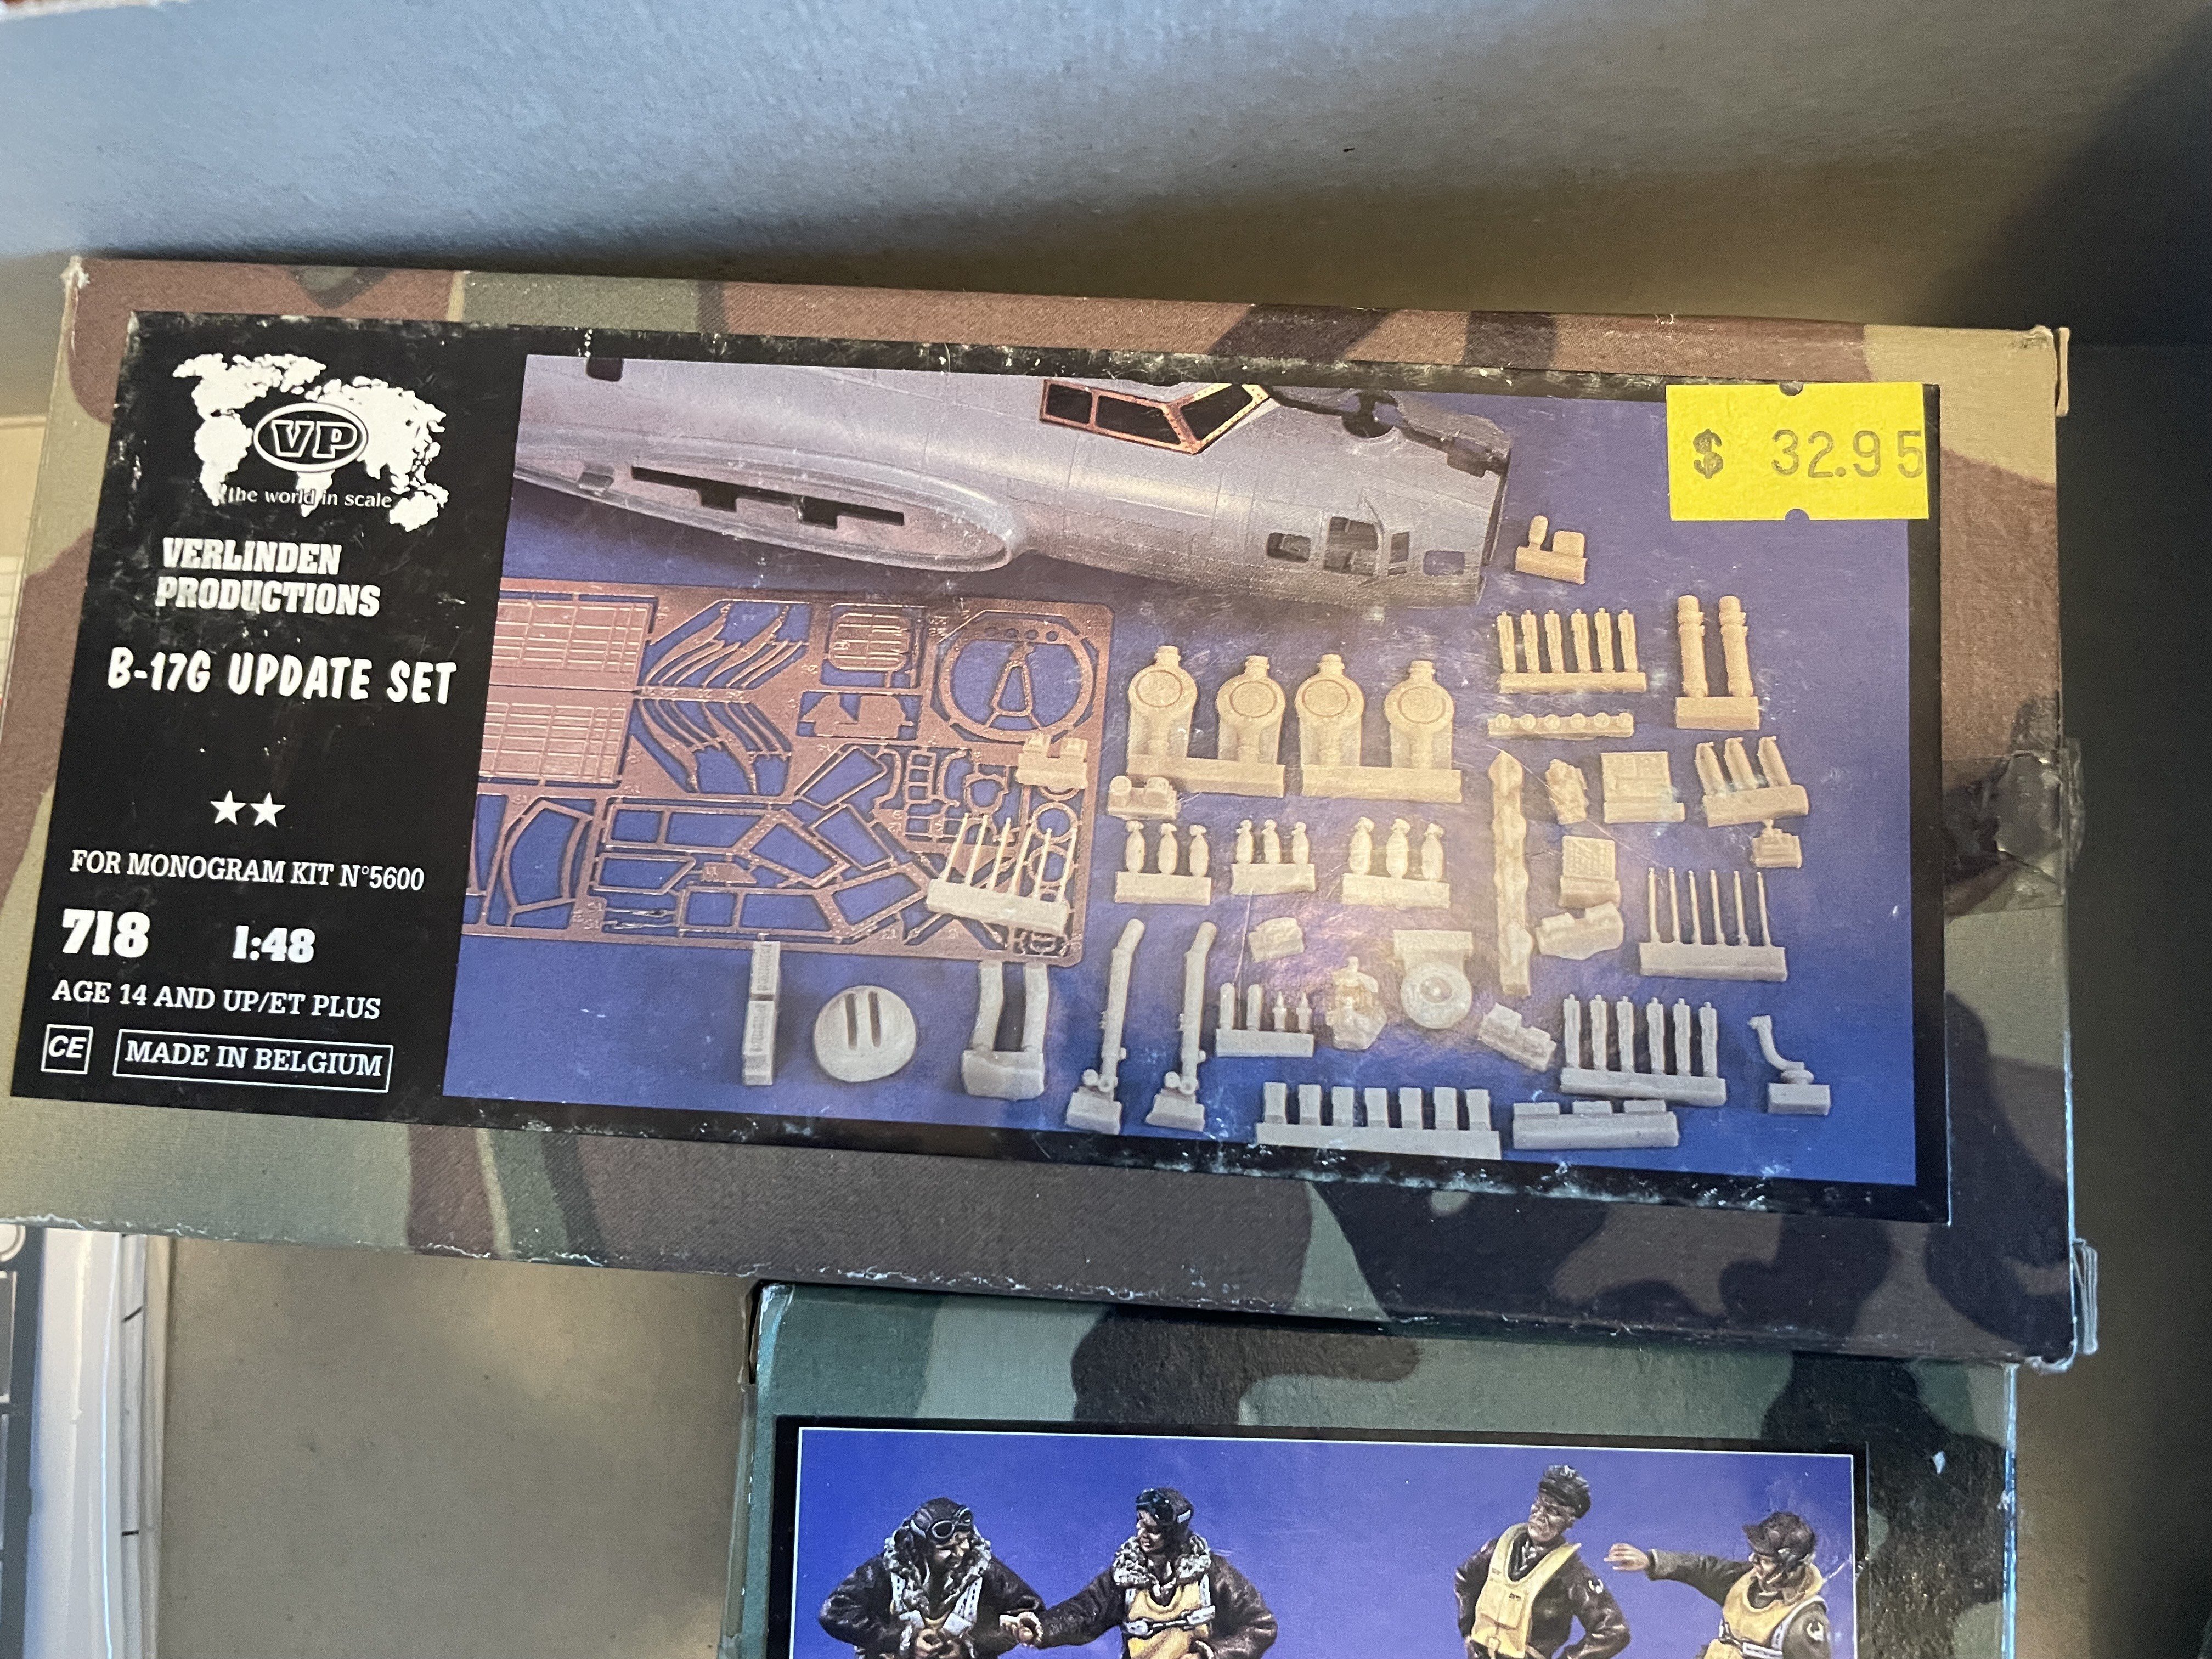
FS: Monogram B-17G #5600 with Lots of Goodies. US/VA
CANicoll replied to CANicoll's topic in Buy, sell, swap, seek
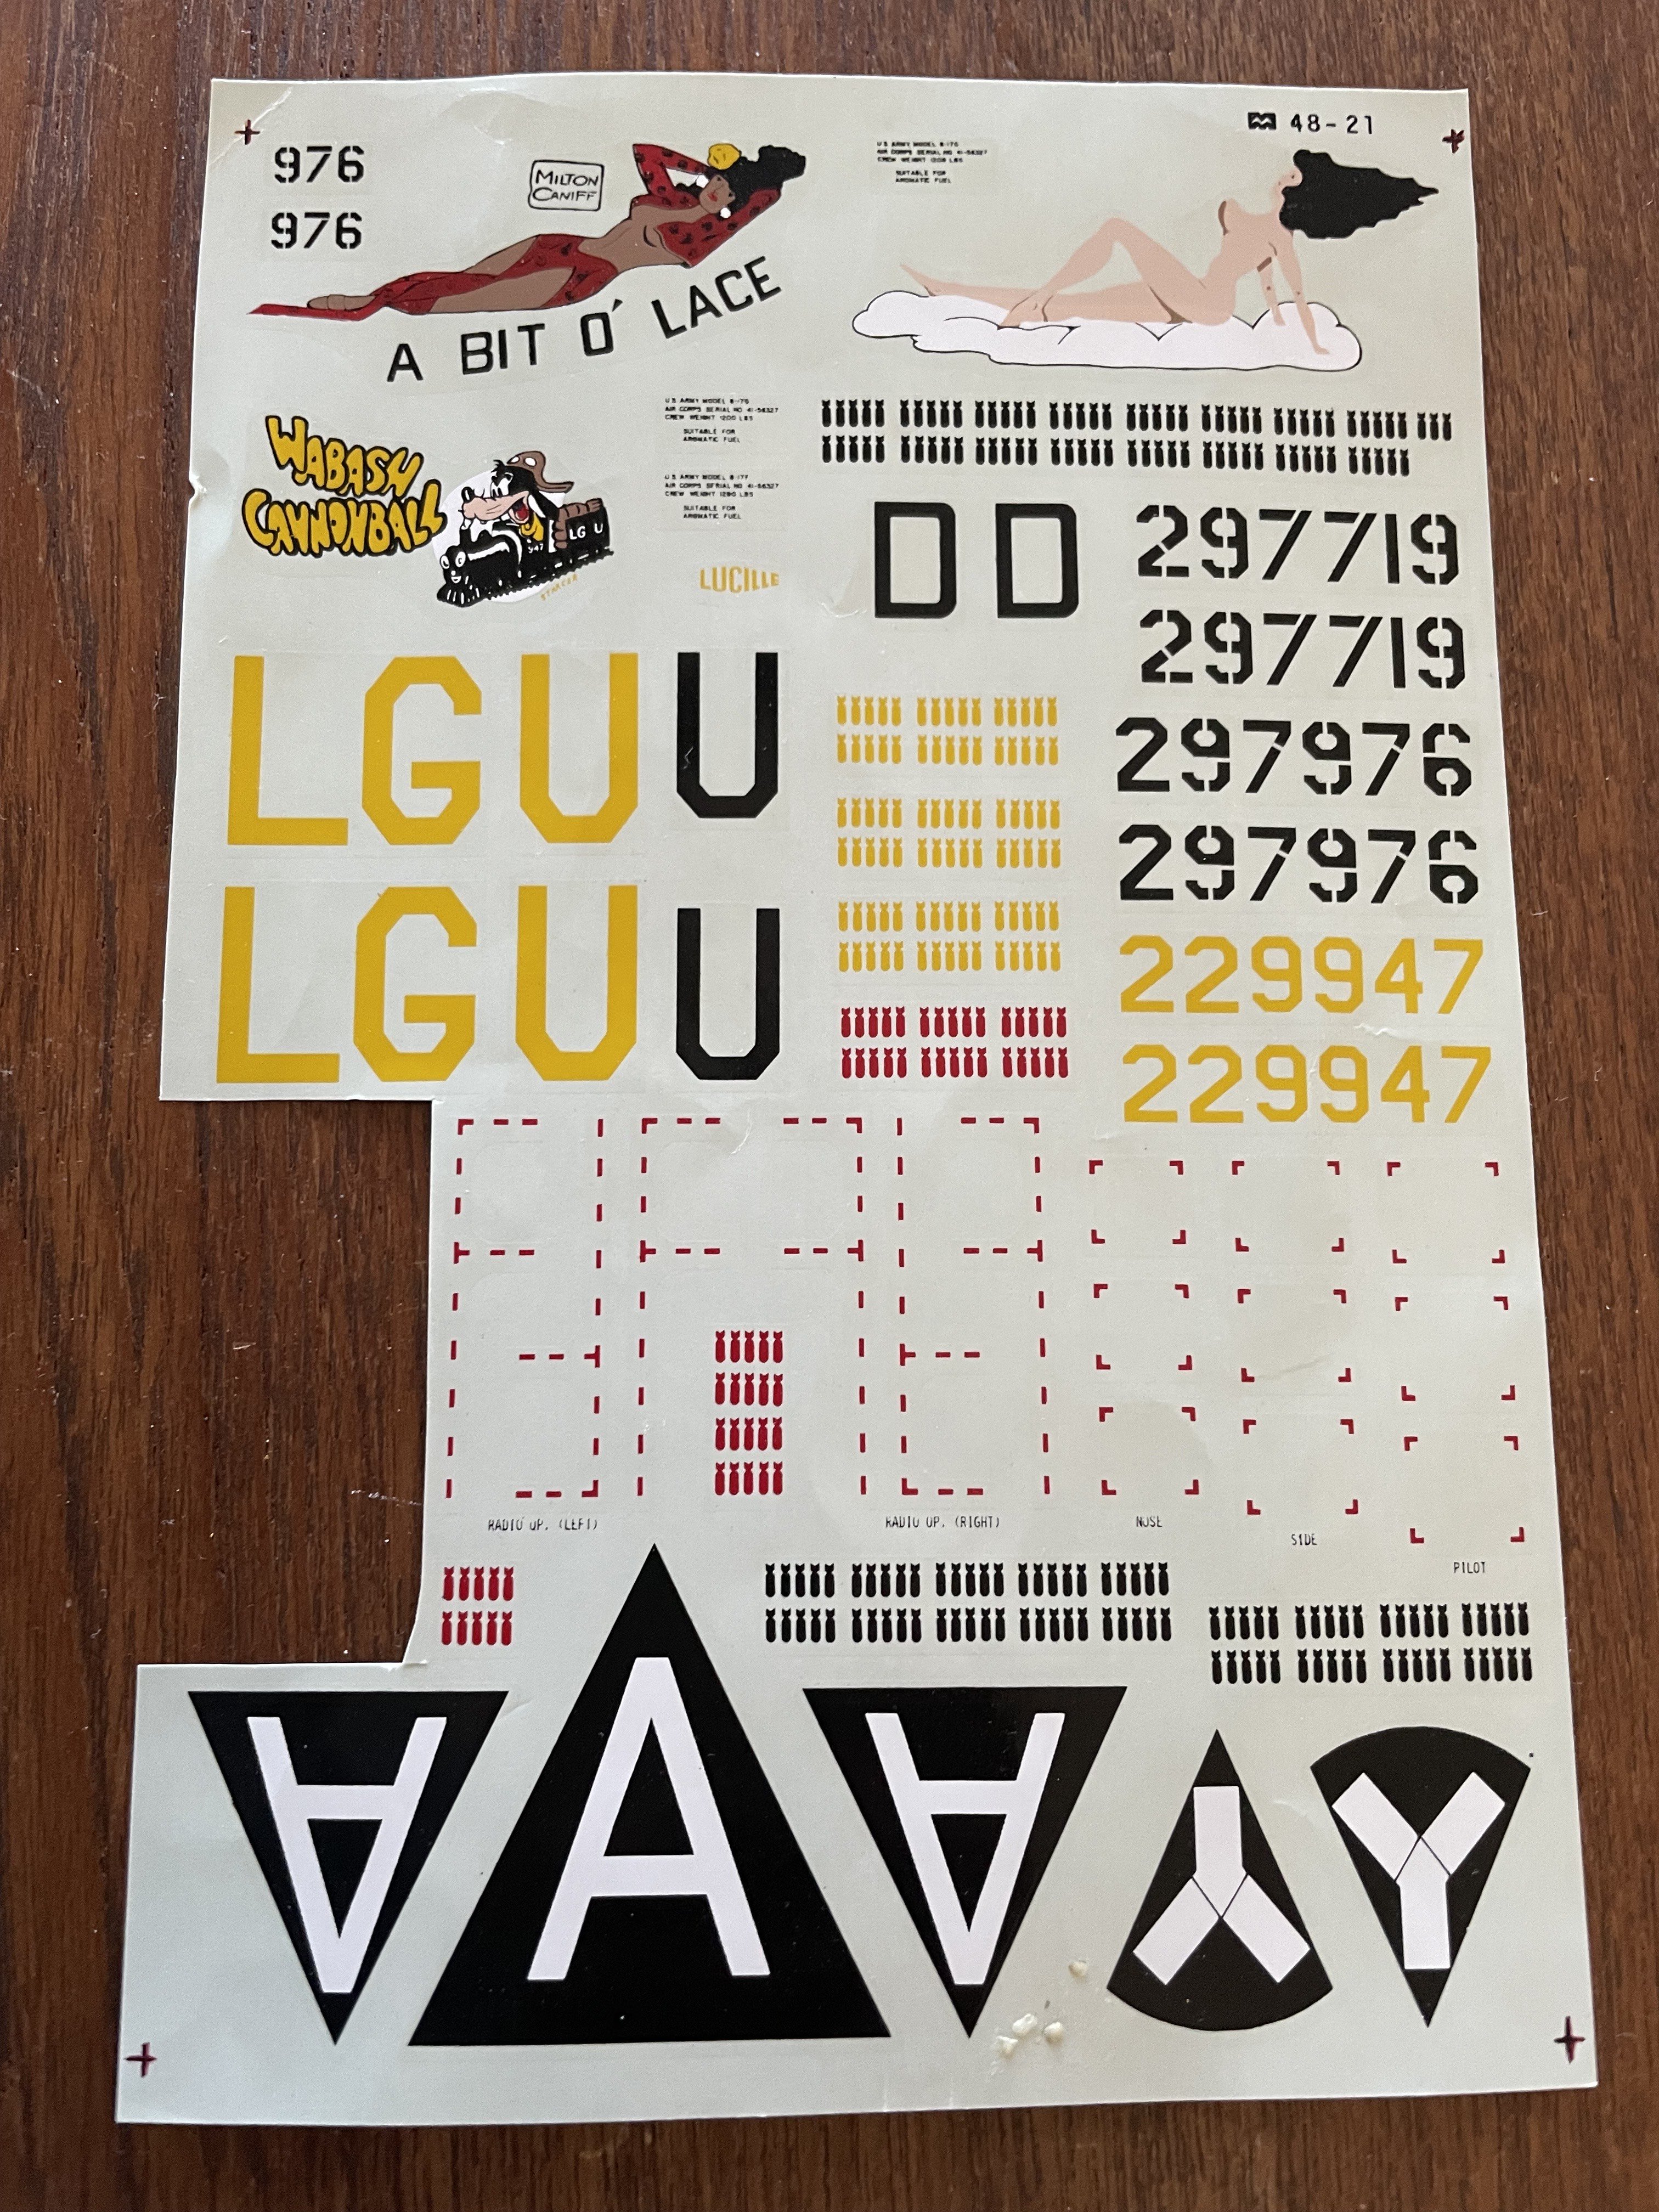
I found this set of decals and will throw them into the box. A Bit o Lace. is the main aircraft. Missing are the tail emblem K.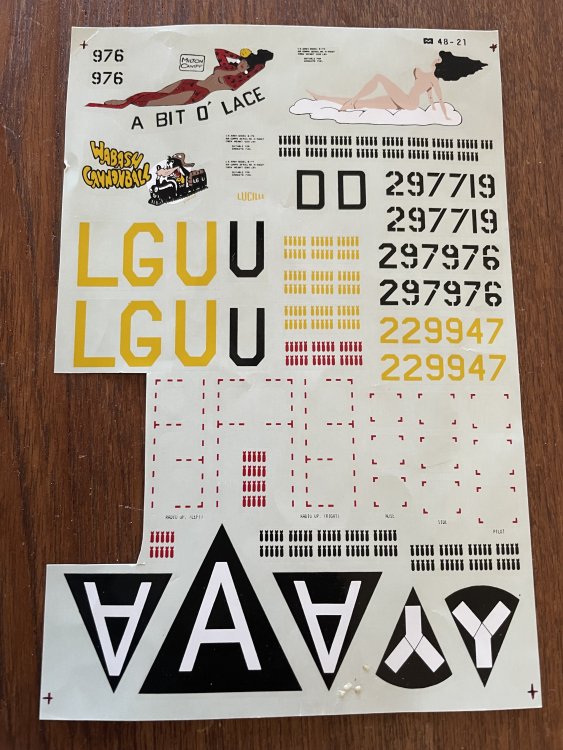
-
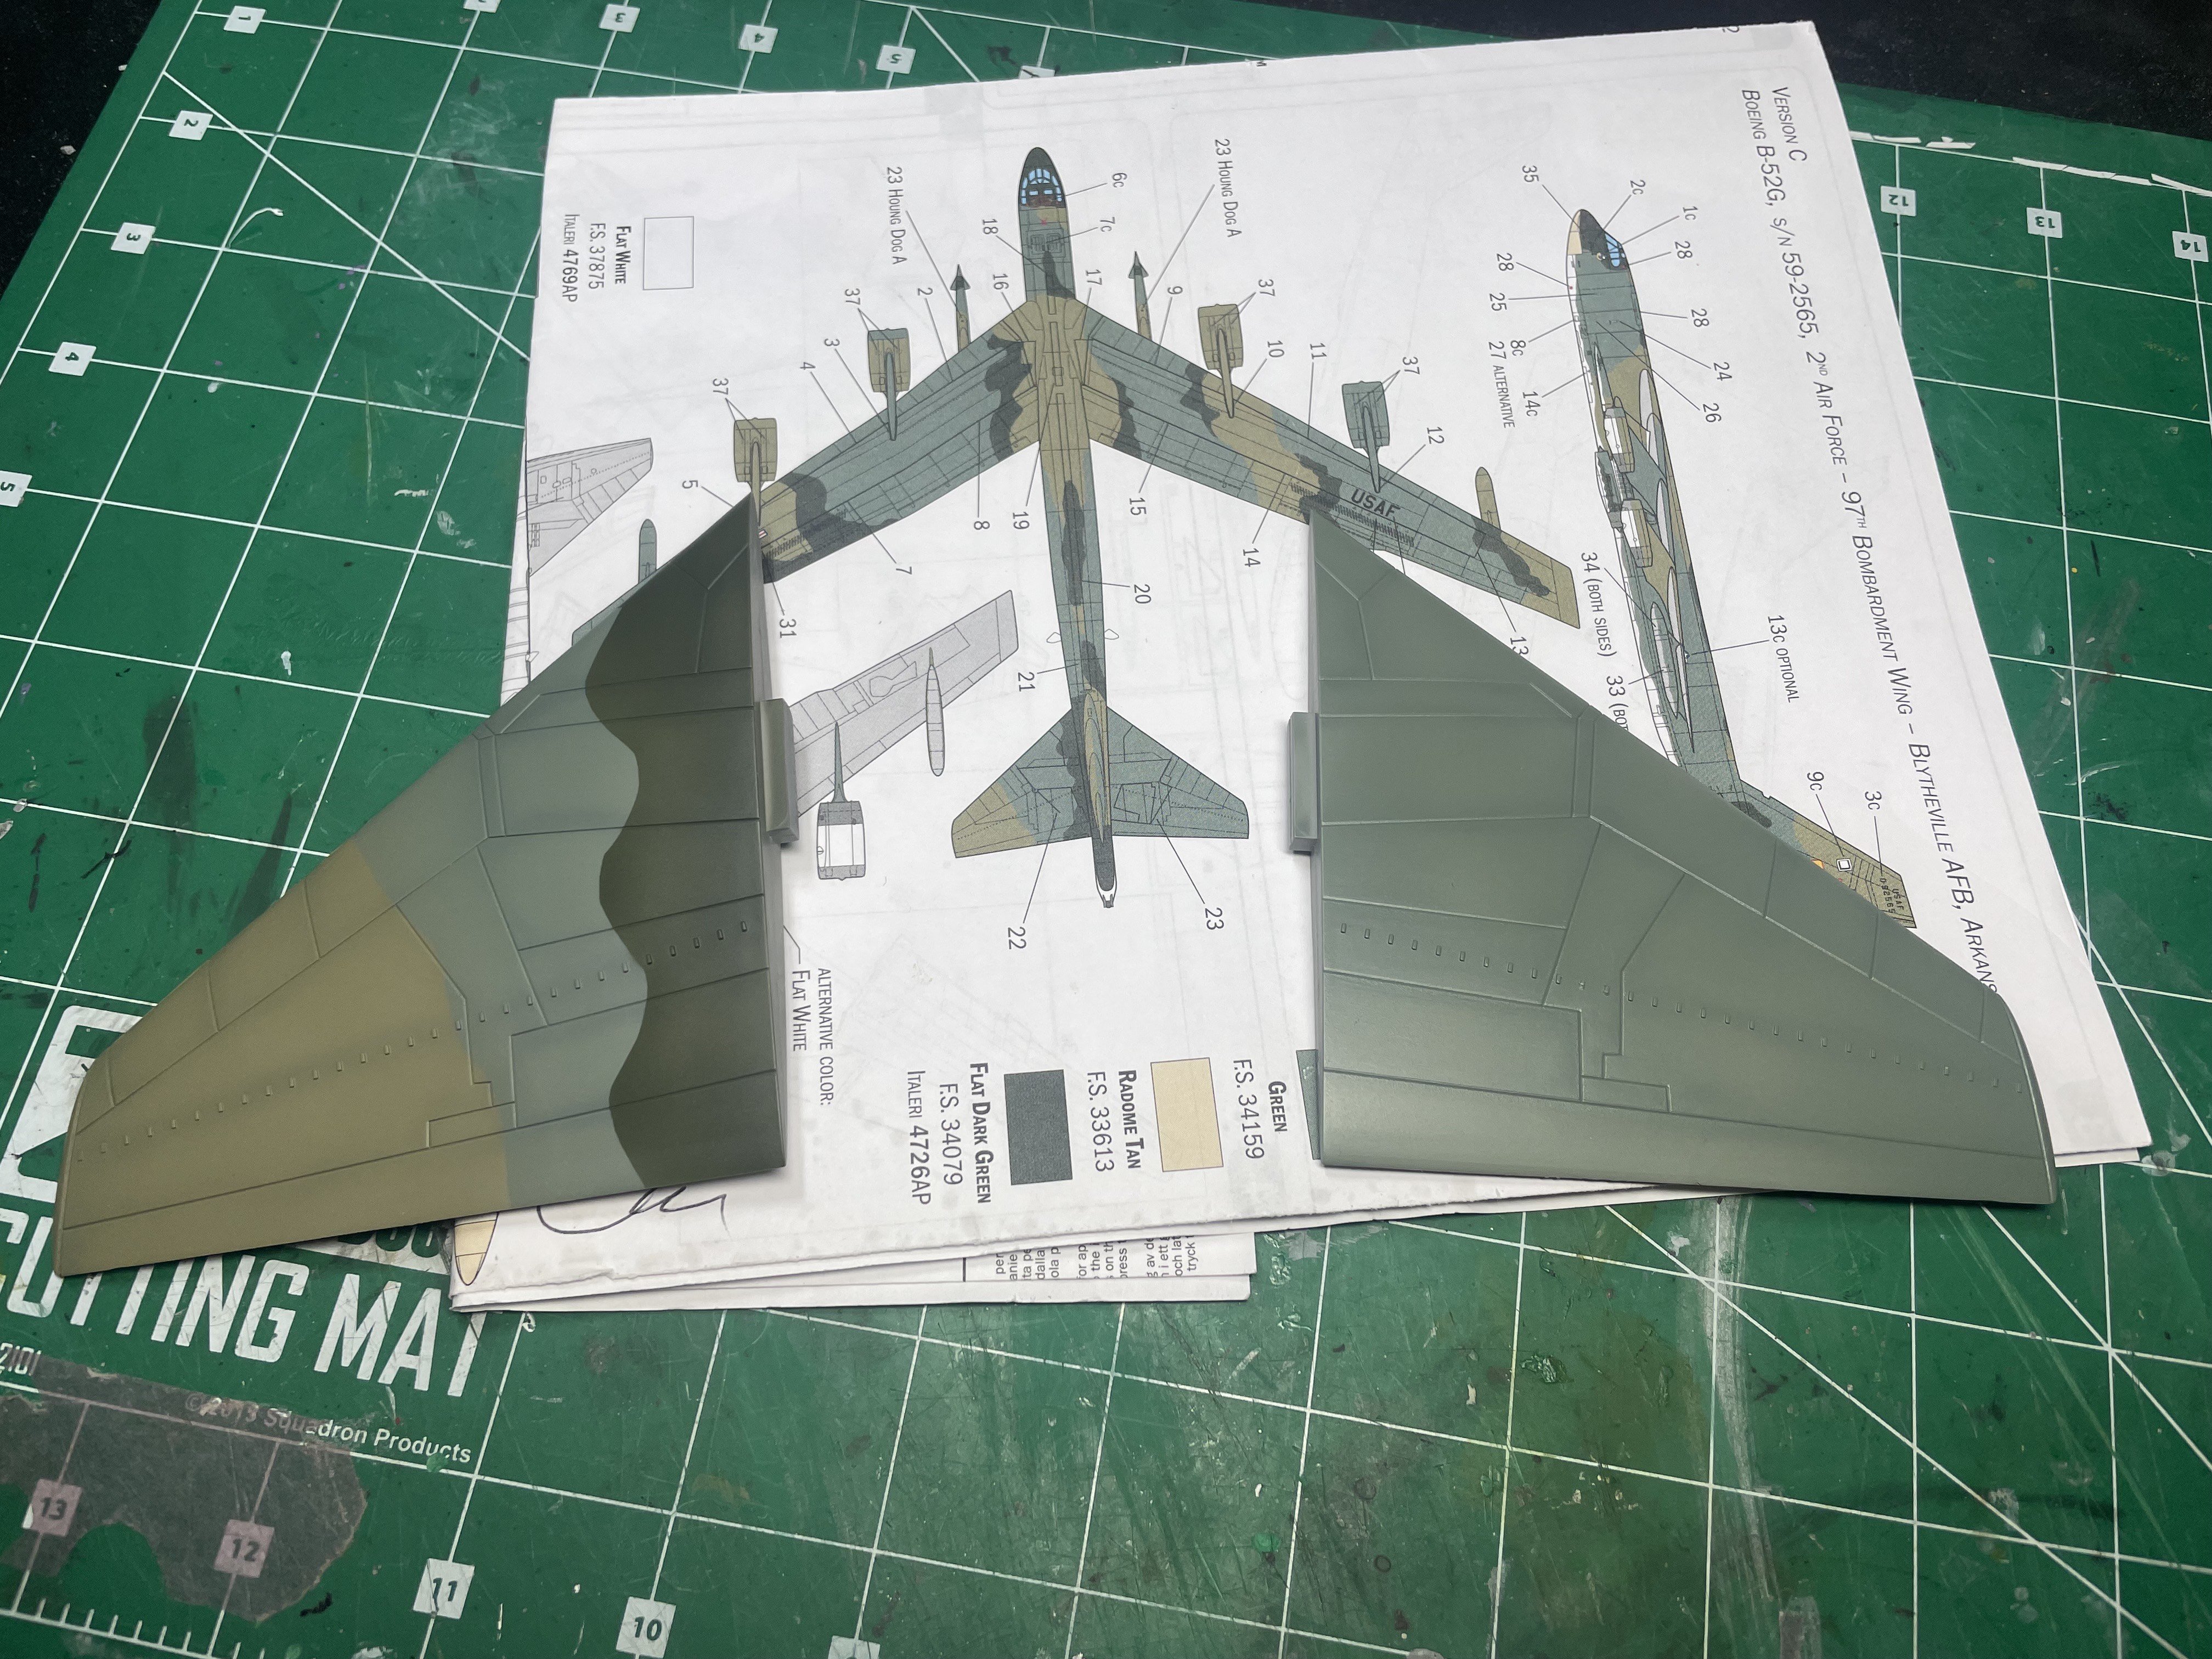
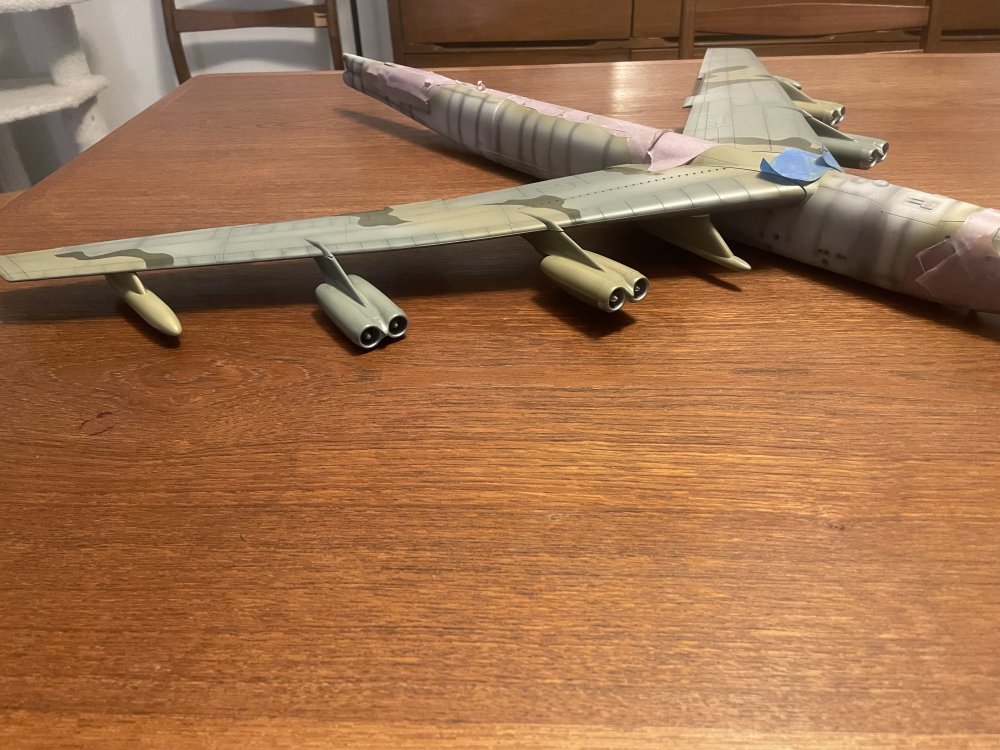
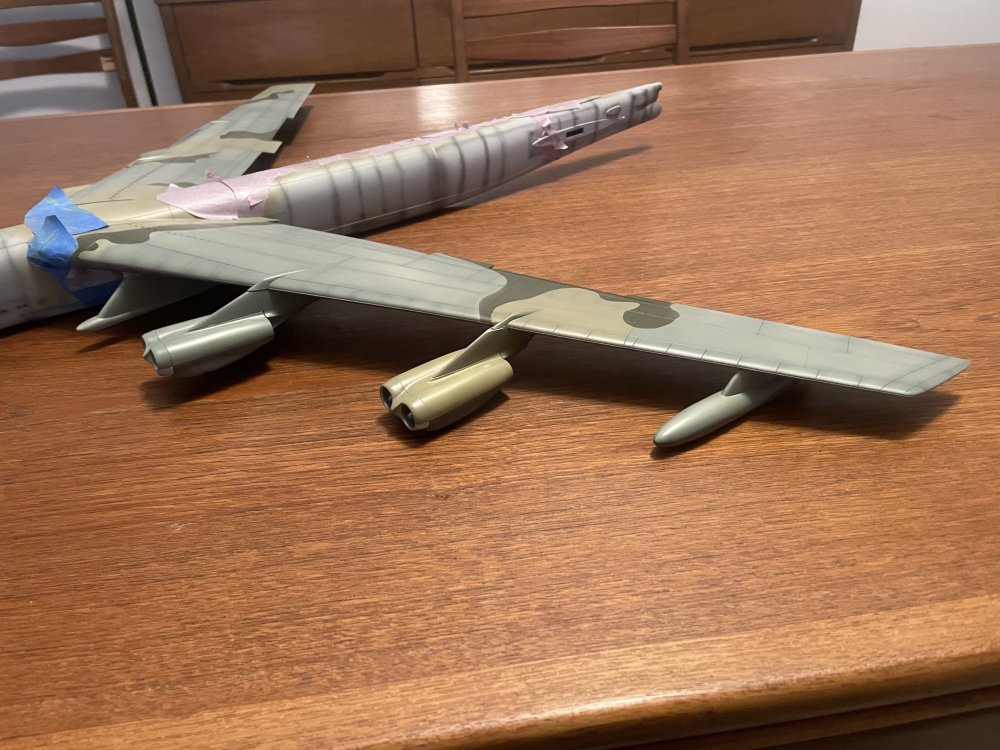
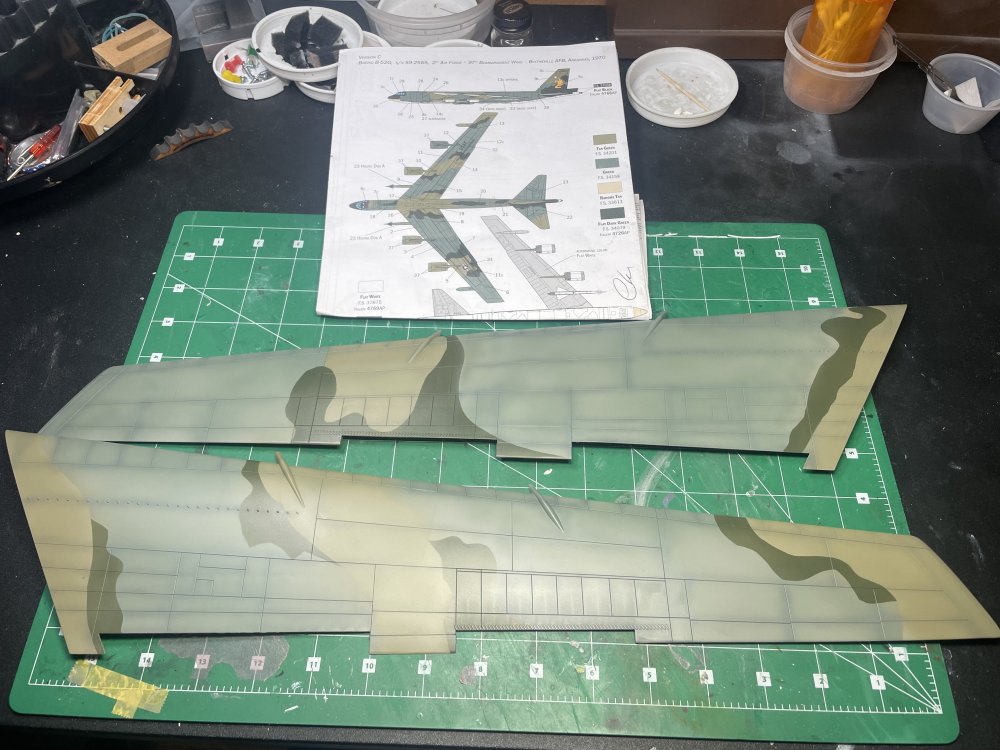
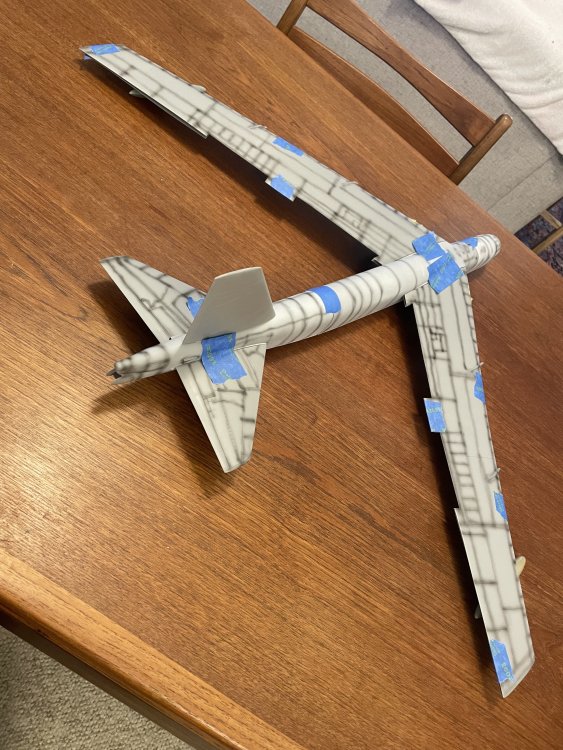
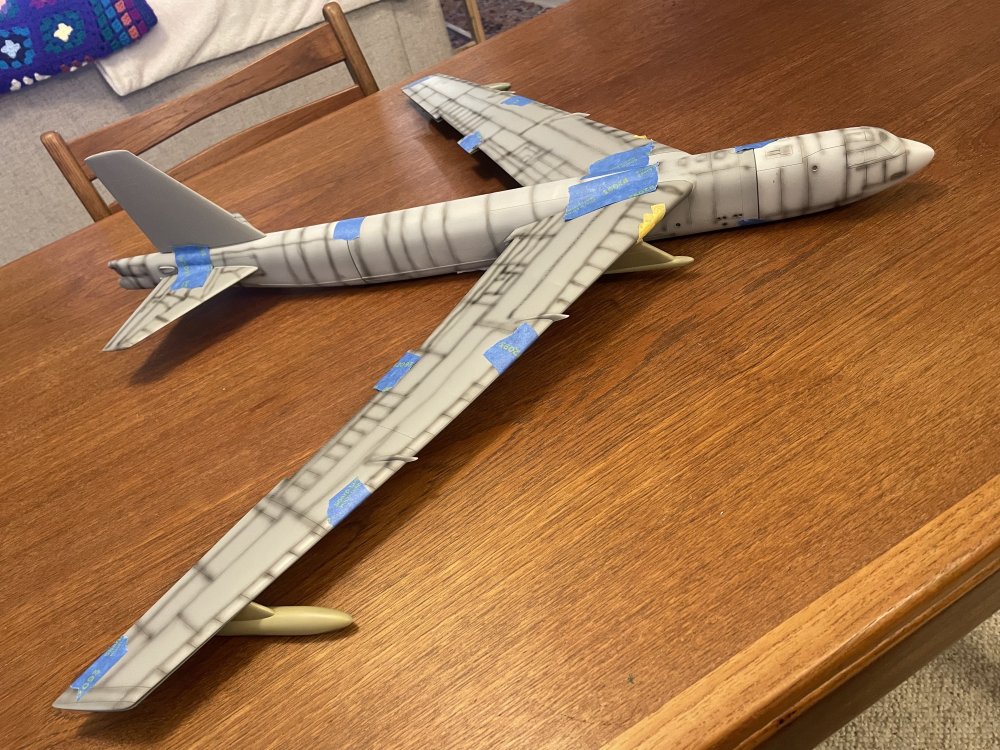
Making progress! Have completed the camo on the wings and have put down the first color on the fuselage. The tape is getting ready for the second color. Attached the engines which are an exercise in patience since there are no clear mounting points. And where the pylon meets the wing there is a gap, and the single pin on pylon top for the inside engines was about 2mm off of where it was on the engine pylon. Will take a bit of filler I think plus I did some paint damage gluing the pylons to the wing so will be doing some touch-up. And, yes, this thing is BIG....

-
Beautiful start on the kit! I love this airplane!
-
Thanks!! Very Interesting.
-
Very interesting! Thanks for sharing!
-
VERY VERY cool Jeroen! Esp the 3D printing of parts. Where do you get the files from to print or do you have a 3D scanner you use? Sorry if I missed this an you have already explained it.
-
FS: Monogram B-17G #5600 with Lots of Goodies. US/VA
CANicoll replied to CANicoll's topic in Buy, sell, swap, seek
Hi Fran, That is a lot!!! -
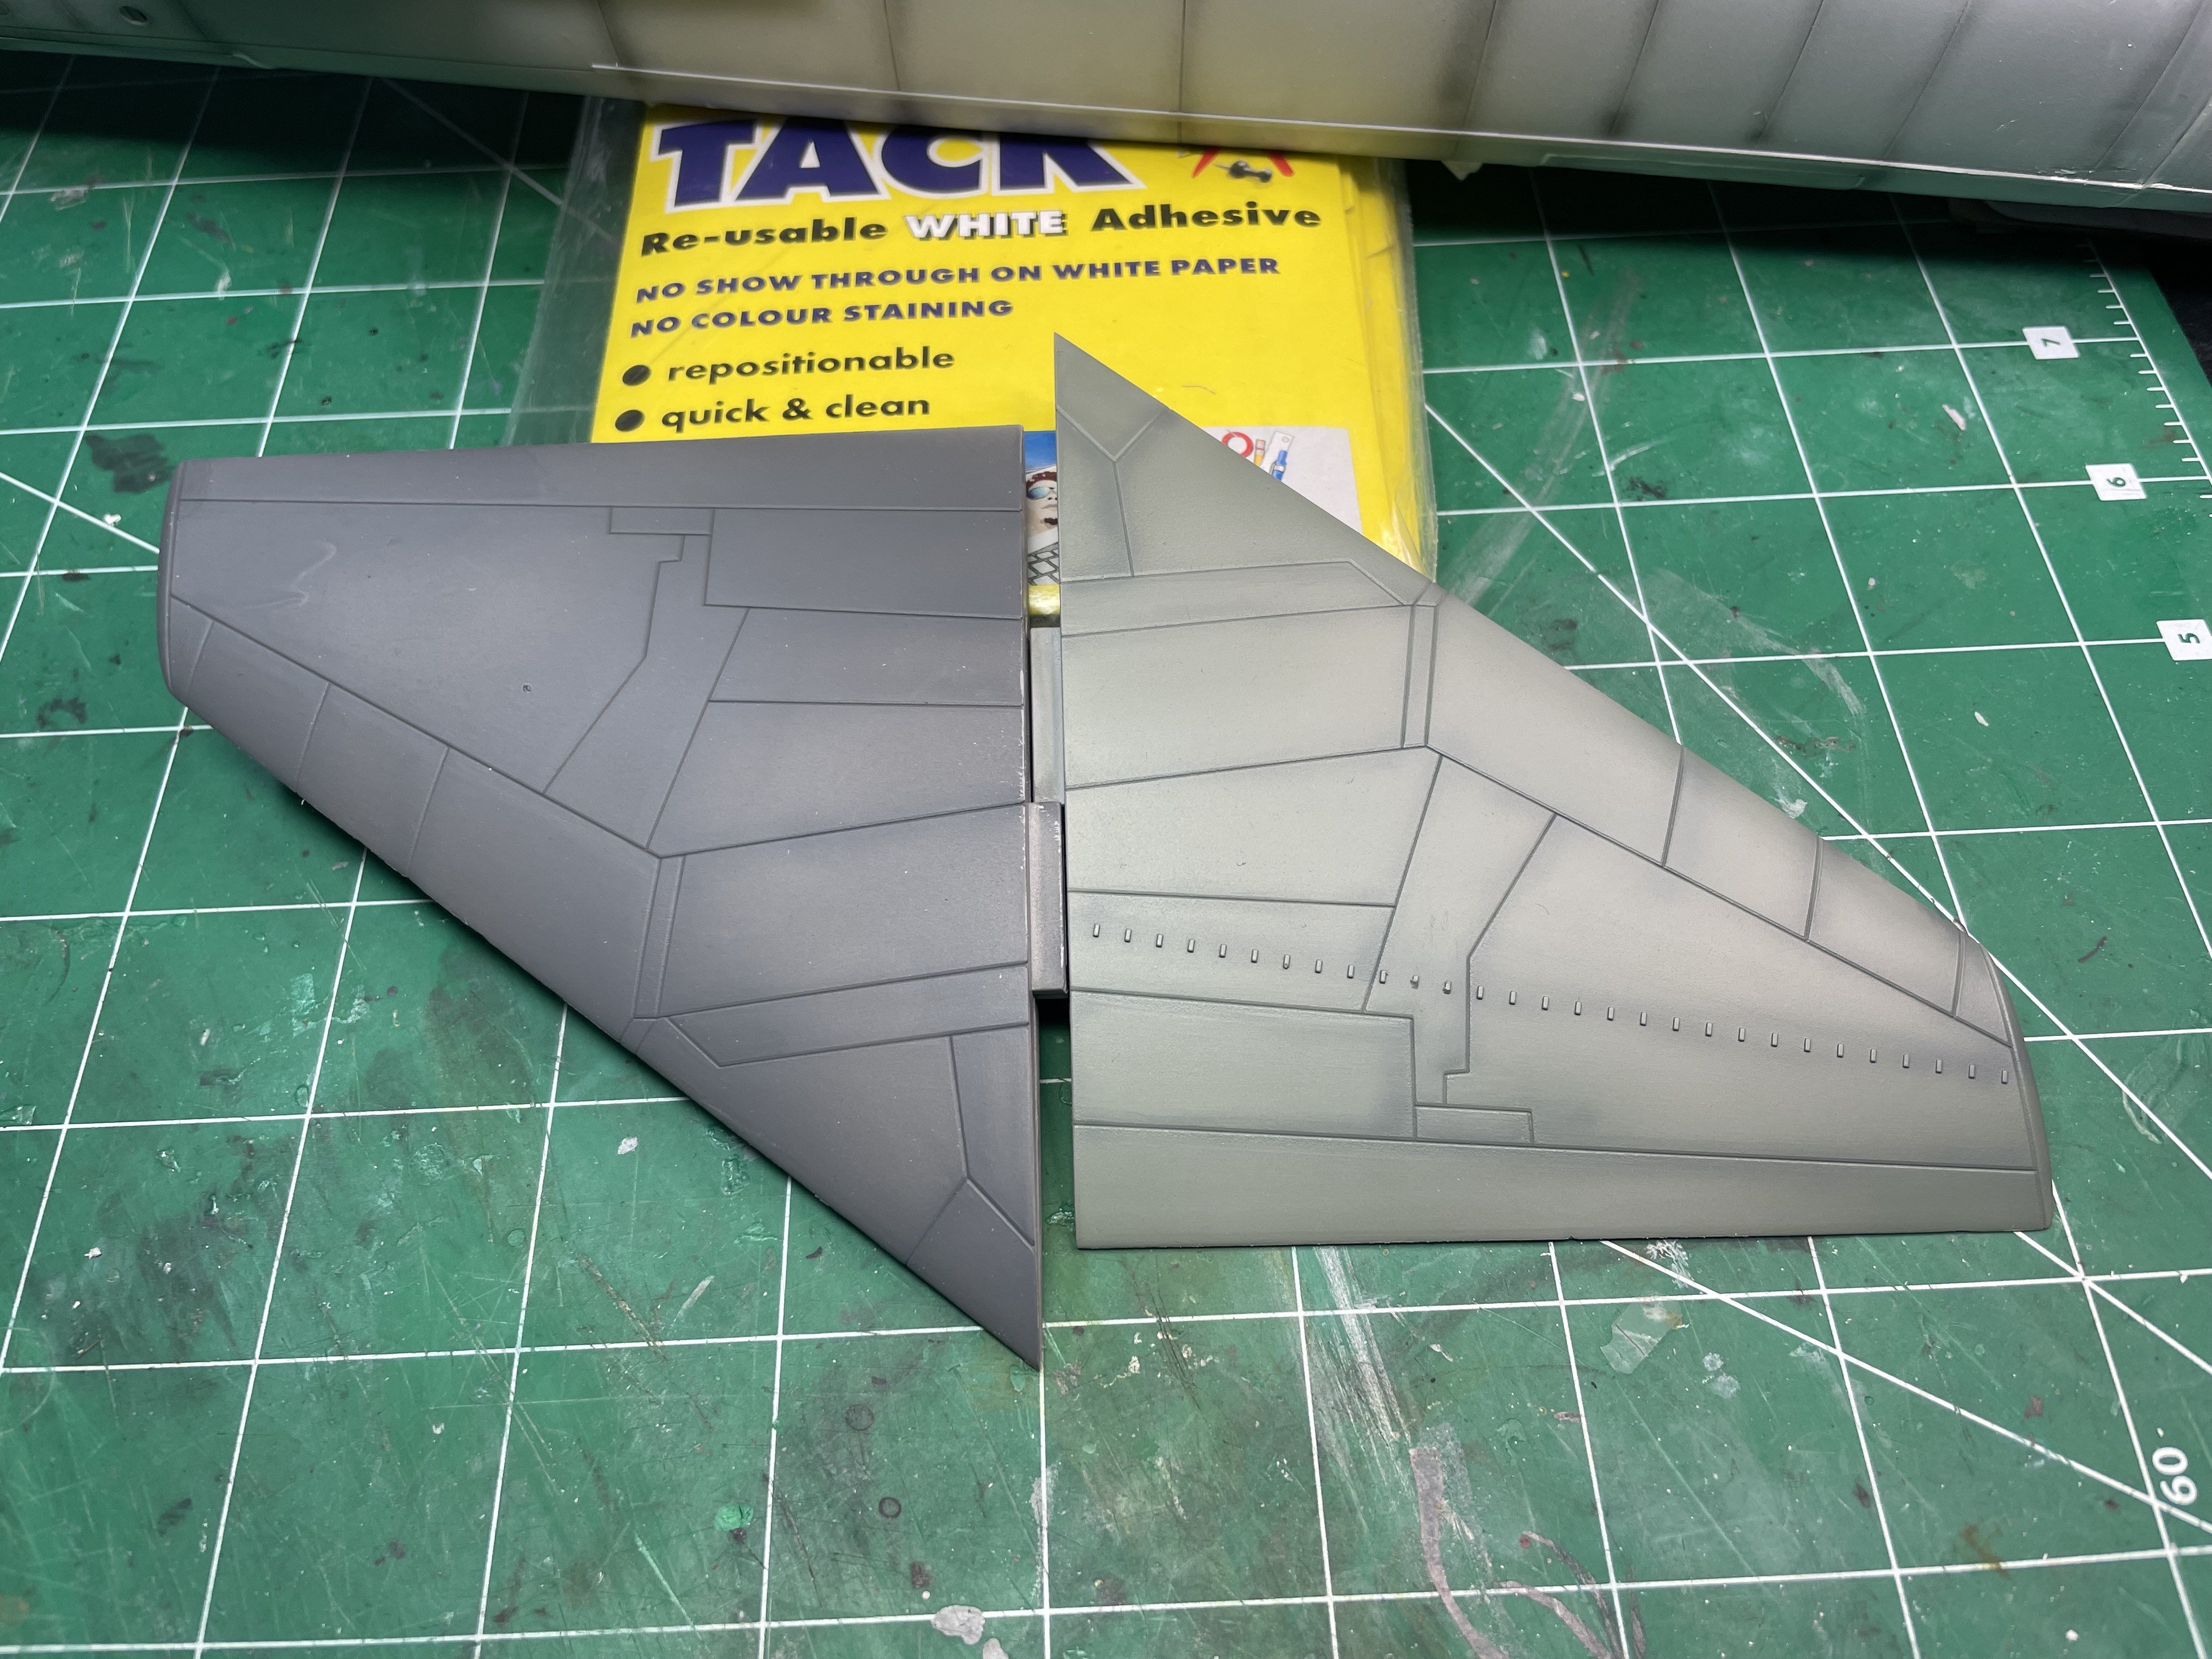
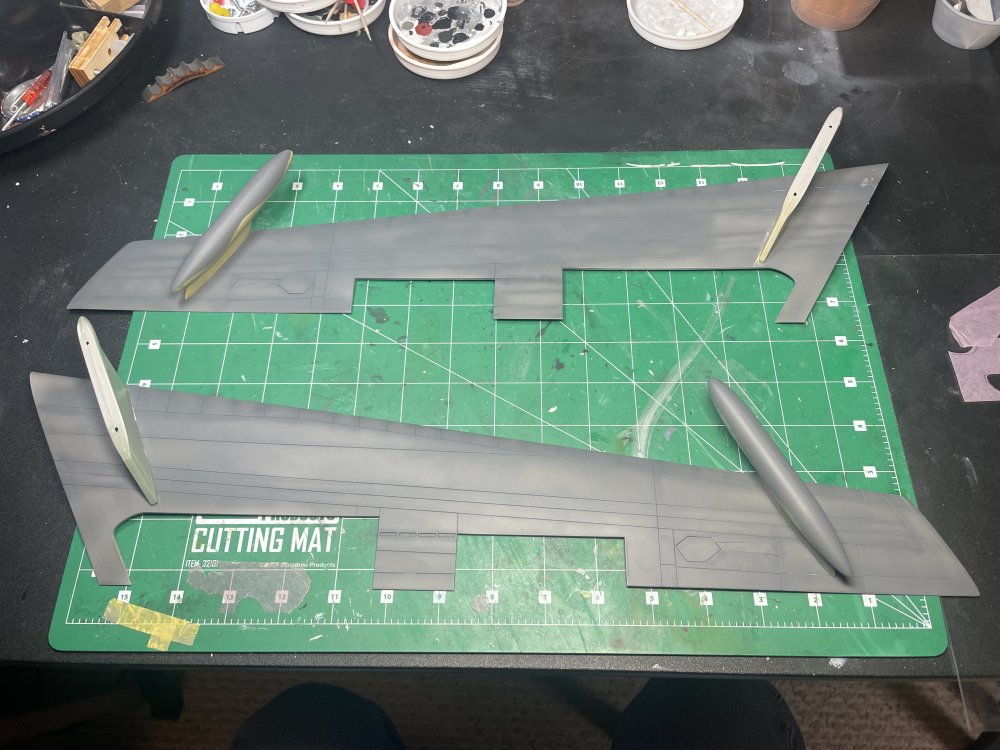
Sorry for the late posts. So much going on here - but good stuff. Getting flooring put in, which means I need to clean out the closets which entails going through boxes and (mostly) throwing stuff away that I've forgotten I had, or have not done anything with for 6-10 years. So there is that. Don't talk to me about picking out paint colors since now the floors will clash with the walls. I don't think my Iwata HP-CS is up to the task.... Here are the wing tops with my hand-drawn camo pattern. Not exact to the sample, but close enough. Went through YARDS of tape however... Underside of the wings with the Italeri pylons in place. Still have a bit of paint touch-up to do. The Camo colors are MRP, the dark grey underside is Vallejo Model Air. Pre-shading was done with Vallejo black primer. Hoping to start working on the Fuselage camo this weekend. We are expecting a huge winter storm on Sunday (up to a foot of snow/ice) so hopefully I can take a couple of days off and spend some time at the bench to get a respite from cleaning out the closets. Saving the hobby room for last - not on purpose but that is going to be a huge job to clean out.
-
FS: Monogram B-17G #5600 with Lots of Goodies. US/VA
CANicoll replied to CANicoll's topic in Buy, sell, swap, seek
I can't even imagine what it would cost to send it to you... I'll see if I can check it at work - I work in shipping.👍 -
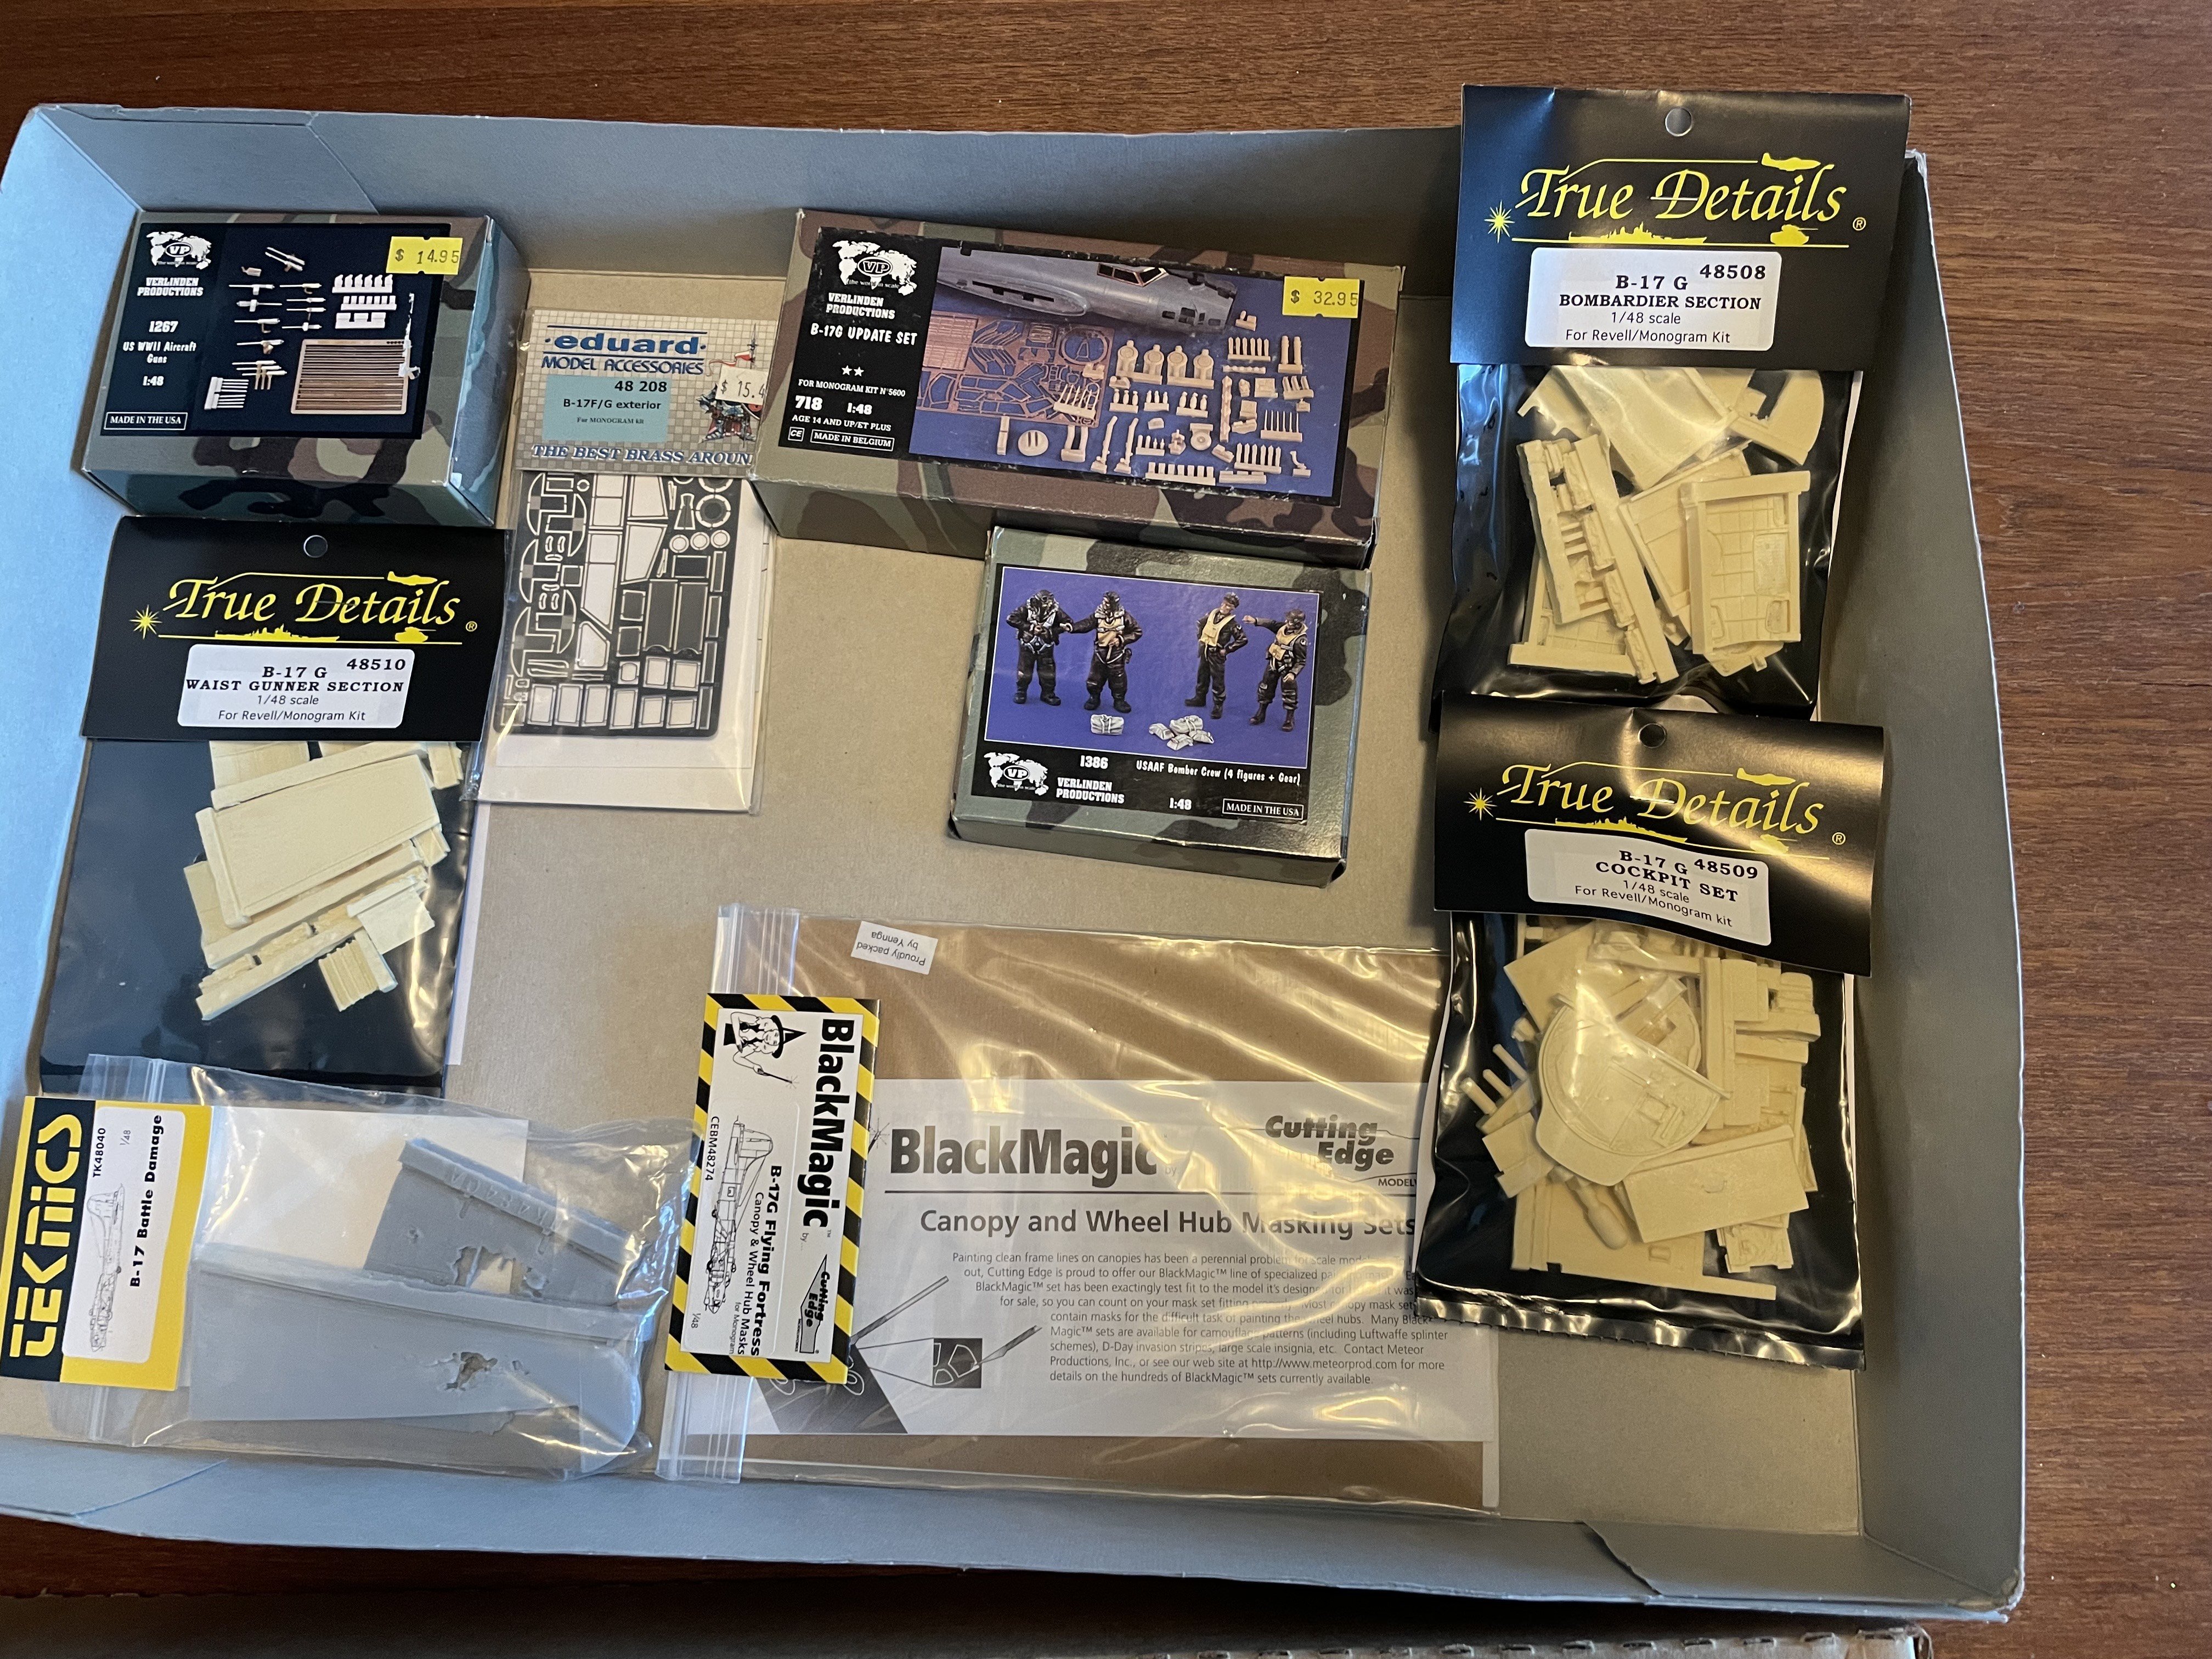
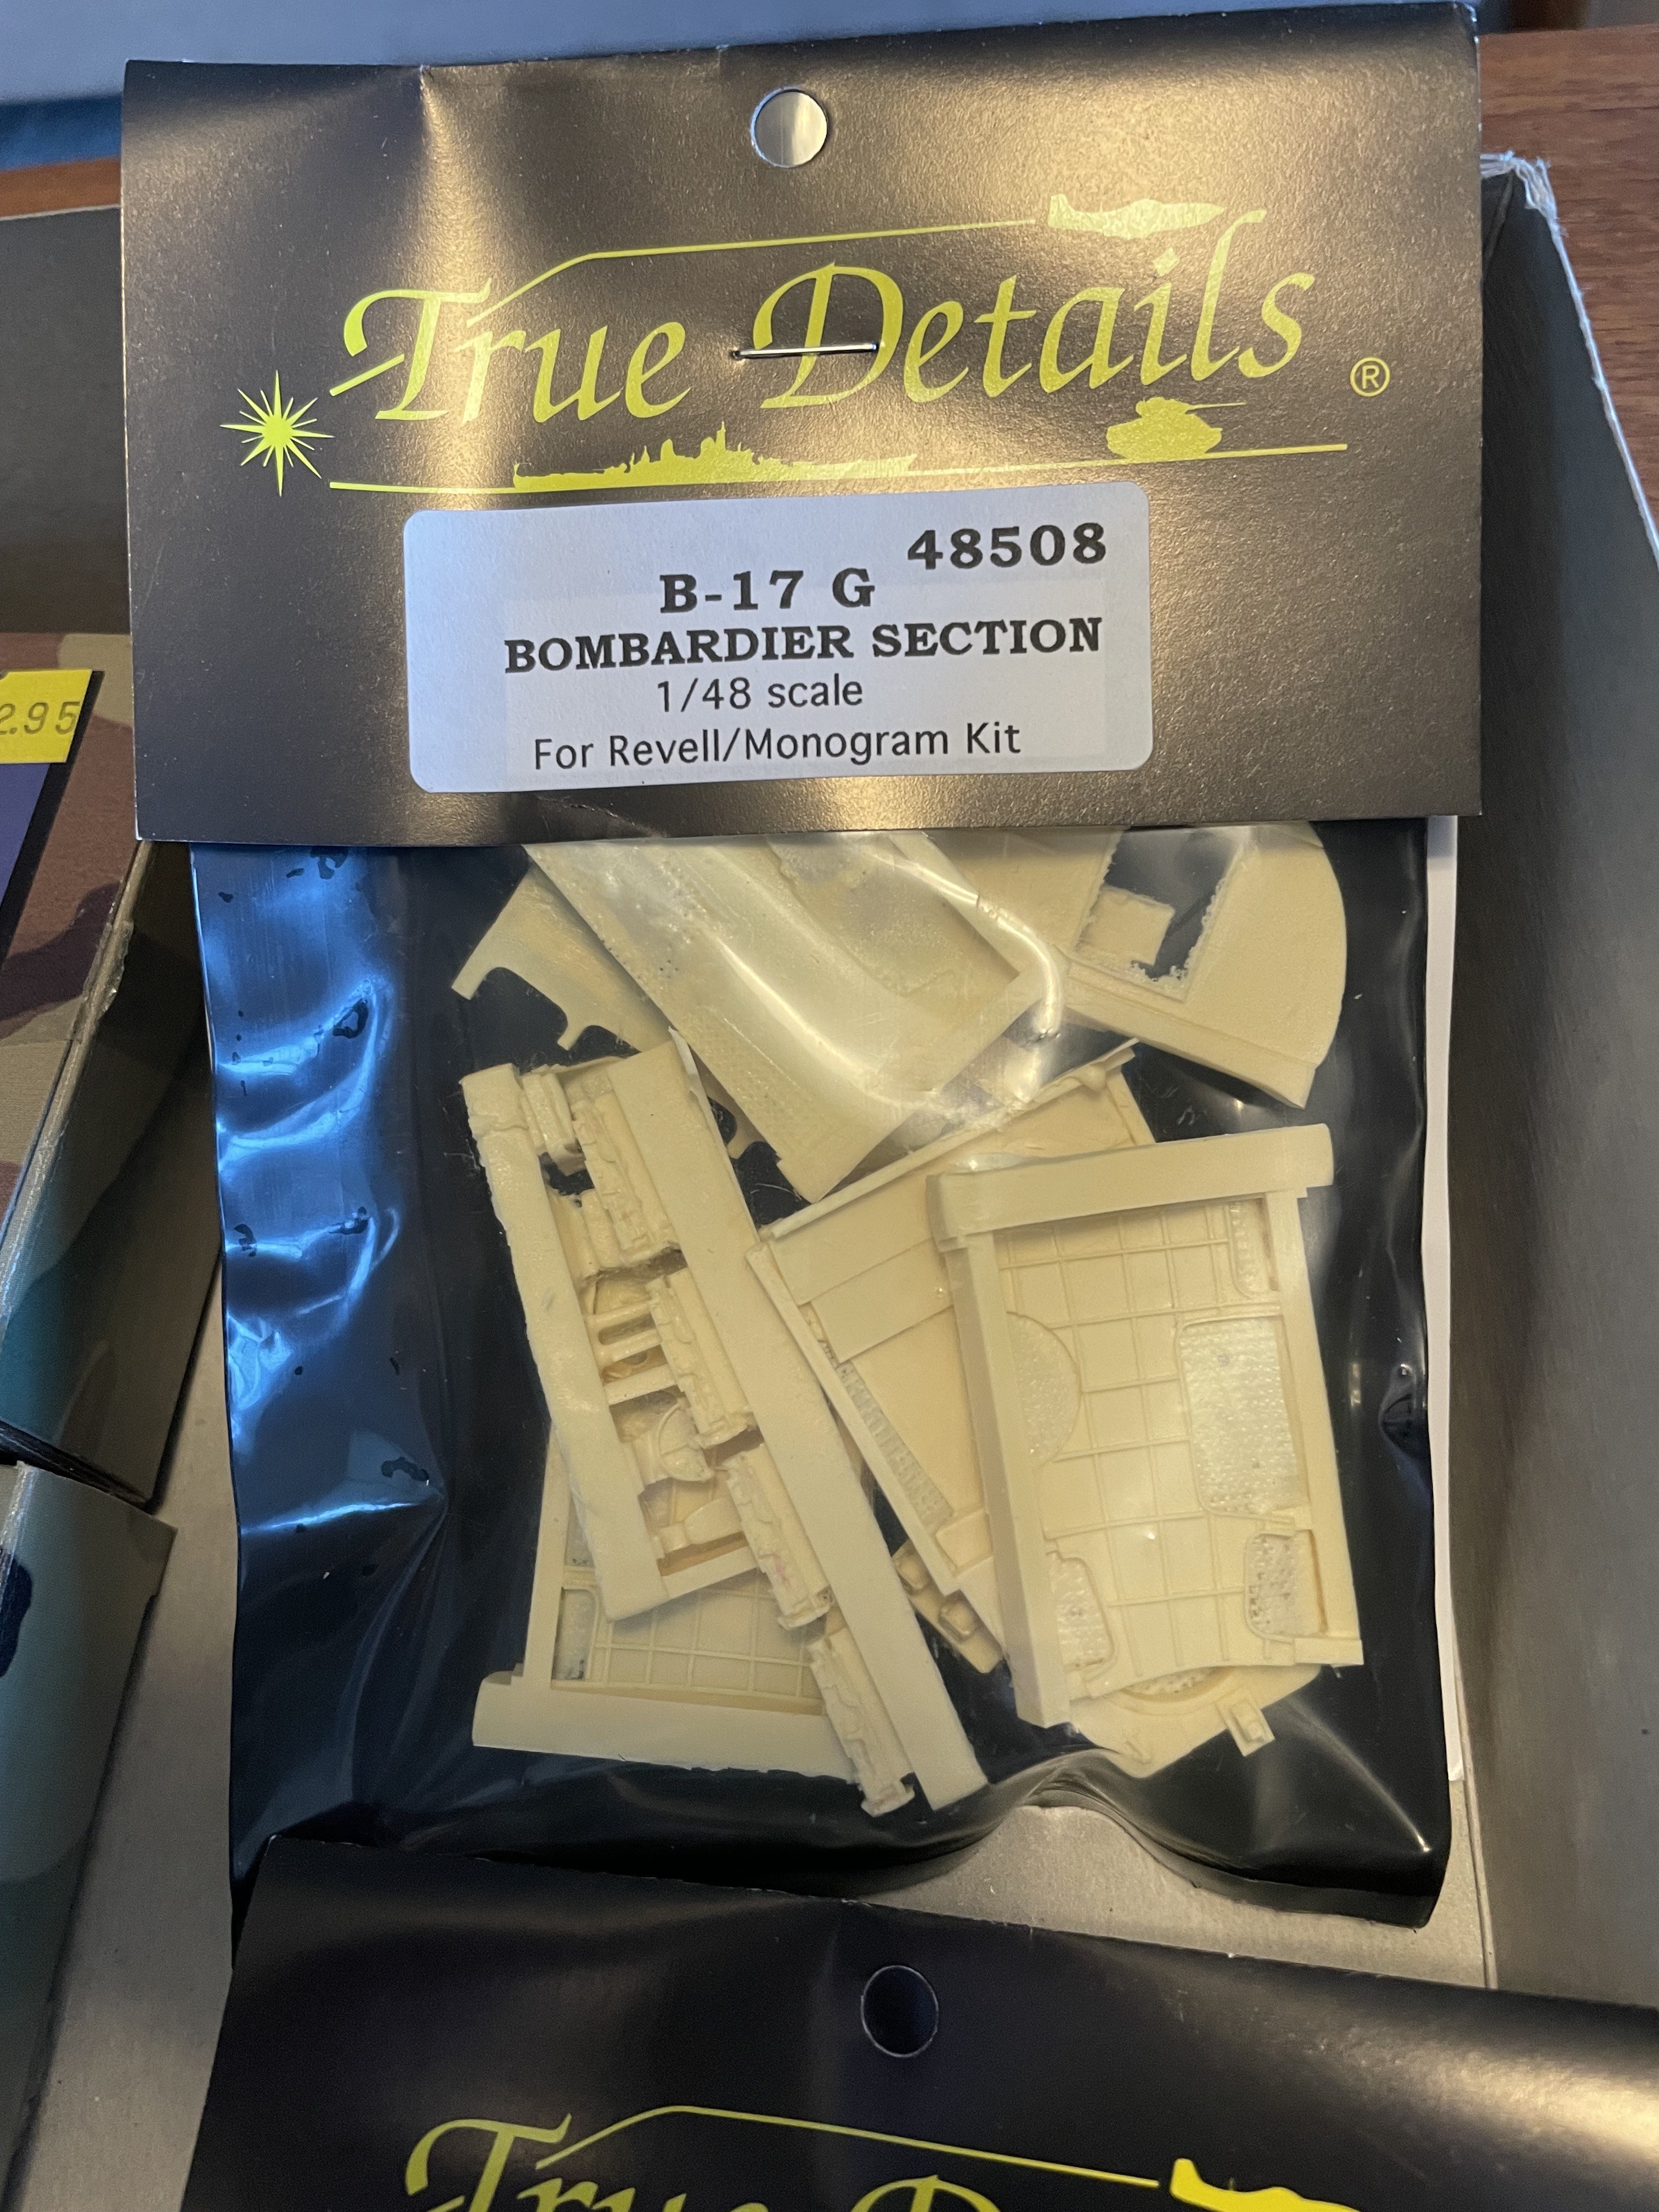
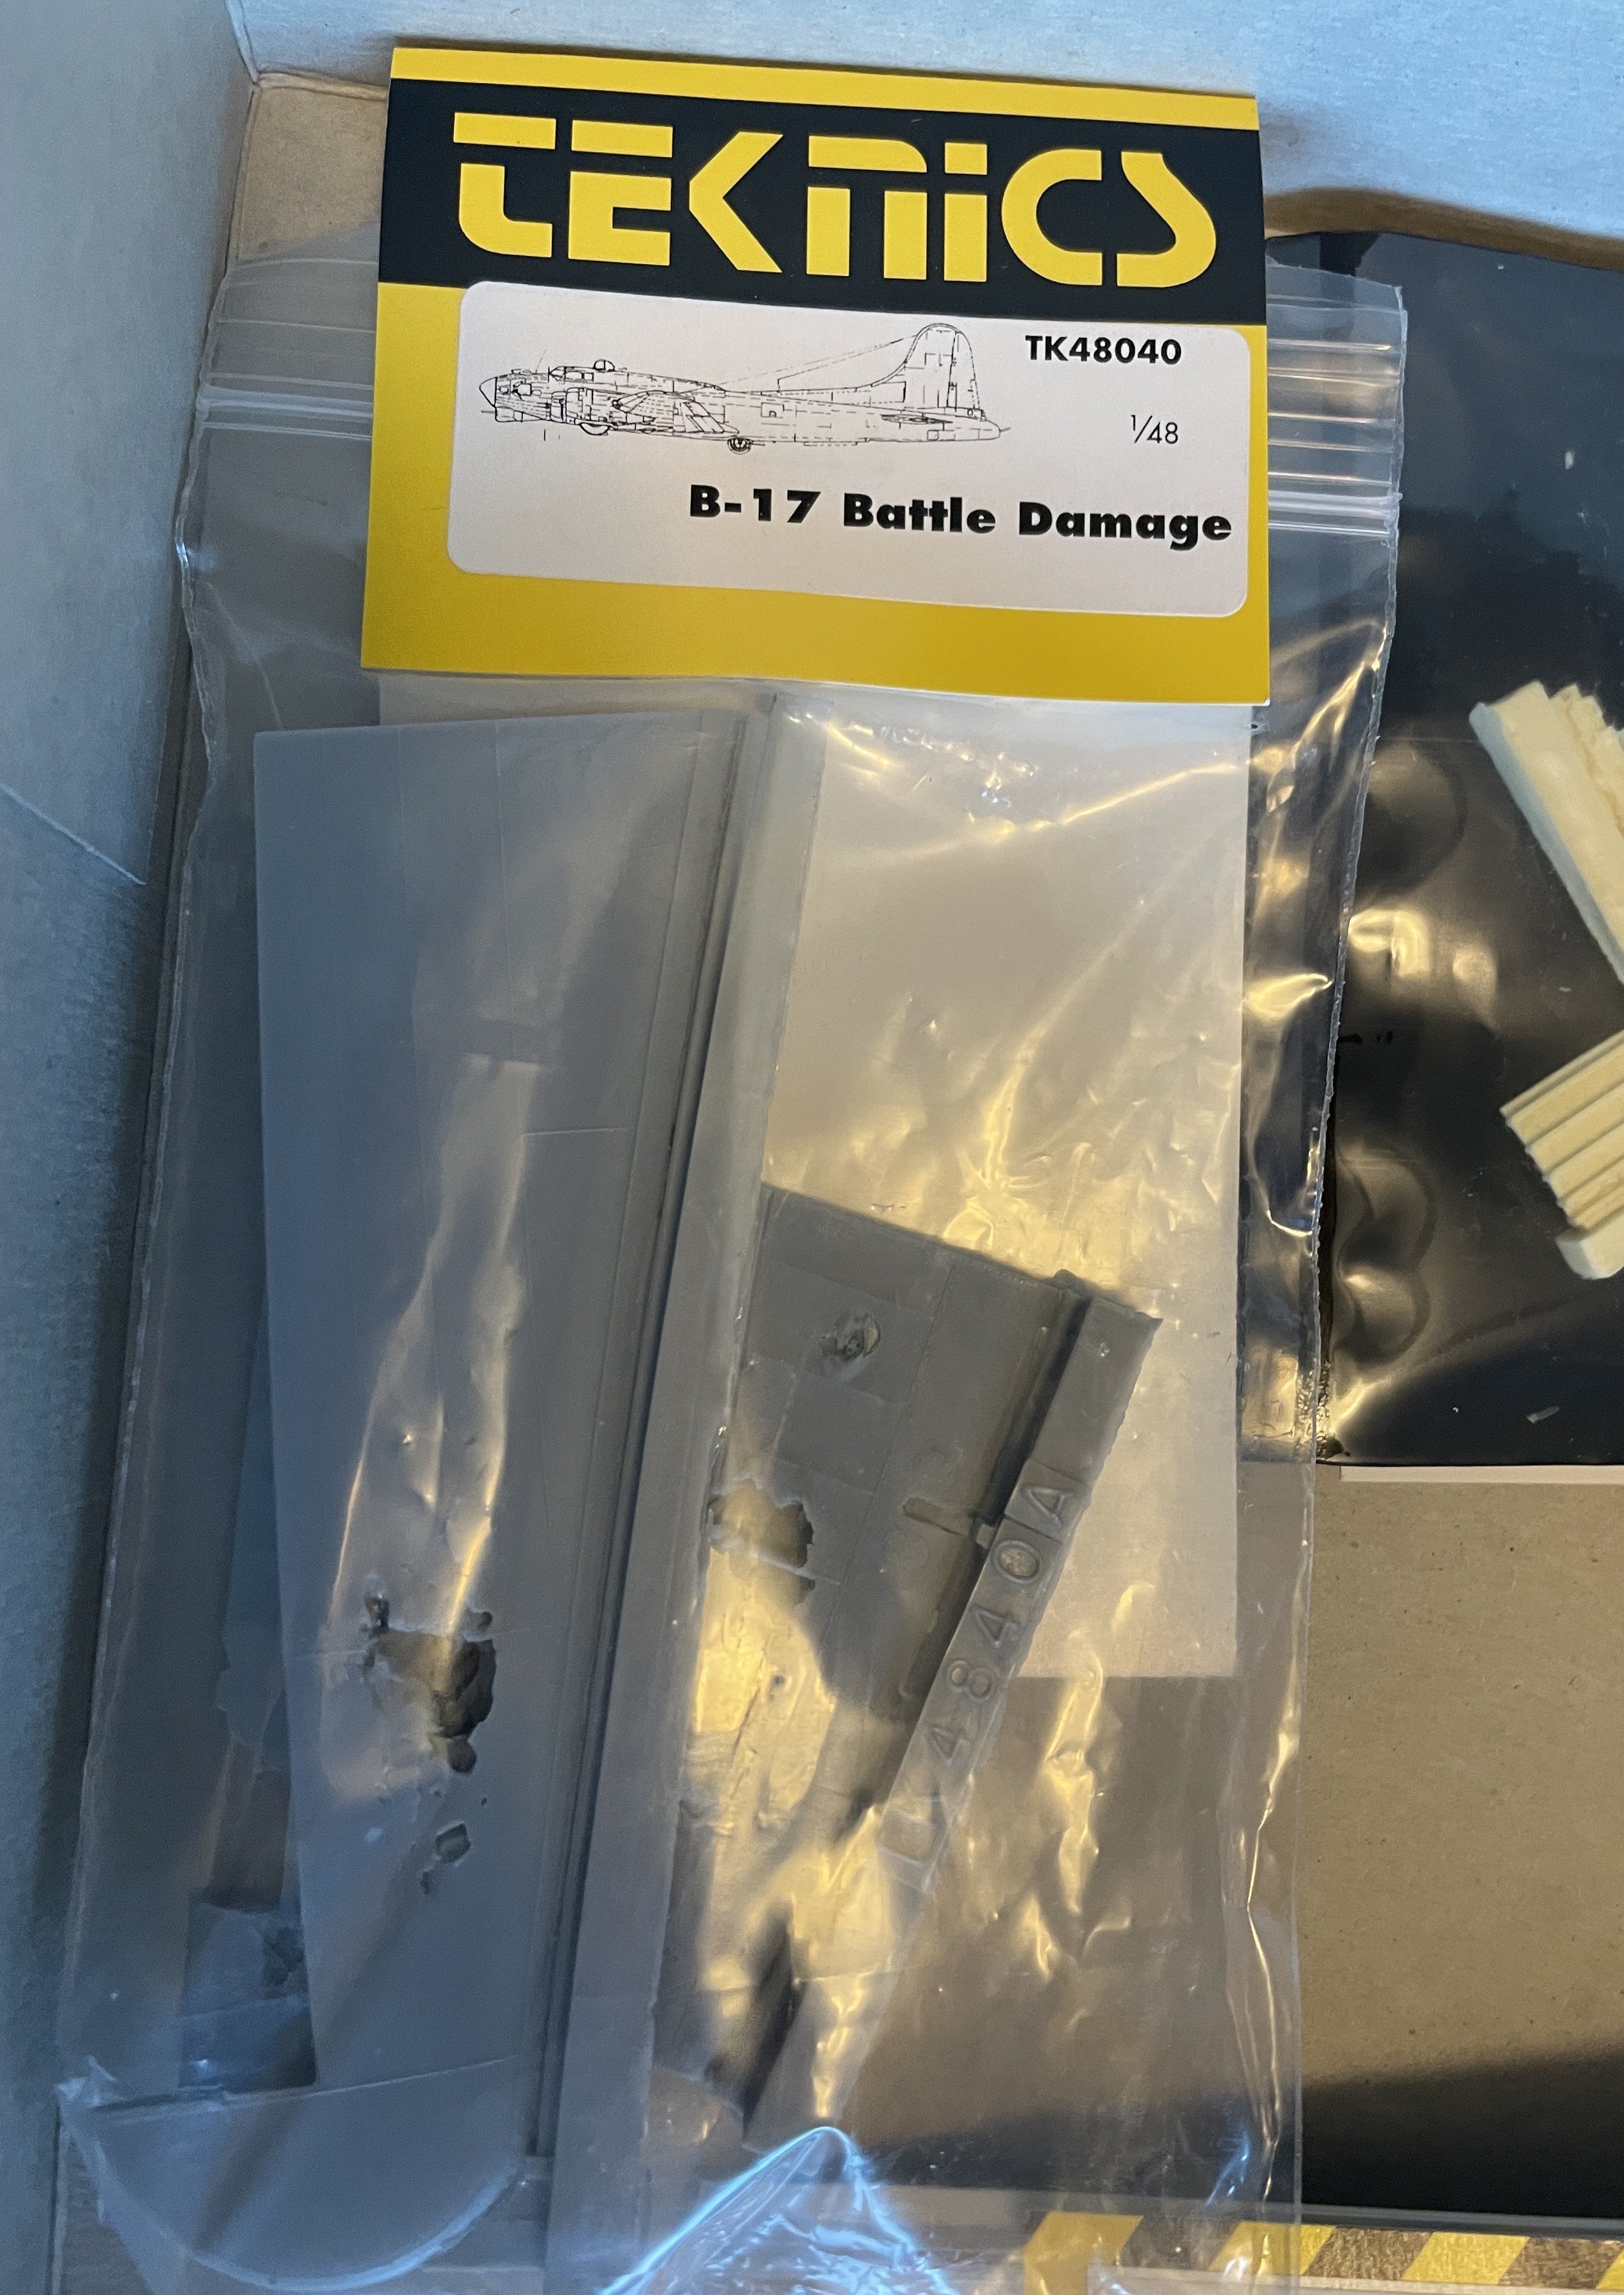
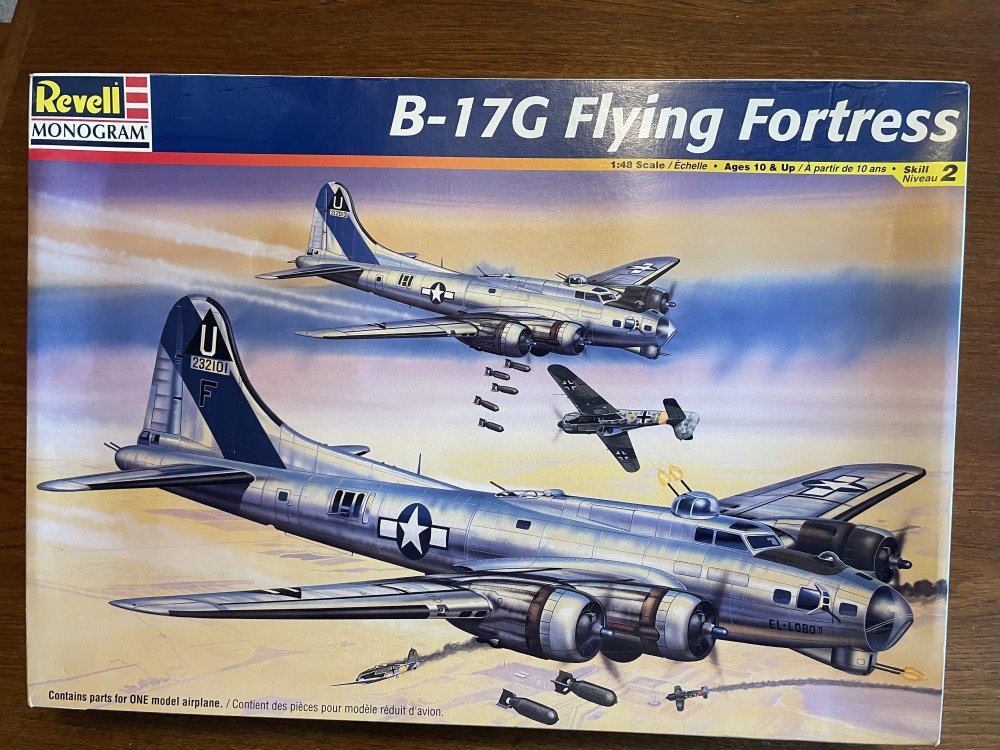
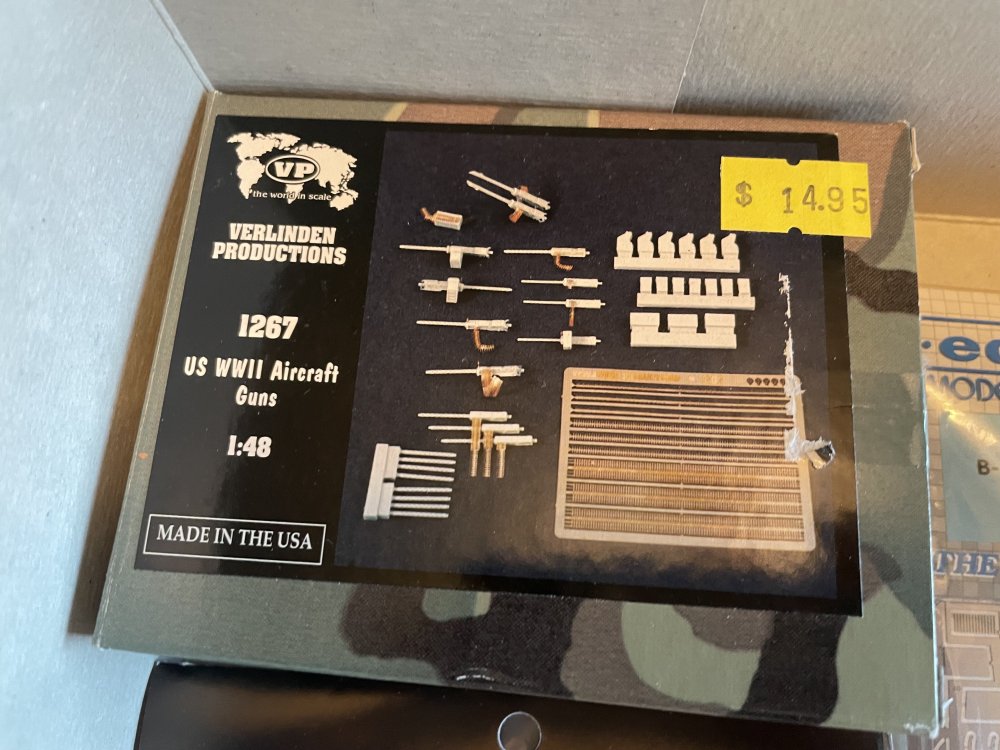
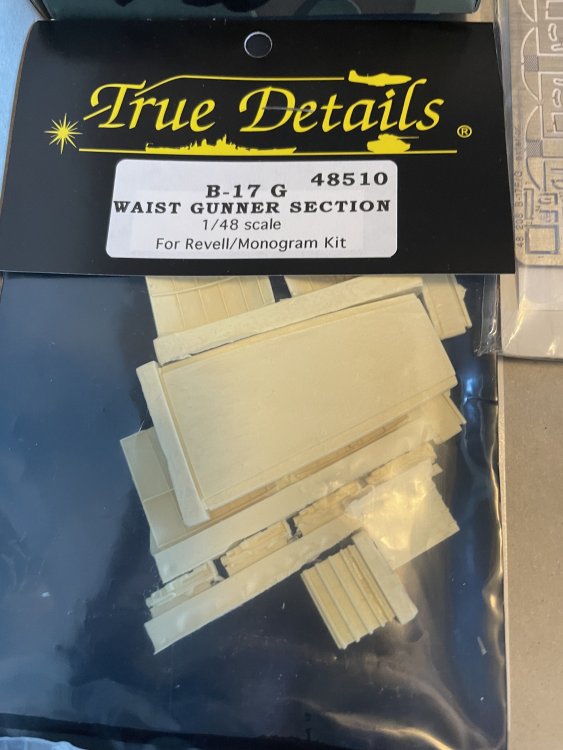
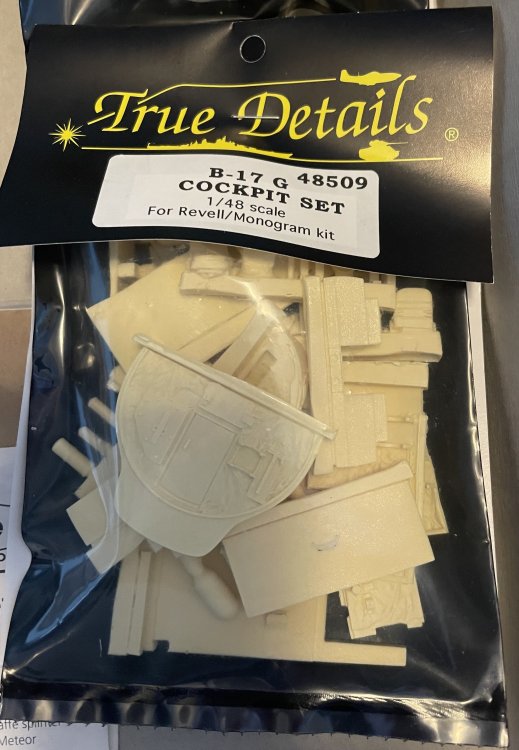
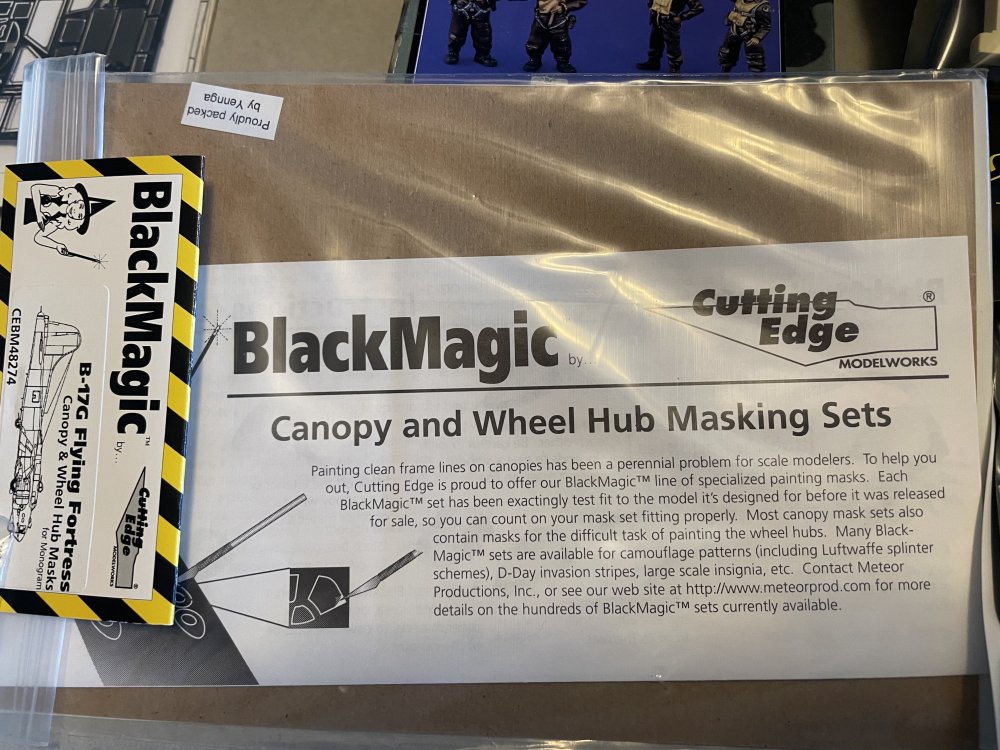
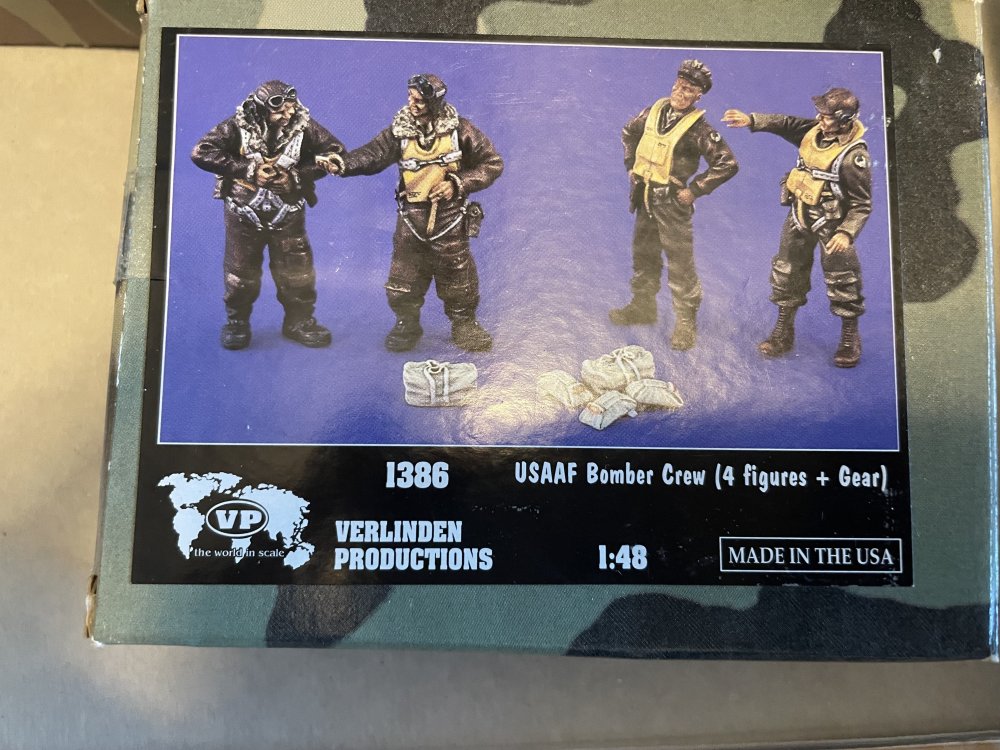
Friends, Have decided to part with this find from my closet. This is the venerable Monogram B-17G kit, number 5600, with lots of goodies to spruce up the inside and out. Nothing started and best as I can tell all of the sets are complete - they have been sitting in this box for who knows how many years! If you want to see inside the AM boxes, let me know and I'll post more pictures. Best as I can tell, all the bits and the kit add up (on EBay anyway) to about $250-$275 plus shipping. The Teknics Battle Damage and the Verlinden update together go for over $100 on Ebay. Crazy. Looking to let everything go for $125 plus shipping. I can't see myself getting into this kit, with this much AM. Maybe if it was a late-production G with the staggered waist positions then I could do my late-friend's B-17G. But nope! Any takers?


-
Monogram B-17G 1/48. Look what I found!!
CANicoll replied to CANicoll's topic in Modelling Discussion
Folks, I'm going to move this over to the "For Sale or Trade" section. I don't think I have it in me to do justice to all of the pieces here. Would be nice! But I just don't have the time. Maybe one of you will! -
Monogram B-17G 1/48. Look what I found!!
CANicoll replied to CANicoll's topic in Modelling Discussion
Too much I wonder! I think I would have to open up one side. -
Monogram B-17G 1/48. Look what I found!!
CANicoll replied to CANicoll's topic in Modelling Discussion
I might have to give that a go Mike! How are things with you these days? -
I know!!! Put a P-51 next to it!
-
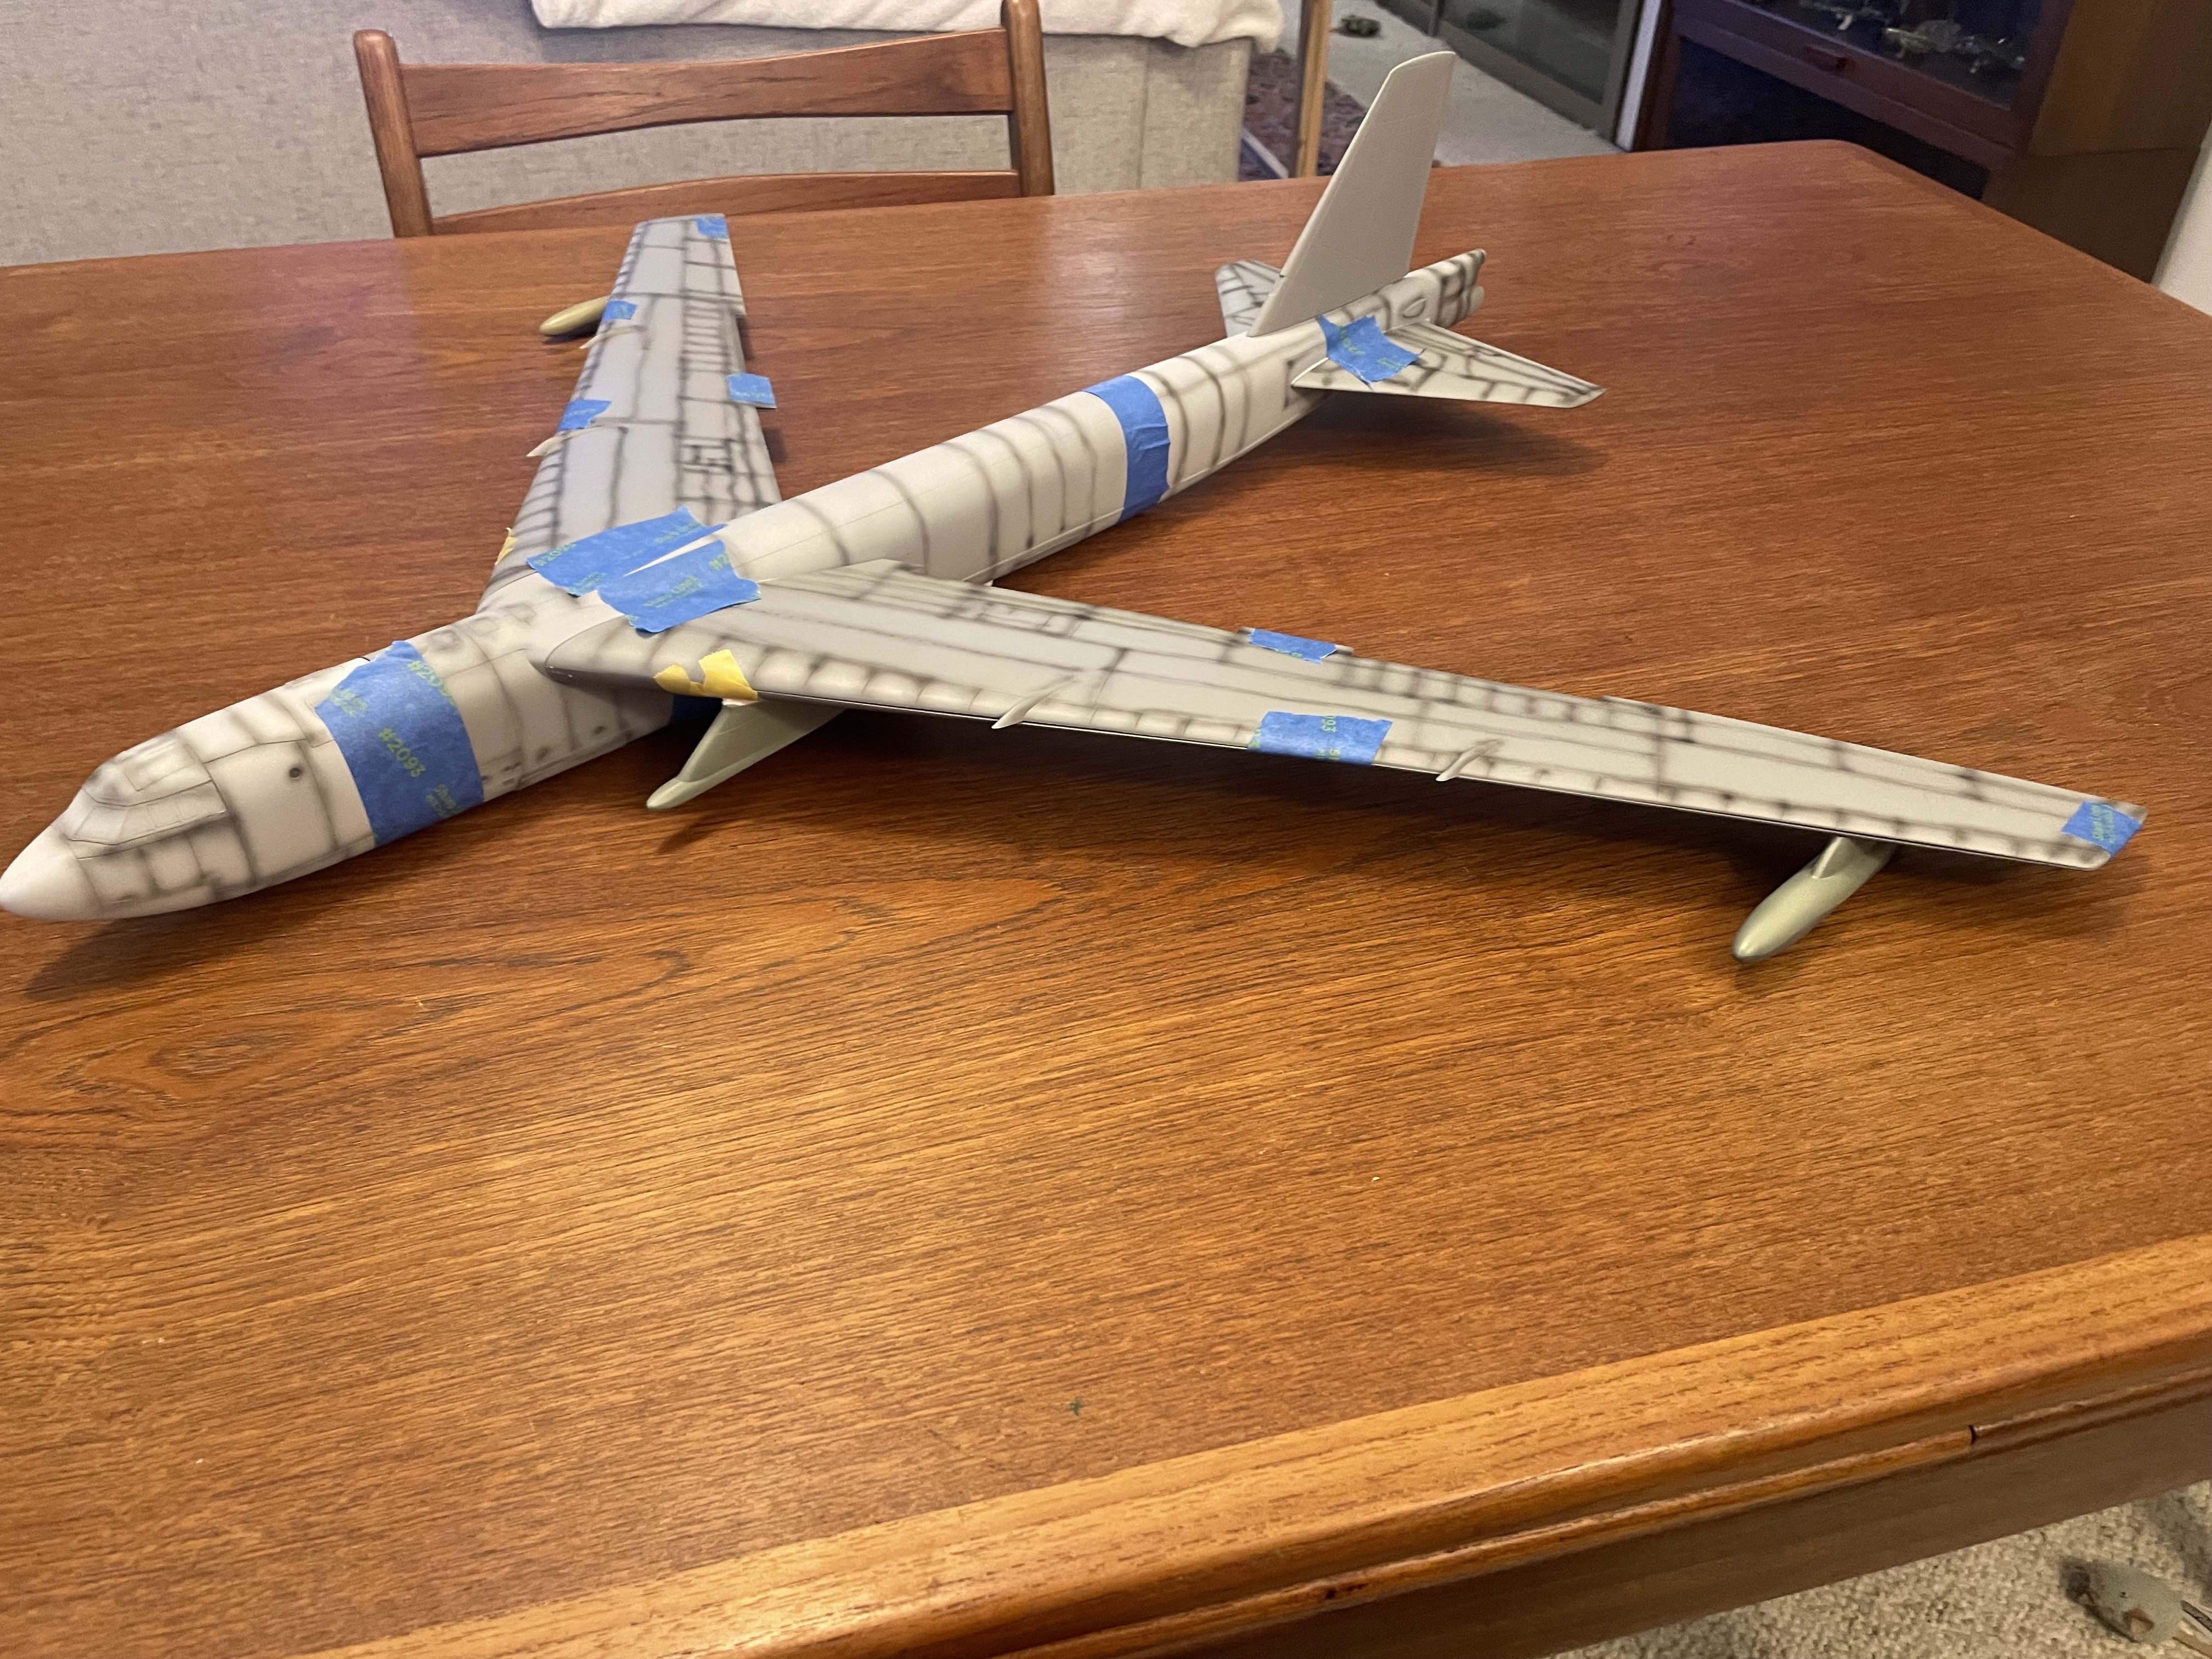
Here are some shots I took on my dining room table. This thing is BIG... It will be hung from a ceiling showing off the open bomb bay and the 27 bombs! First getting the pre-shading done, piece by piece. I actually don't have room on my workbench to assemble the plane, forget in my spray booth! This will be interesting... Had not pre-shaded the tail fin when I took these...


-
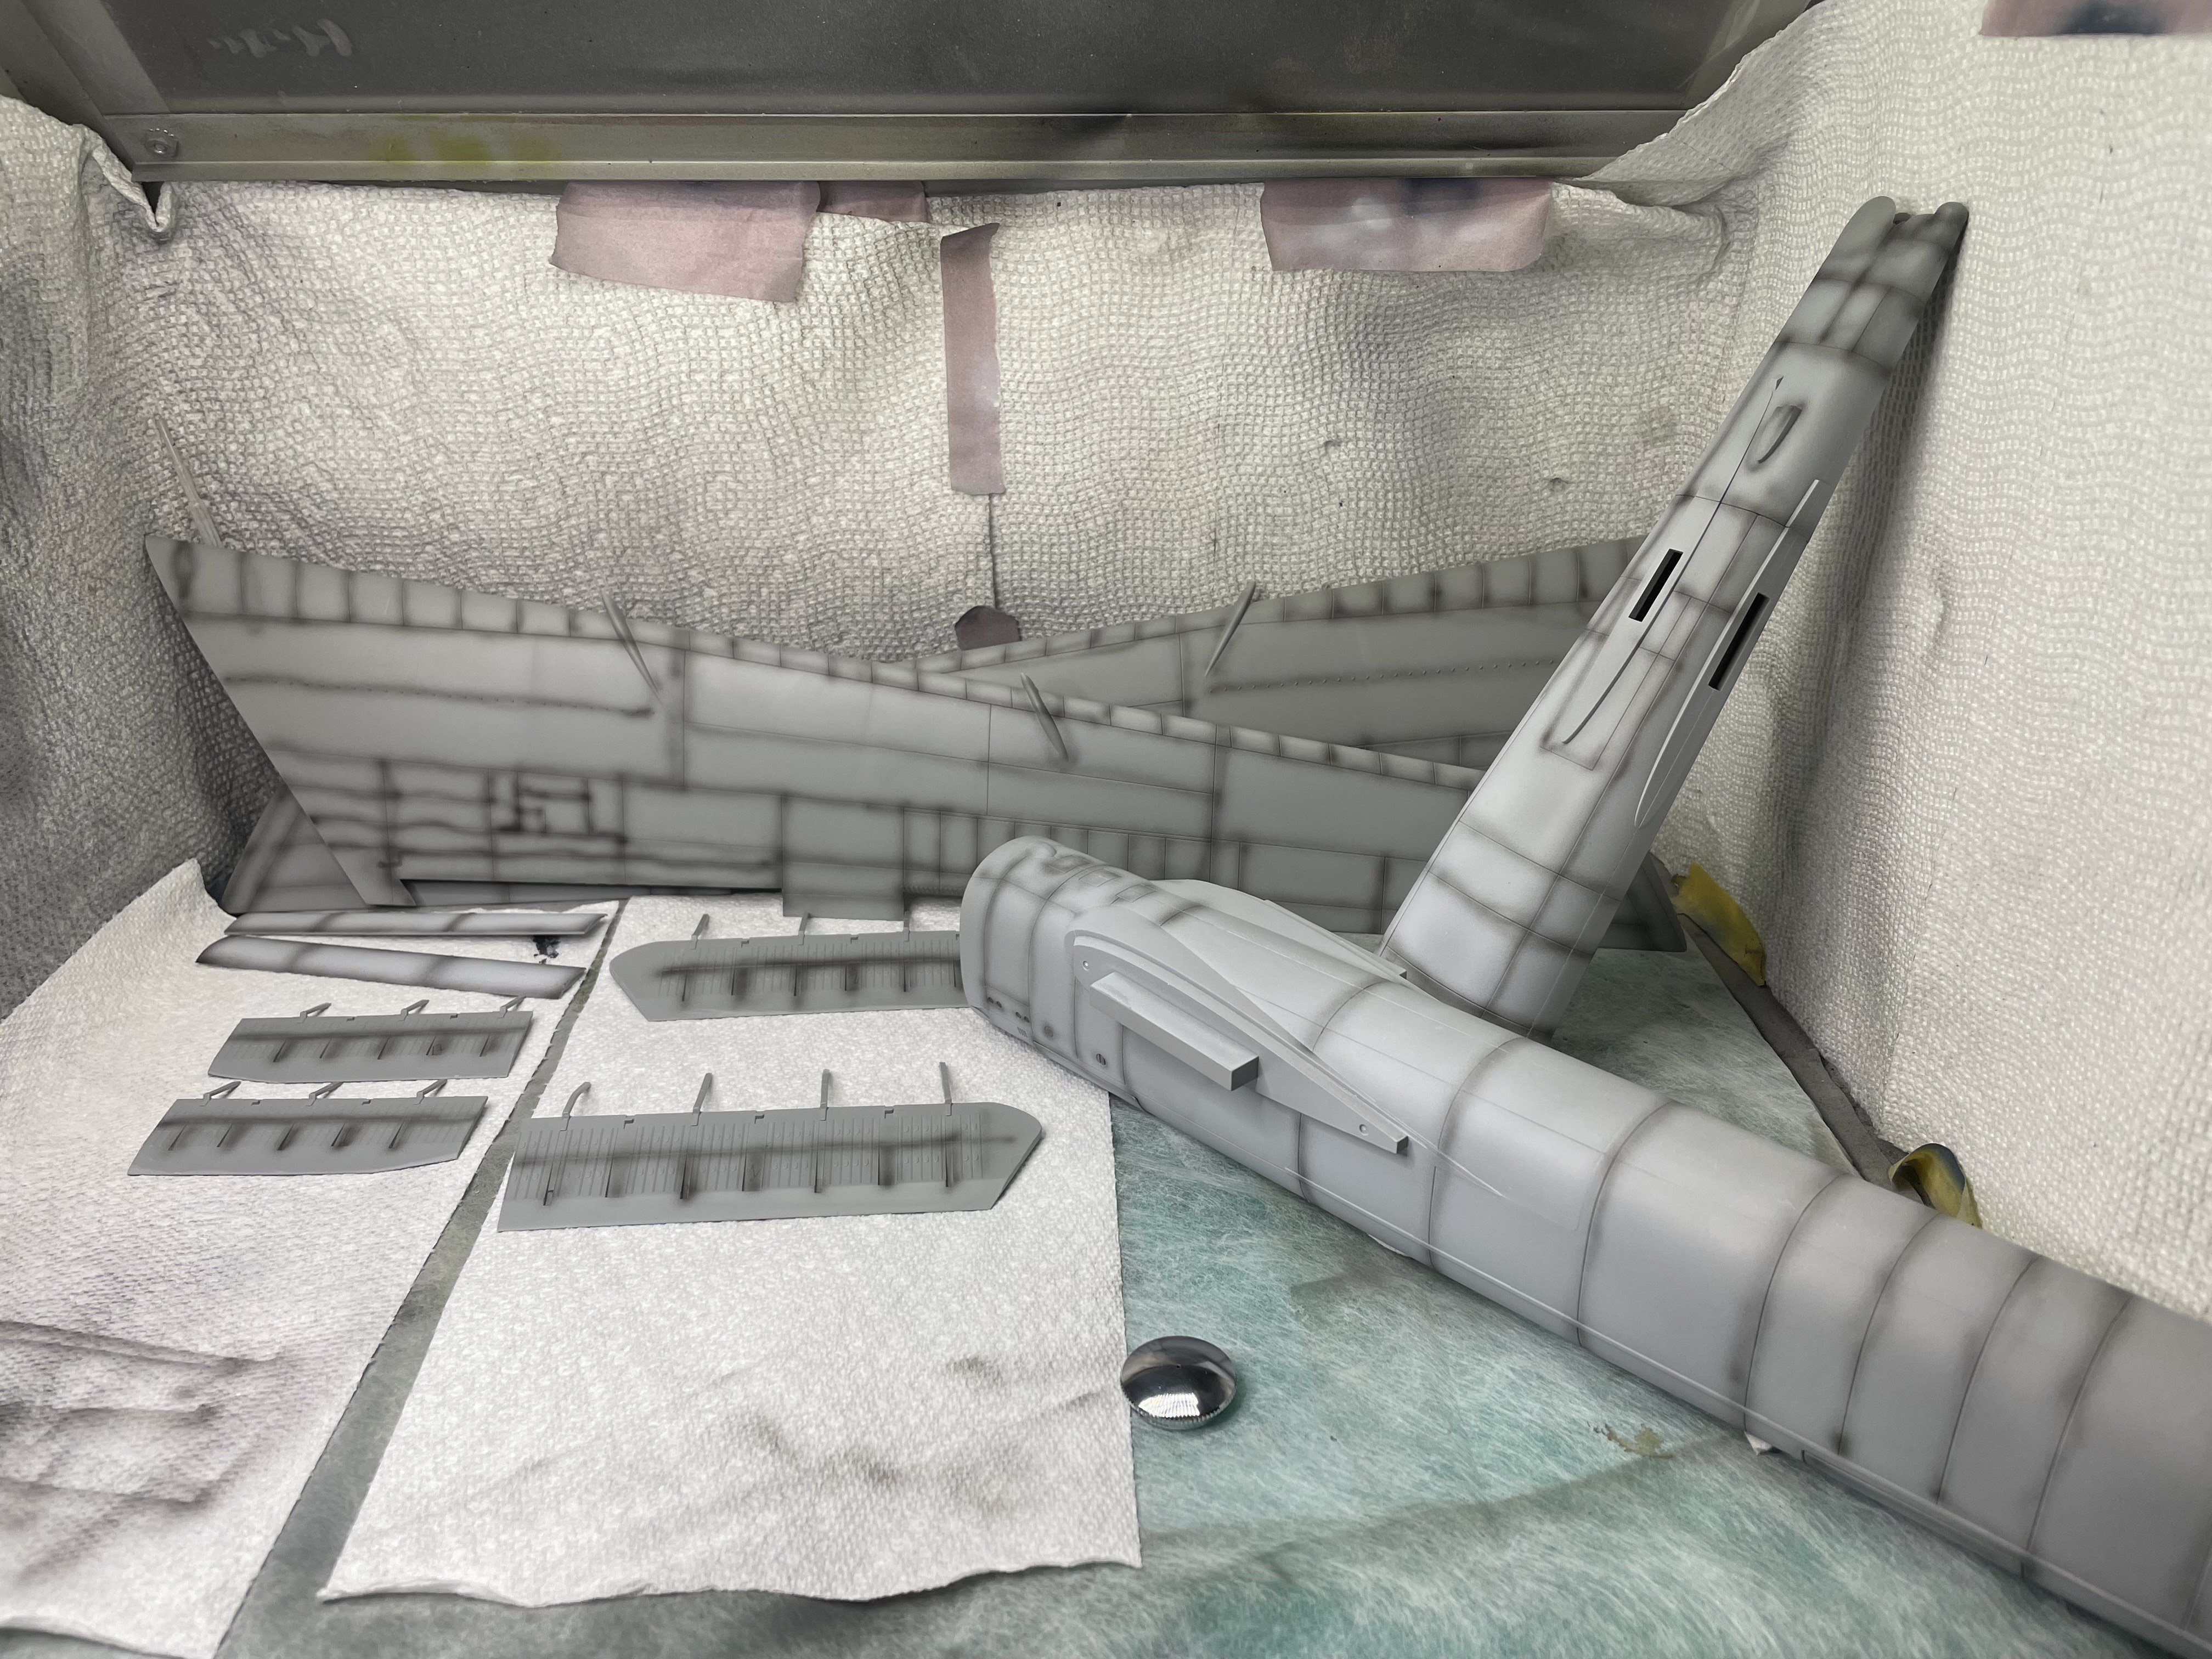
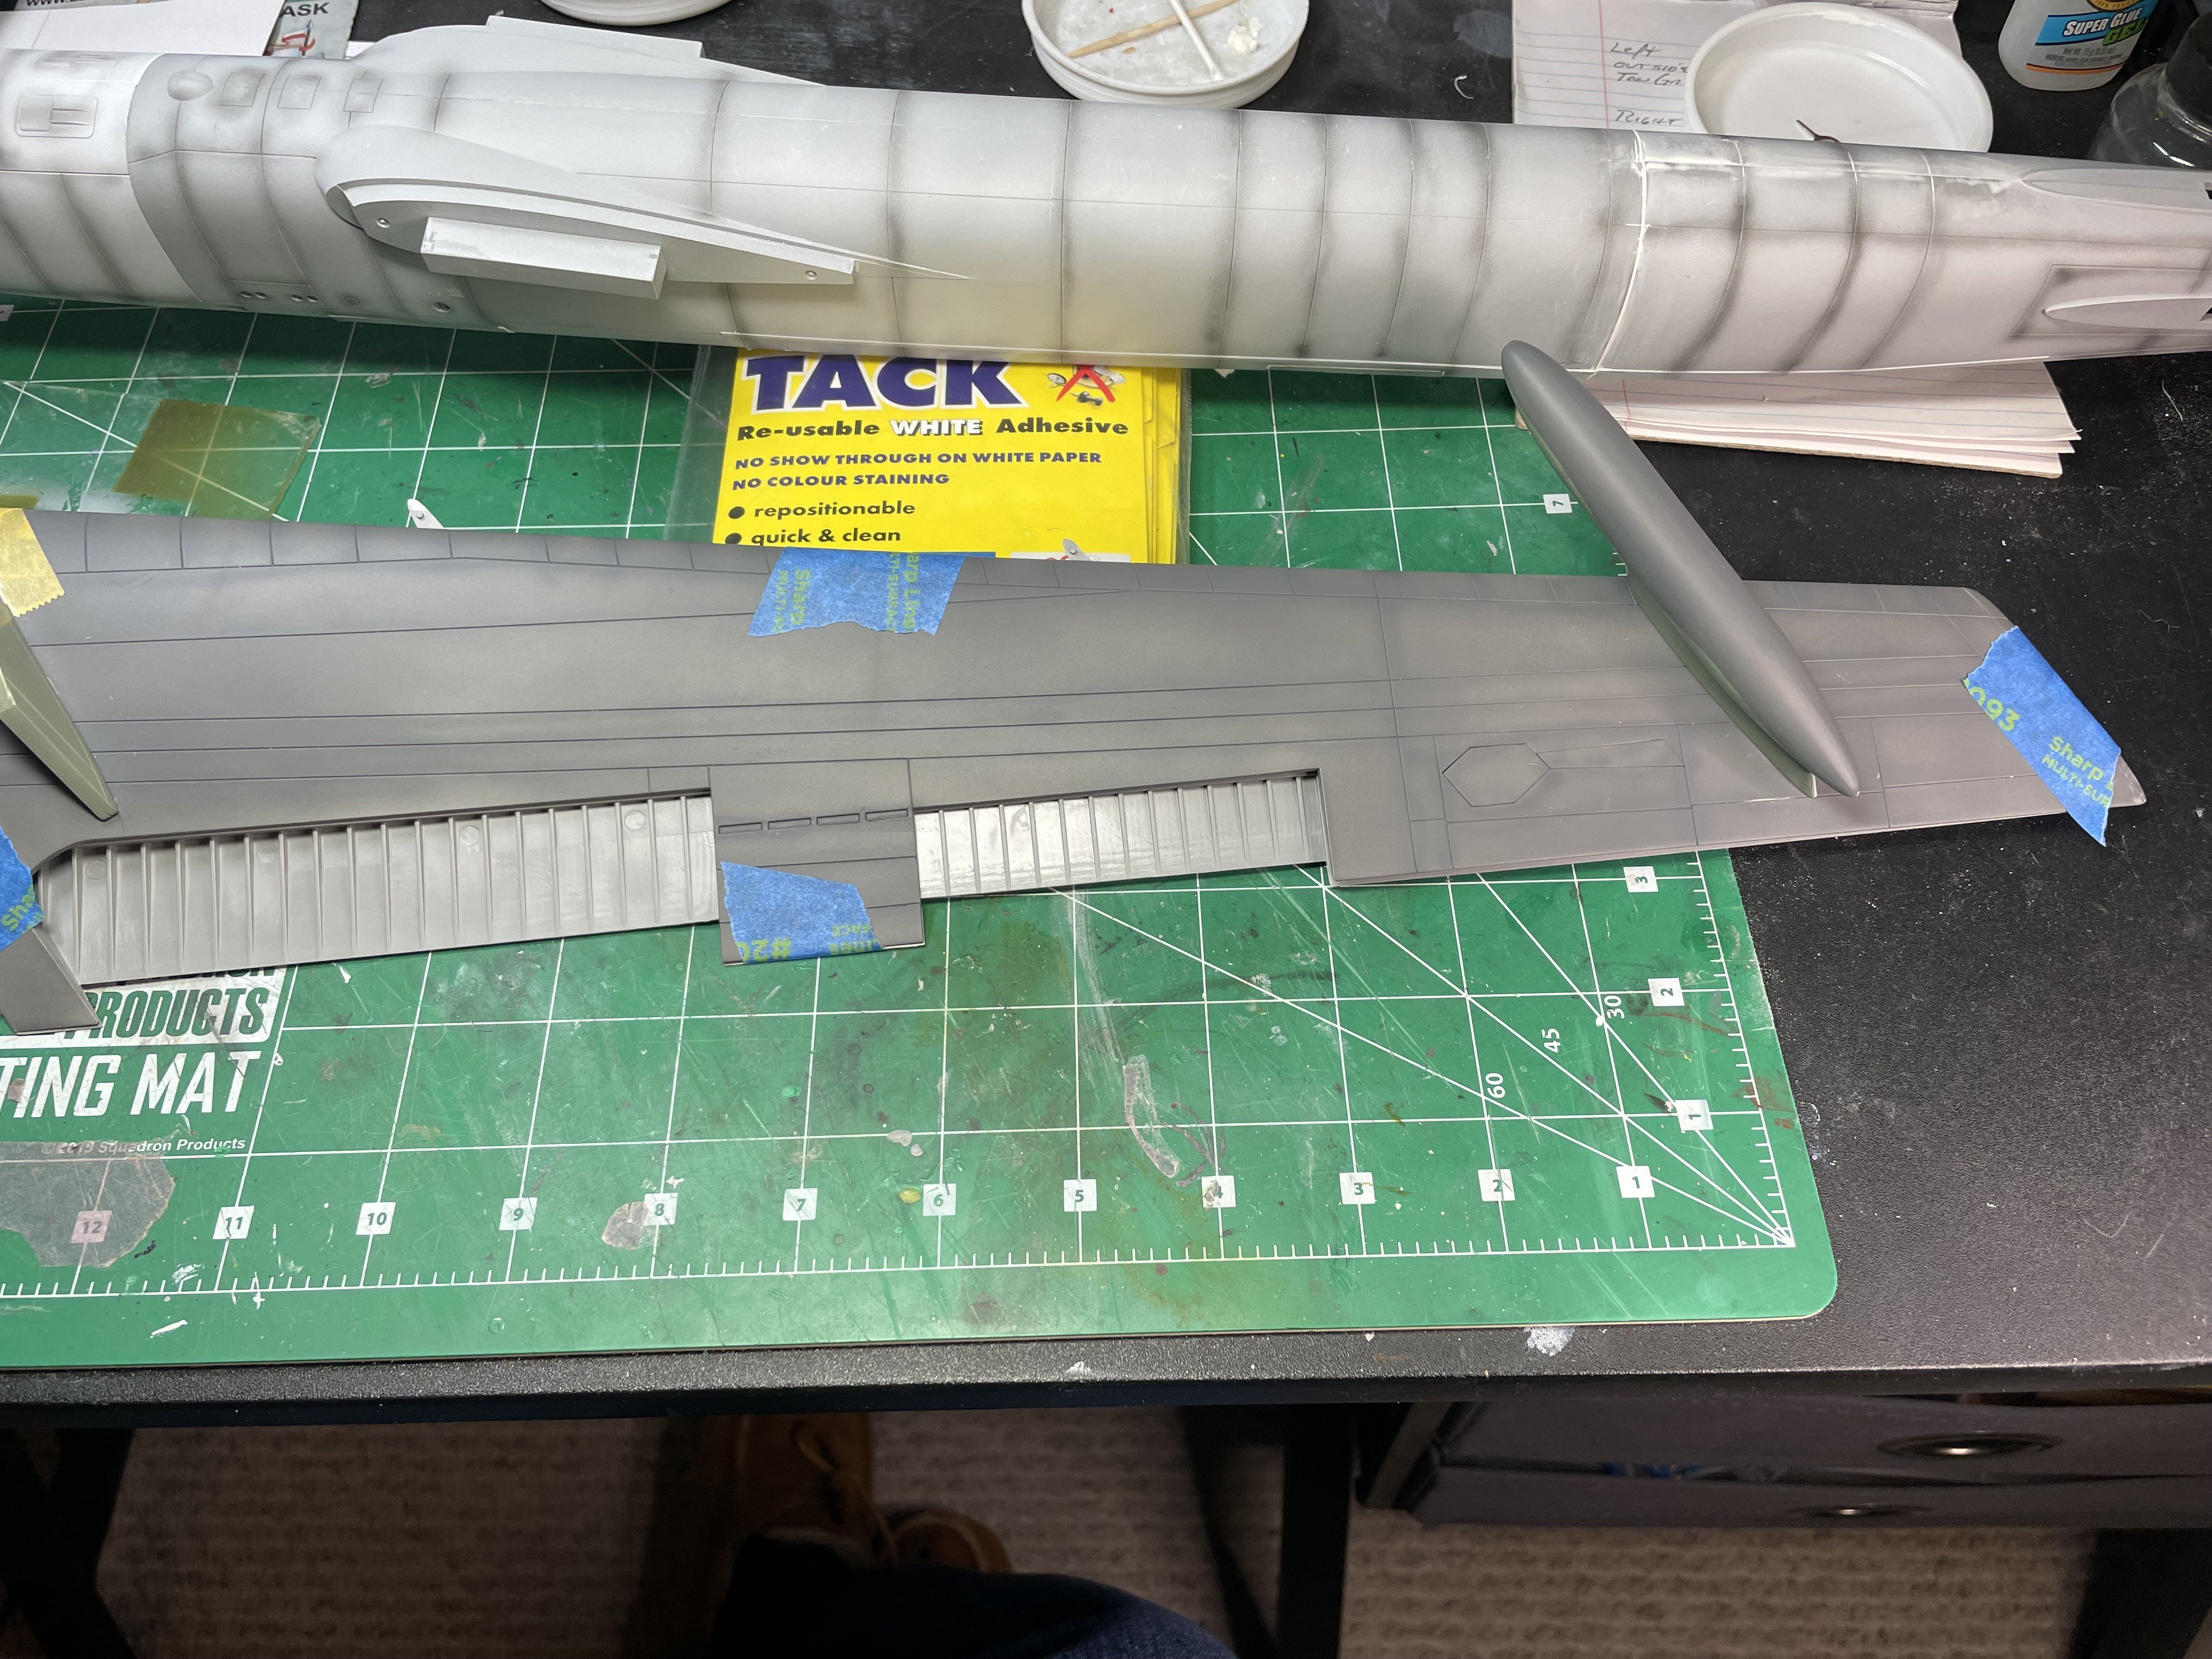
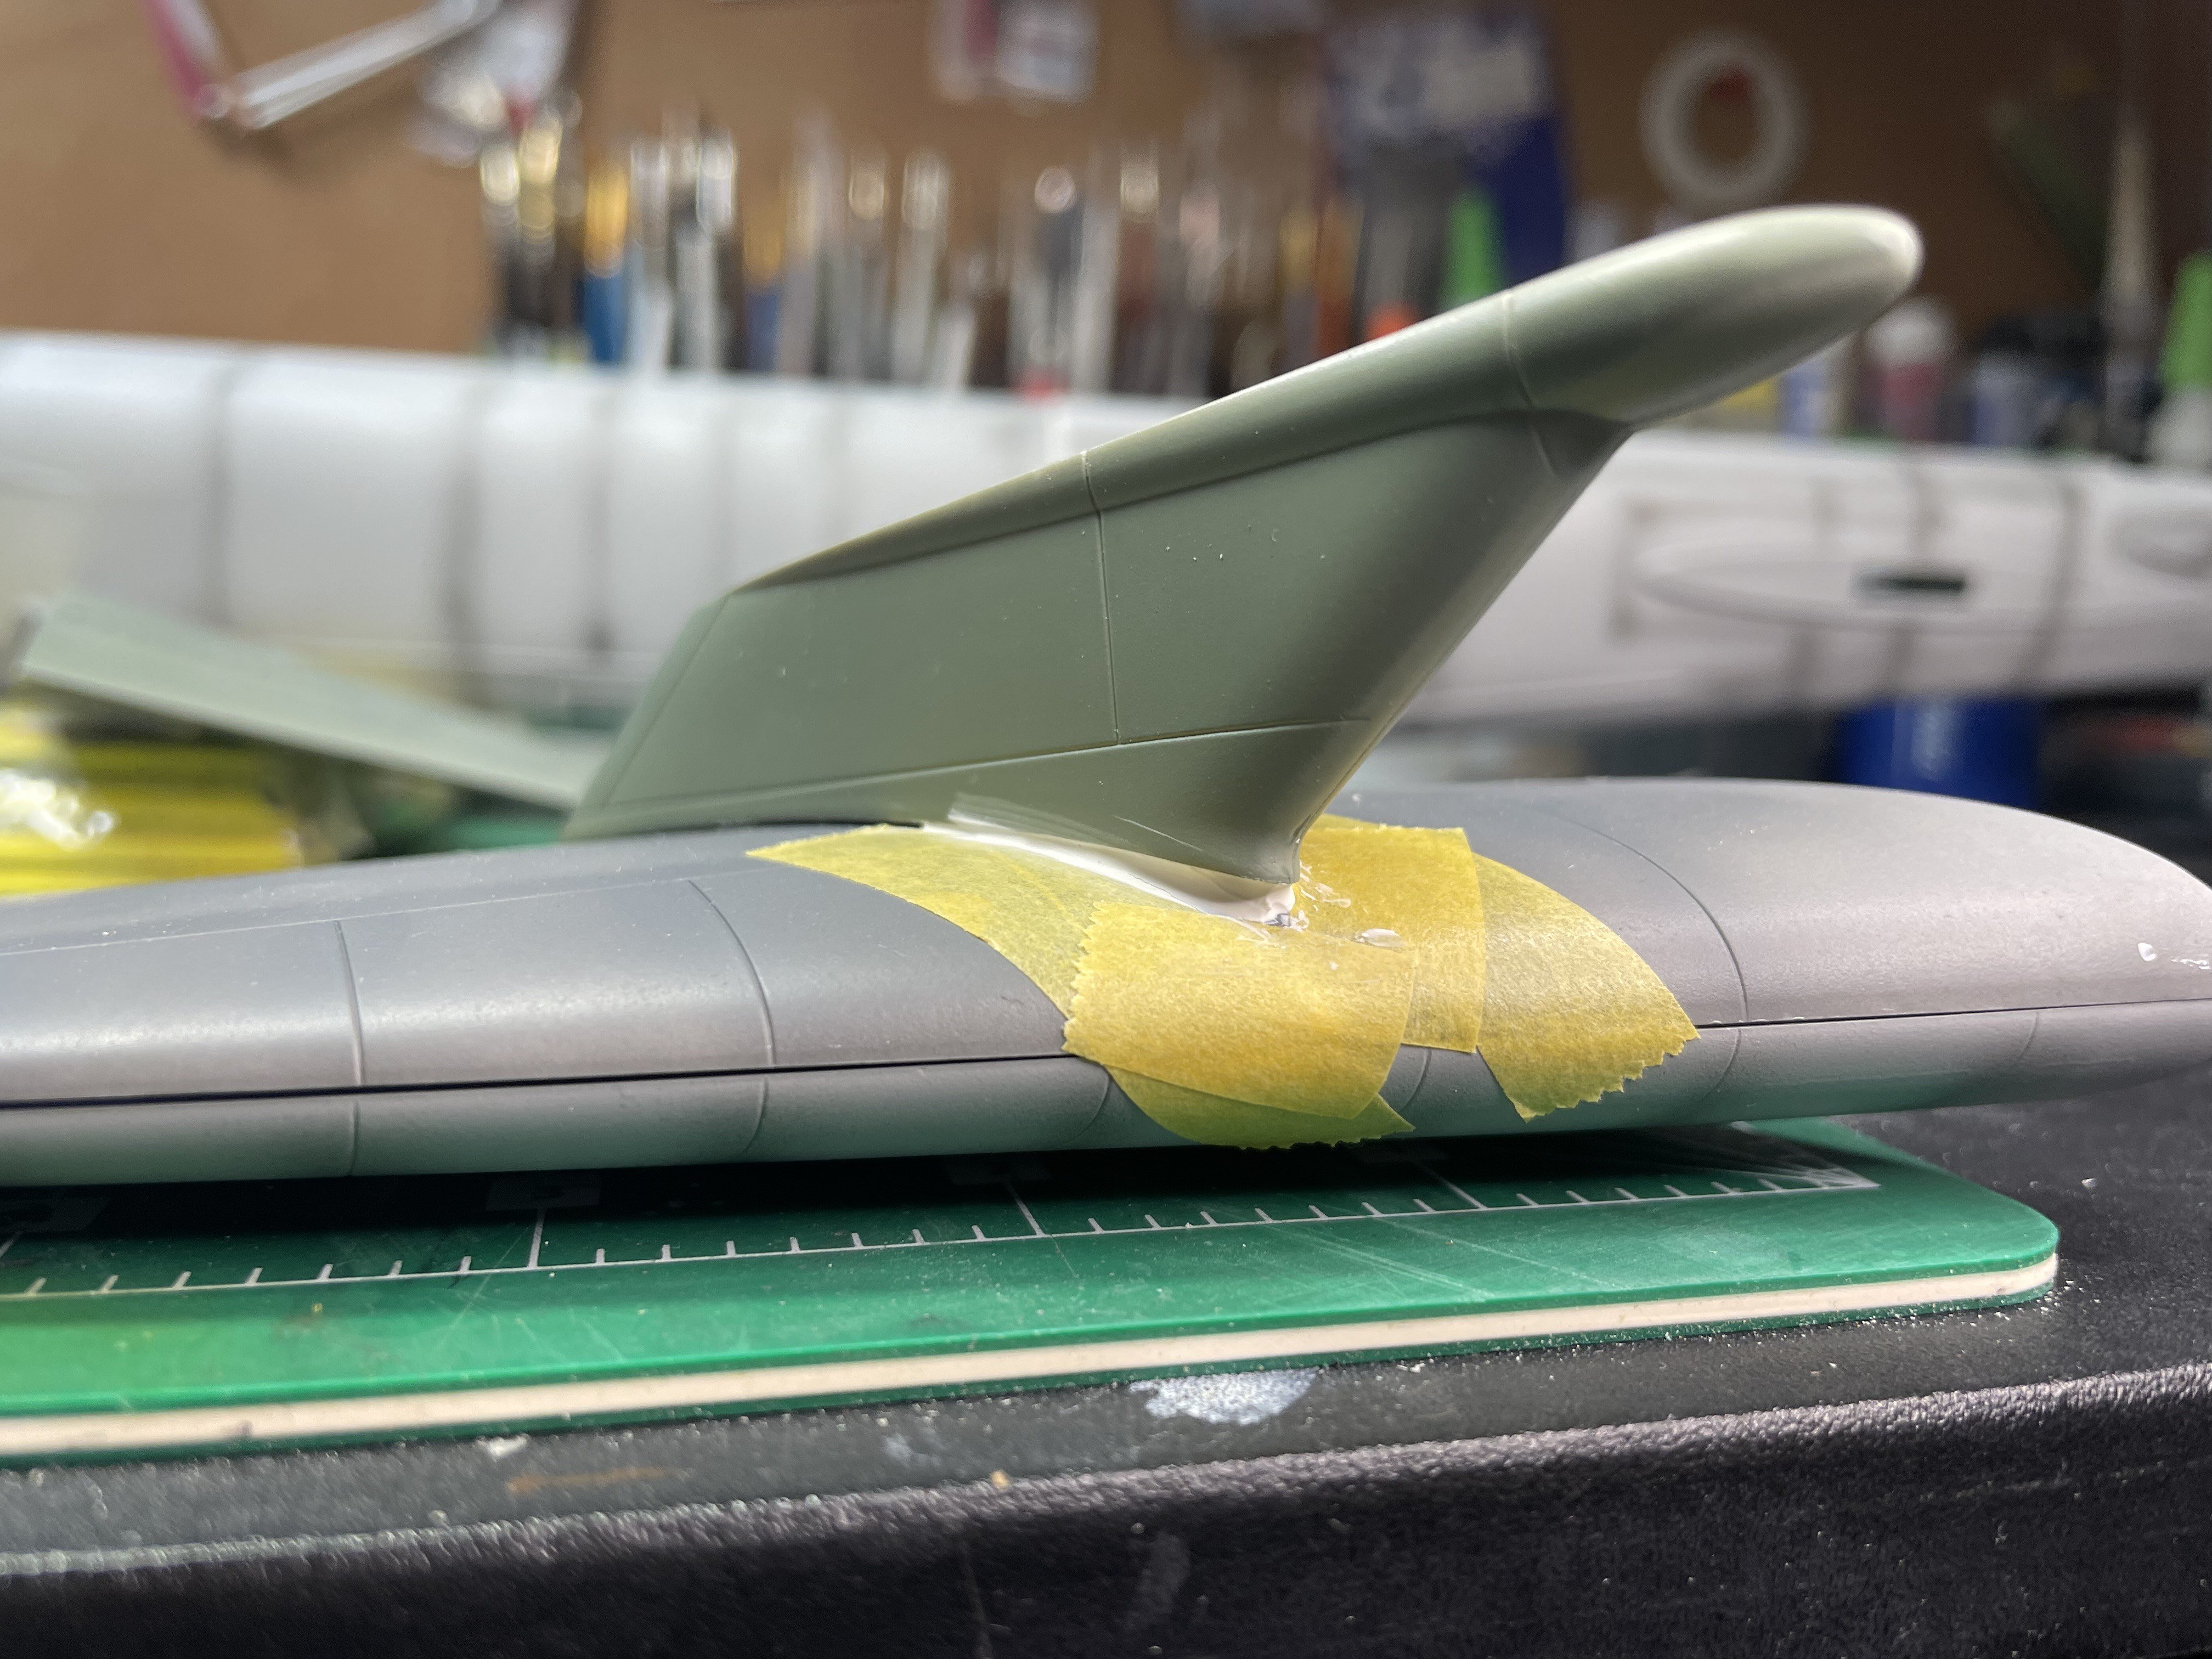
Sorry, gents. I am seriously behind on posting this build. Here is the latest. Closed up the fuselage. Big seams between the sections and again, not having really decent connection points between the halves was difficult. I'm thinking a better strategy is to put each side together first, then join the two sides together. I had to use the Pano mode on my phone to capture the entire fuselage, but now none of those photos, even at 1.8Mb, will upload. So here is a view of the underside of the left wing with its dark gray color and the black pre-shading. You get a glimpse of the fuselage and the join line just to the right of the fuel tank on the wing. The nose to main-body join was better. Here are the elevators. On the left is the underside of the left elevator, and the right is the top-side green camo color with the black pre-shading showing through. Once I get the fuselage painted, I'll match up the coloring. These are MRP paints, which just go down so nicely. The pre-shading is Vallejo Black primer. I decided to add the Italeri Hound Dog missile pylons to this build, but the profile was not a good fit. Did some work with the sanding sticks and got them pretty close but the front of the pylon was off the wings. A bit of Vallejo white acrylic putty hopefully will fill the join. Letting it cure for a few days (unnecessary probably but why not) before I paint it the color of the pylons. The white tac arrived today so am looking at using that to mask the camo, or else buy a LOT of tape... Might go the tape route... Thanks for looking! Chris


-
Revell P-51 20th FG done
CANicoll replied to JohnB's topic in LSM 1/32 and Larger Aircraft Ready for Inspection
Nice work, John! Love the tail!