CANicoll
-
Posts
1,930 -
Joined
-
Last visited
Content Type
Profiles
Forums
Events
Gallery
Everything posted by CANicoll
-
 Martin, Love this work. What material did you make that bag out of? That is amazing. Very cool detail work, like dropping the armor plate. In the bottom photograph above, what is that liquid seeping out of the lefts side of the fuselage? Any ideas?
 -
The Scharnhorst 1/200 by Trumpter-Operation Paderborn
CANicoll replied to KevinM's topic in Non LSM 'WIP
That Paudauk is nice wood but you finished it beautifully - a nice complement to your build! -
Revell Me-262B up. Now down! Now up!!! LOL
CANicoll replied to JohnB's topic in LSM 1/35 and Larger Work In Progress
Had similar problems on my Revell Me262 B-1a/U-1 Nachtjäger "Red 12". I think I actually glued the fuselage from the bottom first to try and minimize that top seam - it was brutal. The wing root gaps were pretty pronounced, too. Oh well, one to work on later. Good luck with the Corsair. -
John, that cockpit is beautifully done. Wow. Your dry brushing is top notch.
-
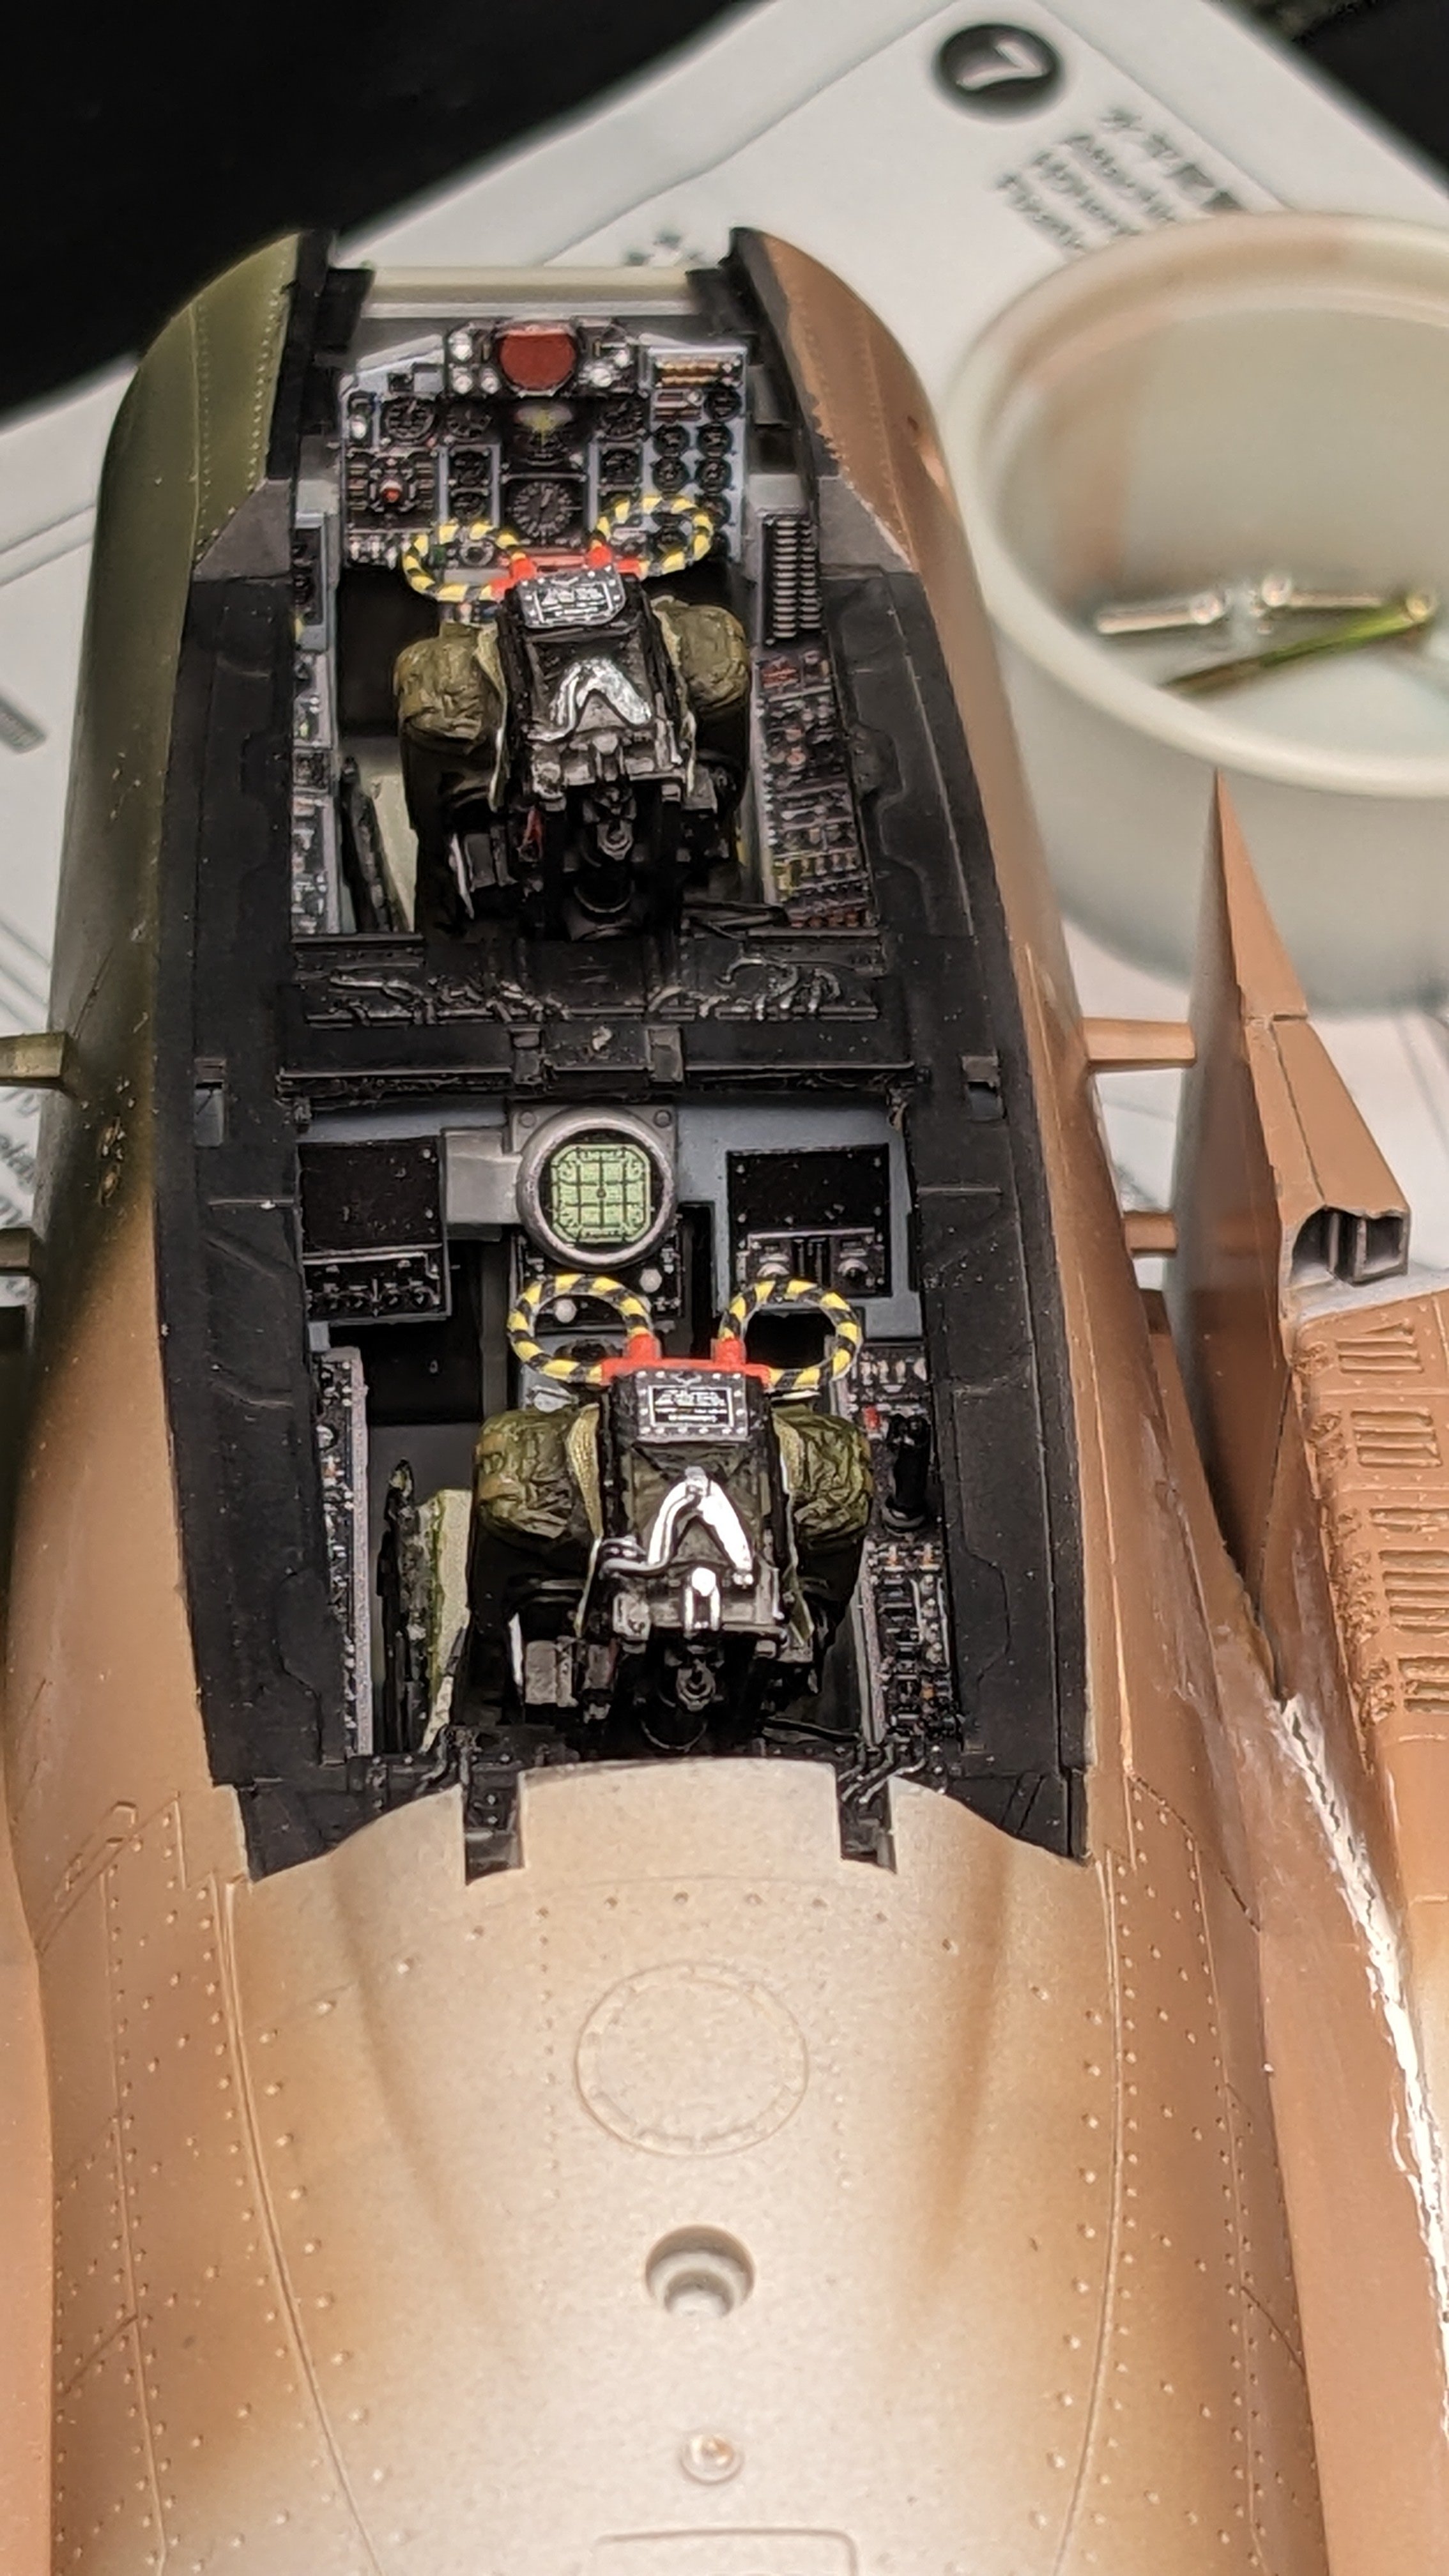
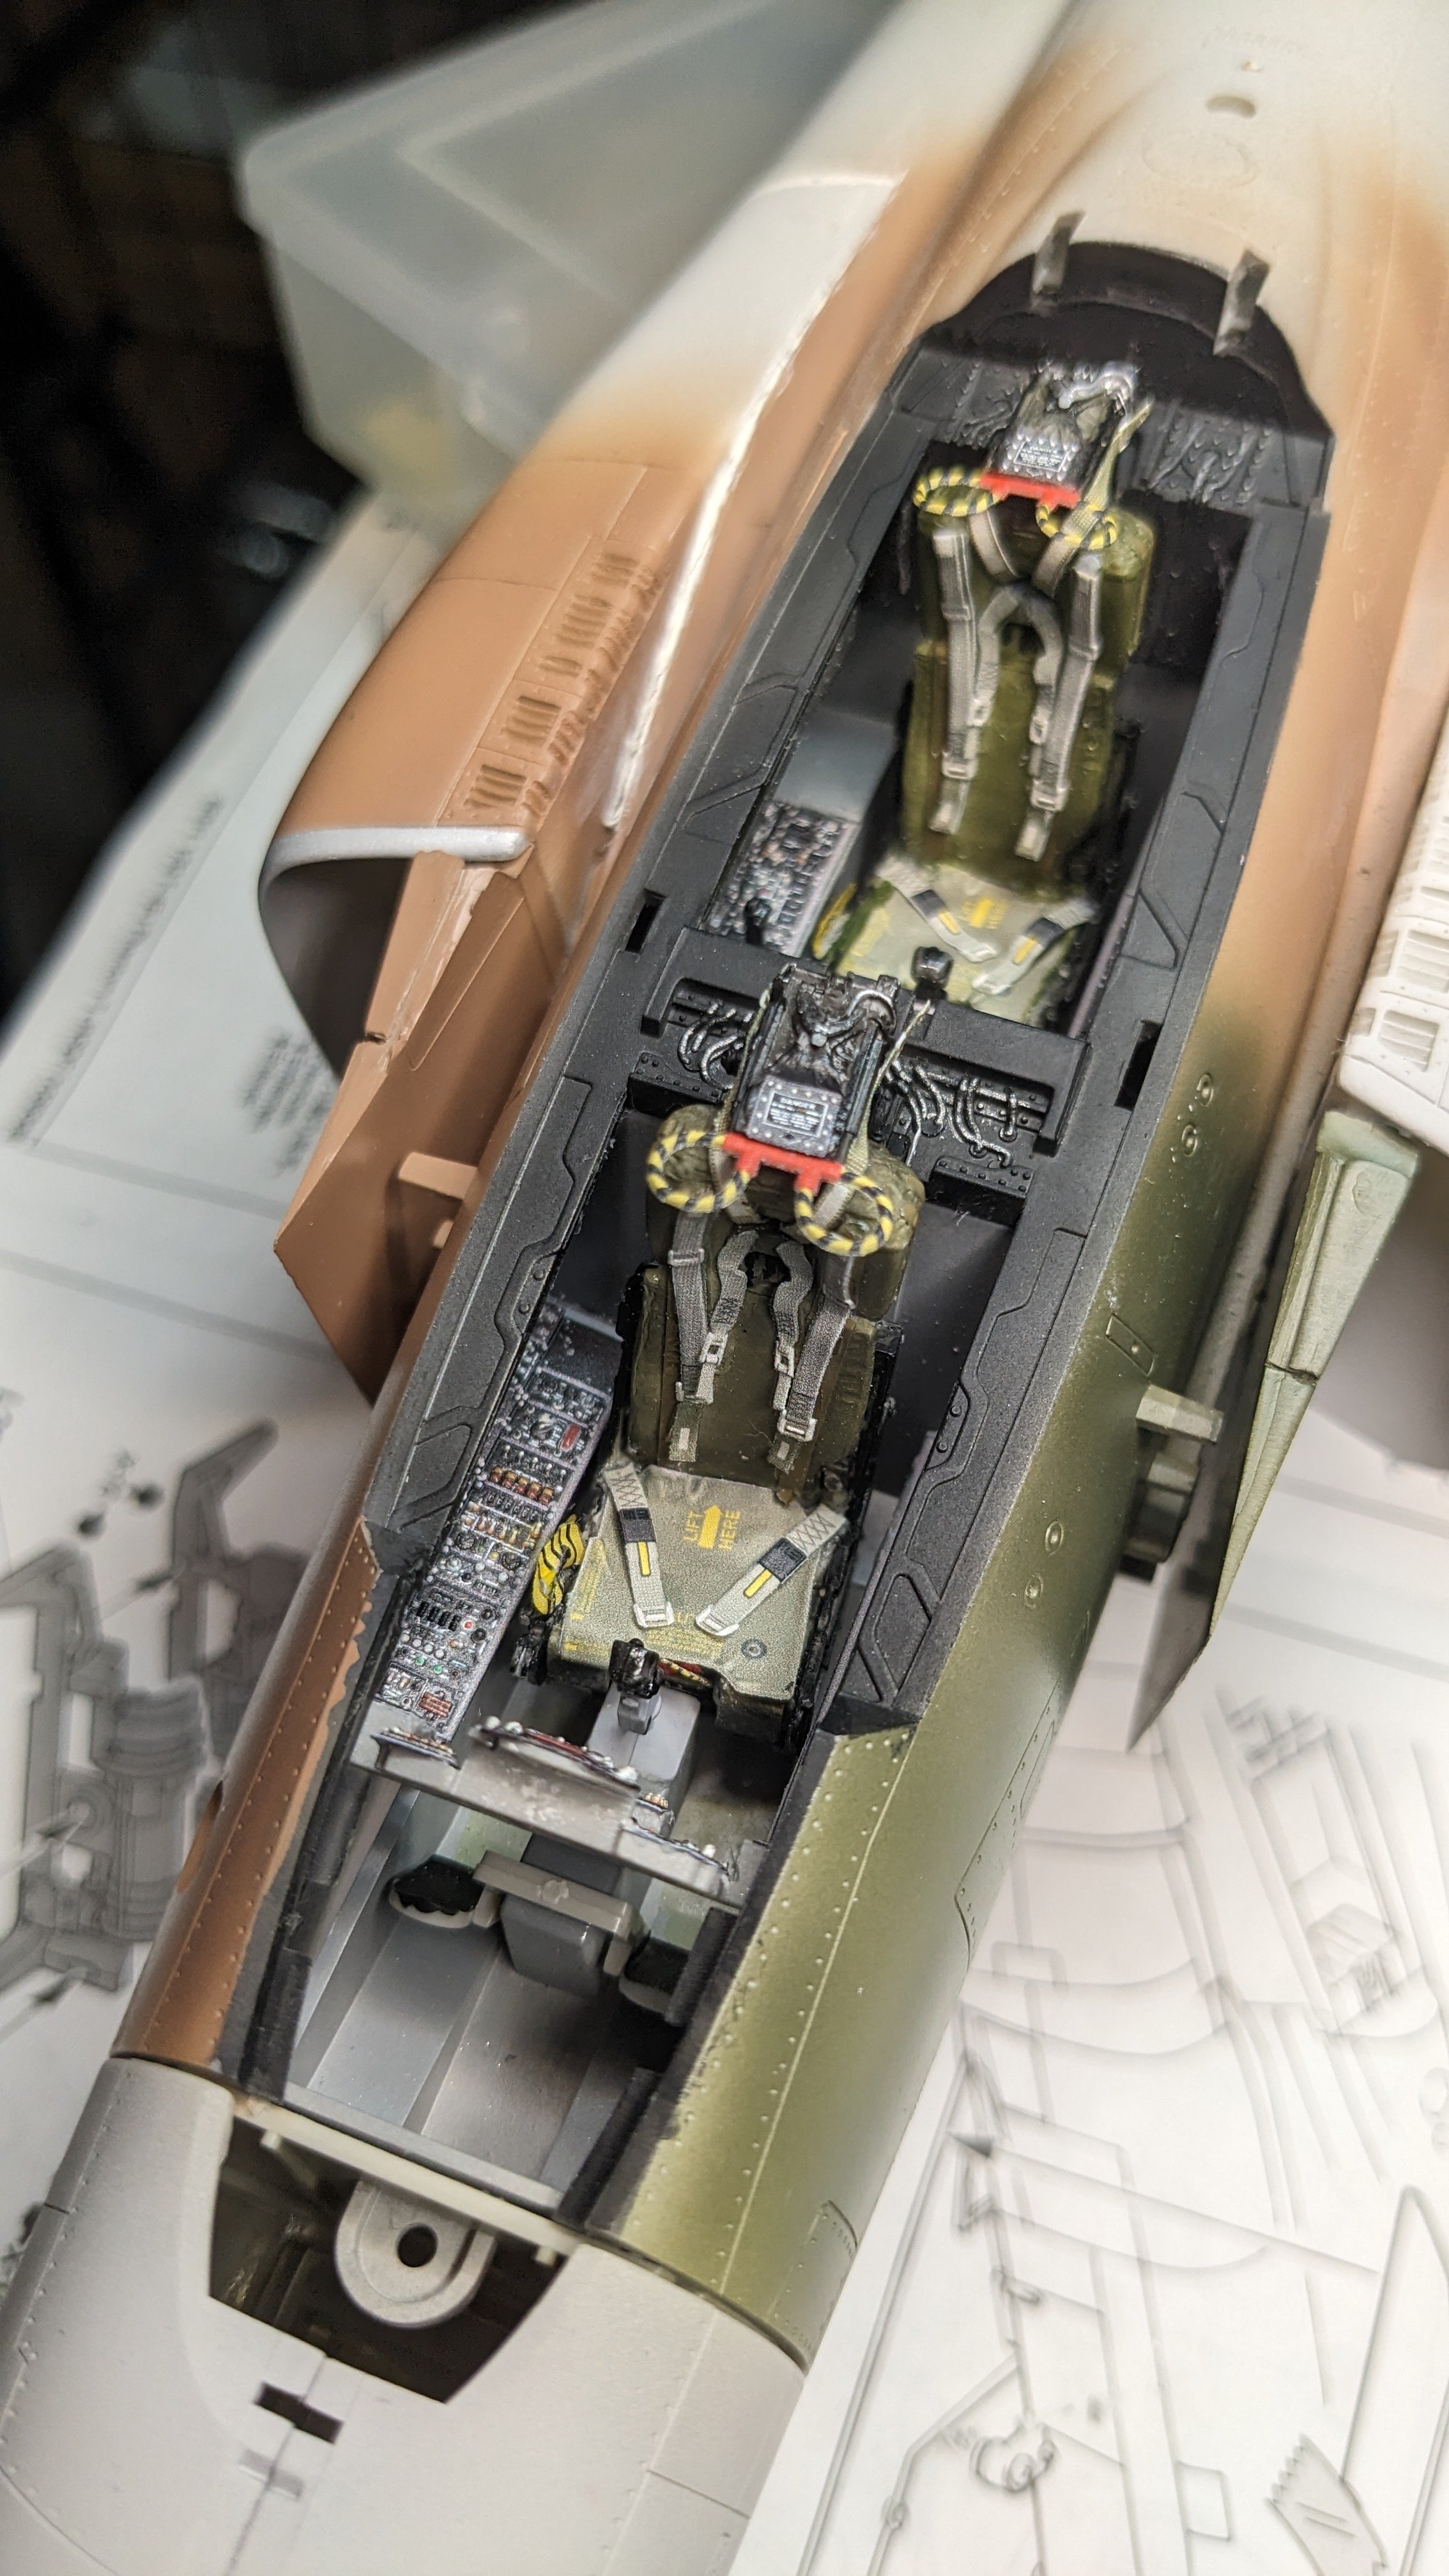
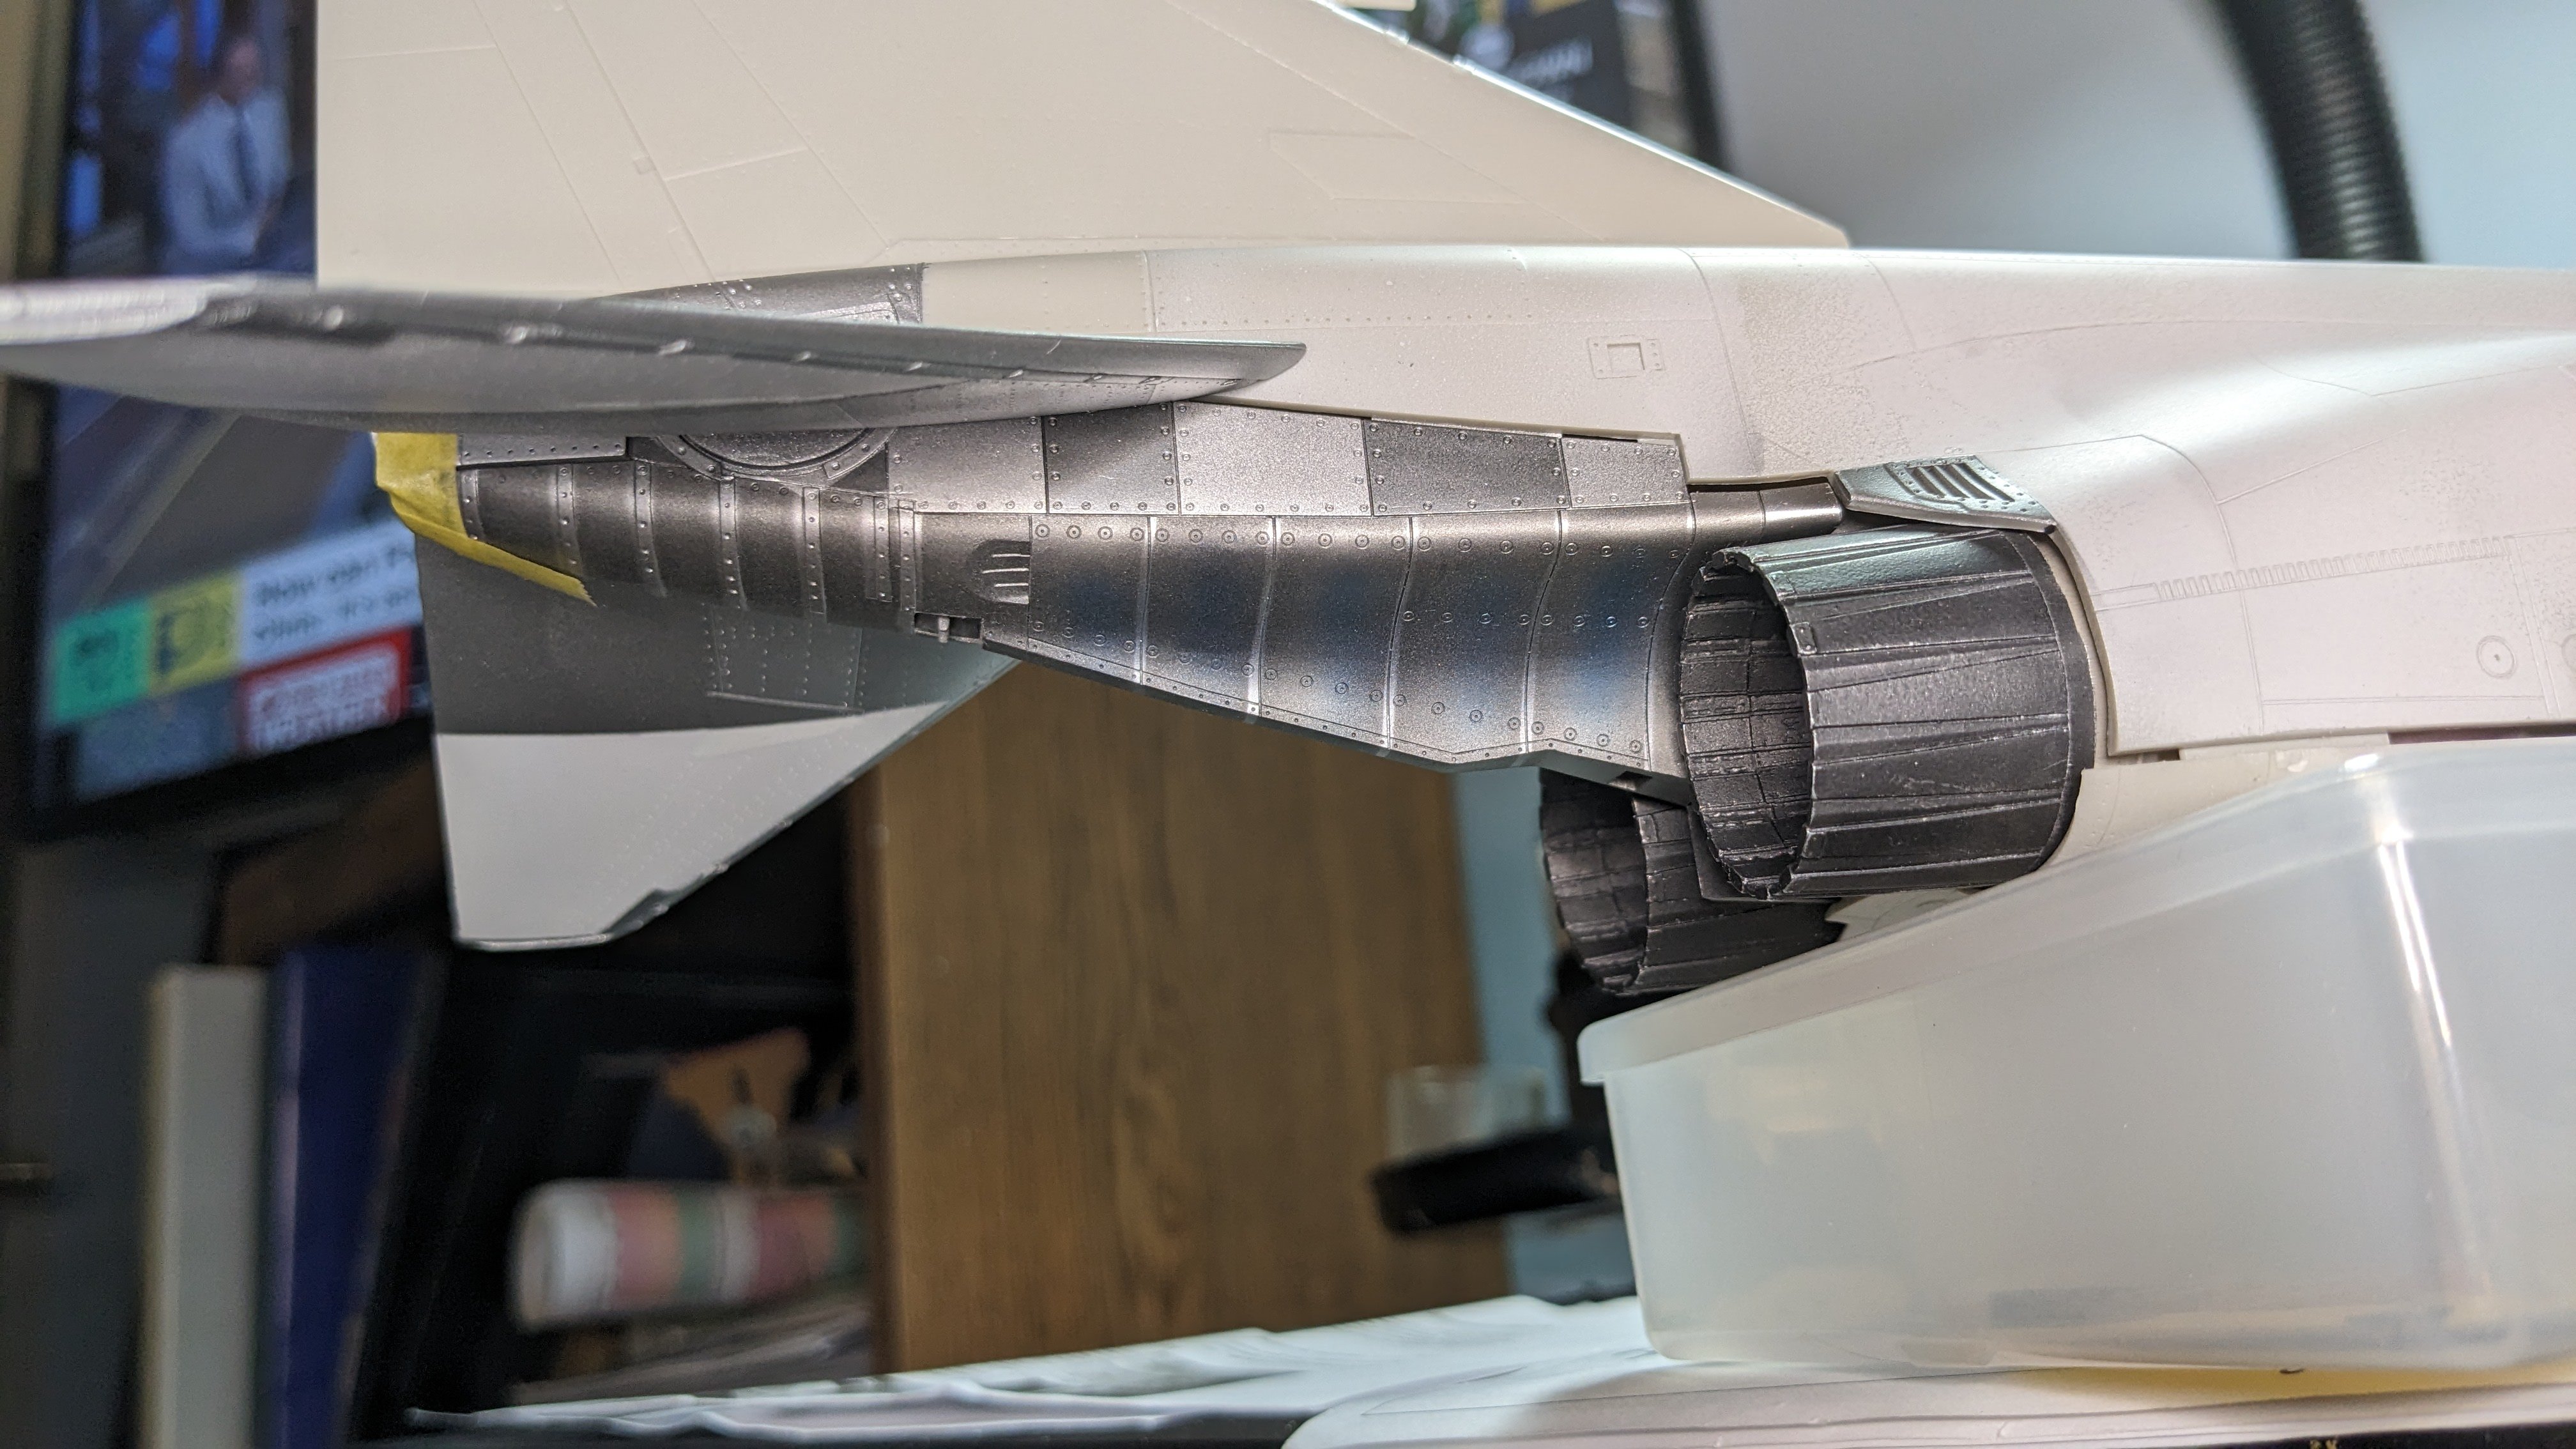
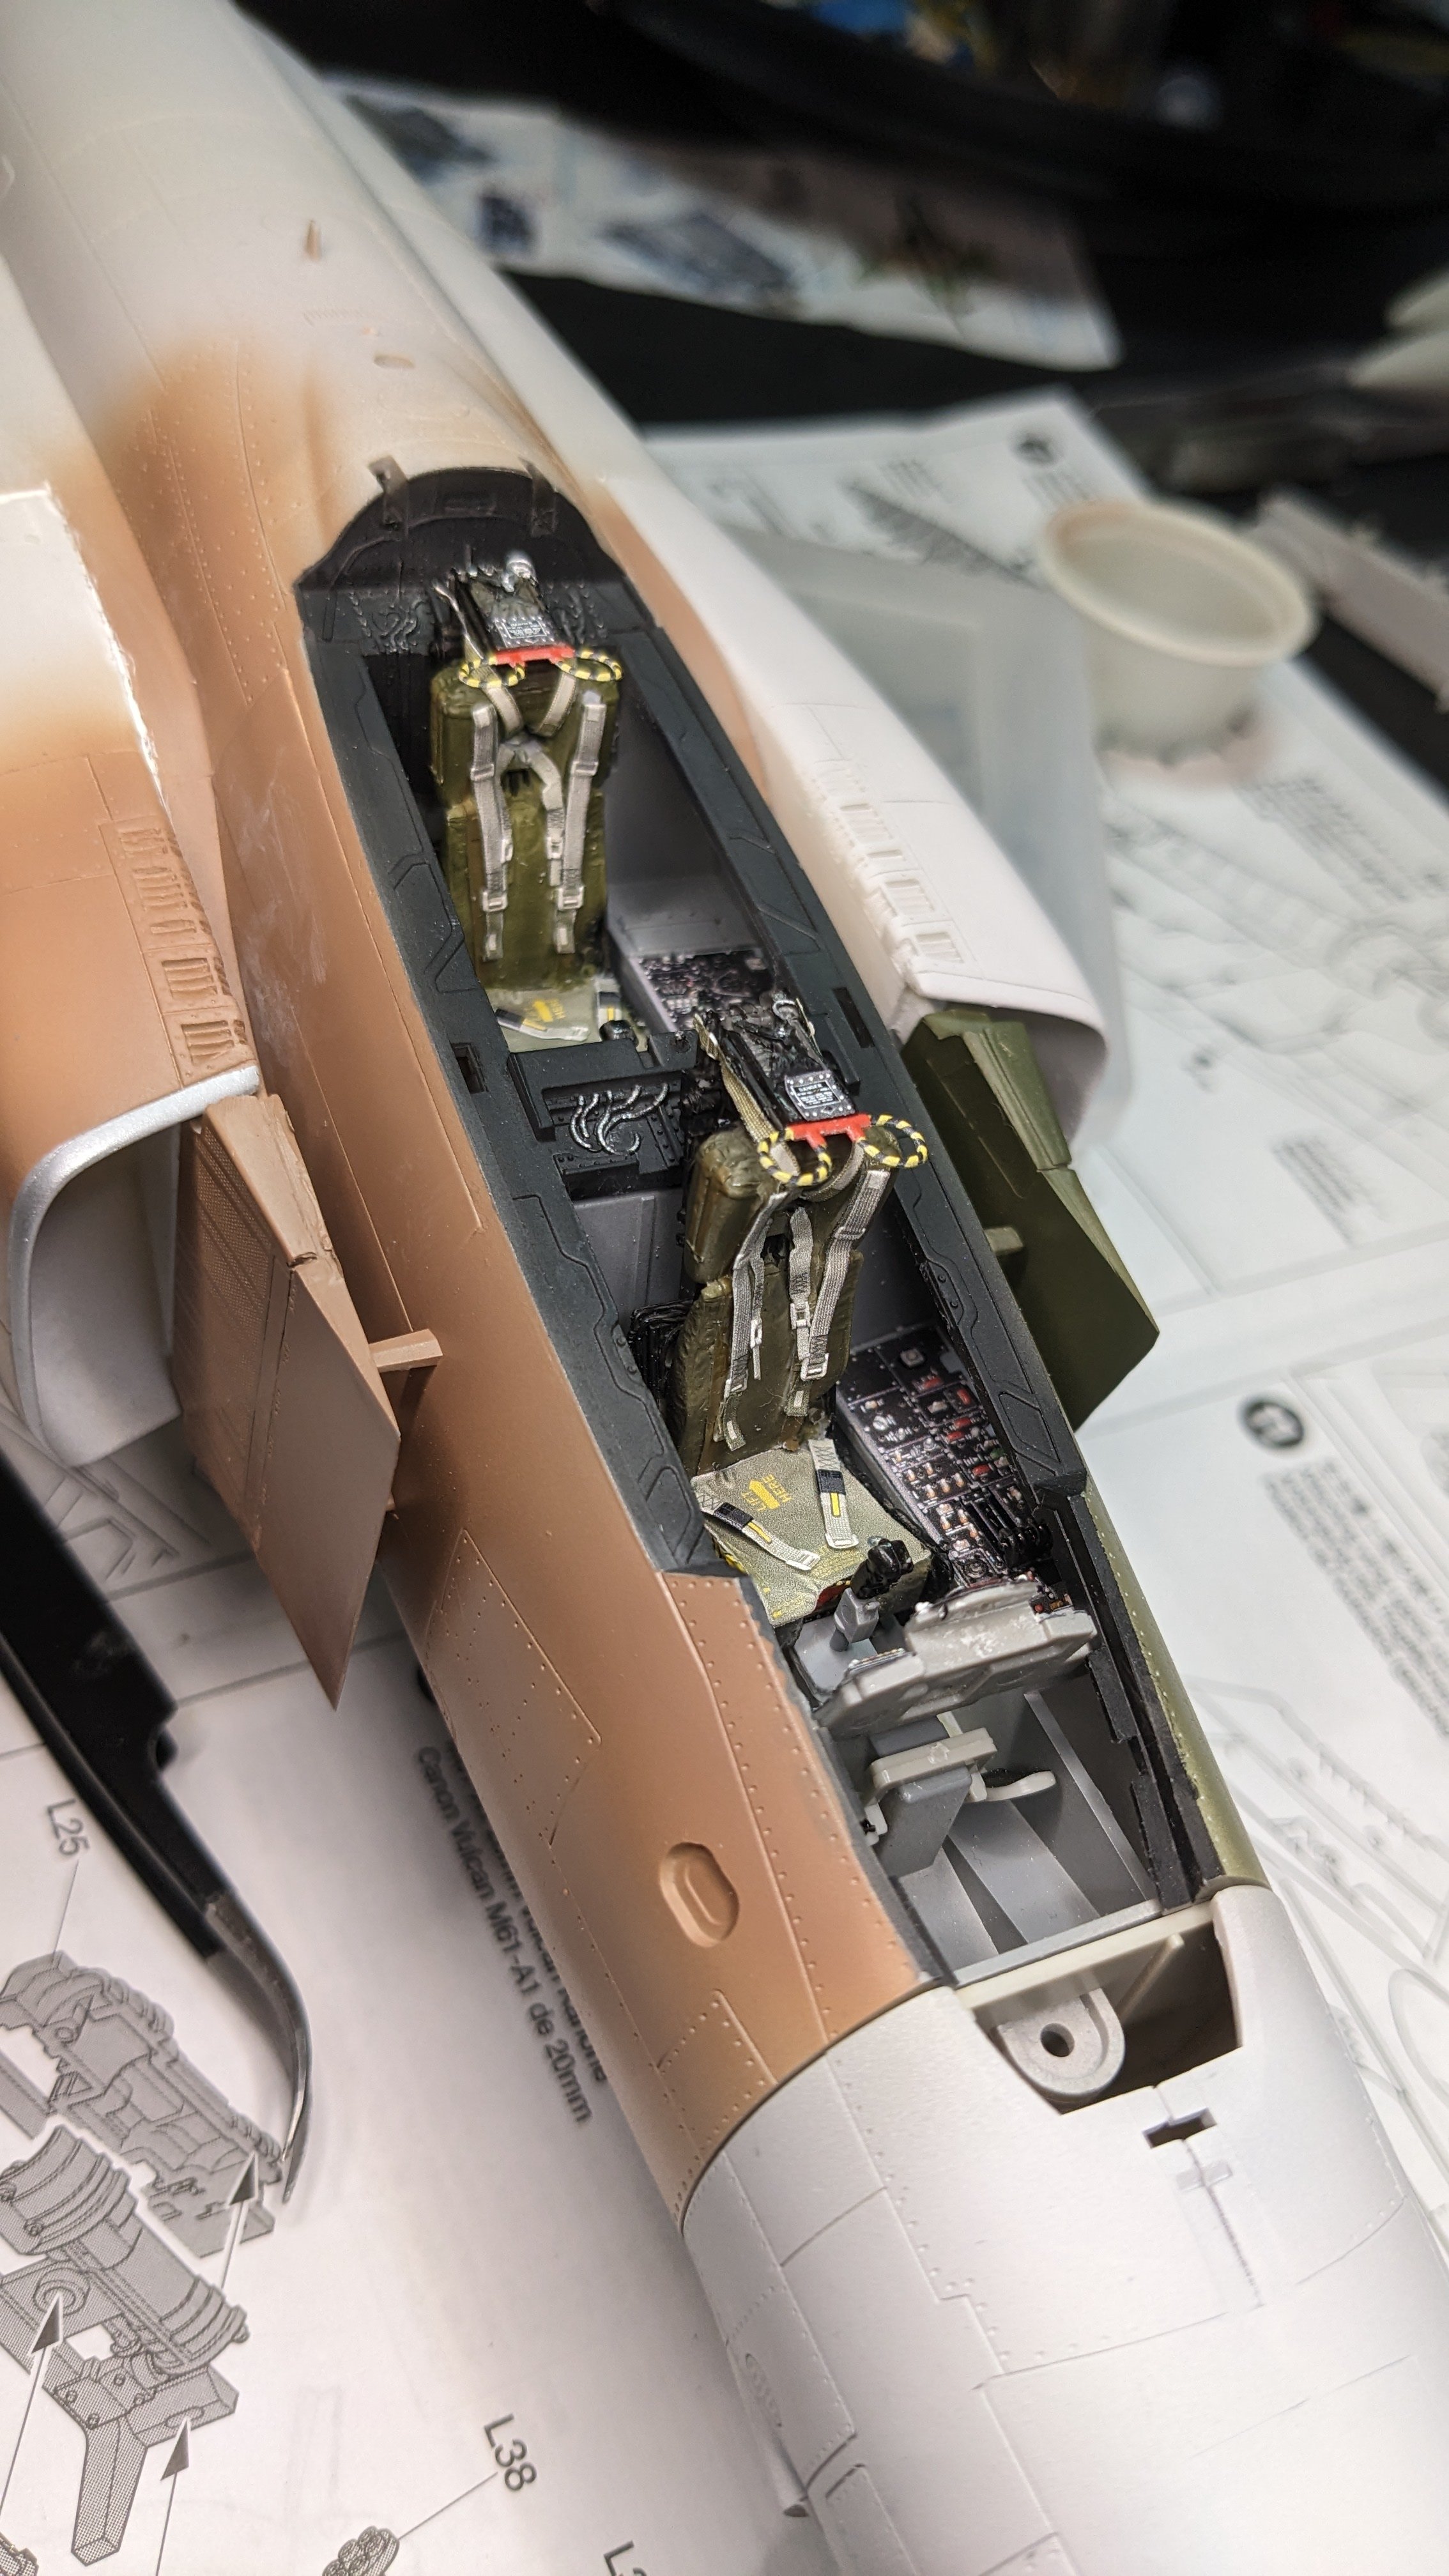
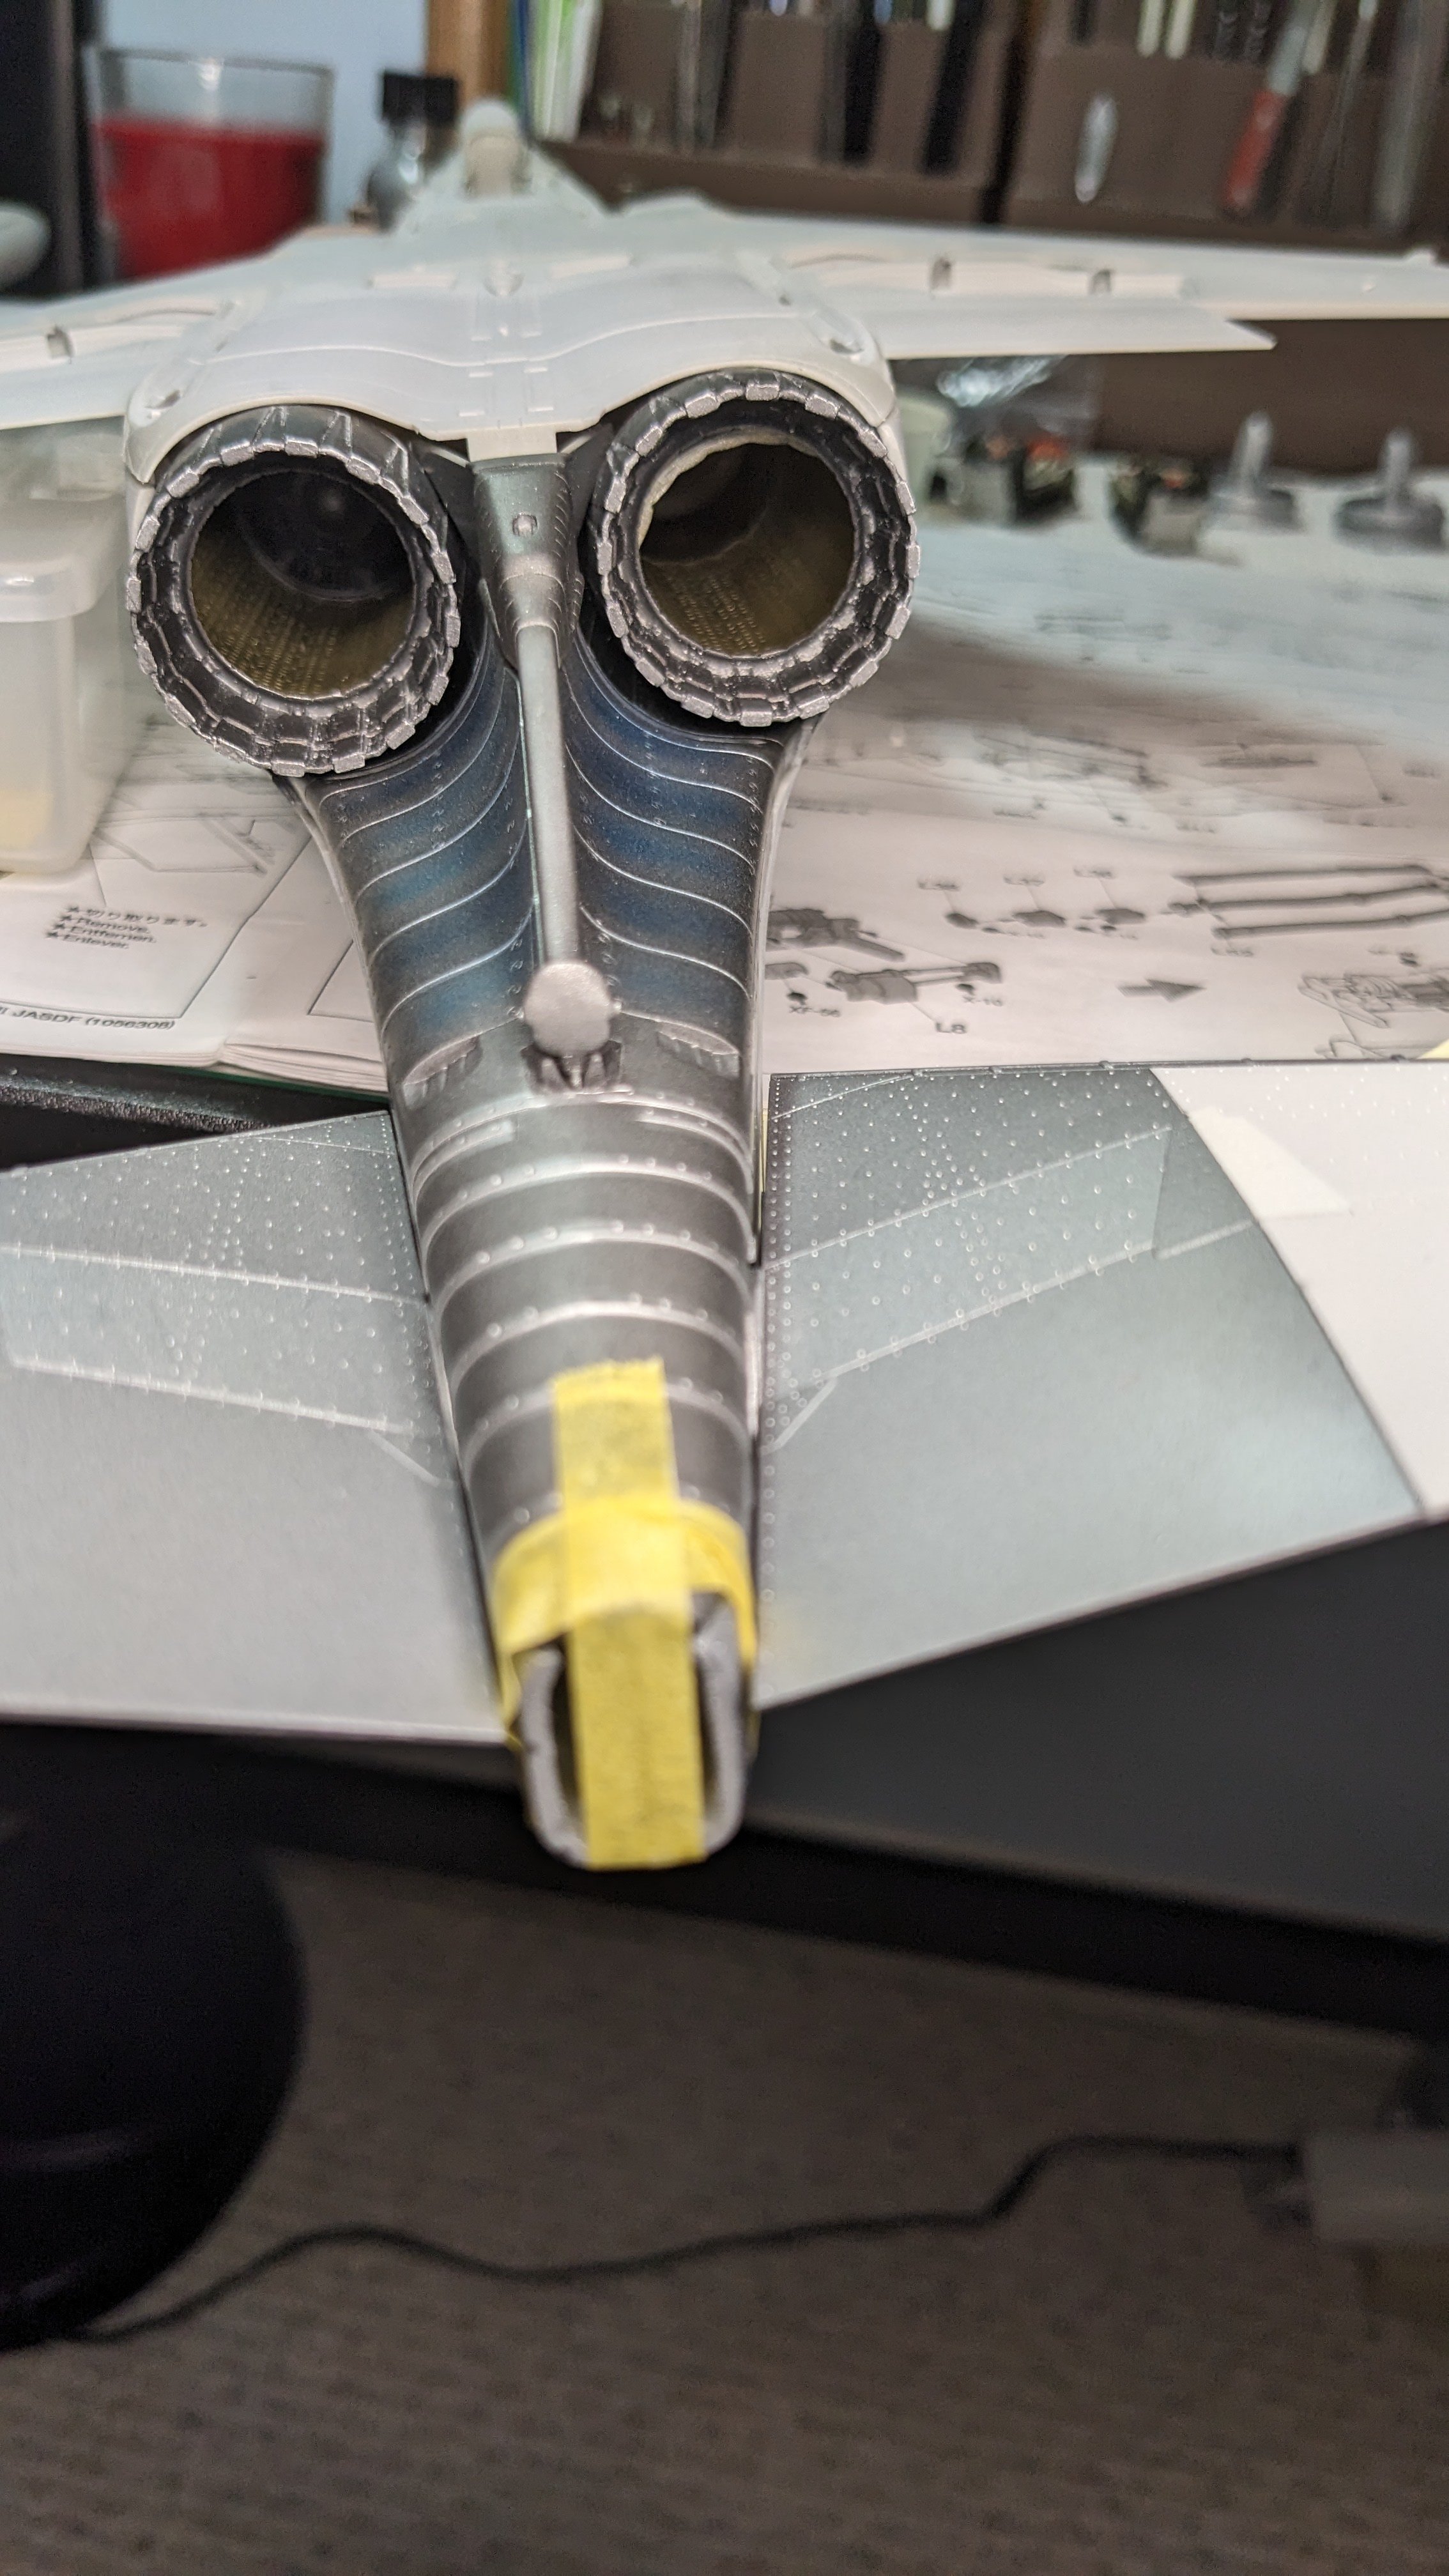
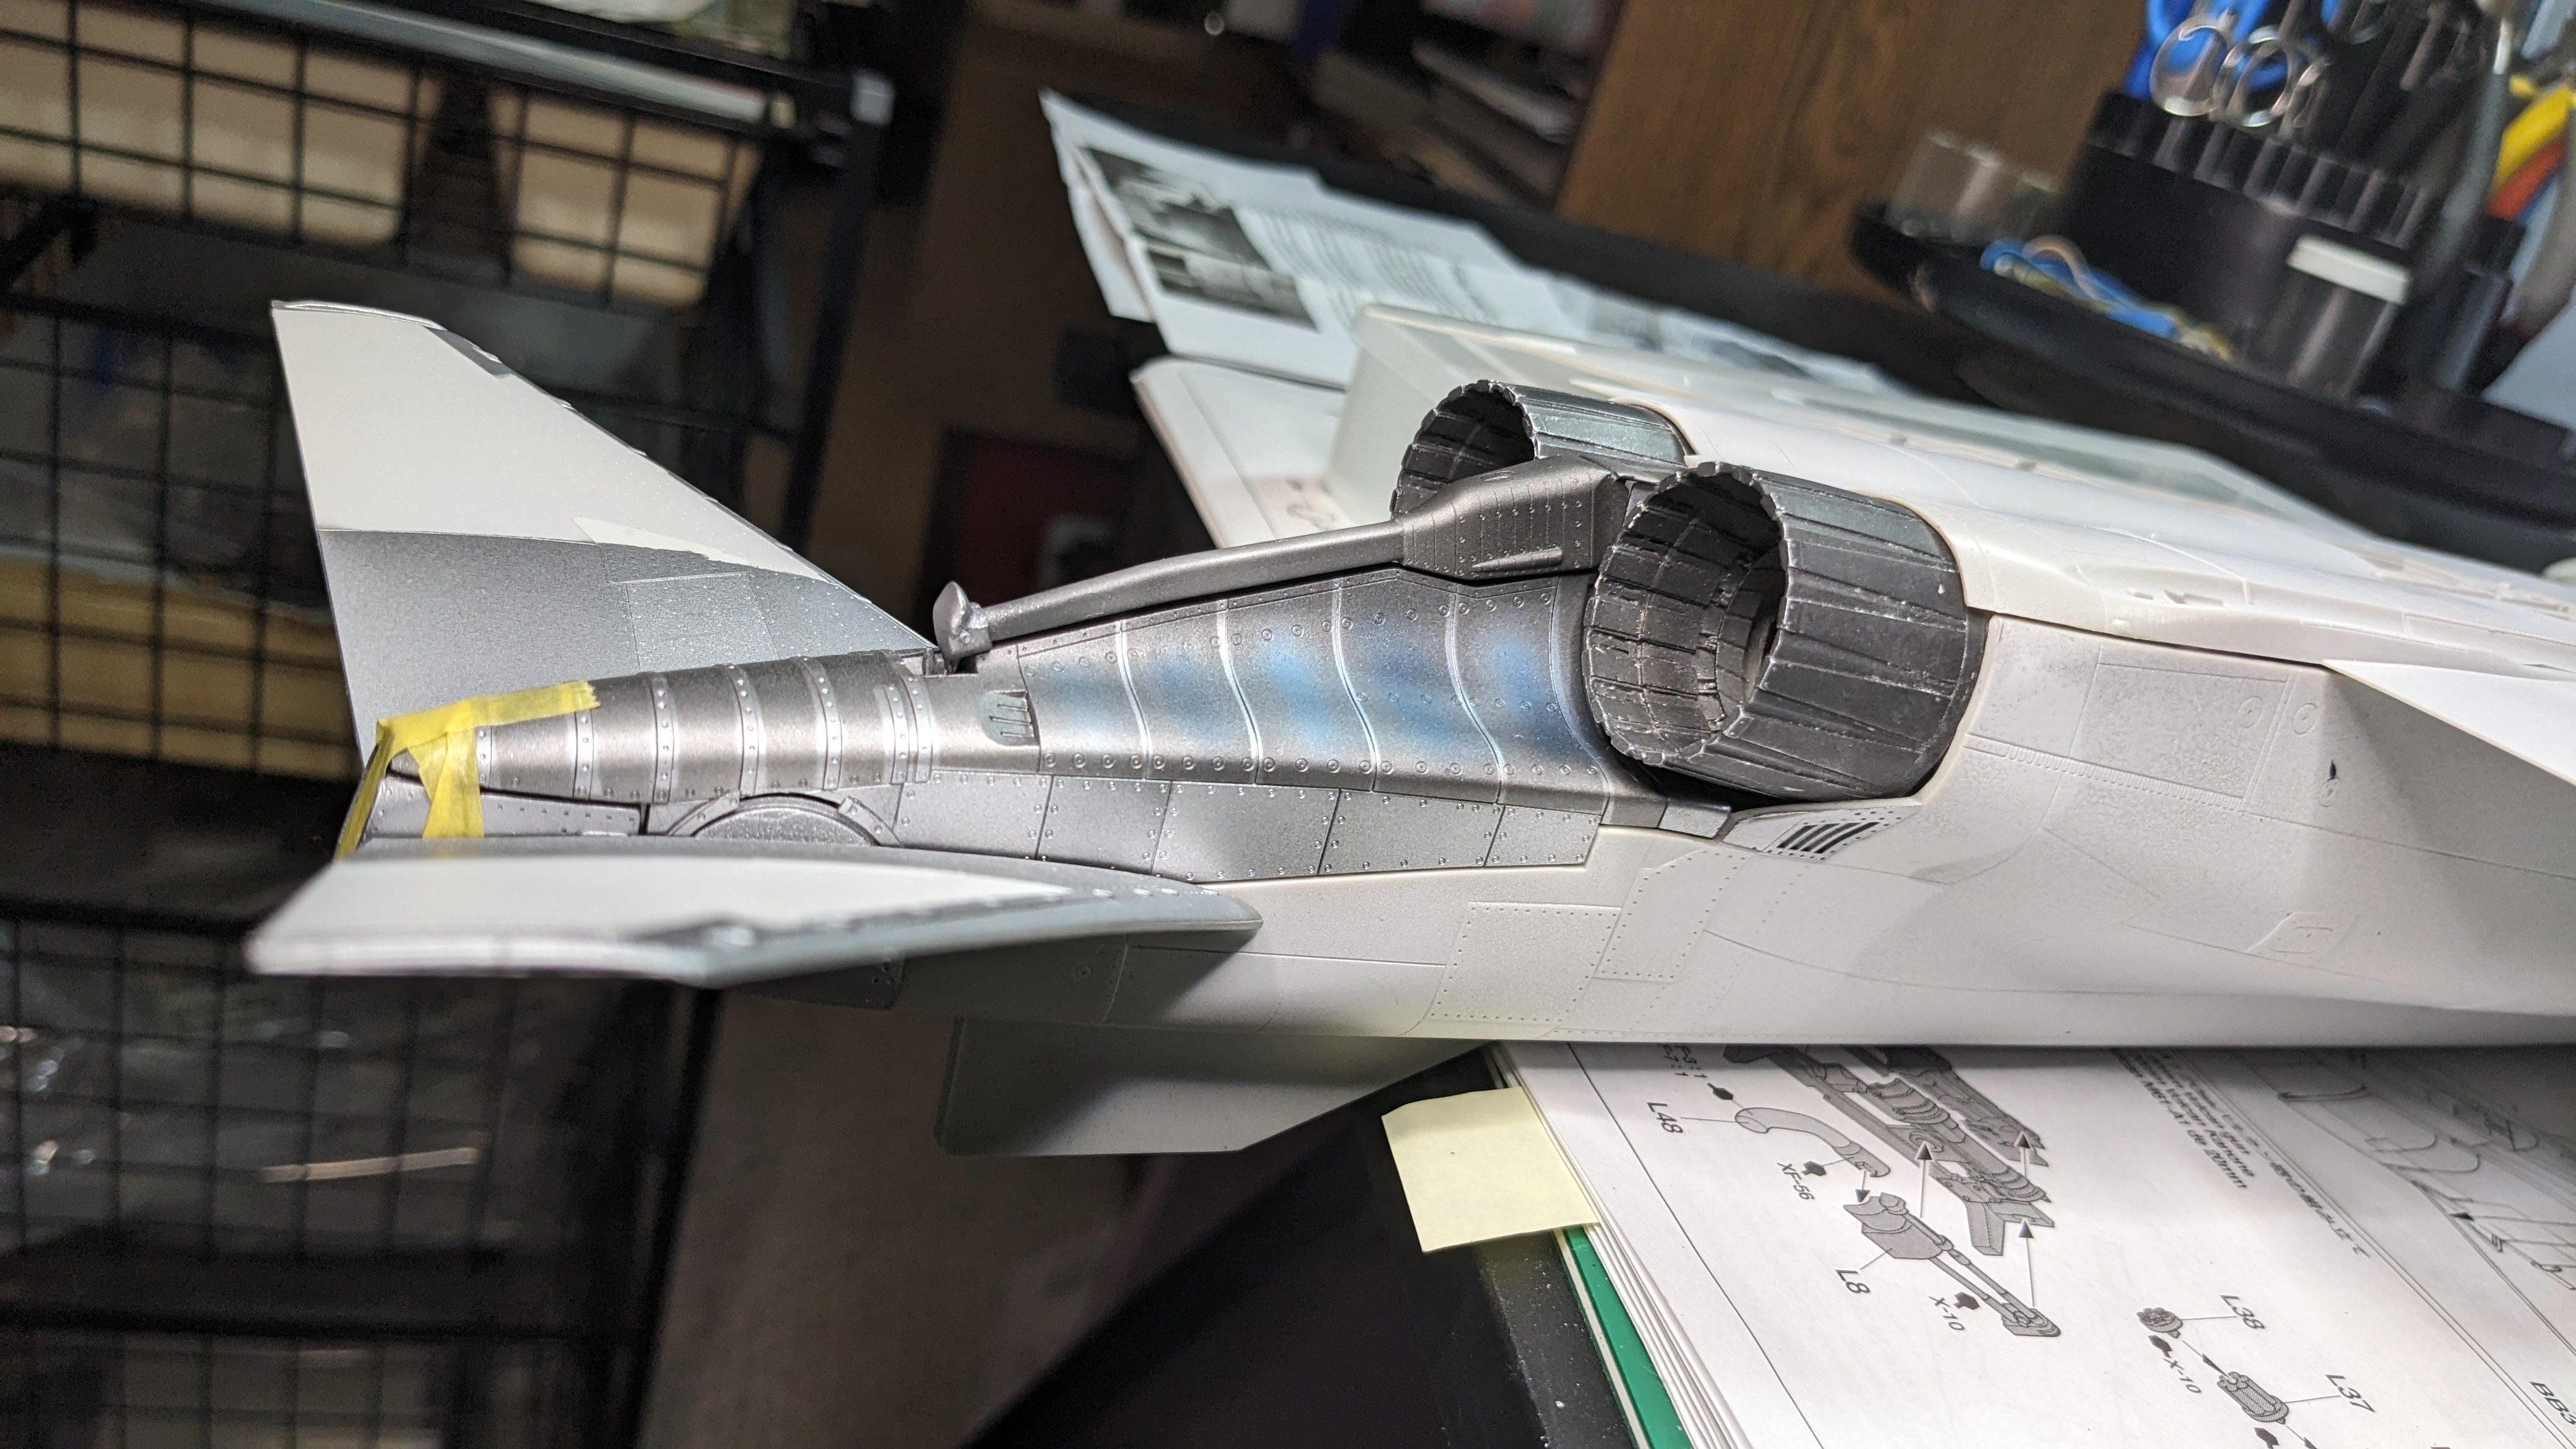
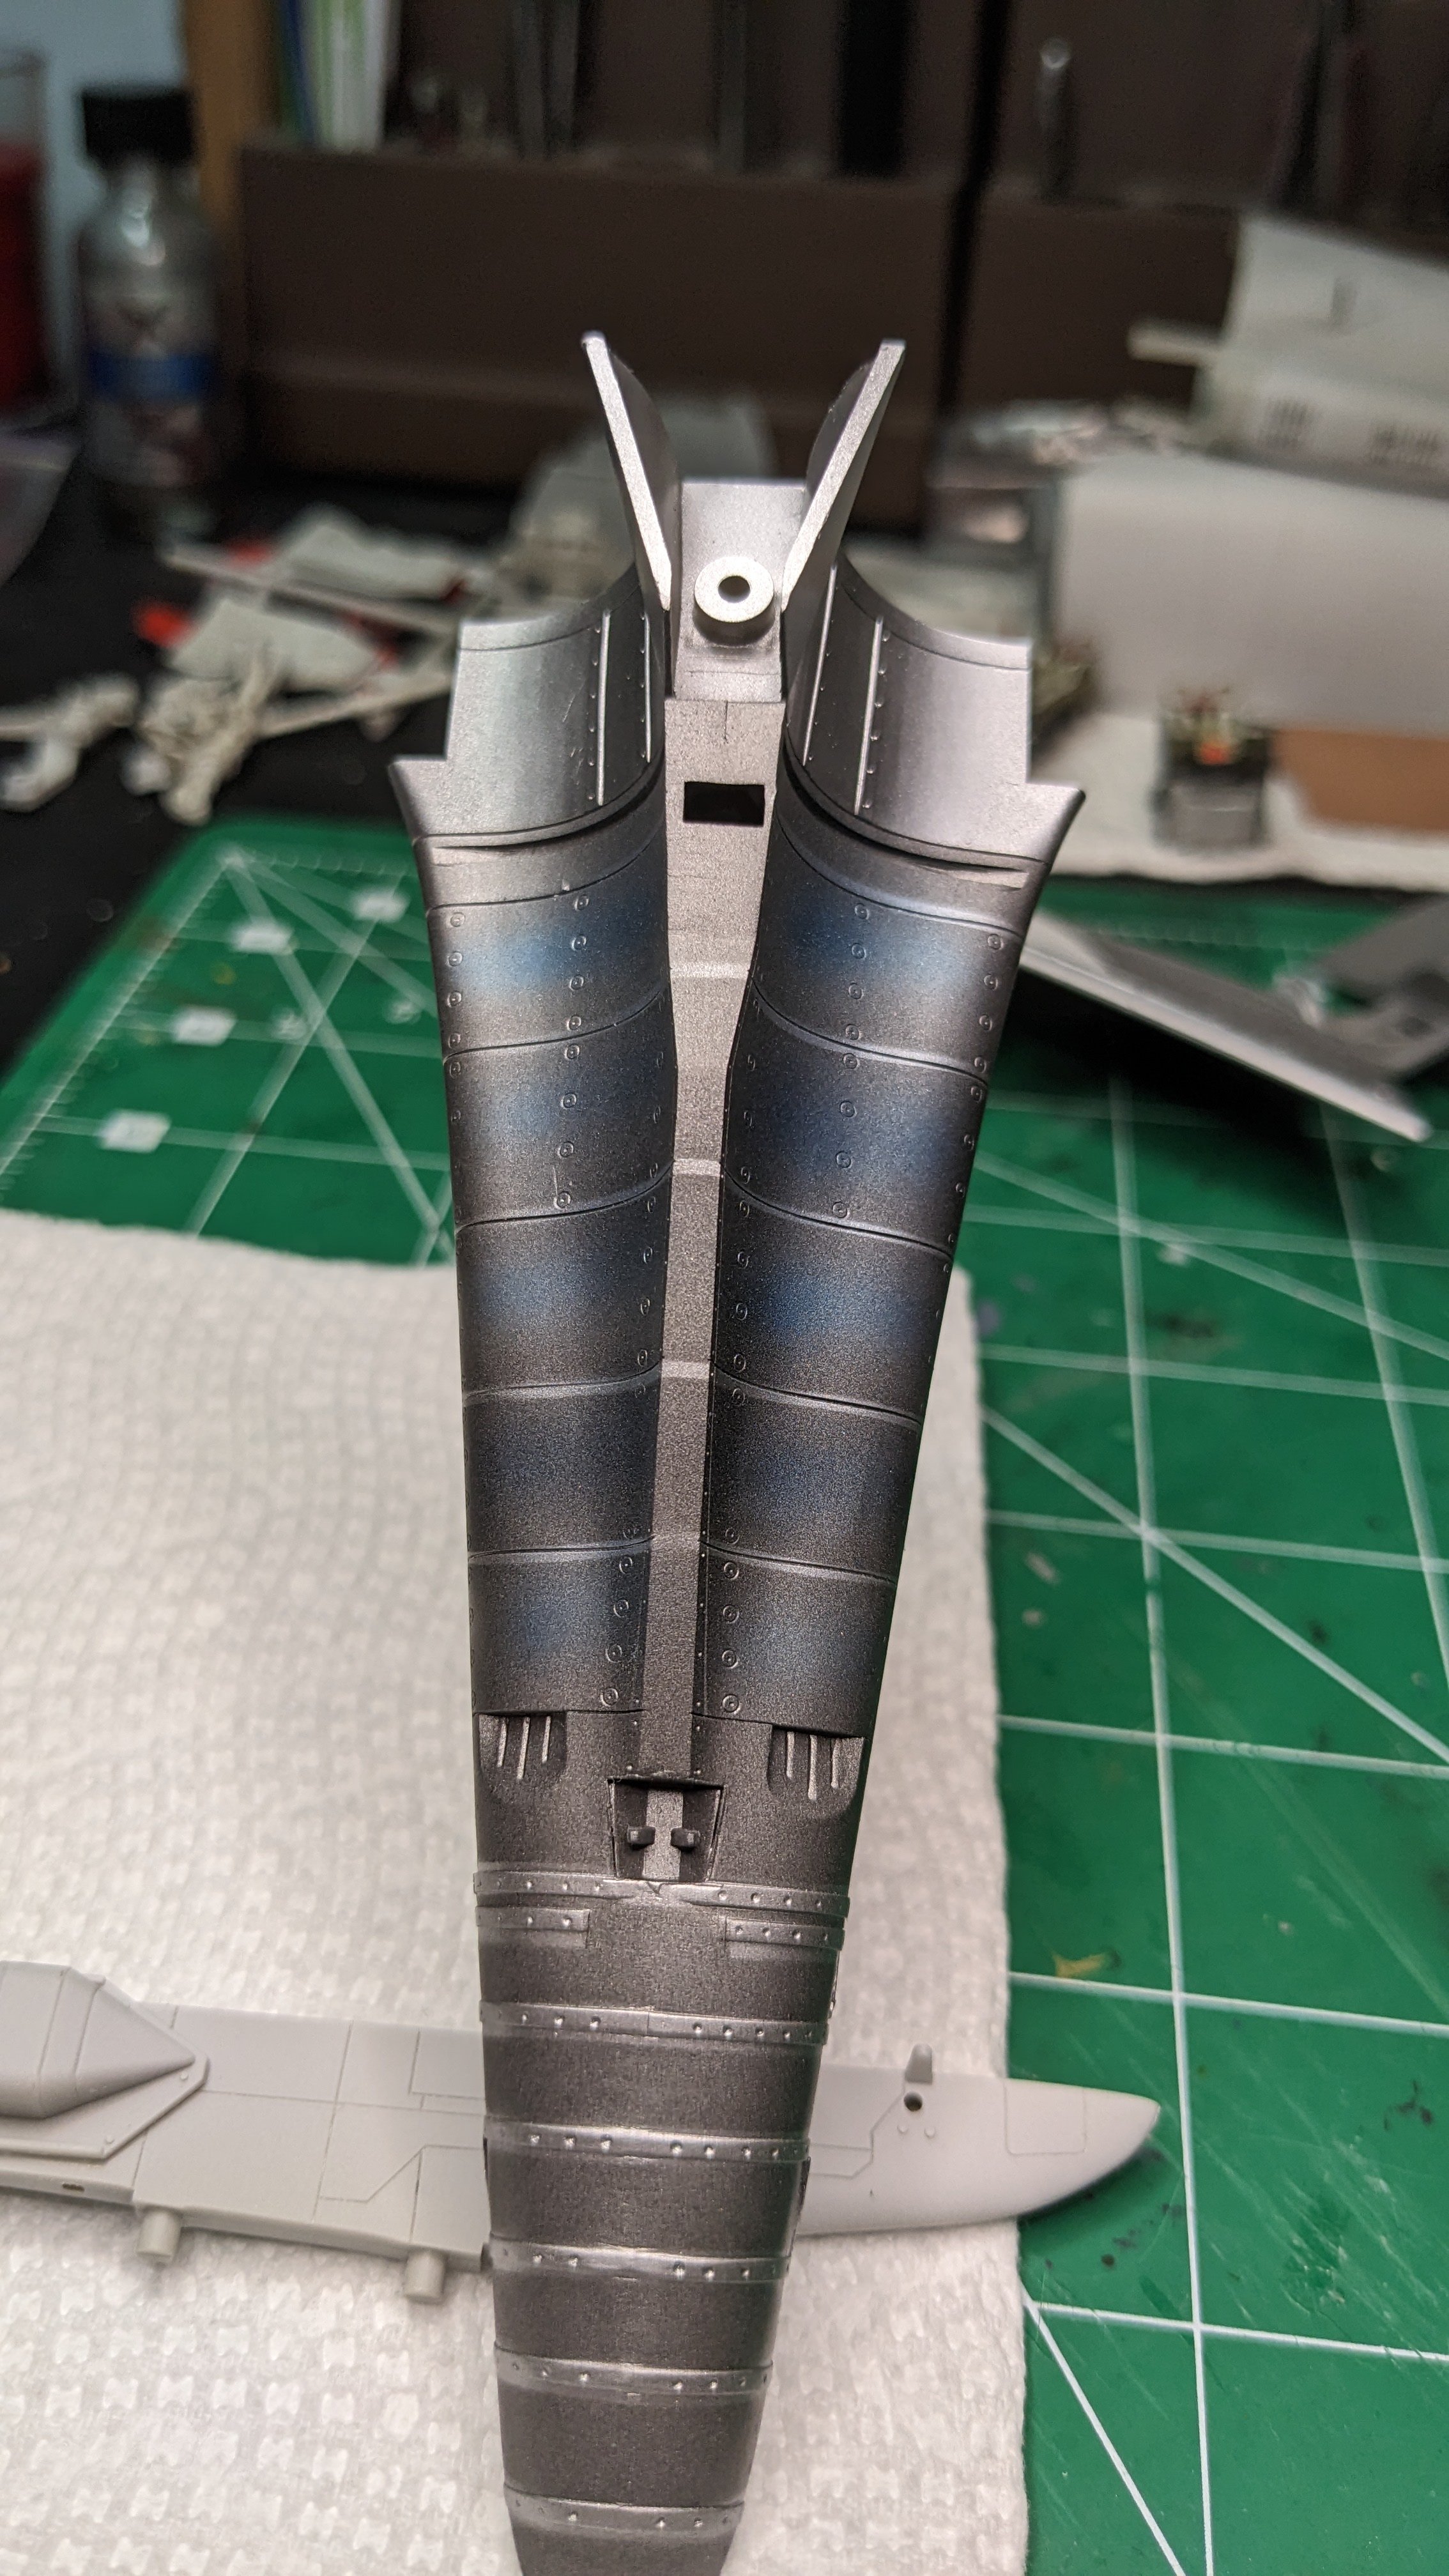
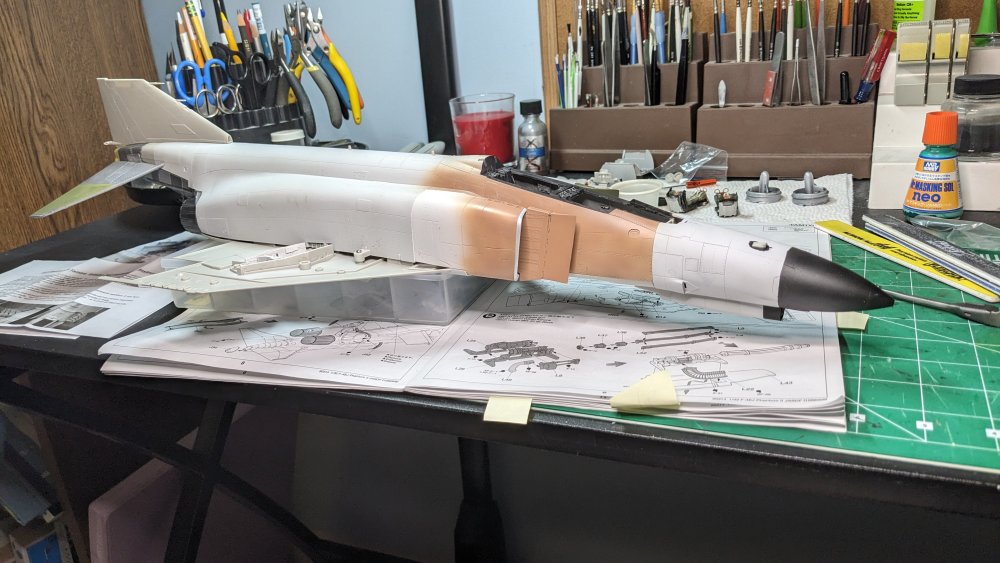
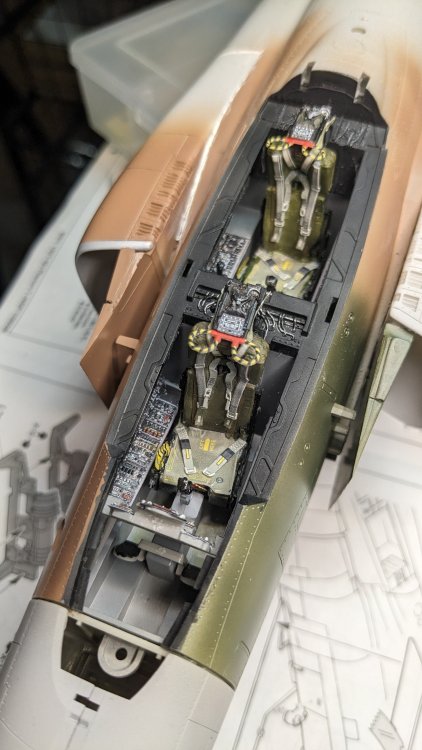
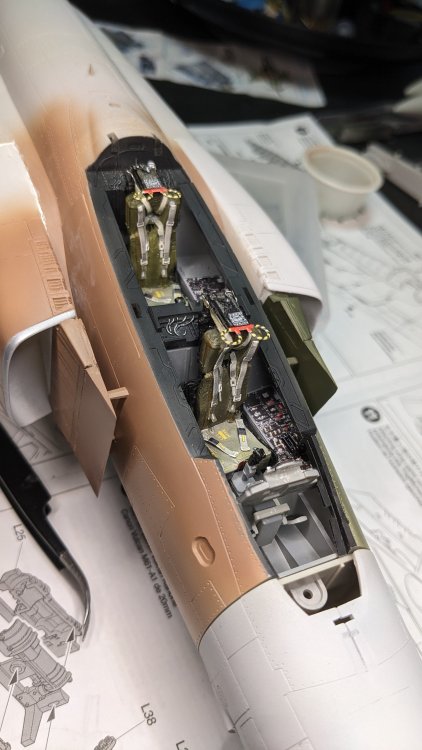
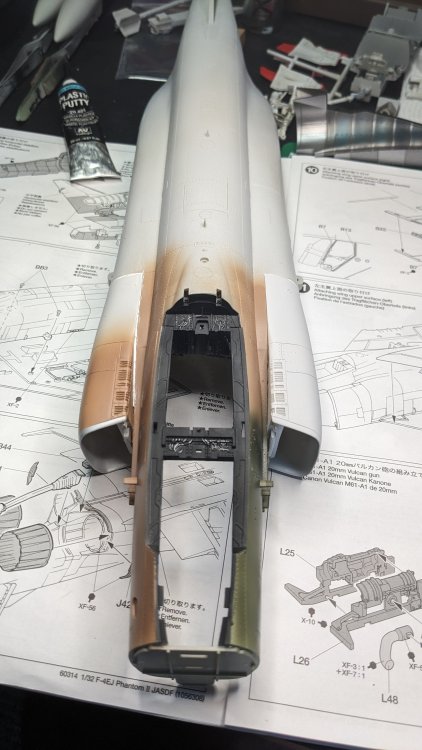
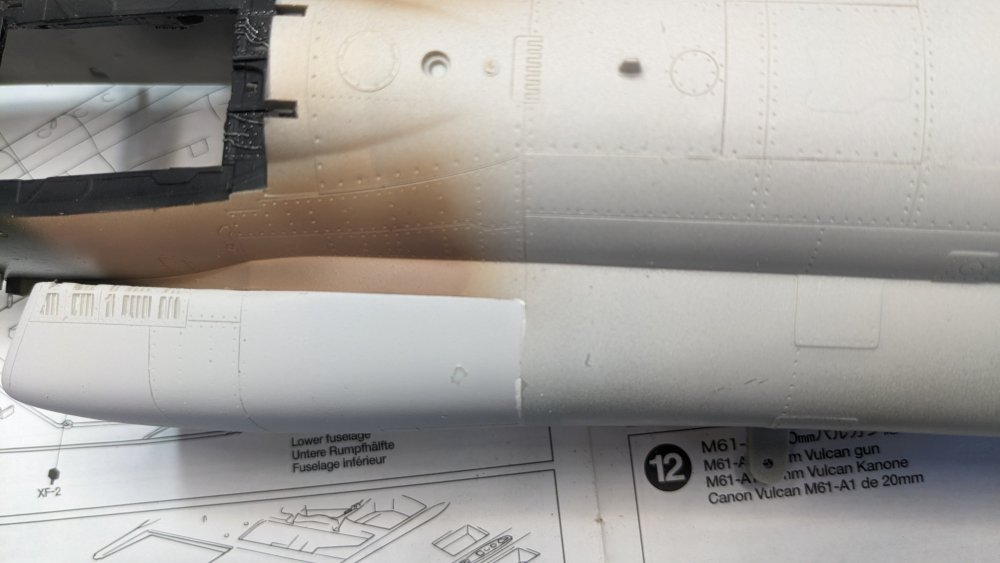
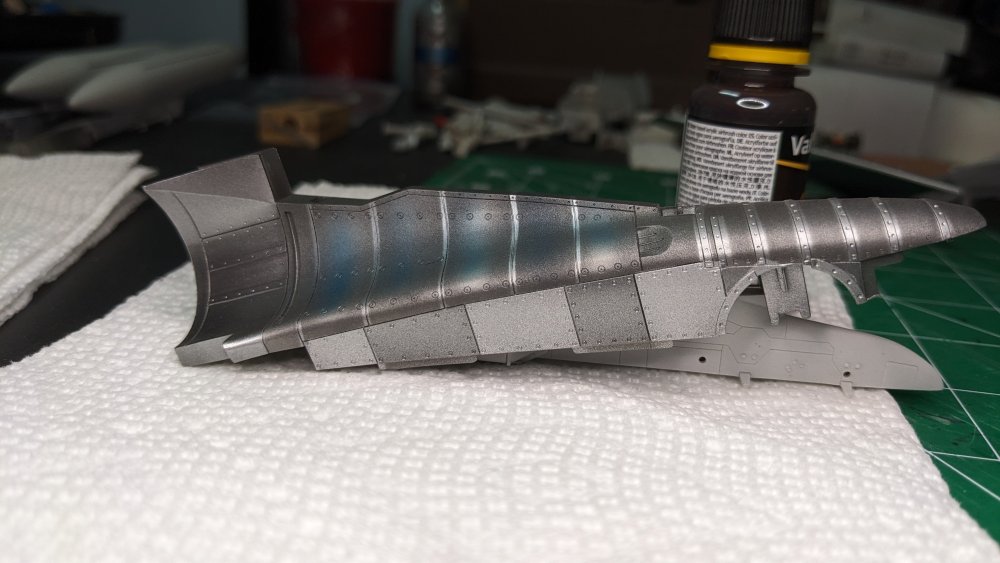
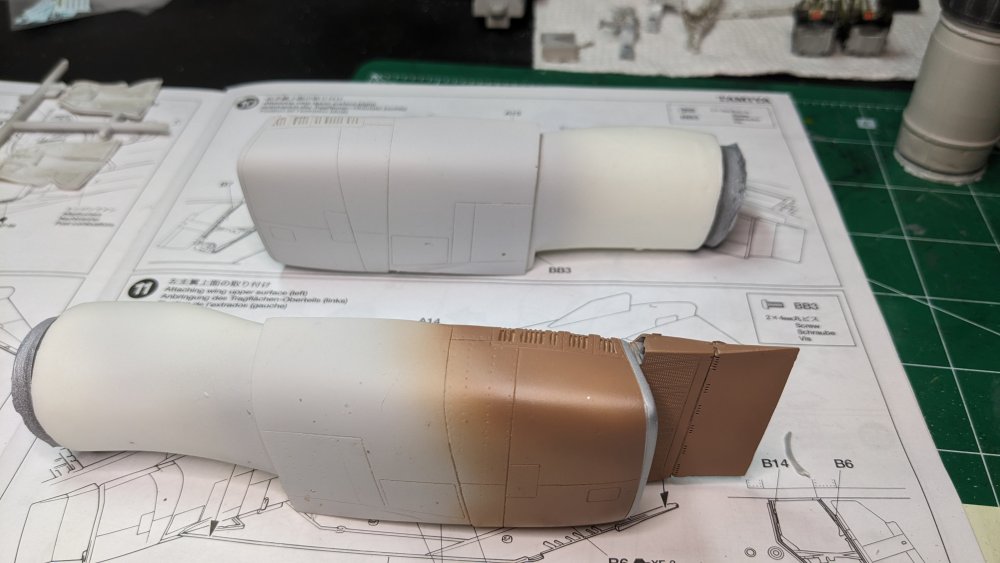
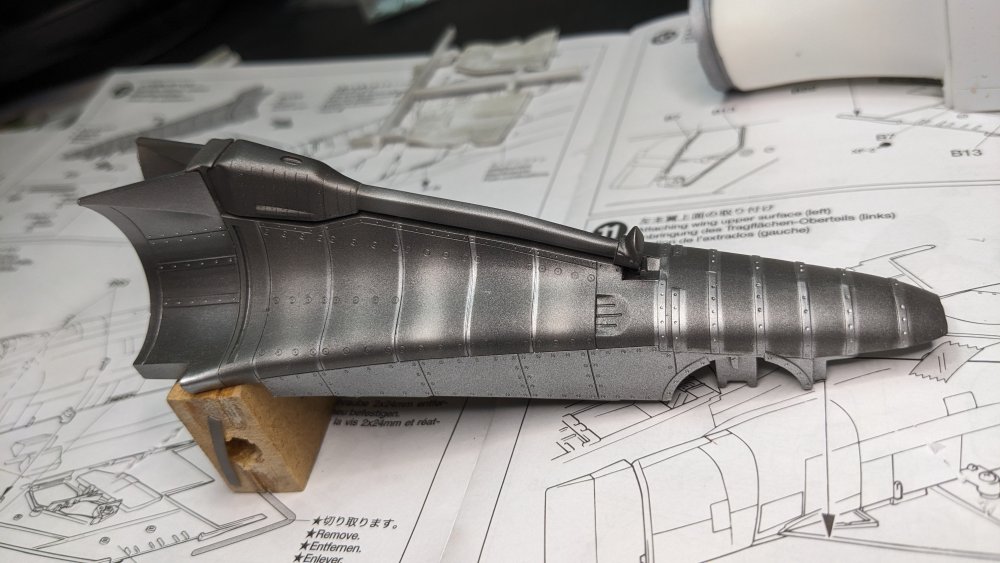
Making progress! Did some test-fitting of the cockpit and exhaust/burner cans along with the fuselage and wing bottom. Have a few things to look out for... First - It is STARTING to look like a Phantom!! Second, this thing is BIG.... The resin intakes with the splitters dry fitted look good as does the nose, which is just sitting there. The splitters stand a bit proud of the fuselage so will have to work on that a bit. The left-side now shows a gap underneath. It is tight on top and the side, but the bottom has a gap. The Right side is on the bottom in the picture below. Not too bad though. It does look like the intake is not squared up to the fuselage. Will have to check that. One thing I've noticed about the bluing of the exhaust is that the blue appears starker in the photographs, then to the eye. The burner cans are just sitting there, and I have not worked on dry brushing them yet. Notice the gap in between the fuselage and the wing bottom in the top picture (below). That may be a dry fitment issue, or the resin parts may be just a bit too big. Or, more likely, the resin parts shifted when I was closing up the fuselage and that is causing the gap. There are some parts that go around the burner cans that have not been painted yet and so are missing in these pictures. What is really showing off pretty well is the Quinta cockpit set. The seats are just sitting there for now. Tight cockpit, lots of knobs and switches. That's it for now!


-
Peter, Thank you so much for your comments and I am really grateful for the support. I learn a lot watching your builds!
-
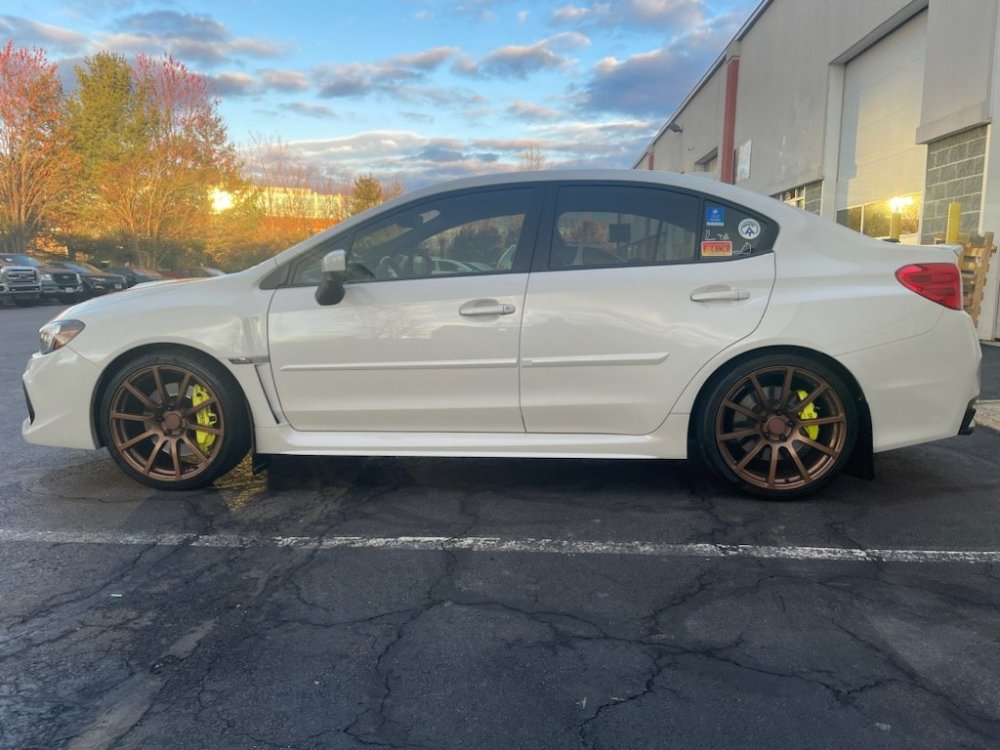
Put on a new set of springs to see how it impacted the ride. Lowered the car about 3/4" but stiffer. The performance under speed and load is much better now. Stock New Springs. Visually just a little bit lower.

- 2,036 replies
-
- 5
-

-
- car related stuff
- anything about cars
- (and 6 more)
-
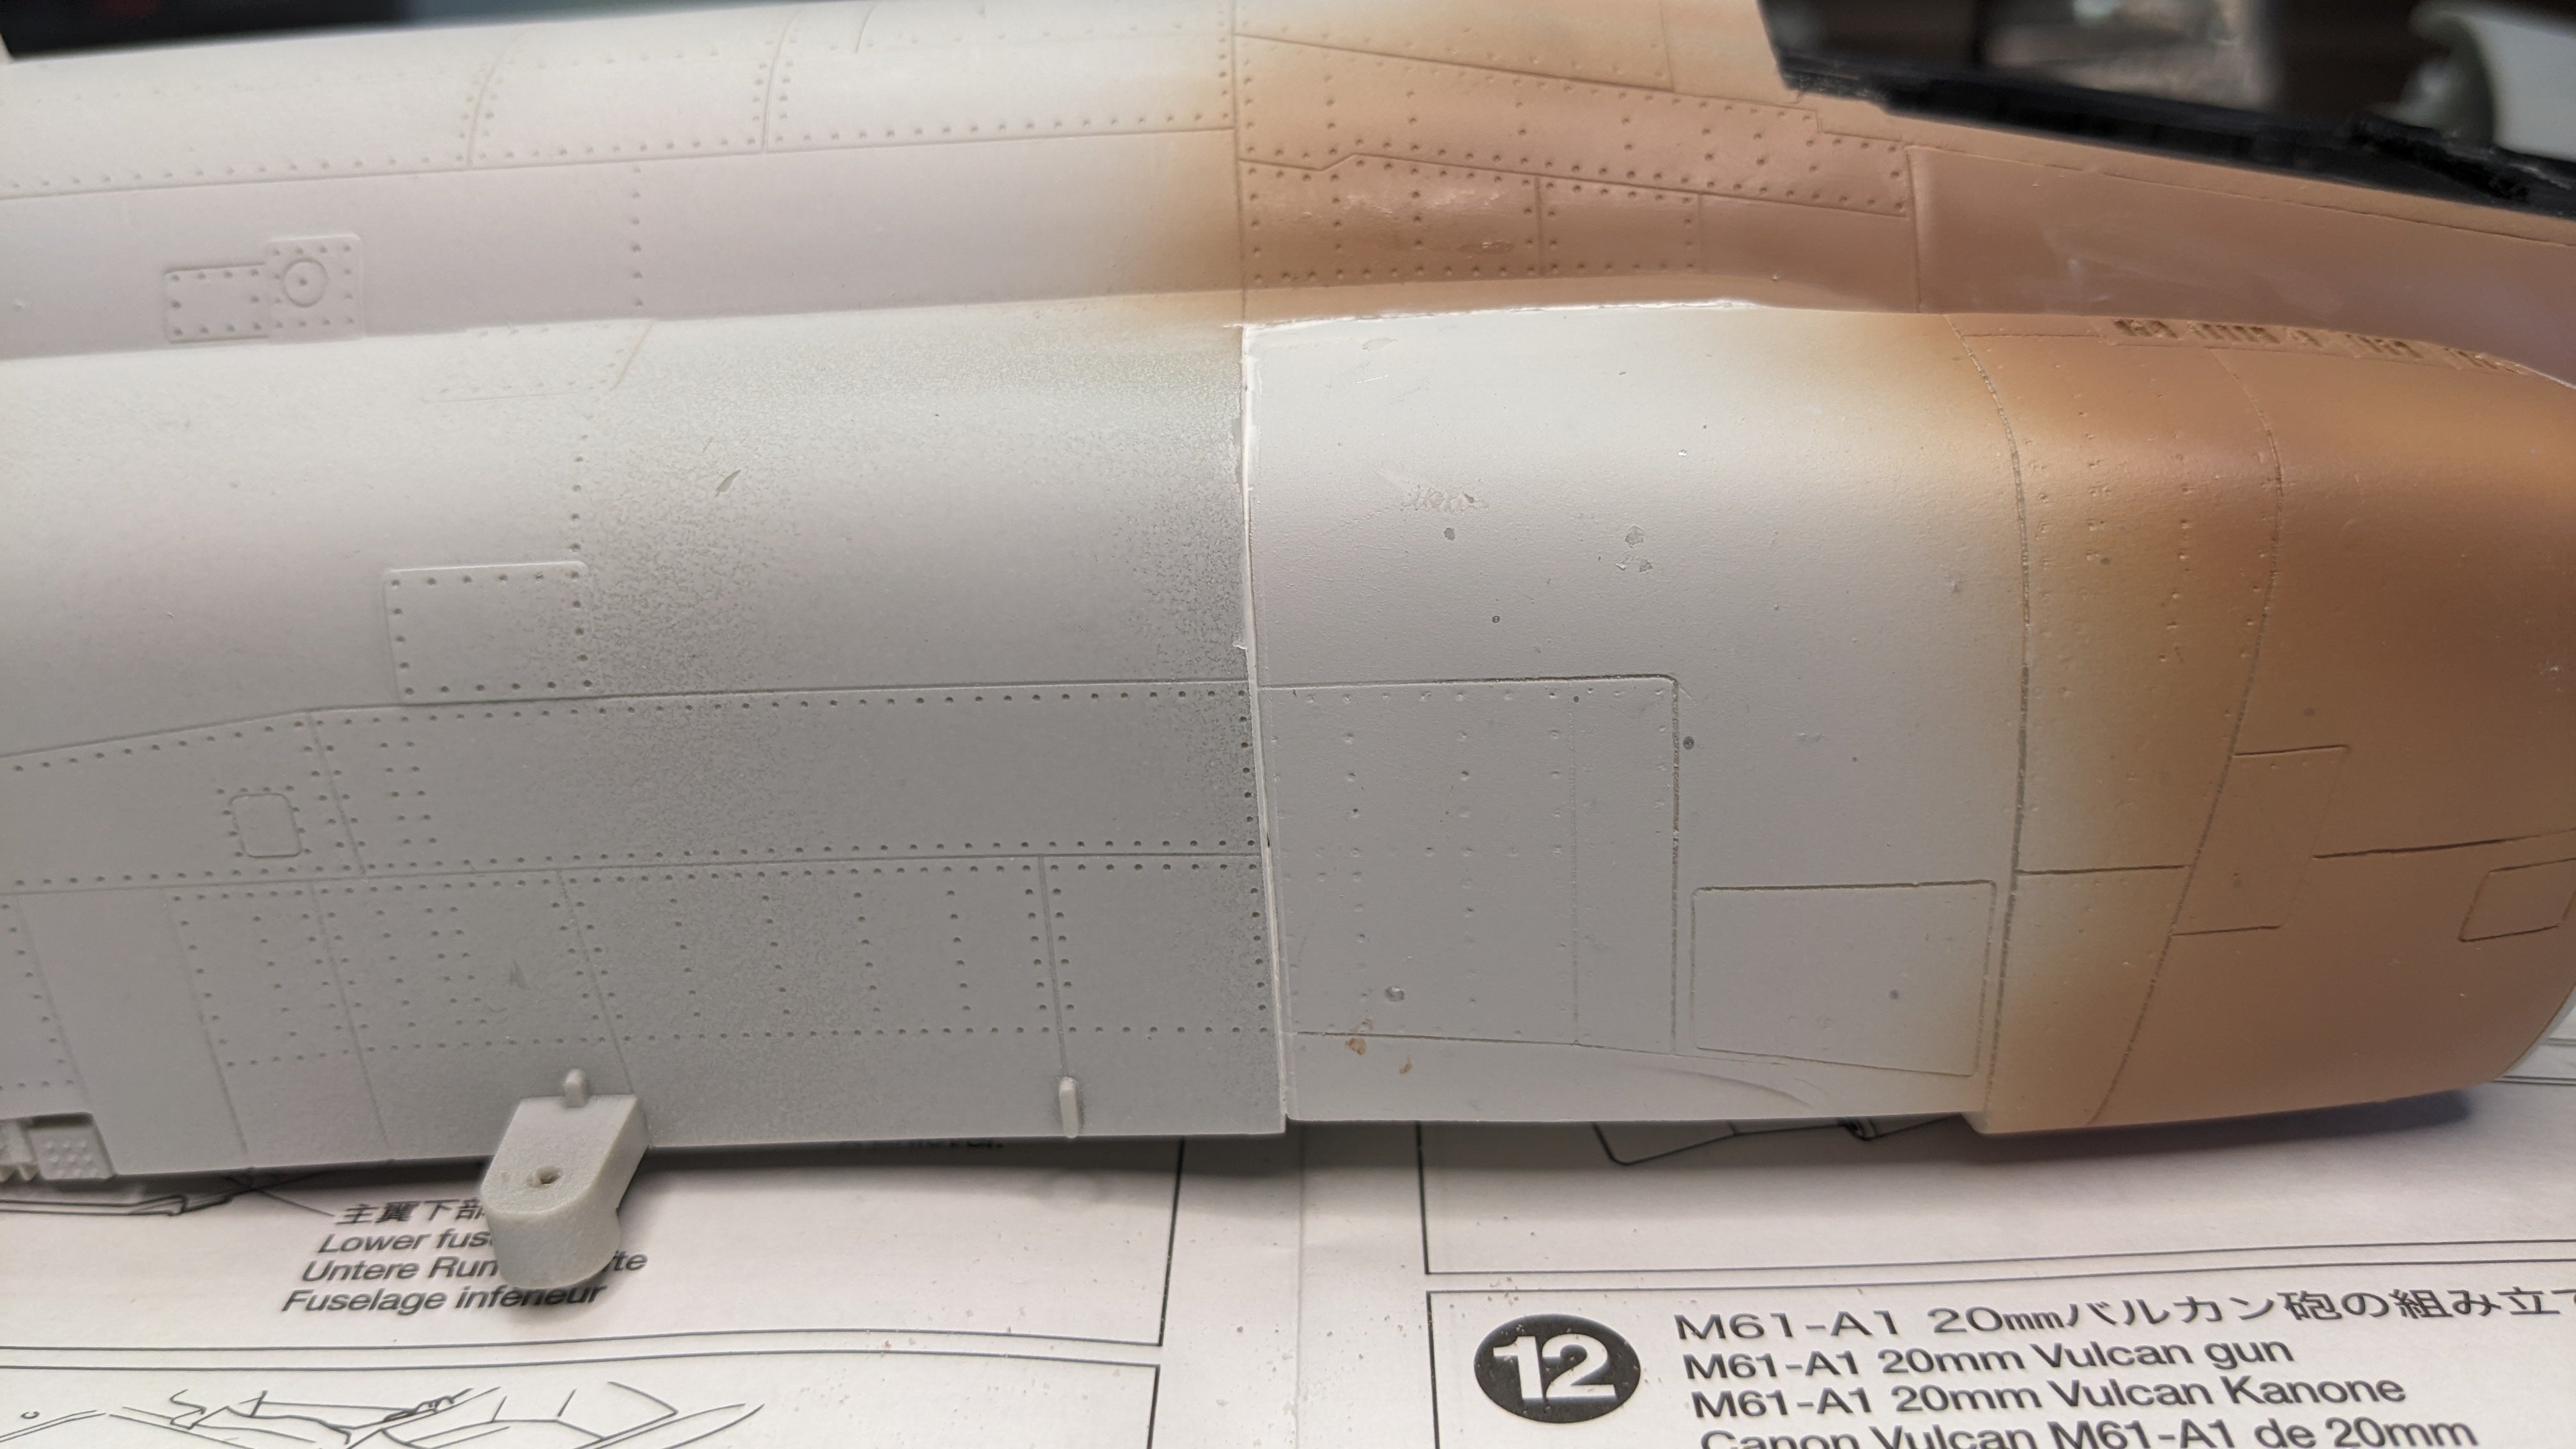
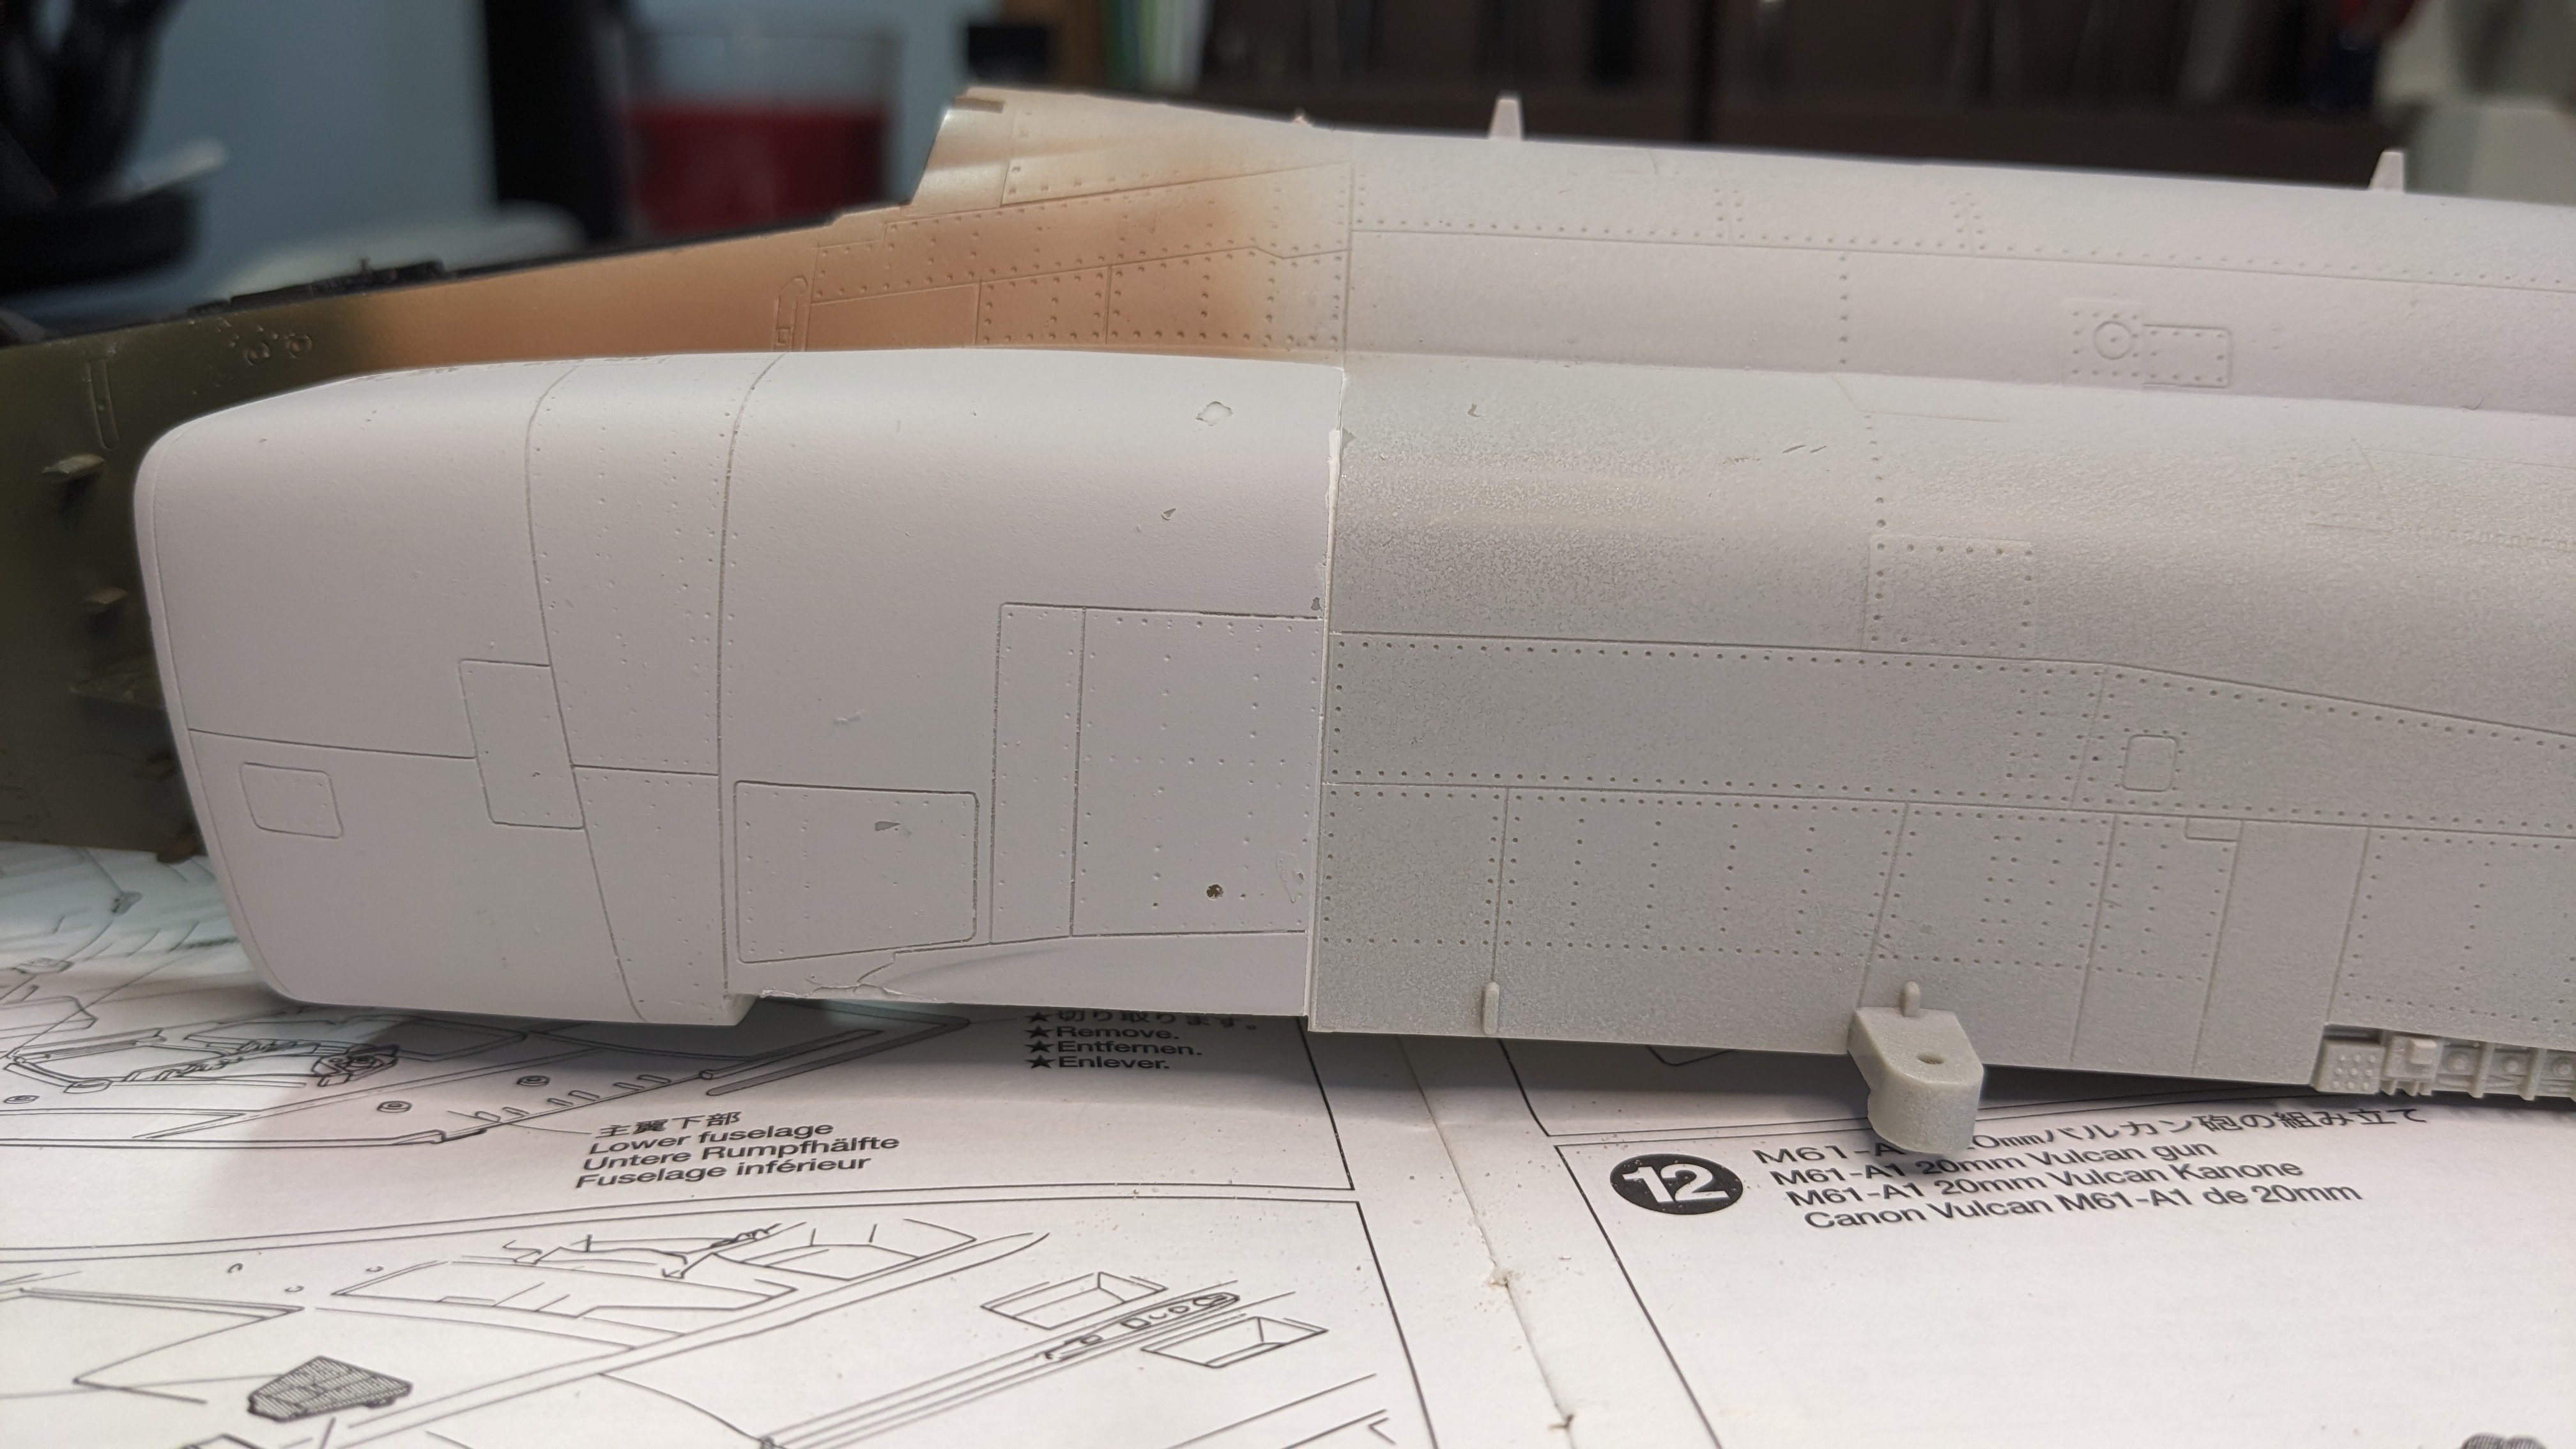
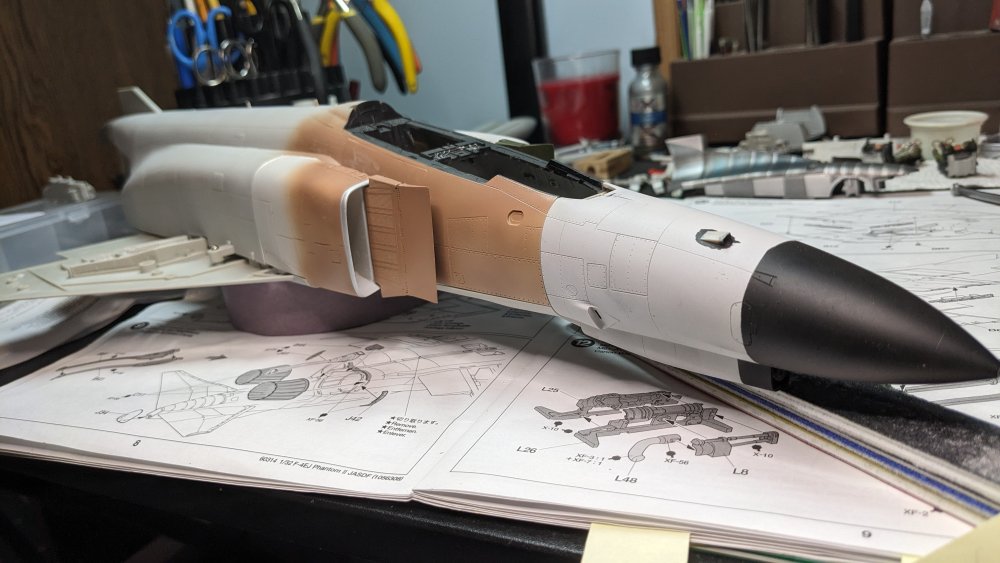
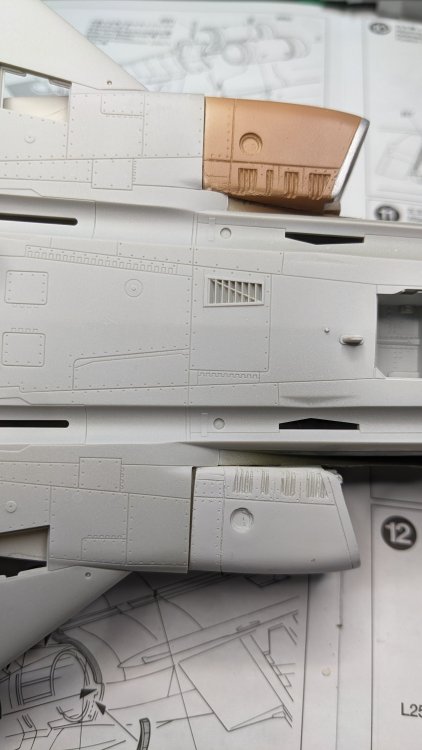
Had a few minutes so decided to attach the intakes. I'd say 'pretty good and good' as far as they go. Here goes: Left side fit beautifully. VERY little filler required as you can see. Even from the top, the fit was terrific and required no filler between the intake and the fuselage. Nice!! The right side is a bit of a different story and it may be my own doing. The side seam was just a bit wider than on the left side, but certainly manageable. You can see the panel lines lined up perfectly. Yay! The top view is a little different story. No matter how I cajoled, clamped, held, squeezed, etc, this was the best I could do. I used CA Gel which sets up in about 20 seconds but also is a defacto gap filler. Once I was sure everything was set - the front of the intake was hard on the fuselage support and the back edge as tight as I could get it, I held it in place for a good two minutes, - just to be sure. On the top and especially down alongside the intake and the fuselage there was a good 1-2mm gap that needed to be filled. This may have somehow been my own doing: When I first removed the fuselage plastic intake to make room for the GT Resin intake - I started on the right side (since mostly I view my aircraft from the left... See, there is a method to my madness!). I'm thinking that I did something different on the left side after first tackling the right and that caused the poorer fitment. I say 'poorer' because this is still a terrific fit. Once I get this all painted and such, I'm thinking this will be a faded memory.... Its beginning to look like a Phantom II!


-
Thanks Carl! I appreciate the feedback. I was wondering the same thing. I might work to tone that down a bit....
-
Martin, Thank you! Jets are very new to me, so all the metallic work is also very new to me. But following you, Peter and everyone here is a HUGE help. Cheers! Chris
-
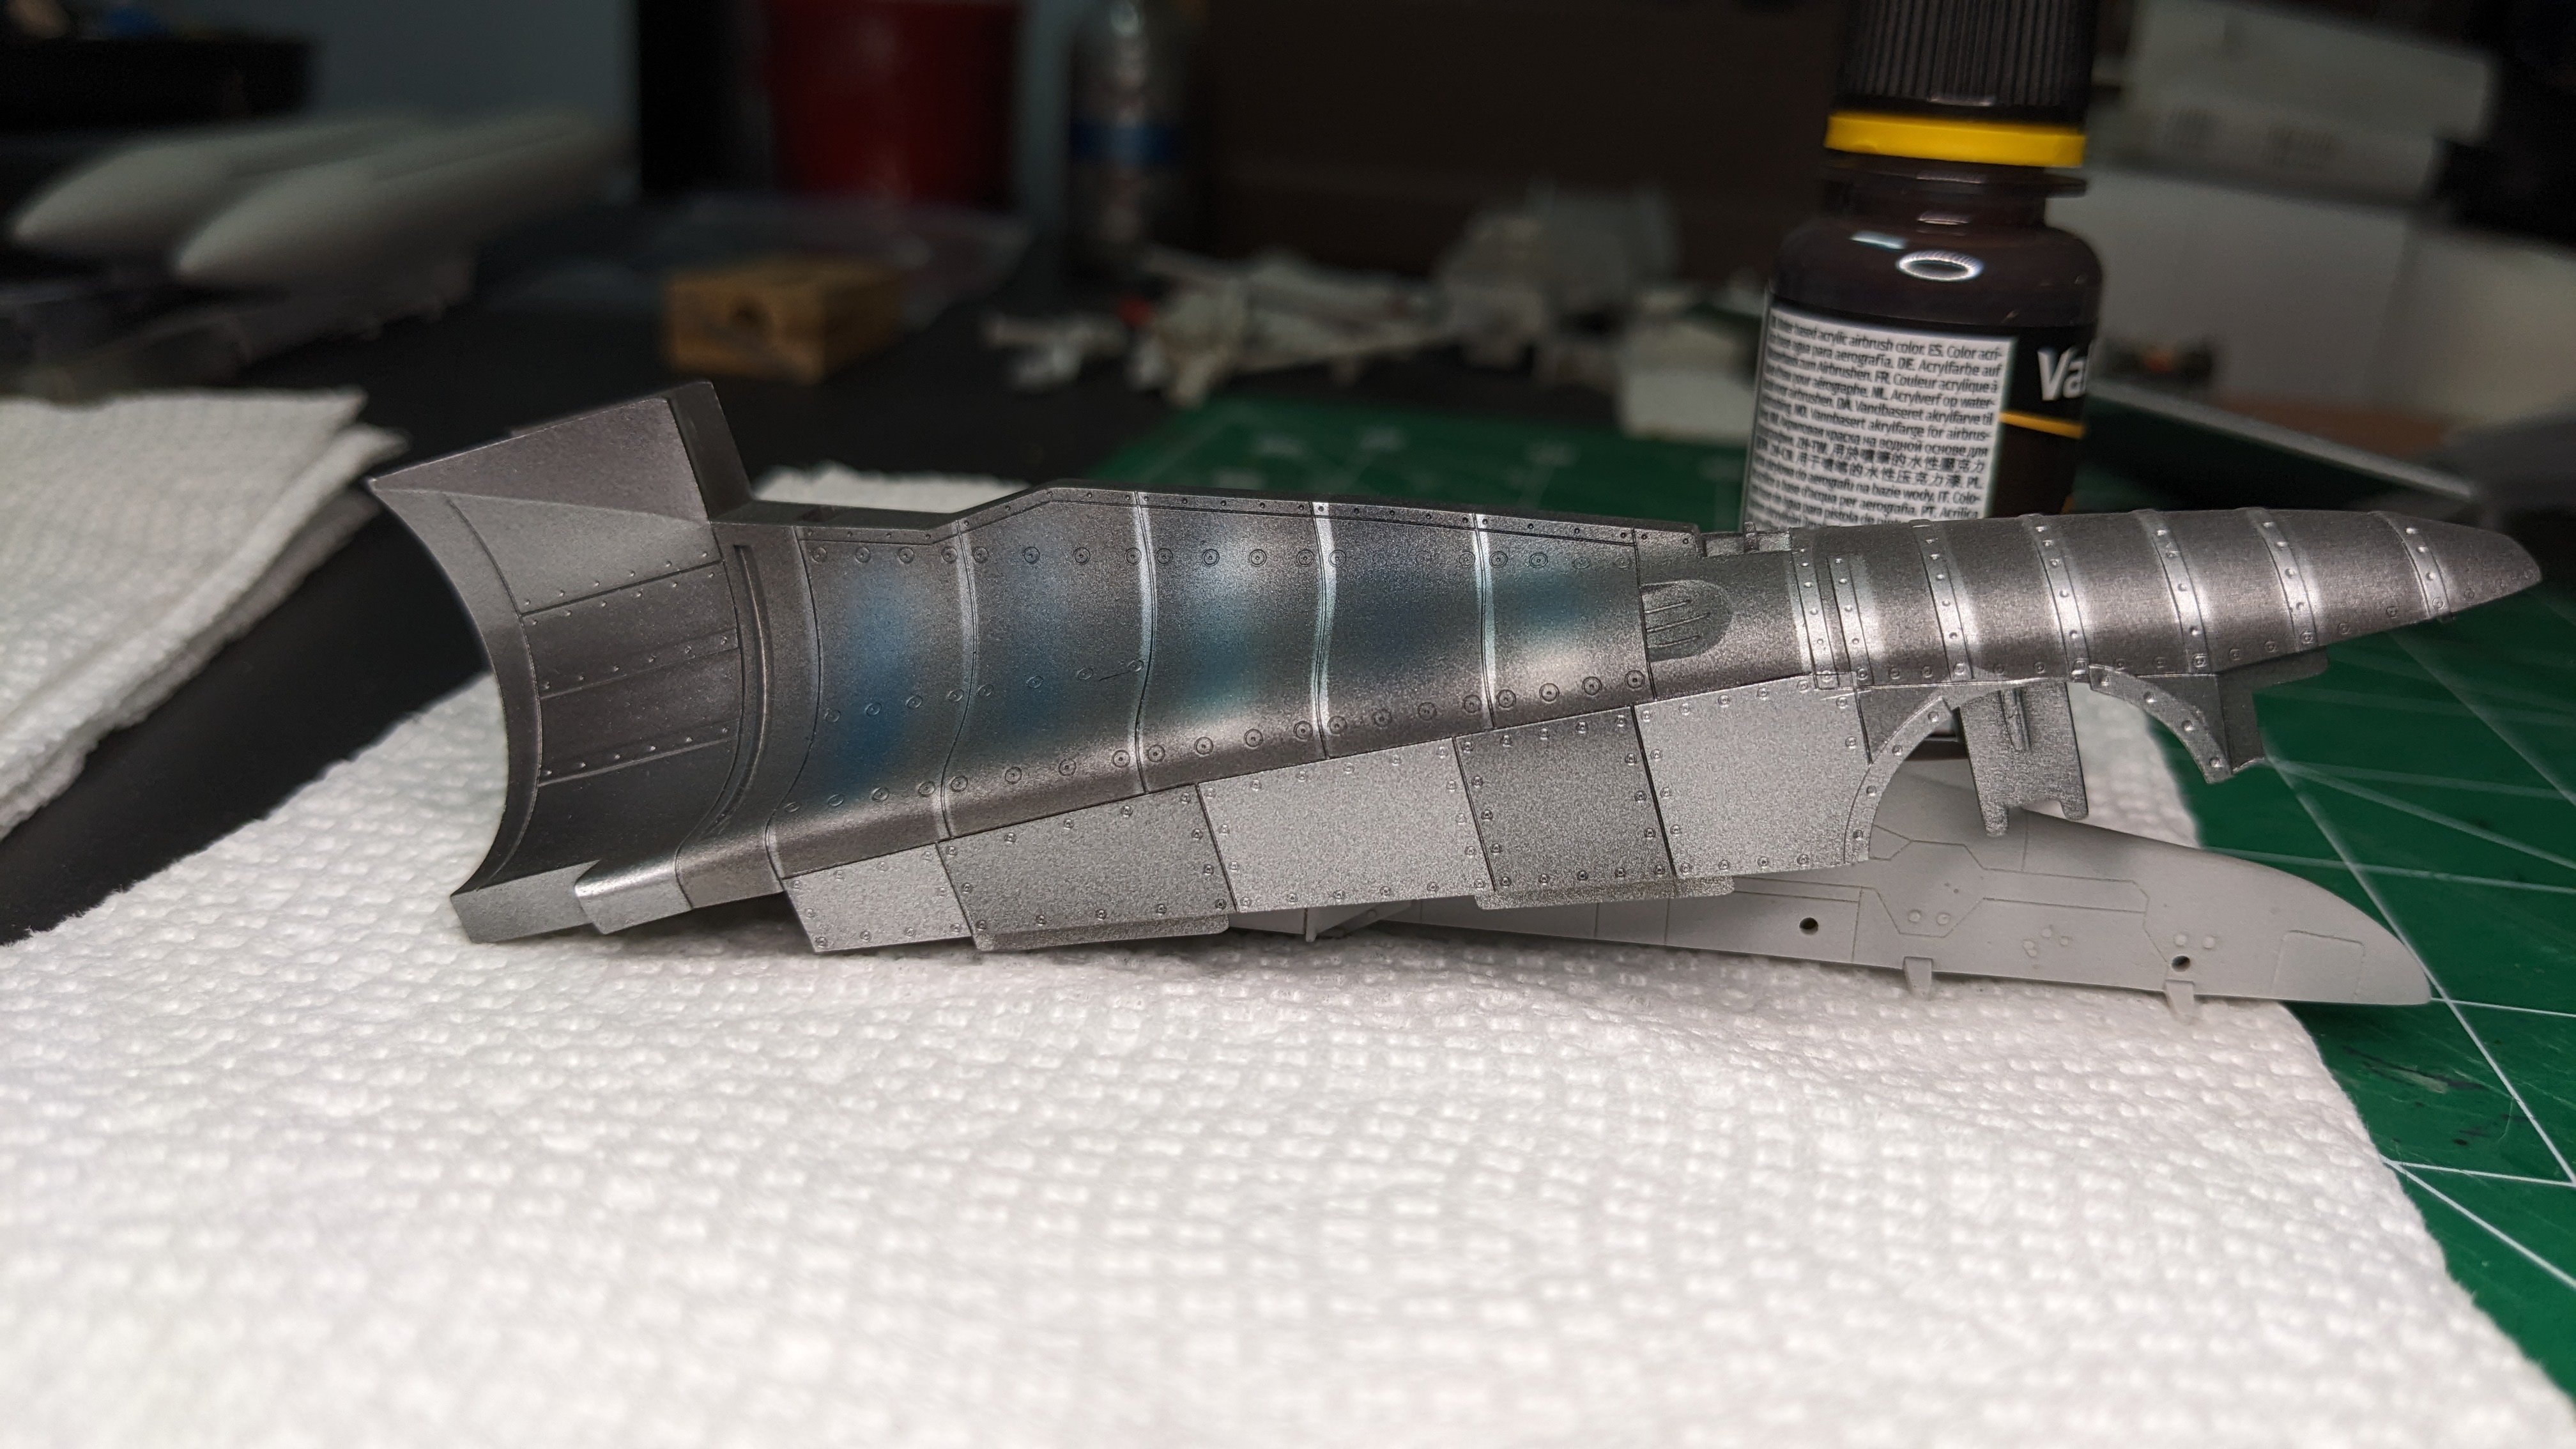
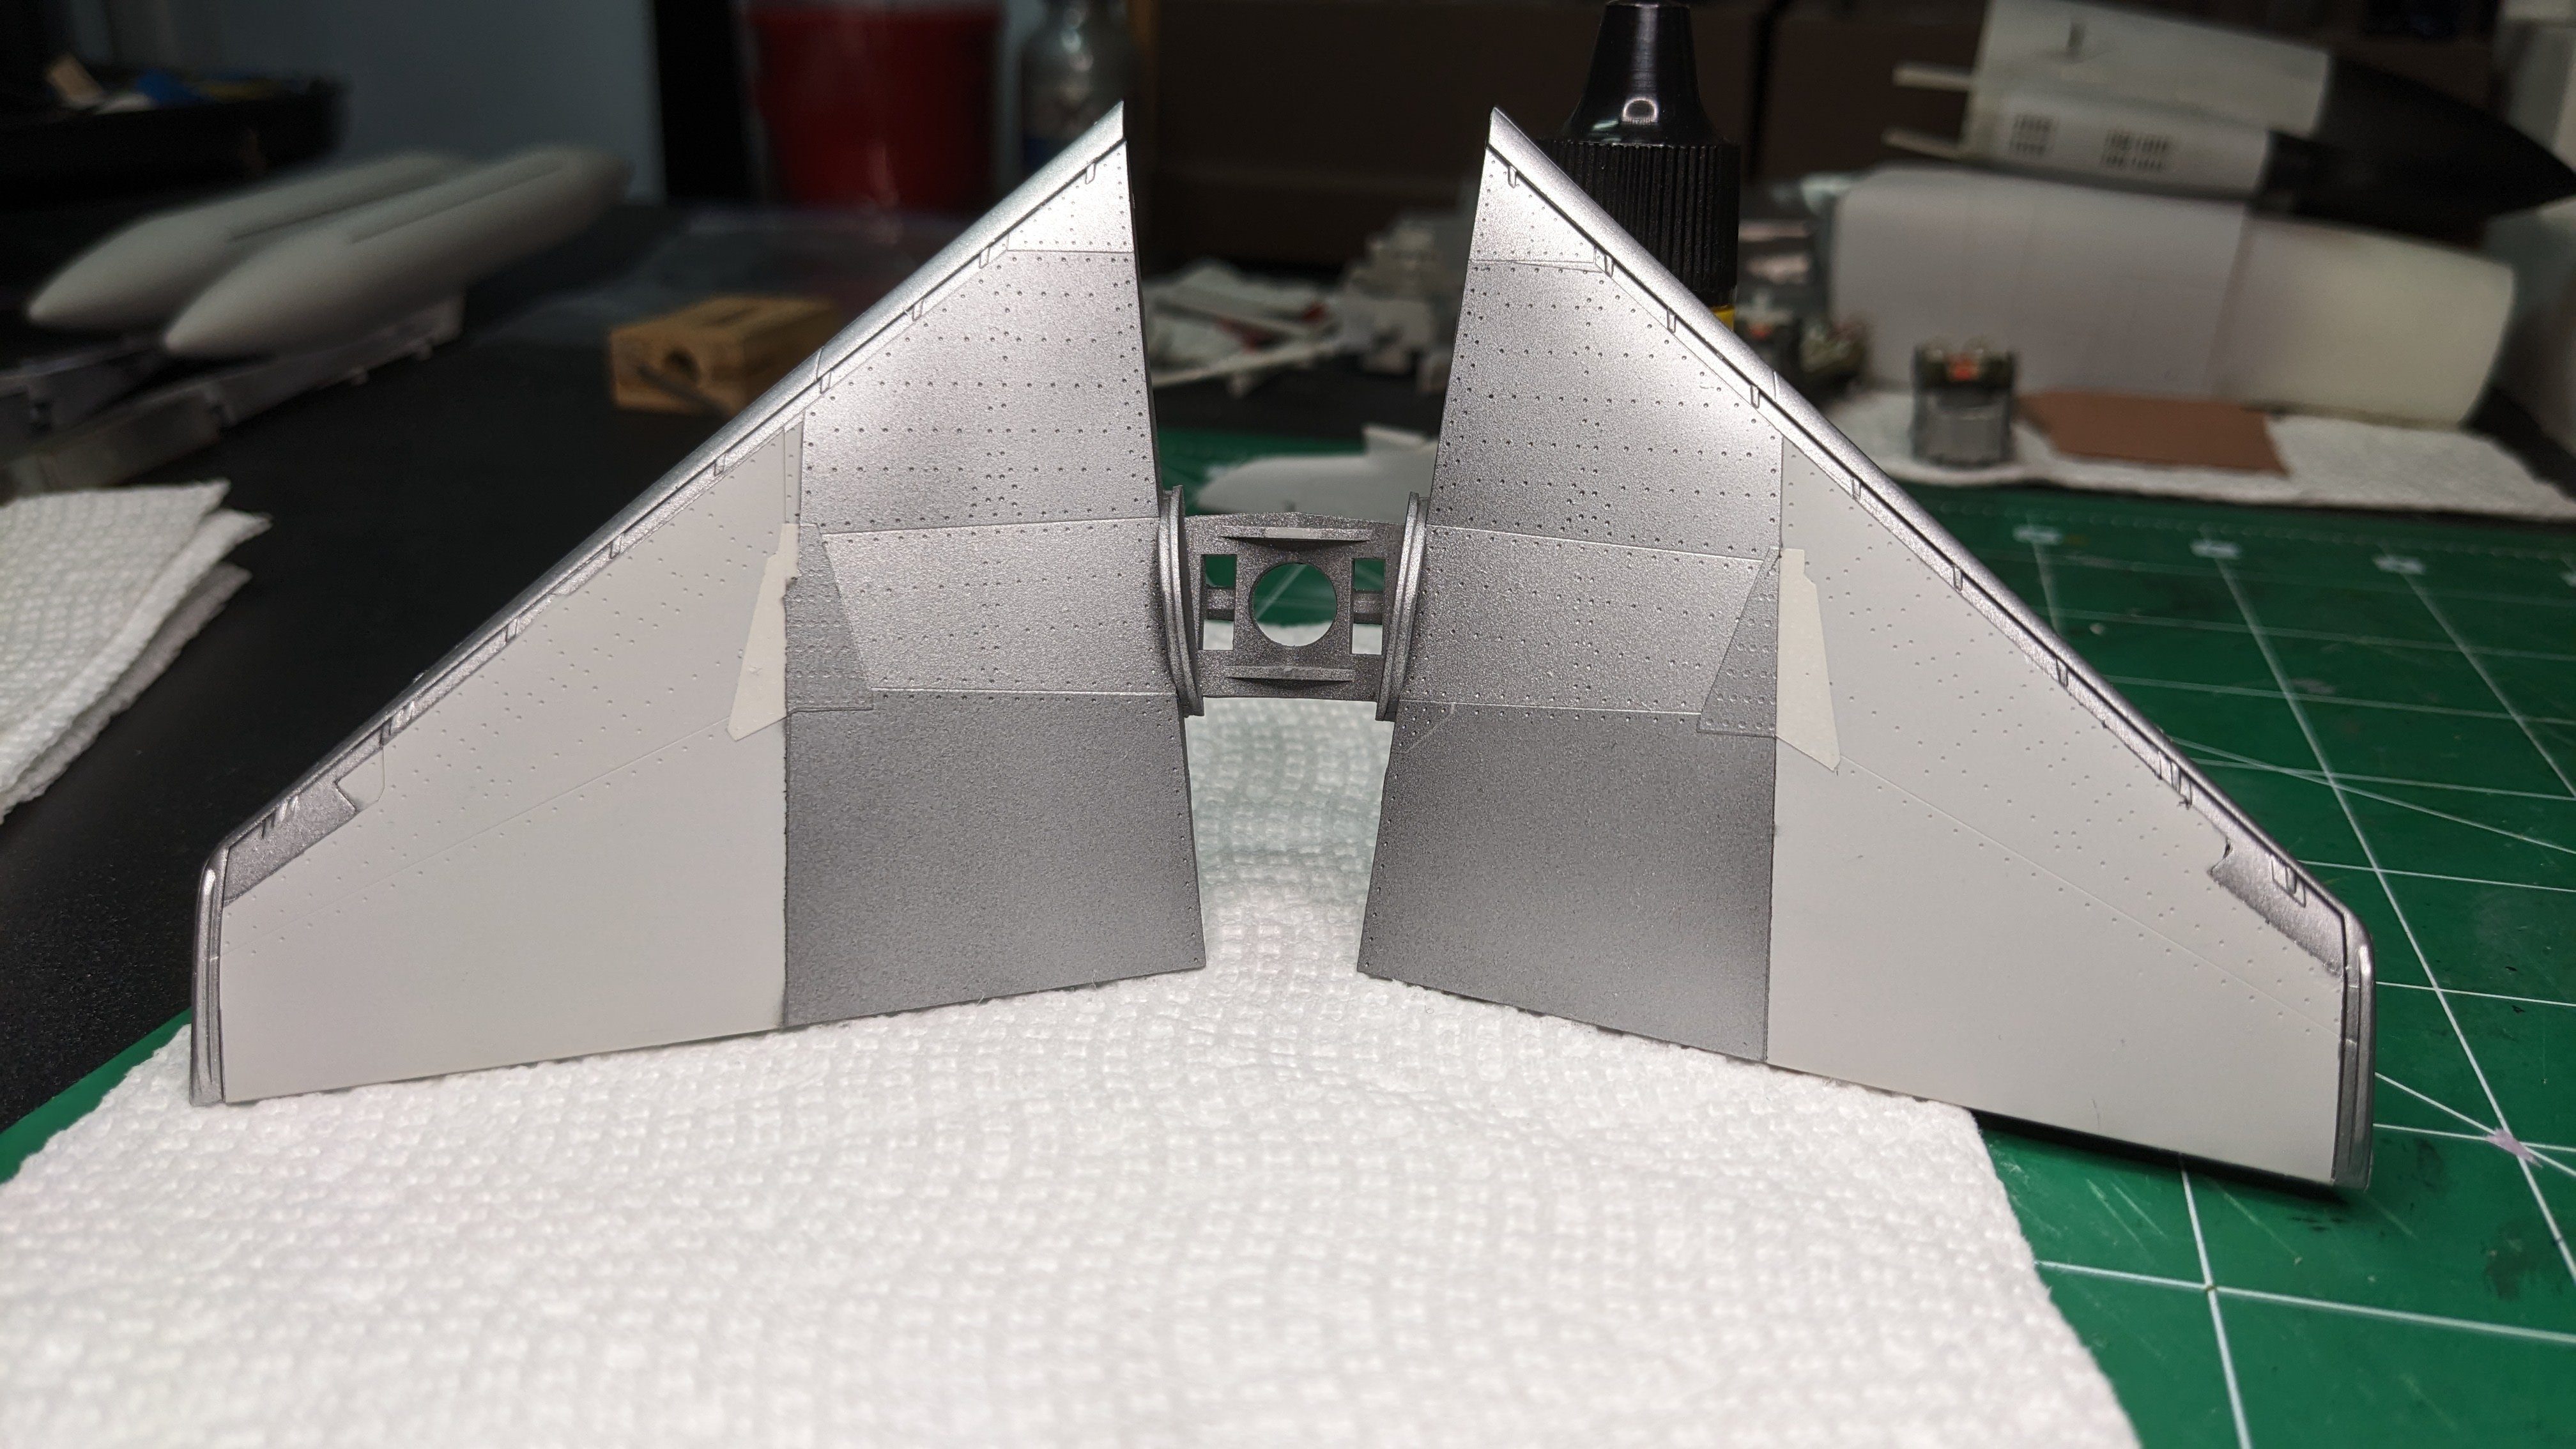
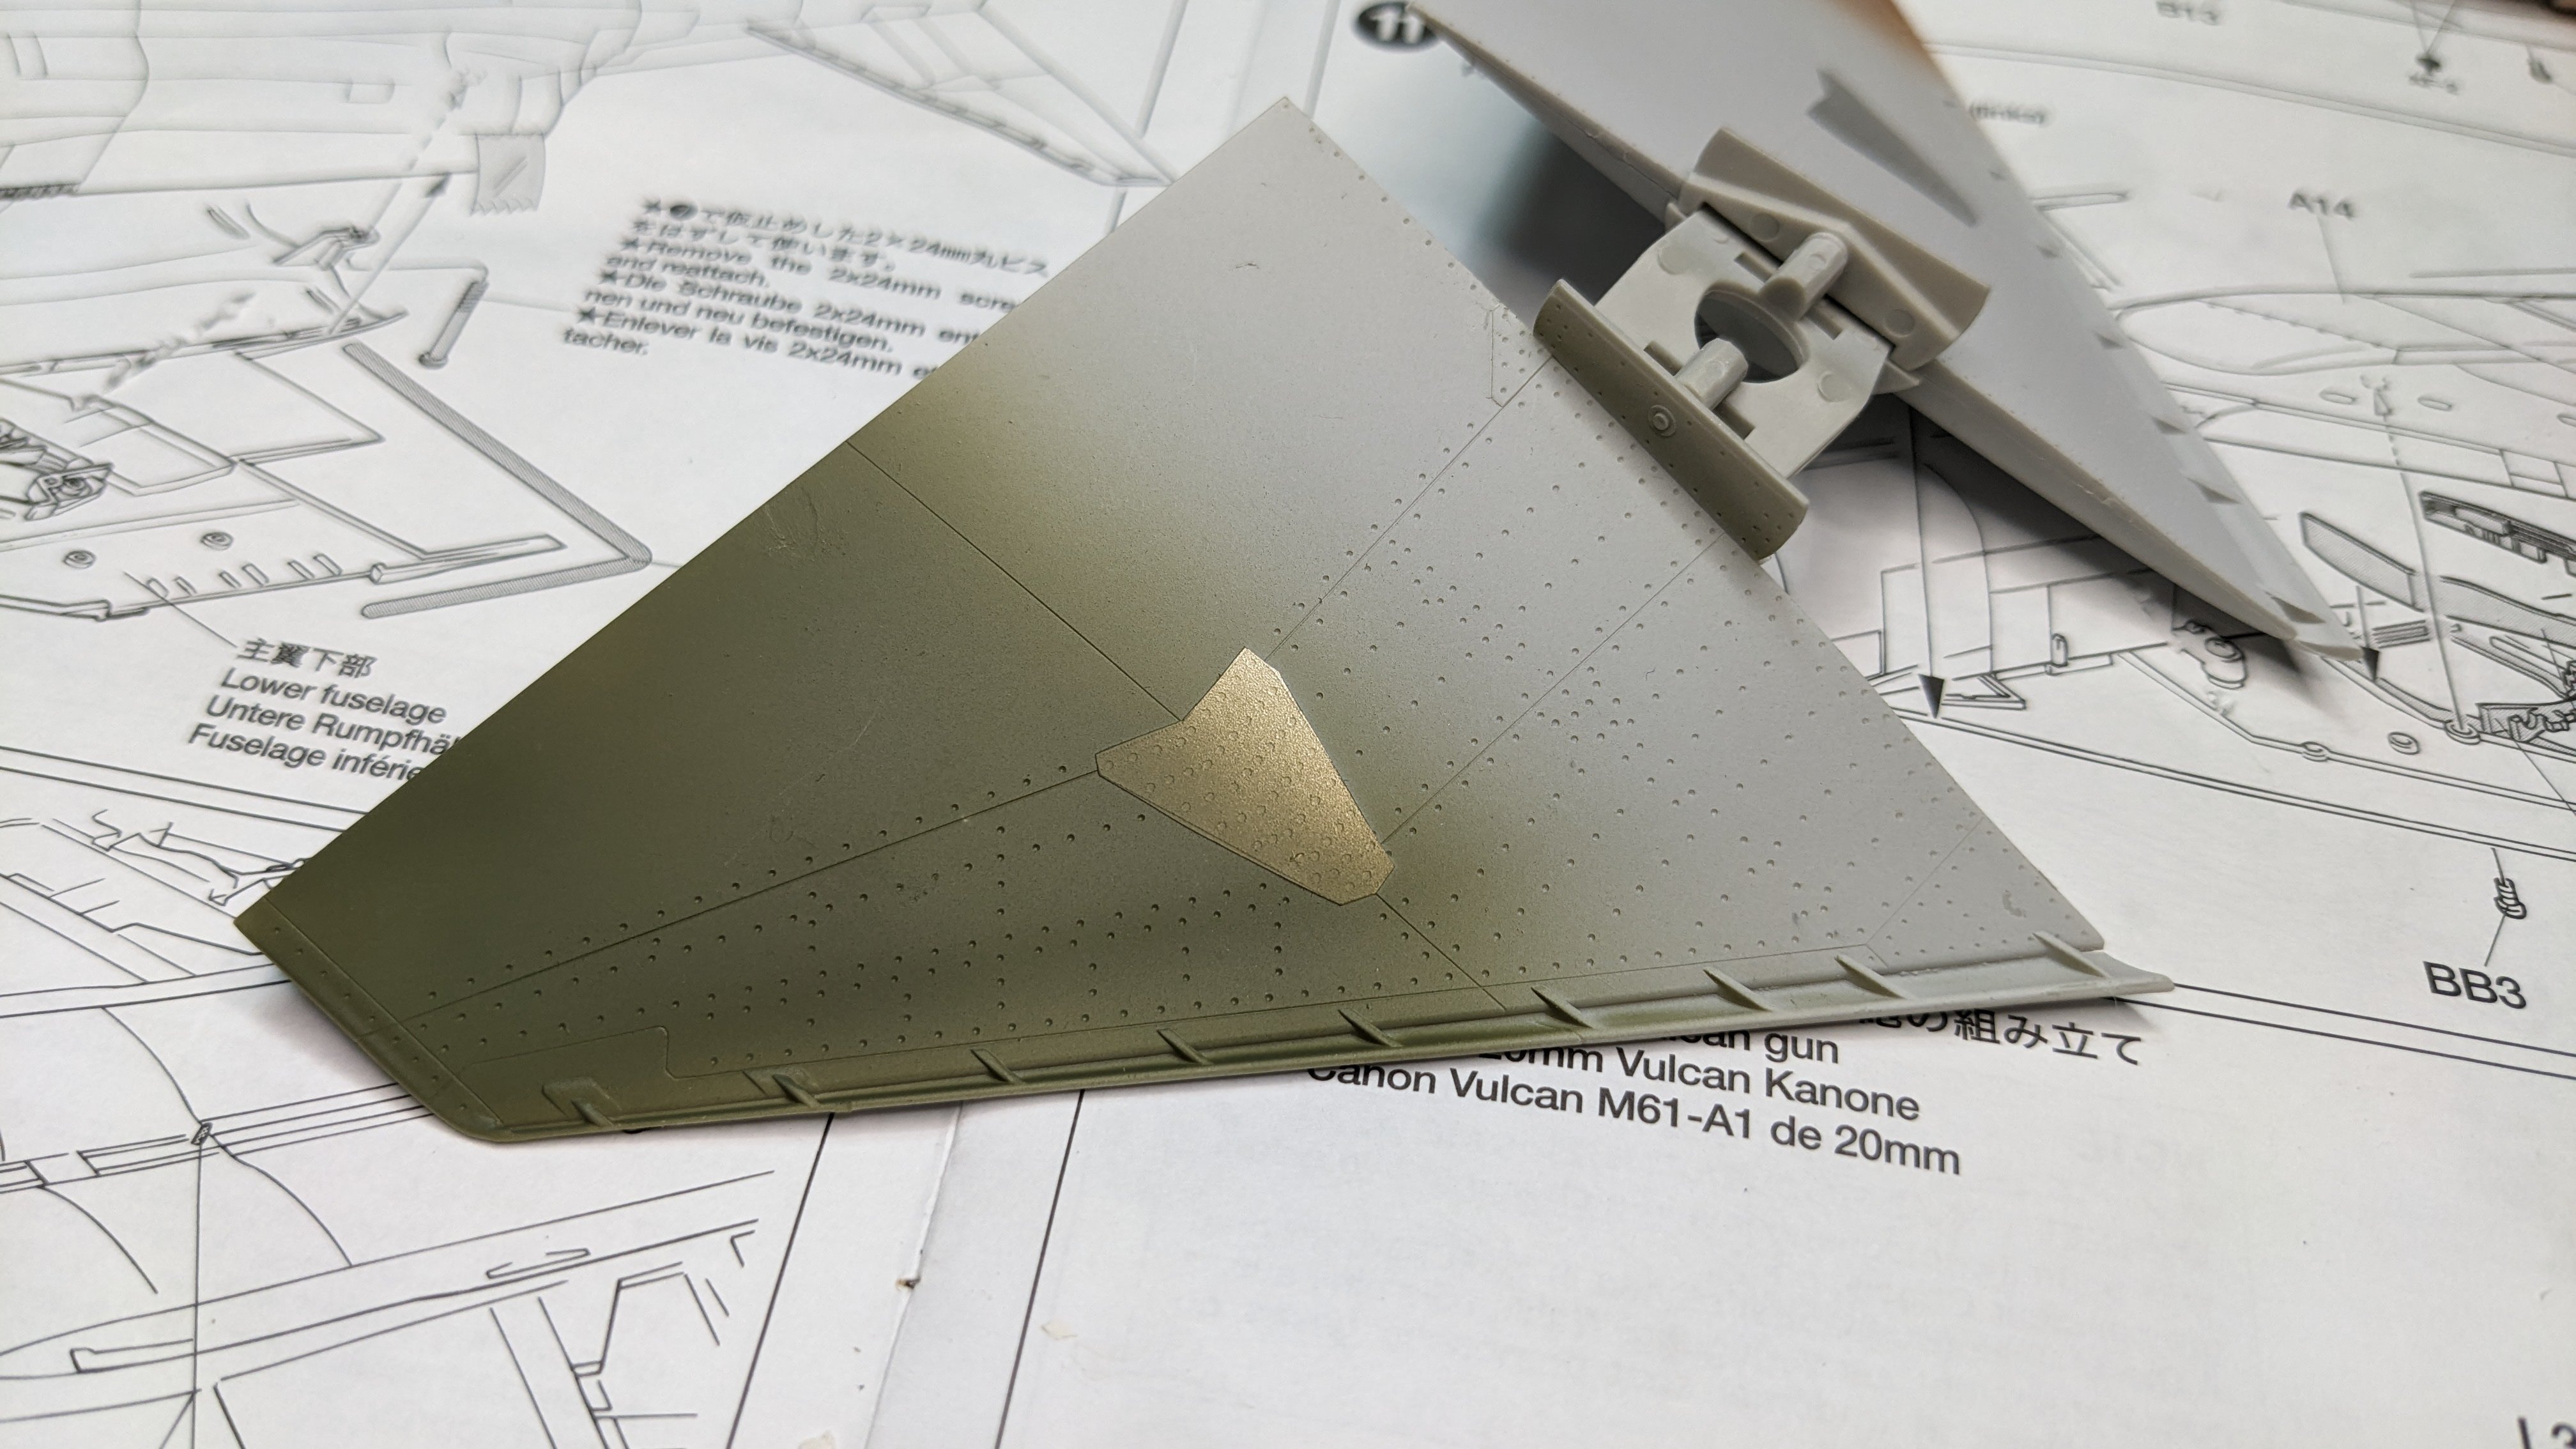
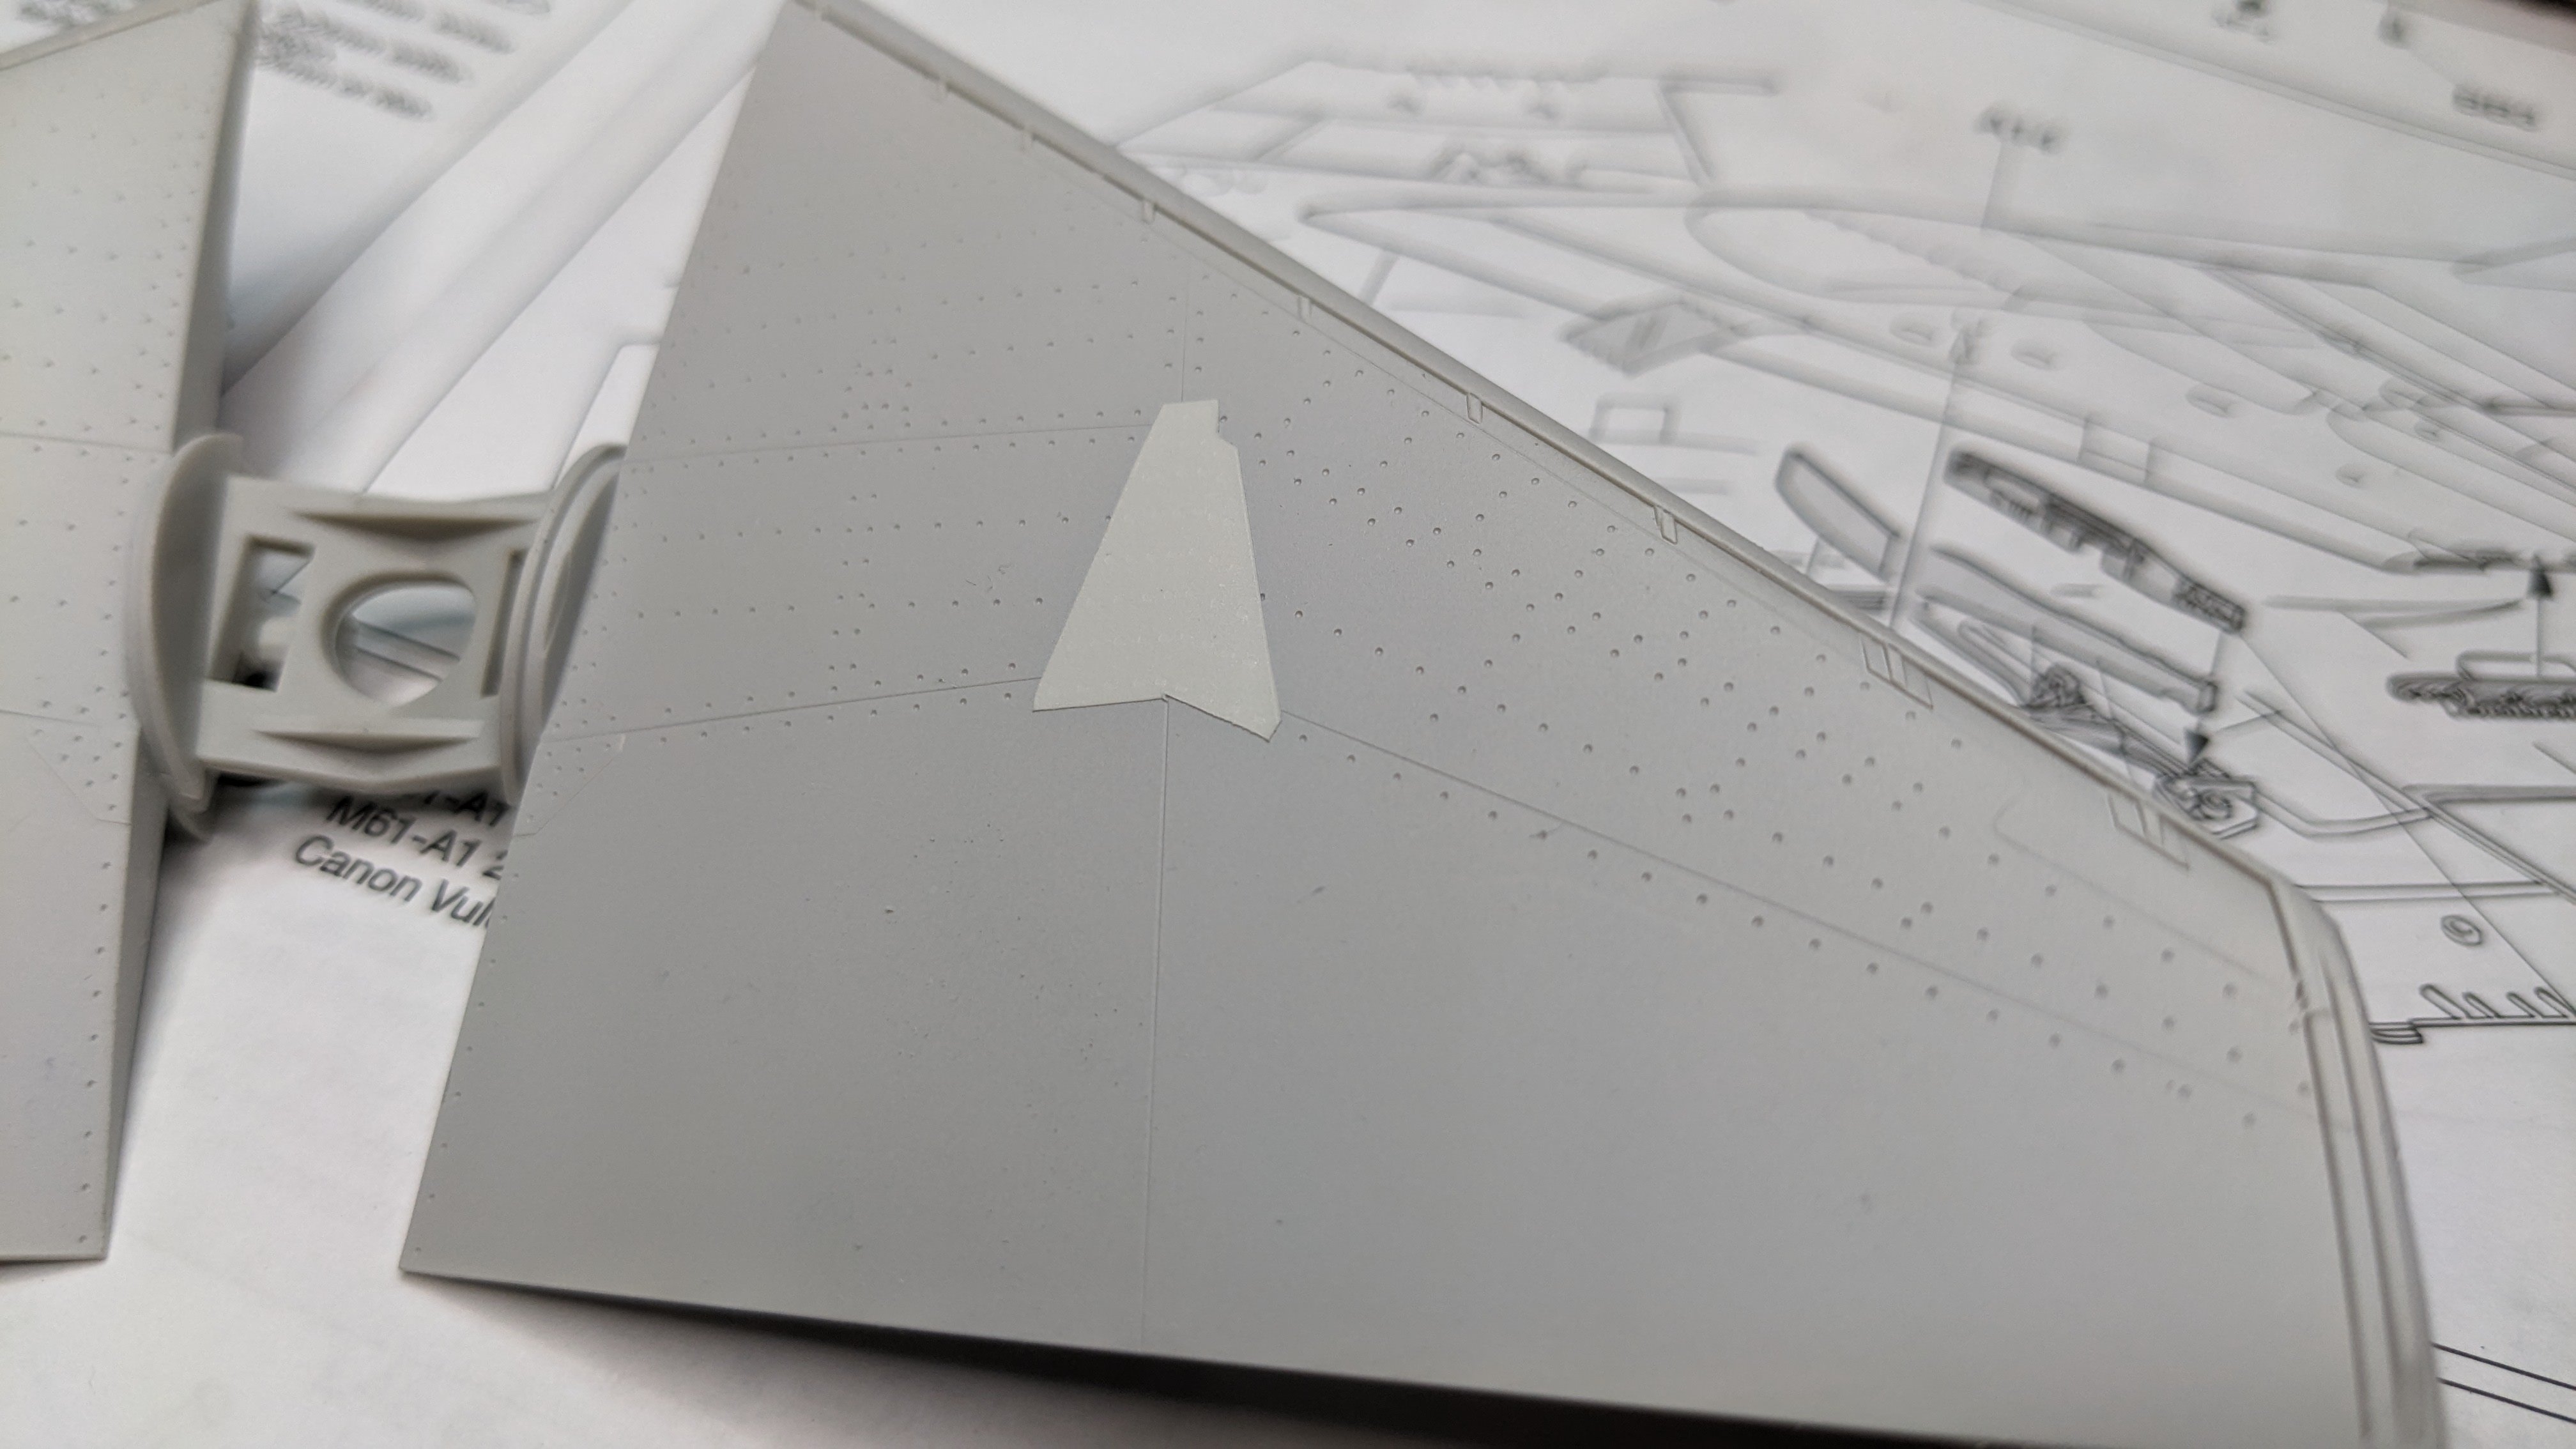
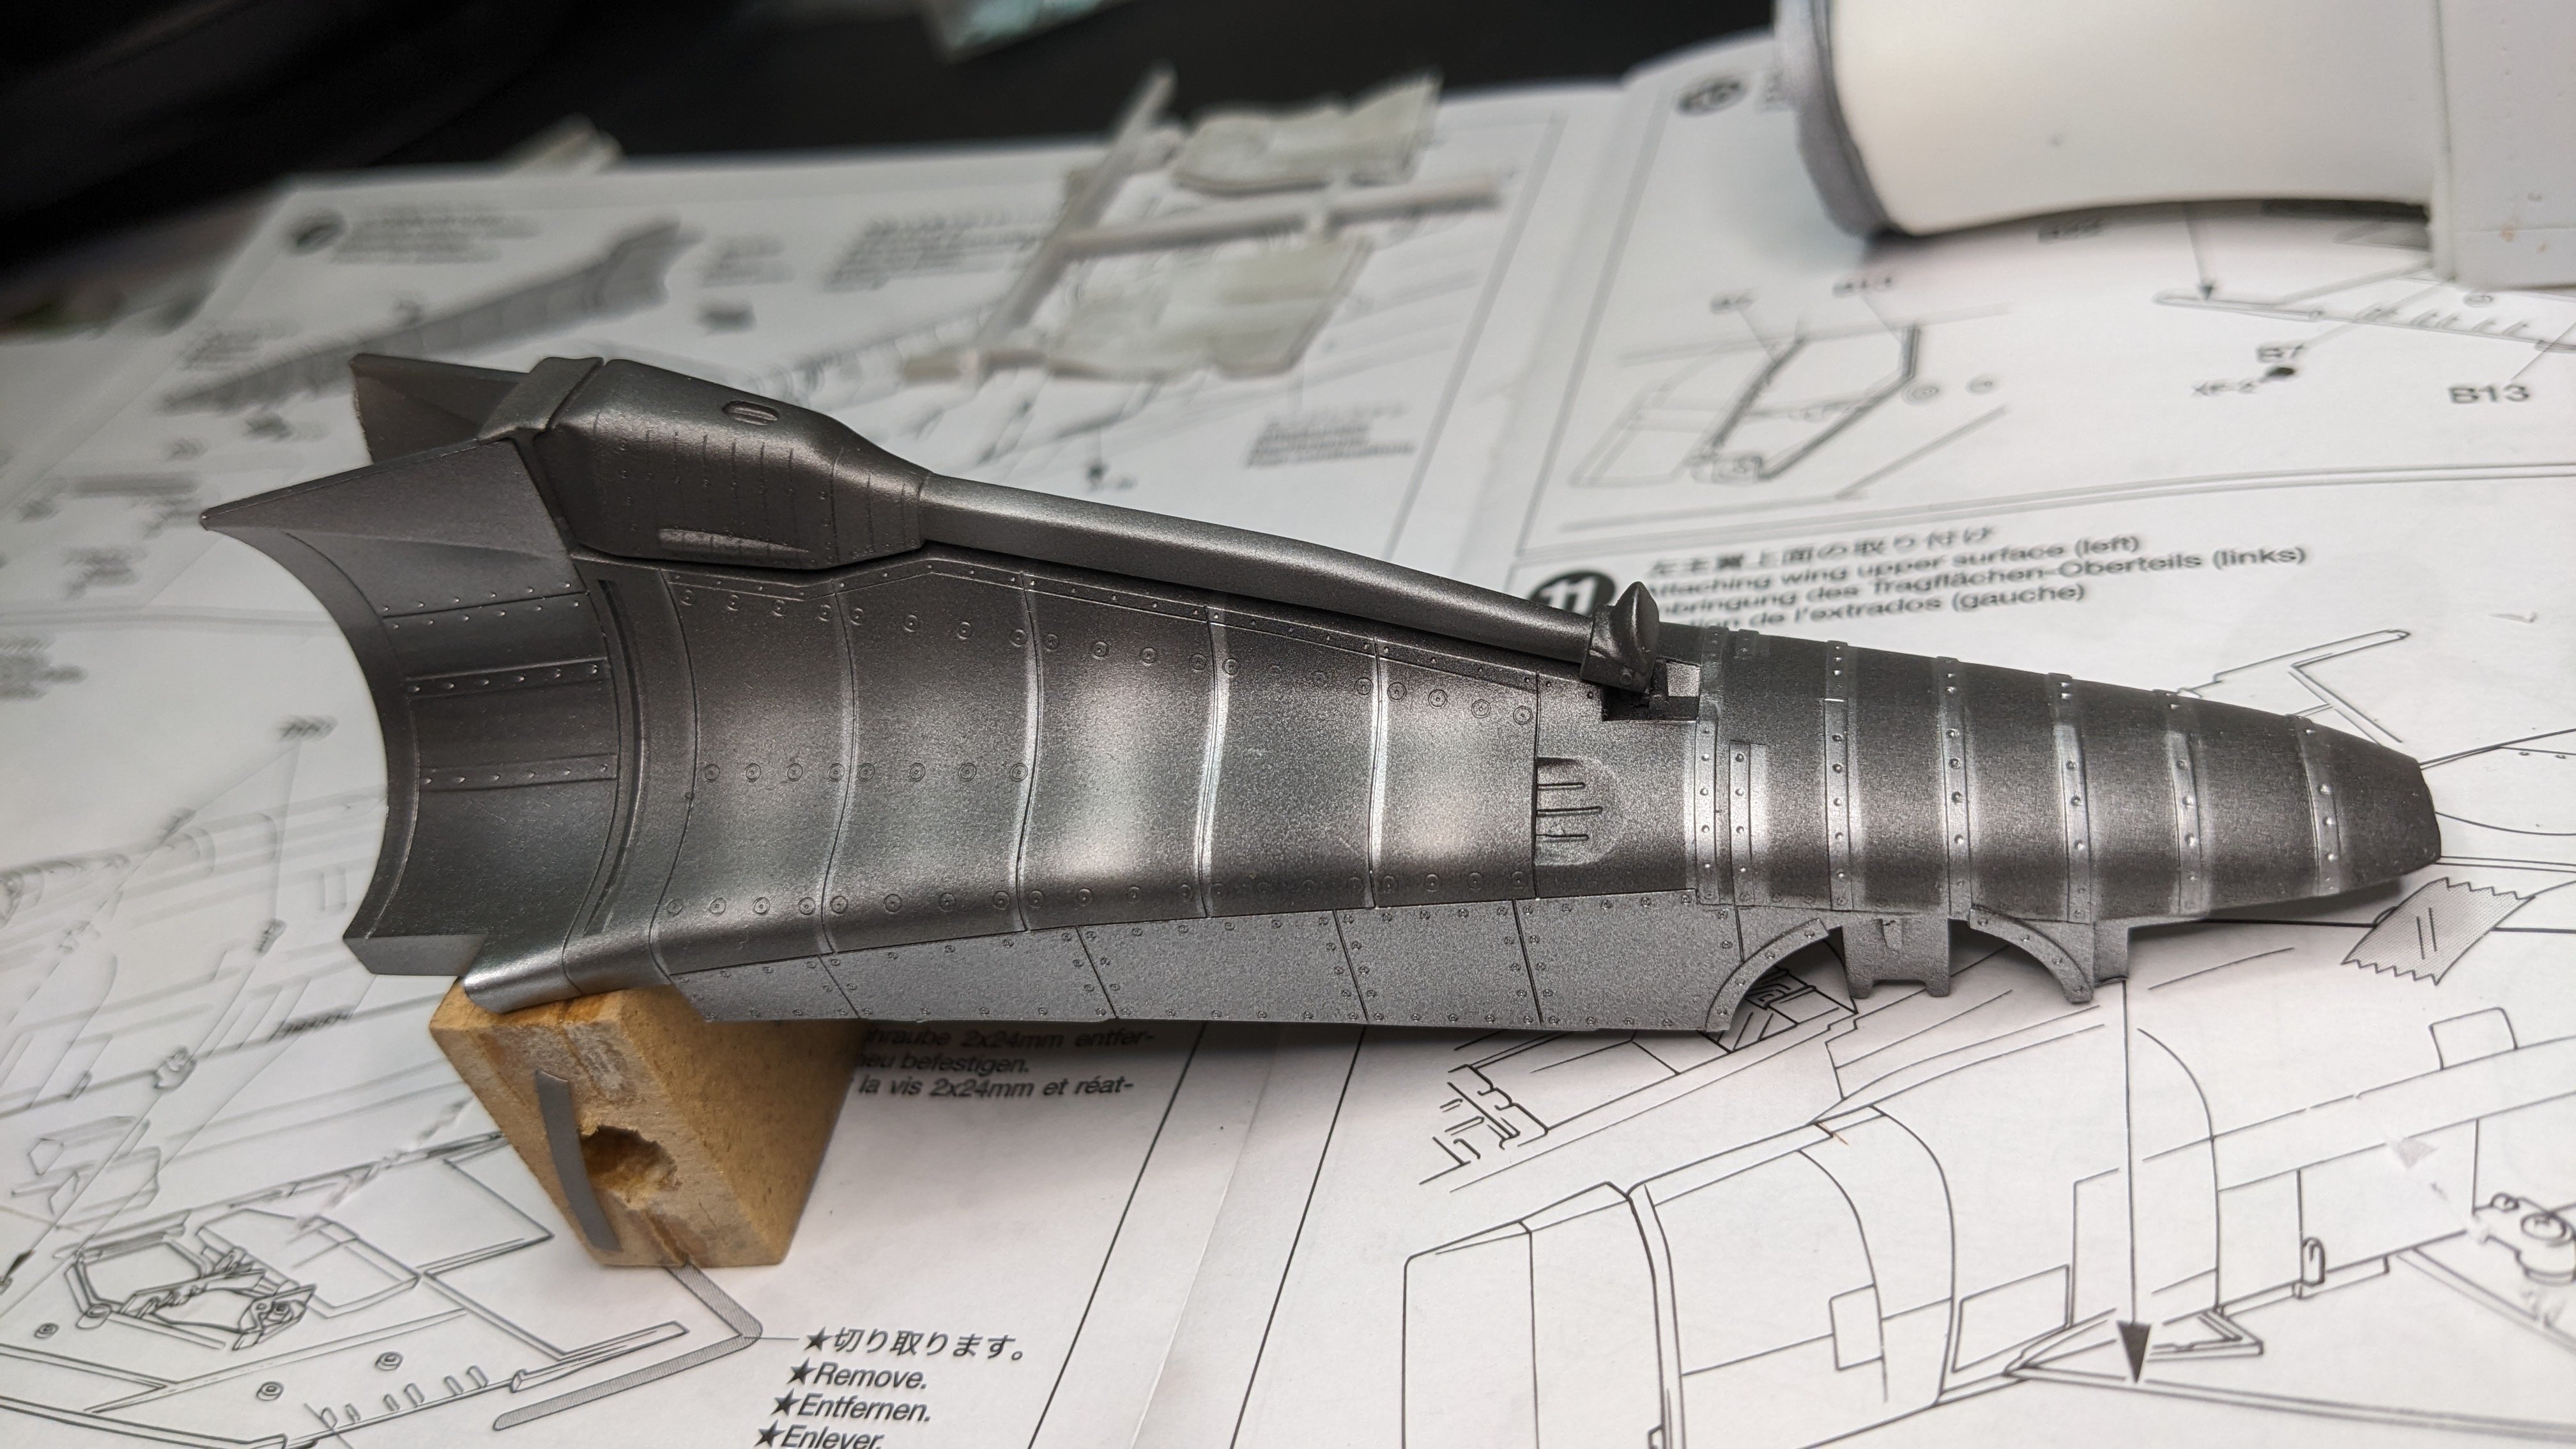
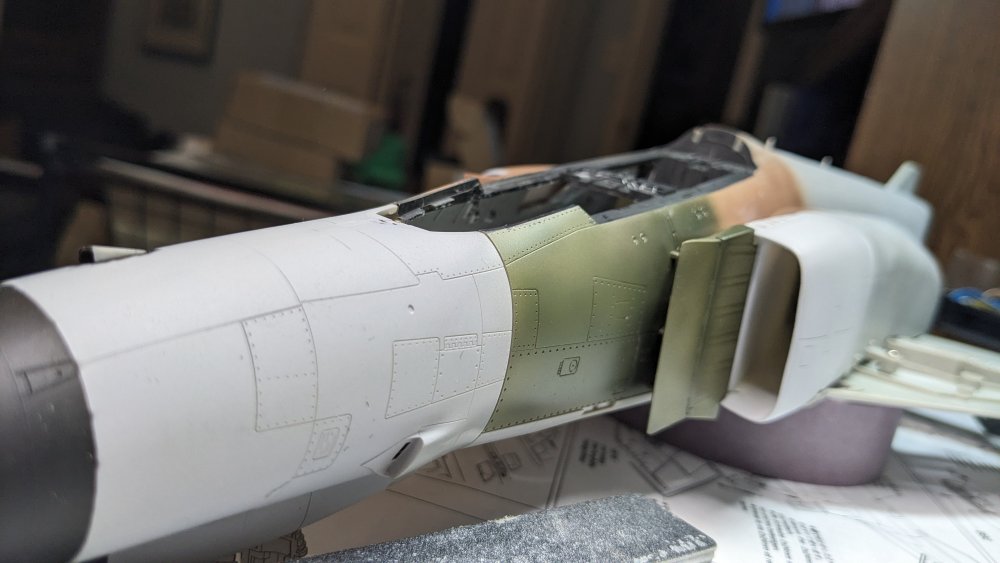
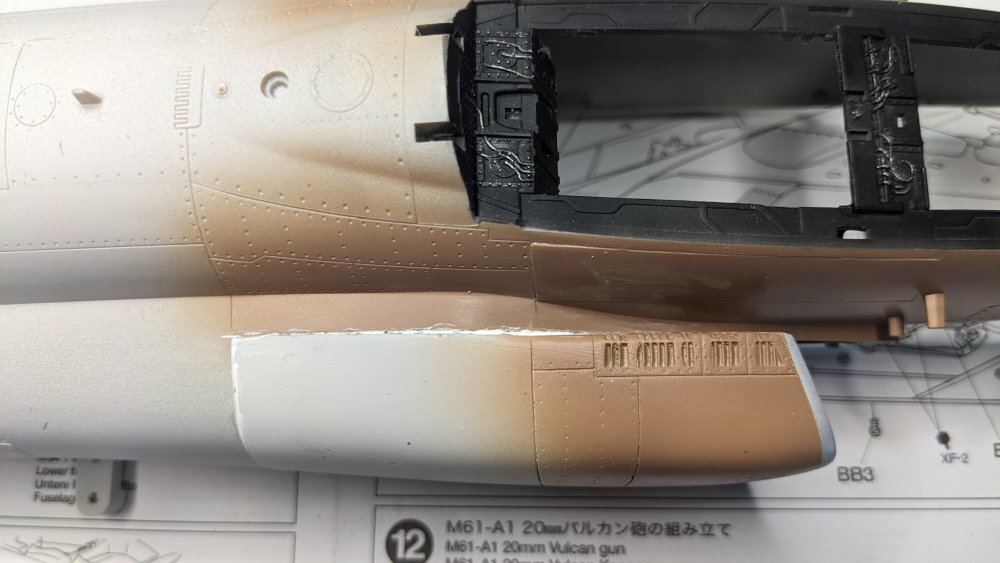
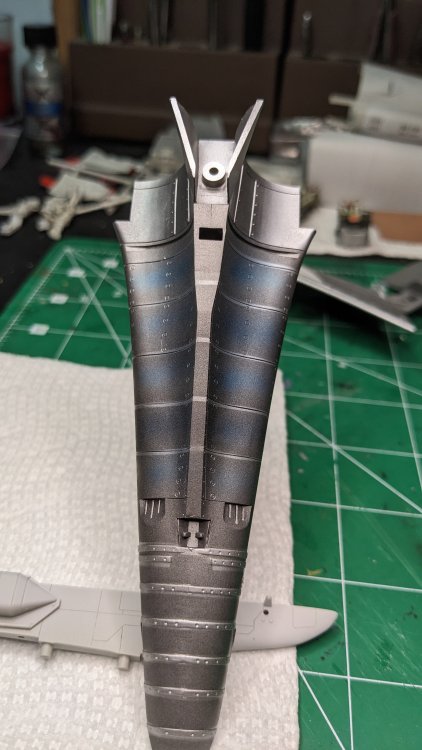
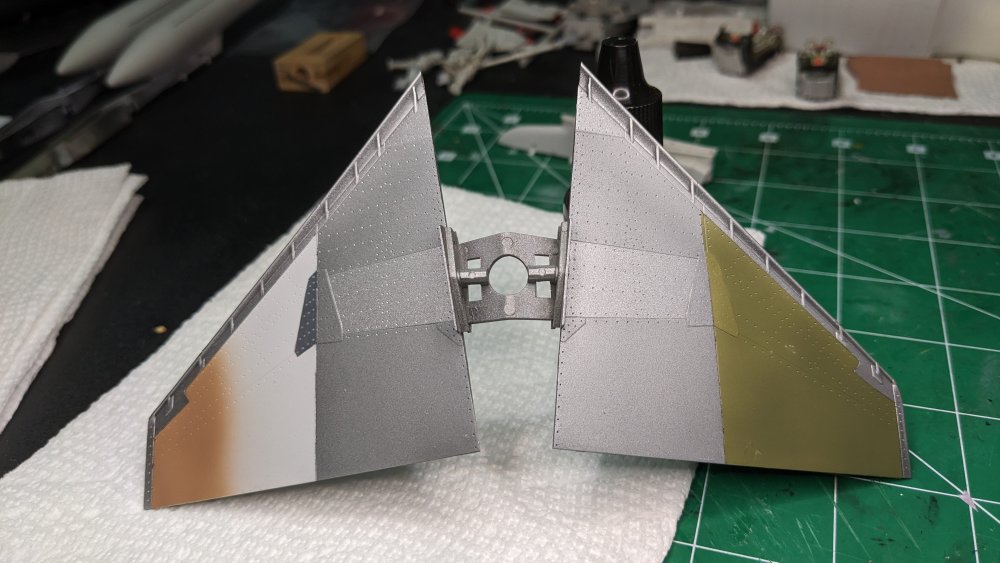
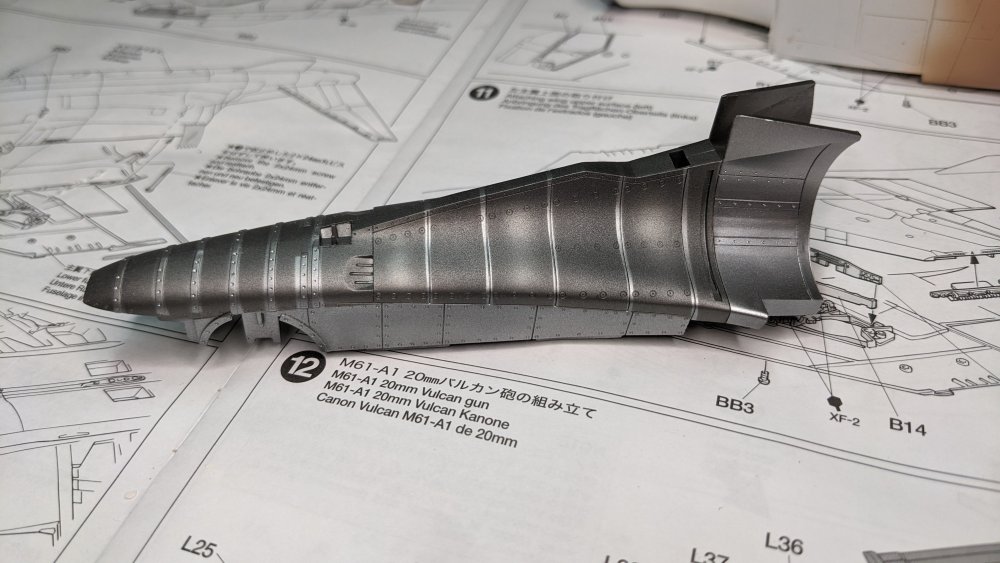
Making some progress with the variation of metal tones. The new paints showed up, but ironically, I used an MRP Fine Silver Primer which looked lighter than the Alclad I shot before. Also picked up the clear blue - want to know what you think... Too heavy, too light, just wrong? Thought please. How about the metal shading on the sides? And the Stabilizers... Please don't ask about my painting order of operation. I have an idea how I'm planning on doing the painting/camo but I can't really explain or defend it. I just take it a step at a time!! What do you think of the metal shading? The Lighter is actually Alclad White Aluminum, and the 'Darker' is MRP Fine Silver Primer. Part of the shading difference is how the light hits the paint. This is the underside, with the AF grey. AND I just noticed that the stiffing plates should be ONE color . The top side has the start of the camo colors Thanks!

-
RESKIT F-4 Sidewinders, Sparrows, Pylons unboxed 1/32
CANicoll replied to CANicoll's topic in Aircraft Reviews
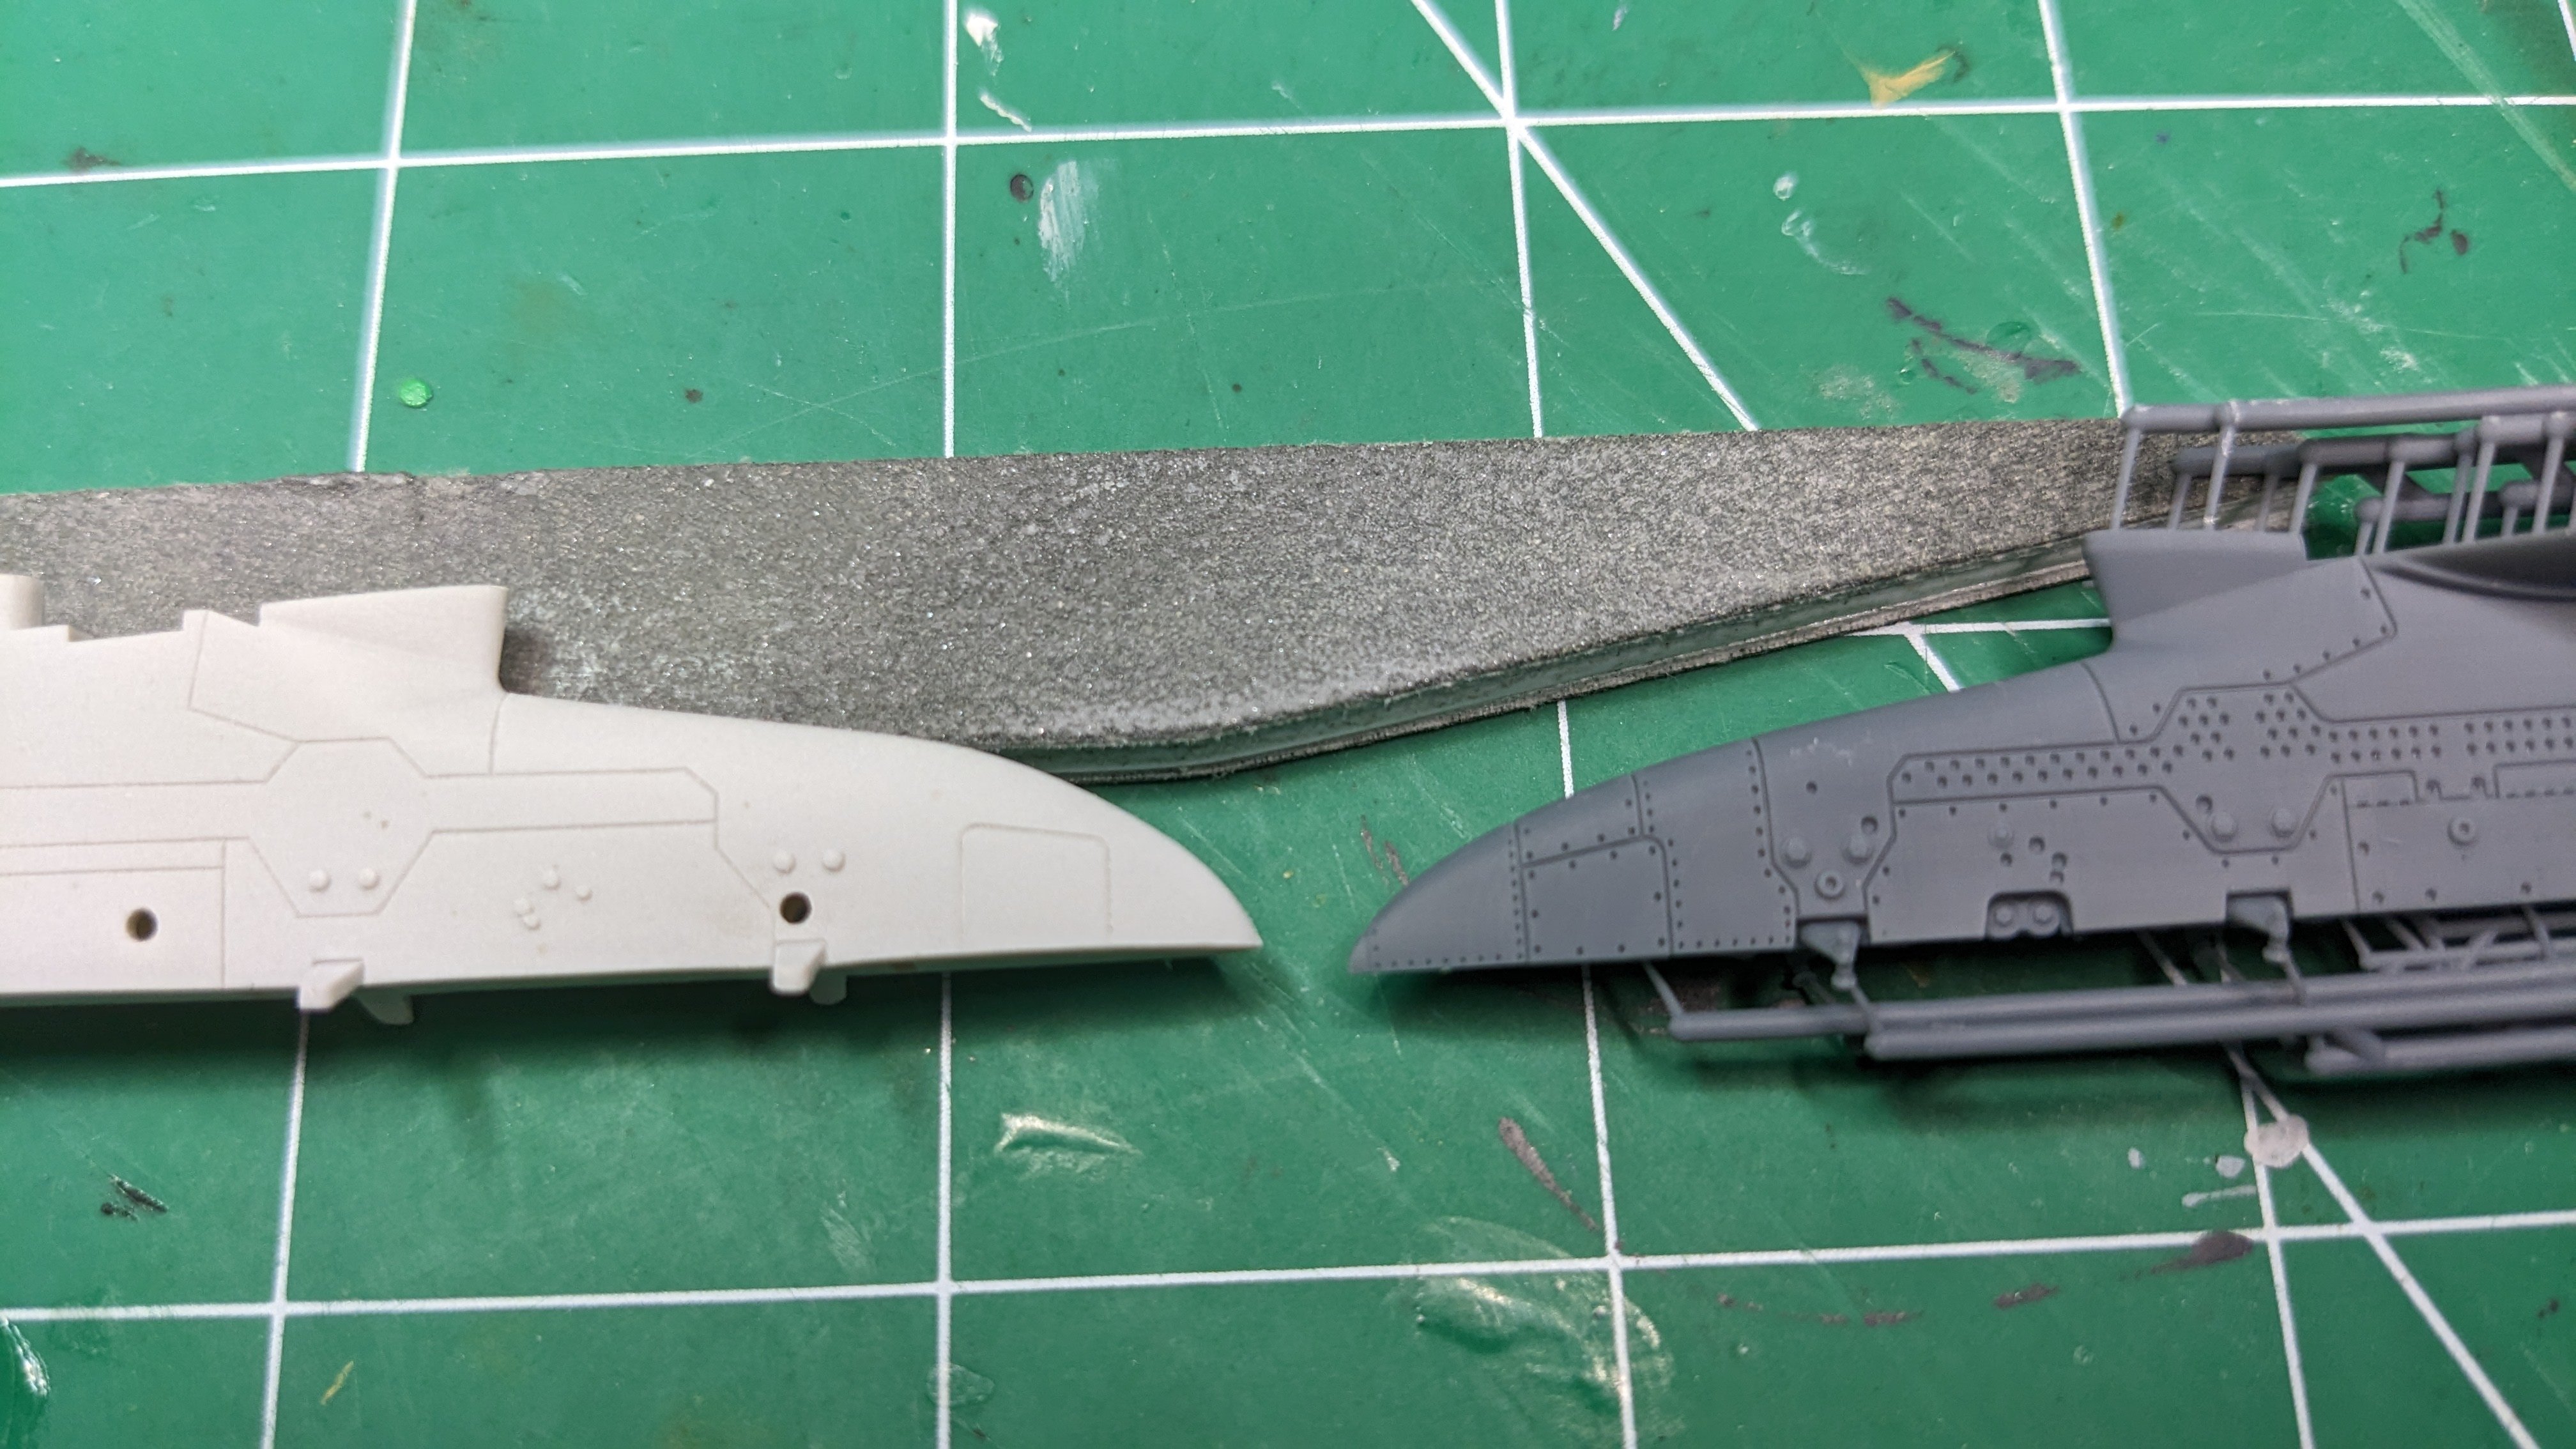
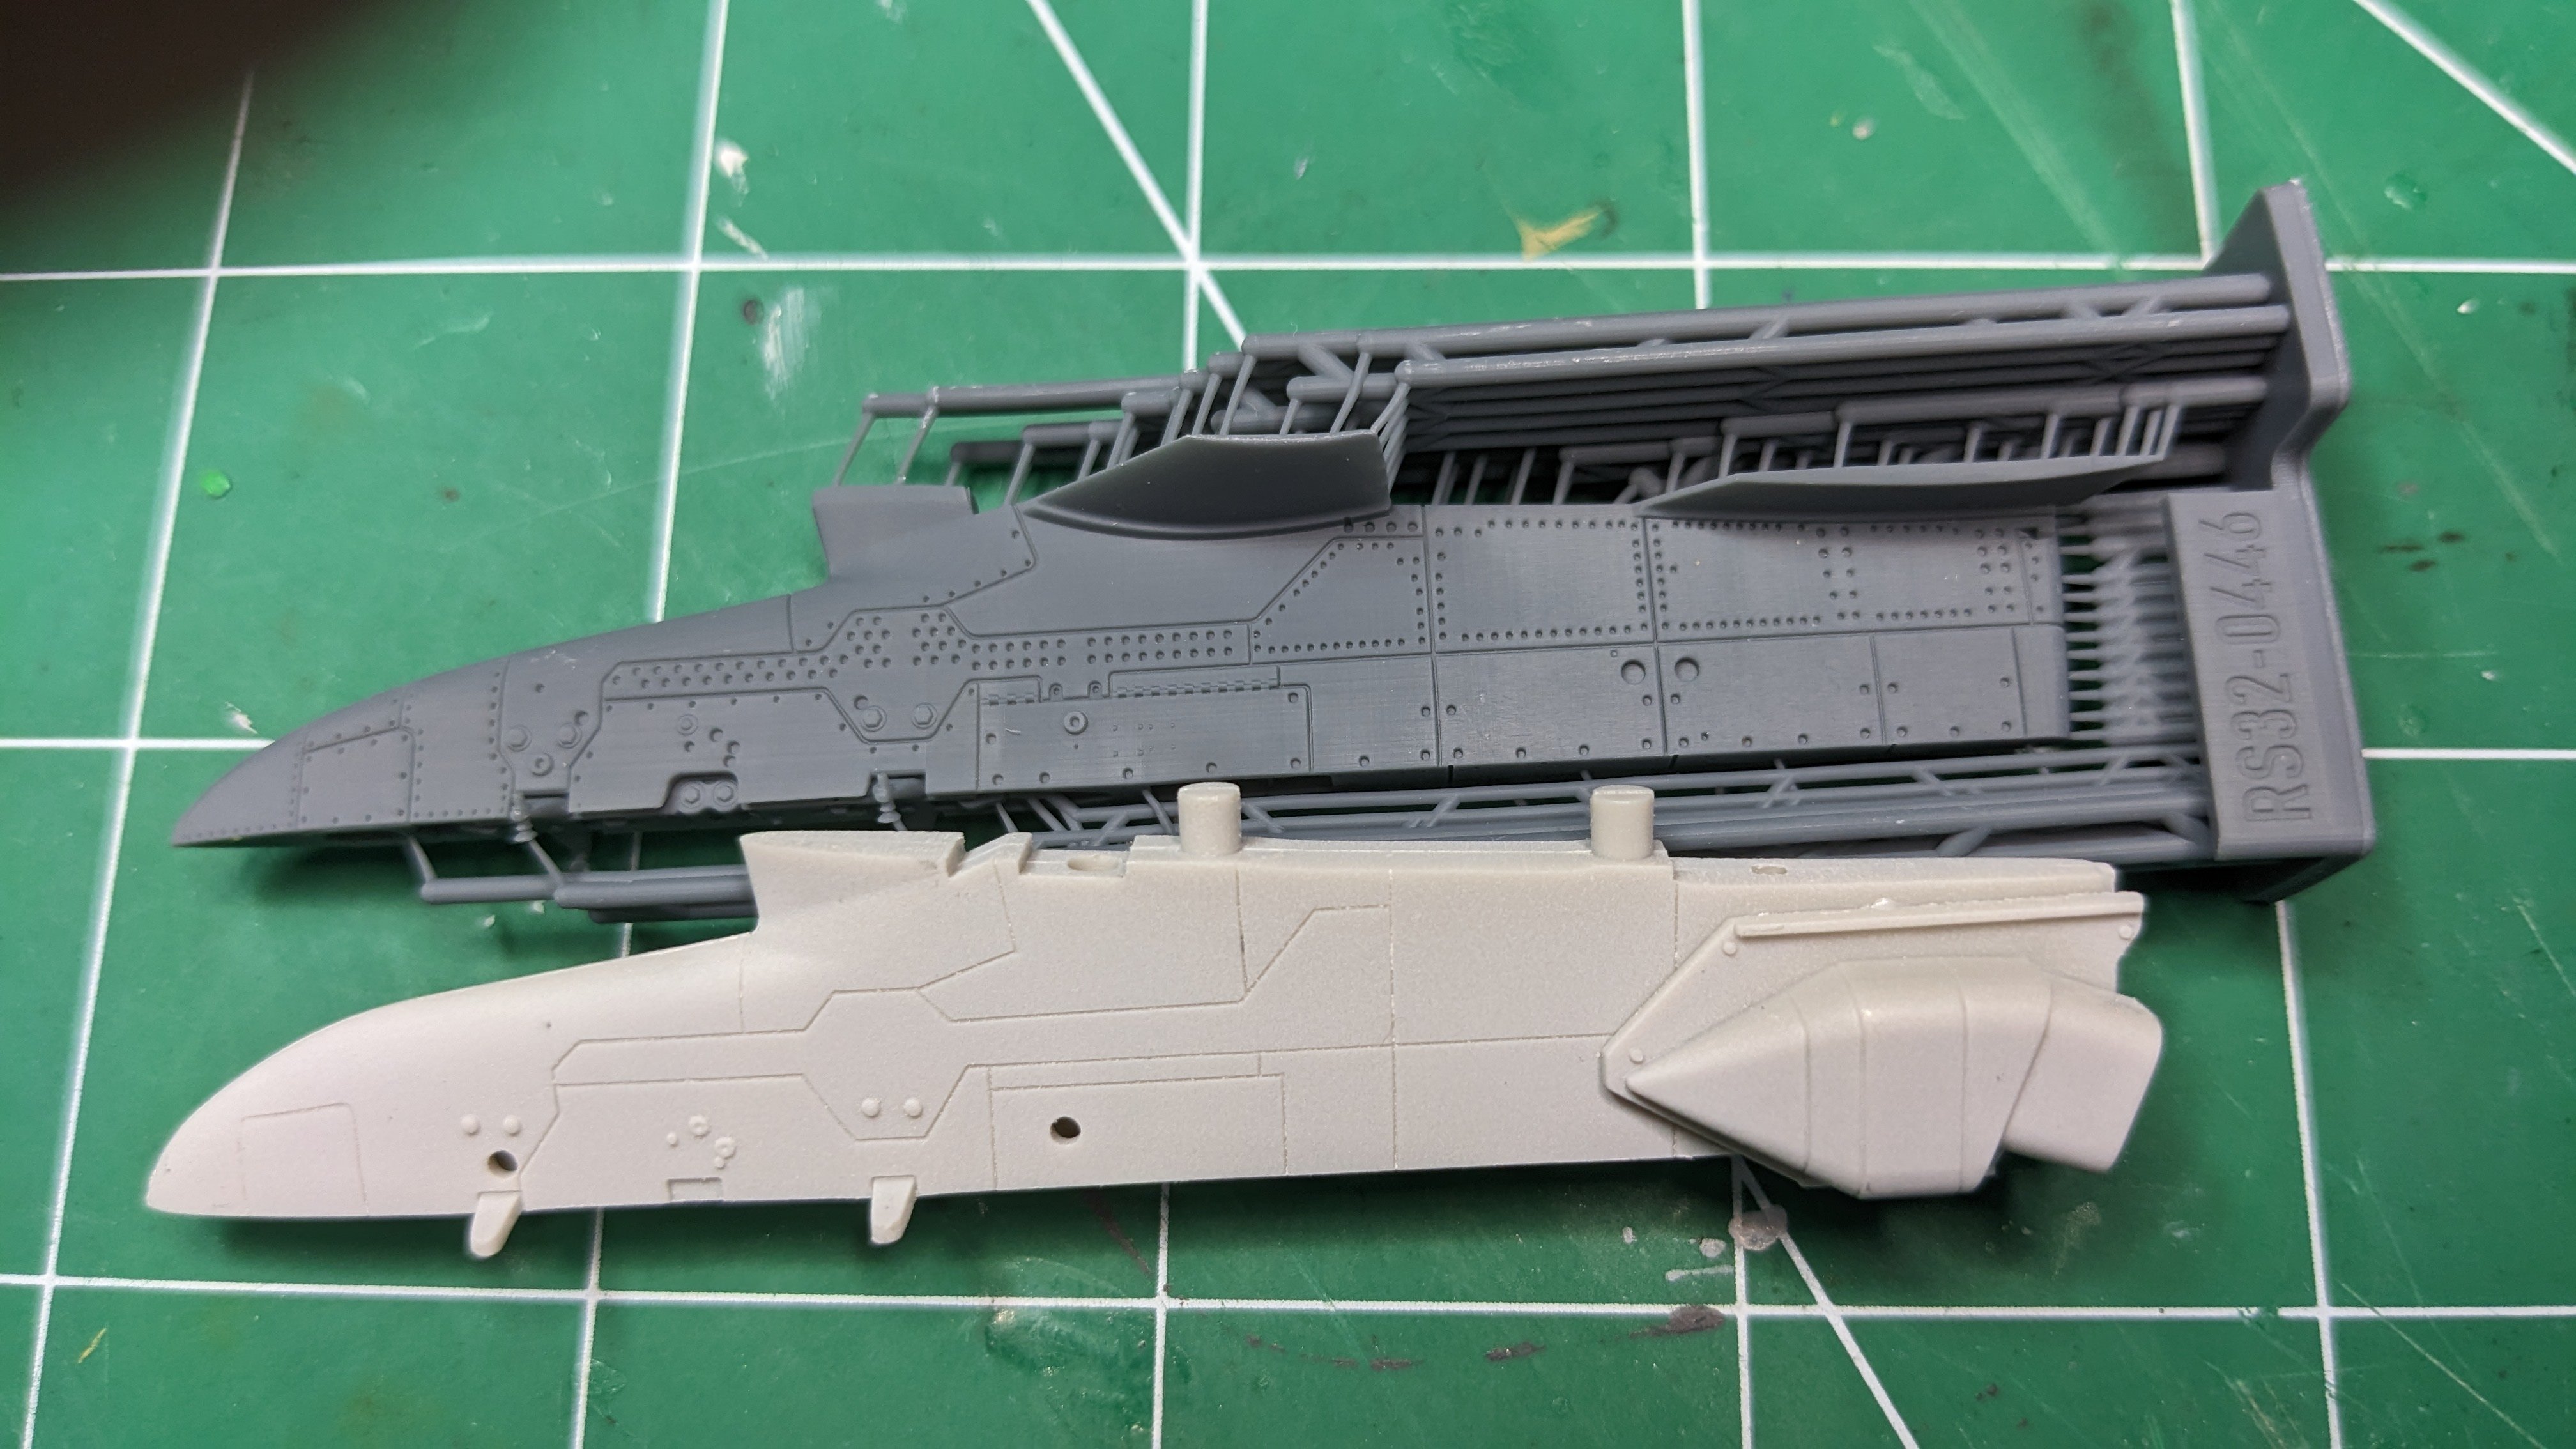
Here is the comparison of the kit pylon to the 3D printed Reskit one: And a close up of the front of the pylon: And a not great picture of the actual pylon. The Reskit does have the rivet pattern but it might be a bit overdone.

-
RESKIT F-4 Sidewinders, Sparrows, Pylons unboxed 1/32
CANicoll replied to CANicoll's topic in Aircraft Reviews
You are welcome, Martin! -
2nd Hasegawa 1/48 Razorback Jug w/Thundercals
CANicoll replied to JohnB's topic in LSM 1/48 Work in Progress
Super nice and clean work John! -
RESKIT F-4 Sidewinders, Sparrows, Pylons unboxed 1/32
CANicoll replied to CANicoll's topic in Aircraft Reviews
Carl, I agree with you. It will be a lot of work, but makes a lot more sense to cut at the attachment lug. I'm looking forward to freeing up the pylons too. -
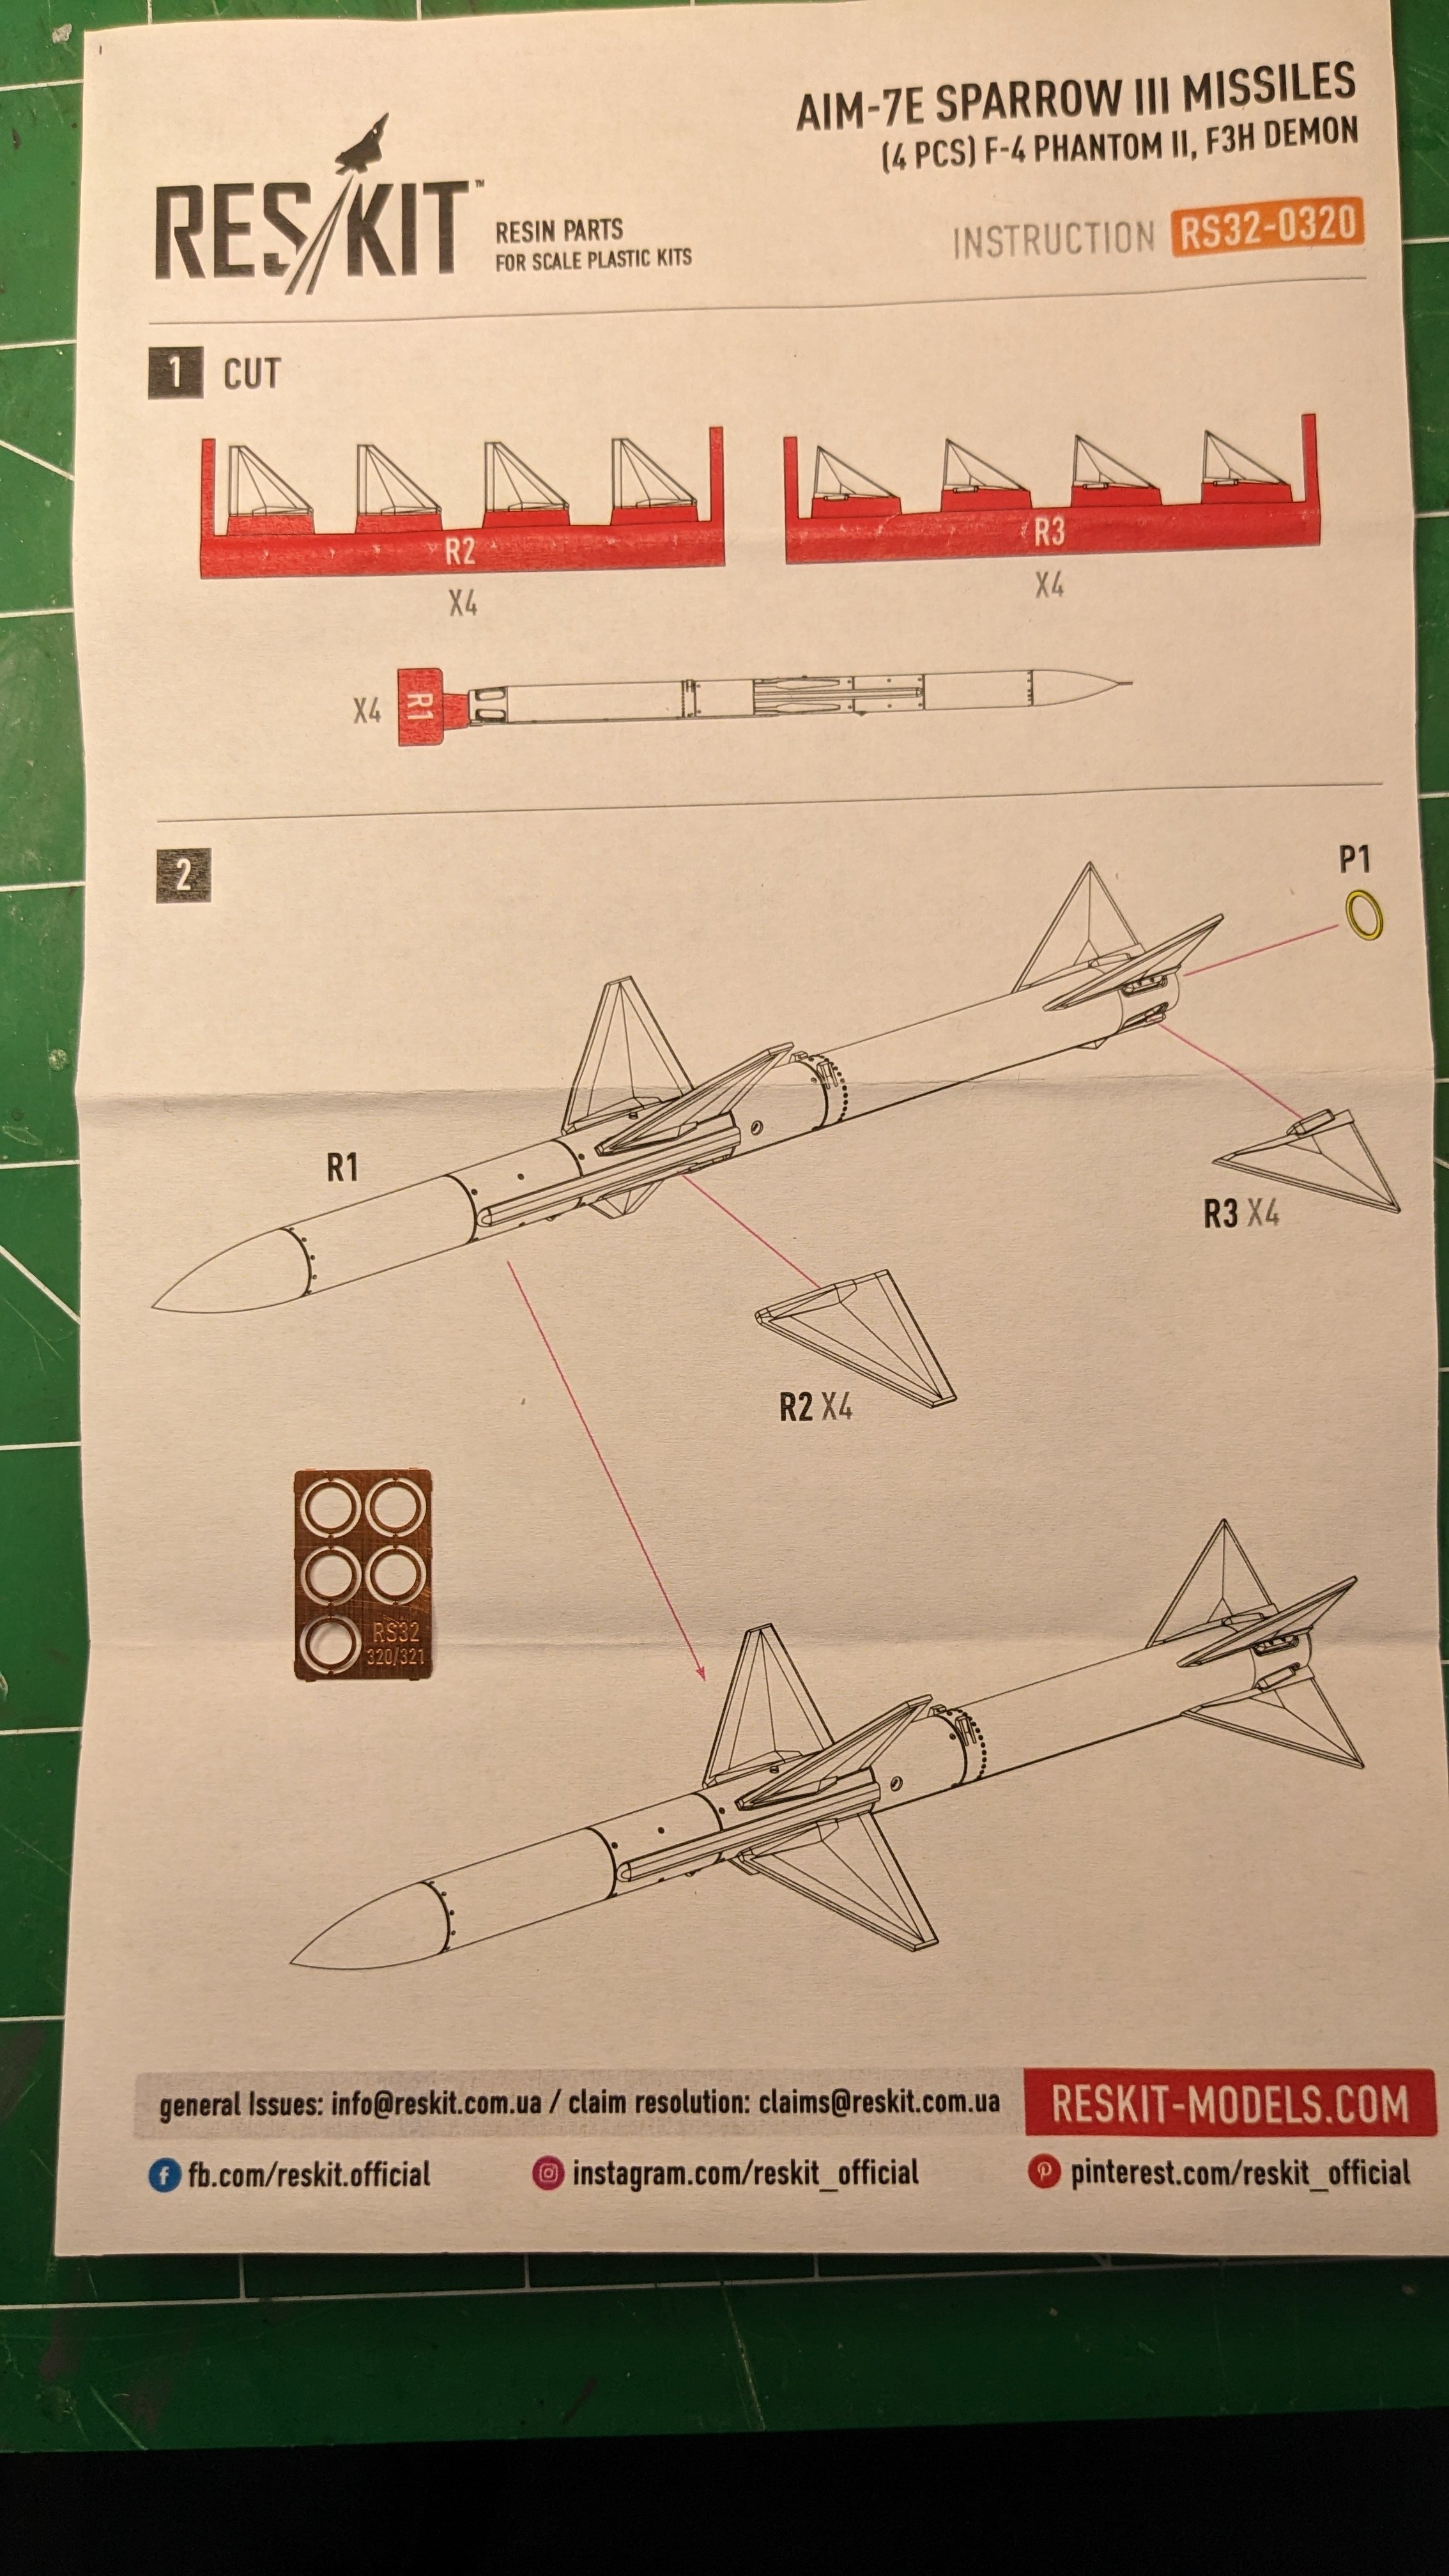
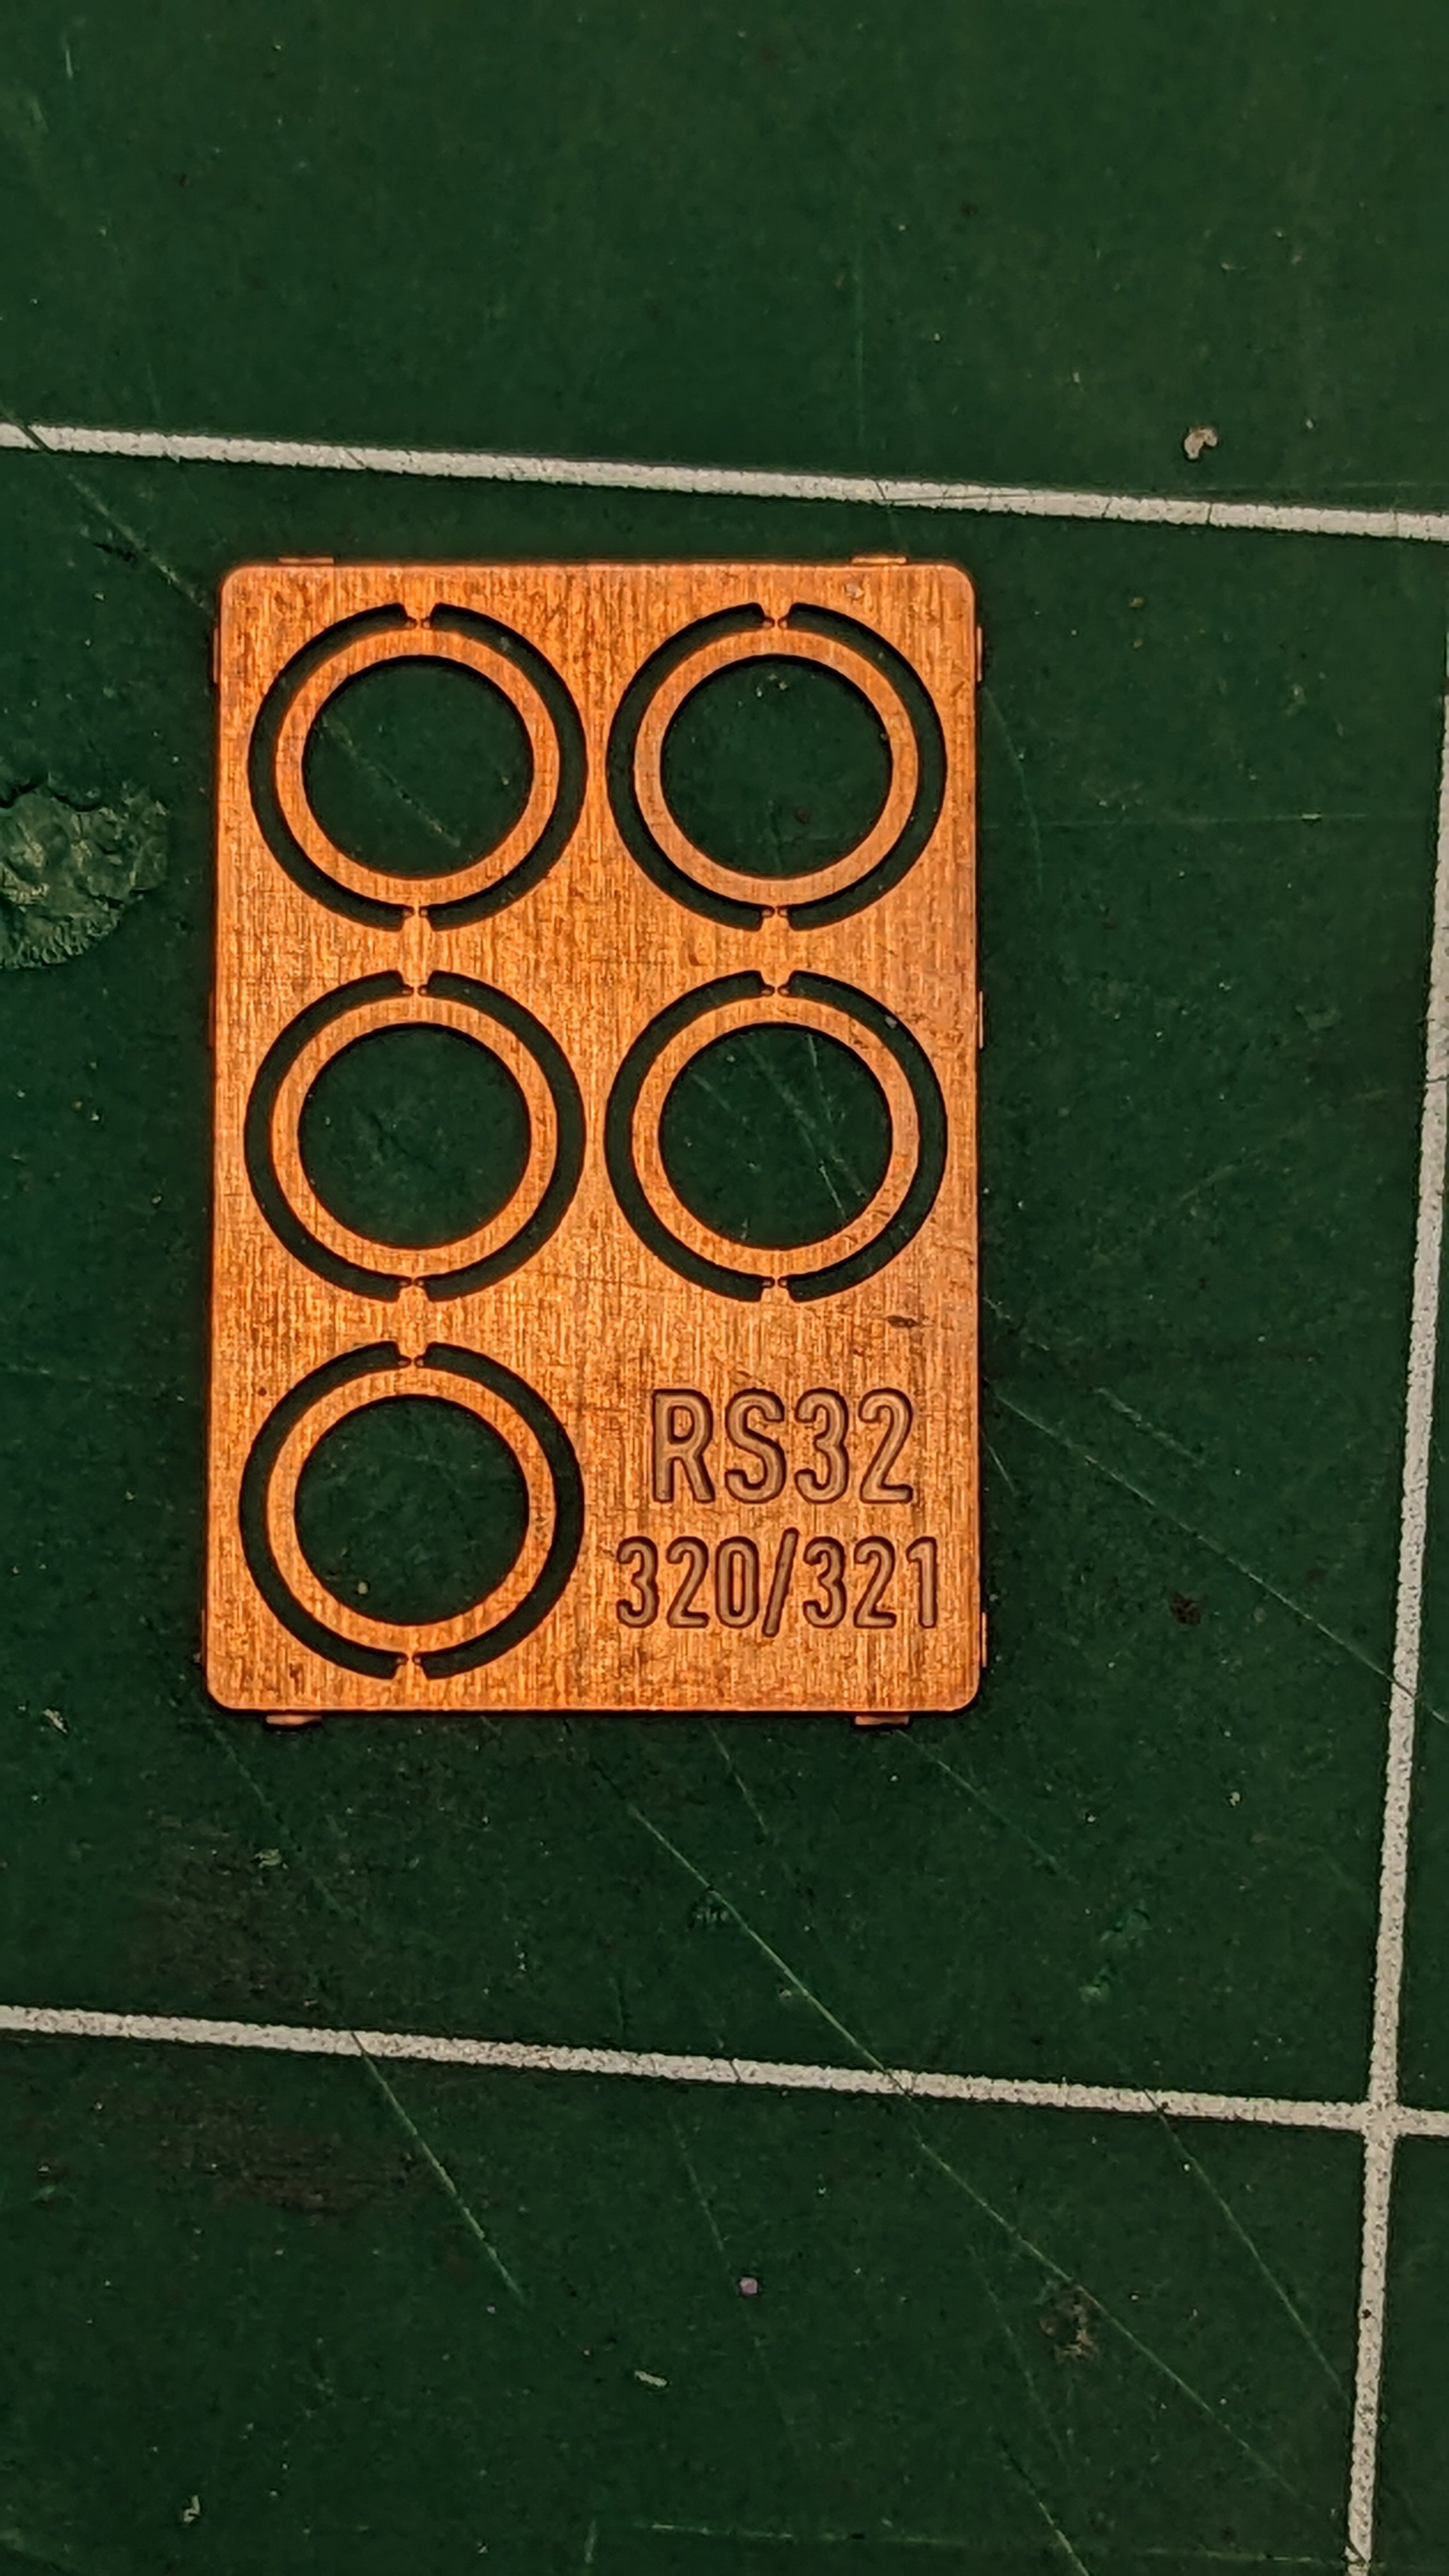
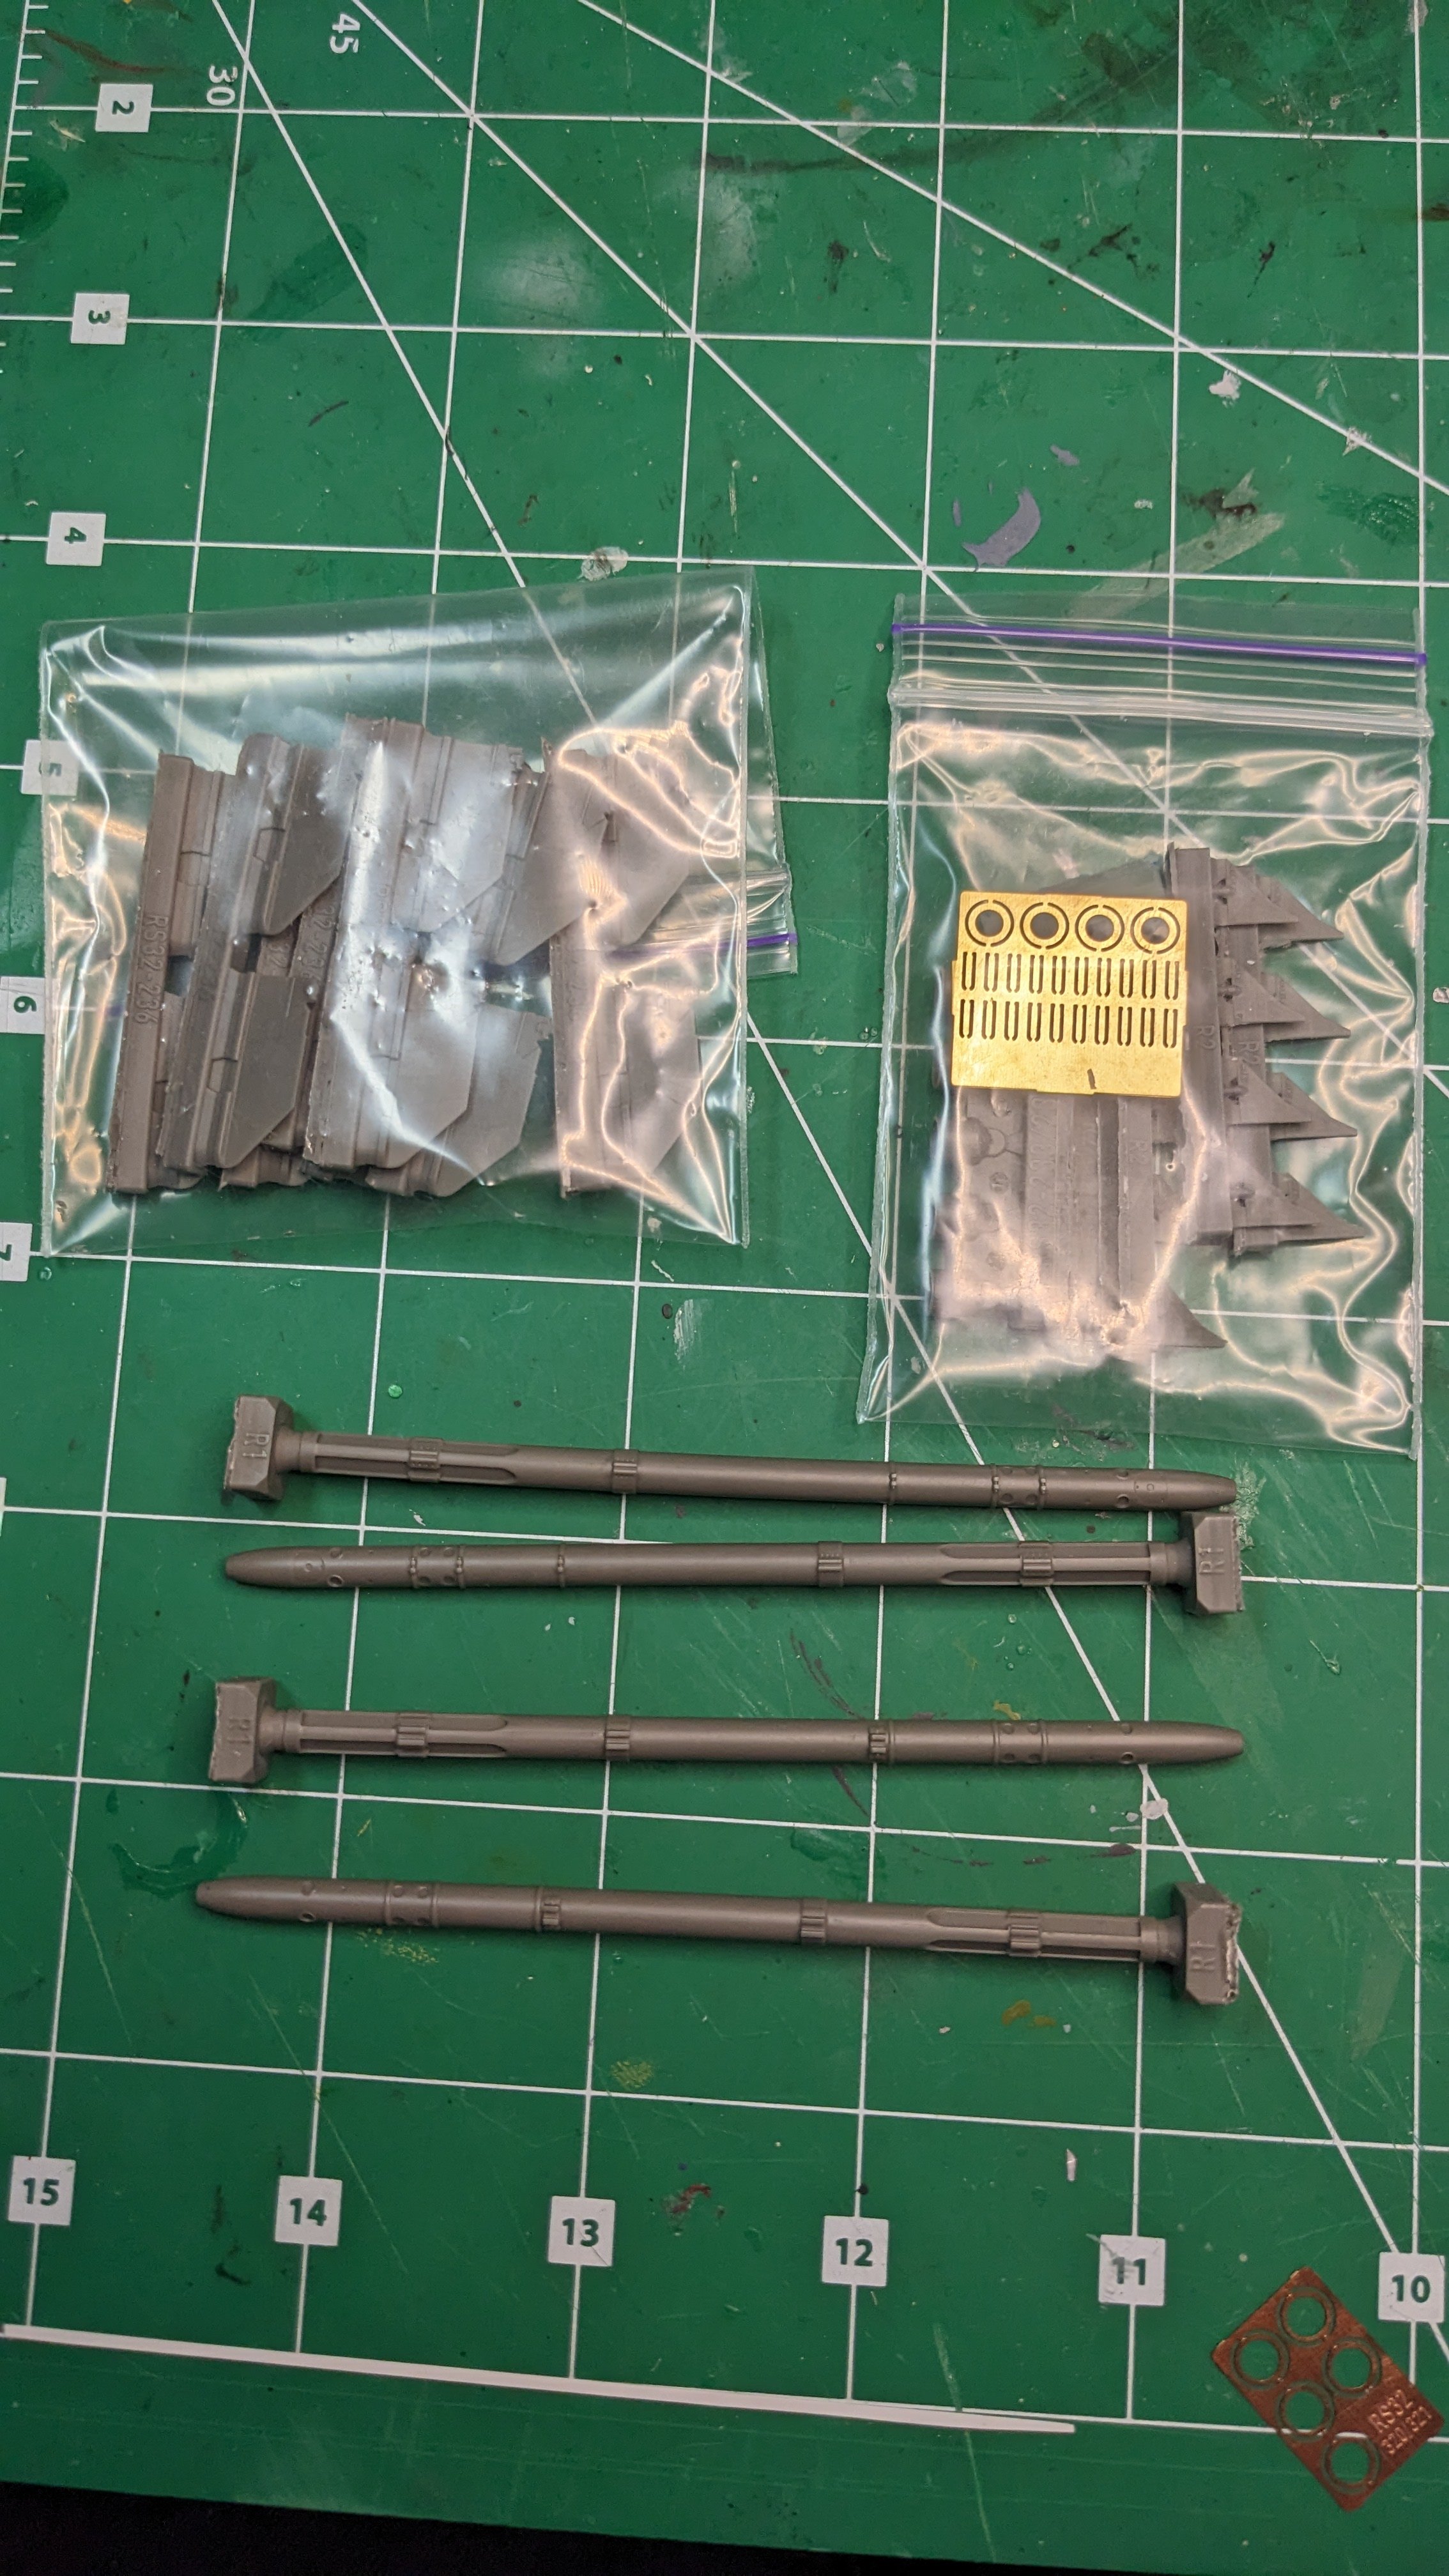
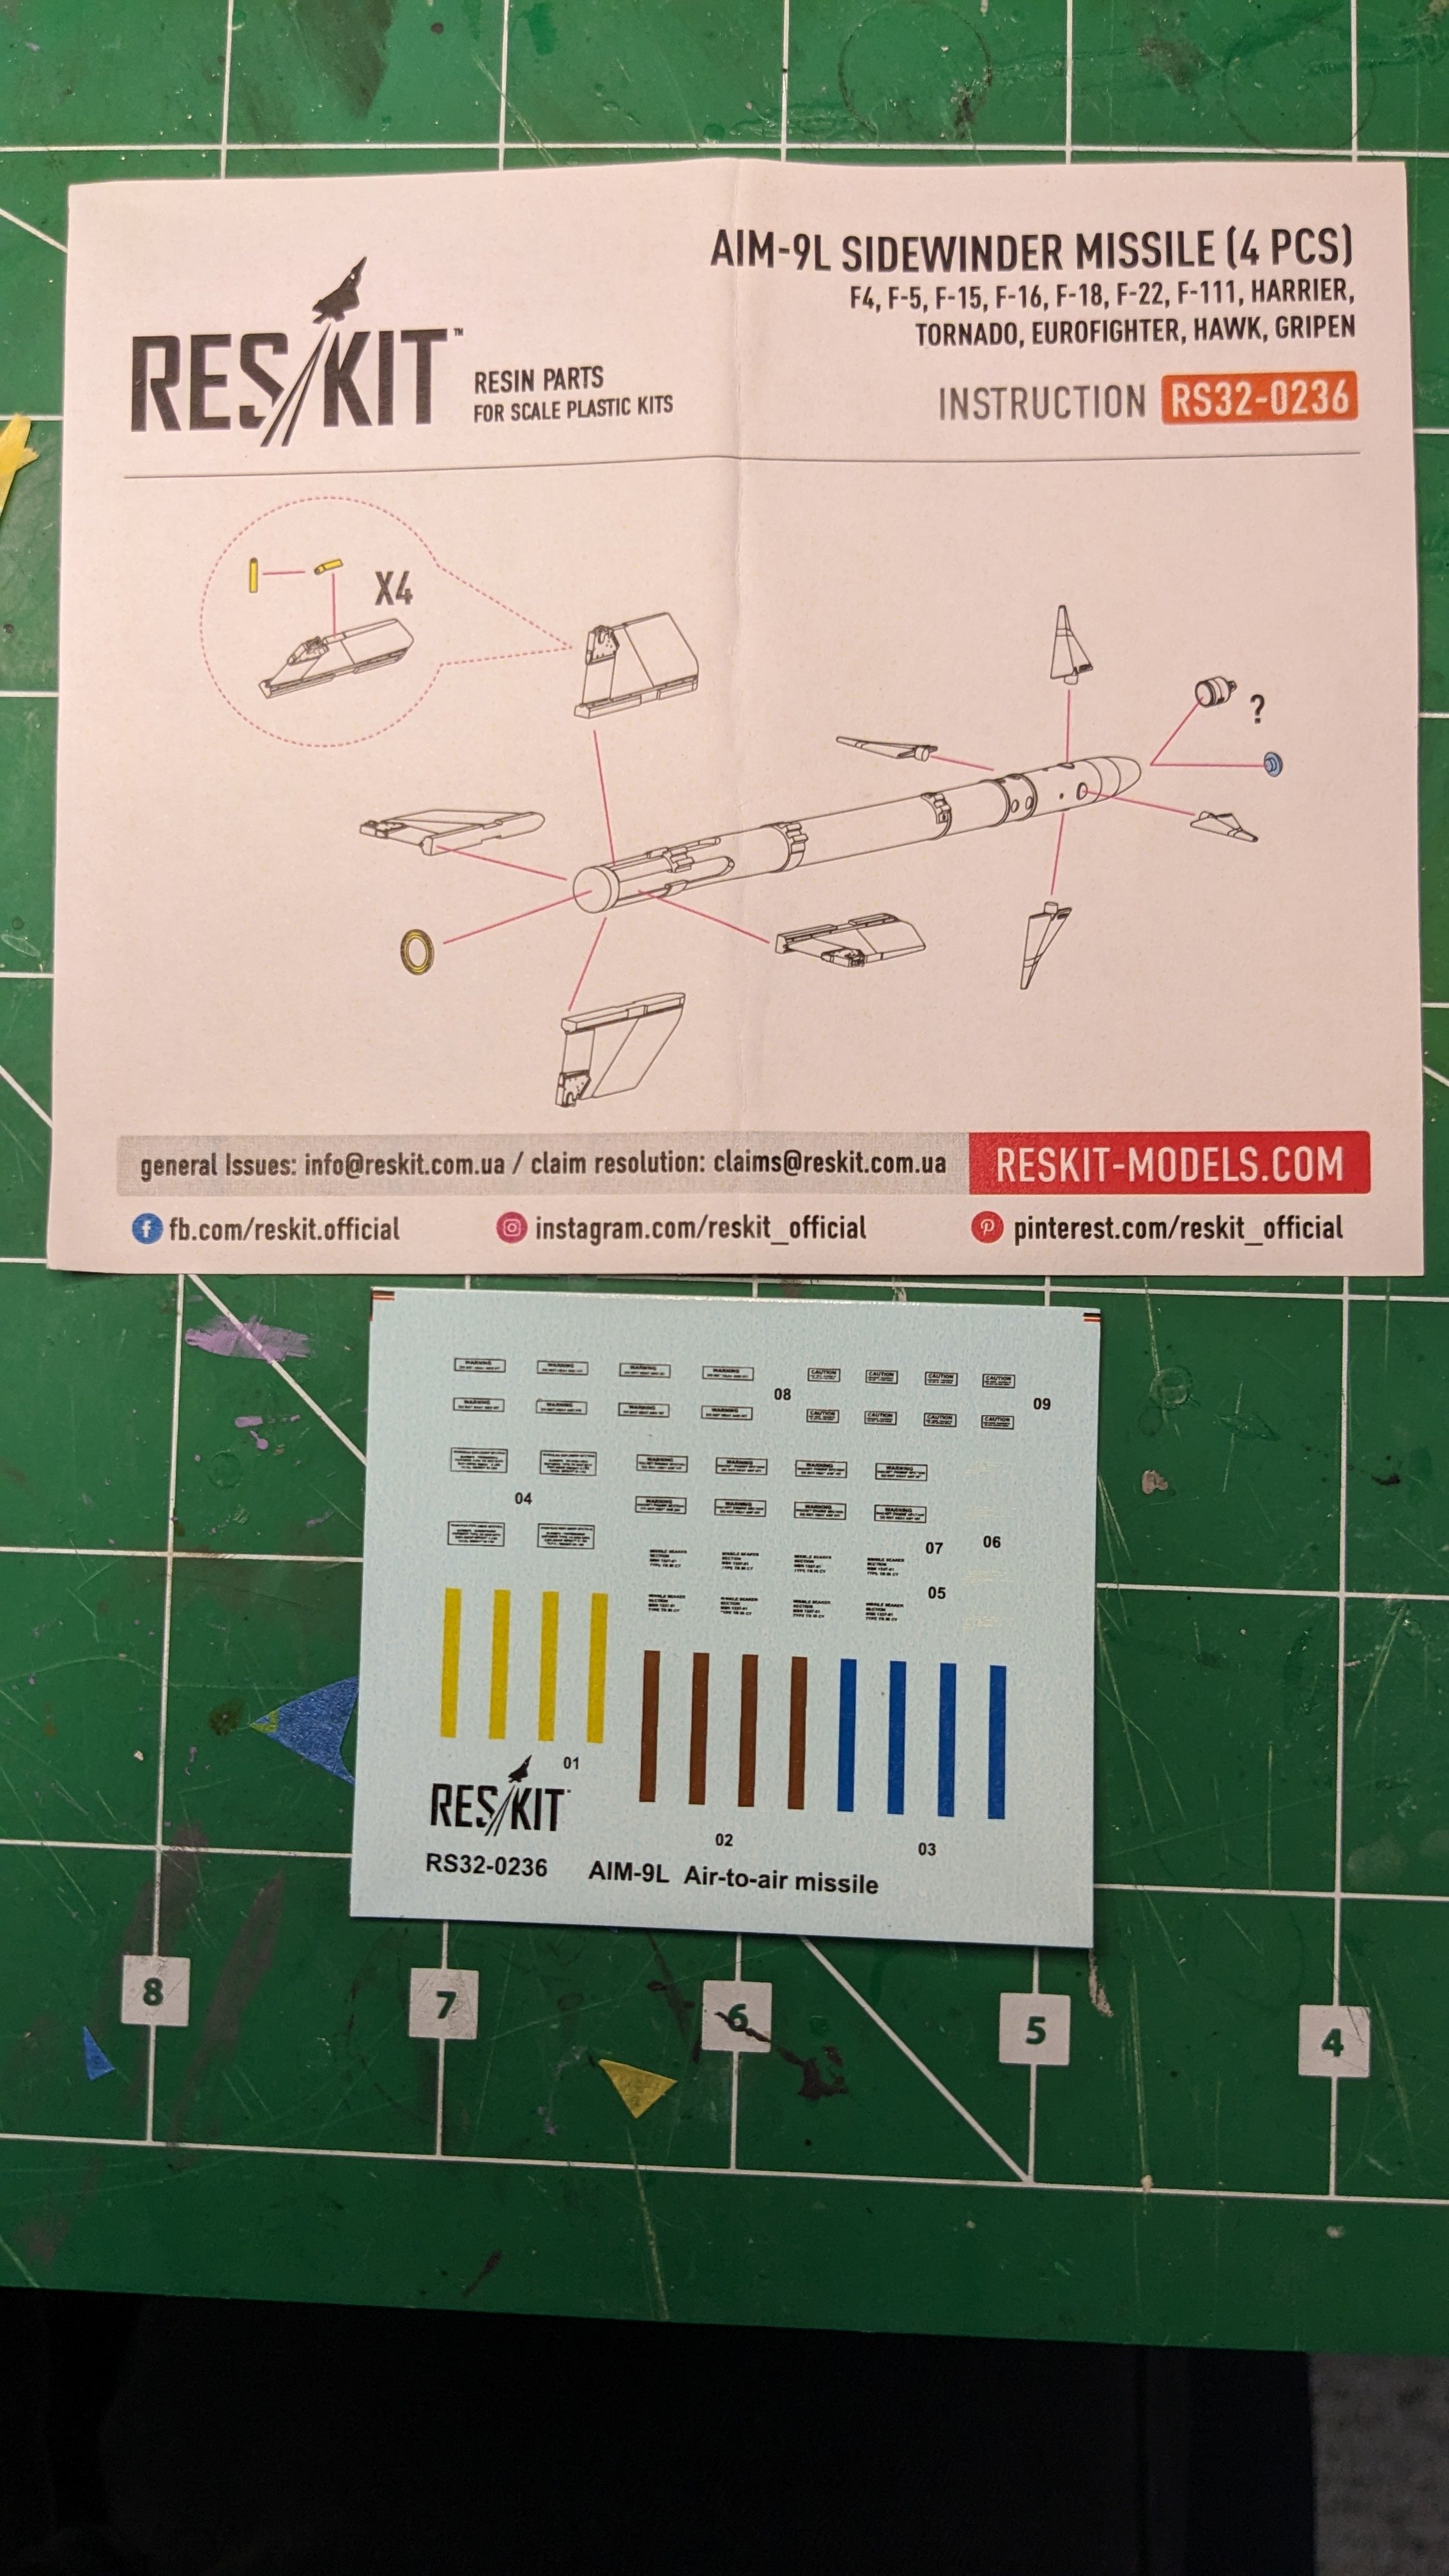
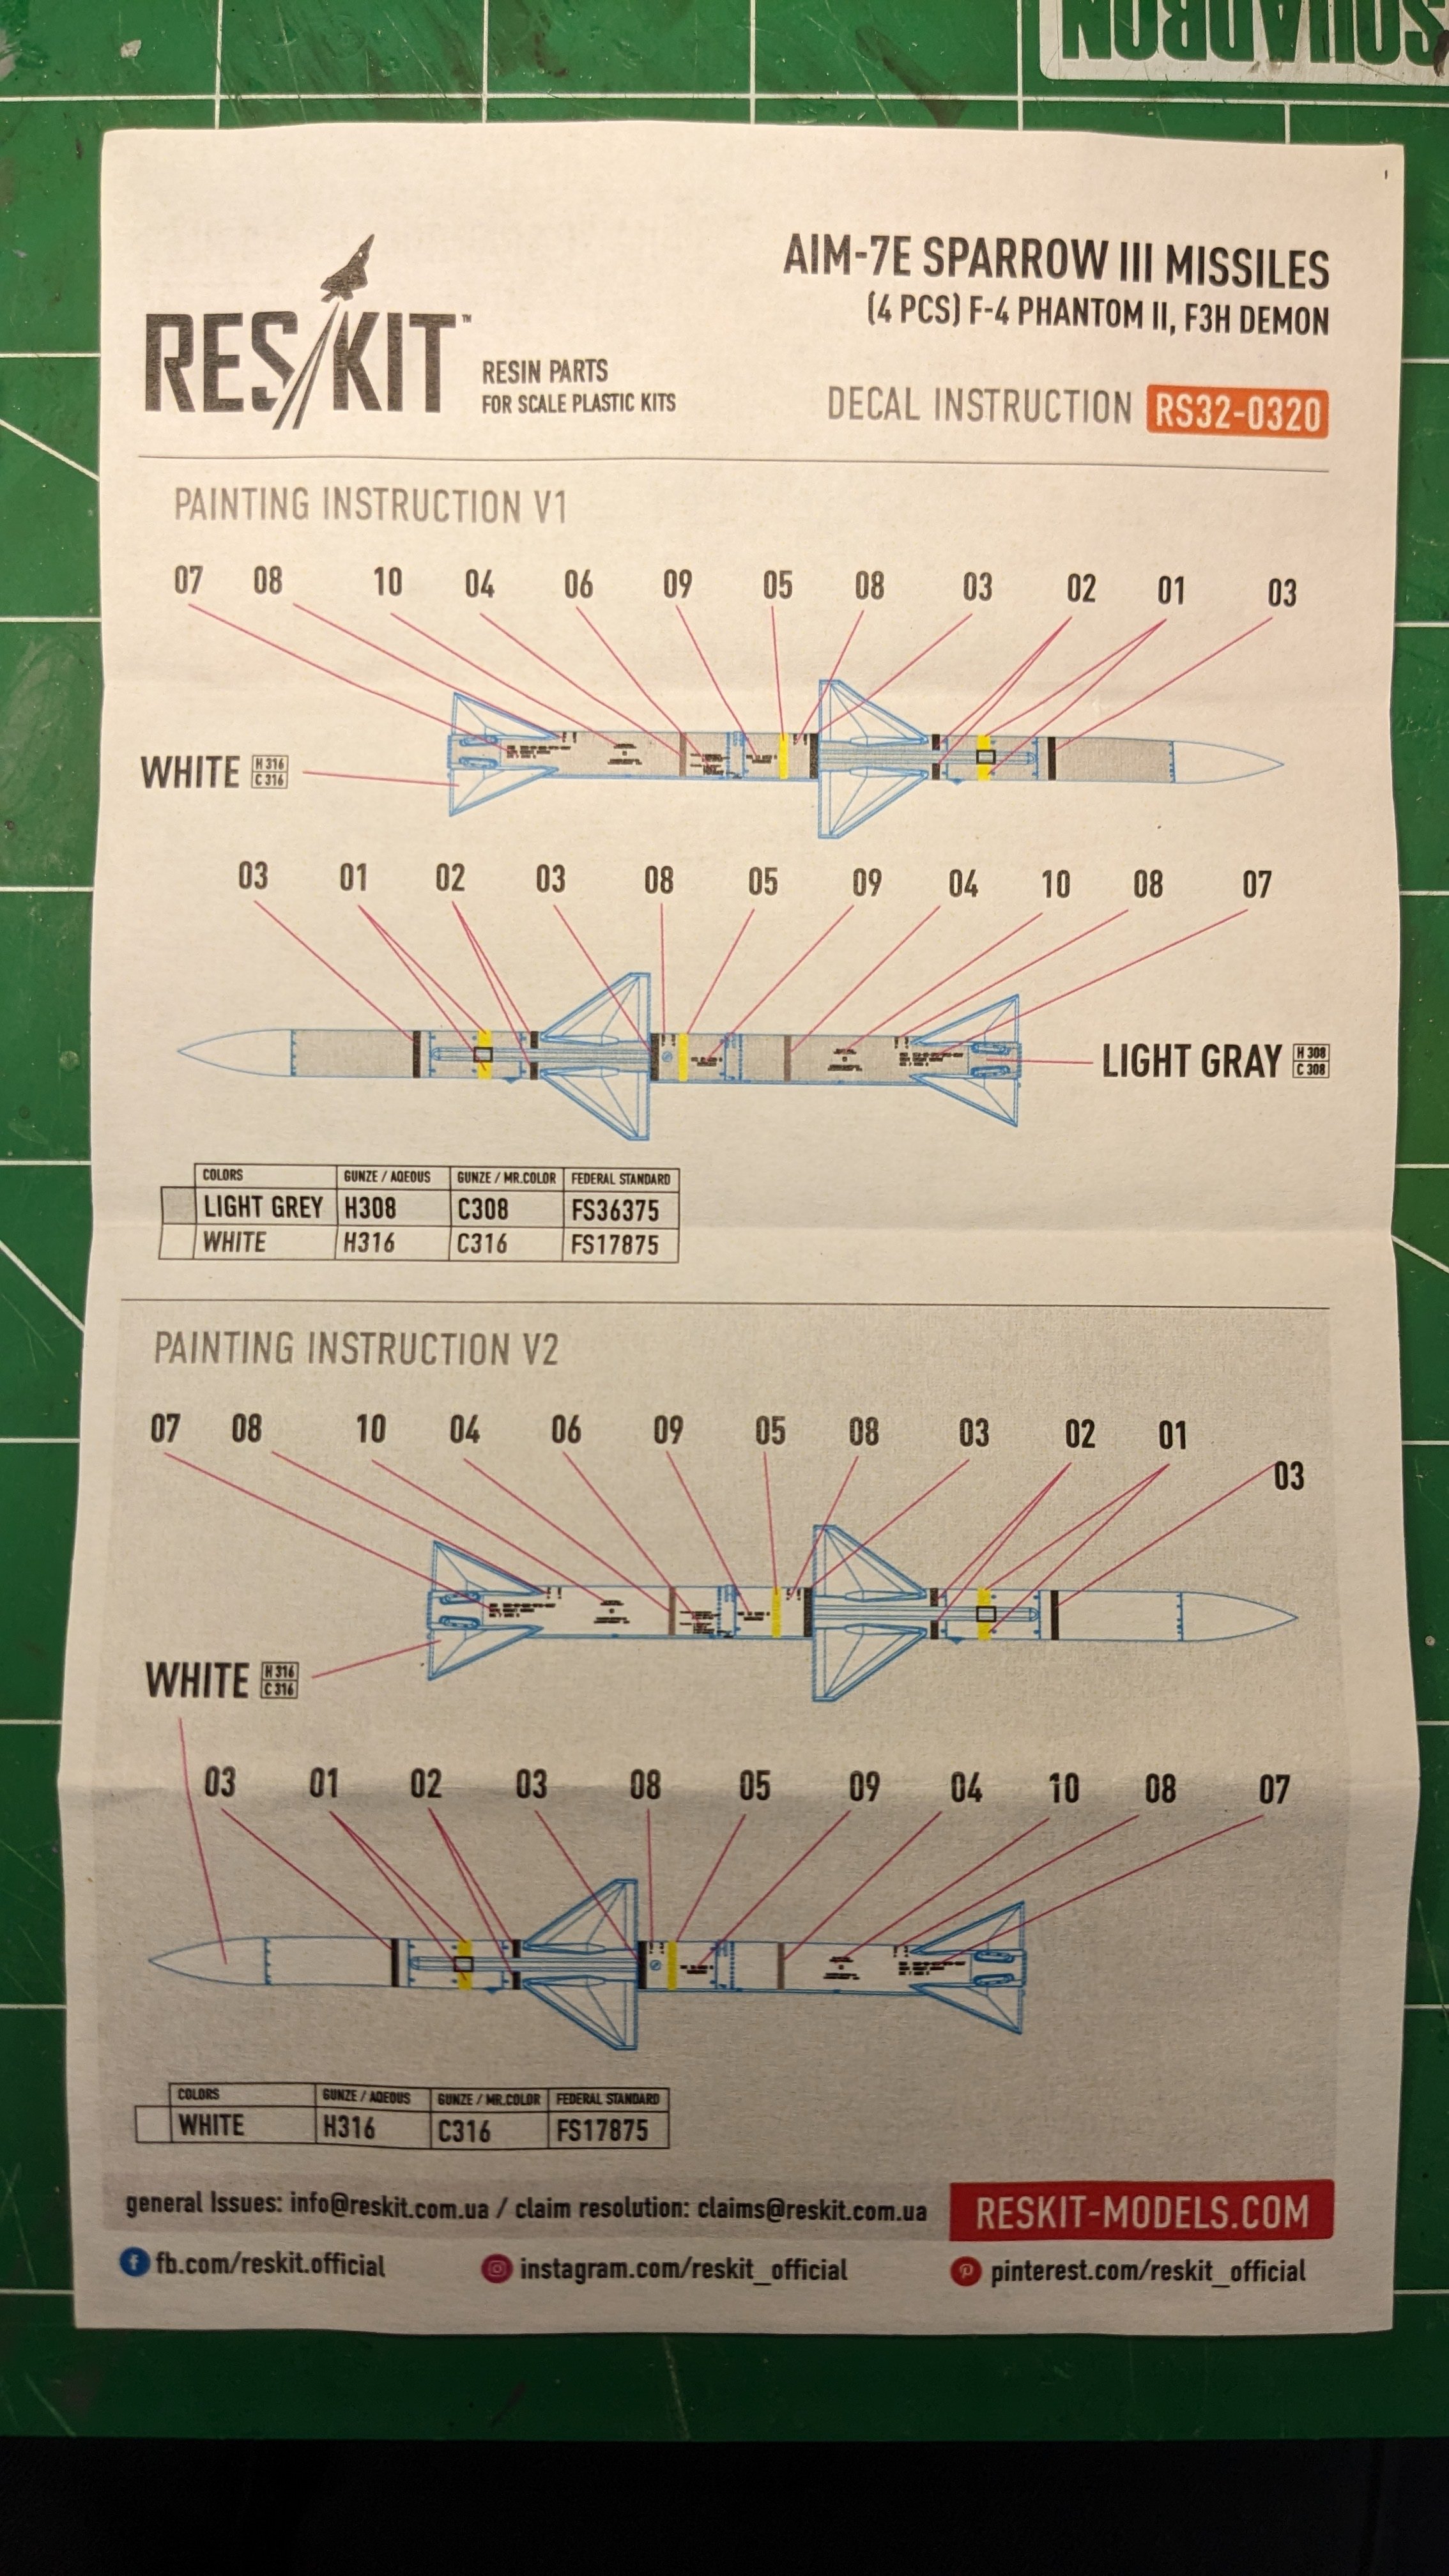
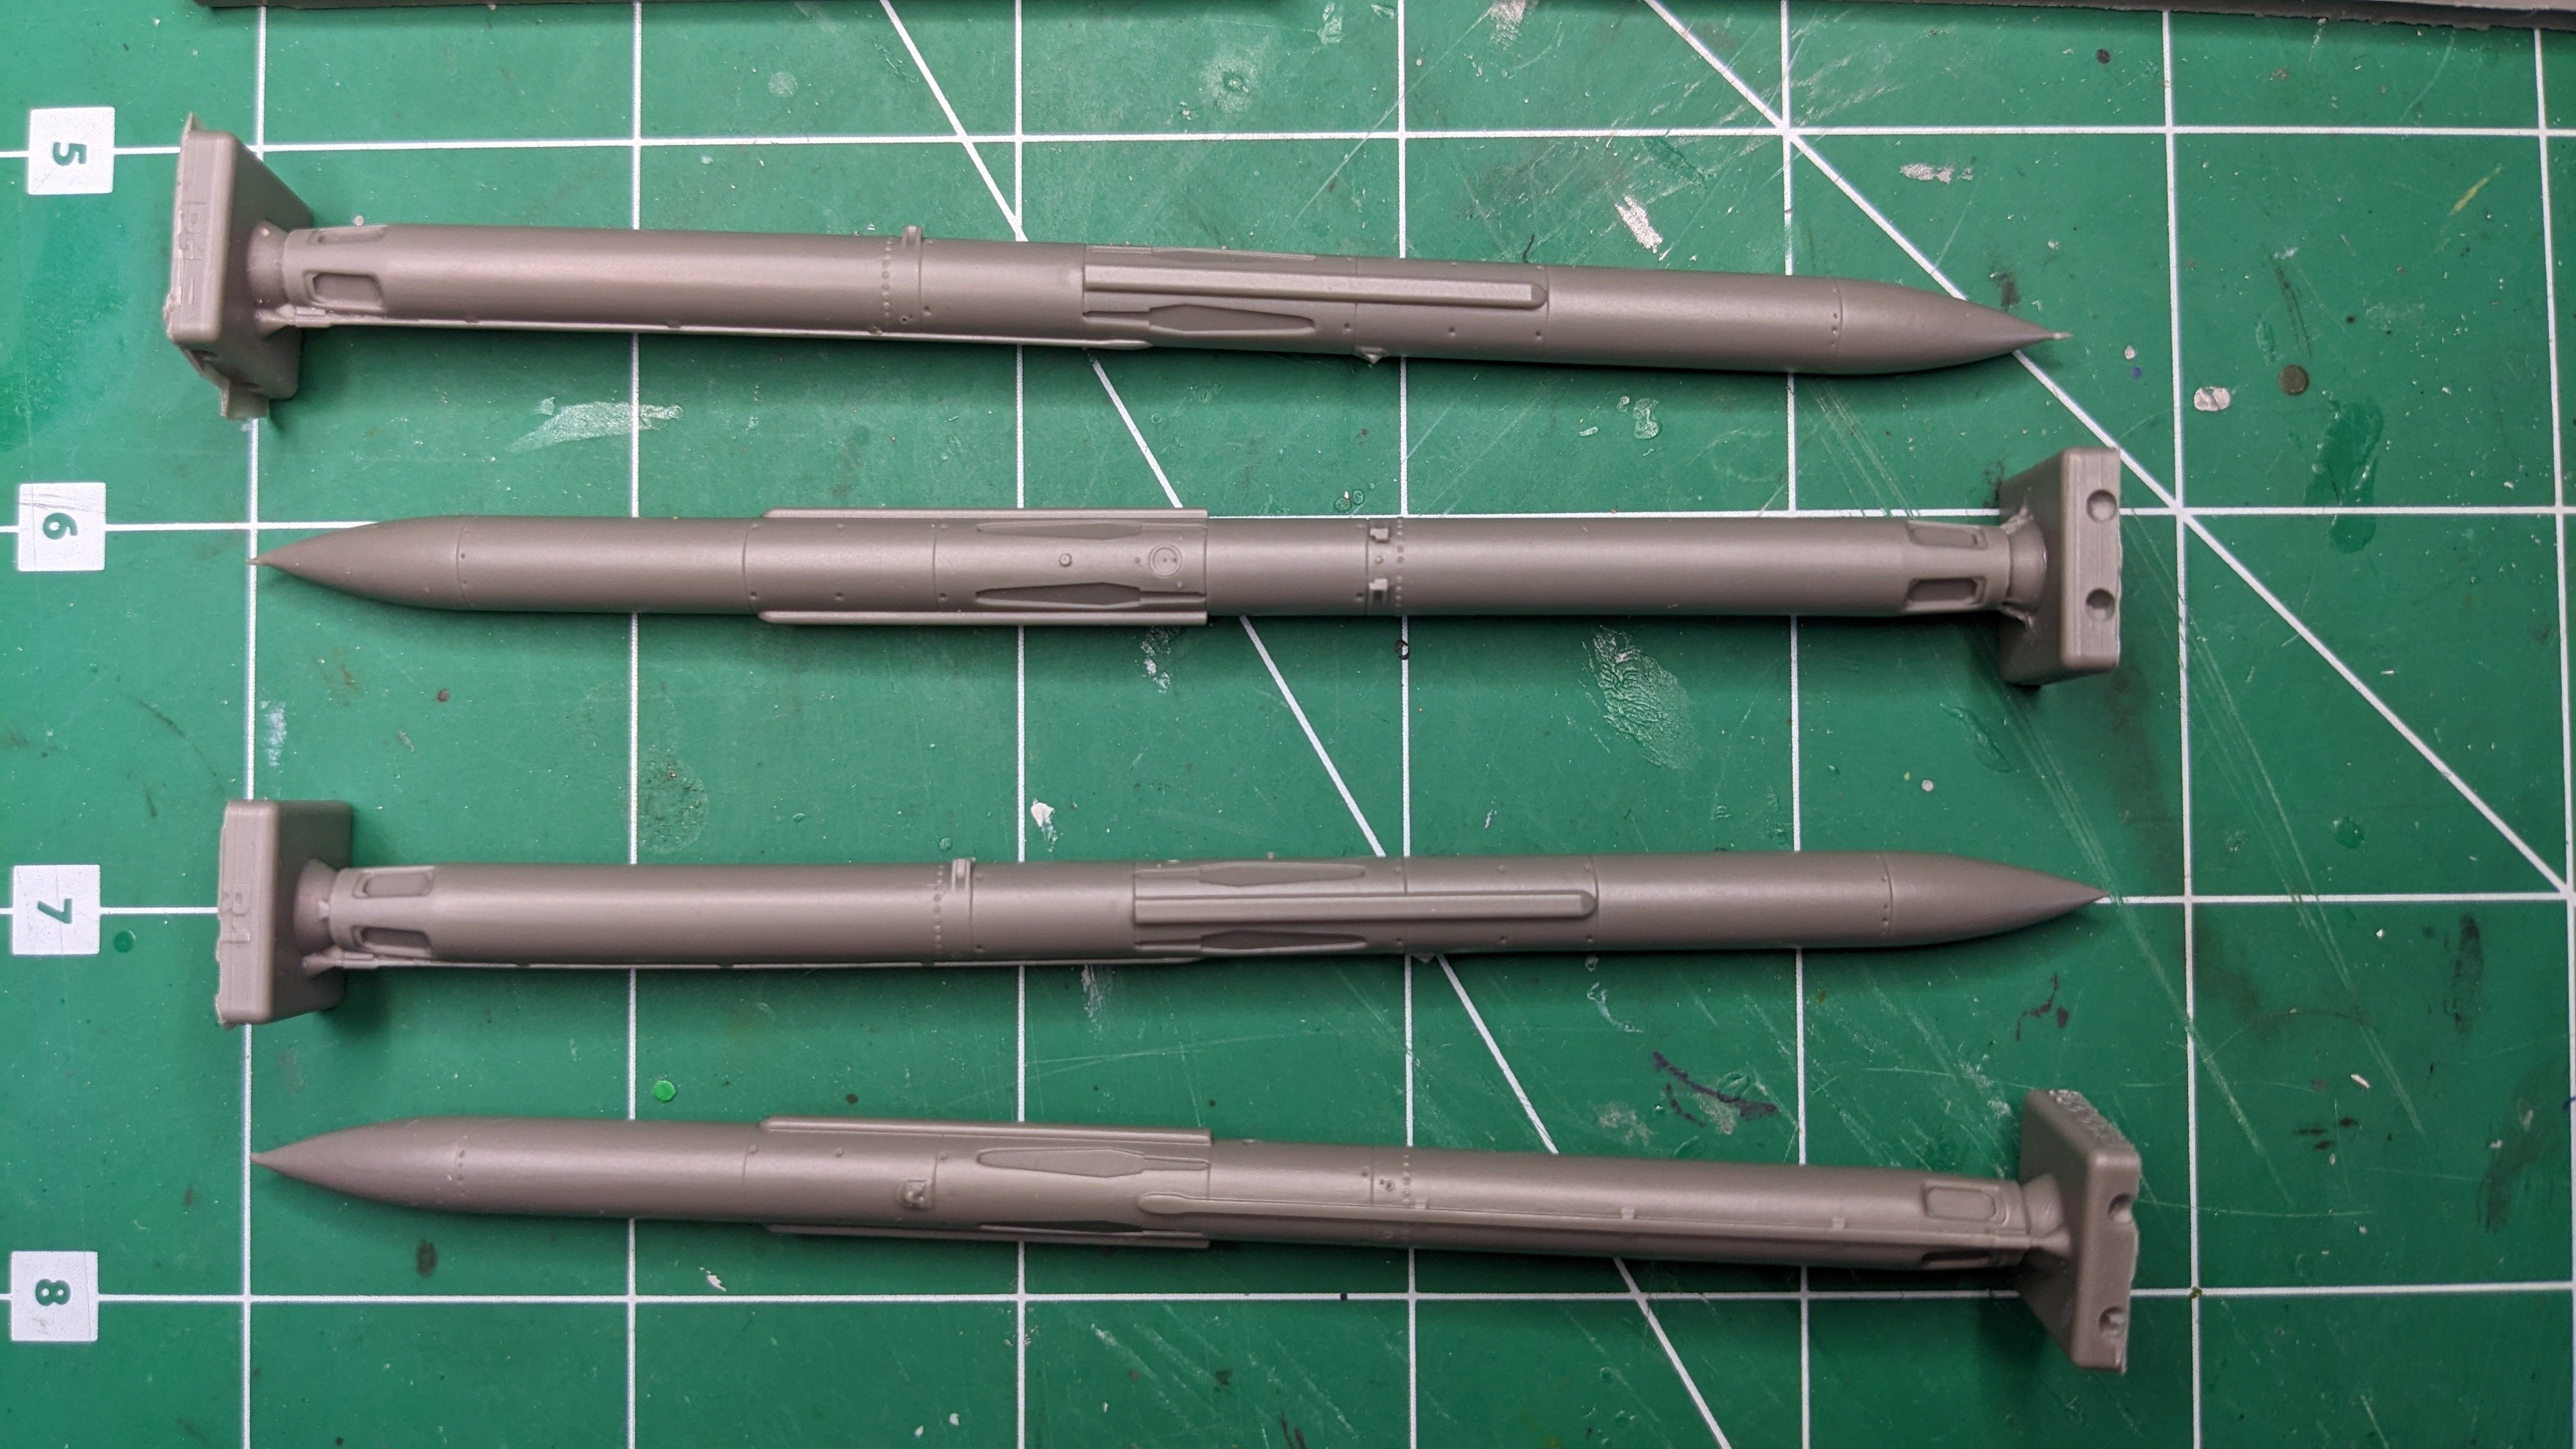
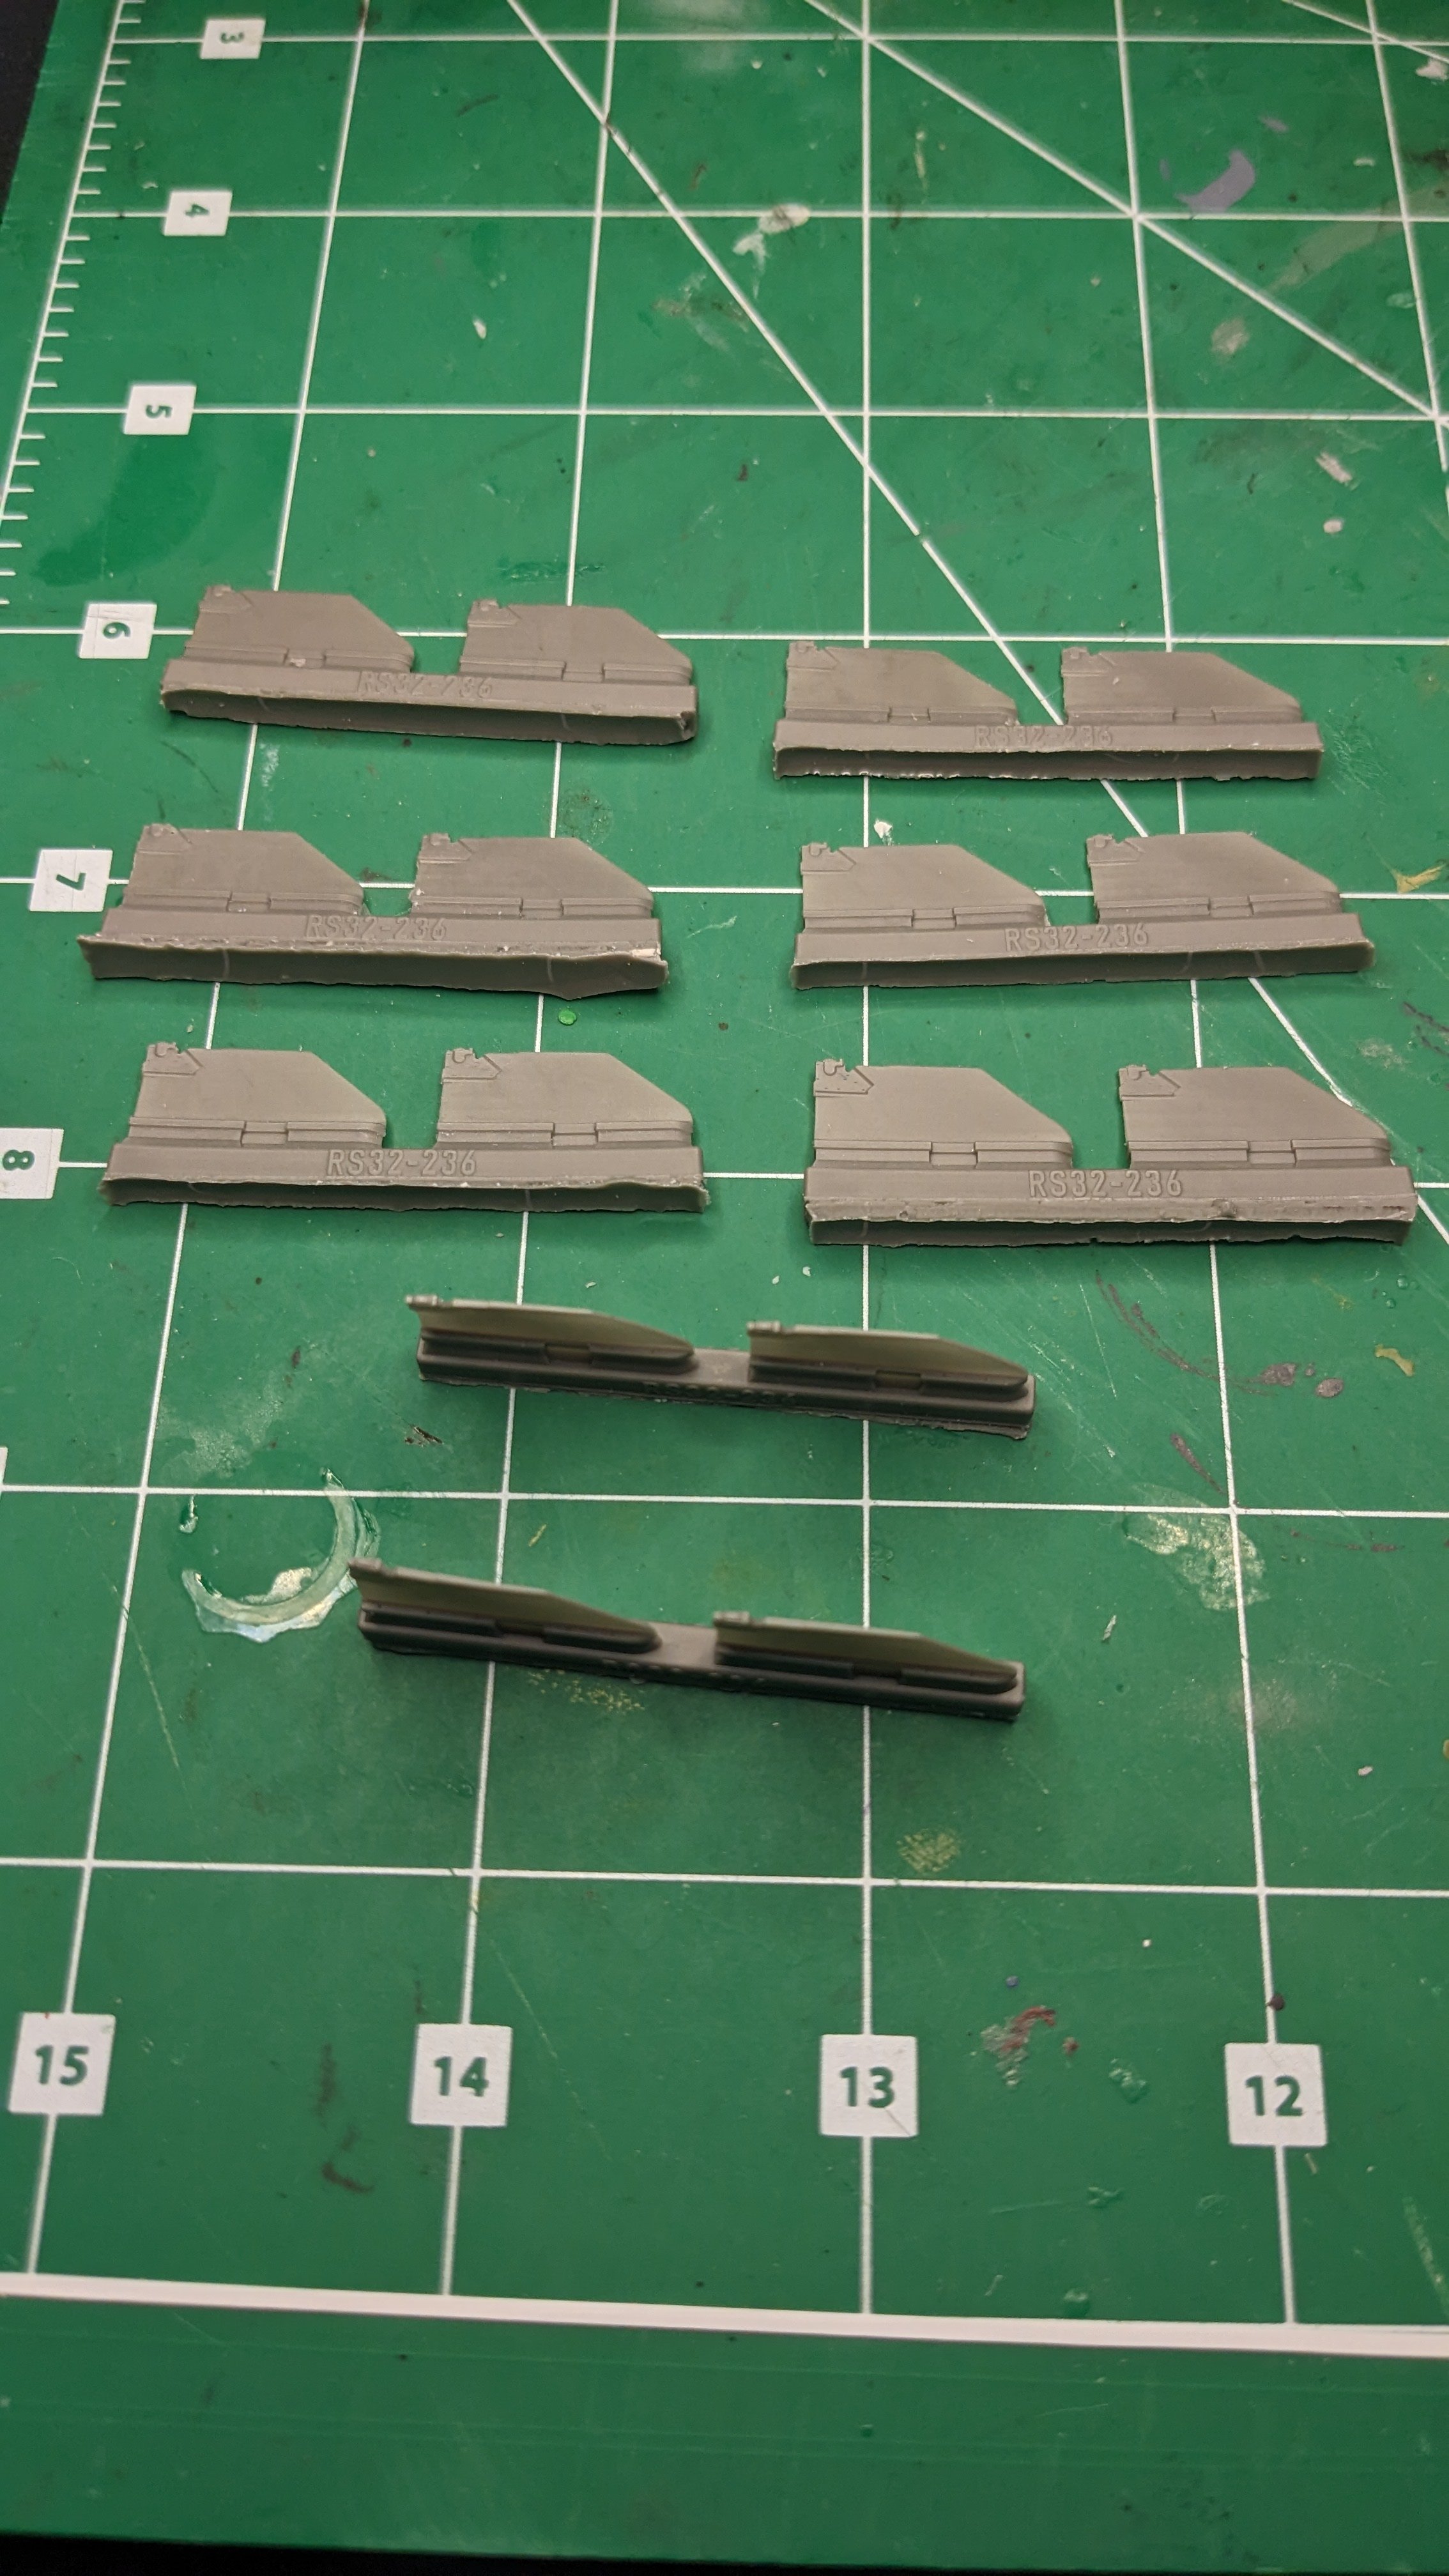
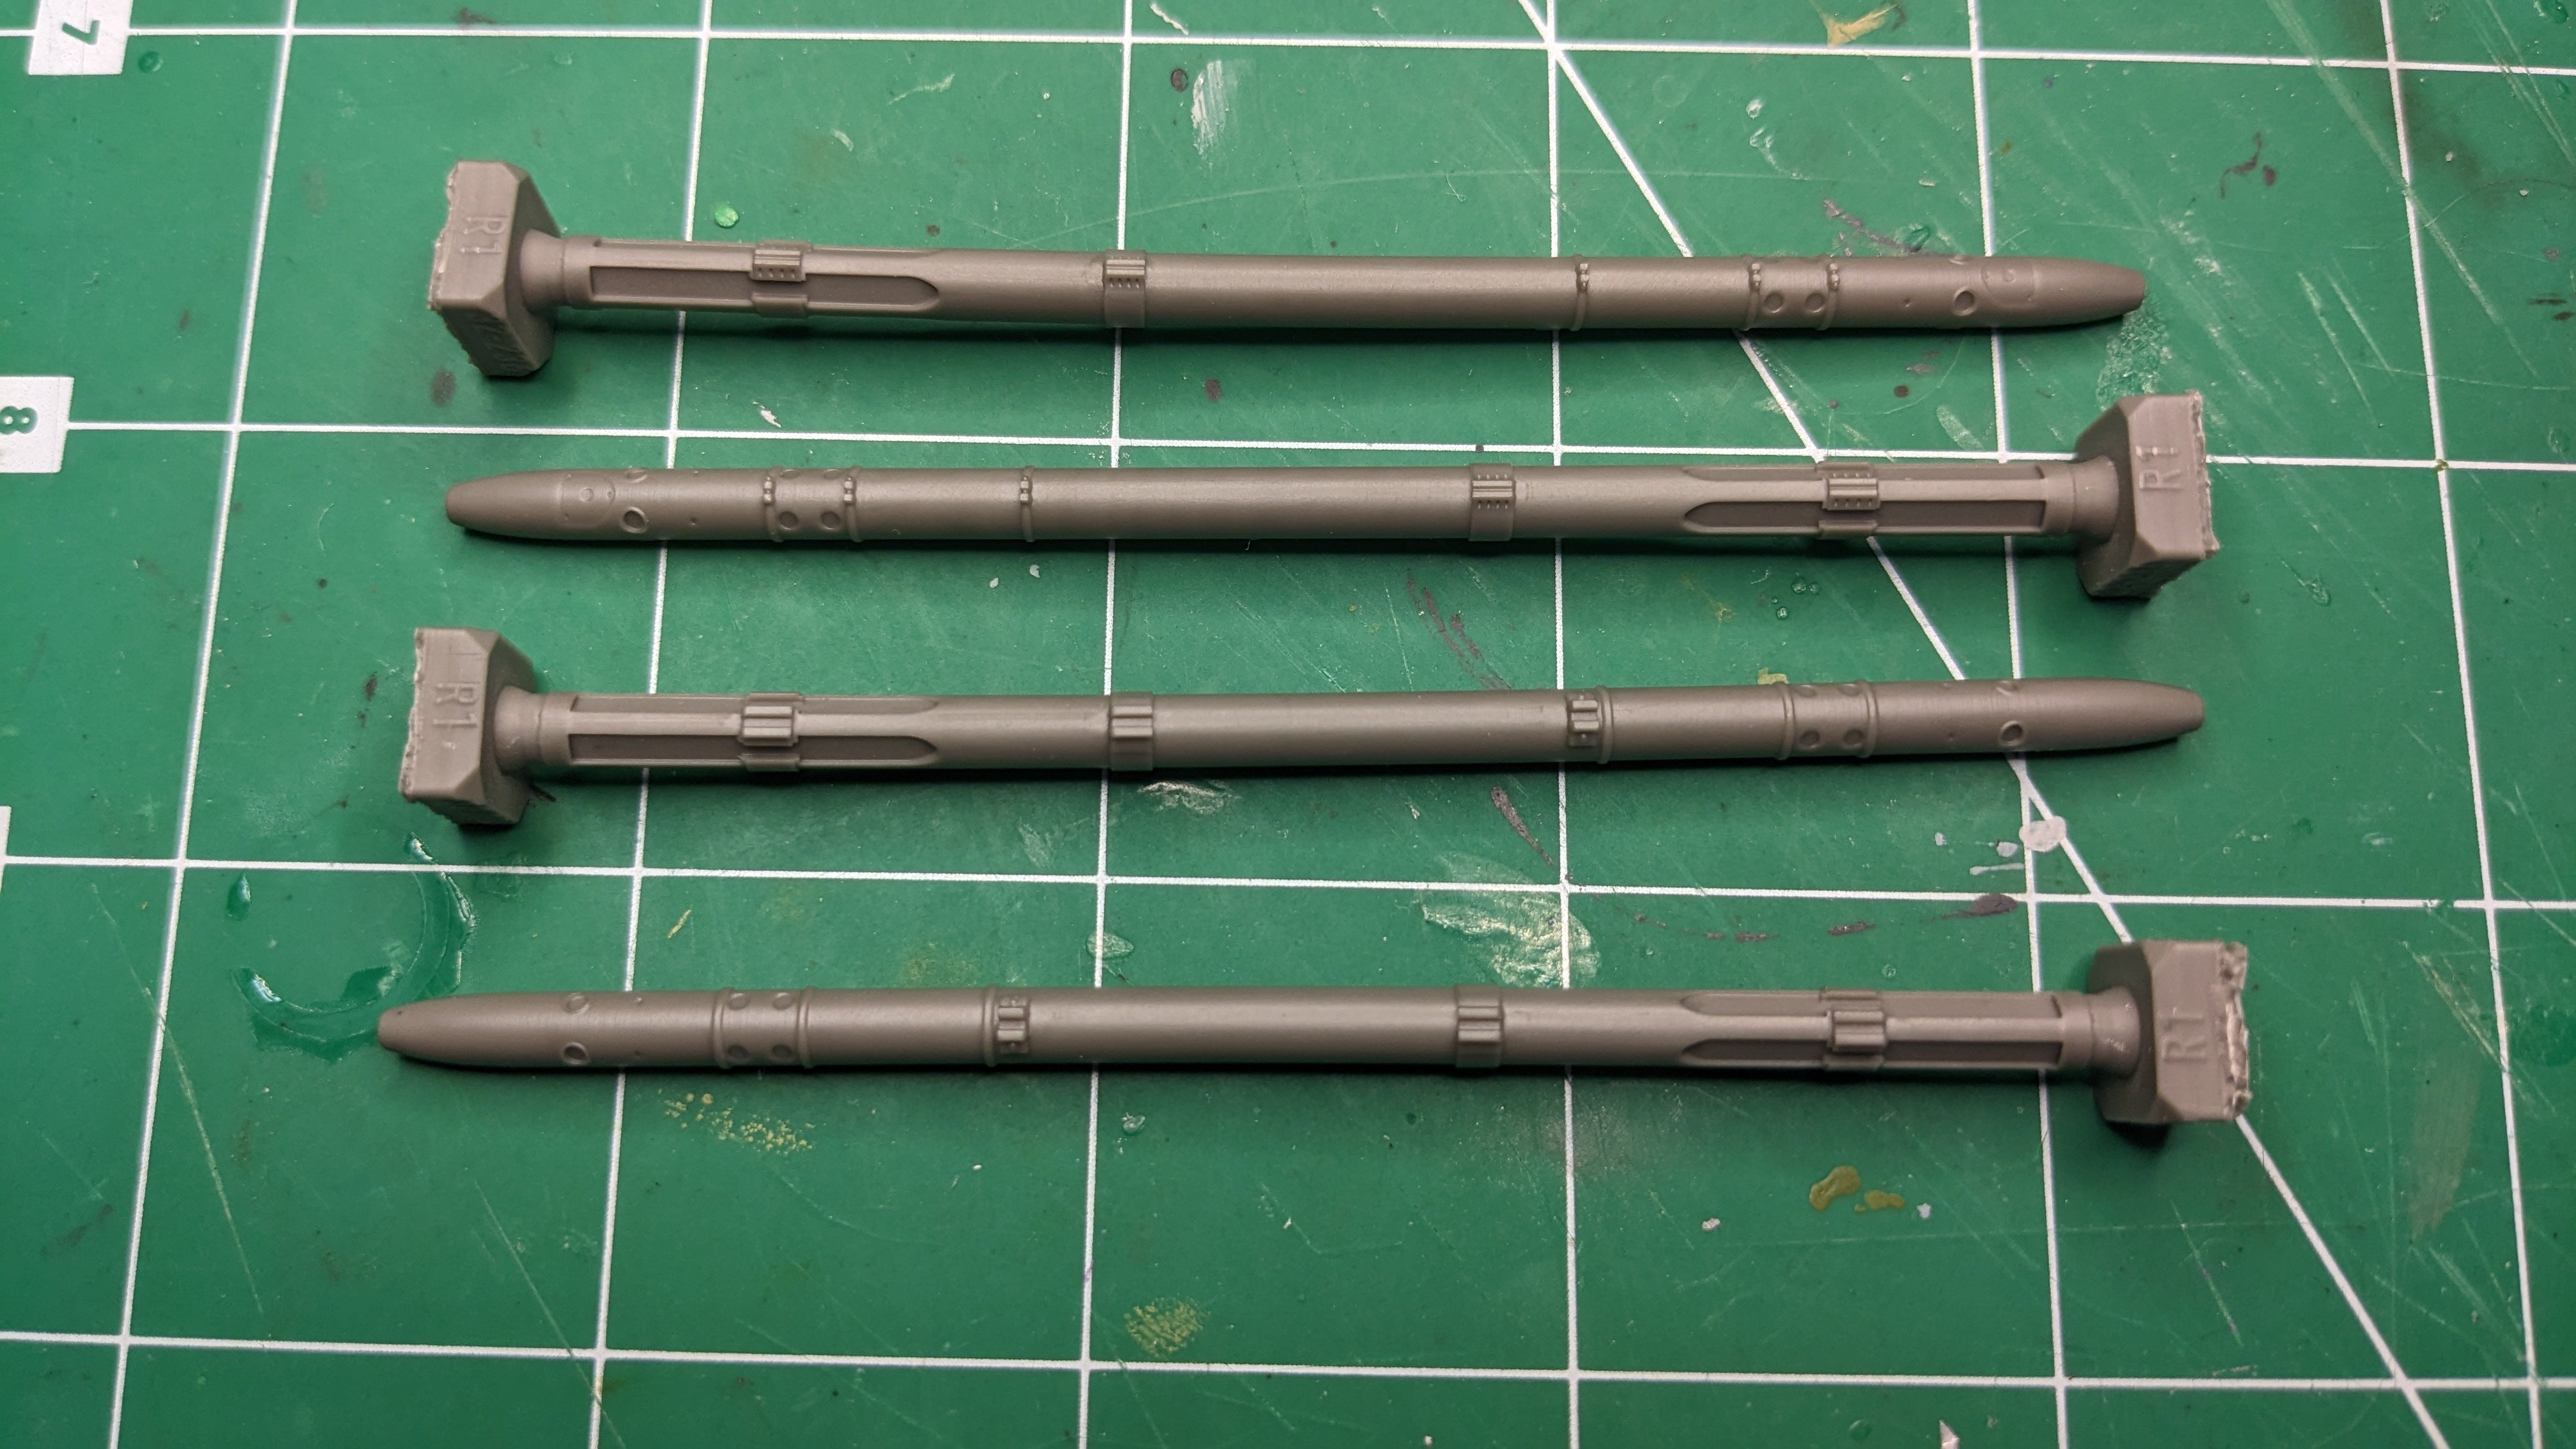
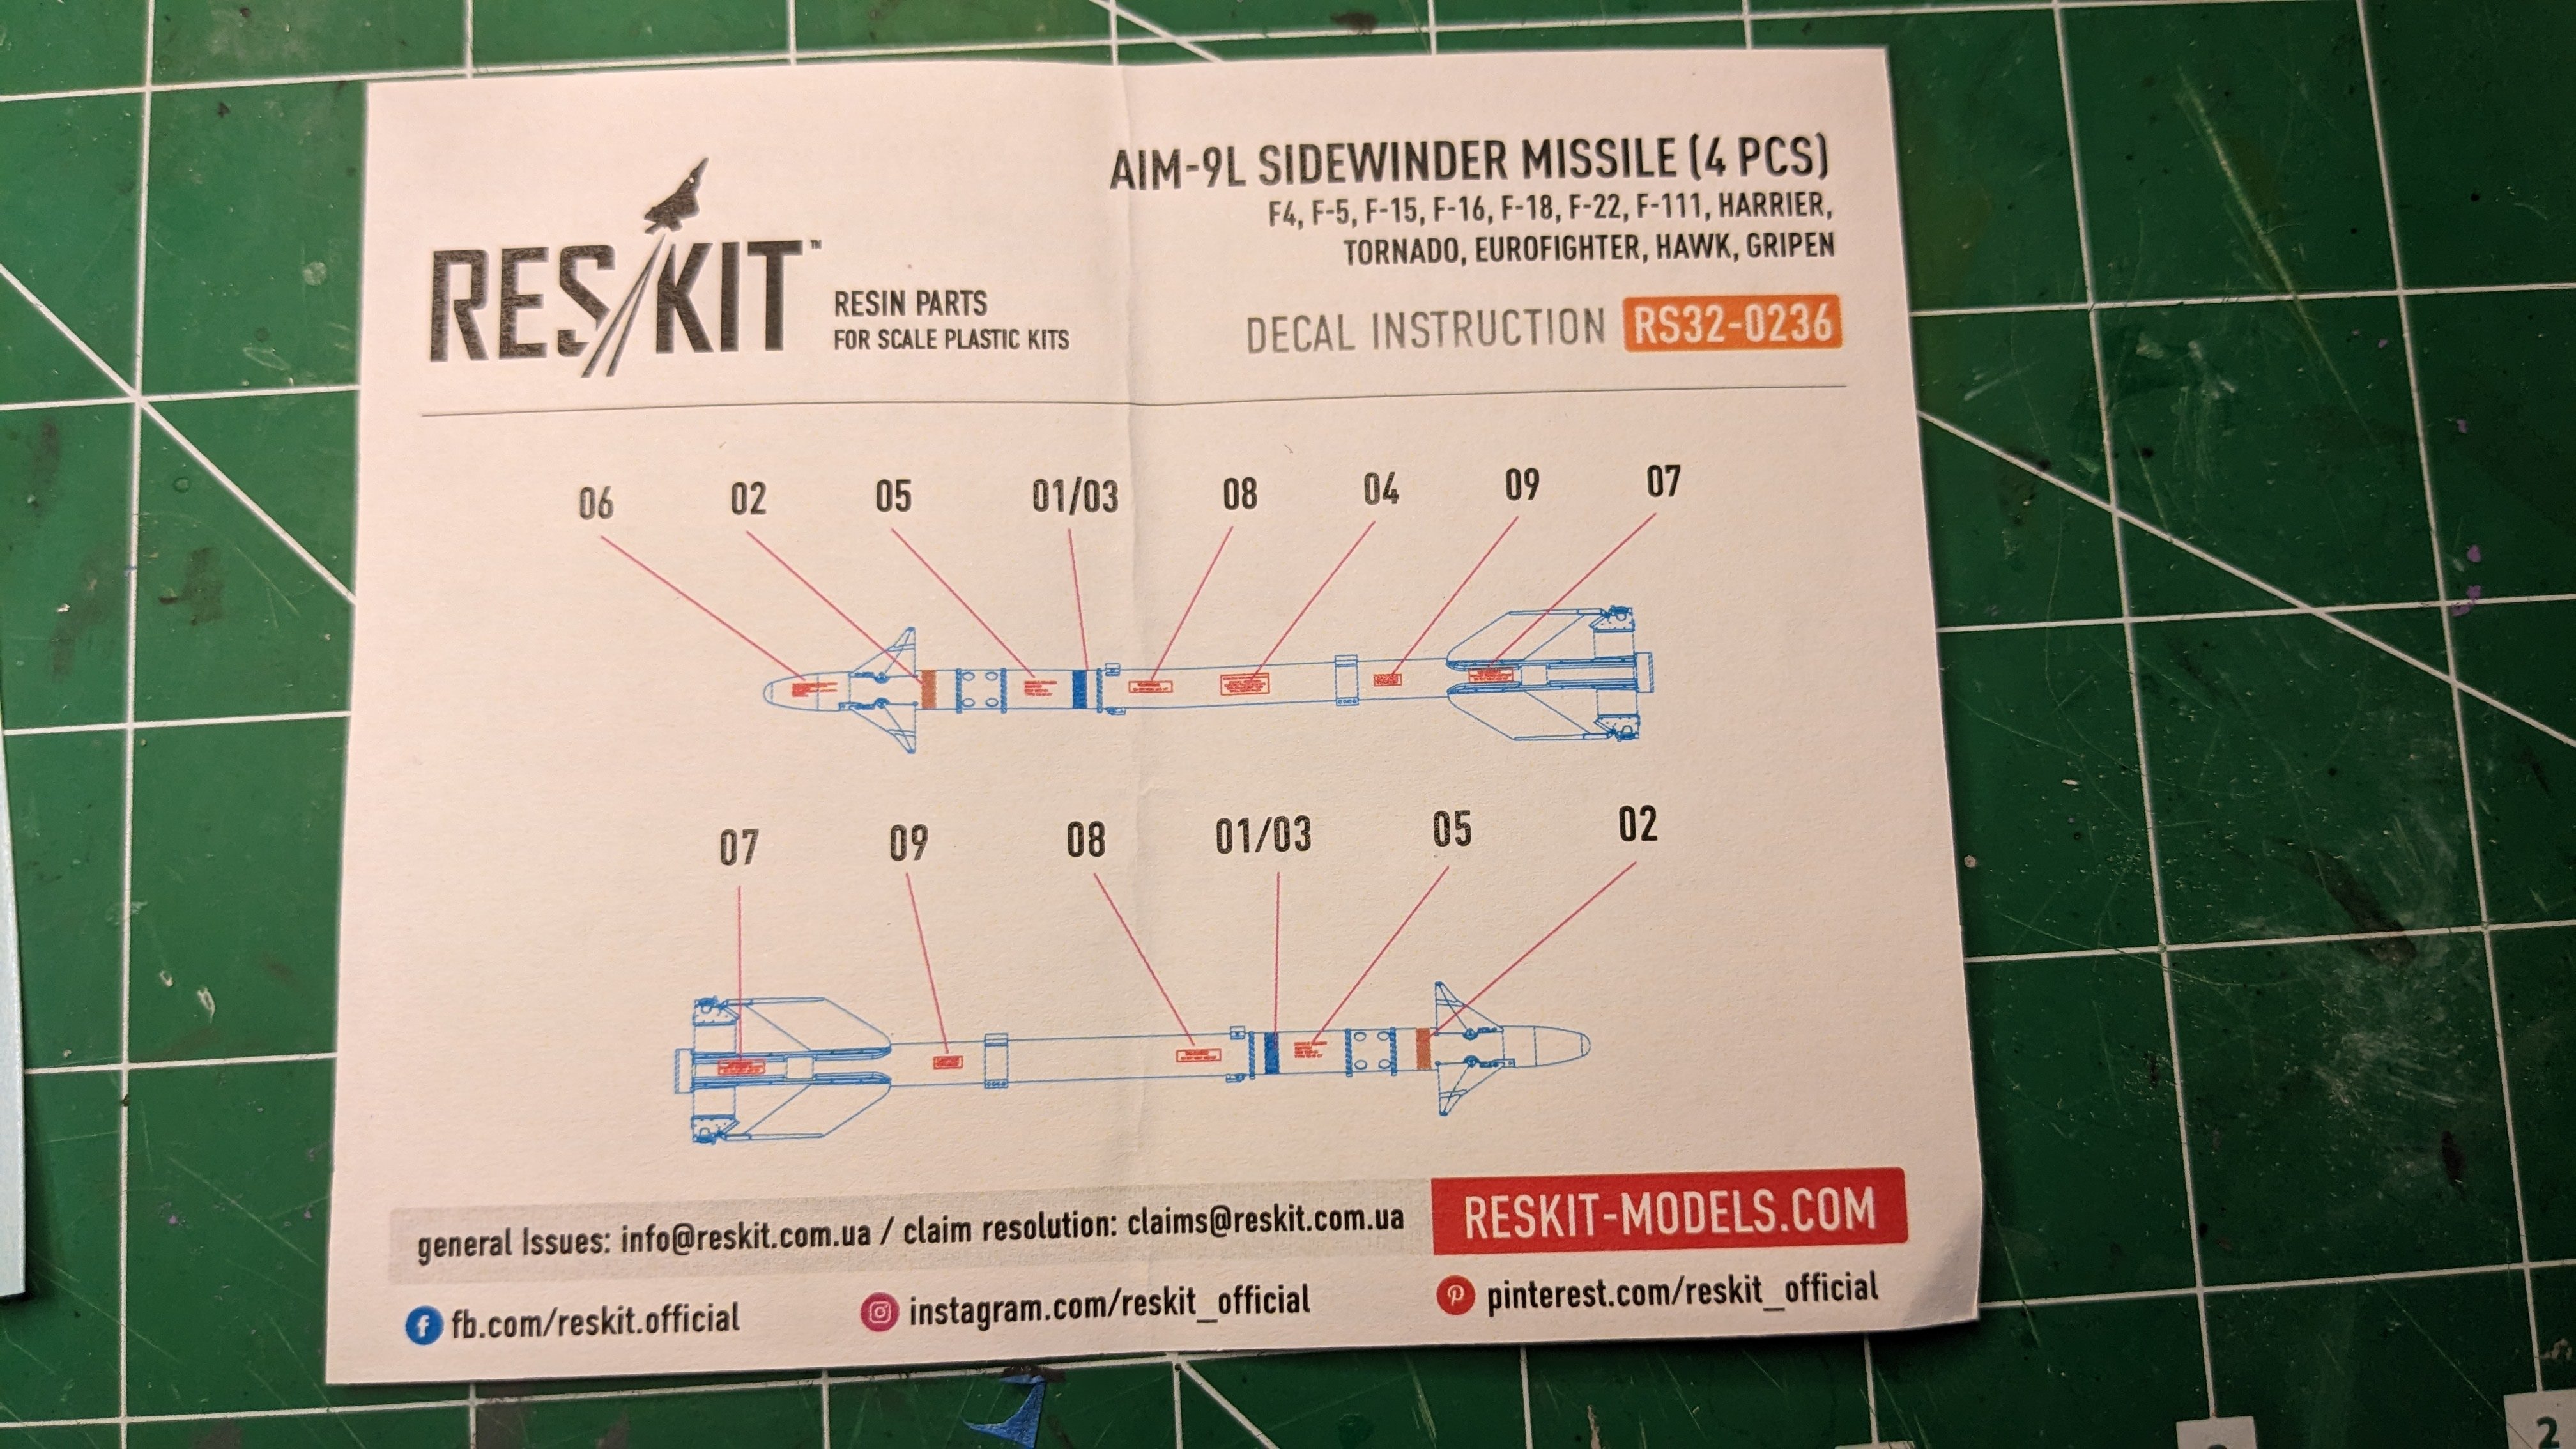
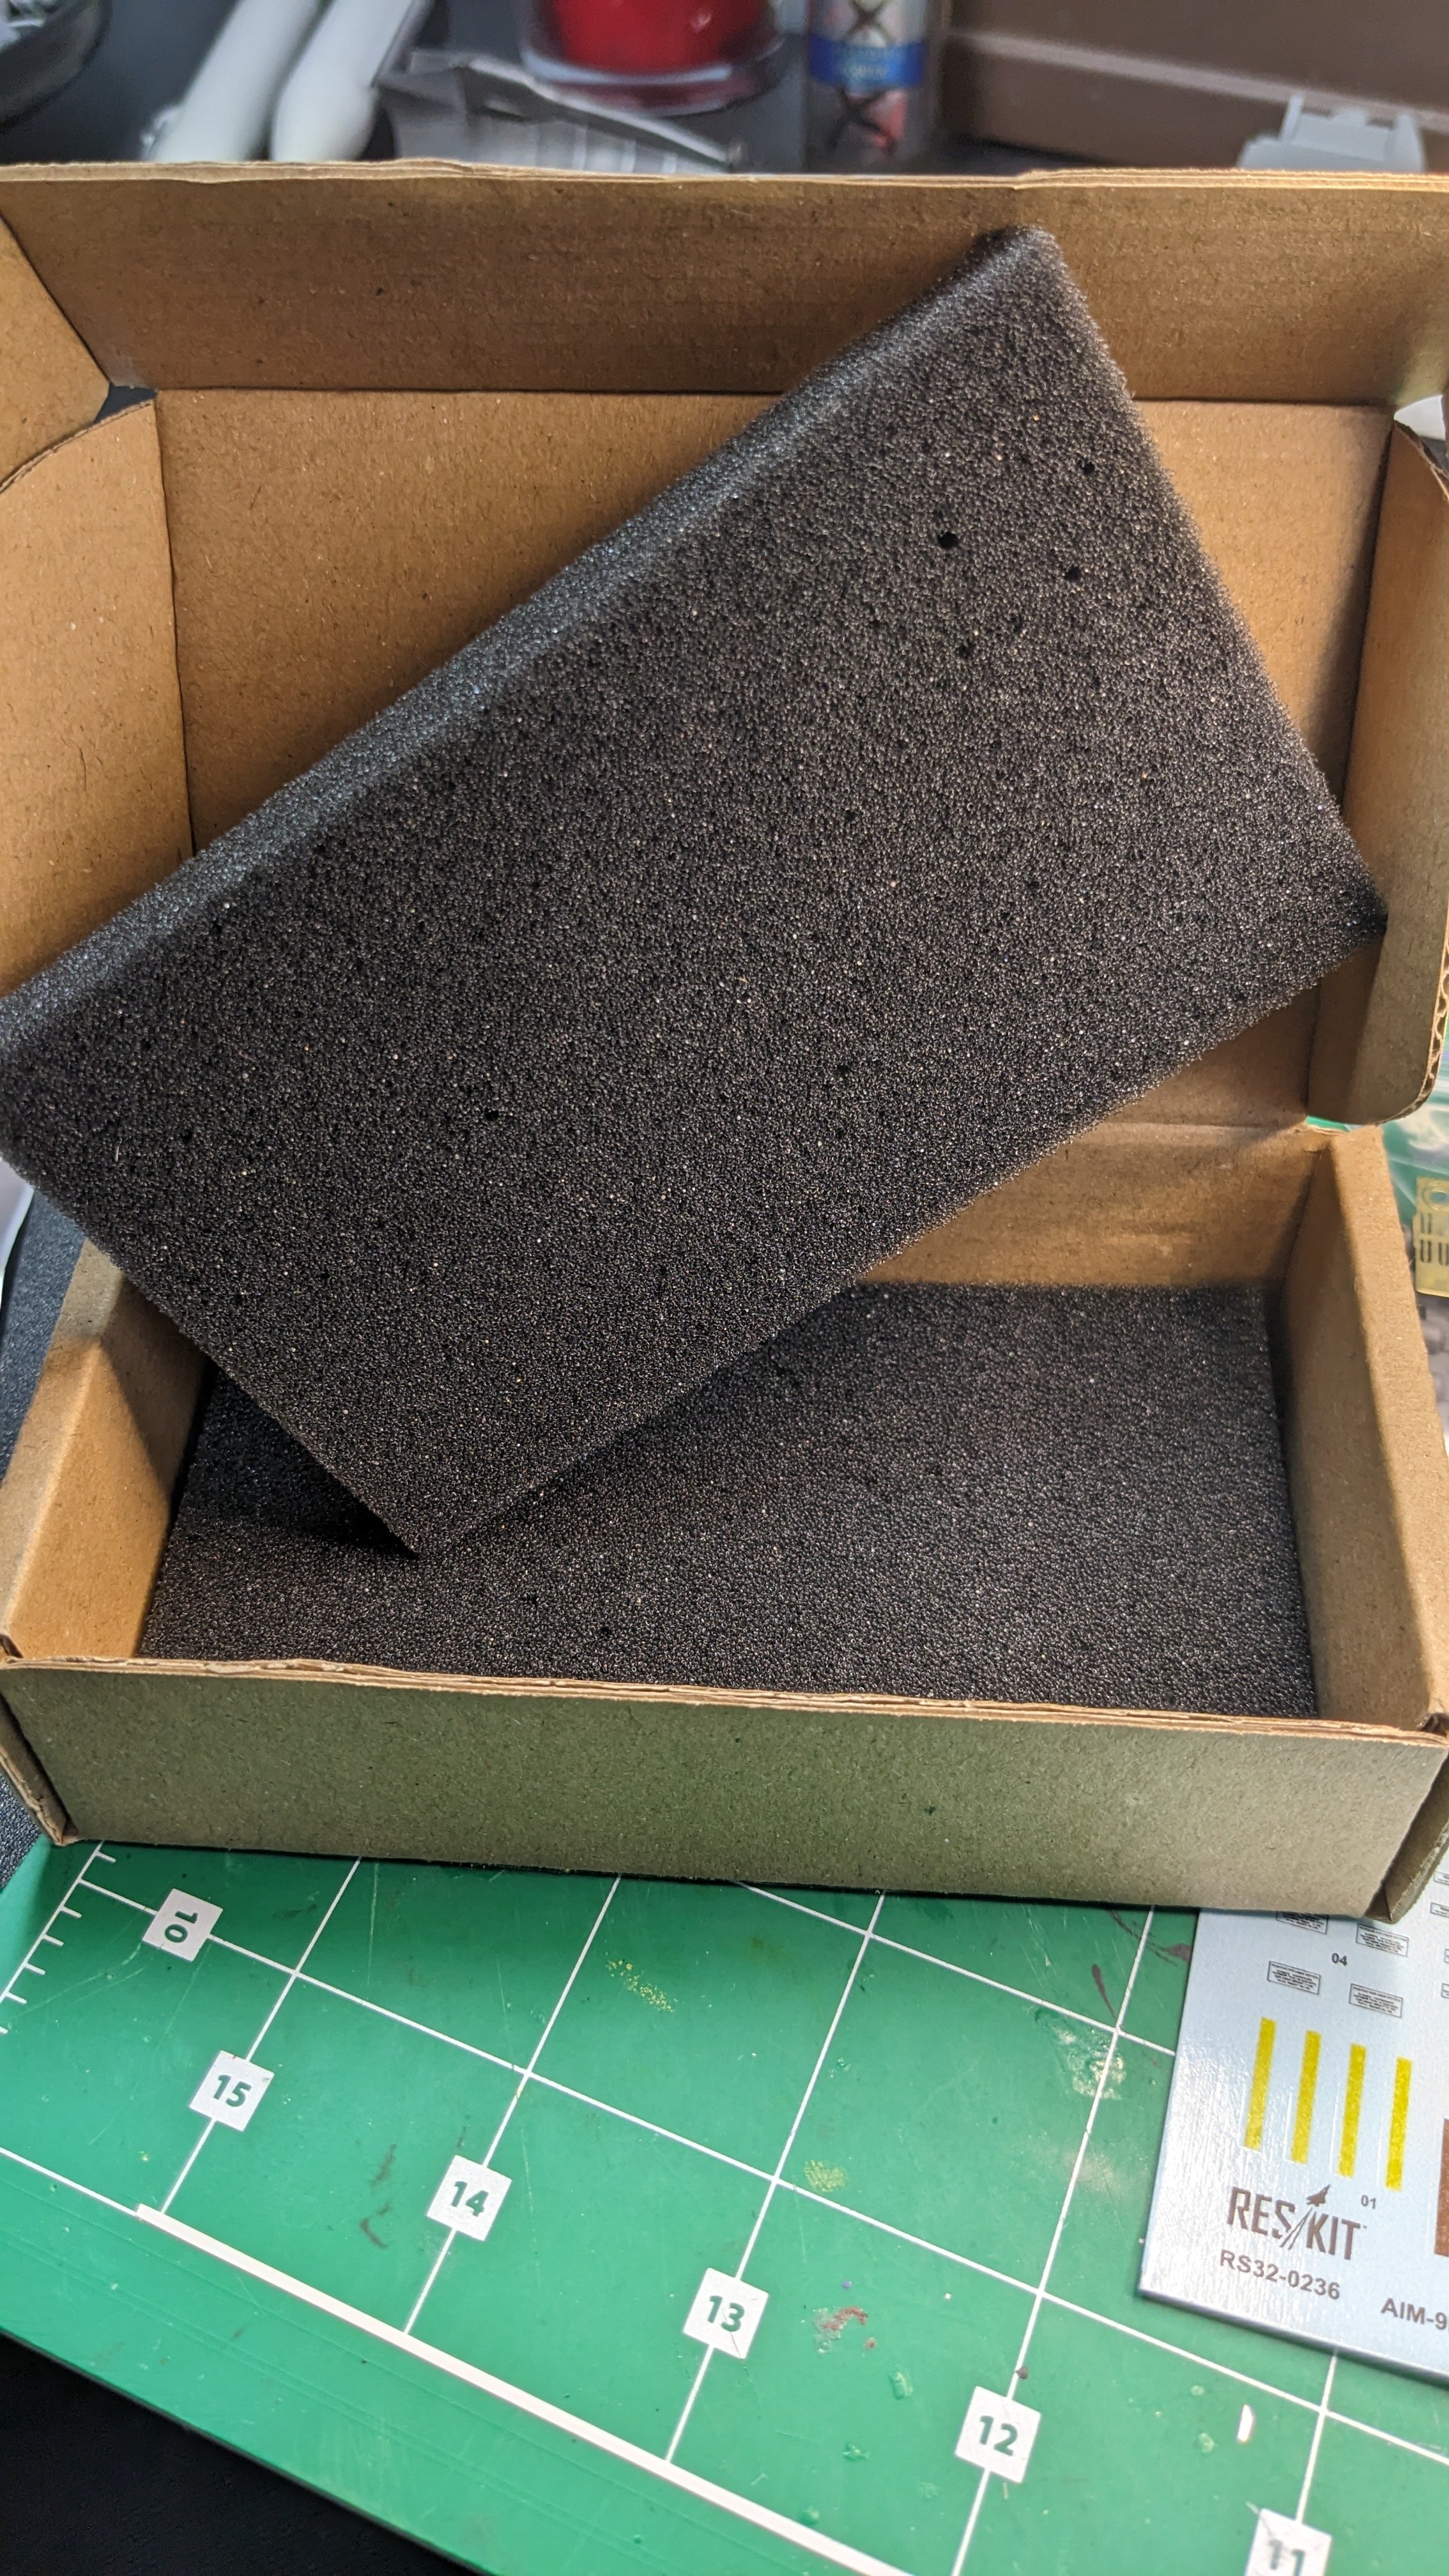
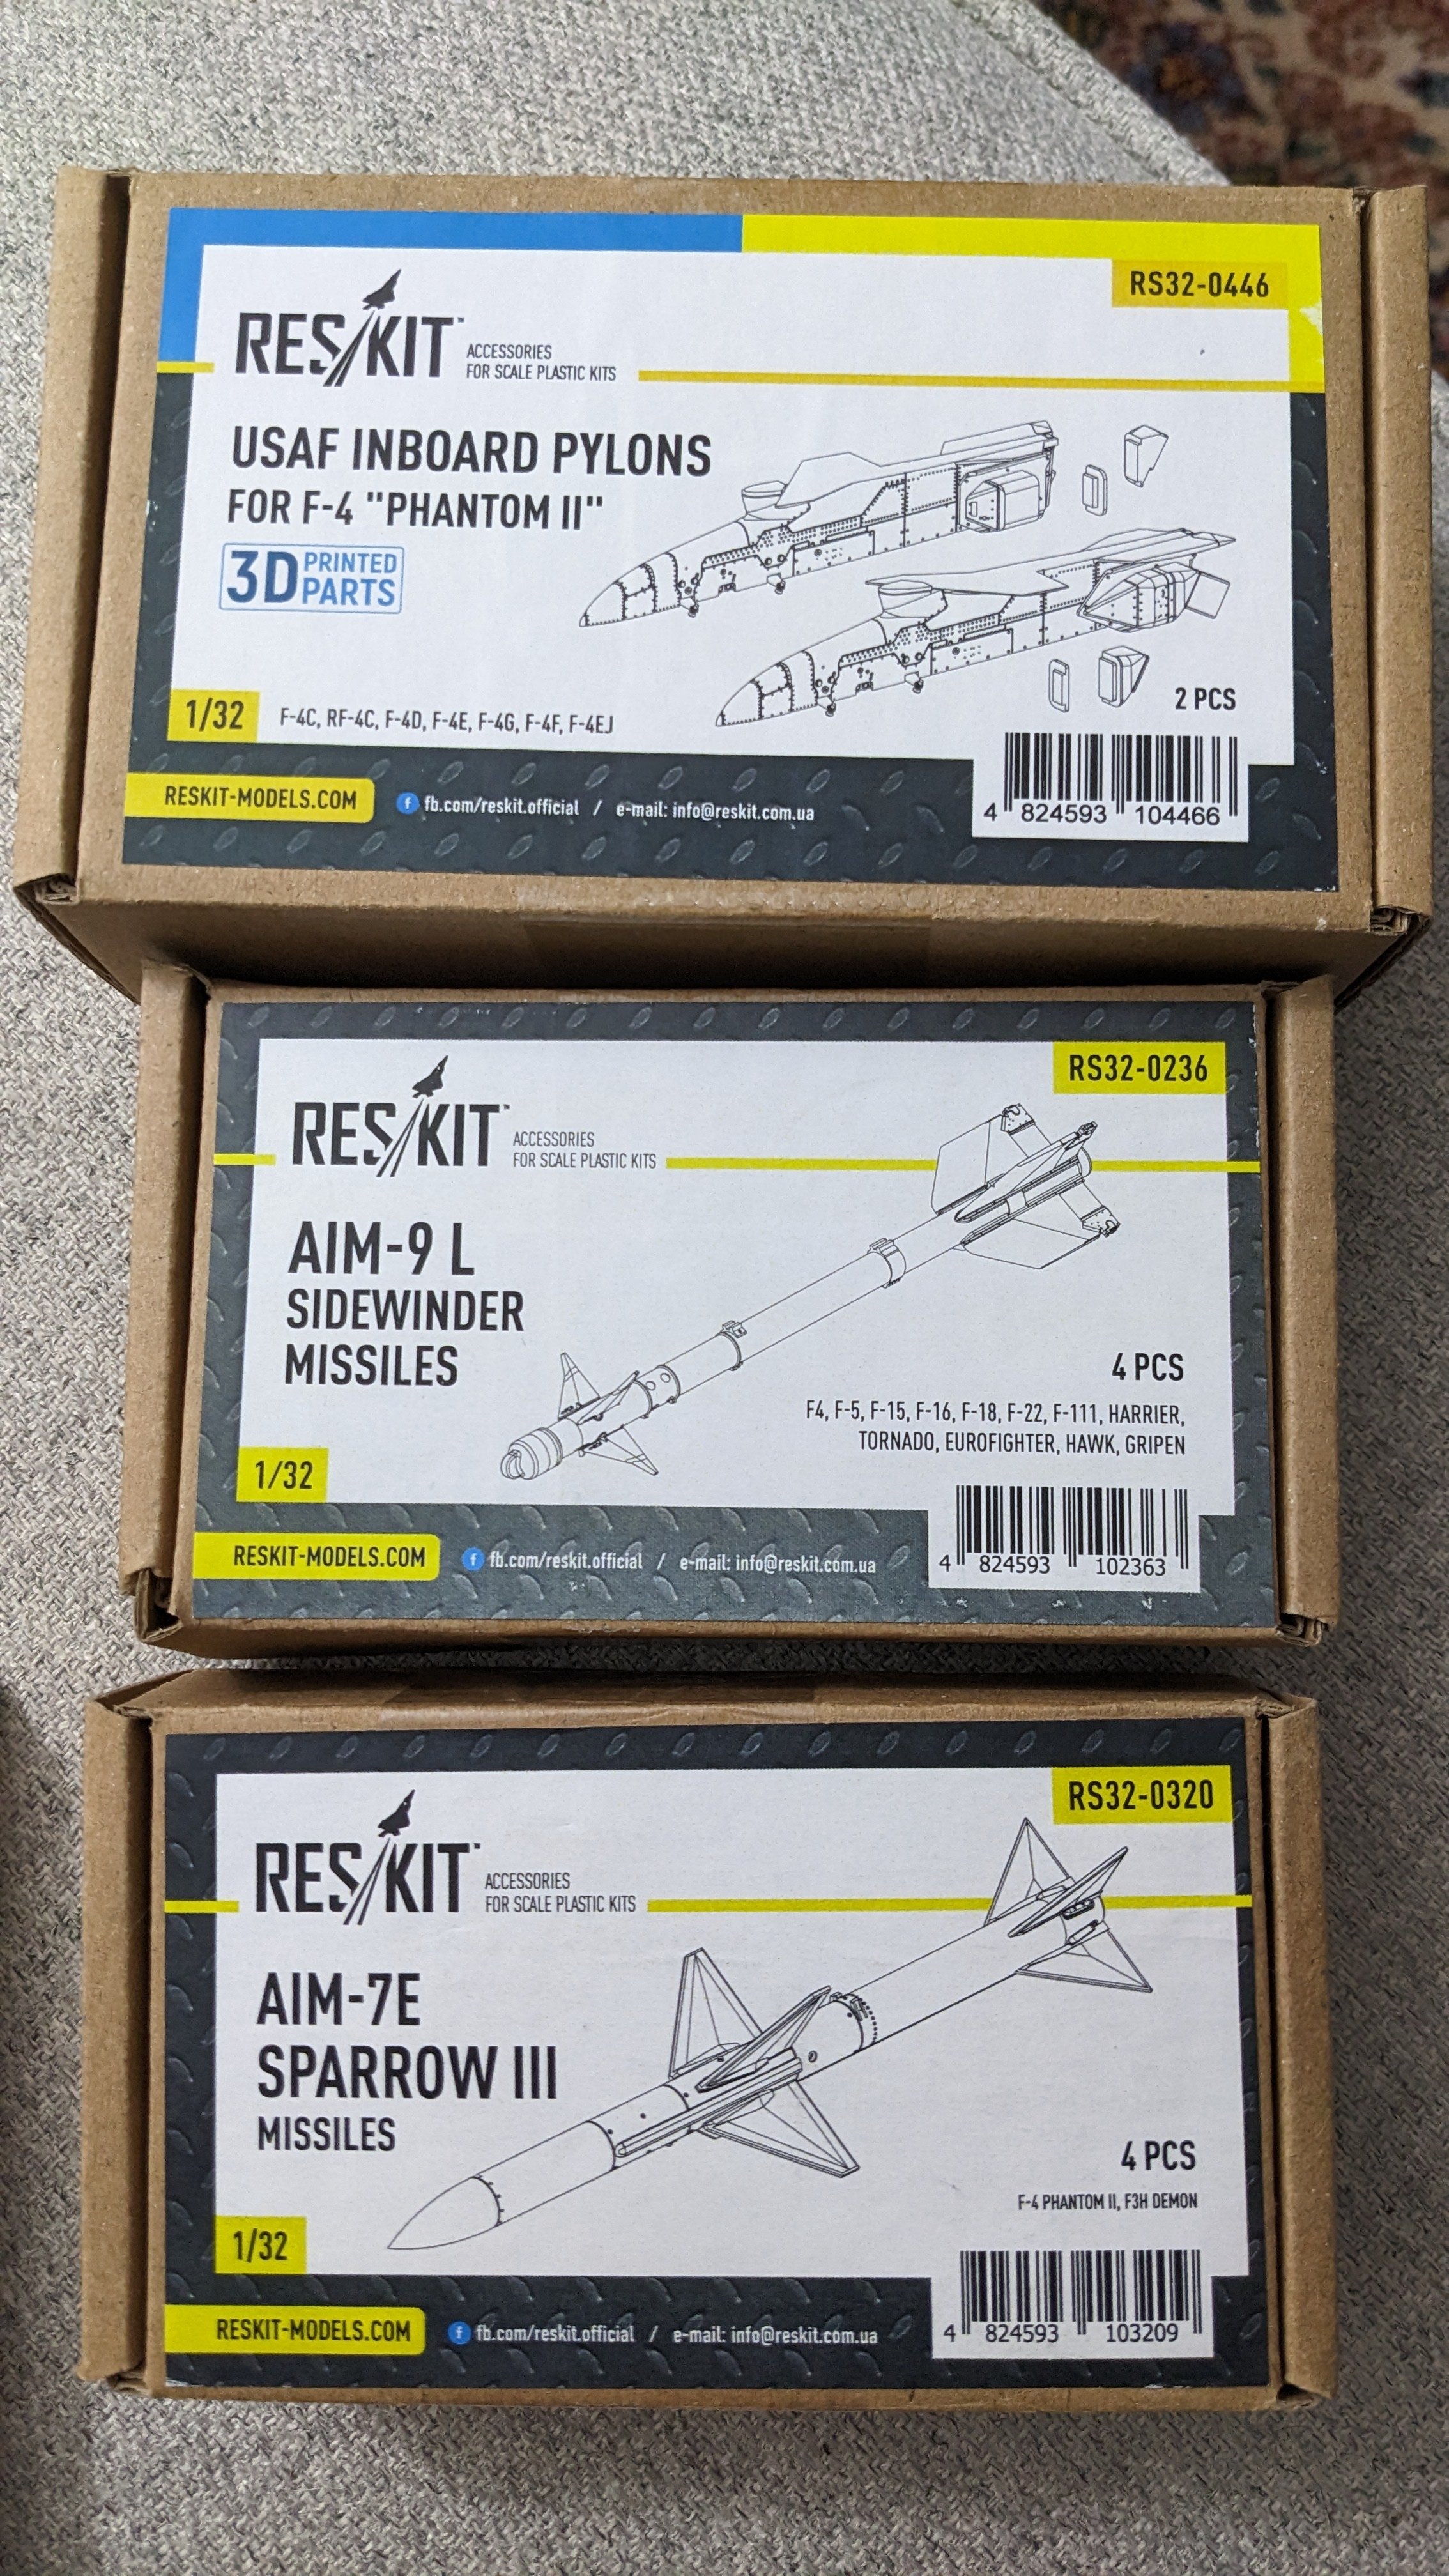
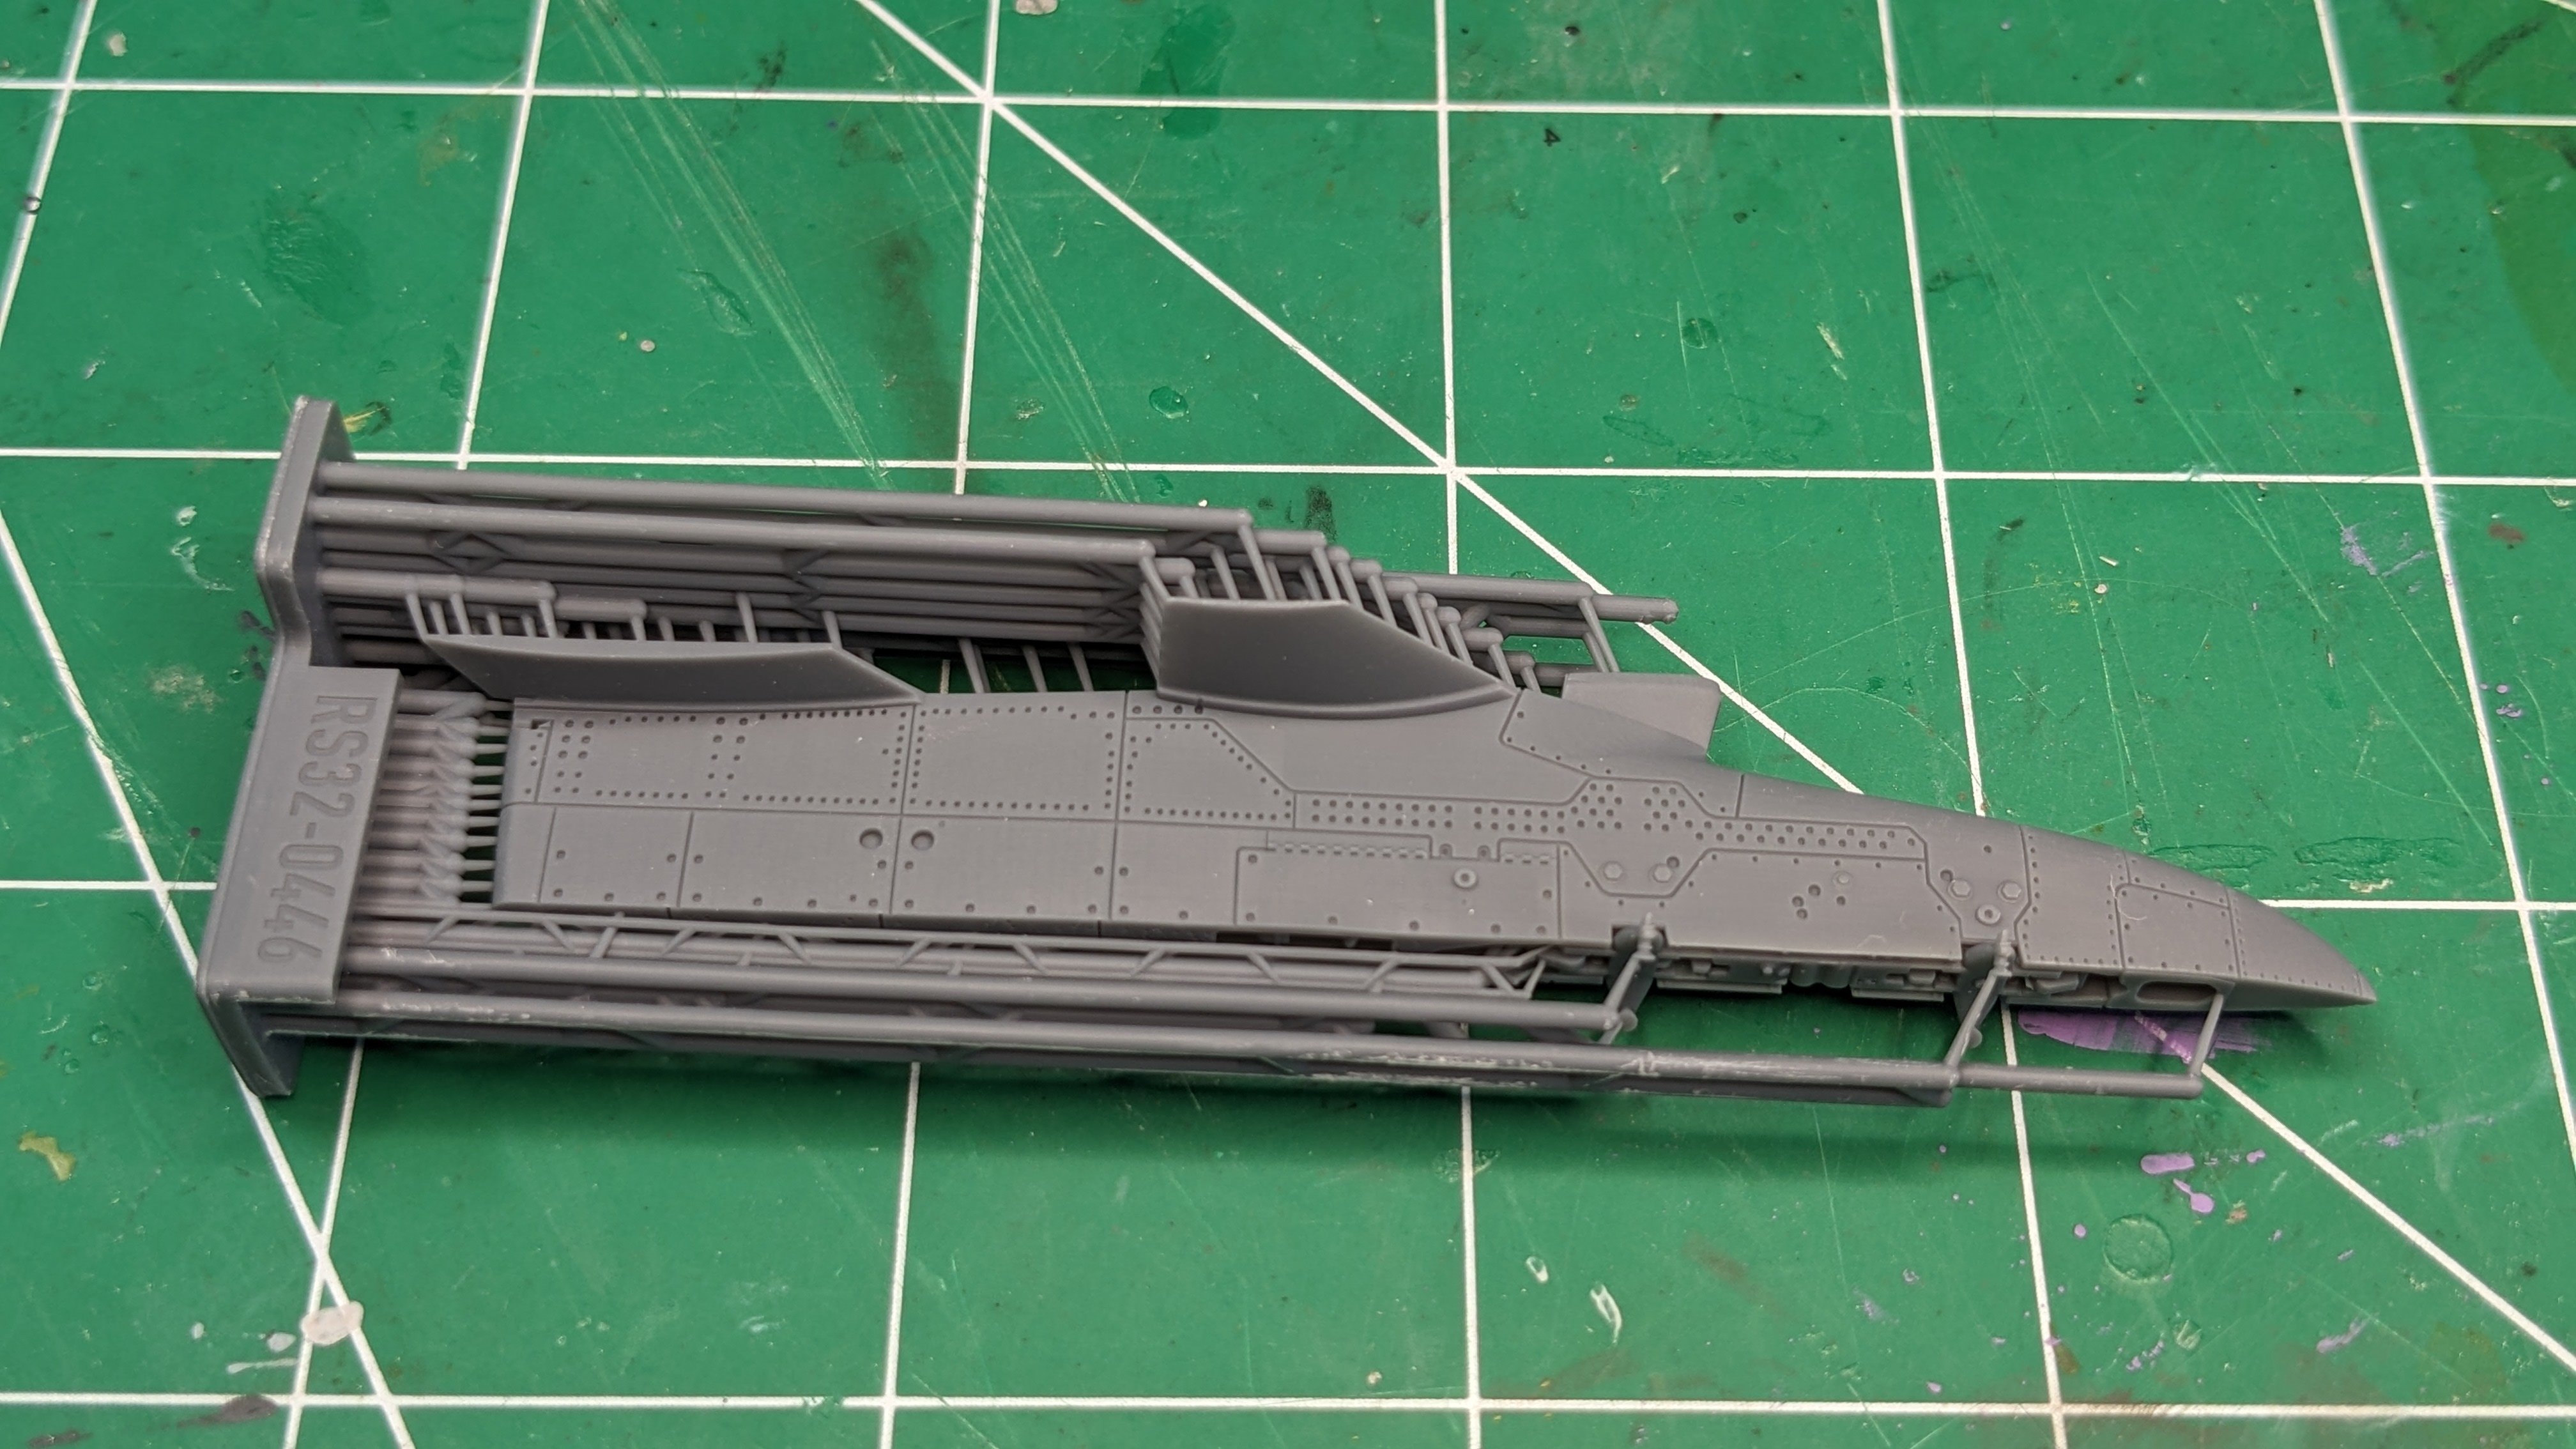
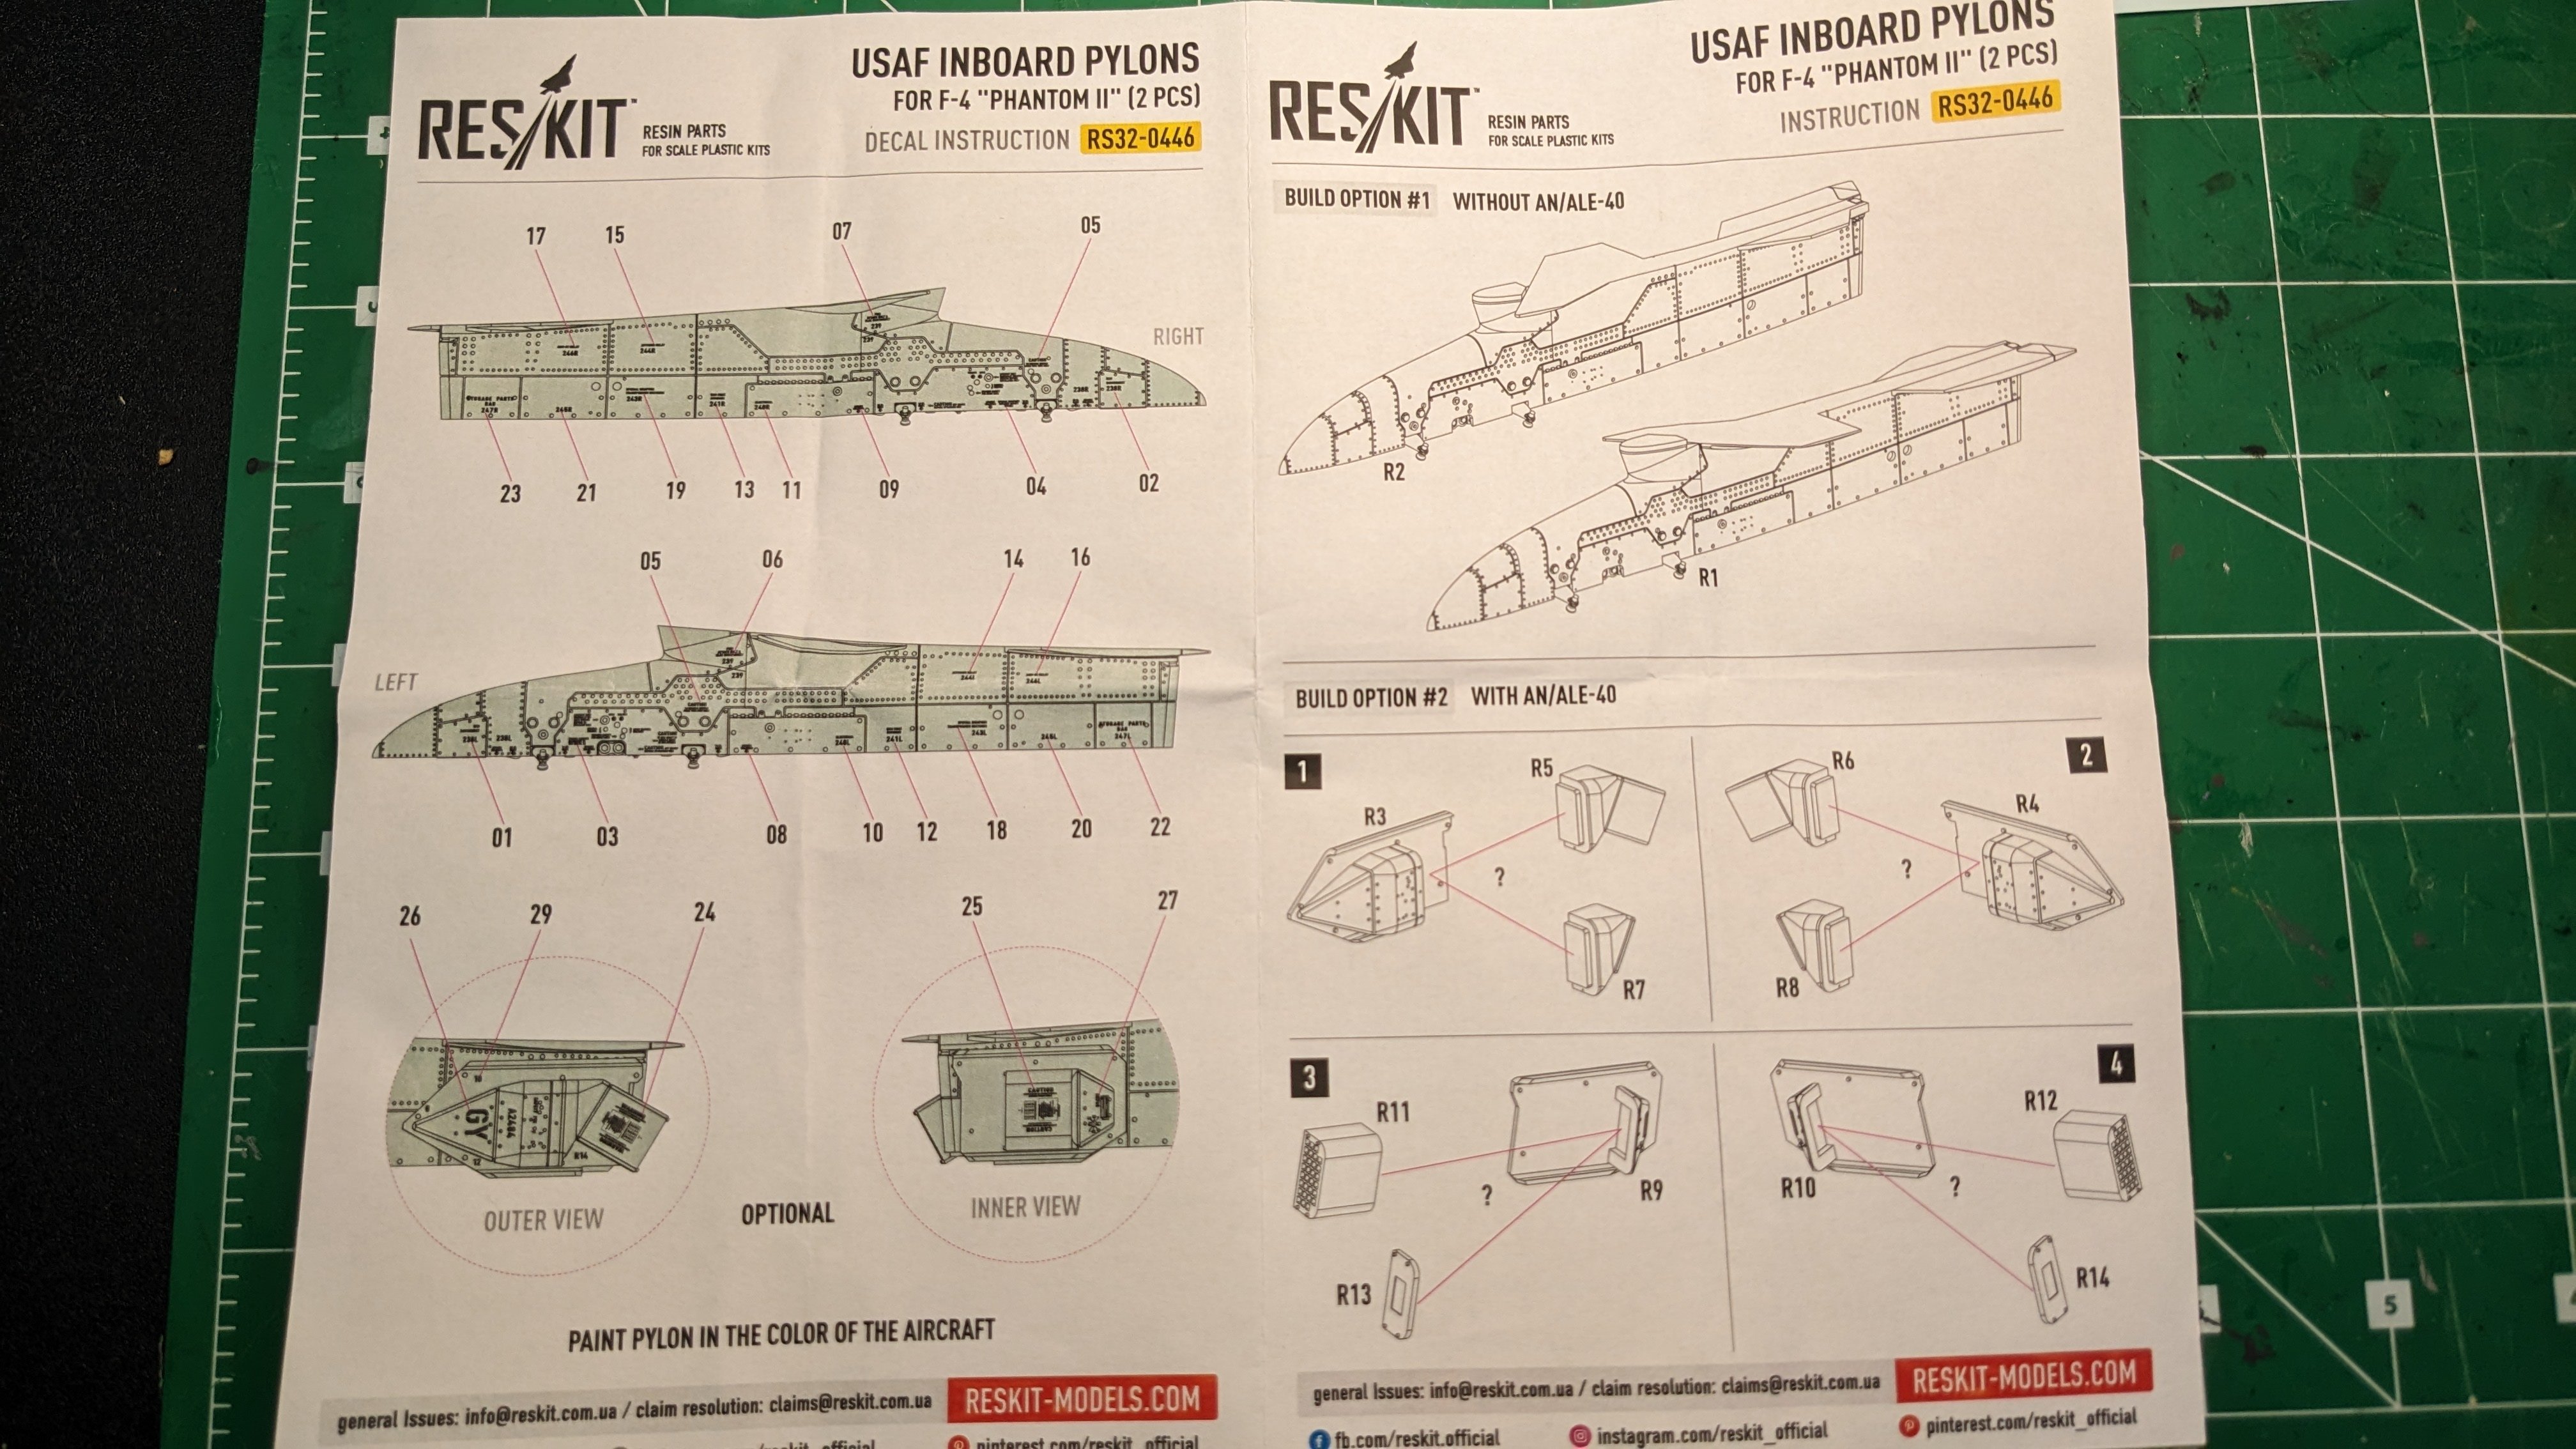
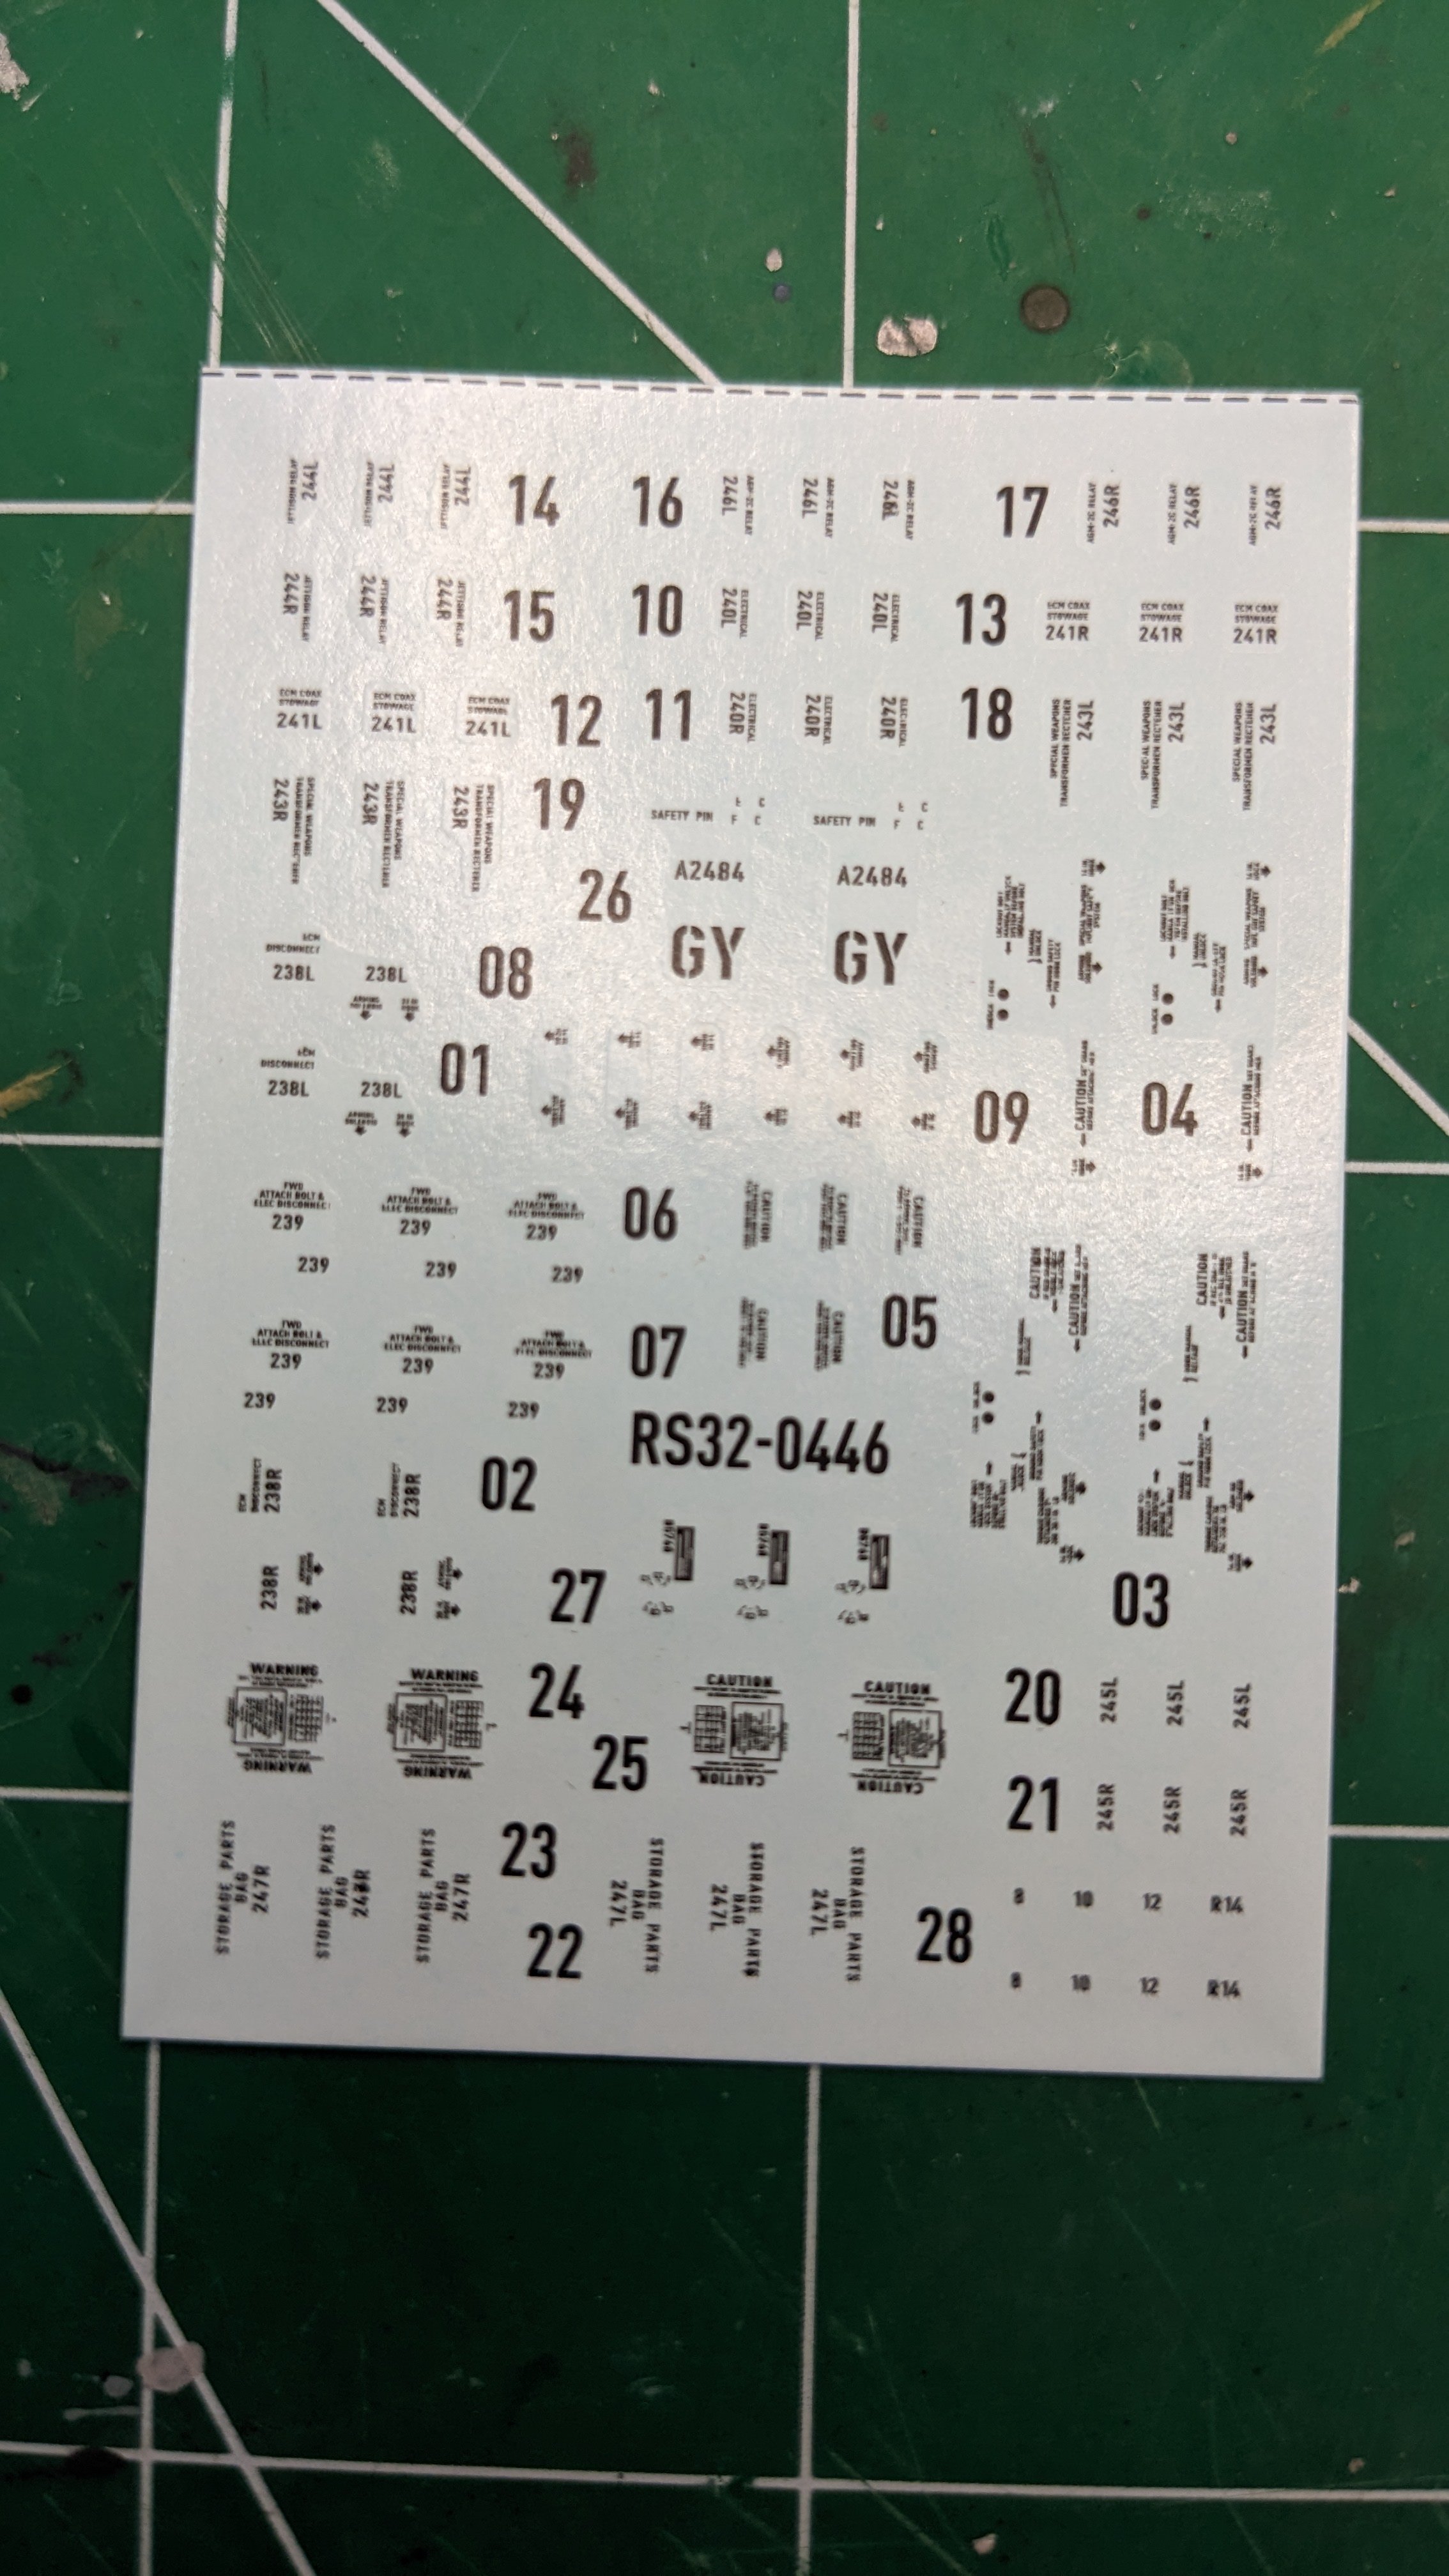
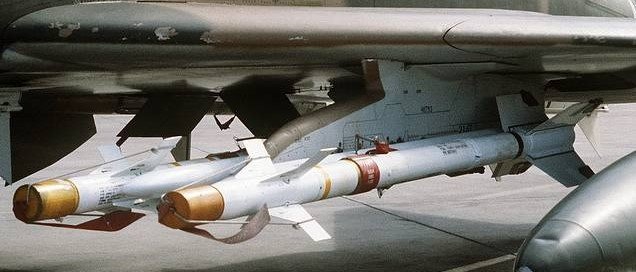
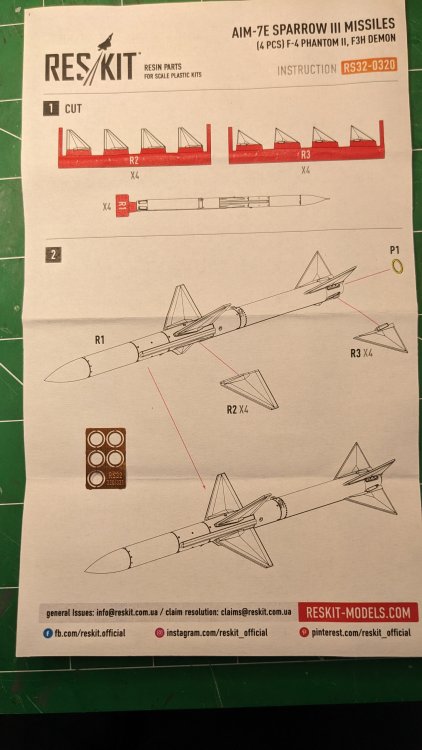
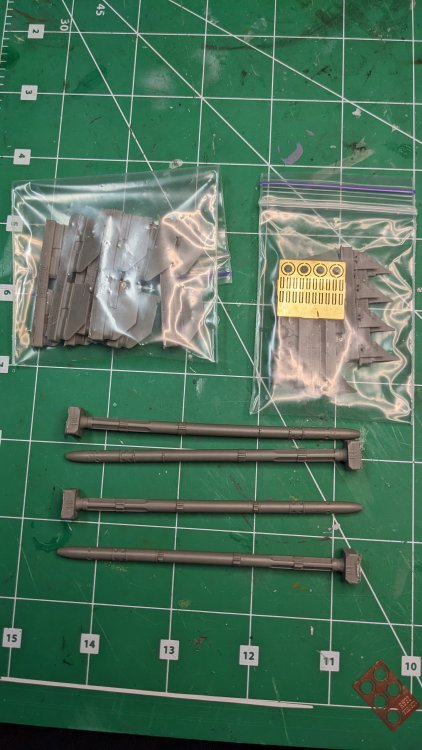
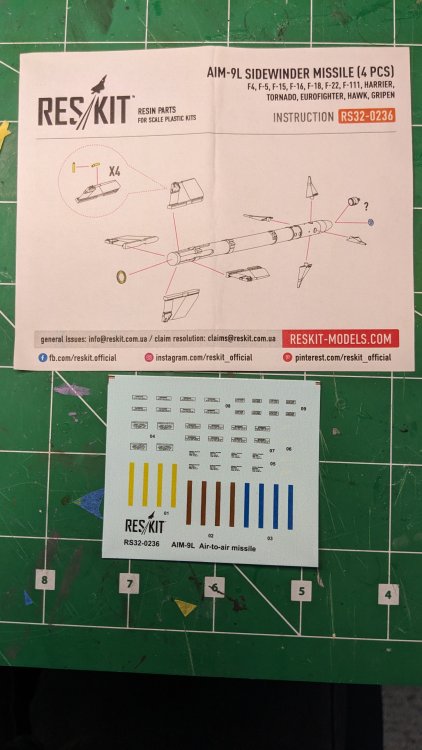
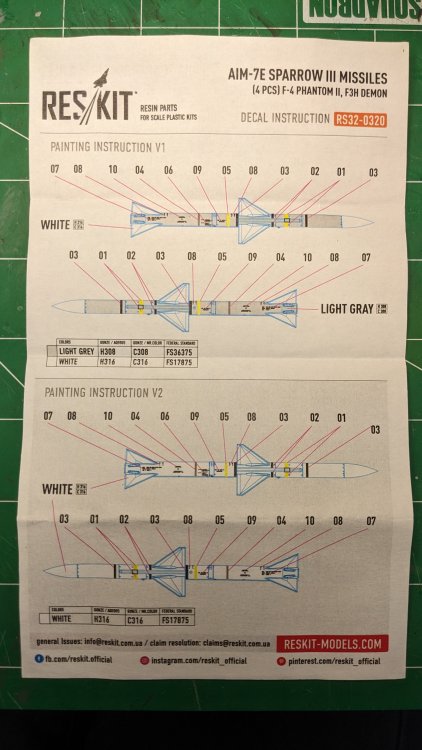
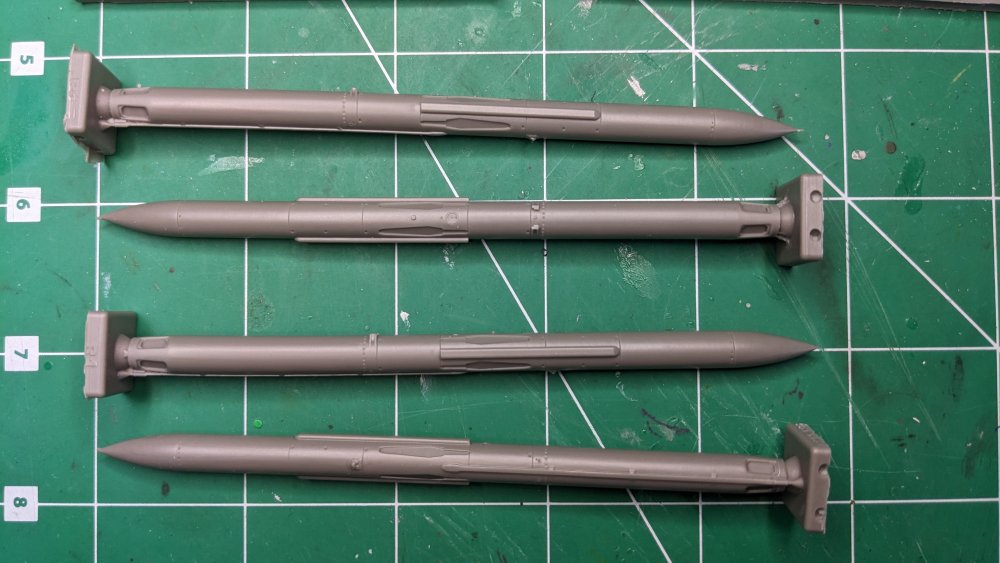
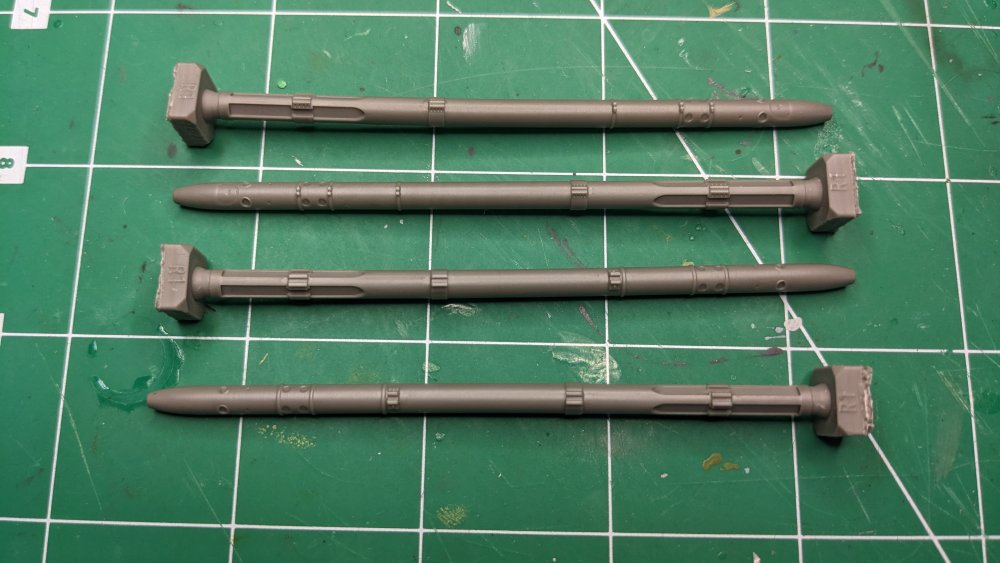
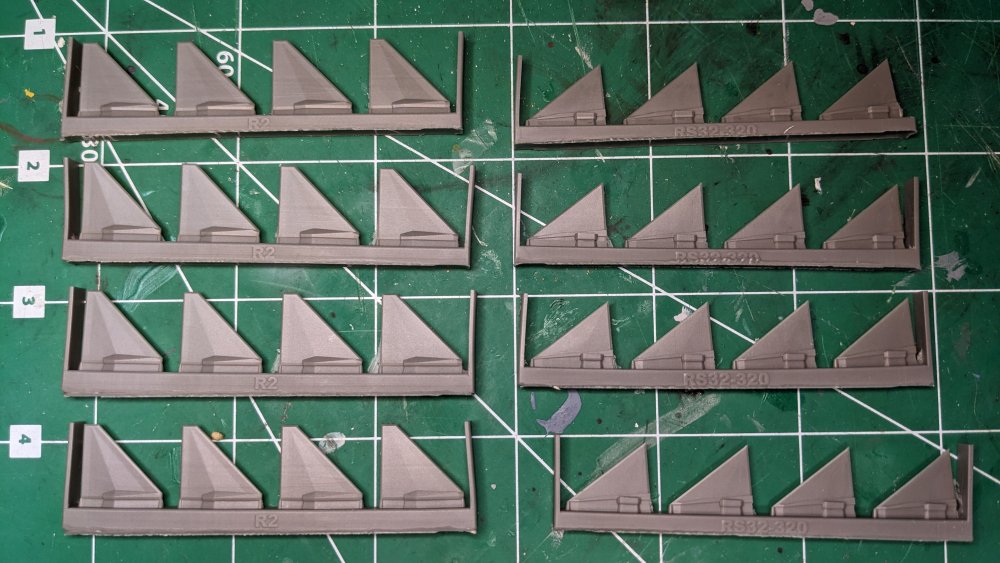
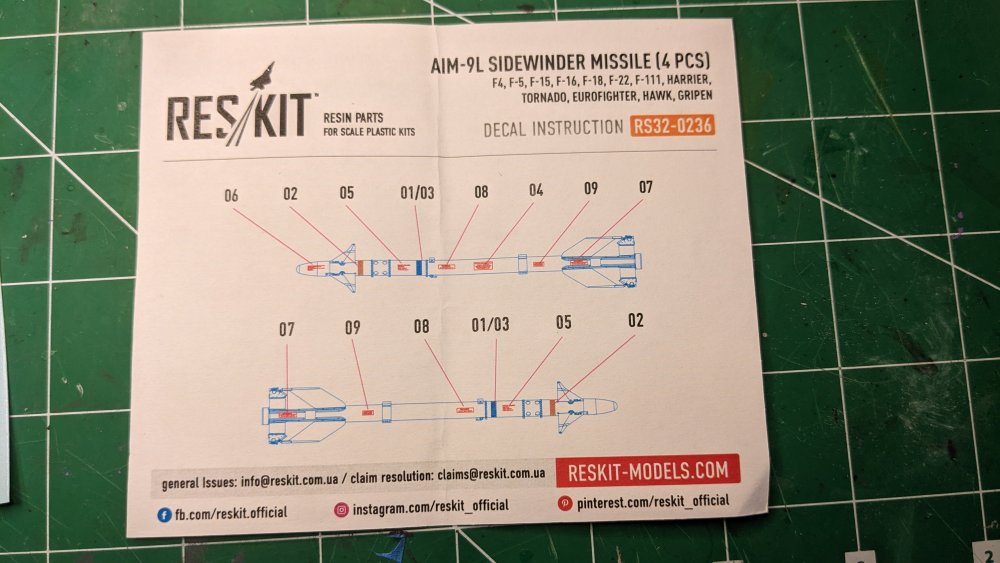
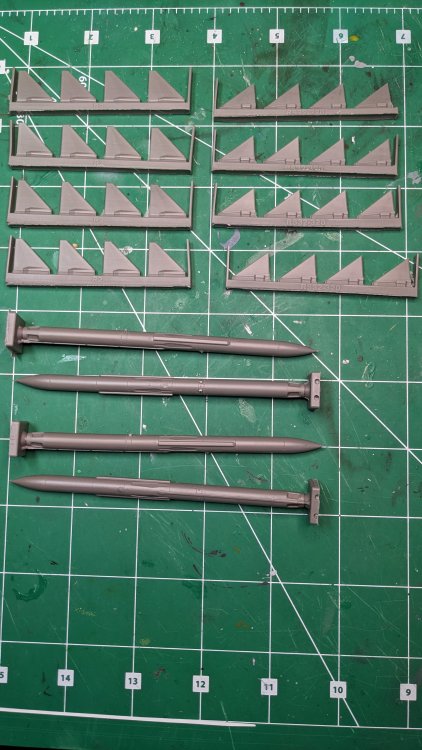
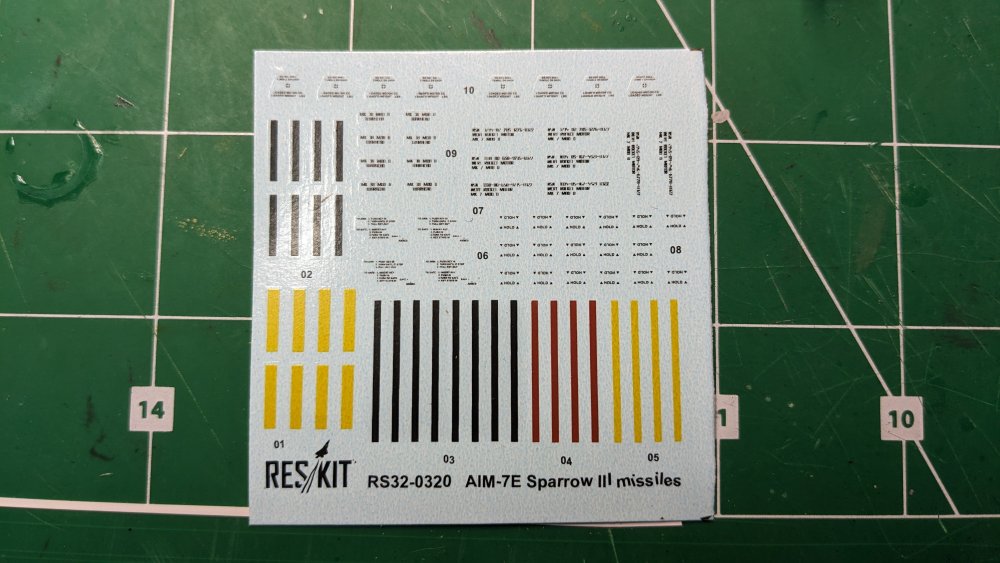
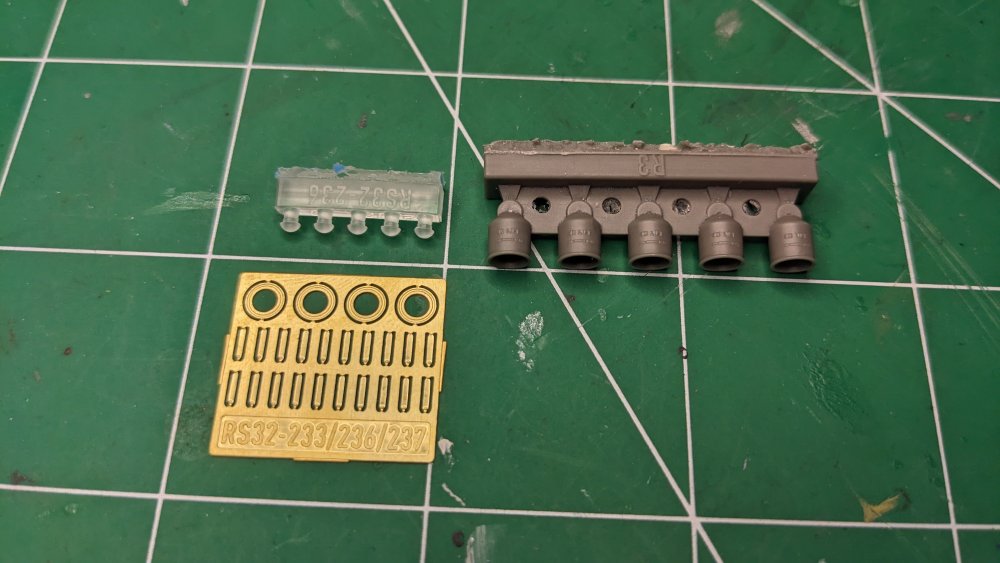
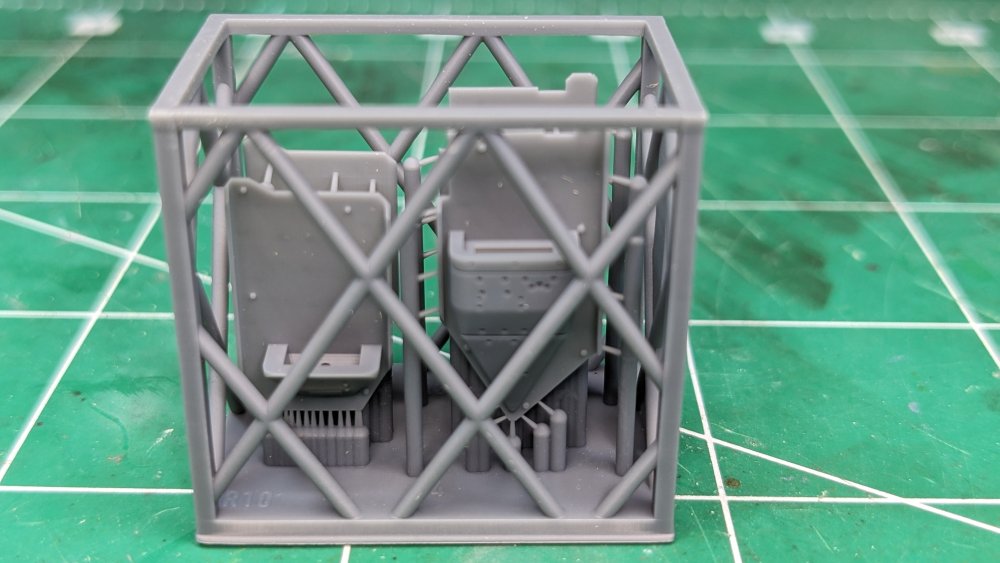
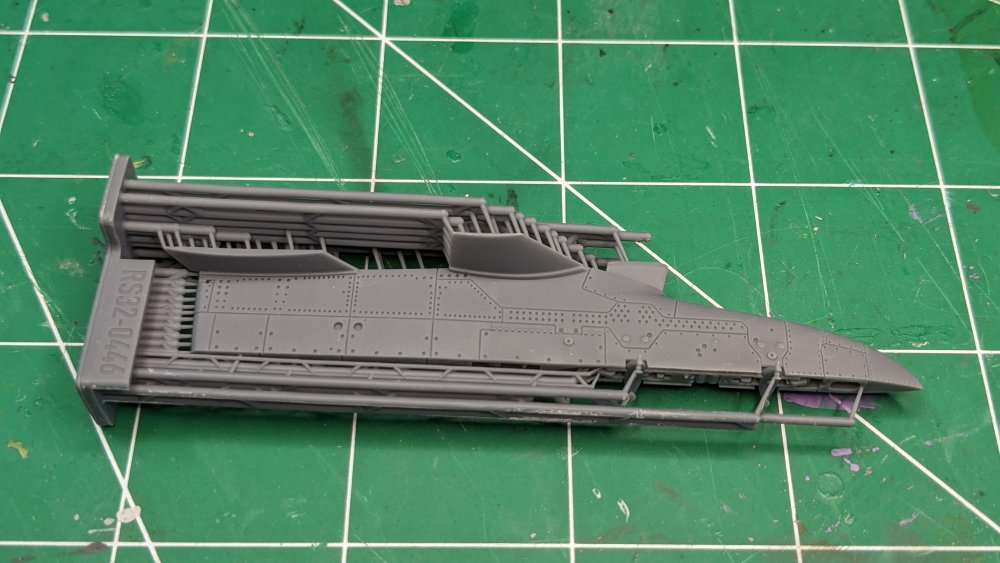
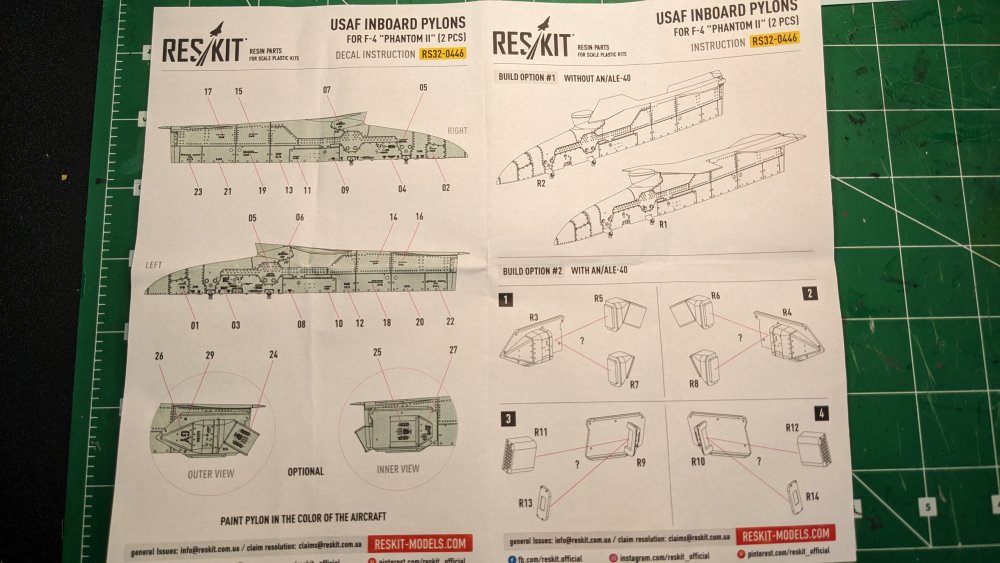
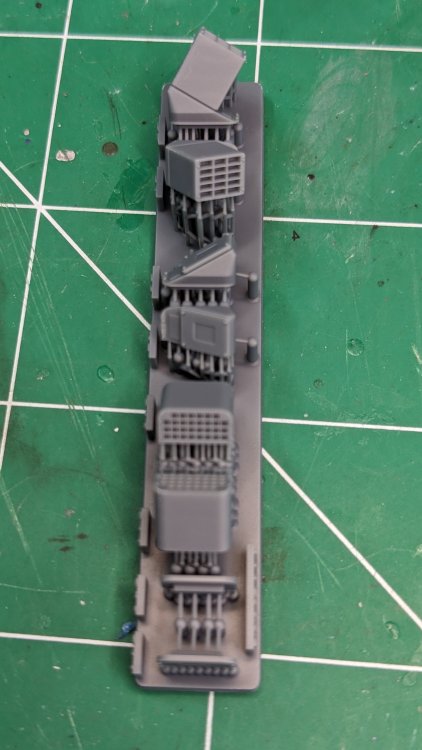
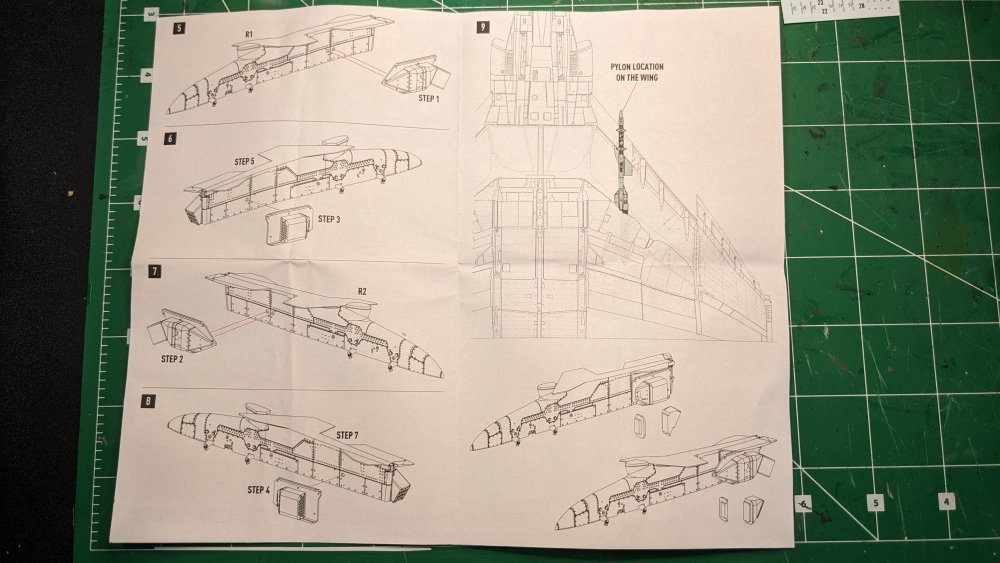
Hi folks, For my Twins Group build of the Tamiya F-4 Phantom II I ordered some Reskit parts to spruce up the build. This is the unboxing of those bits. More will be posted in the WIP thread here. I ordered three of the Reskit bits for my build: The 3D Printed USAF Inboard Pylons for the F-4, RS-320446, AIM-9L Sidewinder Missiles, RS-2-0236, and the AIM-7E Sparrow III Missles. Pylons are two to a box and the Missiles are four to a box. All three came in very sturdy Cardboard boxes: packed tightly with foam inside: The Sparrows are so long they barely fit in the box - I can't close the box again after I opened it. AIM-7E Sparrow III Missiles Each Missile is 9 resin parts (missile body, 8 separate fins) along with a PE fret for the missile rocket opening. In a nice touch the PE fret has an extra missile end. Two different paint options are provided - all white, and white and grey. 23 stencils and color bands on EACH MISSILE!?! Also included is a decal sheet for the stencils as well as the colored bands. Interestingly, the writing of the missile type is skewed, but the rest of the decals look fine. The clear film seems a little thick. The resin parts are finely cast and the fins are razor thin. LOTS of work to be had separating all of these pieces from the bases. The missile bodies have nicely molded recessed places for the fins with clear differences in the mounting points to prevent errors. Should also keep alignment straight. The noses of the Sparrow missiles are very sharp, too much so and will need to be trimmed back a little bit - but it shows the high level of detail possible. AIM-9L Sidewinder Missiles Each Missile is 9 resin parts (missile body, 8 separate fins), with two separate resin nose options - a clear lens and a protective (?) cap, along with a PE fret for the missile rocket opening, no extras this time, but with PE tabs for the rear fin. And a decal sheet with stencils as well as color bands. The missile bodies again showing where the fins are placed. Alignment should not be an issue. Showing how thin the fins really are. They are also somewhat translucent they are so thin. I forgot to take a picture of the front fins, sorry! Clear lens option as well as protective caps? Those metal tabs are going to be a chore to get attached the side of the rear fins. USAF Inboard Pylons - 3D Printed Each pylon is 3d Printed, but still comes with two options for with or without the AN/ALE-40. The challenge will be to separate the parts from the 3D Printing bases. Fortunately, Reskit has a video on YouTube to show you how! And here is the ubiquitous stencil sheet, with a penny for size. I'm going to go blind with all these stencils... These look to be printed differently from the missile decals - I don't see any clear film on this decal sheet. Incredible detail! The removal of all the 3D Printing supports looks to be daunting, but the video shows it is pretty easy, just take your time and be VERY sure what you are cutting. I wonder how well the pieces will sand. Next I'll get the kit styrene parts to put next to the 3D printed parts to compare the detail and we will see if they are worth the time, effort and cost. They look pretty good though!! Comments are welcomed!


-
Thanks Peter! Still trying to figure out which aircraft I'm going to do - I have that Zotz sheet. SO. MANY. OPTIONS!.
-
Carl, thanks for your comments, very much appreciated. I think I will pull off the stickers from the top of the stabilizers. Cheers, Chris
-
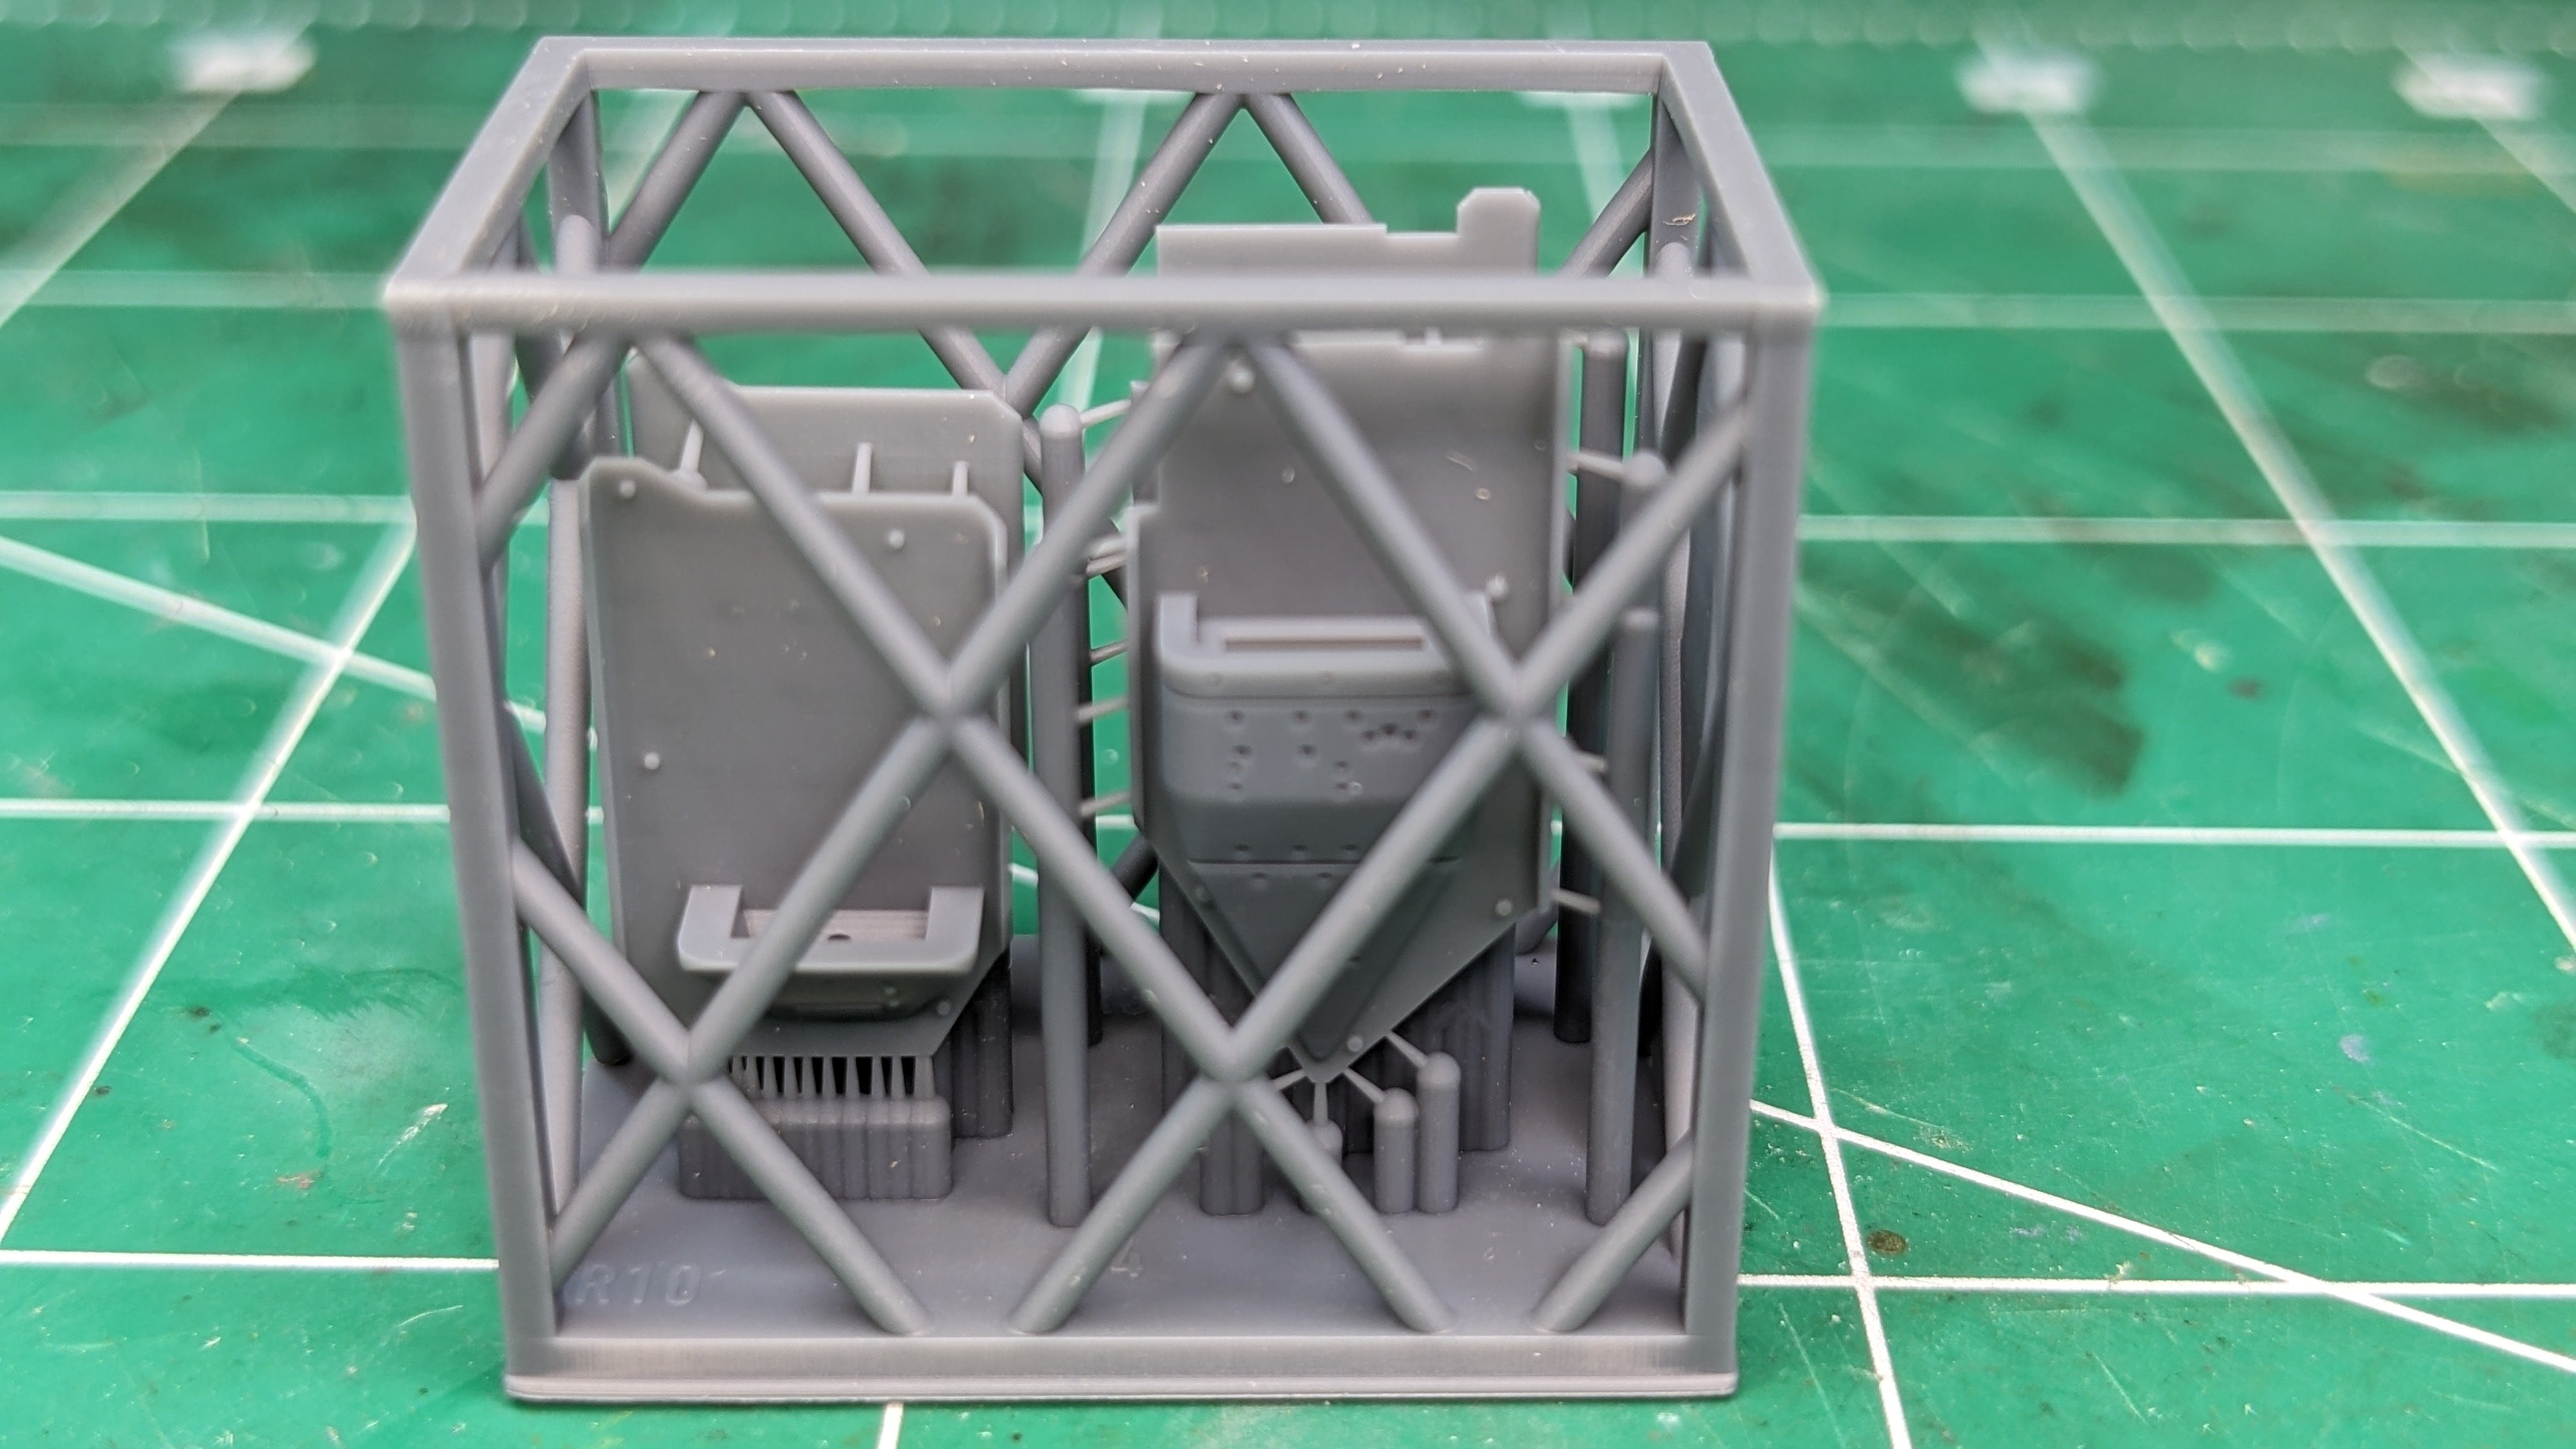
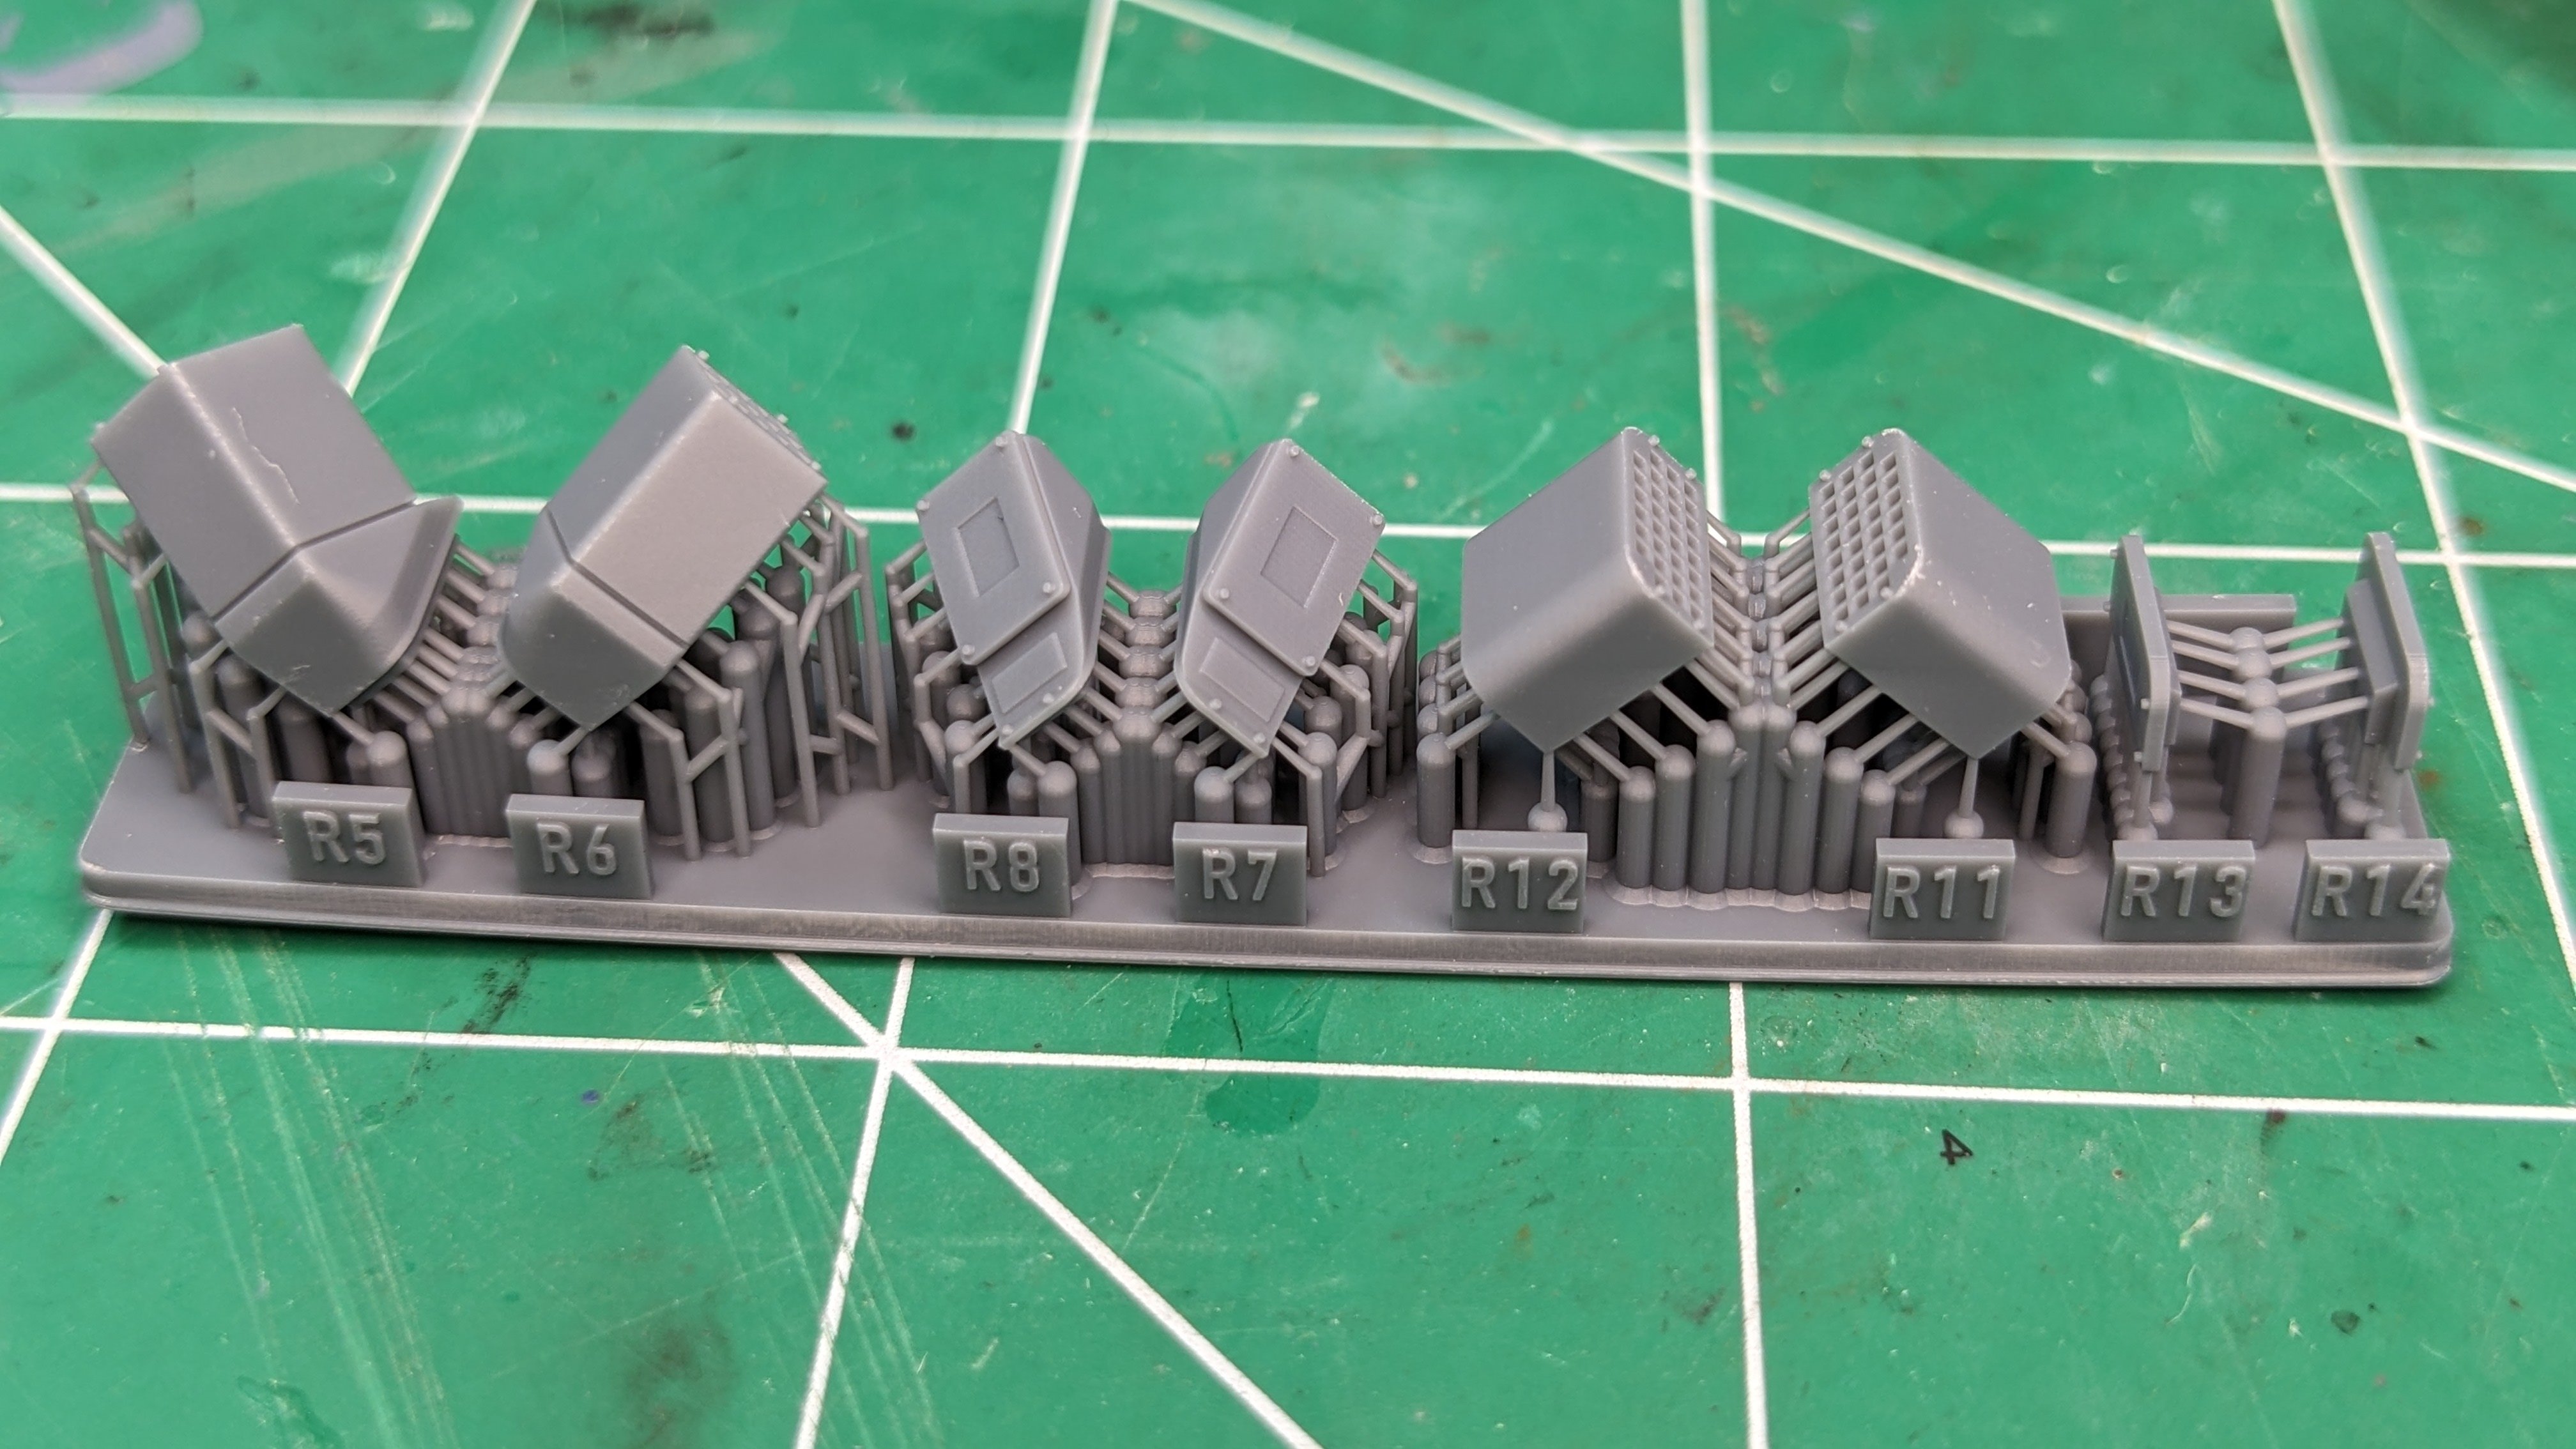
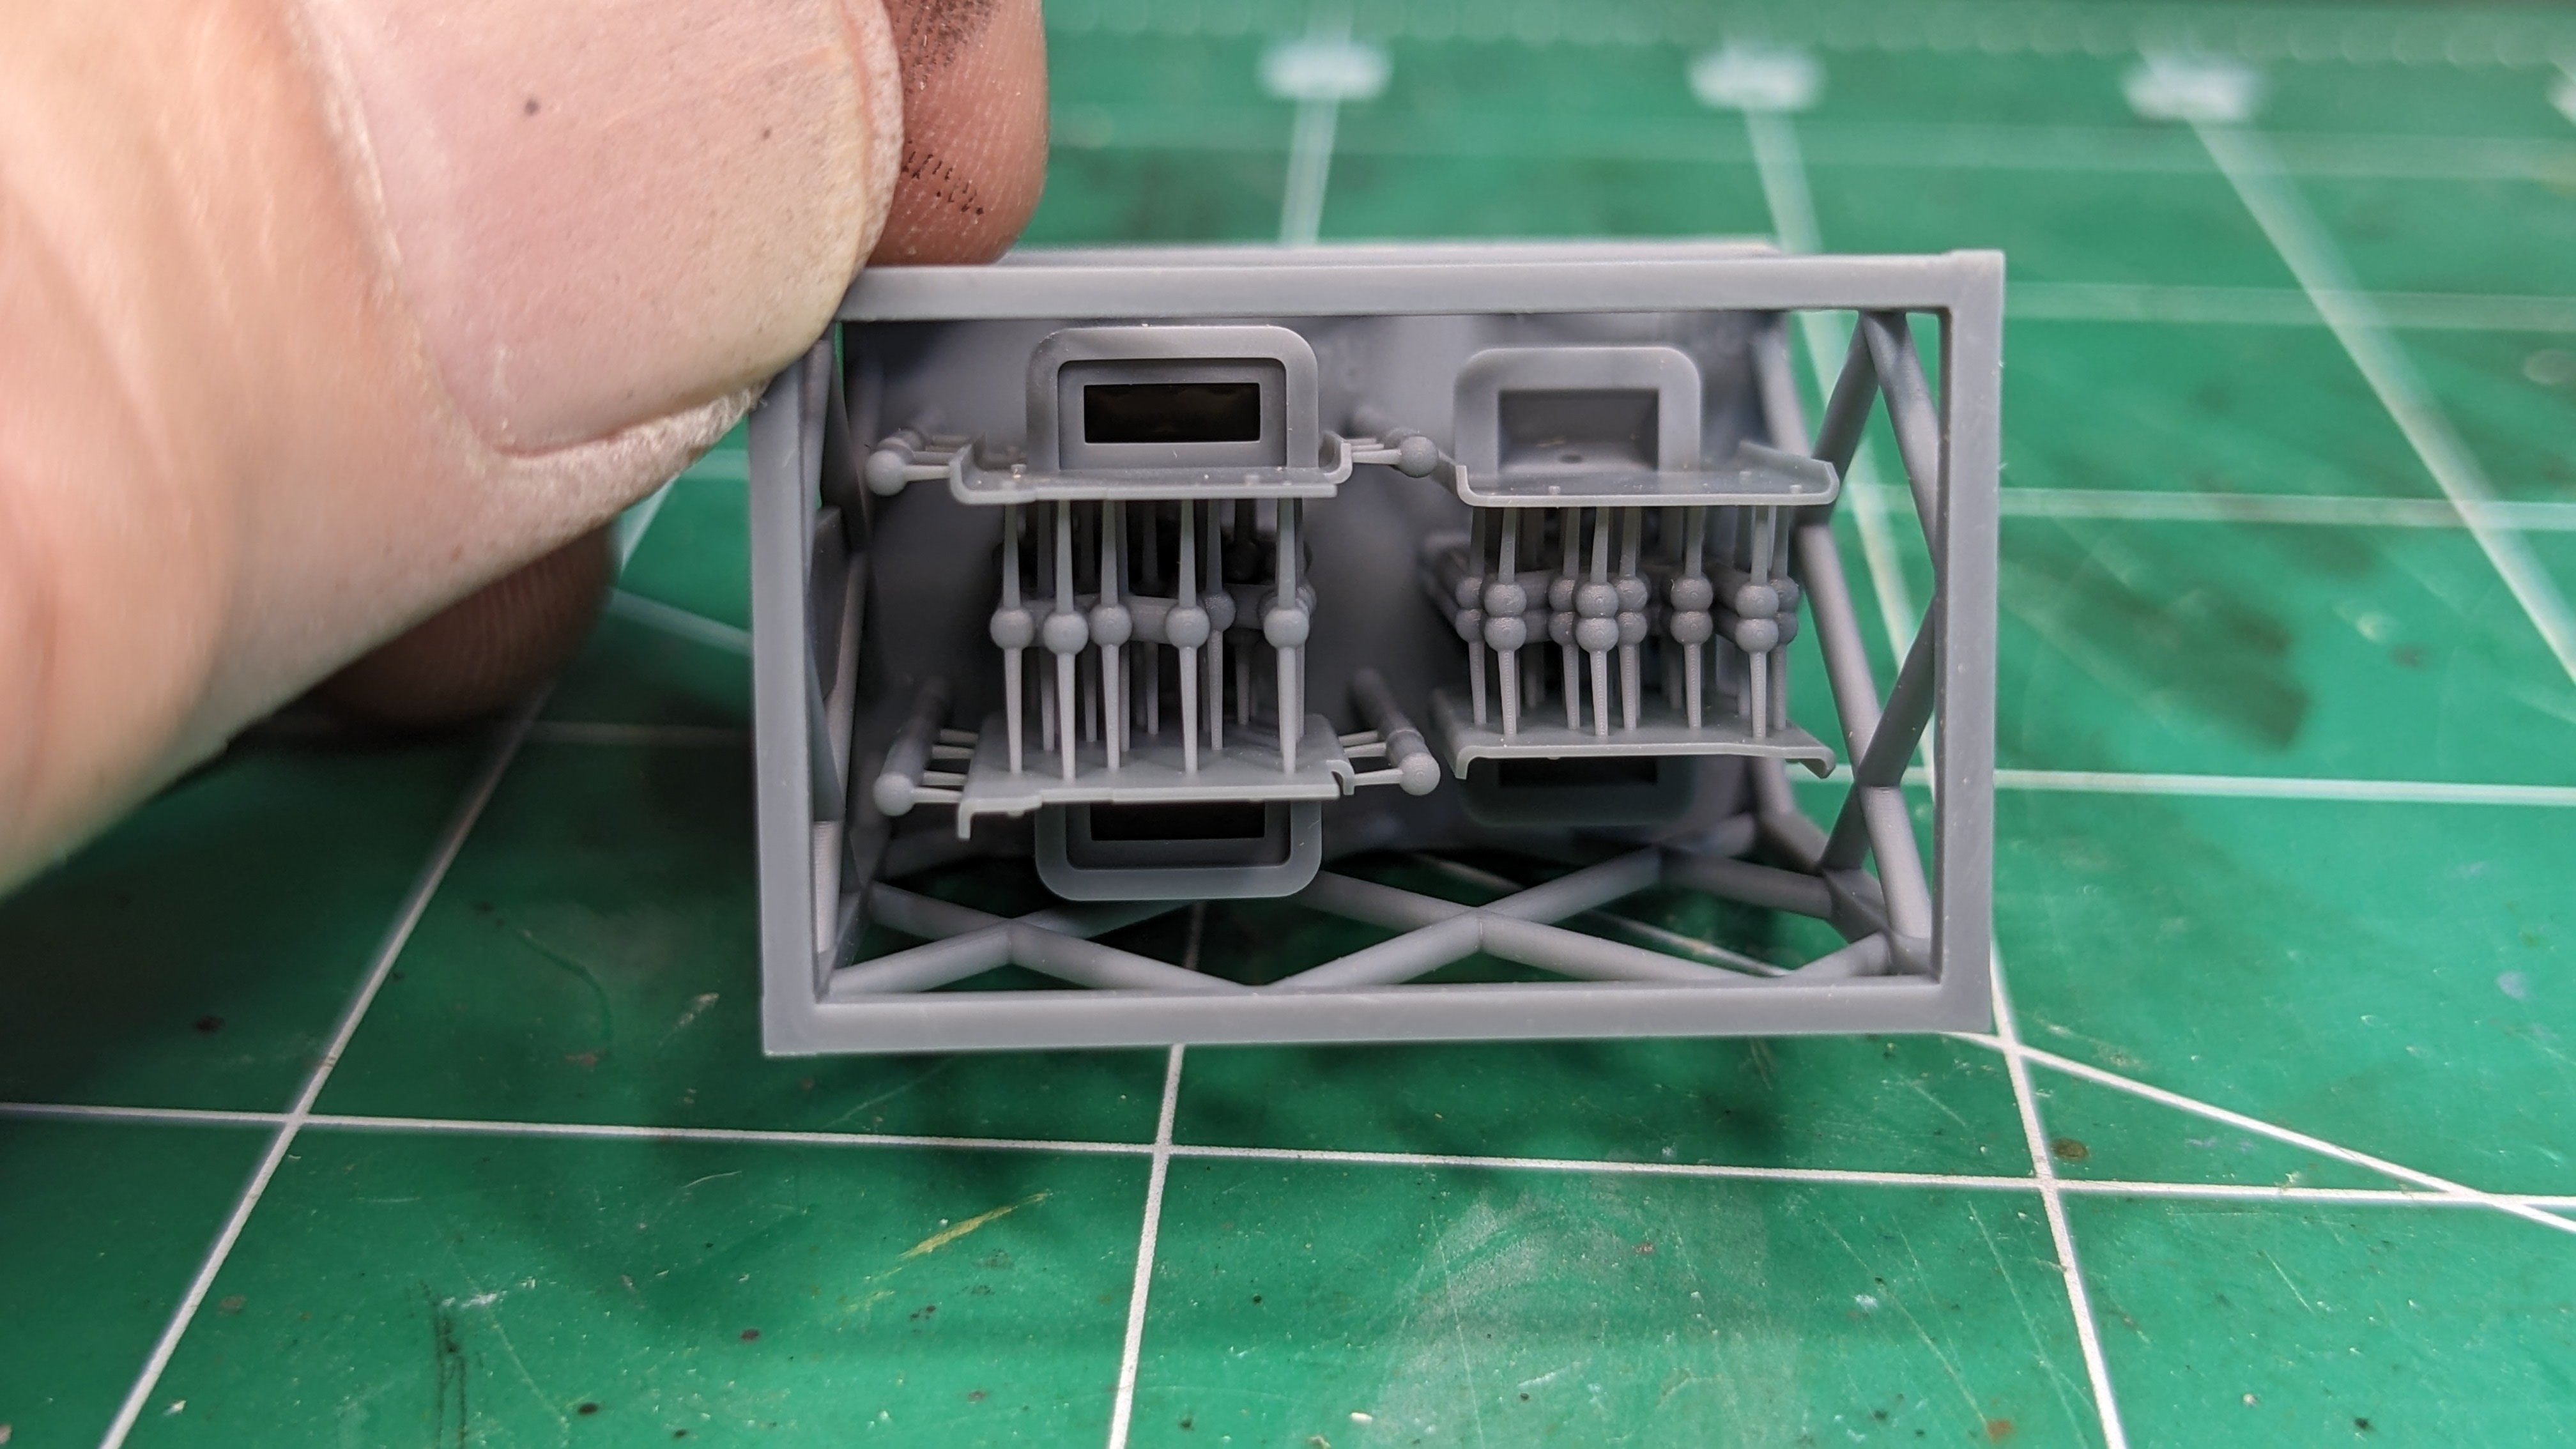
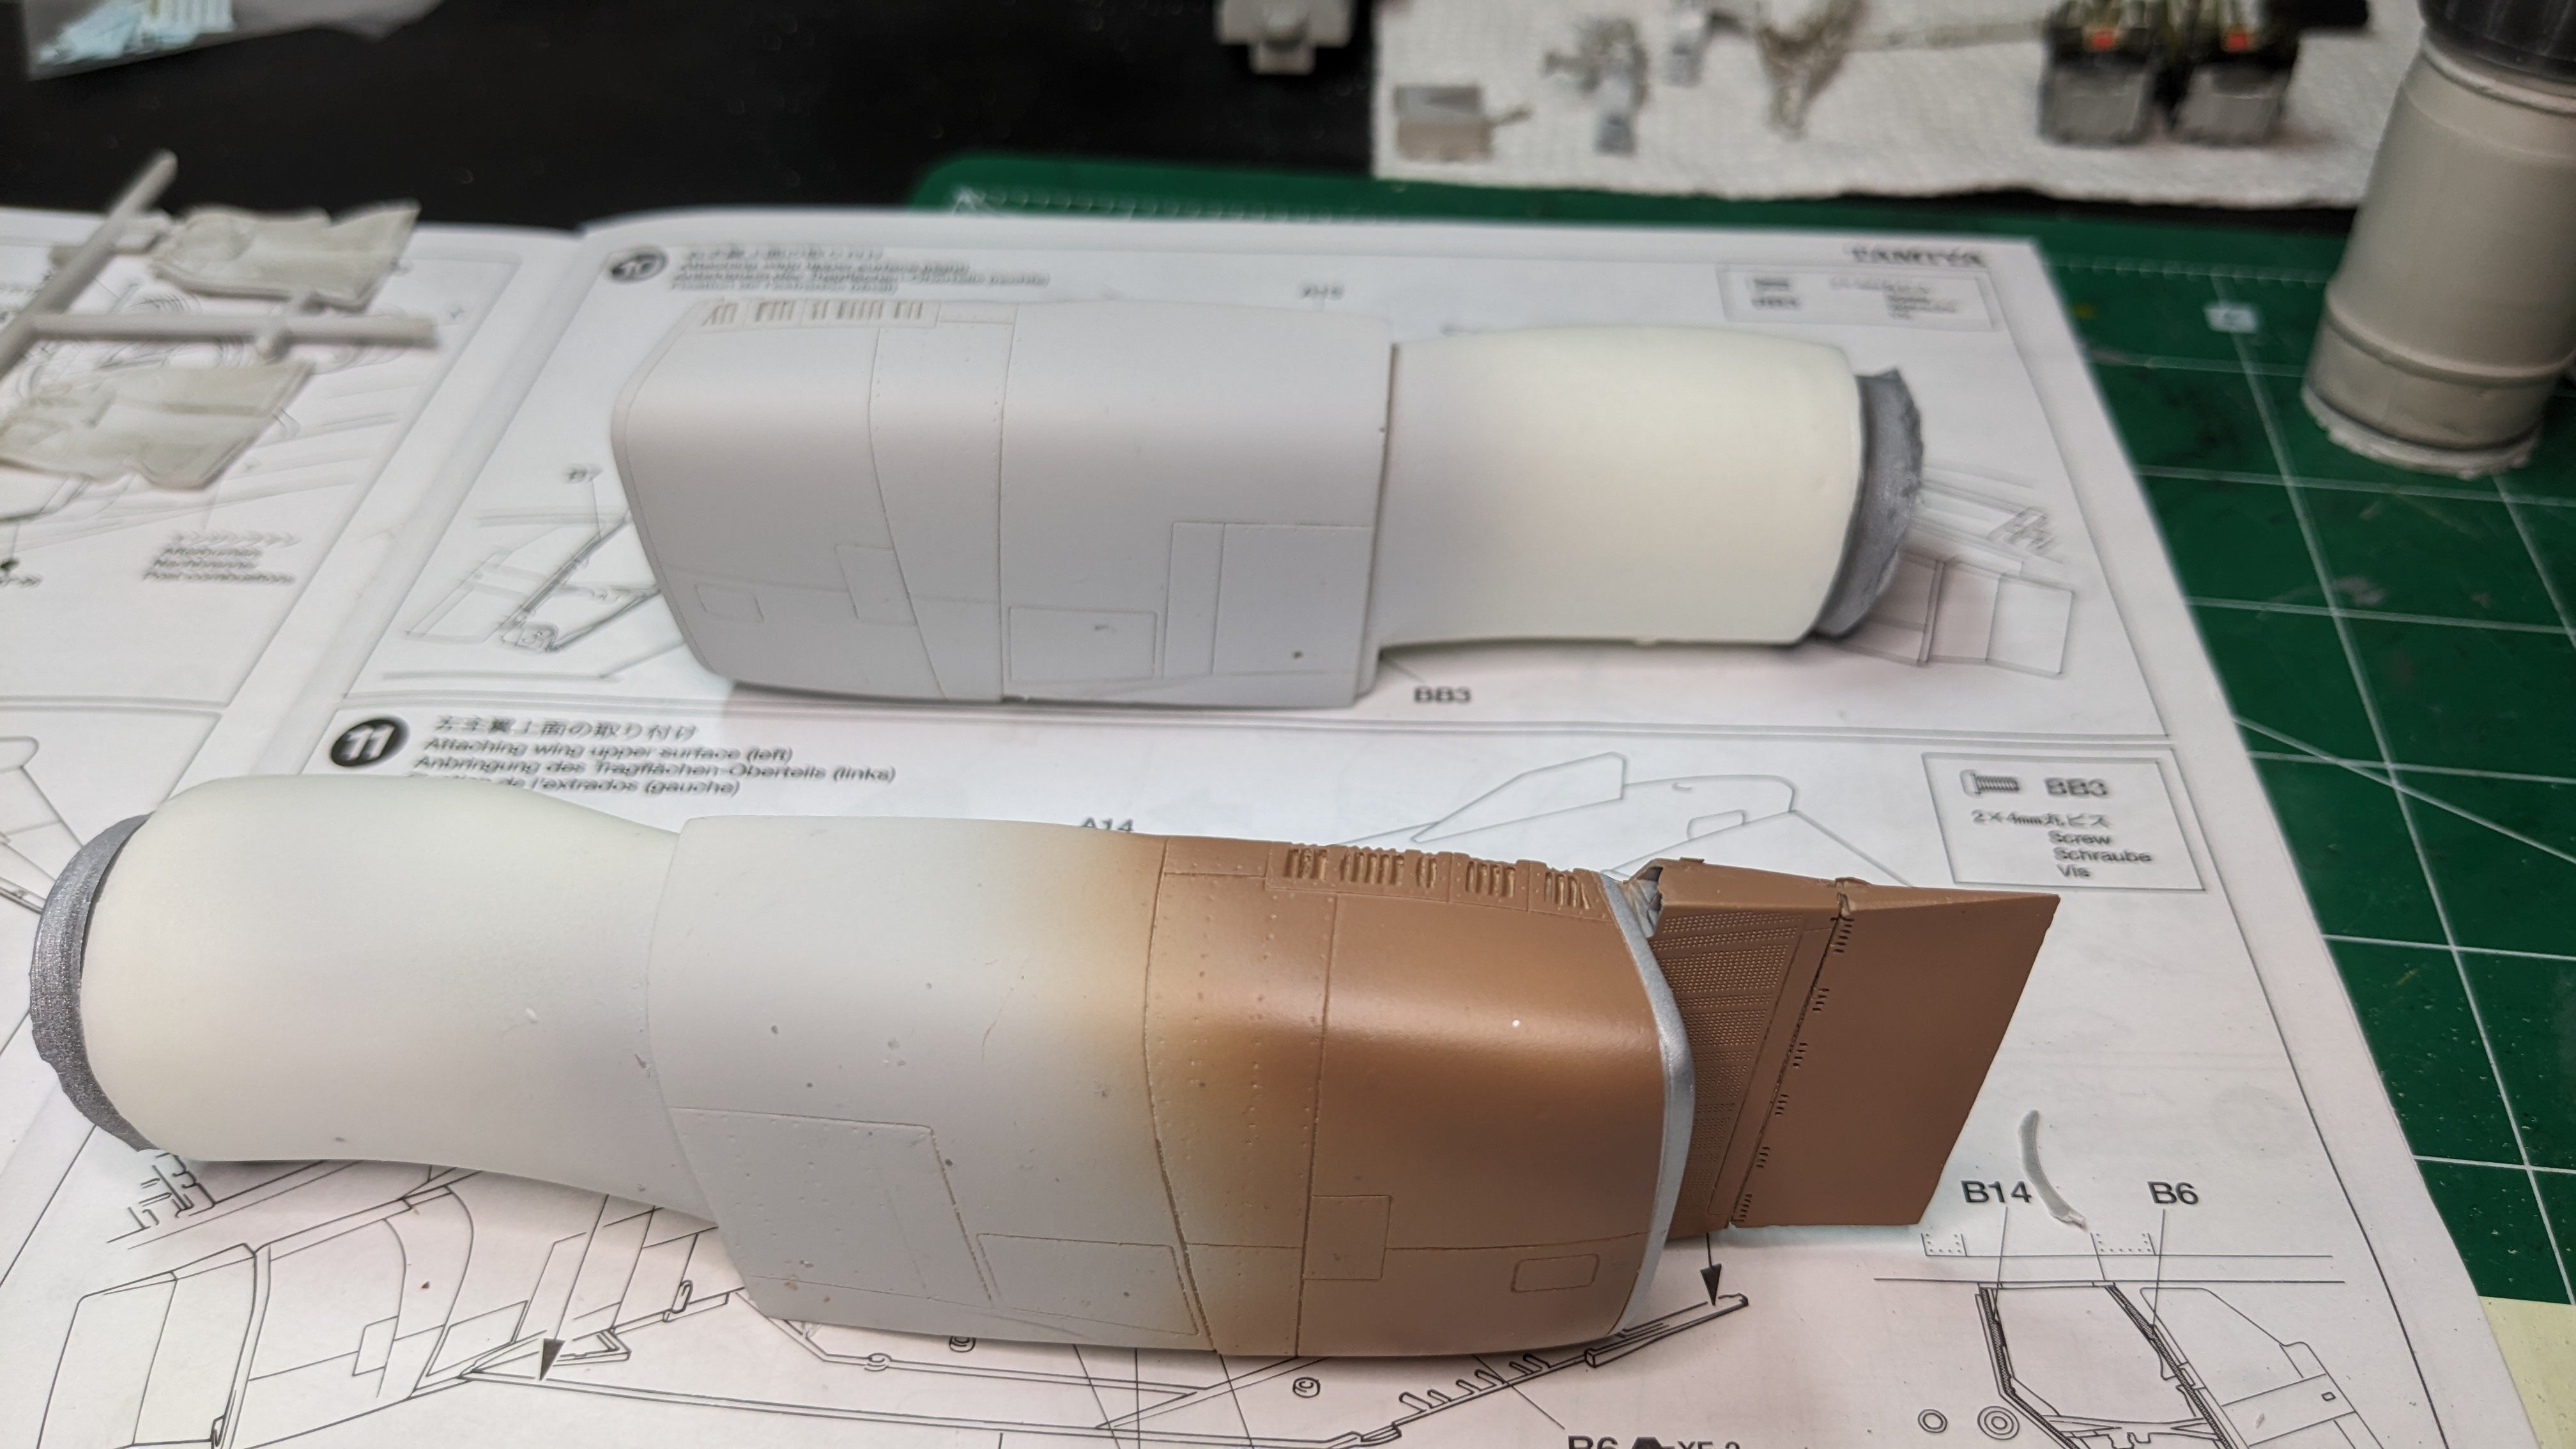
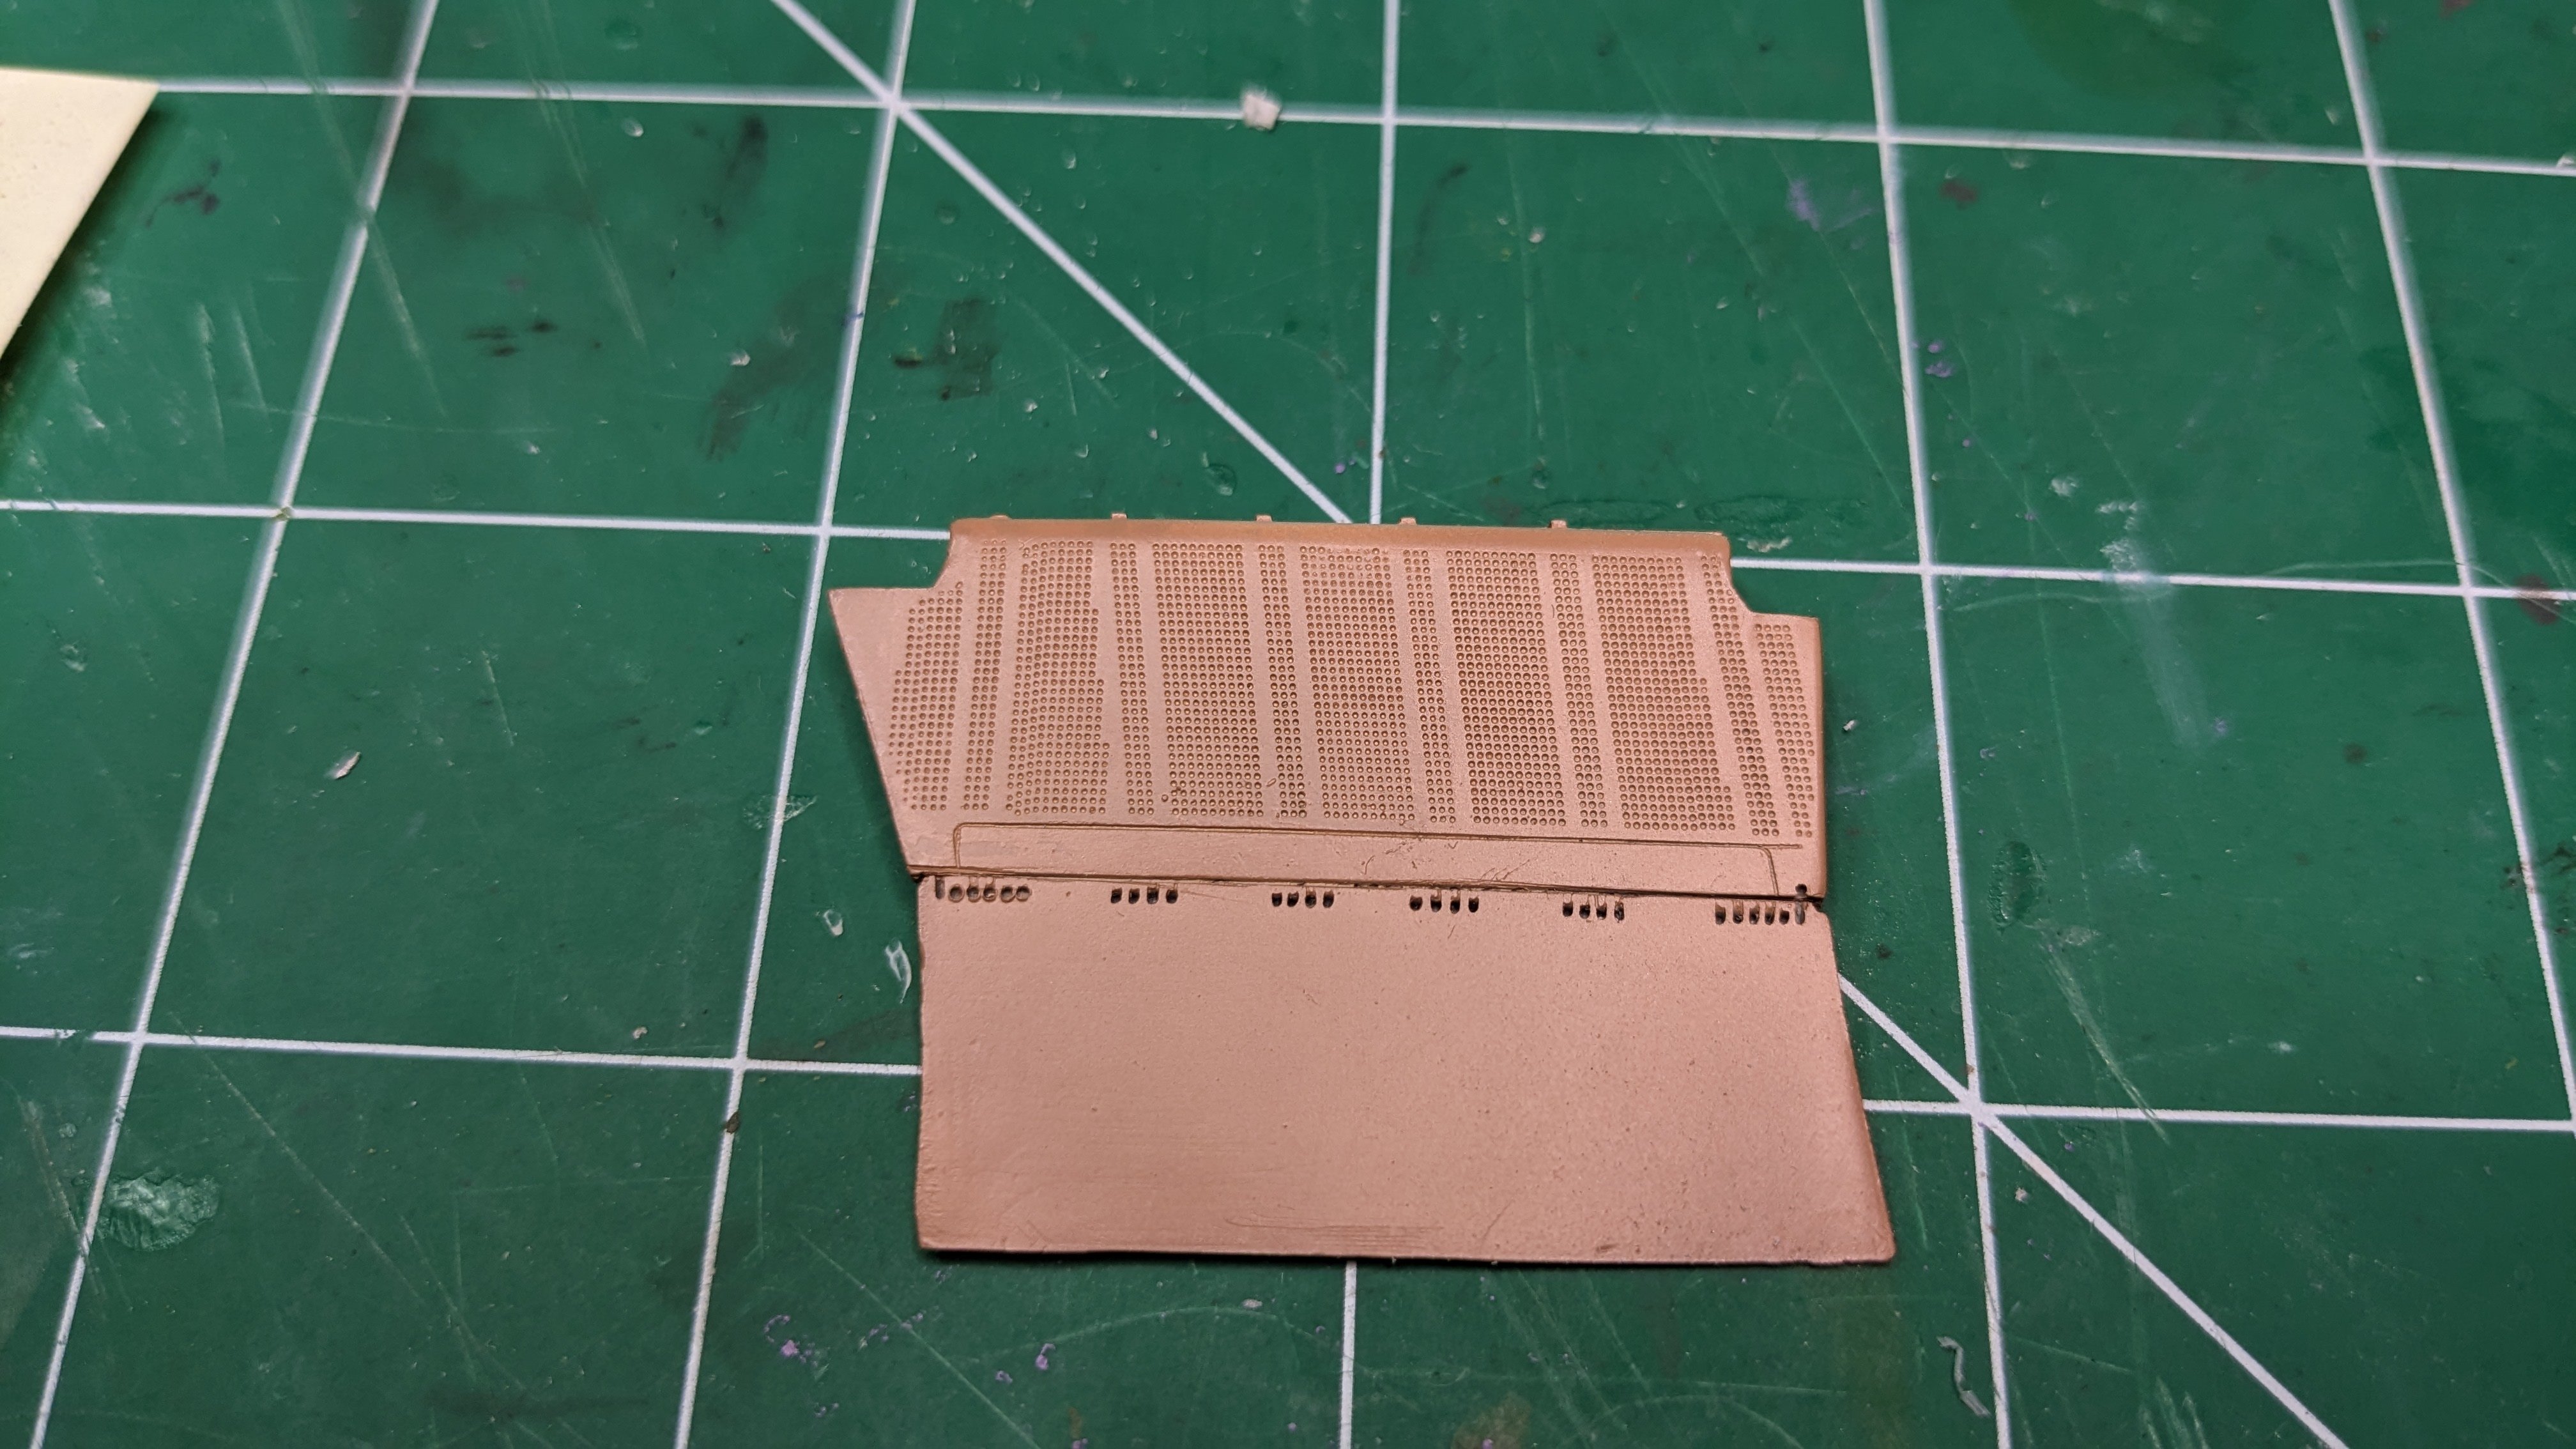
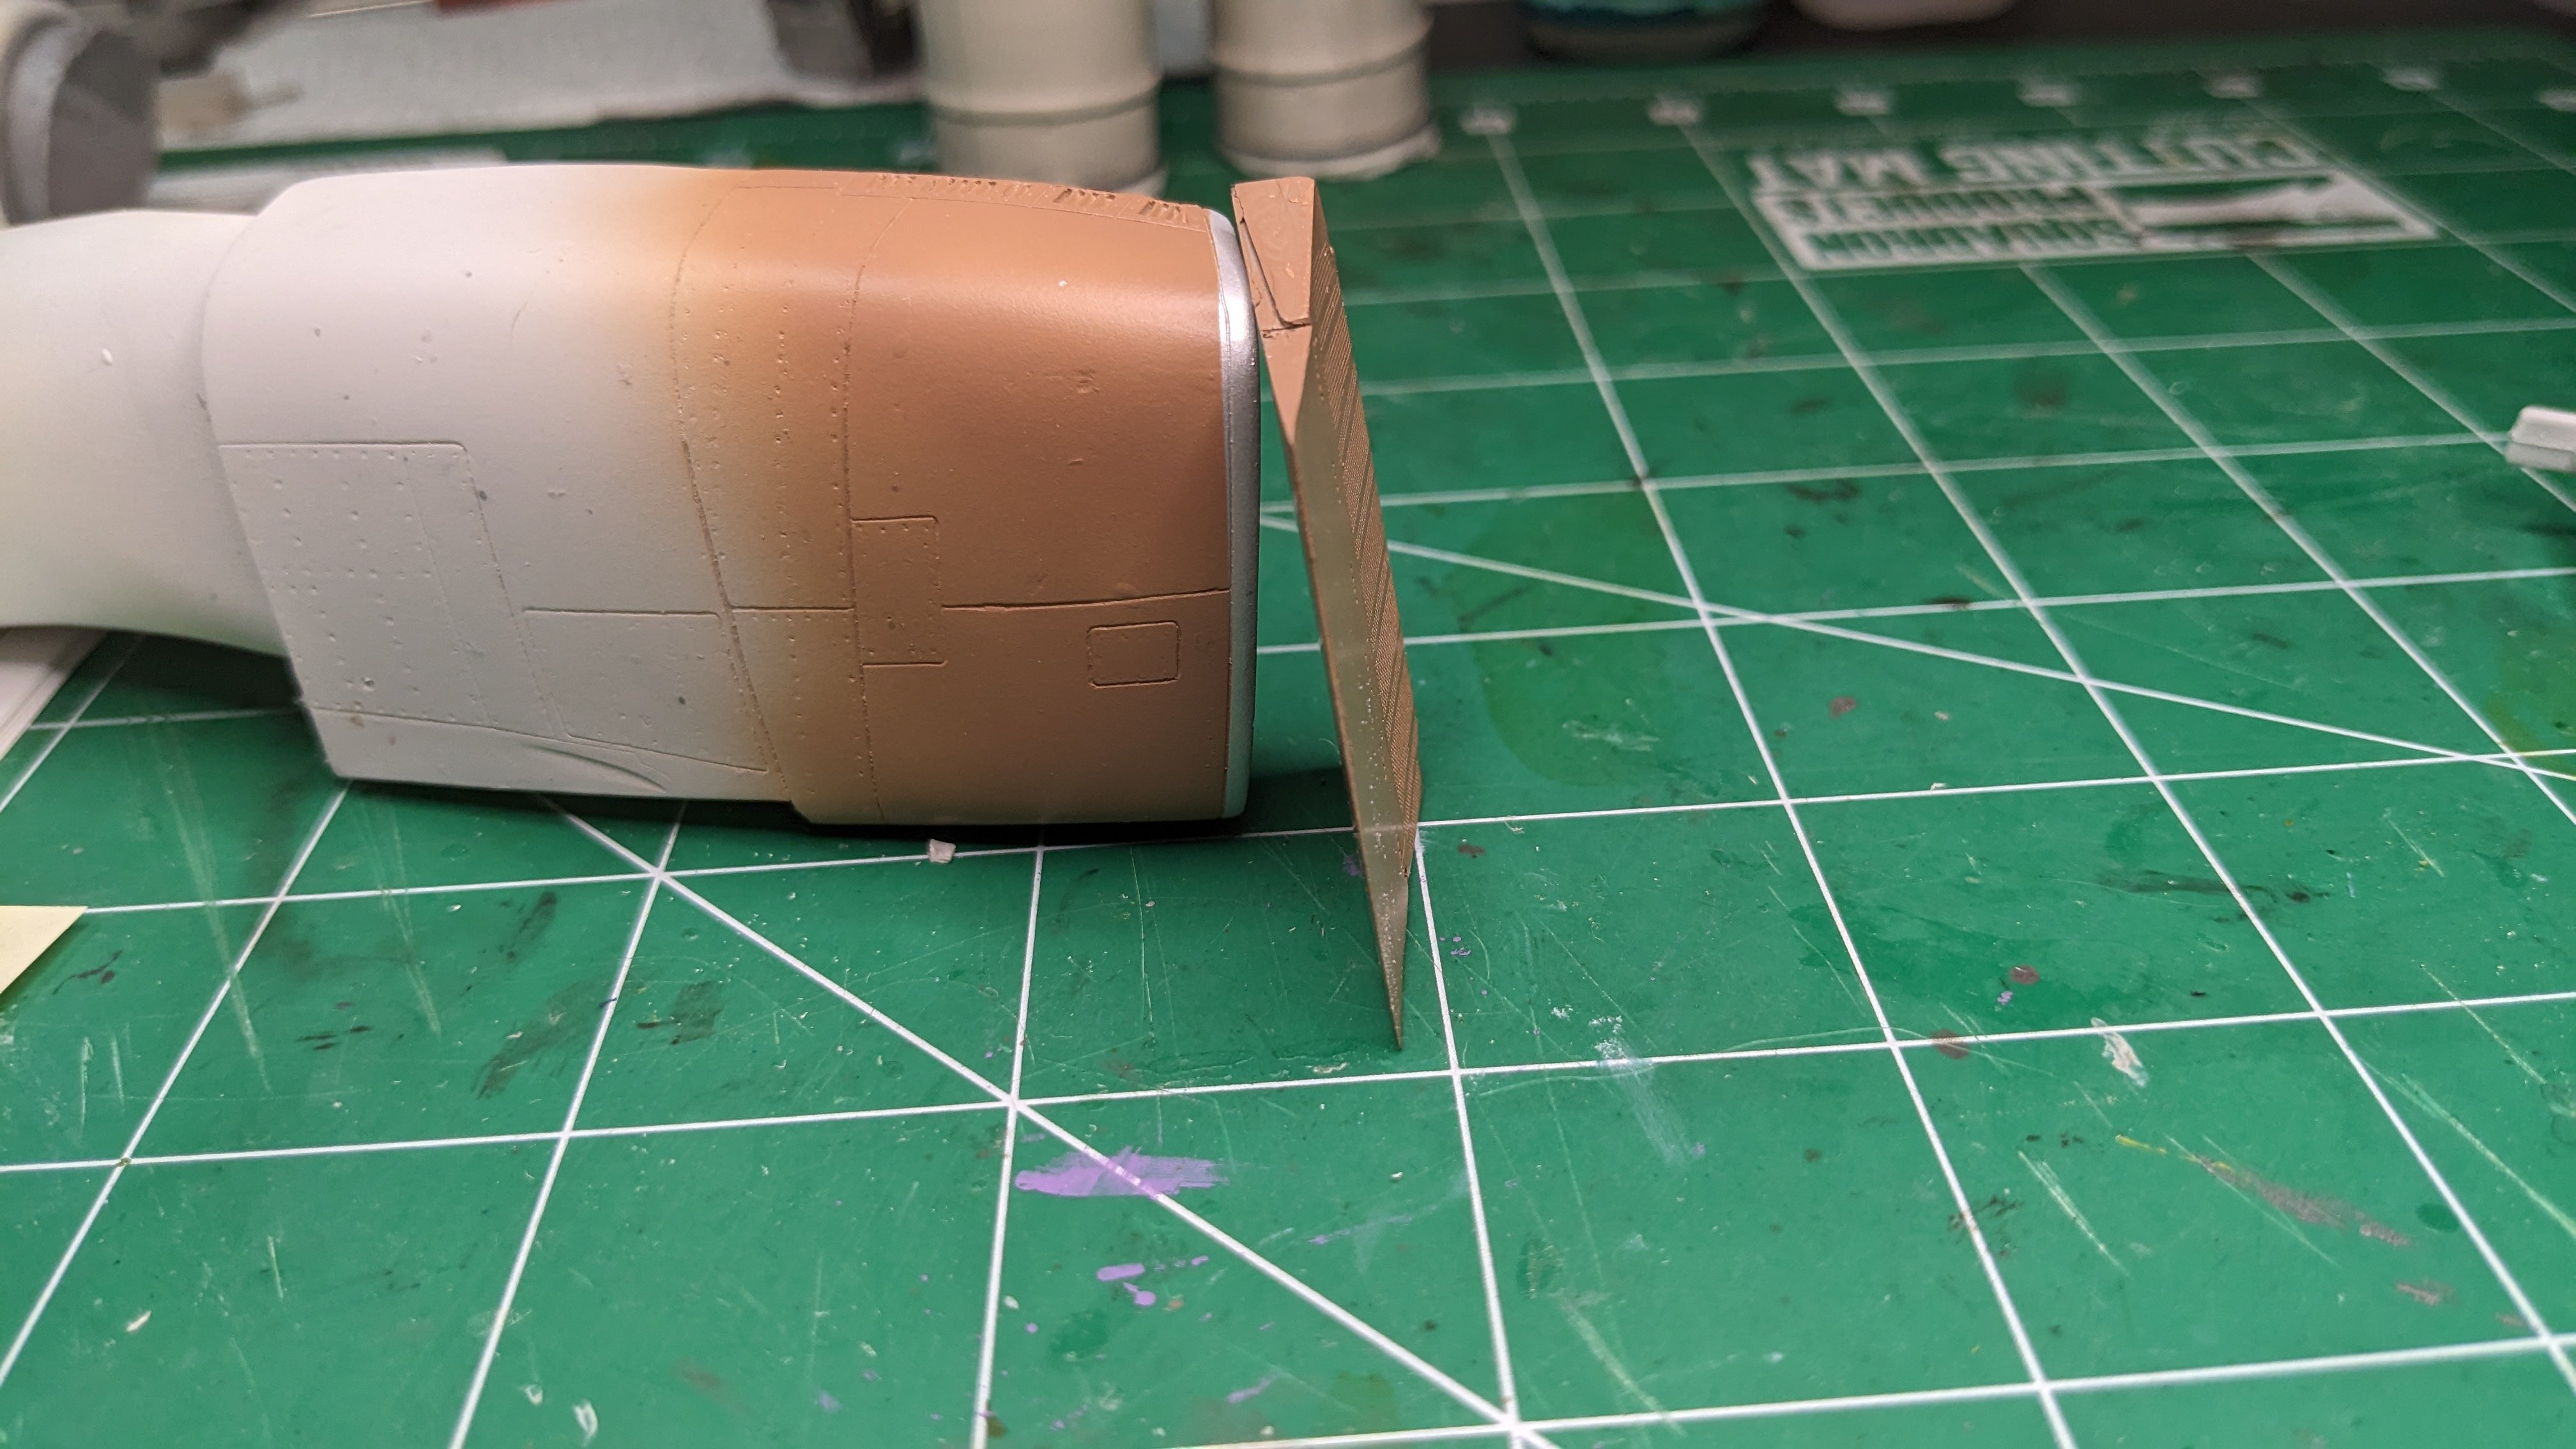
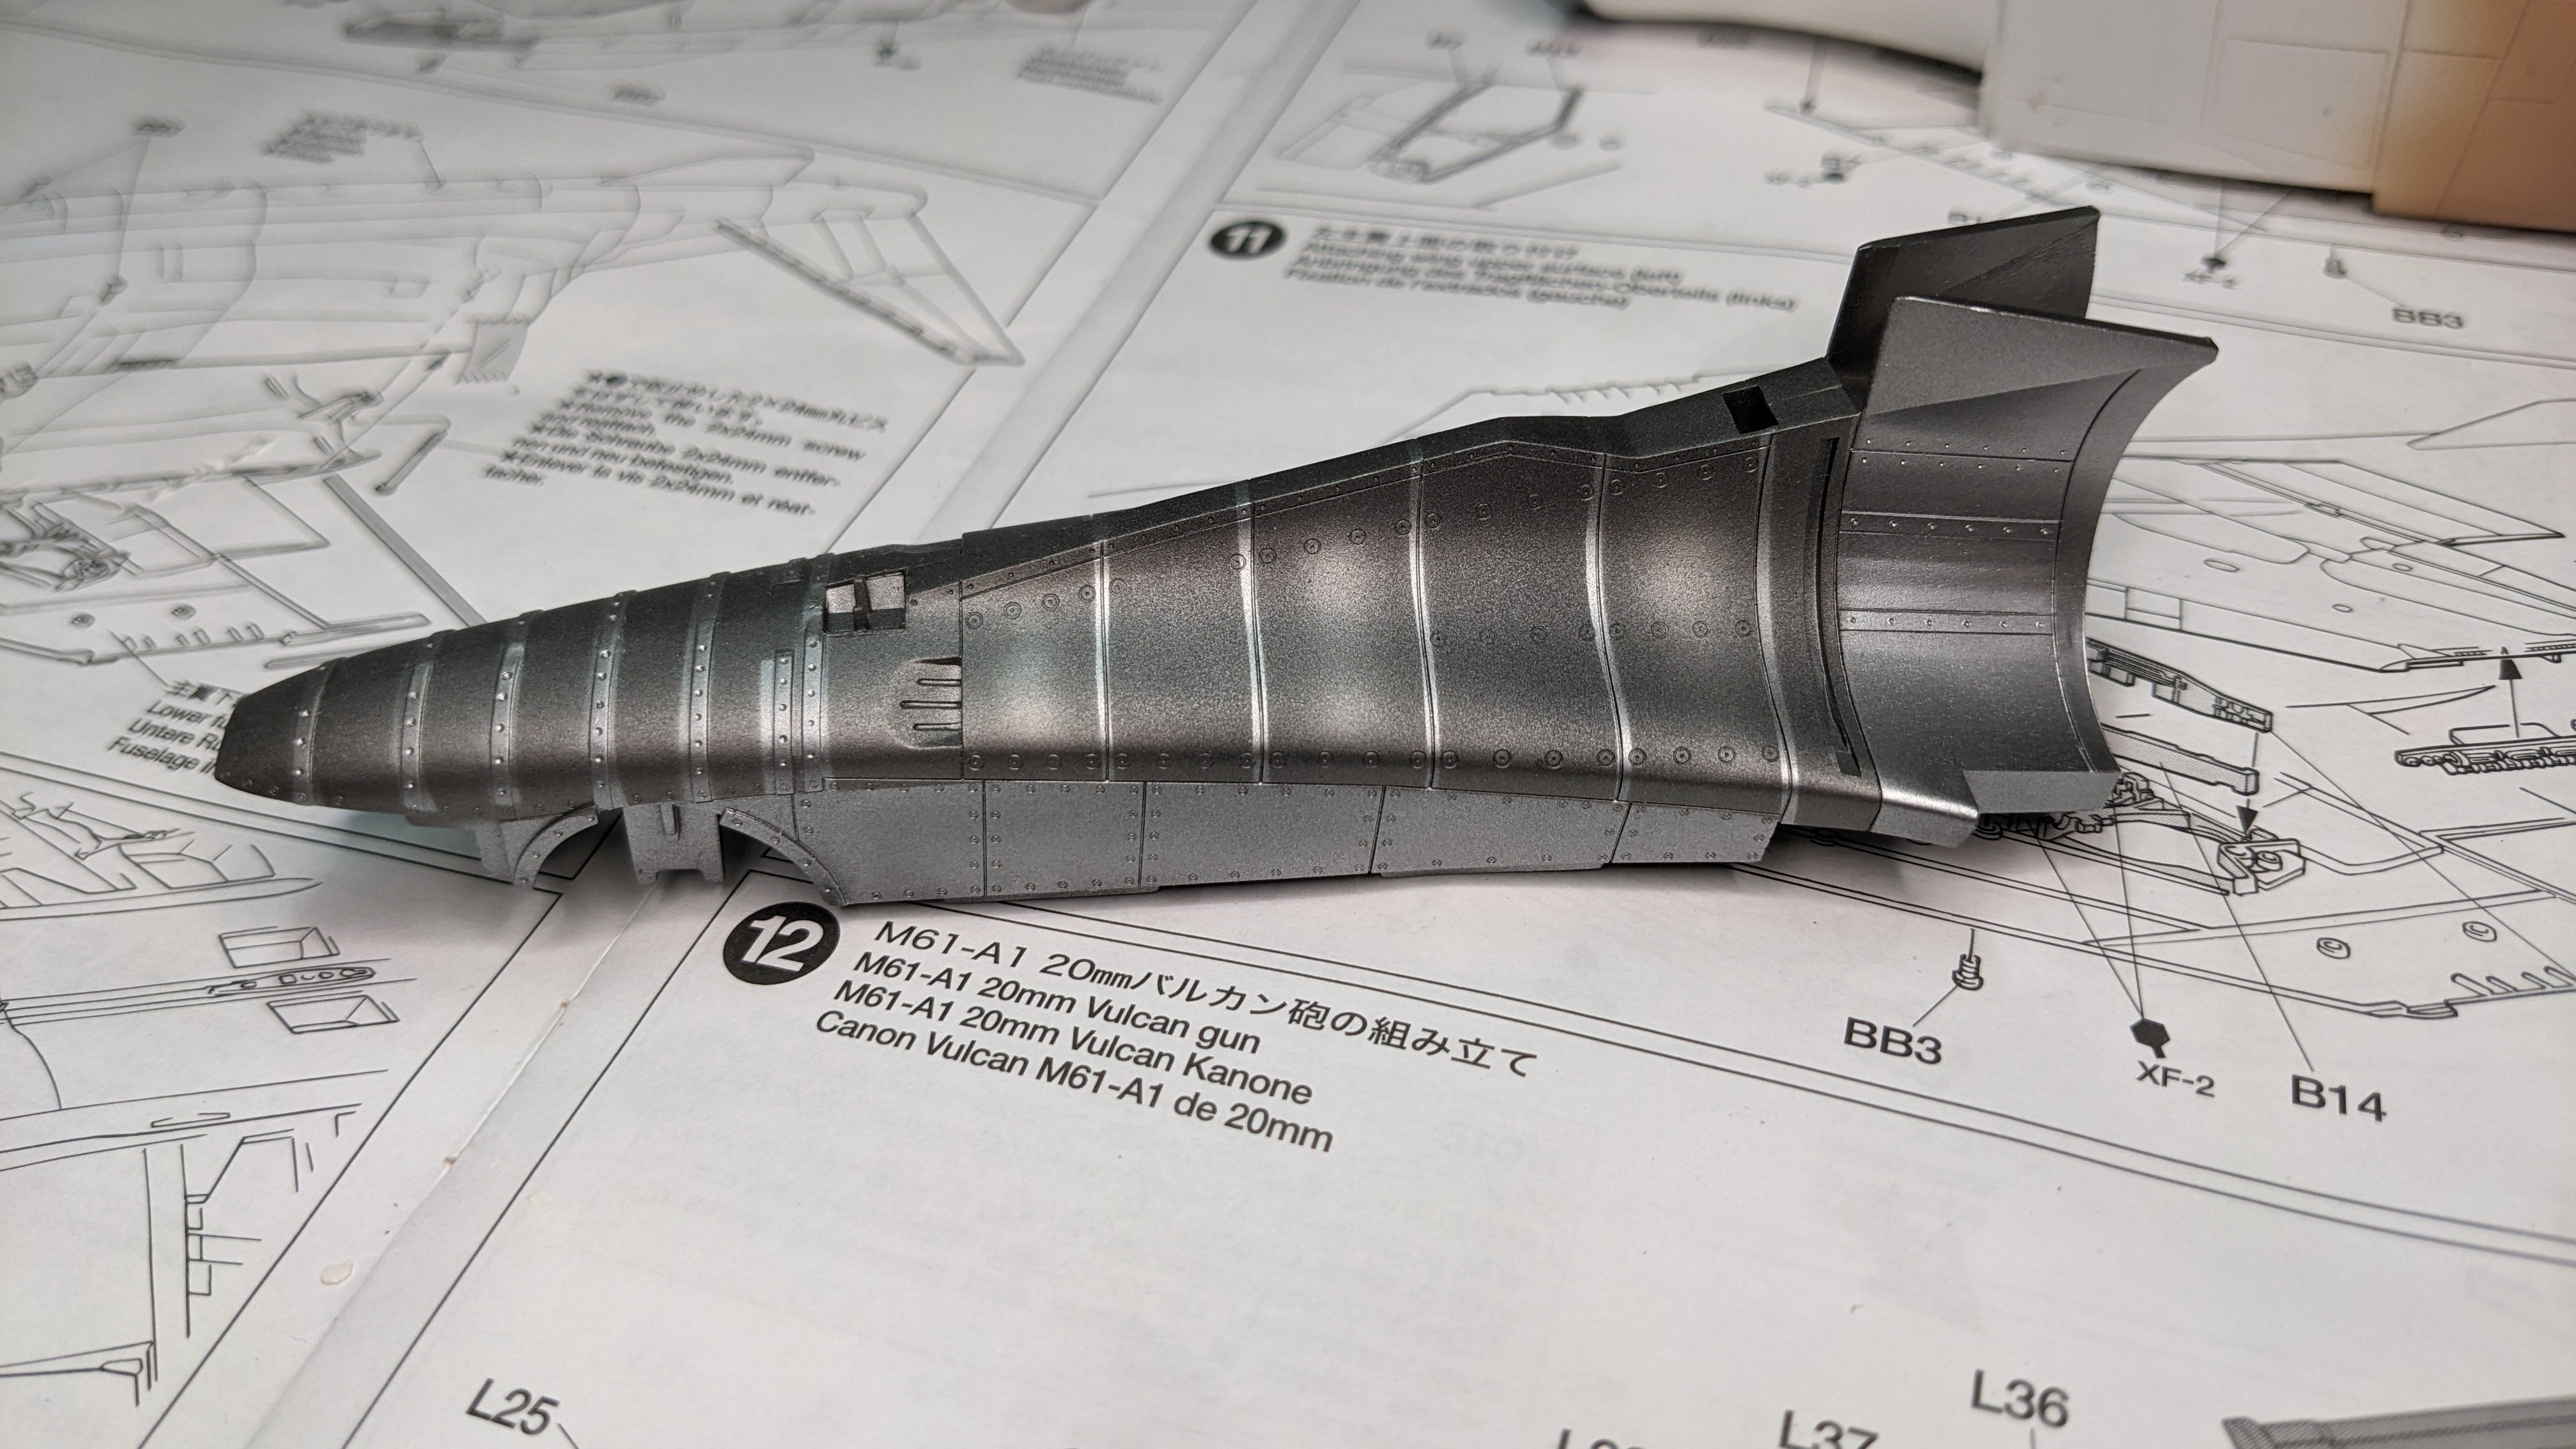
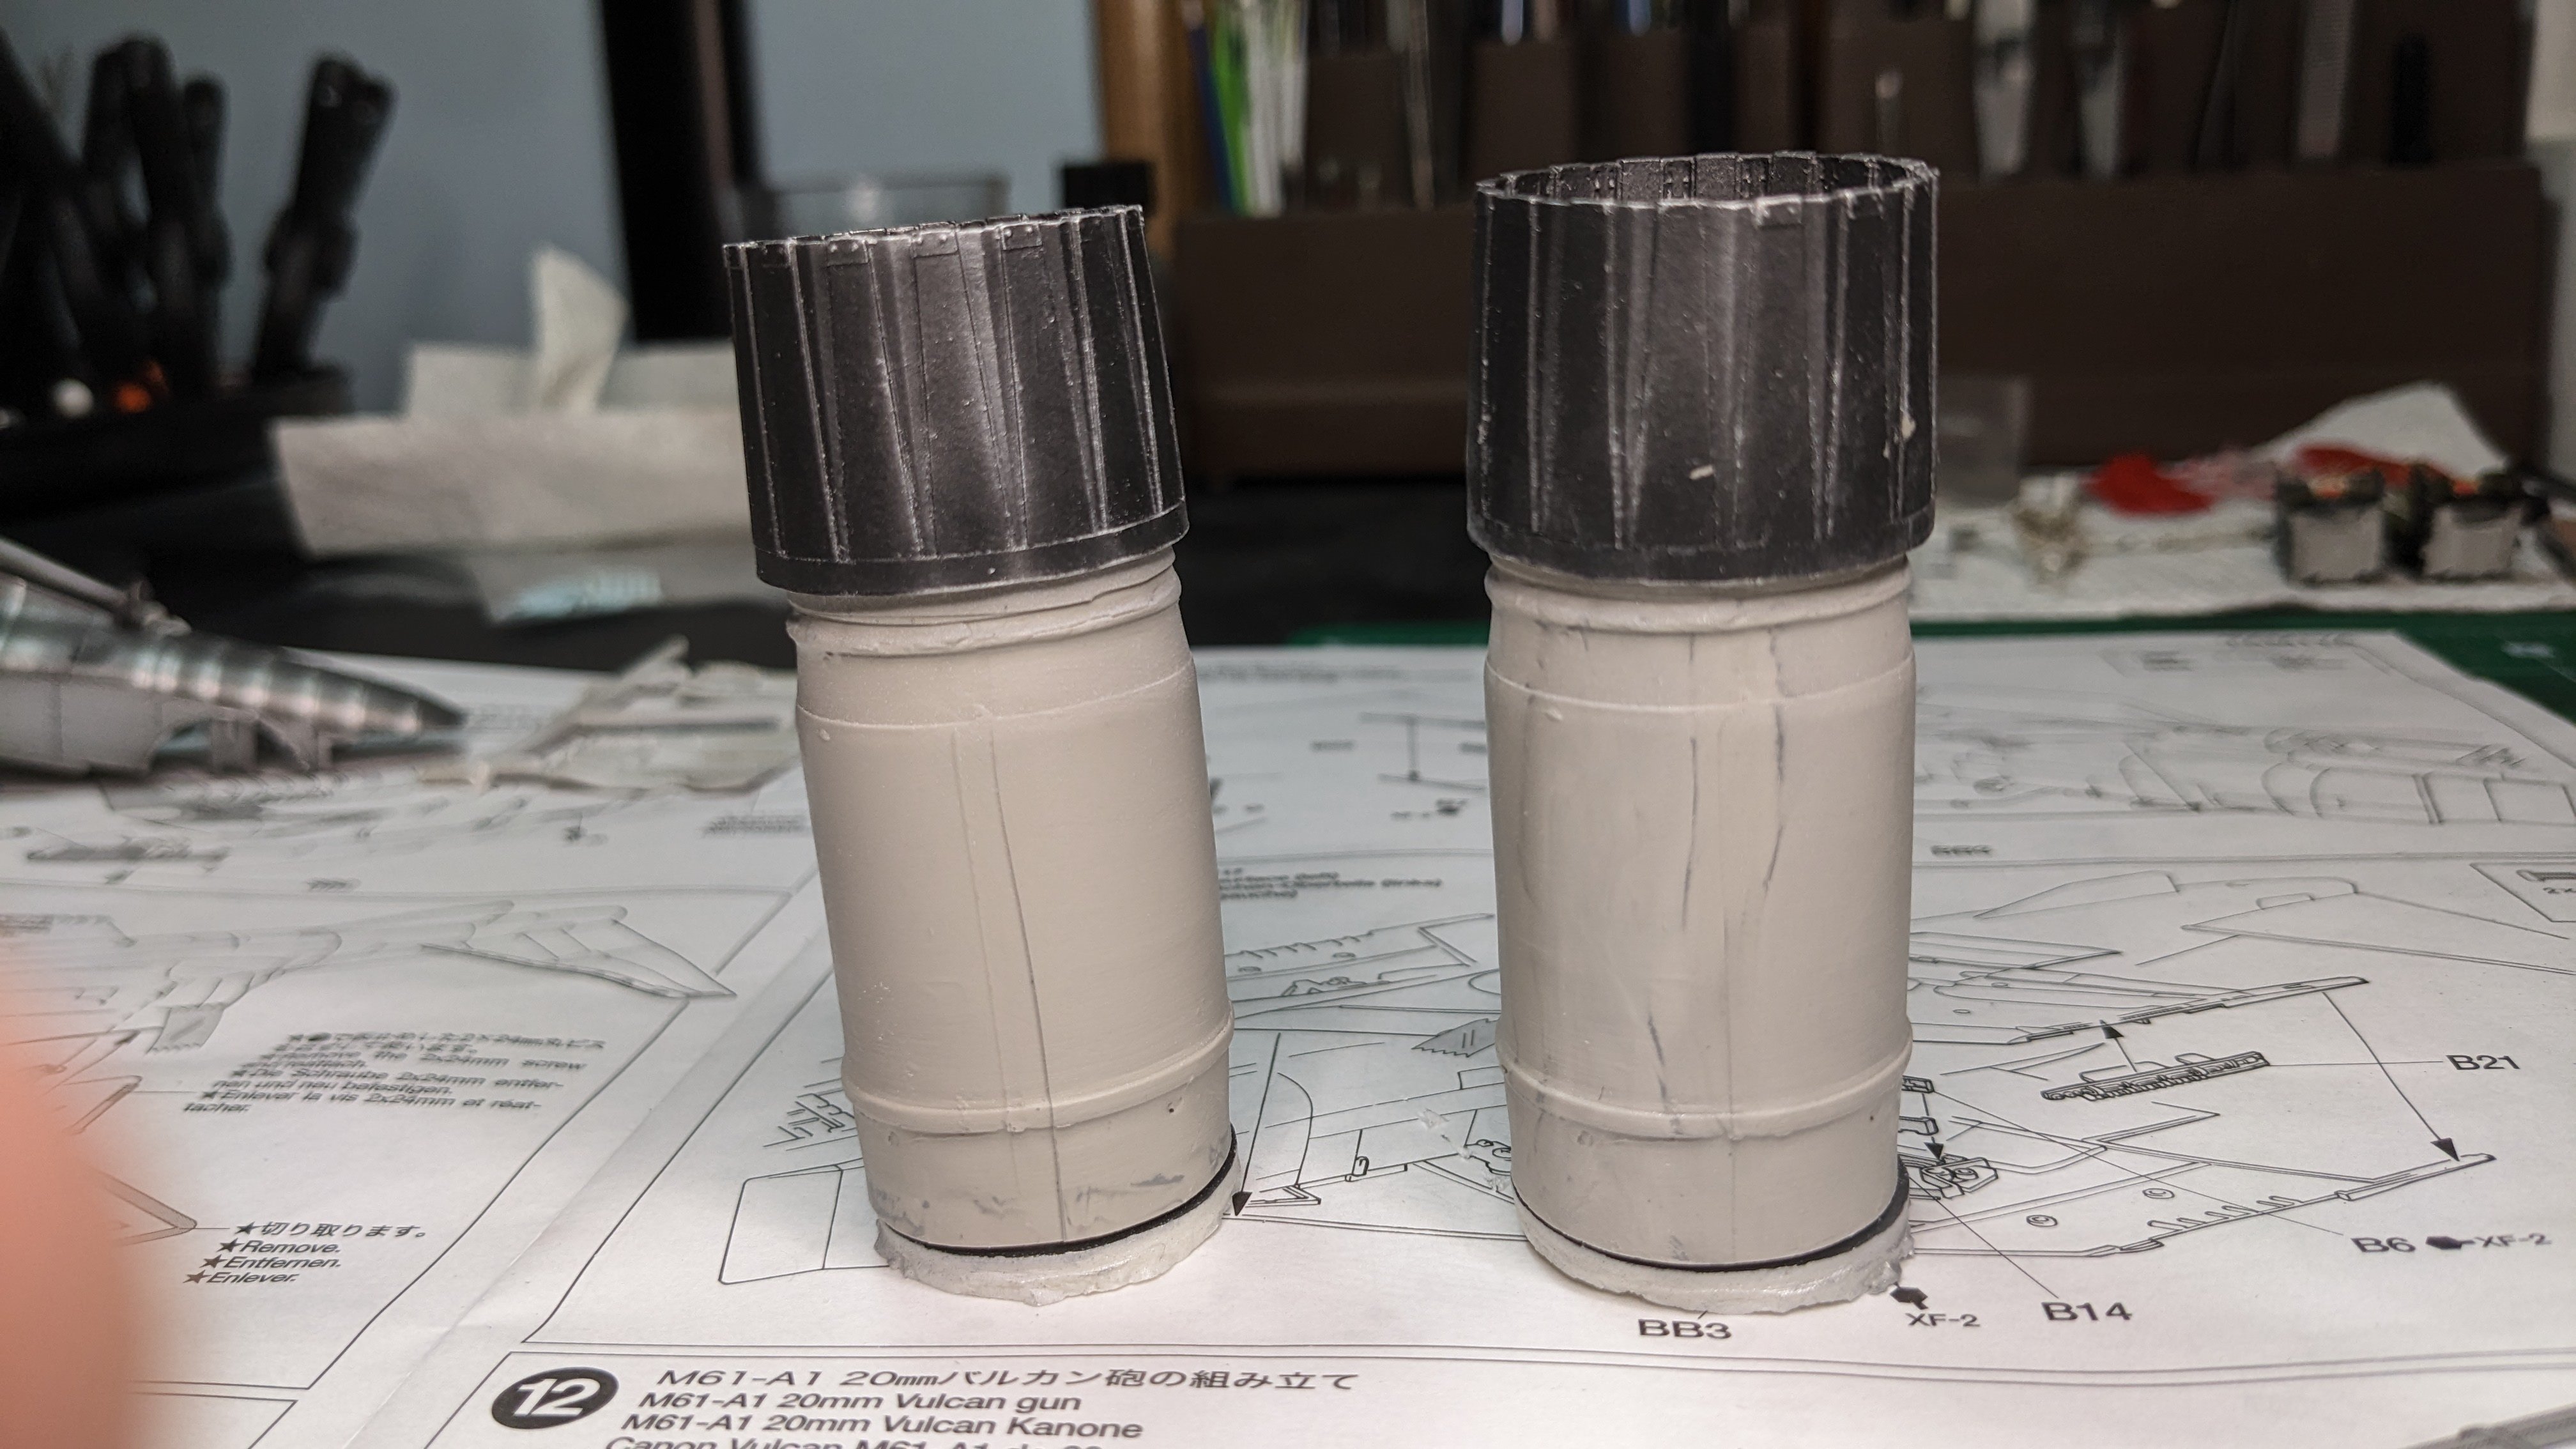
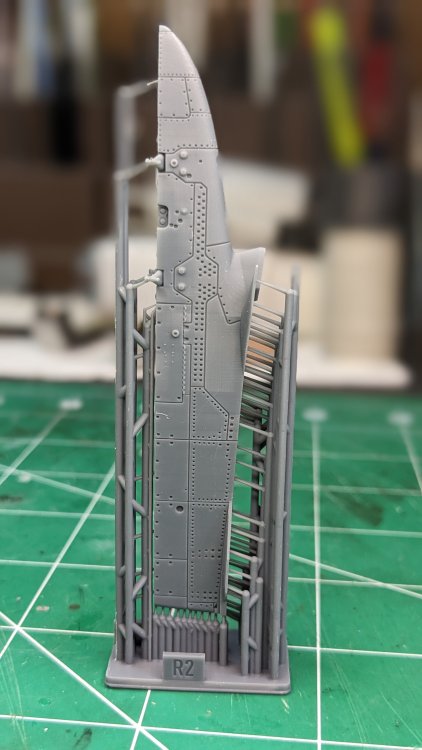
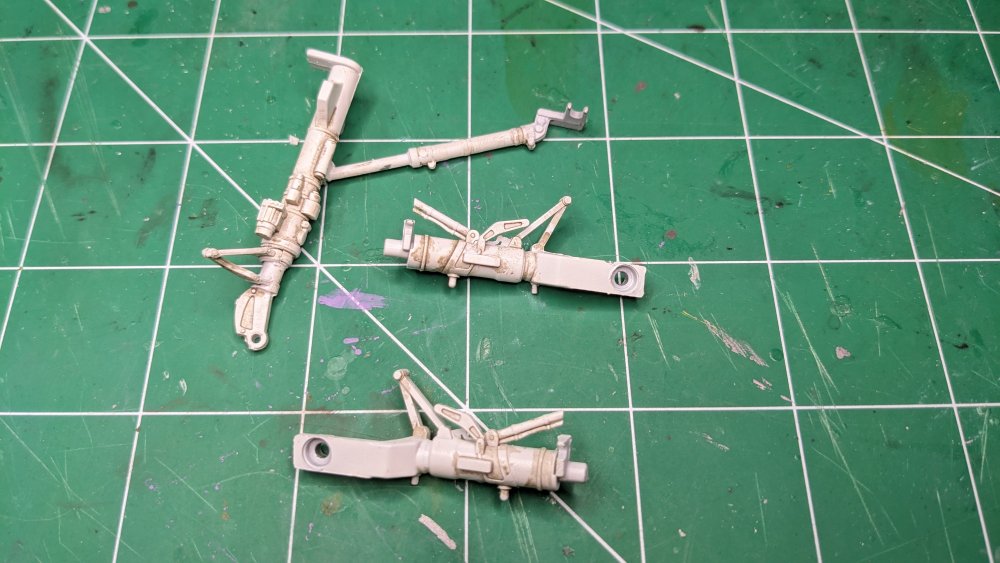
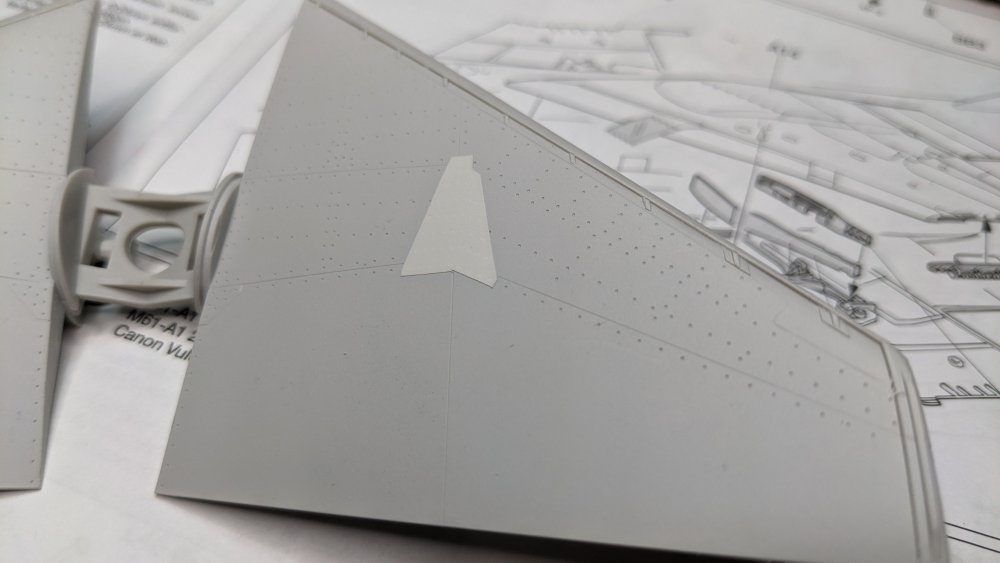
Finally got a bit of bench time, as well as some very timely and helpful assistance from Gary at GT Resin since I am not well versed at F-4 Resin upgrades. Gary's resin parts are amazing - the fit is terrific, and the detail is amazing. Paint is starting to pull out some of that detail, but also, check out the thinness of the intake splitter - very nice to be able to thin that down to a sharp edge. Prepainting the intakes per some earlier advice. Here are the GT Resin engine cans and burners dry assembled. Now that I know how it all goes together (Thanks Gary!) I'll get on the detail painting. Toned down the shiny bits on the tail and am happier with the result. Realized I don't own any clear blue so have that on order. Did do some additional shading. Thoughts? I'm not sold on Tamiya sticker reinforcing plates for the stablizers. There is more detail in the photos vs the naked eye but I'm just not sold on the look. Can't really see these plates in my references, so soliciting advice - keep or ditch? The gray is actually painted with the underside color. But not happy with the look. Just seems too thick. And finally starting to work on the landing gear - applying some washes to pull out some detail. Still want to play with this and do a bit more clean up. Getting close to closing up the fuselage, finally! Still up is to work on the clear resin canopy pieces.


-
Tamiya 1/32 Mk IX Spitfire Polish Fighting Team
CANicoll replied to JohnB's topic in LSM 1/35 and Larger Work In Progress
That is one beautiful finish, John. Perfectly smooth, wow. I've never used Xtracolor but am very impressed. -
Martin, Looking really good, wow. Great work on the research and adjustments as well as the creativity in creating the bits you need. You must have a huge stash of styrene to pull from. My hats off to you!
-
Looks terrific and love the subject - that was a fun series.
-
I know I need to narrow this down a bit: I'm looking for a refill on my usual acrylic paint airbrush cleaner which was the Vallejo cleaner. I see Grex has their own, which has 'detergents' in it. Has anyone used the Grex airbrush cleaner? What are other preferred options? Thanks!