CANicoll
-
Posts
1,928 -
Joined
-
Last visited
Content Type
Profiles
Forums
Events
Gallery
Everything posted by CANicoll
-
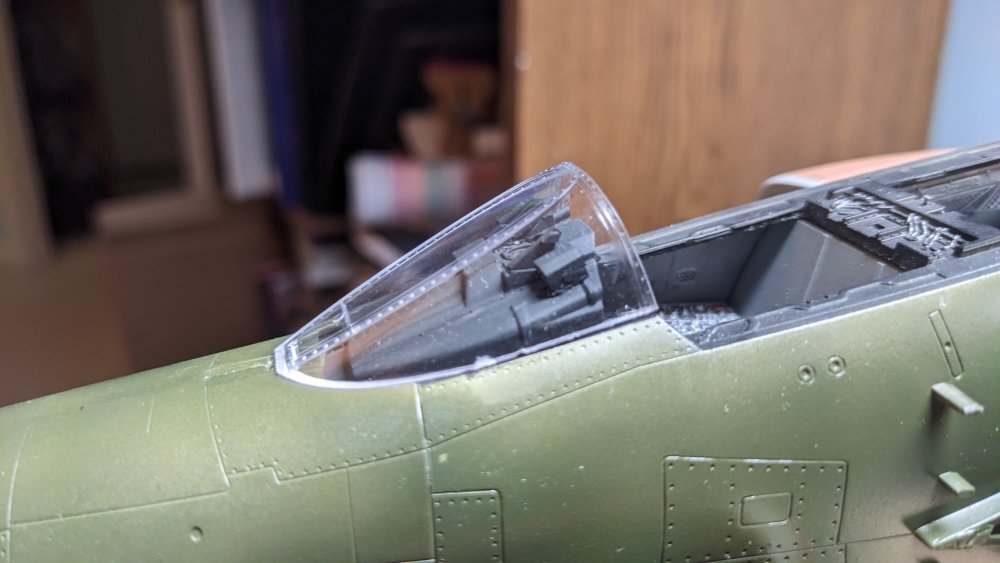
 Using the kit pieces for the canopy did some painting of the frames while the Future-dipped clear pieces dry. There is still a bit of final painting to be done on the center piece to match the fuselage camo line, but while that dries, worked on some of the nose stencils. Should make more progress this weekend.
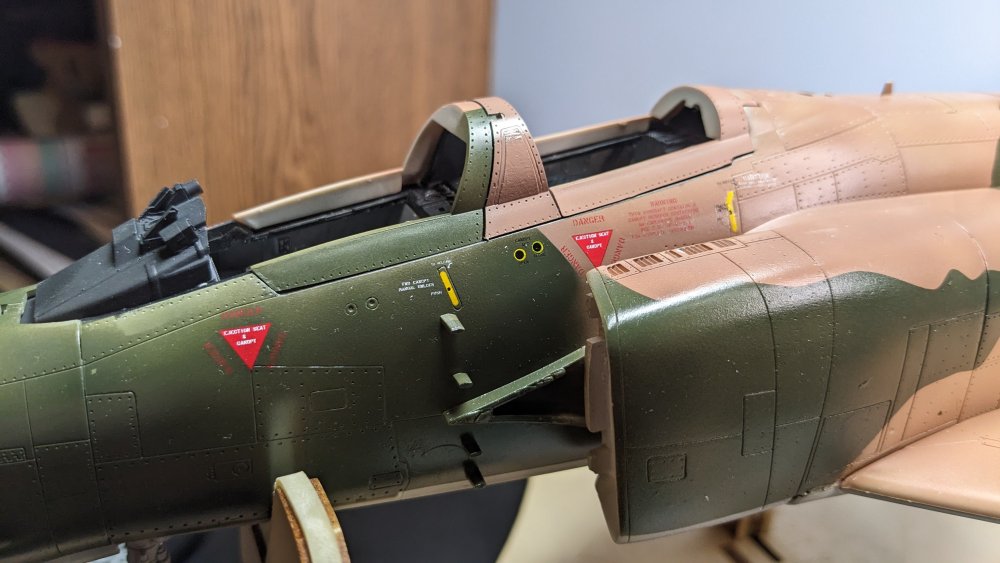
-
Hasegawa P-40E Darwin RFI
CANicoll replied to JohnB's topic in LSM 1/32 and Larger Aircraft Ready for Inspection
John, Great modulation on the OD, nice work! Chris -
Hasegawa 1/32 P-40E Darwin 1942
CANicoll replied to JohnB's topic in LSM 1/35 and Larger Work In Progress
That must have been very cool to see. -
Carl, excellent idea about the sealant. I was very careful about how I clipped the sprue attachment point but I like your idea of cutting it a bit long then carefully sanding it down. I'm not as clever with the styrene bits so that would take me a fairly long time to fix. I really am trying to hit the deadline, even if not with the full armament build out.
-
Hasegawa 1/32 P-40E Darwin 1942
CANicoll replied to JohnB's topic in LSM 1/35 and Larger Work In Progress
Looking Good John! What seatbelts did you use? Great job on the props - not sure I would have taken that on. Well done. -
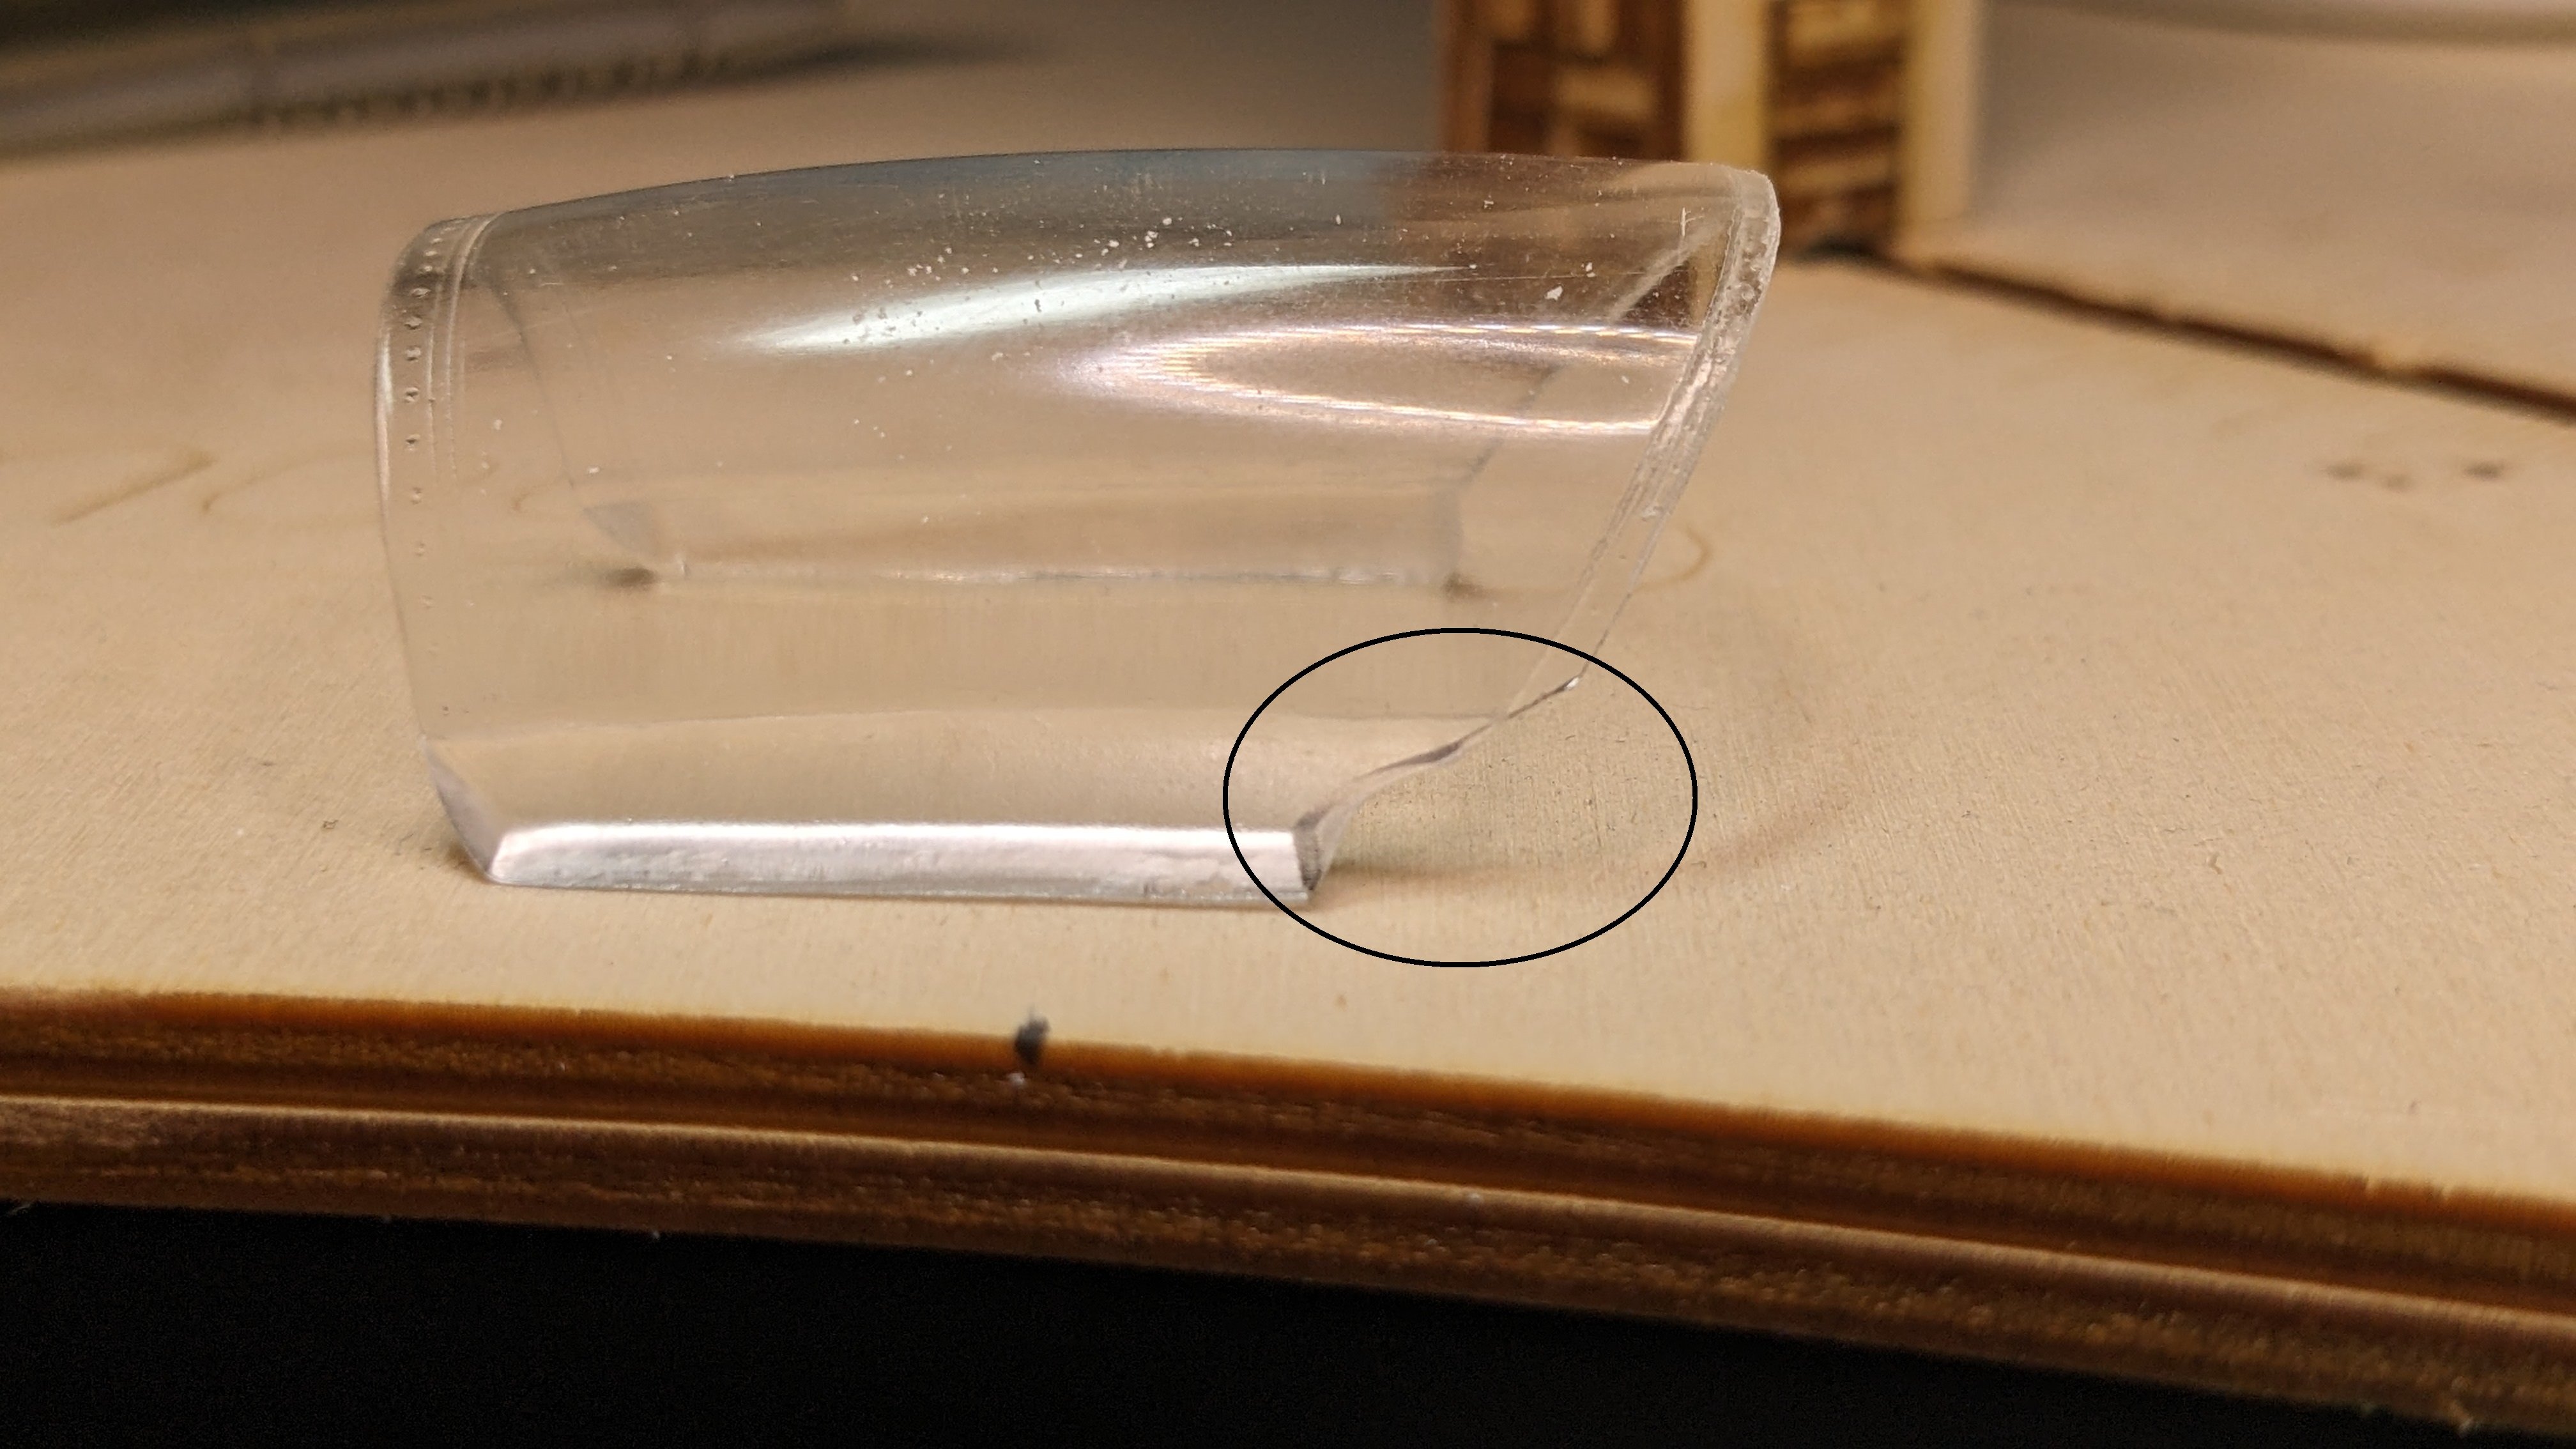
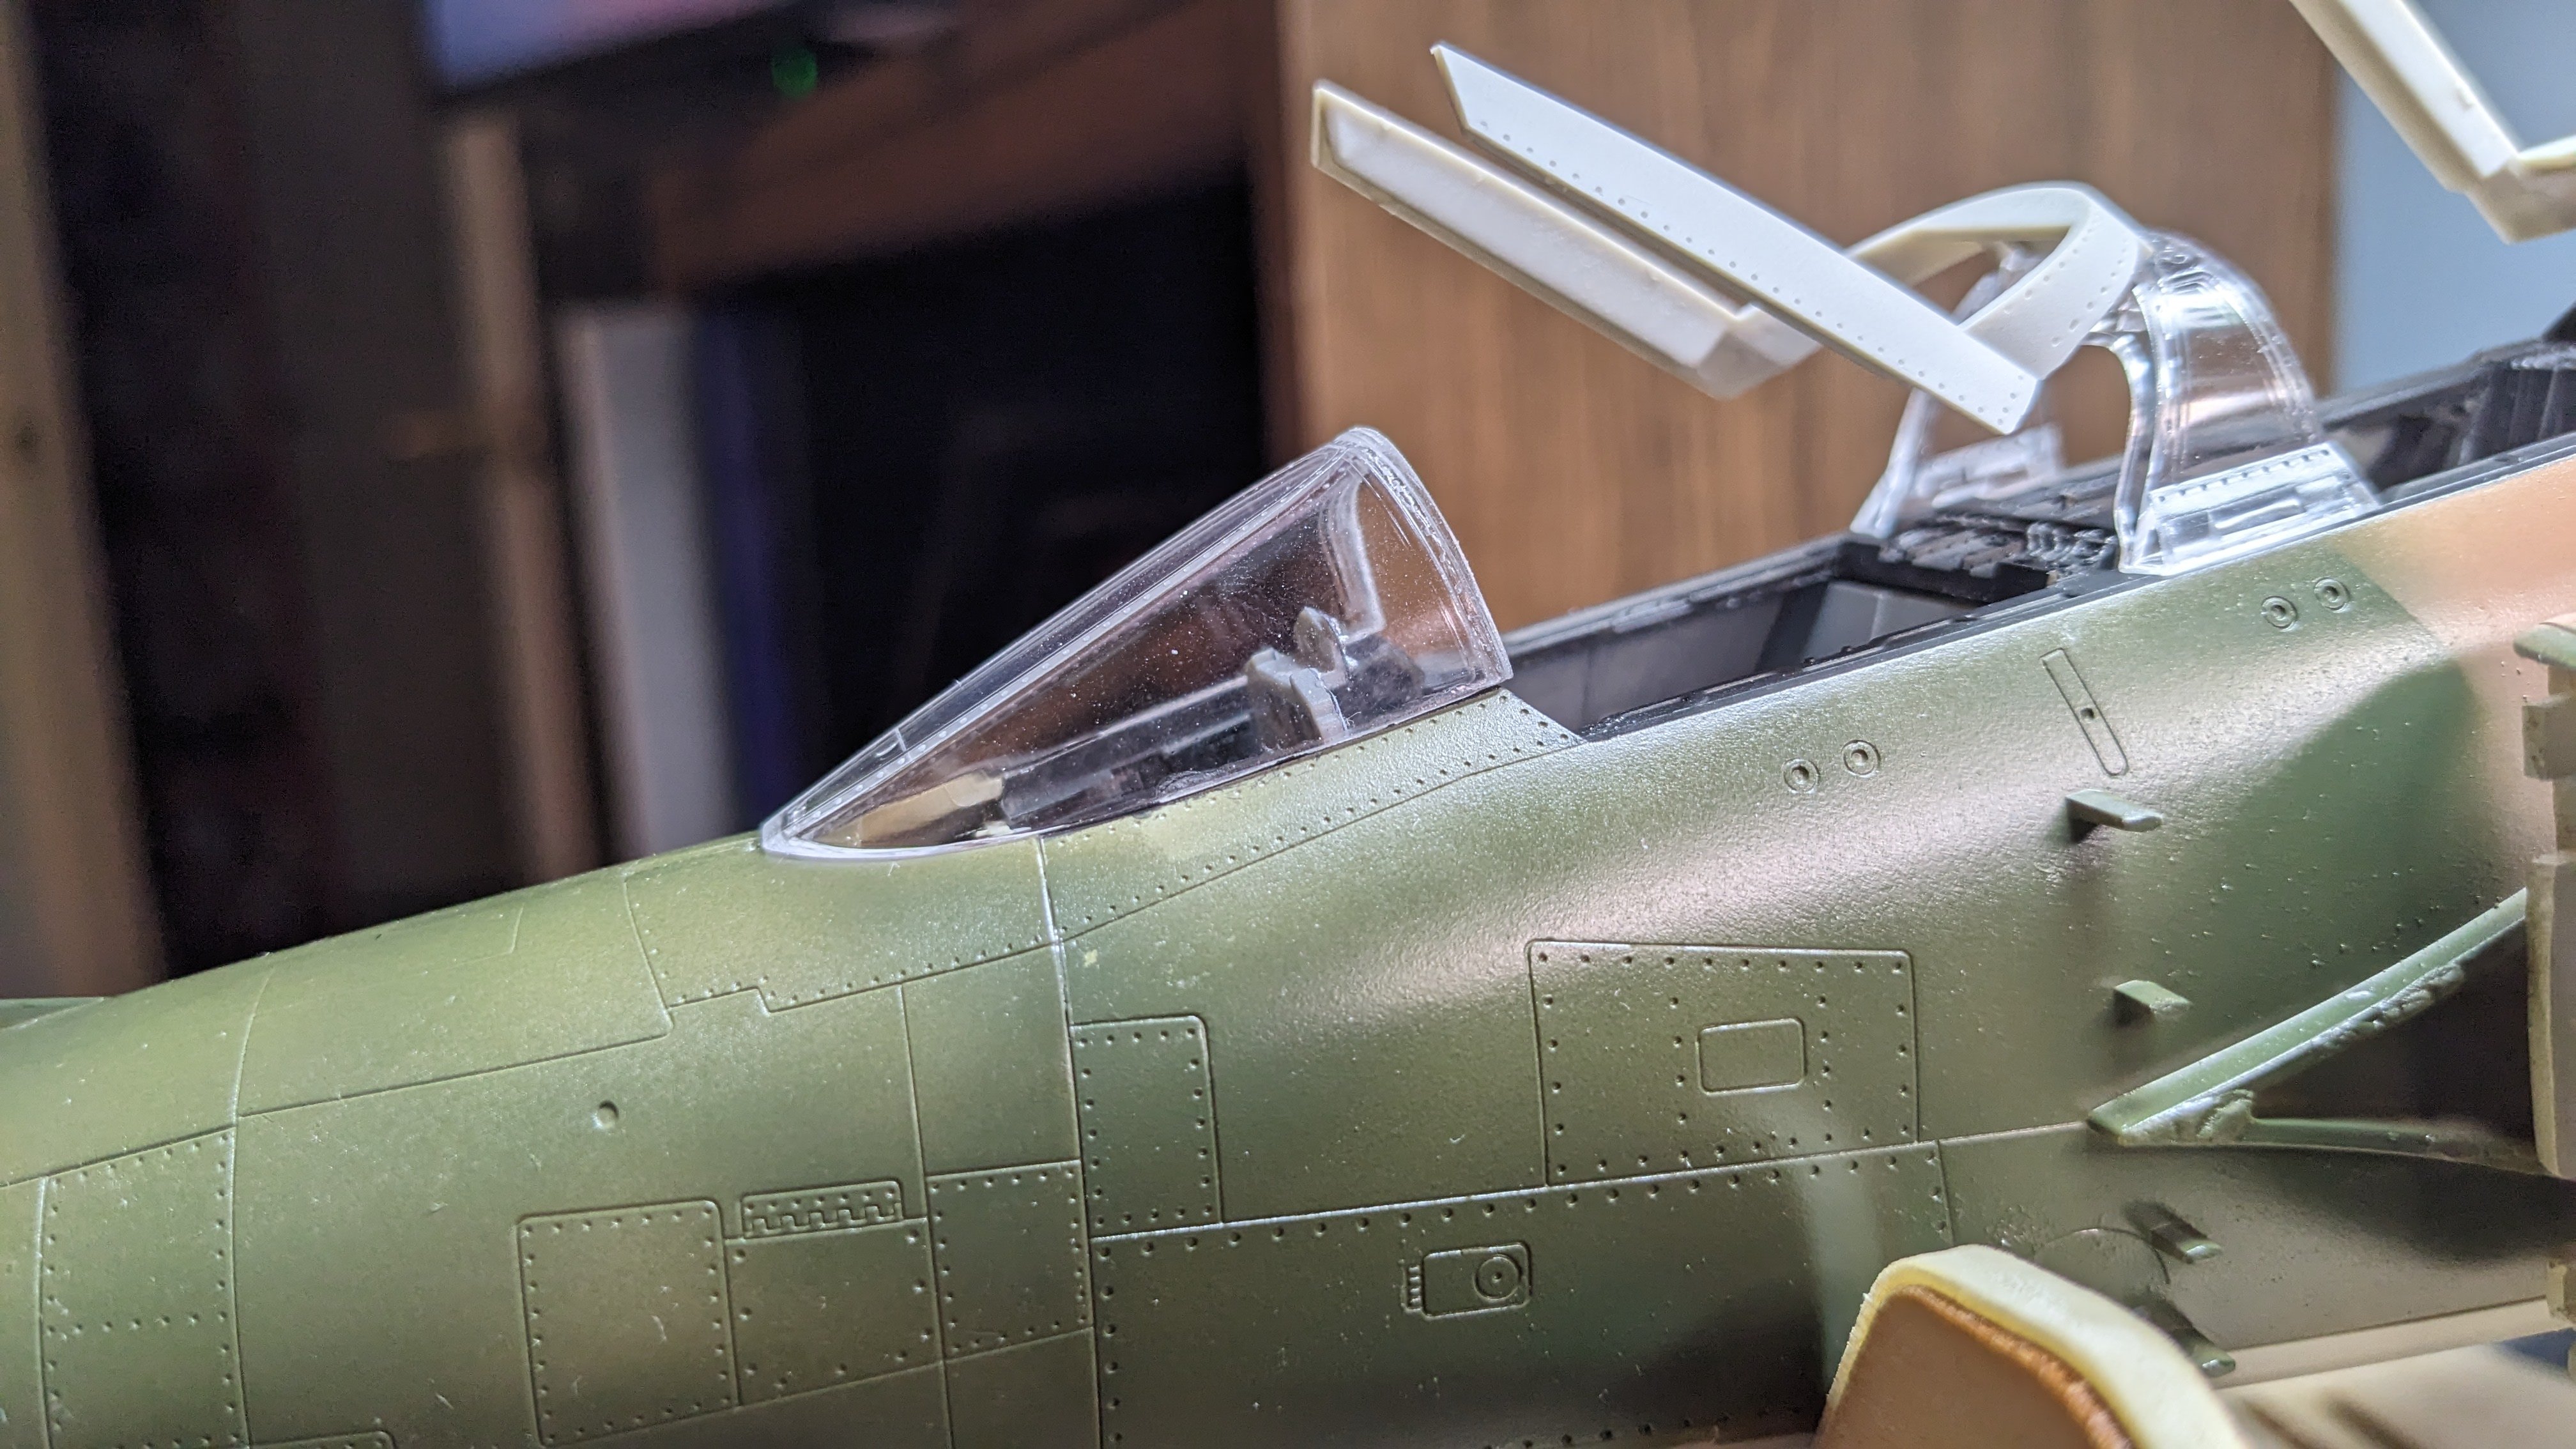
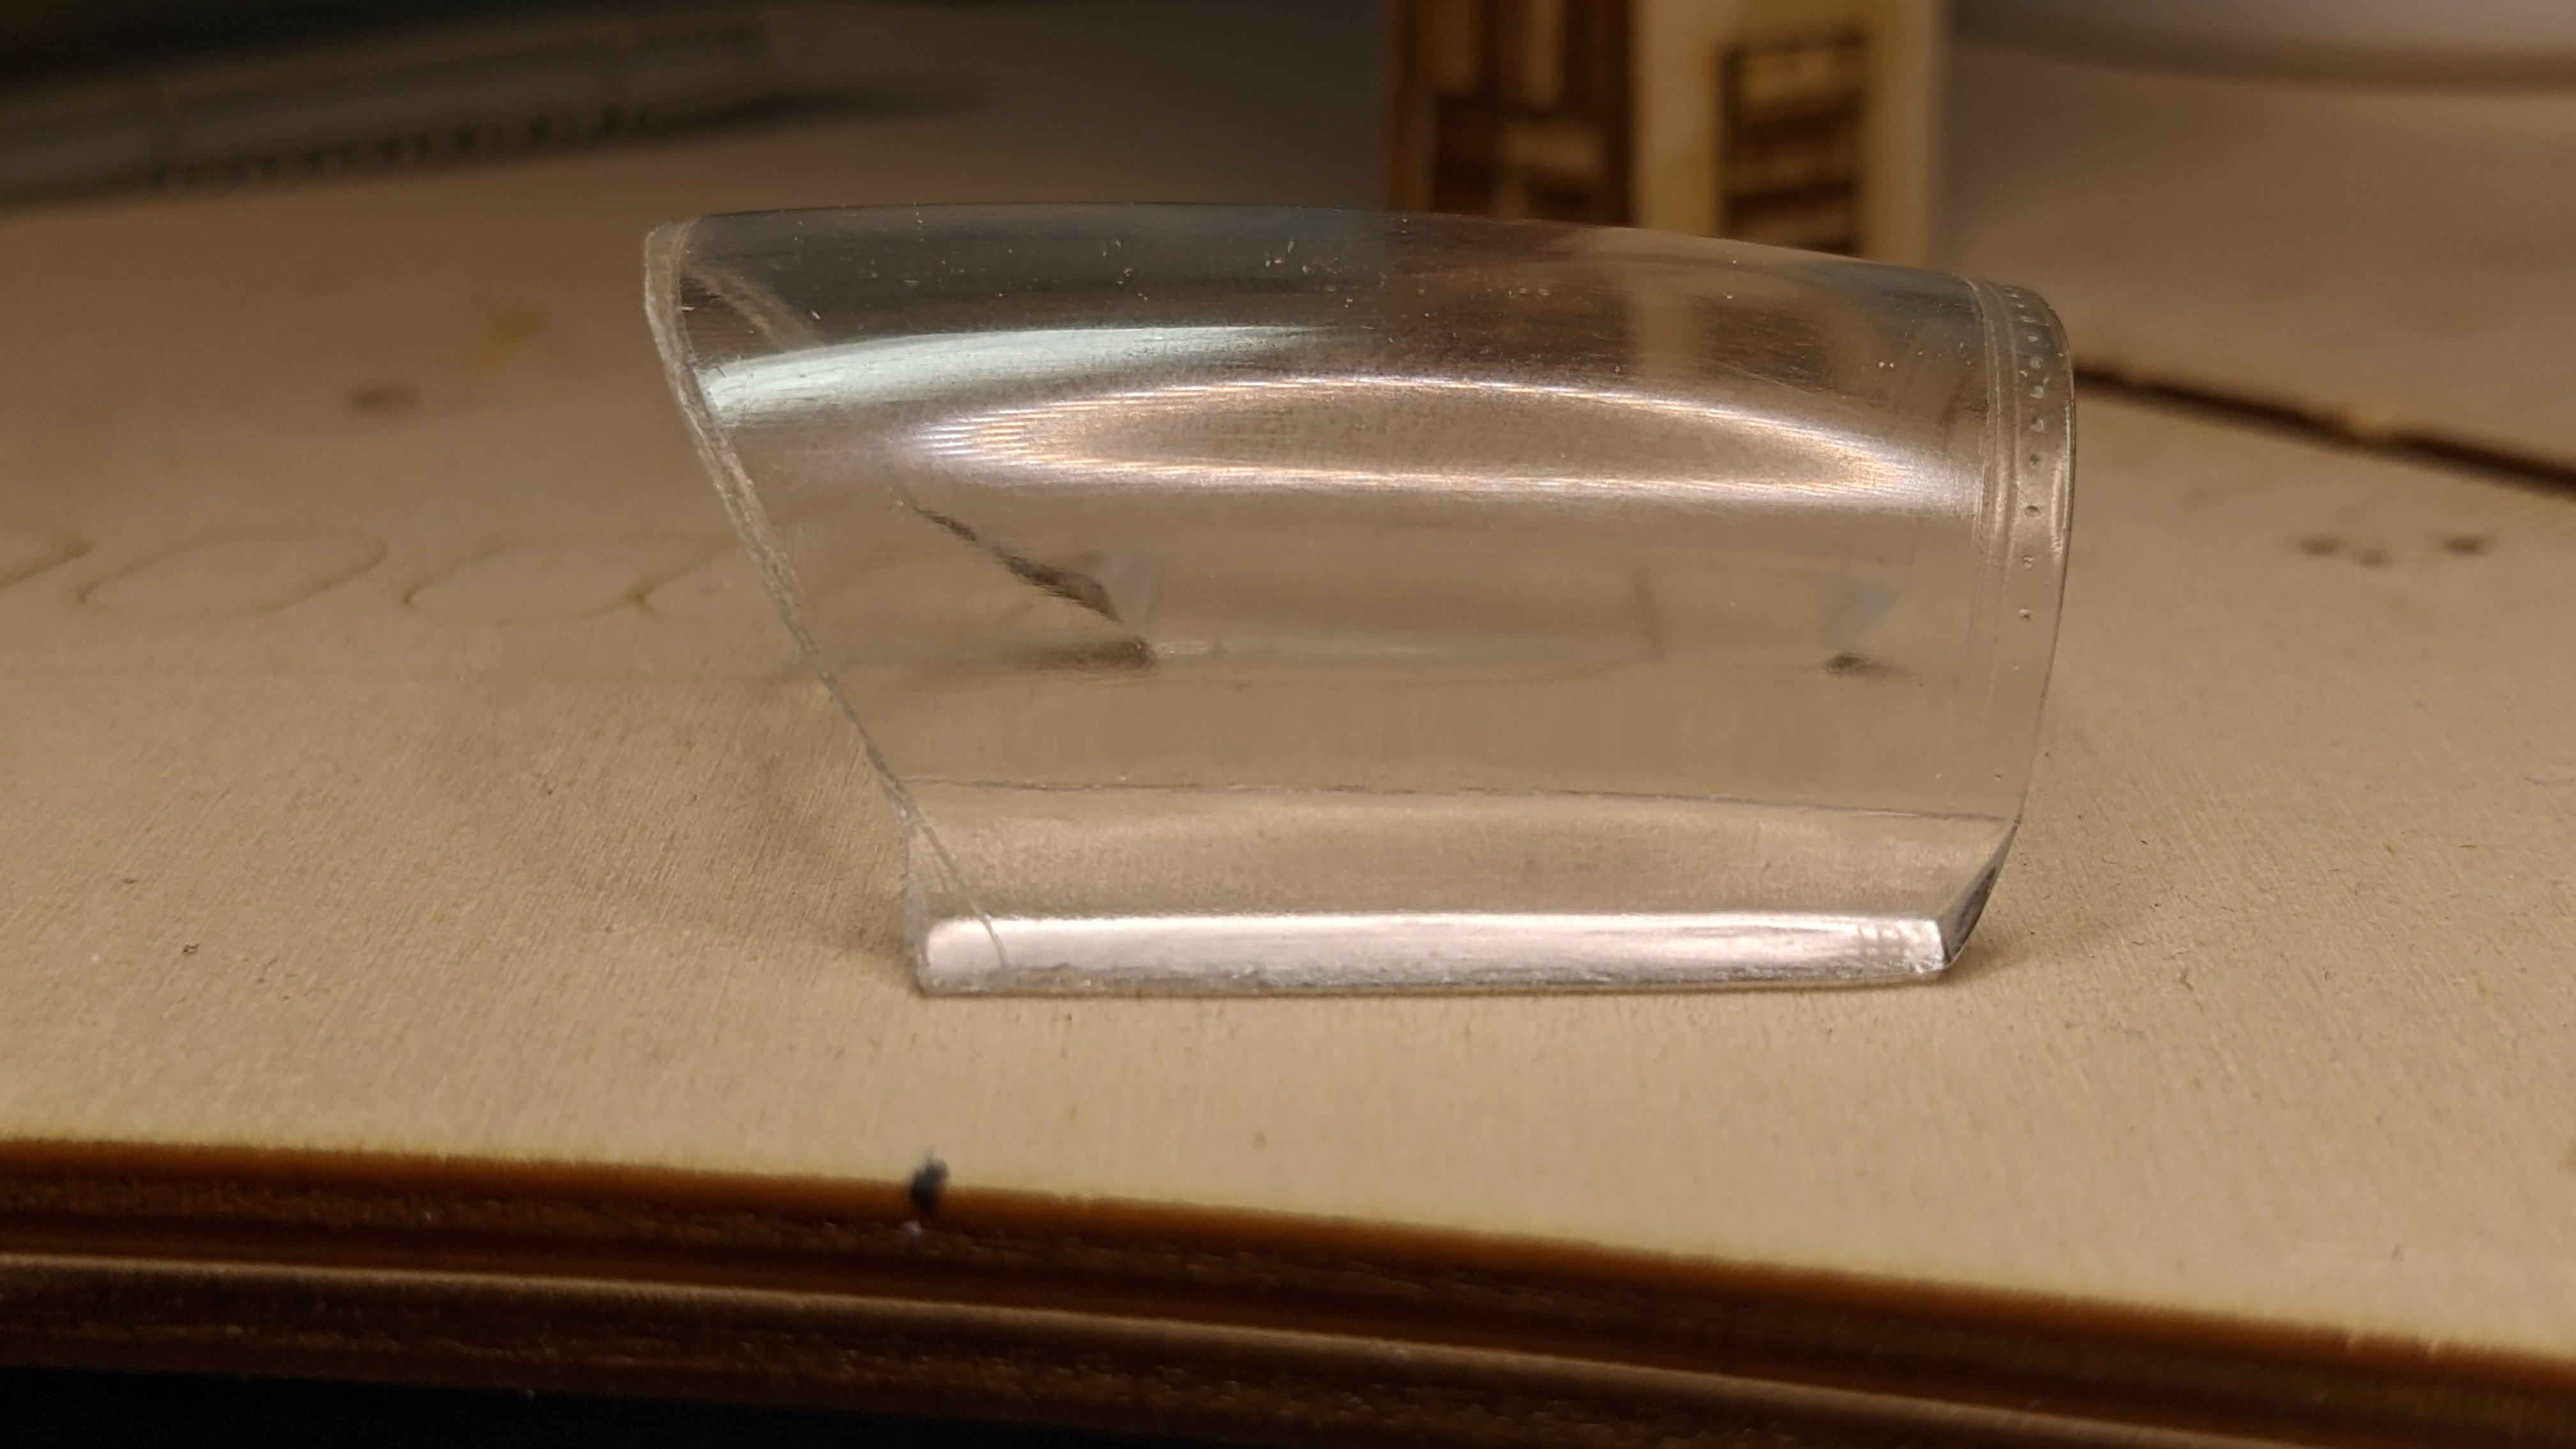
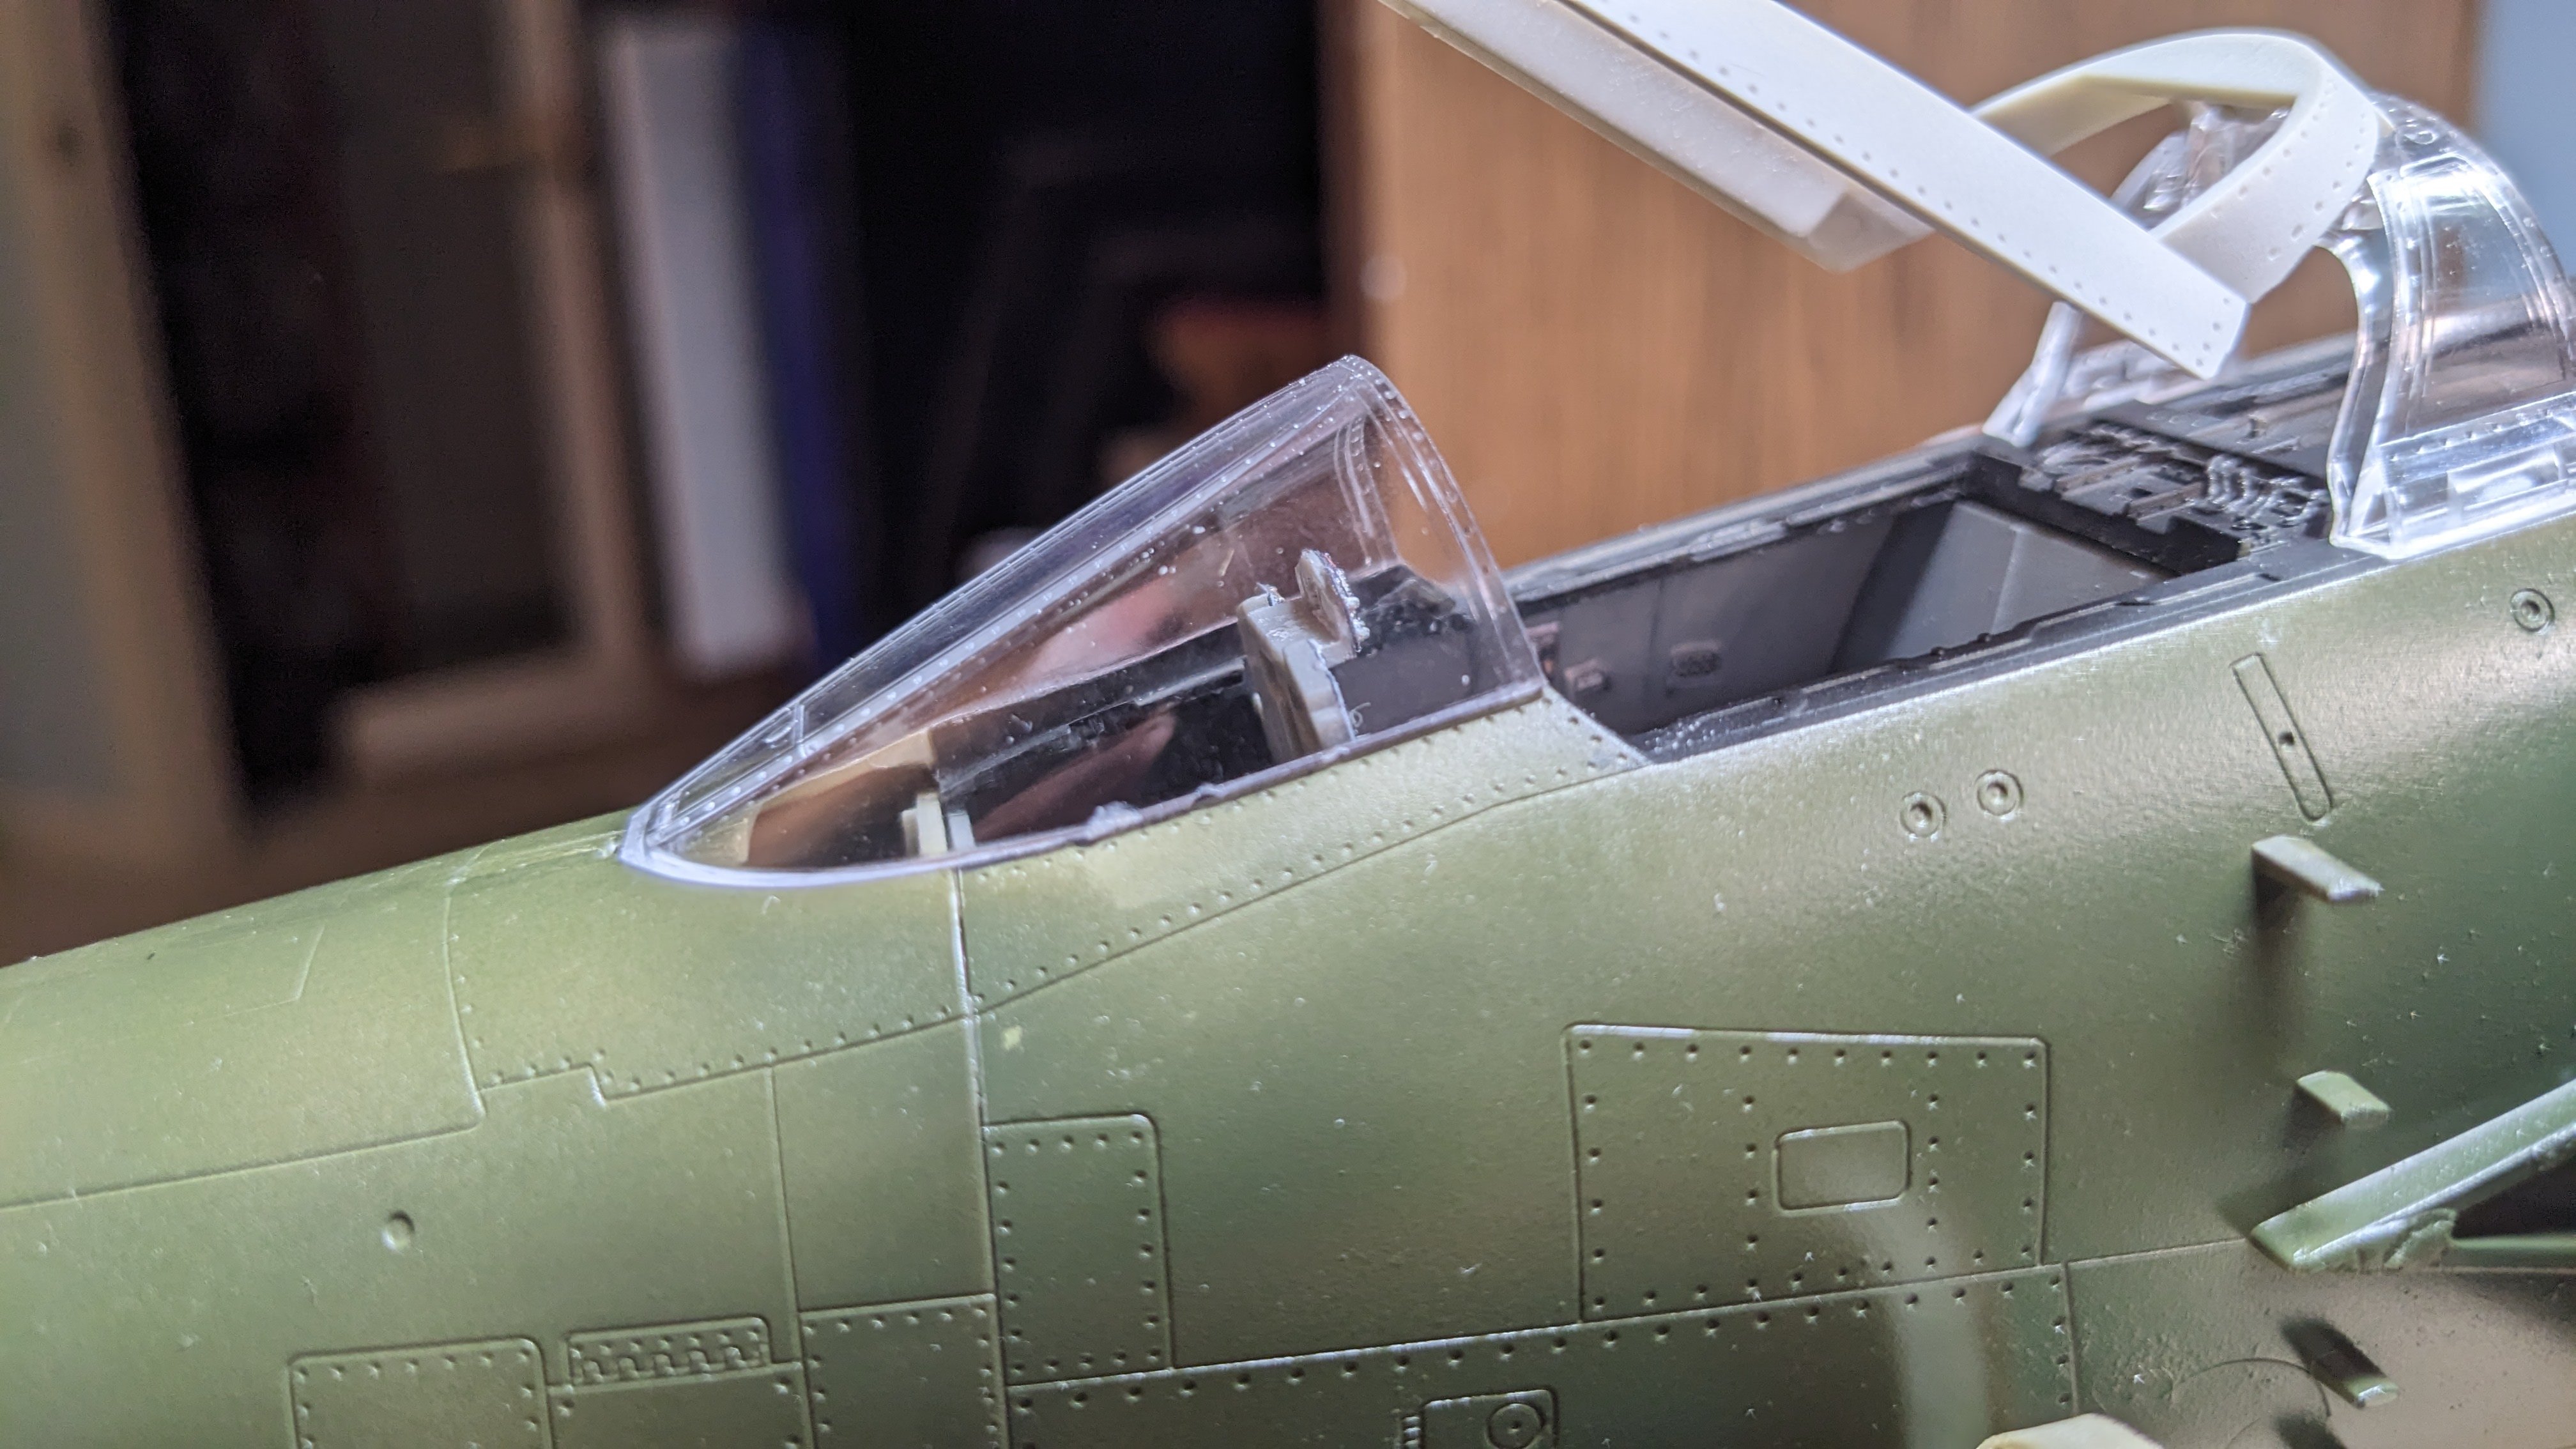
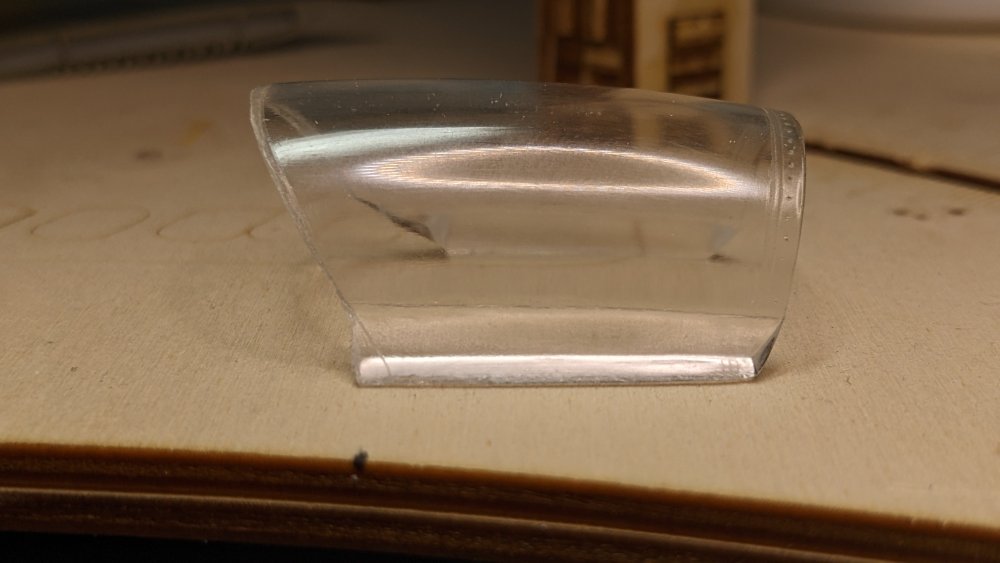
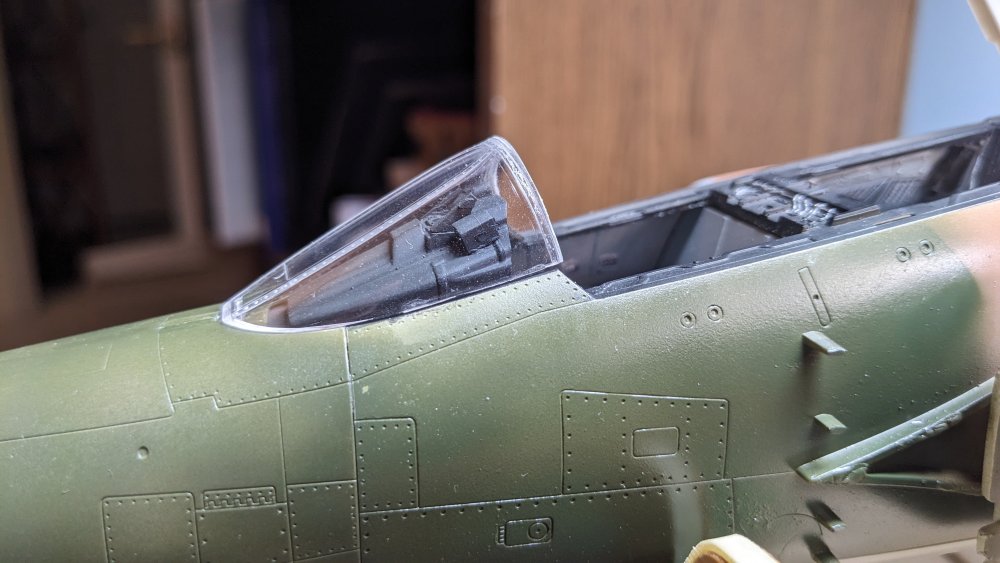
Following on from Peter's problems with his 3D printed seat, my attempts to separate the clear resin canopy pieces from their pour blocks was 95% successful. Yeah, not 100% successful. Ugh I got nearly all the way around, using my small razor saw when at the very last connection, a small part of the canopy frame snapped off and I have no clue where it went. and what it SHOULD look like on the other side: SOO CLOSE!!!! ARRGG. The windscreen also seems a bit out of whack as well, running just a bit long (the windscreen rear needs a little bit more trimming). Will have to see about may be adjusting the HUD which may sit a bit proud, for both windscreens. Compared to the kit piece: I may end up just using the kit pieces. Here they are test fitted: Lots still to do.


-
Wow, the stonework is awesome as is the painting/washes - beautiful work!
-
I still have a bunch of the Model Master Acryl paints, thinner and cleaner. They were terrific!
-
Peter, That issue with wings and flaps is a strange one. Like you said, they are not posable, so why not just mold them in? And we really don't expect to have major fitment issues with kits these days. Not everyone will be at Tamiya-level of precisions, but decent fit should be expected from a major brand. Good luck!
-
Thanks Peter! I'm making slow but methodical progress on the stencils. OMG why am I doing this to myself!!! Taking it stages so doing a little bit at a time.
-
Carl, Thanks for pointing that out. I originally had missed that so am planning on going back and repainting that and a couple of other places. I have to do some alterations to the side pieces to allow the burner cans and tubes to slide in anyway. There is a tab on the inside I need to remove from those pieces.
-
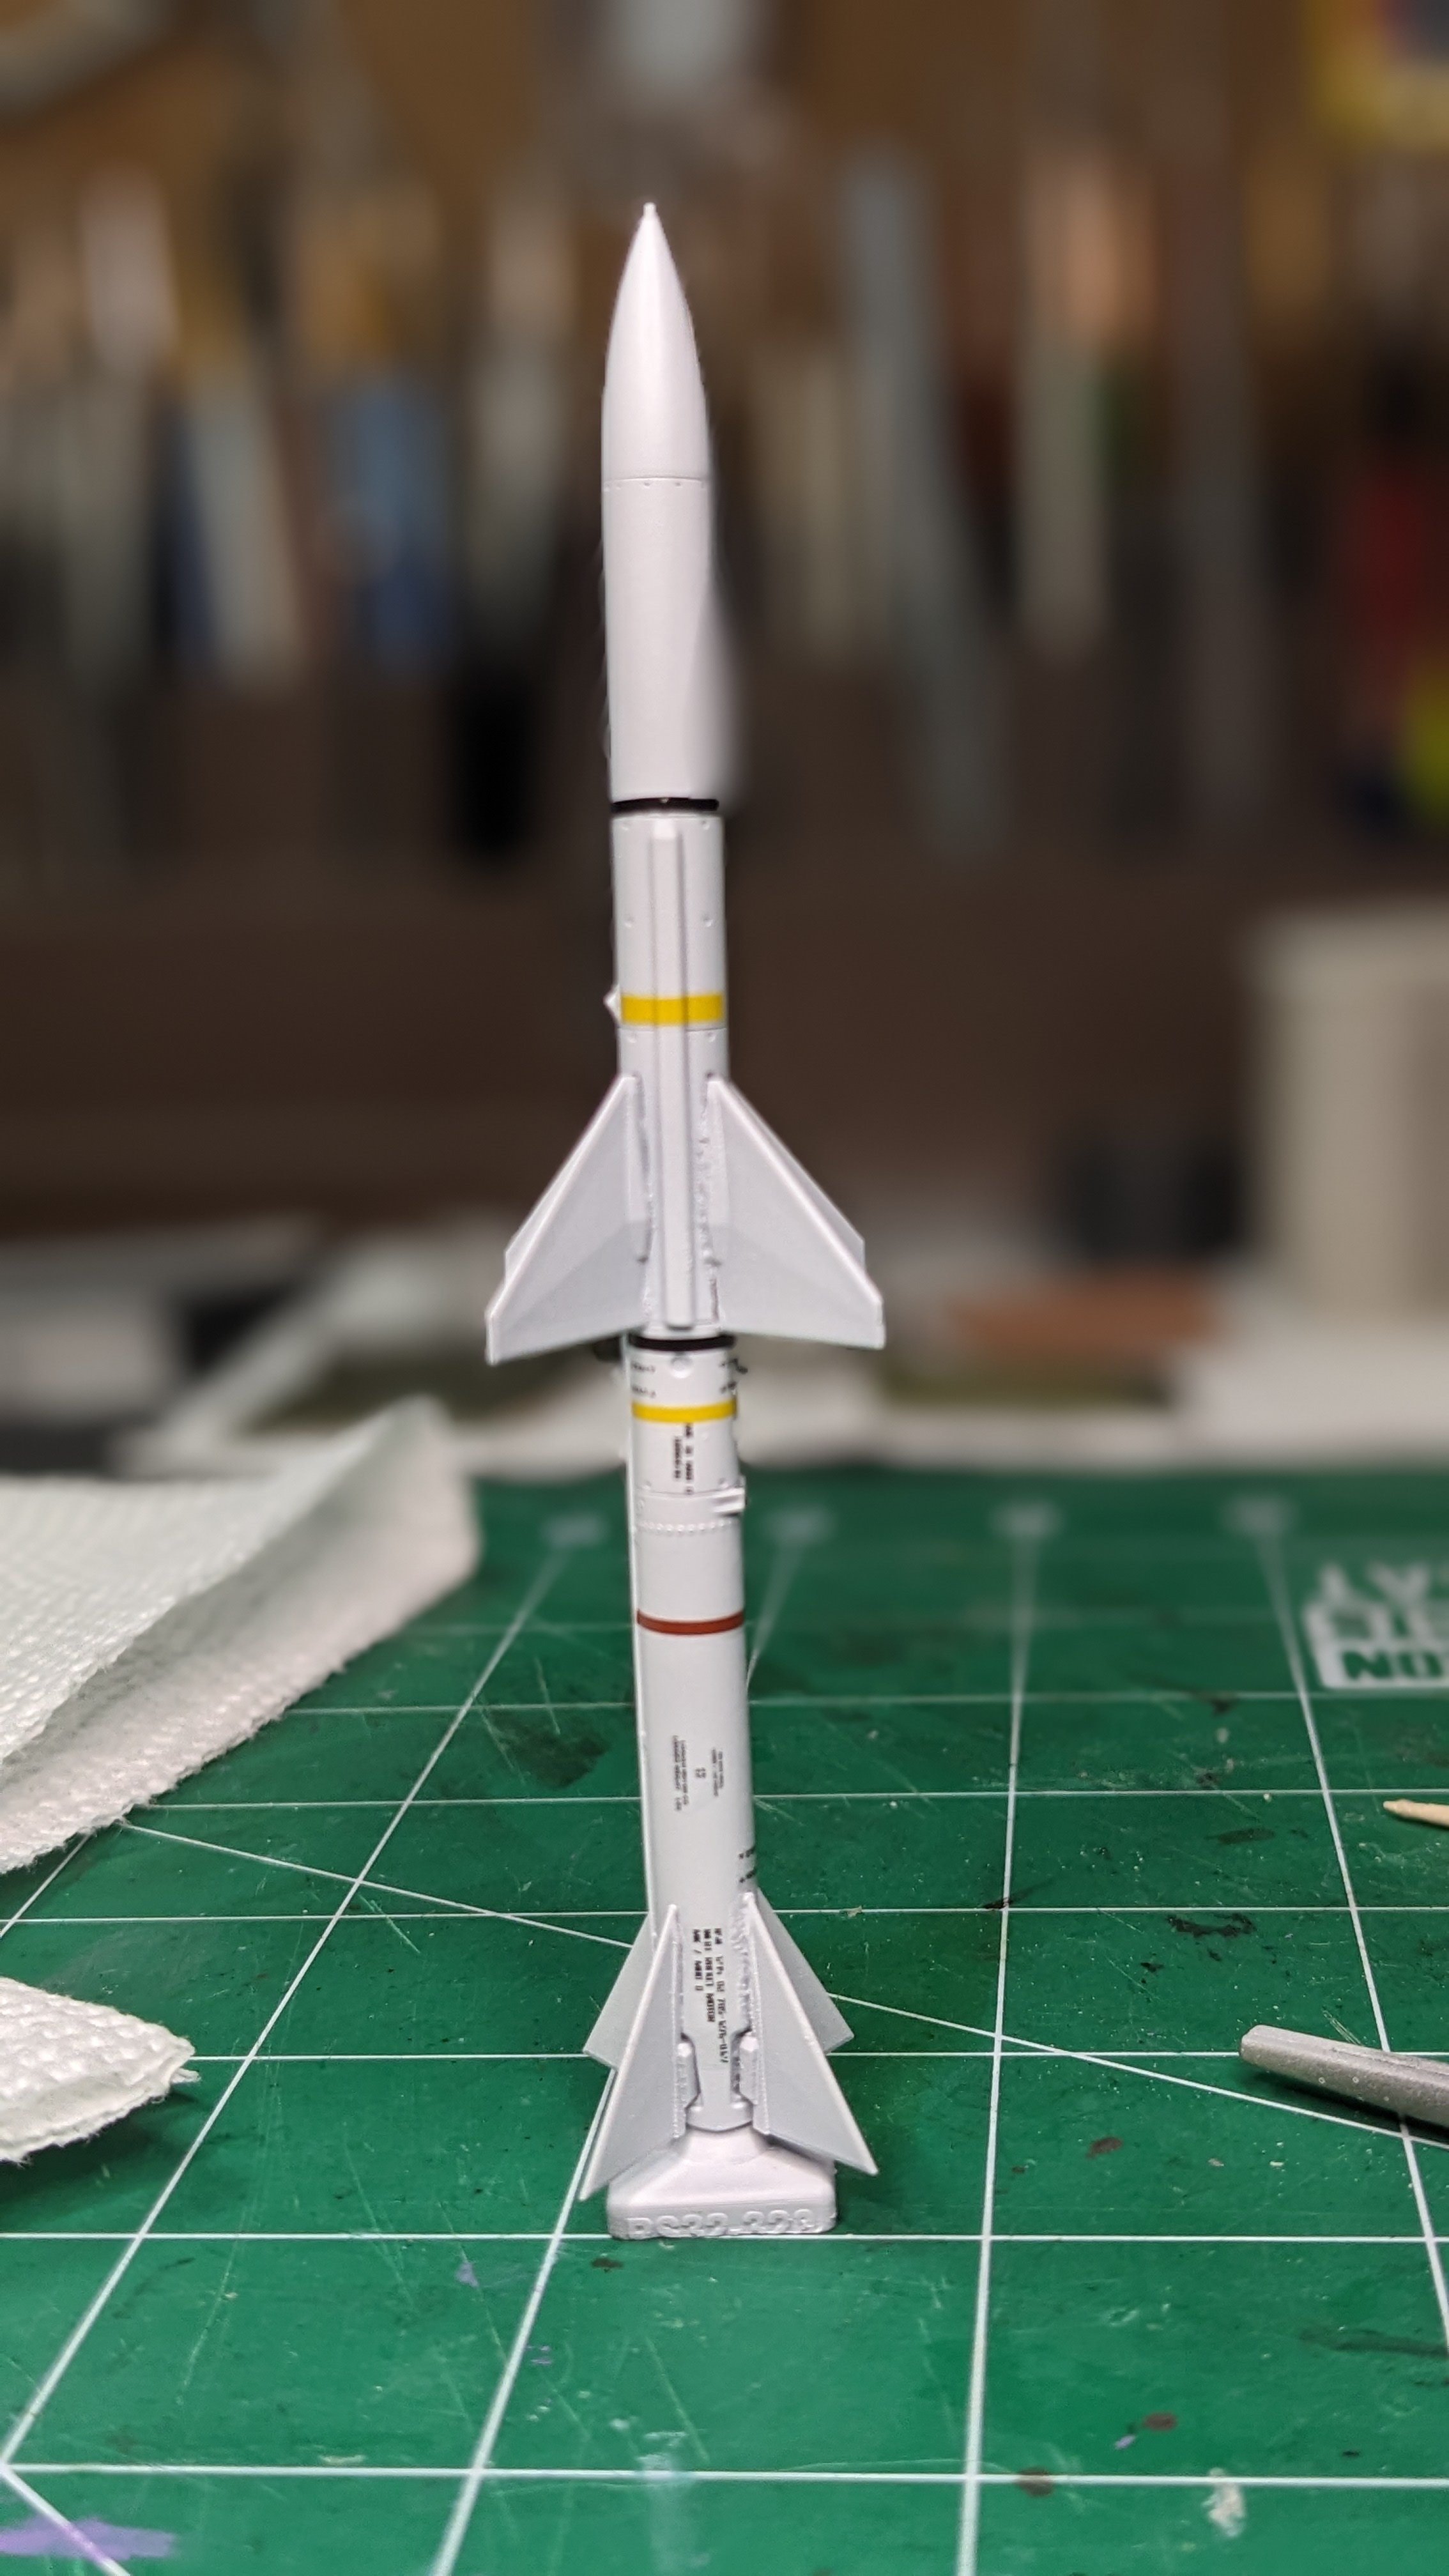
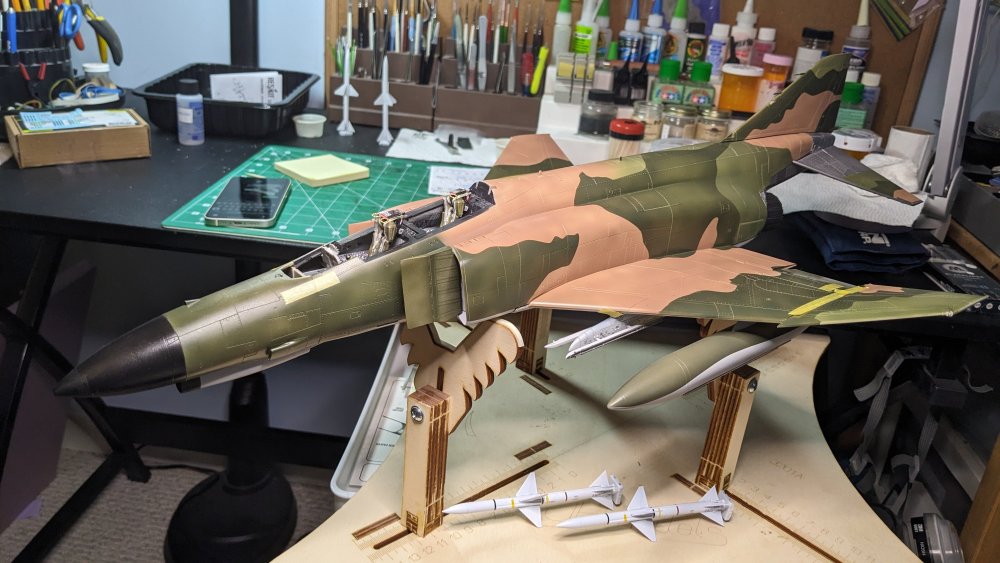
Thank you, Martin. Much appreciated. Started on the stencils for the wings and put the Sparrows in place for the moment.
-
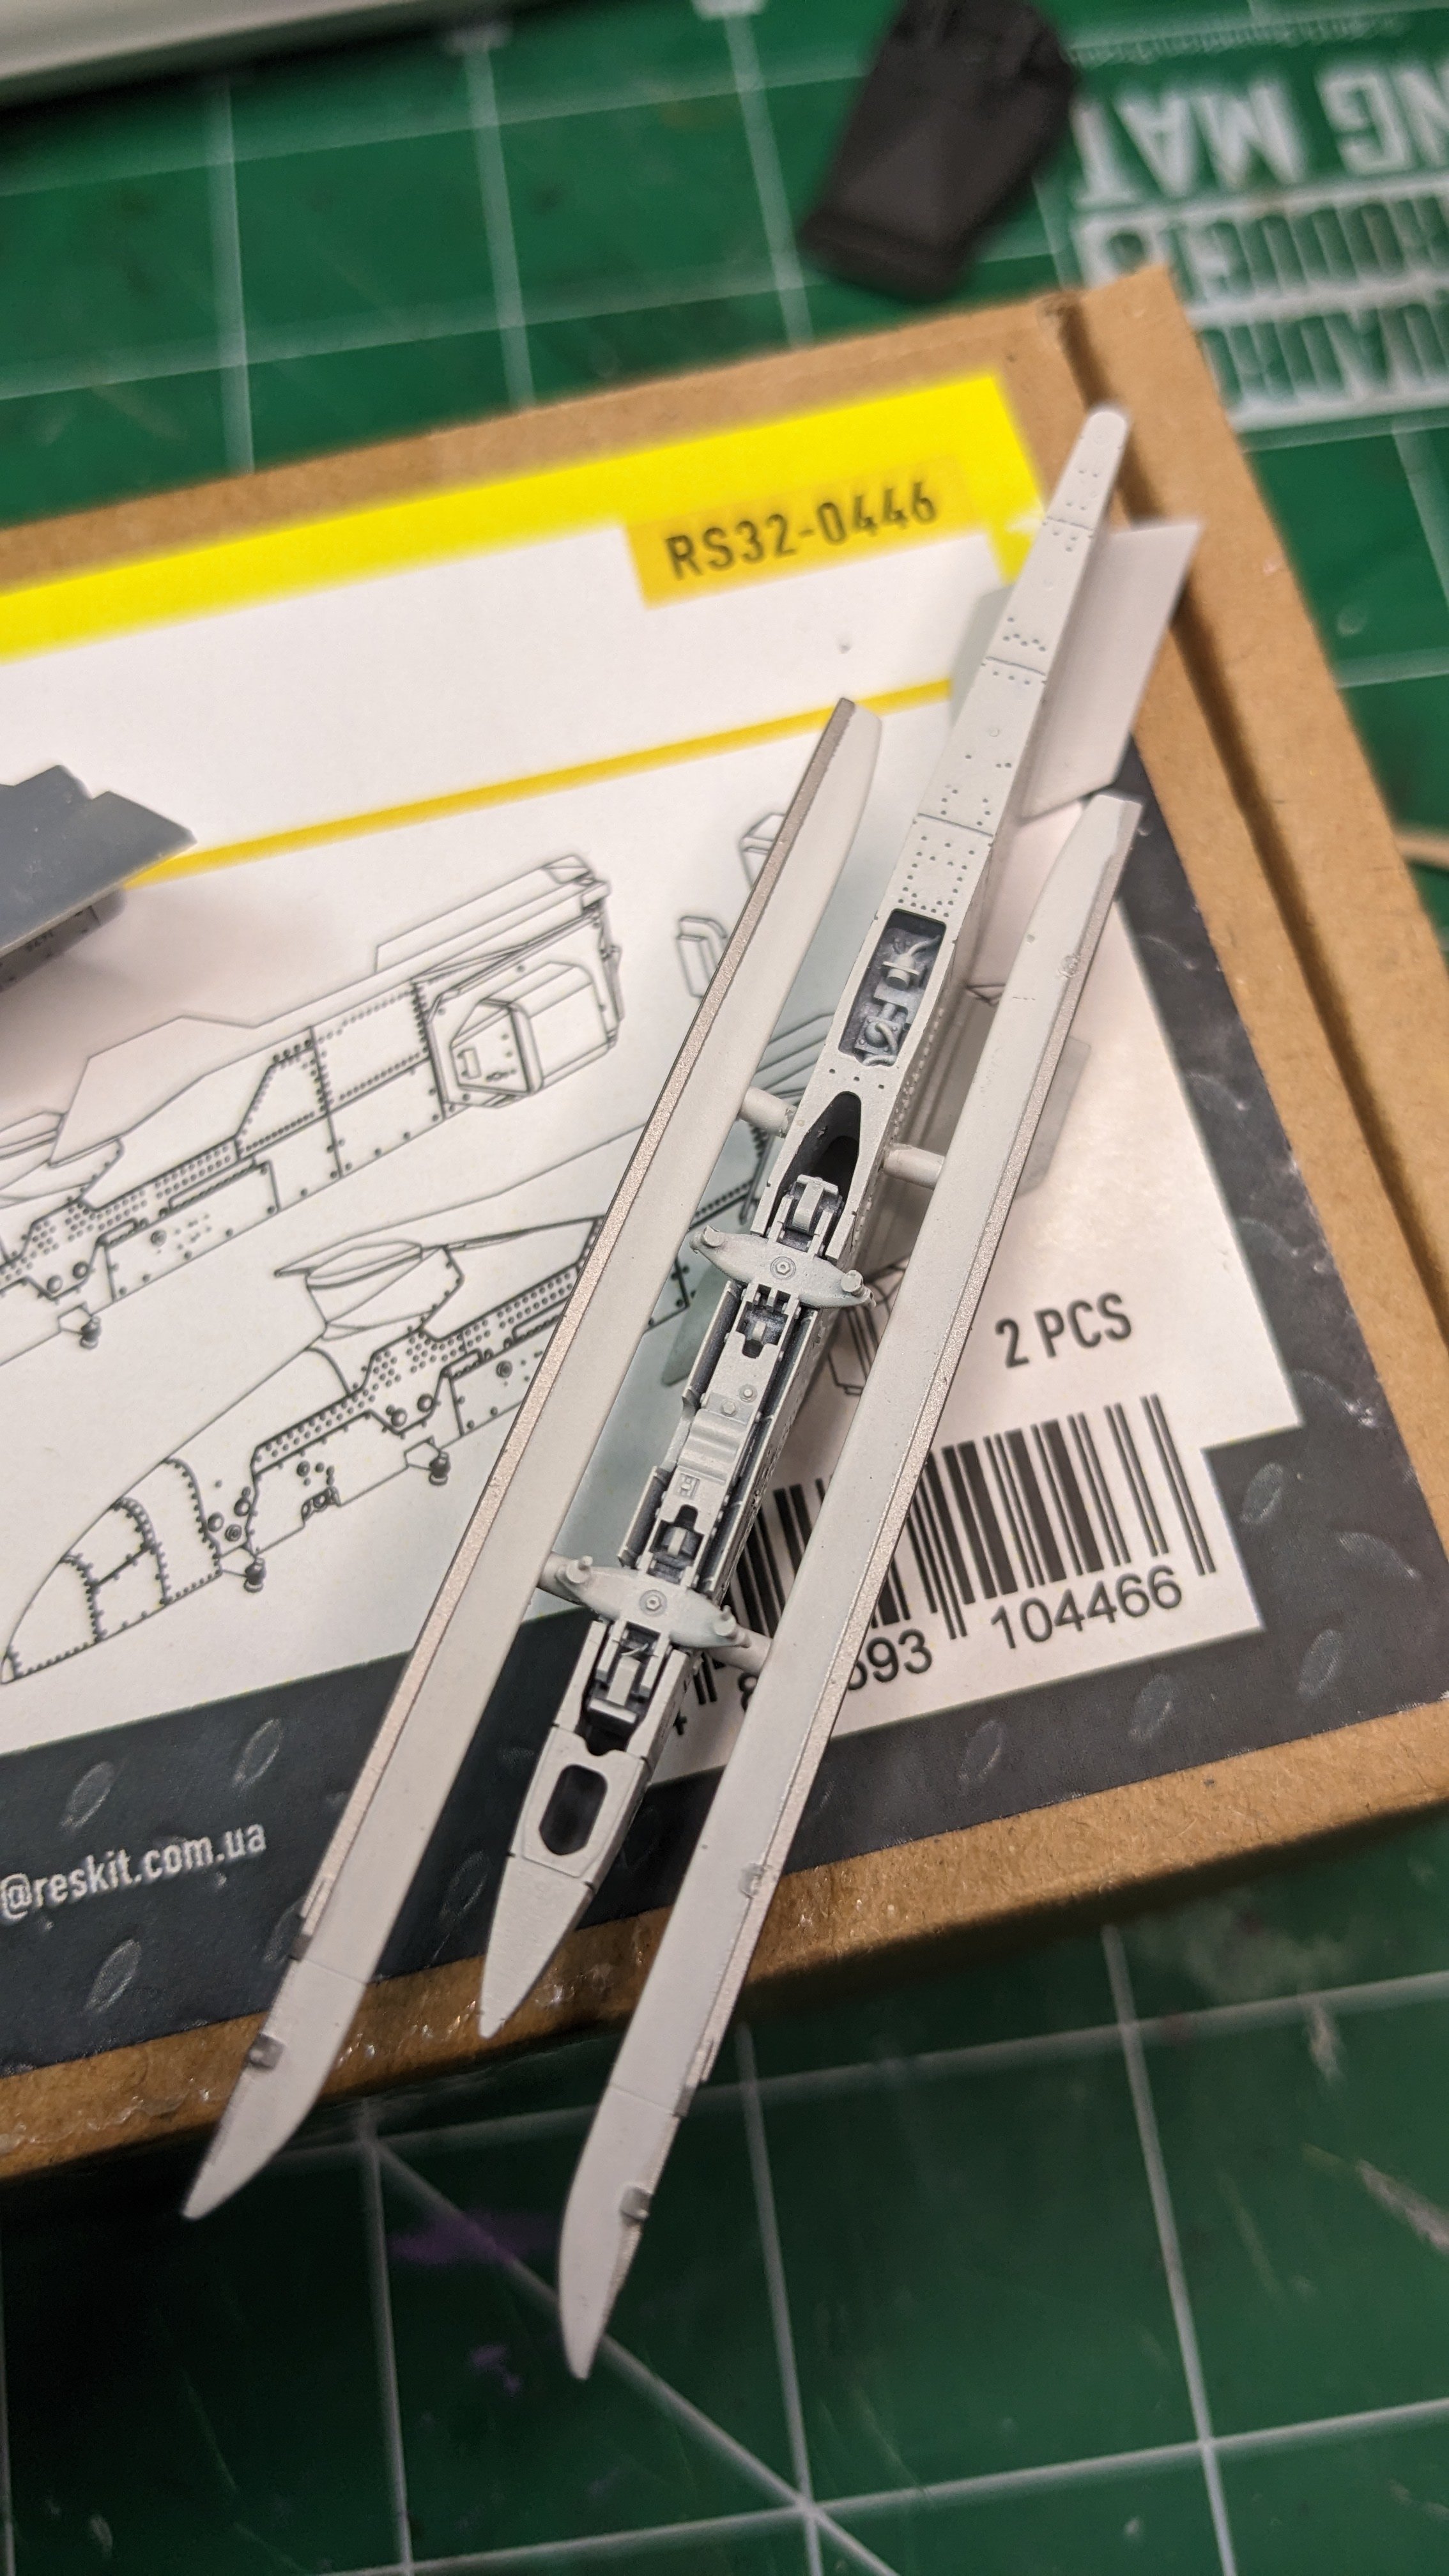
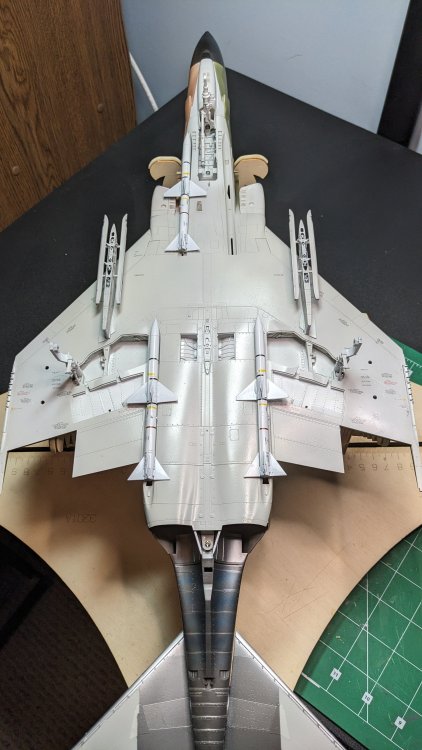
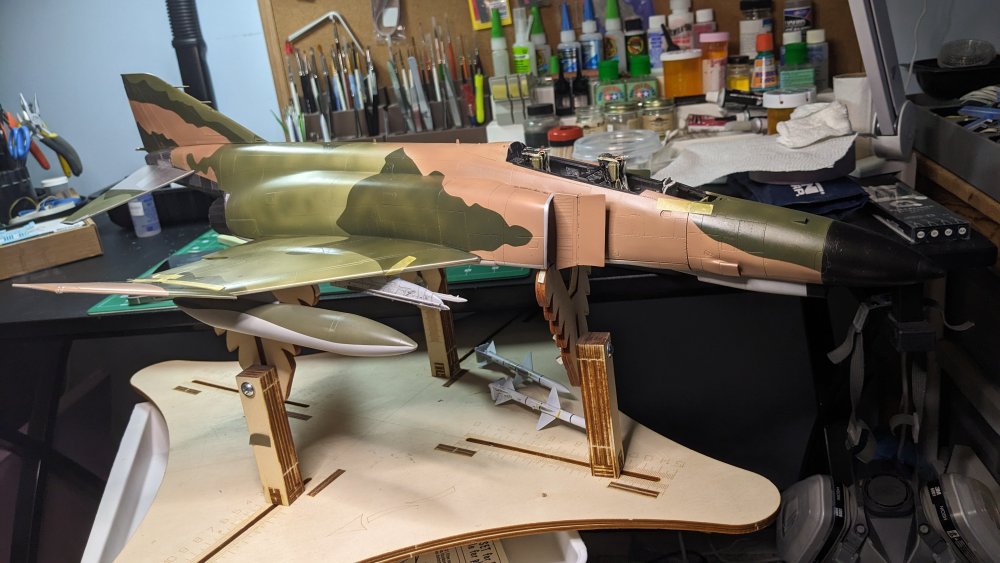
Usually this time of the year I'm outside doing things, but 95 yesterday, 99 today with an expected heat index of 110 so not going a lot outside. Instead - making progress. Attached the Reskit pylons to the main wings, which are now attached to the fuselage. Used toothpicks to position the pylons in the original kit holes, and a bit of CA Gel for the attachment. Thanks again to Carl for the idea on how to sand the pylons to match to contour of the wing.

-
1:144 scale and it has 75 pieces???
-
Peter, thank you! Your work is always terrific - I just try and keep up. I also have a ZM F-4C in 1/48 scale in the stash so may watch to see when you start your build. 🙂 The Tamiya bird is a big beast, however. WOW. The F-4 is heavier than I would have thought and that is without the resin missiles. I imagine it is those huge resin intakes and exhaust. Can't image if I had done the resin radar equipment and cockpit sets as well. The kit came with metal landing gear, and I opted to use resin tires, so it won't have the problem an old 1/32 Mustang I built has with the vinyl tires - they are flat-spotting. Once I finish the last of the Sparrow missiles, I'm going to focus on the canopy and landing gear so the plane can be mostly complete. The canopy is going to take some work. I'm sure...
-
That is a really nice start to the cockpit. I did pick up the Gundam markers but have not used them yet.. I do like the Eagle... one day!
-
Peter, Sorry to hear about the 3D printed seat, what happened? I'm finding the 3D stuff easy to sand, but otherwise kind of brittle. Can't torque the pieces at all.
-
Post it Carl!!! Martin, definitely can't be worse than me bothering Carl for the past two months!! Thanks for your comments. I appreciate it!
-
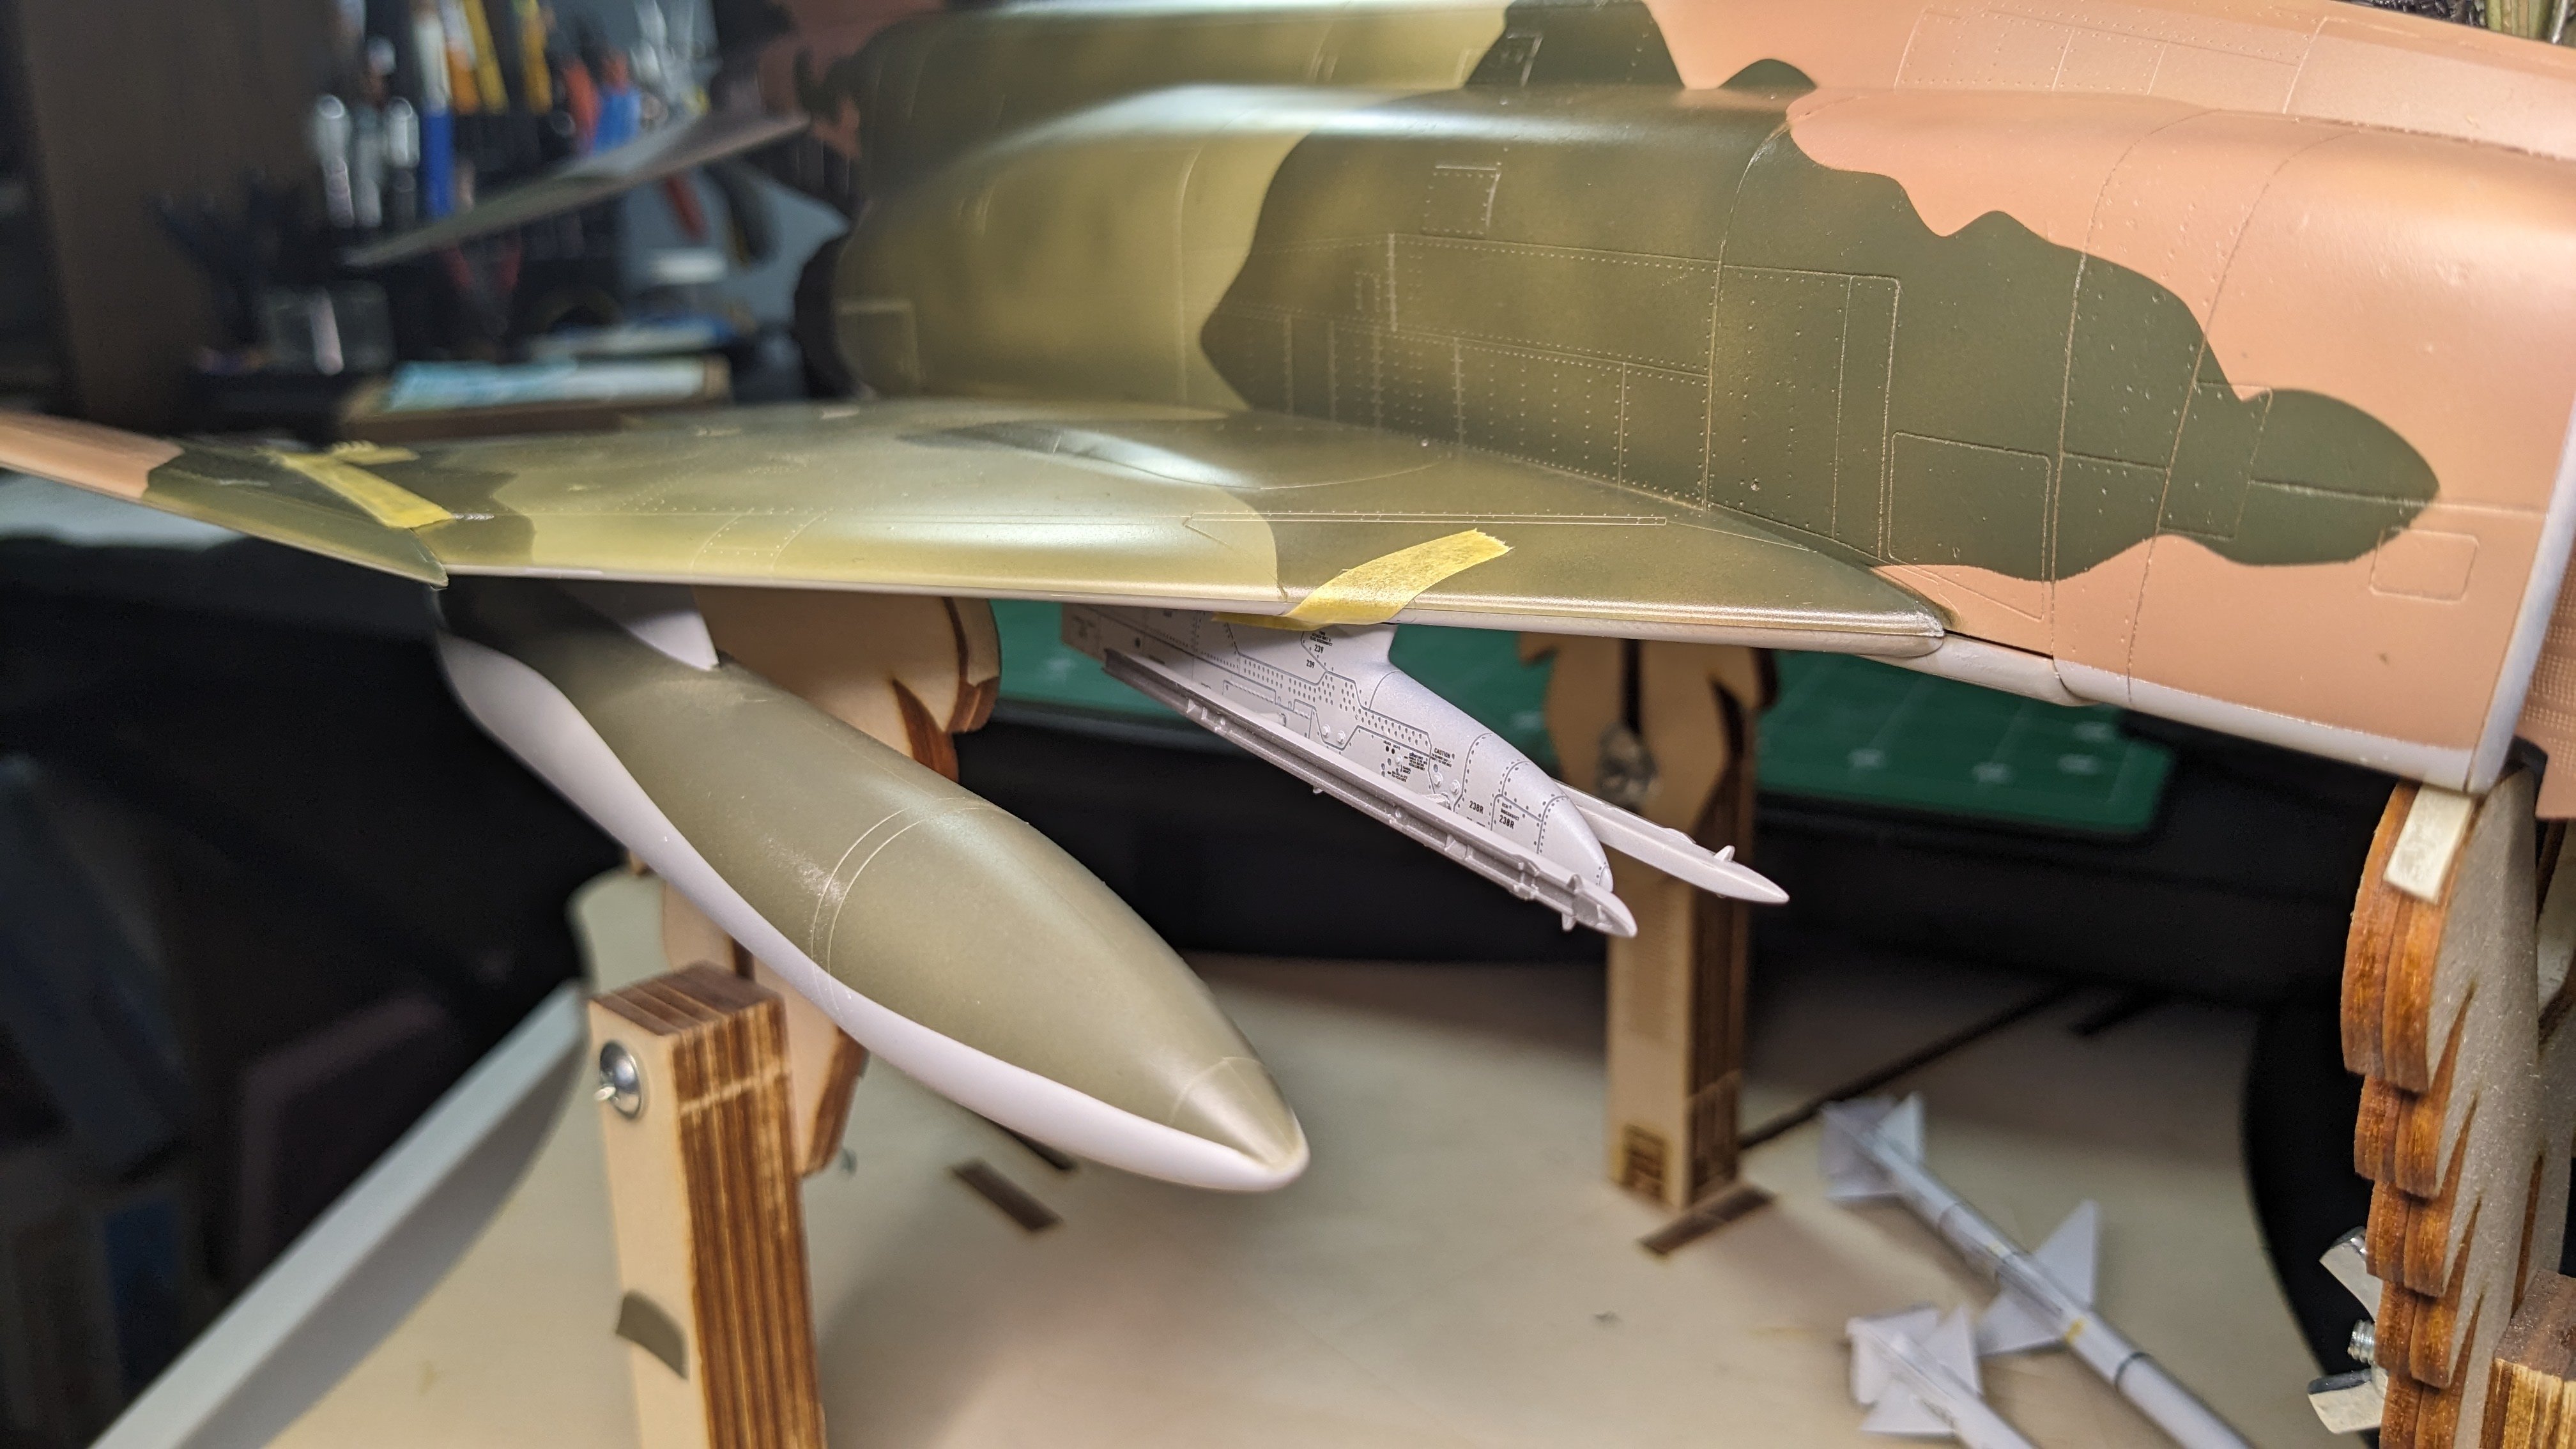
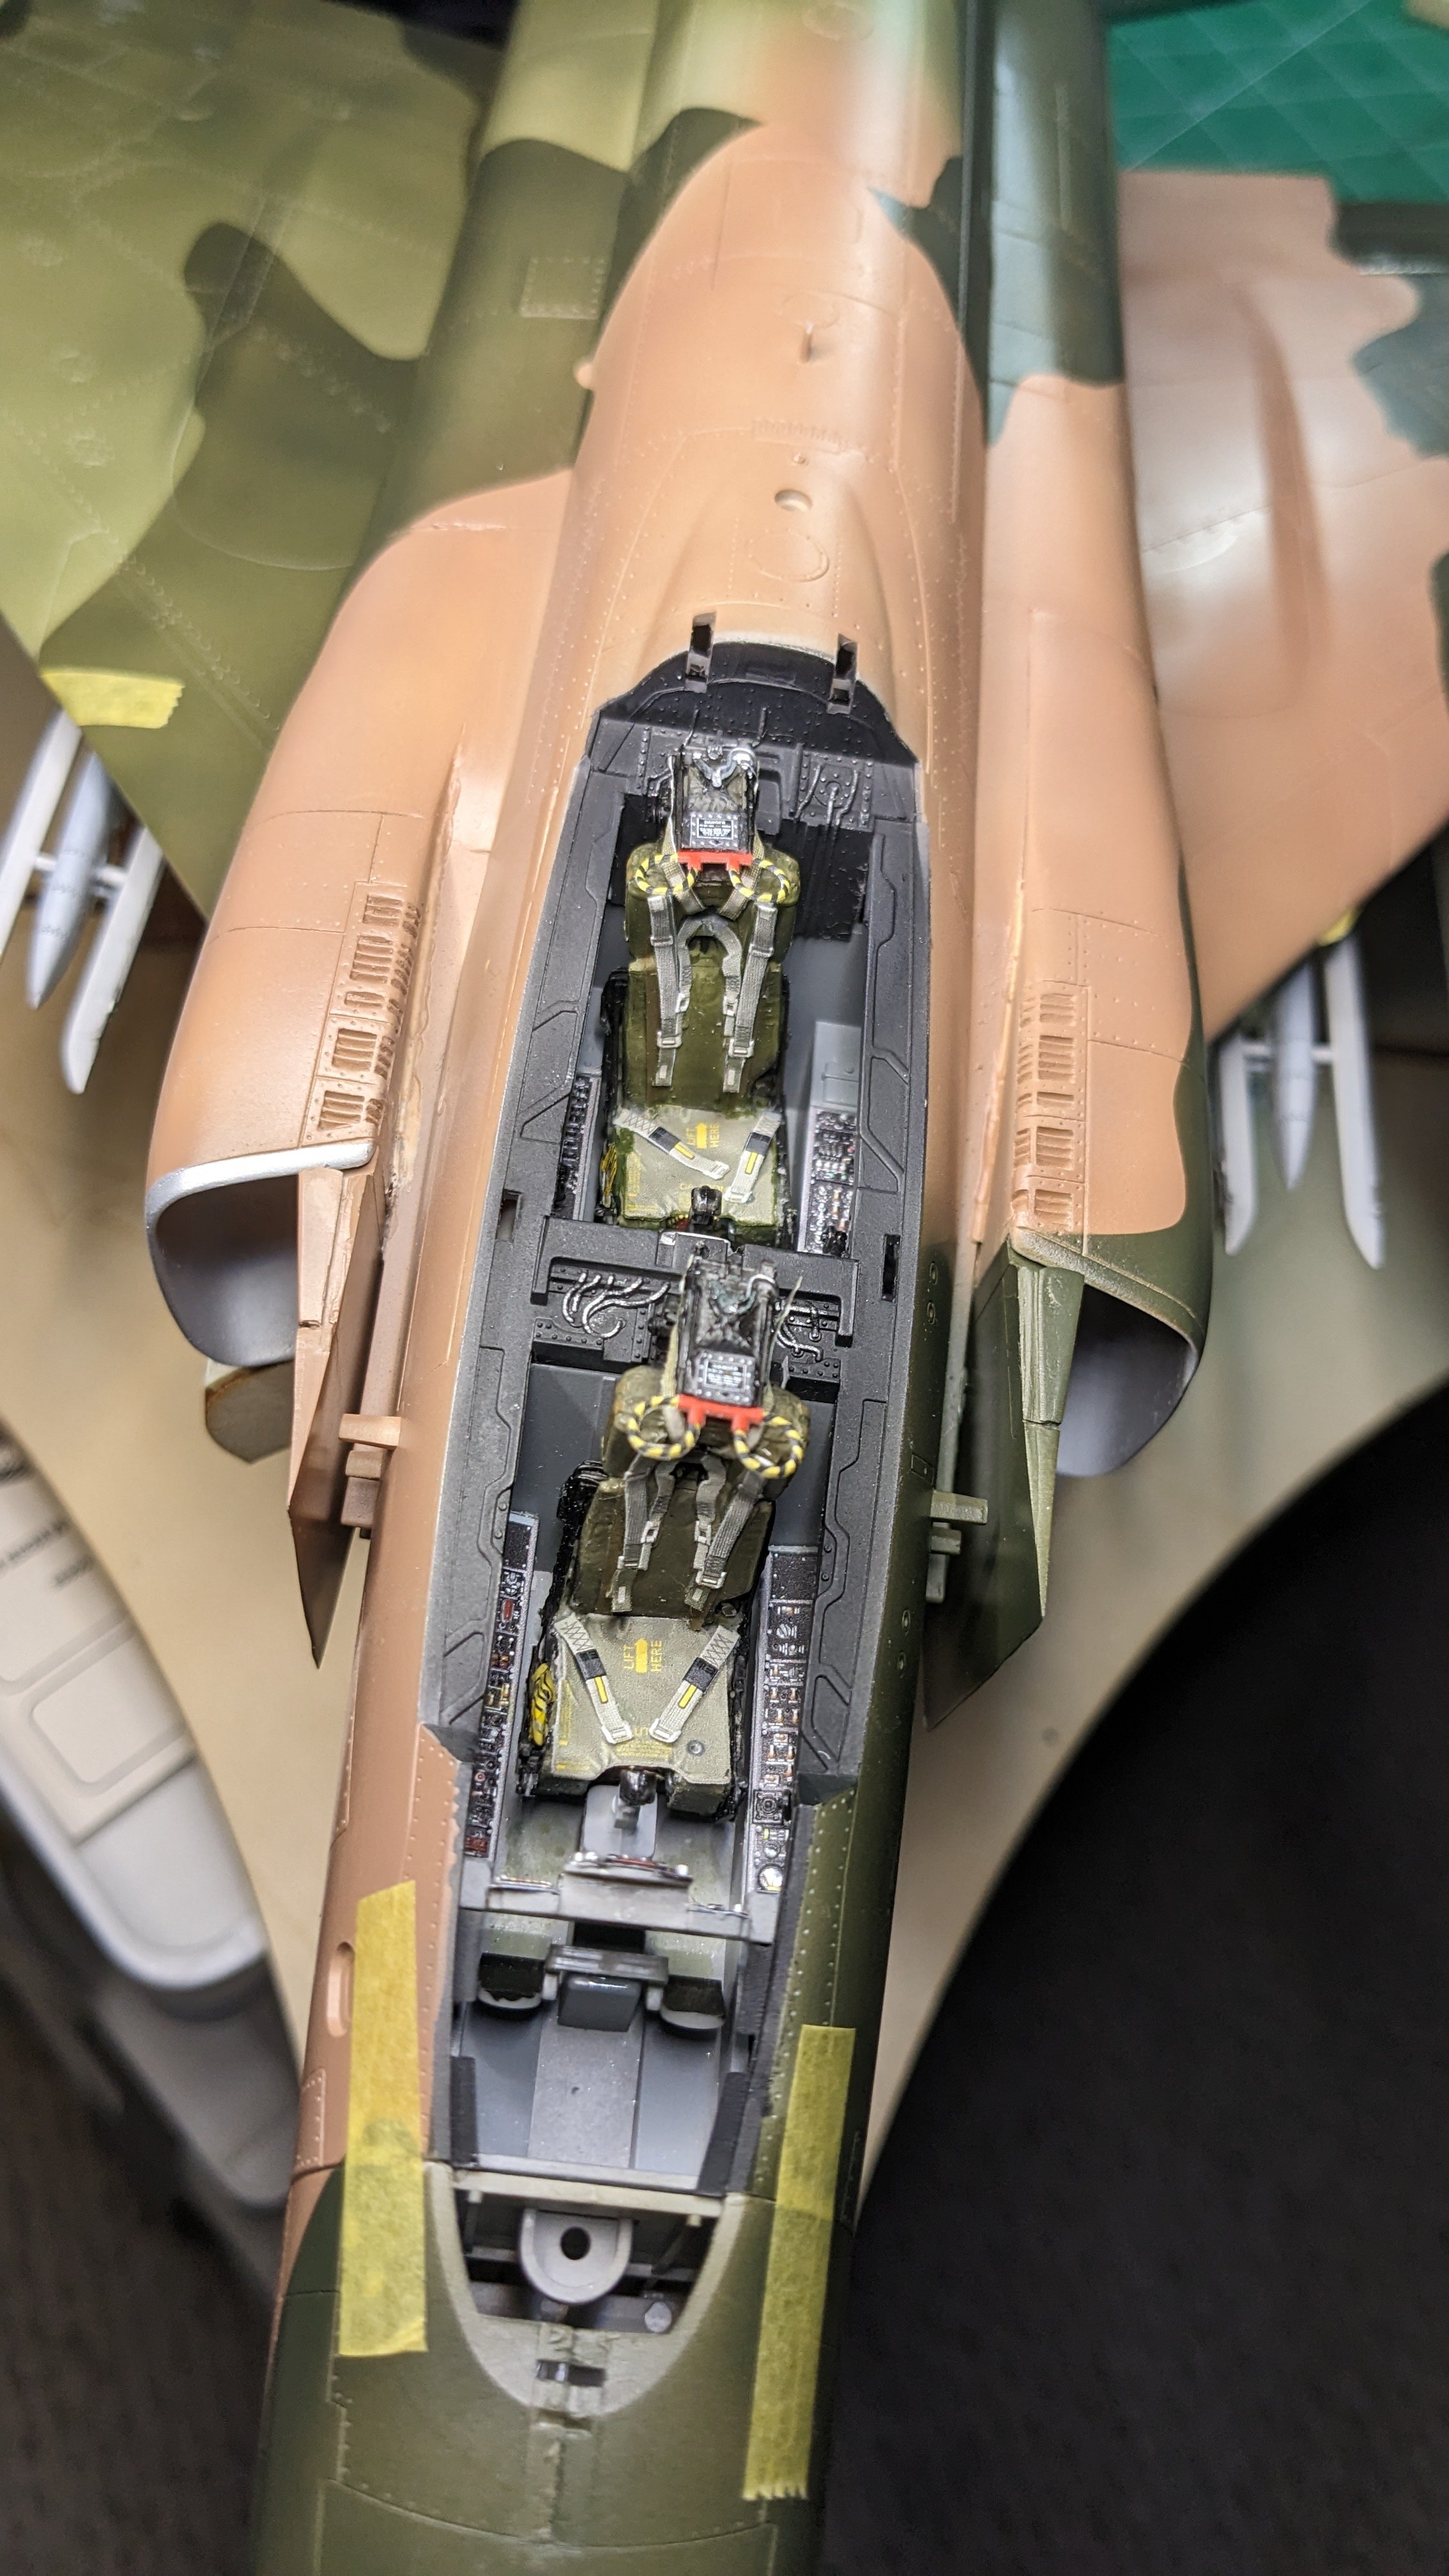
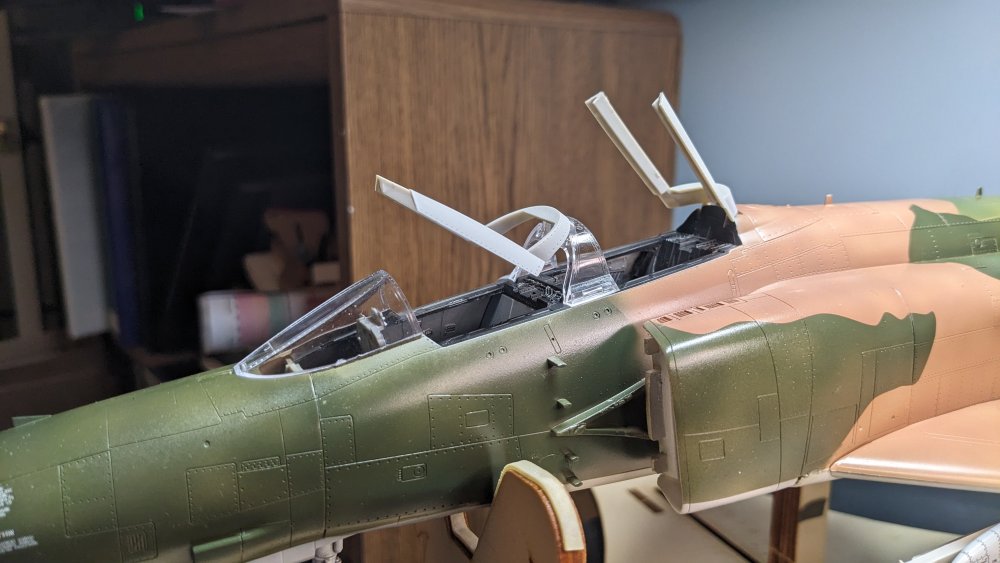
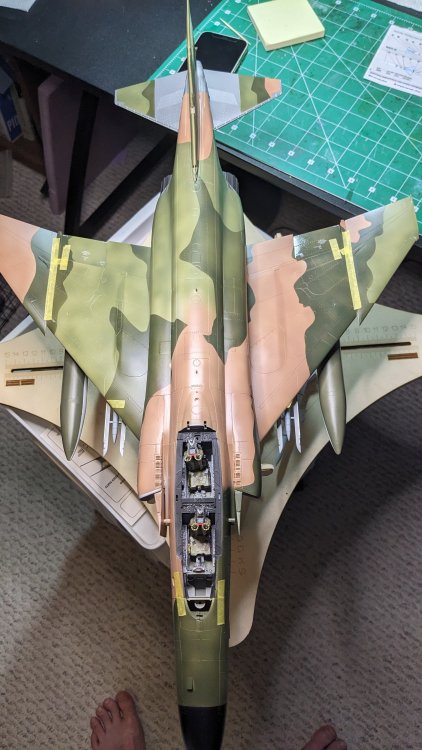
Test Fit #2. Wanted to see how everything was working together, and to show myself some actual progress towards a completed plane. This this is so large and has so many pieces that even right now I can disassemble the plane into 21 pieces. And four screws. The fit looks to be pretty good so that is helpful. Check me on that later... Nothing is glued on, even the seats are just placed at the moment. Nice to see it coming together and where I missed a spot with the masks on the top of the fuselage!. This will be an easy fix... The outer wing tanks are pressed into place while the pylons are taped on. Still doubtful about making the Jul 3 deadline, but will keep on it till I'm done none the less. The clear resin canopy pieces are a real pain to separate from their pour blocks. I'm sure they will look AMAZING once done, however... Have TWO sparrows done but have not started on the sidewinders or the ECM yet so still a lot to do on the build-out. Landing gear is basically ready but have to work on the resin tires.


-
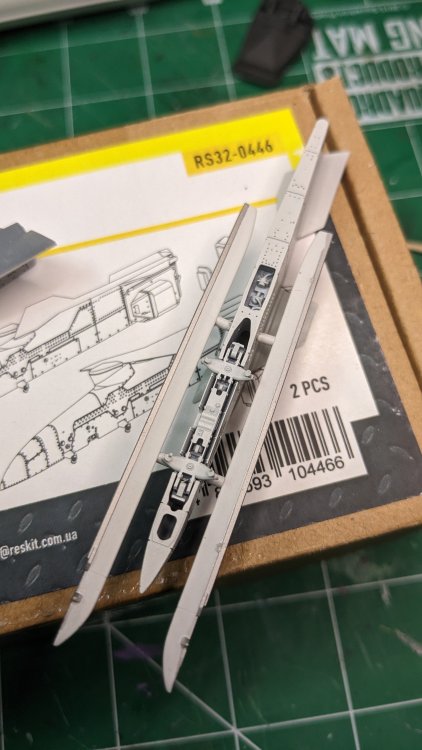
Due to a highly likely possibility of me screwing one up, I was planning on doing all four - just in case!! Am already seeing where I could have done a better job attaching the fins so will pick out the best three. Also, figured out an easier way to attach the pylons. Taped them to the wing in the right spot, used a fine black liner pen to circle down through the original wing mounting holes and draw a circle on the top of the pylon. Helps that I have not put the top and bottom wings together yet. Drilled that out. Amazingly, a toothpick is JUST about the right size and that gives me a tiny bit of wiggle room to make sure everything is straight. Easier than cutting the mounting lugs off the kit pylons. I had to order some more MRP Clear but used some Alclad clear for the bottom. Not completely pleased with the result. When it full dries will see how it looks before doing those stencils.
-
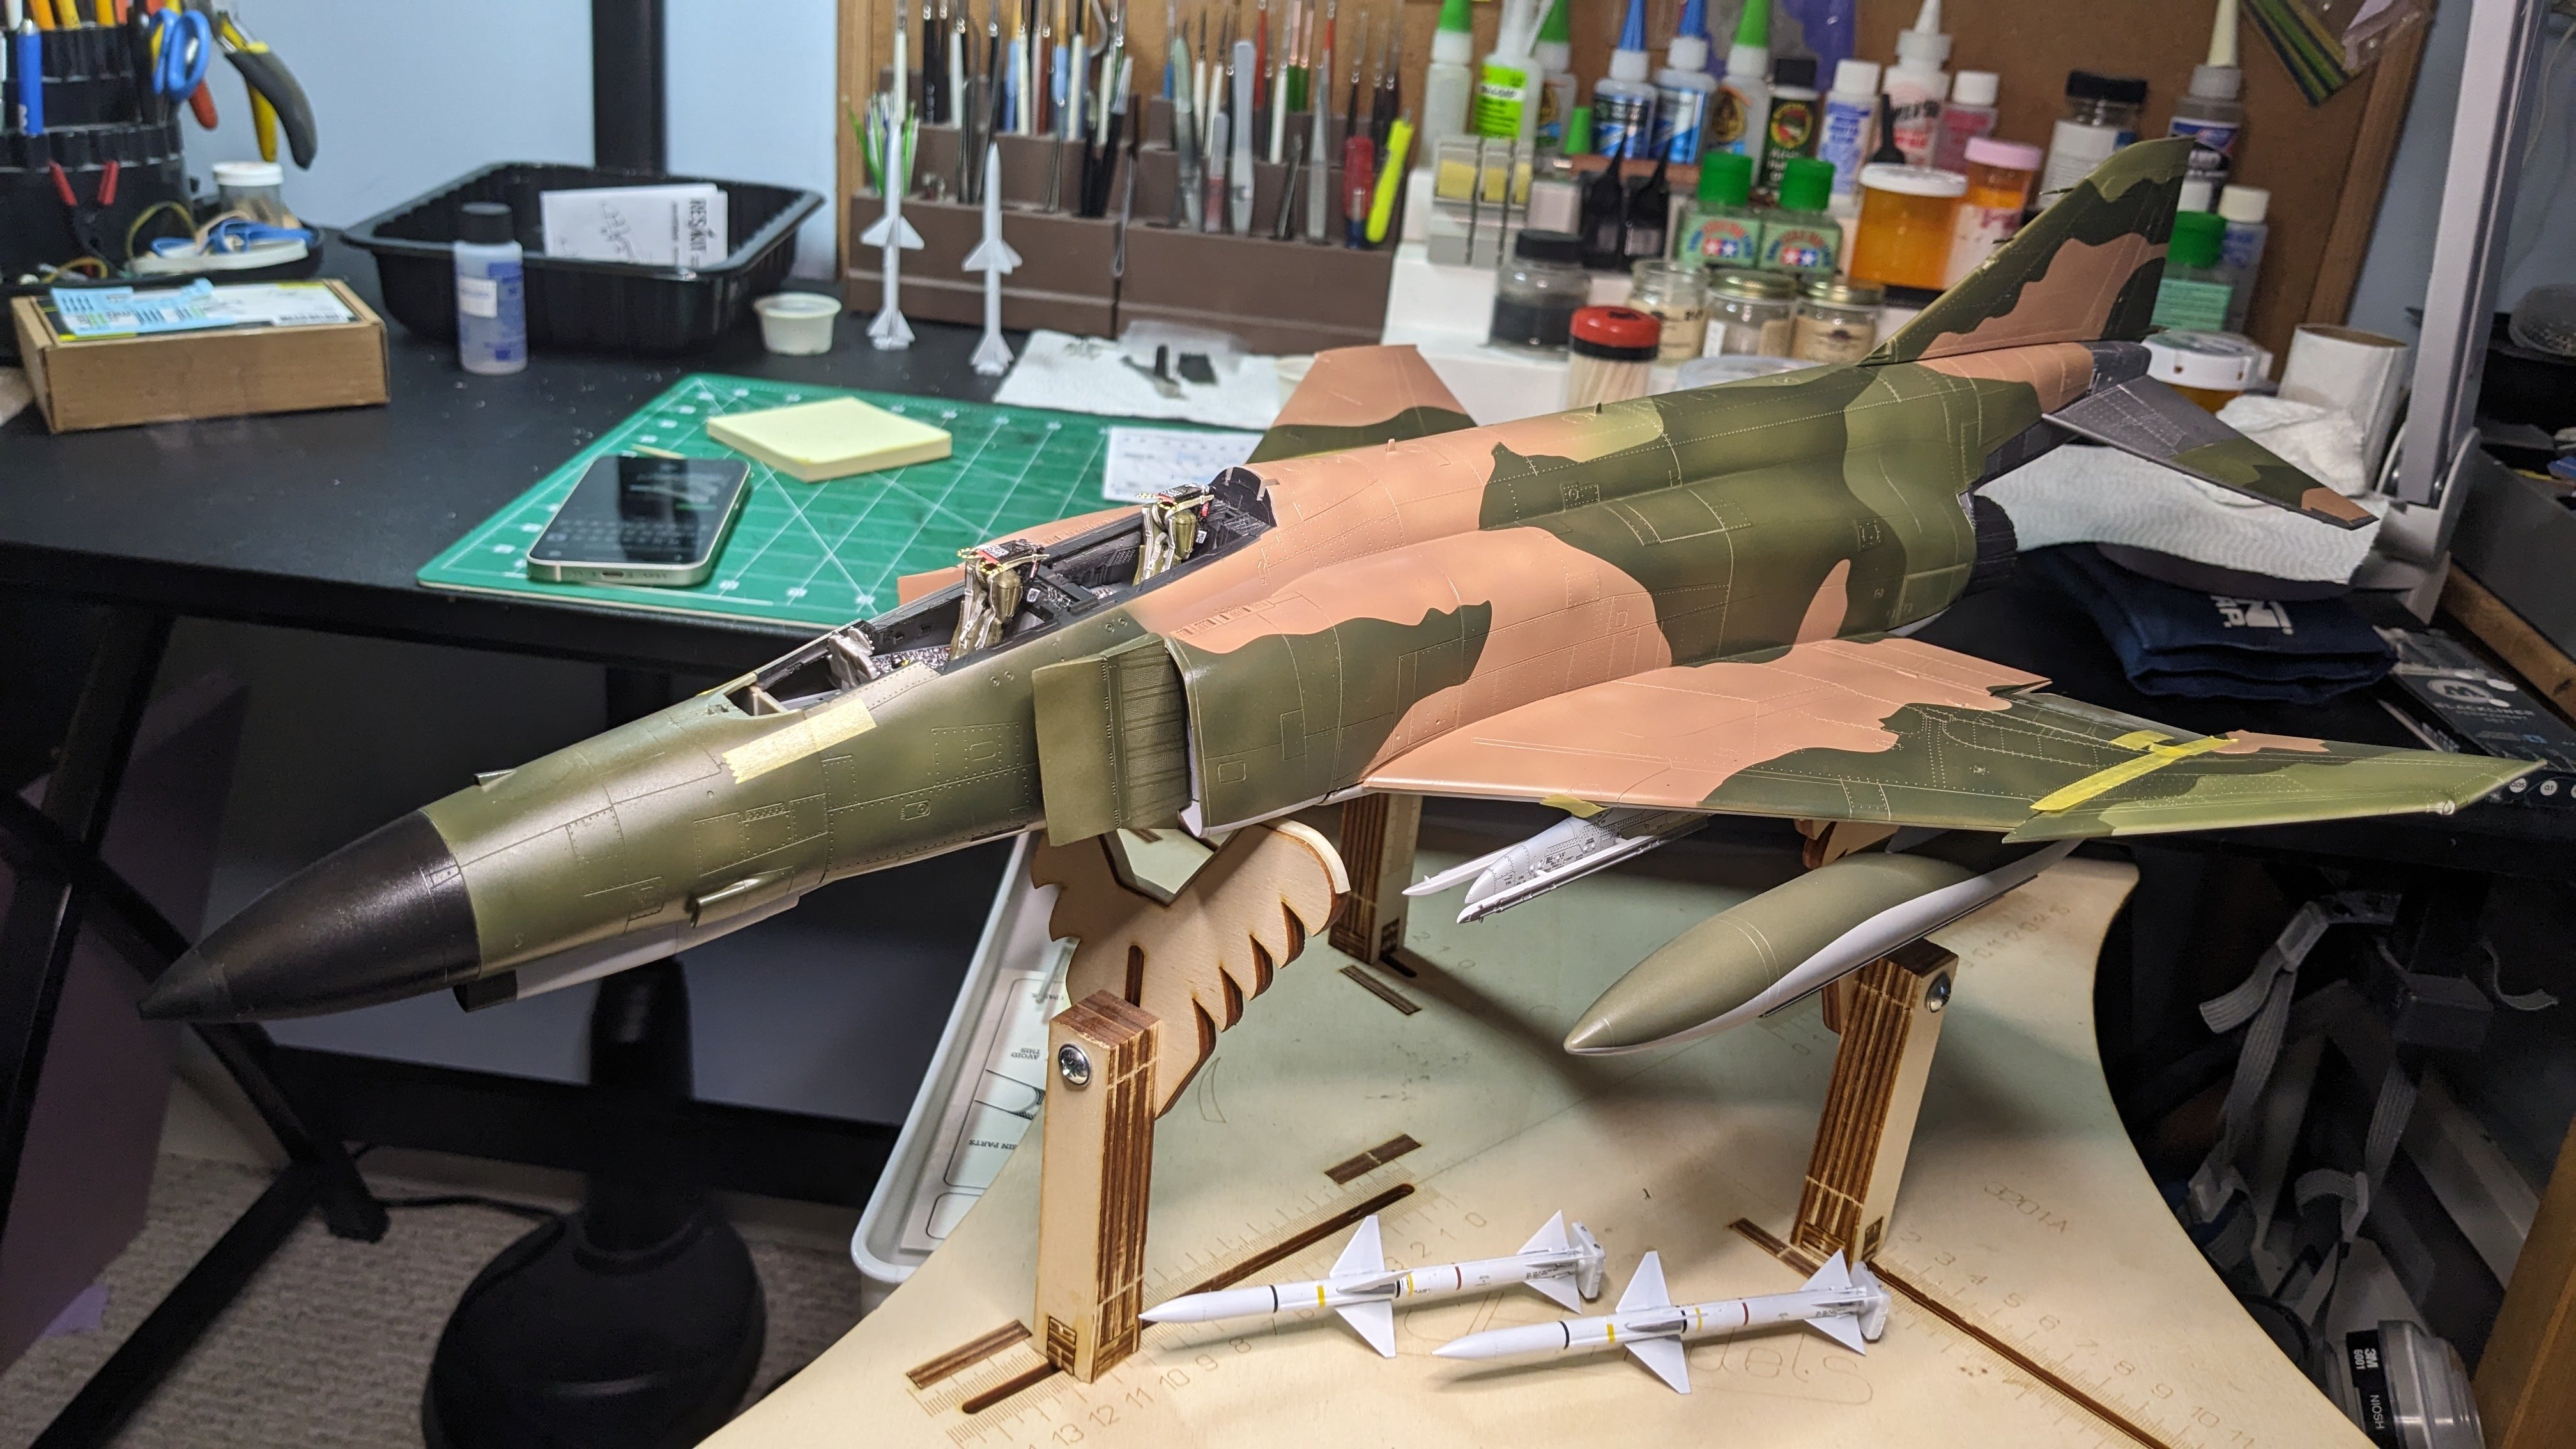
Thanks Martin and Rob. Learning a lot about jets and stencils - wow. It's a LOT of work! Rob - I think the main issue with the Top Notch masks is they do not differentiate between the various Phantom II models and I didn't catch the difference for quite a while. I ran into a similar problem with EagleCal decals for the Tamiya 1/32 Mustang. They had scaled up their 1/48 decals for Big Beautiful Doll - the nose checkers - however Tamiya changed the contours of the nose for their 1/32 kit. Eagle sent me a second set after the first set didn't fit, and when that one didn't either (after sending LOTS of photographs and emails back and forth) they finally admitted they had not actually tried applying the decals to the 1/32 Tamiya plane and had only scaled up their 1/48 sheet. I ended up having to use Zotz nose checkers which were not 100% accurate for BBD, but it got the job done. I don't think anybody can really tell the difference. Kind of the same for my F-4. The Top Notch masks are not 100% accurate in size but I'm not that much of a stickler. It LOOKS very much like the camo pattern used in Vietnam and that's good enough for me. 😉 I'd have gone mad if I had tried to do the camo pattern out of tape... It was pretty easy to use the left-over mask material or just a bit of tape to extend the masks where needed. I'm rethinking how I'm going to attach the pylons to the wings, however. I was going to use screws, but if I do I think it will shatter the pylon. Thinking now of cutting the mounting lugs off of the kit pylons, drilling the Reskit pylons to accept the lugs and then gluing the entire mess to the wing. That is the plan for now! A big factor is how well I can get the pylon to contour to the wing... Stay tuned!
-
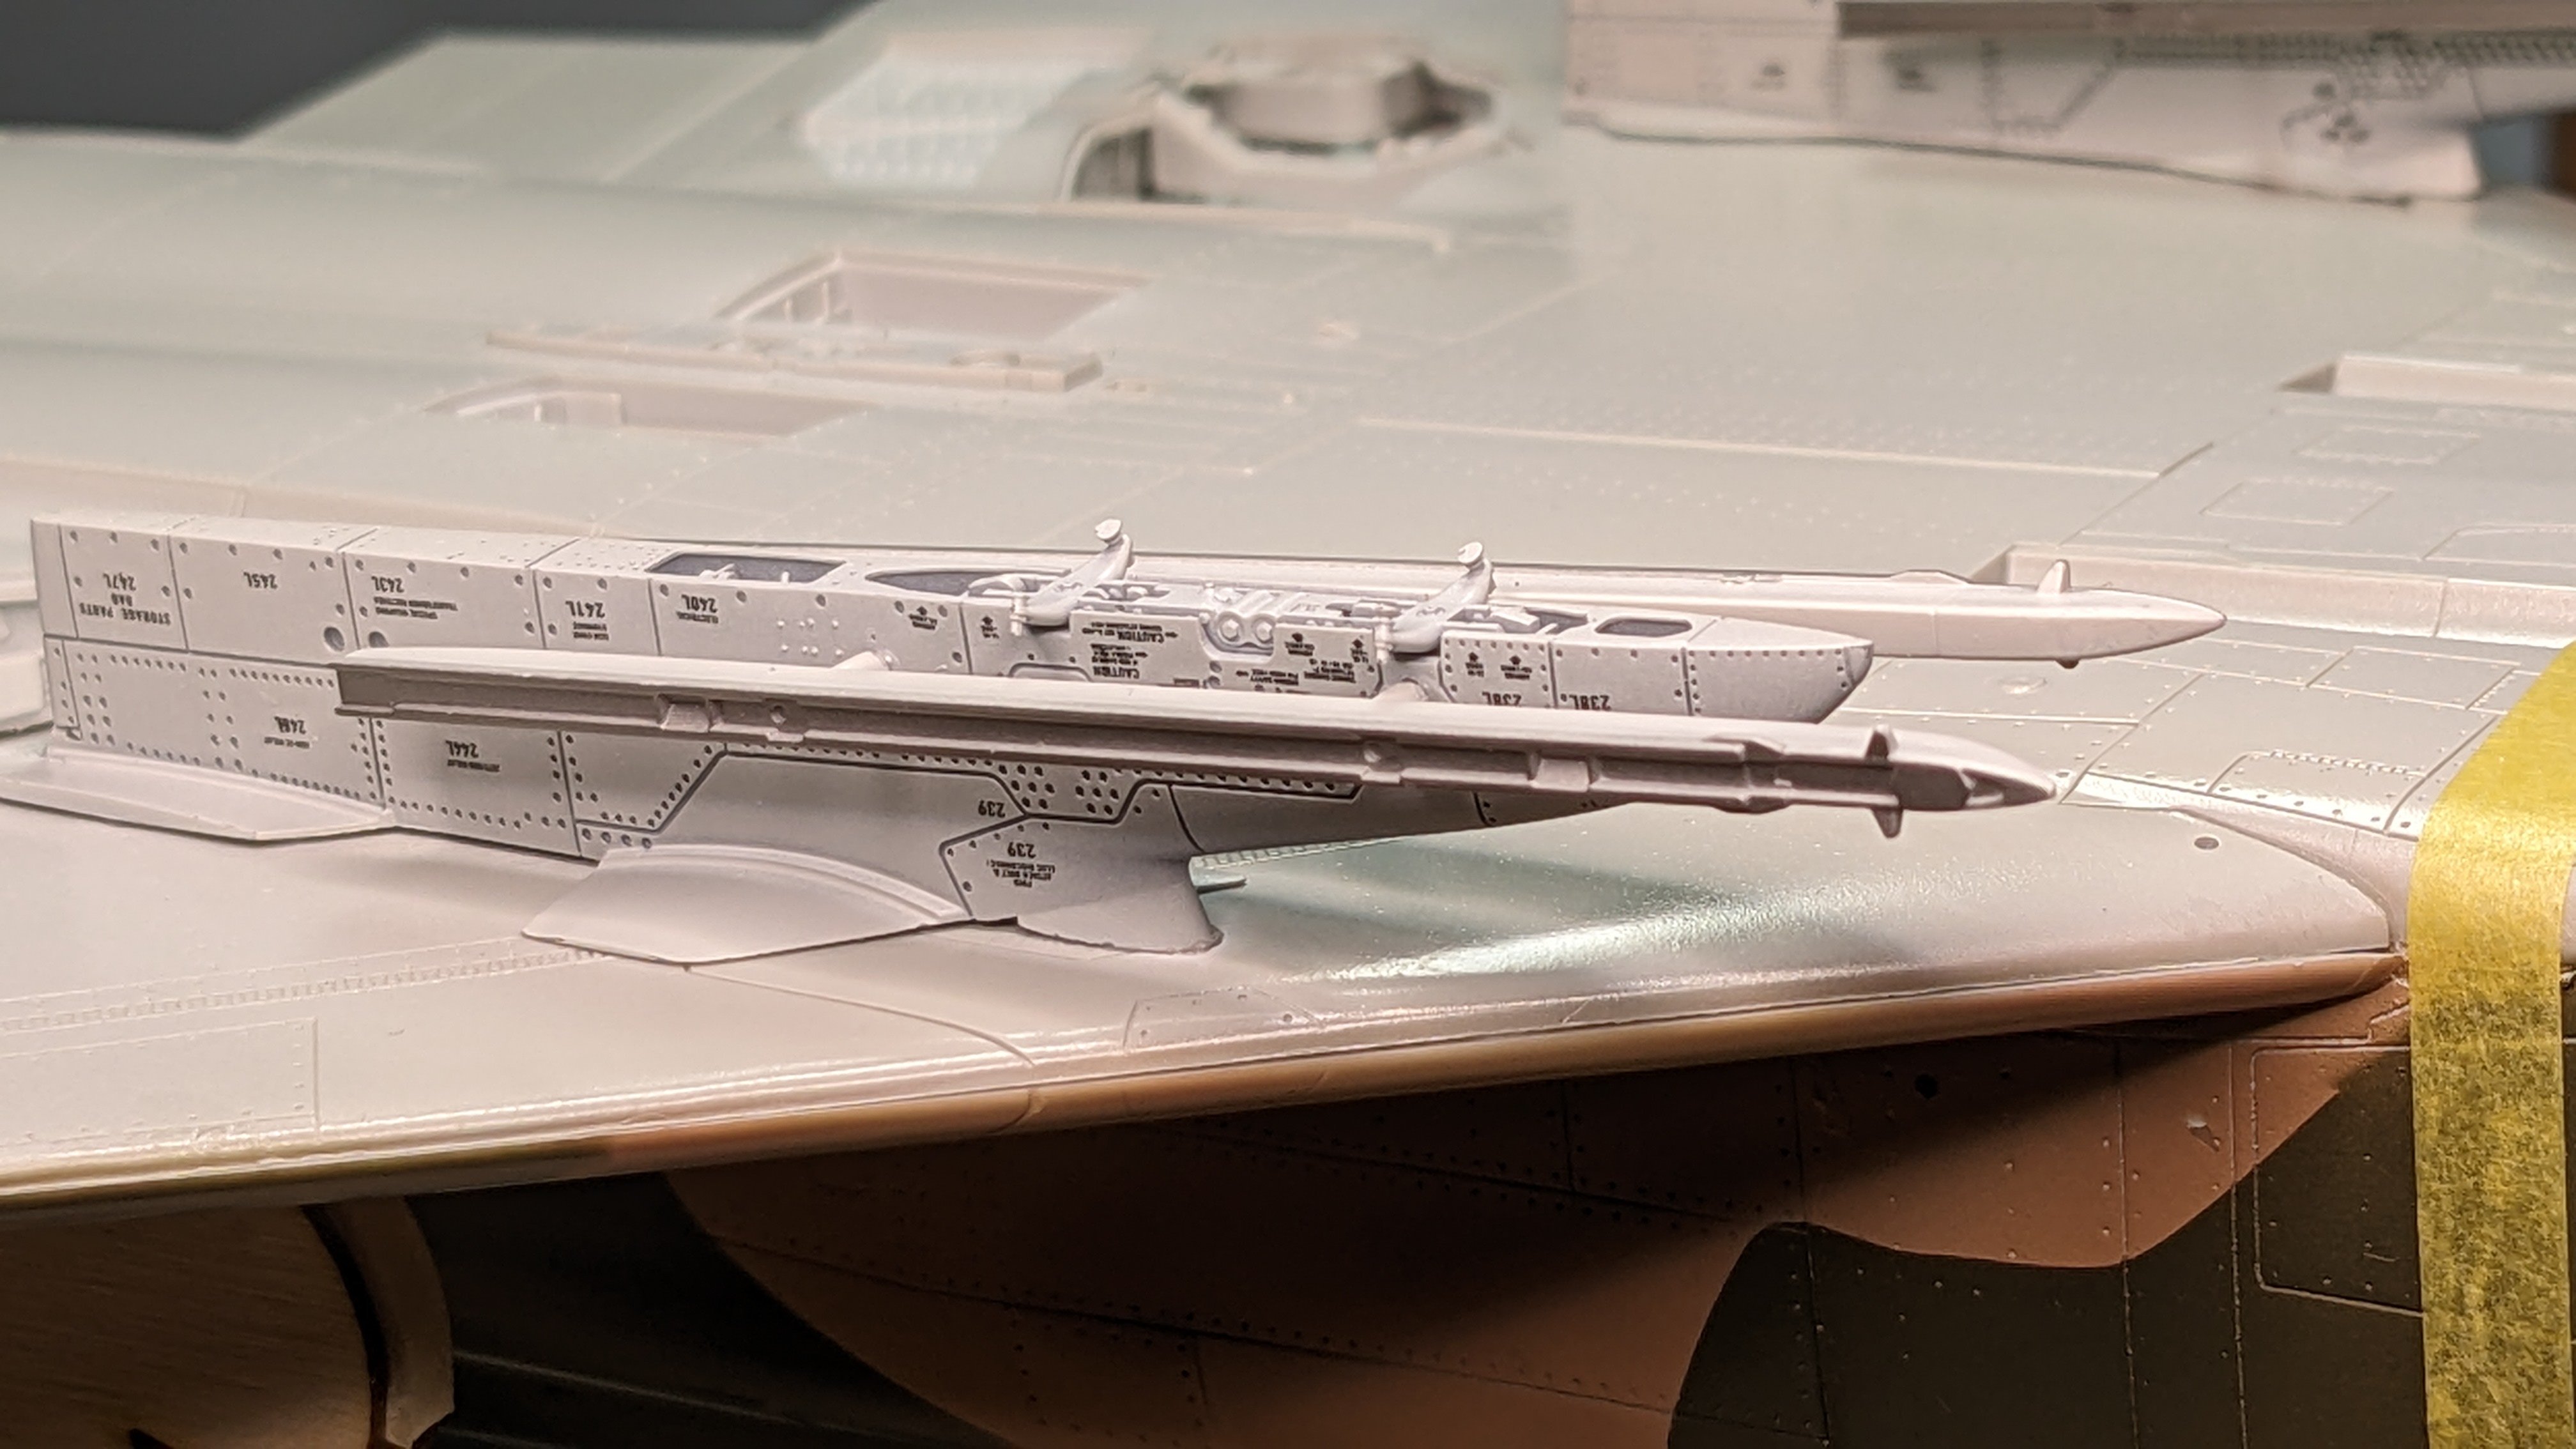
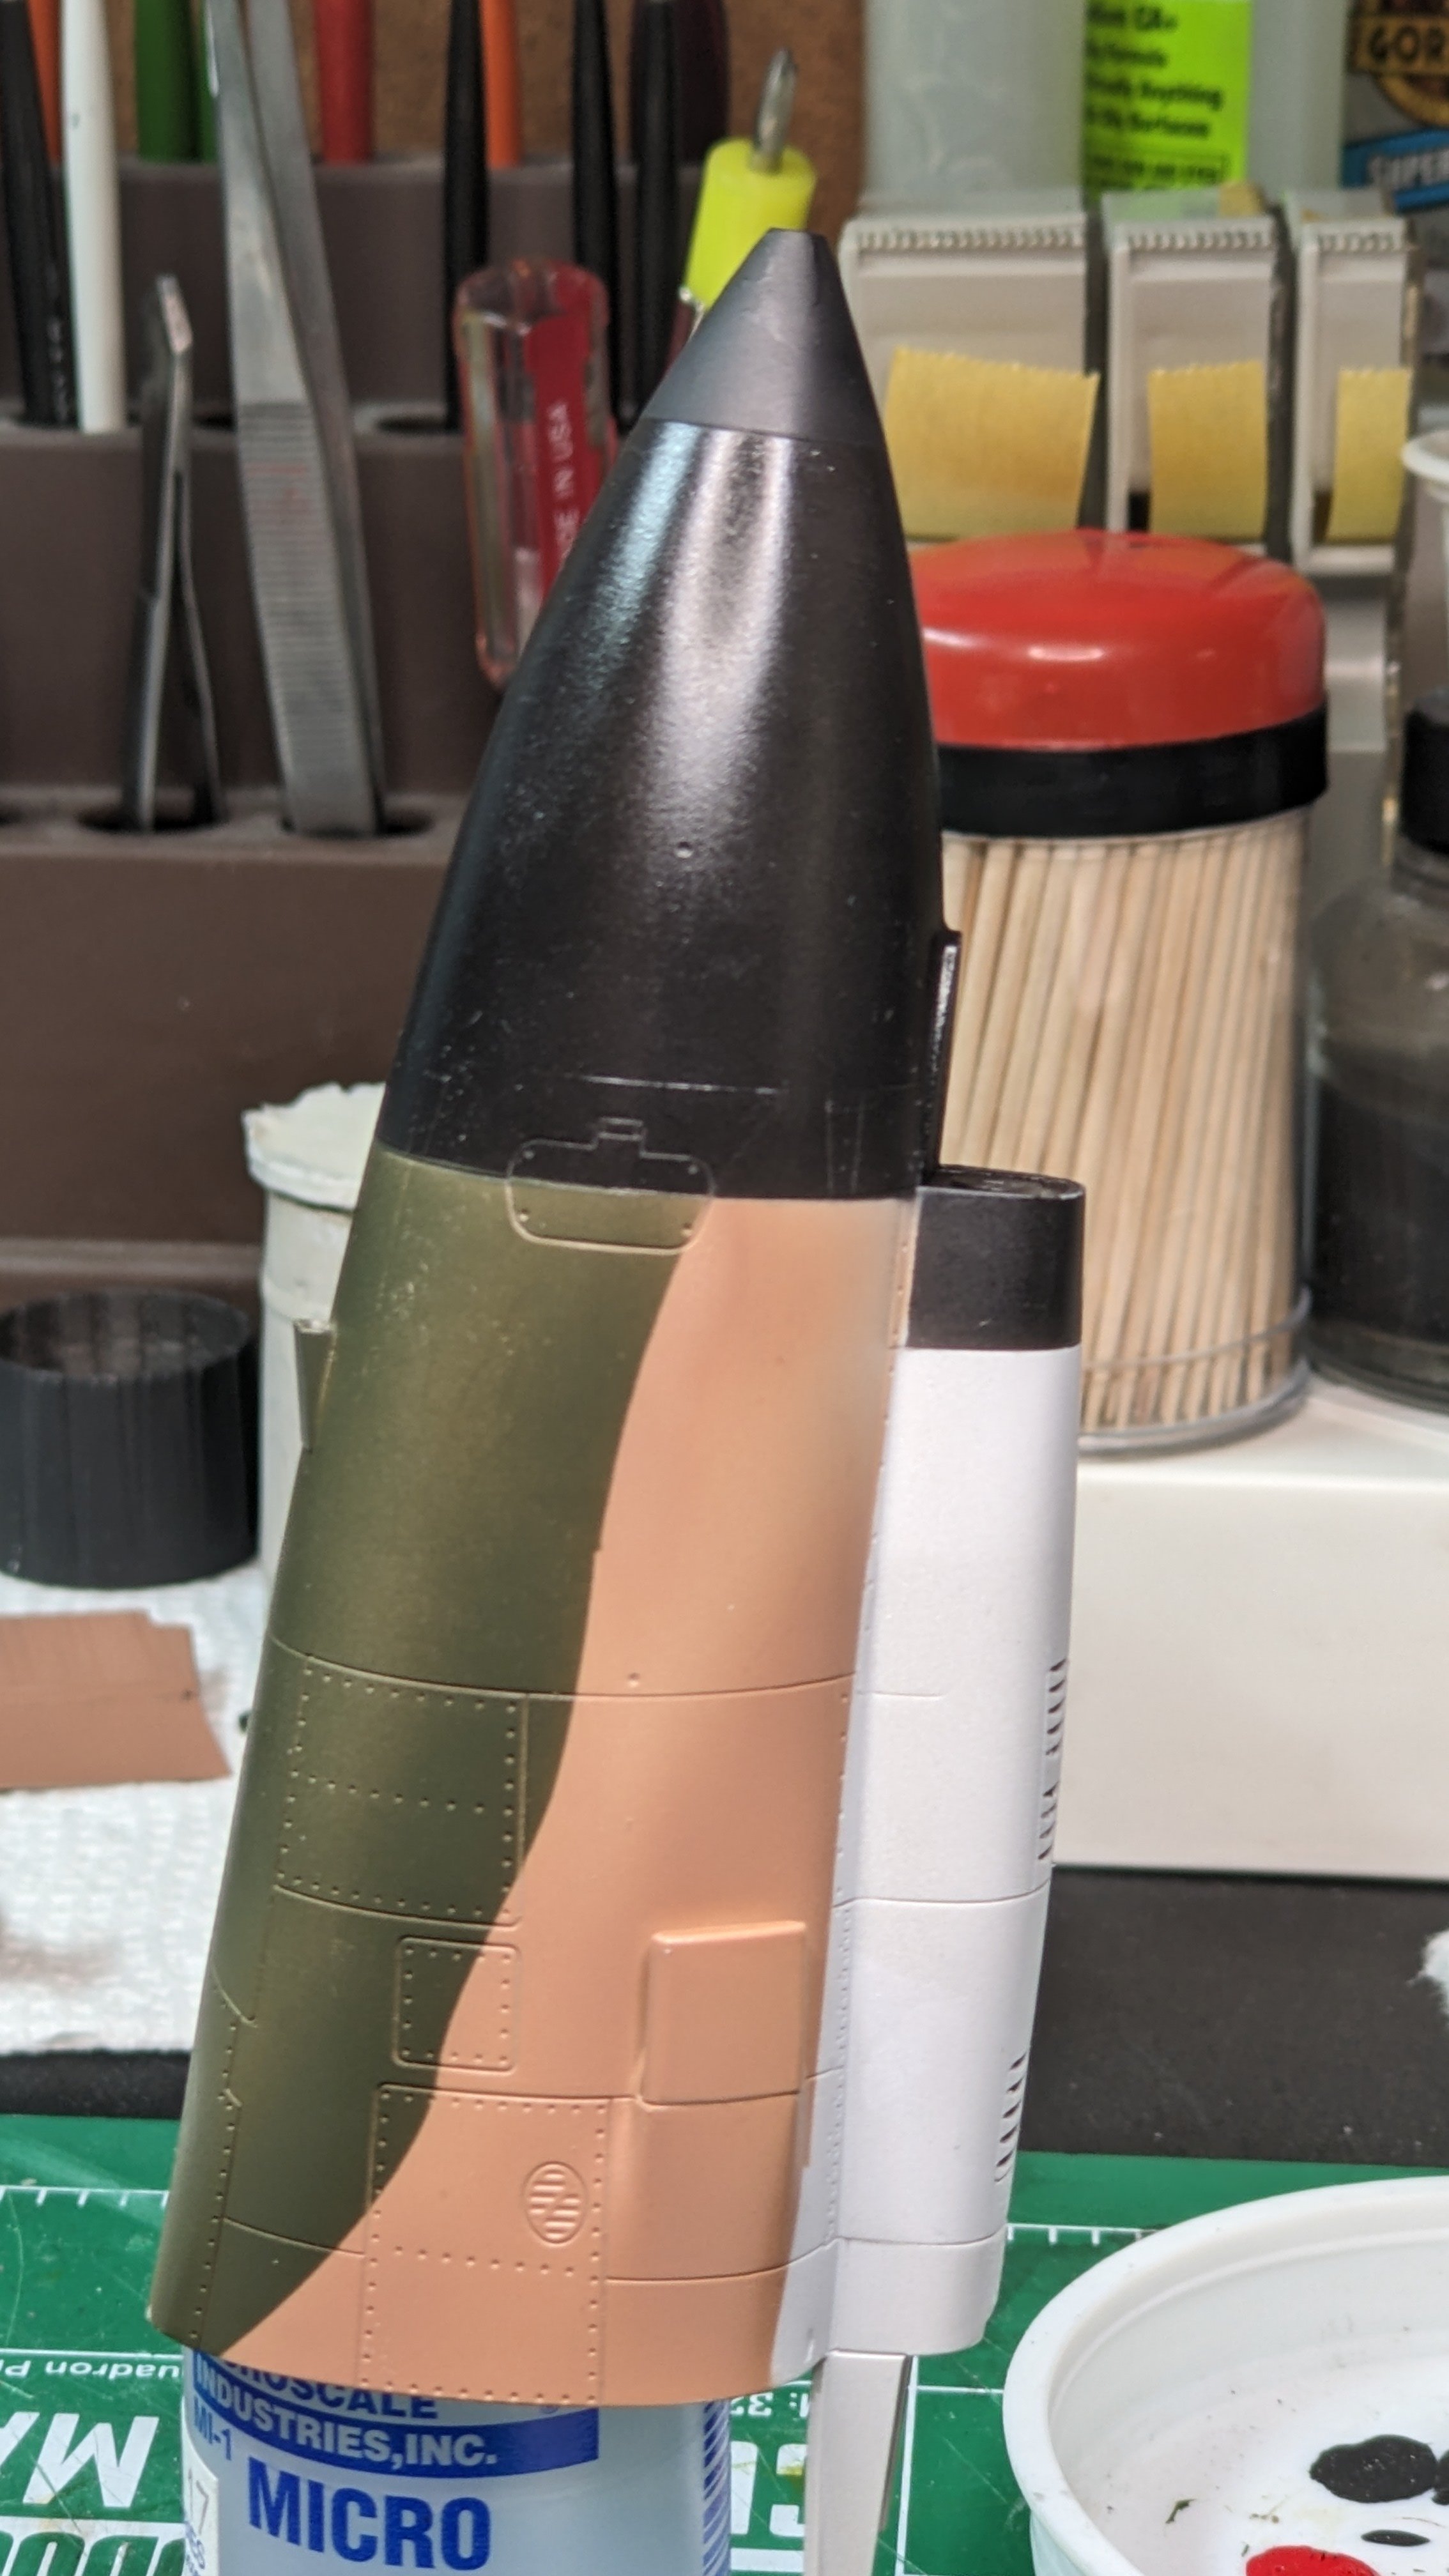
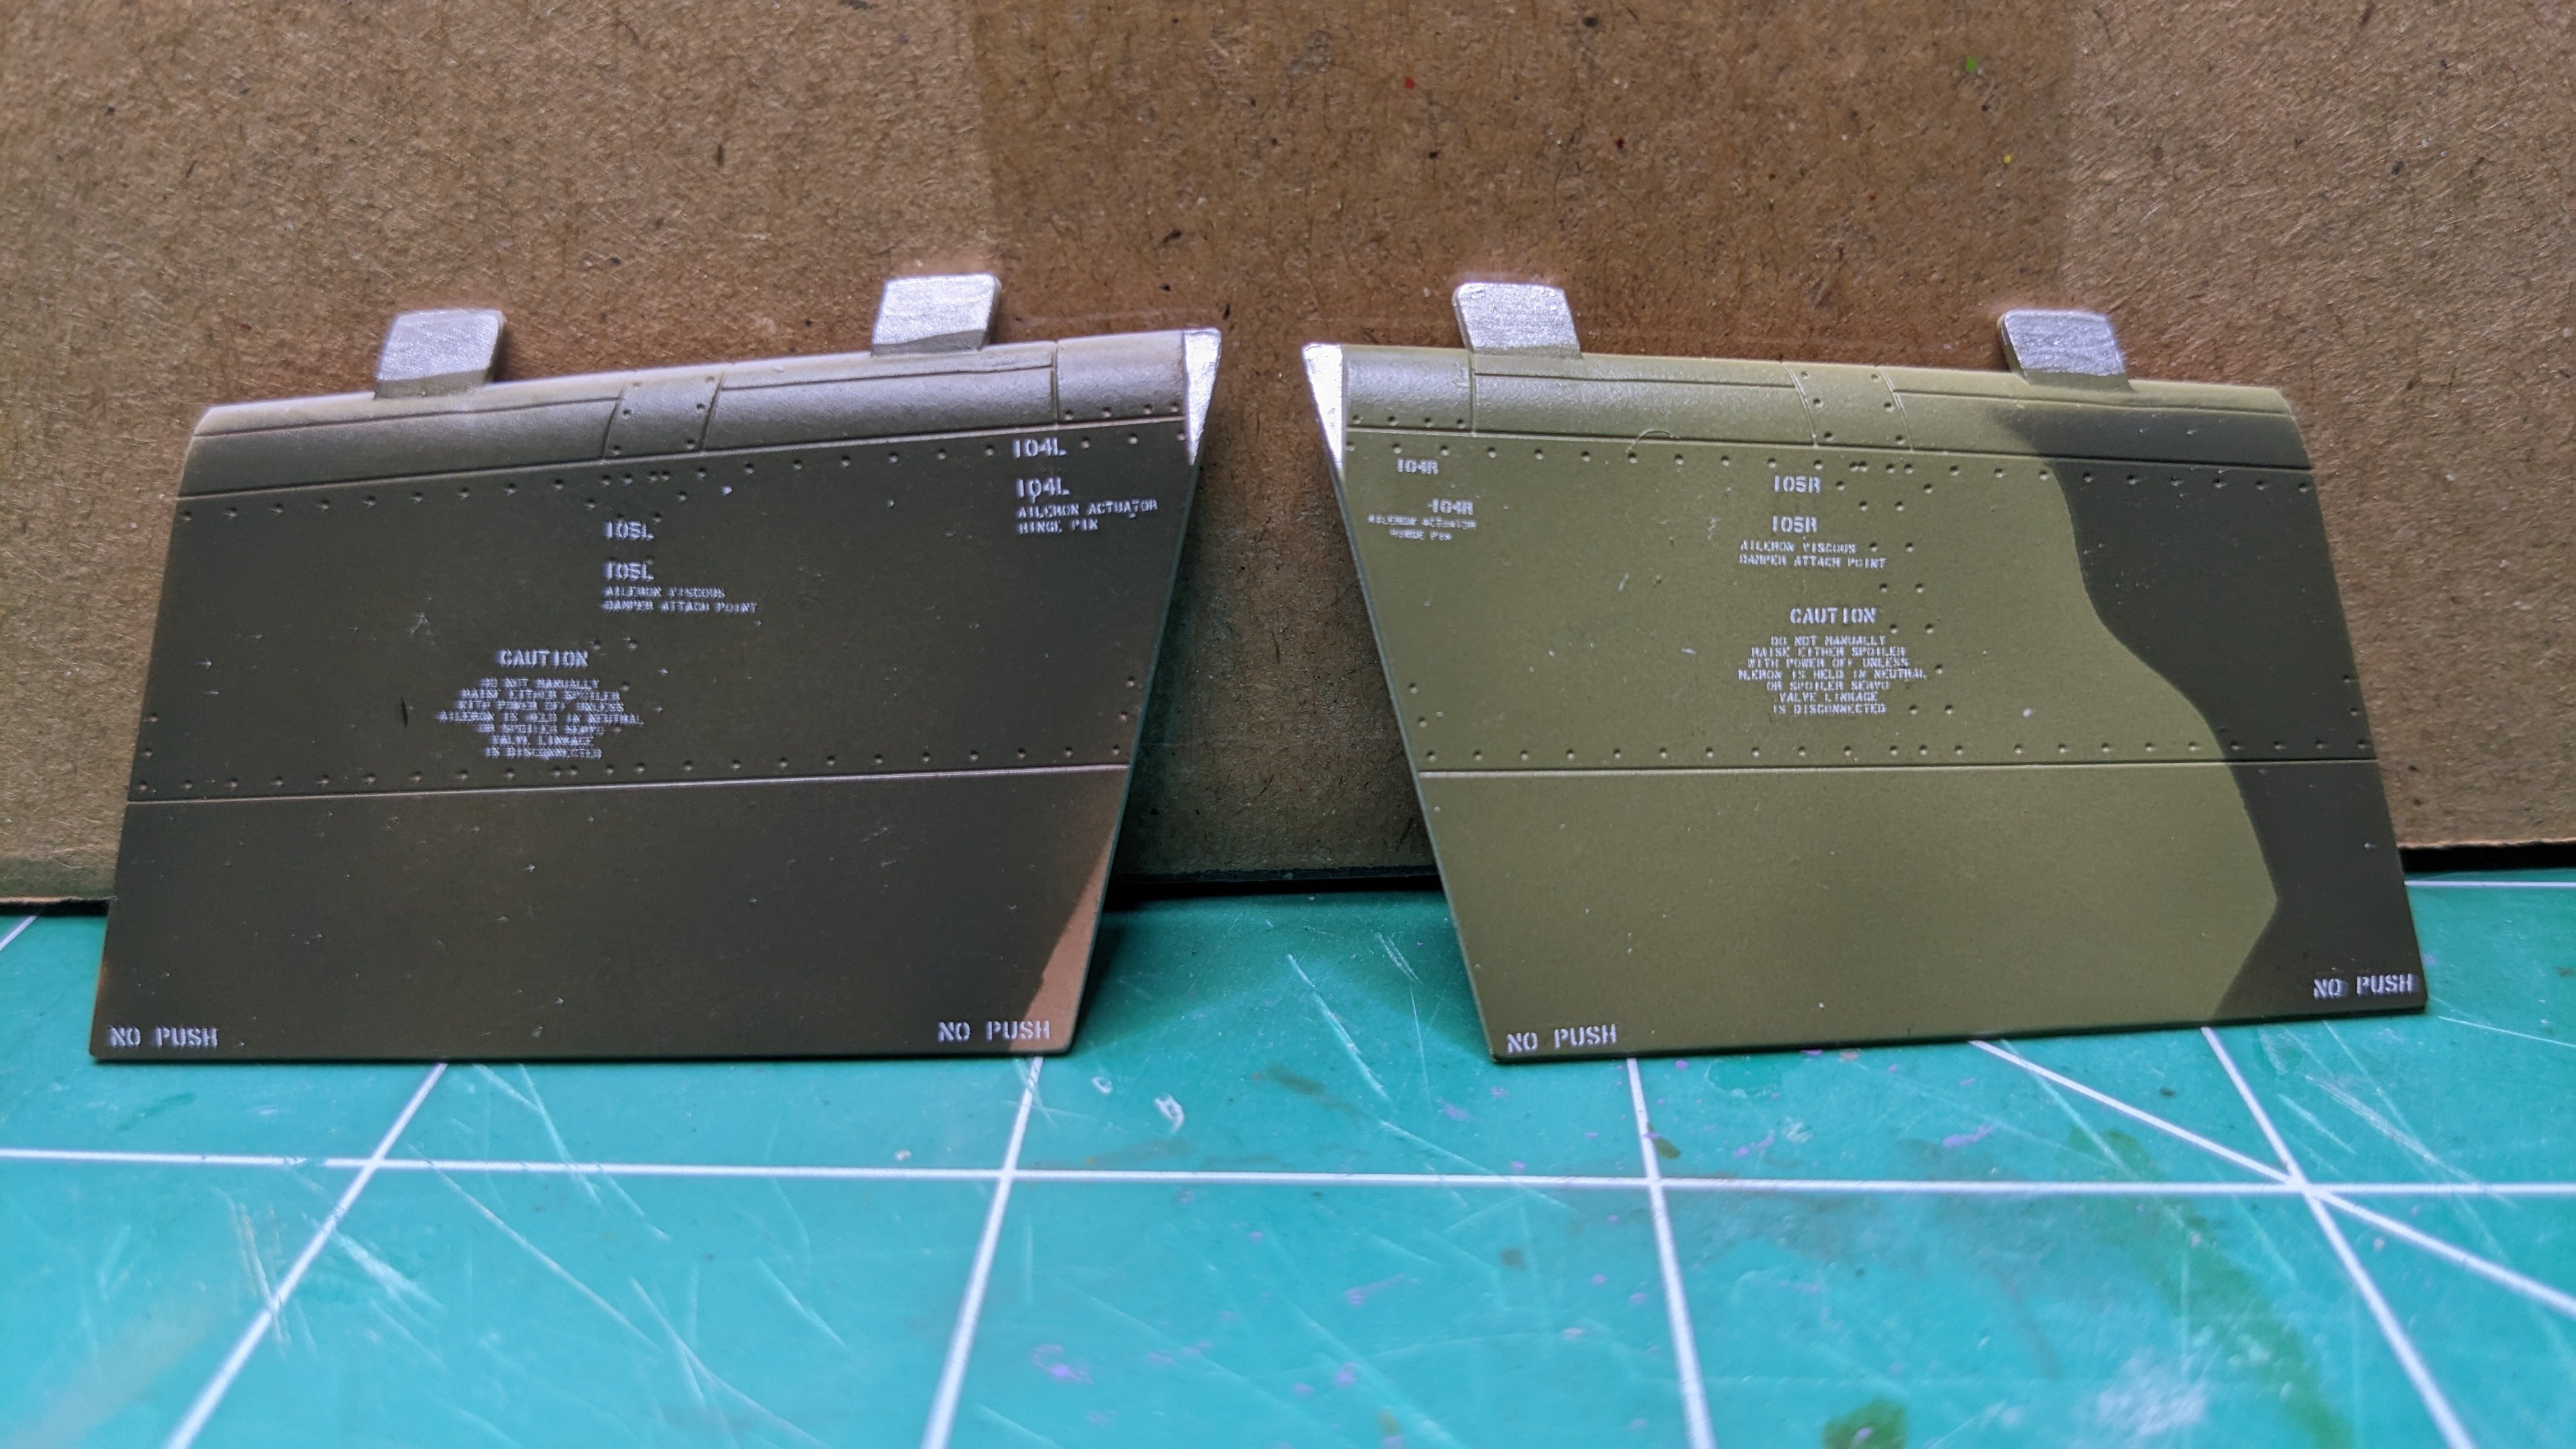
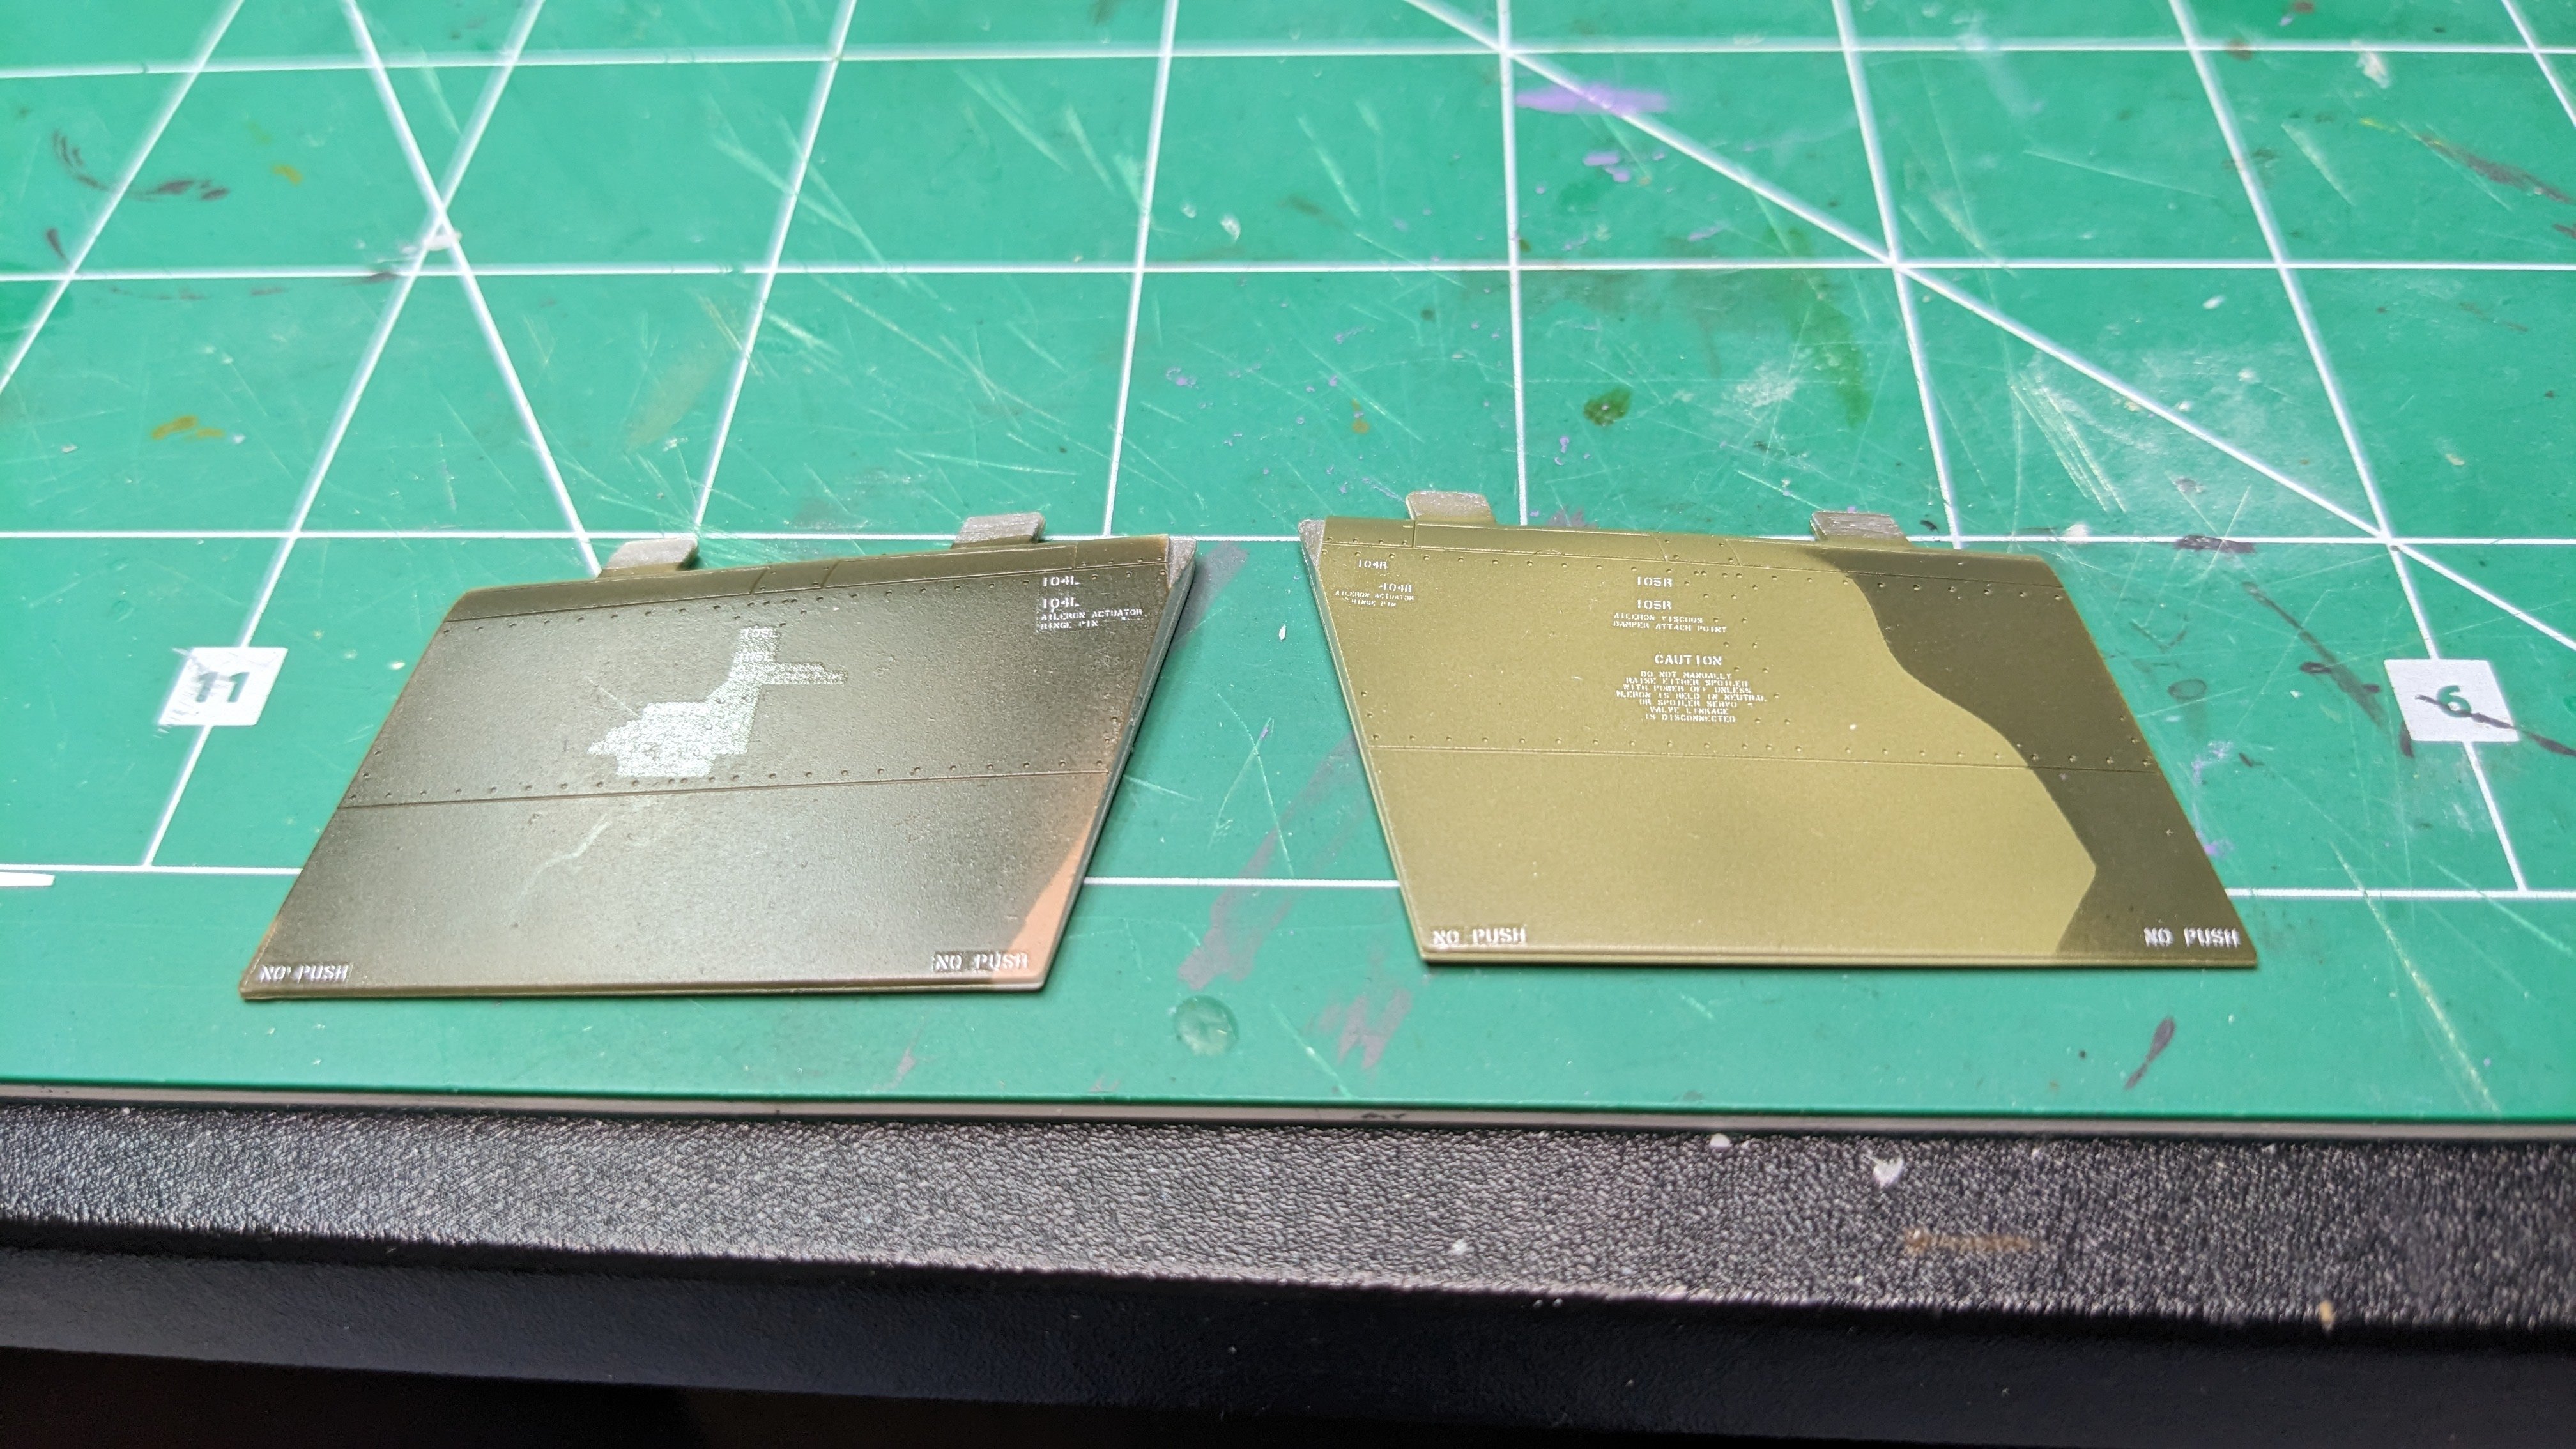
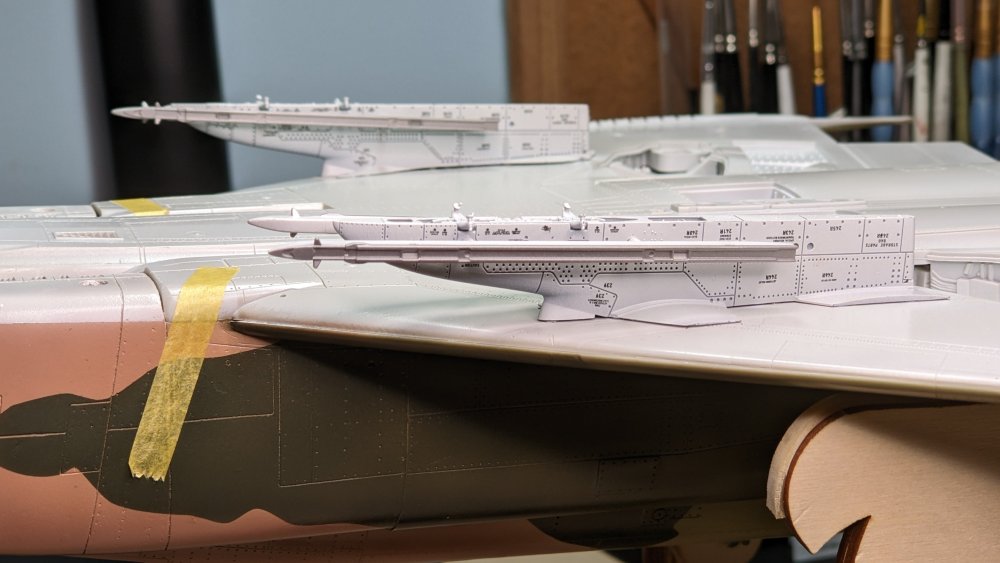
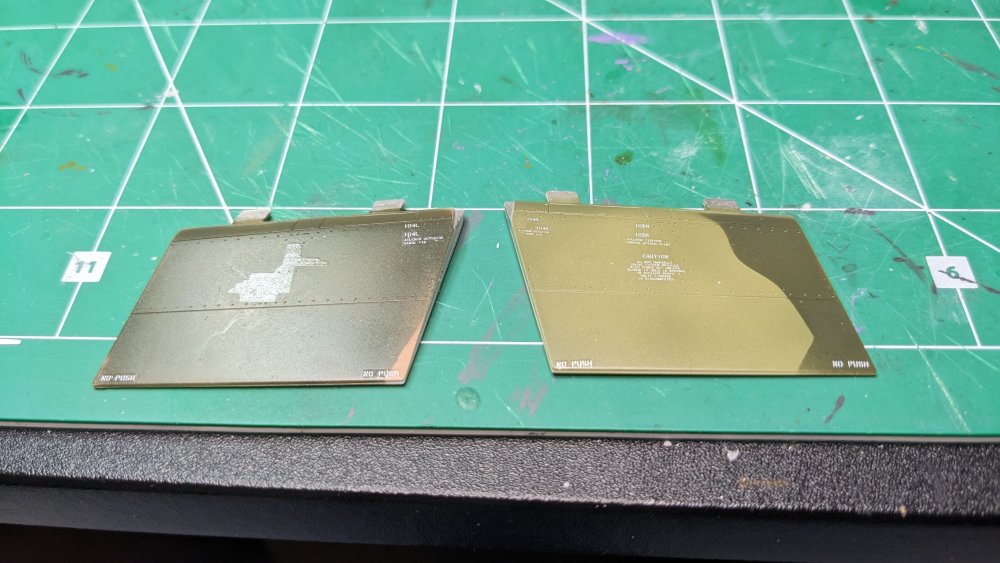
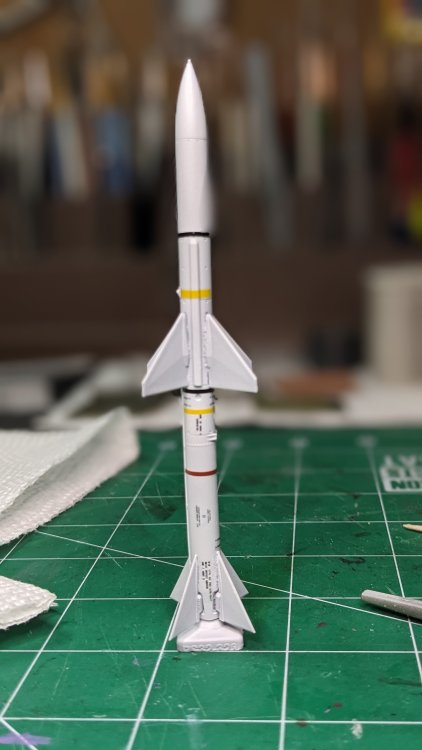
Now that the camo is basically laid down and most of the touch-up done, time to start on the stencils. Taking a cautious approach with the Speed Hunter F-4 stencils as I've never used them before, and also the Reskit missile decals. First the missile - the Reskit decals performed just as well as the stencils for the pylons, but with a bit more carrier film. The black band stencils do not go all the way around, which seems strange so hope I put them on correctly. Bonus how the Sparrows are attached to the aircraft so I can strategically place the gap in the band. One down, three more Sparrows to go. FOUR Sidewinders, and the ALQ to go. The Speed Hunter decals/stencils go down very easily - and seem fairly strong. There. are. a. lot. of them... I wanted to start small (and if I had half a brain, i would have started on the BOTTOM of the aircraft. doh...) so worked on these flaps. One of the hard parts is the use of white stencils on the green backgrounds. White decals are HARD to see on the sheet. However, looked at from a slightly different angle.... These decals are seriously glossy and I think they are kind of prone to silvering. I used MicroSet but will see tomorrow how they look under a gloss coat. Took a swing at the nose cone and the two tones of black. The nose tip is Vallejo black which is a matte finish. I have a bit of touch up but I like the effect. AND, added the missile side rails to the pylons. THAT was an adventure as the 3D Printed Pylons needed to be drilled to accept the narrowed kit launch rail's mounting lugs. Since each rail will have a resin missile attached, I wanted to make sure the attachment point was pretty sturdy. The 3D Plastic is a bit brittle when drilled - have to go kind of slow. But in the end, I think it worked out pretty well. The detail on the BOTTOM of the pylon is really impressive, too. Down to the plumbing. LOTS more to come - and the clear resin canopies are going to be a whole another thing. Started working on removing them from their pour blocks. I should have started this a month sooner!


-
F-15DJ Kai or Eagle Plus- Finished!
CANicoll replied to BlrwestSiR's topic in The Great Twins Broup Bluild
I'm currently in stencil-hell so just trying to share the pain... 👍 -
F-15DJ Kai or Eagle Plus- Finished!
CANicoll replied to BlrwestSiR's topic in The Great Twins Broup Bluild
Wait!!! Where are the stencils!! -
The Yard Office: Update: 6/17/24: Major Progress
CANicoll replied to Peterpools's topic in Non LSM 'WIP
Peter, I'd swear you had the exact building to model from when you did this amazing work. I am blown away at how excellent this is! Just awesome. Definitely agree with your views on changing up the venues to keep things fresh - you have mastered that. Every time I go back and look at your pictures, I see something else that is amazing. Great job!!