CANicoll
-
Posts
1,927 -
Joined
-
Last visited
Content Type
Profiles
Forums
Events
Gallery
Everything posted by CANicoll
-
Your detail painting really brings out the console - a pain to do but really nice job on it!
-
Oh yeah, looking really good Bill!
-

Italeri 1/35 Elco 80' Torpedo Boat PT-596
CANicoll replied to Bomber_County's topic in Let’s Get Wet Group Build.
This thing is a beast! I didn't realize how long this kit is. Wow... -
ProModeler 1/48 PBY-5A Catalina + Goodies, RFI
CANicoll replied to CANicoll's topic in Let’s Get Wet Group Build.
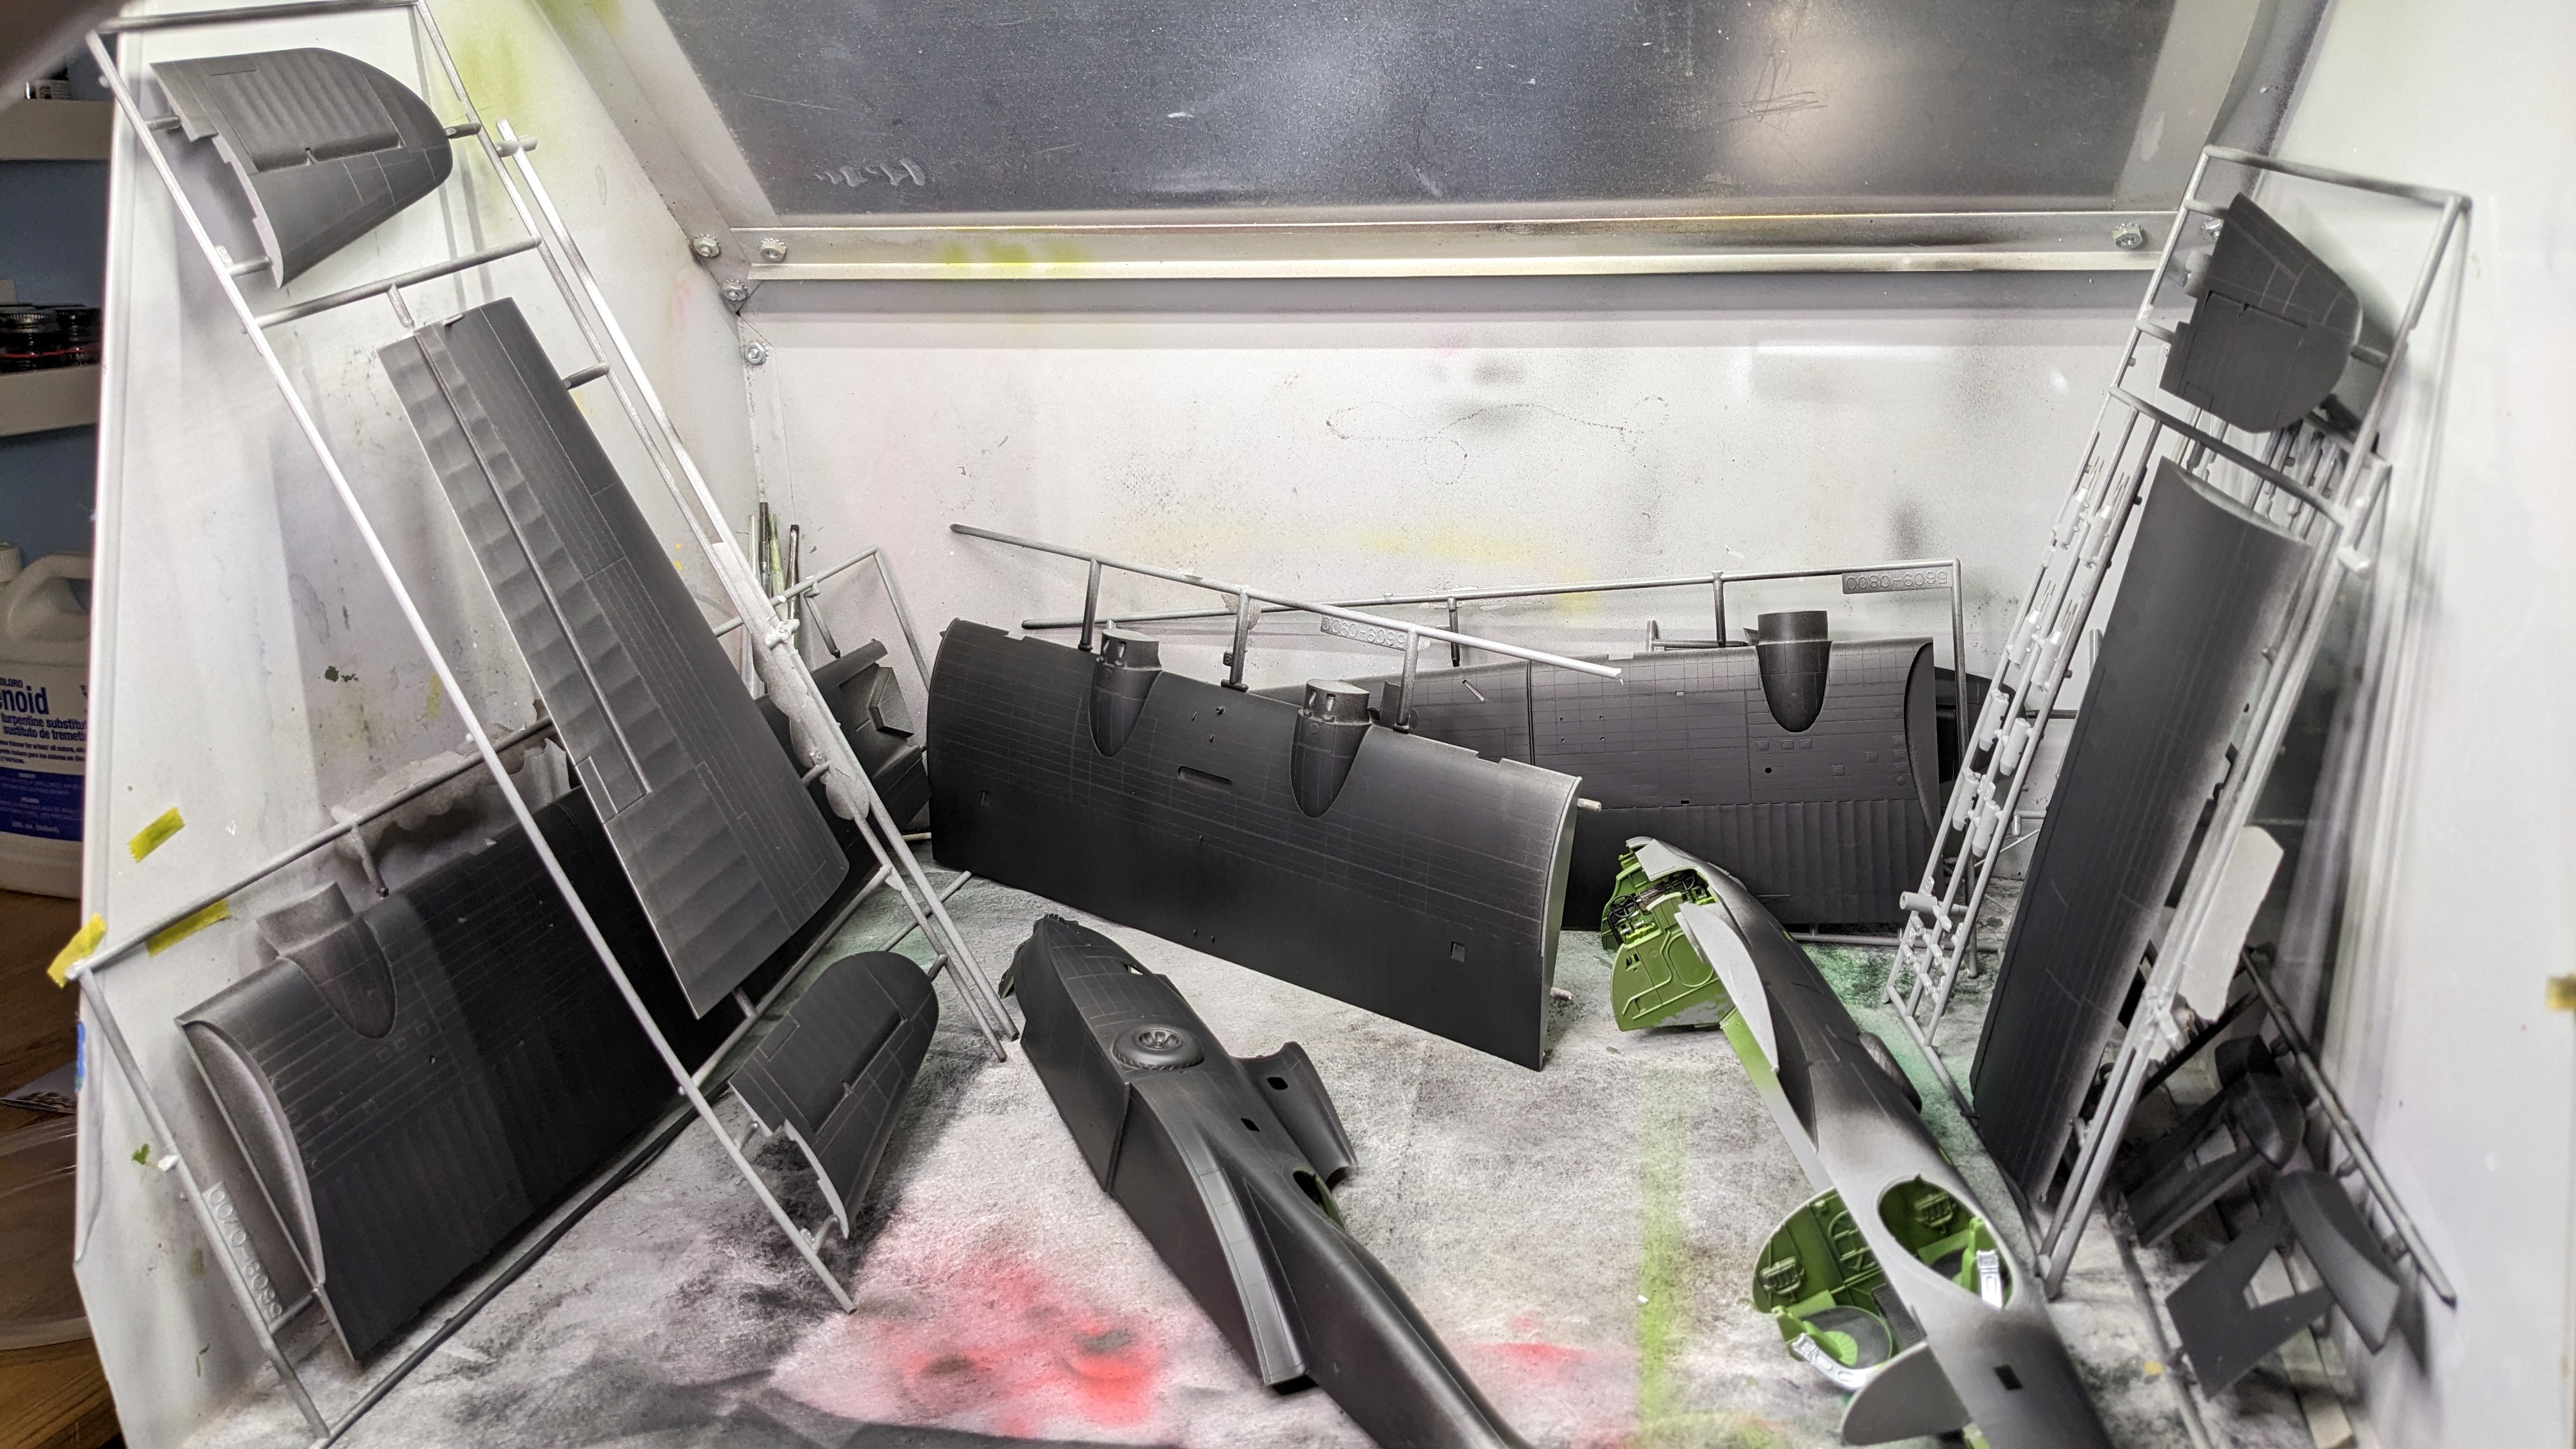
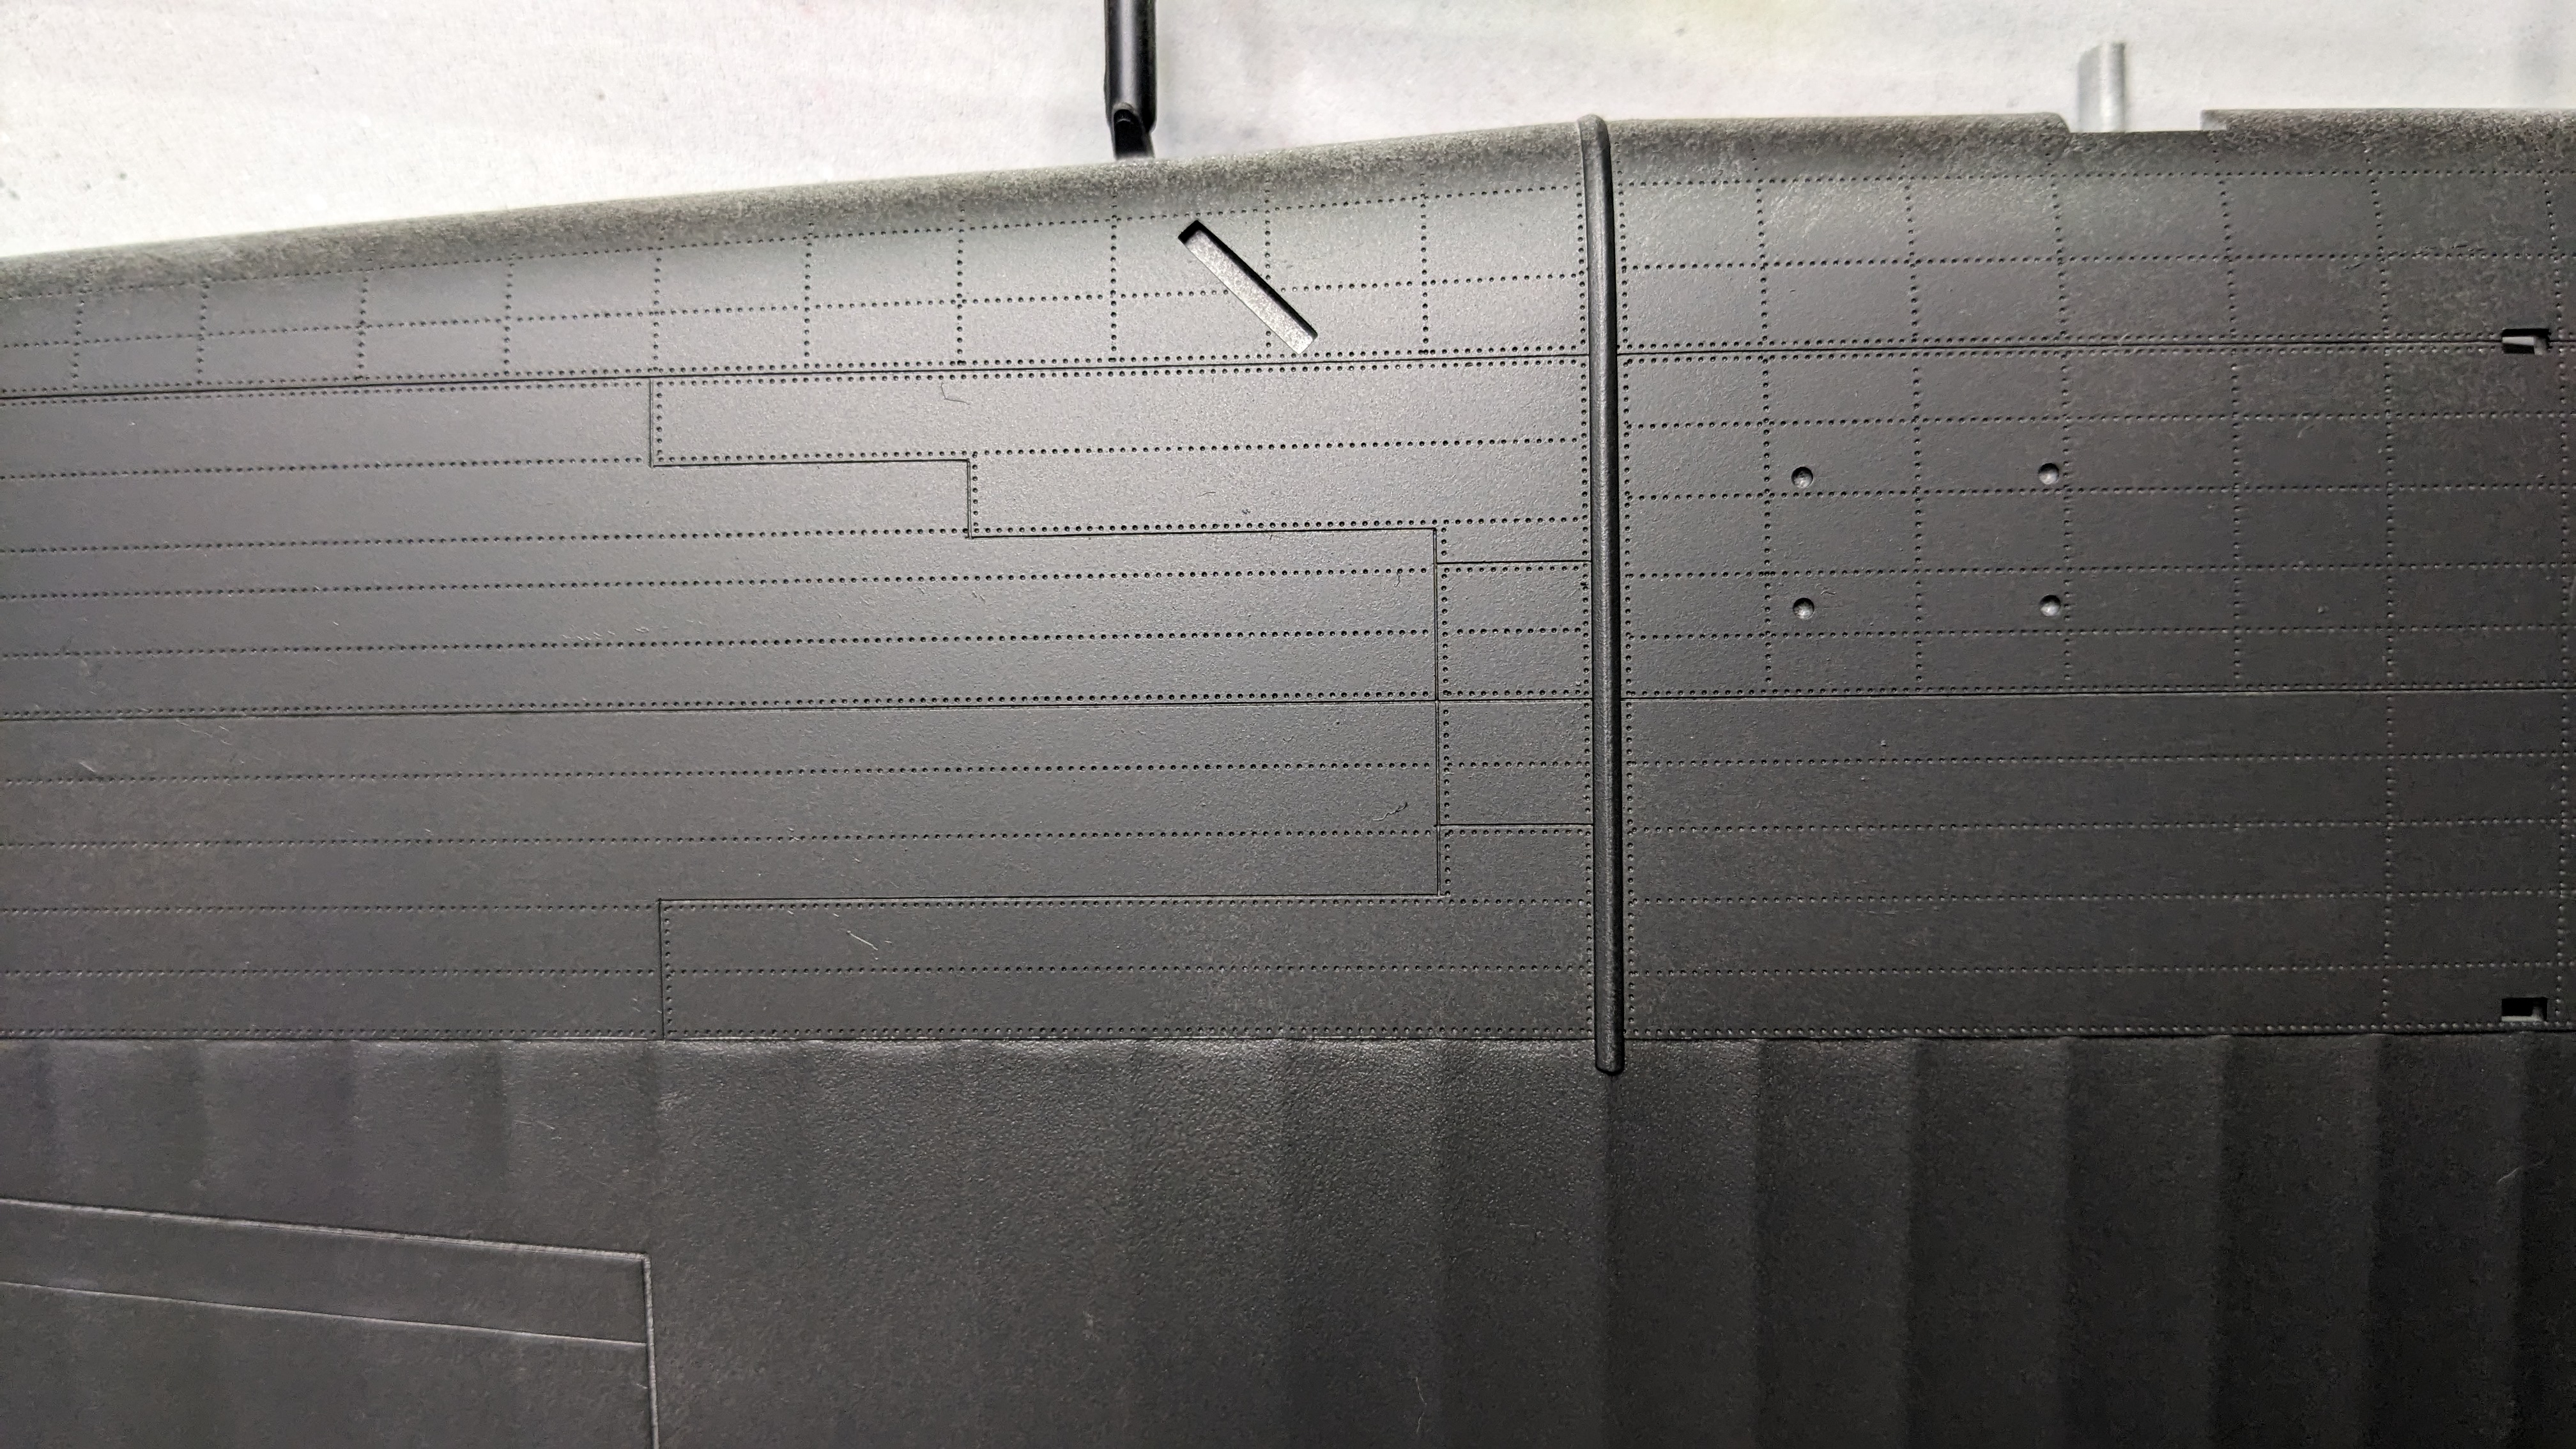
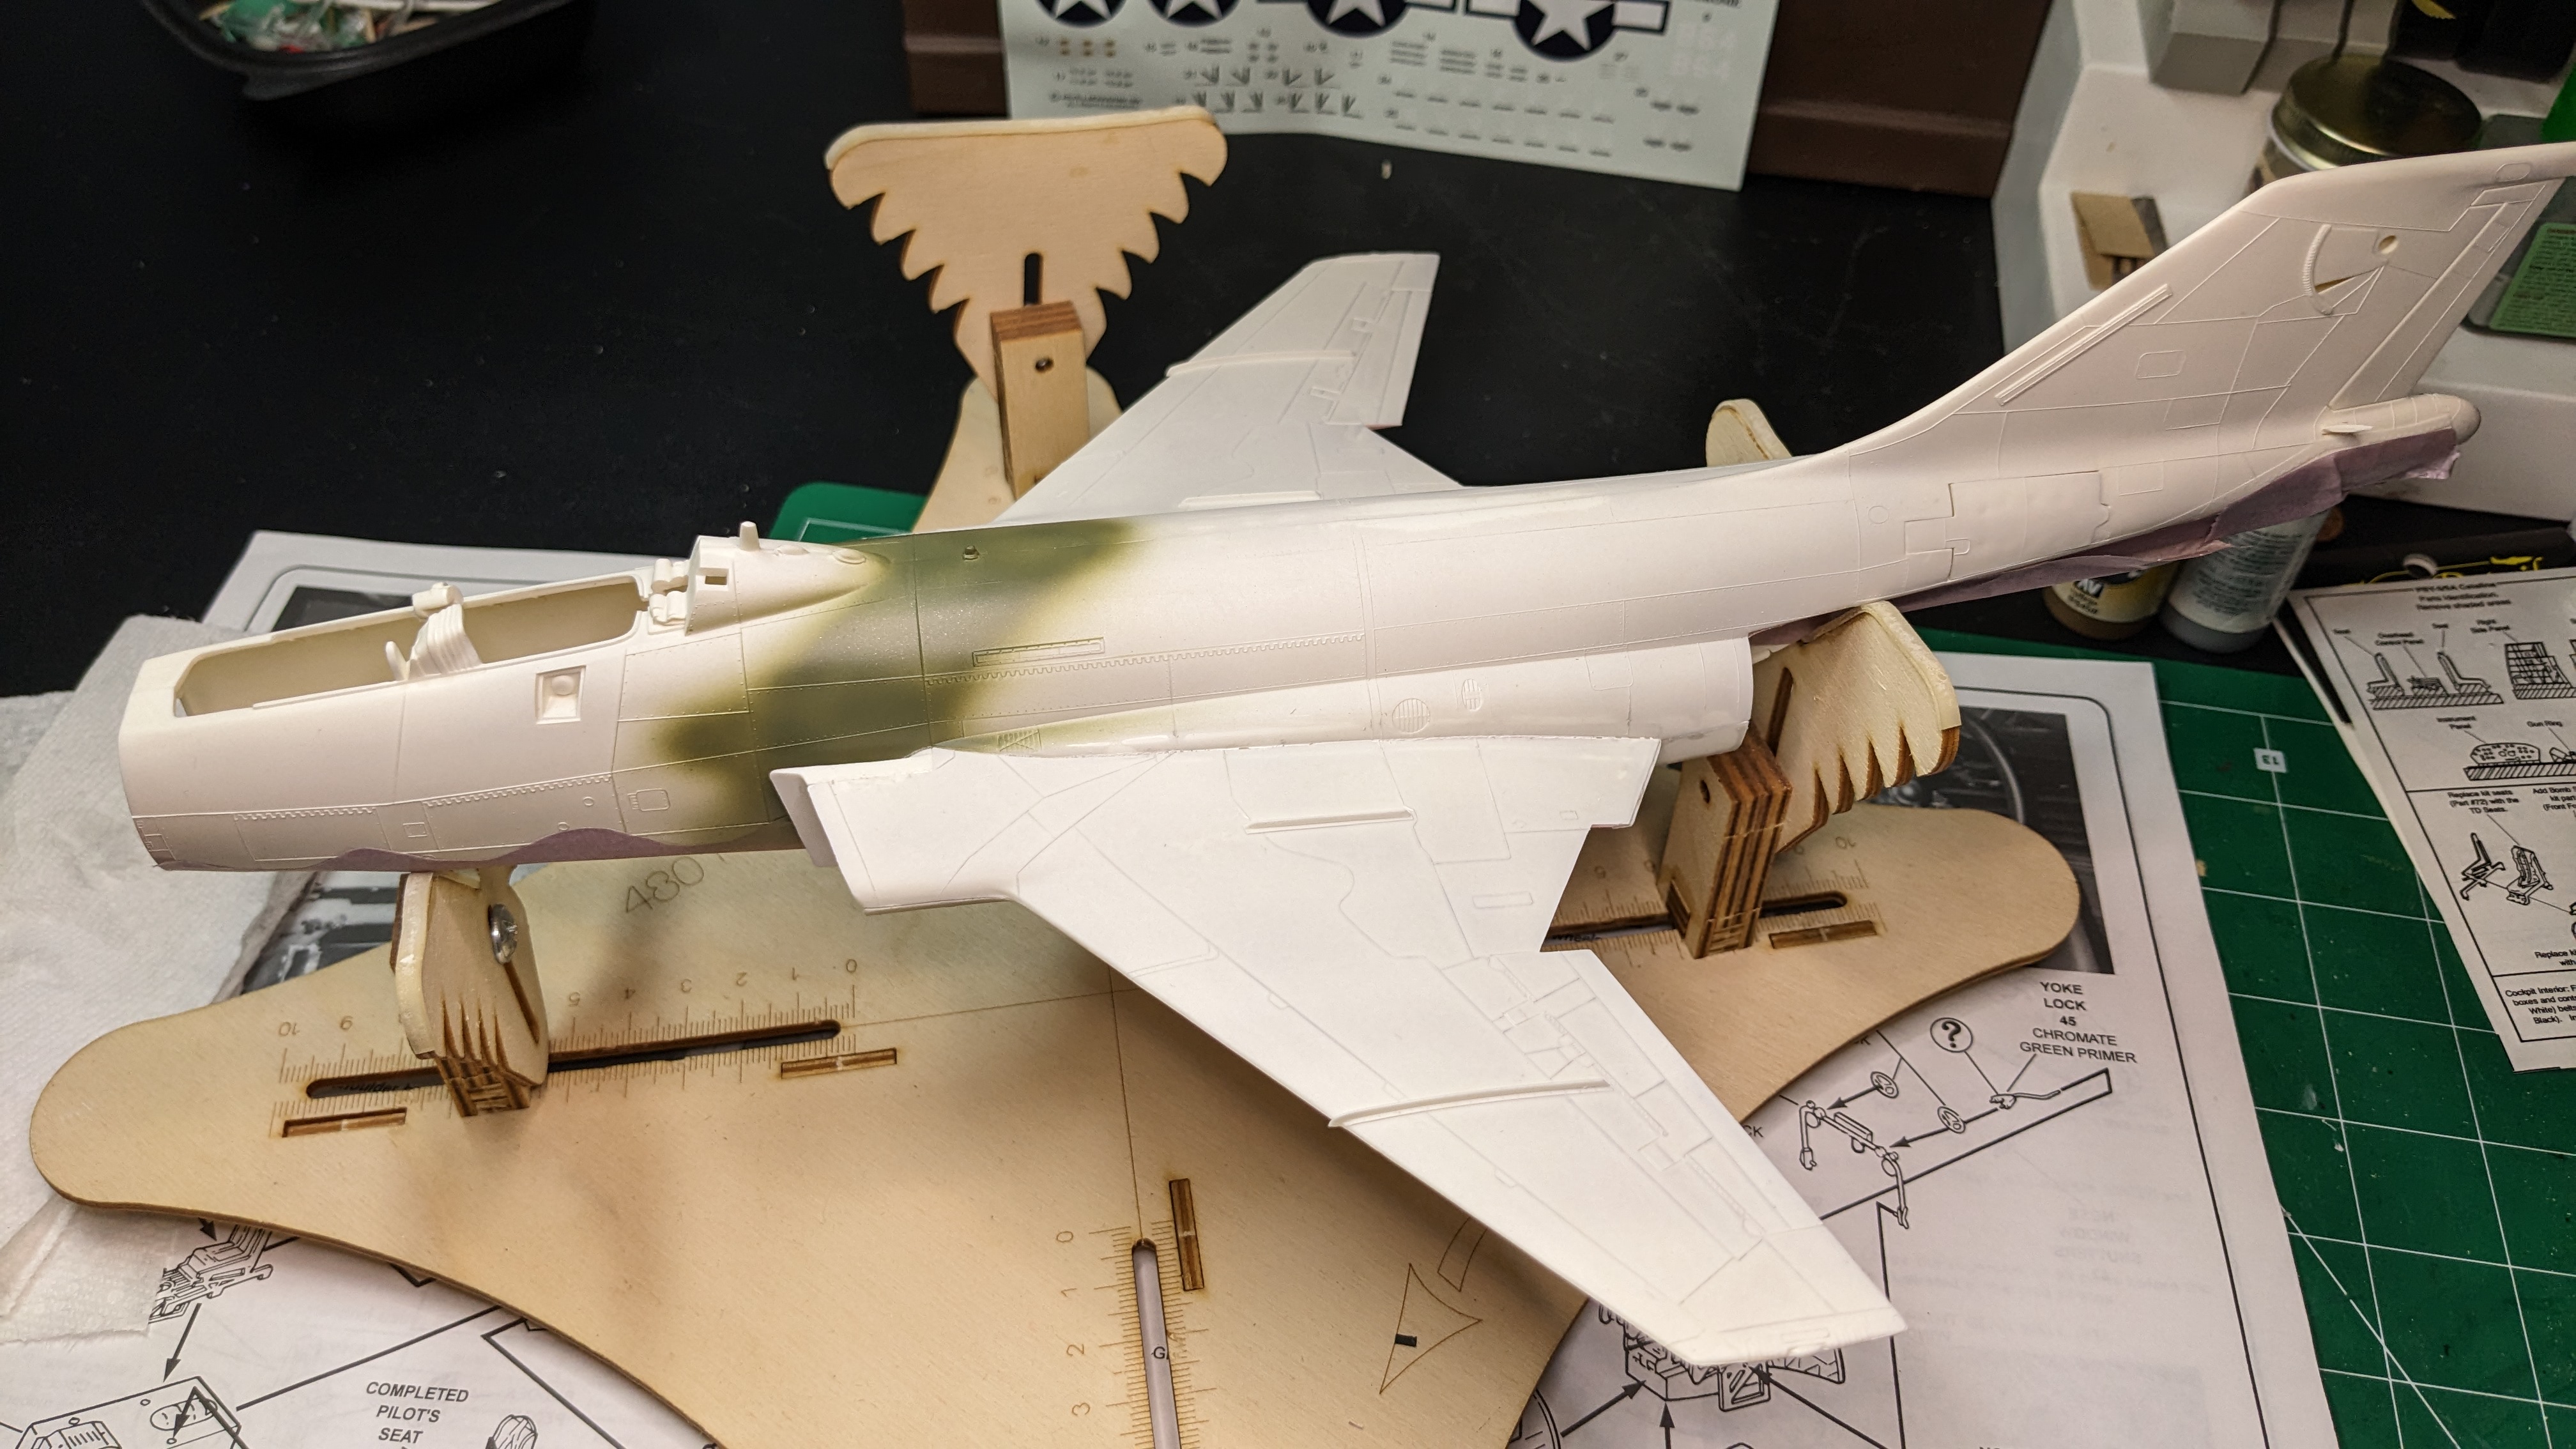
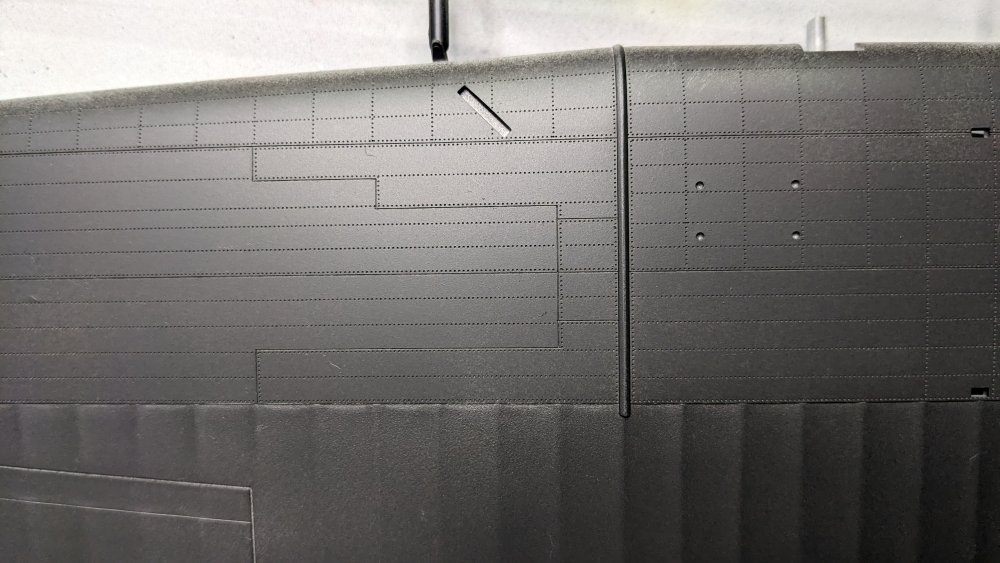
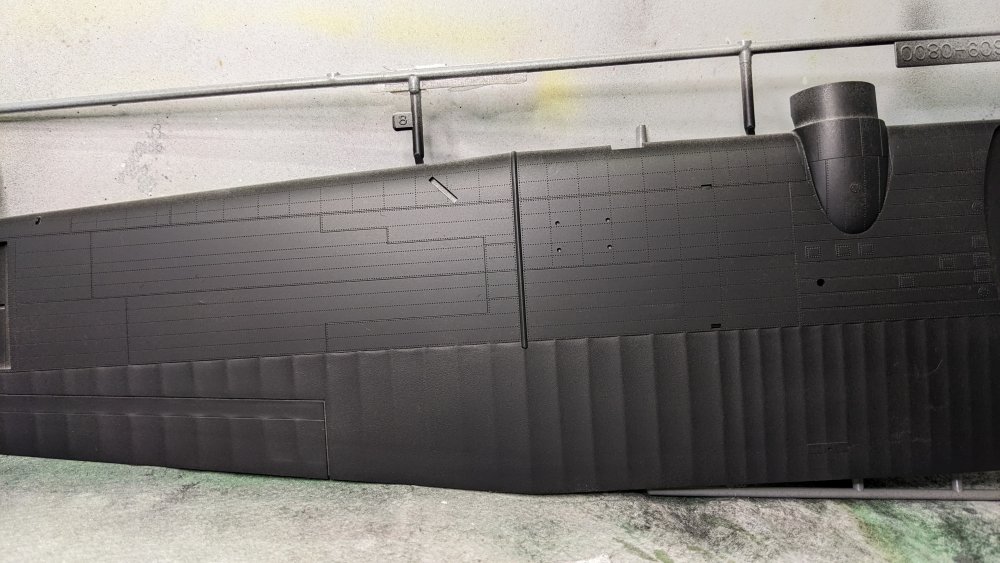
After clearing the fouling of the front wheel doors, I primed/painted most of the bird prior to further assembly. This this has such a huge wingspan that I find it easier to complete the major painting in sections, then finish up and touch-up afterwards. Especially since this is an all-black scheme. Handling is easier for me this way as well. The fuselage has 'hand holds' painted where I can grab on for future painting (e.g. when I get the clear parts installed and masked - then I only have to paint those parts). The paint booth was rather crowded this evening!! No clue how the entire aircraft will get painted. Maybe the wing as one piece, and the fuselage as another, and then put the two together (along with the wing struts). My favorite paint for this is actually Vallejo's Black Primer. The Gloss Black Primer seems to be impossible to get, so settled for the other Black Primer which is somewhere between a matte and a semi-gloss. It goes on very smoothly, handles and masks extremely well (as you would expect from a primer) and is very easy to modulate color if you choose to. This build will be a fairly factory-fresh aircraft so, against my usual habit, I opted to pass on the faded scheme. The paint does go on VERY smoothly (and dries to the touch quickly! By the time everything has gotten a coat, the first pieces can be handled). Here is a closer picture of the wing - showing some pretty fine detail (for 1995! Which is the date shown on the copyright on the elevator tab). There will be one more coat once everything is assembled so pardon the spots with less than perfect coverage. f The masks showed up tonight so hopefully this weekend the clear parts can be installed and masked. Chris
- 291 replies
-
- 11
-

-

-
ProModeler 1/48 PBY-5A Catalina + Goodies, RFI
CANicoll replied to CANicoll's topic in Let’s Get Wet Group Build.
Thank you! Actually you were right - a little bit of gentle pushing and pulling and it pretty much snapped into place. No cutting! Thanks! -
ProModeler 1/48 PBY-5A Catalina + Goodies, RFI
CANicoll replied to CANicoll's topic in Let’s Get Wet Group Build.
Thanks Peter and Gary. I'm going to try and tackle it tonight - it got too late last night and we all know doing these things when you are tired is just asking for disaster. I think the left side resin sidewall might be catching the bulkhead on that side. I'll see if that is actually the case - but either way I think the fix will be fairly easy. Worst case - I will grind off part of that bulkhead to ensure there is no interference. We will see! Oh, the masks for the Cat are 'Out for Delivery', and this also includes the Tan MRP for the Voodoo build. Yay! Chris -
Really an admirable build - the detail is terrific and I'm looking up "Resin2Detail" to see what they have. Regarding matte vs glossy - very tough, as you've said. I'll start with a gloss/semi-gloss and they gently spray a matte over it in streaks trying to show an irregular finish. Very much like fading paint - more faded on top, less on the bottom. But the Helldiver looks terrific as she sits.
-
ProModeler 1/48 PBY-5A Catalina + Goodies, RFI
CANicoll replied to CANicoll's topic in Let’s Get Wet Group Build.
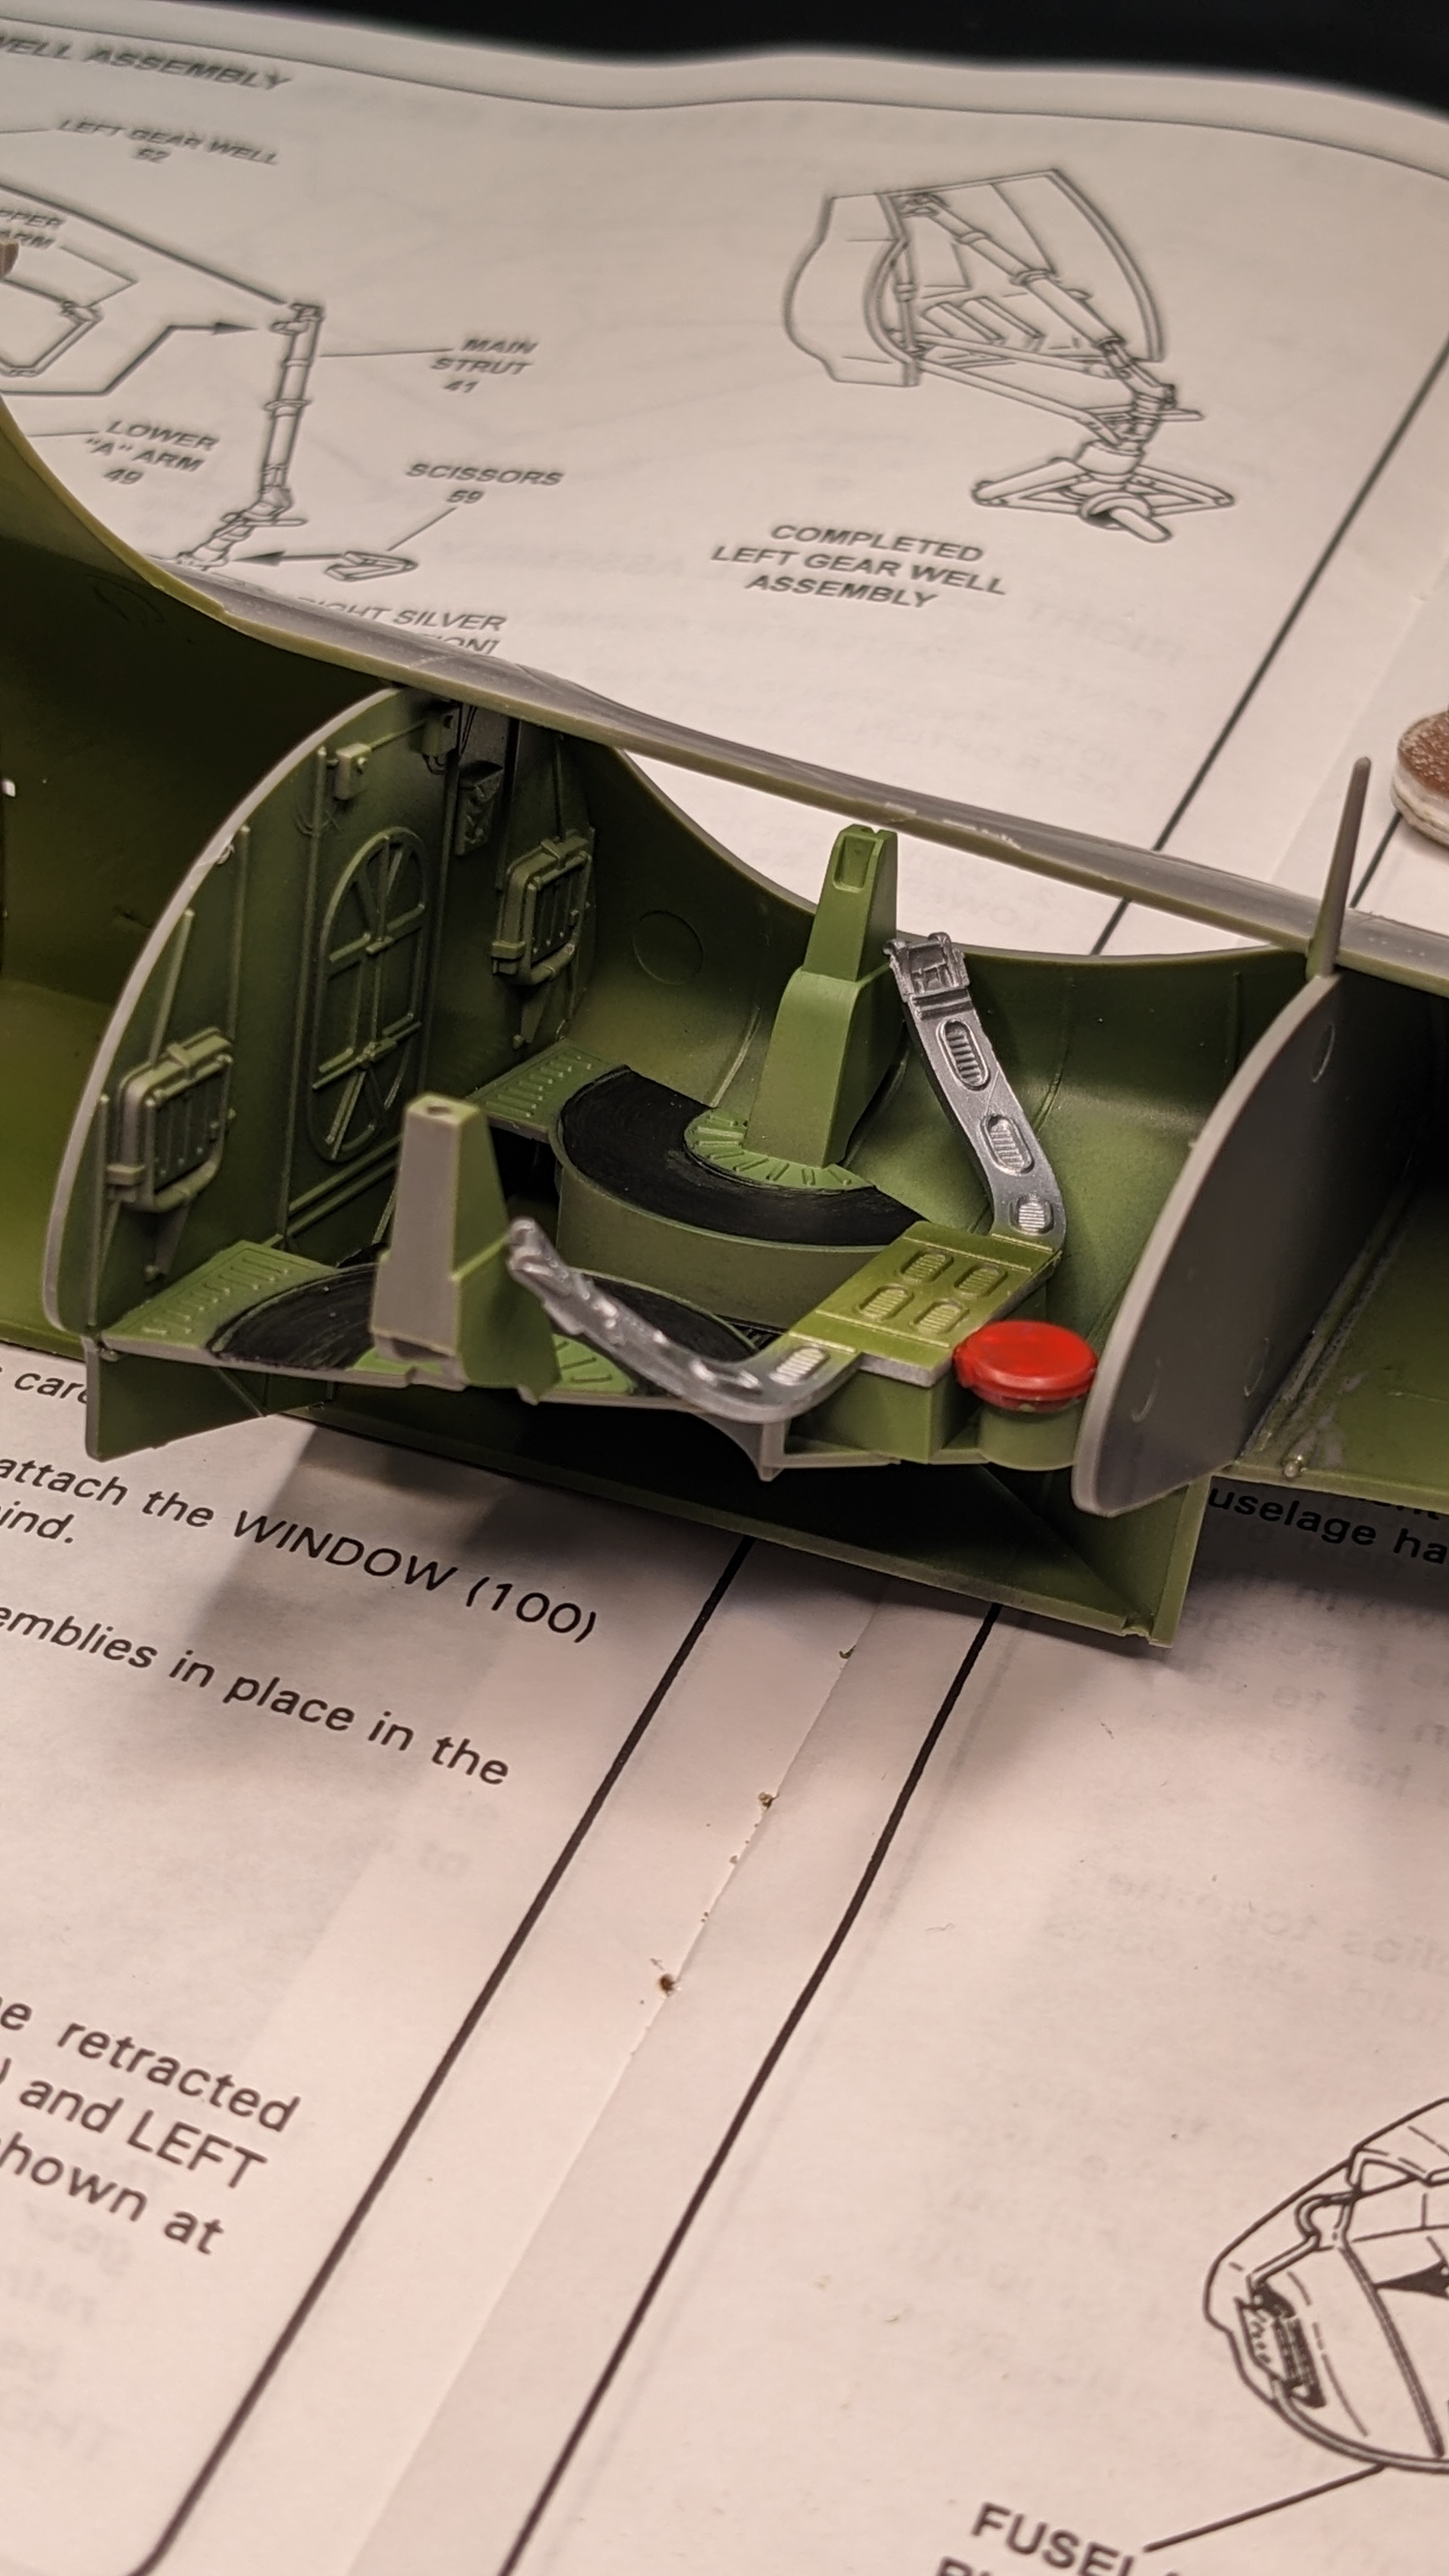
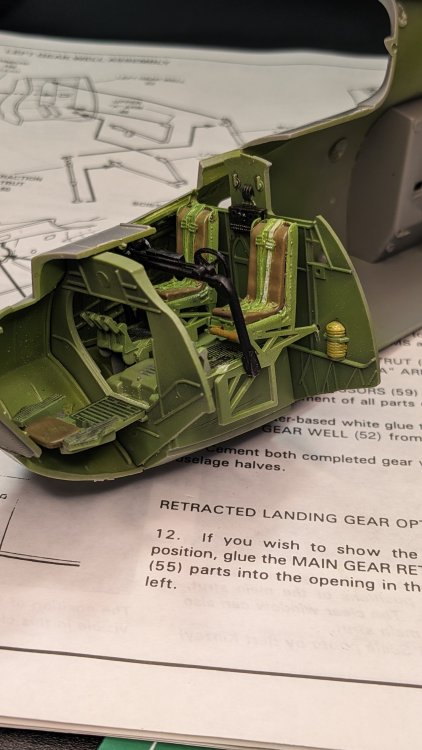
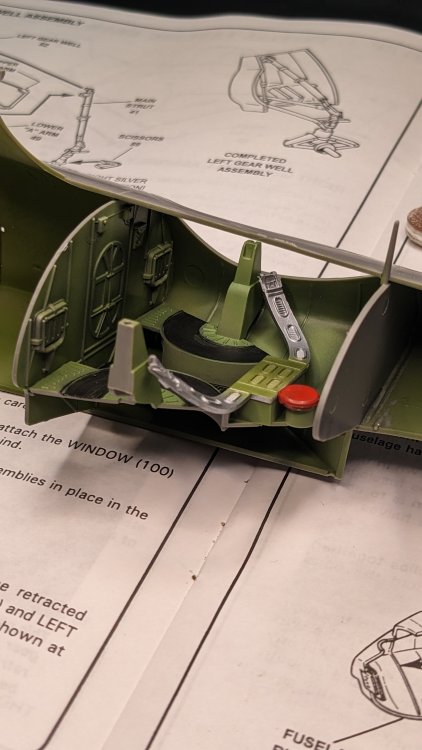
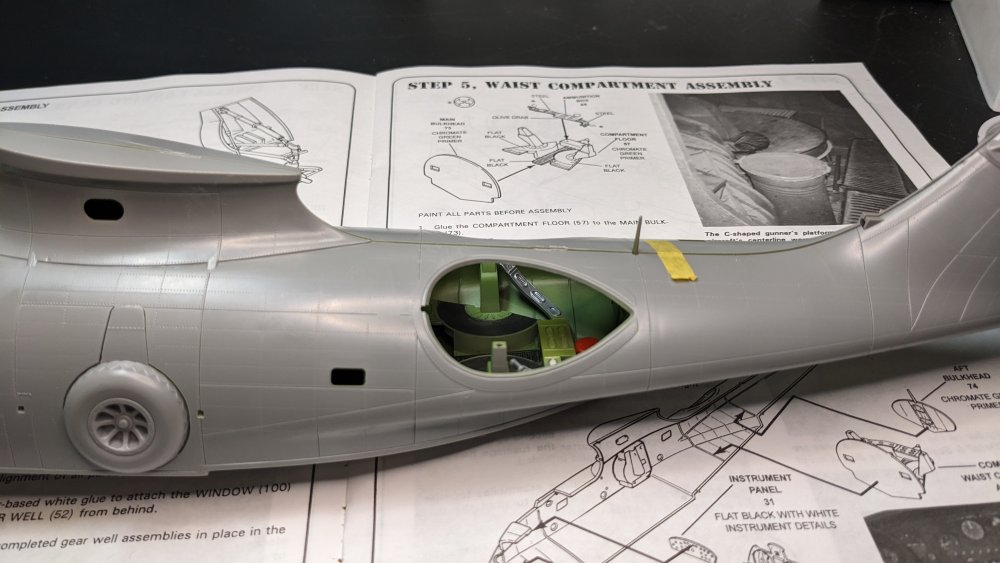
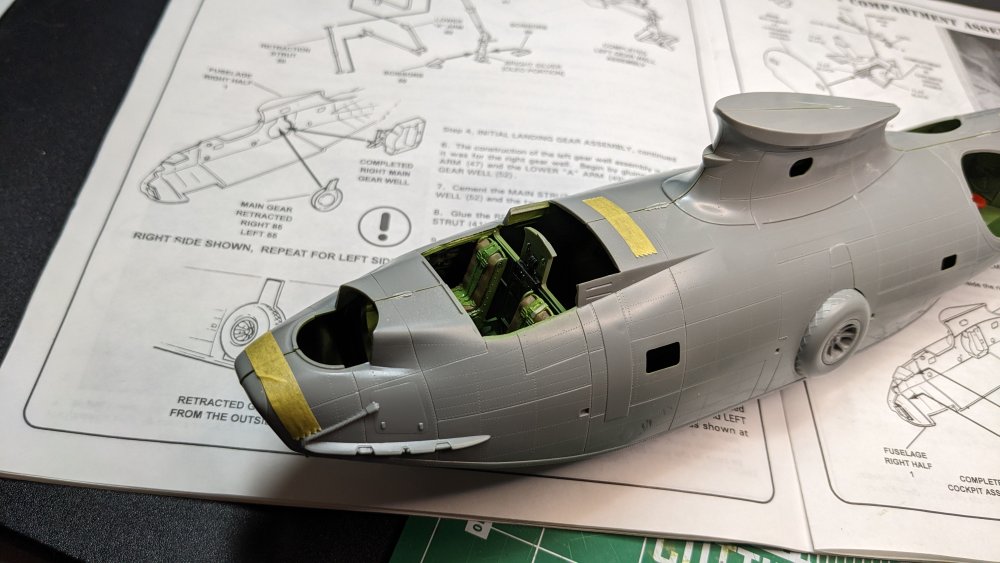
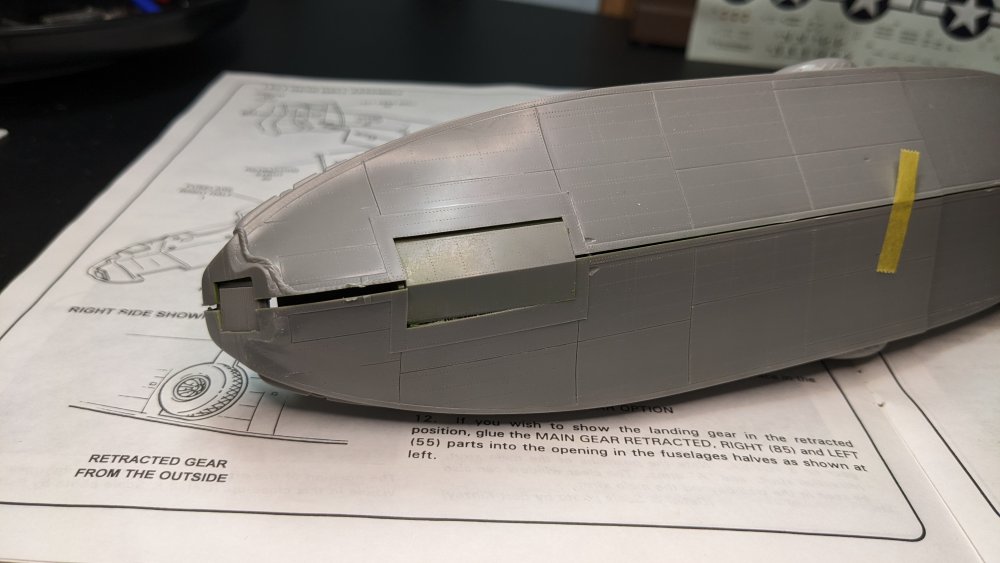
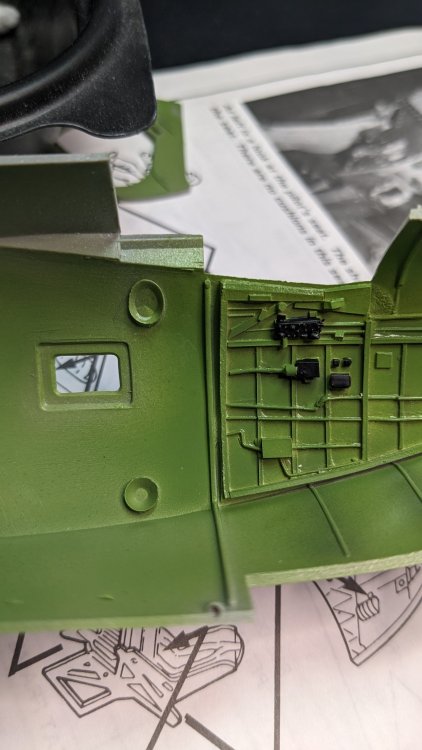
Next stage was to work on the interior - cleaning up some of those huge Ejector pin marks and get the bulkheads installed. Took a bit of fitting but things MOSTLY went right. For some reason put the wheel well interior section in. Mostly in case something was actually visible through the tiny windows. It will be very dark in there once the fuselage is closed up. Notice the opening for a small window into the wheel well. The red lid is to the toilet - in pictures it is really green, but what the heck. The waist machine guns get added after the fuselage is closed up. The fuselage looks like it will come together pretty well. The main landing gear is a one-piece insert on each side of the fuselage. There is a fit problem at the bottom. Under the cockpit are the doors for the nose gear. In-flight this is one piece which looks like it is a bit long for the opening in the fuselage. The fit has been pretty tight in all of the previous test fittings so maybe with some work it will slot in ok. Will look at it tomorrow or Friday. Looks like there is a mooring rope molded into the fuselage nose. More to come!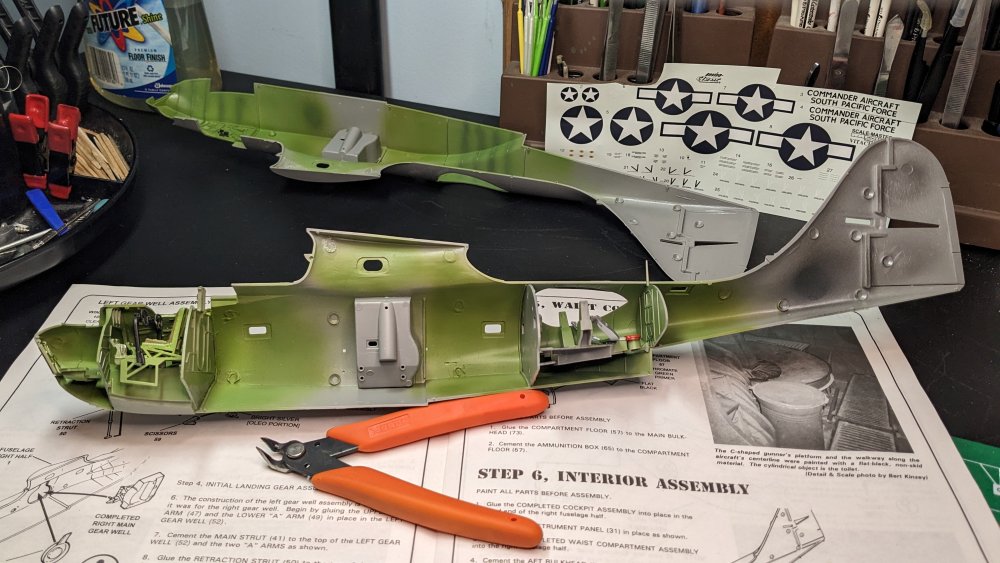
- 291 replies
-
- 12
-
-
And it SPINS!! THAT is a winner! What a space-saver. Hmmm. I think I have an old white 'Lazy-Susan' bottle holder somewhere in the back reaches of the closet. I like to pull down the colors I am using for particular builds and this is one way of doing that.
-
Peter - Thanks for your terrific shots and it reminds me I really should just keep a photo booth set up. The office looks terrific and the fuselage is well along. Definitely agree, these 1996/1997 kits are really surprising us on their fit and detail!
-
Ernie, Just beautiful! Looks amazing and you can definitely see the time and effort you put into this build. The scheme is one of my favorites. Oh, and all that work to drill out those dive flaps really pays off - especially in this scale. The wings in general look terrific. Still watching! Chris
-
Revell P-51D late version #2
CANicoll replied to JohnB's topic in LSM 1/35 and Larger Work In Progress
Nice!!!! Your paint is always sooo smoooth.... How did you mask the spinnner? Always my bugaboo... -
Amazing what you can find in a 'beauty' store. The make-up applicators (little sponges on the end of a small plastic stick) are dirt cheap there, as well as the three-grit fingernail polishers.
-
Thanks Peter and Scott. I have a little bottle of it sitting on my bench now. I think it is a pretty good consistency - we will see. Hopefully will get to use it today. I didn't realize that Tamiya Extra Thin cement is mostly acetone. If my old sprues don't work, I'll pull some newer stuff and try that.
-
Same as Tim. When does the hotel reservations open up?
-
ProModeler 1/48 PBY-5A Catalina + Goodies, RFI
CANicoll replied to CANicoll's topic in Let’s Get Wet Group Build.
Thanks Peter and Gary! I was hoping to make more progress and maybe actually close up the fuselage last night, but it was not to be. Maybe tonight! Still trying to get a bit more color into the cockpit but also not really sure how much of this will actually be visible anyway. Chris -
ProModeler 1/48 PBY-5A Catalina + Goodies, RFI
CANicoll replied to CANicoll's topic in Let’s Get Wet Group Build.
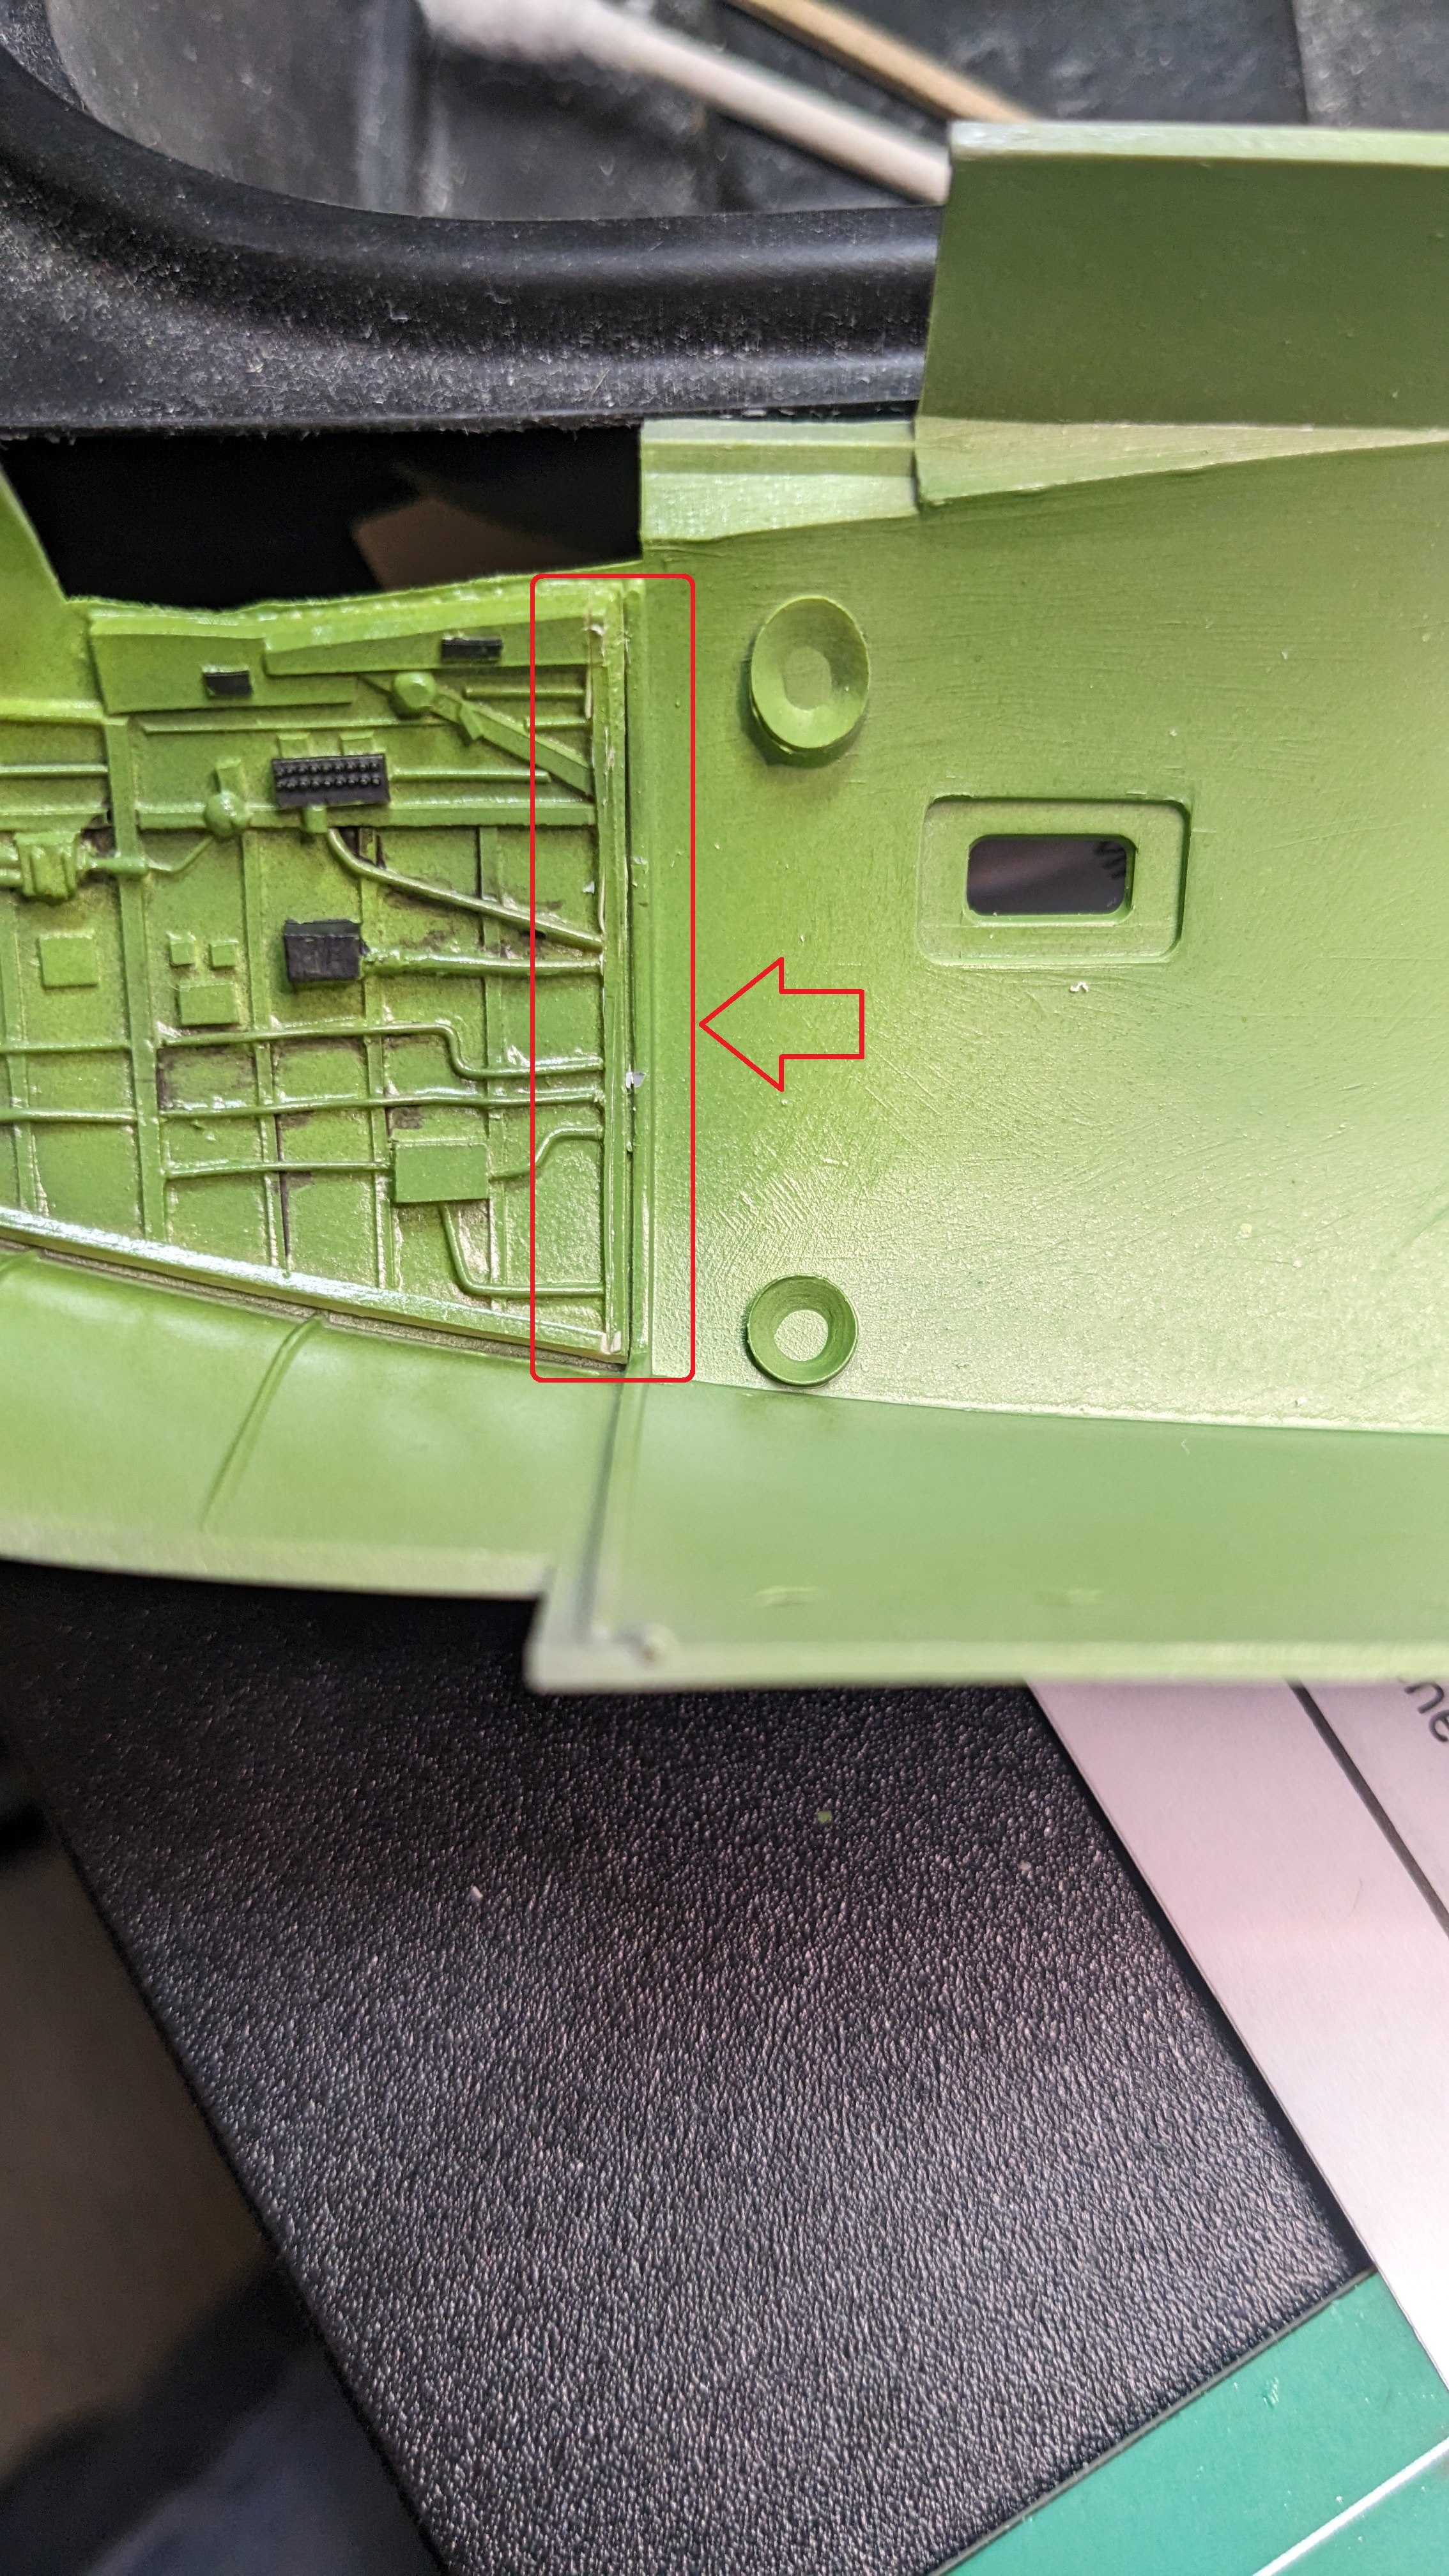
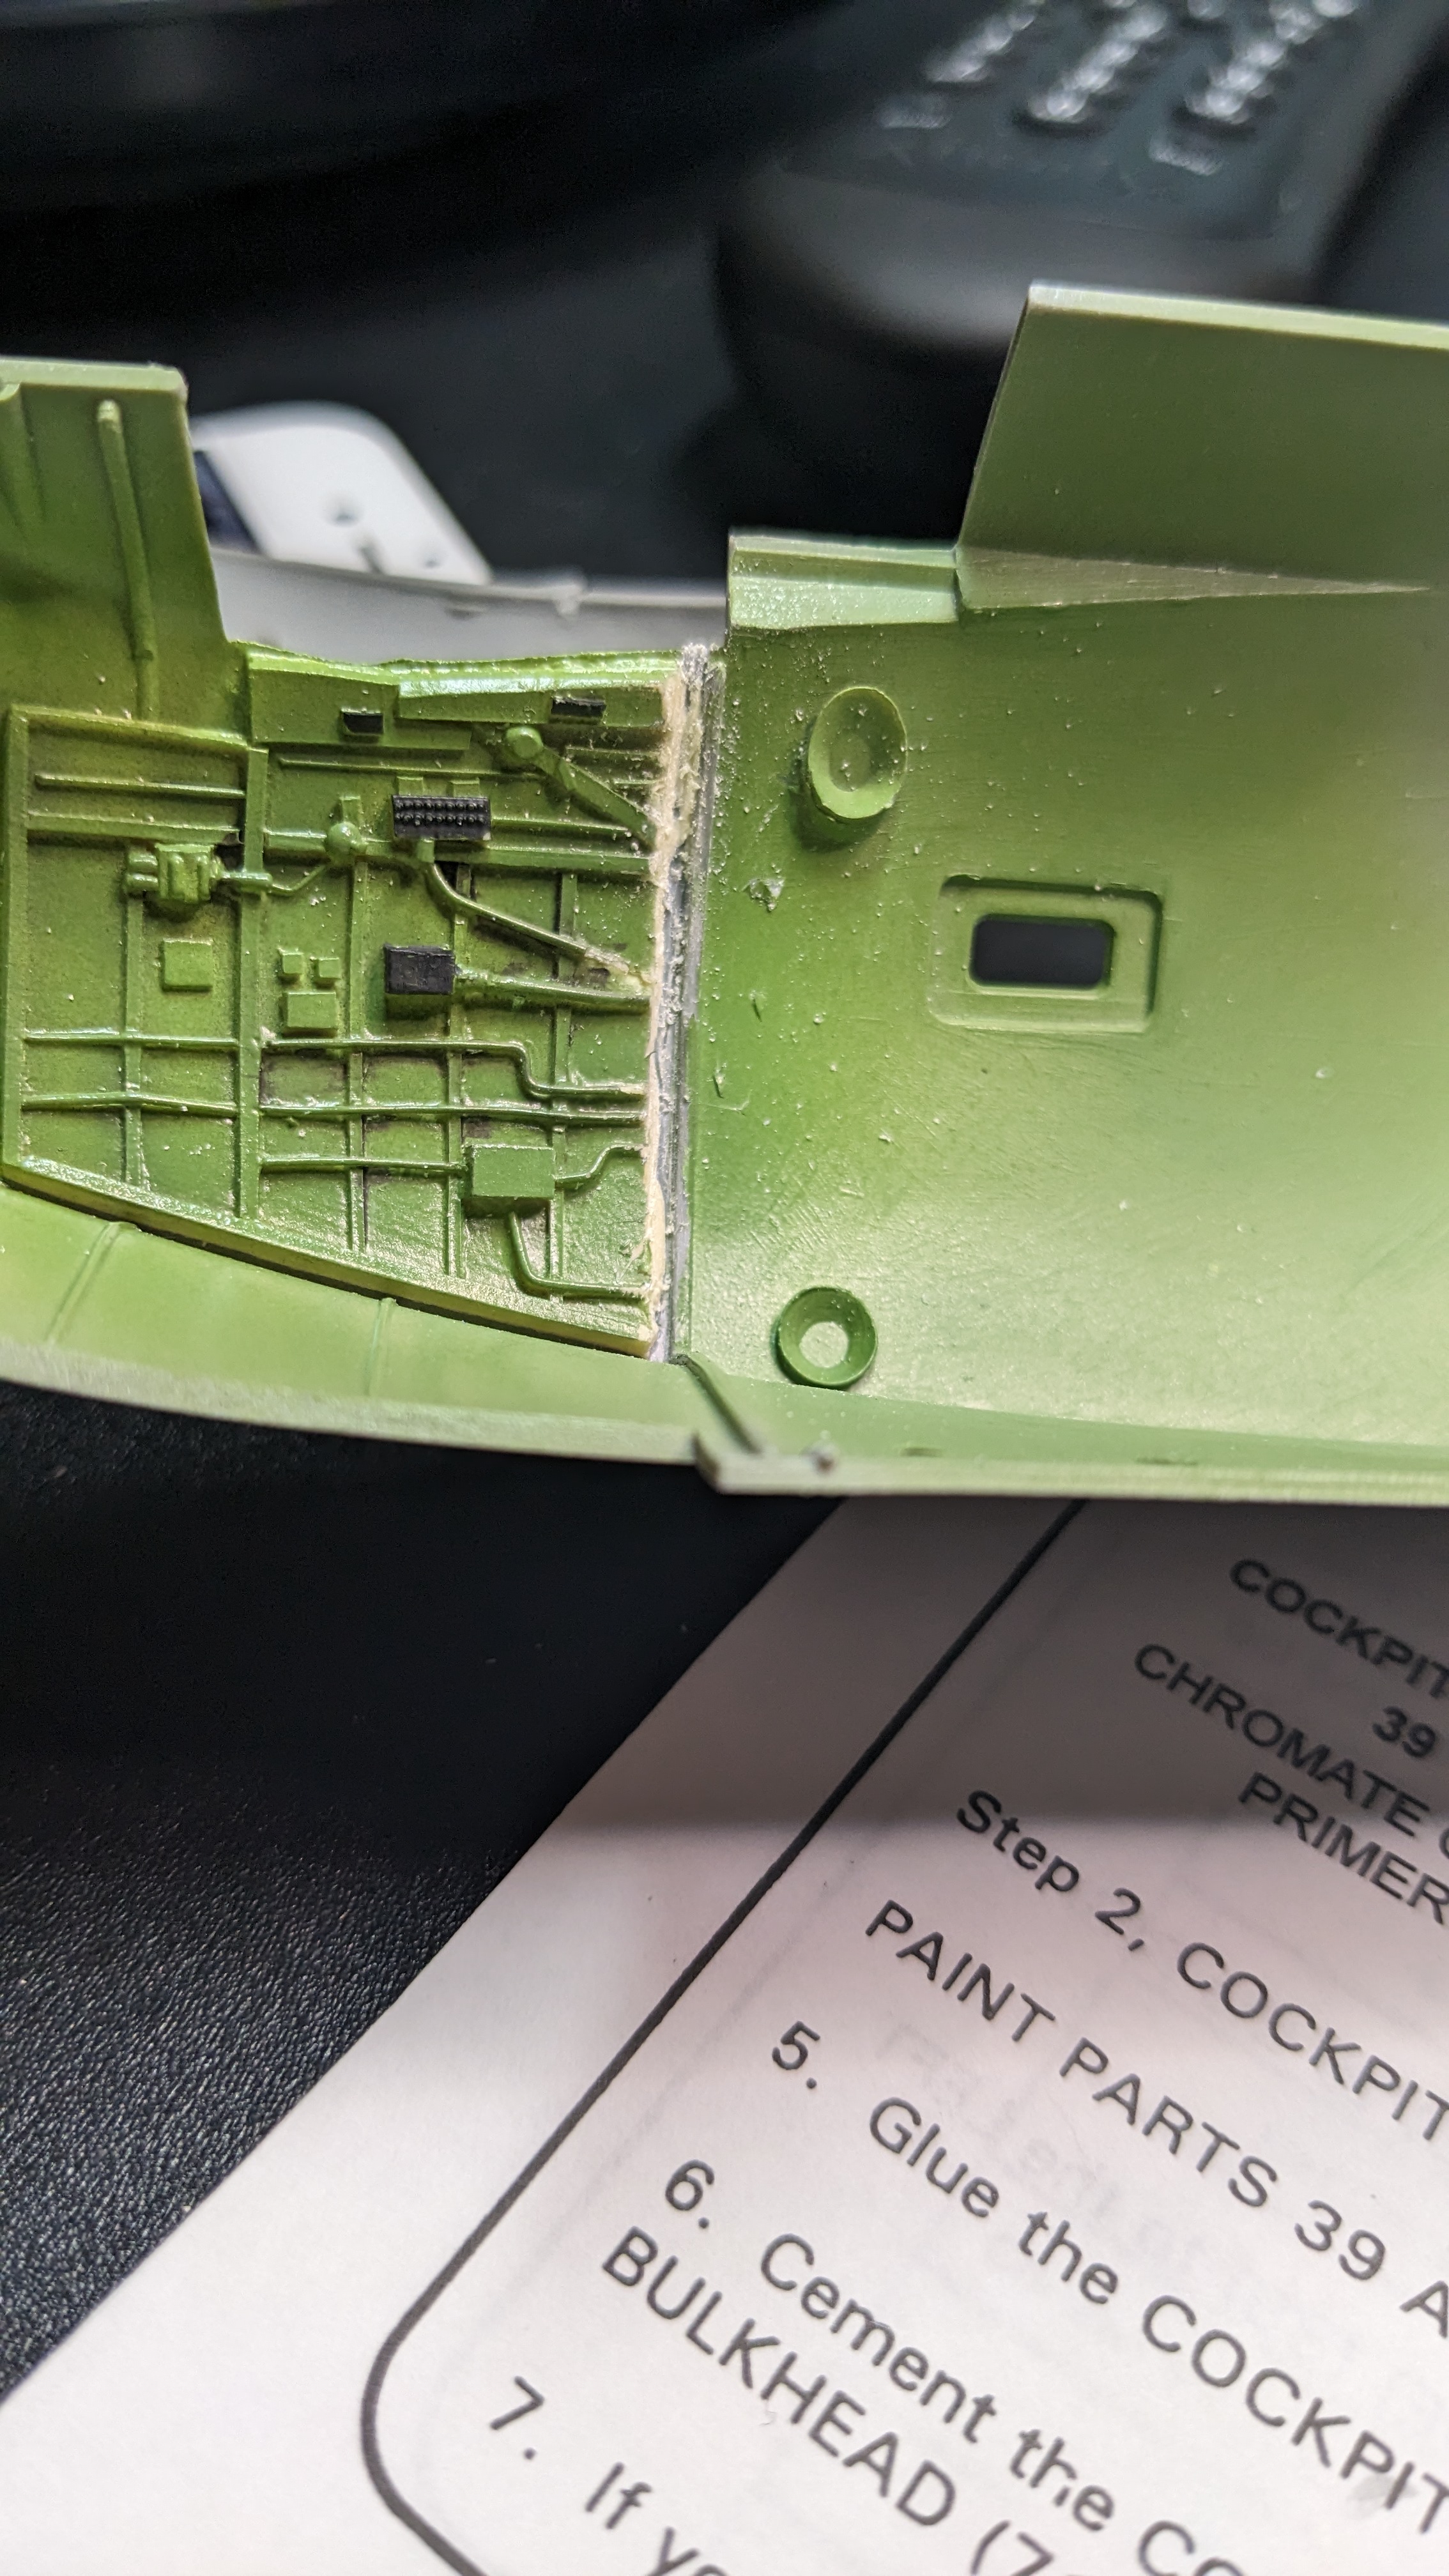
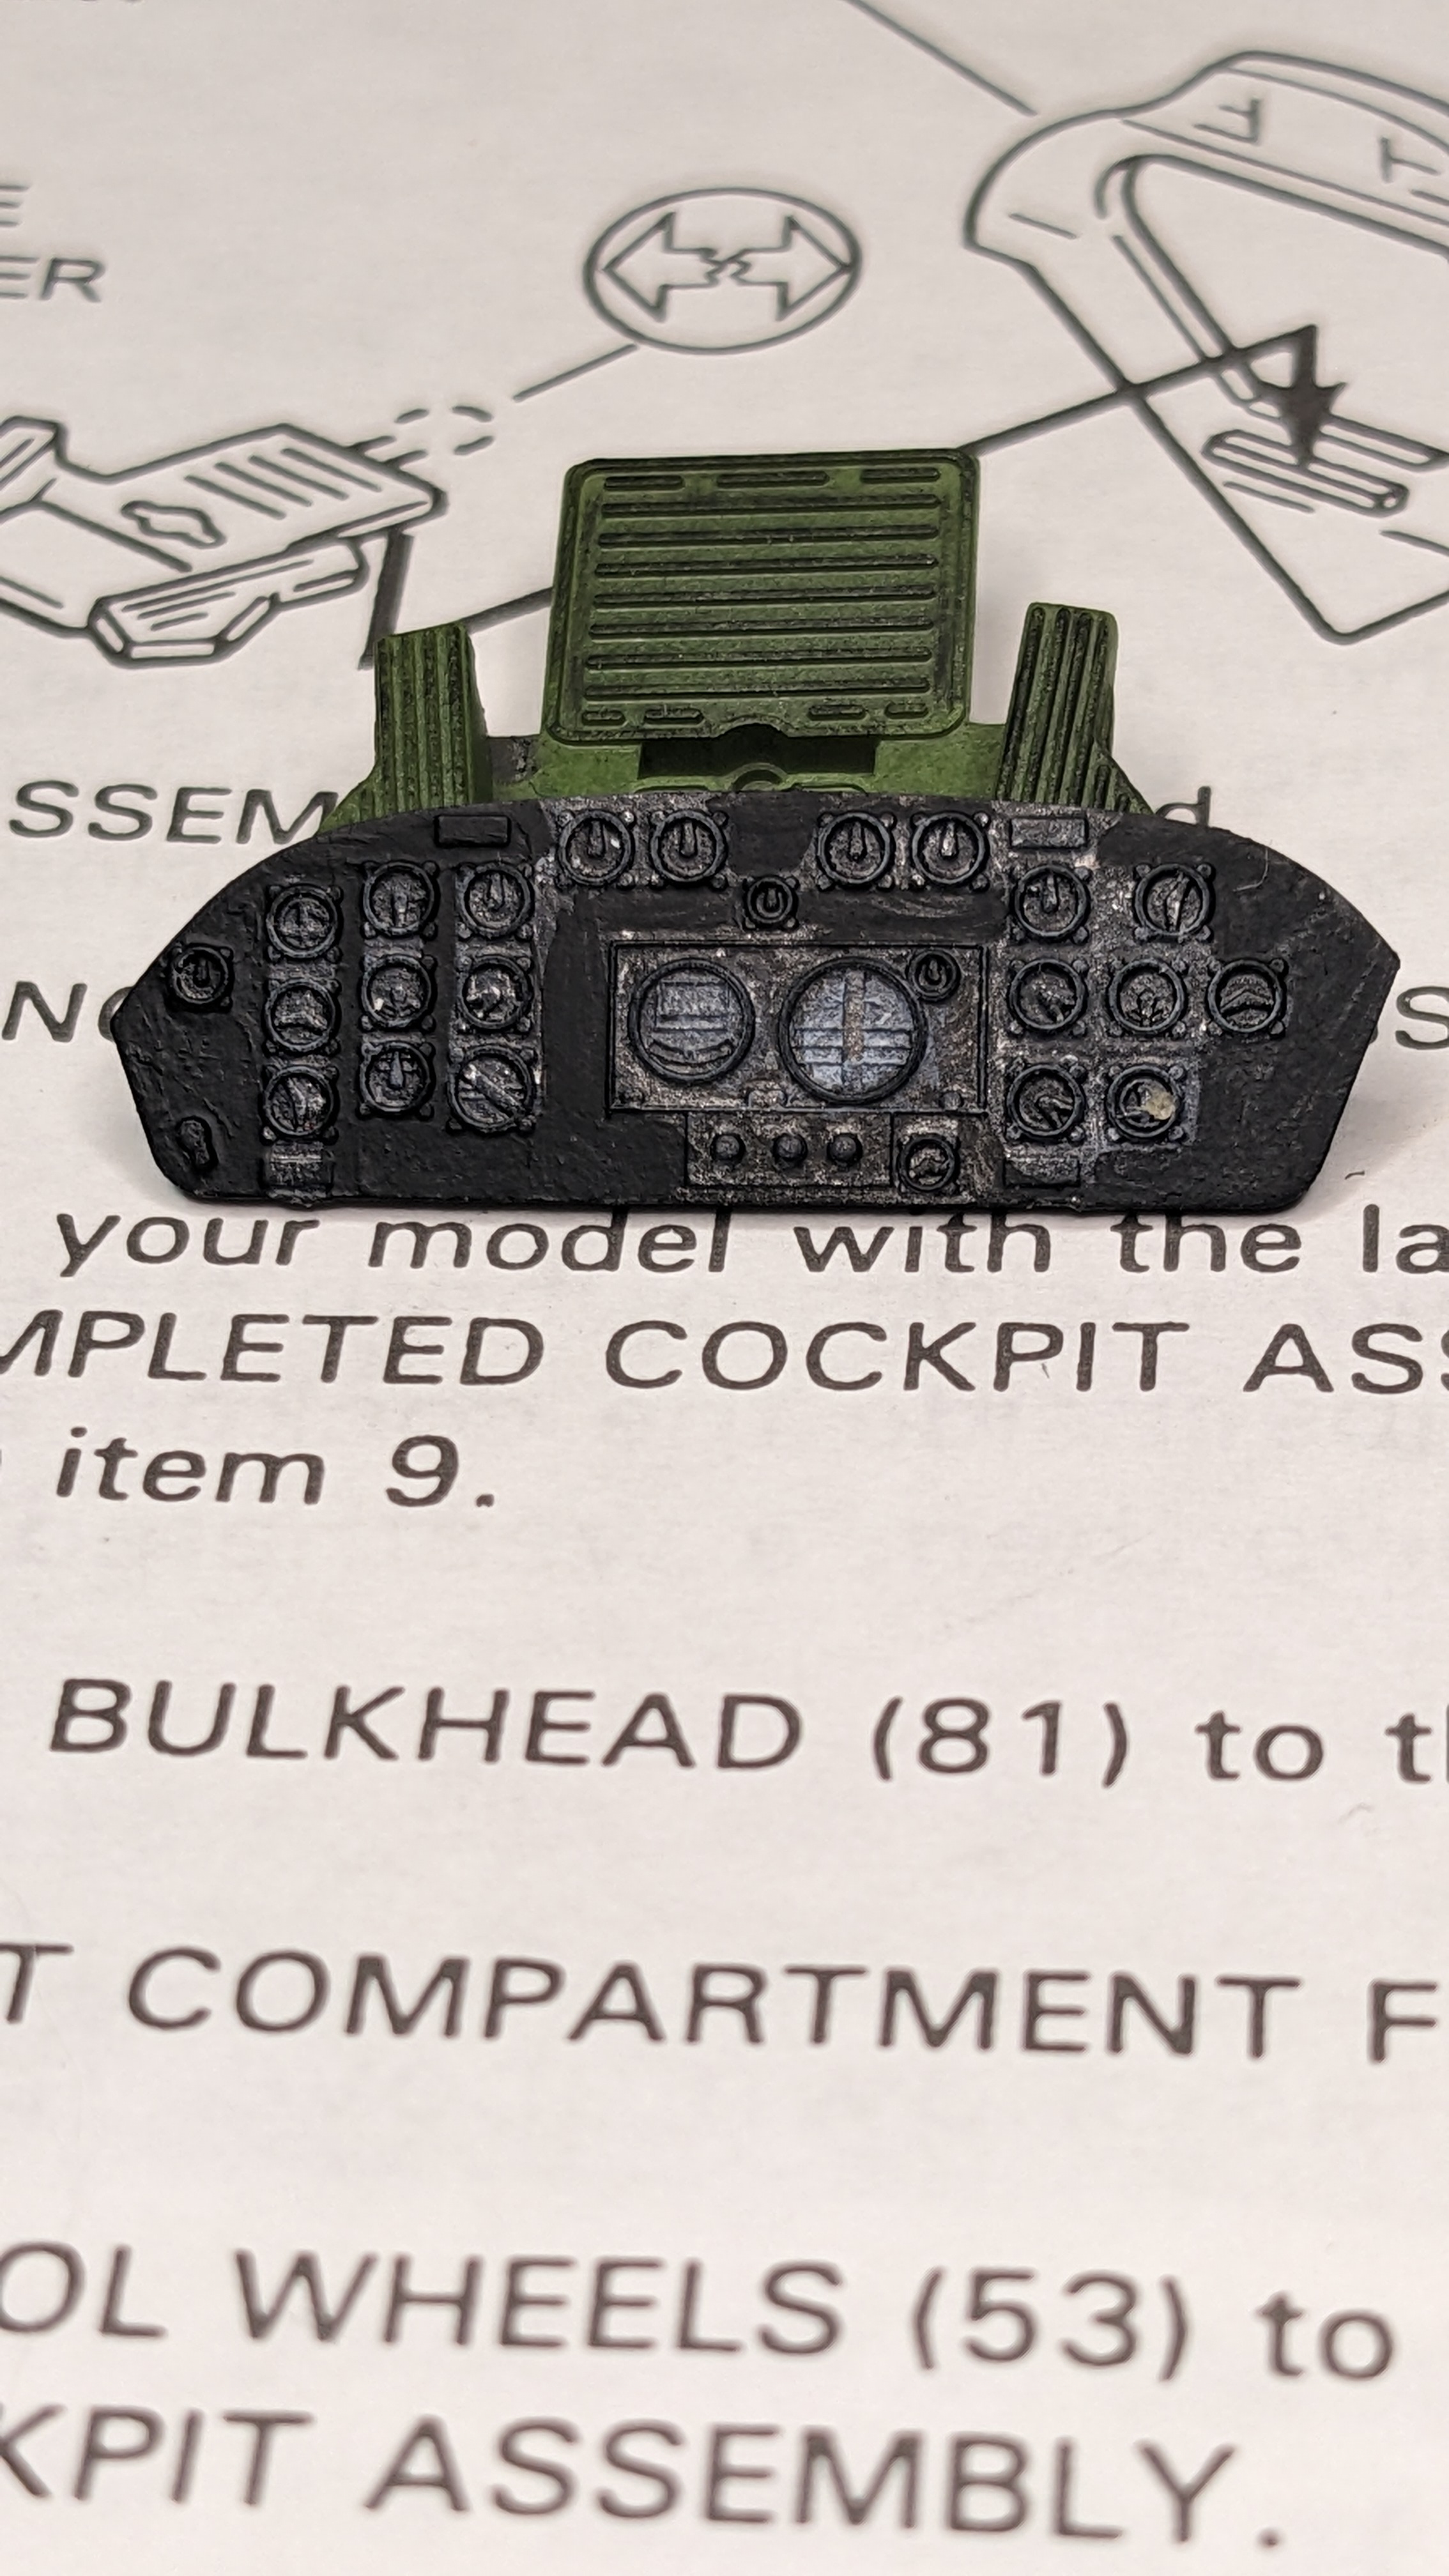
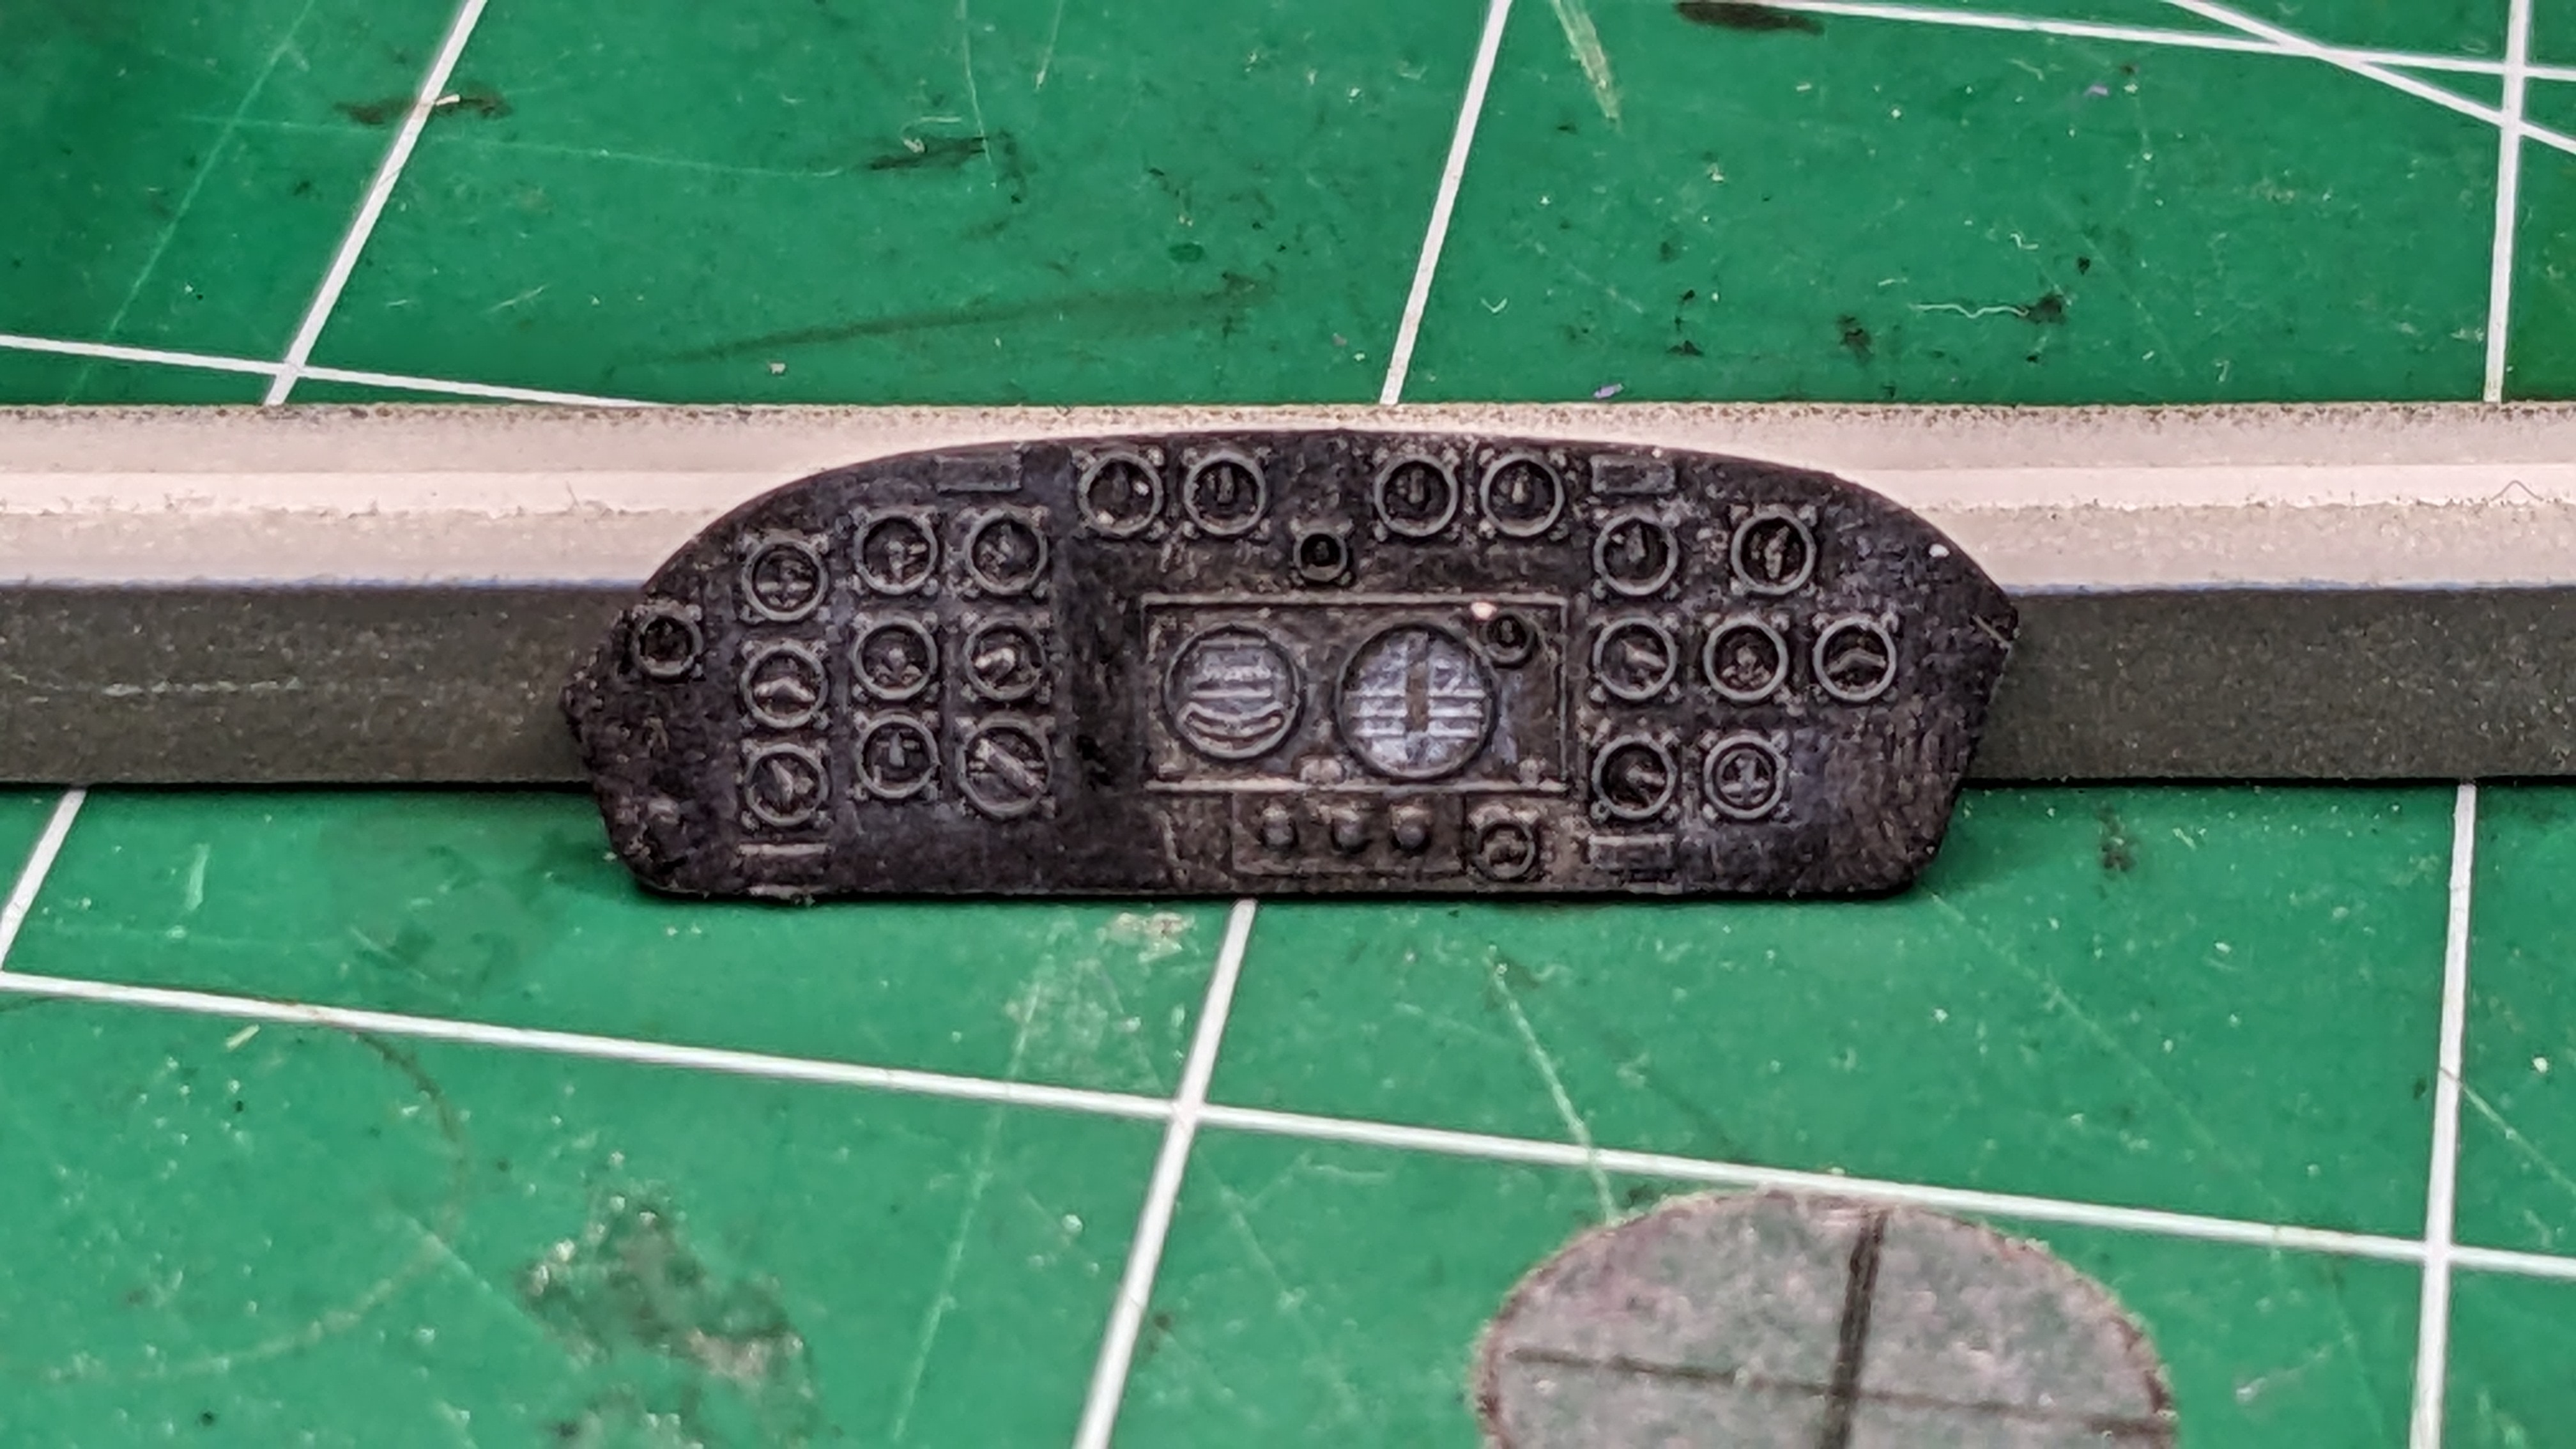
Well, already had to fix a problem I created. I'm blaming really vague instructions, but also, I should have done some dry fitting before gluing the sidewalls in place. Fortunately, the fix was not that hard. This sidewall ended up too far aft, meaning it blocked the bulkhead behind the cockpit from sitting flush against the fuselage. The other side, fortunately, was already far enough forward - from trying to match the cockpit window outline. The fix was pretty easy, just remove back of the resin sidewall with a razor knife. And the next step is to get the Dremel tool out and shave down those huge ejector pin marks. Took the opportunity to hand paint around the gauges with a flat black and put a drop of clear on the gauges. That is the highlight of the evening!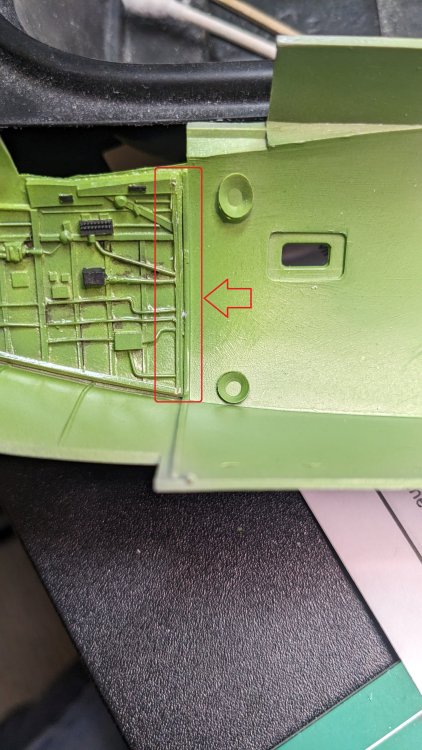

- 291 replies
-
- 12
-
-
ProModeler 1/48 PBY-5A Catalina + Goodies, RFI
CANicoll replied to CANicoll's topic in Let’s Get Wet Group Build.
Hey Scott - I've never masked the national insignia so maybe now is the time. And what better aircraft to do it? All black!!! The insignia should be a medium gray if I remember correctly. If I screw it up, I just paint over it and try again. -
Coming along and can't wait to see how the hull turns out. Honestly, you lost me at '.030'. How do you cut brass (or anything for that matter!) .030?!?
-
Whoo hoo! Now THAT is a stash! Has anyone else noticed that ZM seems to like displaying US bombers with the right inside engine on fire? That is some mighty fine shooting!
-
And NO sprue!!
-
Gap? How do you apply it? Since you can make it somewhat as thick or thin as you want, do you just kind of brush it on/in? Mine is mixing in an Tamiya Extra Thin bottle, with the brush in the cap. @nmayhew: Interesting the point you make about clear vs color sprue. I've always found clear styrene to be very brittle and easy to snap. Some gray styrene (Tamiya I think?) bends significantly before it snaps. I just used the gray sprues from my Catalina build as there is literally feet of it extra. I wonder if aged styrene works very well (from 1996!)? If I had thought about it I would have pulled some Eduard and/or Tamiya sprue...
-
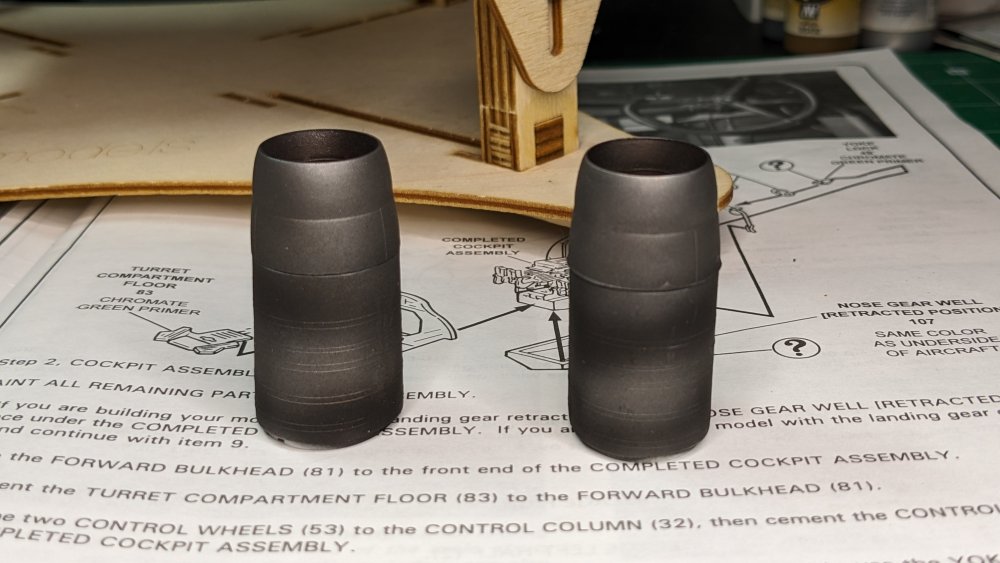
Despite being very distracted with the Catalina, and a lot of woodshop stuff (we have an amazing workshop here) did make some much needed progress on the Voodoo. Got the fuselage together and the wings attached. The wing tops have a tab that goes into the side of the fuselage. The fit isn't perfect and needed some putty to close up. My 'Sprue glue' wasn't ready yet so had to settle for some putty. Already painted the camo color behind the intakes before attaching the wings. Have masked the gray underside where it comes up on the side of the nose. The bummer are the seams and the raised panel lines. Very hard to clean up the seams and not obliterate the lines. Like on the engines/exhaust. Painted with Metalizer Exhaust and banded with Burnt Iron as a start. Ordered some MRP Tan so when that arrives (later this week? with the Catalina masks!) will start on the camo.

-
ProModeler 1/48 PBY-5A Catalina + Goodies, RFI
CANicoll replied to CANicoll's topic in Let’s Get Wet Group Build.
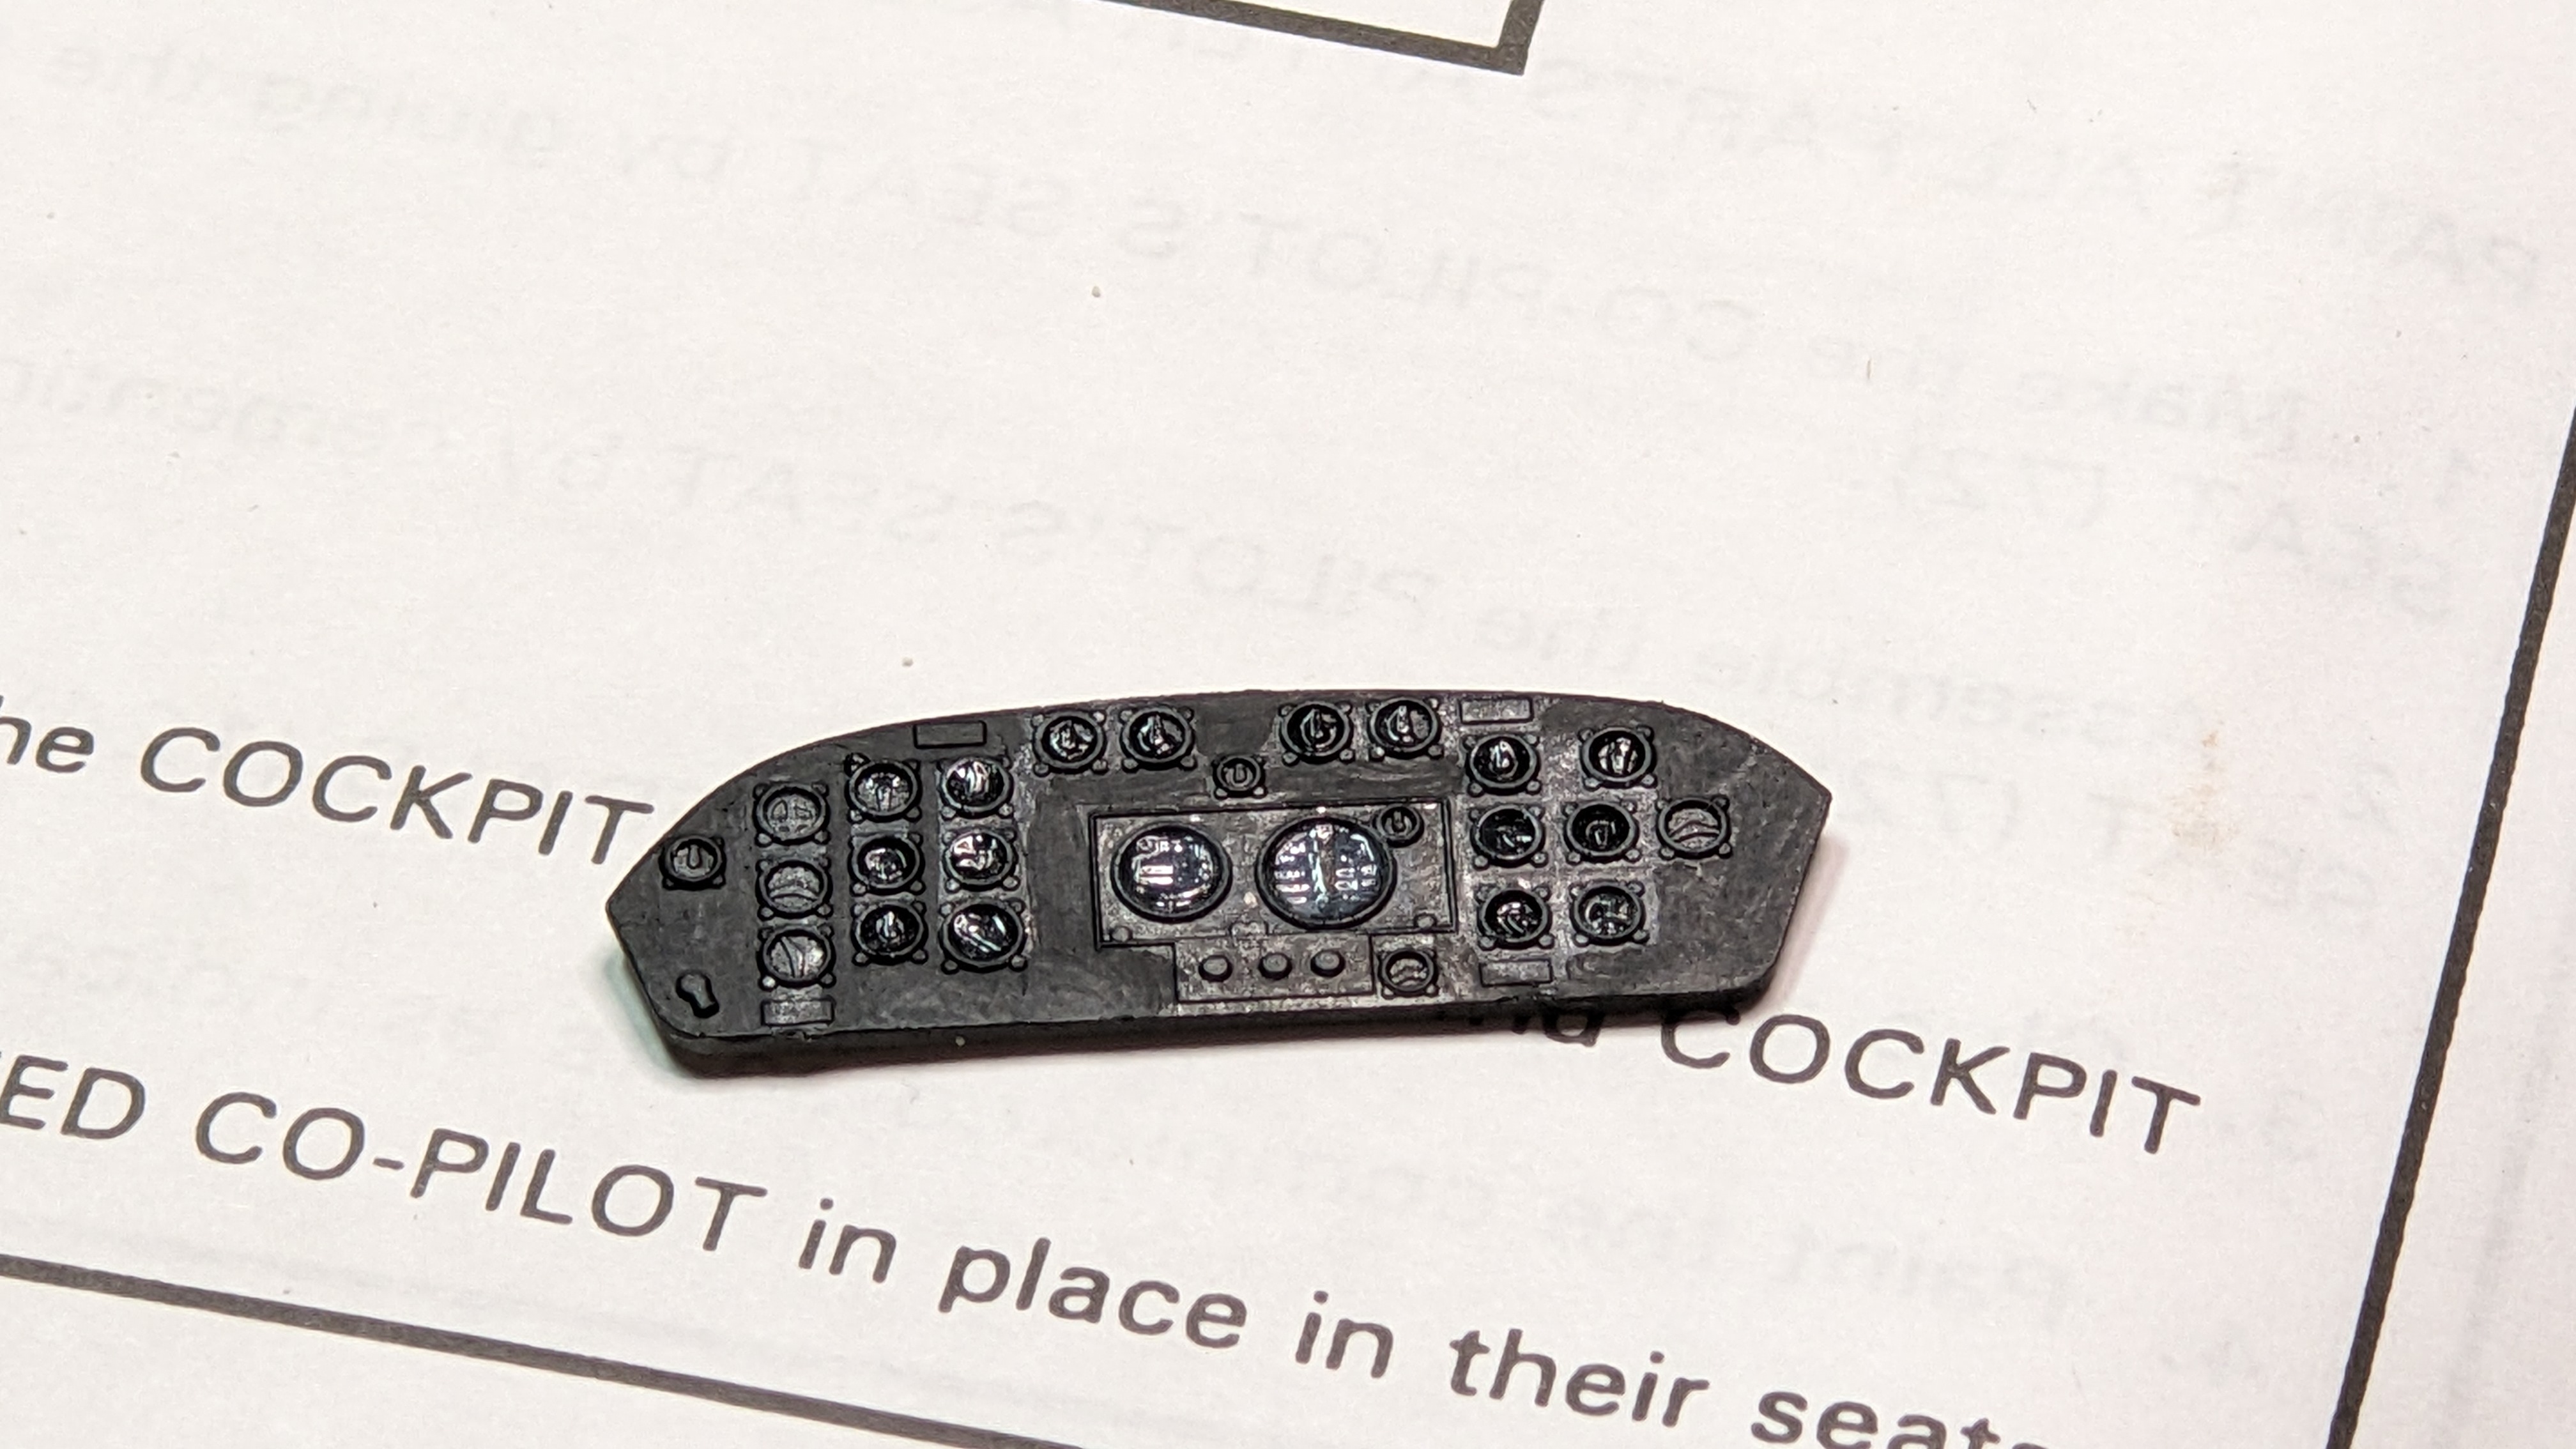
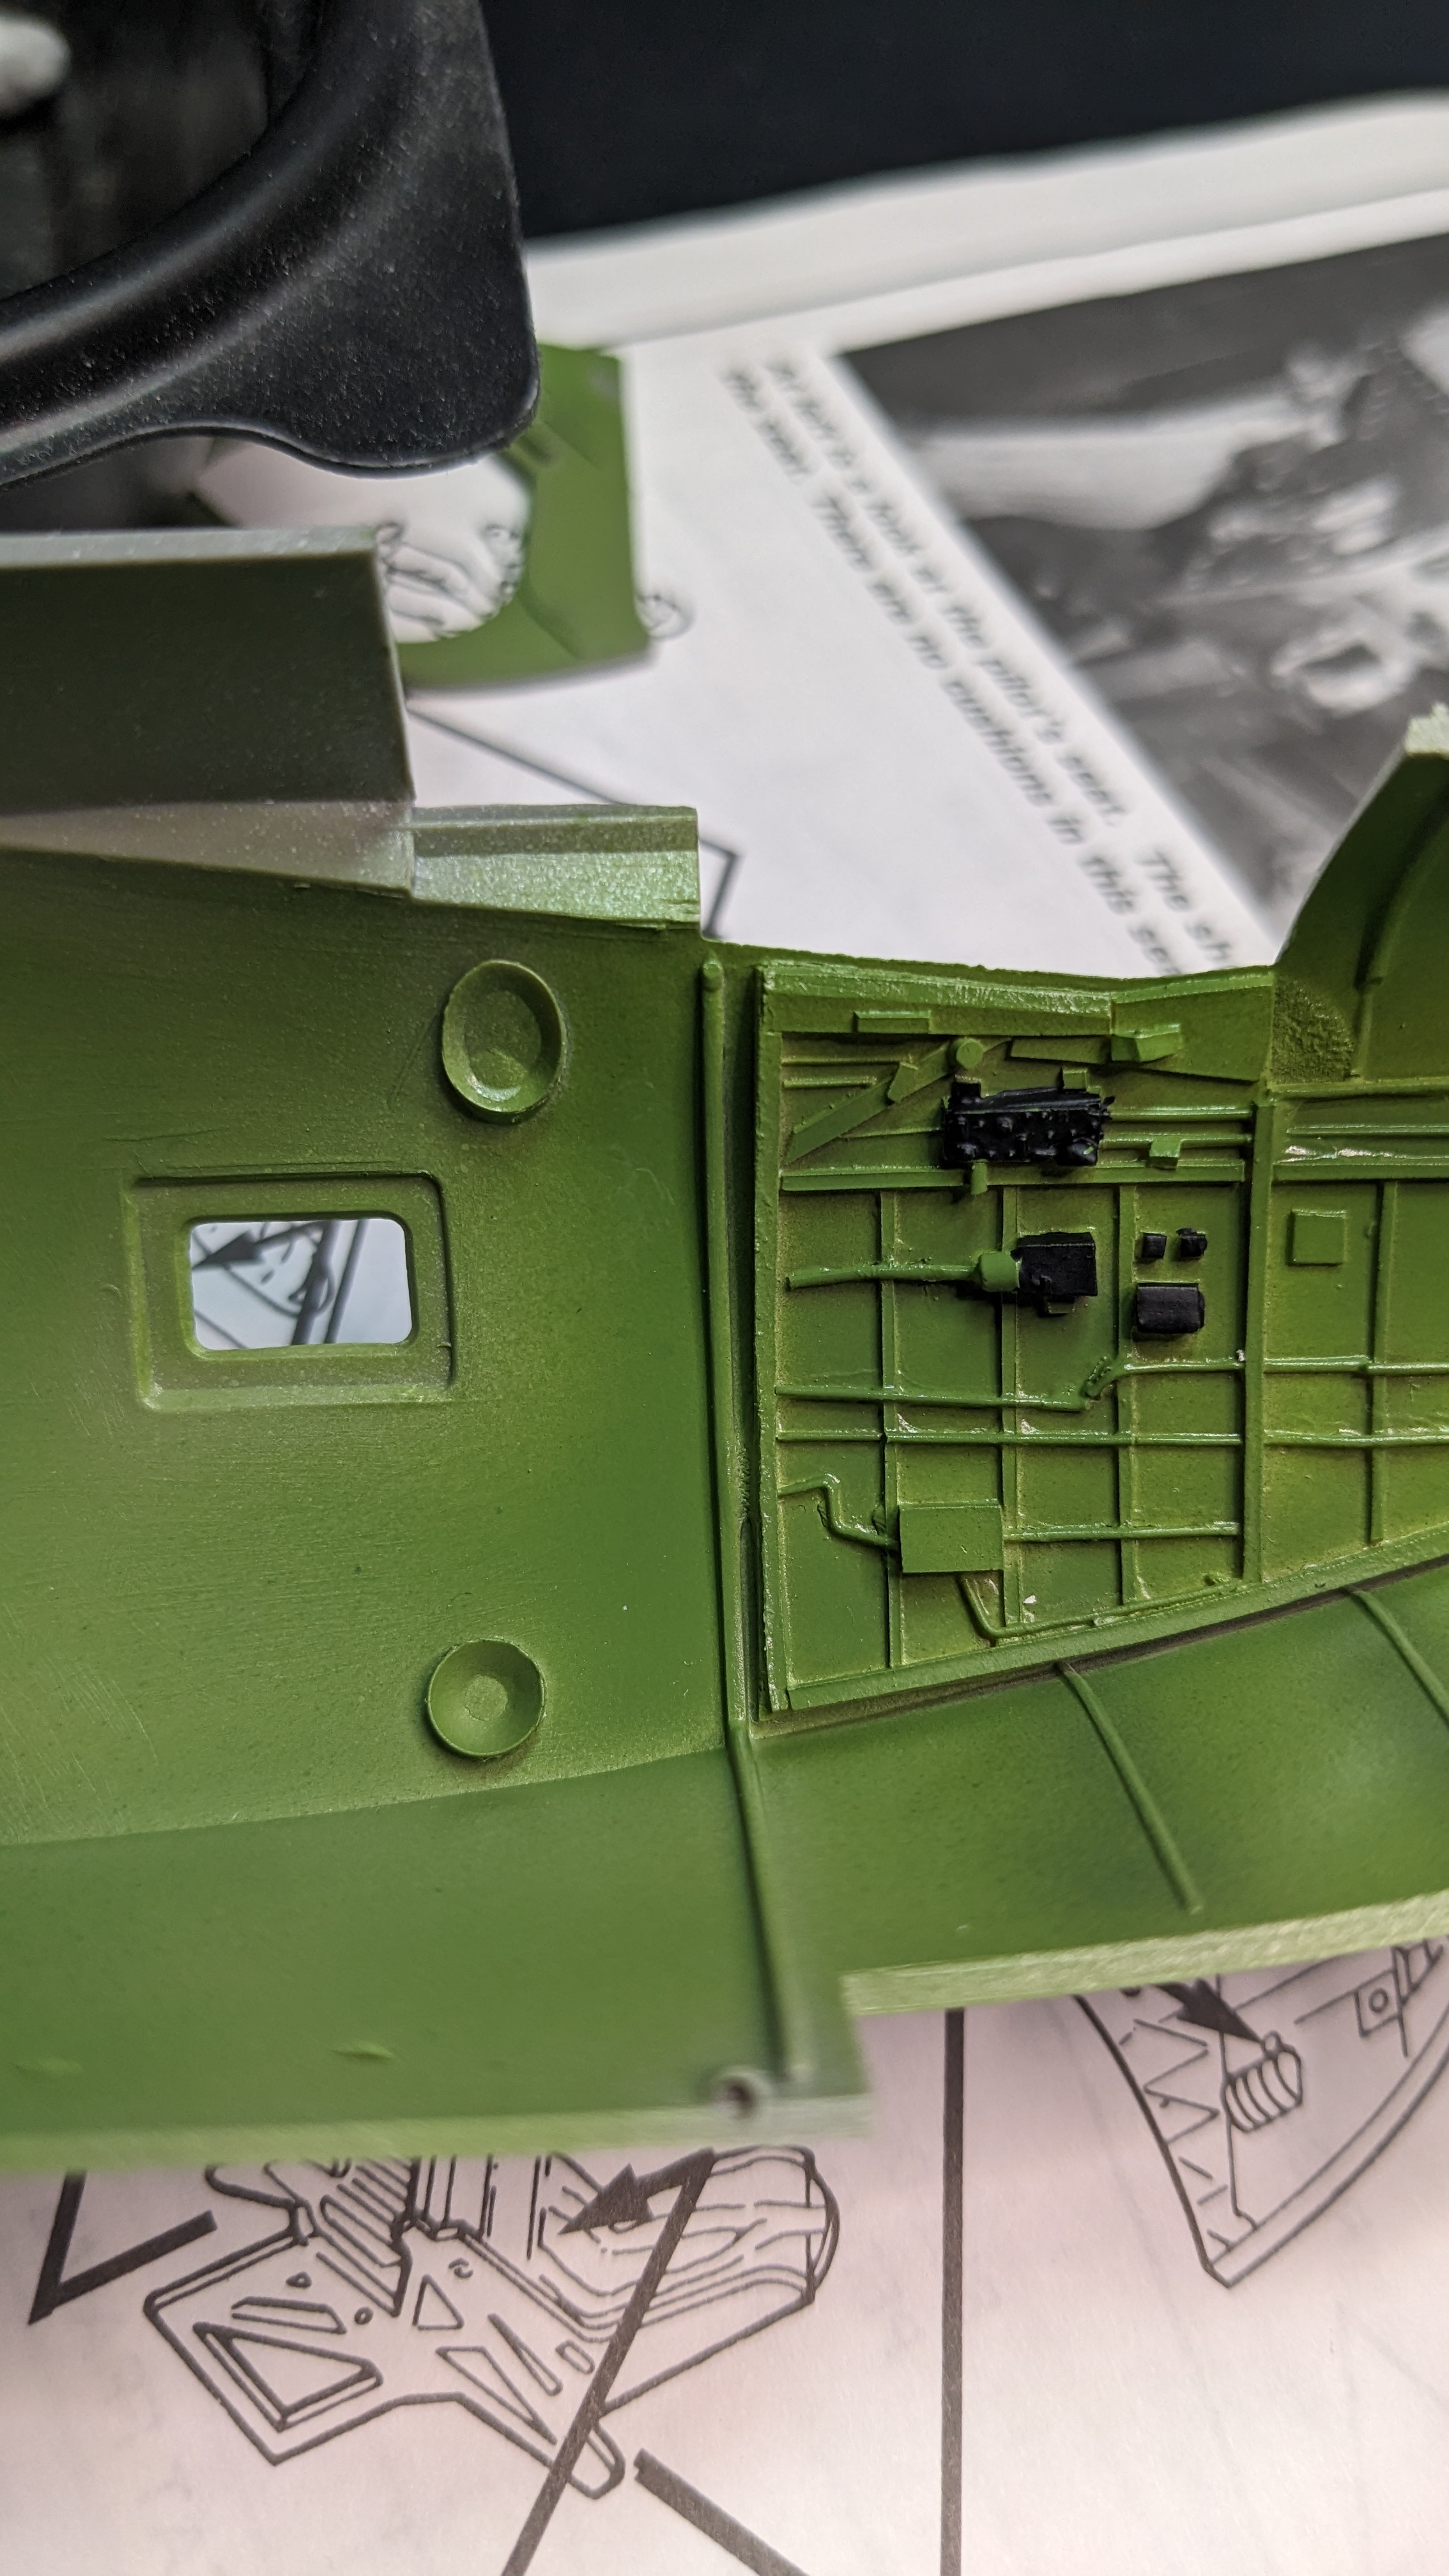
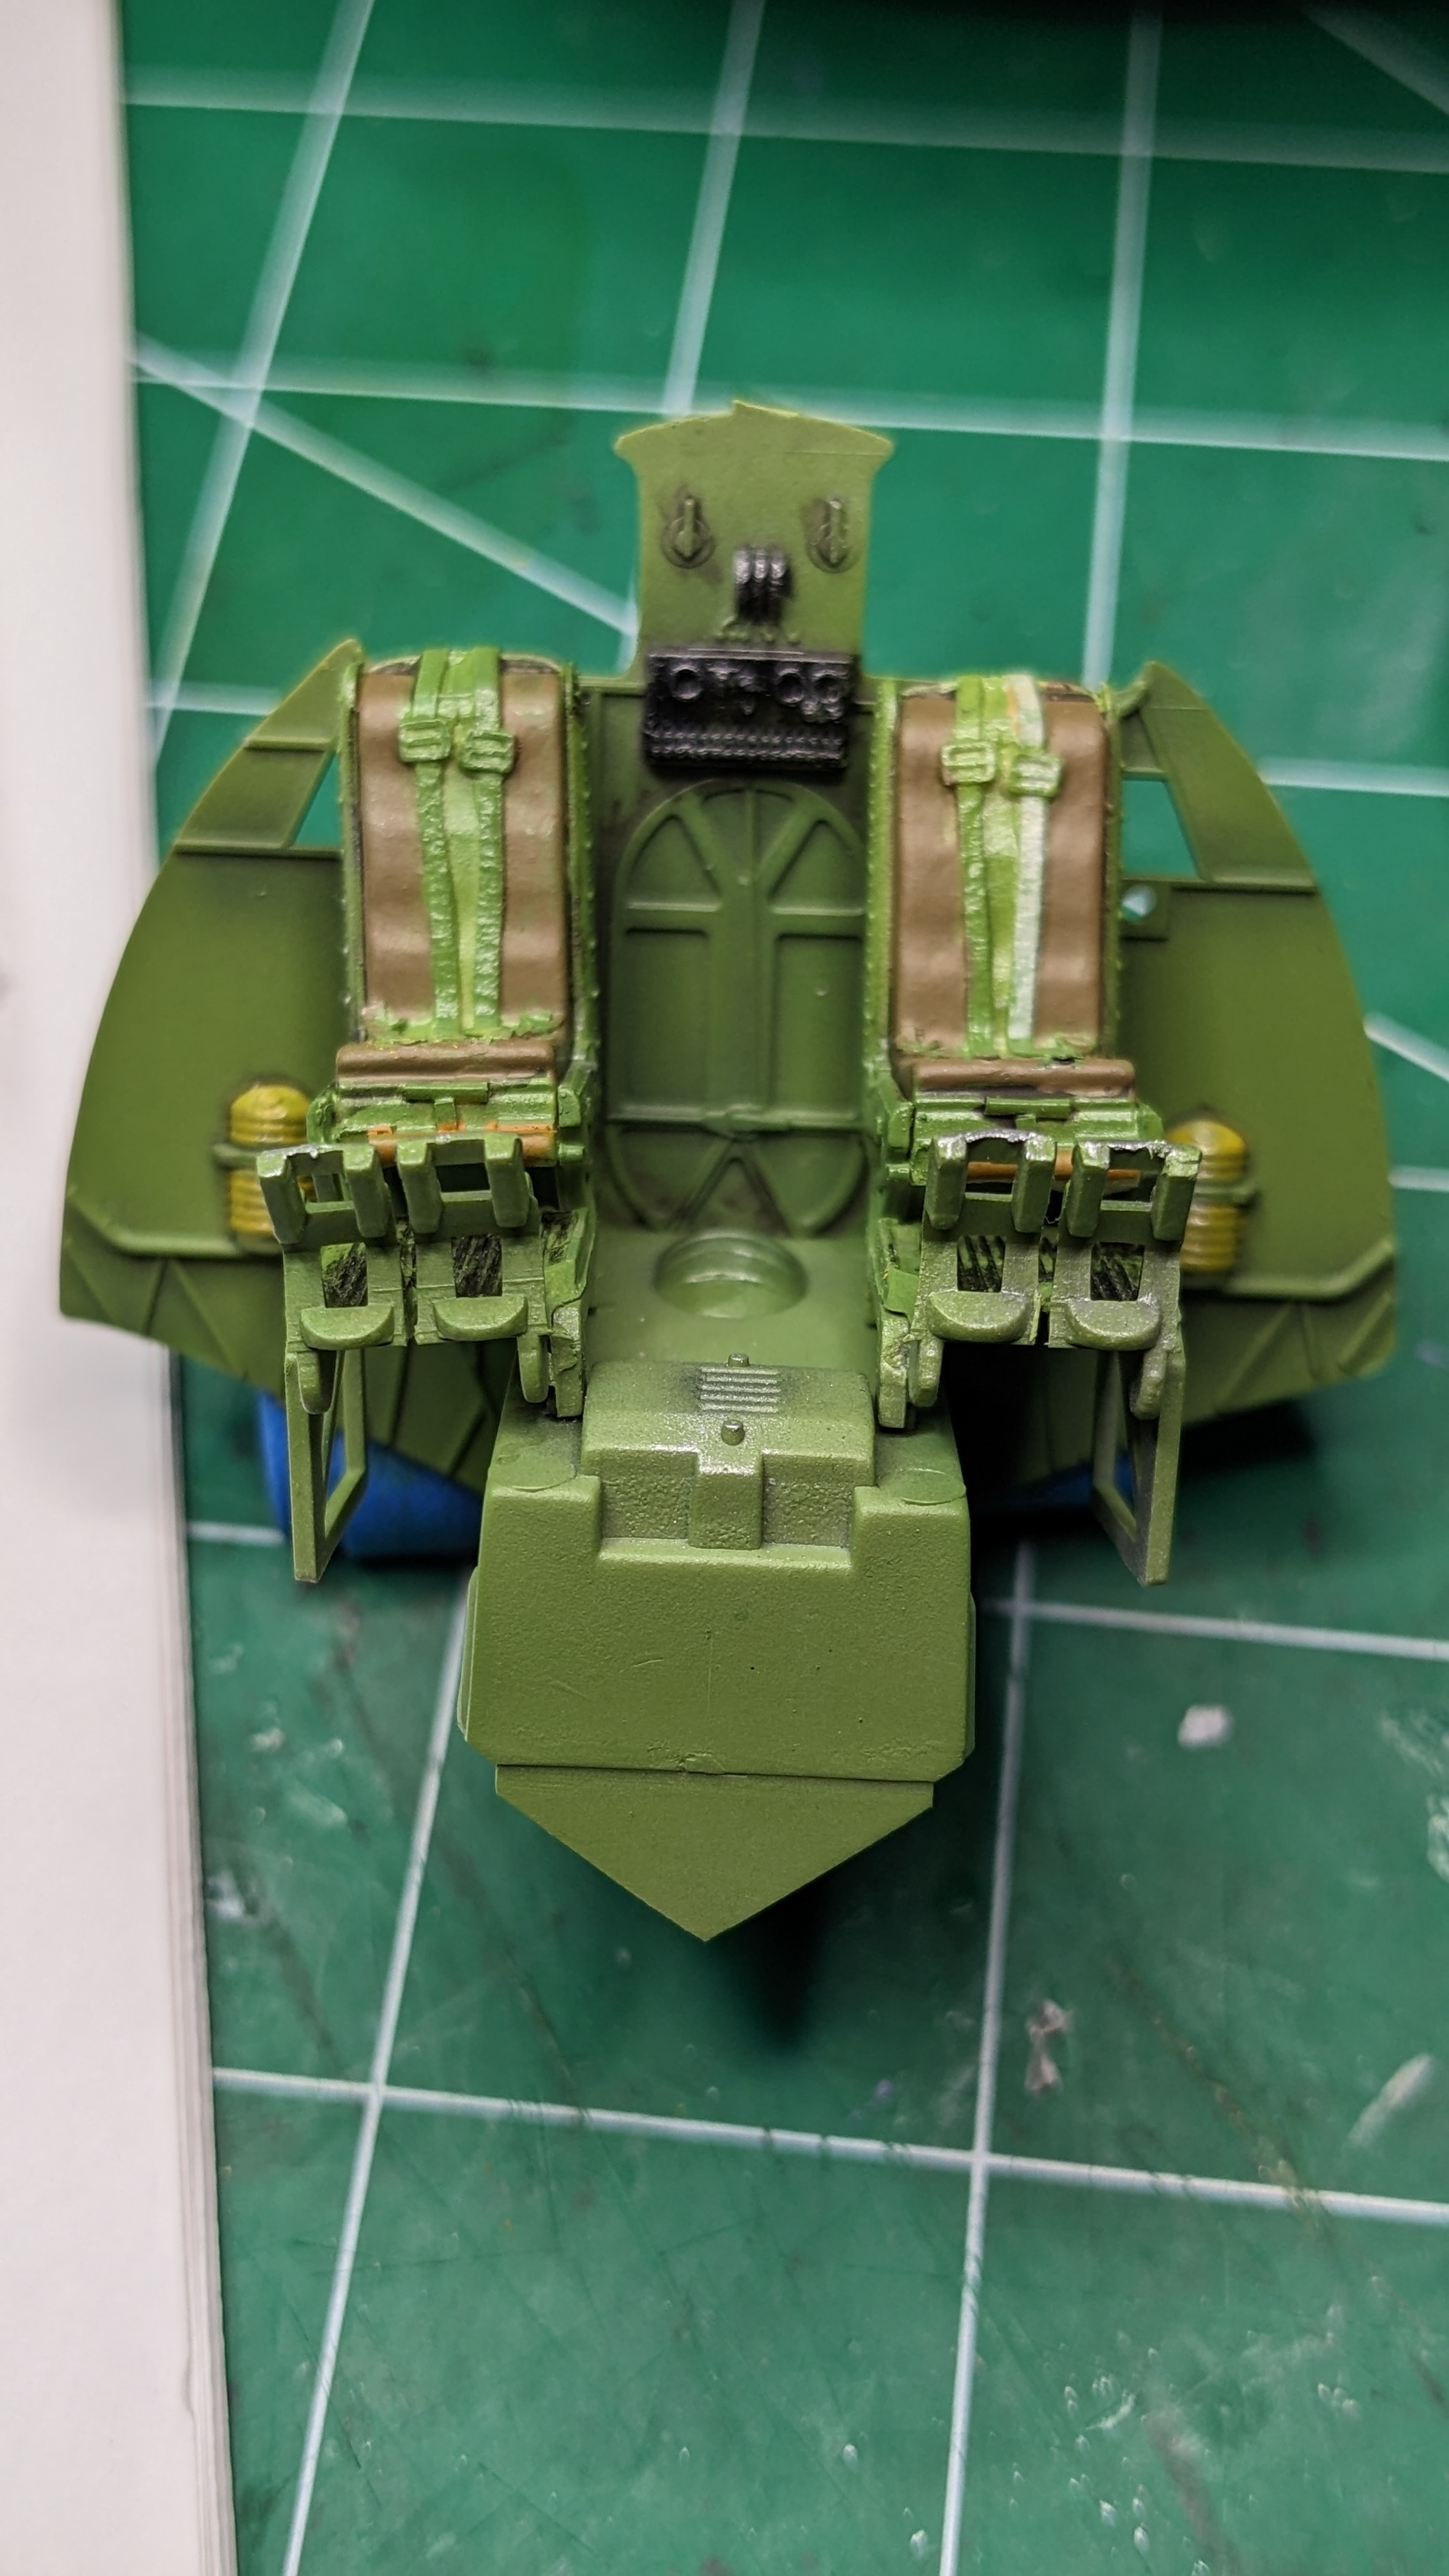
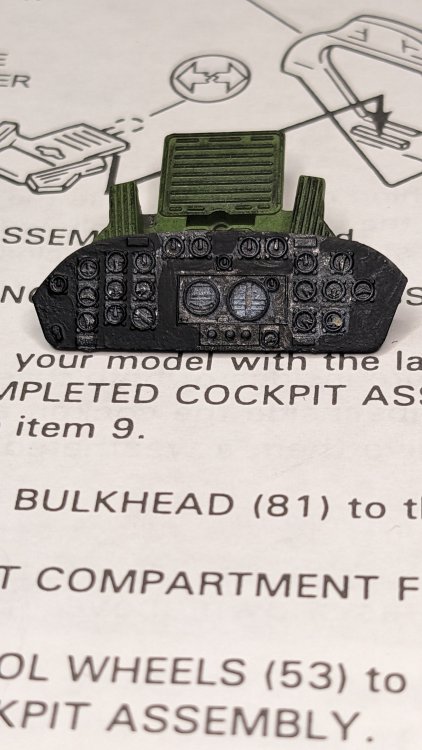
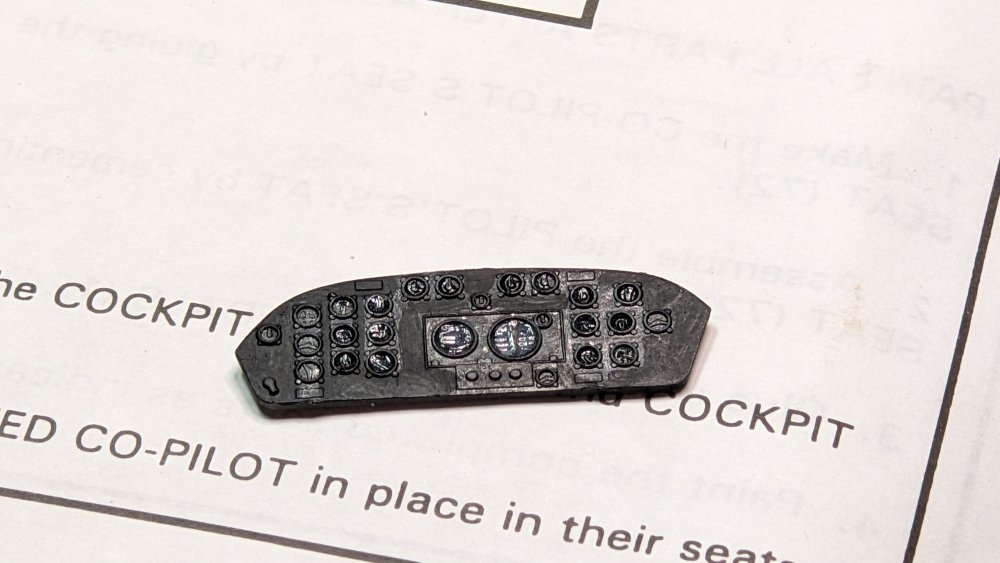
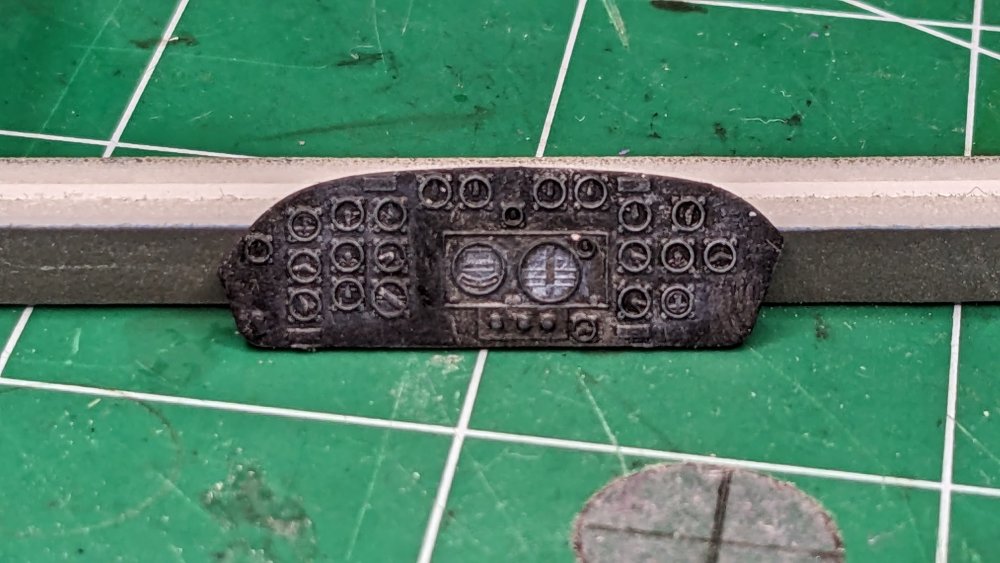
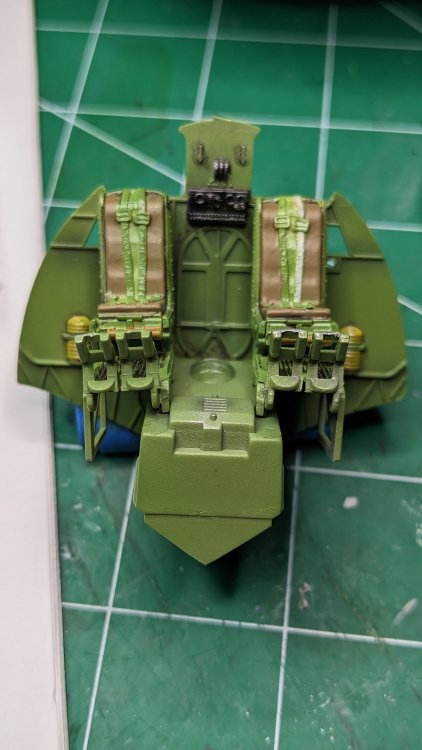
Here is the late update... So, yeah. That IP decal. It slid off the paper just fine. And that is the end of the happiness. So for your viewing pleasure, this gives you an idea of what happened next: Under the dictionary definition of 'decal fracturing' this image appears: So this MIGHT be a good time for me to try out masking the national insignia. There are not many markings on a Black Cat anyway. Back to the IP - trying to remember the tried and true skill of dry-brushing... I spent way too much time trying to find my AirScale instrument decals (which somehow have gone missing(!) and then decided at 1/48 scale it would drive me nutty putting over 20 decals on this panel... Plus, I'm not really sure what a bunch of them are anyway. For a Mustang, you can find anything. Catalina? Not so much... Worked on the cockpit trying to pull a bit more detail into the sea of green. I'm really lacking much in the way of color references other than current planes and restoration efforts - some of which contradict each other in terms of colors used. The idea is that the seated pilots will obscure the seatbelts, but I'll add tape belts to go from the seat to the figures. That's it for tonight!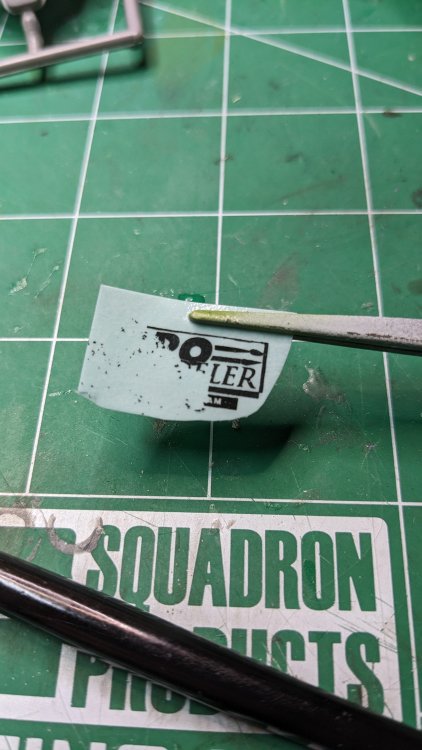
- 291 replies
-
- 11
-
-

-
Revell P-51D late version #2
CANicoll replied to JohnB's topic in LSM 1/35 and Larger Work In Progress
Yep, those were the ones I meant not the radar antenna on the tail. Sorry for not being clear. Thay last picture must have quite a story with it!