


GusMac
-
Posts
2,900 -
Joined
-
Last visited
Content Type
Profiles
Forums
Events
Gallery
Posts posted by GusMac
-
-
Thanks Peter. I have the Maestro masks which should make things a bit easier I hope. I'm also following the method used by Aigore on his build on LSP, so his secrets will be revealed in due course. I'm looking forward to using the MRP as the brief experience with it on the cockpit interior was encouraging.
-
 4
4
-
-
Touch-ups completed and flaps installed. The canard flaps are a breeze due to this nifty bit of engineering....
The 3D printed piece holds everything perfectly in place at the correct angle. The main flaps are a rather different story however! After much tweaking and swearing we got them in place with everything in reasonable alignment. Some of the actuators on the underside are slightly out of alignment but the upper side is good, so I'm going with that as it's the best achievable.

And everything is now primed again ready for the painting.... the dreaded splinter cammo! If a coward so I'm starting with the underside. 😁
-
7
-
-
Wow, the new canopy looks stunning. So much better than the 'wedge' that was supplied with the kit.
Further proof that Peter is a magician!
-
Only the best Islay malts will work!
-
 4
4
-
-
So sorry to hear the news but hopefully Tim's post is an indication that things are looking brighter.
Harv has had a hard few months, so due some good luck.
-
5
-
-
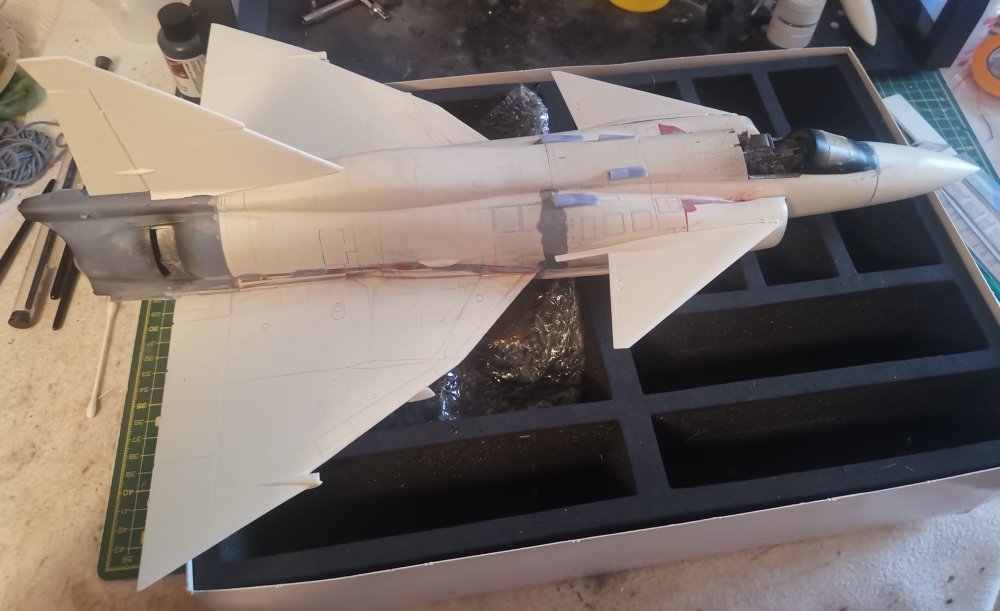
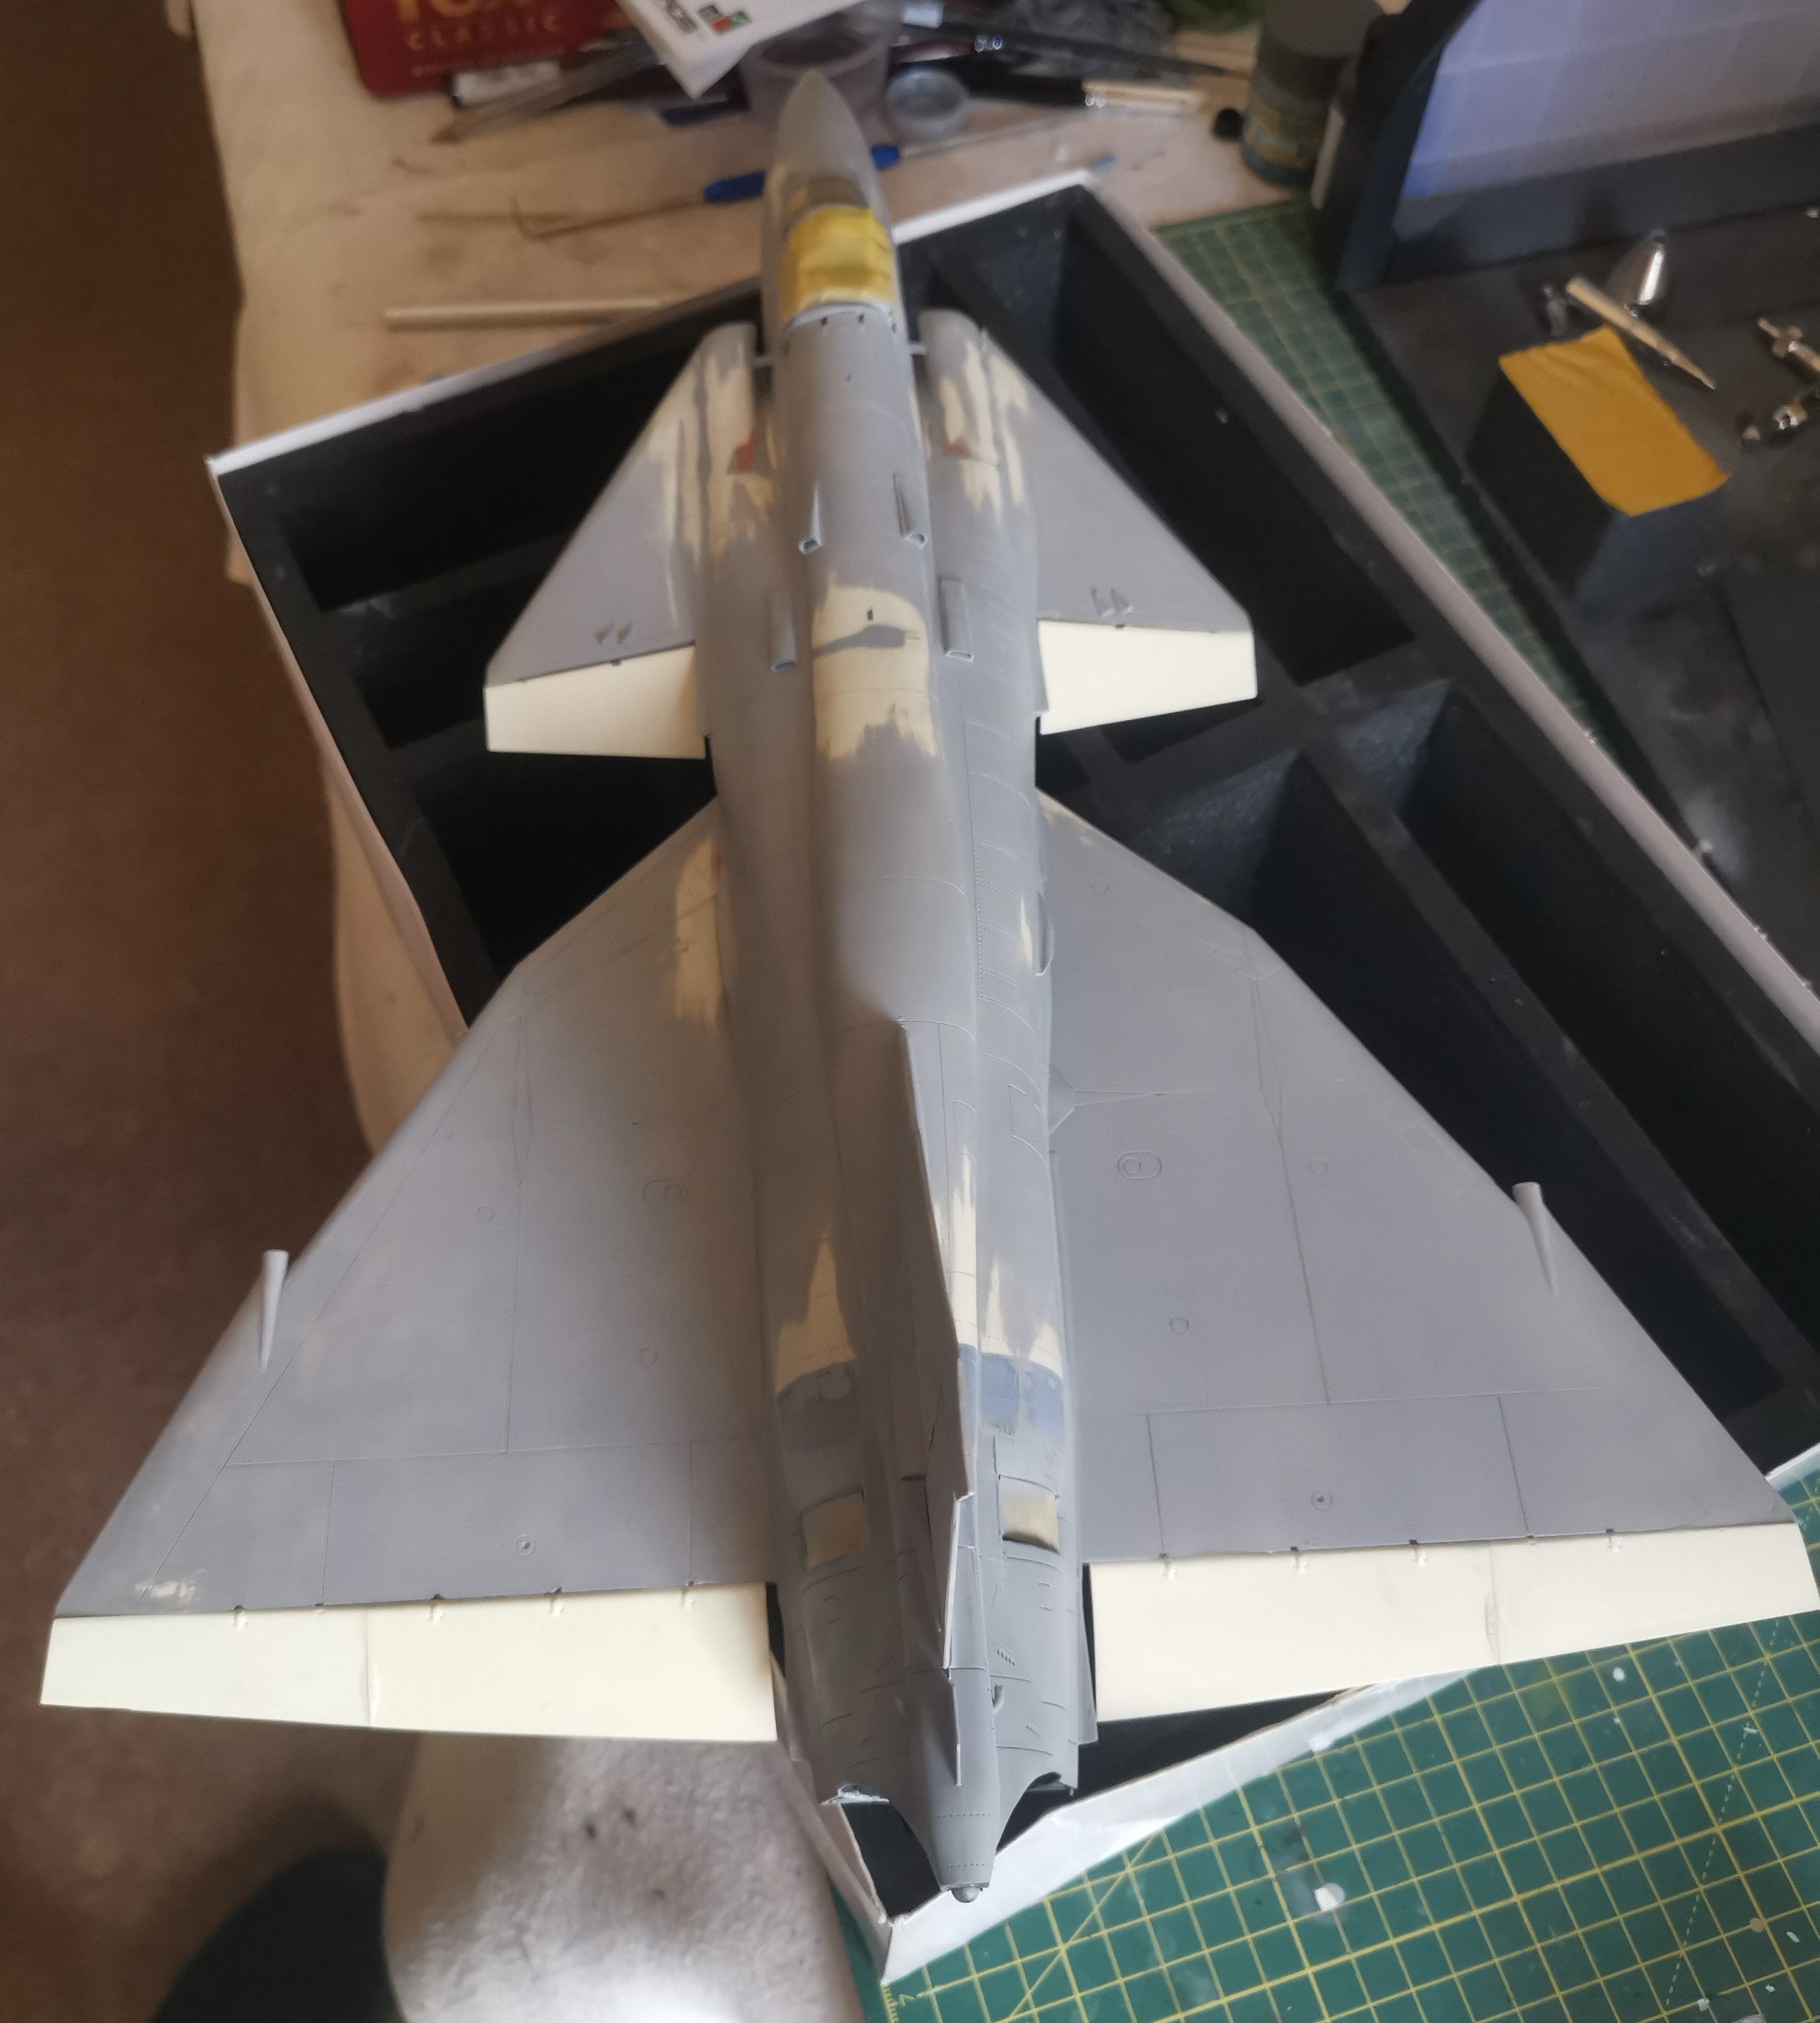
Primer is on! Didn't take quite as long as I thought it might but still a good 90 minute session. There are a few small spots which are going to need a bit more filling and sanding but less than I thought there might be, so I'm pretty happy with that.
-
8
-
-
From the looks of what's oozing out the top, I reckon it's melted ice cream. 😝
-
3
-
3
-
-
Thanks Ernie. Thankfully the chisel didn't go in too deep so the bleeding stopped pretty quickly.
A scalpel straight to the foot sounds nasty. Thankfully avoided that one so far although have had a couple of near misses. My wife is getting seriously into her upholstery so I might 'borrow' her leather apron for protection.
-
3
-
-
7 hours ago, ScottsGT said:
And still trying to figure out how to make the model fit in the paint booth!
I feel your pain! The Viggen is just too damn big to fit other than one wing at a time.
-
3
-
2
-
-
15 hours ago, Jeff said:

Over the head of a UK audience I think.
-
3
-
-
Thanks Ernie, that's pretty much what I ended up doing with a skim of filler over the top to blend it in.
I'm learning a lot as I go along and it's a lot of fun.
-
4
-
-
8 hours ago, BlrwestSiR said:
Pete, the boys had a great time. I think the only lament was they forgot to bring money to buy stuff.
Dad didn't sub them a loan?
Or was that a 'teaching moment'?
-
1
-
5
-
-
Rest of the World - sloping armour is the way to go to maximise protection
The Brits - nah, just make it bloody huge and it'll be fine!
Looks like someone has left the cork in the end of the barrel as well.
-
9
-
-
Thanks fellas. It's been fun so far with a lot of learning along the way. Main learning point is that it isn't nearly as scary as I'd thought. 😆
As long as you take your time and do the prep properly and test fit everything it's actually not too different from IM other than having to use epoxy and CA for everything. That does the advantage though that everything is rock solid, you could beat someone to death with this thing now!
Carl, virtually everything I'm doing is copied from Aigore's build over on LSP. I'd recommend looking it up and bookmarking it before you start as he's got some great photos in it - way better than mine.
-
5
-
 1
1
-
-
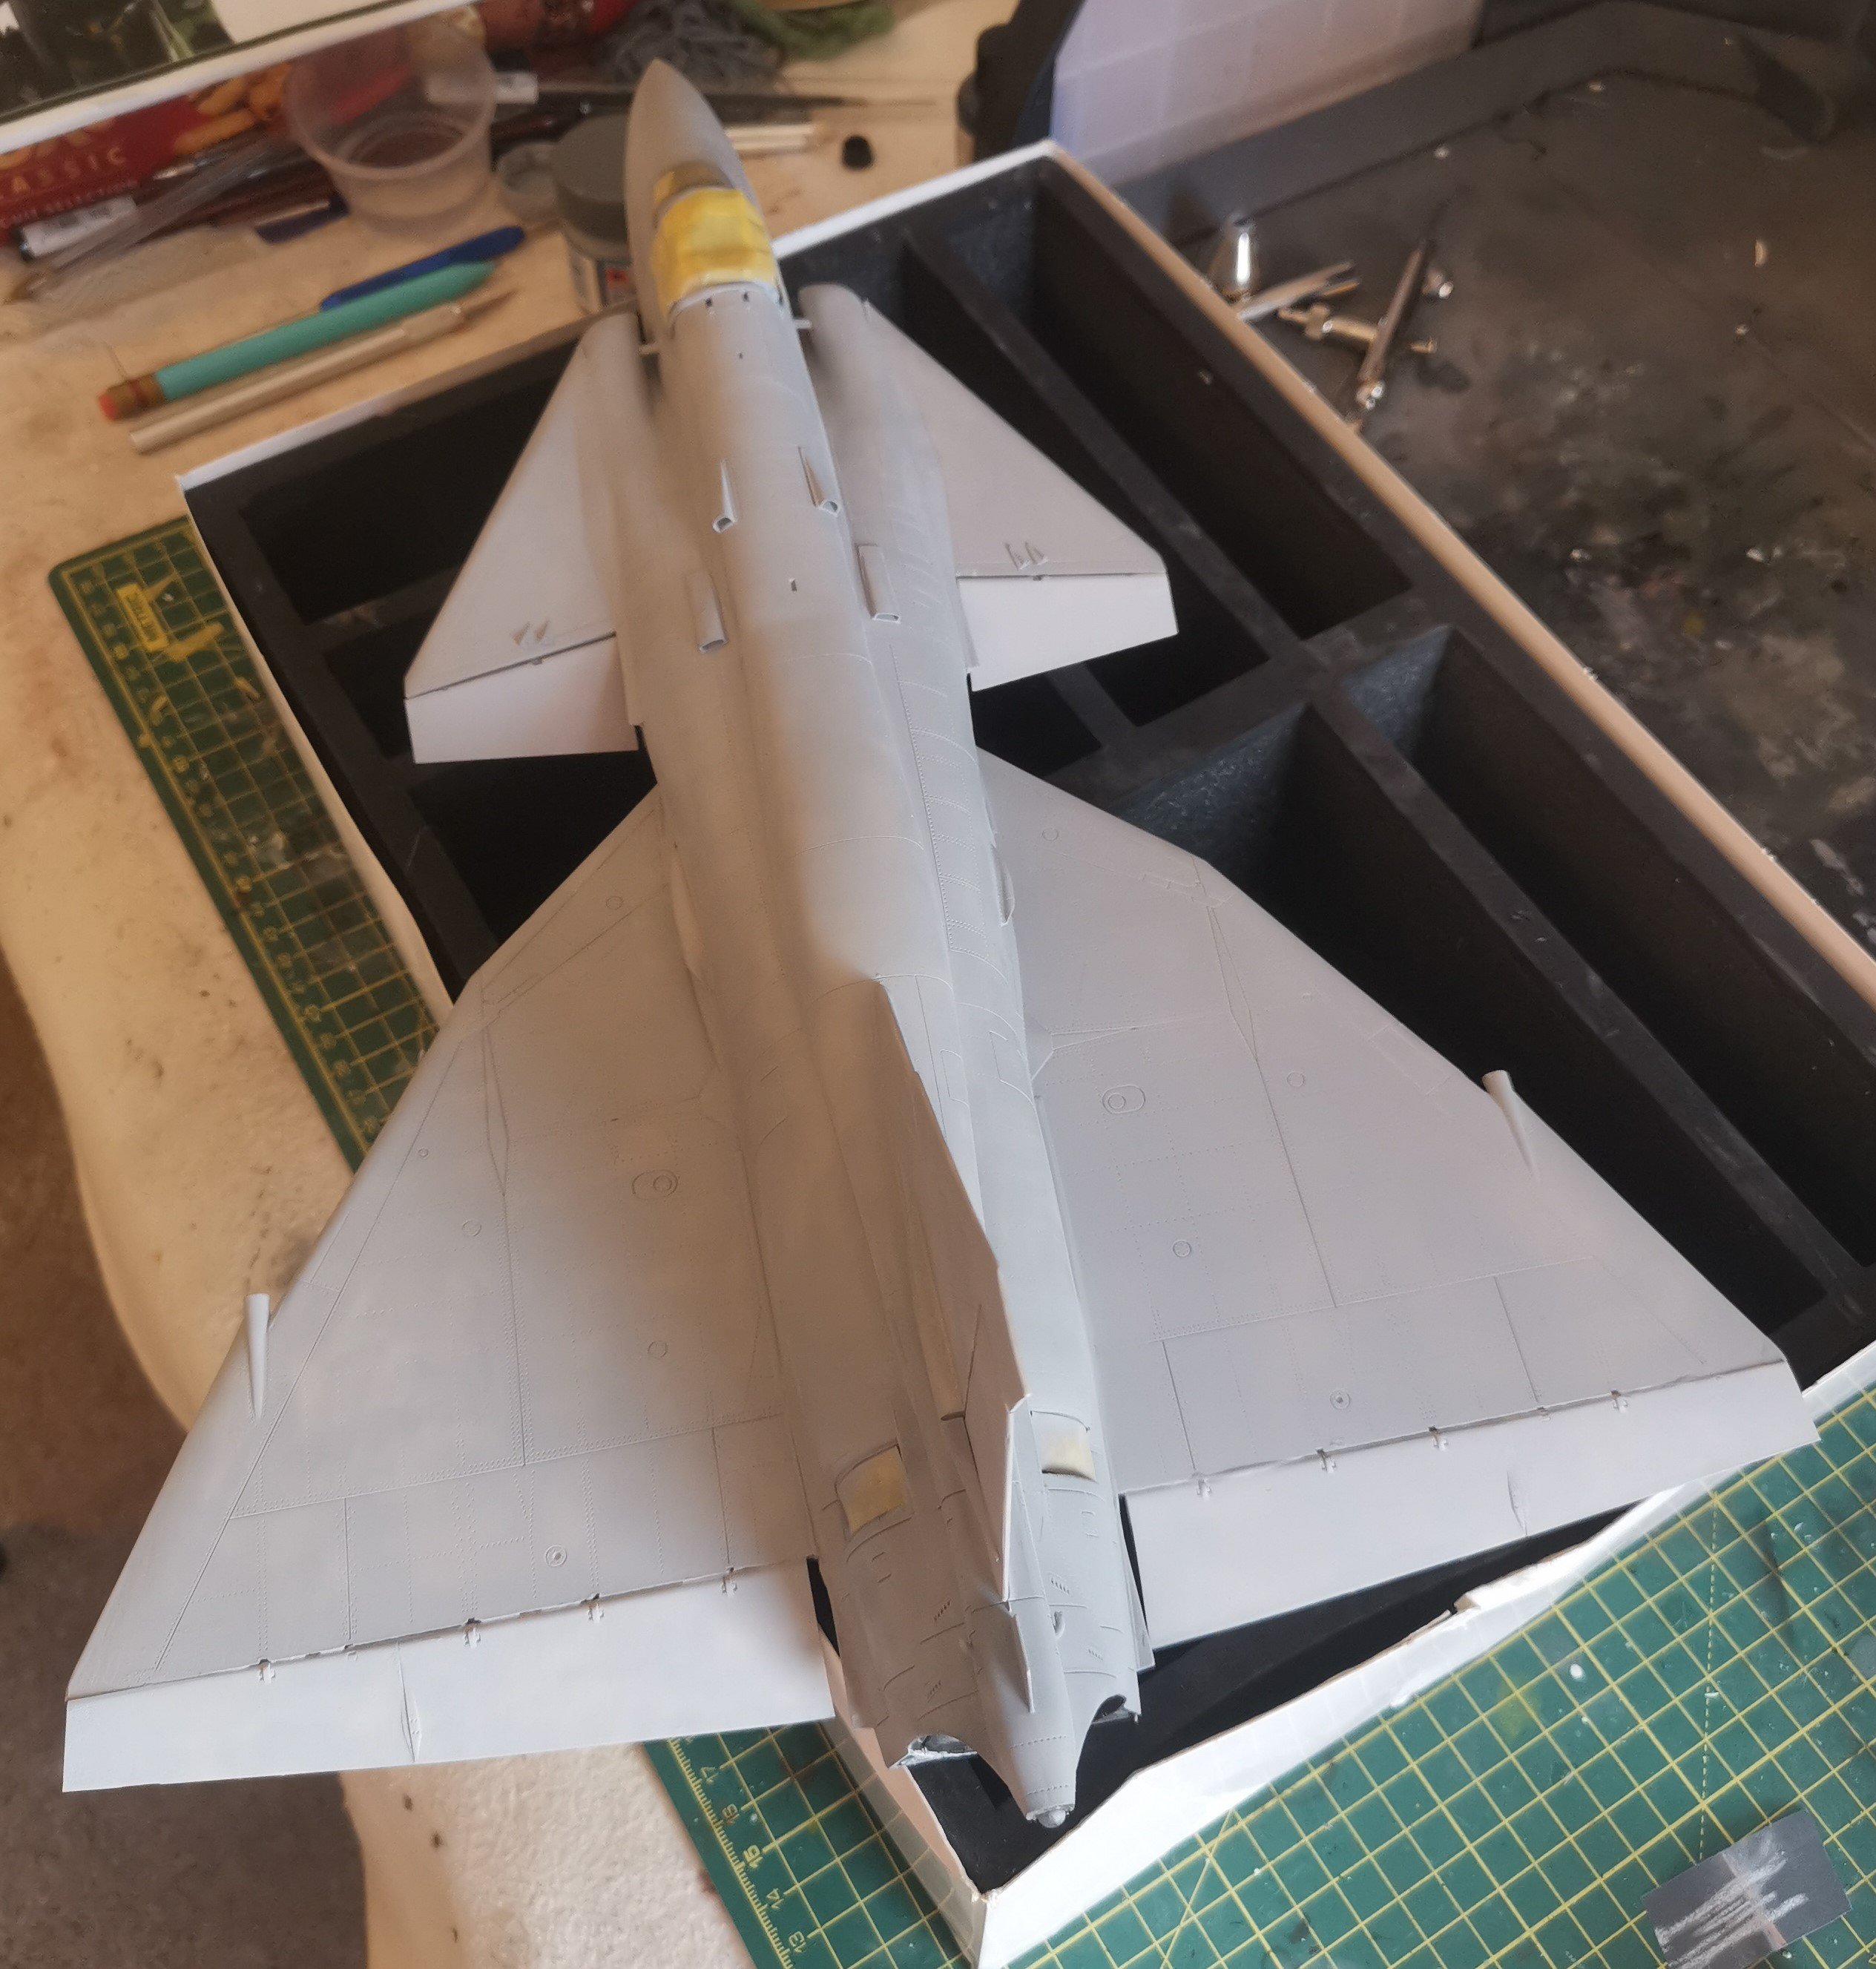
Got some time off work this week Rob as I have to use my remaining days before the end of this month, so been able to really get at it. I did think about leaving the pylons off but the other builds I've been following for hints, etc installed them now, so I just followed suit.
So, today's progress -

Got the belly pylons smoothed in and so it was onto the topside. The canards went on surprisingly easily and the tail was a drop fit. Some filling required around both where the fine edges of the fillets have been chipped and broken but shouldn't be too onerous. Hoping to get it primed later this week.
I've certainly learned a lot about working with resin and although there's a lot of prep and the filling, sanding loop, you actually make pretty quick progress once you get going as all the bigger parts as single piece castings, so it grows fast.
Also learned that another tool you need is a box of sticking plasters! 🚑 Managed to stab myself with the microchisels twice in the last couple of days during parts cleanup. If I had a swear box I might have saved enough to buy another of these! 😁
-
7
-
-
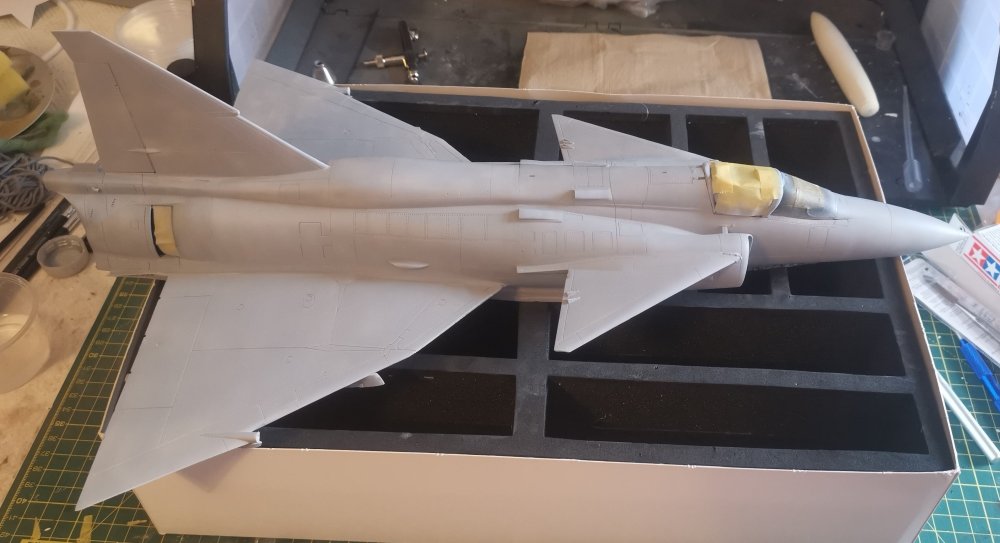
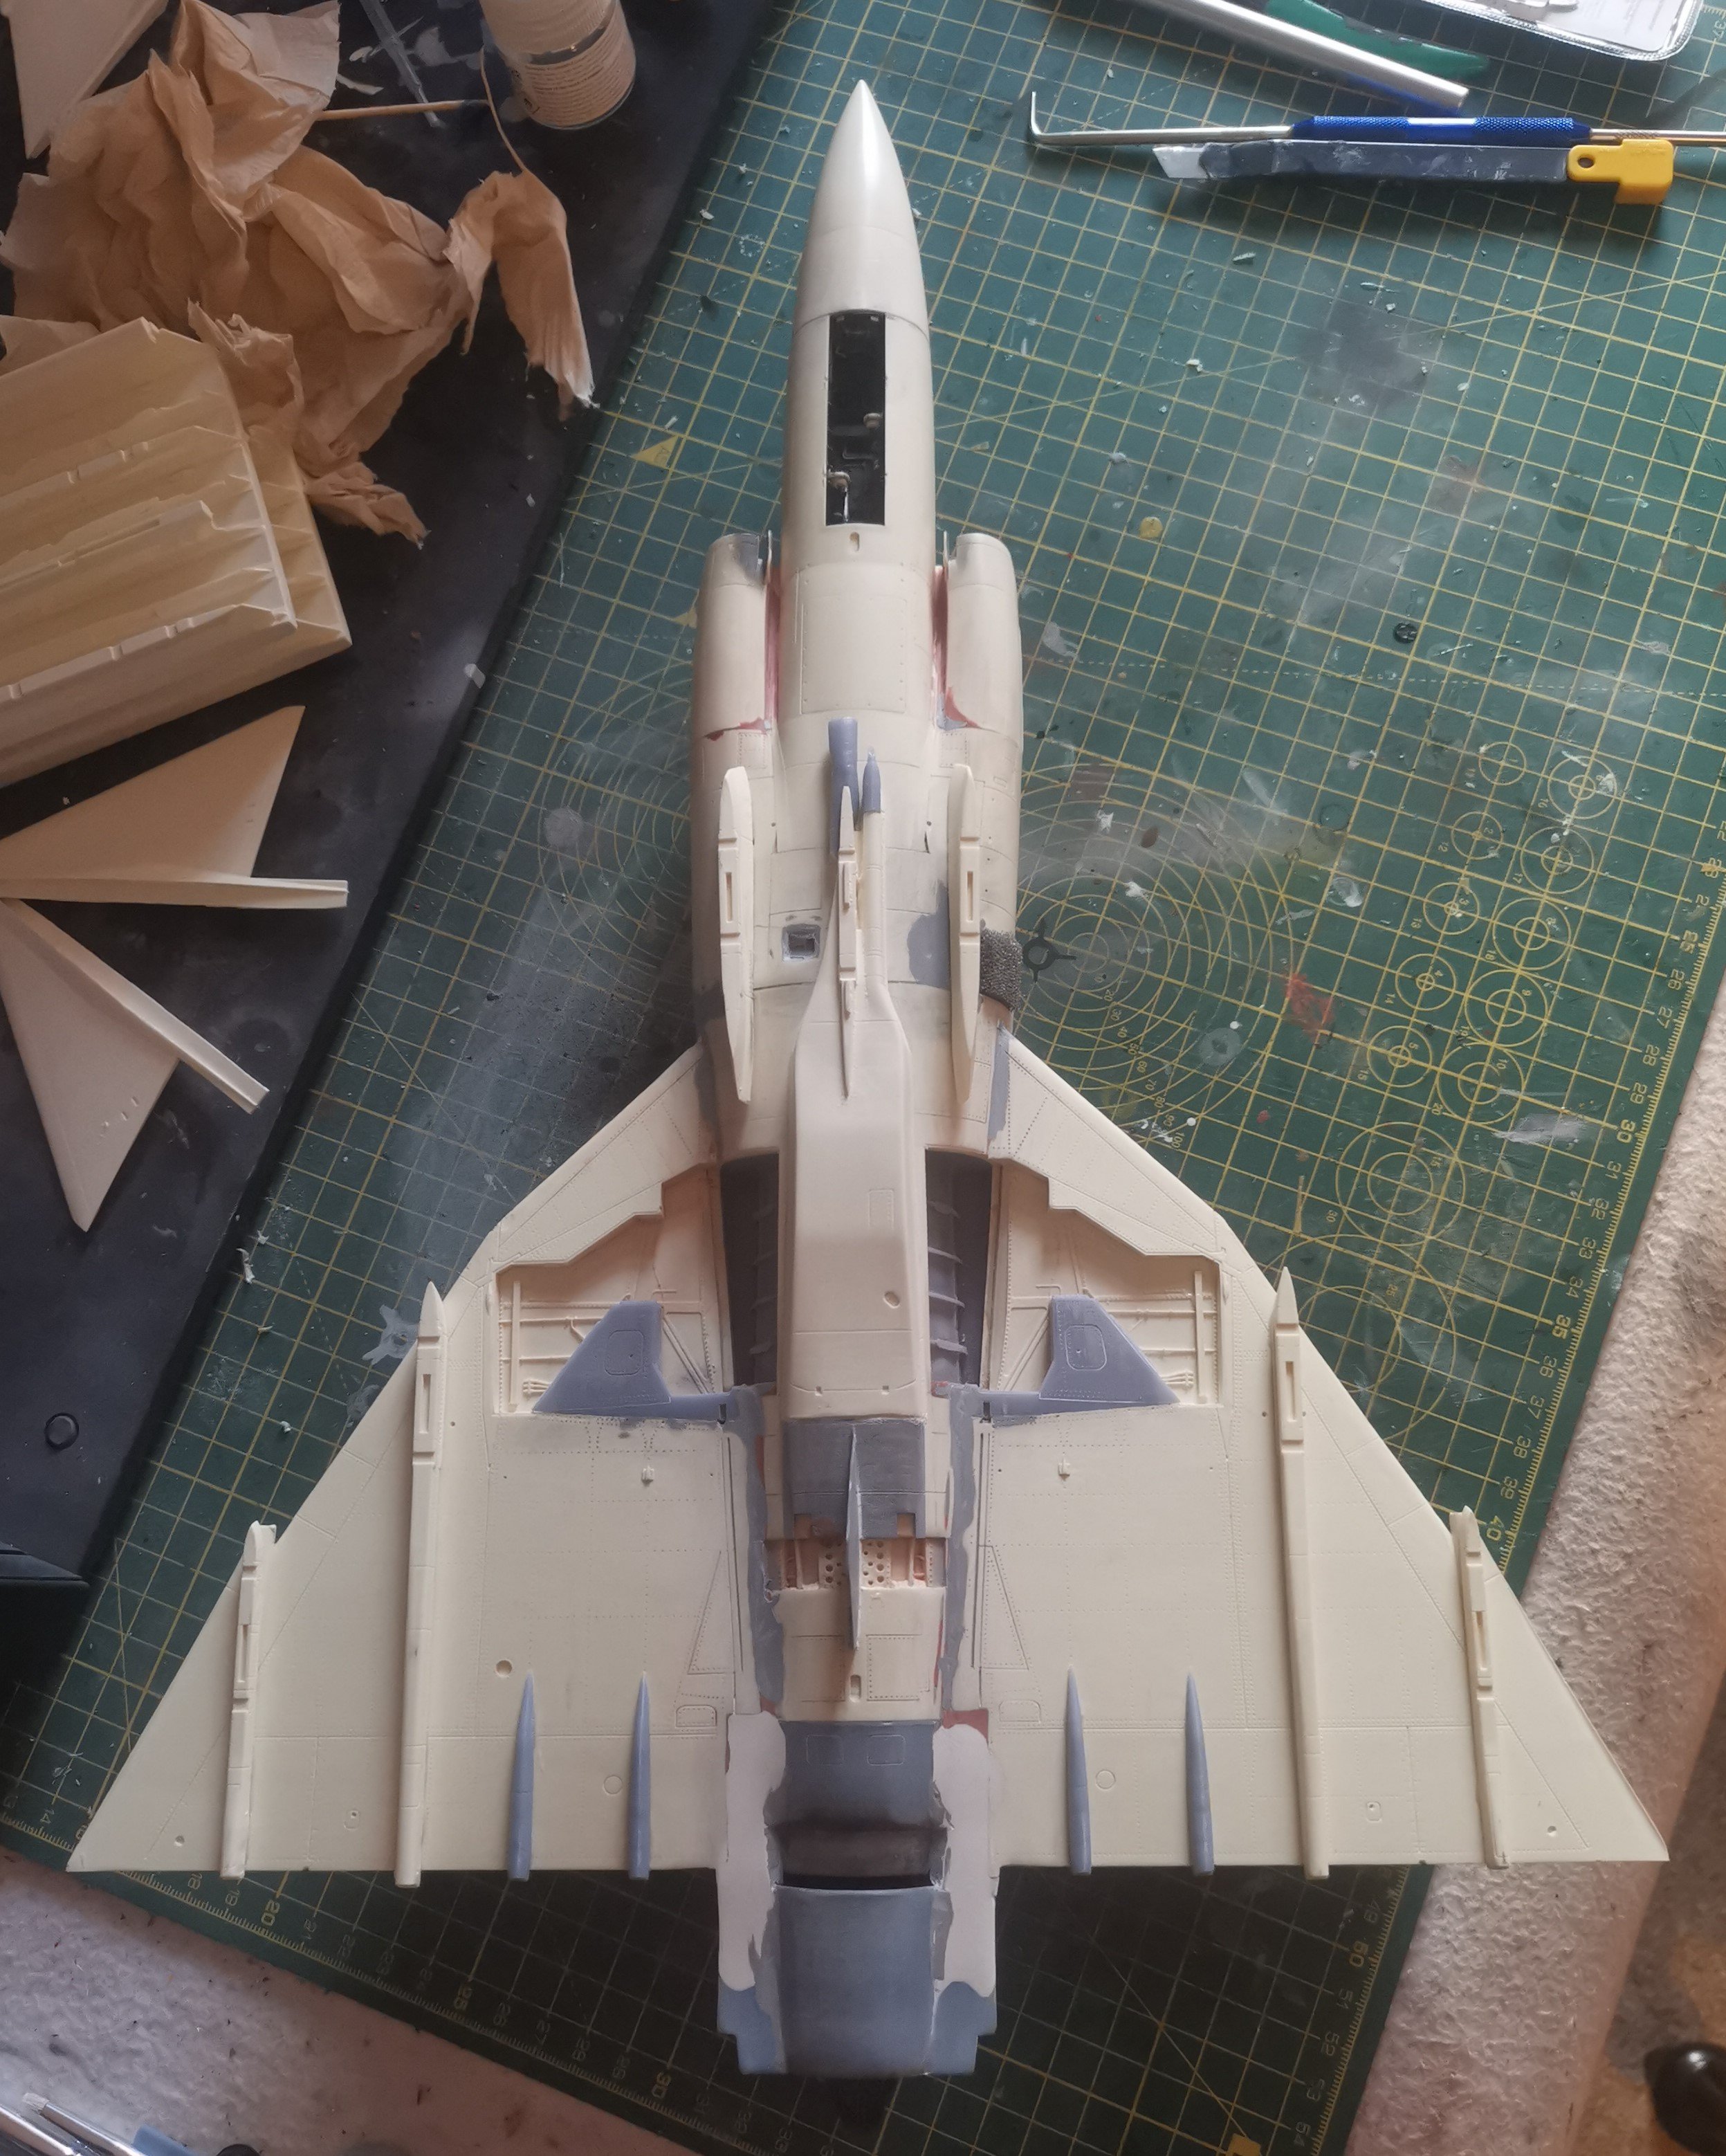
Got all the main underside components on now.

The casting of the pylons was pretty ropey so lots of clean up needed and the belly pylons are going to need a good bit of filler after the epoxy cures properly. The top edge of the pylon is essentially flat while the actual under surface has lots of curves and no flat point! The underwing pylons needed clamping to get them to conform to the curve of the wing but that was fairly easy to achieve.
Next up, after filling around the belly pylons, is flipping it over and doing all the topside pieces, main ones being the canards and tail. Ready for primer soon hopefully,
-
6
-
-
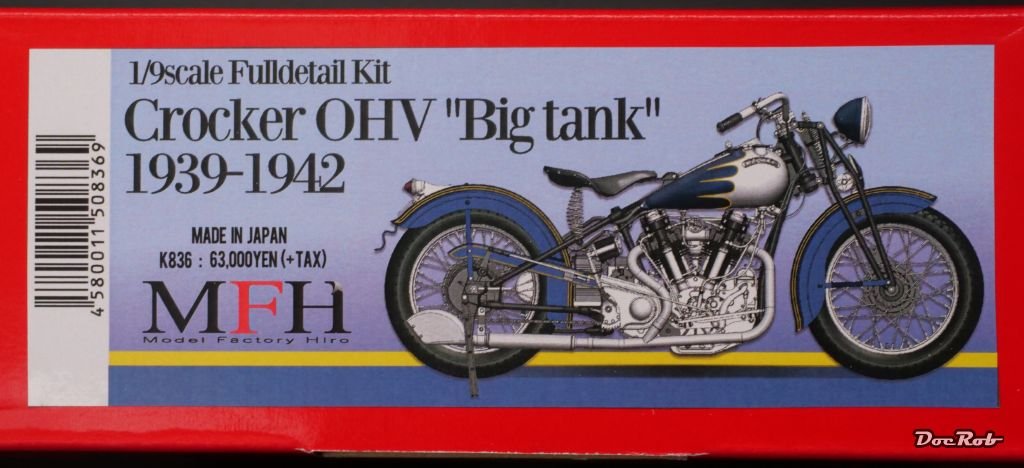
6 hours ago, DocRob said:
I´m absolutely stoked today. On Saturday, I ordered my first Model Factory Hiro kit, exactly on the first day of it´s availability direct from the Japanese homepage. I saw some preview pictures of the big tank Crocker and was immediately in love. Like a Harley, were somebody said, make it nice (I know this will make me enemies, but especially the middle section of Harley´s over the decades looked plump to me).
After only five days, the Crocker made it to my island for a great price and without the Spanish charging customs for whatever reason.
Could be an entry to the twins GB, but no, I will take my time with that beauty.
Cheers Rob
Wow, 5 days from Japan to the Canaries is good going. Hope the shipping price wasn't inversely proportional to the shipping time!
-
6
-
-
On 3/21/2024 at 10:36 AM, FullArmor said:
Serious next level beer😮. Thank you for sharing this👍
They've done a couple of other barrel aged beers as well. One was a stout at 12% and the other was a Scottish Heavy at 9.6%, so they're not for the faint of heart.
They do a really nice session Pale Ale at 3.8% as well as lots of other nice sensible beers, so it's not all insanely strong.
-
3
-
-
3 hours ago, PeteinLincs said:
Ah, beer. After forty years of working on and with Military Aircraft, I wanted a change of direction.
So for eight years I worked as a Drayman for a Drinks wholesaler based in Lincoln. I retired last September.
What's odd about that? Well for the last twenty of those forty years, I worked in Riyadh, Saudi Arabia. So kind of got out of the drinking habit.
However, I do have the odd one, I like sharps Doombar. Brewed on the North Cornish coast.
I'll join you in a vote for Doombar, it's a nice drinkable pint.
-
4
-
-
Sorry to hear of the travails of you both. Hopefully, you'll get through this and make it back to the club.
I've had one of our dogs chew a few parts but never had one send a kit airborne. However, Jack Russells are bit smaller than German Shepherds!
-
3
-
-
23 minutes ago, Bomber_County said:
With the Tamiya Gloss Black lacquer are you limited to Tamiya Lacquer thinners, I do not any Mr Colour etc etc….?
Hi Phil, I've successfully used the Mr Levelling Thinner with Tamiya Gloss Black Lacquer. It goes down very smooth and dries hard as nails. It was certainly a bog improvement over the Extreme Metals black primer which never seemed to go off.
-
2
-
-
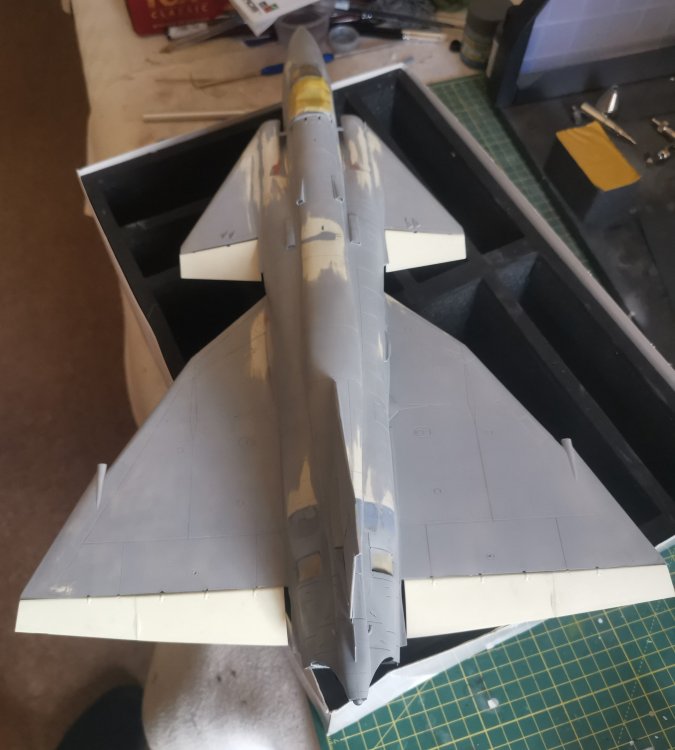
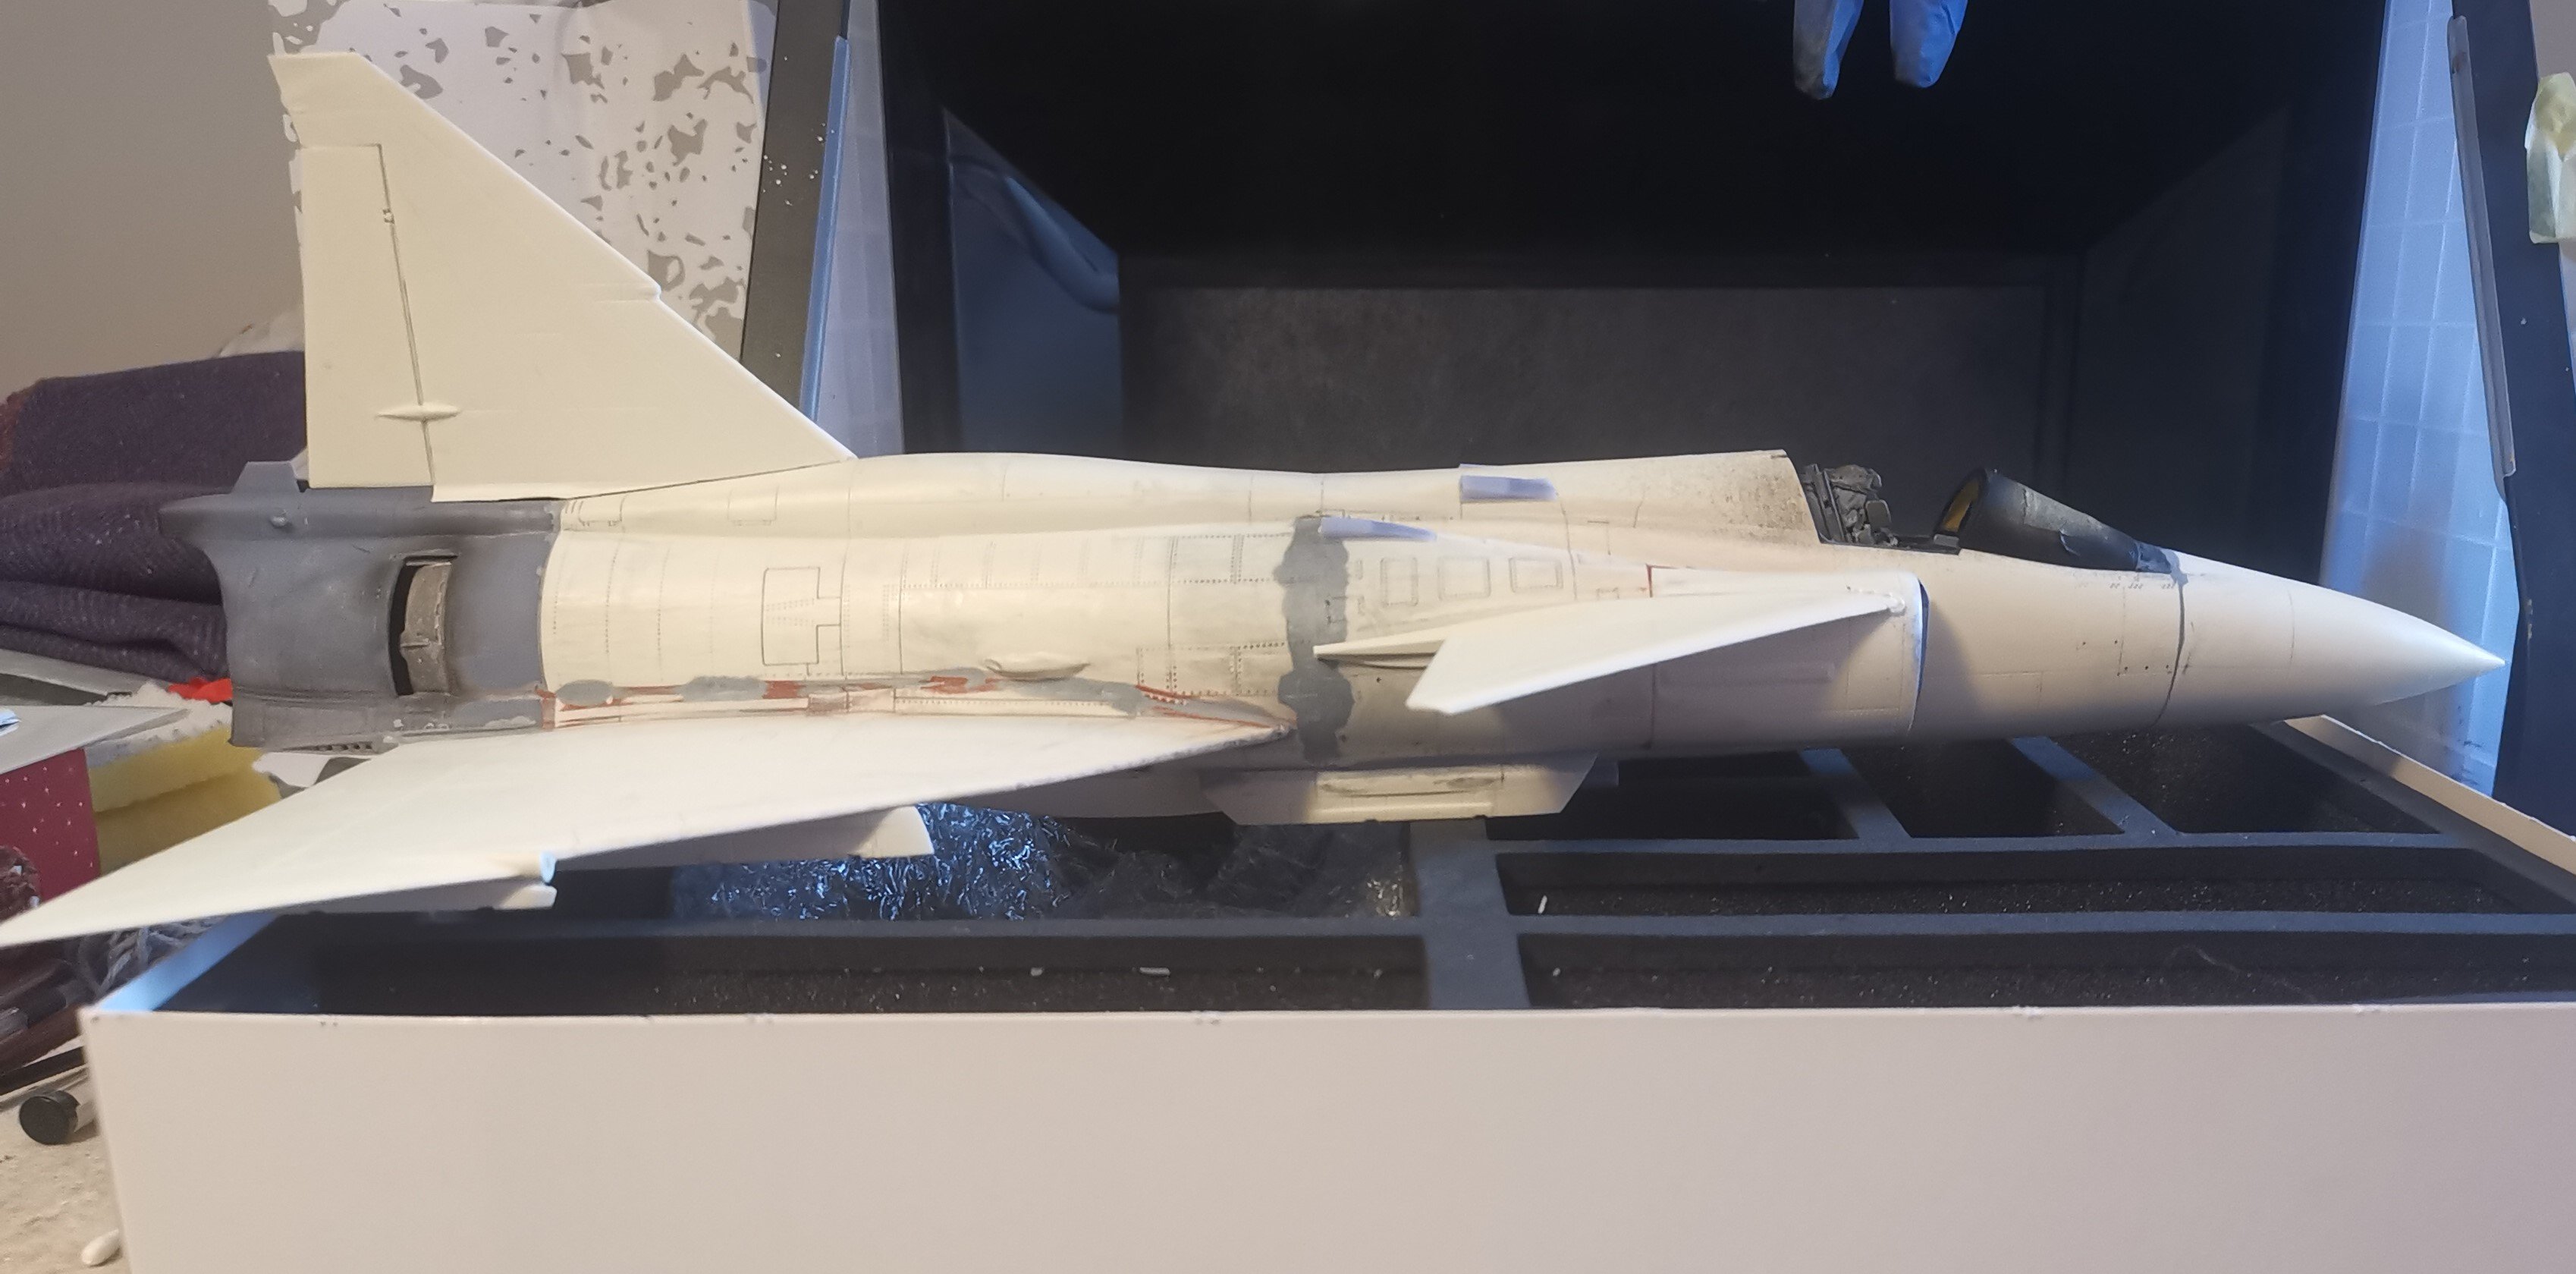
Well, a major bit of progress tonight....
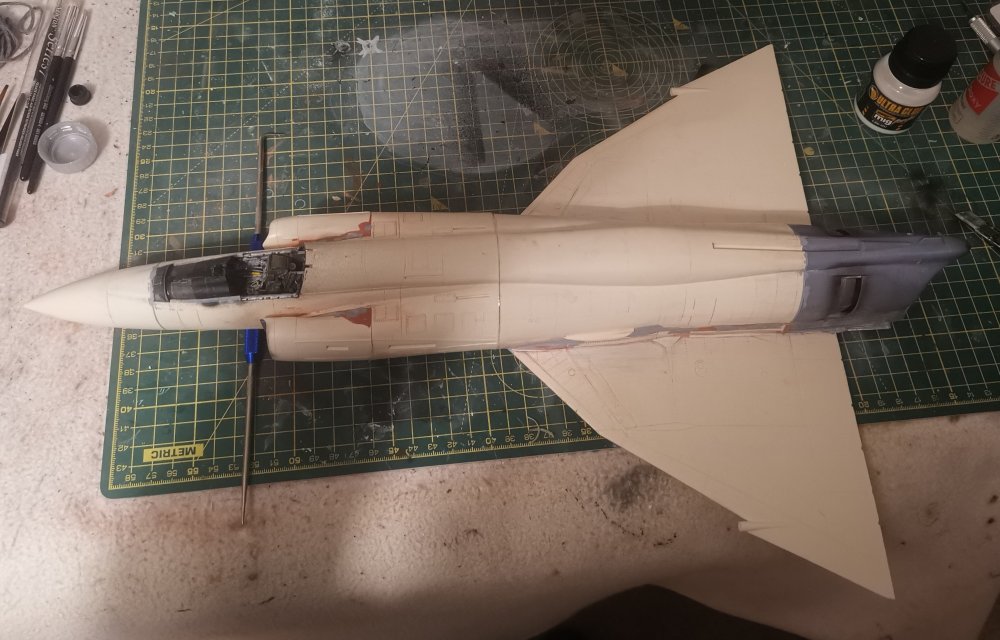
Glued the front fuselage on, so we have the bulk of the airframe together.
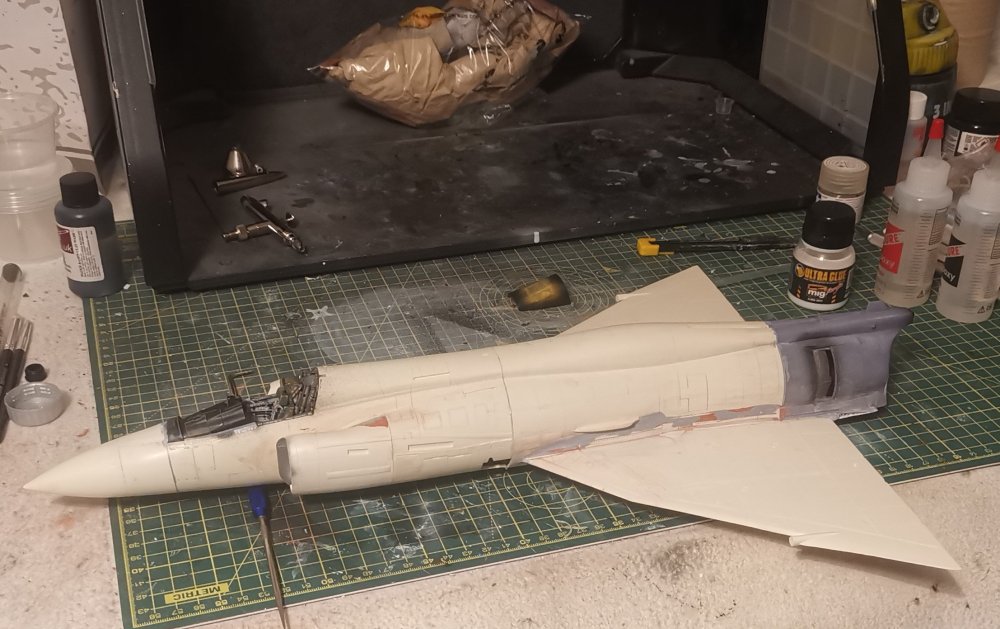
This view gives a better sense of scale and clearly confirms that it's not fitting in the spray booth! May have to look into Rob's suggestion for expanding the booth to let it fit.
I also got the front windscreen removed from the casting block and trimmed and sanded to fit. Haven't glued it yet as I'm slightly unsure as to the best adhesive to use for a resin clear part. My go to is the PVA you can see behind it but I'm not sure how well that works with resin. All suggestions welcome!
-
5
-
-
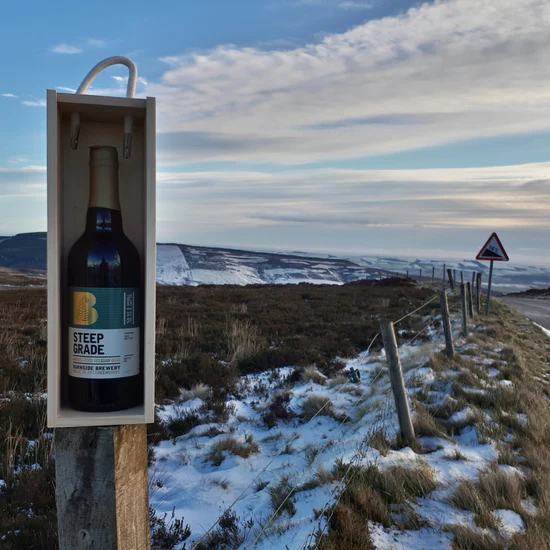
Steep Grade from Burnside Brewery here in my own village. It's a barrel aged Belgian Quad at 14% - it's a 750ml bottle, so equivalent to bottle of red wine! Very drinkable which dangerous at that strength.
Aged in casks from the Fettercairn distillery just up the road. The photo is taken at the top of the Cairn'o'Mount which is the local high pass over the hills into Royal Deeside after which the beer is named. It's a route I cycle occasionally as the 'steep' but of the name is well earned.
The brewery owners are friends of mine, so got to give them a plug!
-
5
-
-
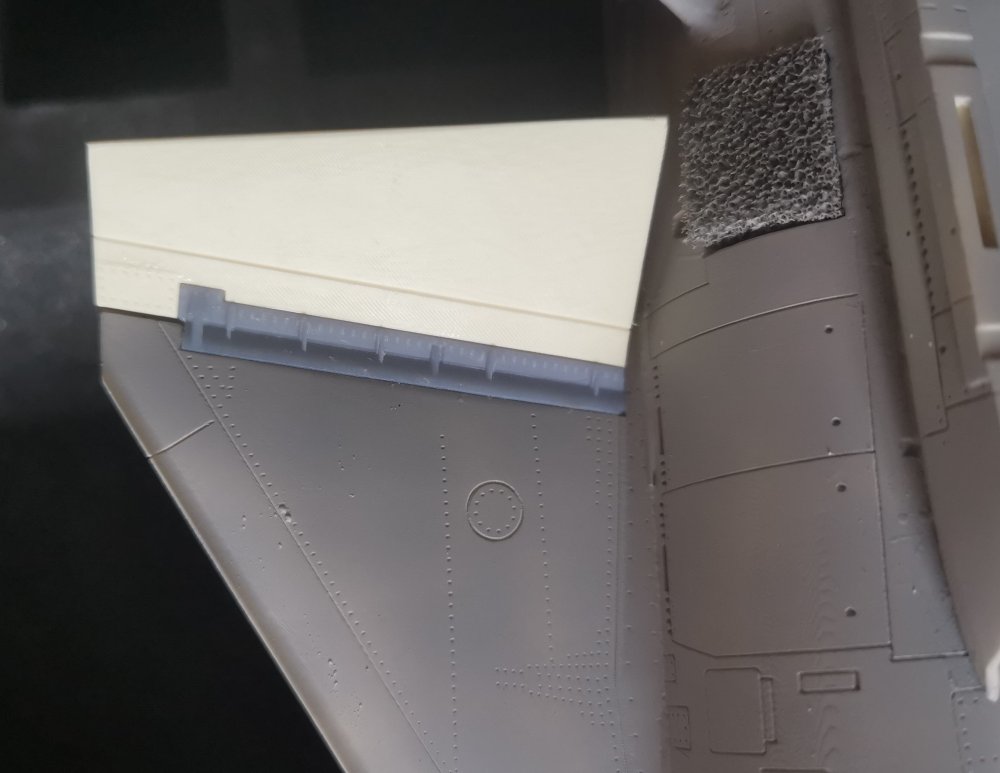
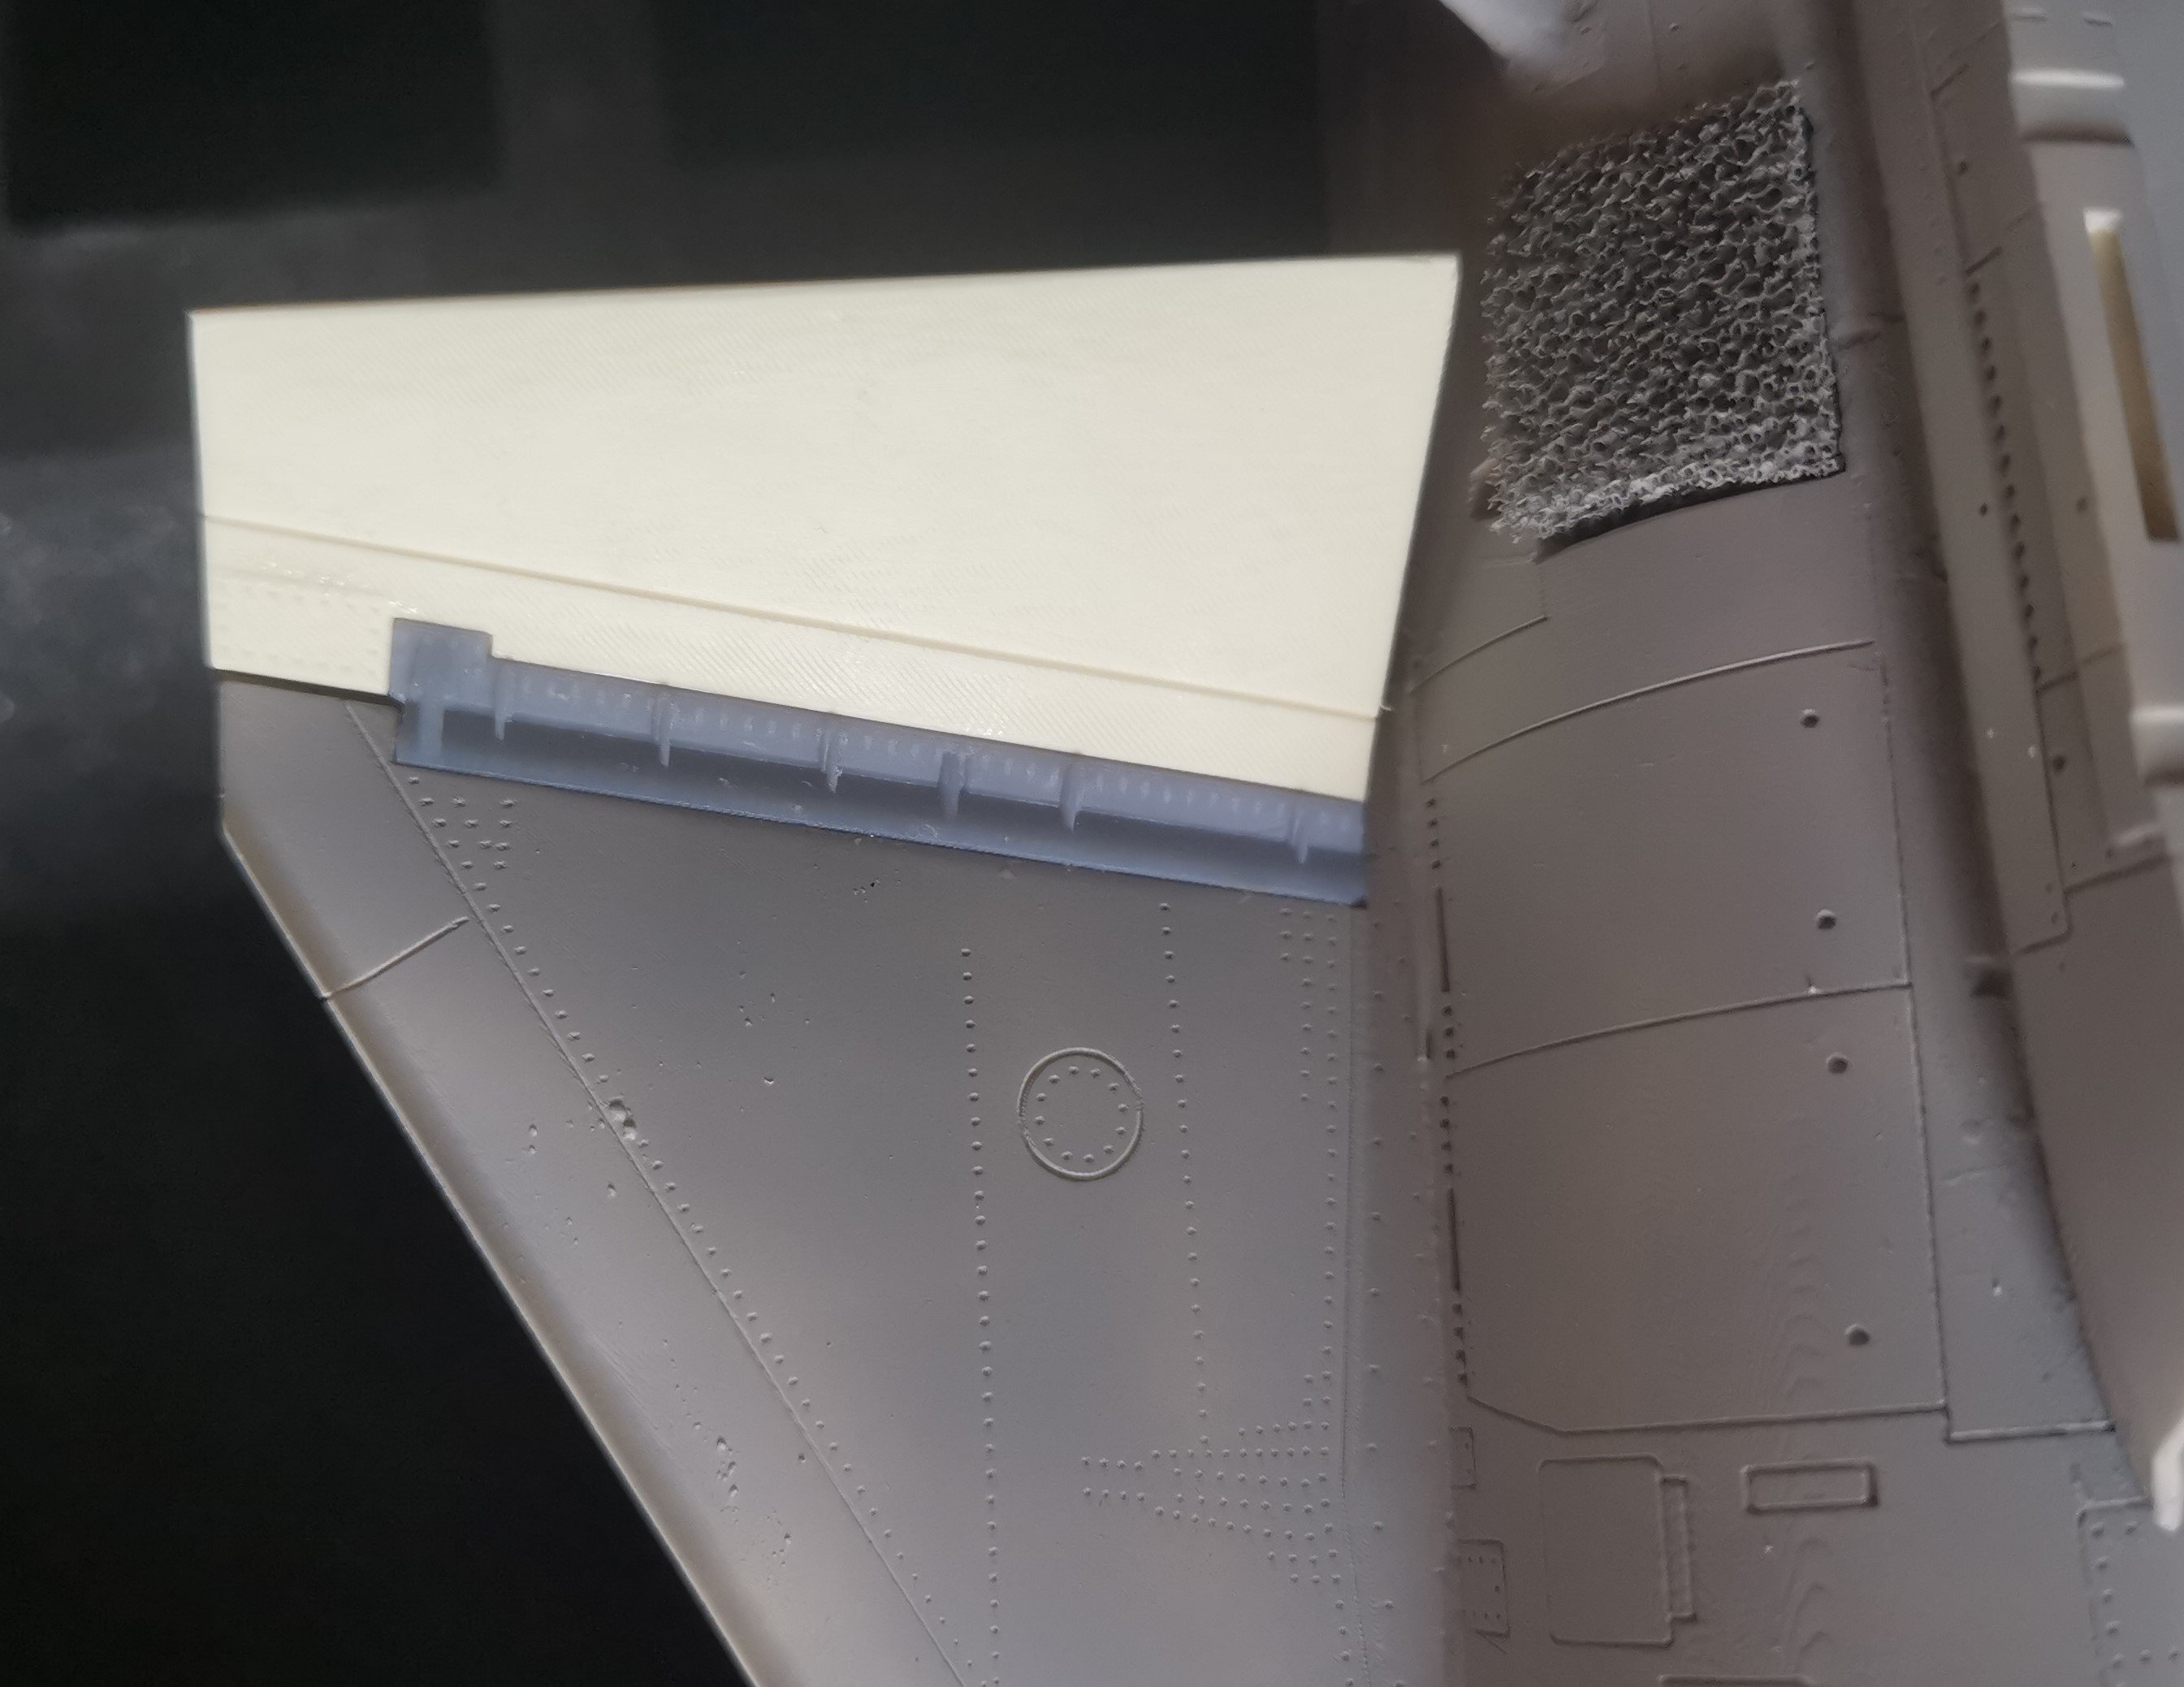
Not sure if I've just been unlucky Peter or if I've screwed something up somewhere. Other's builds have shown some gaps but nothing quite as big as this. It's almost like the 3D printed tail section is too small but anyway I think I'm there with the fix. Fingers crossed anyway!
-
3
-


JetMads 1/32 Viggen
in LSM 1/35 and Larger Work In Progress
Posted
Slight hold up as my jar of XF-63 German Grey which I was planning to use for preshading on the underside has dried out, so waiting on it and a jar of X-16 purple for the tail.
In the meantime started removing and cleaning up the undercarriage parts. The gear bay doors have some pretty nasty print lines as they've been printed horizontal - look like grid lines on a topographic map, so started on fixing that.
Ladled a mix of Tamiya putty thinned with lacquer thinners over the top. I'll let it fully dry overnight, give it a good sand and see where we are at that point. The underside isn't great but with all the detail it isn't possible to use this method - will just try and sand them as best I can.