


GusMac
-
Posts
2,900 -
Joined
-
Last visited
Content Type
Profiles
Forums
Events
Gallery
Posts posted by GusMac
-
-
All the best to you and Mary, Scott. It sounds flippant but it is one of the best cancers to have nowadays.
As others have said my mum had breast cancer 40 years ago and is fit, healthy and about to turn 84 in a weeks time. That's also the reason I've spent 30+ years as an imaging physicist mainly doing cancer work.
-
 2
2
-
 1
1
-
-
3 hours ago, PanzerWomble said:
I don't feel fear or panic ,
Nothing brings me down
I'm an aero-spaceage warrior
I fly sideways through sound ...........
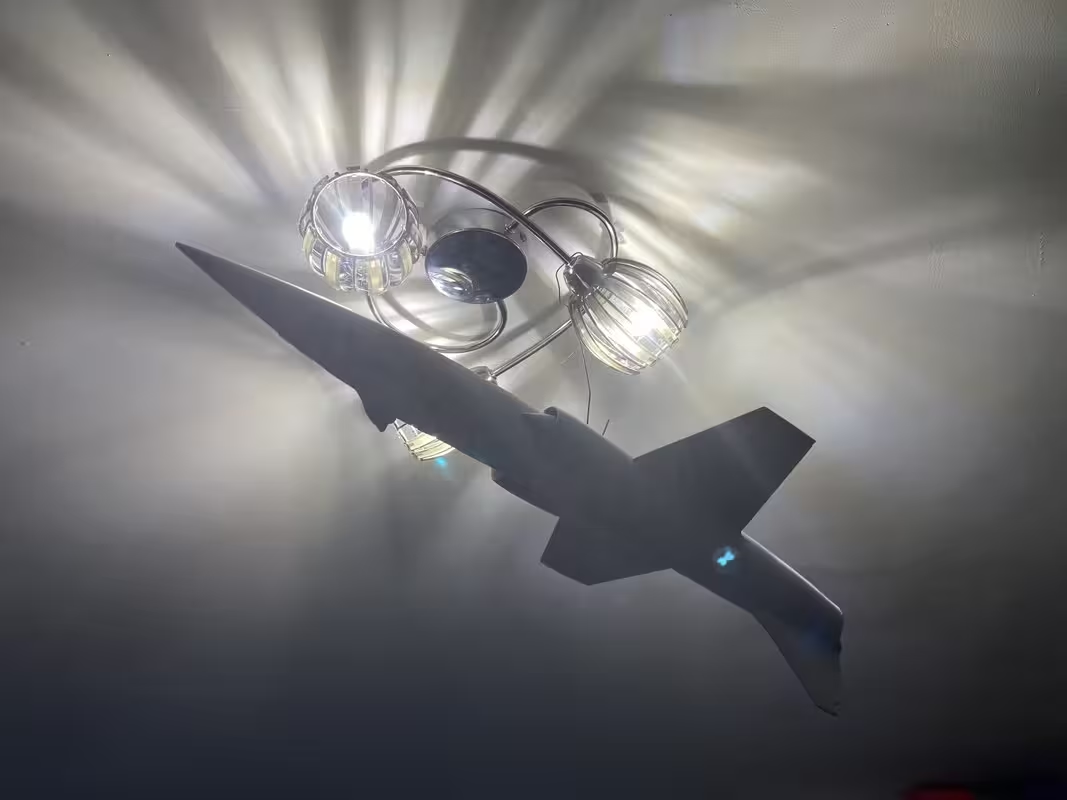
It's in one big lump after a days work , 4 layers of primer , a lot of filing , sanding and filling . Overall not a bad fit but needs to be good for the NMF .
Drying in the upper atmosphere ....
Ah .........but how does she handle ??
Nice bit of the Right Stuff.
You've got me digging more old albums out of the cupboard now!
-
2
-
-
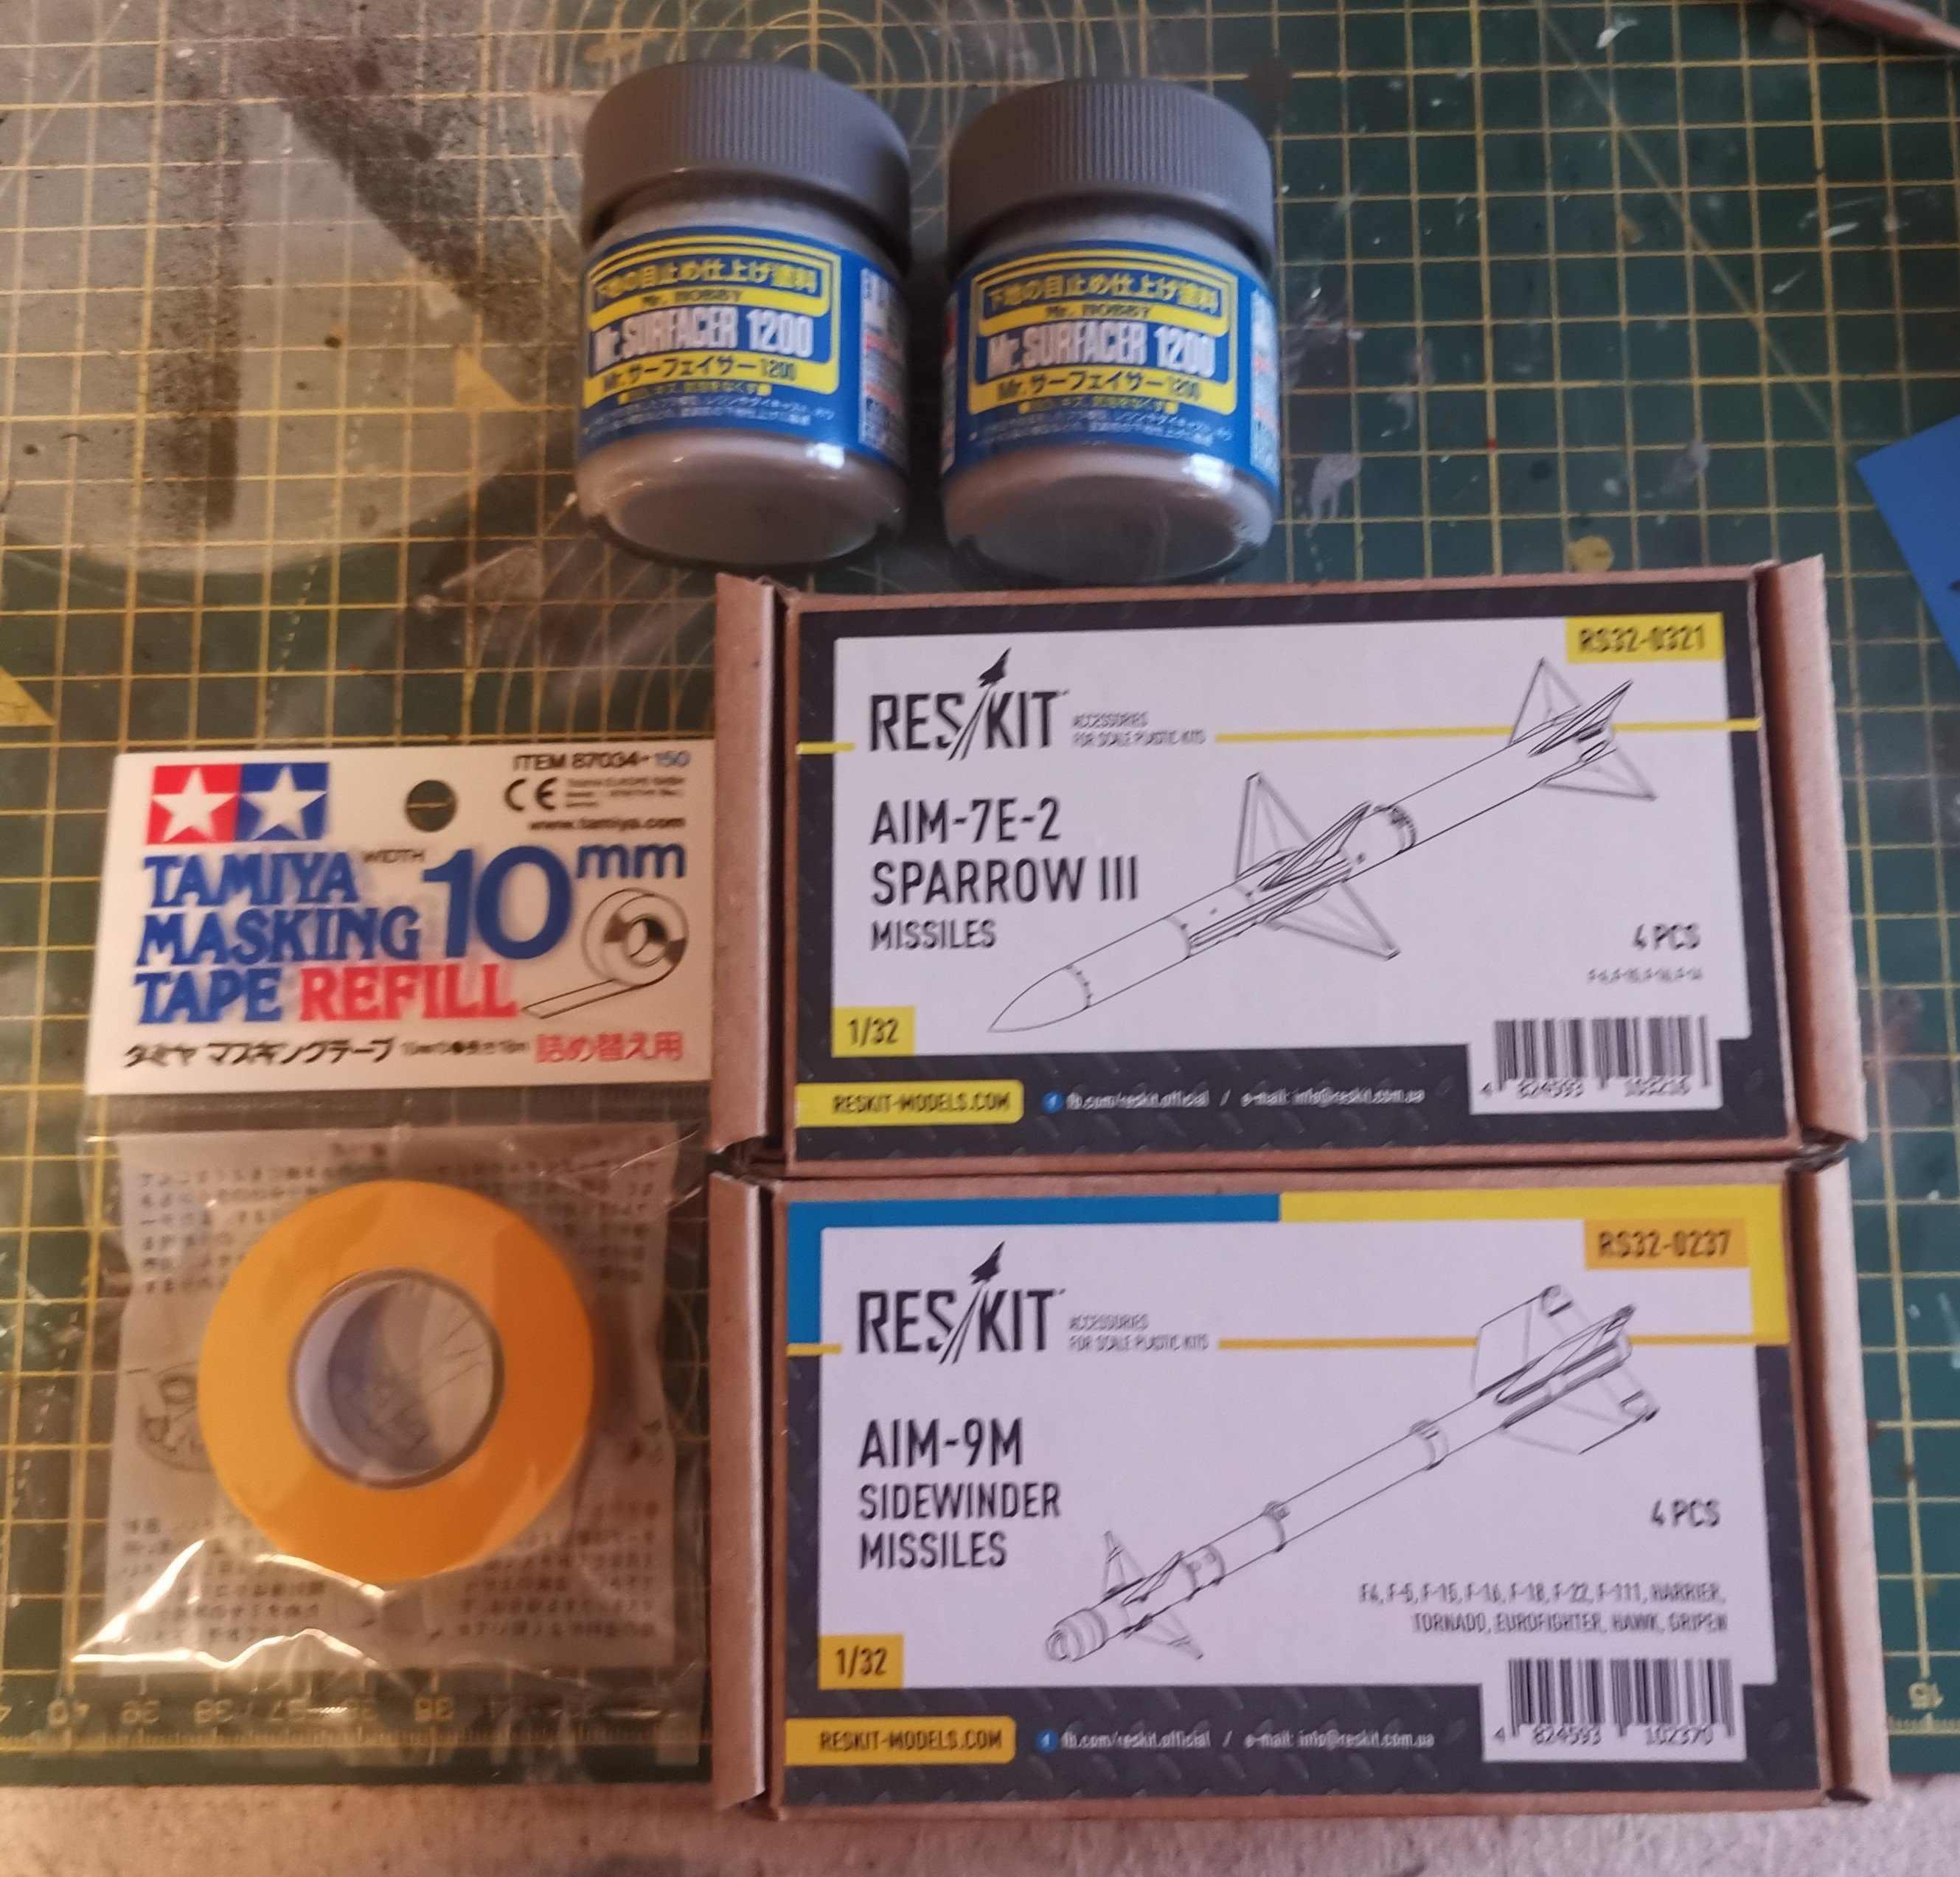
Some supplies for the Viggen, reckon I'm going to need plenty of primer!
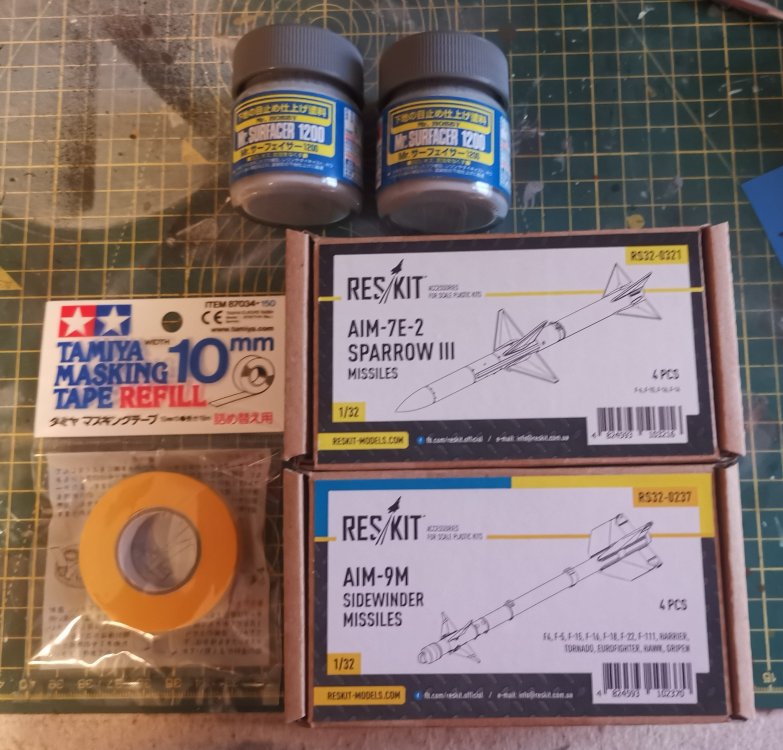
The kit weapons are probably the weakest point so I got the Reskit offerings which were a better price than the Brassin ones and look as good to my eye.
-
7
-
-
On 3/12/2024 at 2:49 AM, Martinnfb said:
Never seen such a detailed kit of a polished turd before. 😁
-
 4
4
-
-
On 3/12/2024 at 8:07 PM, Martinnfb said:
Common guys you can't miss this
")
It's good but I preferred the original film. Always fun to see Hugh Grant in his natural state playing a scumbag.
-
2
-
-
Thanks fellas. I might give the Milliput a try Carl as saving on the sanding definitely sounds like a plus.
-
6
-
-
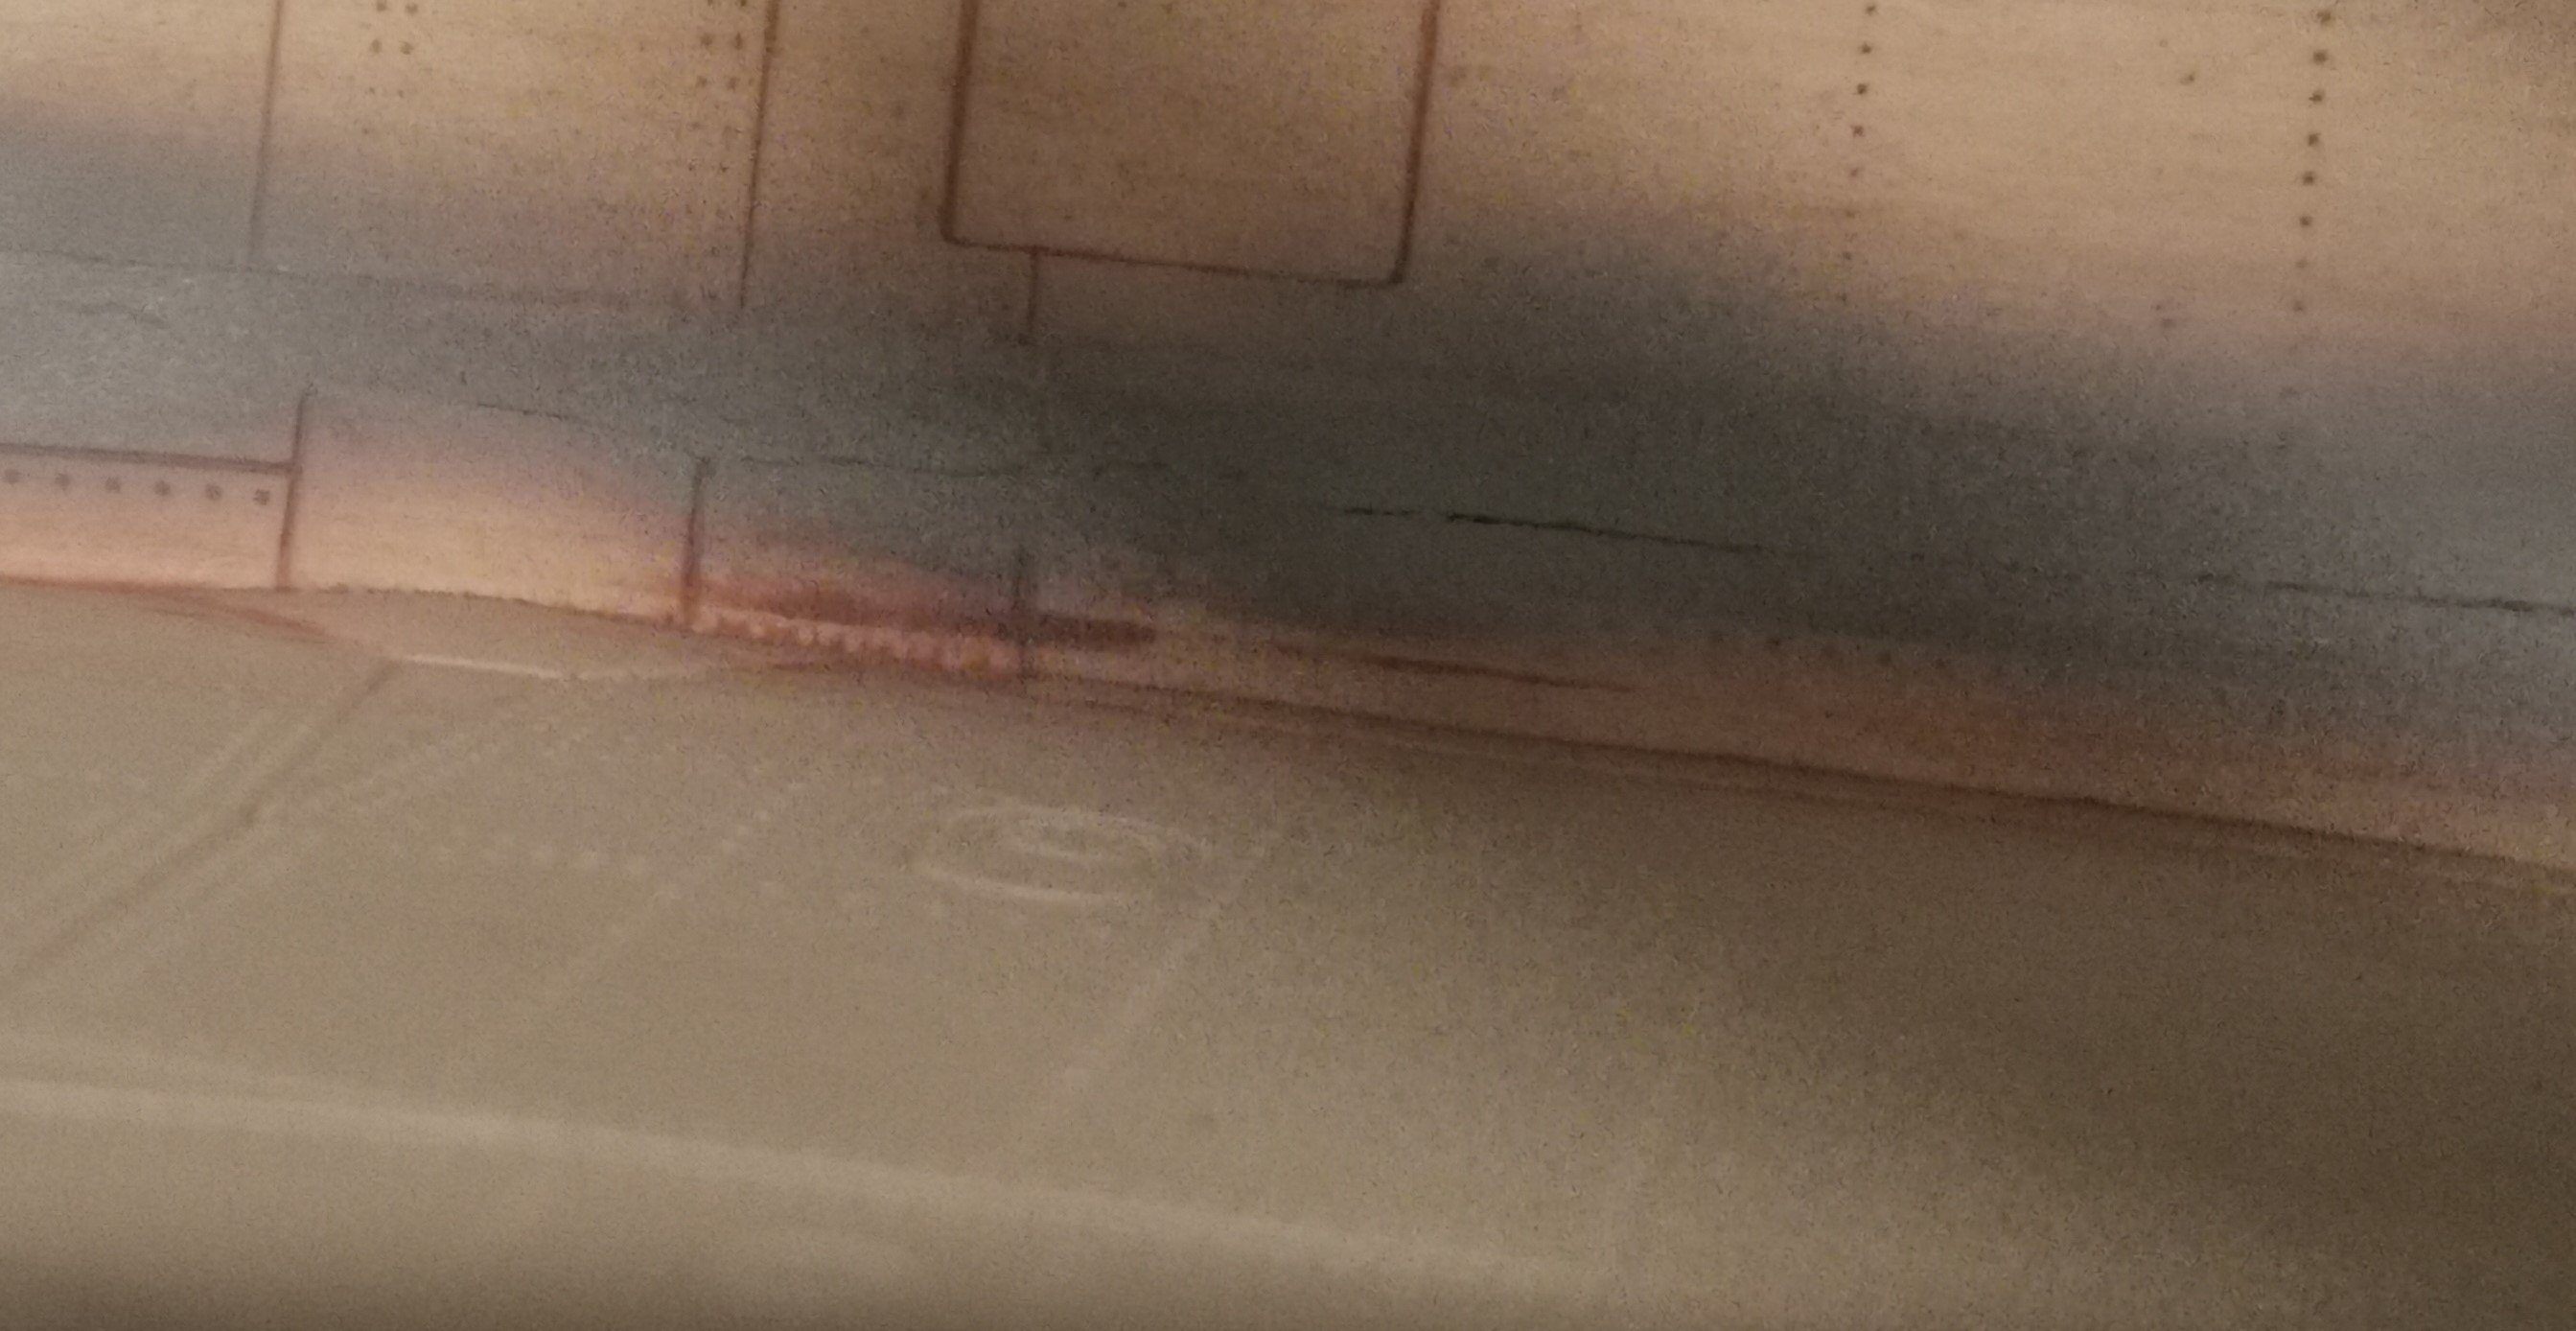
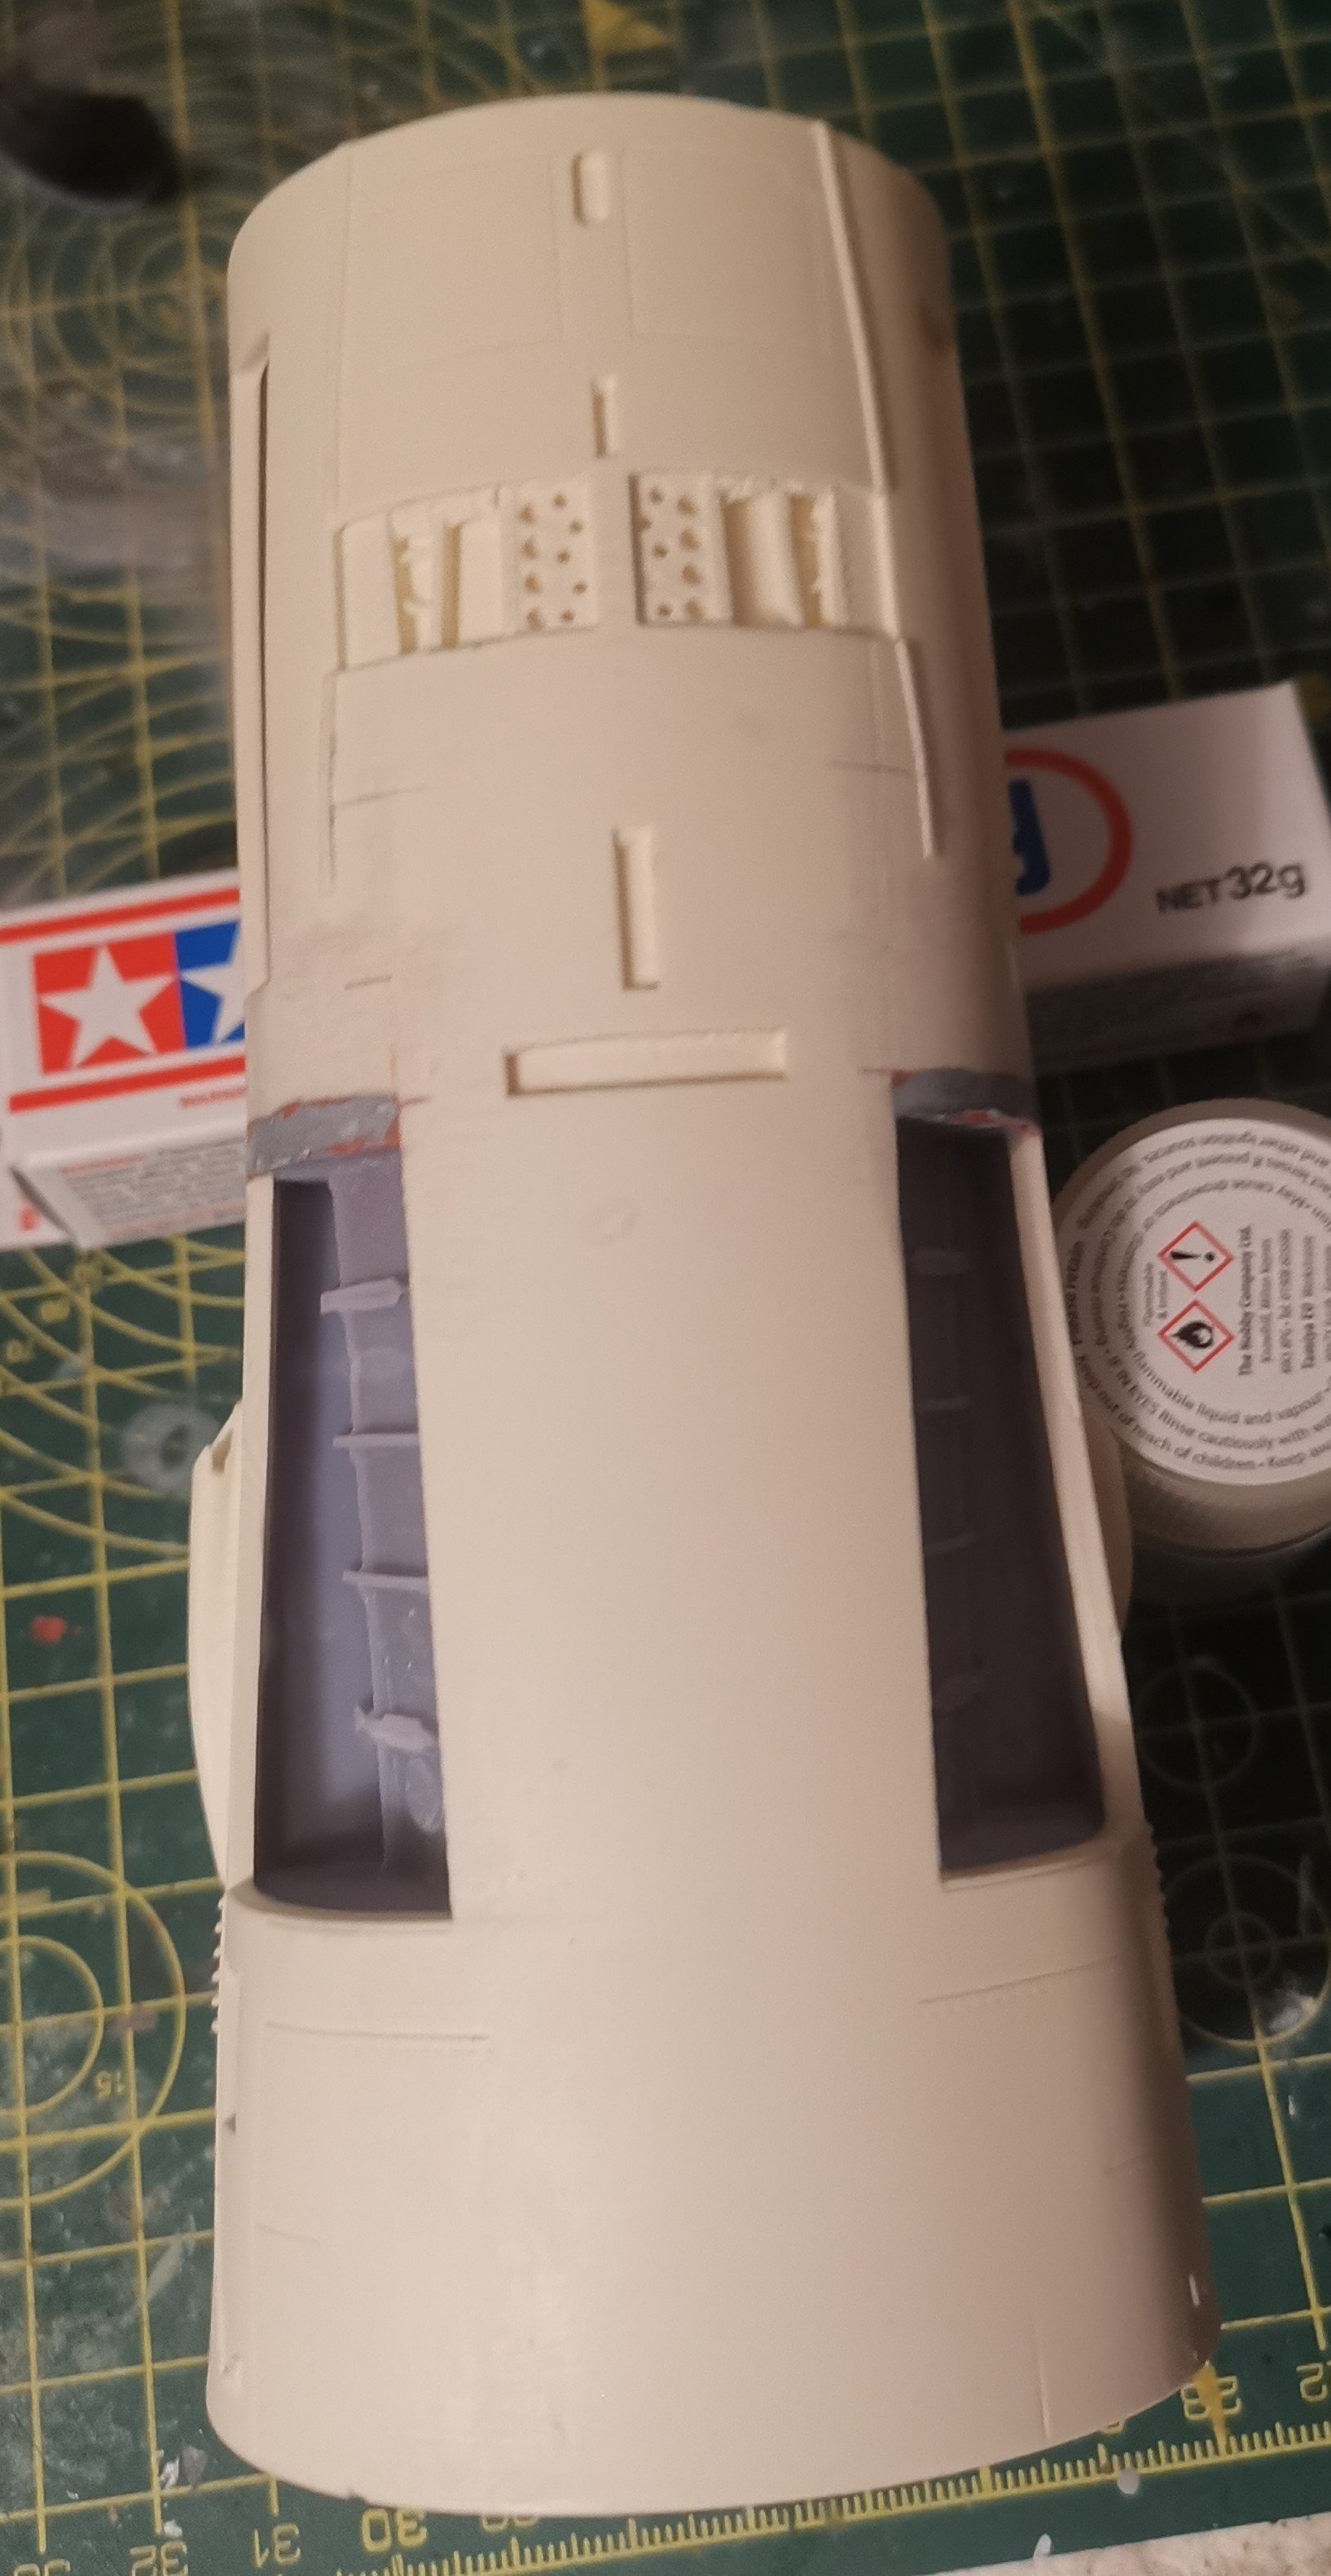
So after a couple of rounds of filling and sanding with the Bondo putty I've put some primer down to see where we are. Apologies for the crappy pics, it's big and heavy enough now to be difficult to move and hold and hang onto the phone!
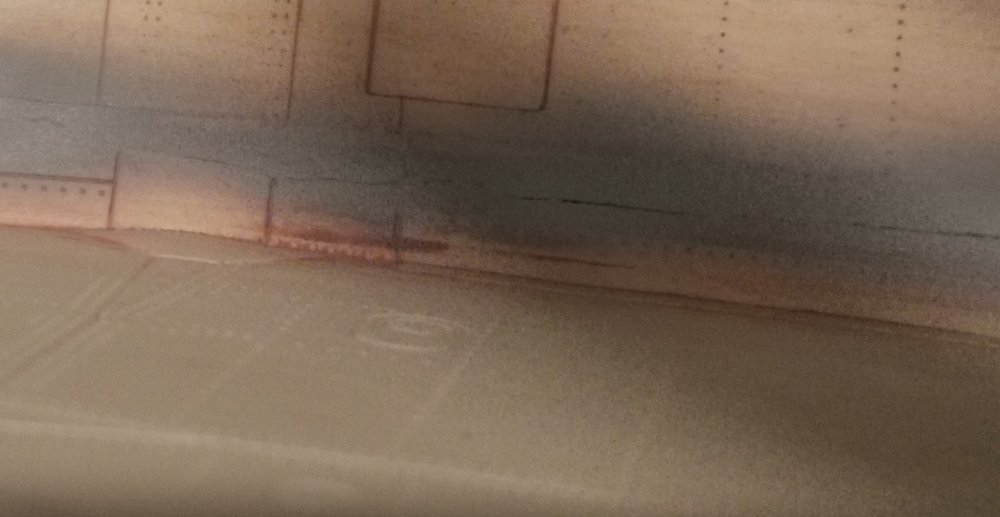

So, a bit more work needed, mainly on the underside. A lot is just hairline cracks in the Bondo so I'm moving on to the grey Tamiya putty as I hope the finer grain should deal with this.
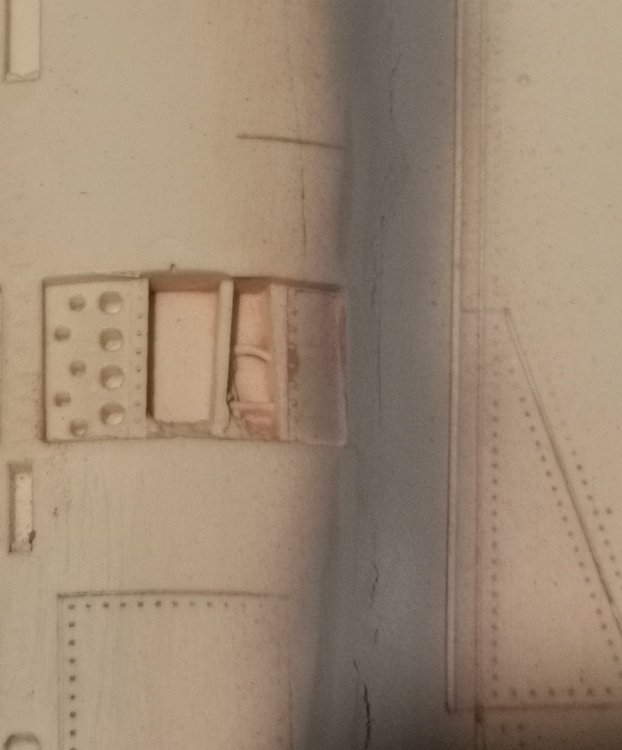
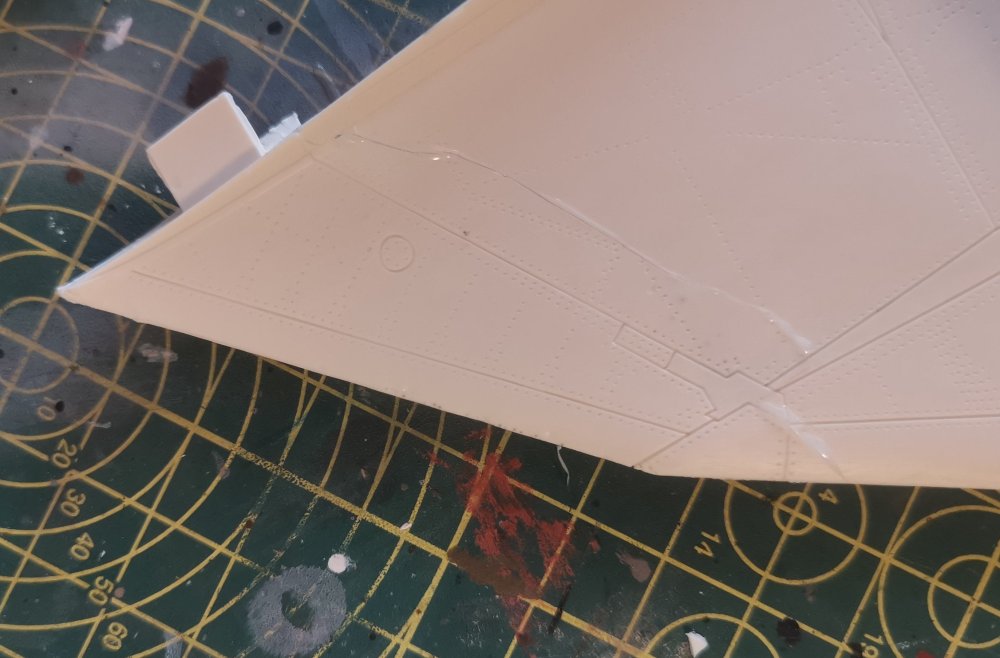
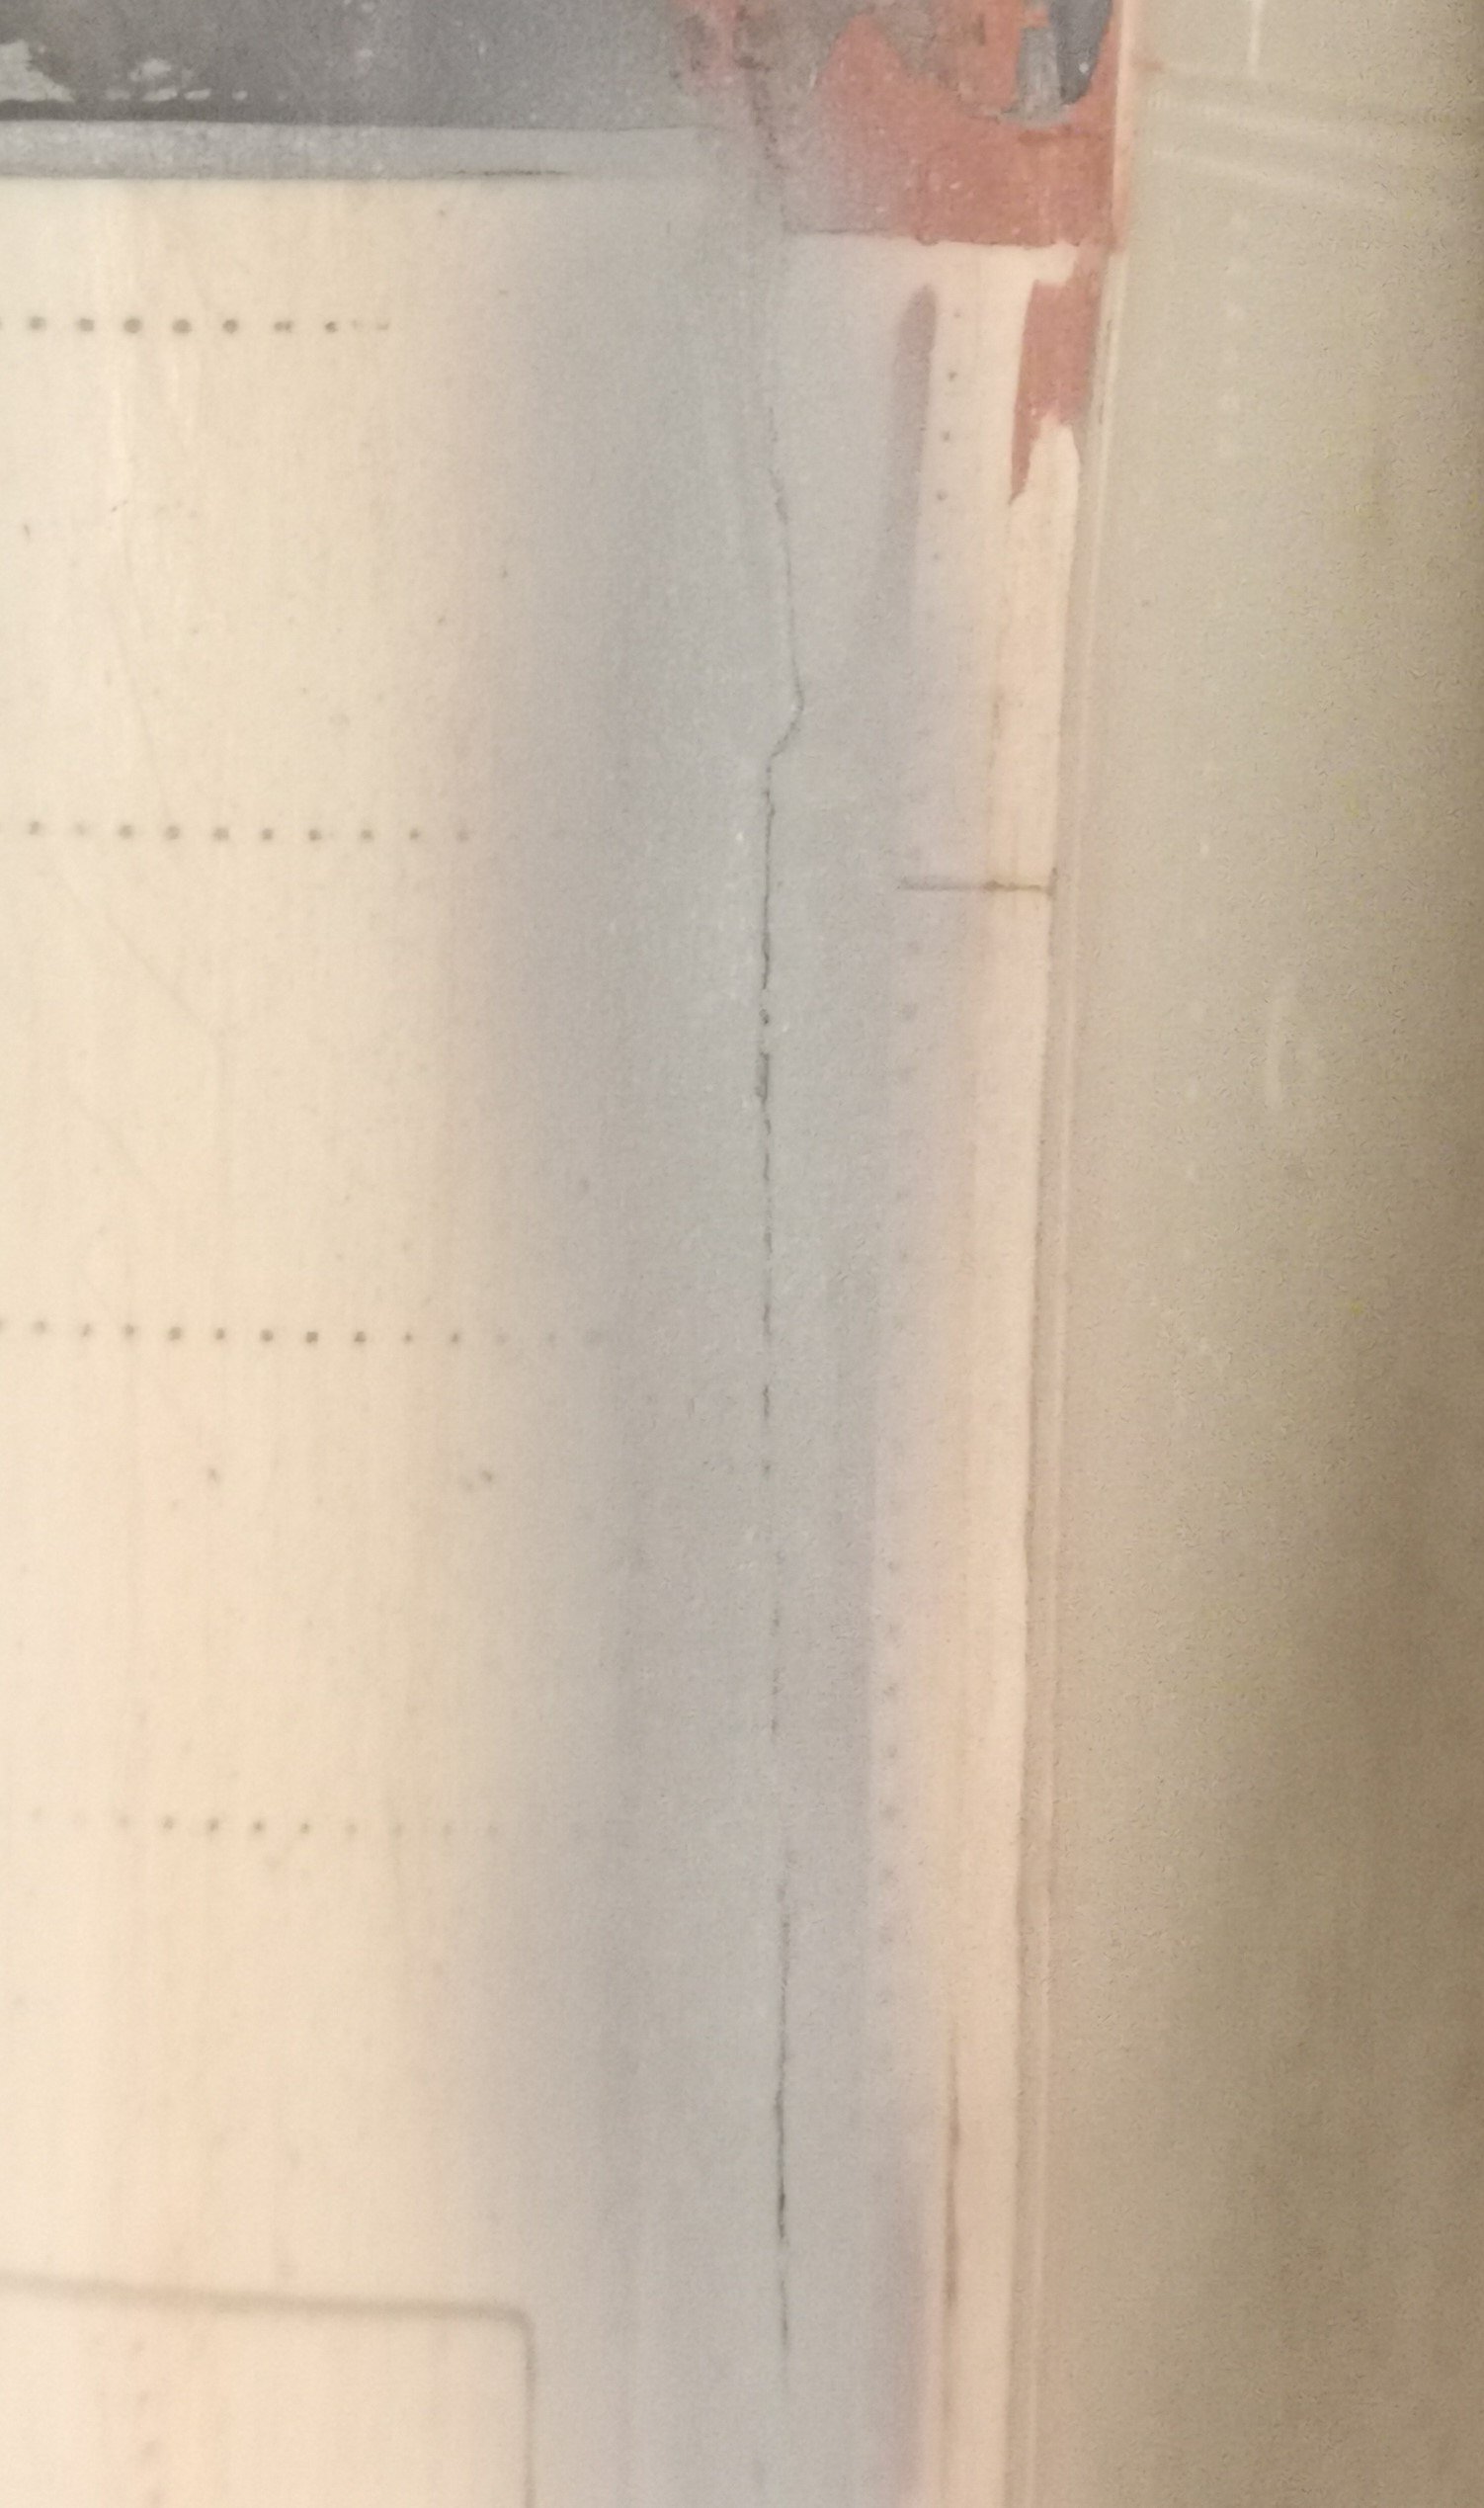
I'll now show what I'm facing next and it's got me a bit worried as I'm unsure how best to approach it.
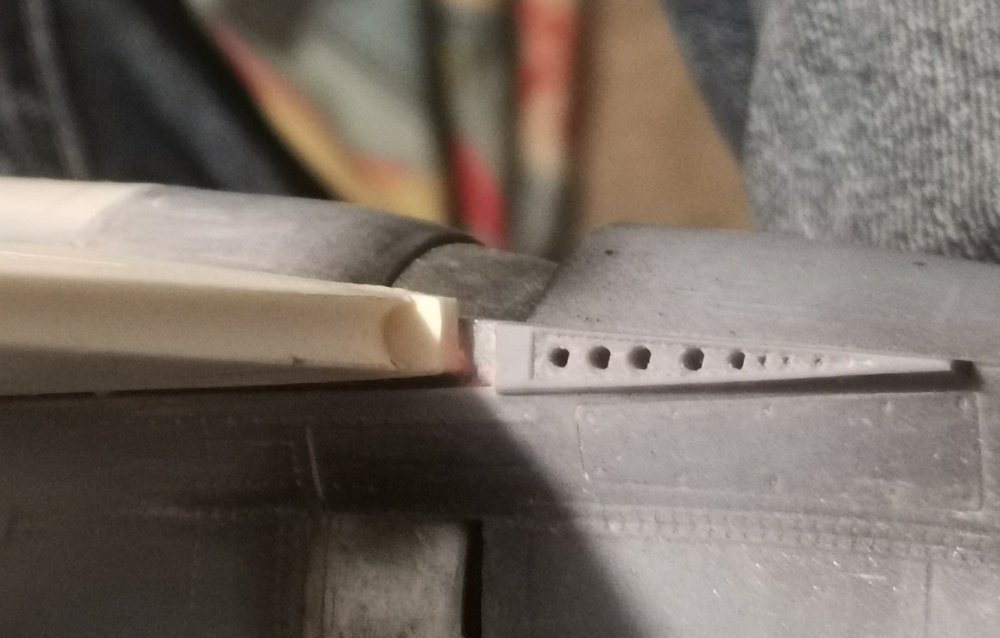
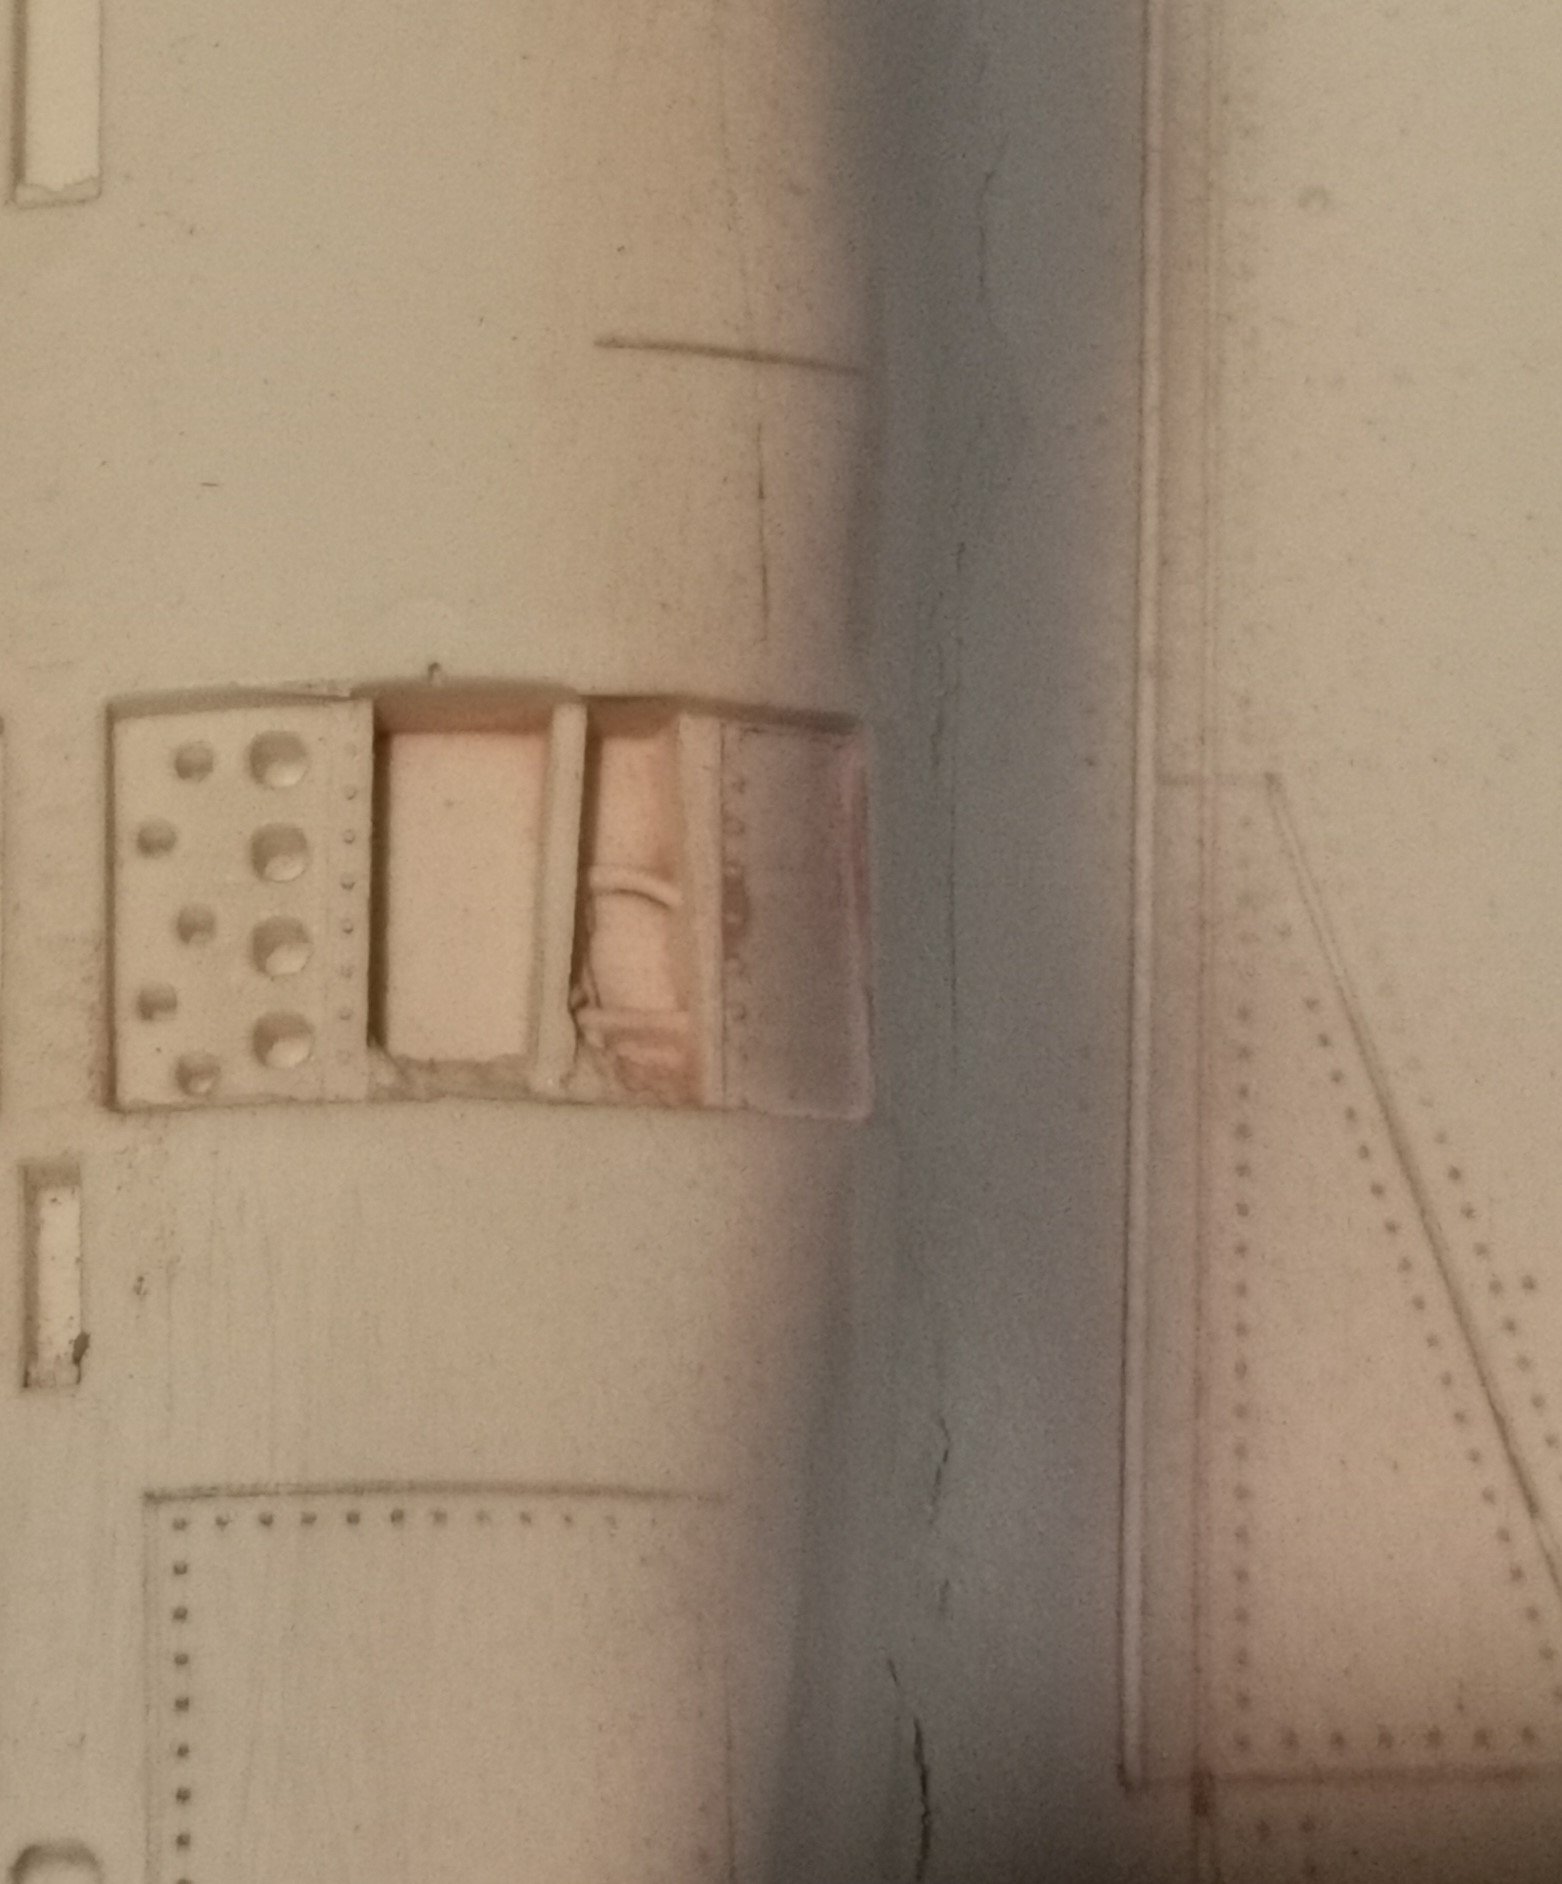
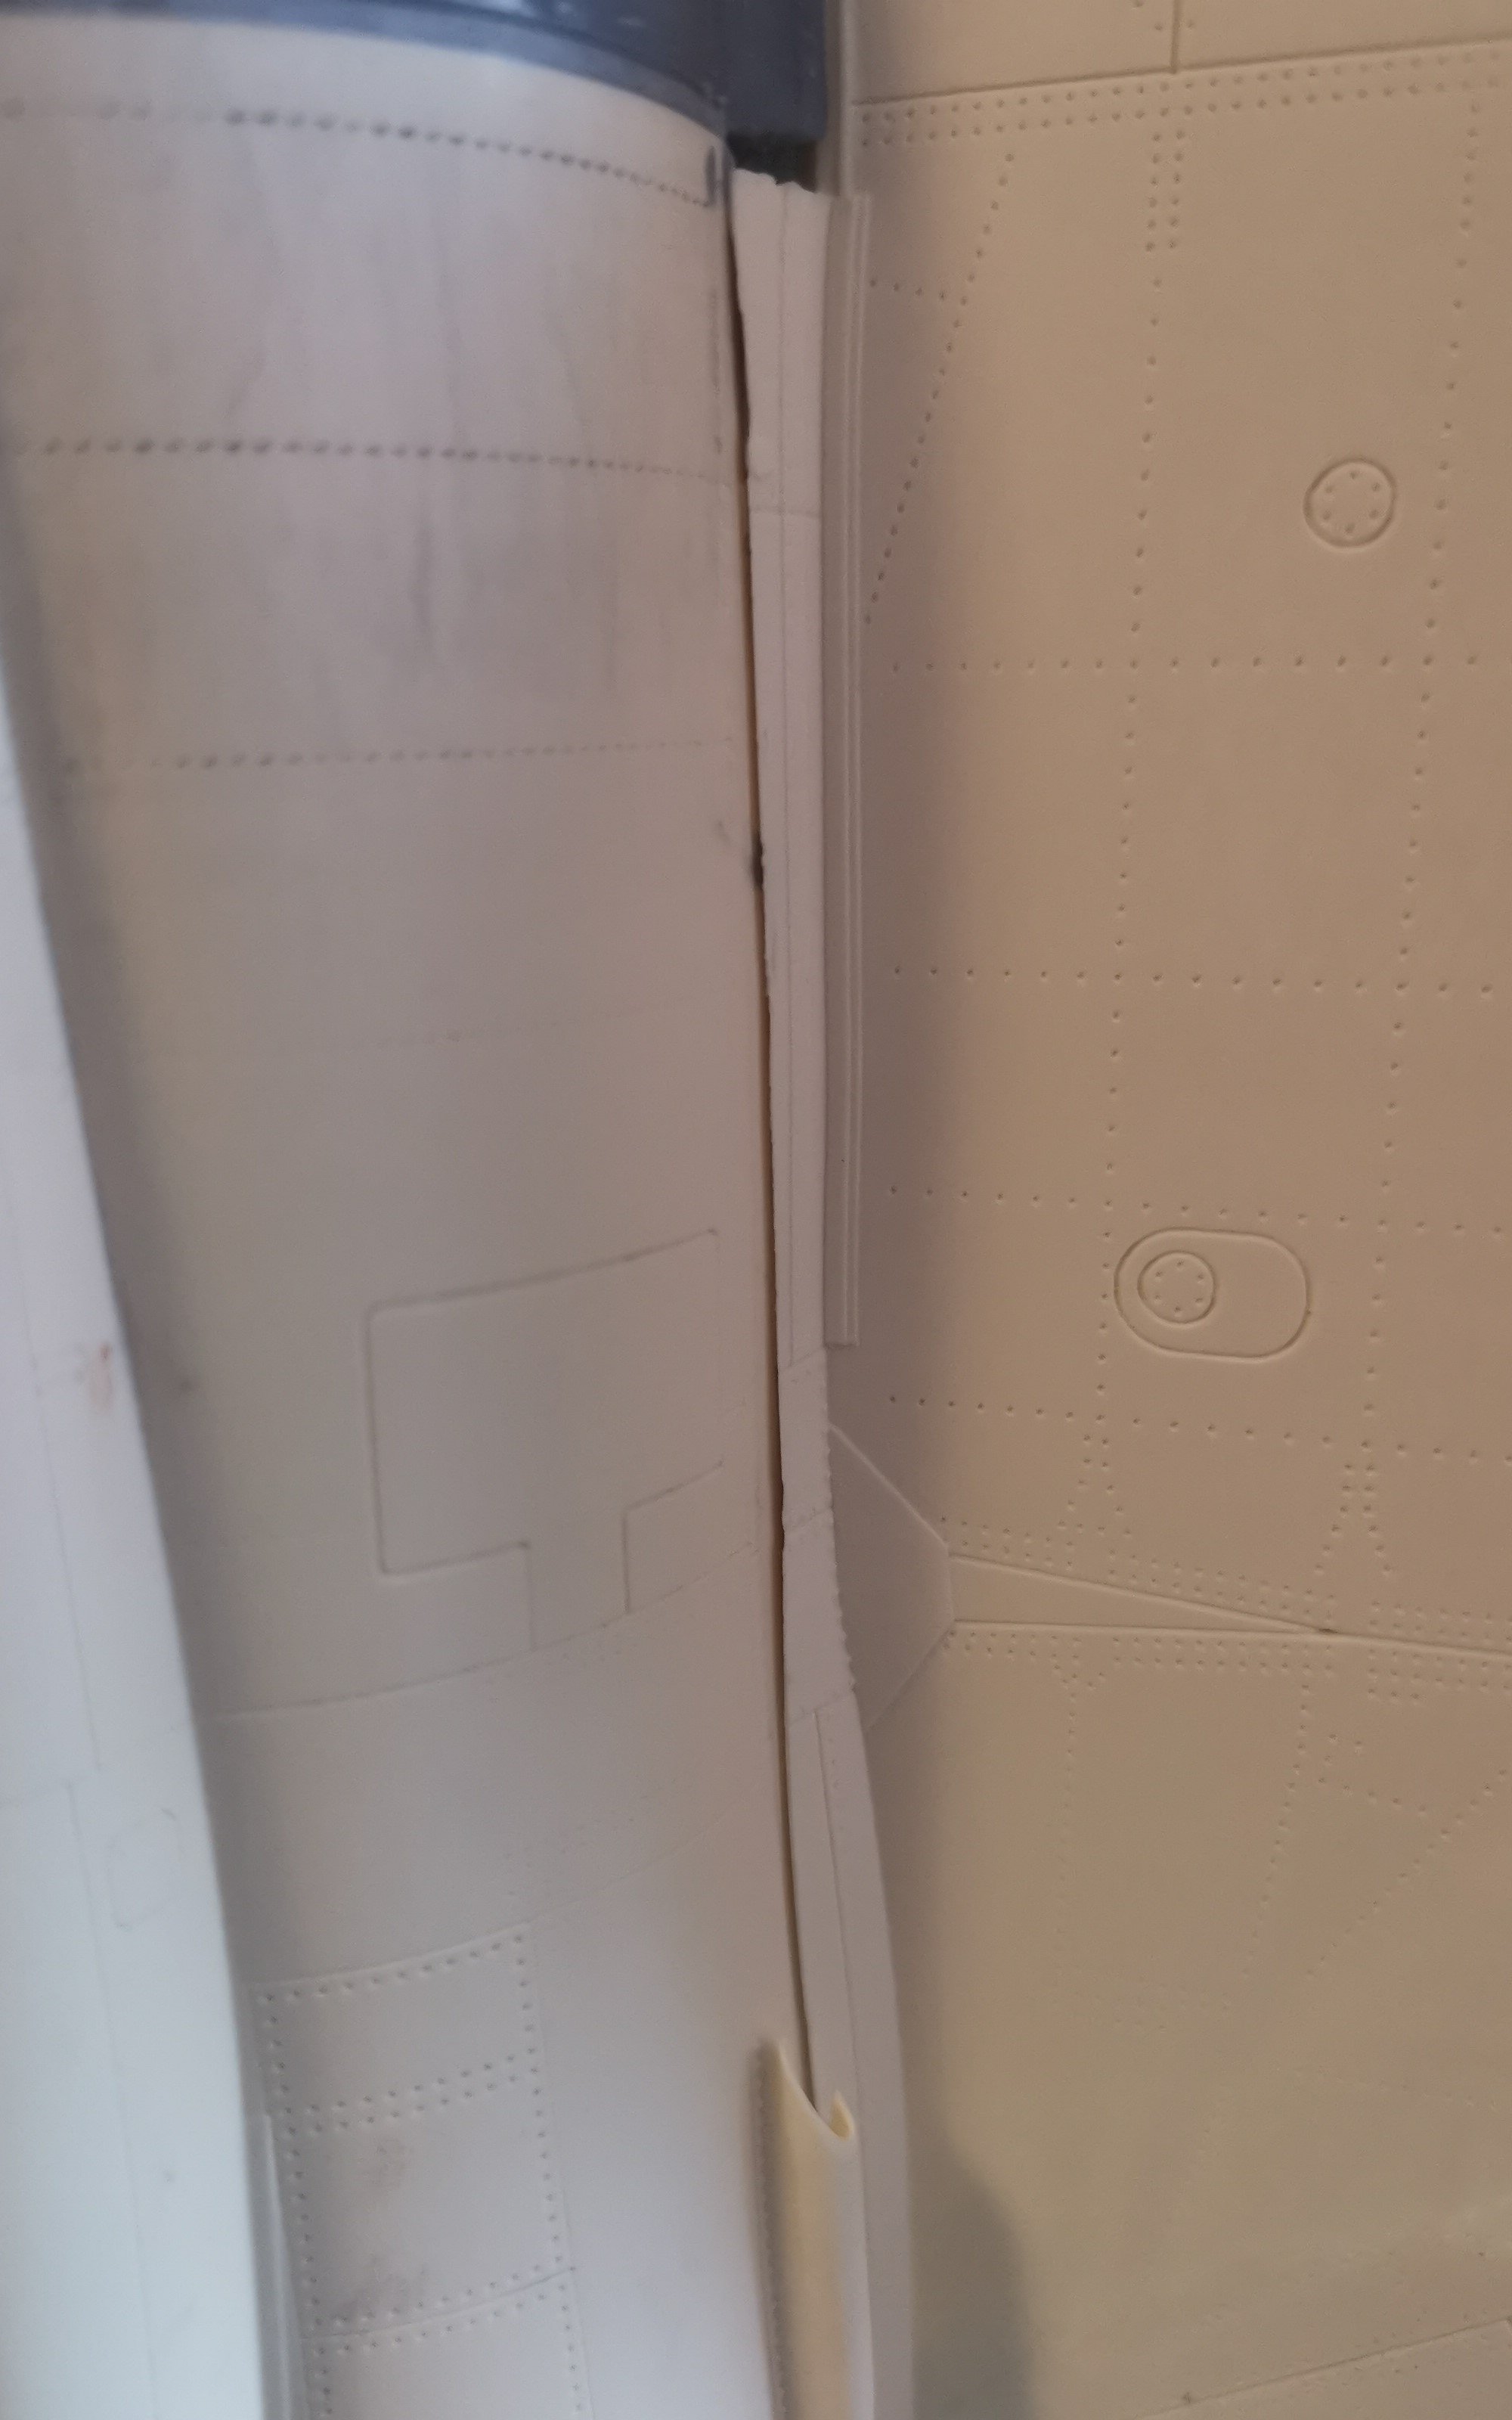
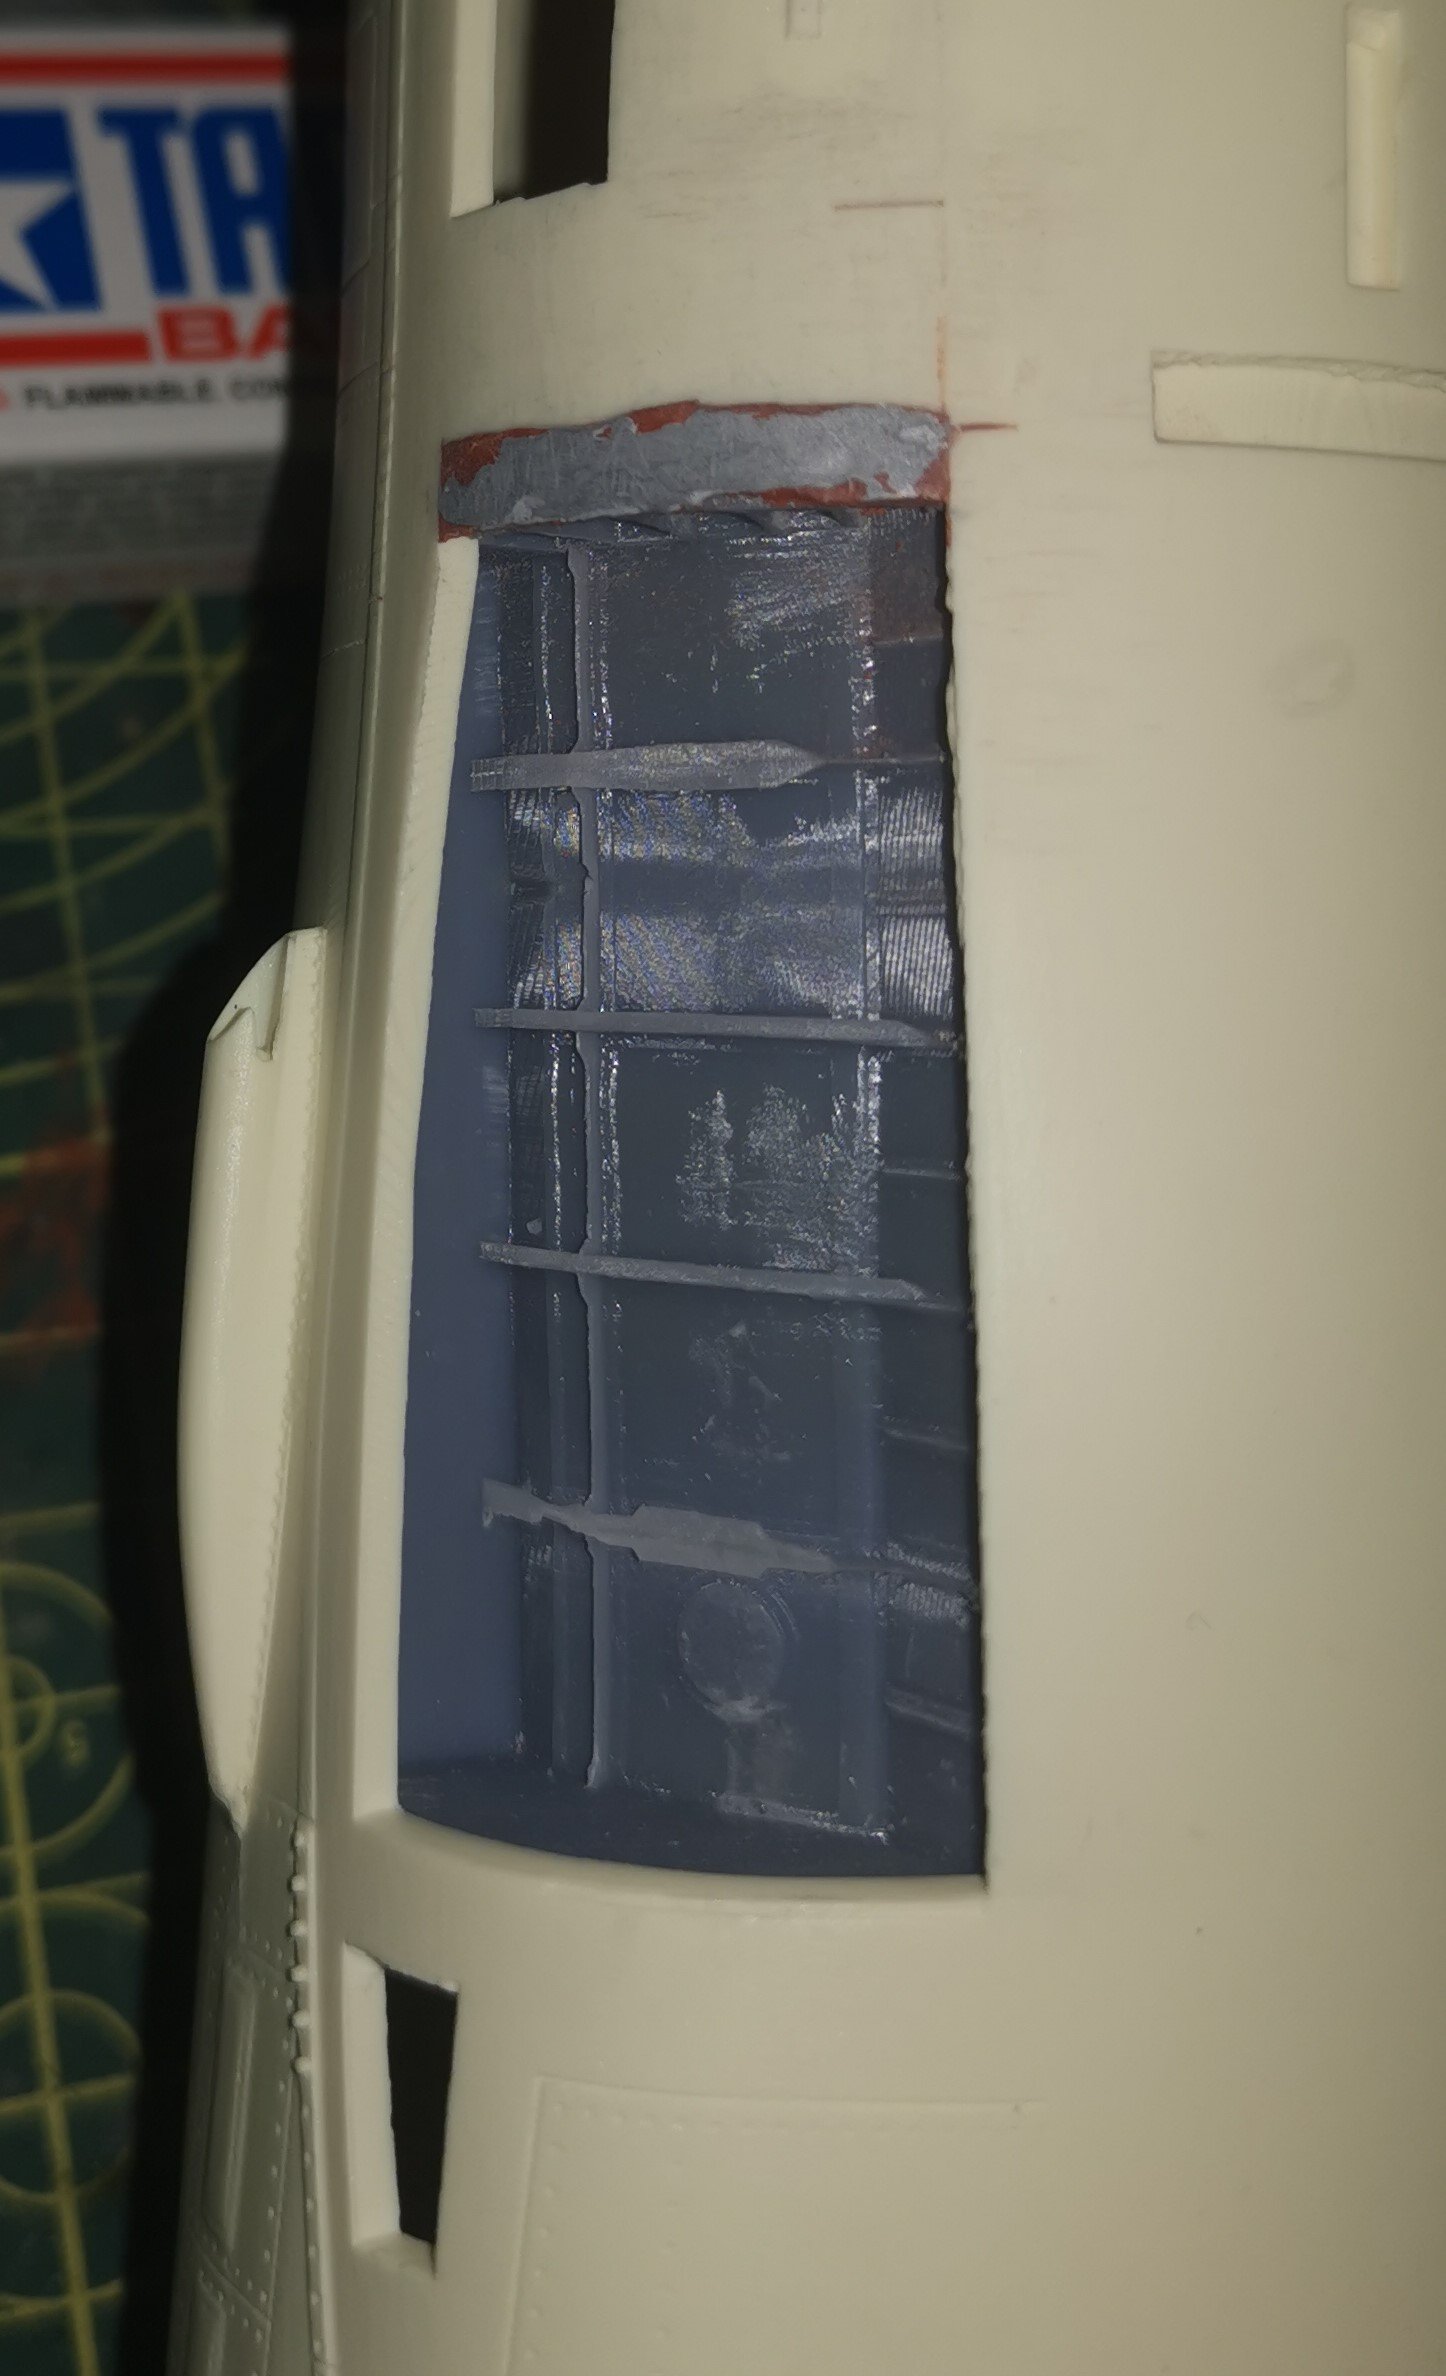
The wing root is correct at the leading edge and tight against the 3D printed tail piece at the join area but I've got this big gap and the bottom of the wing sits about 2mm proud of the corresponding 3D printed section.

Another angle to show what I'm meaning. The problem is I'm constrained by the position of the inferior reverse thruster vent as you can see below.

I can't grind down the wing as the flaps wouldn't fit correctly so I'm going to have to lose the difference in the short distance to the thruster vent.
My plan is to plug the worst of the gaps with plasticard and then blend it with filler as I think all filler would be too prone to cracking, etc. Does anyone with experience of these type of kits think that's a sensible plan? I'm kind of stuck until I sort this out.
It's a bit weird as the tail piece and wings fit perfectly everywhere else but something seems to have propagated to produce this. I know others have moaned about the wing fit on other forums but that's mainly been around the topside fit.
-
7
-
-
Looking really good. The paintwork is nice and faded. 👍
-
4
-
1
-
-
Grey Mr Surfacer 1500 is obviously easier to find in the US. It's like rocking horse poop over here at the moment. I spent a good hour hunting online for a European stockist with some in last night for use on the Viggen. Finally managed to track down 2 jars on Evilbay.
-
5
-
 1
1
-
-
5 hours ago, Martinnfb said:
Saw this last night, really good.
I remember reading a book which was written by one of the survivors, Parrado. Absolutely terrifying and a true testament to human survival in the bleakest circumstances.
-
3
-
-
54 minutes ago, PanzerWomble said:
That was Harry Secombe's nickname for himself
-
3
-
-
Nice bit of trivia. He was one of the great British eccentrics.
I did dig out The Doughnut in Granny's Greenhouse for a listen last night after seeing his name. Hadn't listened to it in years and it was a nice shock - Urban Spaceman and Can Blue Men Sing the Whites still make me laugh
-
2
-
-
Wow, loads of brilliant builds. Love the Jackie Stewart and Kenny Roberts ones especially.
-
1
-
-
Looking great Peter. It is such a joy to build, as close to trouble free as I've experienced in a long time.
-
4
-
-
2 hours ago, PanzerWomble said:
So apart from the EE Lightning being the finest fighter ever for shure., I have a soft spot for the old Widowmaker.
Back ...no ...........way back when ...no even further back please ......, in my trippy dippy psychedelic youth , my love of prog rock was strong , and this particular album has happy memories .
As far as I know it's the only album soley dedicated to an aircraft model ( don't correct me if I'm wrong) ,

.......so for your delight and delectation , please join me down the rabbit hole of 1974 and the magnificence of Bob Calvert's / Hawkwind's meanderings .... or just sit along for a build log and ignore the music ...it probably hasn't dated well. . Either way I'll be singing along . Enjoy ... or not ....
Laterz
Why did I expect anything by Bob Calvert and Viv Stanshall to be anything other than bloody weird.......
-
1
-
1
-
-
56 minutes ago, PanzerWomble said:
She's a big bird for sure , you're getting your exercise in moving all that resin around. 😀
Yes, she's getting fairly weighty now, will save me doing some of my weight training with the missus.
Given the length she's going to be, I've been pondering your method with the Lightning and contemplating doing at least some of the basic painting before I add the nose section. It'll be a very tight fit in the paint booth either way.
-
5
-
-
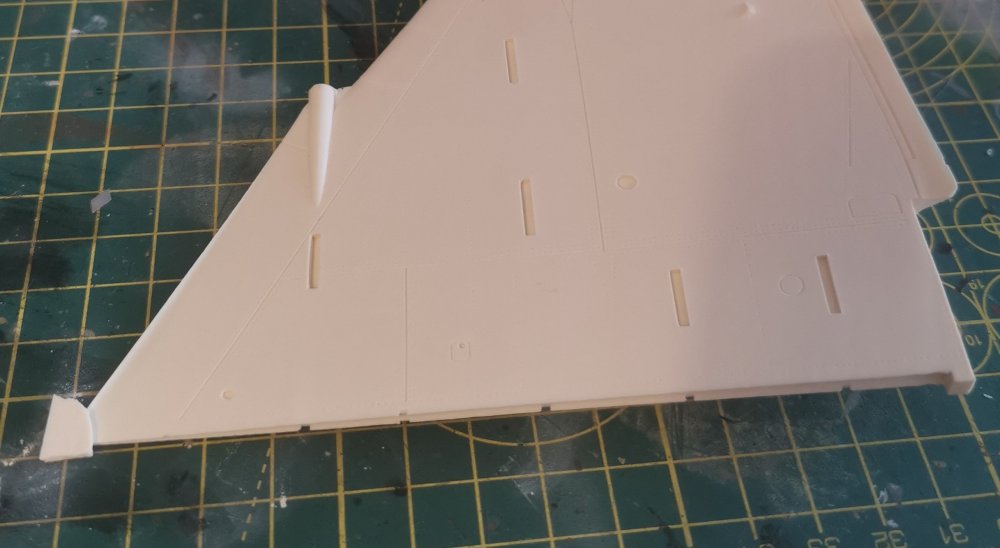
Well, it hasn't been drinking a well known energy drink BUT it has got wings!
Sorry, that joke probably only works if you get the same annoying RB adverts as we do in the UK.
Anyway, after a lot of trimming, scraping and swearing I got the wings to a point where the gaps were as small as I was going to get so they've been epoxied in to place. Had to give it a wipe down as well to remove the blood from where I stuck a micro-chisel into my thumb, which just helped with the bad language. 😁

Still some fairly sizeable gaps so I anticipate the next few days are going to iterations of the fill, sand, prime routine until I get it looking reasonable.
-
6
-
-
9 hours ago, BlrwestSiR said:
Nice progress Gus.
The way you are fixing the wingtip is perfect as I have the same problem on my kit.
Thanks Carl, except it pinged off as I was sanding it down!
Should have trimmed it a lot closer before I glued it to save putting so much pressure on it trying to sand it. I've trimmed and reattached it and I'll have another go tomorrow.
-
2
-
-
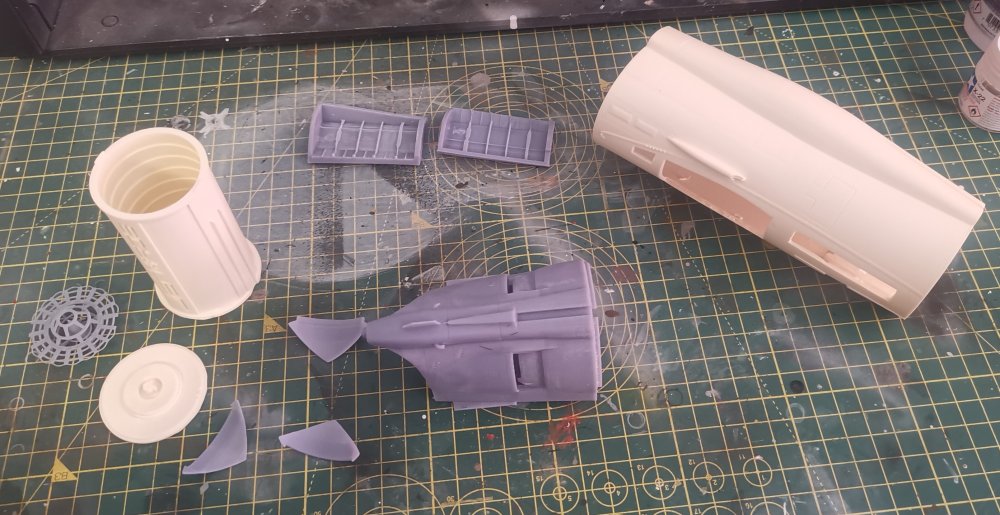
And now today's progress. First got the casting blocks roughly removed from the wings and started the repairs to the damage. The broken forward section has joined really nicely so I'm hoping once it's cleaned up it won't be visible. I also noticed the other wing tip was broken so I've epoxied a piece of the casting block to it and I'll sand to shape once fully cured.
Then I attached the rear section to the mid section of the fuselage. Join is pretty even so just going to be a bit of filler required.

-
7
-
-
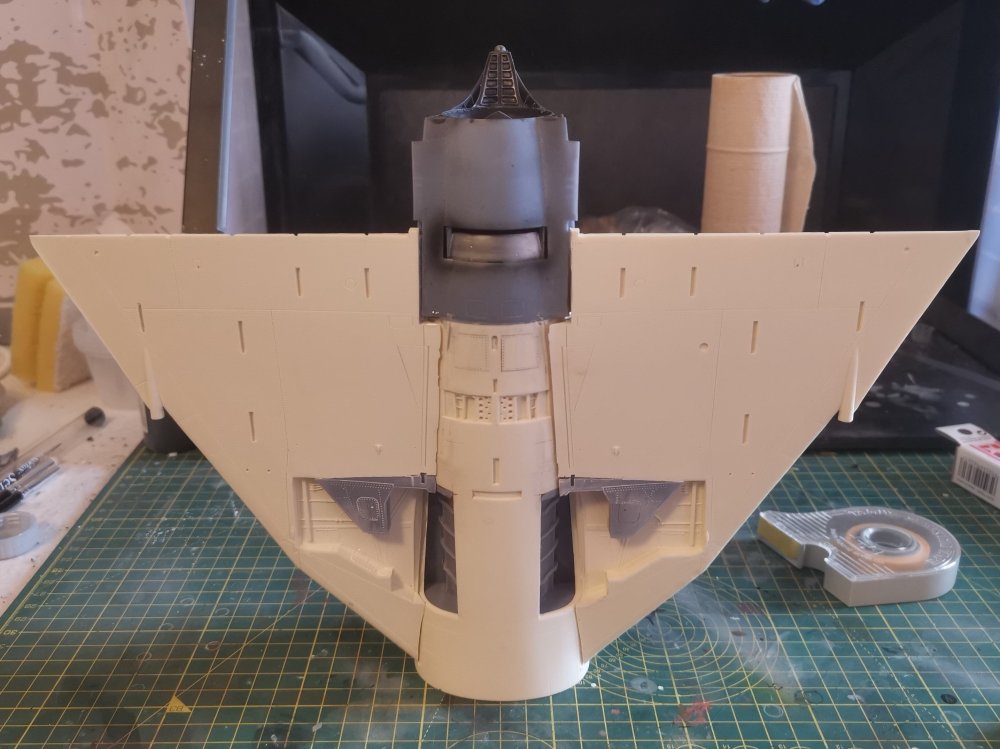
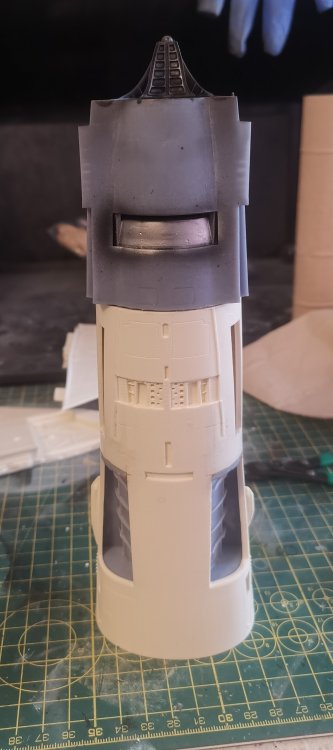
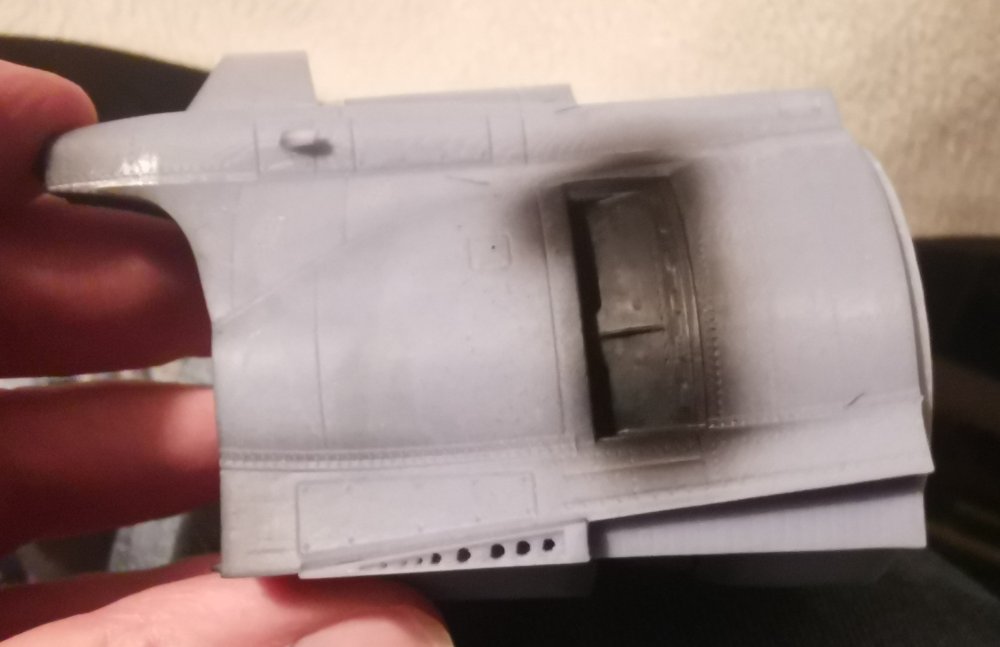
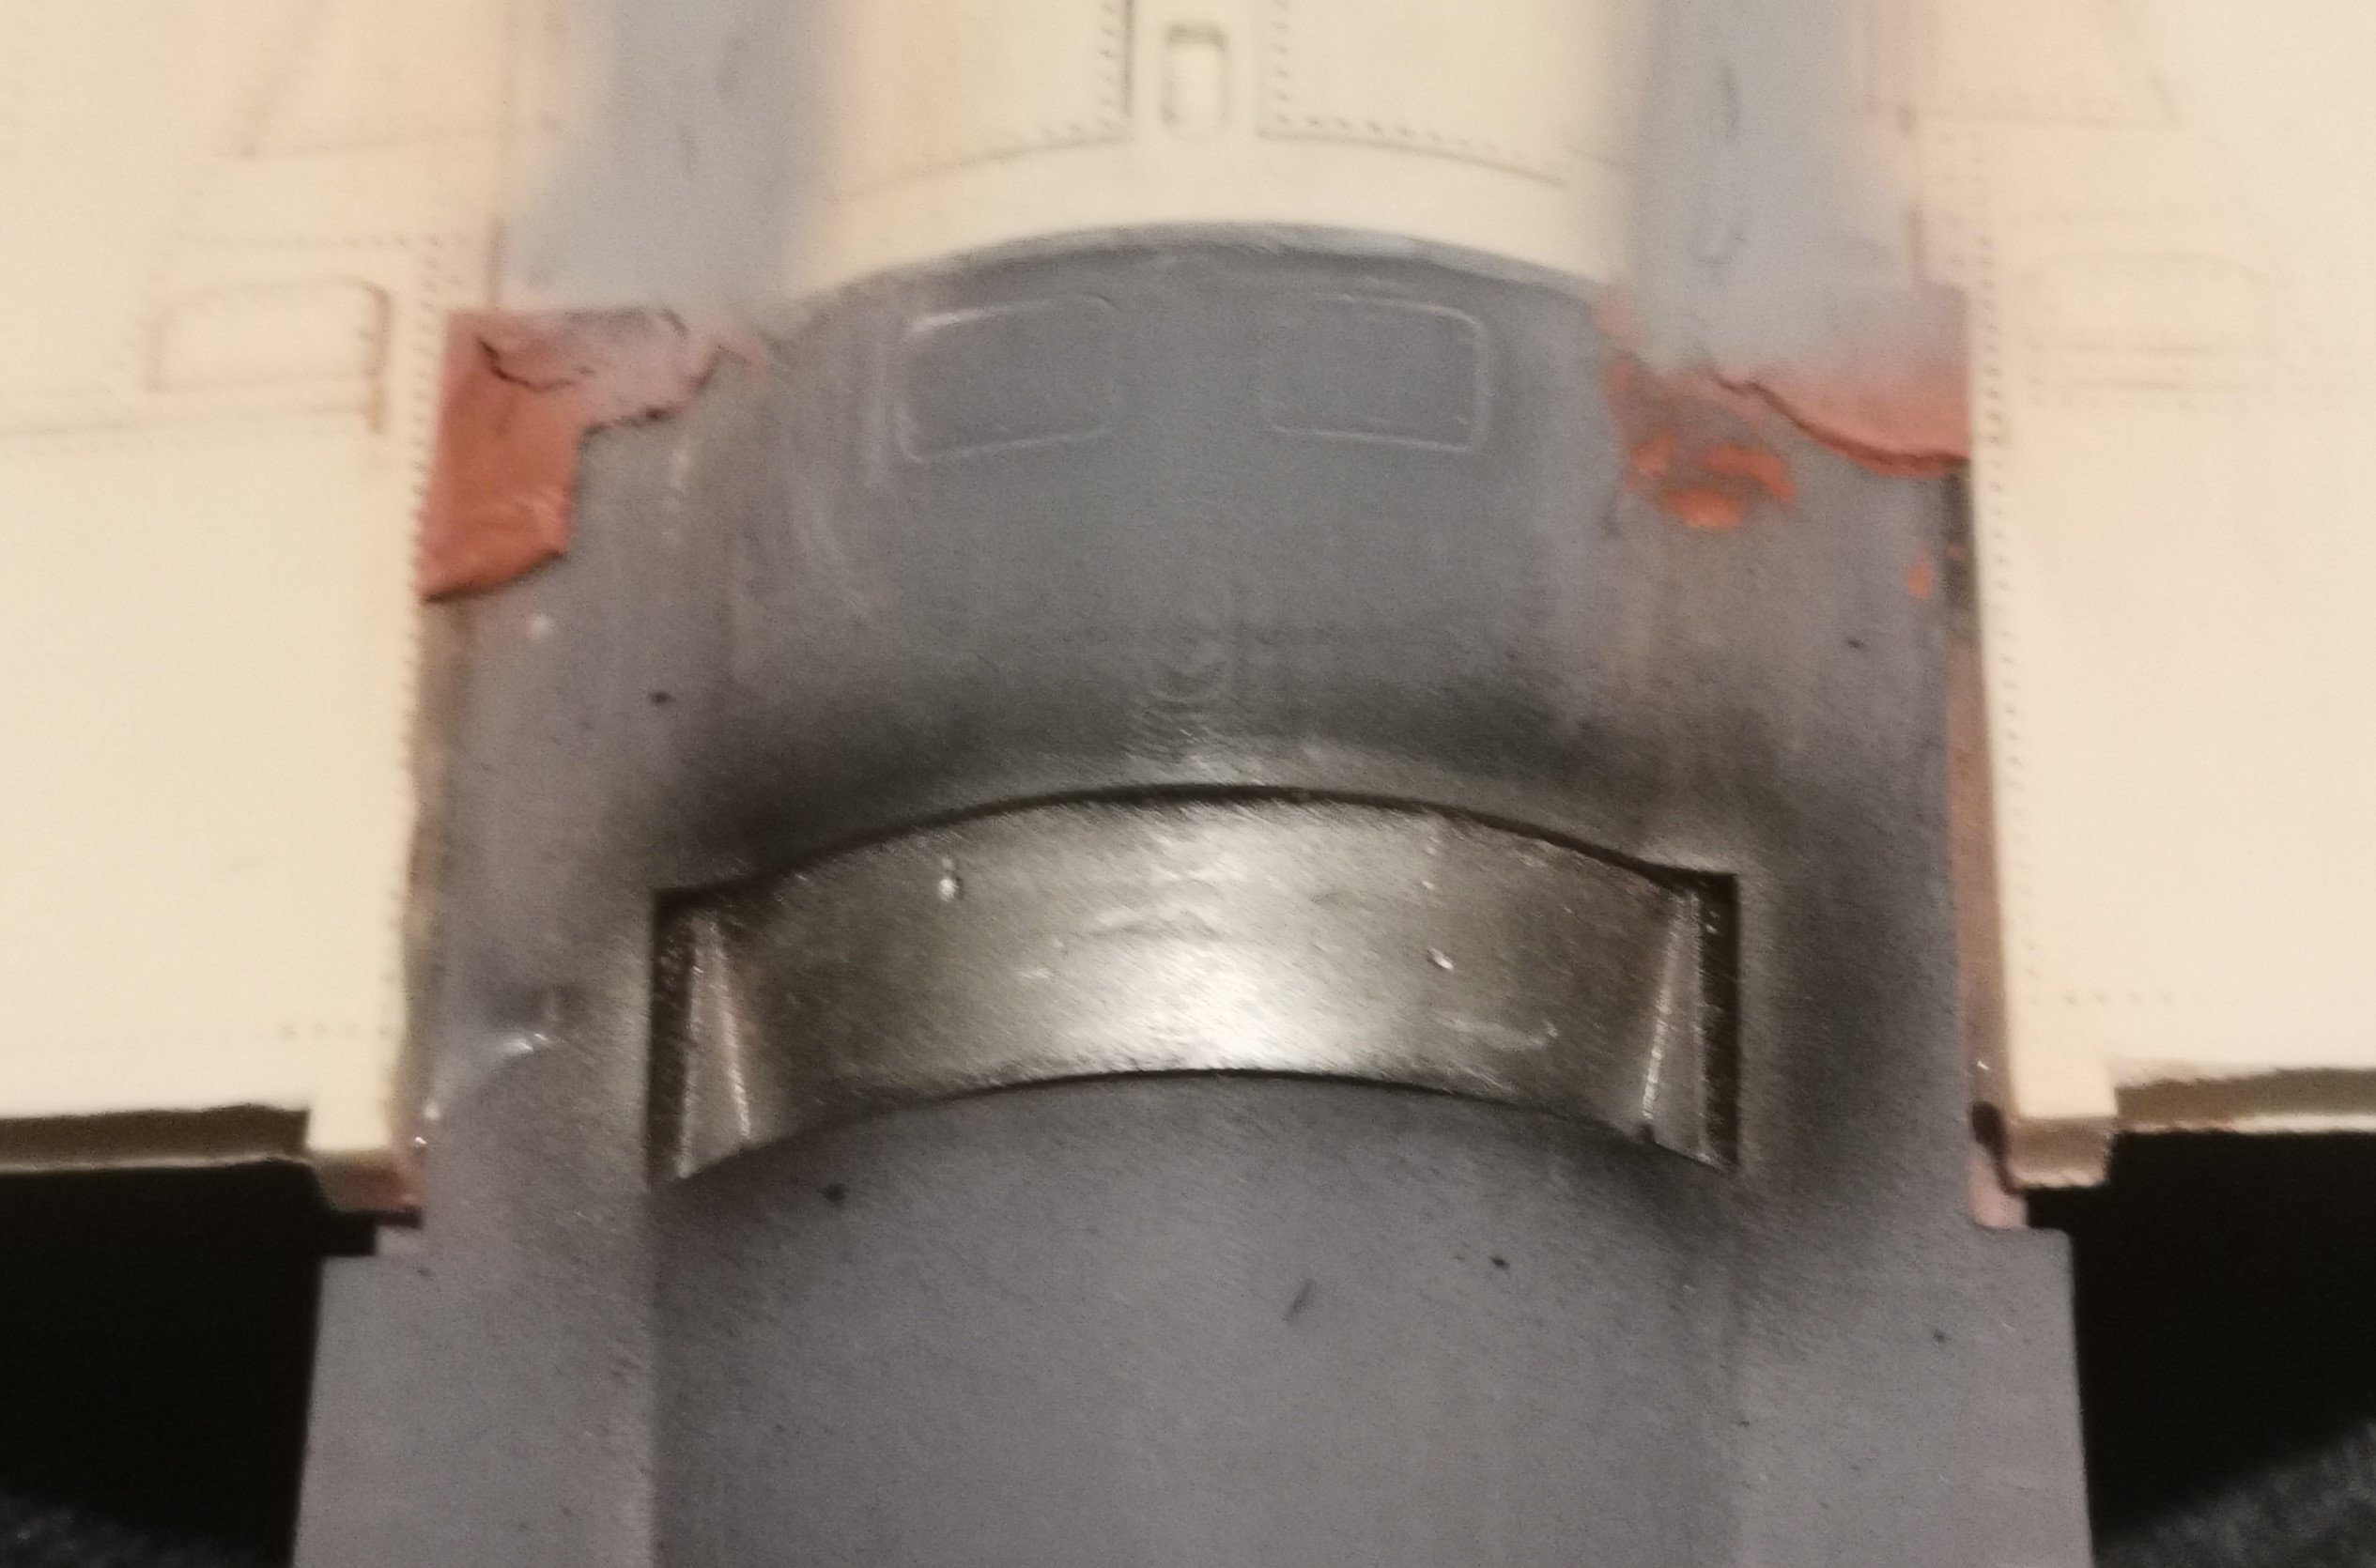
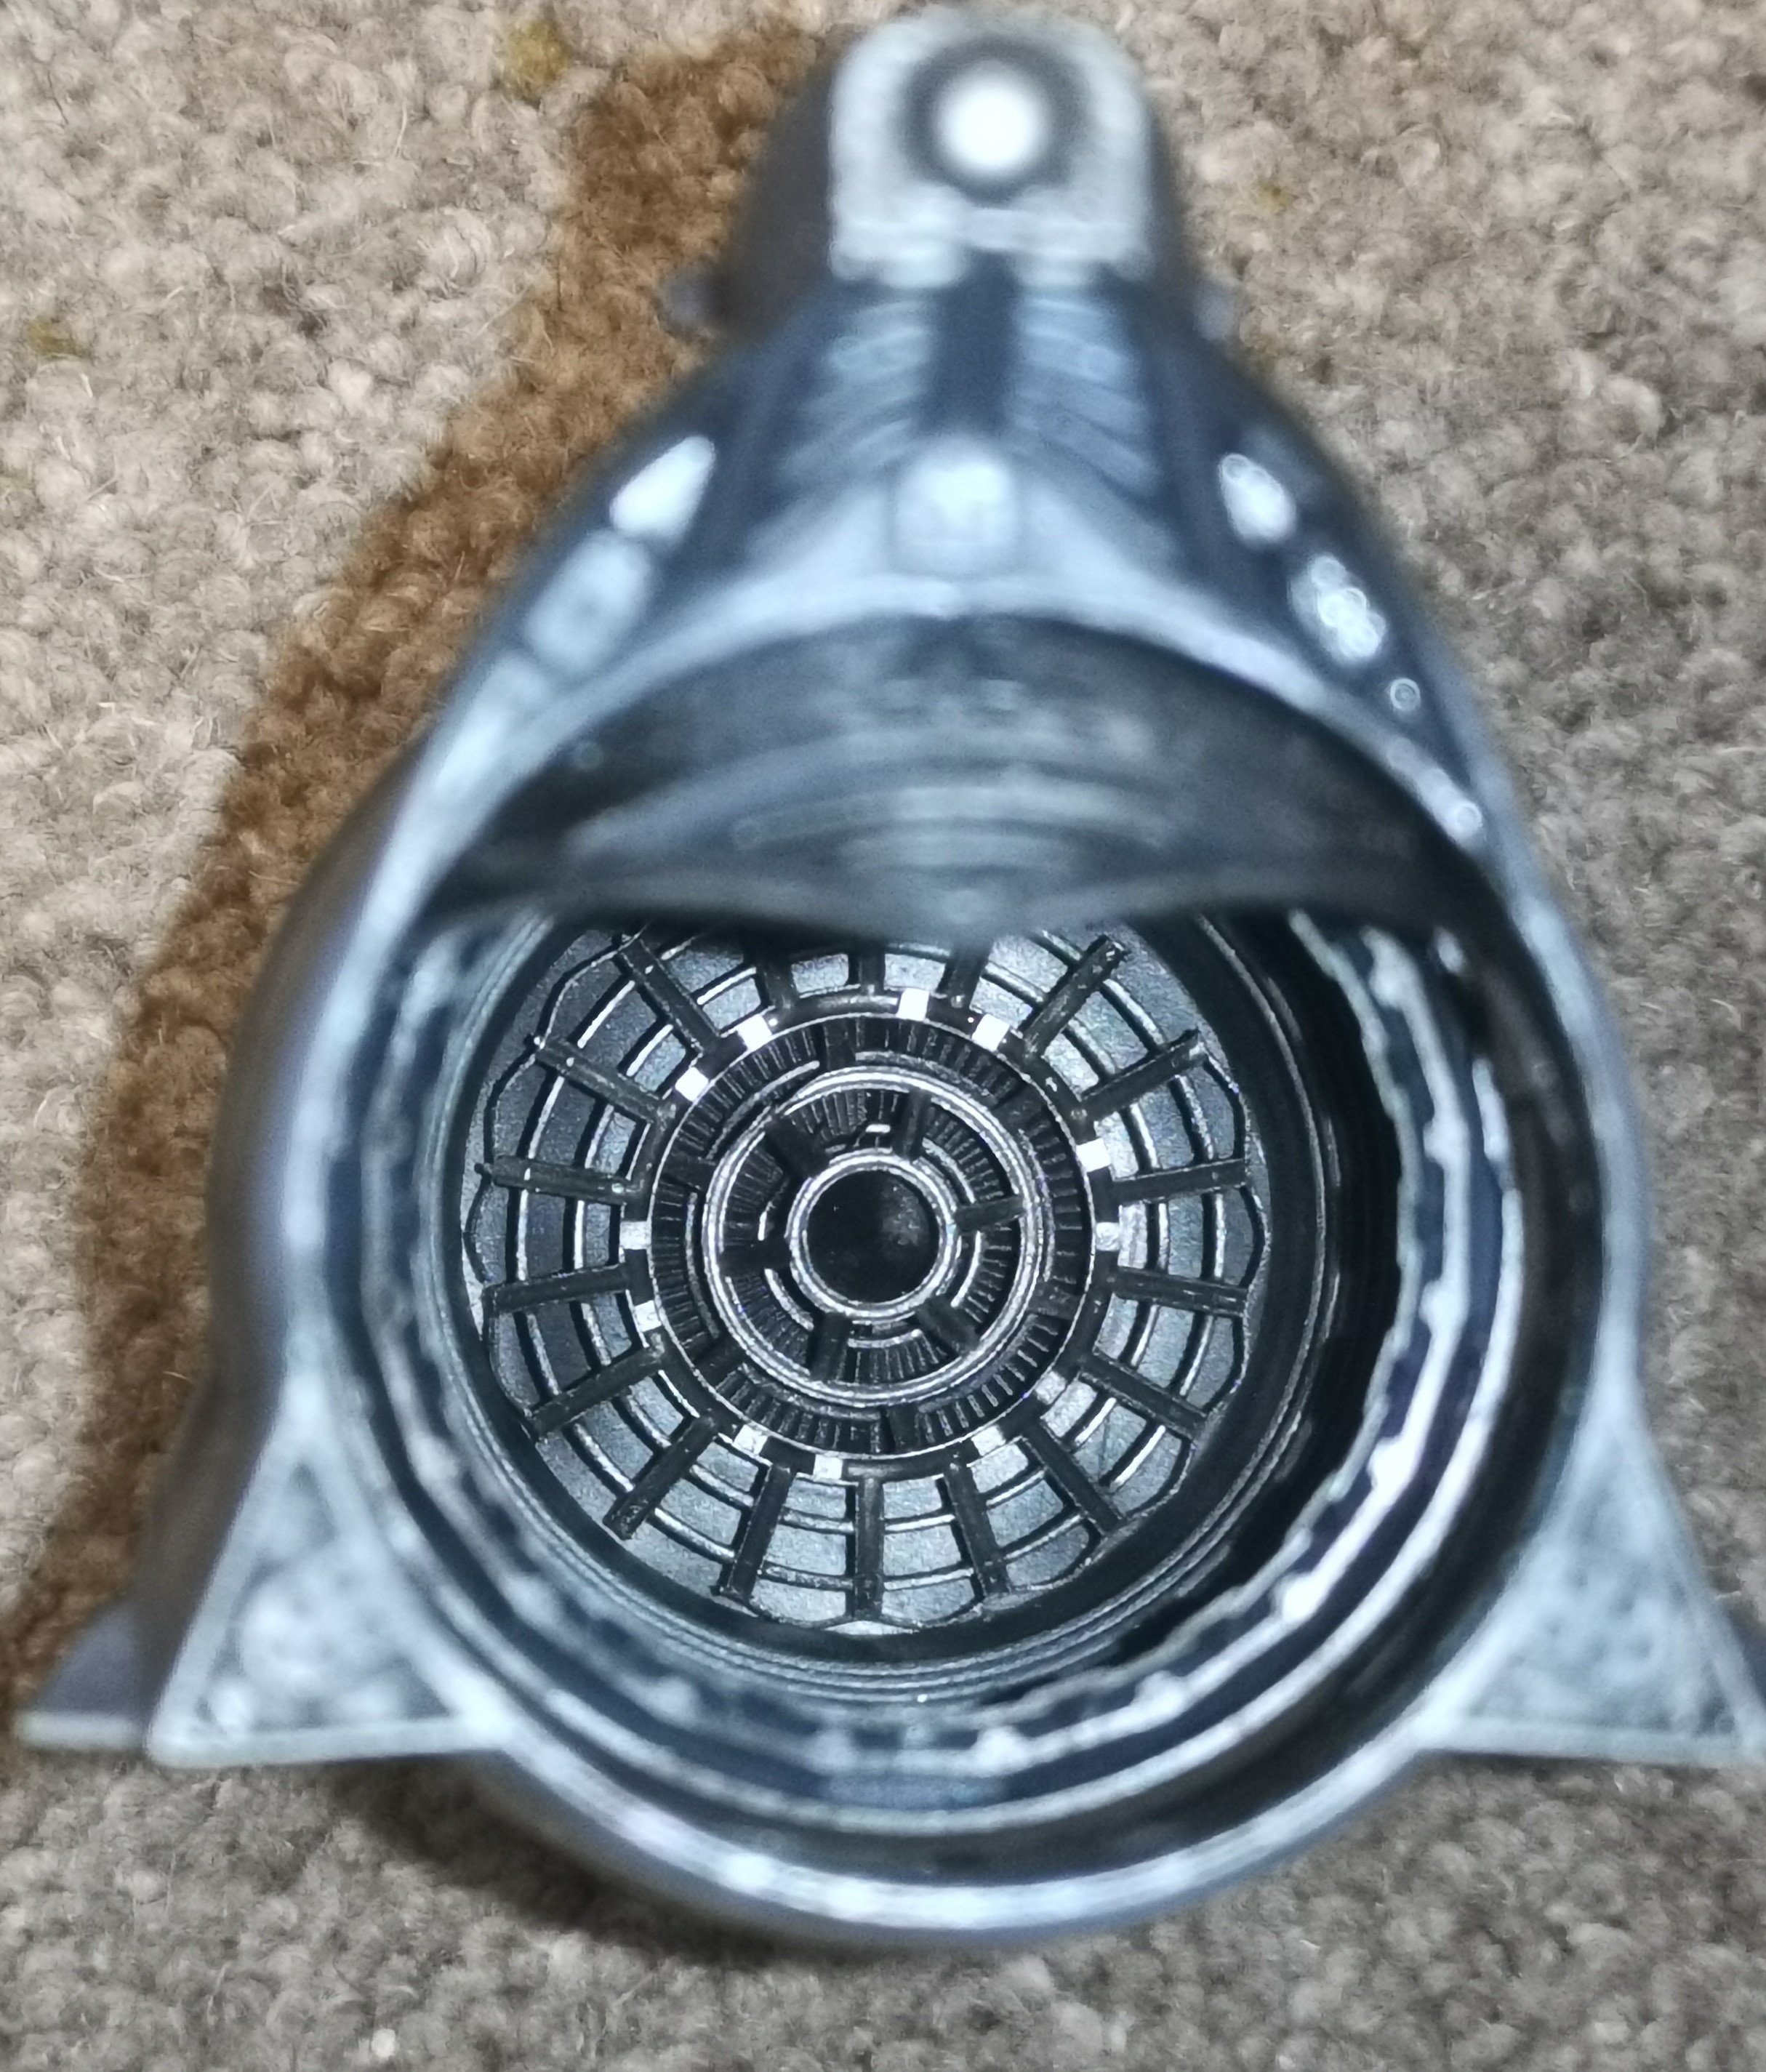
Made a bit of progress this weekend. First of all got the rear exhaust painted up and weathered and the reverse thruster petals installed with the top one drooping as the hydraulics bleed out.

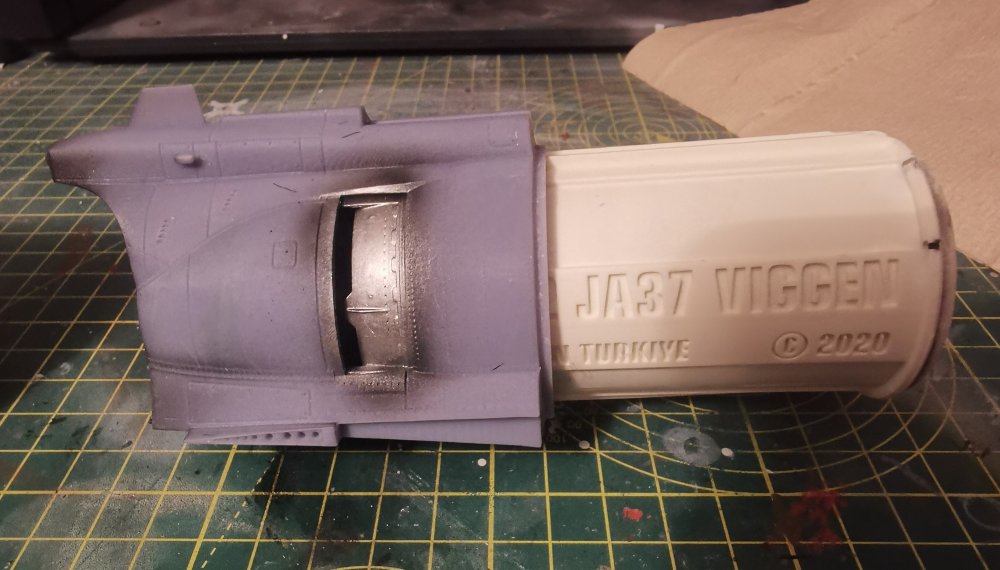
The flash has washed out some of the weathering in the photos but I'm pretty happy with how it looks. Also painted the reverse thruster nozzle so I can mask that off when I paint the exterior.
-
4
-
-
9 hours ago, PanzerWomble said:
Darwin Award nominee....
-
2
-
-
Got the gear bays epoxied in and filled.


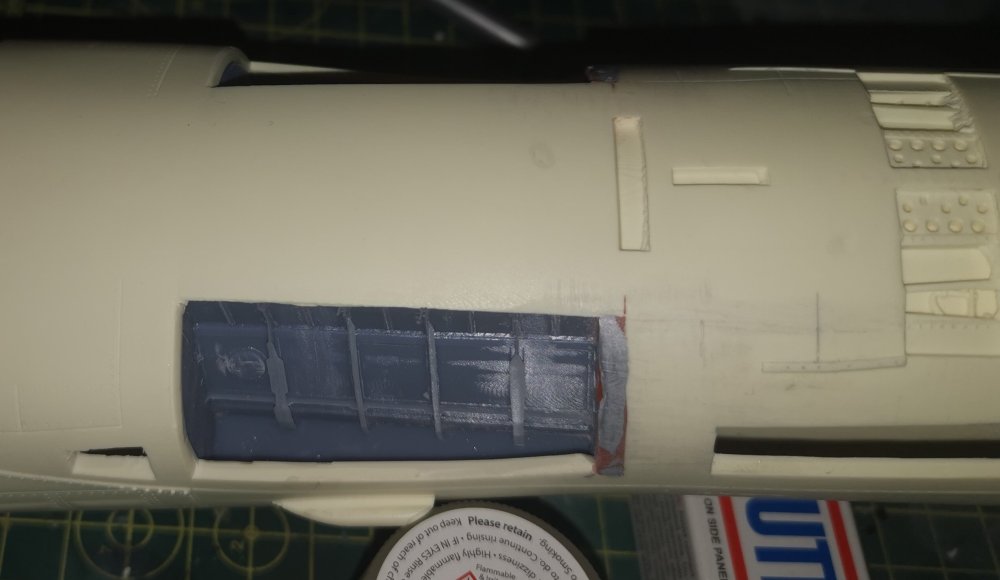
Fit definitely isn't anything to write home about but the main gear doors are closed on the ground, with perhaps a little sag if the hydraulics bleed, so not going to worry too much about it.
Also got the other parts for the rear primed.

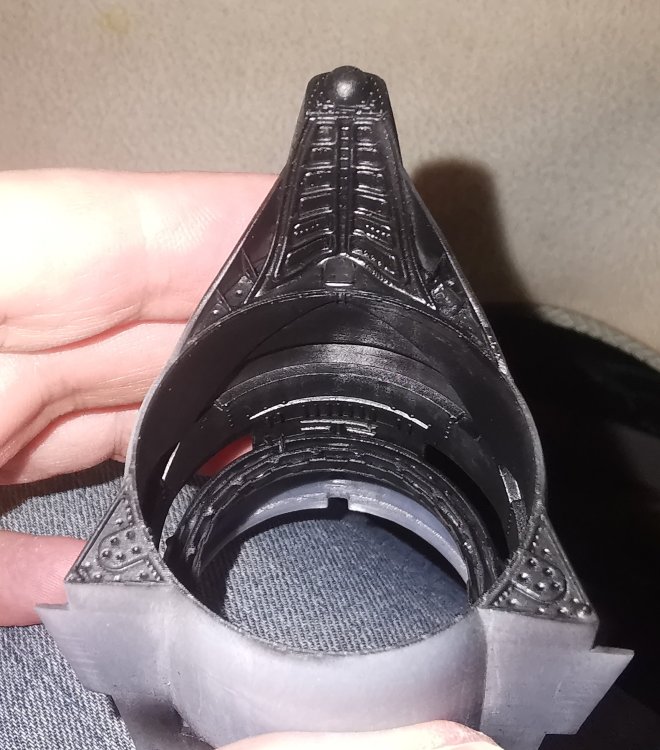
Nice detail on the 3D printed rear section. Metallics and weathering next.
-
6
-
-
47 minutes ago, PanzerWomble said:
Flogger .....built the Airfix 1/72 back when it came out (1980) this looks 40 years in advance.
Sadly one engine means I can't 'twin build' it unlike the ol' Tomcat or MRCA
FUN FACT - Back in the 70's MRCA ( Tornado) was jokingly referred to as Must Replace Canberra Again ...following the TSR2 cancellation and the F111 purchase failure .
Odd how two English Electric products seem to have lasted far beyond their expected lifespans 🙄
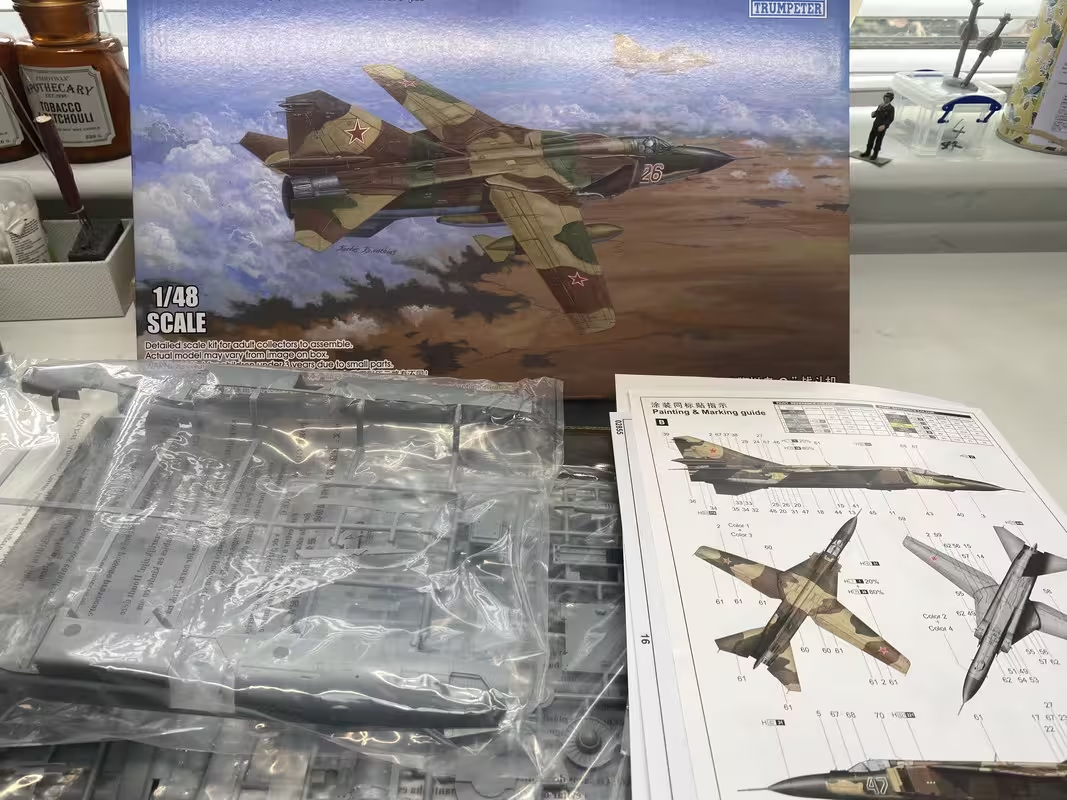
Nice! I've built the 1/32 big brother and it goes together really nicely.
-
6
-
-
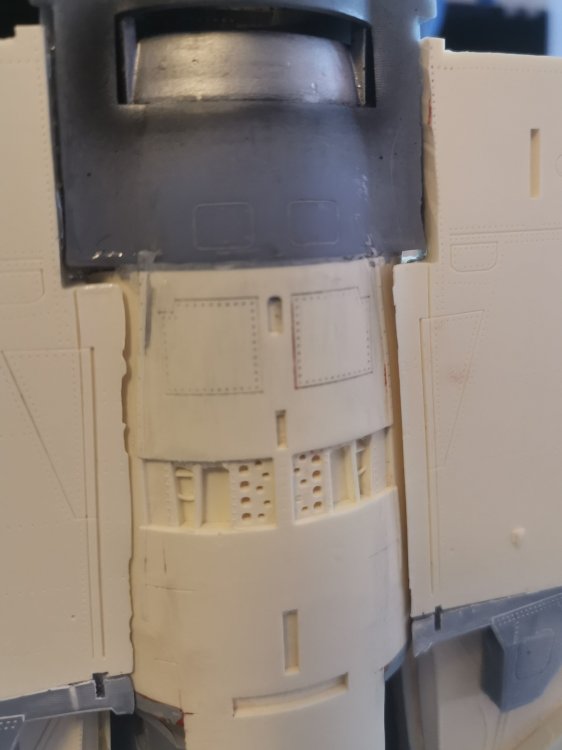
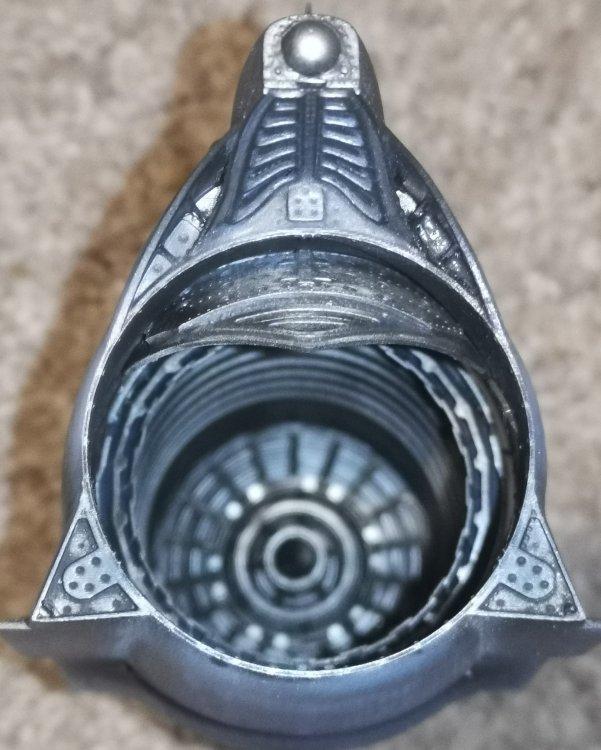
Started prepping the parts for the rear fuselage. The 3D printed rear section needed a little sanding due to print lines but not nearly as much as some others I've seen, so slight bullet dodged there.
There's going to be a fair bit of thinning and filling to get a snug fit with the gear bays though. Detail's fairly sparse there but the main doors are closed other than when the gear is deploying, so not going to bother trying to improve that.
-
6
-


JetMads 1/32 Viggen
in LSM 1/35 and Larger Work In Progress
Posted
Thanks Peter, I think I'm just learning about the challenges of resin kits.
In the end I've gone for a hybrid of your's and Carl's suggestions. A styrene base with a skin of Miliput over the top. It's looking good so far but just needs a bit more blending and sanding. Will post some pics later.