


GusMac
-
Posts
2,900 -
Joined
-
Last visited
Content Type
Profiles
Forums
Events
Gallery
Posts posted by GusMac
-
-
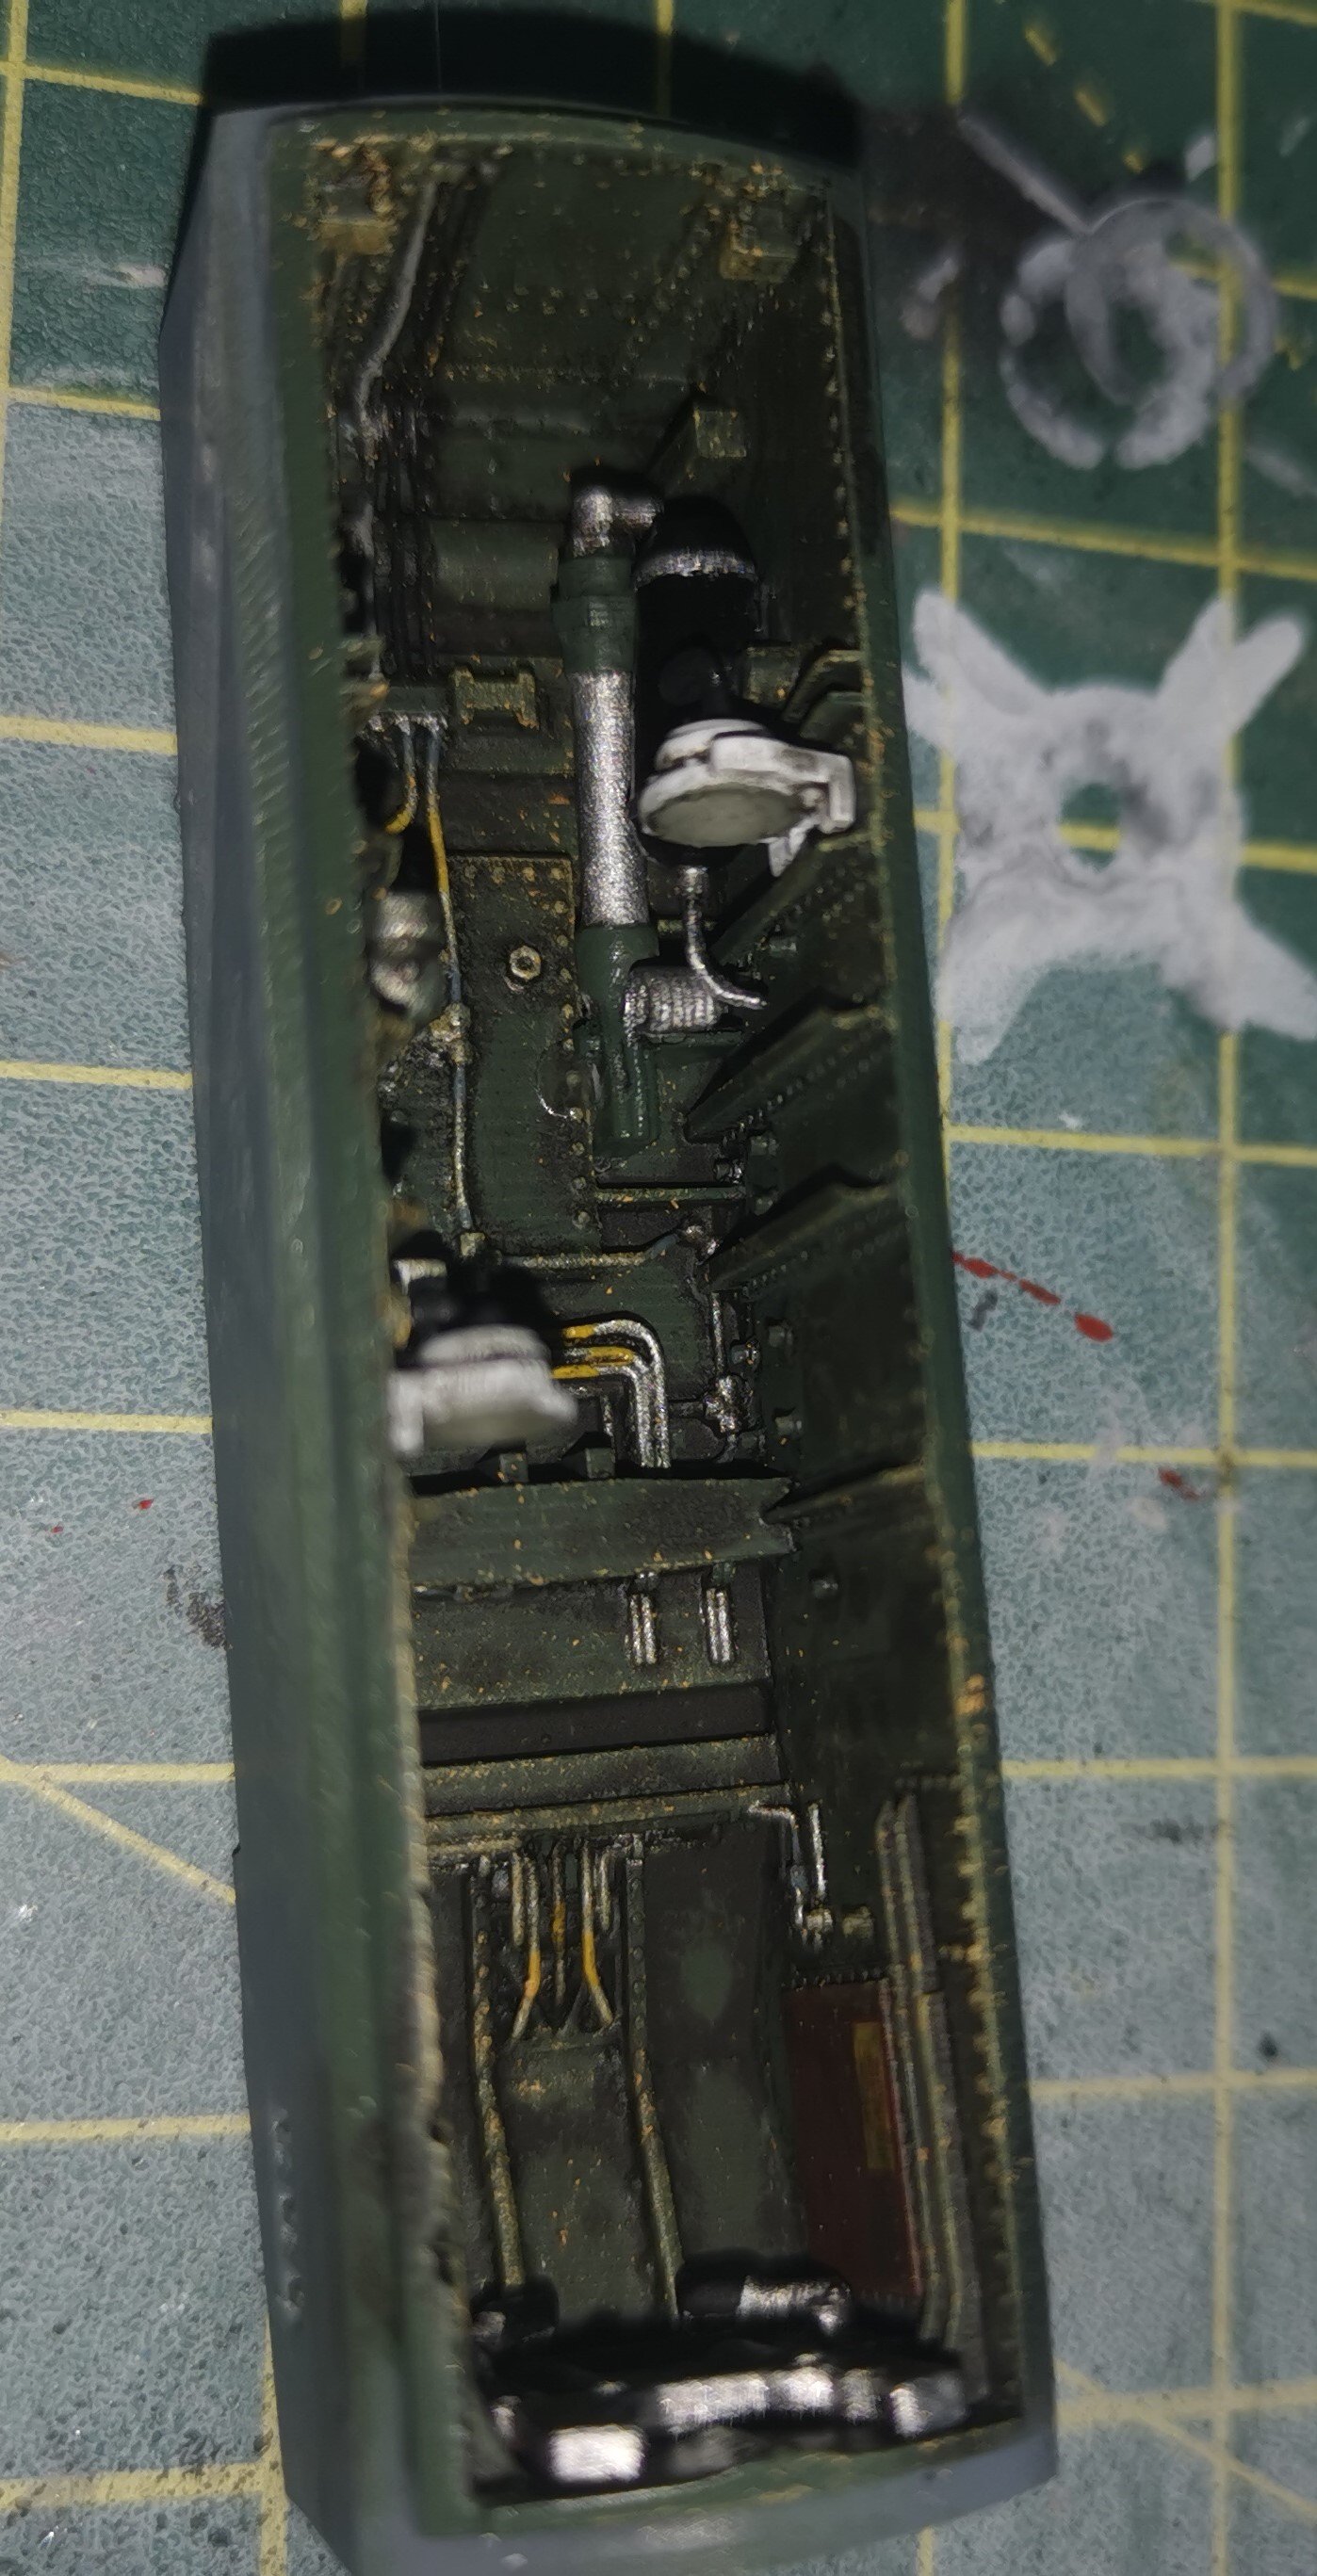
Got the front wheel well done. Pictures with flash make the weathering look a bit heavier than it does to the naked eye.

The package from Poland with the Mr Paint should arrive tomorrow so hopefully can get on with the cockpit painting again.
-
 10
10
-
-
And another one courtesy pf the ever generous Ernie.

Not only the kit but also the full accessory pack.
Really looking forward to this but might be a while given how long I think the Viggen might take me.
-
6
-
-
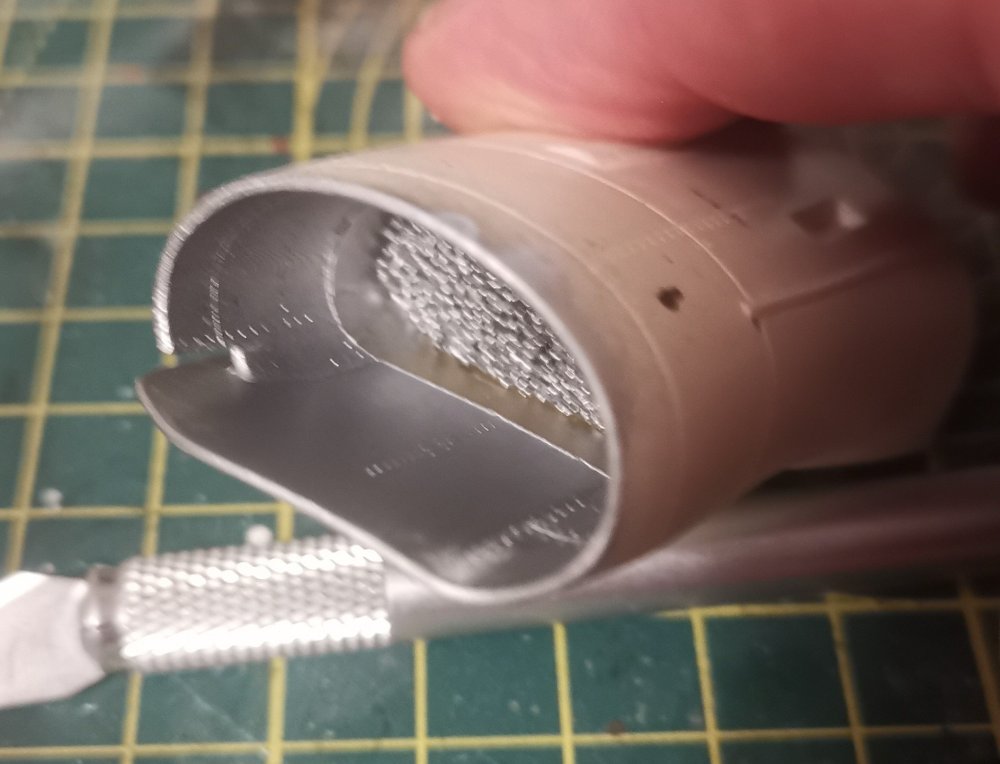
That's some seriously smooth cutting not to snap or bend that super thin part at the edge of the wheelbay!

-
3
-
-
9 hours ago, BlrwestSiR said:
The 500 and Abarth are both newer releases and not older kits. I'd like to get the Abarth as well.
If you can find one, the Tamiya Caterham Super 7 is an impressive kit. It has a one piece chassis and aluminum body panels like the real thing.

Around our area the Caterham is known as the 'Twat Killer' as so many mid-life crisis victims have wrapped themselves around trees or other immovable objects in them on the back roads in the Cairngorms.
They look lovely but I'm not sure that a lot of those who buy them actually have the skillset to drive them safely on anything but straight main roads sadly.
-
1
-
 5
5
-
 1
1
-
-
Superb finish as always. I just love the modulation of the paint and the absolute 'flatness' of the flat coat (if that makes sense)
-
2
-
-
Lovely build of a rarely seen kit Dennis. The Italians did build some nice looking aircraft (and a few munters, I'm looking at you Freccia!). Lovely smooth paint job.
-
1
-
-
It's certainly different to anything I've done before but I'm enjoying it at the moment.
-
3
-
-
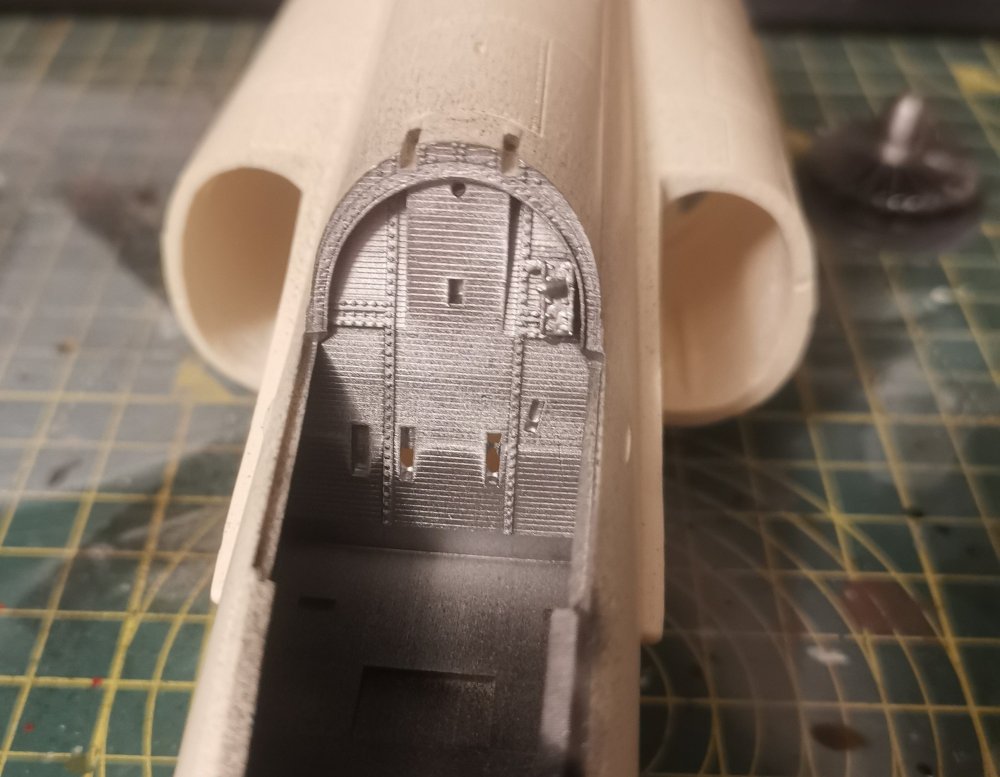
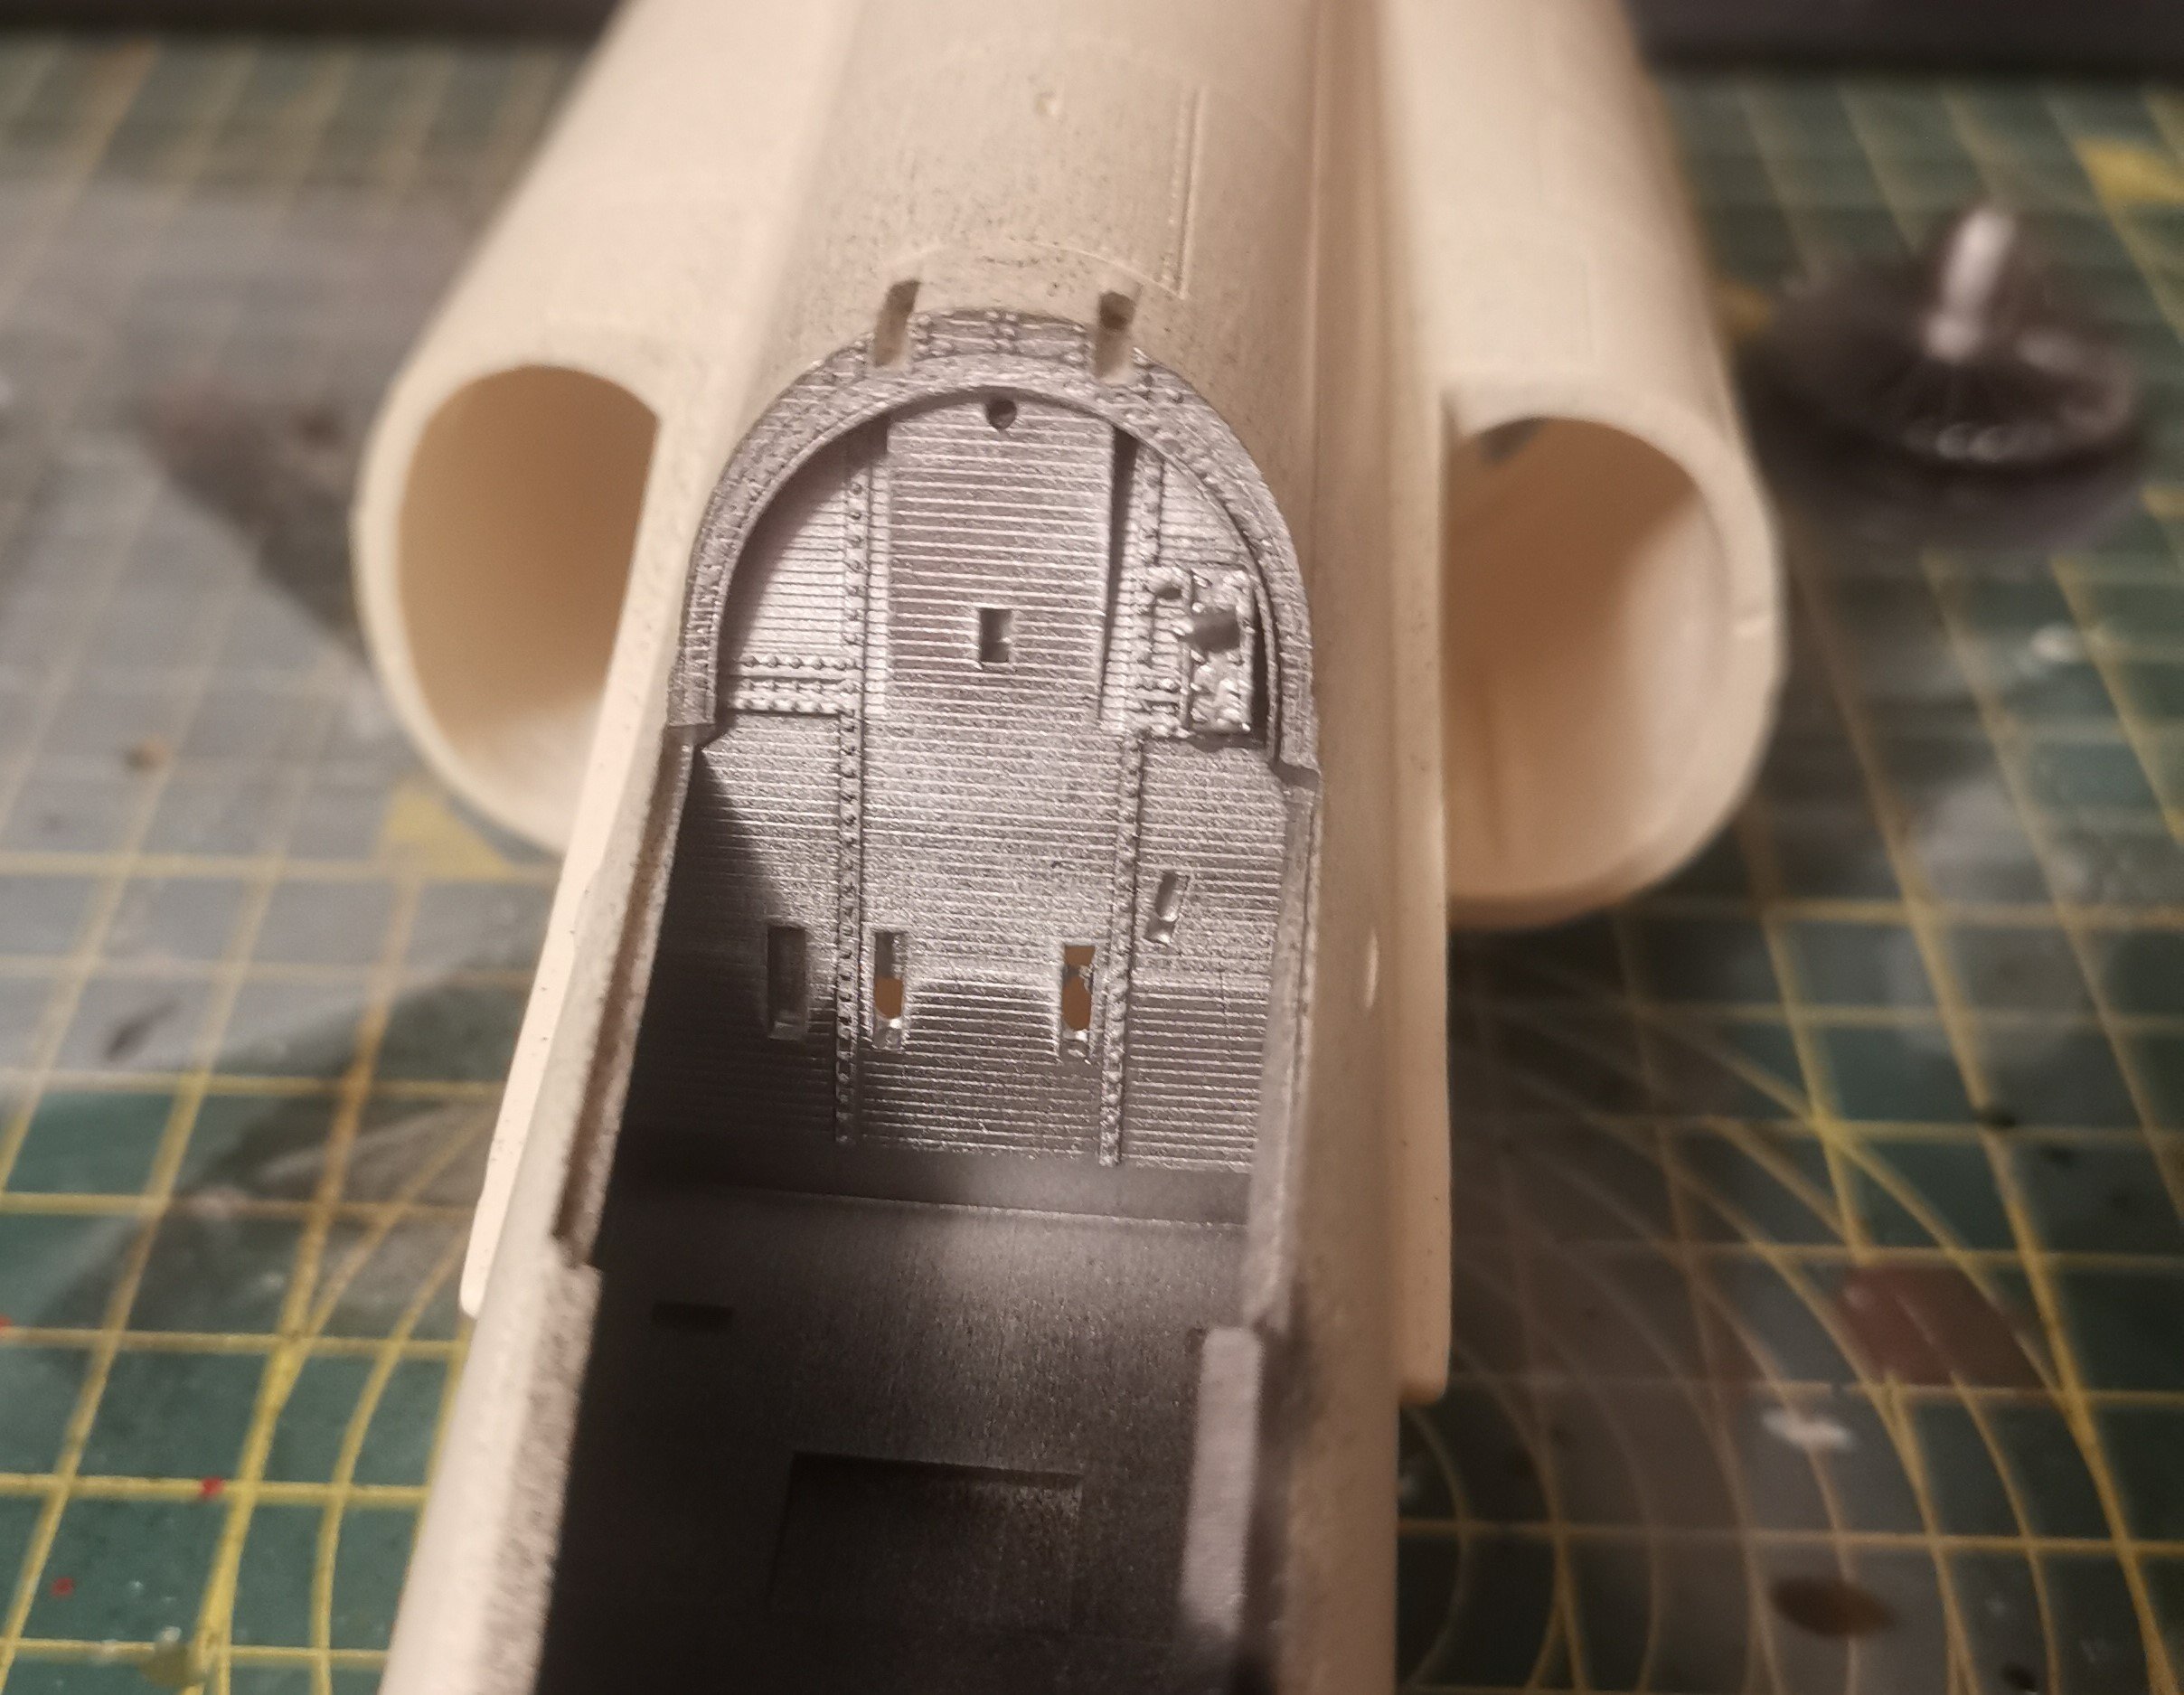
Hi Peter, you can see the issue in this picture.

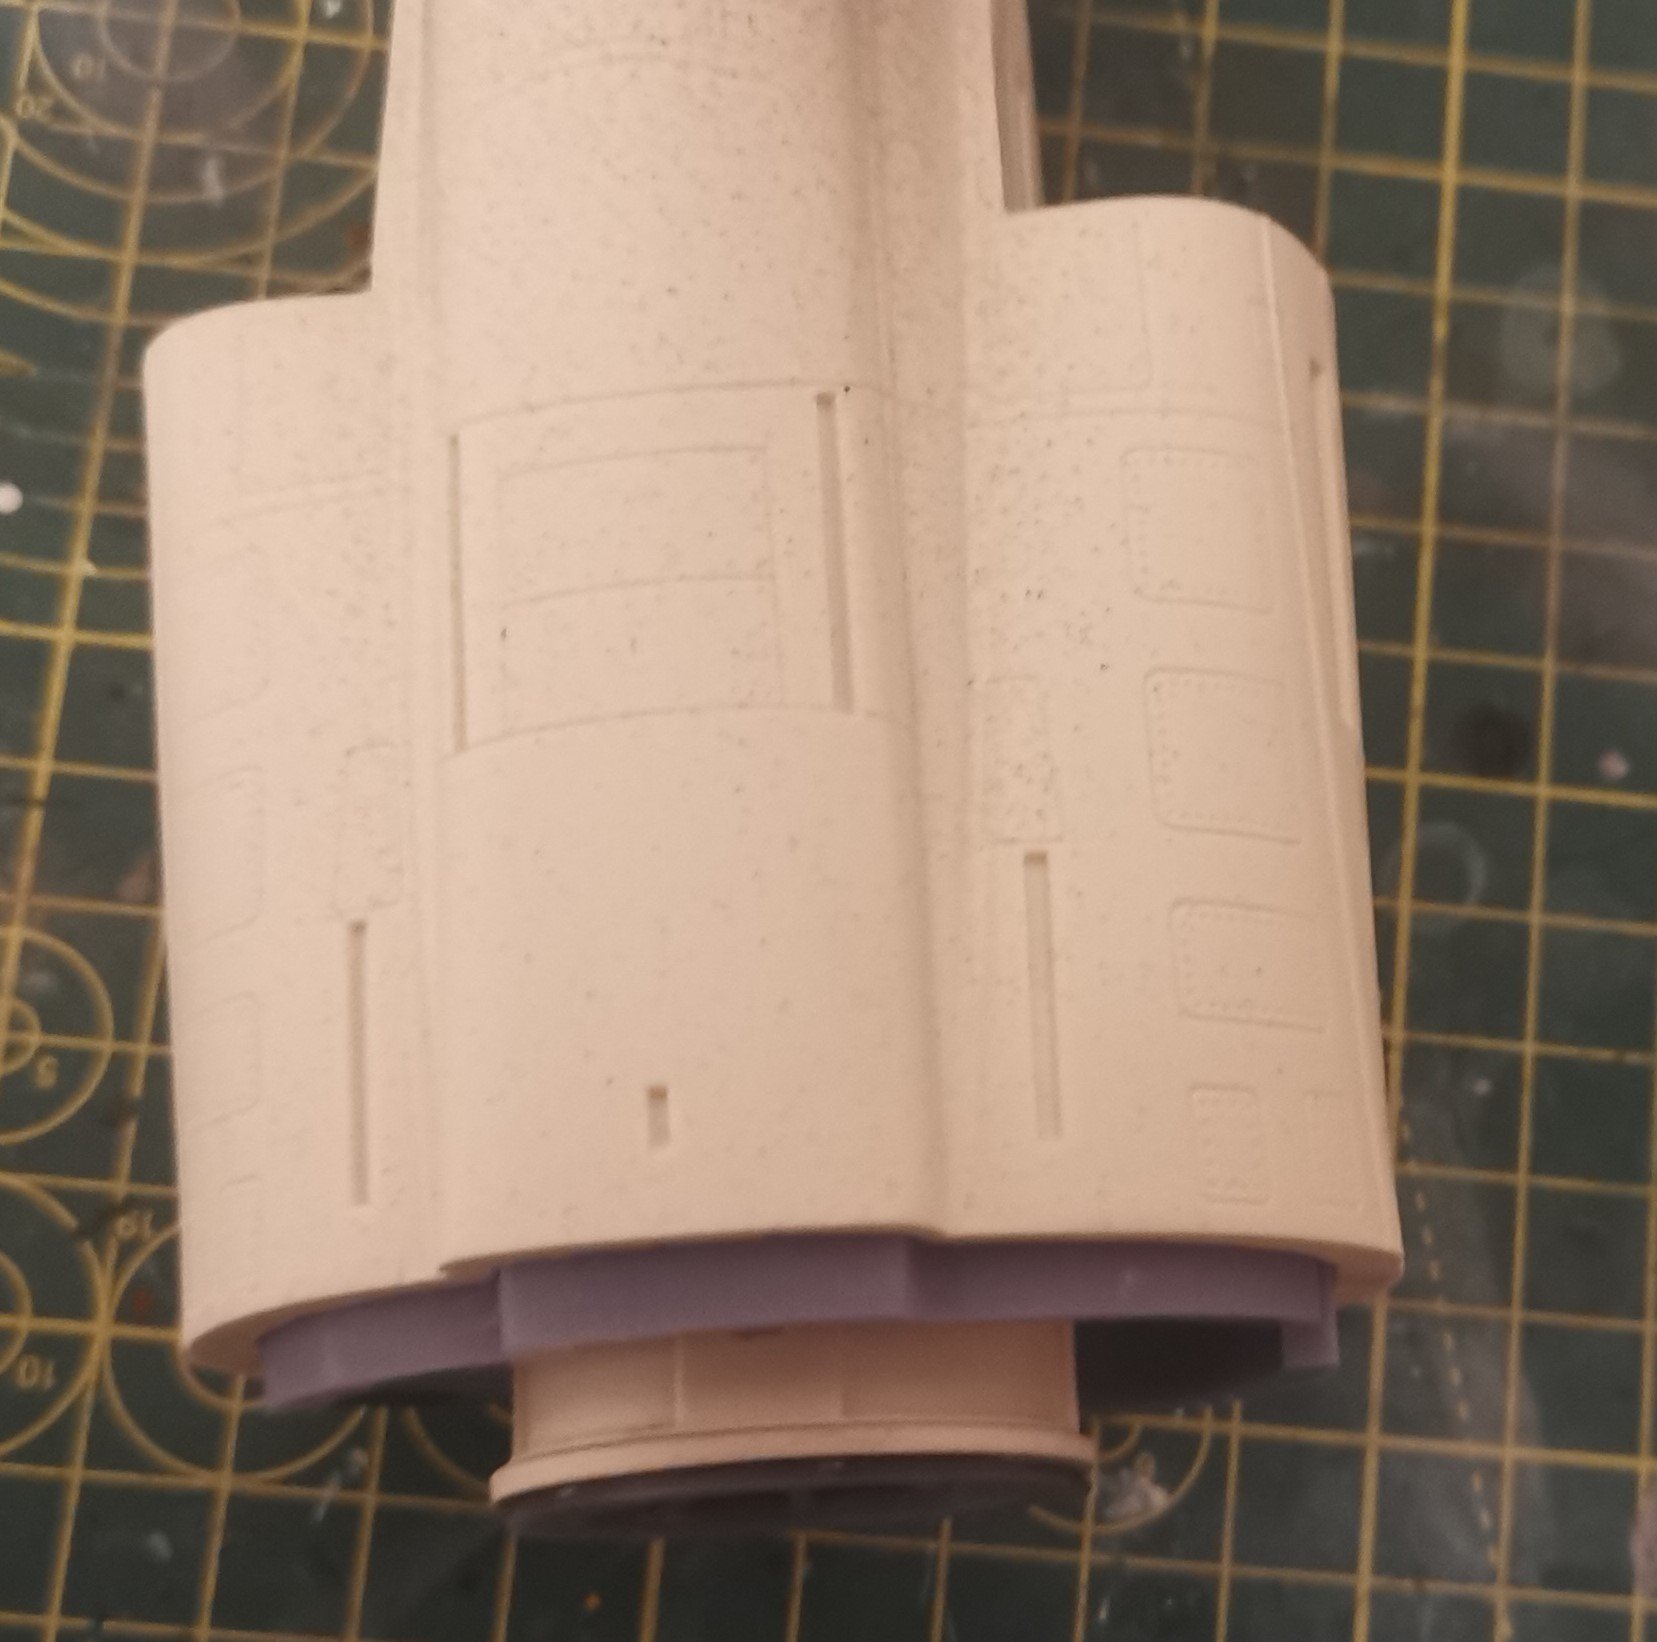
Looks like the mould might have slipped slightly or something similar but as you can see the left side wall of the upper spine is at least twice as thick. From test fitting it looks like I might need to take off about a couple of millimetres to get it to fit. Only needs to go back about 5 millimetres for the joint support, so hopefully it won't take too long.
-
5
-
-
23 hours ago, BlrwestSiR said:
You've reminded me that Italeri are supposed to release a new 1/12 Lancia Stratos this year.
And the Spiny from X-Plus.
I'd forgotten the Stratos. Never built a car kit but that could definitely tempt me.
-
5
-
-
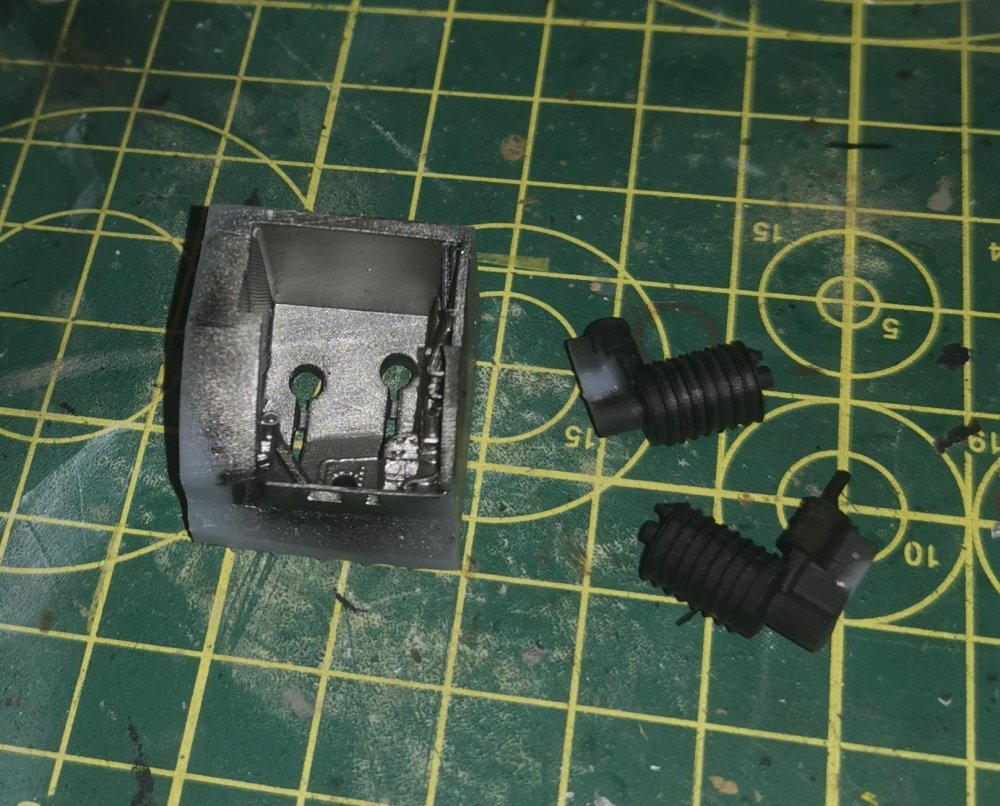
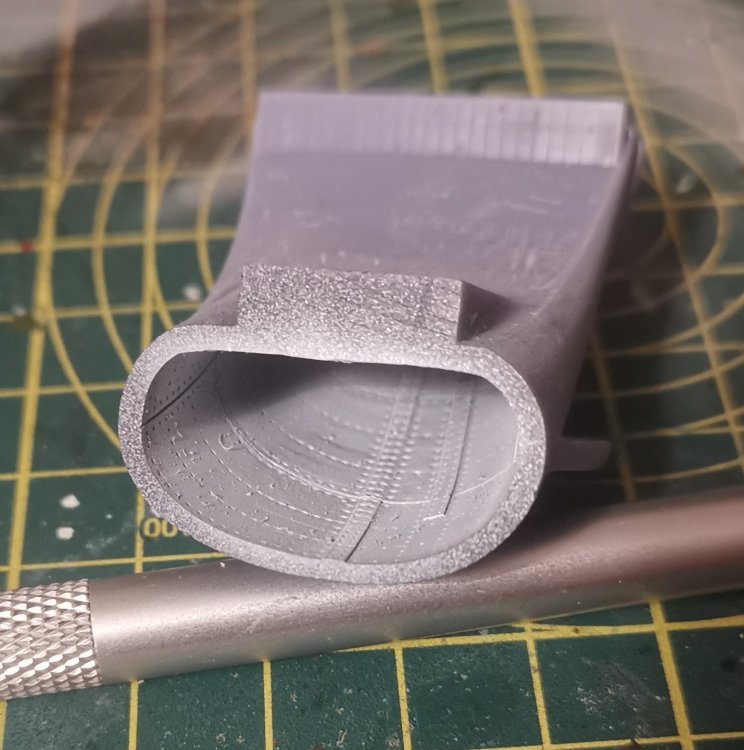
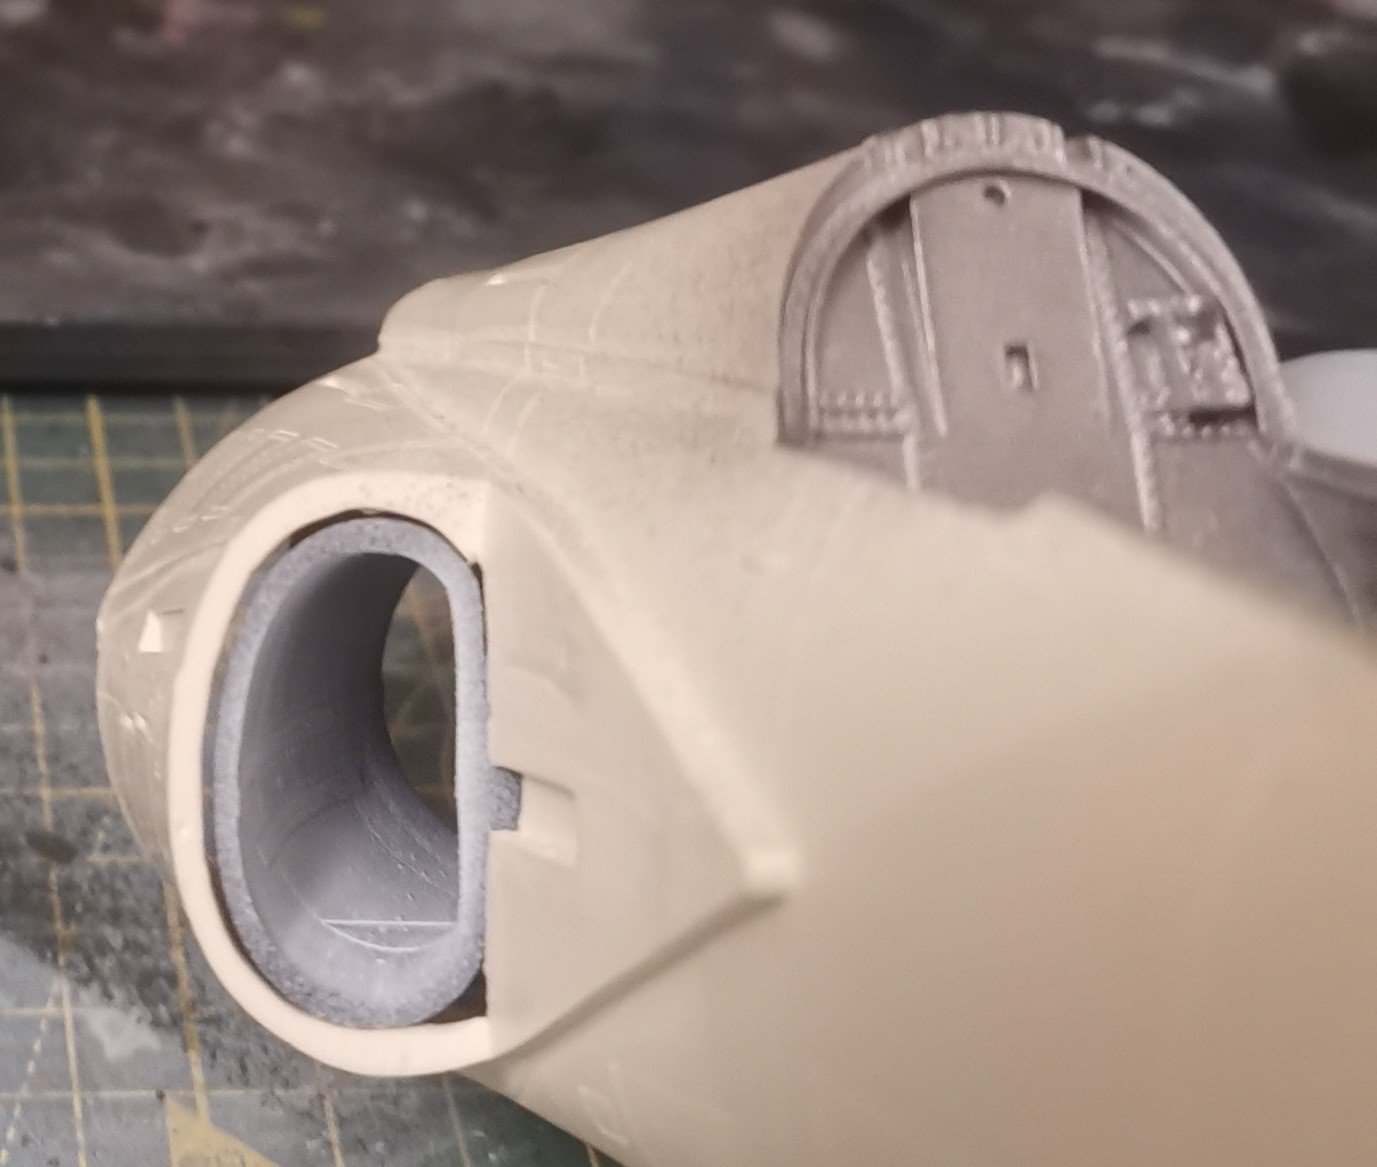
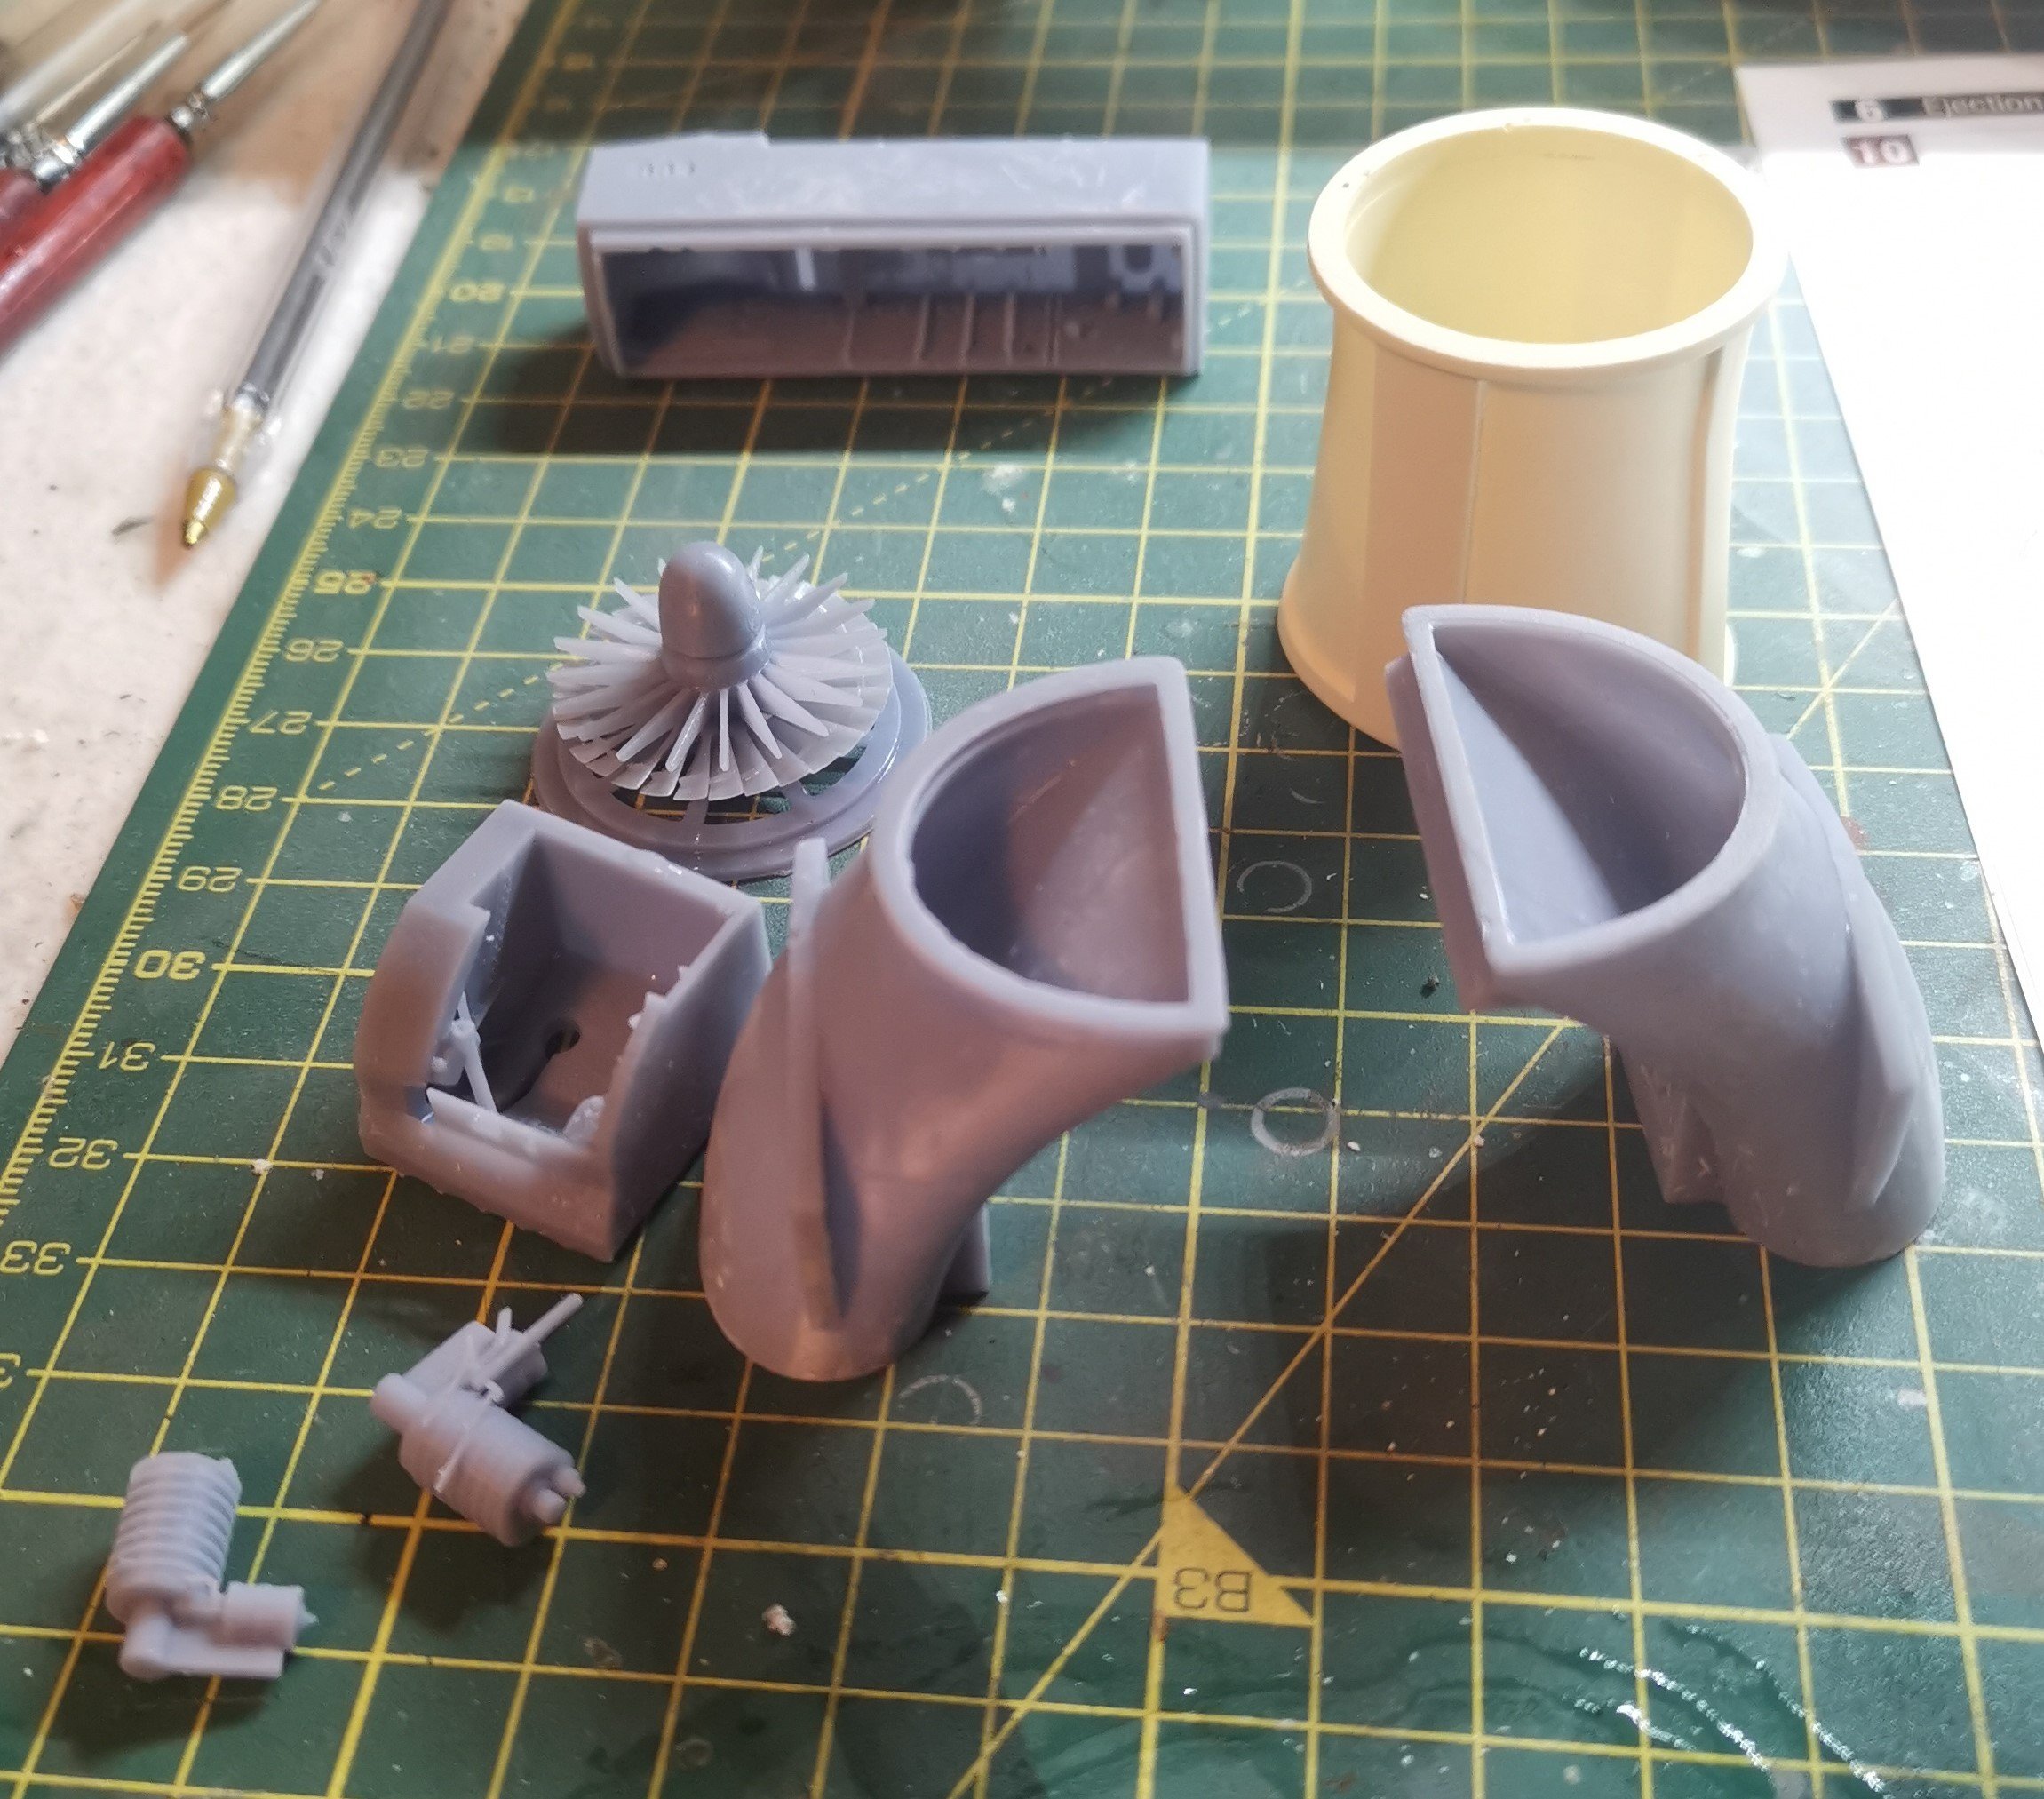
The 3D printed stuff certainly produces great detail but it is very brittle. When you're cutting off the print supports there are pieces pinging everywhere, just hopefully none of the detail with it.

Got the rear trunking and turbine attached and the pieces which support and align the join to the rear fuselage section added. I've already spotted an issue from a quick test fit as the cast walls of the upper section of the rear piece are quite asymmetric and don't align correctly. More action with the Dremel ahead! This is only about 1/4 of the final airframe but it's already quite a weighty chunk - I think my arms will get a good workout by the end of this.
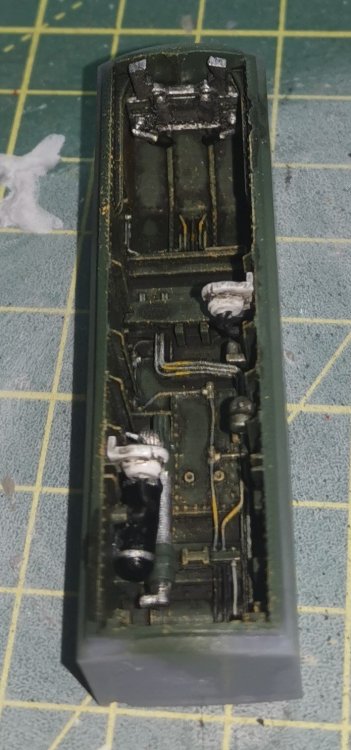
Started on detail painting the front wheel well which should keep me busy until the Mr Paint arrives and I can continue on with the cockpit. I really should be attaching the intakes but they are going to require quite a bit of filling and sanding and I'm putting it off for the moment until the inspiration strikes.
-
5
-
-
Bit more progress today.


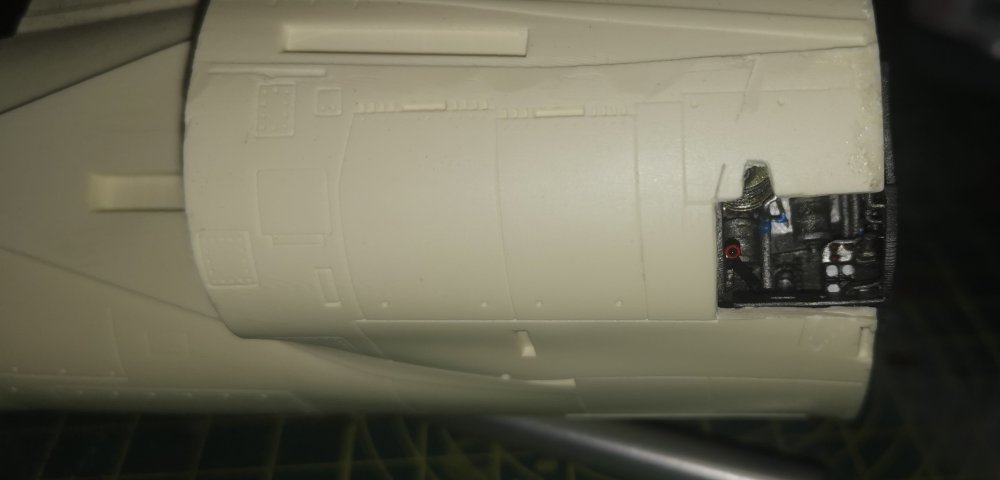
Got the RAT painted up and installed. A lot of the detail is hidden once it's in place but it might all be invisible once the door and the actual turbine are added.
Also got the base colours on the front wheel bay, so detail painting on that will be next.
-
6
-
-
Sounds good Peter. my wife is okay with the Tamiya Lacquers so hopefully this'll be fine too. I always use my respirator and paint booth, so fingers crossed!
-
2
-
-
25 minutes ago, ScottsGT said:
Too high of maintenance. Think you’re spending a lot on building supplies like paint and thinner now? Just the war paint alone is unaffordable on that model.
Too true! 😆
-
3
-
-
21 hours ago, Martinnfb said:

That's certainly how a lot of the oil industry wankers in Aberdeen seem to think they work. And you definitely don't signal to let anyone else have half a chance of knowing what you're going to do next!
-
1
-
1
-
 1
1
-
-
Thanks Peter, looking forward to trying the Mr Paint. My only concern is how strongly they might smell as my wife is quite sensitive to anything too noxious.
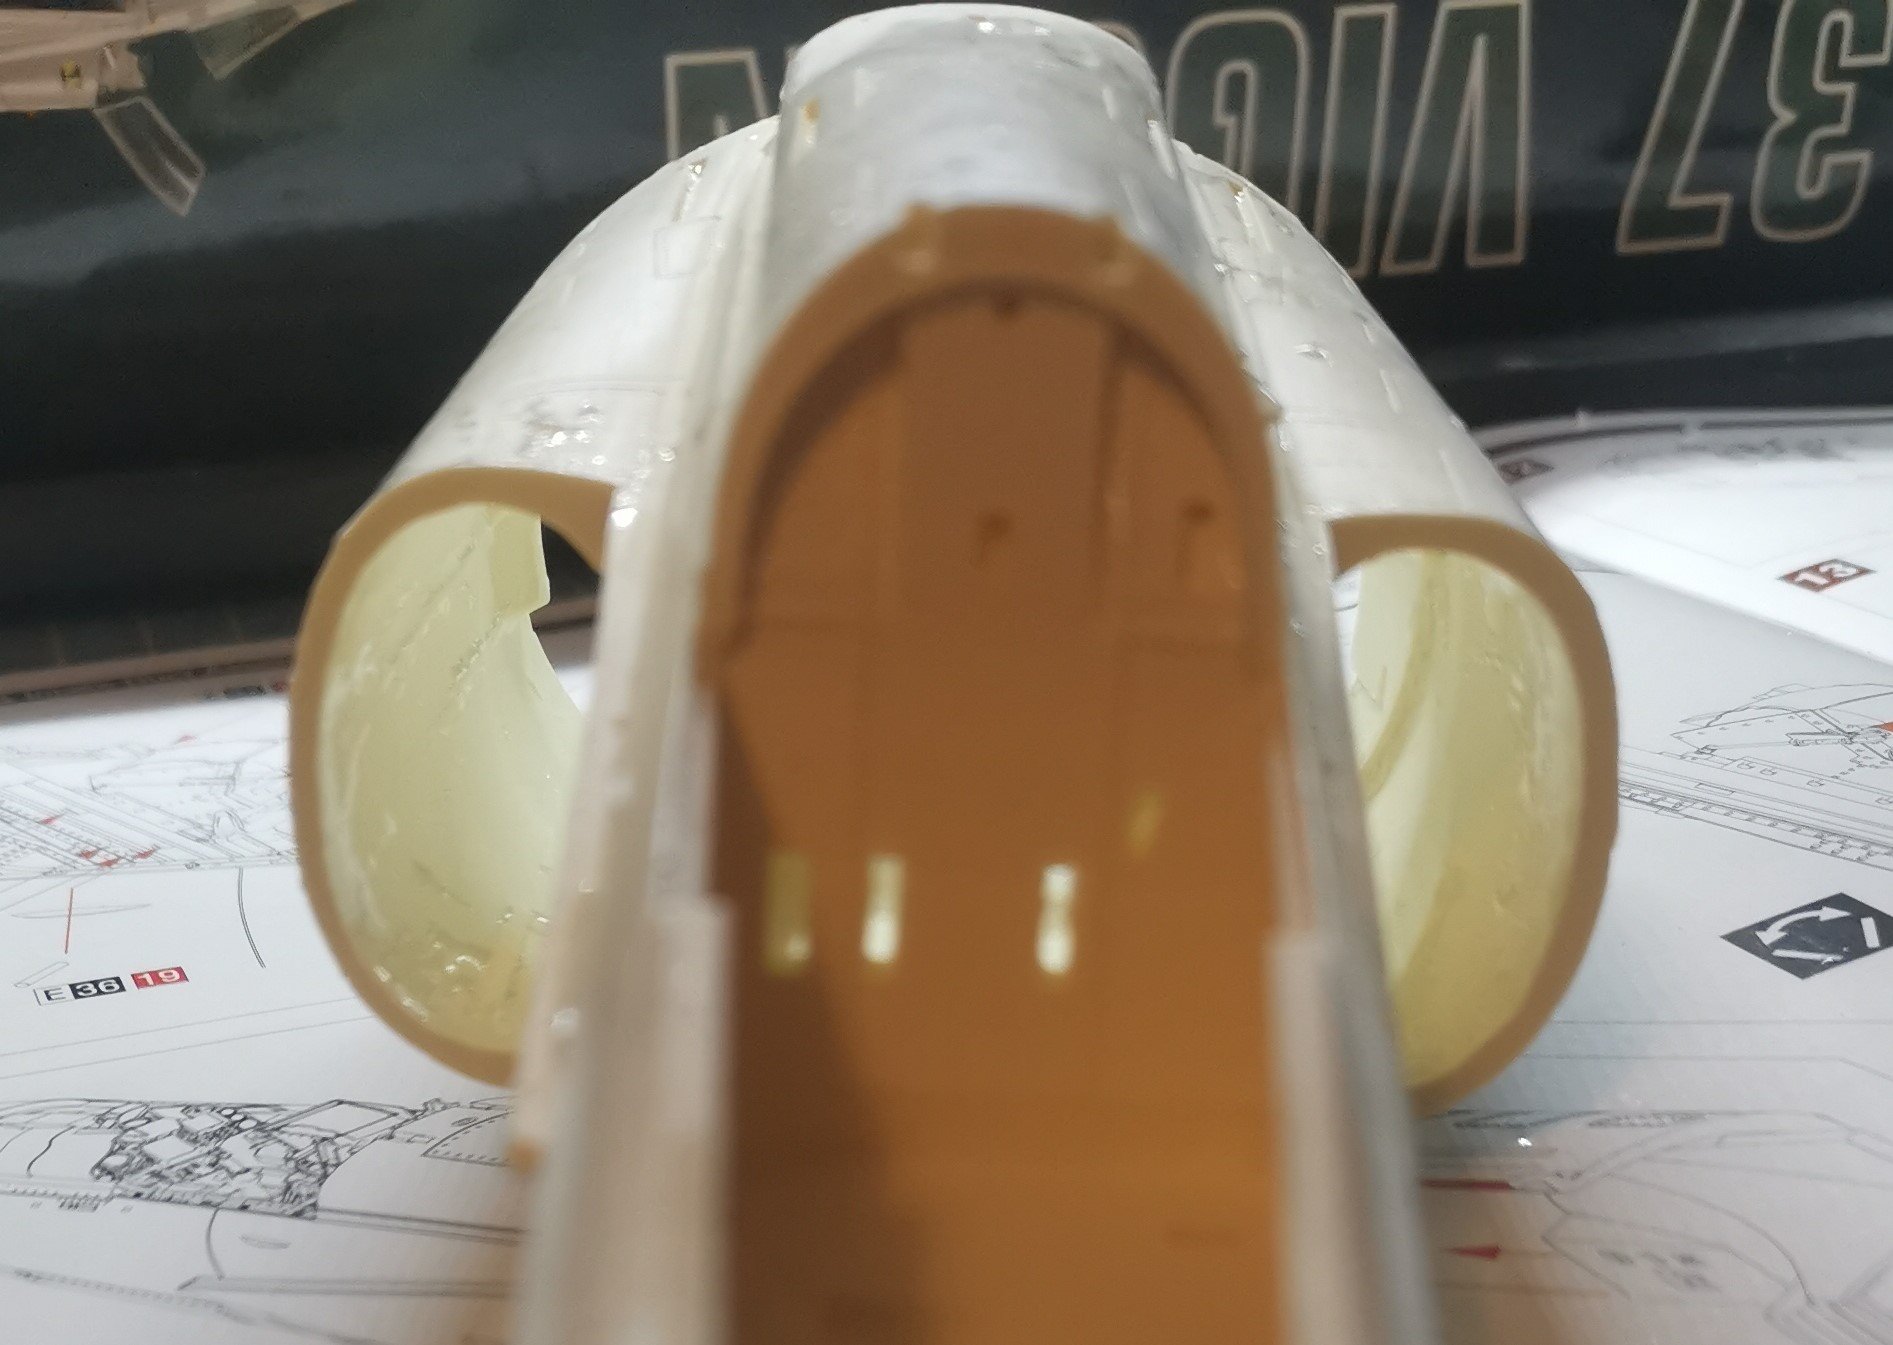
Bit more progress tonight.

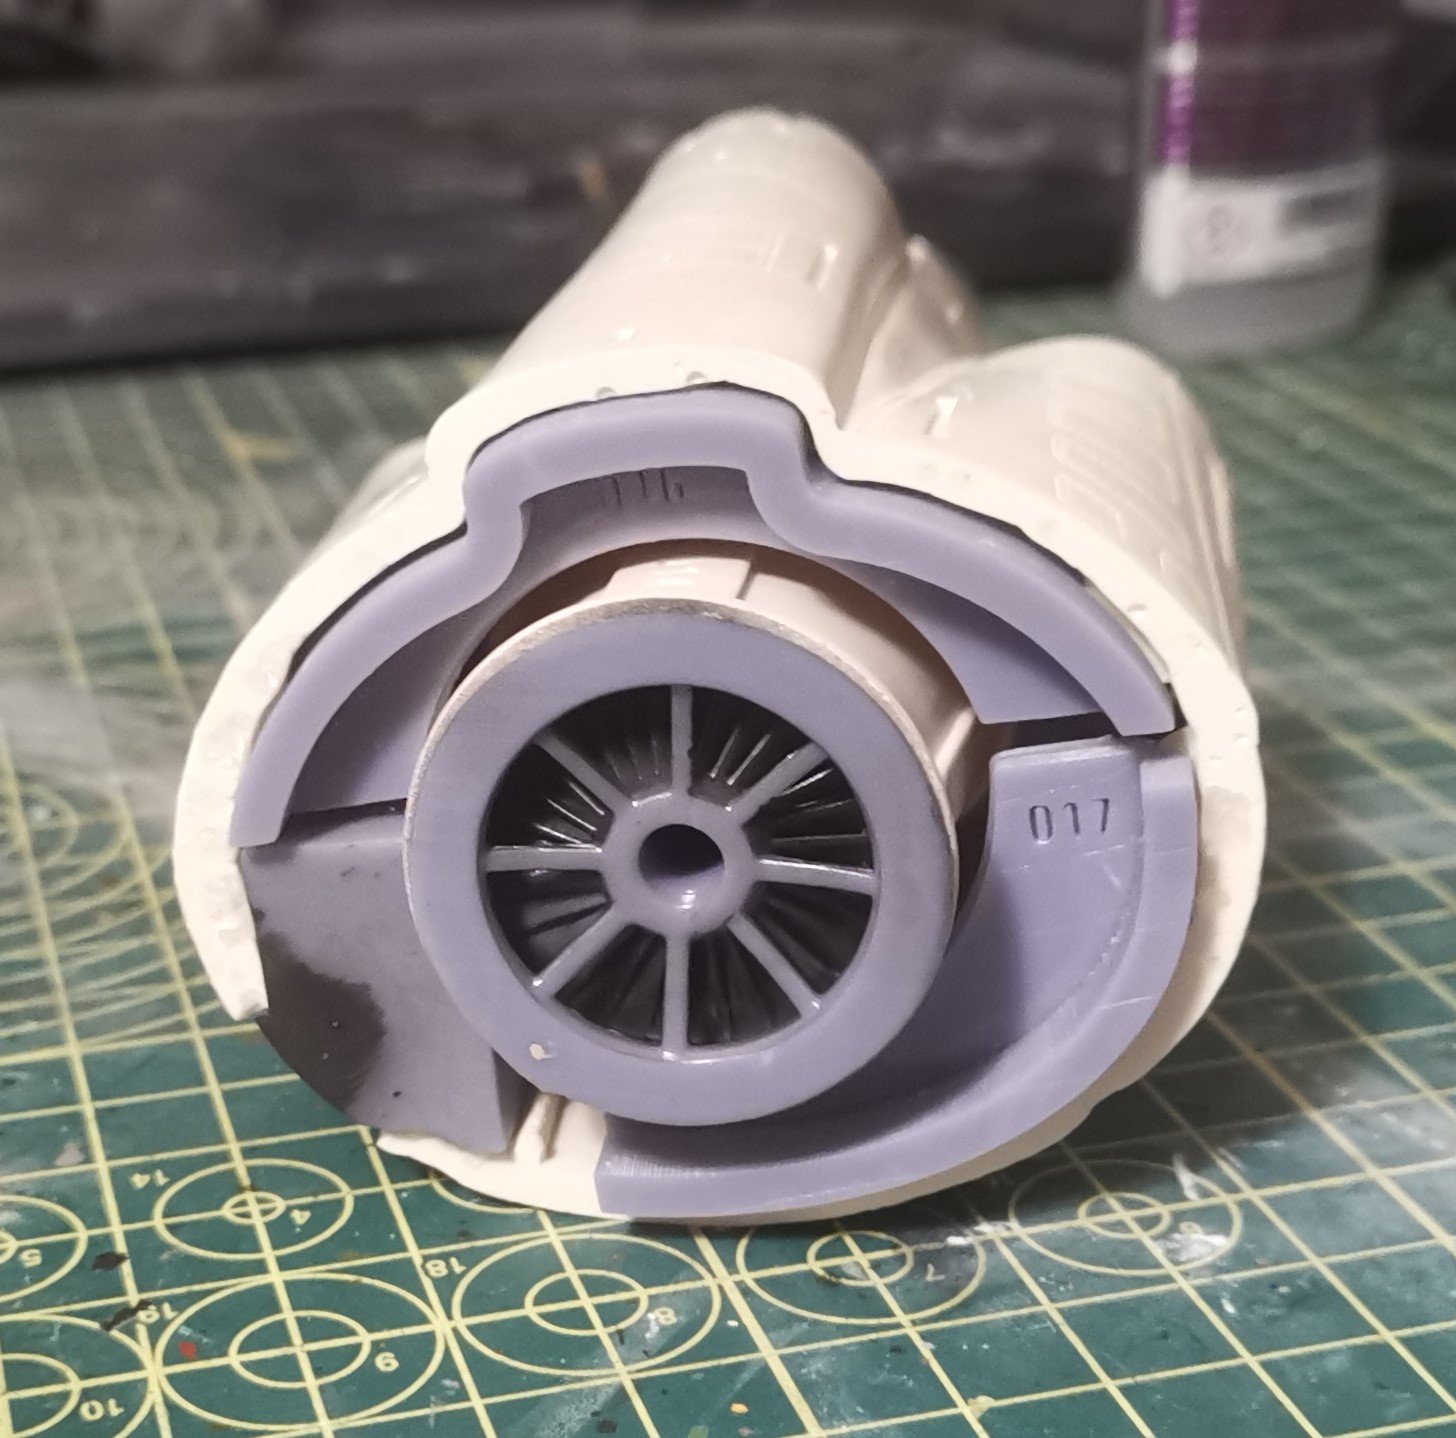
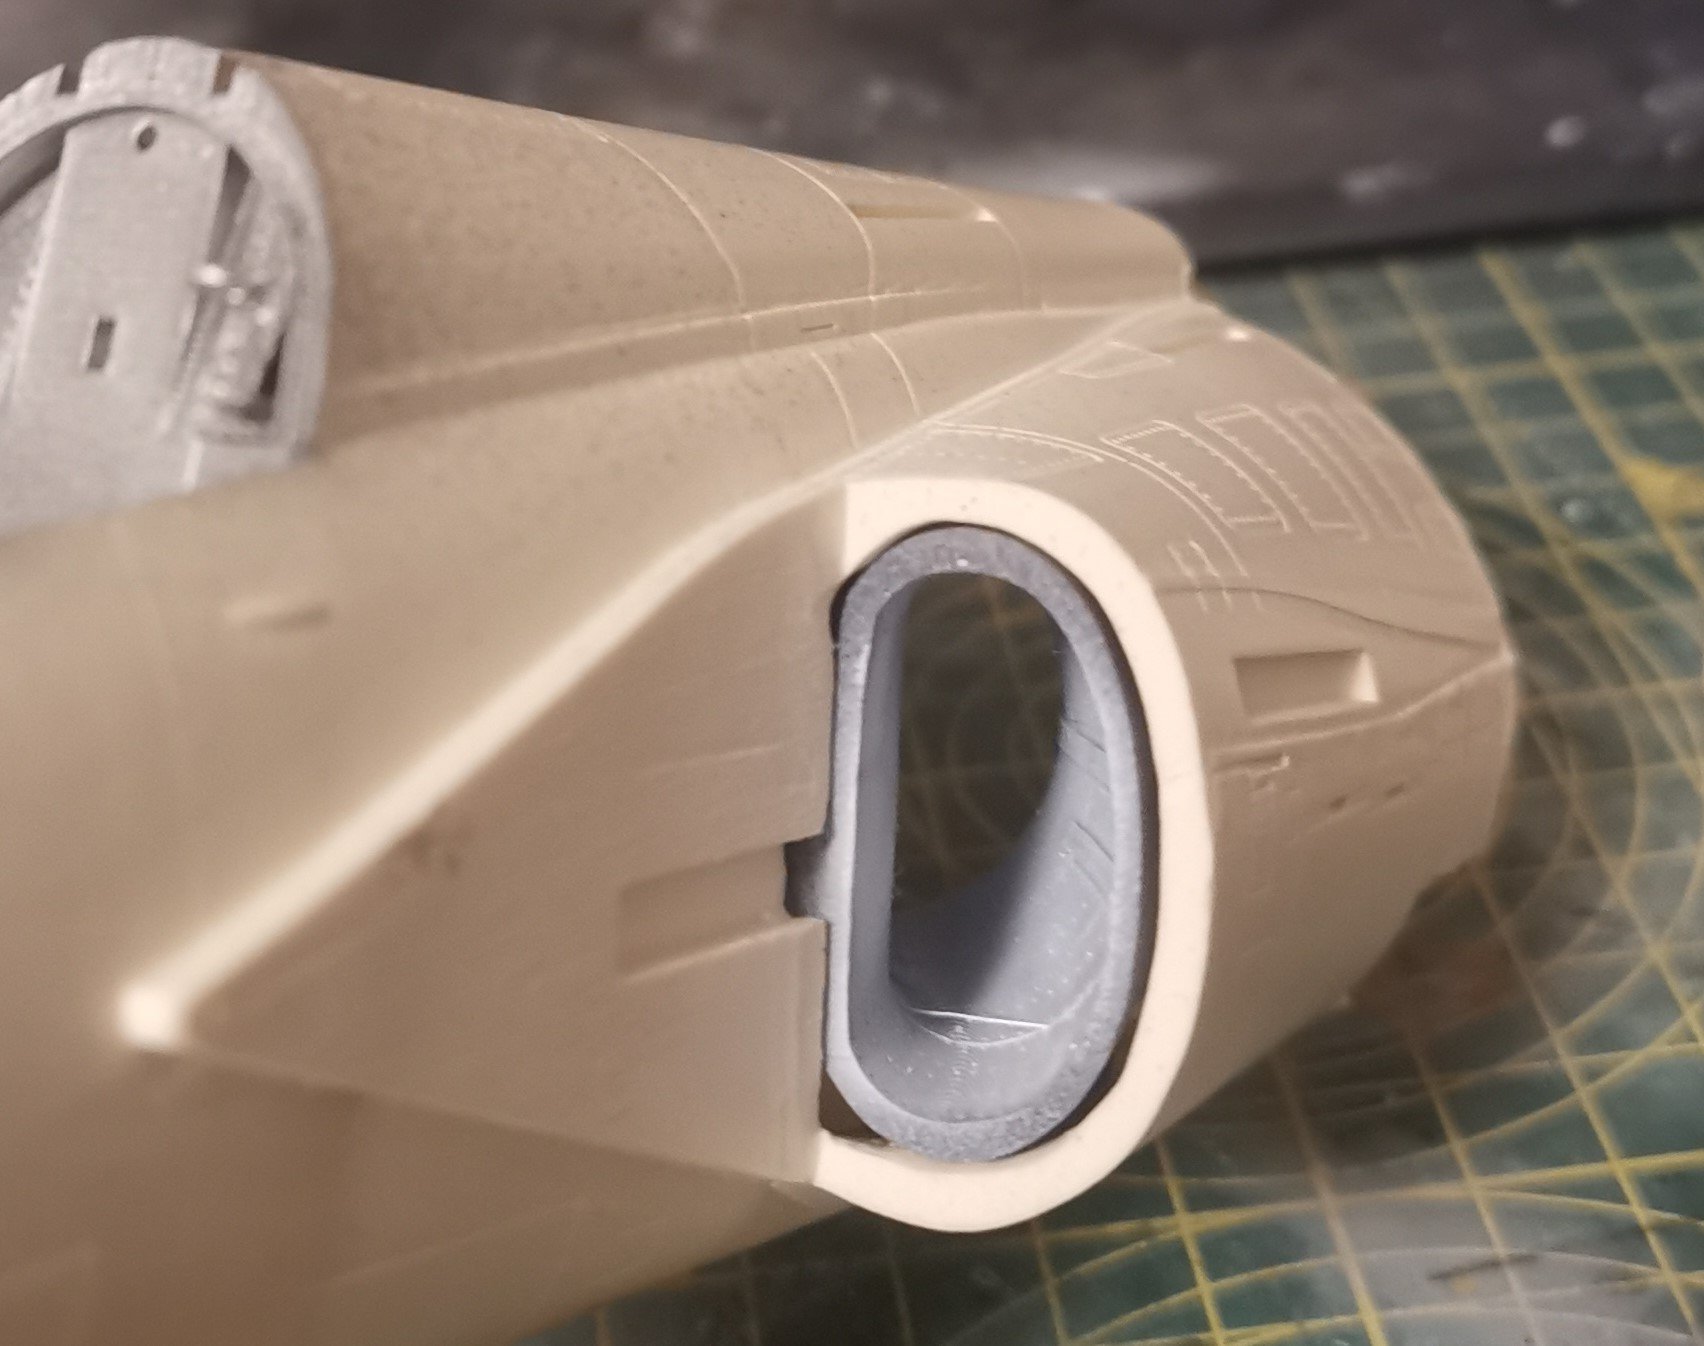
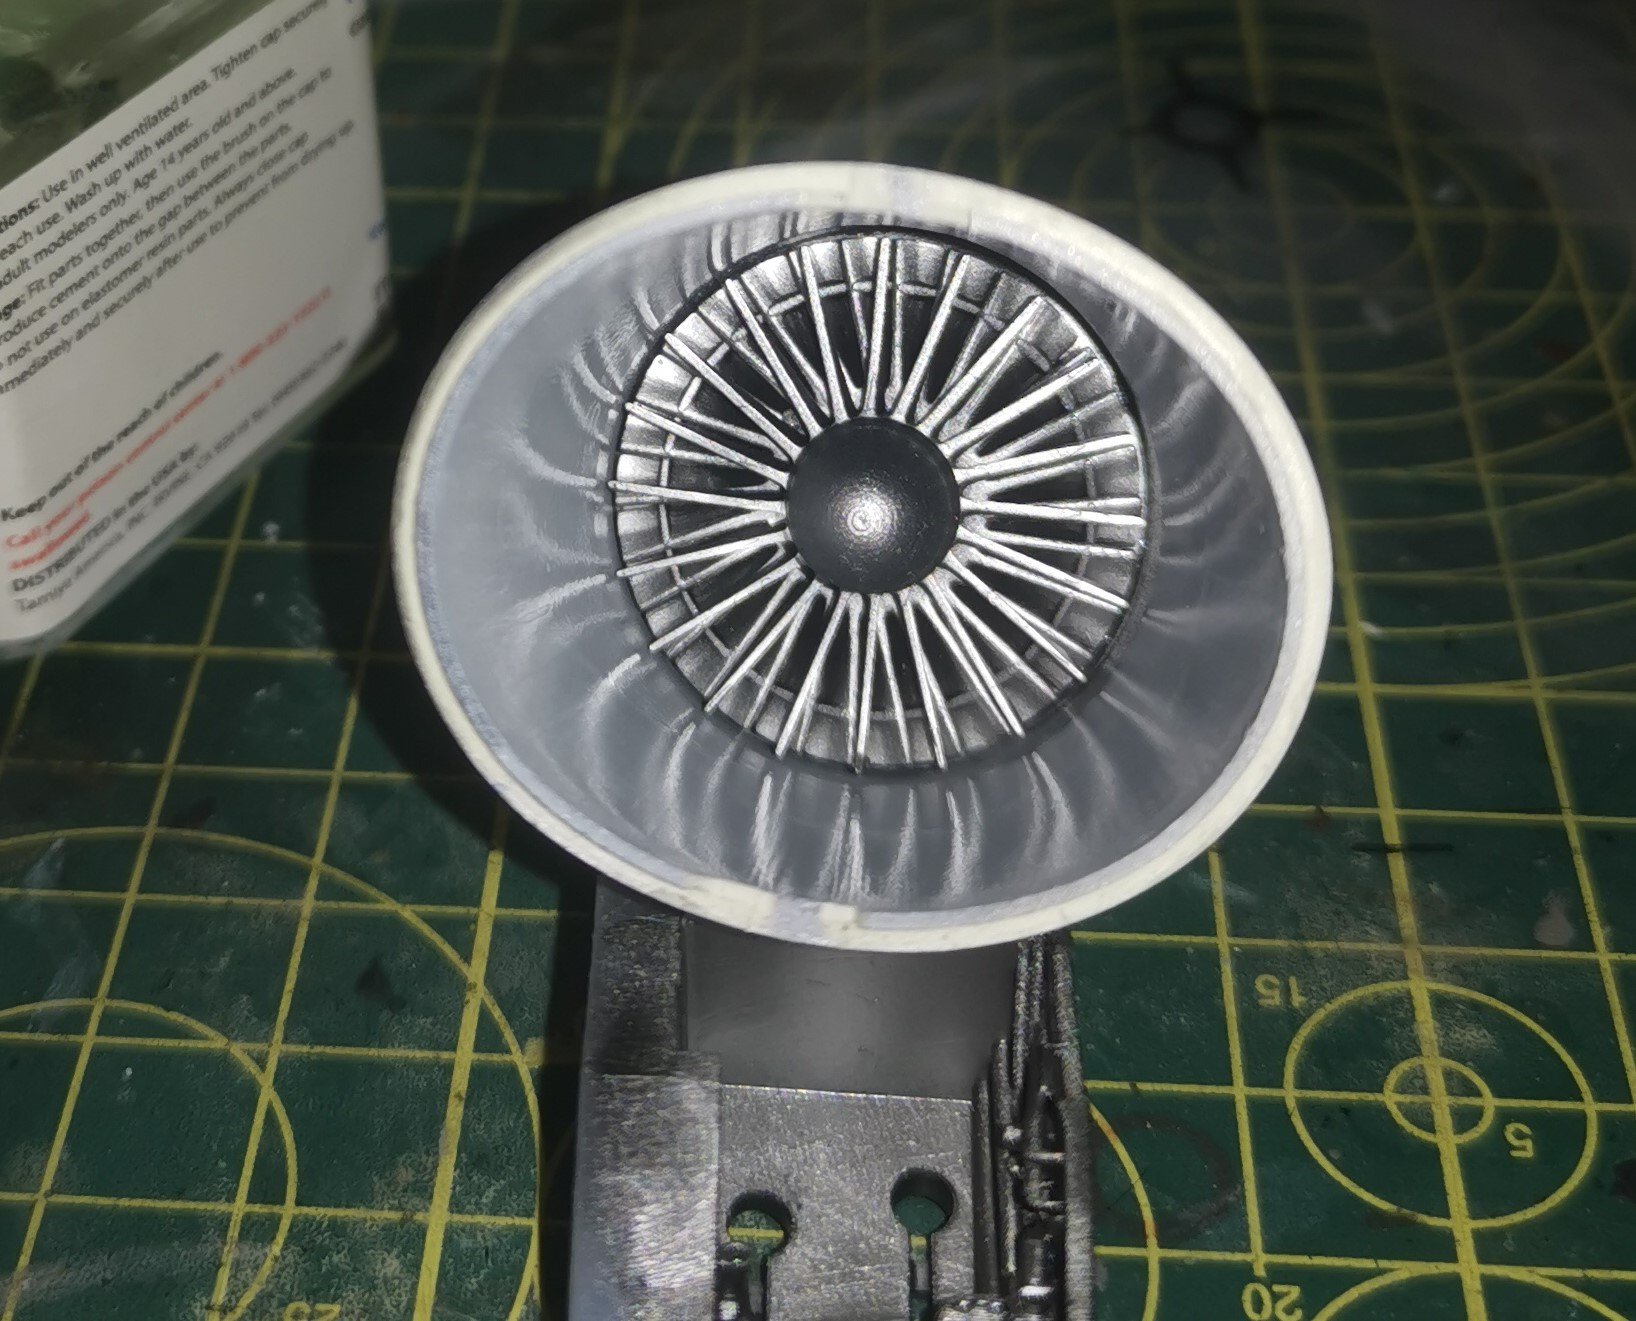
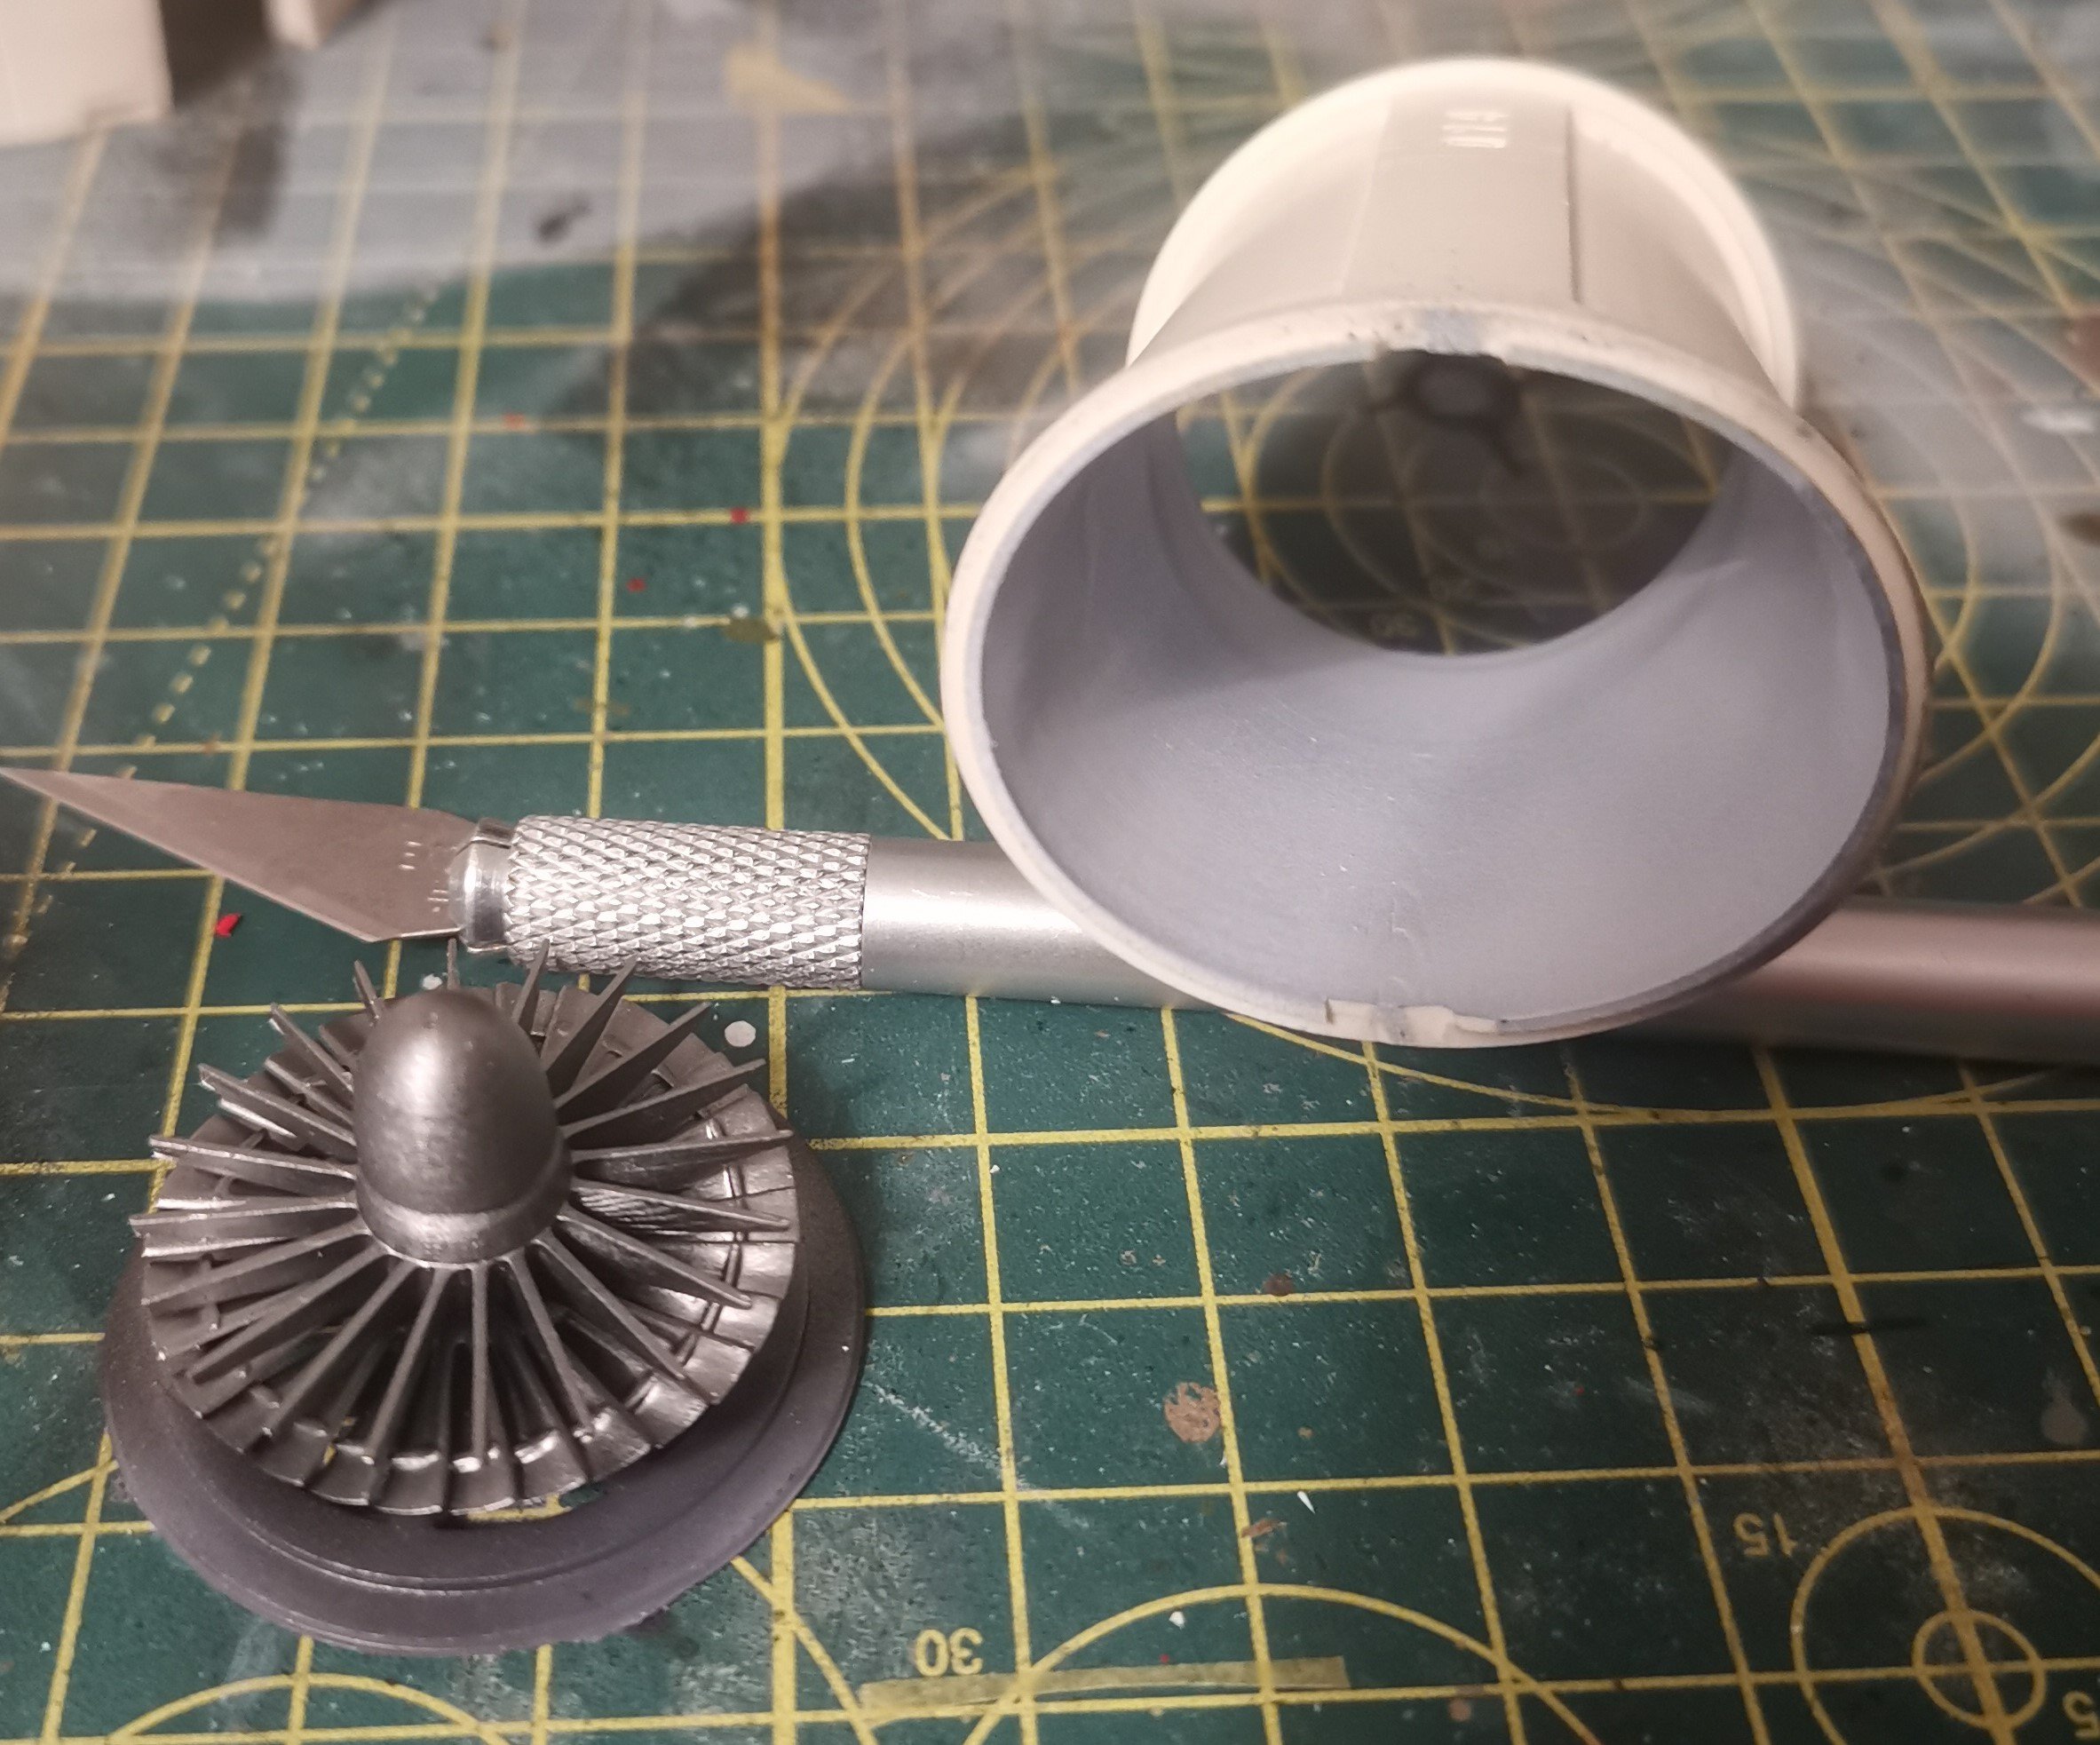
Intake trunking glued in place. You can see that very fine support I was talking about quite nicely in these photos - just amazed at what they can achieve with the 3D printing.

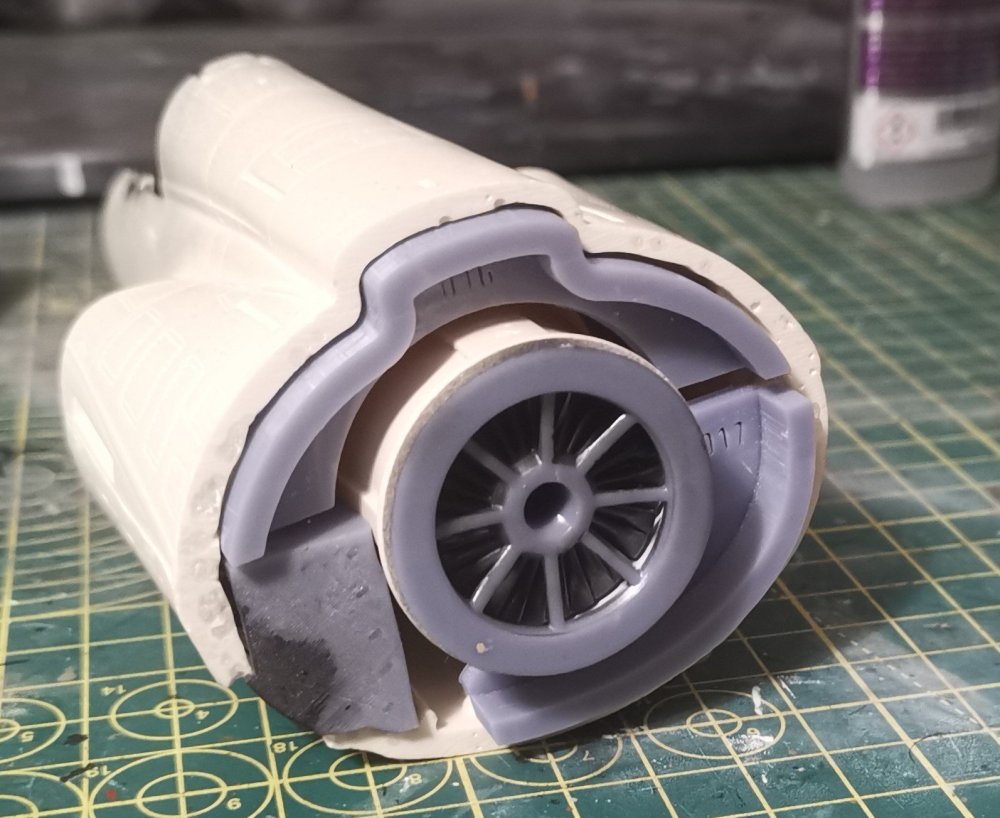
Turbine fan glued in place at the back of the trunking. I haven't glued this to the back of the intake trunks as a bit of dry fitting showing that the RAT housing will have to be fitted first as the fit is extremely tight and I'd rather avoid the cursing and chances of breaking bits.
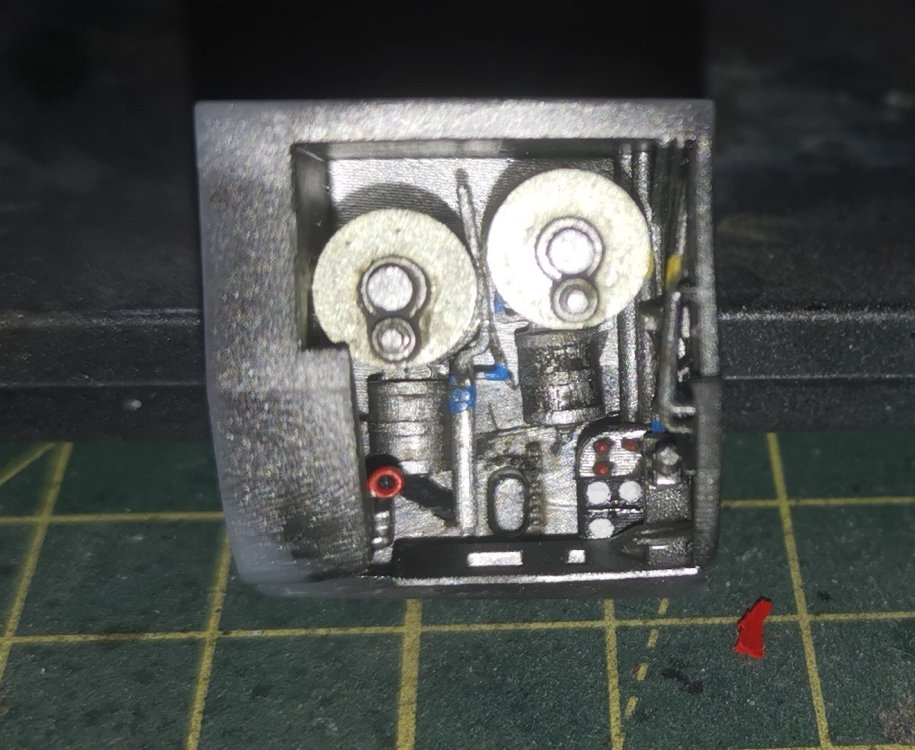
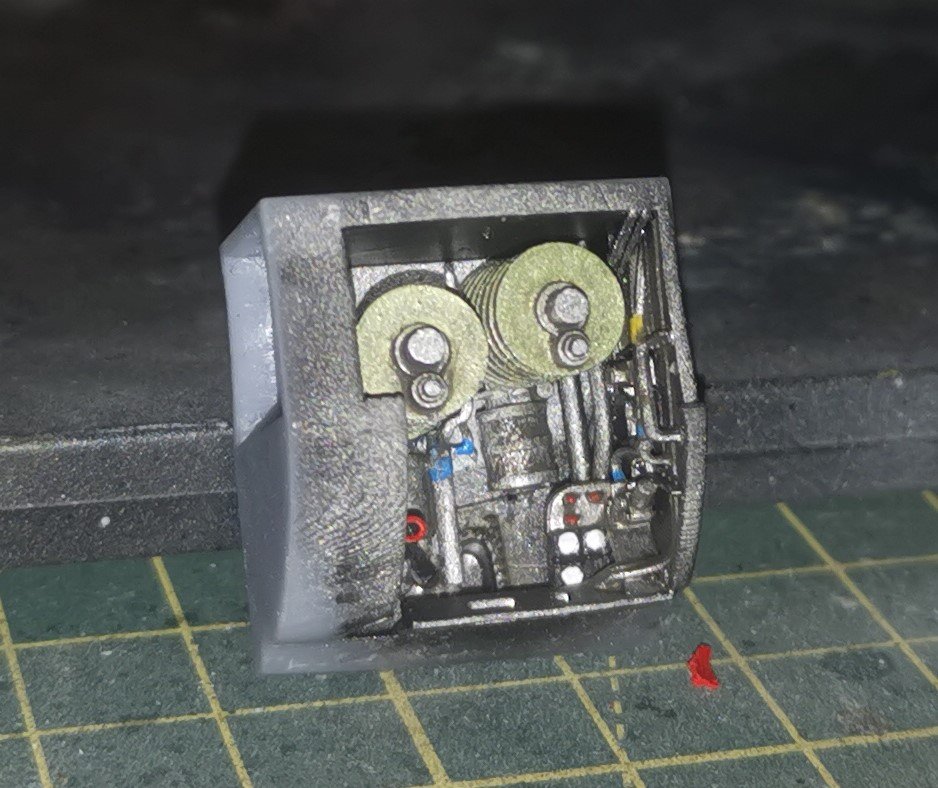
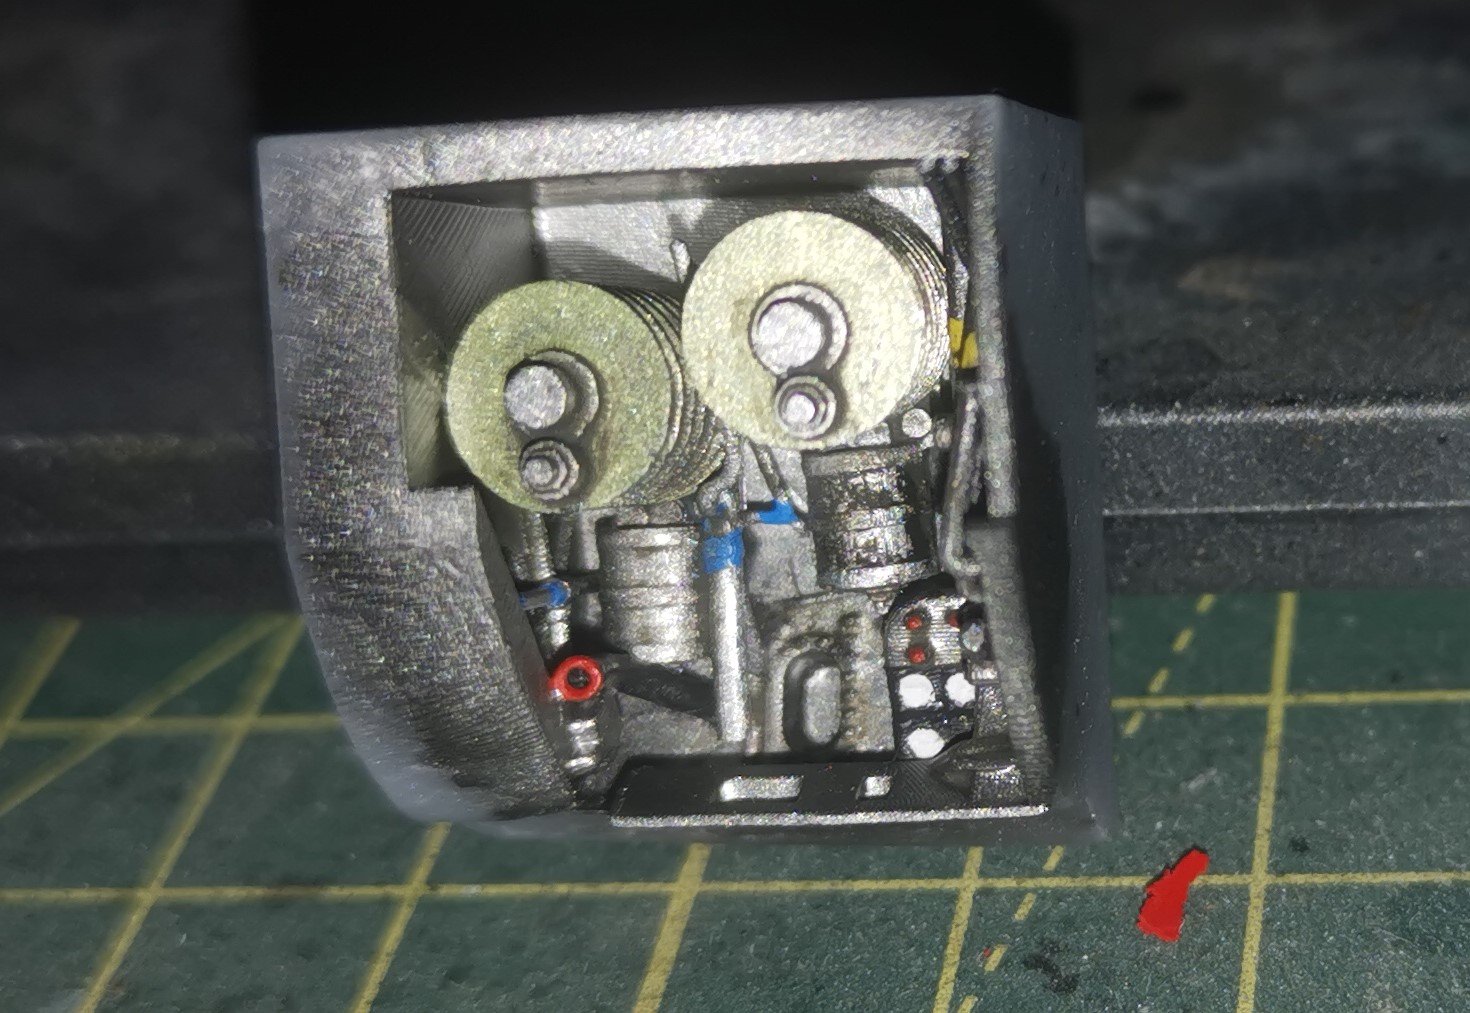
Speaking of which, here is the RAT housing painted in Xtreme Metals Steel and the 2 parts (don't know what they are) that go inside ready for detail painting. The coils appear to be a strange greeny-gold colour so I've made an eyeball mix of Titan Gold and Park Green. I'll see how it looks tomorrow after it's dry.
-
7
-
-
Given that I think the JetMads Viggen will keep me occupied for most of this year, my main ideal buy is a set of paint masks for the splinter cammo!
If it appears this year, the Border He-111 looks very tempting.
-
5
-
-
19 hours ago, BlrwestSiR said:
It's like hitting the jackpot if you can order everything for a project from one place in one go. That's yet to happen for me. It's usually place an order for some stuff from one place, another order elsewhere or later on and hope it all arrives when I want to start. But shipping costs are making that an expensive option. Then throw paint and supplies into the mix.
Just today I was hunting around in my paints for a colour I needed. I think I have around 500 different bottles of paint (not counting multiples) and I found two in the colour I needed. Yes, I really should consolidate on a couple paint lines and stop buying all over the place.
As for Mr Color Levelling Thinner, it's gotten a bit thin on the ground here too but still available. More importantly though, it's gone up in price almost 50%. So with the last few sales at my LHS, I've stocked up on Tamiya thinner with retarder (their version of Levelling Thinner) and airbrush cleaner.

Again, I'm happy to have a well stocked Hobby shop in my city.
There's the reason for the shortages fellas - Carl has it all!! 😁
-
5
-
-
First parts primed, painted and ready for assembly.

Trunking and fan in Tamiya X-2 and Xtreme Metals steel. The detail on the 3D prints is amazing.
Rear trunking in X-2. Just noticed the hair in the photo, but it's so far back into the interior that I'm just gonna leave it. There's a support of some sort across the bottom of trunks which isn't much thicker than a hair - the quality of the 3D prints just makes me laugh. I know JetMads get some stick about print layers on some stuff, especially the Stiletto, but the detail is just lovely.
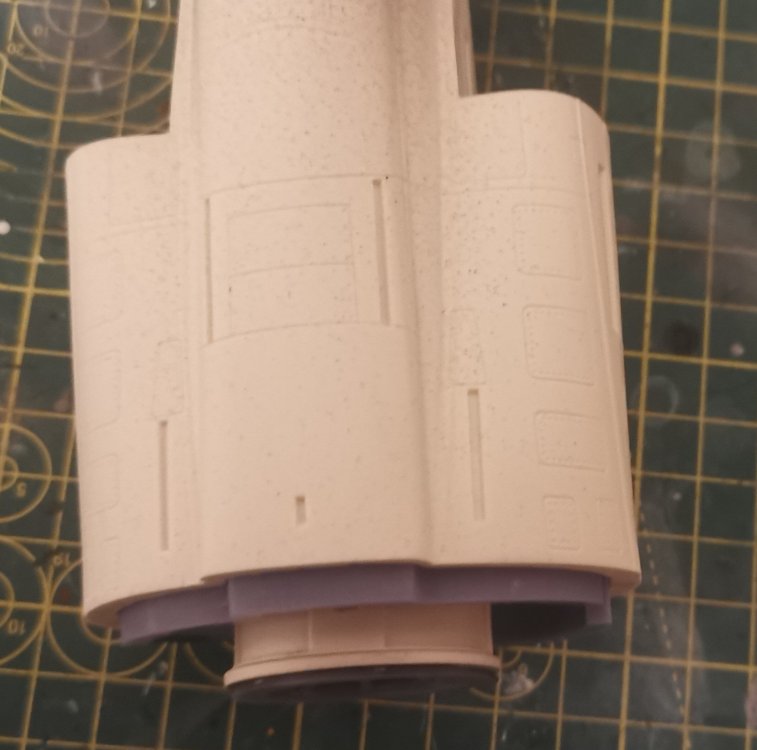
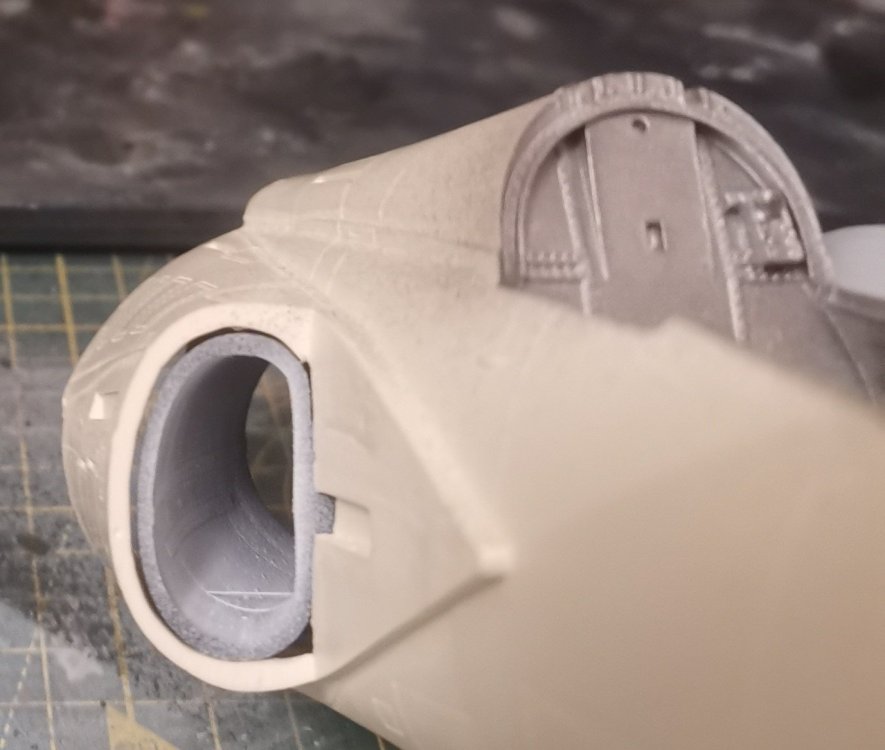
Front intakes done in X-2 then masked and the anterior portions done in Xtreme Metals aluminium. It's hard to see if this correct in pictures of real airframes but it seems to be the consensus in other previous builds, so I'm not gonna argue!
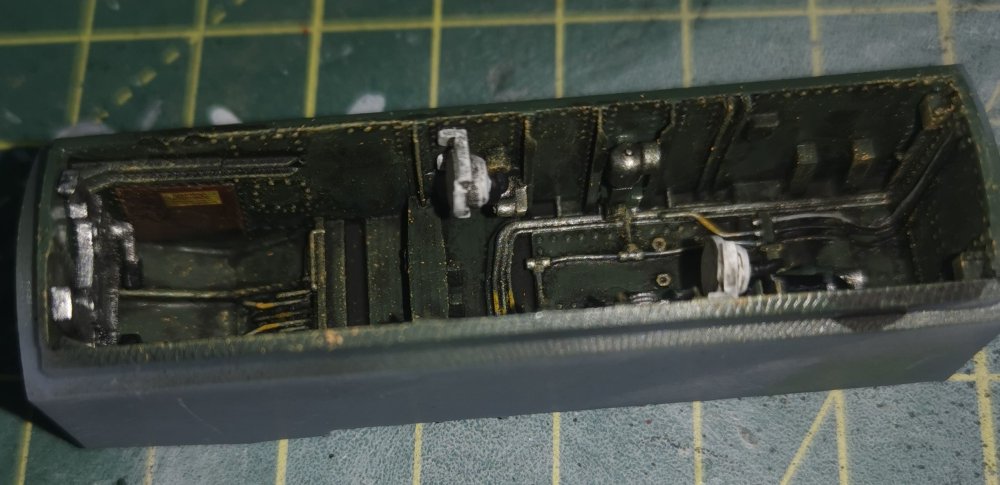
Rear wall of the cockpit done in aluminium as well.
Have ordered Mr Paint colours for this build as they seem to be the best match to the Swedish colours. Haven't used them before but always seem to get a good write up and the 'no thinning' should hopefully make it a pleasant experience I hope. Paint is coming from Poland as none of the UK stockists had the necessary colours, so probably going to take a couple of weeks to get here. Plenty to get on with in the meantime....
-
5
-
-
Beautiful finish and the 3D printed pieces really add to the finished result.
-
1
-
 1
1
-
-
20 hours ago, ScottsGT said:
U Boat was a fun build. You can see mine peaking from behind other builds on the top shelf.
I’ve got the Gato is the stash as well. But man, that thing is huge!
Okay, explain how that Richthofen egg plane manages to stand like that?!? 🤔
-
2
-
3
-
-
Just the two completions for me last year but at least they follow a vague theme both being carrier aircraft.
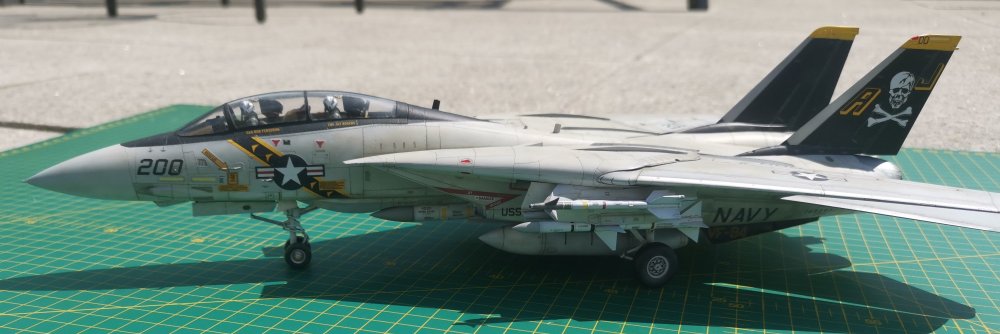
Tamiya F-14A

Hobby Boss A6E Tram
The Tamiya was certainly the easier build as it just falls together but I quite like the Intruder as it's the first folded wing kit I've done.
Have a feeling the Viggen is going to take most of this year!
-
7
-
-
First progress with this. Removed the first set of printed parts for priming. Thankfully the supports come away very easily but you have to keep your eyes peeled not to inadvertently remove some of the detail as well. The resolution of some of the detail is amazing.

First bit of Dremel action as well - cleaning up the inside of the resin trunking so that the printed pieces fit nicely. Not sure I'm a fan of having to wear my respirator for assembly as well as painting but it's better than breathing the dust.

Hopefully get this all primed tomorrow as long as the household task list isn't extended!
-
10
-
-
Looks good to me as well, certainly matches the photo. 👍
-
1
-
1
-
-
Sorry to hear it's defeated you for the moment Carl. It does seem to be designed by someone who's never actually had to assemble something this fiddly.


What is on your bench right now ? Share a picture :)
in Modelling Discussion
Posted
Nice tribute to Dale. 👍