GusMac
-
Posts
2,978 -
Joined
-
Last visited
Content Type
Profiles
Forums
Events
Gallery
Everything posted by GusMac
-
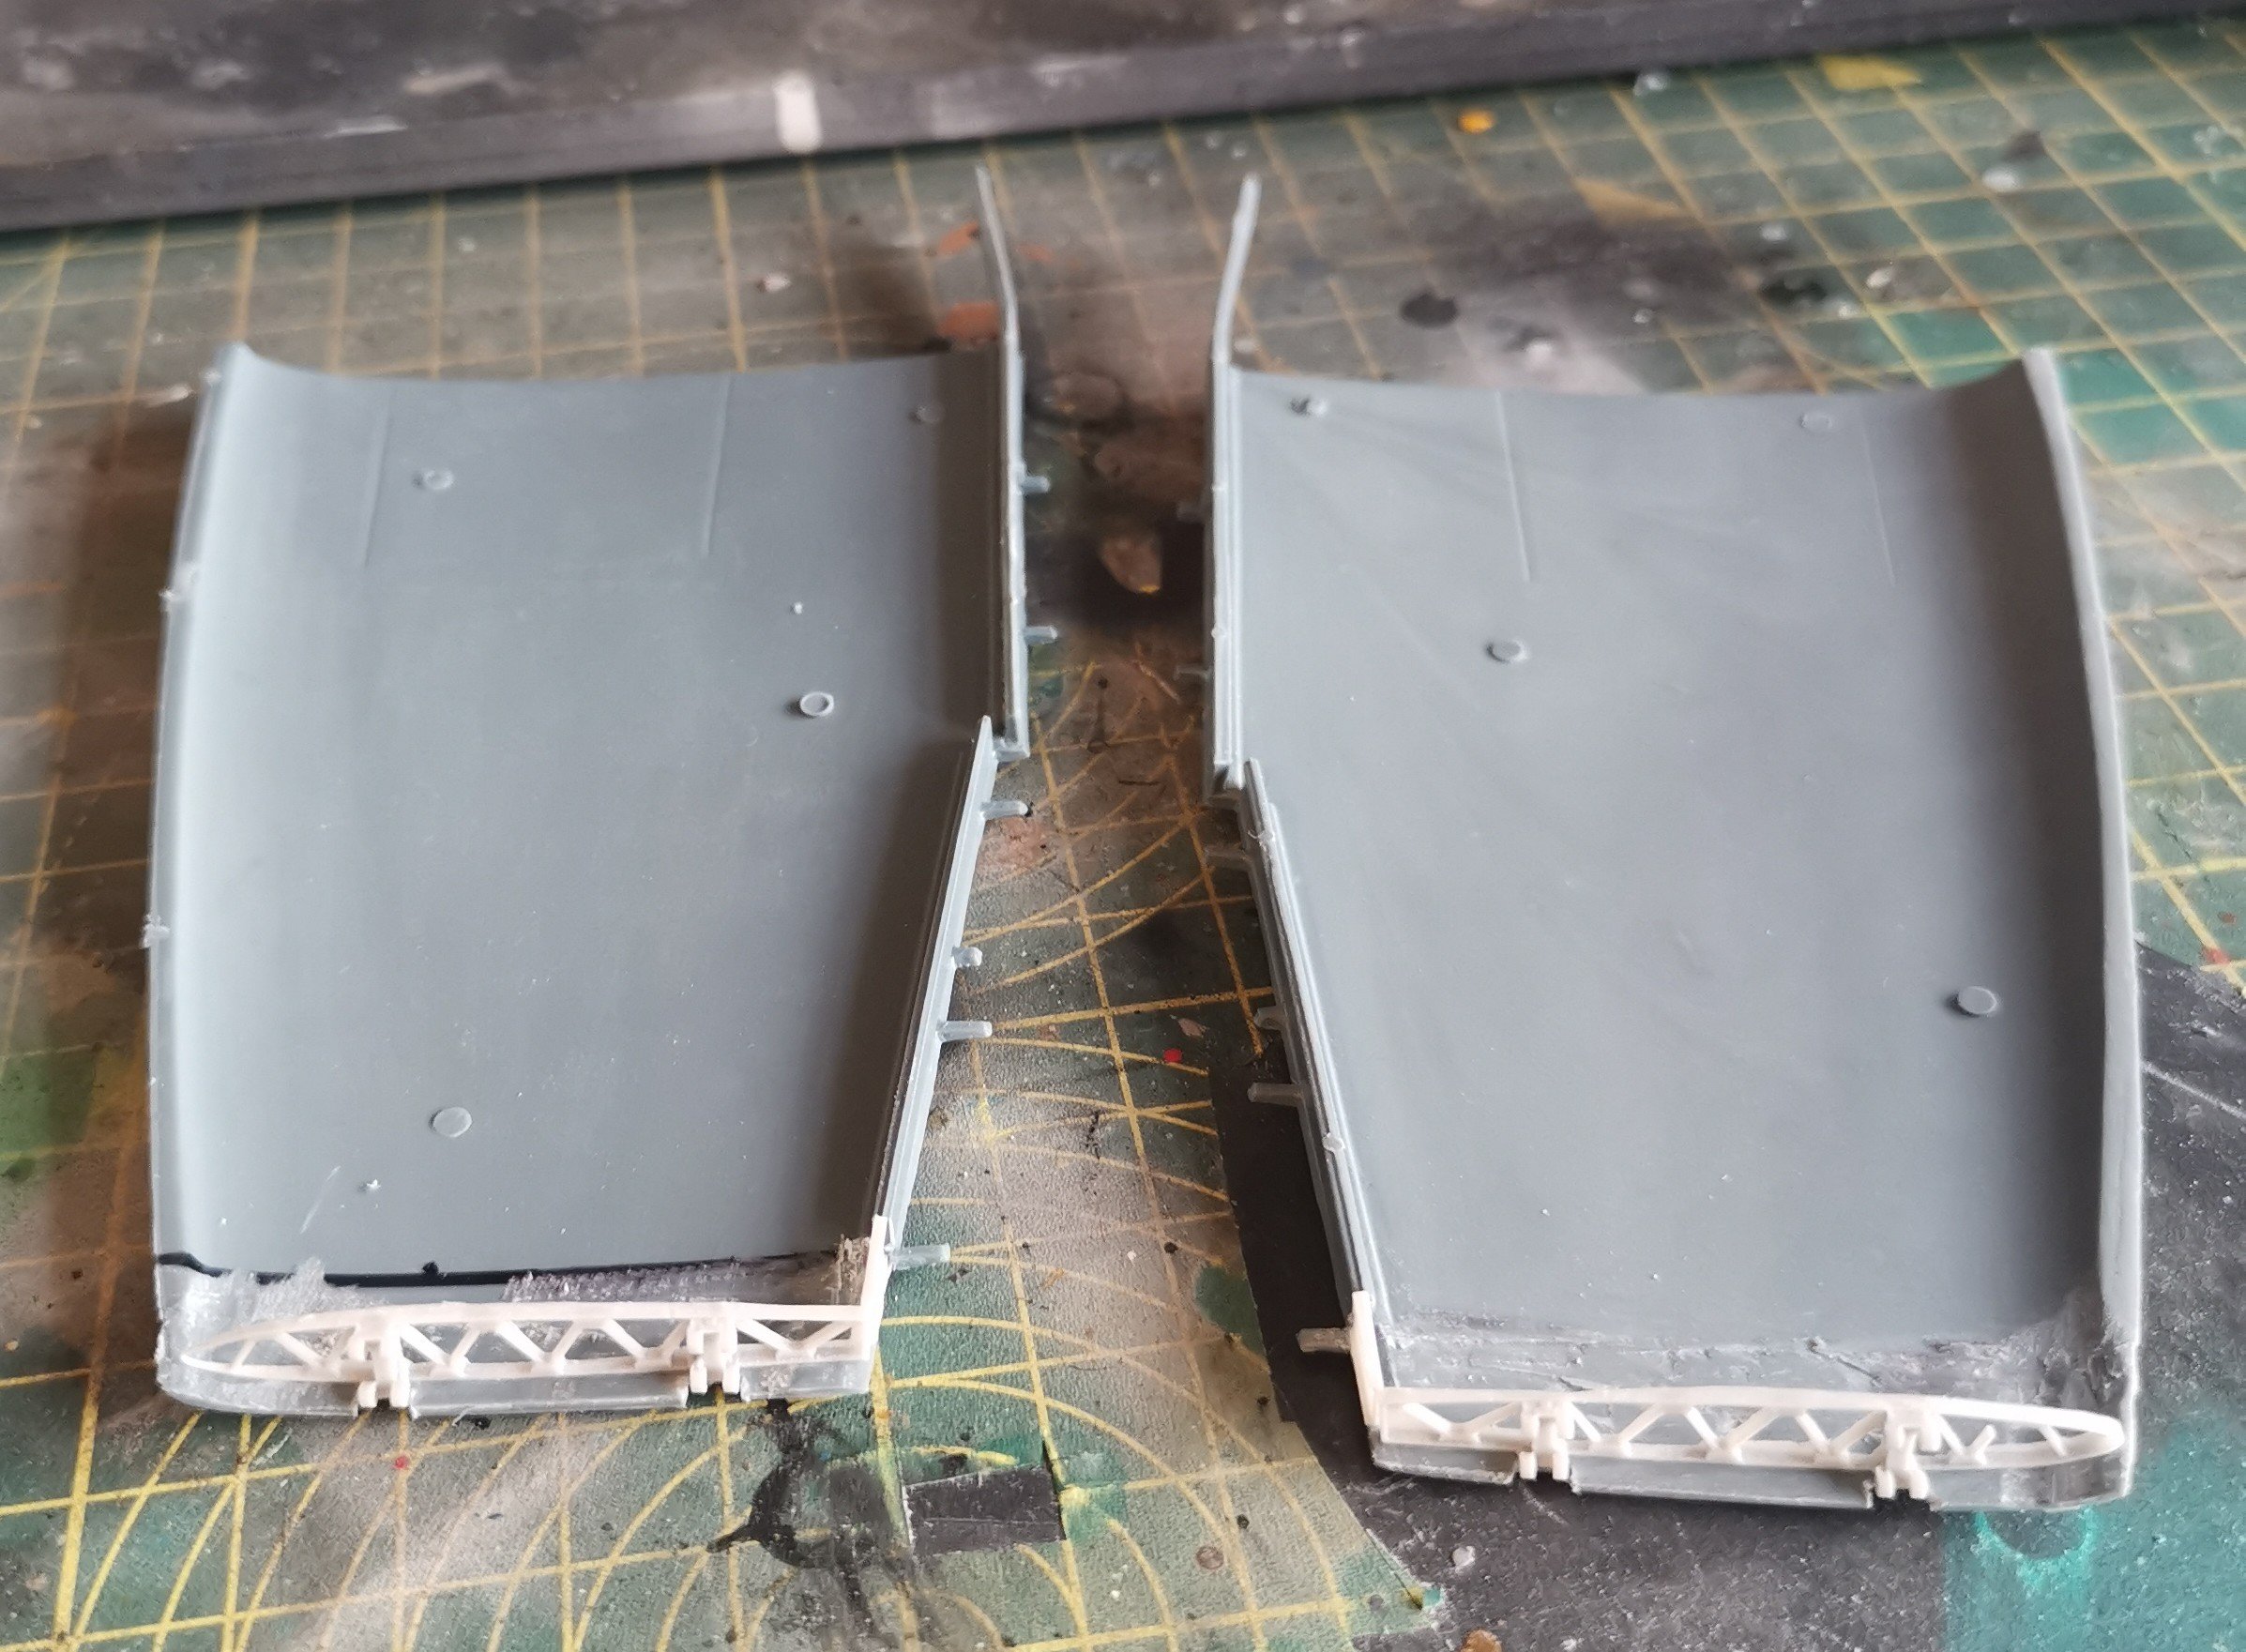
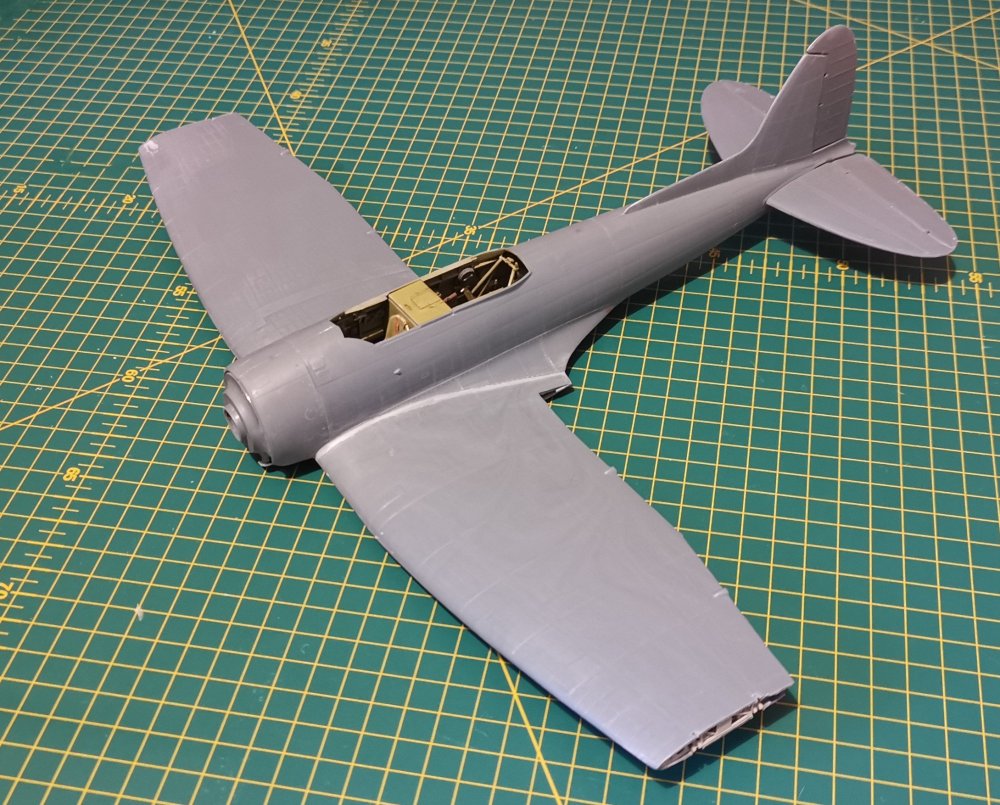
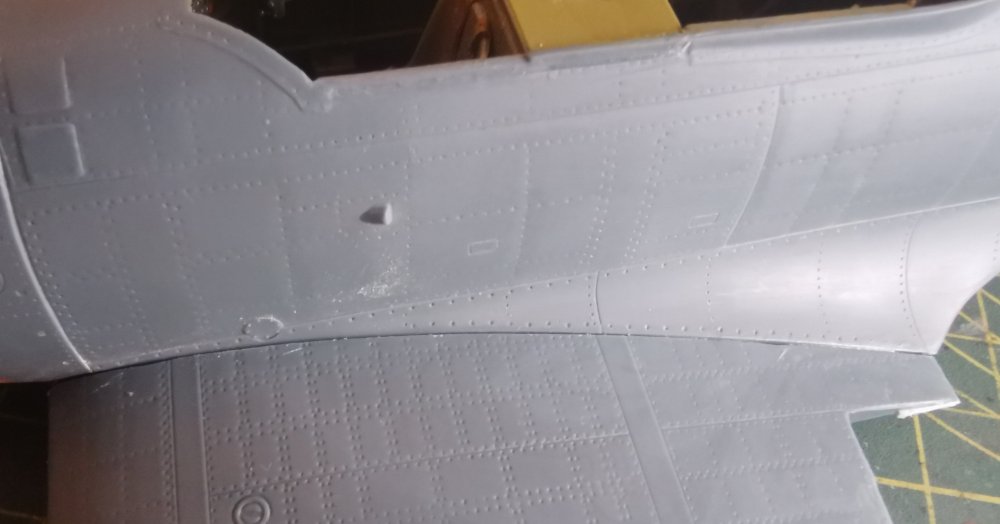
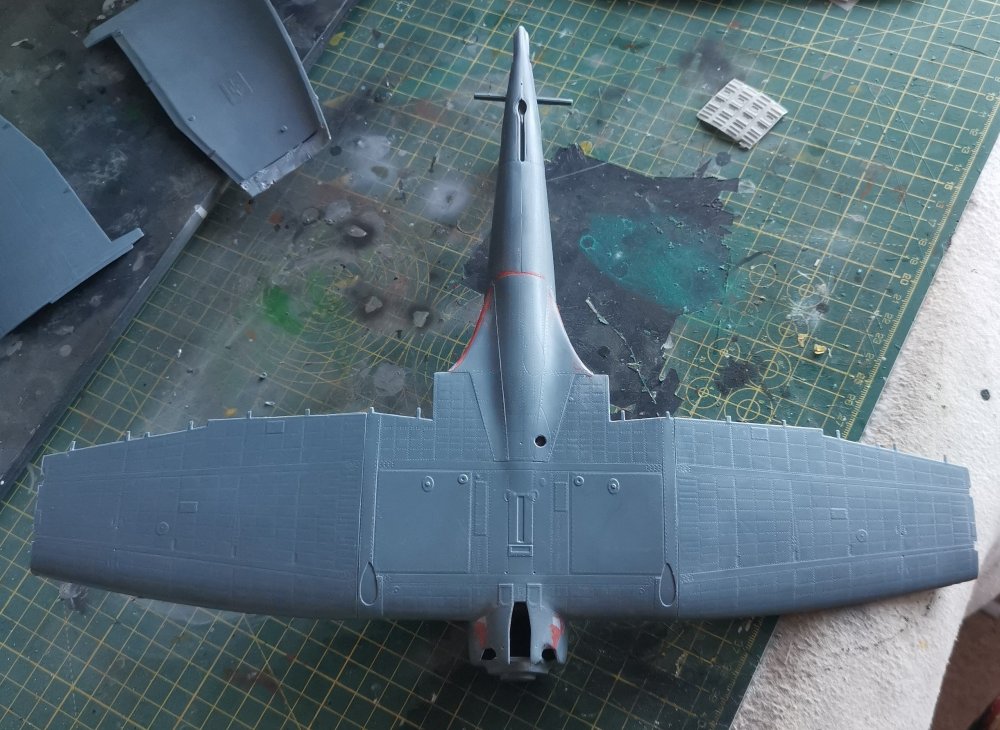
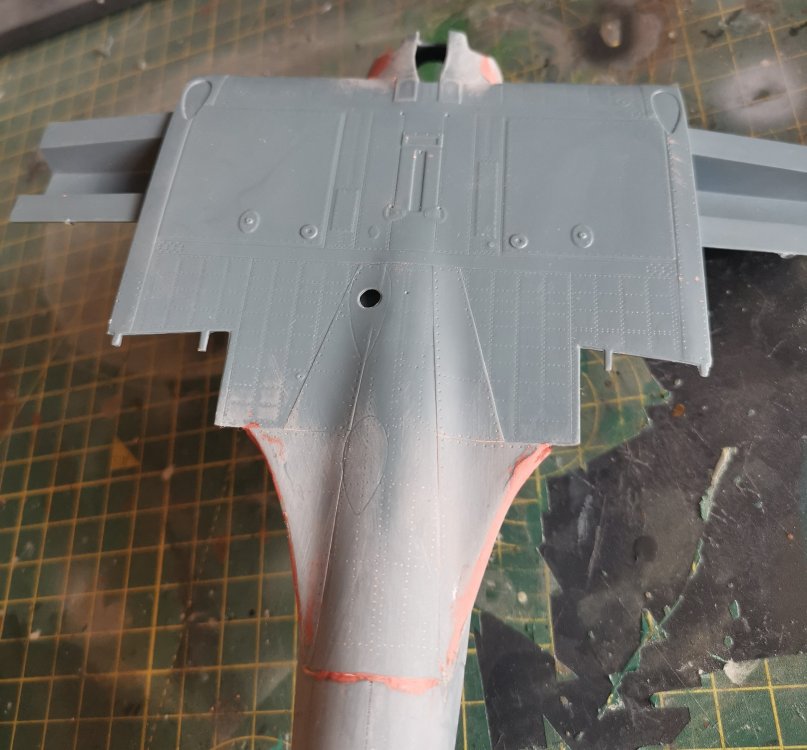
Slow but steady progress on this one. Got the gaps at the wingroots filled and detail restored and the tail feathers are on. The resin parts are in for the port wing folding mechanism. Fit was easier than I expected but I'm not sure the other side is going to be so simple. That's tomorrow night's entertainment!

-
Amazing how quick the exhaust stains seem to have appeared given how few hours it's probably flown when this was filmed. Very cool.
-

Brabham BT45 - Model Factory Hiro - 1/12
GusMac replied to DocRob's topic in LSM 1/35 and Larger Work In Progress
Yes, that's a pretty stark difference Rob. My Molotow pen is only a few months old, so I'll need to watch and see if it goes 'off' as Hubert says. Will definitely check out the AK option. I've used their Extreme Metals and found them very good. -
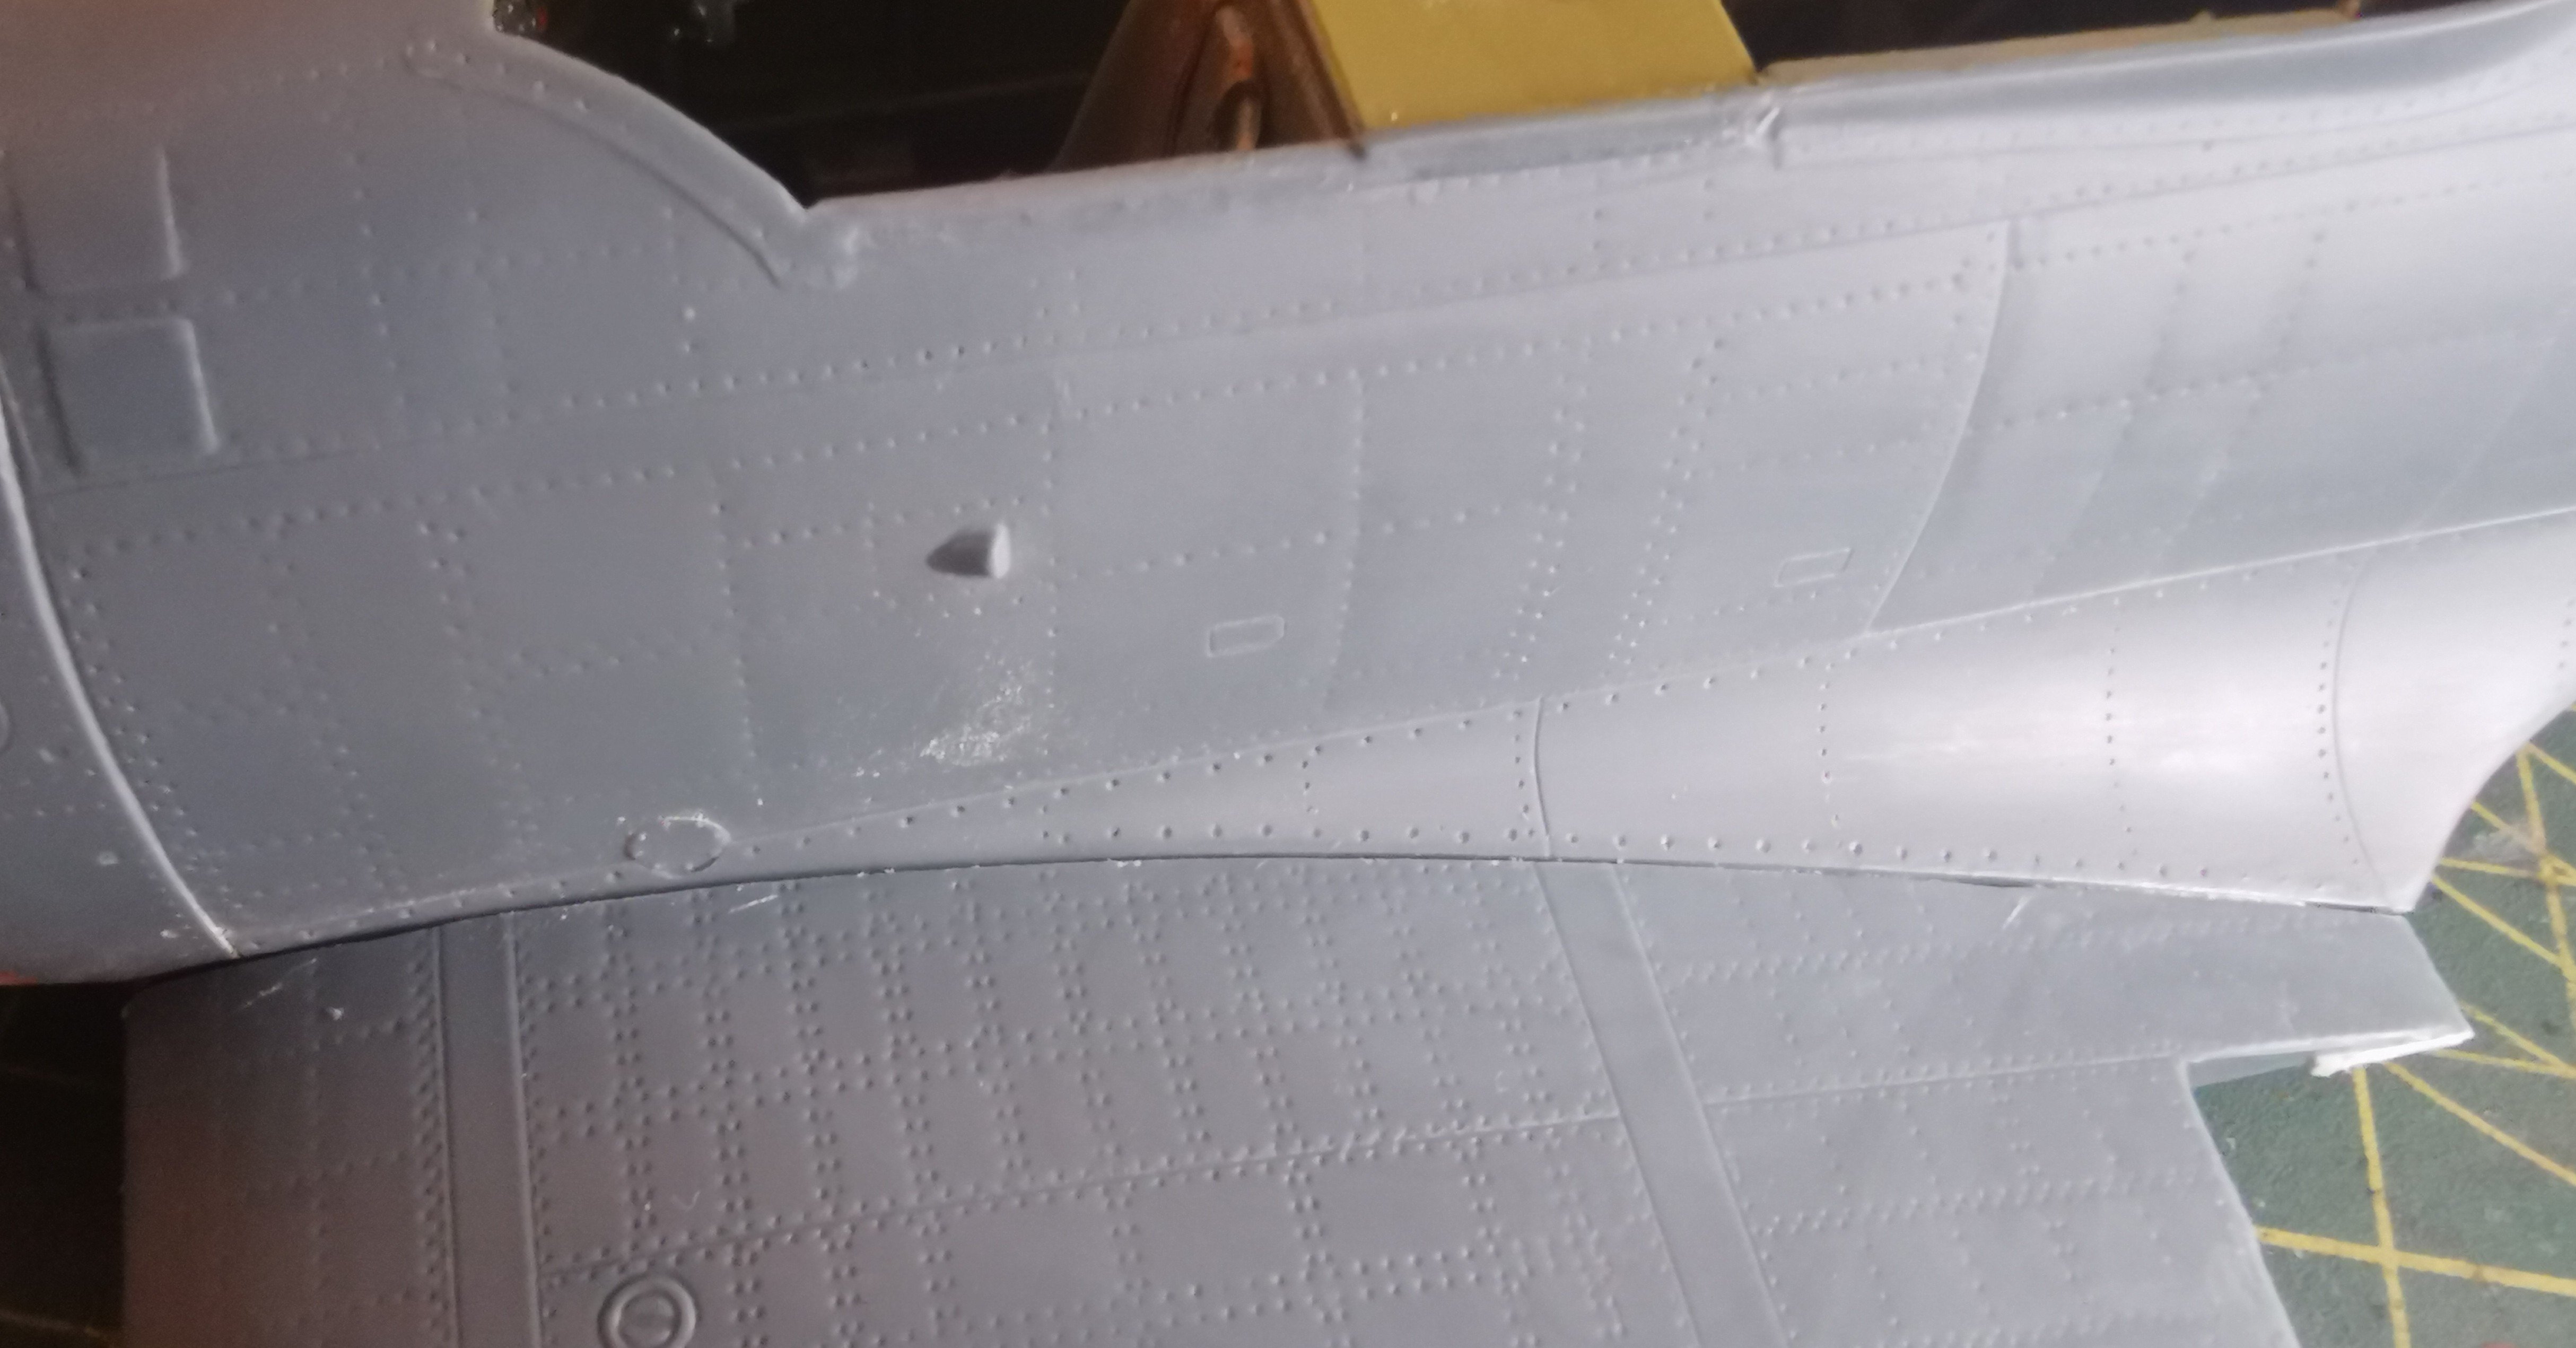
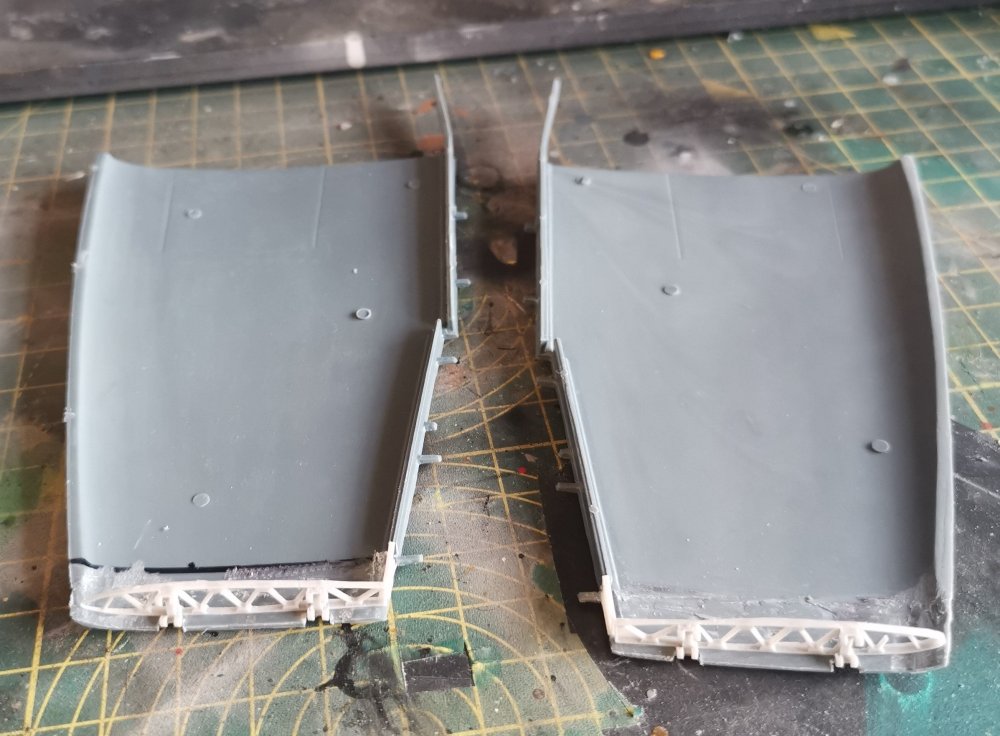
Well getting the upper wings on wasn't quite as onerous as I'd thought it might be. Just a bit of sanding and trimming and we were away. As you can see a bit of filler needed along the wing roots but the worst gaps are at the front although I think this is mainly down to how I sanded the edges. This removed some of the scalloped edge which would have filled that space. Anyway, it shouldn't be too difficult to get this all tidied up and we'll be ready to finish the edges of the wings for the folding mechanism.
-
Brabham BT45 - Model Factory Hiro - 1/12
GusMac replied to DocRob's topic in LSM 1/35 and Larger Work In Progress
Looks great Rob. What issue did you have with the Molotow marker? I've only used mine a couple of times but have always found it pretty good. -
Been taking advantage of the unseasonably dry weather here to paint all the exterior woodwork on the house, so bench time has been virtually non-existent. I did however get the lower wings on and the fit is very good. Unfortunately, as Ernie found, the upper wings are going to be a different story and I foresee a lot of sanding and grinding in my future!
-
They'll be fine with just one Carl!
-
What is on your bench right now ? Share a picture :)
GusMac replied to Martinnfb's topic in Modelling Discussion
Amsterdam to Liverpool is a fair stretch for a first stint. Thought they might have stopped somewhere on the east or south coasts to break it up a bit. Orkney and Shetland are definitely worth the trip with all the Viking and earlier settlements. It's crazy at Skara Brae on Orkney to think that it was already 2500 years old when the Great Pyramid was built! -
What is on your bench right now ? Share a picture :)
GusMac replied to Martinnfb's topic in Modelling Discussion
Newcastle to Ijmuiden? -
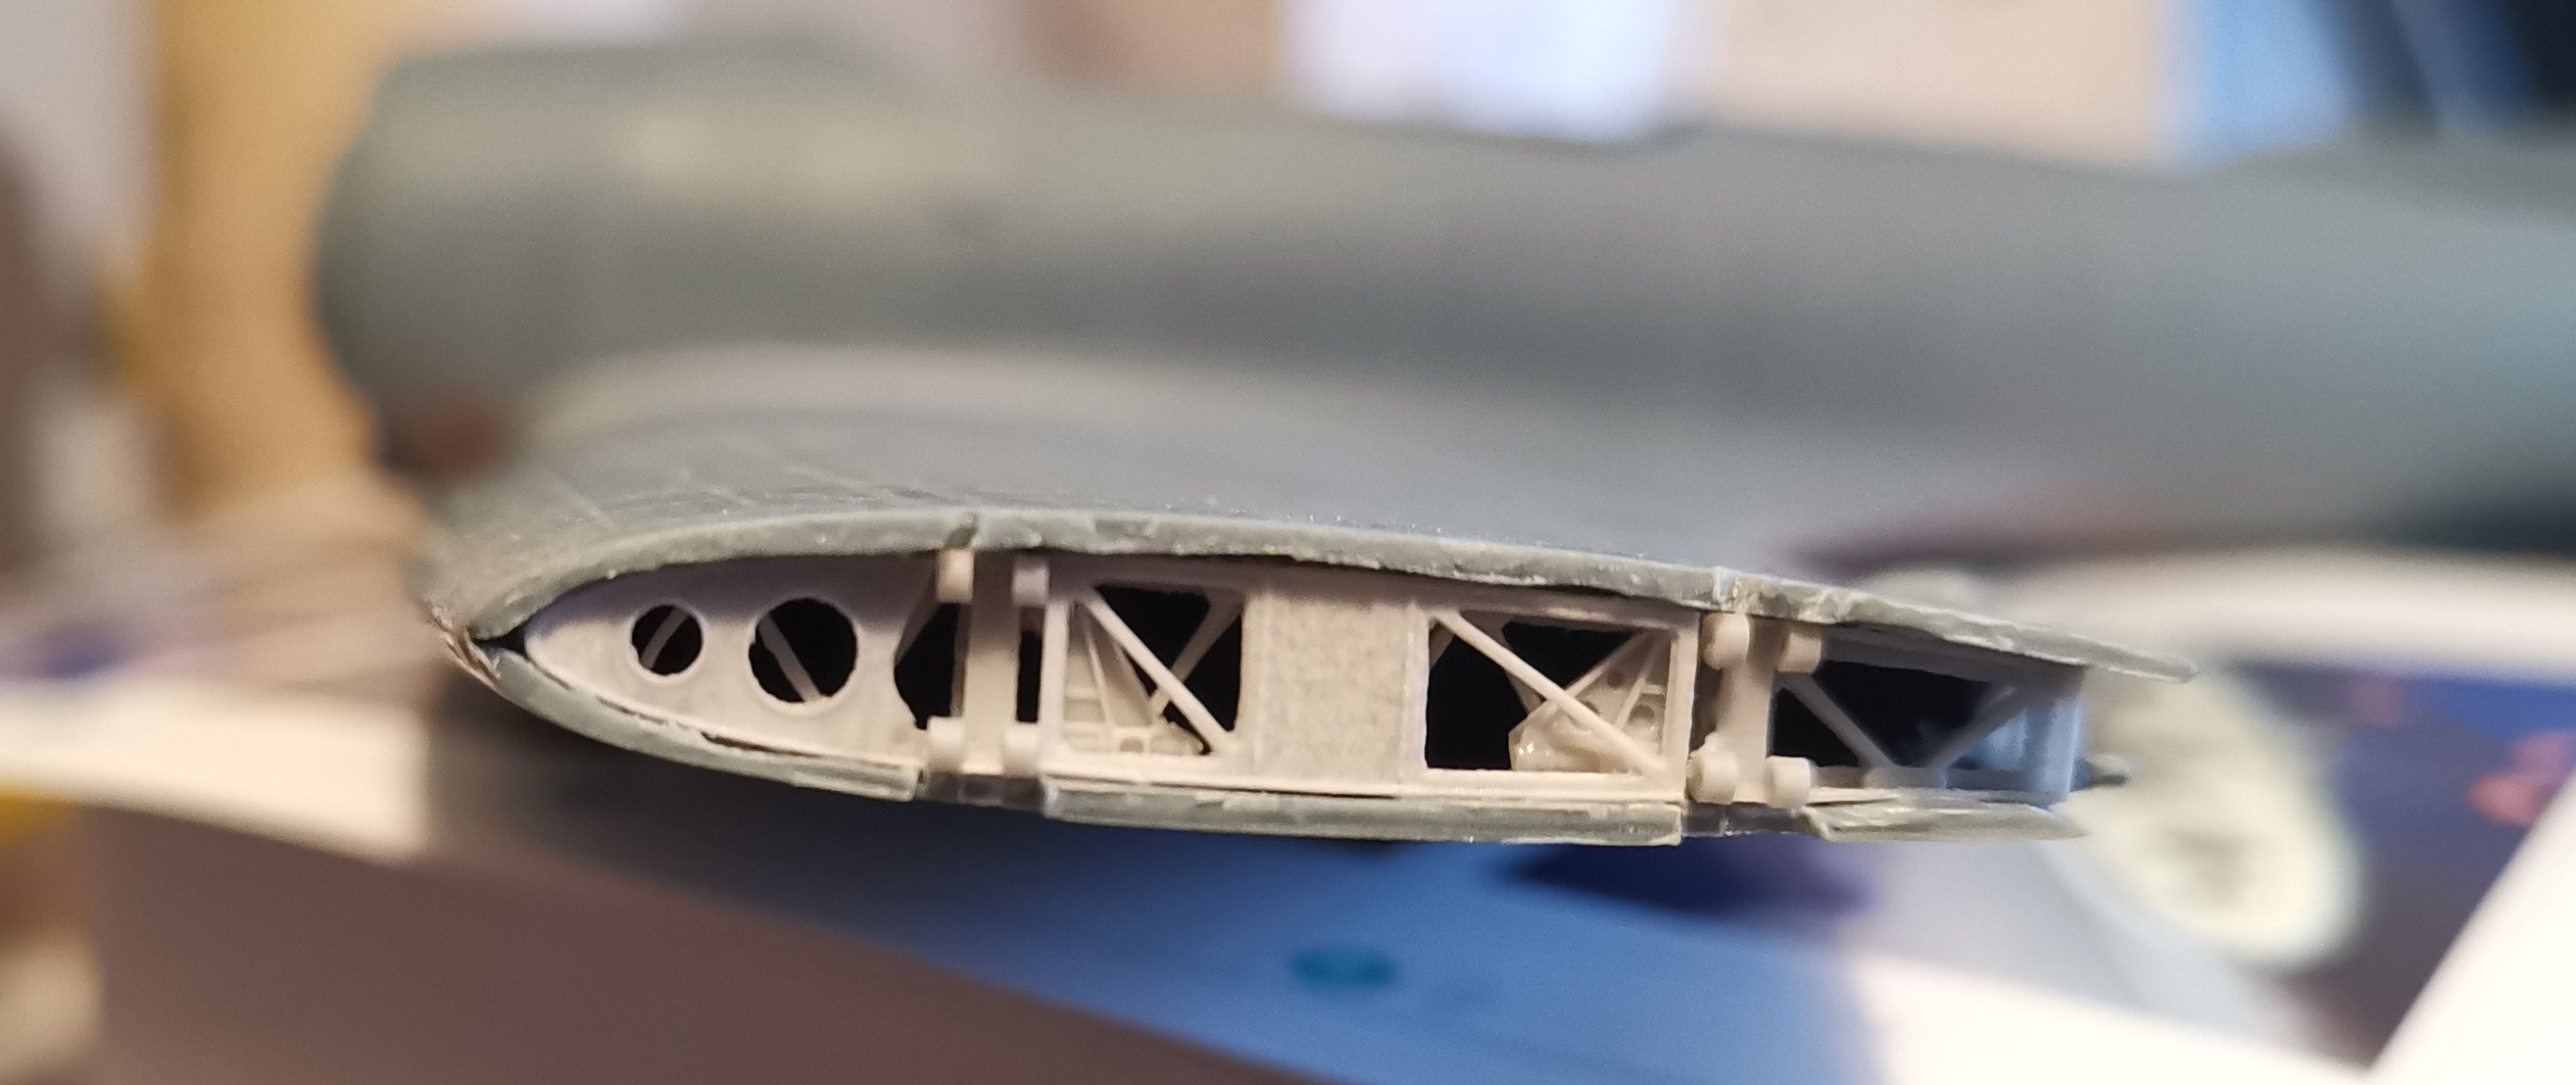
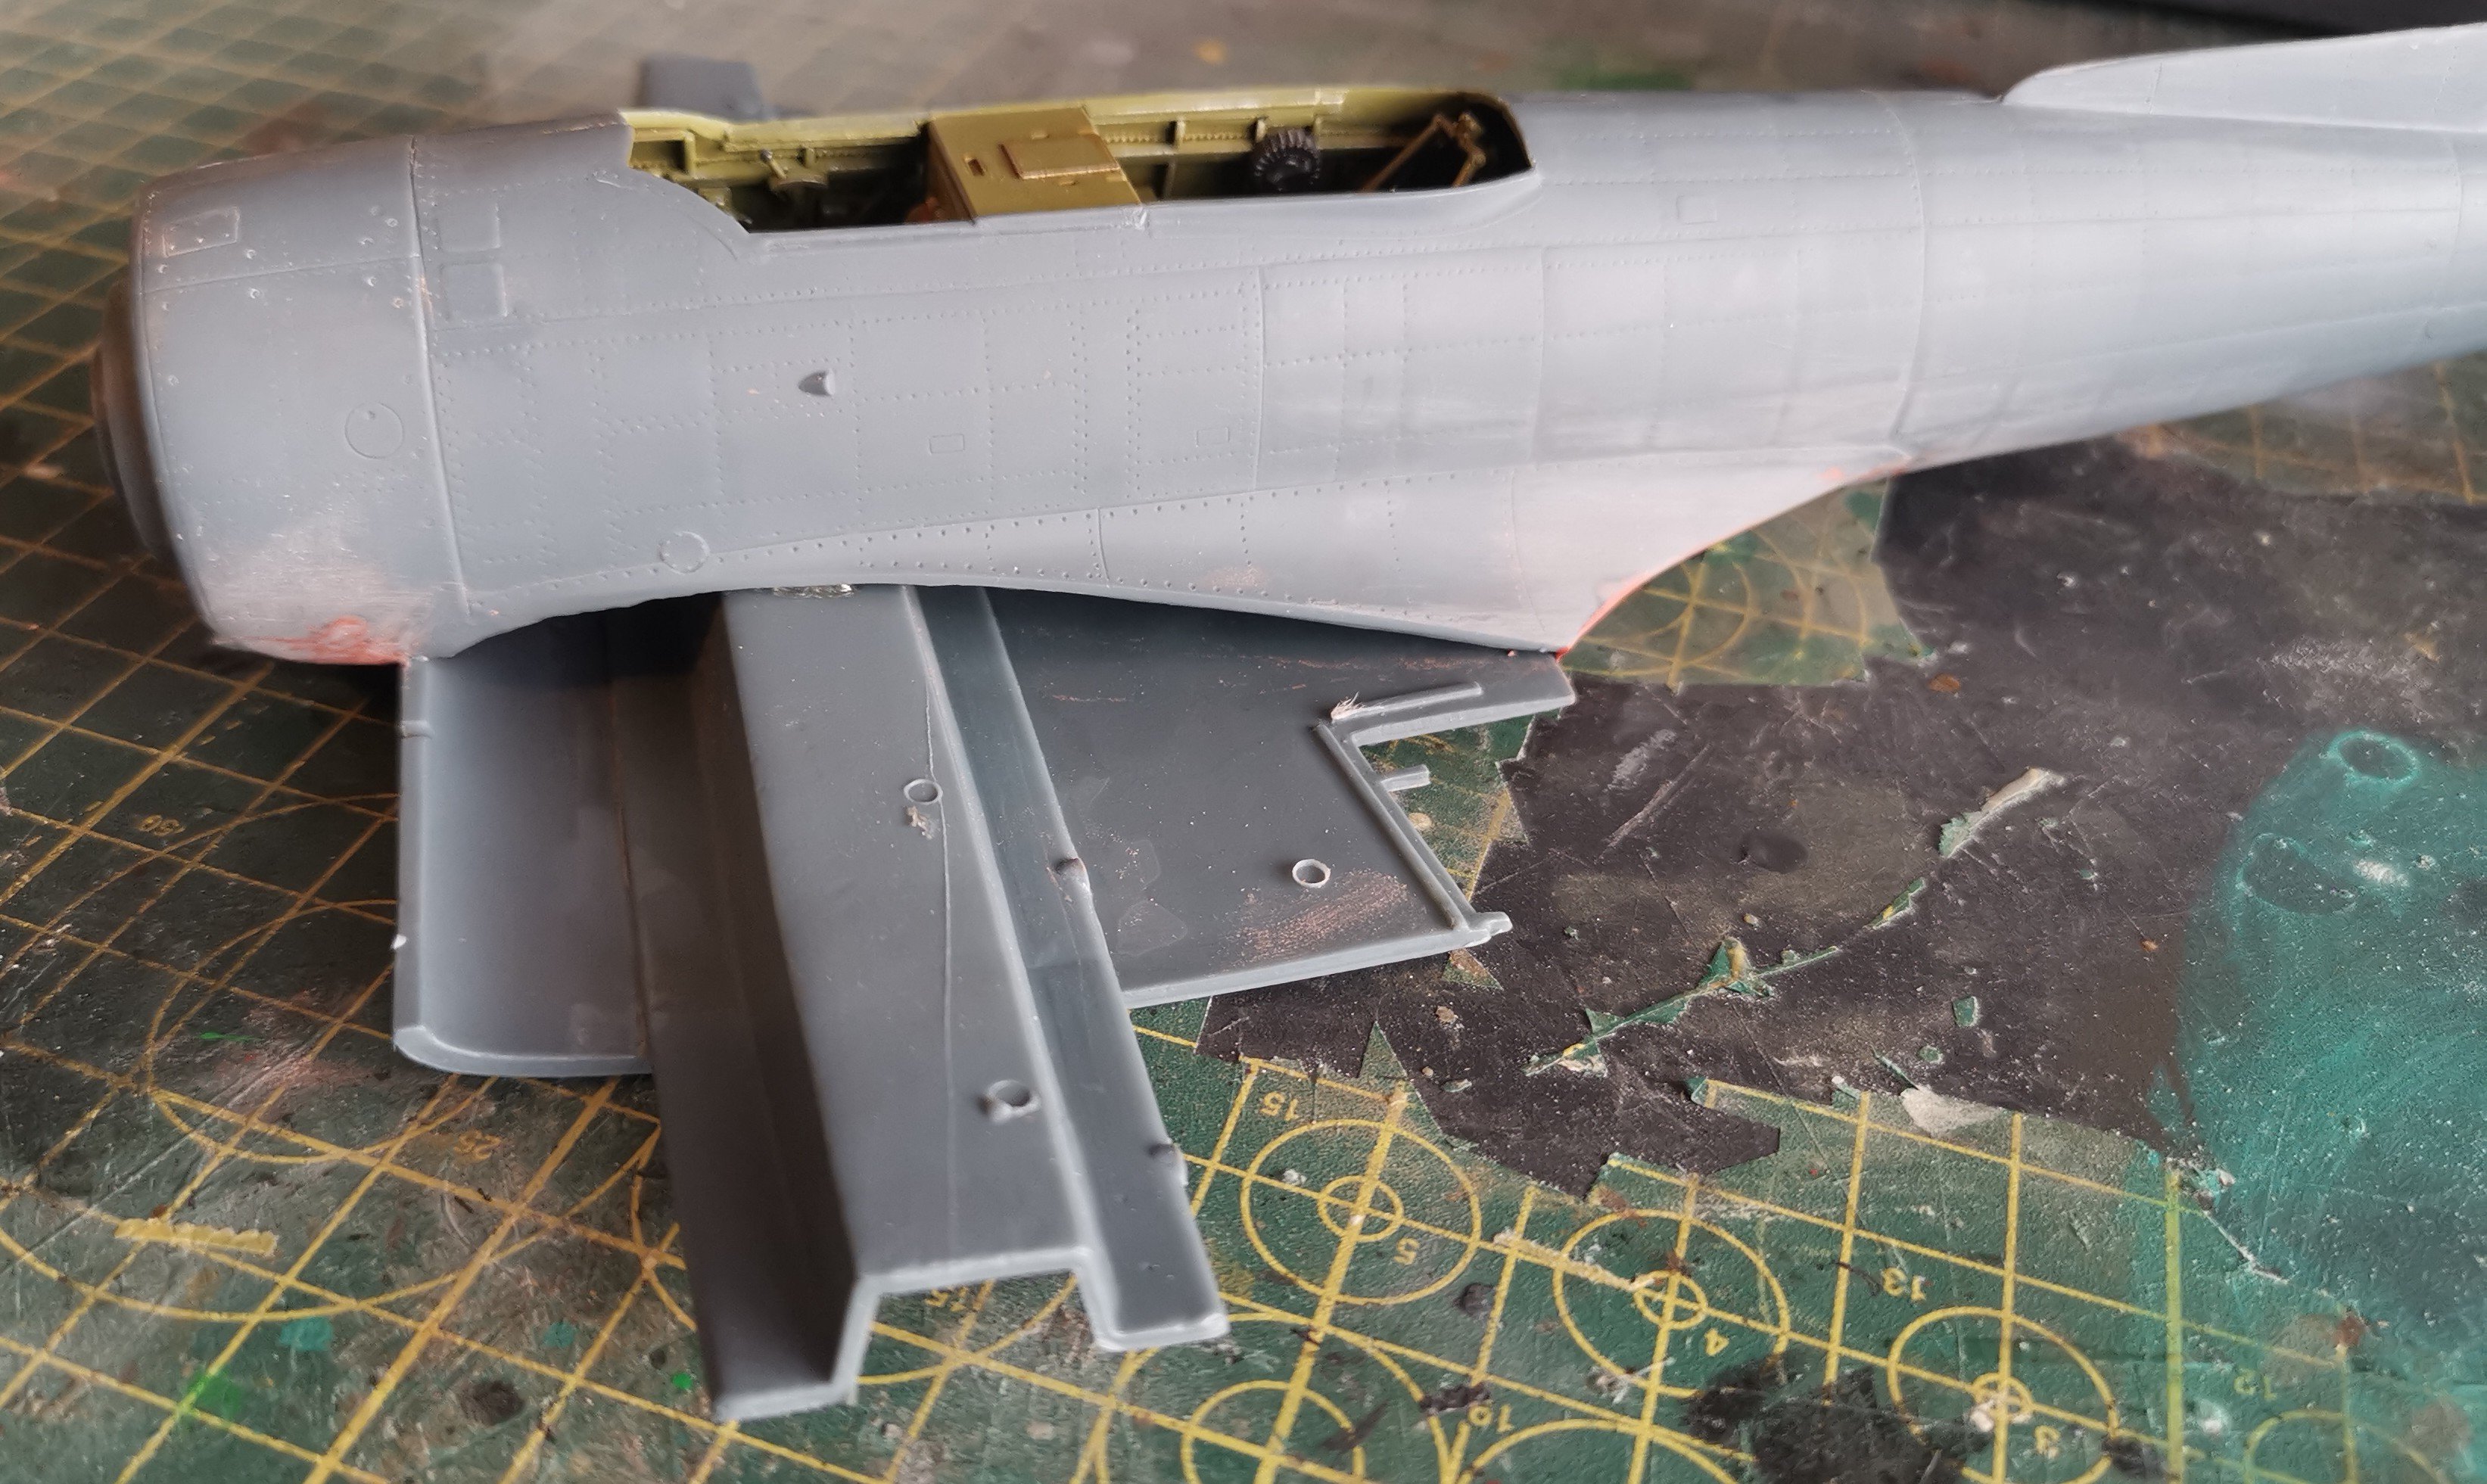
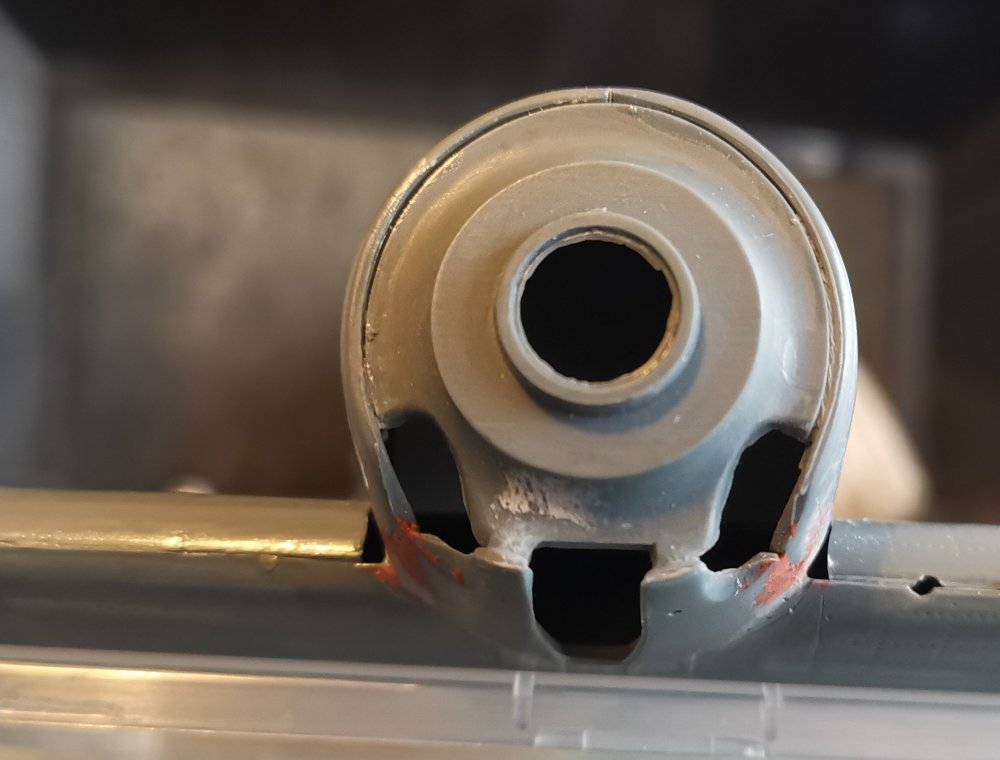
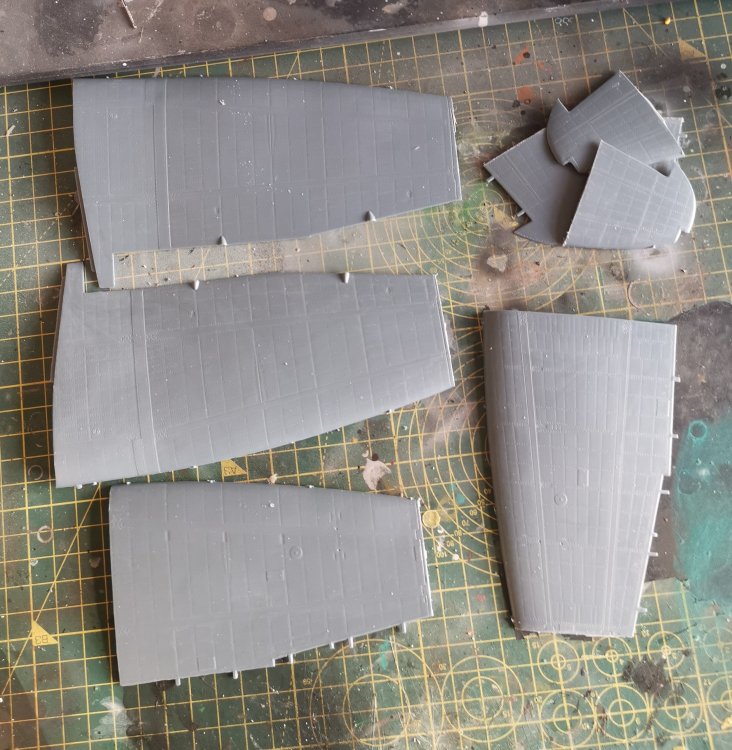
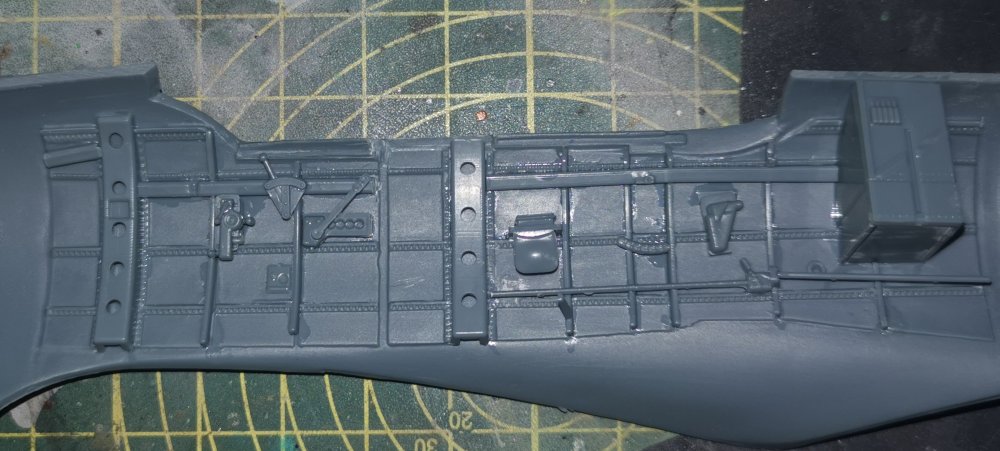
Slow but steady progress on this one. Underwing centre section is attached with the chunky spar to ensure the dihedral is correct. I wasn't convinced by the amount of gluing surface available, so this is attached with BSI 5-minute epoxy to make sure it's going nowhere. As Ernie emphasised in his build, you've got to dry fit everything before you commit to glue - I had to thin the top of the spar on one side to stop it catching on the bottom of the cockpit floor but everything seems to be lining up correctly now. First round of filling on the gaps with some Bondo. Next is a second round with Tamiya grey filler, then a proper sanding and reinstating all the detail. Also got the initial resin parts in place for the wing fold mechanism. Thinning the inner surfaces sufficiently was stressful and tedious - you don't want to go too thin but the tolerances are so tight that you've got to push it a bit. If anyone has this set you'll notice that there is supposed to be an inner set of spars 1cm in from the edge (at the marked line) but these will be totally invisible and serve no structural purpose so I made an executive decision and ditched them as the thought of fiddling with tolerances twice was too much to contemplate!

-
'504 Tigre Italiano - w.i.p.
GusMac replied to Blimp's topic in LSM 1/35 and Larger Work In Progress
Looks great, did you apply the zimmerit yourself? -
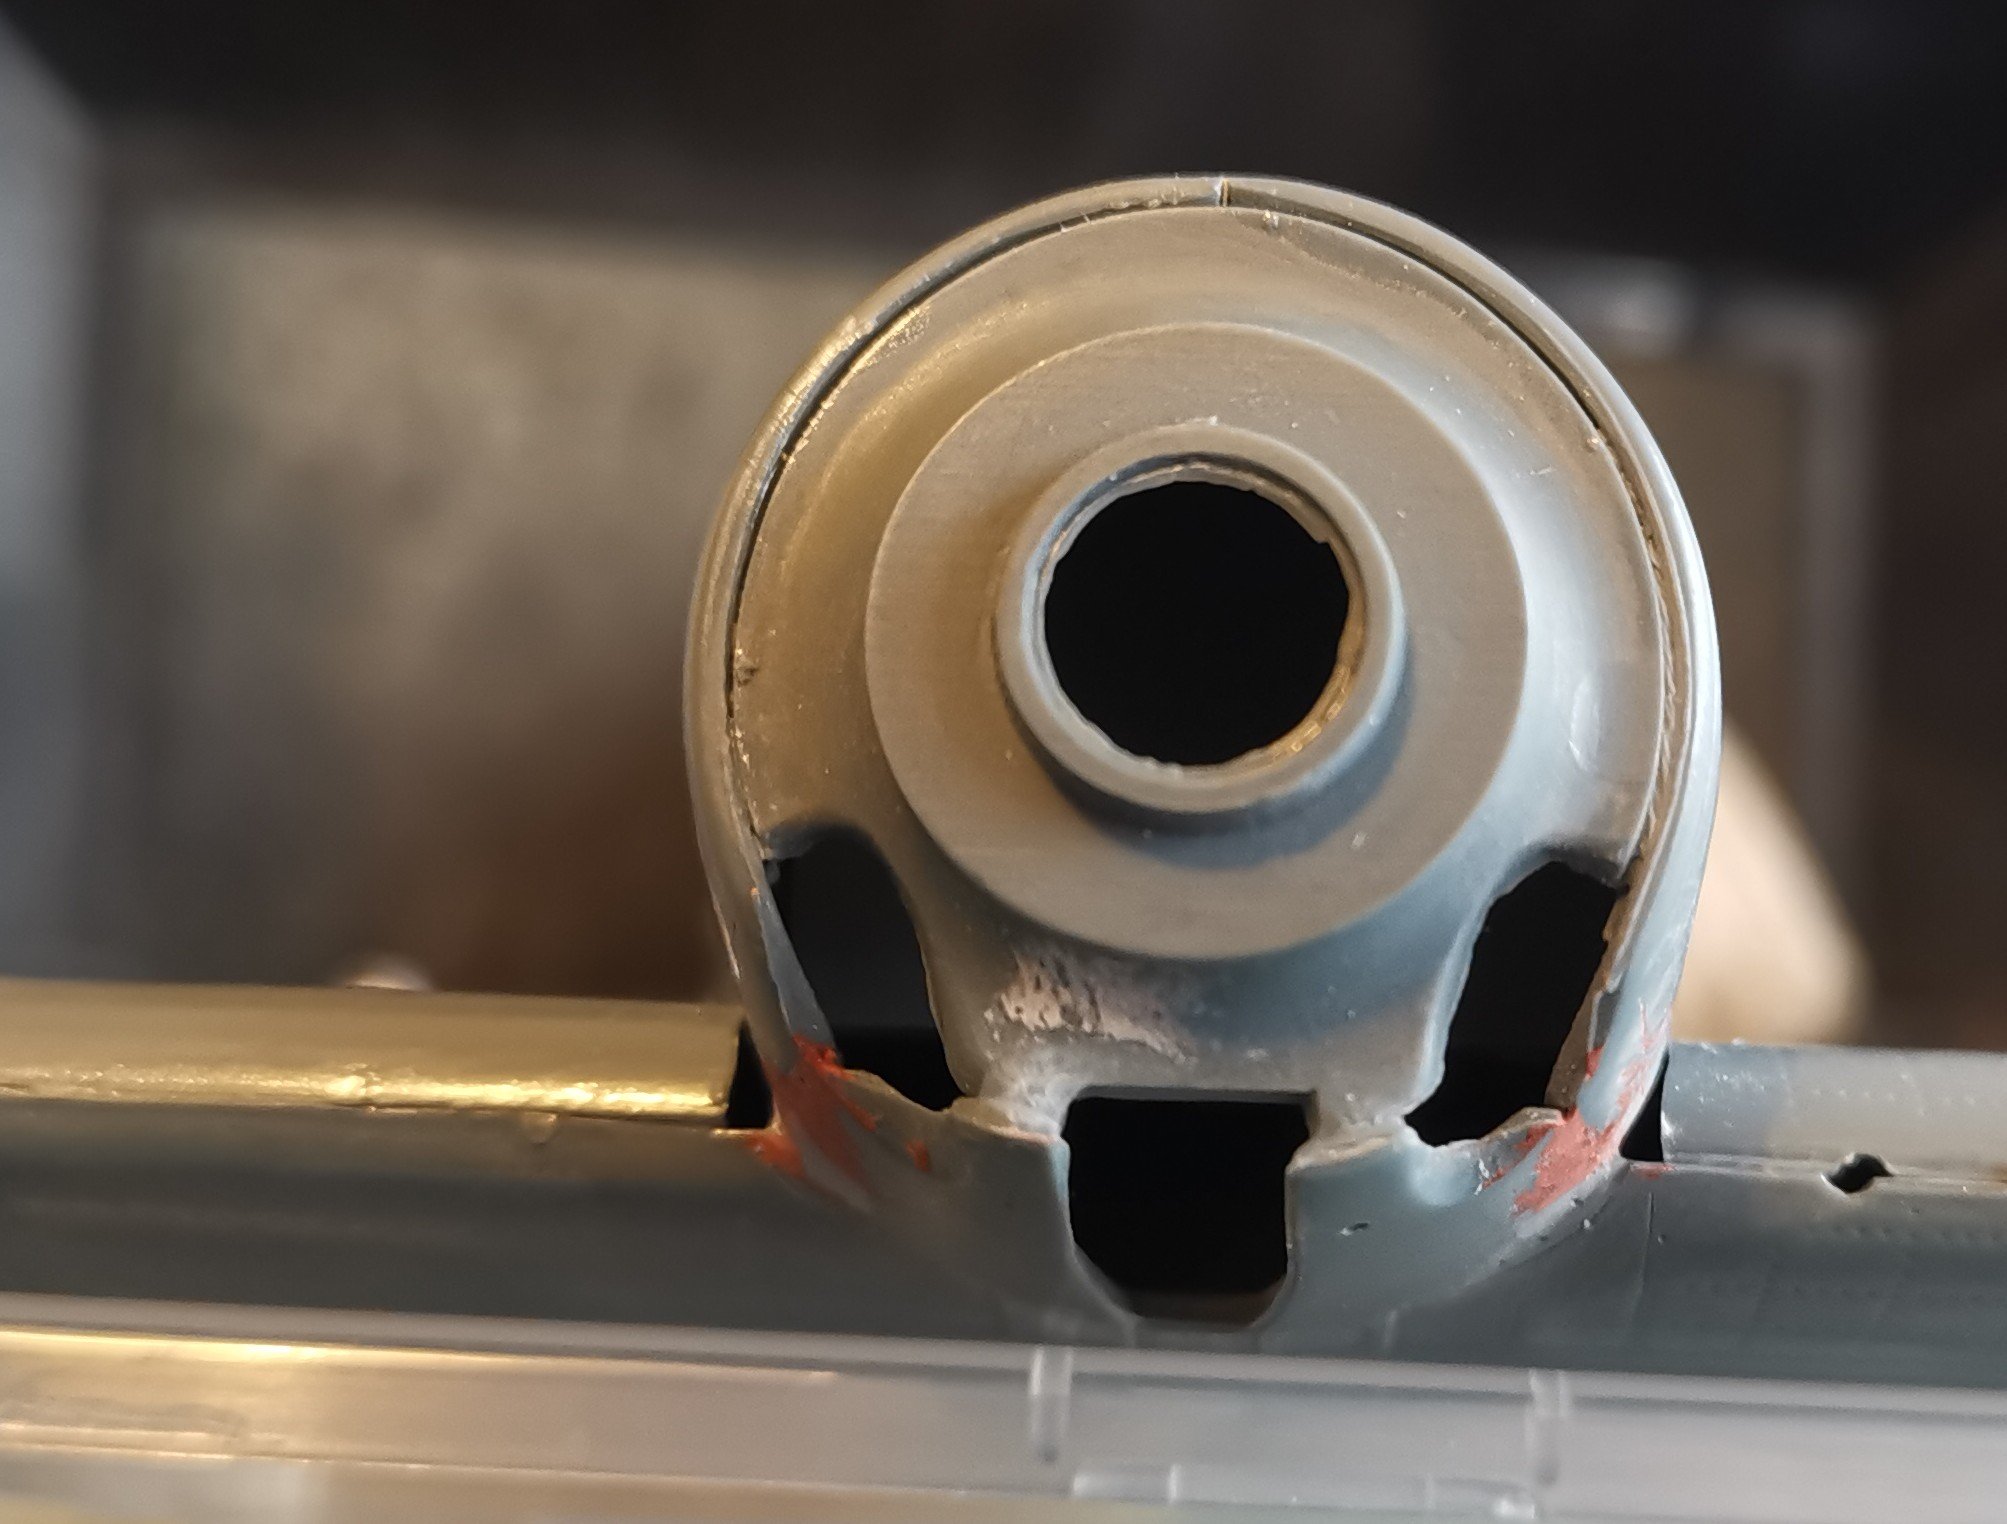
No going back on the wingfolds now! 😆 Seems wrong taking a razor saw to a kit like this but the deed is done now.
-
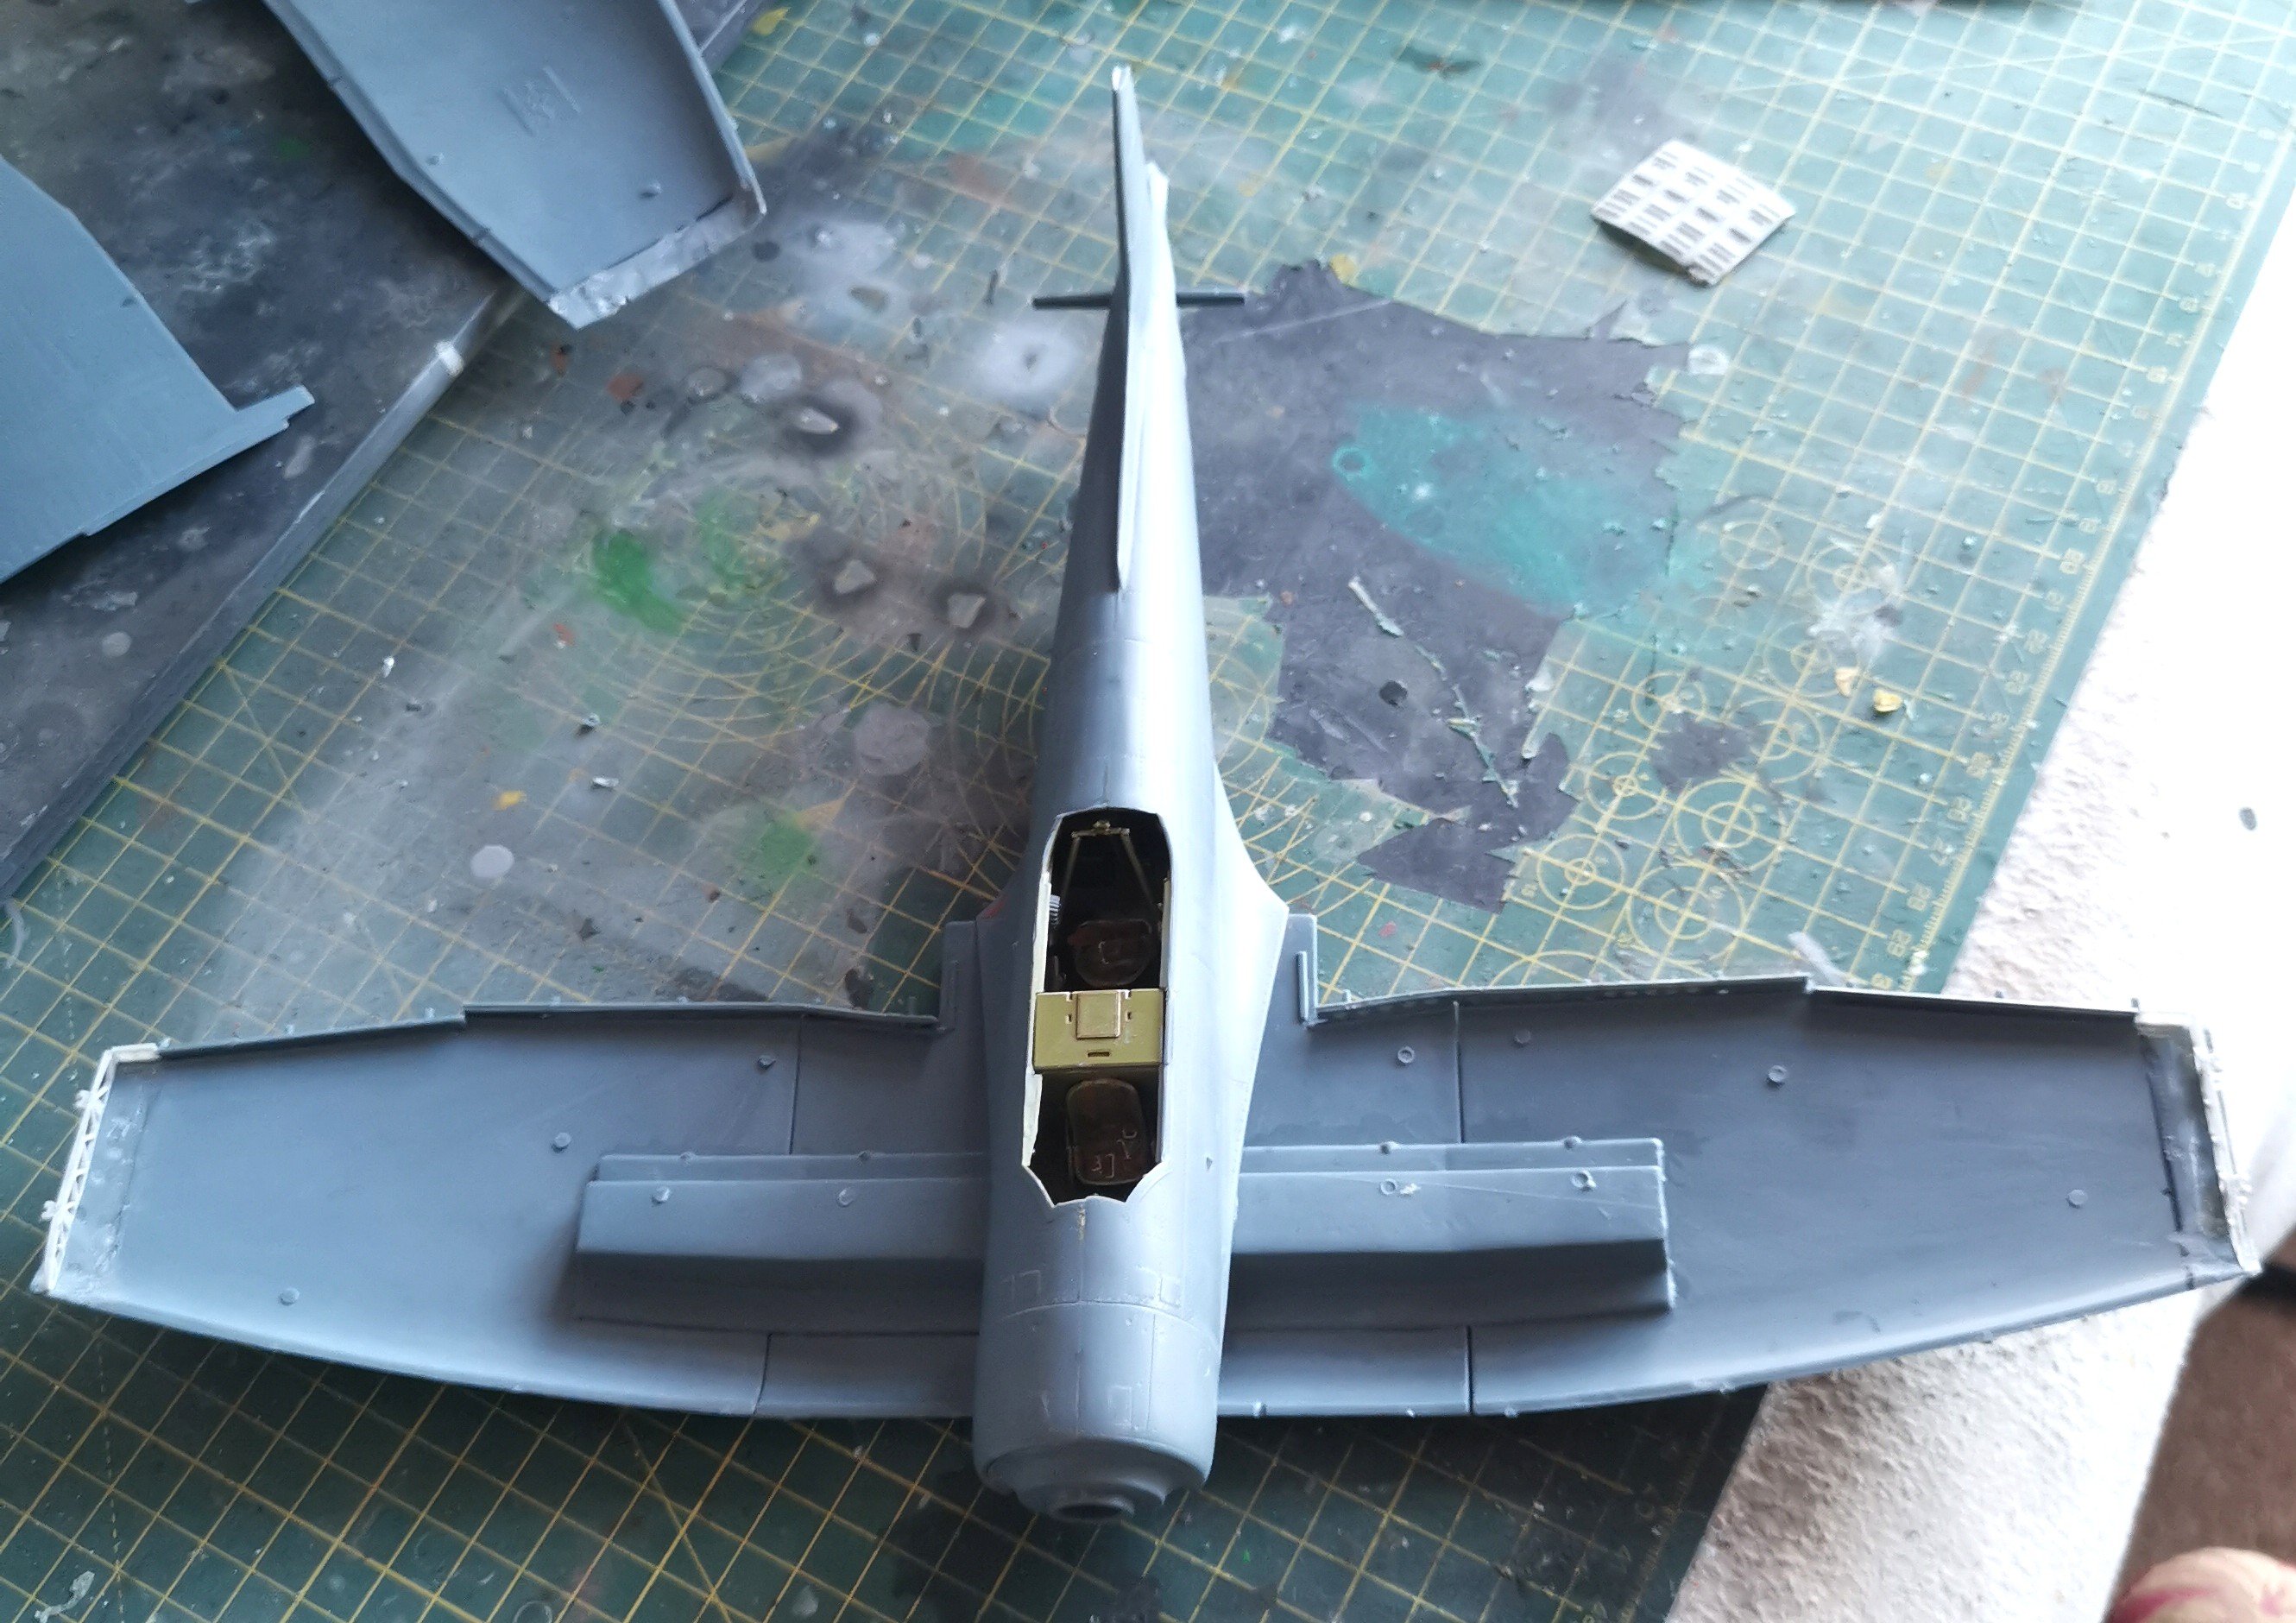
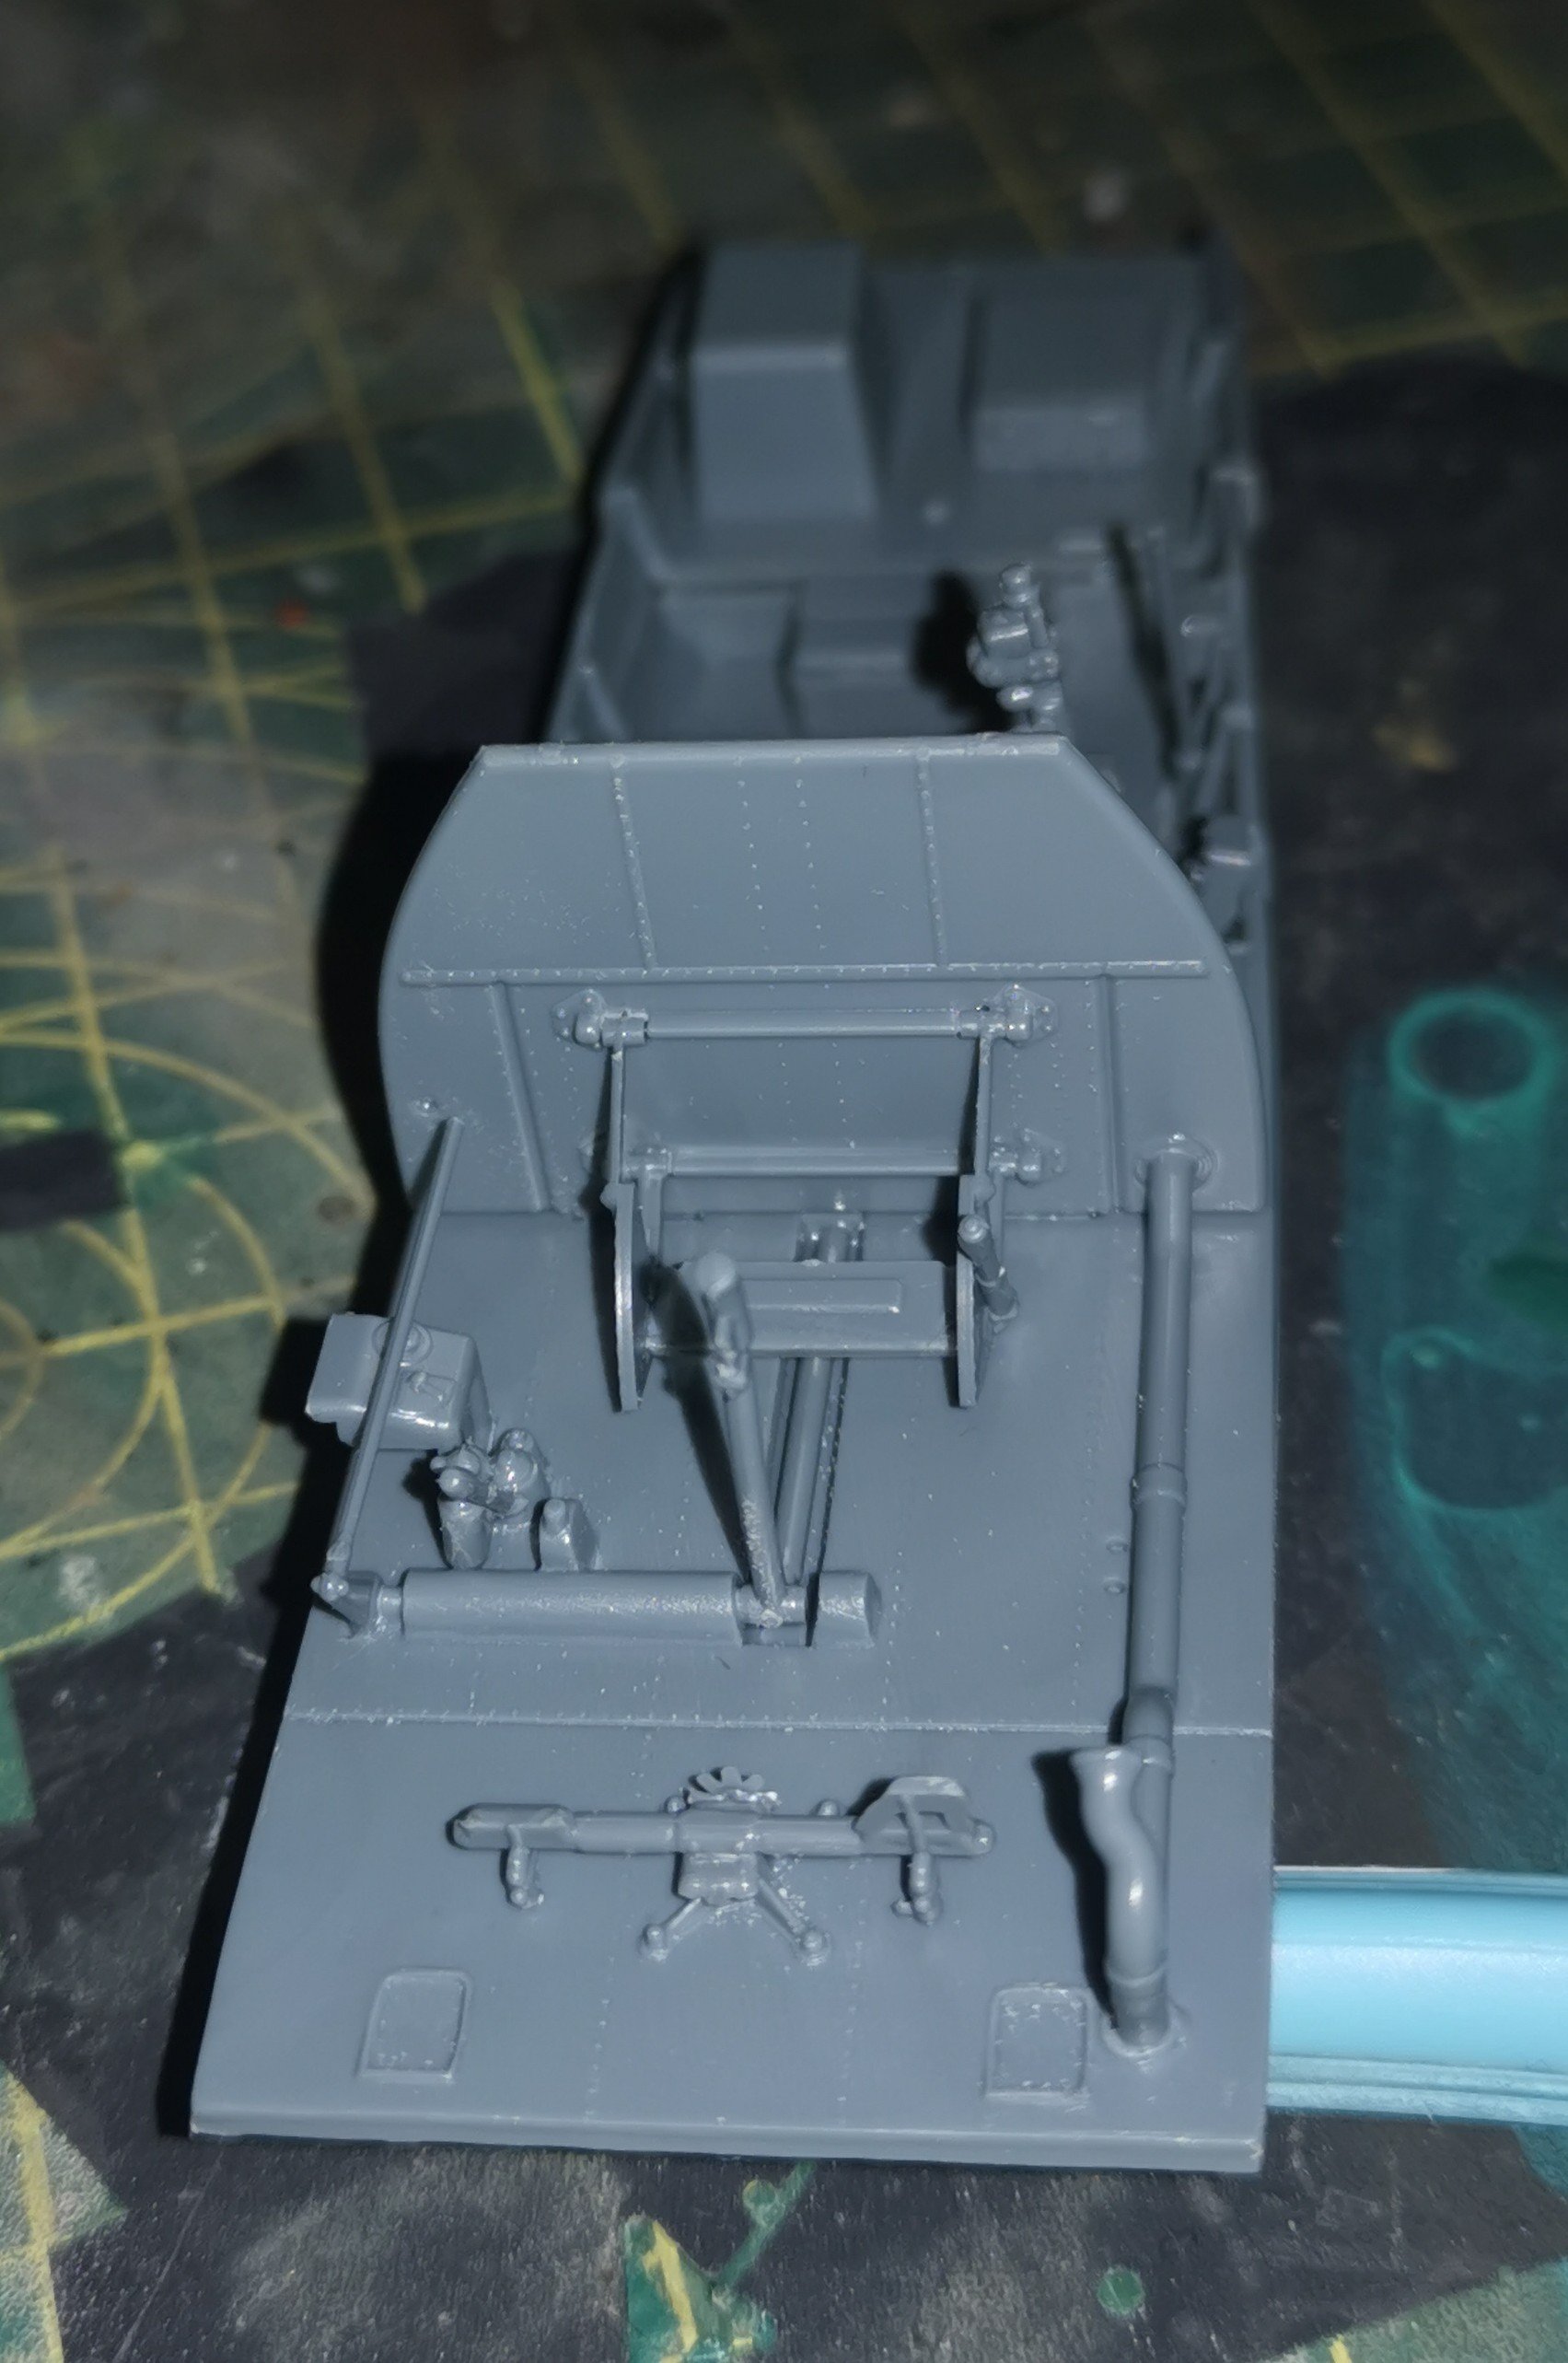
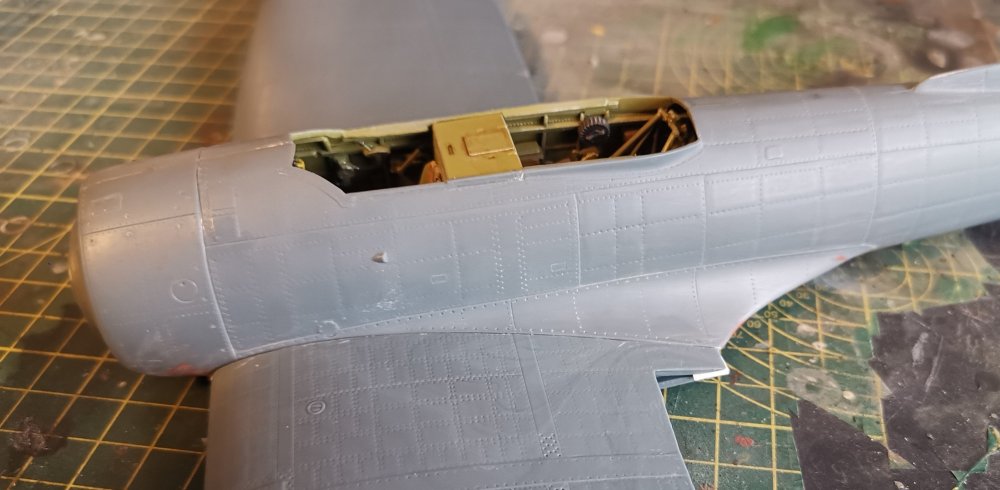
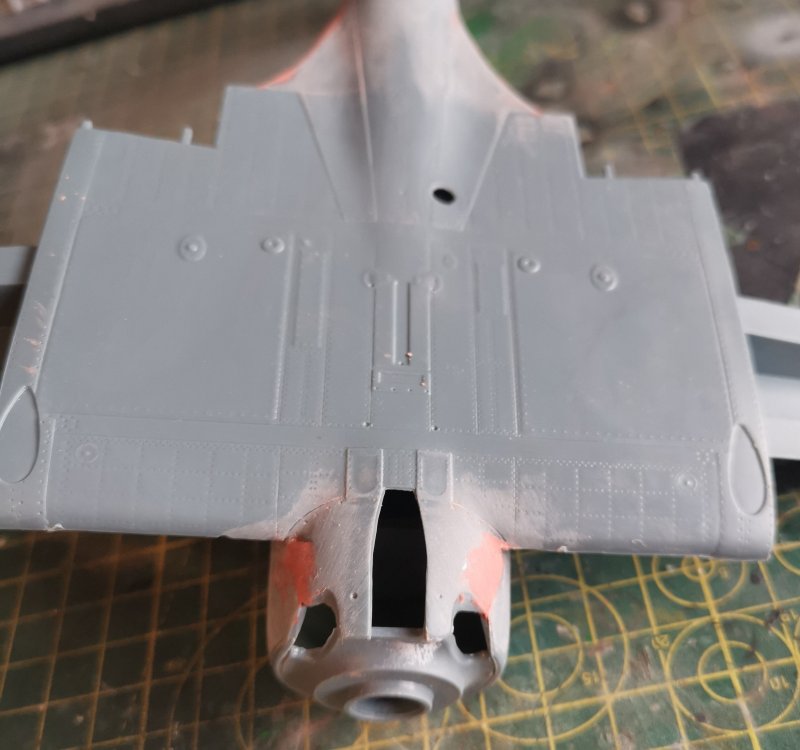
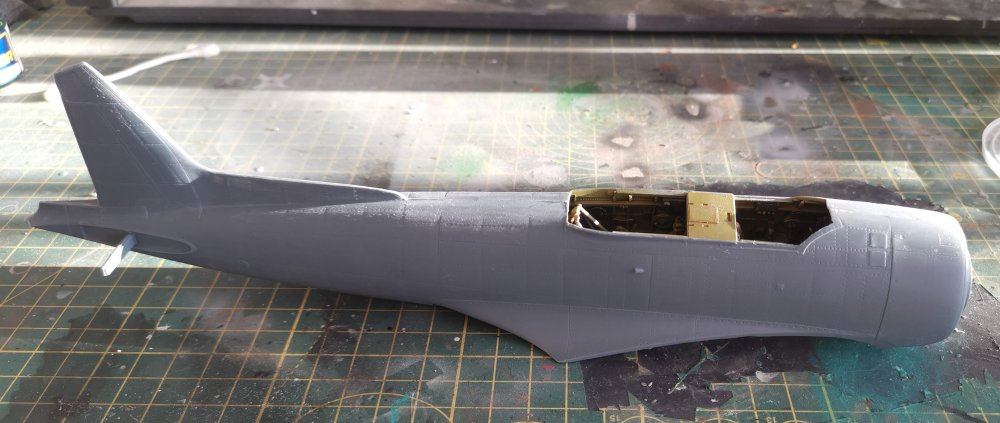
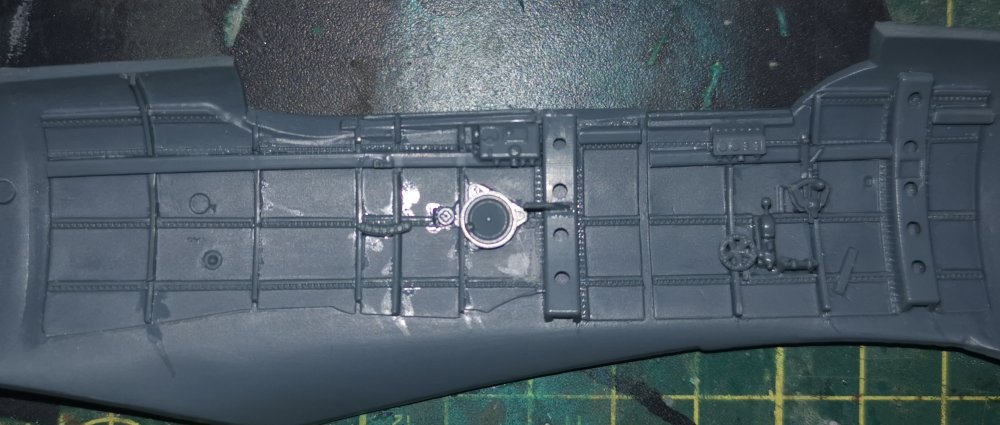
Fuselage is together now and the seam clean-up is completed. Just a tiny amount of filler and CA needed as the fit is very good - the spar for the tail fins and the firewall line everything up nicely which compensates for the lack of location pins. There's a fair bit of rescribing to do but that's a task that I have to be in the mood for, so it'll wait for a bit until it's time to join the wings to the fuselage. That'll be a while away as I think it's going to take a bit of time to get the wing fold mechanism all done.


-
Visiting Glasgow, Scotland - tips for places to see?
GusMac replied to telepatu's topic in General Discussion
Hi Jani Yes, Dunnottar is definitely worth seeing as the location is stunning and you can get nice fish and chips and ice cream in Stonehaven! If you have time it's worth popping in to the castle at Glamis as well - many interesting connections to the royal family and Macbeth. Gus -
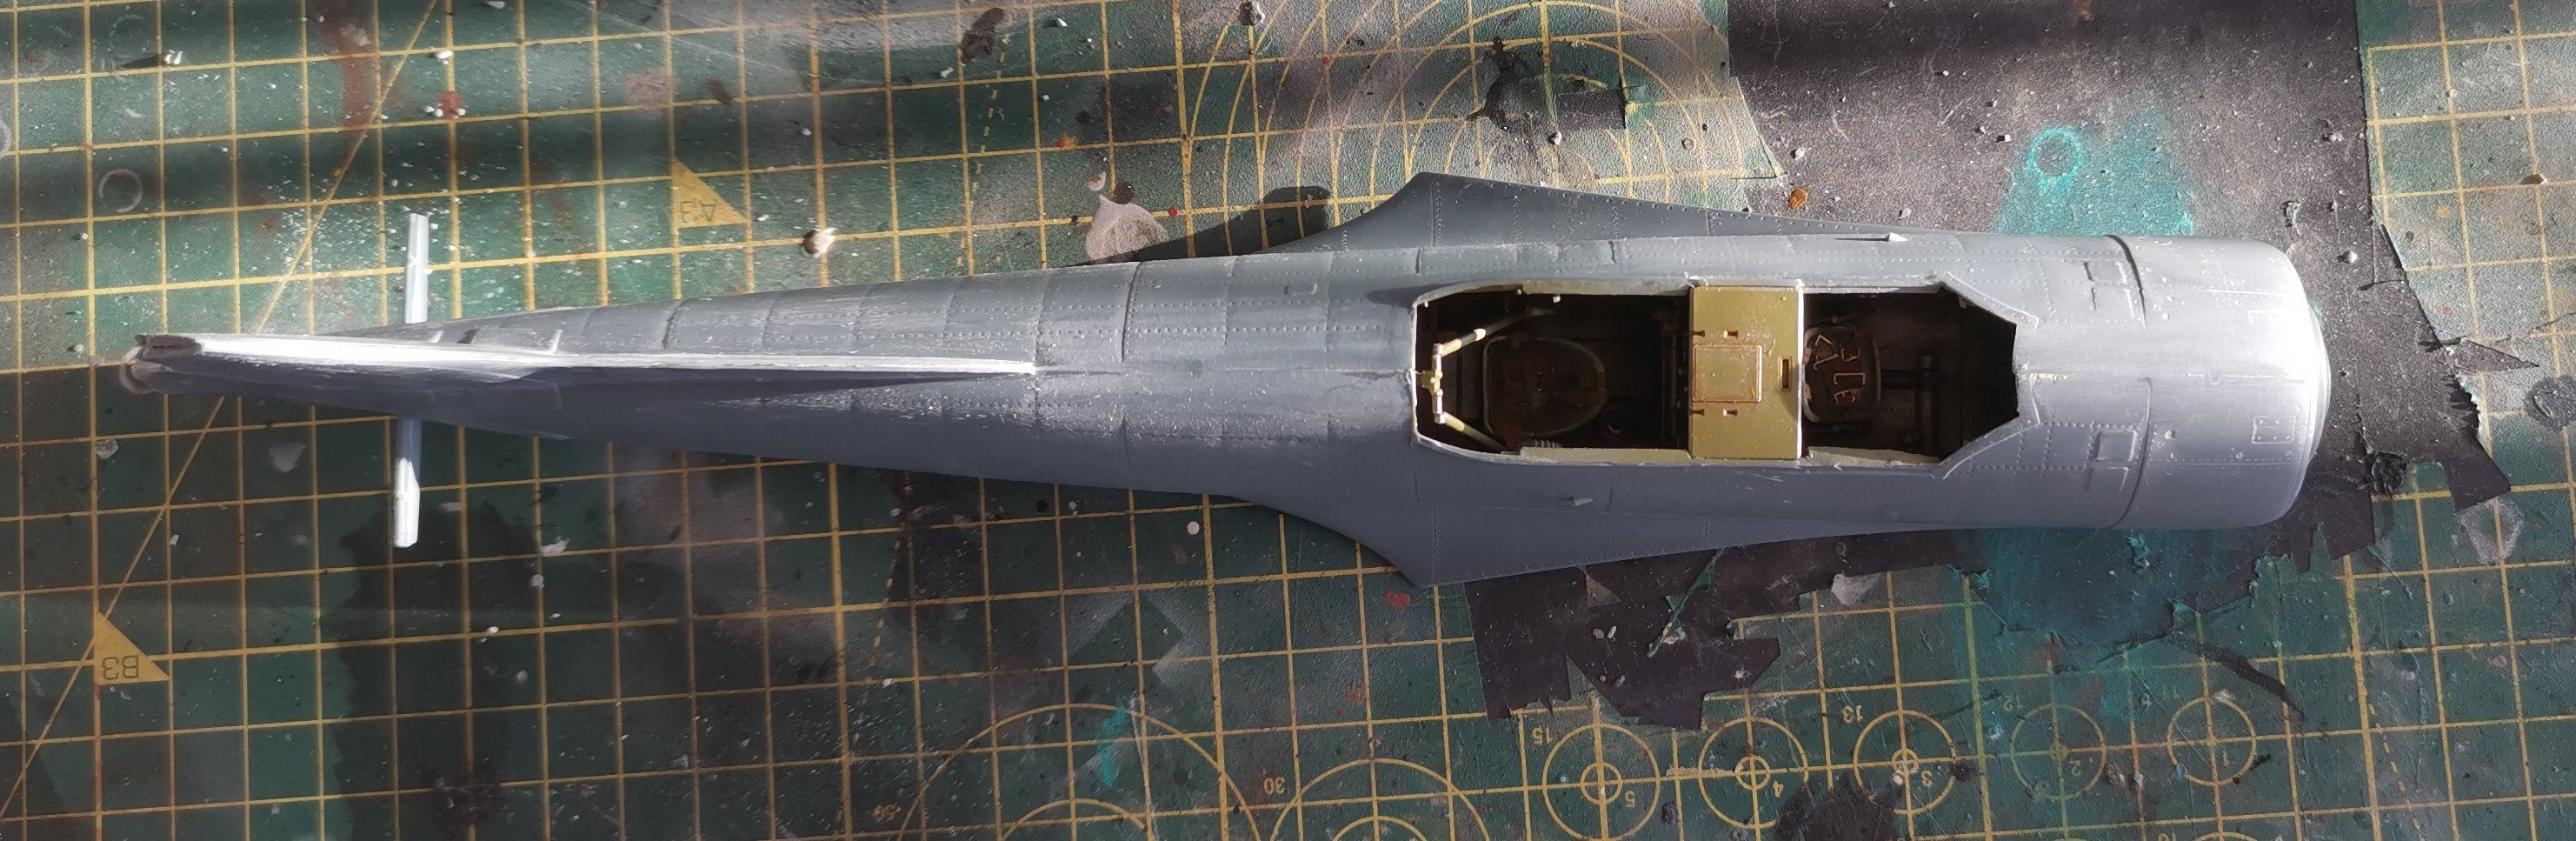
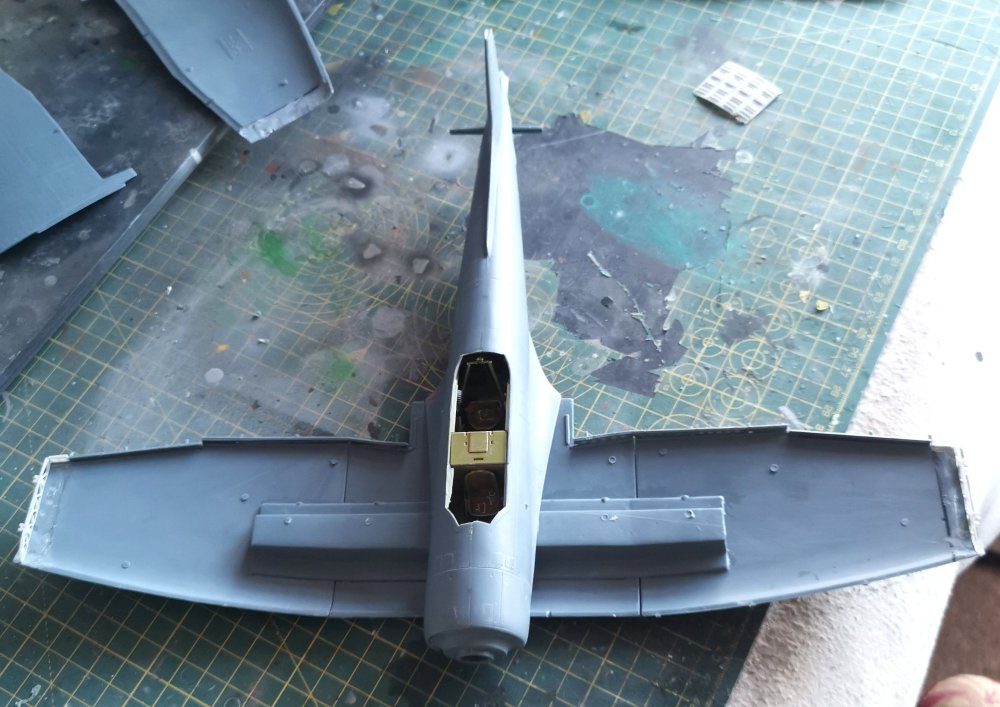
Thanks Rob. Looking from above and the side, the IP does sit straight. I see what you mean in the photo though. I wonder if it's just because of the combination of straight and curved edges in that area. I've dry fitted the fuselage and it all fits really nicely with no issues which is a pleasant surprise given how busy the sidewalls and cockpit floor are.
-
Just about ready to join the fuselage halves. Everything fits nicely so far, so hopefully the rear spar and tail wheel bay don't screw that up! Definitely a fun build so far.


-
Love the paint job, looks great in that scheme and a bit different to the usual worn look.
-
Definitely tempted to get one of these to accompany the Attacker I finished earlier in the year. Would show the FAA transition from prop to jet nicely. The price seems very reasonable for what's being offered.
-
Visiting Glasgow, Scotland - tips for places to see?
GusMac replied to telepatu's topic in General Discussion
Hi Jani No, you're not really missing any others with that list. I'd agree that the Solway museum is the better of the two in the south but they're only about a 45 min drive apart so definitely possible to visit both in one trip. The Montrose museum is only about 10 miles from where I am and definitely worth a look if you're close by but I'm not sure it justifies a 2 hour plus drive from Glasgow. East Lothian is definitely the best of the bunch. For 'non-aviation' stuff, Loch Lomond is always worth a trip and Stirling castle and the Wallace Monument are fairly close to Glasgow. The Burrell Collection out in Poloc at the west end of Glasgow and the Kelvingrove museum are also worth a visit. Loads of great places to eat and drink in Glasgow as well to show that Scottish food is not just pies and deep-fried Mars bars! Cheers, Gus -
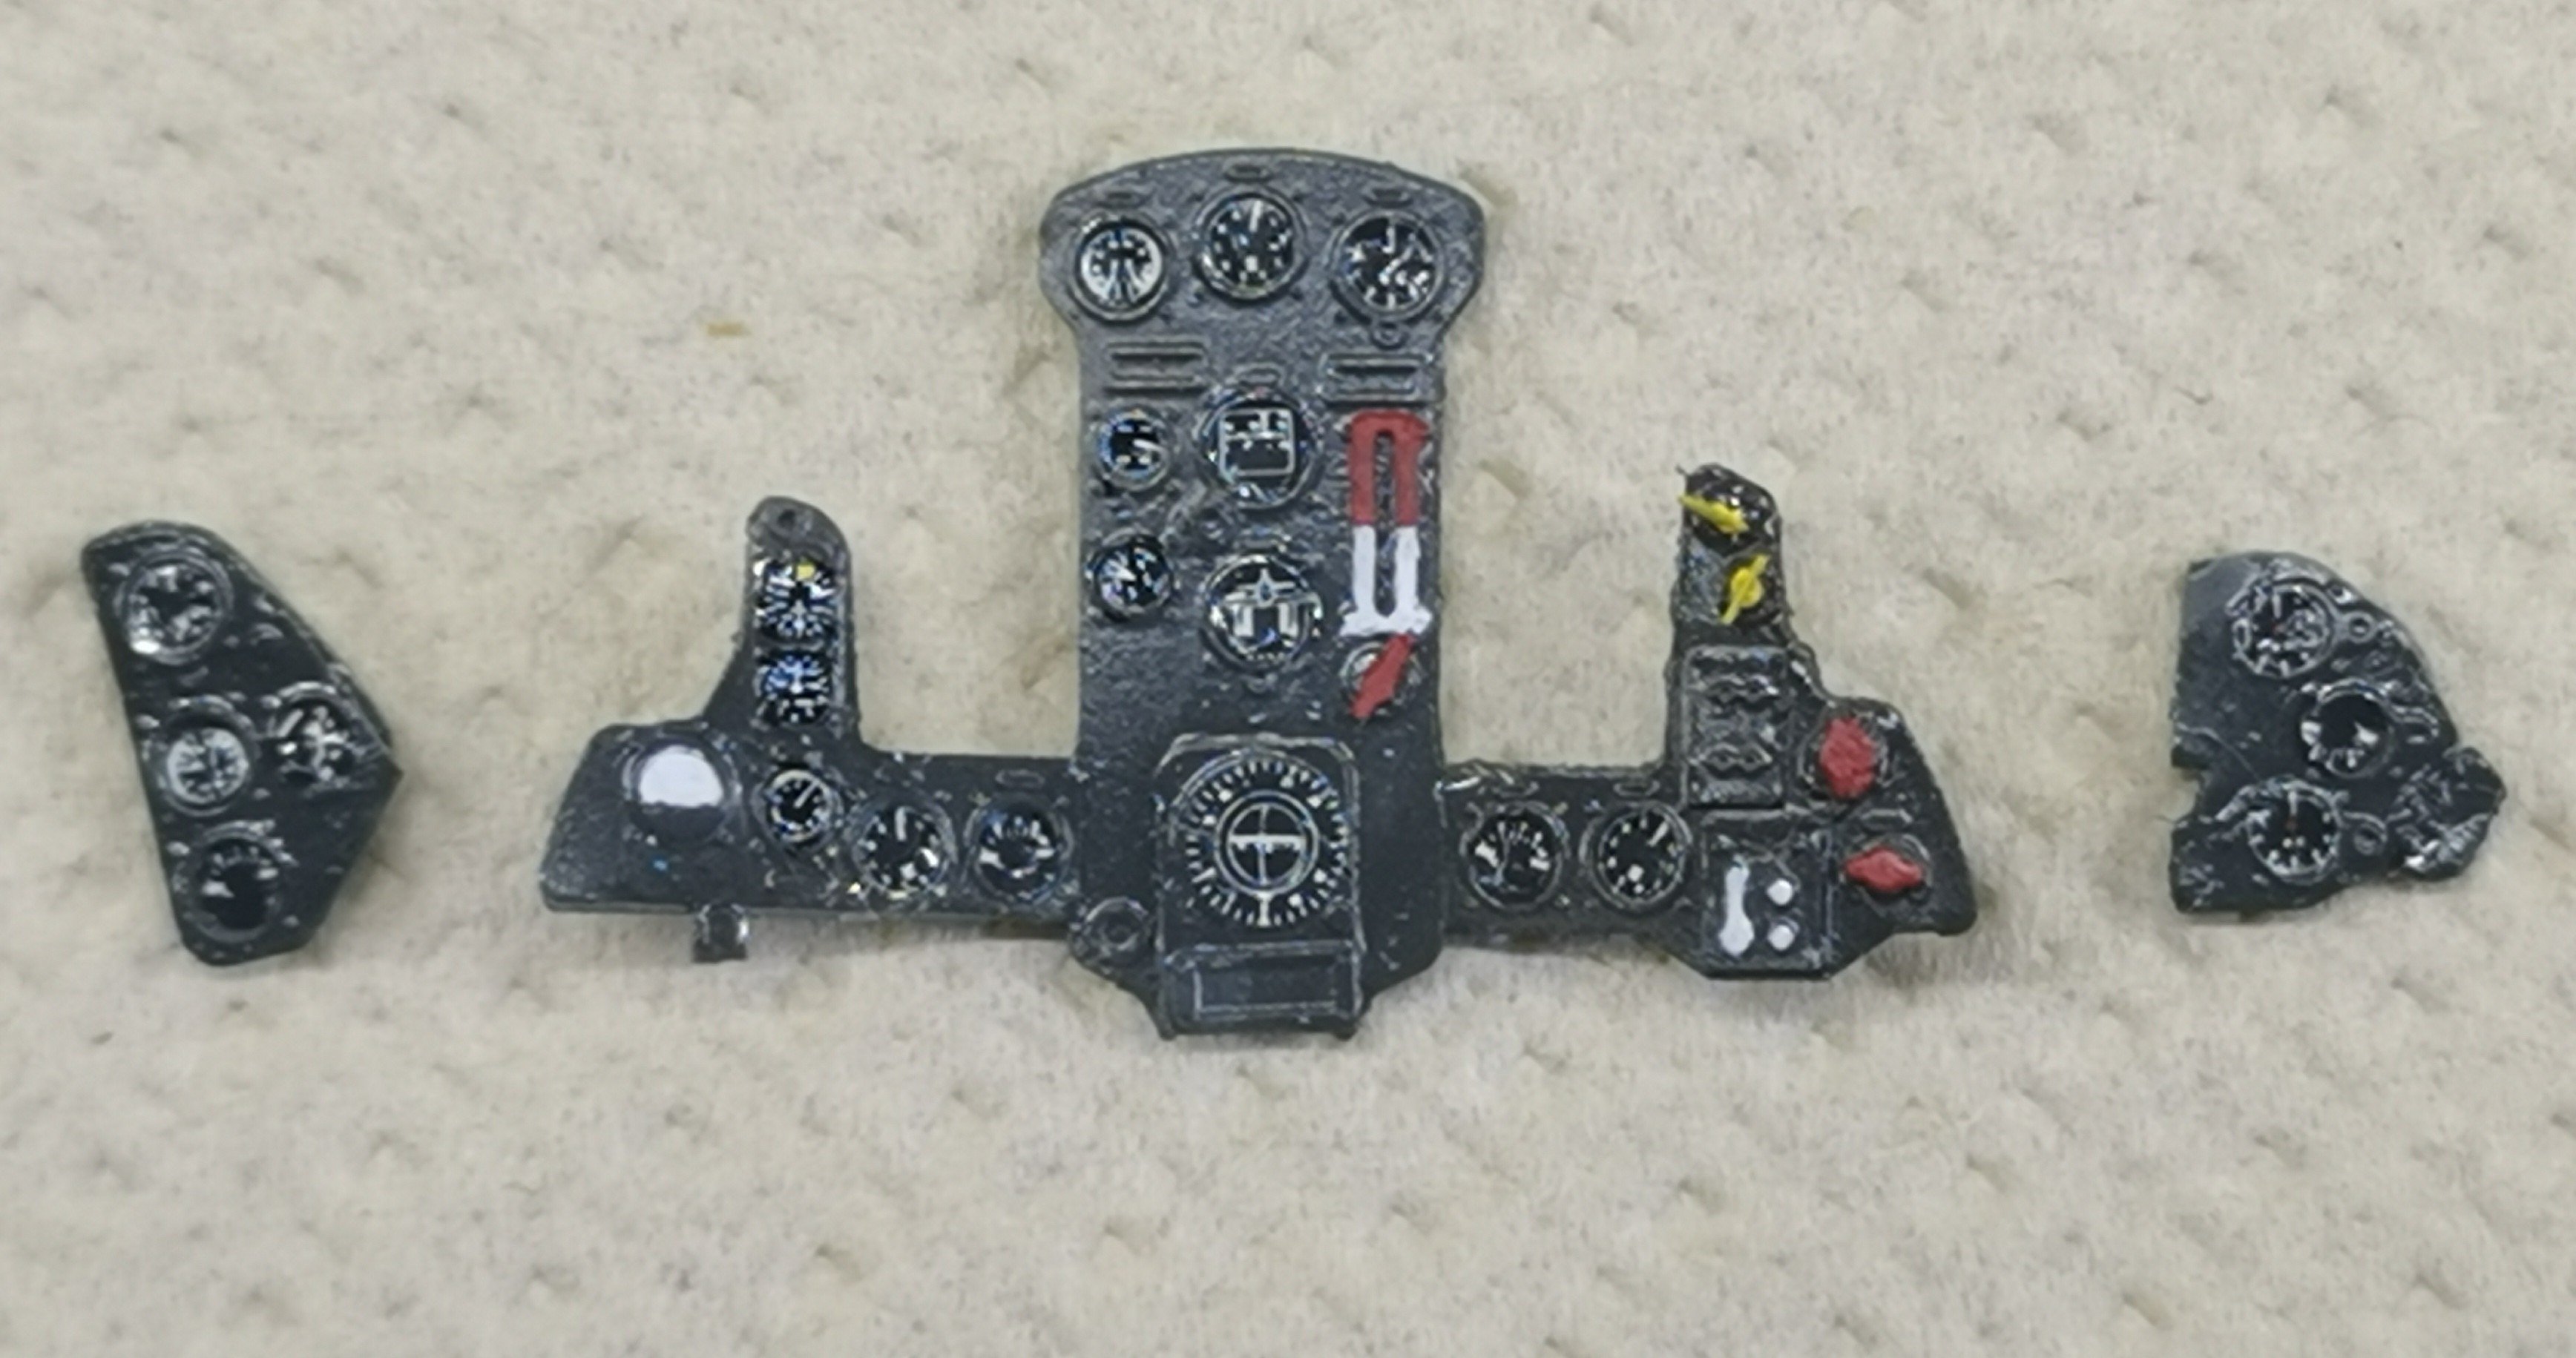
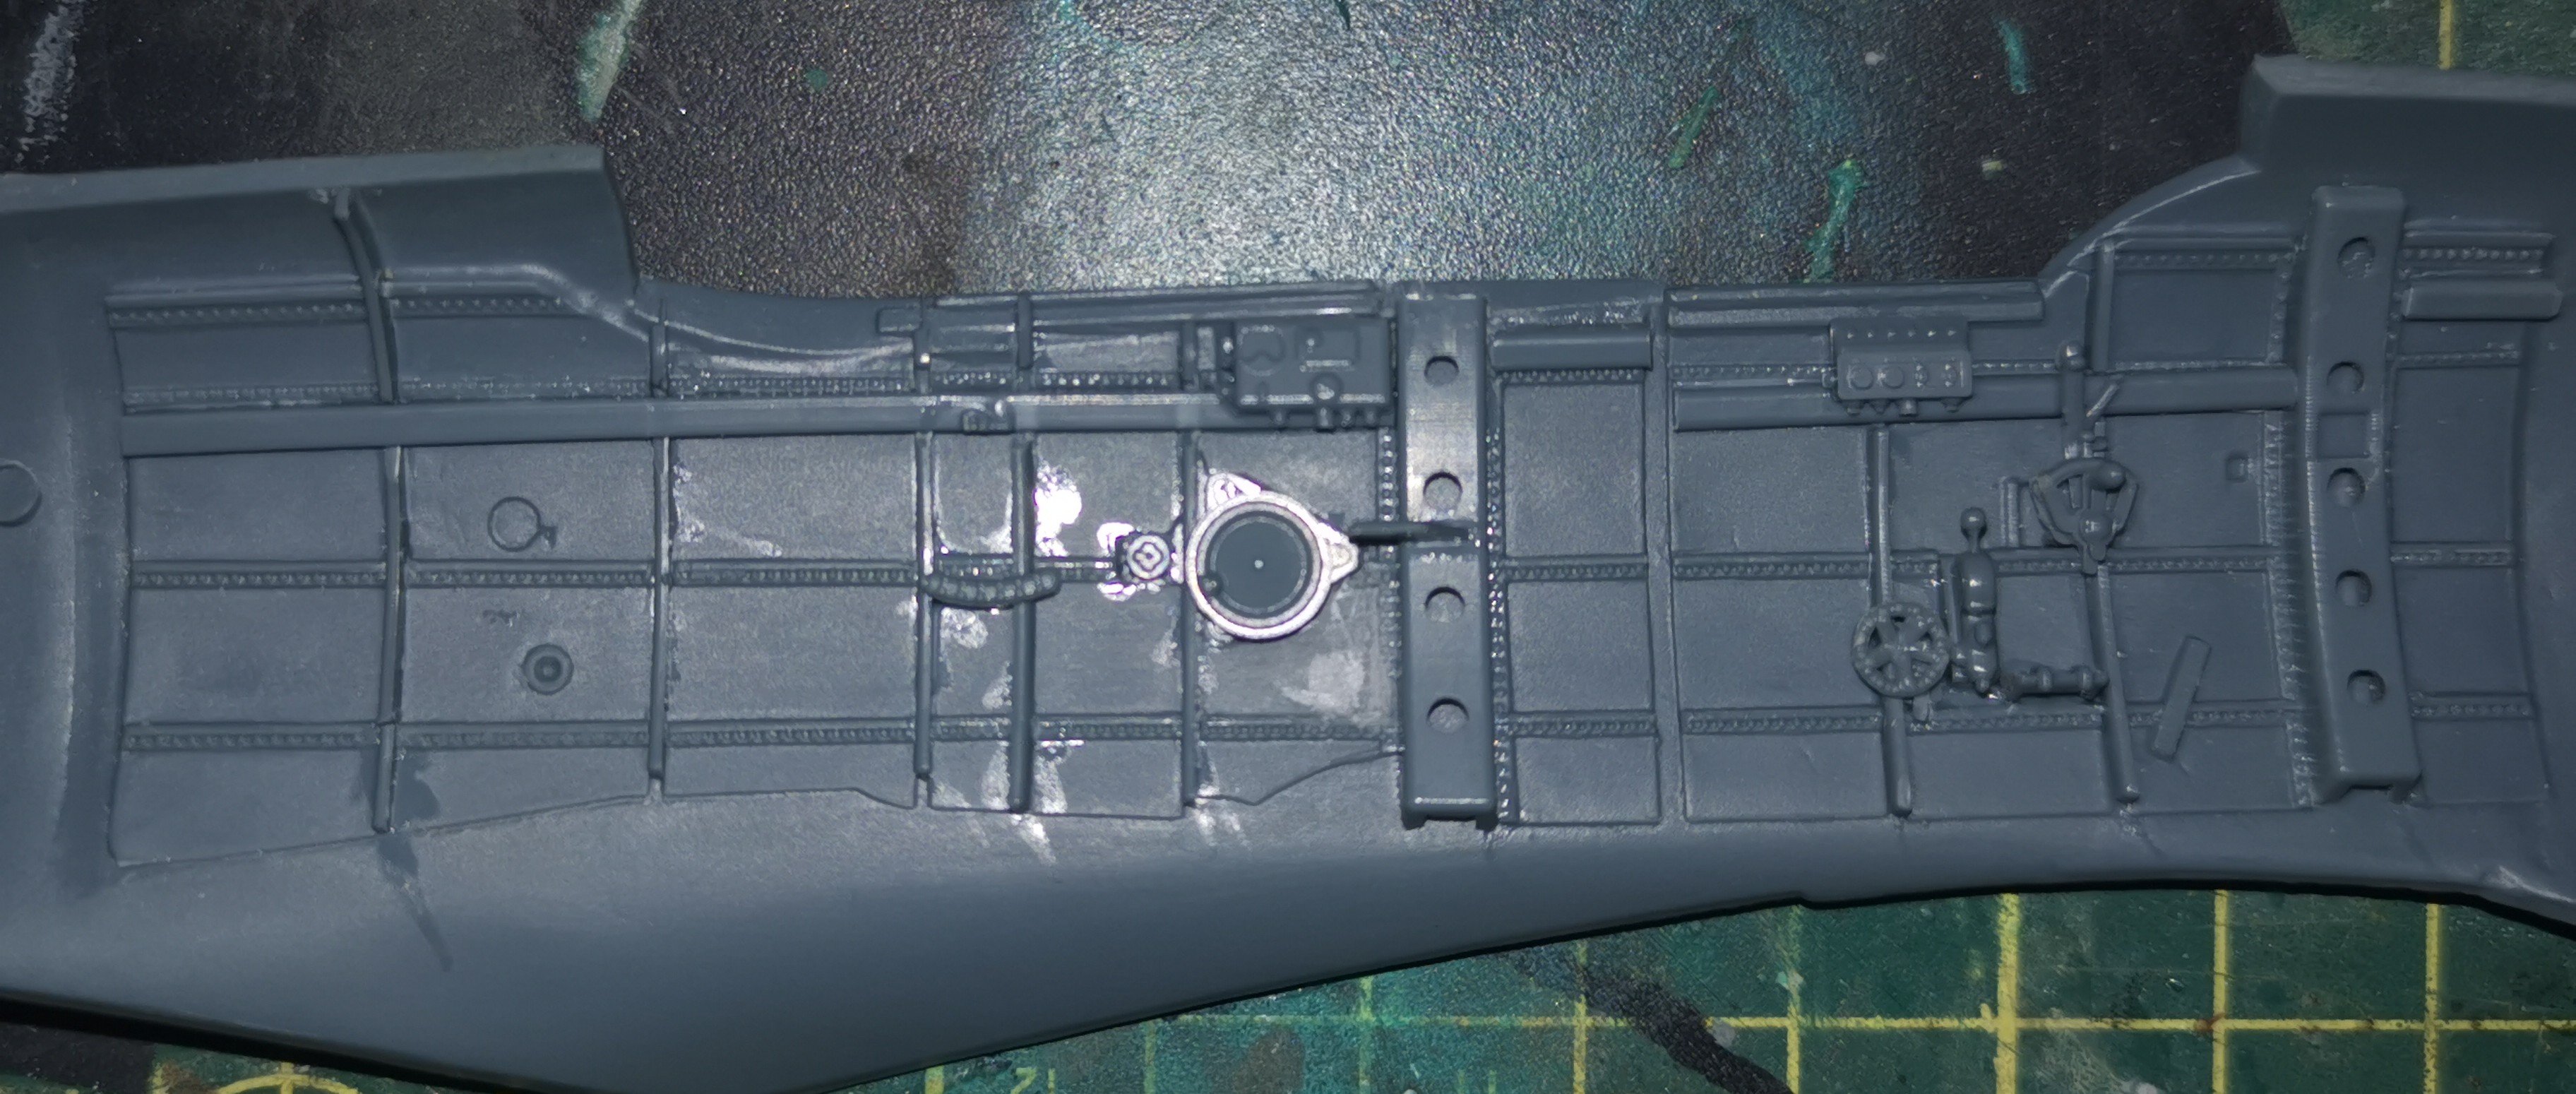
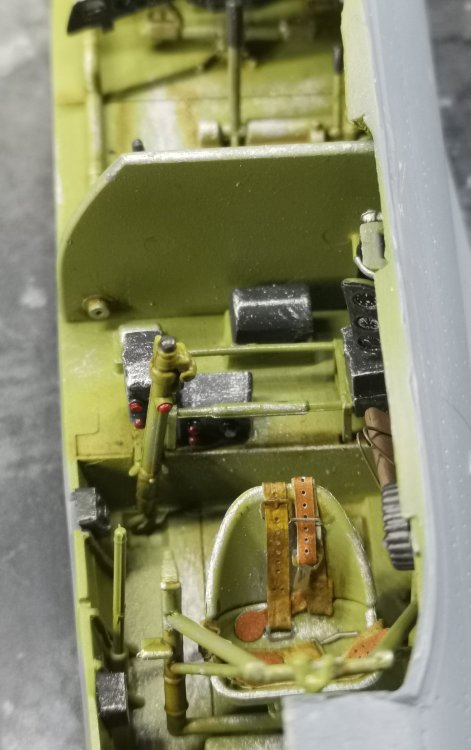
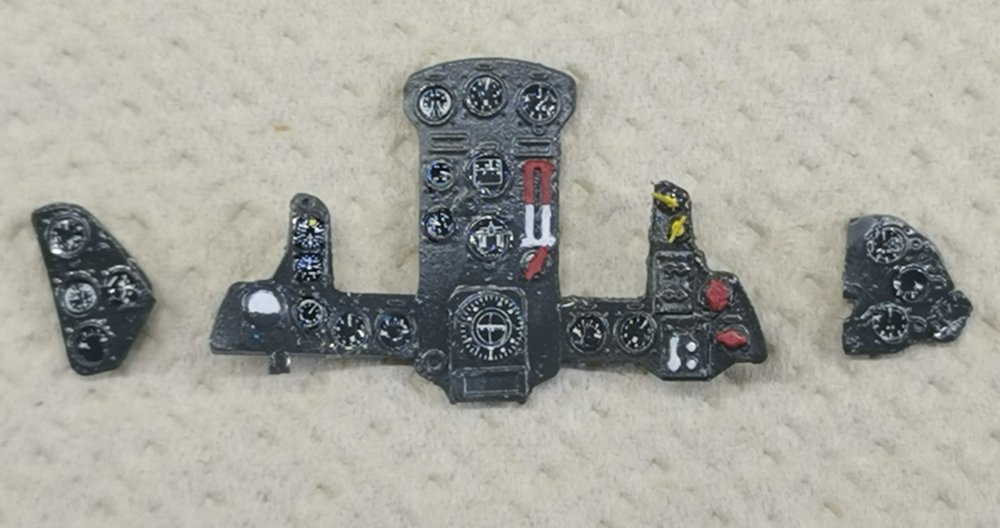
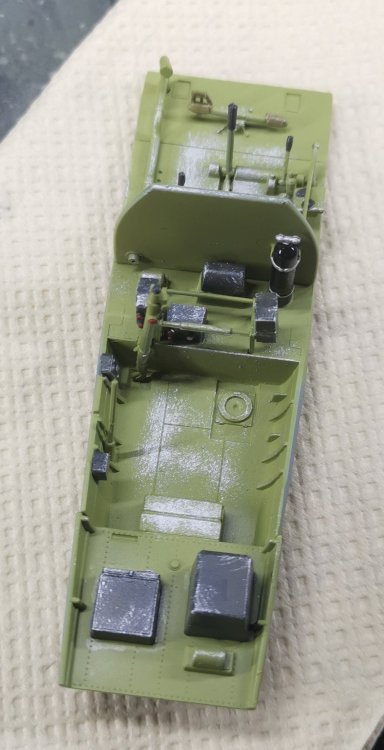
I should've mentioned I used Gundam markers for the first time on the cockpit dials and switches - very impressed with most but the red is too dark and translucent for my taste.
-
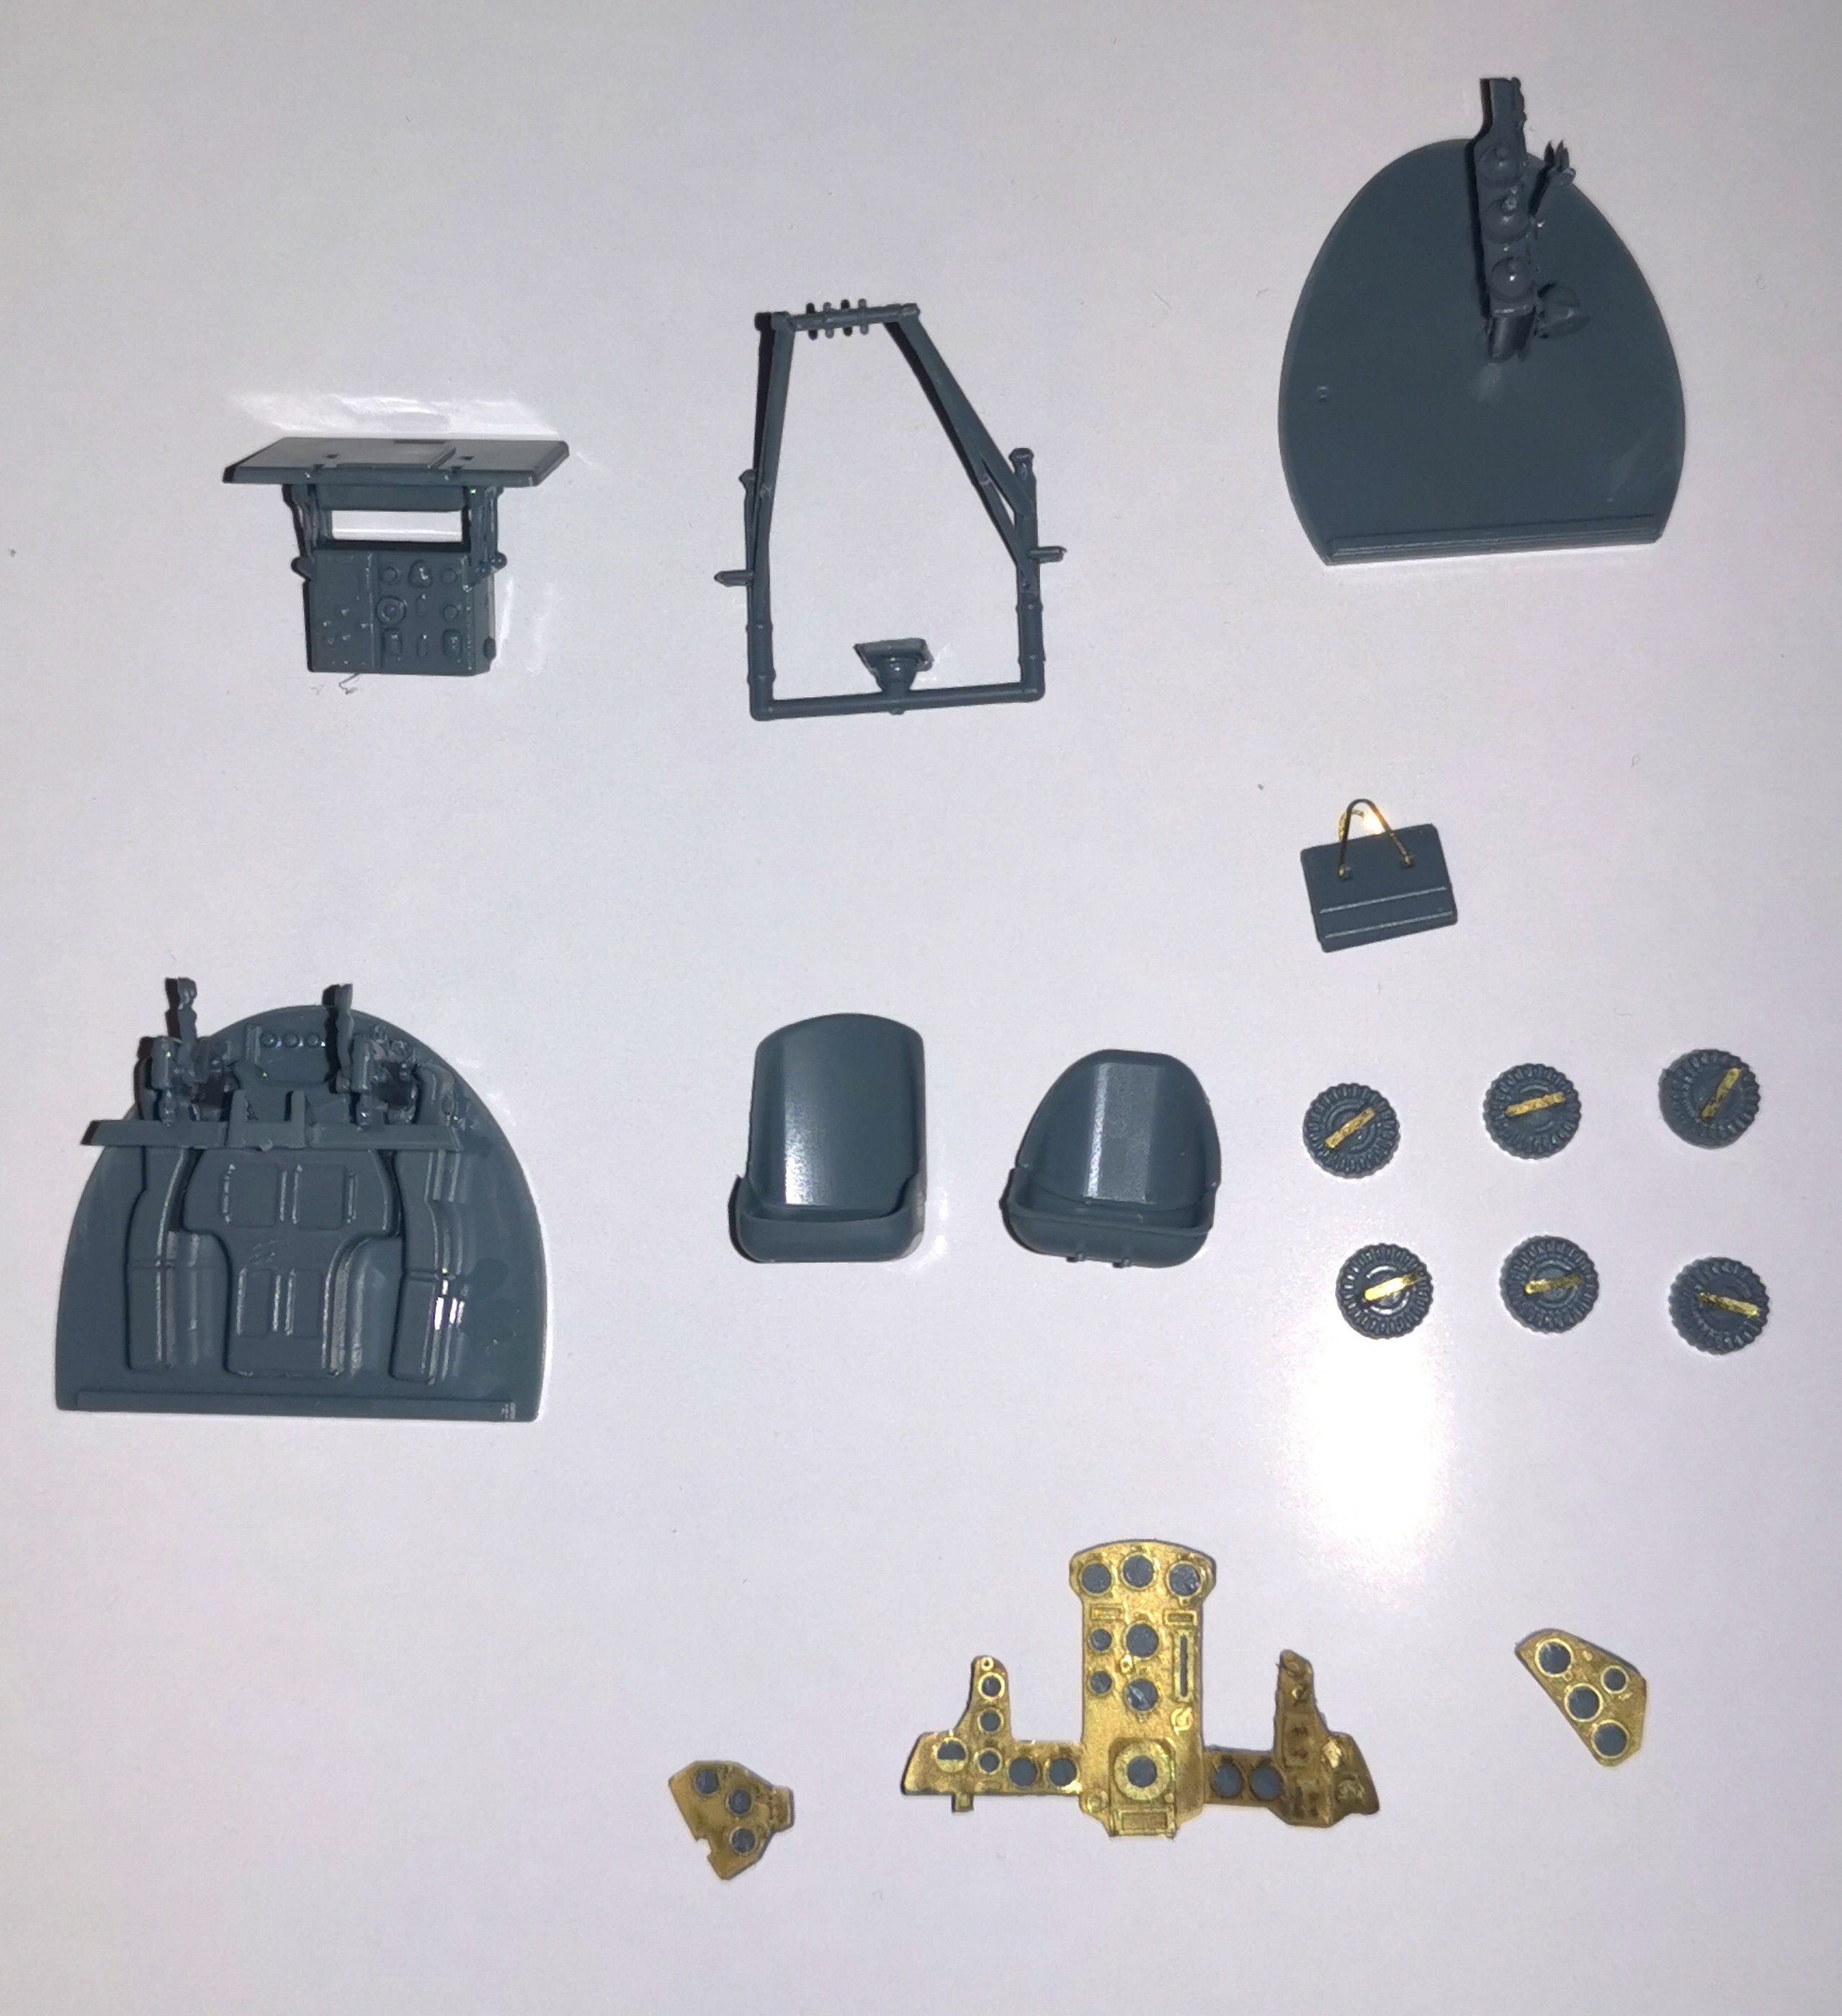
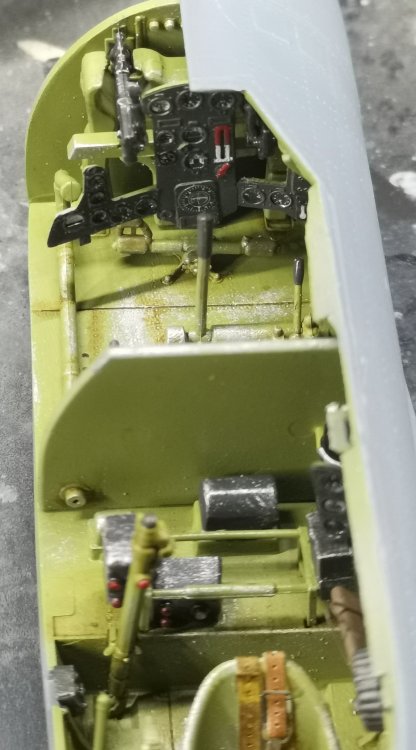
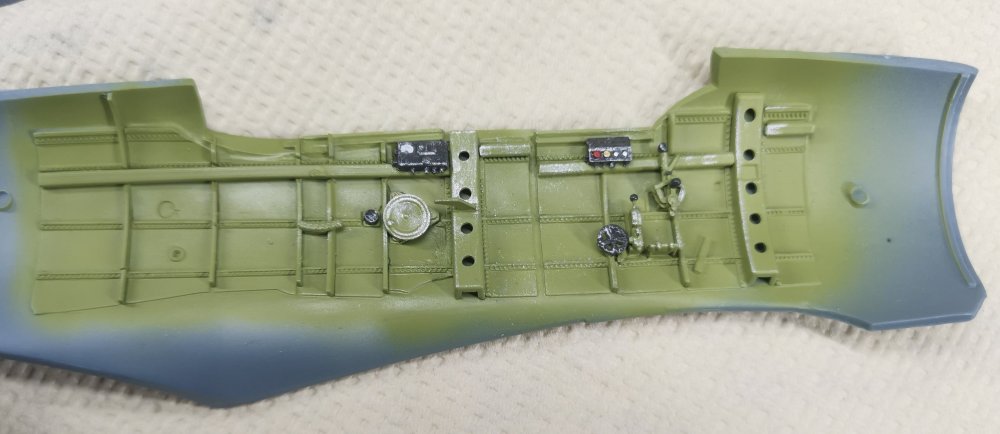
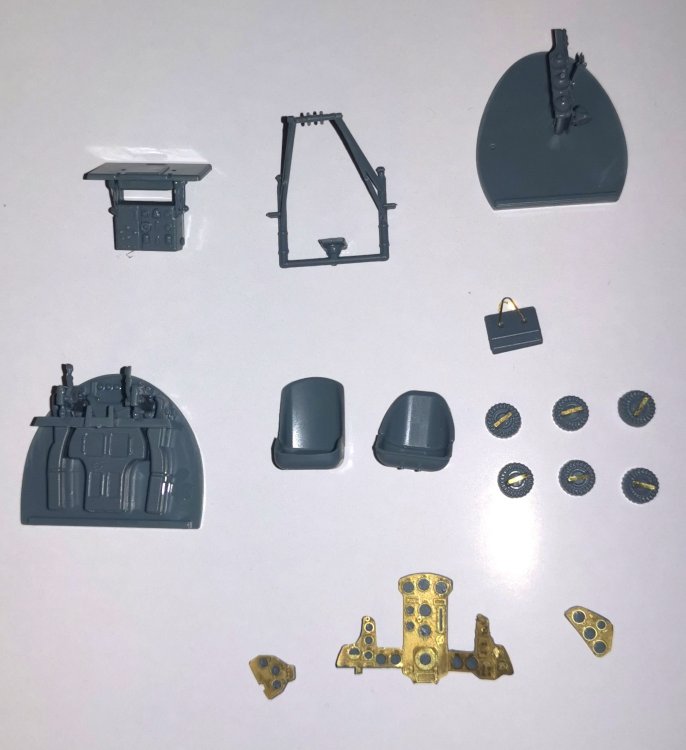
Got the instrument panels done with some detail painting and Airscale decals. Flat coat and gloss over the dials to come.
-
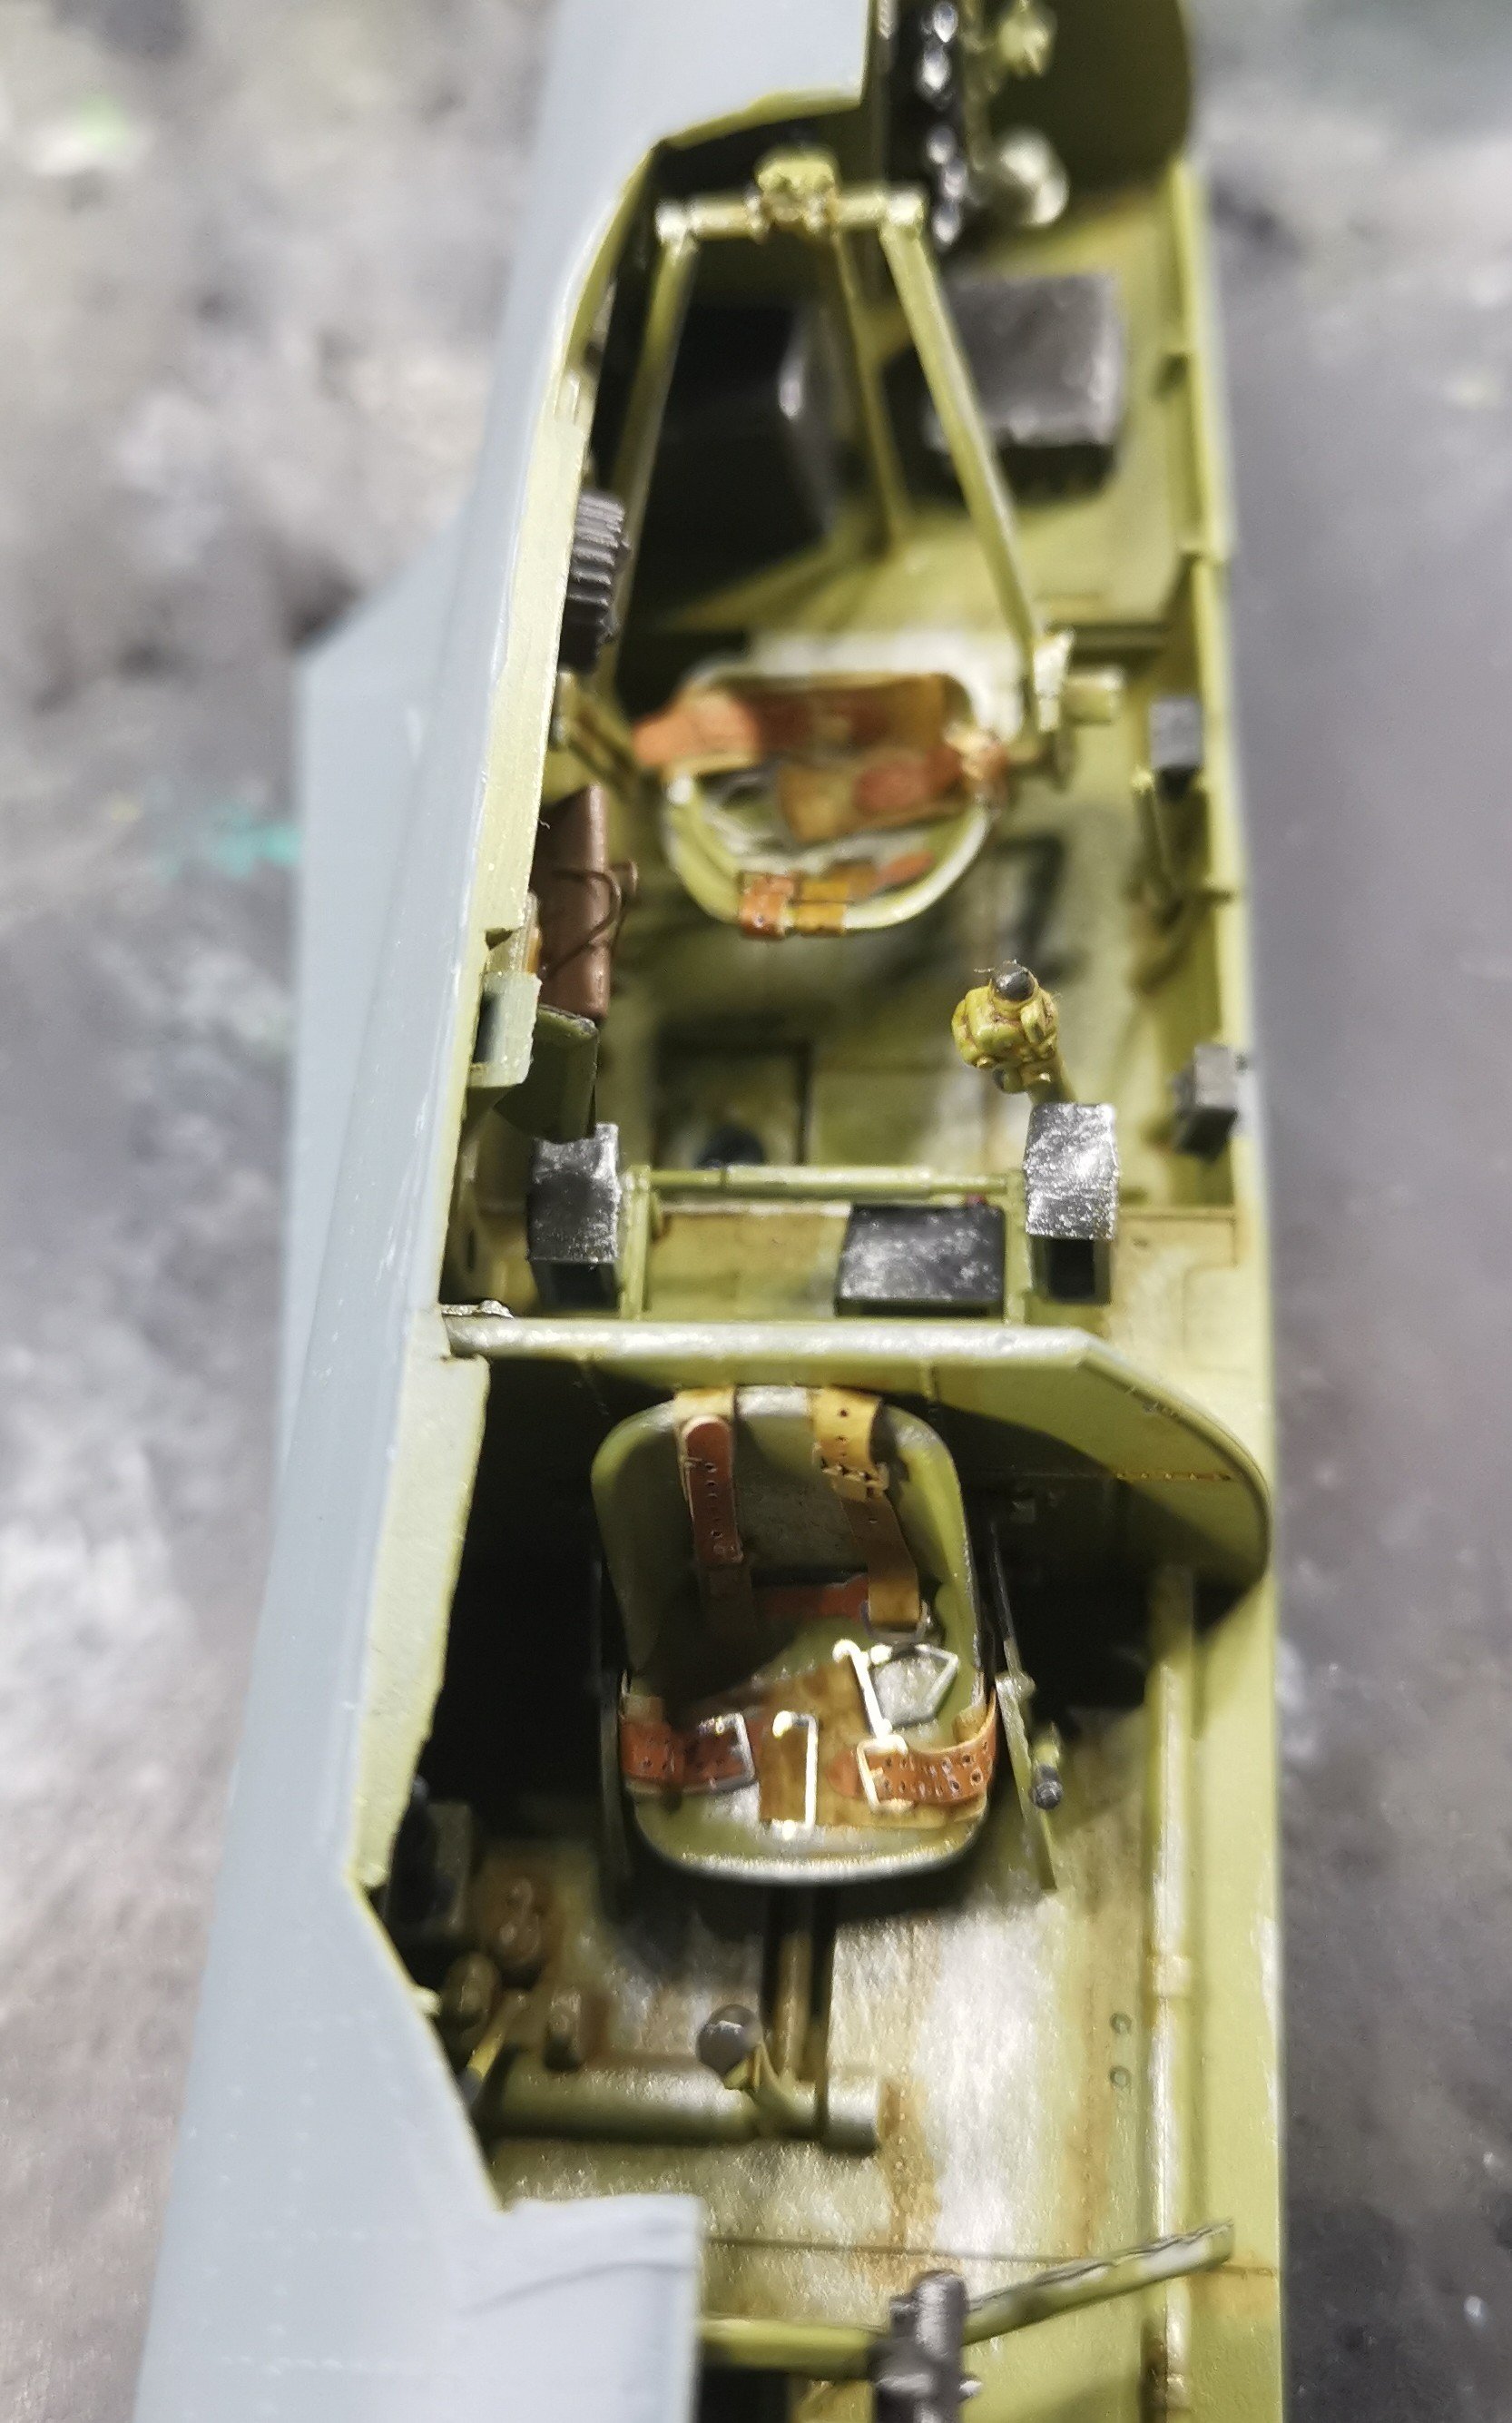
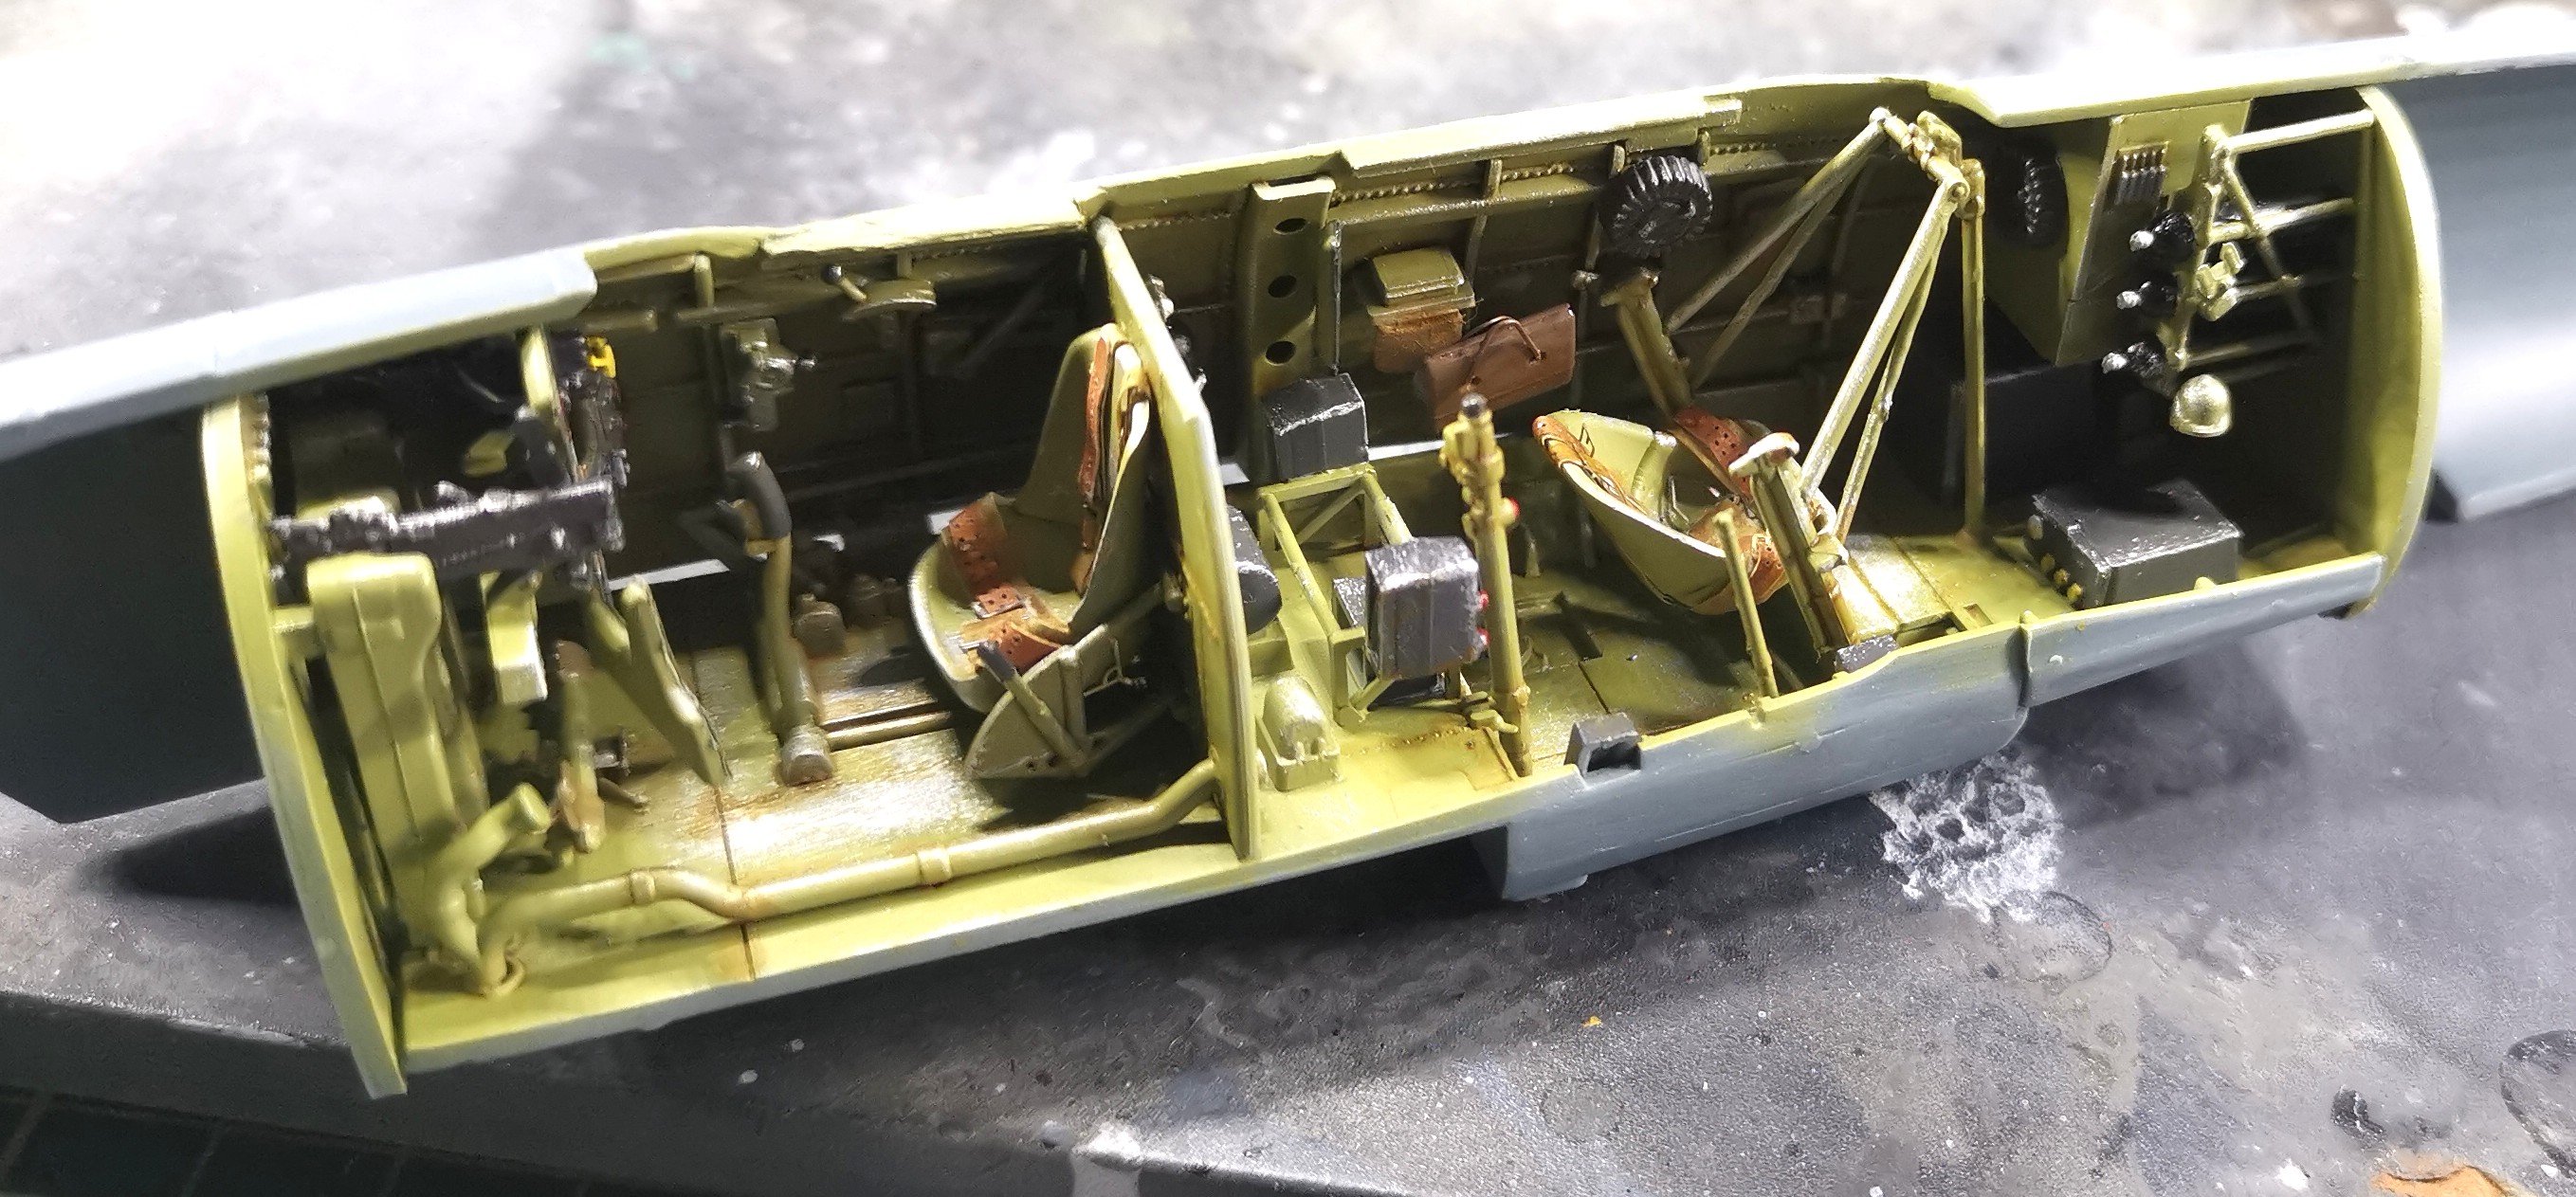
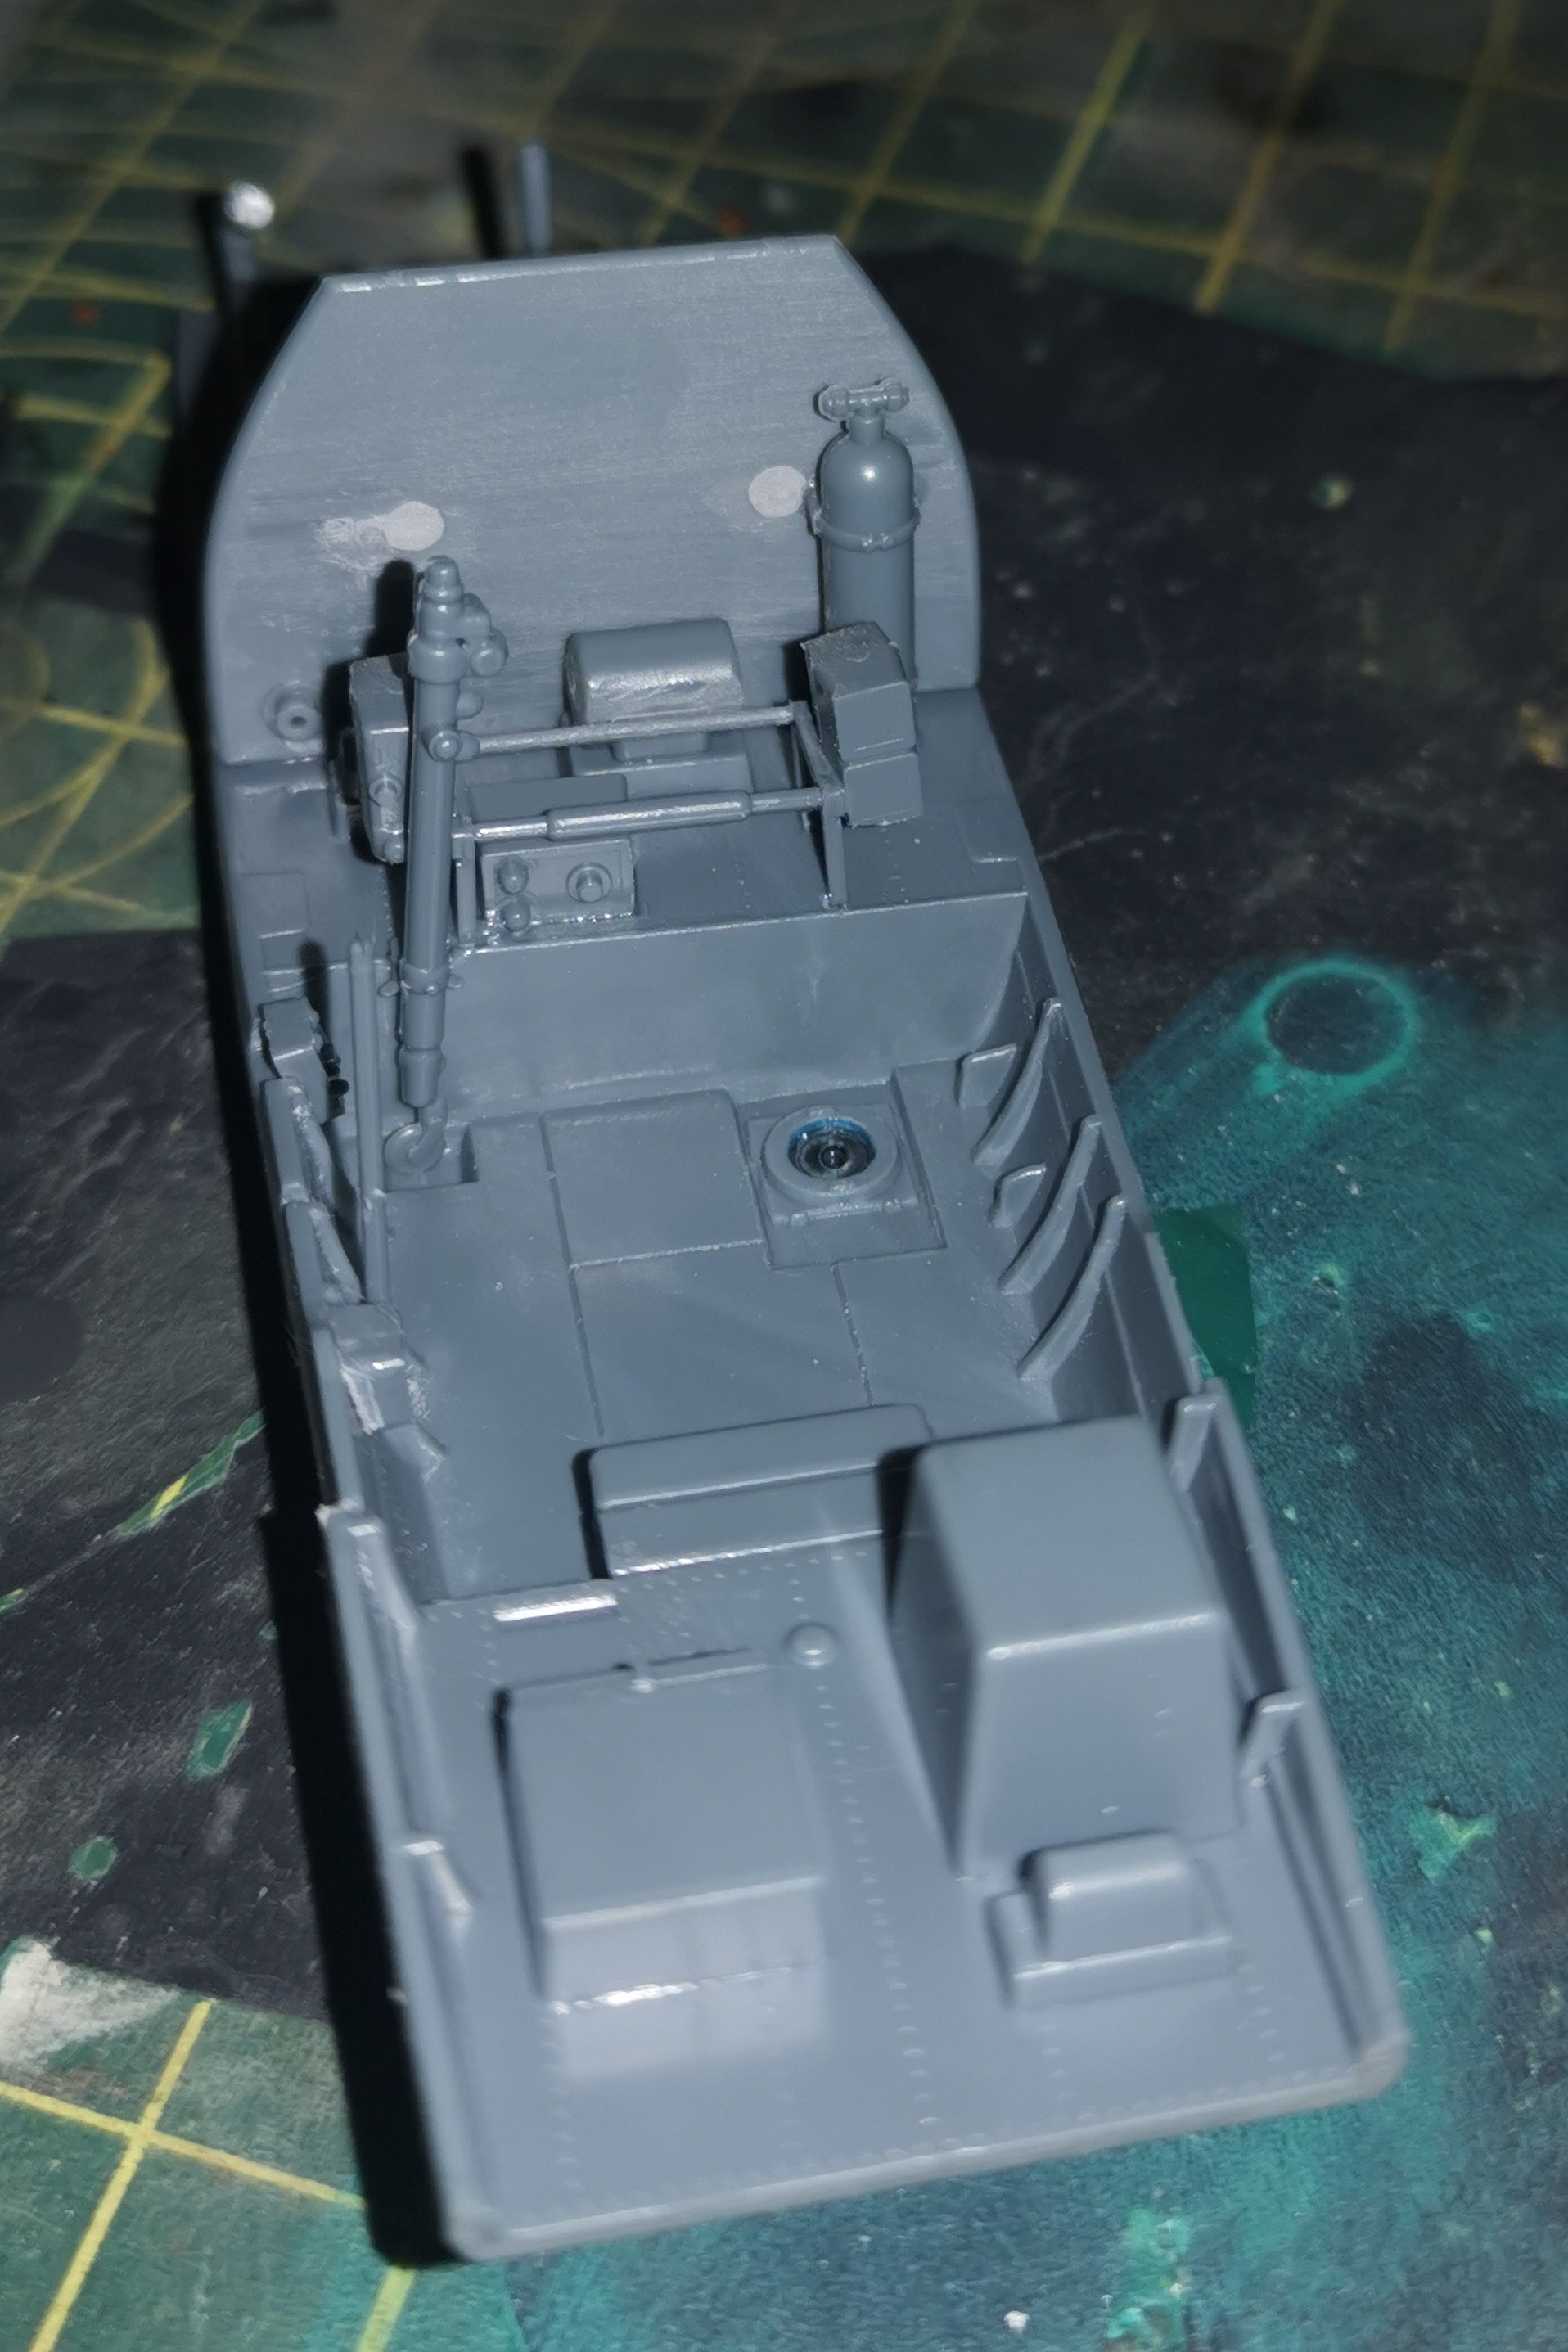
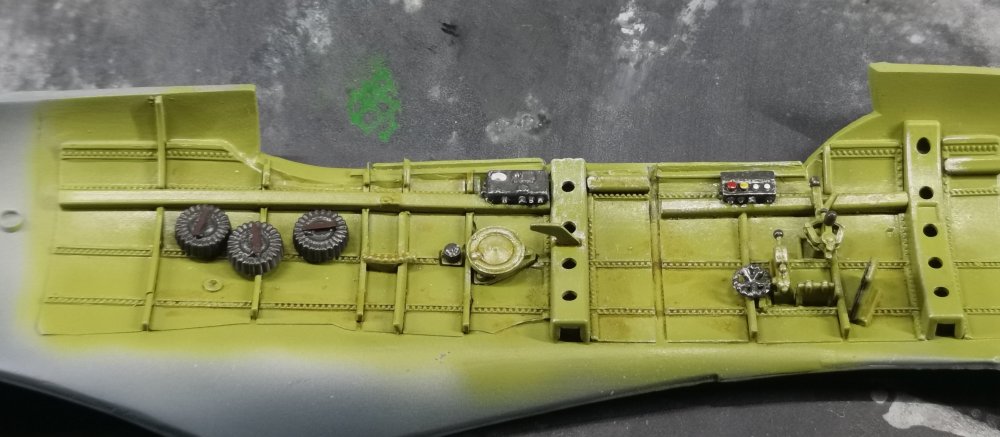
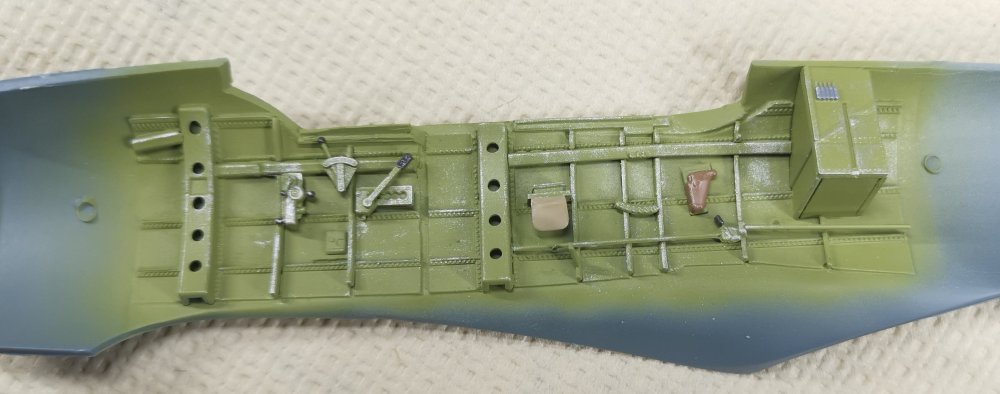
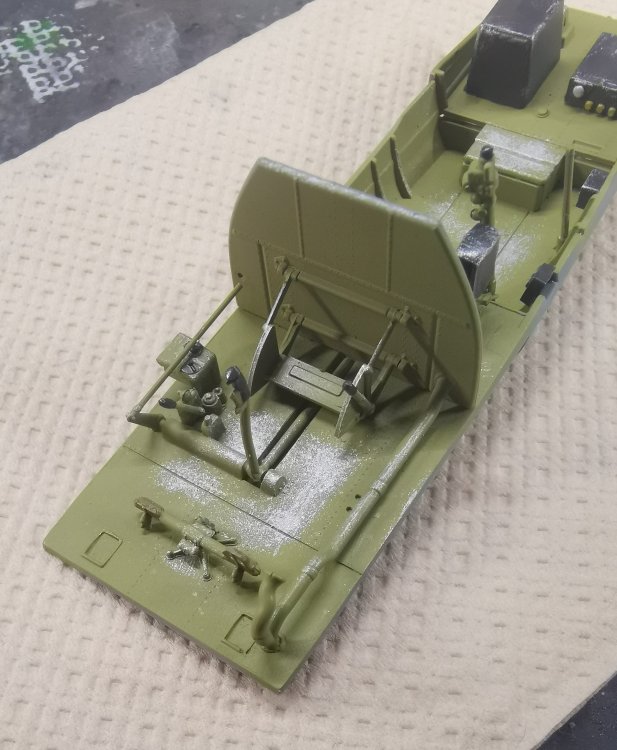
Got the detail painting and some dry brushing done on the cockpit components. Next up is a gloss coat then some oils and a pin wash and we'll see how we're looking. The small detail parts really become apparent after they're painted and I'm pretty happy with it all goes together so far.
- 65 replies
-
- 11
-

-
This kit was gifted by Ernie as the prize in the GB last year, so I'm using his build as inspiration. If mine looks half as good as his I'll be happy.
-
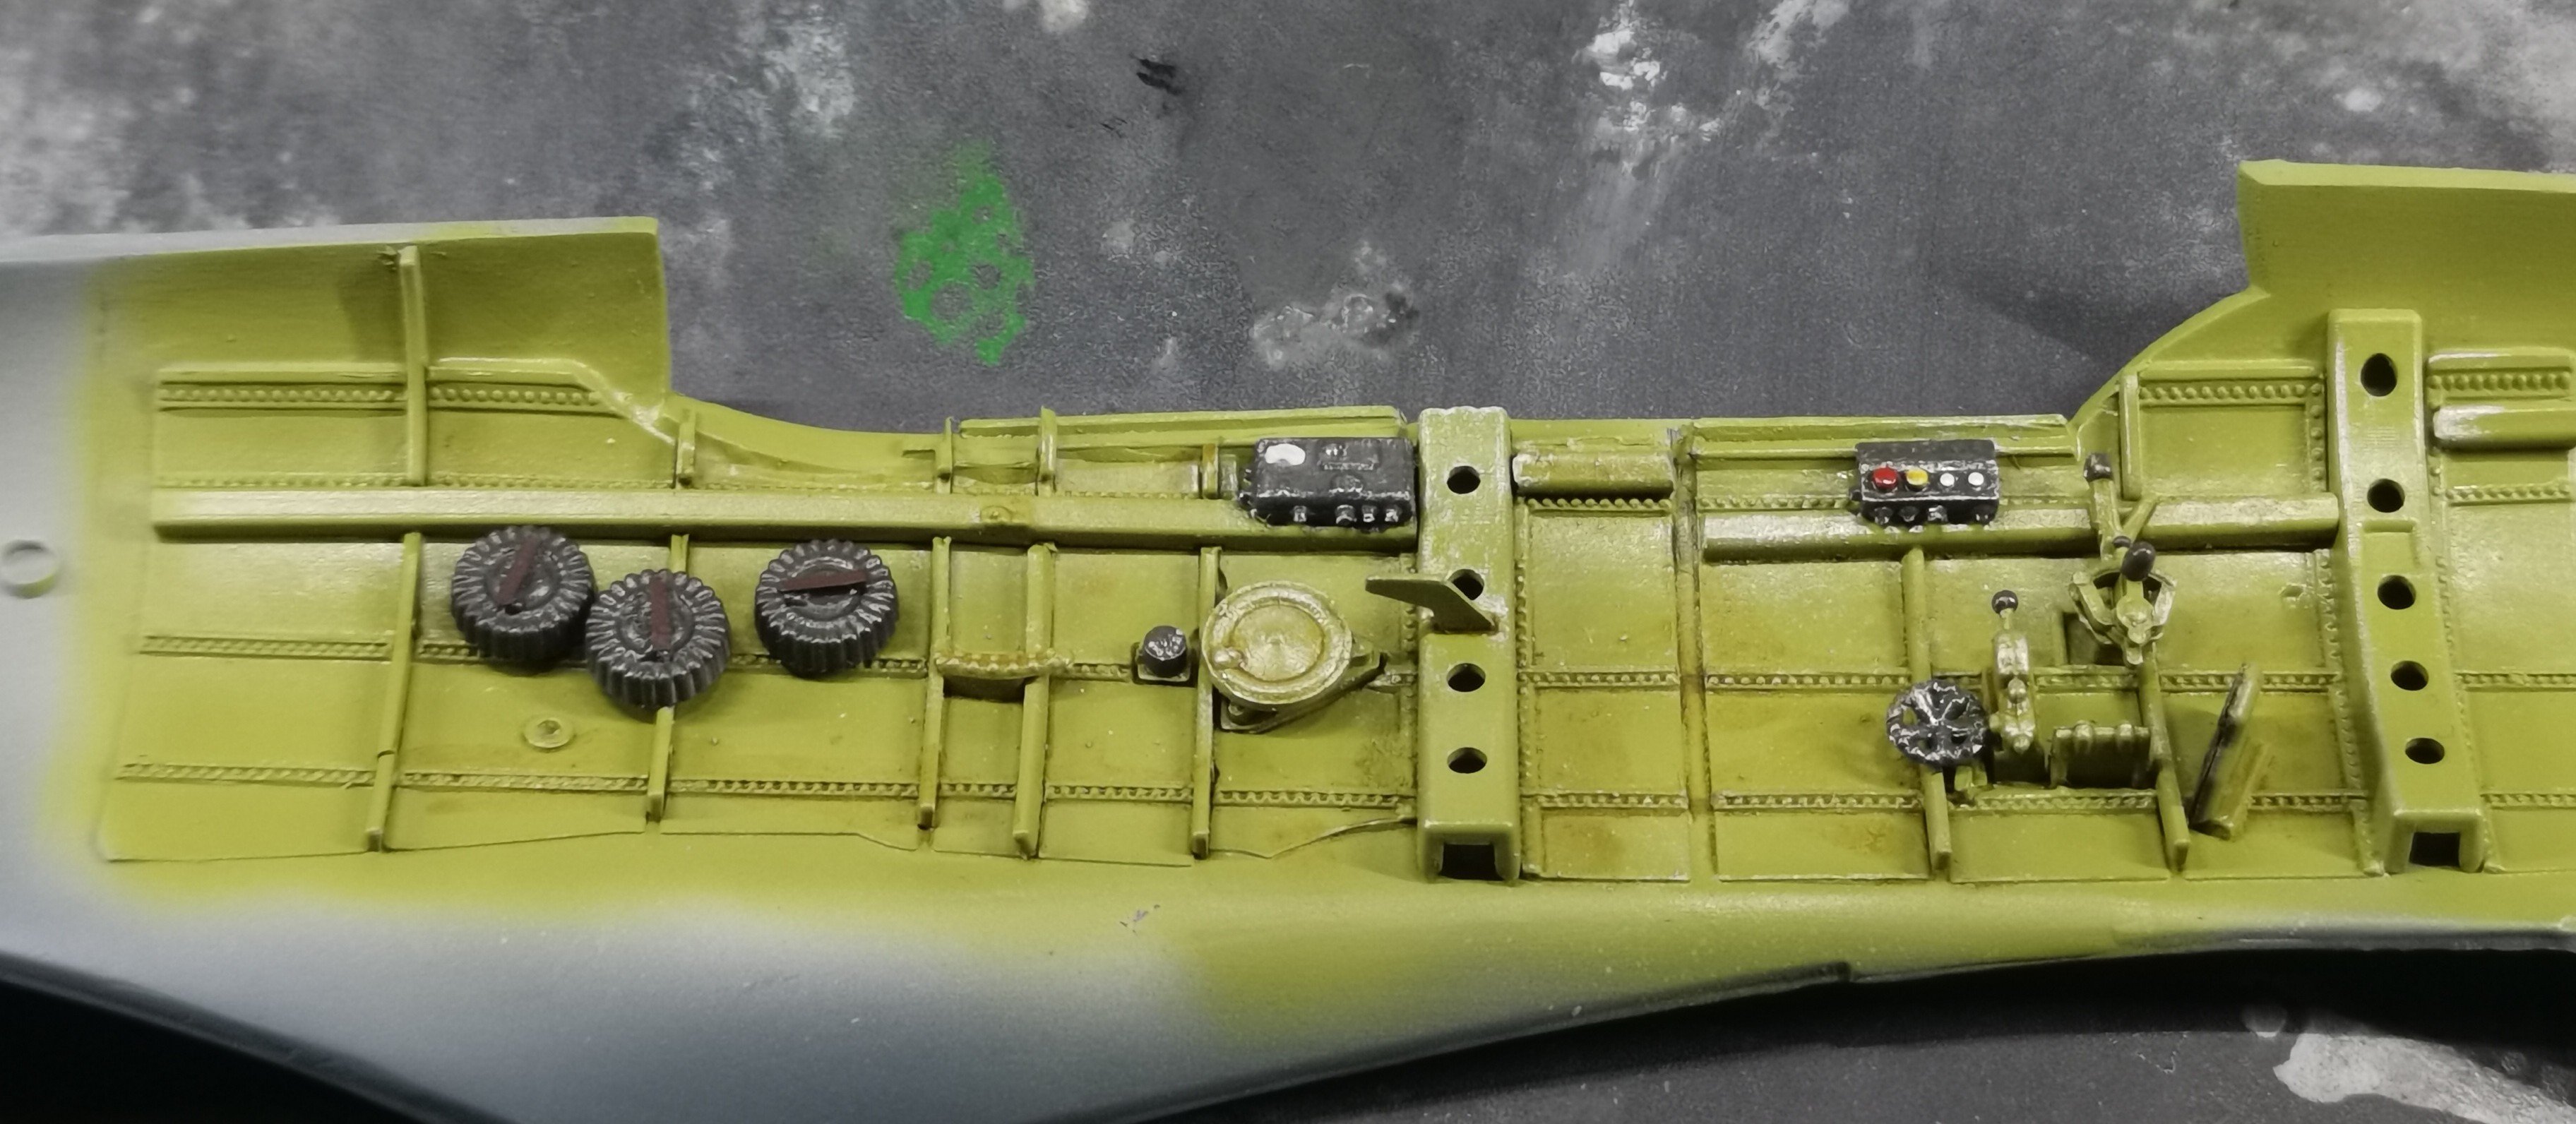
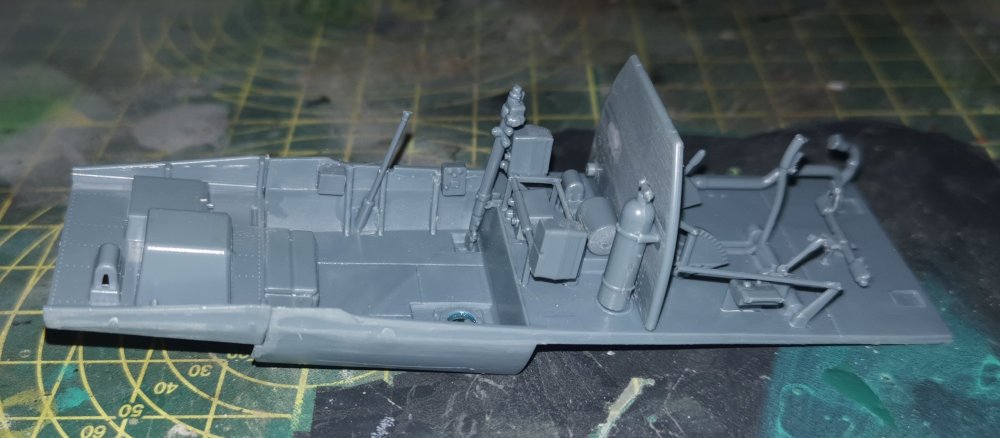
Have had some decent bench time over the last few days as the weather here has reverted to more typical Spring weather, ie rubbish! I've got all the cockpit sub-assemblies ready for priming and painting. Lots of very small parts to attach but thankfully managed to get them all on without any losses. The plastic has a slightly strange texture being hard but waxy and some of the parts needed a fair bit of clean-up but it's not difficult to put together, just needs time and no rushing. So, next it's primer and the Kawanishi interior green then lots of detail painting.


-
Cobra Coupe - Le Mans - Model Factory Hiro 1/12
GusMac replied to DocRob's topic in LSM 1/35 and Larger Work In Progress
That really does look stunning under the natural light Rob. I know it maybe didn't go quite how you'd hoped but I'd still be extremely proud of how it finished up.