JeroenPeters
-
Posts
4,867 -
Joined
-
Last visited
Content Type
Profiles
Forums
Events
Gallery
Everything posted by JeroenPeters
-

1/32 ME-262A-2a/U2
JeroenPeters replied to JeroenPeters's topic in LSM 1/35 and Larger Work In Progress
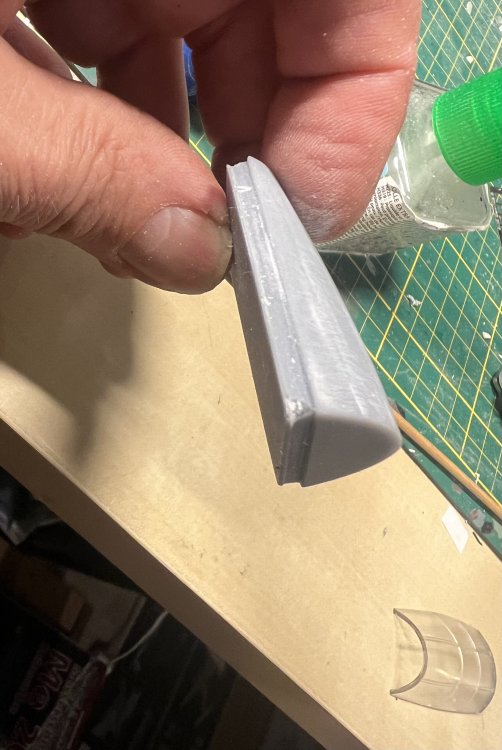
Mind the gap! This whole set is A JOKE. Every single part needs to be seriously altered or completely remade. The rear upper part has serious shrinkage OR the side parts have. Either way: more scratching is needed.
- 151 replies
-
- 10
-

-

-

-
1/32 ME-262A-2a/U2
JeroenPeters replied to JeroenPeters's topic in LSM 1/35 and Larger Work In Progress
Painting and fitting the Aires parts. Shite fit. Probably due to shrinkage and it being… well.. Aires. Also remade the sanded away detail in the MDC interior. Almost fits. Almost.


-
1/32 ME-262A-2a/U2
JeroenPeters replied to JeroenPeters's topic in LSM 1/35 and Larger Work In Progress
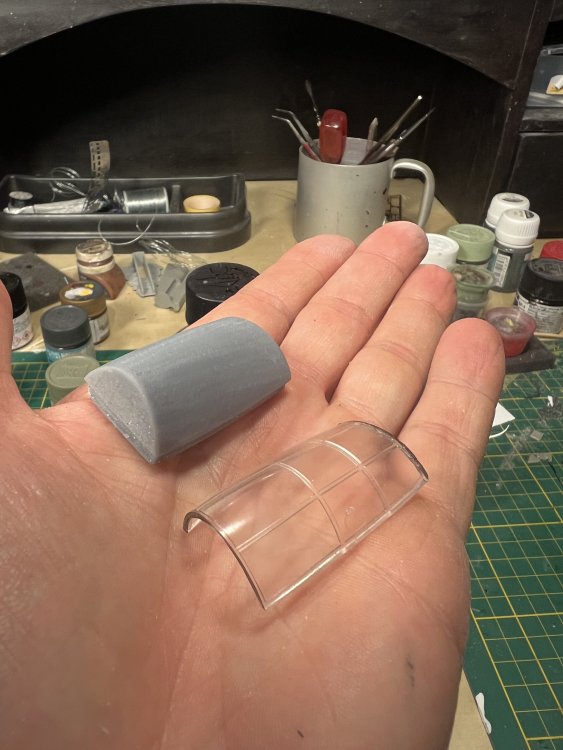
So… not being happy with the resin MDC transparent parts, i 3D printed a mold for the upper canopy. I bought Evergreen transparent sheets in 0.2 and 0.4 mm. I’ll heat up a piece and pull it over my mold.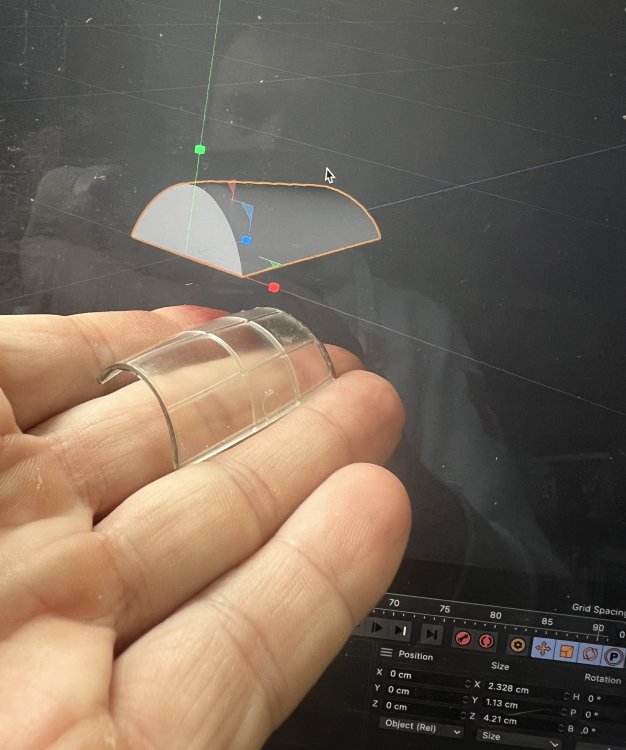
-
1/32 ME-262A-2a/U2
JeroenPeters replied to JeroenPeters's topic in LSM 1/35 and Larger Work In Progress
Stick installed. Wheelbay painted in aircraft aluminum from Alclad2.
-
1/32 ME-262A-2a/U2
JeroenPeters replied to JeroenPeters's topic in LSM 1/35 and Larger Work In Progress
Hard to capture in a decent photo, but all the detail is there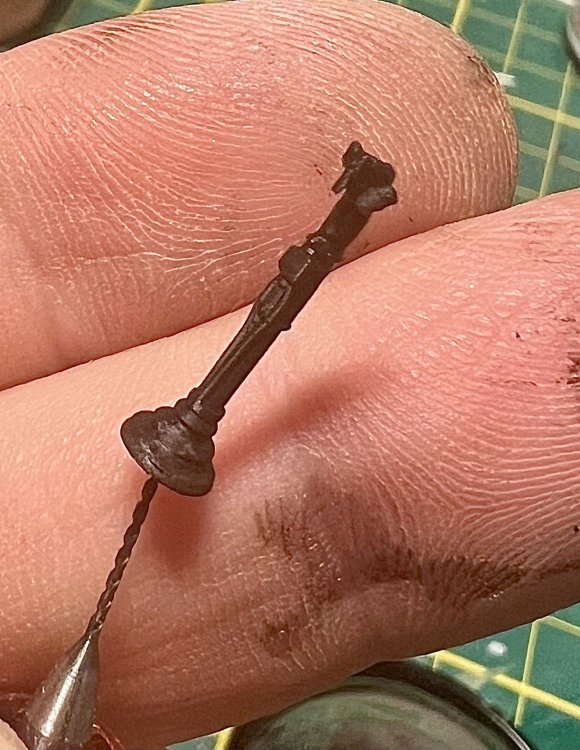

-
1/32 ME-262A-2a/U2
JeroenPeters replied to JeroenPeters's topic in LSM 1/35 and Larger Work In Progress
Better.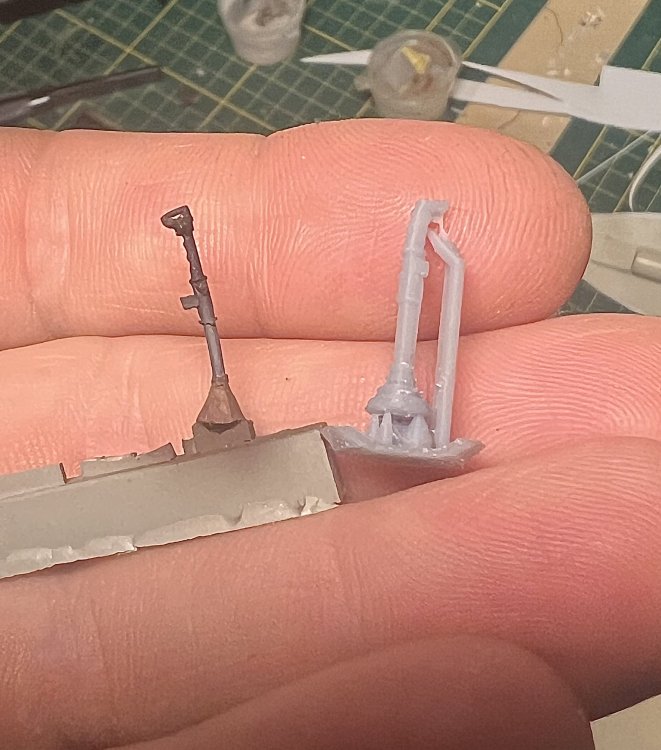
-
1/32 ME-262A-2a/U2
JeroenPeters replied to JeroenPeters's topic in LSM 1/35 and Larger Work In Progress
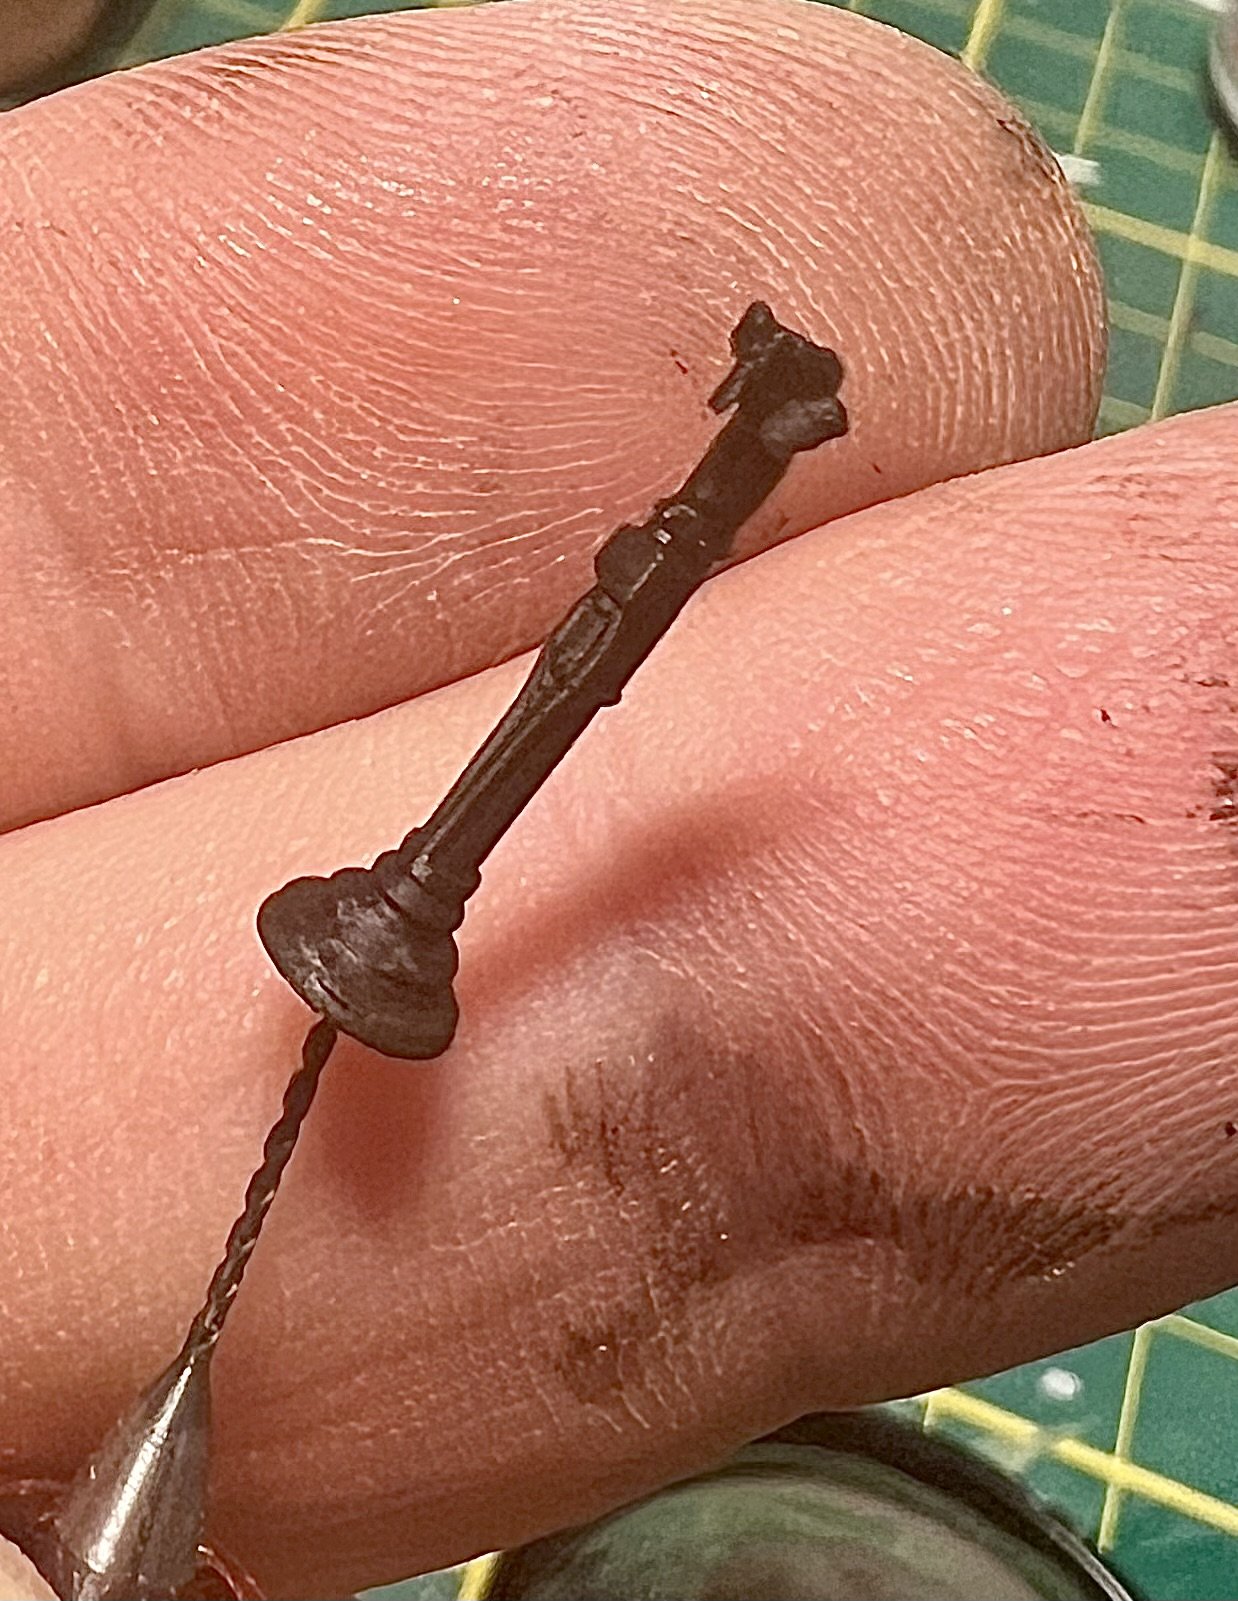
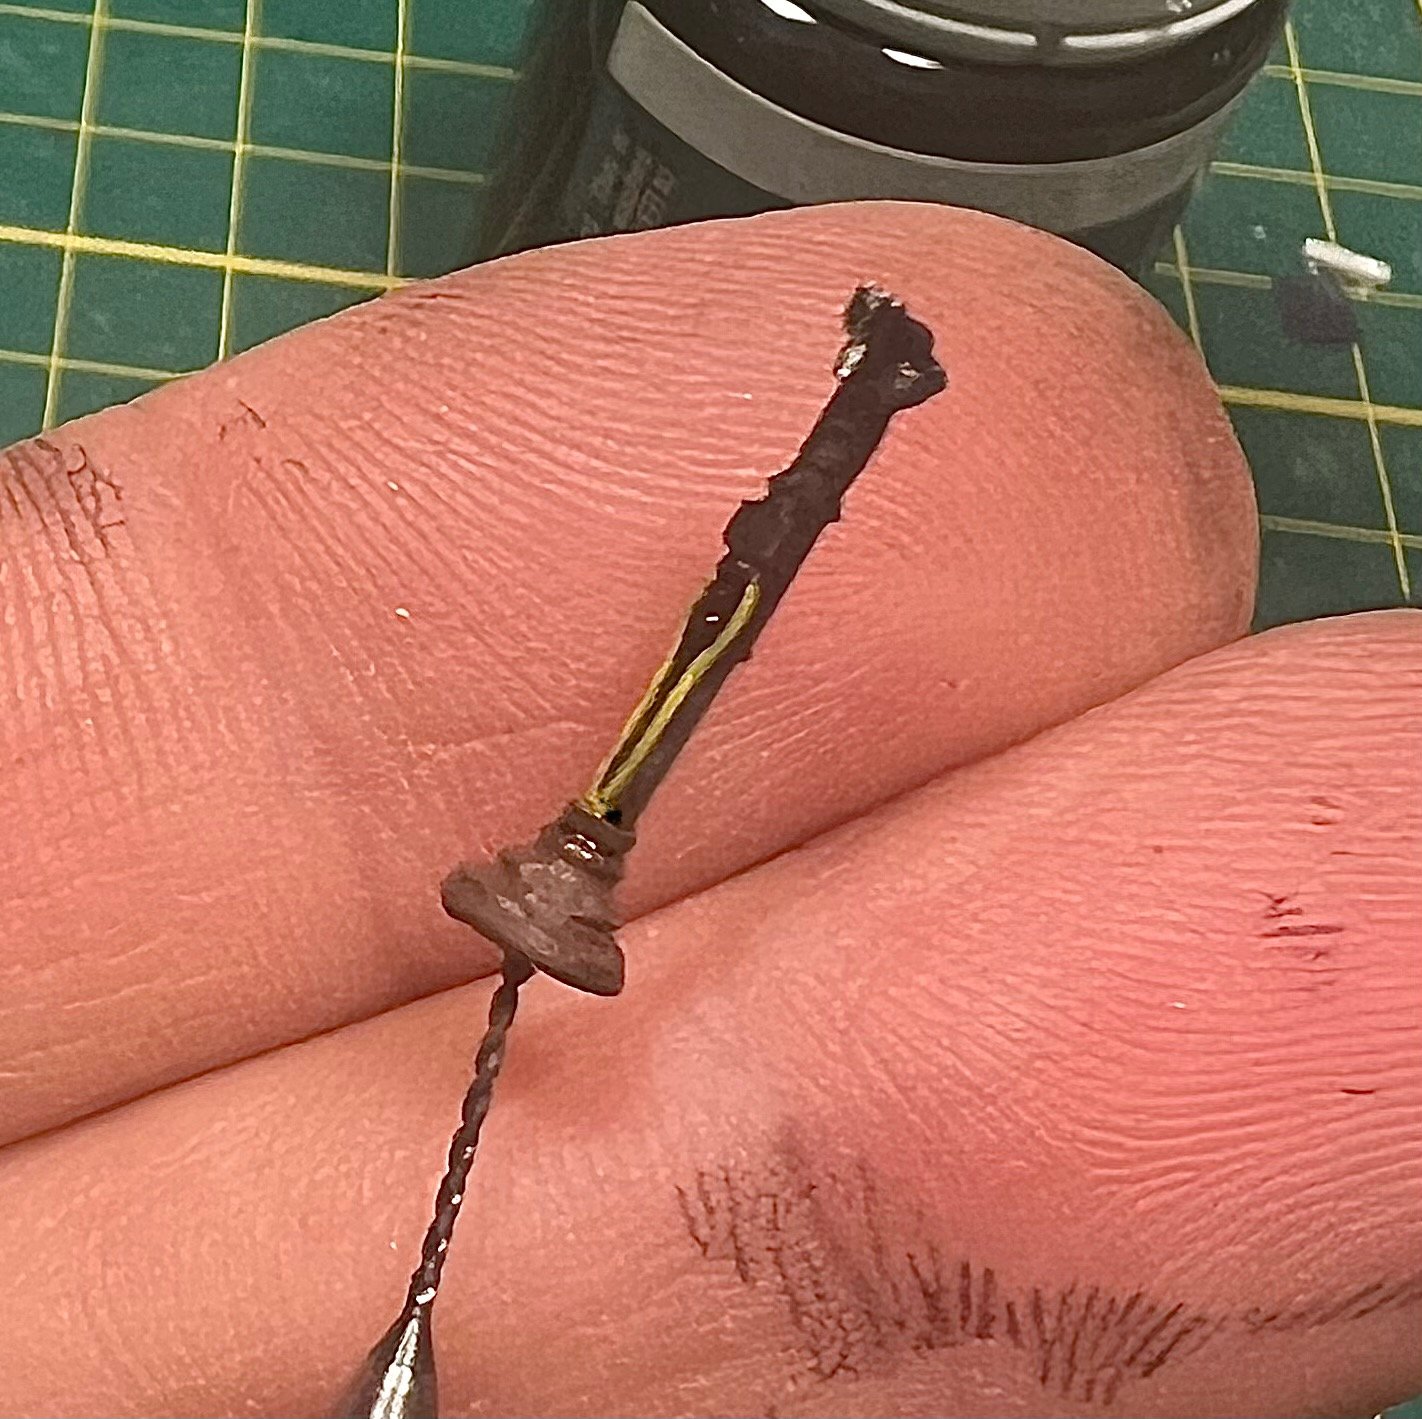
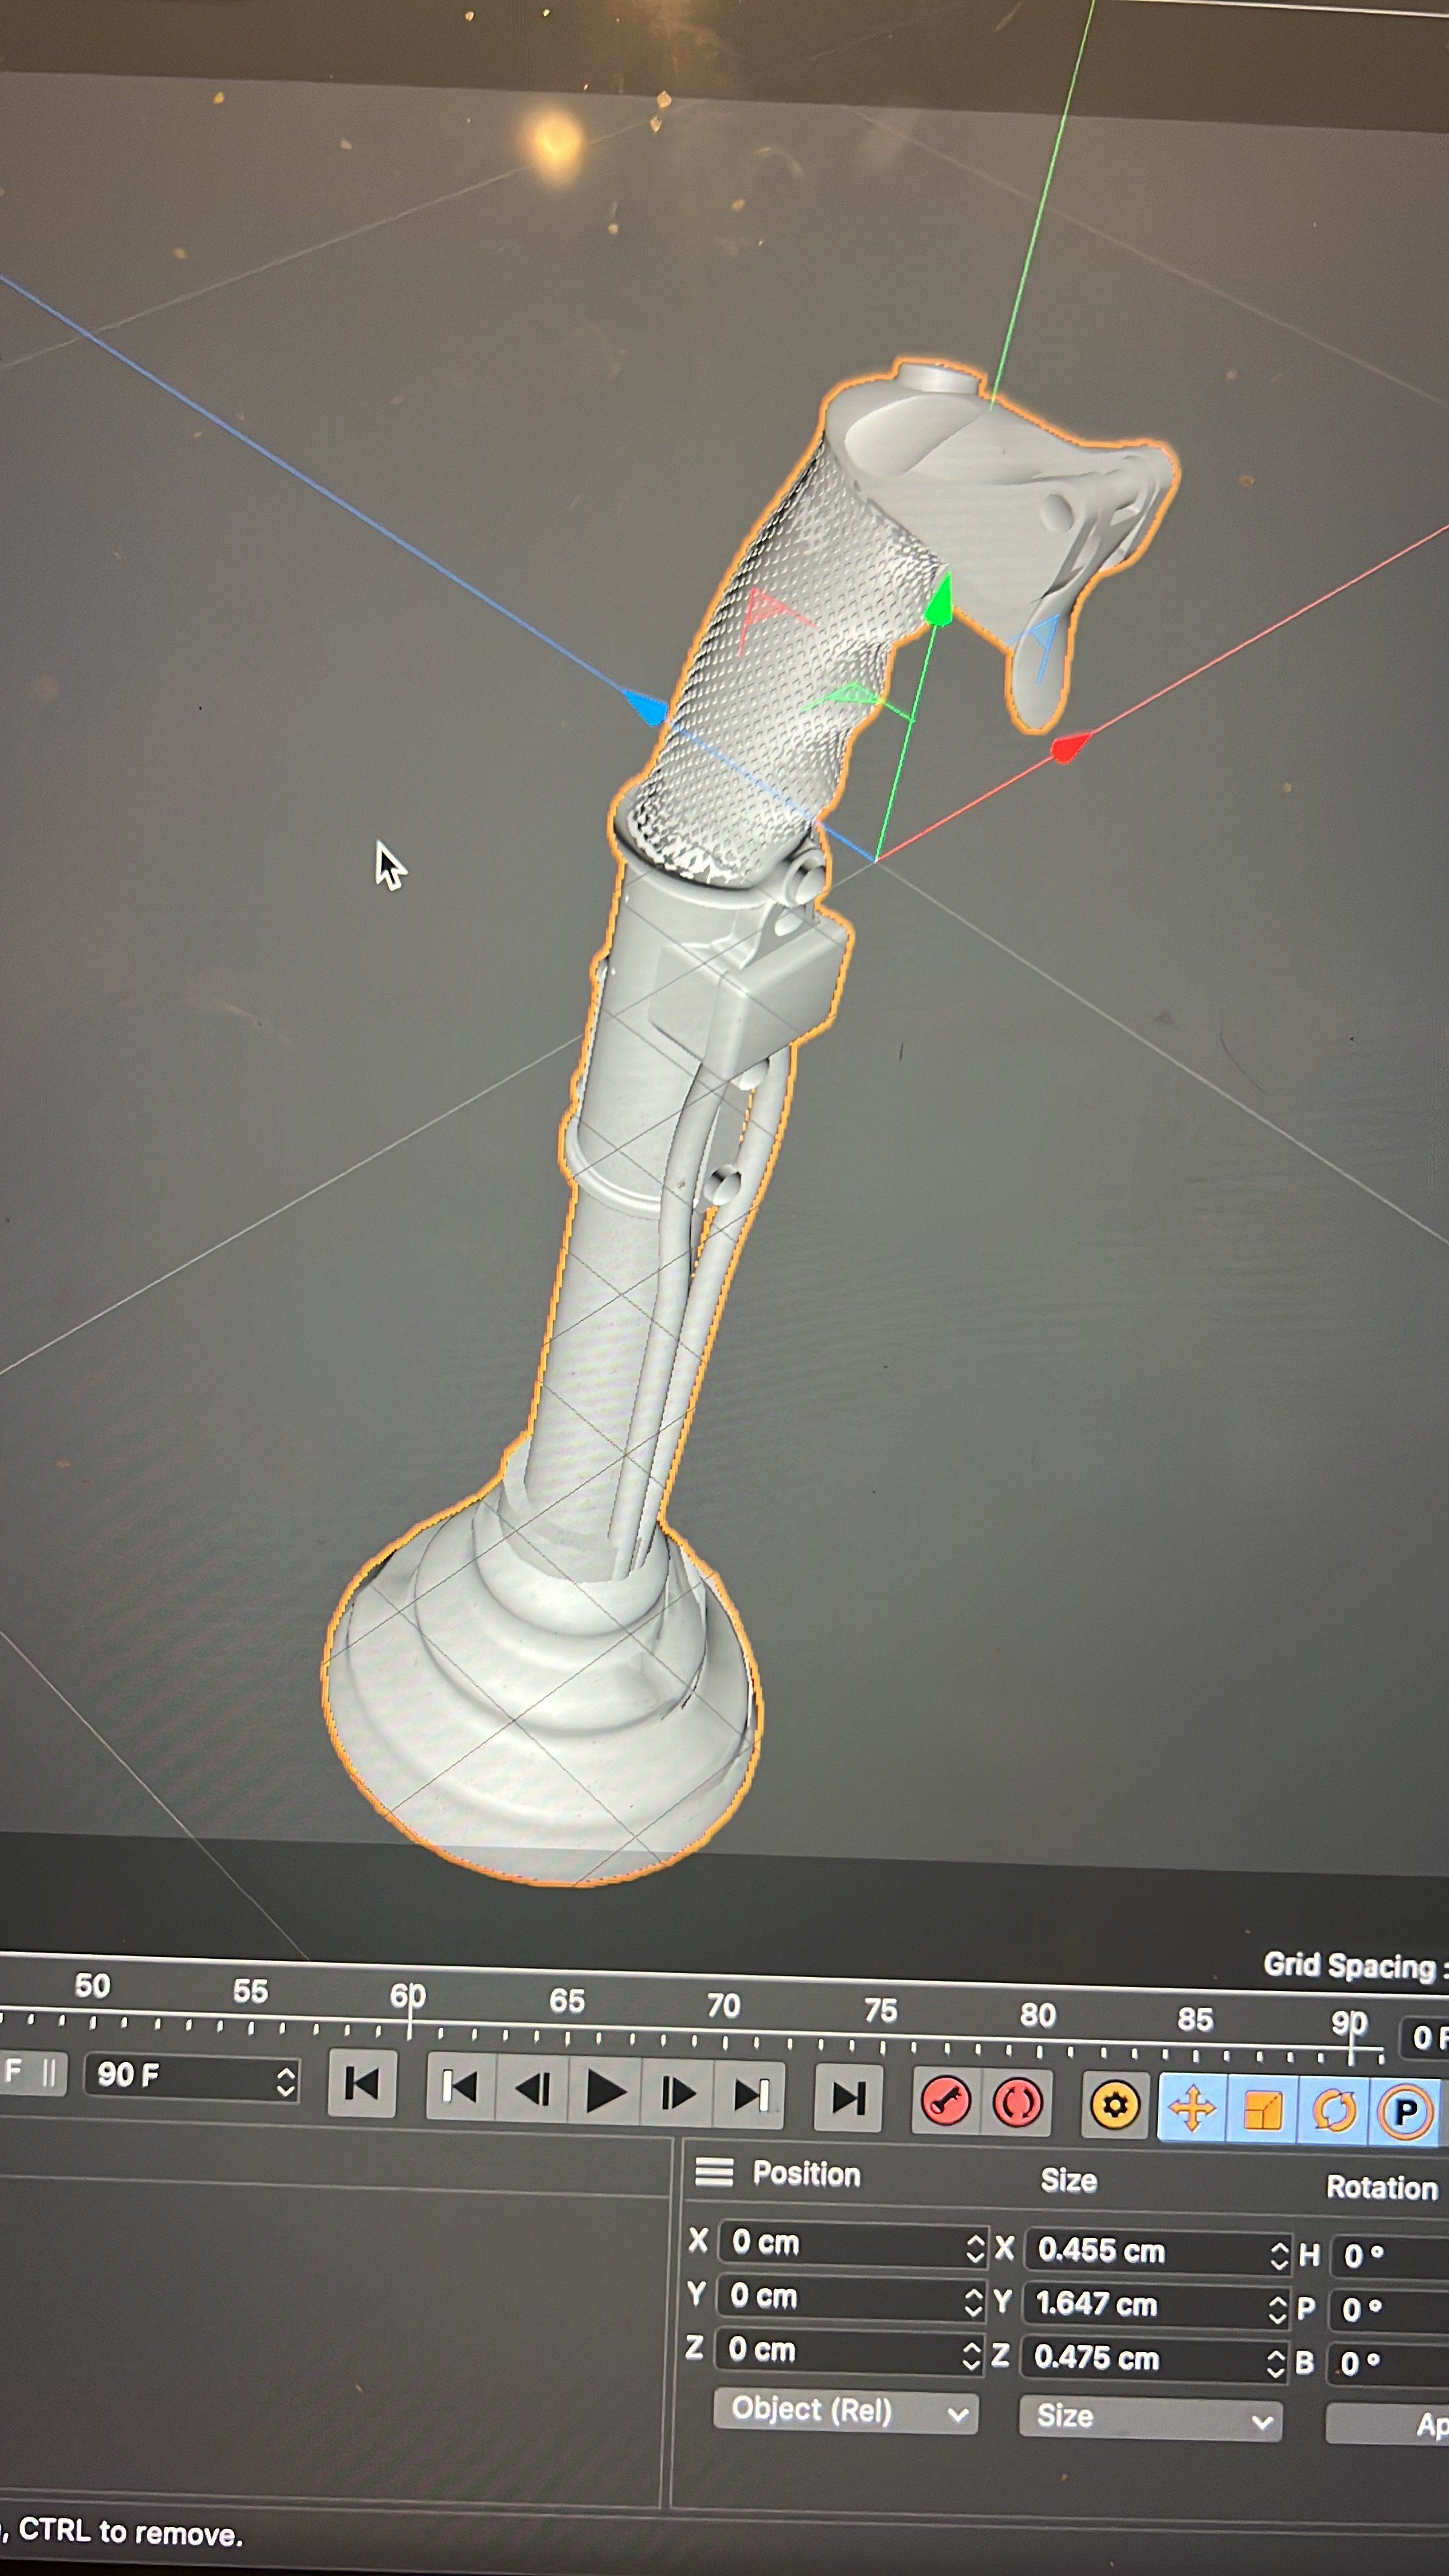
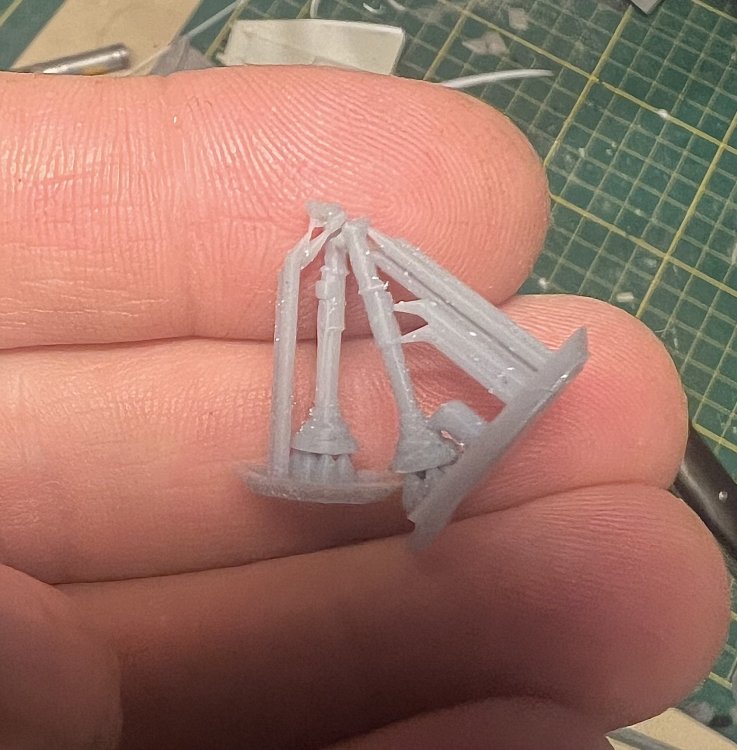
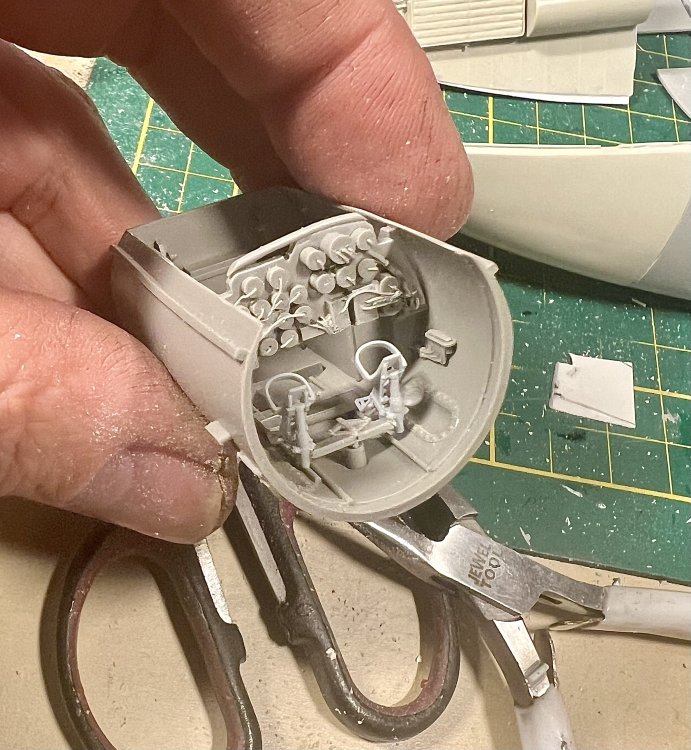
Really was not liking the KG13C control stick Aires provides. Downloaded a decent file for the handle and drew the rest myself. Jist picked them out of the printer and they are curing right now. Picture below is the resin Aires version i abandoned.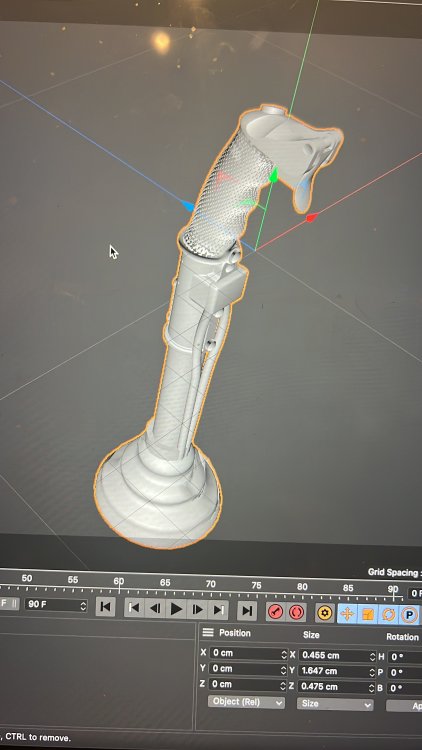

-
1/32 ME-262A-2a/U2
JeroenPeters replied to JeroenPeters's topic in LSM 1/35 and Larger Work In Progress
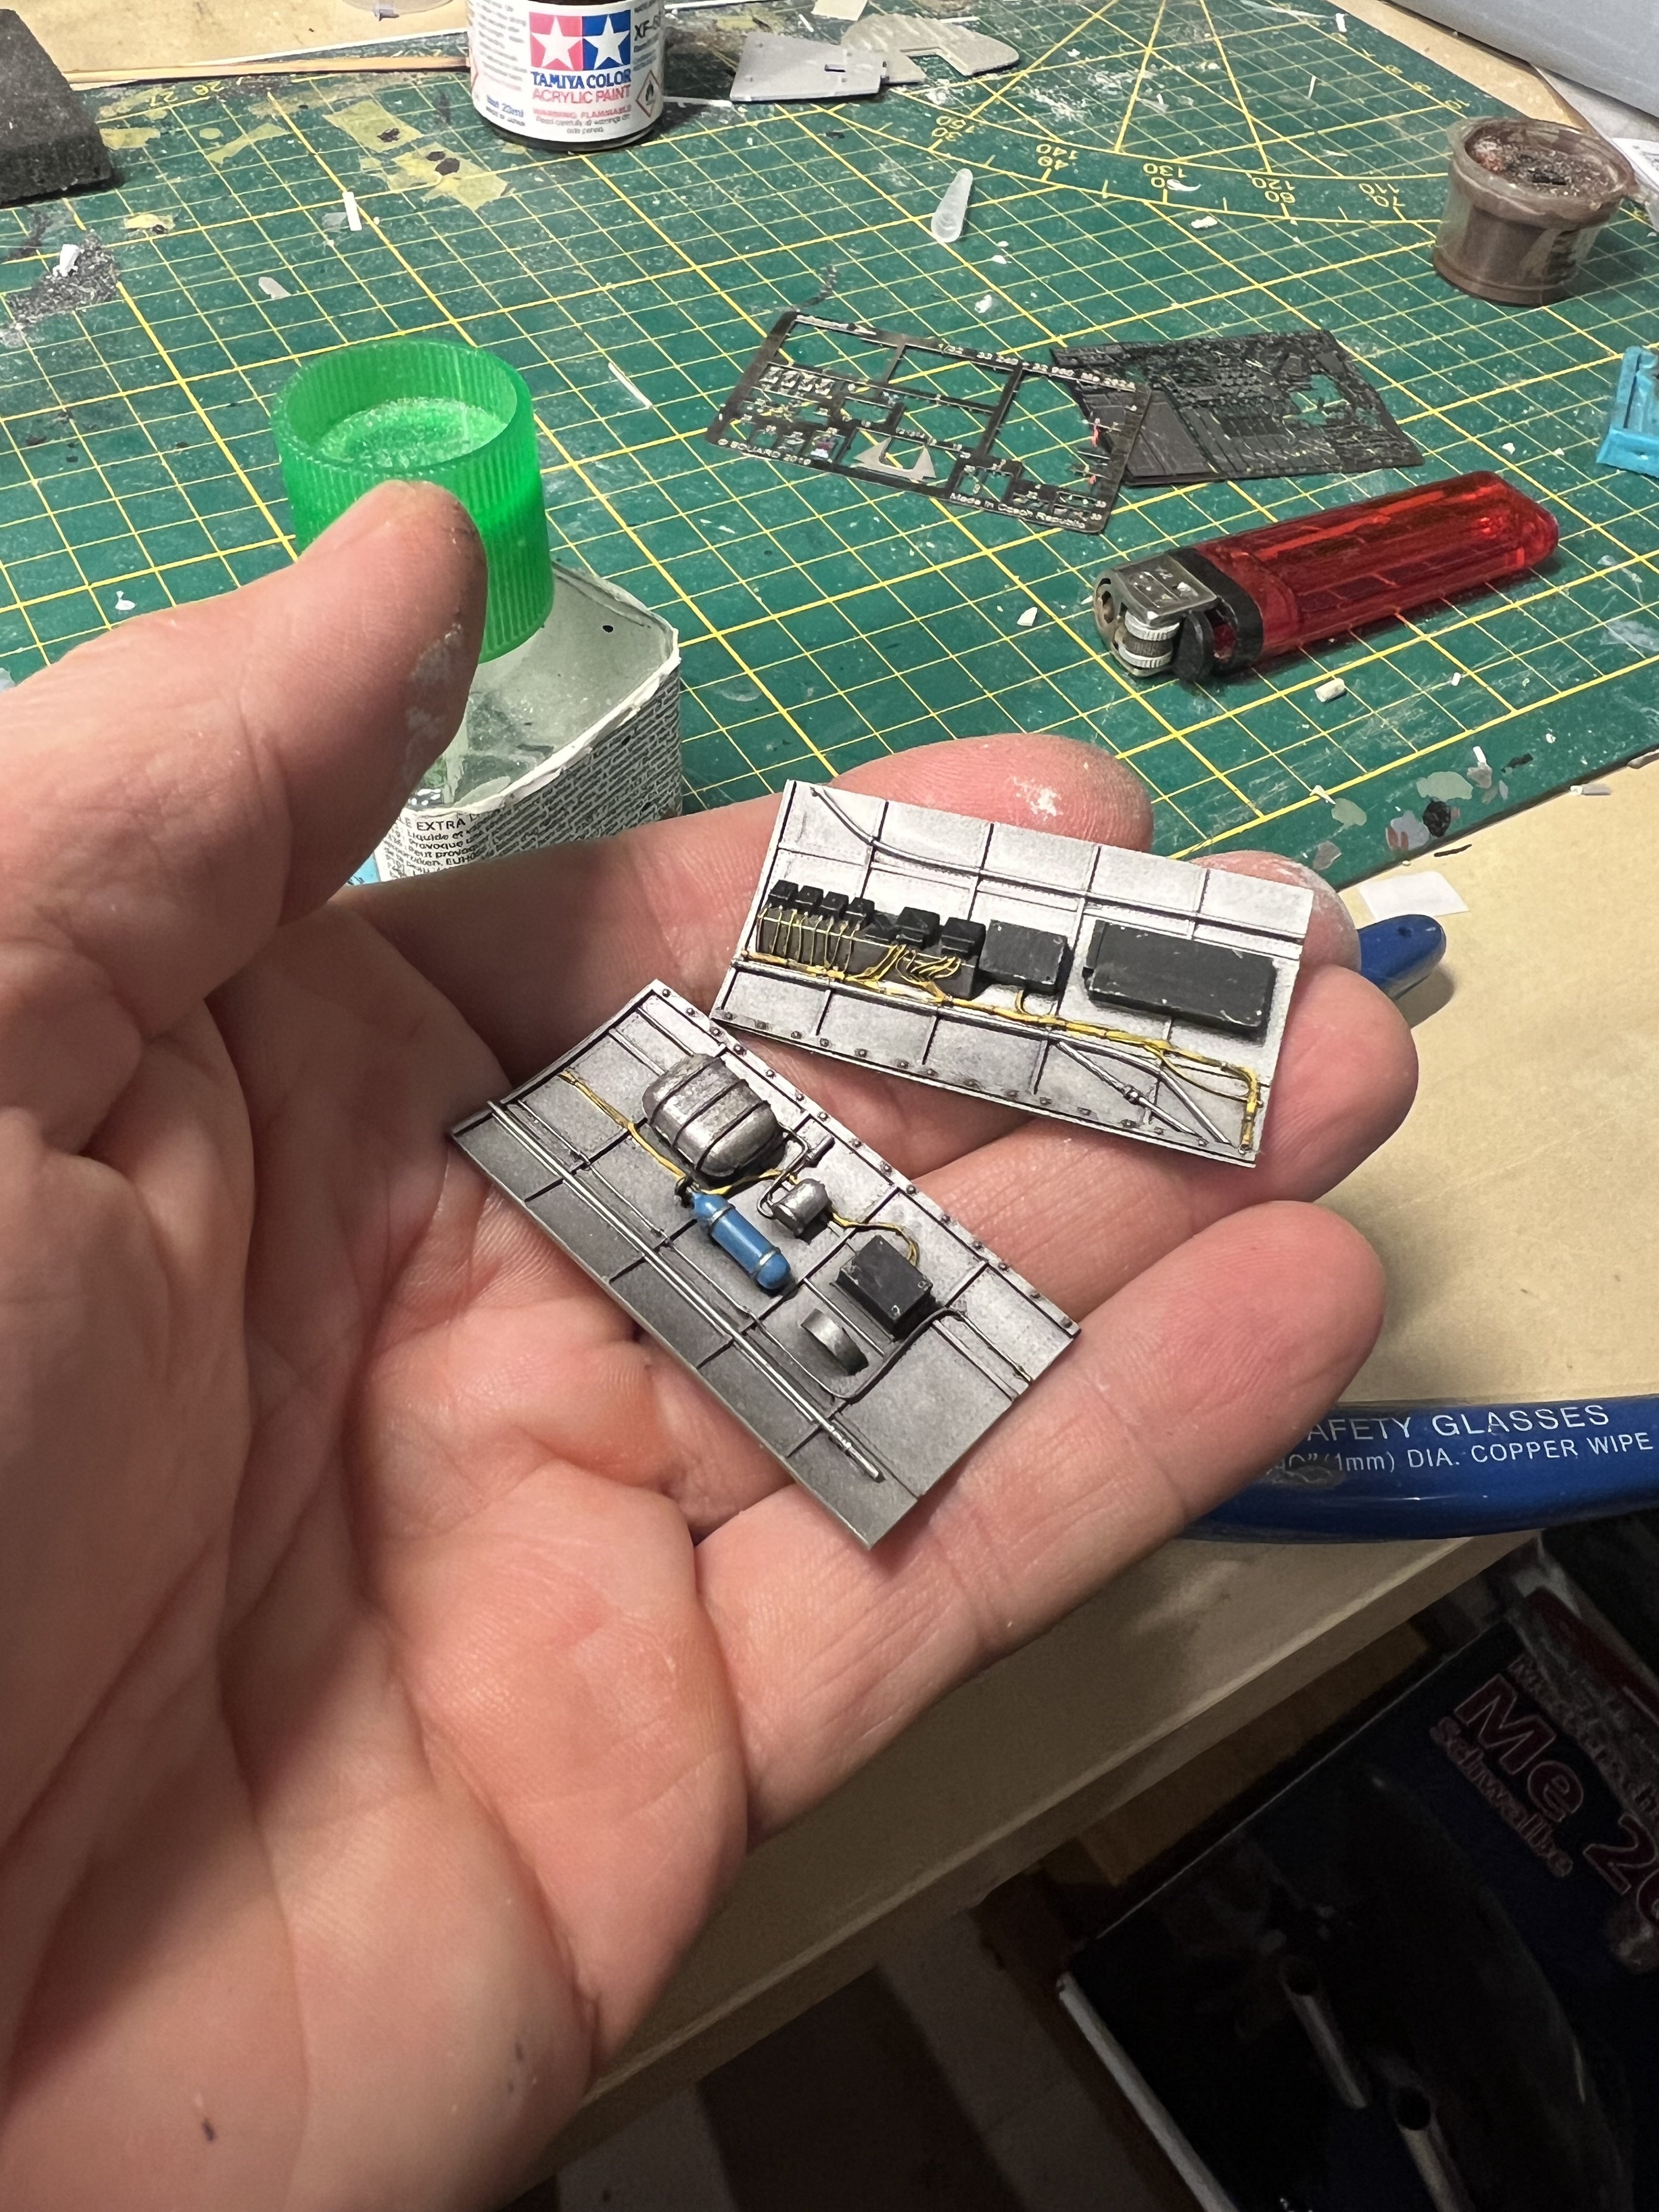
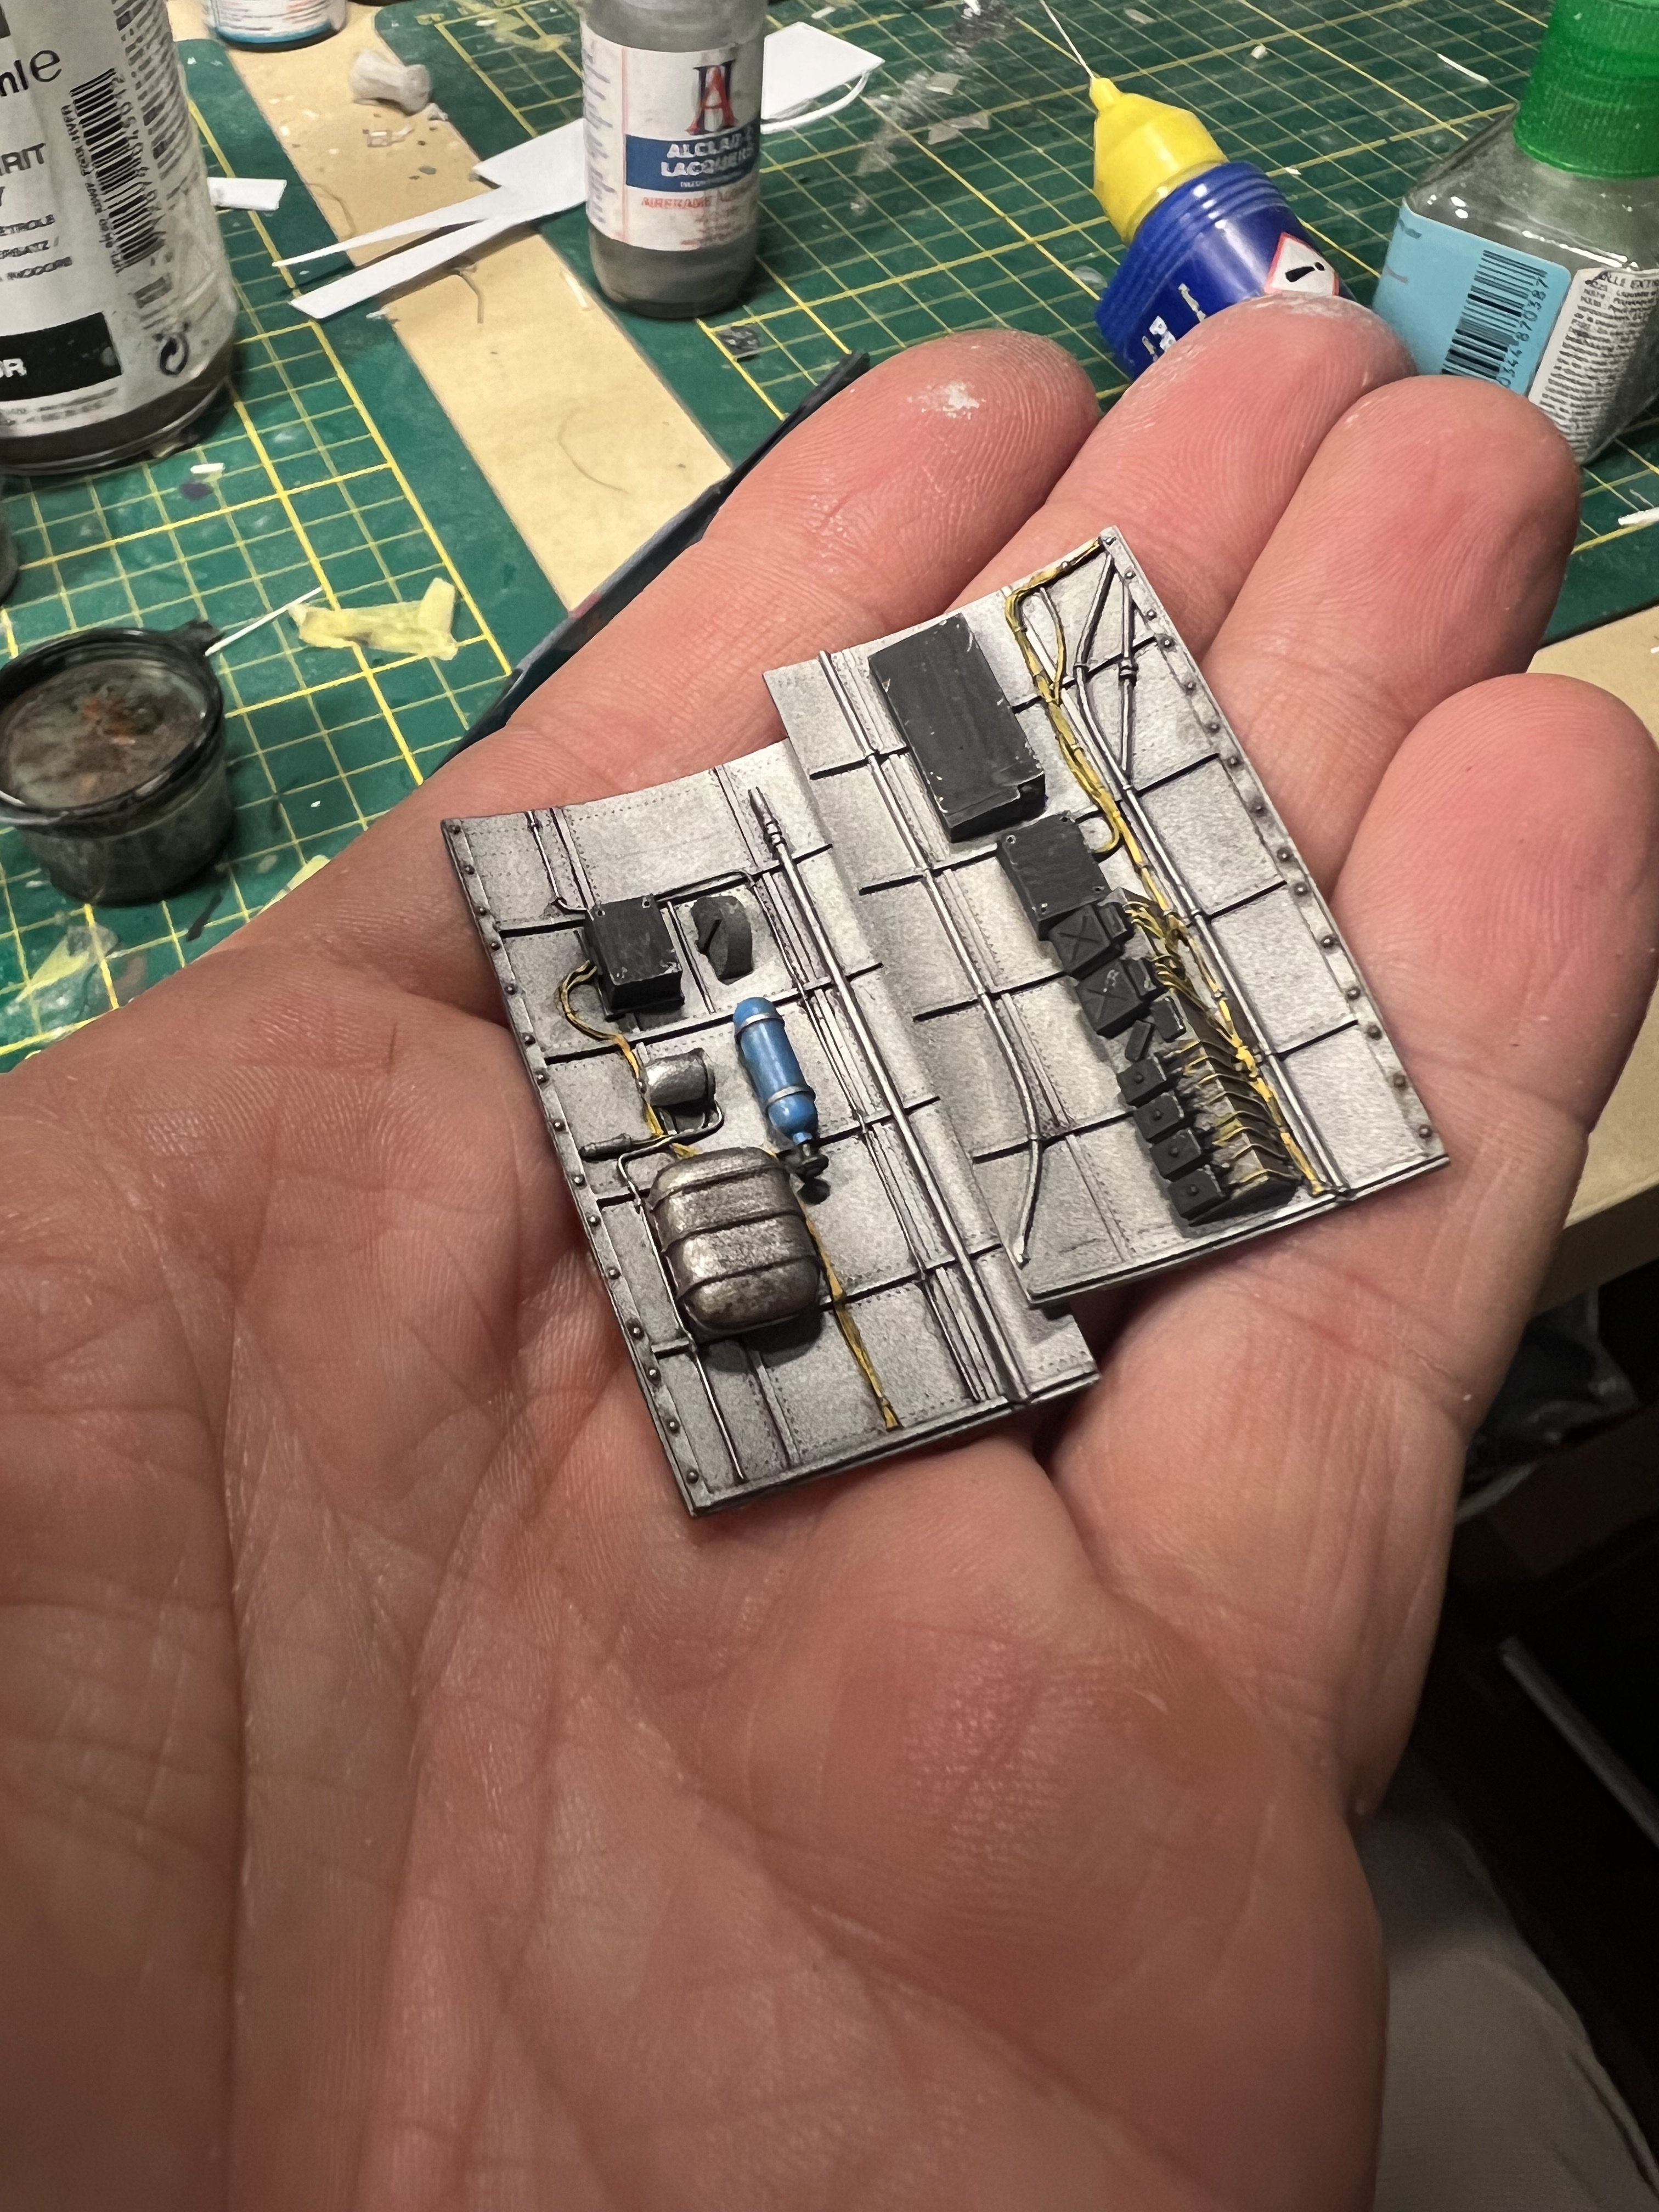
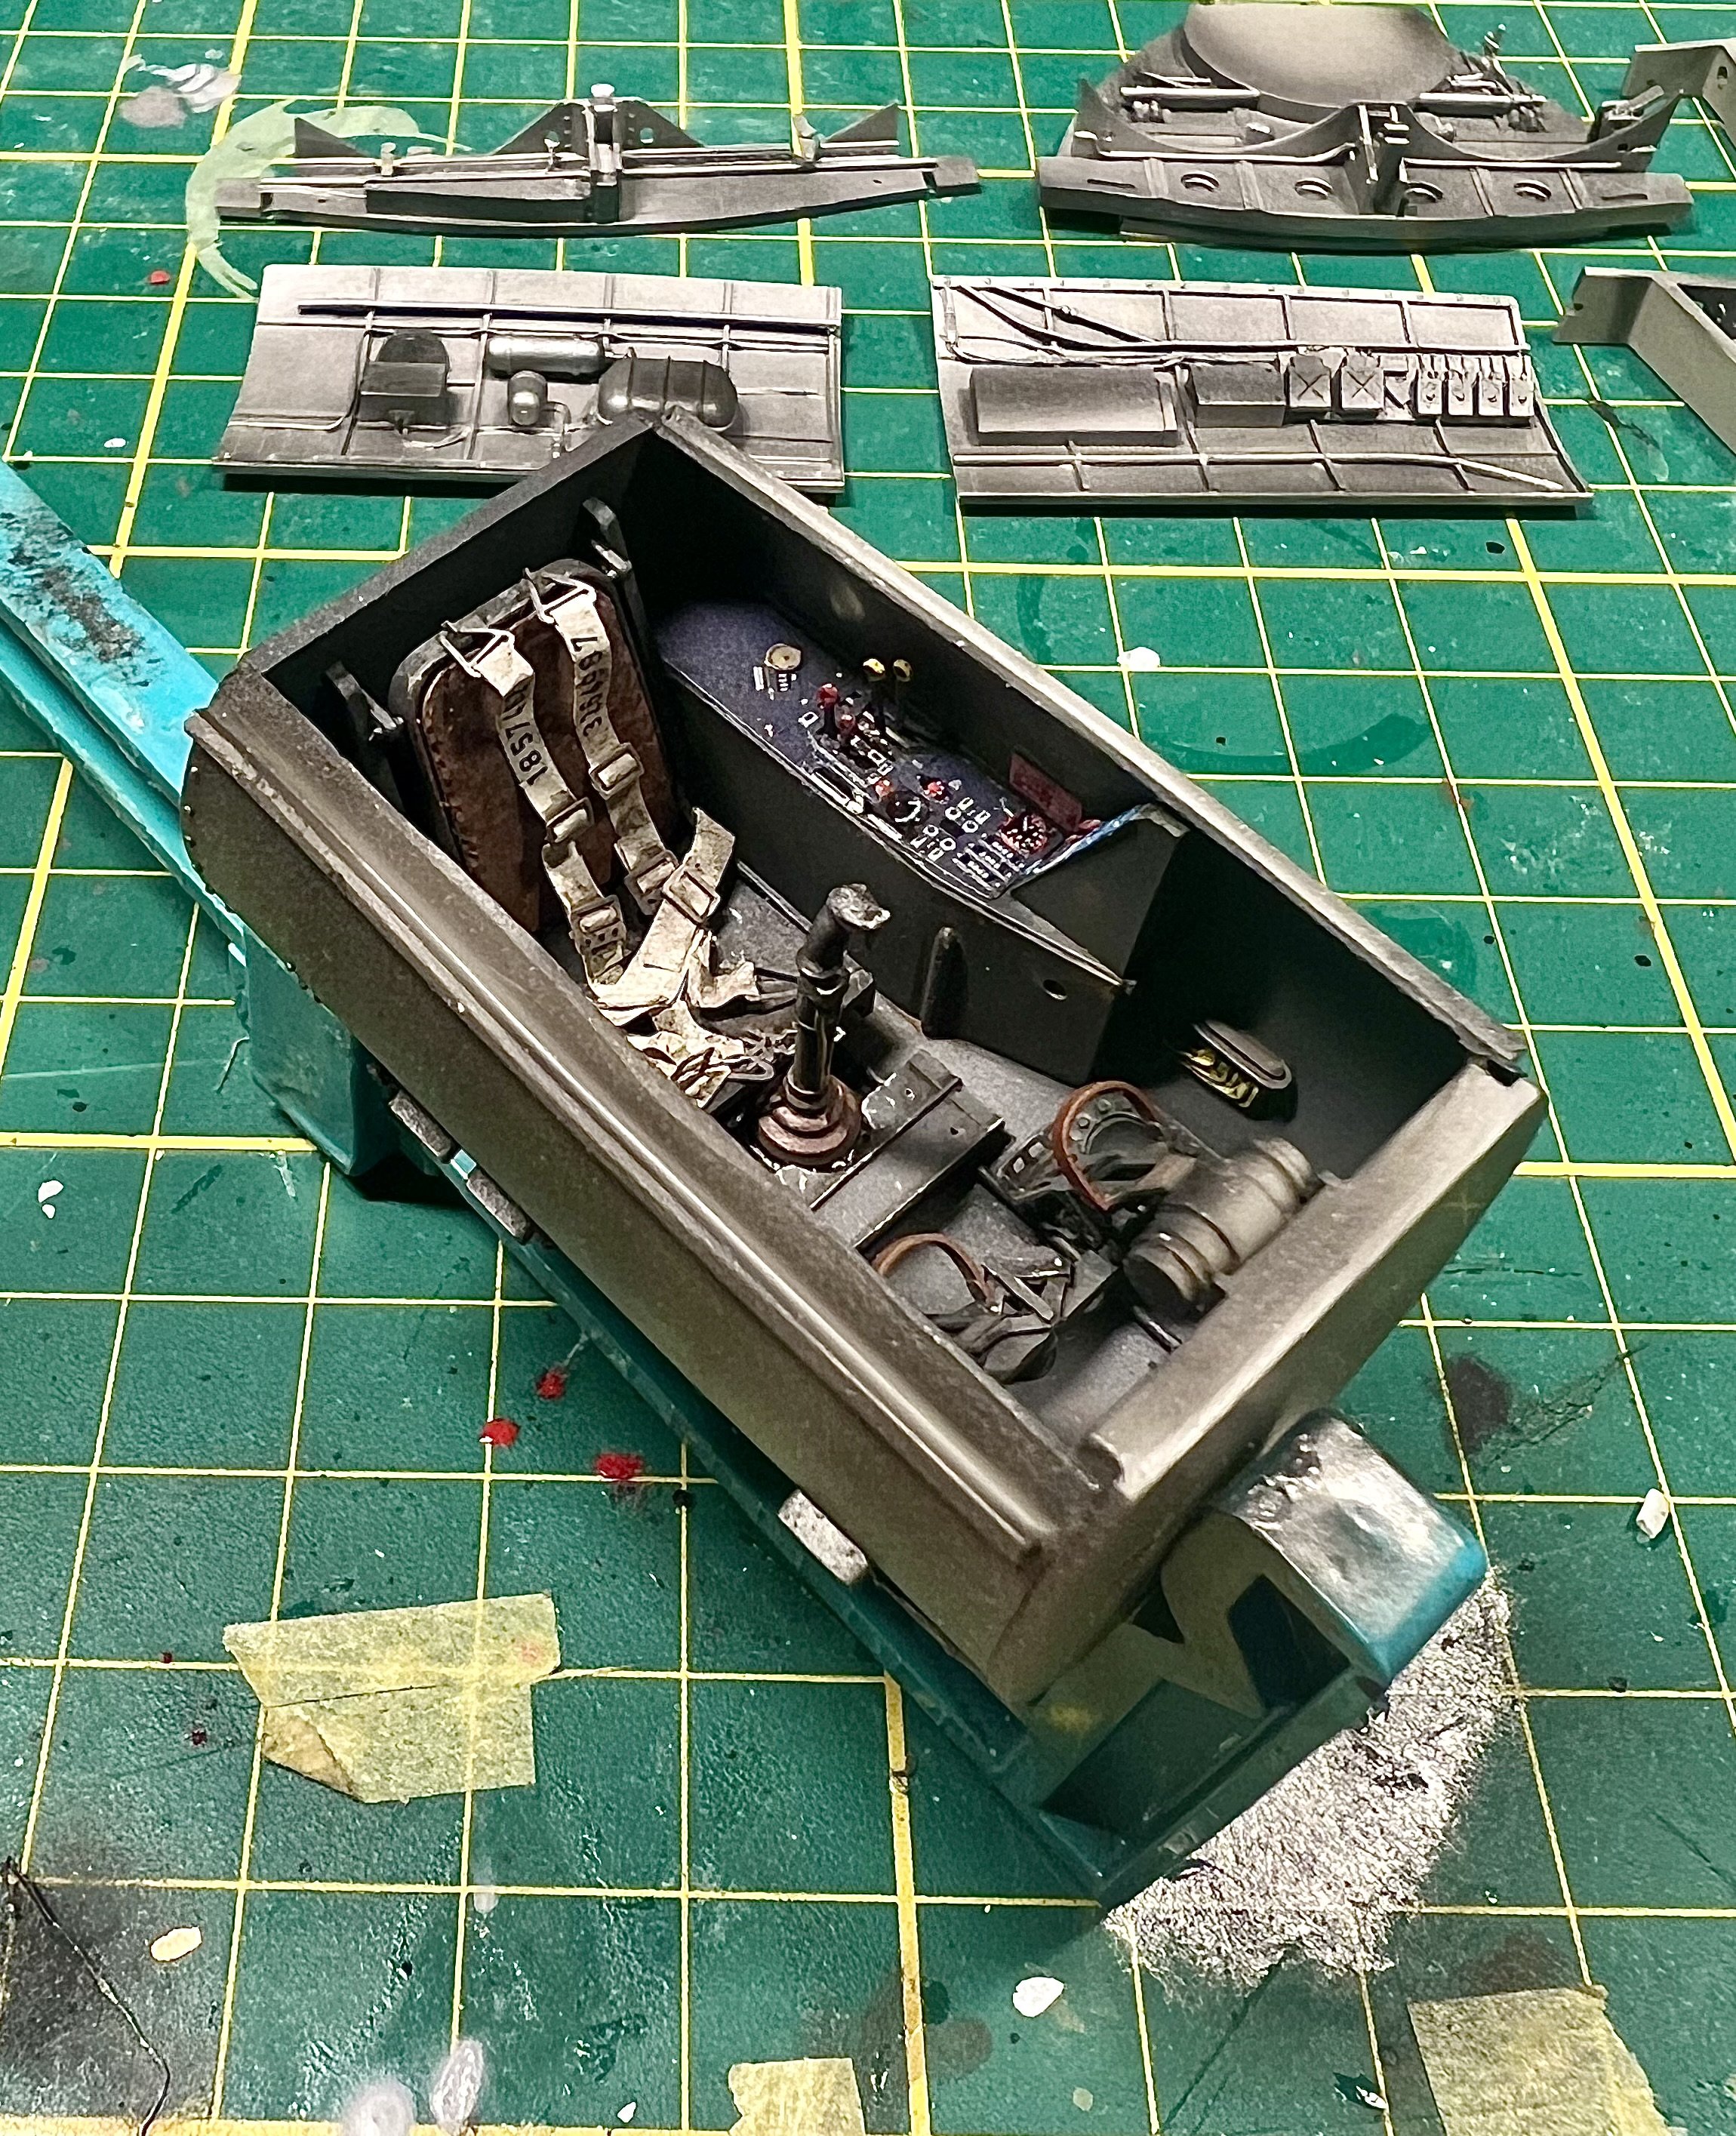
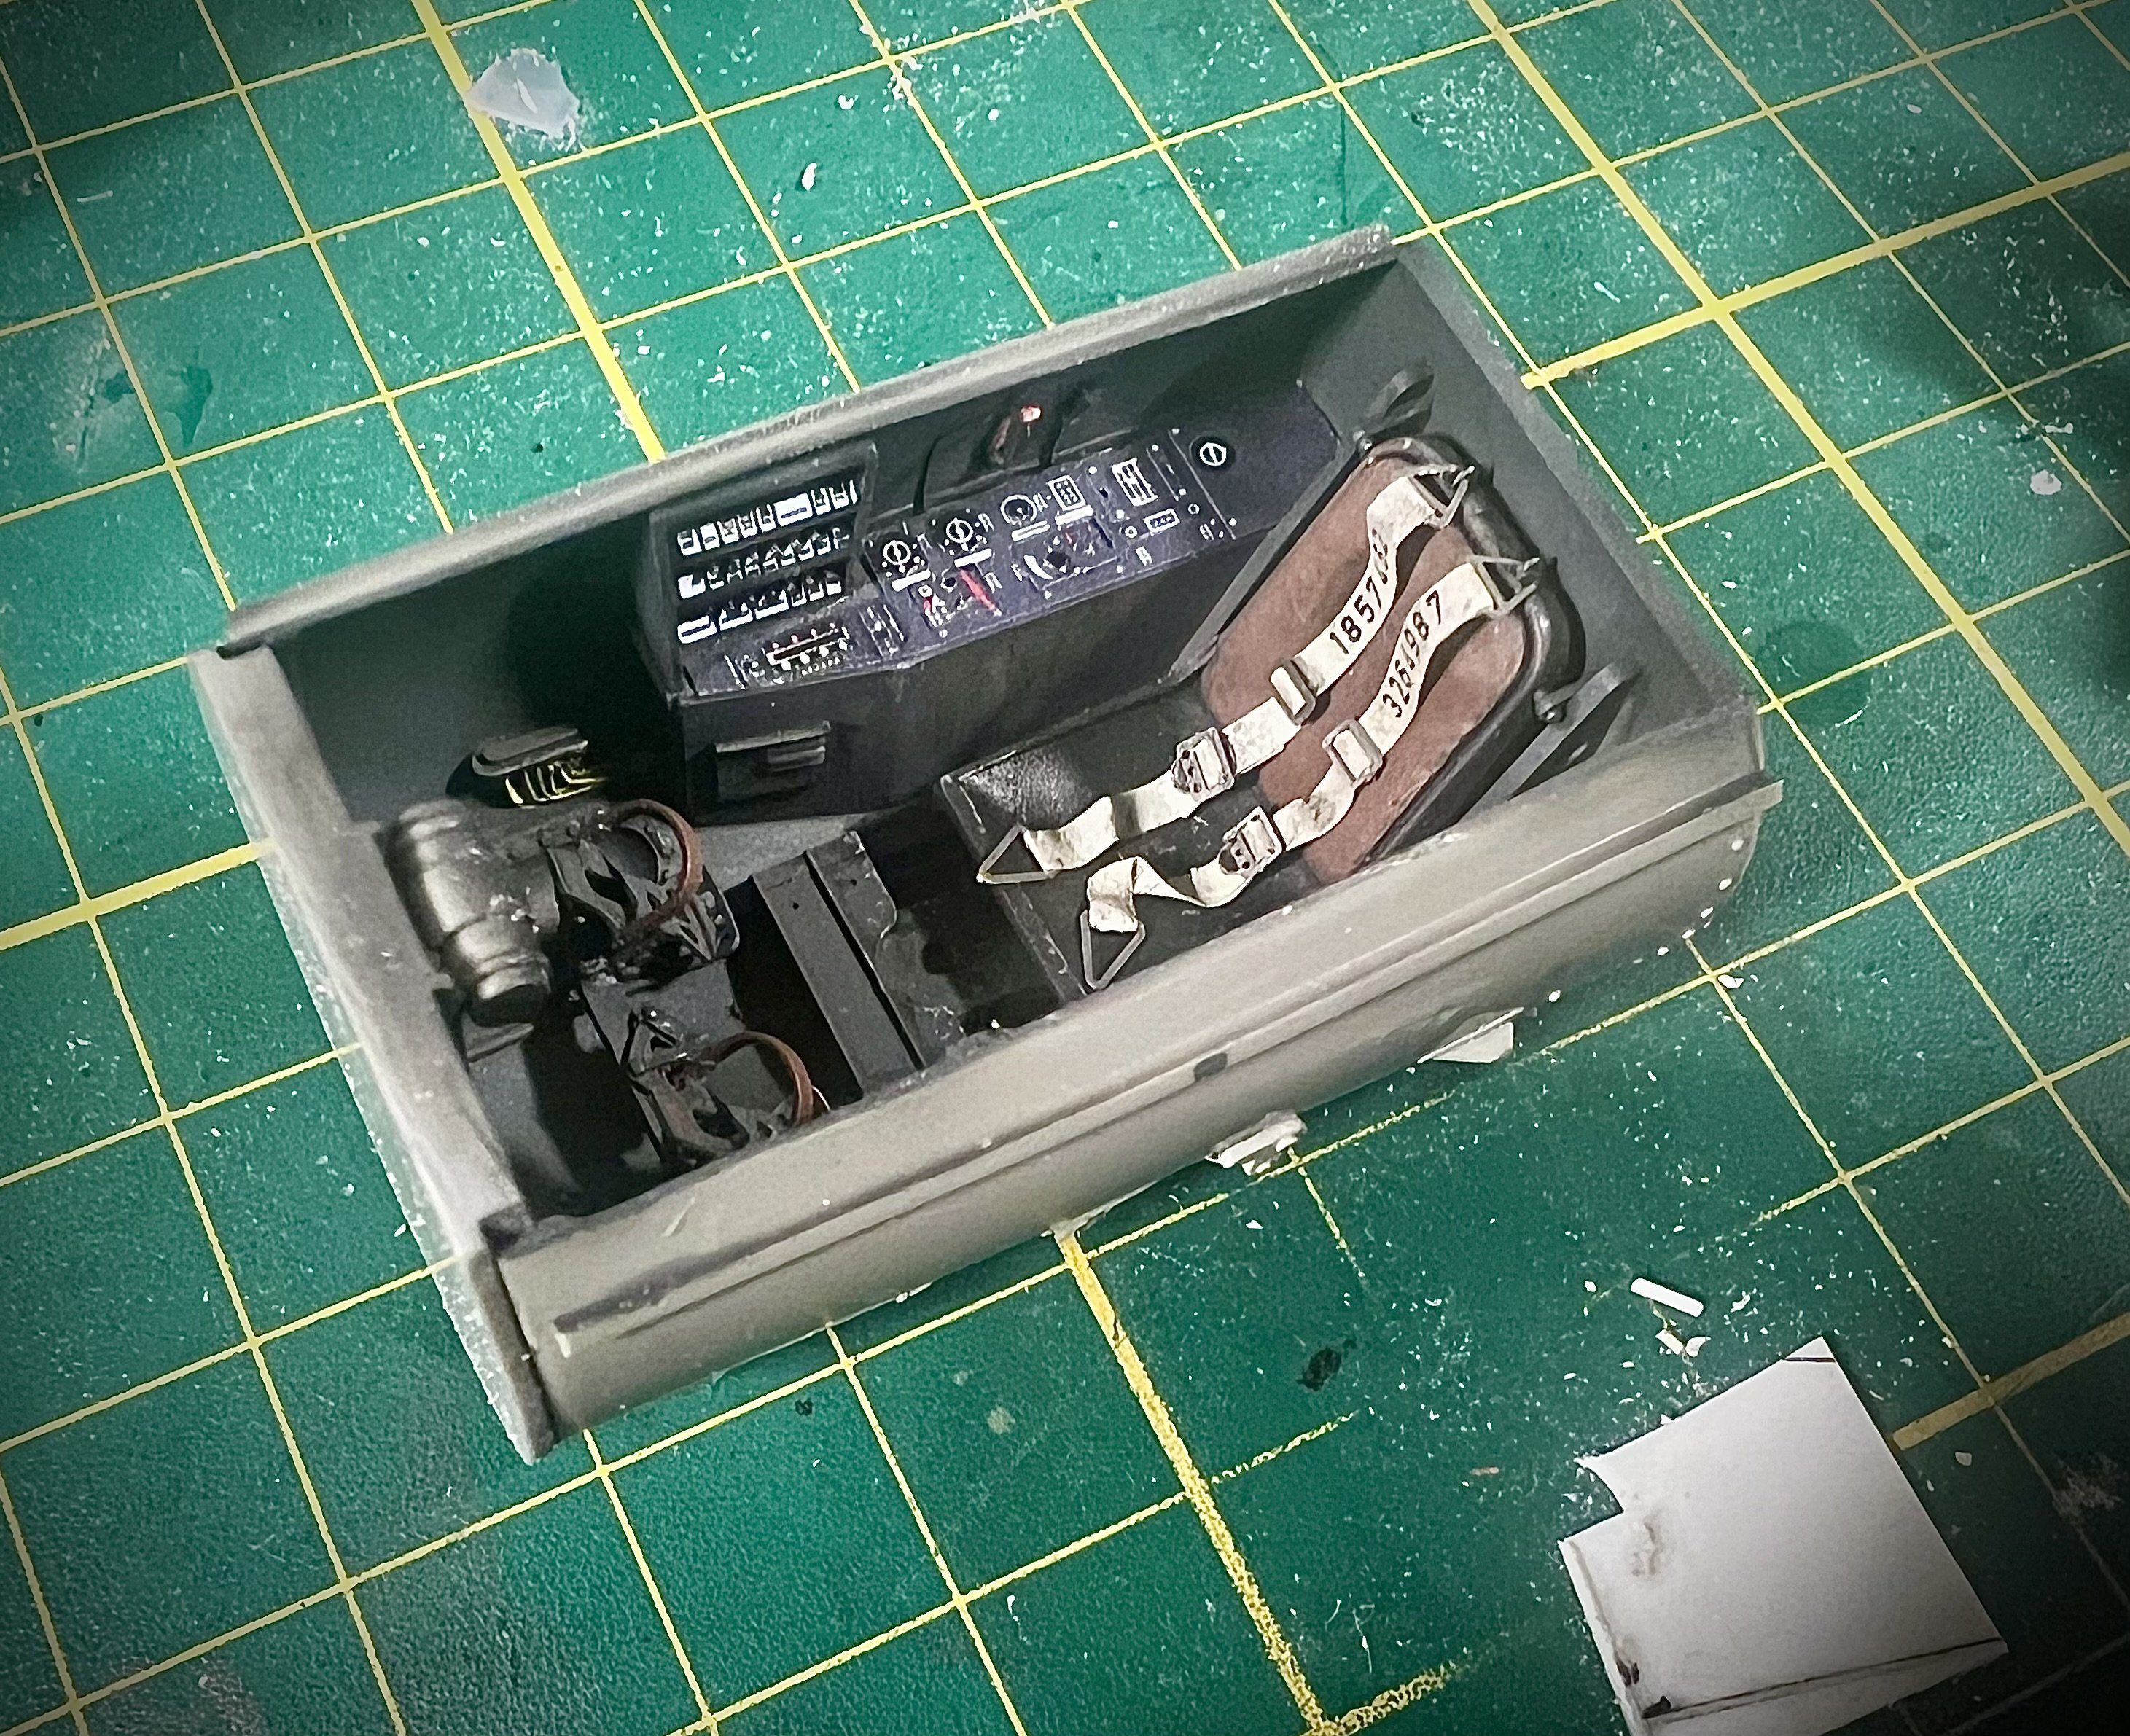
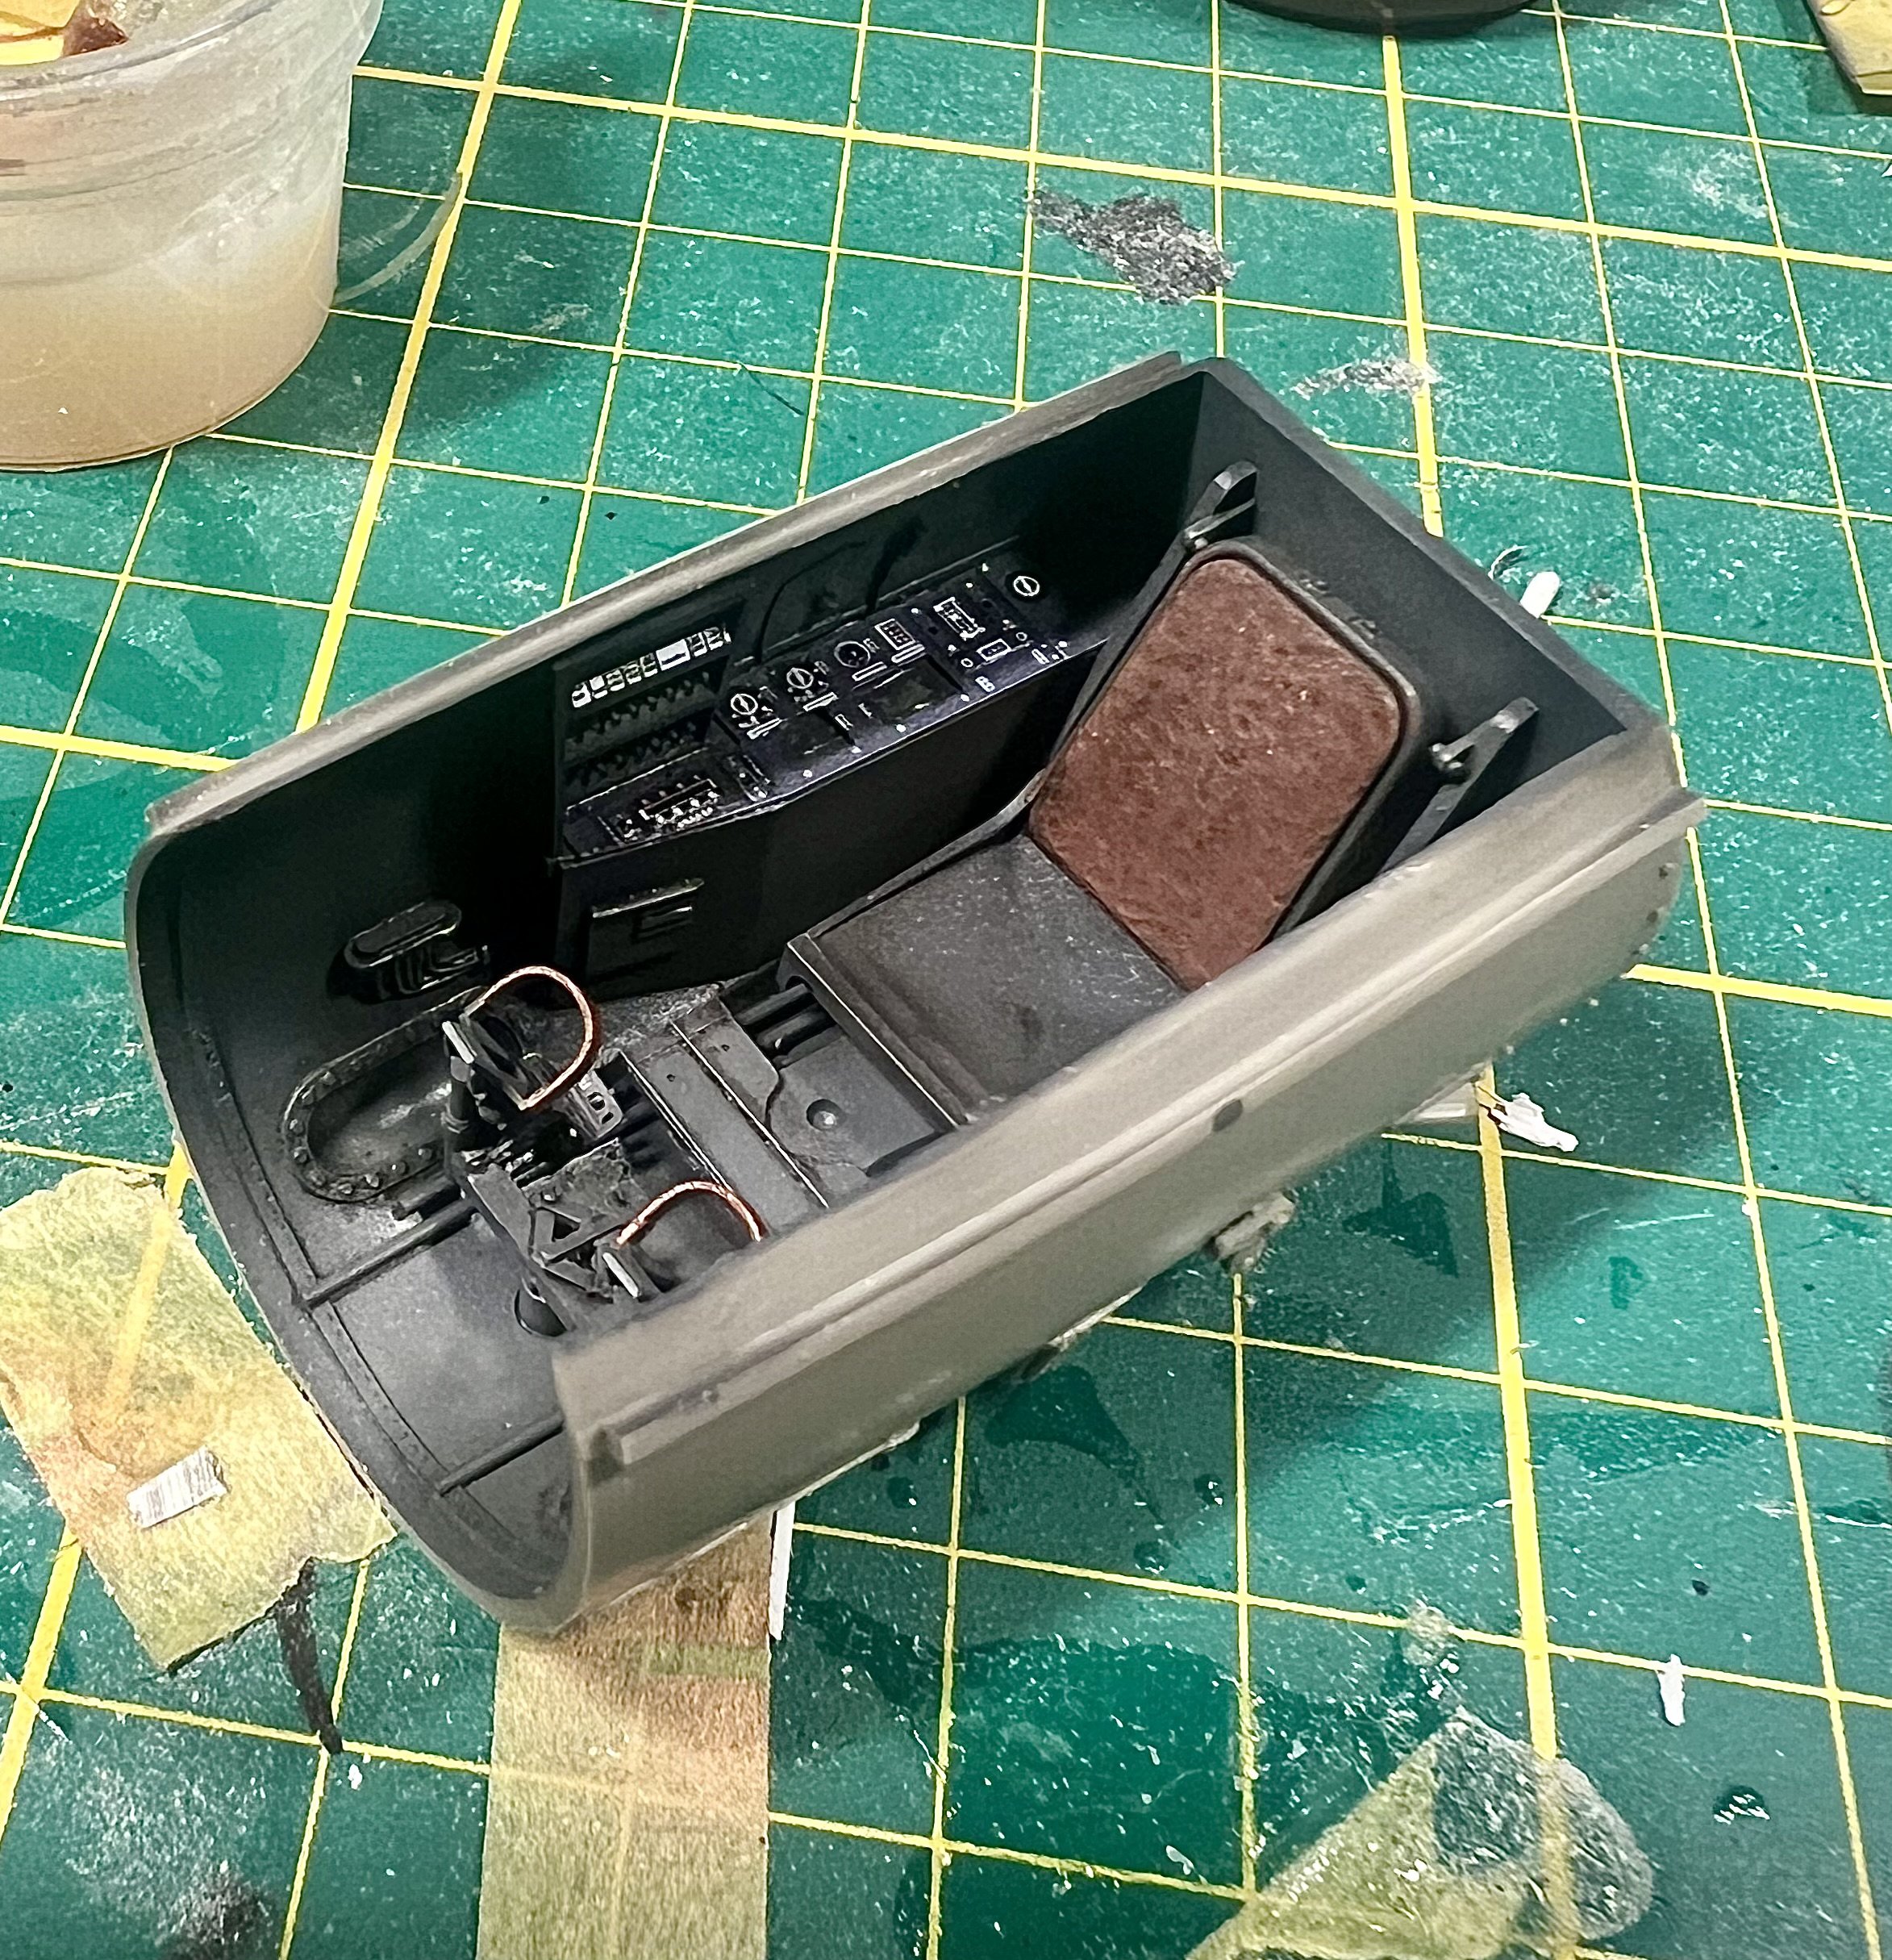
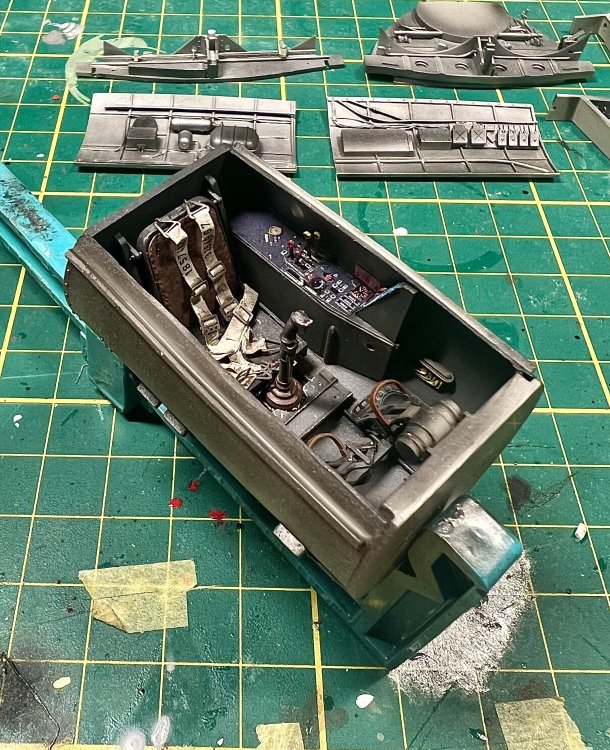
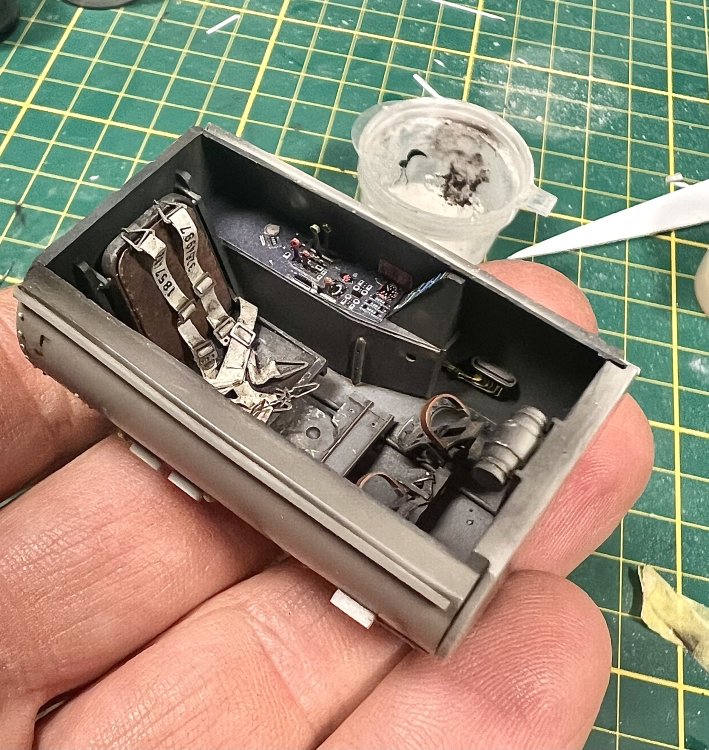
More work on the pit. Seatbelts done, wrinkled and weathered with pigments. More levers installed. Getting there.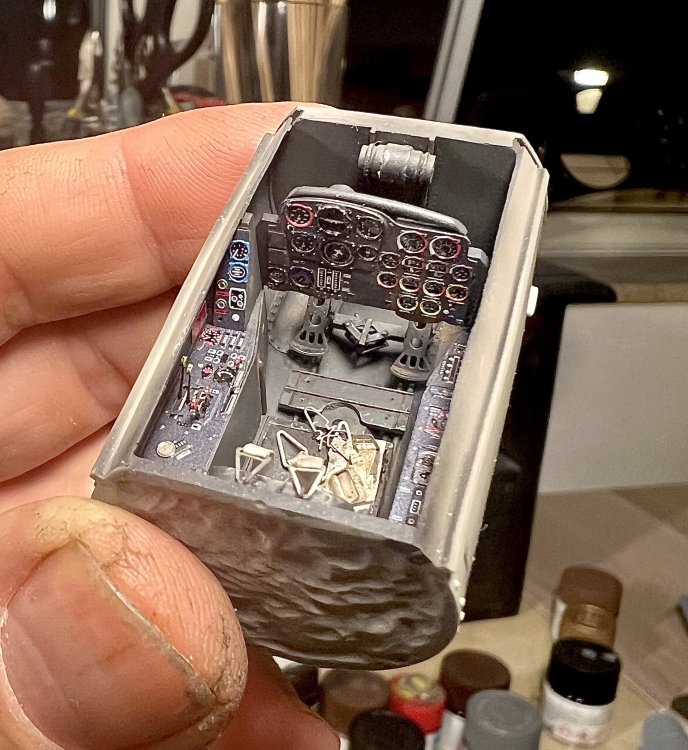
- 151 replies
-
- 10
-
-
1/32 ME-262A-2a/U2
JeroenPeters replied to JeroenPeters's topic in LSM 1/35 and Larger Work In Progress
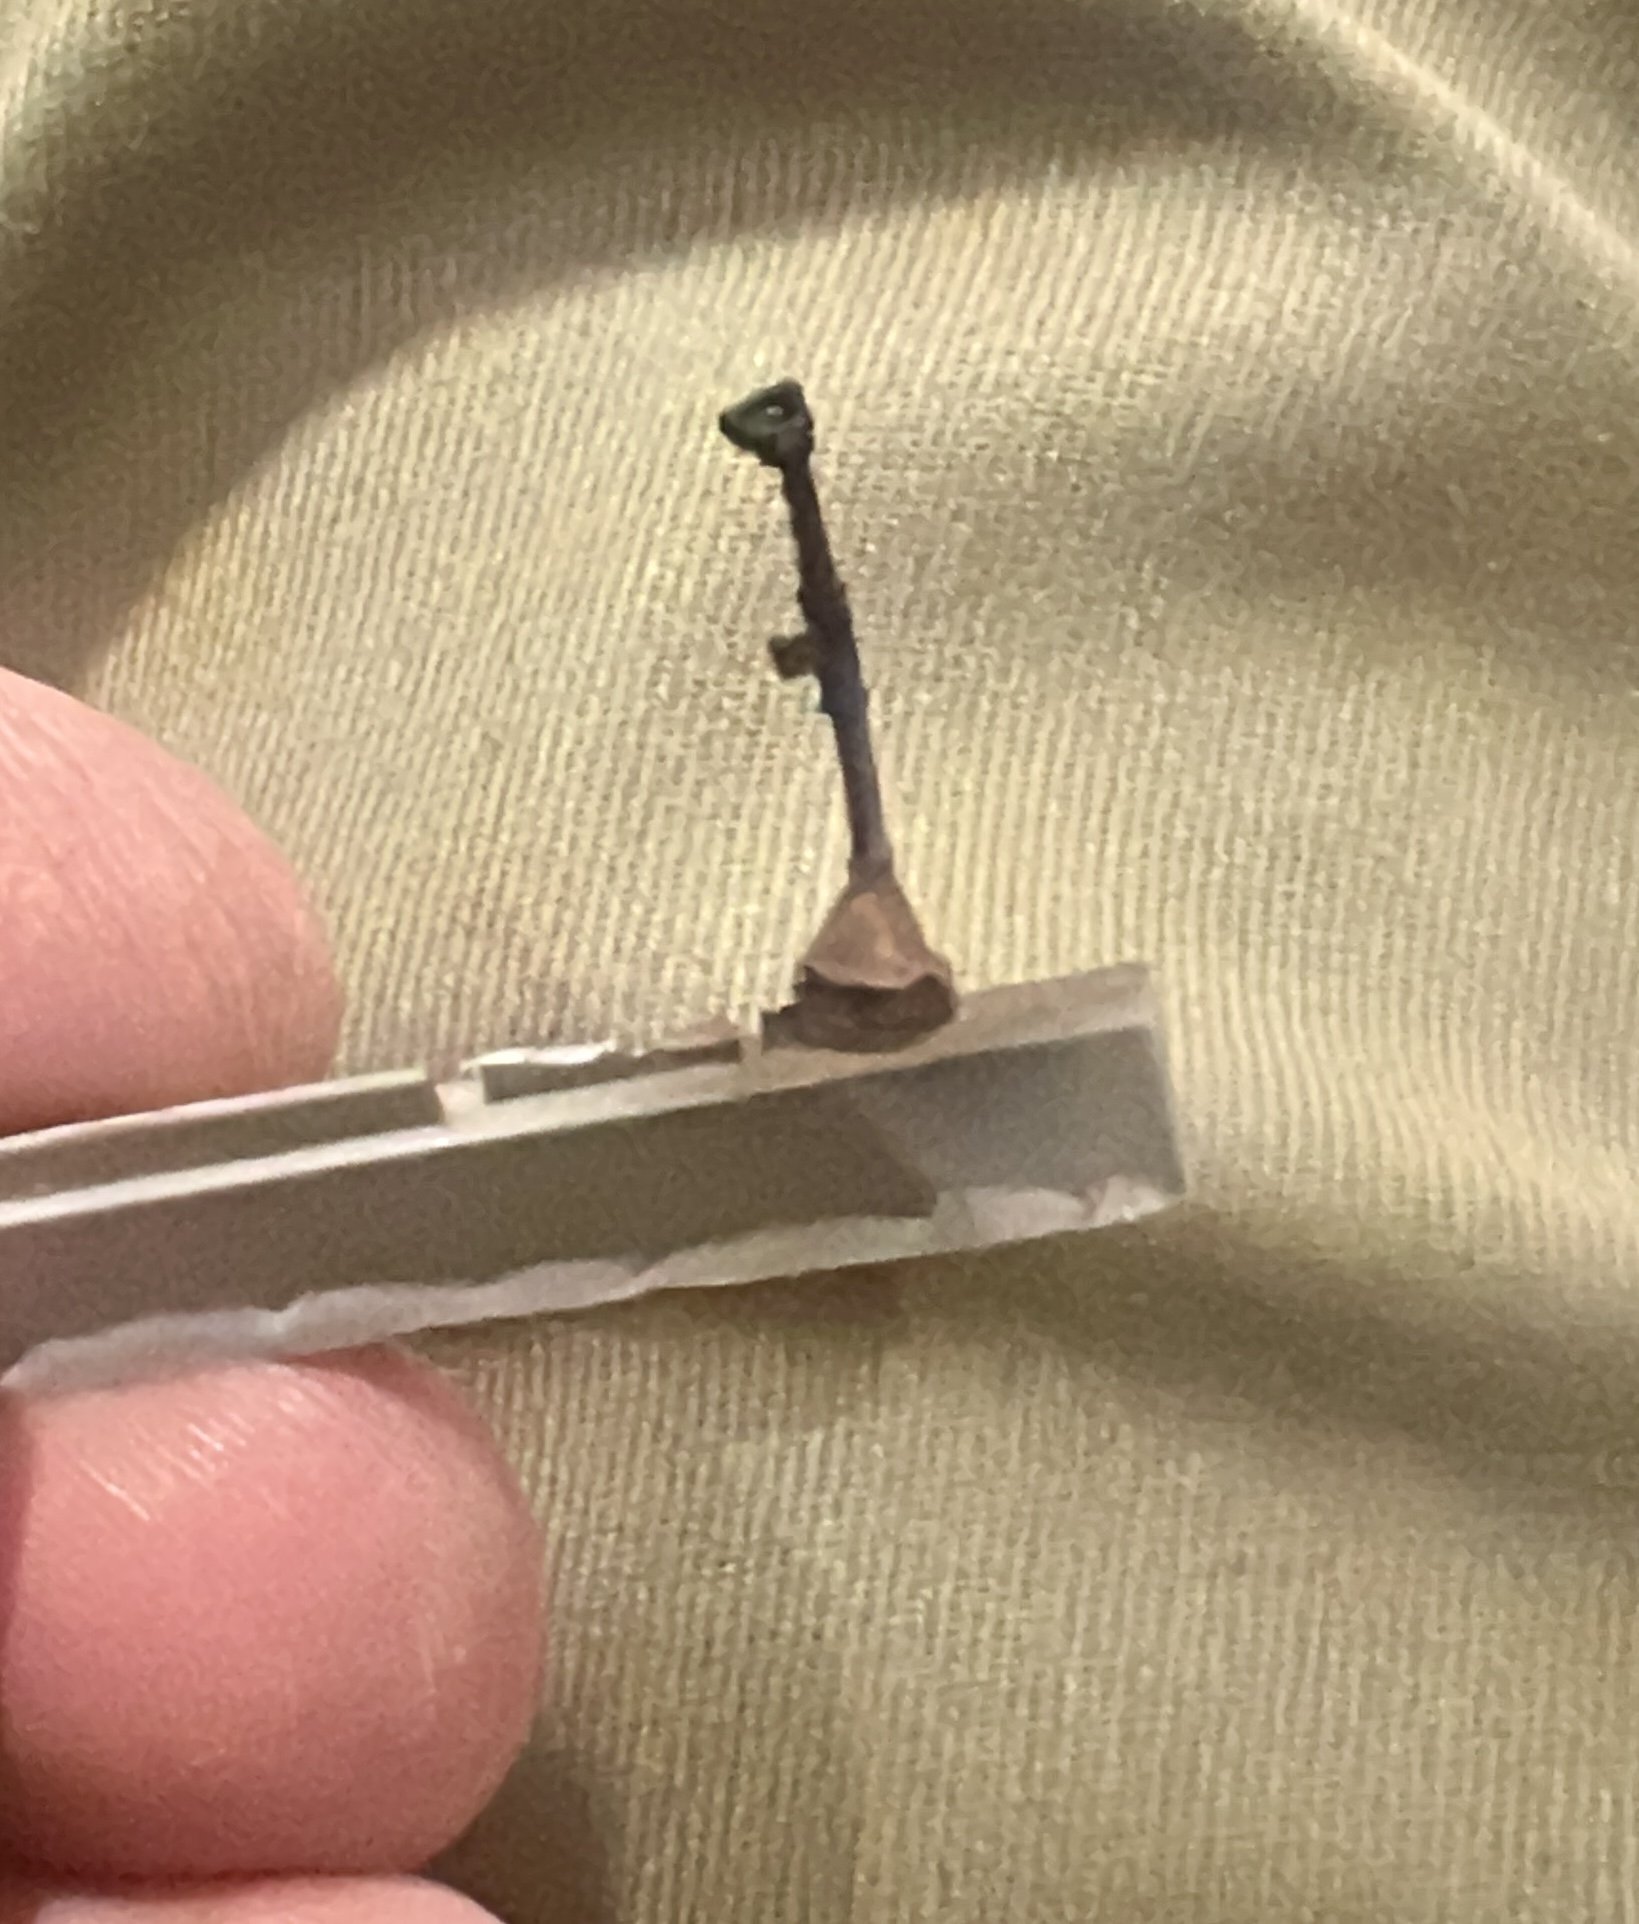
You are correct! But the release handle is still on my PE fret. I will install it after fitting the pit, since it will be easily knocked off. The handle you see is red as well, but looks yellow since you see it from the top in the pic and shines metal. I’ll add some extra red to that as well. Cheers!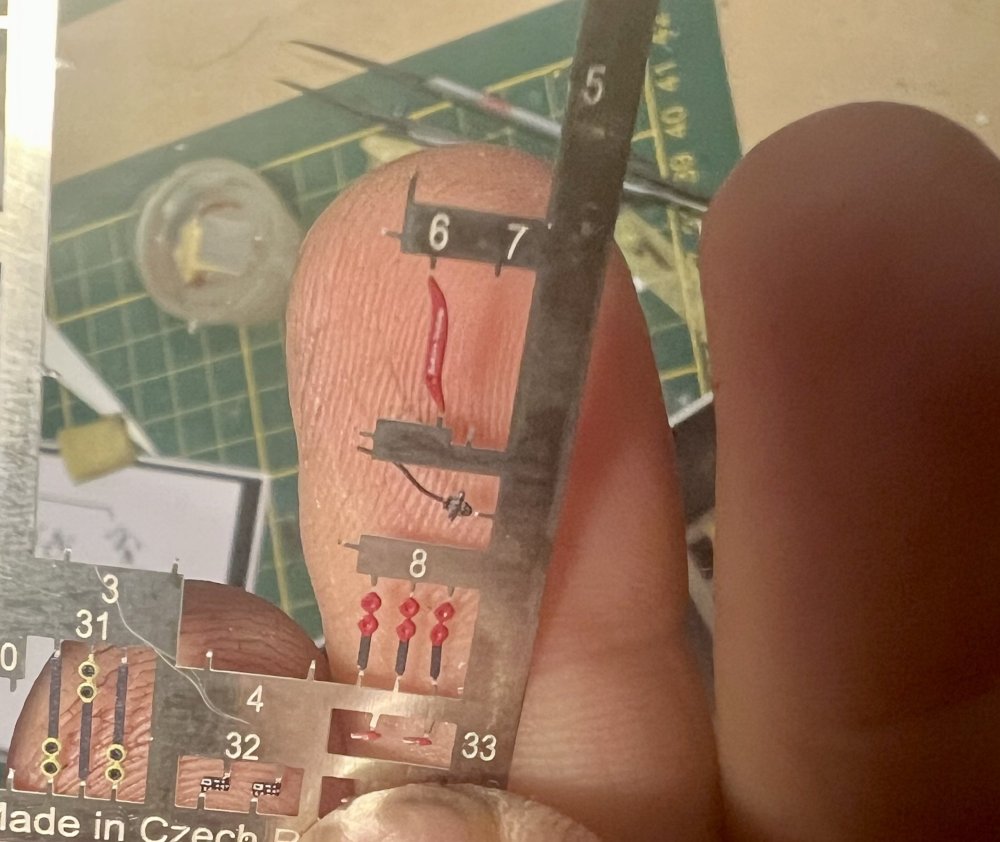
-
1/32 ME-262A-2a/U2
JeroenPeters replied to JeroenPeters's topic in LSM 1/35 and Larger Work In Progress
Starting to look like a pit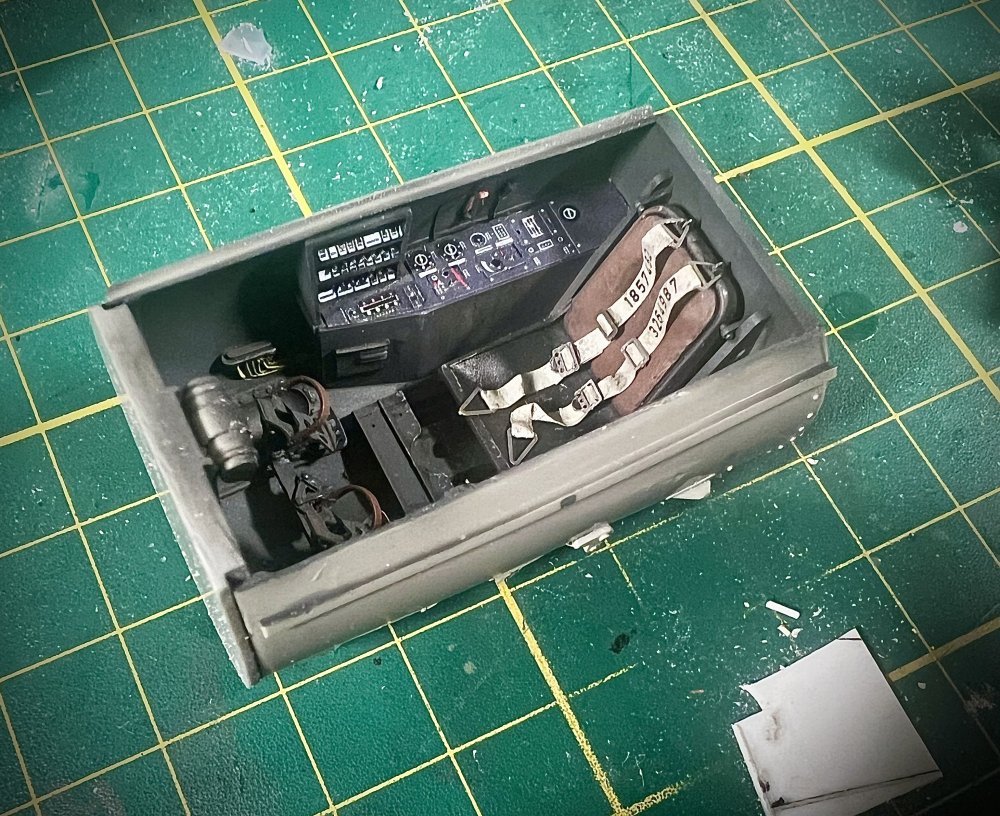
-
1/32 ME-262A-2a/U2
JeroenPeters replied to JeroenPeters's topic in LSM 1/35 and Larger Work In Progress
Slowly adding detail to the pit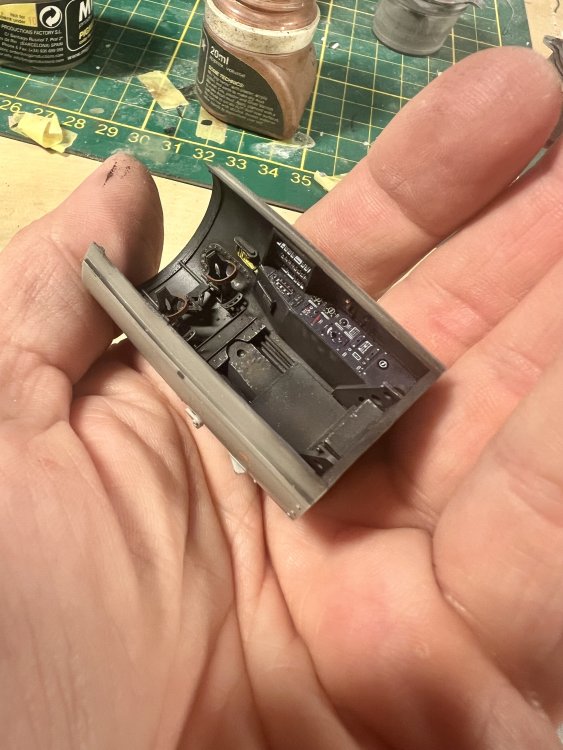
-
1/32 ME-262A-2a/U2
JeroenPeters replied to JeroenPeters's topic in LSM 1/35 and Larger Work In Progress
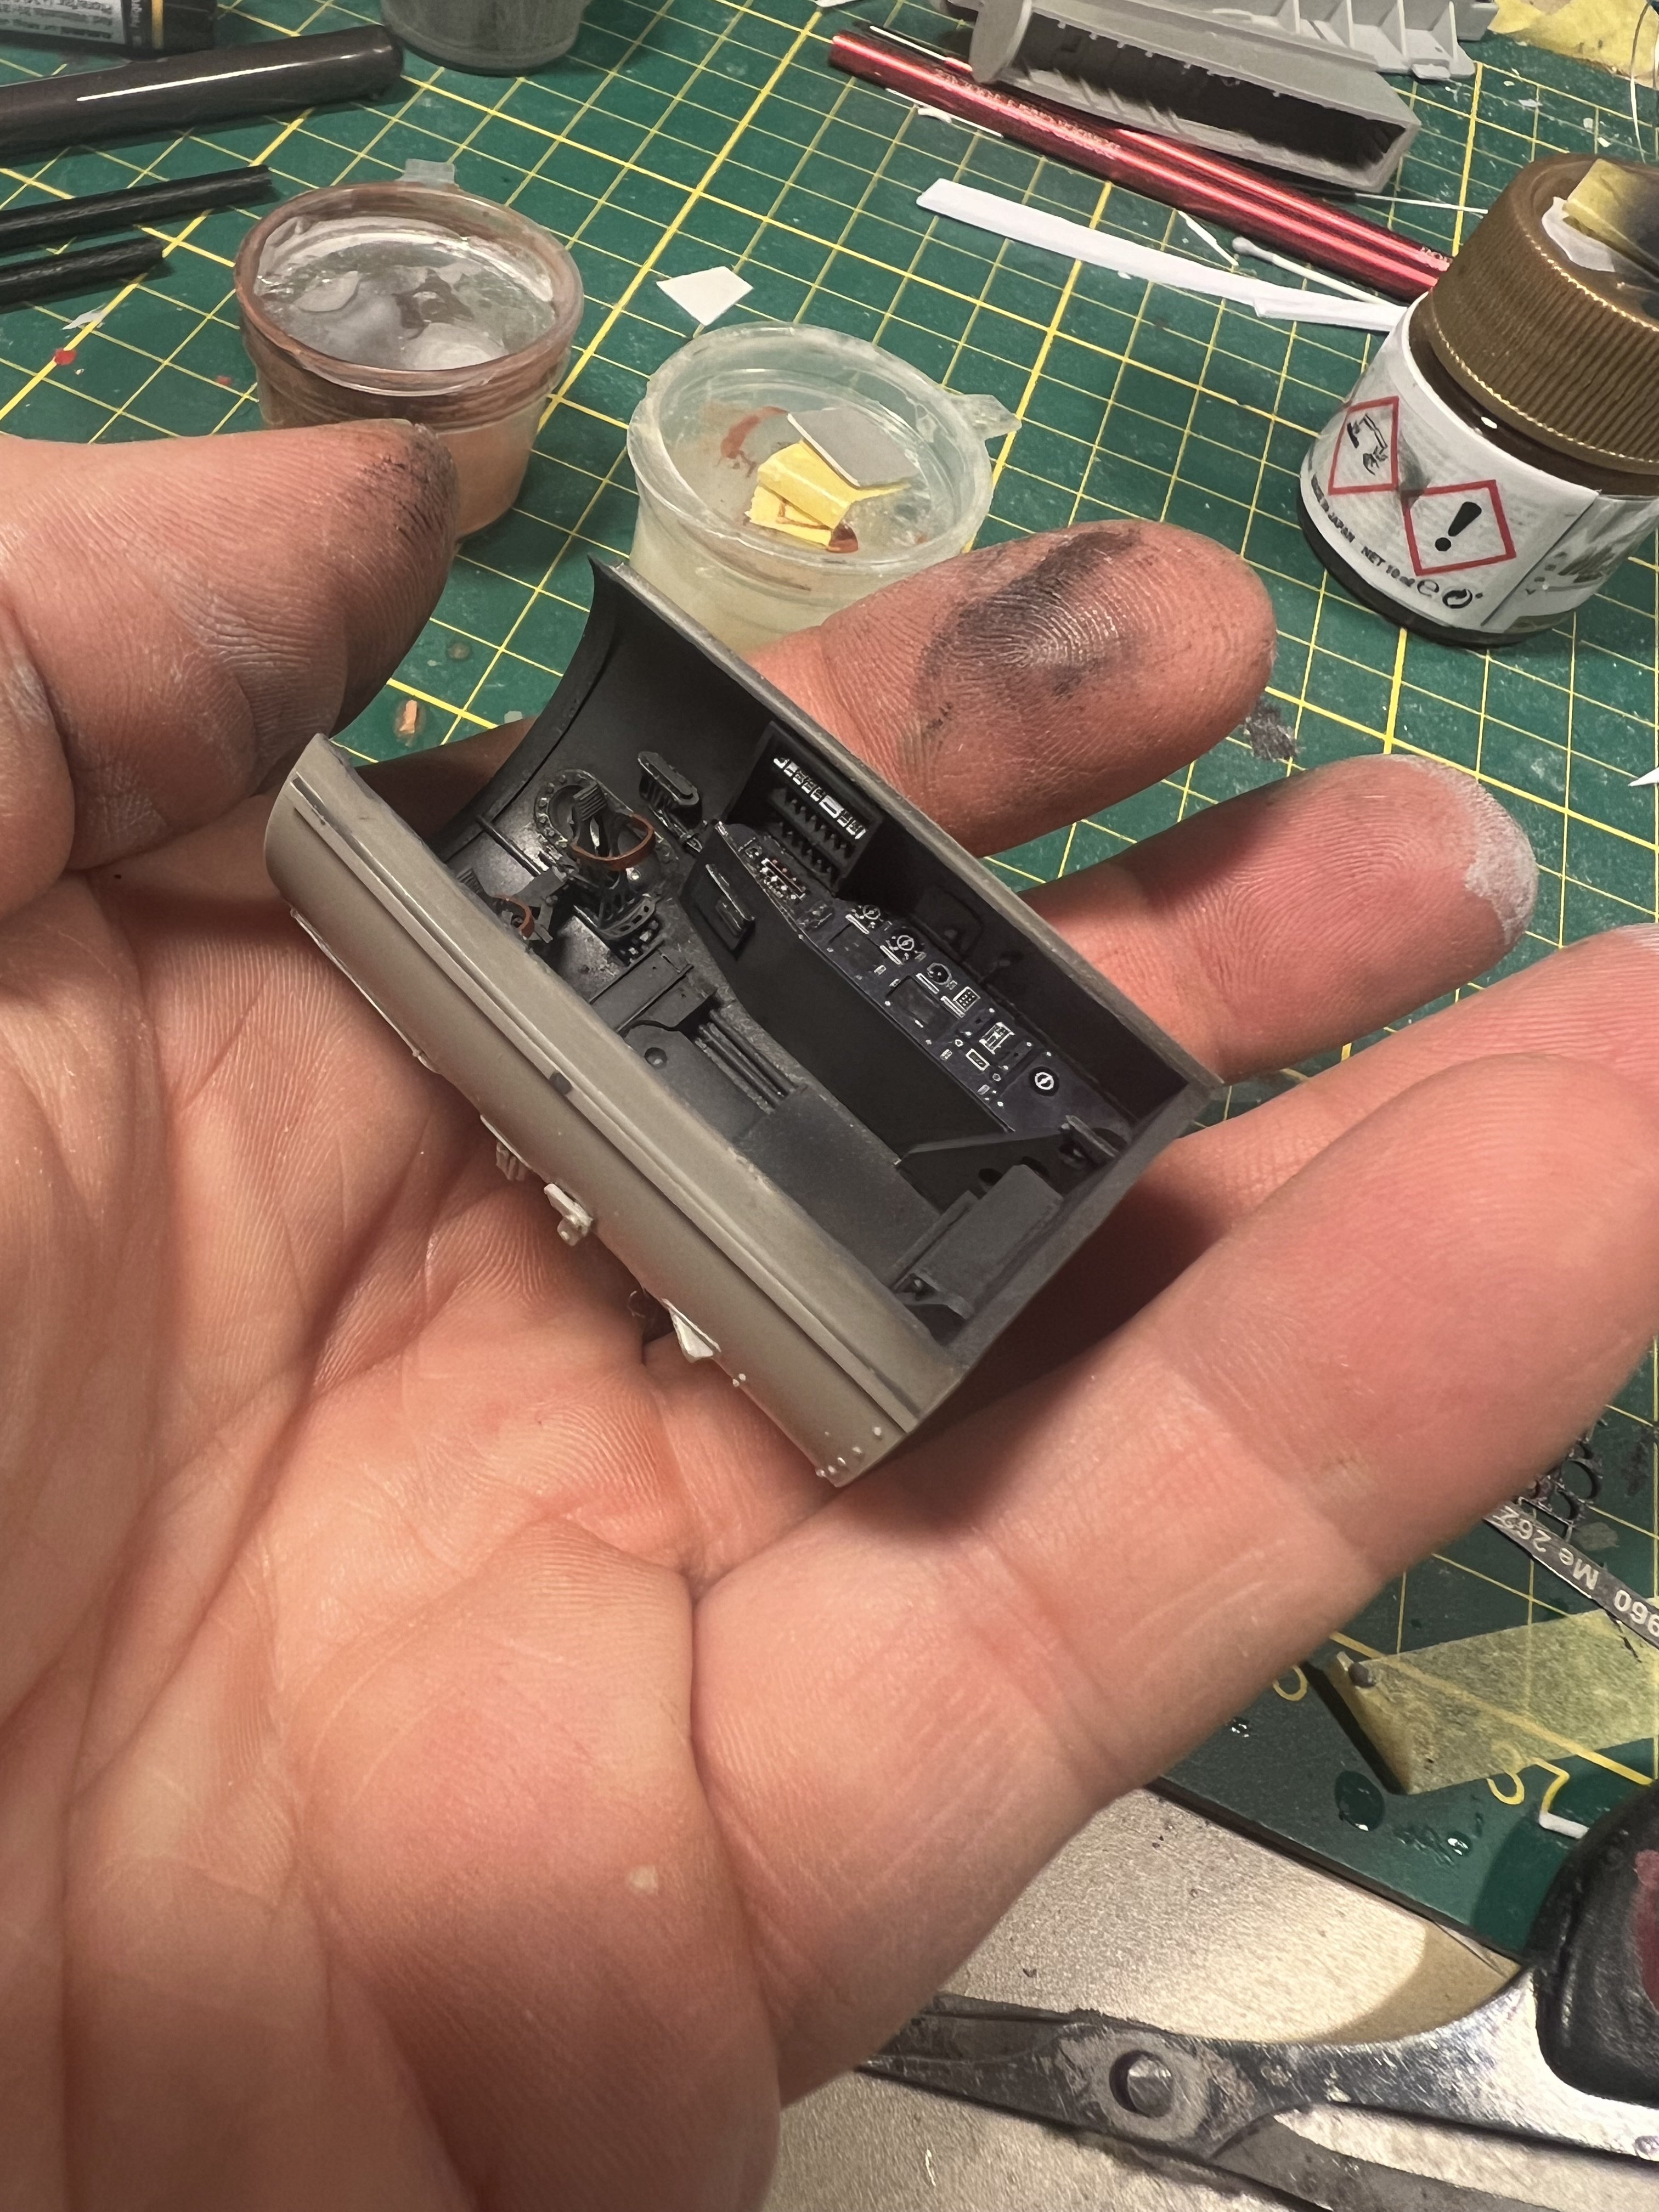
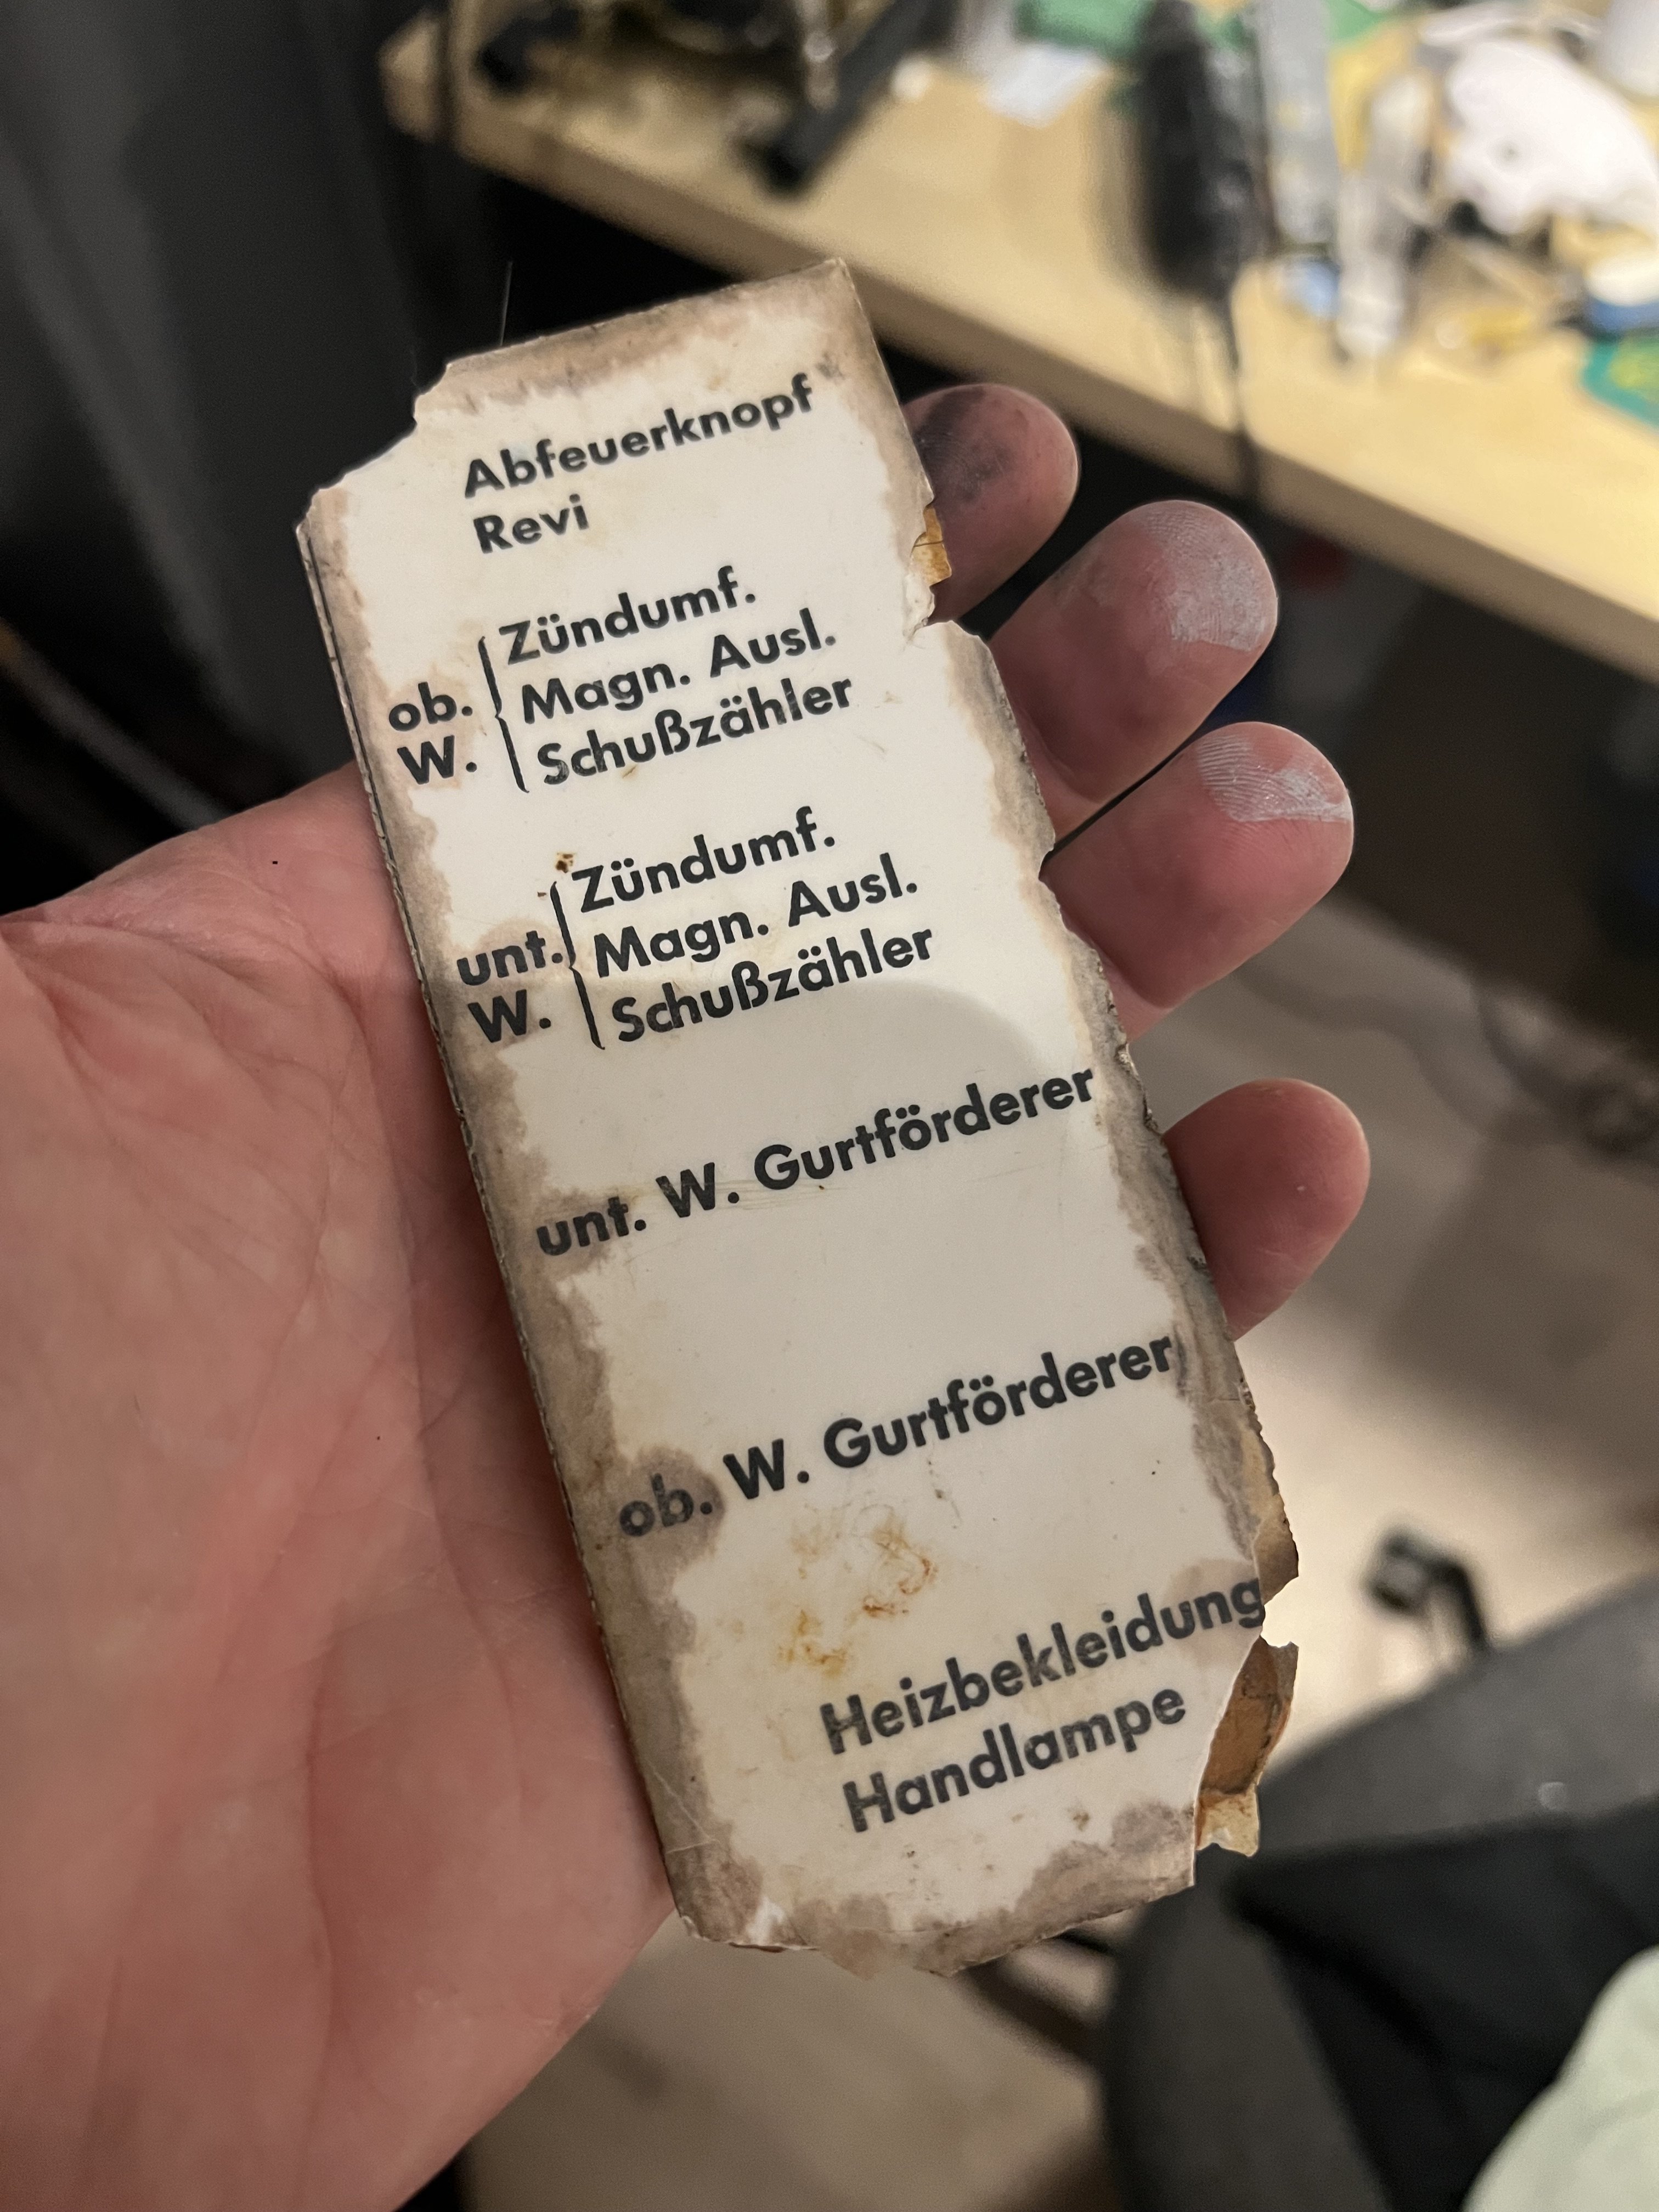
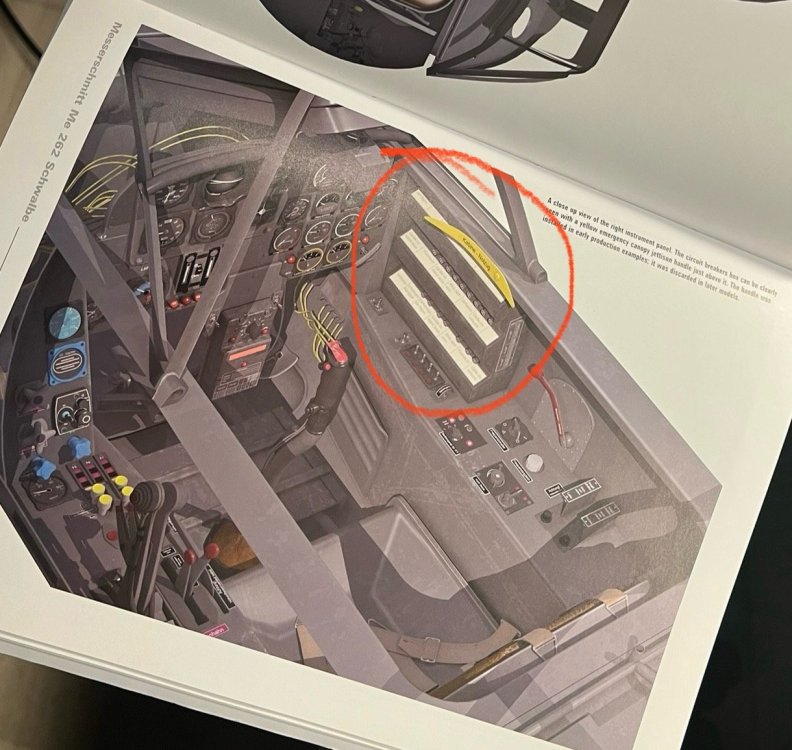
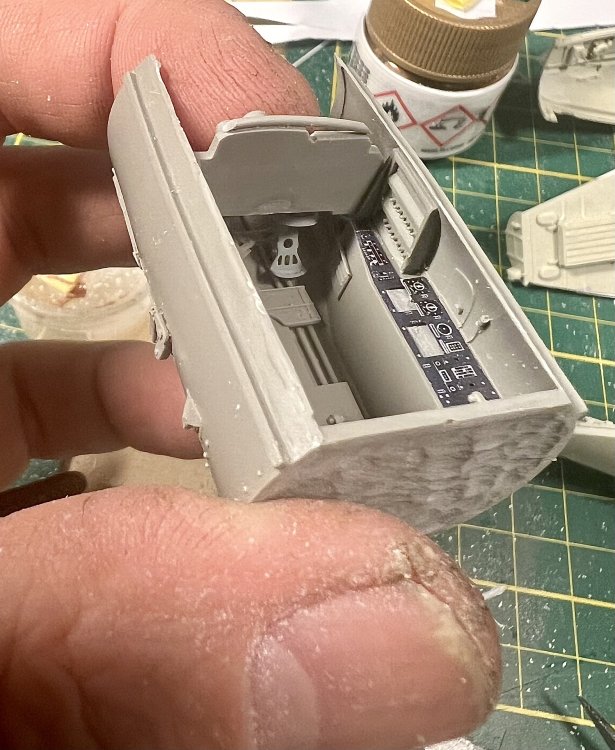
First paint in the pit. Mixed my own RLM66 to match the Eduard coloured PE. Much more stages to go, but it’s a start. Also found in my stuff original me262 breaker switch lettering. If that makes sense. I encircled them in one of the most useful me262 books i have for a modeller.


-
1/32 ME-262A-2a/U2
JeroenPeters replied to JeroenPeters's topic in LSM 1/35 and Larger Work In Progress
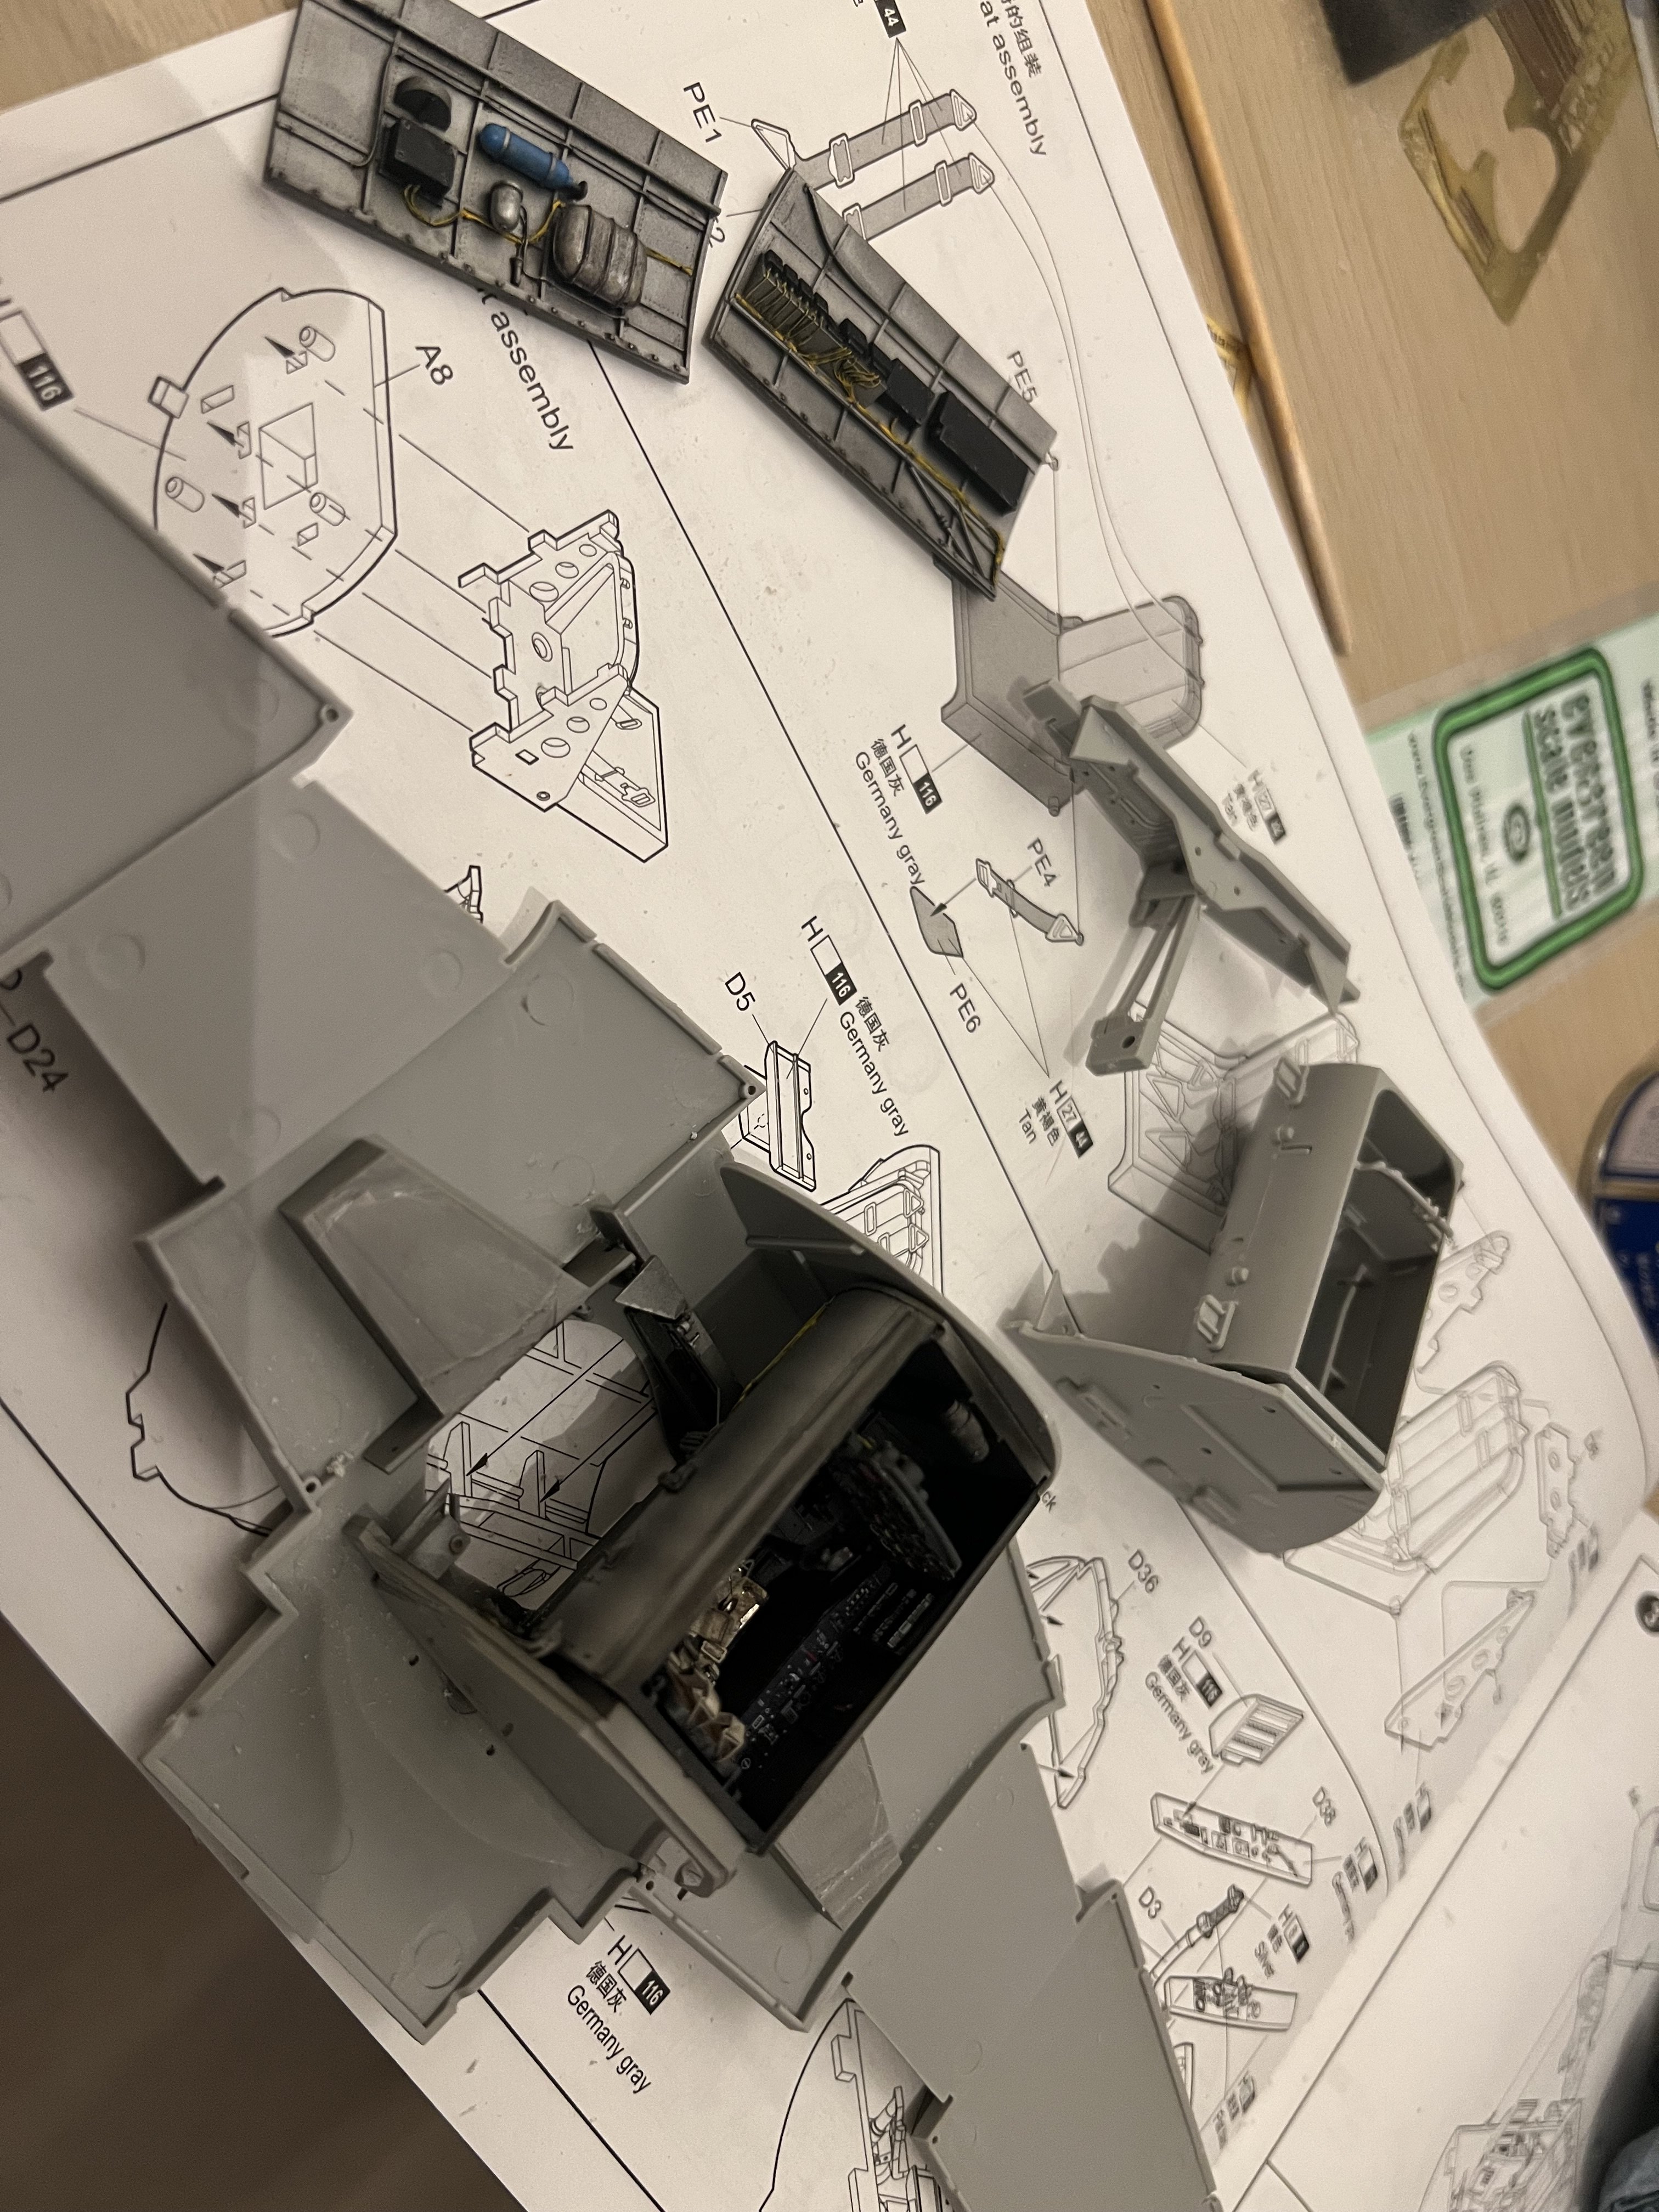
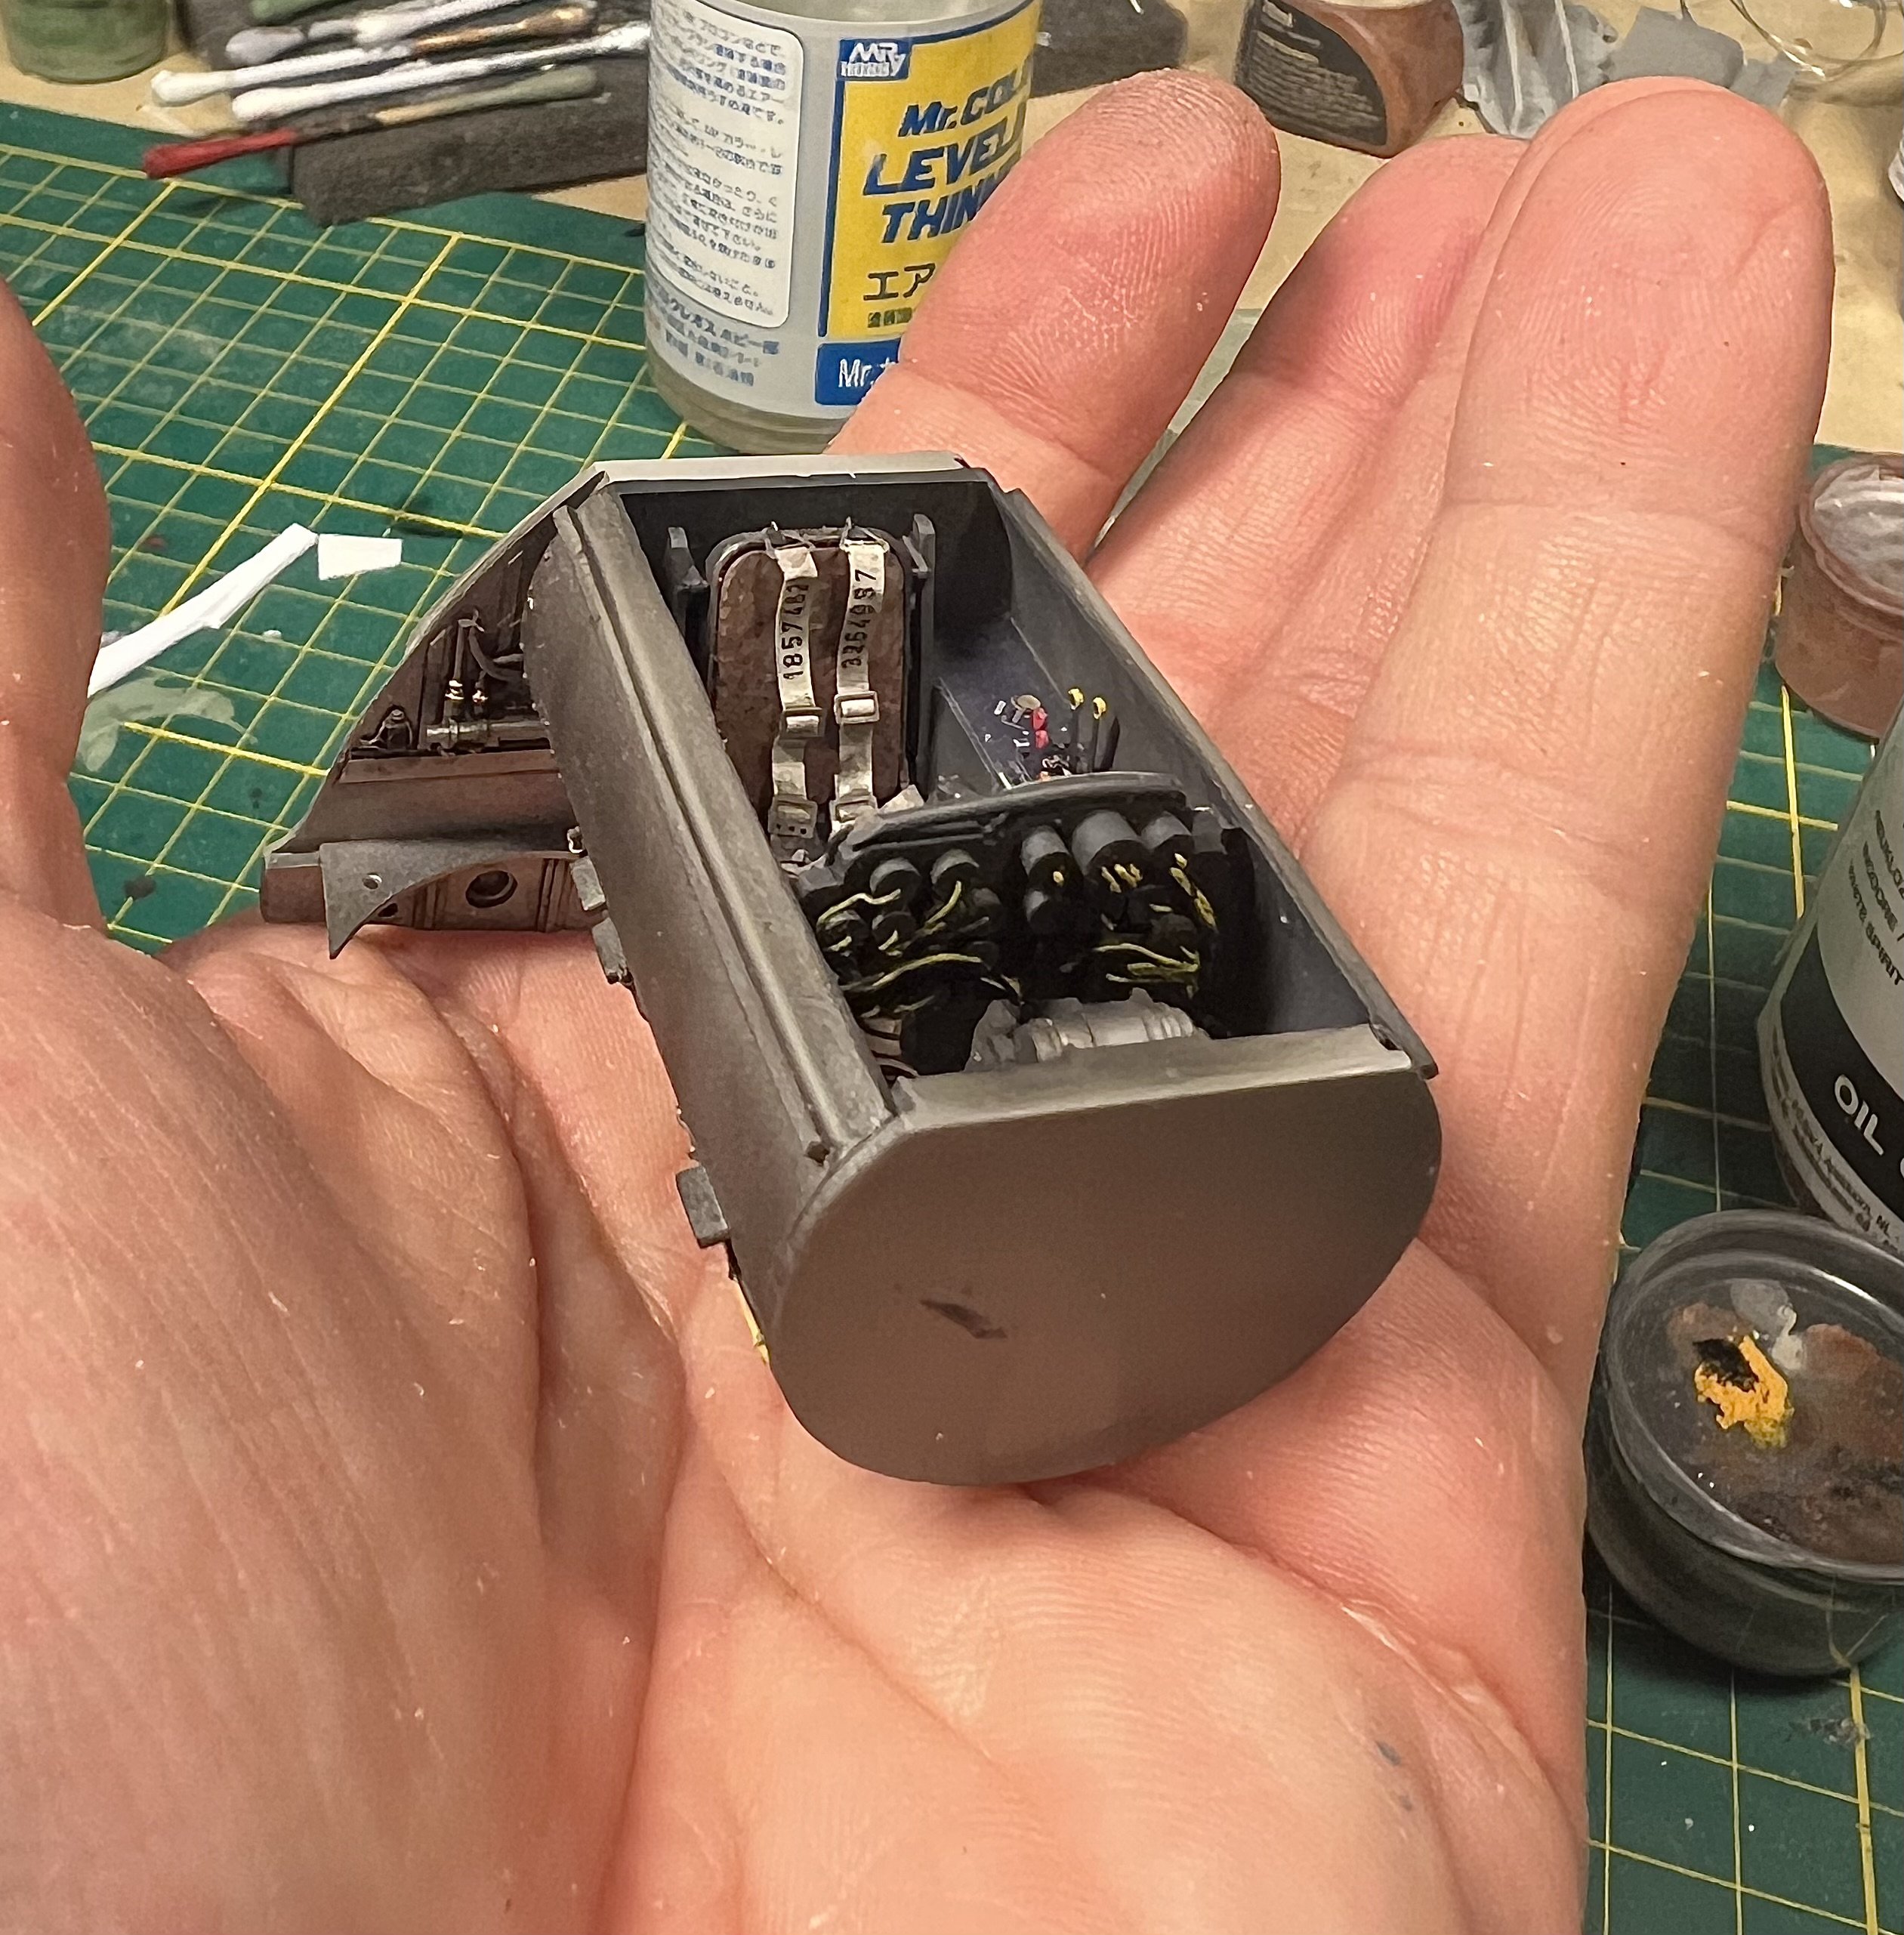
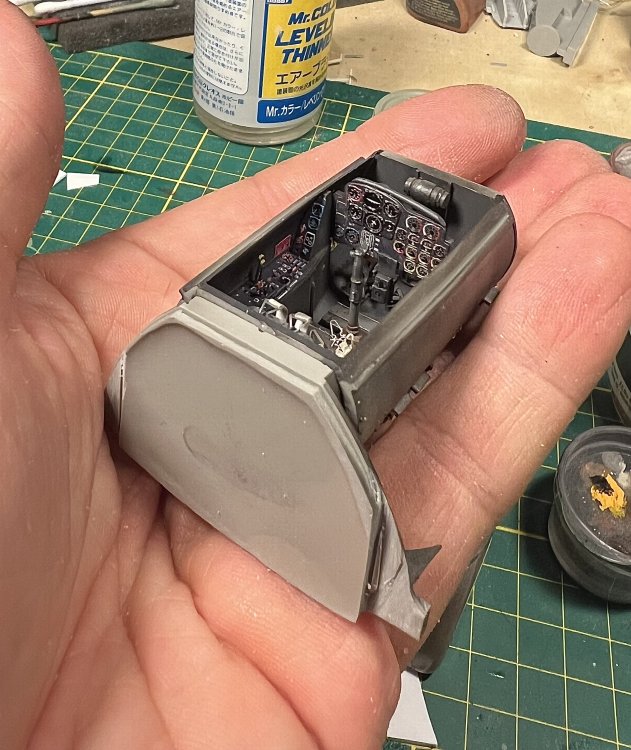
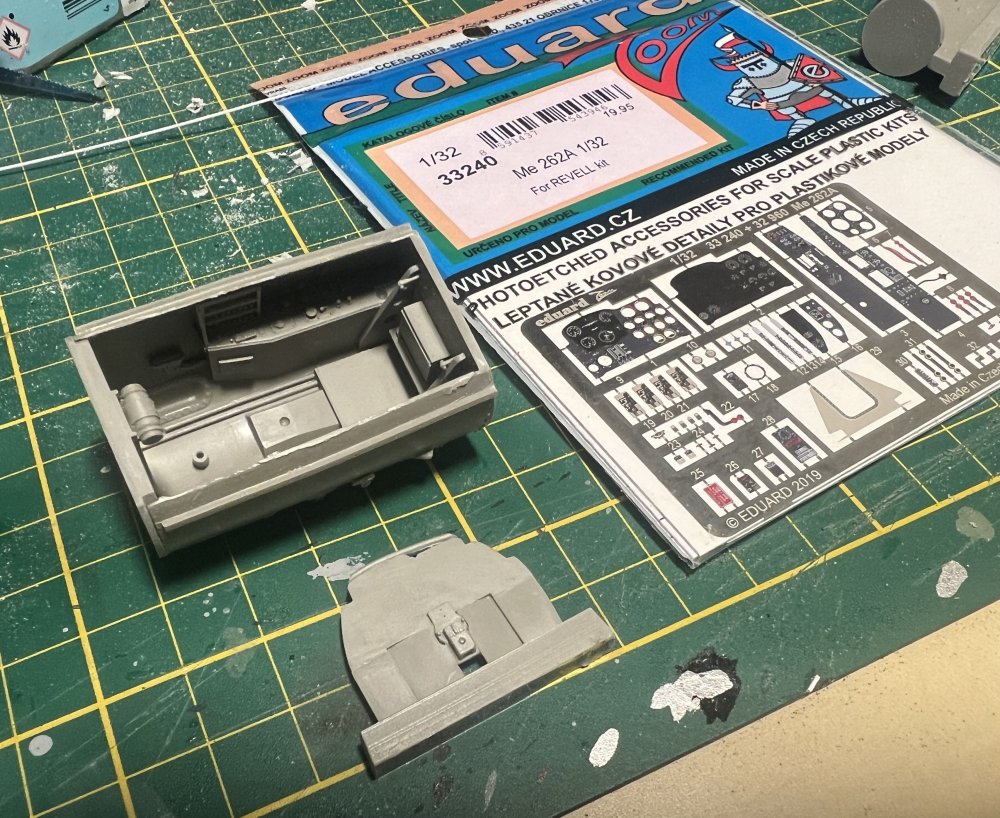
Combining the Aires resin cockpit with Eduard coloured PE and rudder controls. The PE needs some adjustment but nothing major. My me262 control panel provides some mojo.
-
1/32 ME-262A-2a/U2
JeroenPeters replied to JeroenPeters's topic in LSM 1/35 and Larger Work In Progress
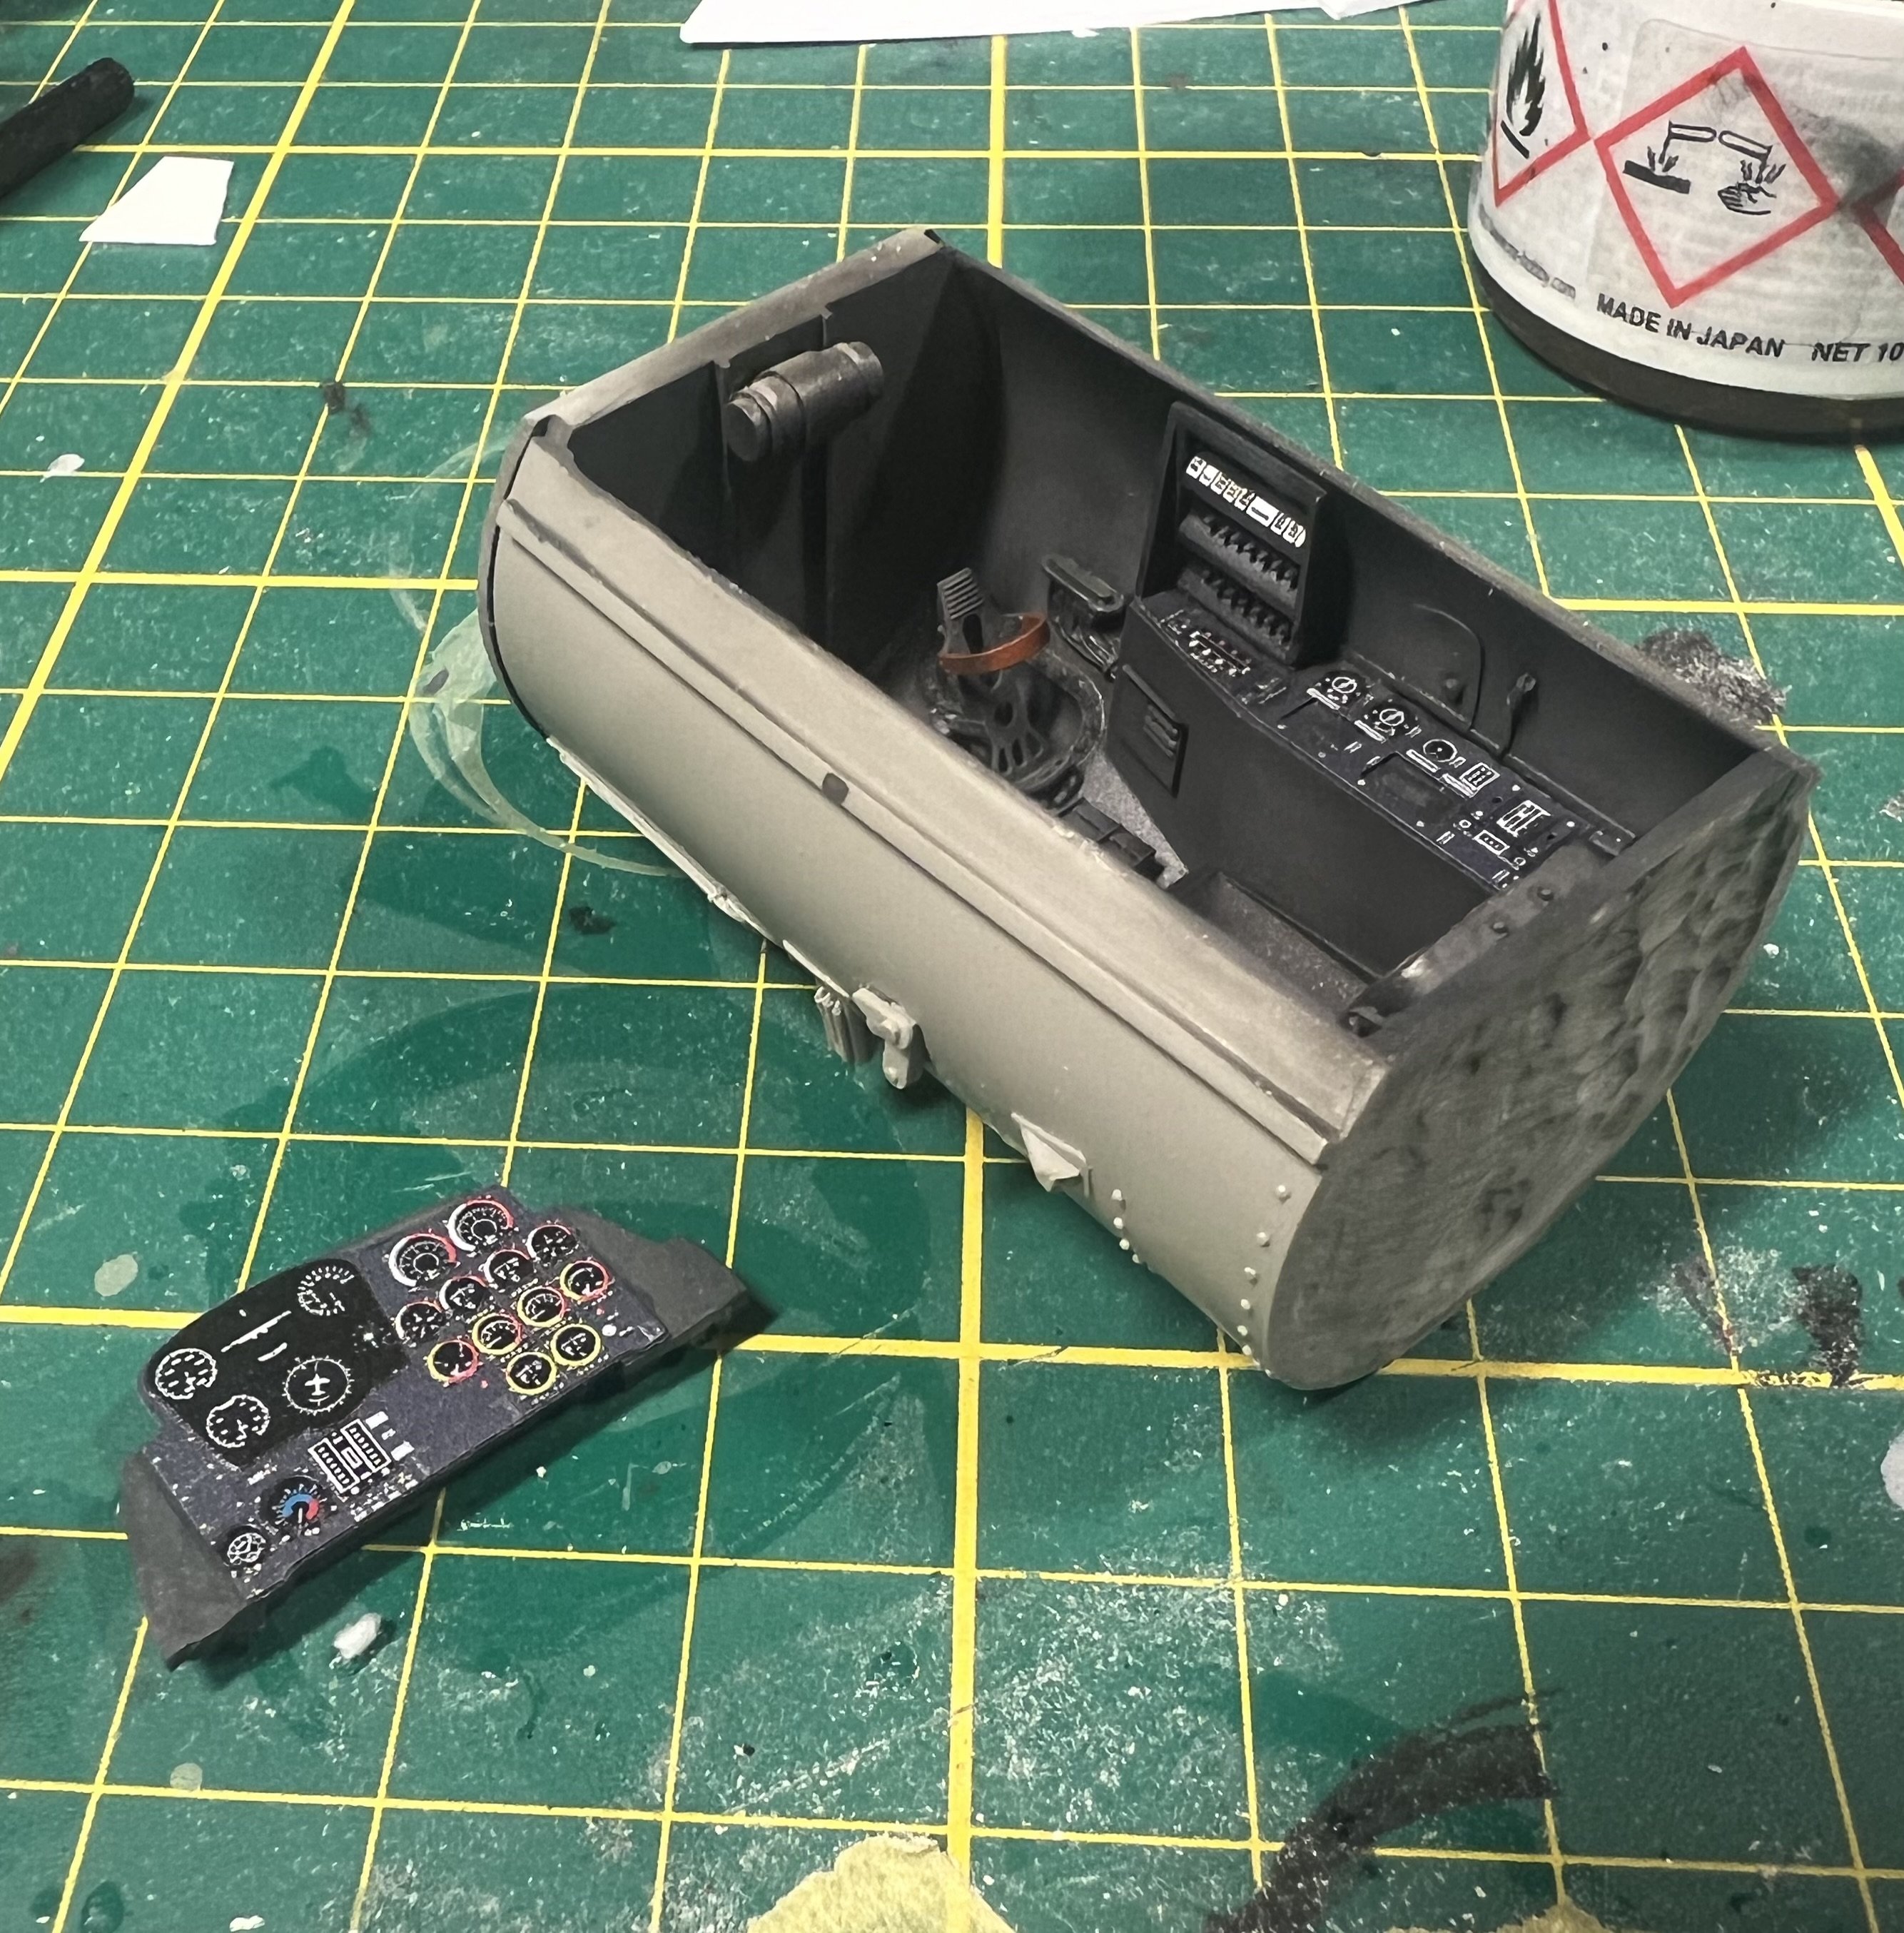
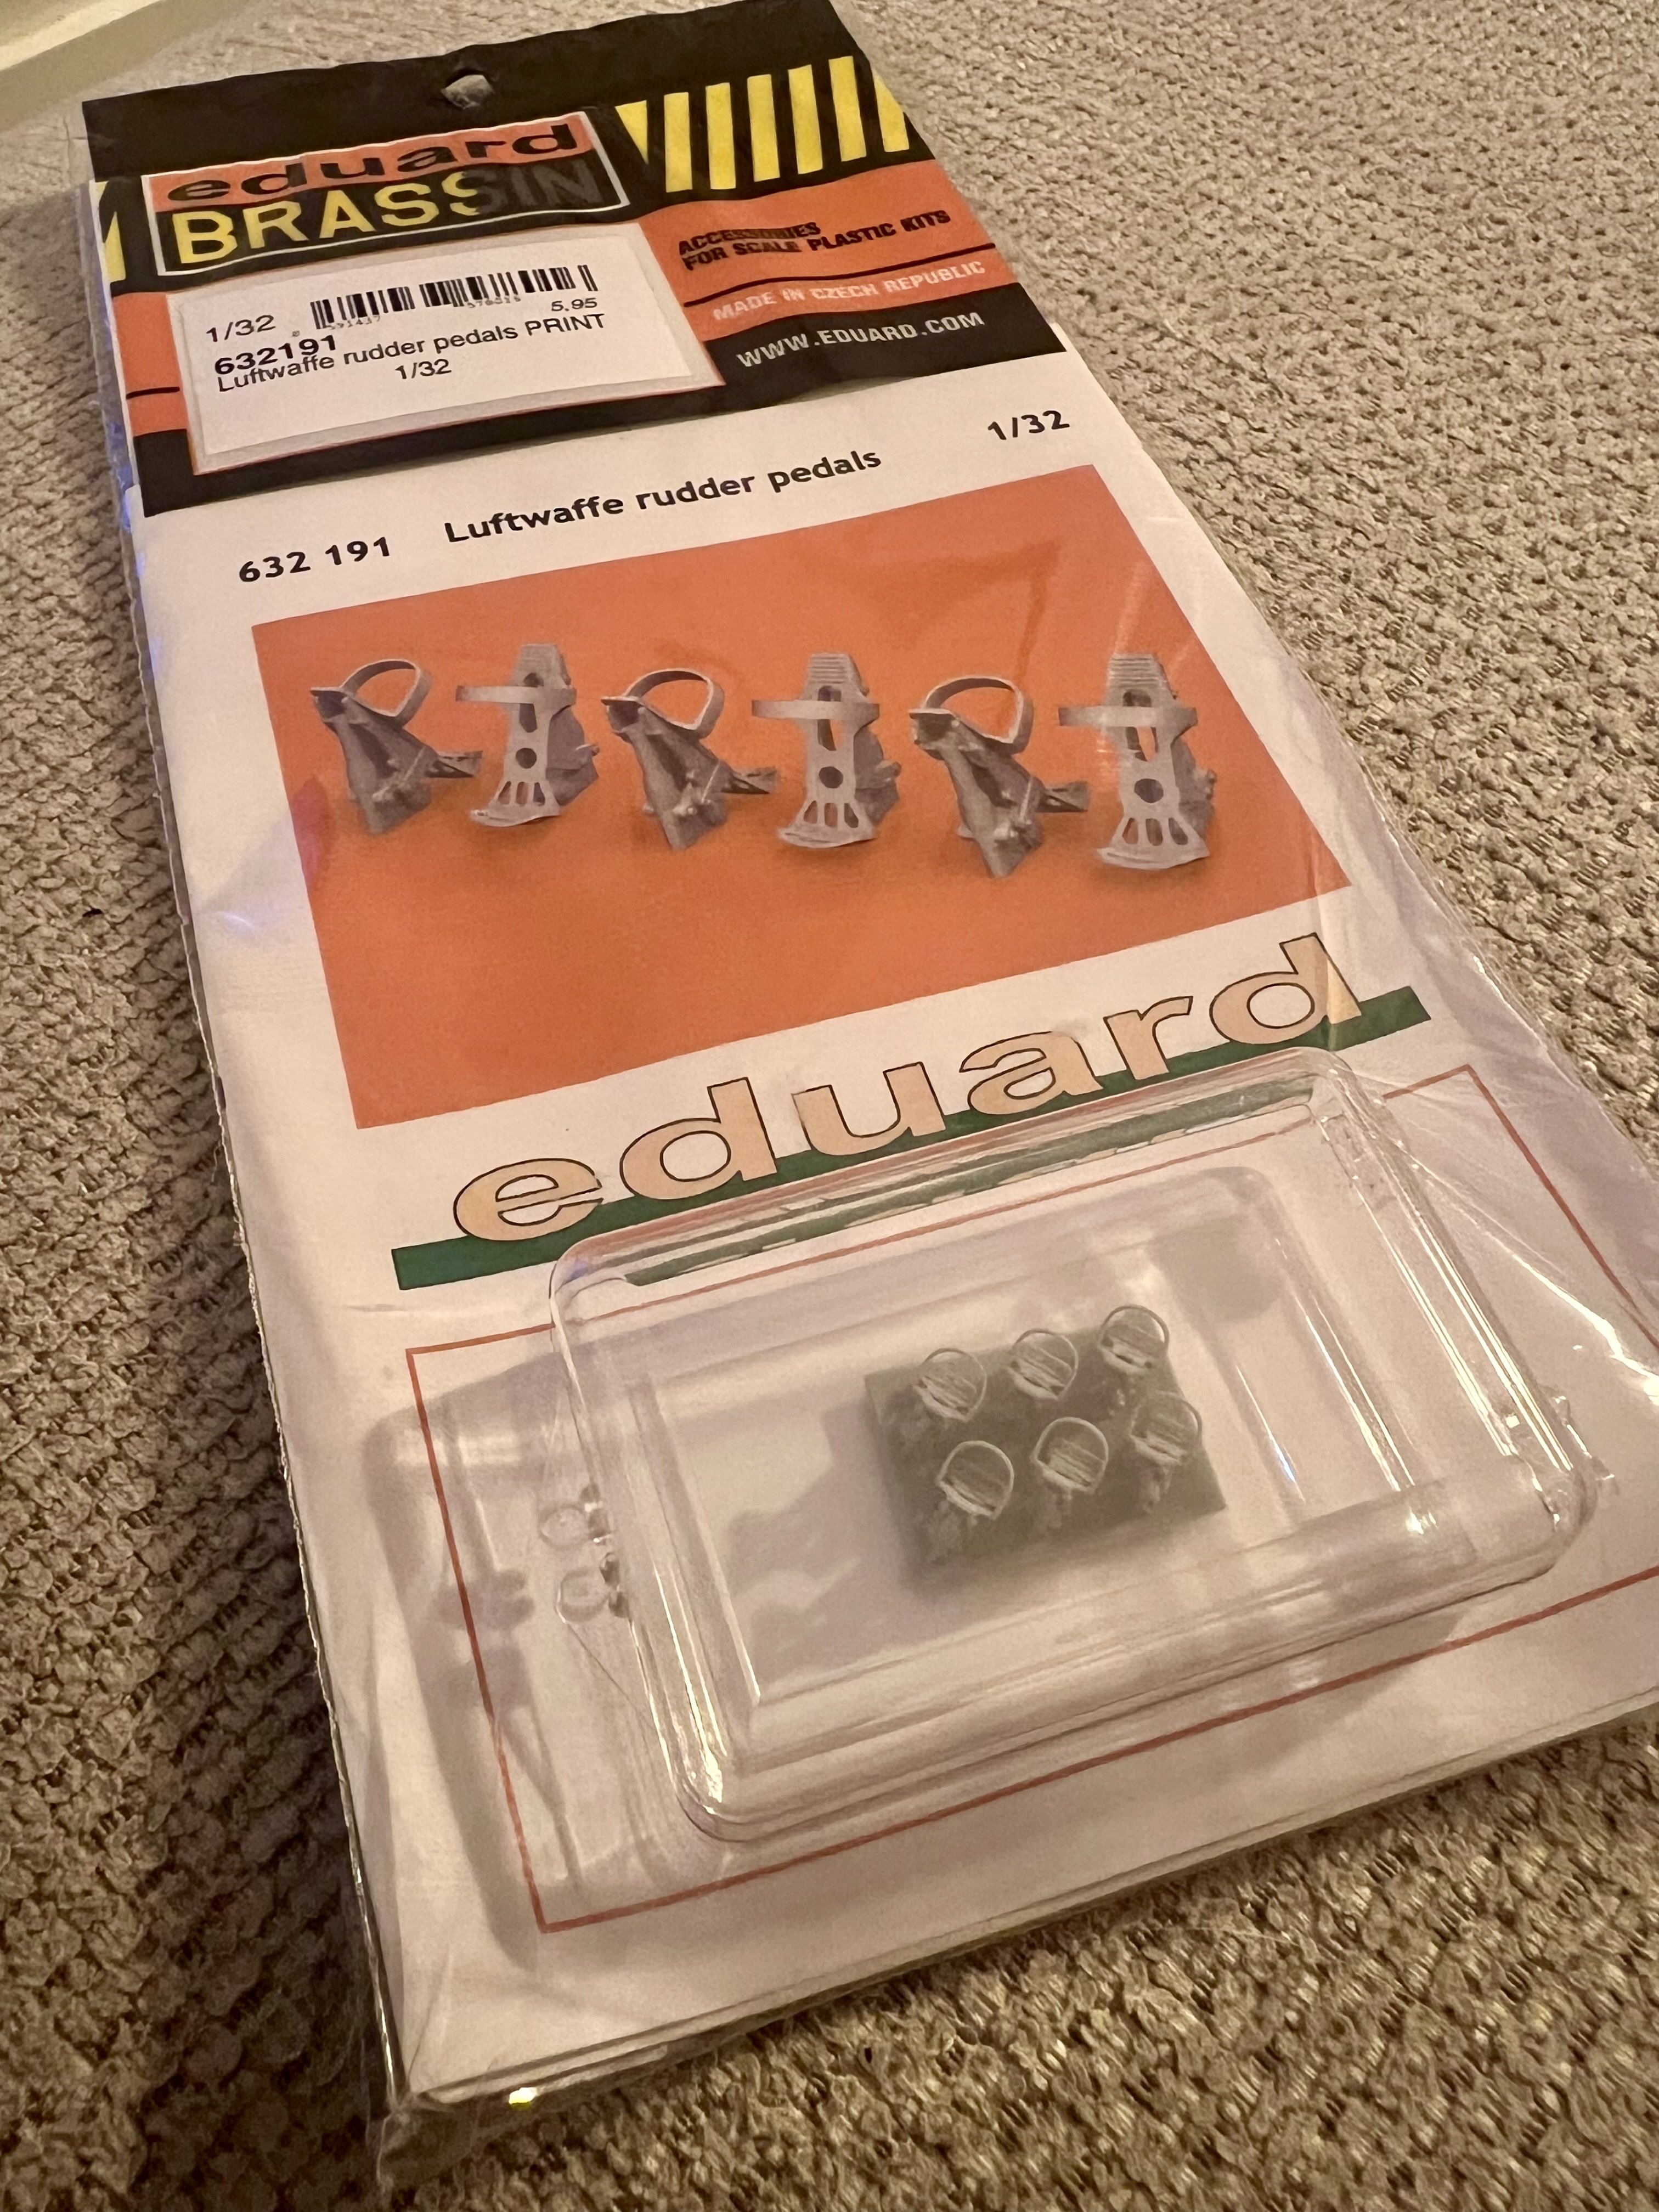
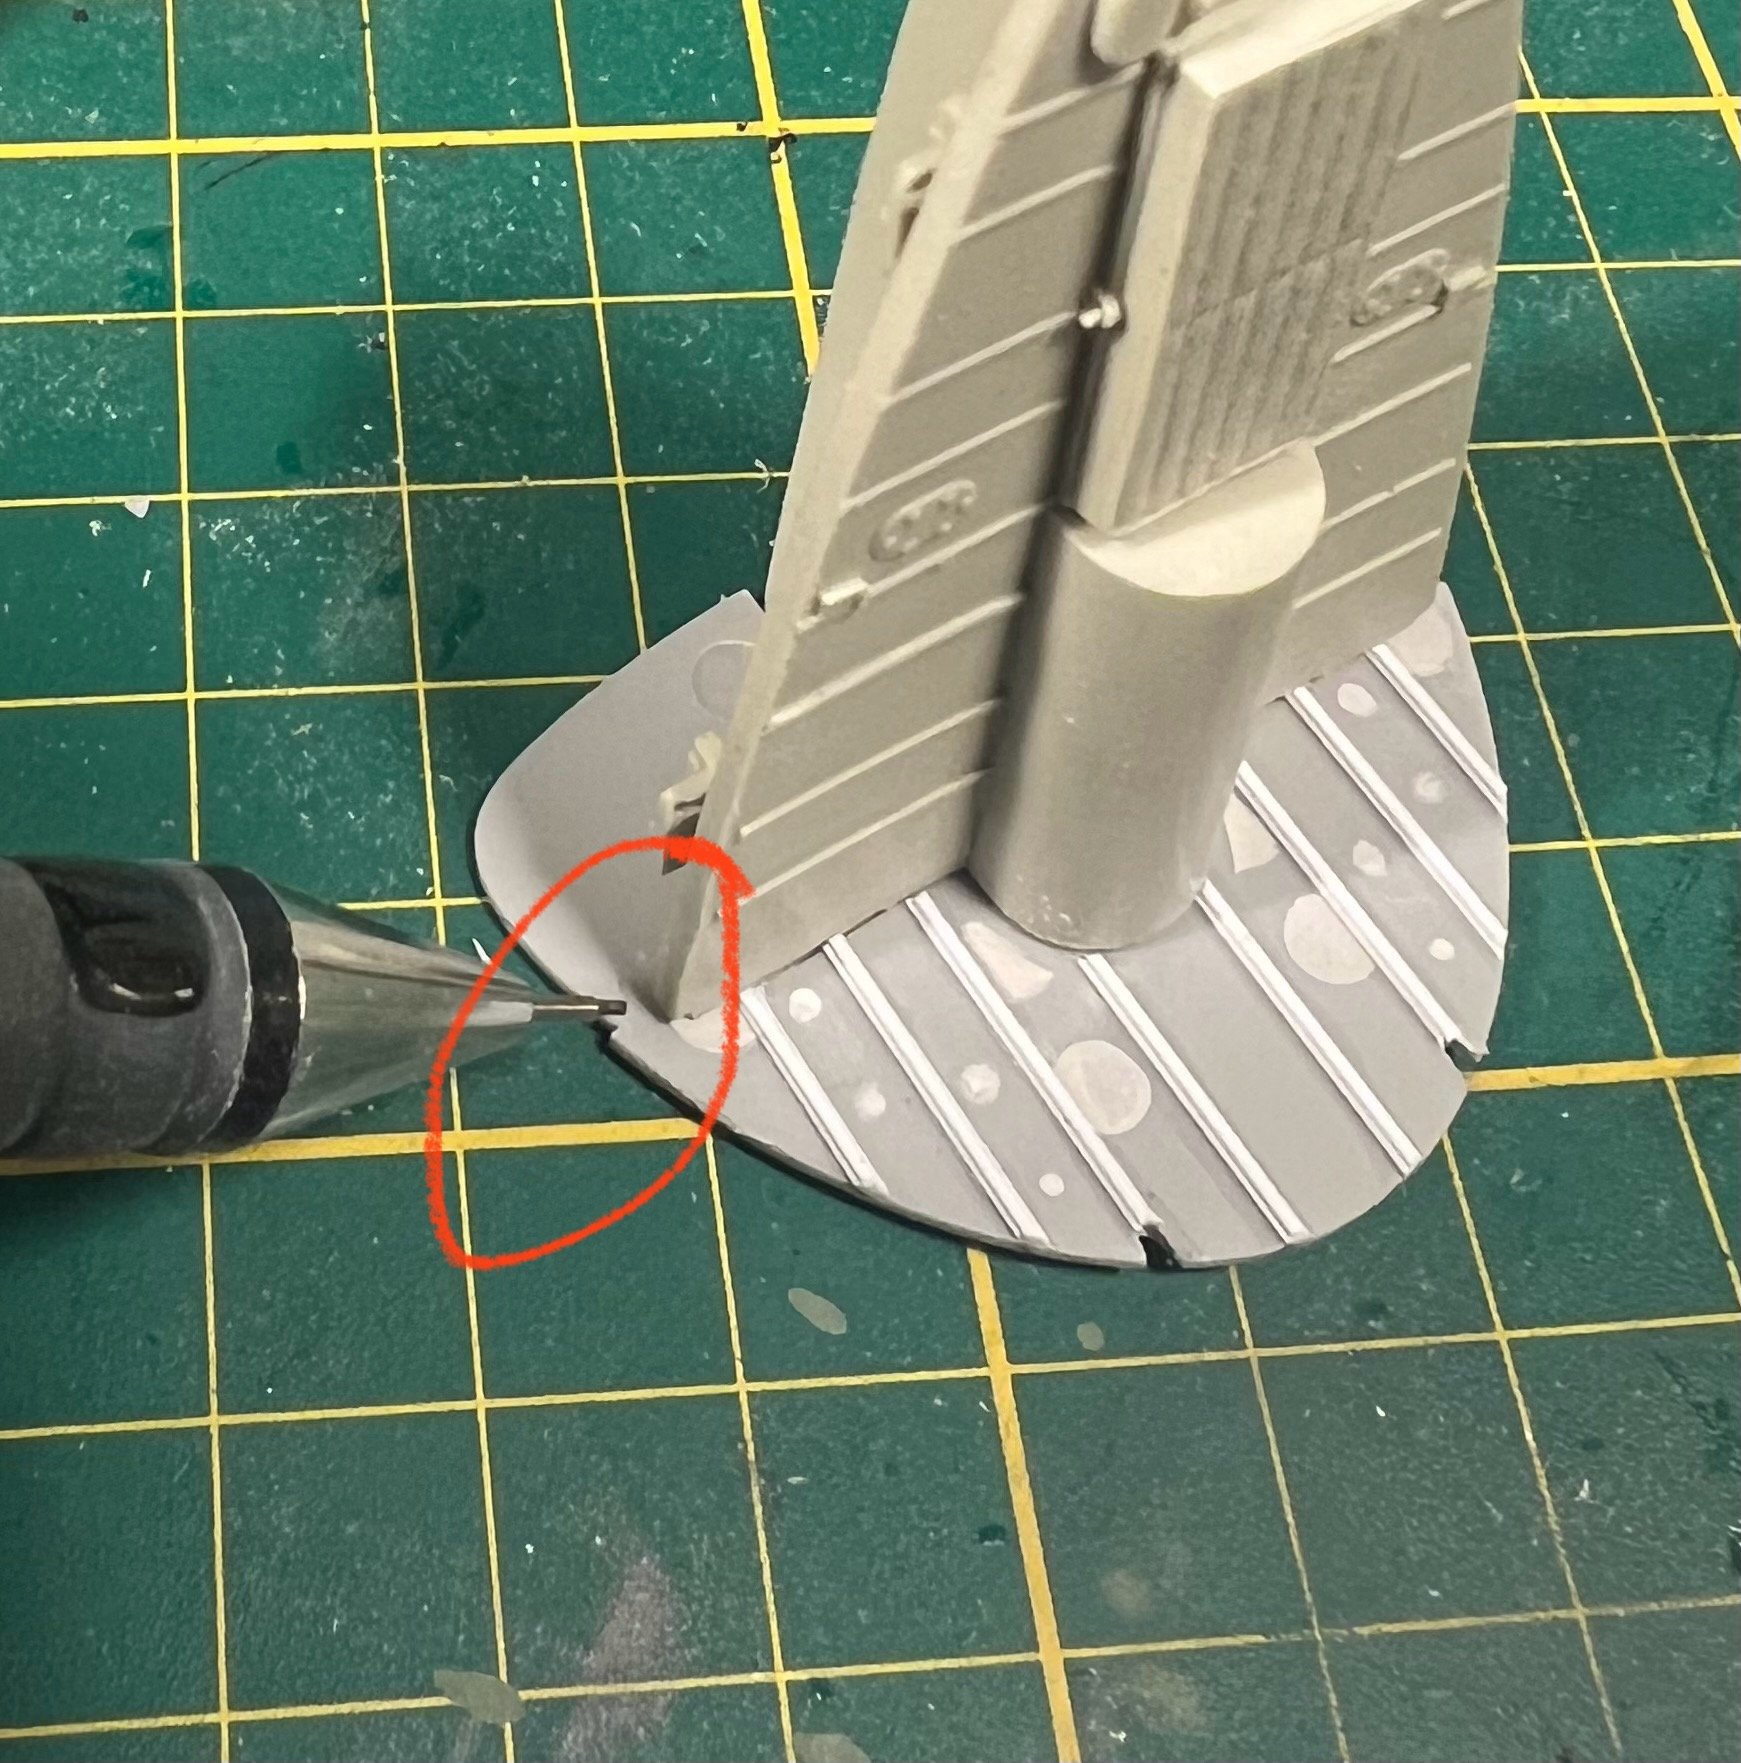
Wasnt happy with the rudder pedals. Aires lets you install these waaay too wide. And Aires does not provide the whole assembly. Scored a few of these to make life easier.
-
1/32 ME-262A-2a/U2
JeroenPeters replied to JeroenPeters's topic in LSM 1/35 and Larger Work In Progress
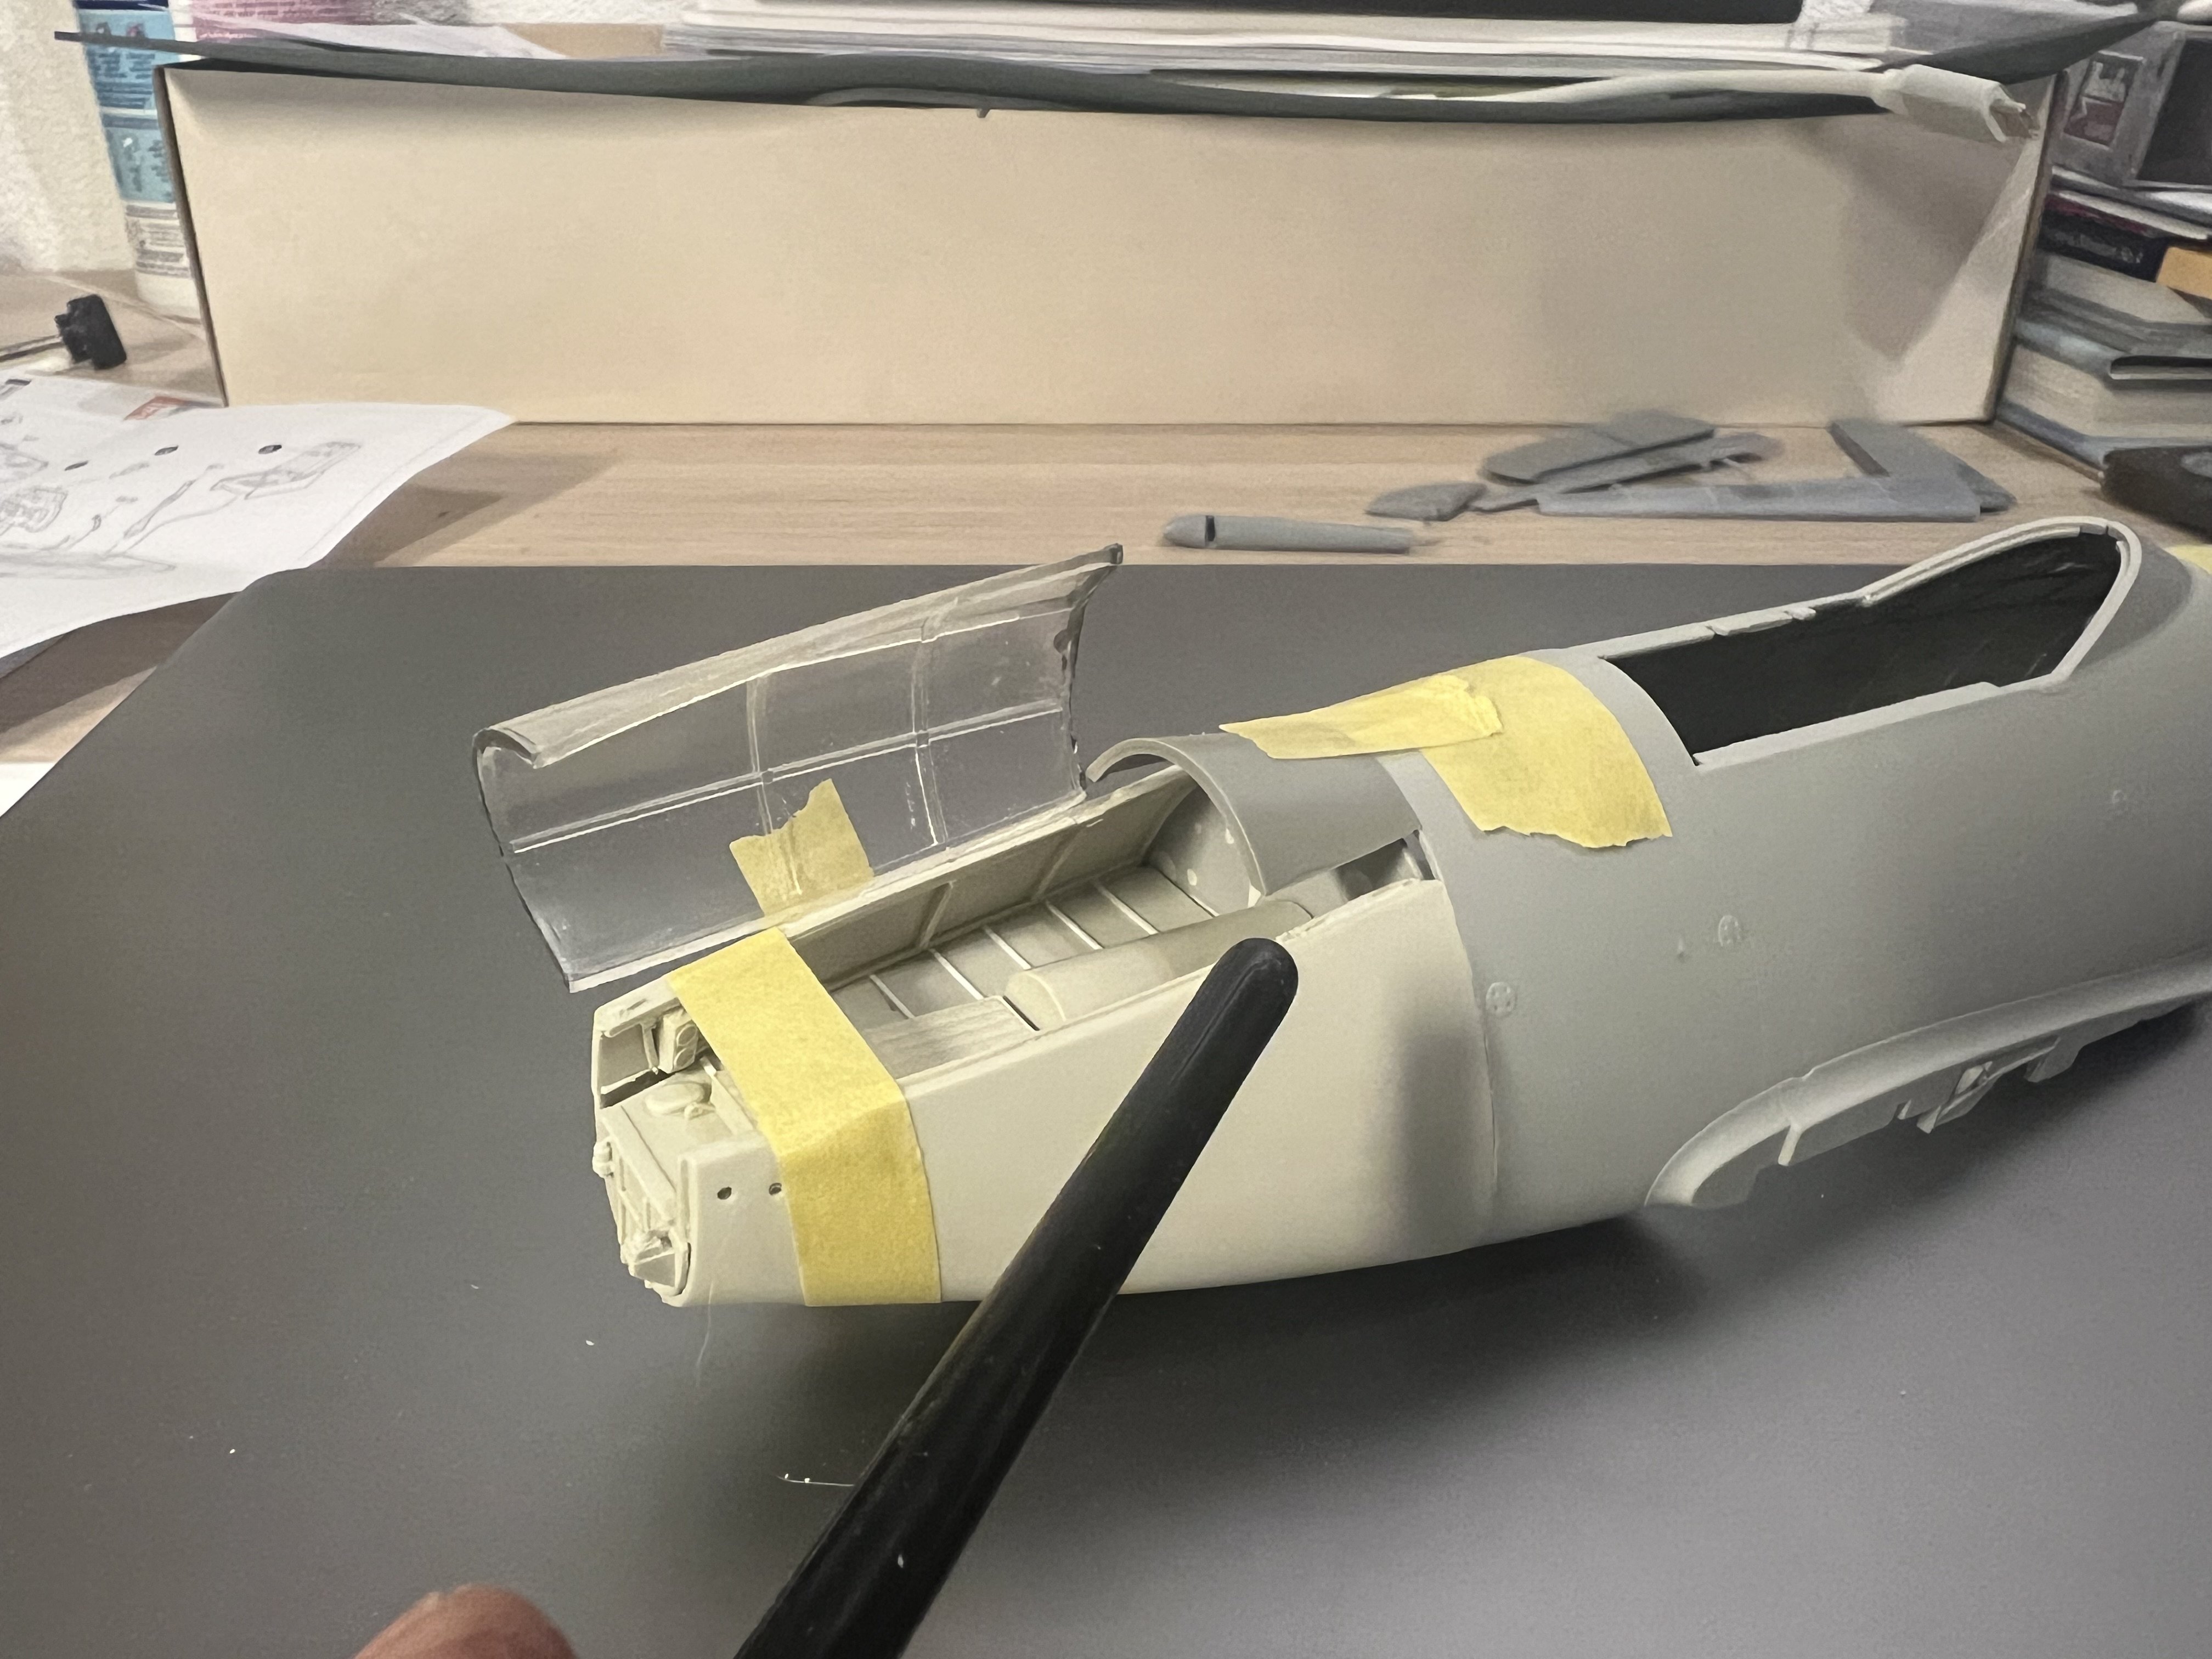
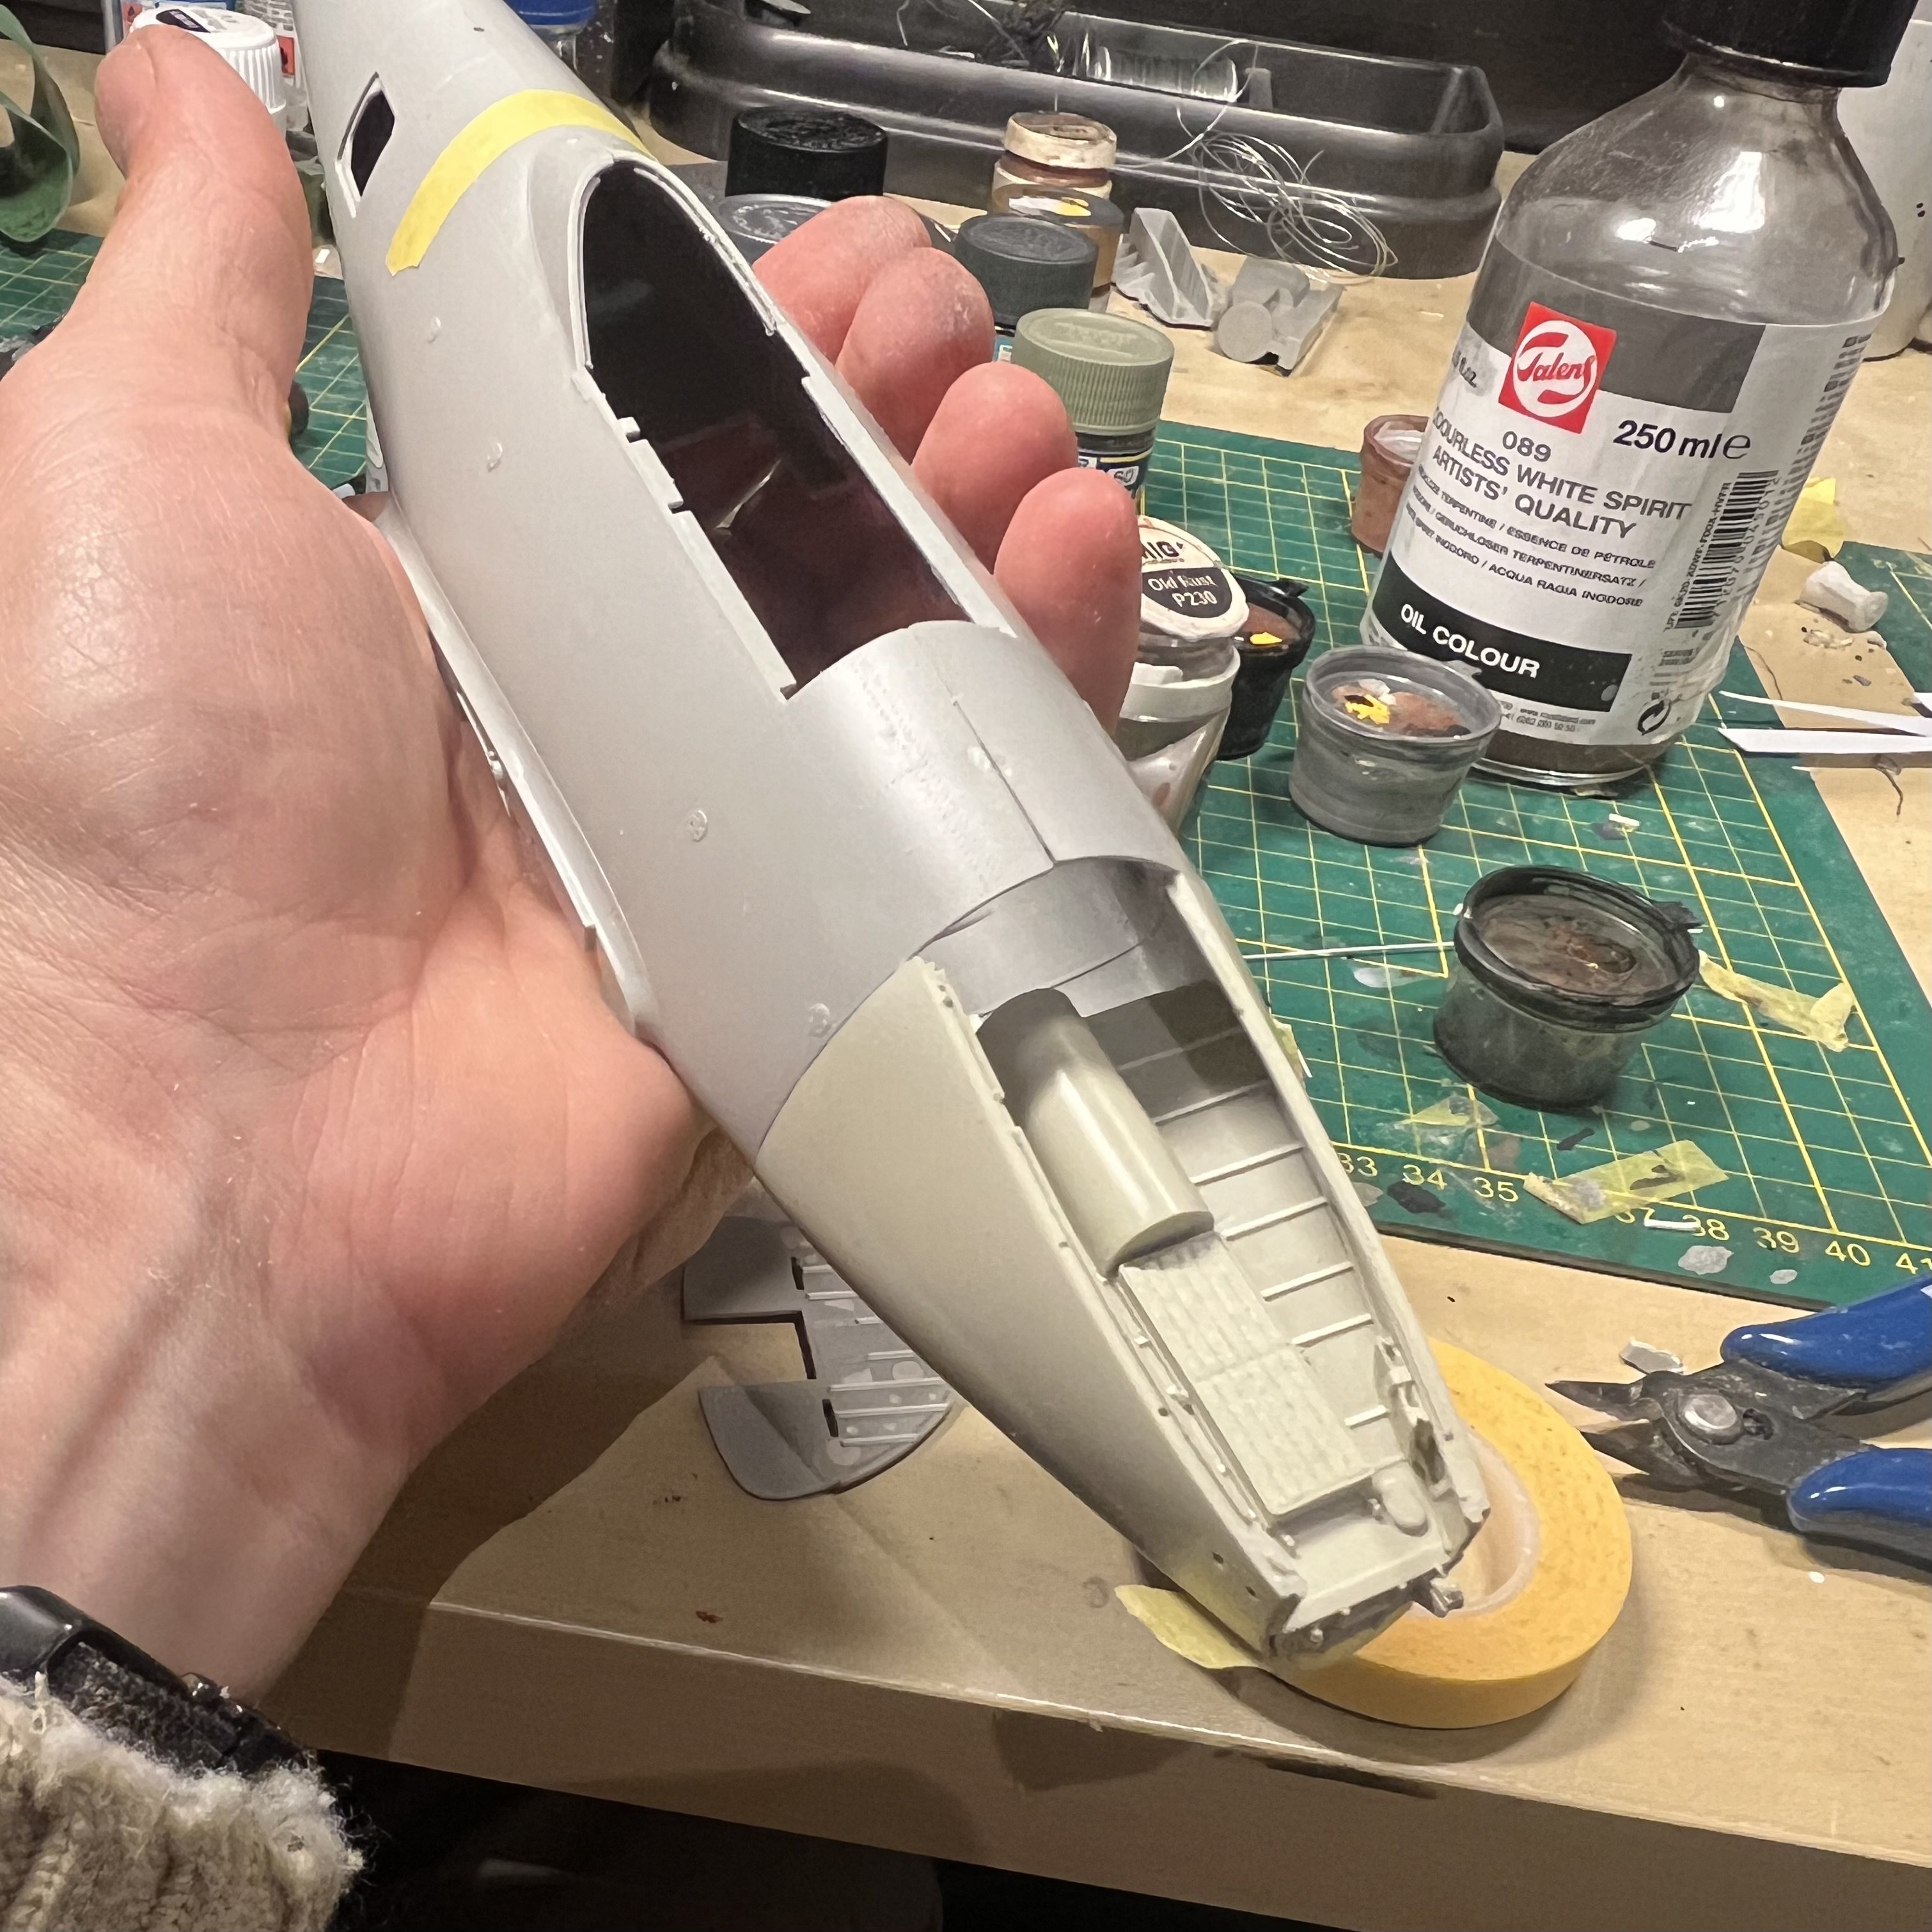
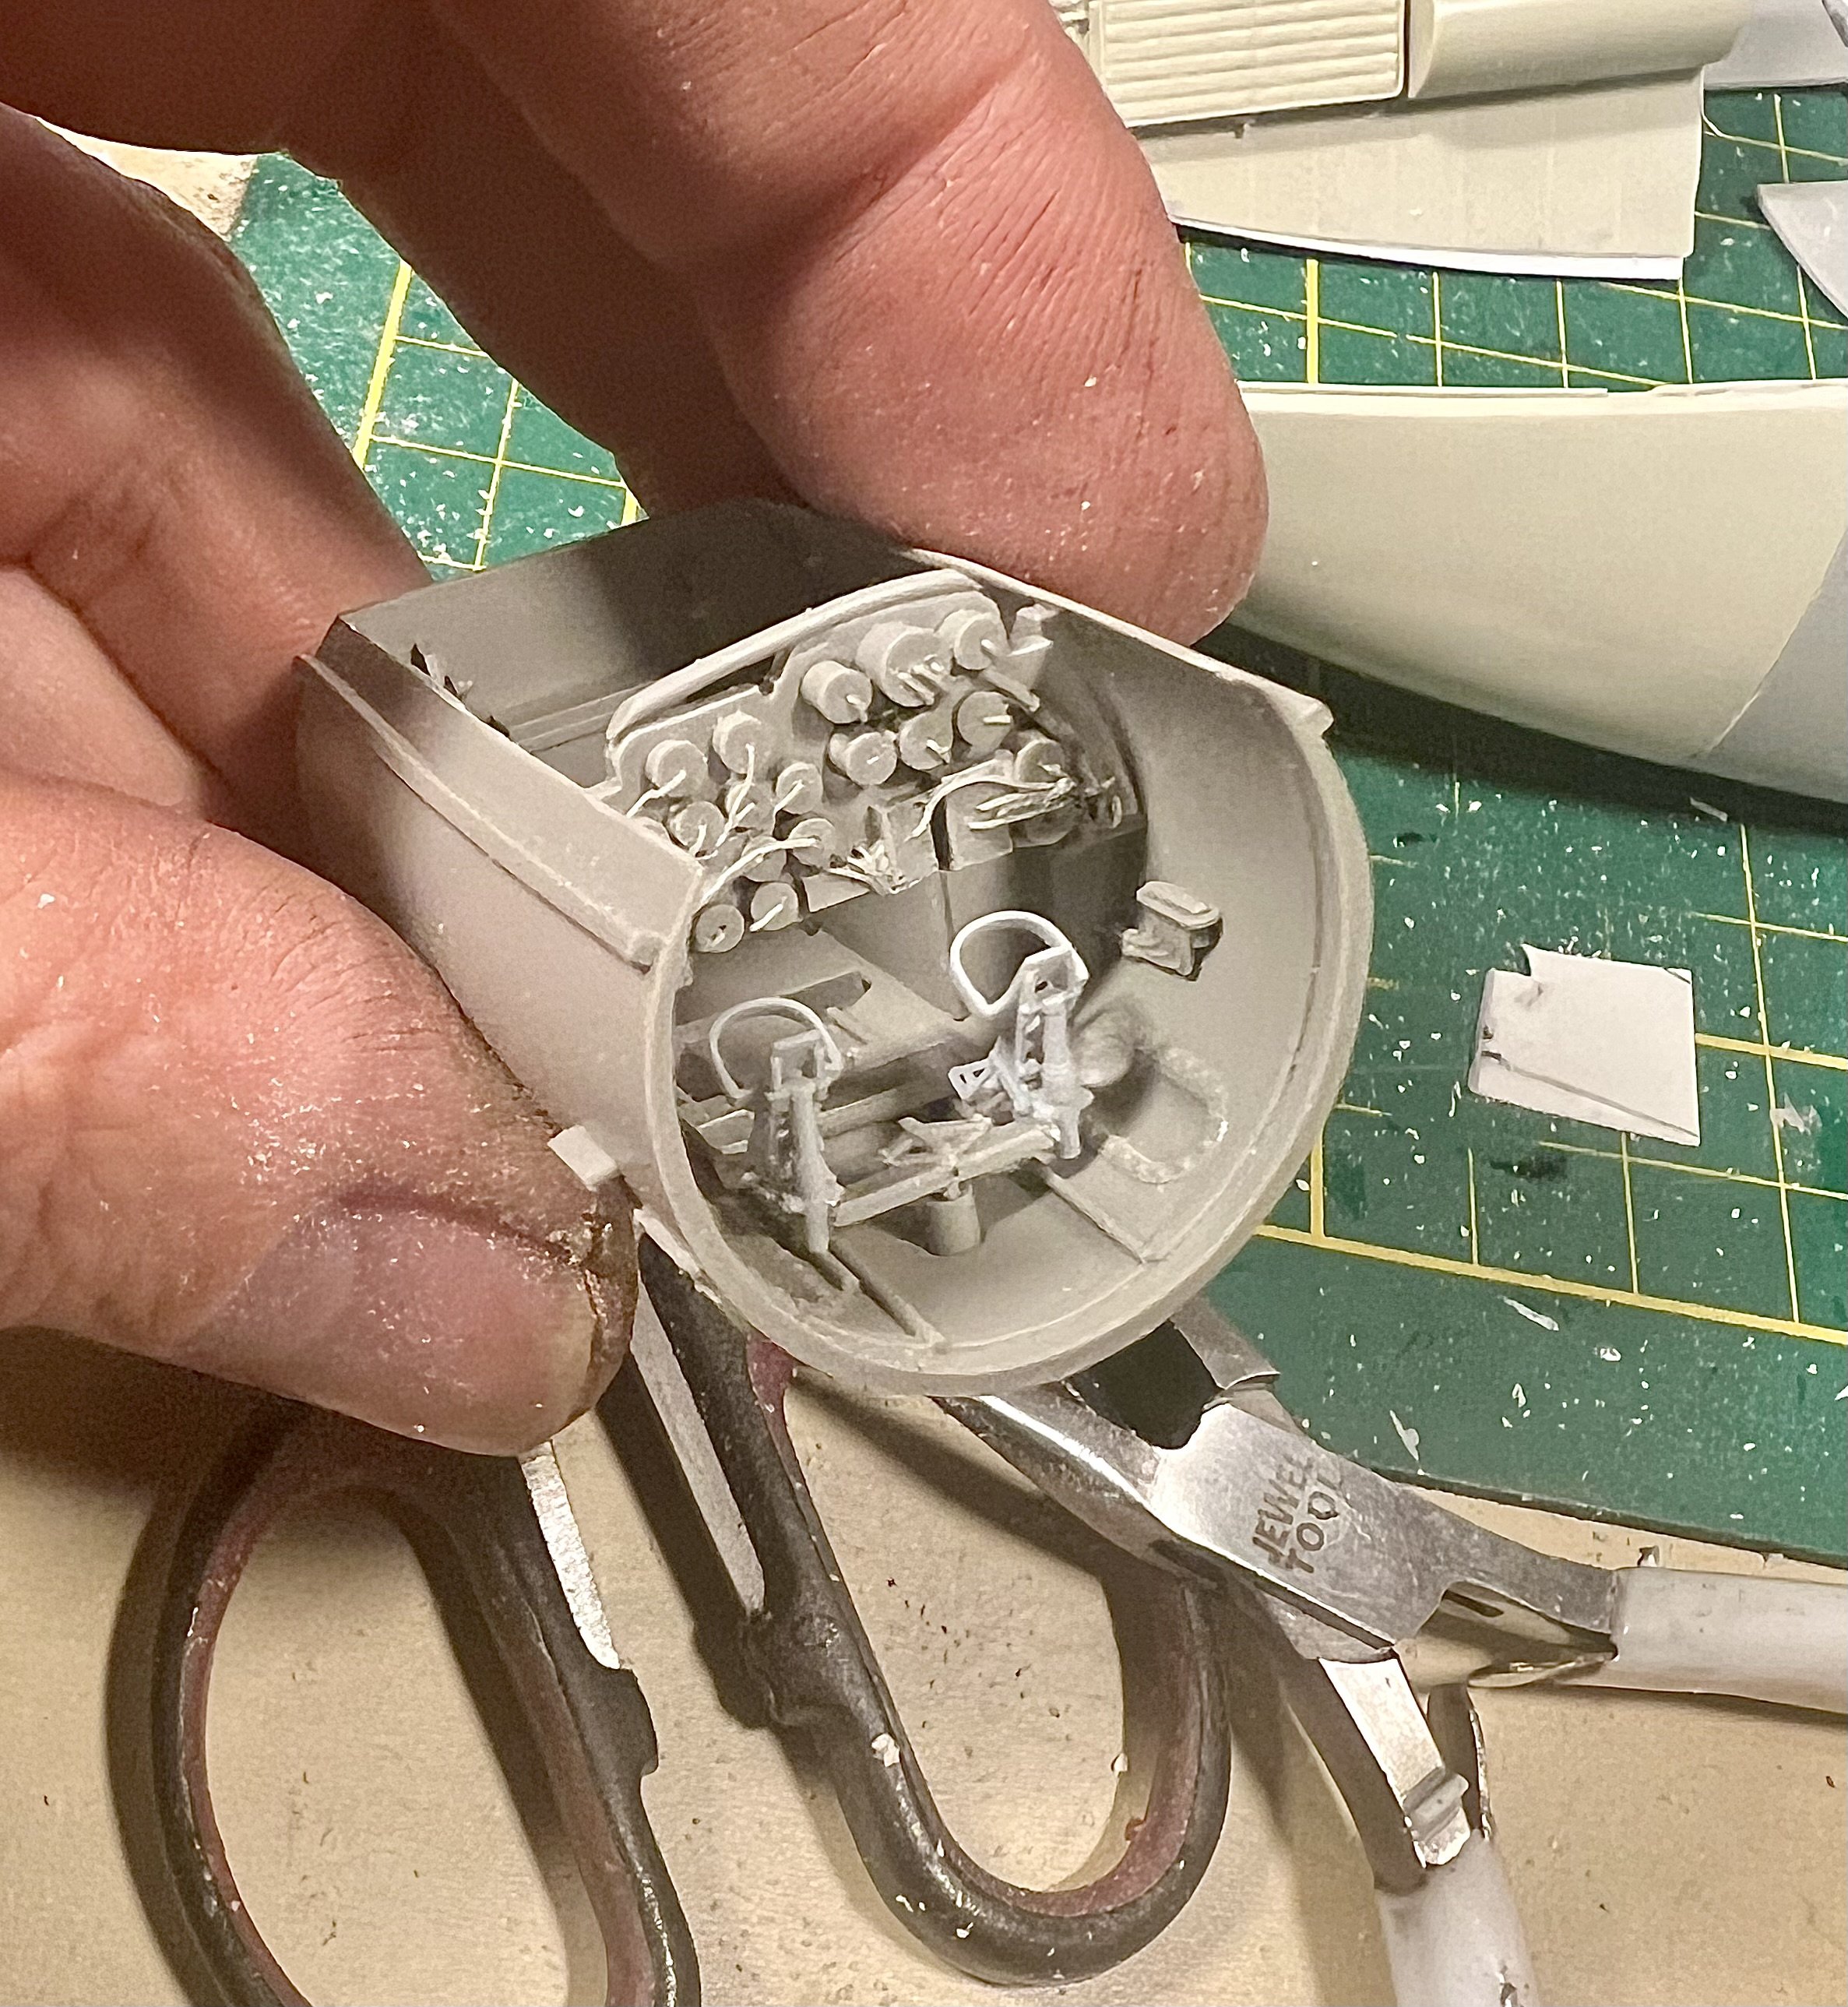
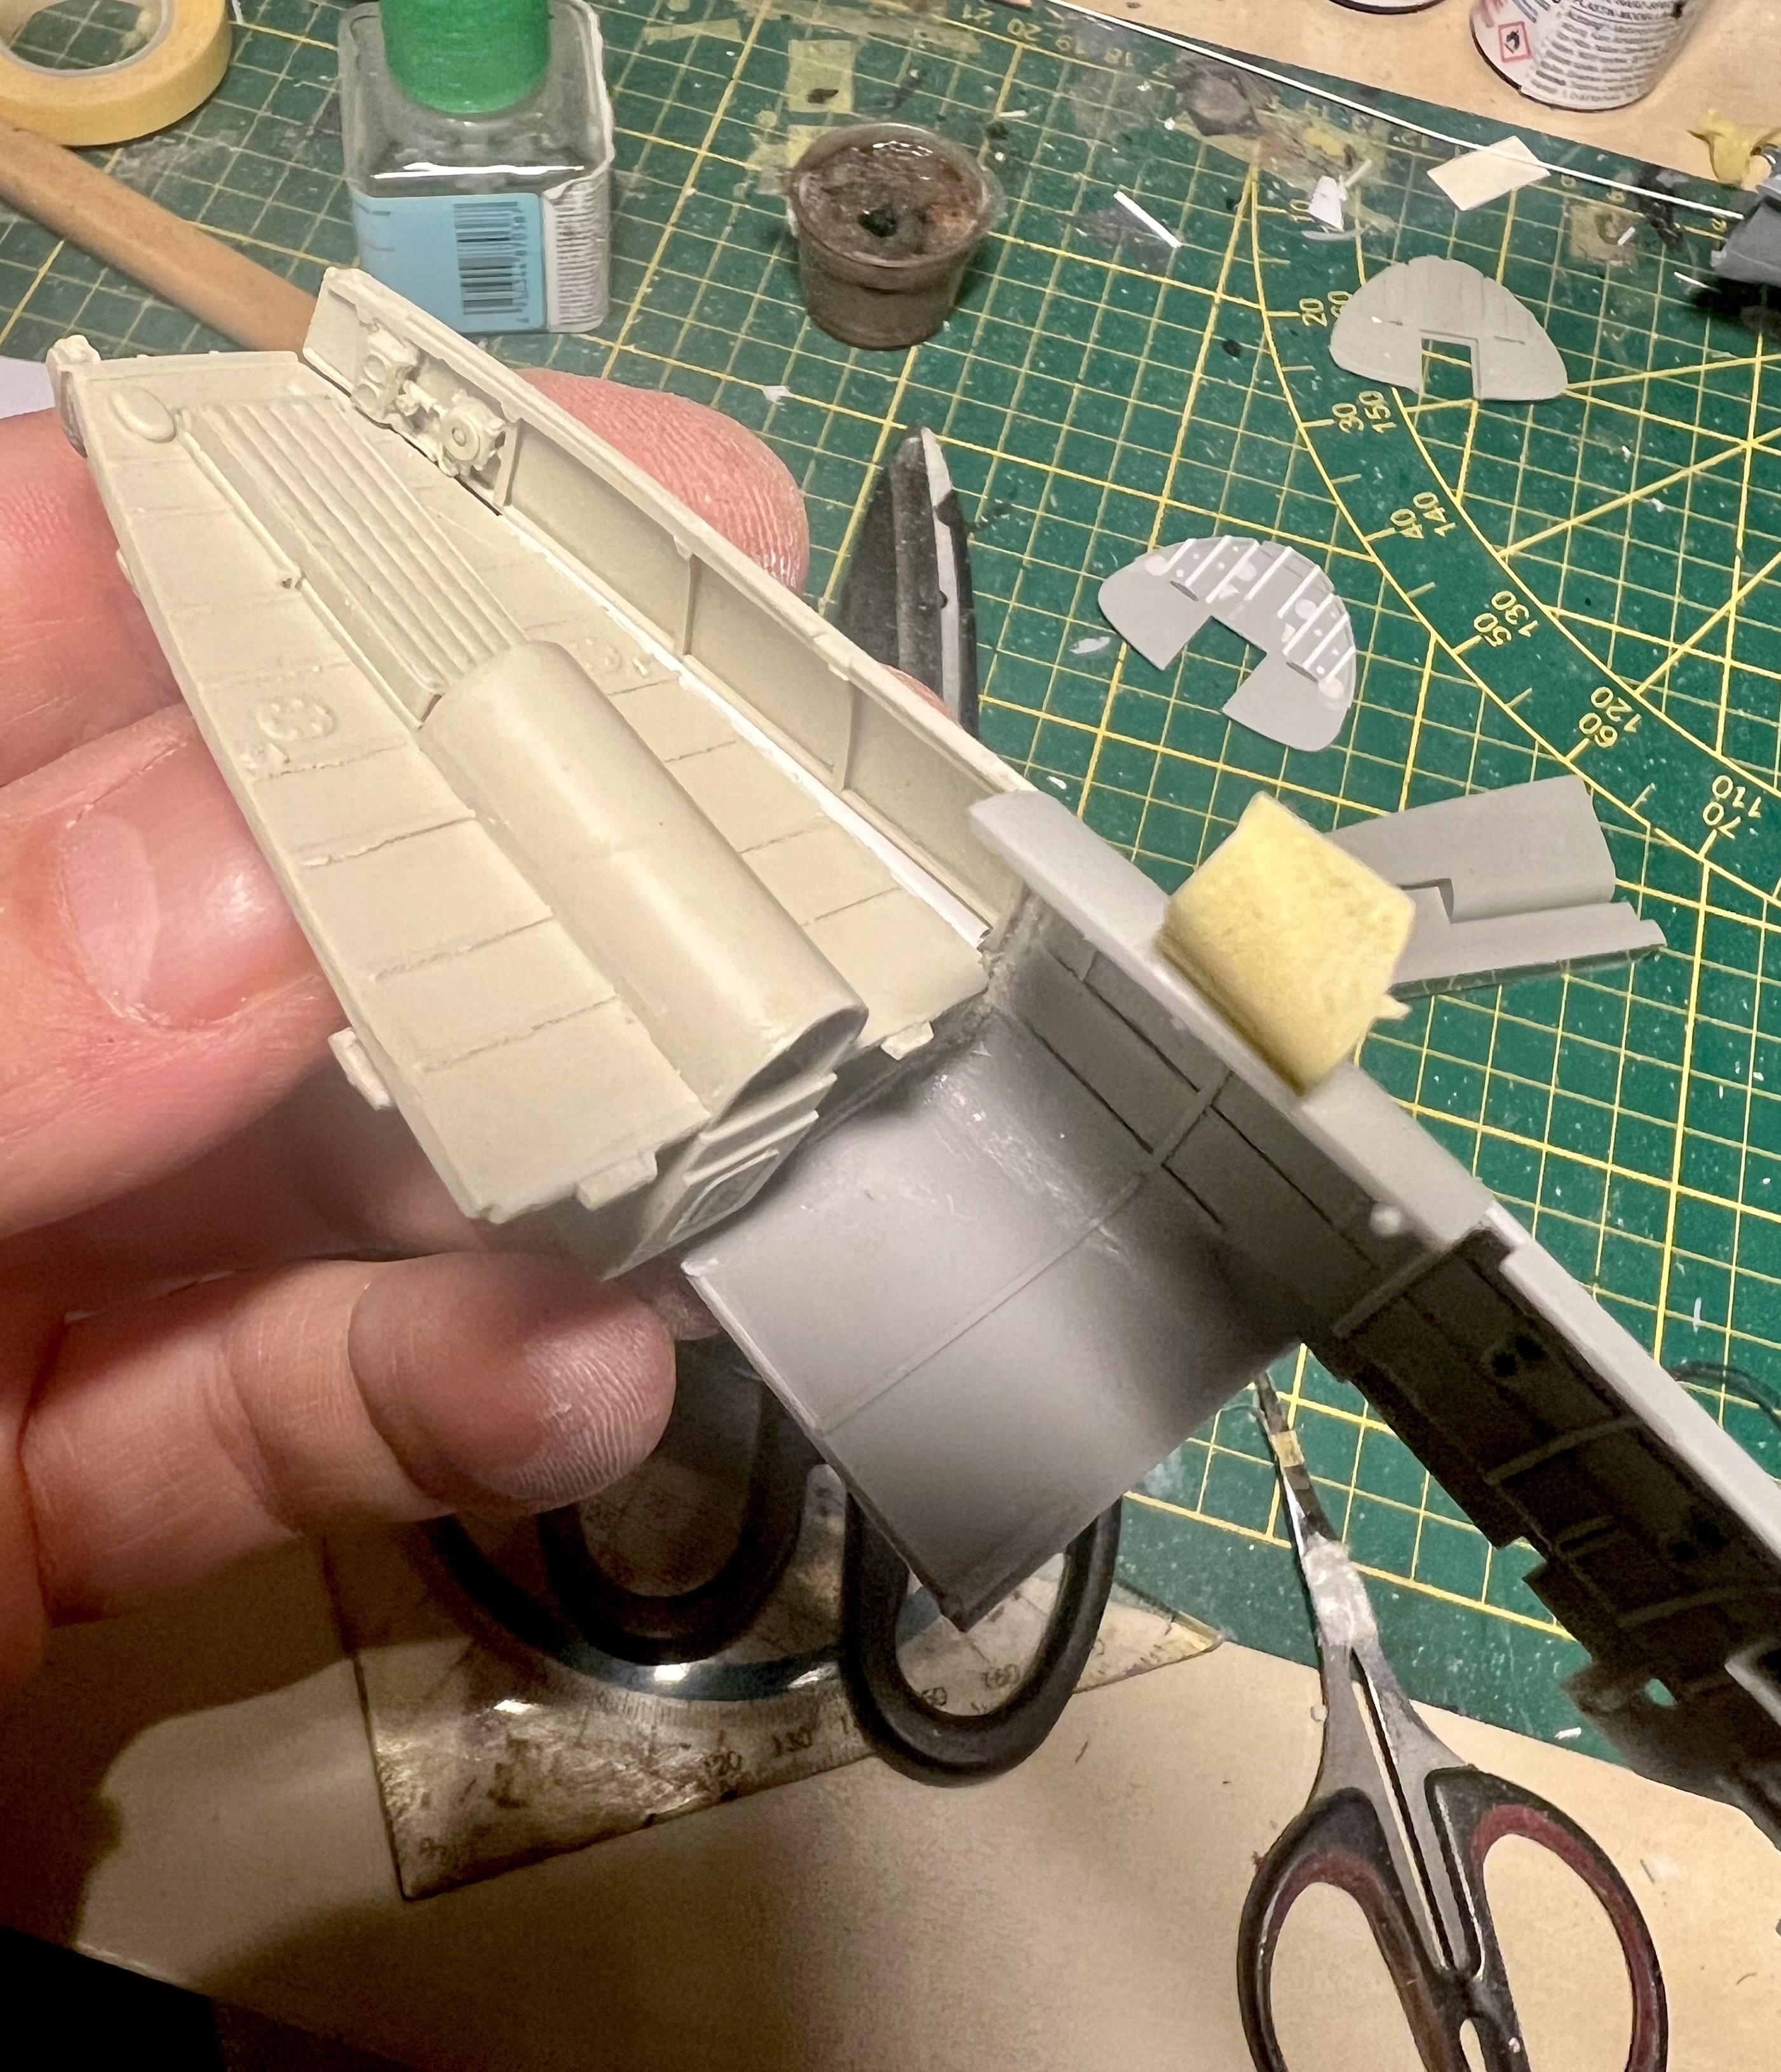
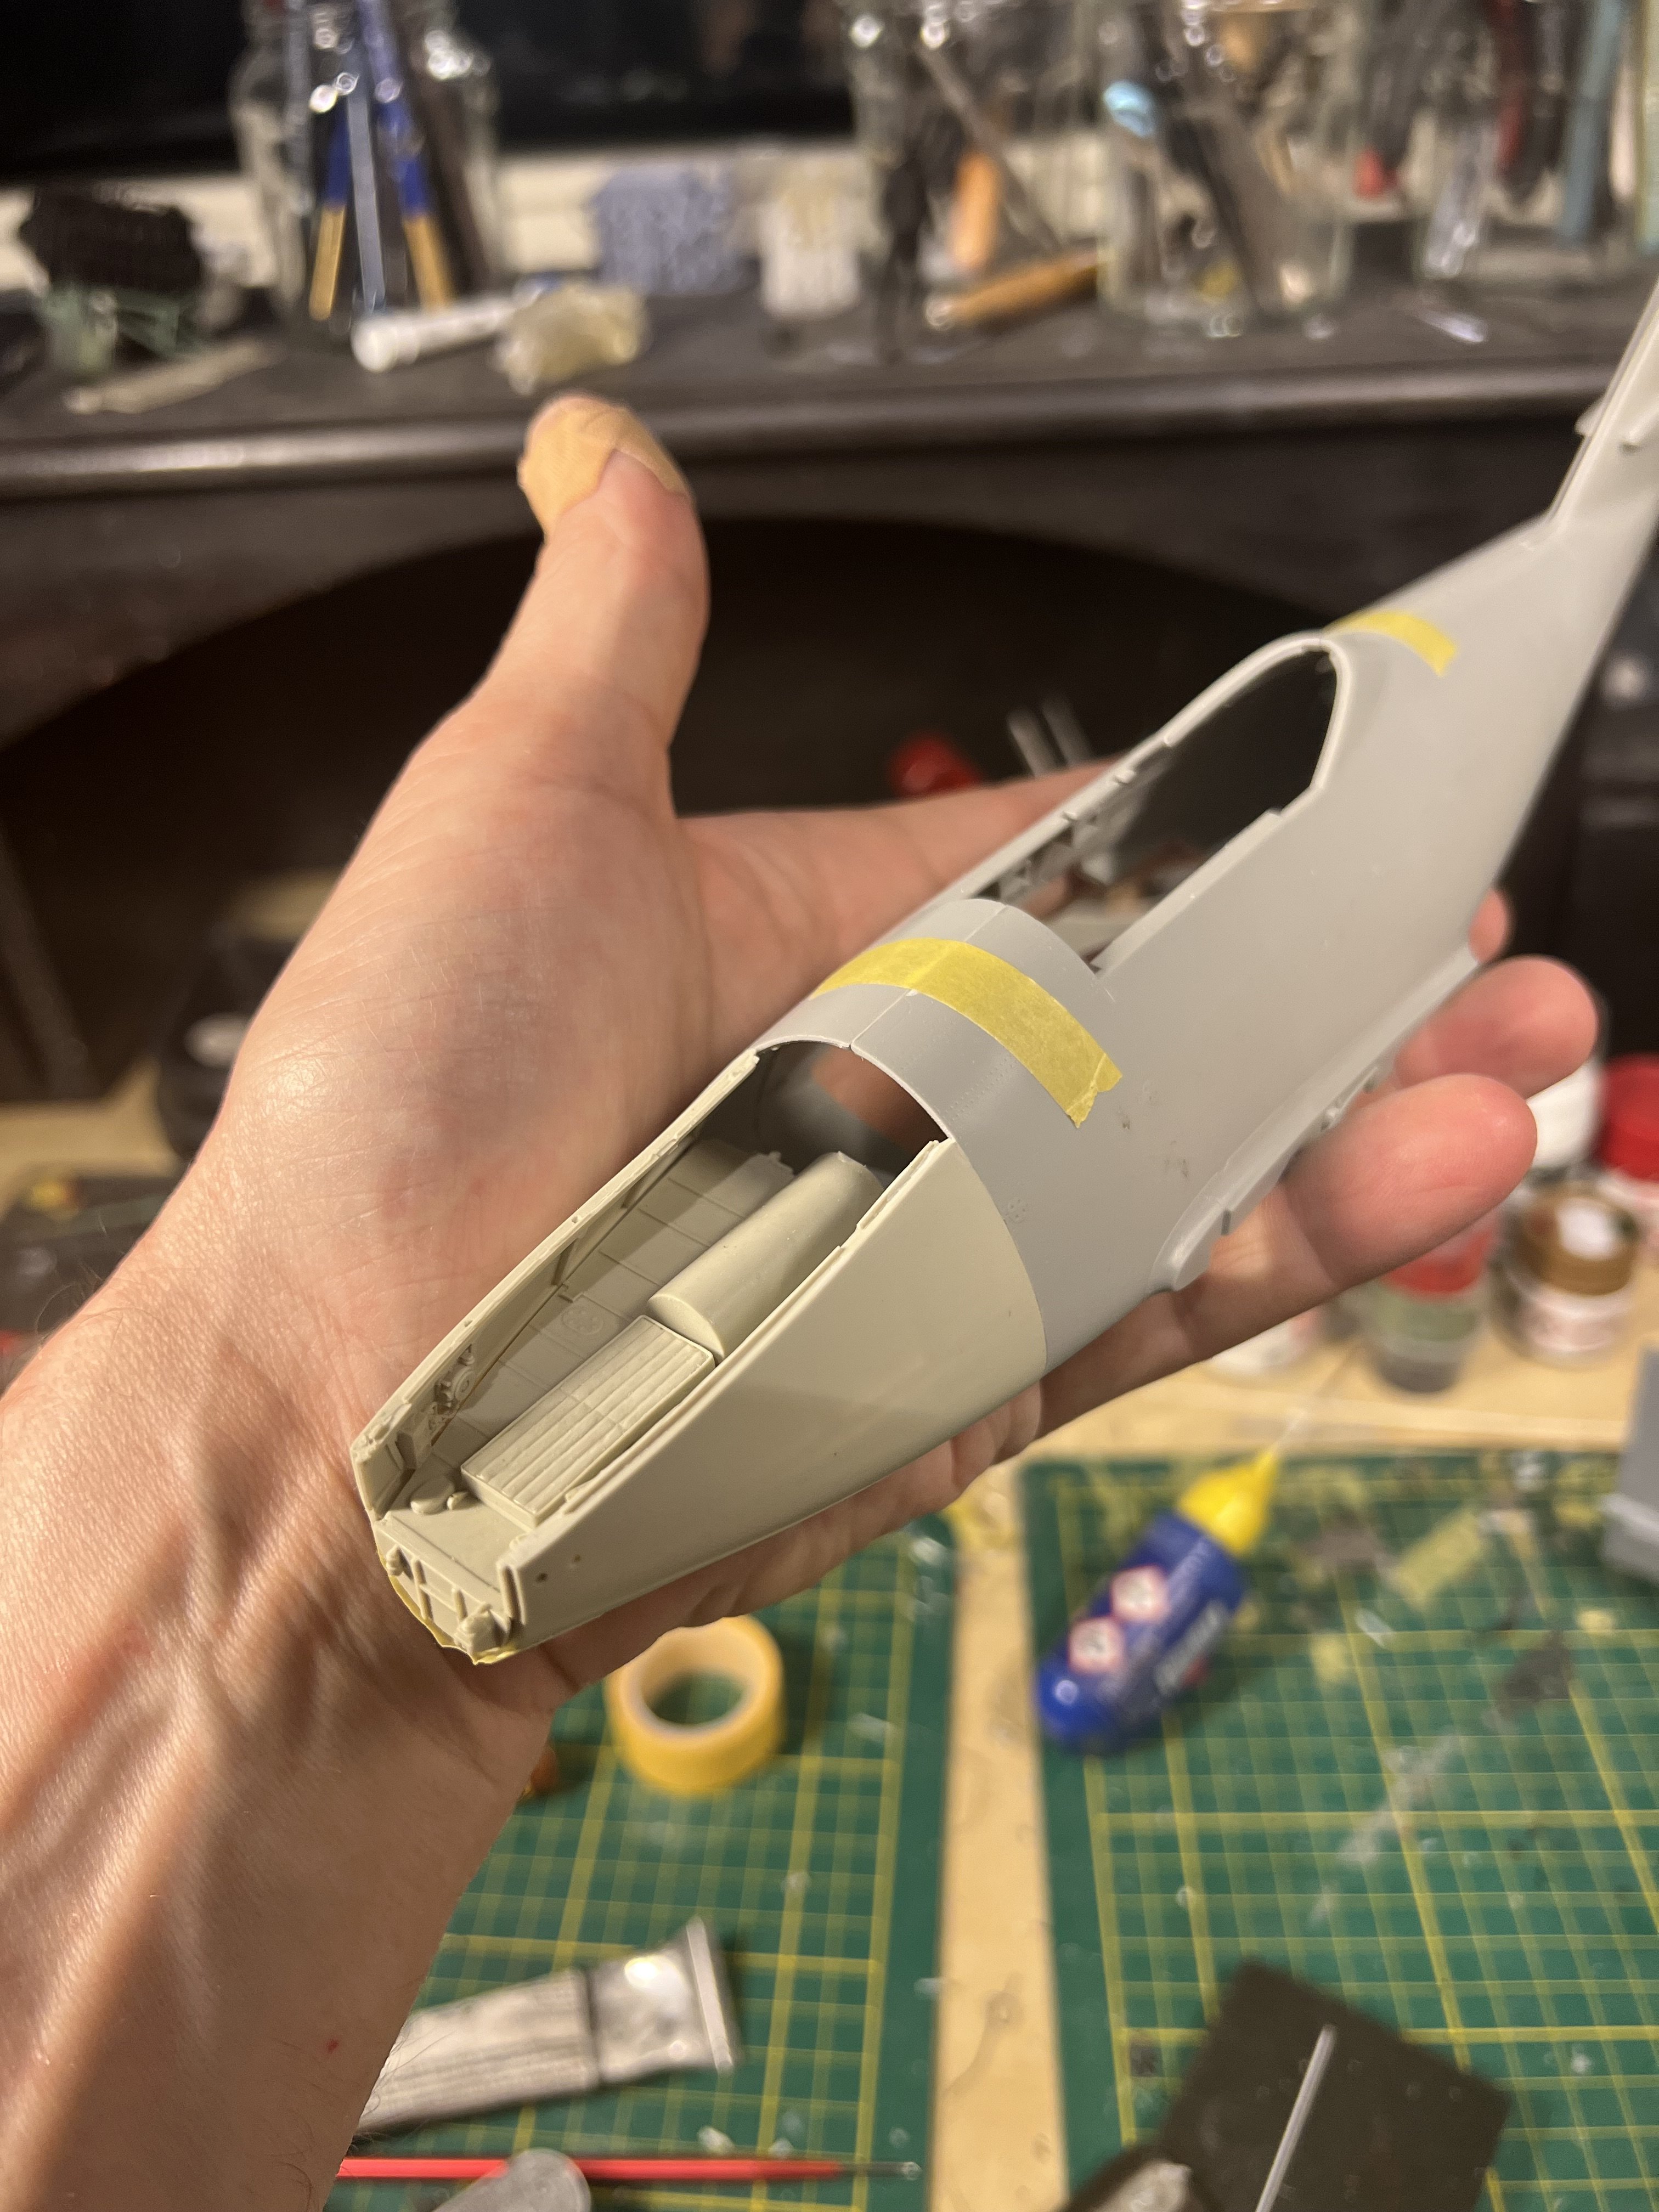
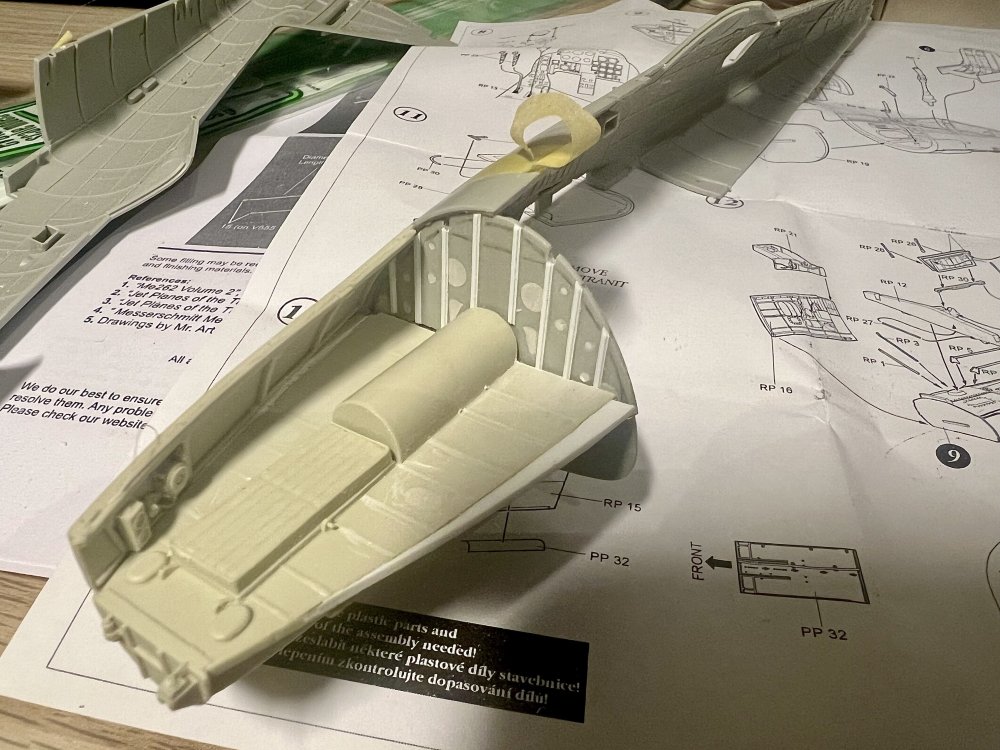
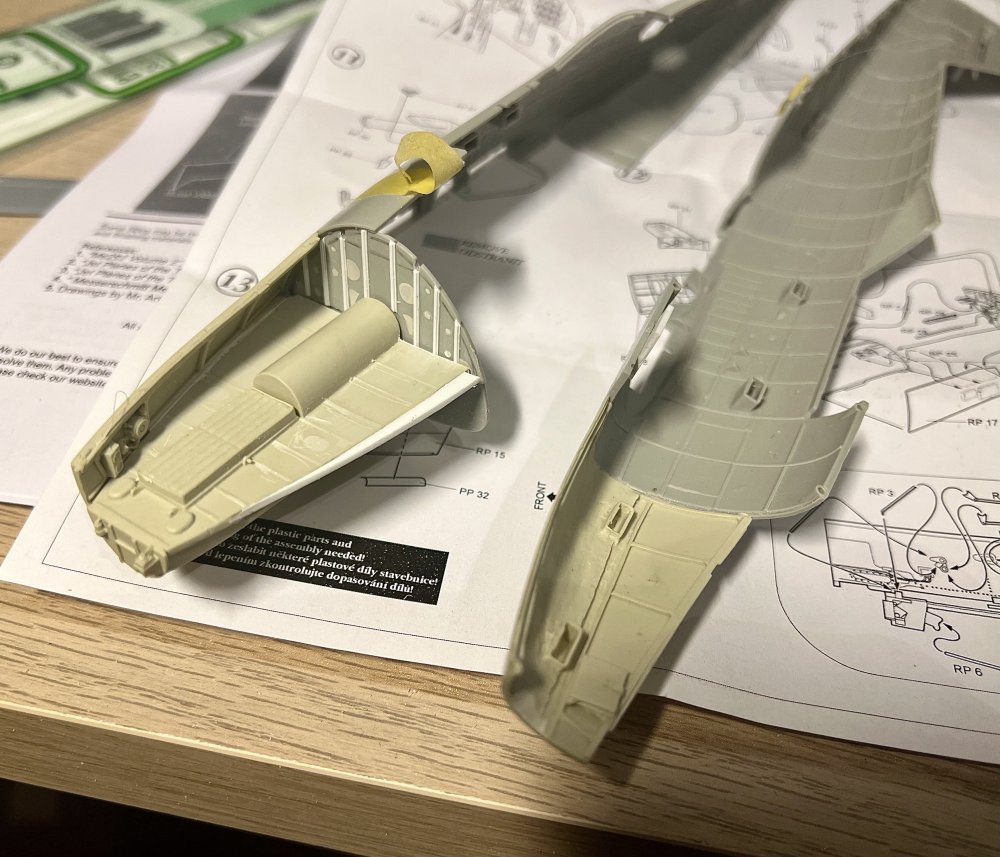
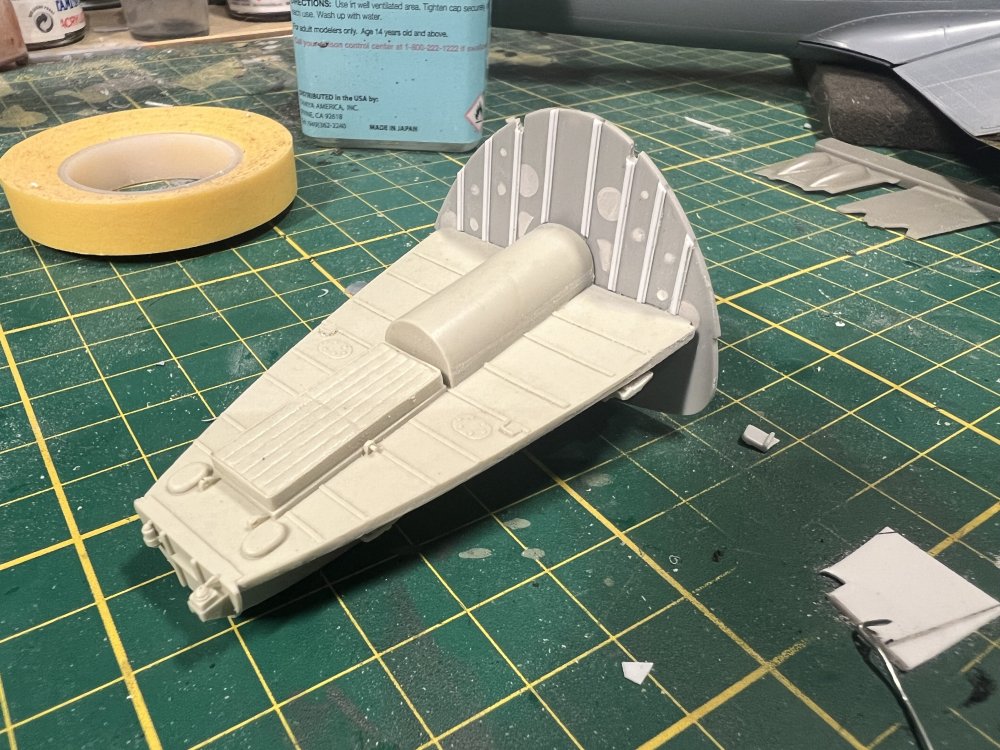
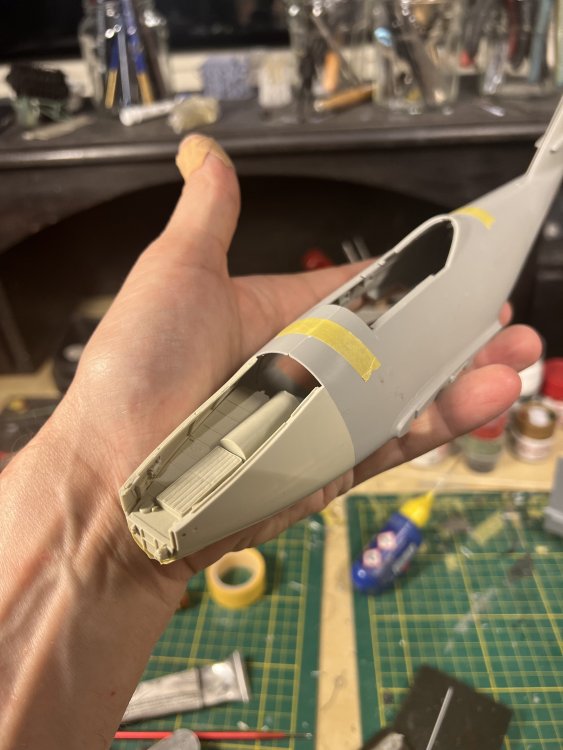
Still trying to make the floor fit. Shrinkage all over the place. Removed all the floor detail on order to sand everything flush. Then i’ll have to scratch the detail back into place. A bit worried about the transparent parts.
- 151 replies
-
- 10
-
-
-
1/32 ME-262A-2a/U2
JeroenPeters replied to JeroenPeters's topic in LSM 1/35 and Larger Work In Progress
Fighting the shrinkage. Adding shims to the sides of the floorbed. Bought the Eduard zoom set for the Revell kit and hoping it will fot the Aires resin pit. We’ll see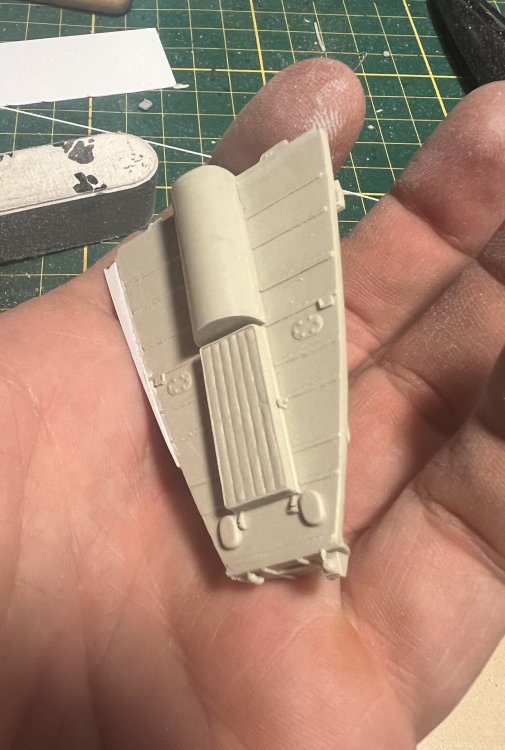

-
1/32 ME-262A-2a/U2
JeroenPeters replied to JeroenPeters's topic in LSM 1/35 and Larger Work In Progress
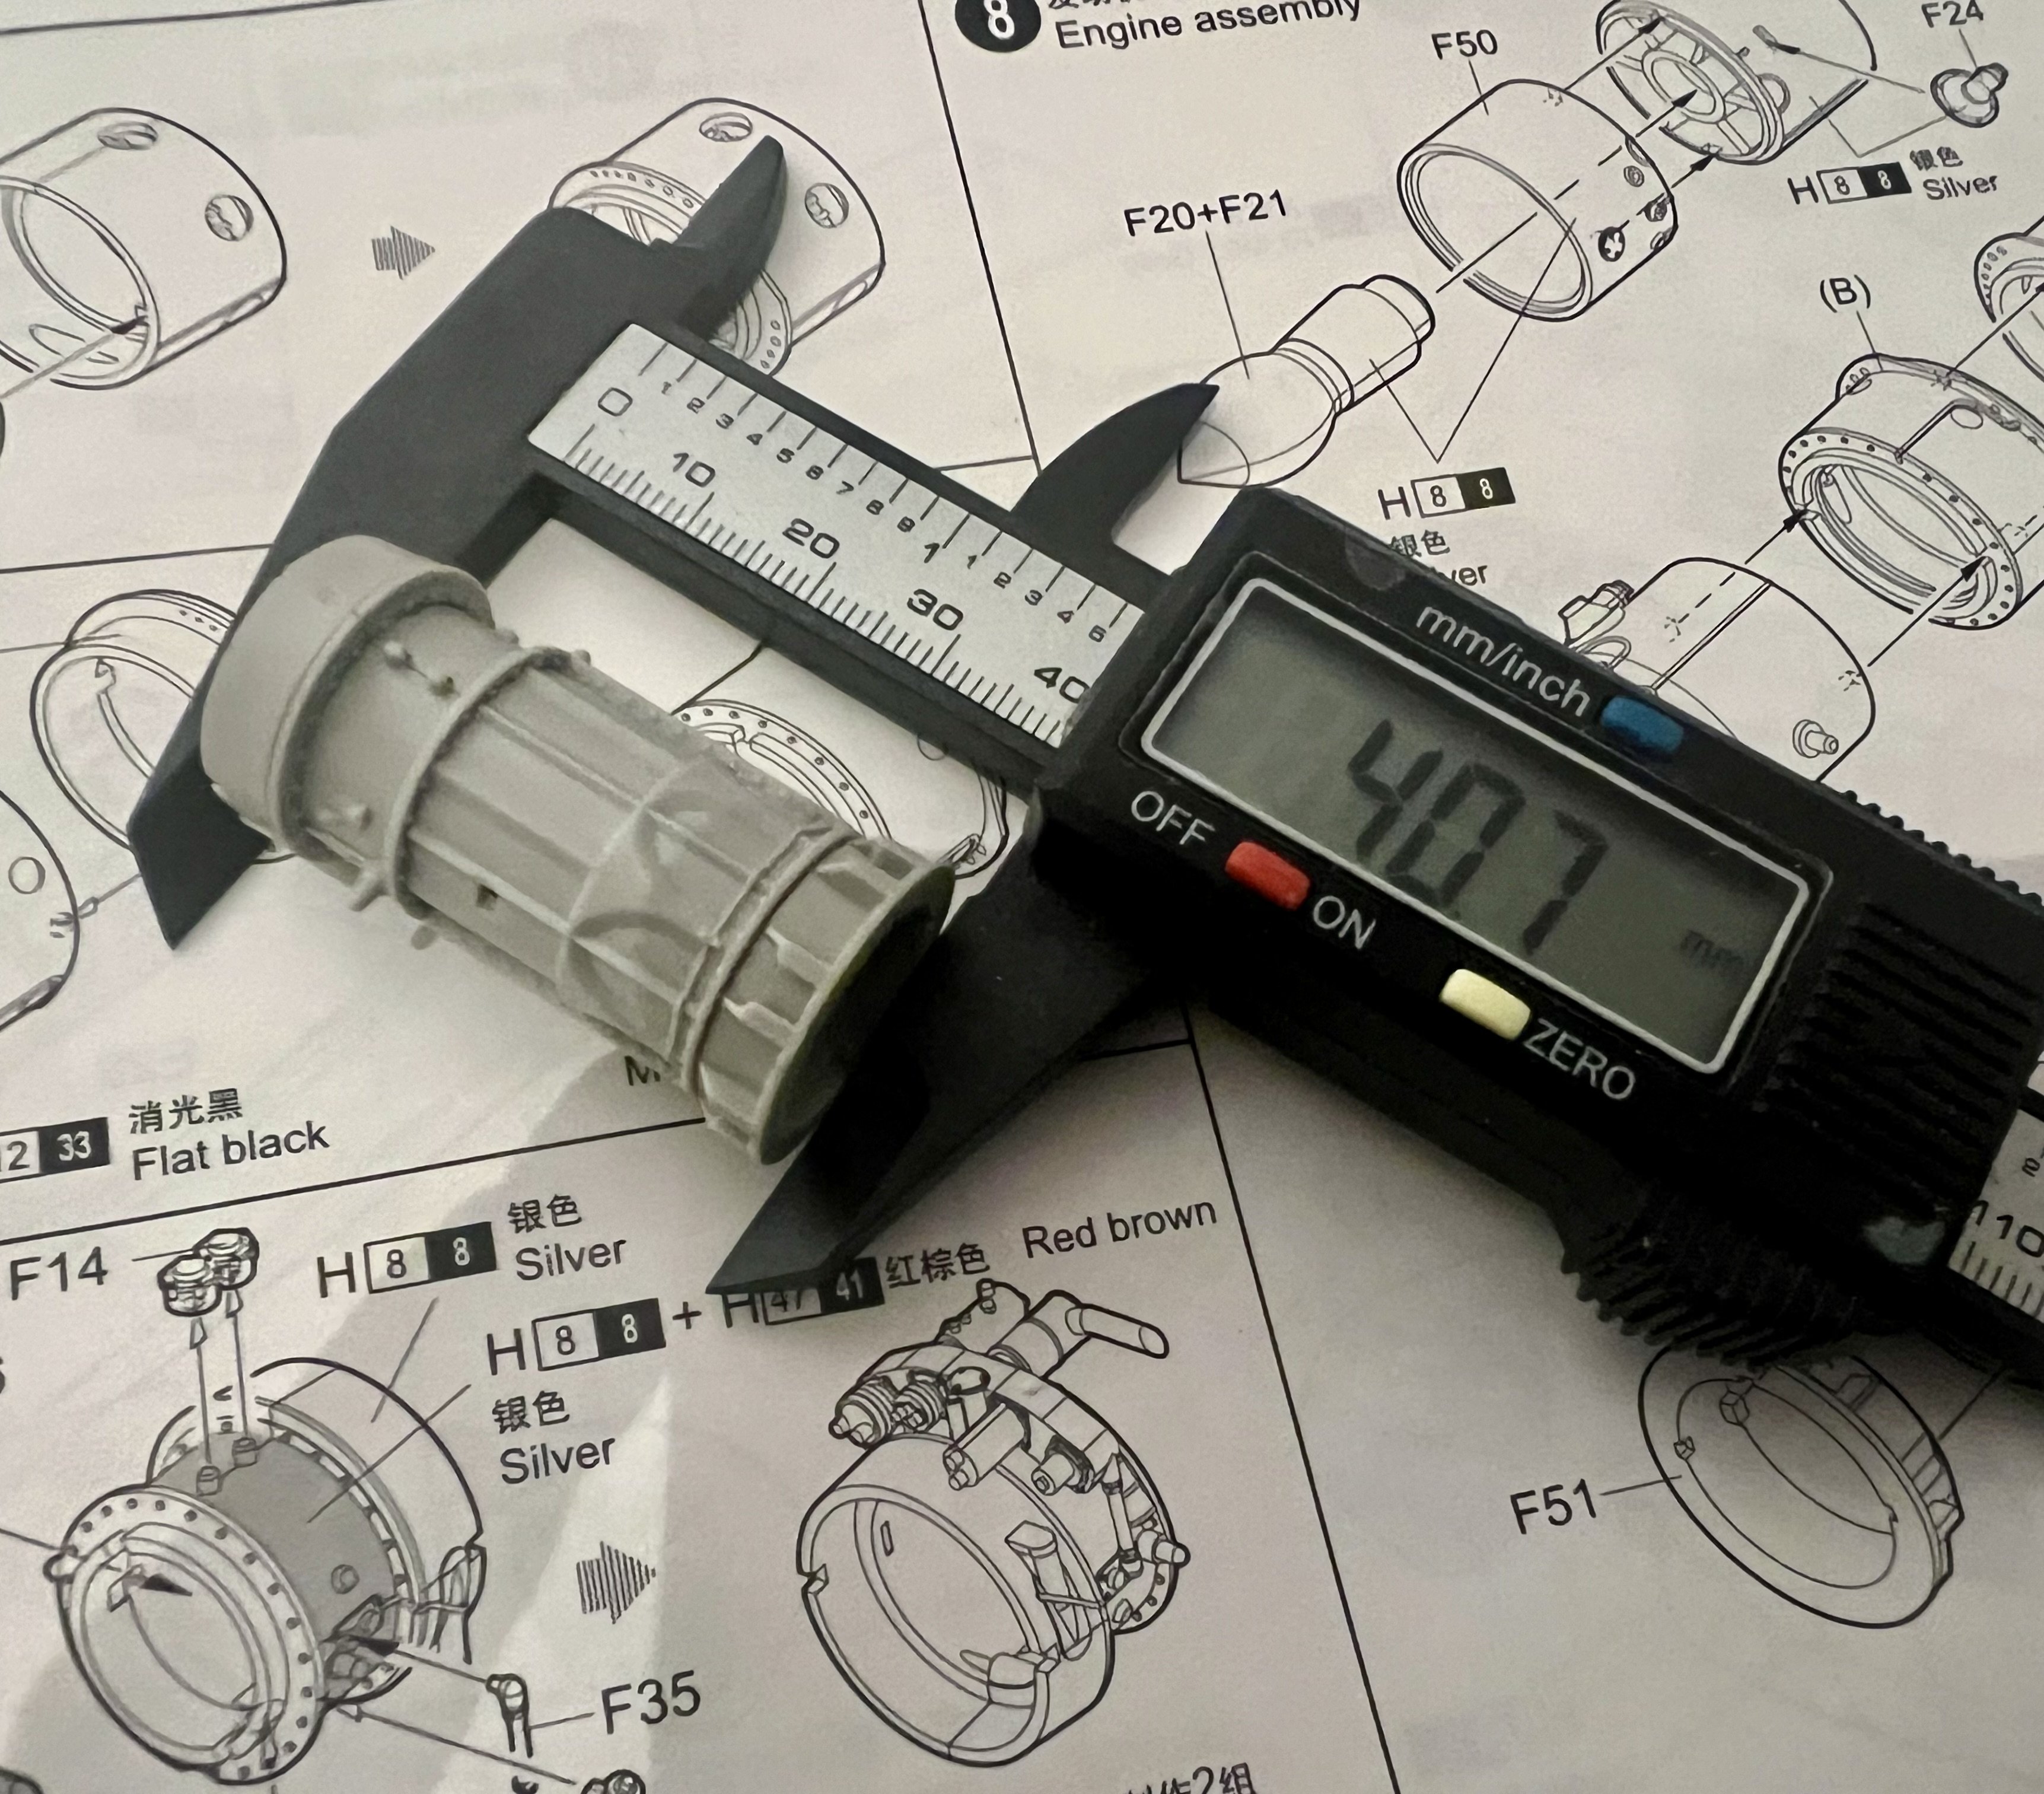
Measuring the kit section of the engine so i can fully replace it
-
1/32 ME-262A-2a/U2
JeroenPeters replied to JeroenPeters's topic in LSM 1/35 and Larger Work In Progress
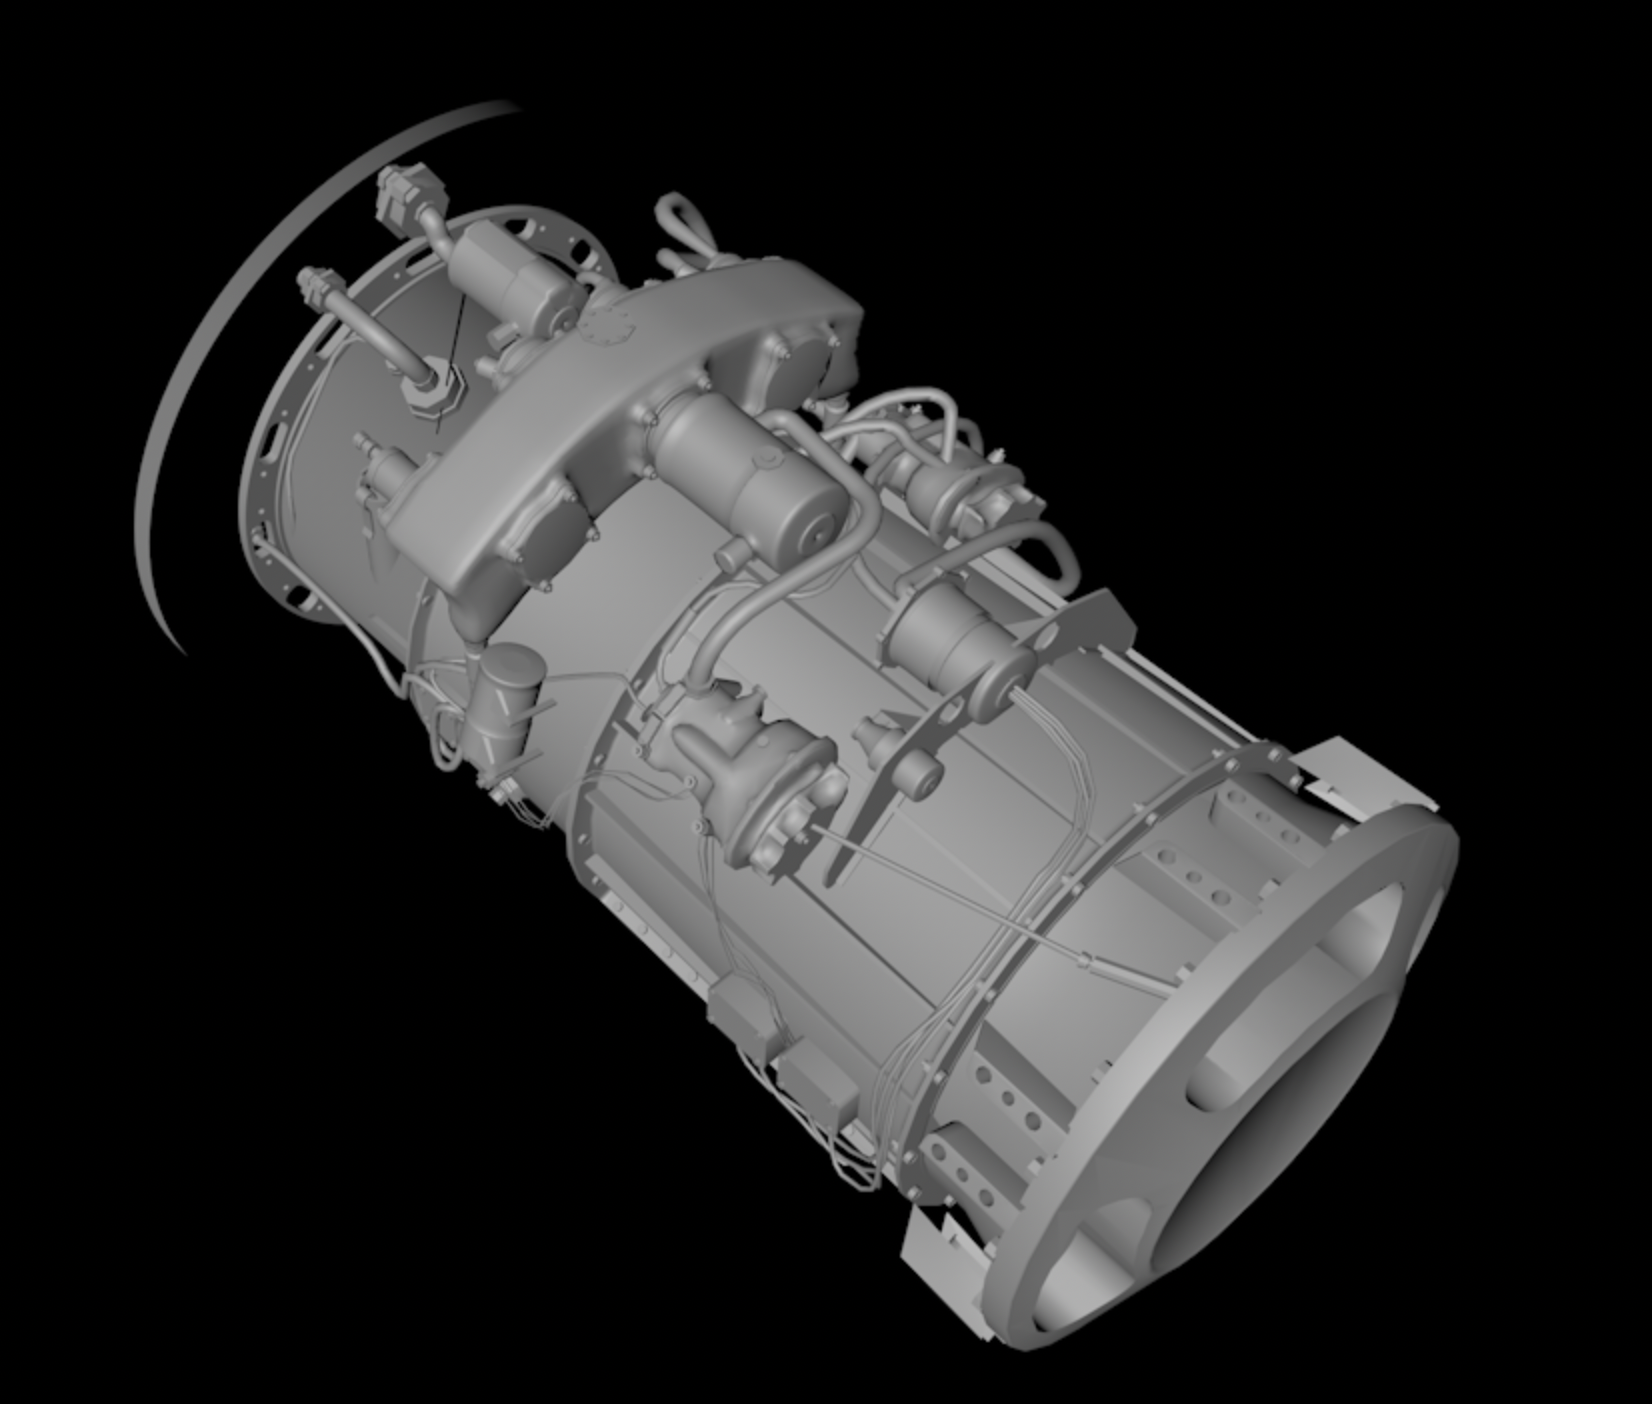
Isolated the engine part that I need and modifying it so it is suitable for 3d printing.
-
1/32 ME-262A-2a/U2
JeroenPeters replied to JeroenPeters's topic in LSM 1/35 and Larger Work In Progress
So. The floorbed also shows shrinkage. Almost 2mm on both sides. Will need to fill this out.
-
1/32 ME-262A-2a/U2
JeroenPeters replied to JeroenPeters's topic in LSM 1/35 and Larger Work In Progress
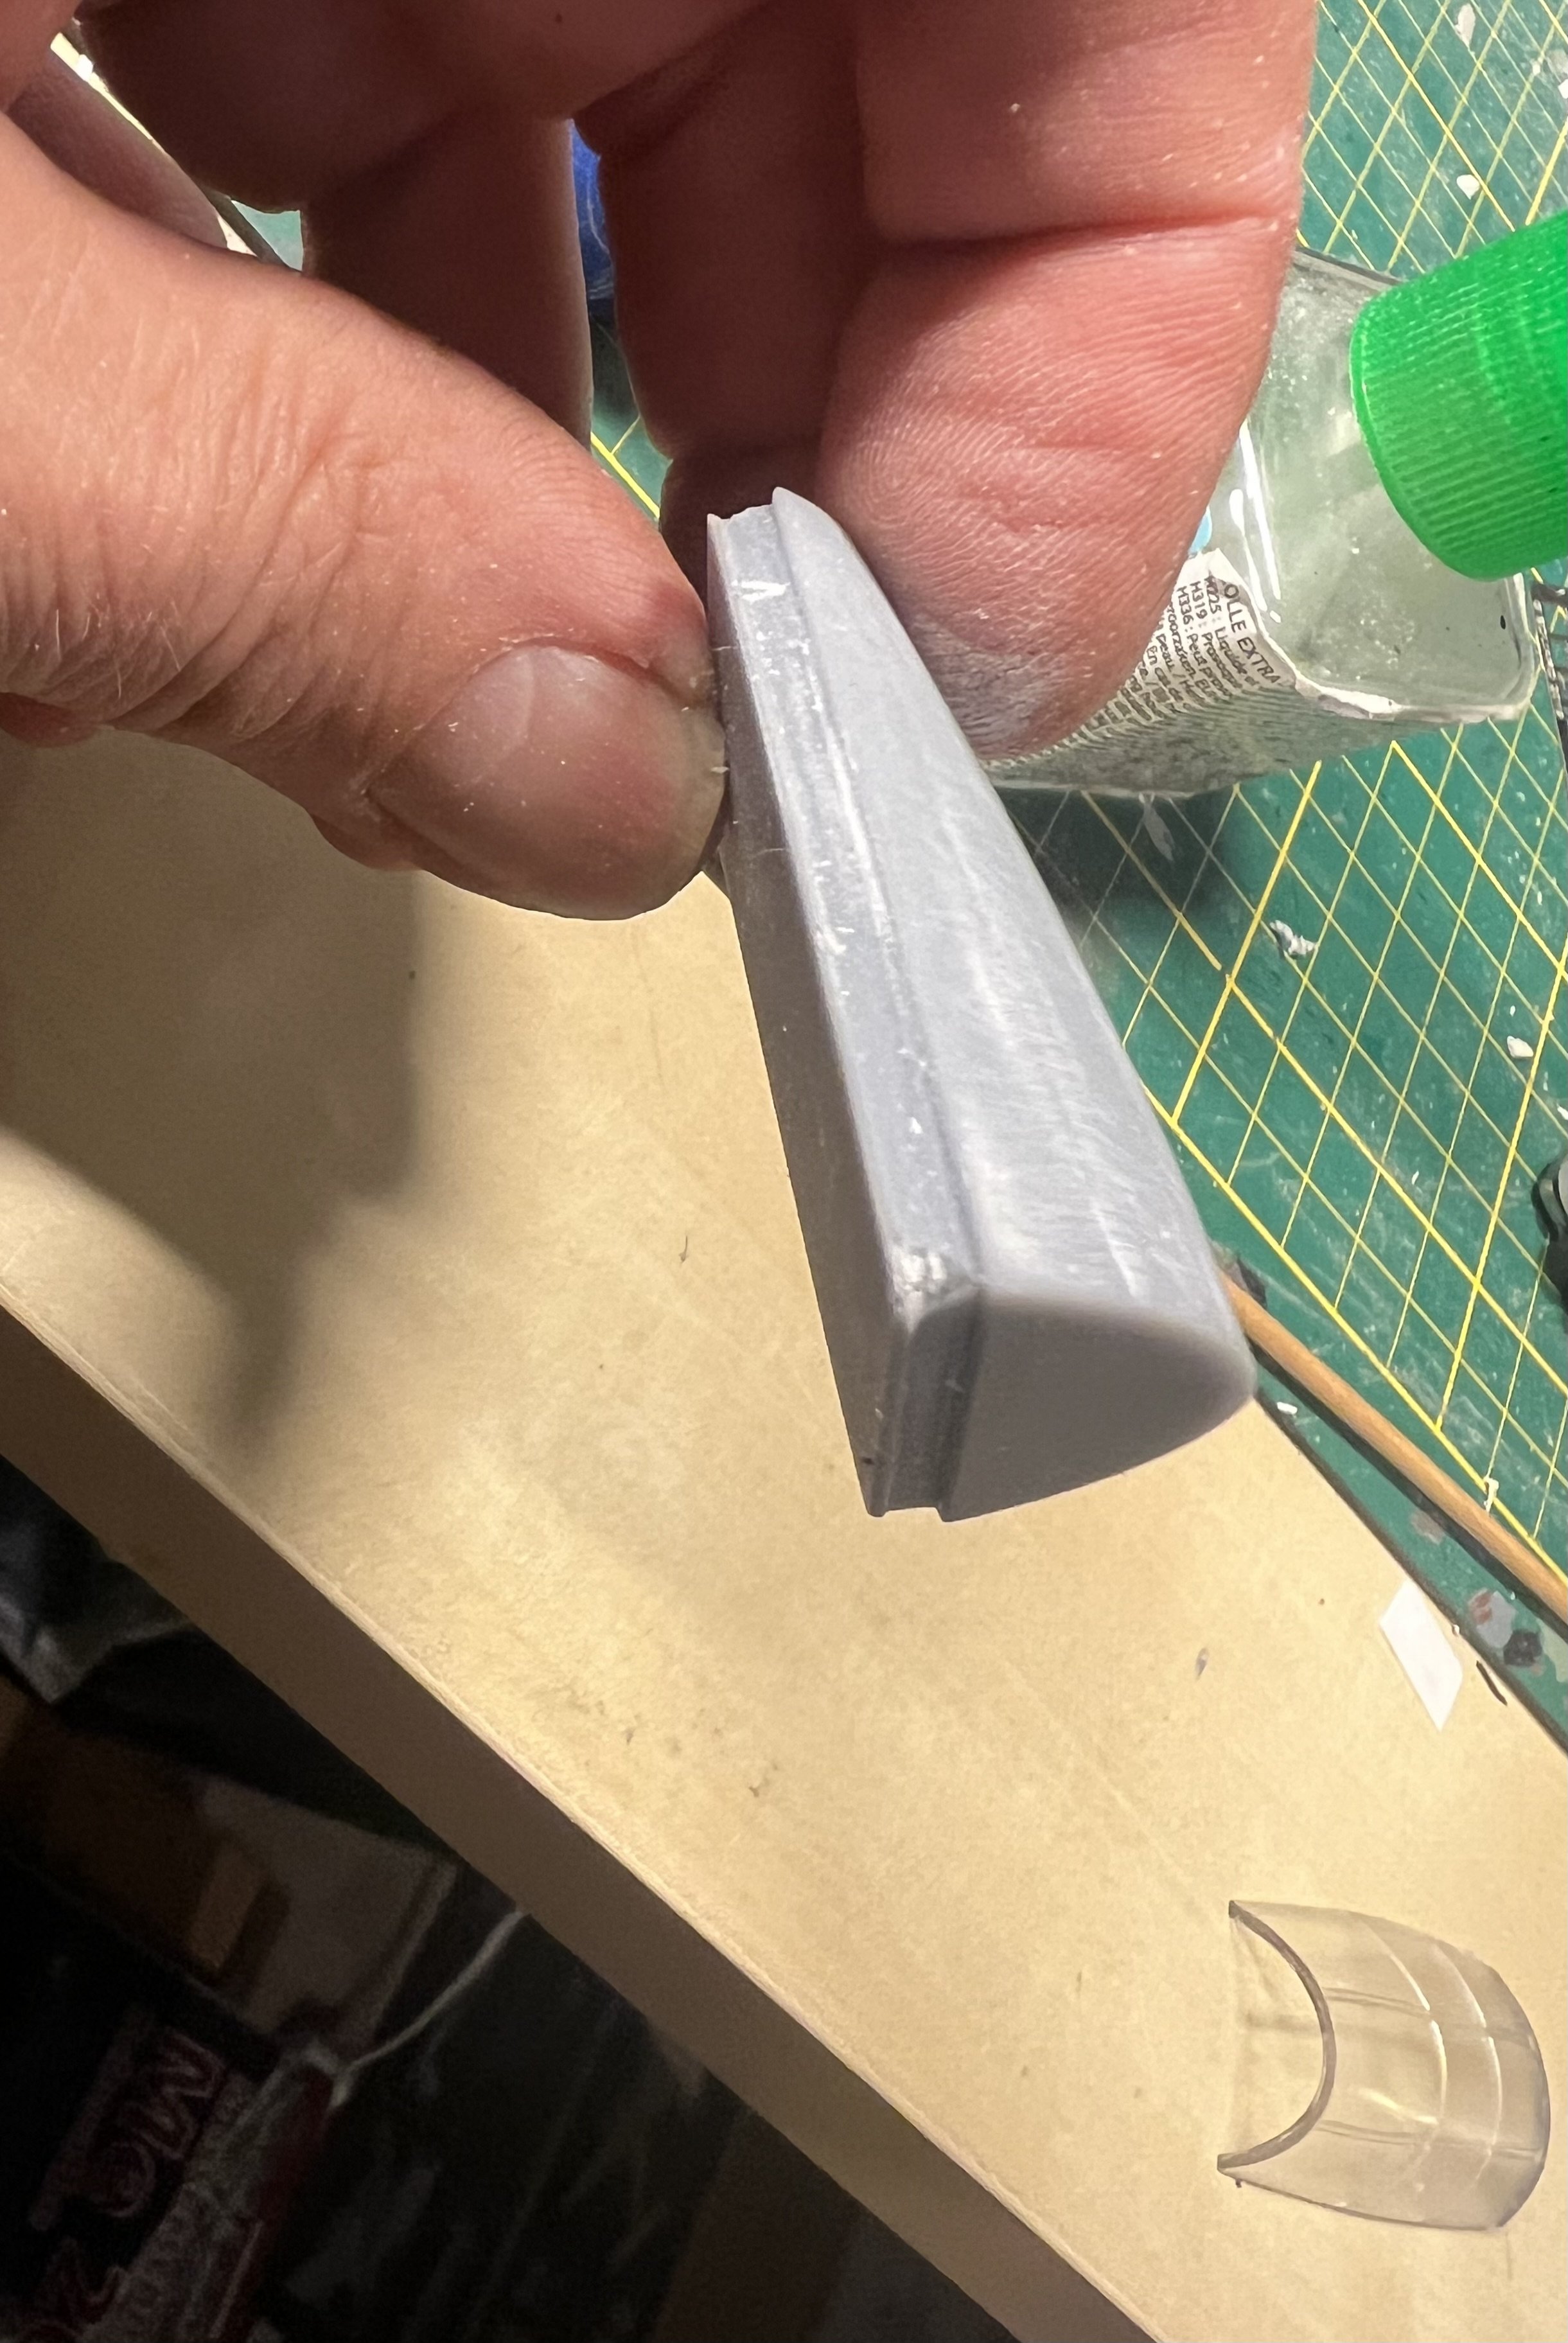
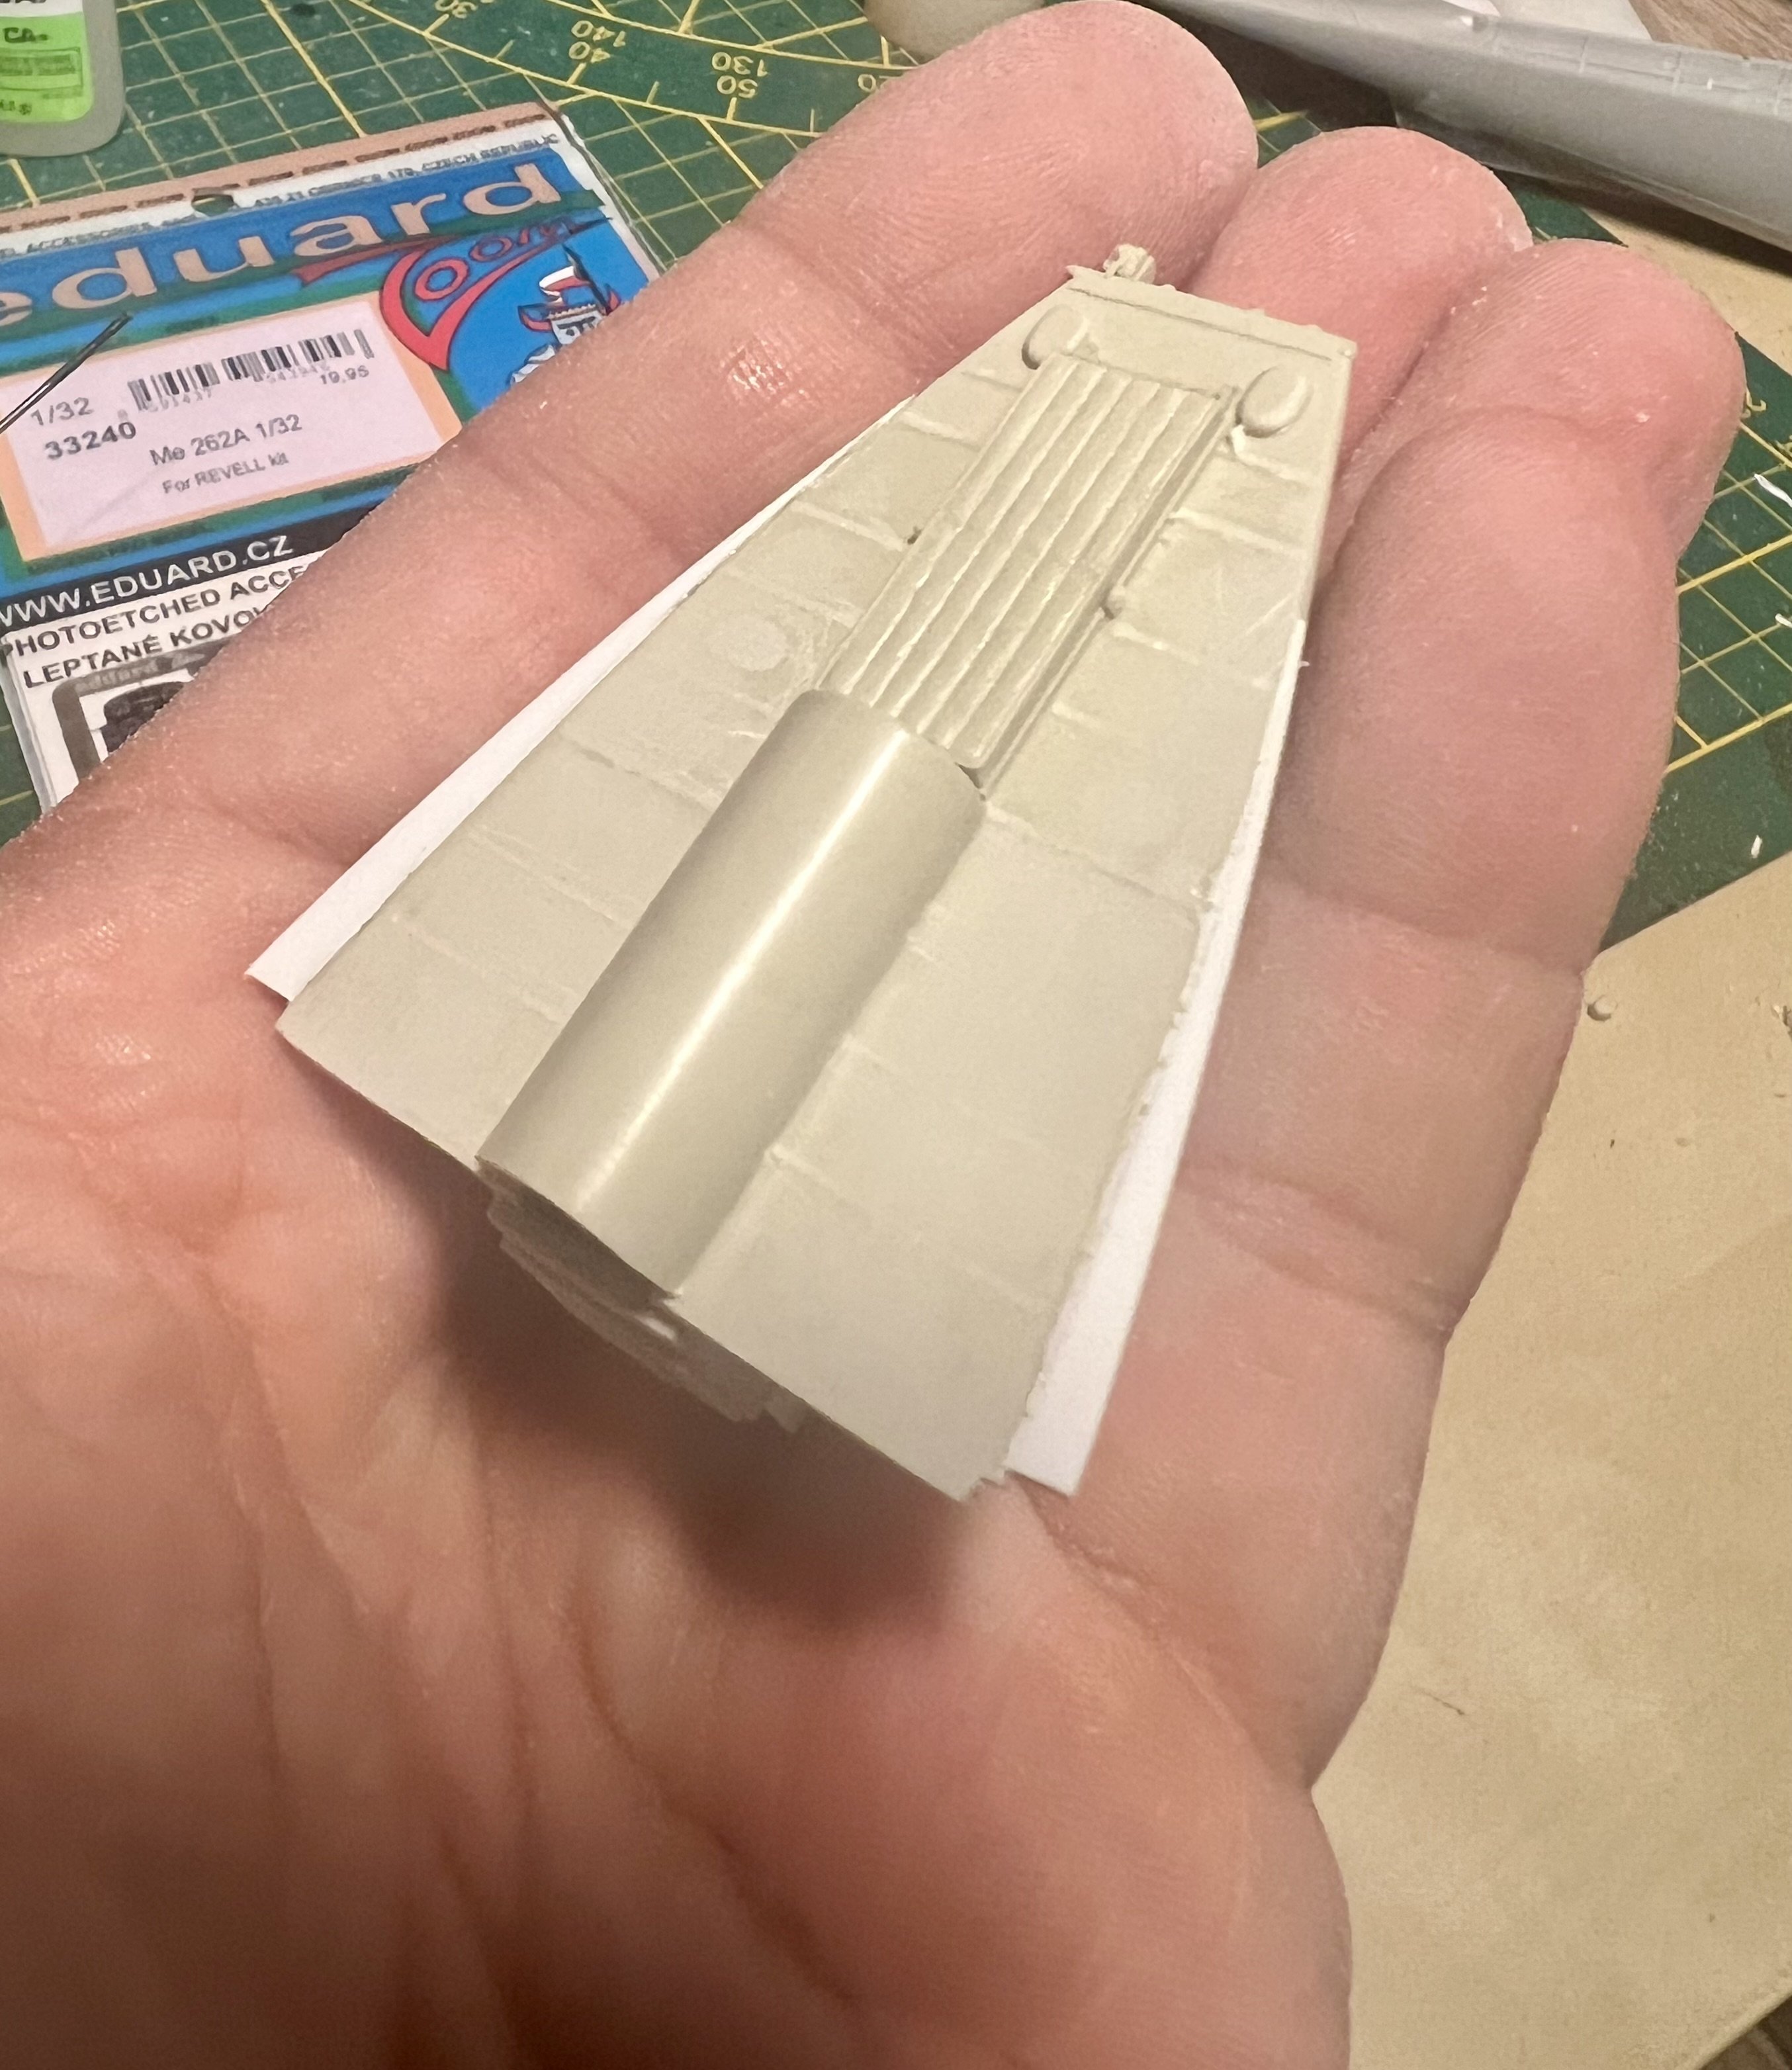
I used the Trumpeter bulkhead. Flipped it. Filled it. And used Evergreen to make the ribs.
-
1/32 ME-262A-2a/U2
JeroenPeters replied to JeroenPeters's topic in LSM 1/35 and Larger Work In Progress
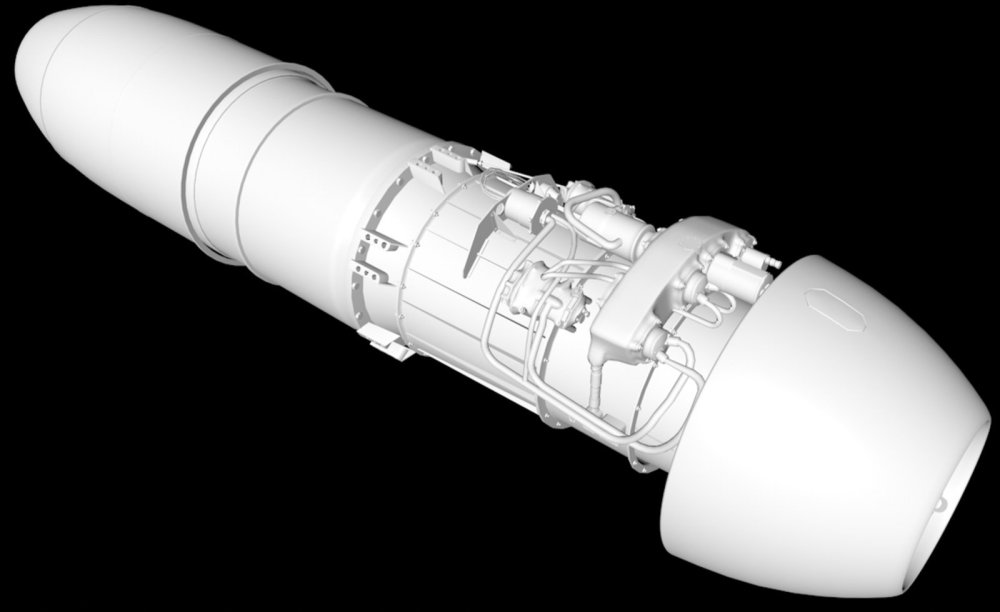
Talking about 3D models. Just bought this file of the net. I will print the forward section in order to open up the top cowling of one of the engines.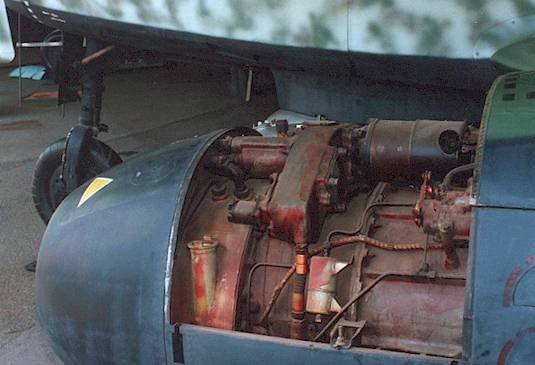
-
1/32 ME-262A-2a/U2
JeroenPeters replied to JeroenPeters's topic in LSM 1/35 and Larger Work In Progress
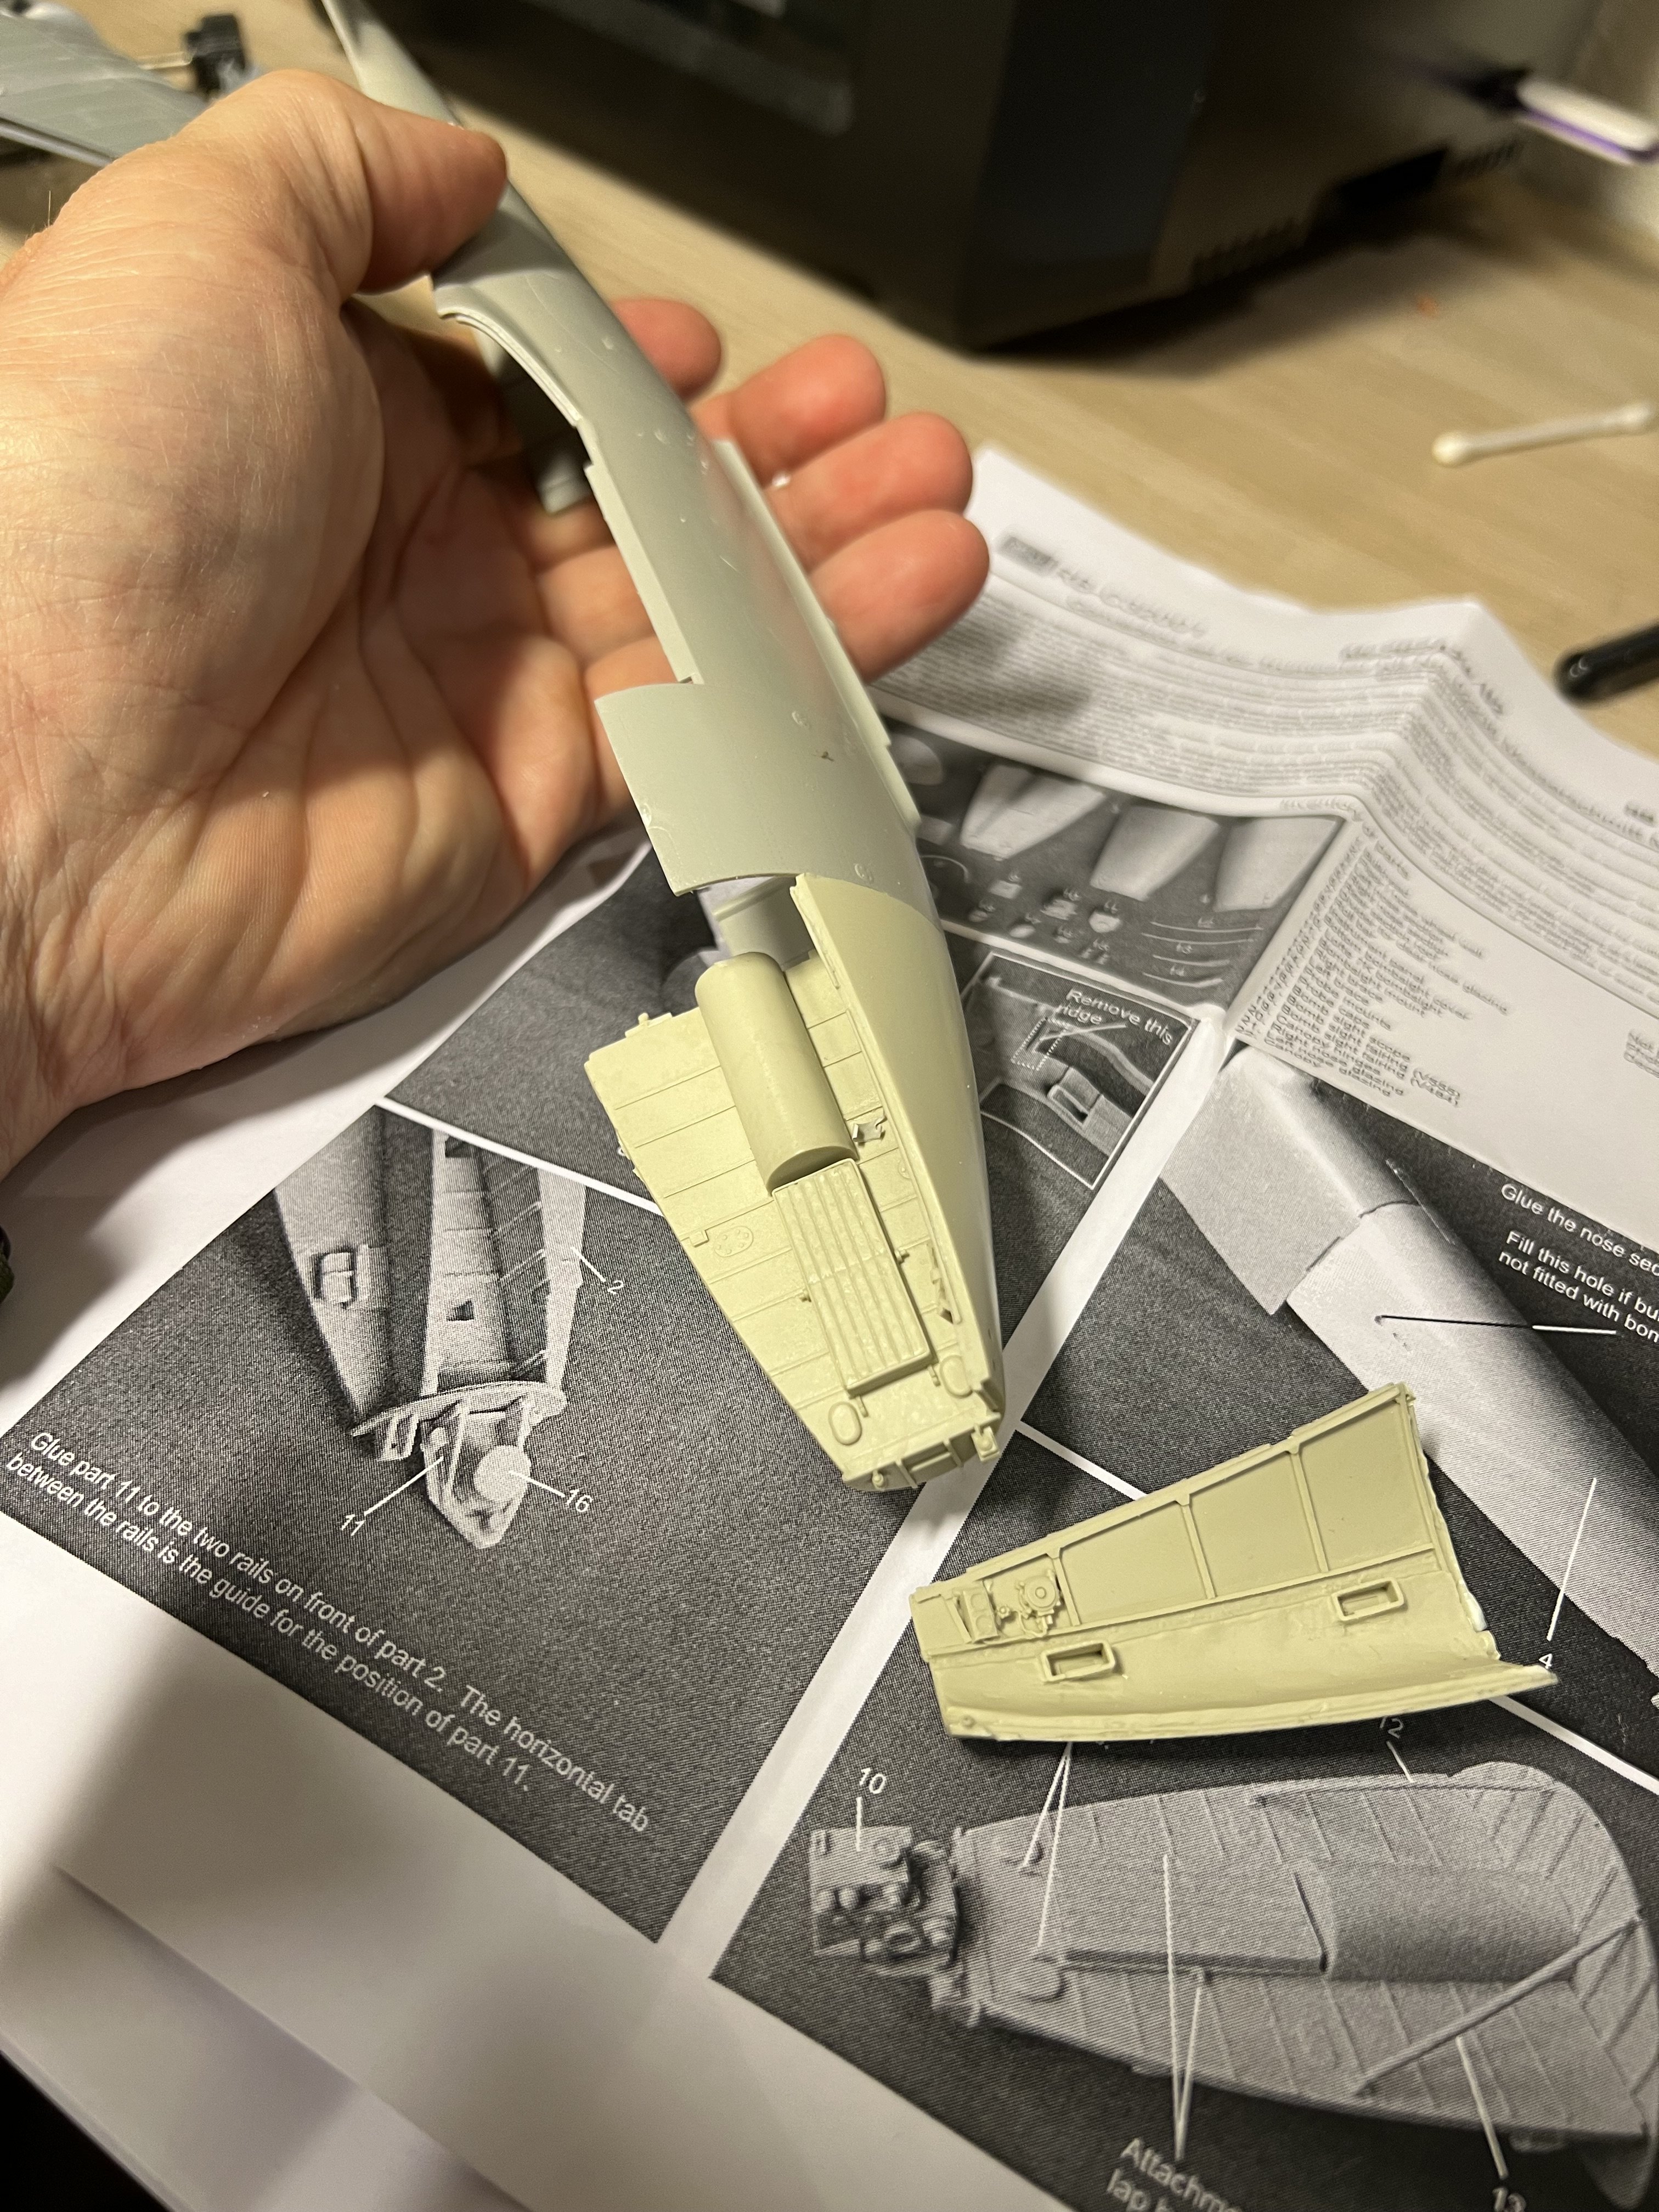
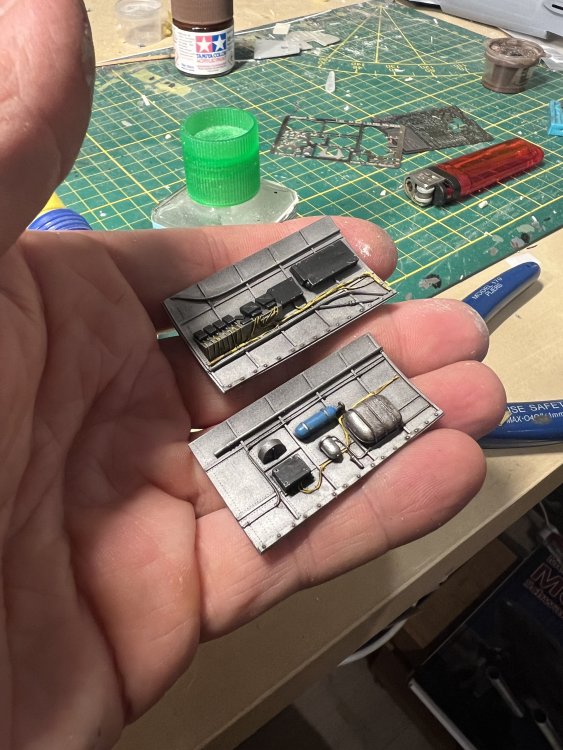
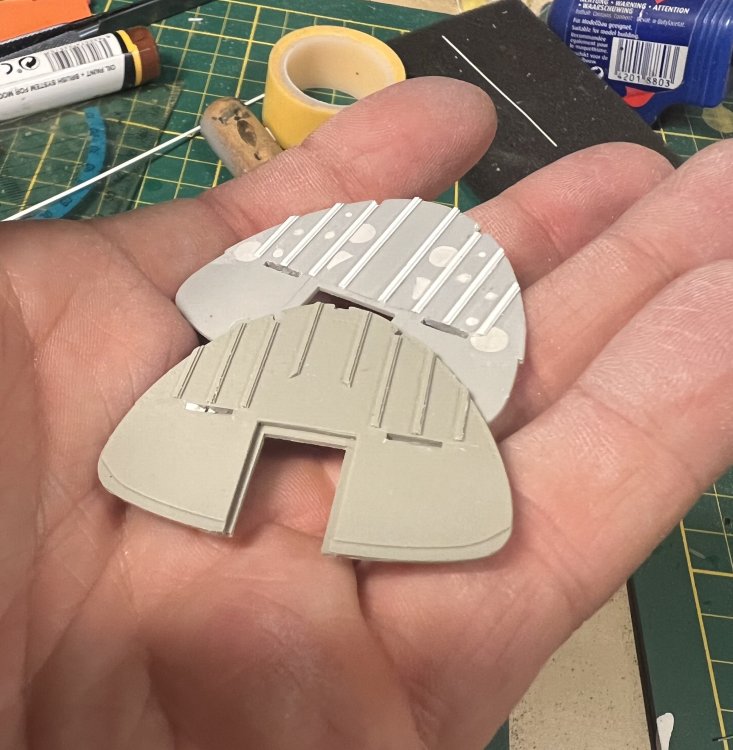
The bulkhead has major shrinkage and can’t be used. See in the pic: the one on top is the MDC resin. The lower Trumpeter. I will make a 3D one and print it. The whole floor has shrinkage too. This was supposed to be a quick build.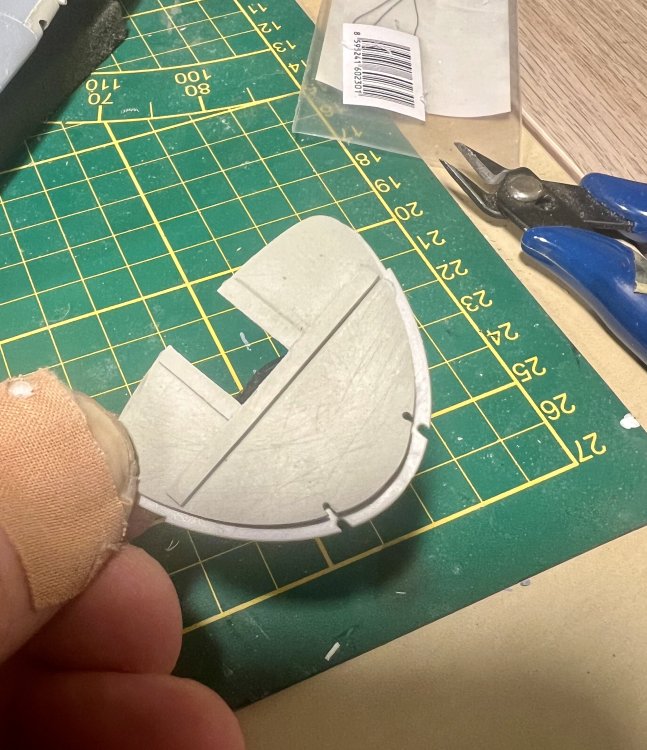

-
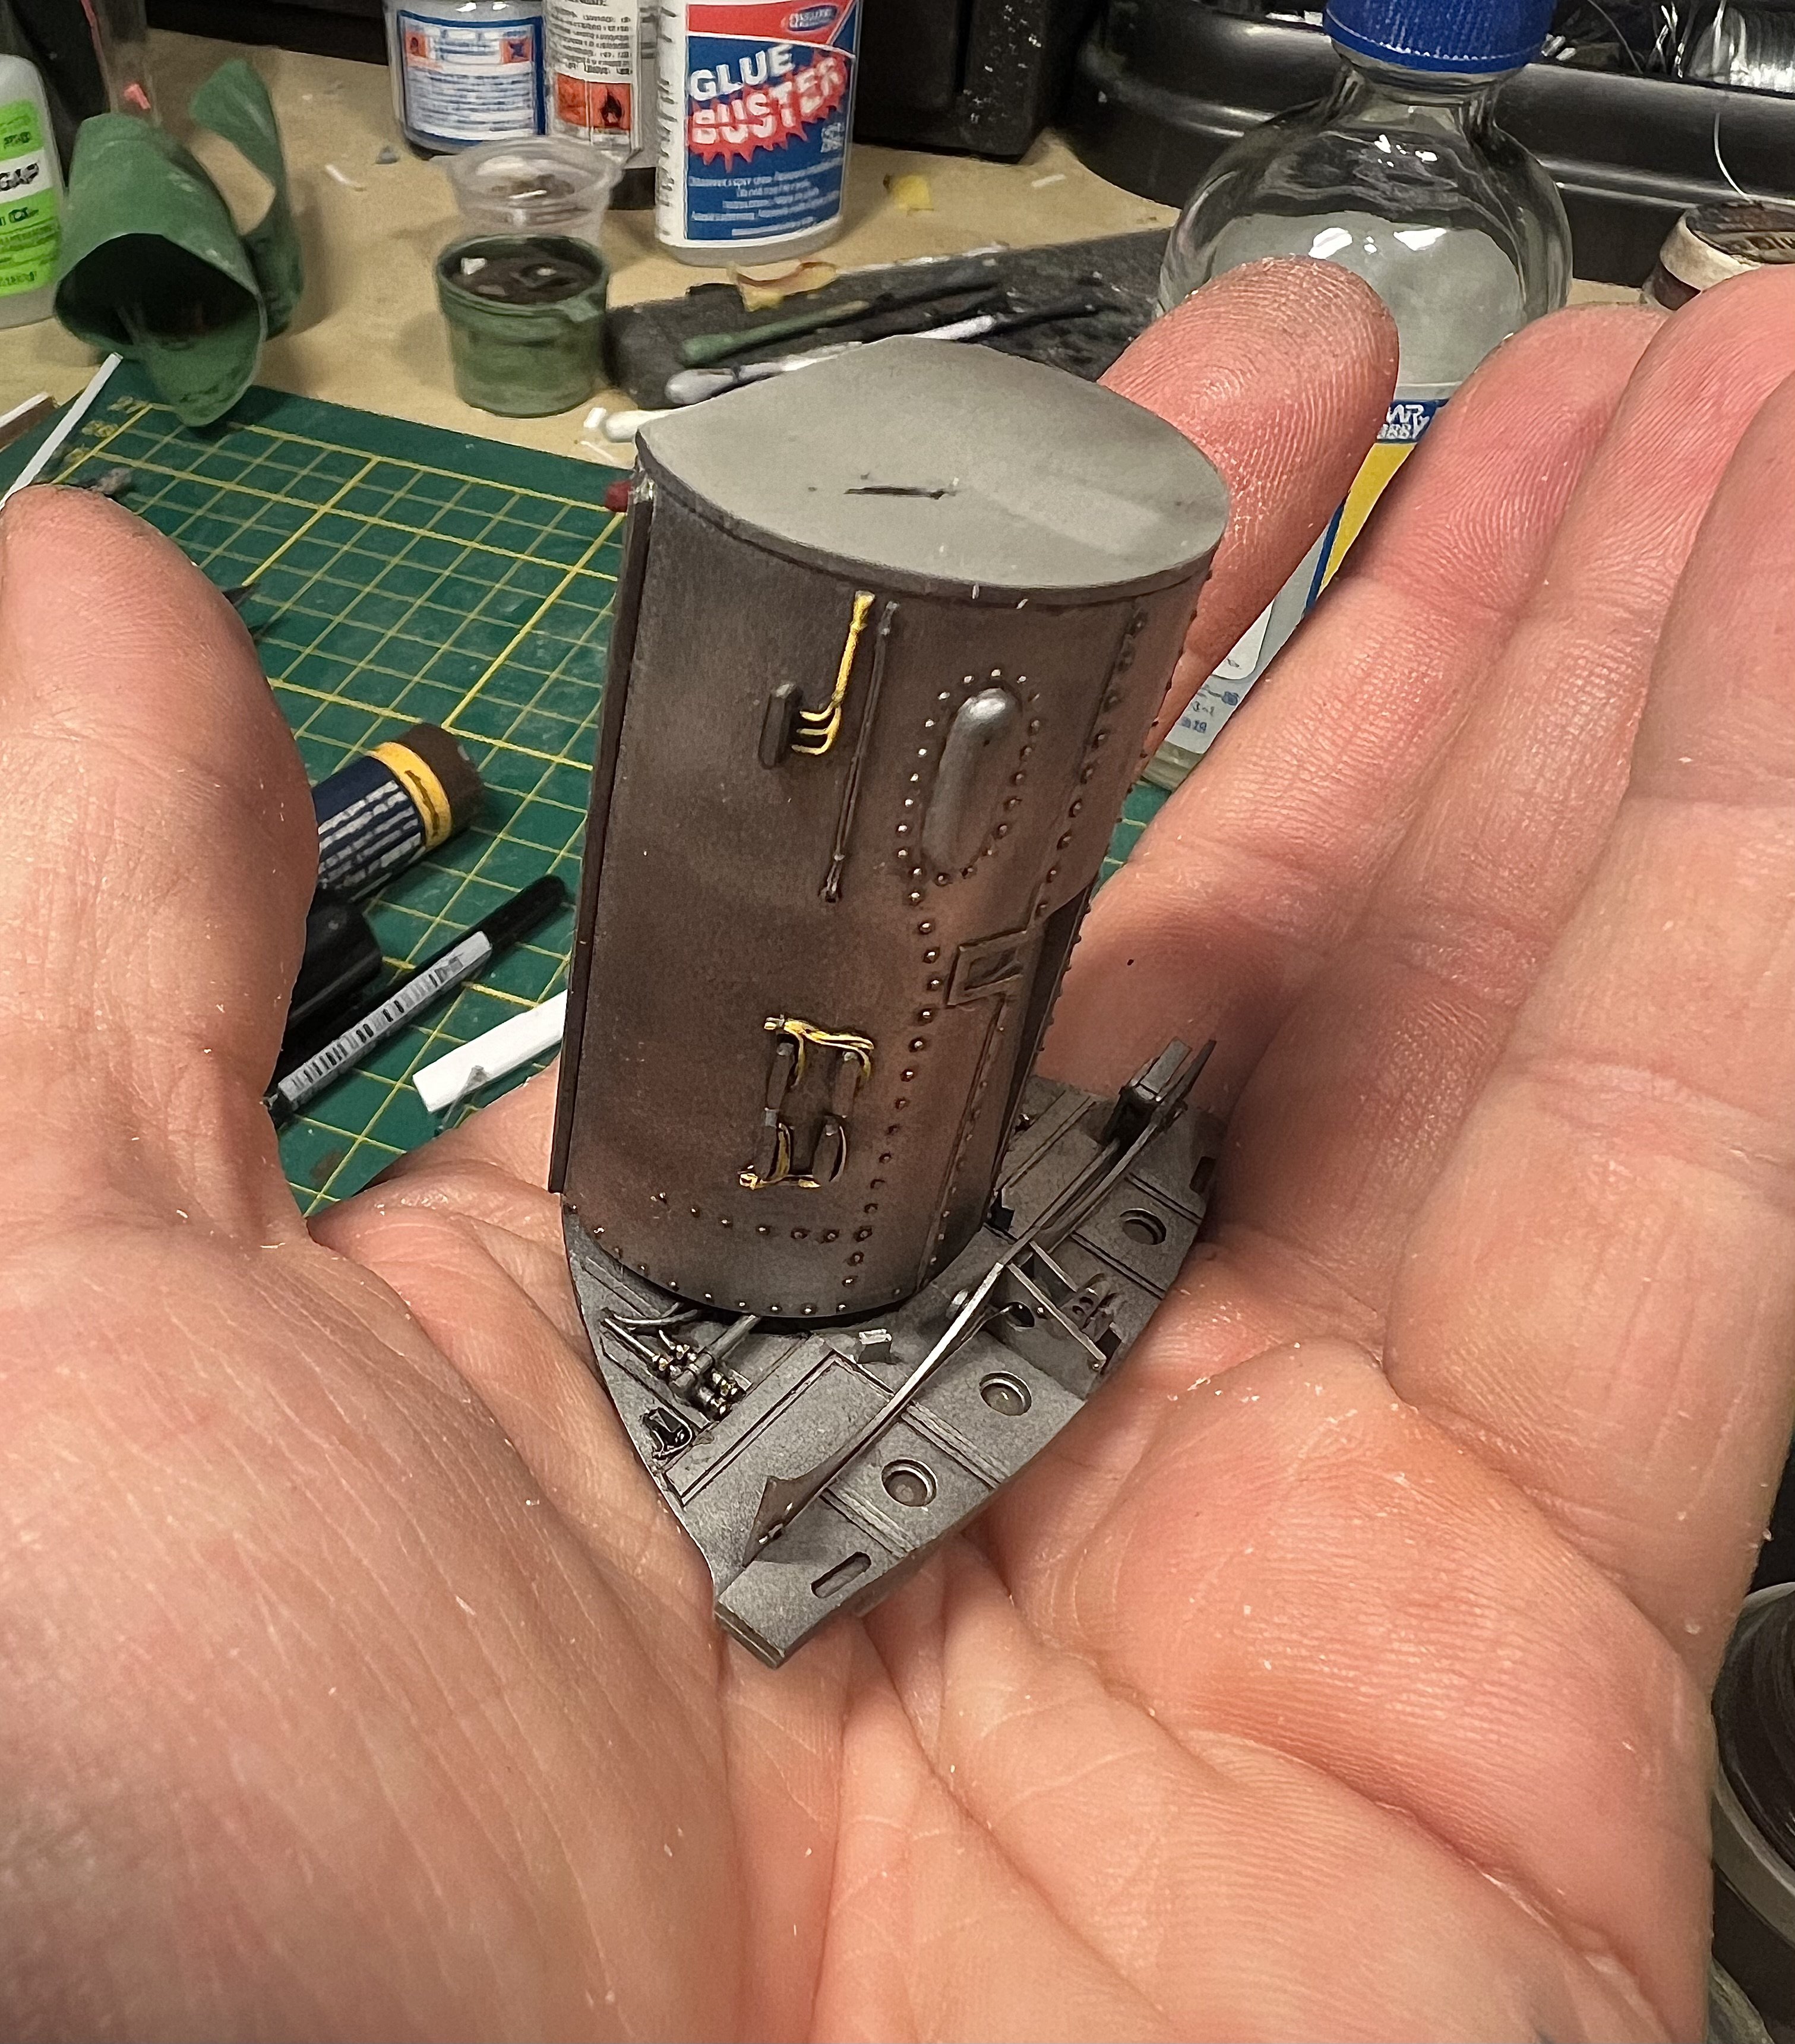
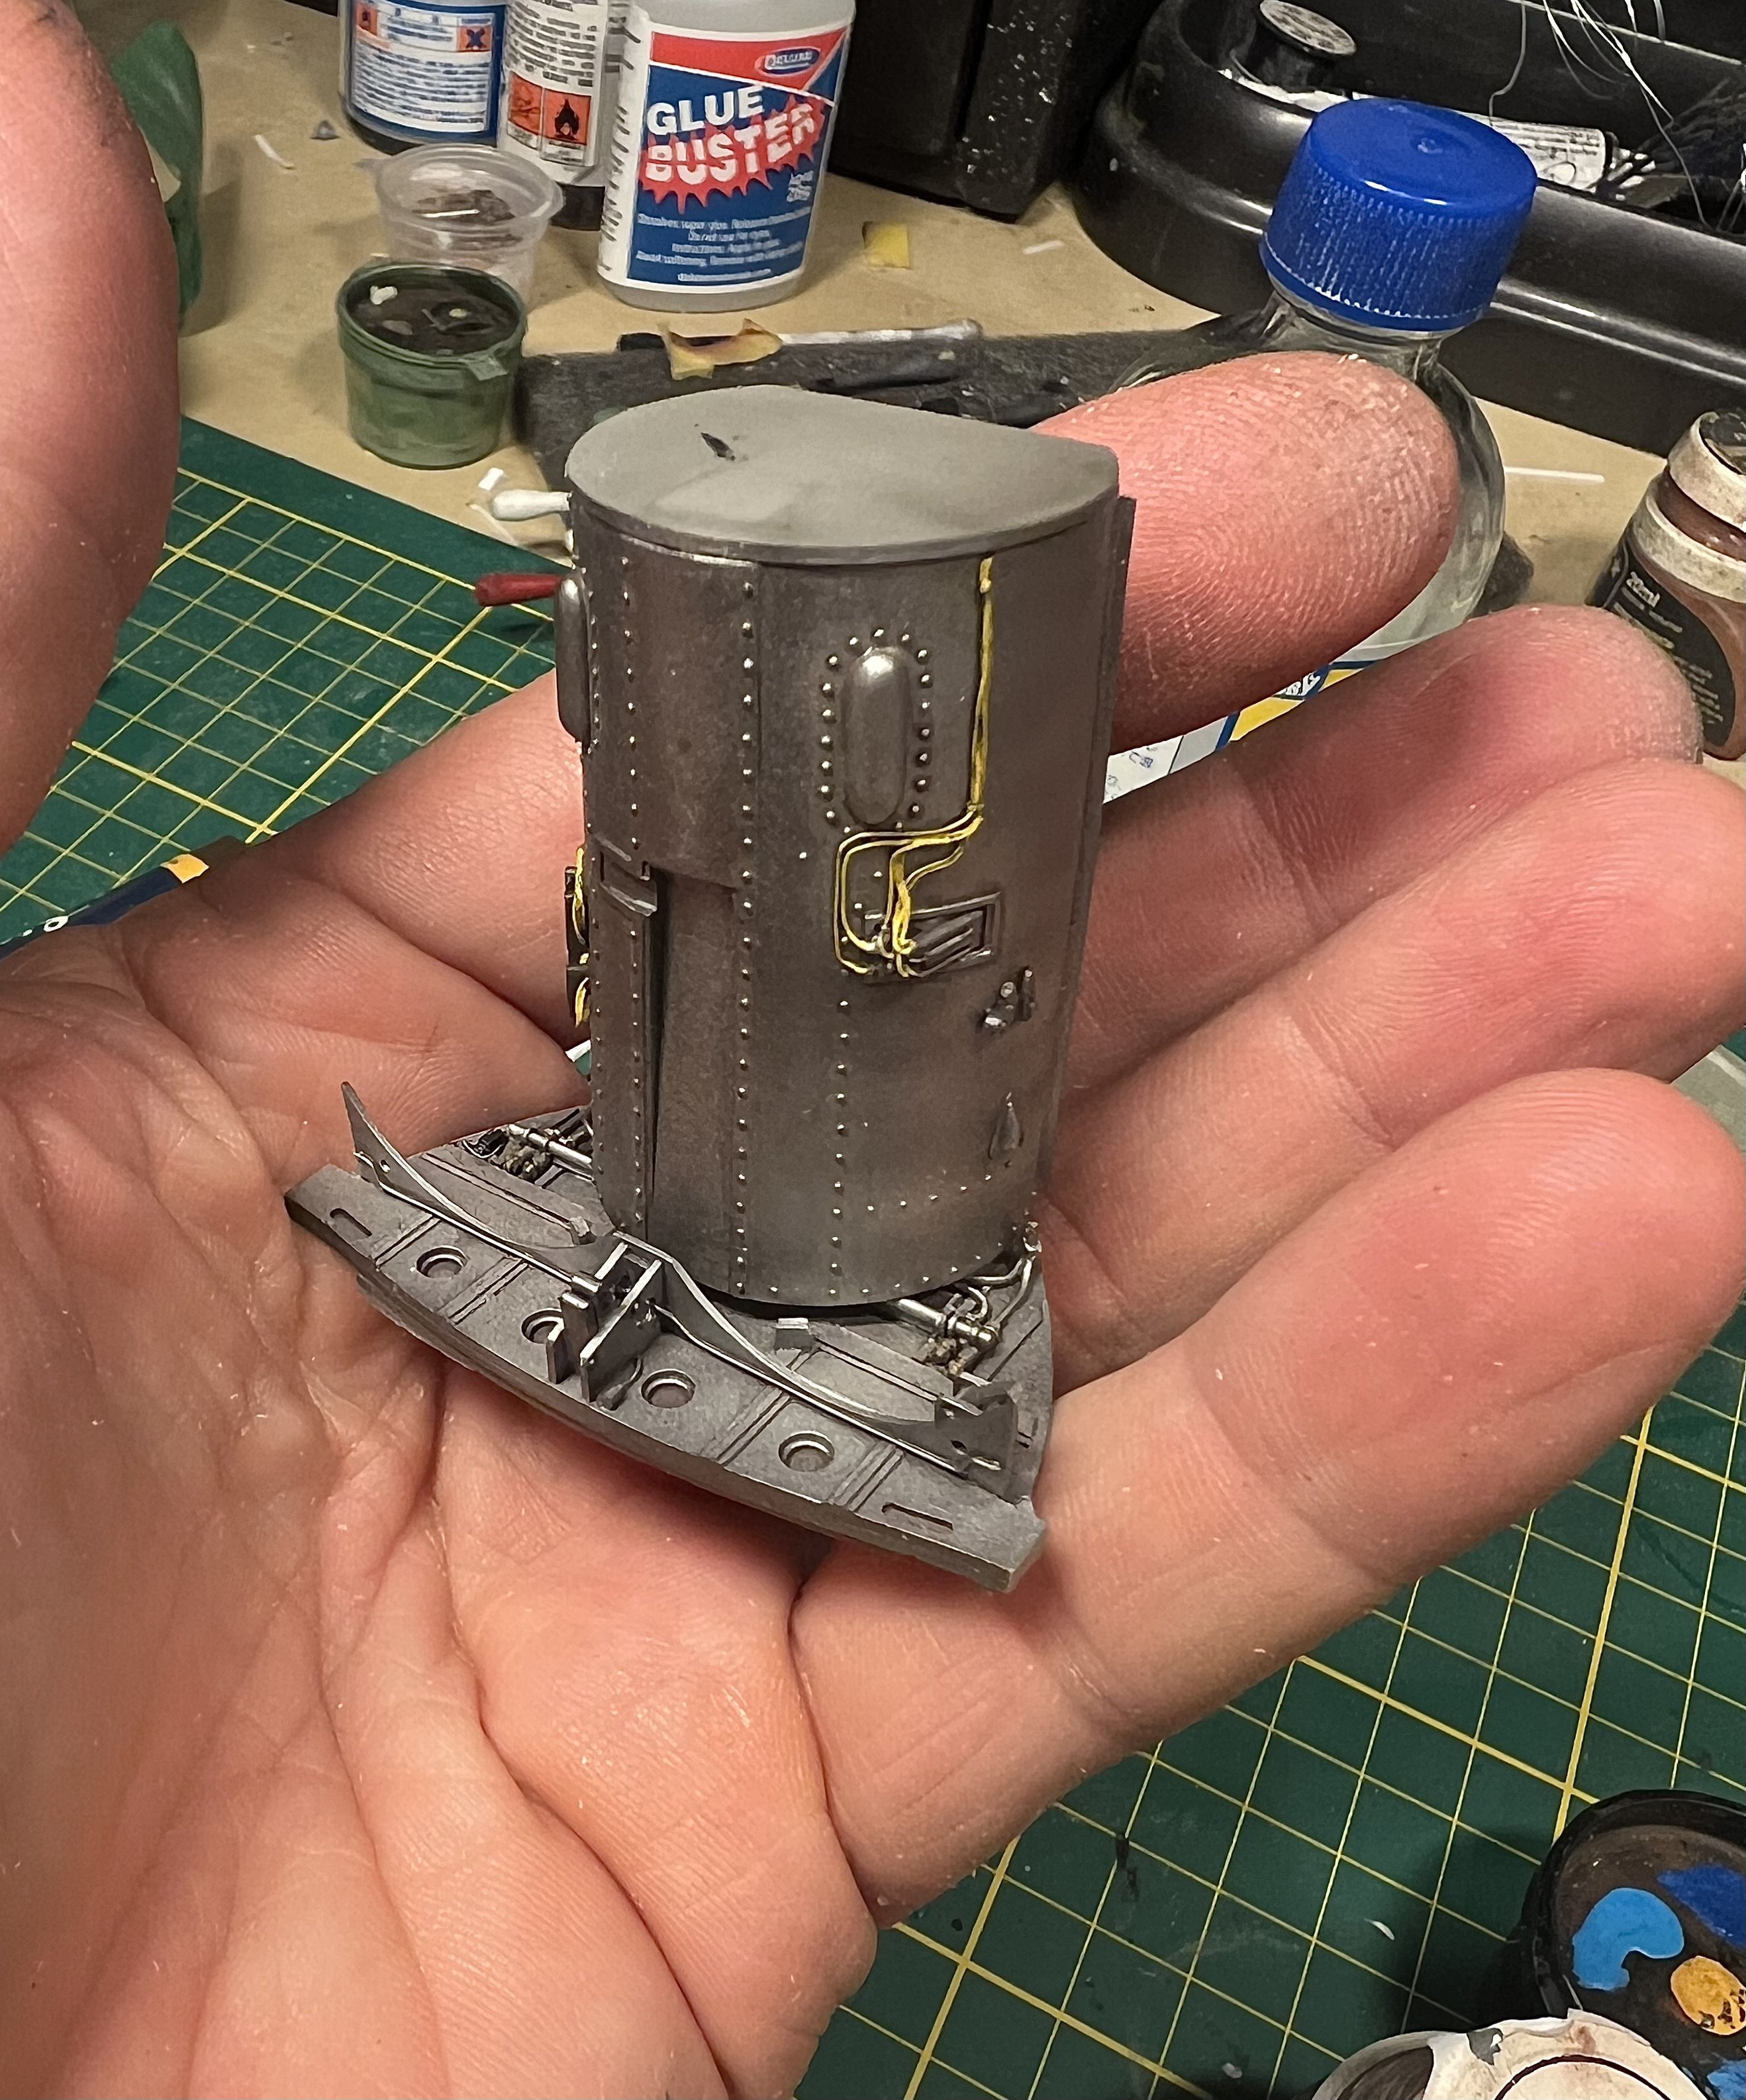
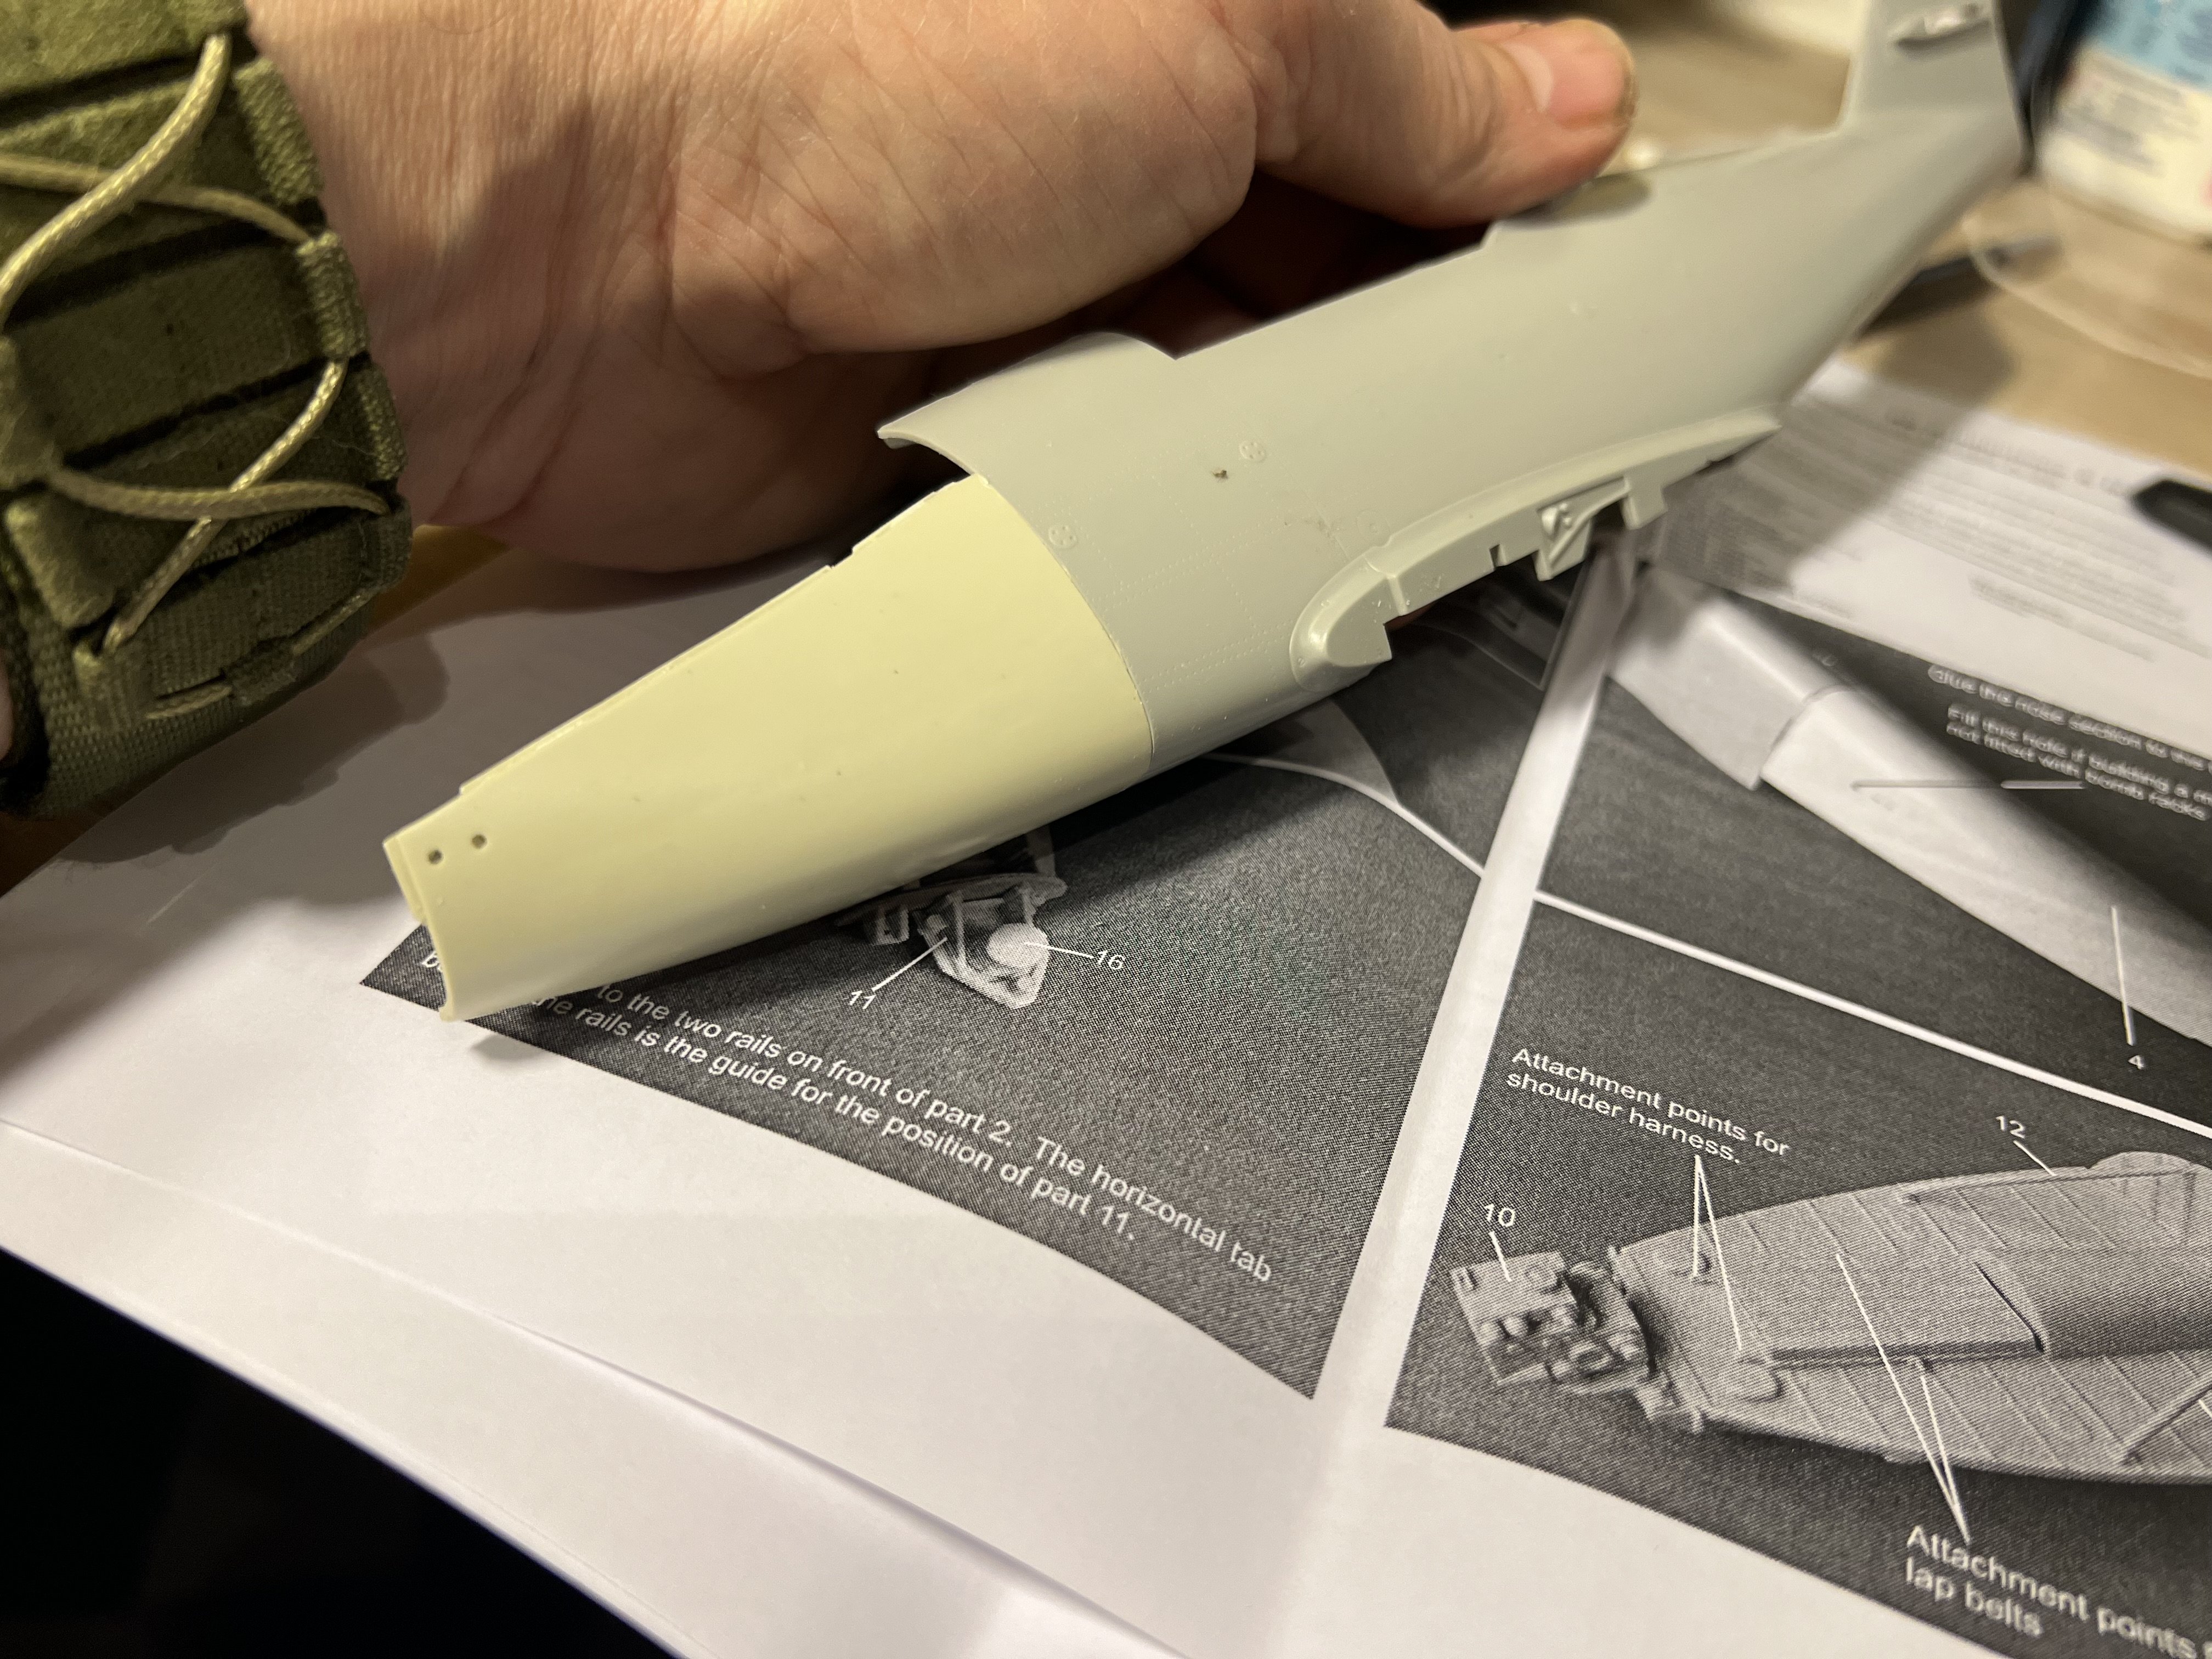
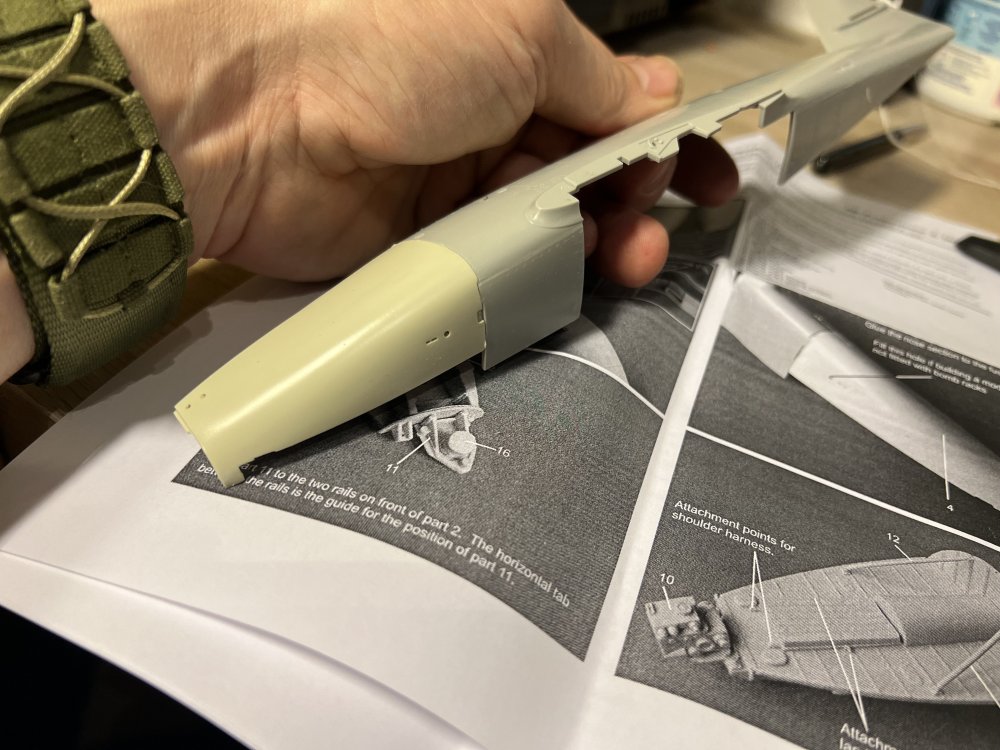
I could not help myself. Had this Radu Brinzan conversion in the drawer for years. Suddenly whipped out a Me262 kit and sawed off the nose. The resin nose is a pretty good fit. Some boiling water to make it fit perfectly.


- 151 replies
-
- 11
-
-
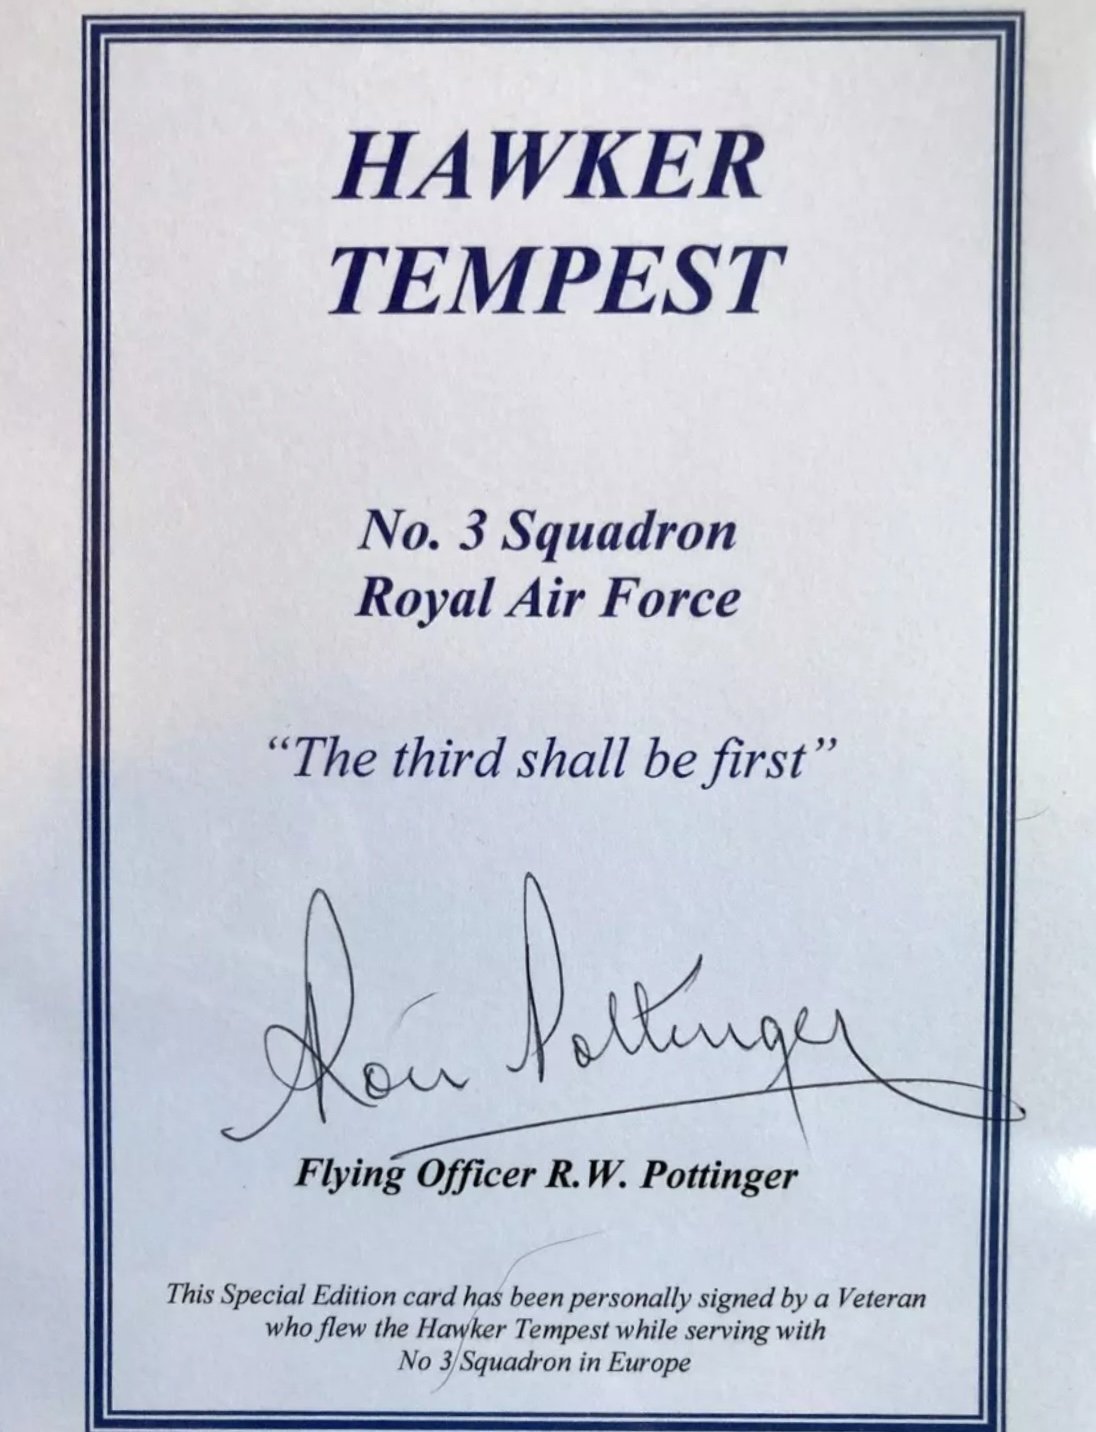
1/32 Hawker Tempest
JeroenPeters replied to JeroenPeters's topic in LSM 1/35 and Larger Work In Progress
Managed to buy another signature from Ron Pottinger. Might fit better in the final set up.
-
1/32 Hawker Tempest
JeroenPeters replied to JeroenPeters's topic in LSM 1/35 and Larger Work In Progress
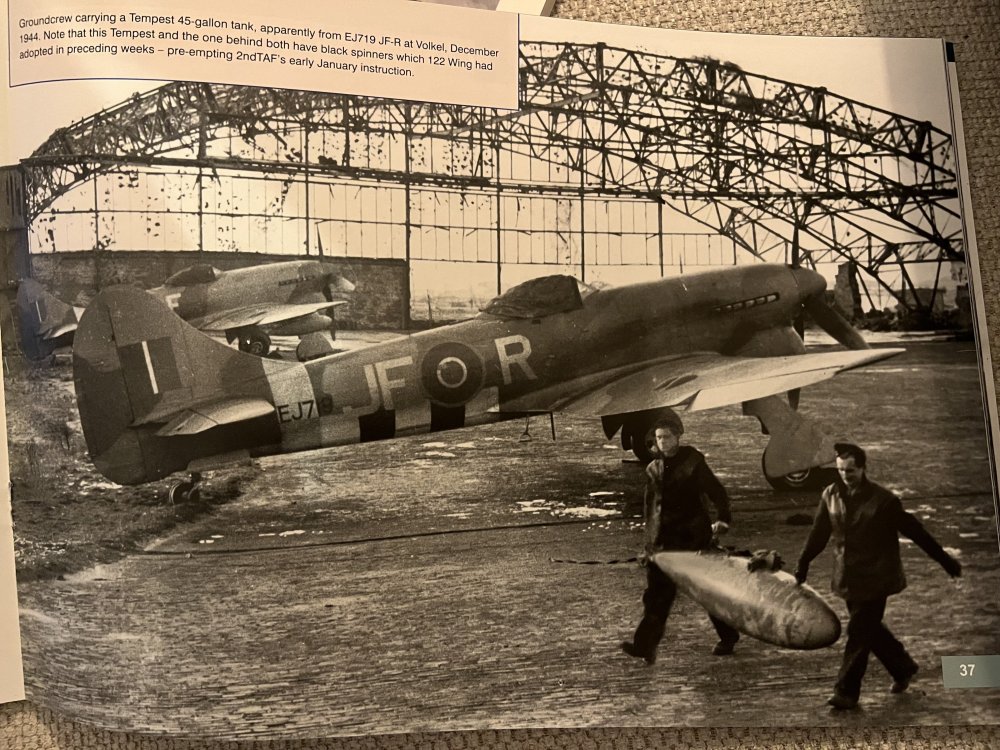
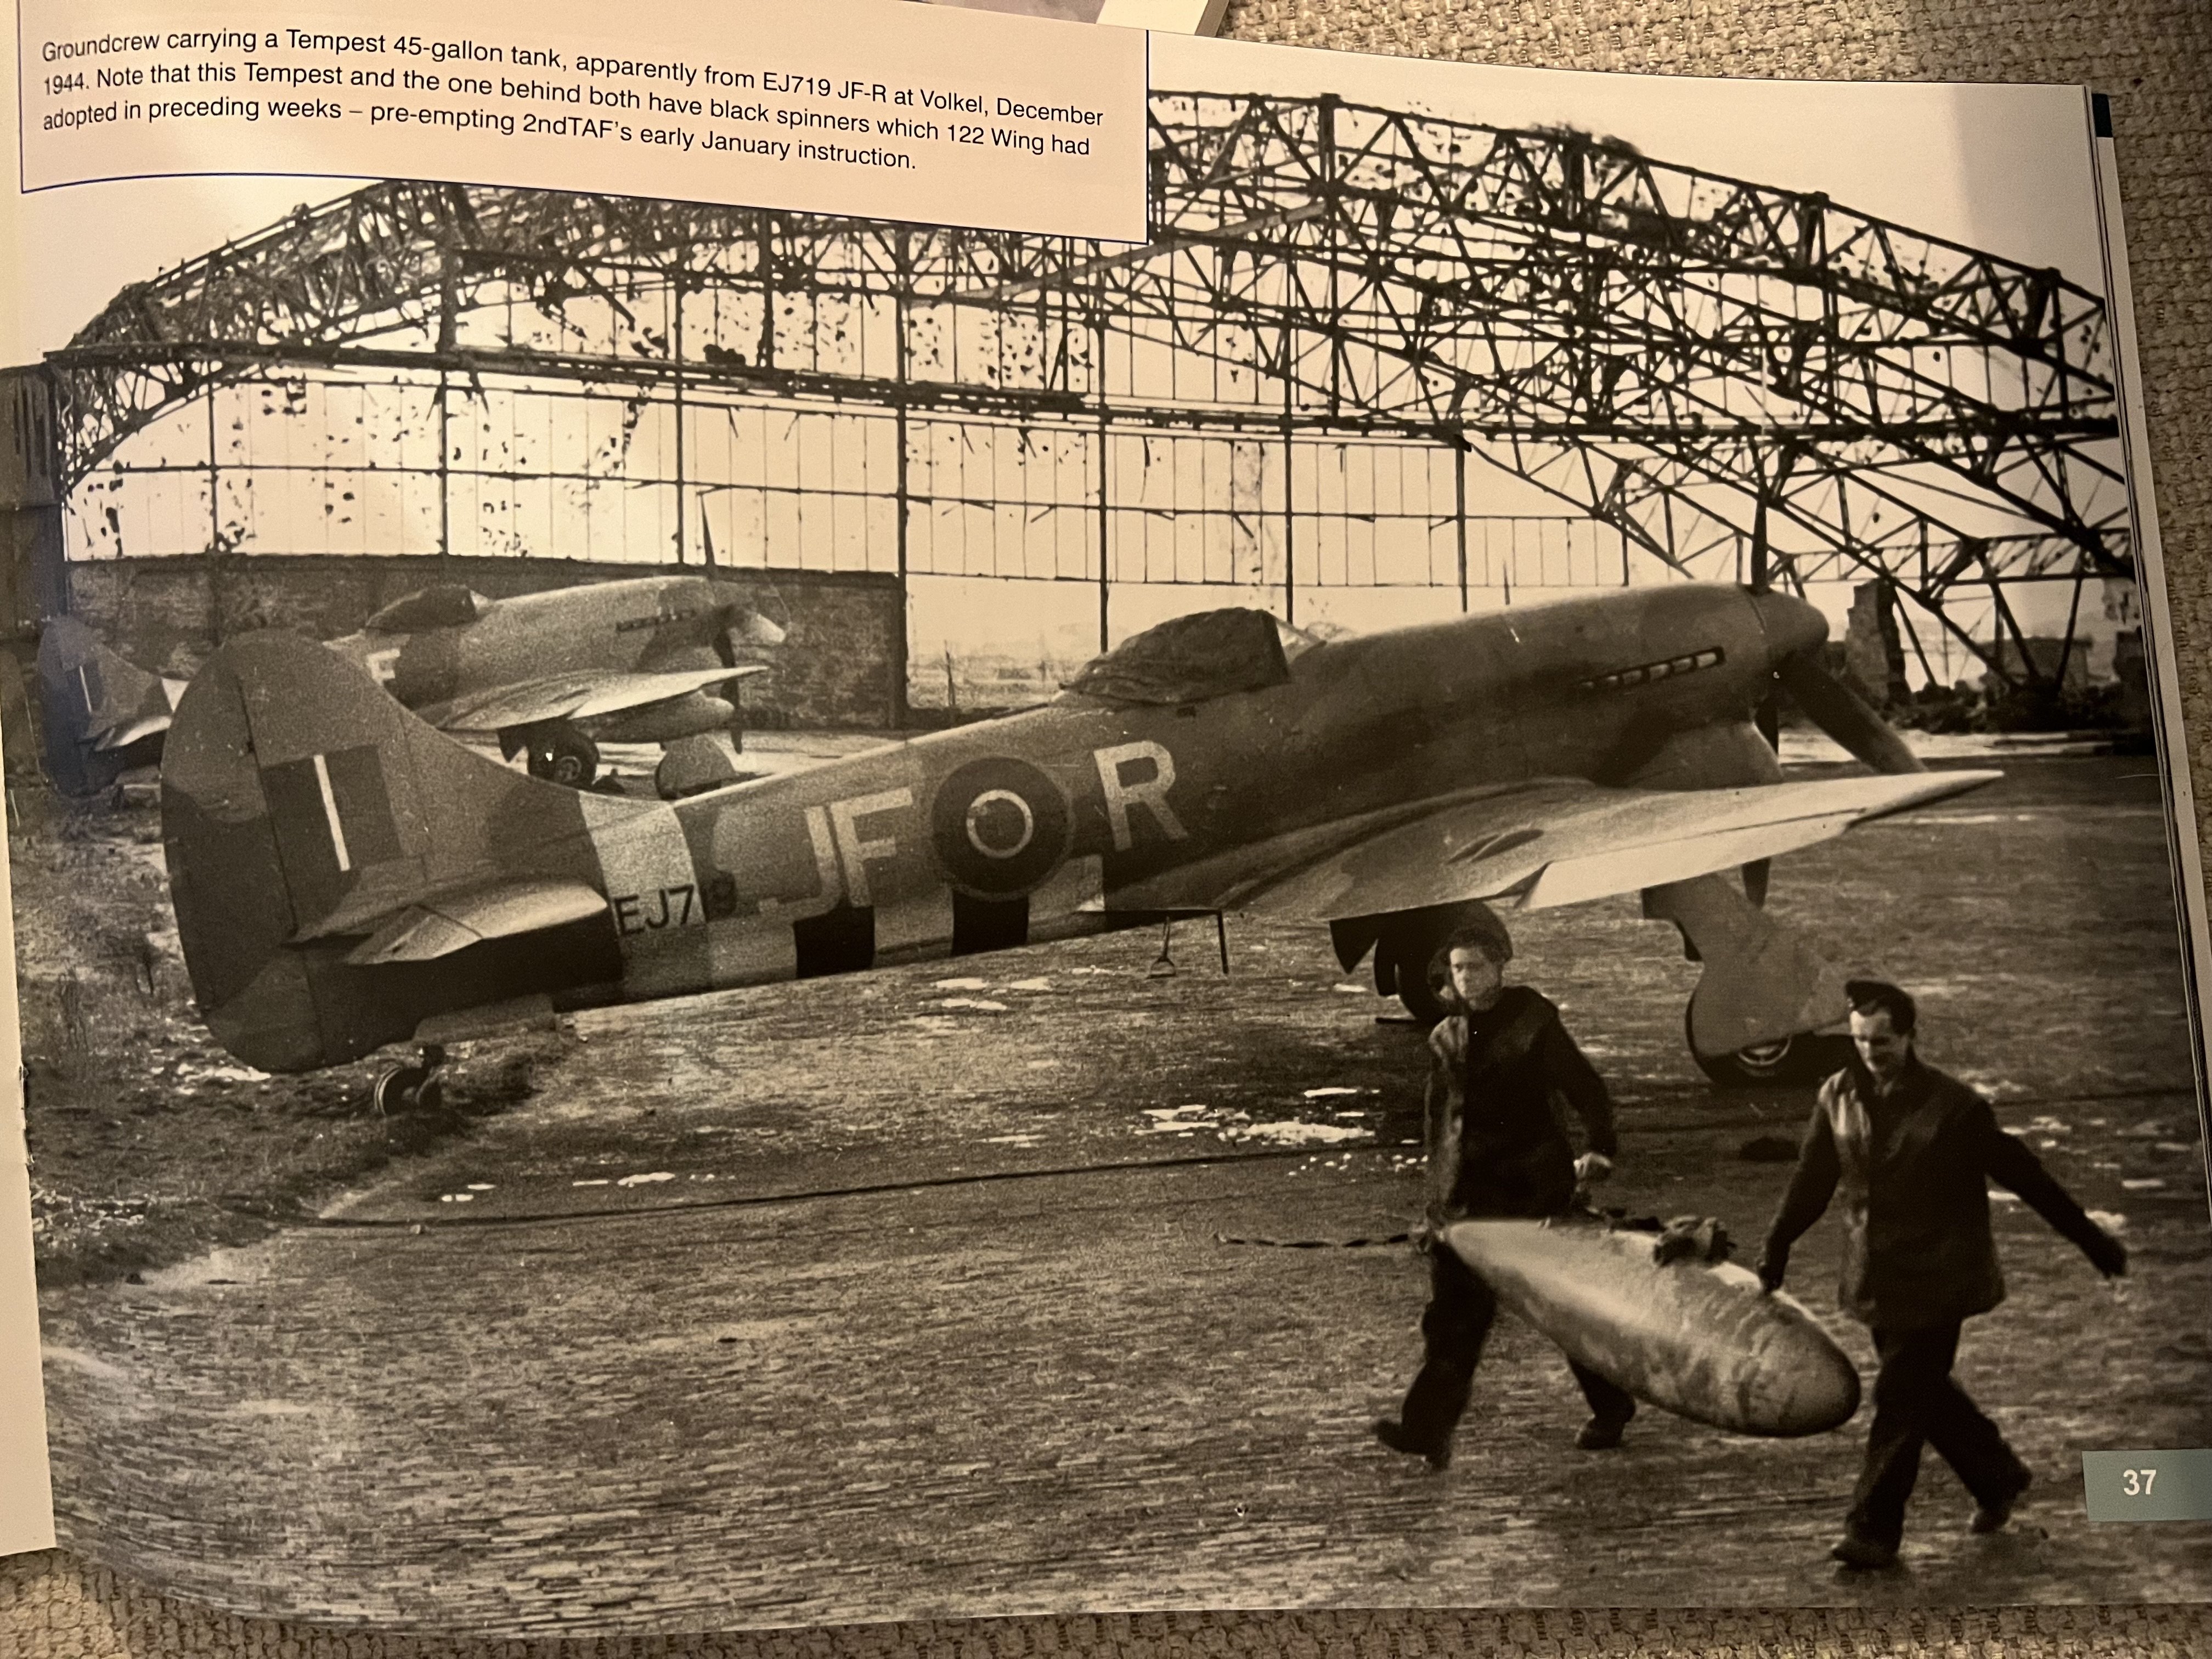
Turns out the same photo is in the Wingleader book!