JeroenPeters
-
Posts
4,867 -
Joined
-
Last visited
Content Type
Profiles
Forums
Events
Gallery
Everything posted by JeroenPeters
-

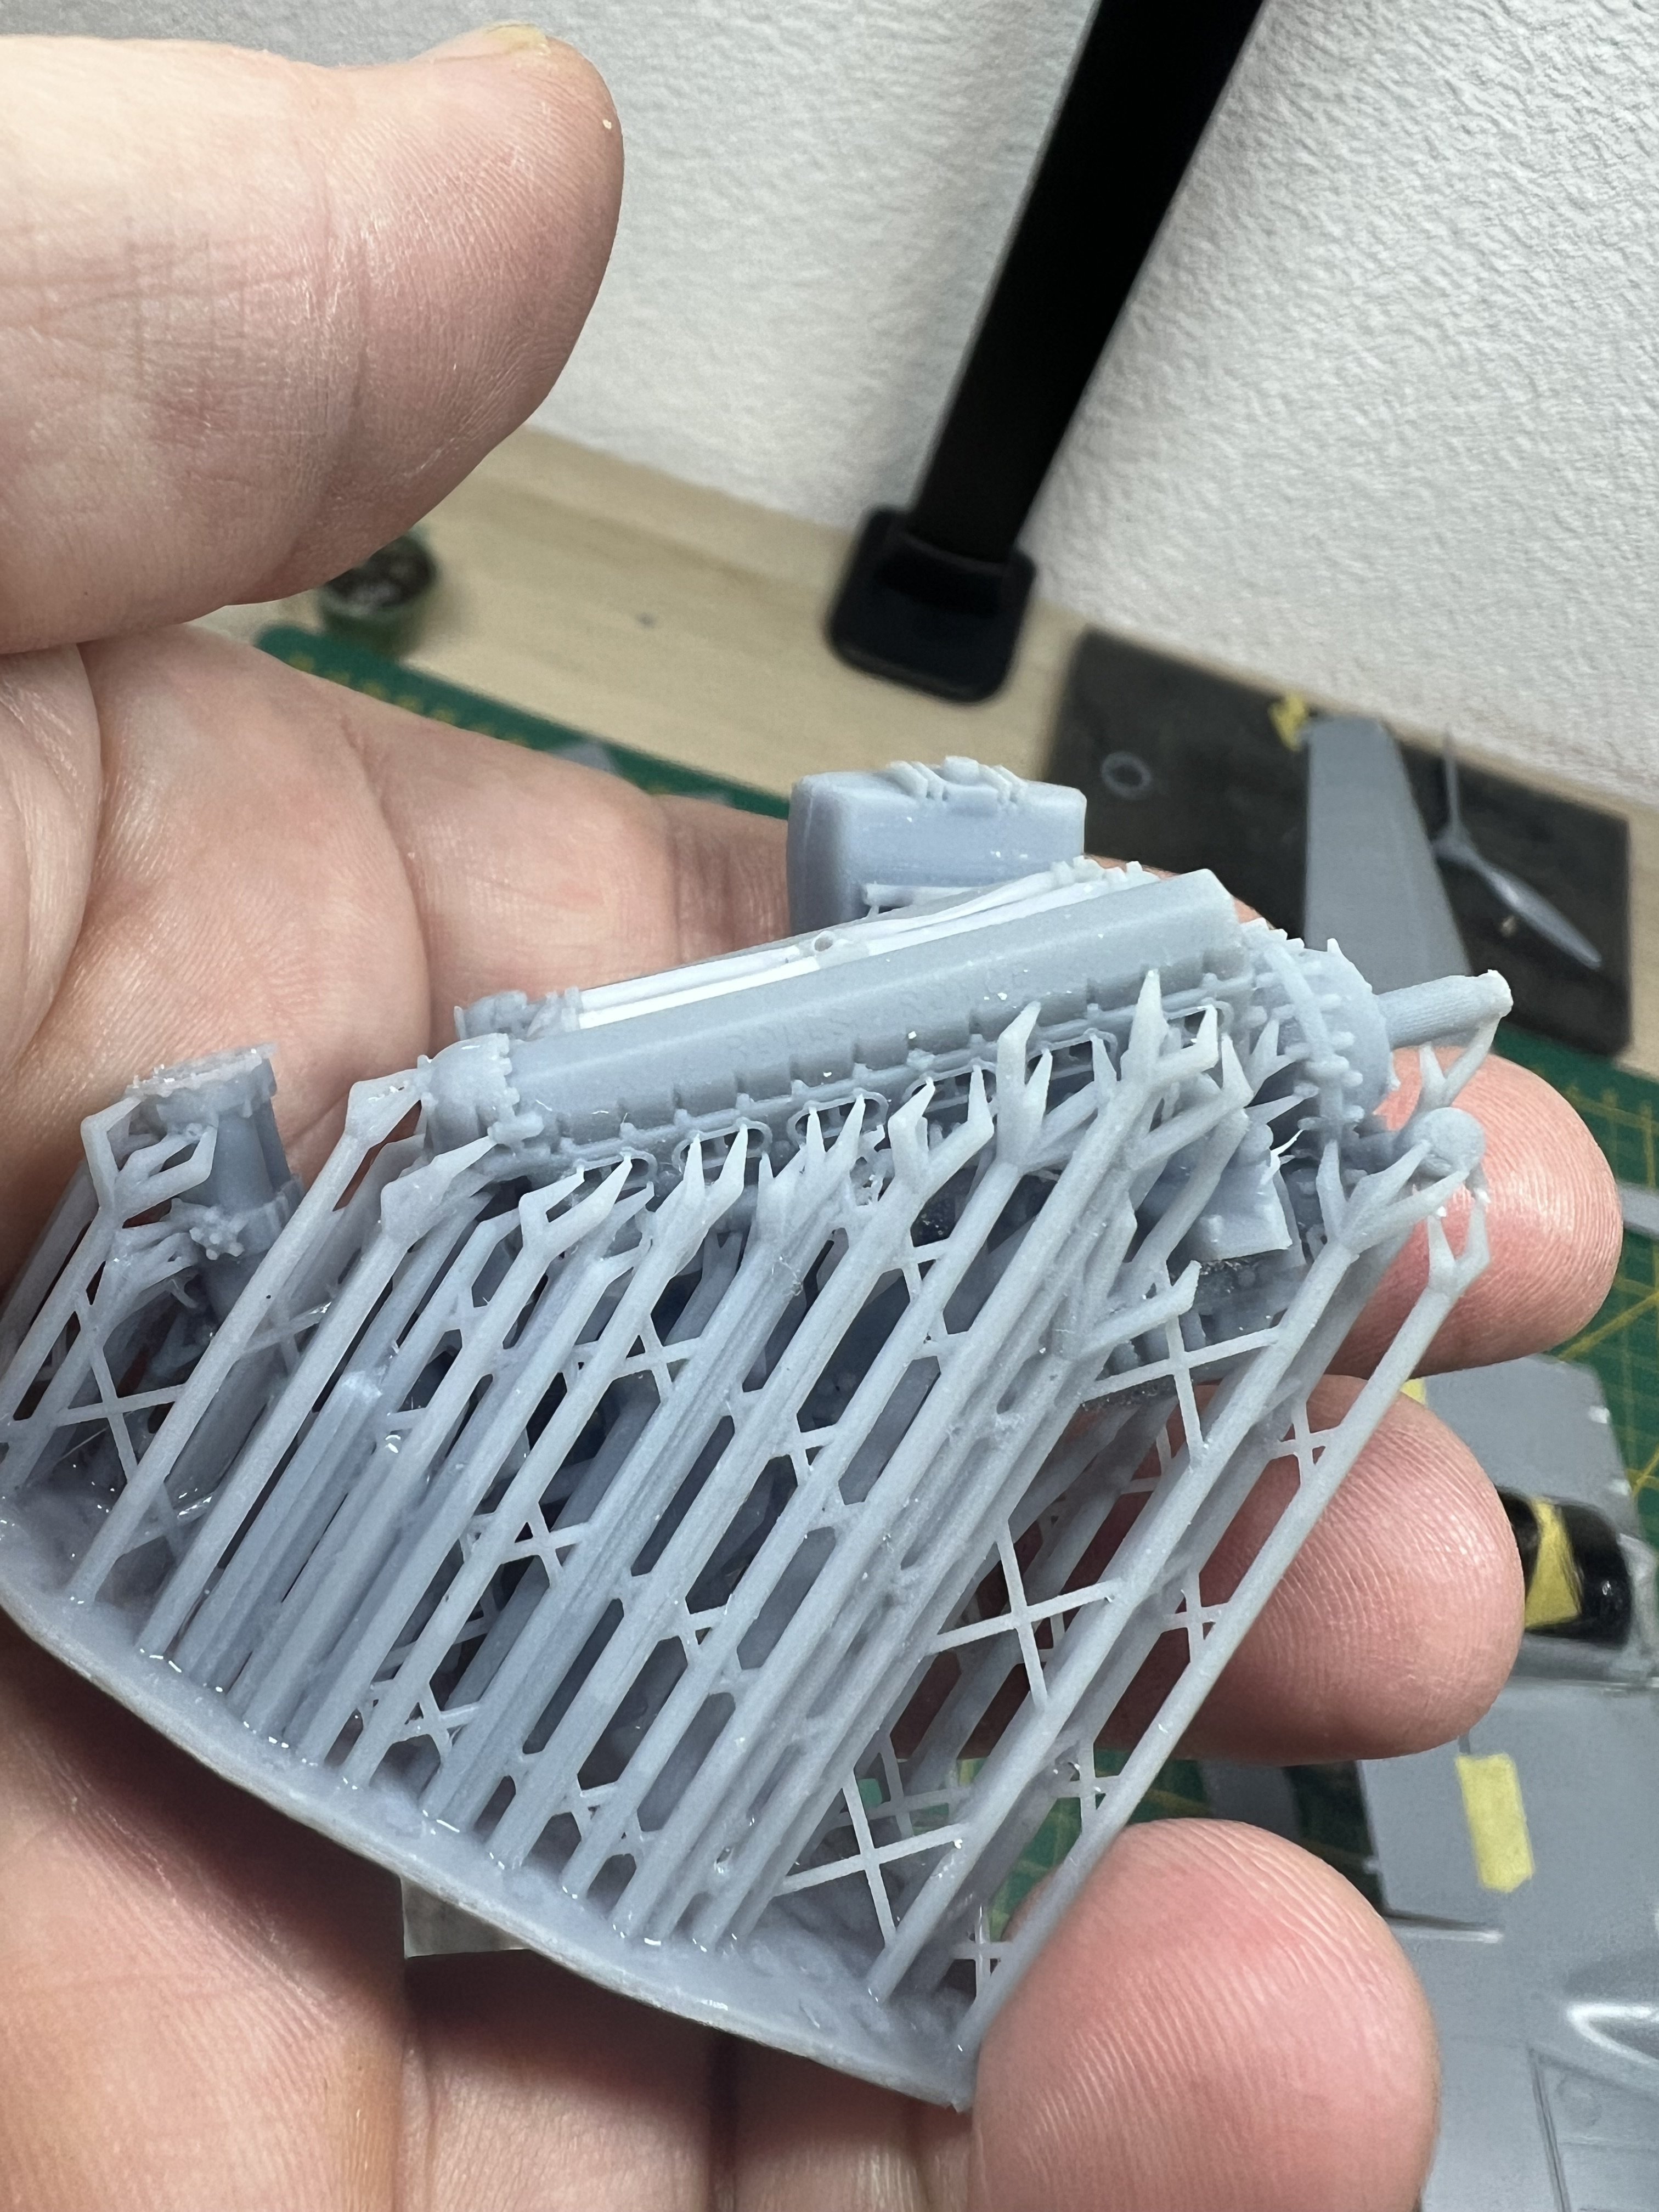
1/32 Westland Whirlwind
JeroenPeters replied to JeroenPeters's topic in LSM 1/35 and Larger Work In Progress
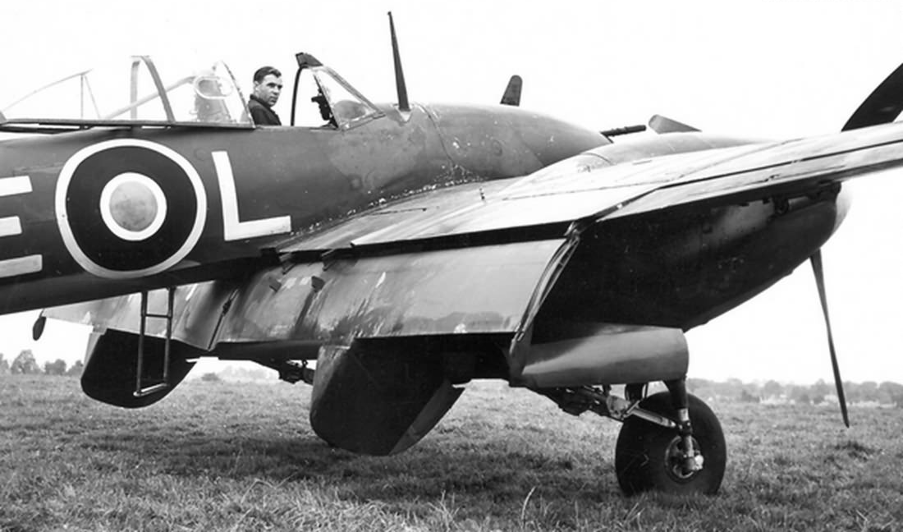
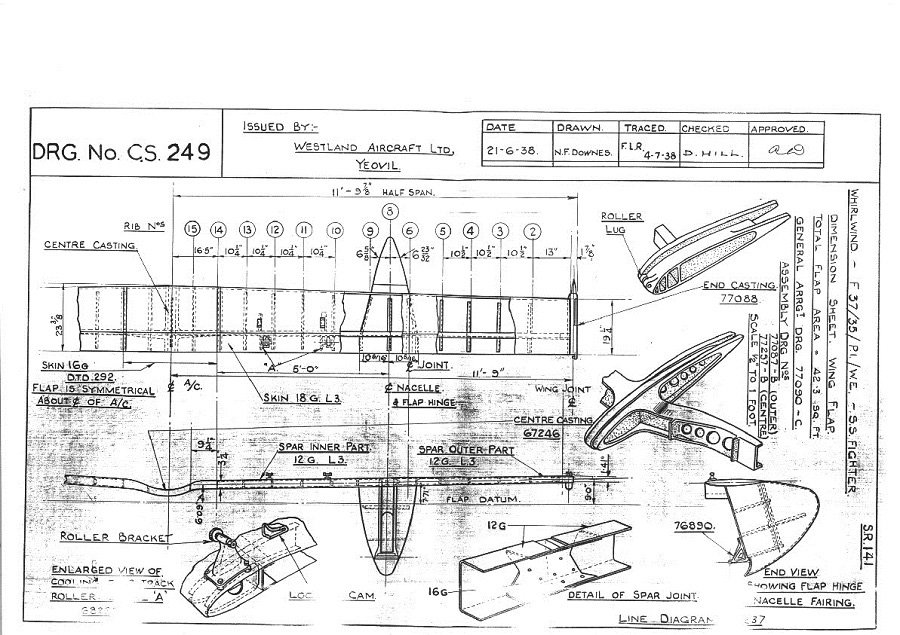
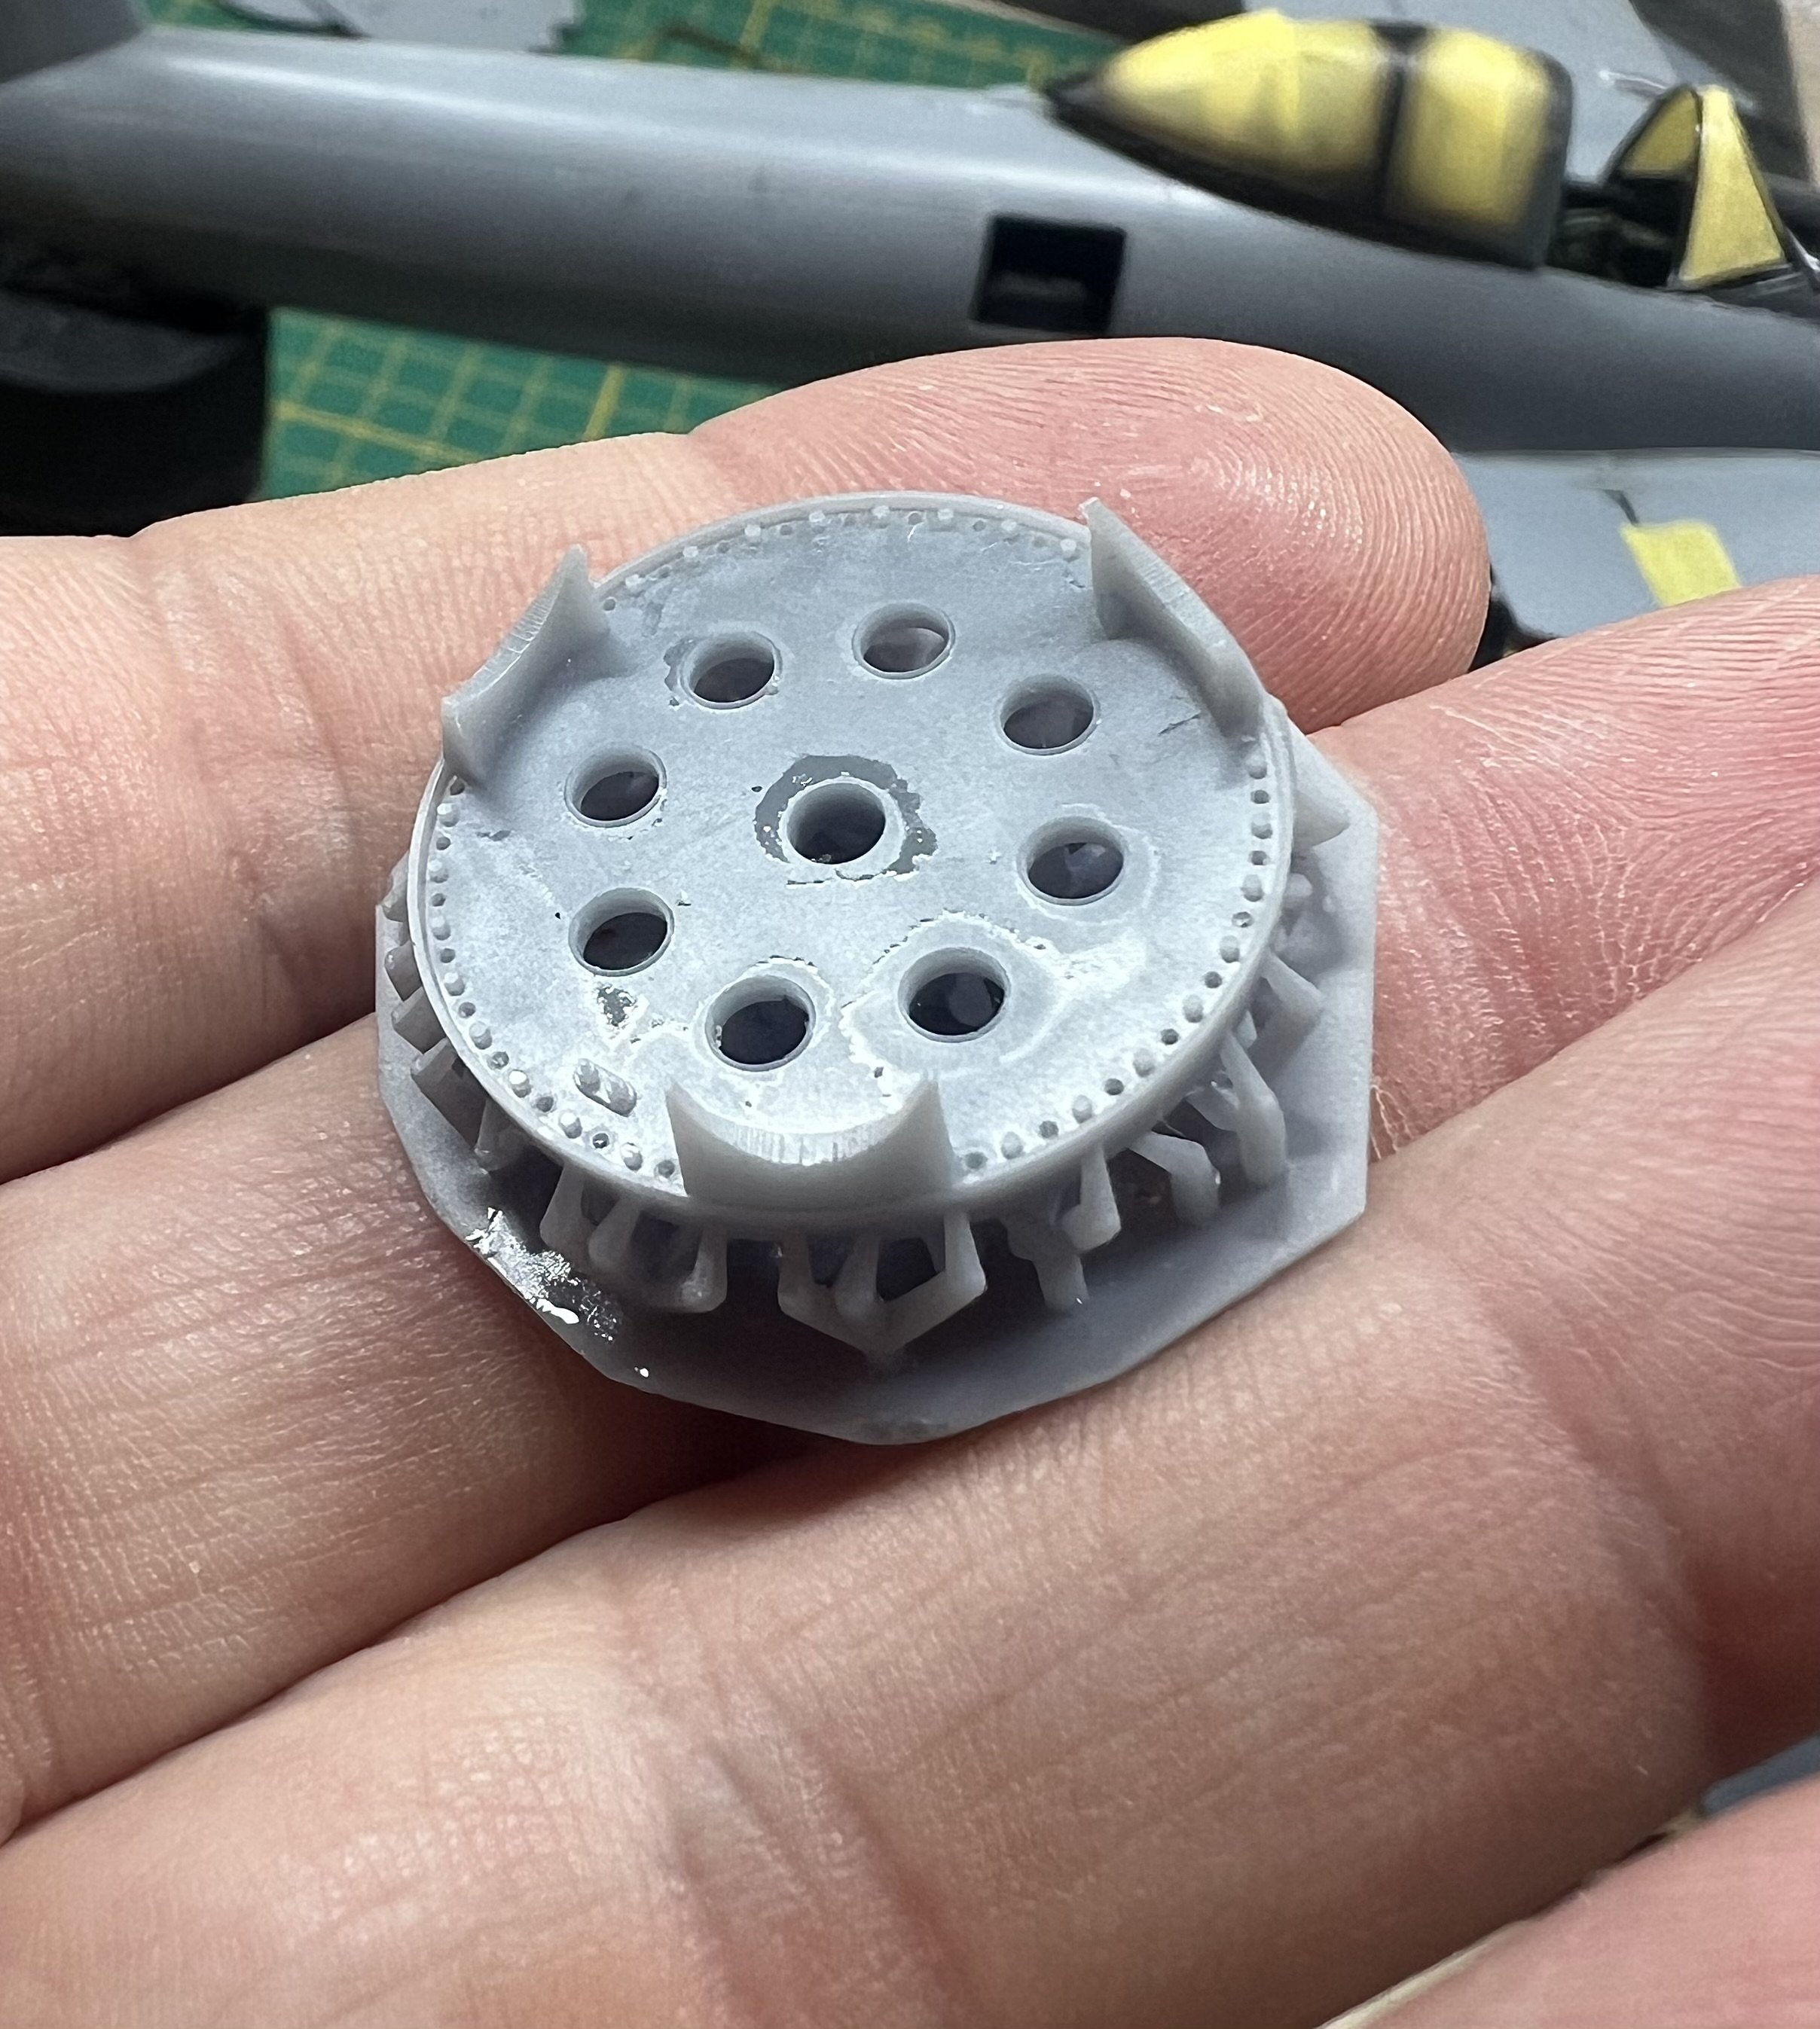
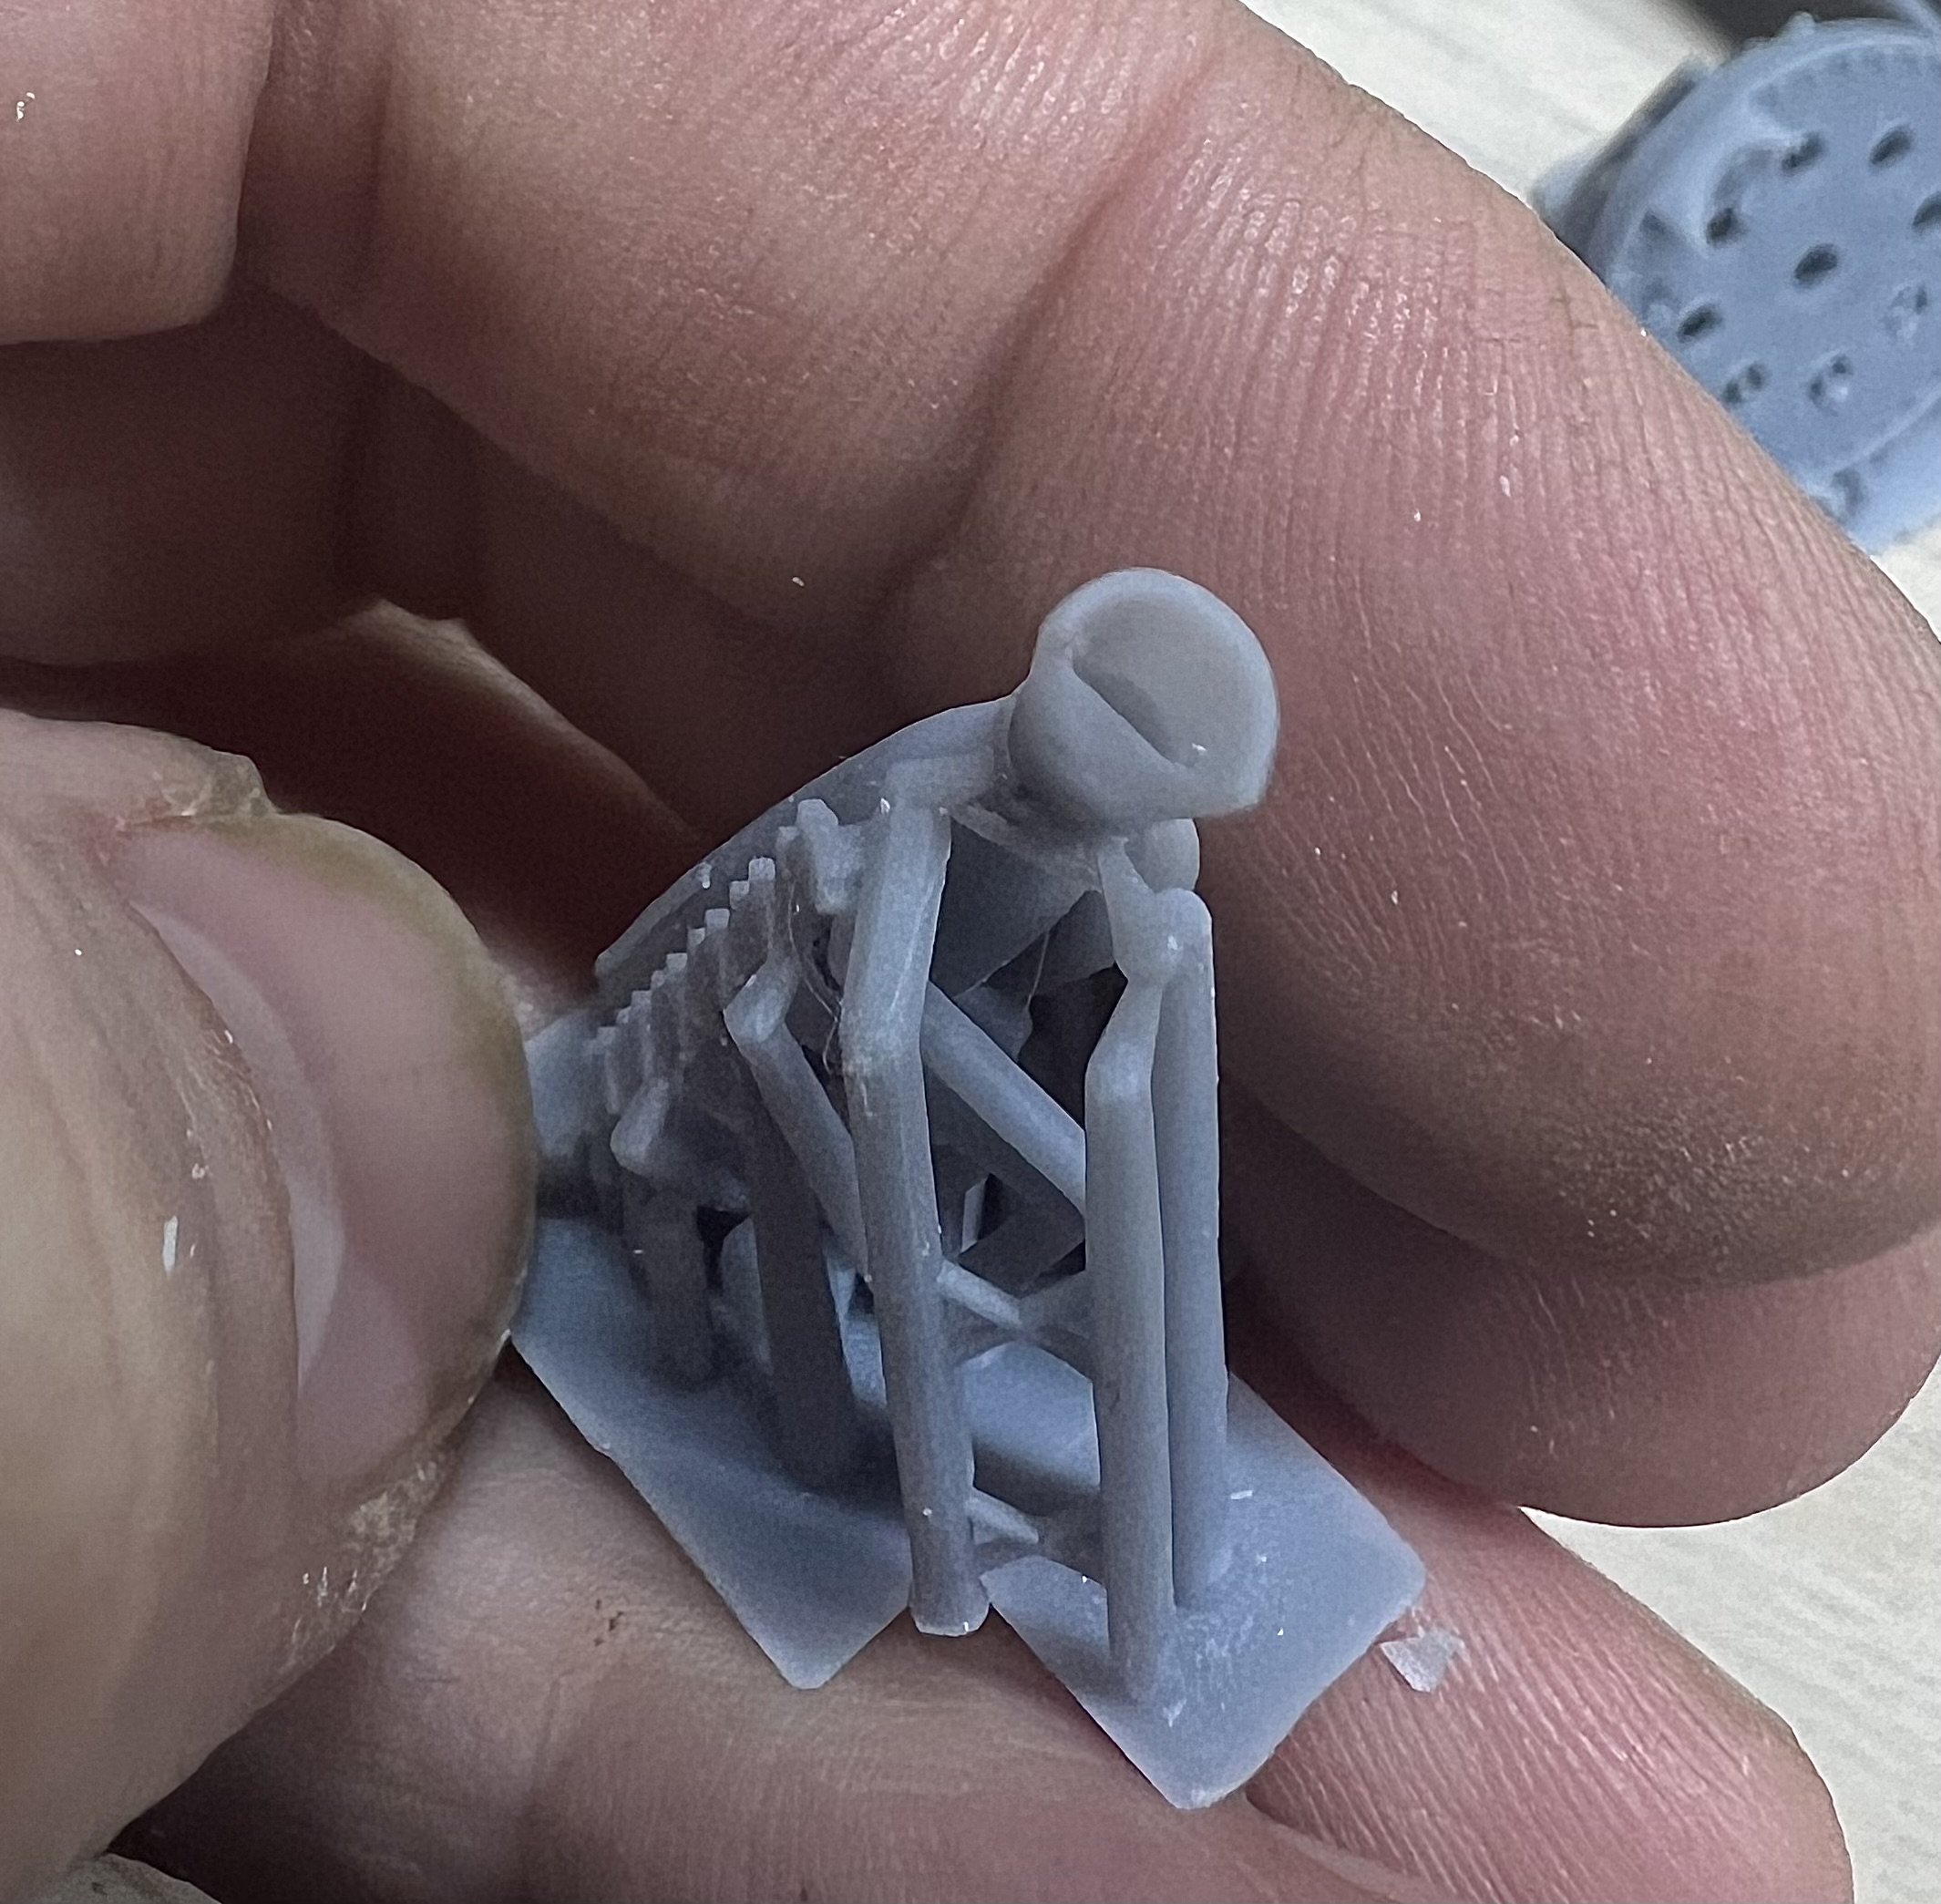
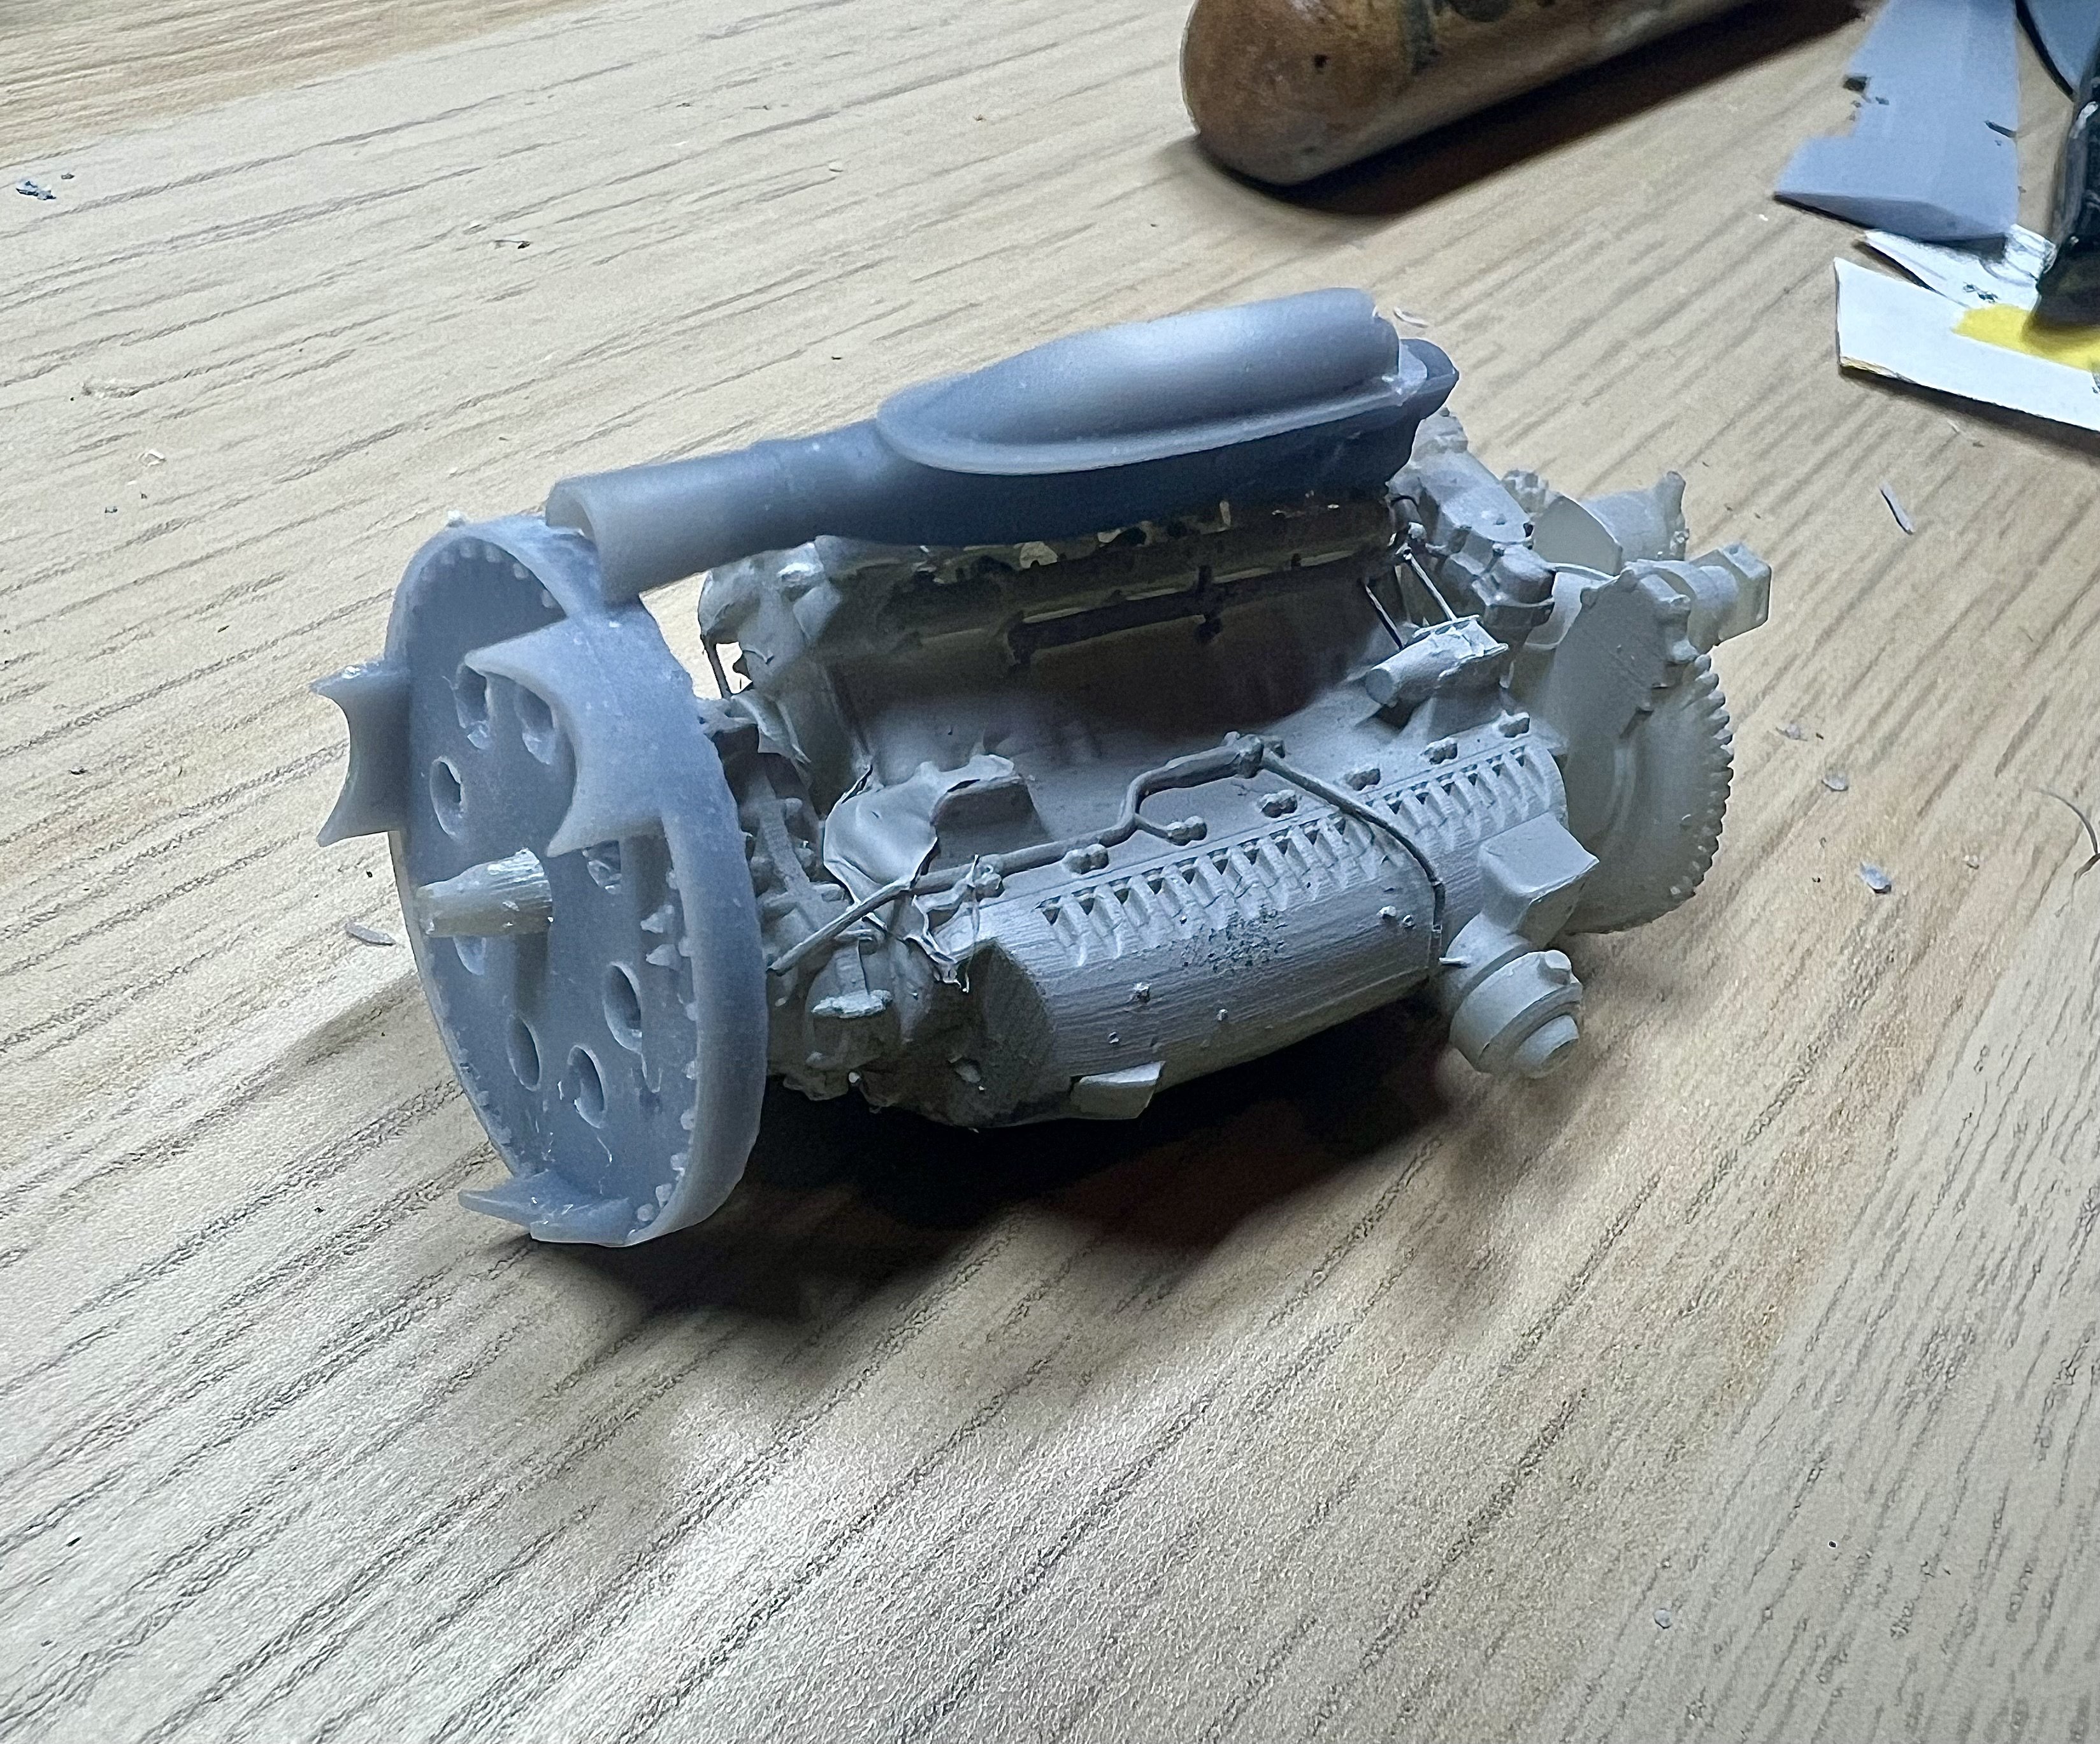
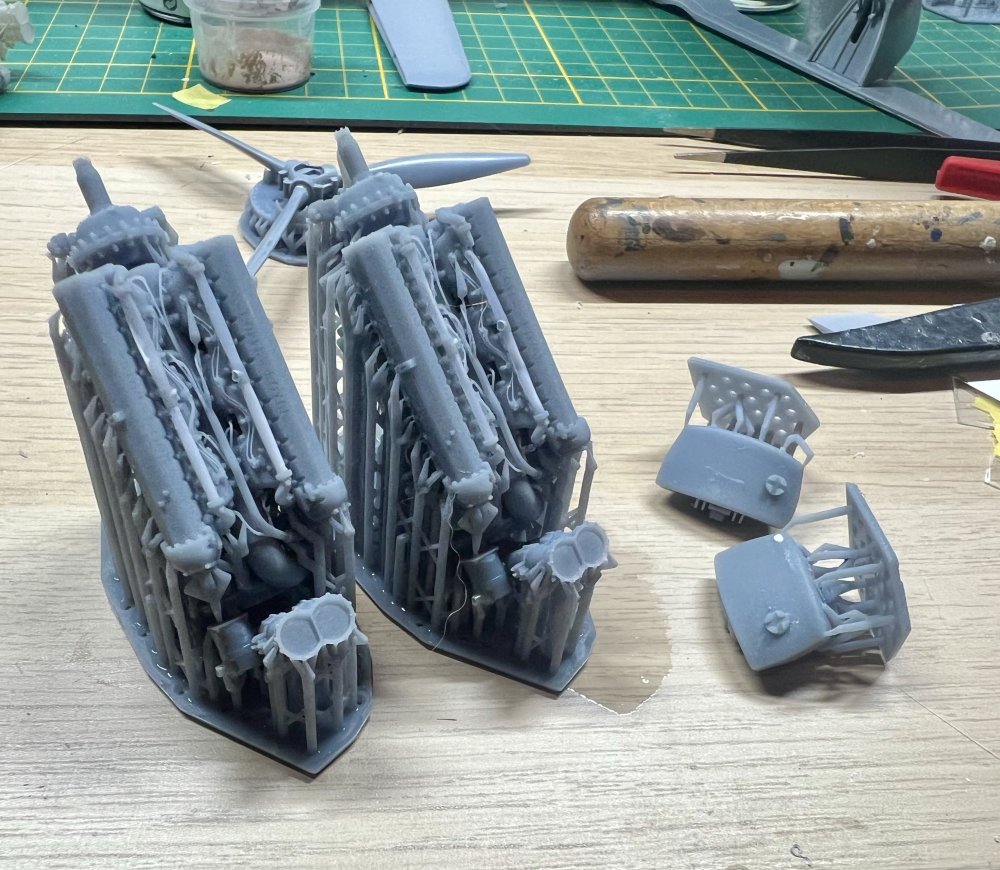
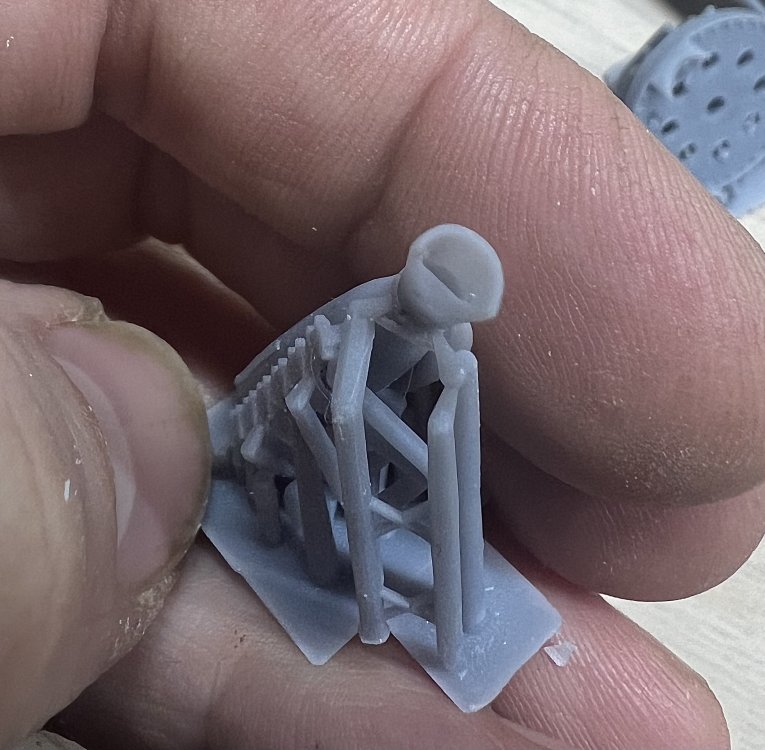
Printed 4 engines. Two turned out near perfect. Oil tank came out perfect too.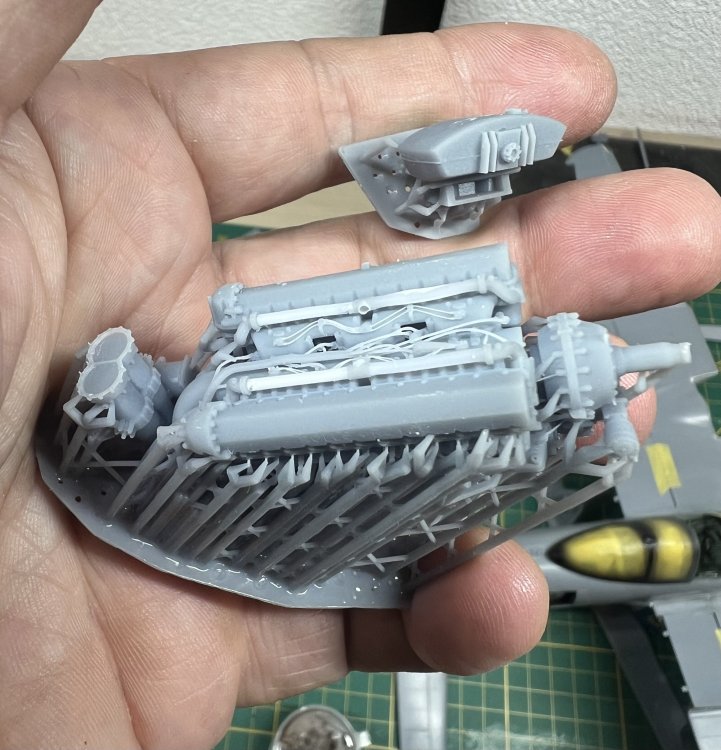


-
1/32 Westland Whirlwind
JeroenPeters replied to JeroenPeters's topic in LSM 1/35 and Larger Work In Progress
Prints turned out great. Next print will be the engines themselves. The first ones were printed on a 4K printer as a test.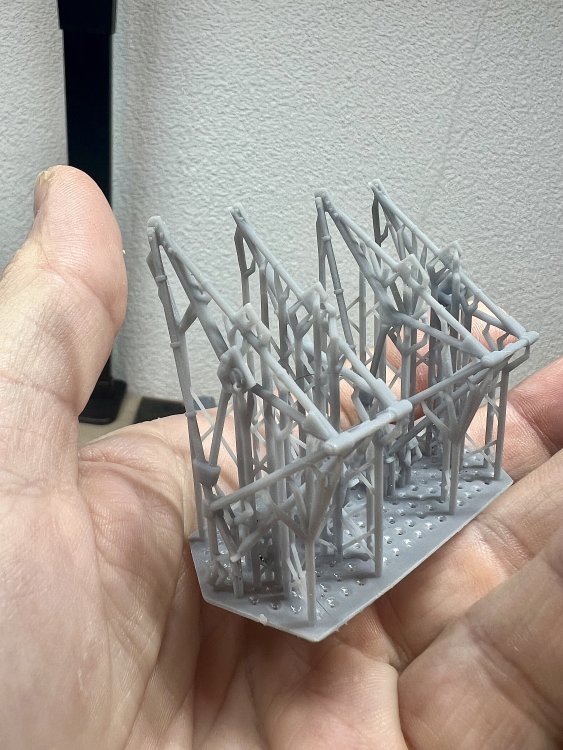

-
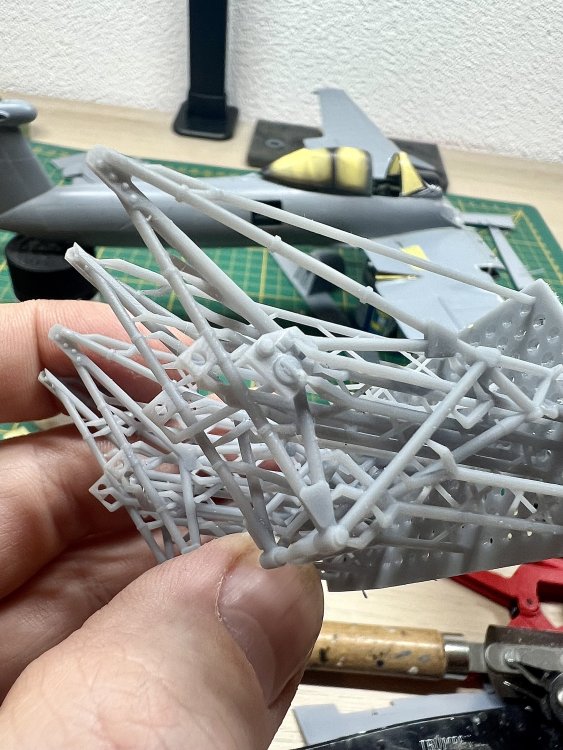
1/32 Westland Whirlwind
JeroenPeters replied to JeroenPeters's topic in LSM 1/35 and Larger Work In Progress
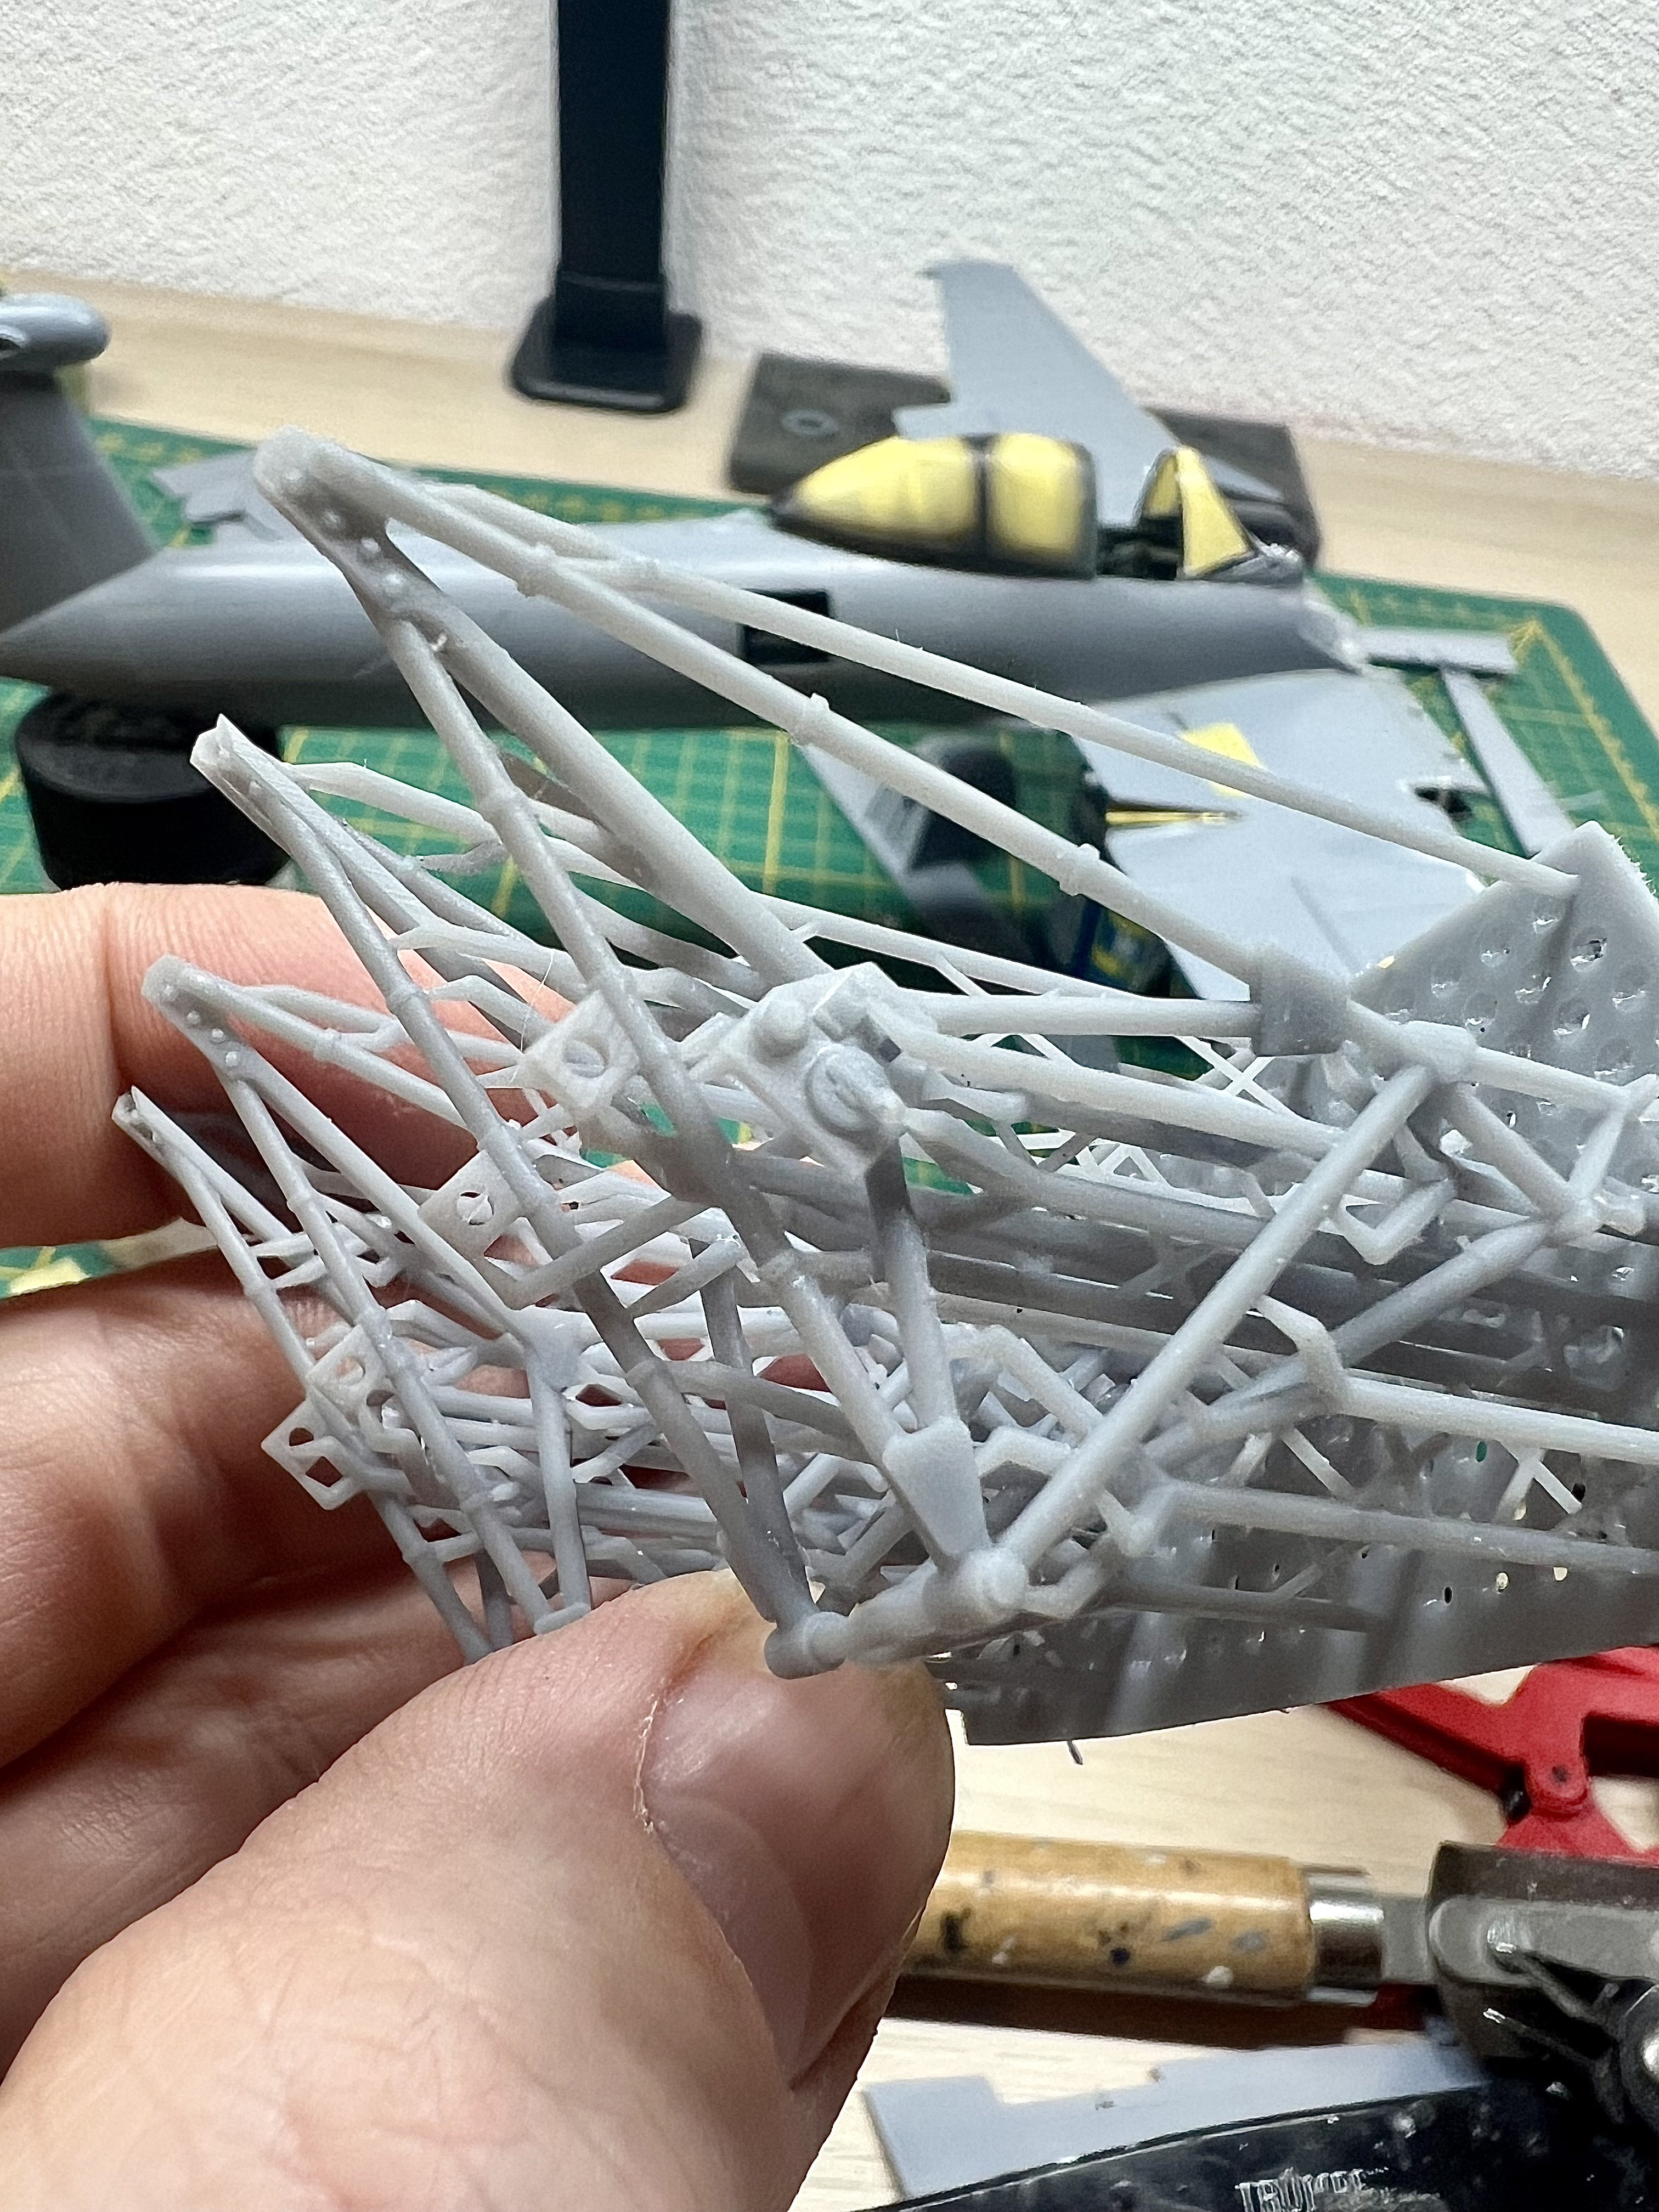
This never gets boring…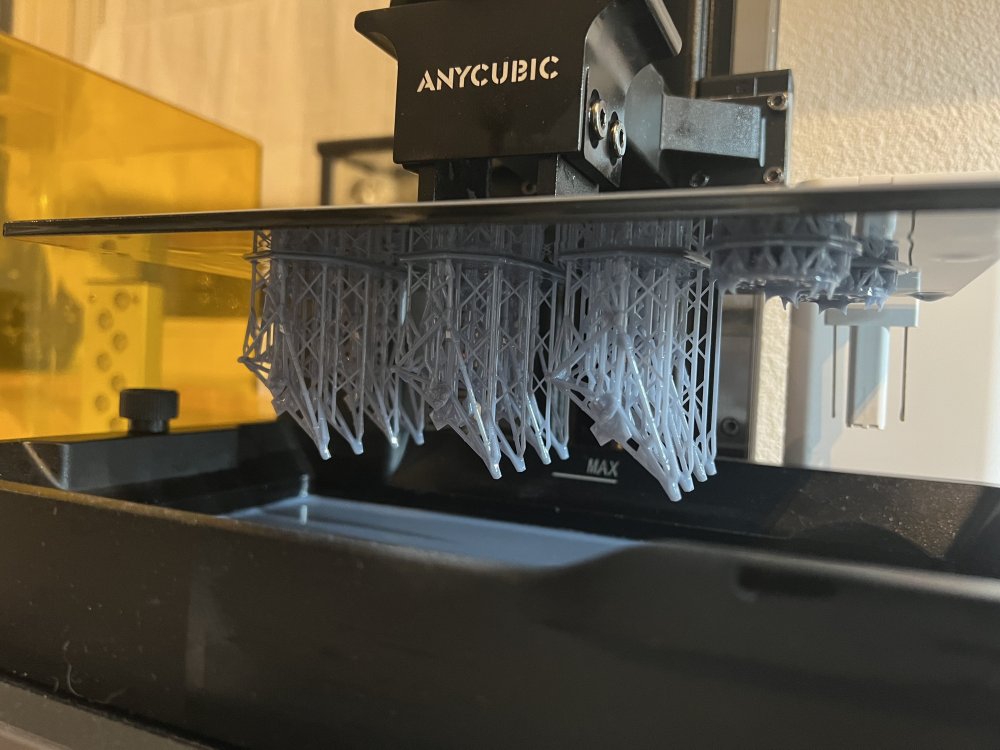
-
1/32 Westland Whirlwind
JeroenPeters replied to JeroenPeters's topic in LSM 1/35 and Larger Work In Progress
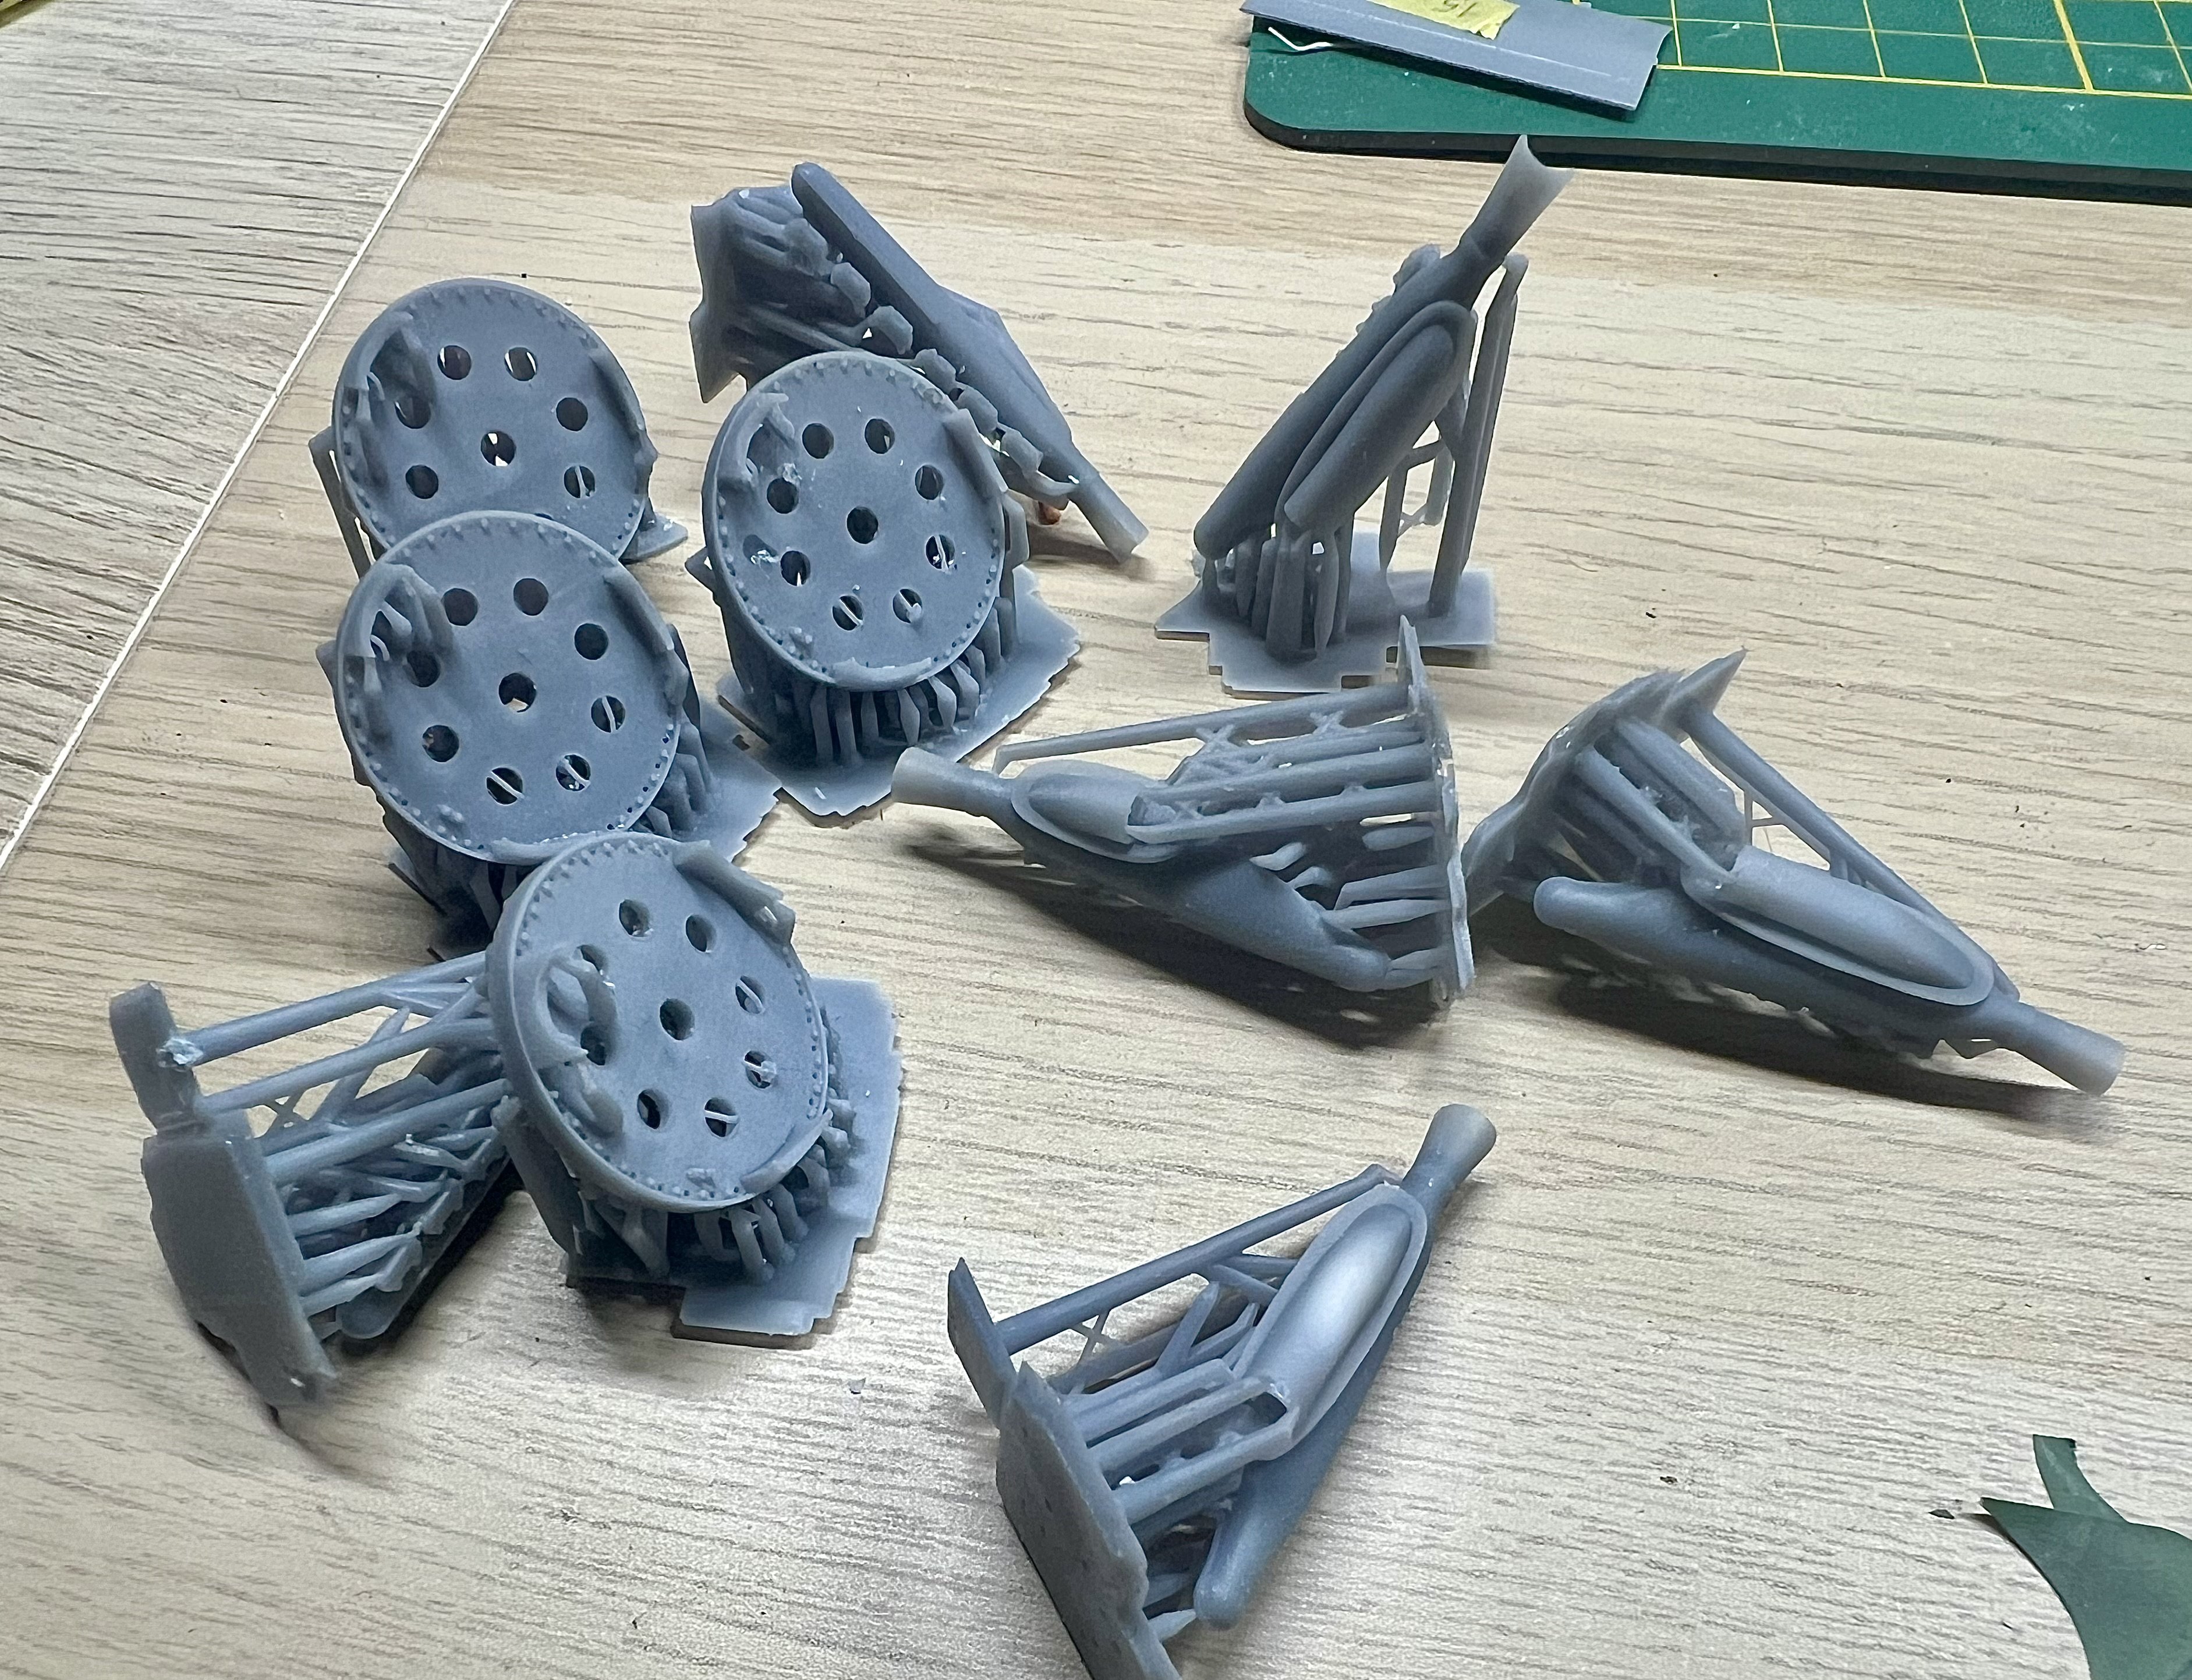
Isolated the engine bearers and did some final research. Will print a set of 3 because I'm expecting some print flaws.
-
Dragon Bf110E - Wolfgang Falck - Finished
JeroenPeters replied to denders's topic in LSM 1/35 and Larger Work In Progress
Nice work. Do you have the book: The Happy Falcon? Here’s something for your inspiration: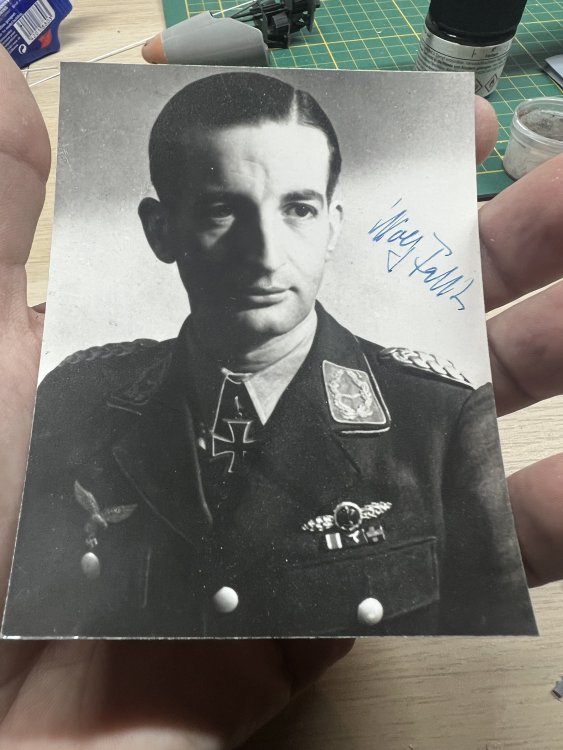
-
1/32 Westland Whirlwind
JeroenPeters replied to JeroenPeters's topic in LSM 1/35 and Larger Work In Progress
Spent the afternoon fiddling with Chitubox, Lychee and Photon Workshop. The latter worked best with my M7 Pro printer. Printed the exhausts and spinners. Note: there are four different exhausts on this plane. The inner exhausts are different from the outer. I have spent so many hours tweaking on the engine 3d model that i decided to push forward, or this will never get finished!


-
1/32 Westland Whirlwind
JeroenPeters replied to JeroenPeters's topic in LSM 1/35 and Larger Work In Progress
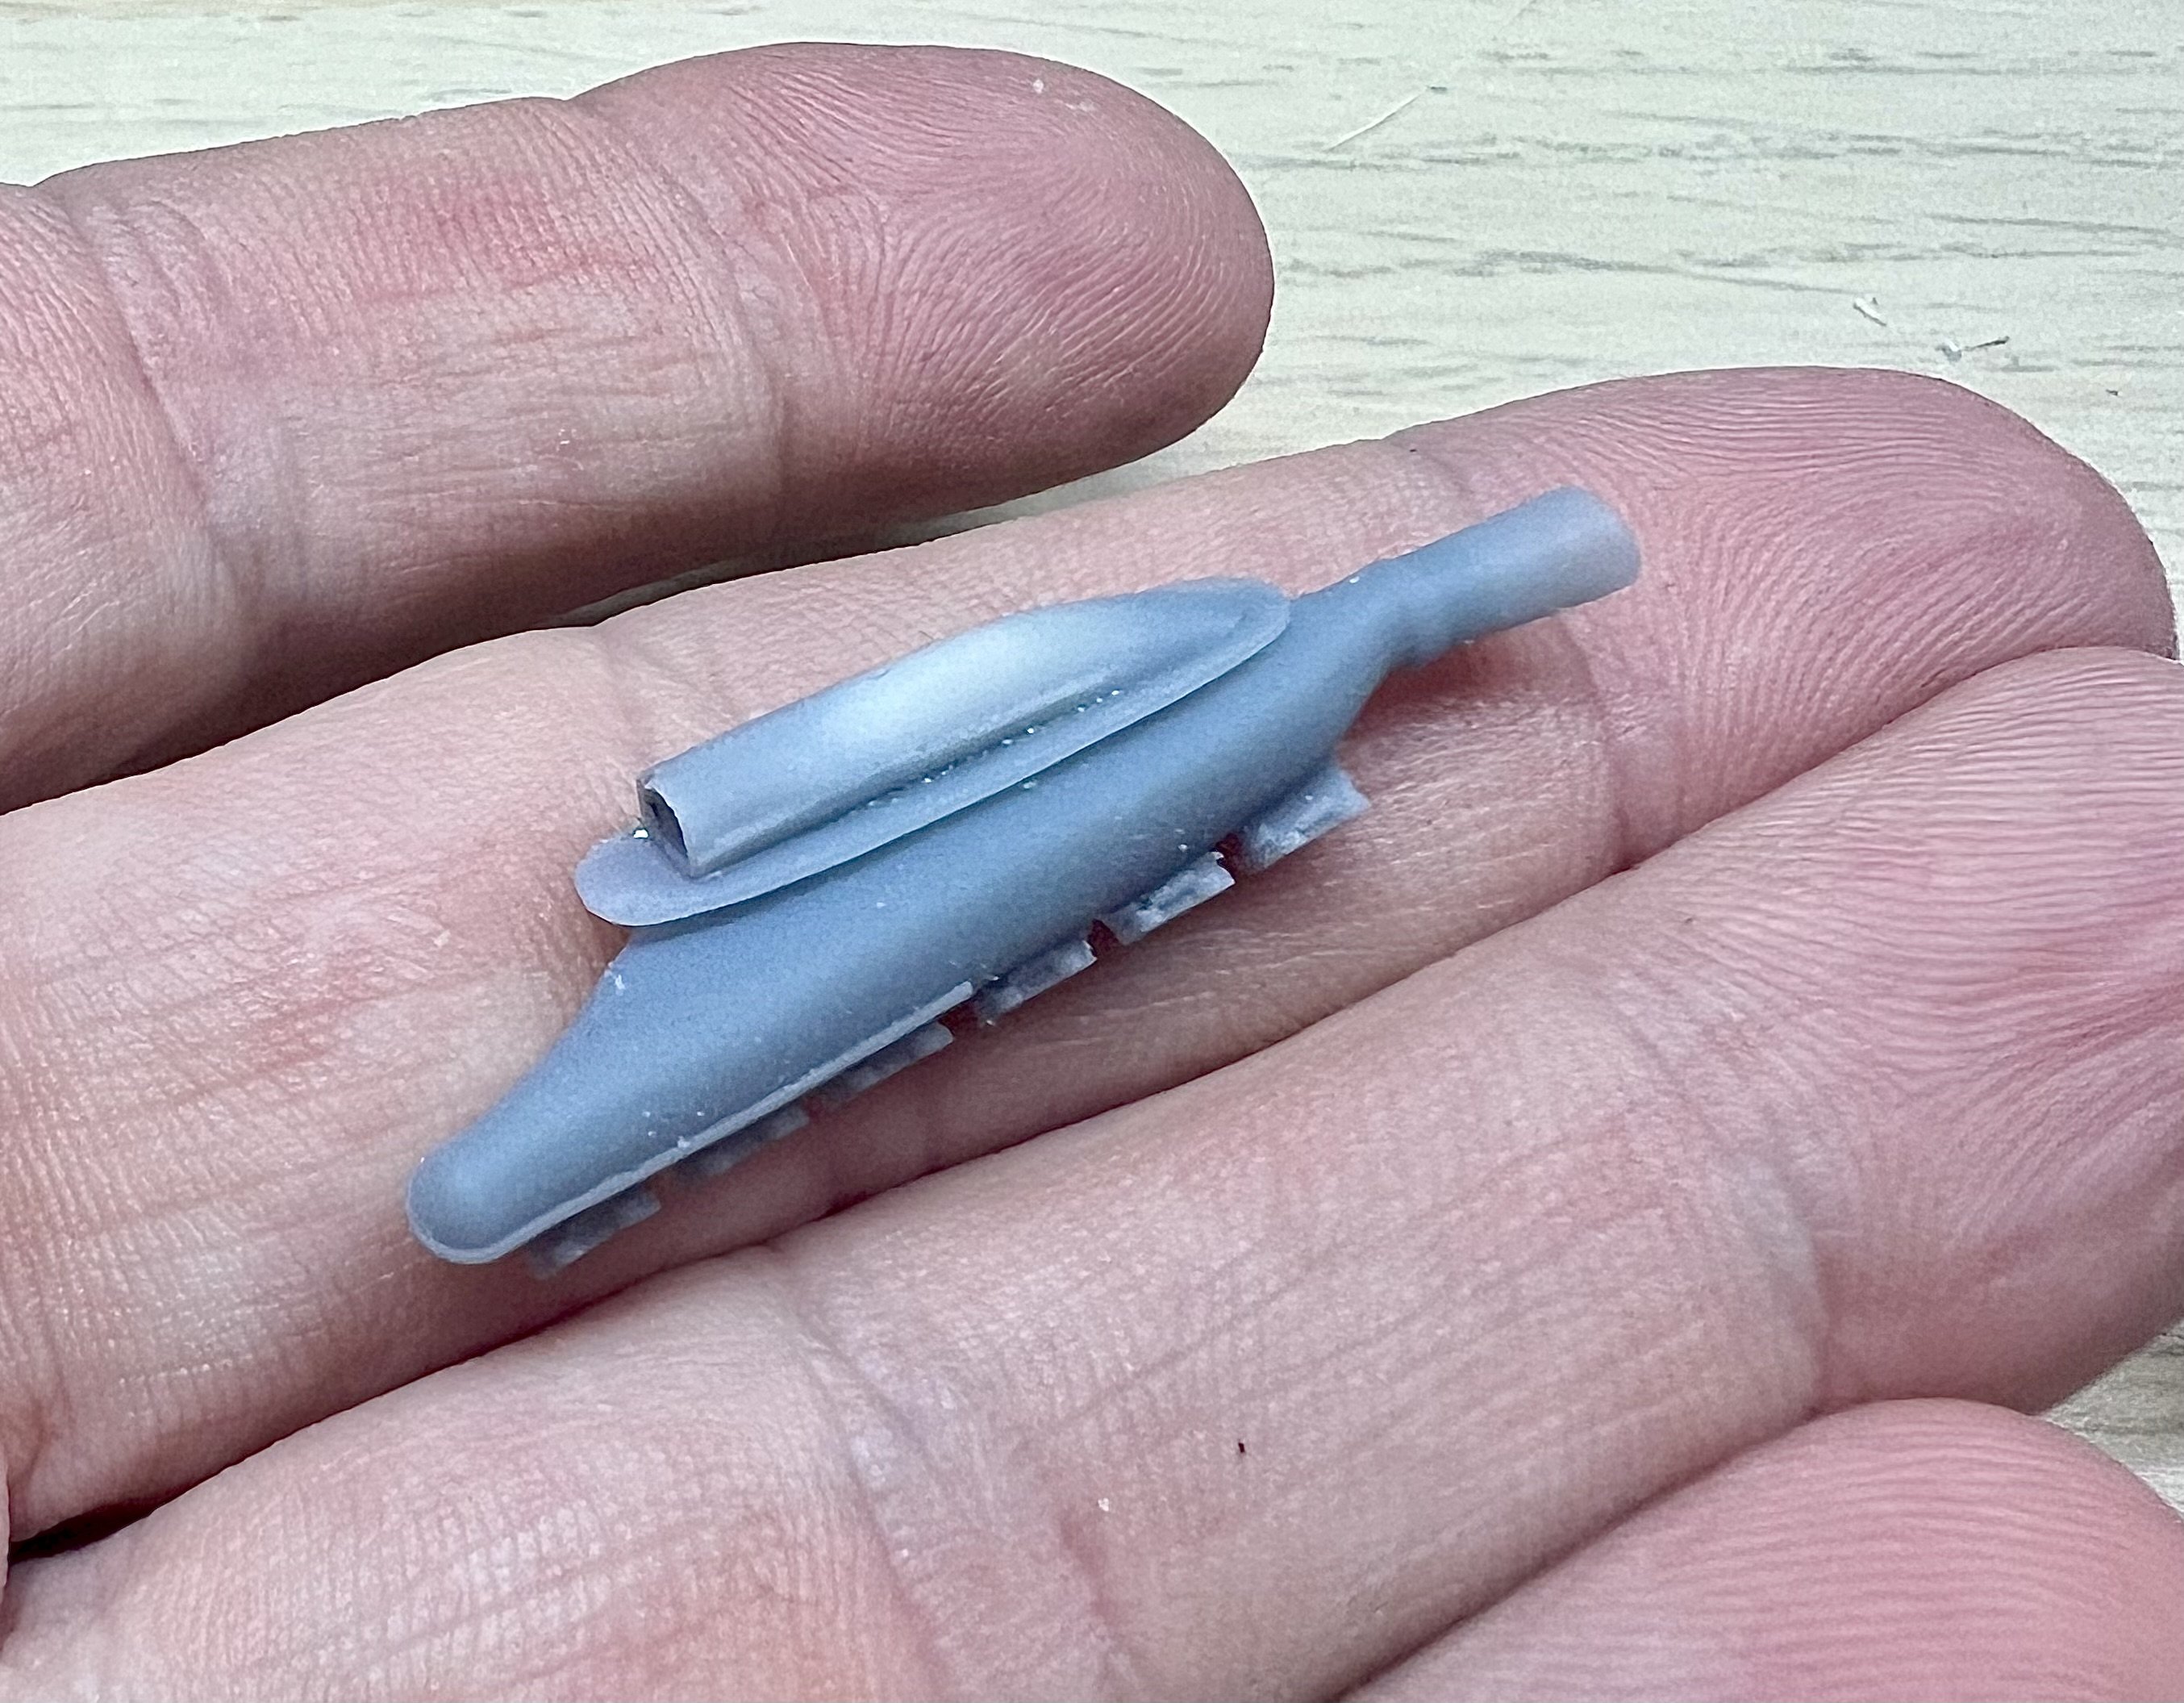
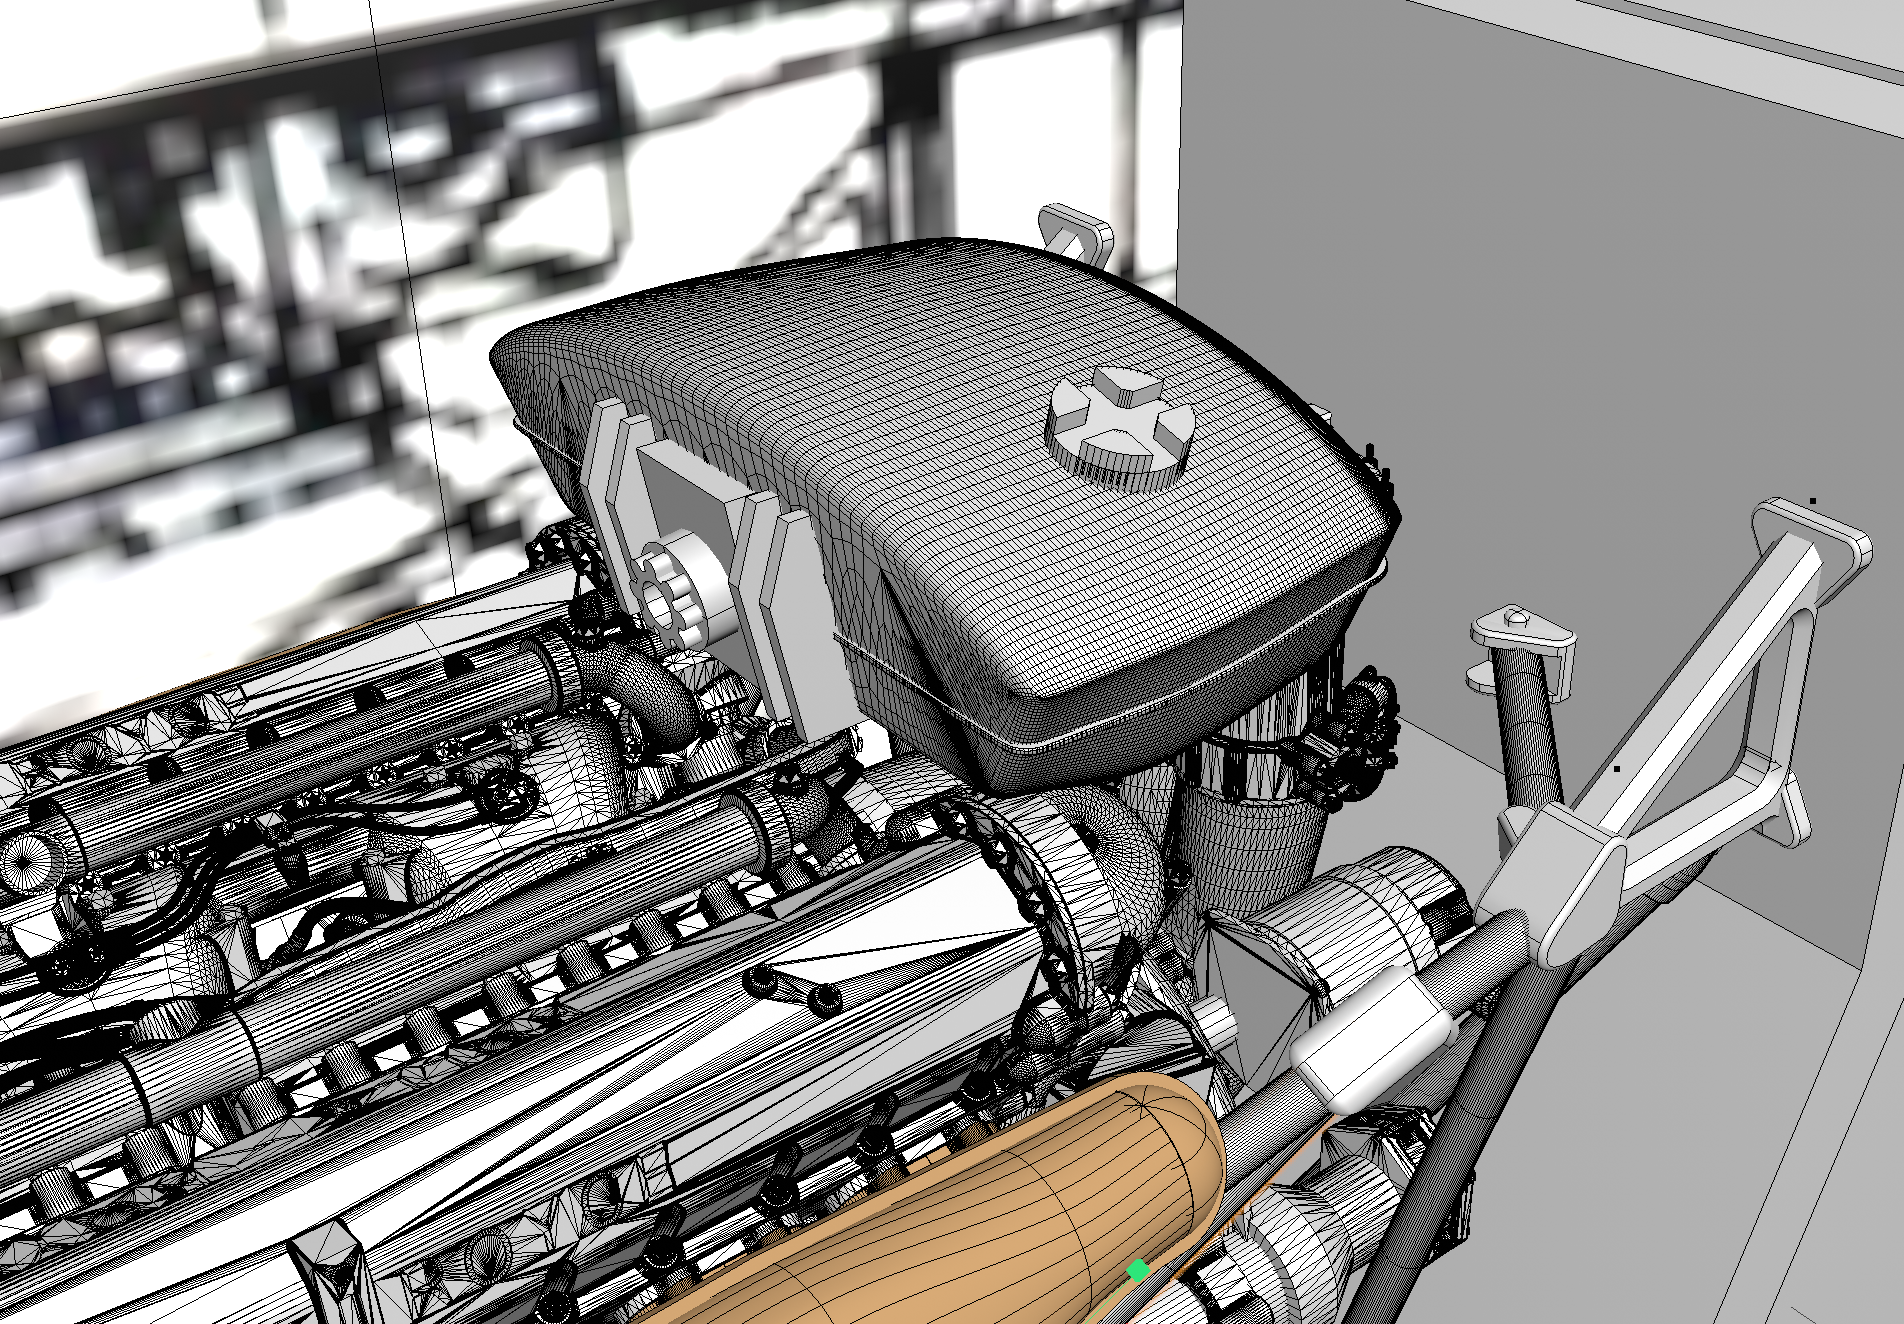
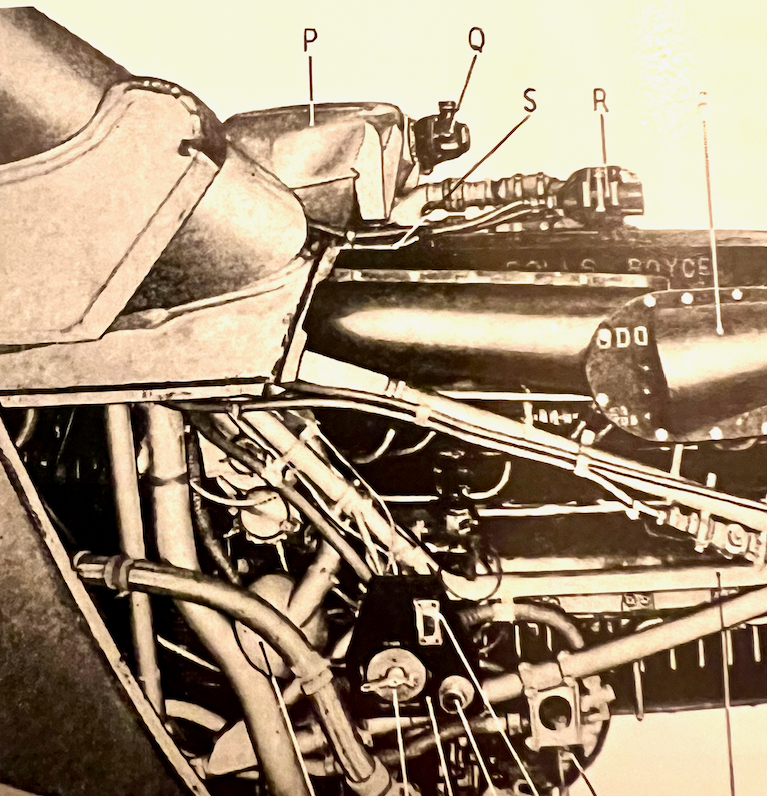
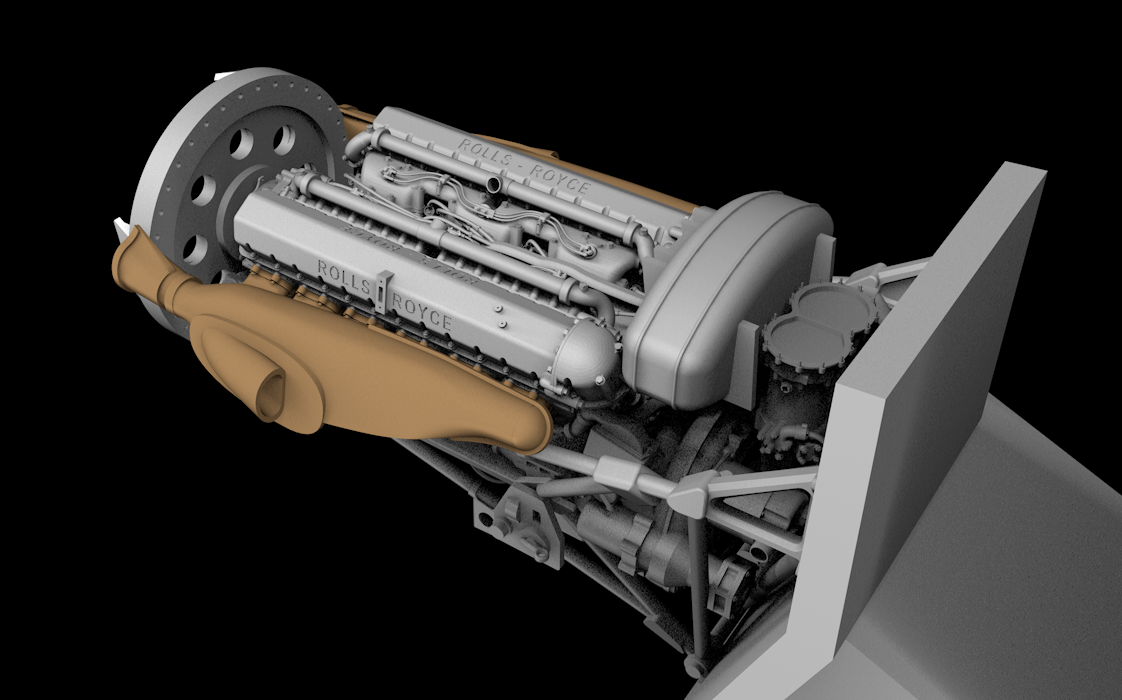
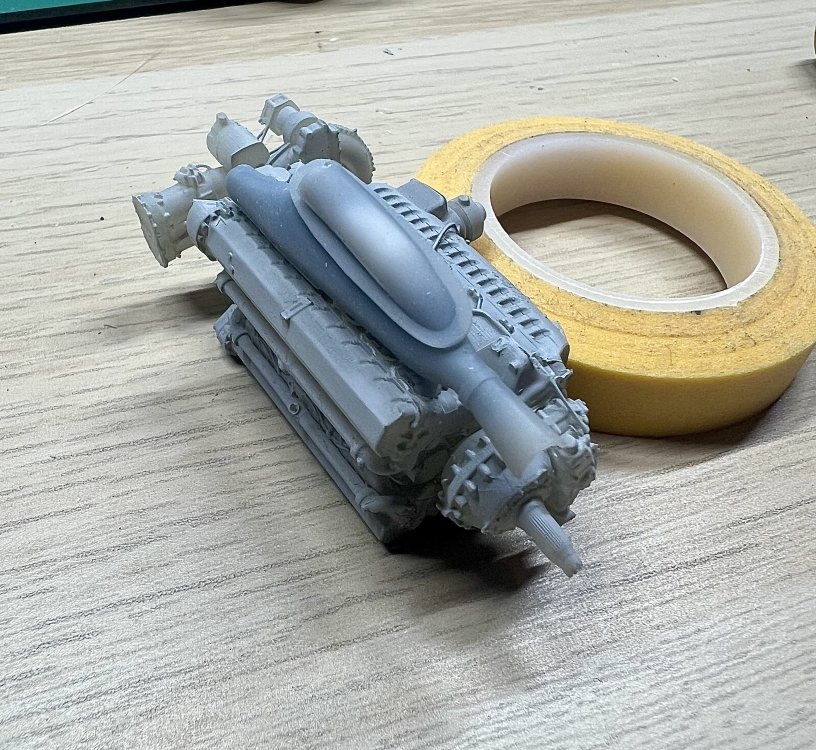
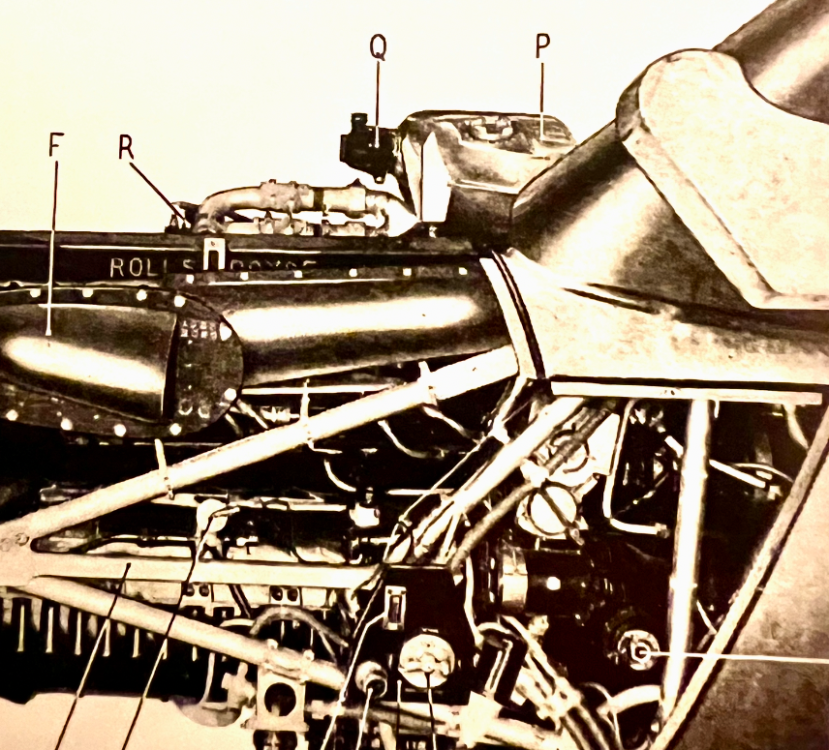
The oil tank annoyed the crap out of me after taking a good look at these. The oil tank should extend more forward. And the shape is more flattened, with a negative sloping front.

-
Dragon Bf110E - Wolfgang Falck - Finished
JeroenPeters replied to denders's topic in LSM 1/35 and Larger Work In Progress
Nice. I have a couple of signed memorabilia from Falck. Even a handwritten letter he wrote to an allied pilot after the war. Also a couple of interesting books on (and from) him. Will follow -
1/32 Westland Whirlwind
JeroenPeters replied to JeroenPeters's topic in LSM 1/35 and Larger Work In Progress
A bit further with the engine and oil tank. Took more measurements from the model and moved a few bearers around for a better fit. Still figuring out. how the oil tank was attached to the firewall?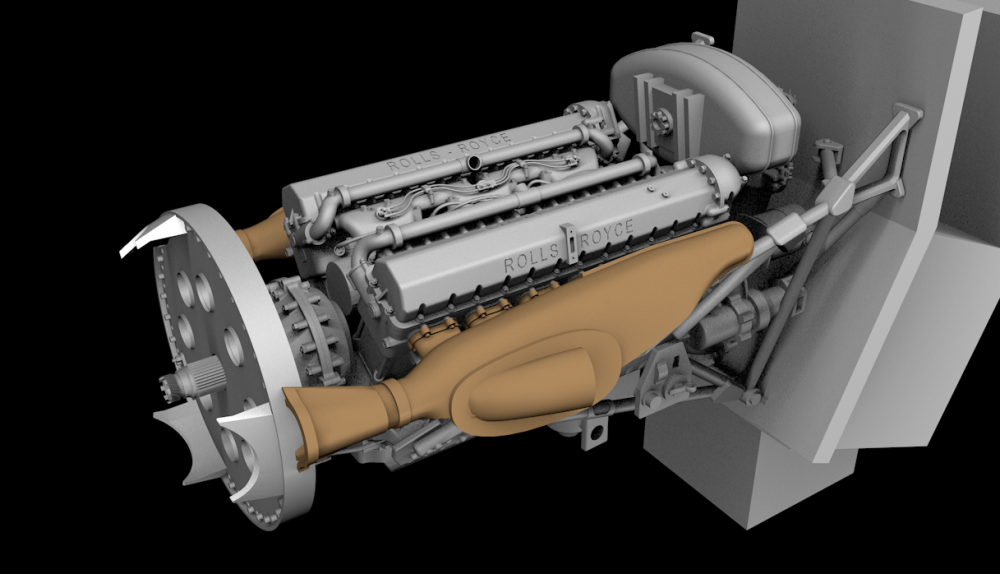

-
1/32 Westland Whirlwind
JeroenPeters replied to JeroenPeters's topic in LSM 1/35 and Larger Work In Progress
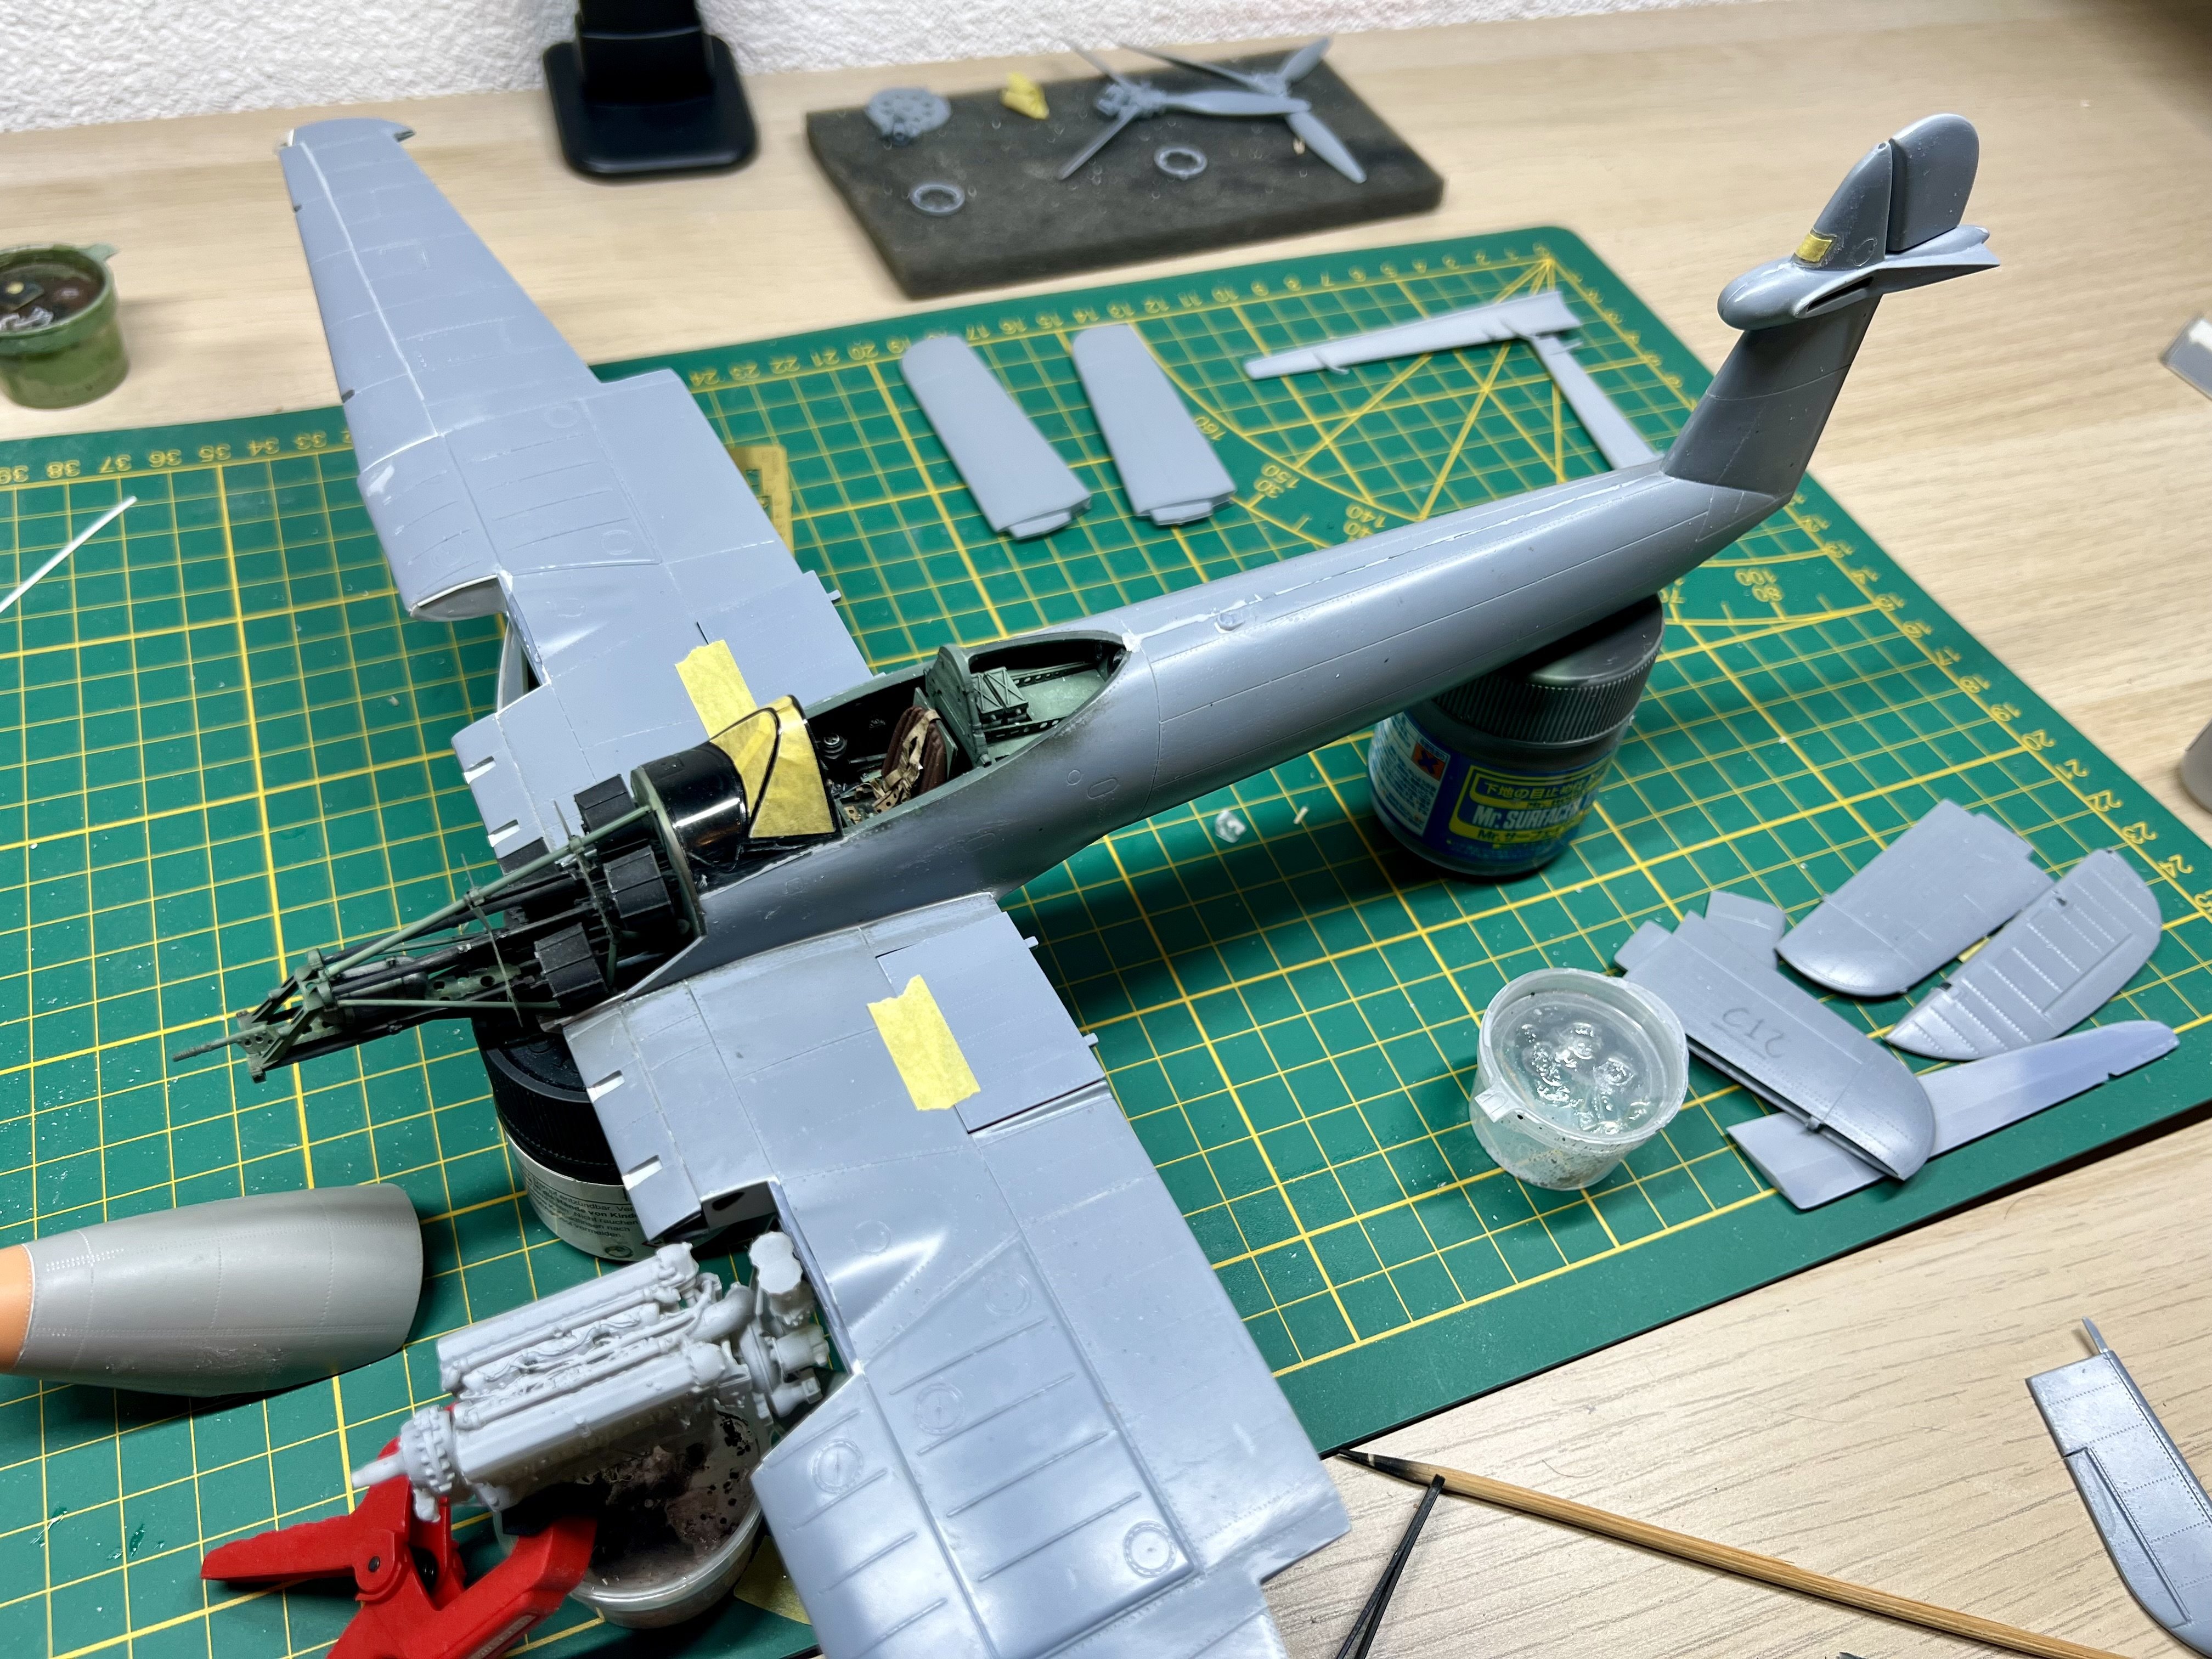
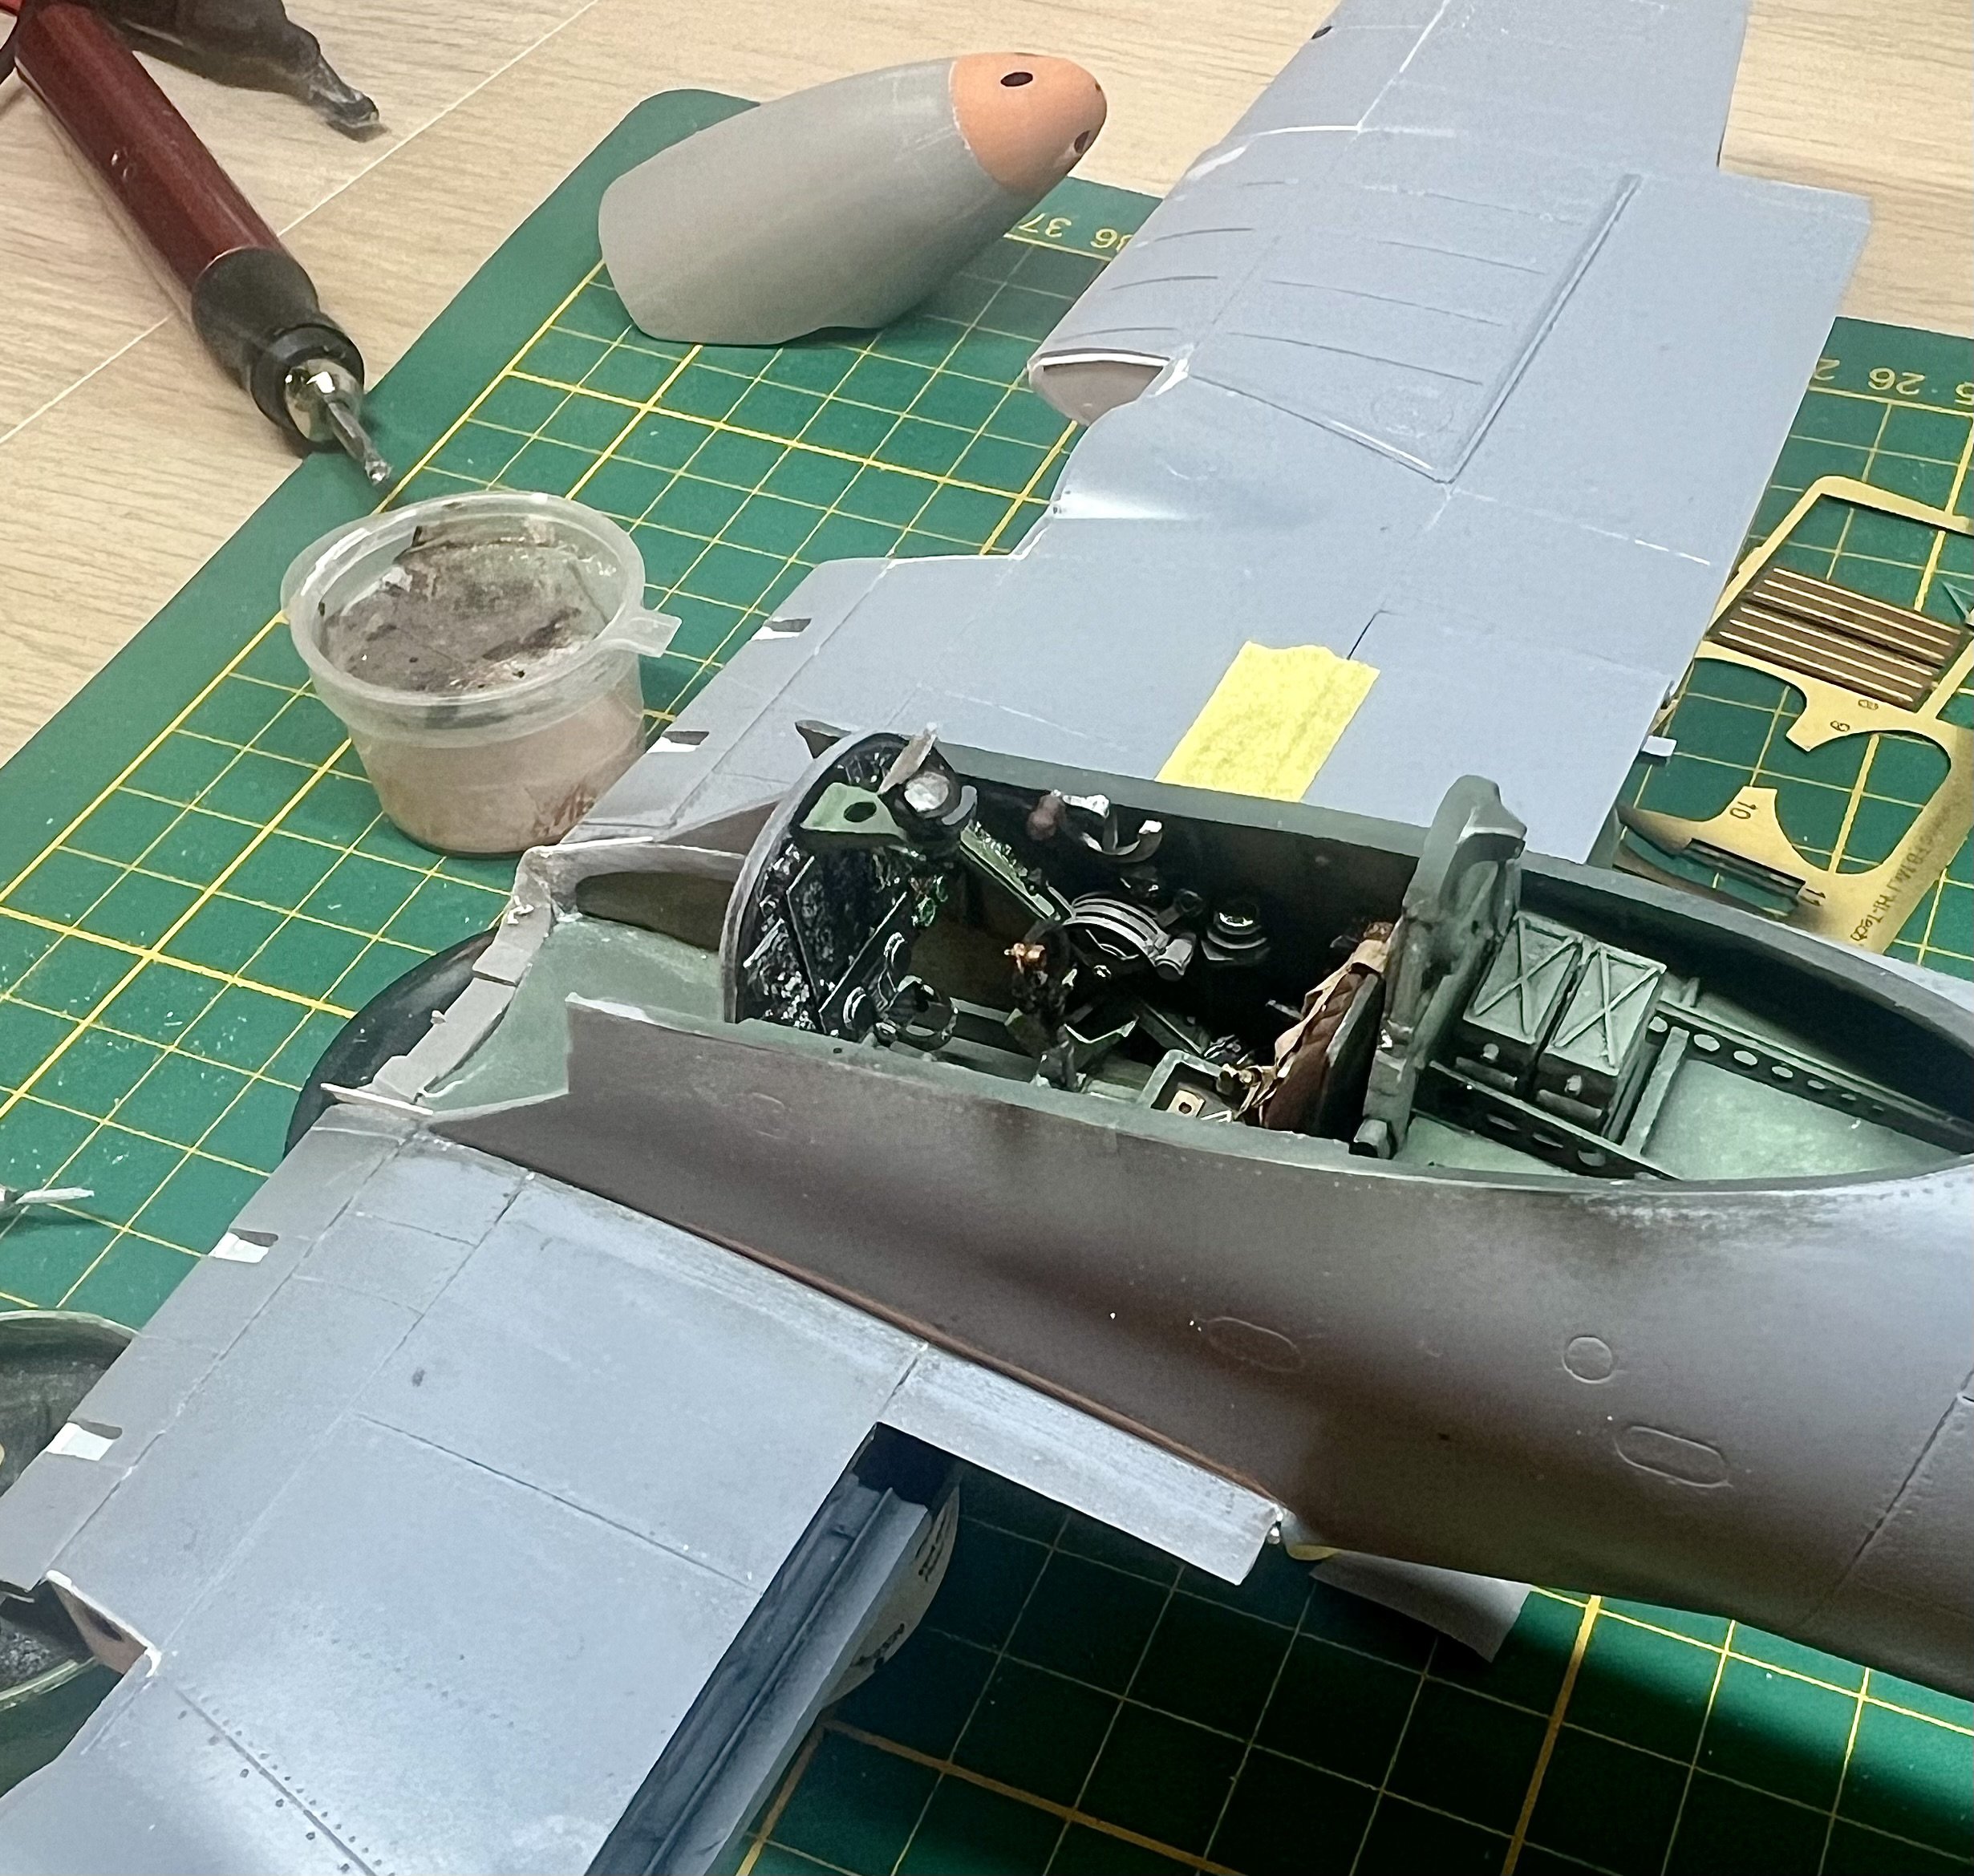
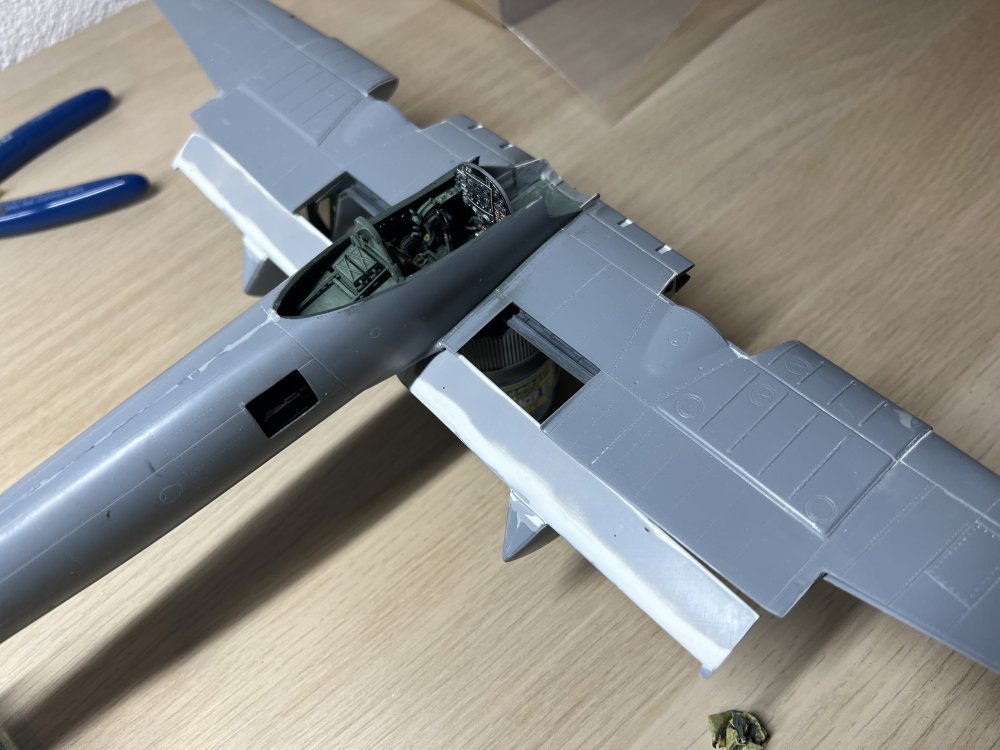
Spent a few evenings getting the nose guns to fit and sit properly. Also took some elbow grease to get a clean fit of the windshield. Getting close to paint!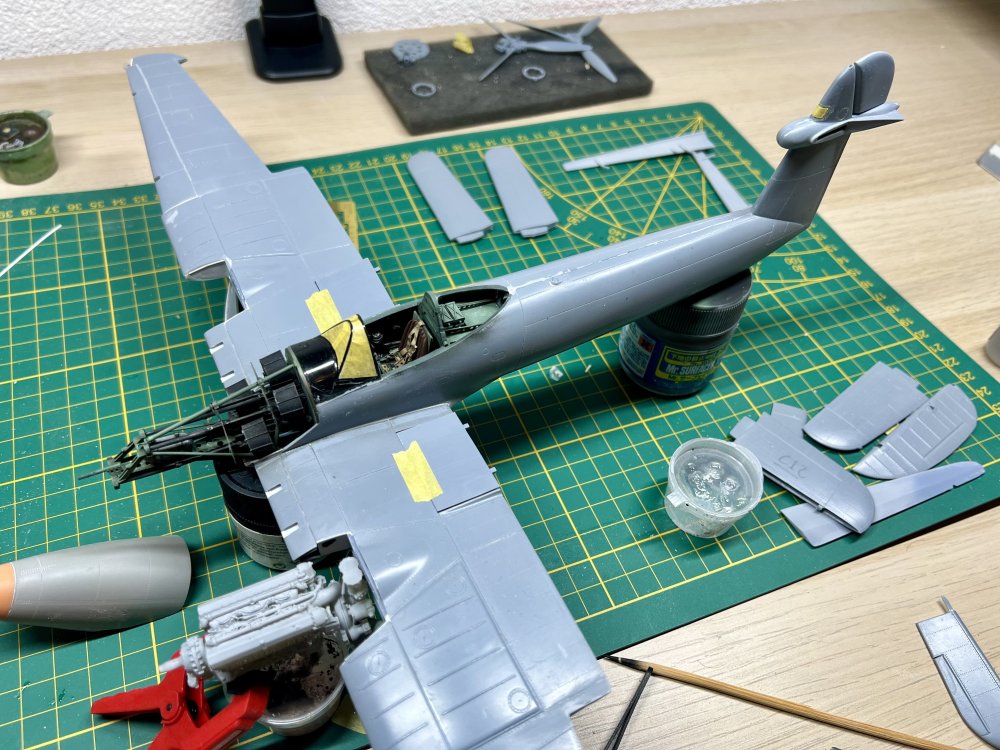
-
1/32 Westland Whirlwind
JeroenPeters replied to JeroenPeters's topic in LSM 1/35 and Larger Work In Progress
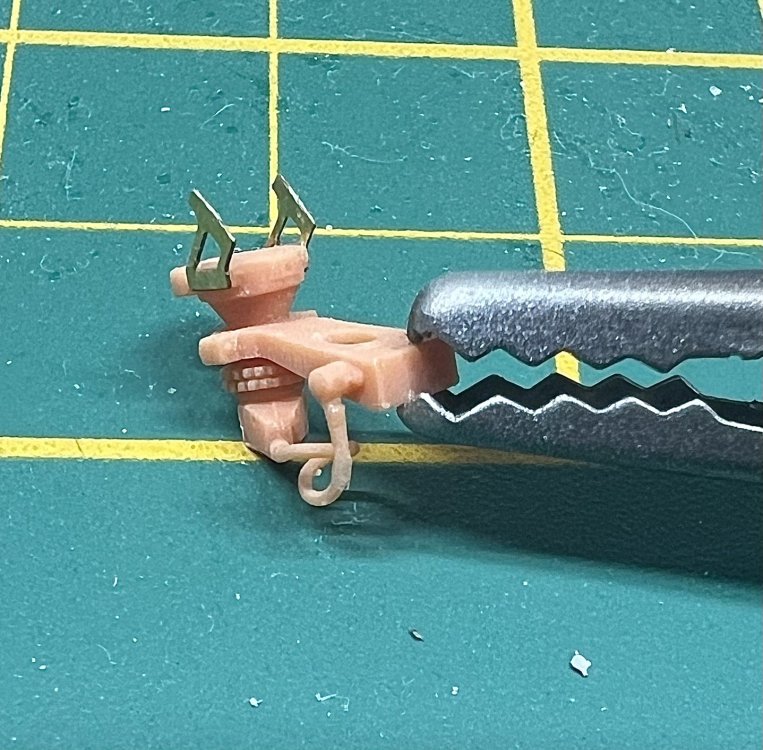
Finished the gunsight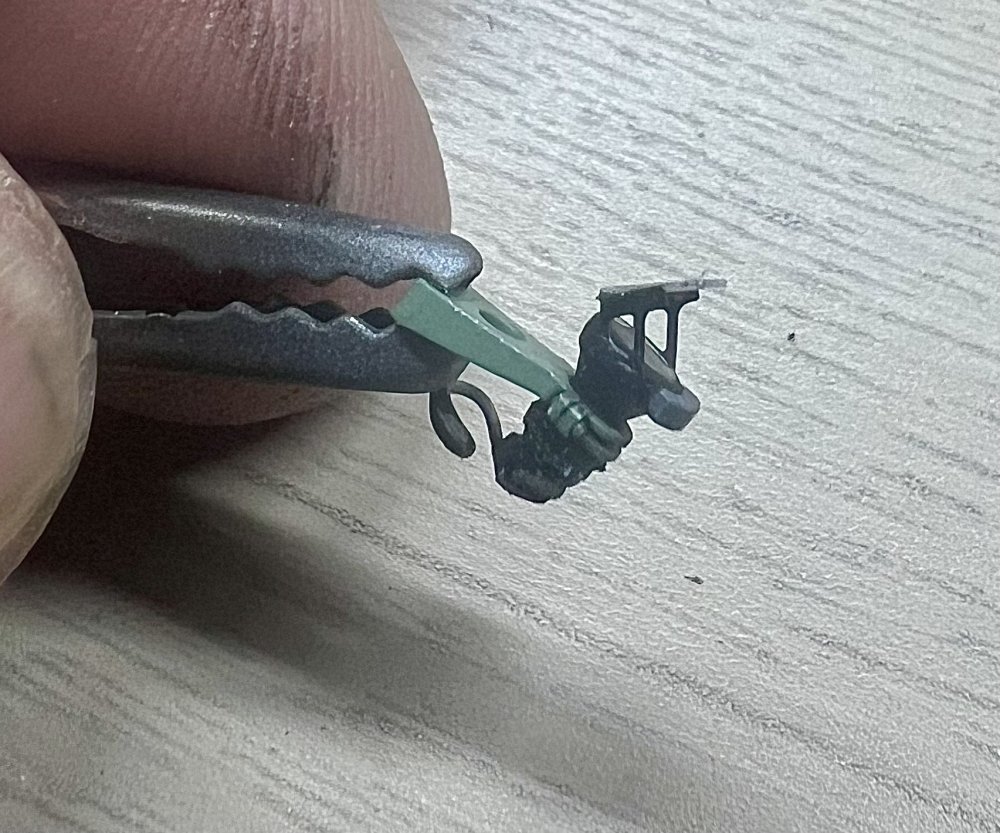

-
1/32 ME-262A-2a/U2
JeroenPeters replied to JeroenPeters's topic in LSM 1/35 and Larger Work In Progress
This is a 12K printer. I alsouse a 14K printer, but for some reason the 12K is sharper, better and more detailed. -
1/32 ME-262A-2a/U2
JeroenPeters replied to JeroenPeters's topic in LSM 1/35 and Larger Work In Progress
Sprayed some surfacer on the printed bomb sights. Pretty happy with the result.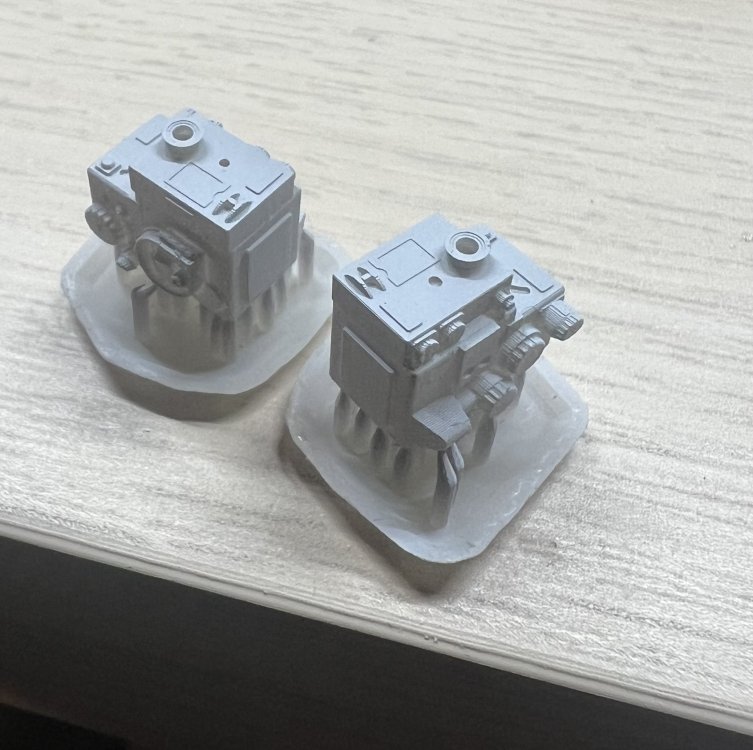
- 151 replies
-
- 11
-

-
1/32 Westland Whirlwind
JeroenPeters replied to JeroenPeters's topic in LSM 1/35 and Larger Work In Progress
A bit of a shitty pic but the end detail really is better than just a flat surface.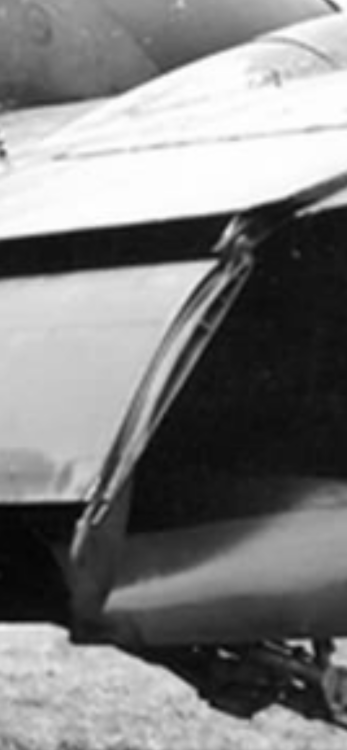
-
1/32 Westland Whirlwind
JeroenPeters replied to JeroenPeters's topic in LSM 1/35 and Larger Work In Progress
Thnx! I use Zap a Gap. Love that stuff. The light is from Amazon. Brand: Bravzurg. -
1/32 Westland Whirlwind
JeroenPeters replied to JeroenPeters's topic in LSM 1/35 and Larger Work In Progress
Other than not reading the label on the resin bottle before pouring: no :)) -
1/32 Westland Whirlwind
JeroenPeters replied to JeroenPeters's topic in LSM 1/35 and Larger Work In Progress
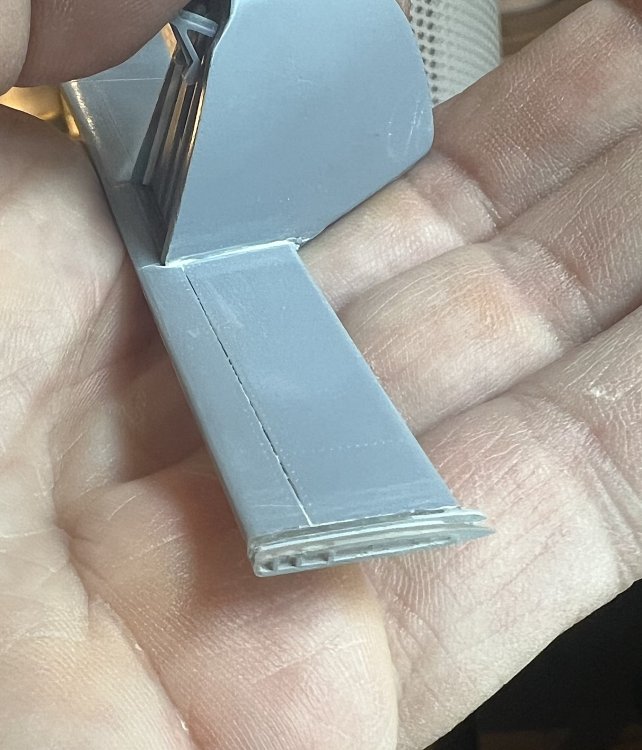
Just printed the flap endcaps on my new printer IMG_0276.mov -
1/32 ME-262A-2a/U2
JeroenPeters replied to JeroenPeters's topic in LSM 1/35 and Larger Work In Progress
Just installed my new printer. The Anycubic m7 Pro. And wow… IMG_0277.mov -
40 dollars!! No way!! I live about 10 minutes from the Aviationmegastore.com They have all the kits you can dream of, but not the Hase Stuka. Enjoy! I have my next projects lined up: Me262 and Tempest on the bench. The He162 and then Me163.
-
That Stuka is my holy grail kit.
-
1/32 Westland Whirlwind
JeroenPeters replied to JeroenPeters's topic in LSM 1/35 and Larger Work In Progress
In the meantime started cleaning up the parts for the gear and resin wheels. The 3d printed gunsight is very delicate. While snipping of the supports i managed to damage the power cable. Made a replacement piece of cable from a piece of support. You can see some thick glue where i messed up. Will sand this down as soon as it had hardened.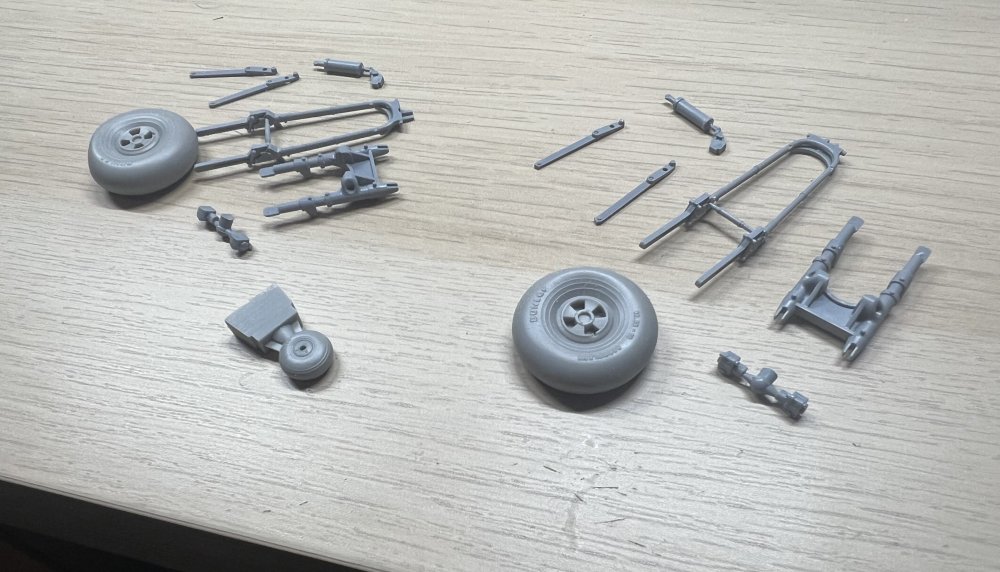
-
1/32 Westland Whirlwind
JeroenPeters replied to JeroenPeters's topic in LSM 1/35 and Larger Work In Progress
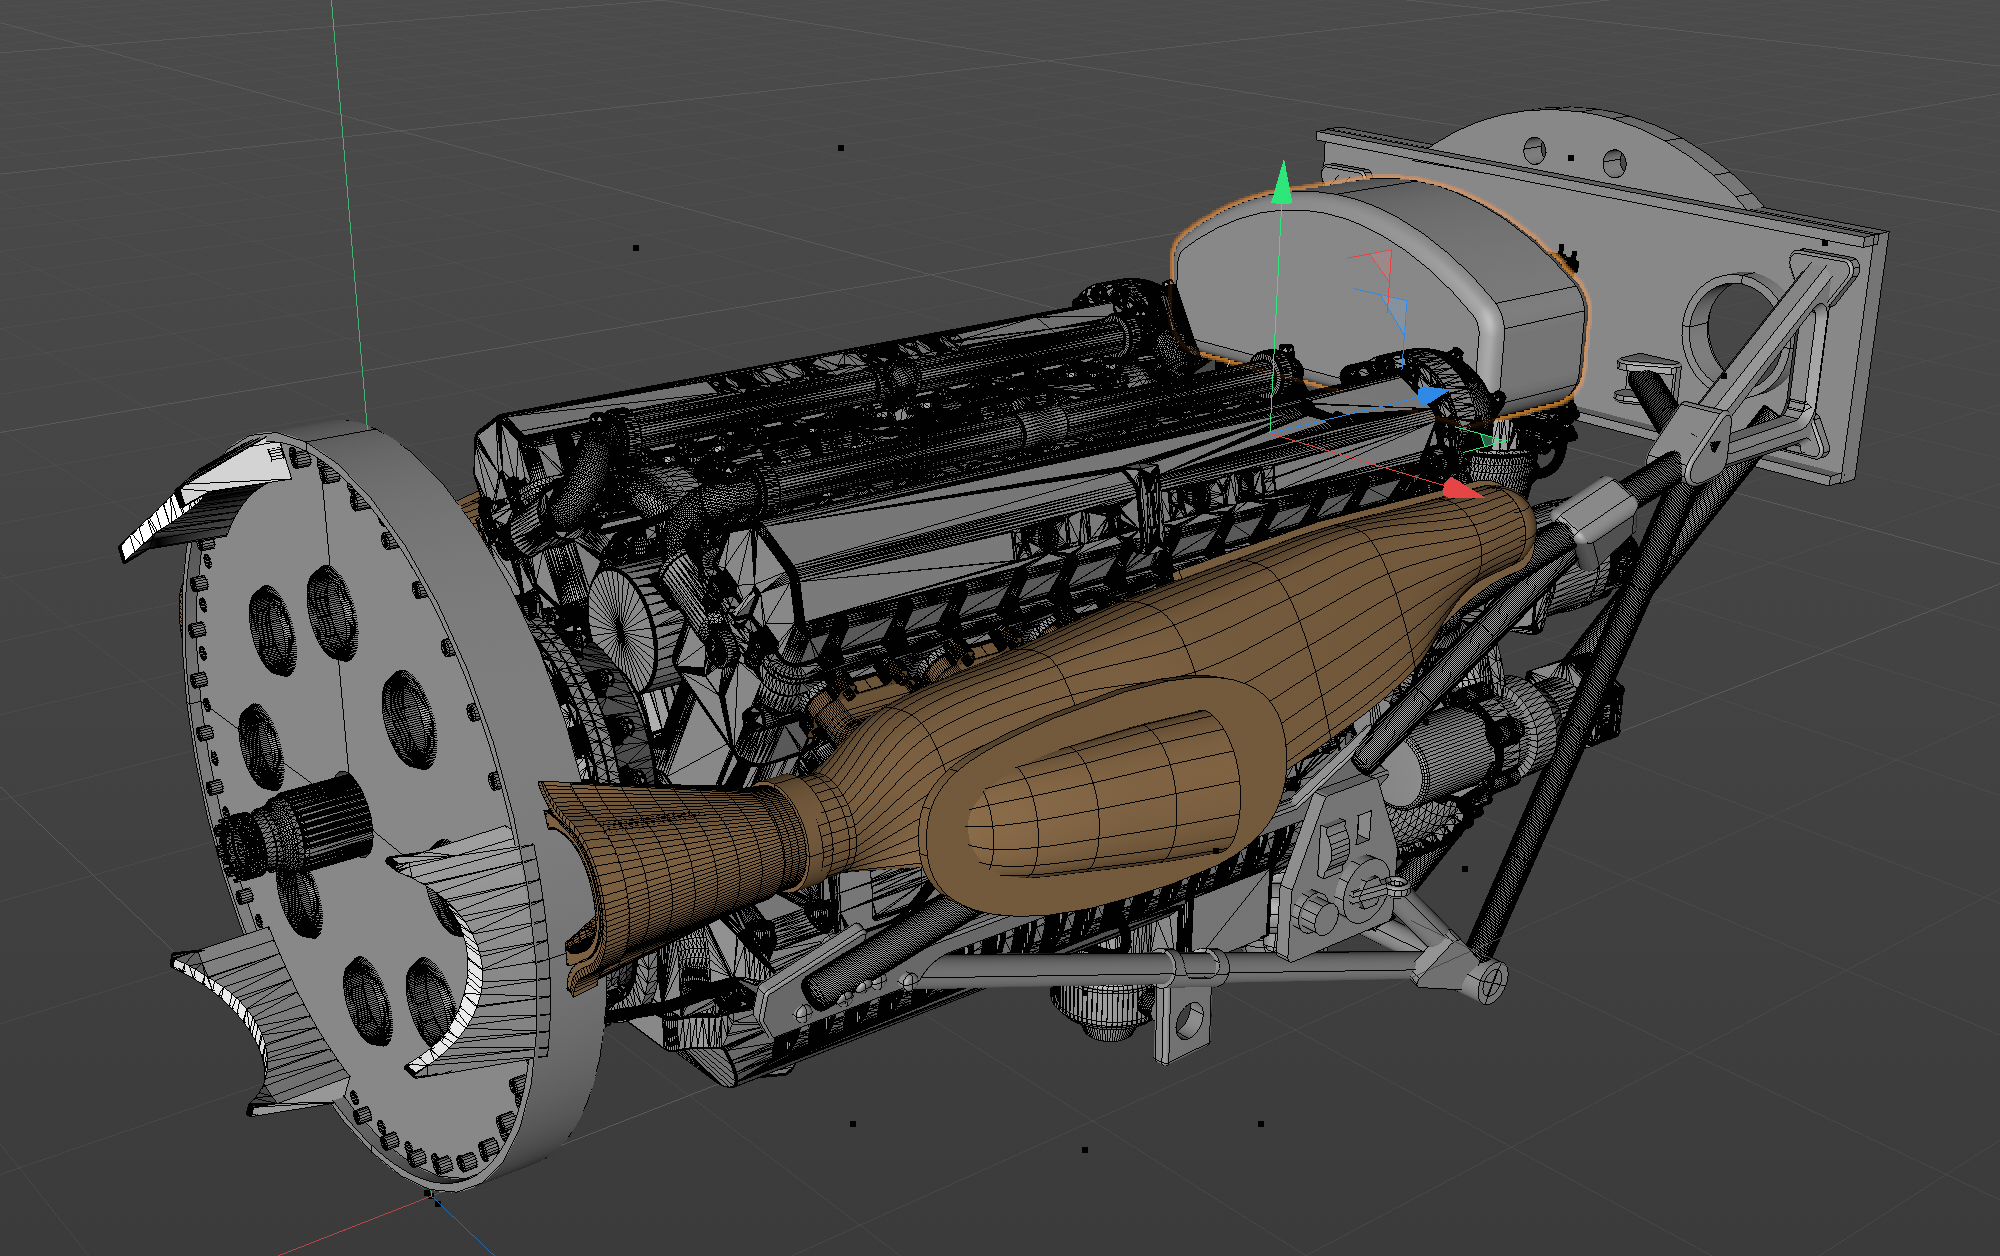
In the meantime I'm also working on the engine. Hardly any info exists (or can be found) on the oil tank positioned on the rear of the engine. I'll see what I can draw based on what I can find...
- 439 replies
-
- 10
-
-
1/32 Westland Whirlwind
JeroenPeters replied to JeroenPeters's topic in LSM 1/35 and Larger Work In Progress
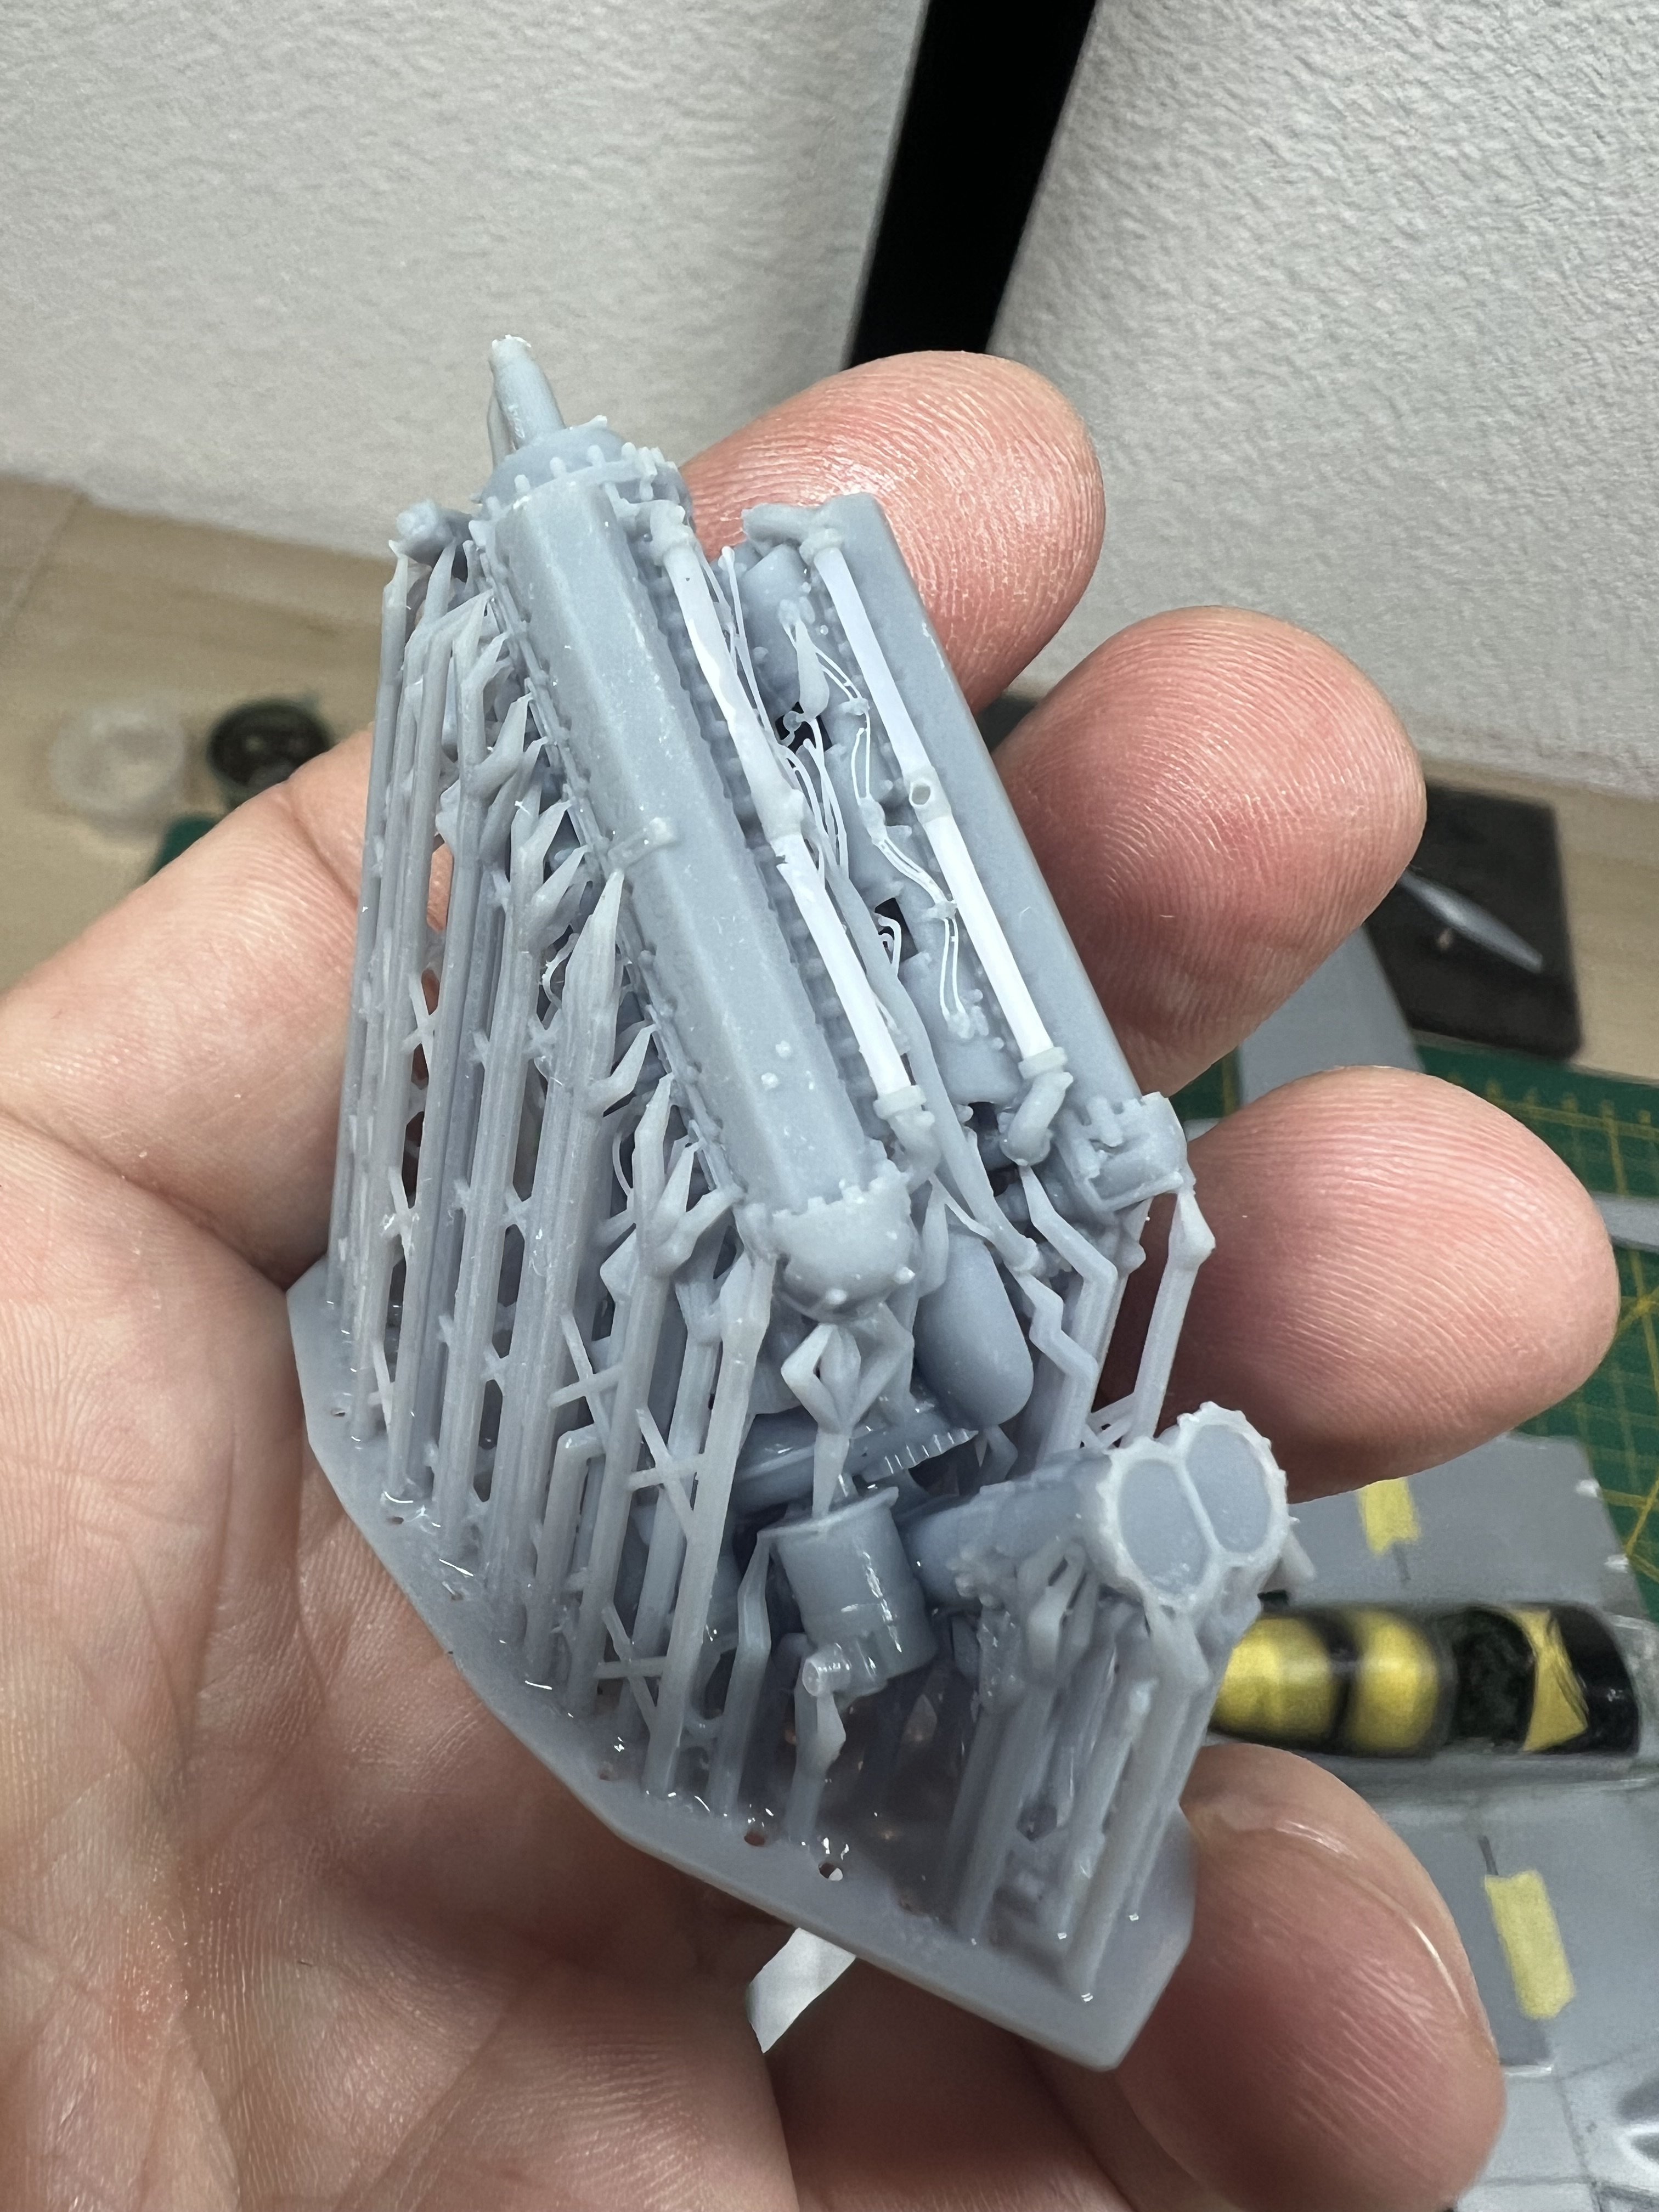
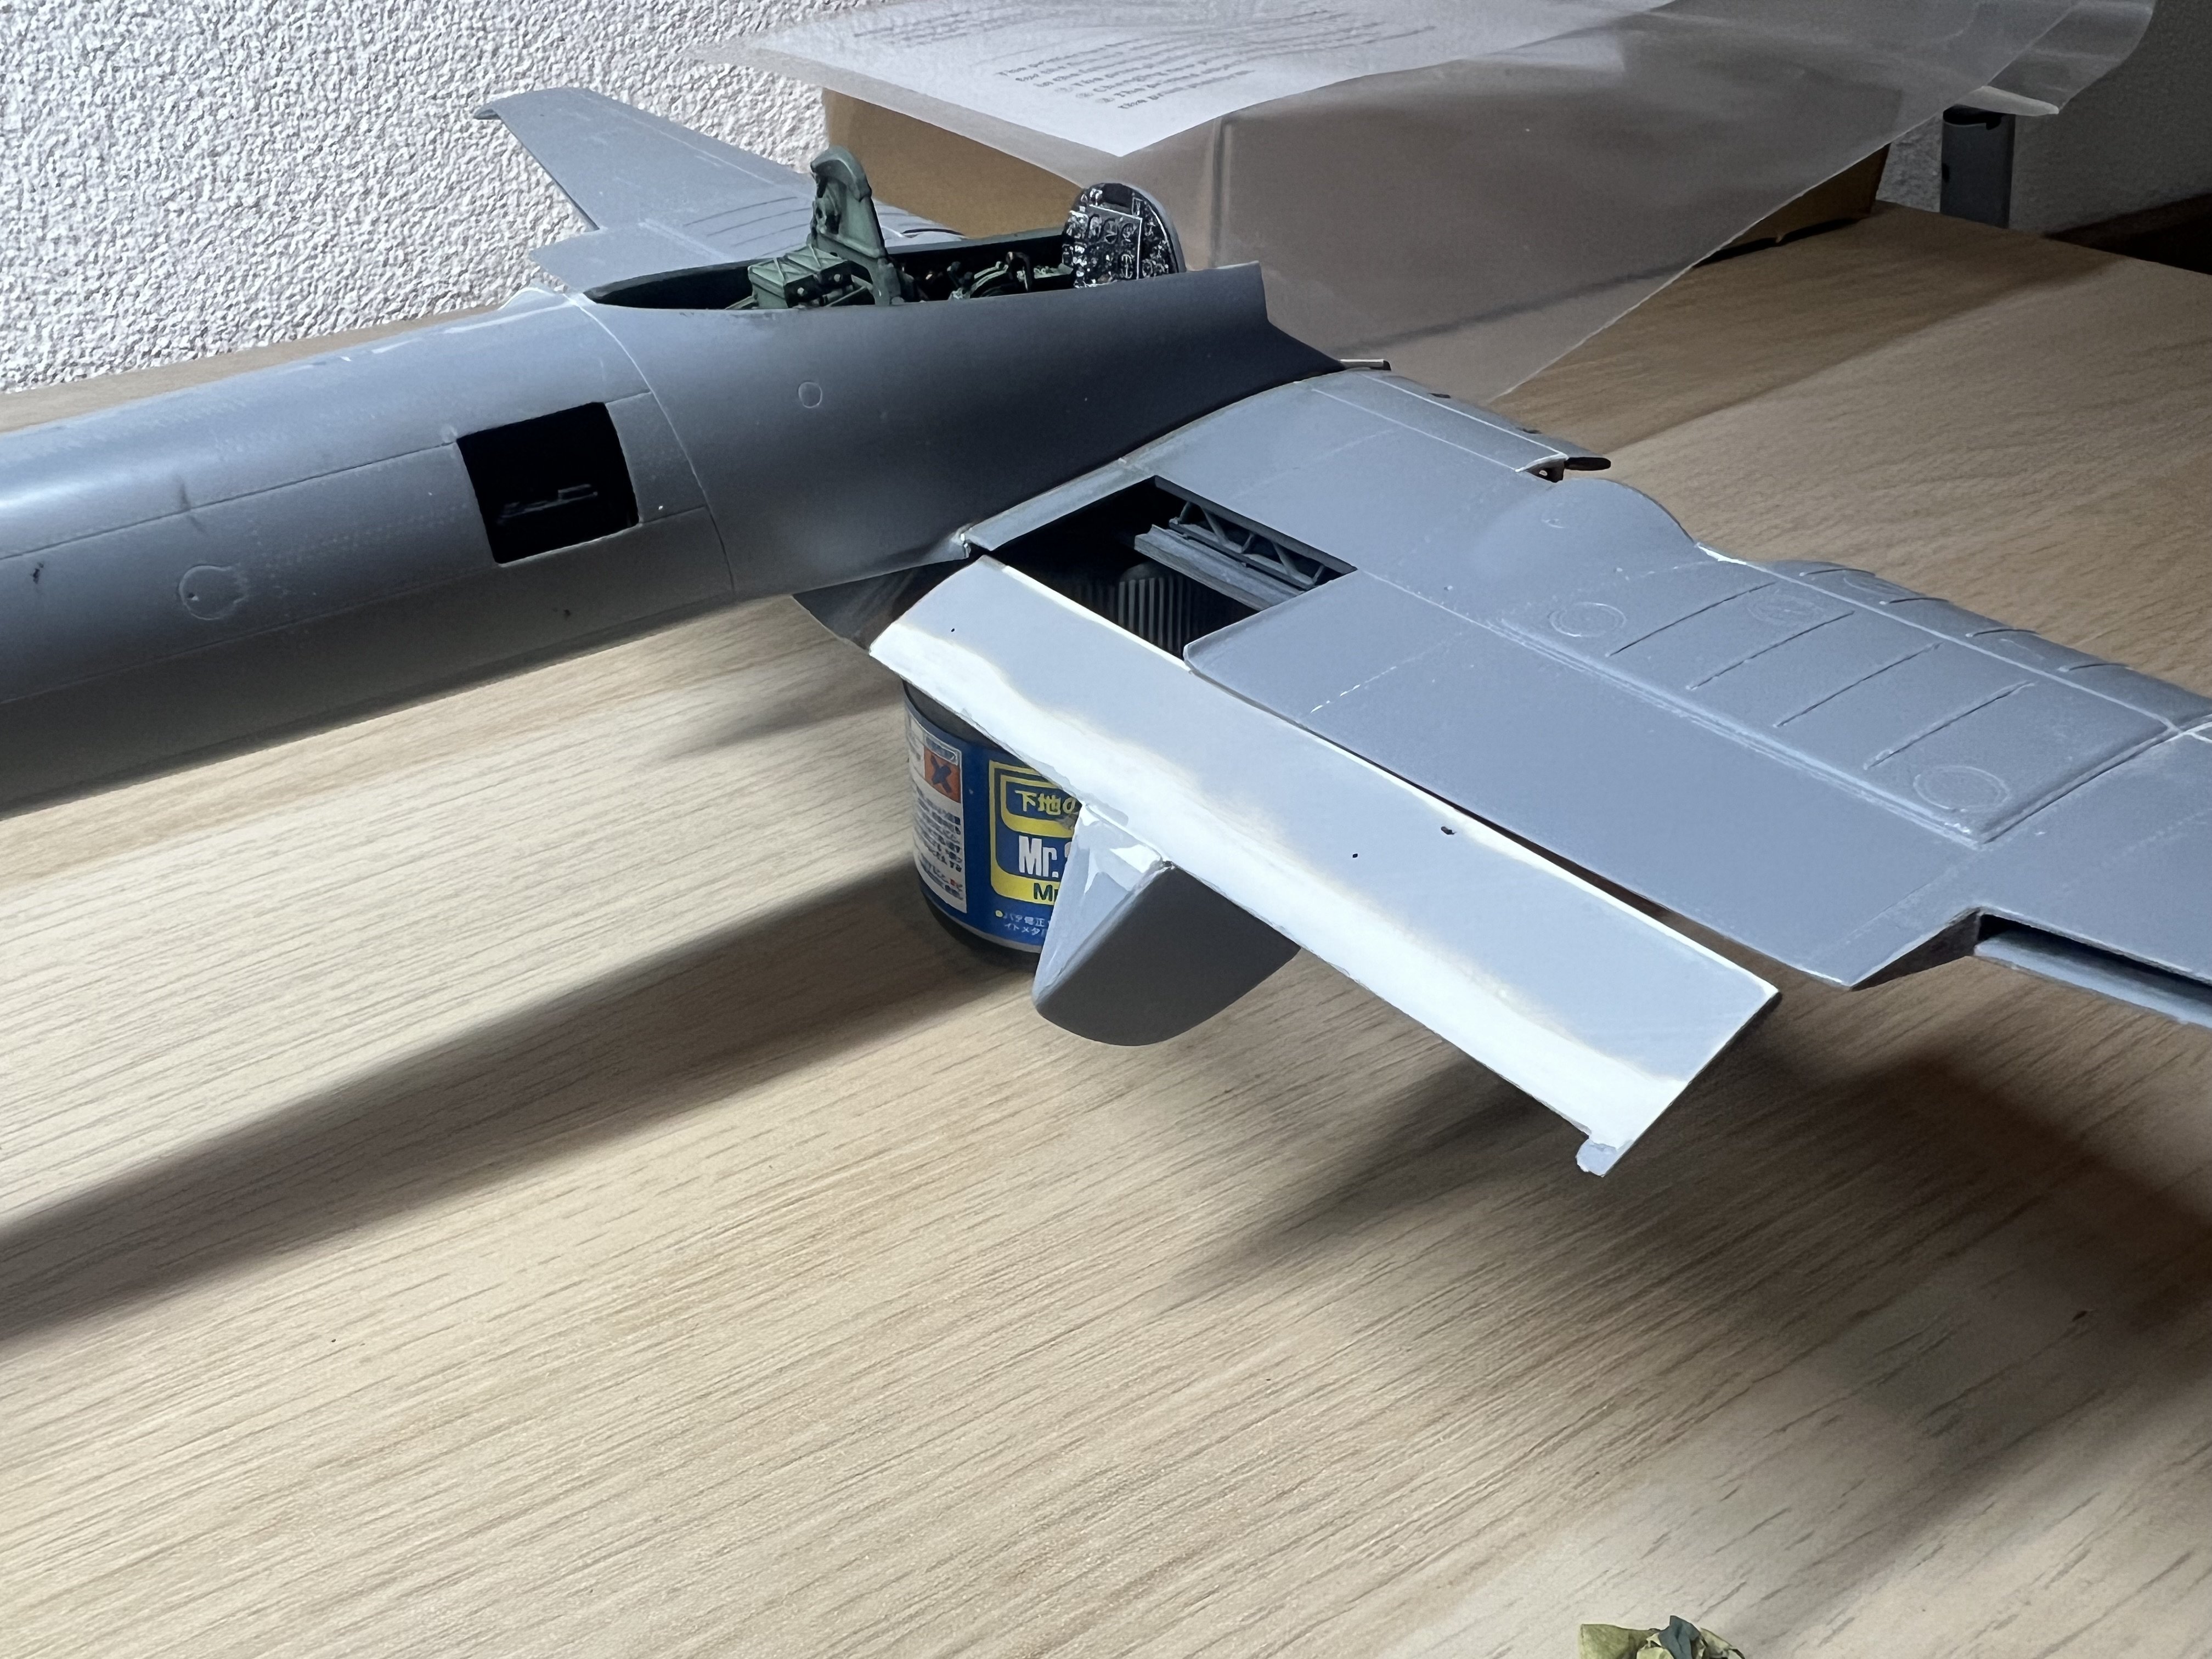
The shoe shaped end rails are included in the kit. Indid 3d draw the flap ends. The flaps can actually be moved and hinge in the right place now. I extended them half way and opened the radiator flaps. Now i need to make the two little stubs on the flap that actually push the radiator flaps up during movement. If that makes sense
-
1/32 Westland Whirlwind
JeroenPeters replied to JeroenPeters's topic in LSM 1/35 and Larger Work In Progress
Anyhoo… this is what i’m fiddling with:
- 439 replies
-
- 10
-
-

-
1/32 Westland Whirlwind
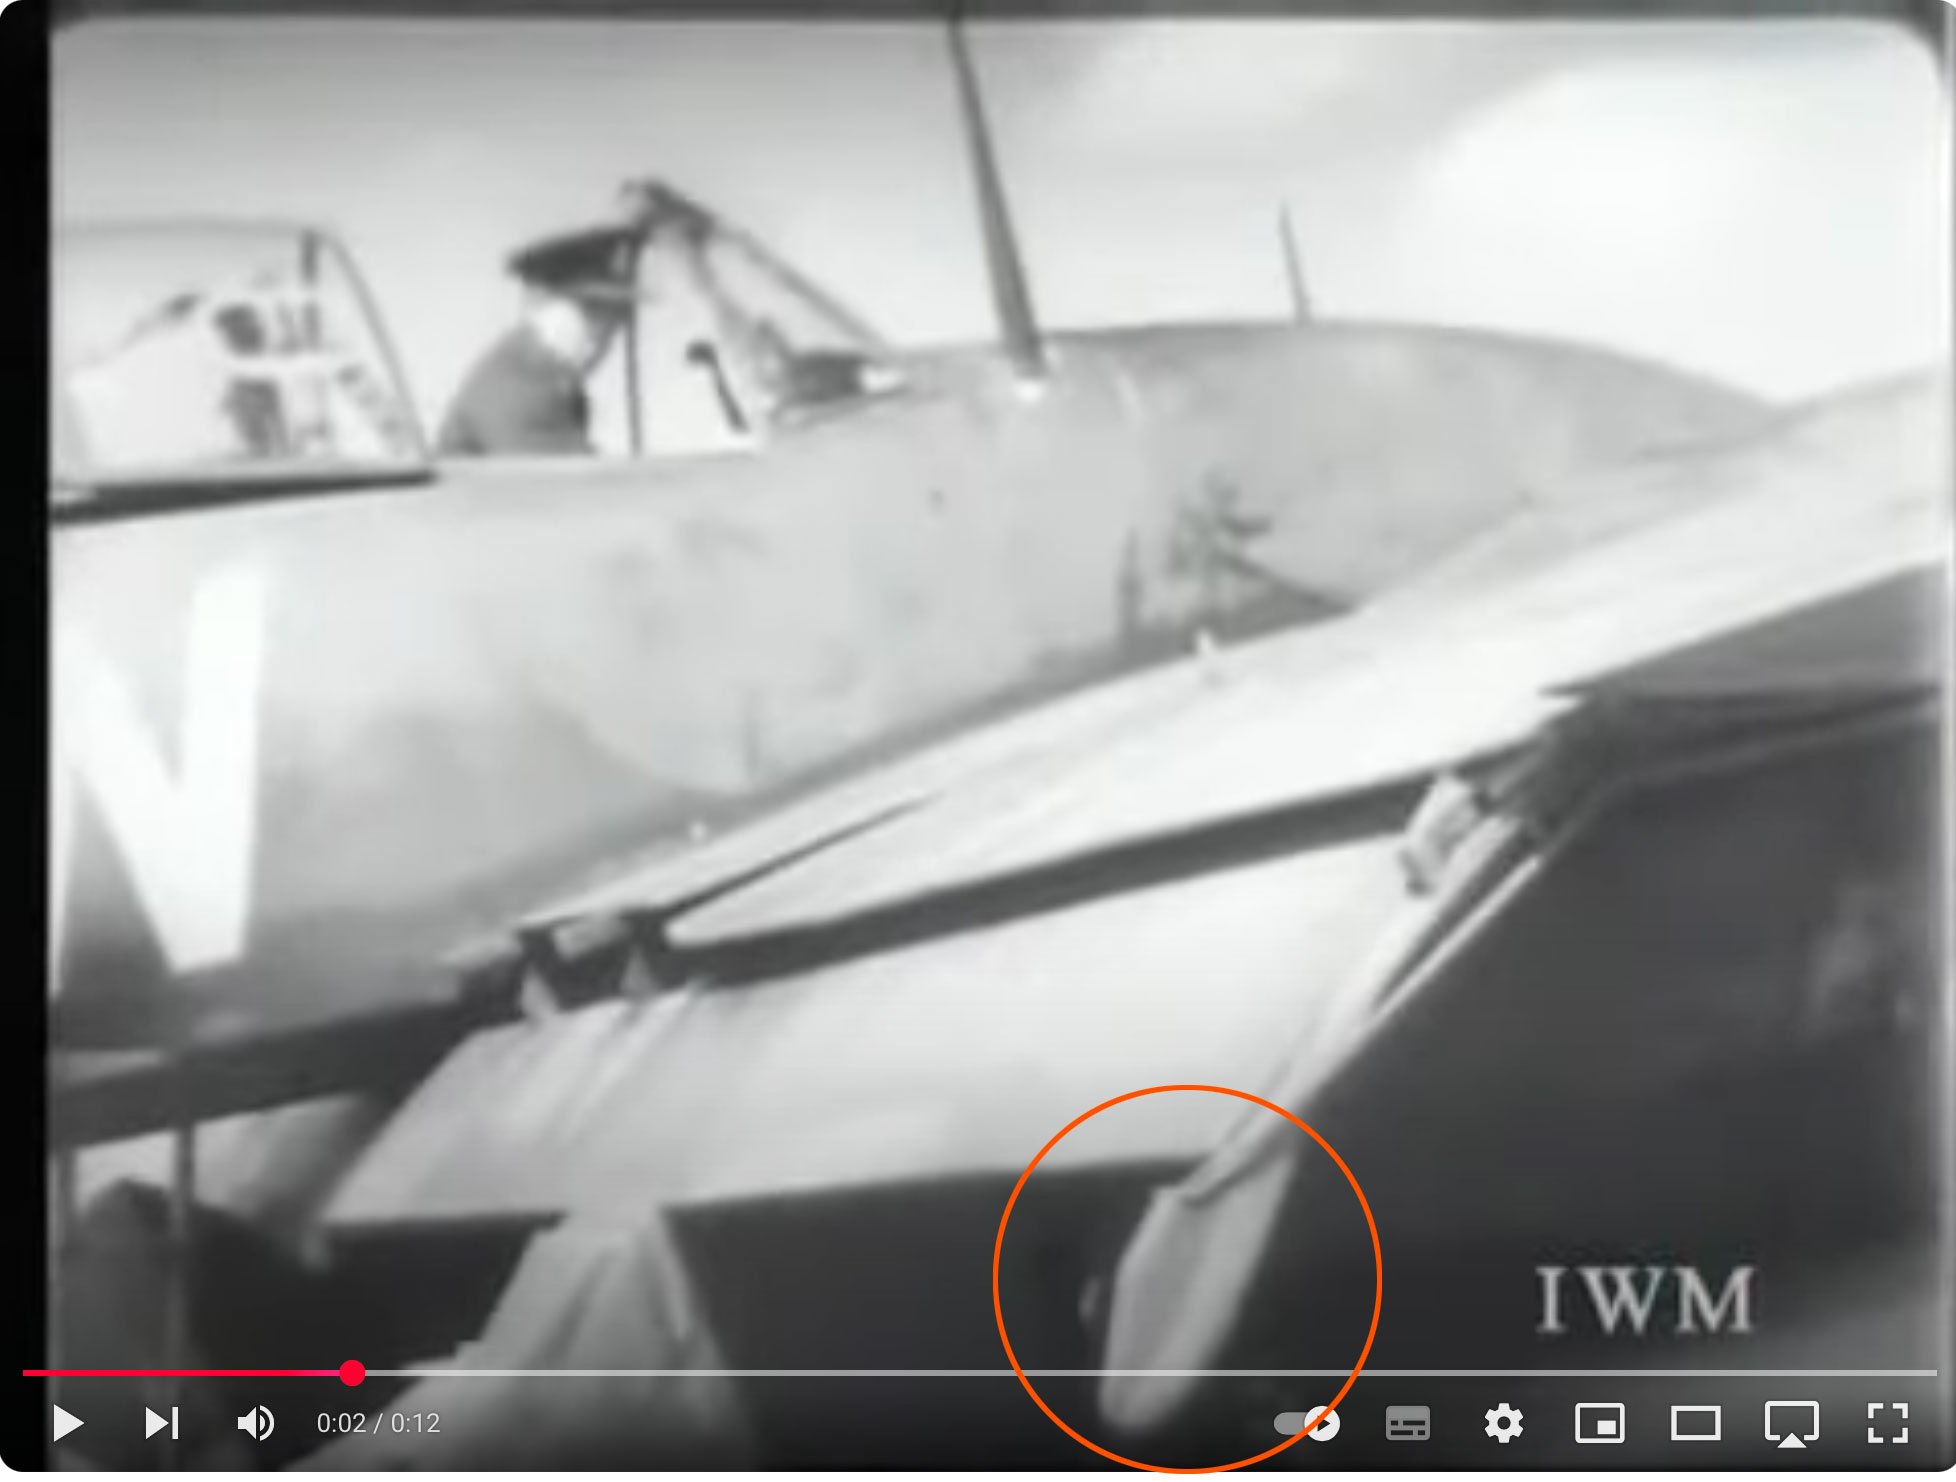
JeroenPeters replied to JeroenPeters's topic in LSM 1/35 and Larger Work In Progress
Back to the flaps... Very complicated design indeed. Check this video. See how the radiator flaps open and close on the flap movement. This means I should actually keep the radiotor flaps closed, if I pose the flaps fully extended. Or... extend the flaps half-way. And then there is the question. How do I 3d model the end rails of the flaps. Like in the photo above, or with the 'shoe' like in the video? I don't see the 'shoe' shape in this drawing either: