JeroenPeters
-
Posts
4,867 -
Joined
-
Last visited
Content Type
Profiles
Forums
Events
Gallery
Everything posted by JeroenPeters
-

1/32 Ju-87D Stuka
JeroenPeters replied to JeroenPeters's topic in LSM 1/35 and Larger Work In Progress
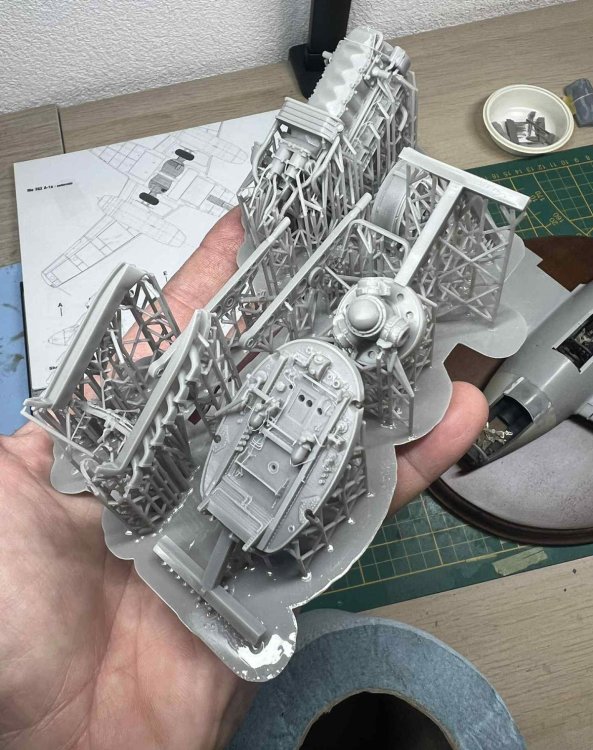
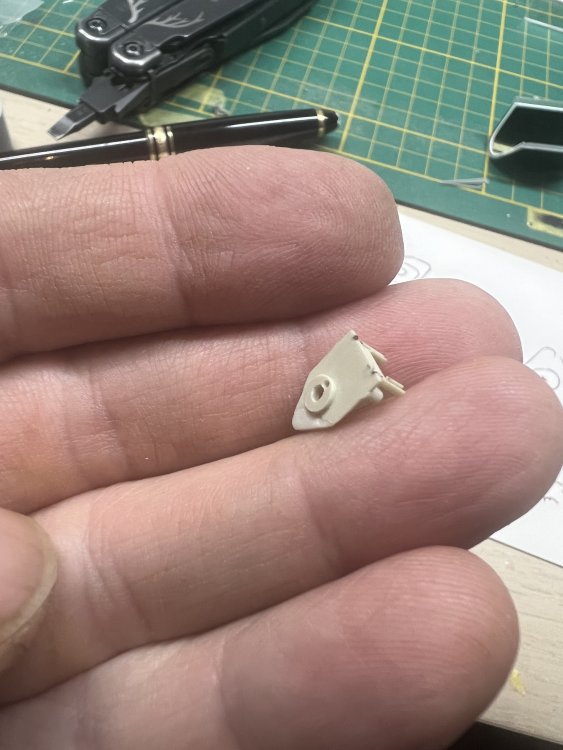
First 3d print of engine. The firewall needs adjustments, but for a first try I am pretty pleased.
- 27 replies
-
- 10
-

-
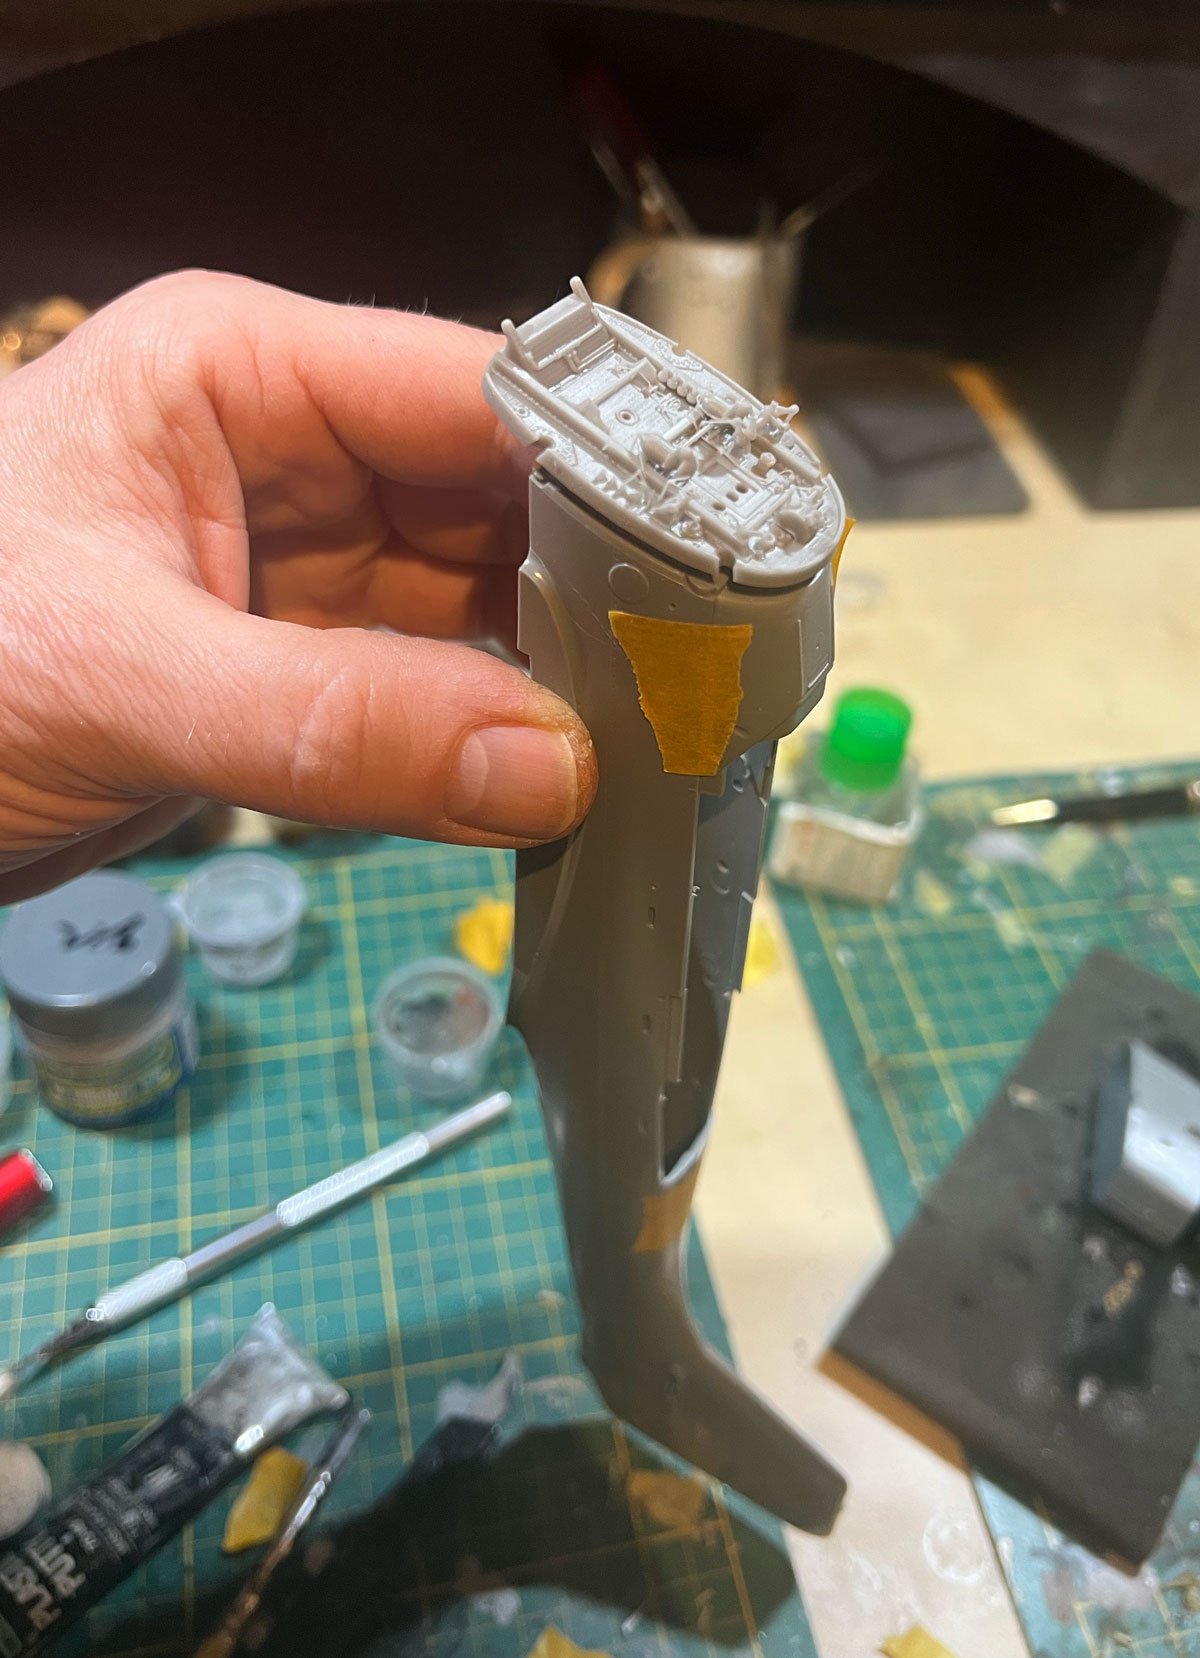
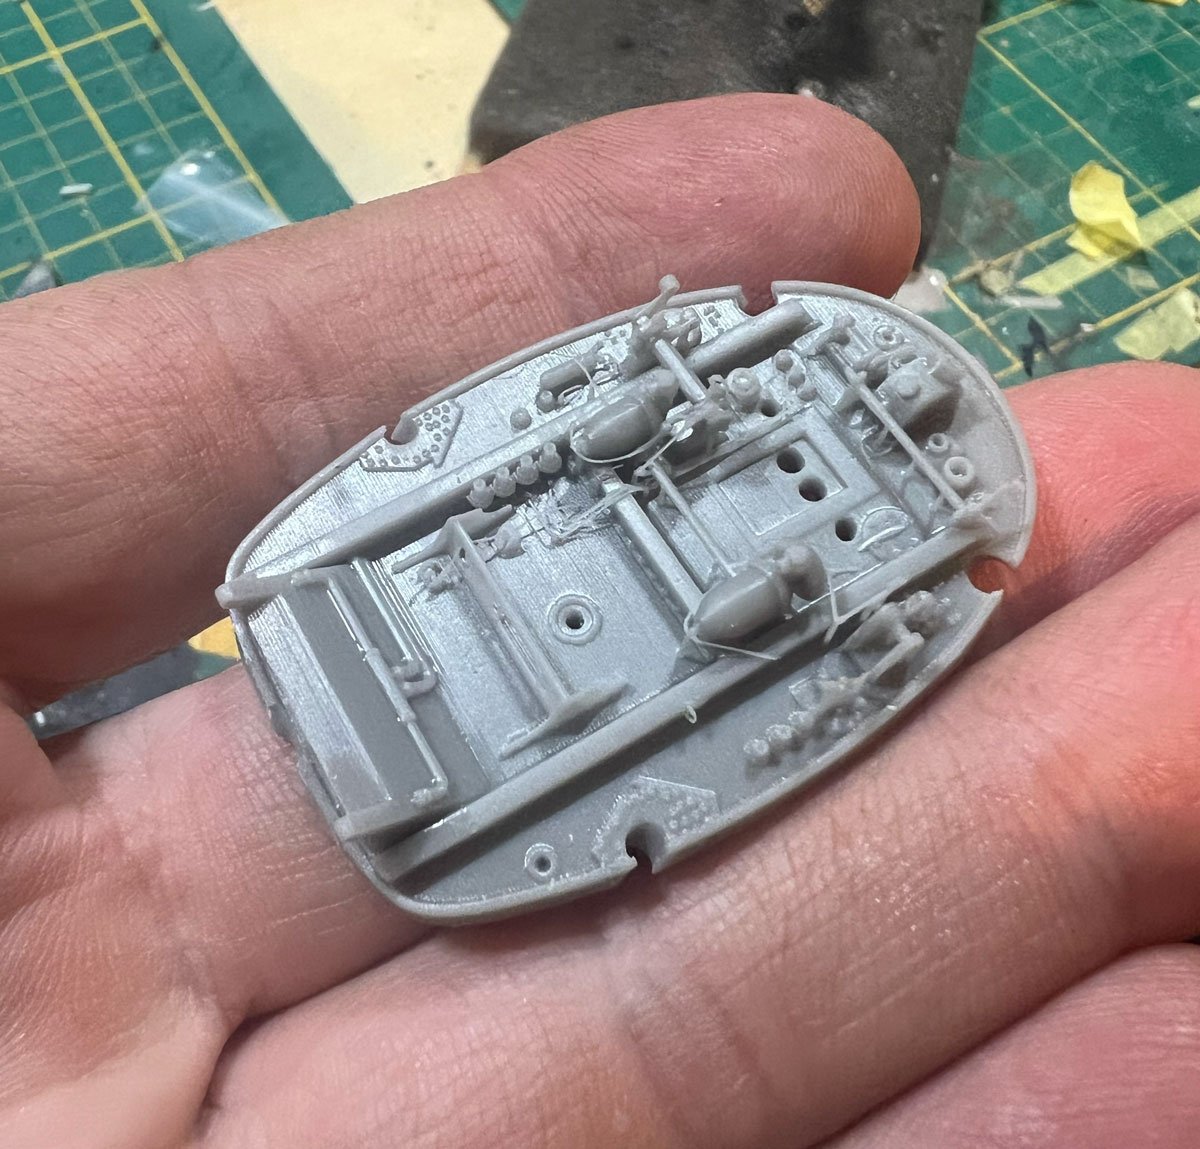
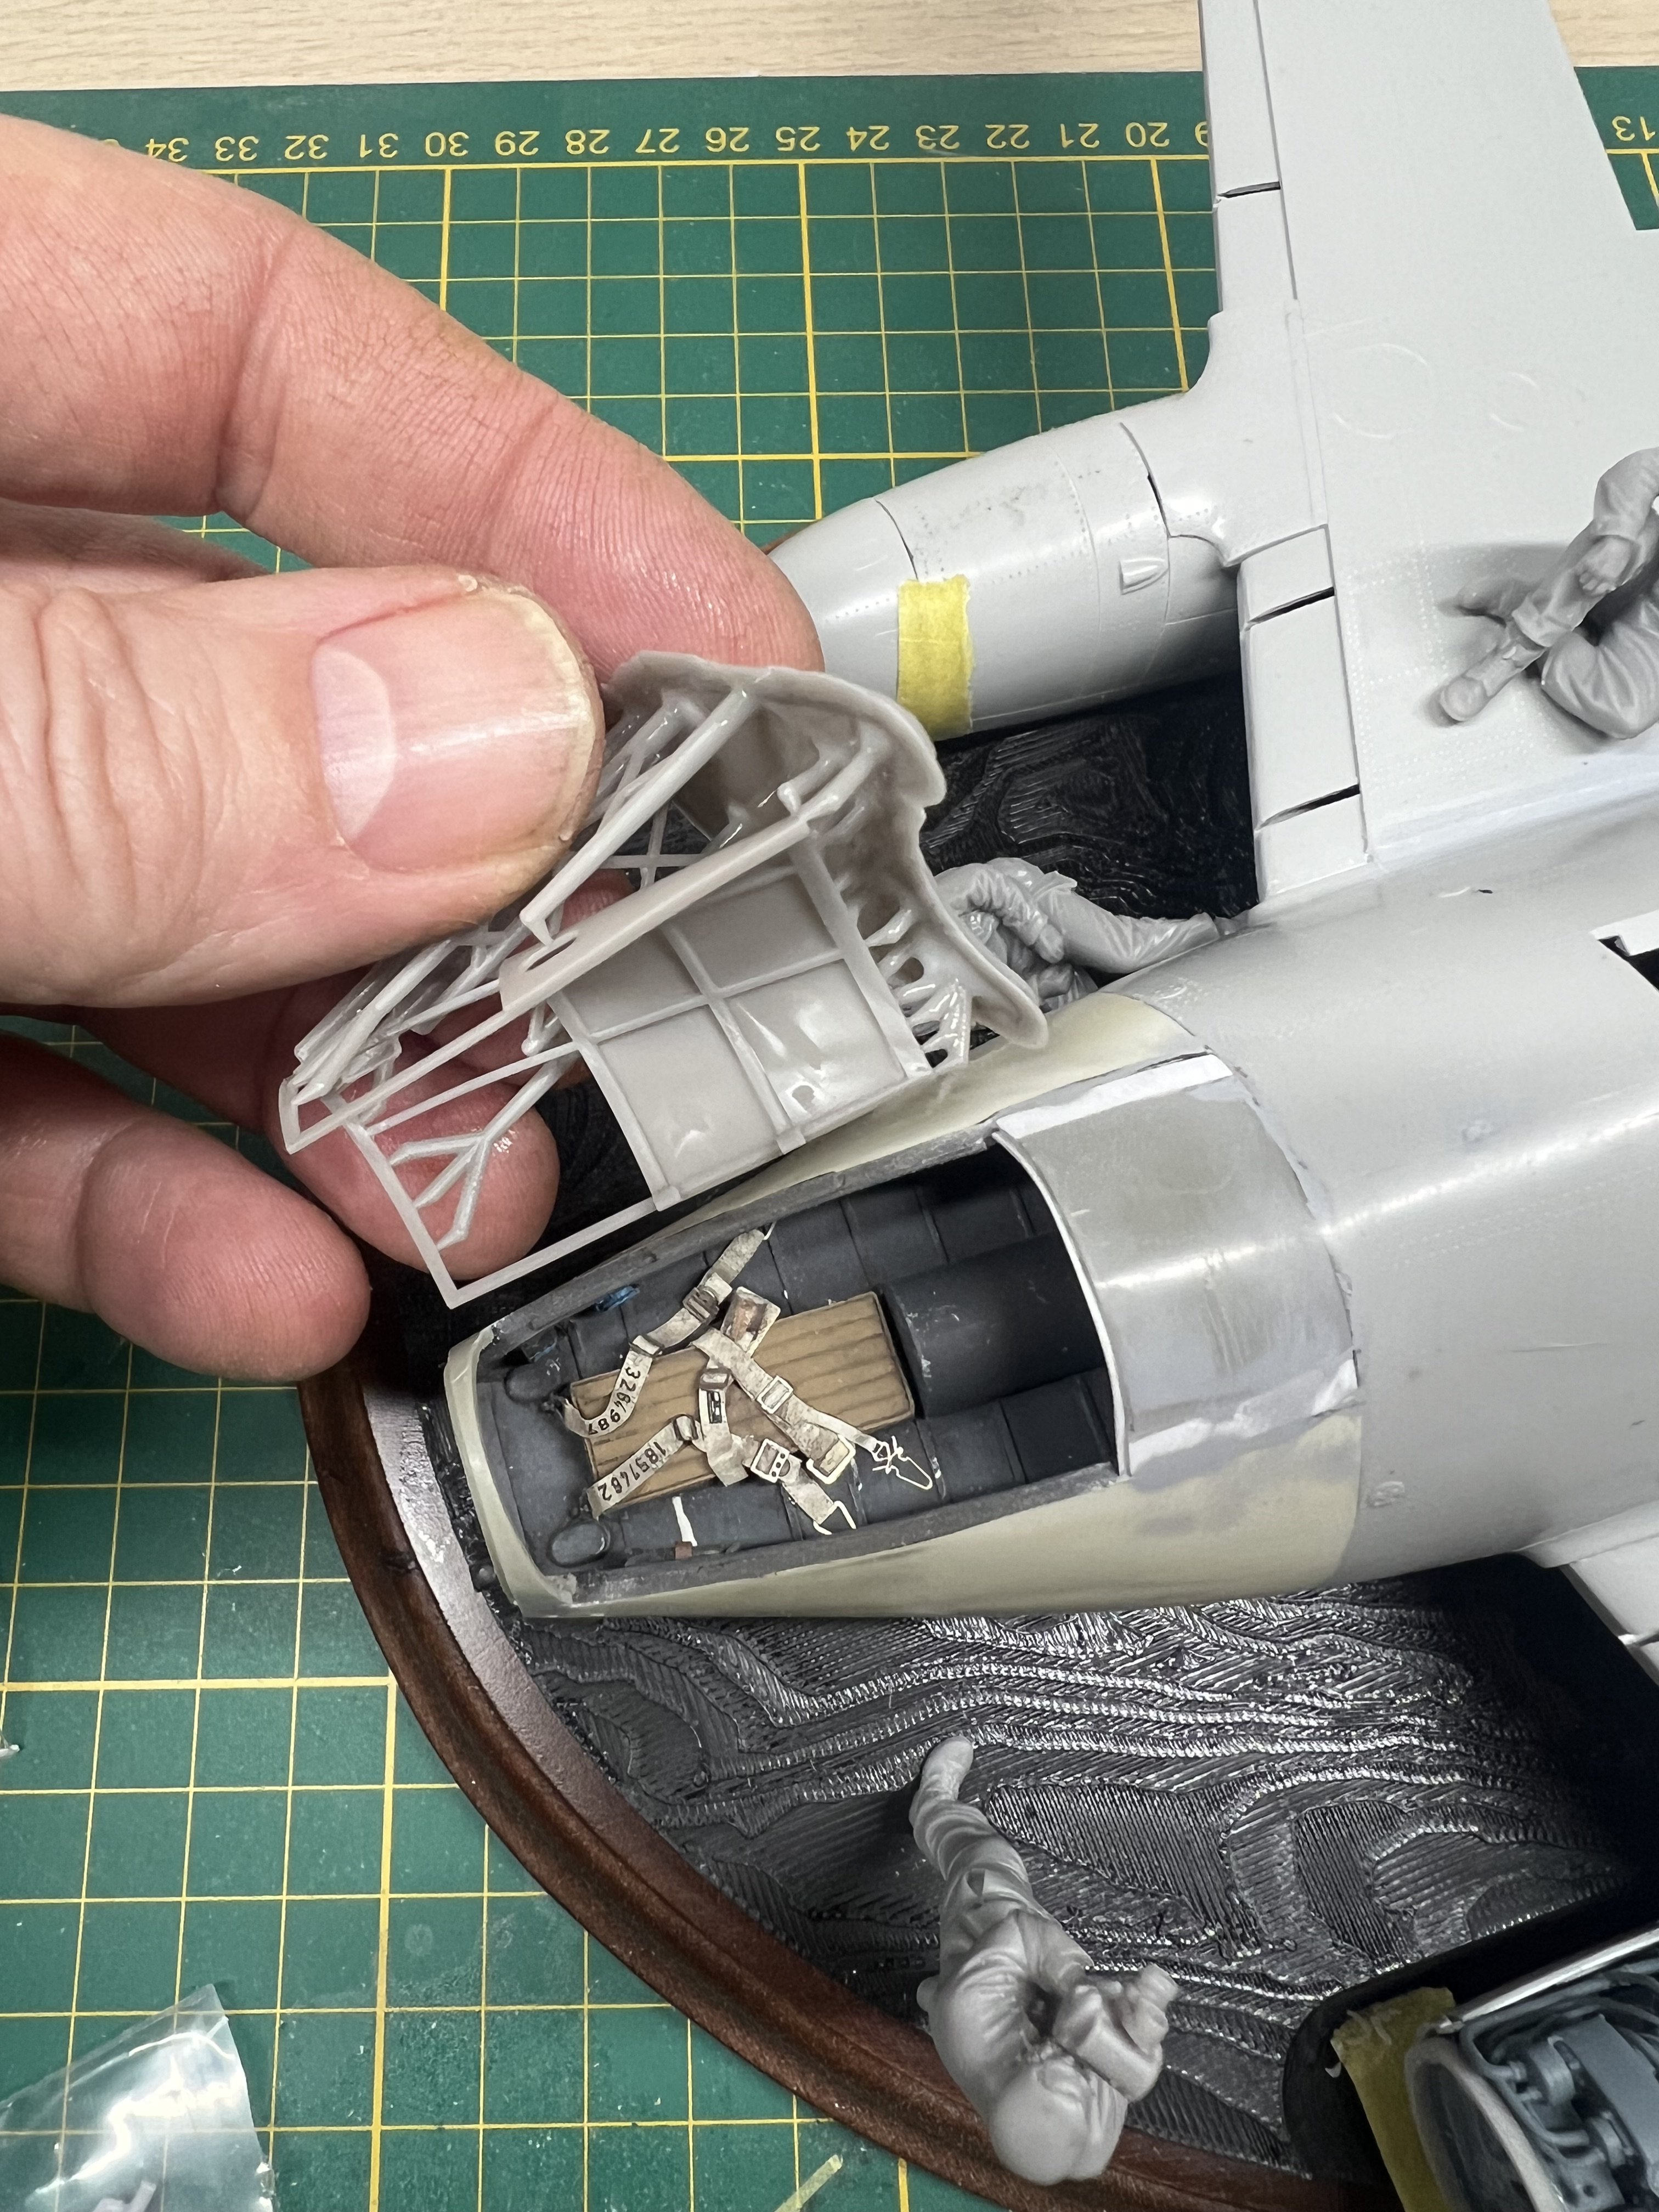
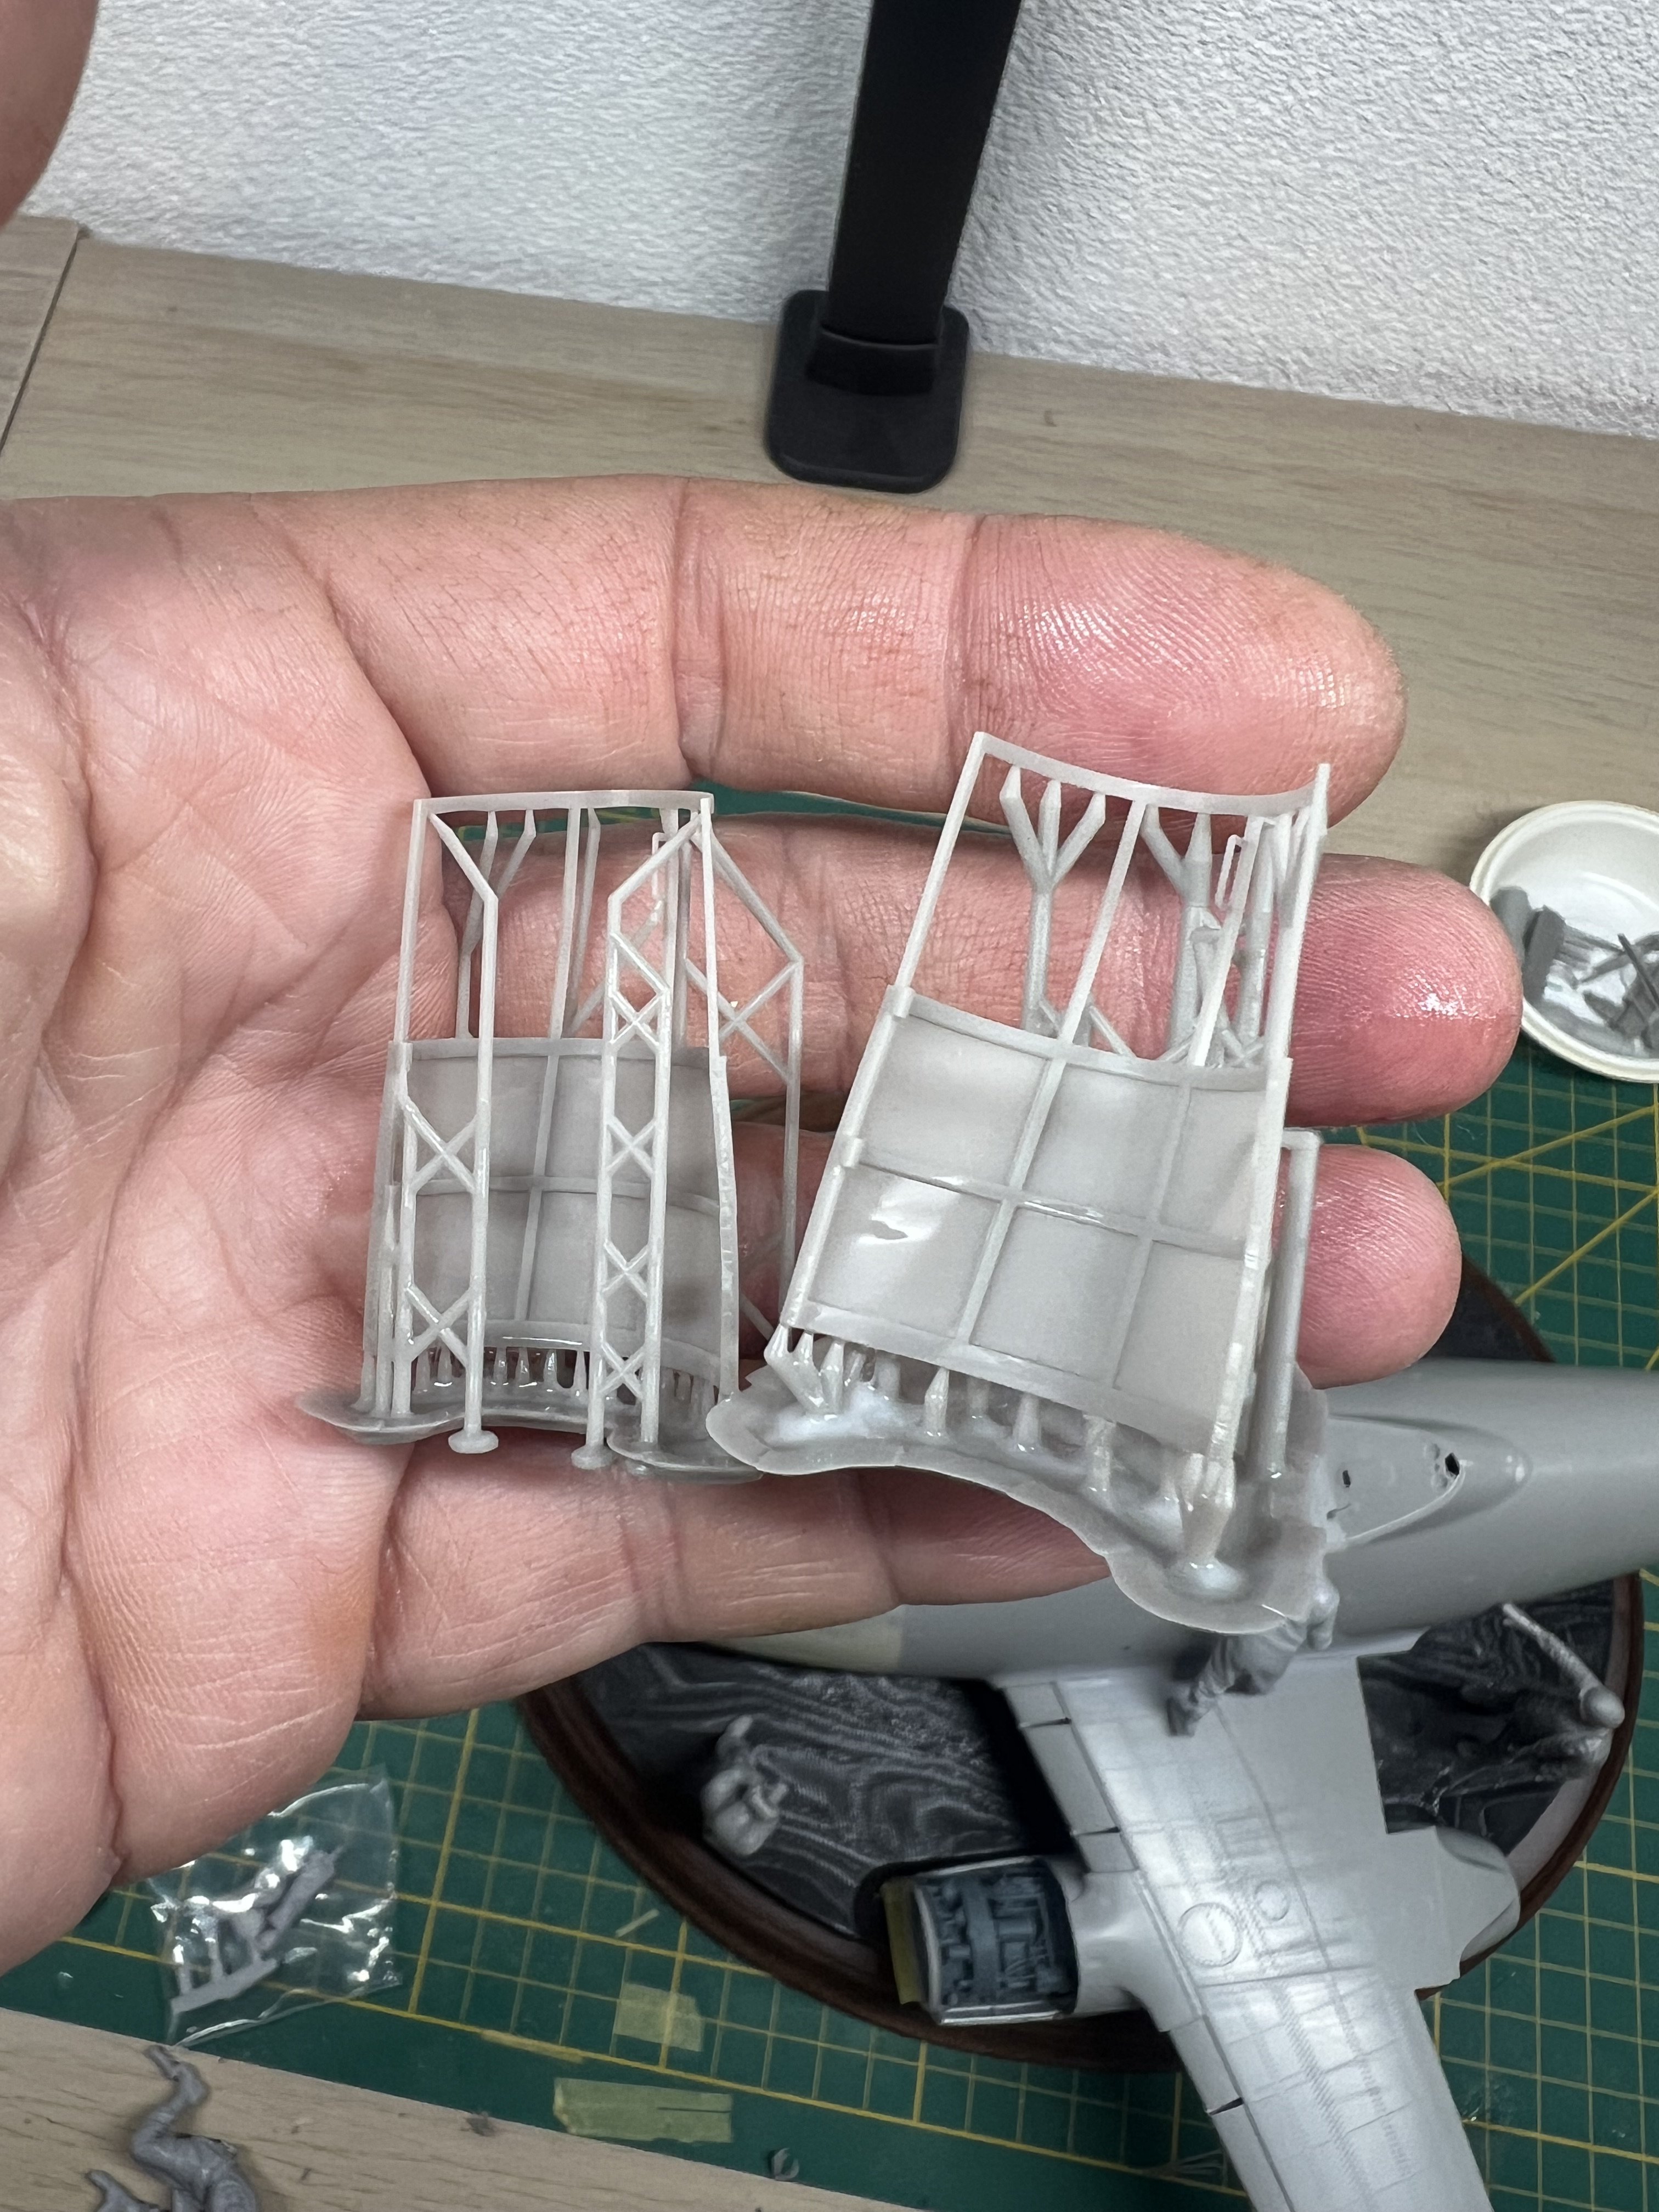
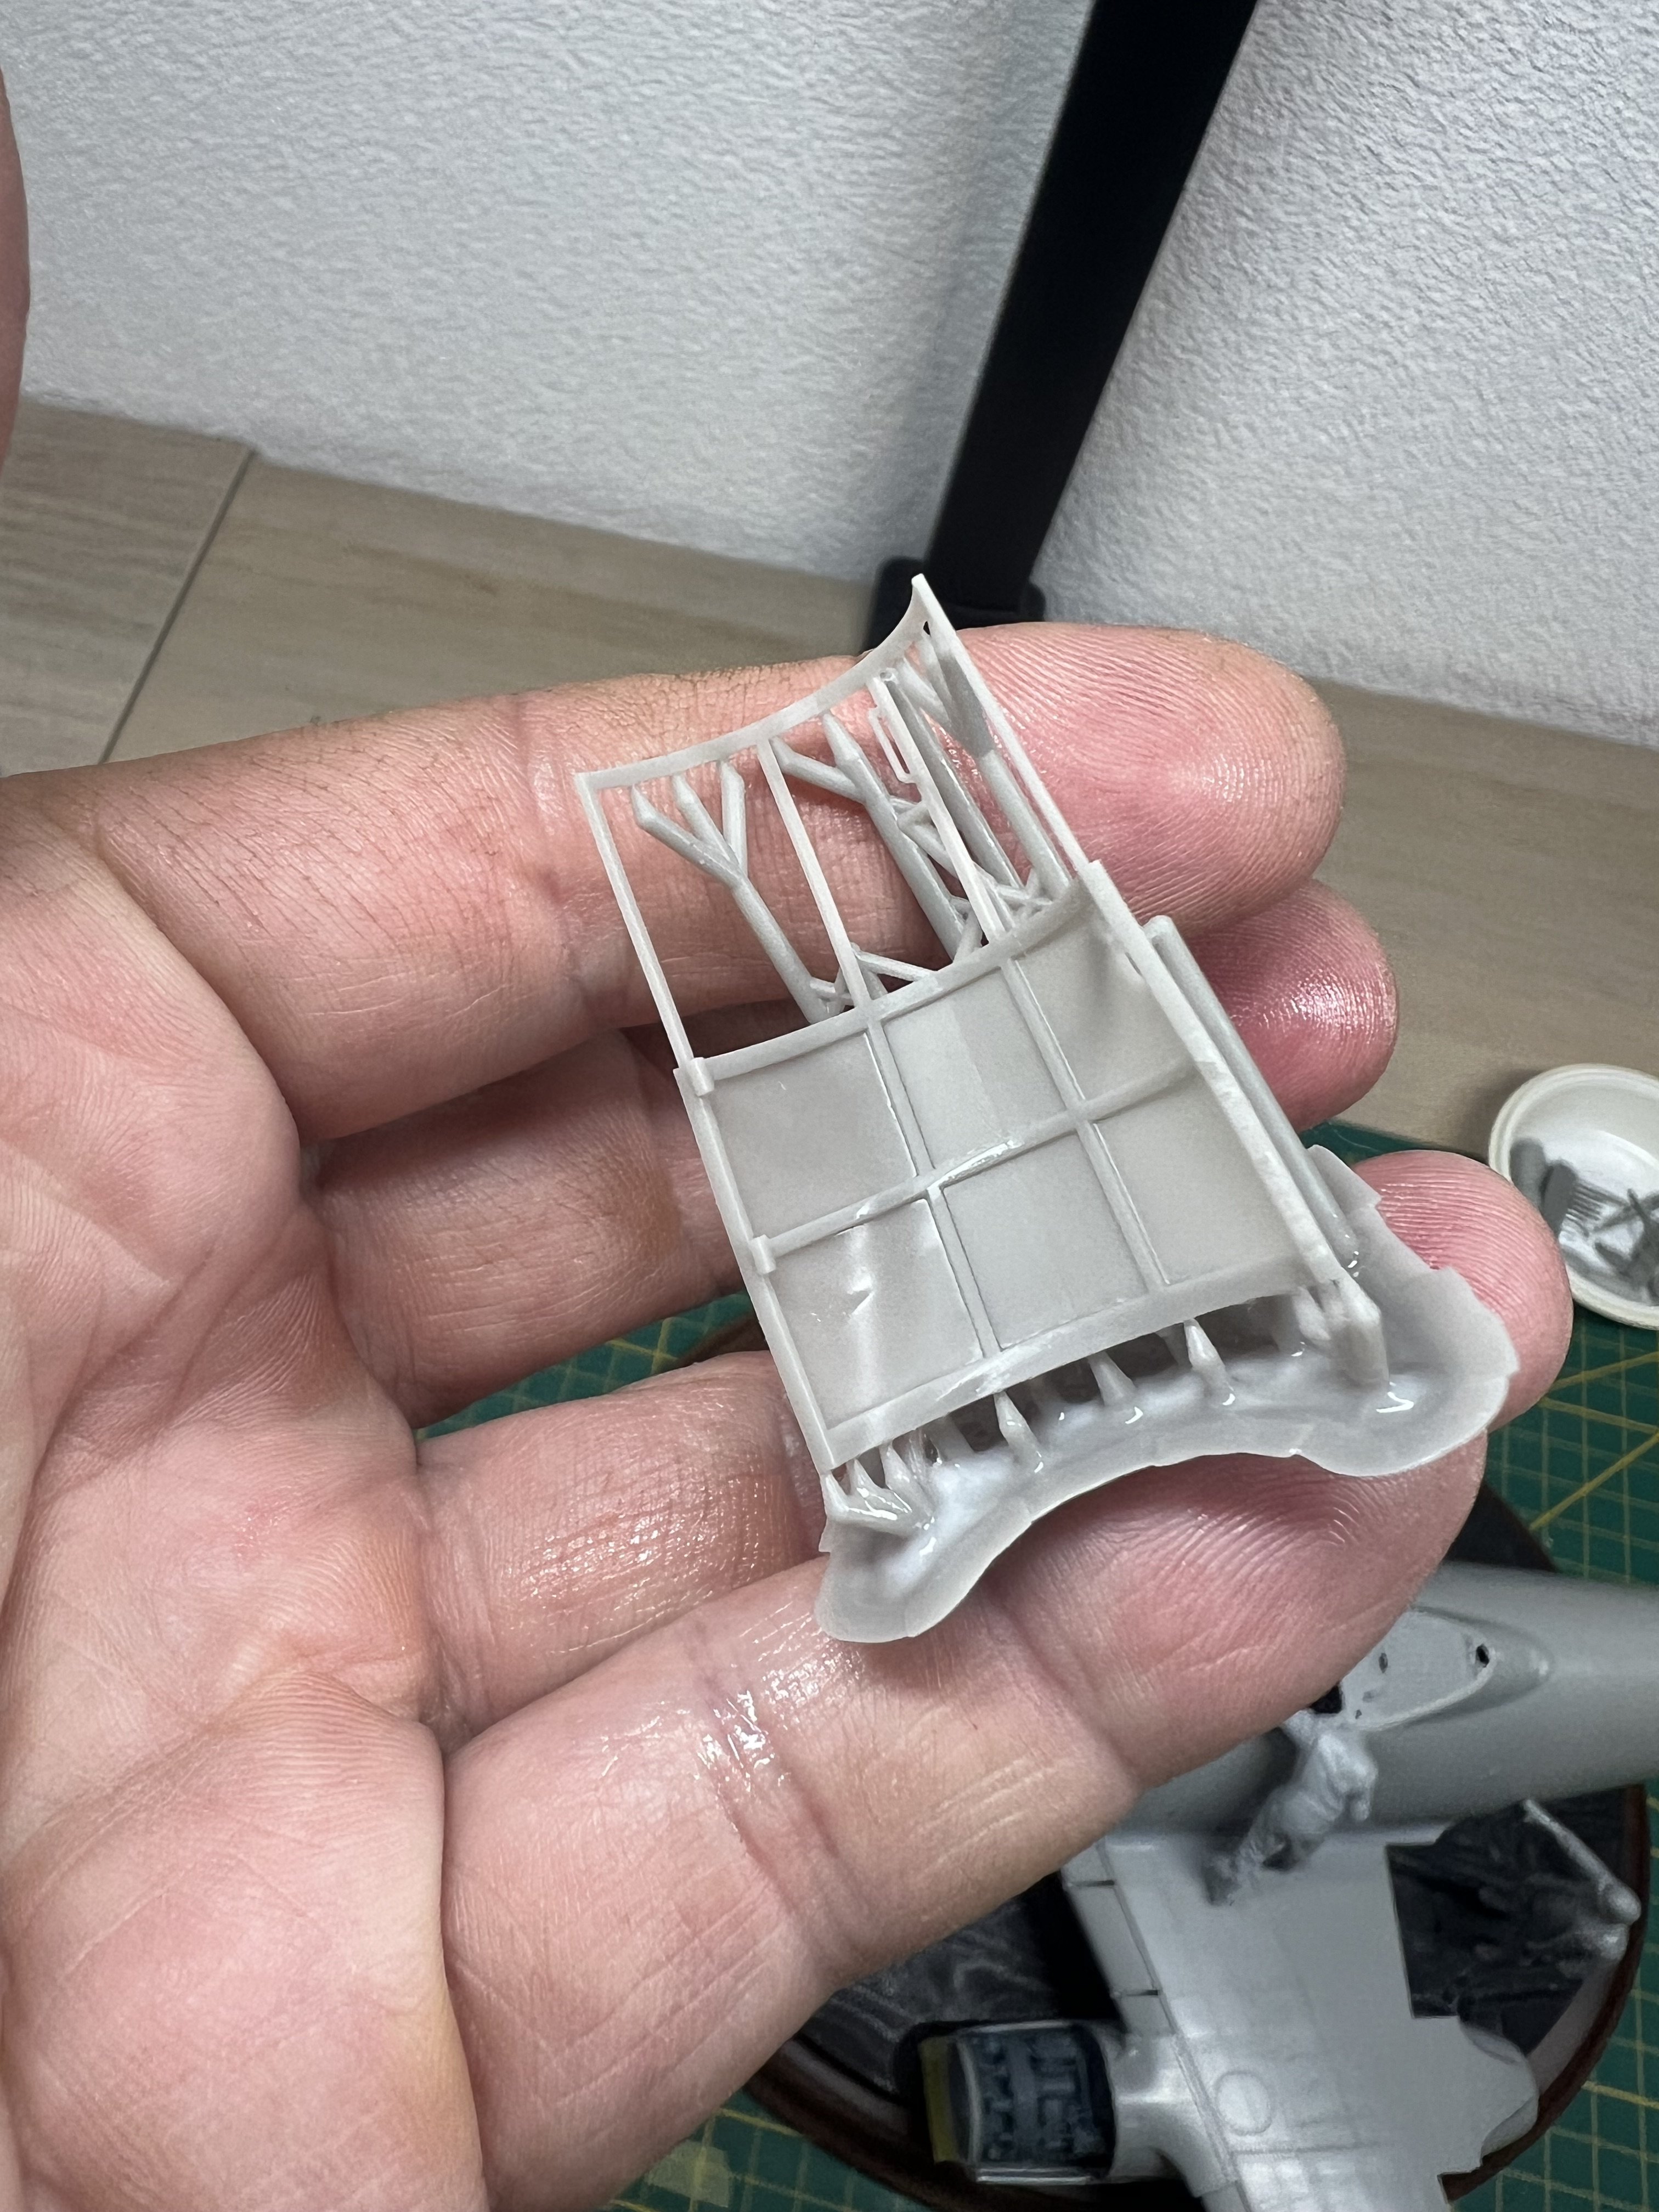
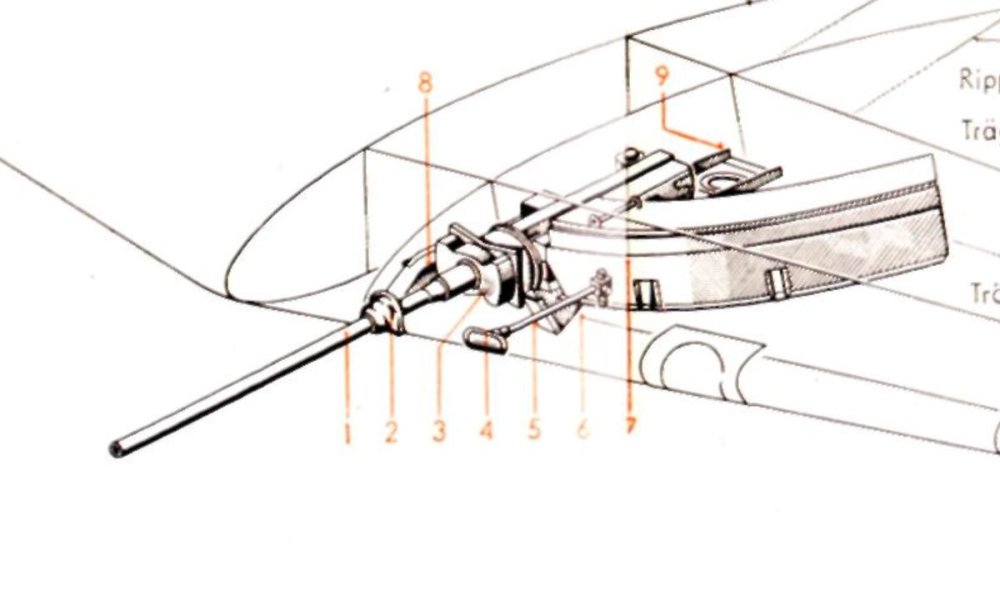
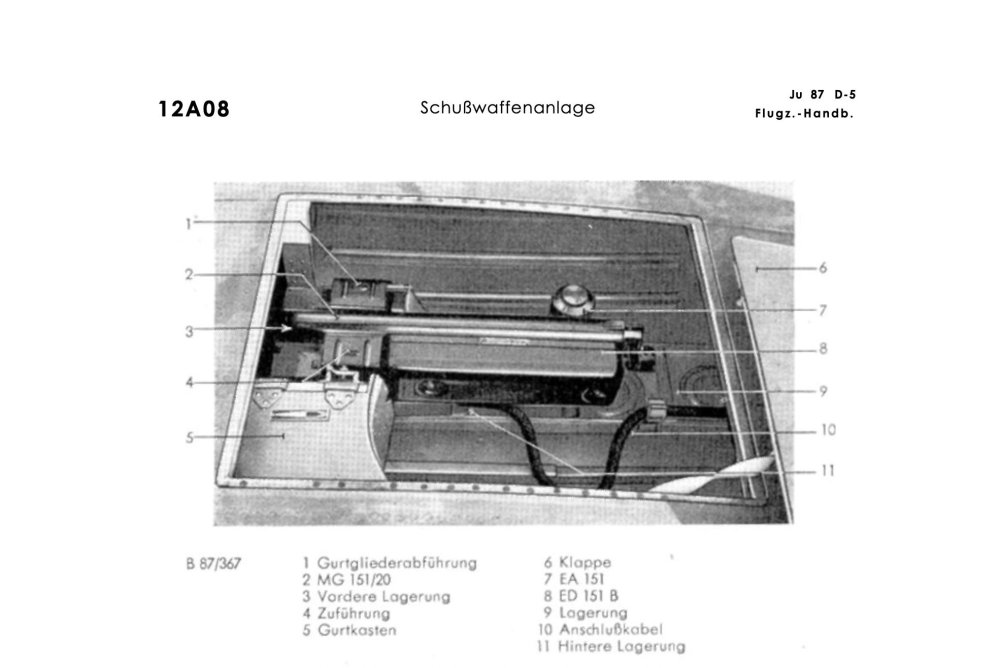
Hi all, Fellow member Martinnfb remembered I said one day I was interested in building a Stuka once. He was insanely kind to gift me a Hasegawa Ju-87D-8 he had in the stash. Not shying away from building multiple projects at the same time I started flipping through my Stuka books. I have an idea, but it's not crystal clear yet. I feel like building two piled up Stuka's with all panels open. I might change my mind a couple of times. A bought the Aladdin models 3d model of a Jumo 211 engine. It has the B radiator hanging underneath, but I will 3D print what I need to make it a souped up version for the Ju-87D. Meanwhile I am researching the Mg151/20 wing guns and 3D drawing the gun bays. This will actually be the easiest part. Aires cockpit is ordered. 1Manarmy masks. HGW seatbelts. Eduard exterior.

-
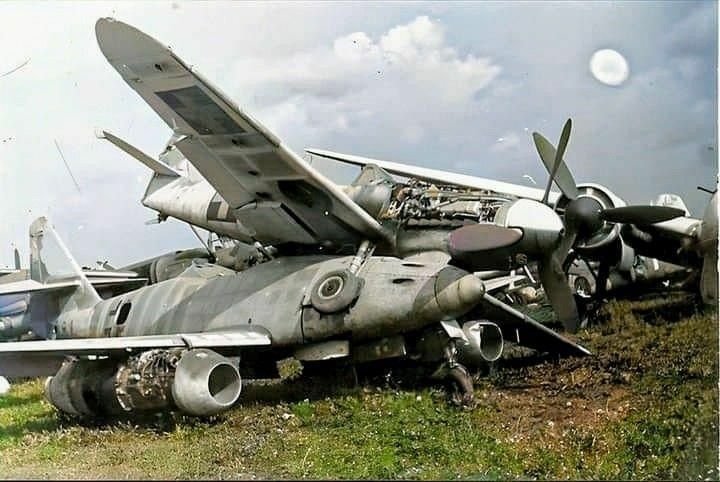
1/32 ME-262A-2a/U2
JeroenPeters replied to JeroenPeters's topic in LSM 1/35 and Larger Work In Progress
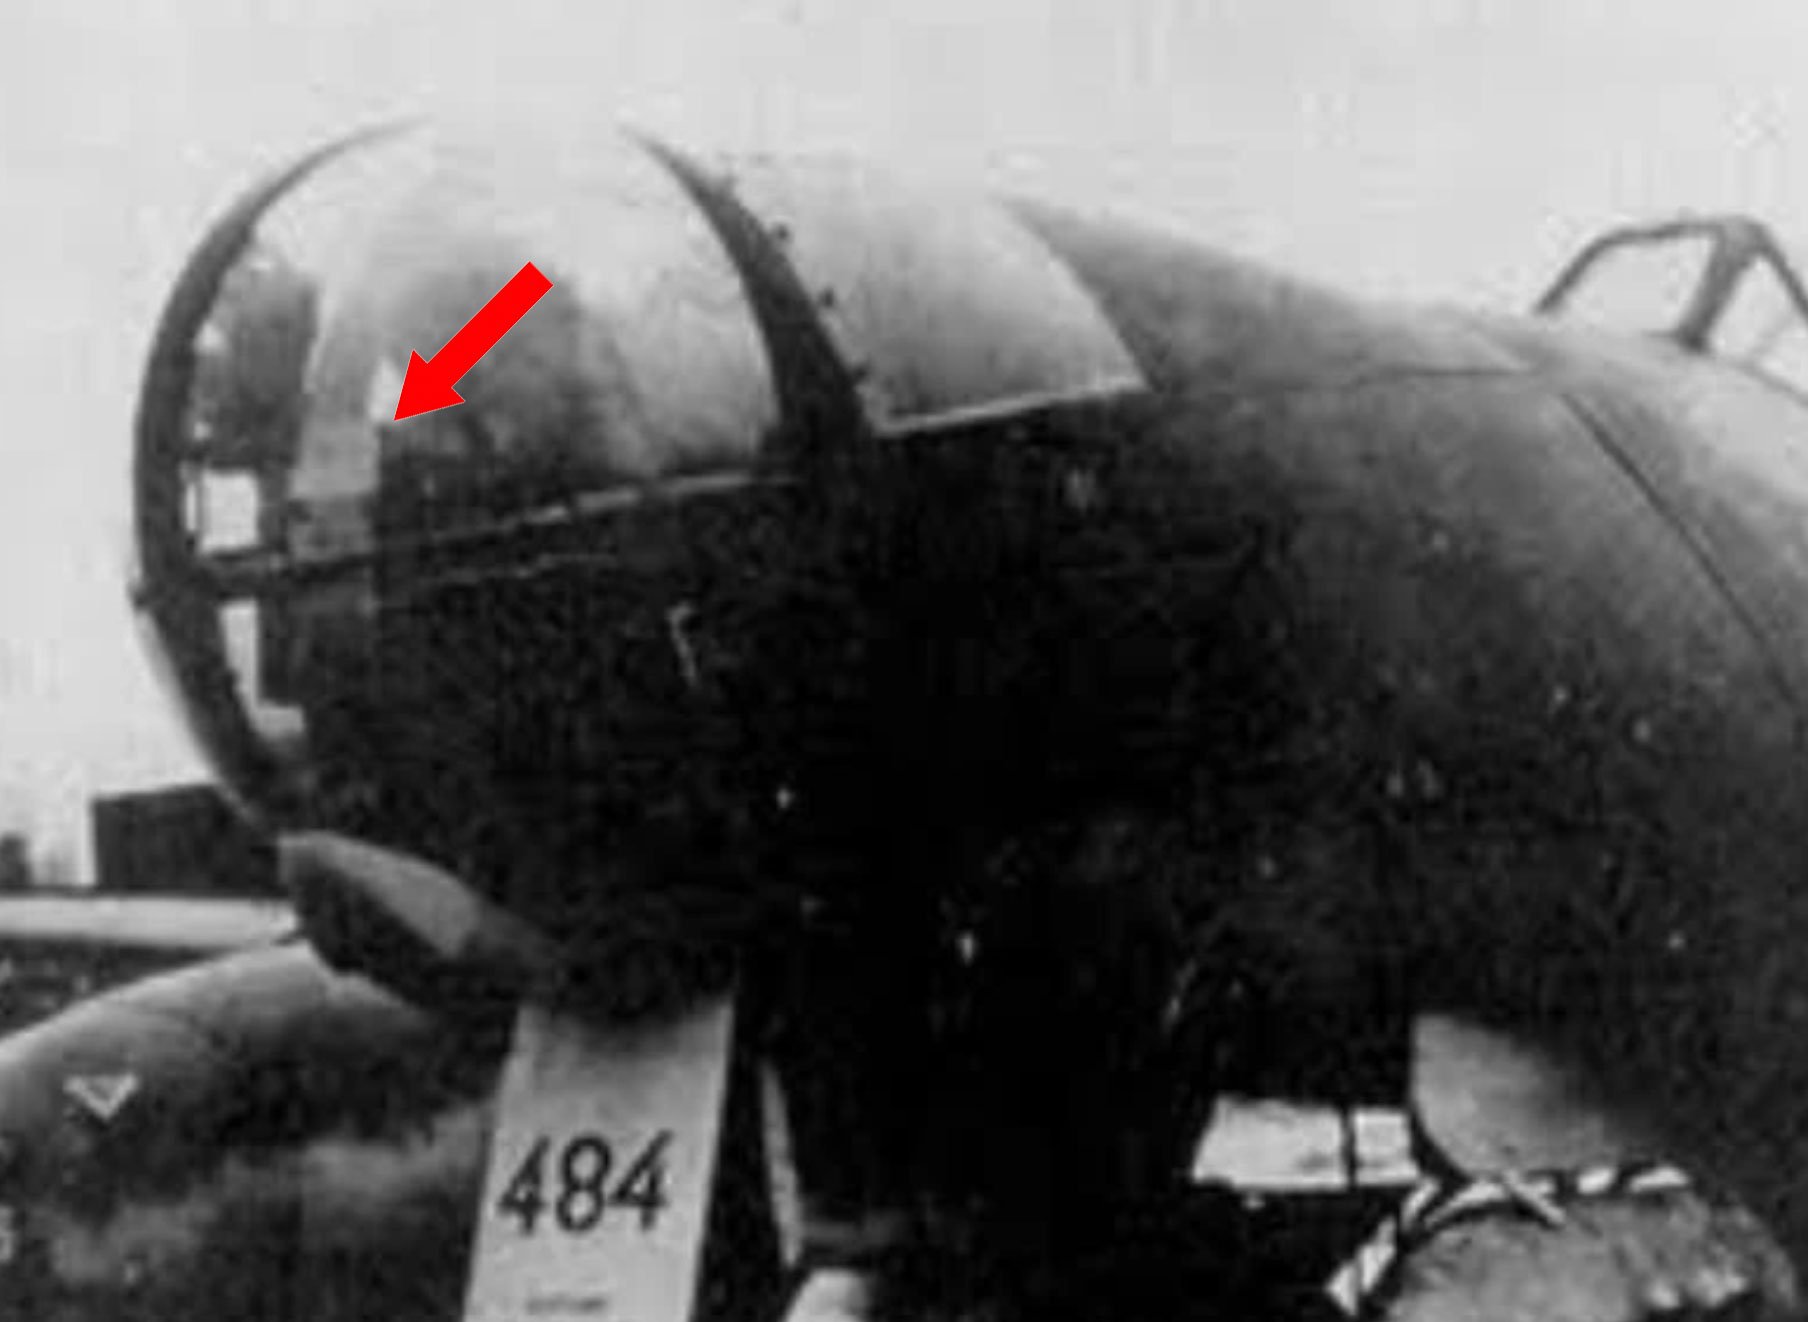
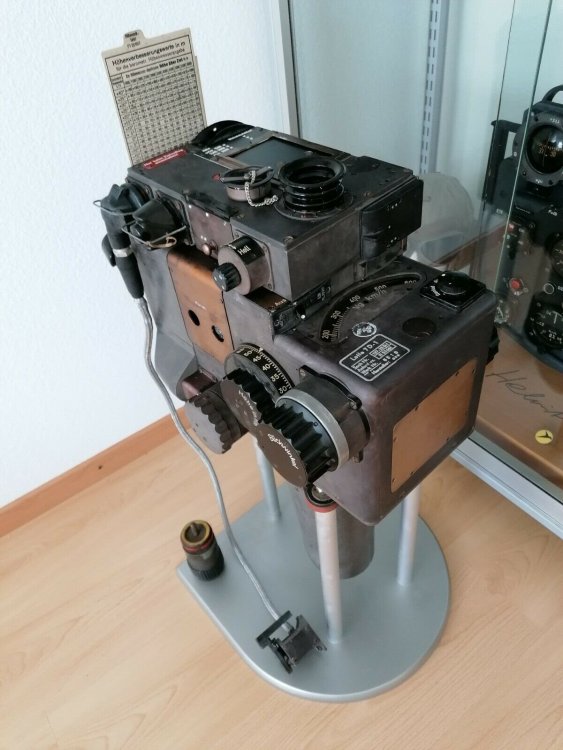
In this photo you can see the extractable chart... extracted from the metal case at the head of the bombsight.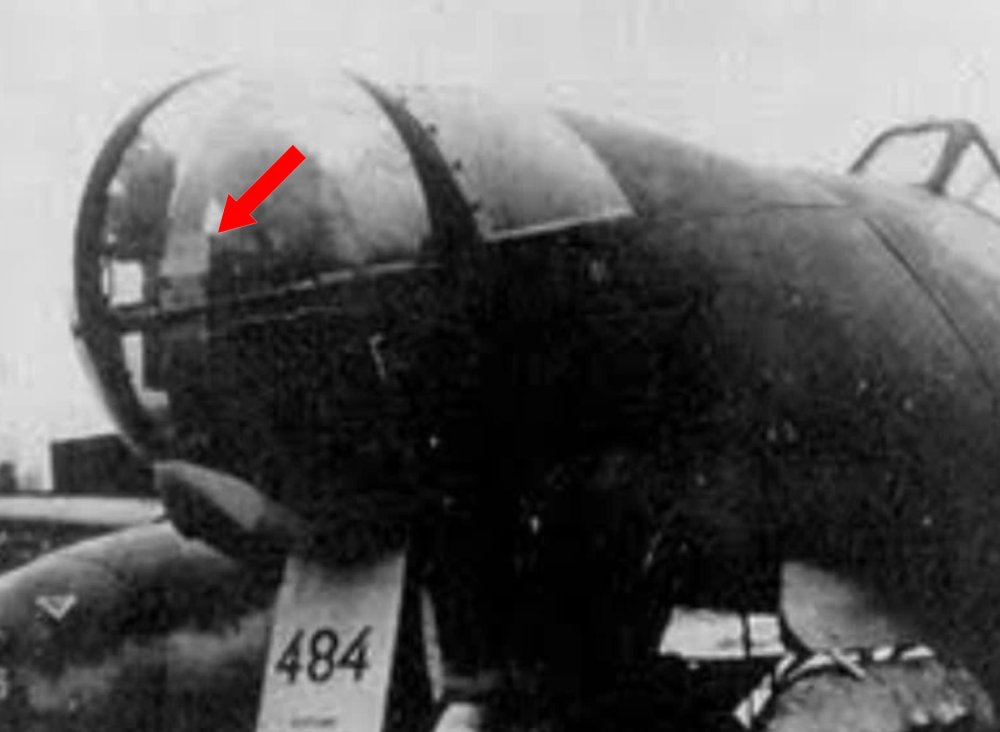
-
1/32 ME-262A-2a/U2
JeroenPeters replied to JeroenPeters's topic in LSM 1/35 and Larger Work In Progress
Lofte bombsight with bracket printed. Huge improvement over MDC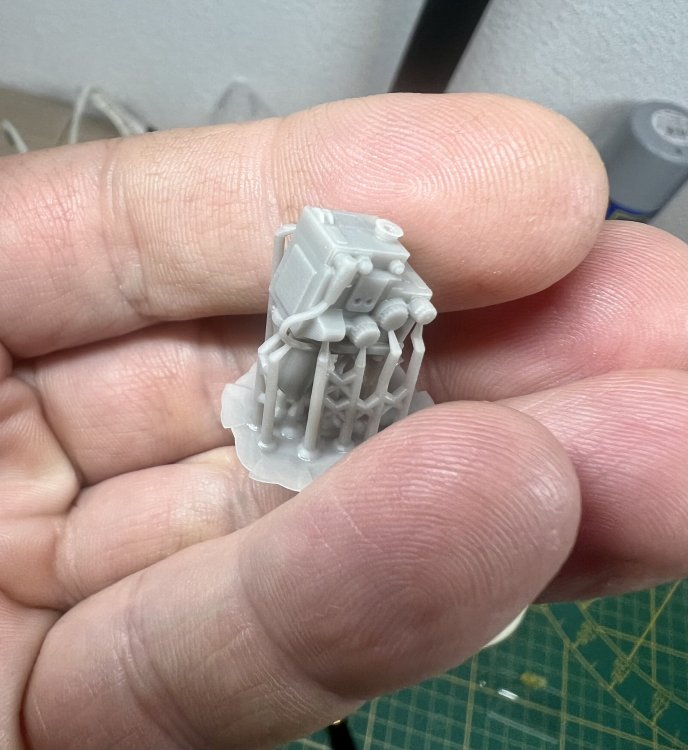
-
1/32 ME-262A-2a/U2
JeroenPeters replied to JeroenPeters's topic in LSM 1/35 and Larger Work In Progress
Pretty easy i reckon. 3D design a tailwheel well, tailwheel and doors. Close up the nose and delete the nose gear door seams. And probably some other bits and bobs. -
1/32 ME-262A-2a/U2
JeroenPeters replied to JeroenPeters's topic in LSM 1/35 and Larger Work In Progress
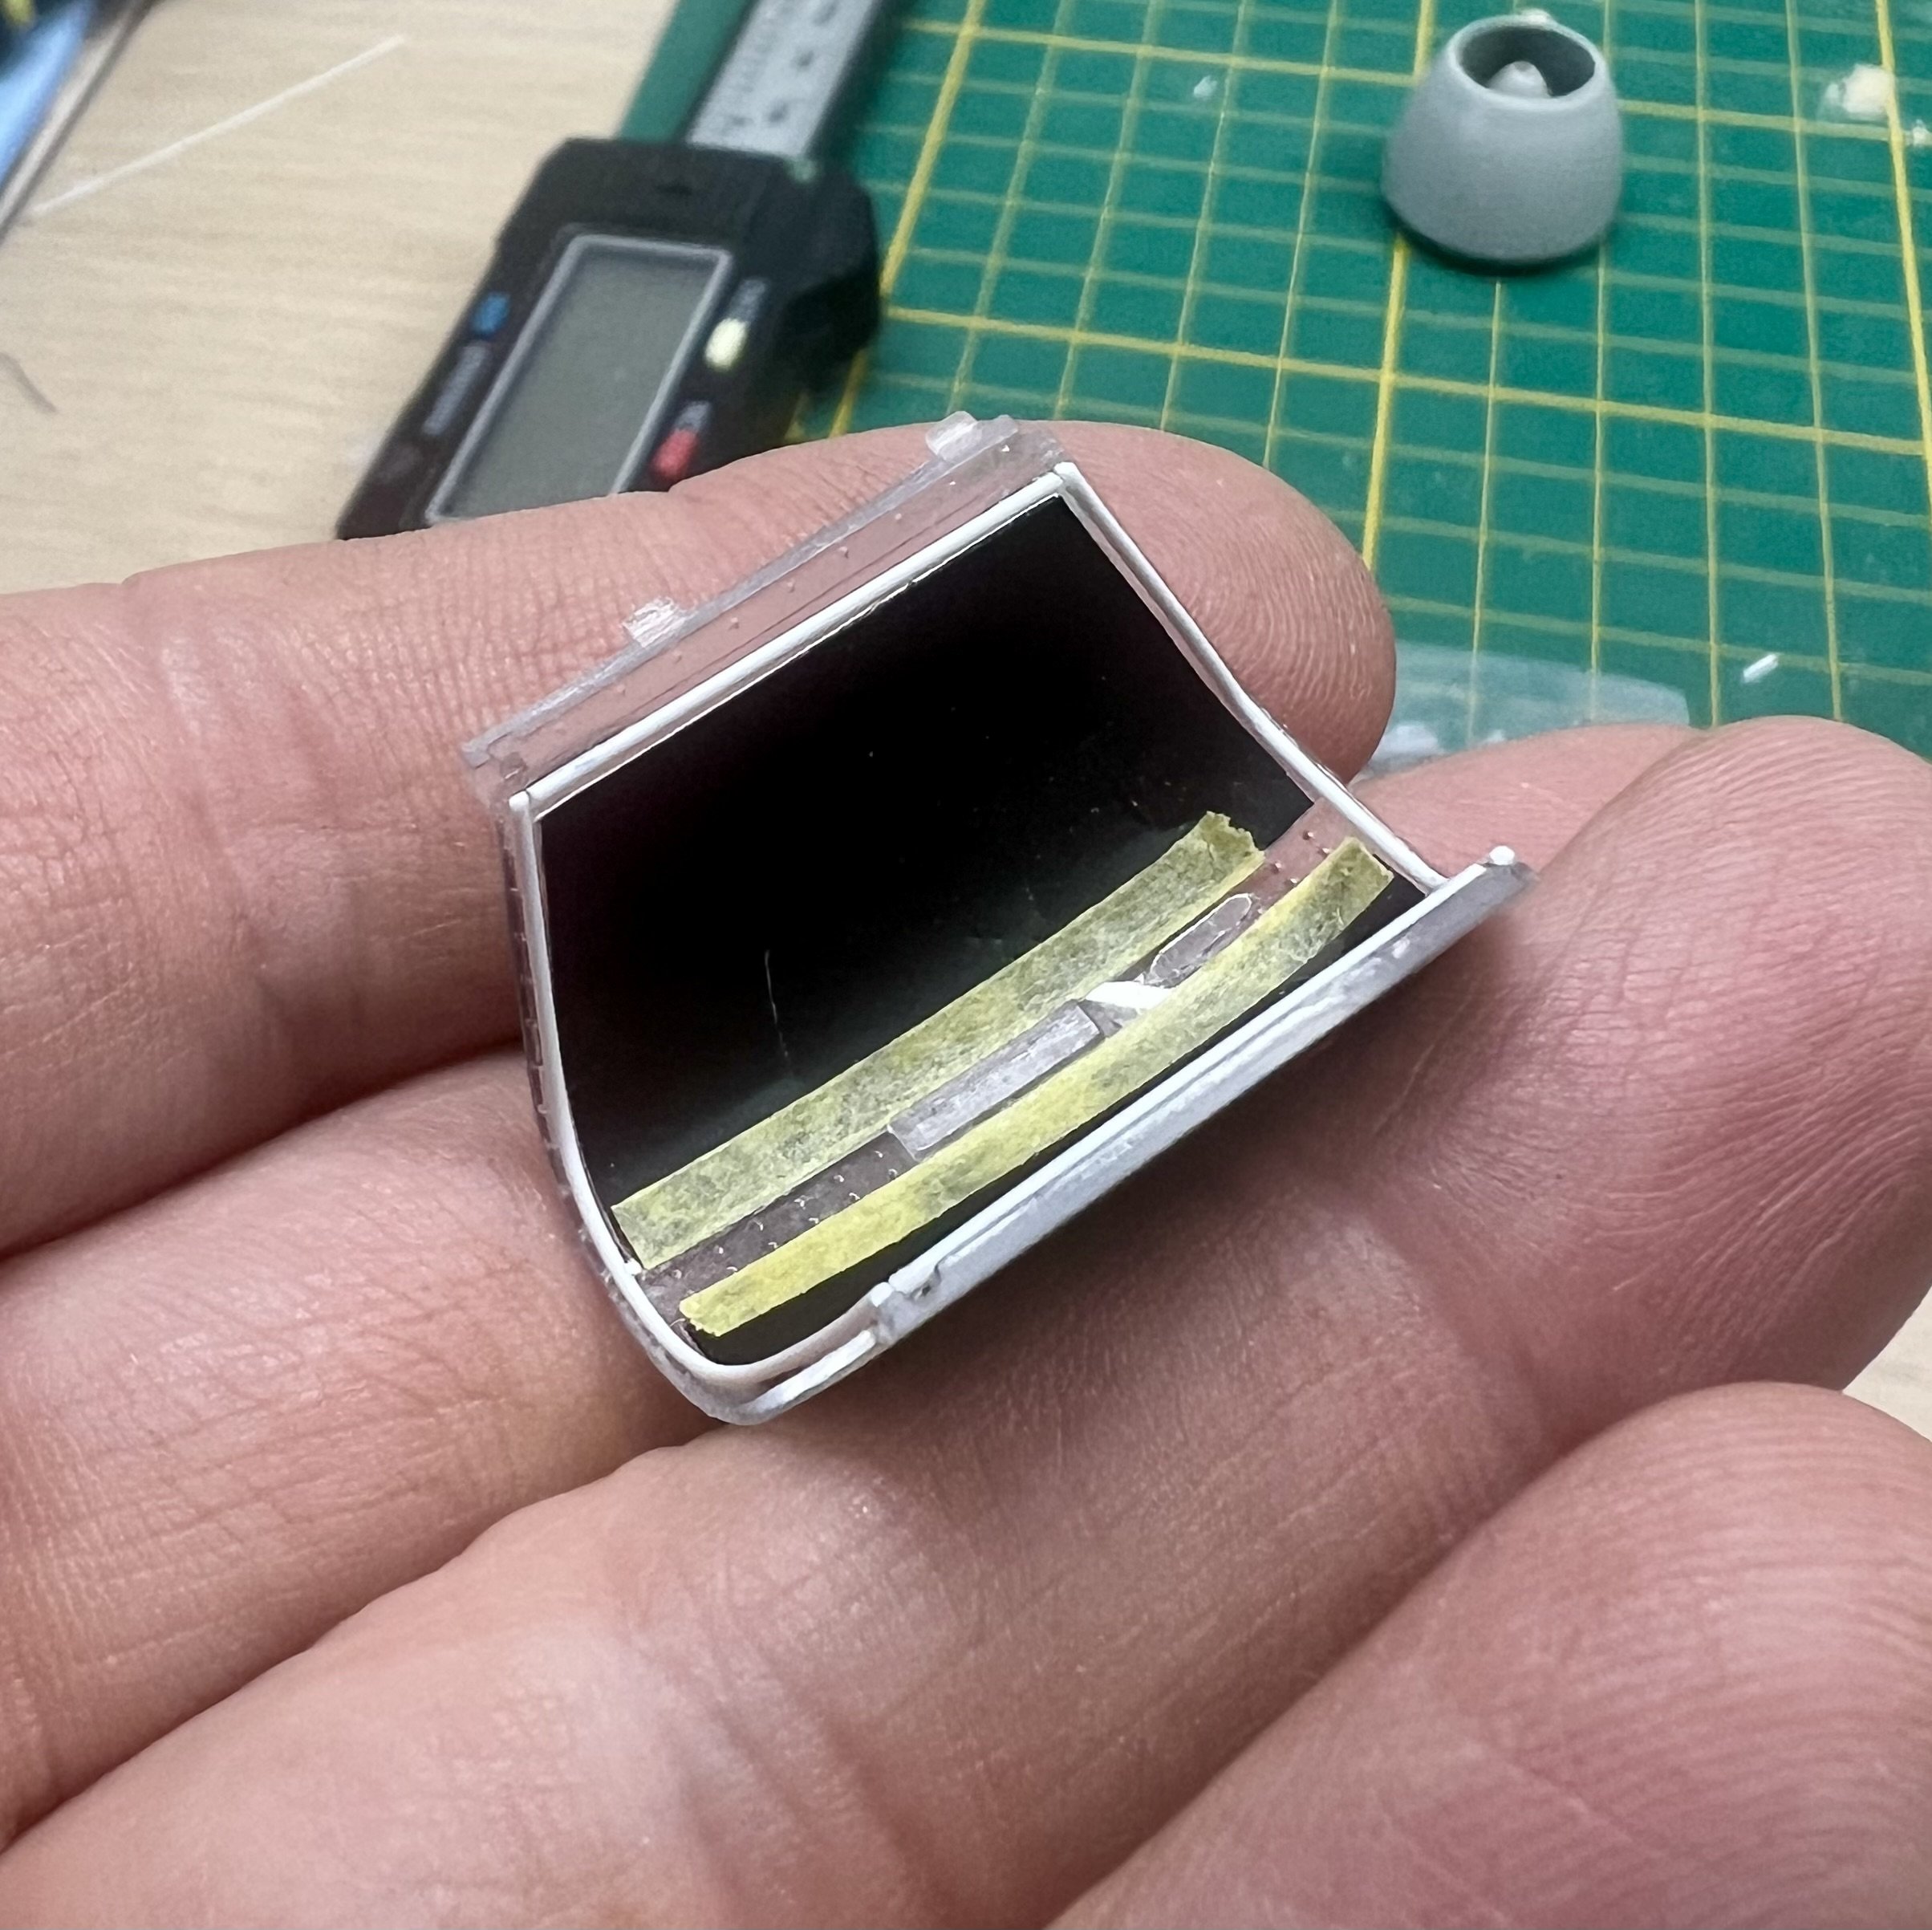
Drew the bracket and started adding the wiring and bomb release 'remote'. Already printed the Lofte bombsight a few times, but I'm siure the new printer gives better detail.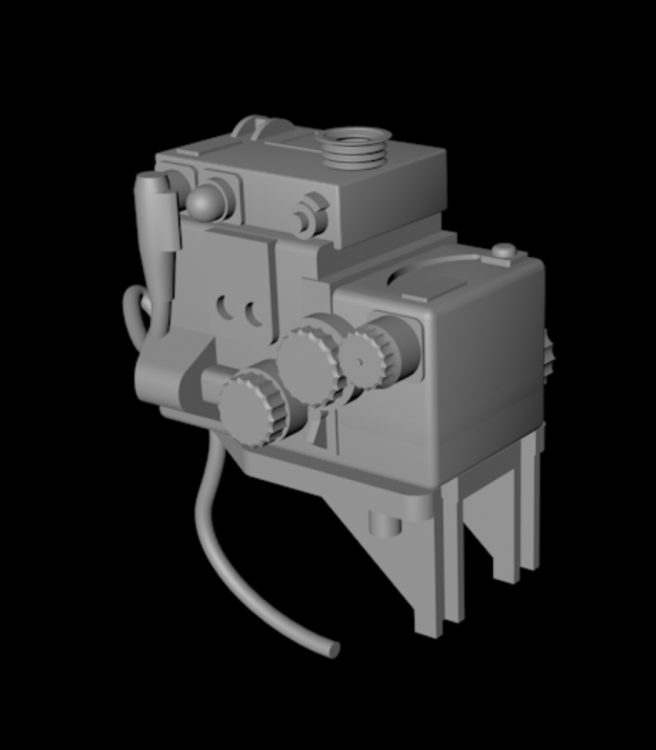
-
1/32 ME-262A-2a/U2
JeroenPeters replied to JeroenPeters's topic in LSM 1/35 and Larger Work In Progress
Reprinting the canopy tomorrow, together with a positive vacform shape to fashion the glass. The canopy needed to be 1mm longer. Adding tubular framing to the inside of the canopy hood and need to add the lock and handhold. Also having to 3d model the gunsight bracket. Seriously every single MDC part is bend, foggy, shrunken, etc.
-
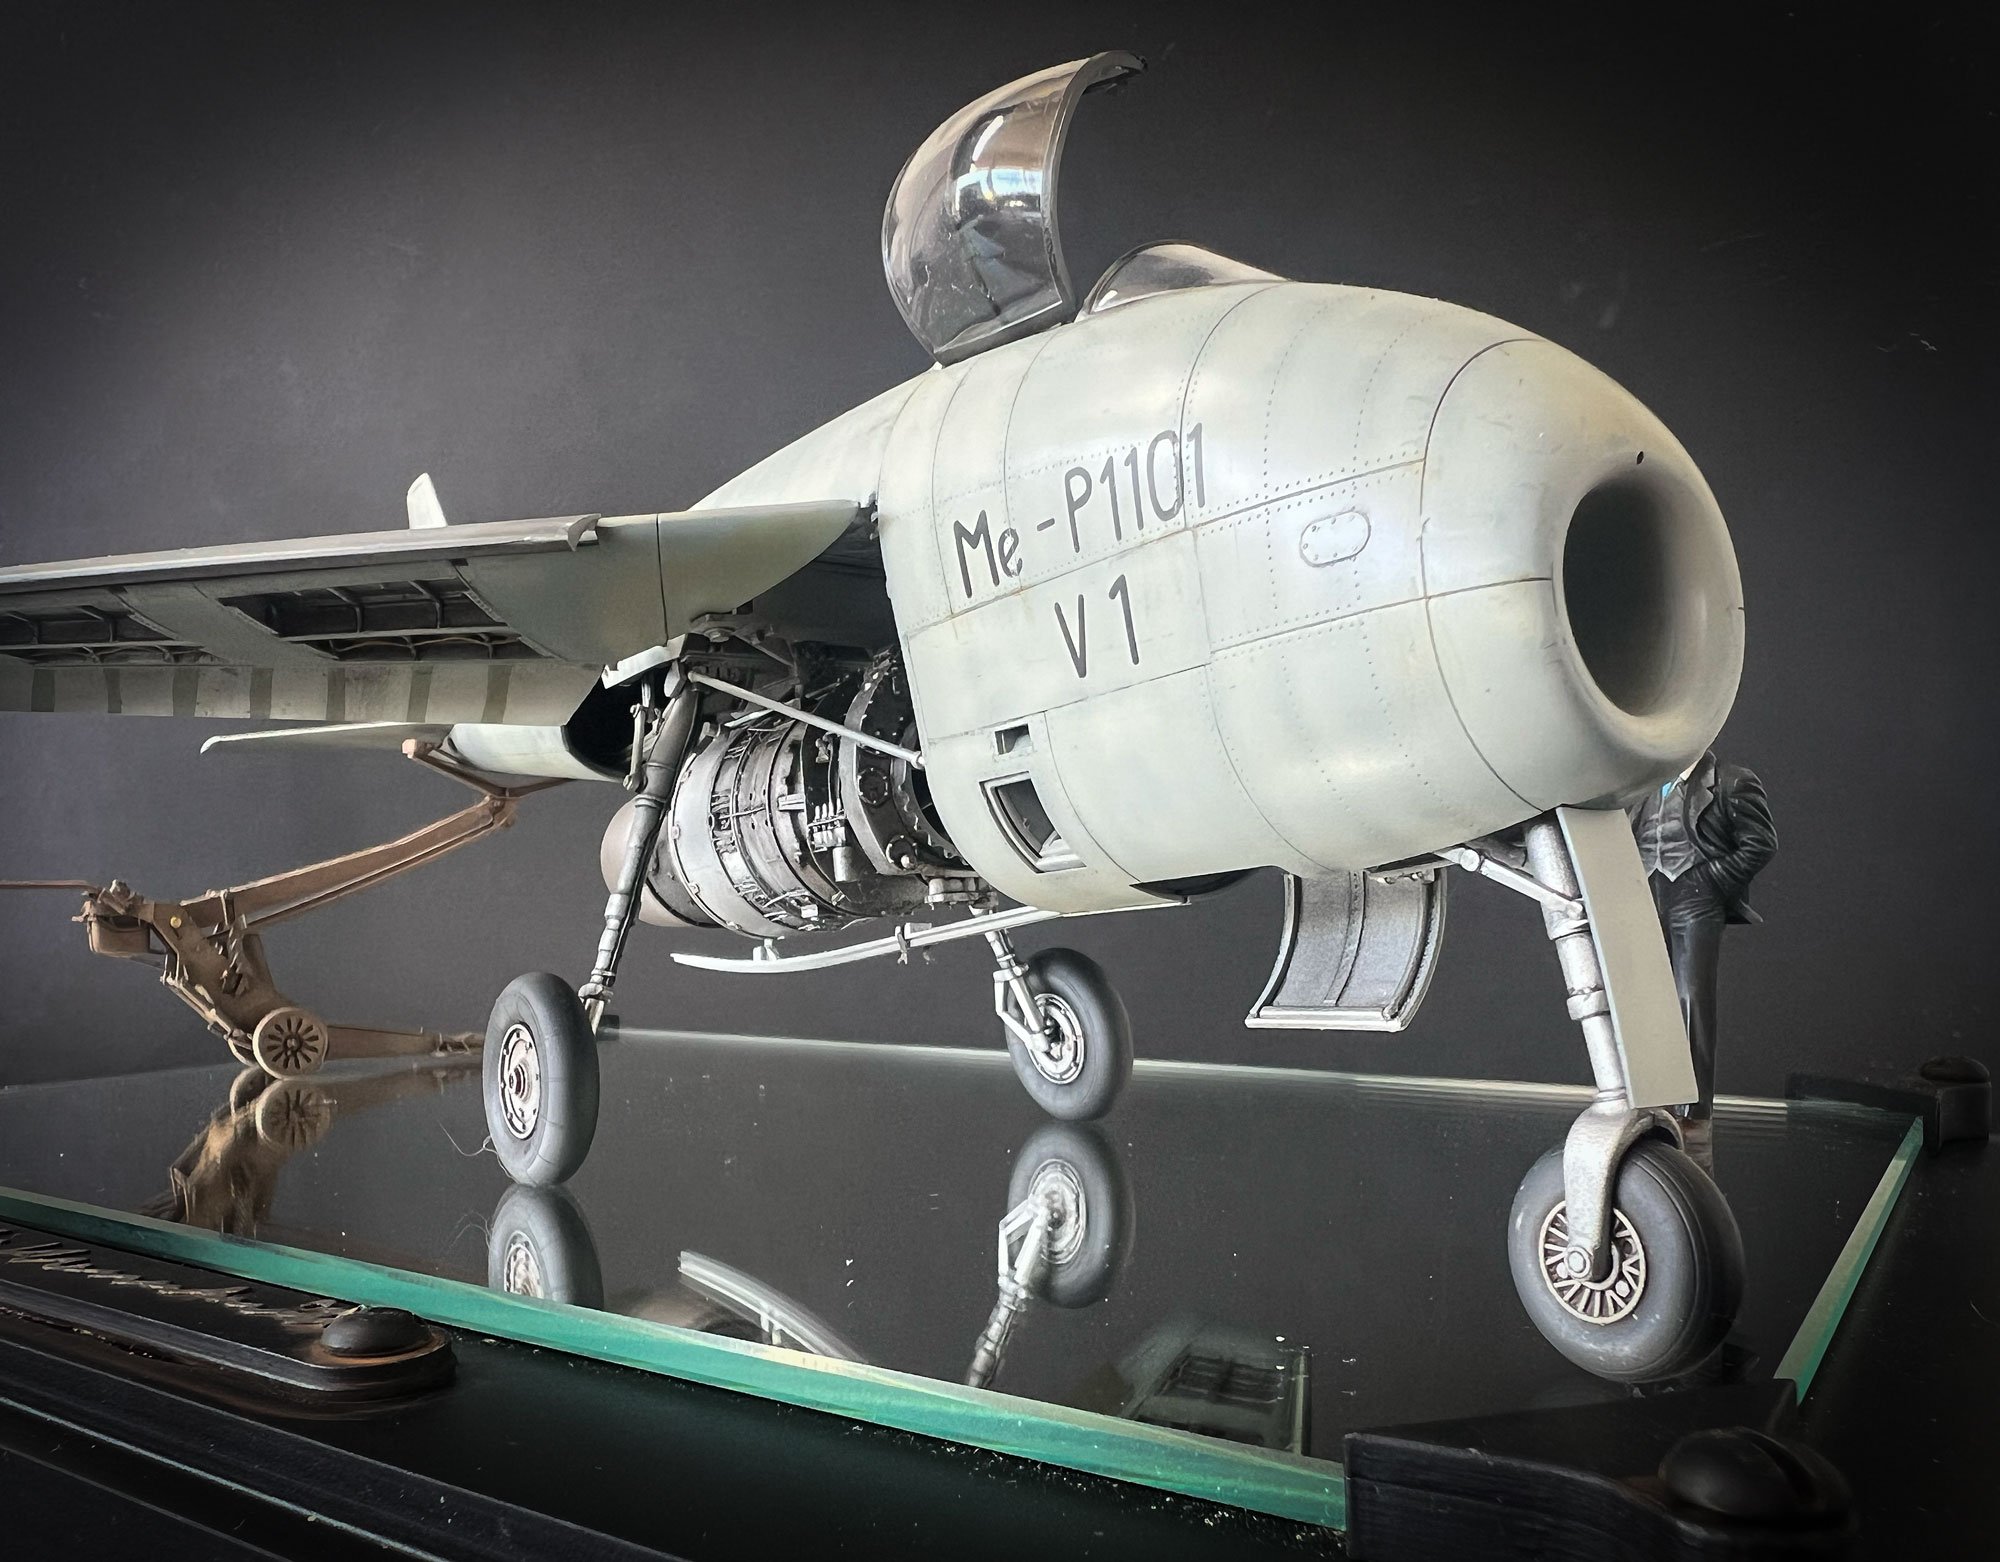
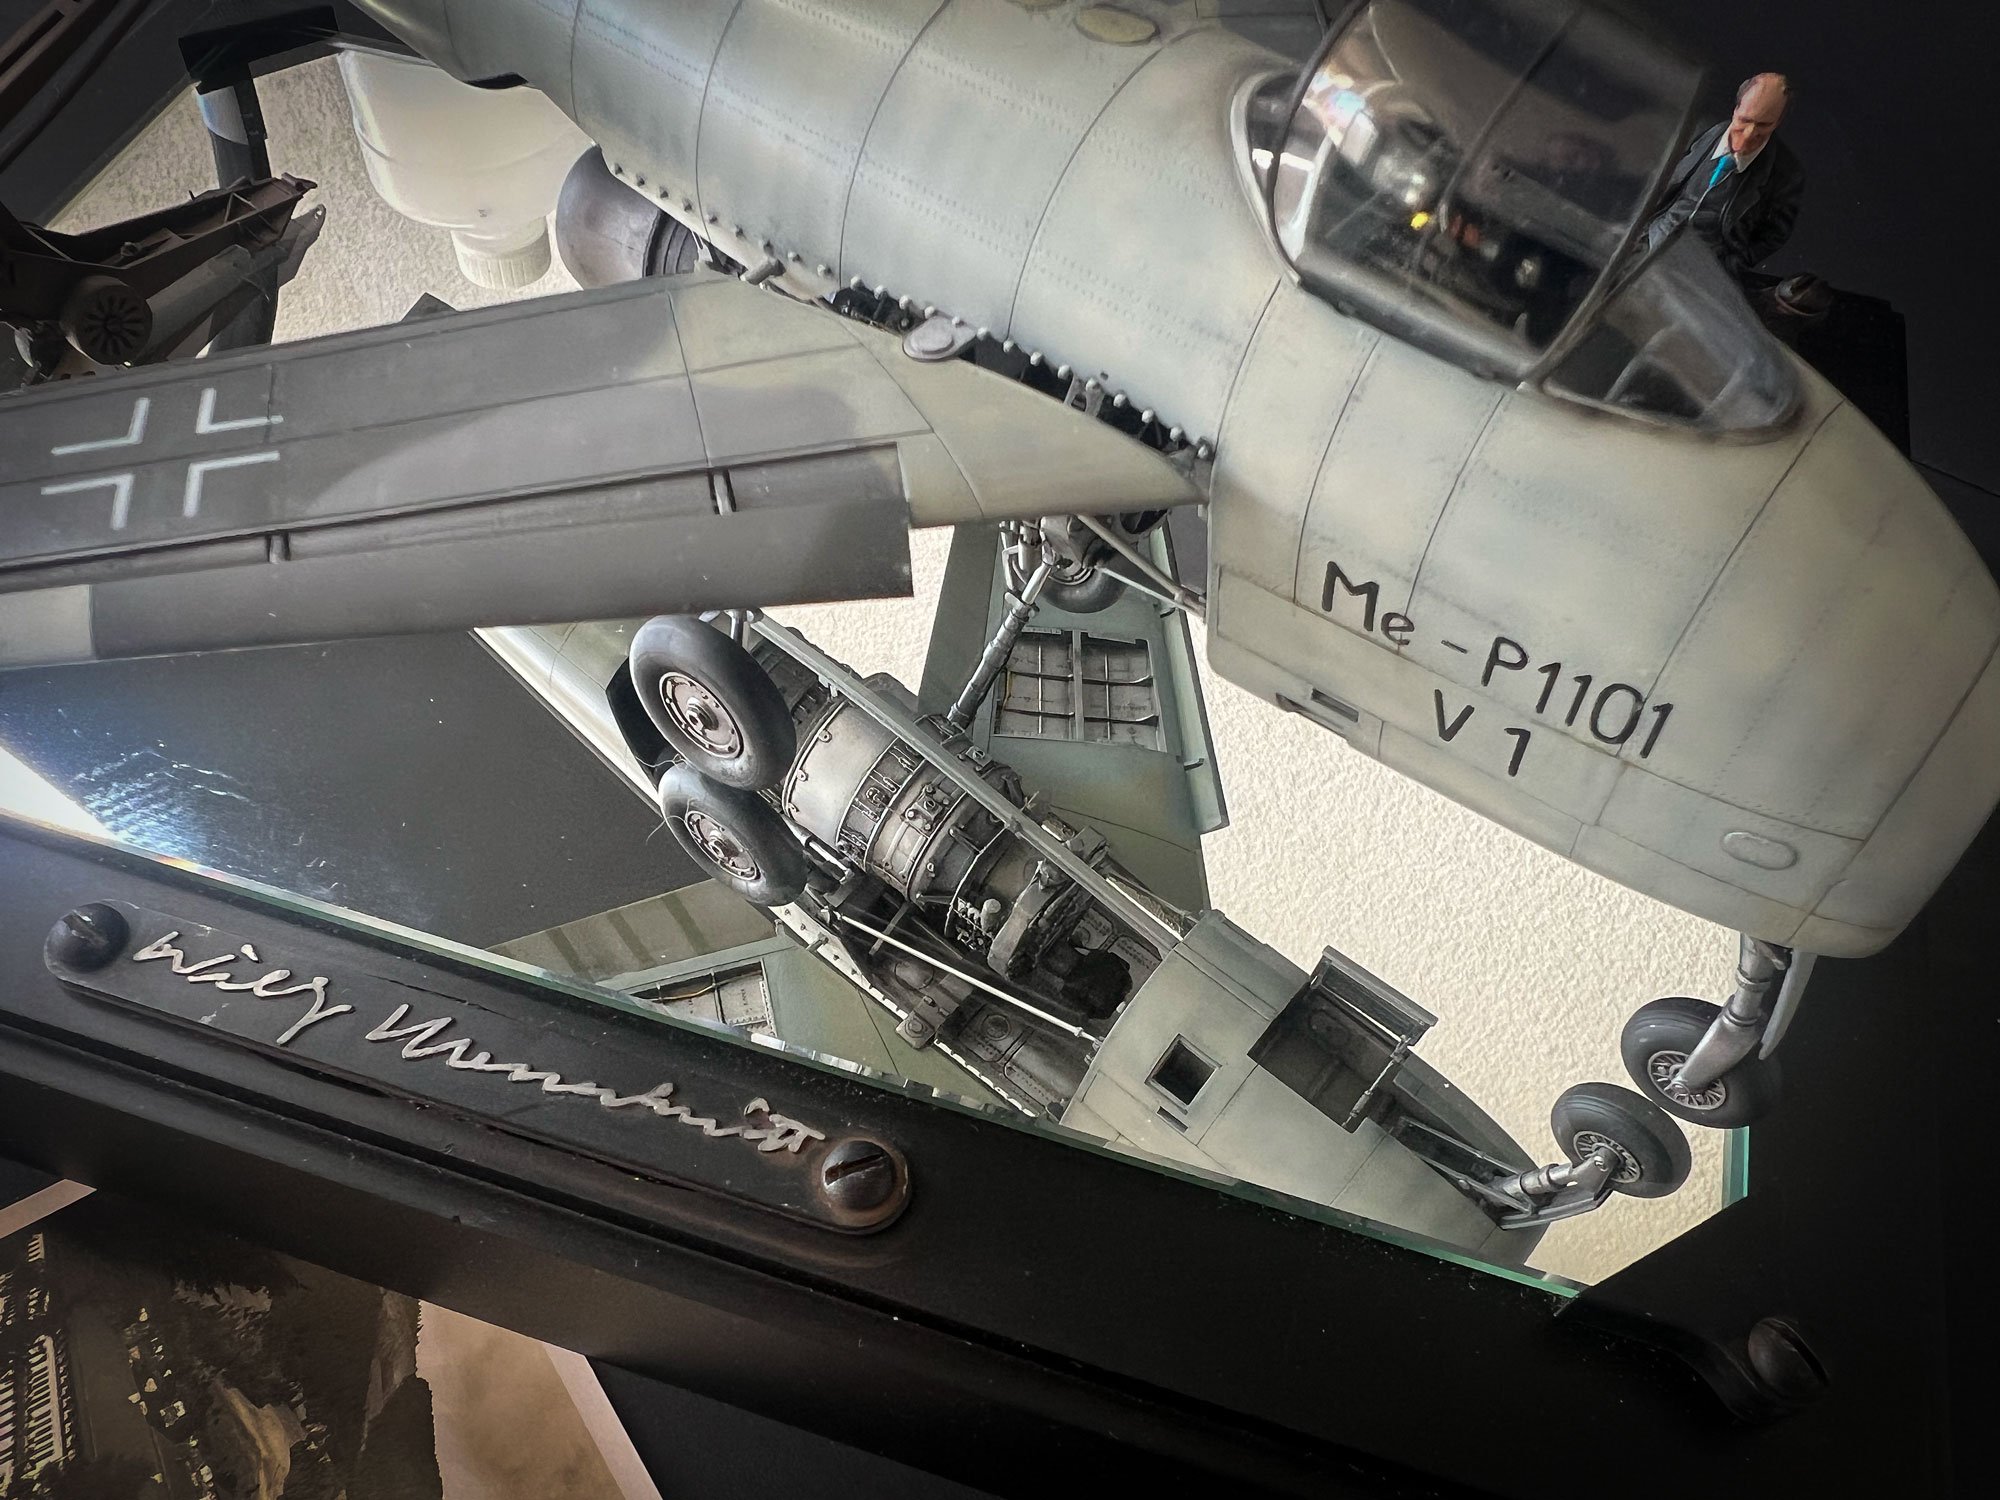
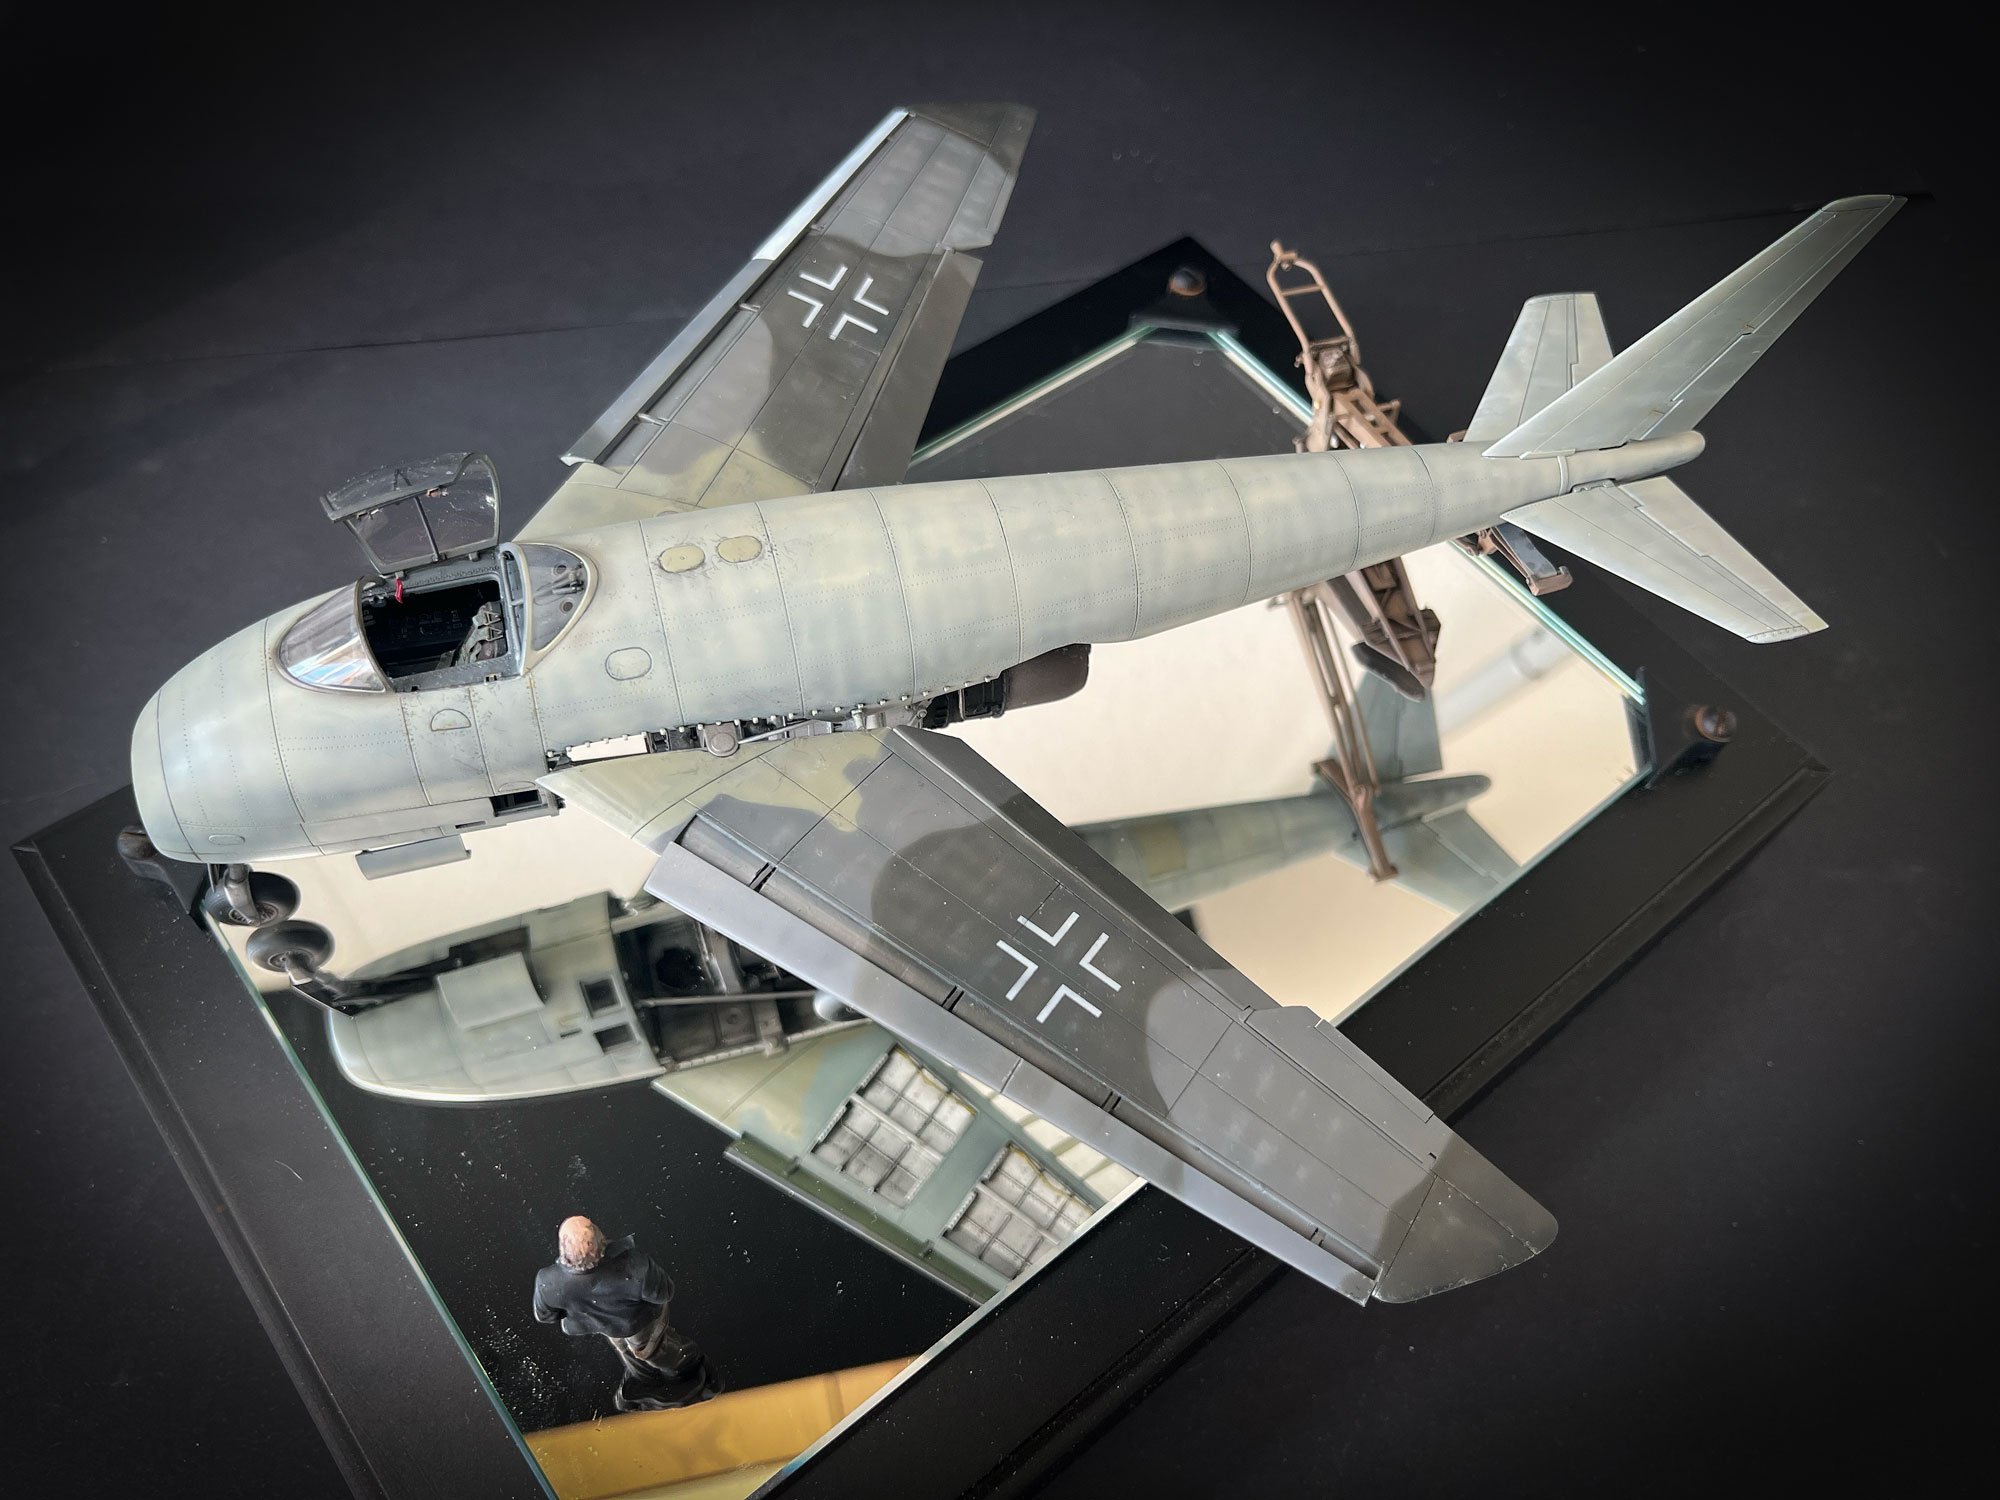
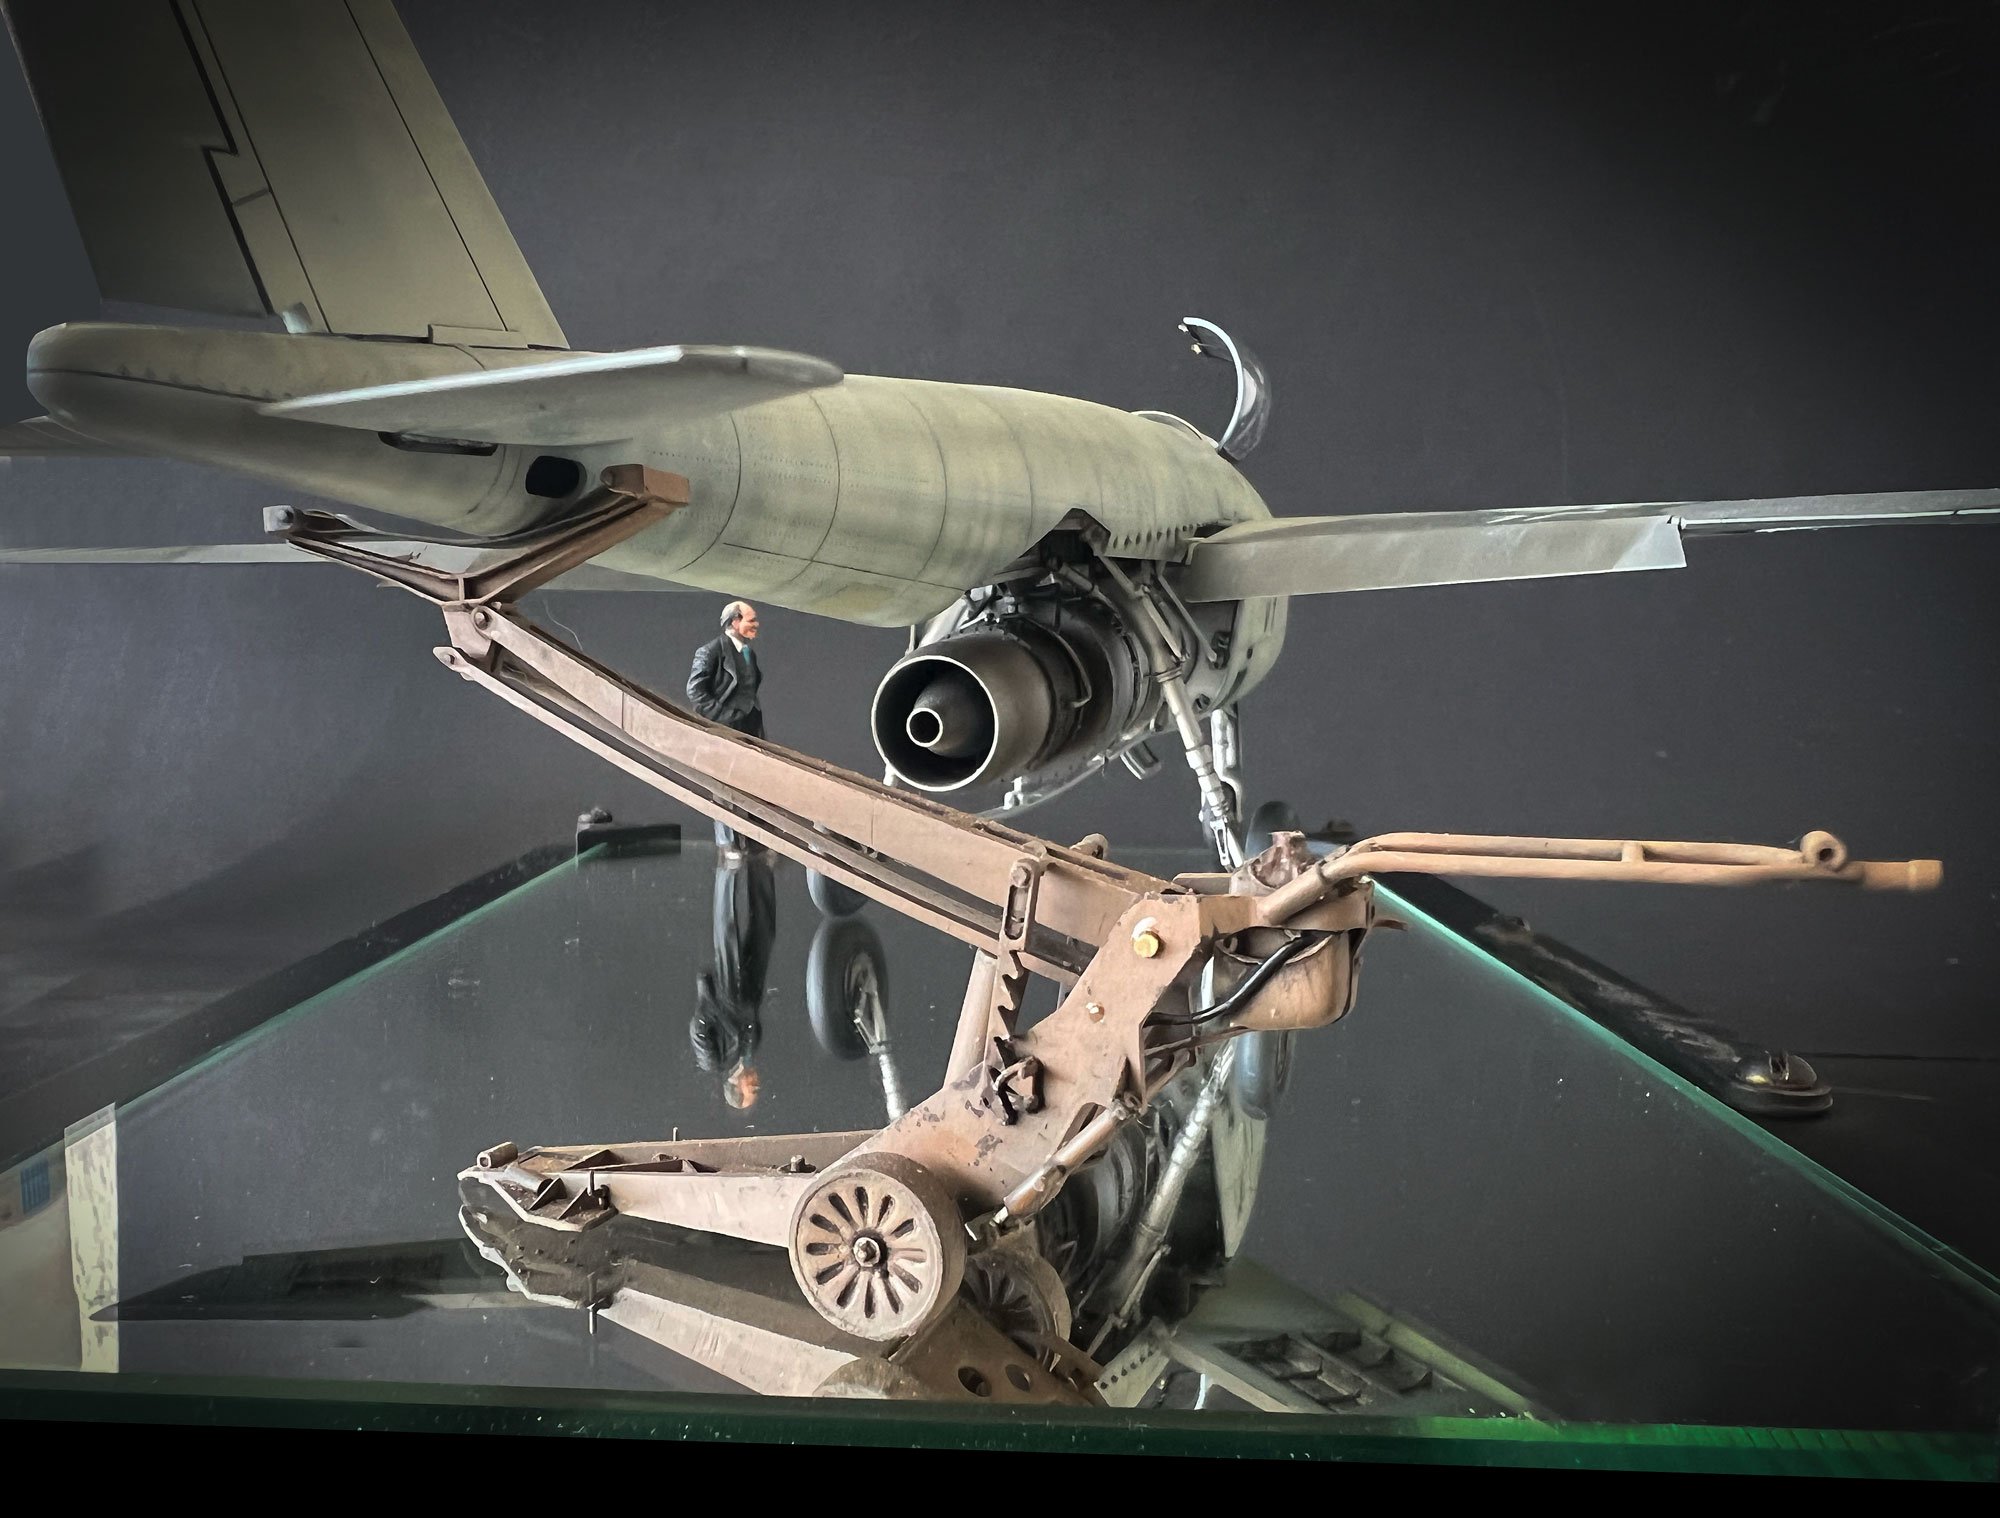
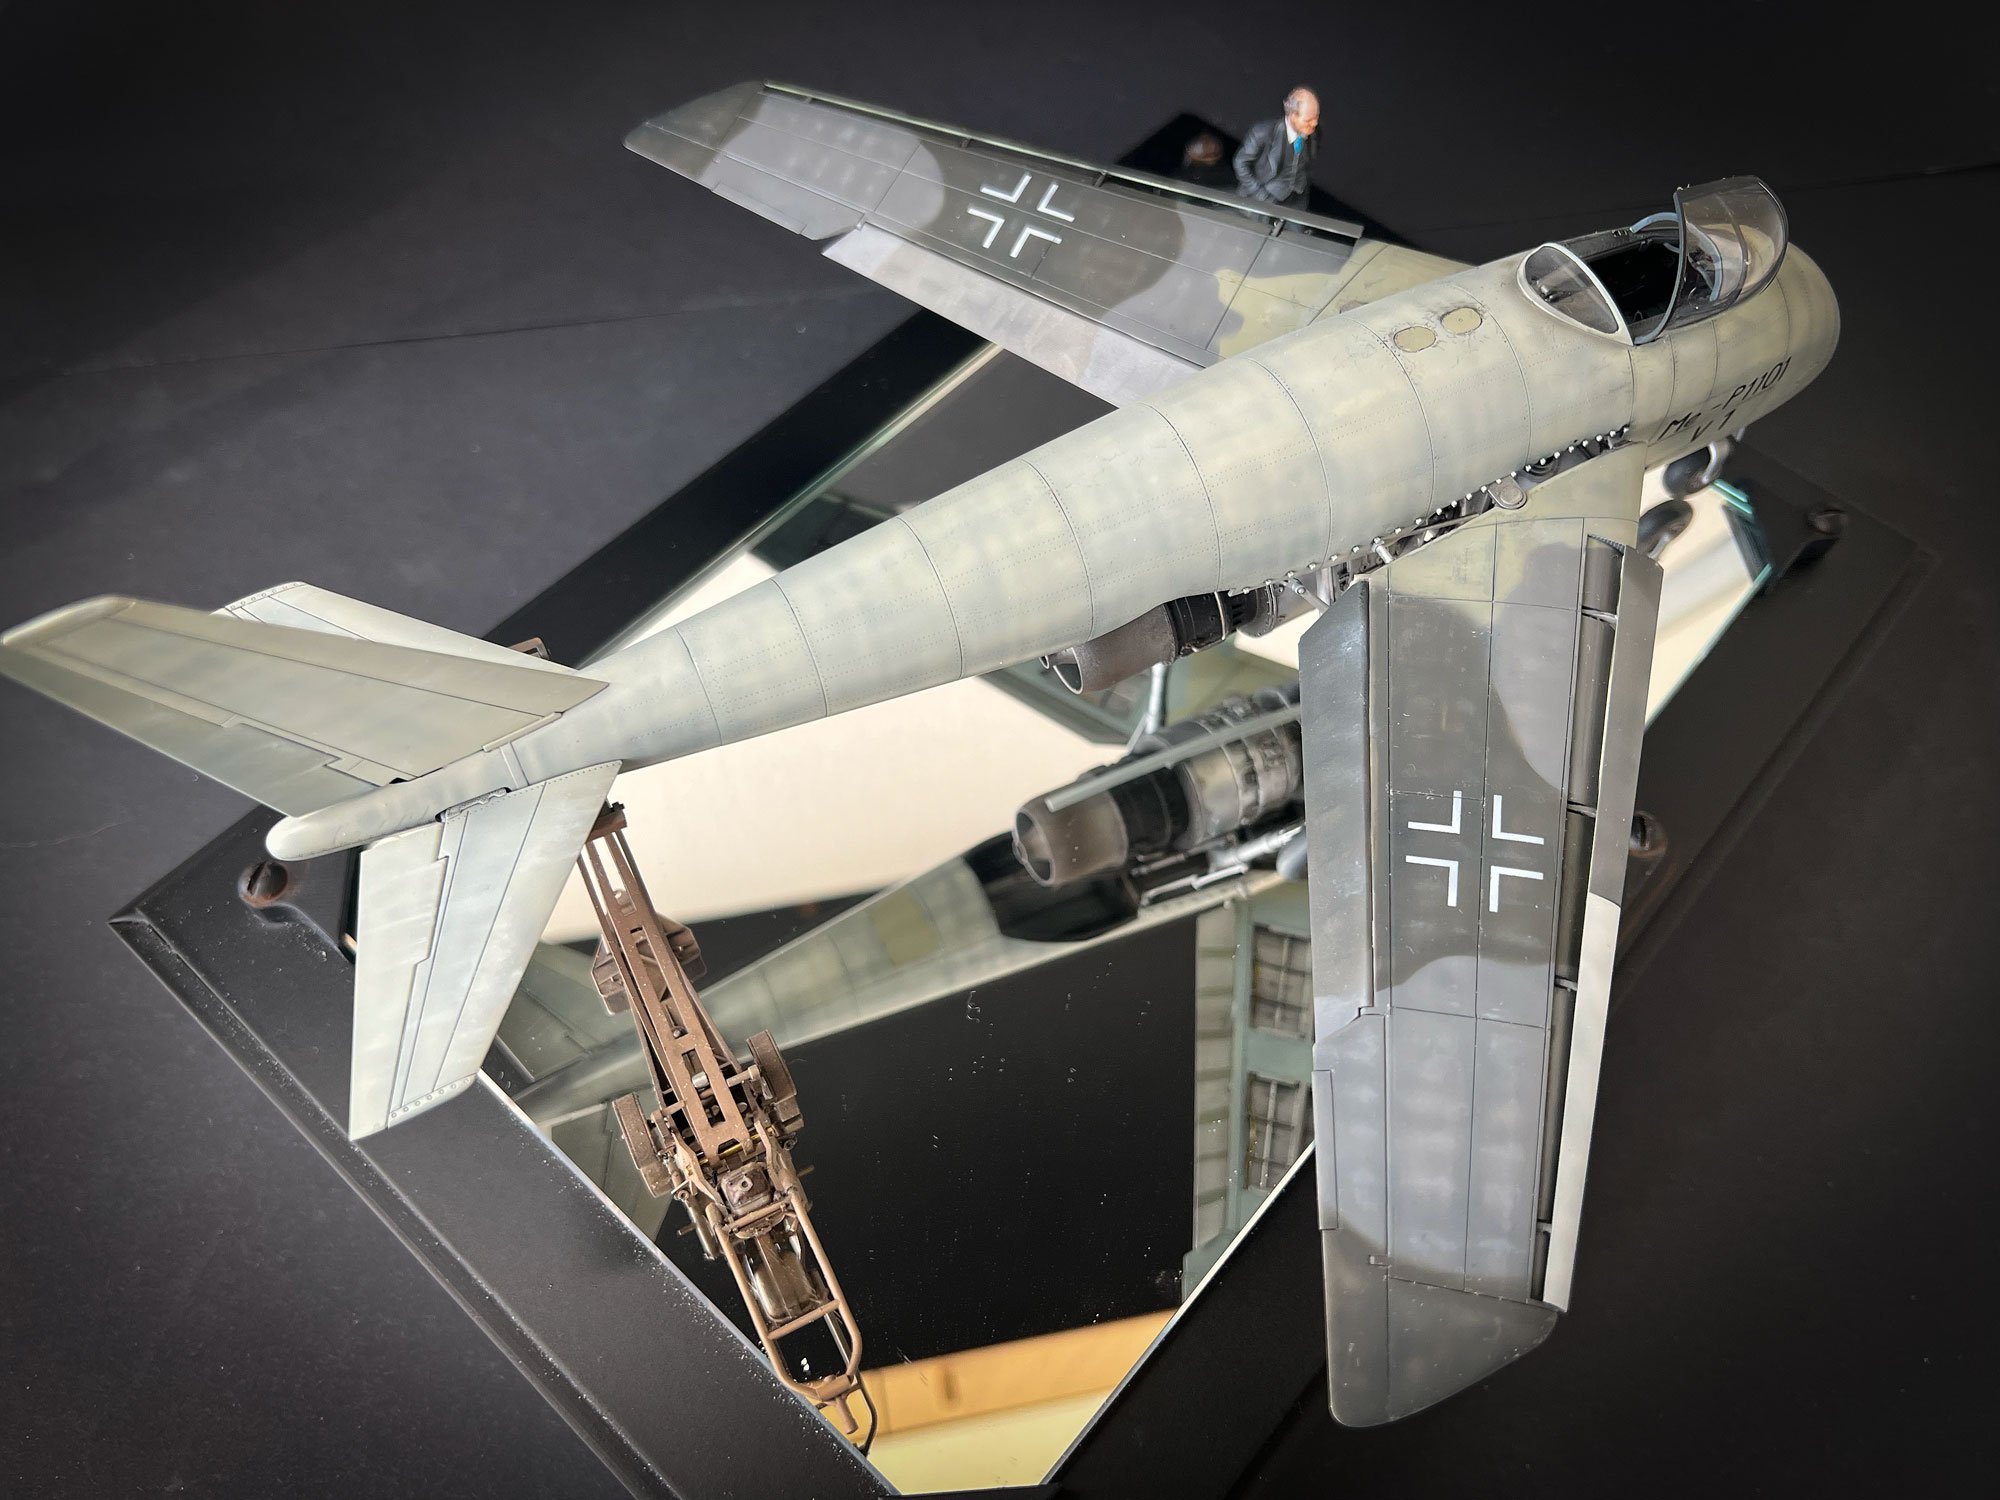
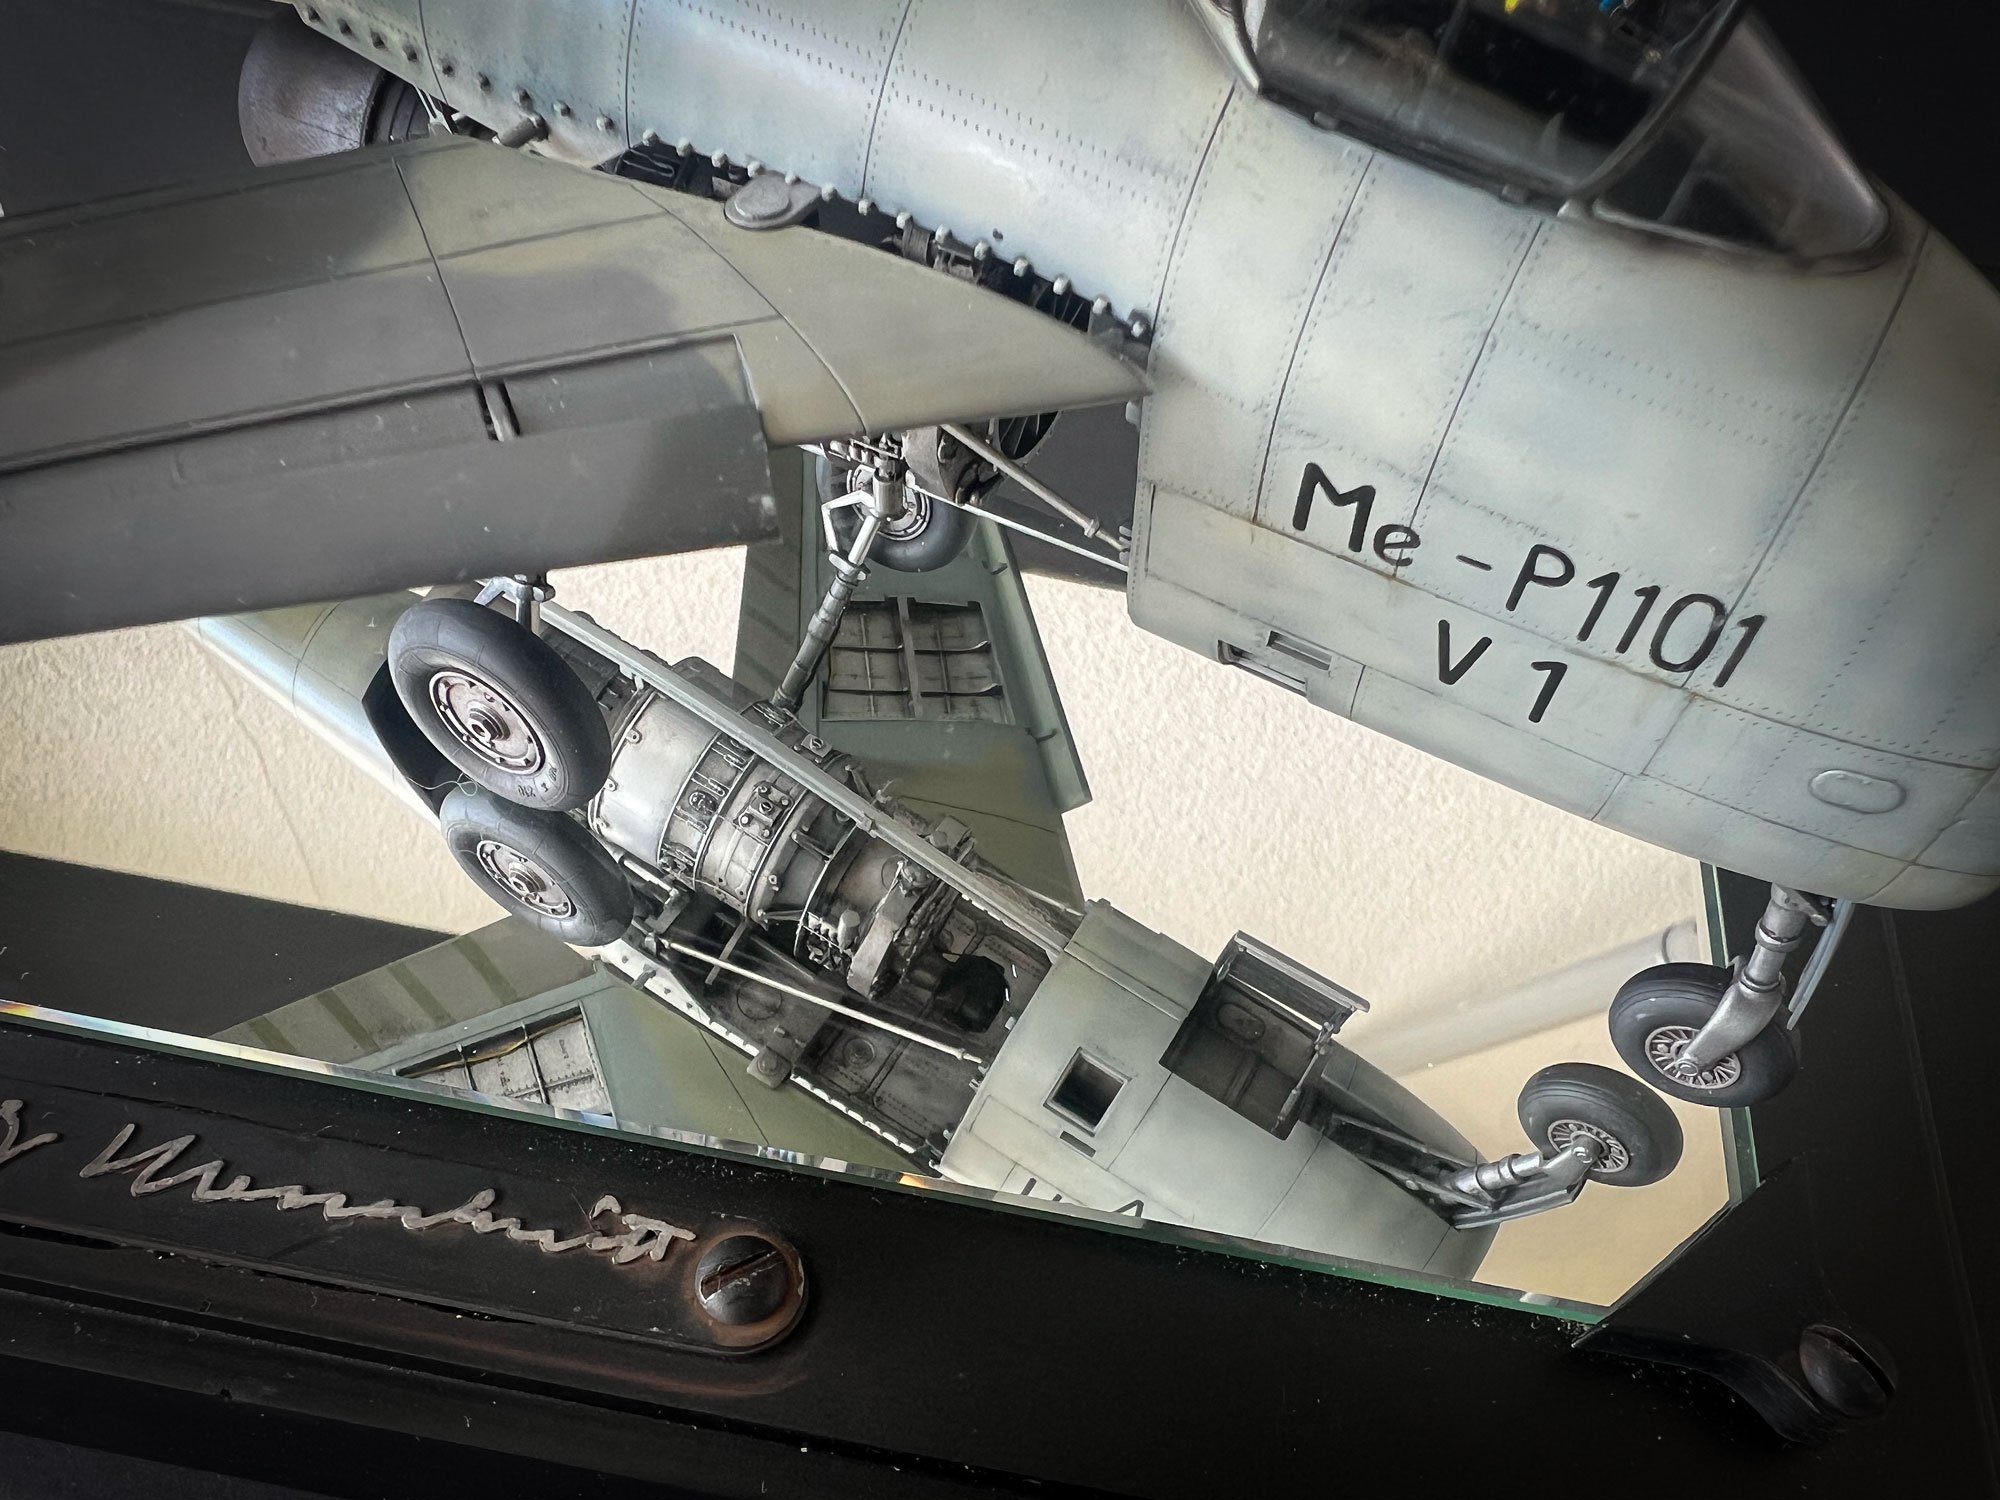
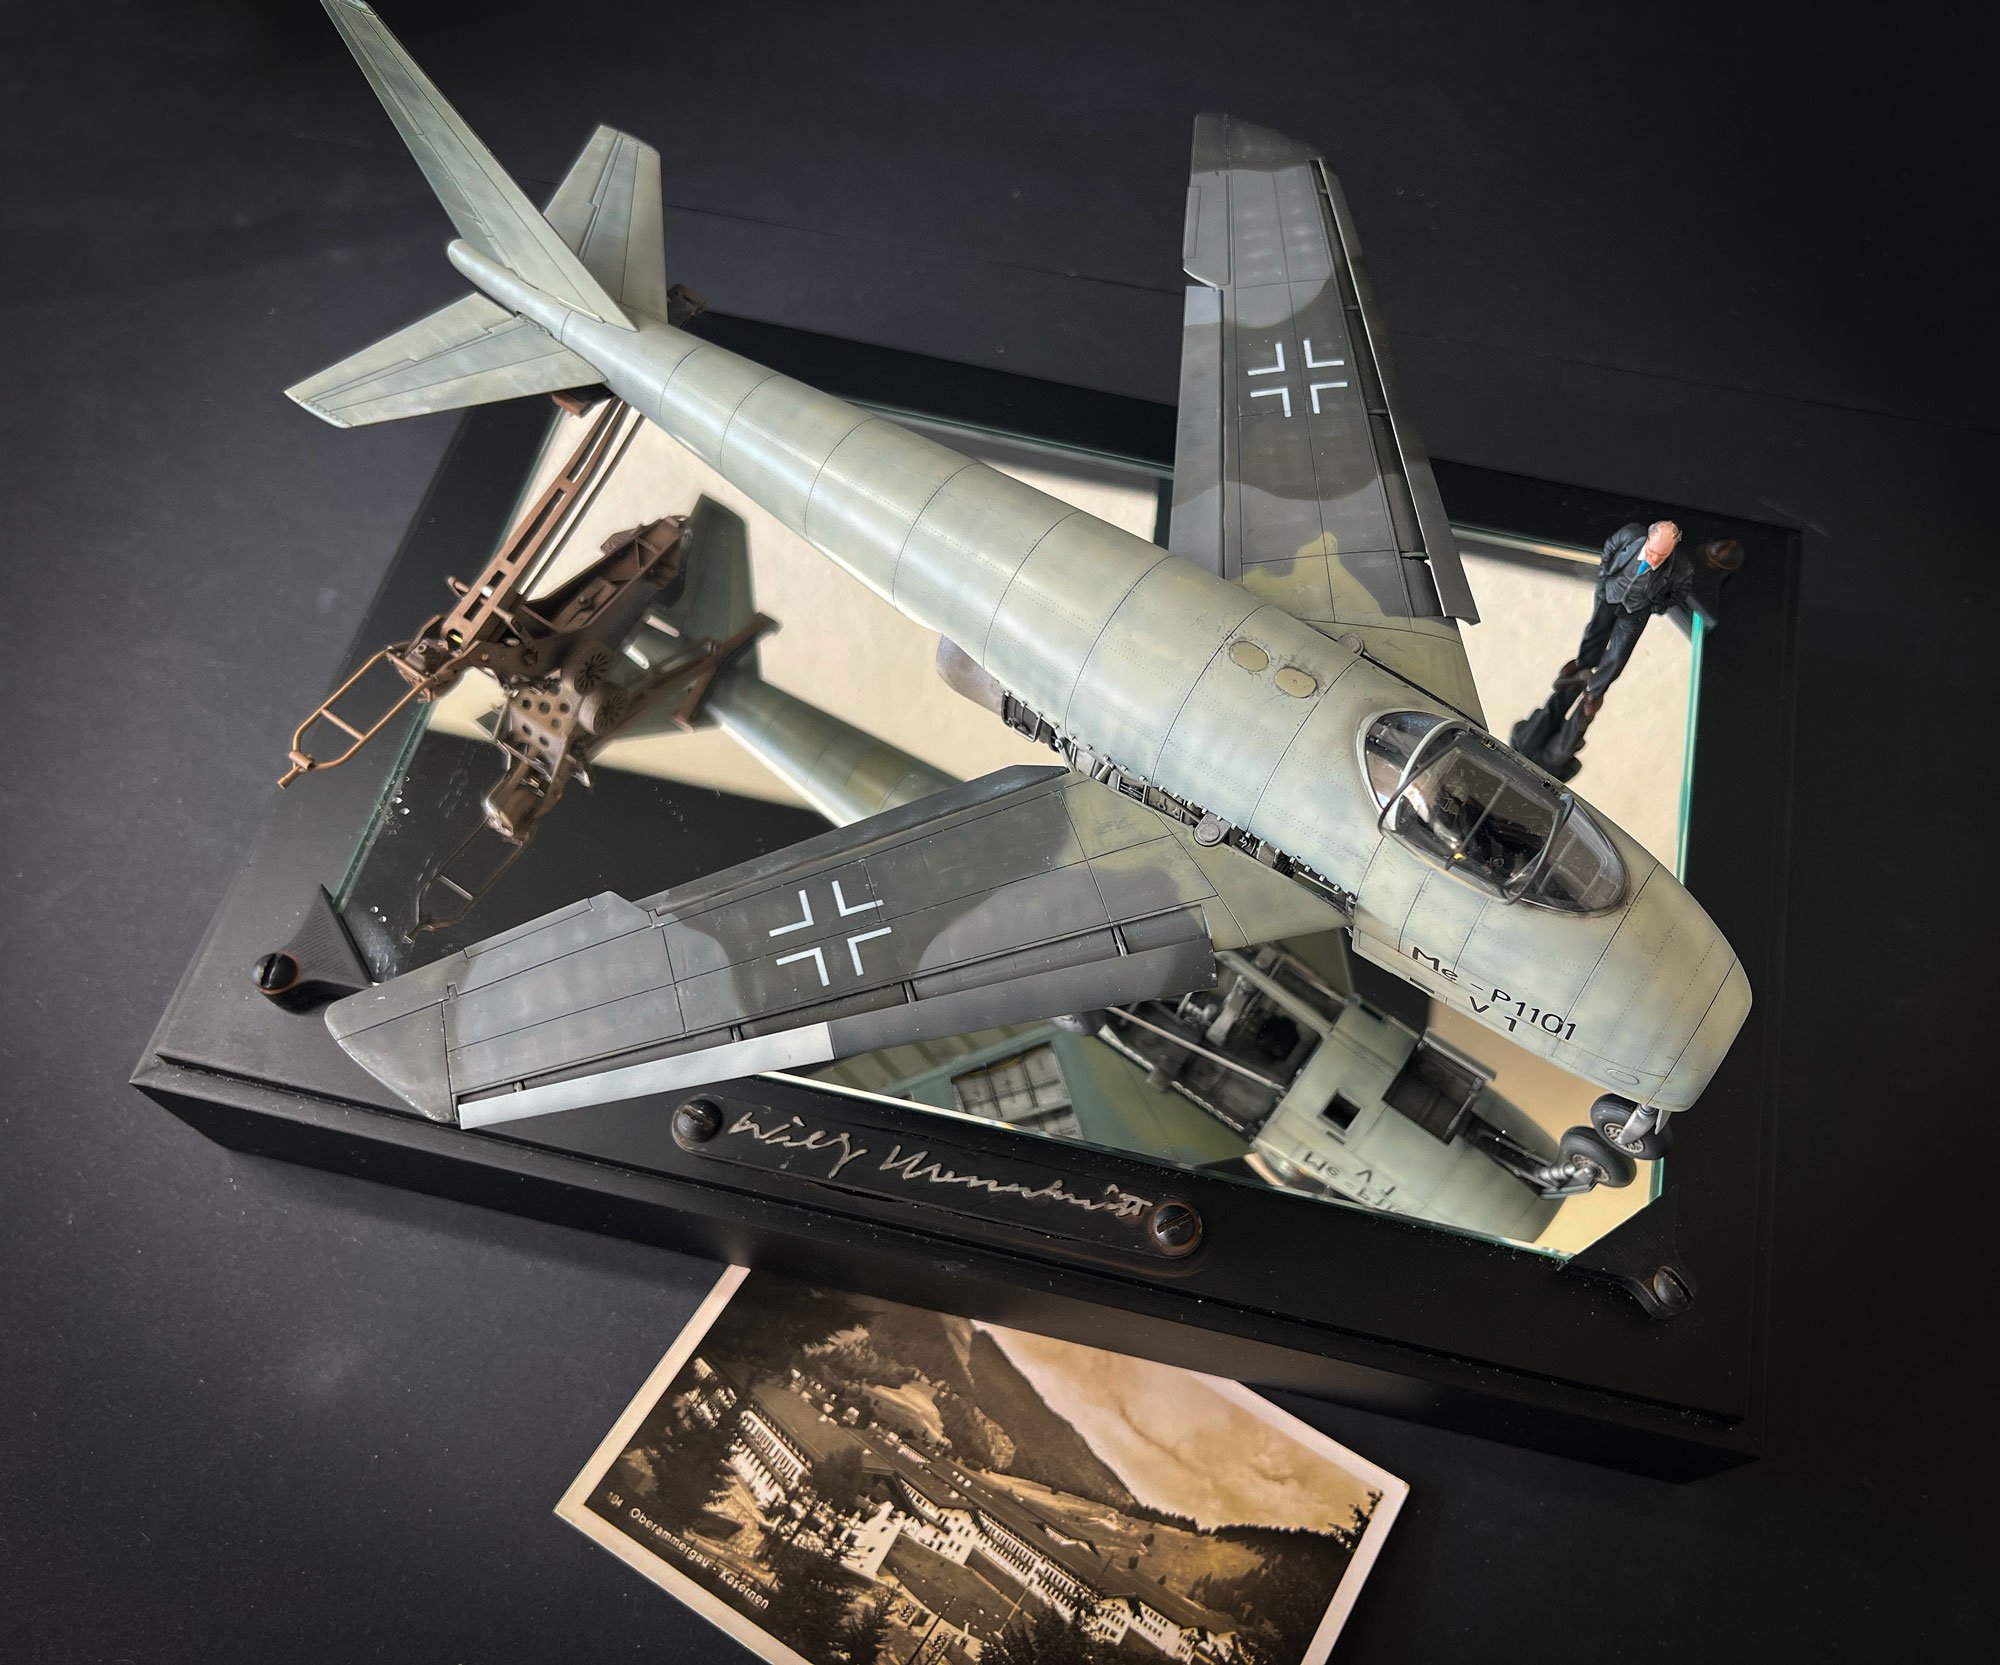
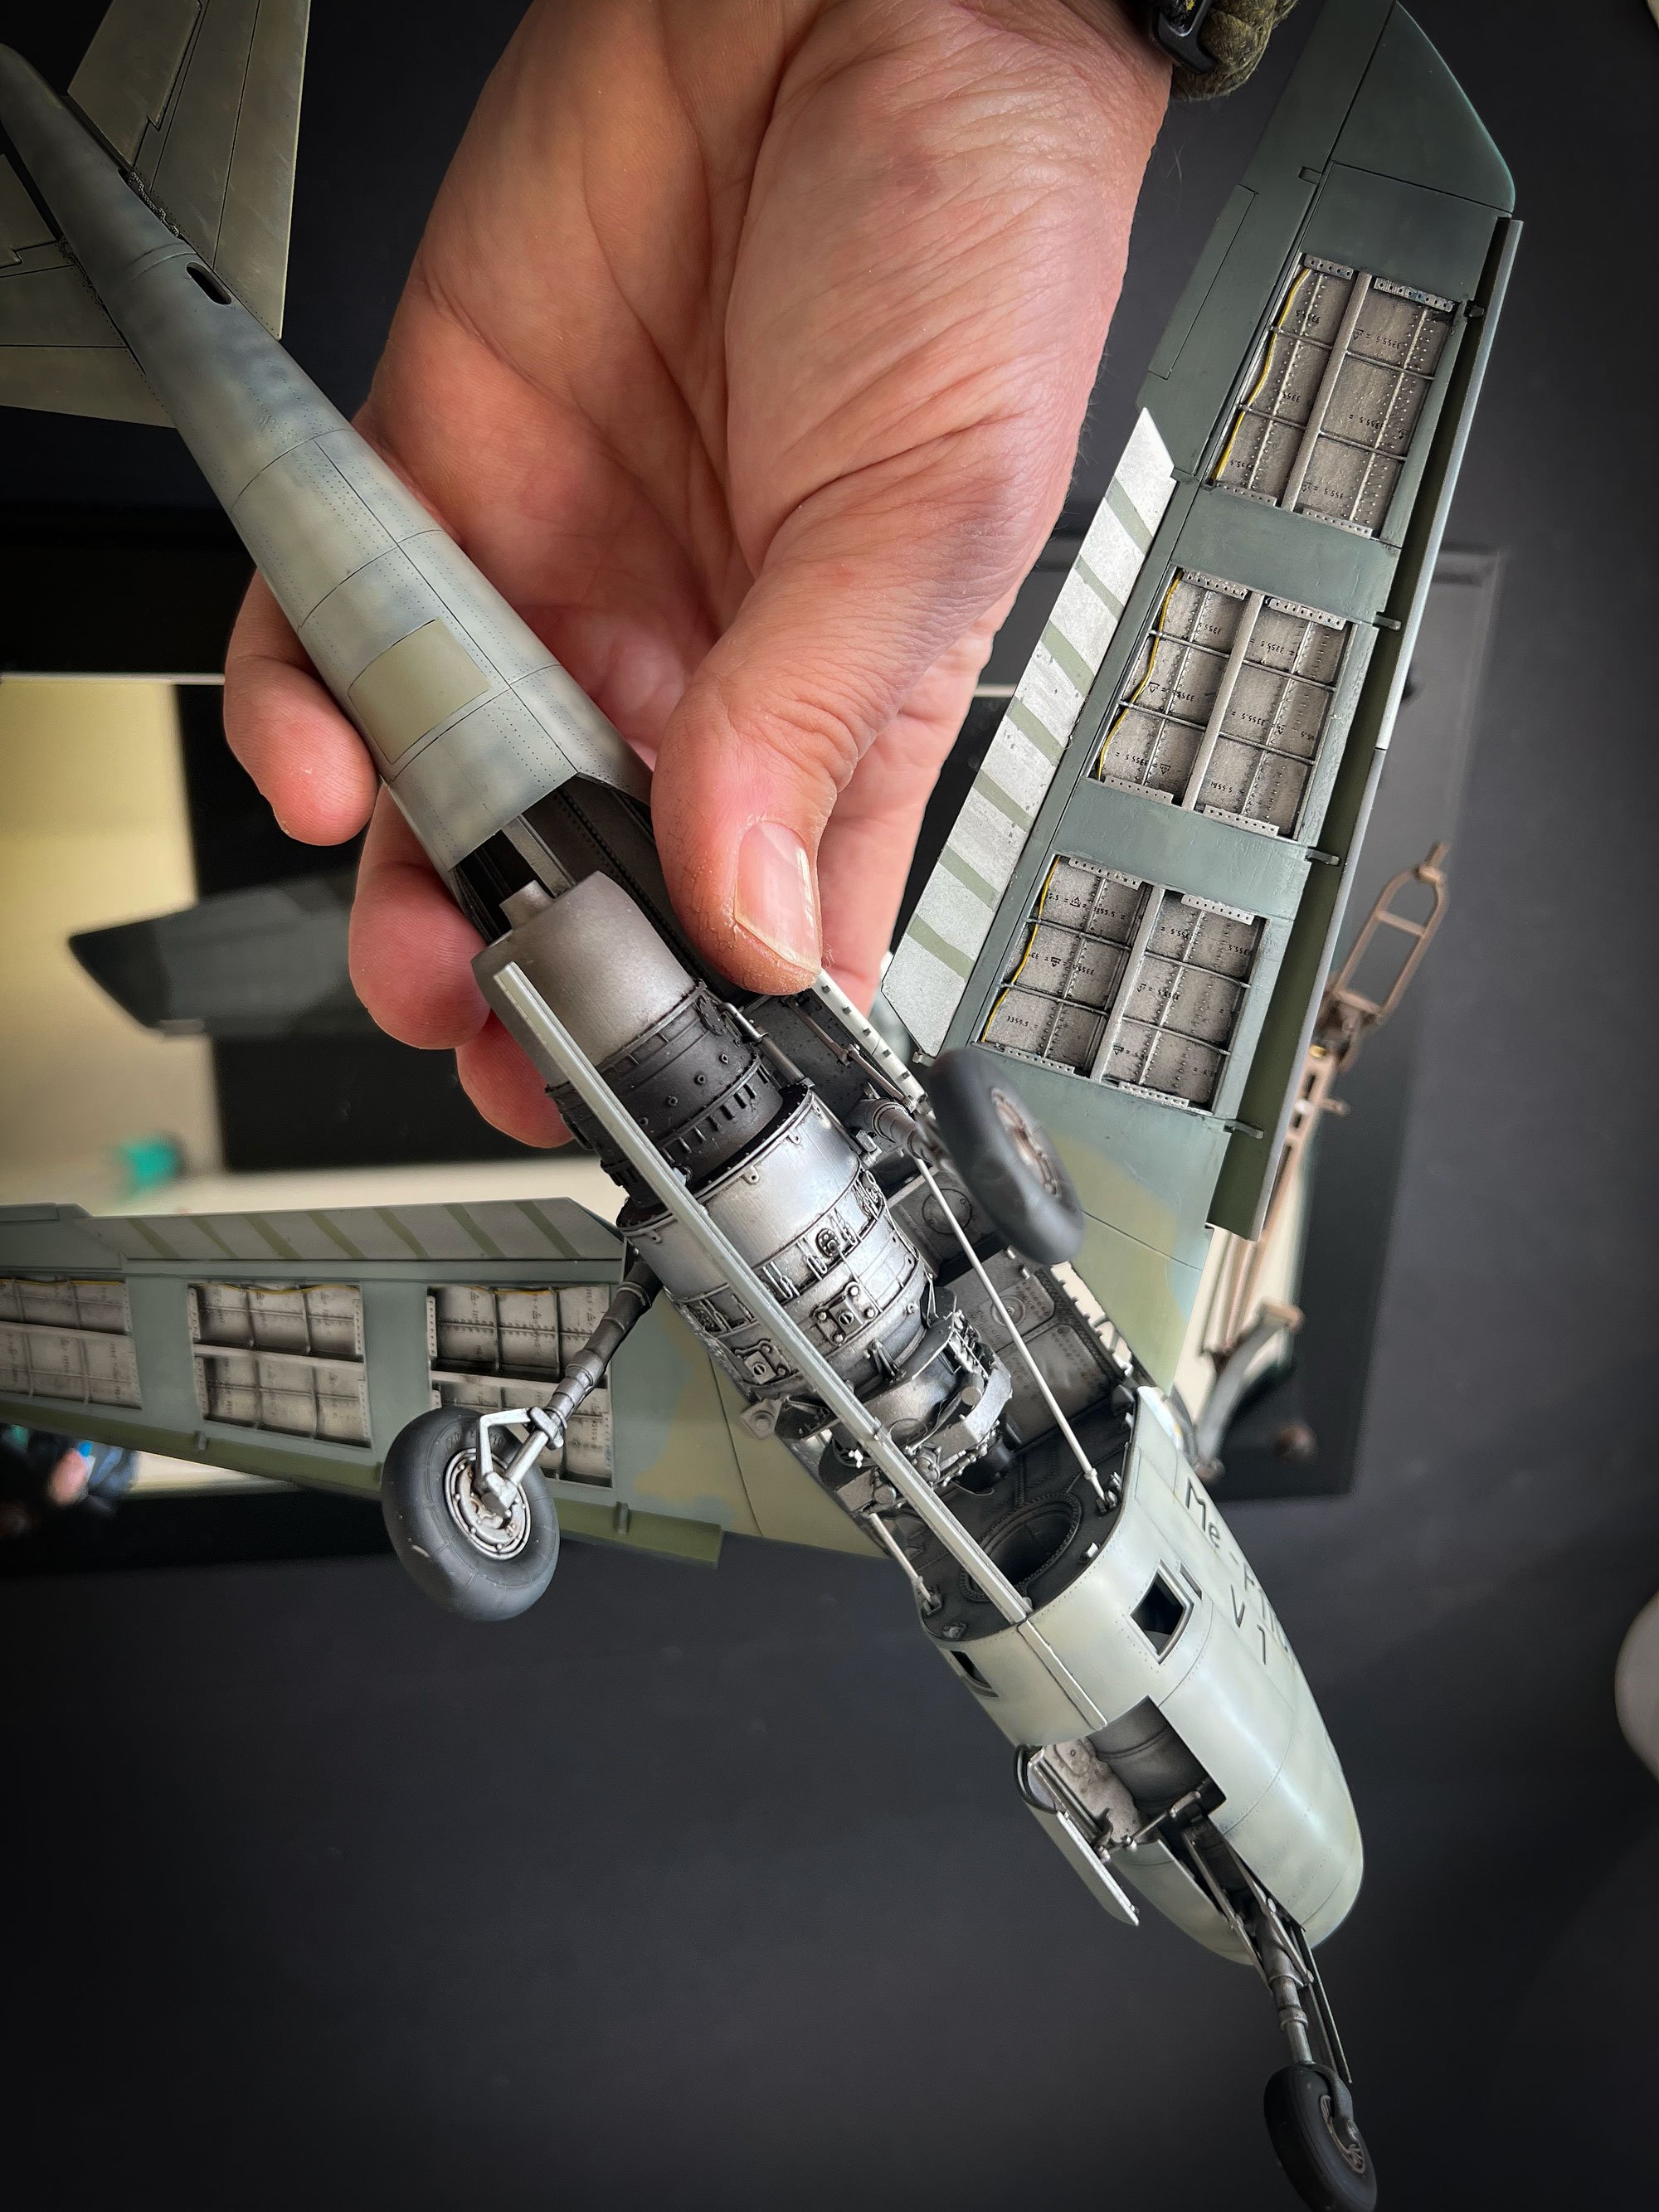
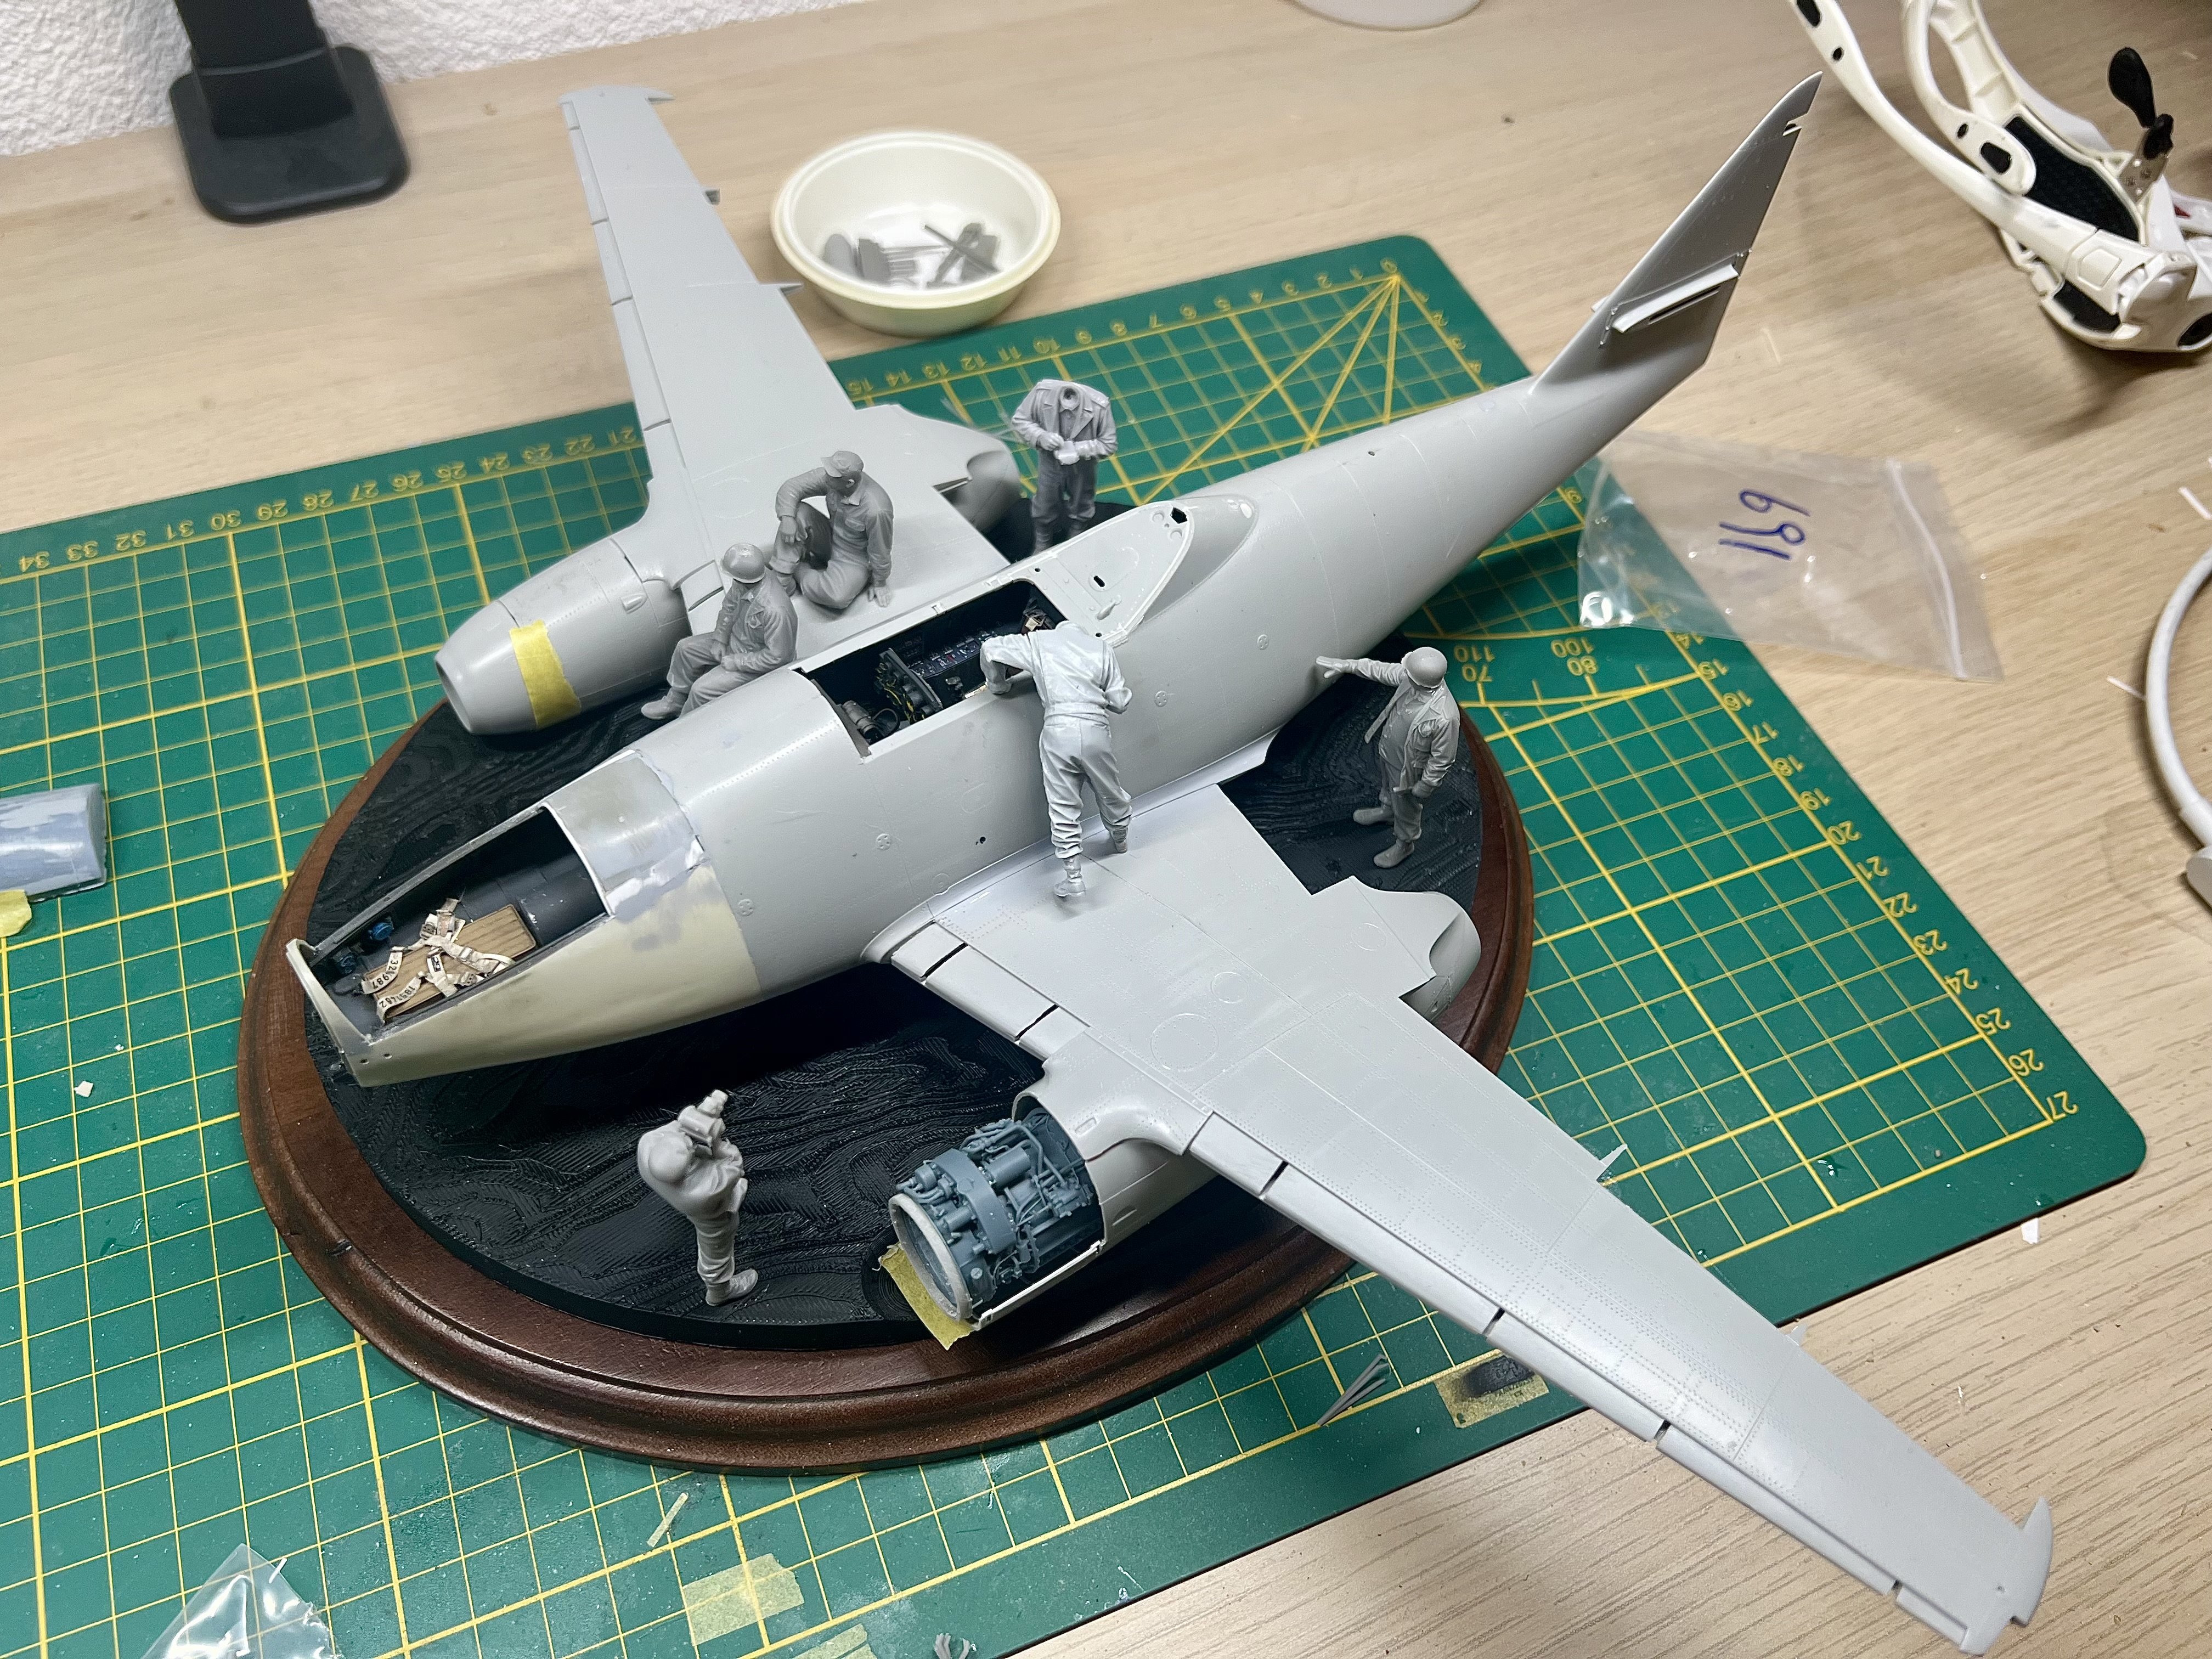
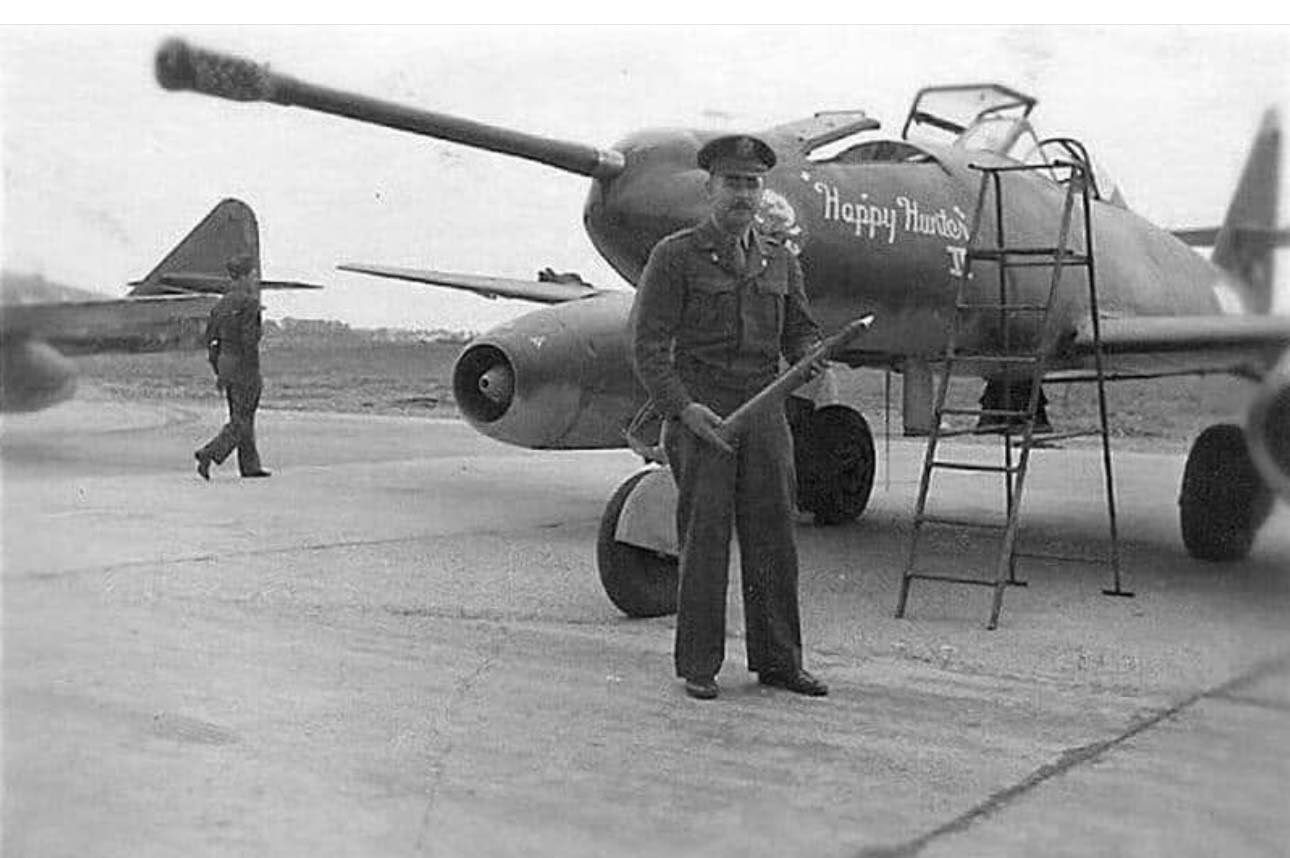
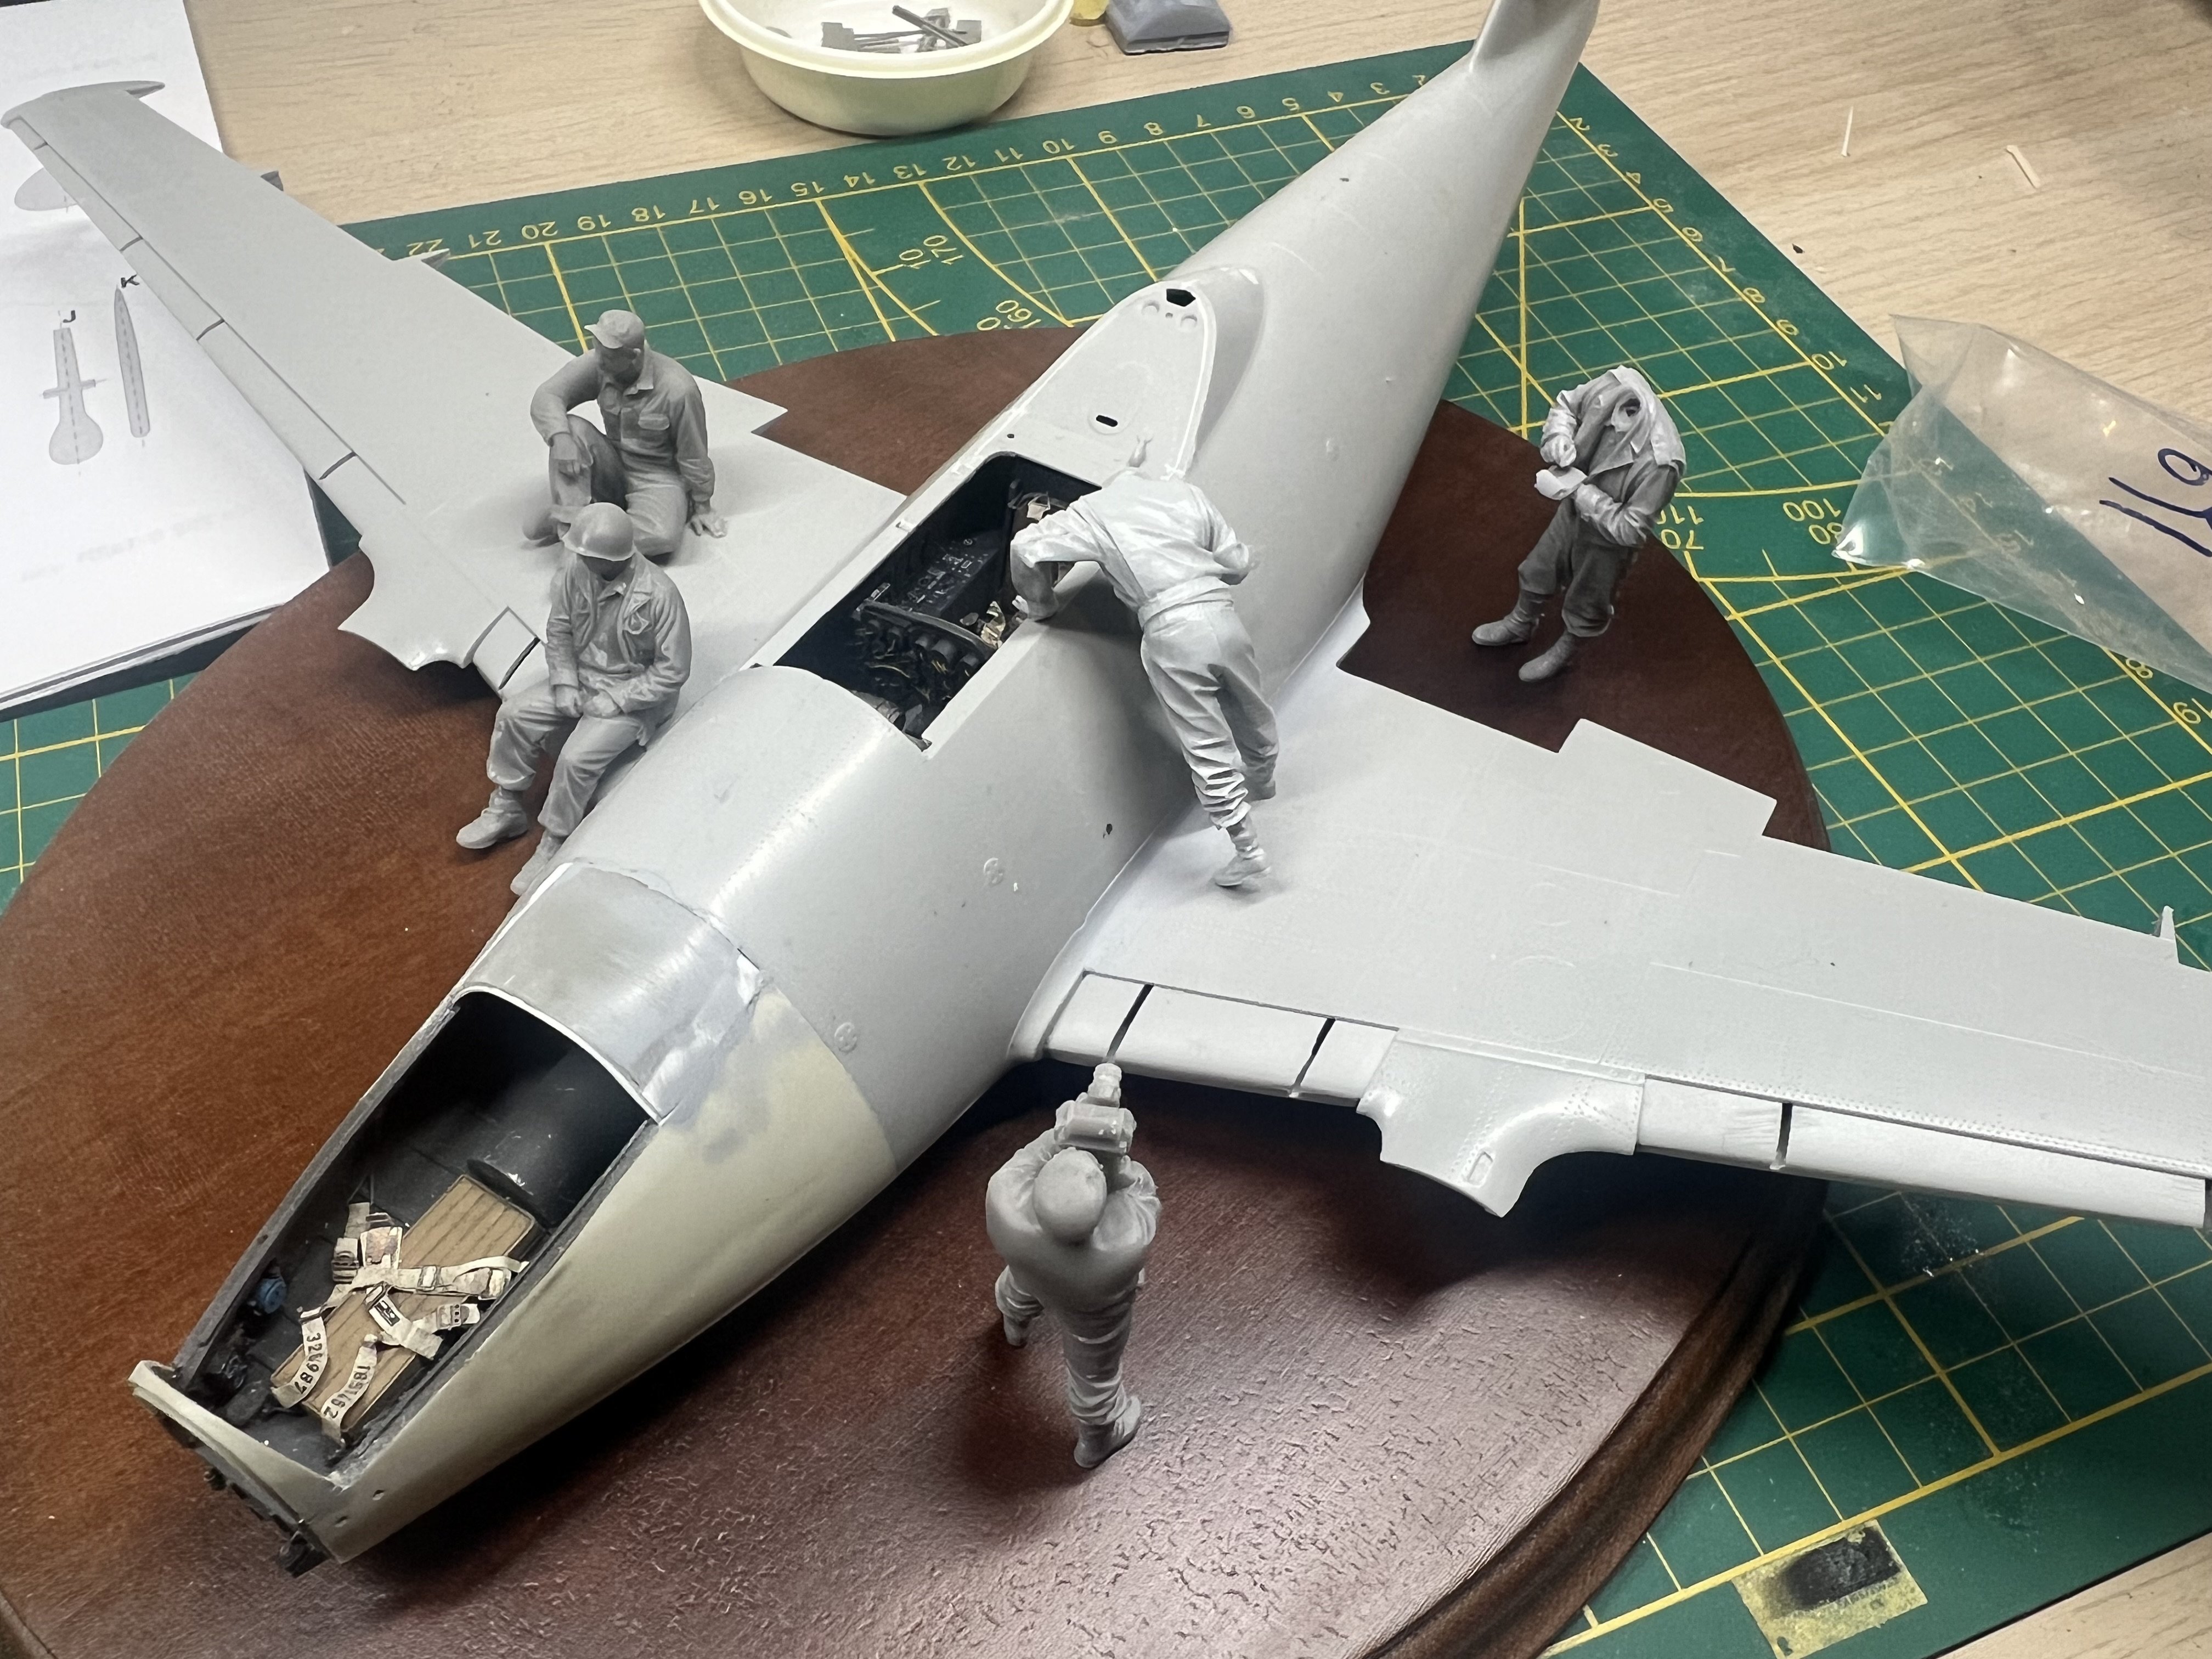
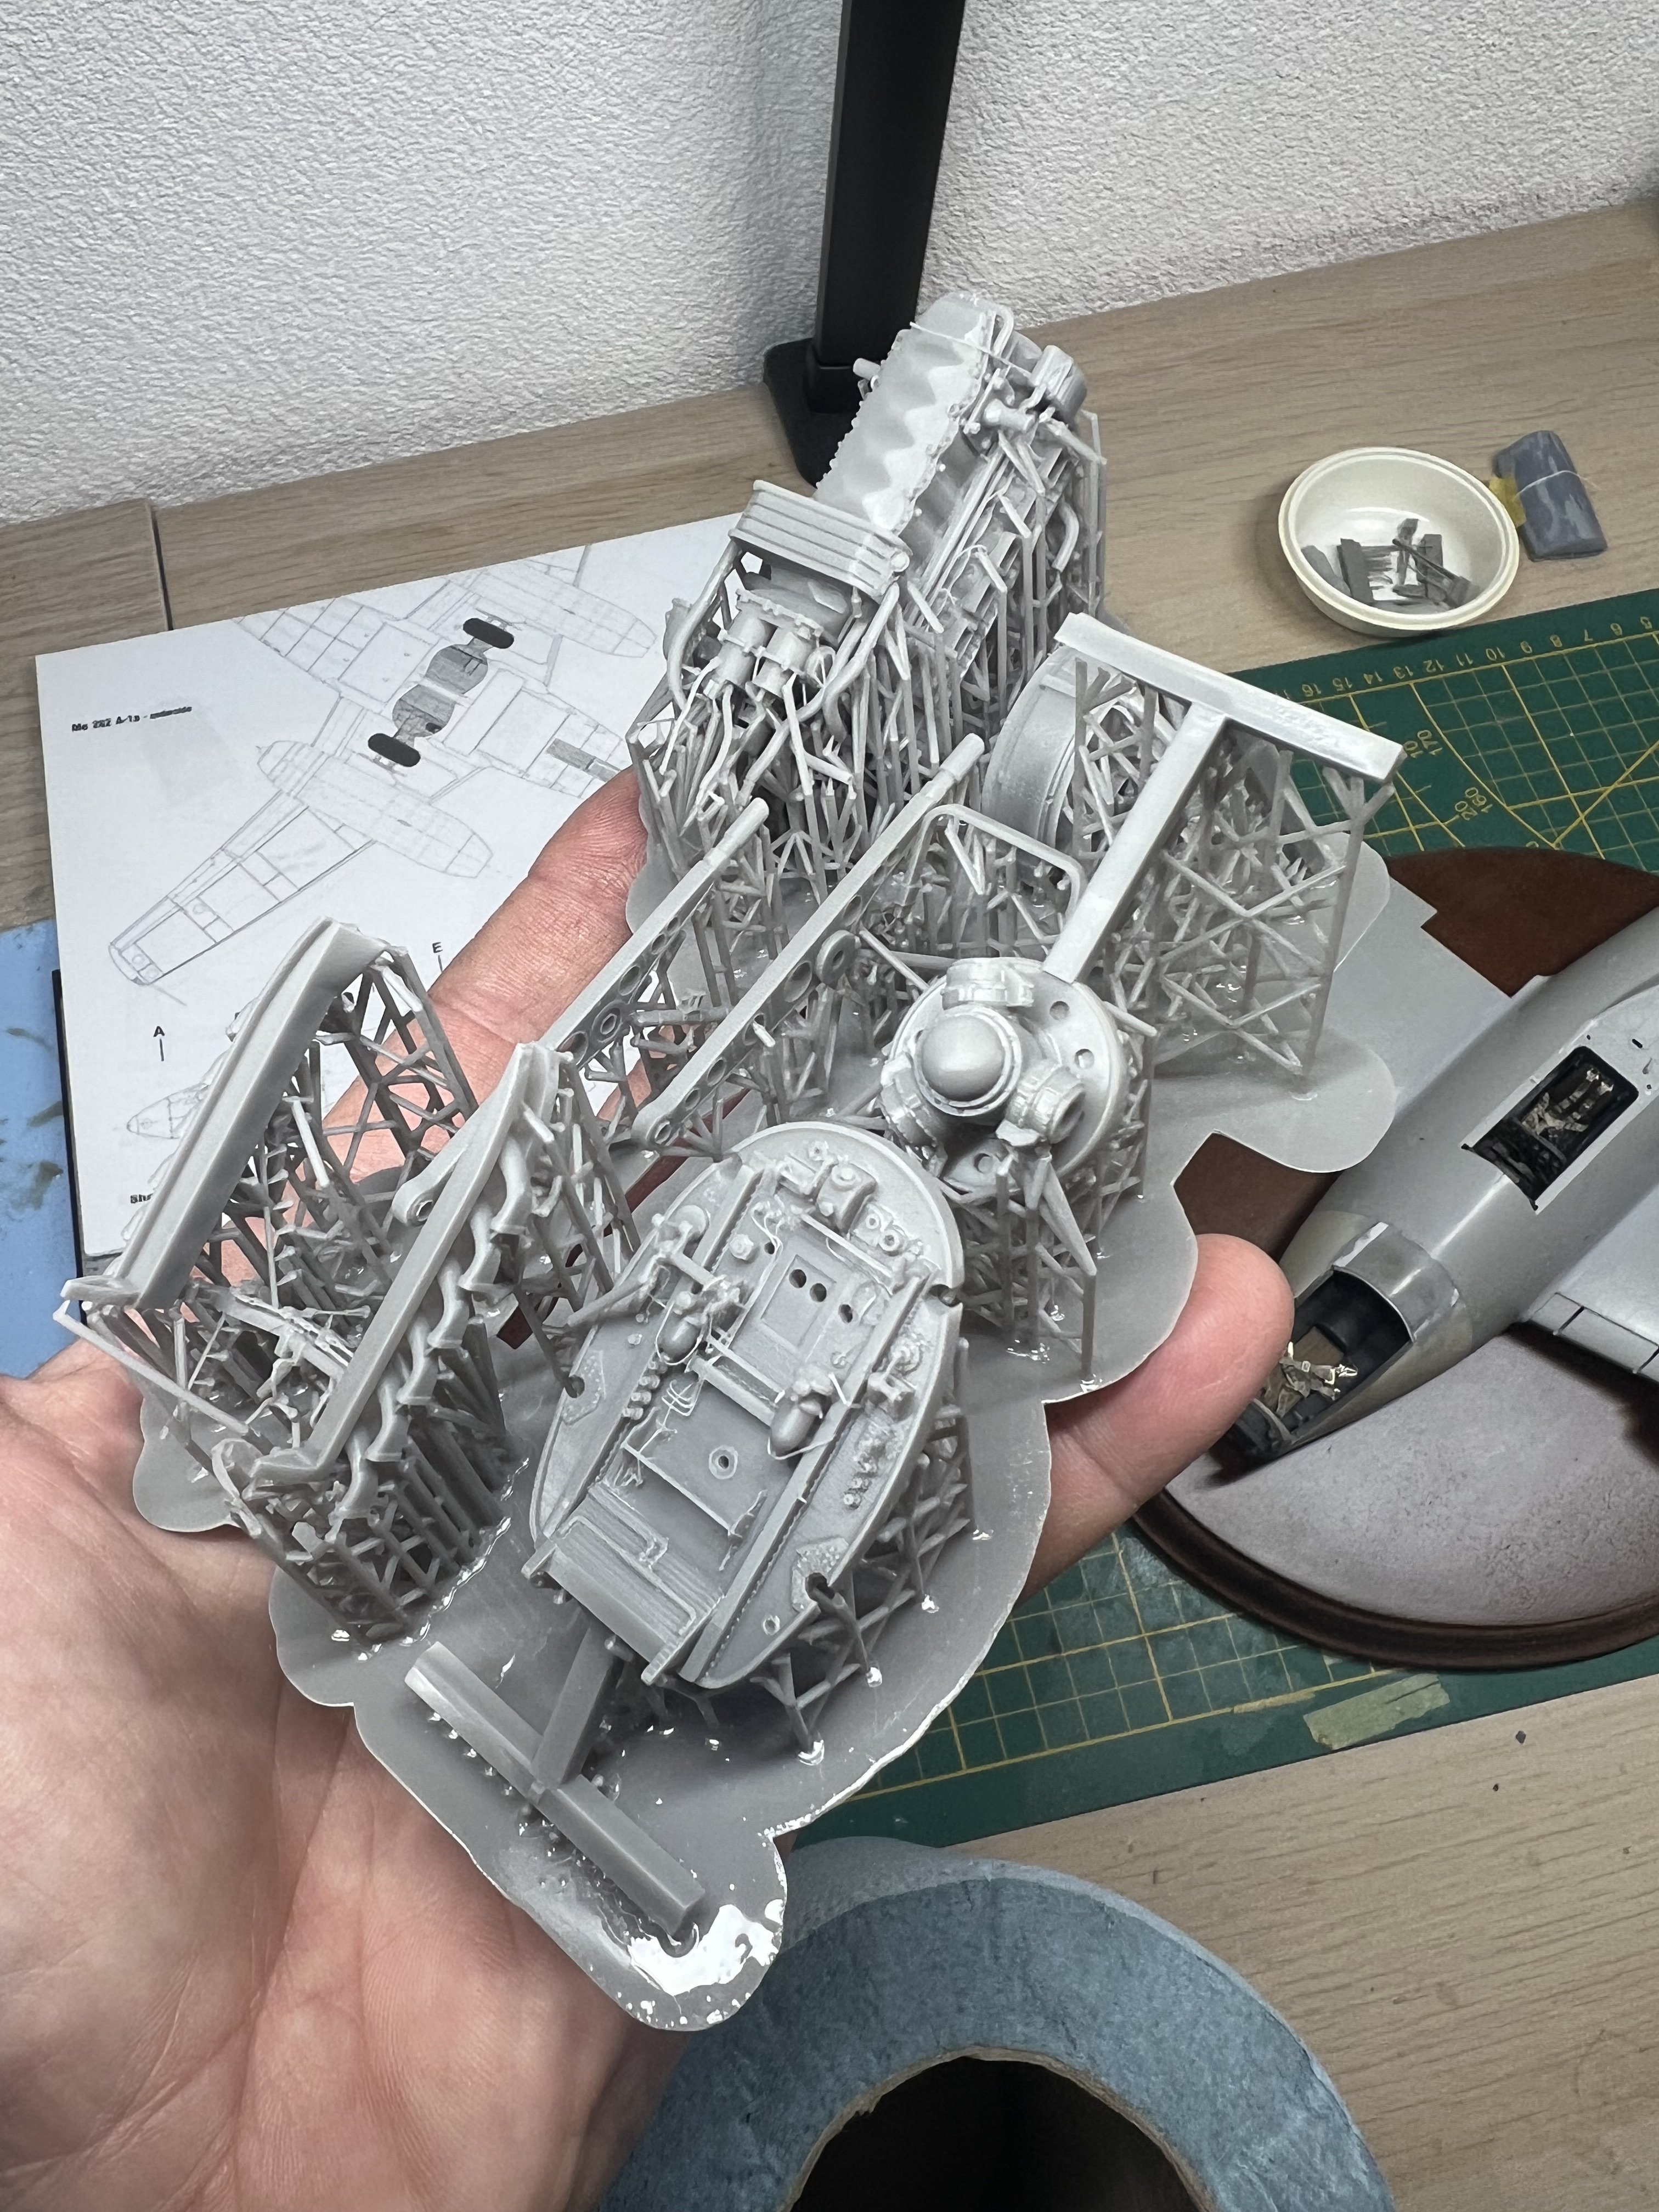
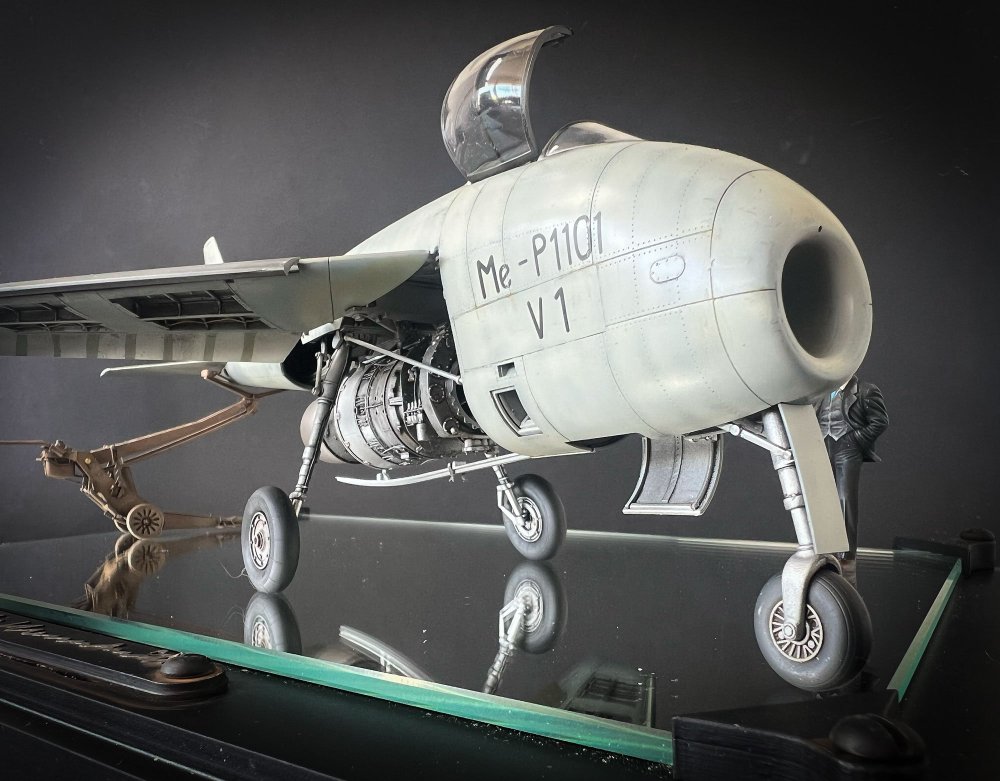
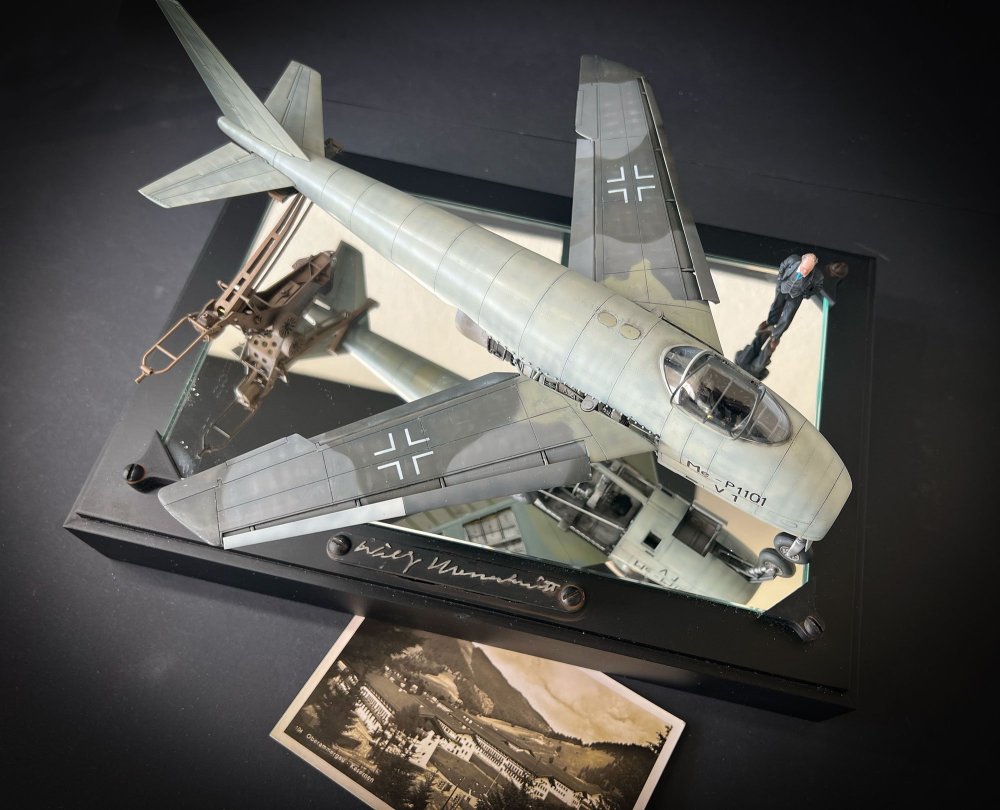
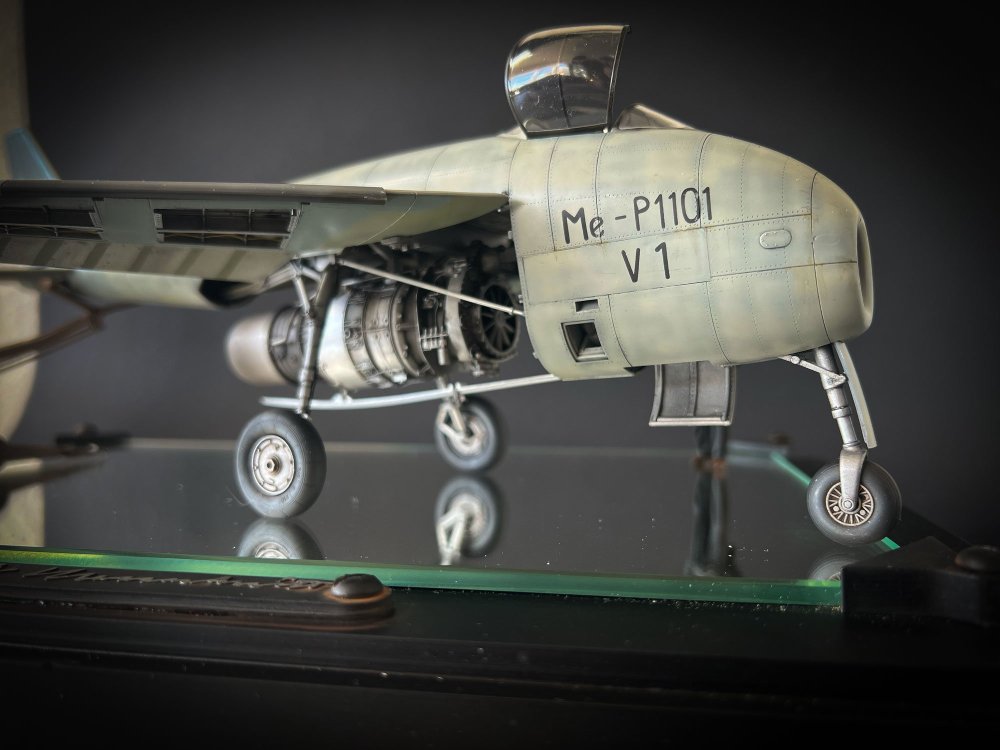
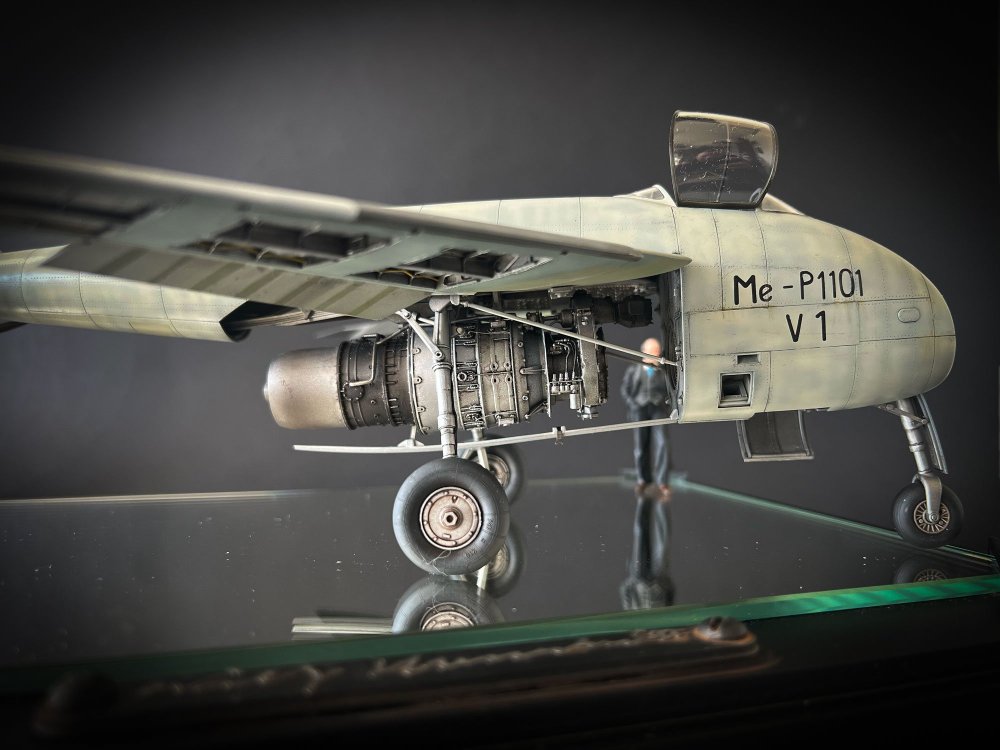
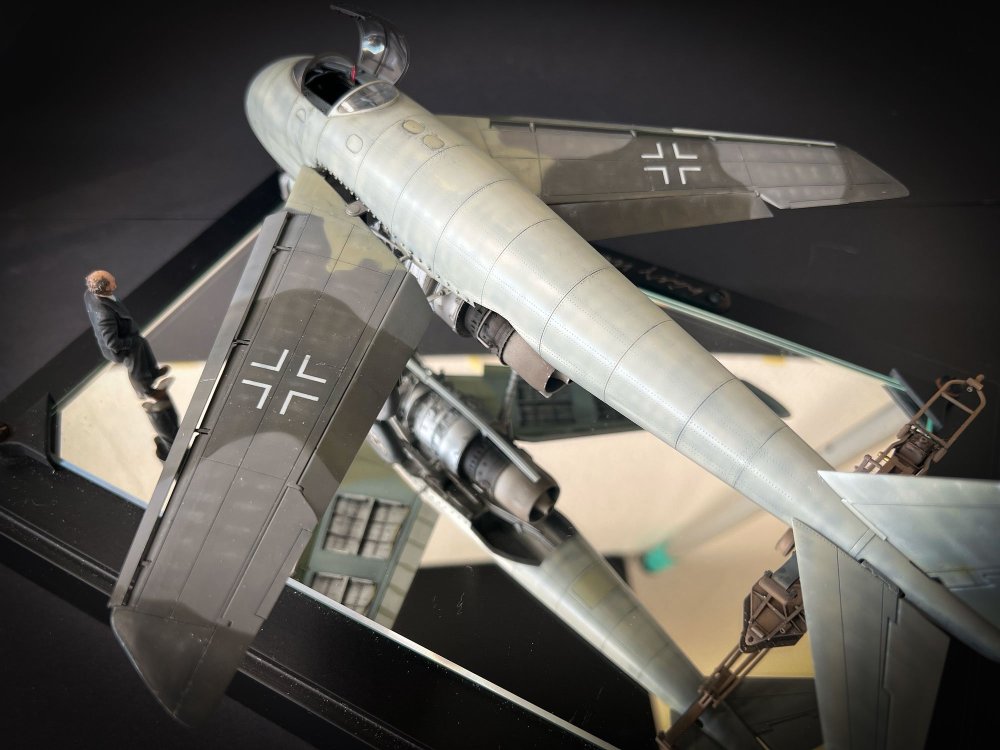
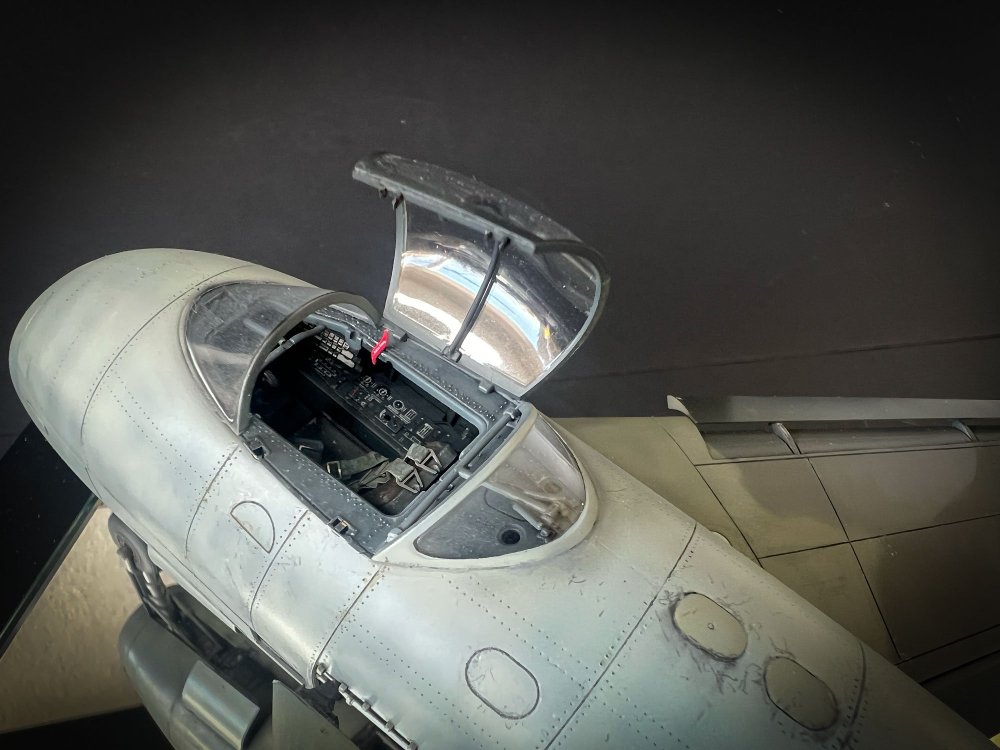
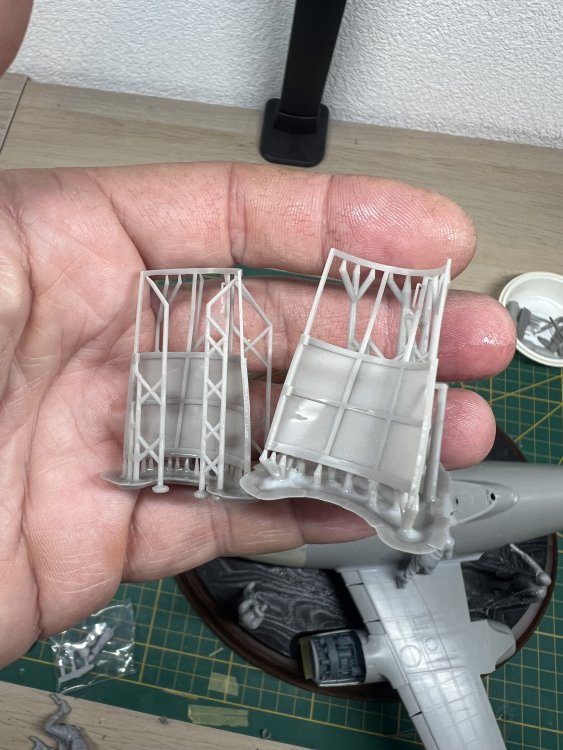
Hi all, made some 'proper' pics of my finished model. It has been modelled exactly (as far as my research could reach) as the mockup that was found at Oberammergau. The tail is lifted to prevent tail sitting (it had no guns so the balance was off) by a Herkules II bomb lift. This bomb lift was completely 3D designed and printed. The wings had open panels on the underside, so I 3D drew the internal detail. Many thanks to Pete Hamann! The limited amount of markings were done with the always excellent 1ManArmy masks. The HeS011 engine is a 3D printed engine from FPW model. HGW seatbelts of course. And some Eduard photo etch for the cockpit taken from a Me262. And an ArtScale seat. The figure of Willy Messerschmitt was created with Ai 3D software and printed.


-
1/32 ME-262A-2a/U2
JeroenPeters replied to JeroenPeters's topic in LSM 1/35 and Larger Work In Progress


-
1/32 ME-262A-2a/U2
JeroenPeters replied to JeroenPeters's topic in LSM 1/35 and Larger Work In Progress
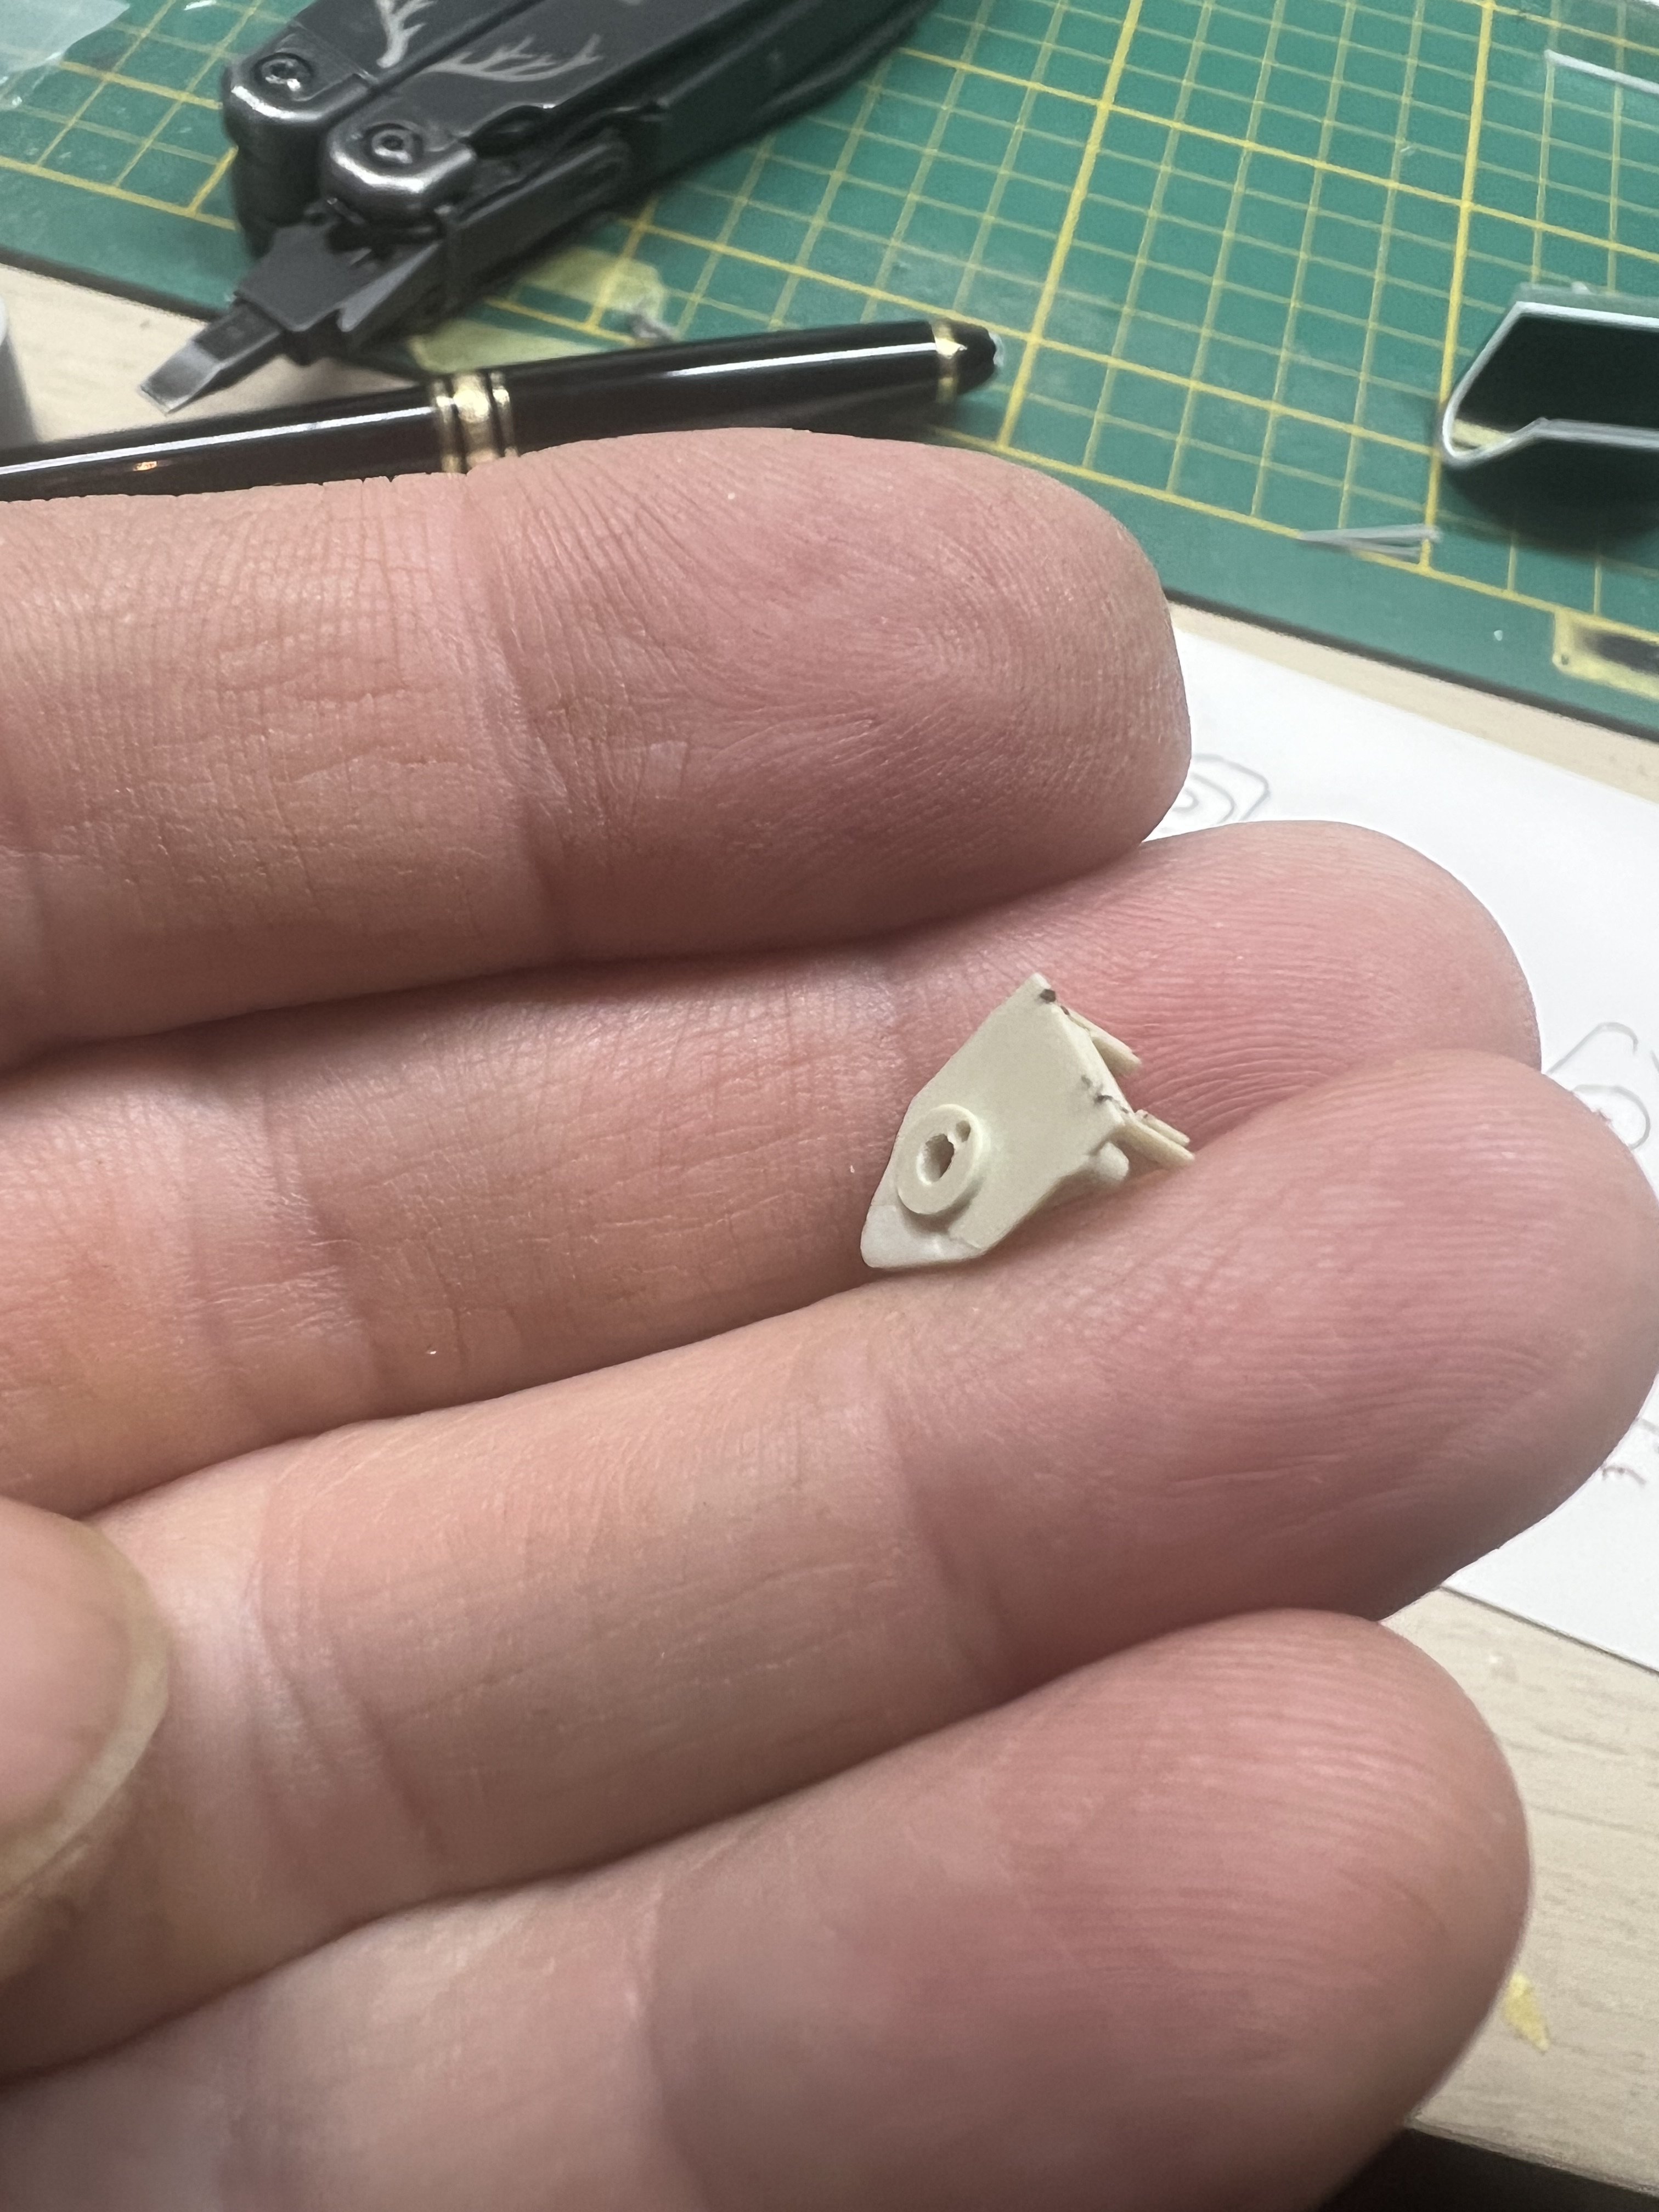
after getting really frustrated with the canopy 3d model for not being solid and therefor not printing, I re-drew the whole damn thing in a different way. I think the open access hatch gave access to the canopy lock. So one could open it from the outside. I'll fashion a similar kind of lock as was present in the pilot's canopy.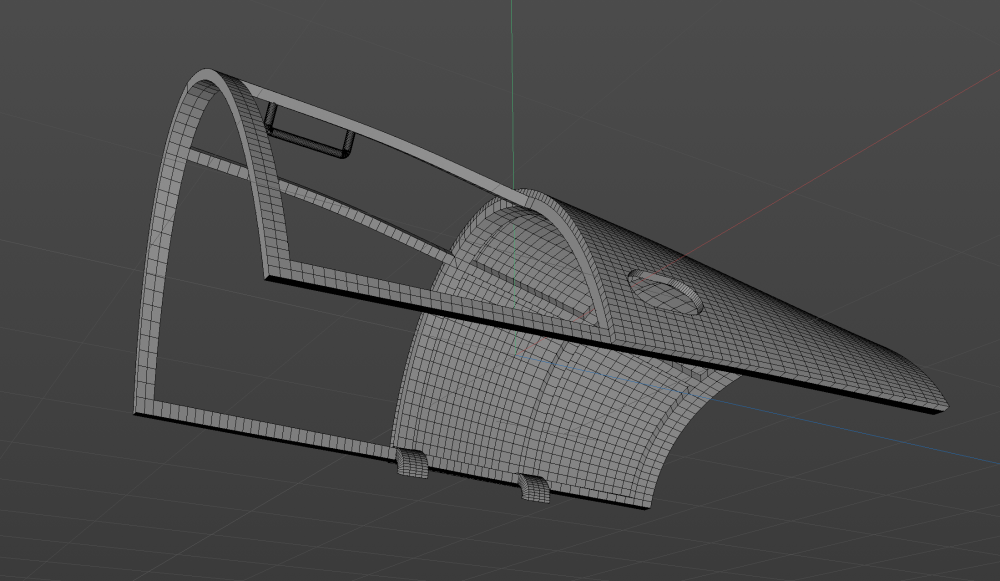
-
1/32 ME-262A-2a/U2
JeroenPeters replied to JeroenPeters's topic in LSM 1/35 and Larger Work In Progress
Something like this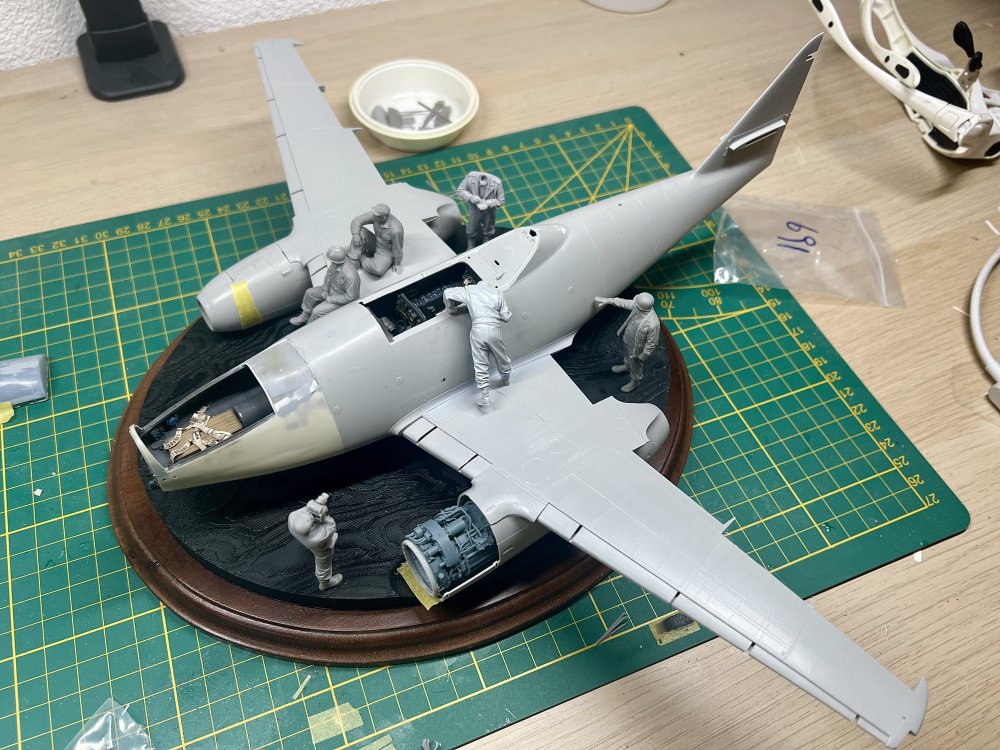
-
1/32 ME-262A-2a/U2
JeroenPeters replied to JeroenPeters's topic in LSM 1/35 and Larger Work In Progress
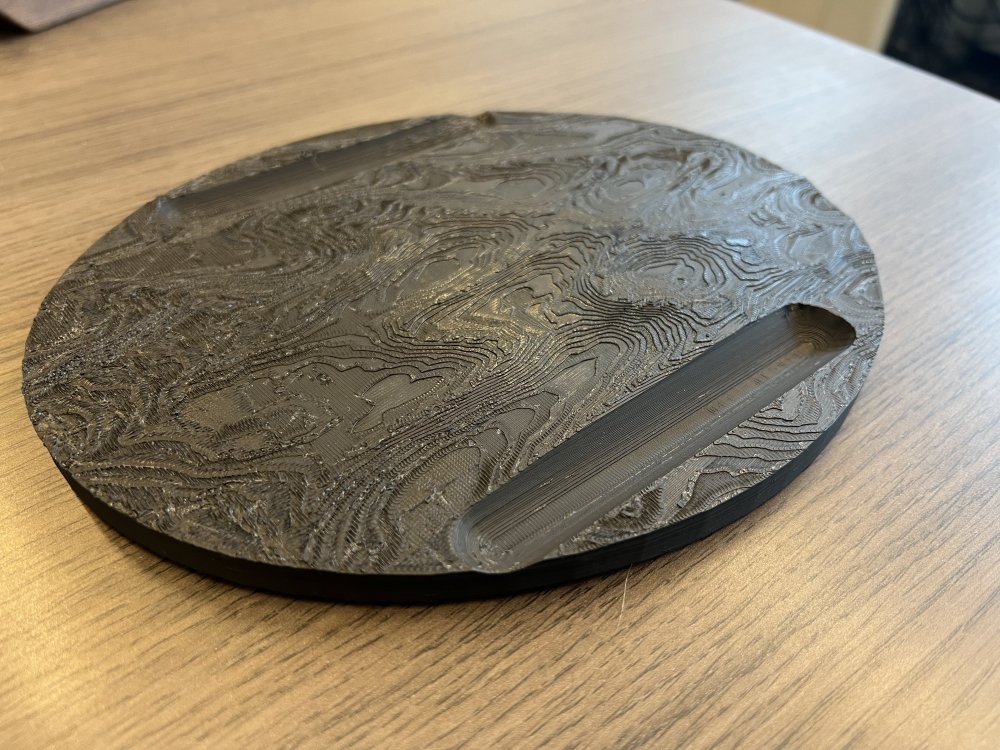
Base printed. This will be added as a starting point for grass and mudd.
-
1/32 ME-262A-2a/U2
JeroenPeters replied to JeroenPeters's topic in LSM 1/35 and Larger Work In Progress
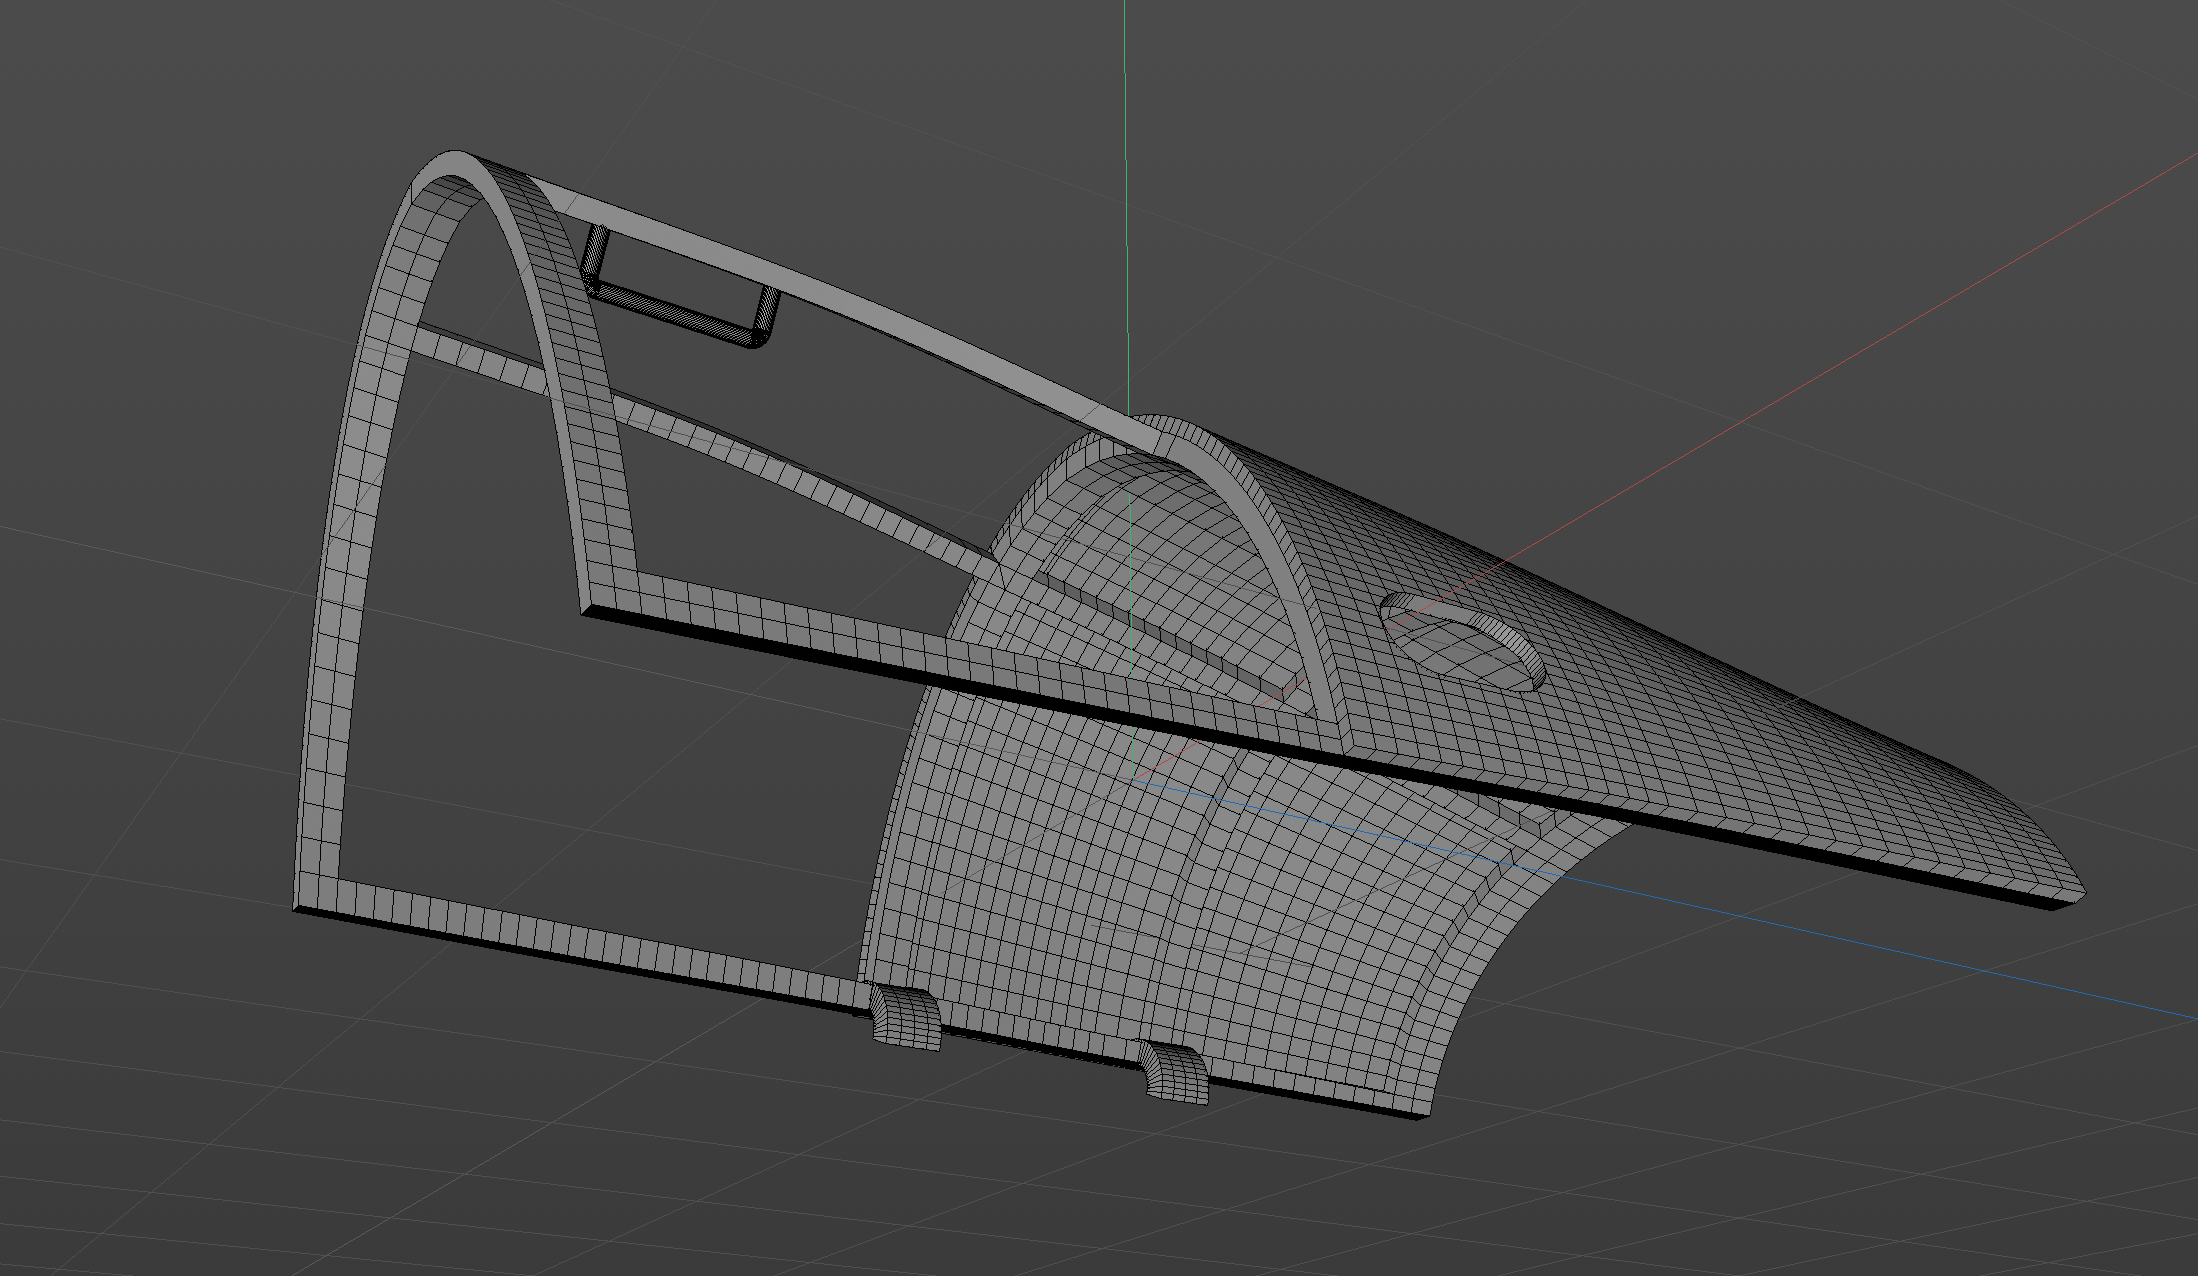
Started drawing the upper door of the bomb aimers postion in 3D. Tricky stuff.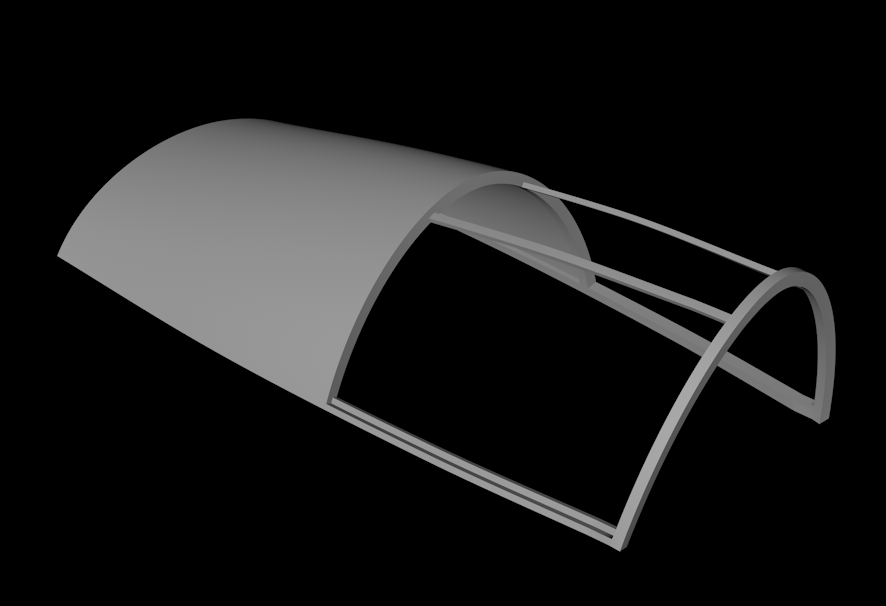
-
1/32 ME-262A-2a/U2
JeroenPeters replied to JeroenPeters's topic in LSM 1/35 and Larger Work In Progress
3D drew the terrain to fit the wood oval base. You can see the indentations for the engines. Further terrain will be added by... hand! Drawing this is literally 5 minutes of work.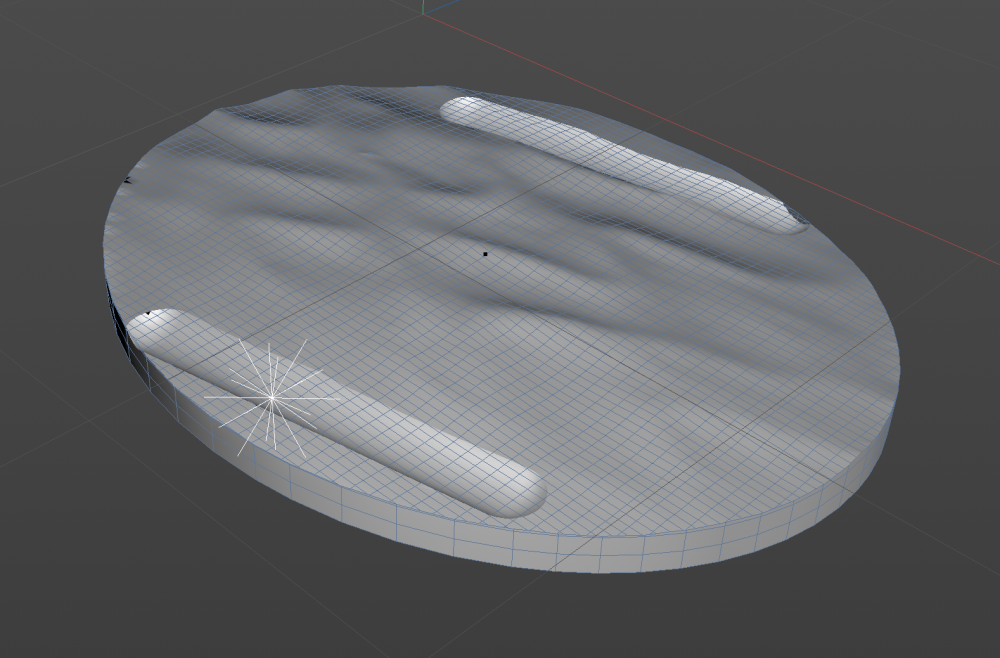
-
1/32 ME-262A-2a/U2
JeroenPeters replied to JeroenPeters's topic in LSM 1/35 and Larger Work In Progress
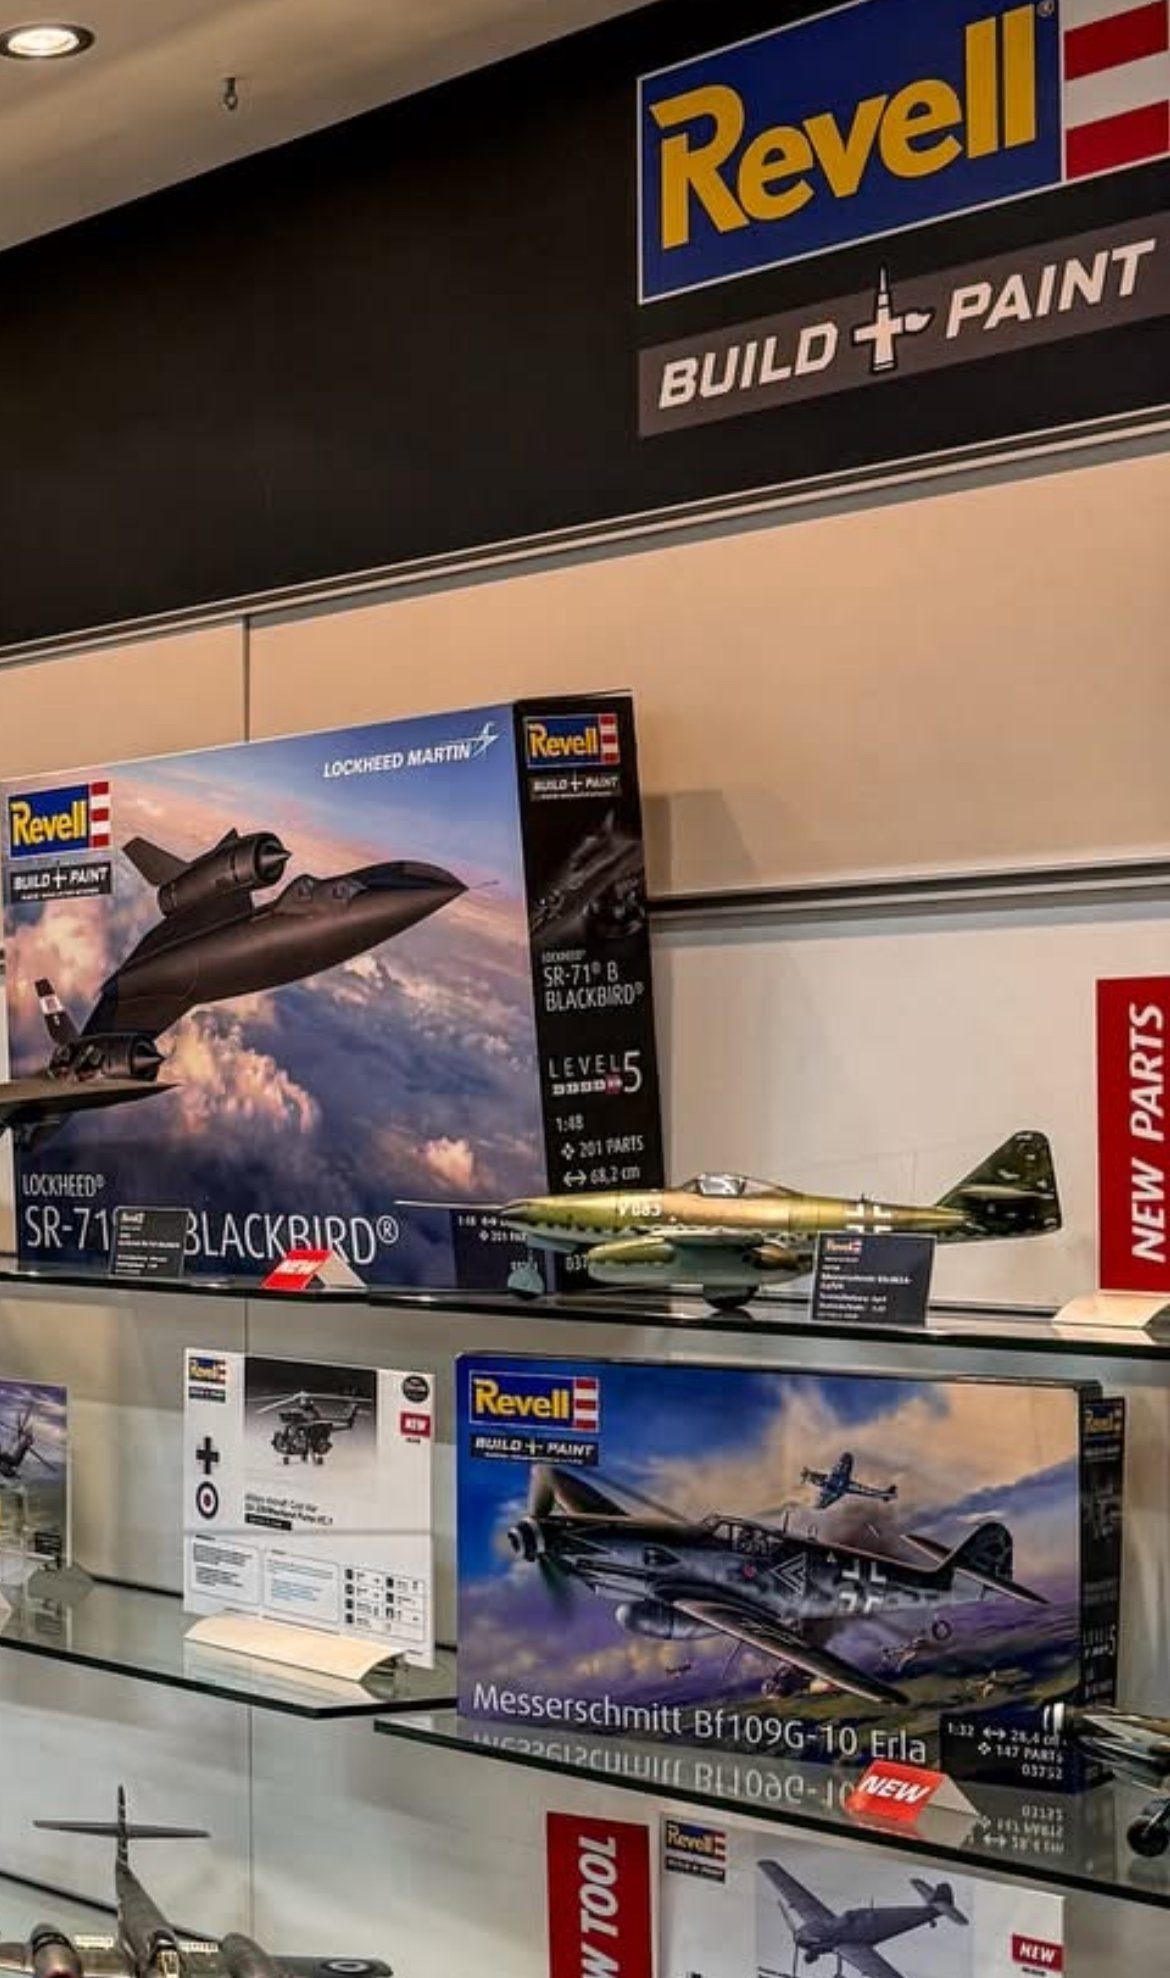
This kinda answers my questions. I think the Revell mk214a can do with some extra detail.
-
1/32 ME-262A-2a/U2
JeroenPeters replied to JeroenPeters's topic in LSM 1/35 and Larger Work In Progress
Just spotted the U4 in the new Revell releases :)))) Let’s hope my 3d model of the mk214a gun is more accurate and it wasn’t in vain.
-
1/32 ME-262A-2a/U2
JeroenPeters replied to JeroenPeters's topic in LSM 1/35 and Larger Work In Progress
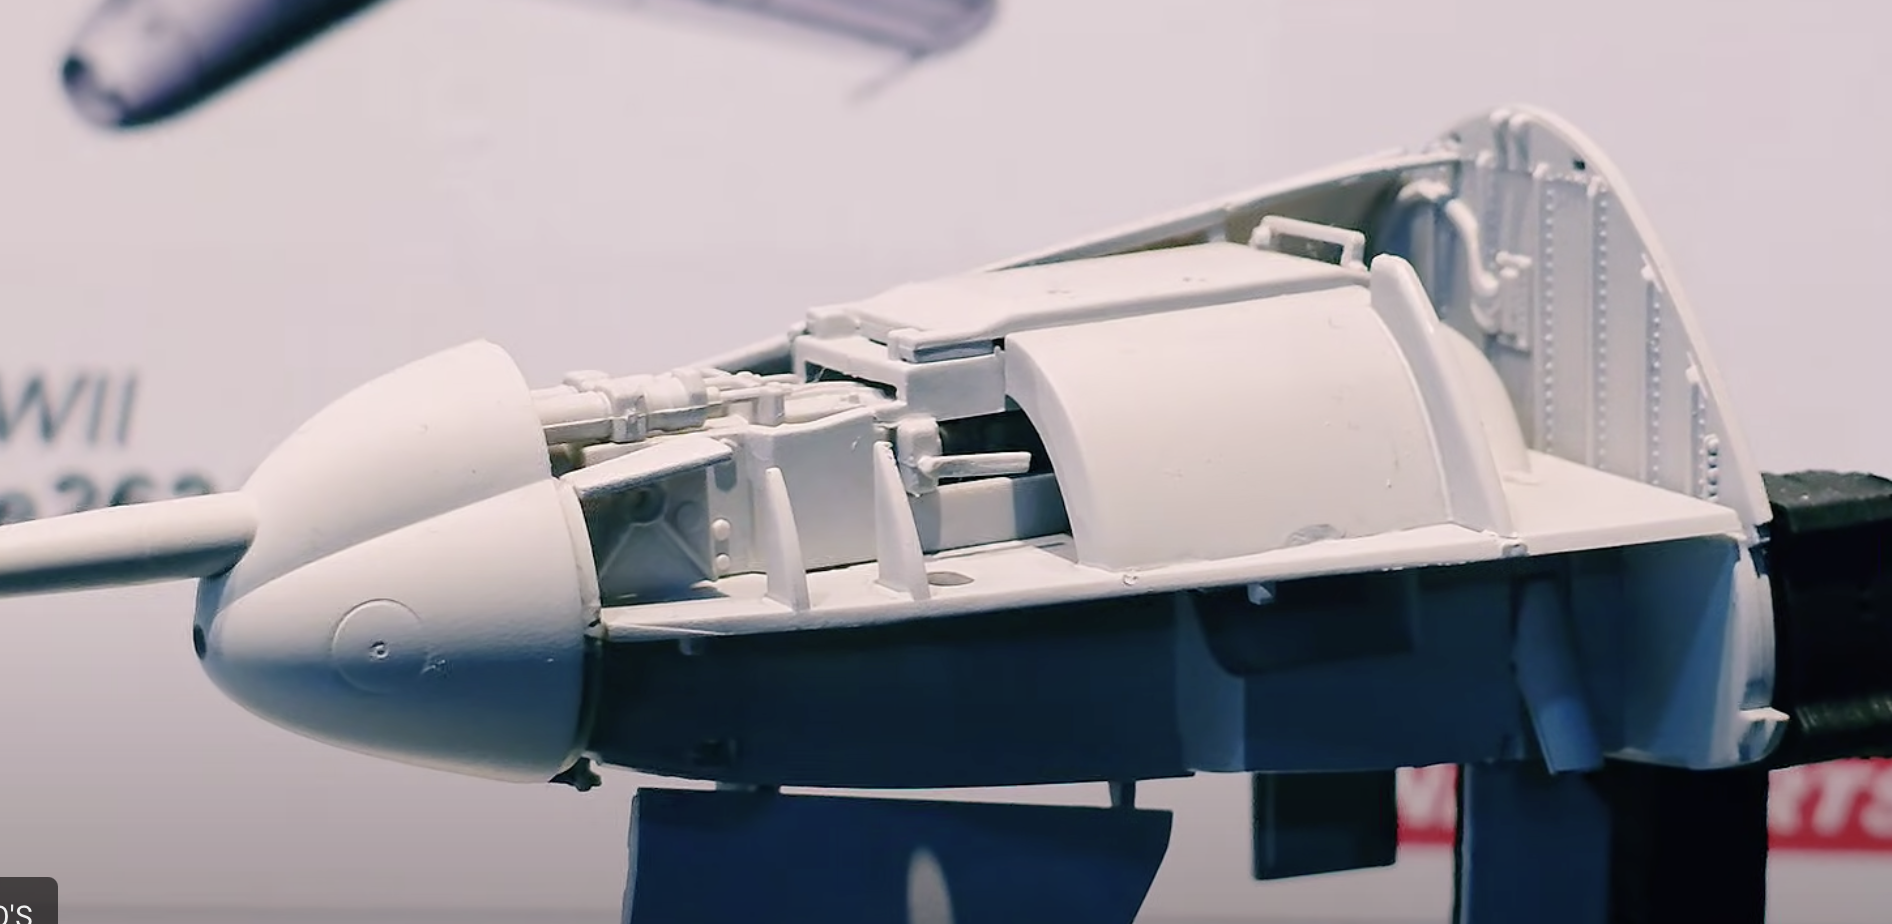
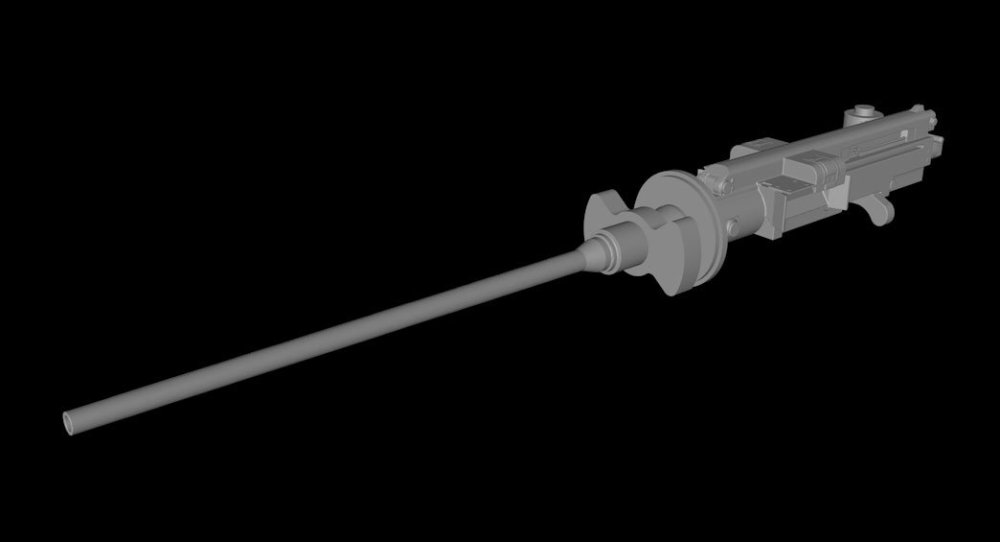
Some more work on the Mk214A gun. Found some proper drawings of the ammo and some more reference on the gun itself. Only need to find some good reference on cables, attachment in the gunbay, etc.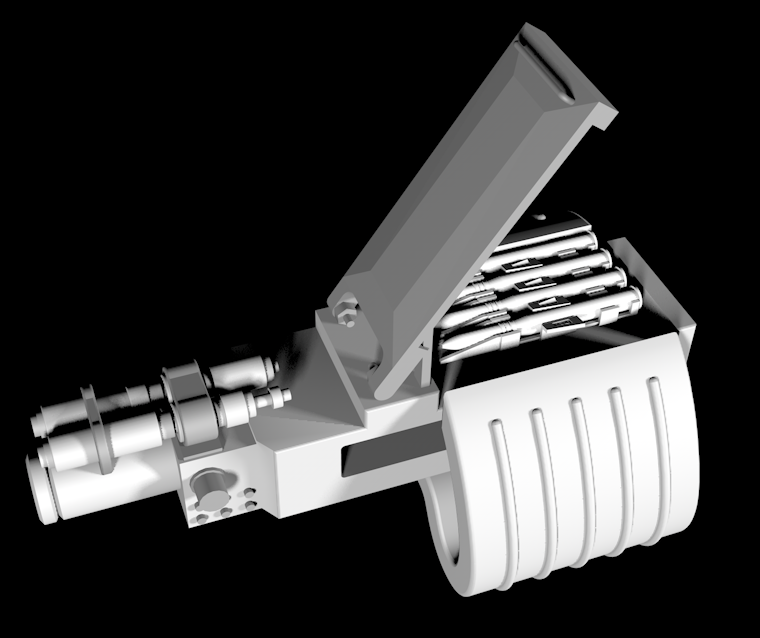
-
1/32 ME-262A-2a/U2
JeroenPeters replied to JeroenPeters's topic in LSM 1/35 and Larger Work In Progress
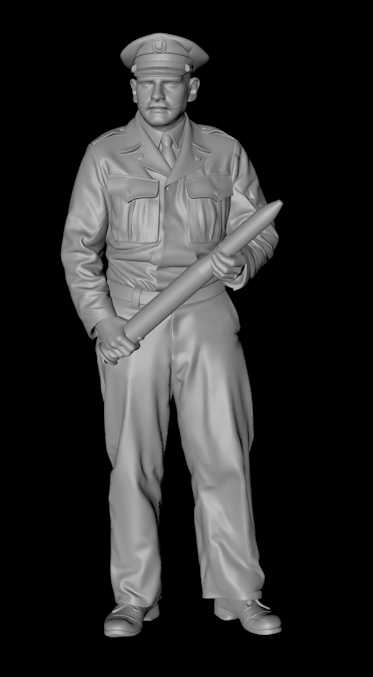
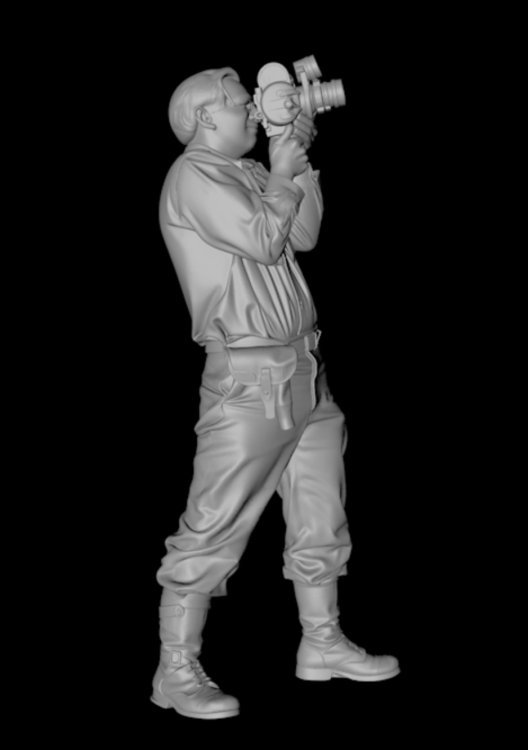
And in preparation of the U4, also working on this officer demonstrating the size of the 50mm round. Still needs a lot of tweaking on the hands...
-
1/32 ME-262A-2a/U2
JeroenPeters replied to JeroenPeters's topic in LSM 1/35 and Larger Work In Progress
With the coming Das Werk Me262 kit, I though it would be a great opportunity to build a Me262A-1a/U4. Here is the first rough work on the 50mm Mk214a cannon. Still looking for way more reference pictures of this cannon and the gunny. It will need the whole nose to be altered and probably 3D printed. We'll see. First to finish this U2!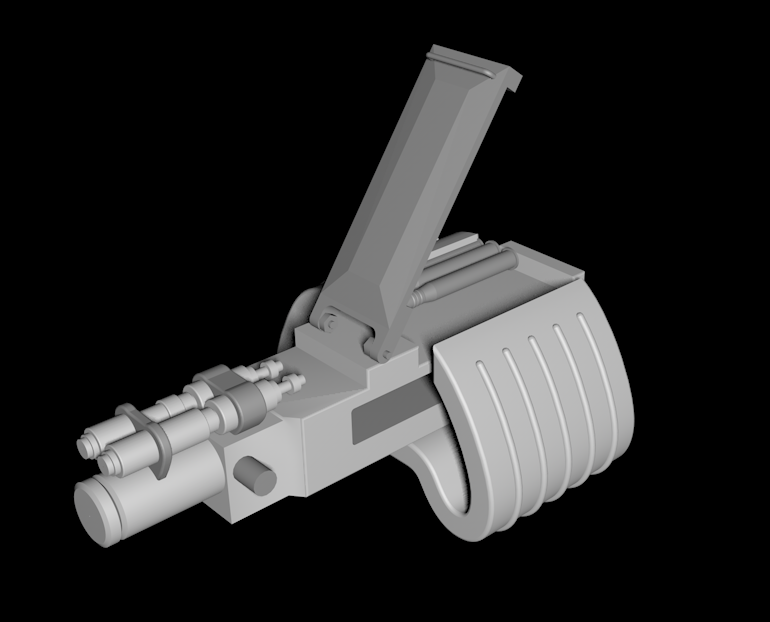
-
1/32 ME-262A-2a/U2
JeroenPeters replied to JeroenPeters's topic in LSM 1/35 and Larger Work In Progress
It’s getting busy!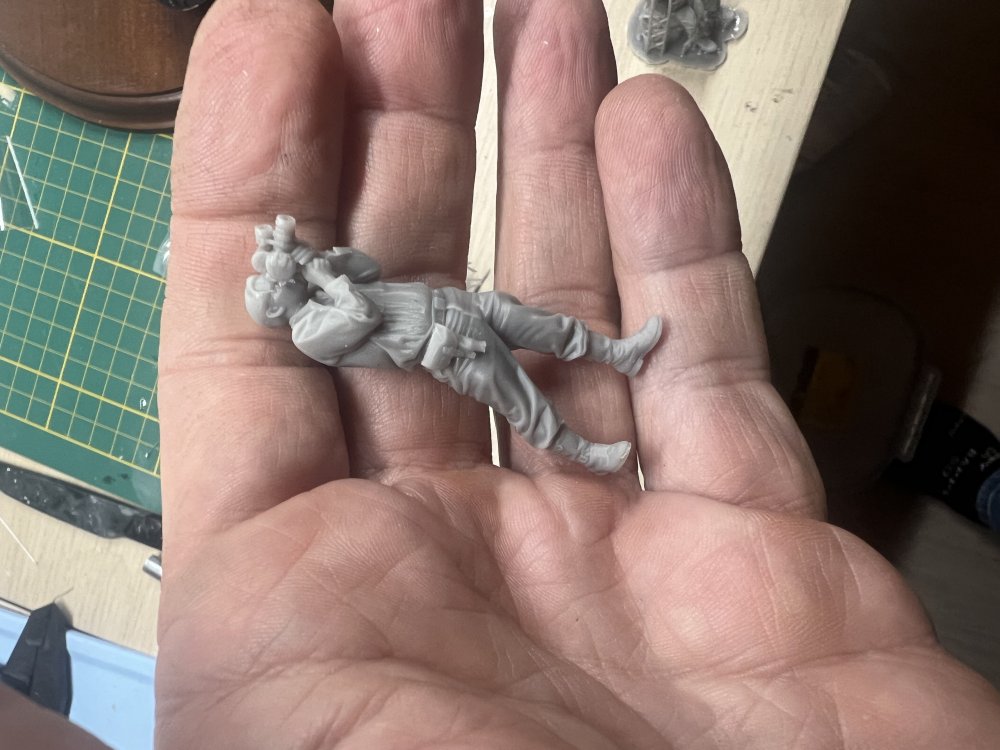

-
1/32 ME-262A-2a/U2
JeroenPeters replied to JeroenPeters's topic in LSM 1/35 and Larger Work In Progress
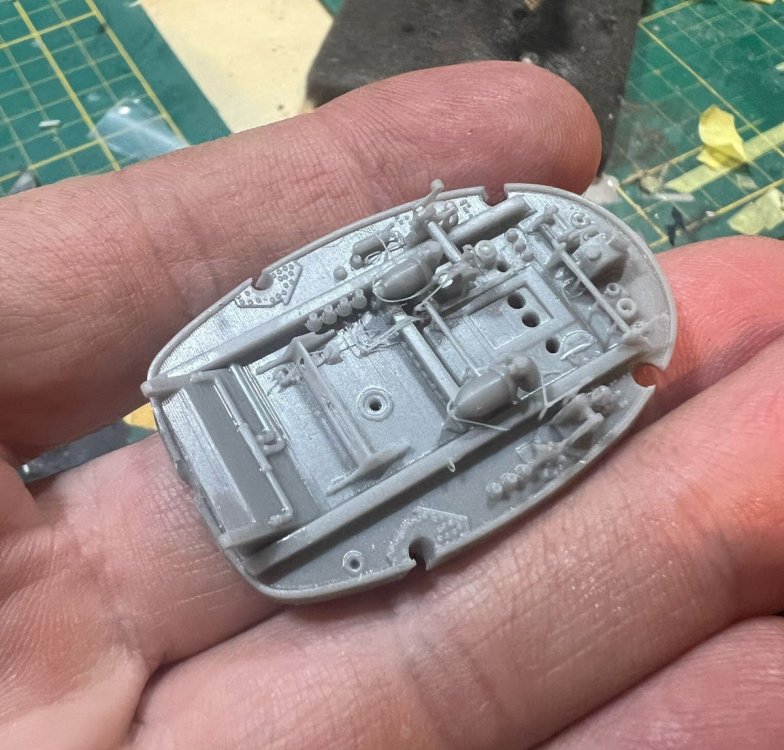
Off topic: a member on LSP sent me a Stuka kit. So i had to print this Aladdin Models Jimo211. Only need to convert it to the beefed up Ju87D version. The jumo211J. Print came out nice.
-
1/32 ME-262A-2a/U2
JeroenPeters replied to JeroenPeters's topic in LSM 1/35 and Larger Work In Progress
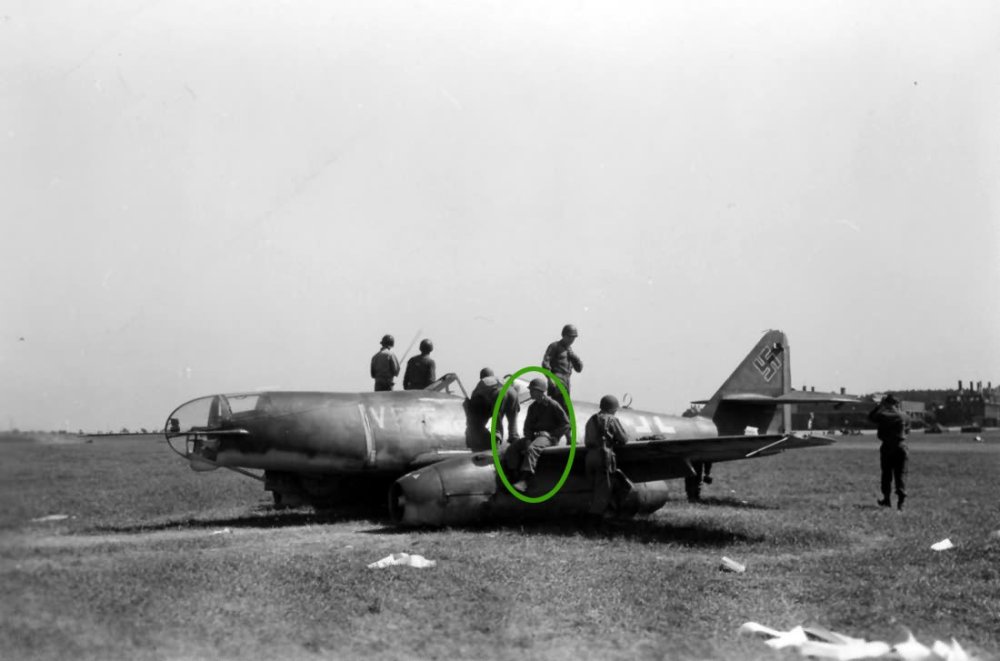
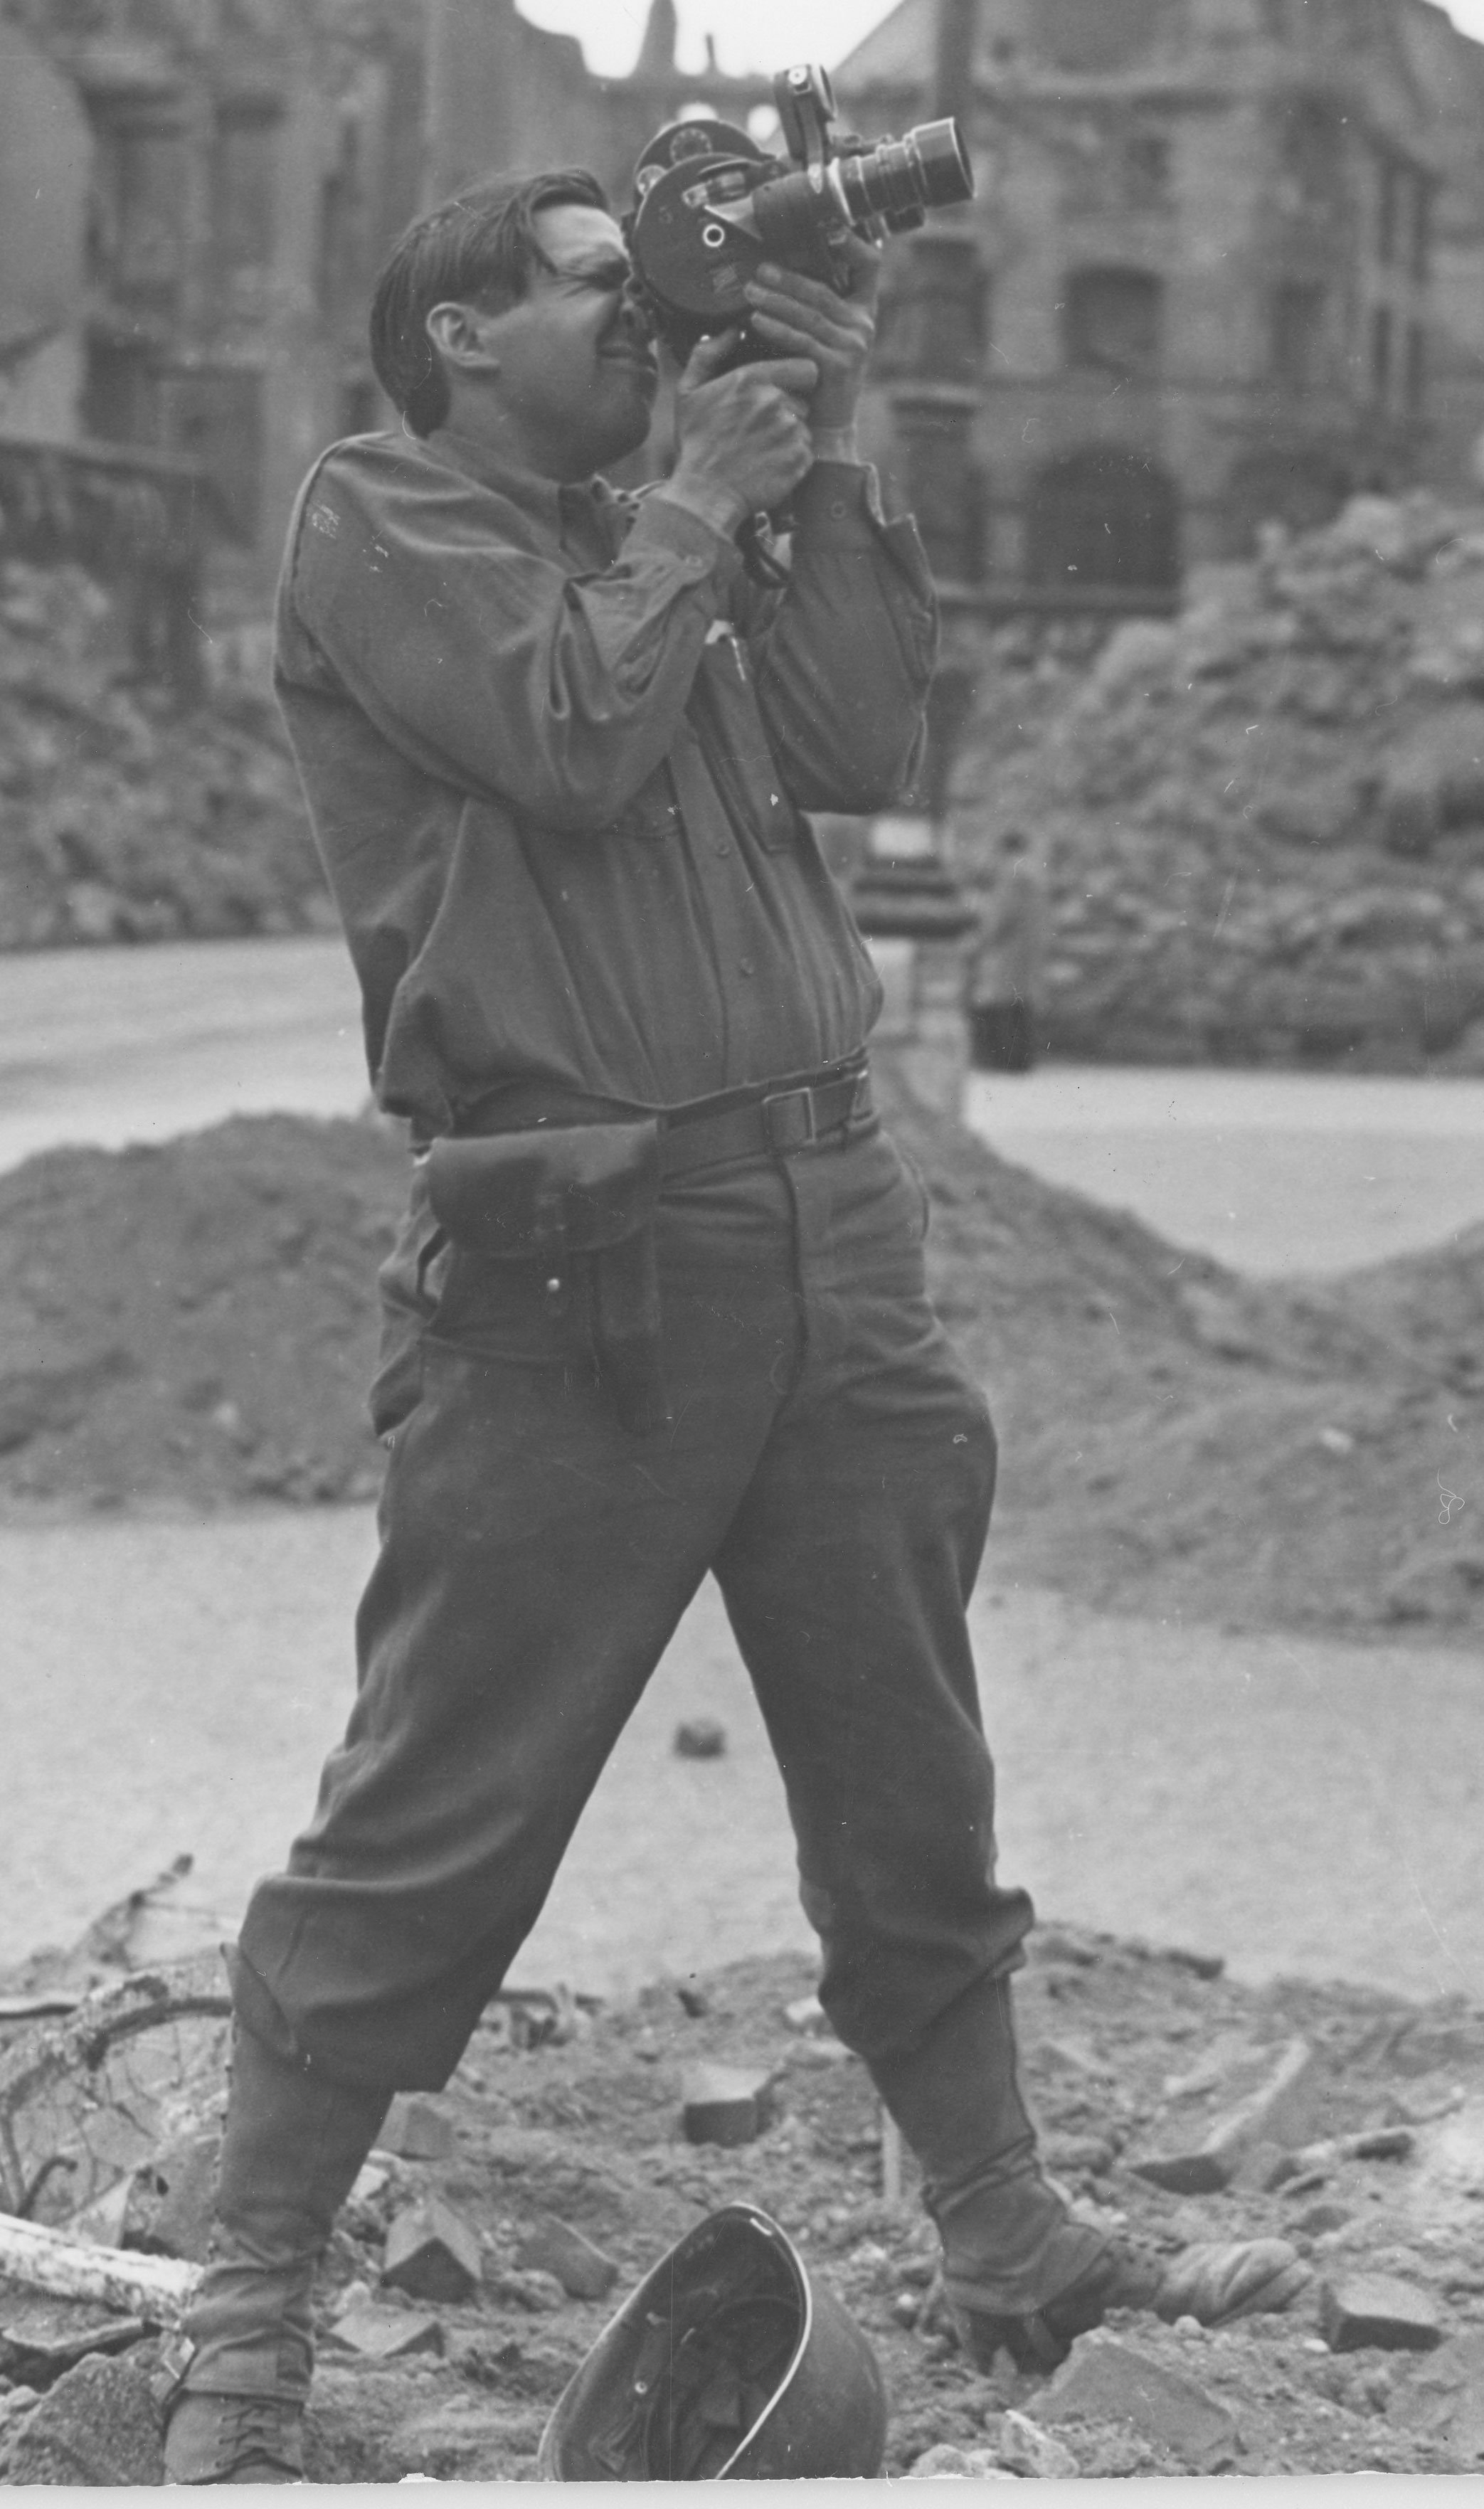
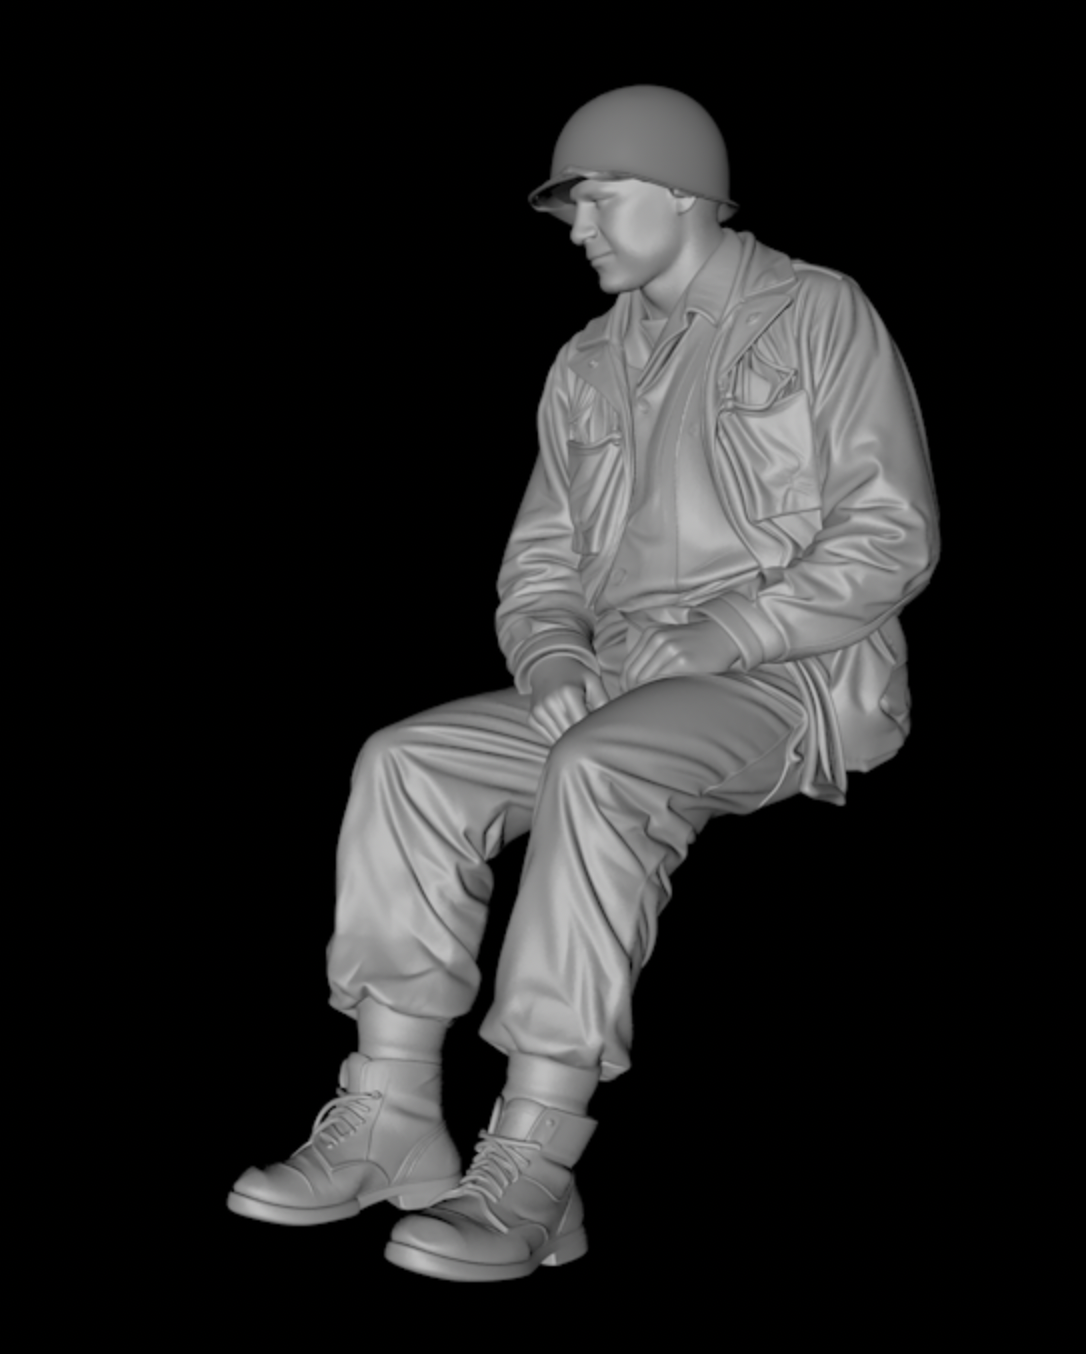
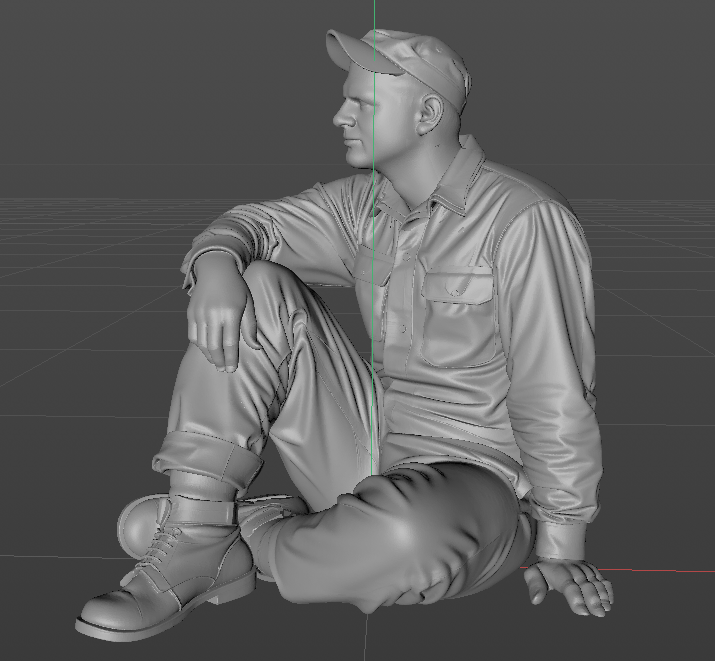
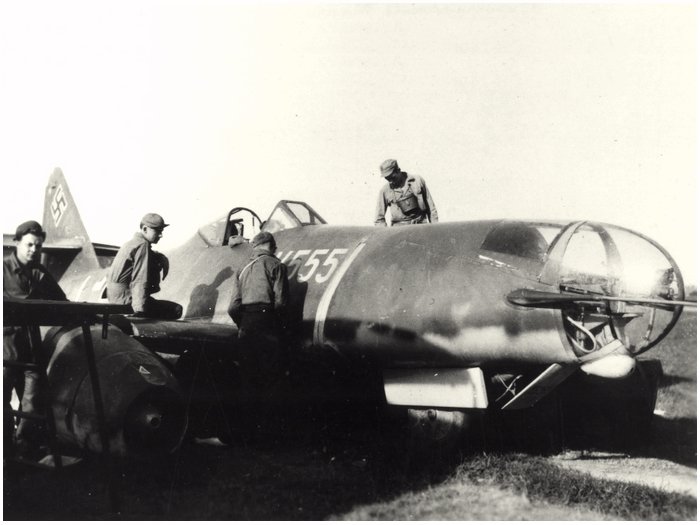
And more. This one took me a lot of work and tries. It's the guy sitting on the wing.
-
1/32 ME-262A-2a/U2
JeroenPeters replied to JeroenPeters's topic in LSM 1/35 and Larger Work In Progress
peaking inside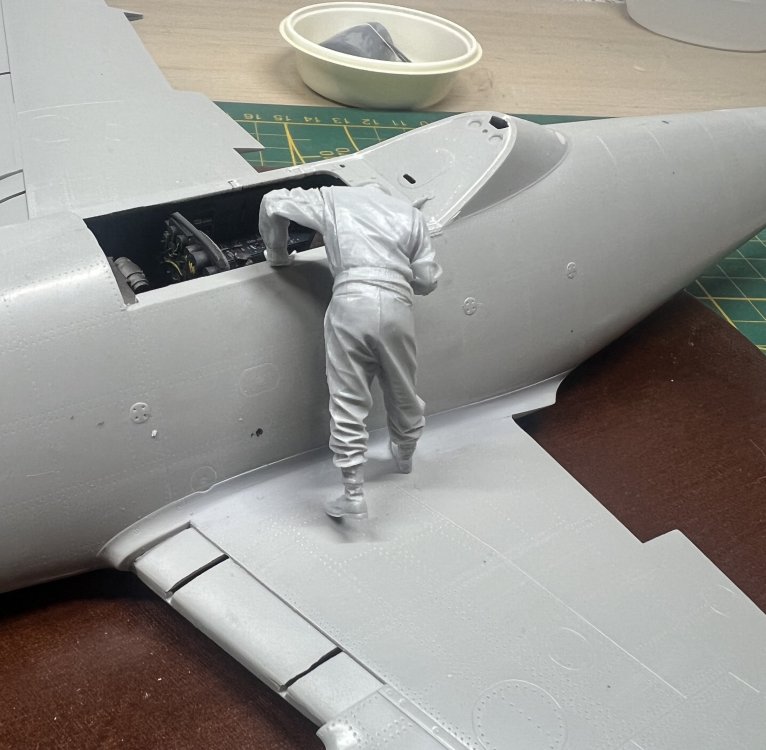
-
1/32 ME-262A-2a/U2
JeroenPeters replied to JeroenPeters's topic in LSM 1/35 and Larger Work In Progress
Thnx. Here's another one. Looks easy but you will have to give it a lot of tries and change small things in photoshop before you get it right.

-
1/32 ME-262A-2a/U2
JeroenPeters replied to JeroenPeters's topic in LSM 1/35 and Larger Work In Progress
This is how far the Ai goes. I use this black and white photo and crop it to the sitting figure. Then I tell ChatGPT to add sharpness and details and make the image bigger. Then I upload it to Hunyuan3D and generate the 3d model. Note: I use photoshop to change details in the image to help the 3d tool to interpret clothing and creases. The helmet is a detailed correct helmet I bought online and use that to replace the rather strange helmet the Ai tool creates.