JeroenPeters
-
Posts
4,904 -
Joined
-
Last visited
Content Type
Profiles
Forums
Events
Gallery
Everything posted by JeroenPeters
-

1/32 ME-262A-2a/U2
JeroenPeters replied to JeroenPeters's topic in LSM 1/35 and Larger Work In Progress
This kinda answers my questions. I think the Revell mk214a can do with some extra detail.
-
1/32 ME-262A-2a/U2
JeroenPeters replied to JeroenPeters's topic in LSM 1/35 and Larger Work In Progress
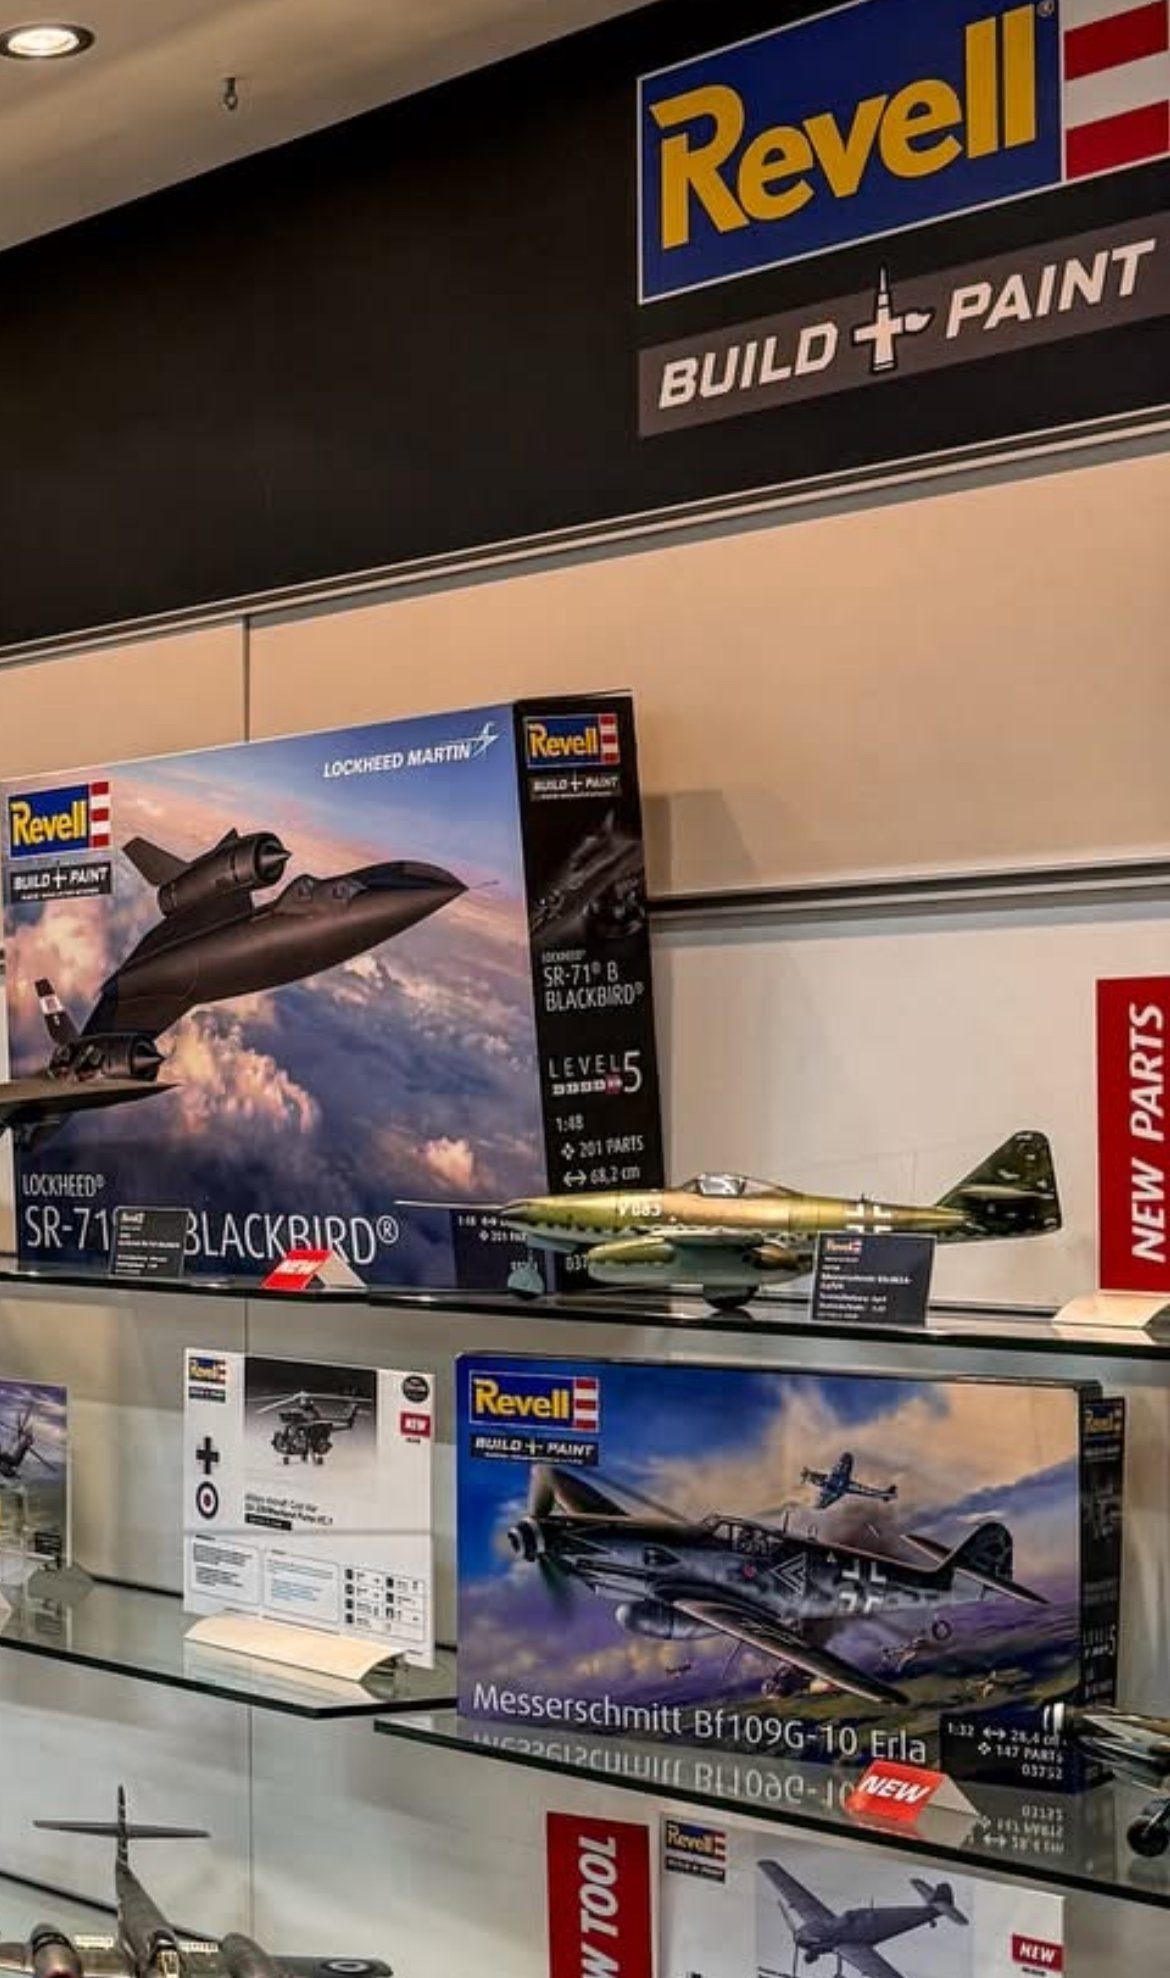
Just spotted the U4 in the new Revell releases :)))) Let’s hope my 3d model of the mk214a gun is more accurate and it wasn’t in vain.
-
1/32 ME-262A-2a/U2
JeroenPeters replied to JeroenPeters's topic in LSM 1/35 and Larger Work In Progress
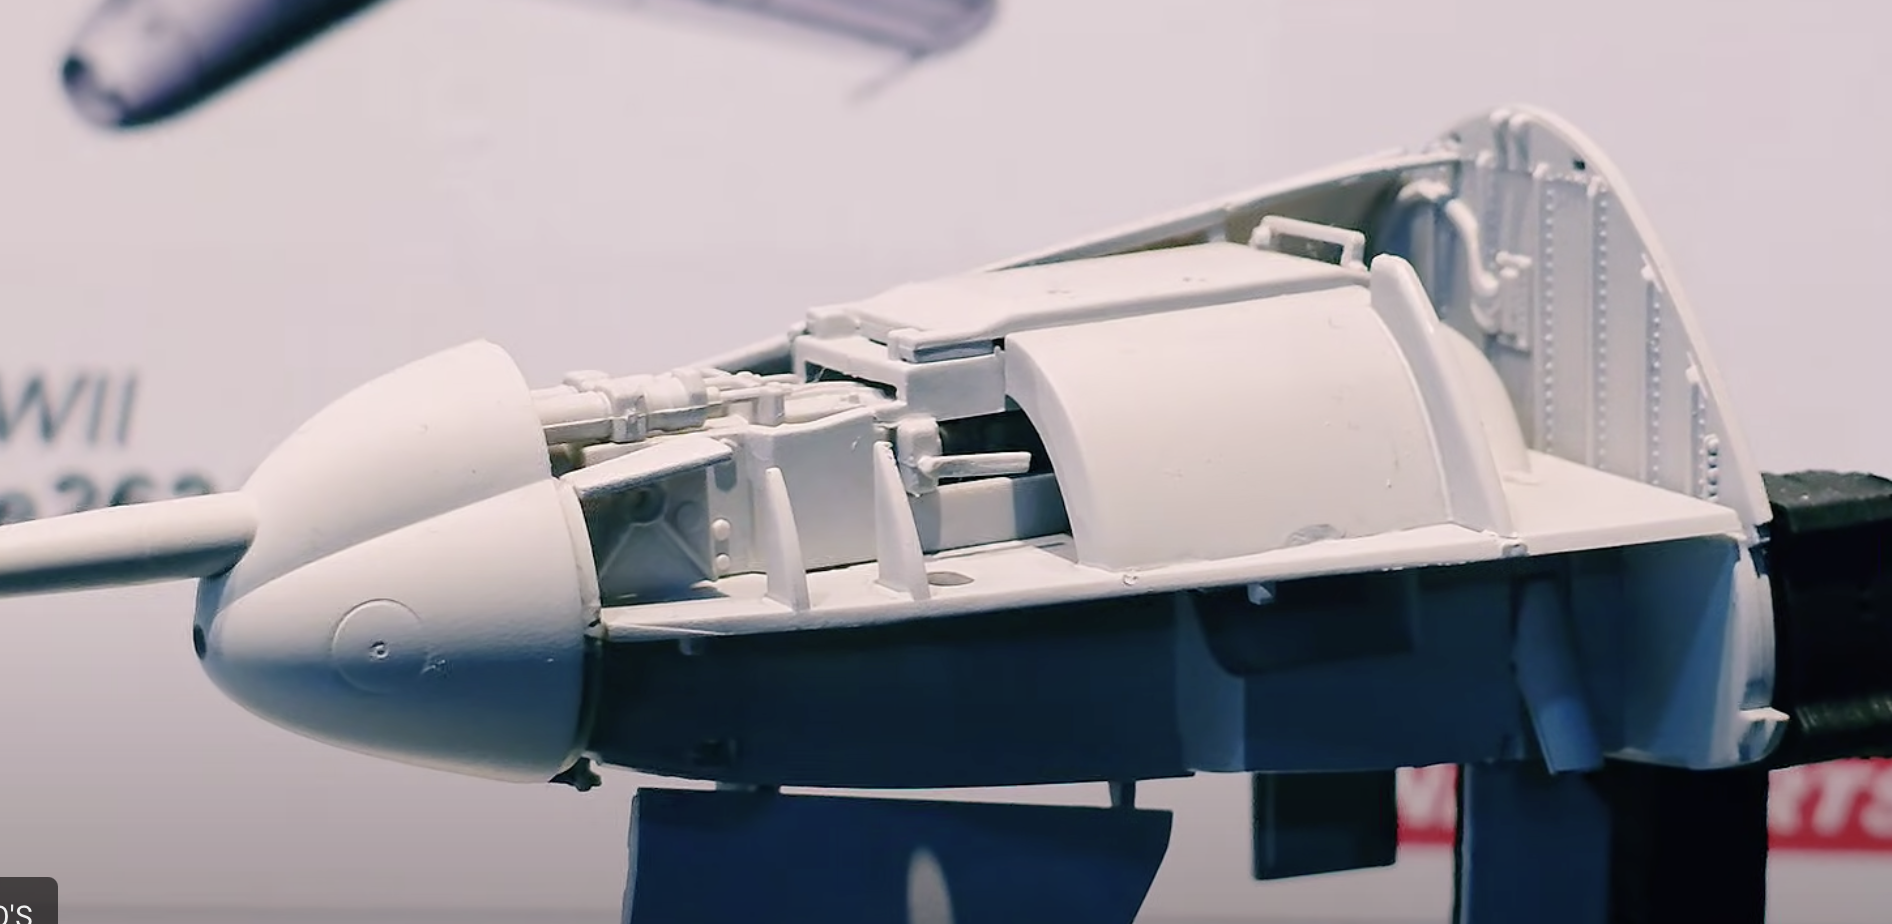
Some more work on the Mk214A gun. Found some proper drawings of the ammo and some more reference on the gun itself. Only need to find some good reference on cables, attachment in the gunbay, etc.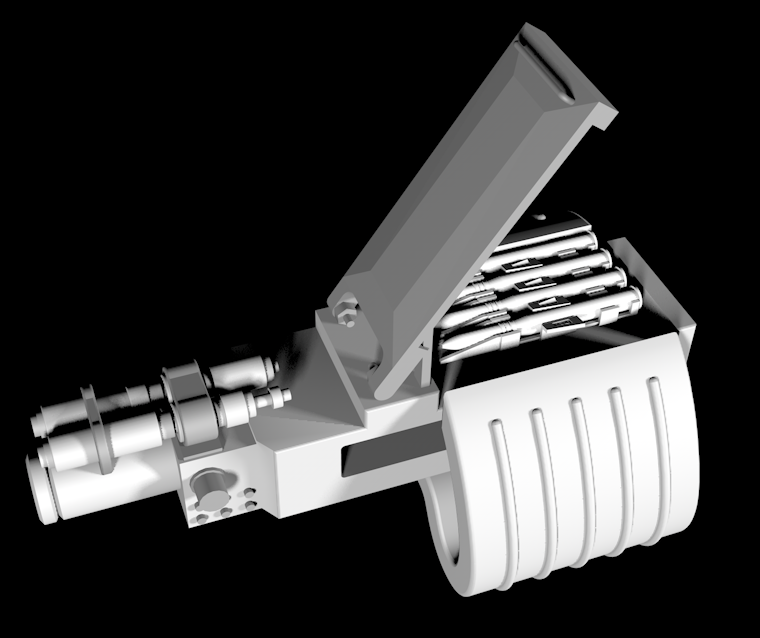
-
1/32 ME-262A-2a/U2
JeroenPeters replied to JeroenPeters's topic in LSM 1/35 and Larger Work In Progress
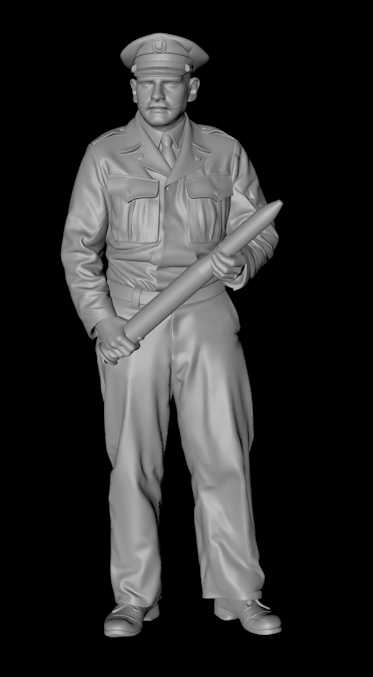
And in preparation of the U4, also working on this officer demonstrating the size of the 50mm round. Still needs a lot of tweaking on the hands...
-
1/32 ME-262A-2a/U2
JeroenPeters replied to JeroenPeters's topic in LSM 1/35 and Larger Work In Progress
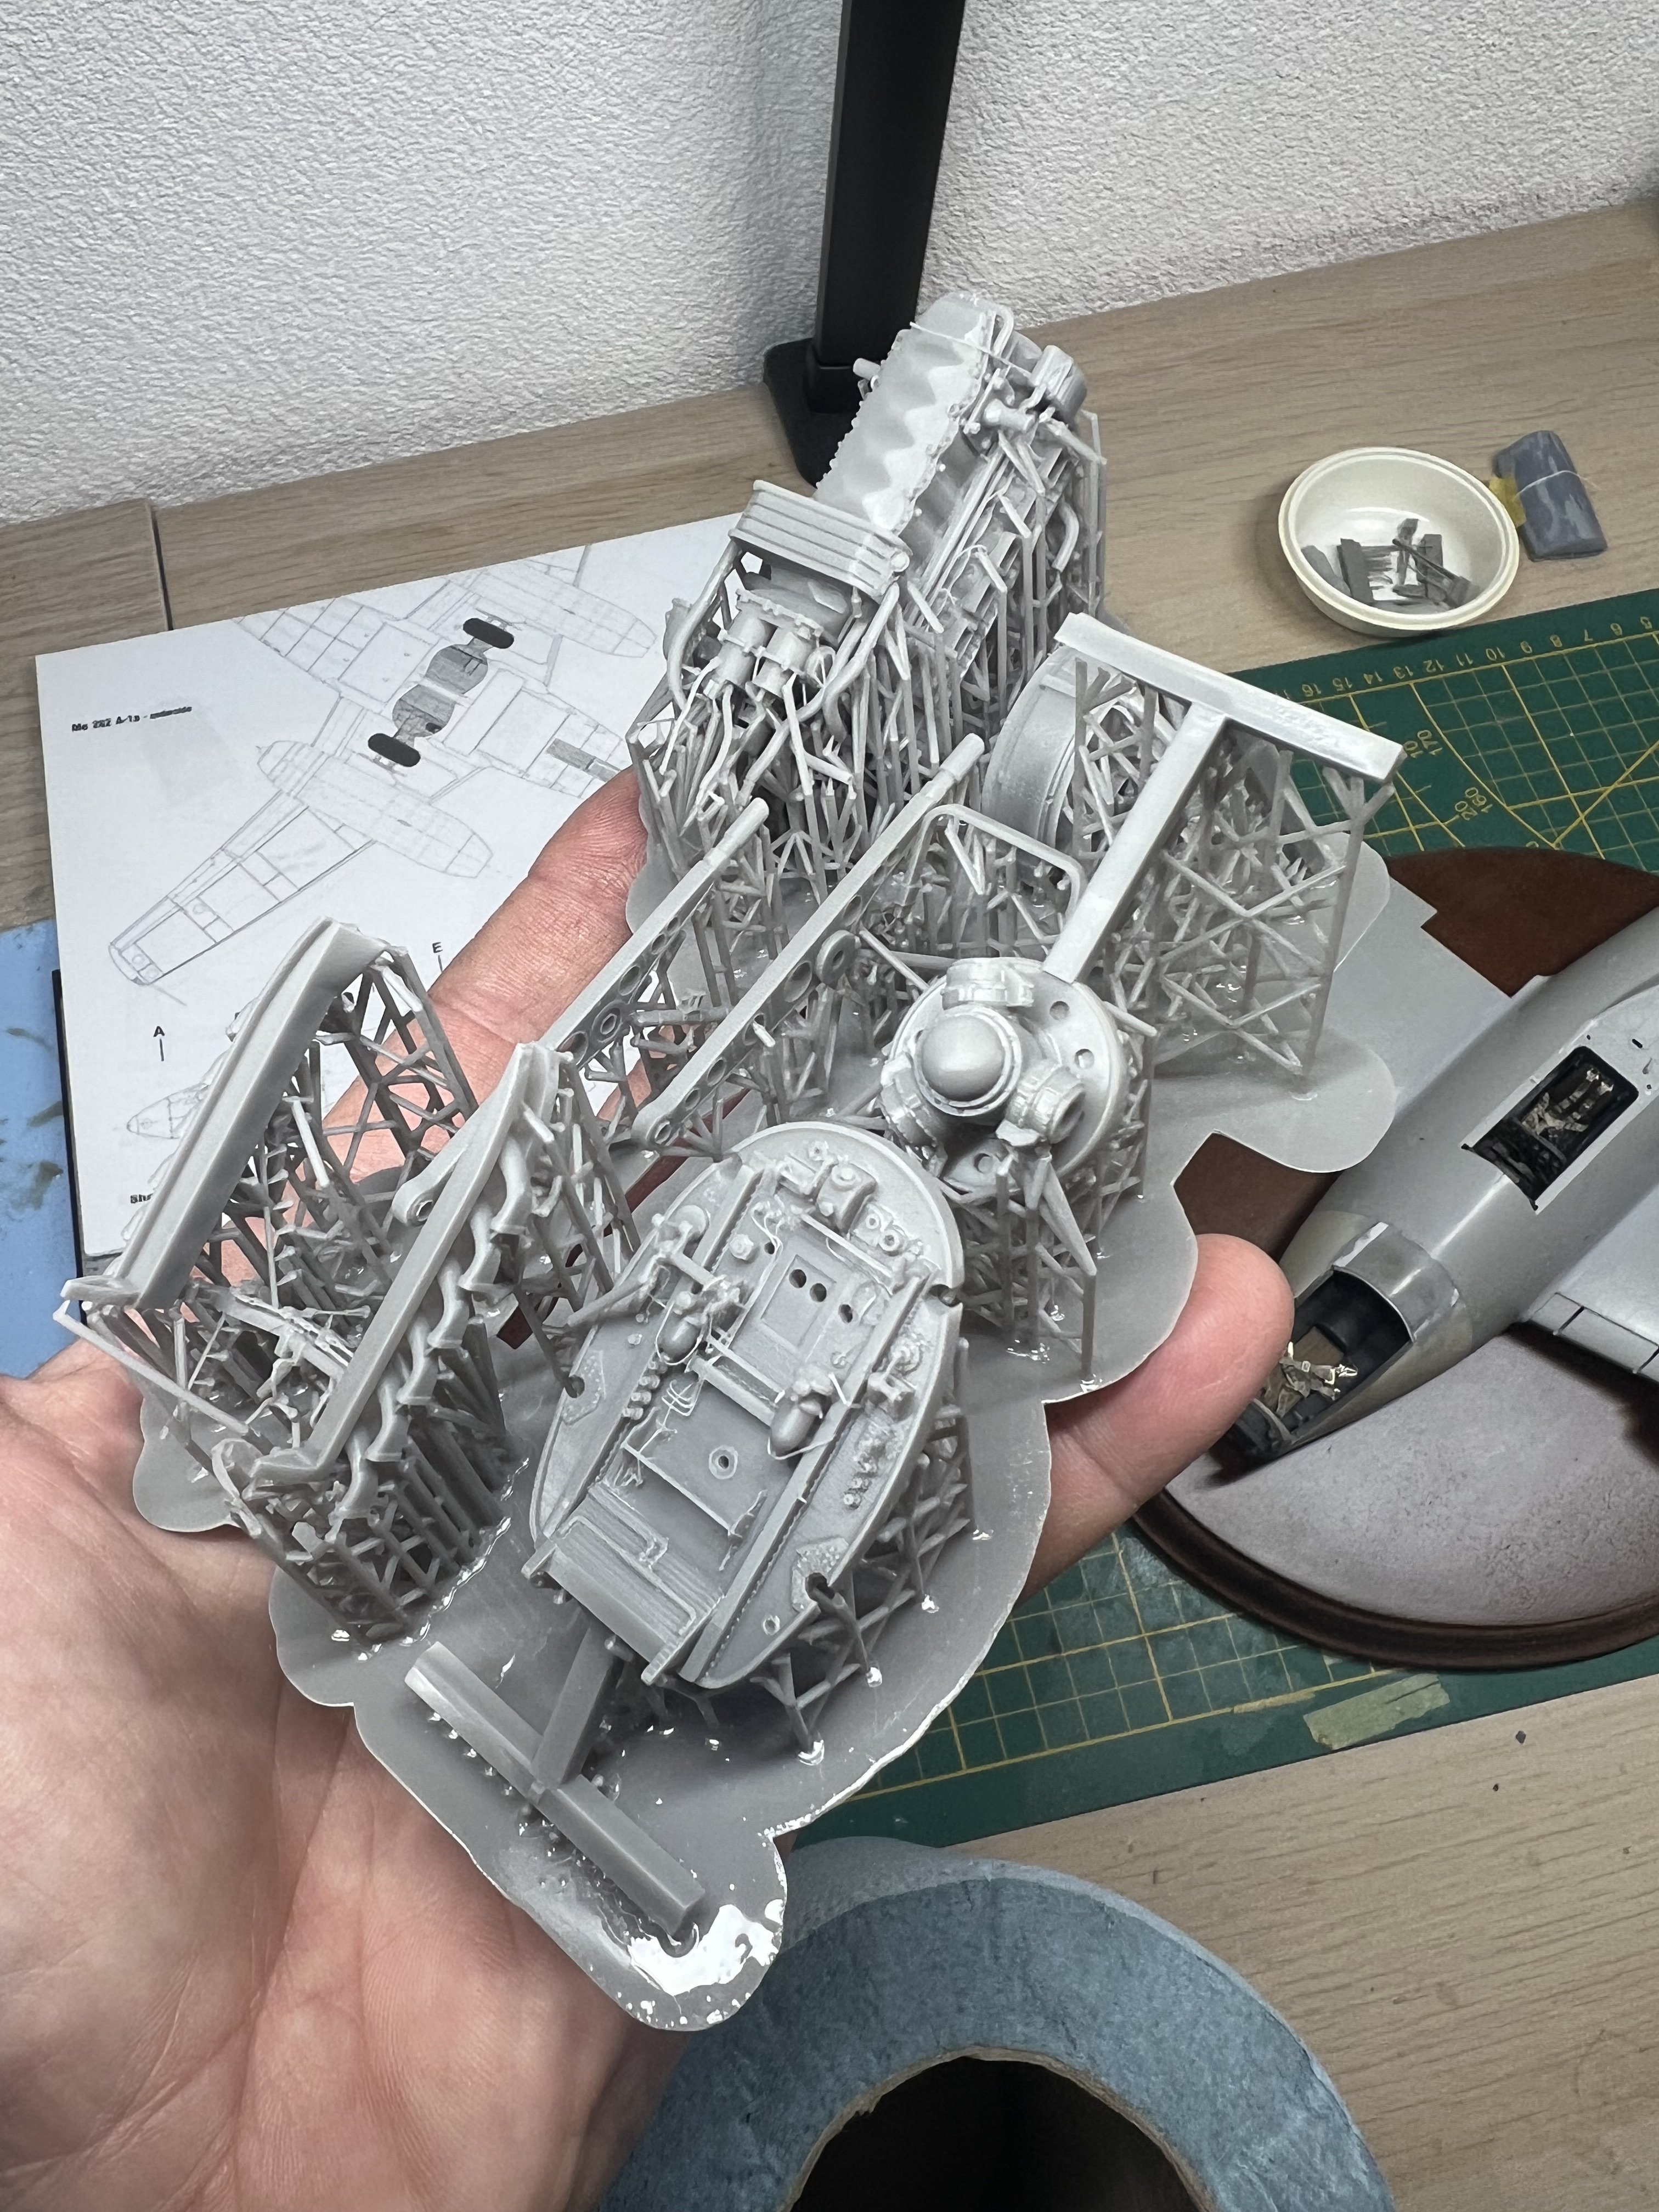
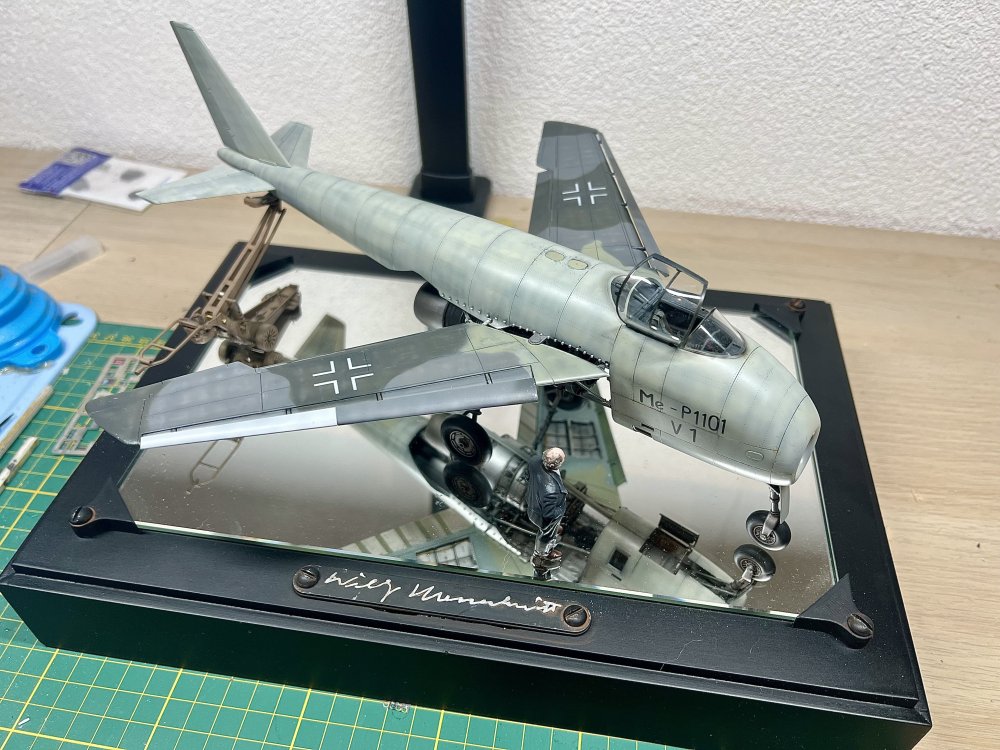
With the coming Das Werk Me262 kit, I though it would be a great opportunity to build a Me262A-1a/U4. Here is the first rough work on the 50mm Mk214a cannon. Still looking for way more reference pictures of this cannon and the gunny. It will need the whole nose to be altered and probably 3D printed. We'll see. First to finish this U2!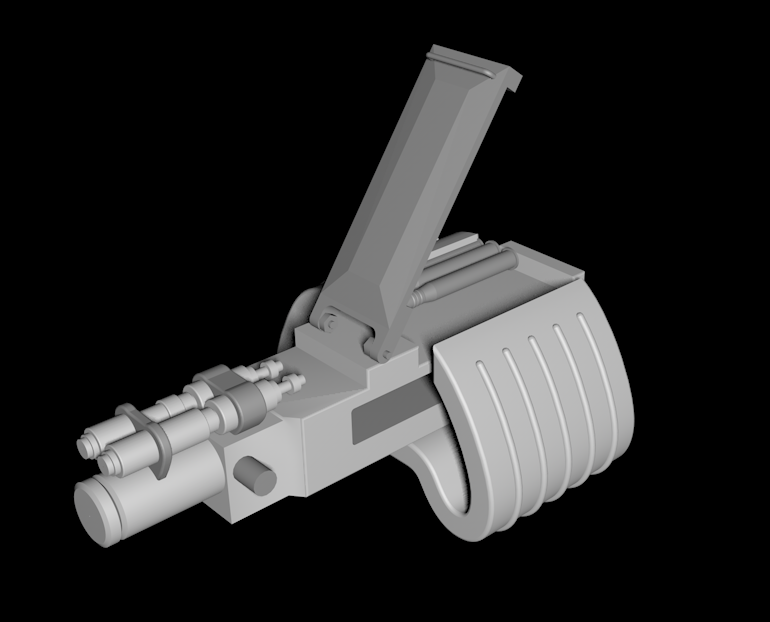
-
1/32 ME-262A-2a/U2
JeroenPeters replied to JeroenPeters's topic in LSM 1/35 and Larger Work In Progress
It’s getting busy!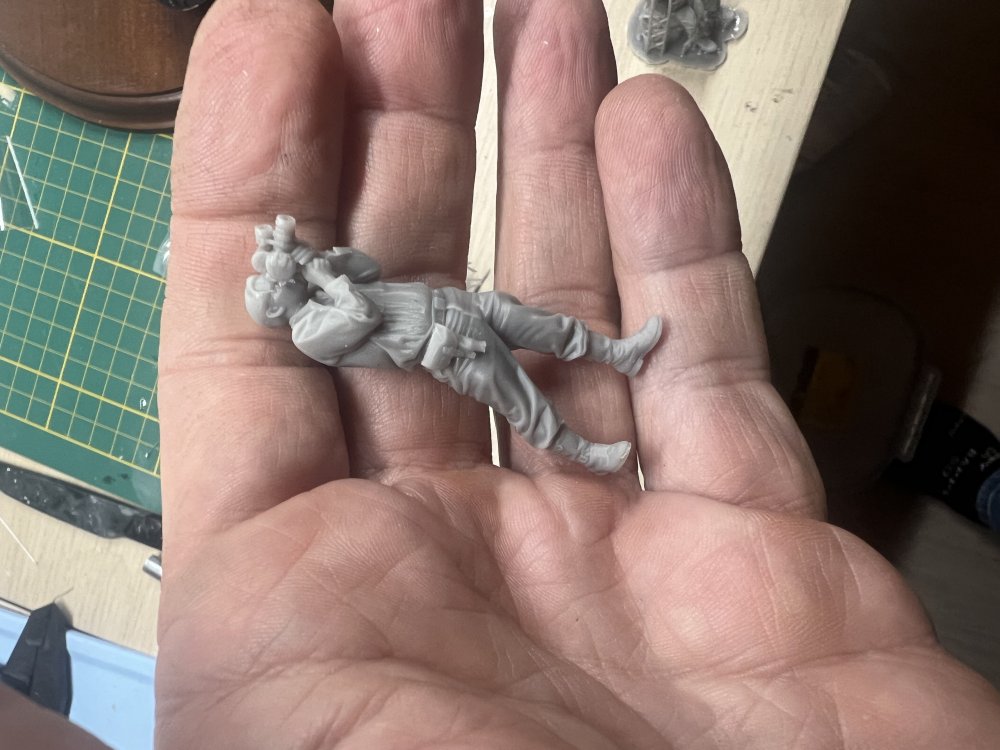

-
1/32 ME-262A-2a/U2
JeroenPeters replied to JeroenPeters's topic in LSM 1/35 and Larger Work In Progress
Off topic: a member on LSP sent me a Stuka kit. So i had to print this Aladdin Models Jimo211. Only need to convert it to the beefed up Ju87D version. The jumo211J. Print came out nice.
-
1/32 ME-262A-2a/U2
JeroenPeters replied to JeroenPeters's topic in LSM 1/35 and Larger Work In Progress
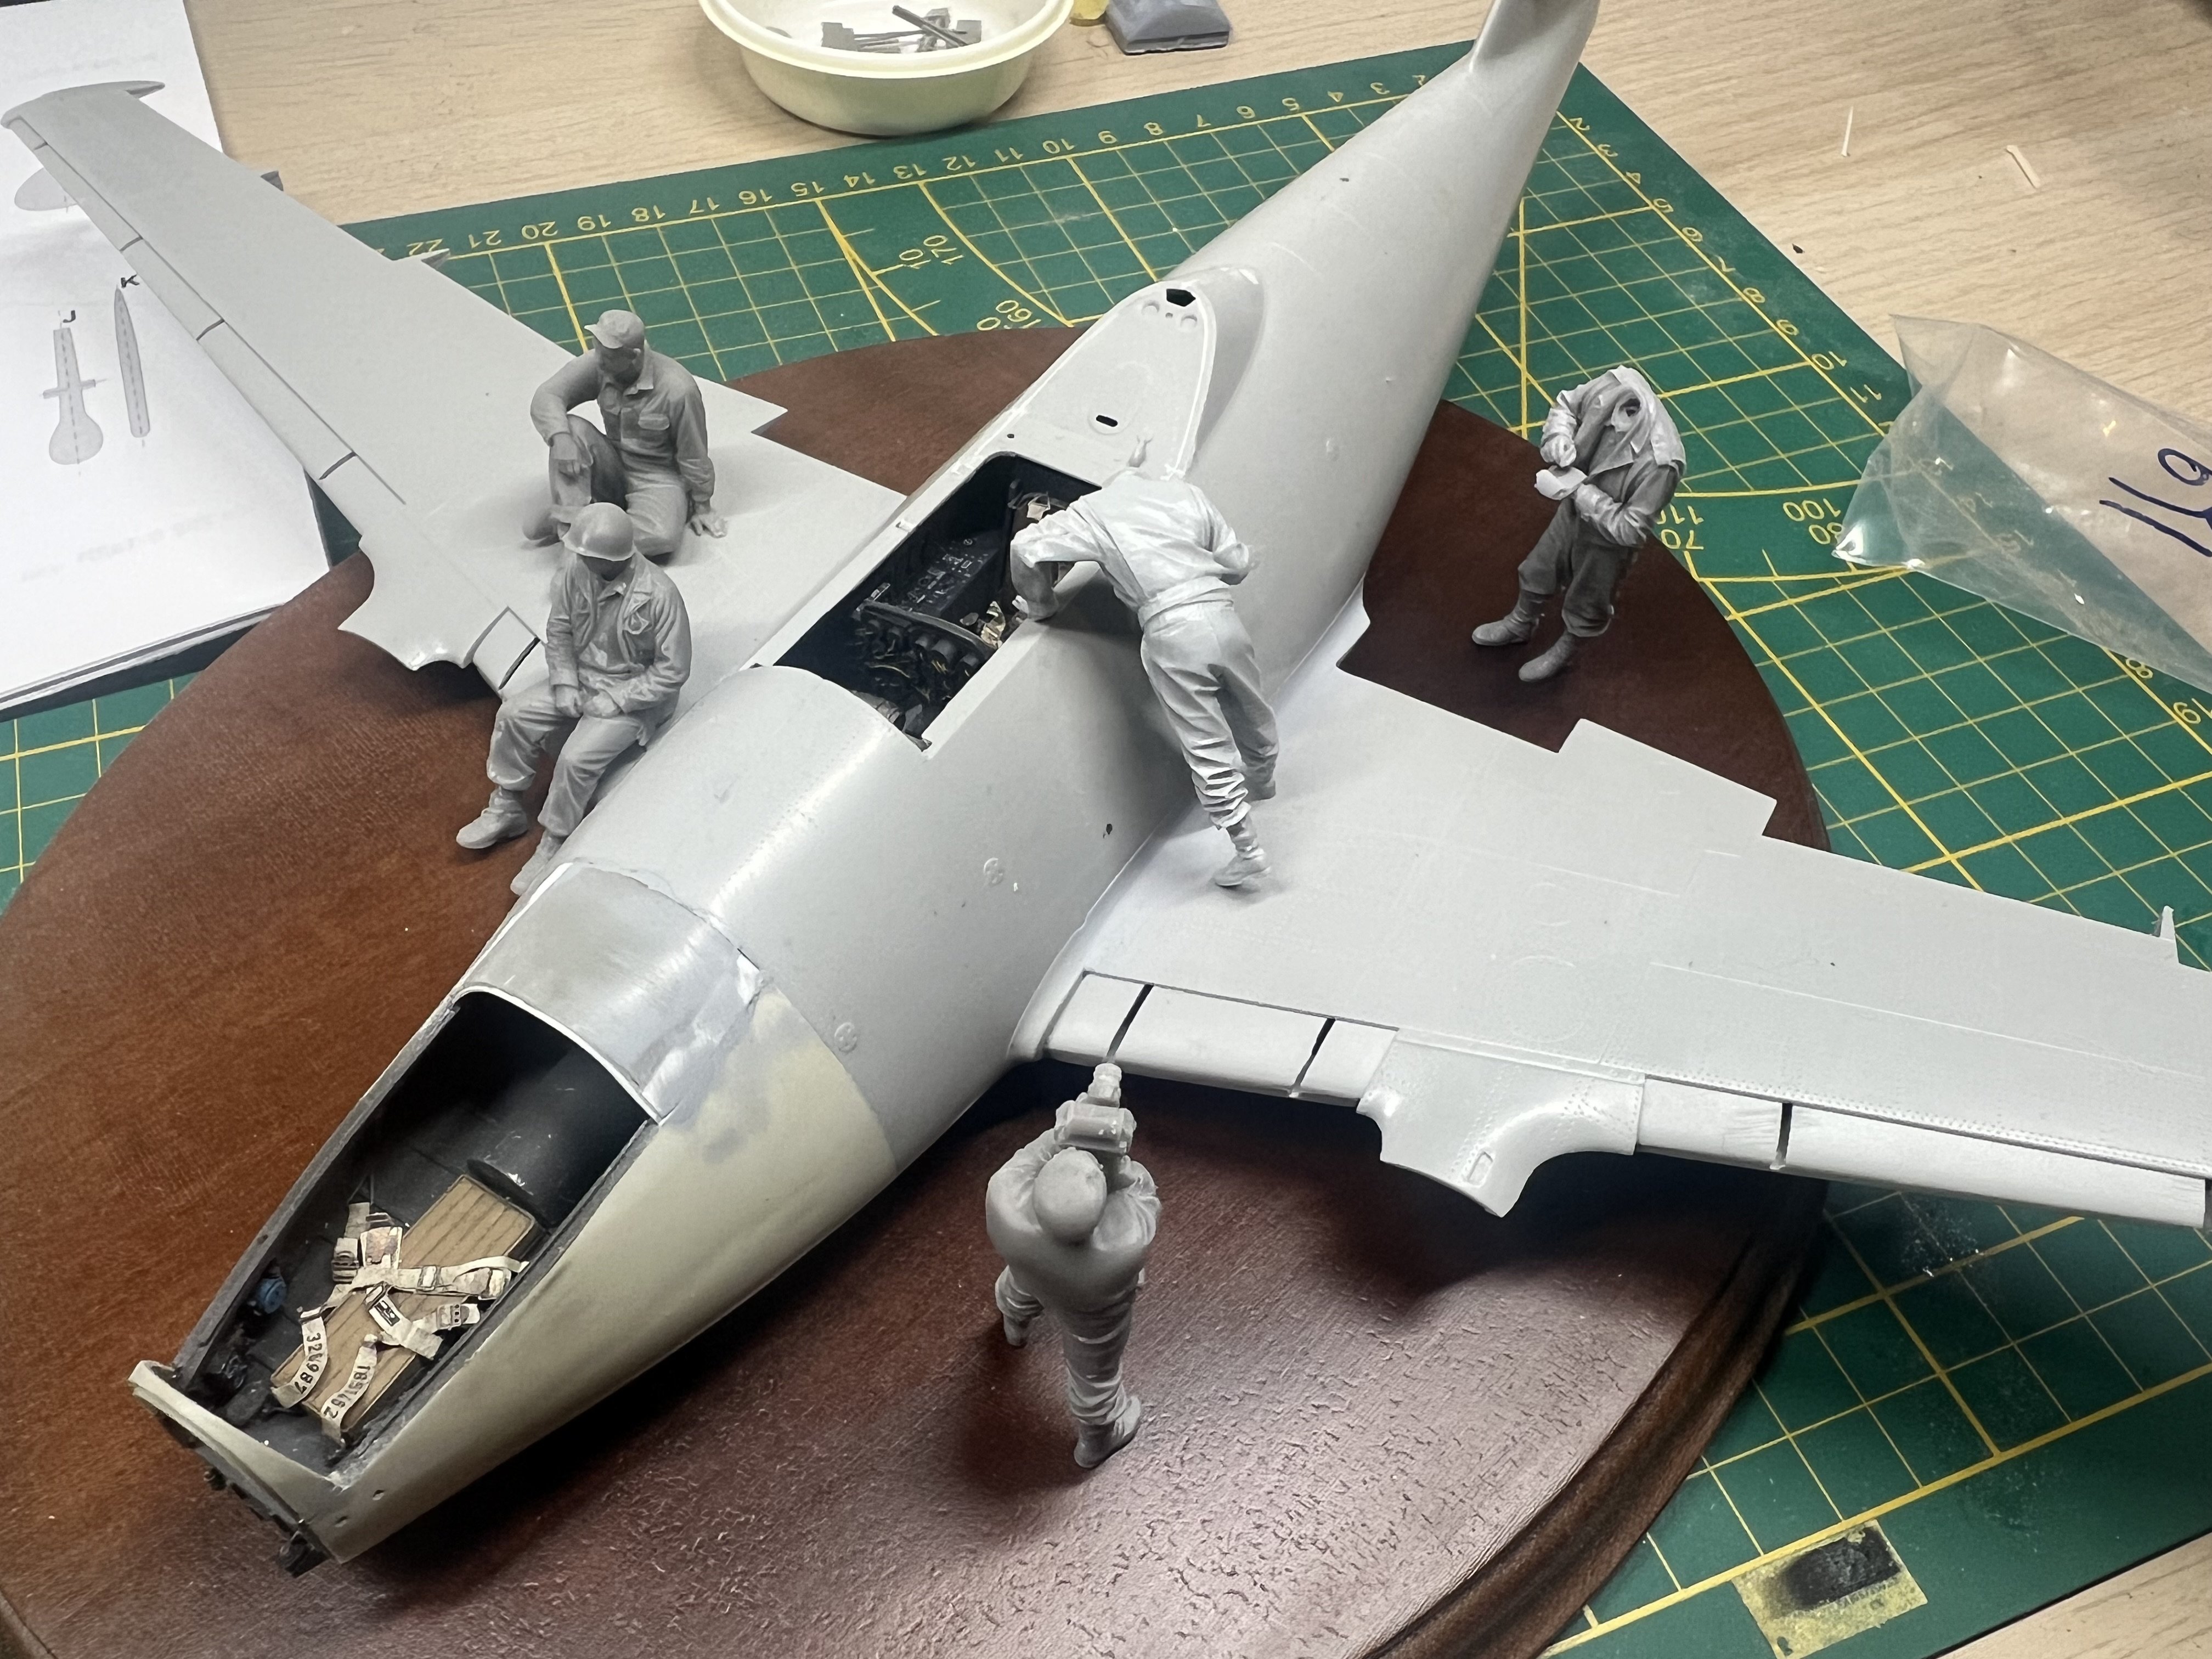
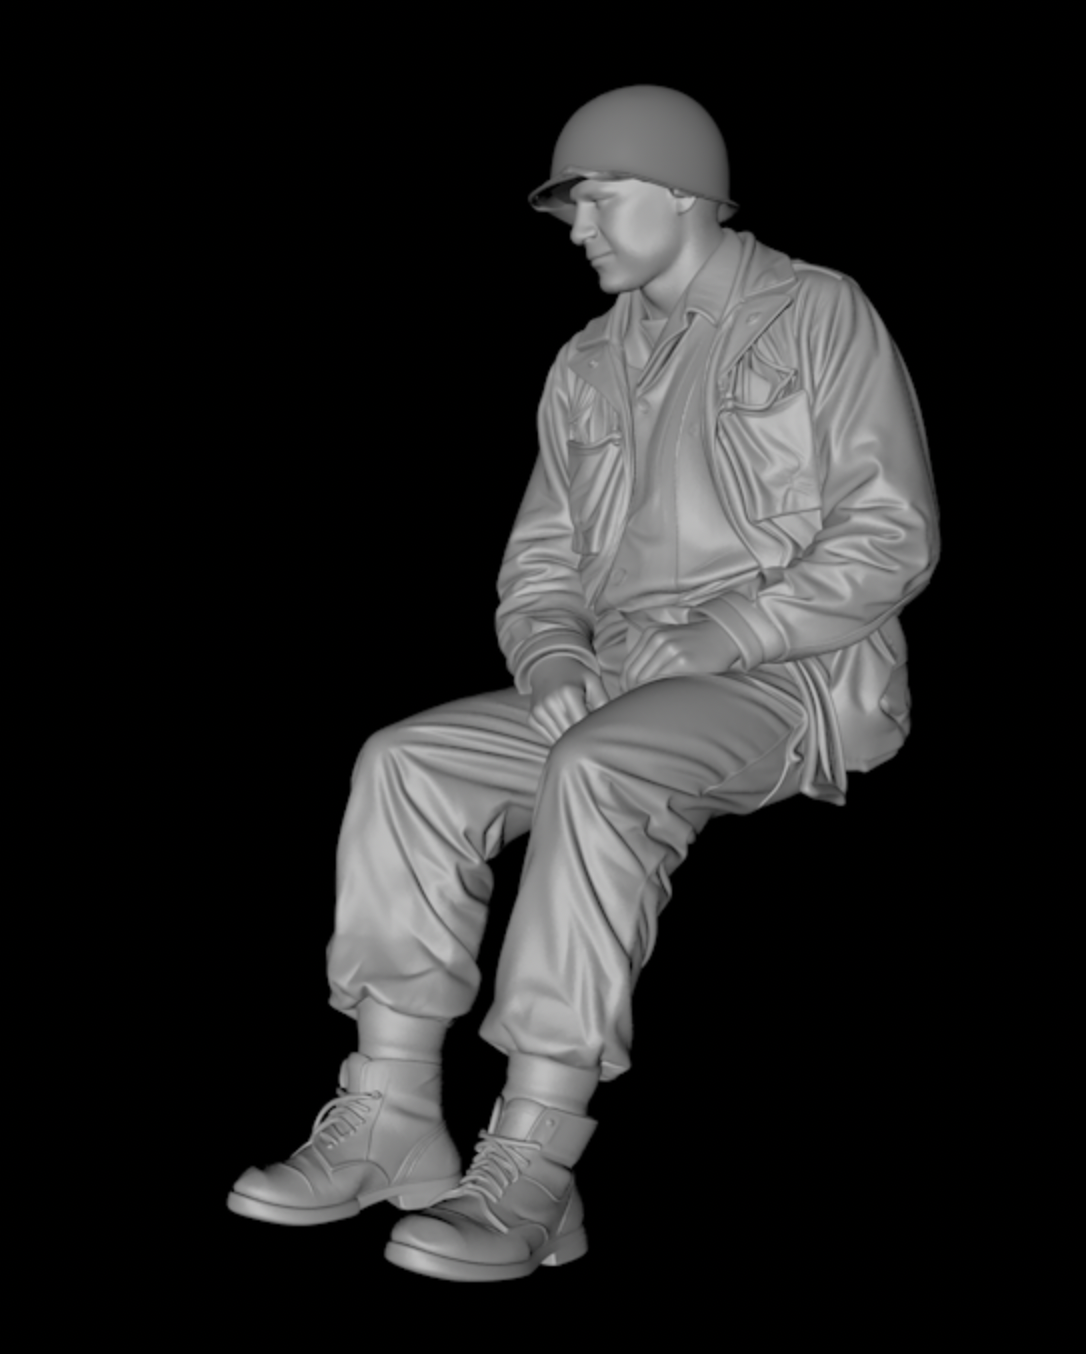
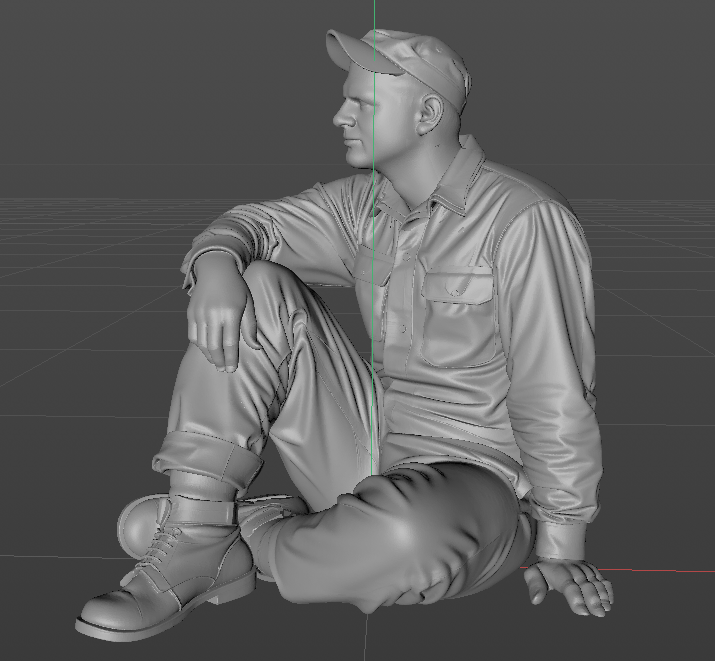
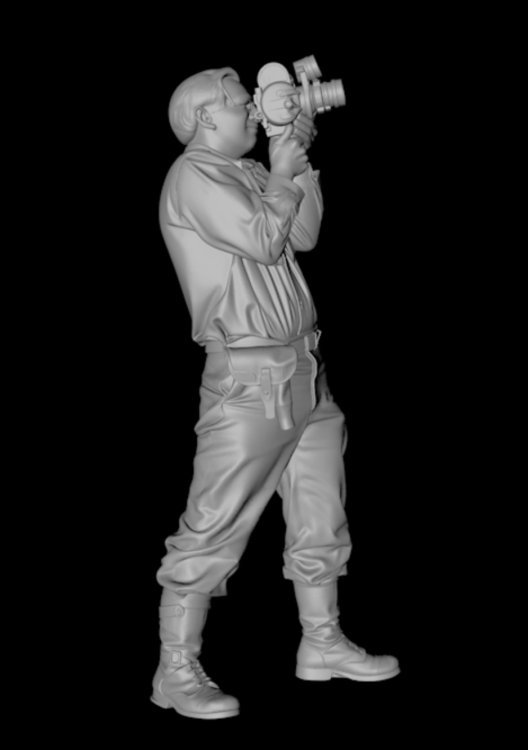
And more. This one took me a lot of work and tries. It's the guy sitting on the wing.
-
1/32 ME-262A-2a/U2
JeroenPeters replied to JeroenPeters's topic in LSM 1/35 and Larger Work In Progress
peaking inside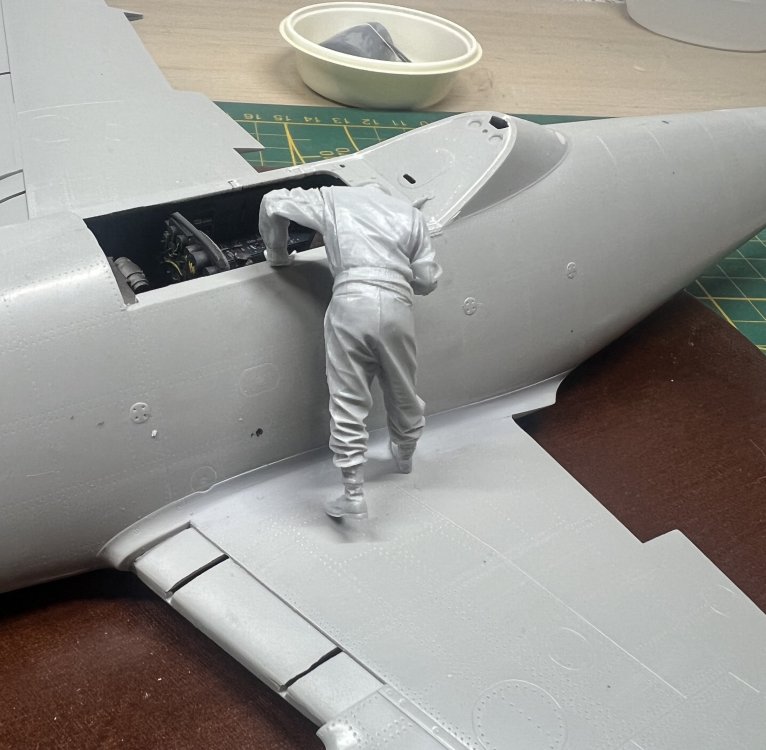
-
1/32 ME-262A-2a/U2
JeroenPeters replied to JeroenPeters's topic in LSM 1/35 and Larger Work In Progress
Thnx. Here's another one. Looks easy but you will have to give it a lot of tries and change small things in photoshop before you get it right.

-
1/32 ME-262A-2a/U2
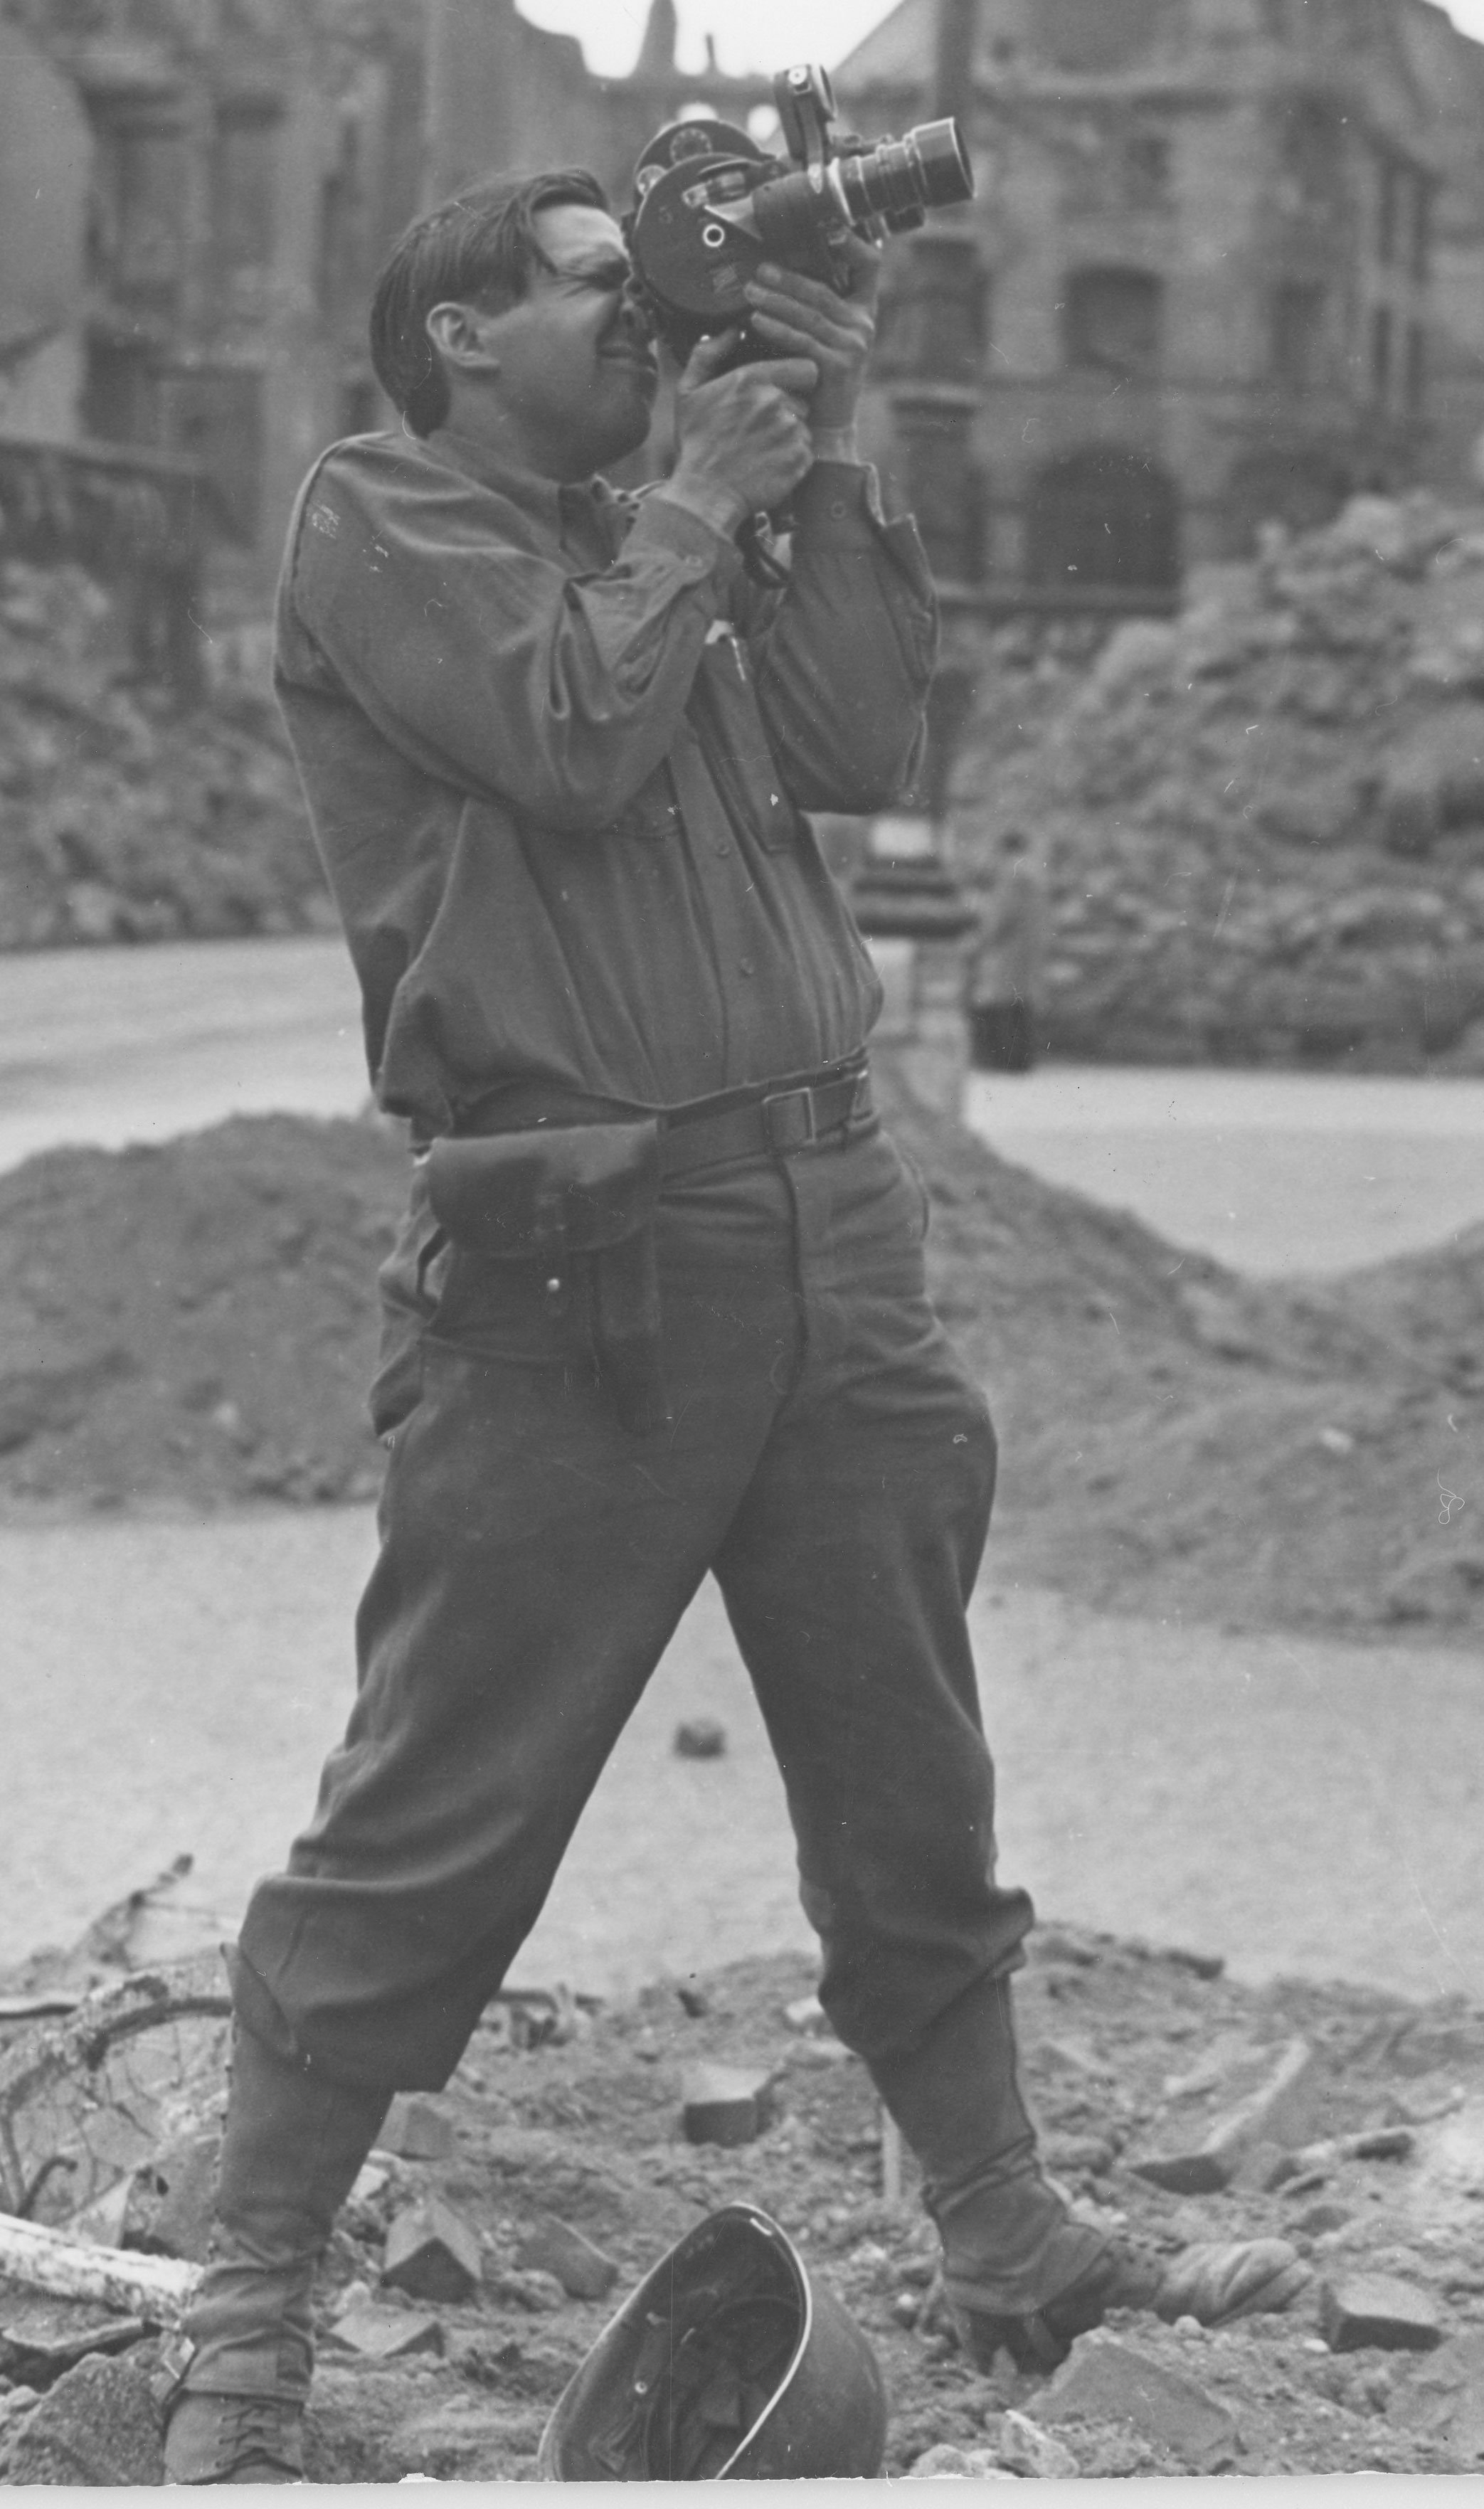
JeroenPeters replied to JeroenPeters's topic in LSM 1/35 and Larger Work In Progress
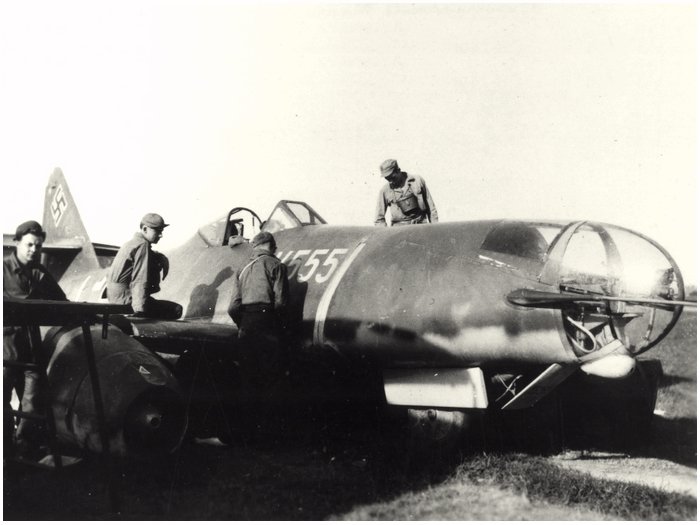
This is how far the Ai goes. I use this black and white photo and crop it to the sitting figure. Then I tell ChatGPT to add sharpness and details and make the image bigger. Then I upload it to Hunyuan3D and generate the 3d model. Note: I use photoshop to change details in the image to help the 3d tool to interpret clothing and creases. The helmet is a detailed correct helmet I bought online and use that to replace the rather strange helmet the Ai tool creates.

-
1/32 ME-262A-2a/U2
JeroenPeters replied to JeroenPeters's topic in LSM 1/35 and Larger Work In Progress
Hi, i 3d design most of what i print myself. Sometimes i buy a model, but then i usually heavily modify it. And sometimes i use ai to generate something, but that will be mostly figures.. -
1/32 ME-262A-2a/U2
JeroenPeters replied to JeroenPeters's topic in LSM 1/35 and Larger Work In Progress
Figuring out what base to use. I prefer undersized. Not sure about groundwork yet. I have some me262 parts, like this jumo004 fan blade. Trying to find a way to incorporate it. We’ll see.

-
1/32 ME-262A-2a/U2
JeroenPeters replied to JeroenPeters's topic in LSM 1/35 and Larger Work In Progress
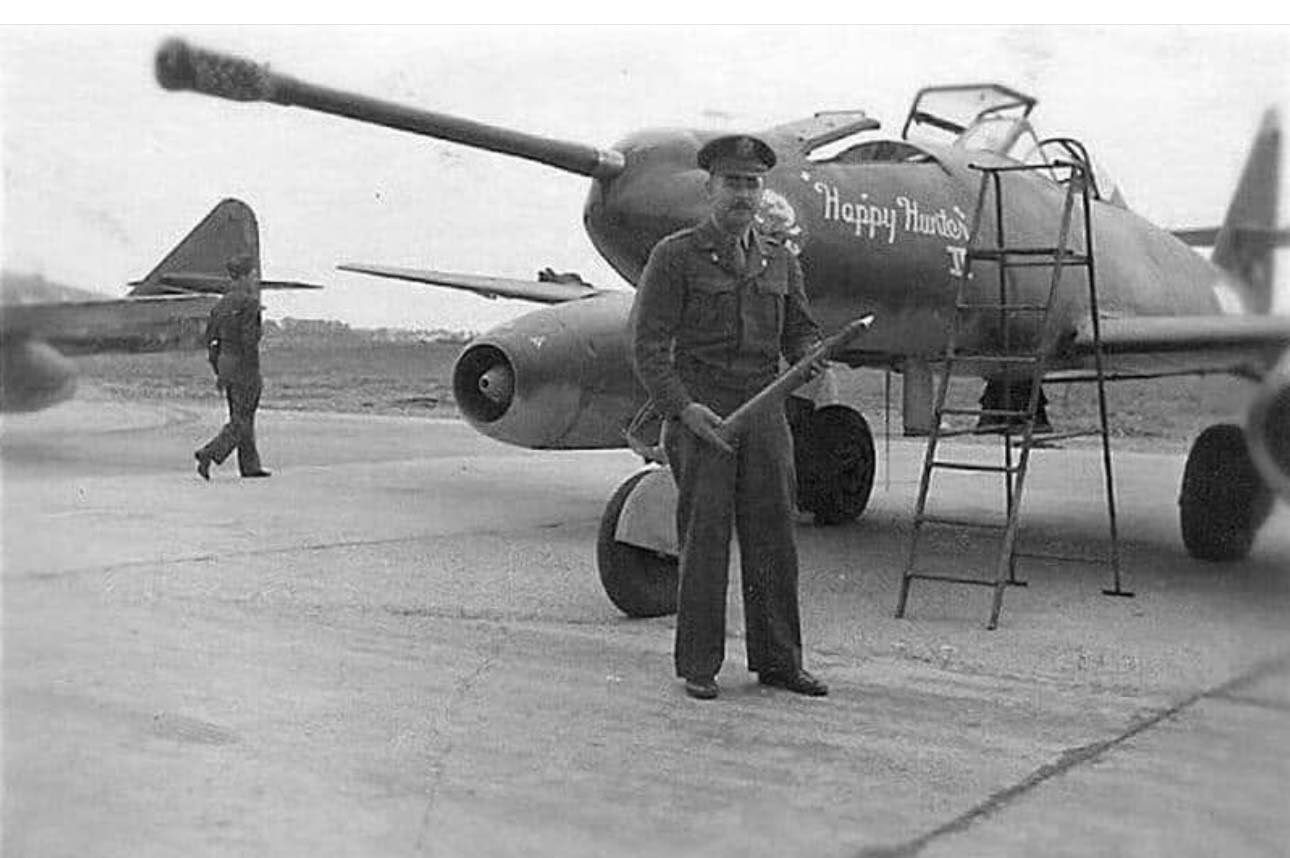
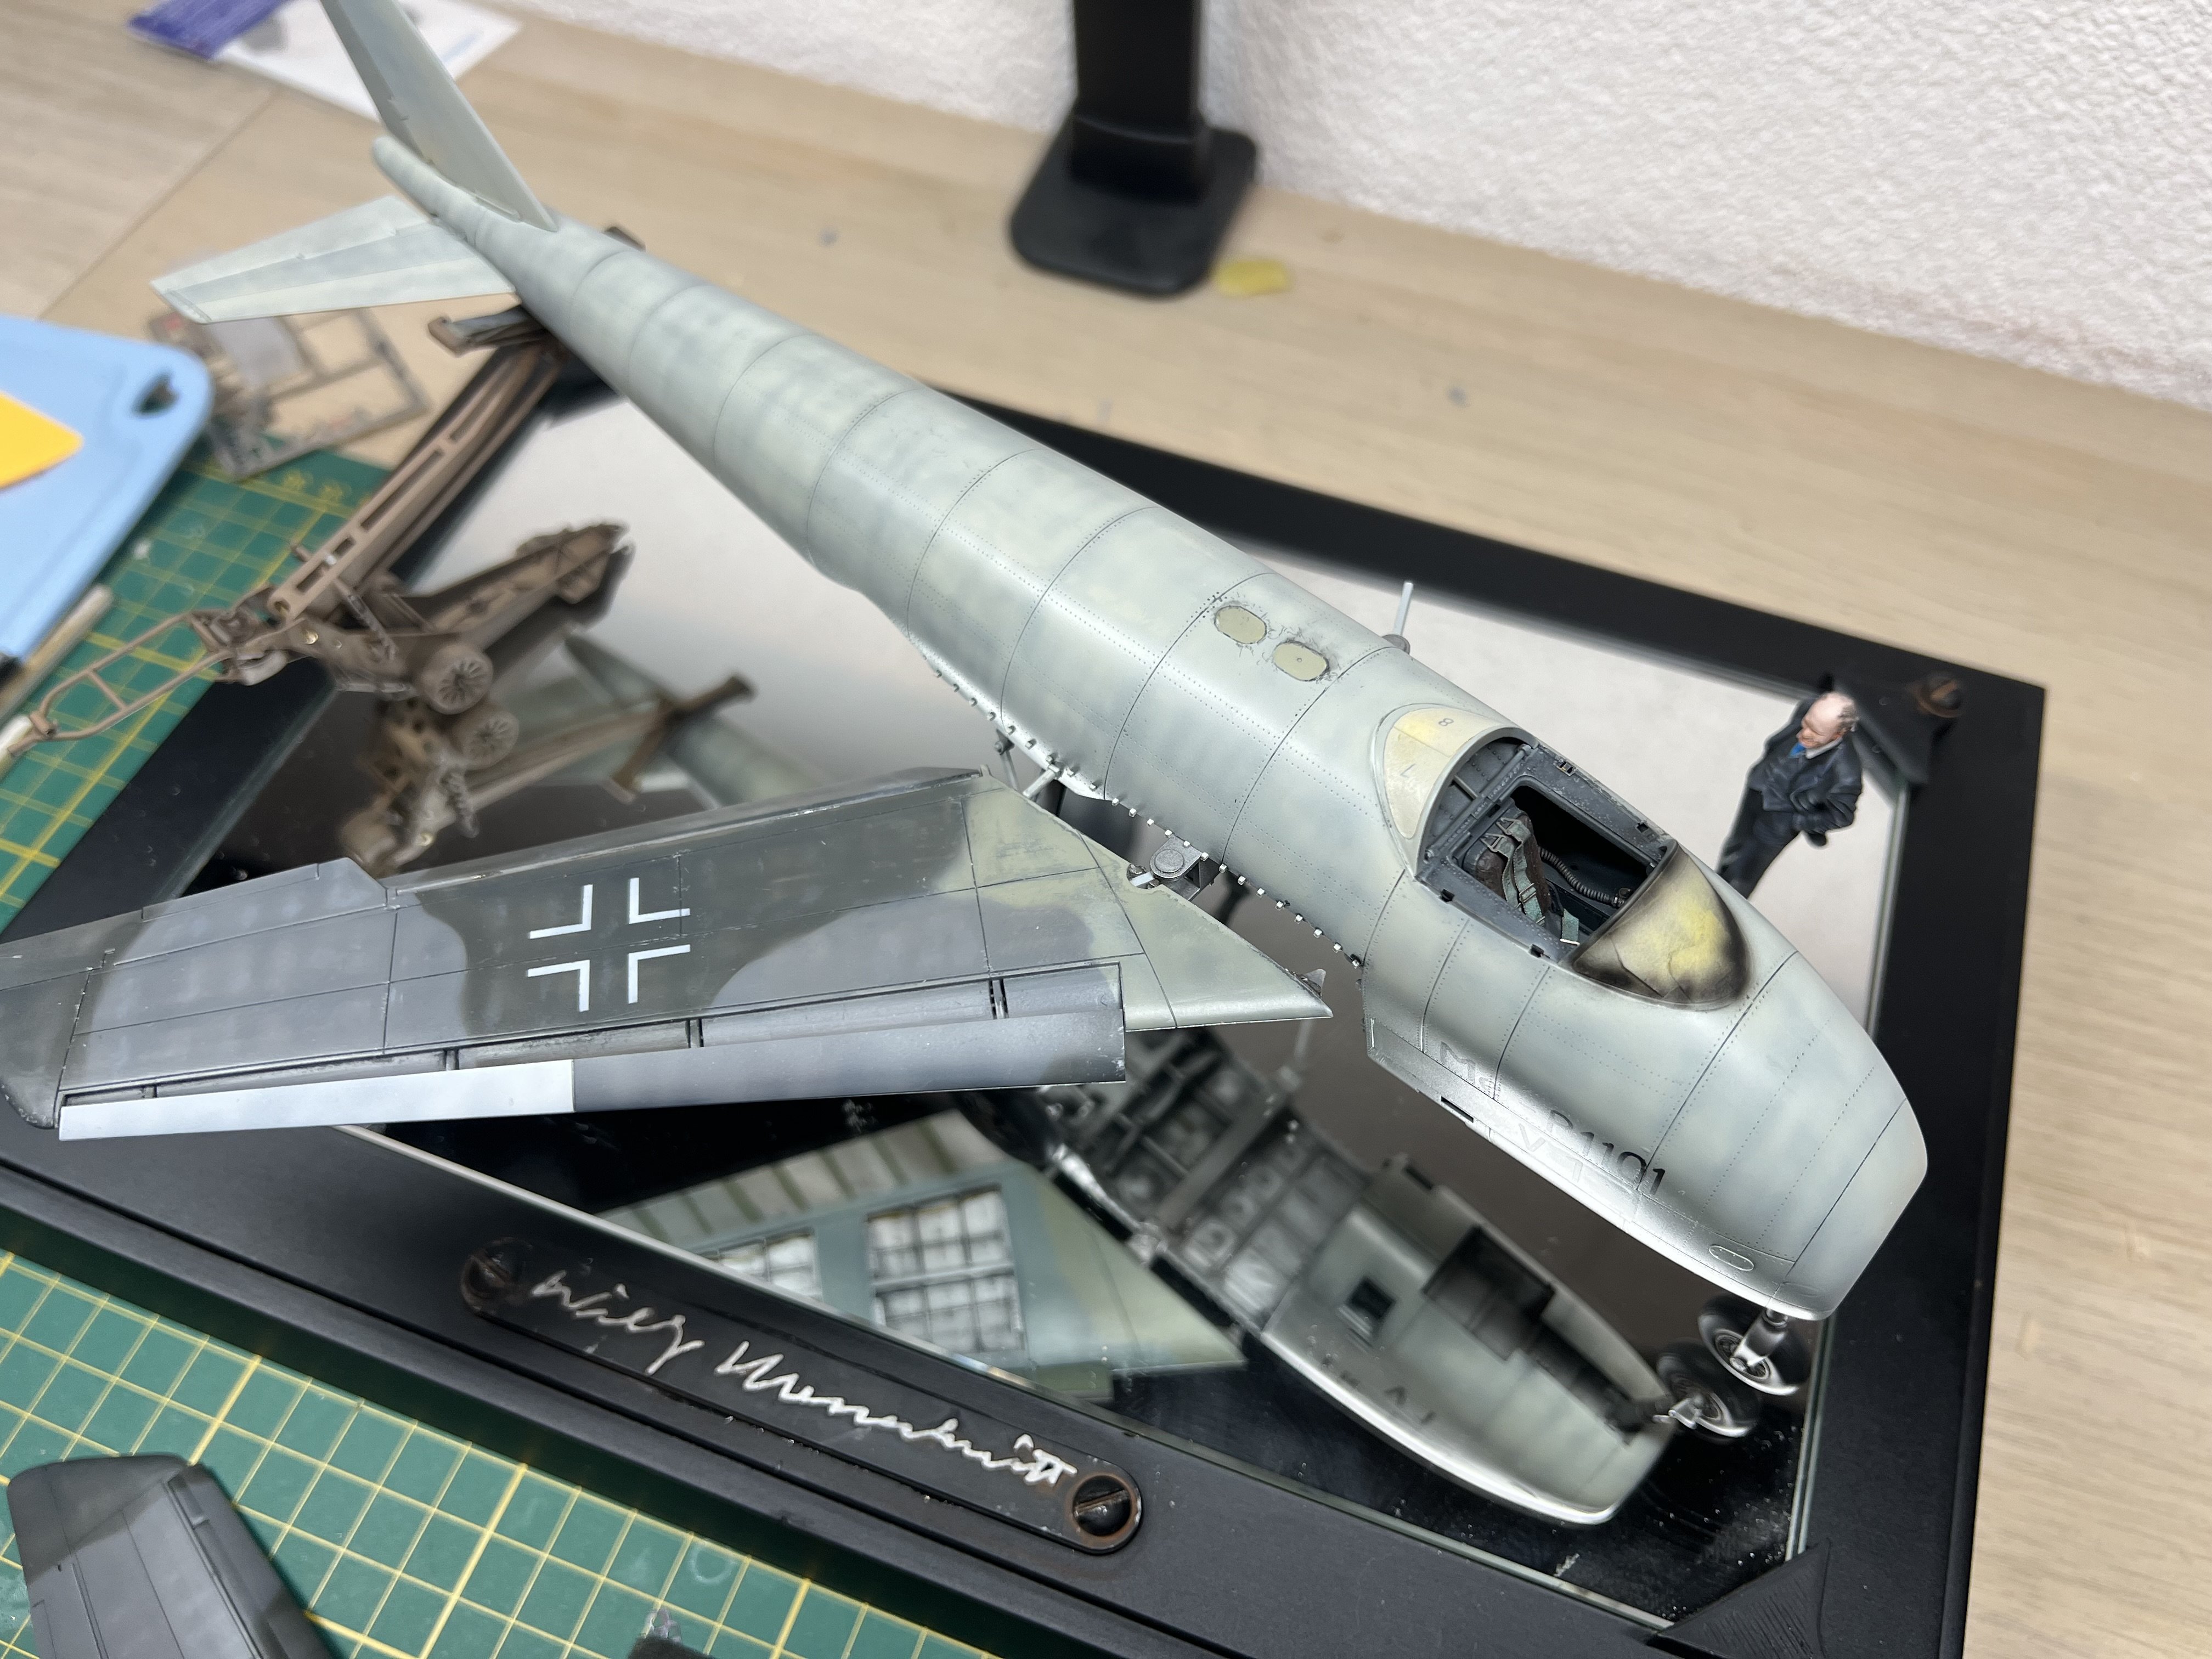
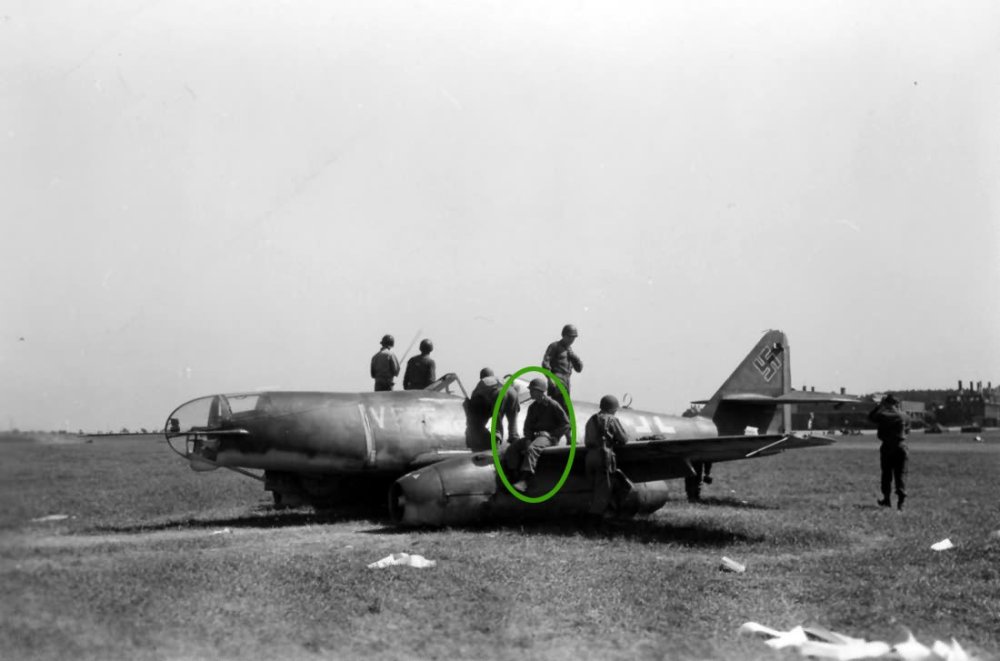
So… with the side tracking p.1101 out of the eay it’s back to this project. I might make it as the V555. 555 stands for tge last 3 digits of the Werknummer. Nothing more. It will be crawled upon and examined by US soldiers after it belly landed. We’ll see!


-
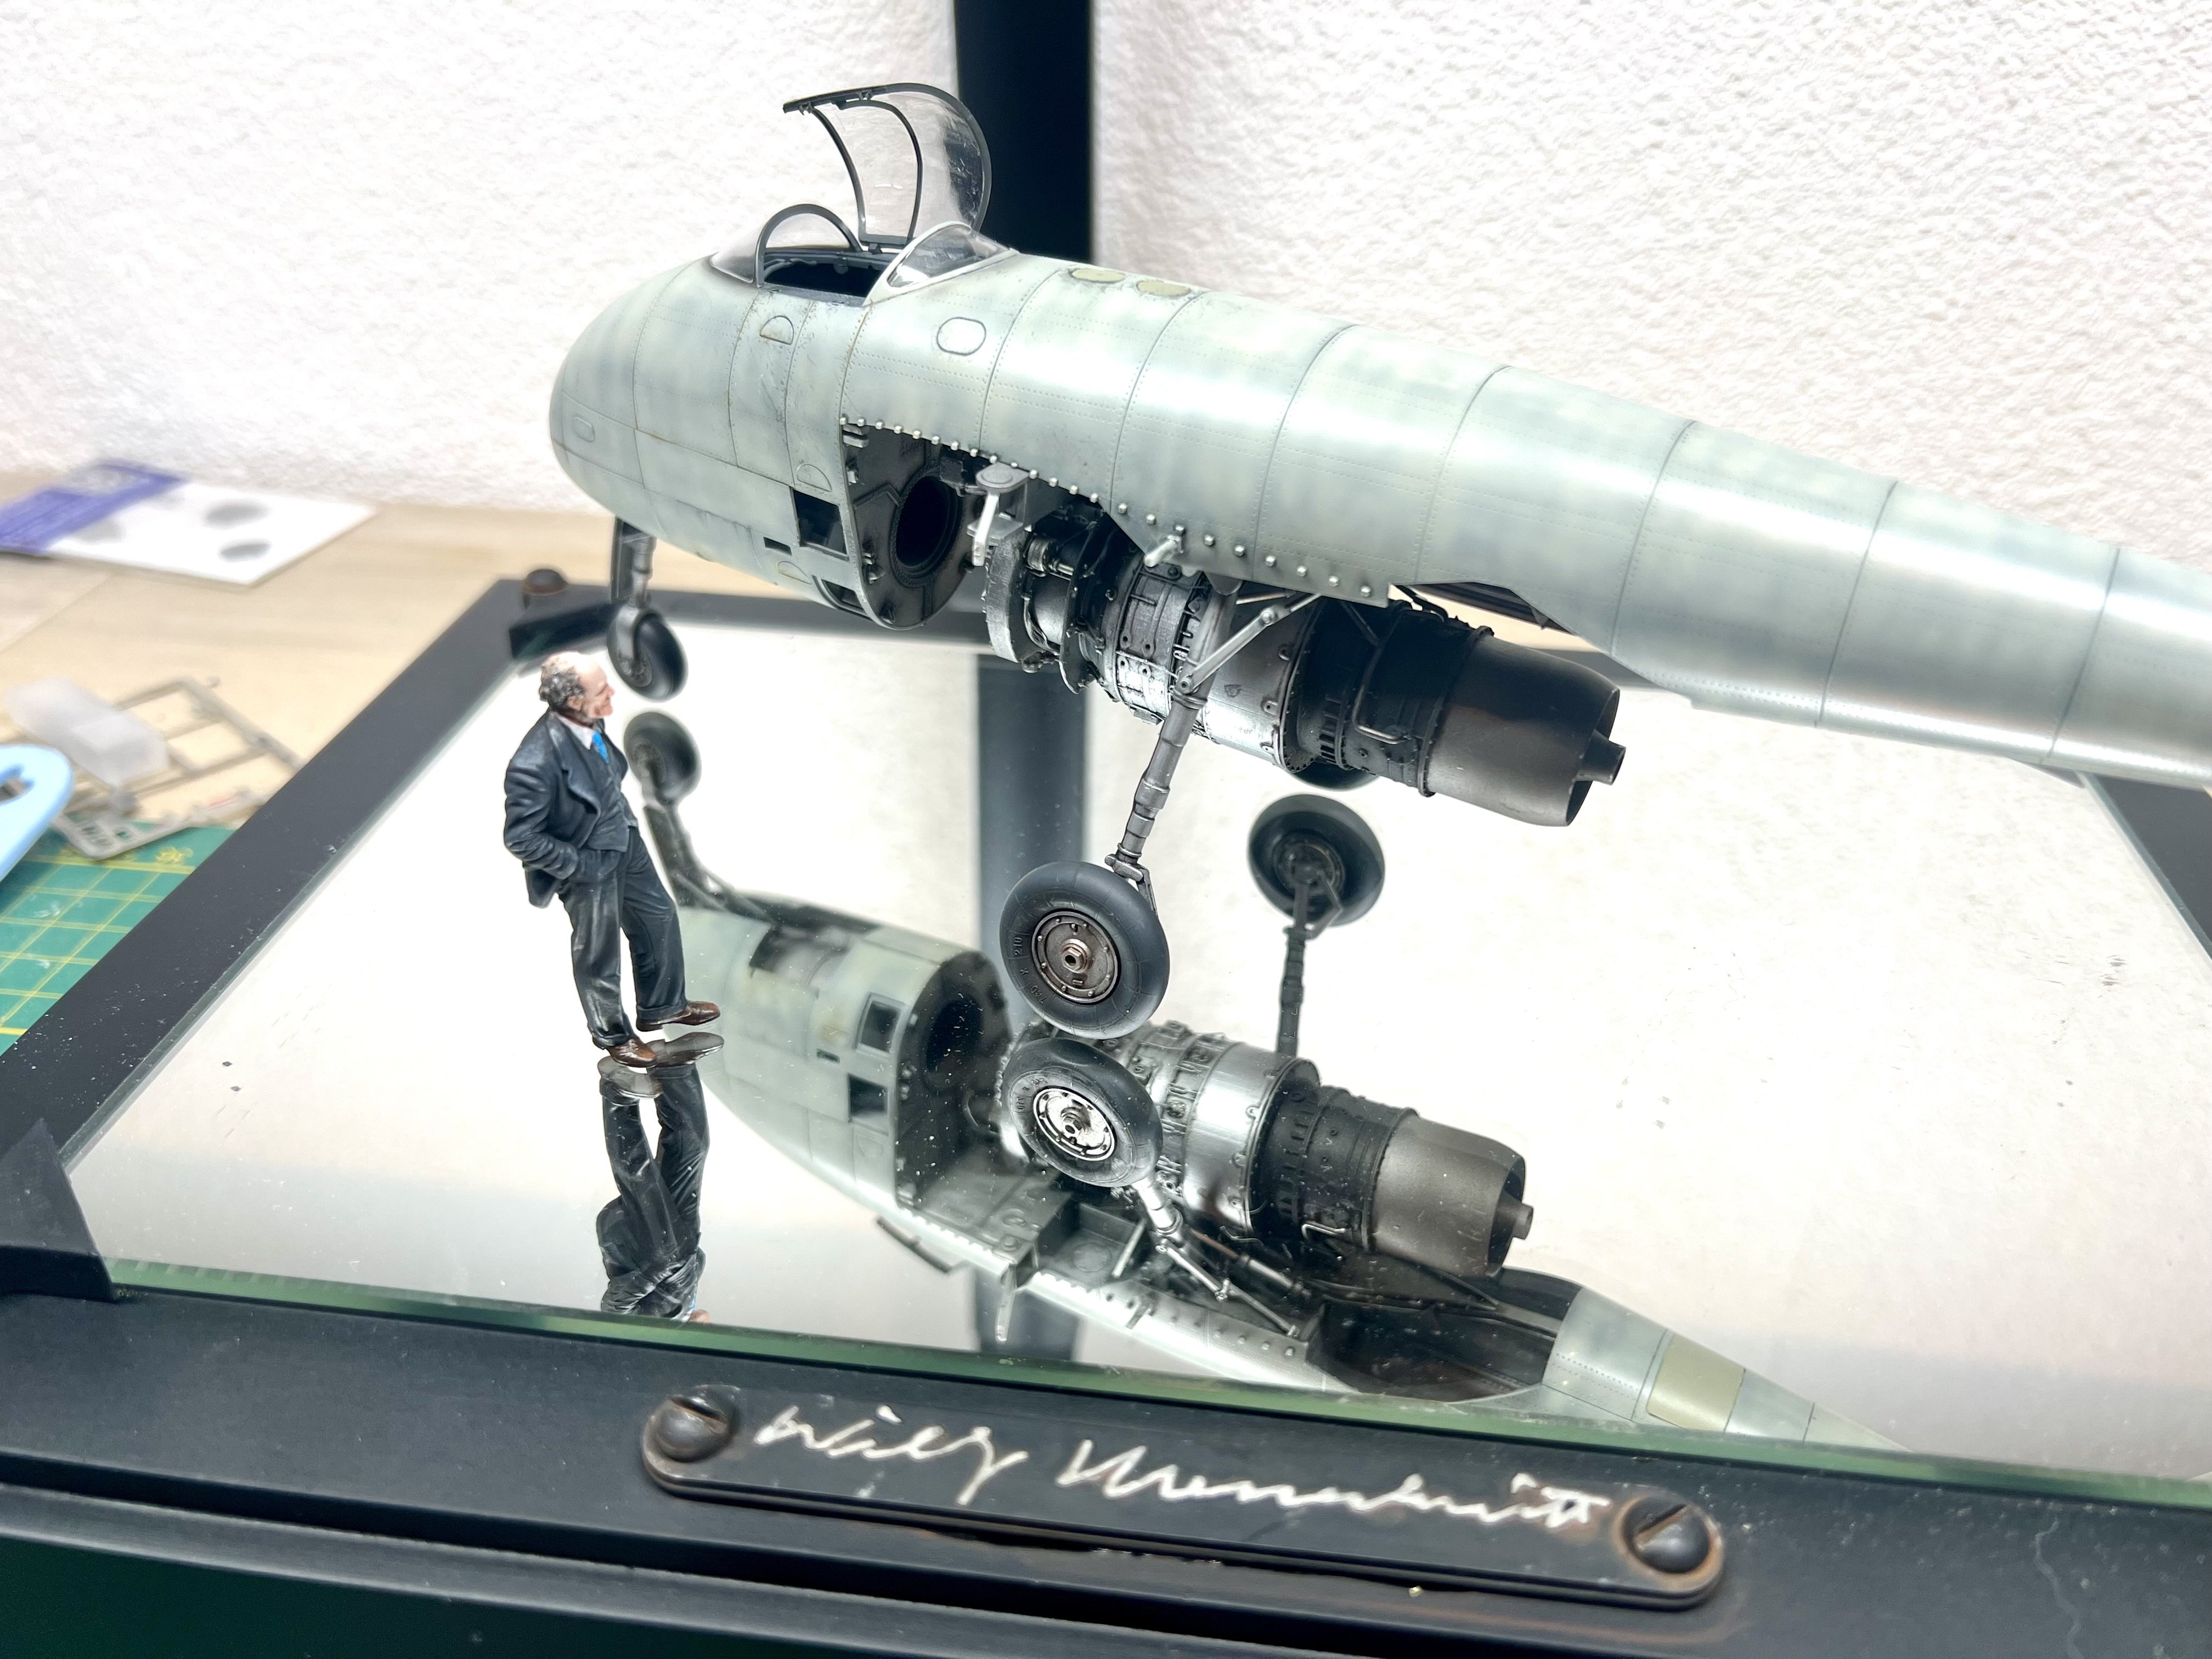
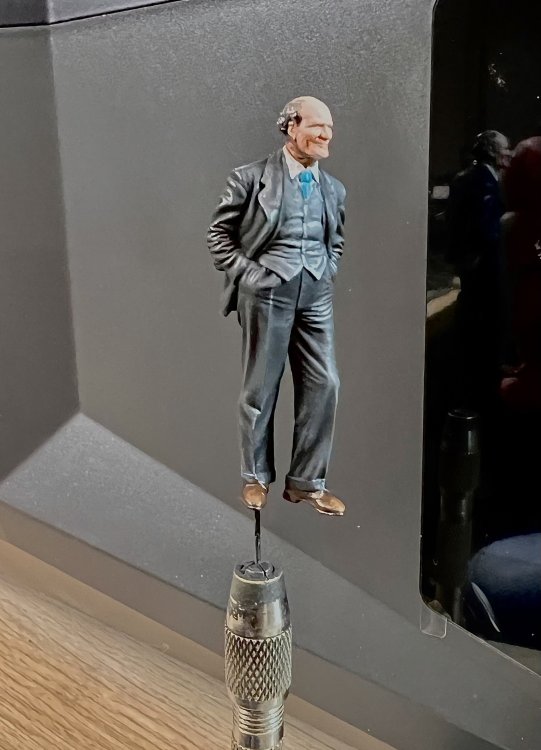
Willy approves Almost done.
-
Weathering should be kept to a bare minimum but i can’t help myself. IMG_4934.mov

-
Some careful dry fitting and testing the composition

-
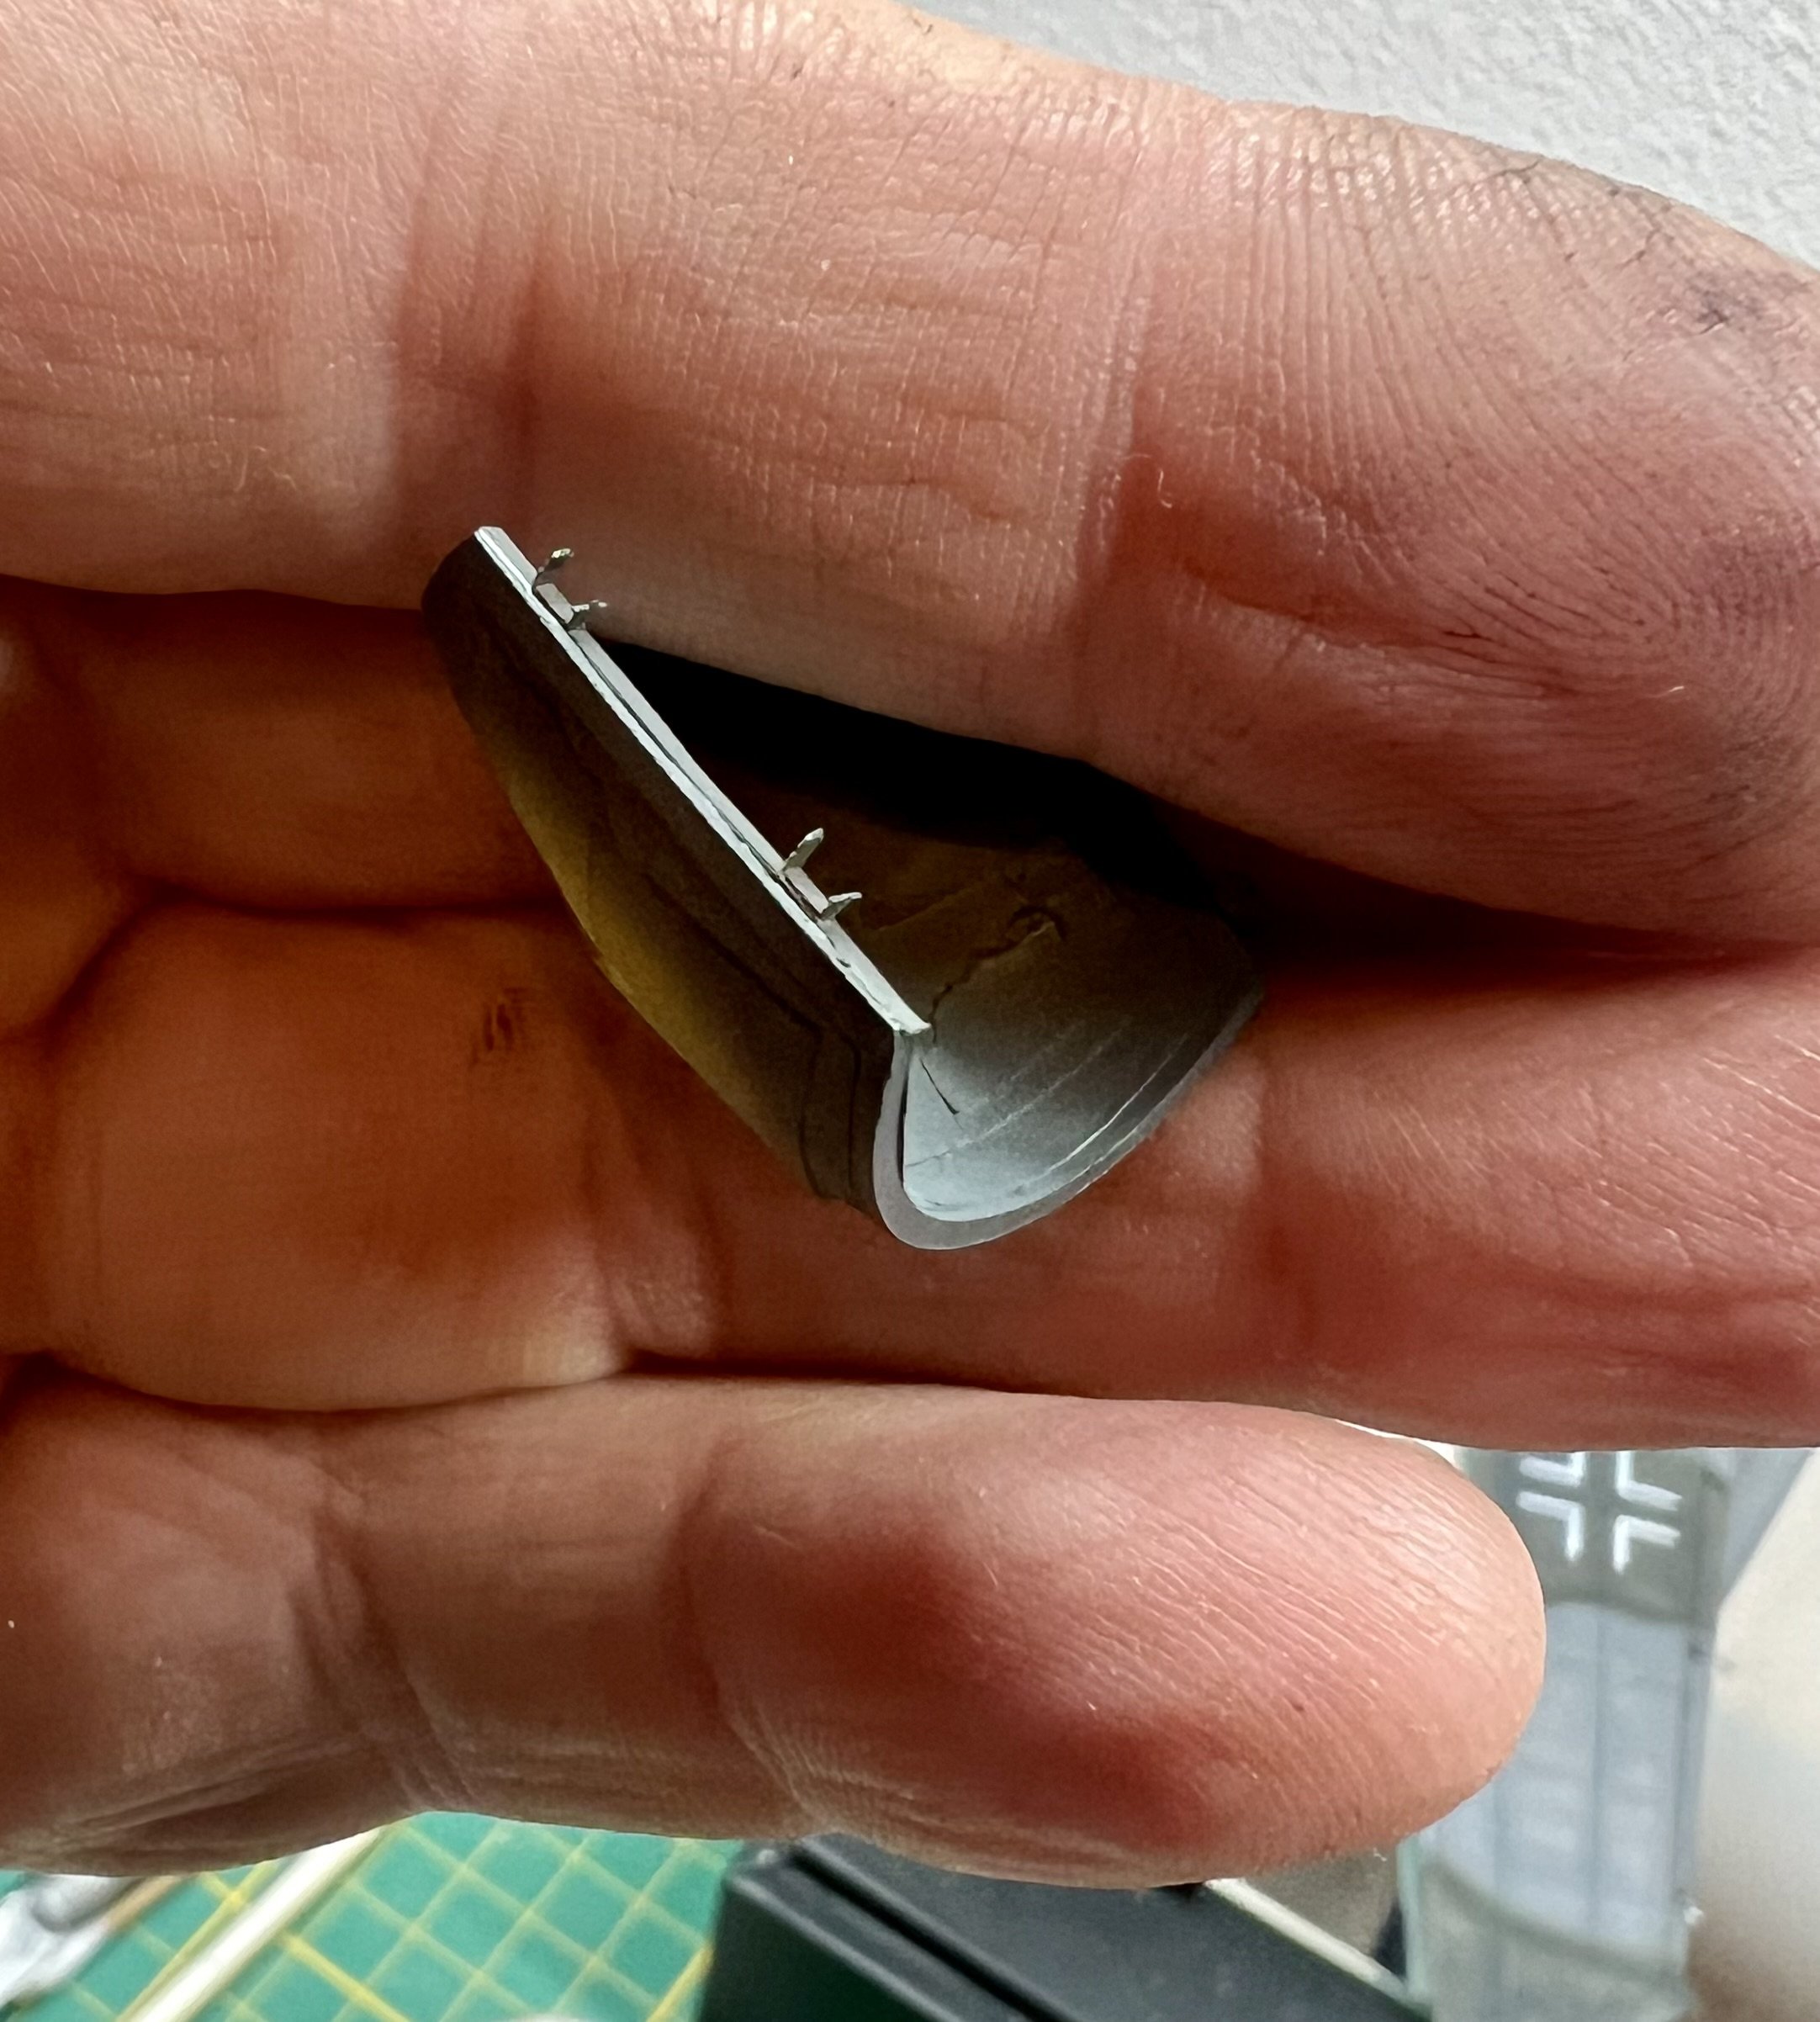
The locks on the canopy were a bit chunky. I cut them off and installed a rail from photo etch and 2 photo etch clamps. Not historically correct perhaps, but more interesting

-
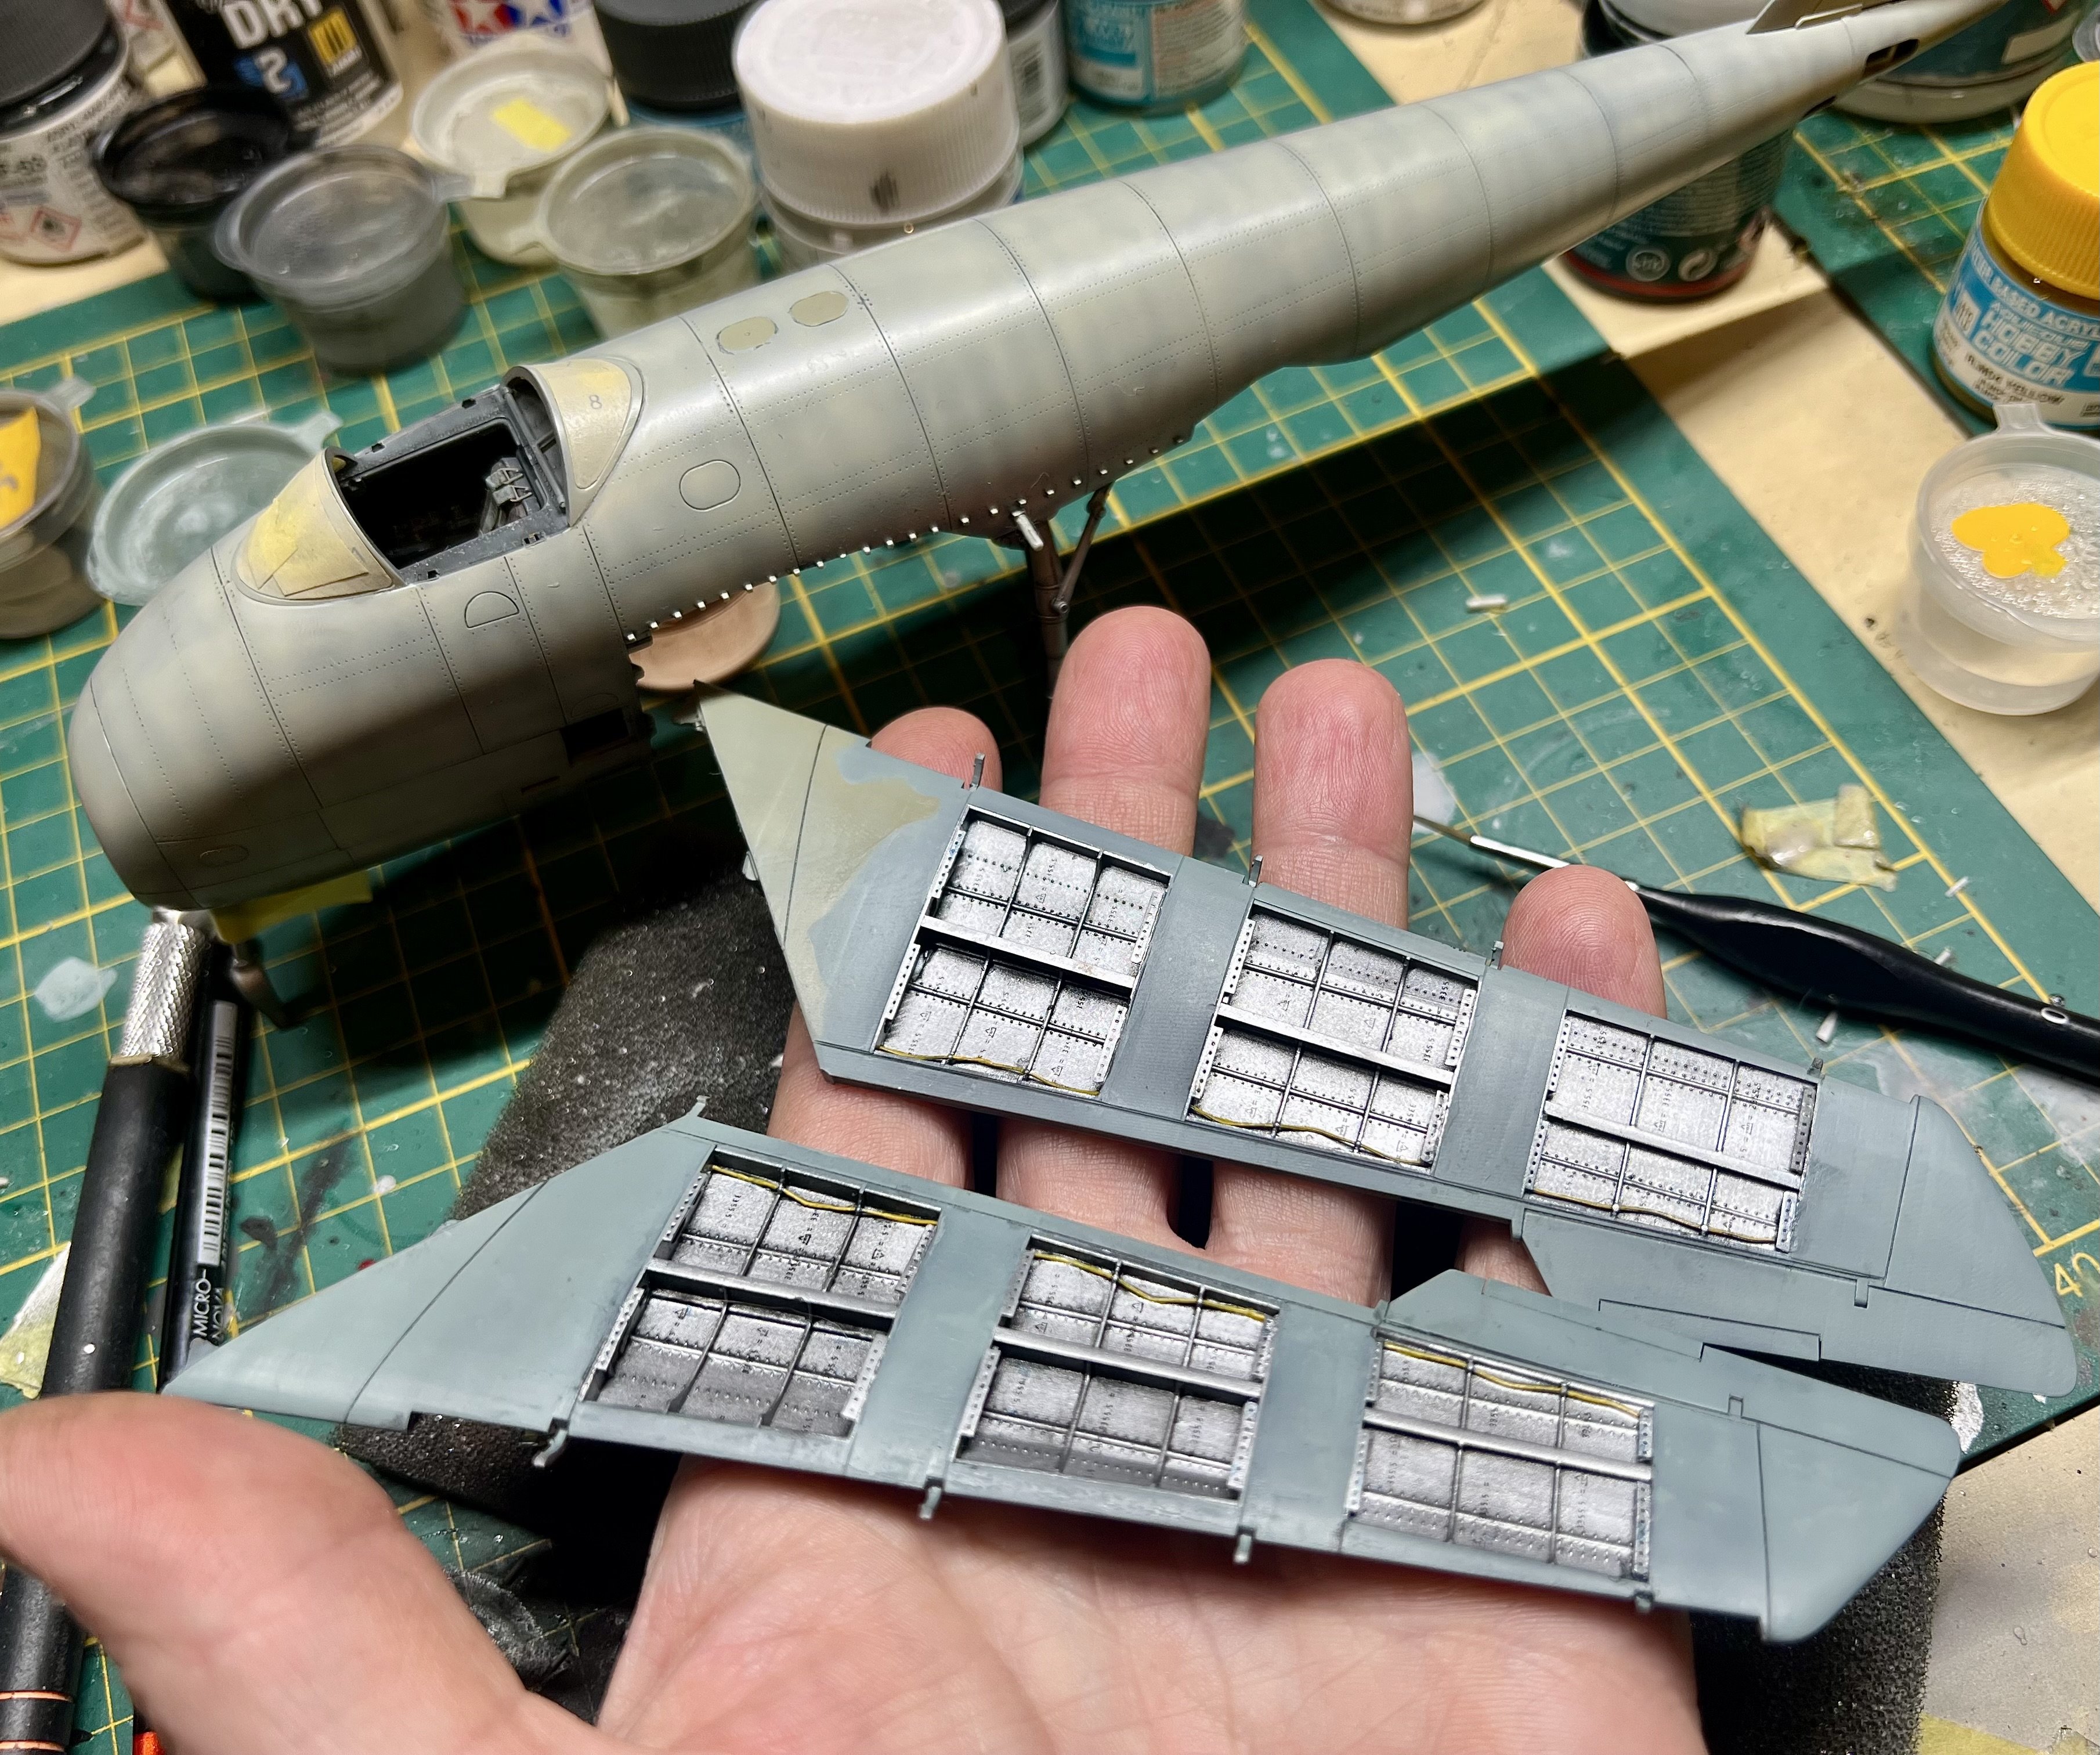
Step by step.
-
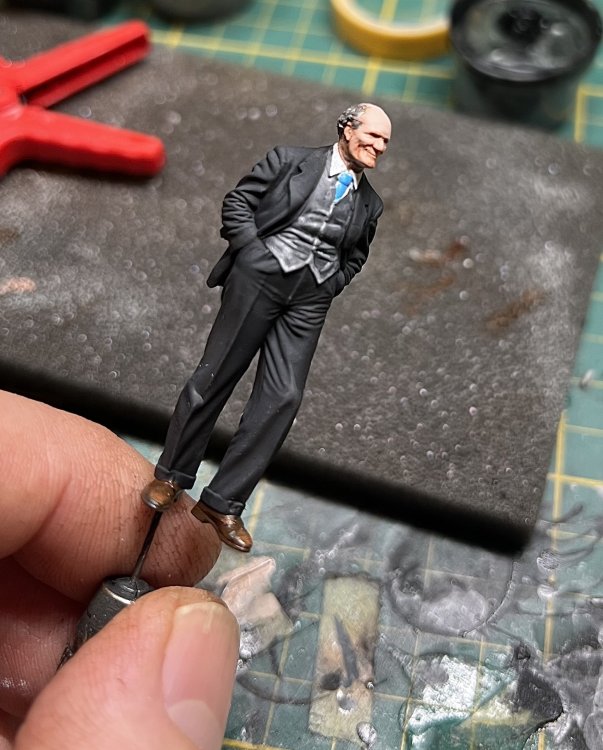
Started painting the Willy figure. This is absolutely not my strength but it’s something i’d like to learn. Using an oil set from AK for the flesh. These are the first colours.
-
Applying washes is a challenge with El Cato around.


-
Sprayed some crosses with 1manarmy.

-
Getting there.

-
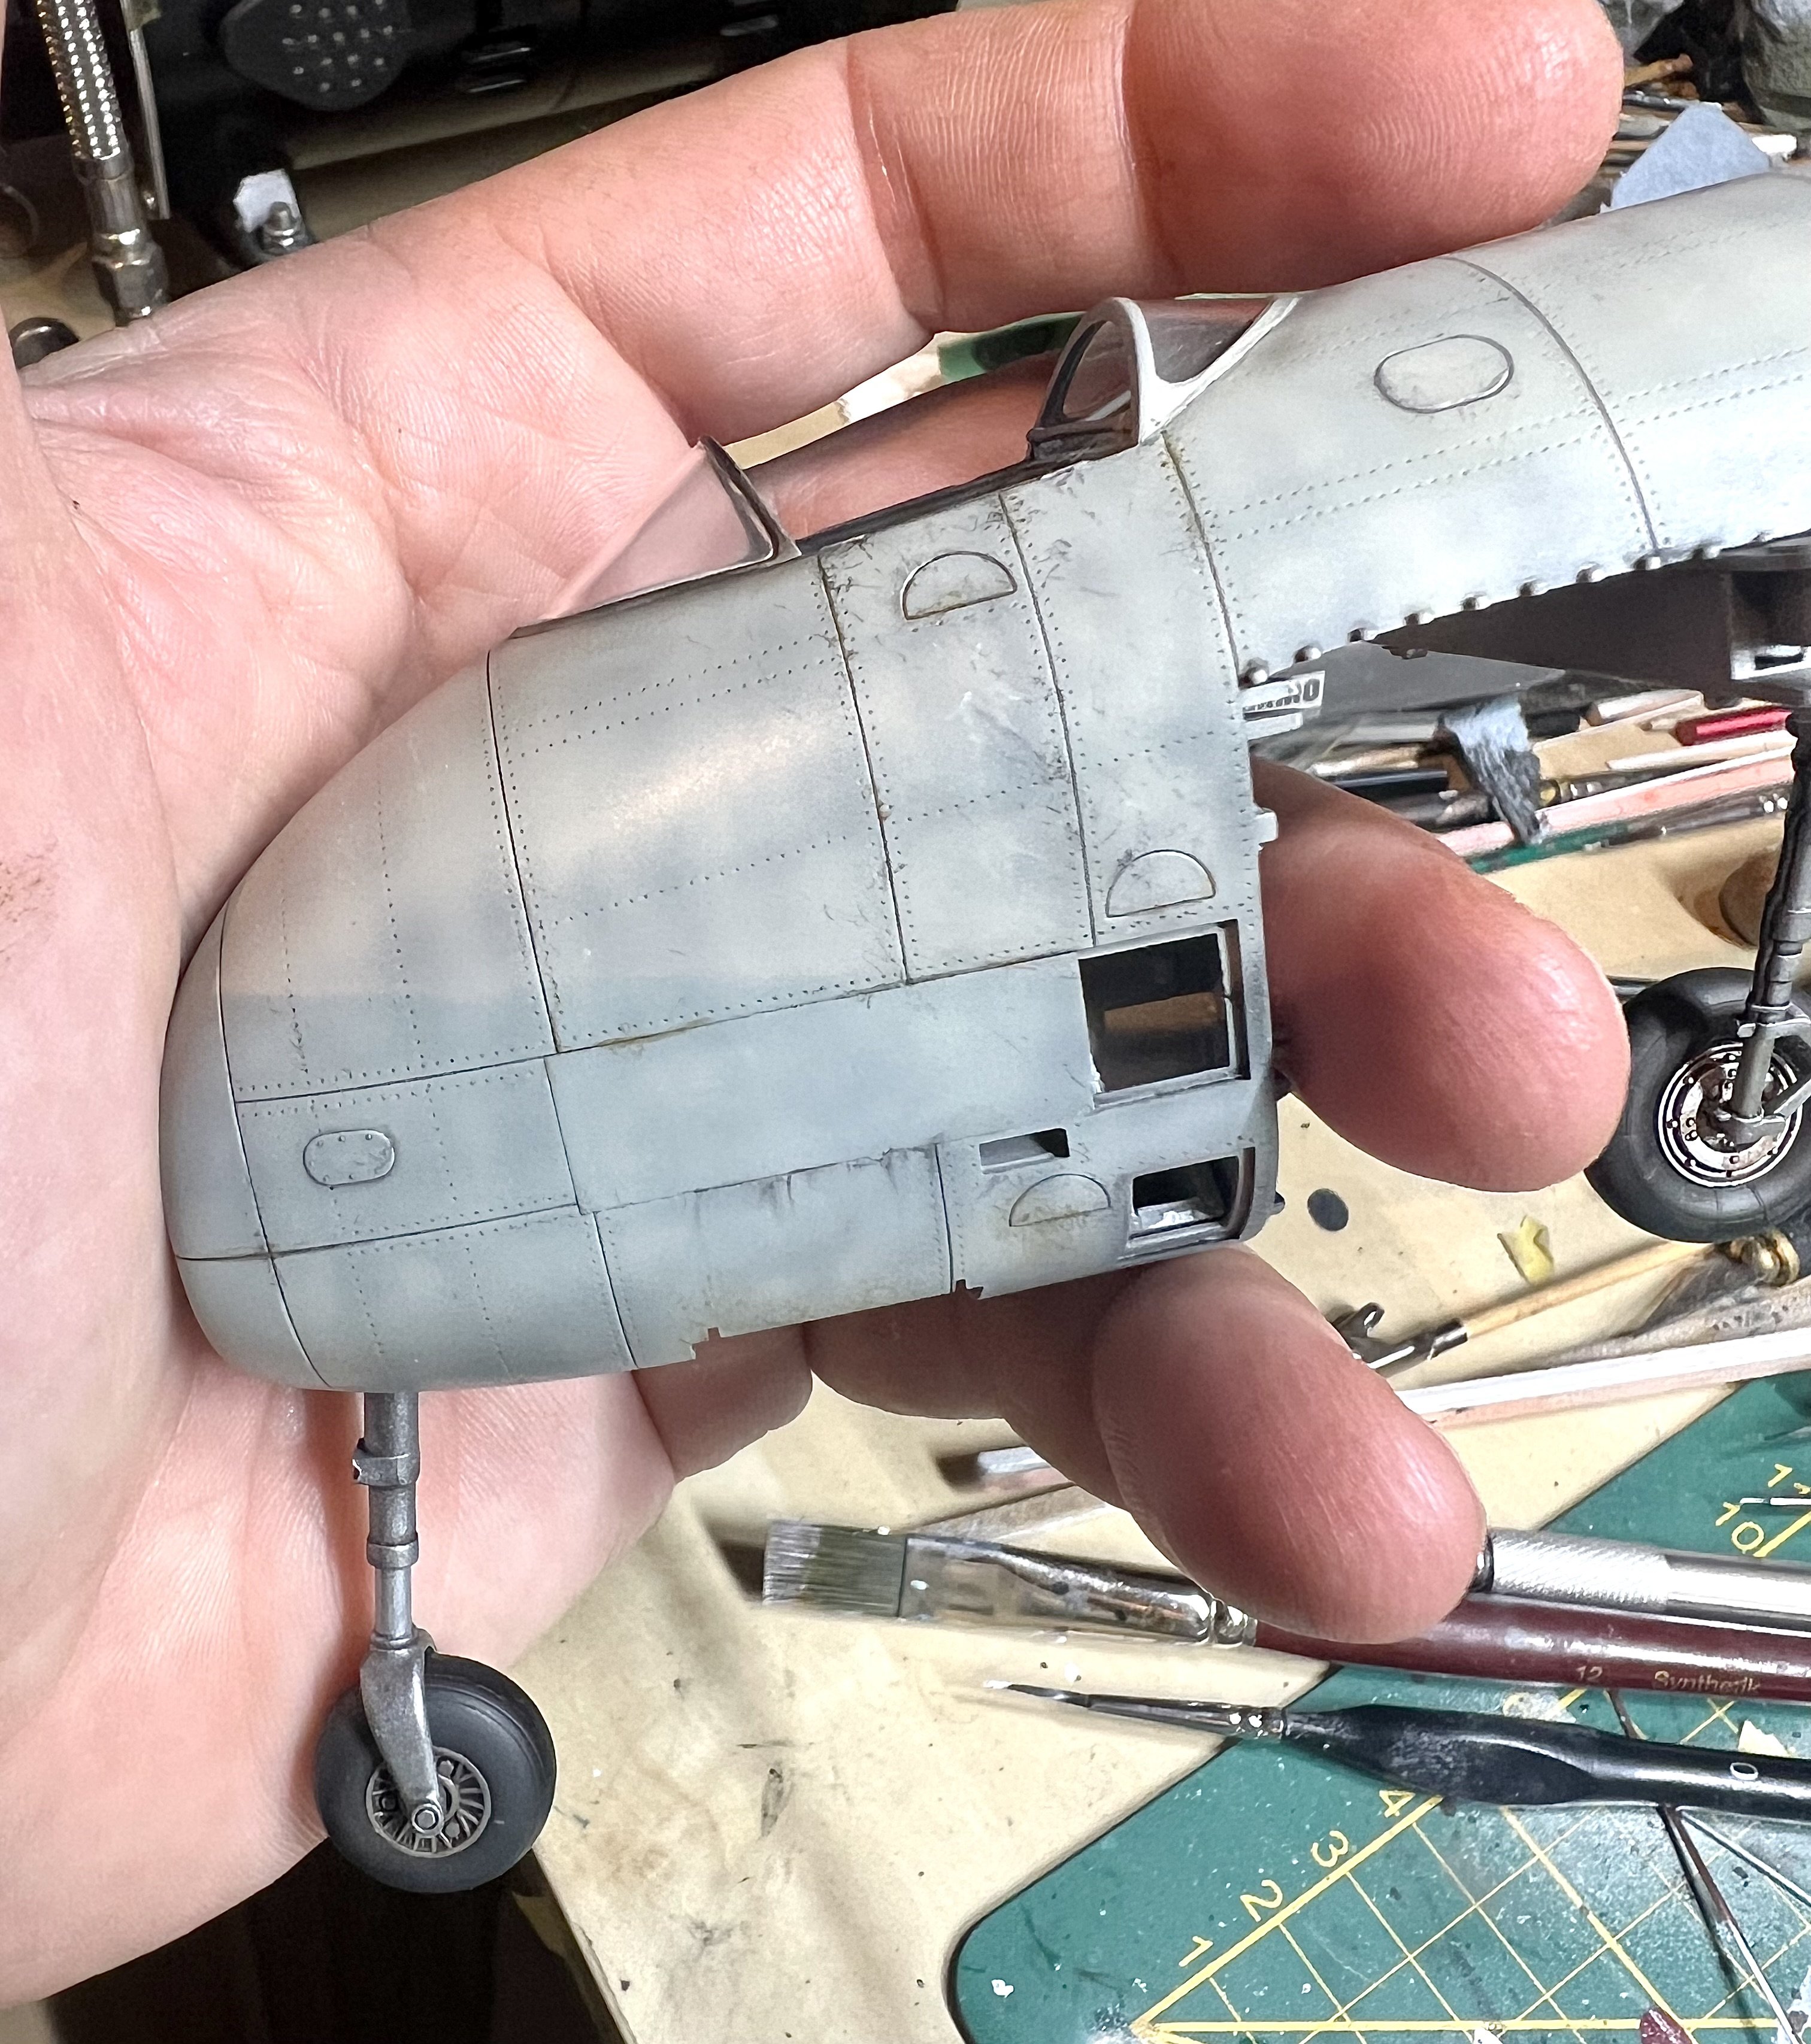
Rlm74/75 camo down.

-
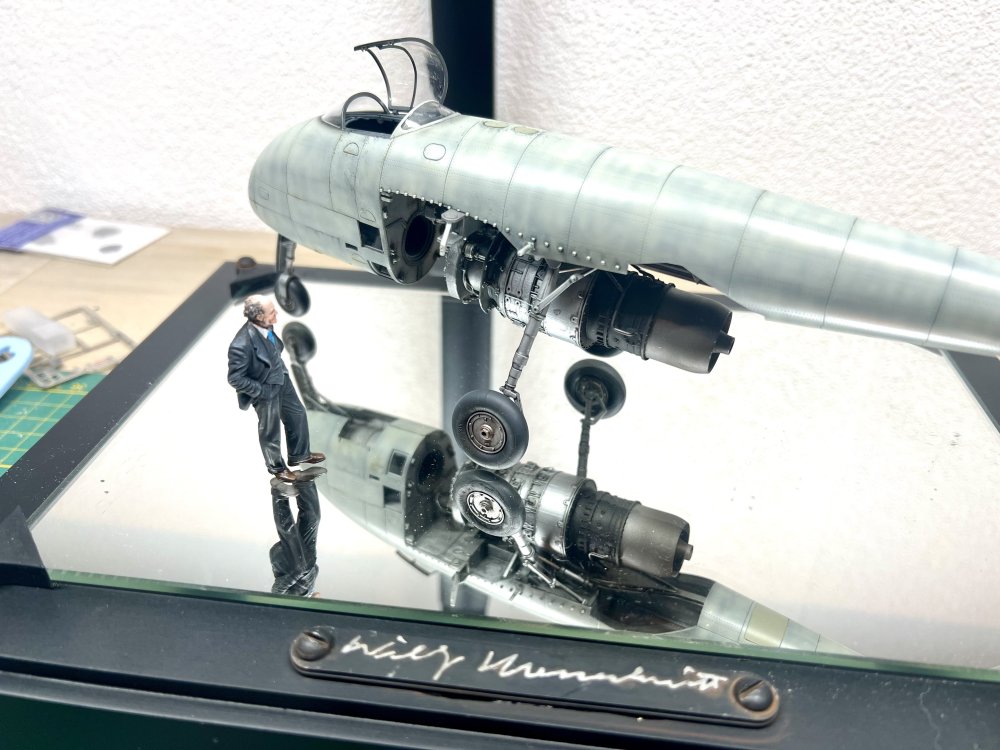
The base is almost done. Also sprayed the Me P1101 V1 lettering on the fuse. Still studying photo’s to determine the colour of the outside canopy frame. Looks like Rlm66 in some pics. You really need to decide at what stage you model this airframe. In the hangar during construction. Or after it has been towed outside. Or after the US tried to restore it.