JeroenPeters
-
Posts
4,904 -
Joined
-
Last visited
Content Type
Profiles
Forums
Events
Gallery
Everything posted by JeroenPeters
-
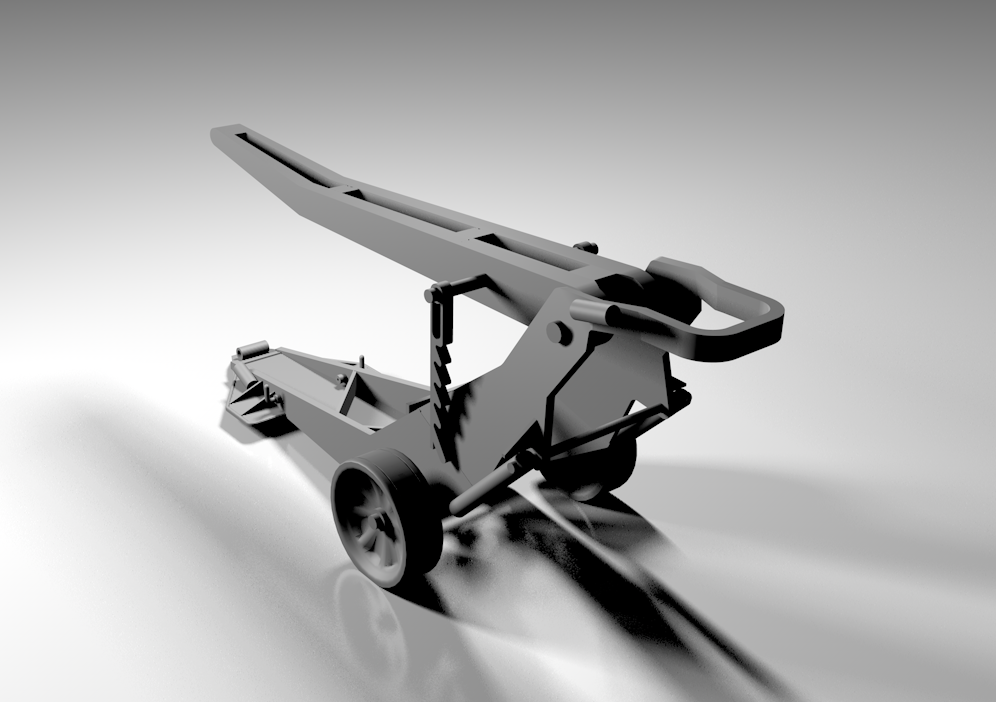
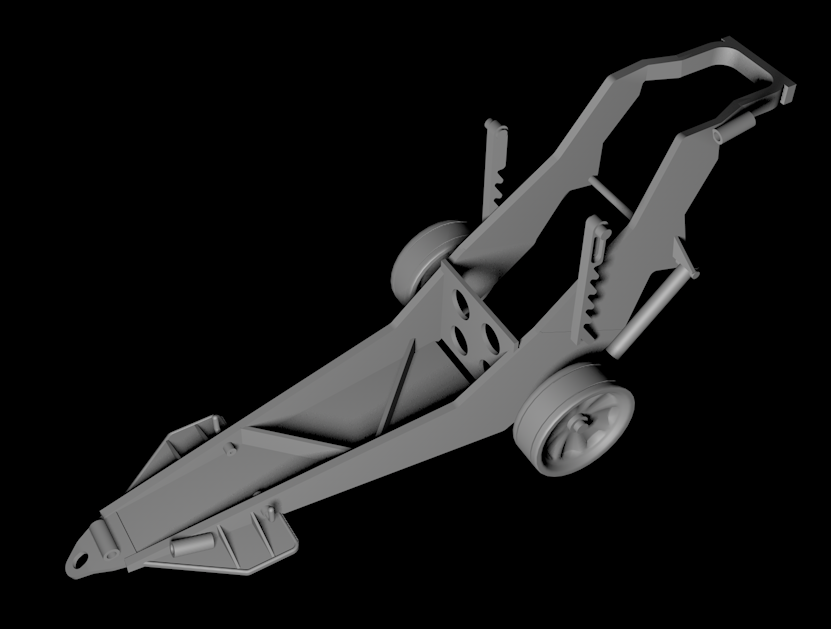
 Drew the cradle, but left out the 'hammock', since I'll make that from masking tape. Only need to measure the exact height of the tail, in order to determine the height of the arm.
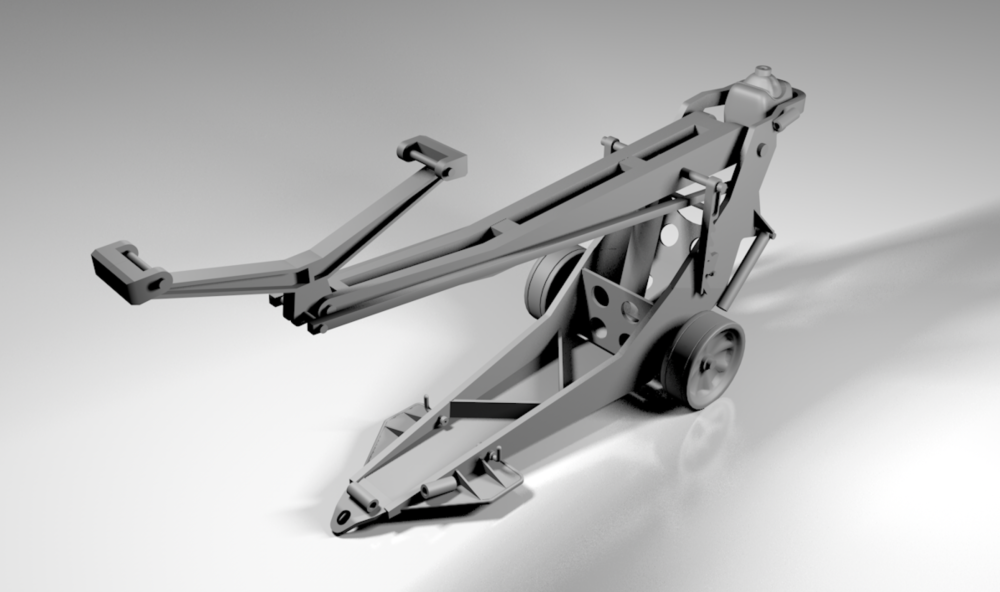
-
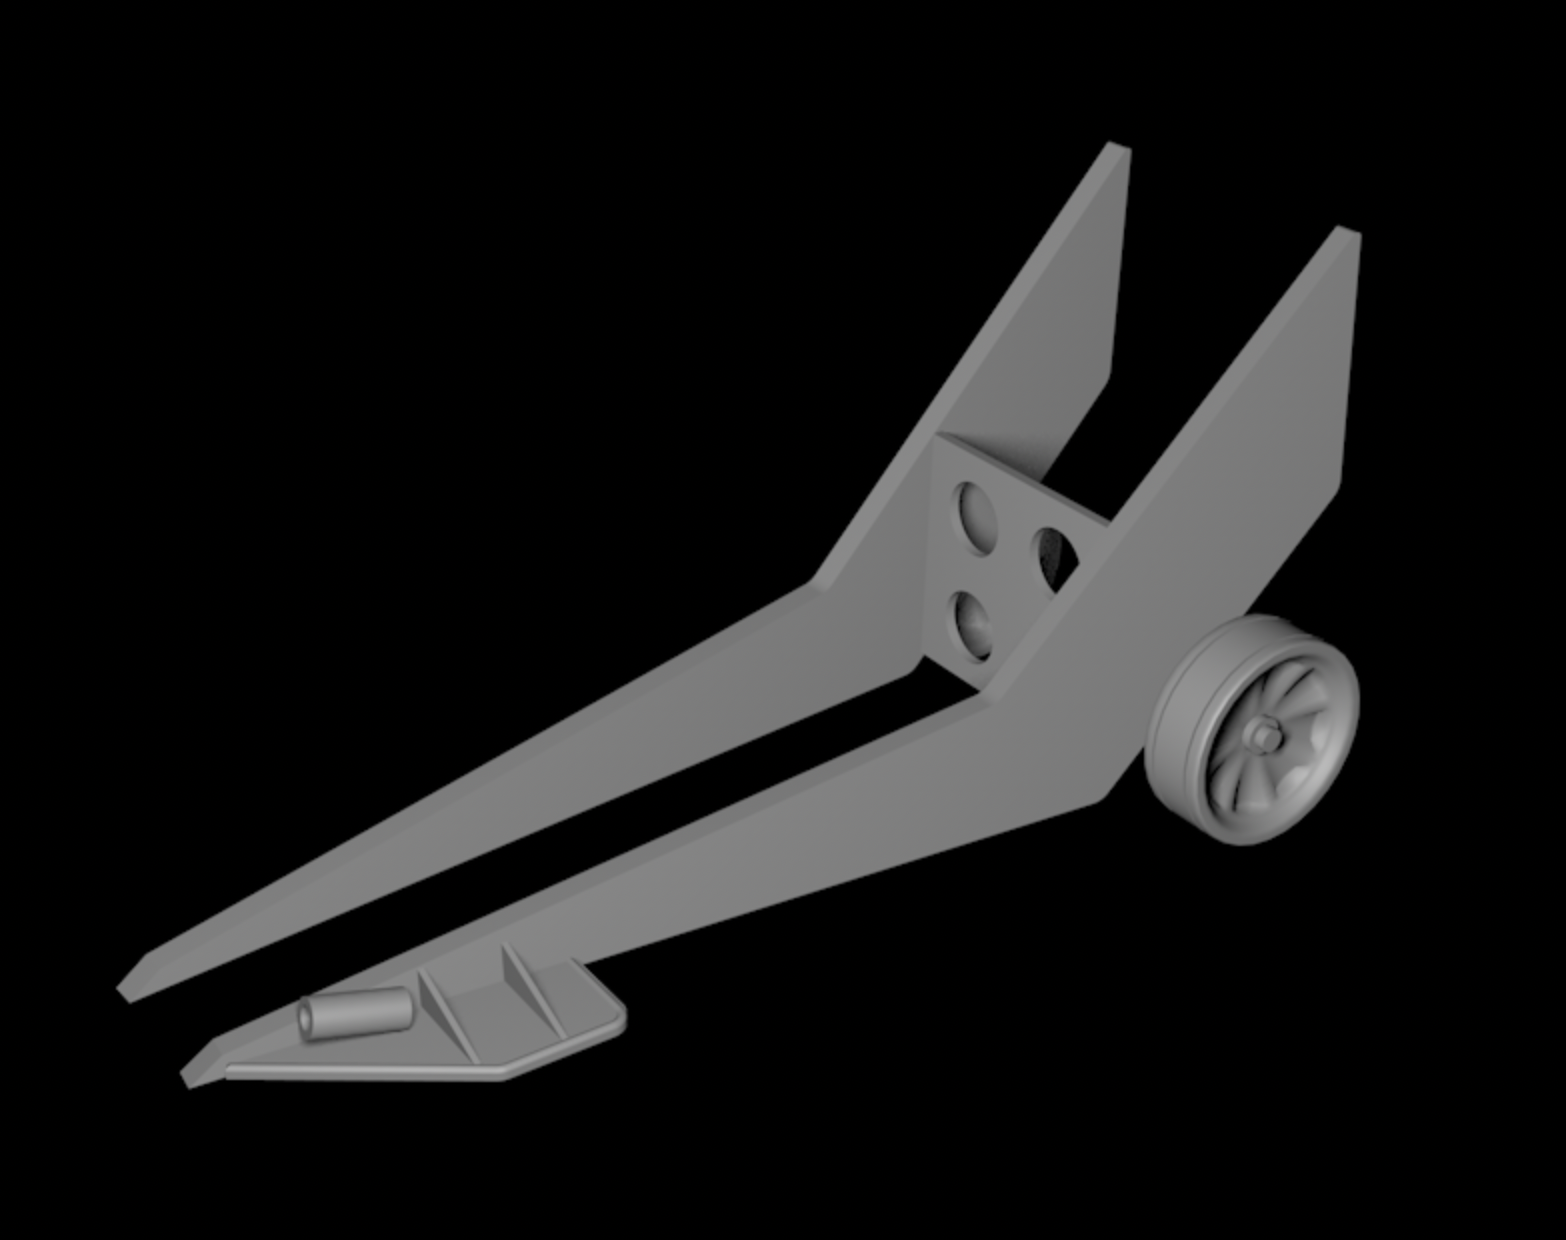
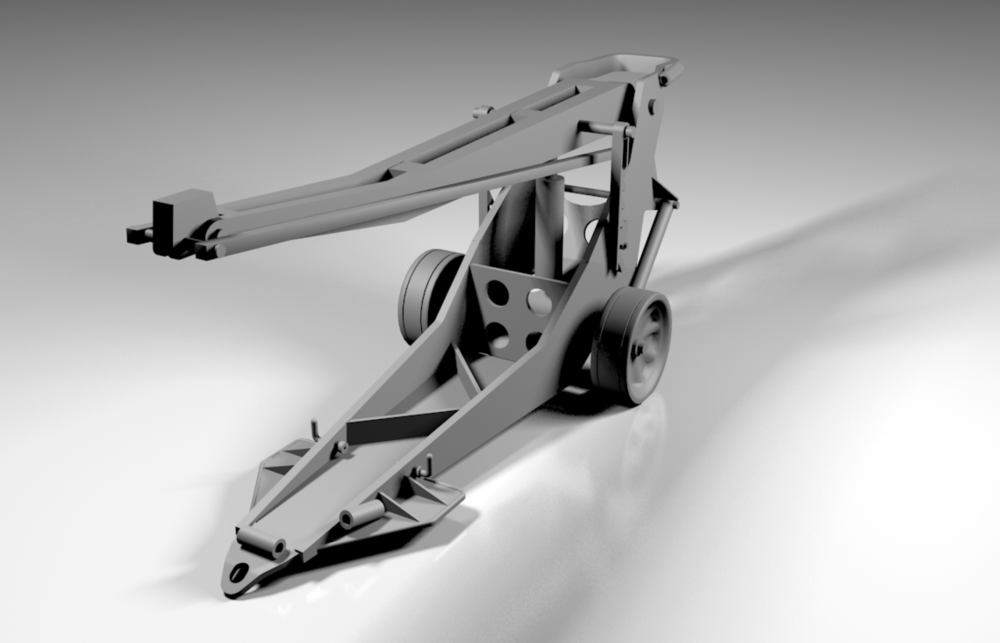
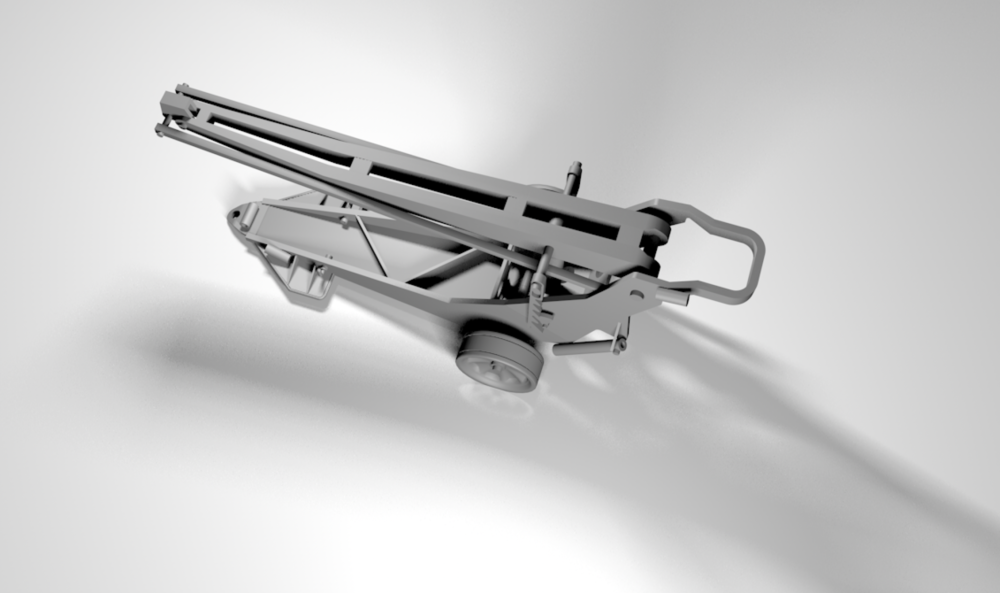
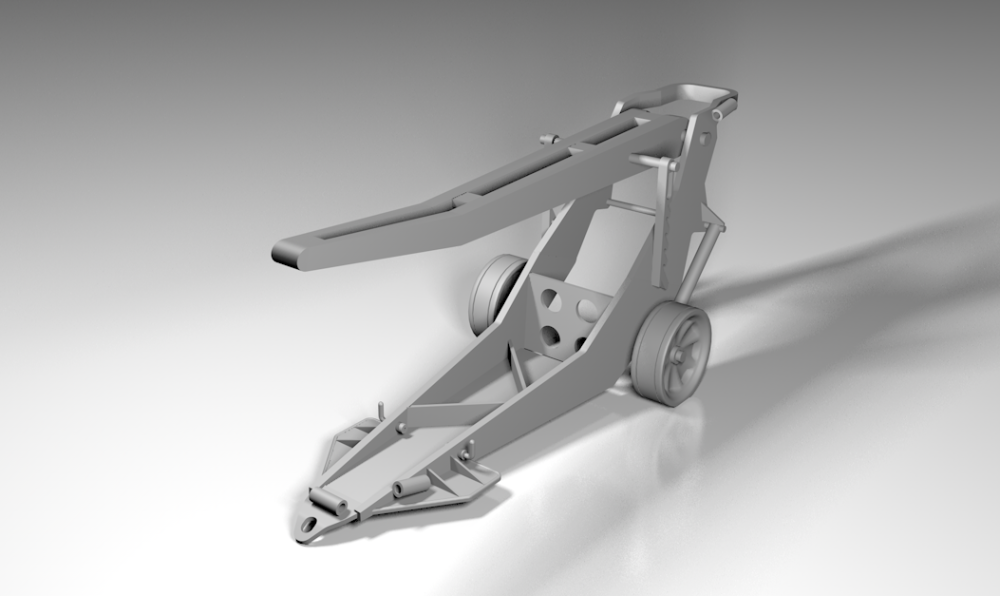
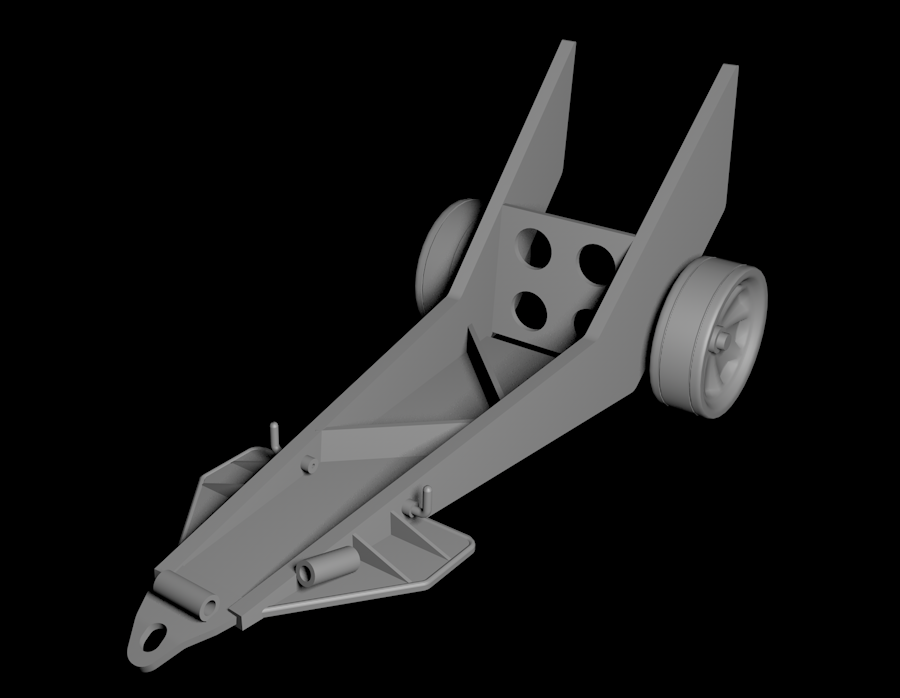
Most of the basic shapes are there and seem to check out. The hollow tubes on the base-plate and the side of the handle are to stick a long carrying bar in. This way the jack could be transported by either two men side by side, or one pulling and one pushing.
-
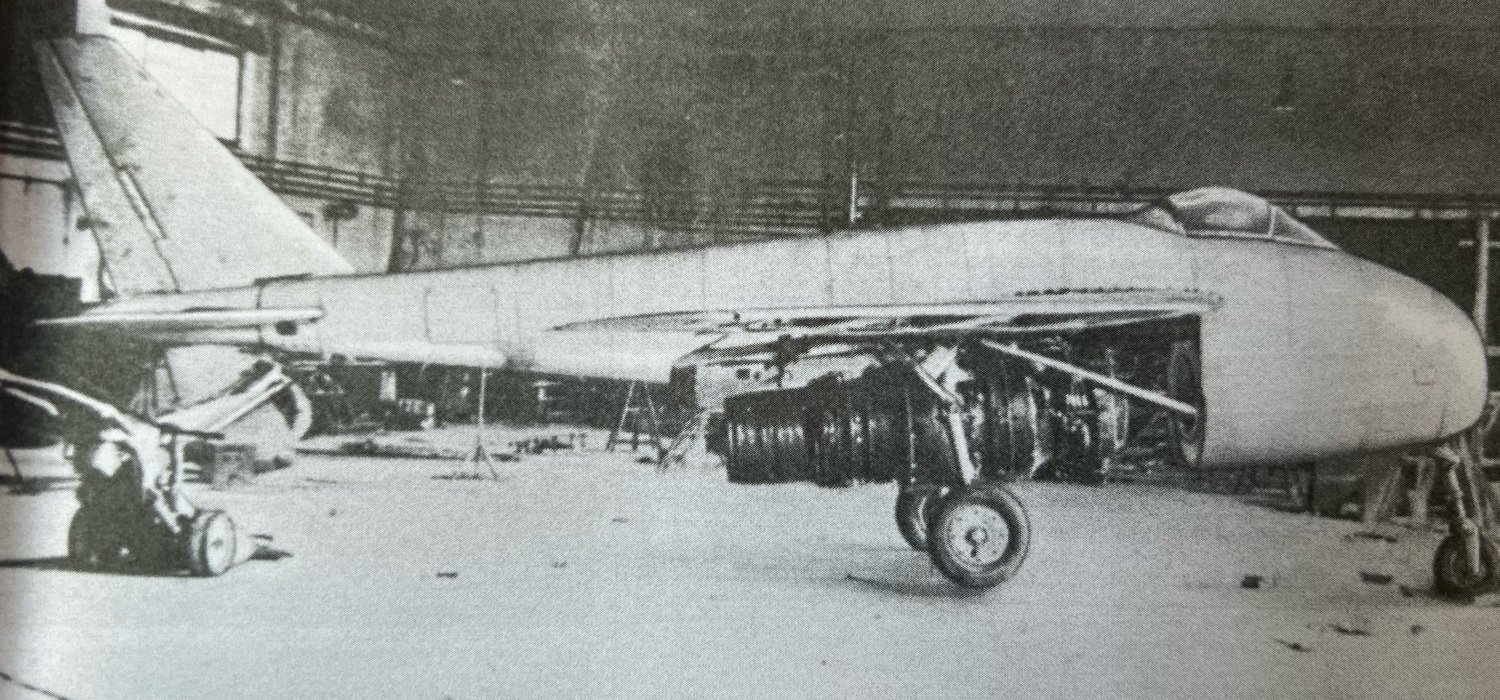
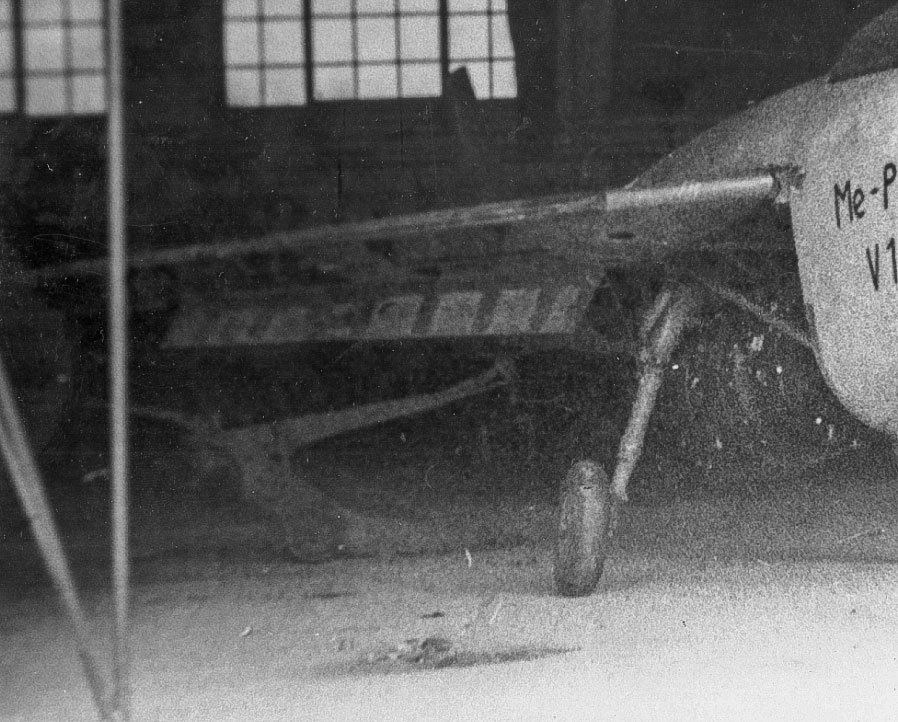
Starting to look like something now. While drawing I try to think about how I'll 3D print this in the best possible way. If you study the photo's, you see that the Herkules at Oberammergau did not have the vertical pin, as was used to handle the Me163, but rather the 'hammock', if that makes sense to support the tail. That's the reason it was placed sideways to the P.1101.

-
It's really difficult estimating measurements and shapes from the few pics I have as reference, but things are slowly starting to make sense....
-
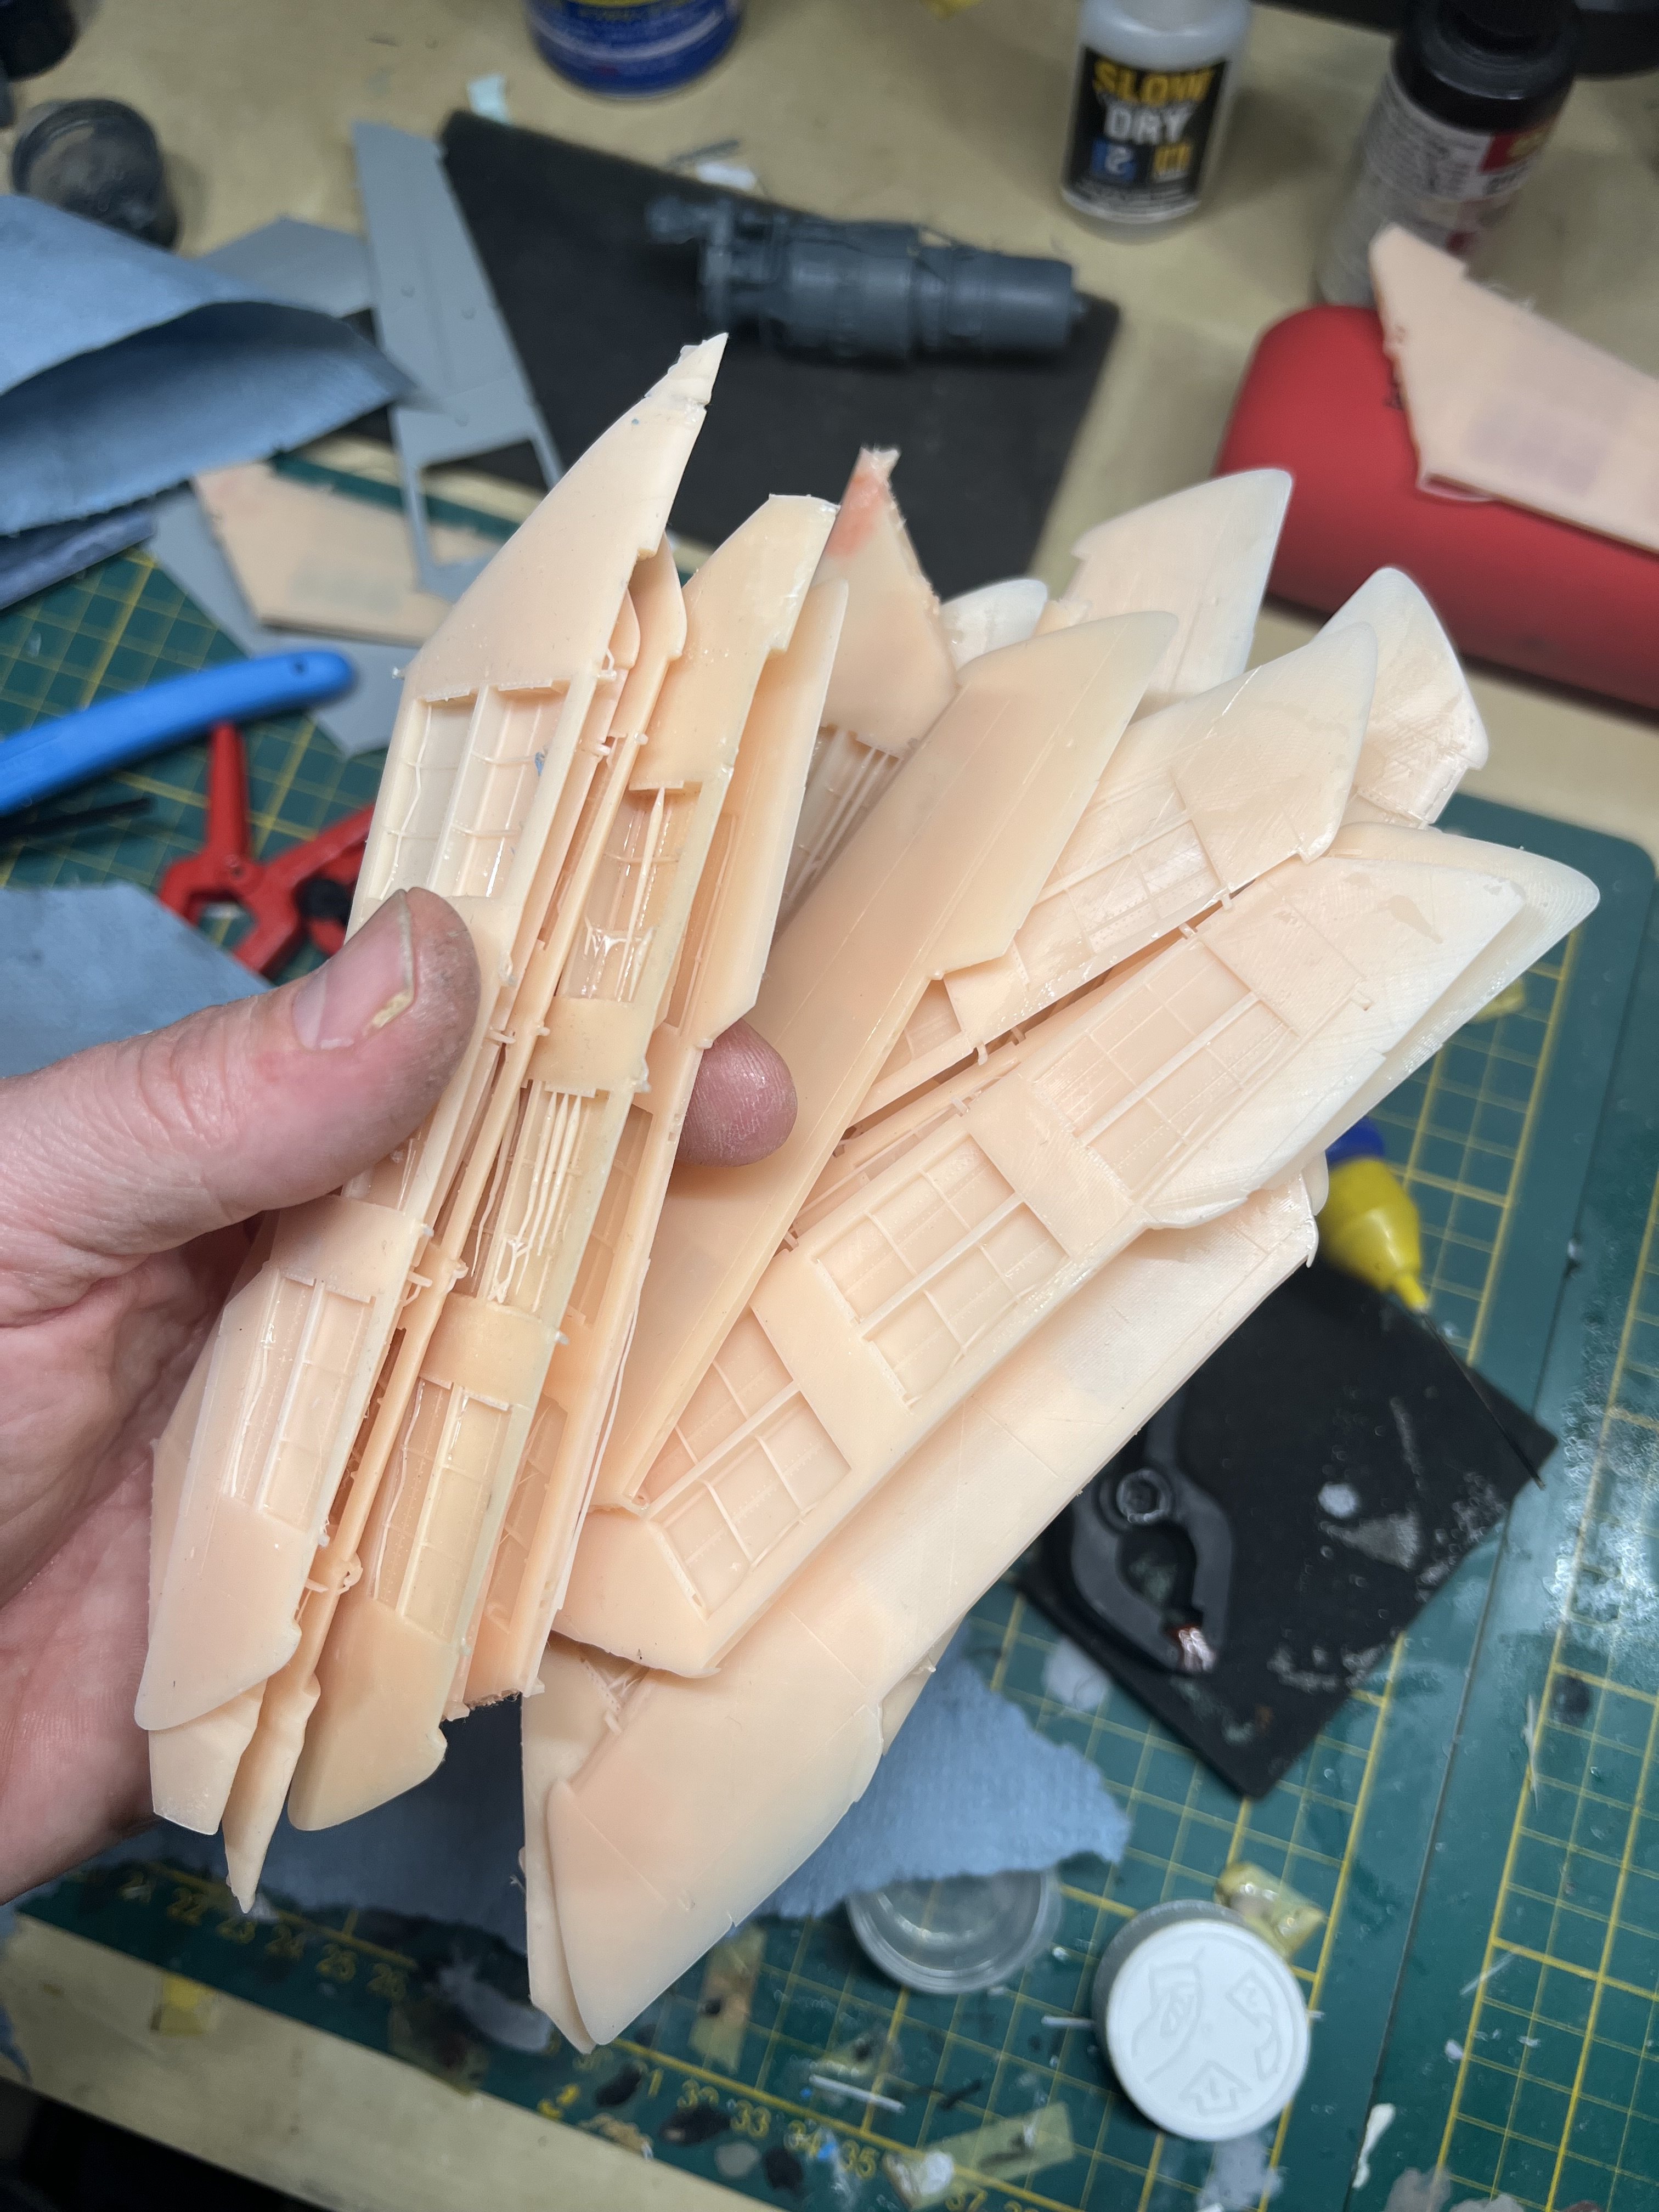
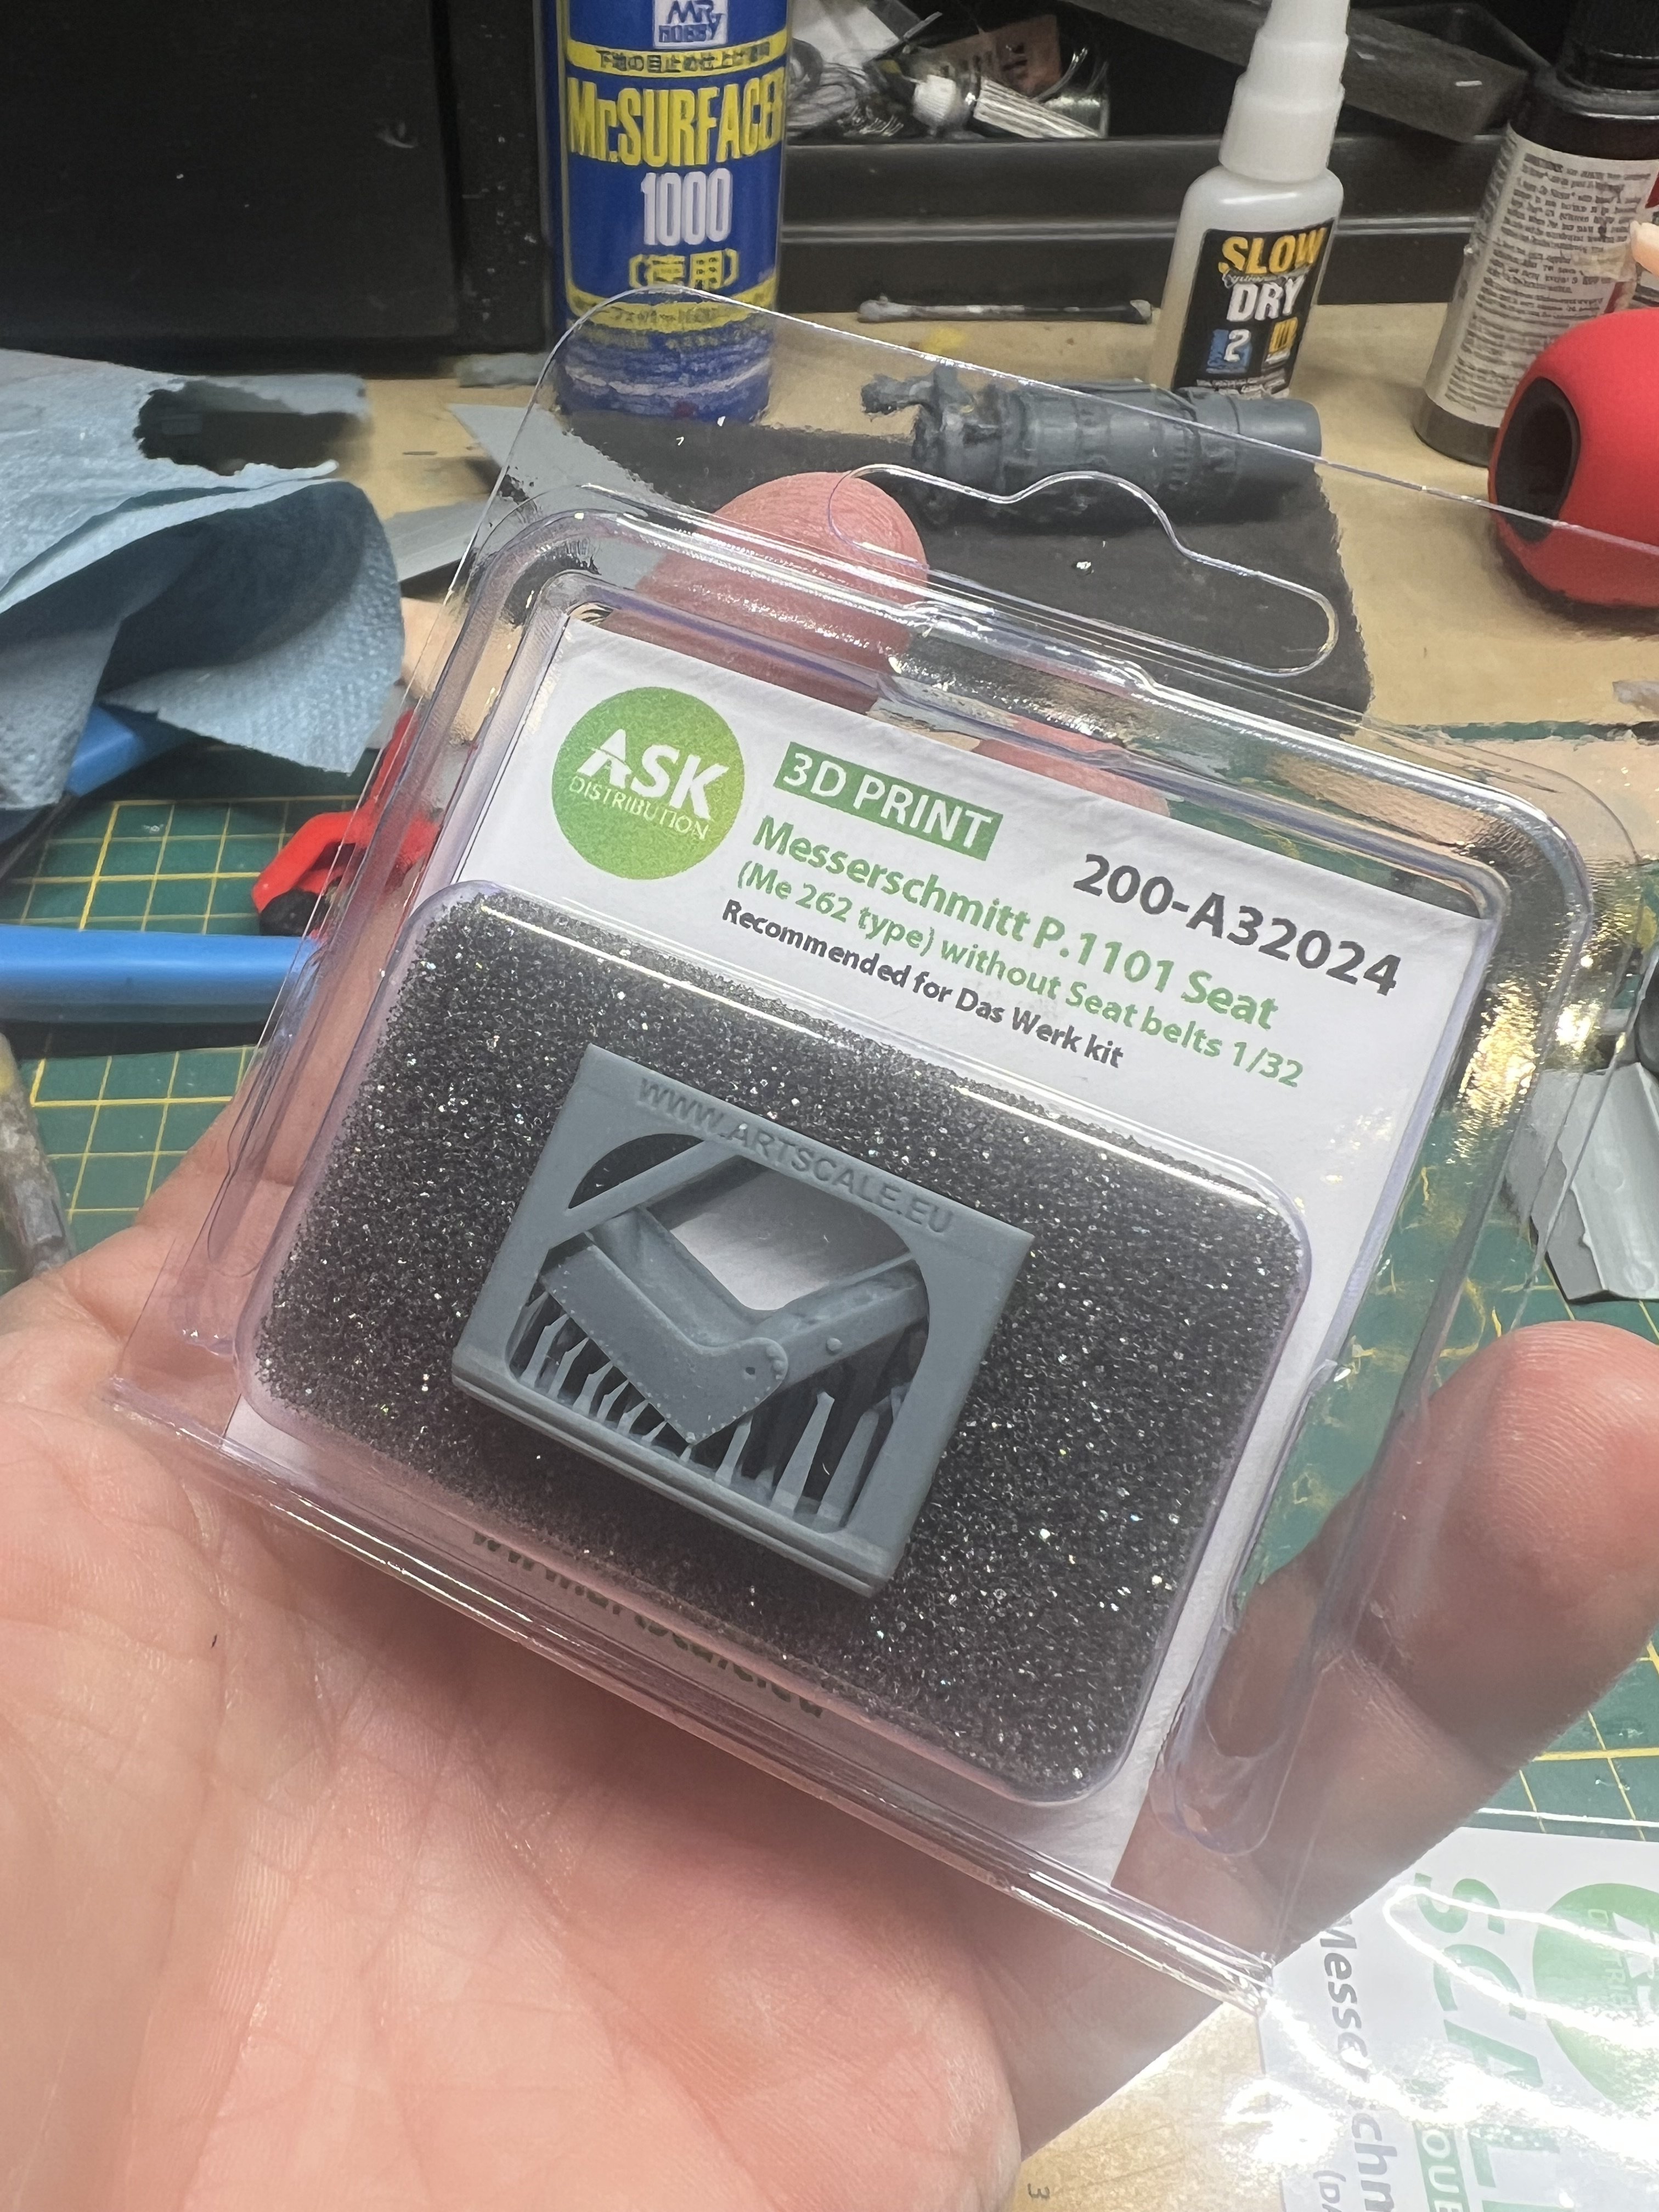
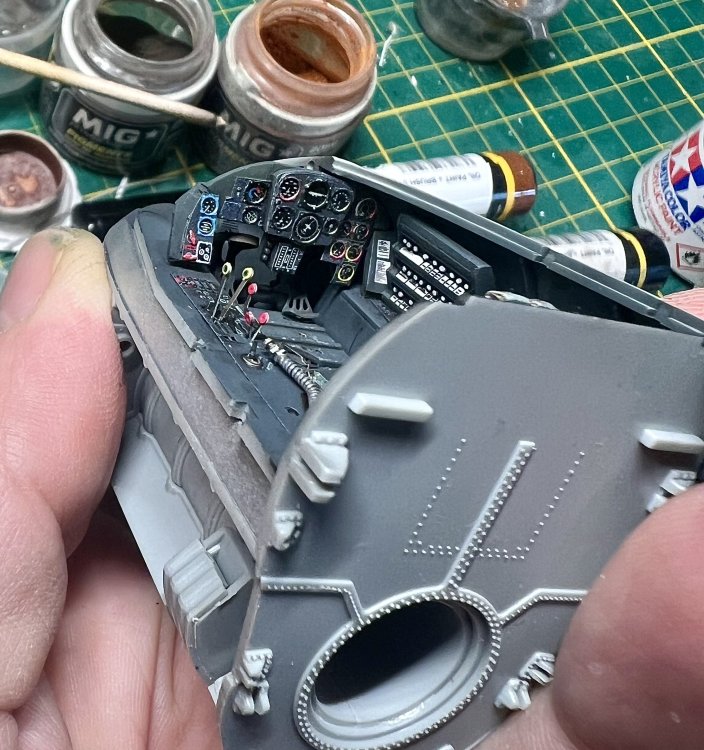
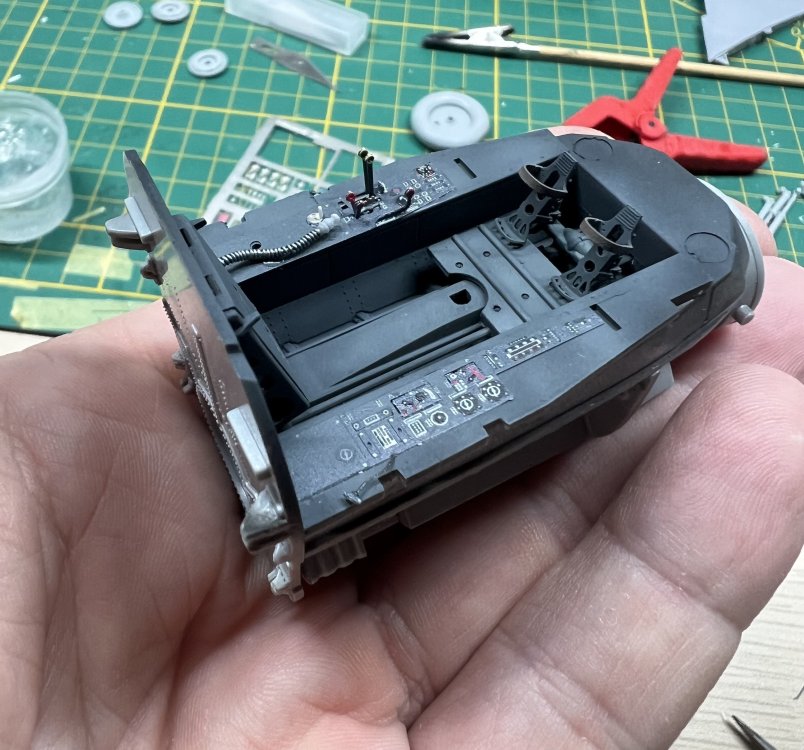
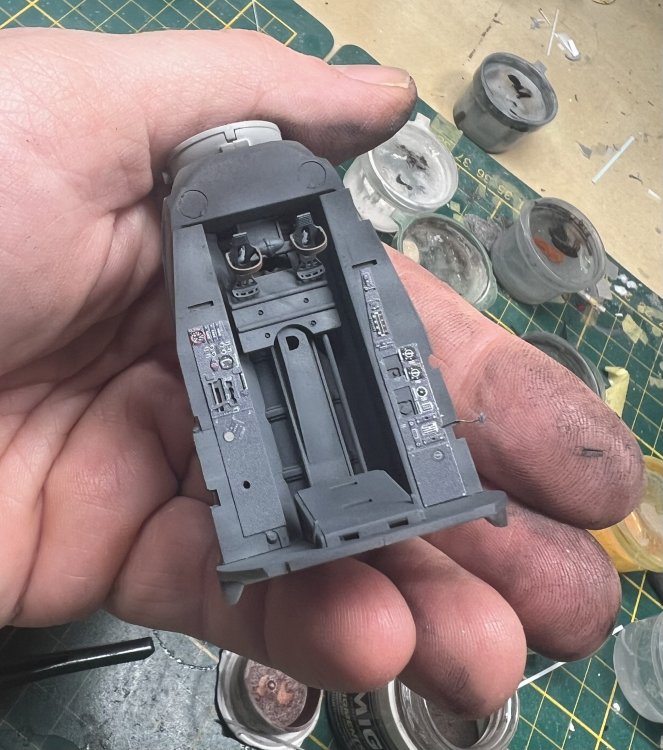
More work on the pit. All the Eduard bits i could use from the me262 set are in. So are the HGW seatbelts. Always a treat. And the Artscale seat.

-
Small steps..
-
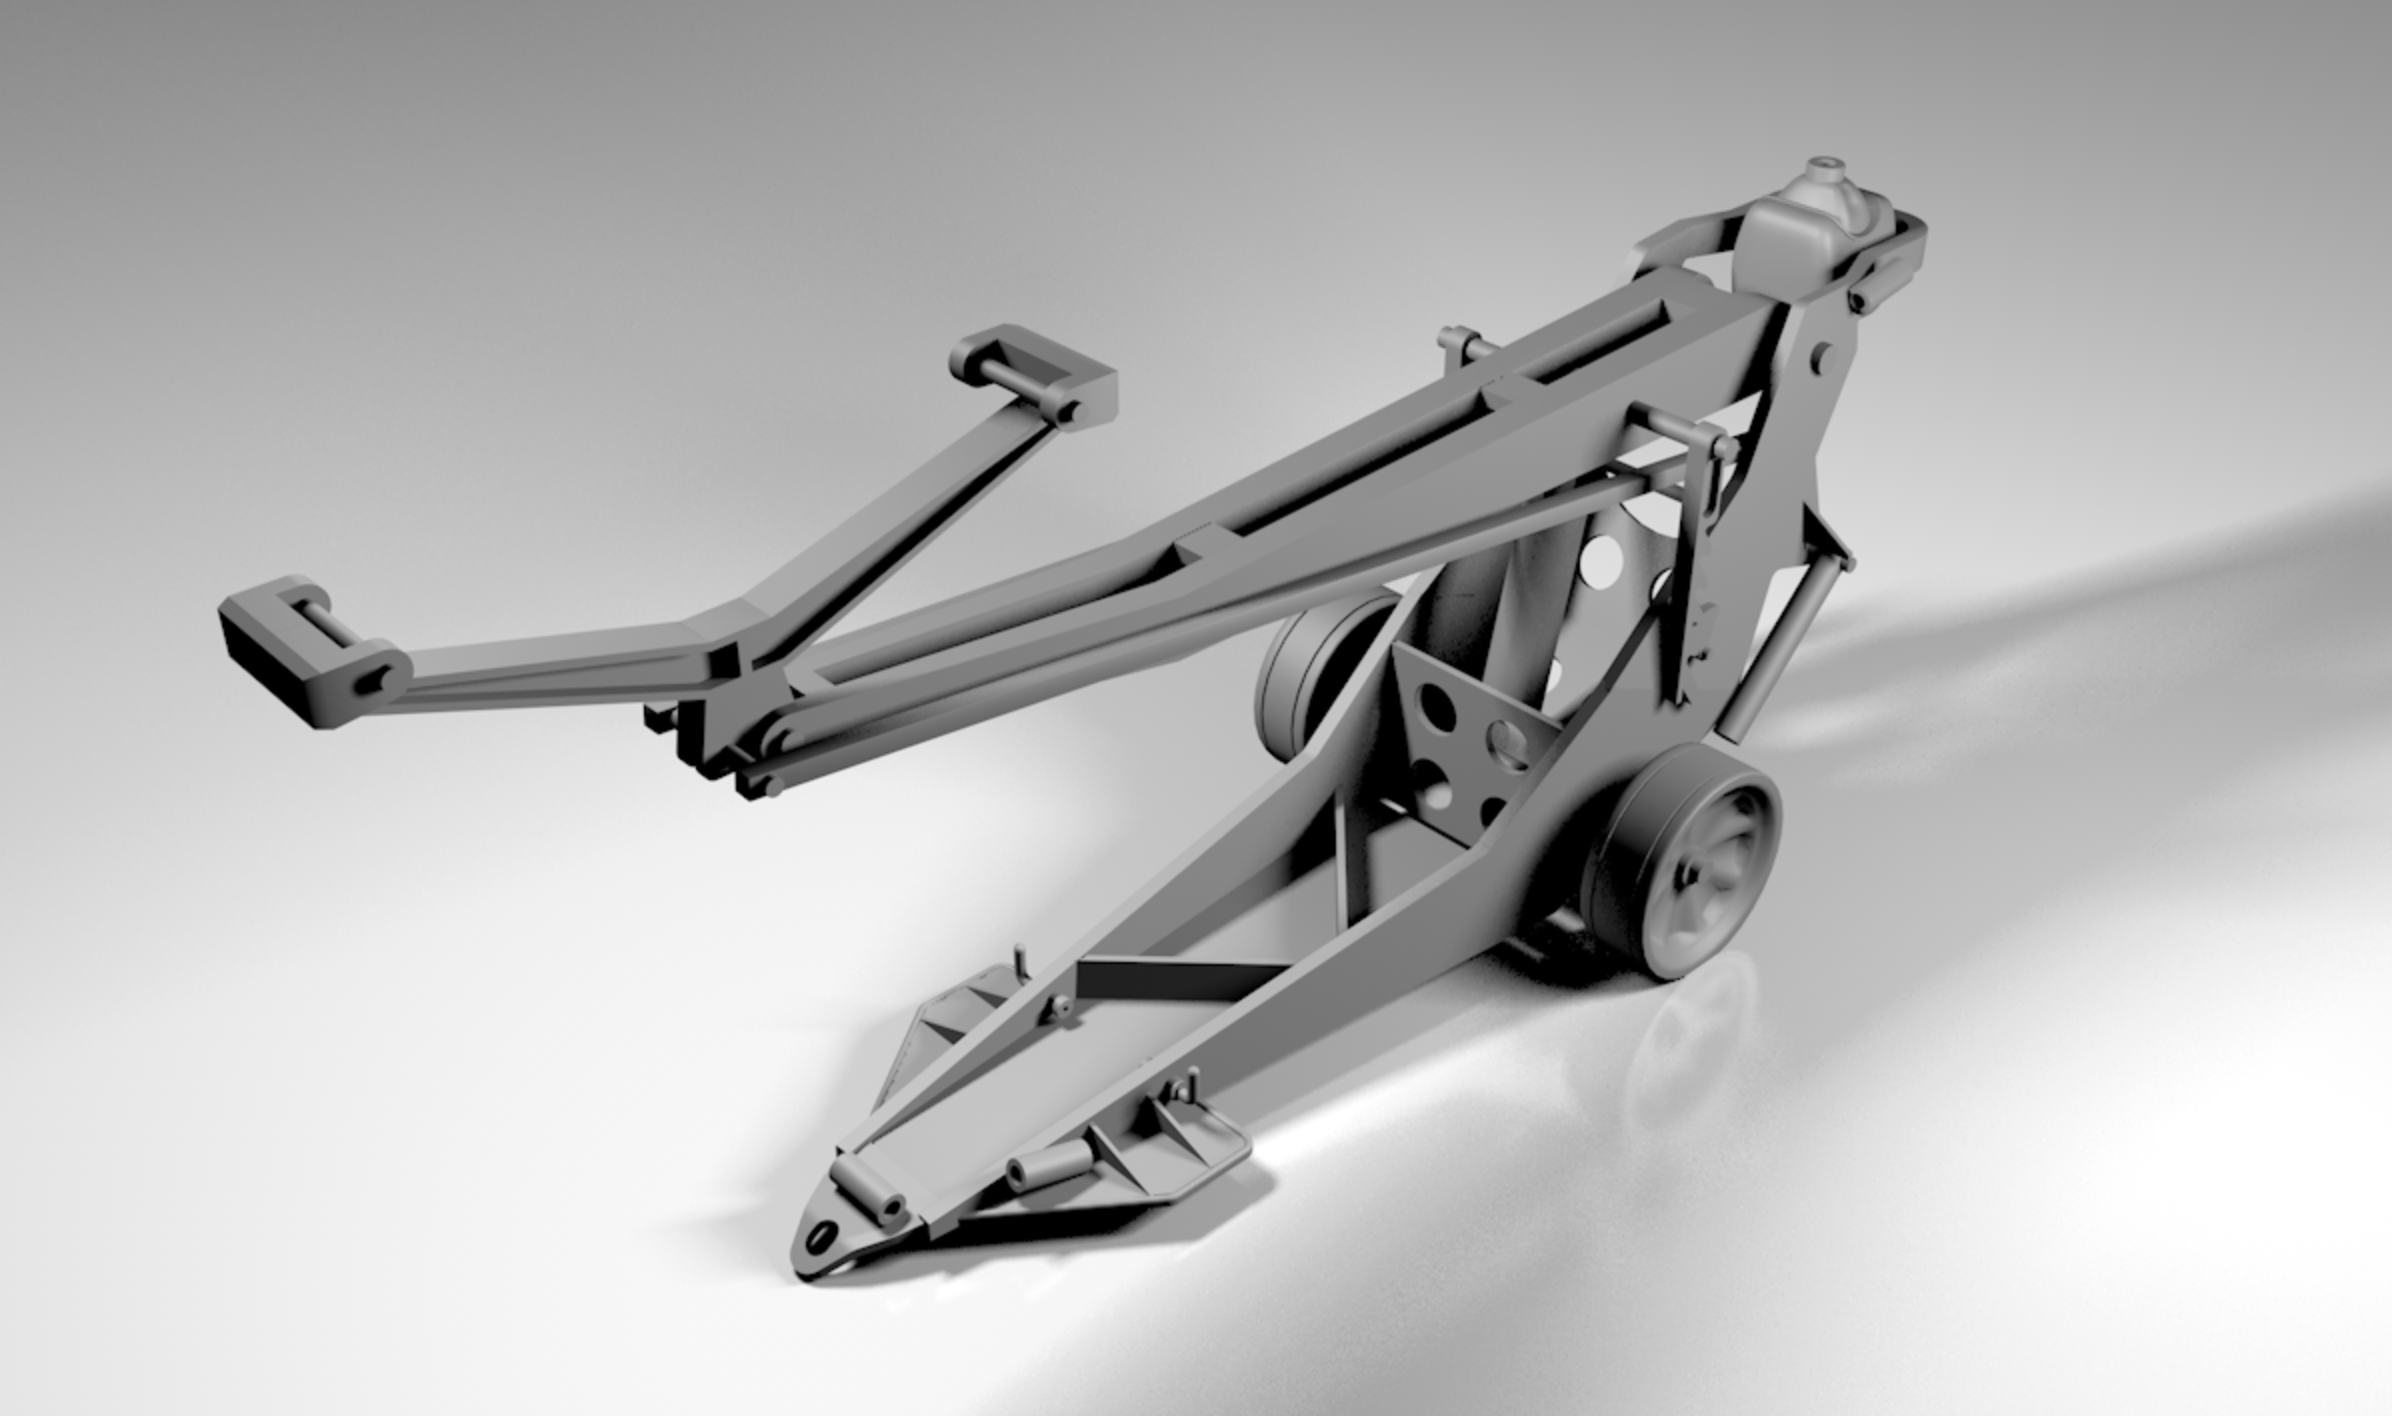
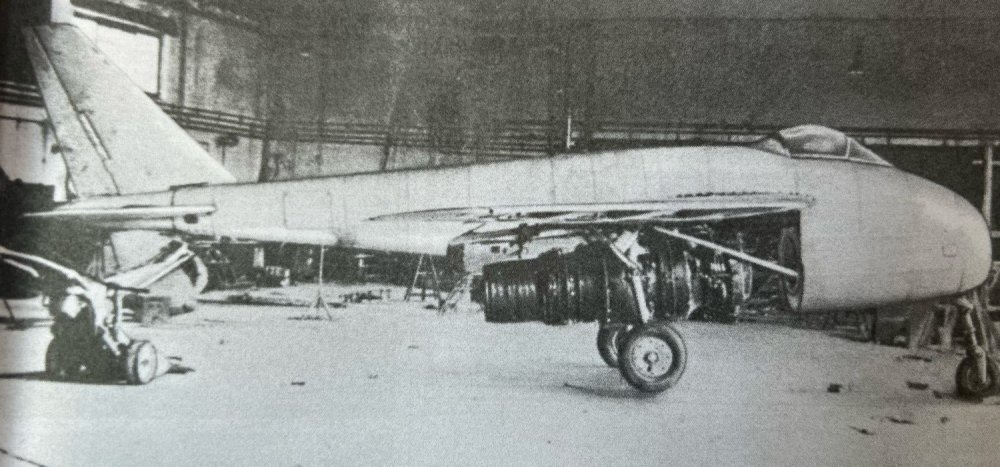
First steps in drawing the Herkules II lift. I have bought the Luftwaffe manual, which describes the workings of the Herkules I, II and III. The wheels on the one found underneath the P.1101 at Oberammergau are steel, instead of the rubber tire ones in the manual. I did my best to guess the shape of the steel wheels from the few photos there are and I'm trying to use new 3D techniques as I go along. The manual (L.Dv 526) is in the German Bundesarchiv, but is not digitally available. This manual was bought from Luftfahrt Archives Hafner for 29 euro's (for those wondering).

-
Now for the bomb loader that was holding up the tail at the time the US Army found it. It was actually a 1939 Hercules II model. Not much can be found on this loader. U-models made a 1/35 resin kit once, before it went belly up. There was someone on Artstation (whom I messaged) who did a 3d model on this loader, so let's see. Today I bought the Luftwaffe manual on this loader with the intention to 3d draw it myself.


-
I saw it too. I remember contacting them about over a year ago asking whether they were interested in buying the 3D models of the engine to produce their own update set. But they were not. Glad they at least liked the finished product! And it's not that I wanted to make money of this. The engine itself was drawn by someone from the Westland Whirlwind Fighter Project and he would have been compensated. Ah well.
-
Decided to add the oxygen hose again. Made it from thin lead wire and an Anyz coupling. Having a kot of fun adding all the Eduard PE from the Me262 set.


-
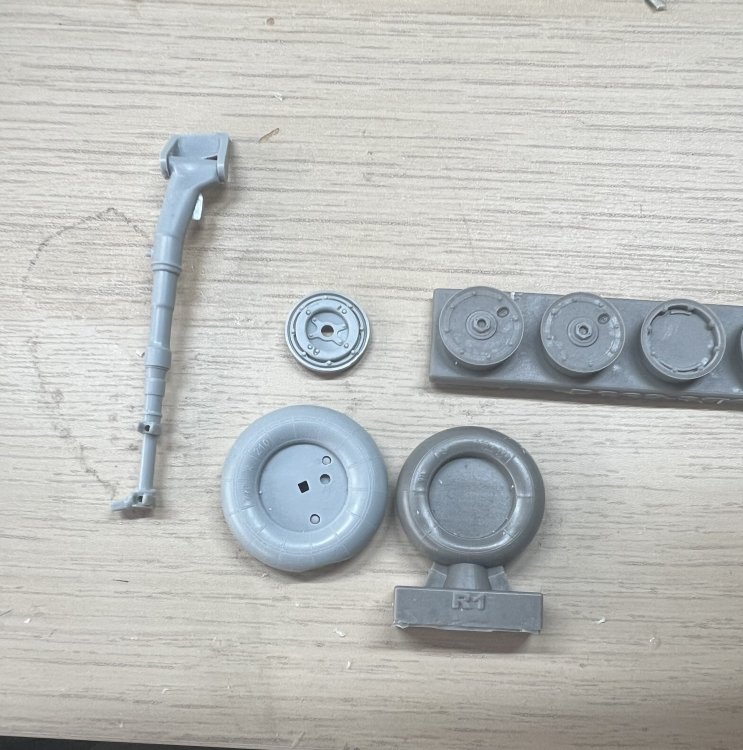
I stand corrected. The tires correctly state 740mm which corresponds to an outer diameter of 74cm. Converted to 32nd scale that translates to 23,13mm. I measured about 23mm. I also sanded and polished the wheels a bit, so that checks out The story that this mockup used Bf109K wheels is therefor not correct. Maybe the wheel hubs, but not the tires.
-
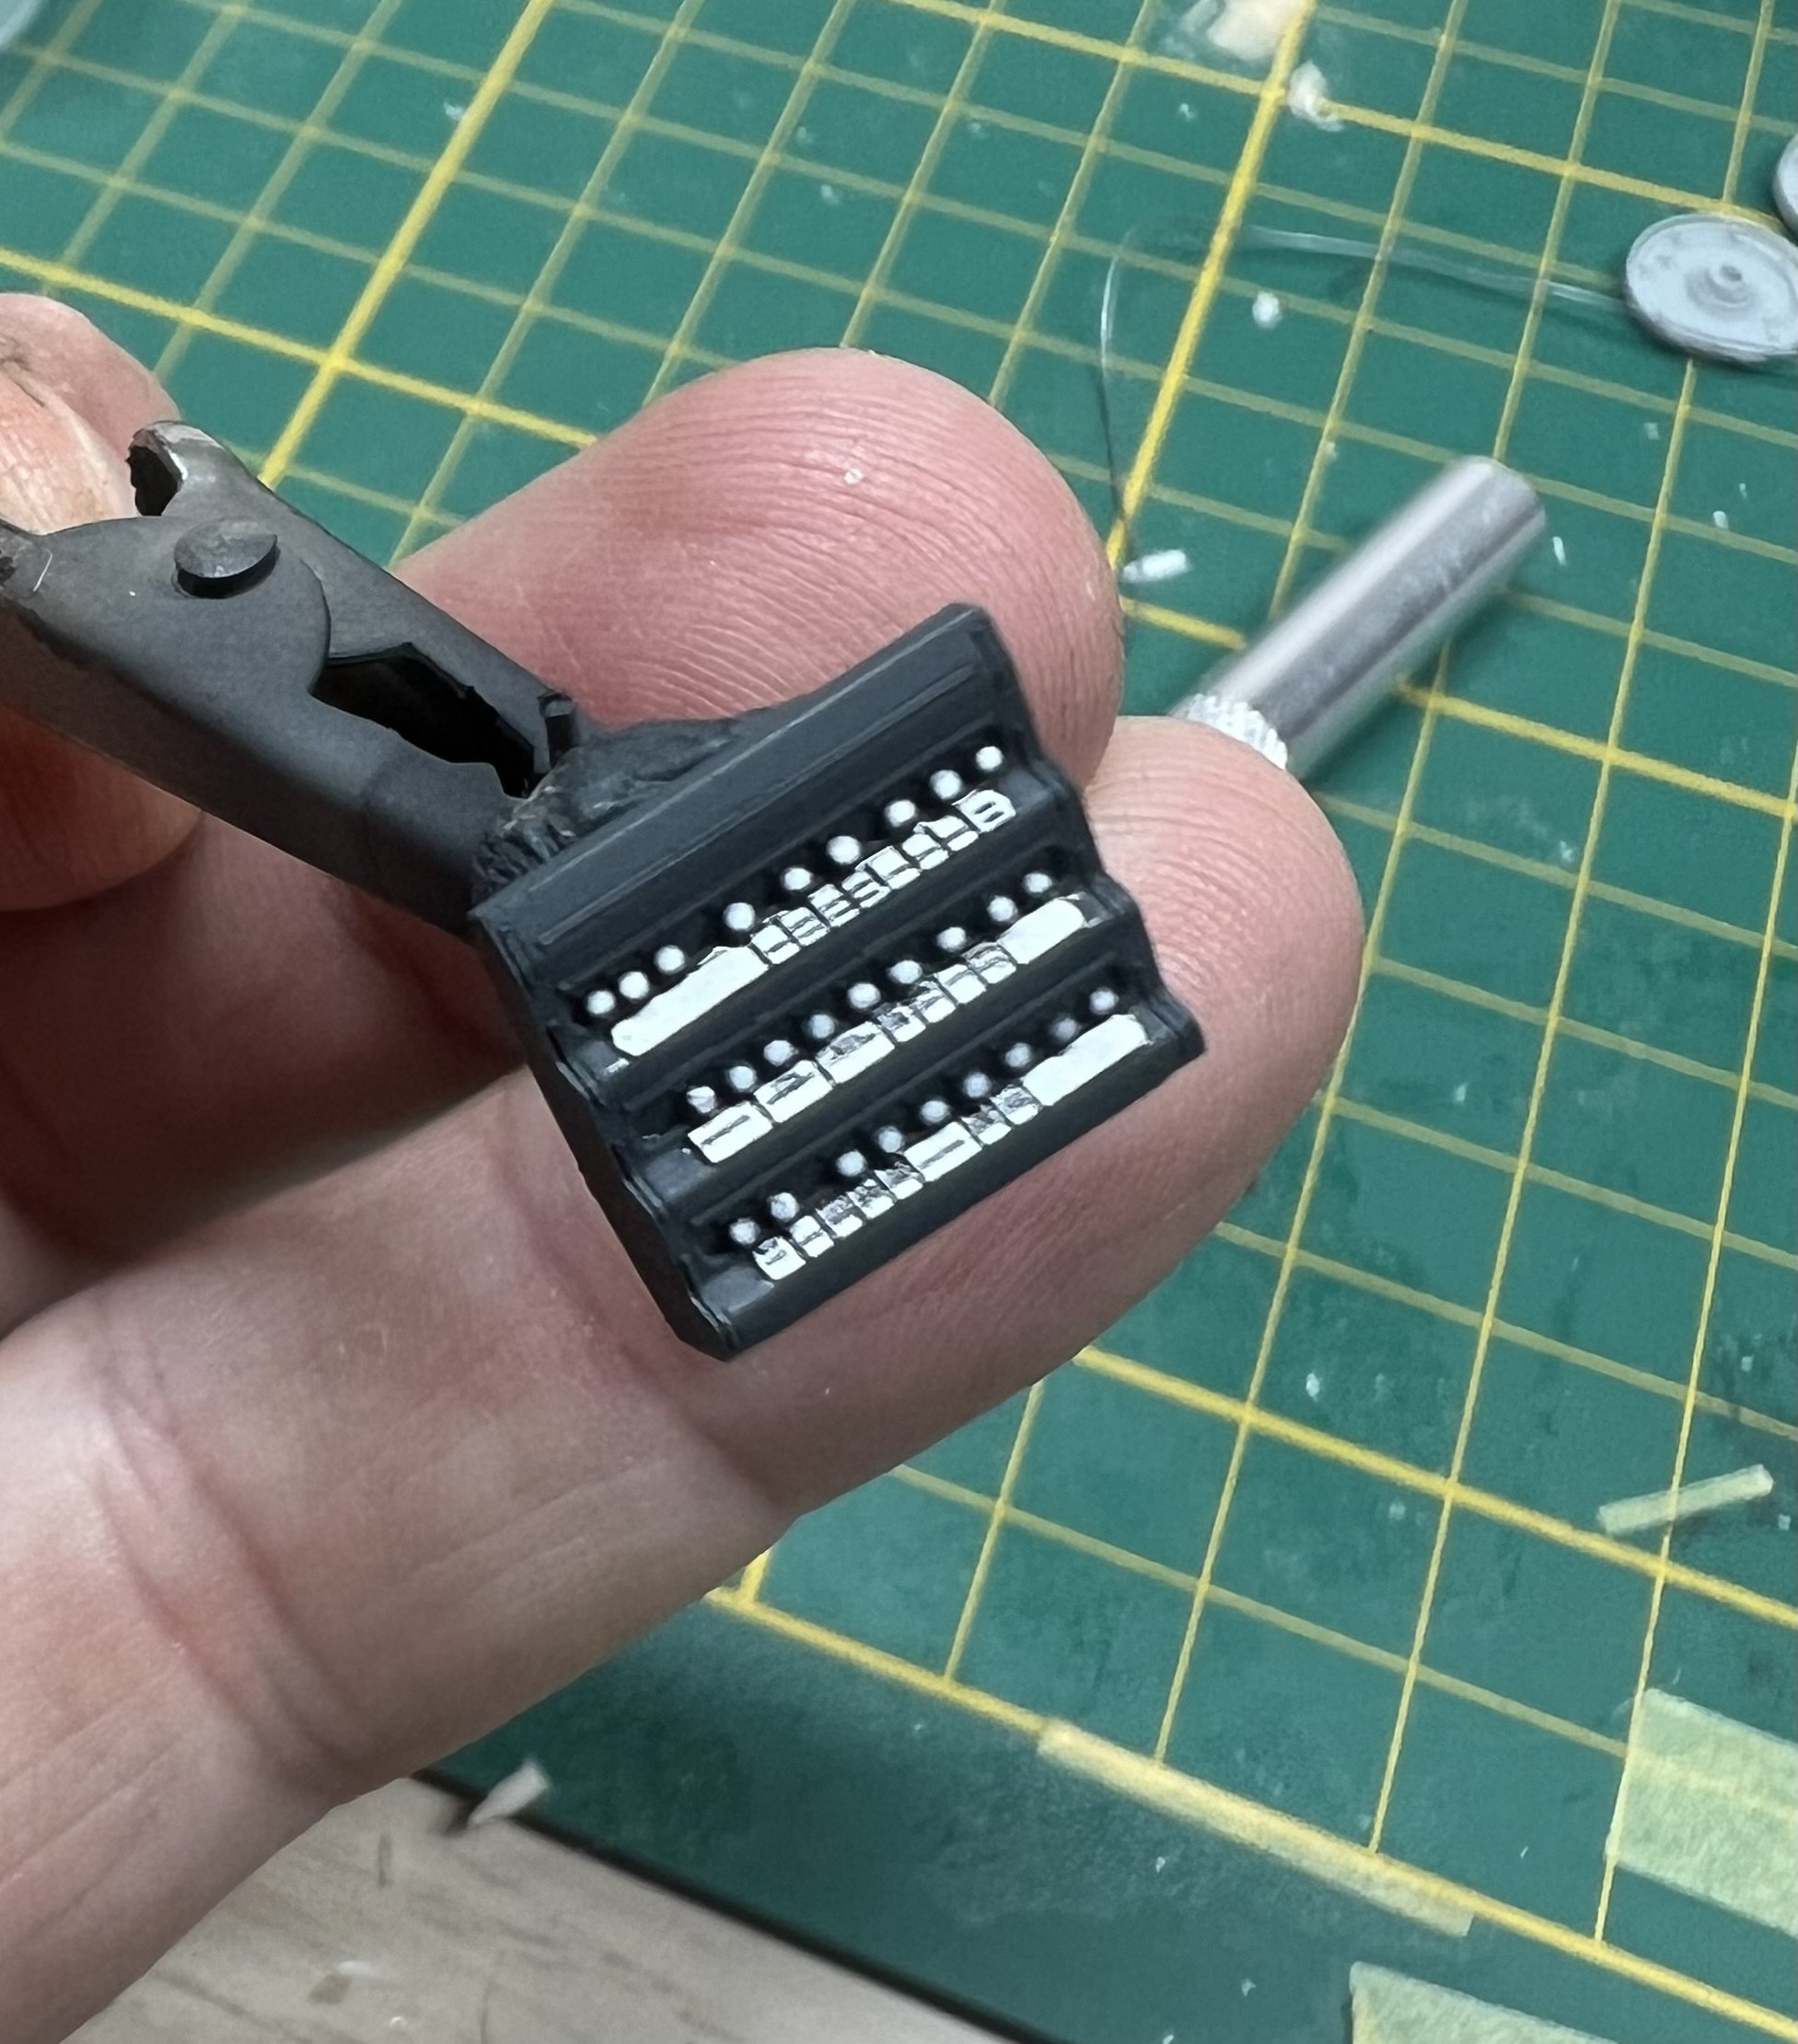
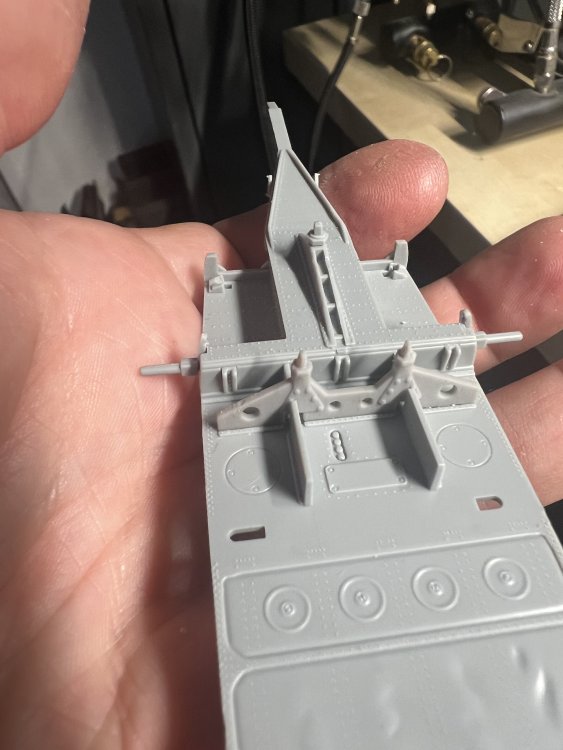
Cutting up the me262 Photoetch panel to fit the P.1101 panel. The fuse rack is similar to the 262’s so the placards fit. Not much will be visible after installing the cockpit combing. Another thing: i don’t think this pit should have a gunsight, seatbelts and would maybe be missing a lot of equipment since it was never meant to fly. But i’ll forget that thought. I won’t add a gunsight though…


-
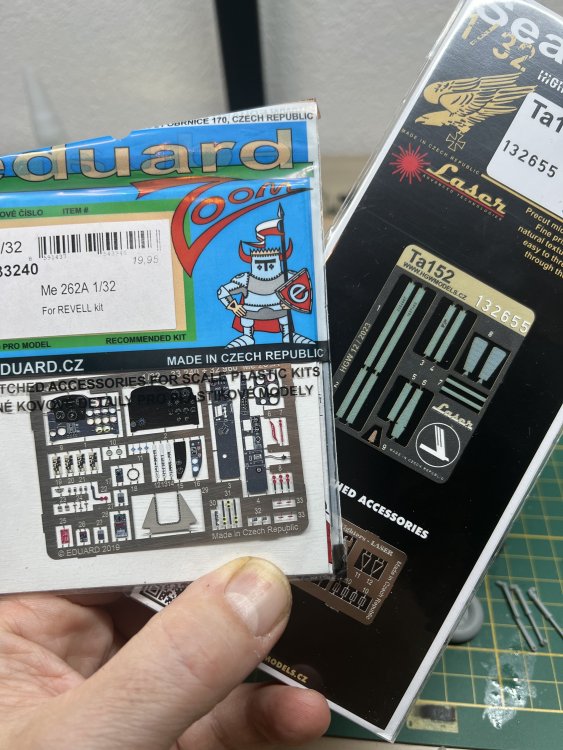
So. I stopped by the Aviation Megastore today to get a Me262 cockpit set and some HGW seatbelts. The Ta152 blue-ish ones appealed to me. I cut off and sanded off all the instrument details and am using as much PE as i can. I contacted Quinta studio to check whether they’d release a set, but a blunt: check our FB page for news… was all i got. Seemed logical they would release a set, since they also released a 1/48 set for this plane. Ah well. Already added the blind flying panel and did my best to match the Eduard RLM66.


-
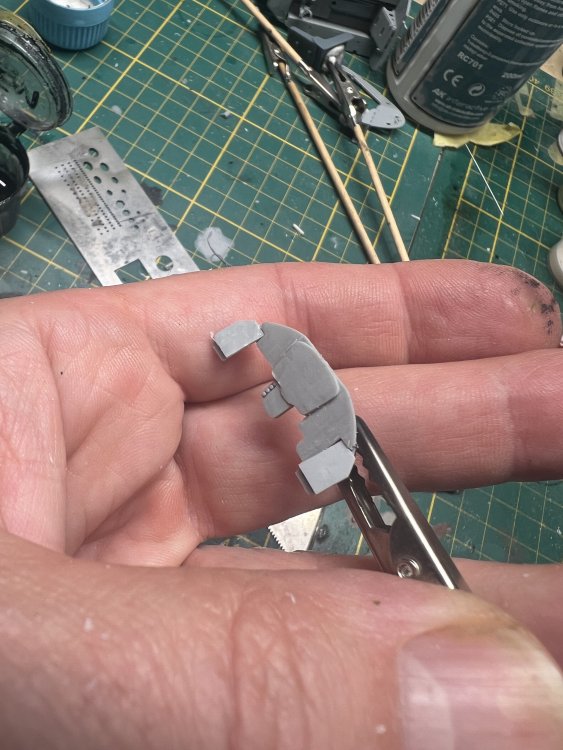
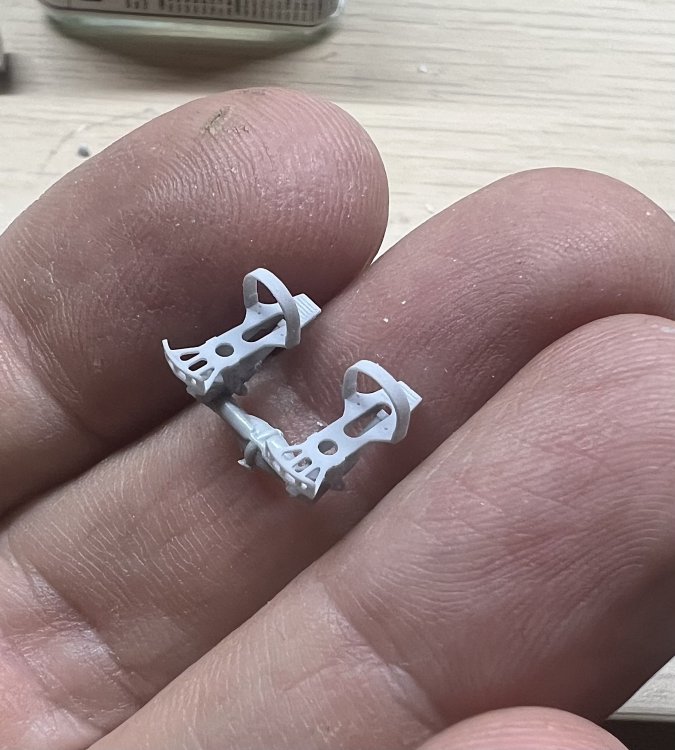
Spent the evening cleaning up parts. Decided to swap the rudder pedals for 3d printed ones from Eduard. Sawed off the kit pedals from the bar and simply glued the new ones on.

-
A bit on the fence about the wheels. I’ve read the wheels came of a Bf109K. The wheel hubs of the kit match these, but the radius of the tyres is bigger than some resin wheels i have for the 109K. What to do…

-
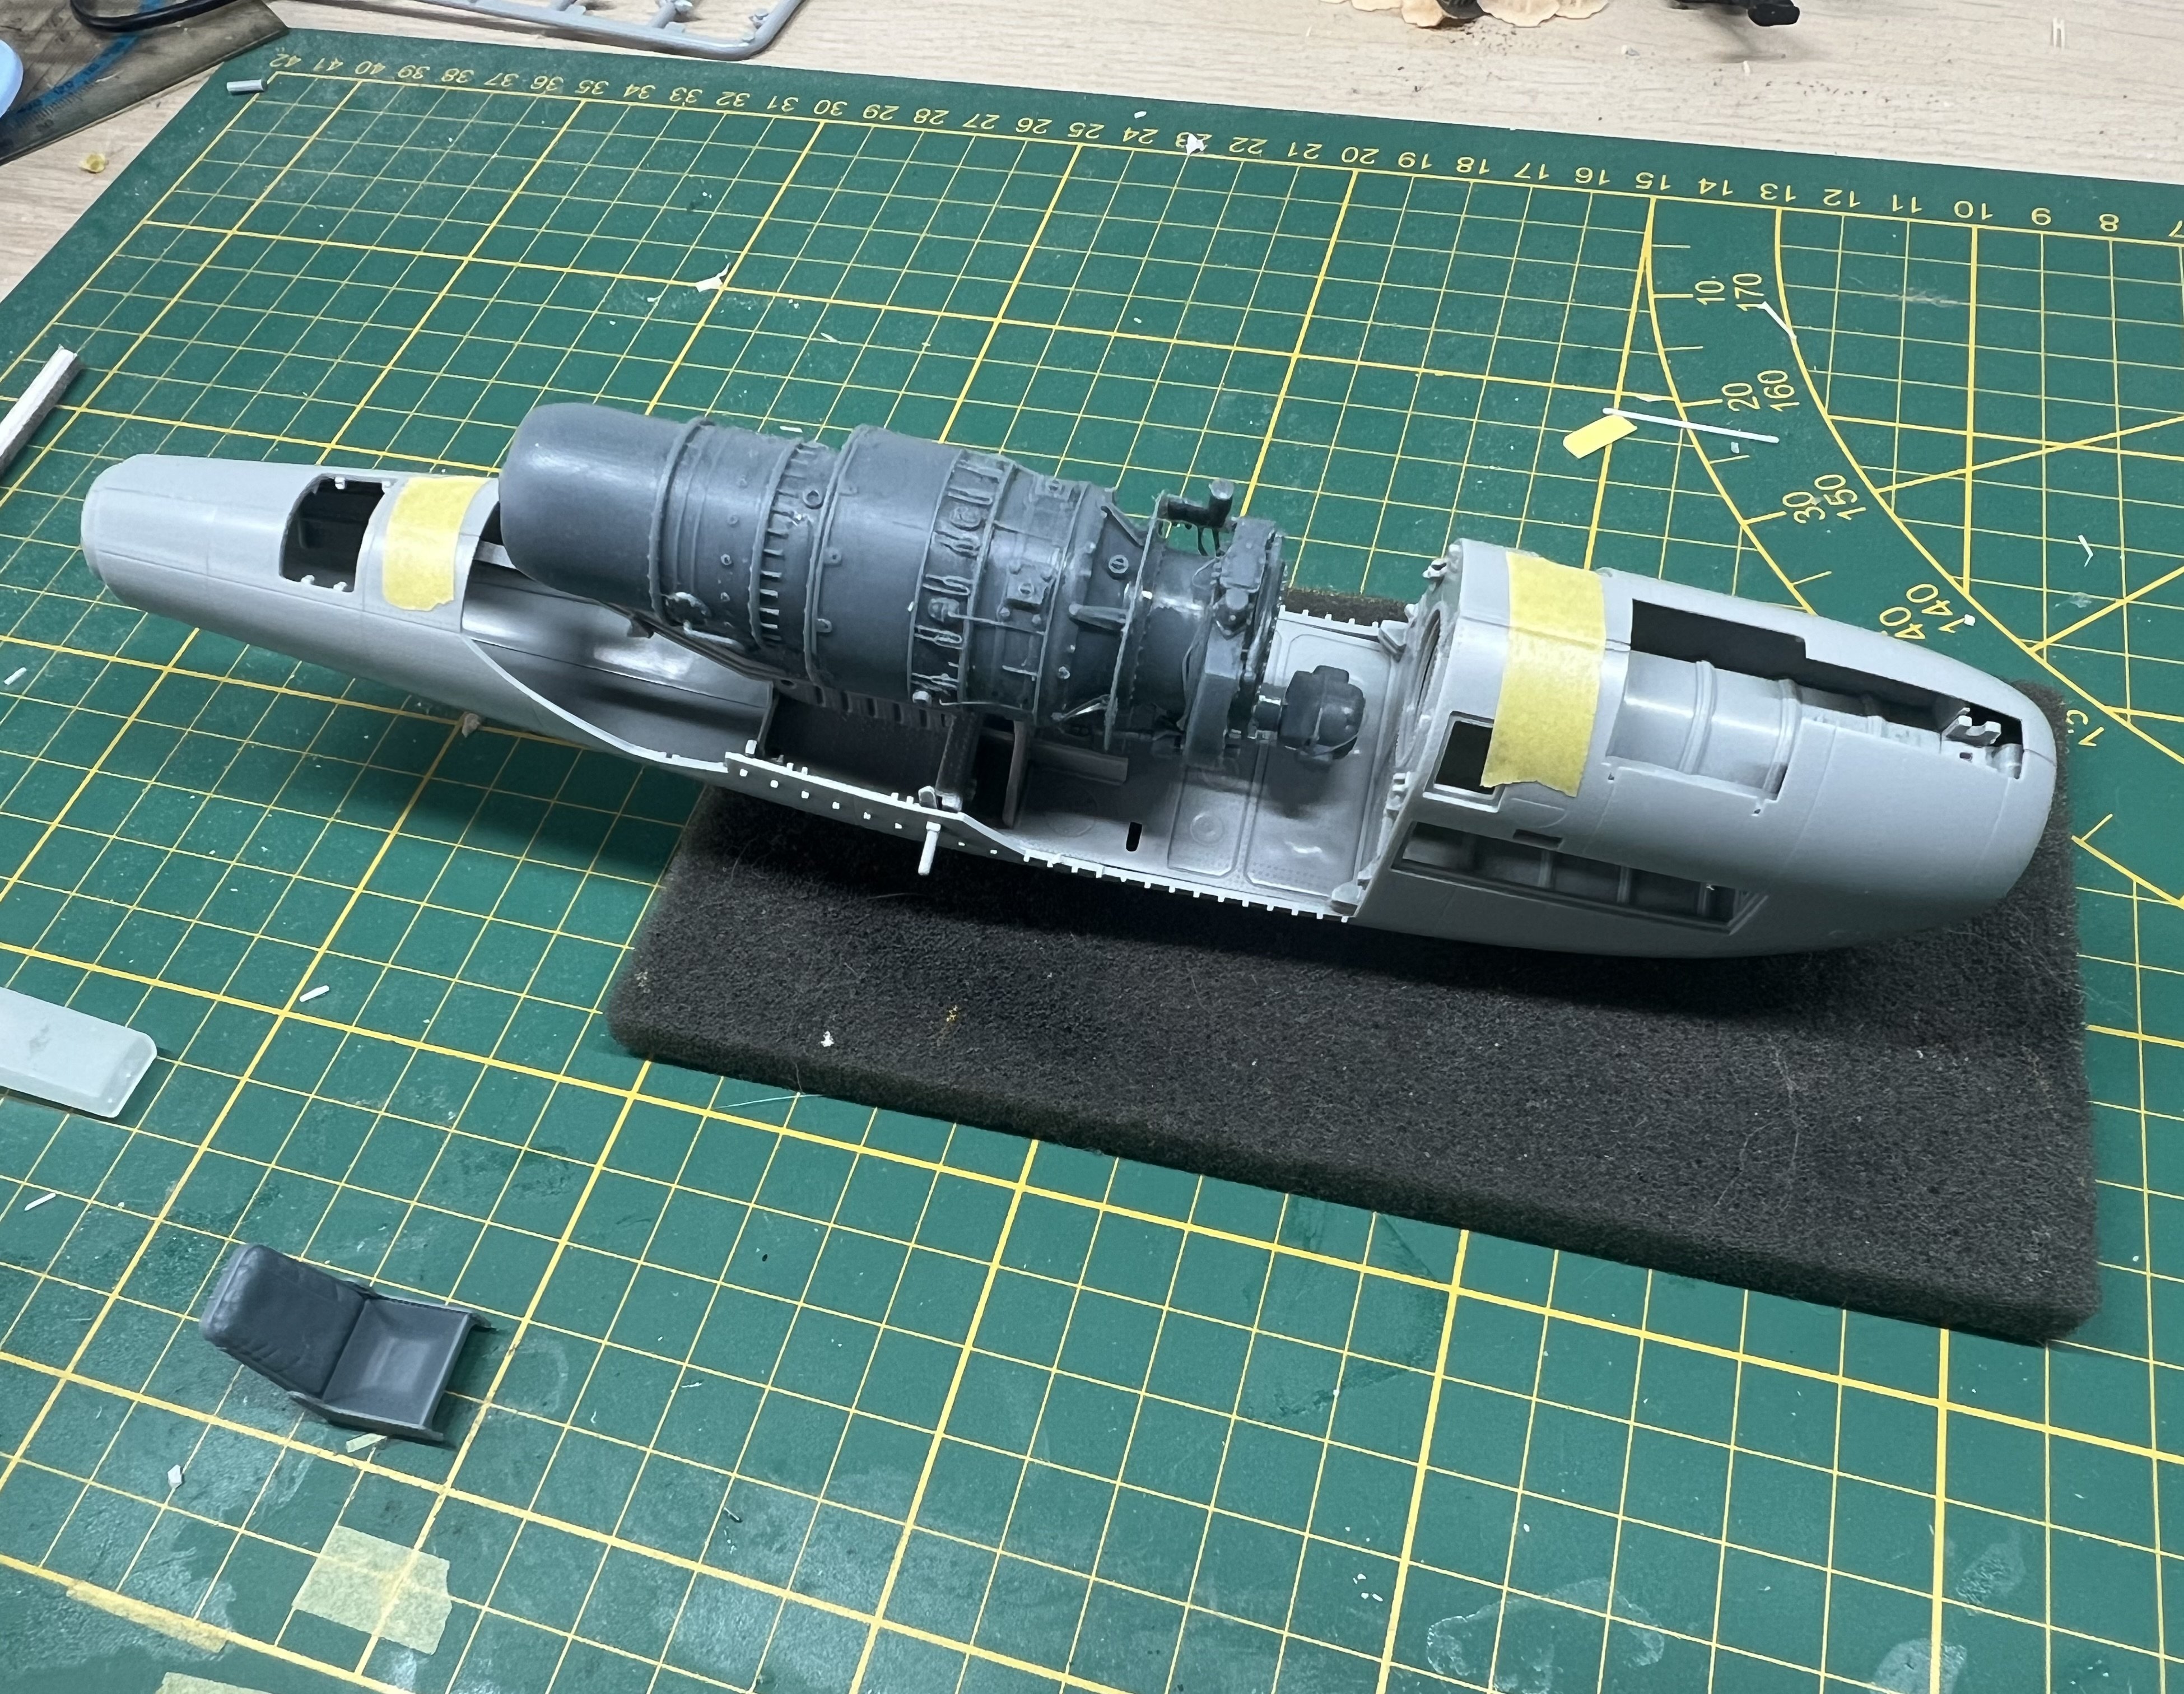
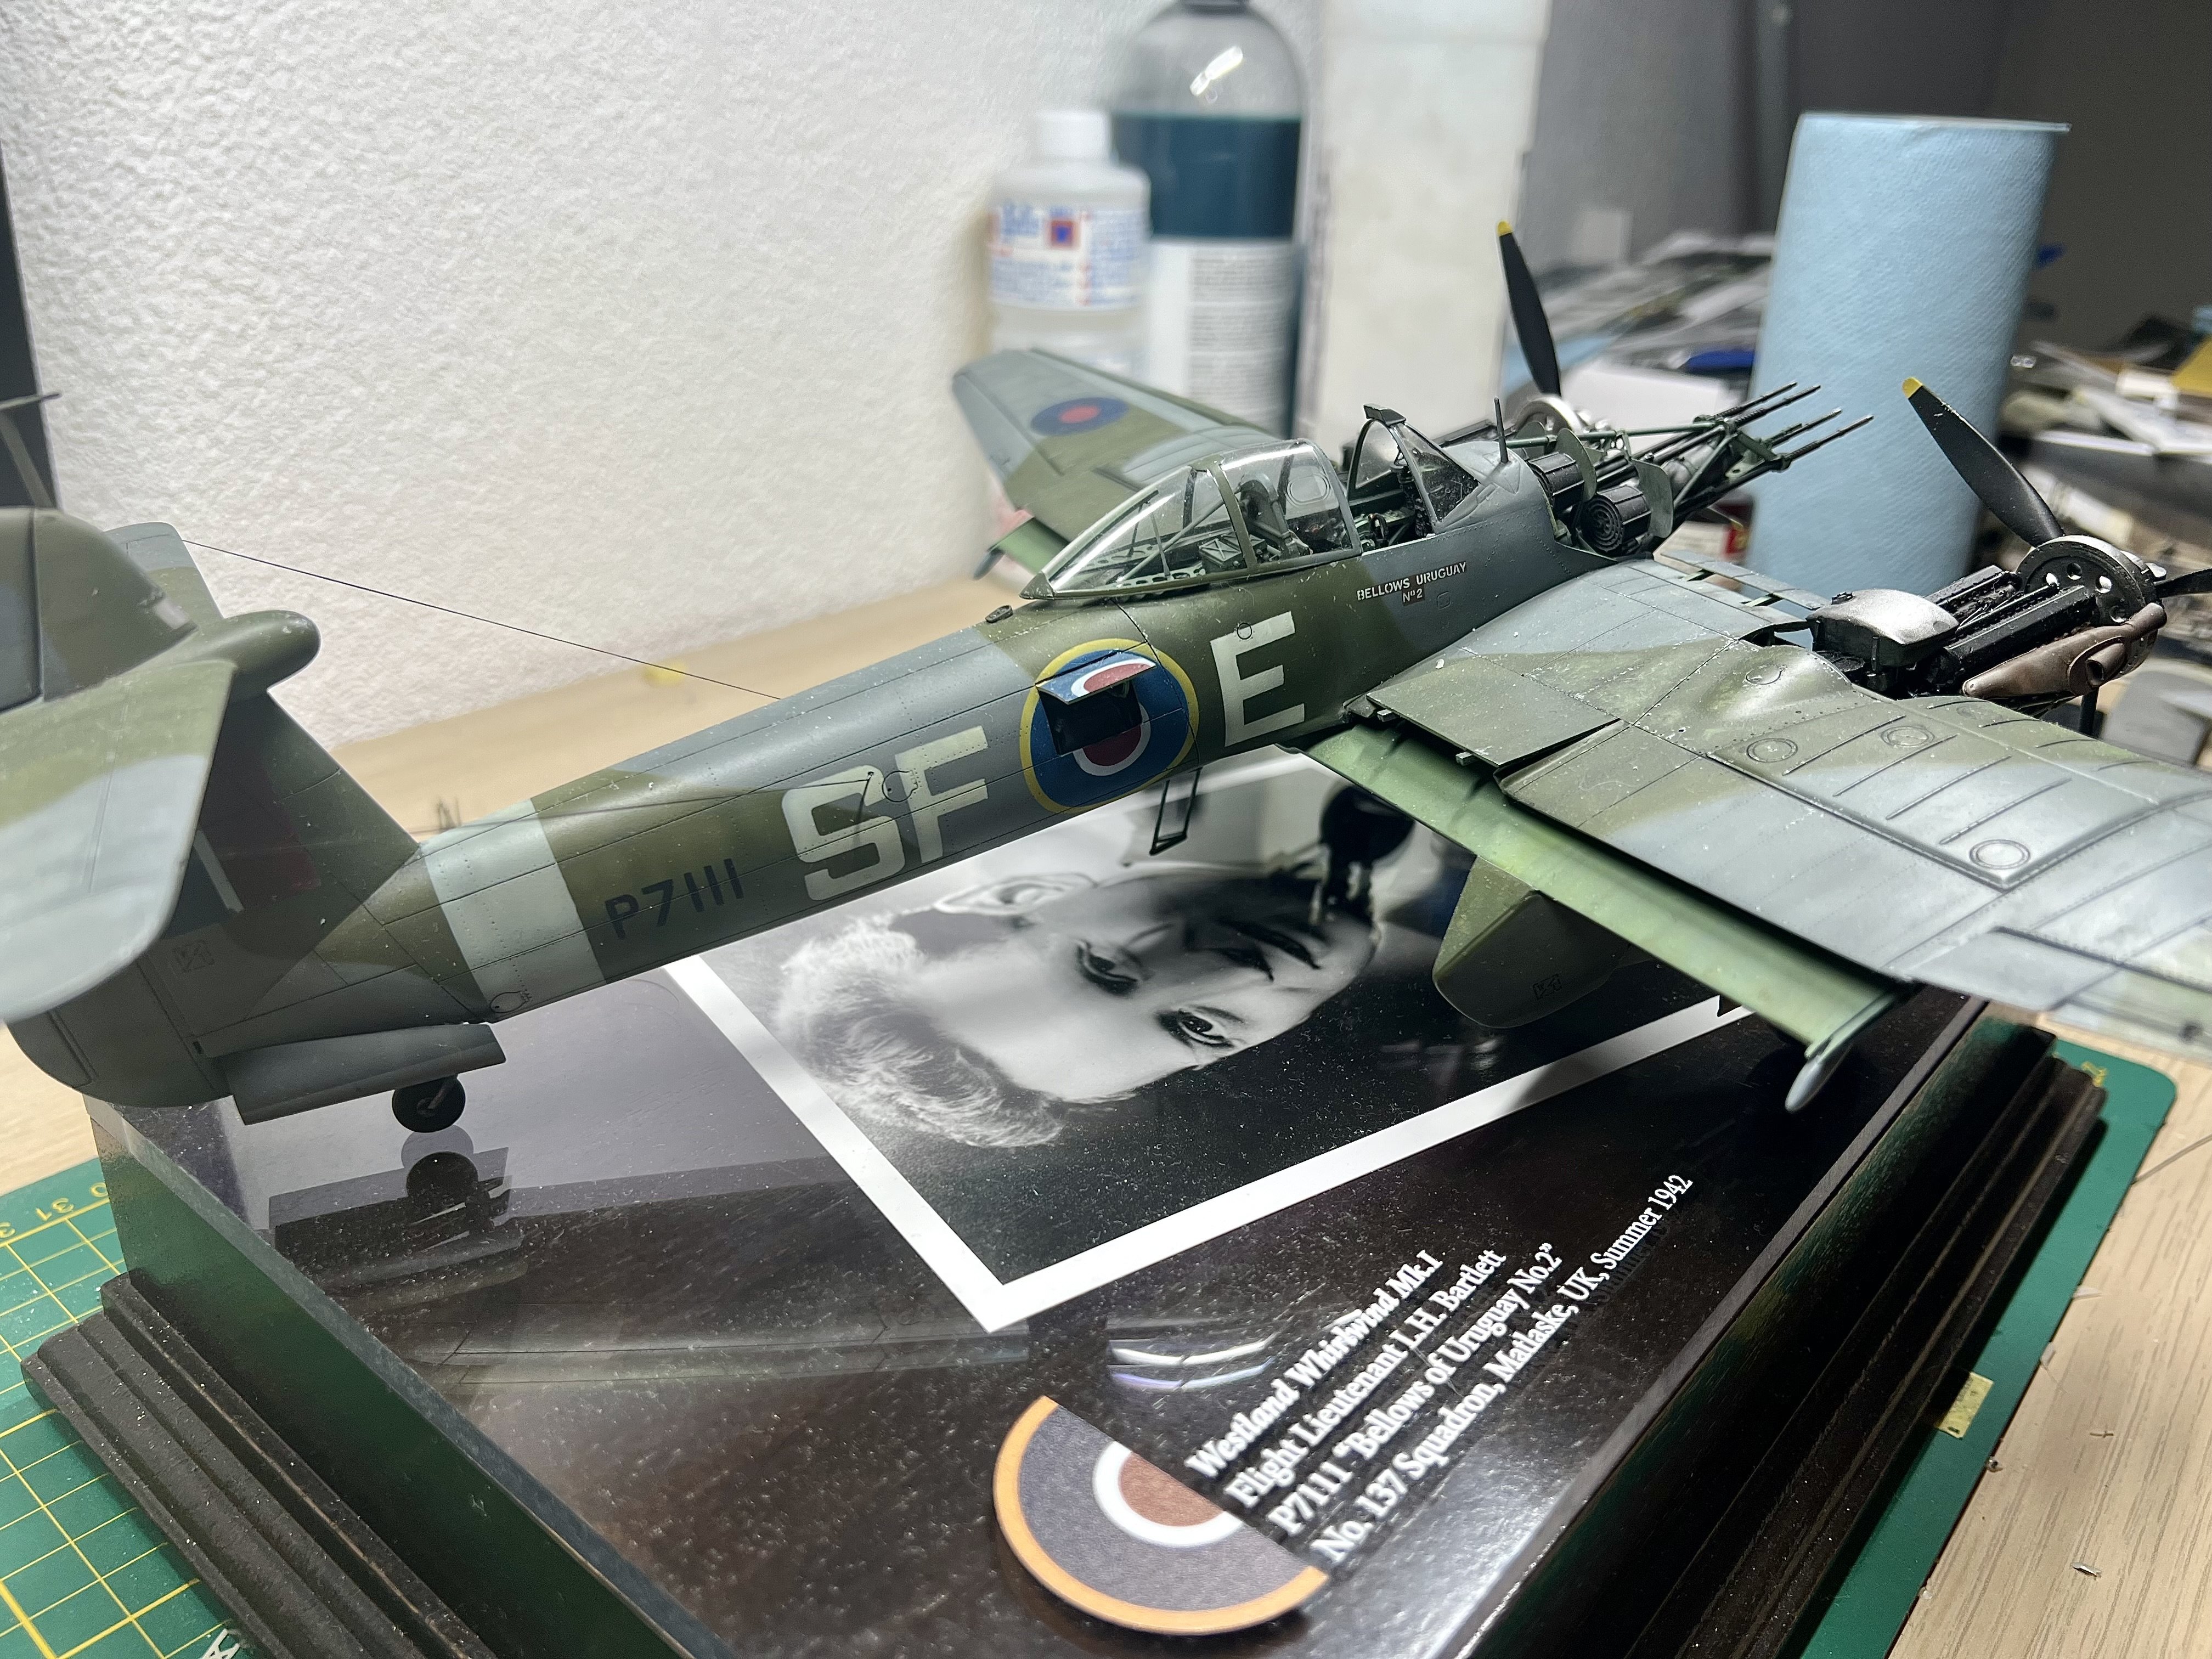
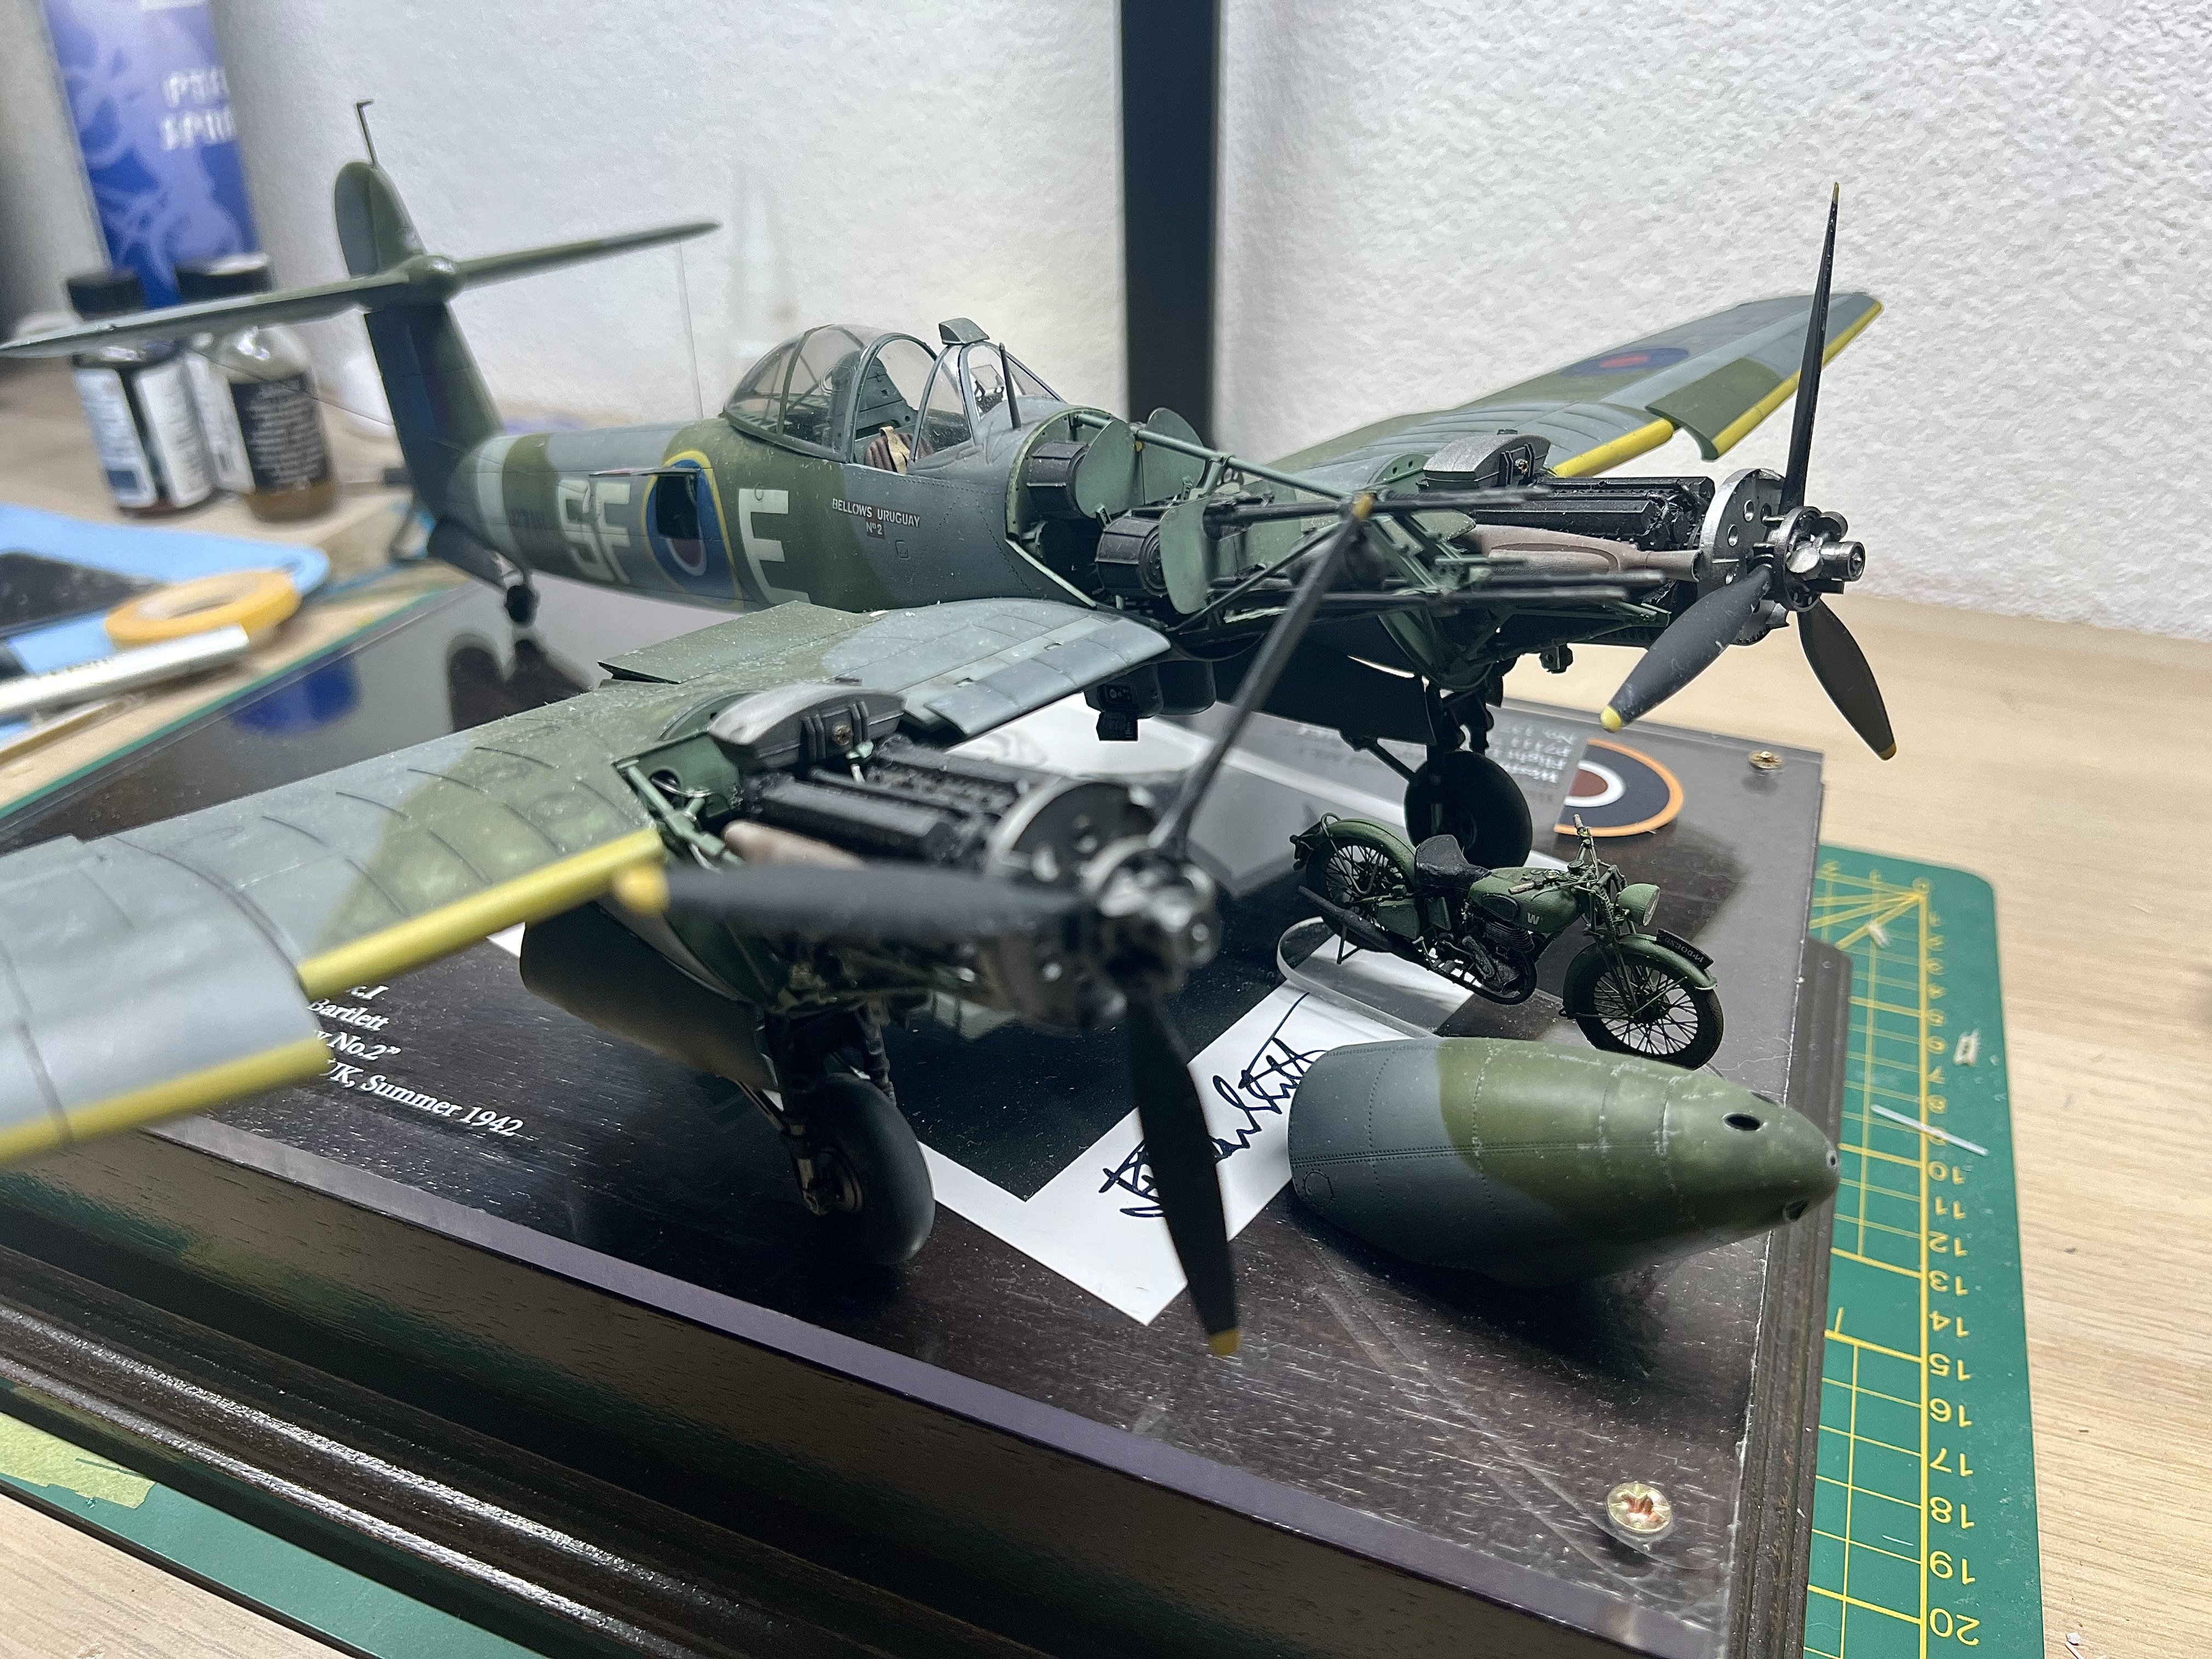
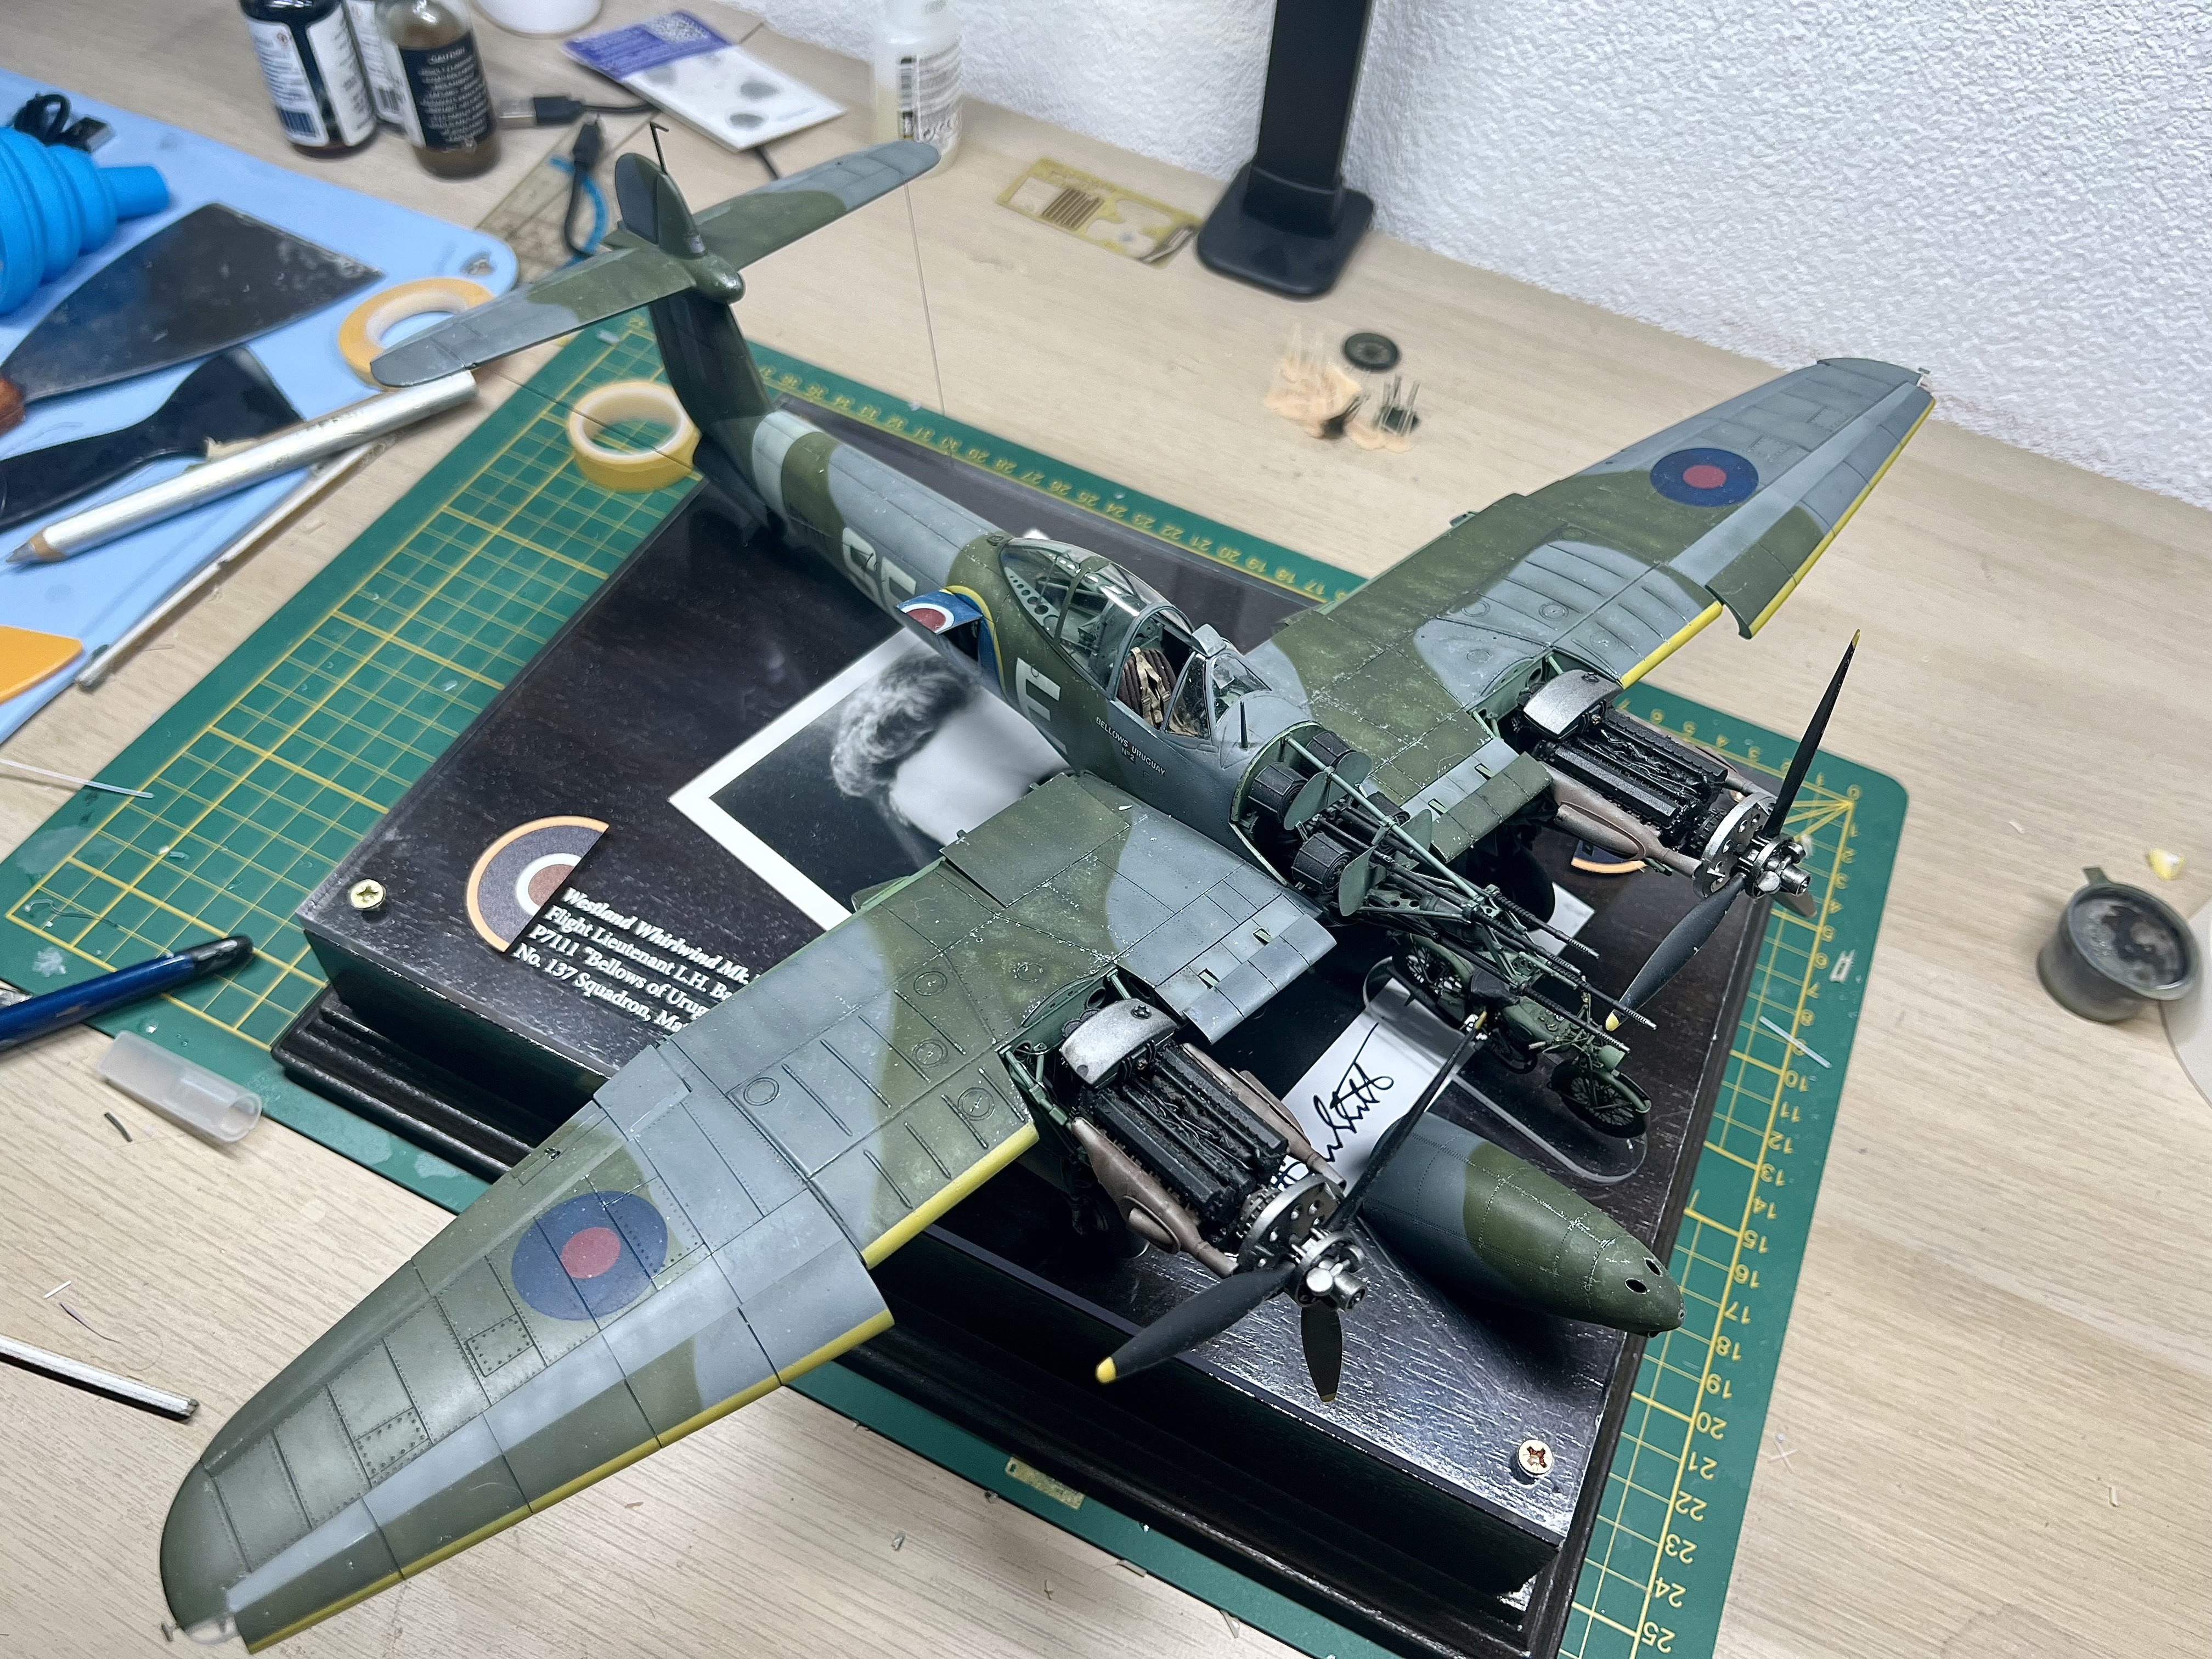
Hi all, after about 1.5 years in the making, I can call her done. I had this idea in my head of building this plane with exposed engines and guns. The guns are easy, since they are included in the High Tech version of the Special Hobby kit. The engines however were a whole different story. I came into contact with a dutch 3d artist, who some time ago drew the Rolls Royce Peregrine engines for the Westland Whirlwind Fighter Project in the UK. His name is René Peters. He allowed me to use his excellent drawing to print a couple of engines for my build. So a big thank you to him! Another big Thank you goes to Gunnar Olsen and Cees Broere for all their technical tips, info and feedback. Especially since RAF is not my main focus. The base is printed on transparent acrylic and has a signed photo of Leonard Bartlett underneath. Here's what else I did: - 3D drew the radio compartment and hatch - Added a VacForm canopy and windshield - 3D drew the antenna outlet on the spine - 3D drew the exhausts and engine bearers and firewalls - Added HGW harnesses - Used 1manarmy masks. A must!! - Added resin wheels - Drew my own code masks| - 3D drew the spinner back plates - 3D drew the ailerons - Seperated the flaps (this was quite a challenge!) - Seperated the forward slats, 3D drew them and extended them - Scratched the wingtip extended nav lights. Build topics here.


- 10 replies
-
- 13
-

-

-
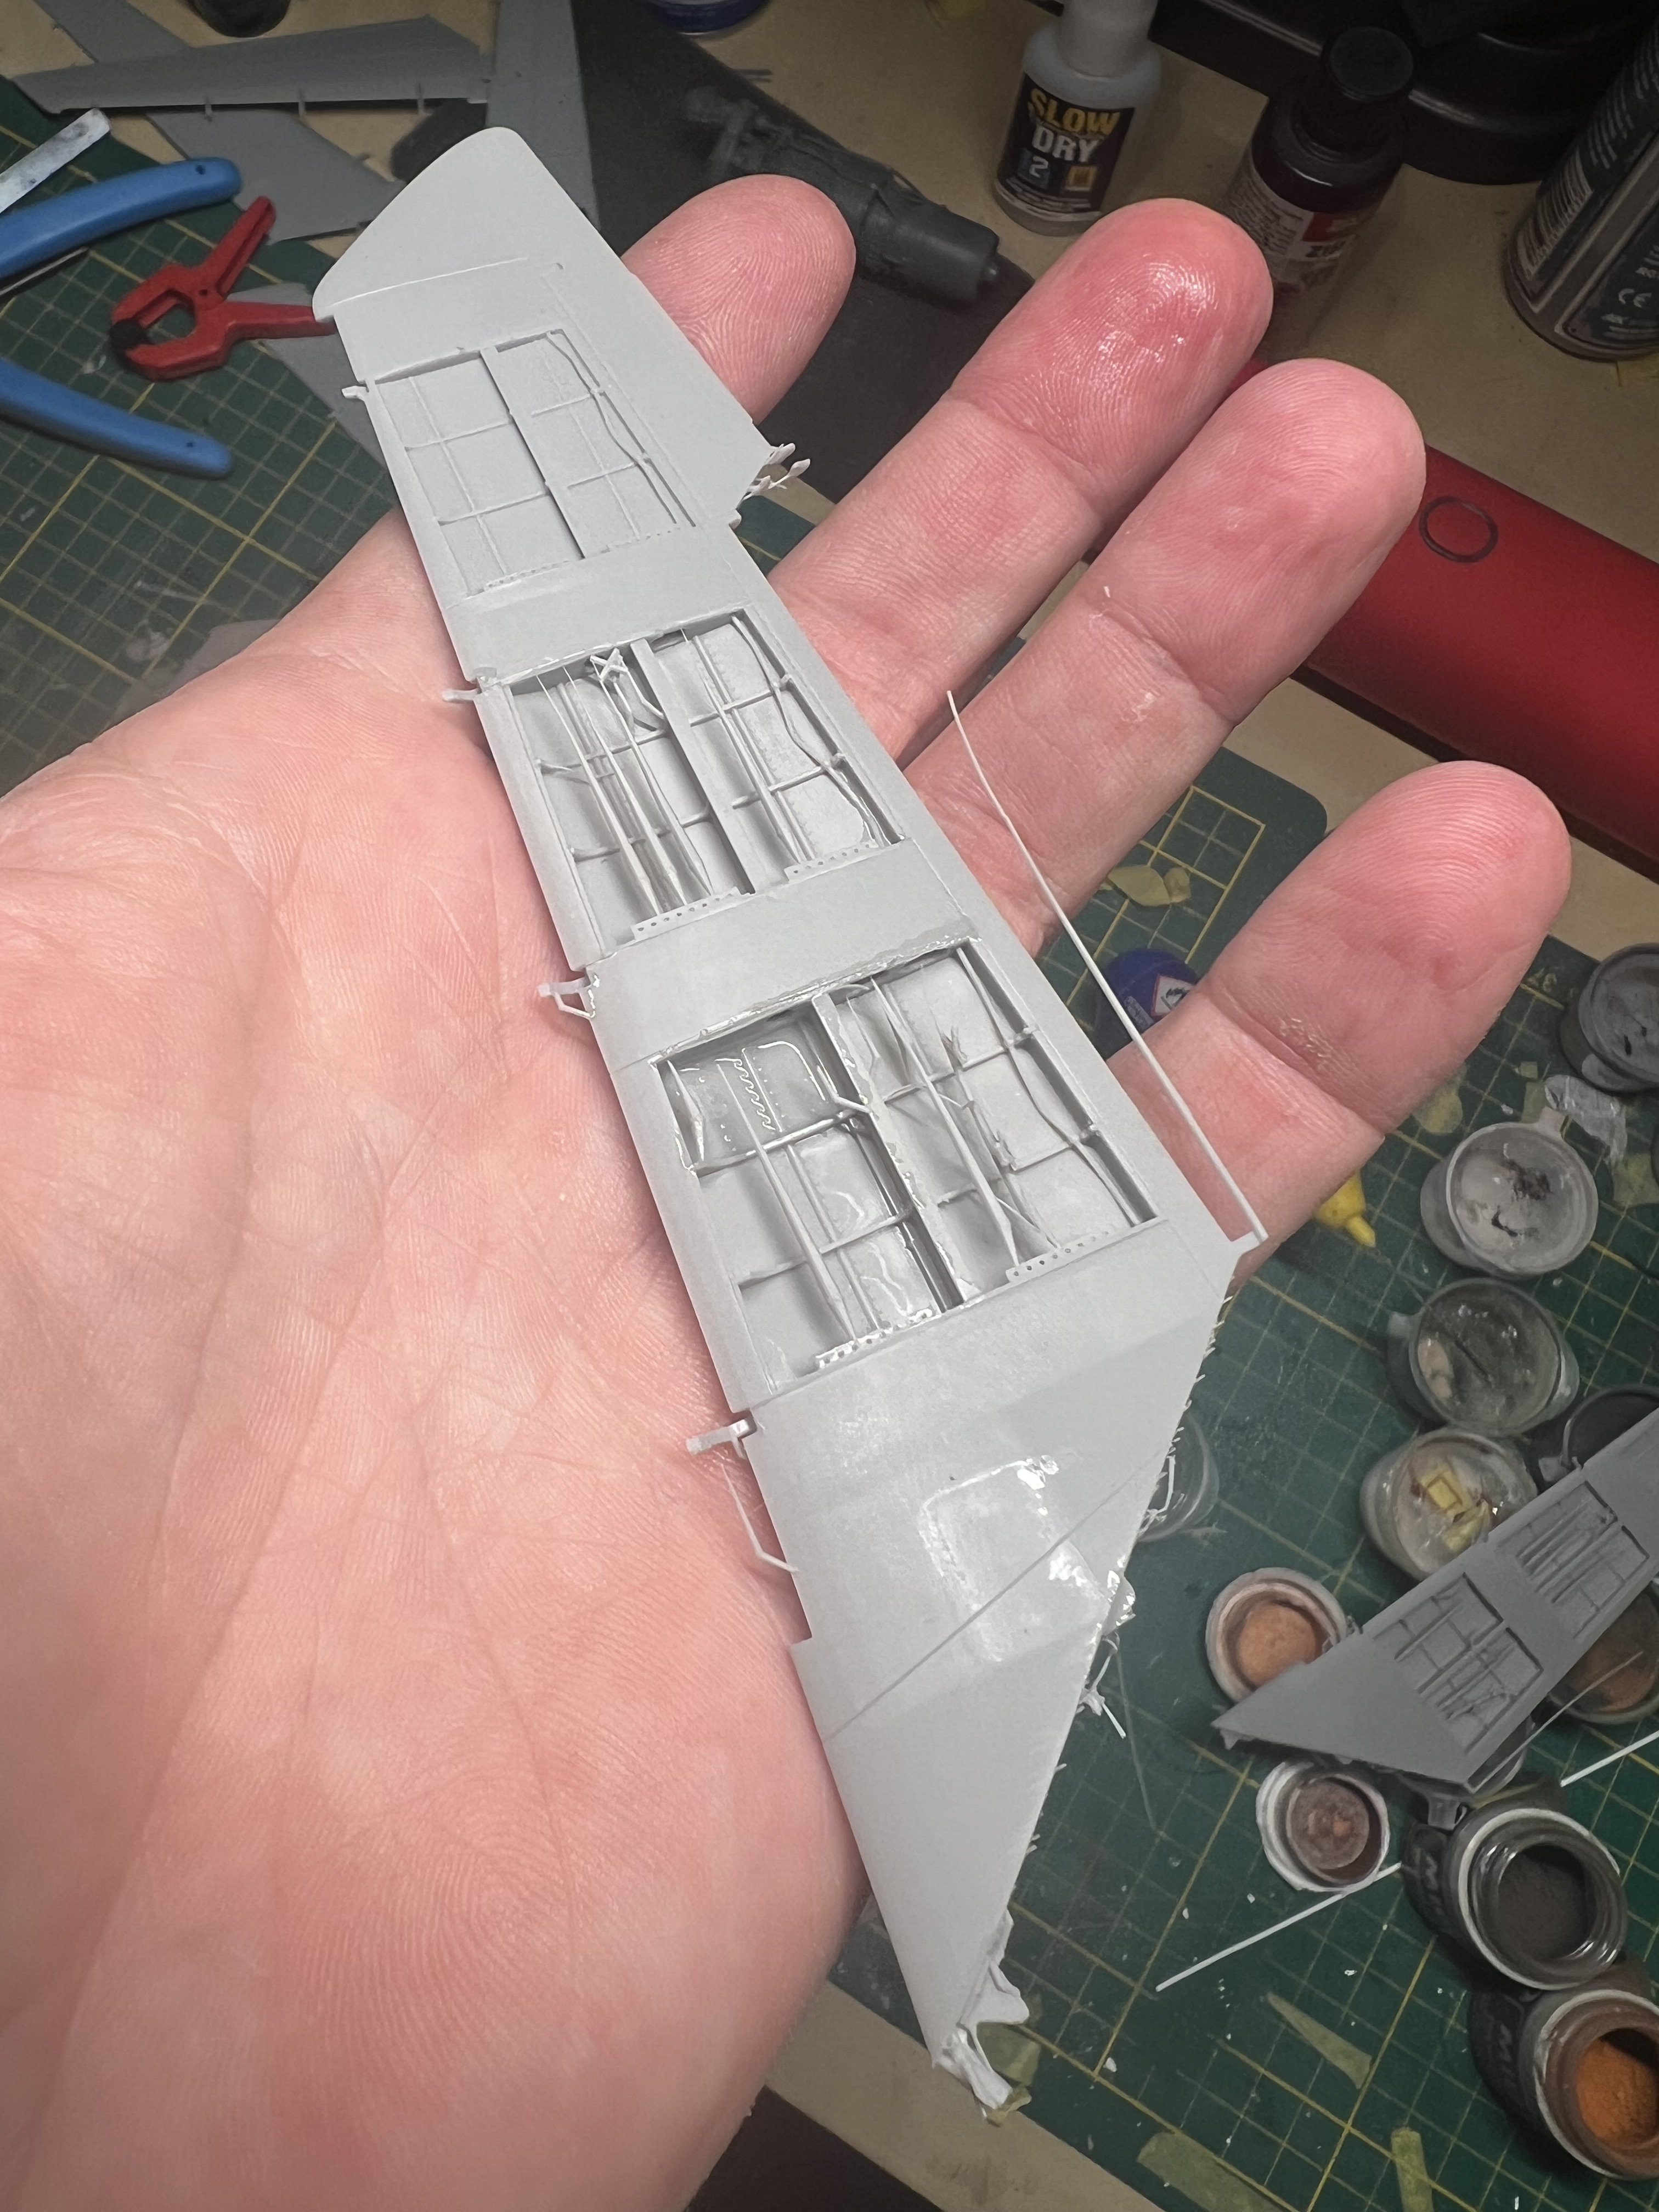
Don’t want to bore with these shots but reprinted another set of parts with better settings.
-
1/32 Westland Whirlwind
JeroenPeters replied to JeroenPeters's topic in LSM 1/35 and Larger Work In Progress
I can’t believe it, but i think it’s done! I’ll have a once go-over tomorrow and do proper pics. Last line of order were the scratched delicate wingtip navigation lights.


-
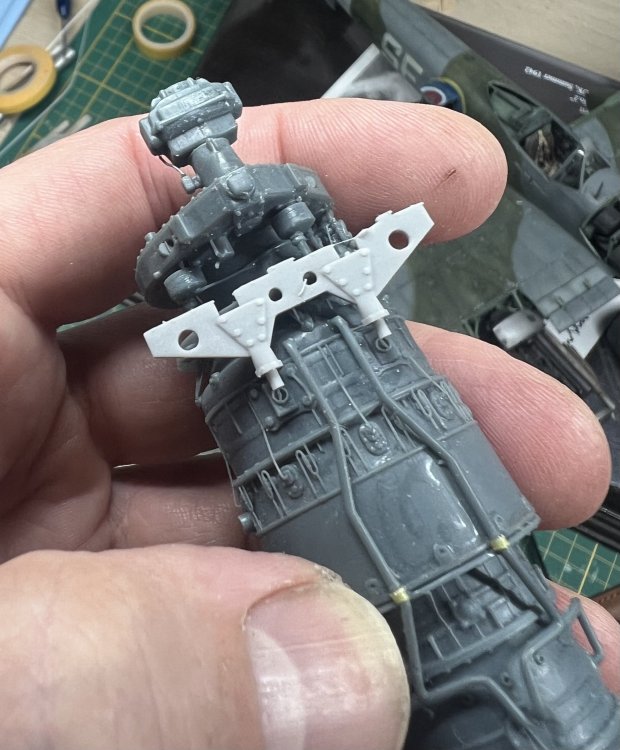
Dry fitted the engine to it’s lugs. Perfect fit. Wings ready for primer.


-
The printed part and you can see how it lines up with the corresponding holes in the resin engine
-
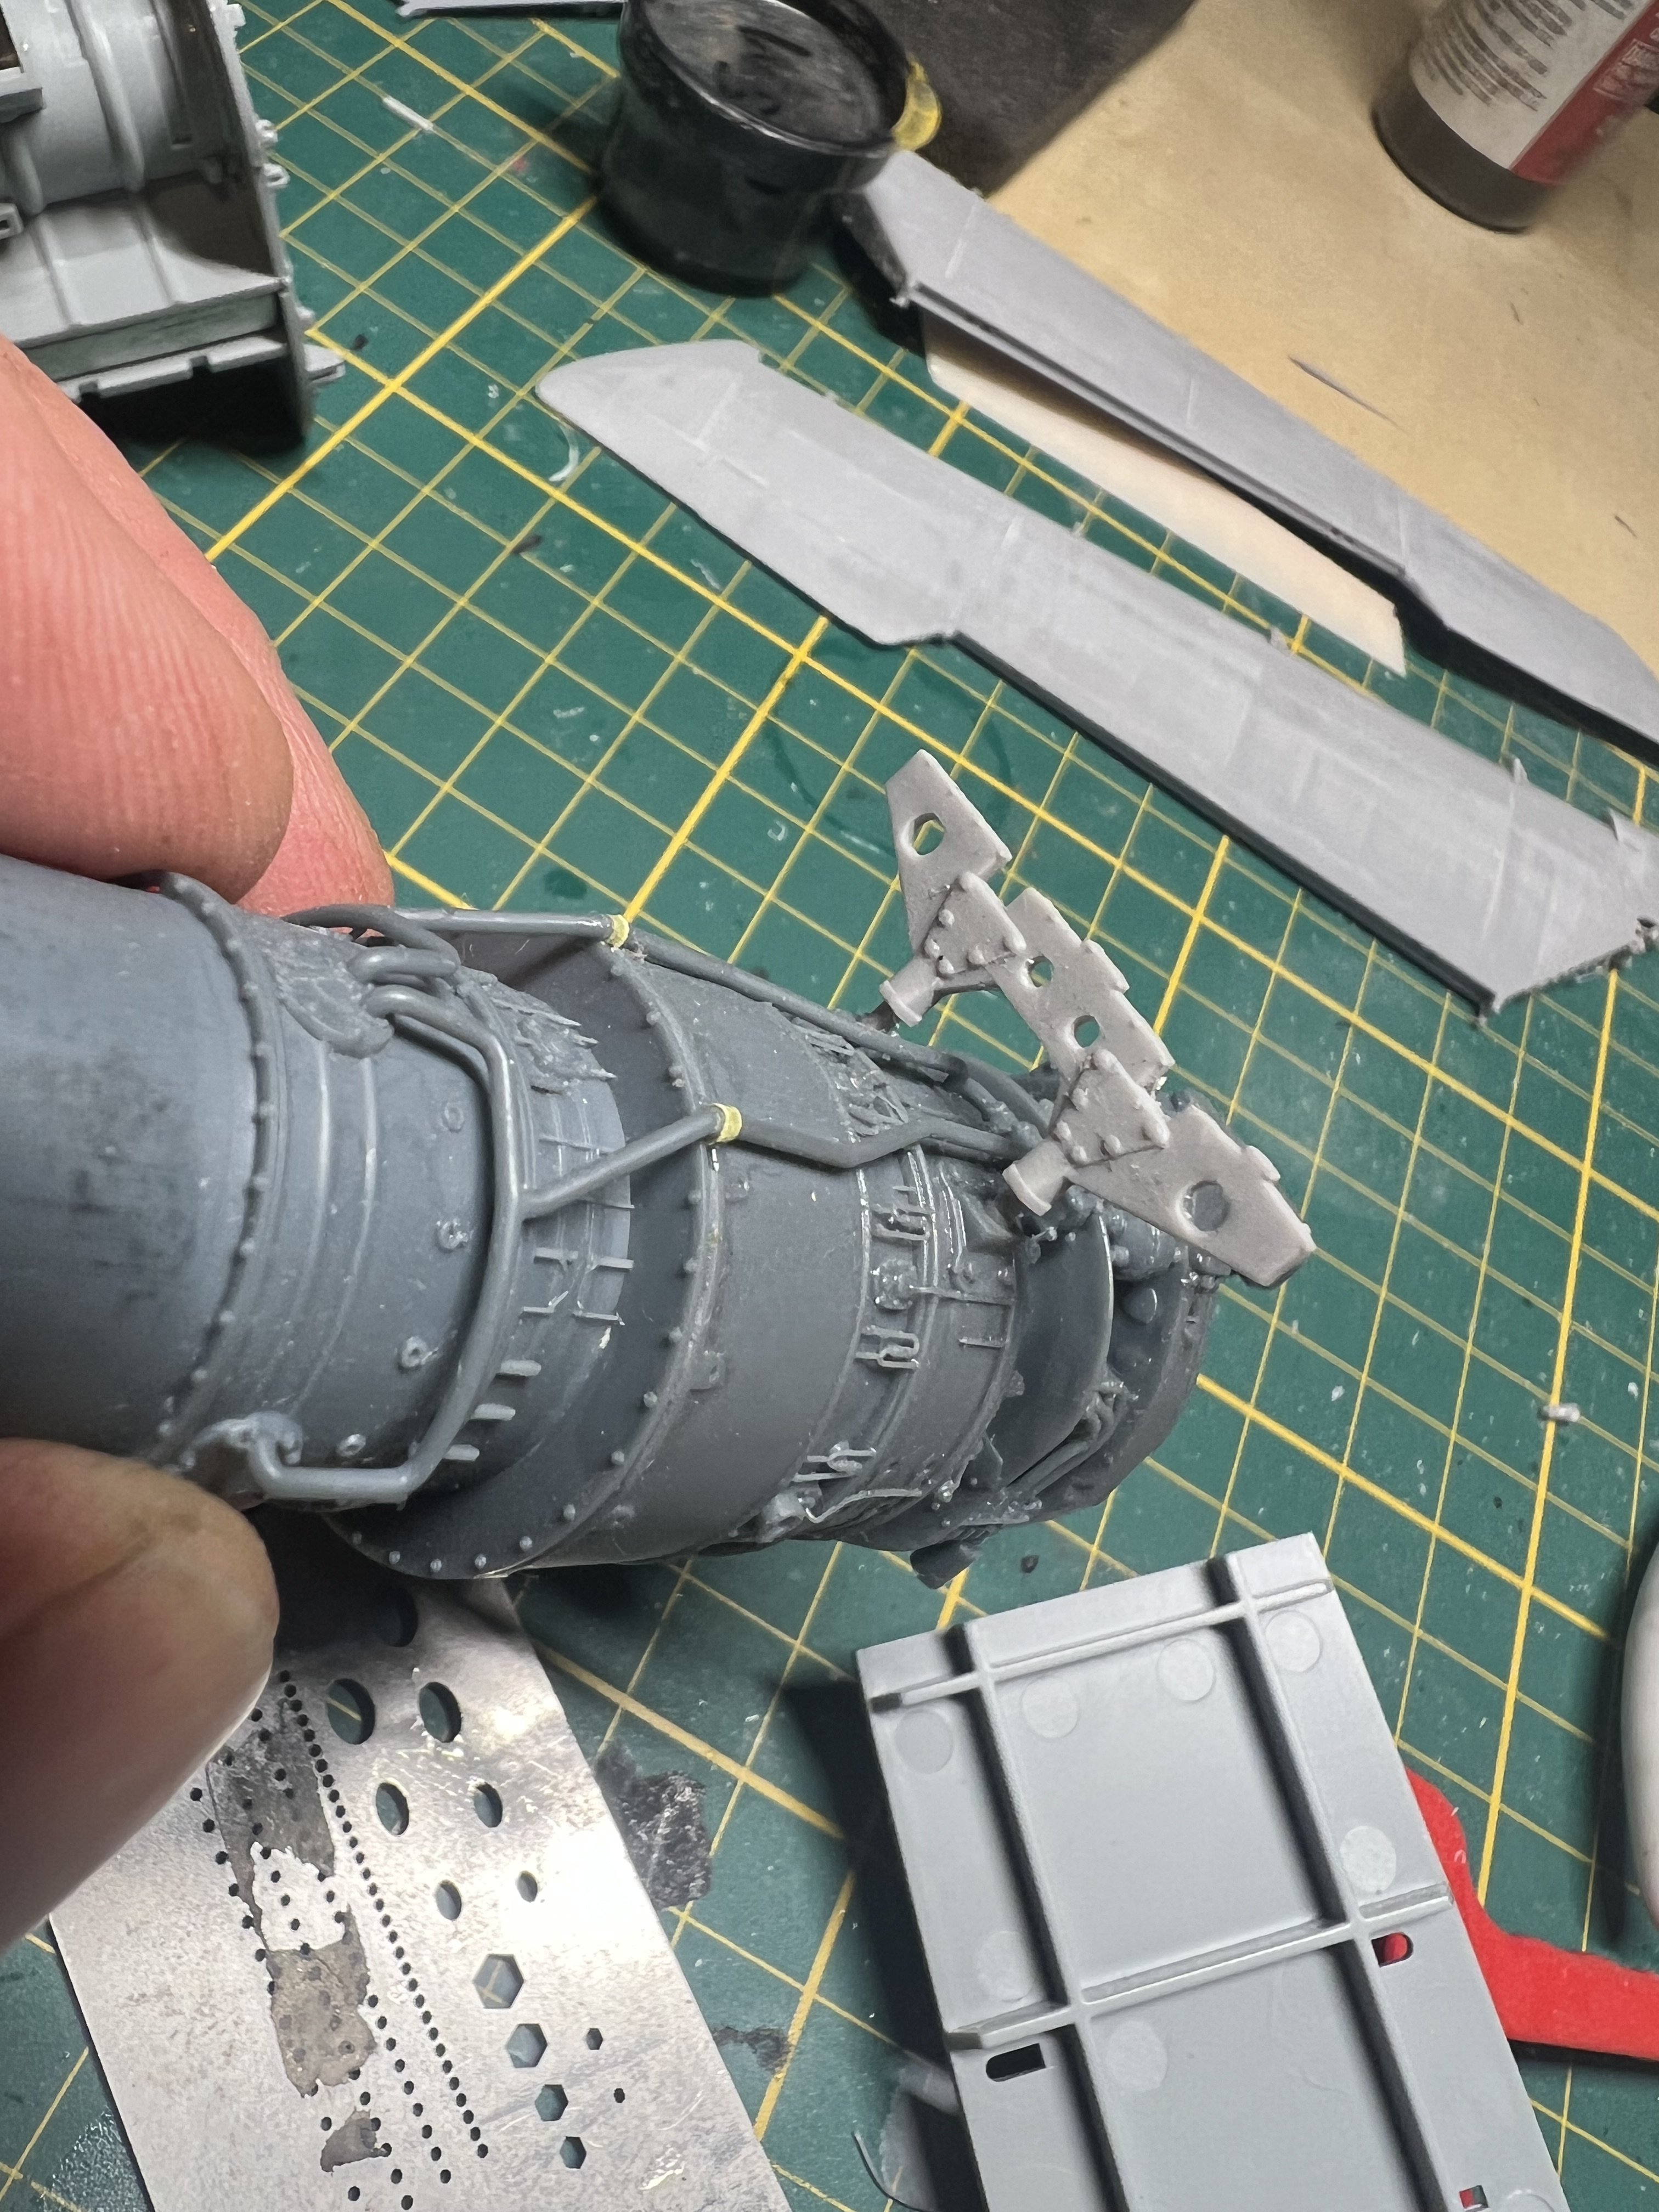
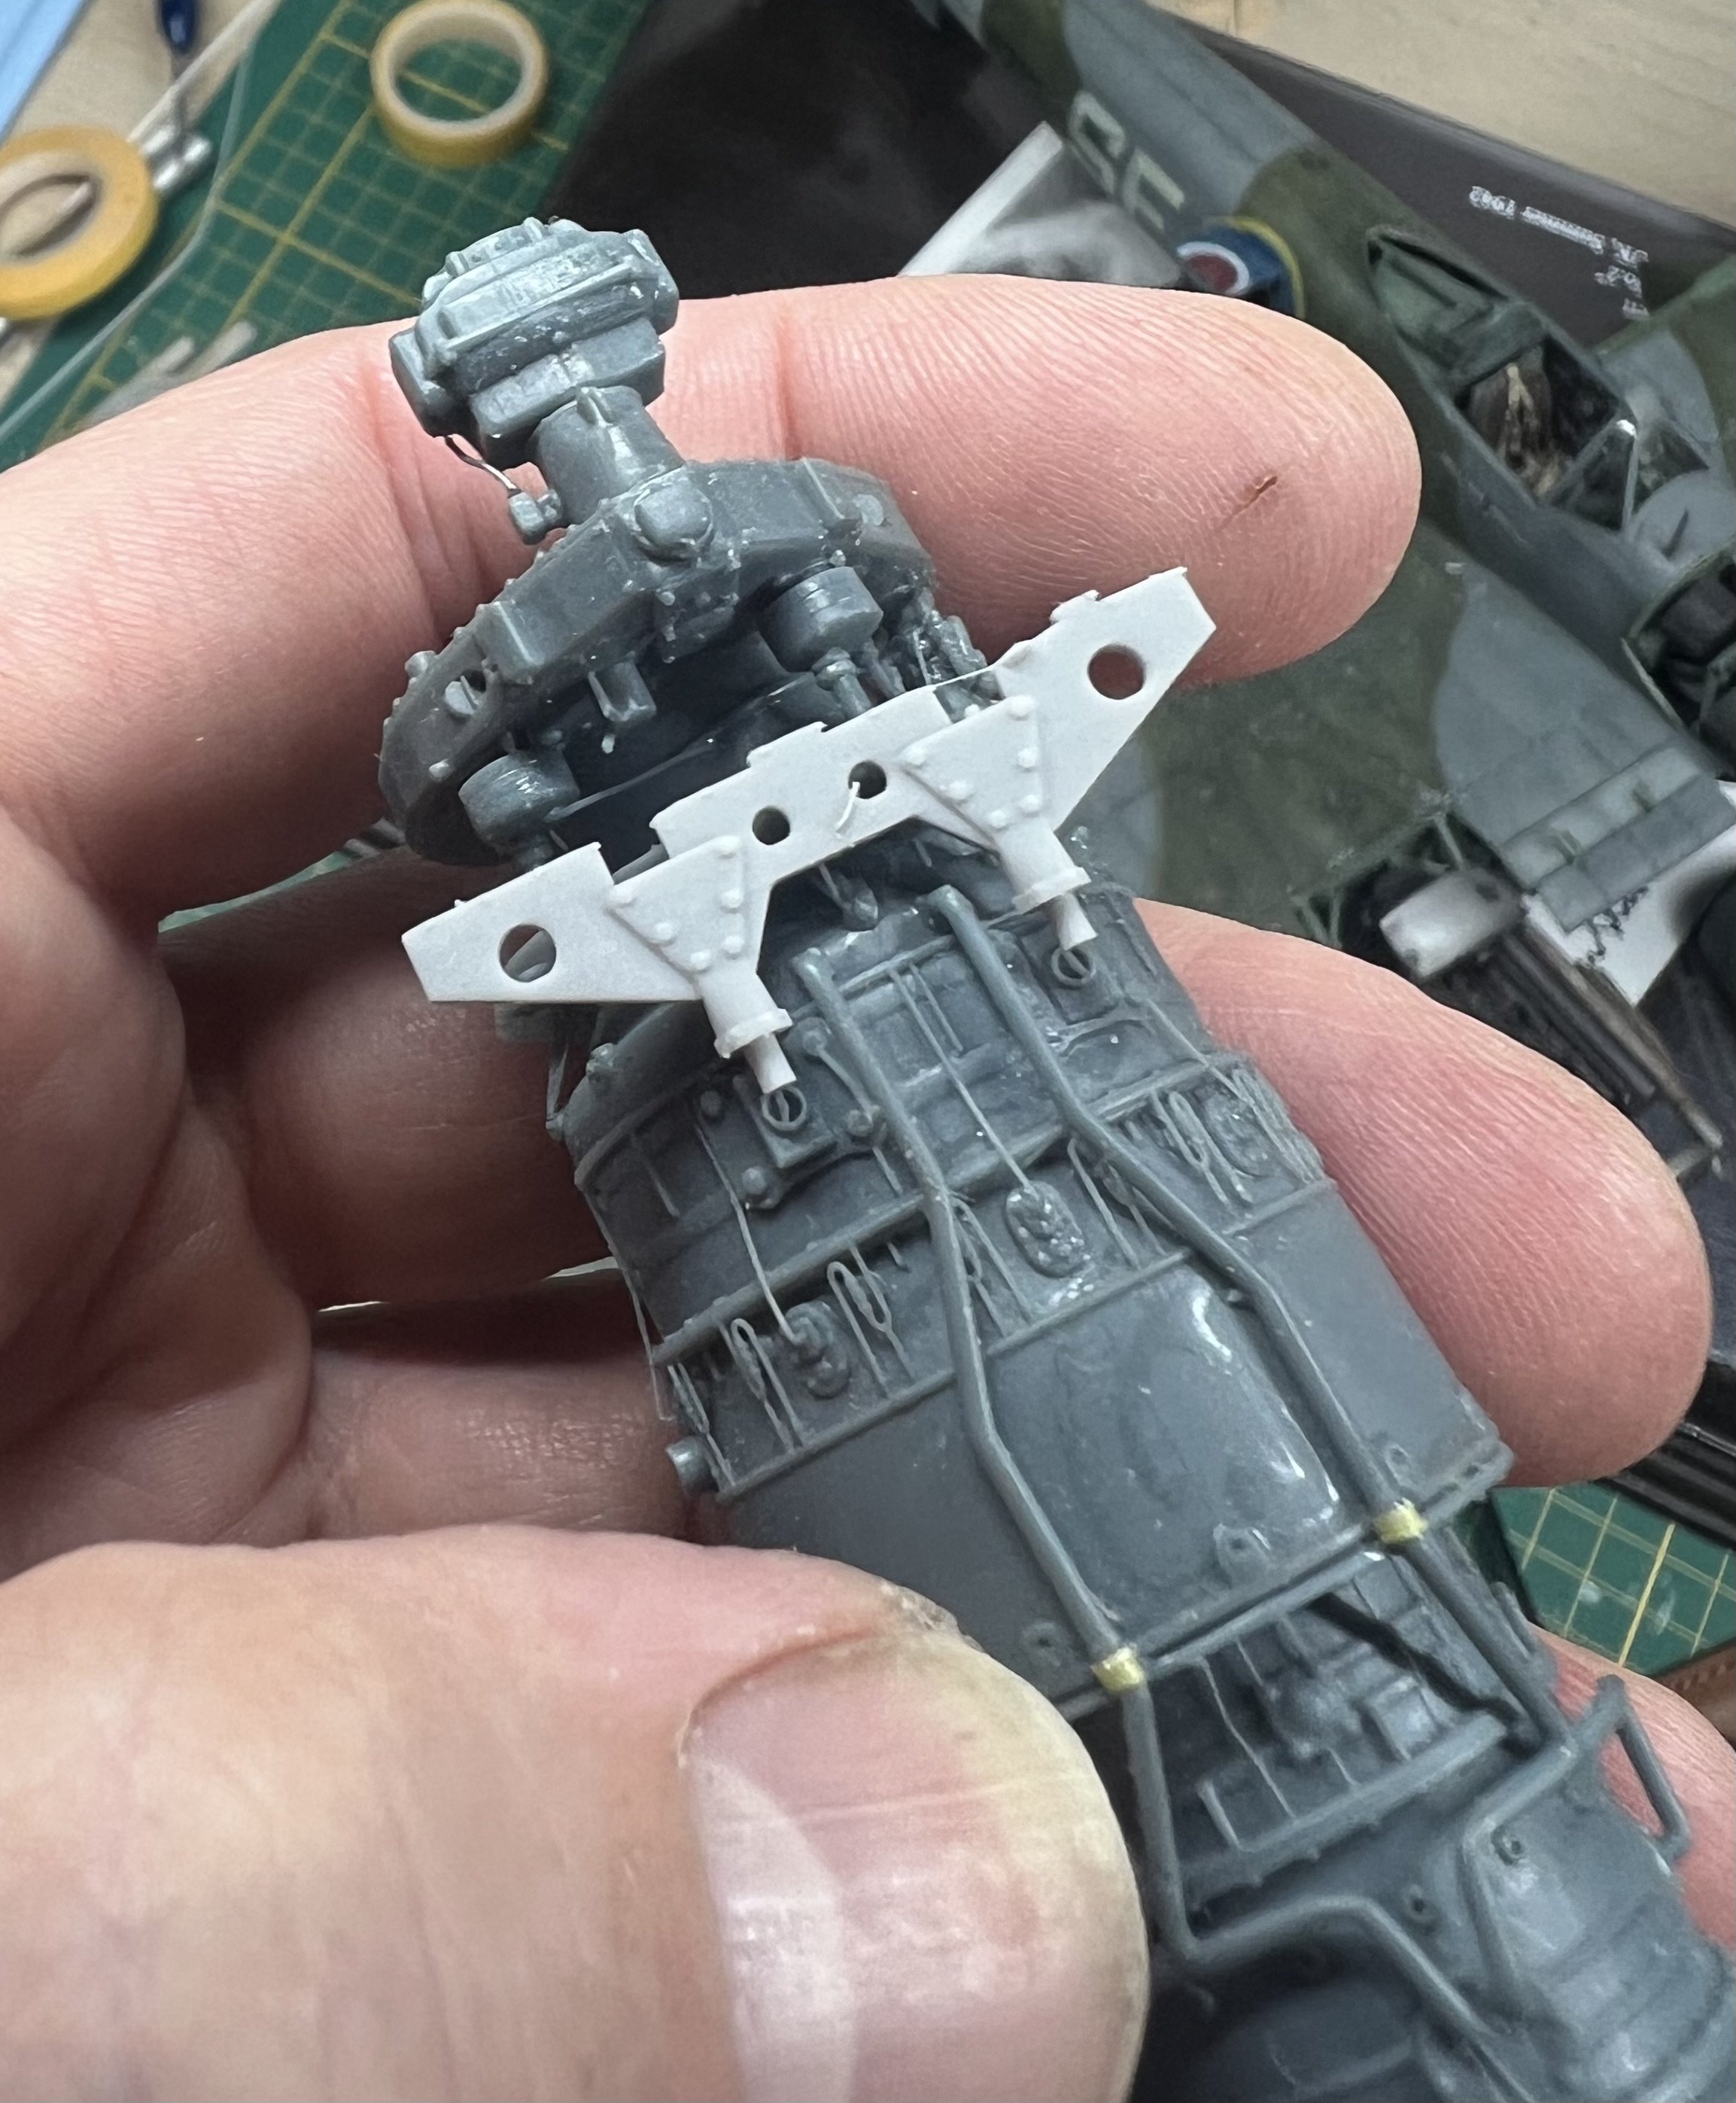
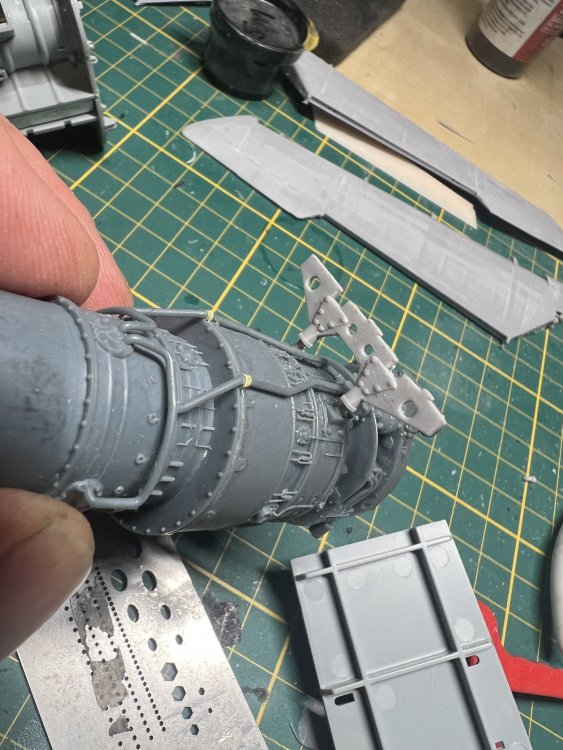
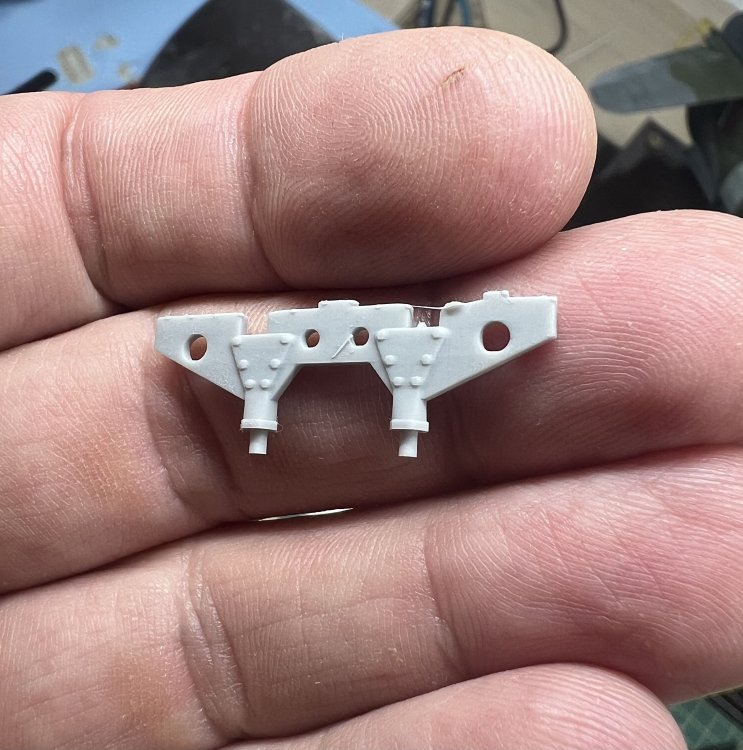
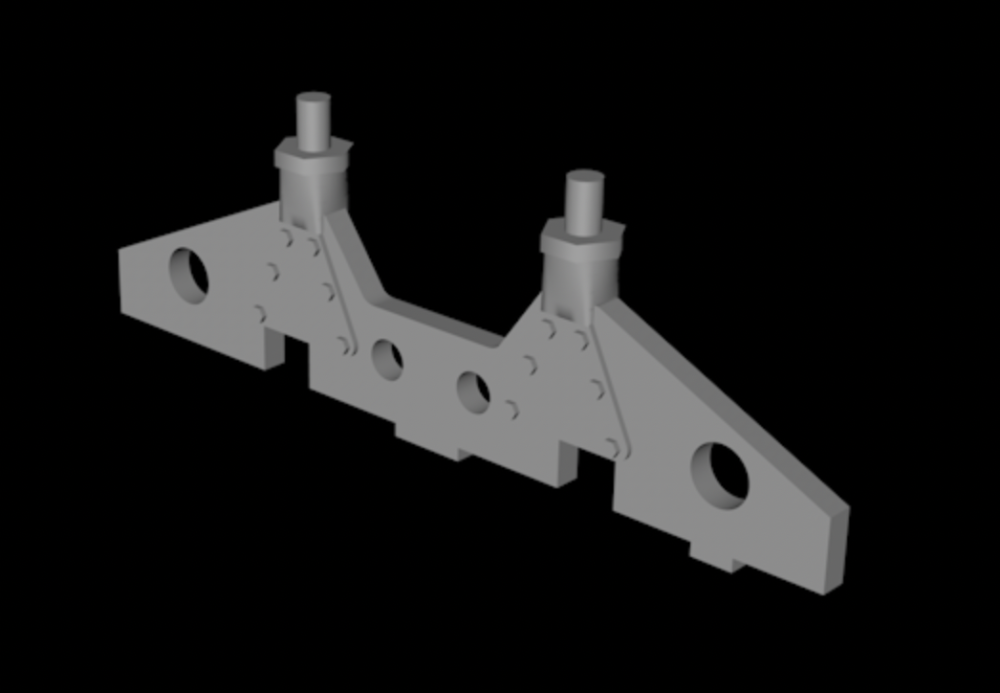
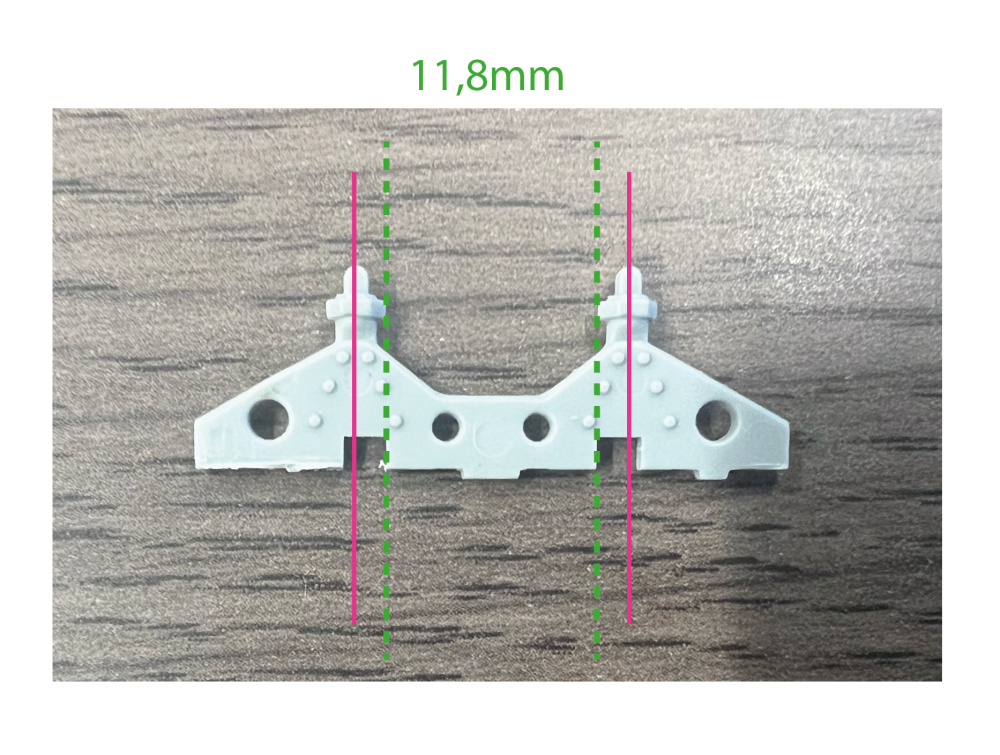
The bracket that holds the kit engine is too wide for the after market FPW engine. I drew the part in 3D and narrowed the attachment points to 11,8mm.
-
Finally success with Inslogic high detail ABS. Also tried the water washable variant but that warped at watp speed. Now for some mr surfacer, and polishing, I set the anti aliasing to 4. If you set it too high you risk losing detail.

-
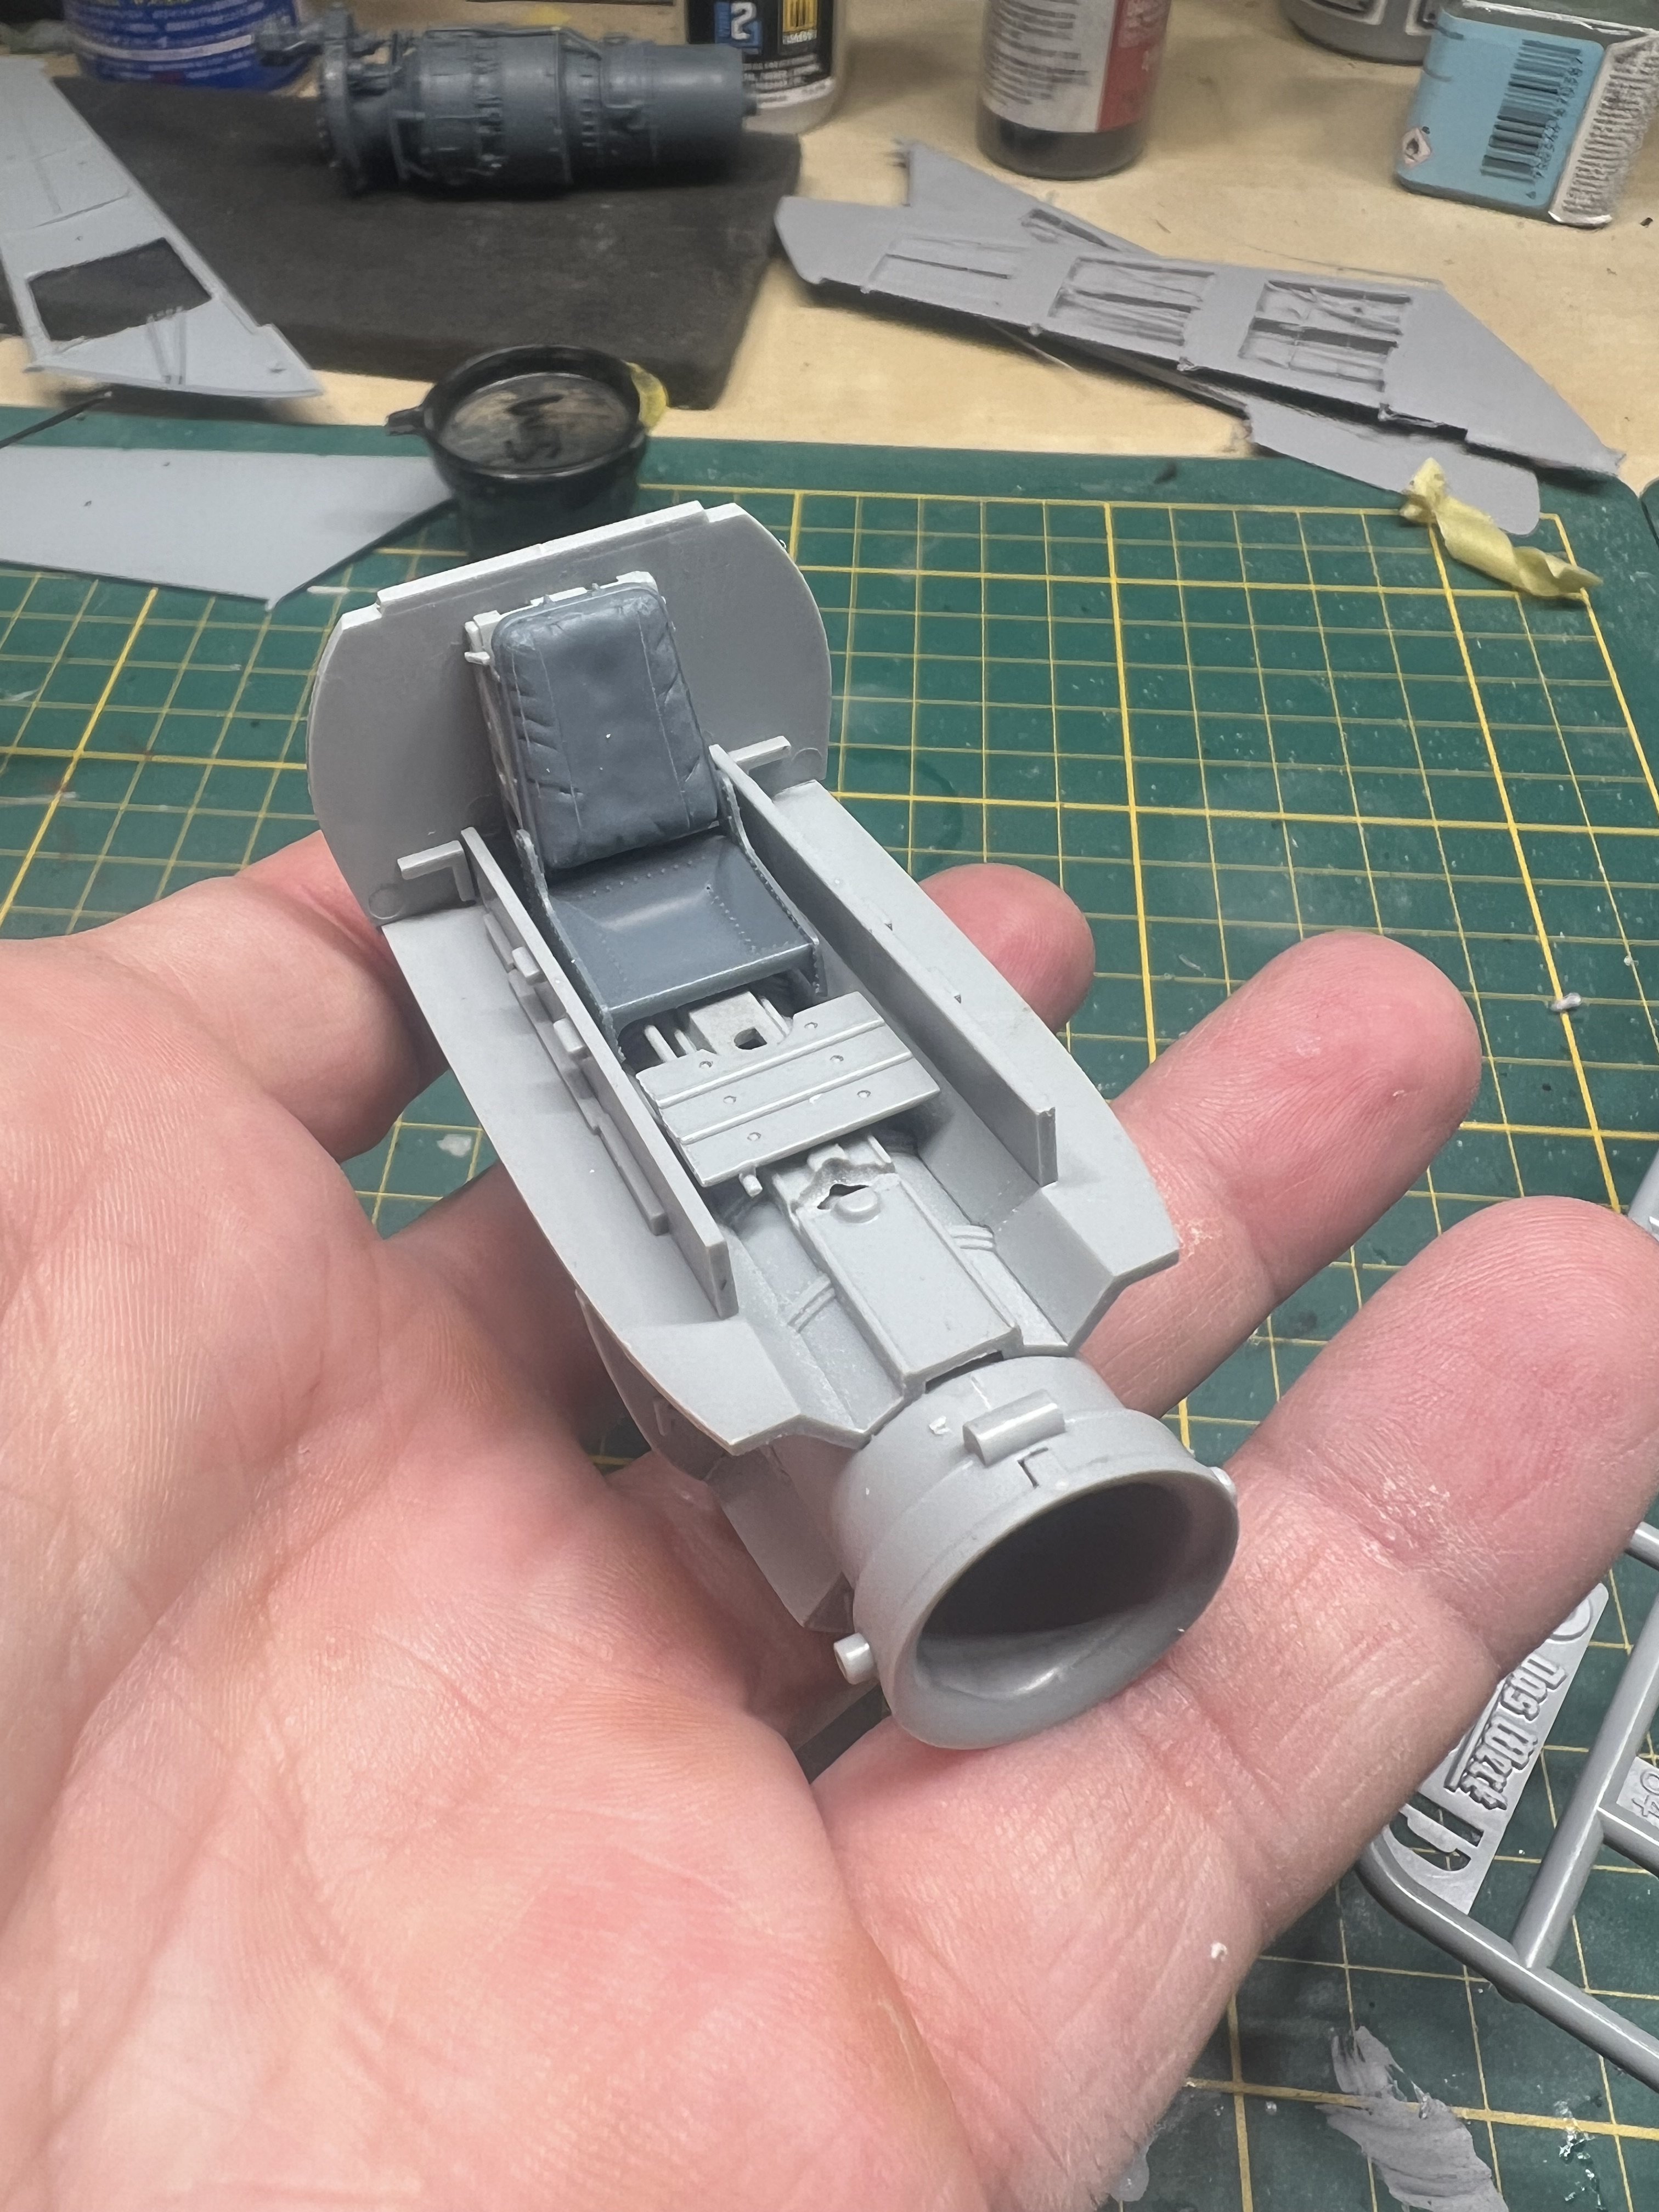
Assembled the forward section and dry fitted the excellent resin seat from ArtScale. Reading the US intel reports you’ll learn that the air intake was perfectly smooth inside. Spent some time sanding and adding mr Surfacer followed by more sanding and polishing.

-
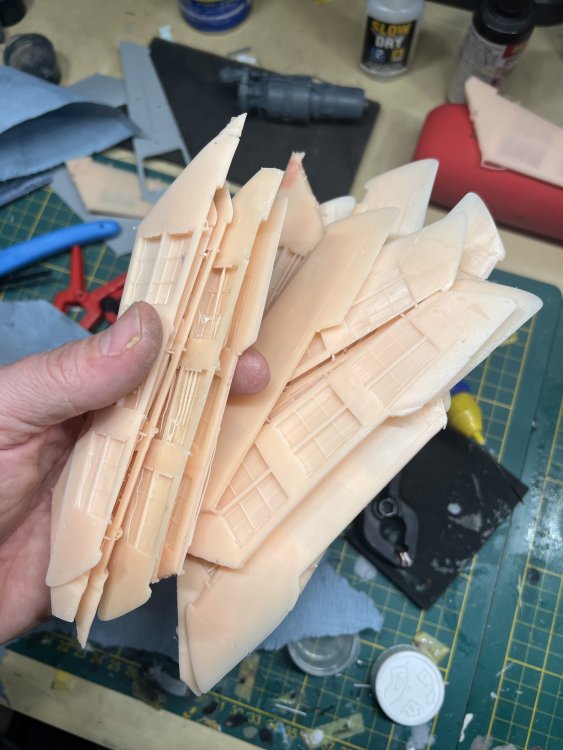
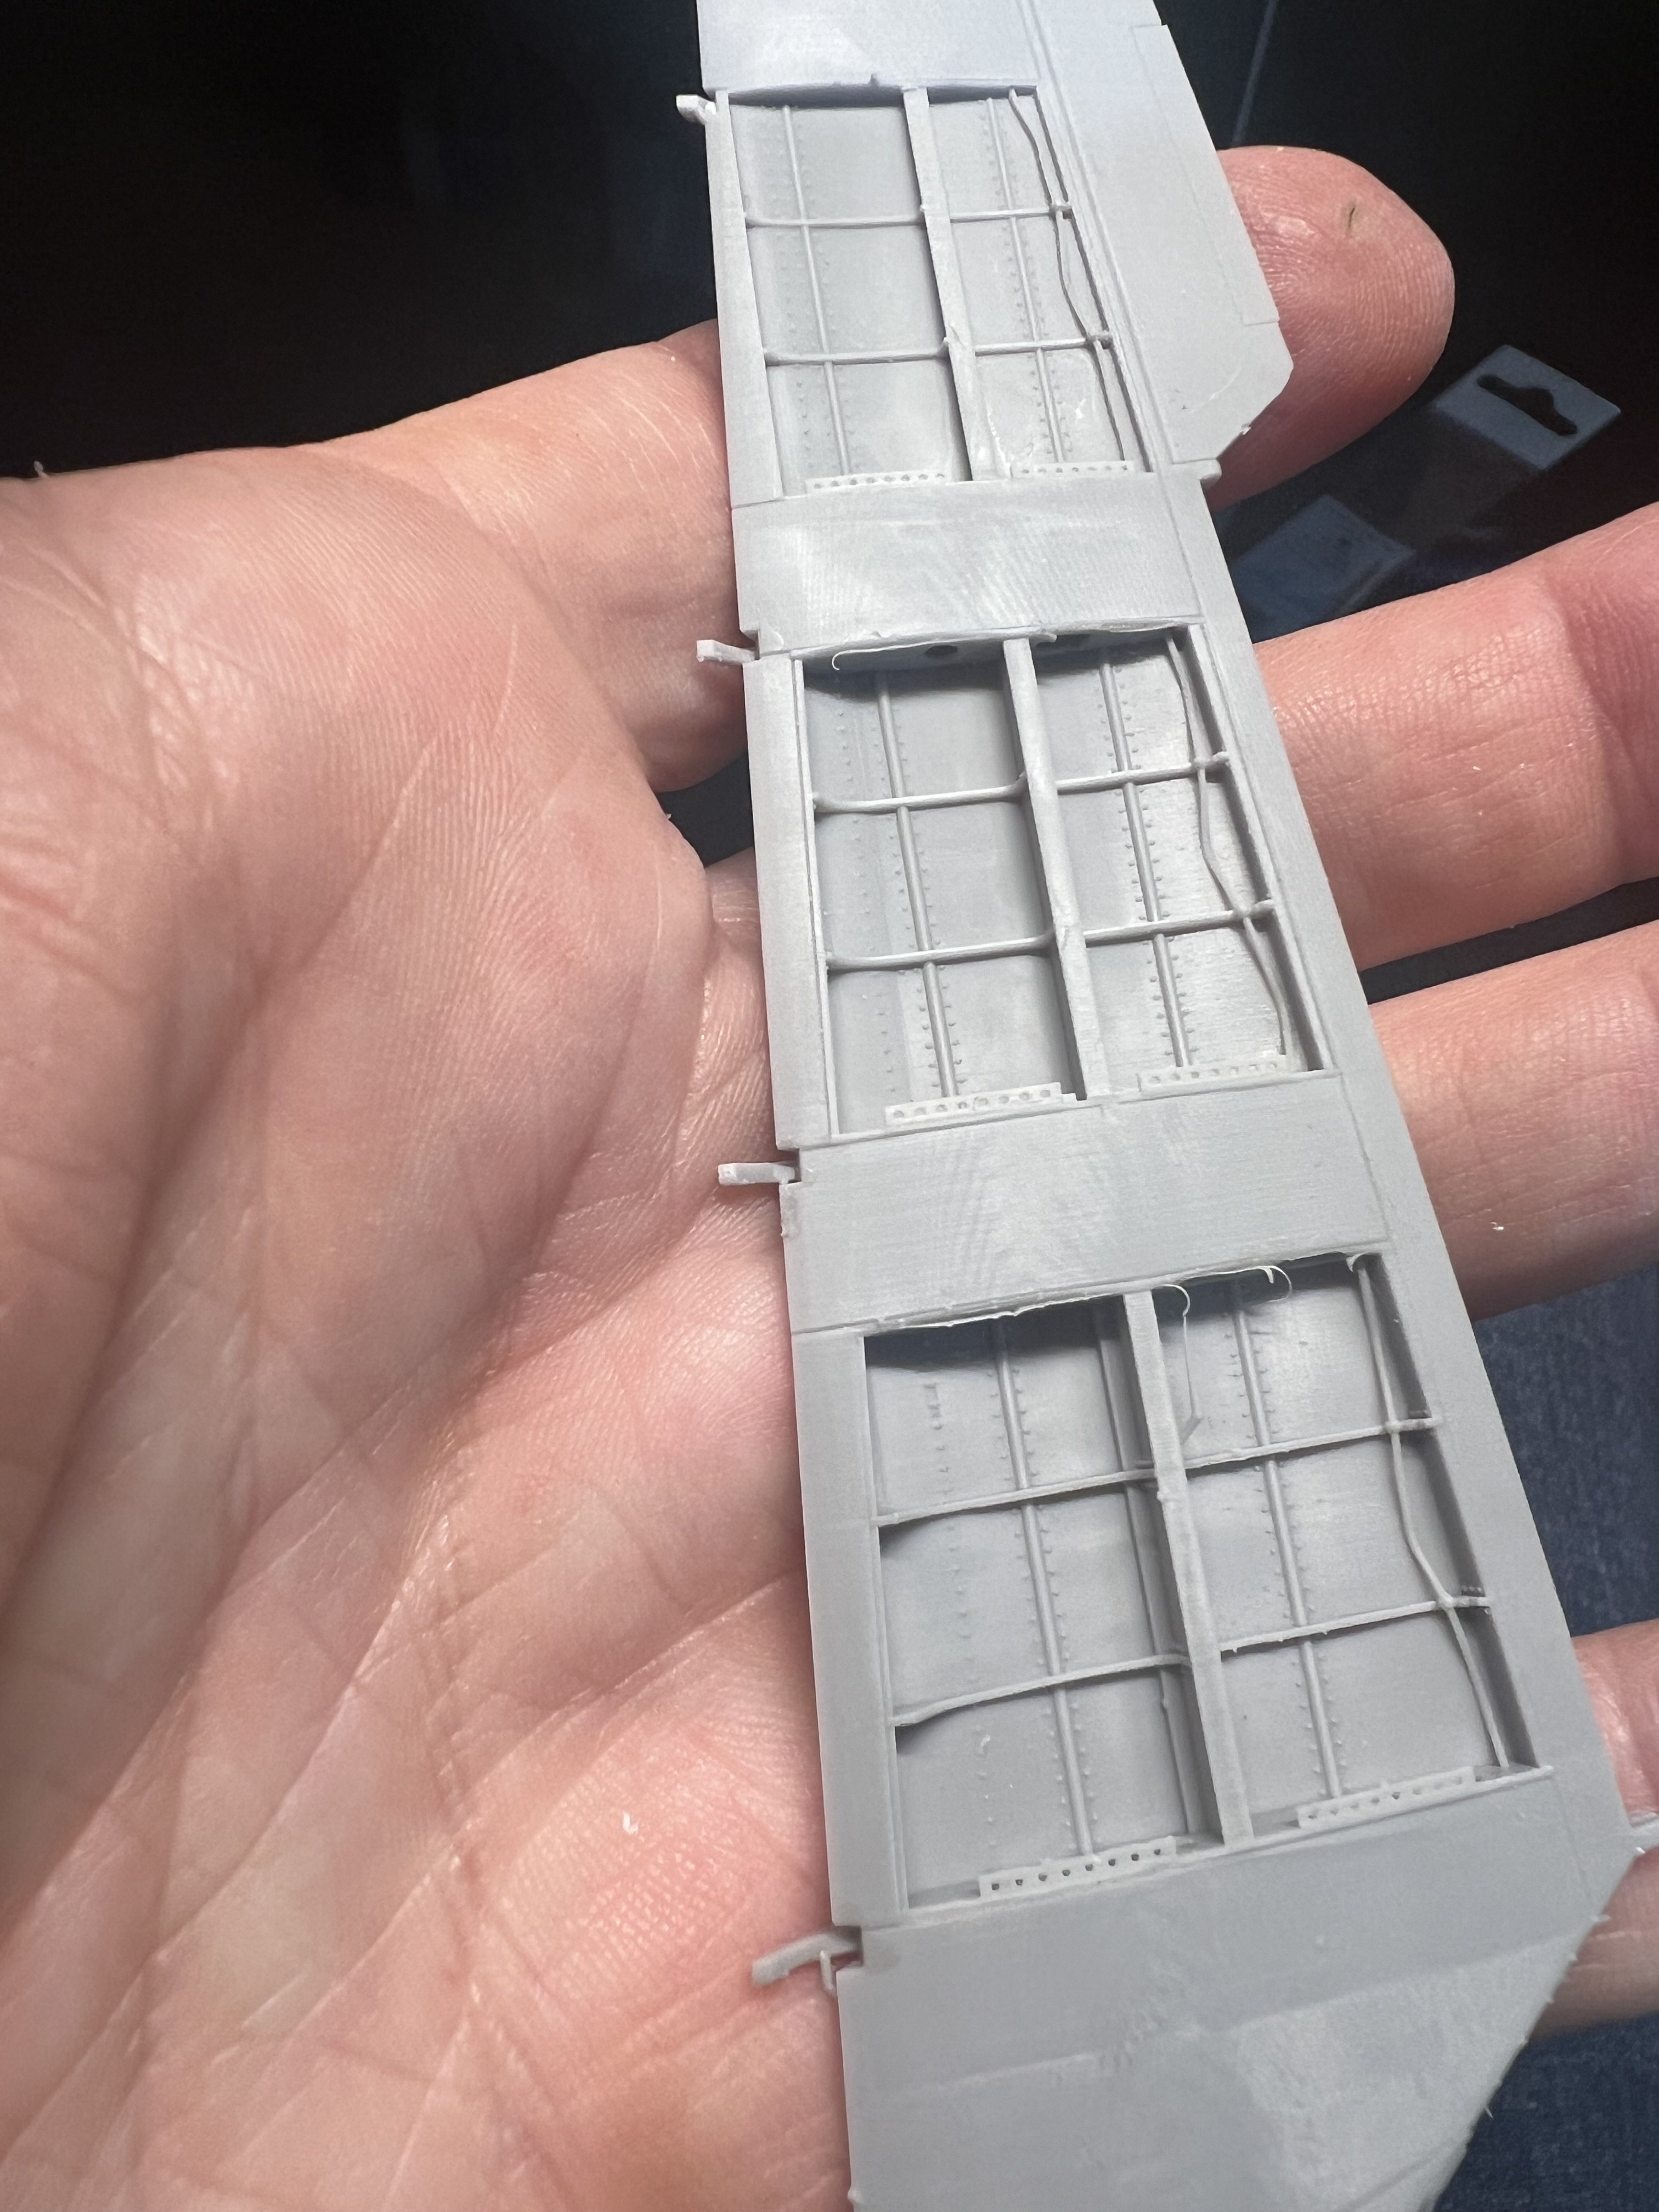
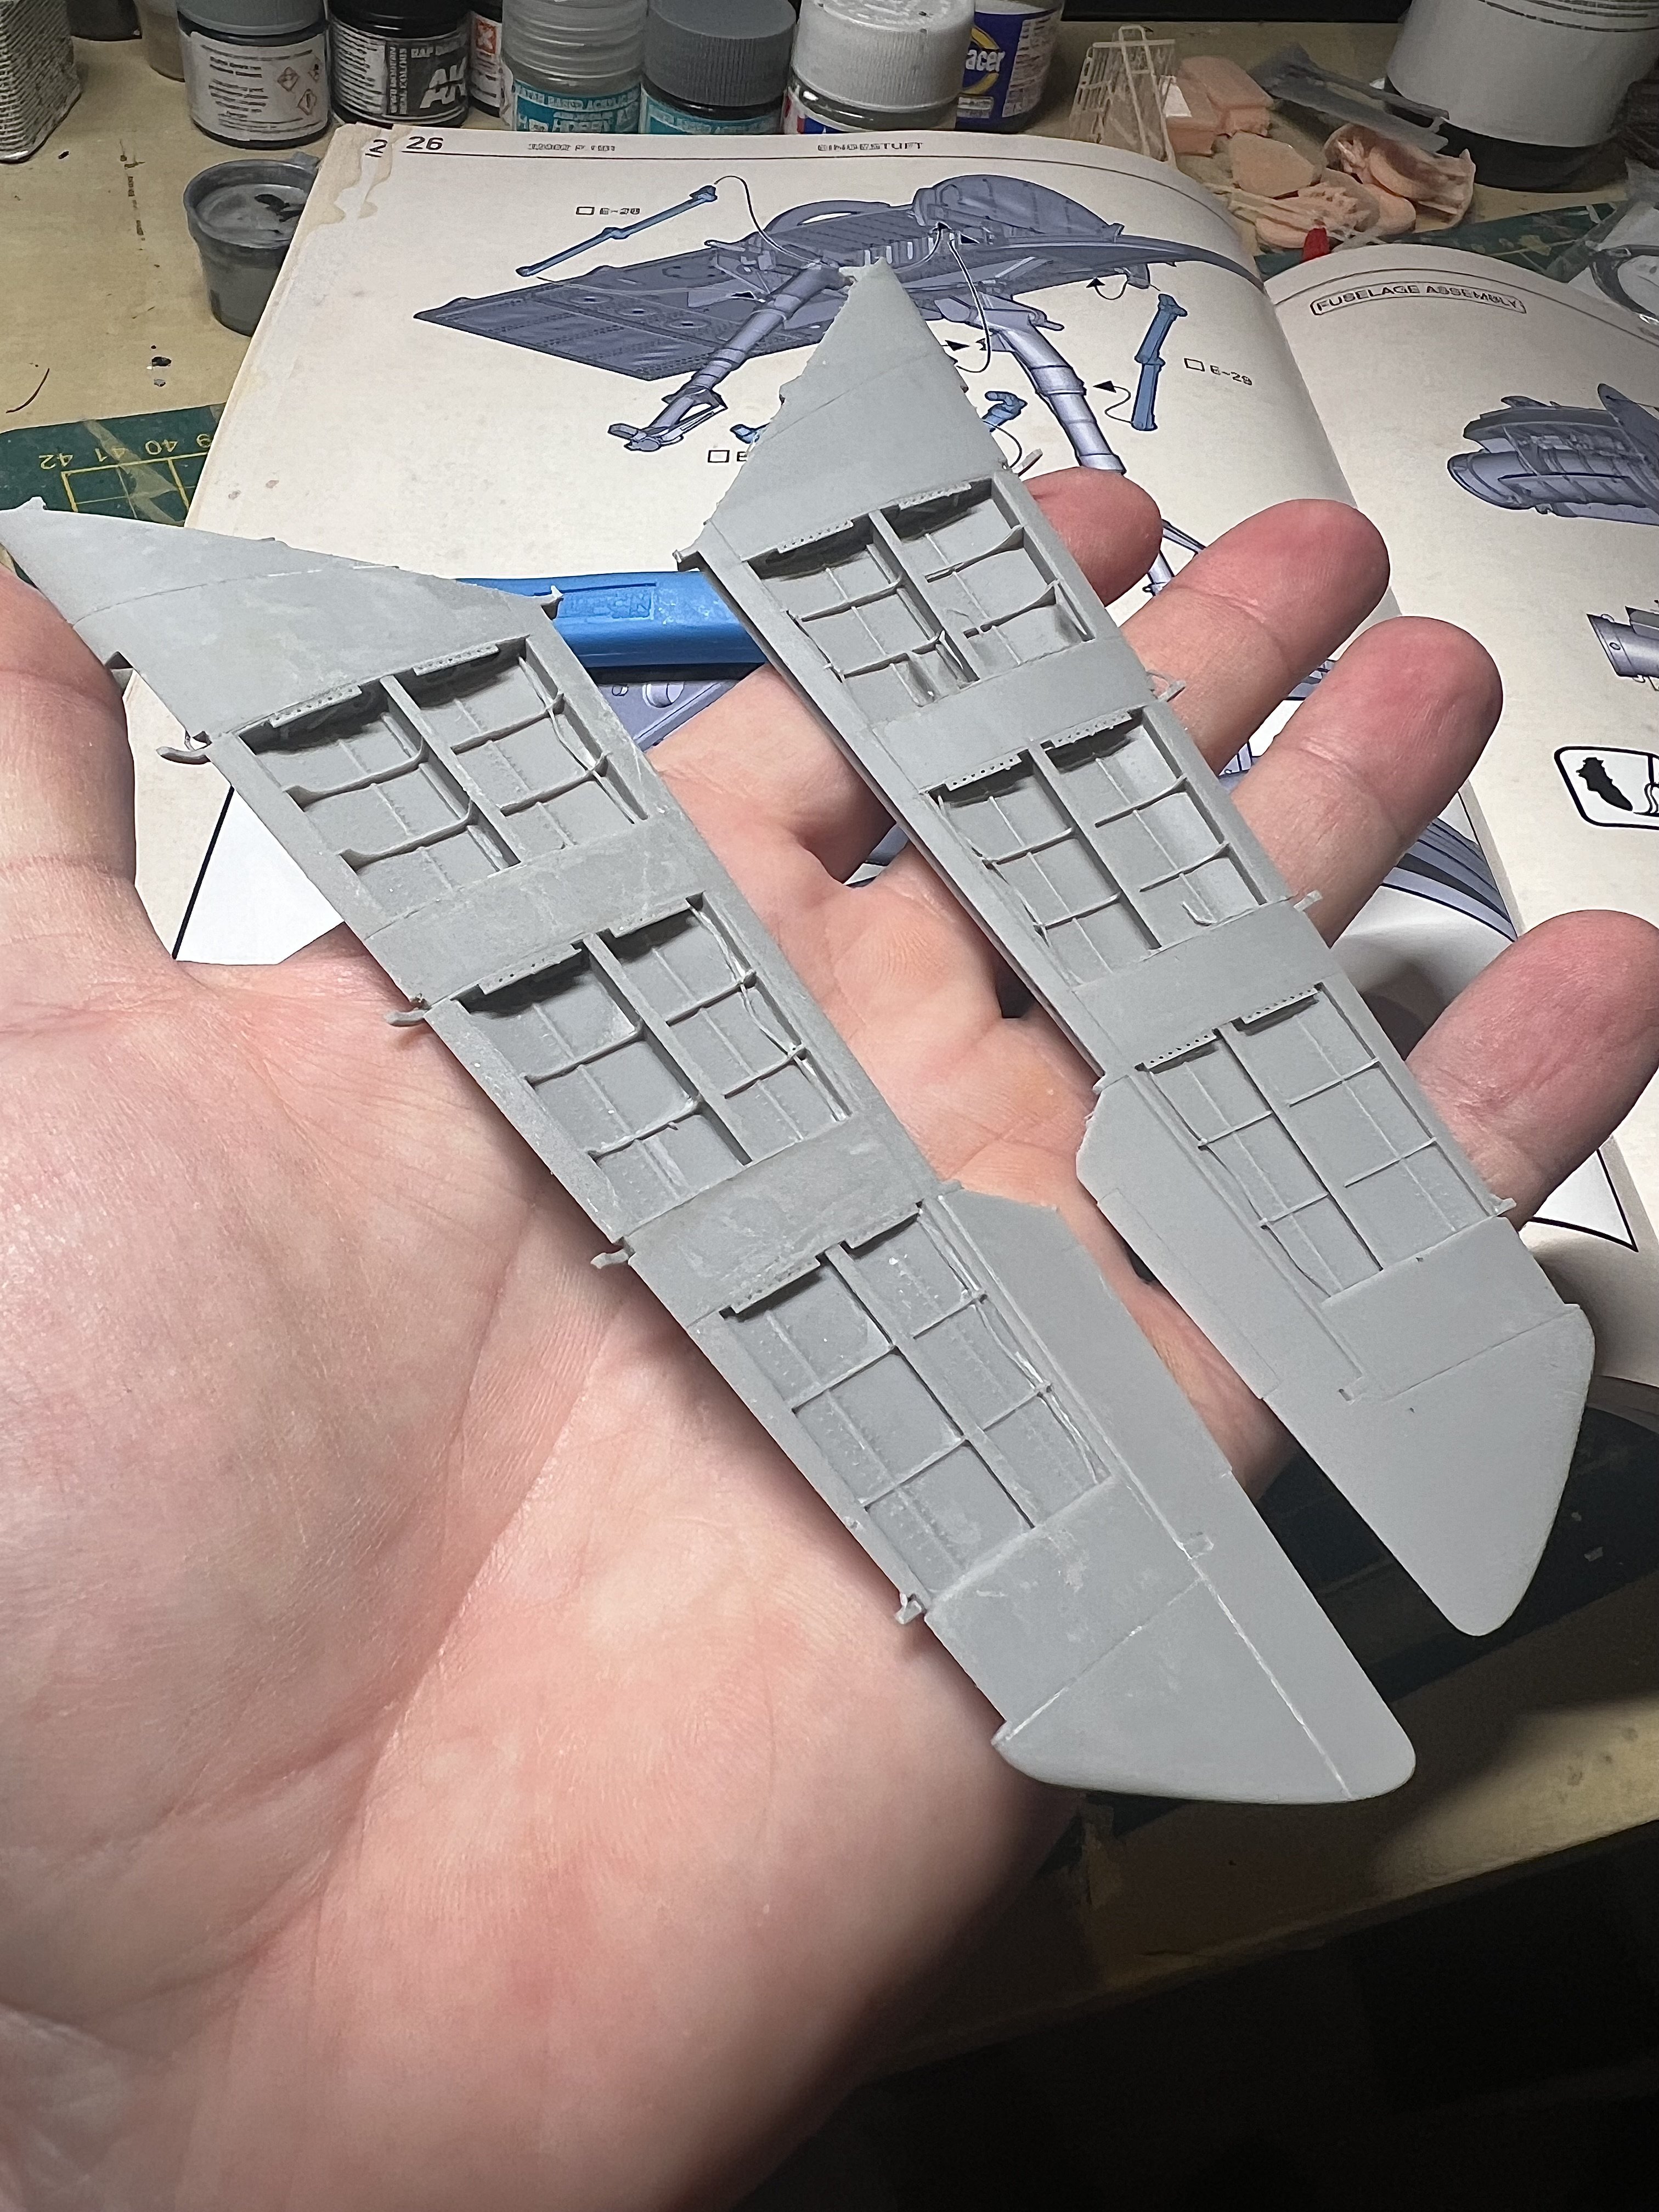
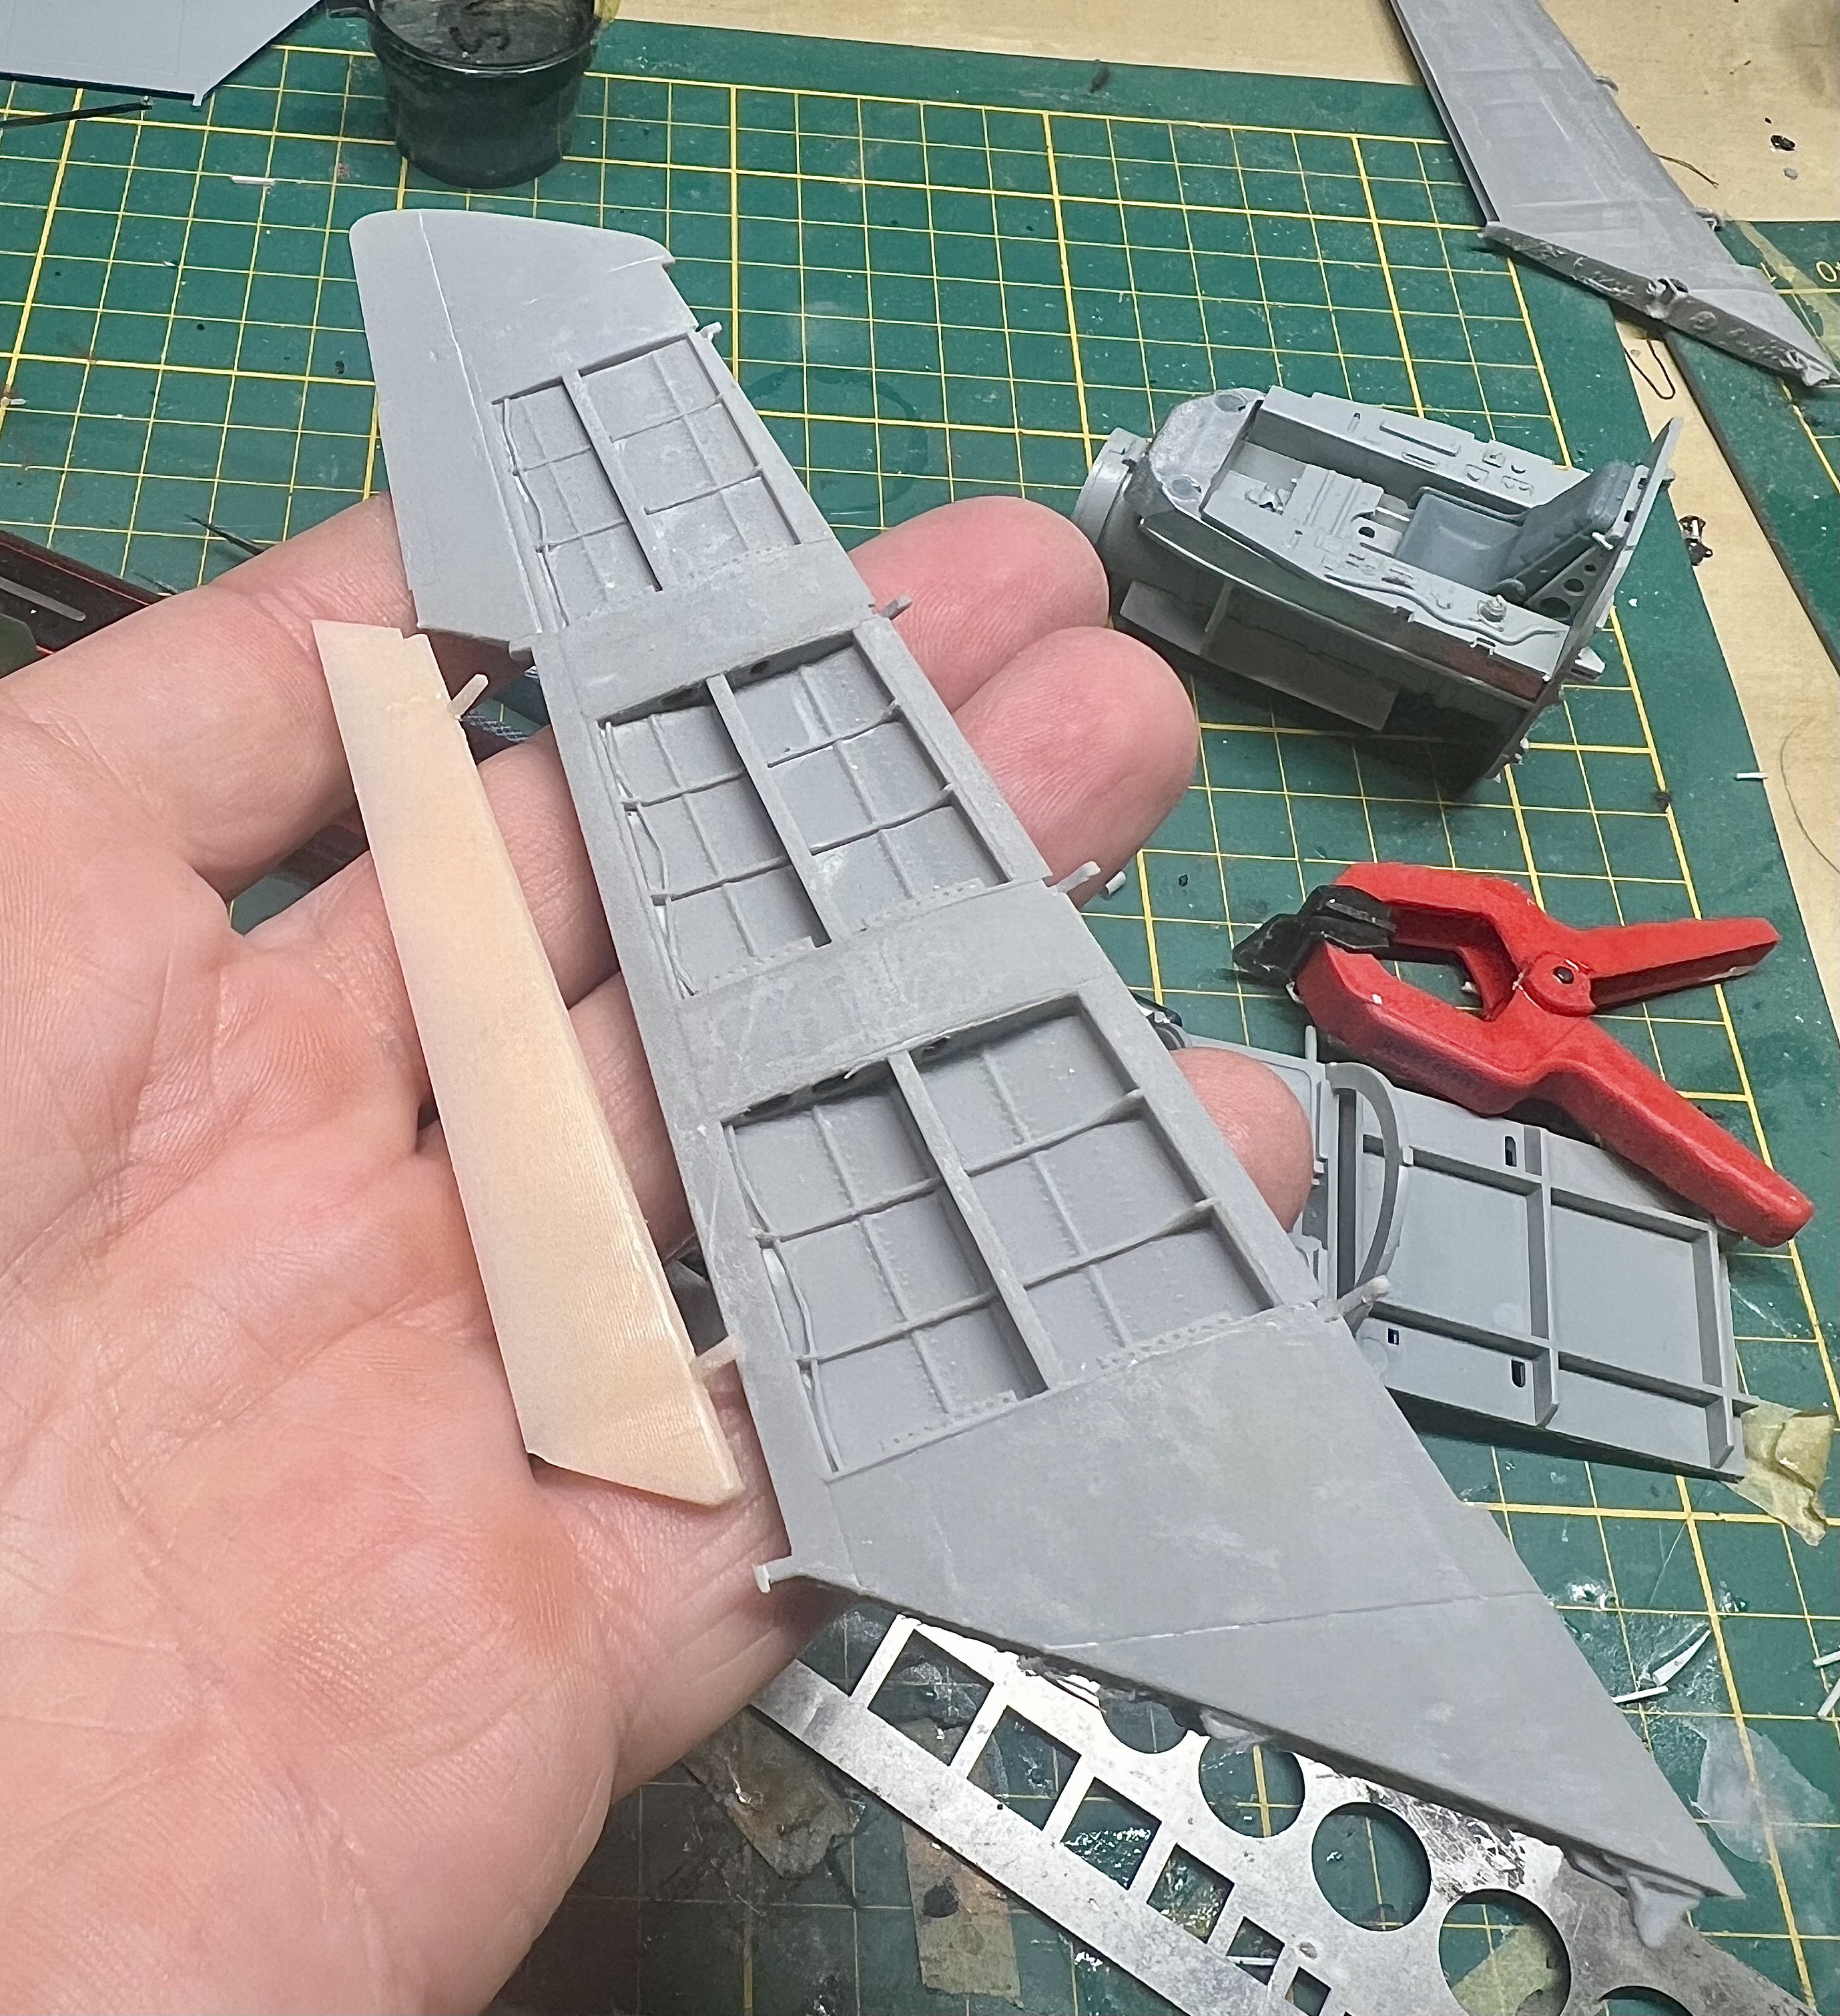
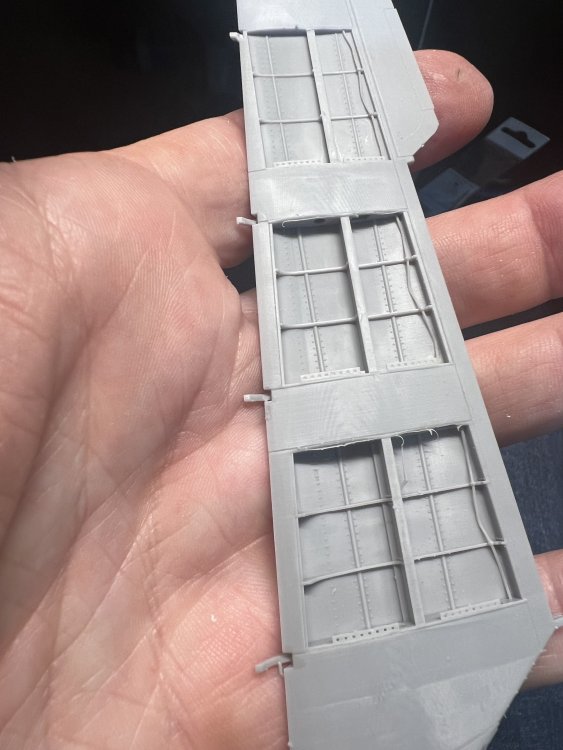
Tried a different resin with much better result. Sadly only two left wings came out and two right wings failed.


-
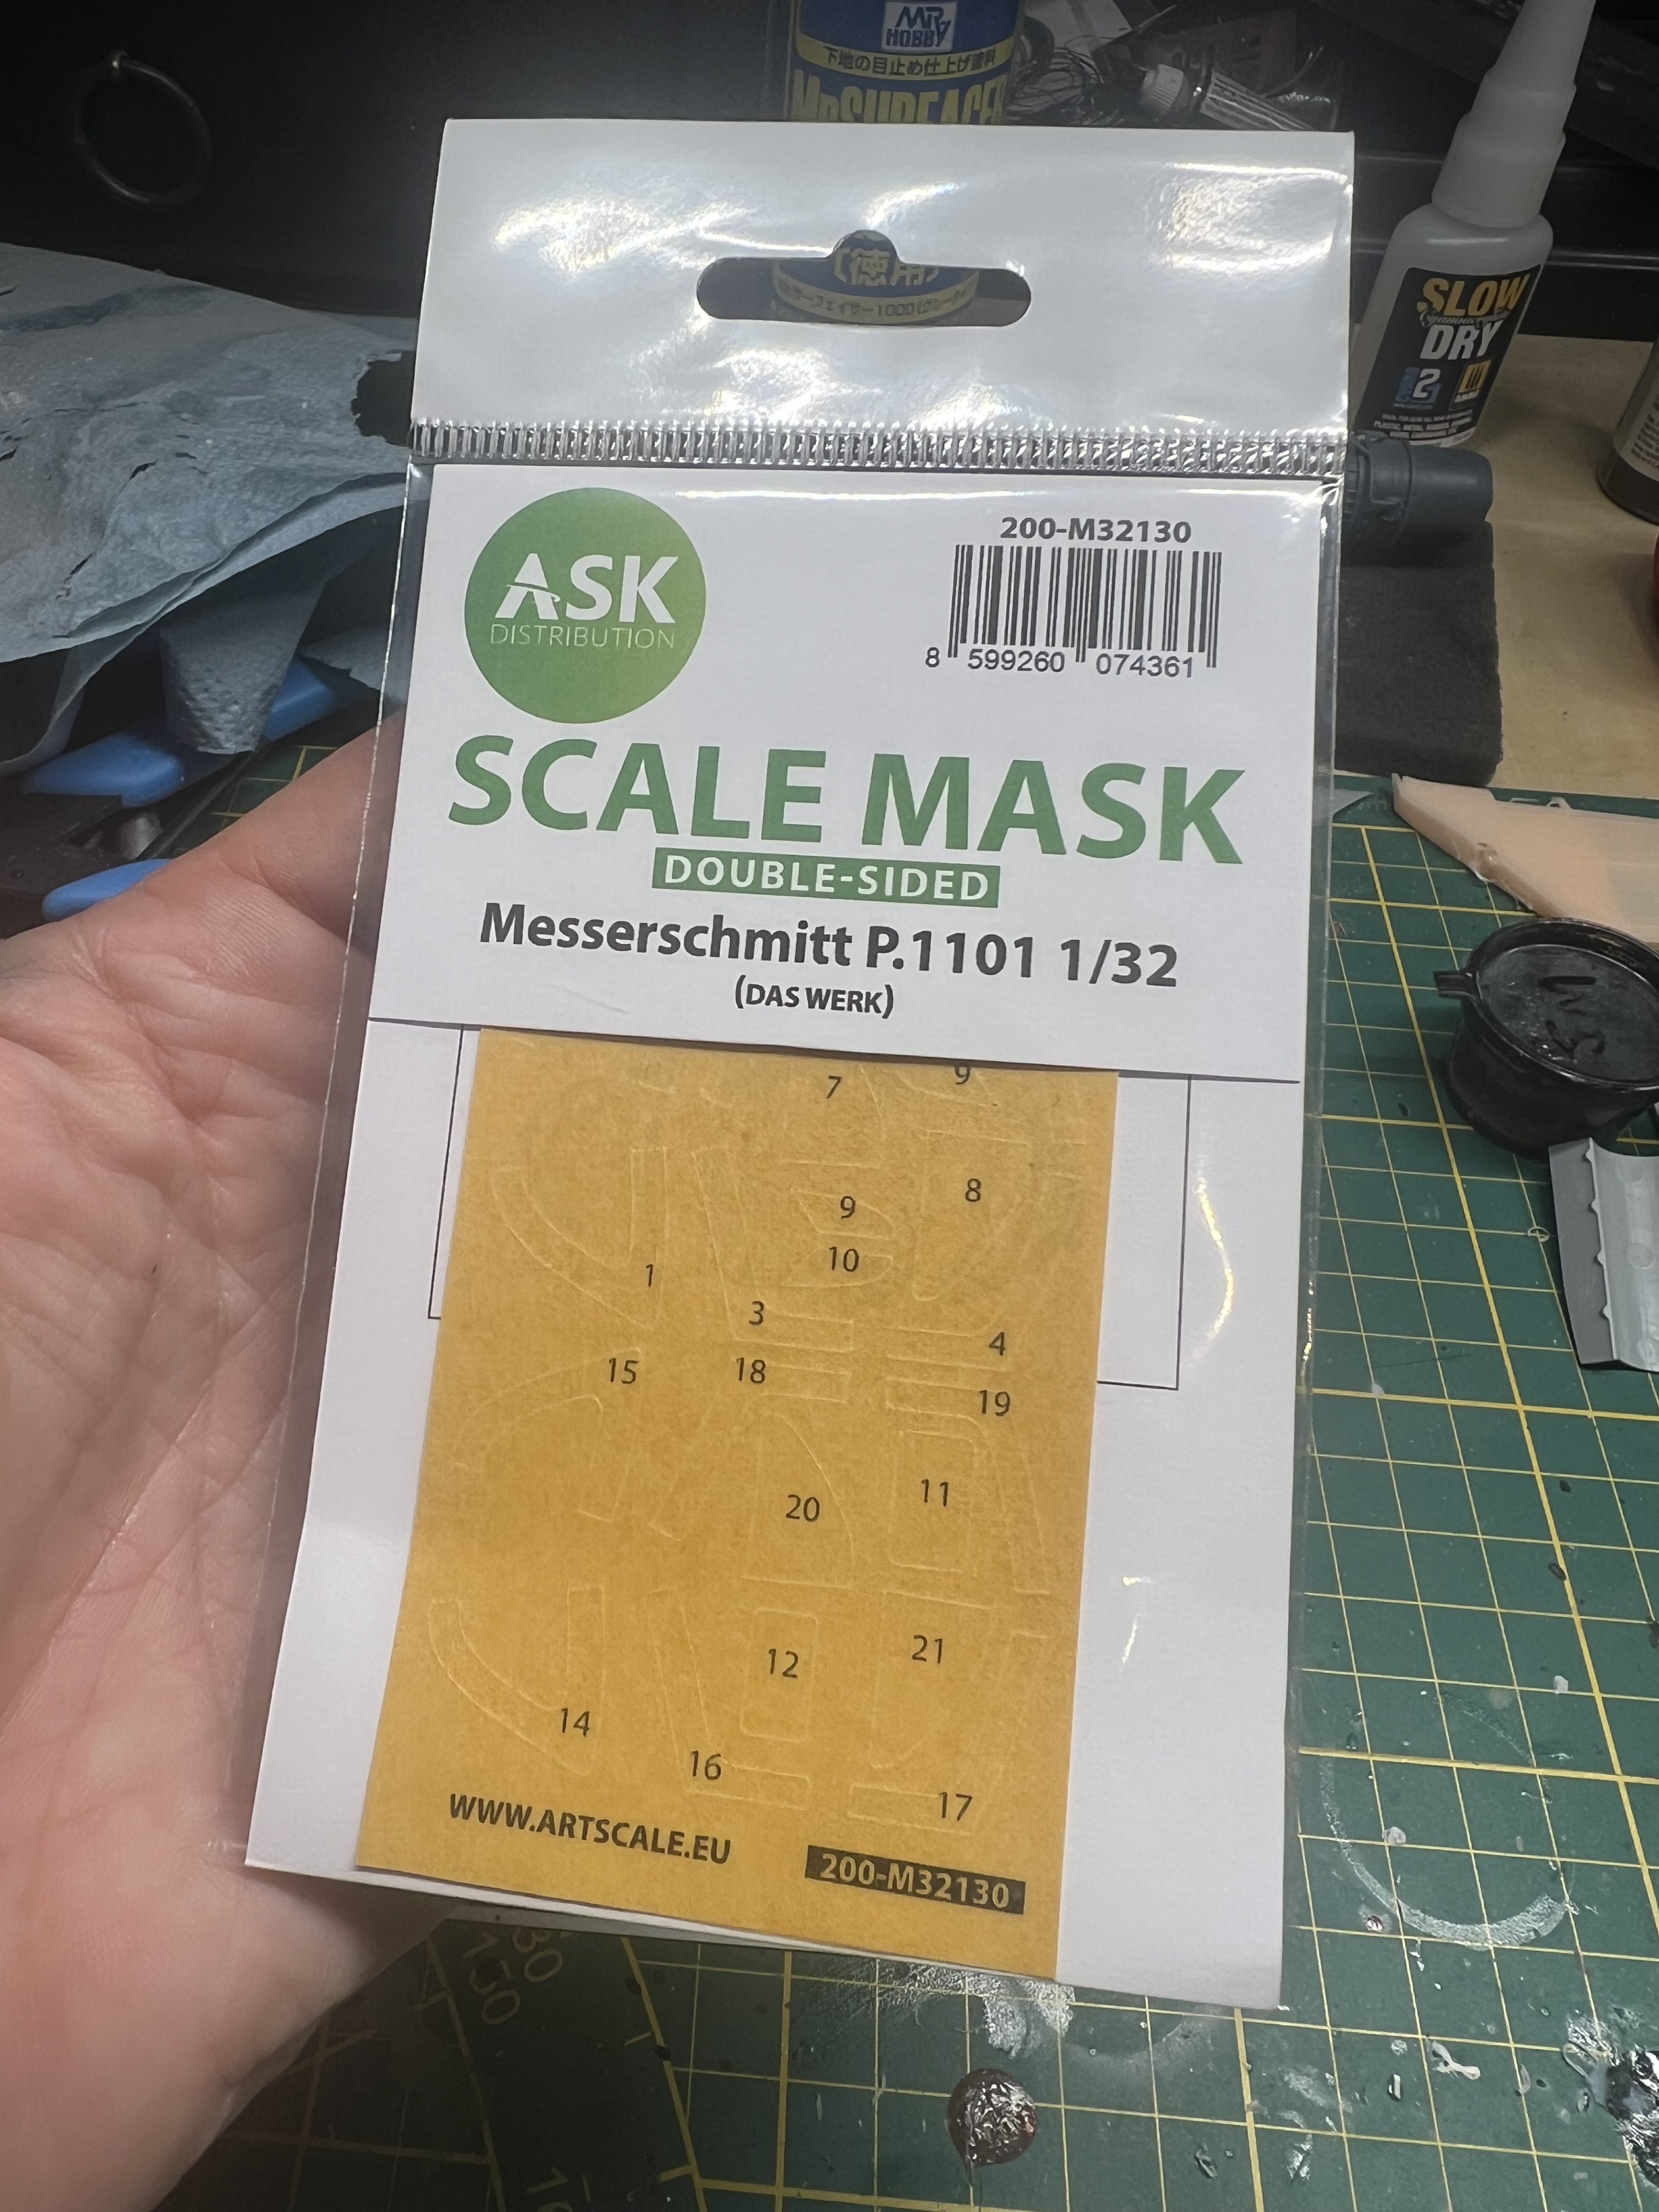
Getting a bit frustrated with failed prints. Almost have the right anti alias setting and right angle for the prints. Took 5 tries… sprayed some mr surfacer to check the details. Might print some more tomorrow. We’ll see. ASK goodies also arrived. A nice seat and some window masks.