All Activity
- Today
-

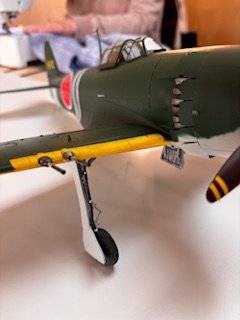
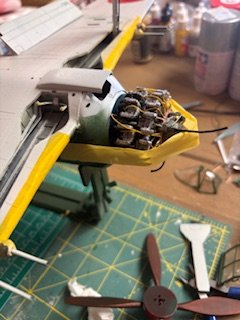
1/32 Ju-87D Stuka
JeroenPeters replied to JeroenPeters's topic in LSM 1/35 and Larger Work In Progress
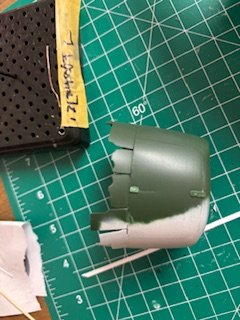
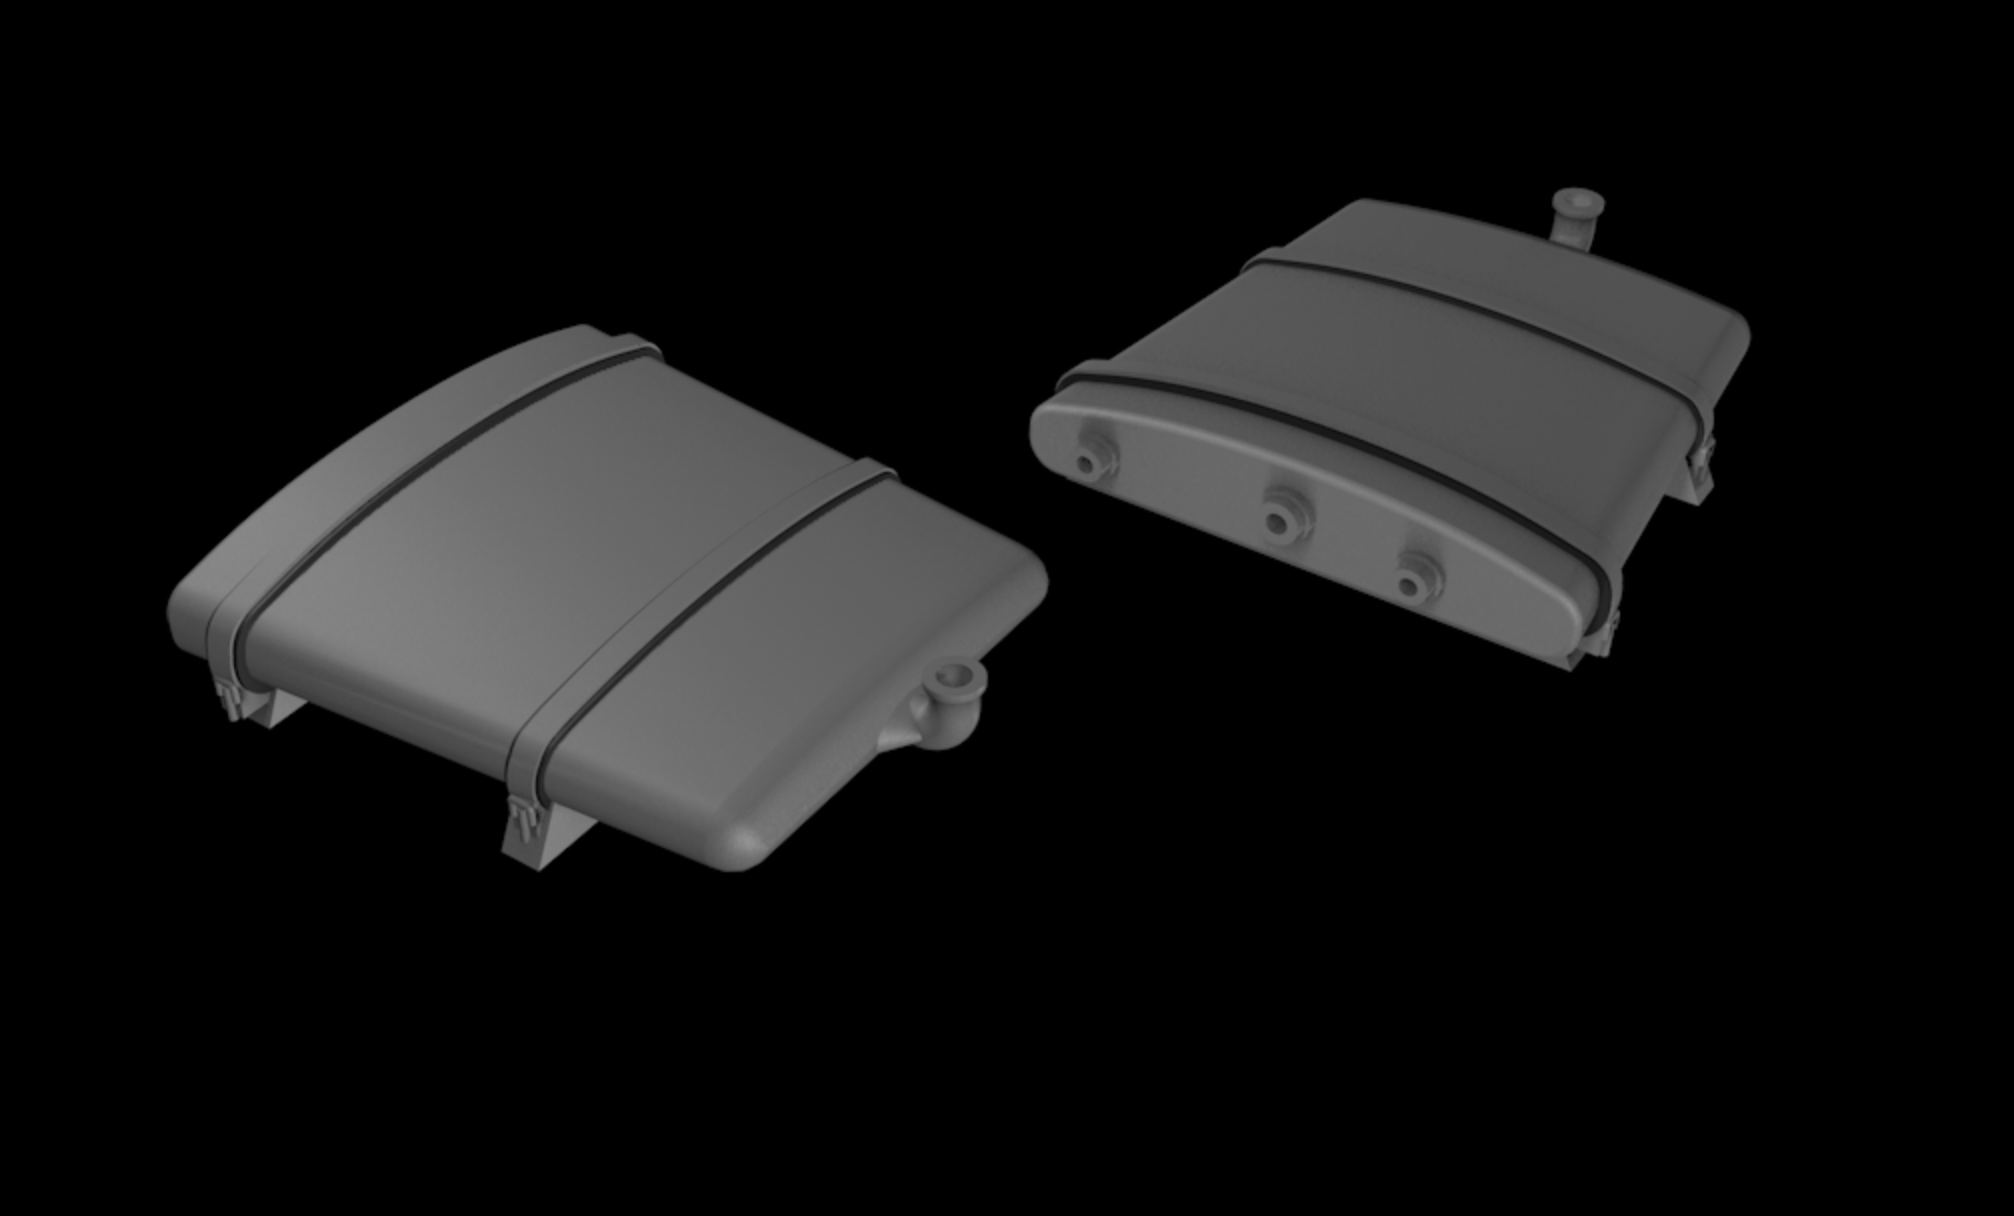
Started drawing the oil tank that sits on top of the Jumo 211 engine. Only on the later D and G Stuka models. For this I had to cut off and sand down the radiator that sat on top of the Jumo 211 engine I printed, but what was designed of the ju87B model.
.thumb.png.b9612c757e0d16731d6d77fd230cc222.png)
-
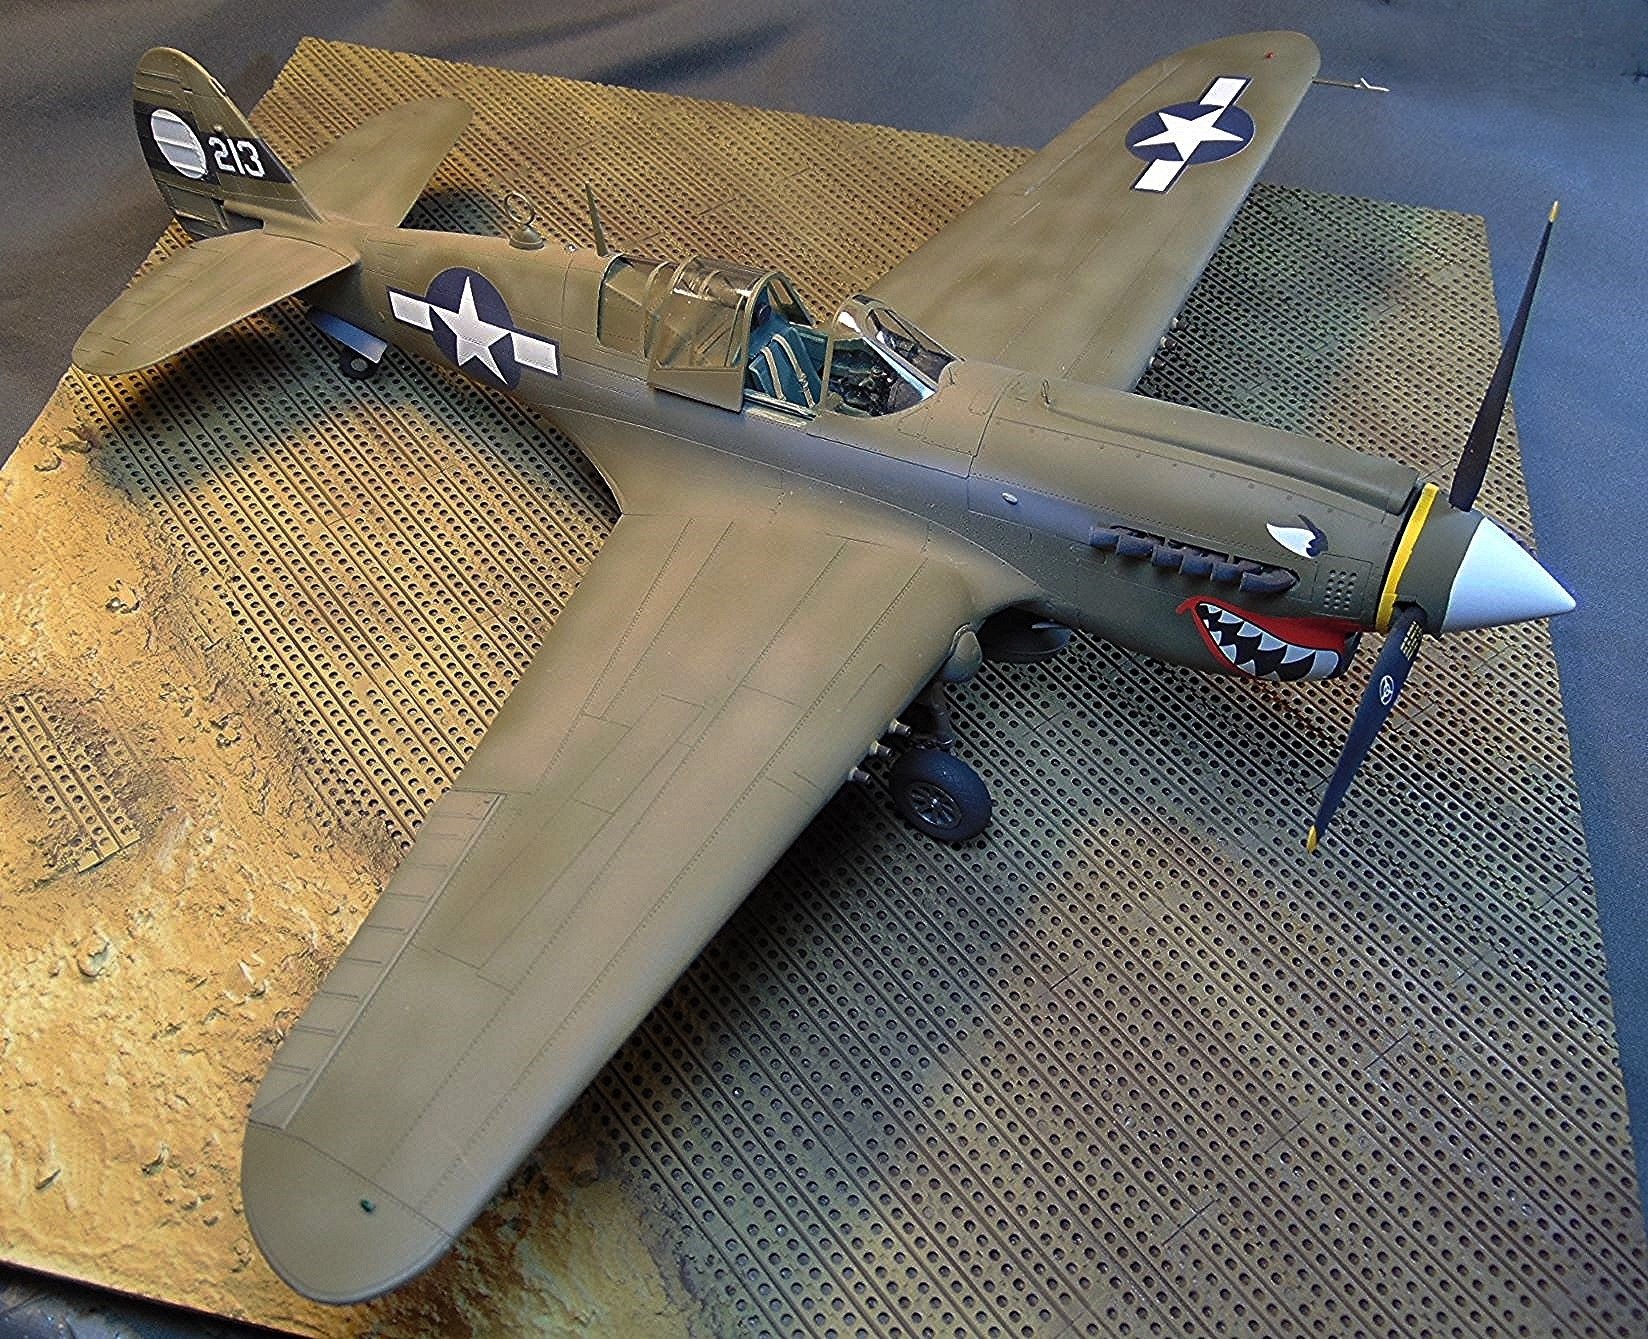
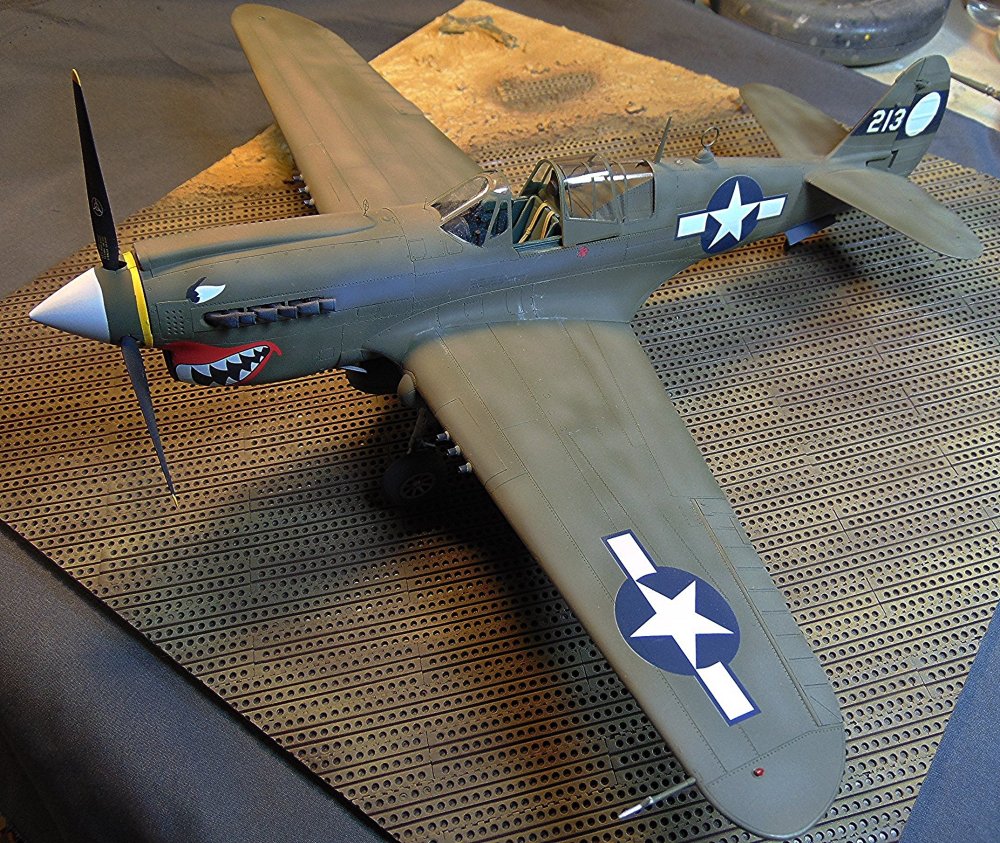
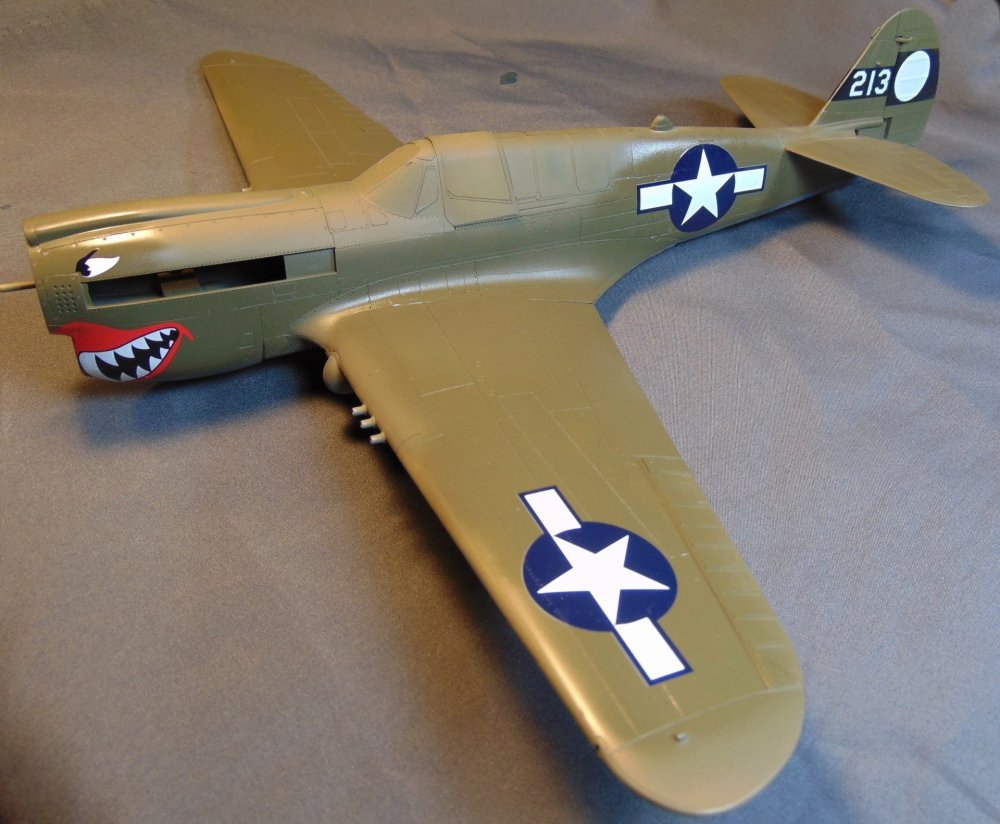
Completed: https://forum.largescalemodeller.com/topic/21024-hasegawa-p-40n-cmi-rfi/
-
I'm calling this one done. OOB except belts, PE gun sights and replacement prop from my stash. Exterior painted with Testor's enamel, interior with AK acrylic. Decals are from Superscale, my decal stash and the kit. 🙂 I like the results and I hope you do also.


-
- 1
-

-

What is on your bench right now ? Share a picture :)
PanzerWomble replied to Martinnfb's topic in Modelling Discussion
Dead Tweet coming soon ....clearing the SOD ... -
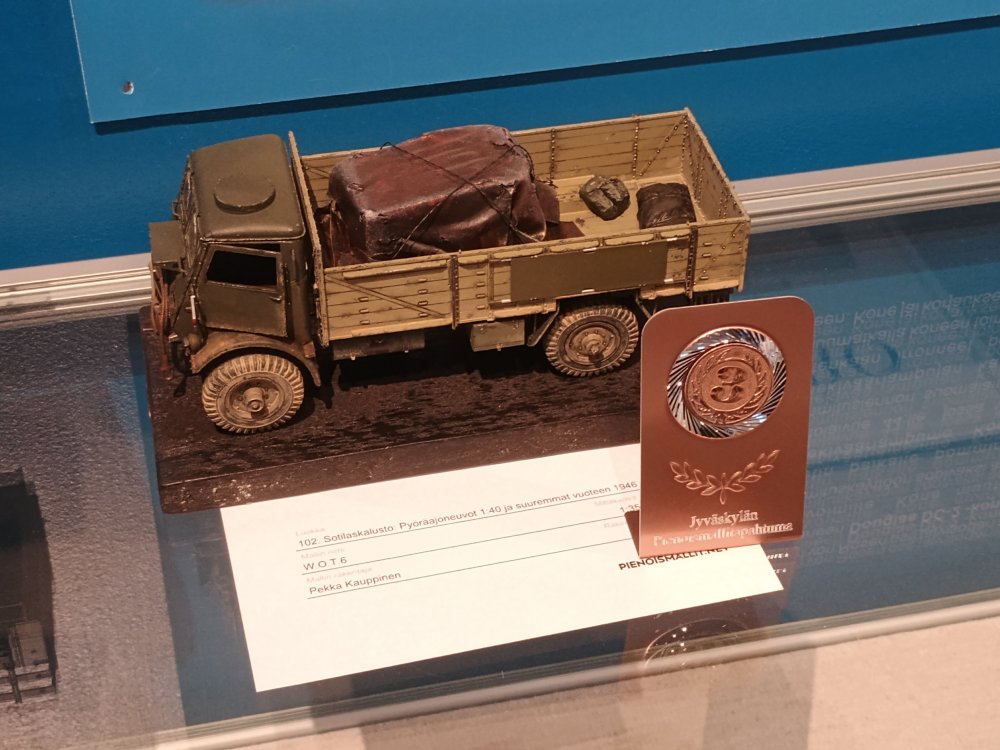
Got medal with this build🙂🥉 Thanks for feedback. Especially DocRob for those comments about ropes🧐
-

Tamiya Spitfire VIII converted to a VII
denders replied to denders's topic in LSM 1/35 and Larger Work In Progress
Pre-shading done and the exhaust stubs are ready for painting. Hopefully none of them 'ping' off to neverland. -
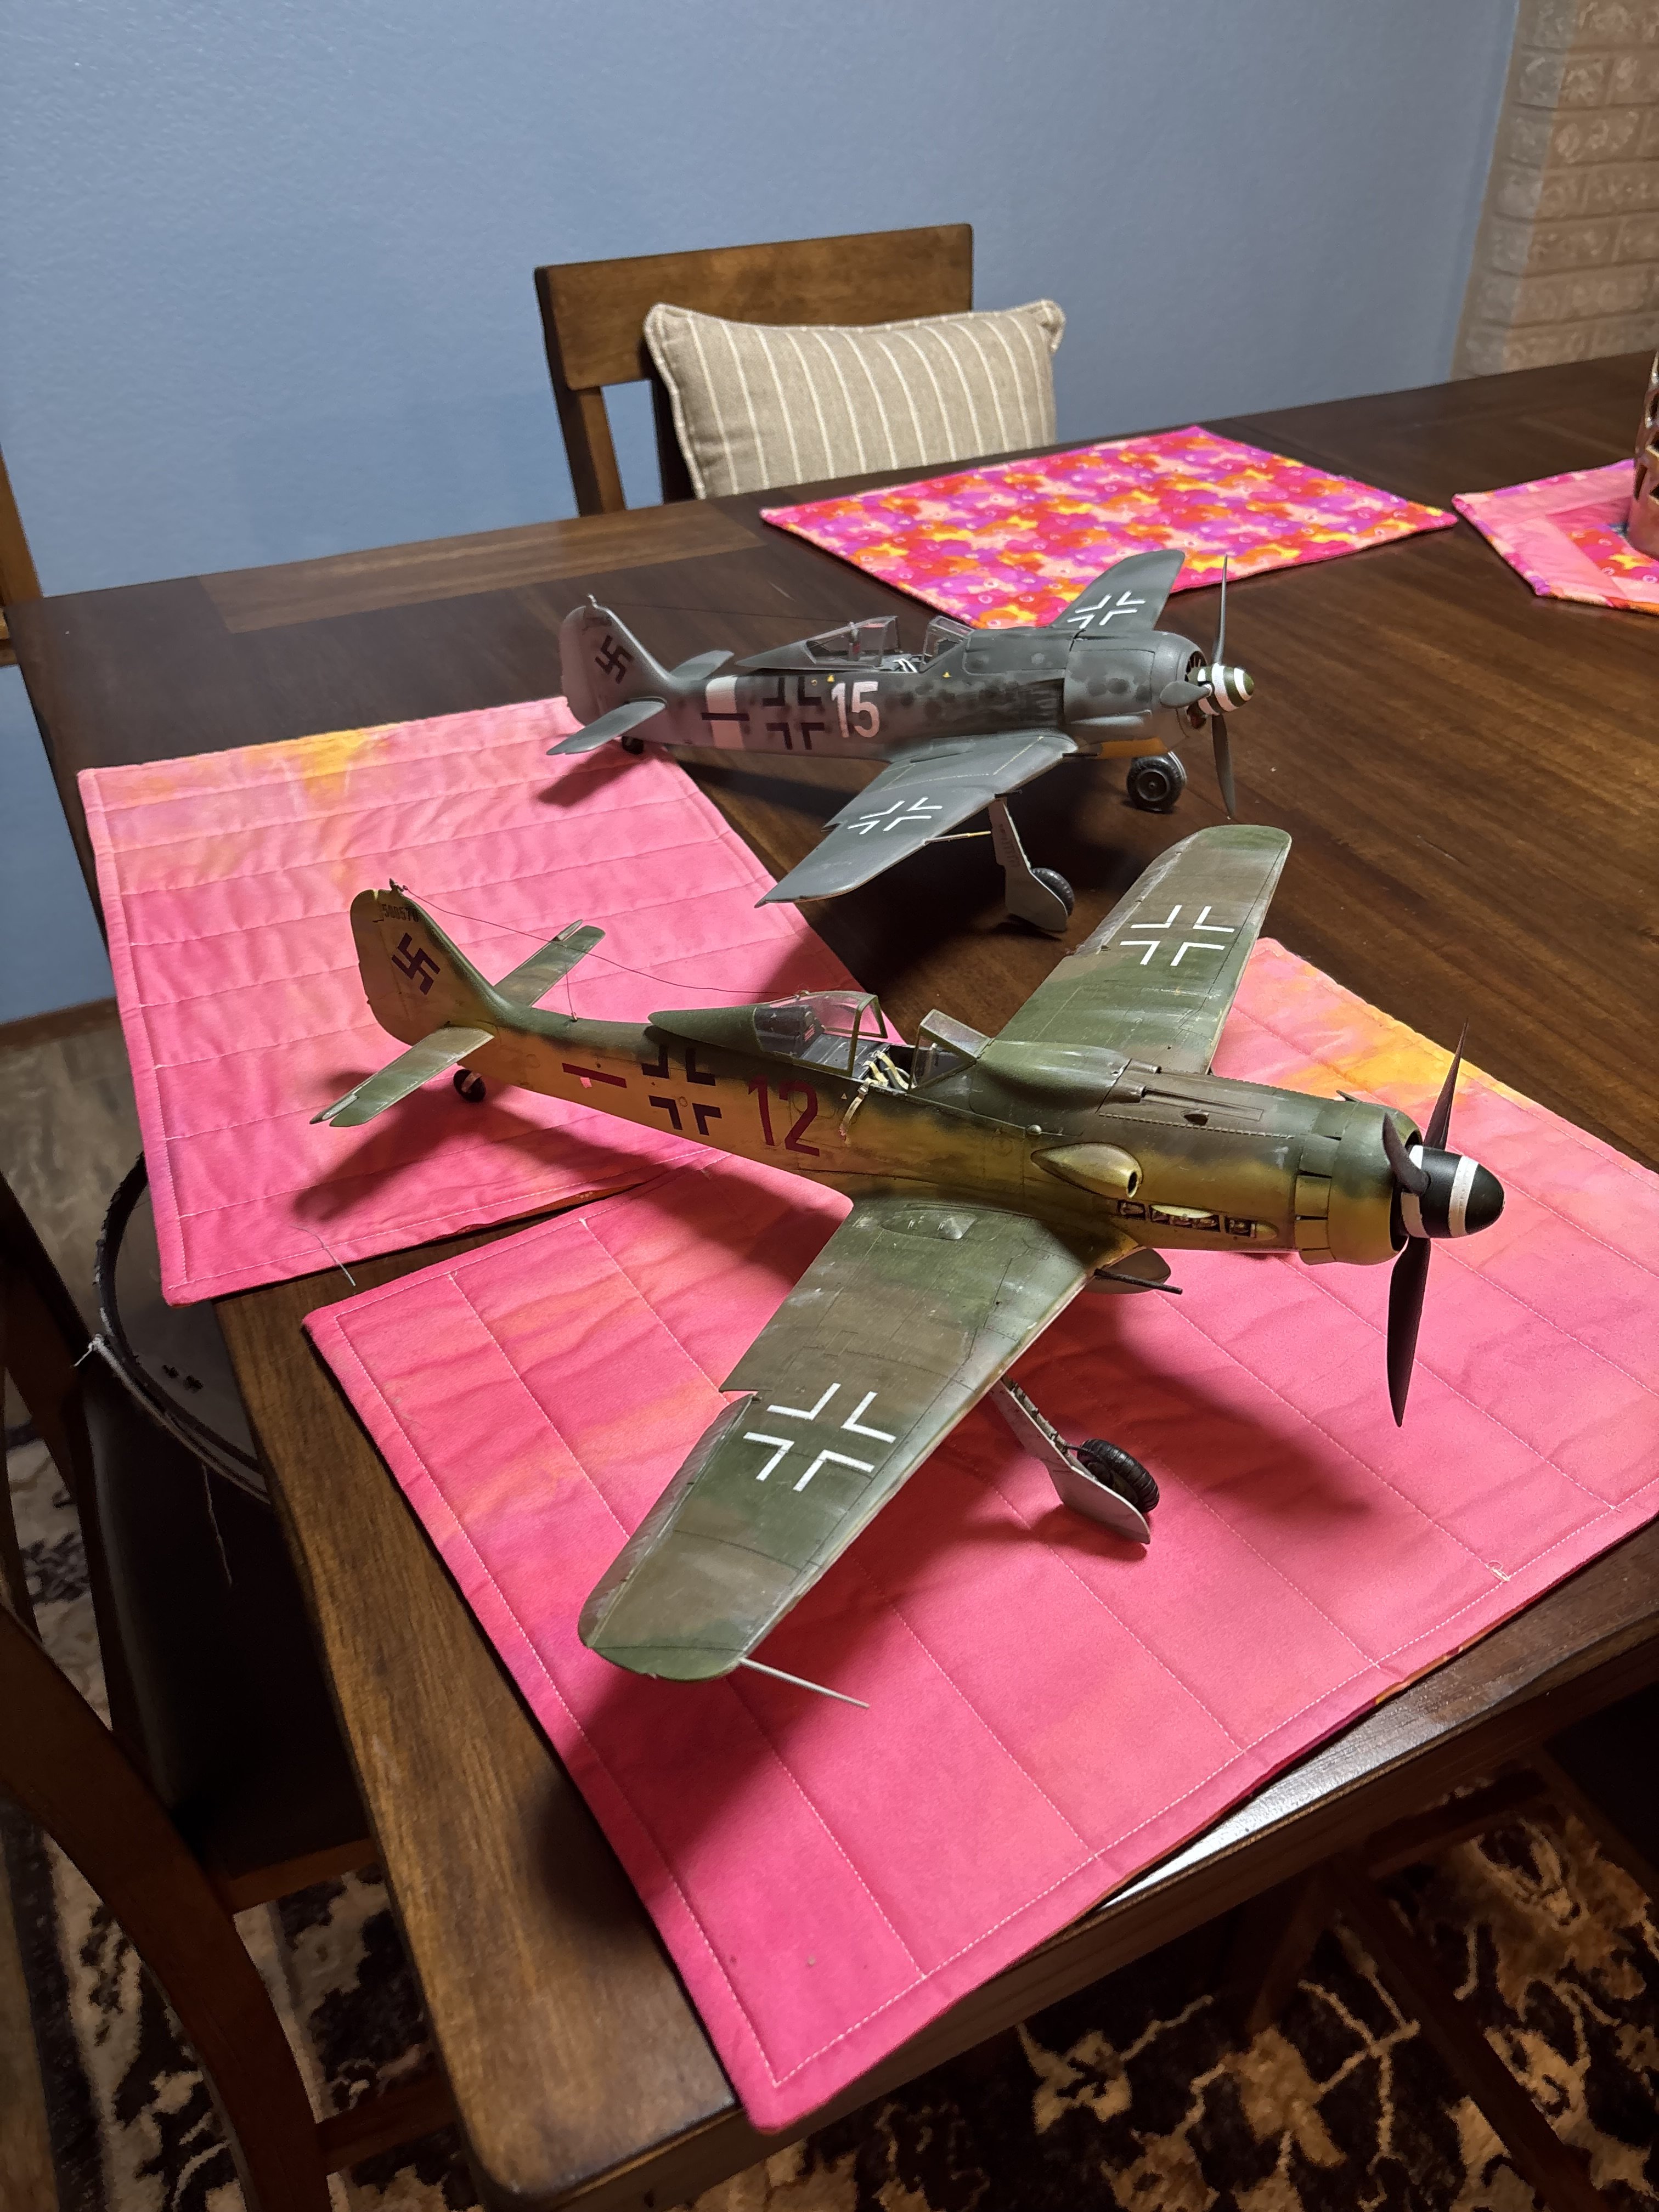
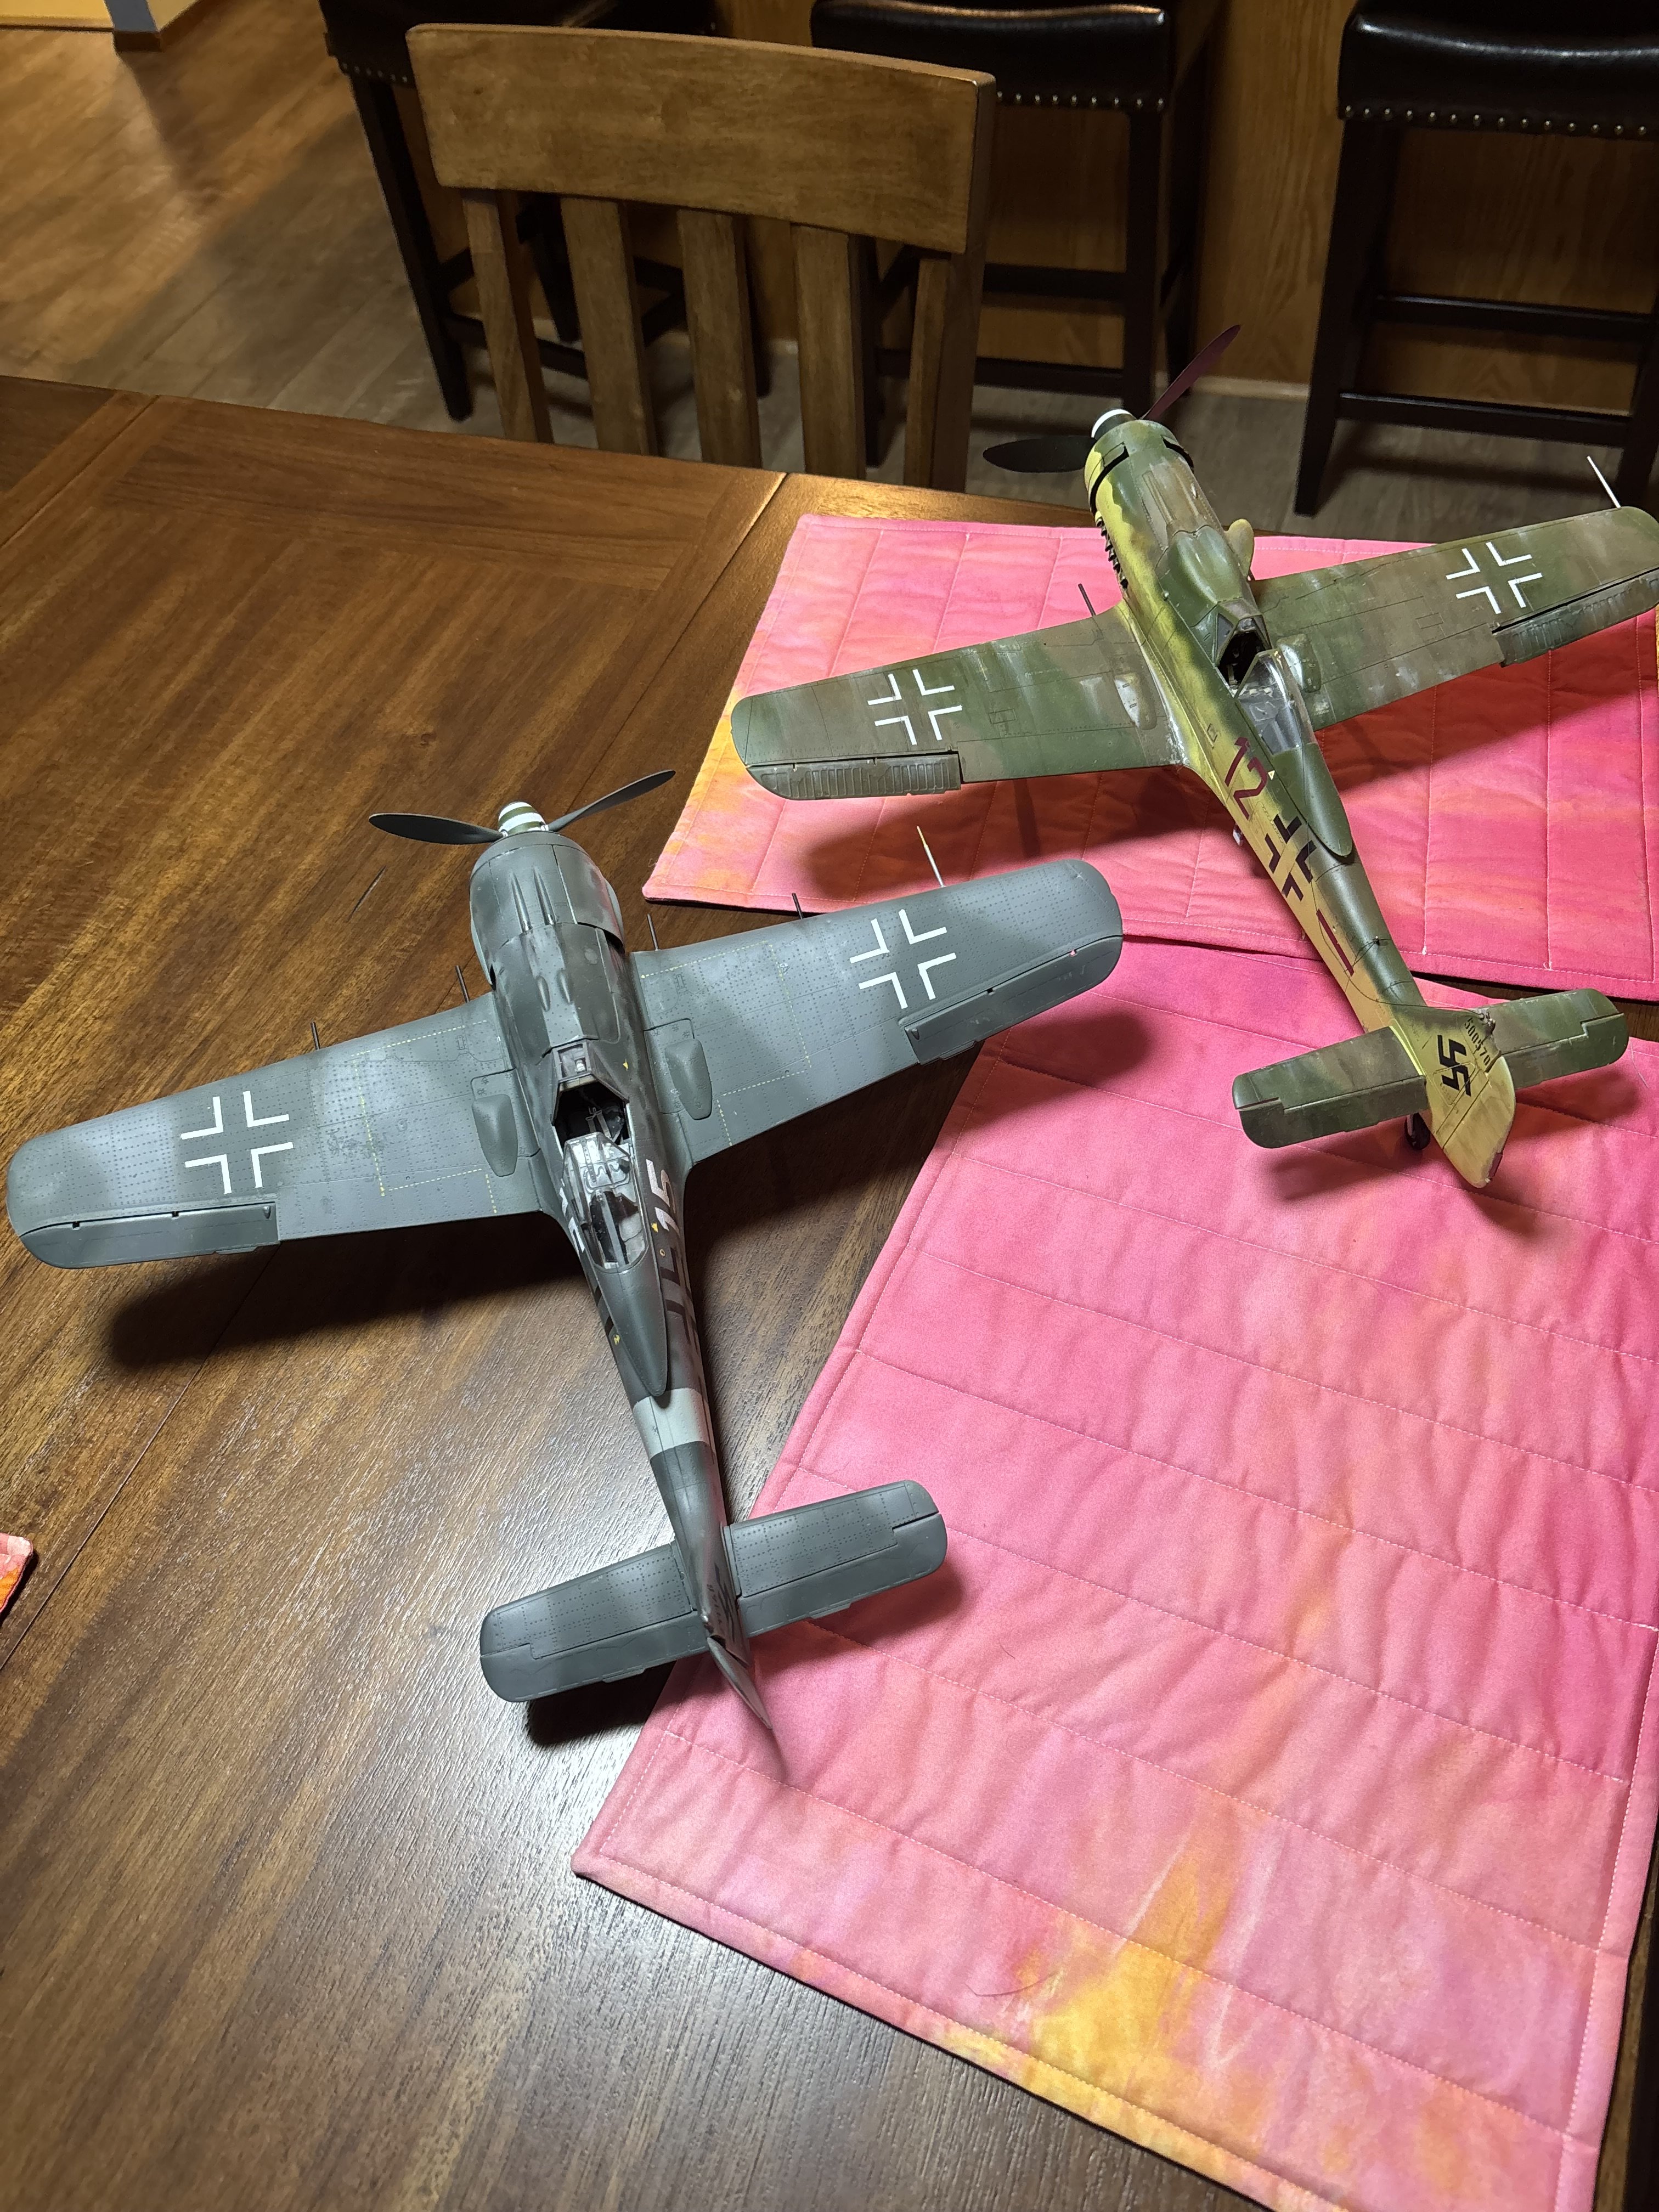
 Both are very good looking aircraft🥇
 -
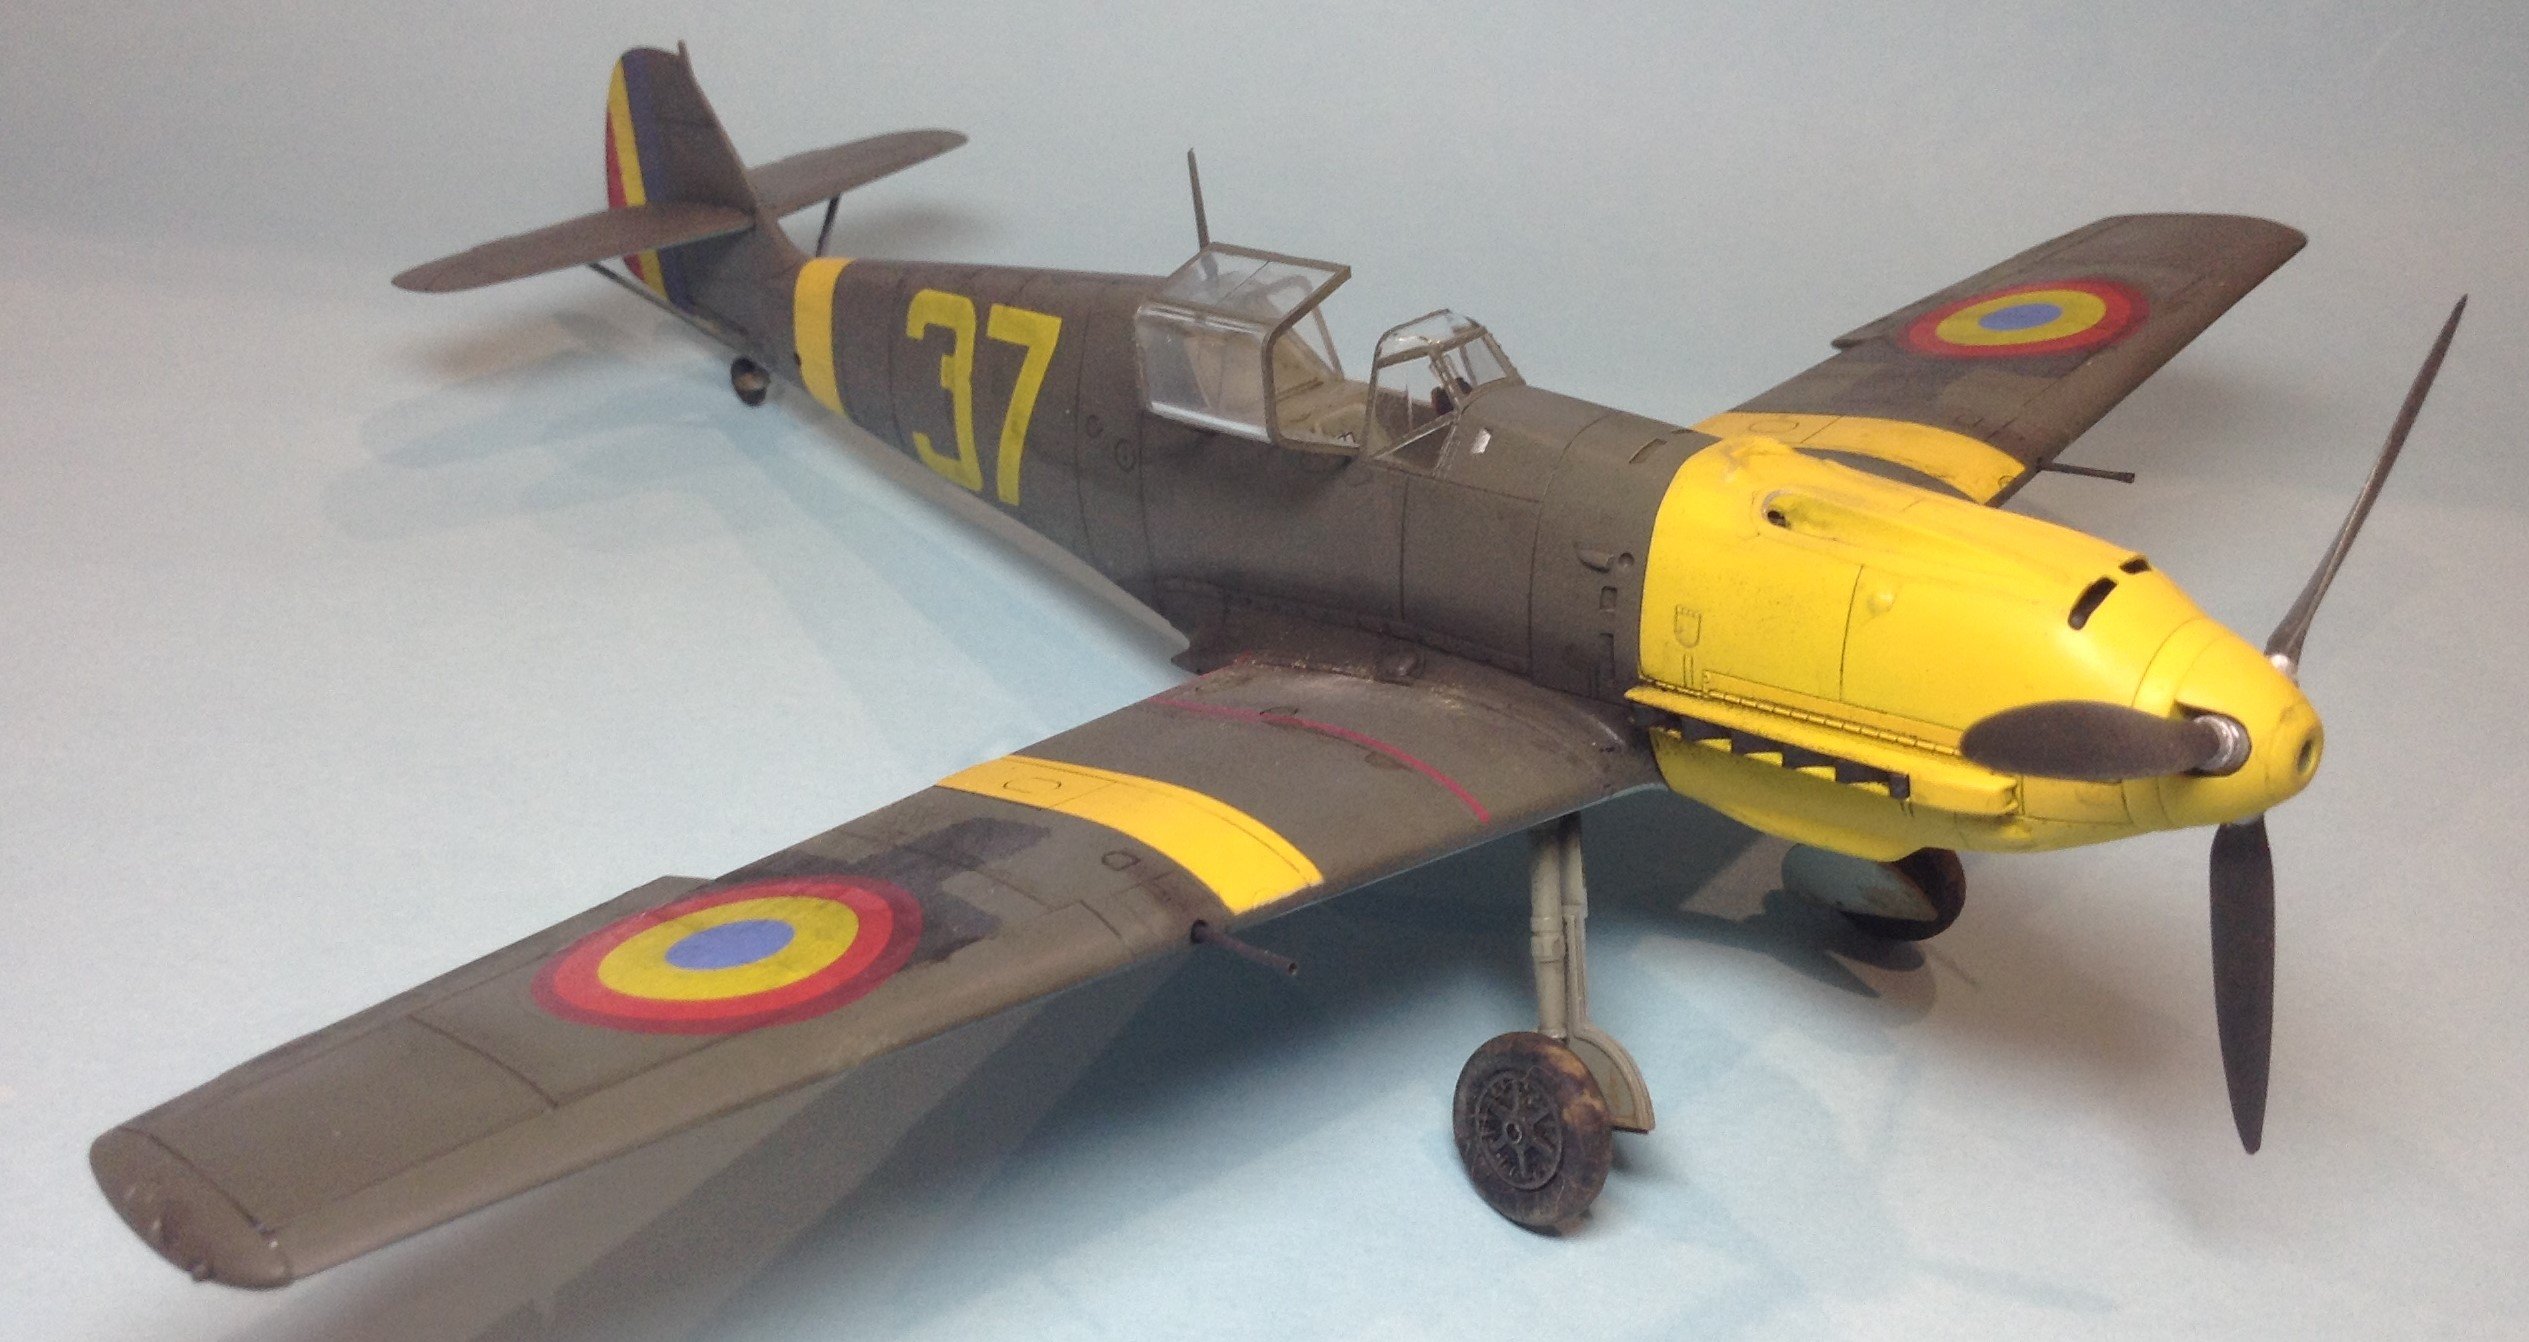
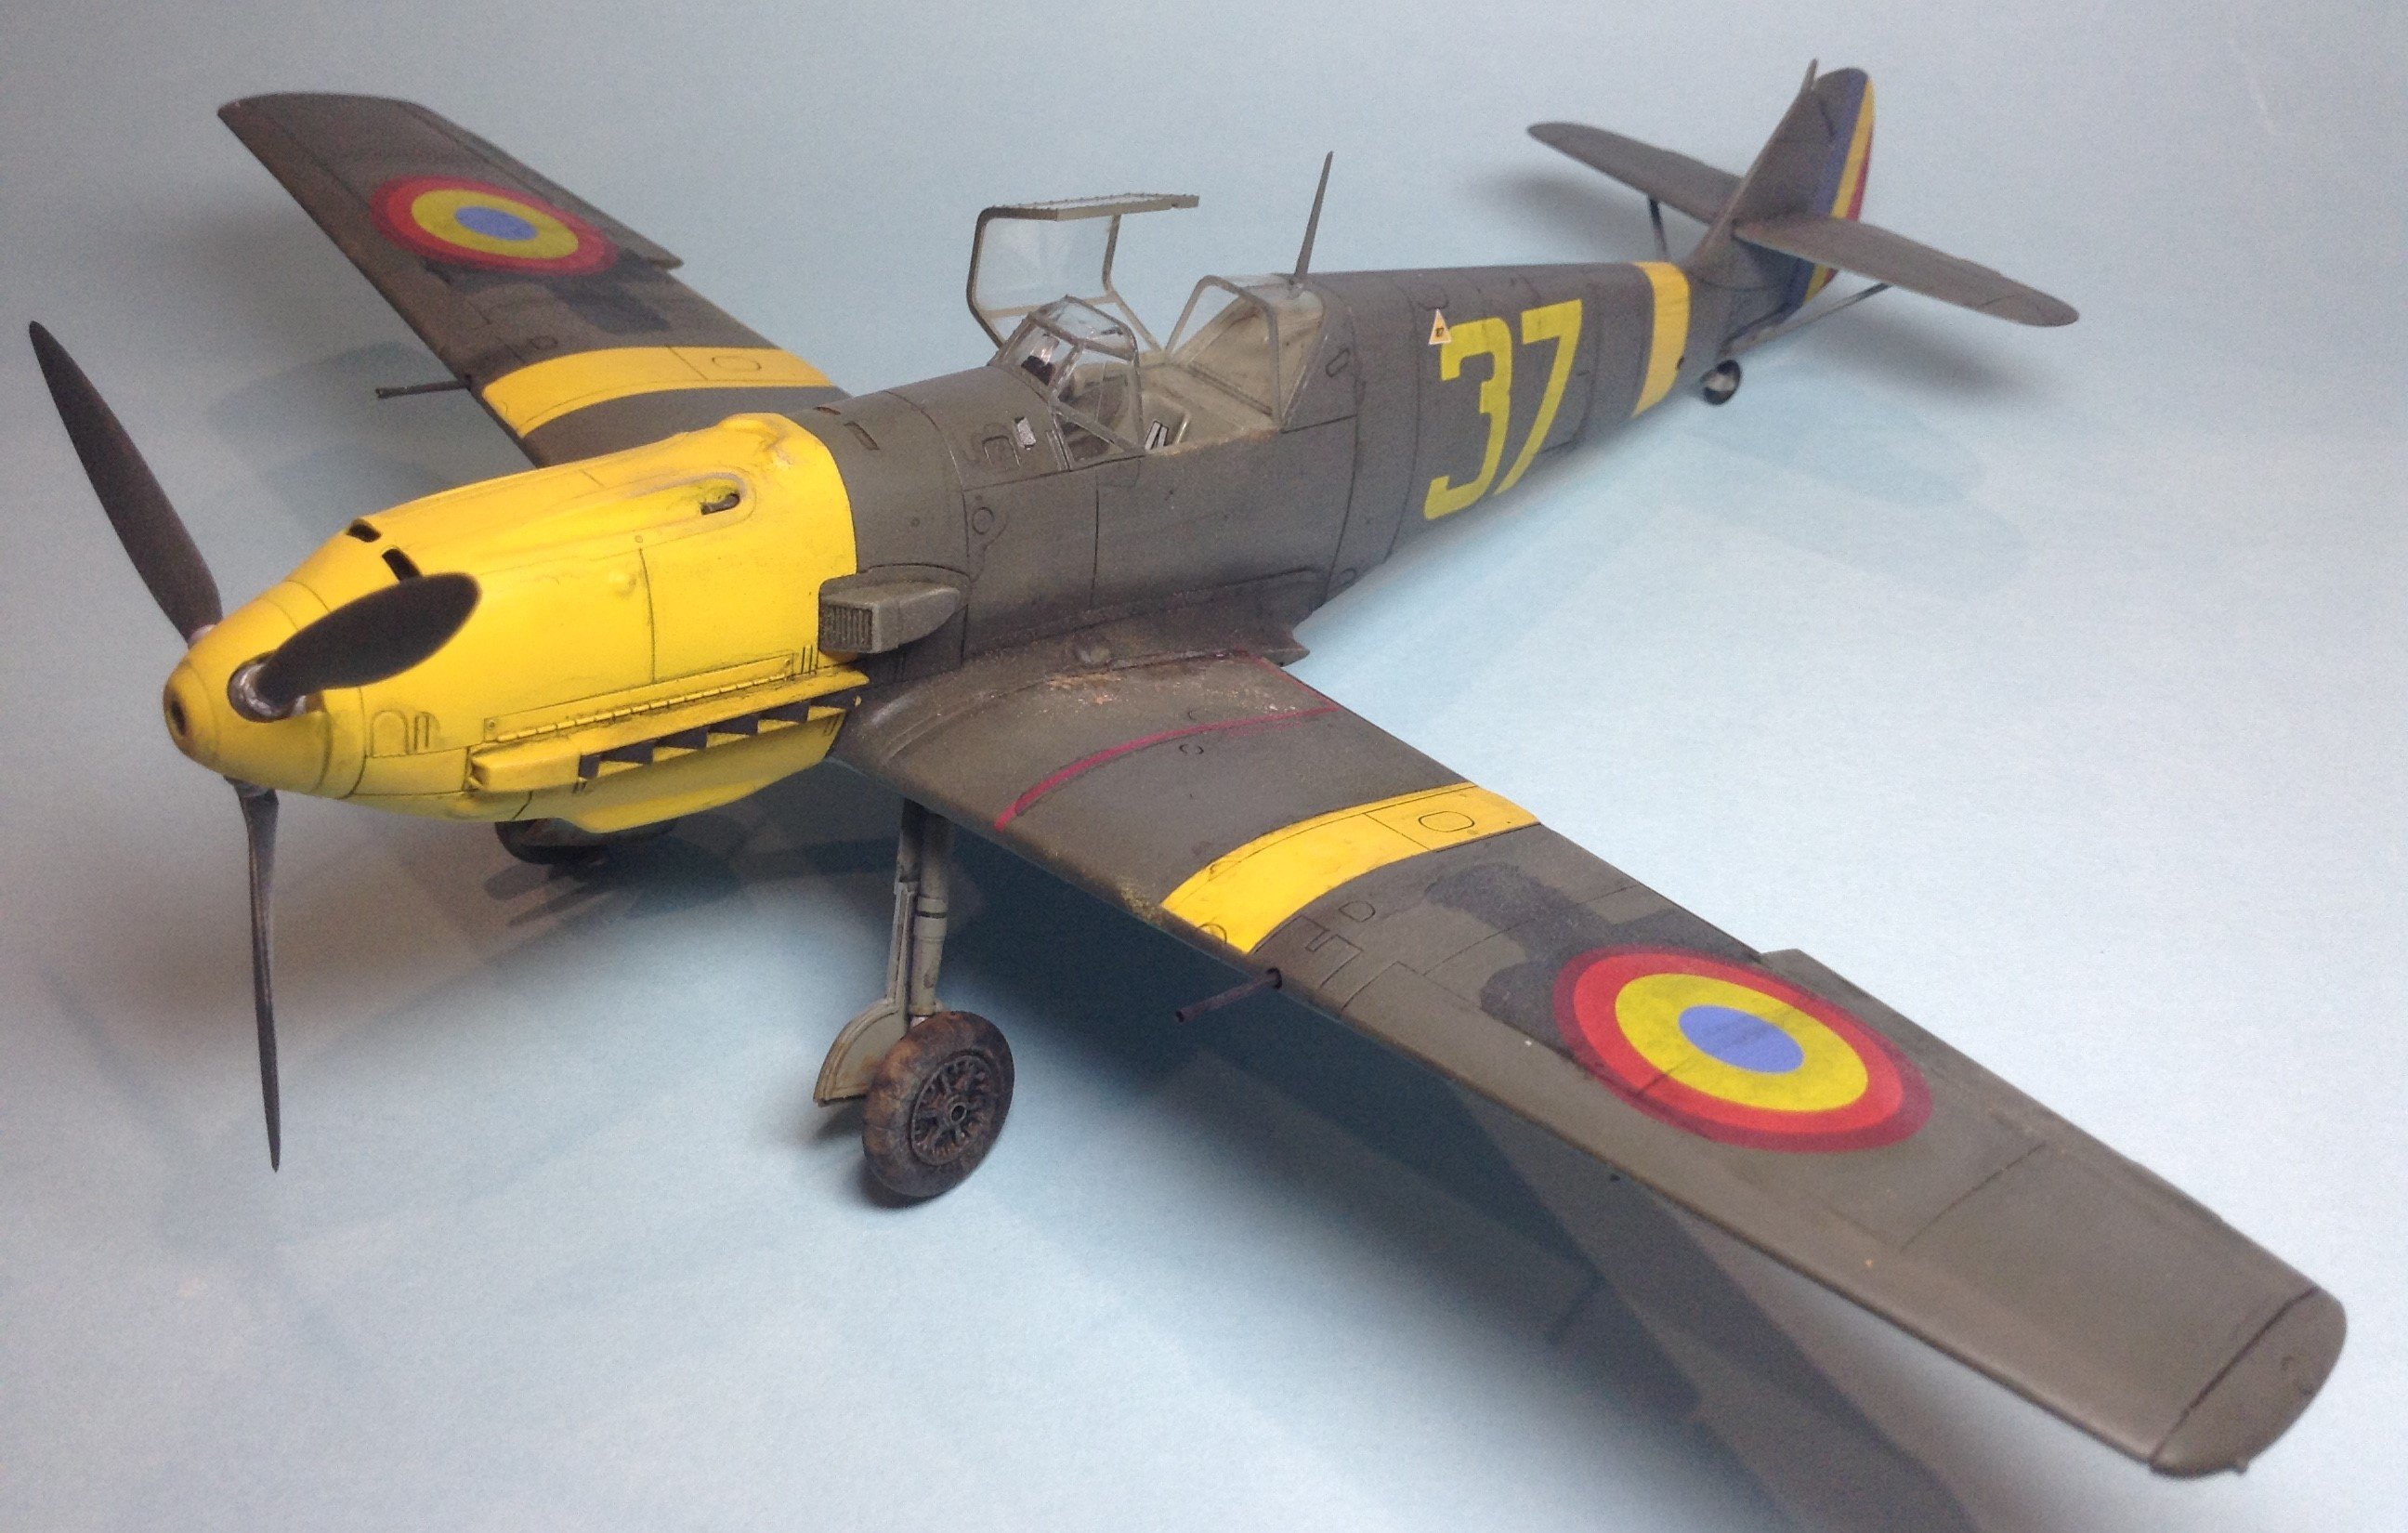
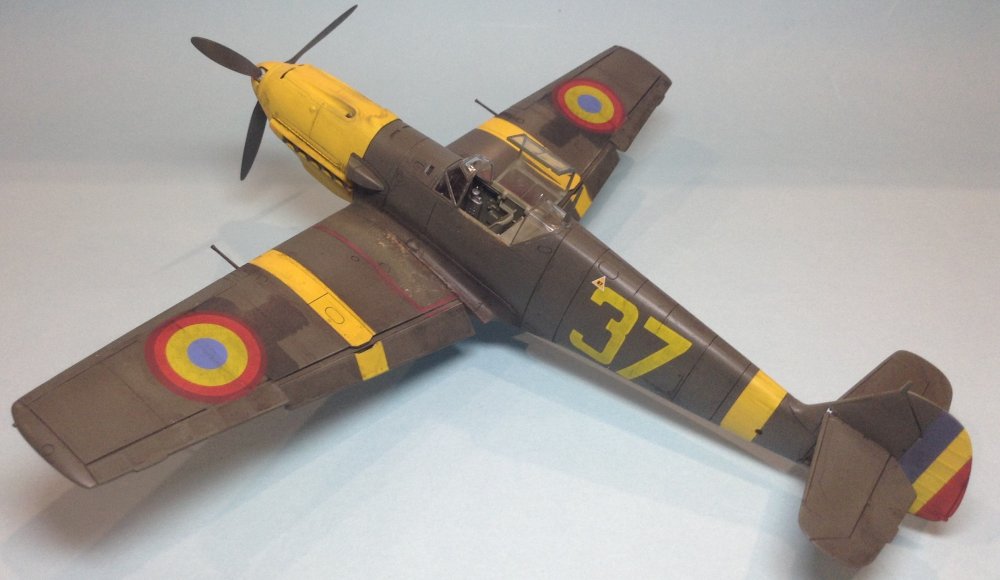
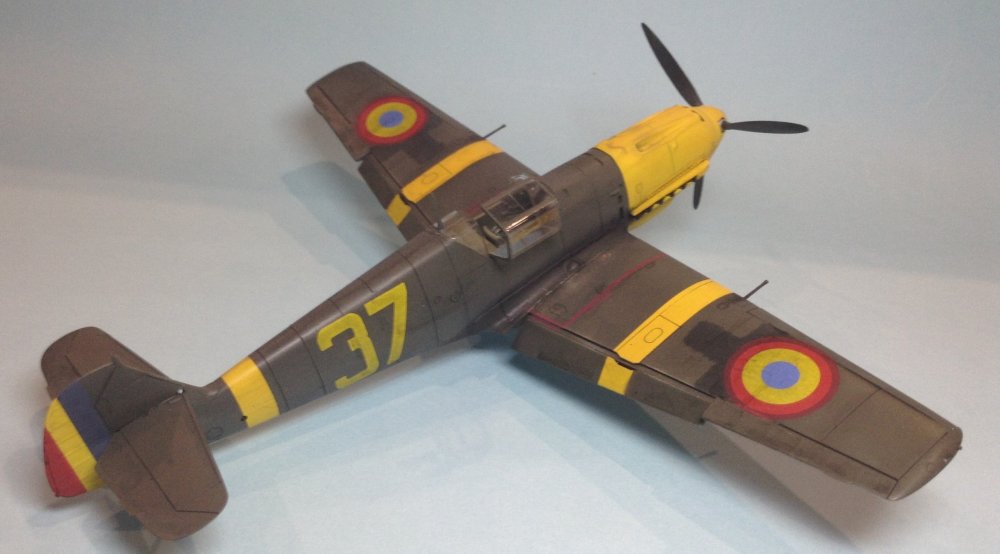
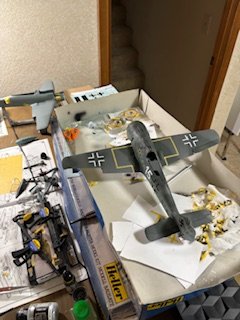
Rumanian Messerschmitt Bf 109E-3
FullArmor replied to BradG's topic in LSM 1/48 Aircraft Ready for Inspection
Nice work! I like the bright colors🙂 -

What is on your bench right now ? Share a picture :)
BlrwestSiR replied to Martinnfb's topic in Modelling Discussion
That looks great Paul. Not a subject you see everyday. Carl -

What is on your bench right now ? Share a picture :)
belugawhaleman replied to Martinnfb's topic in Modelling Discussion
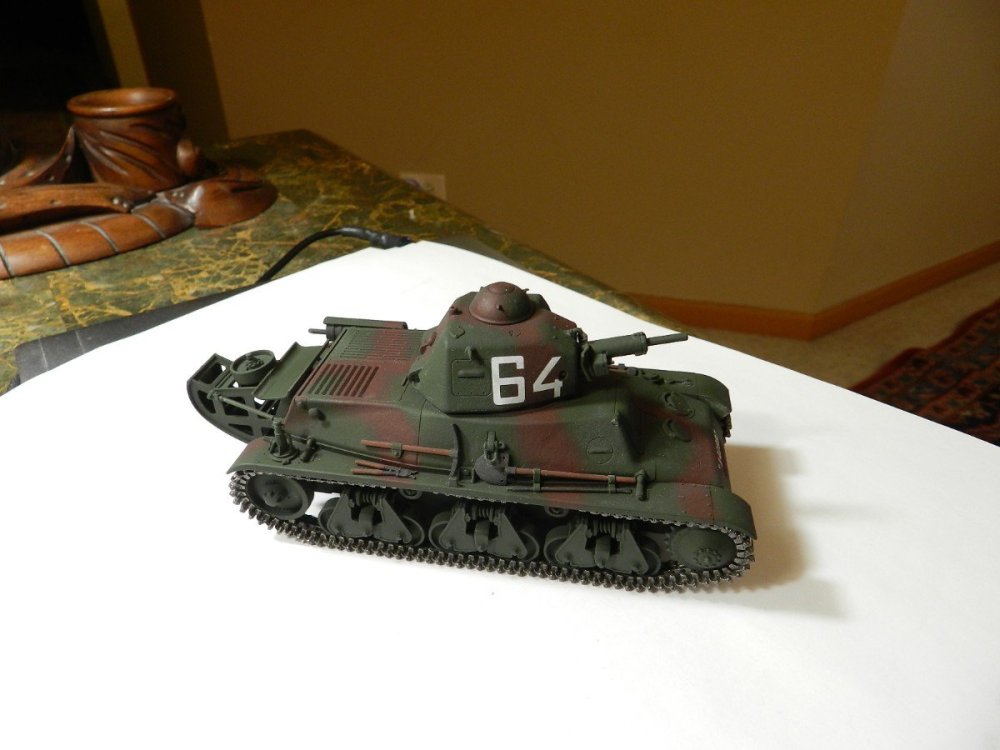
Started this little Tamiya H39 last September....... Hard to believe😀 Very nice little kit. Added Friulmodel tracks. Decided to leave off the provided tow chains....they just looked too big I used my H&S Infinity 2024 for the camouflage. Works great, but I need more practice.
-
This is the very nice Tamiya kit with Ventura decals and turned brass 20mm barrels. The Rumanian E's were delivered with 20mm oerlikon cannons rather than the standard MGFF weapons. They also had a spade grip to the control column but I found out this information after I'd closed the fuselage. Decals were ok, they could have had better colour density, but oh well. I'm glad I finished this as the project has sat for a good 20 years in the stash!


- Yesterday
-
Some farmers around here are still driving clunkers like that, you can almost follow the trail of rust up the road. 😁
-
Zis & Zat ....more dereliction .
PanzerWomble replied to PanzerWomble's topic in LSM Armour Finished Work
I think with a wipe with an oily rag and some aerosol paint it might come around 🤣 -
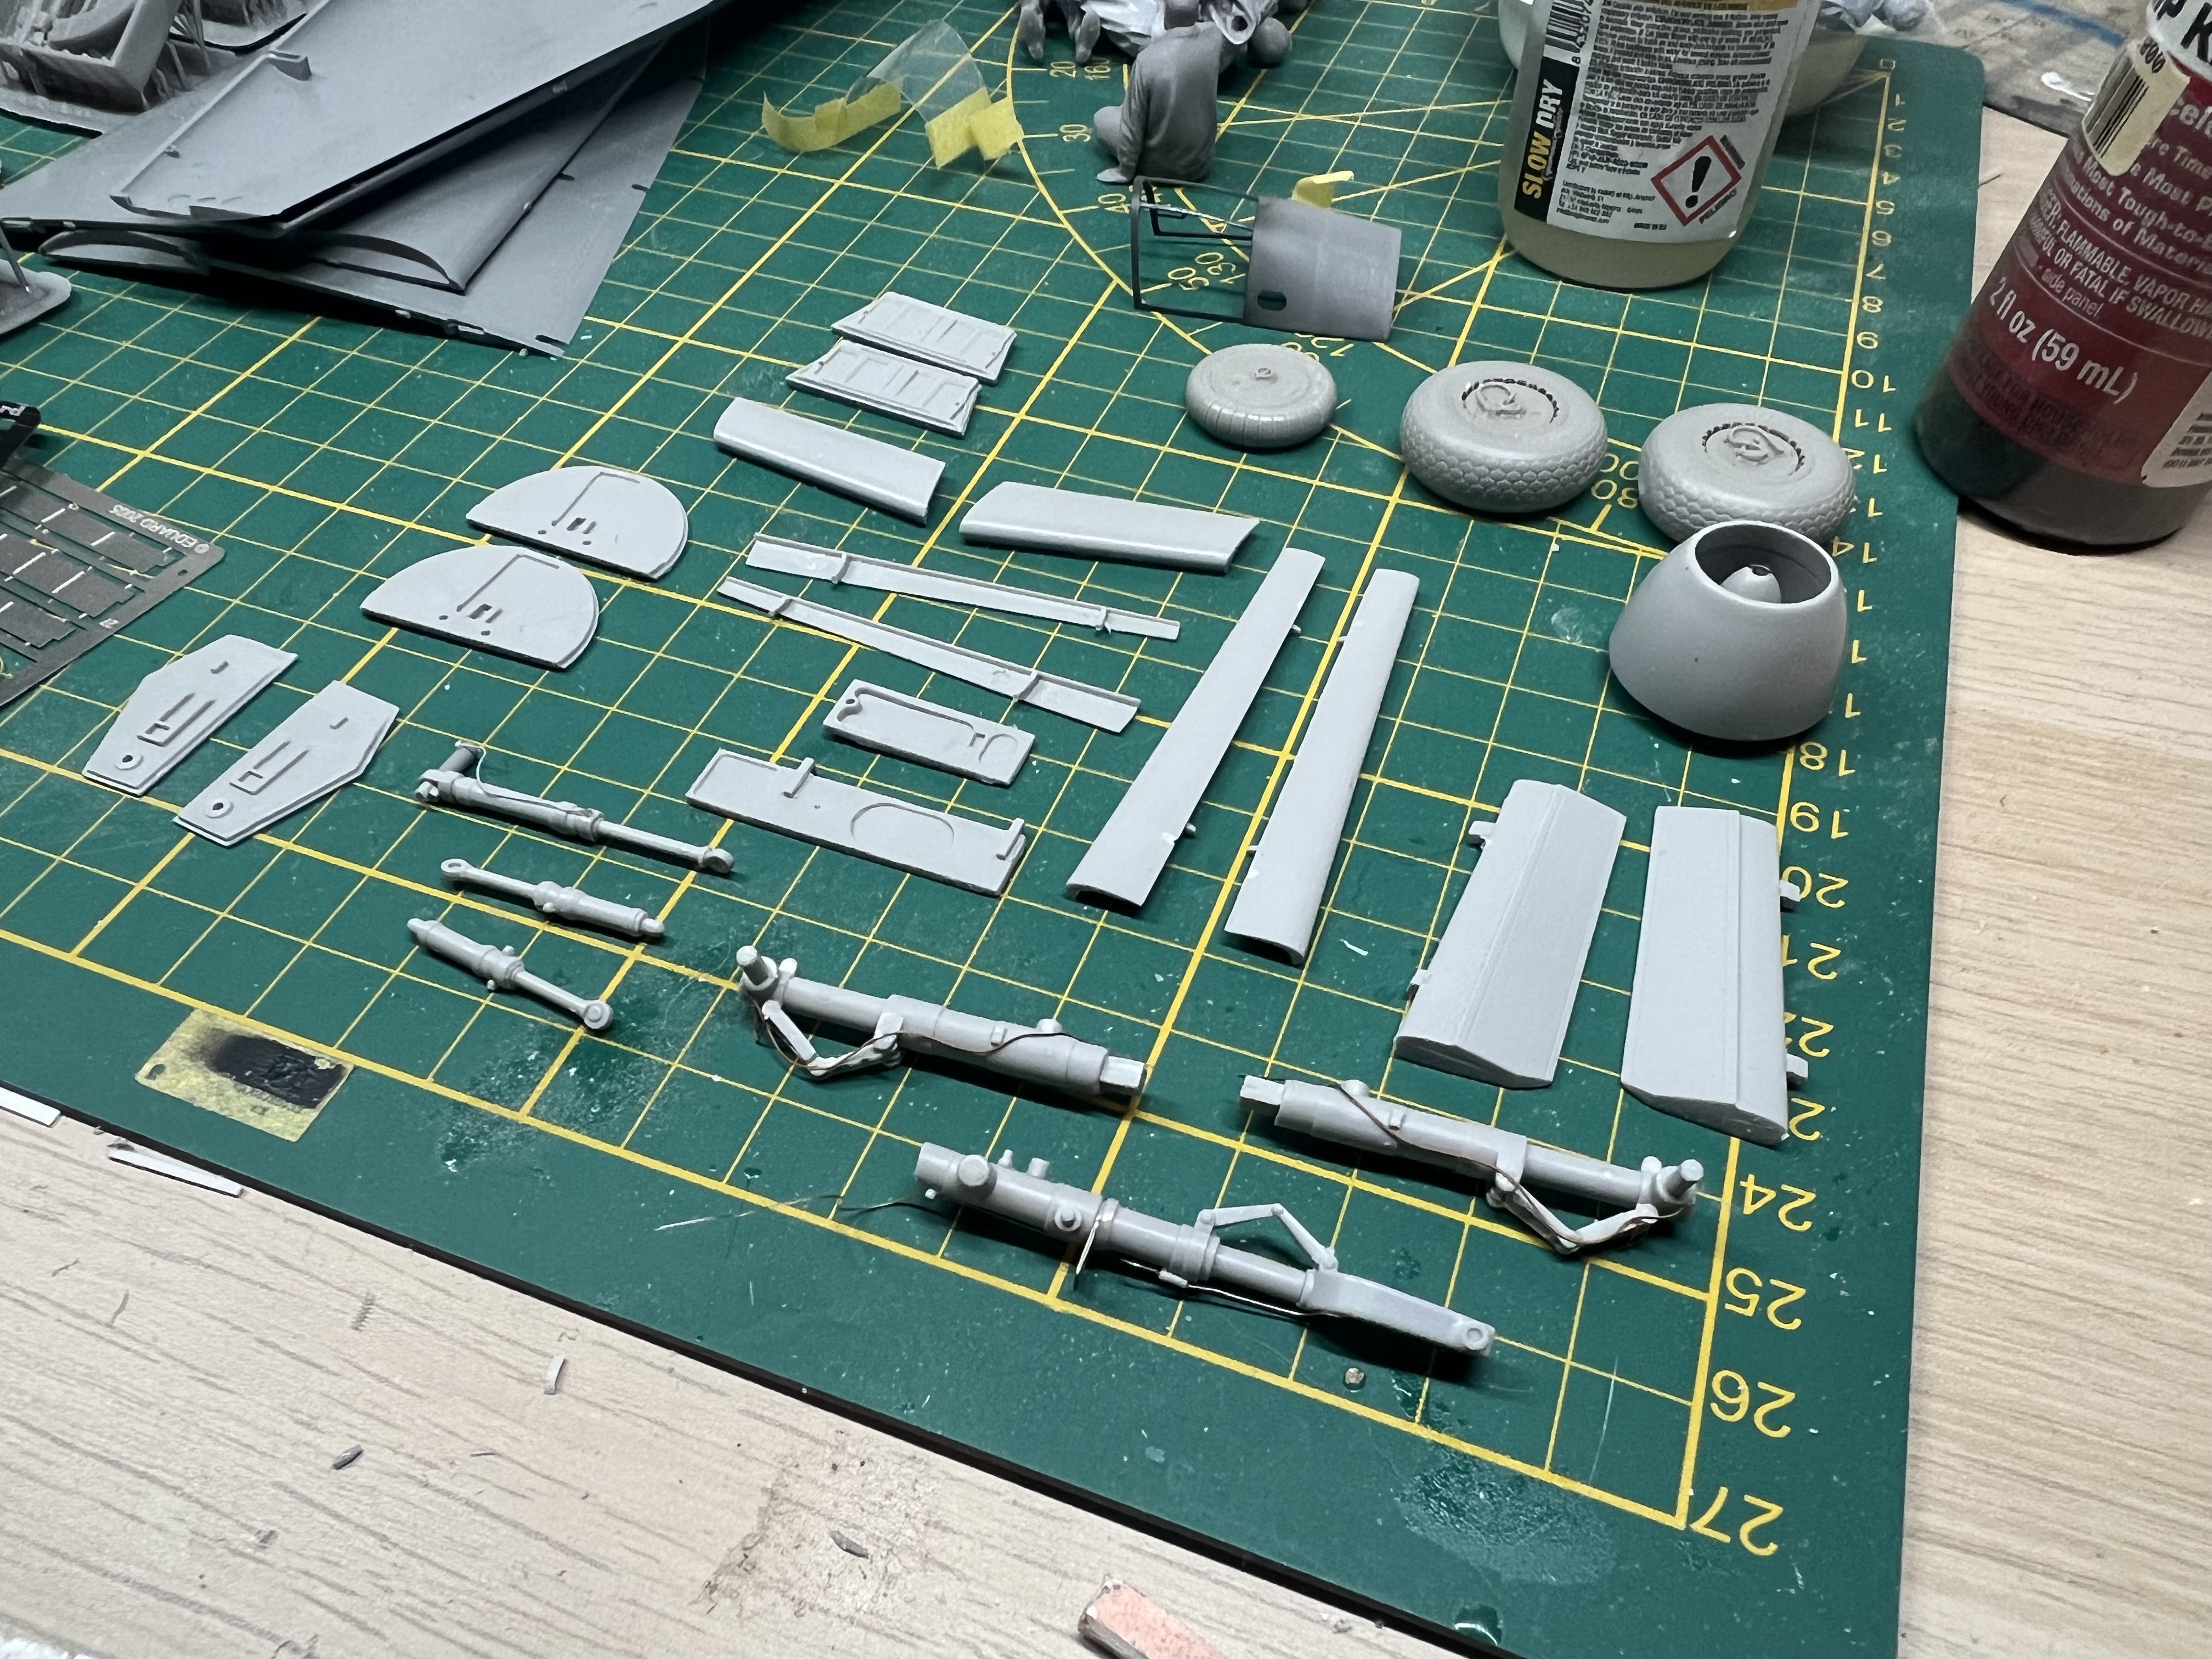
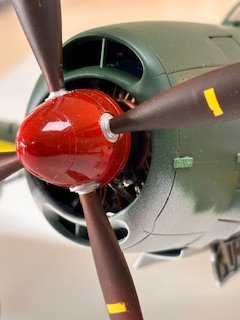
1/32 ME-262A-2a/U2
JeroenPeters replied to JeroenPeters's topic in LSM 1/35 and Larger Work In Progress
Prepping all the parts. Adding brake lines, PE details, etc.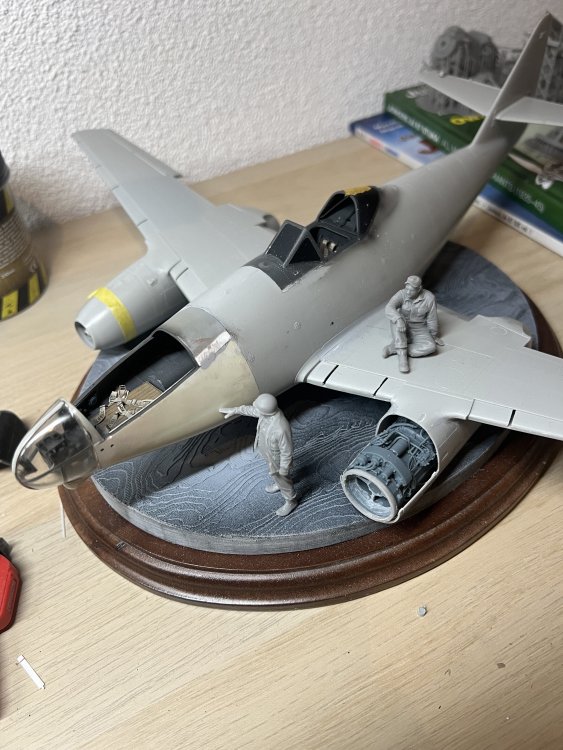

-
Decaling nearly finished. 🙂
-
Everything you tried was abusive PW, and it worked . Cheers Rob
-
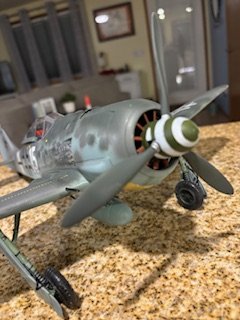
 The trumpeter 1/24 fw190D

-
A few more pictures from the build


-
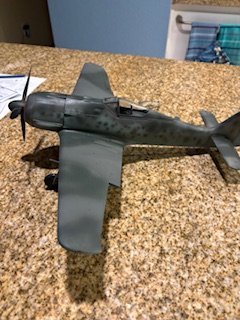
I couldn’t load pictures when I was building this mate to the fw190D I just built. Here’s some pictures of the build. I again used one man army stencils for this model.

-
 Thank you Nick, I always dread the final assembly stages of MFH kits. Everything is so fragile and with the paint on, you can ruin a lot. I always try to get ahead mentally and solve the probs before they occur, but I reached this point with all my MFH kits, except for the Crocker motorcycle. With the BT52, there is no body material to grind away, it is preciously thin, where it hits the ignition wiring. You can notice, the BT52 is an older kit from MFH, not as refined as the newer ones and with many white metal parts heavily bent, which was not caused by my cleaning efforts. Even very large parts, like the frames for the coolers are deformed and you need some force to get them right. Cheers Rob
 -
Tamiya Spitfire VIII converted to a VII
BlrwestSiR replied to denders's topic in LSM 1/35 and Larger Work In Progress
Nice work on the Merlin. It's all coming together. -
Tamiya Spitfire VIII converted to a VII
Spitfire replied to denders's topic in LSM 1/35 and Larger Work In Progress
Looing very Spitfirish, nice work. Cheers Dennis -
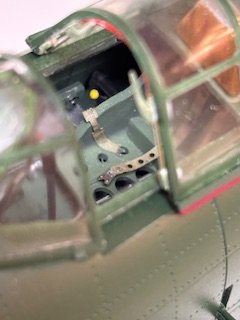
1/24 Airfix Bf-109K (conversion)
PanzerWomble replied to Martinnfb's topic in LSM 1/35 and Larger Work In Progress
Thanks Martin , 👌🏻 -
Should be able to start detailing tomorrow! Touch up and small items to paint then weather. I made the cockpit canopy latch system too. It’s a little bit large but it looks good
-
More progress today getting close to weathering

.png.516824b7ac8344d3707be7fe53a801d9.png)