
James H
-
Posts
3,257 -
Joined
-
Last visited
Content Type
Profiles
Forums
Events
Gallery
Everything posted by James H
-
Is he on LSM? If not, pop him an invite.
-

icm 1:35 Railway Tools & Equipment
James H posted a topic in LSM-Related Reviews (military figures etc)
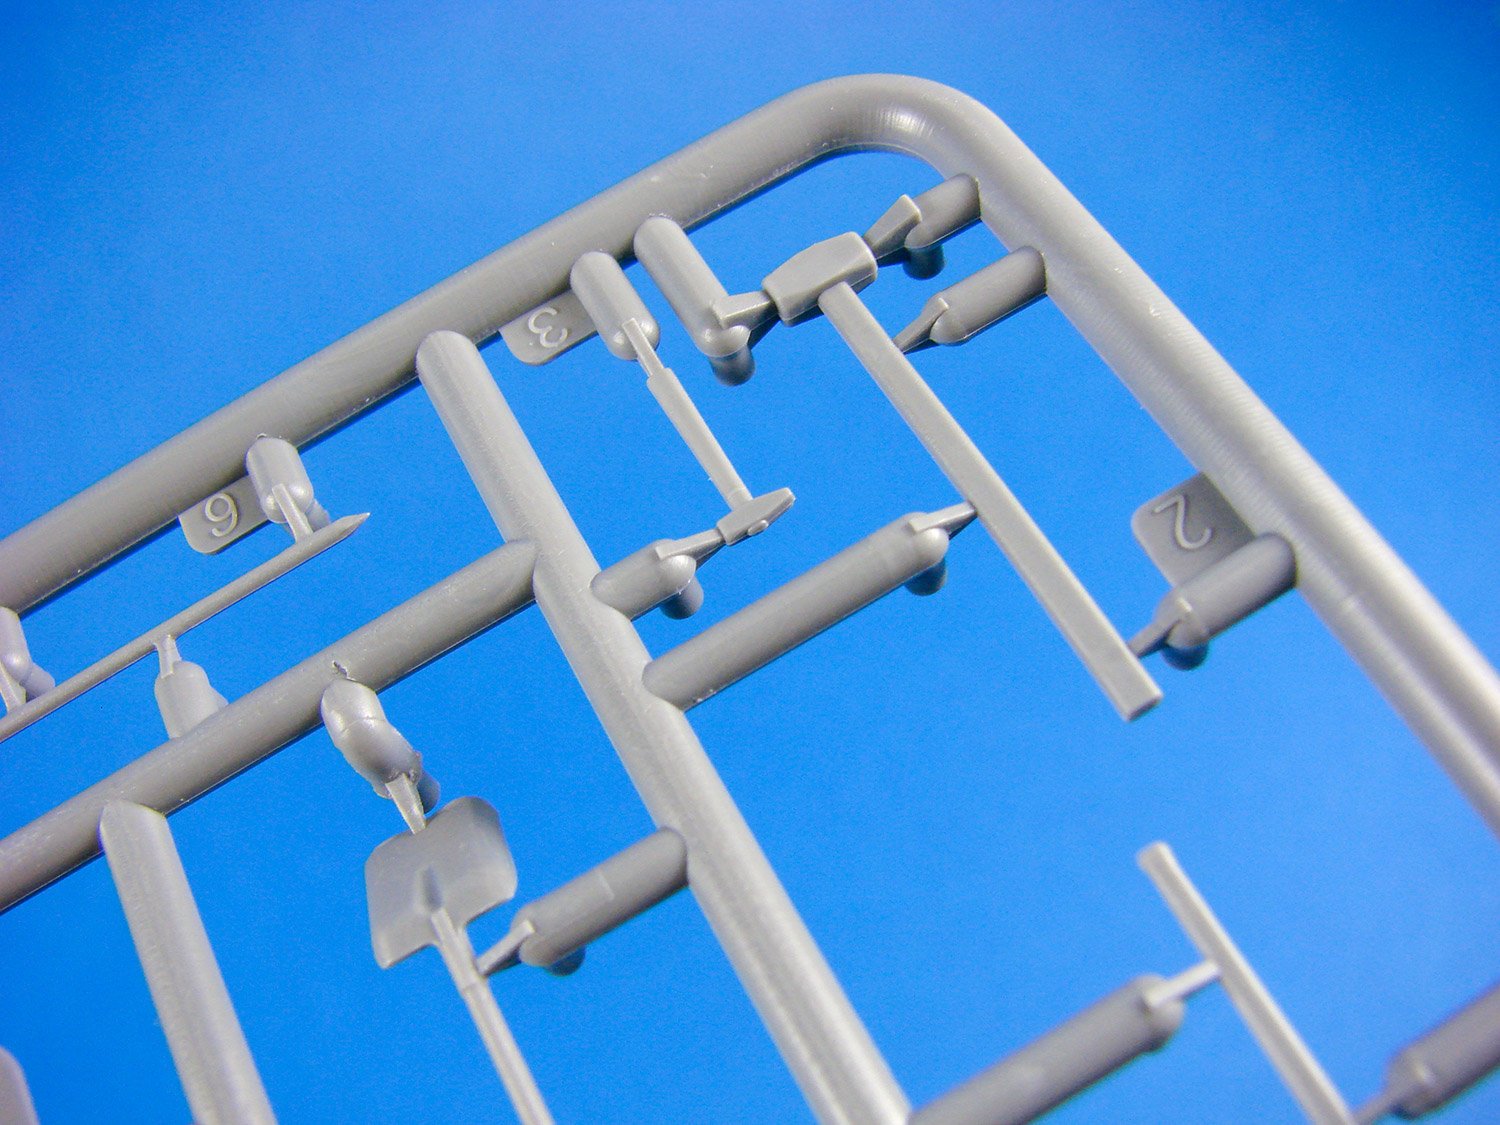
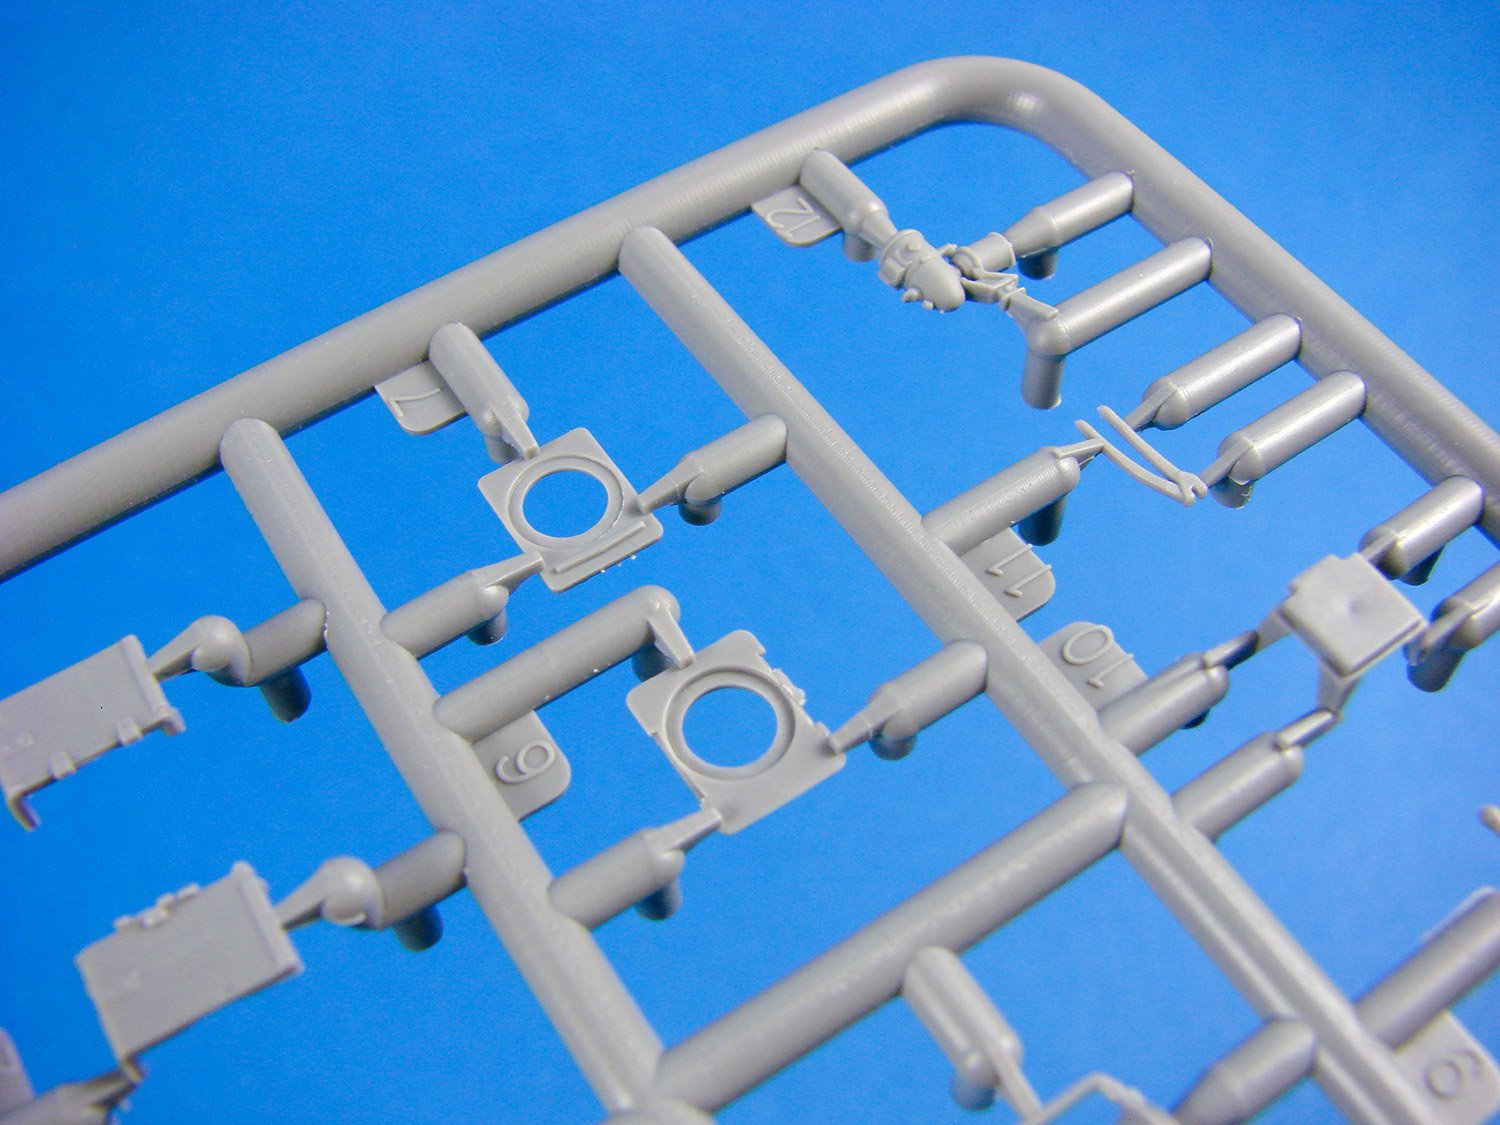
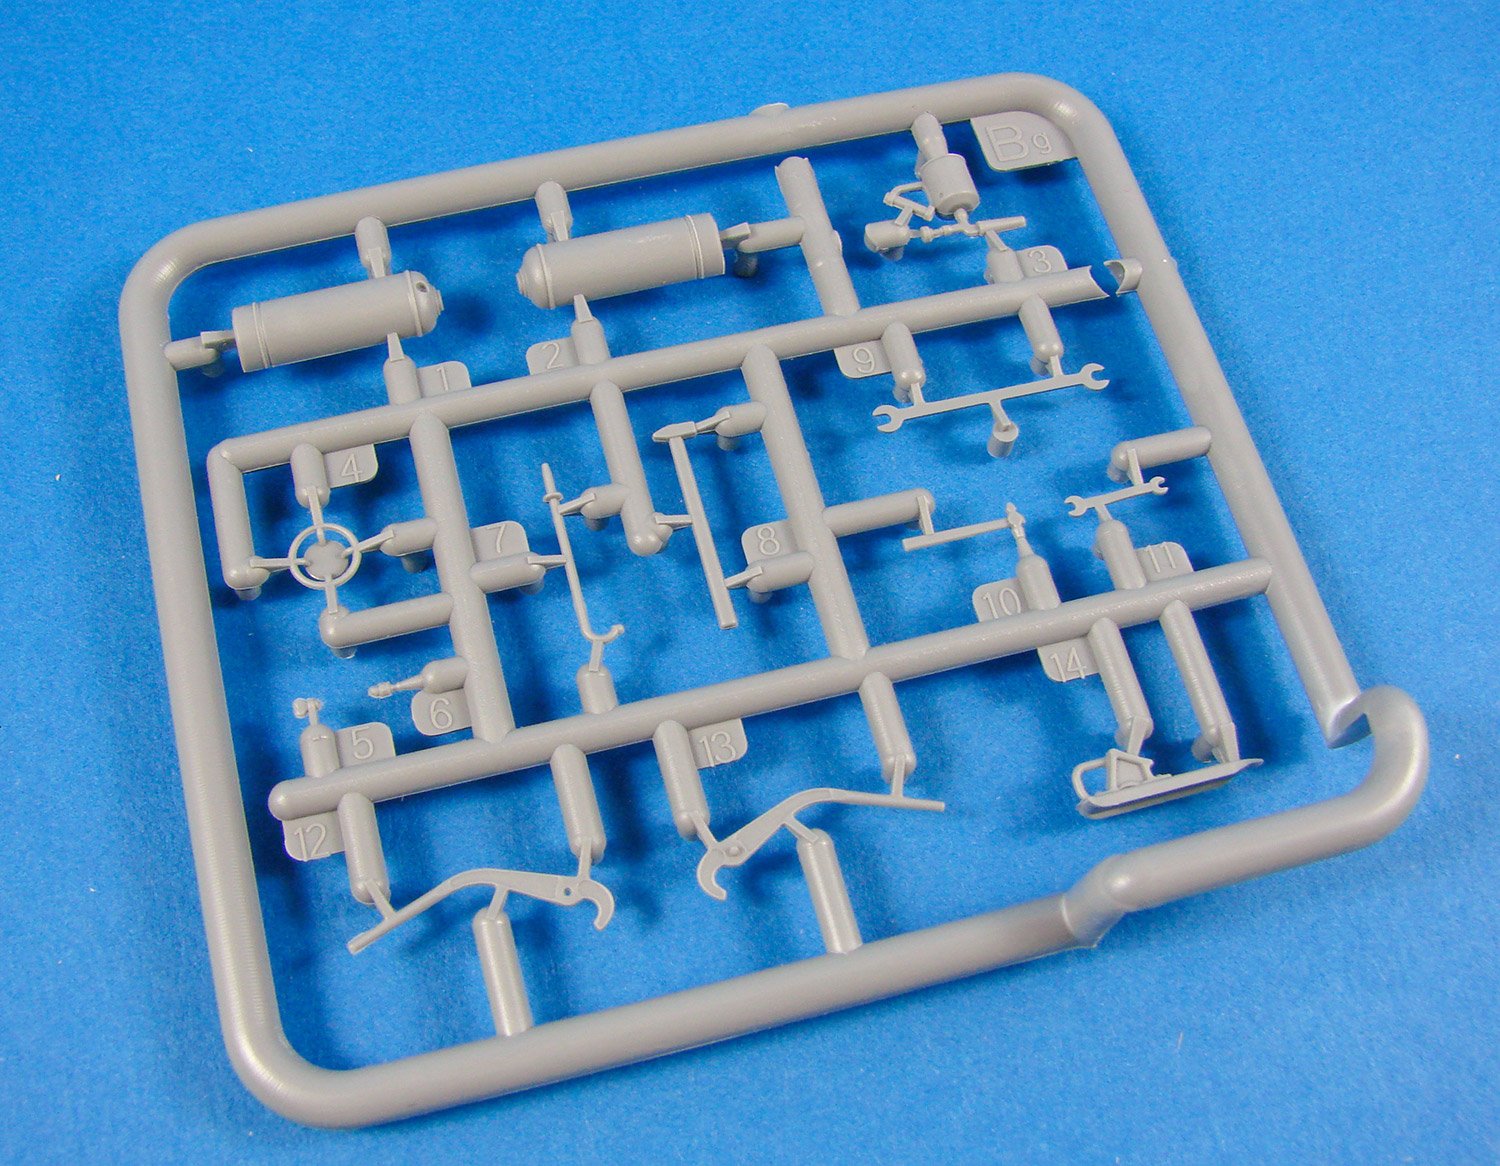
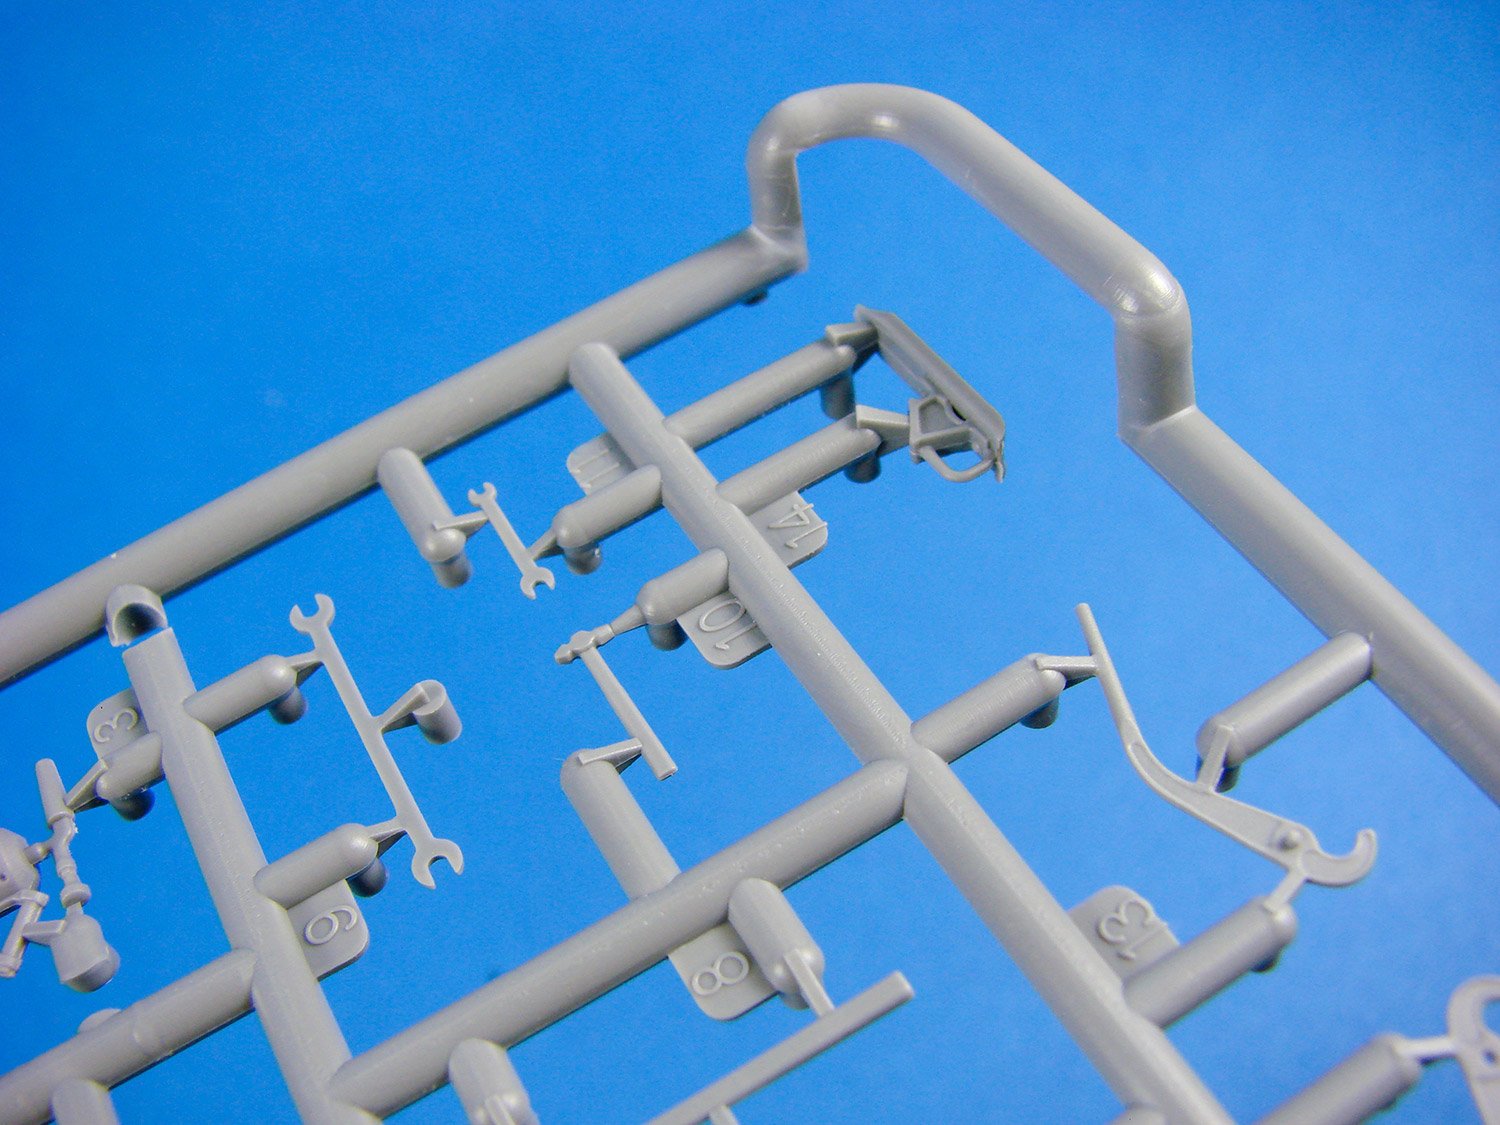
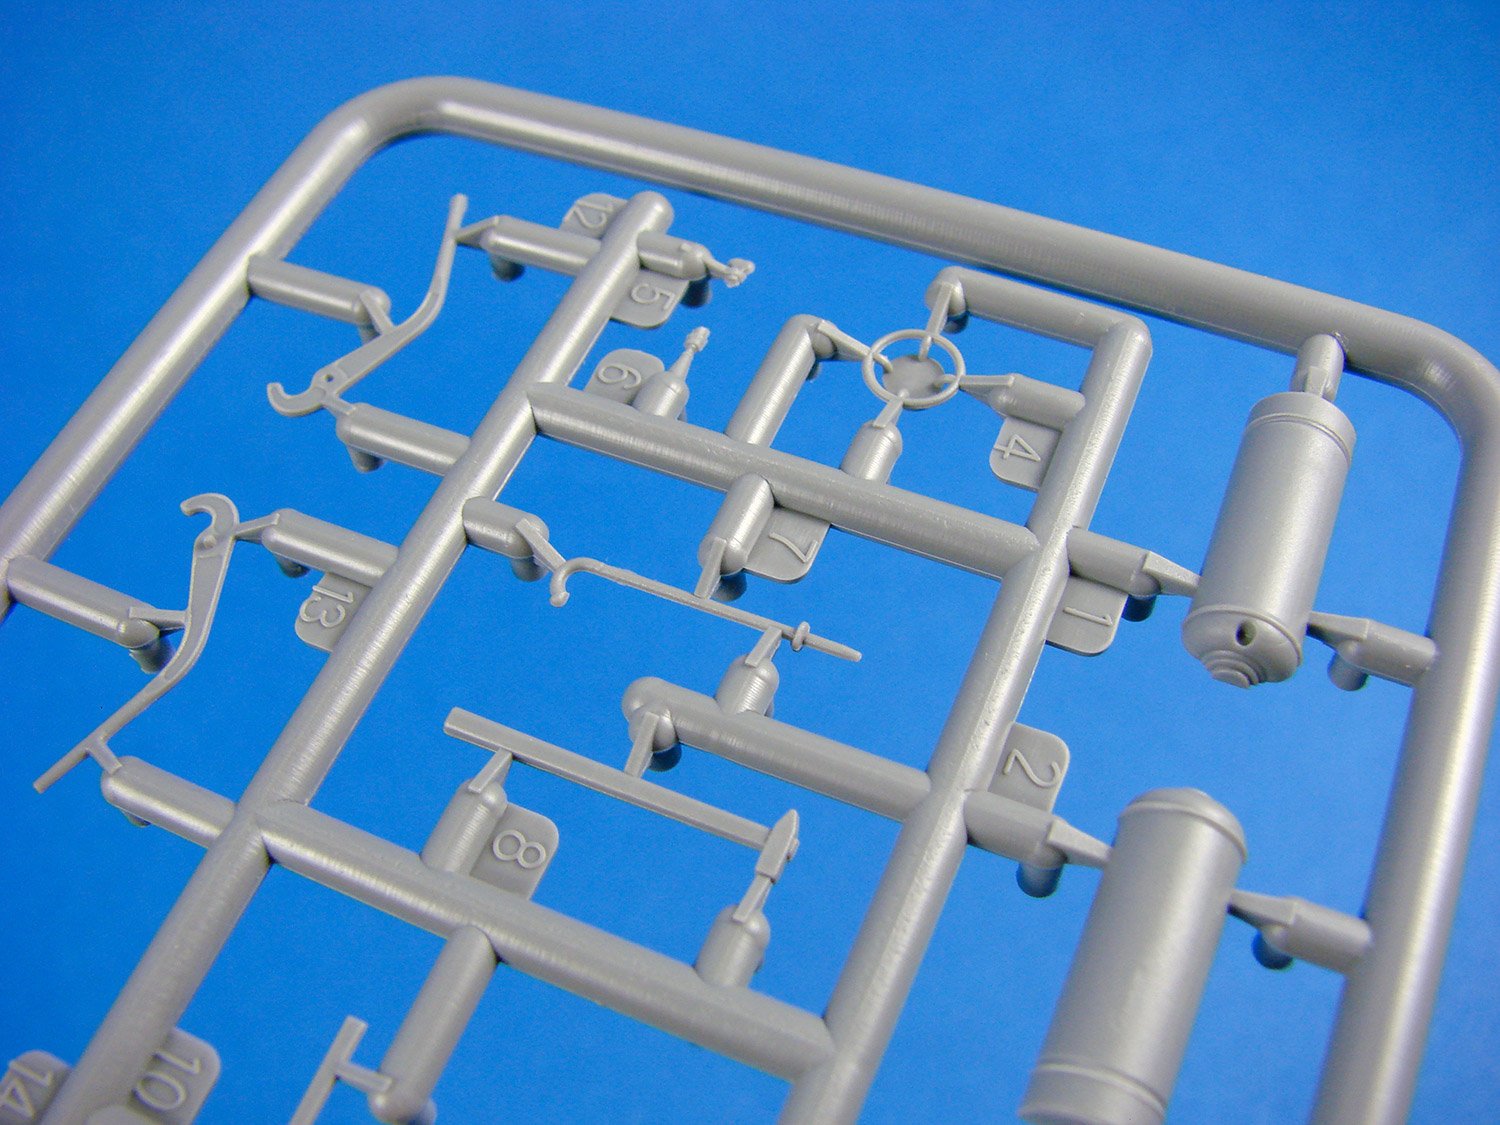
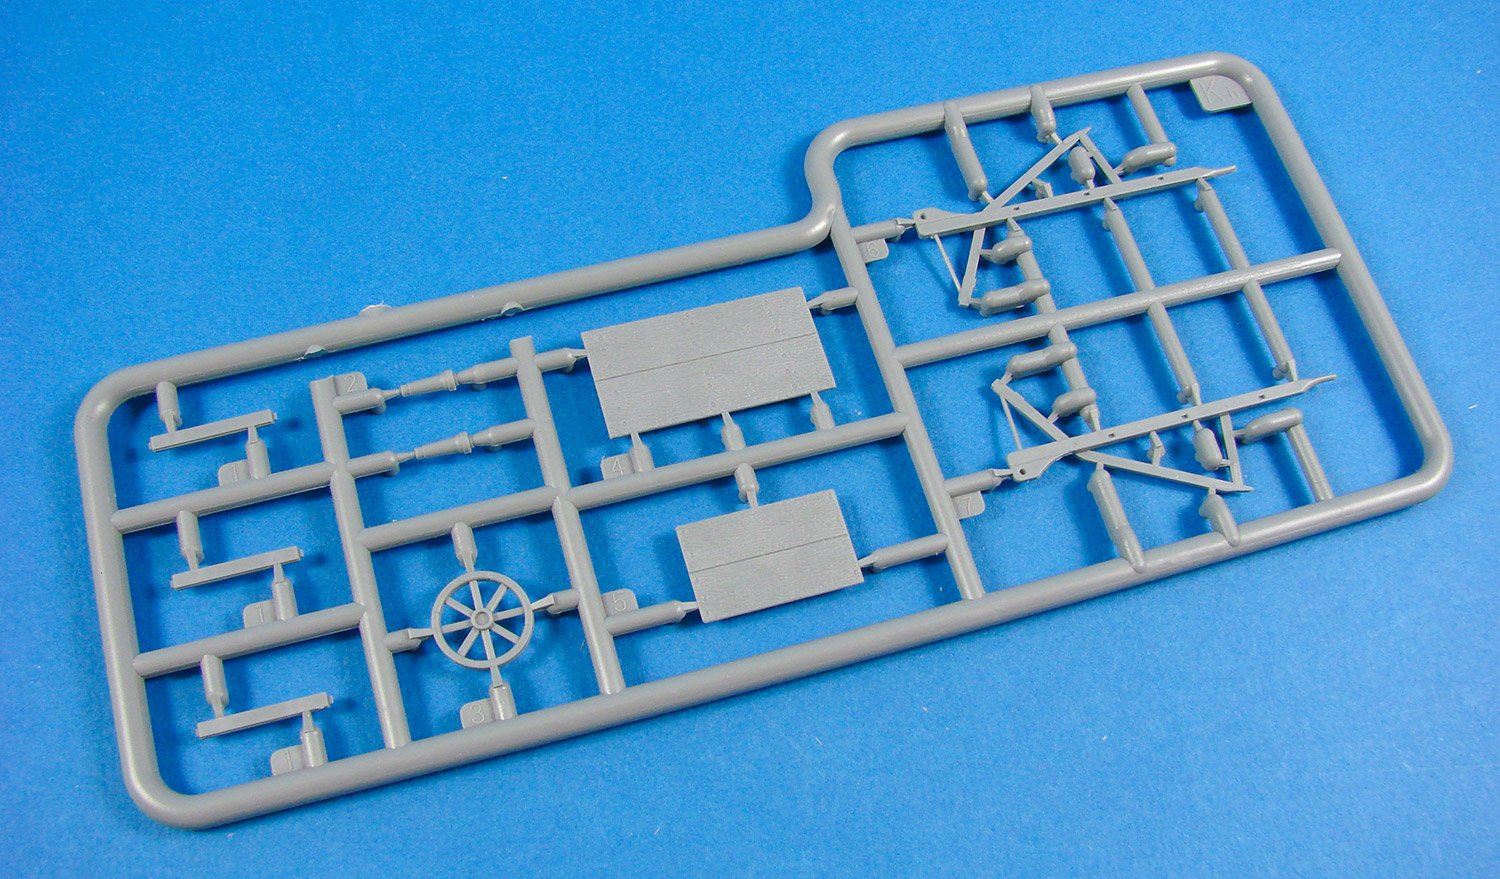
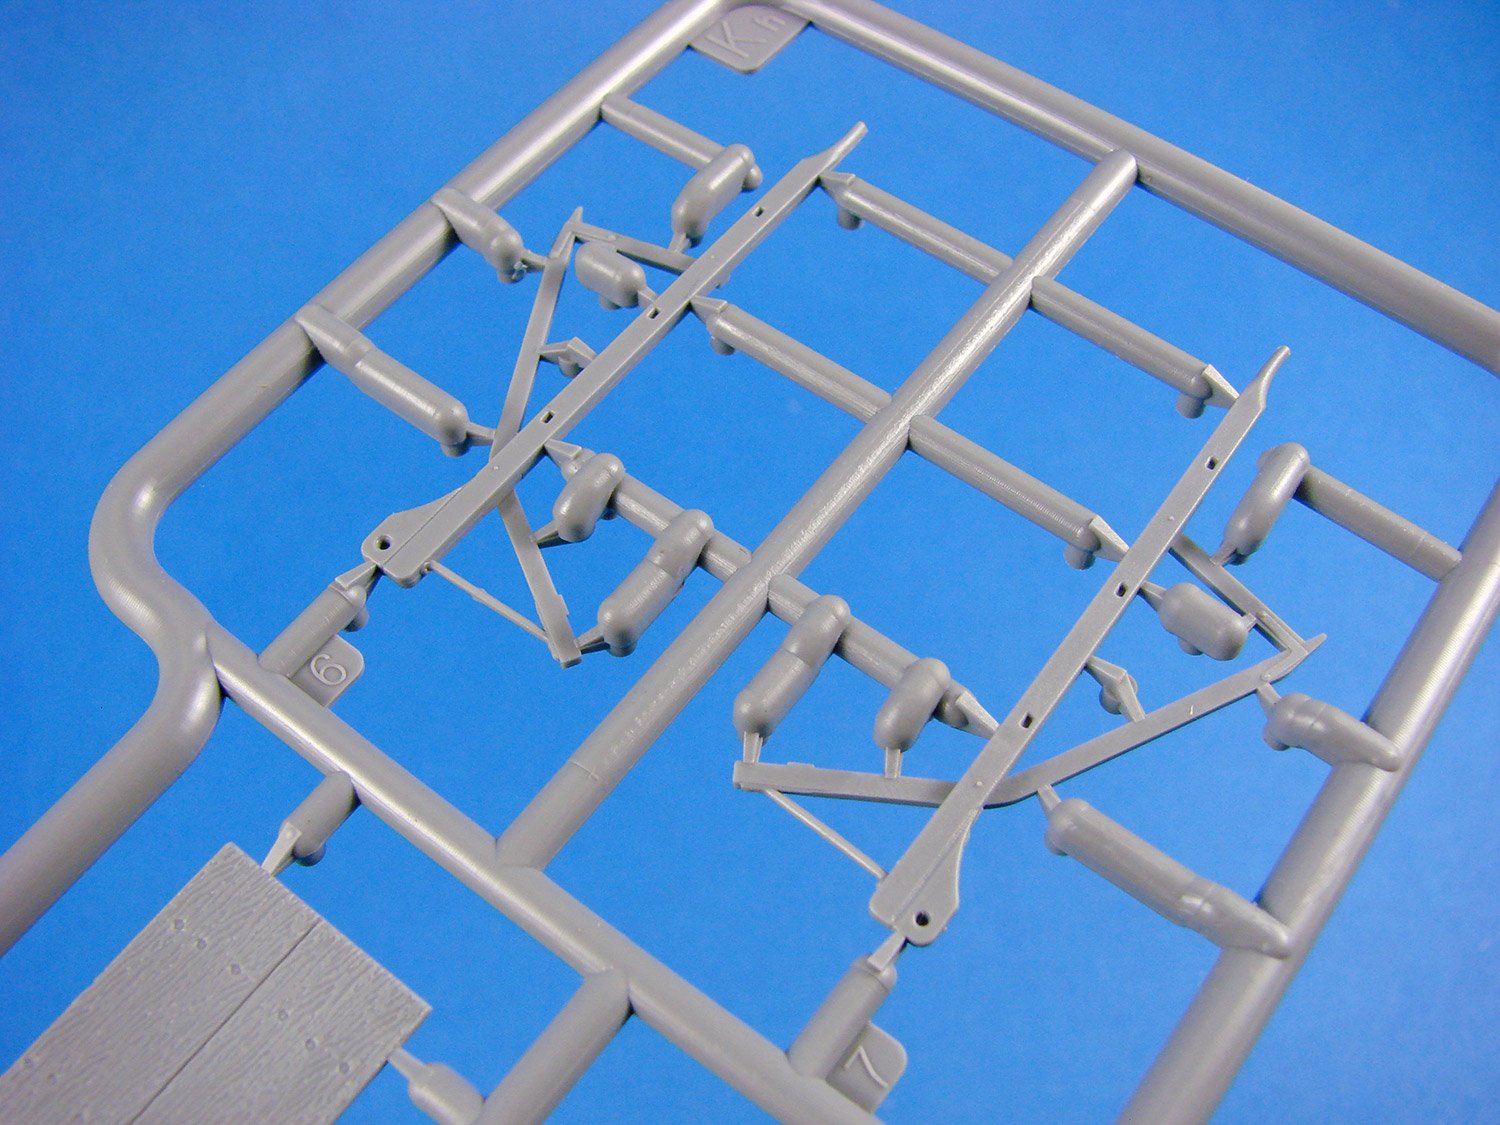
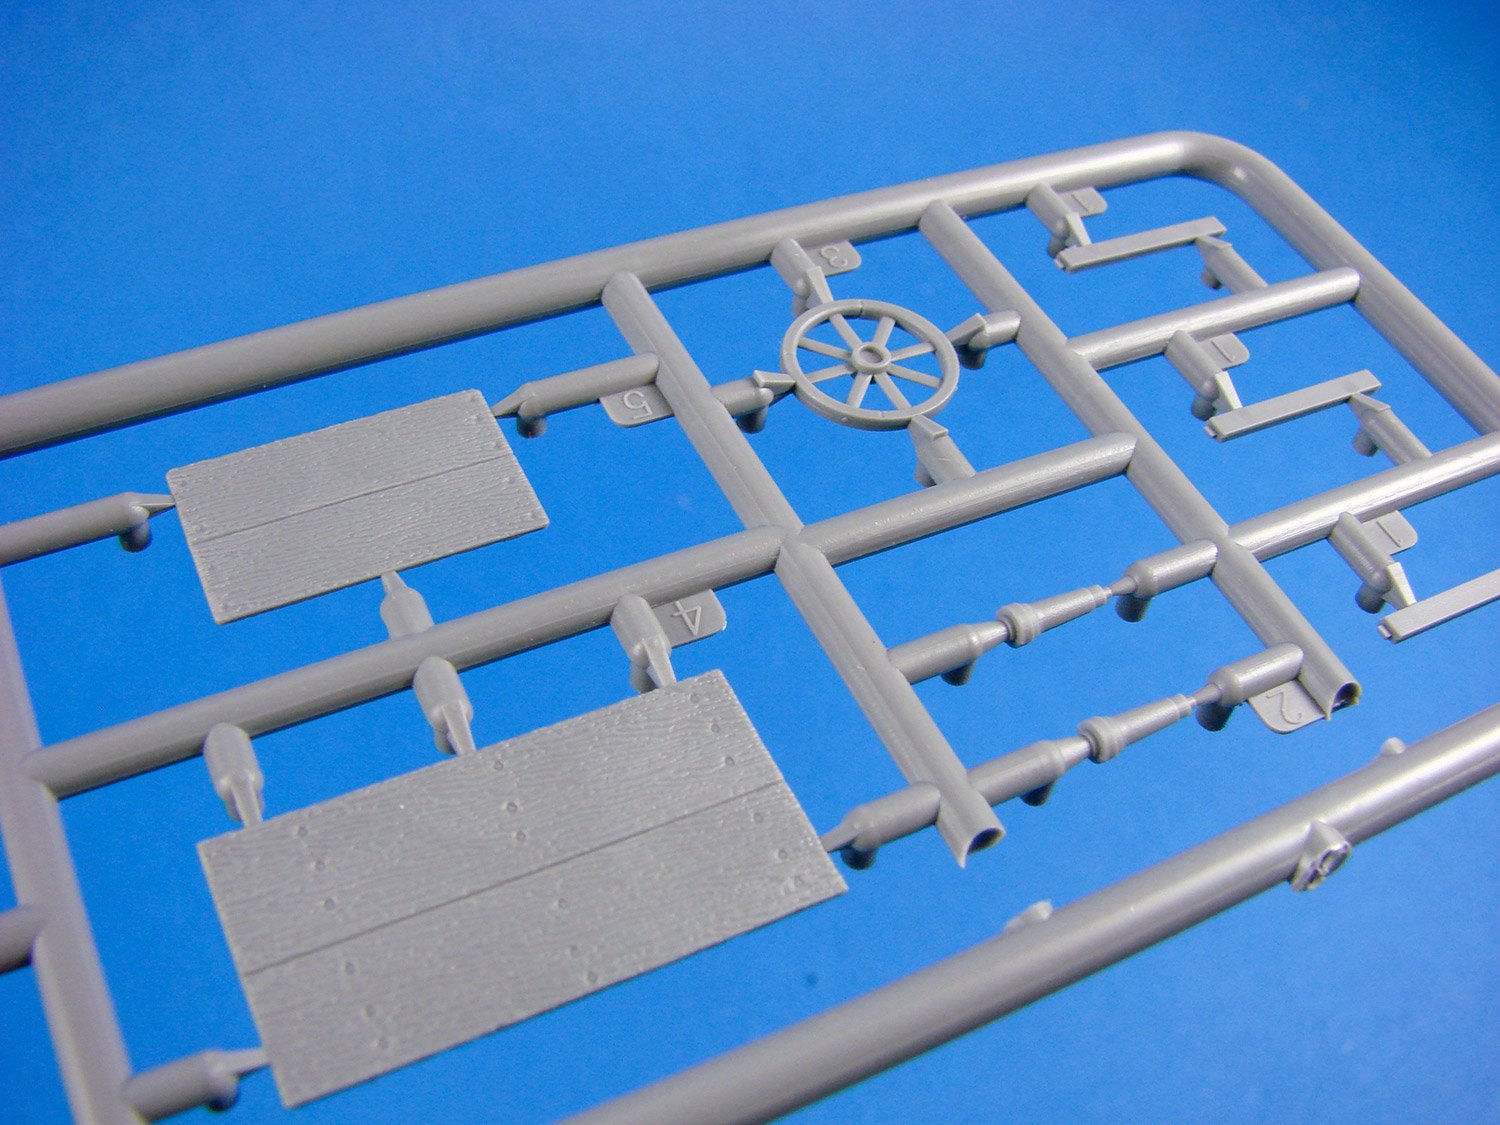
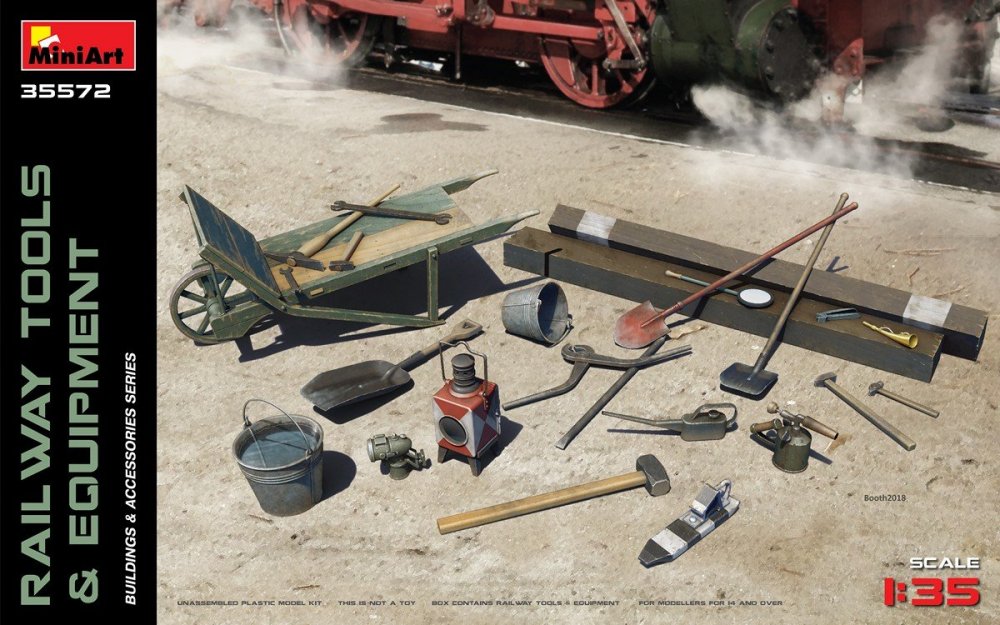
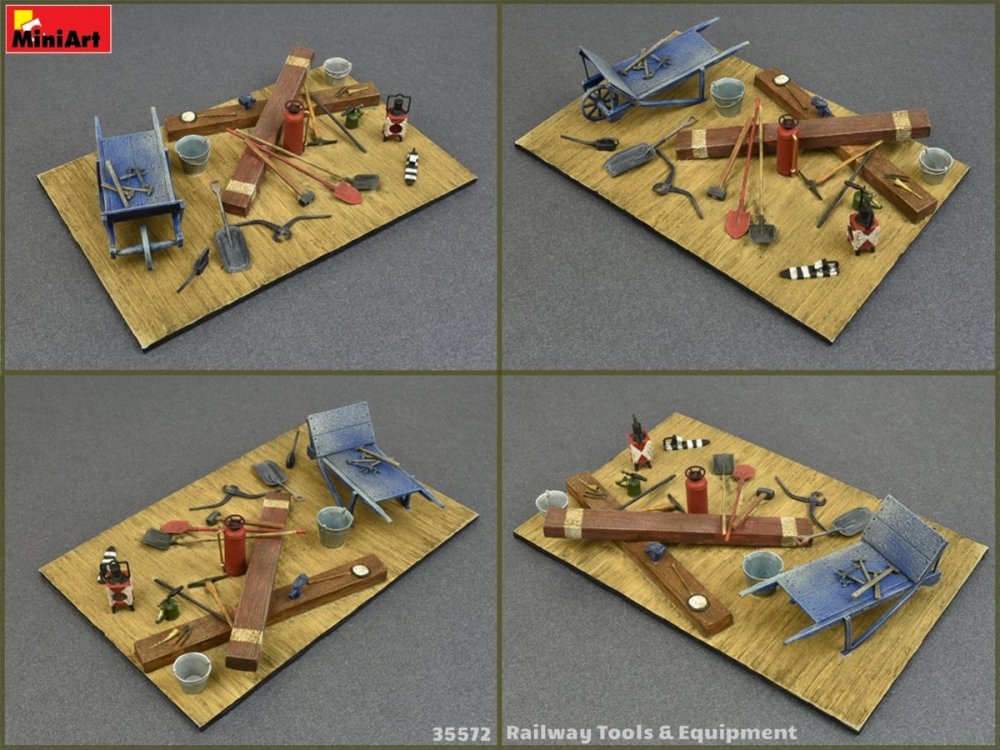
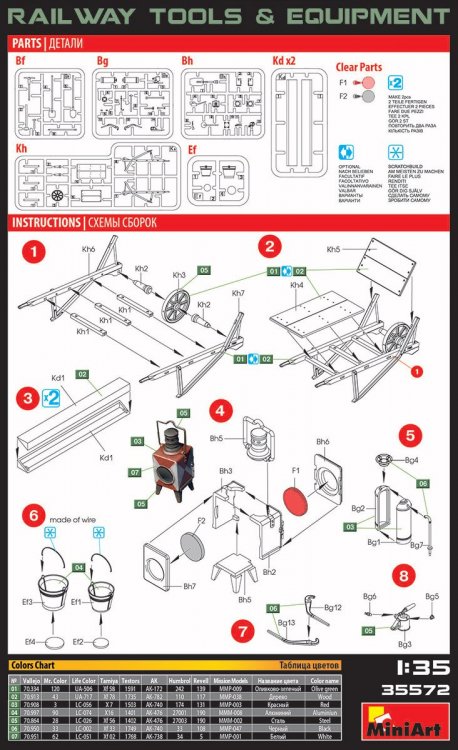
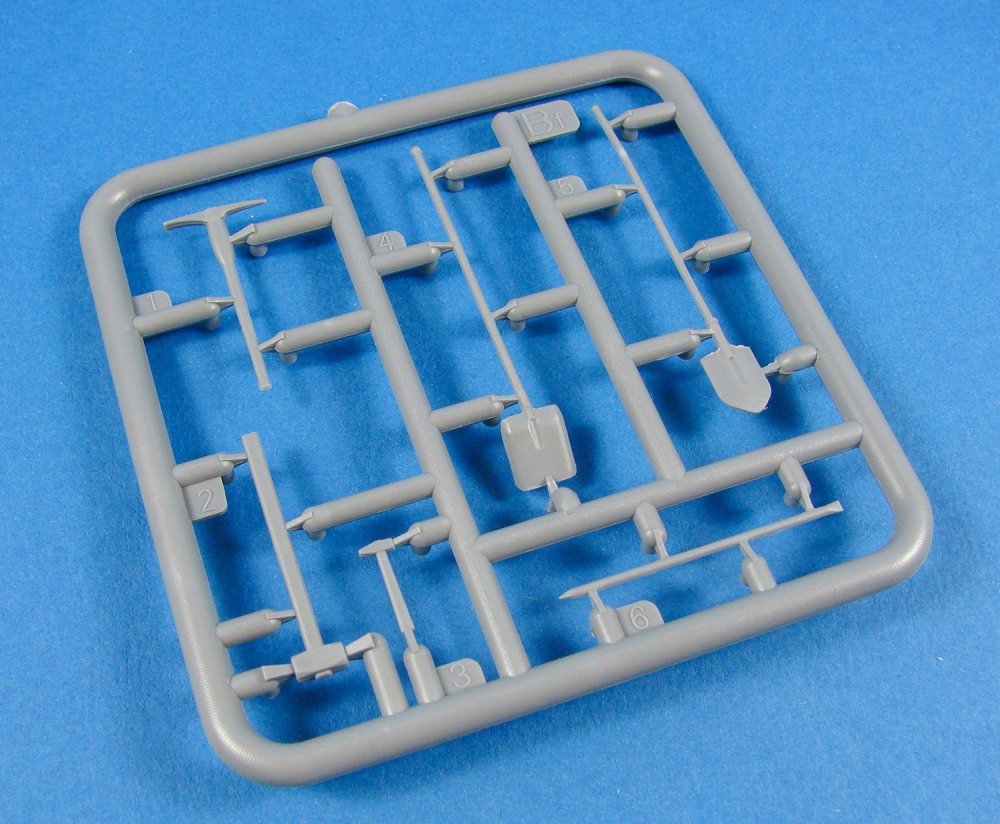
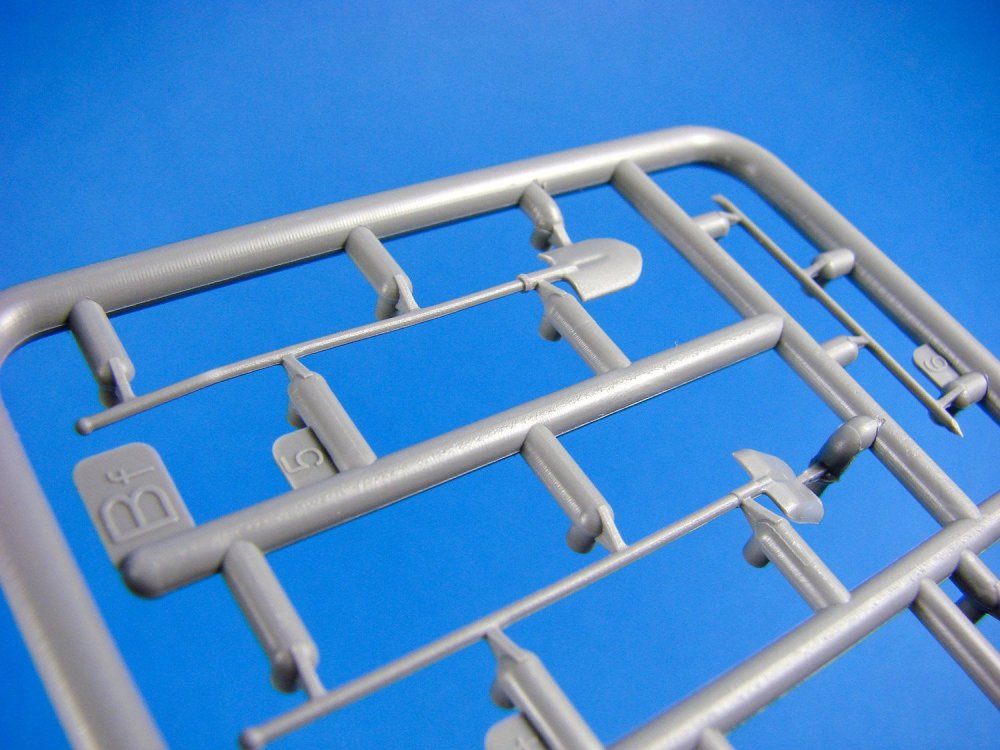
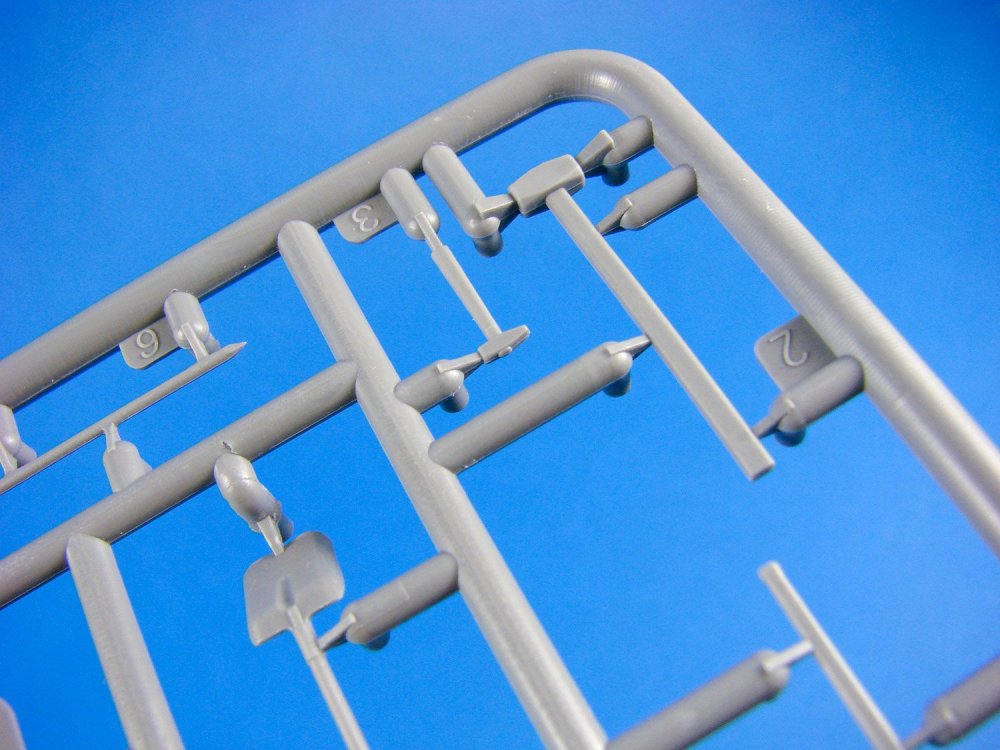
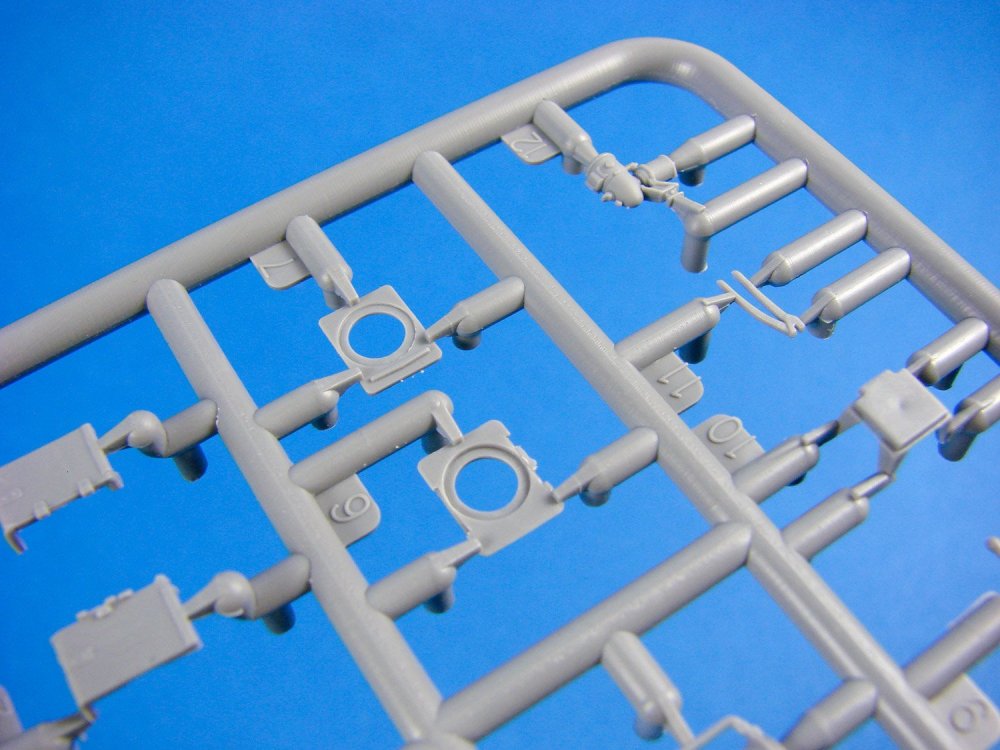
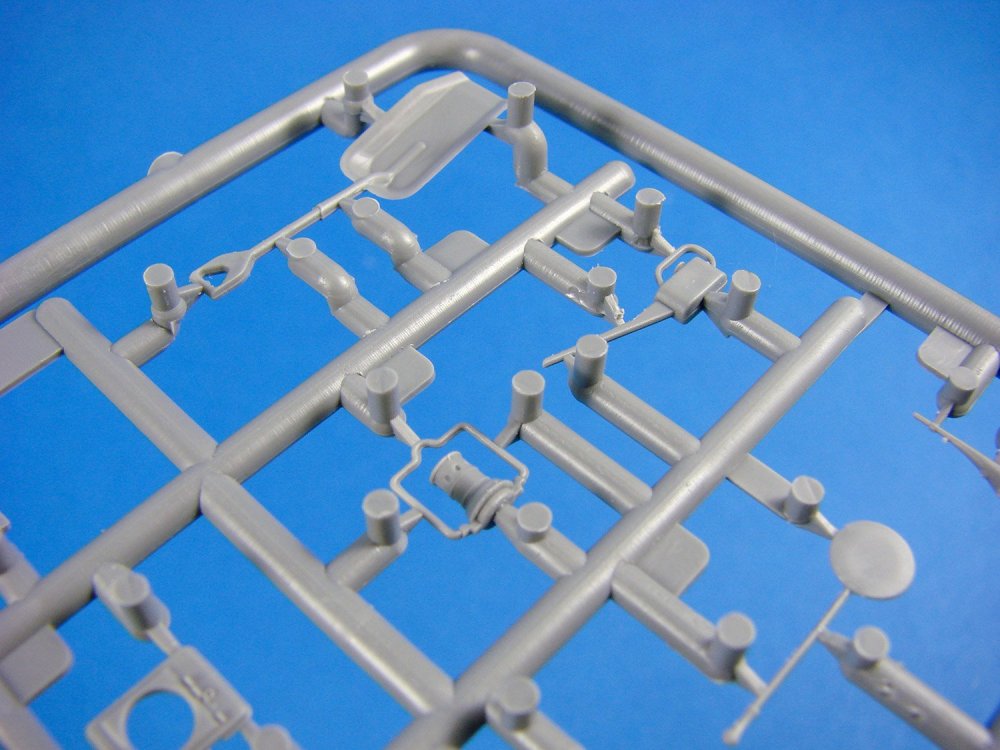
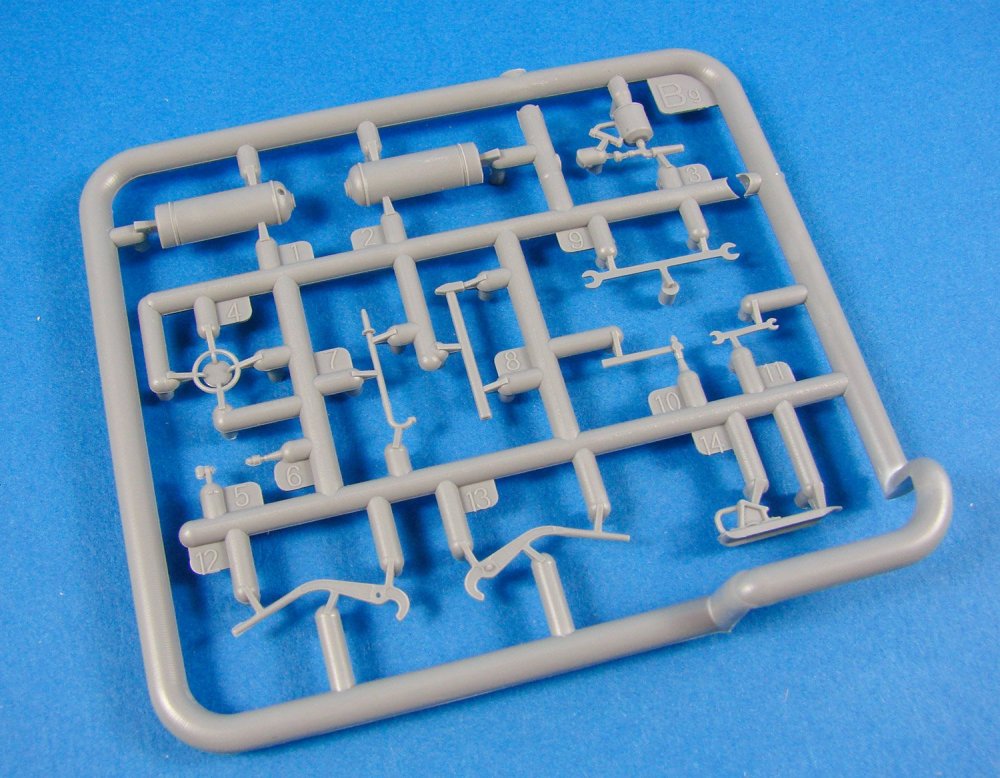
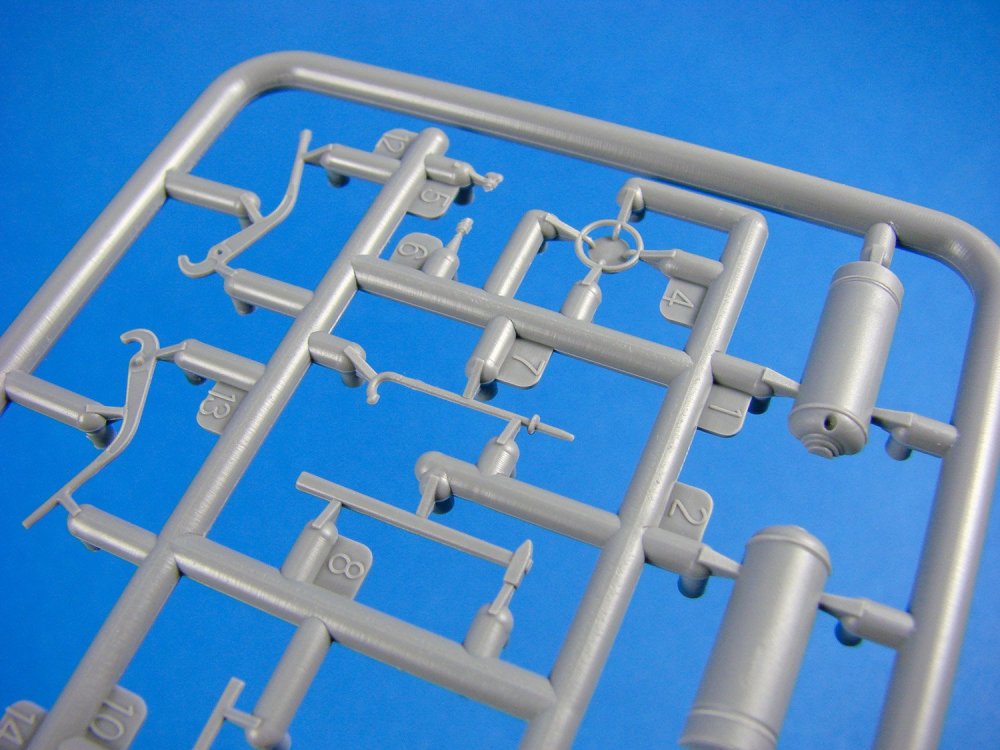
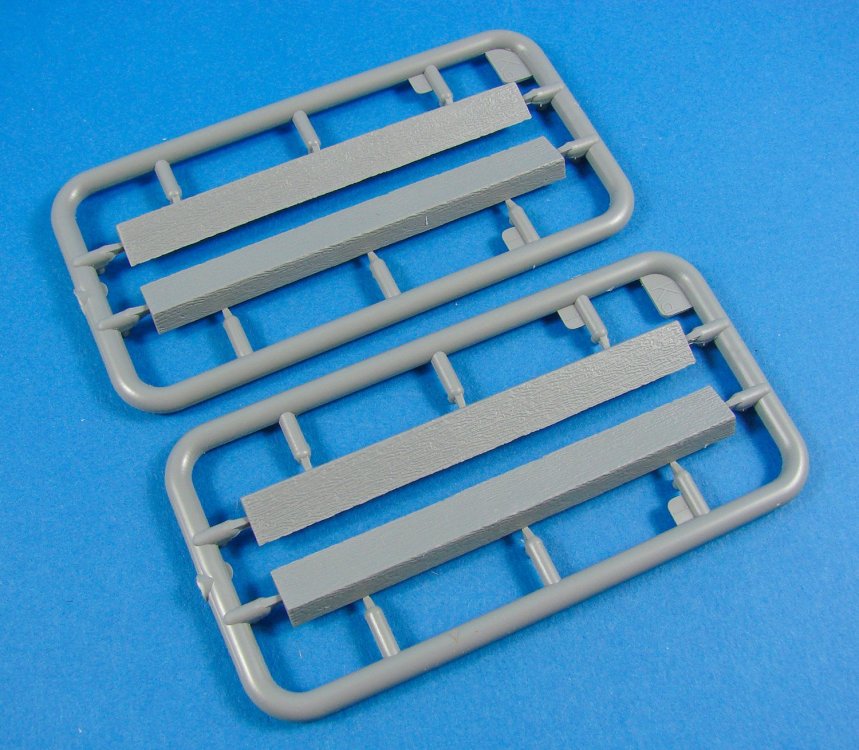
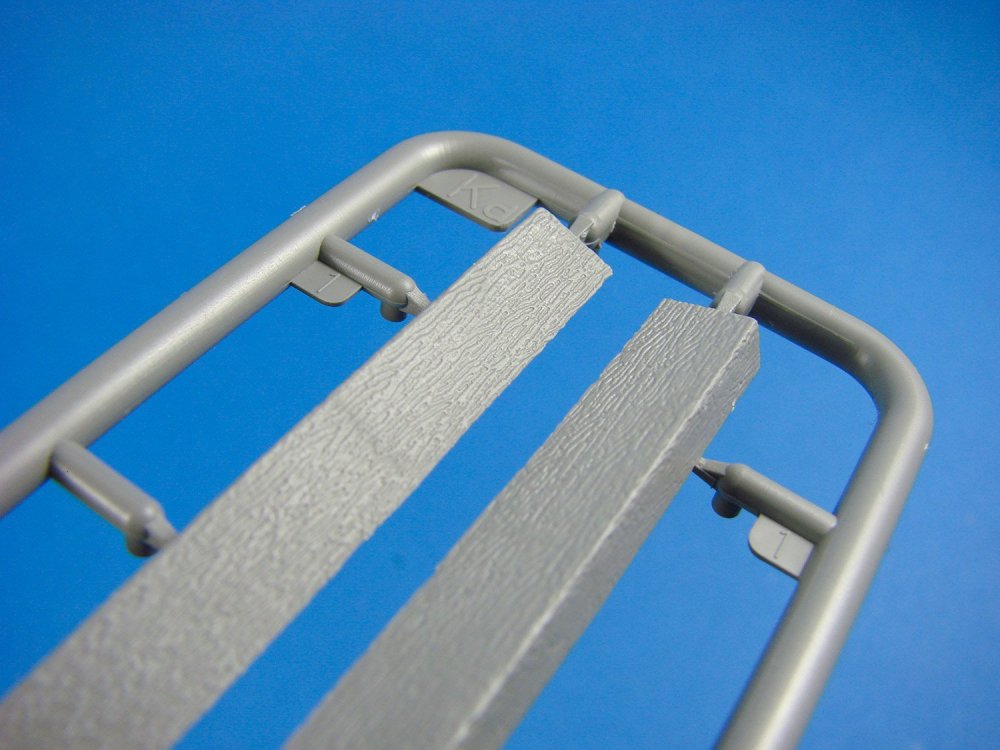
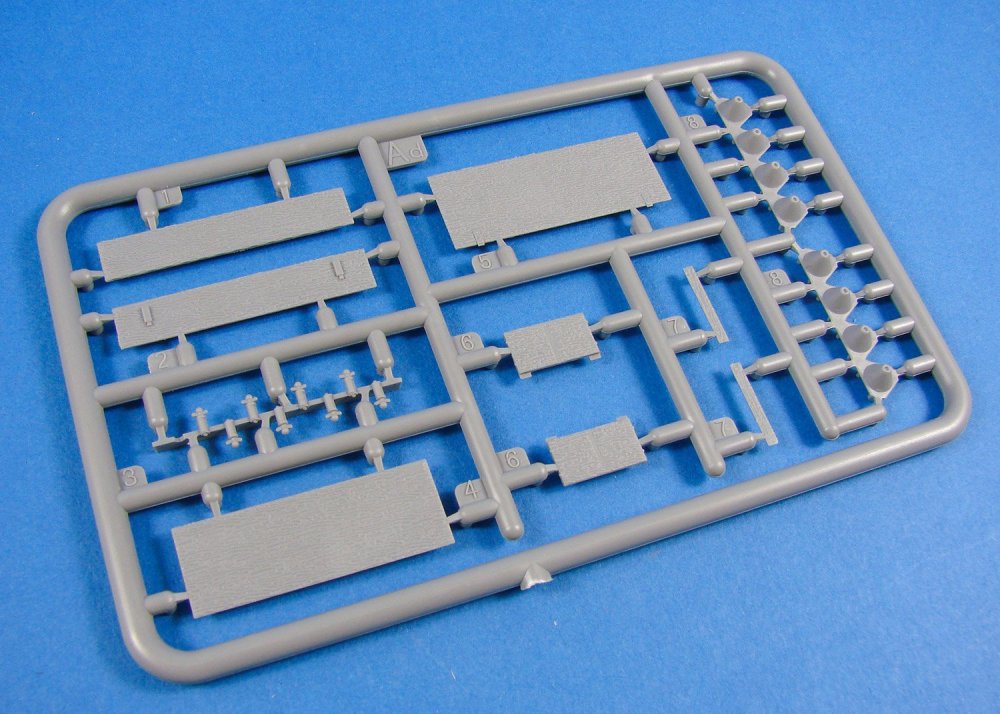
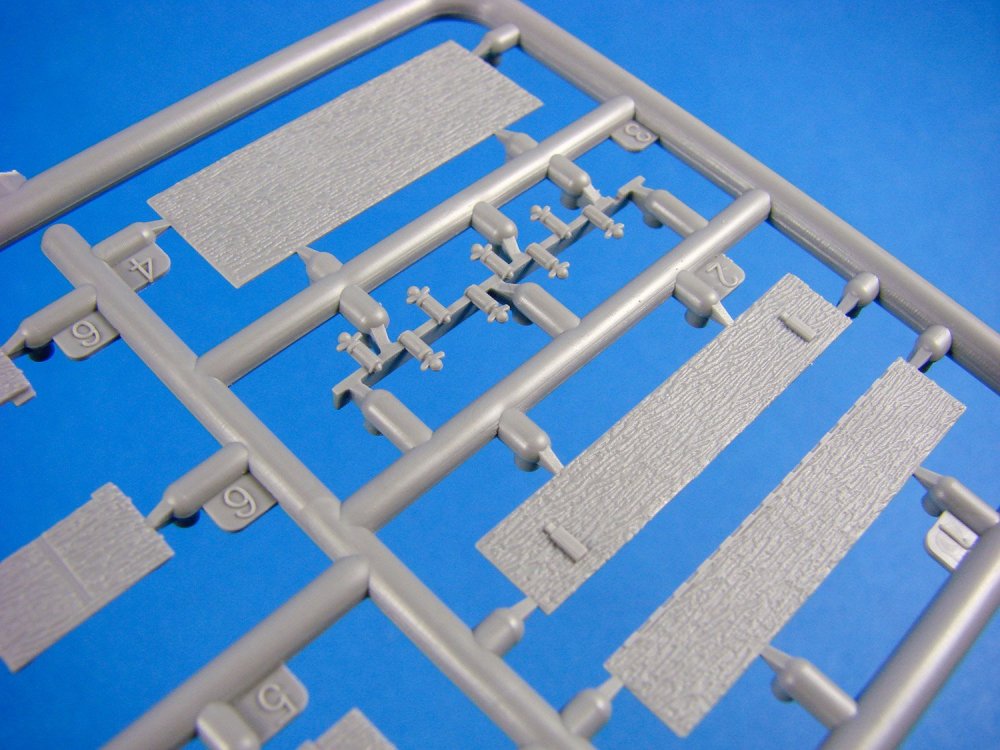
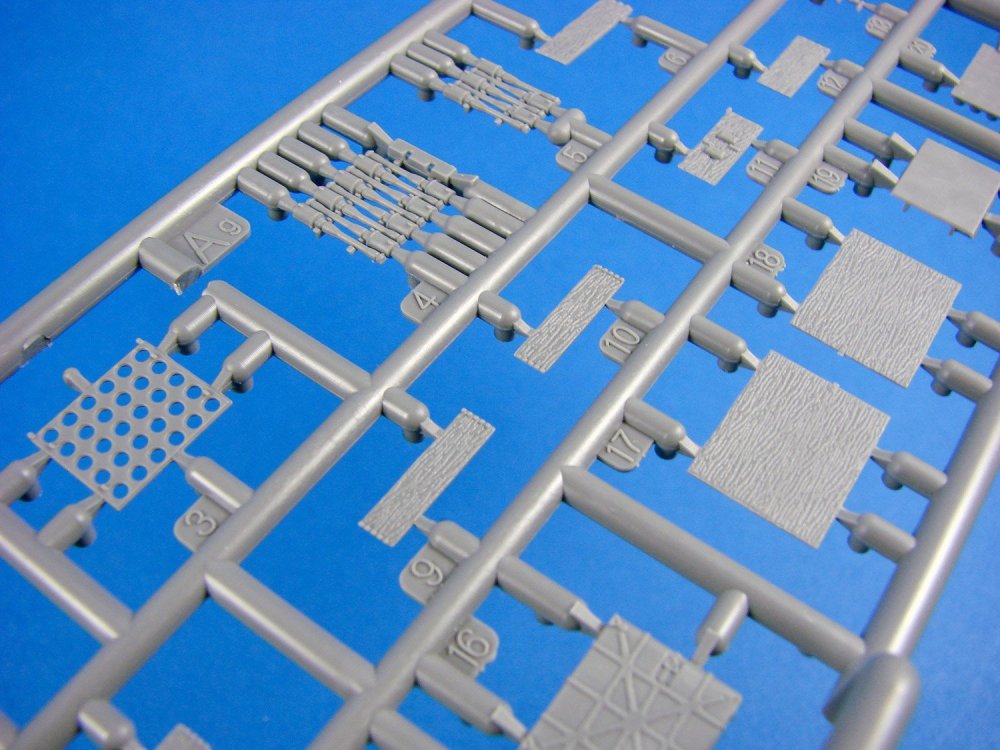
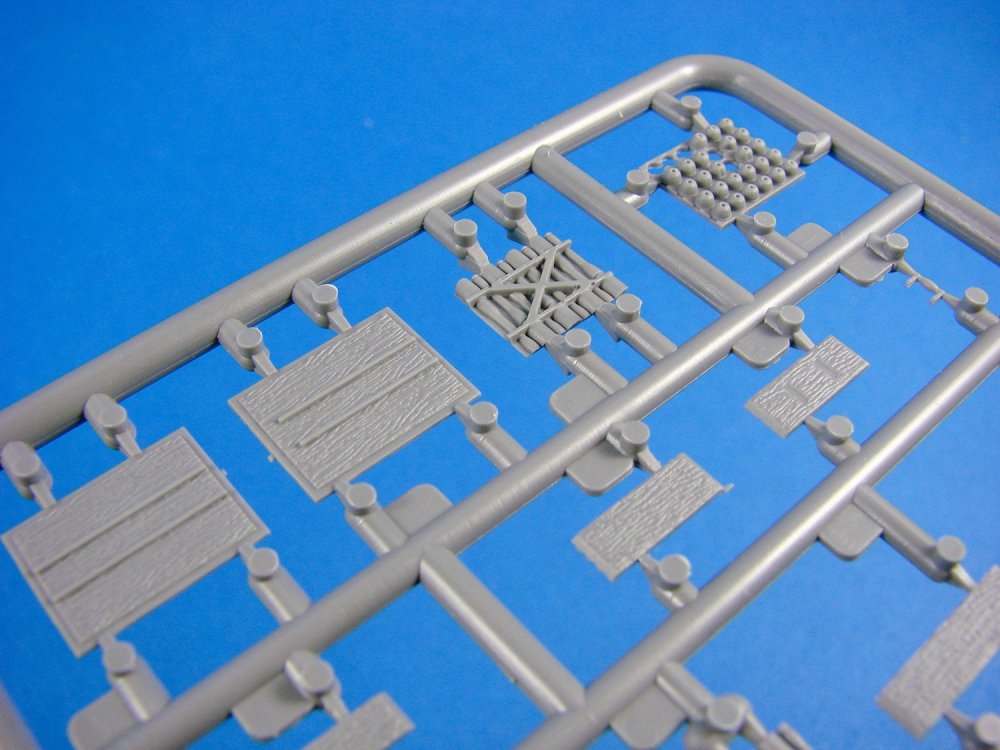
1:35 Railway Tools & Equipment MiniArt Catalogue # 35572 Available from Hannants for £10.99 Back in the days of yore, before portable arc welders, mass-produced tools and battery drills etc., your average railway worker would still of course need to maintain his stretch of track so those lumbering steam locos would get to their destinations safely. There are of course a number of 1/35 locos and wagons available for which to create some nice dioramas, but until this new release from MiniArt, you might have been struggling to find period rail tools and equipment for it. Struggle no more! MiniArt’s new release is packaged into one of their smaller, slim but glossy boxes, this time depicting the whole gamut of the railwayman’s arsenal of equipment. You’ll notice a barrow, buckets, lantern, lump hammer, blowtorch, and even a small ear-trumpet to listen to the track to see if any trains are likely to arrive on the scene of a maintenance job. Inside the box, a small clear heat-sealed sleeve contains SIX light grey sprues, plus another small sleeve with one further small sprue containing the buckets and clear lantern lenses. MiniArt has also employed some excellent slide-moulded parts to make your project a little easier to handle. Sprue Bf The basic layman’s tools are provided here, and you’ll see a lump hammer, small hammer, straight crowbar for moving rail sleepers, pickaxe, shovel and spade. Of course, these are single-piece items and no assembly is required. Just cut, clean and paint. Sprue Bg On this sprue, you’ll find the gas tank and blowtorch ensemble, which only requires a length of wire to represent the connecting hose. Note also a two-part wrench, spanners, standard crowbar and a wood plane. The latter is slide-moulded for a nice one-shot part! Sprue Bh The multipart lantern is represented here, made up from numerous parts, as well as an oilcan, grips, ear-trumpet and a broad shovel. Sprue Ef Here we have the smallest sprue, with parts for two sizes of bucket. The base on these is a separate part, and again, slide-moulding is used to good effect, so you don’t have to remove a seam. Sprue F1 & F2 These are simply the lenses for the lantern, with one moulded in clear, and the other in clear red. A small nub will need to be snipped off before use. Sprue Kd (x2) Two rail sleepers are included here, moulded as halves, with the joint being along the corners. You’ll only need to remove a diagonal seam on the end of each sleeper. These parts have an excellent wood grain detailing too. Sprue Kh Our last sprue contains the parts for the barrow. This comprises 10 parts and looks great when built up. Note, of course, the single, wooden spoke wheel too. A very agricultural-looking item but fitting perfectly the era. Again, wooden parts are detailed with a grain pattern. The back of the packet contains the assembly instructions, as well as a paint guide, with colours given for Vallejo, Mr.Color, Life Color, Tamiya, Testors, AK etc. Probably more options than your average kit would normally list. A parts map is also included on the obverse side of the box. You will note that the instructions themselves are very clear in their approach, with line drawings used to represent the construction, and clear part annotation. Some wire will need to be added, for the bucket handles, and in the case of the lantern, a small colour image is presented to help you with painting this nice little addition. Of course, some smaller items such as the ear-trumpet do not need assembly and aren’t represented on the instructions. However, you can look at the box front for a colour representation of that item. Conclusion A wonderful and comprehensive little set that will provide invaluable to railway diorama modellers, and typically those that model period steam locos, as this appears to be the era to which these tools pertain. Beautifully realised, engineered and moulded, this set is very easy to construct, has plenty of detail and will provide those little touches that really help a diorama come alive. It’s also a very reasonably priced release. Go check it out! My sincere thanks to MiniArt for supplying this sample for review. Click the link at the top of the article to purchase directly from Hannants.


-
icm 1:35 German Grenades & Mines Set
James H posted a topic in LSM-Related Reviews (military figures etc)
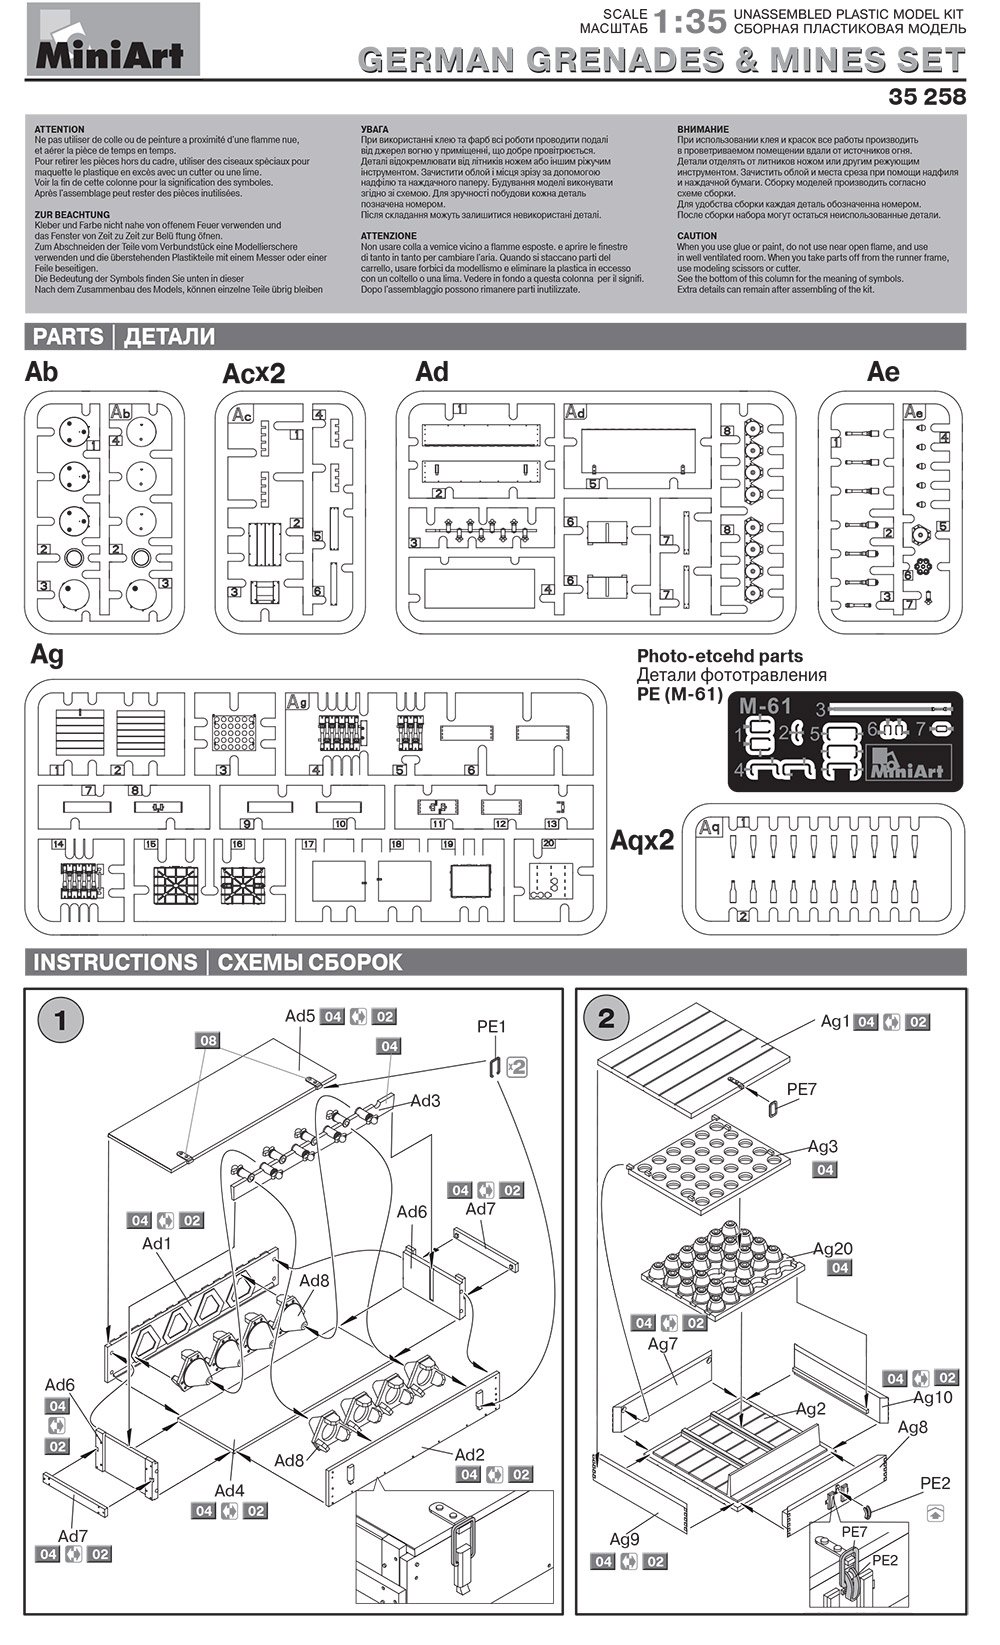
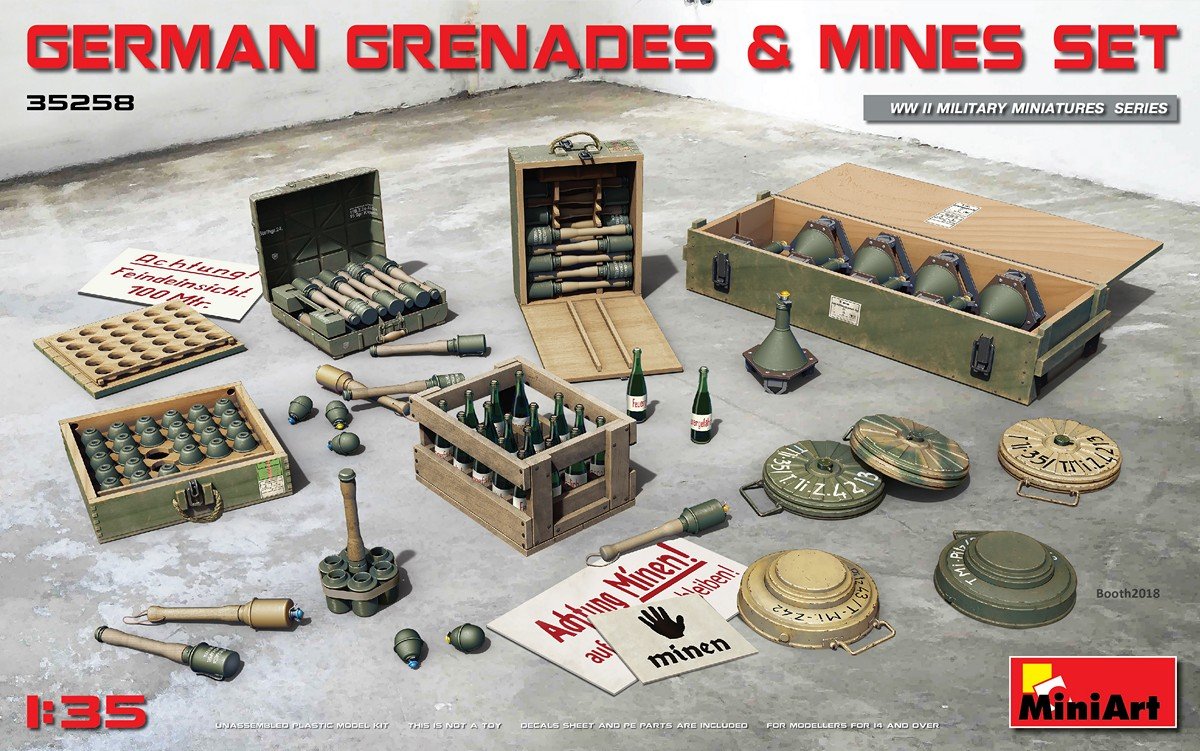
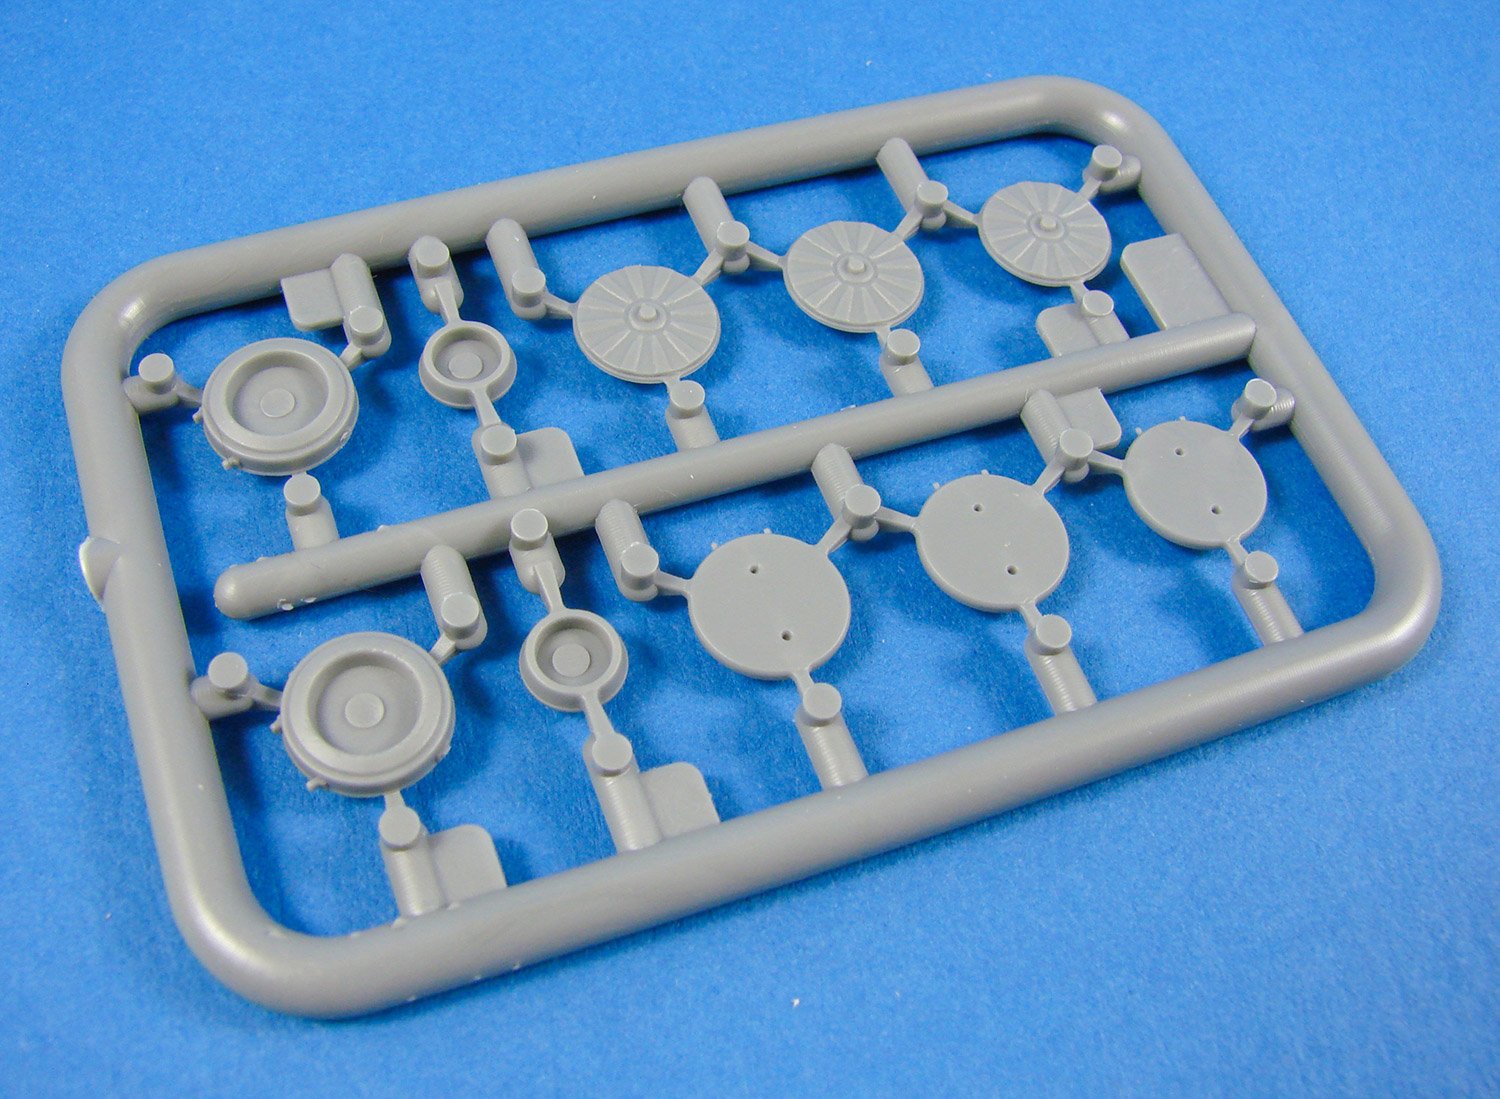
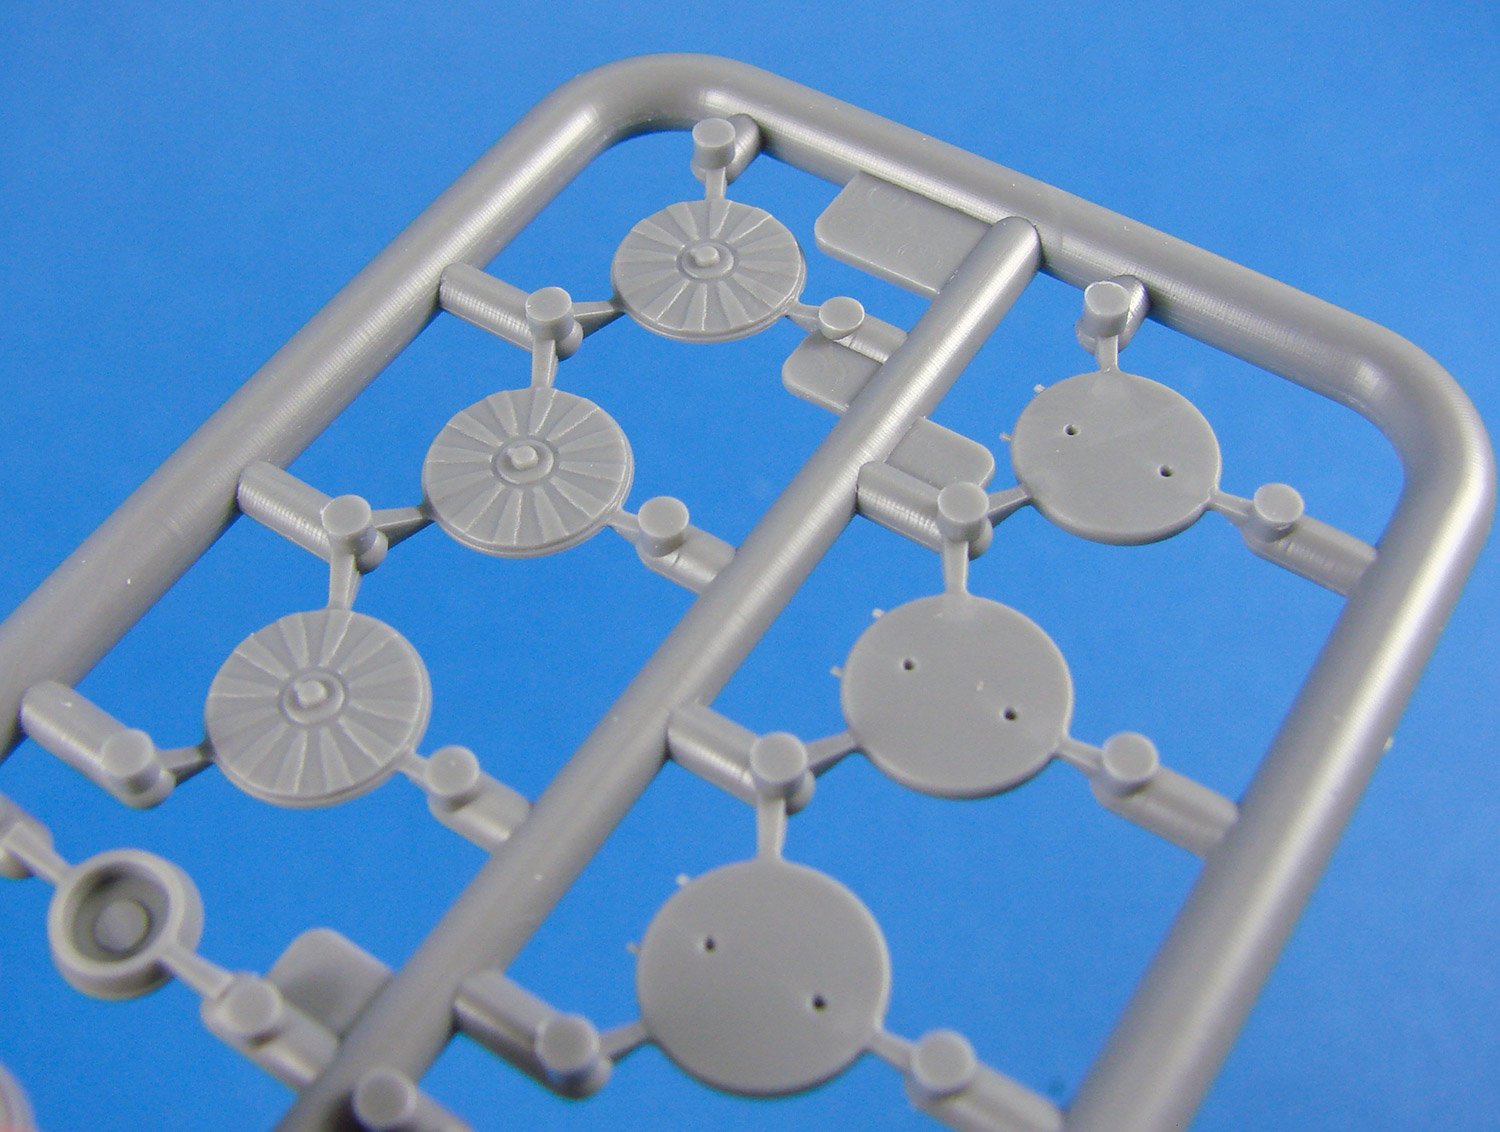
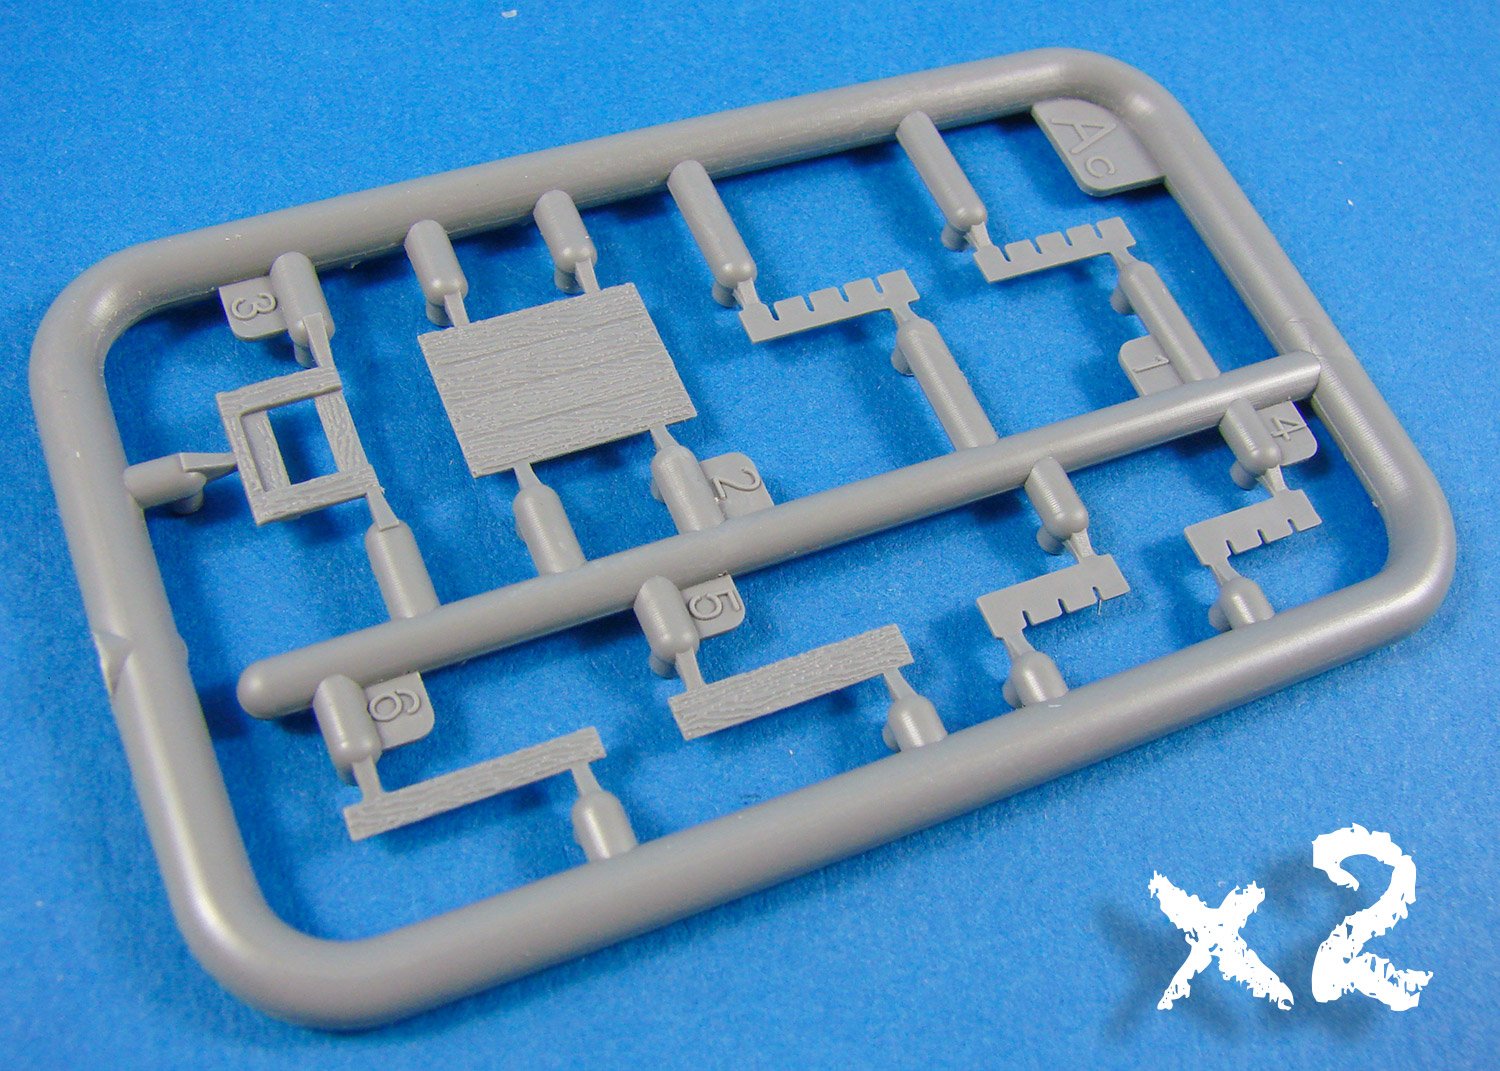
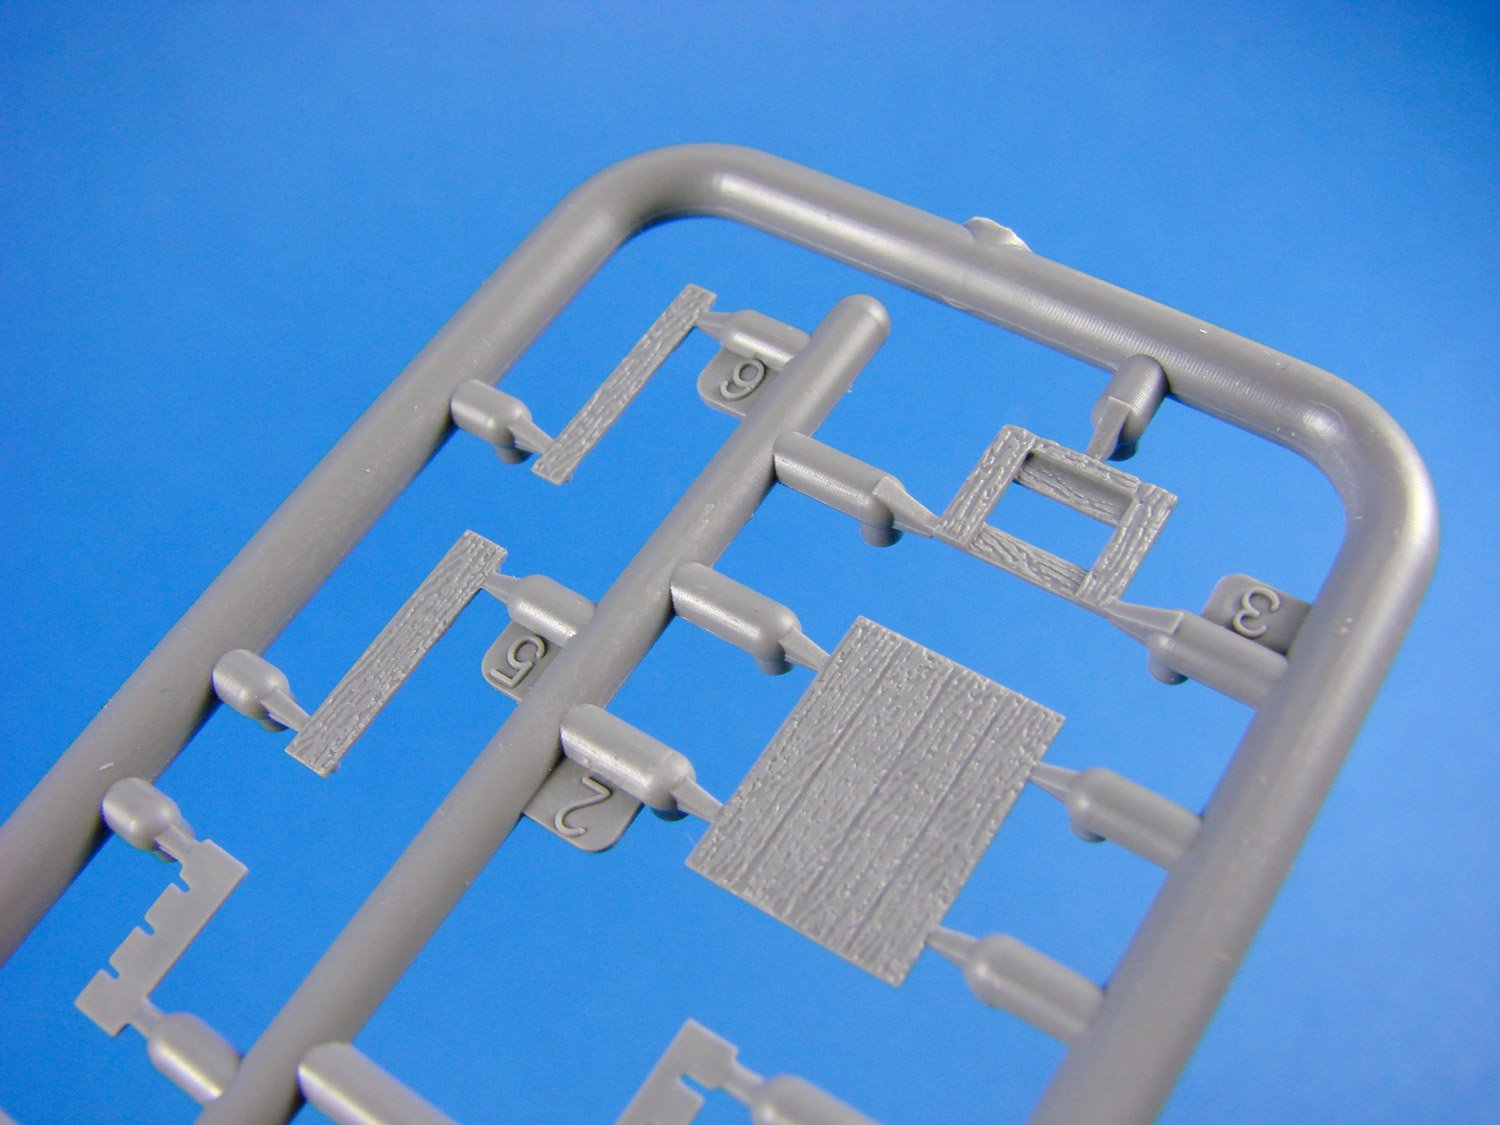
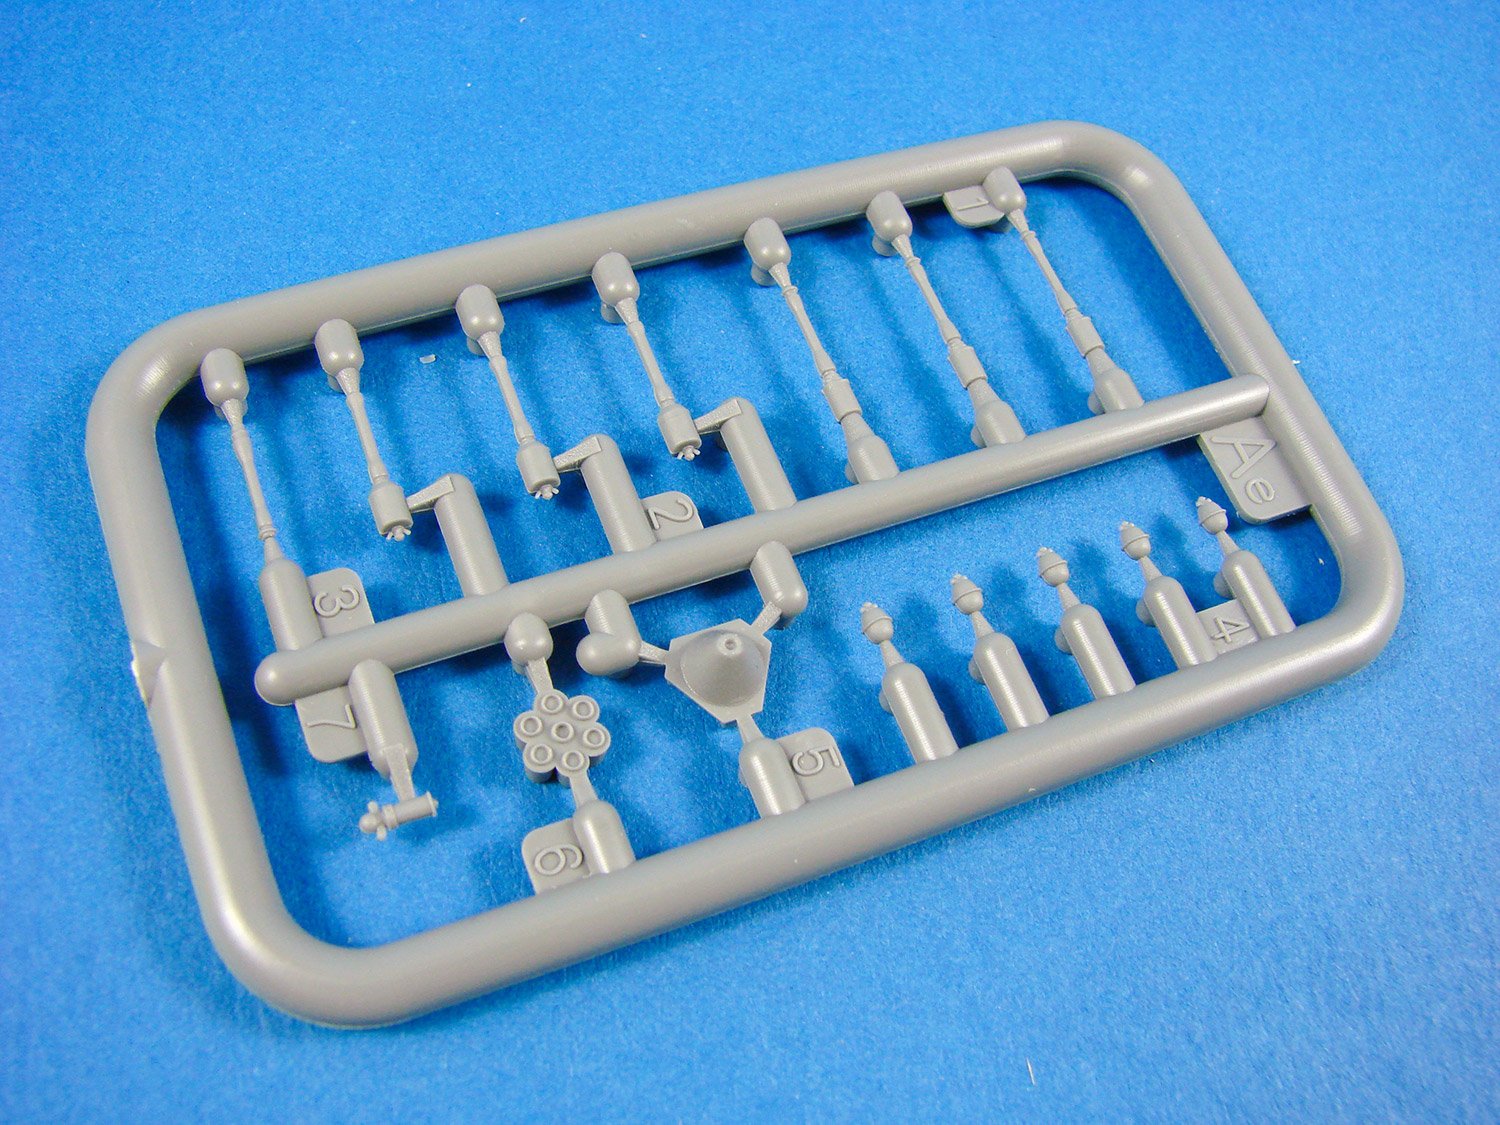
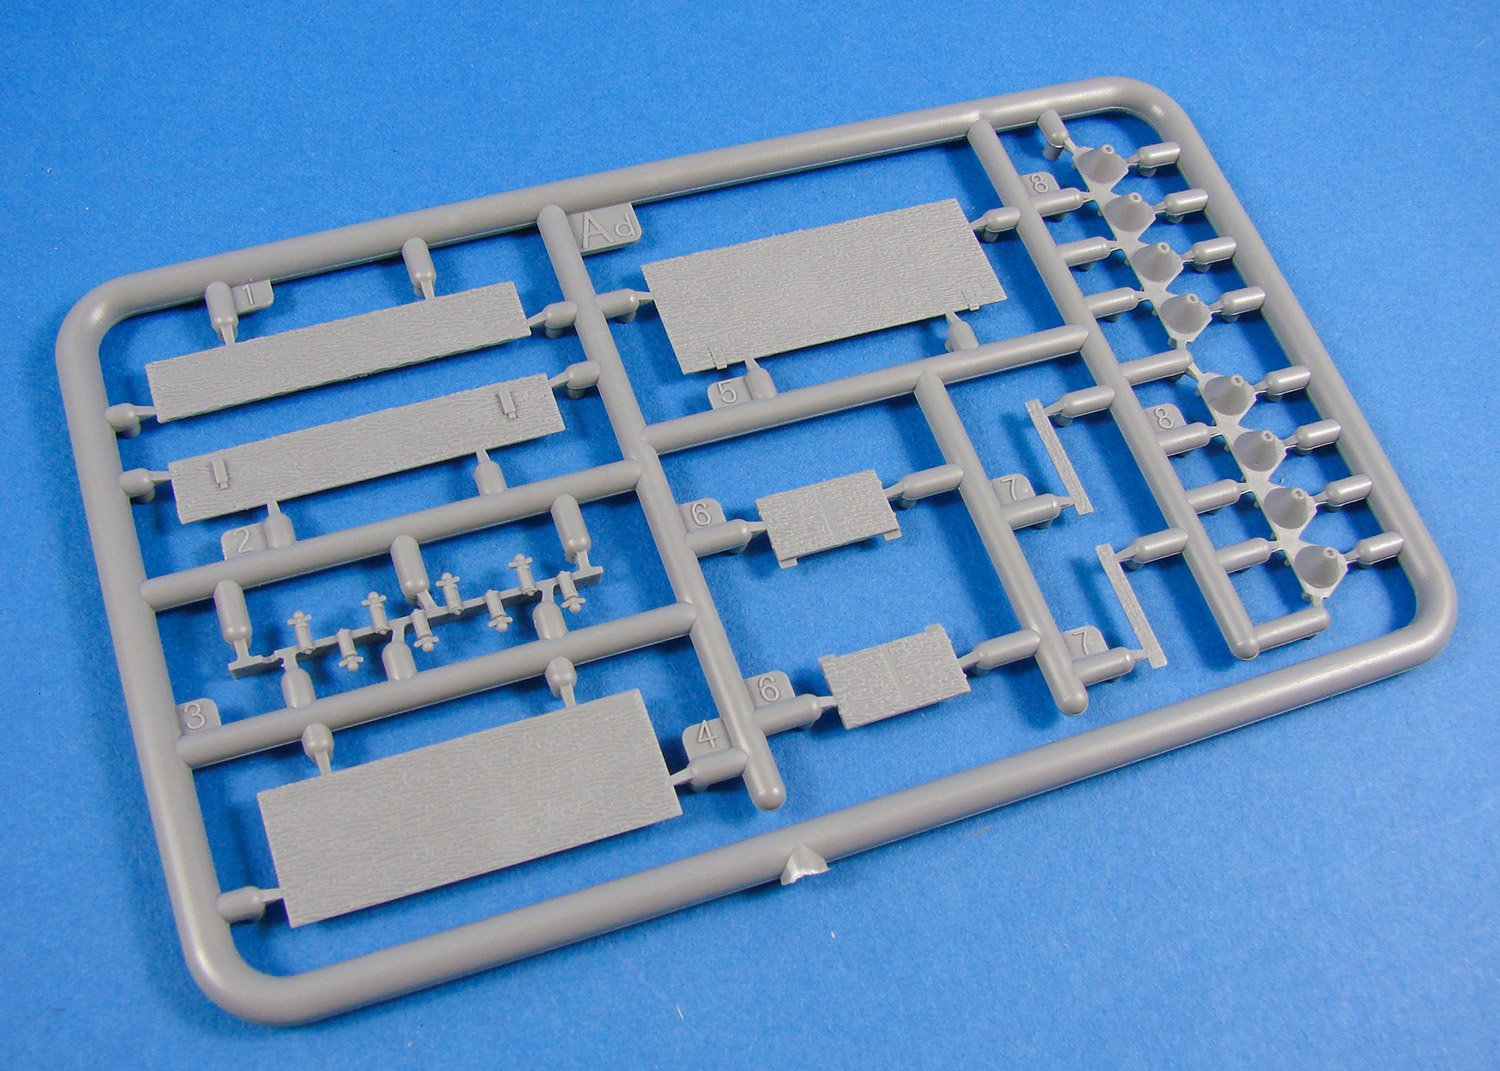
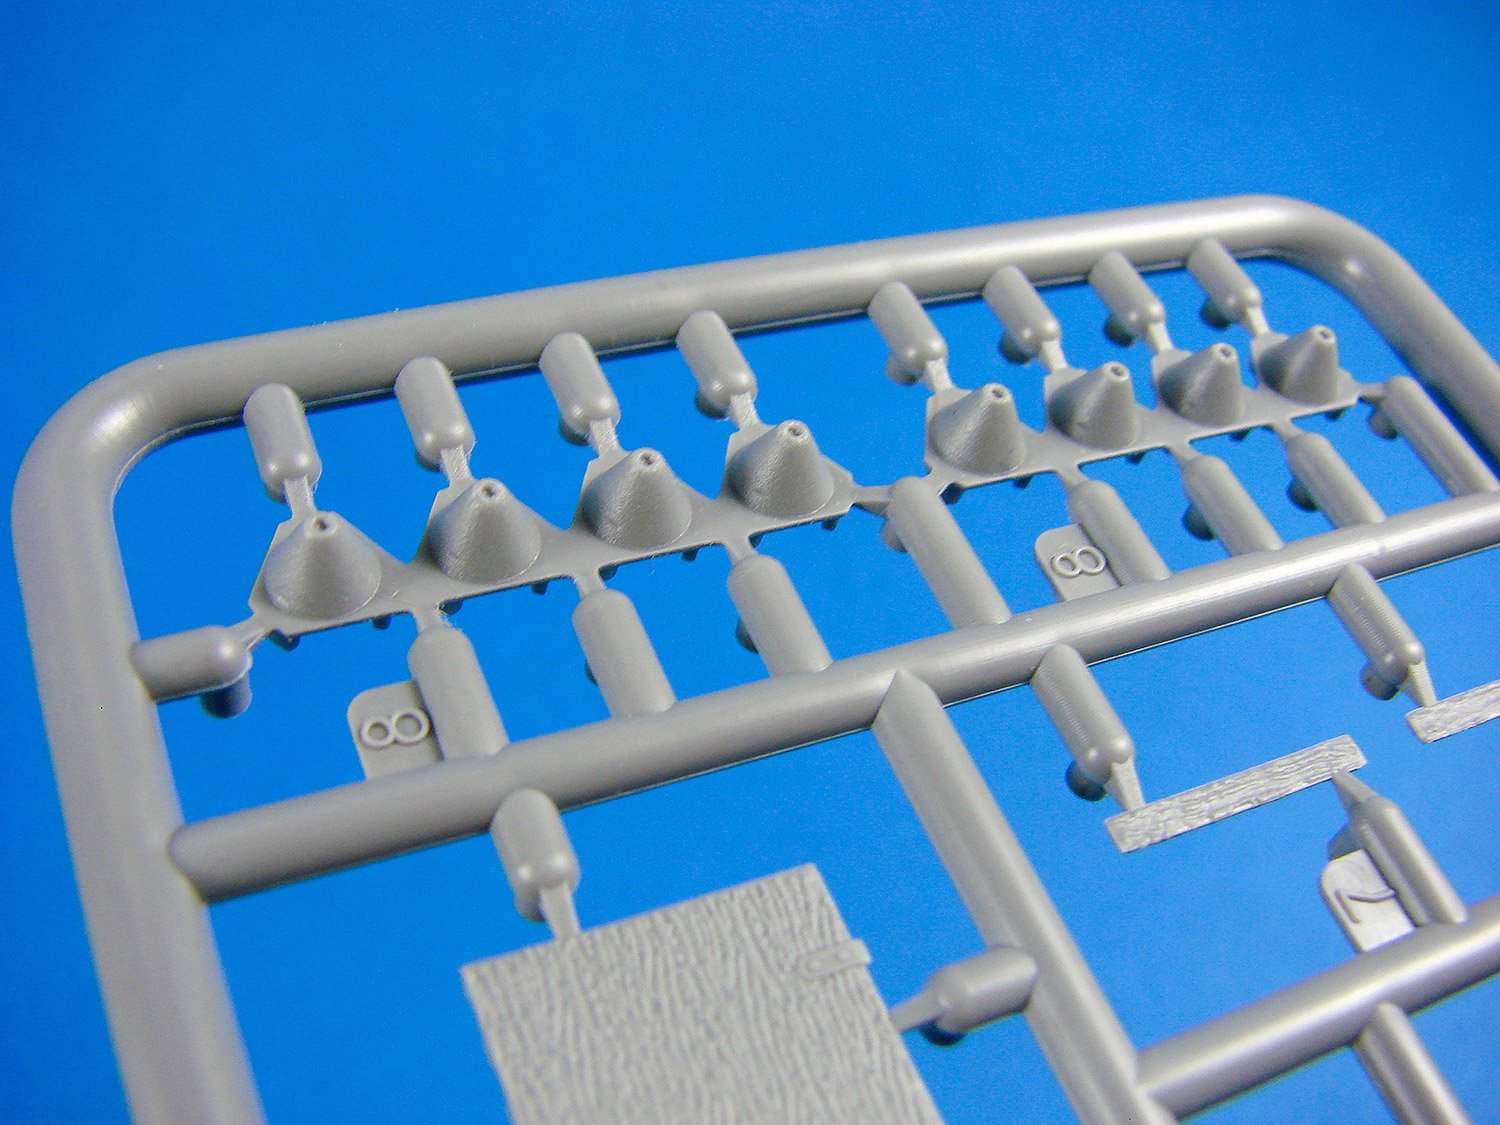
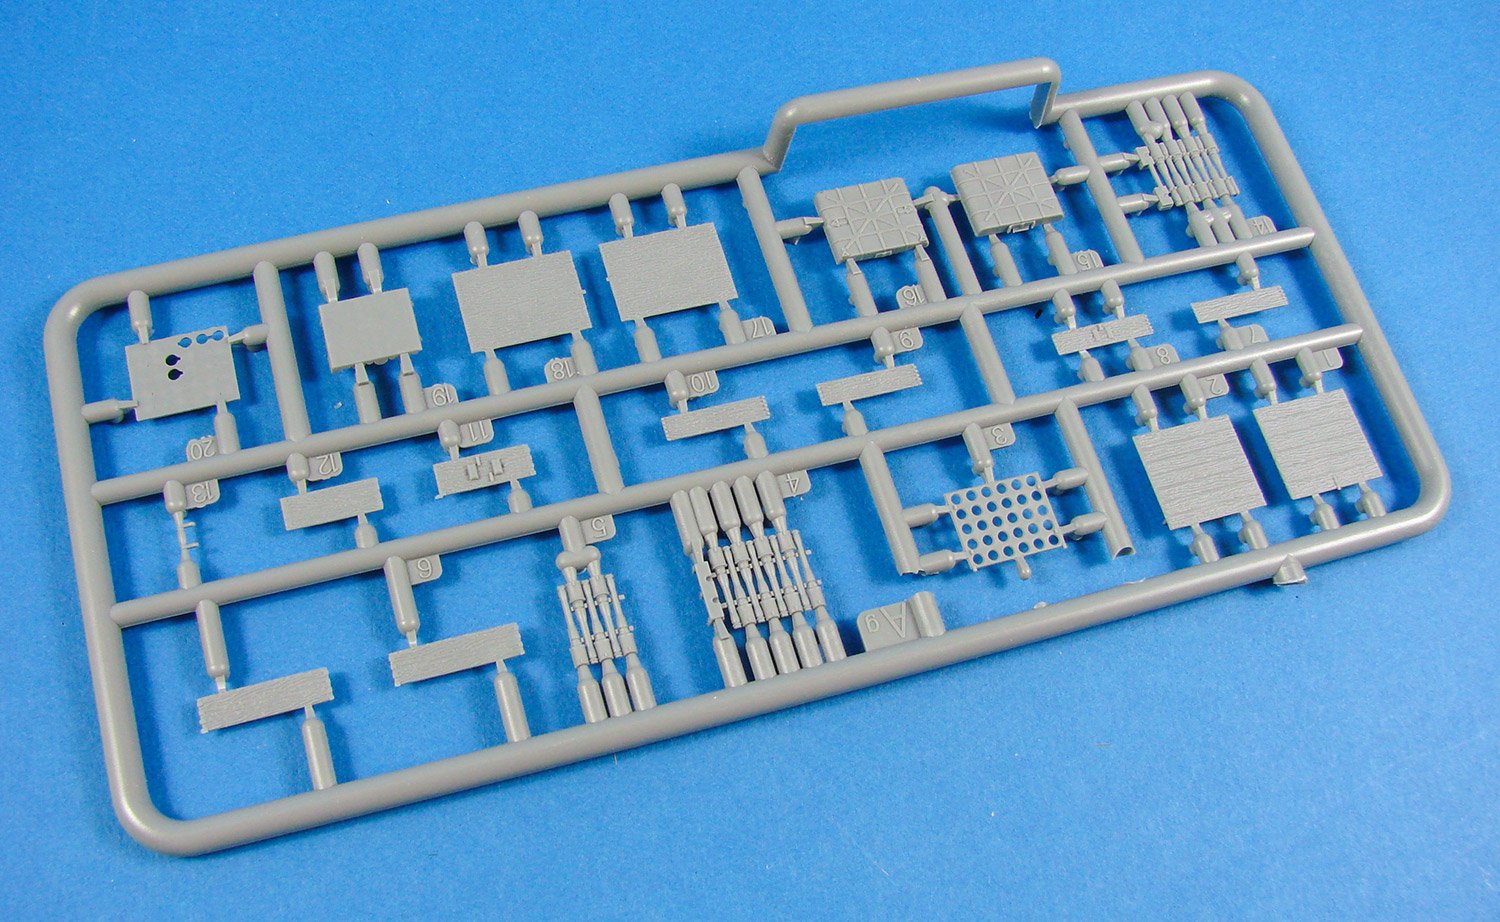
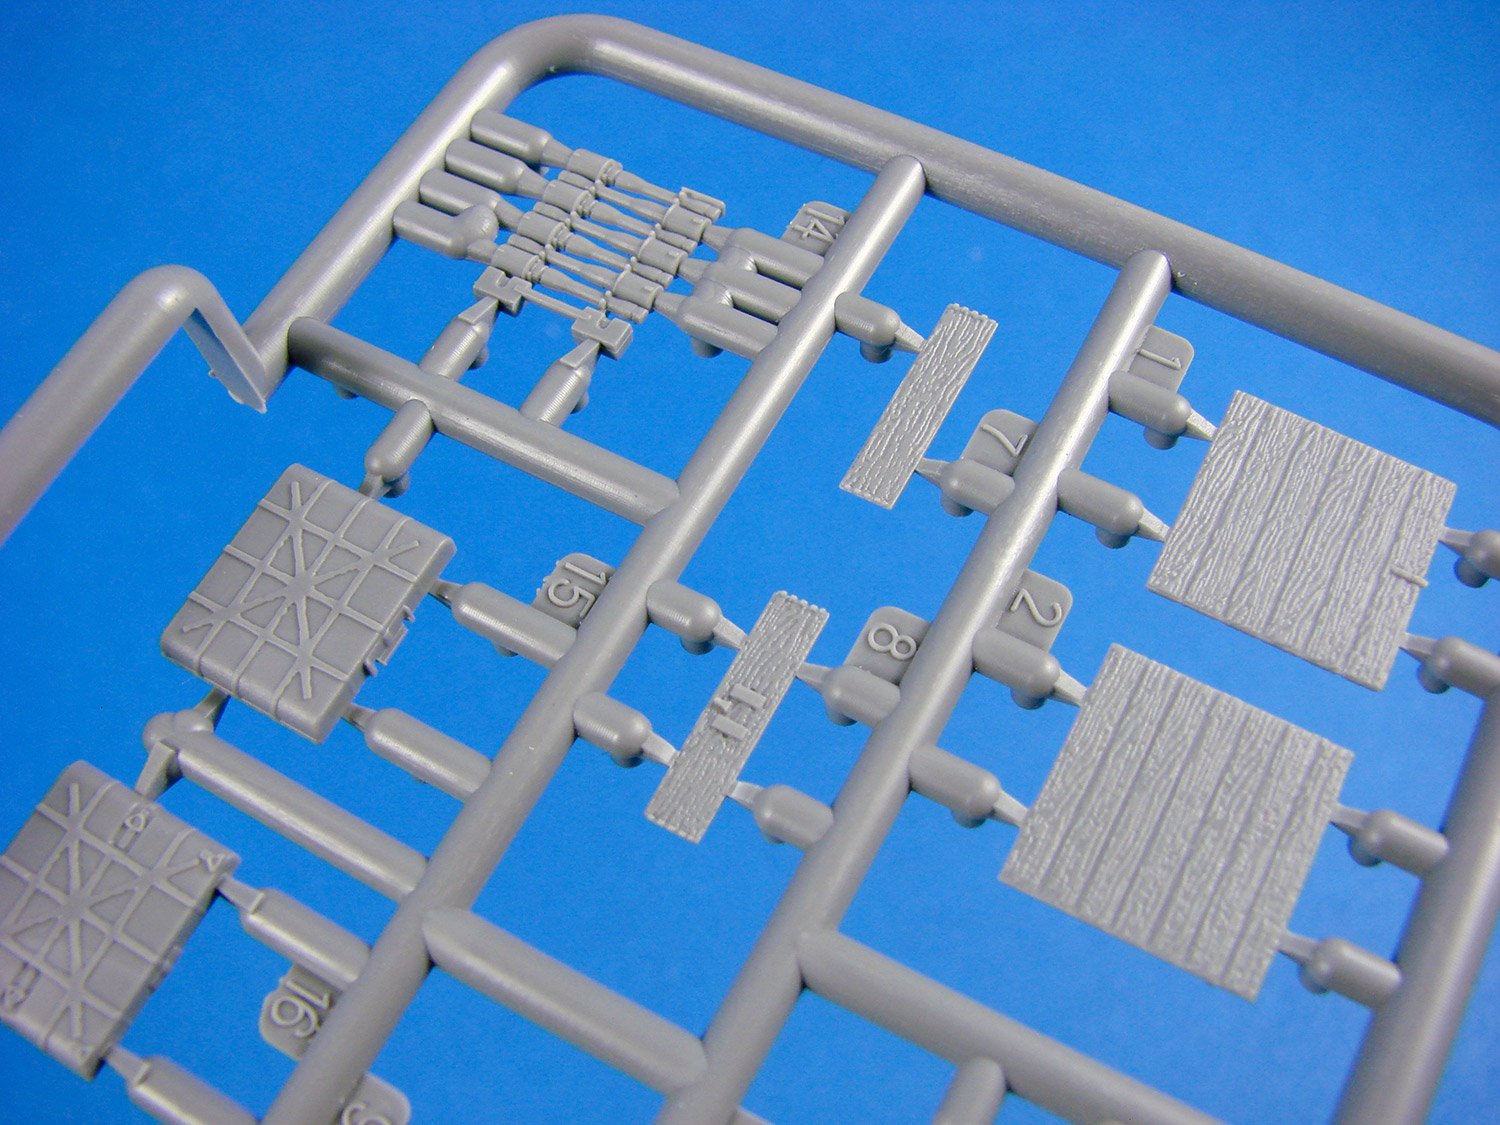
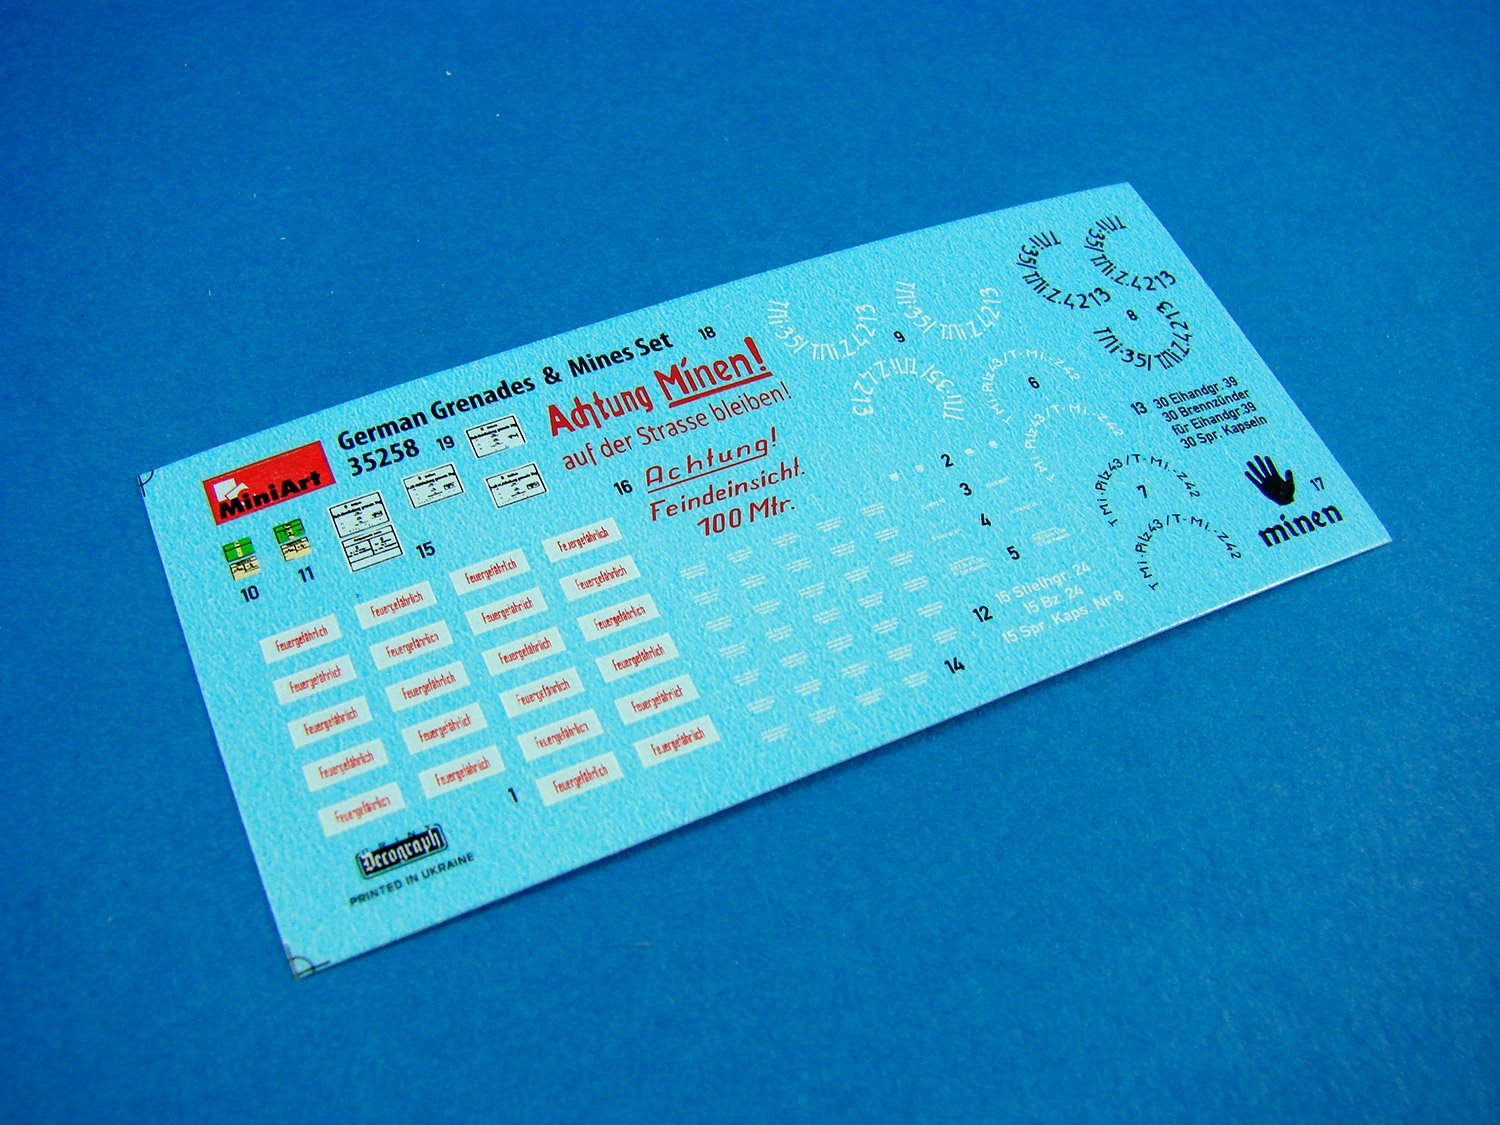
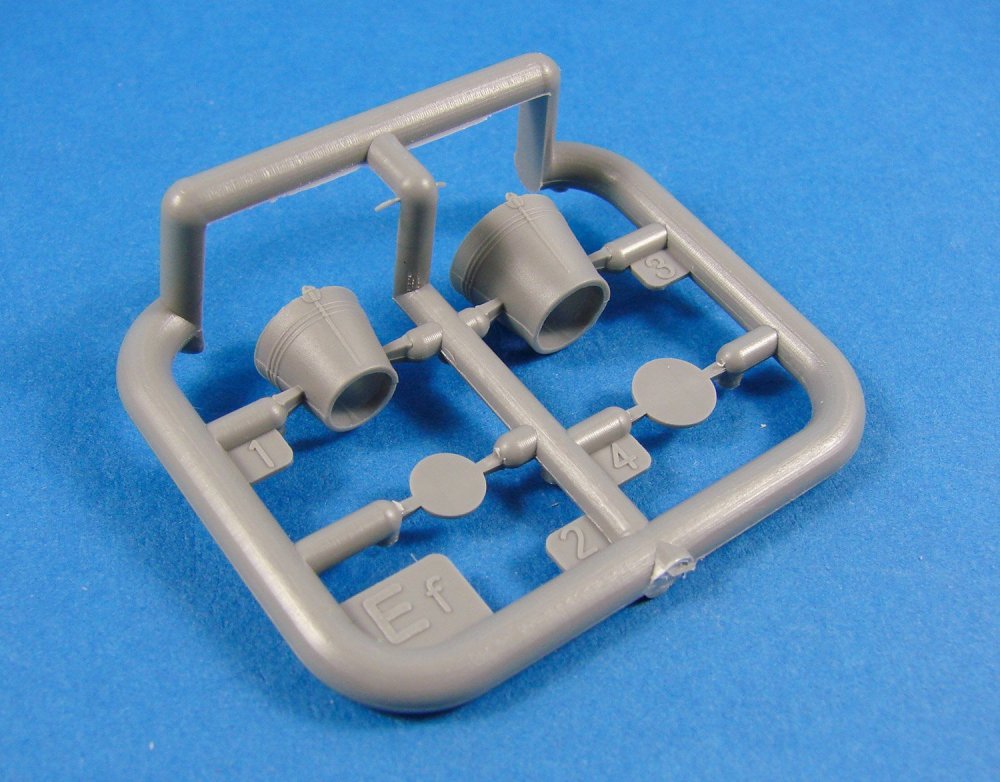
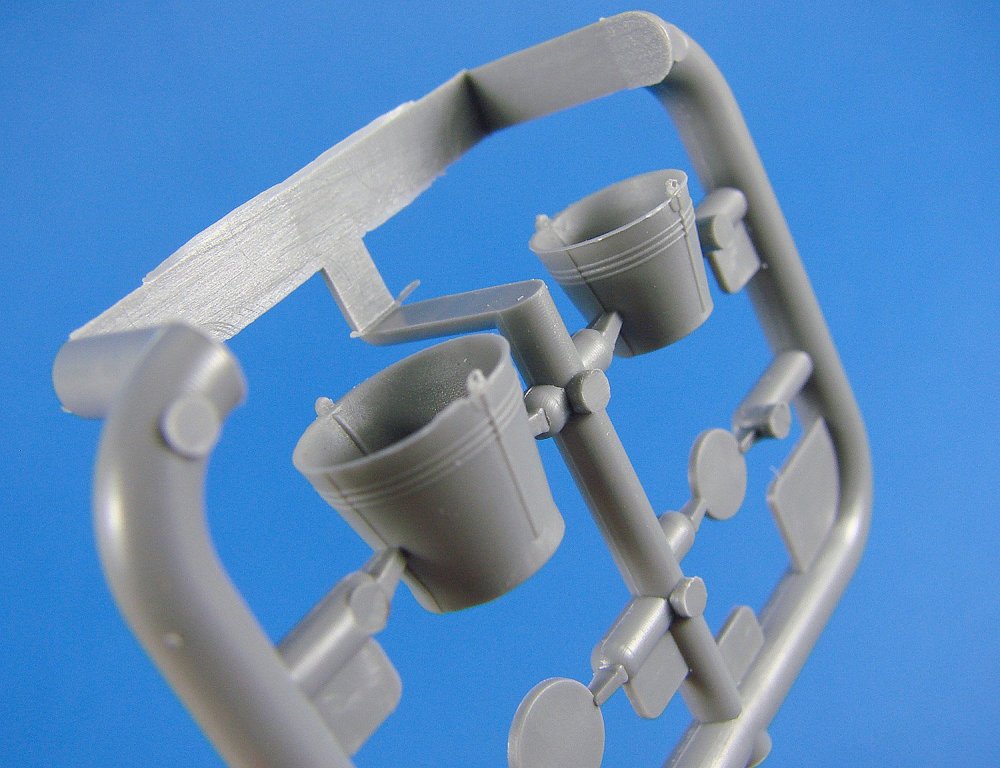
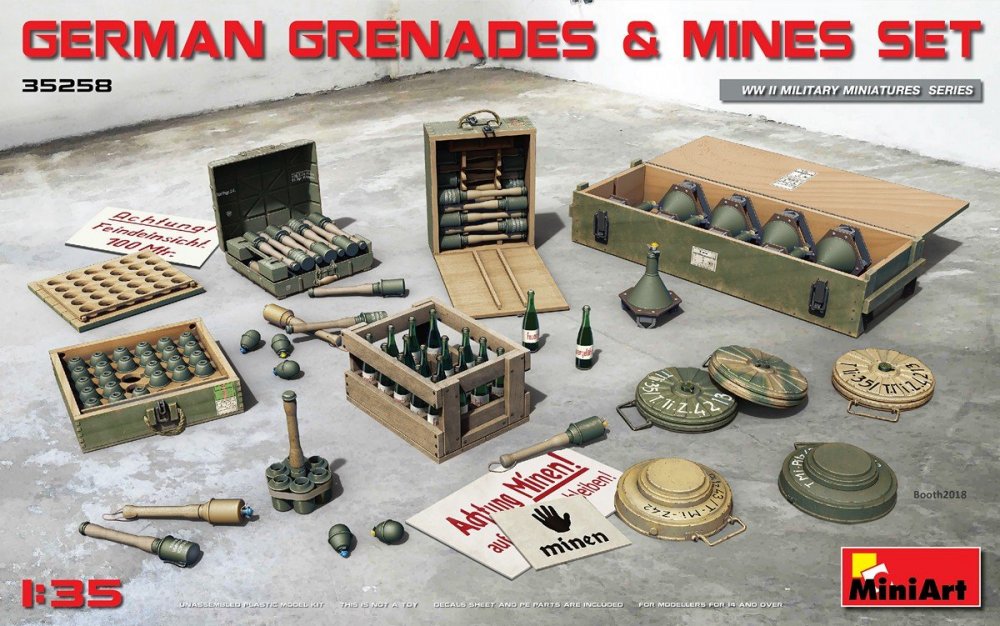
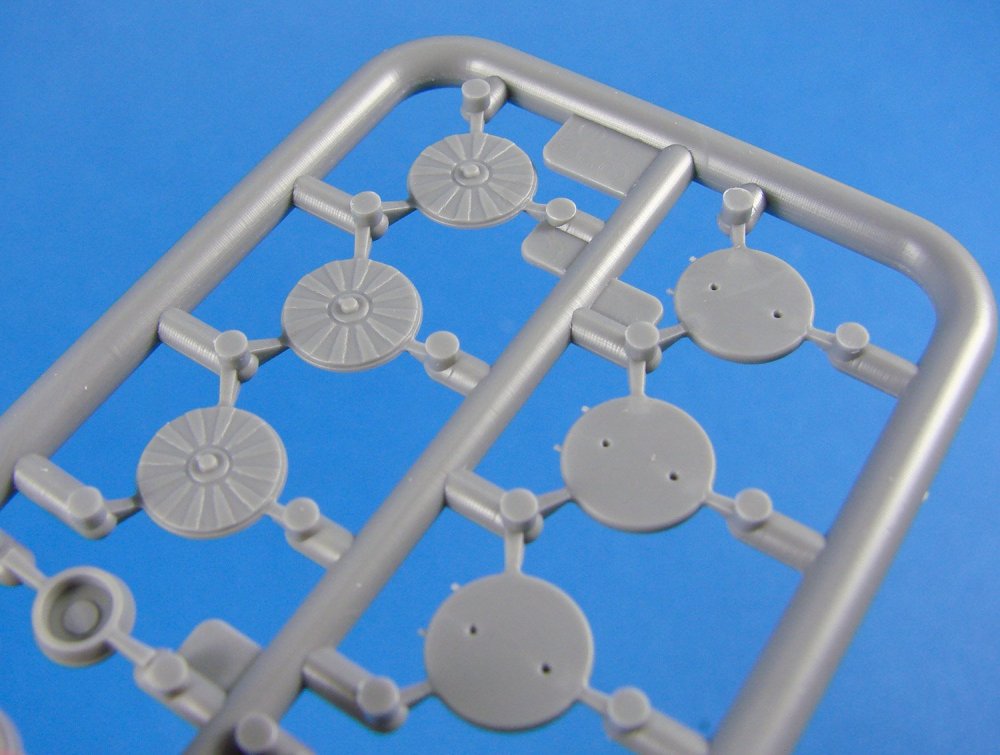
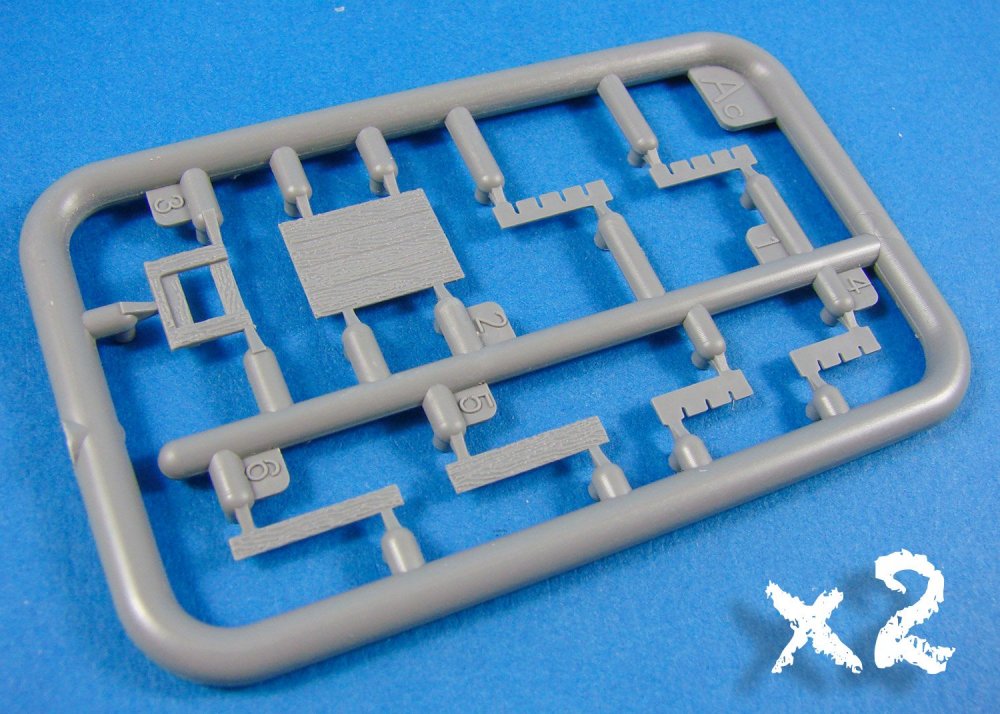
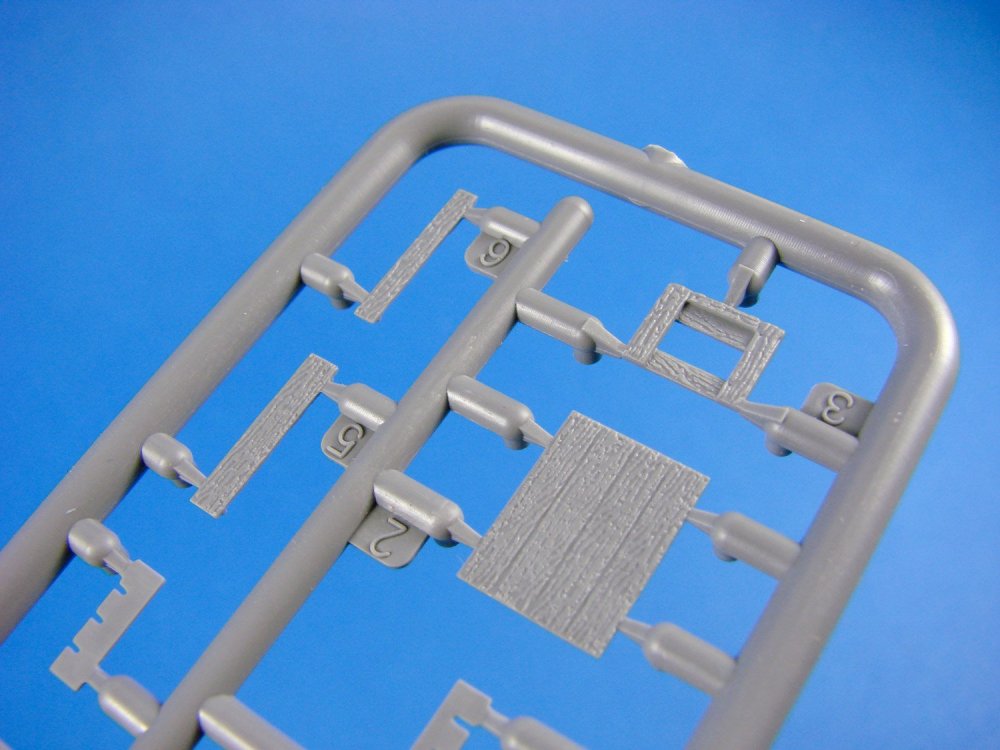
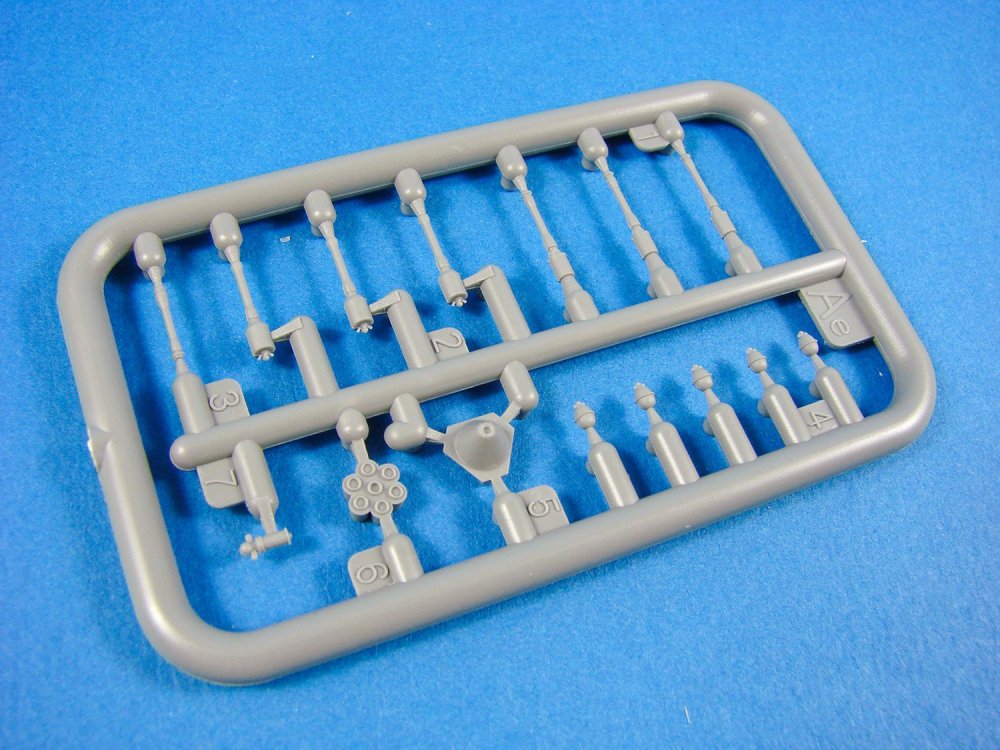
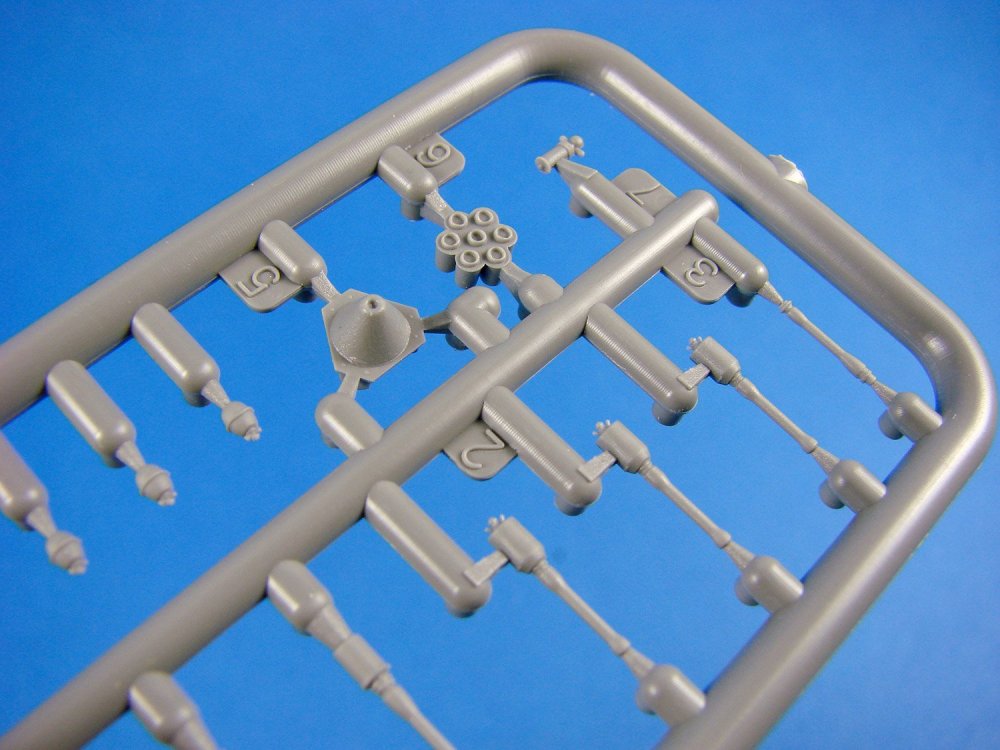
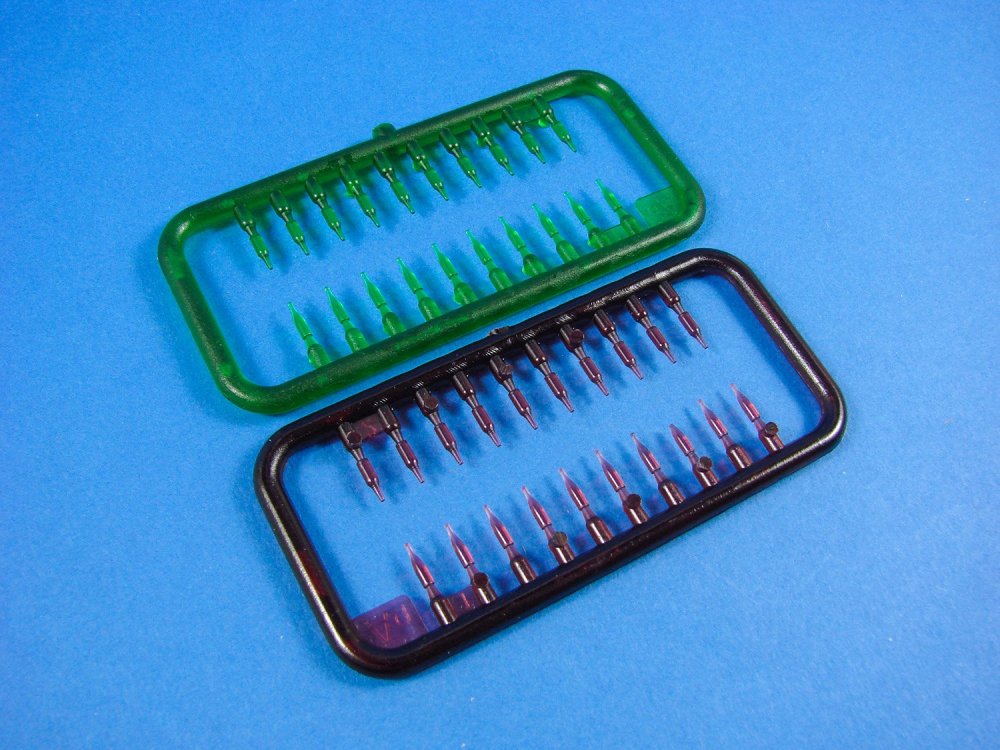
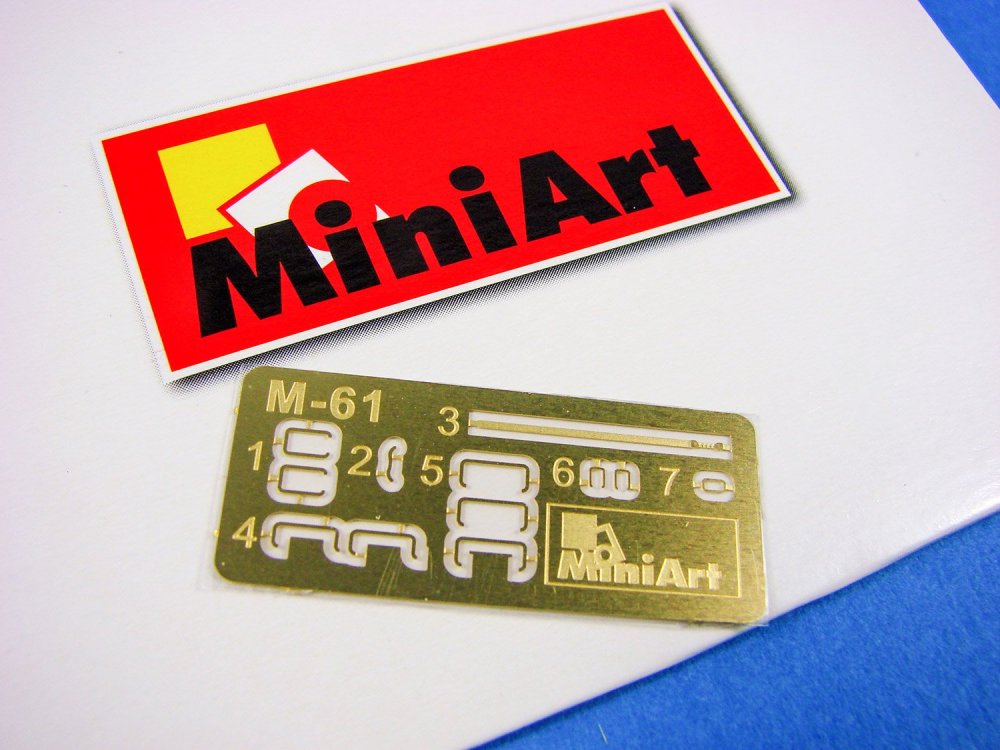
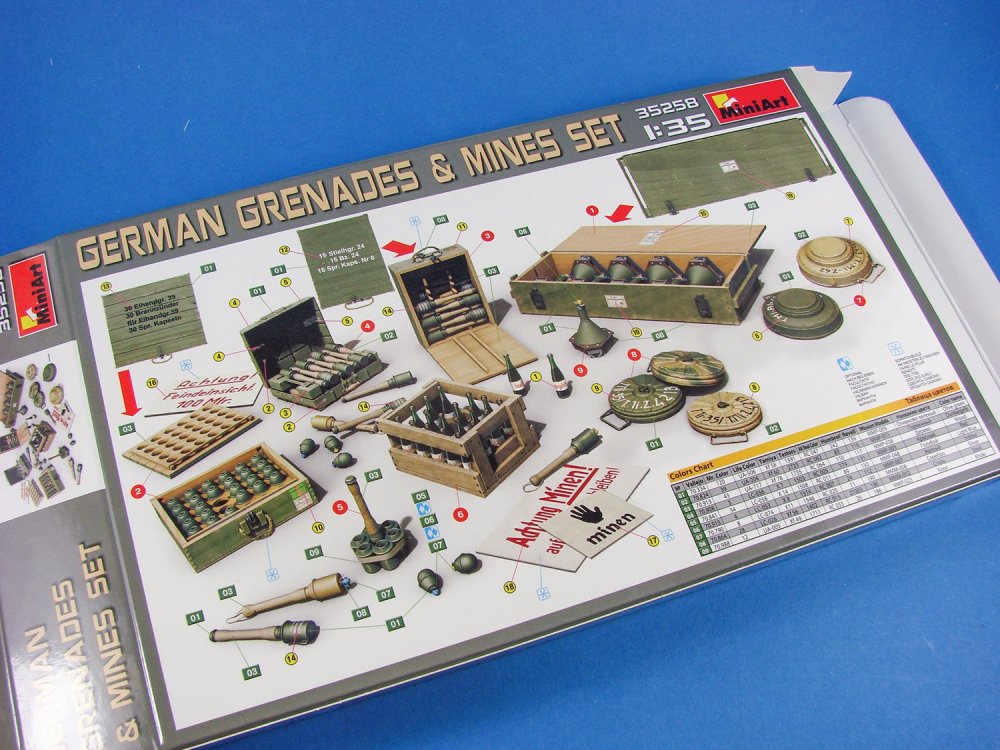
1:35 German Grenades & Mines Set MiniArt Catalogue # 35258 Available from Hannants for £12.35 Every self-respecting soldier can only operate properly when they have the correct weapons for the field. And we don’t just mean rifles, machine guns, carbines and mortars. Some of the more subversive and violent aspects of war, both close and remote combat, need the use of explosives, whether these are simply lobbed at the enemy through an open window or door as house clearance, or by laying them underground in the hope that it’s an enemy protagonist (and not civilian) will tread on them and be sent to meet their maker. War…it’s a bloody business. MiniArt’s new set comprises a whole swathe of nasty explosive devices which is guaranteed to make any battle go with a bang. As the box art shows, this set contains the famous Stielhandgranate (stick grenade) and other deadly incarnations of it, landmines (both pressure and magnetic activated), crate of Model 39 egg grenades, crate of Heft Hohladung Granate magnetic mines, and even the low-tech Molotov Cocktails for some extra whizz-bangs! The back of the box shows the same image as the front. But minus the background. Here, you will find the references for painting and decaling. Paint codes are given for Vallejo, Mr.Color, Life Color, Tamiya, Testors, AK etc. The illustrations themselves are excellent and a great reference for detail painting your new set of fireworks. Inside the box, a single clear sleeve contains SIX sprues of light grey styrene with a total of 113 parts. Another sleeve within this also contains a sprue of clear green and one of clear red parts (40 in total). To complete the set, a small decal sheet is included, as is a card sleeve containing a photo-etch fret of a further 12 parts. This set comprises 125 pieces of lethal ordnance. Sprue Ab Here we have both magnetic and pressure activated mines, comprising each of two plastic parts. Very simple to assemble and nicely detailed. These will be supplemented by the fitting of handles from the photo-etch fret which is included. Sprue Ac (x2) No weapons here, but these two sprues make up the open-topped crates into which the Molotov Cocktails will be stored. The various parts have a convincing wood grain texture to them. The crate will look convincing if painted in a wood colour and then overpainted with an actual finish colour before being worn using the hairspray technique to antiquethings a little. Sprue Ad A whole crate of Heft Hohladung Granate magnetic mines is included, and here are the parts for assembling the crate and the weapons. The mines are moulded in rows of four and have separate fuse which needs to be fitted to each. As with all wooden parts, a convincing grain texture is moulded on the crate sections. Locking clasps are included as PE parts. Sprue Ae This sprue contains two varieties of Stielhandgranate (M43 ‘potato masher’ and M24), plus a small number of loose weapons such as the Heft Hohladung Granate, and Model 39 egg grenade. An option to make a Stielhandgranate bundle (Geballte Ladung) is also included. Sprue Ag The largest sprue in the box contains parts to build a crate of Model 38 egg grenades, plus one case and one crate of Stielhandgranate. The weapons themselves aren’t separate and are moulded in rows to make things easier. Sprue Aq (x2) One sprue of each clear red and clear green wine bottles are moulded here, with 20 bottles on each sprue, giving you a battle-busting 40 Molotov Cocktails to equip your soldiers with. These are superbly moulded and are removed from the sprue which connects to the bottom of each bottle. Labels are included for these as decals, so all you need to do is to pop them in the supplied crates when complete. PE Here we have handles, latches and a strap for the Stielhandgranate bundle. Only twelve parts to play with here, which is nicely made and come in a protective card sleeve. Decals All of those crates, mines, Molotovs and cases could use a few stencils and labels etc. This rather packed little sheet of decals has enough to keep you toiling for a few hours. Note also that some signage is also present, and for these specific decals, you’ll need to affix them to a backing of plasticard, so as to create the board. Decal production is excellent with printing being nice and thin, and with everything in register. Carrier film is also minimal. Instructions A single, double-sided sheet contains the instructions for this kit, clearly printed and easy to follow, over a total of 9 stages. Paint references are also supplied throughout. Conclusion I’m really quite a fan of these small detail sets from MiniArt, despite not actually being any good at diorama work! This set is well thought out and engineered, as well as moulded and presented. Details are excellent throughout and this set would perfectly complement MiniArt’s own Panzerfaust set. For not much more than a tenner, you get a full range of perfectly-formed explosive weapons and a really nice decal sheet too, plus the small PE fret. Definitely one to consider for your next WWII dio! My sincere thanks to MiniArt for sending this kit out for review. To purchase, click the link at the top of the article.


-
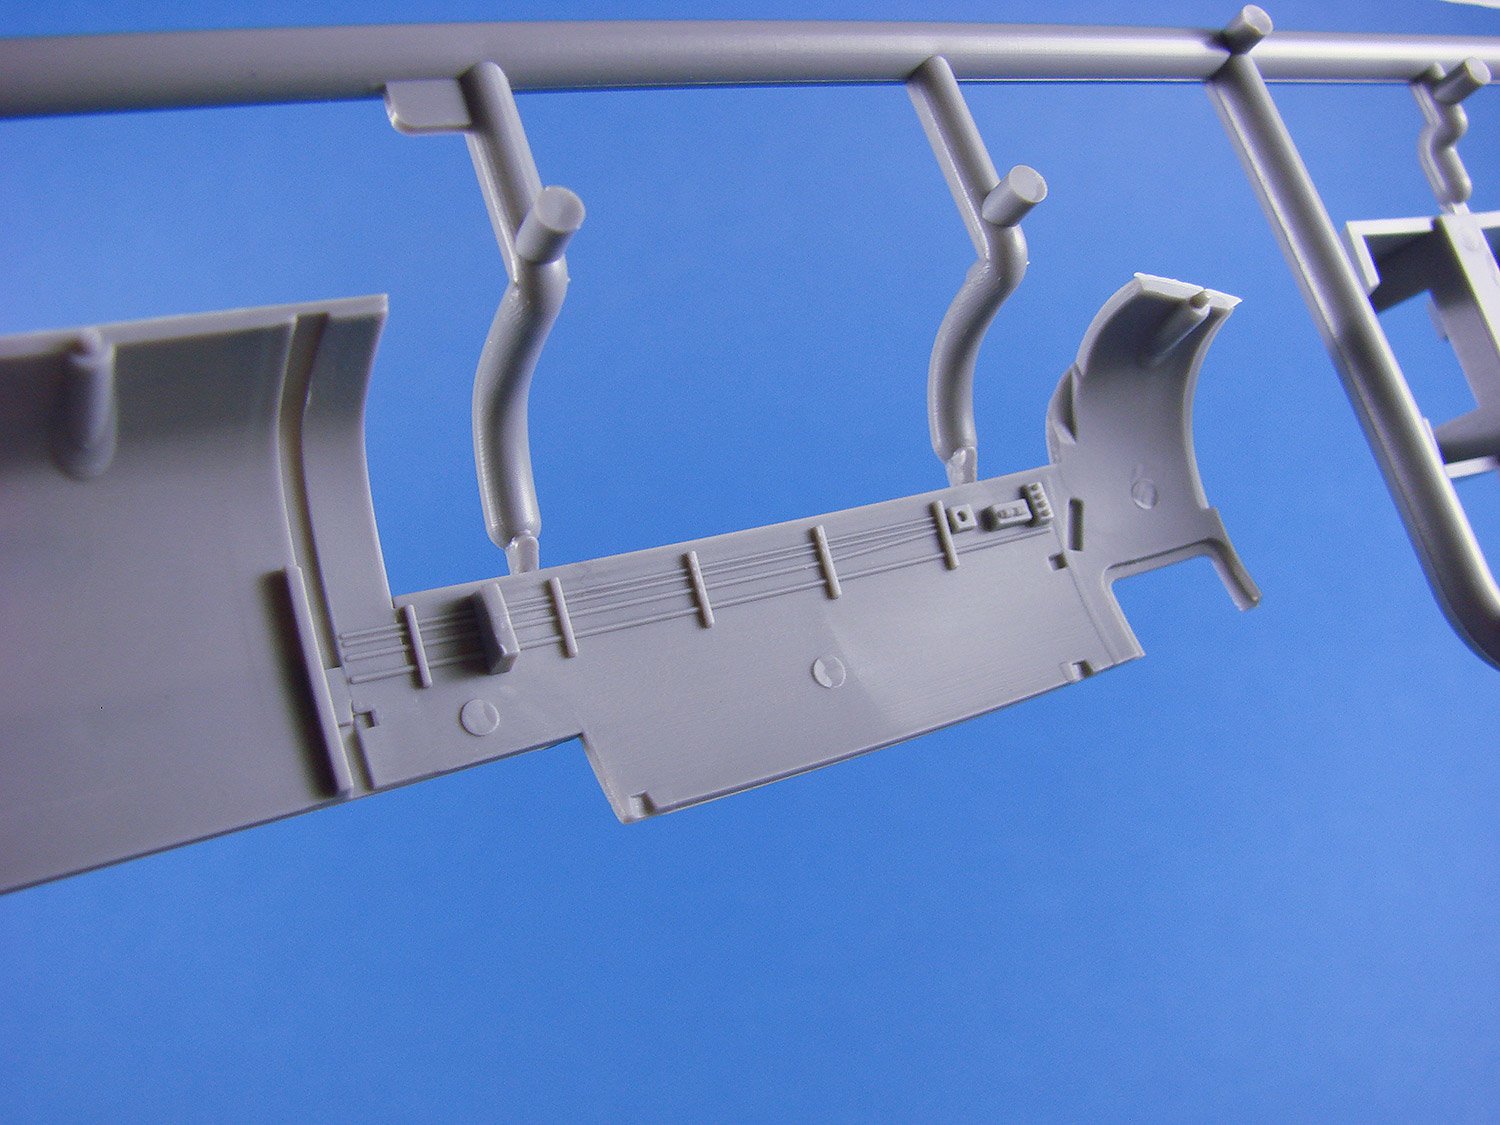
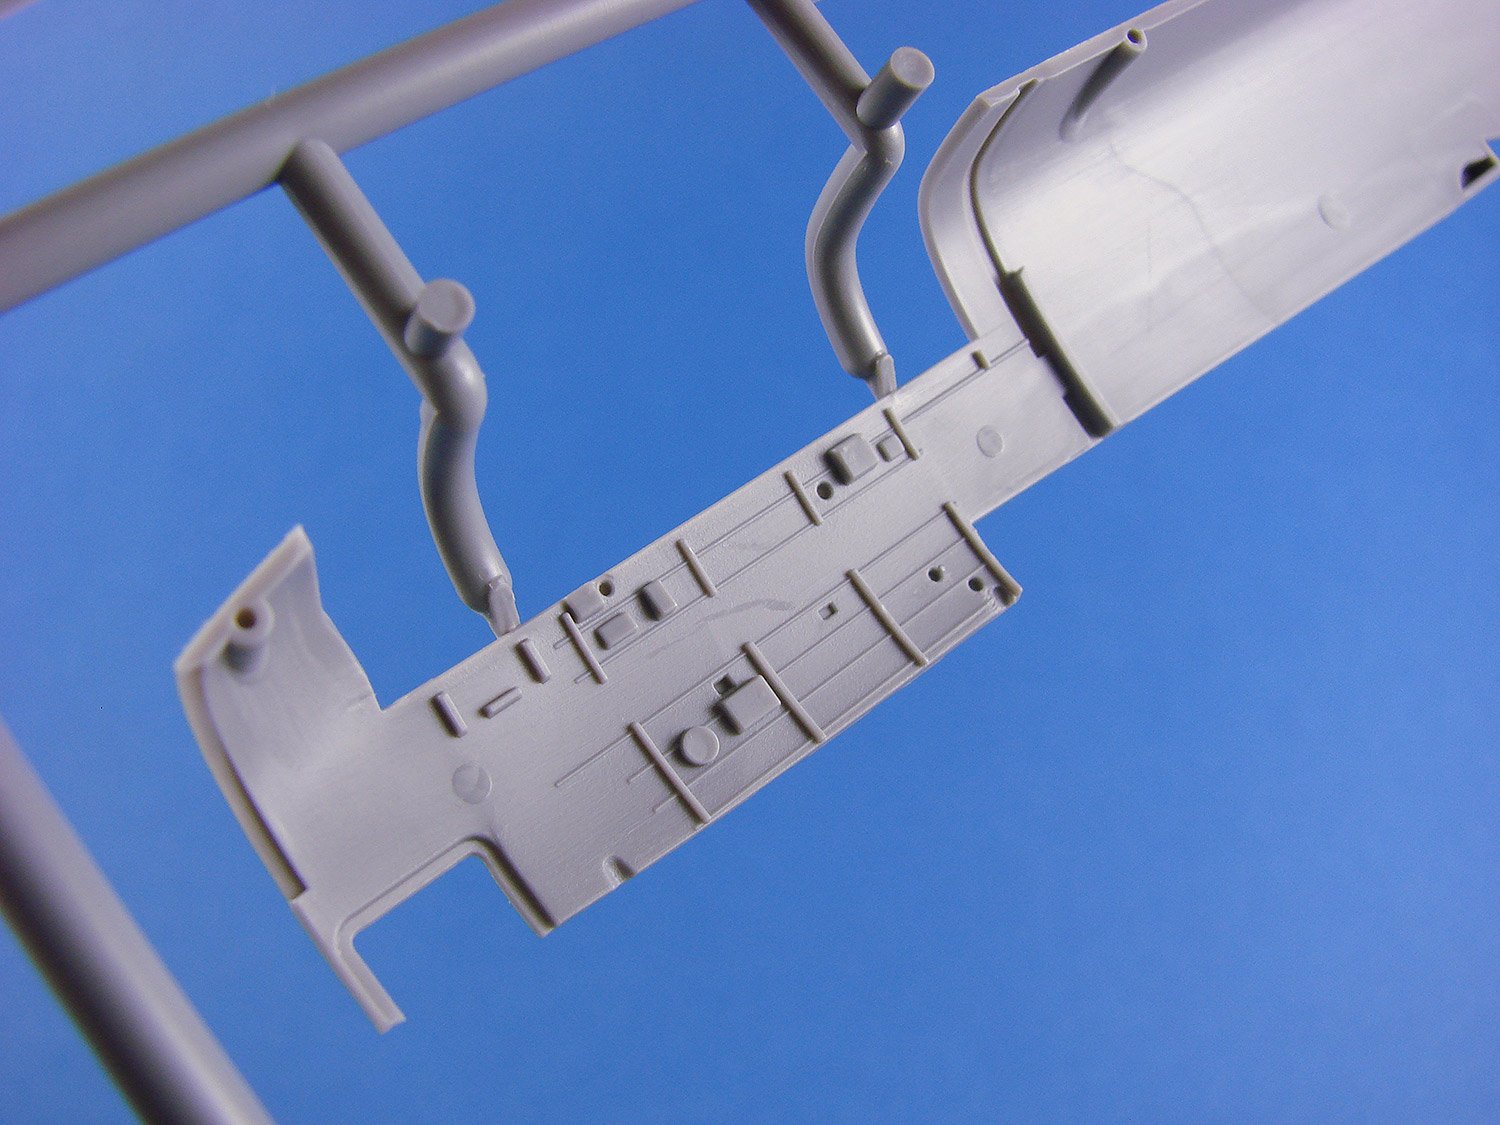
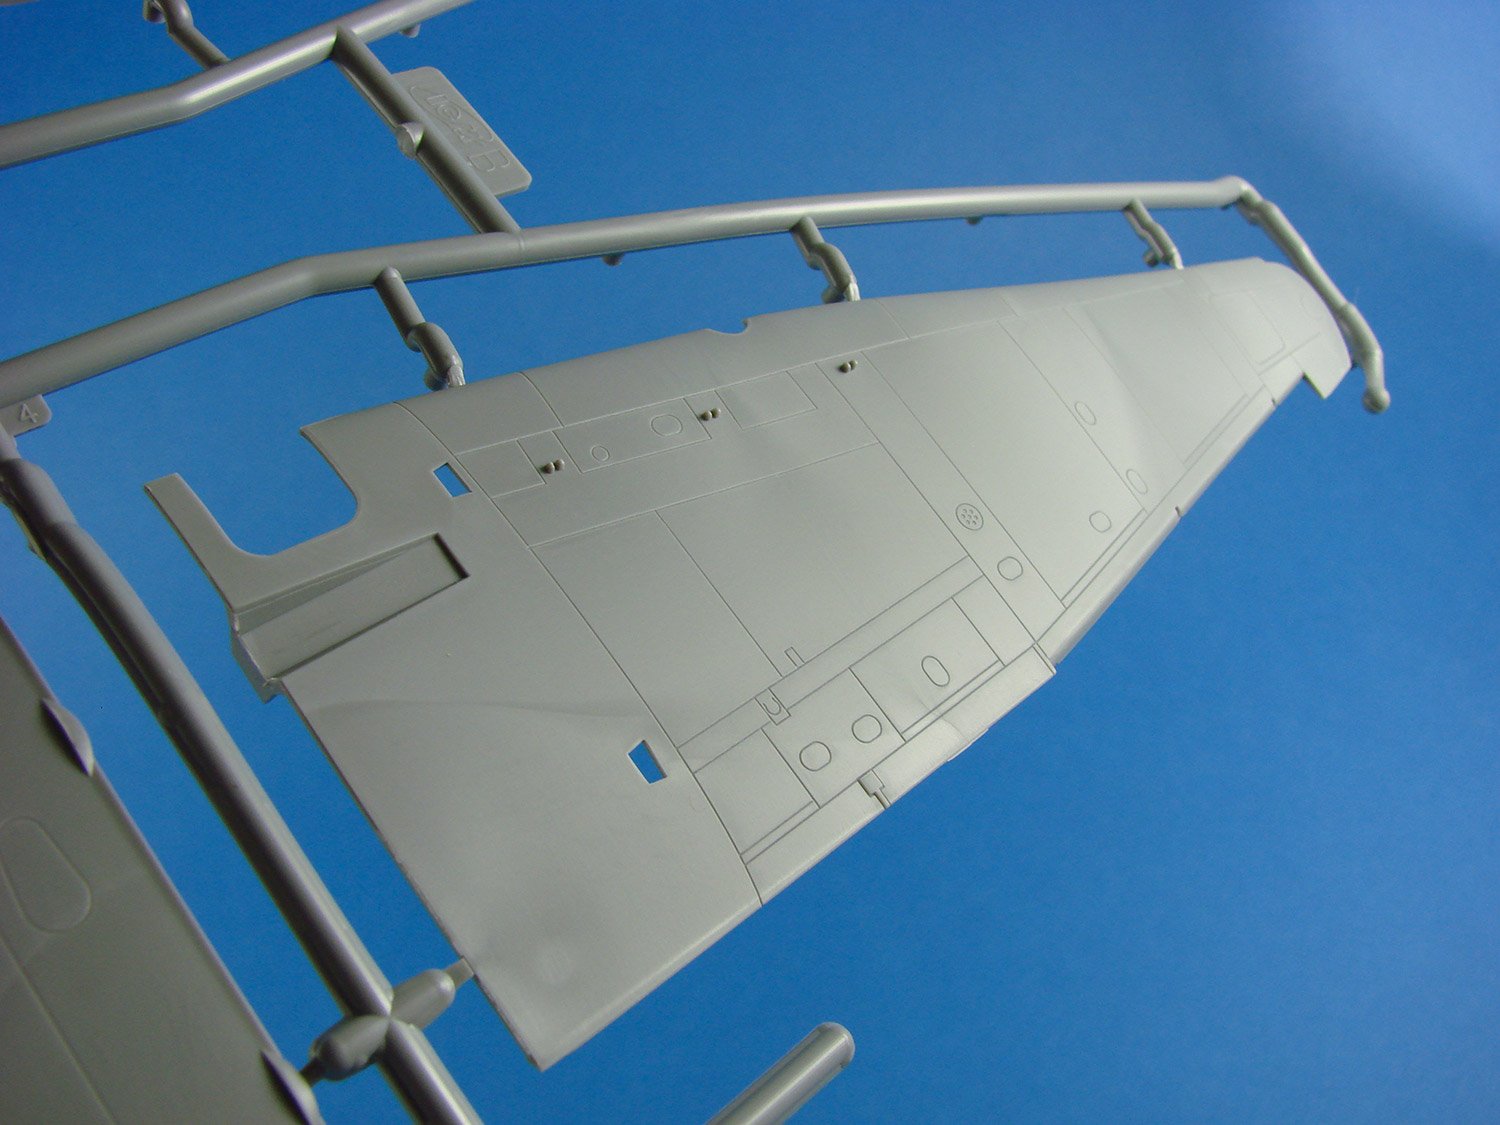
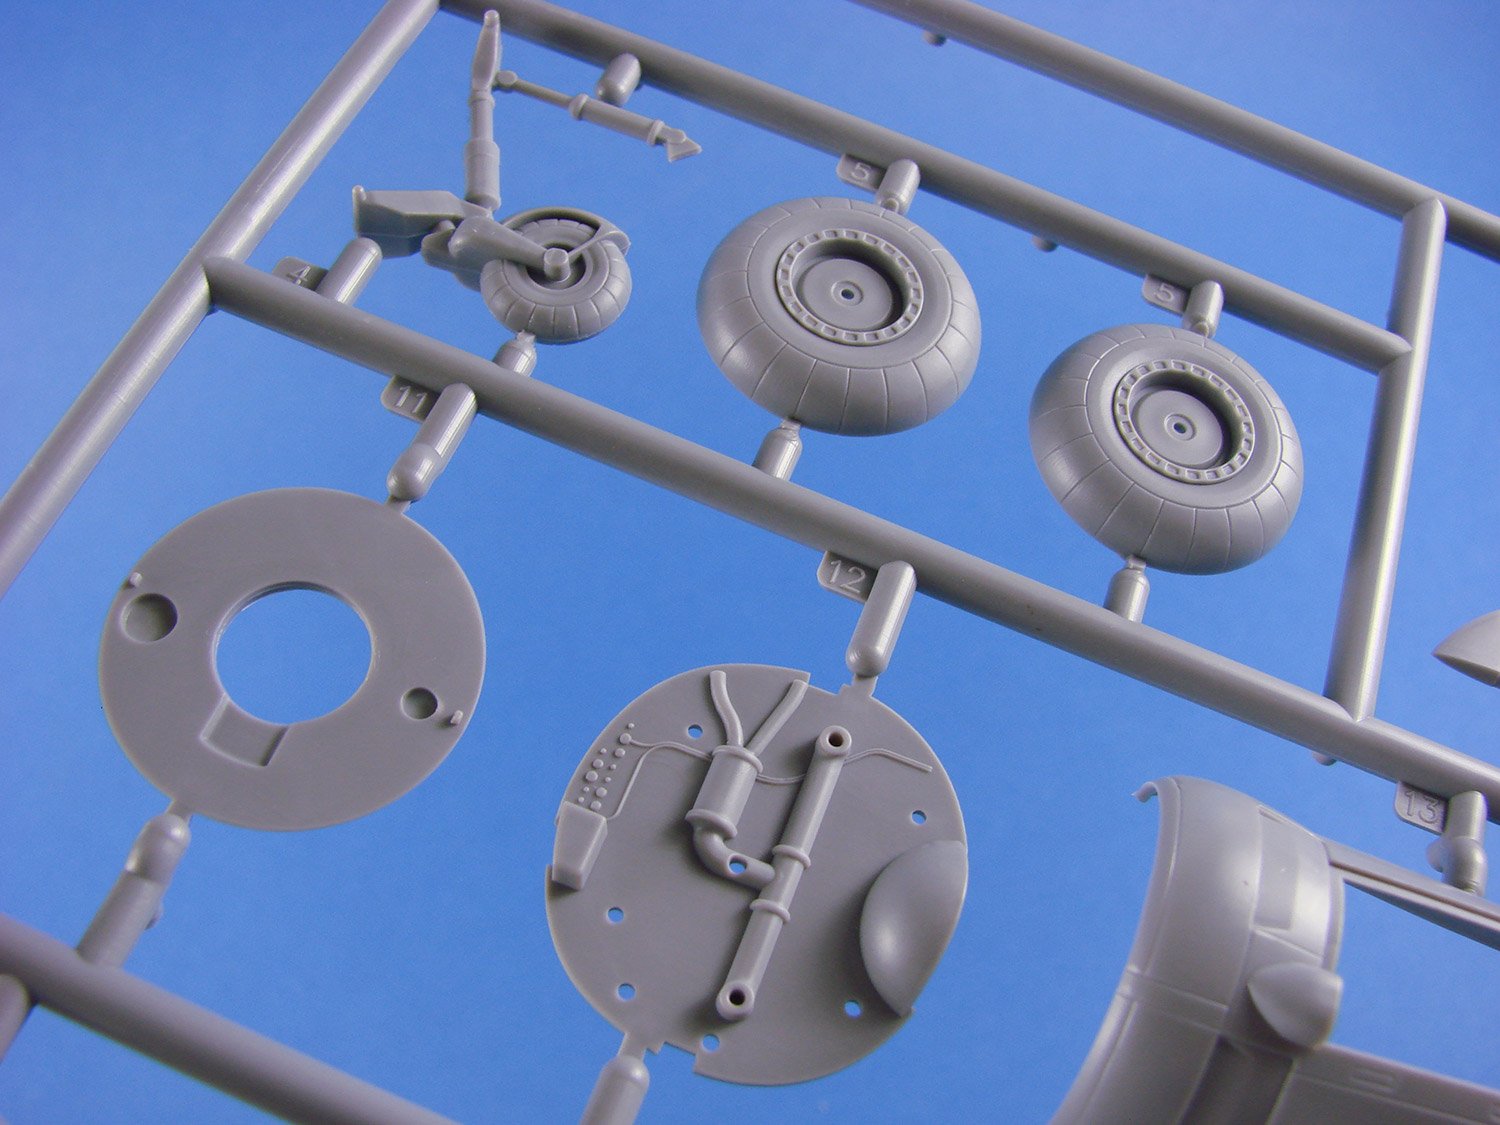
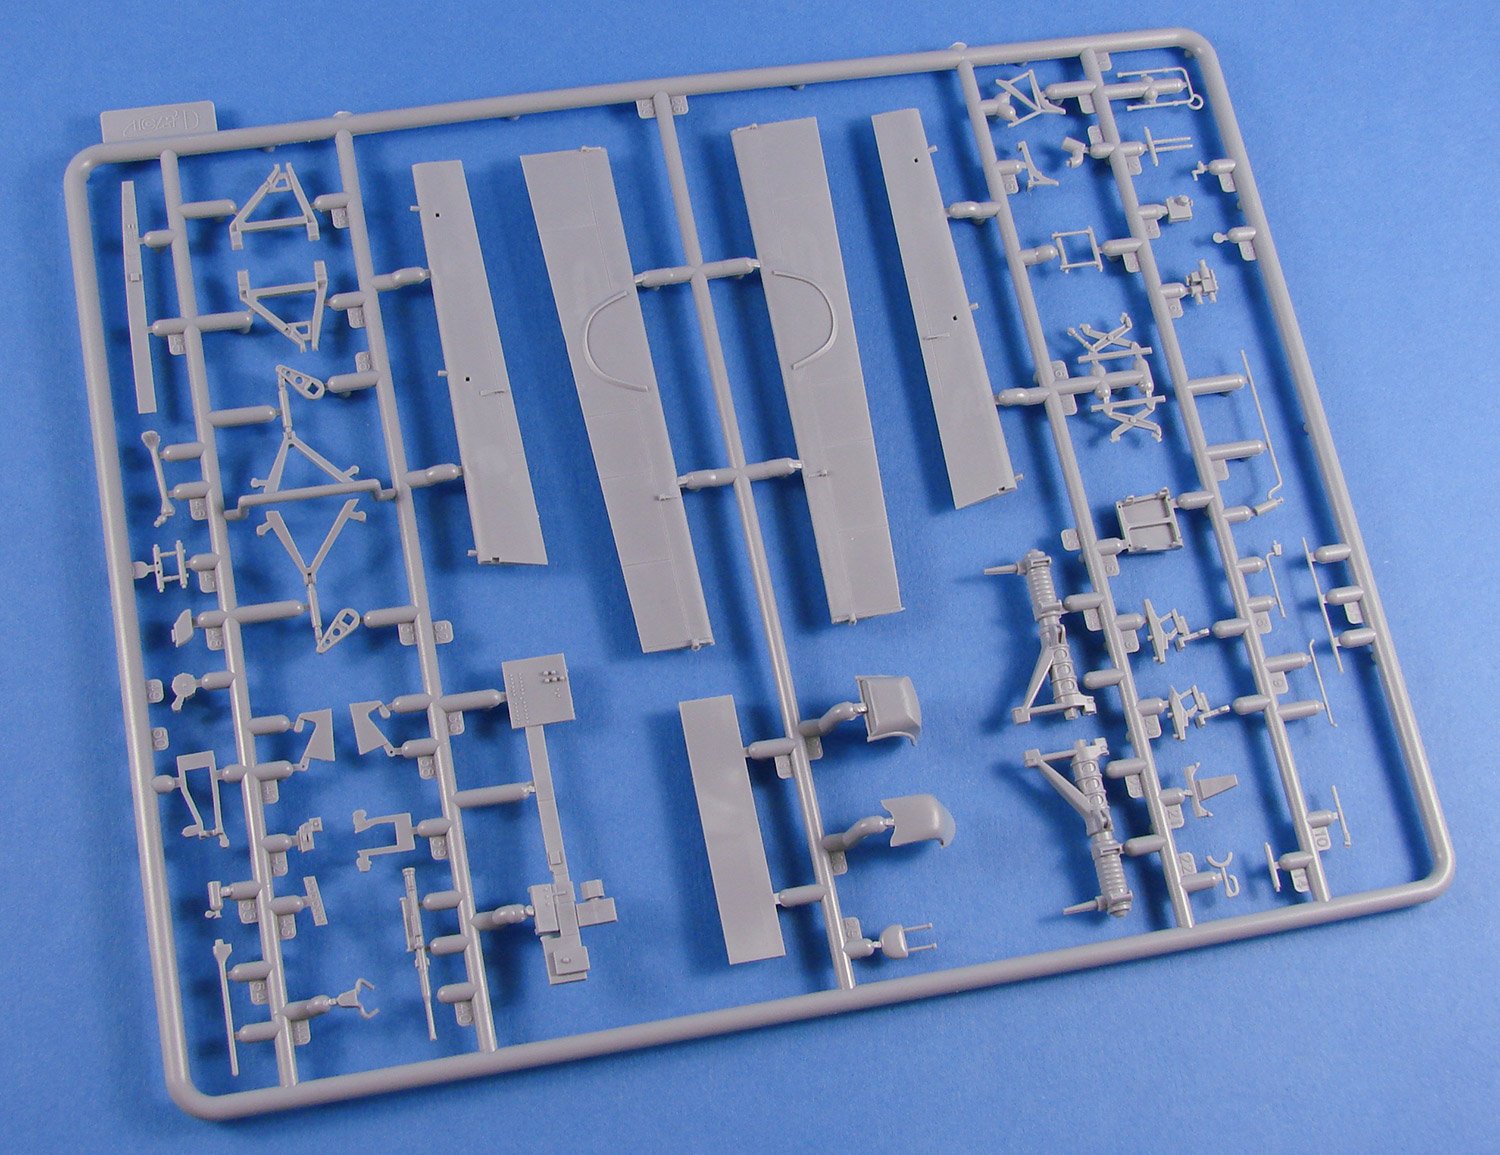
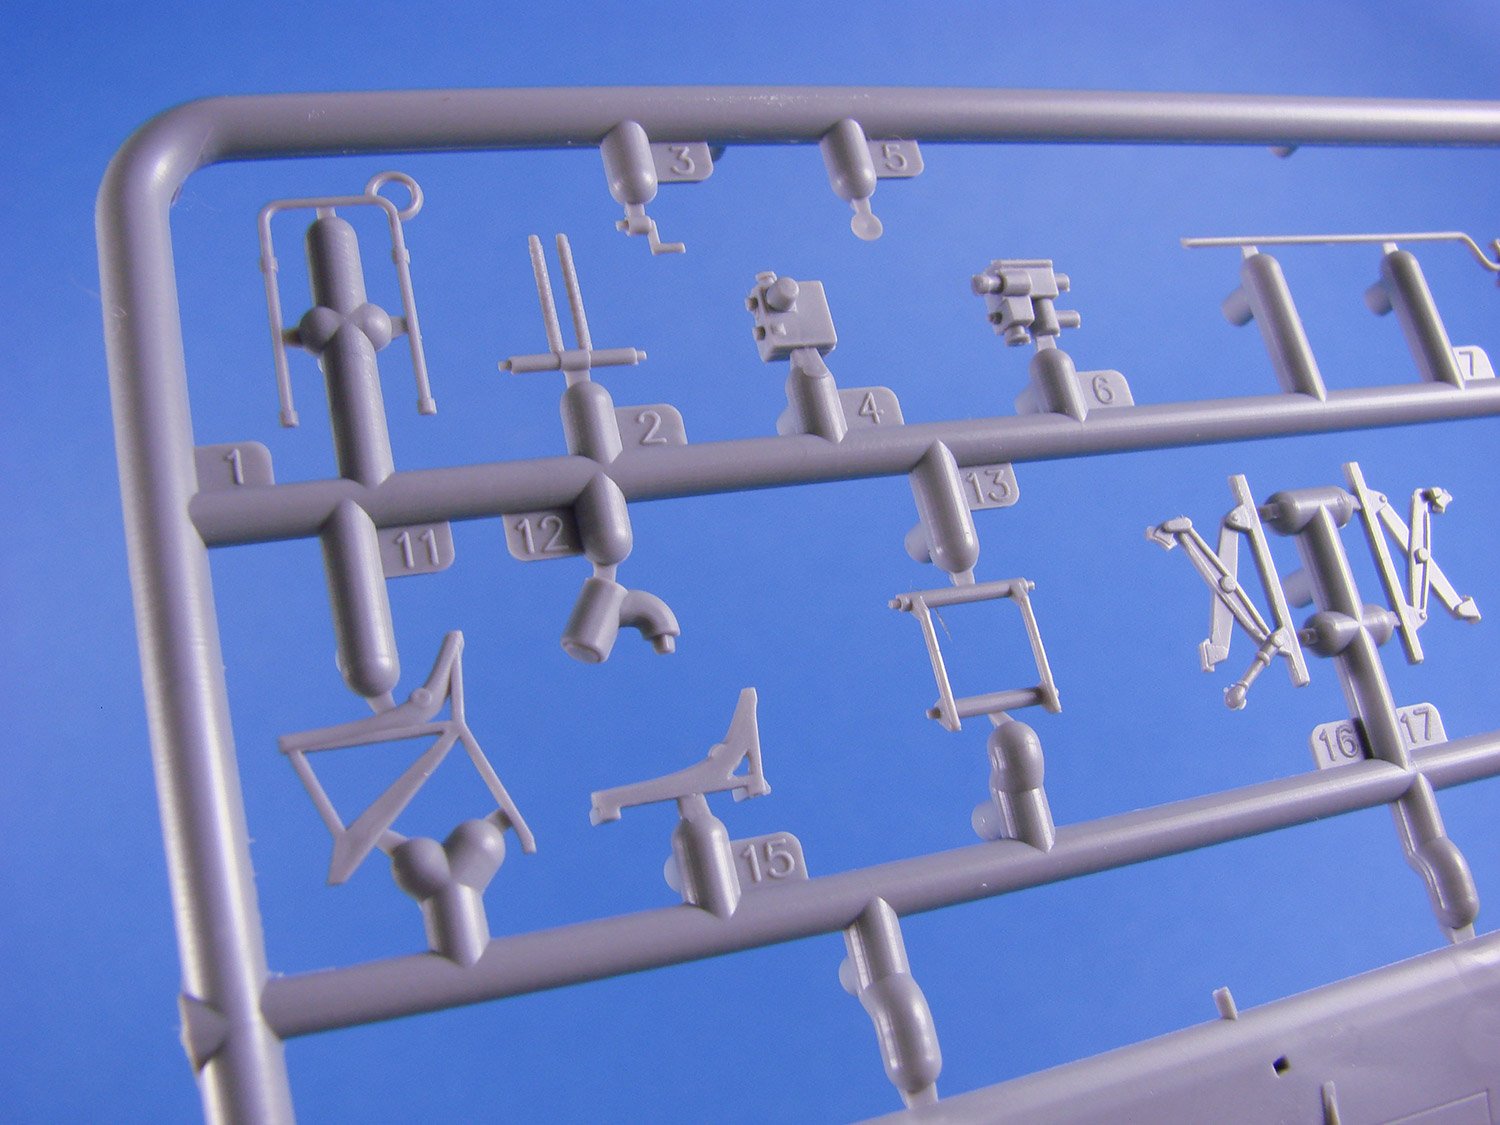
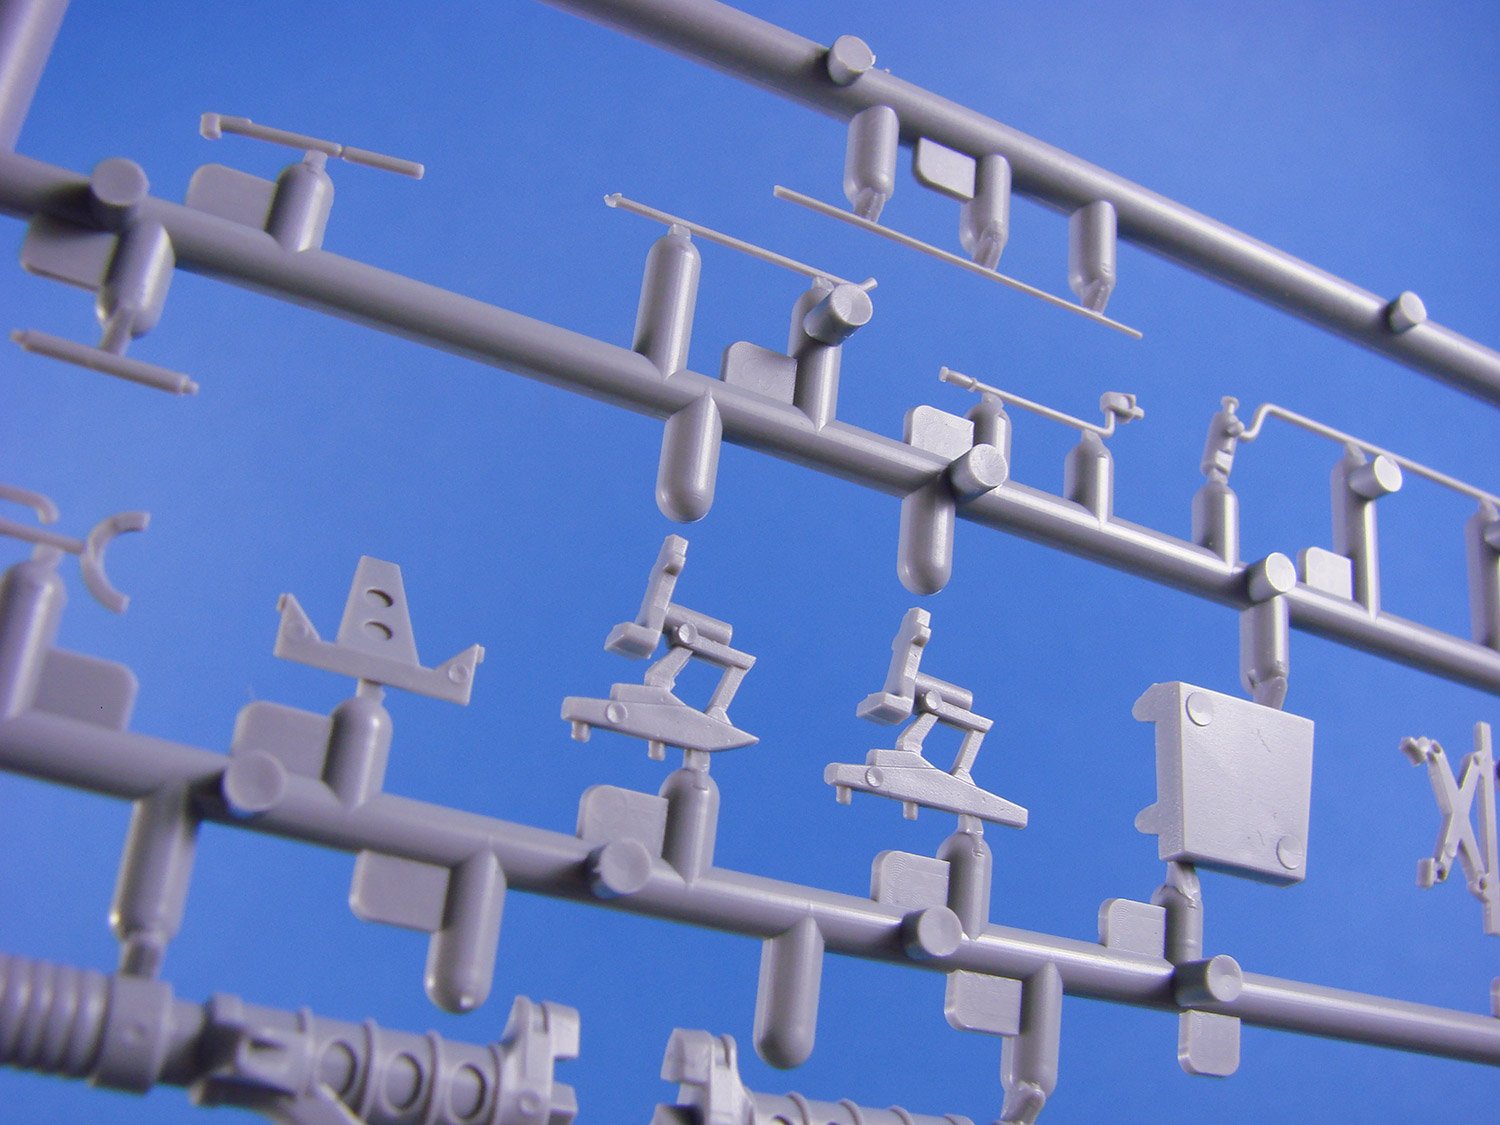
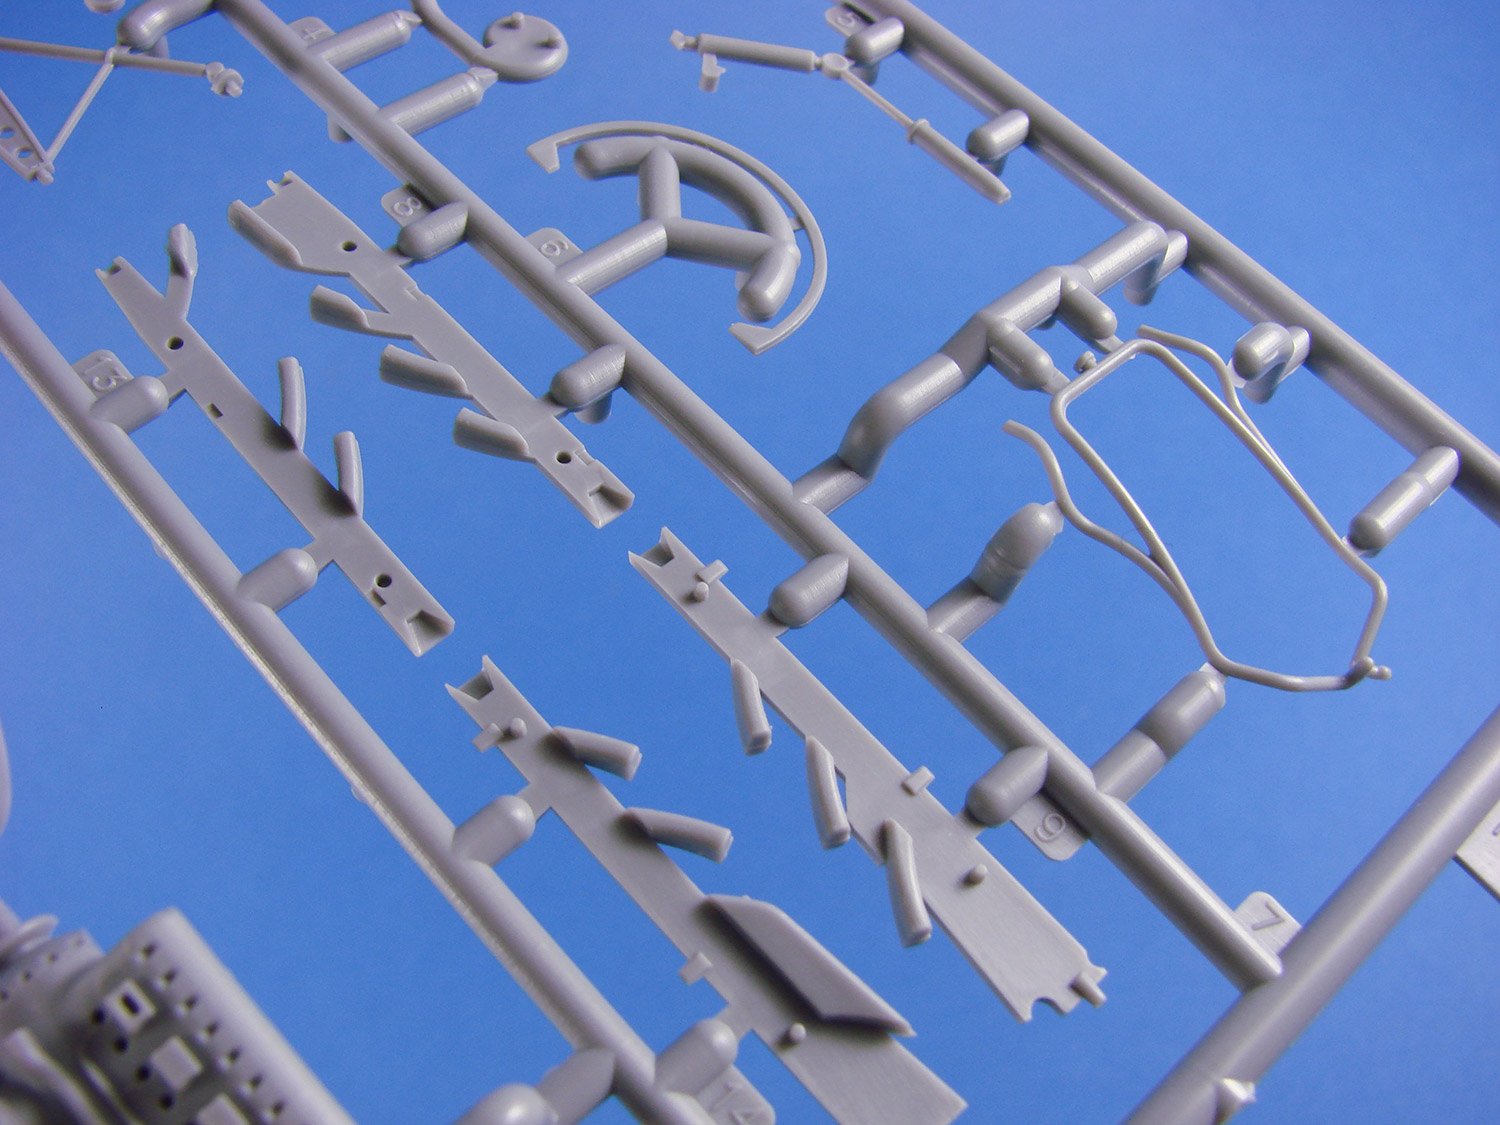
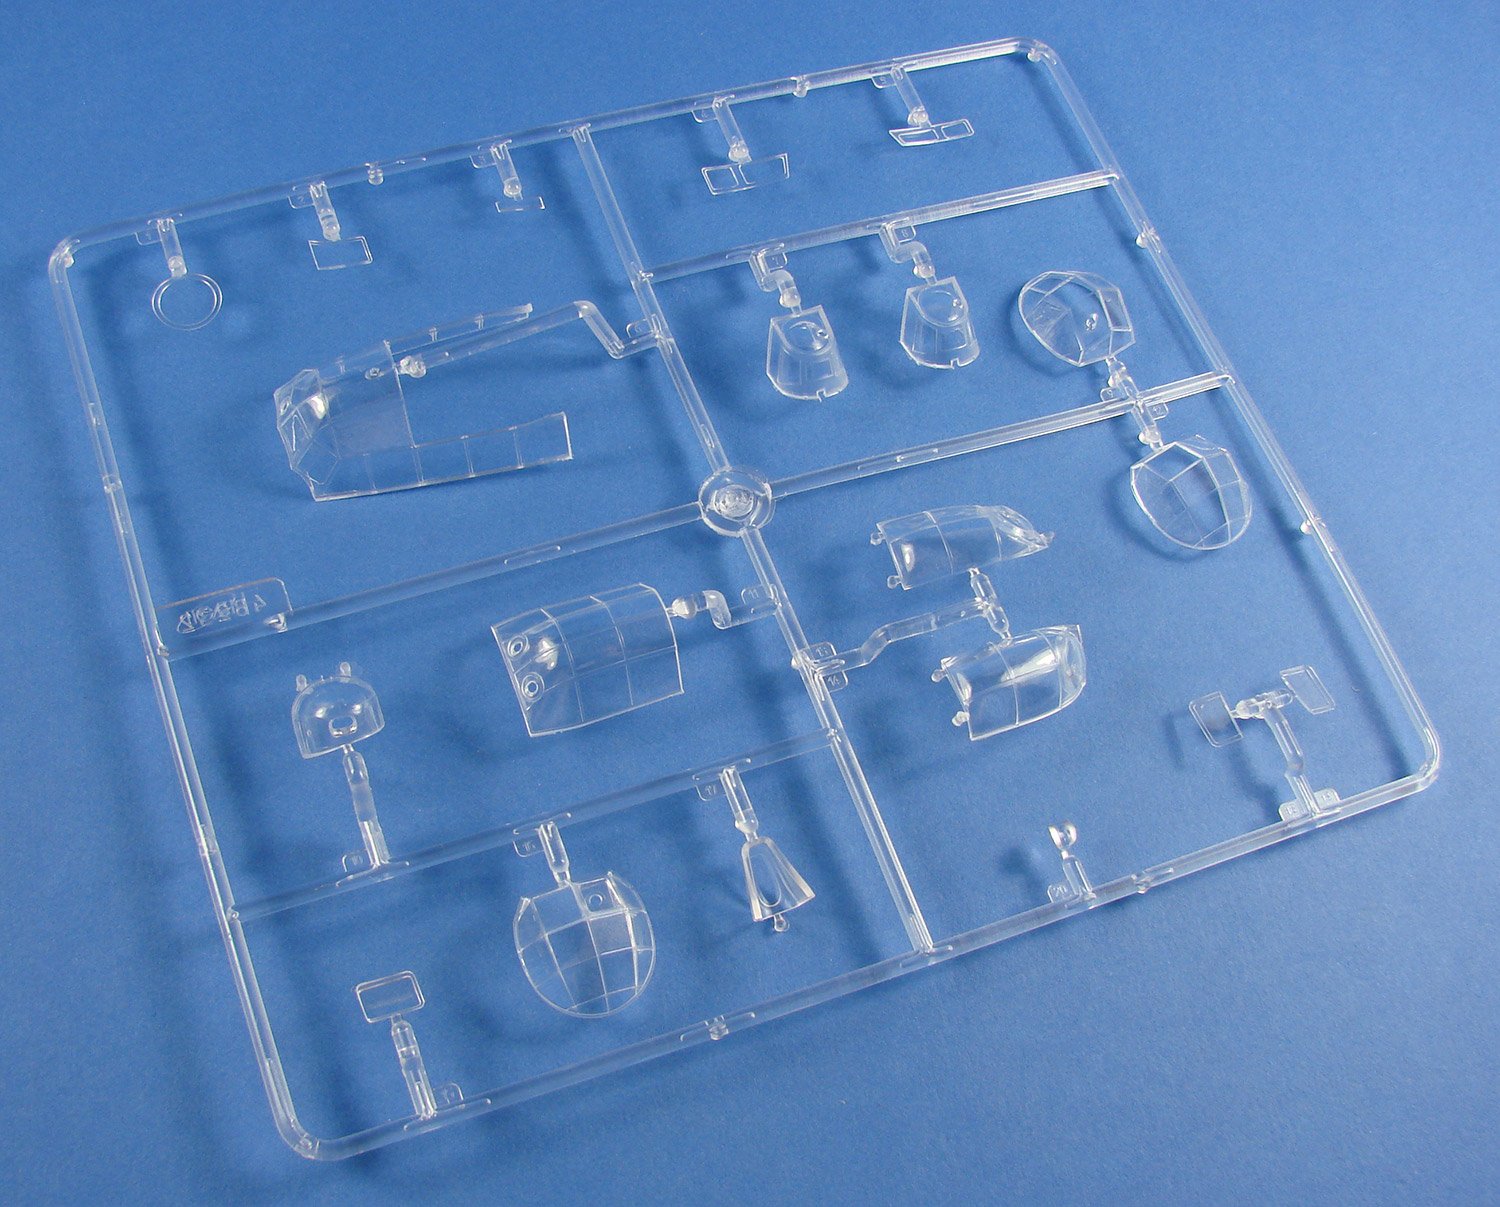
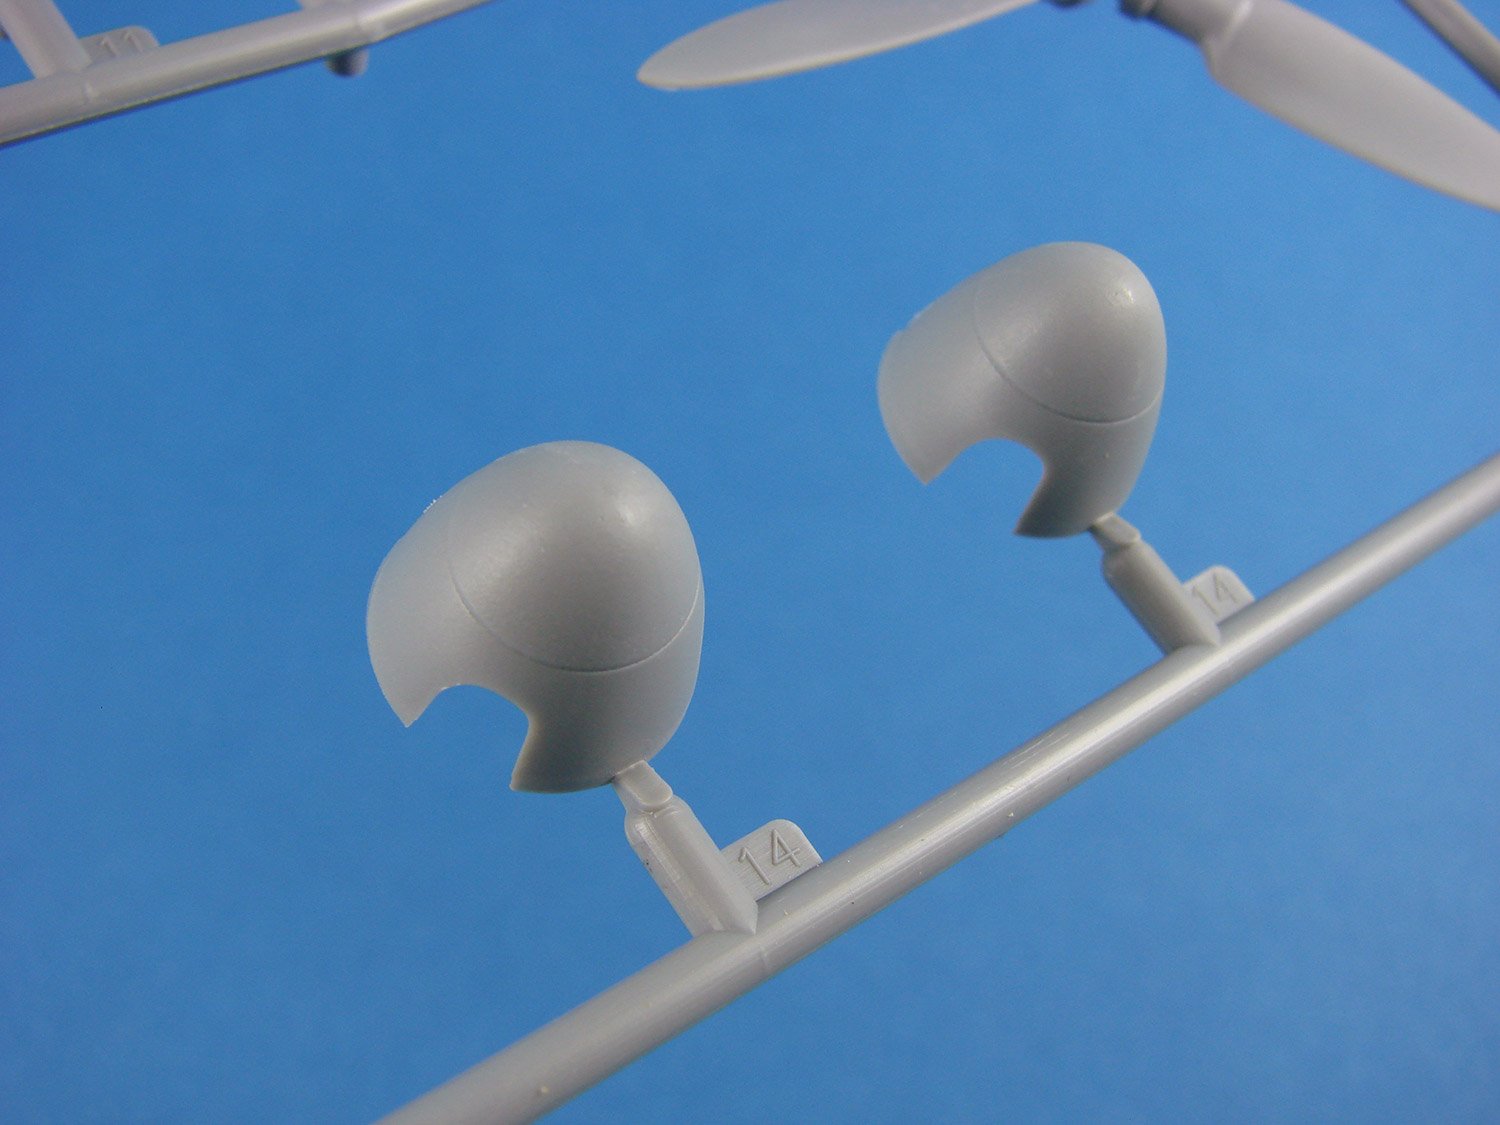
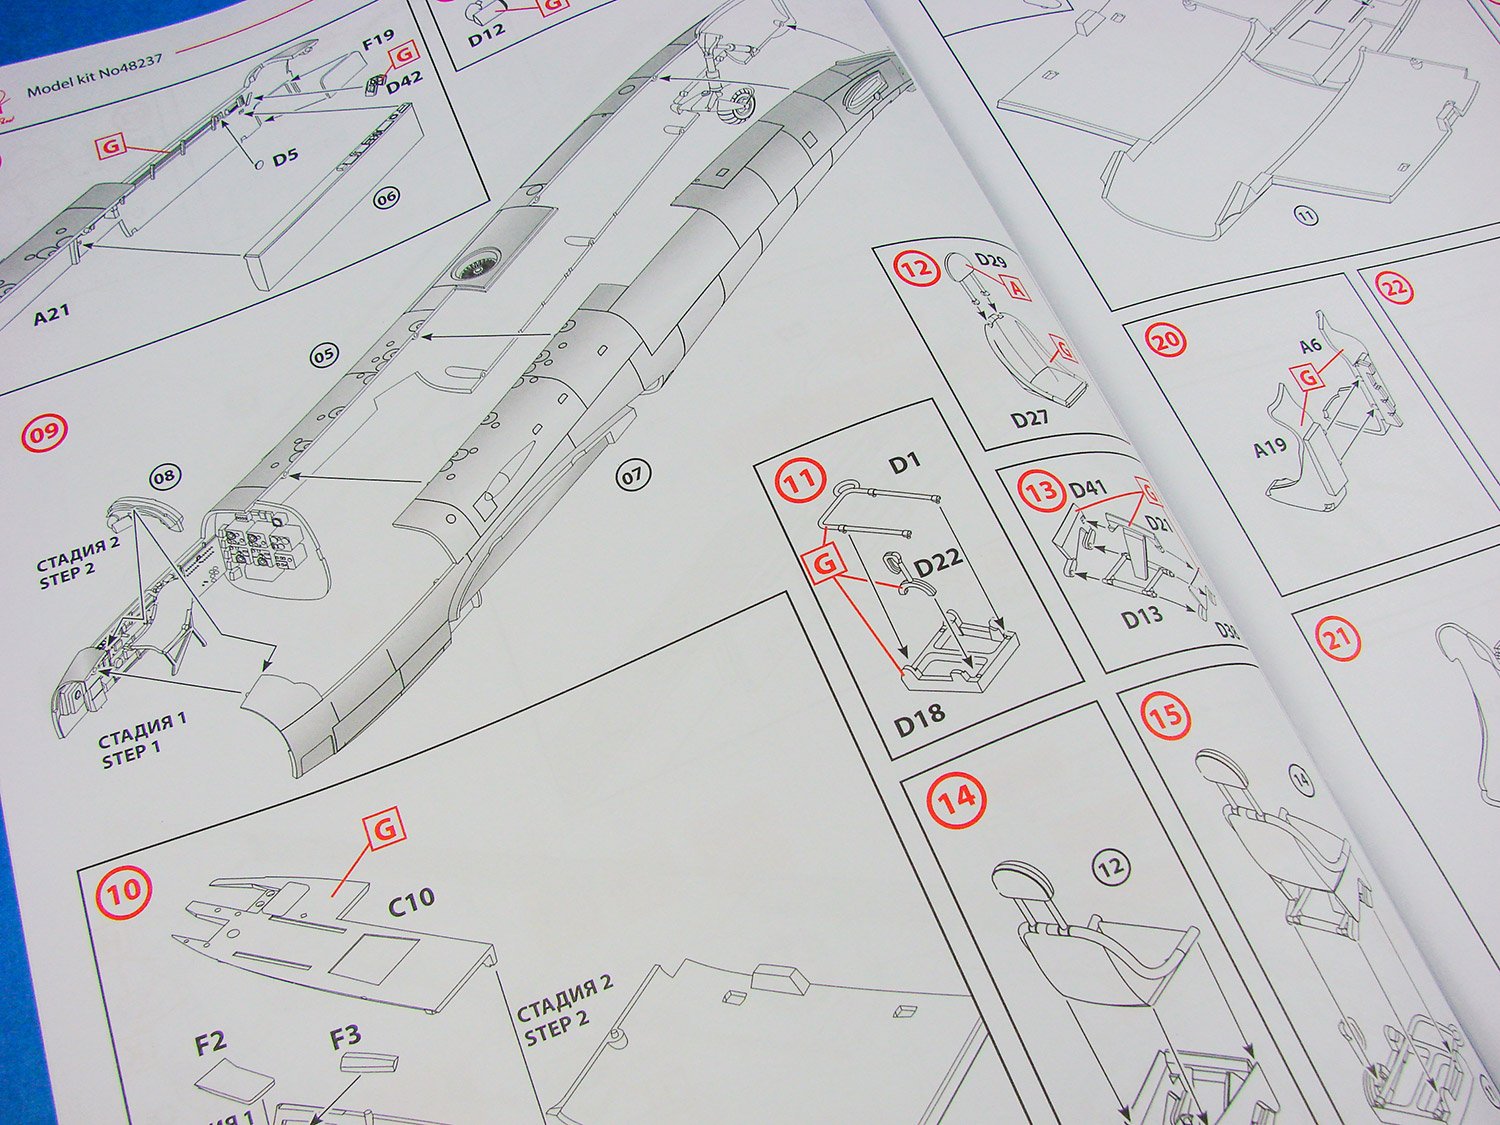
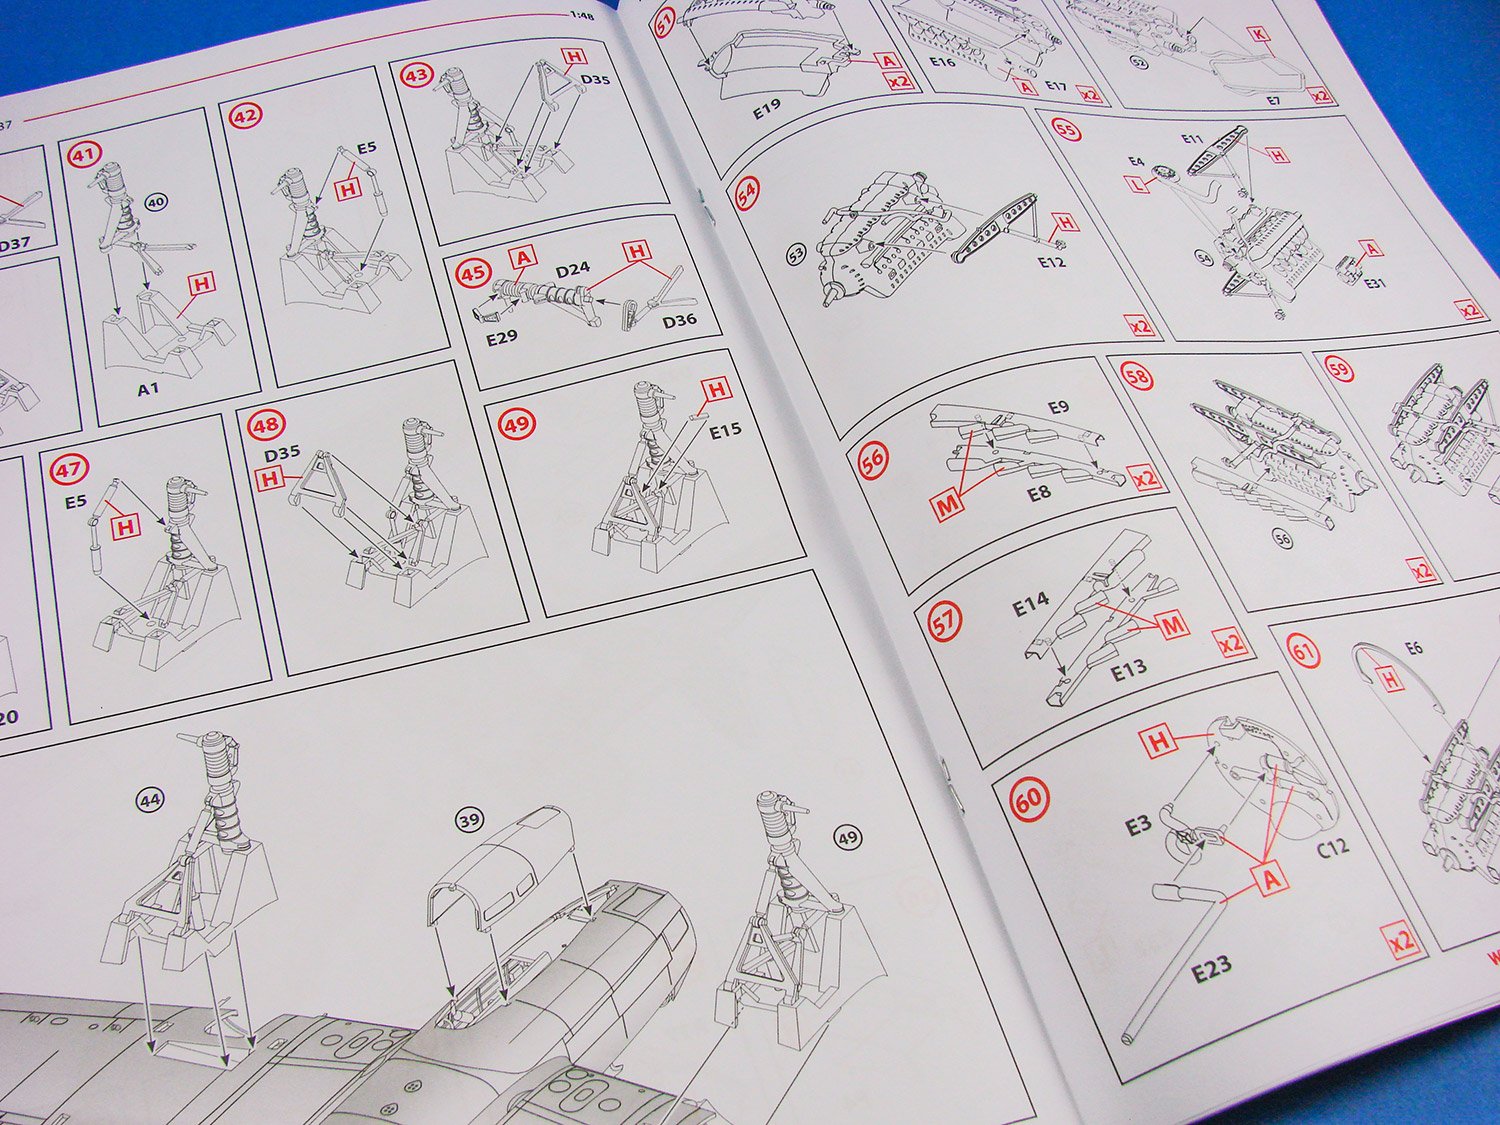
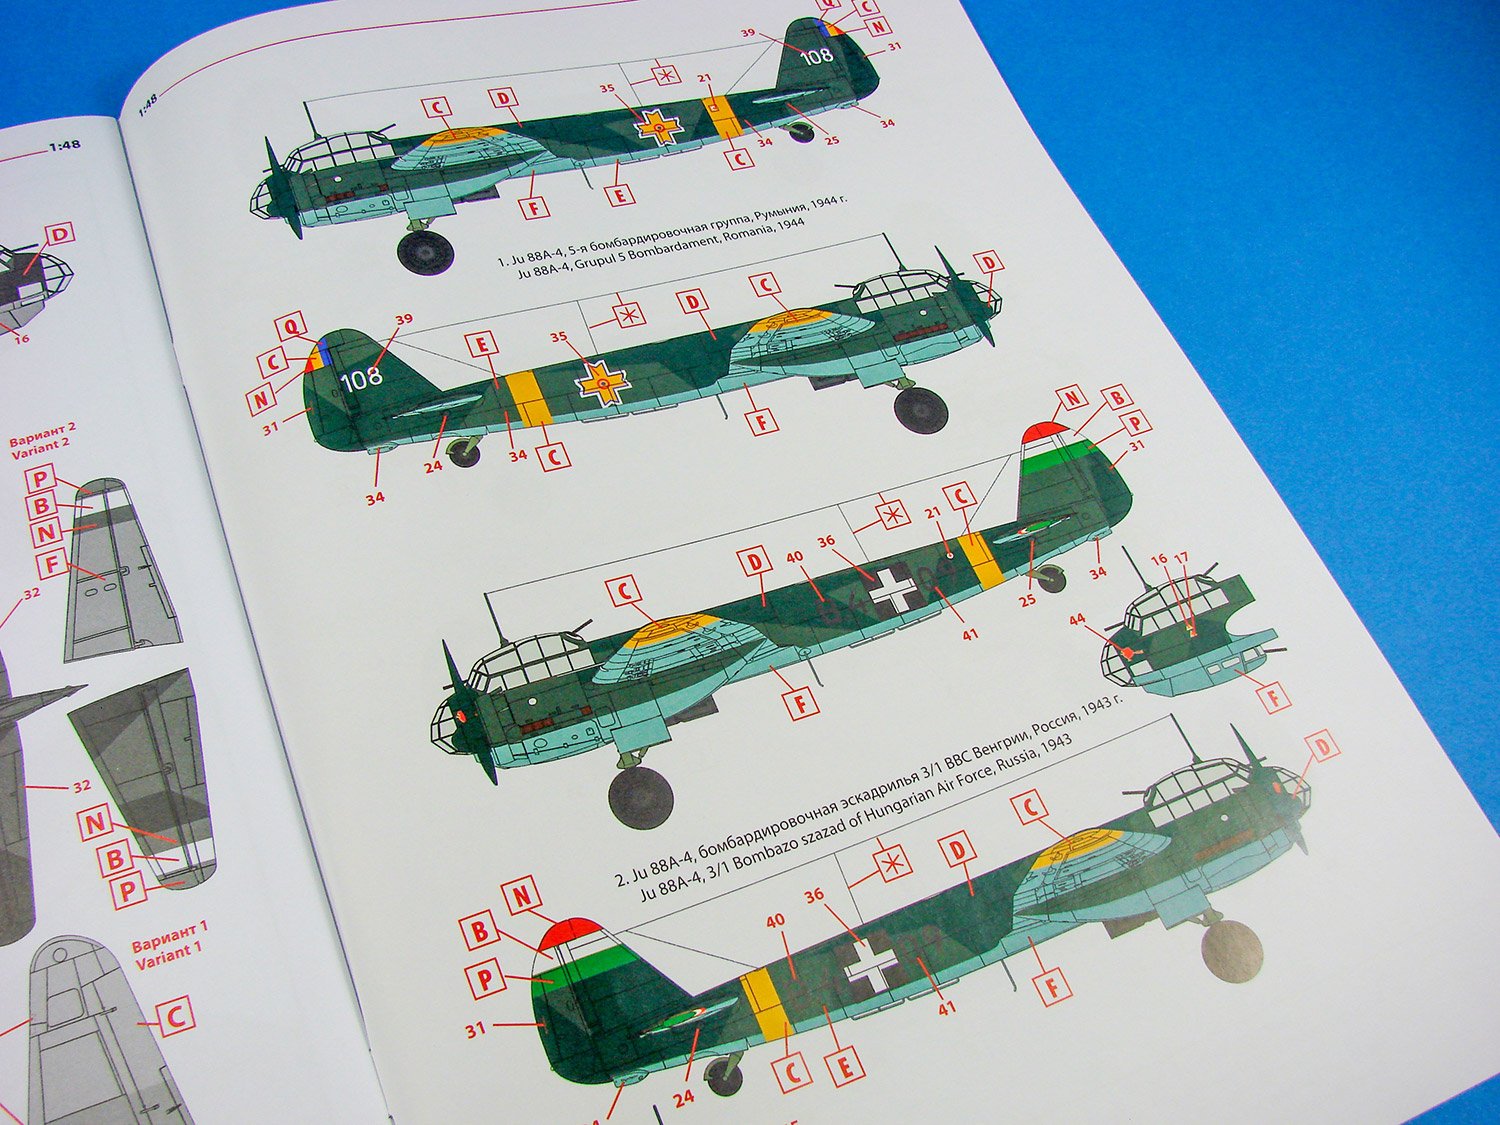
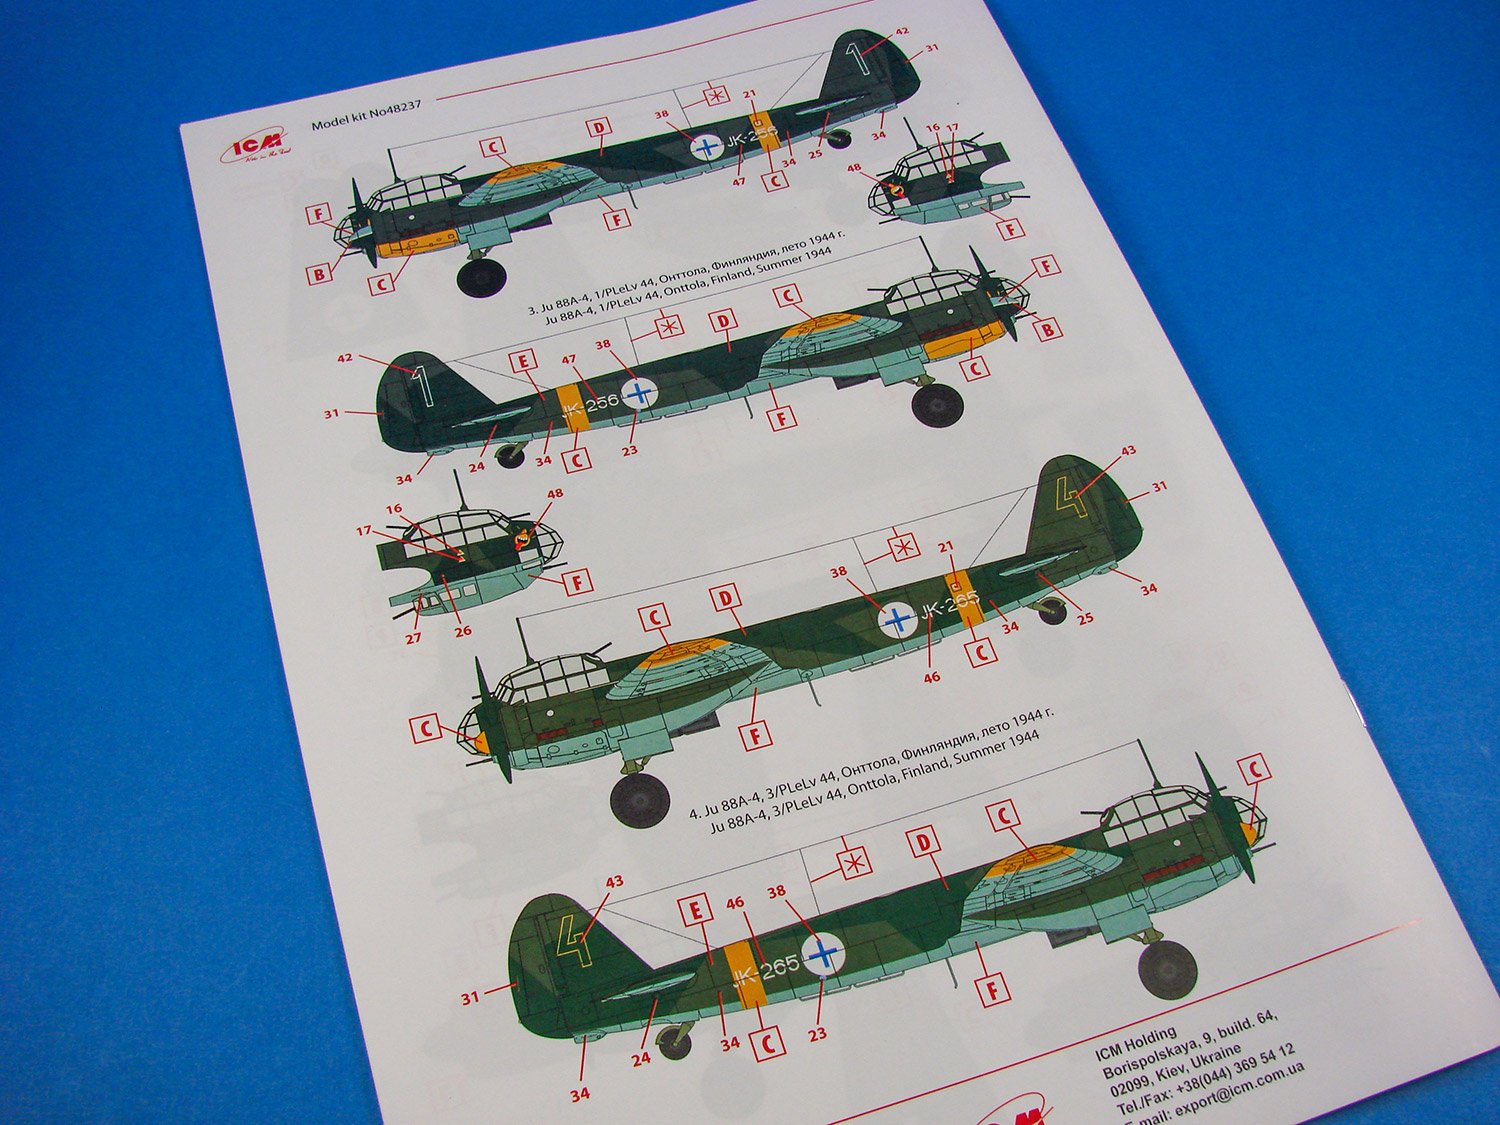
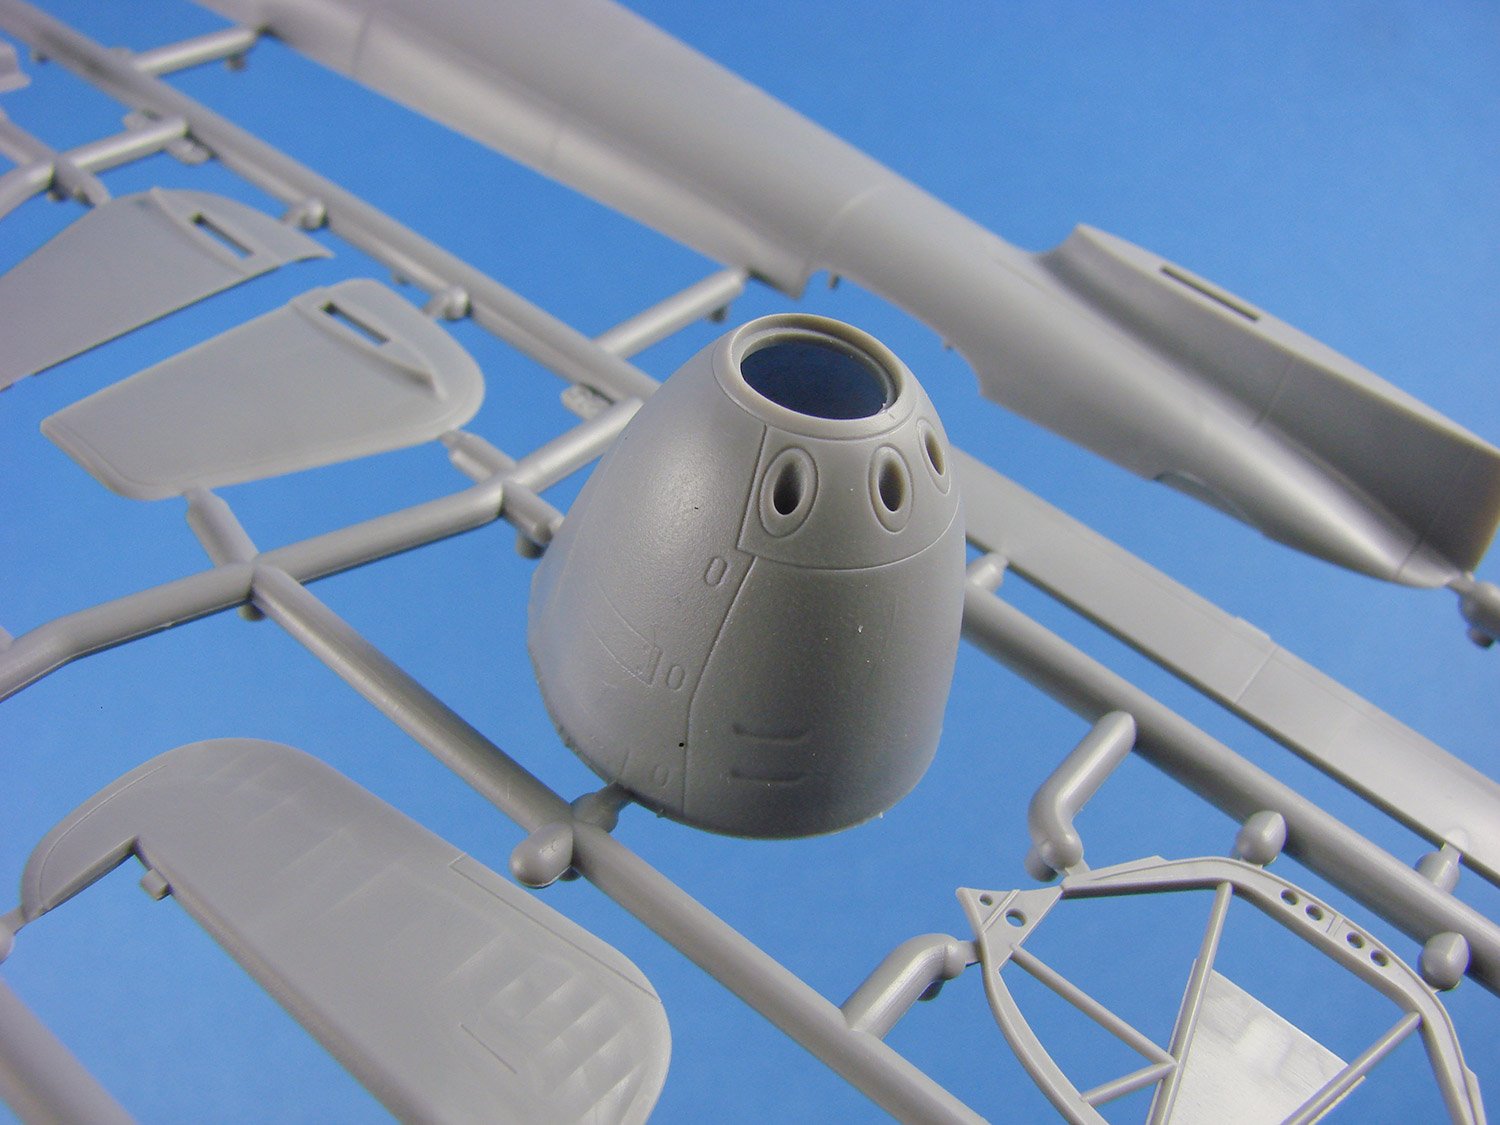
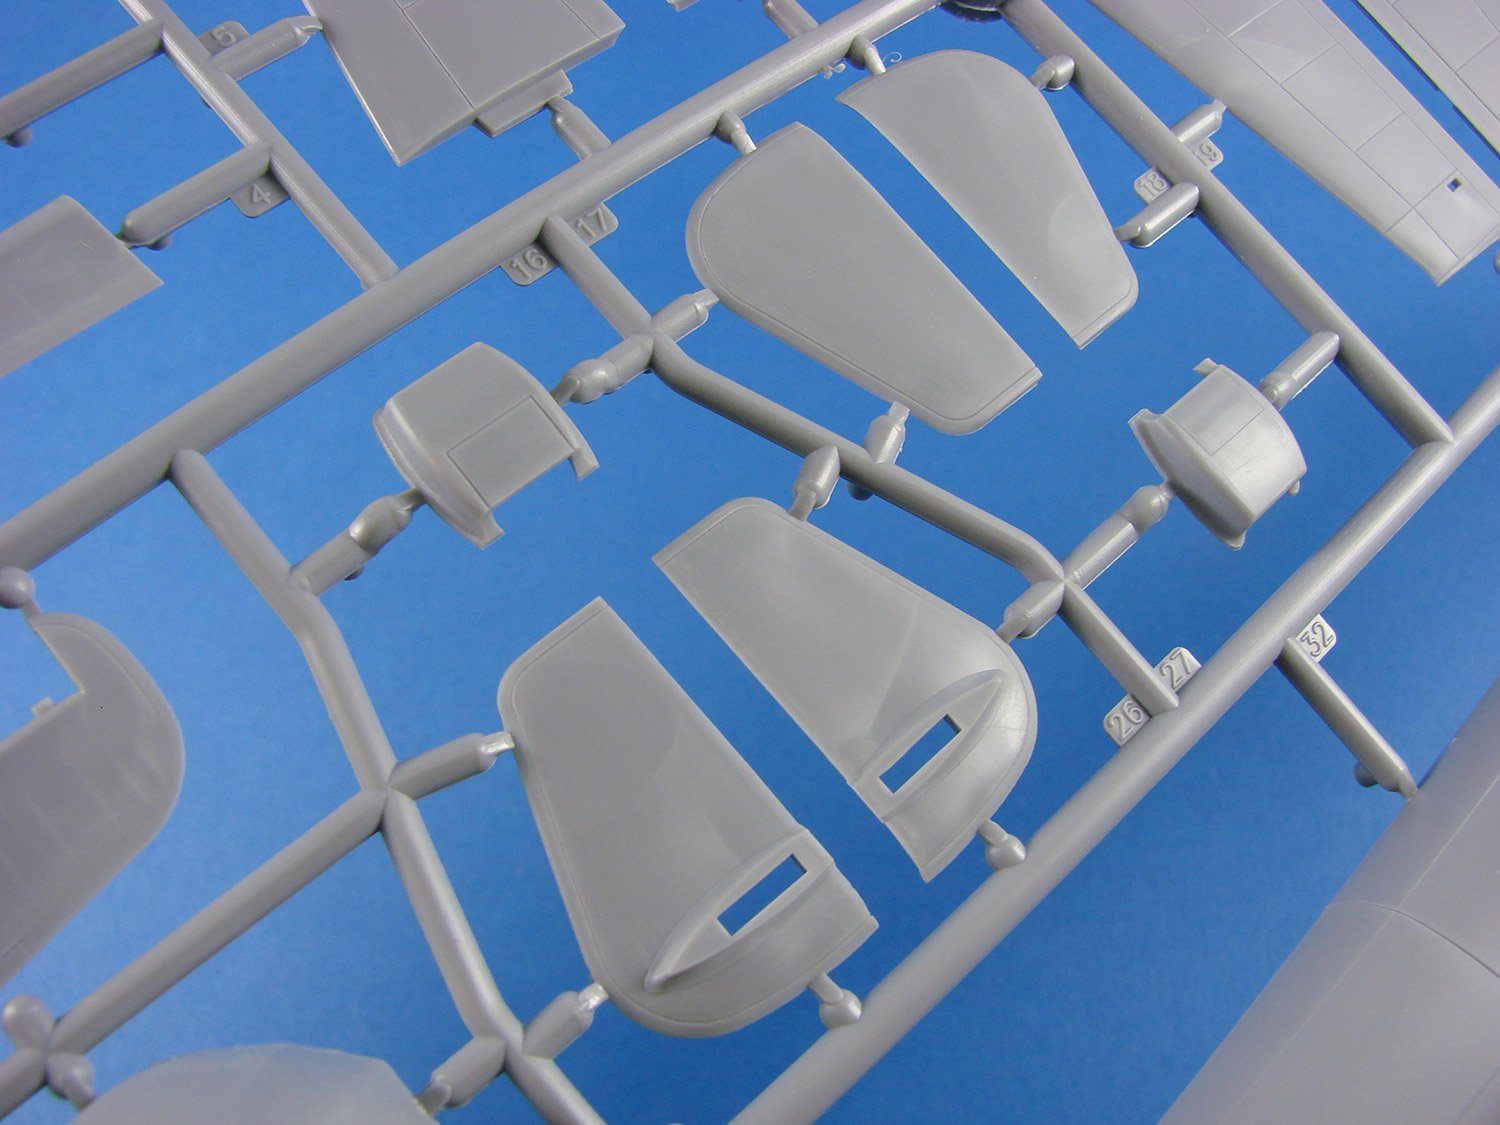
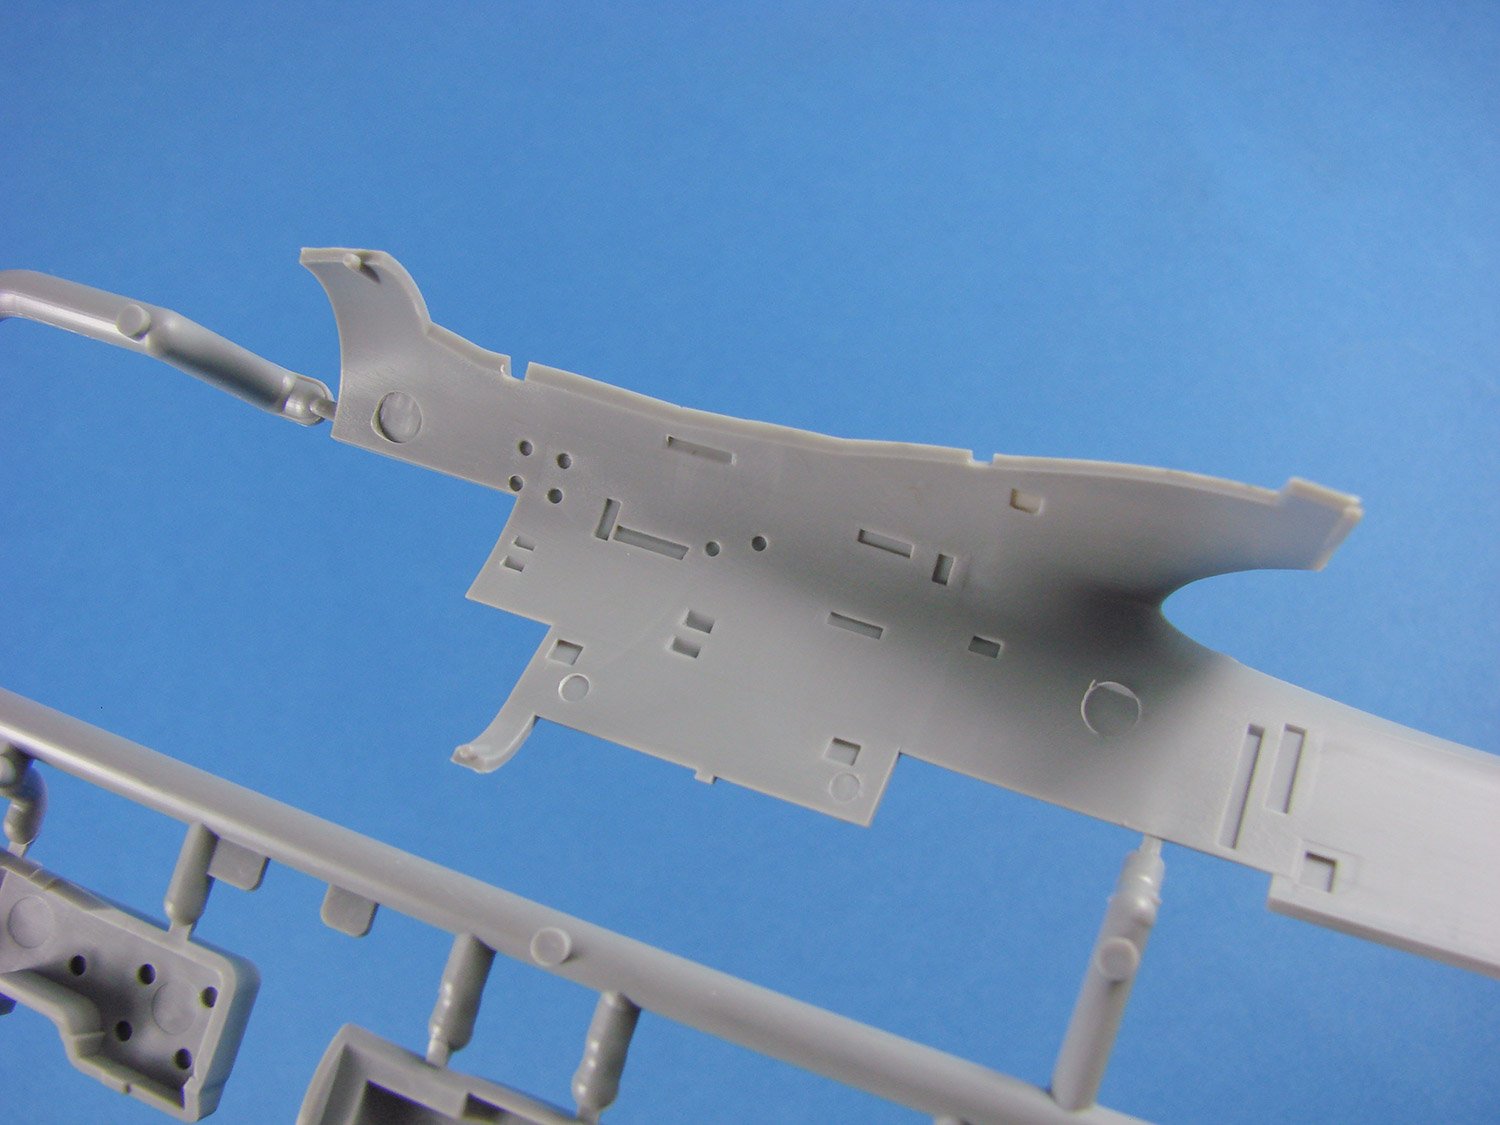
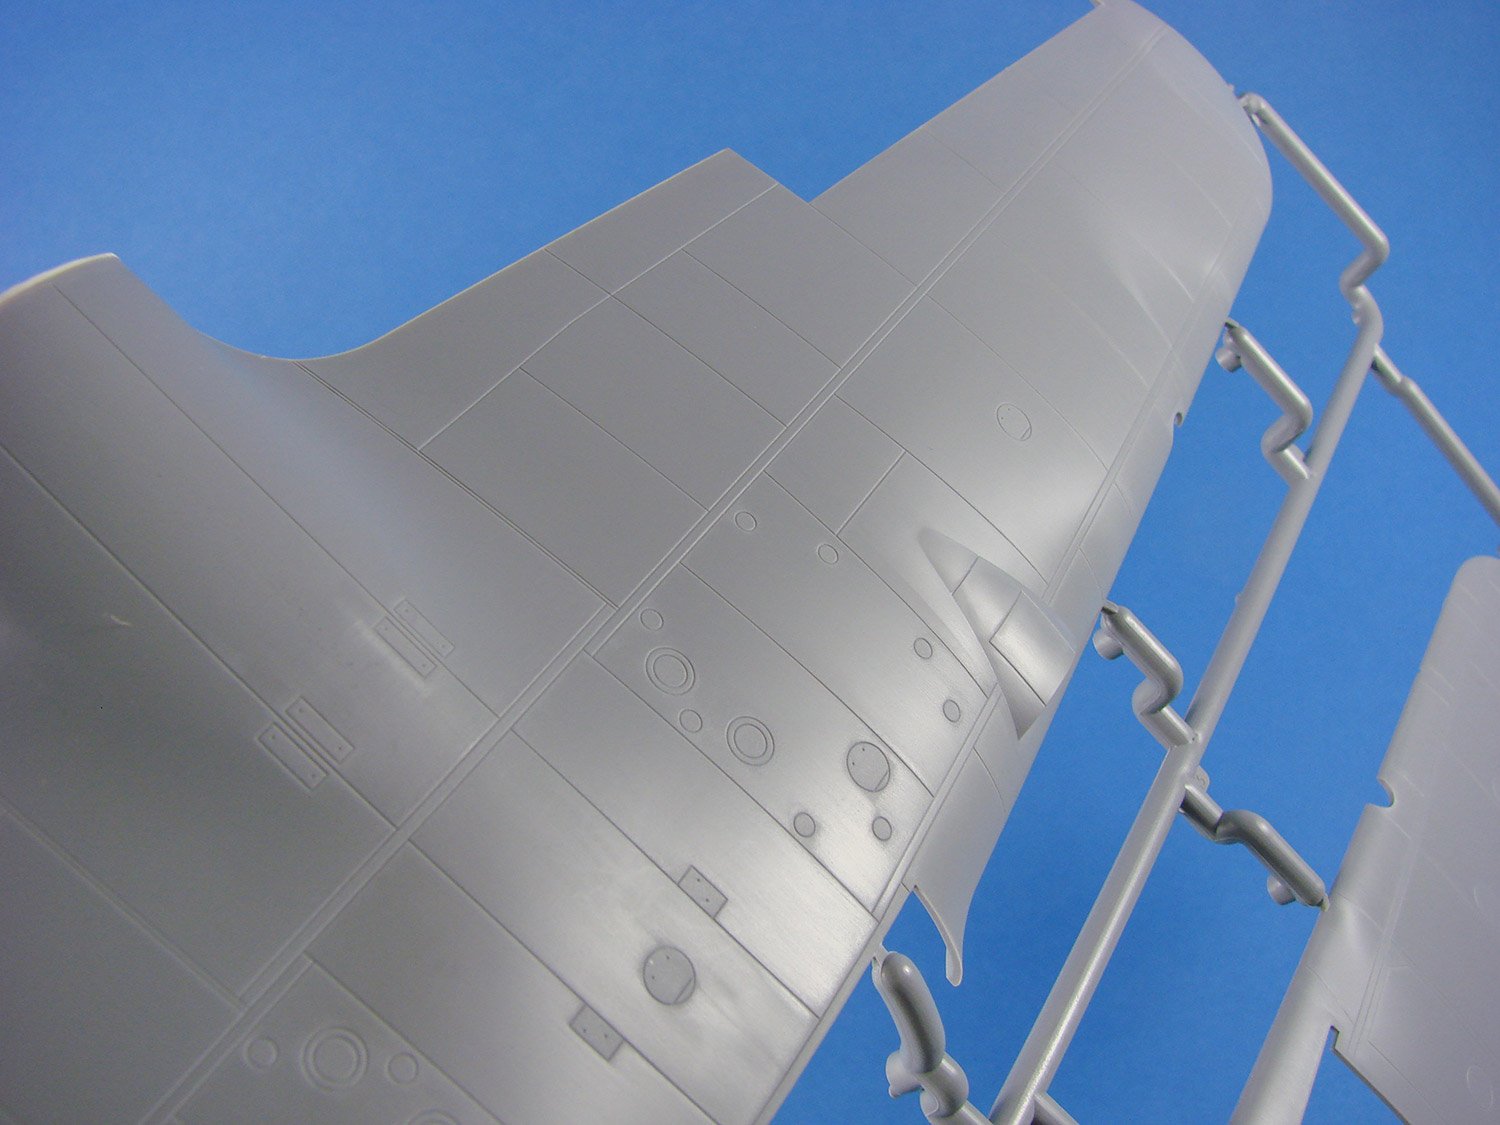
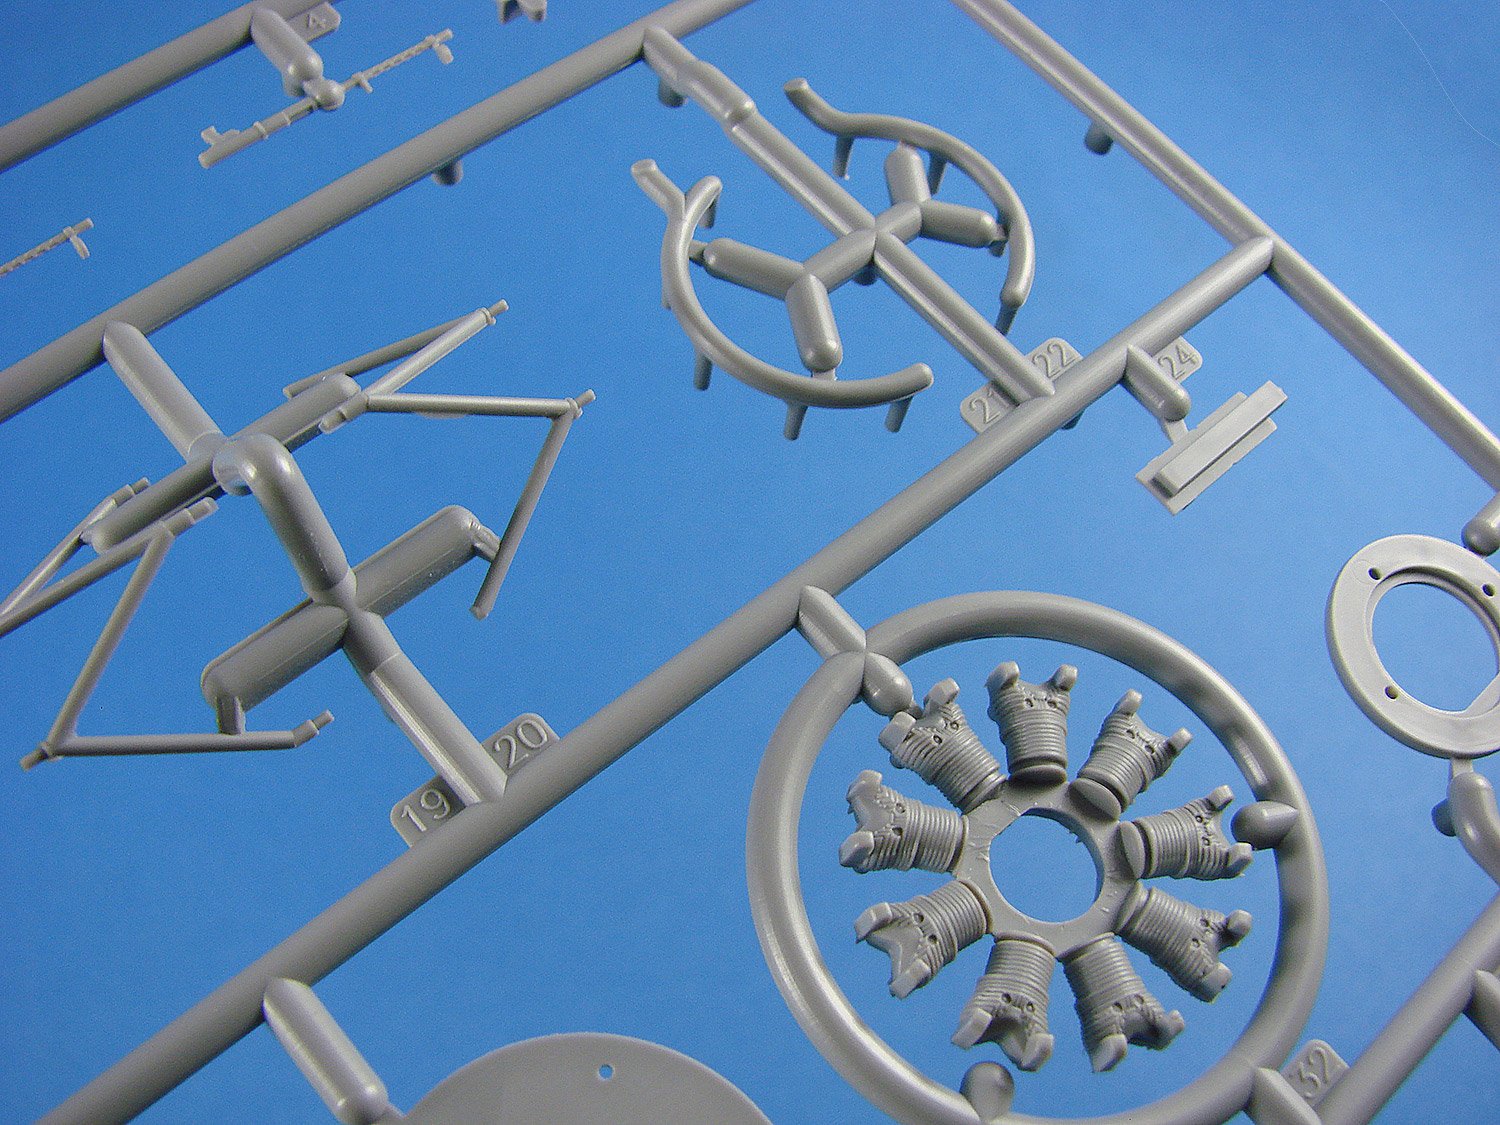
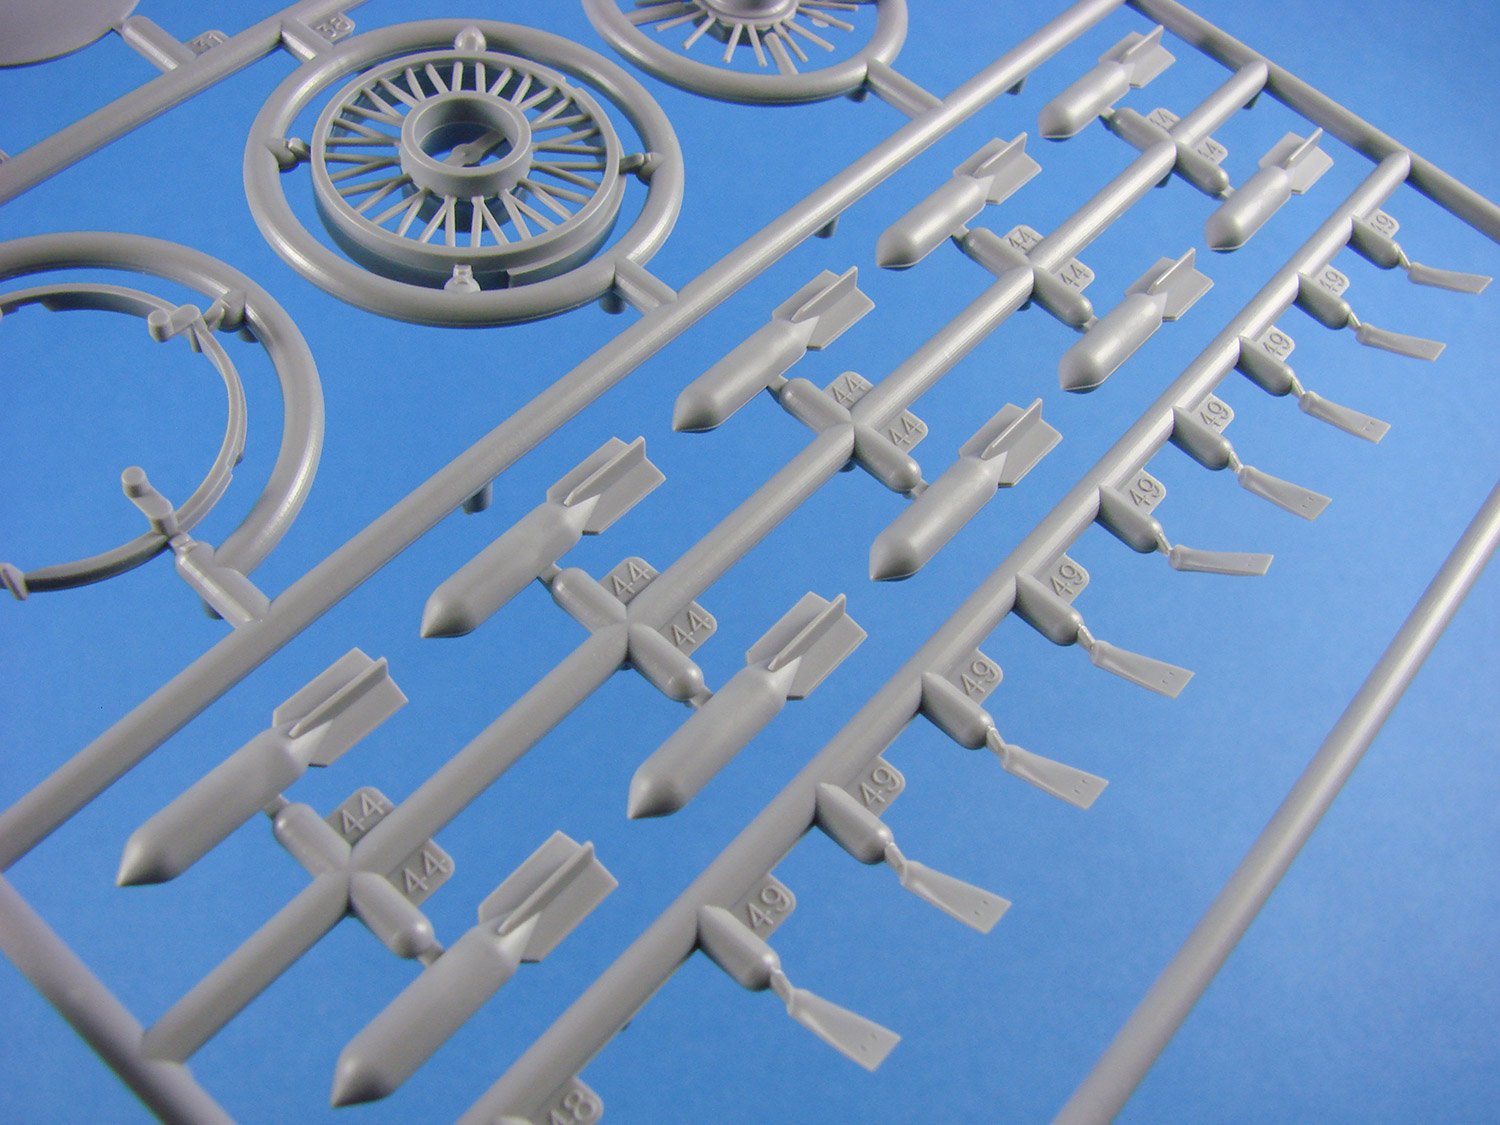
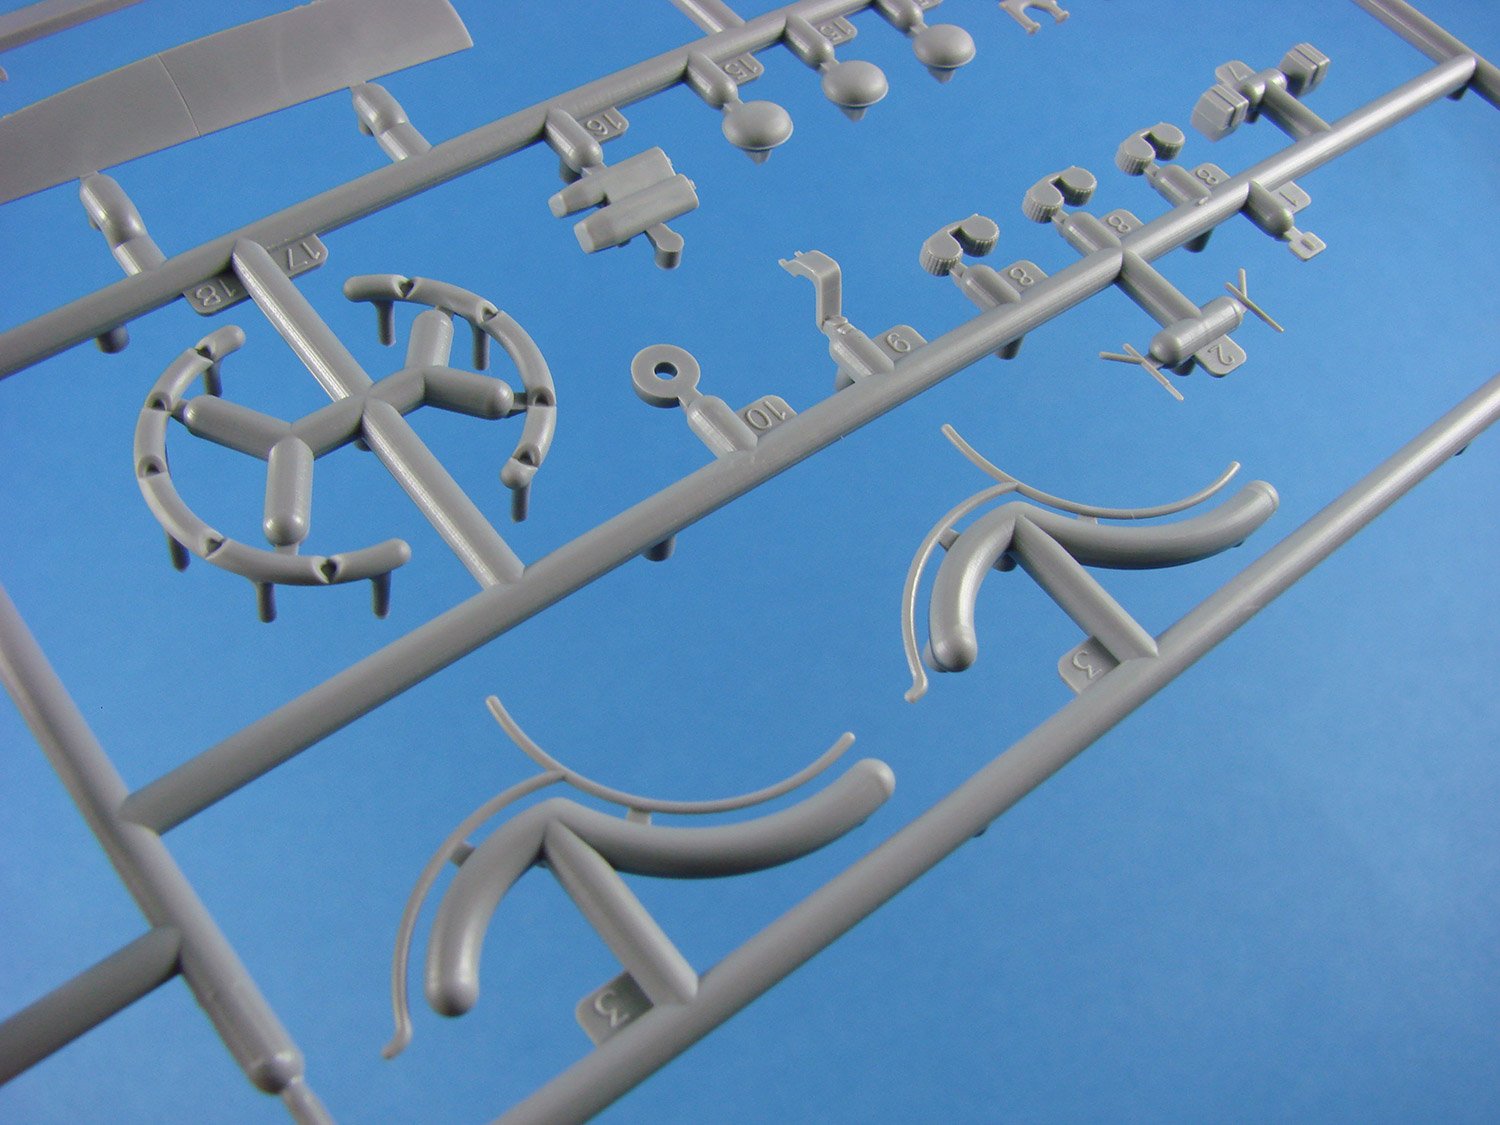
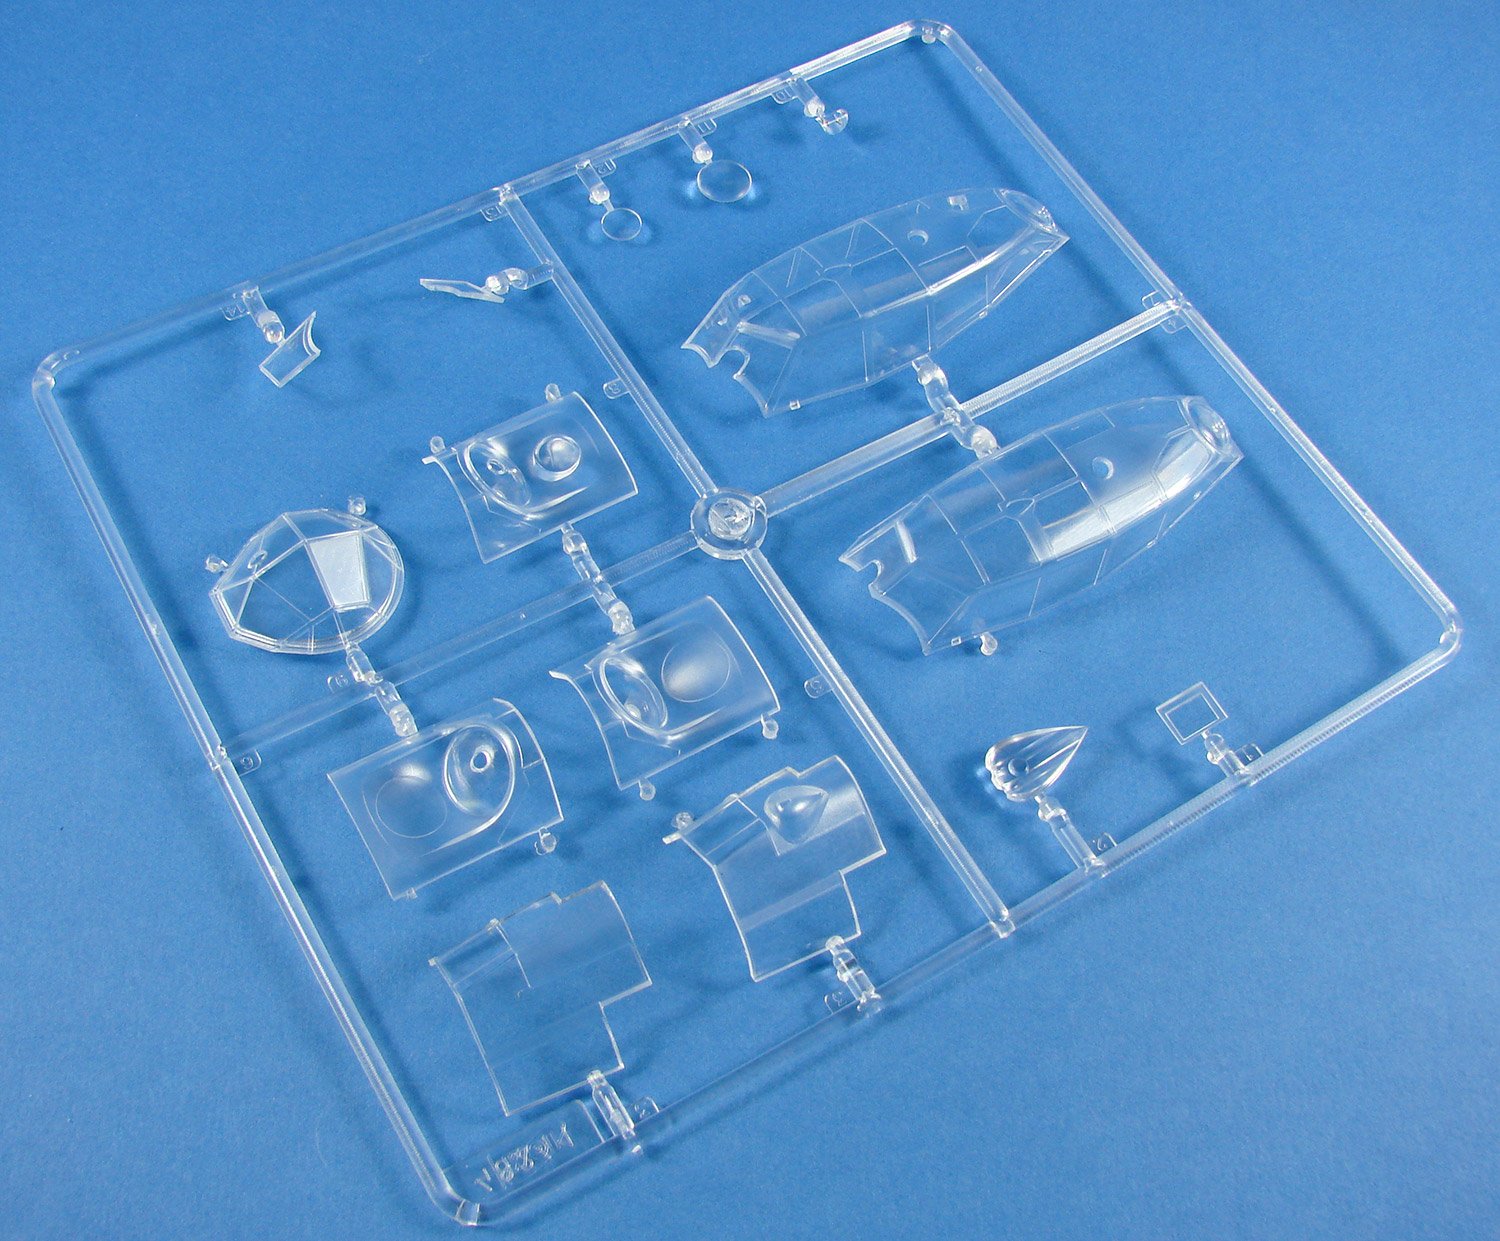
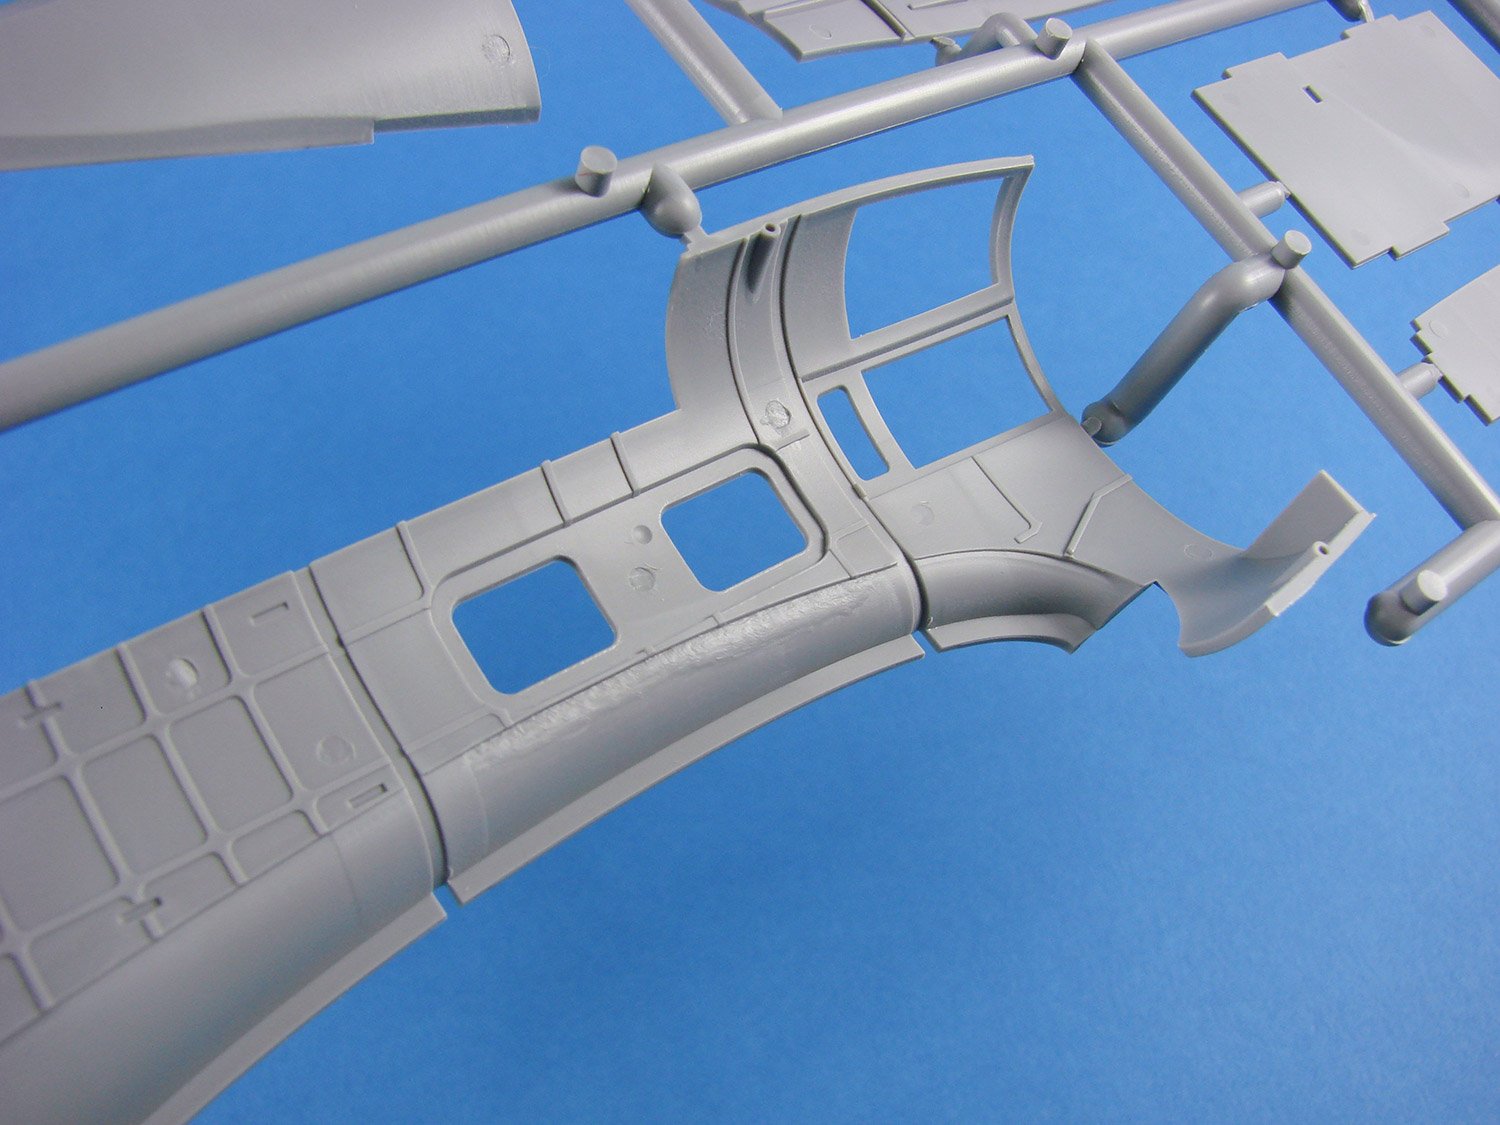
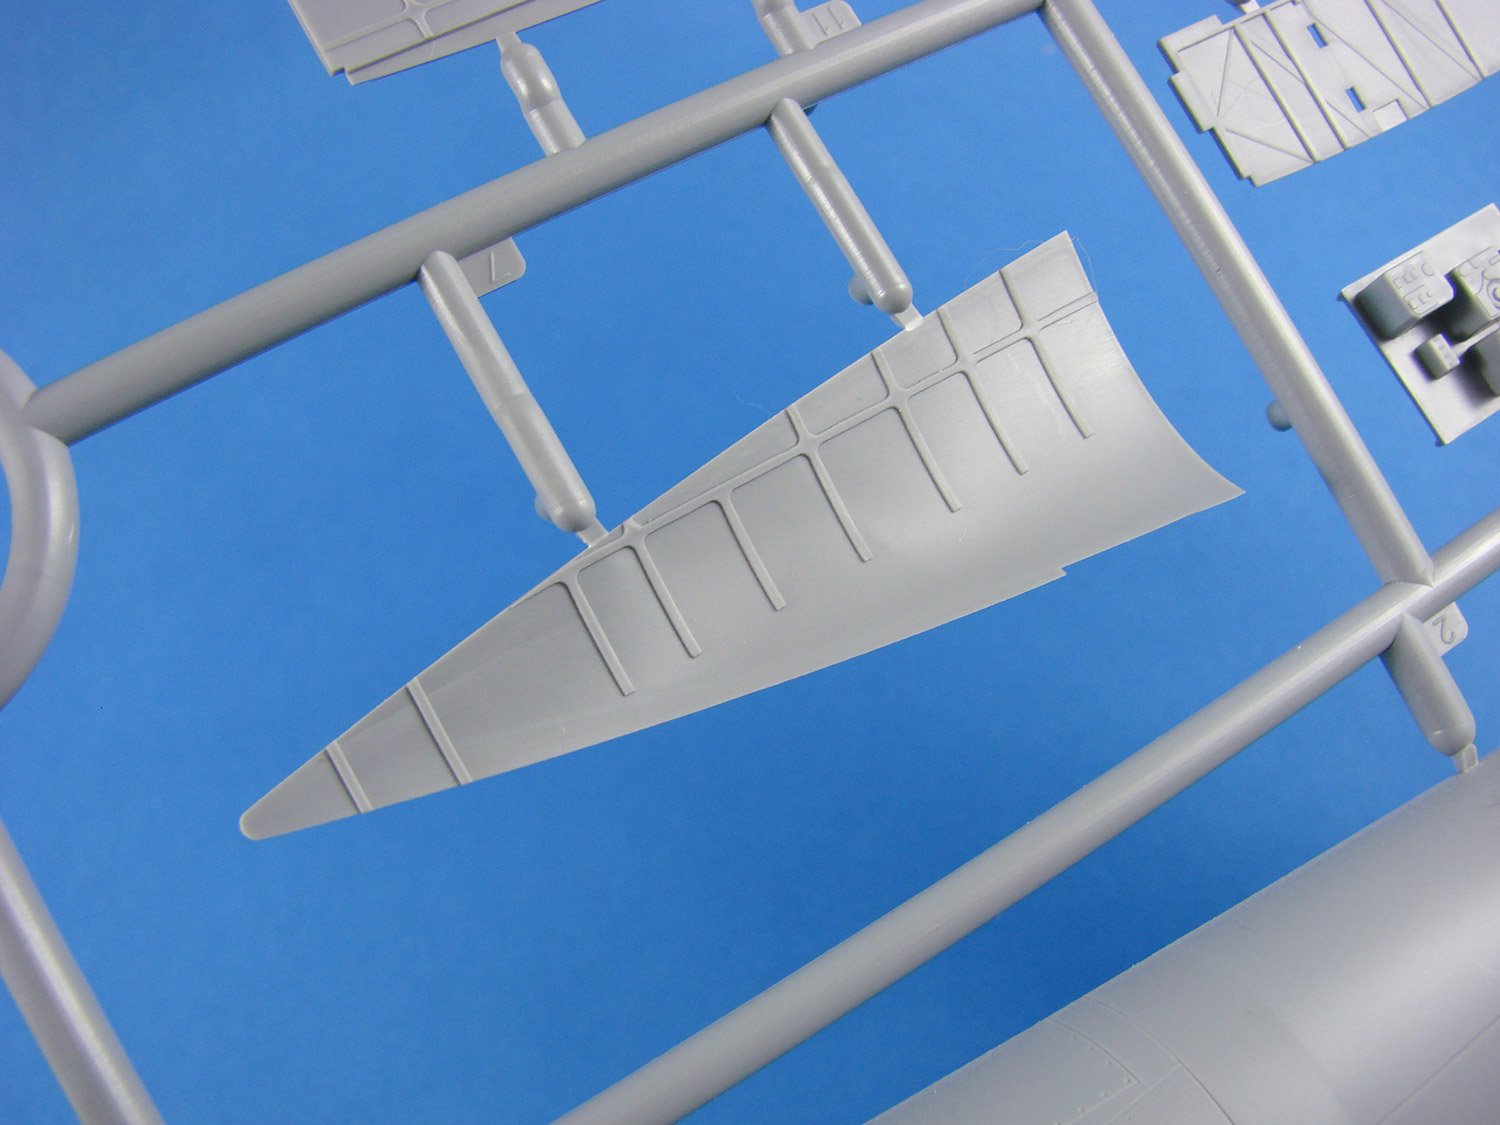
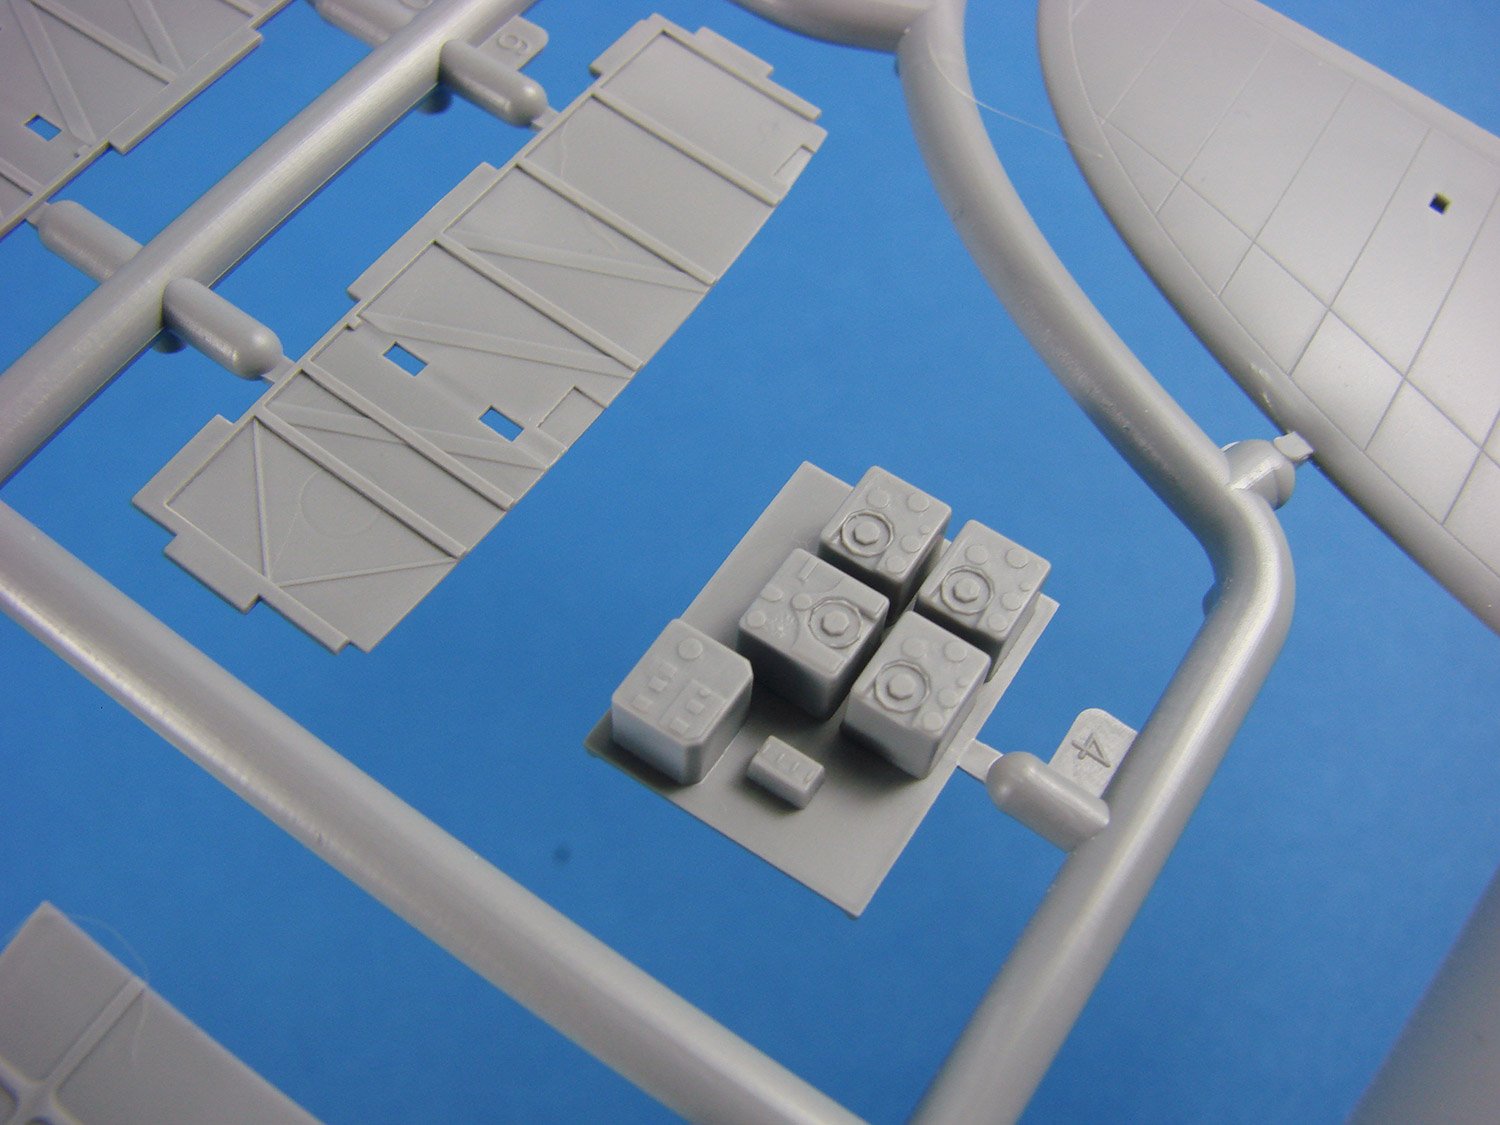
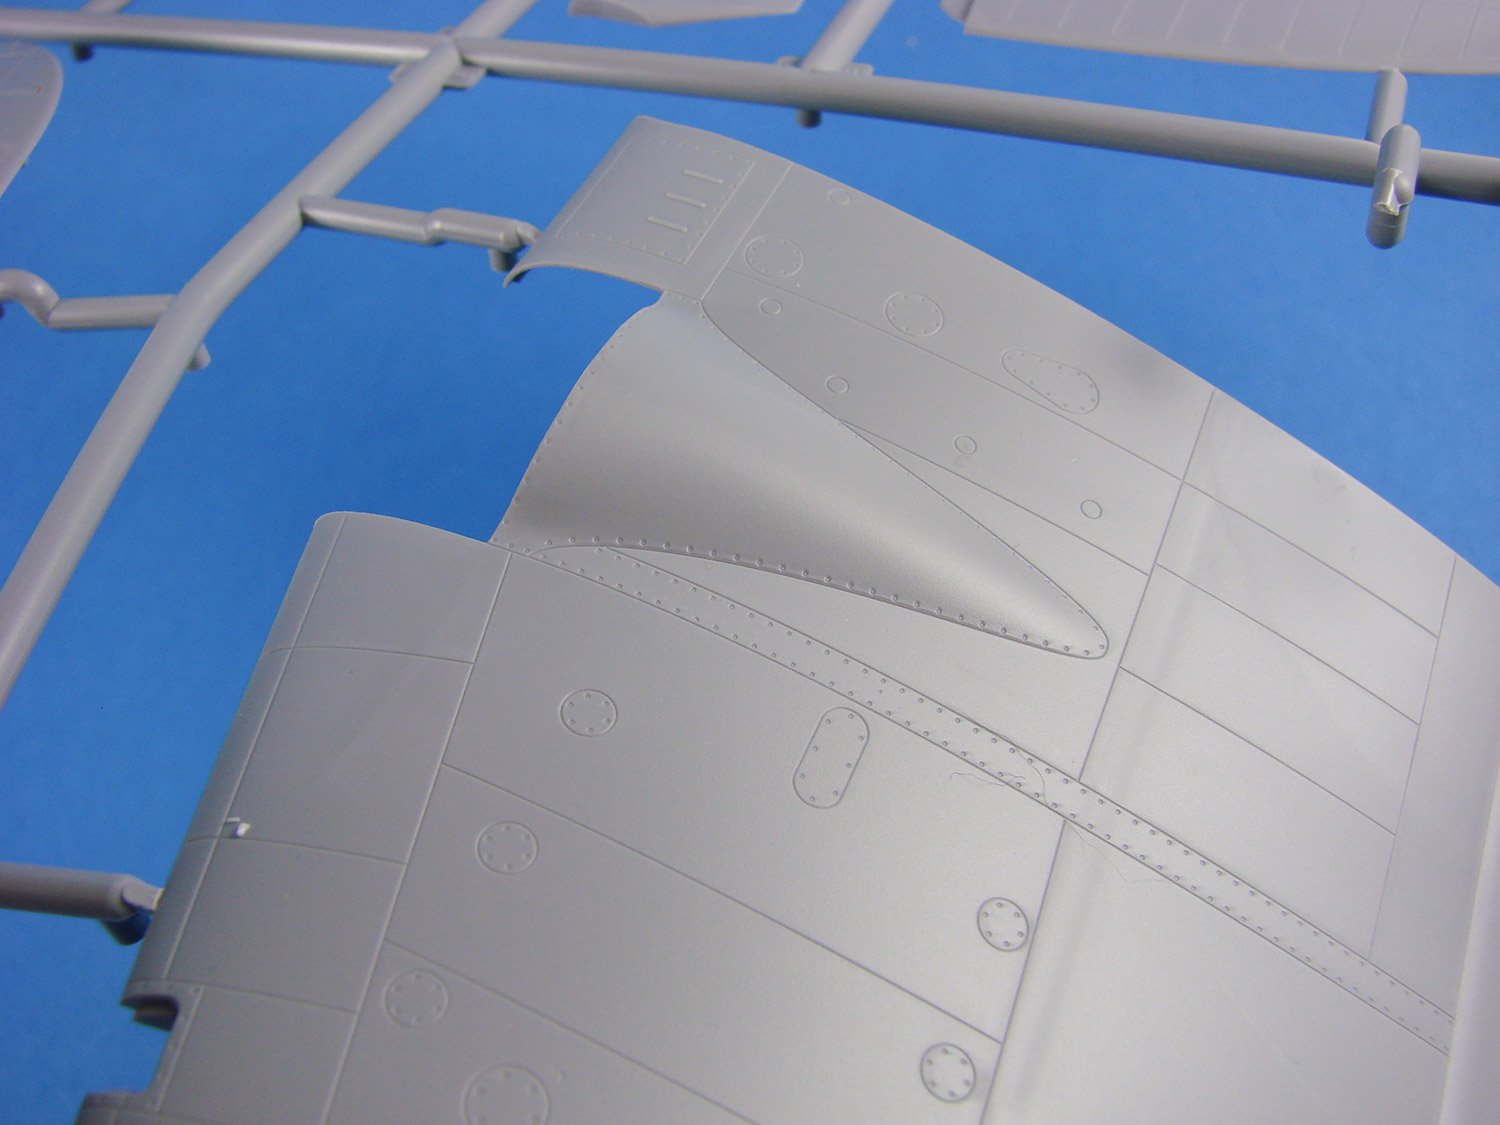
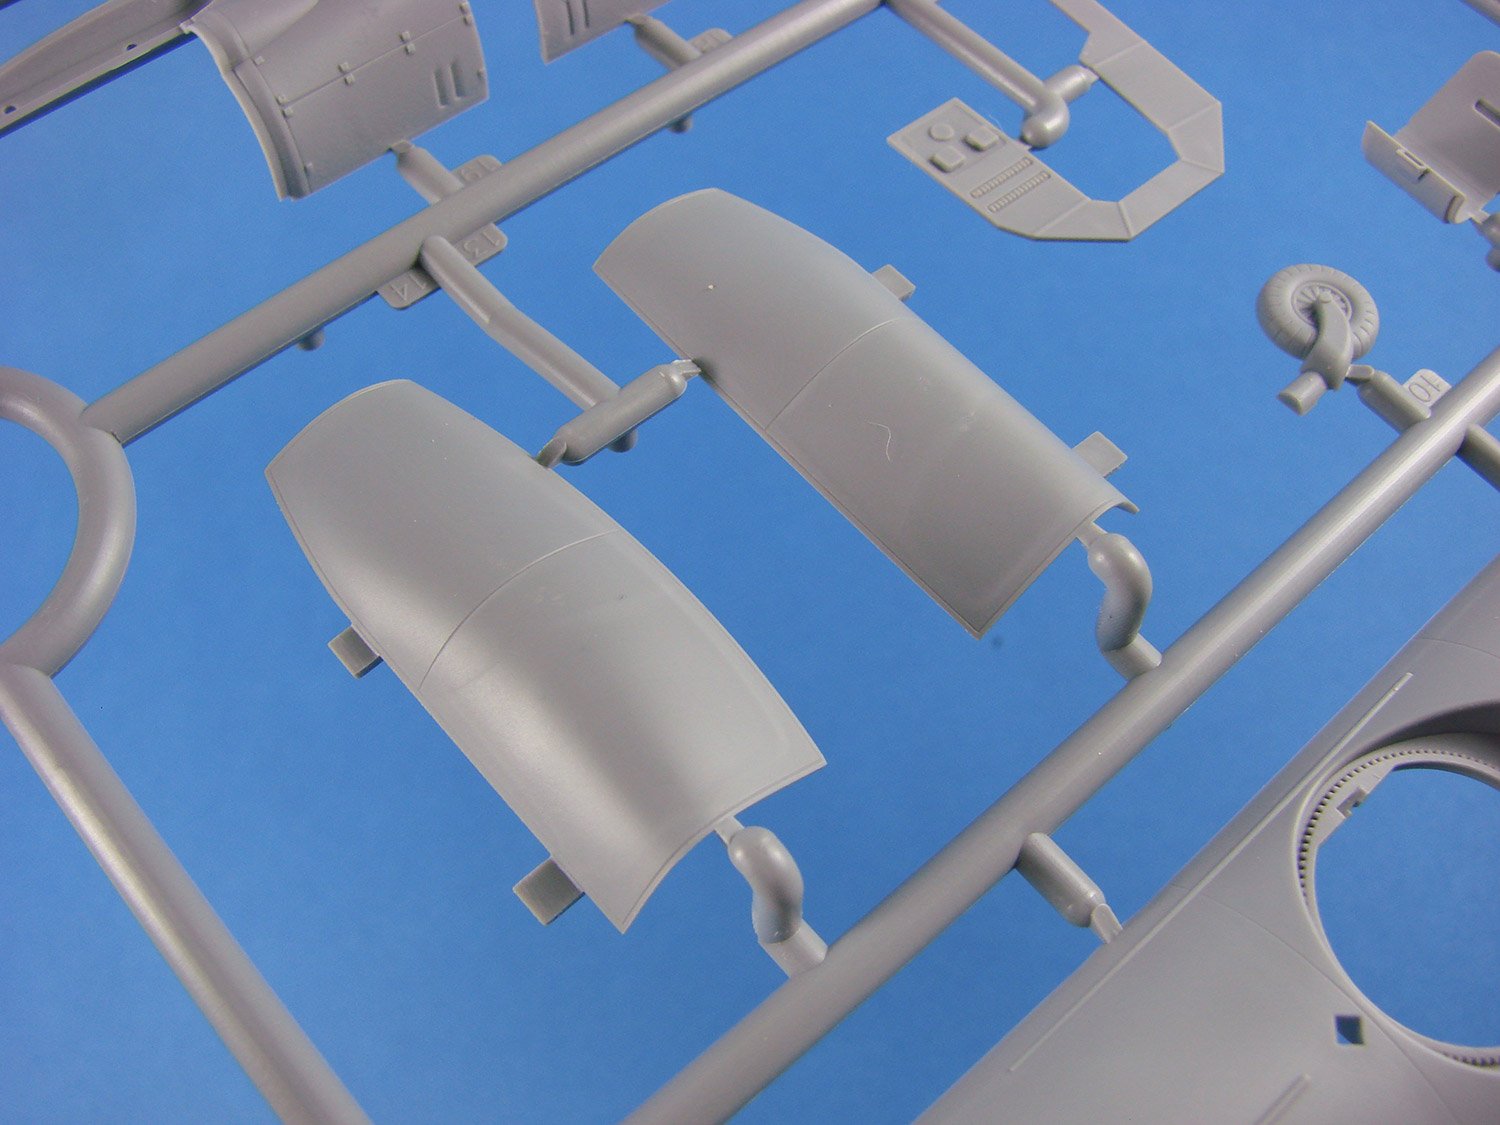
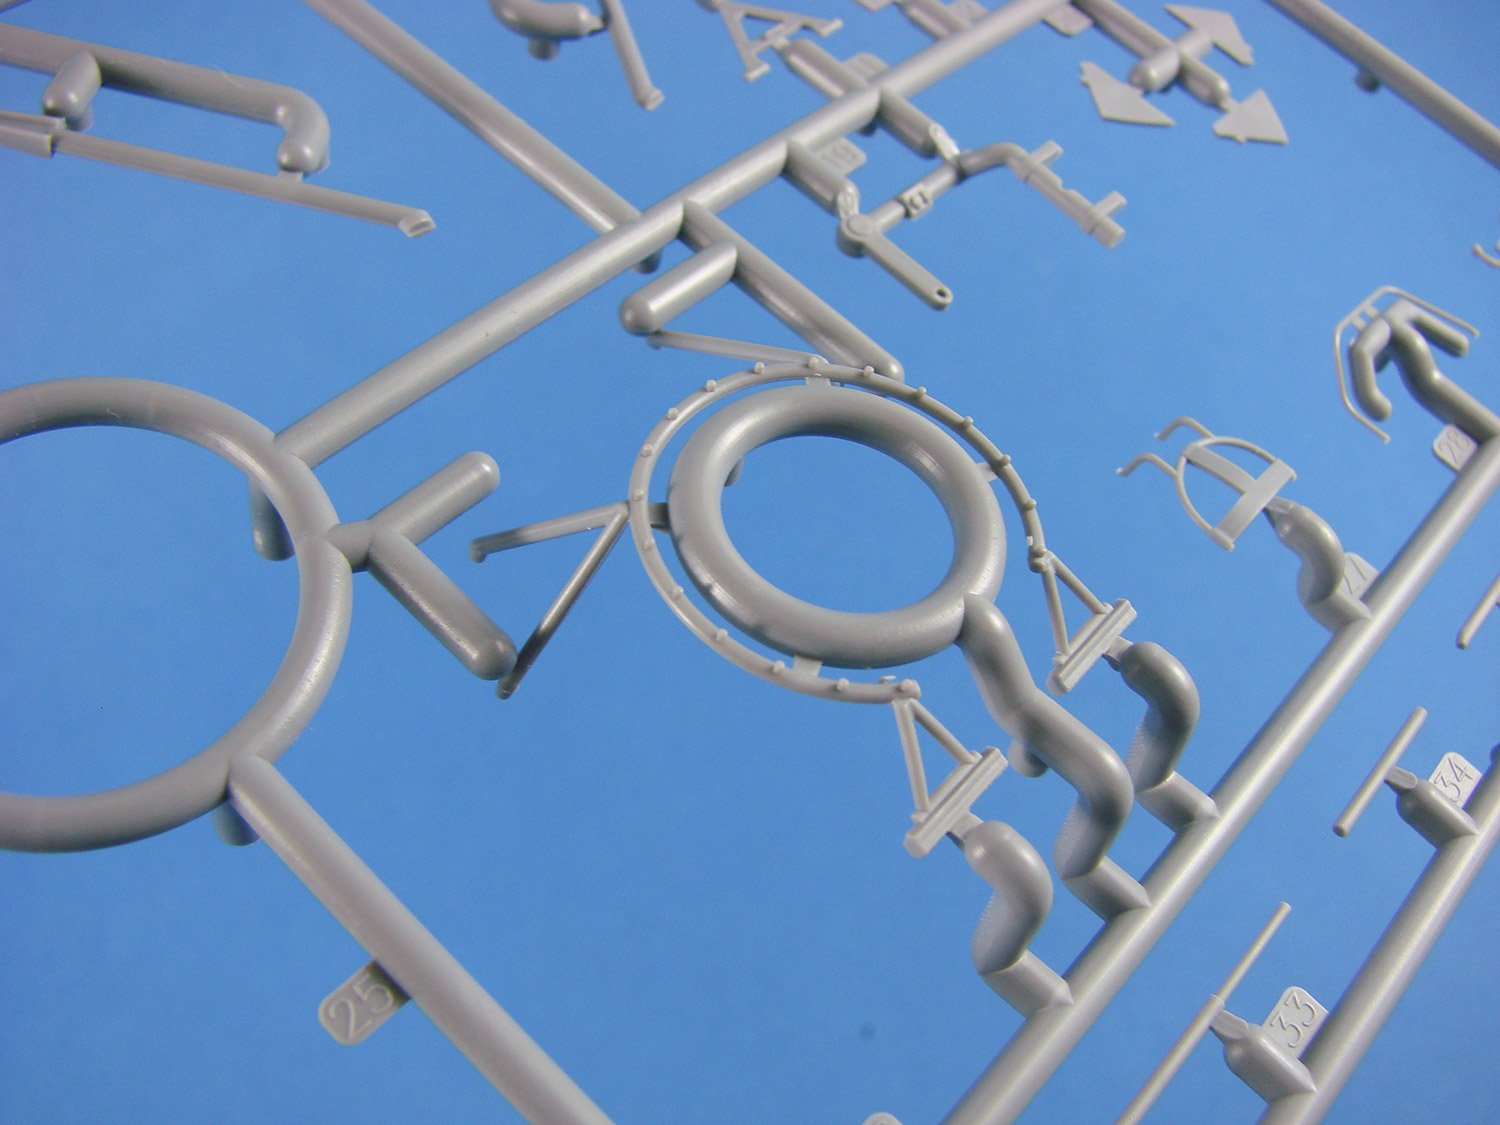
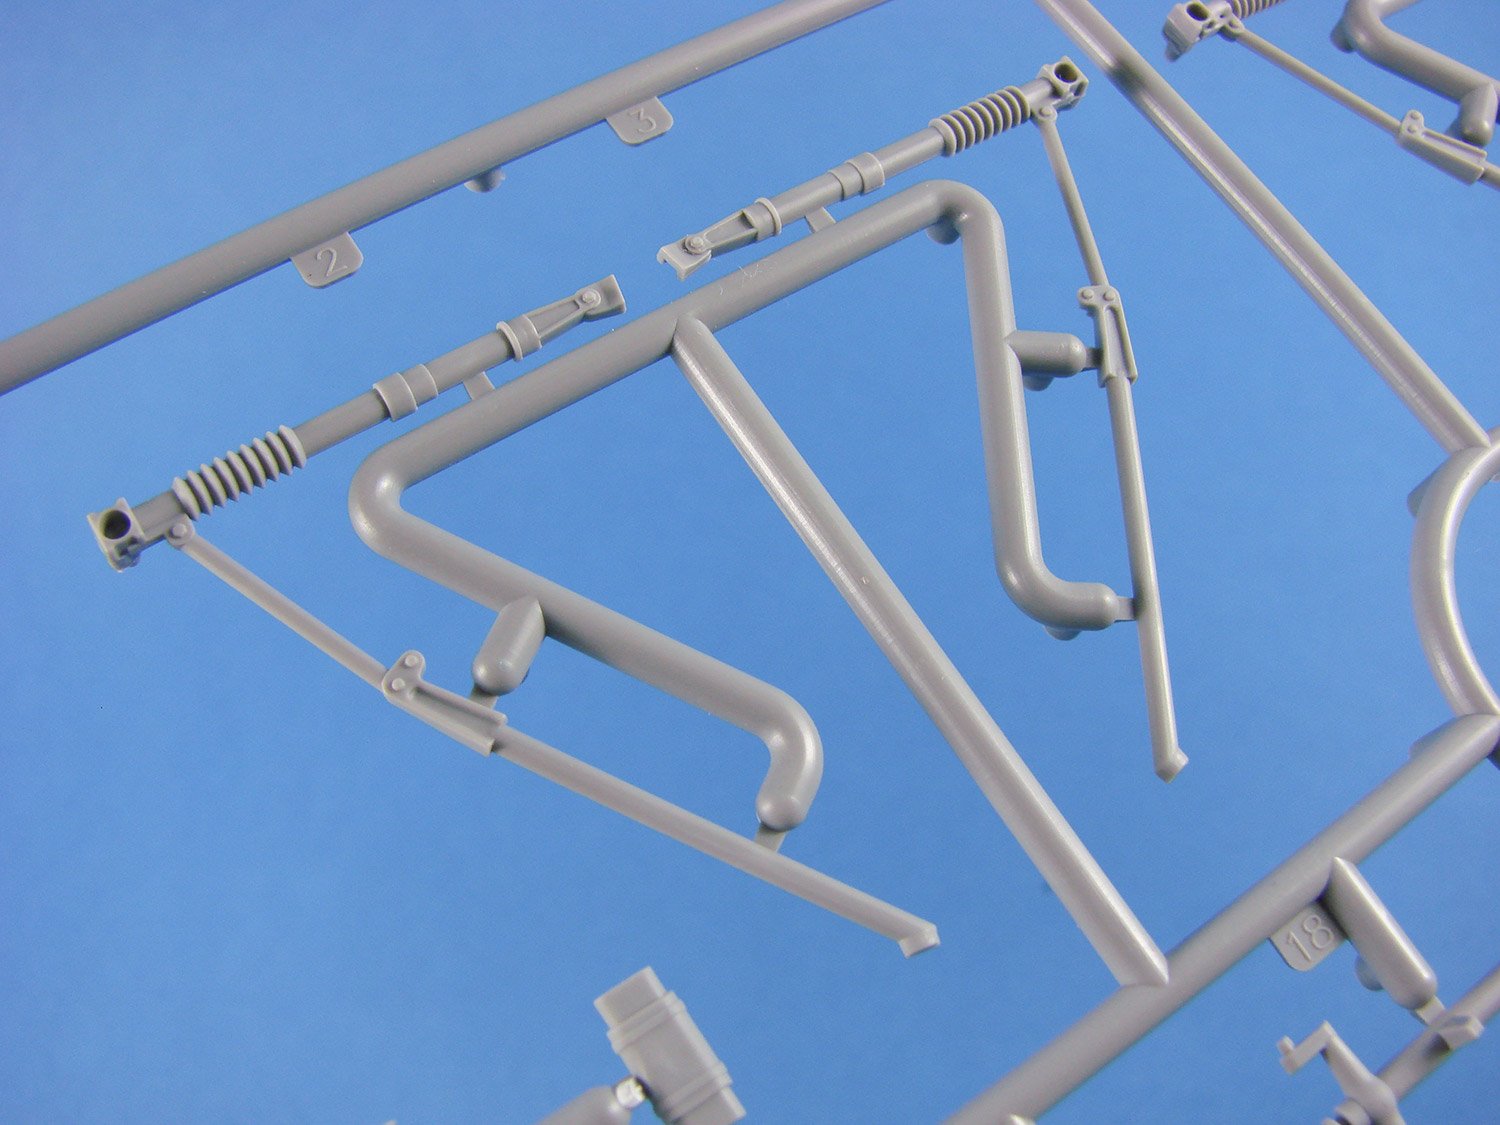
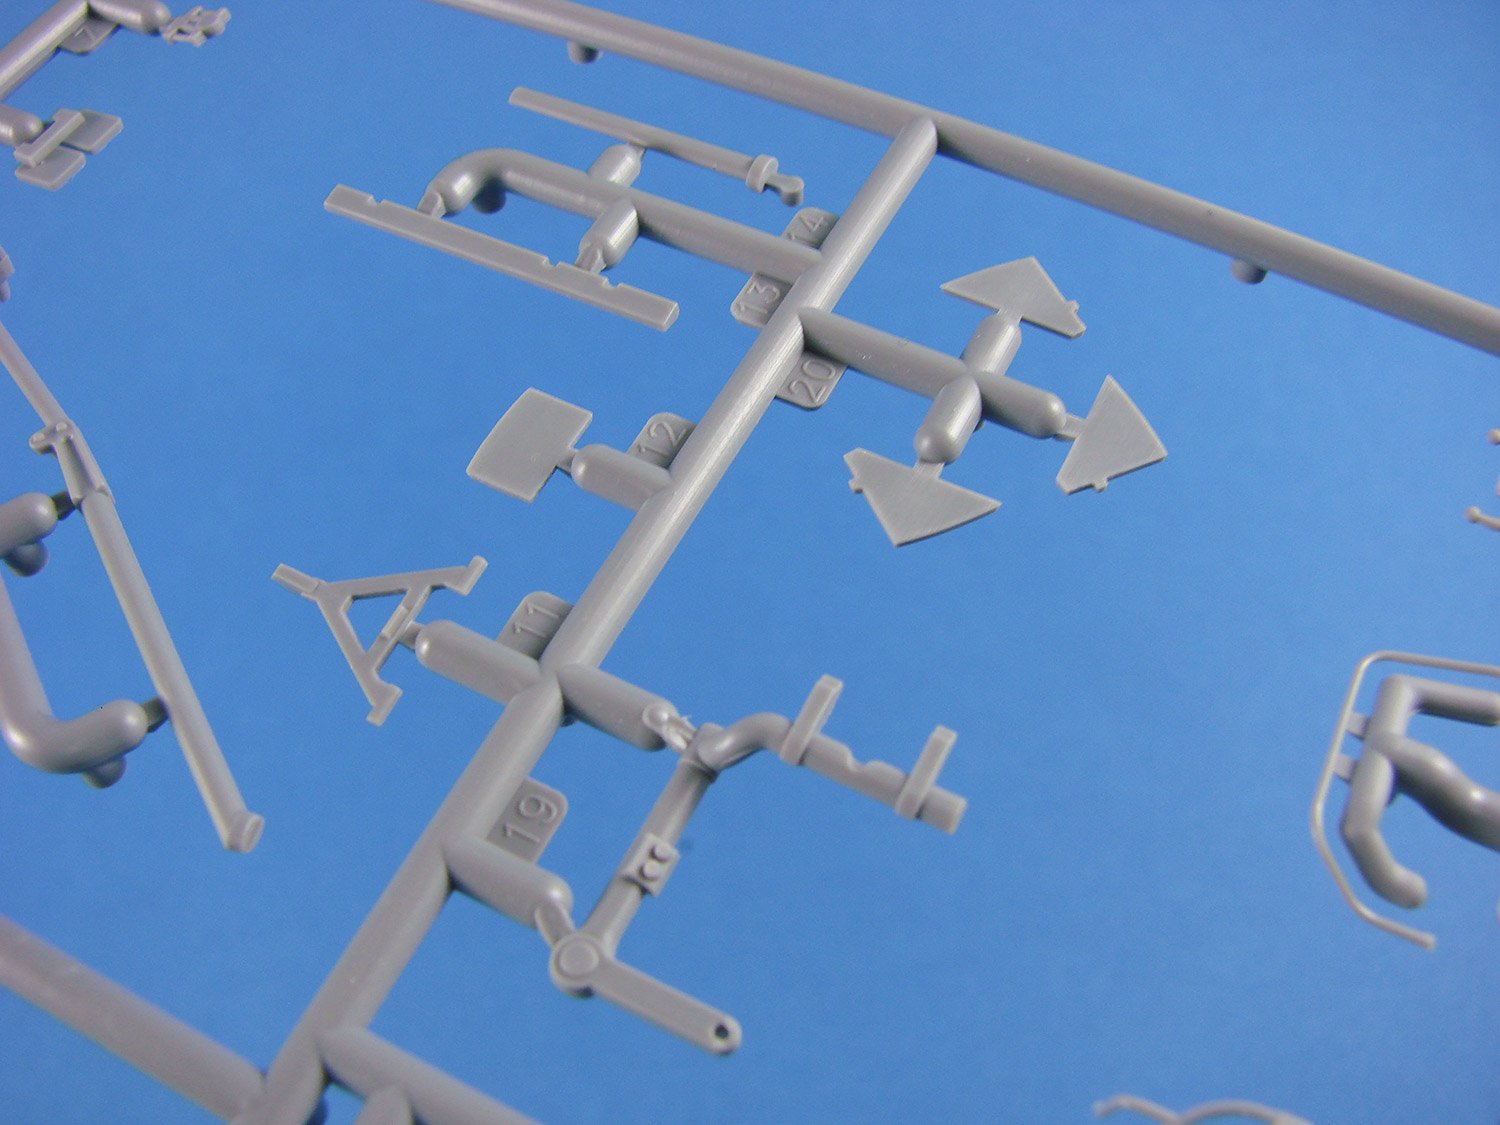
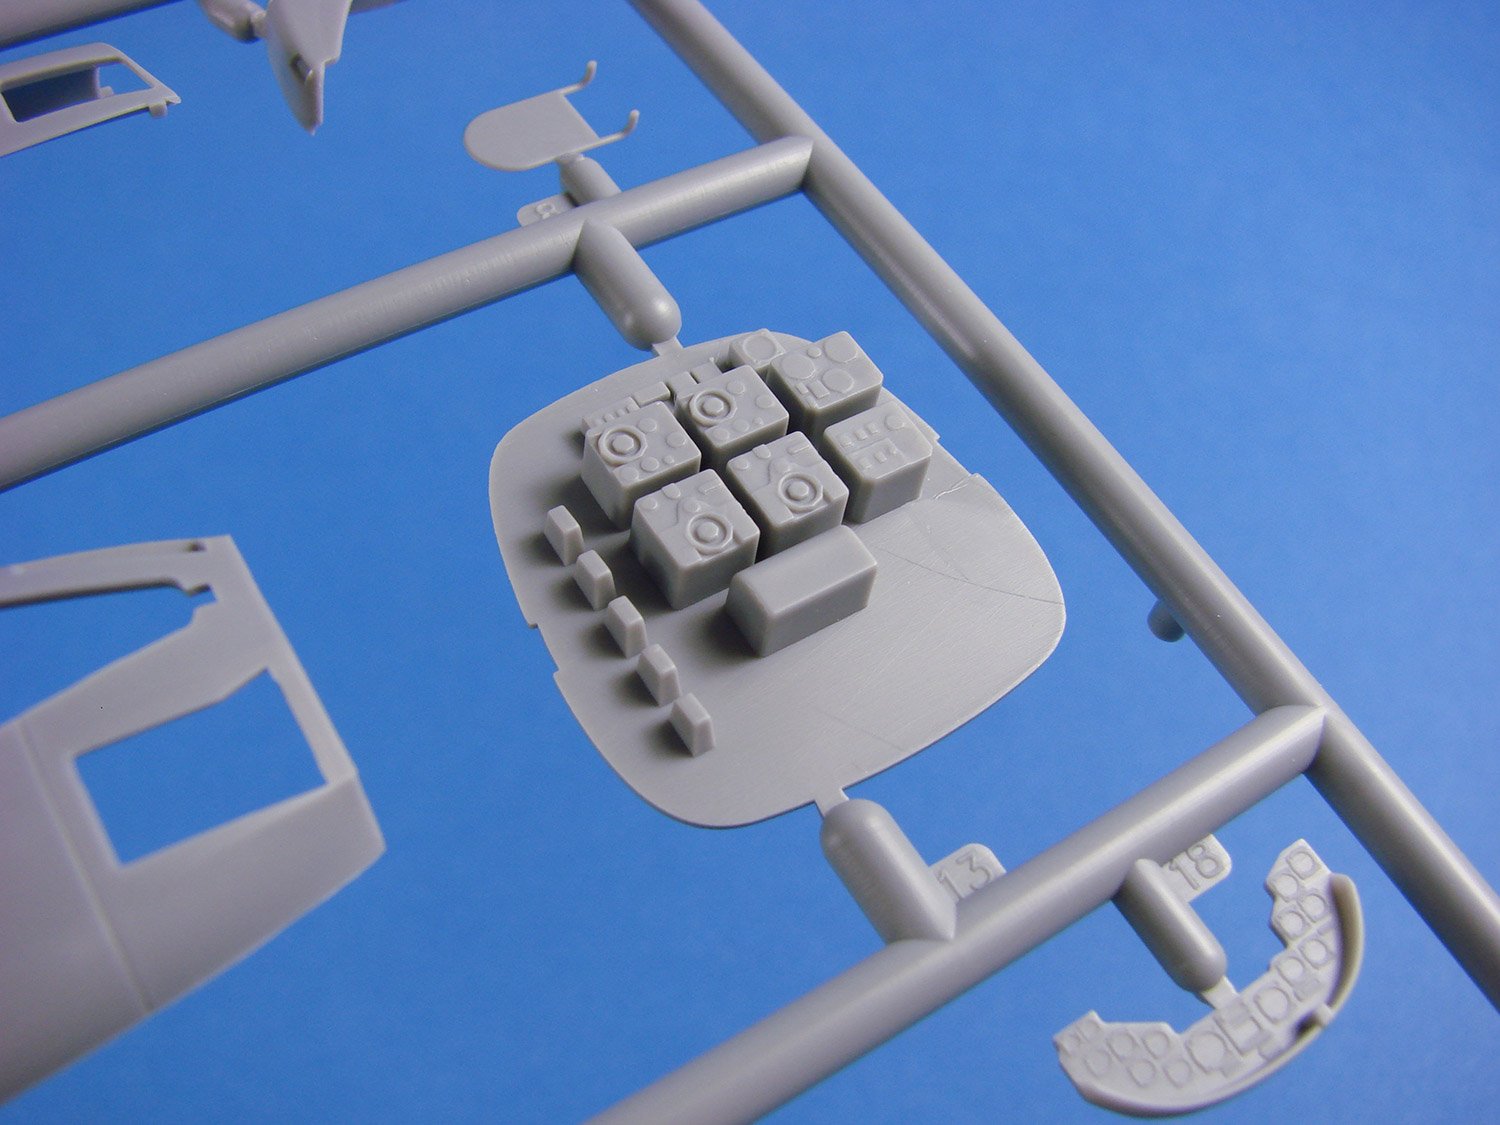
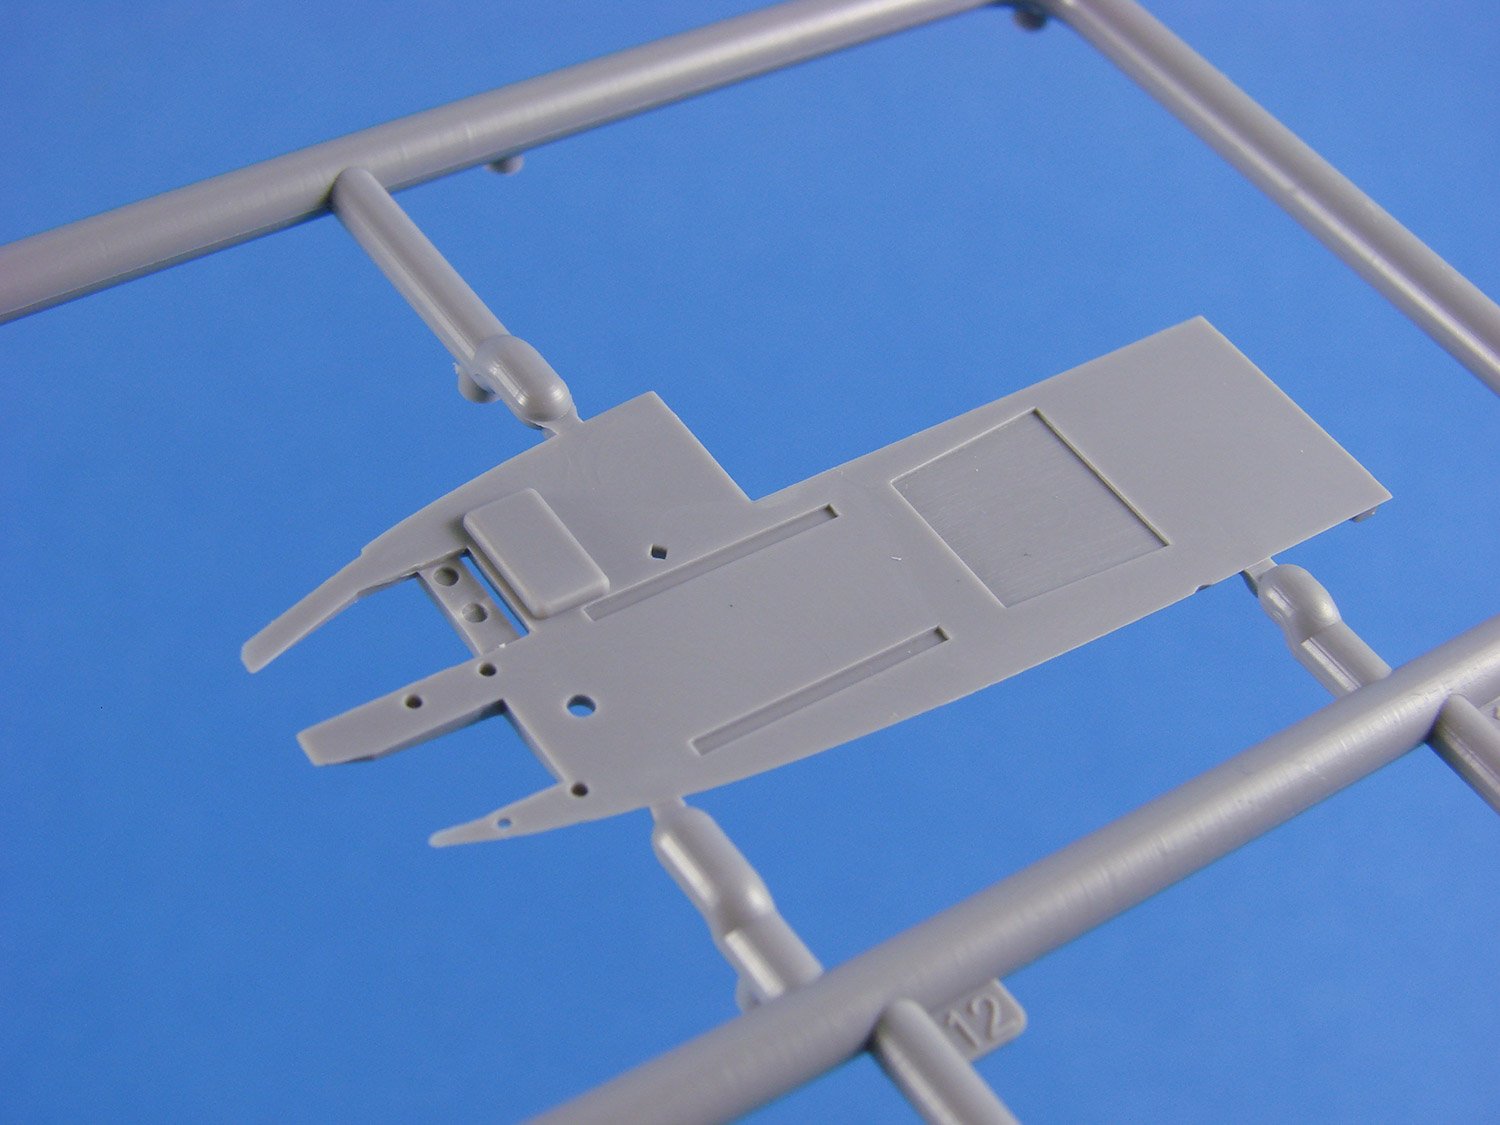
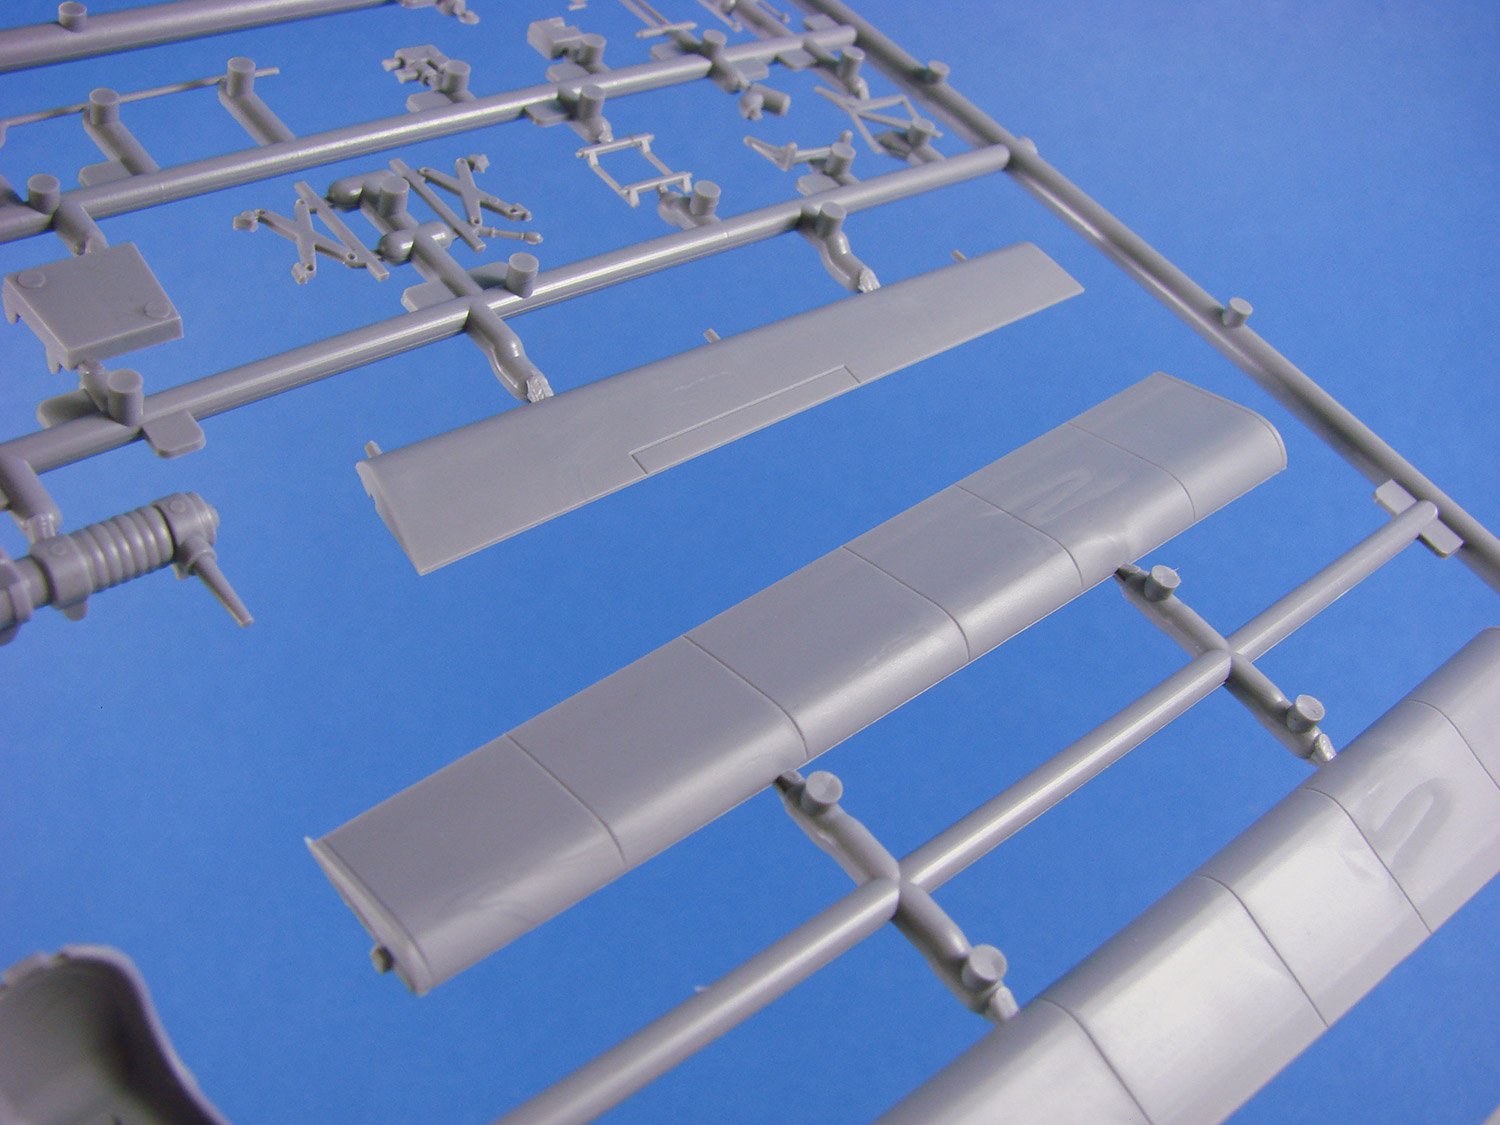
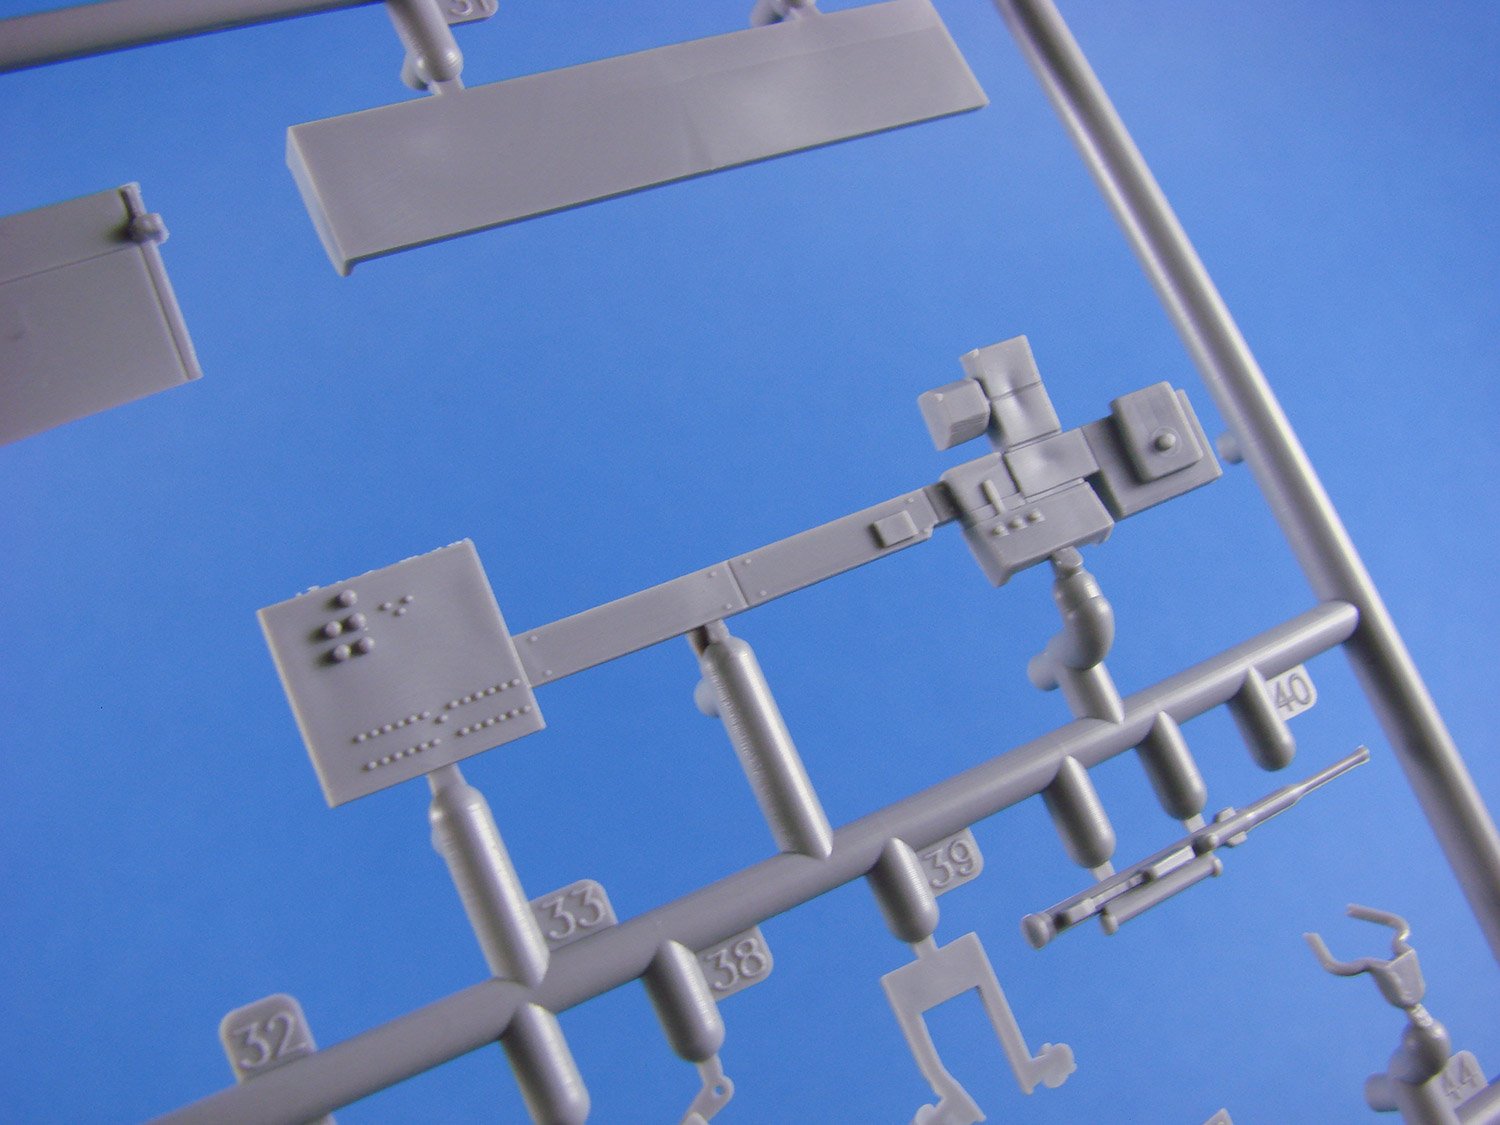
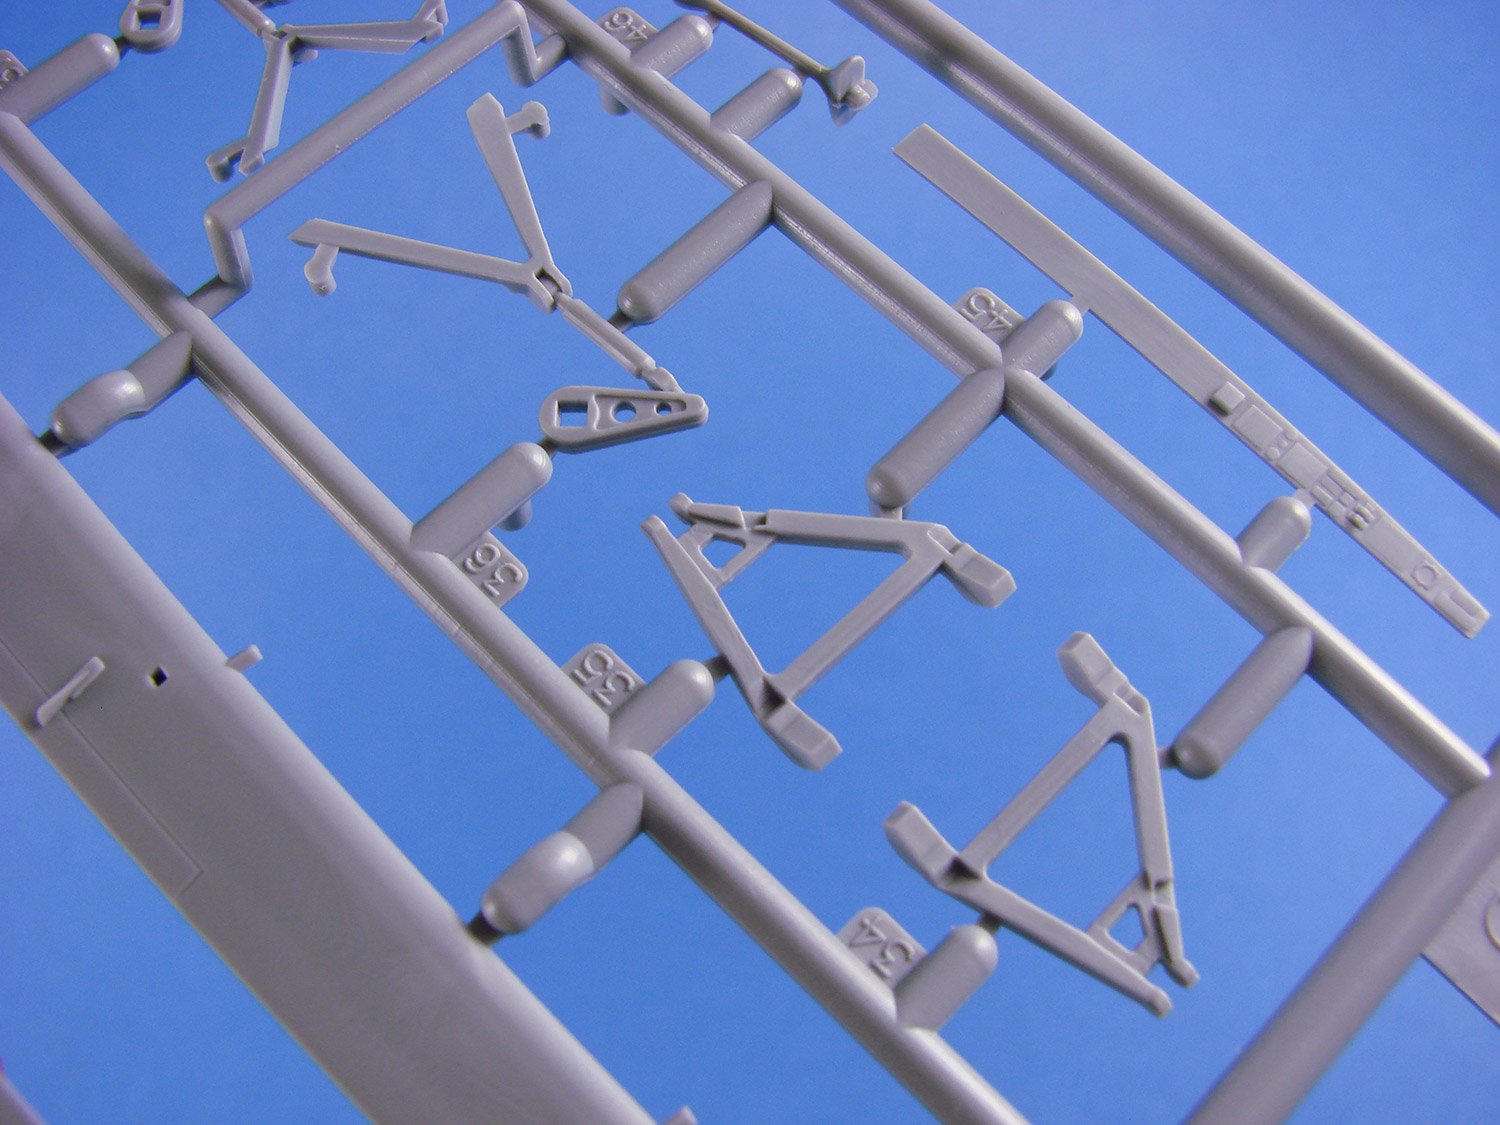
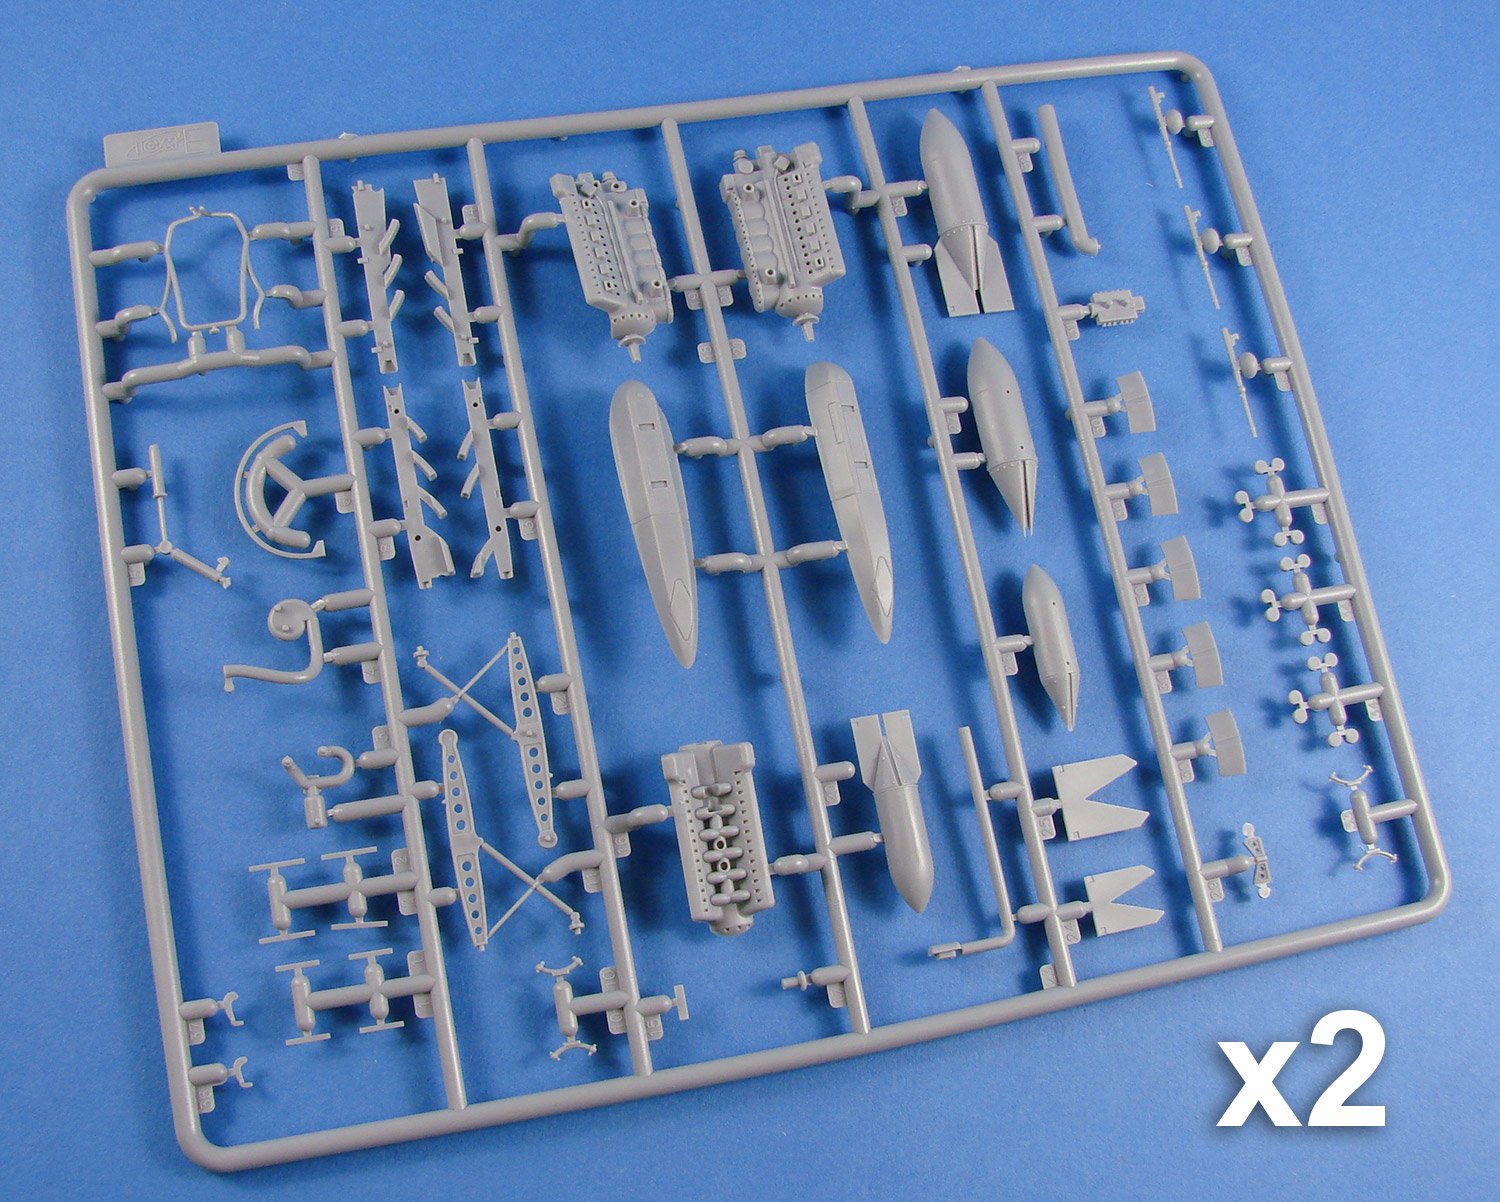
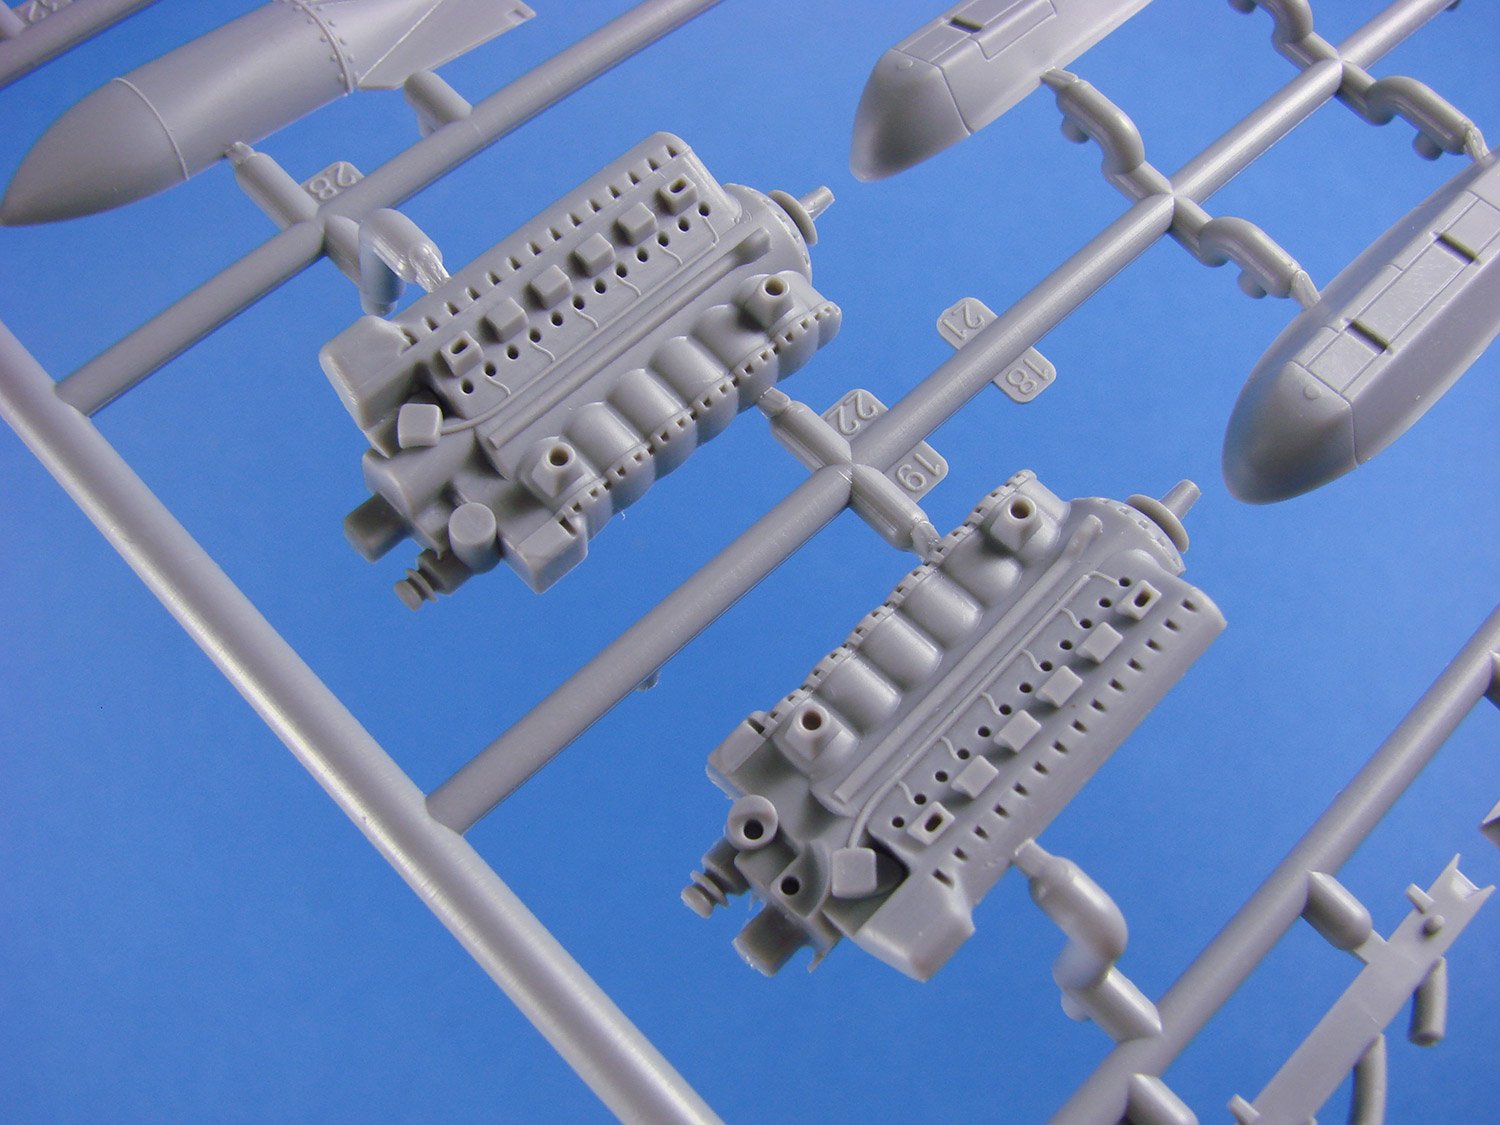
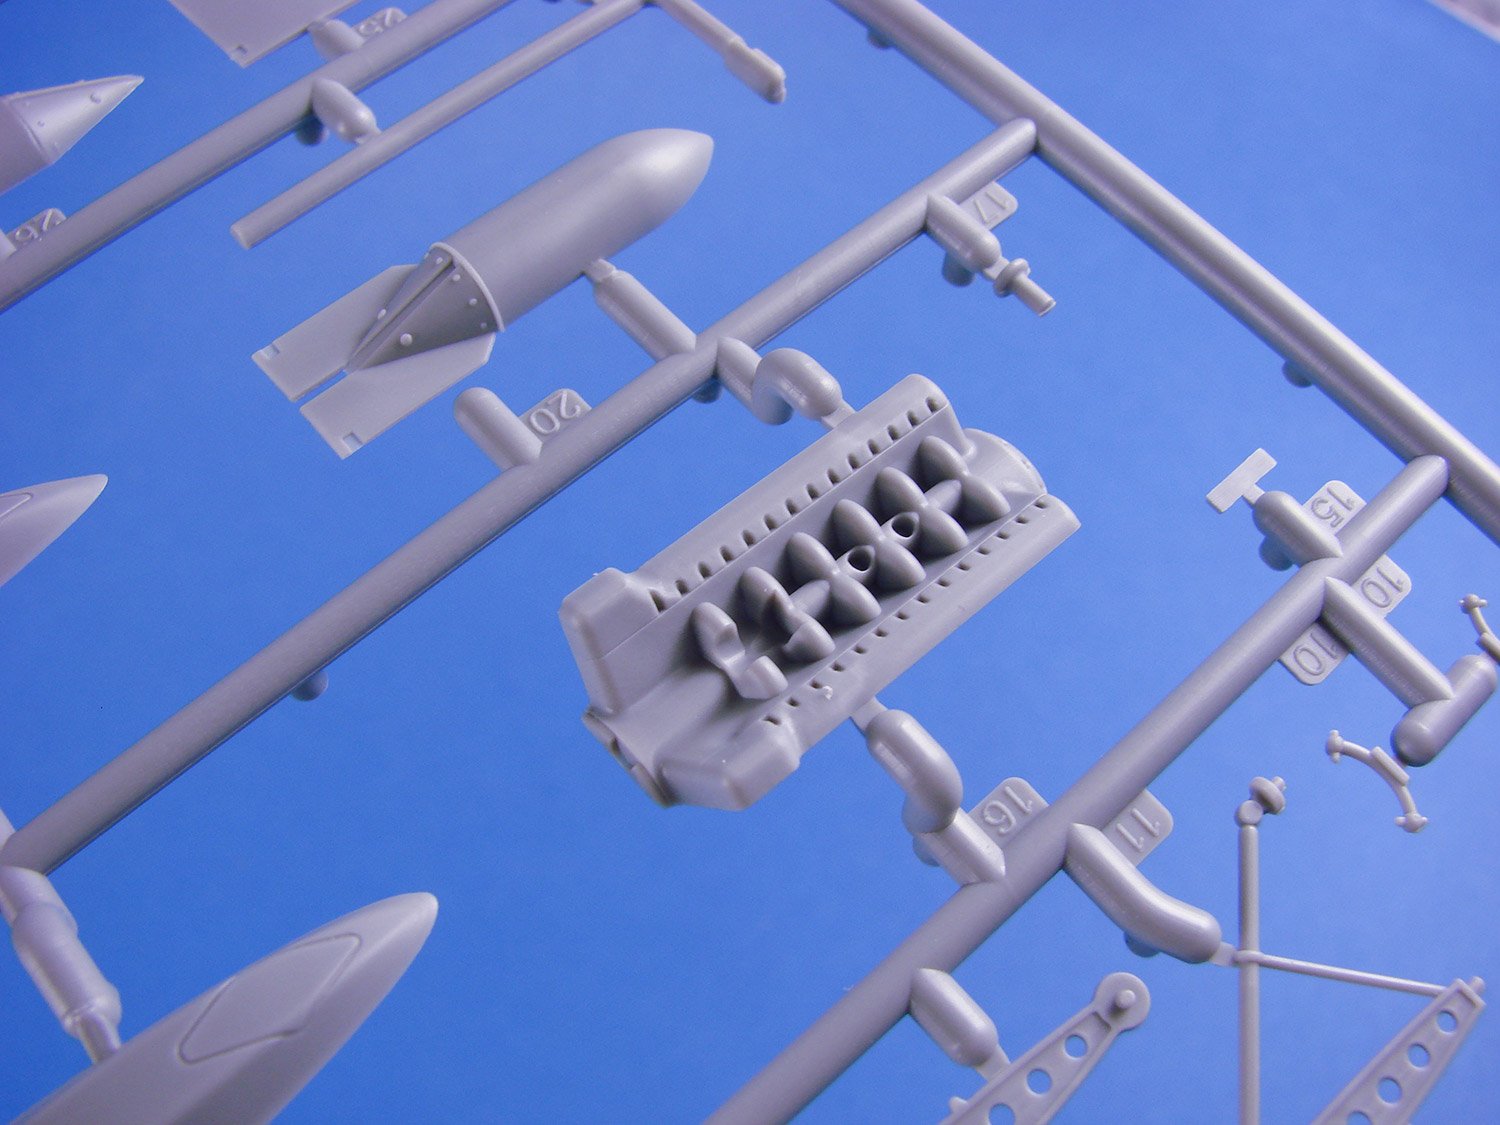
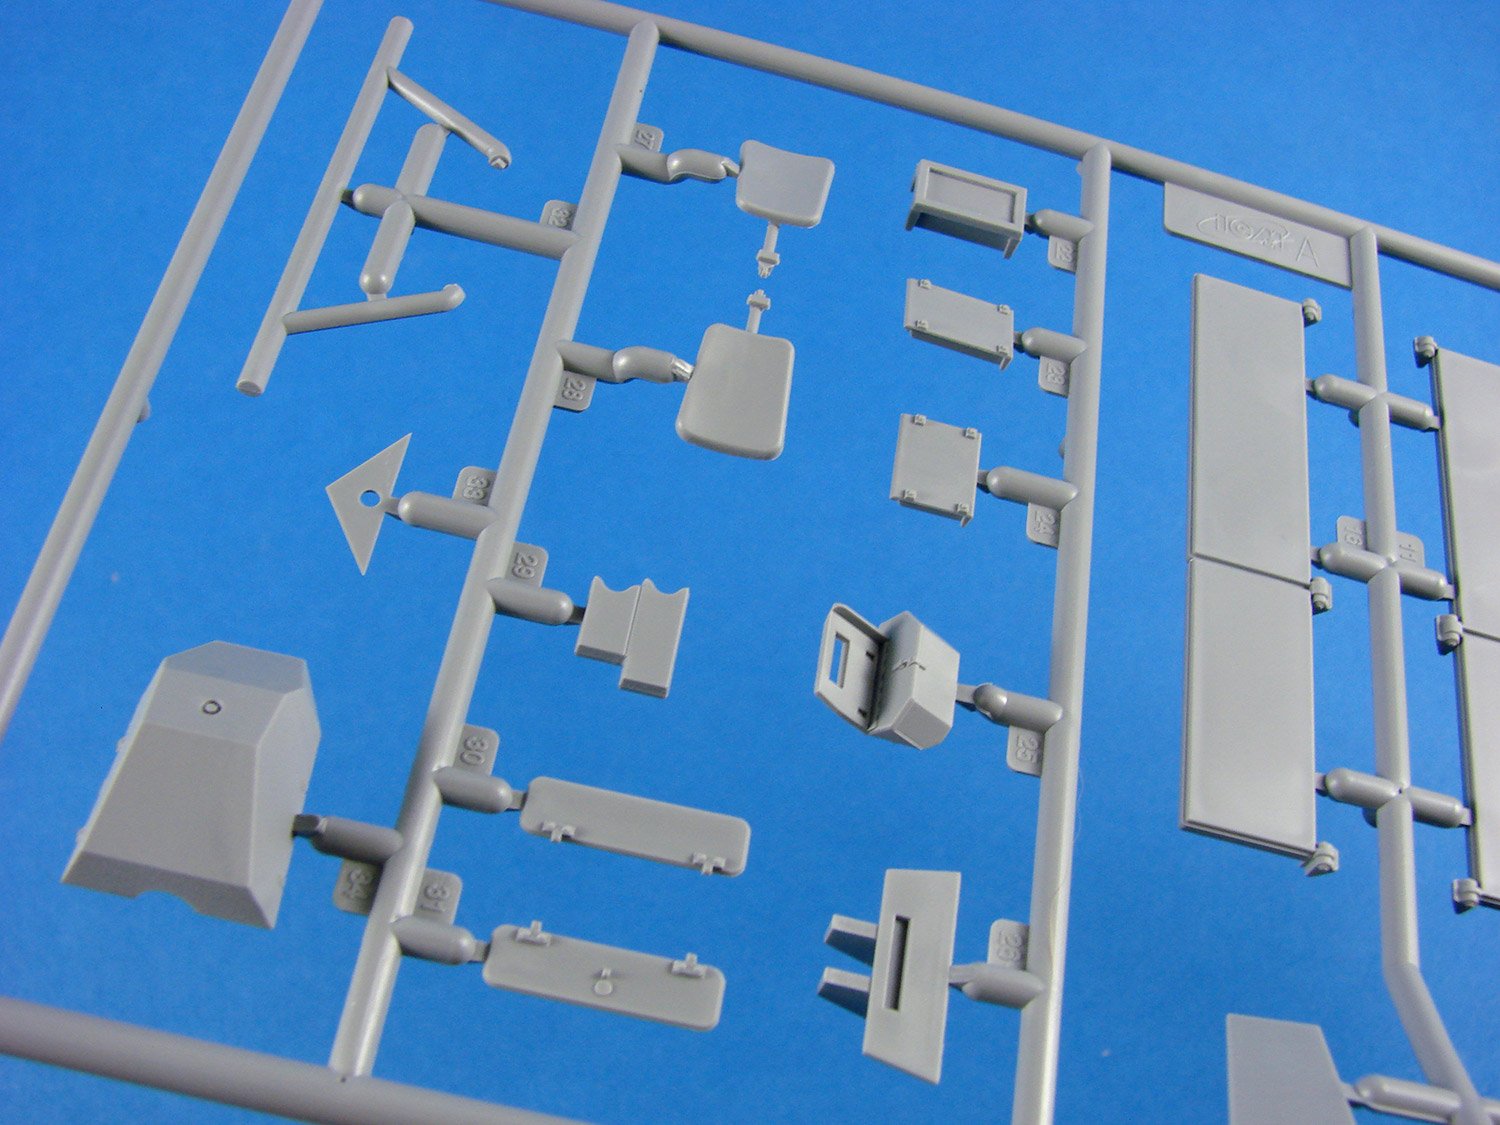
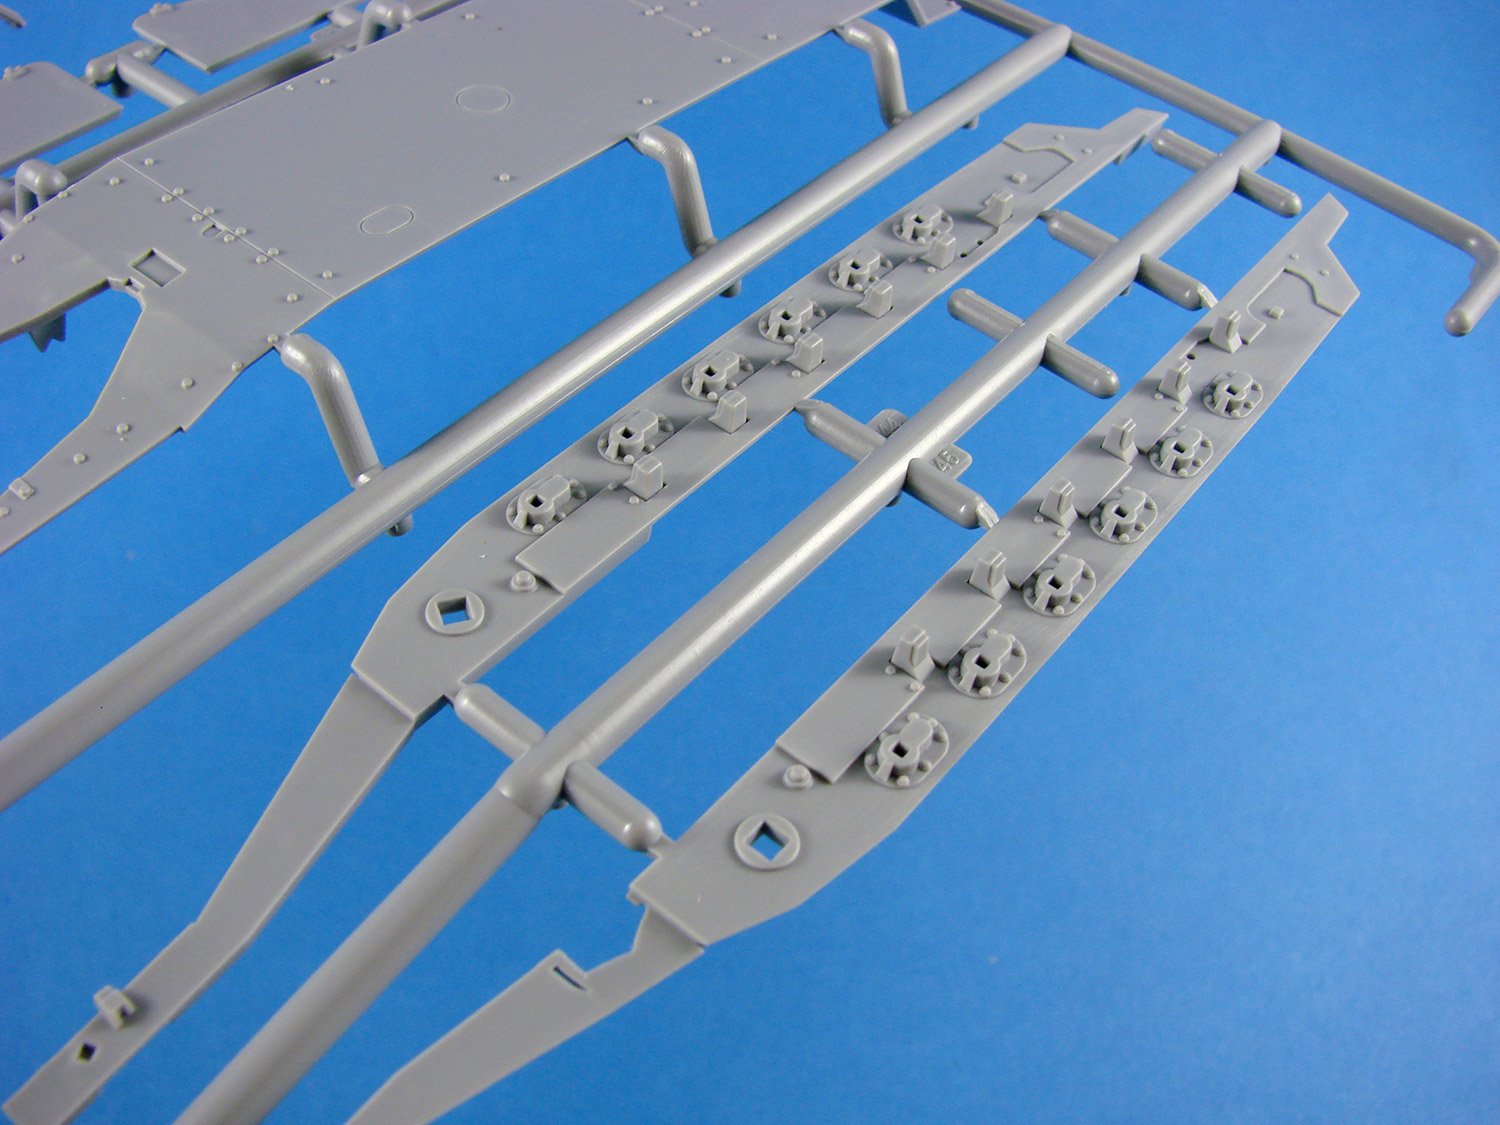
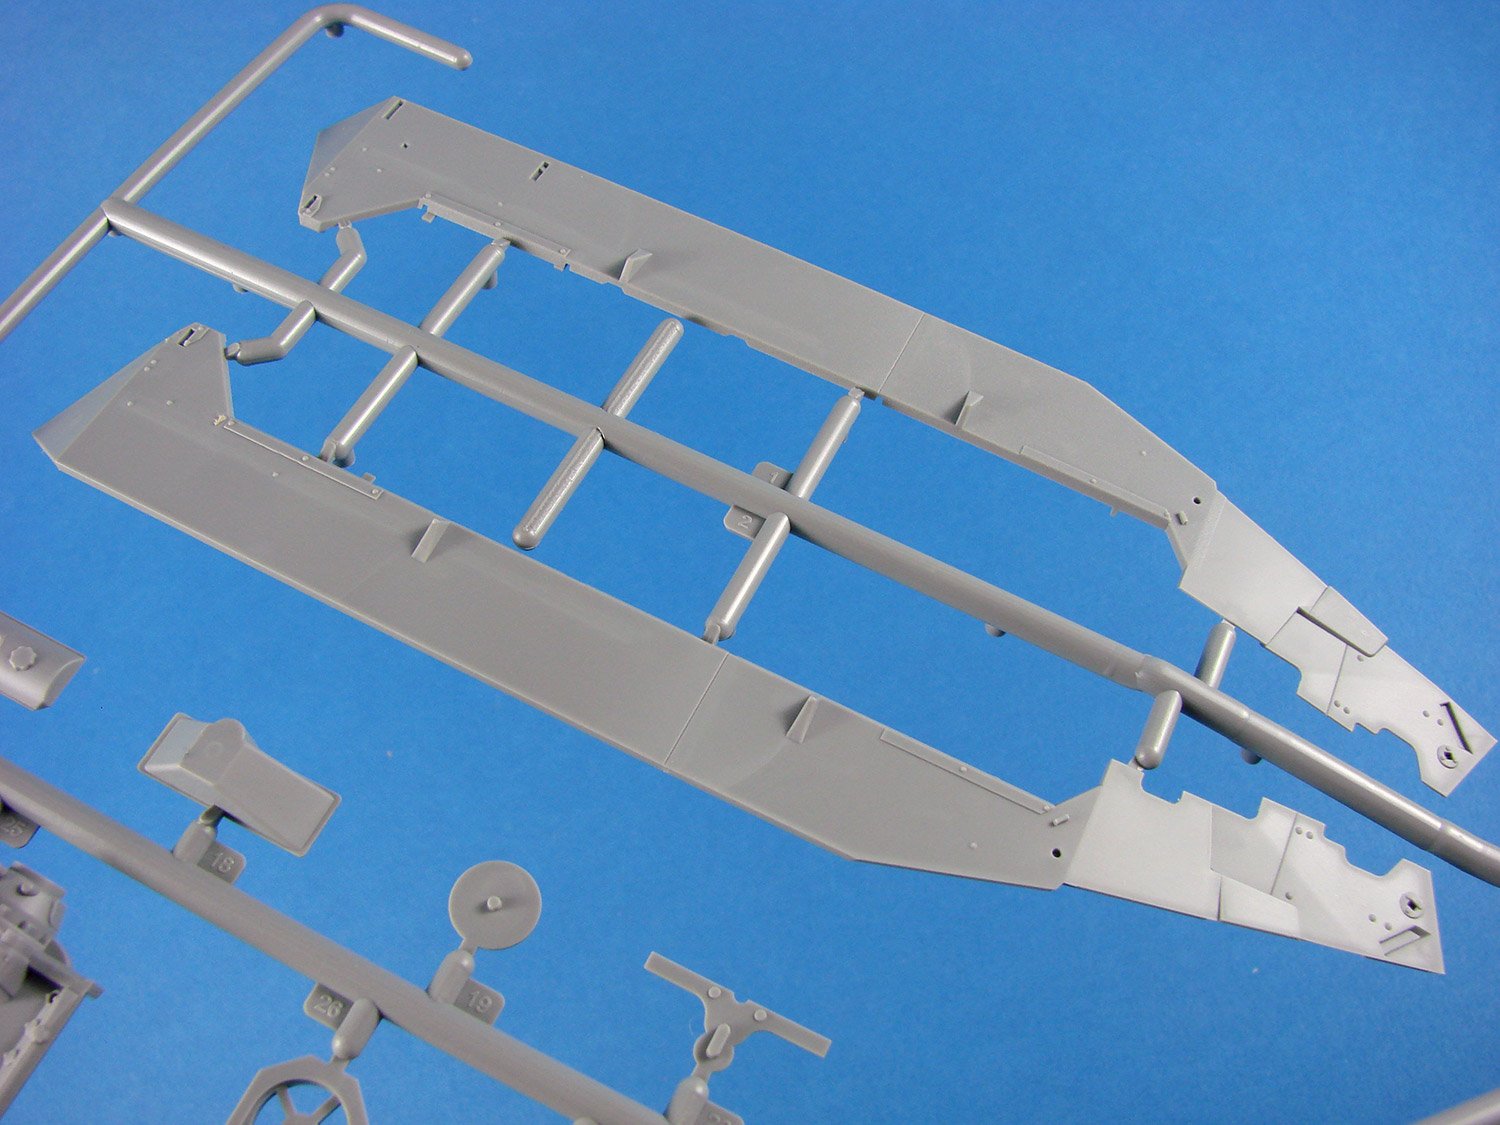
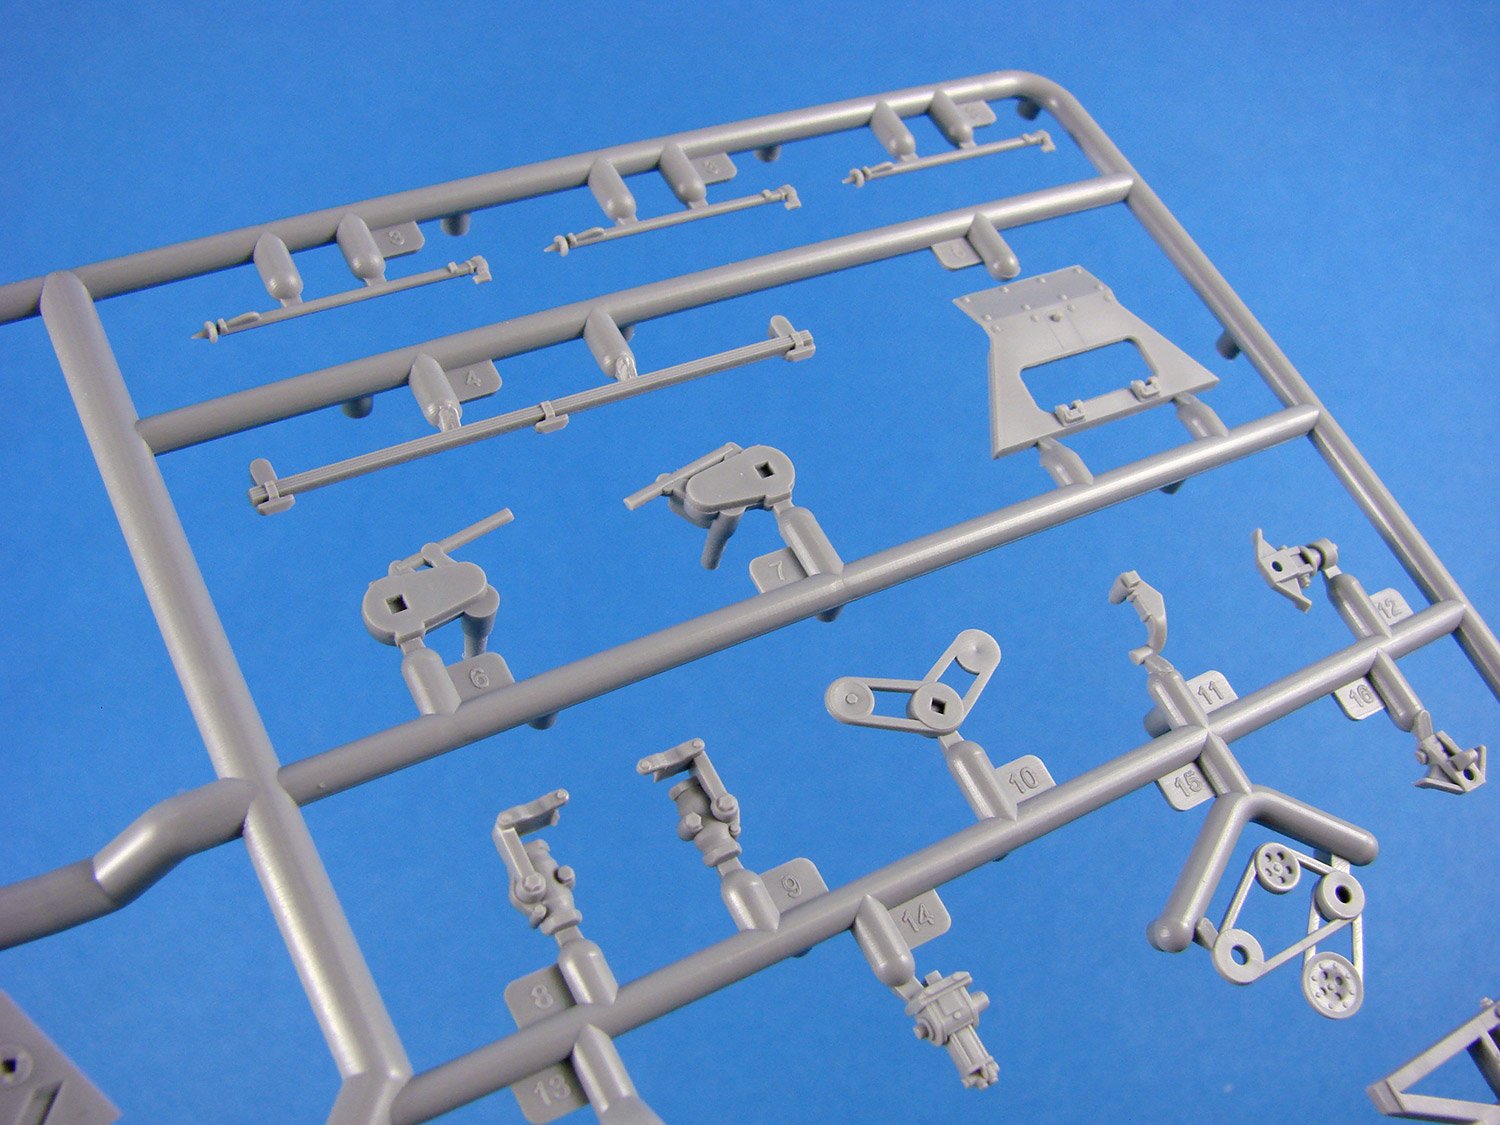
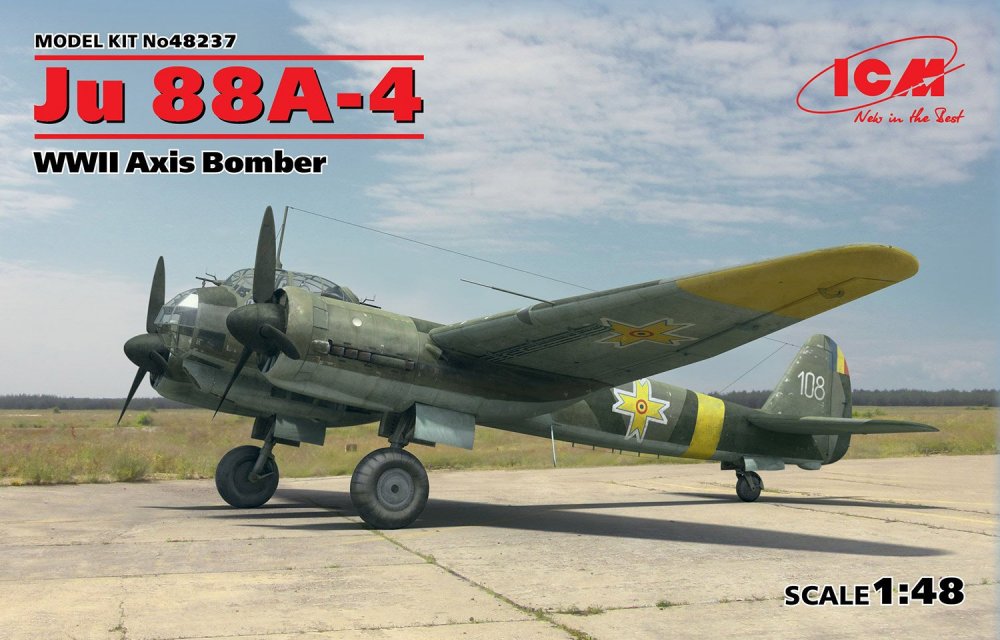
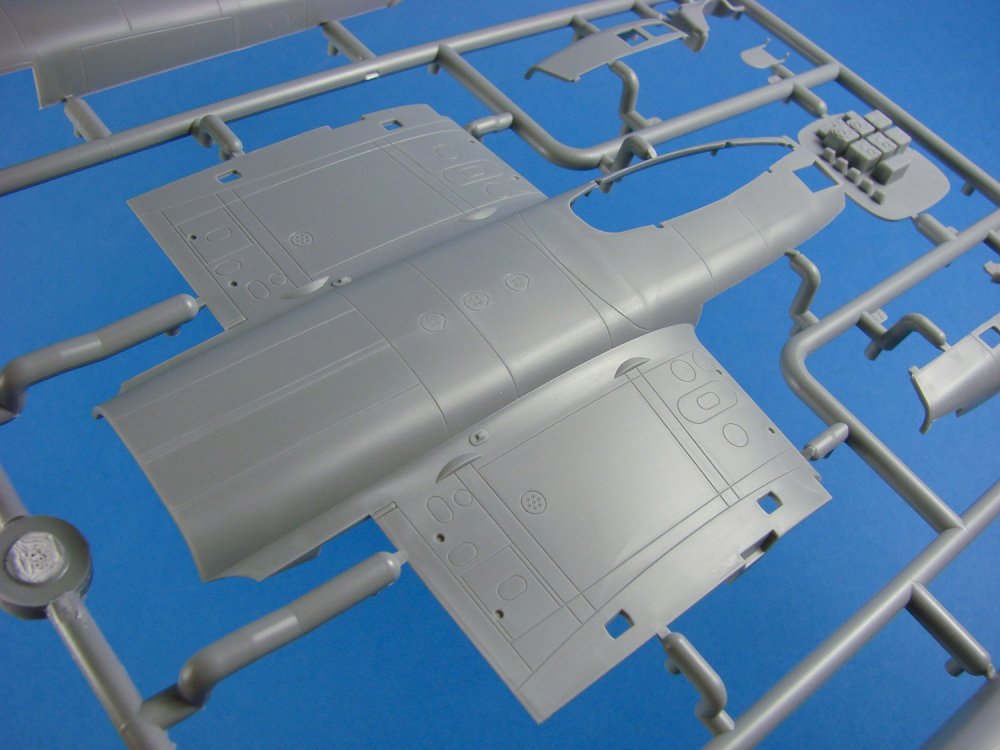
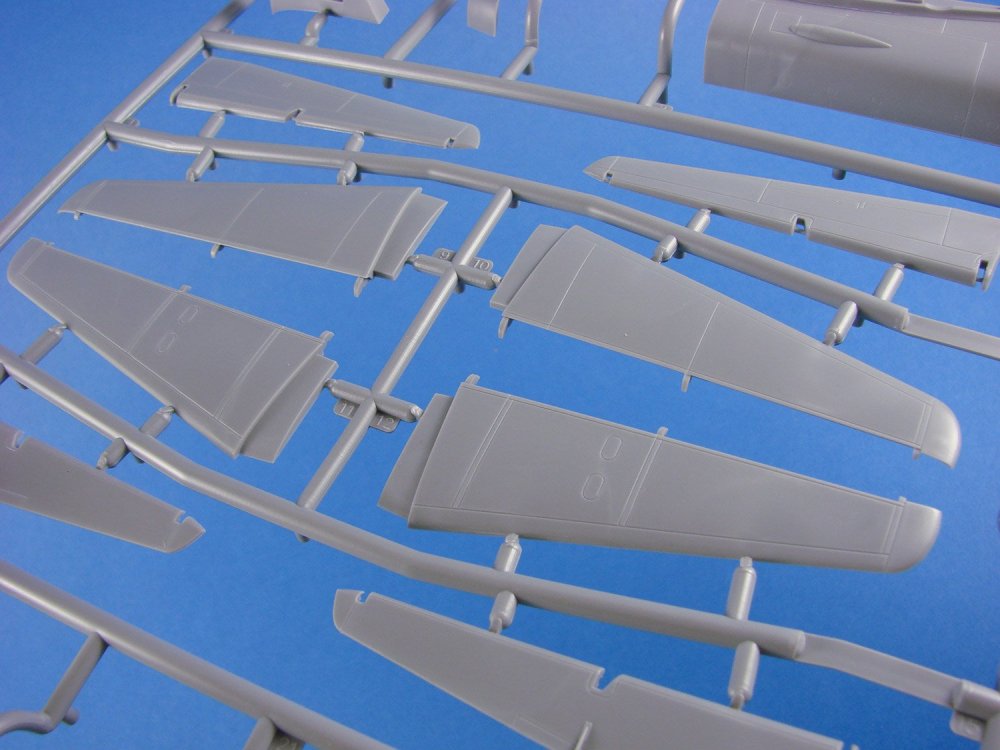
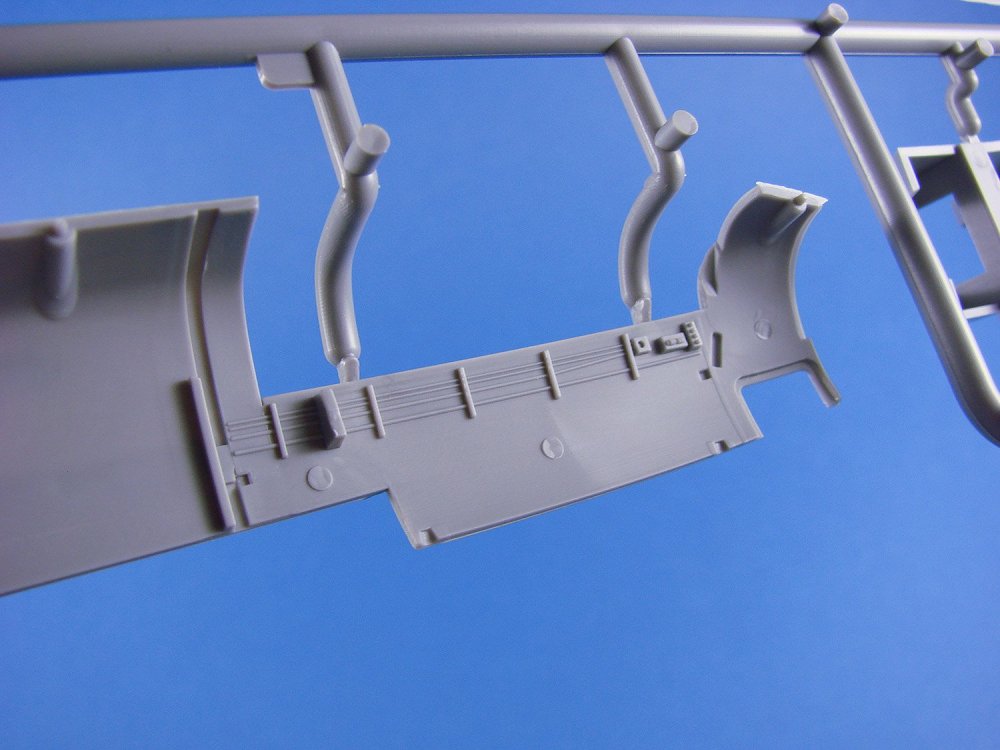
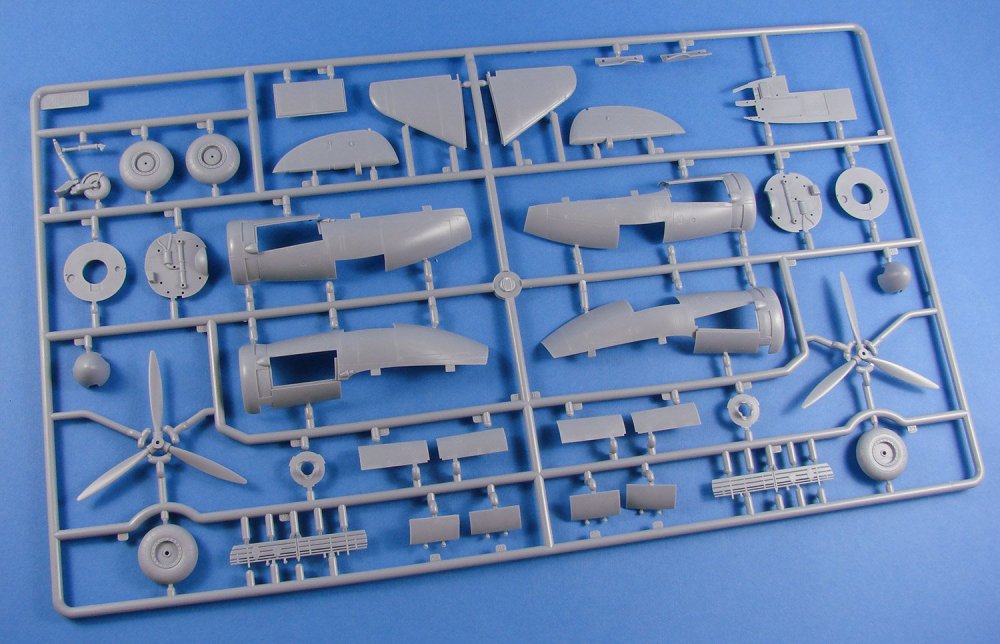
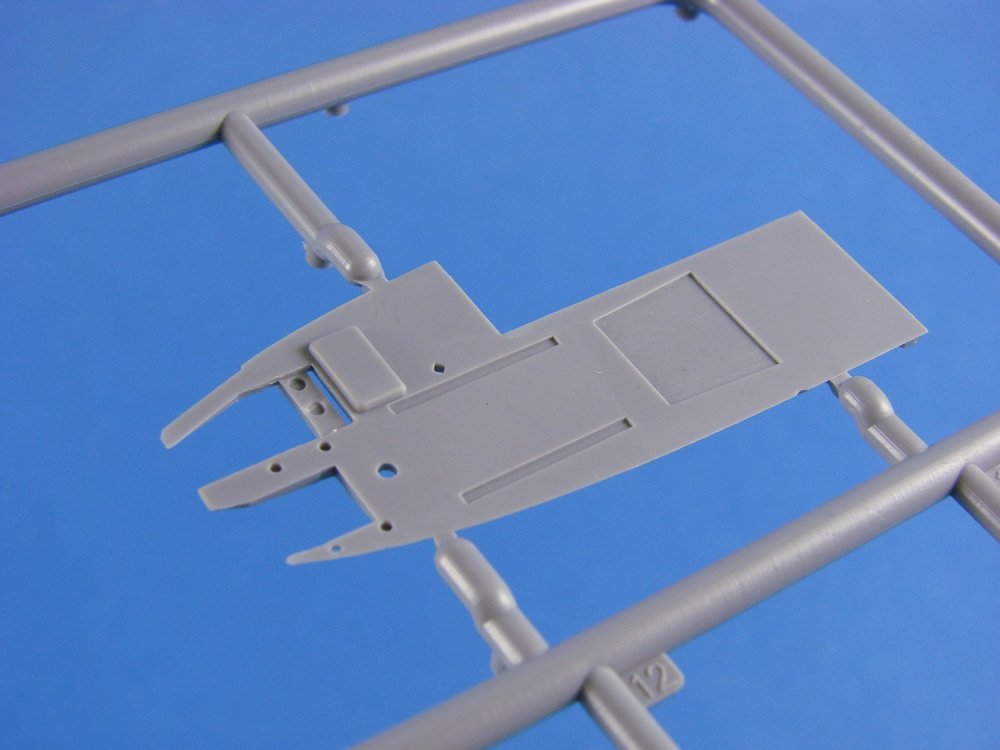
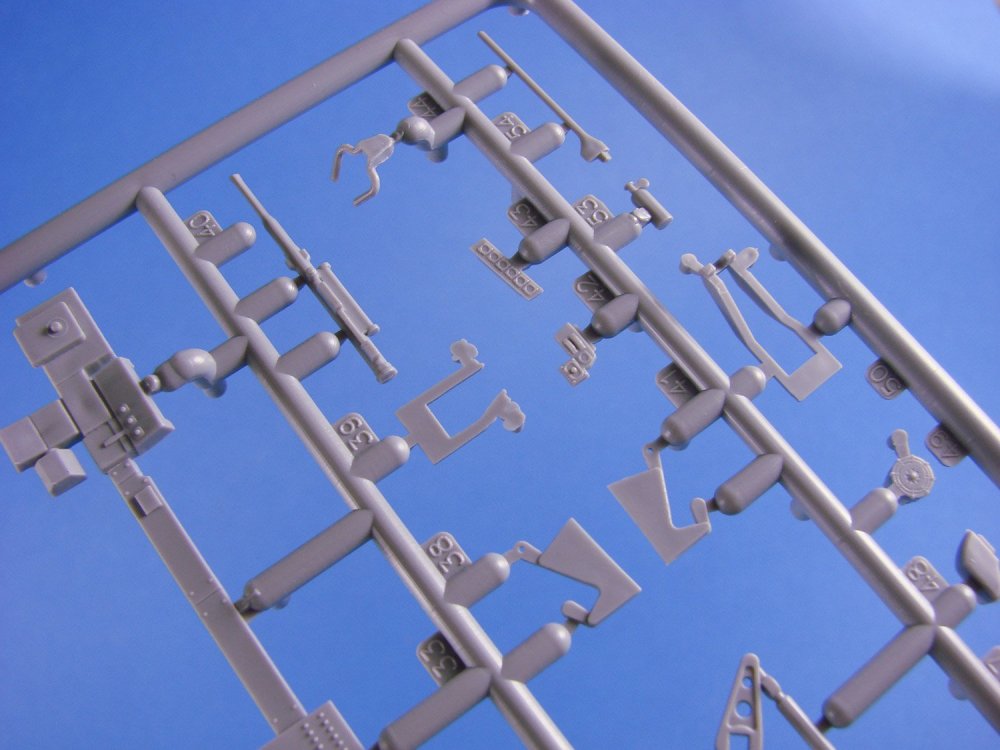
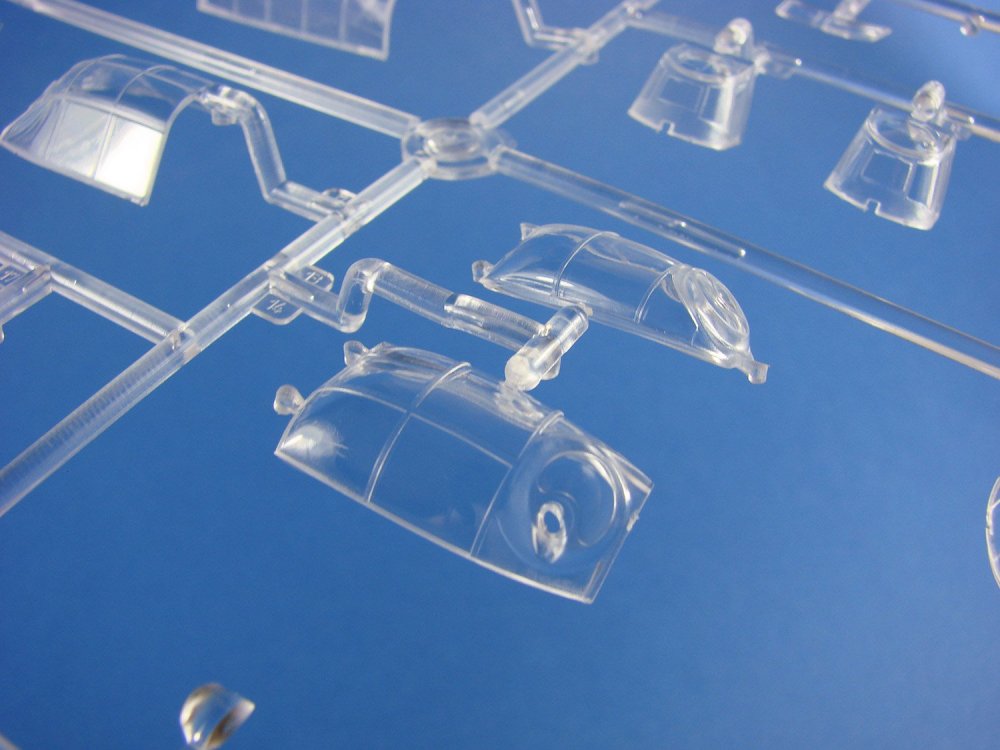
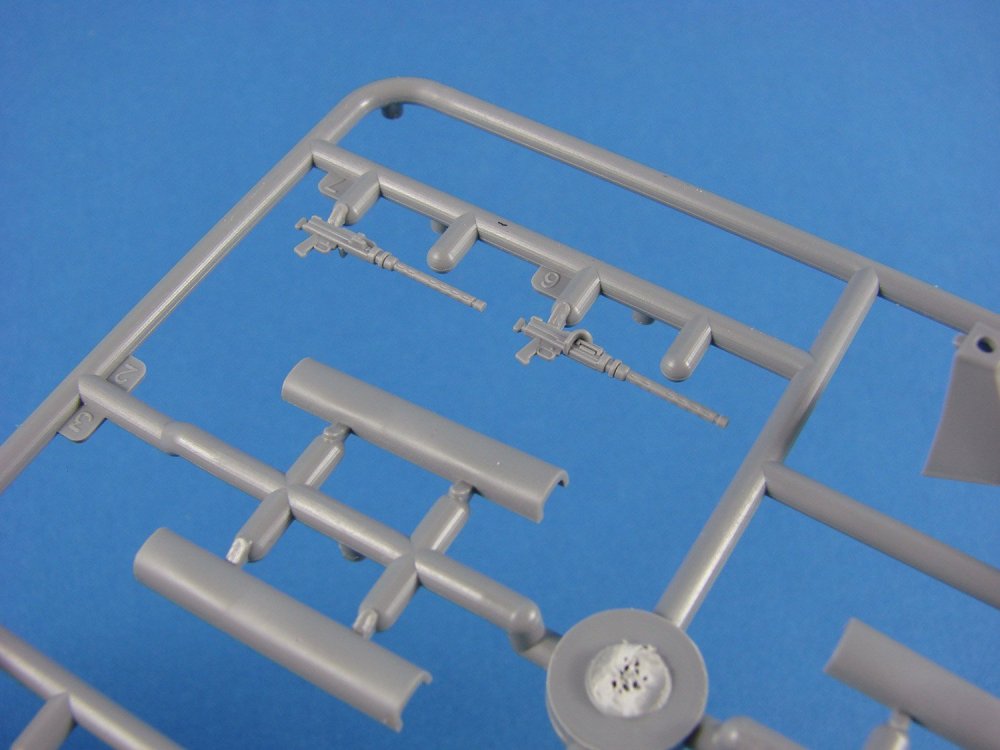
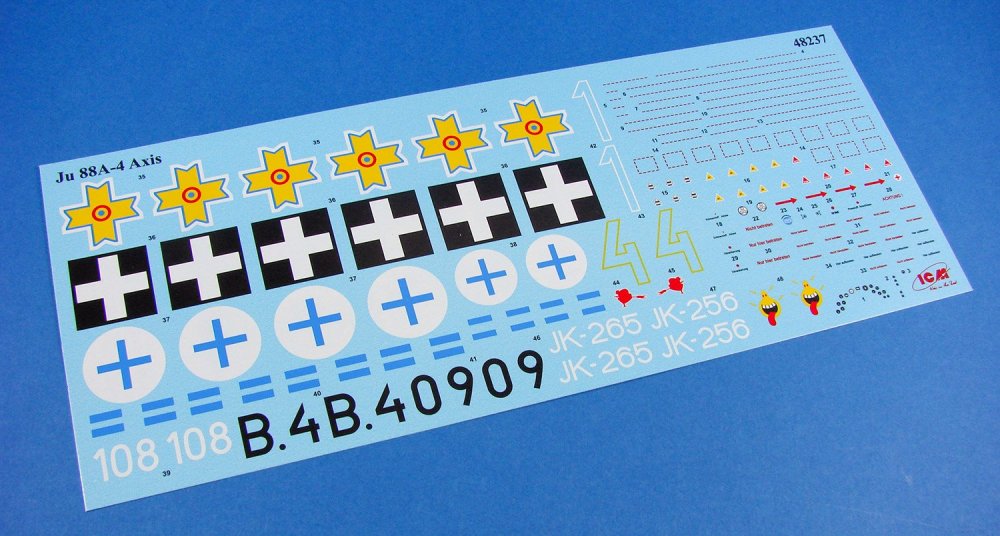
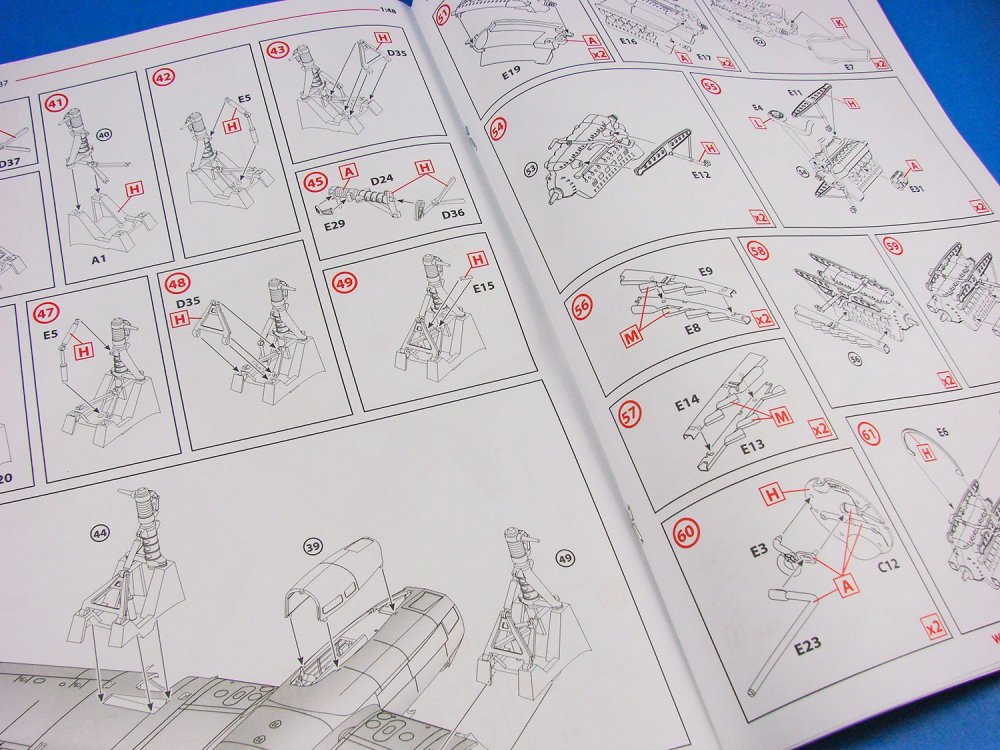
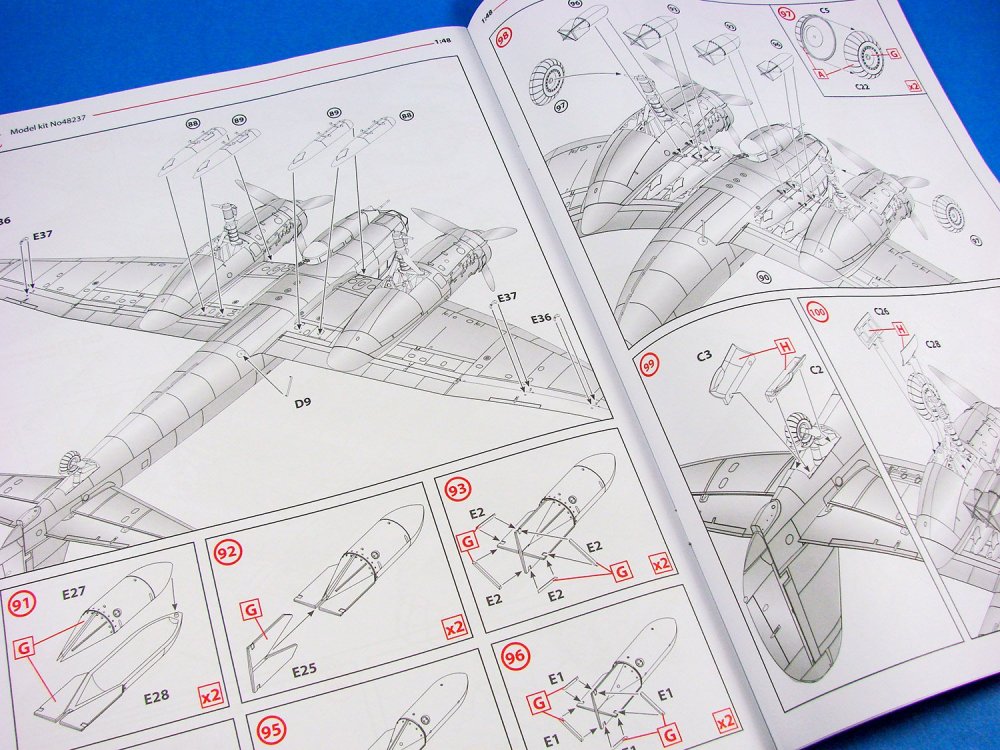
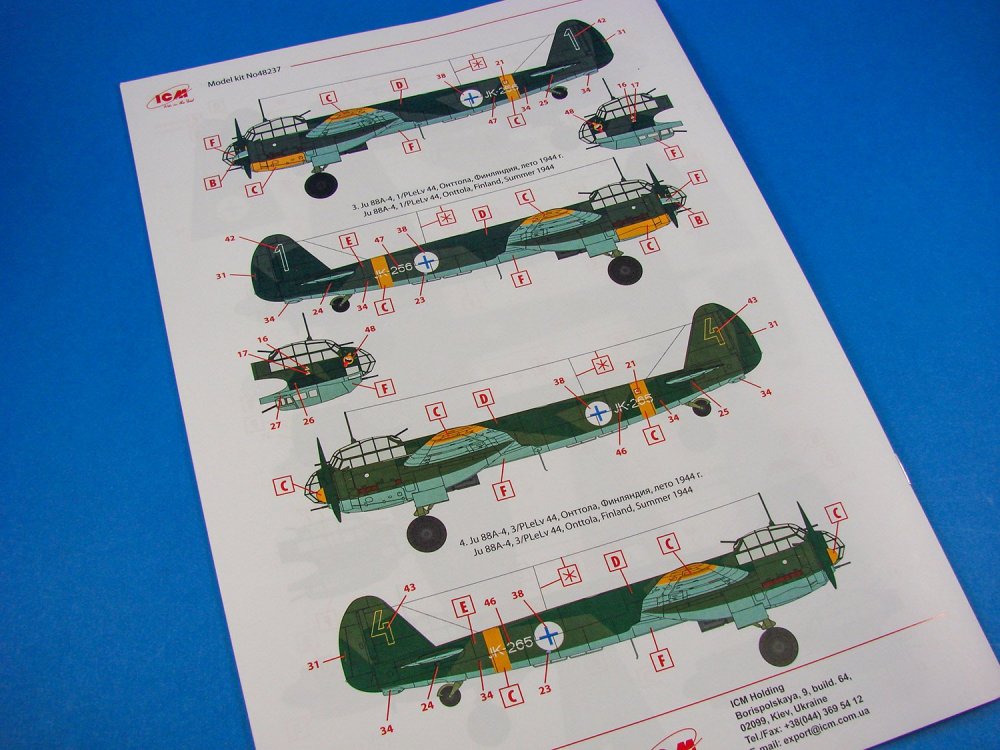
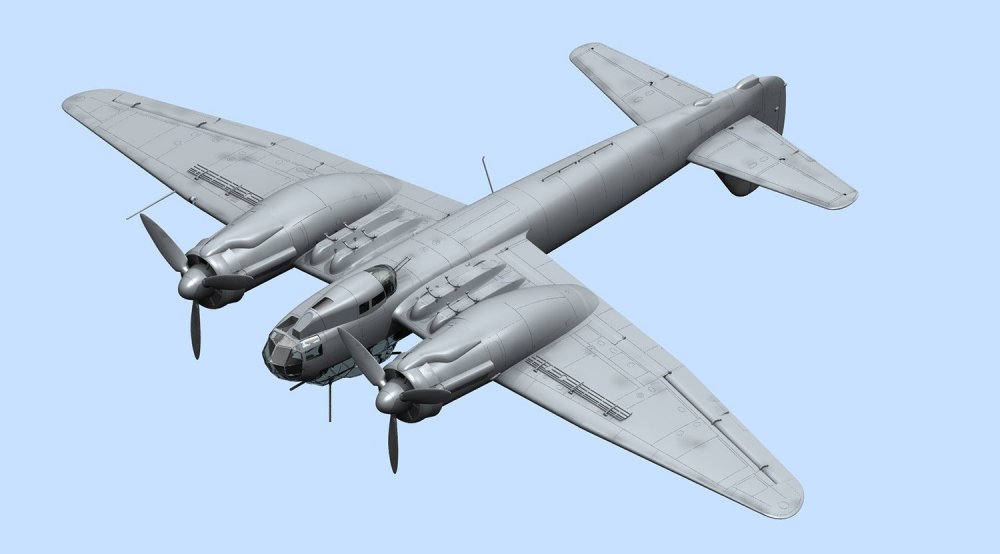
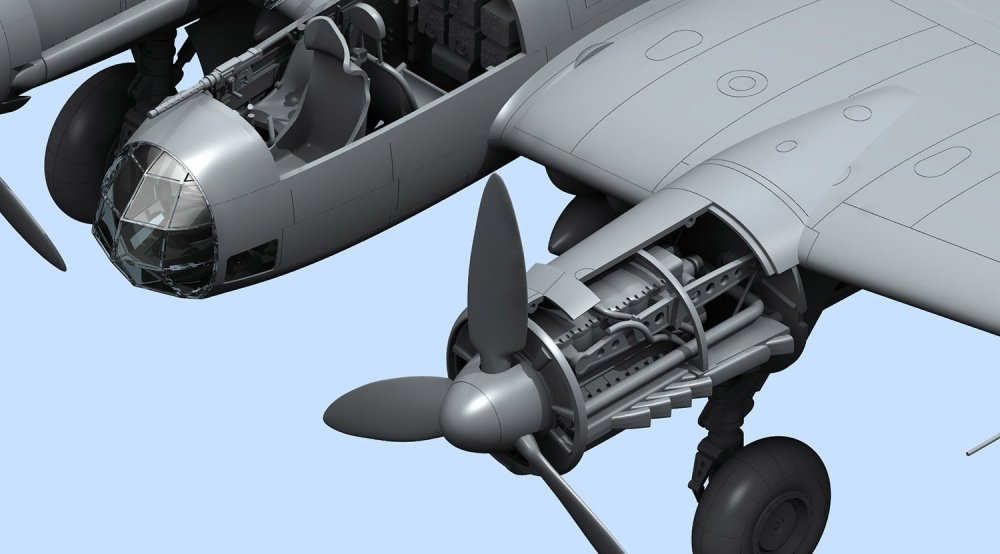
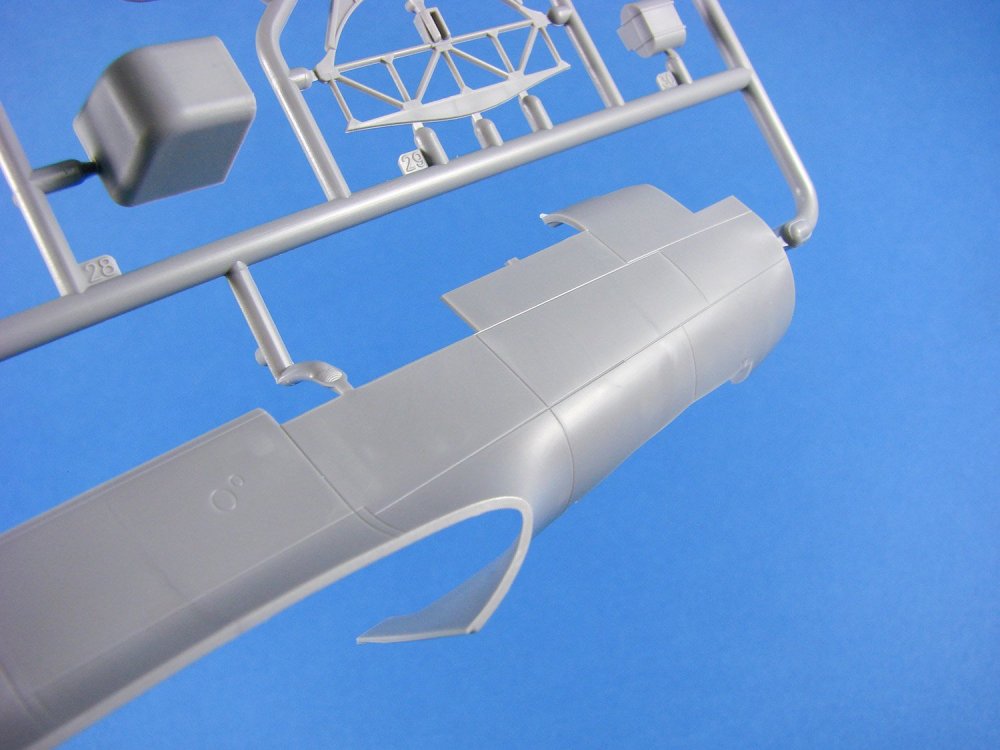
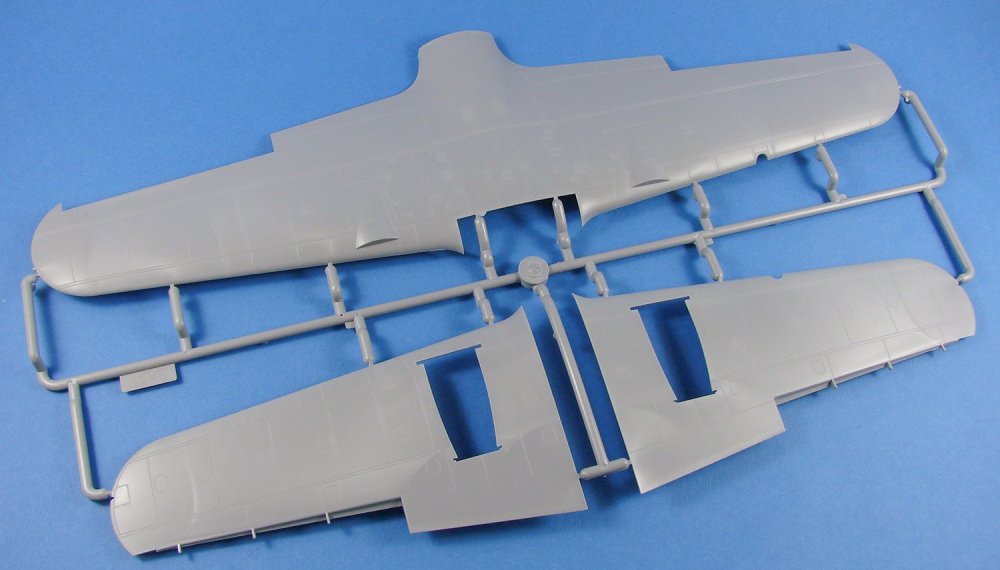
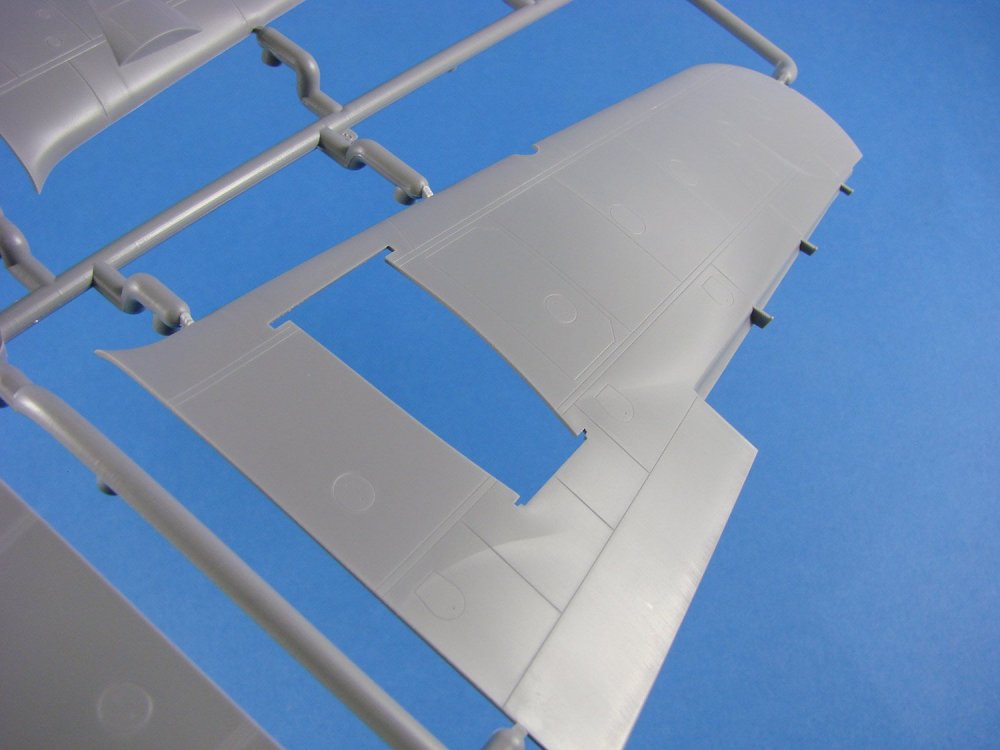
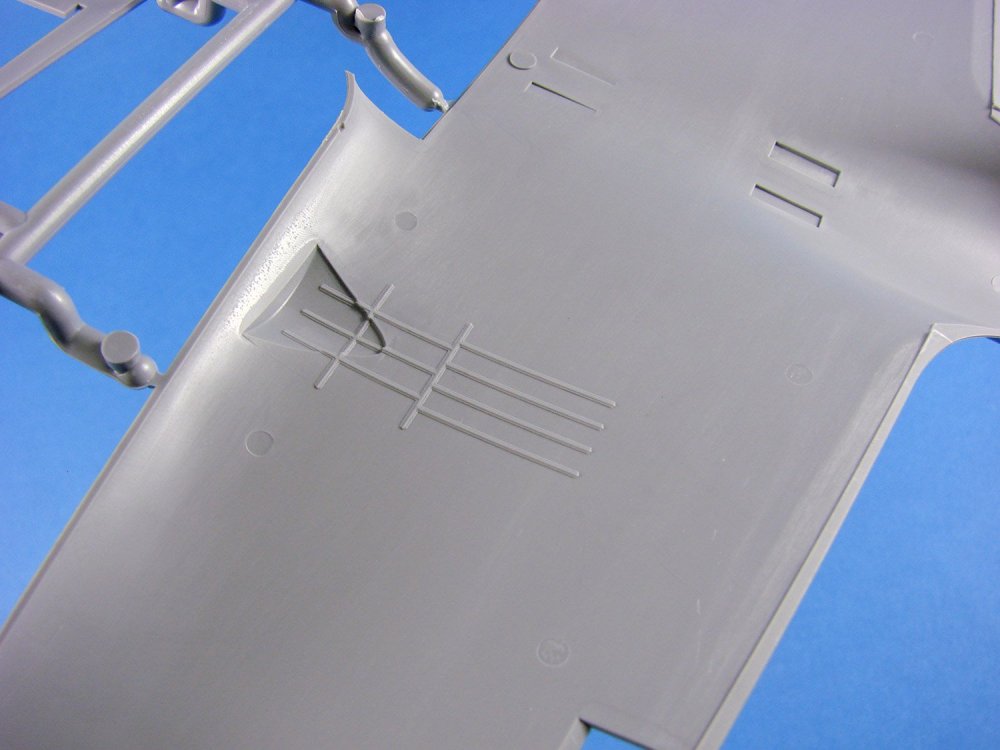
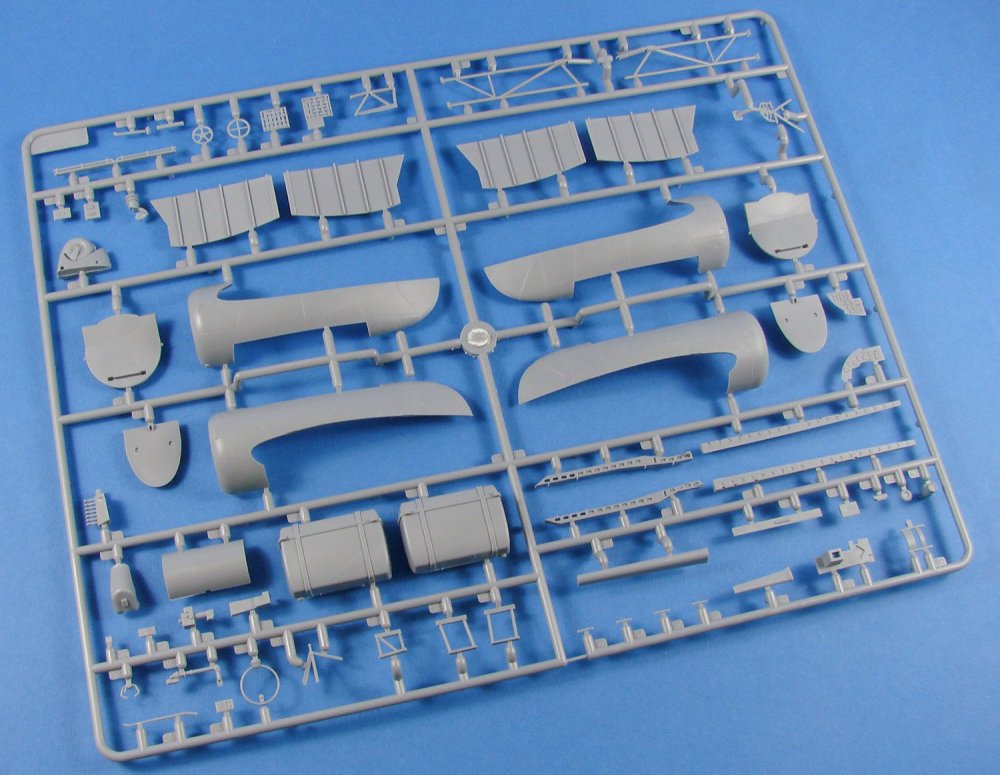
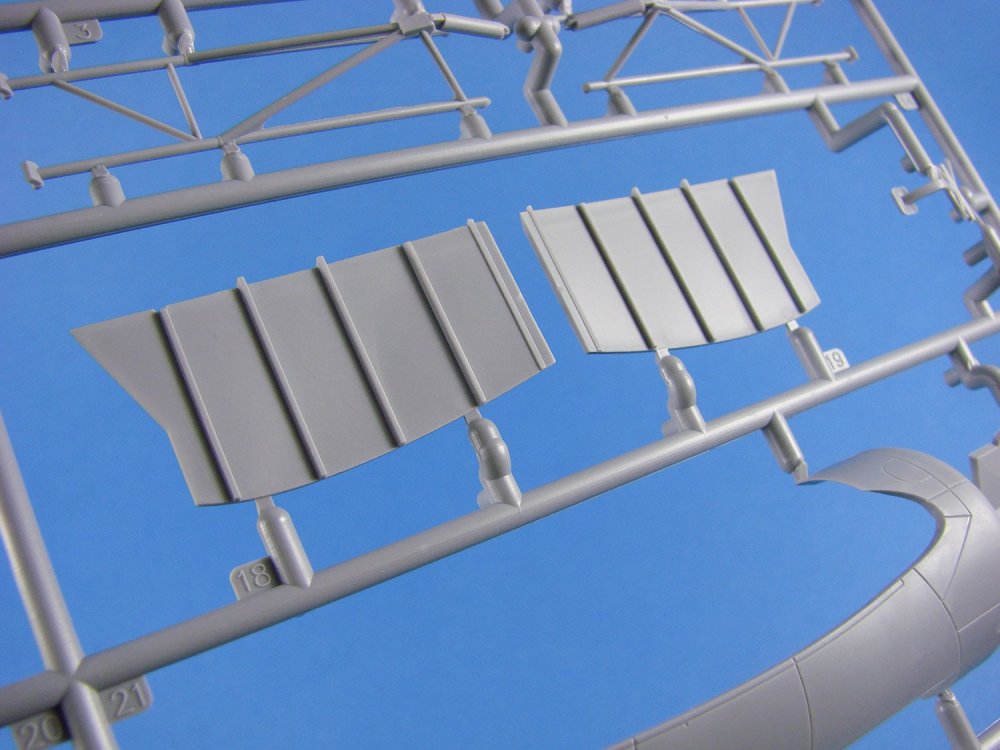
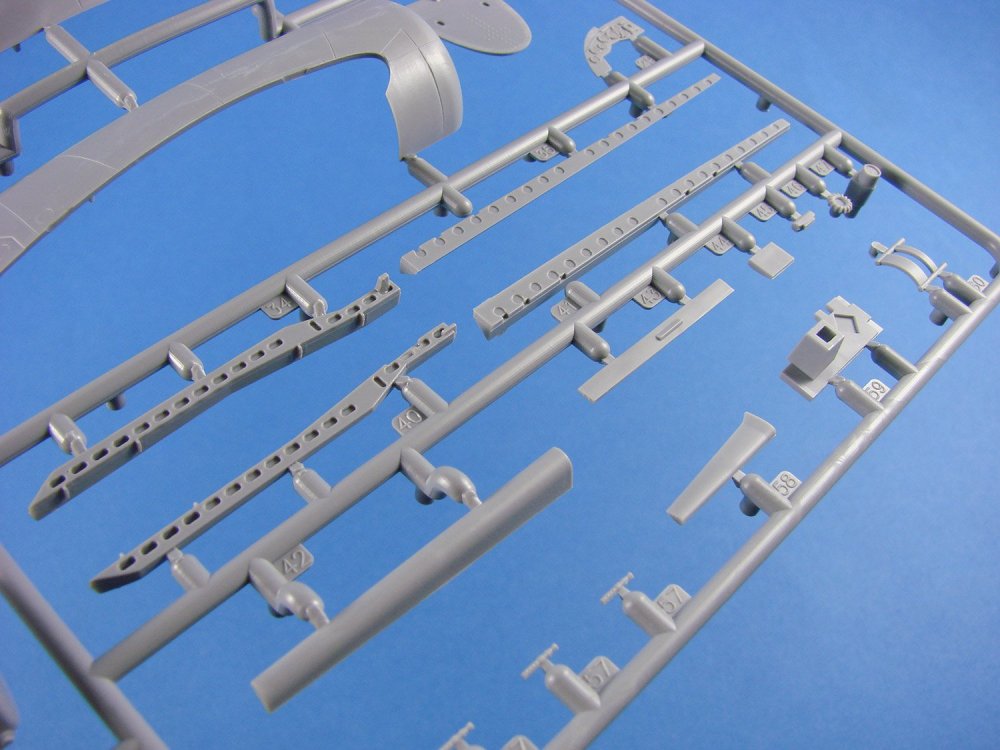
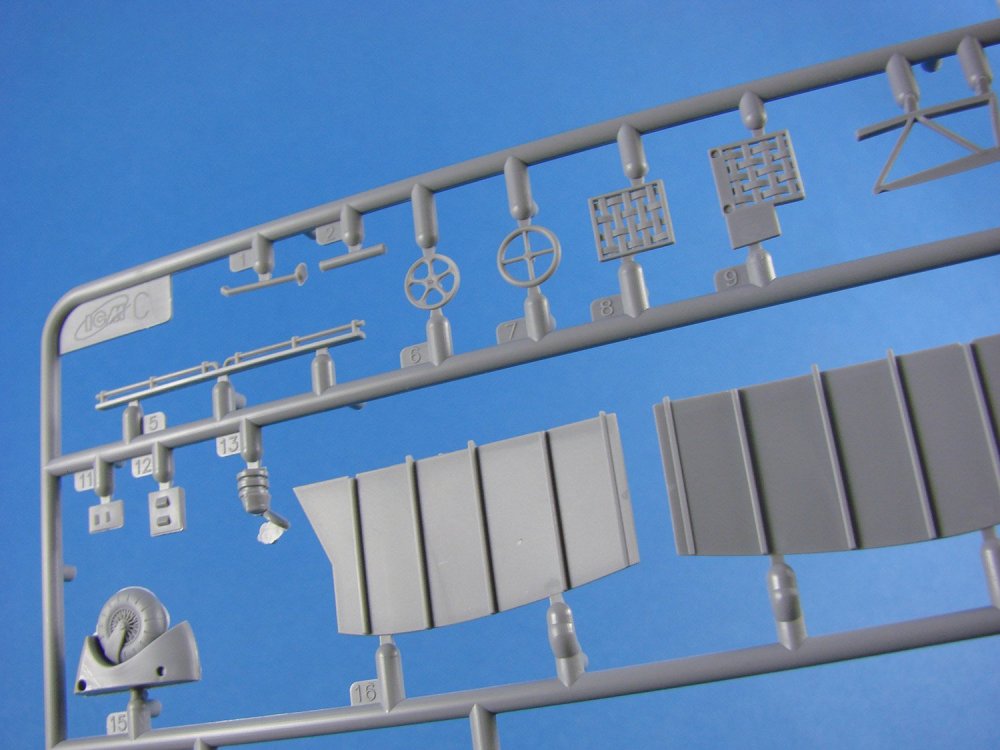
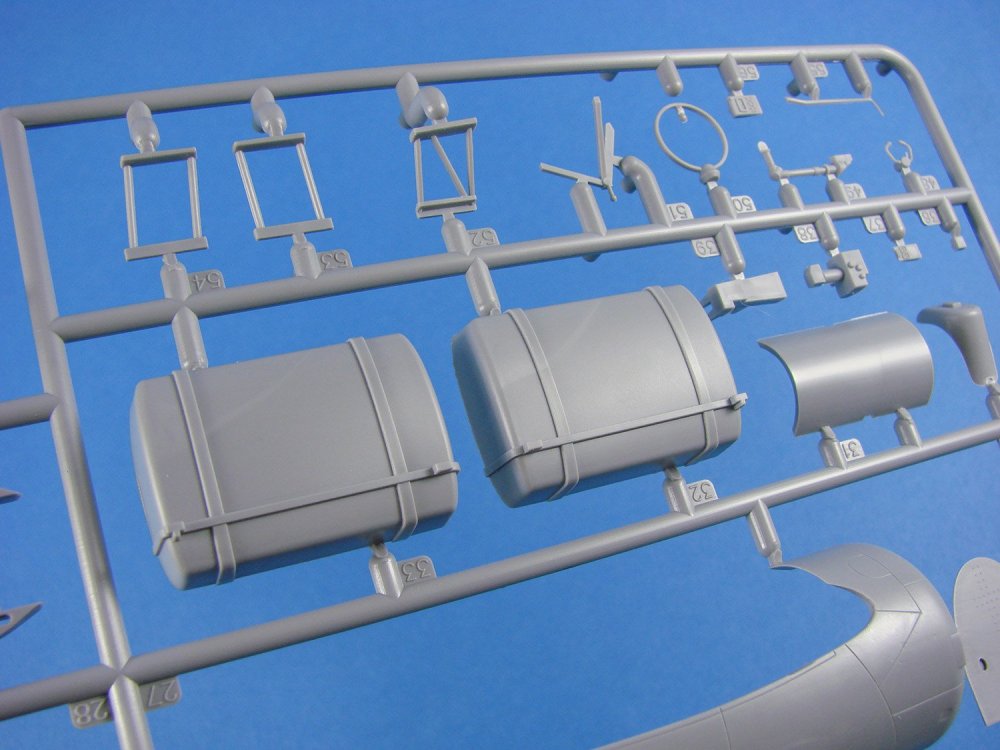
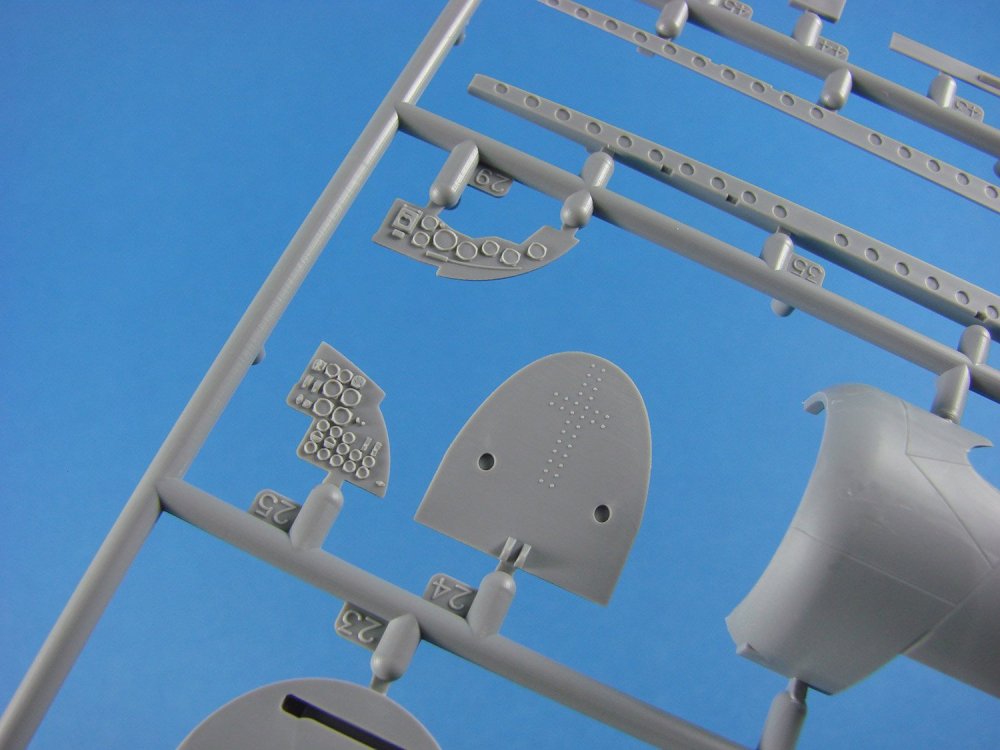
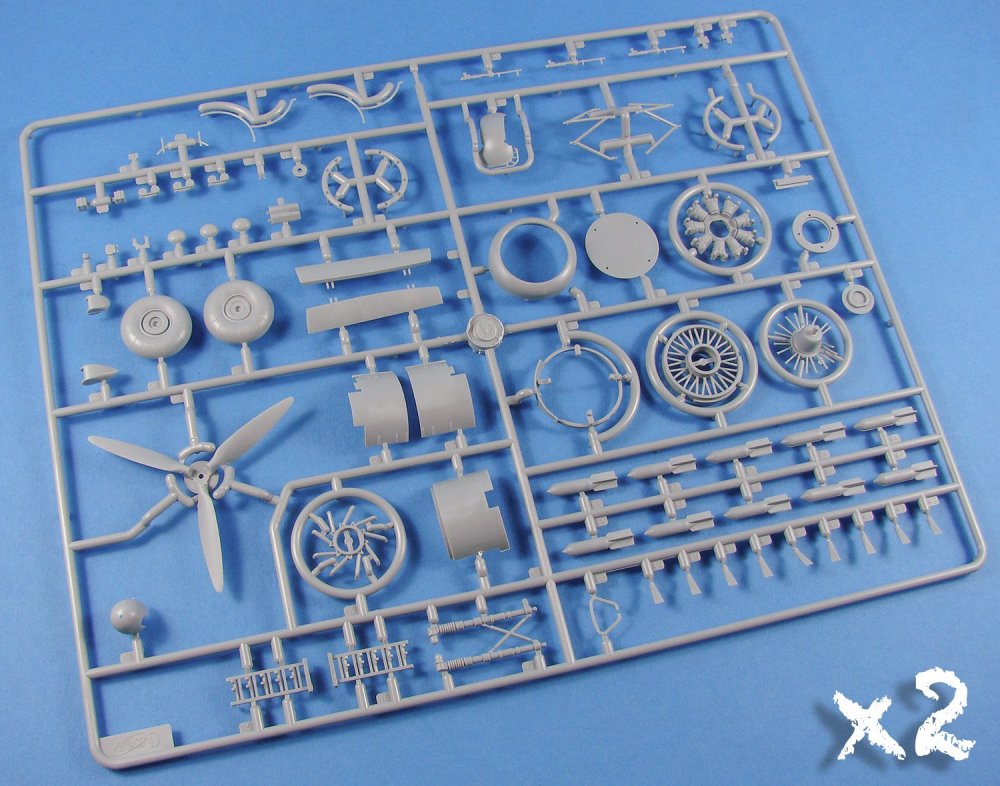
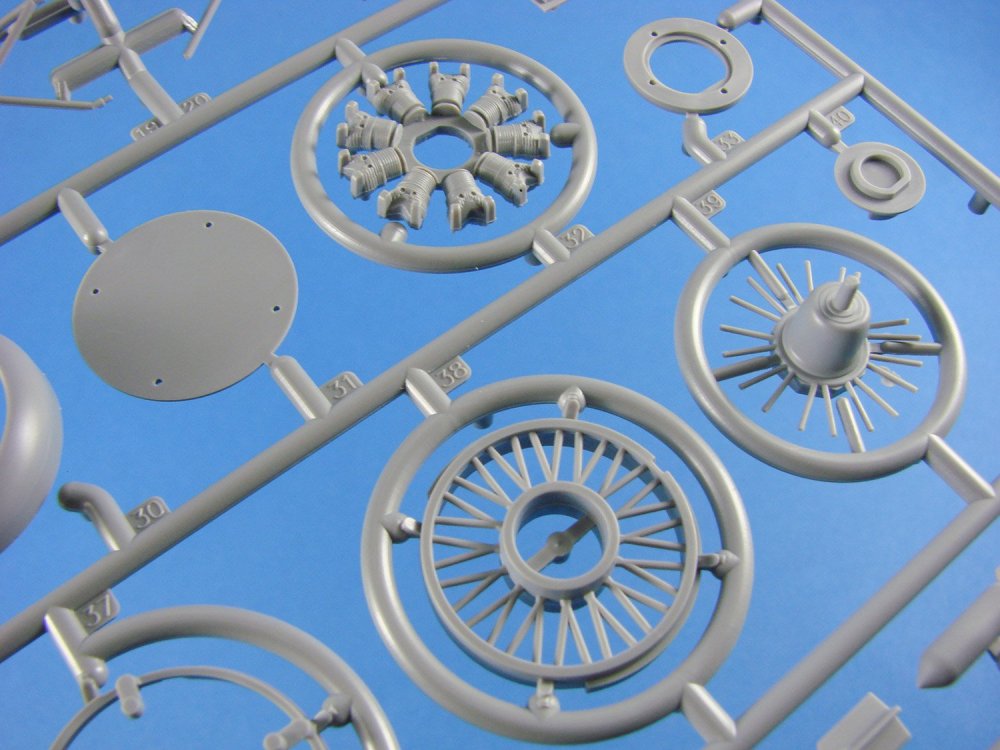
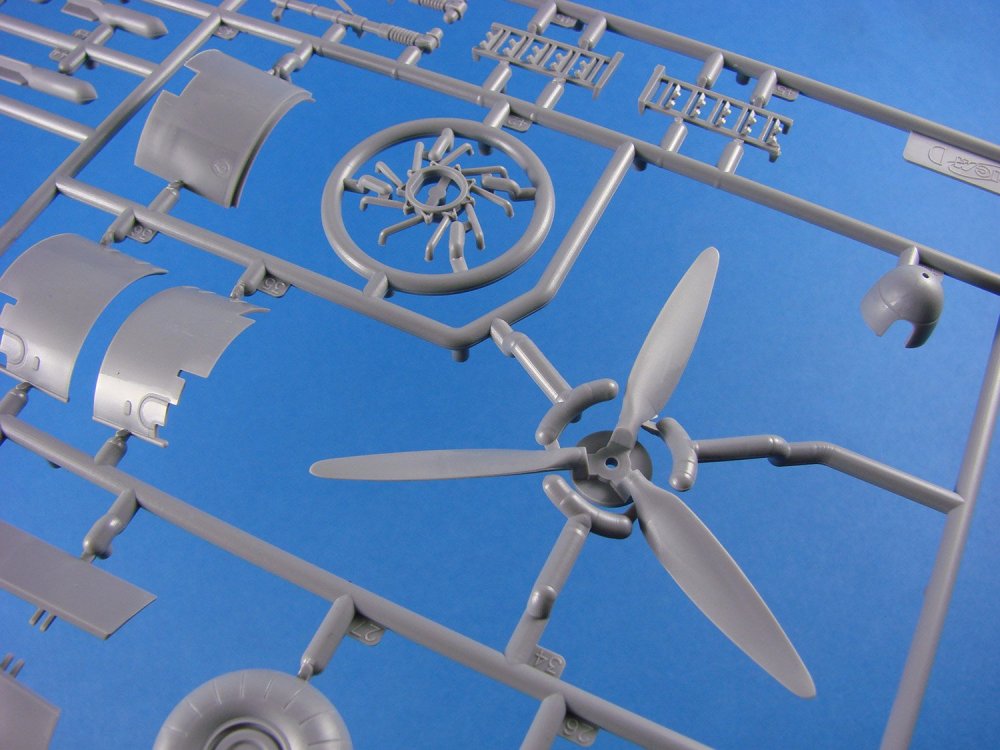
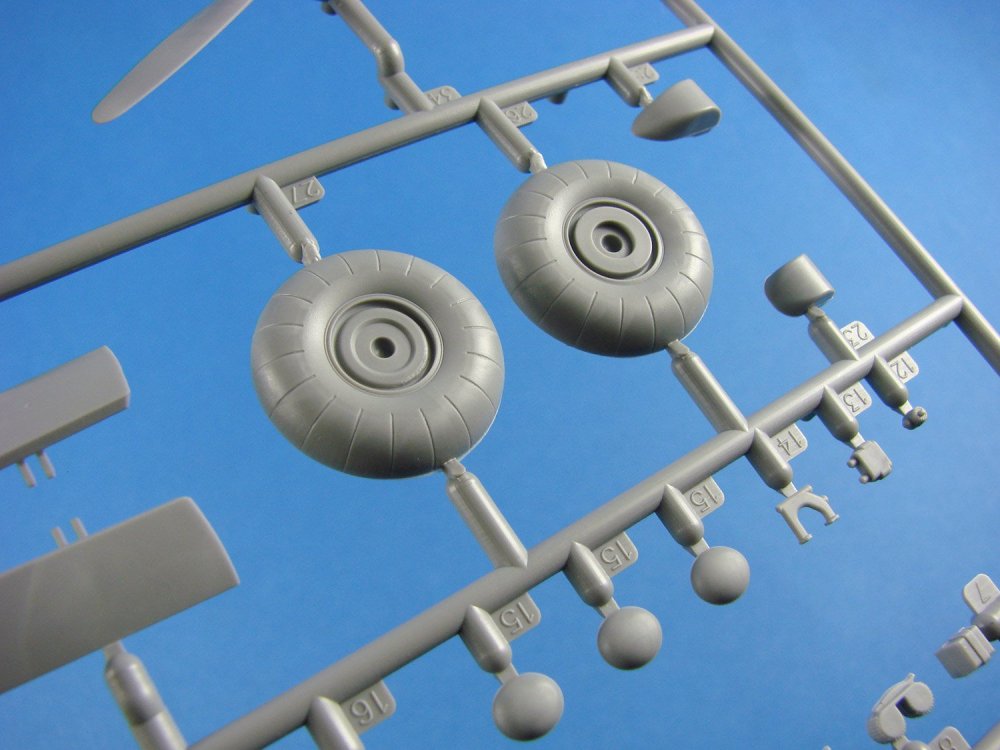
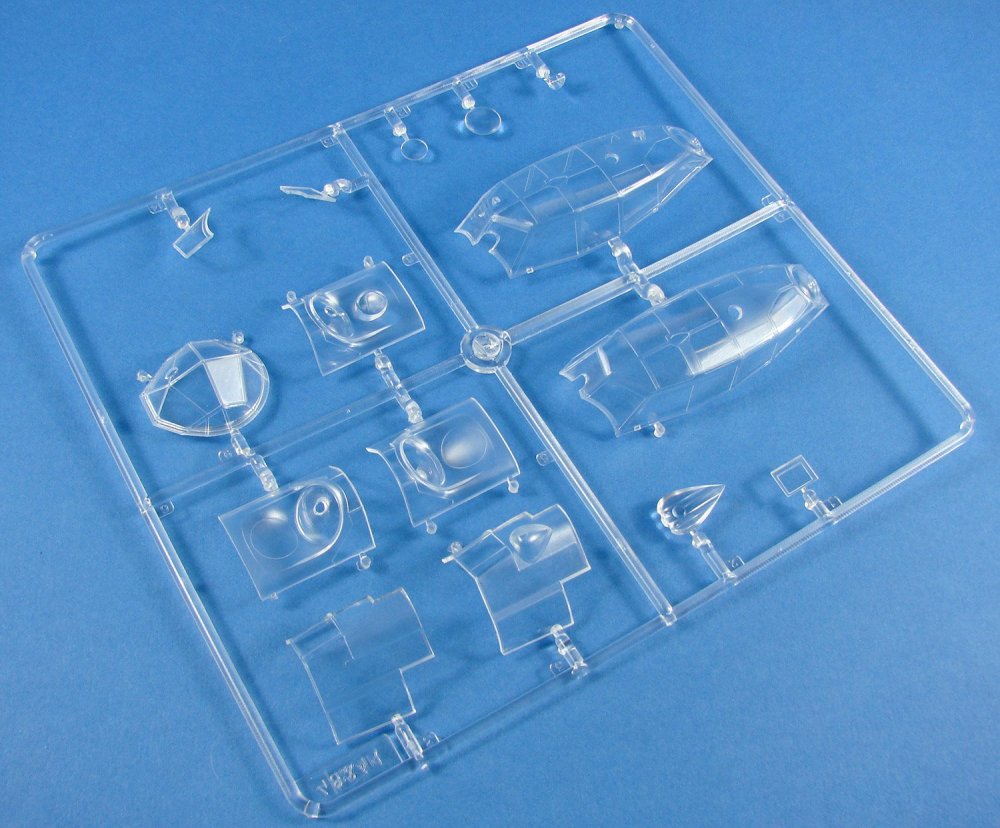
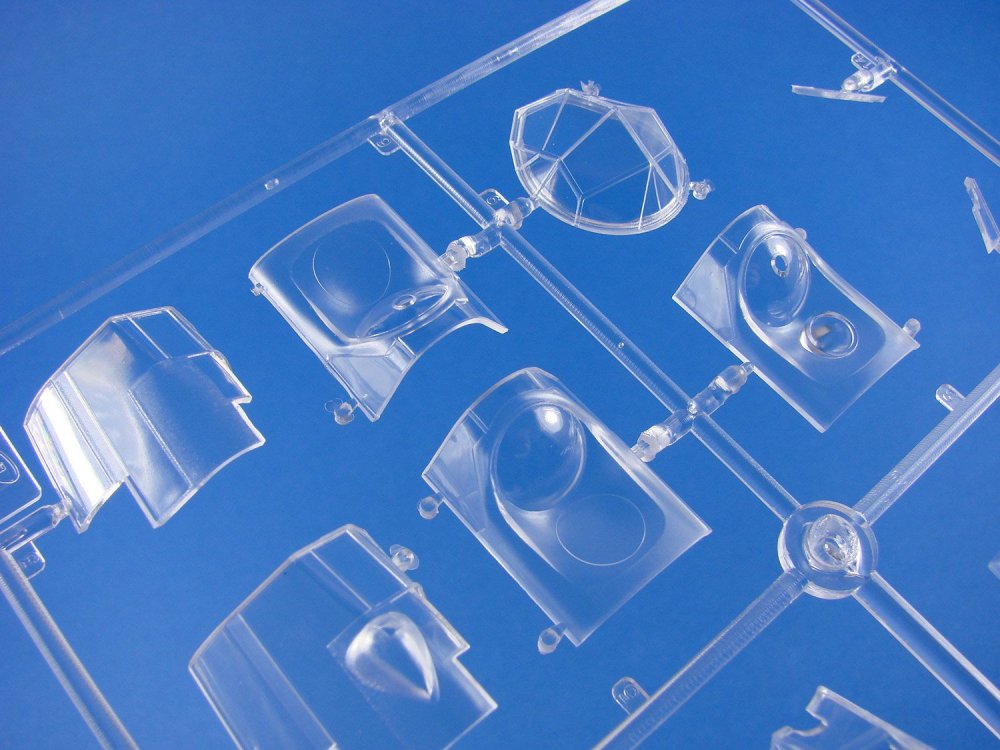
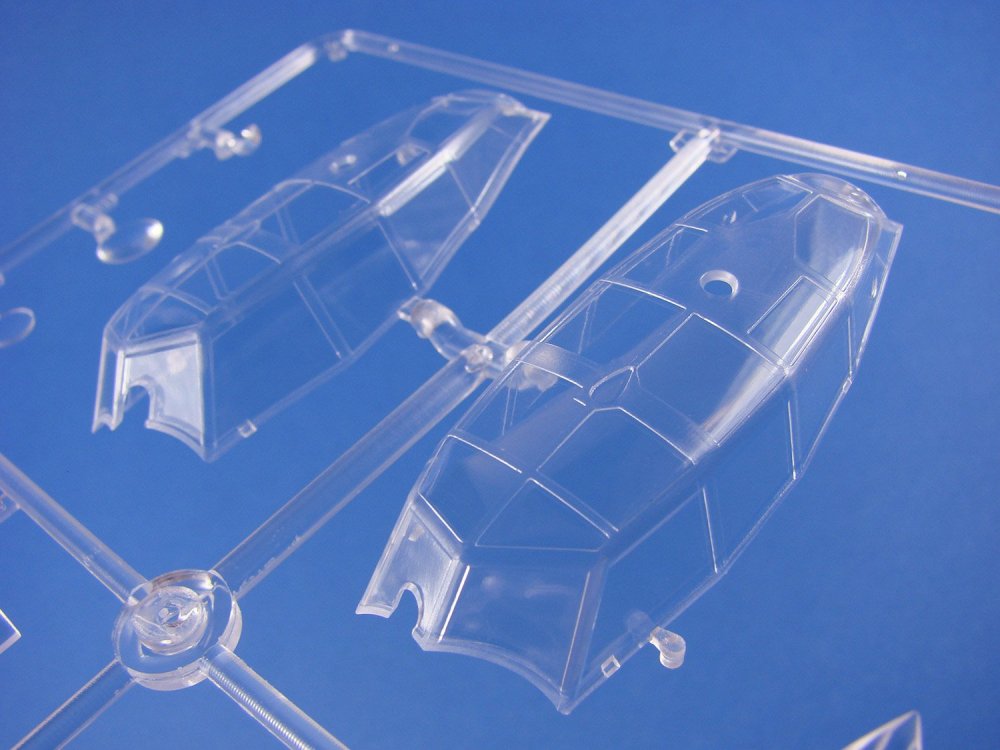
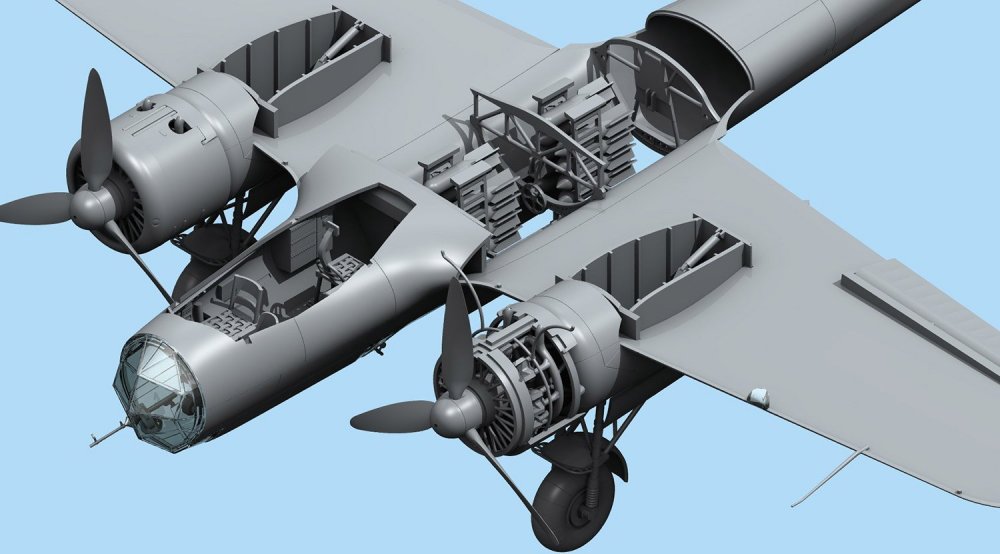
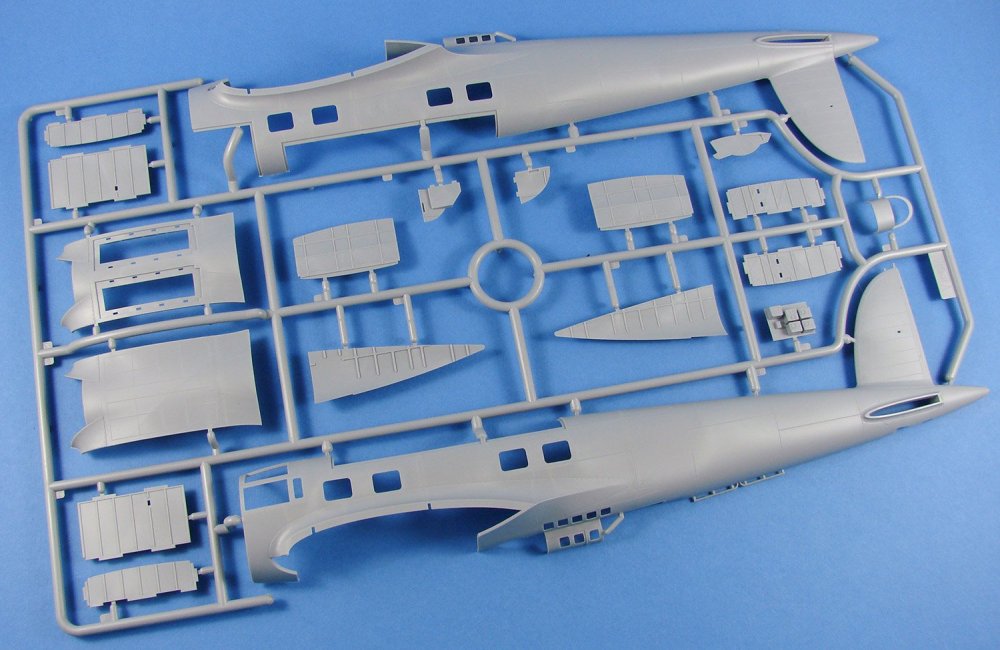
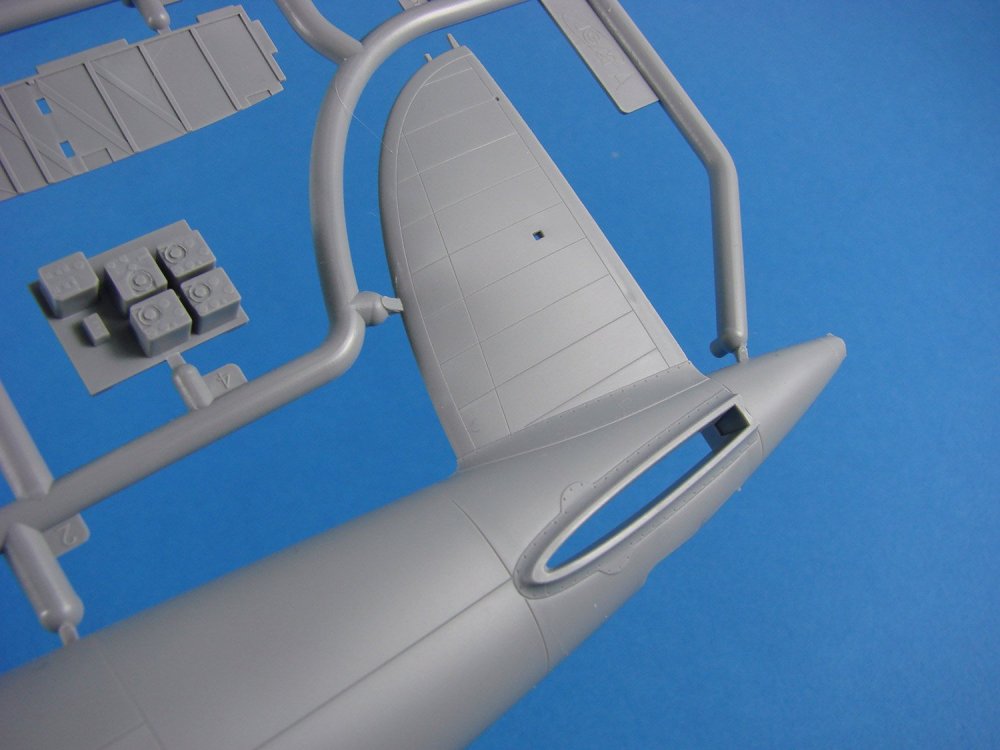
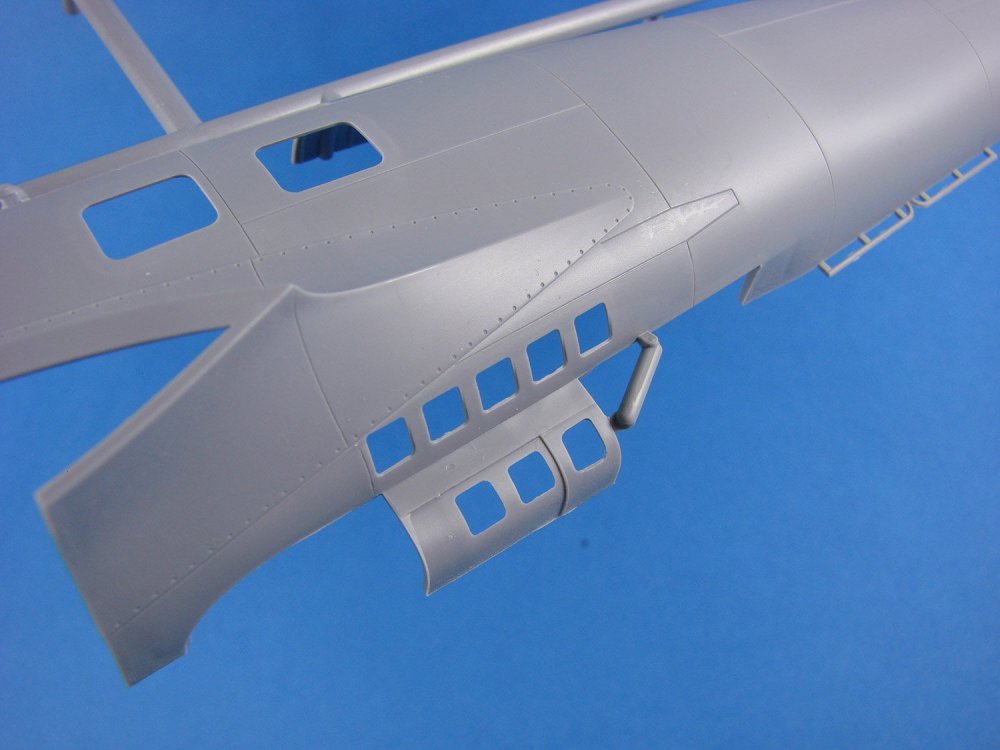
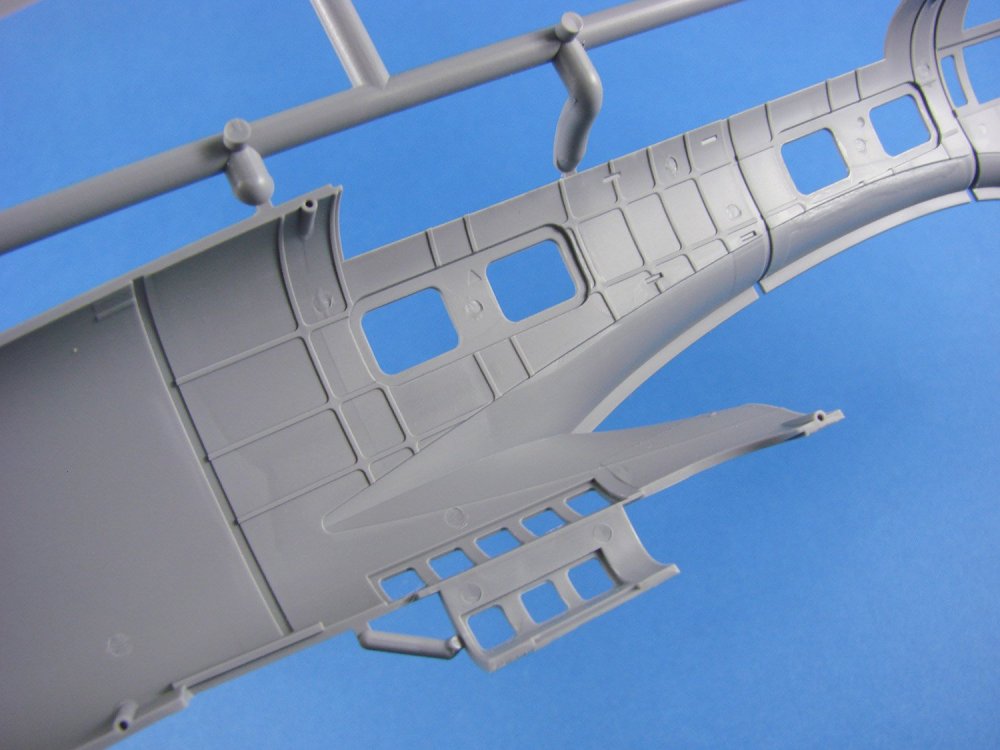
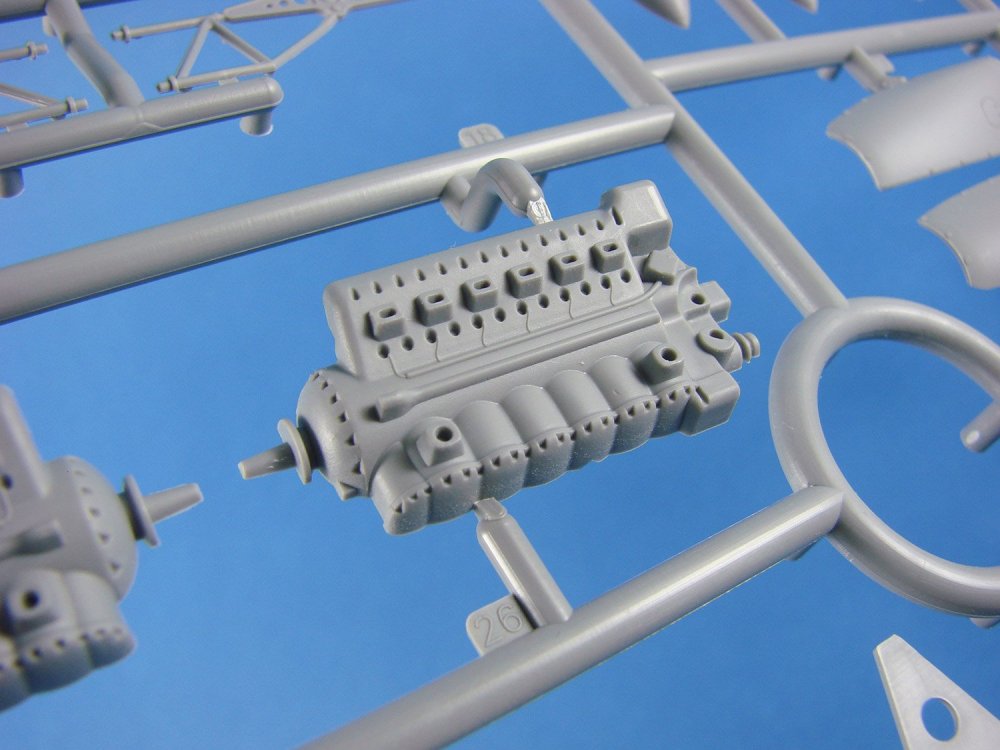
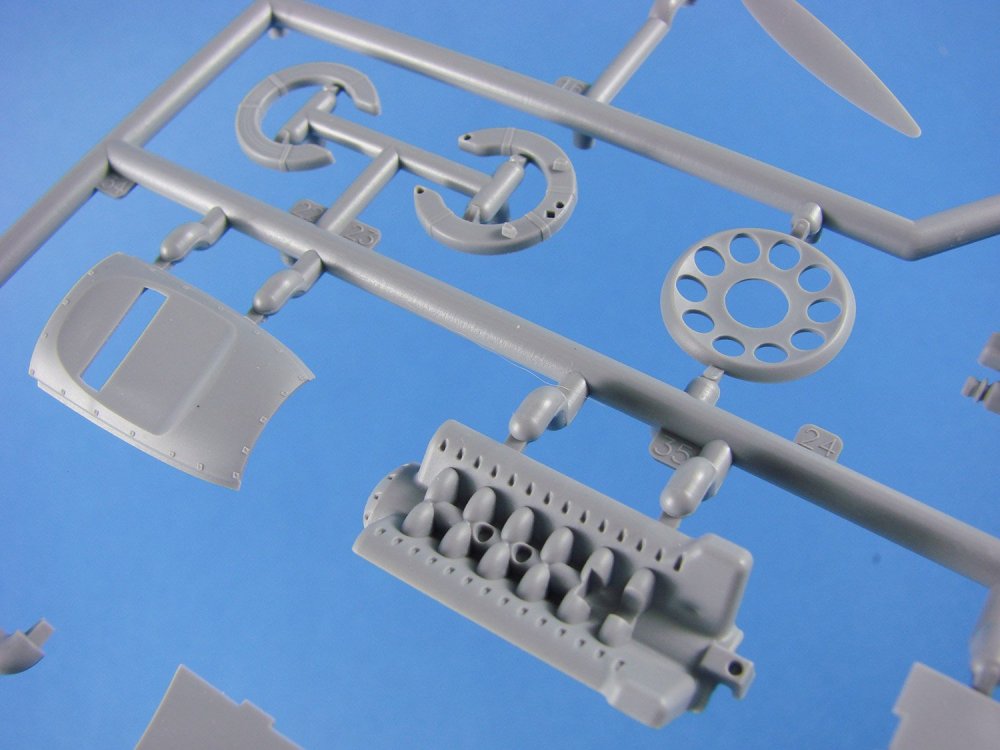
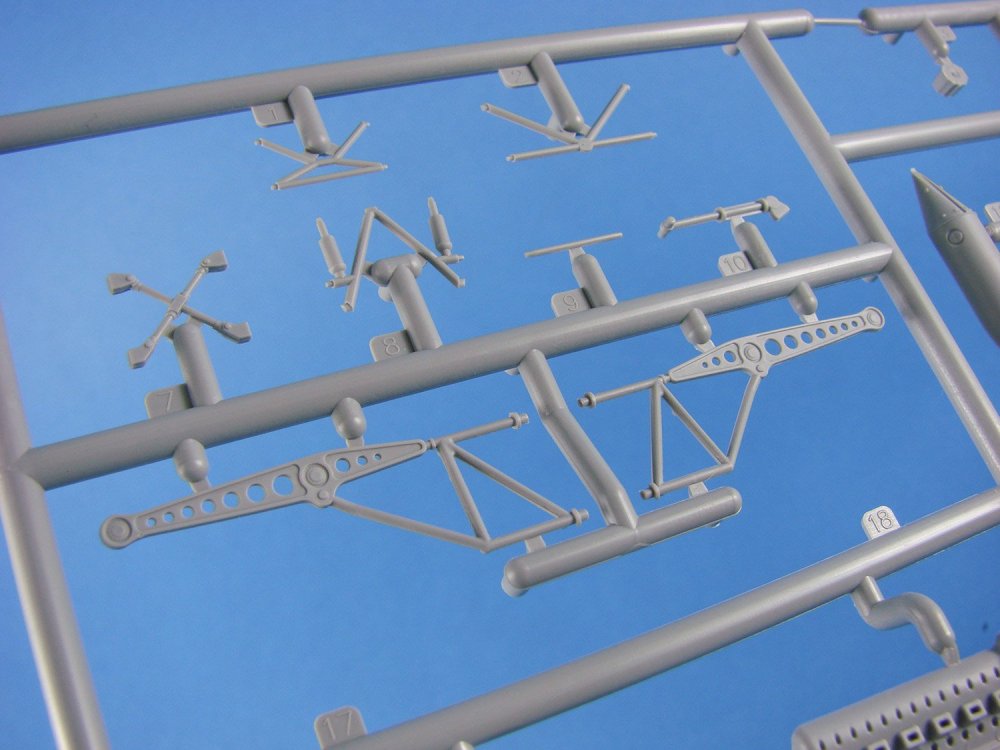
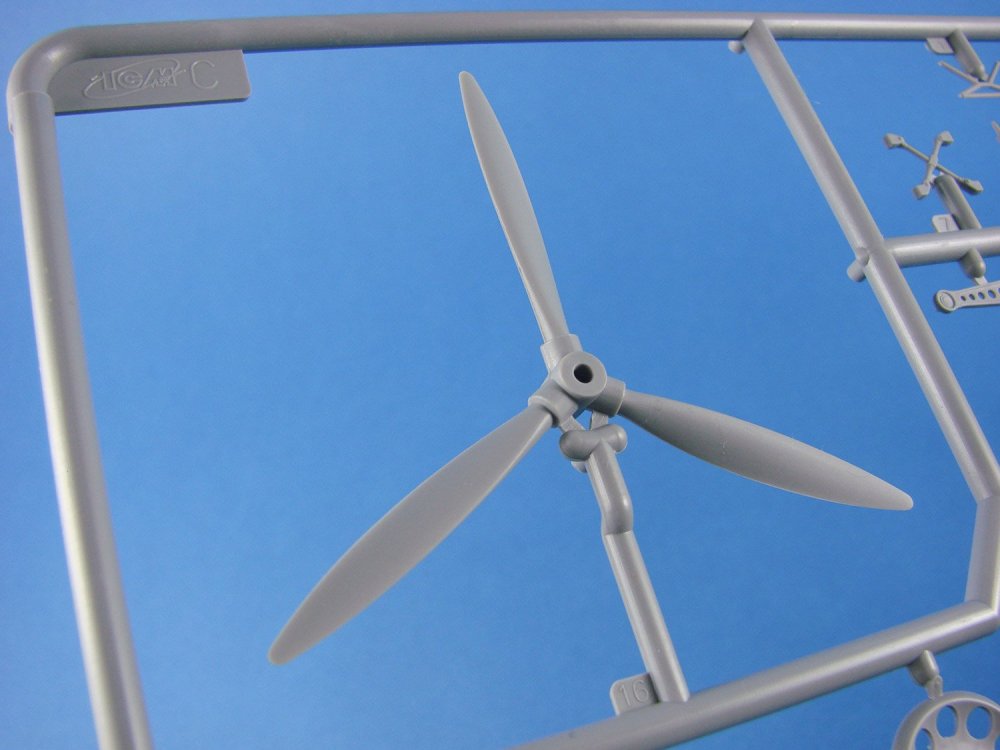
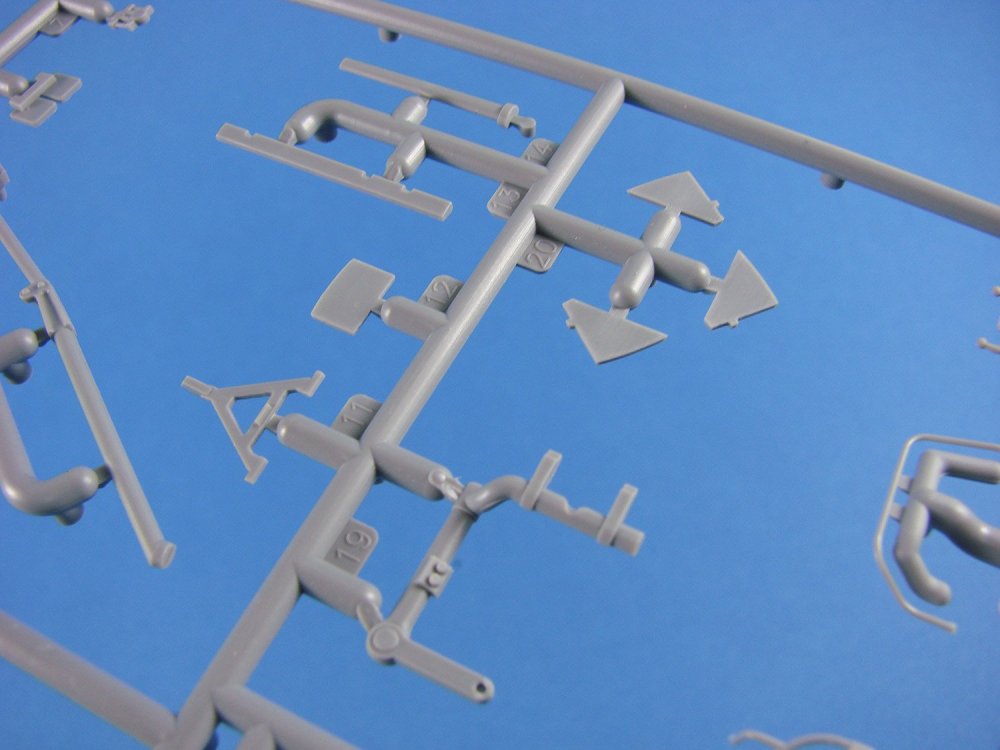
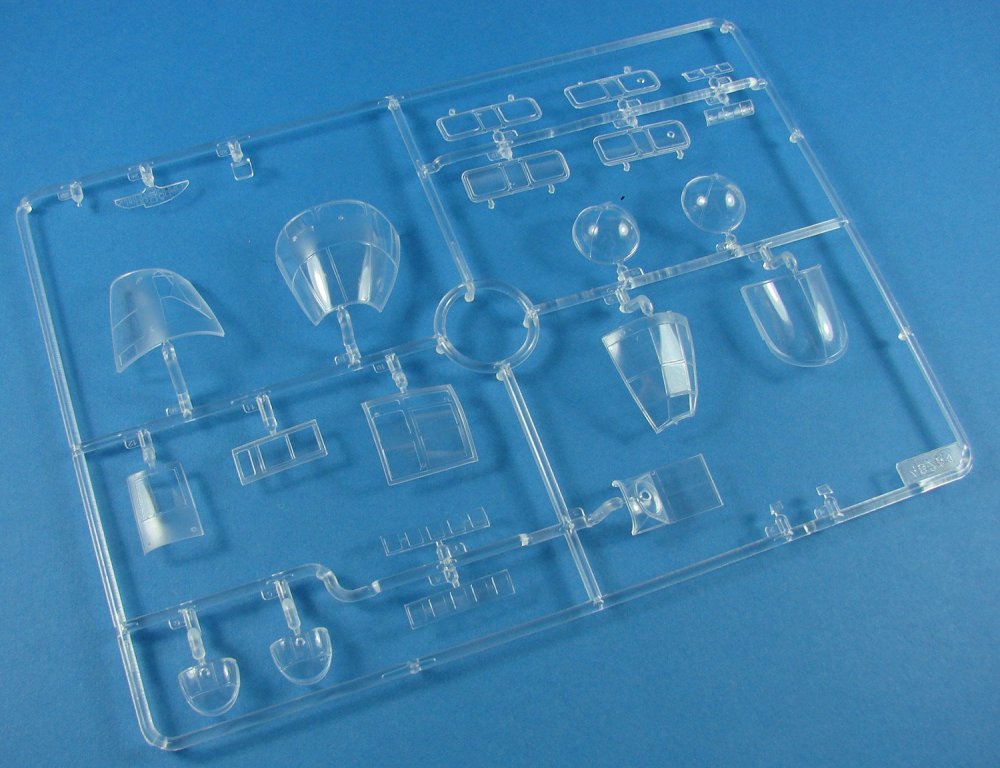
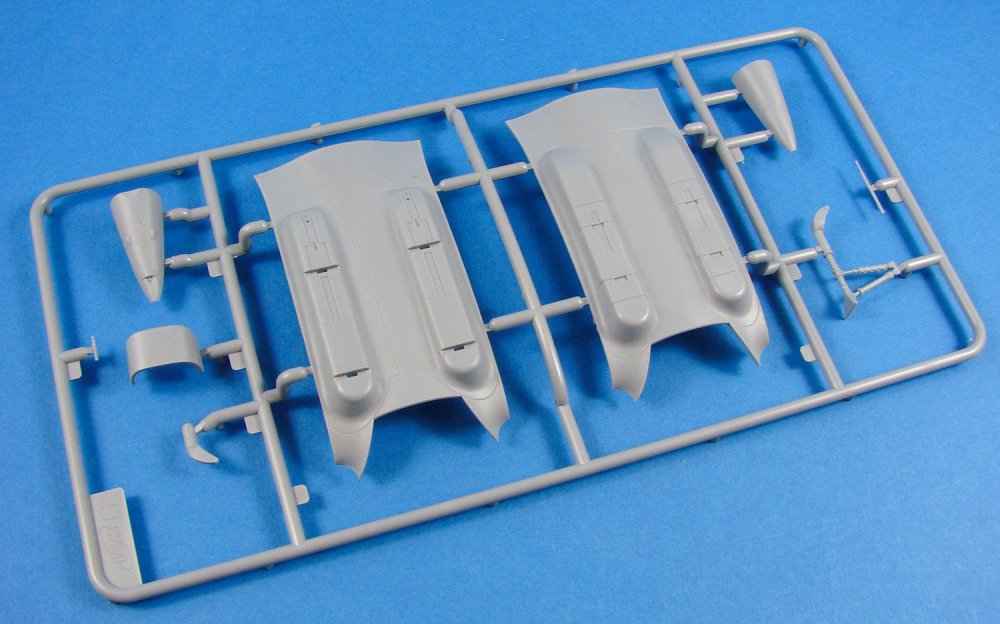
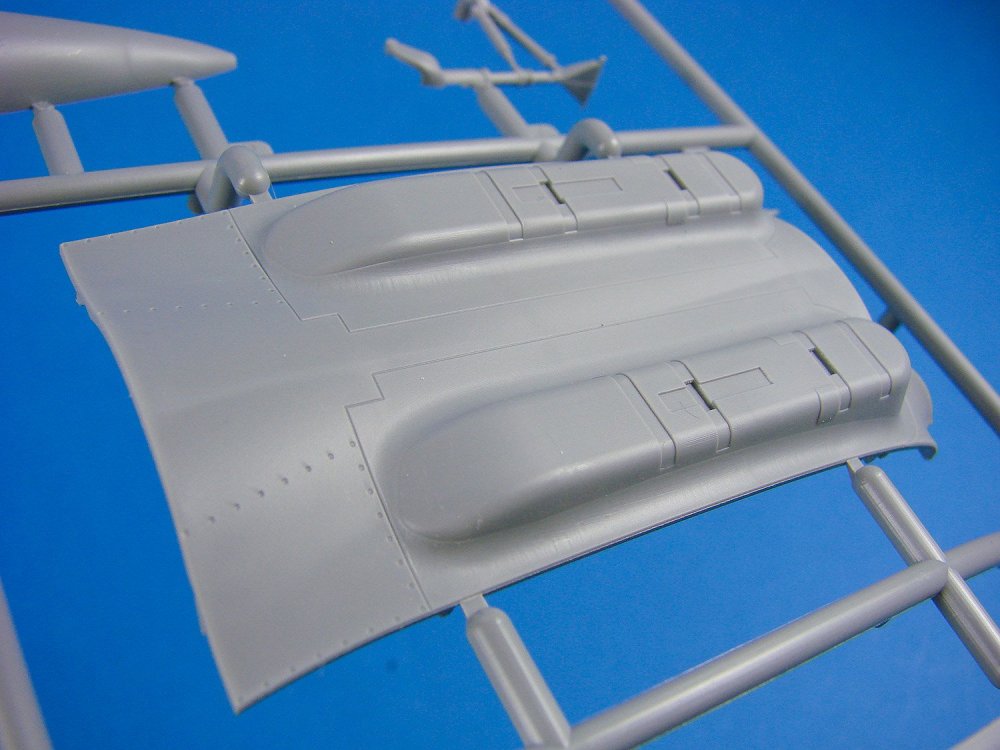
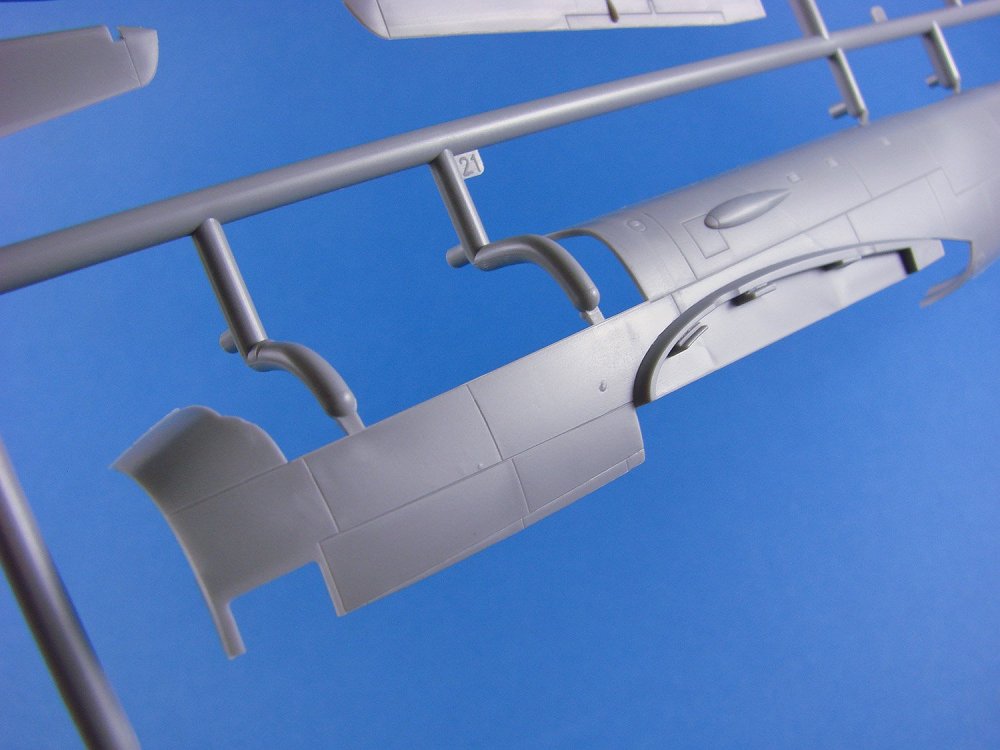
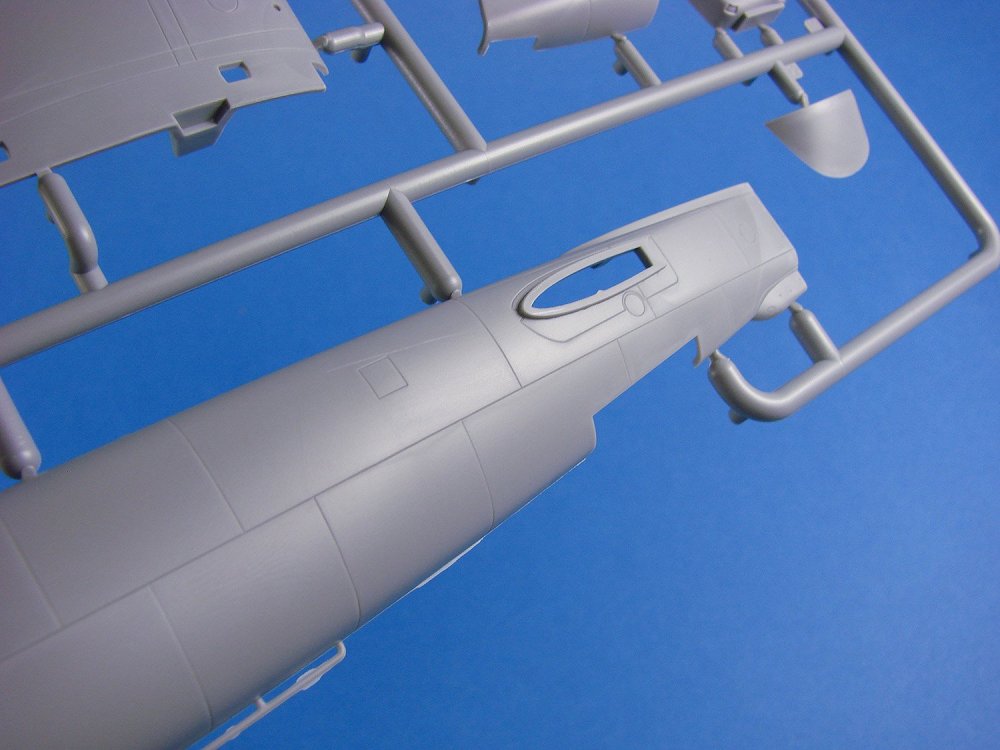
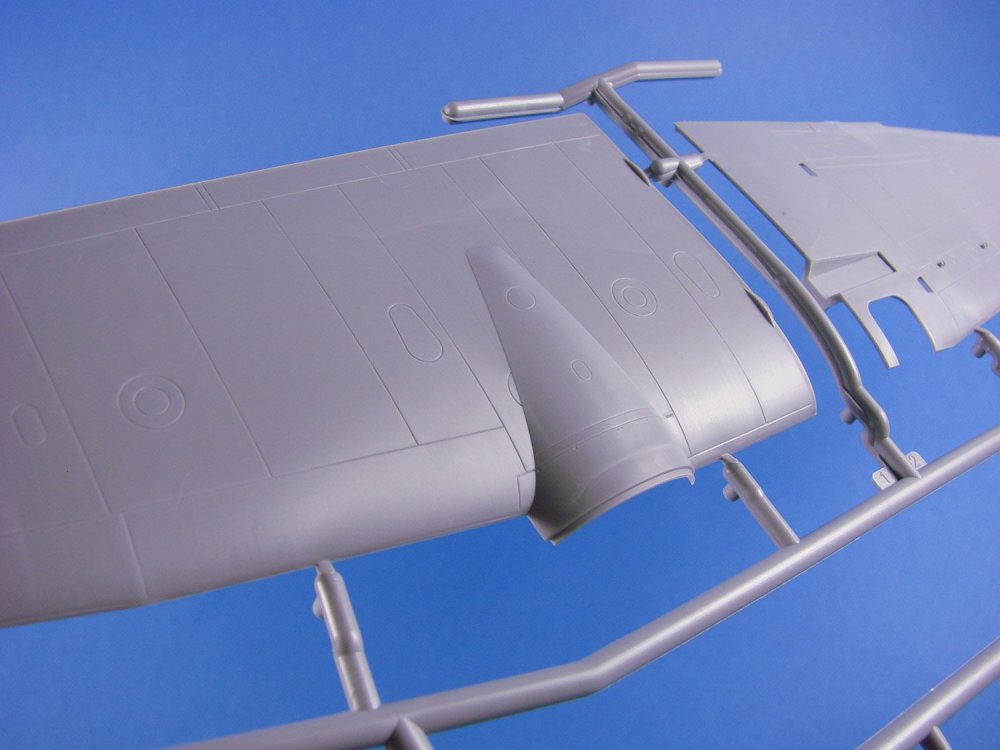
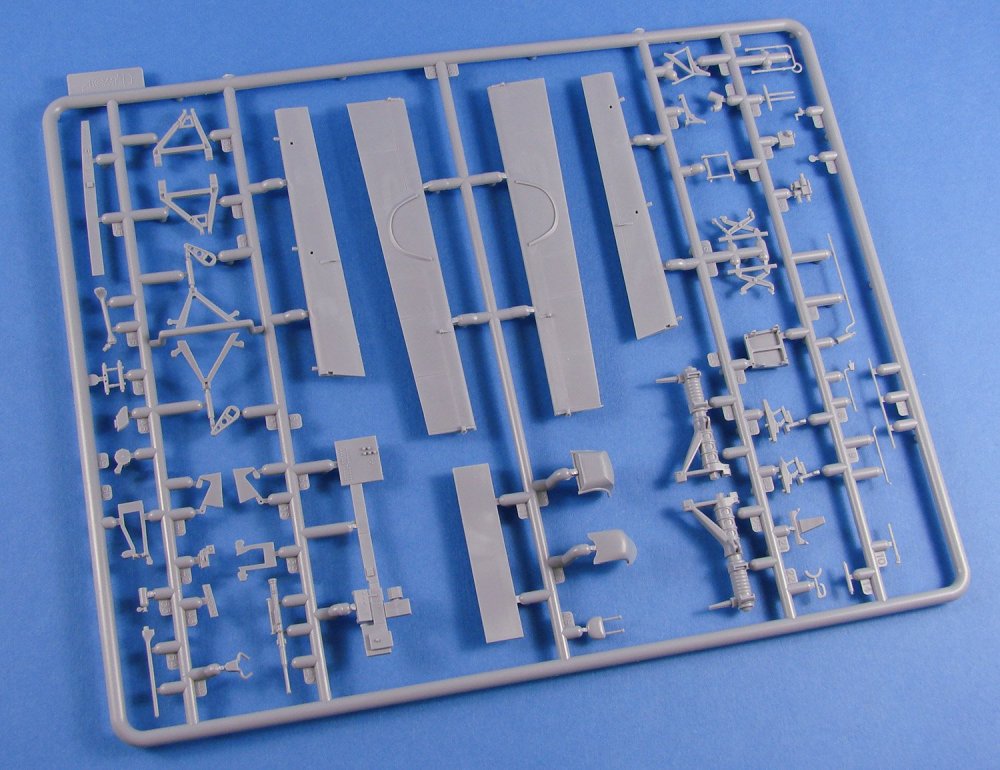
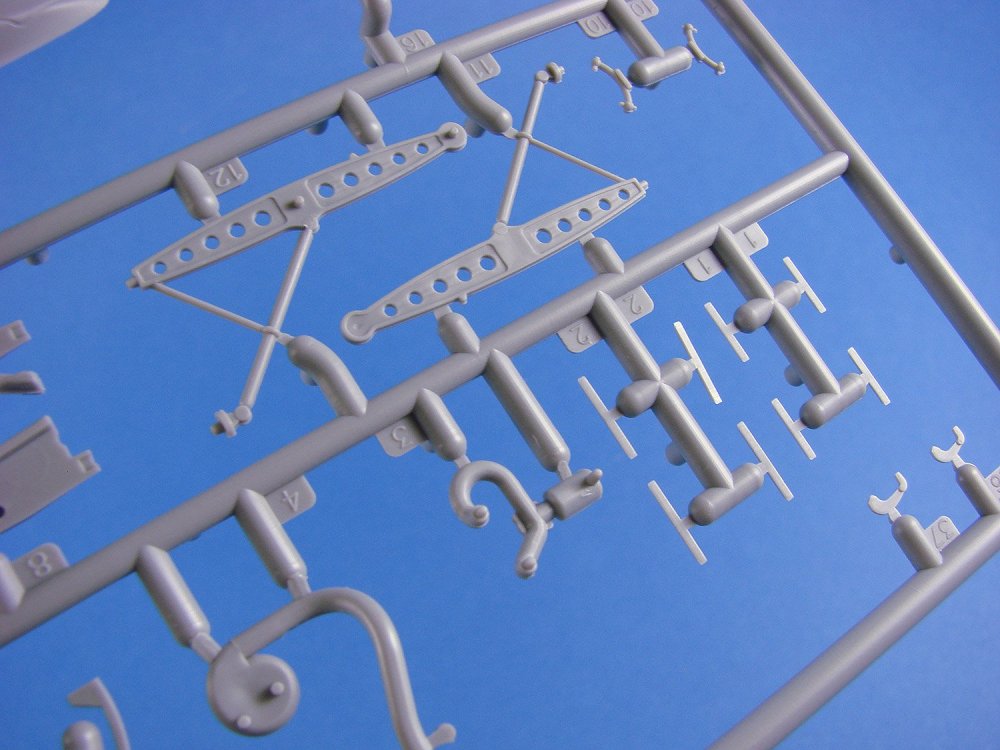
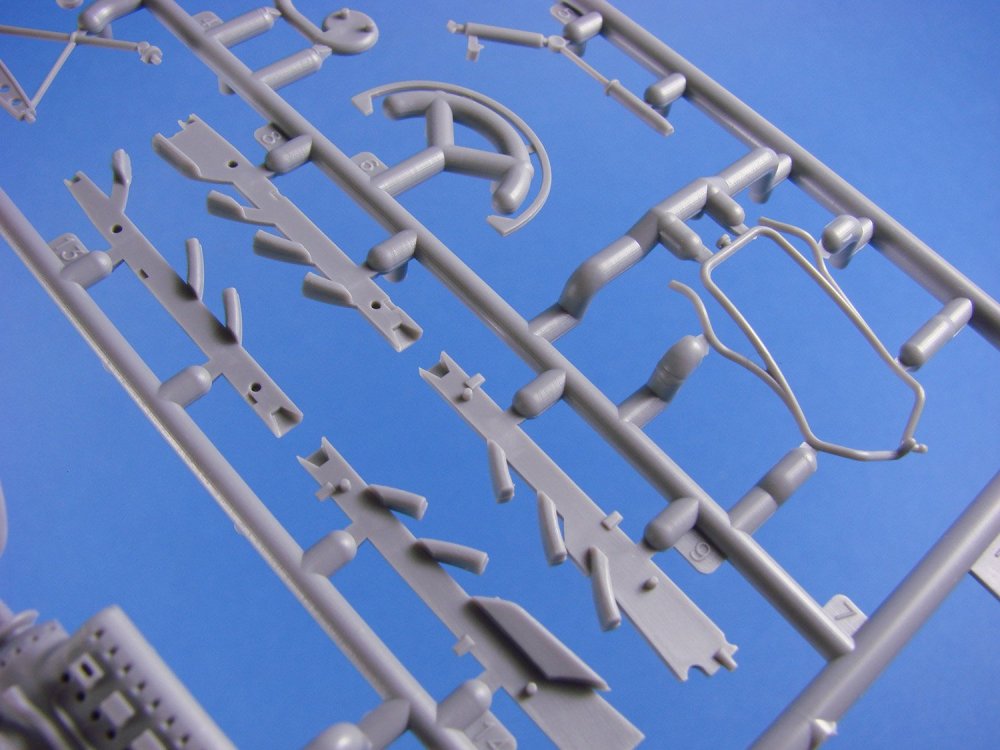
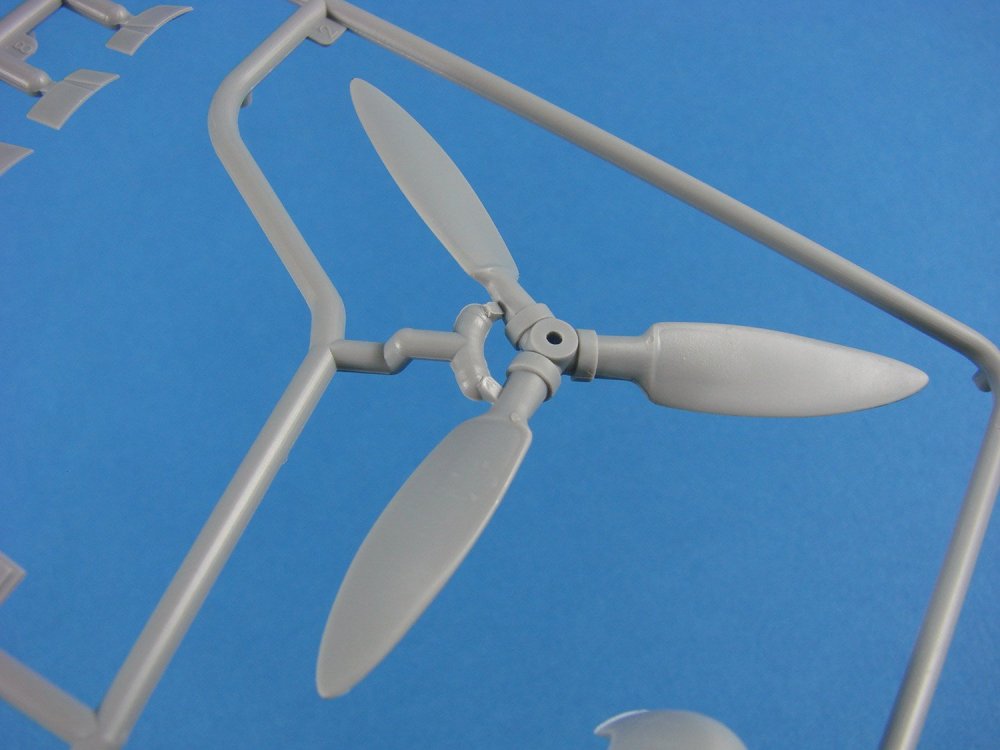
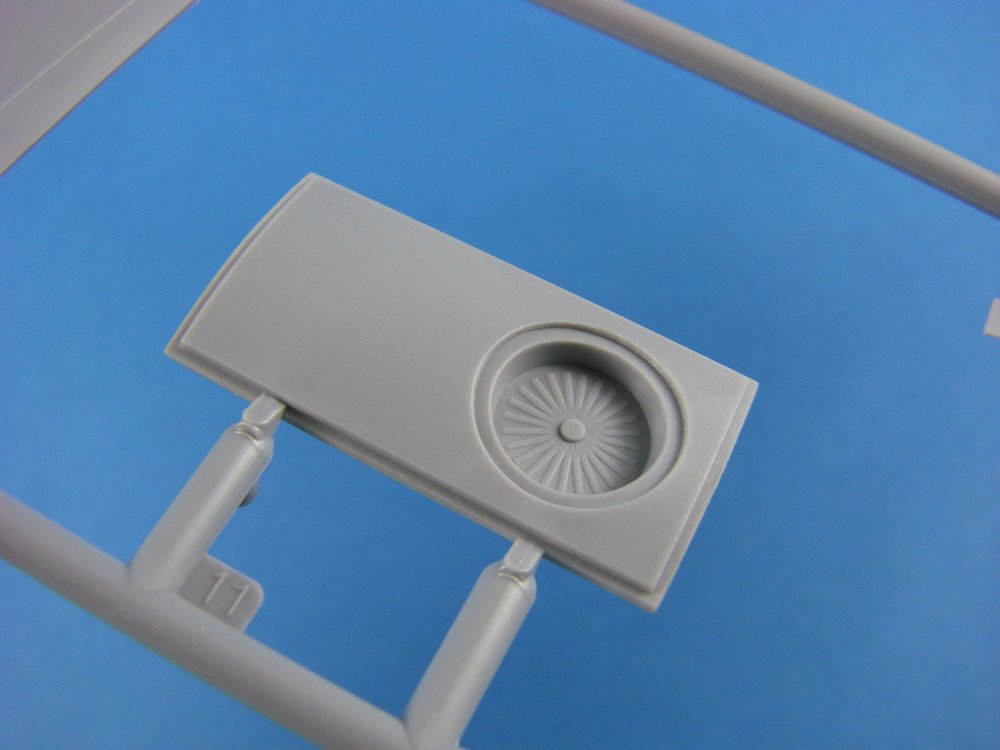
1/48 Junkers Ju 88A-4 WWII Axis Bomber ICM Catalogue # 48237 Available from Hannants for £27.99 The Junkers Ju 88 was a German World War II Luftwaffe twin-engine multirole combat aircraft. Junkers Flugzeug- und Motorenwerke (JFM) designed the plane in the mid-1930s as a so-called Schnellbomber ("fast bomber") that would be too fast for fighters of its era to intercept. It suffered from a number of technical problems during later stages of its development and early operational roles but became one of the most versatile combat aircraft of the war. Like several other Luftwaffe bombers, it served as a bomber, dive bomber, night fighter, torpedo bomber, reconnaissance aircraft, heavy fighter and, during the closing stages of the conflict in Europe, as a flying bomb. Despite its protracted development, the aircraft became one of the Luftwaffe's most important assets. The assembly line ran constantly from 1936 to 1945 and more than 16,000 Ju 88s were built in dozens of variants, more than any other twin-engine German aircraft of the period. Throughout production the basic structure of the aircraft remained unchanged. Without a doubt, the Junkers Ju 88 was one of the most versatile and adaptable aircraft to have been used during WW2. Entering service as the war was literally starting (on the day of the Polish attack), the Ju 88 became successful for its numerous famous and infamous roles, starting out as a light bomber/dive bomber, and when losses started to mount around the time of the Battle of Britain, it was moved into other theatres of war, such as North Africa, and against shipping in the Mediterranean with a torpedo-carrying variant. Where it is perhaps best known are for its roles as both a heavy fighter and night-fighter, in which it excelled. The A-4 was an improved variant. It had a longer wingspan due to redesigned wingtips. It also had a more powerful defensive armament. Power was provided by two Jumo 211 J-1 or J-2 engines (1410 hp) driving wooden bladed propellers. A reinforced undercarriage was also introduced, as was a provision for four external bomb racks. Courtesy of Wikipedia. The kit There has certainly been some mileage seen in the moulds for ICM’s rather sweet Ju 88 kit, with there now being TWELVE incarnations that have been released across the ICM, Hasegawa, Special Hobby and Revell labels, with Special Hobby creating their own resin and injection plastic parts to accompany the base ICM plastic. This particular Ju 88A-4 version was released about April/May of this year. I certainly wouldn’t be surprised to see more incarnations of this kit in future, hopefully covering a number of the other exotic machines that were derived from the base Ju 88 airframe. In fact, a C-6b night-fighter seems to be slated for later this year. There is of course a reason why we are seeing this kit being given multiple releases and that is simply because it is the definitive tooling of this important aircraft that is currently available, and with so many Ju 88 versions that existed, modellers are going to want to build the one that is specific to their interests, such as the heavy fighter, torpedo aircraft etc. Packaged into ICM’s very sturdy, full corrugated cardboard box, with a colourful and glossy product lid that depicts a Romanian machine at rest on an airfield, this kit consists of a single clear sleeve that holds all EIGHT medium-grey sprues and a single clear one. Around about 250 parts makes up this release. Thankfully, the clear sprue is separately bagged within the main sleeve and all of the others are tightly packed up against each other, so no space for them to jiggle and rub against each other. A 24-page A4 manual is included, and a single decal sheet finalises the contents. I know that some modellers can be driven to frustration by the engineering choices that some companies make, but with this kit, ICM has boxed clever. As we know, it has been designed to accommodate other versions so as to maximise the tooling, but none of this is done to the disadvantage of the modeller. Some very intelligent design work can be seen here, such as the fuselage halves being full length, so no need to graft on different nose versions. The fin is also separate, indicating something from the 88G family, maybe. Wing root fairings are moulded to the fuselage and are tabbed, meaning that the upper wing panels can easily sit on these and provide a positive location point. Another touch of genius is a single piece lower fuse and inboard wing panel section. When this is fitted to the fuselage, and then the wing panels added, the lower seam will be totally hidden under the broad nacelle structure. The nacelles themselves will then locate into the undersides via tabs. If you’ve ever seen the Revell 1/32 kit, you’ll know that there is a sturdy structure within the nacelle that the undercarriage is mounted to. Looking at this model, I think that whilst you may need to fit that mounting structure prior to the nacelle, it appears that you can probably fit the landing gear later, after painting. All control surfaces on this model can be posed, with the rear of the nacelles being separate for this purpose. You may need to fiddle things with this, and I can’t comment further without test fitting this one. Two detailed Jumo211 engines are included in this kit, with the provision to display one/either of them. These really do look very good, with each unit containing around 15 parts per engine, including the firewall and associated plumbing. The engines must be installed within the nacelle before the whole assembly is offered to the wing. You’ll need to make sure your painting and masking regime is good here. Cowl radiator flaps are presented as open only, so to pose these in the more aesthetically pleasing closed position, you will need to do a little surgery. Propellers are supplied as single piece units, and the spinner comprises of the typical back-plate and front section. If you expect a lot from the cockpit area, in terms of detail, then this won’t disappoint. There are already a number of Eduard sets for this, pertaining to the earlier Luftwaffe A-4 release, so there’s always plenty to choose from if you wish to detail this model further. As no seatbelts are included in this kit, you will definitely need to sort out that omission. The office area is very well-appointed, with nicely moulded fuselage sidewall details, superbly equipped radio rear bulkhead, ammunition racks and drums, detailed instrument panel, side consoles with delicately rendered instruments, two-piece control column, rudder pedal assemblies, seats with intricate mounting points etc. I don’t really think there would be much to add in here, with the exception of some colour PE, perhaps. When assembled the cockpit will most certainly be a very busy and visual area. The bola gondola is well-appointed too, and this area is moulded separately to the underside fuselage and can be fitted later in assembly. Surface detail is everything you would expect from a modern-tooled model, with finely engraved panel lines and port details. There are also no rivets at all, so if you do want them, then you’ll have to get out Rosie. Plastic quality here is excellent with no flaws or obtrusive ejector pin marks. Clear plastic parts, both ICM and Special Hobby, are superb, with excellent clarity and nicely defined frame details. Of course, this particular kit does vary in a number of aspects, from previous releases, and looking through the parts maps does indicate a large number of parts that should NOT be used with this particular release. In fact, the original Sprue C has been supplemented with Sprue C1. This contains whole new engine nacelles, propellers, spinners, annular radiator intakes, tabbed fin and rudder, fuselage spine section with dipole etc. Parts not to be used are clearly defined on the parts map by being shaded in pink. Decals An ICM-printed decal sheet contains markings for FOUR marking schemes, with all printing being in solid, authentic colour, with minimal carrier film and also being both nice and thin. Registration is perfect too. As well as markings, a full suite of stencils are included as are instrument decals. The instruments are probably better punched out from the decal and applied individually, so you don’t have to attempt to get the decal to conform to the raised panel details. My only reservation is having to assemble the swastikas on the Finnish scheme, as these are produced with all arms as separate decals. The four schemes in this release are: Ju 88A-4, Grupul 5 Bombardment, Romania, 1944 Ju 88A-4, 3/1 Bombazo szazad of Hungarian Air Force, Russia, 1943 Ju 88A-4, 1/PleLv 44, Onttola, Finland, Summer 1944 Ju 88A-4, 3/PleLv 44, Finland, Summer 1944 Instructions ICM’s instruction manuals are very attractive and easy to follow, with 102 easy-to-follow stages that shouldn’t present any issues with assembly. The first part of the manual highlights the colours needed for completing this model (Revell and Tamiya paints), as well as parts maps of the sprues. The rear of the manual has two pages for the four schemes, printed in colour and with good decal placement notes, plus a page denoting stencil placement etc. Conclusion Another excellent Ju 88 release, and as this is Revell, you know that the price point is spot on. This kit currently retails for around £30 or less in the UK, and I think that relates to excellent value for money when you look at the detail levels that are provided here. The A-4 was a pretty common variant from around the end of the BoB until the latter stages of the war, so doubtless that this specific release will prove to be popular. I certainly hope to see more in future. This kit doesn’t have any PE parts, so for at least the seatbelts, you might want to consider some of Eduard’s aftermarket sets for the other ICM/Revell variants. Most parts will be completely usable in this release. Of course, this is an in-box review, but I am currently building the C-6 version and have found very little in the way of problems, with everything being straightforward and fitting superbly. ICM’s engineering seems to be logical and sensible, and without the annoyances of the earlier, unrelated Dragon releases. Highly Recommended My thanks to ICM for the review sample seen in this article. To purchase directly, click the link at the top of this article.


-
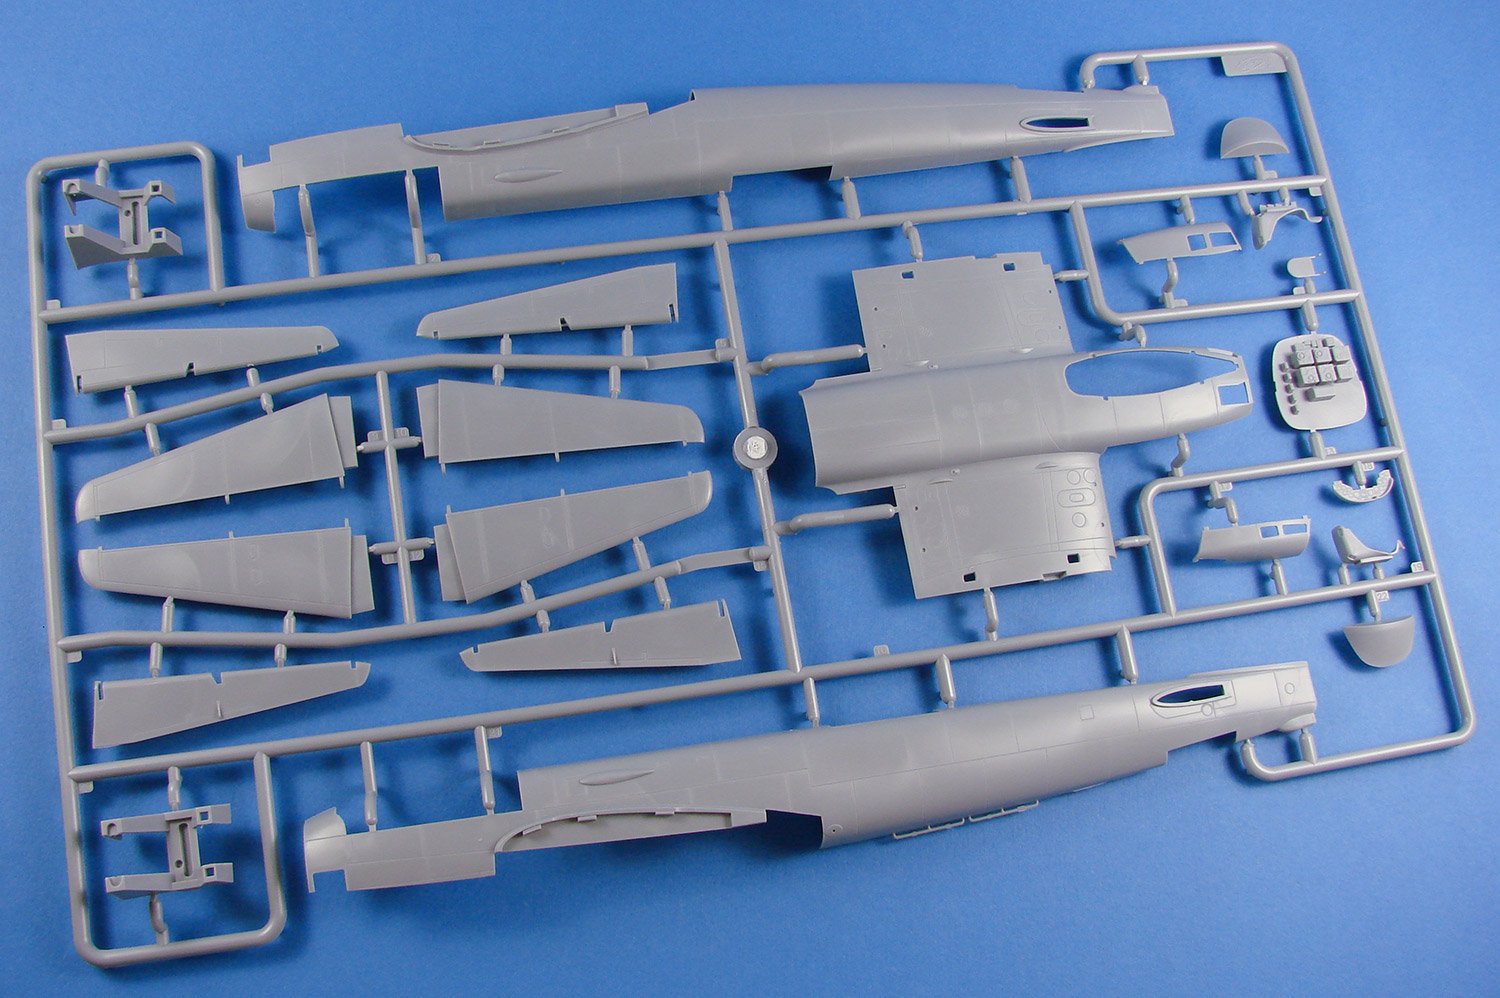
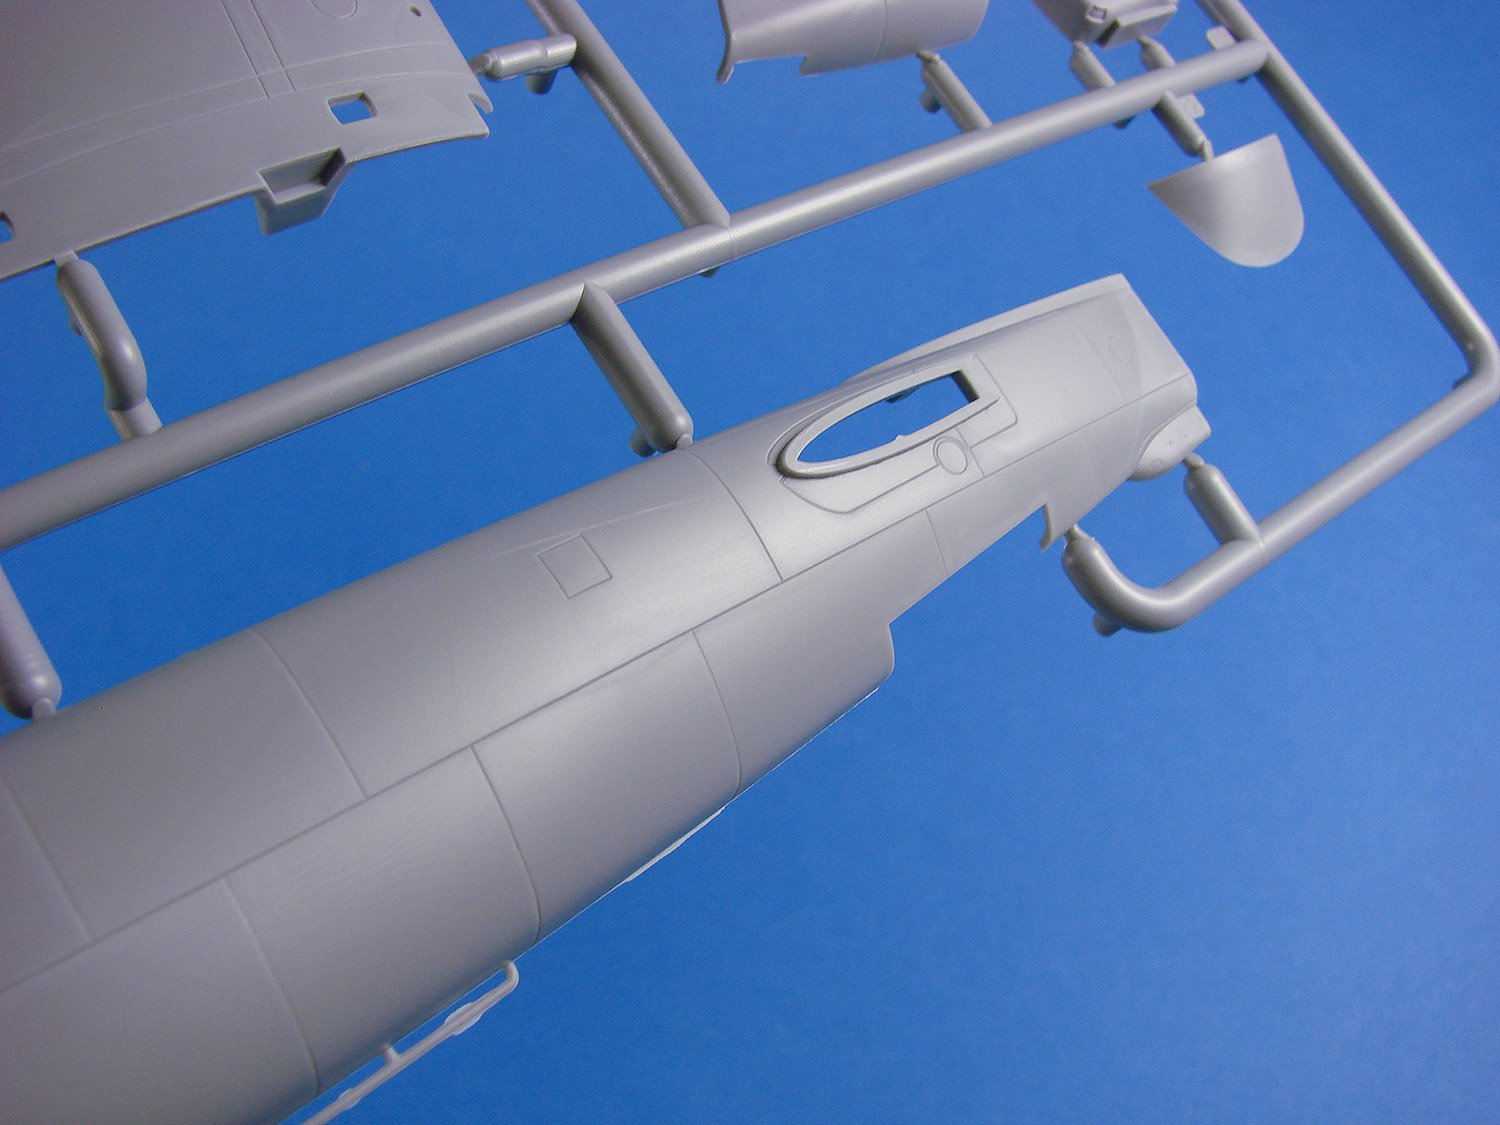
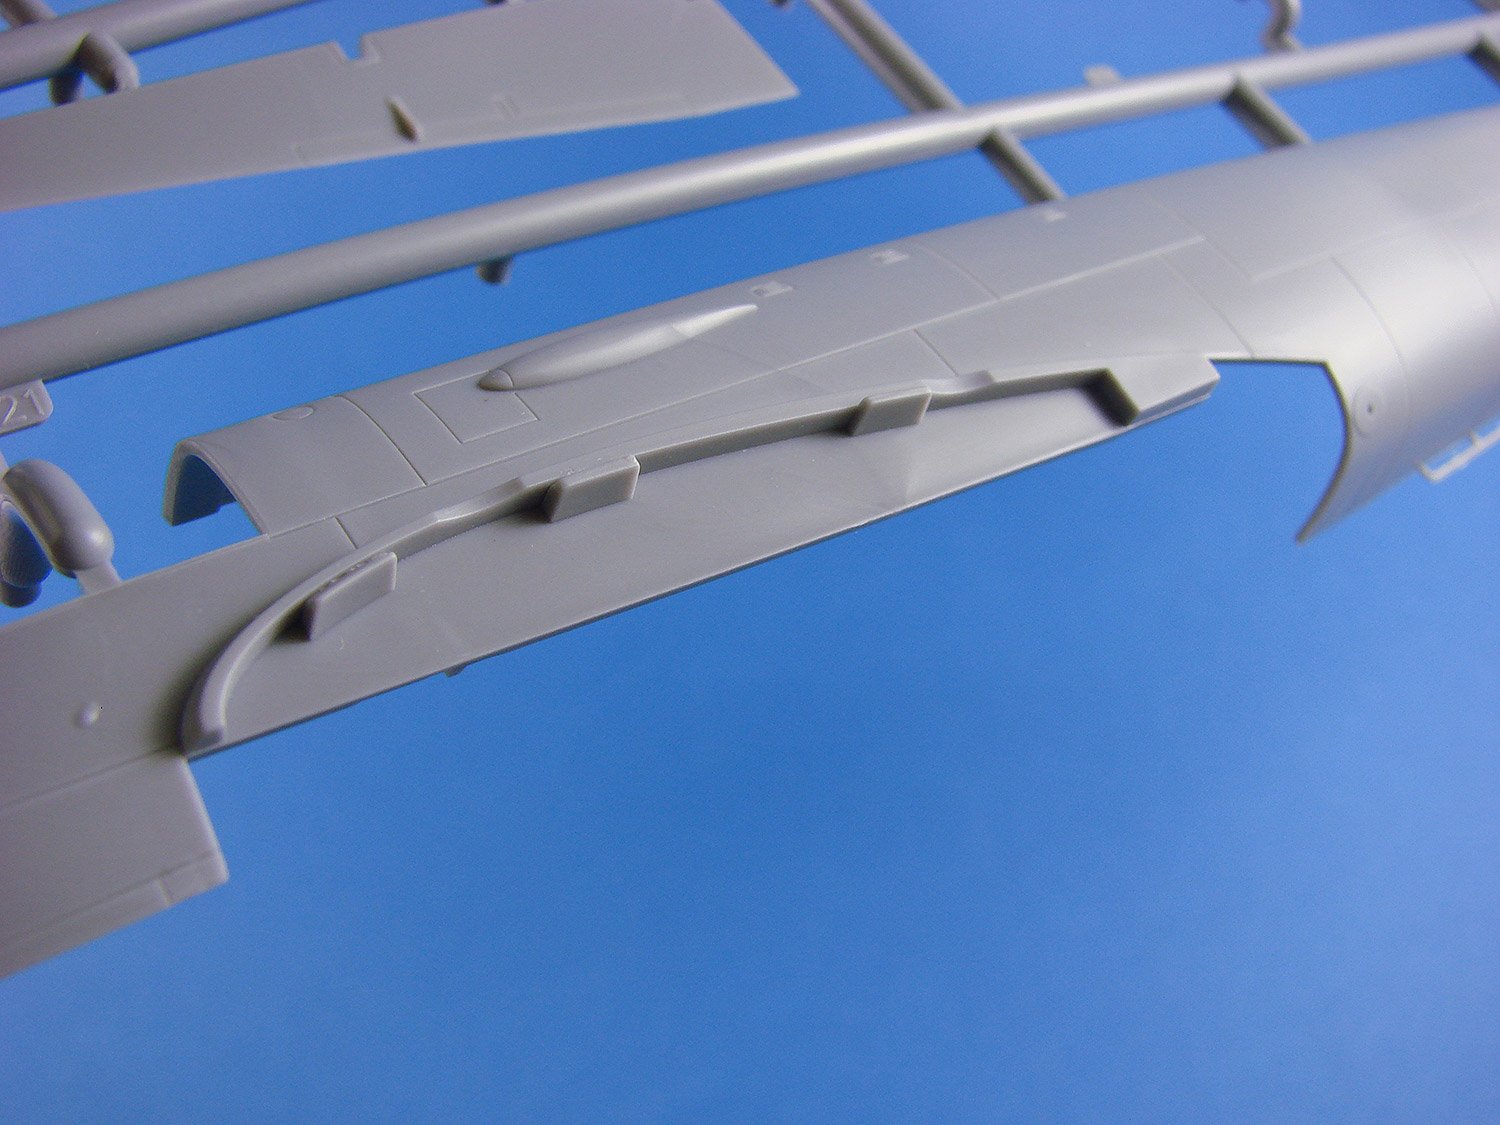
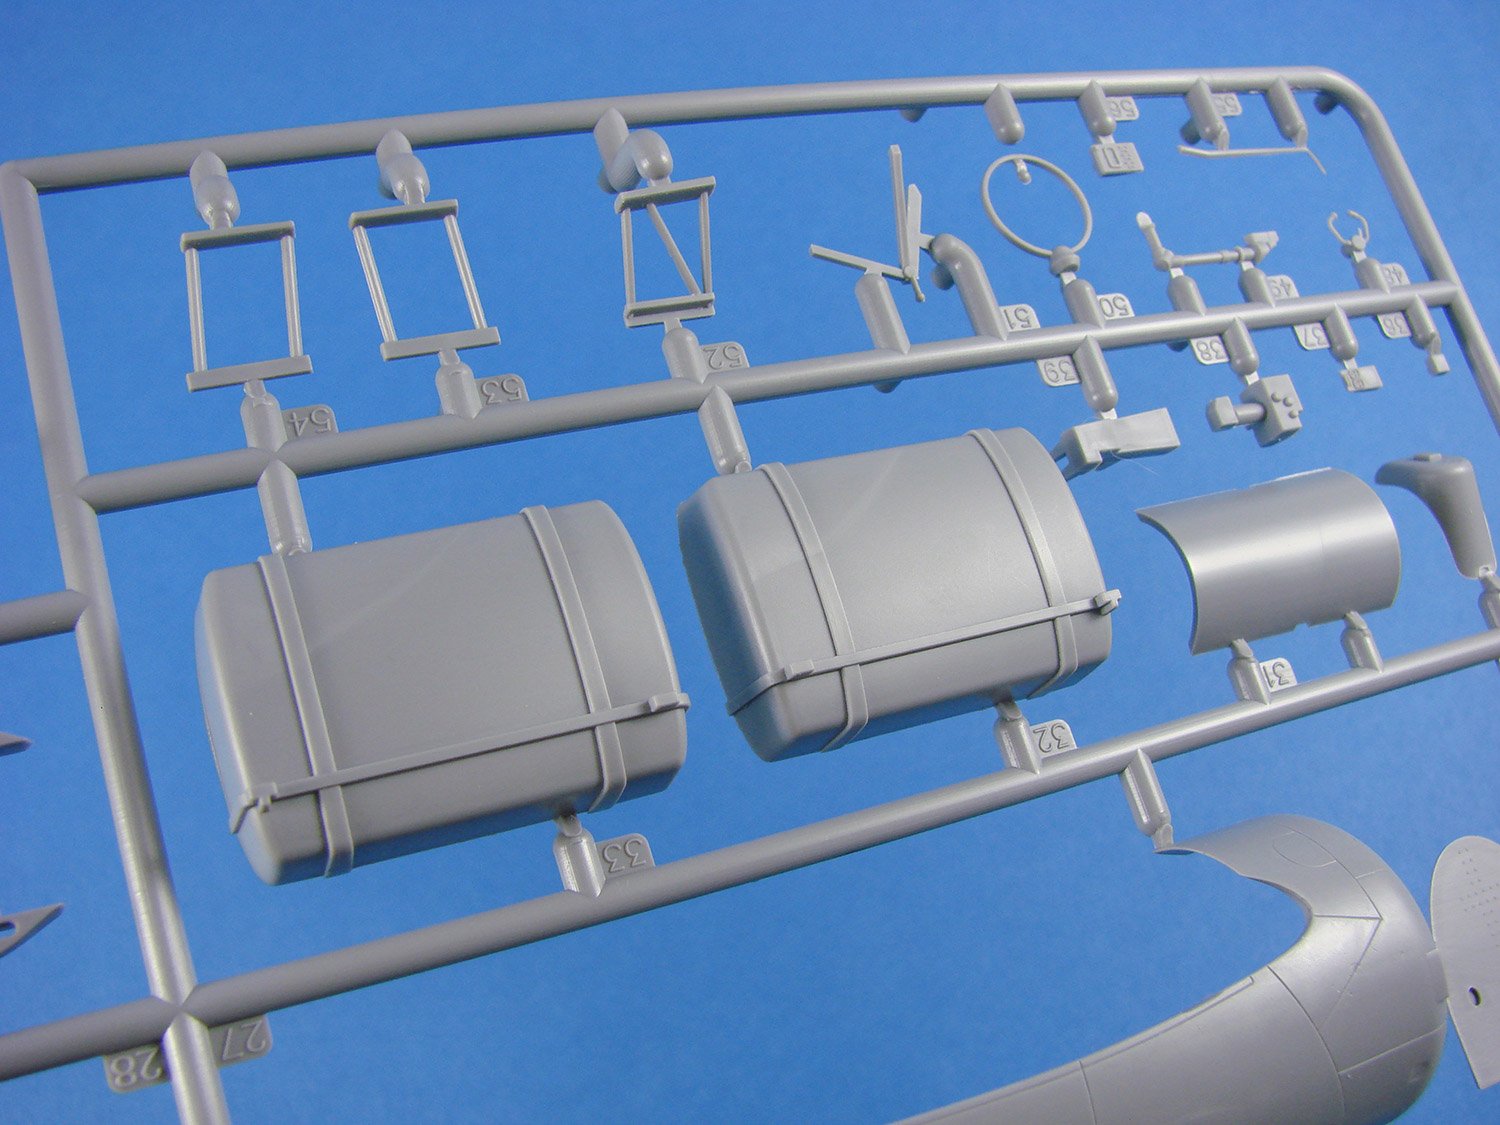
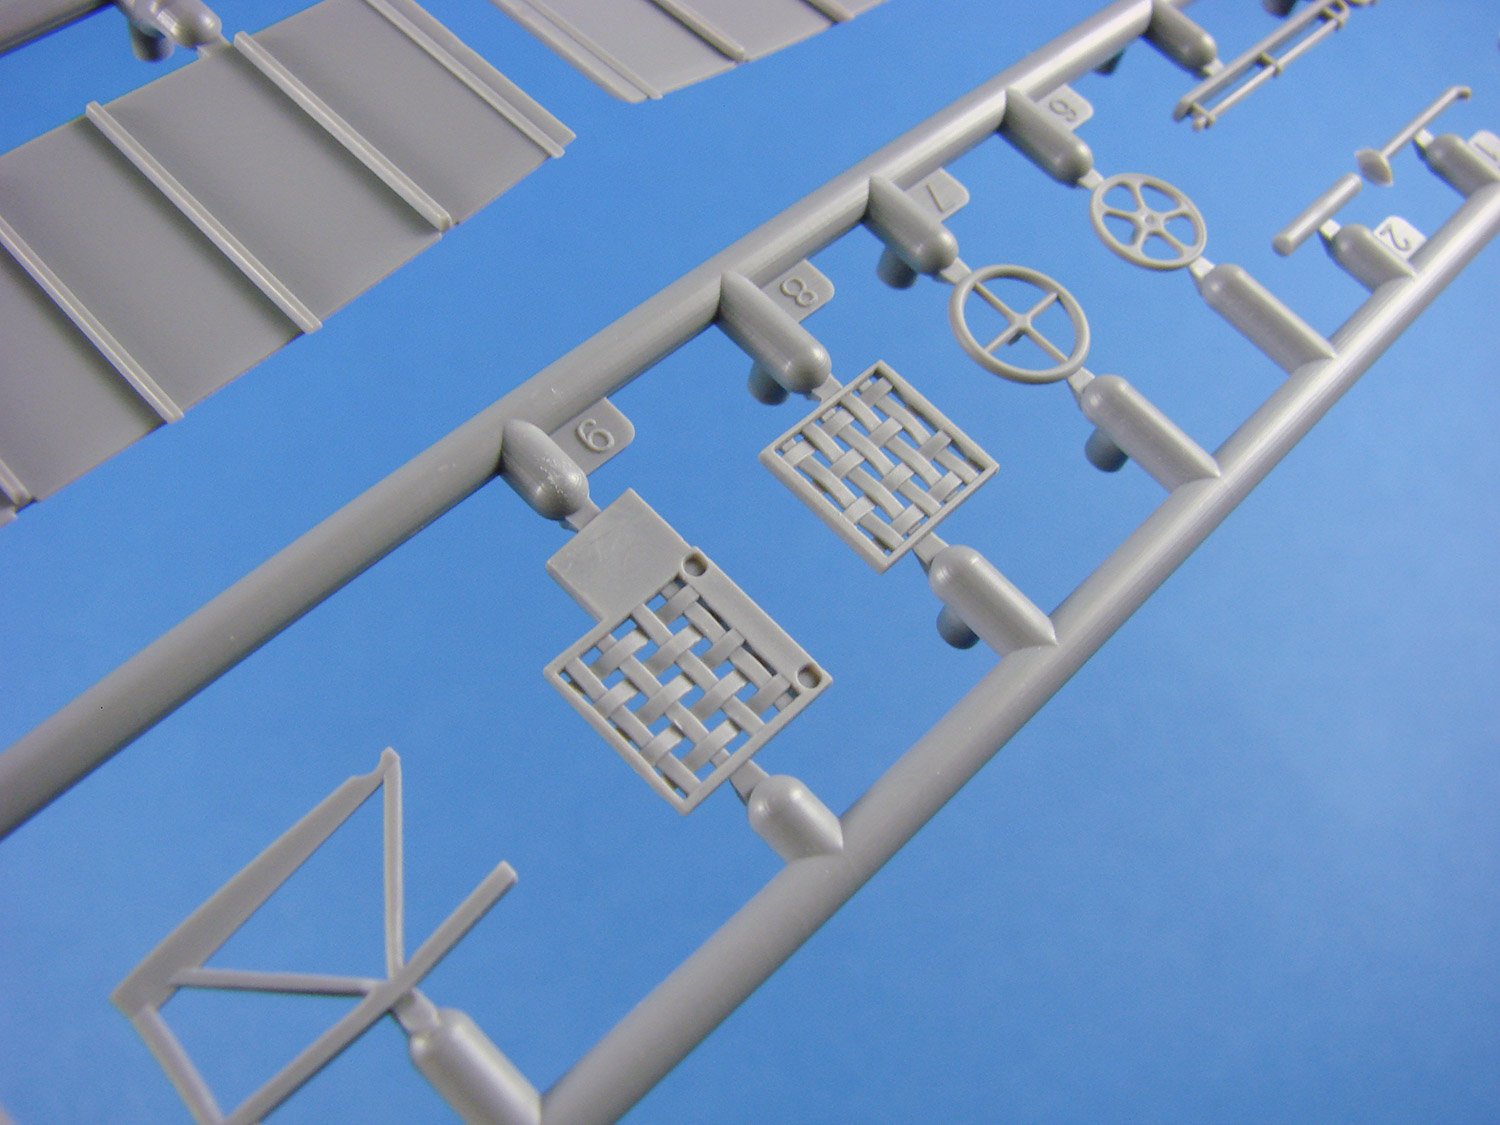
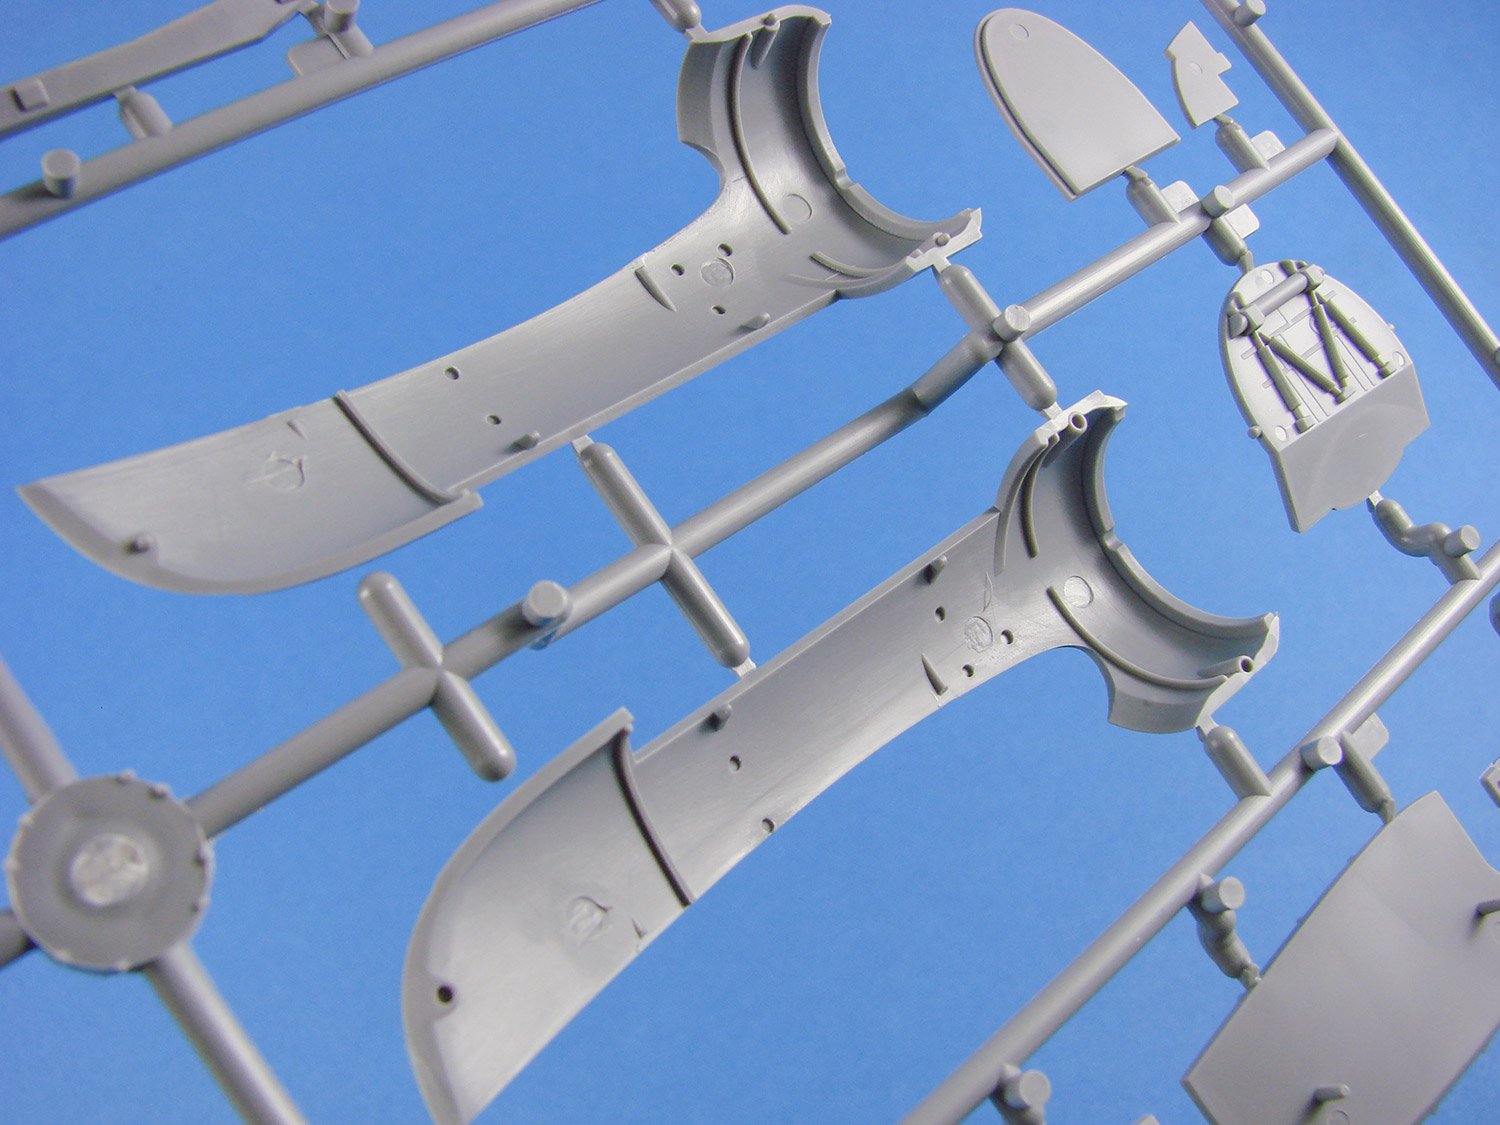
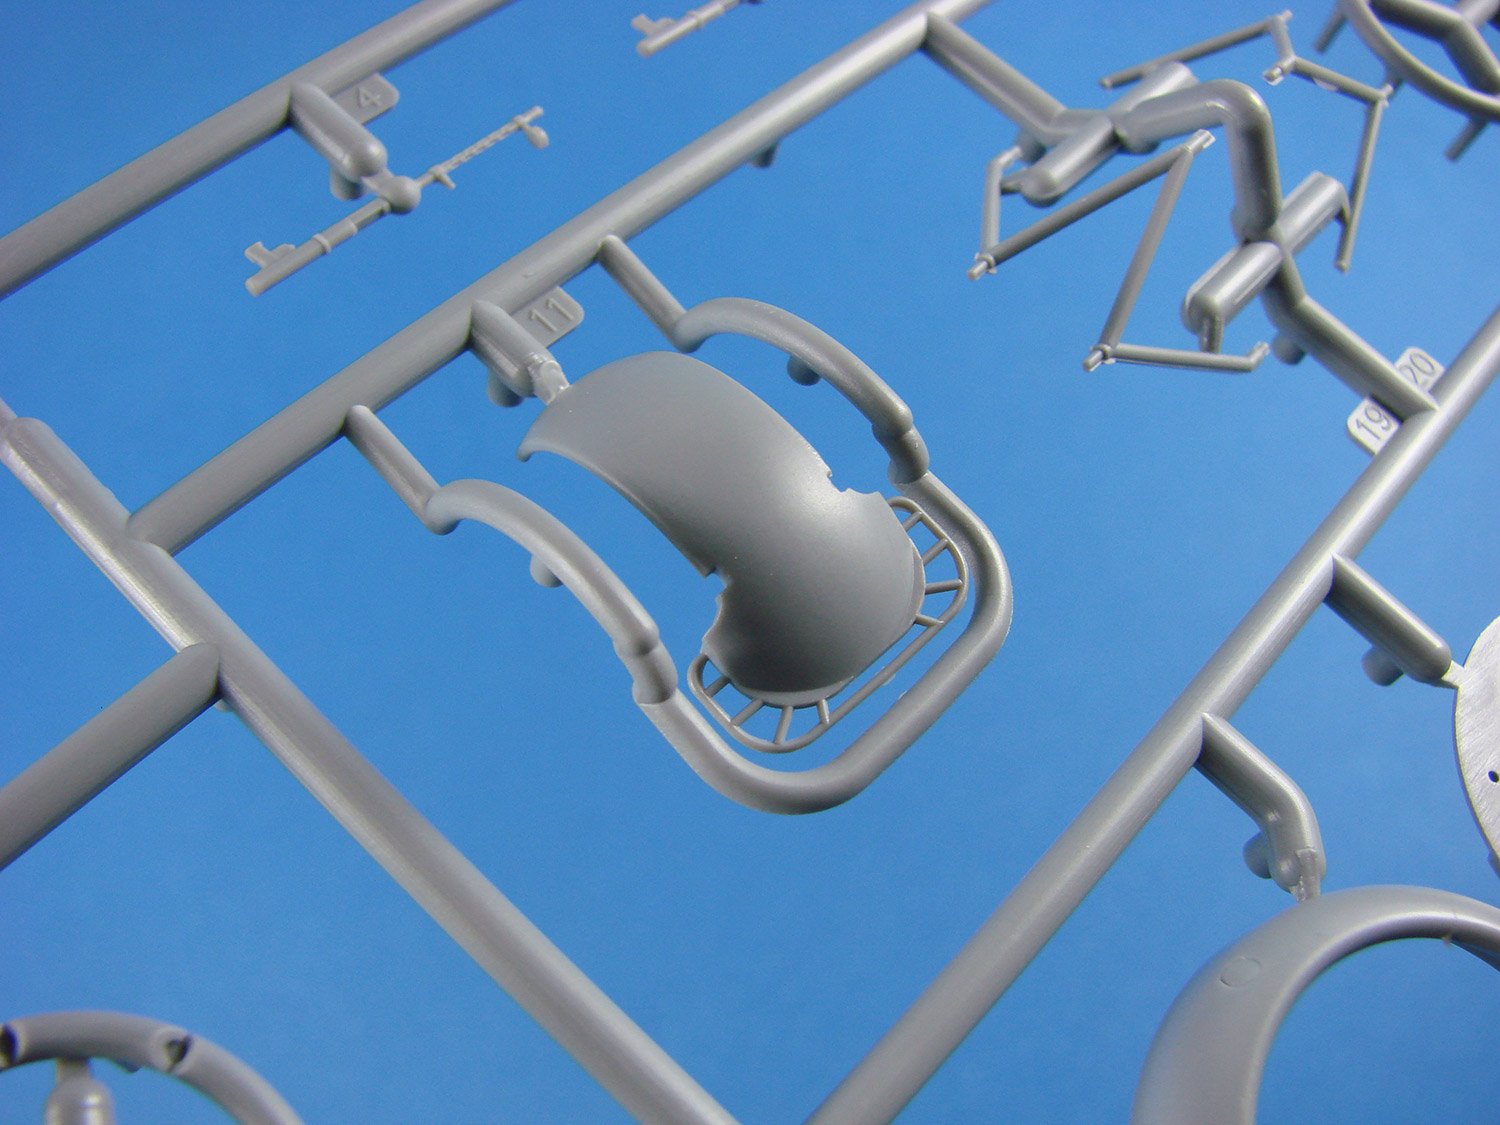
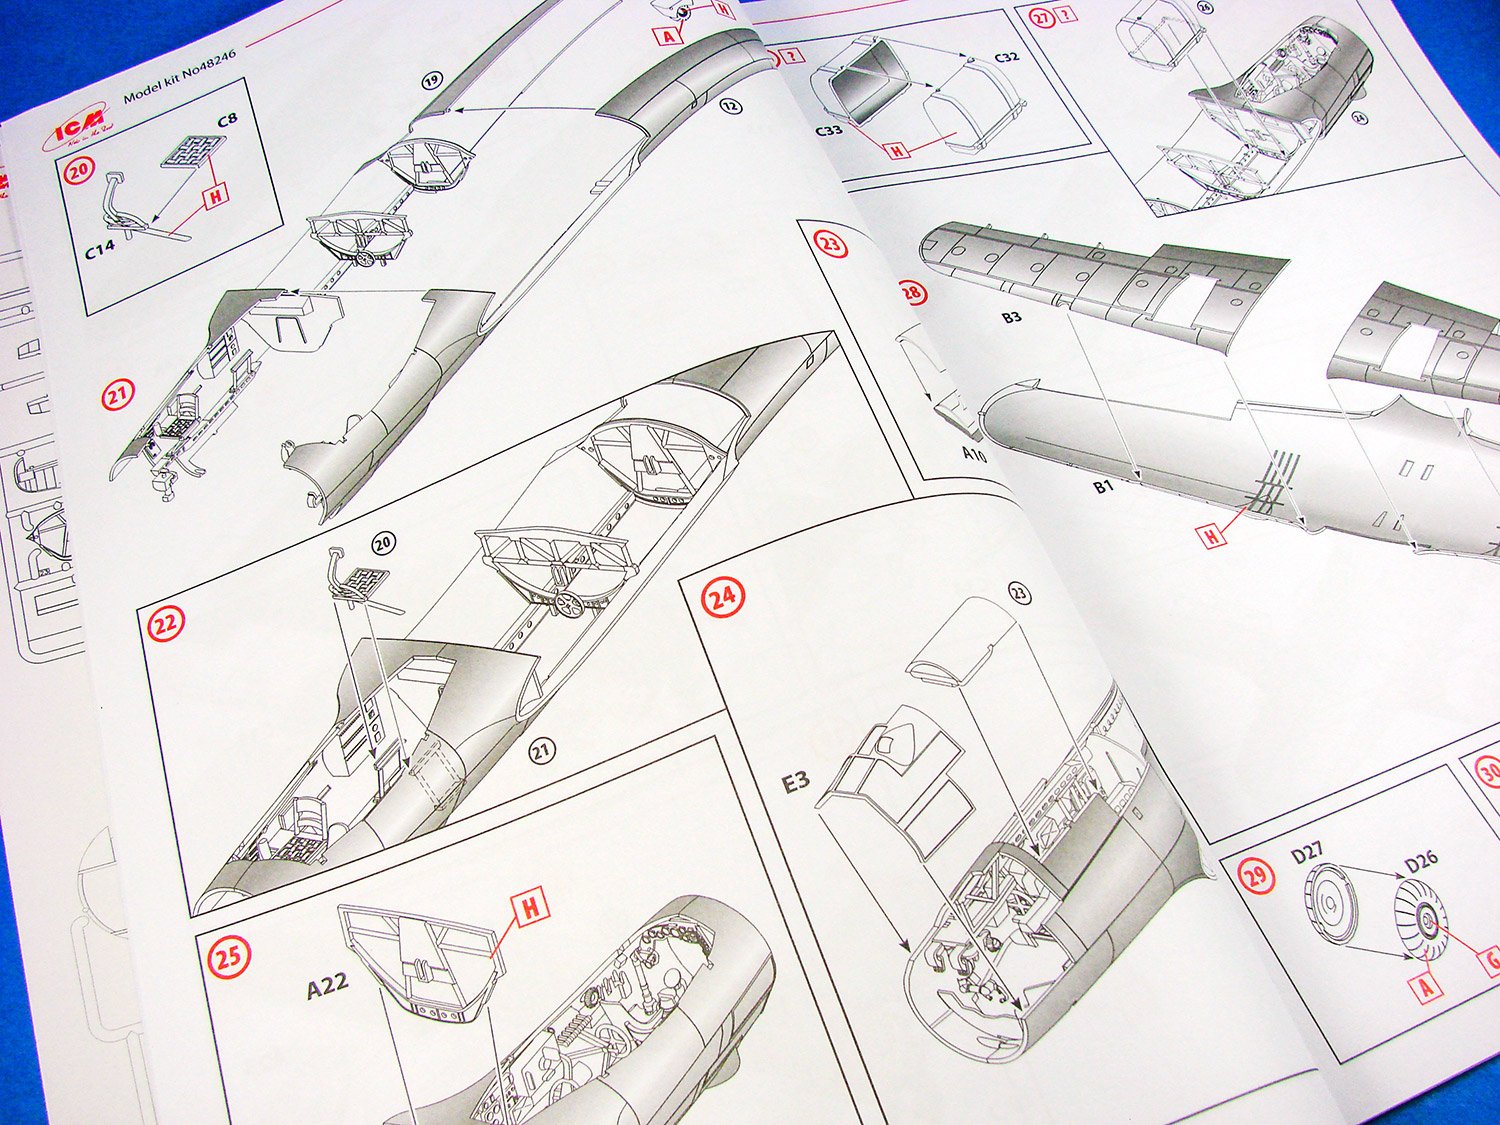
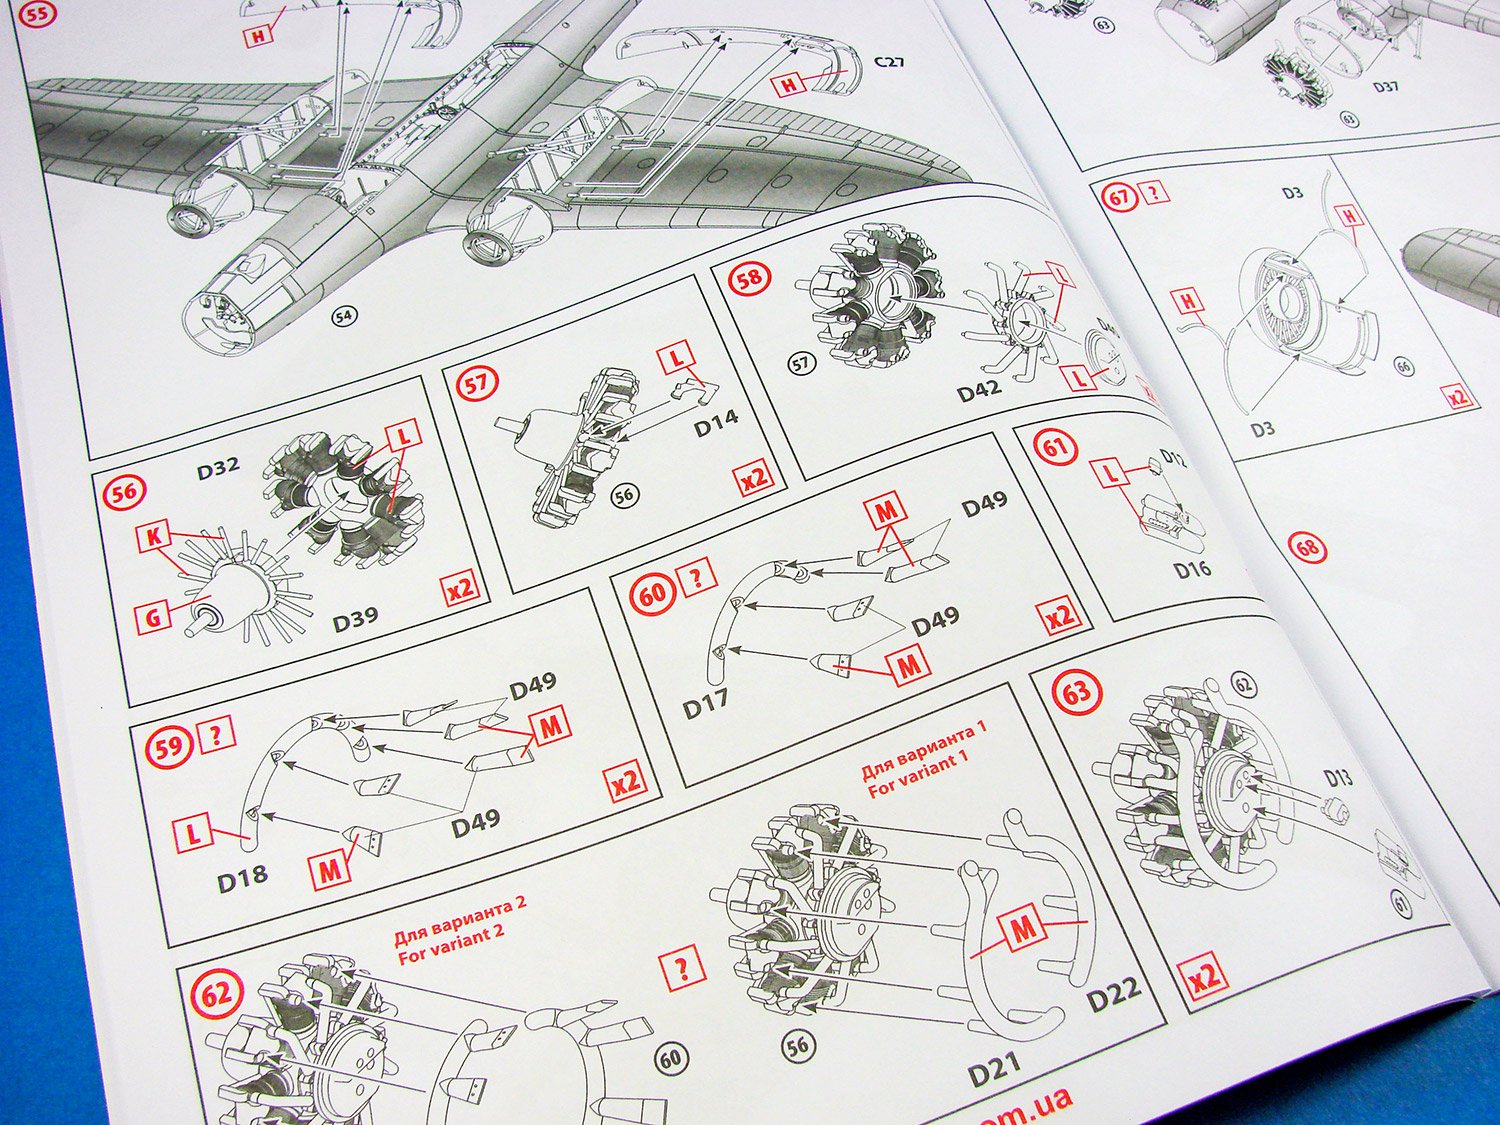
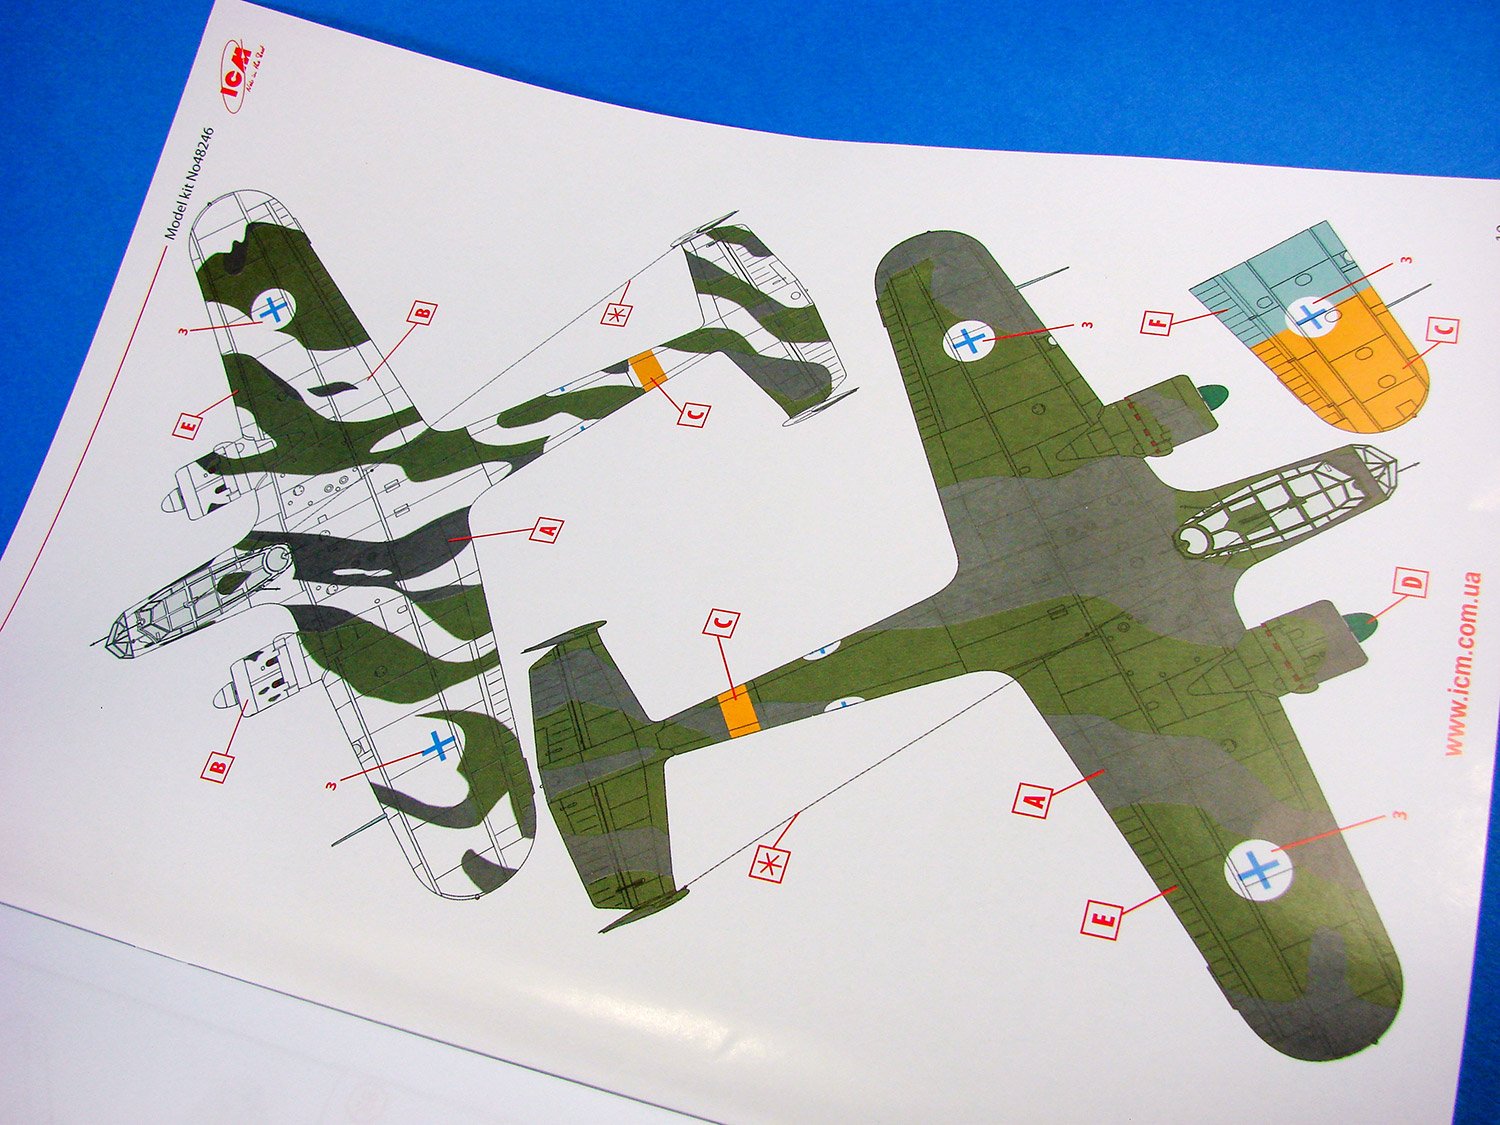
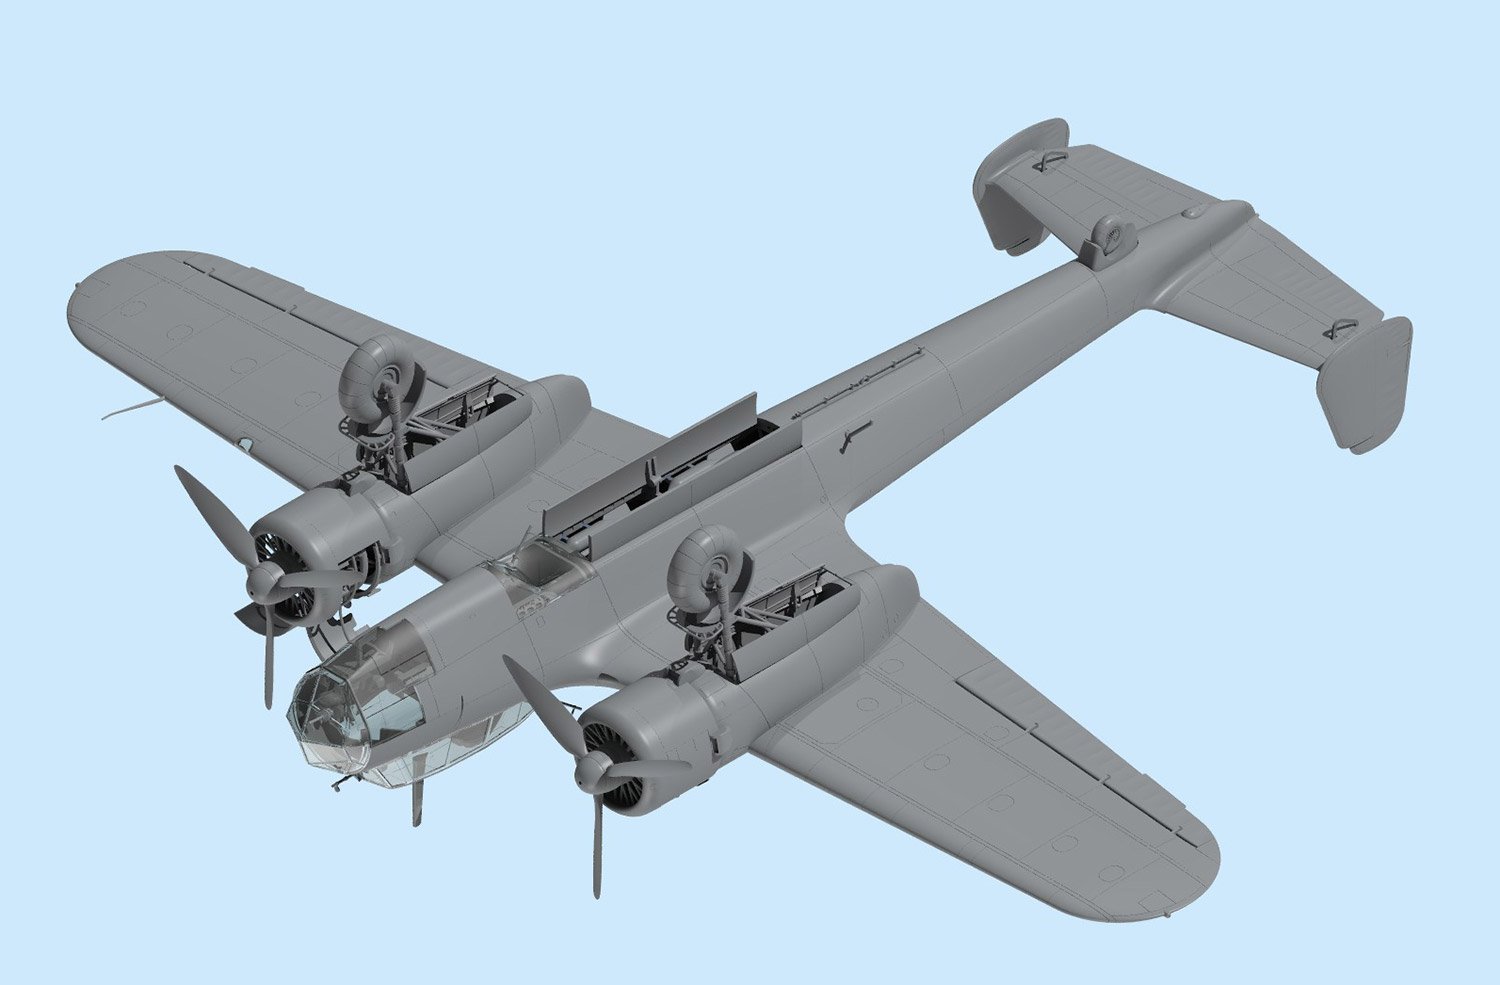
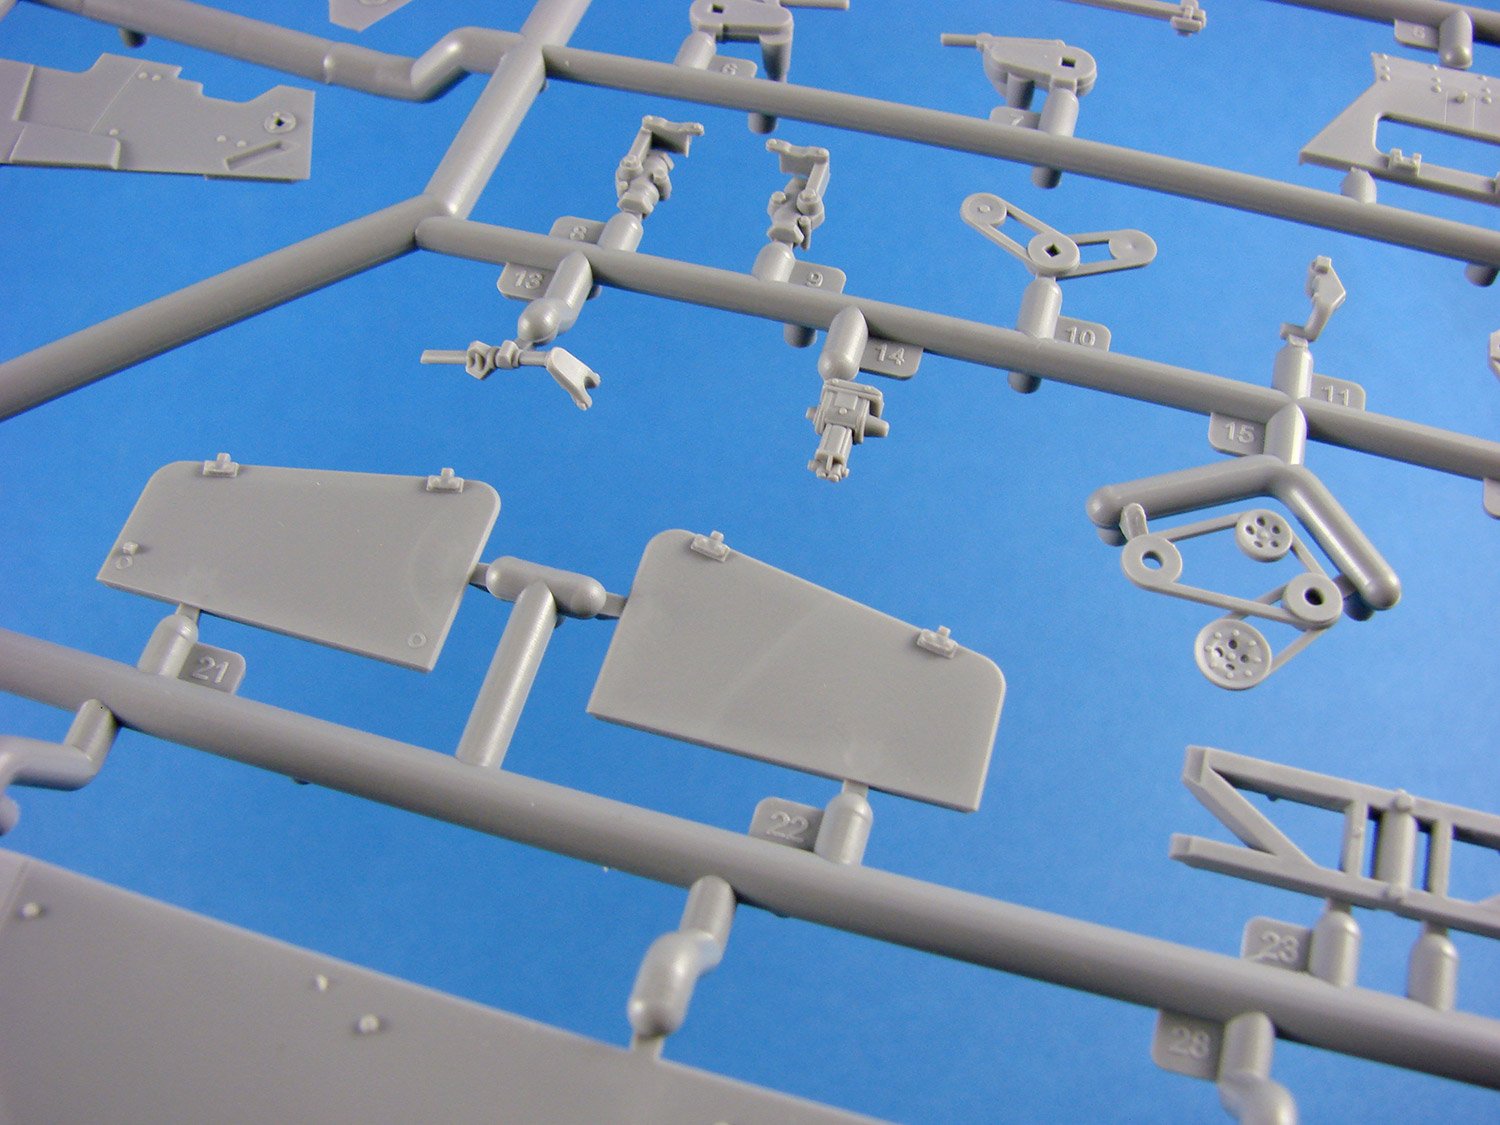
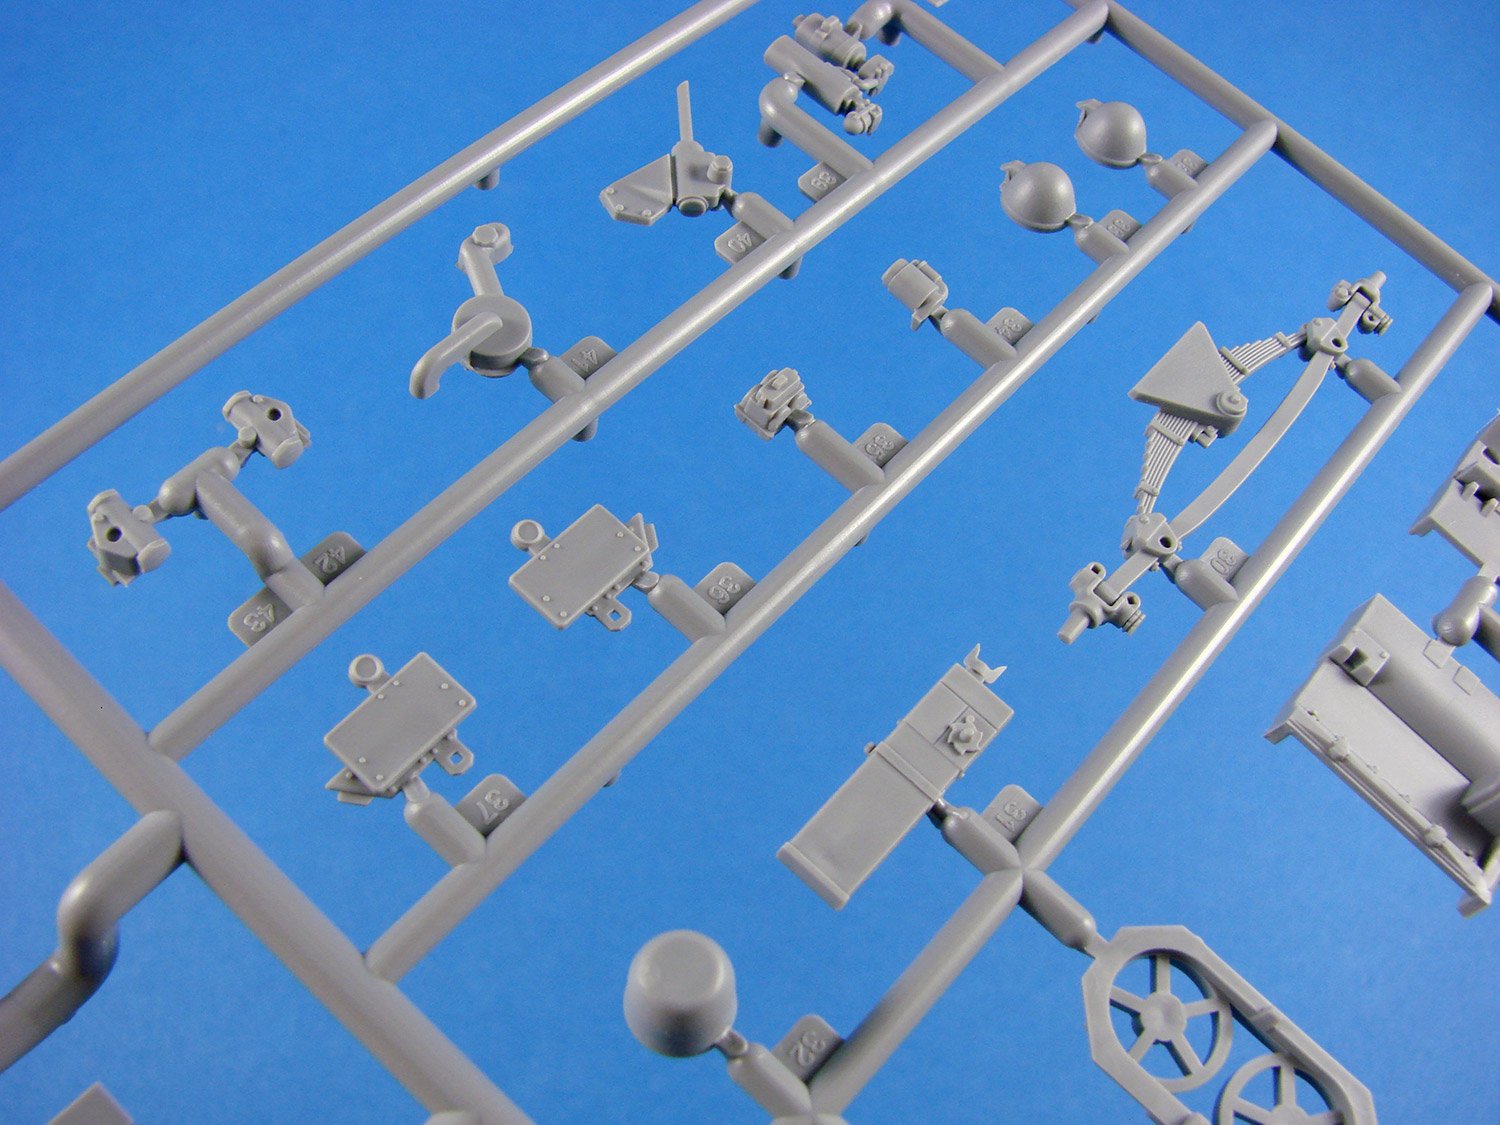
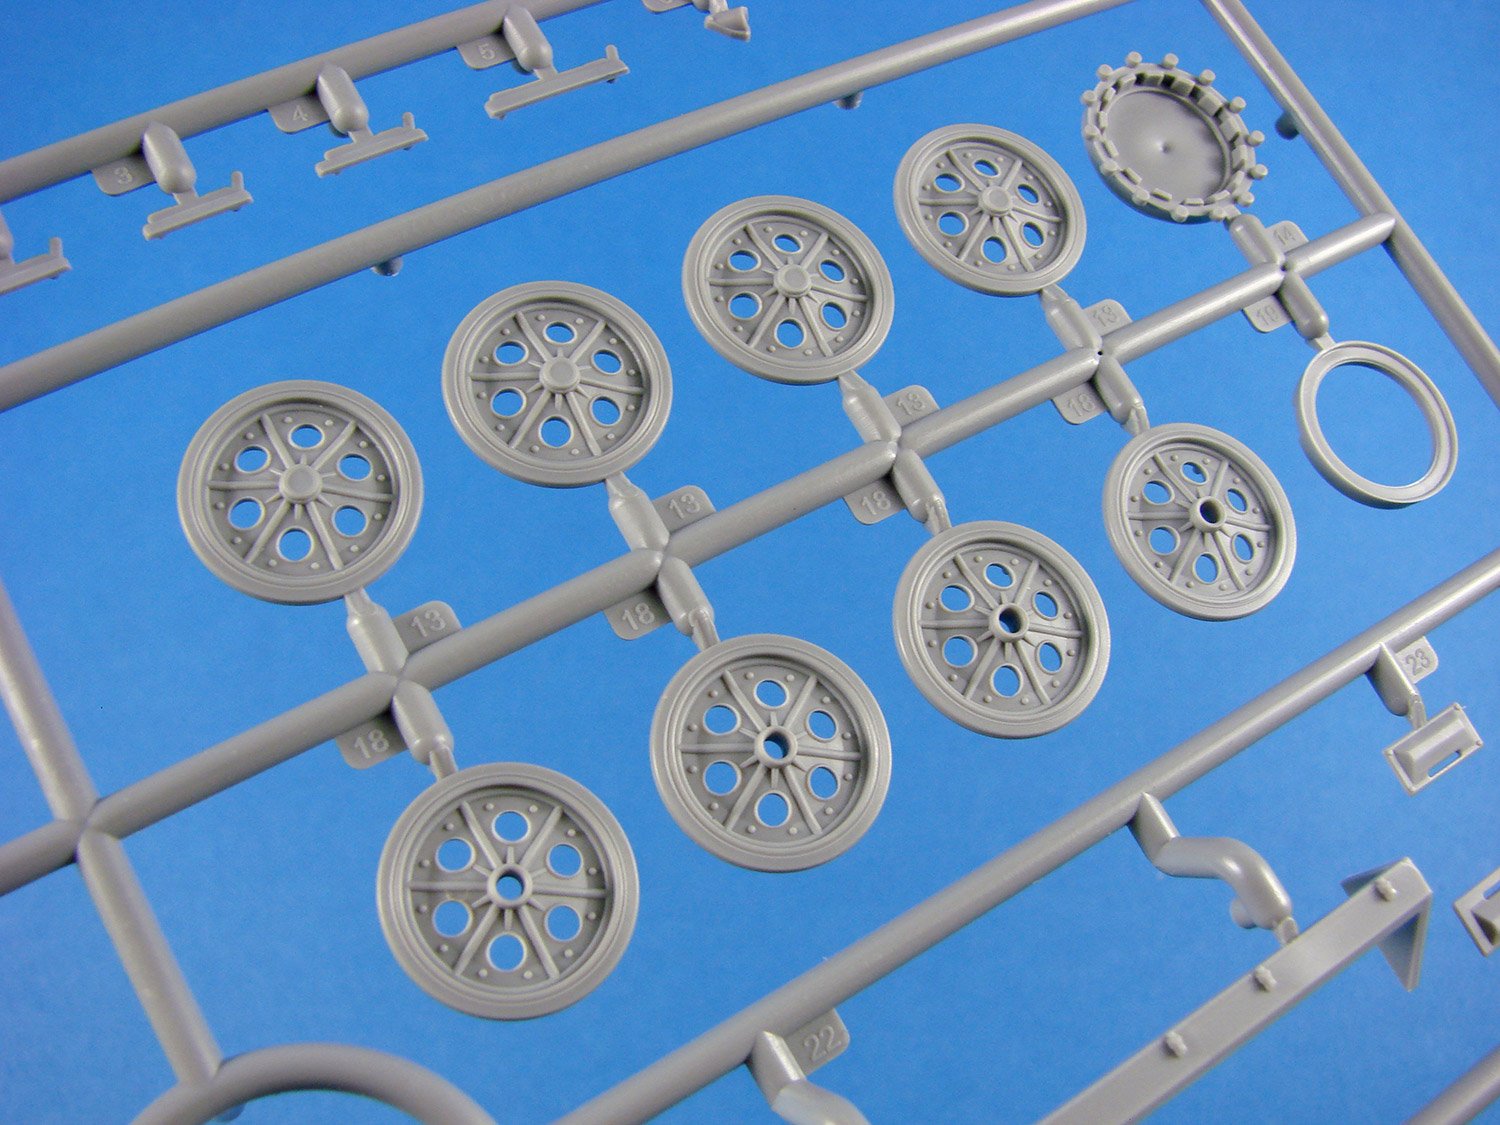
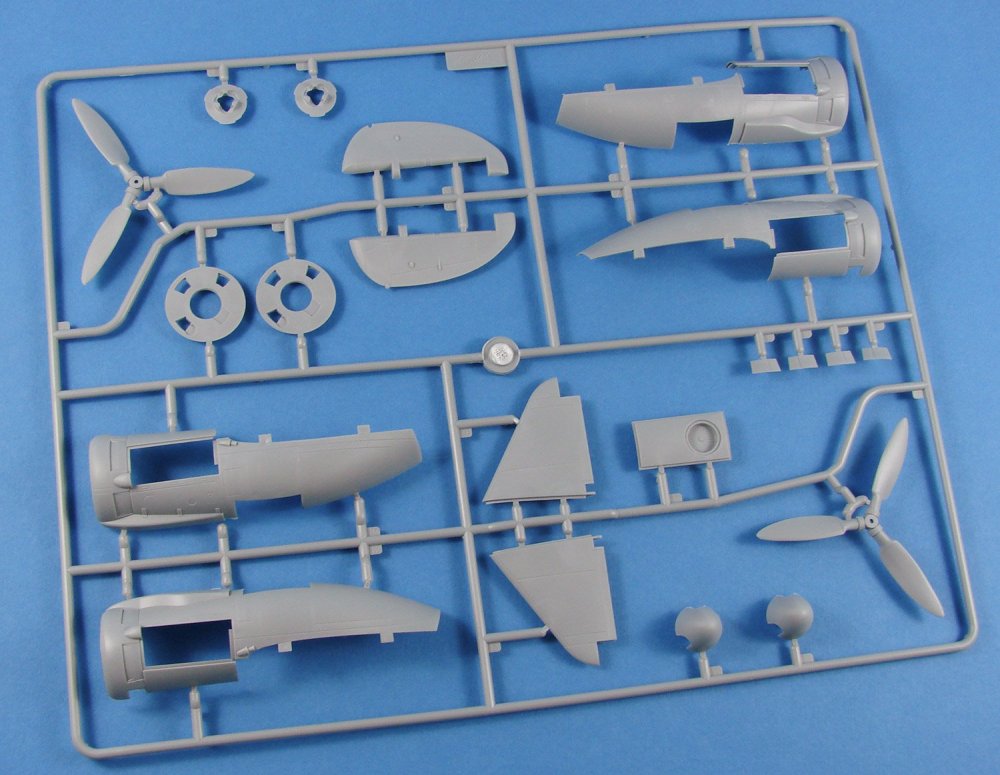
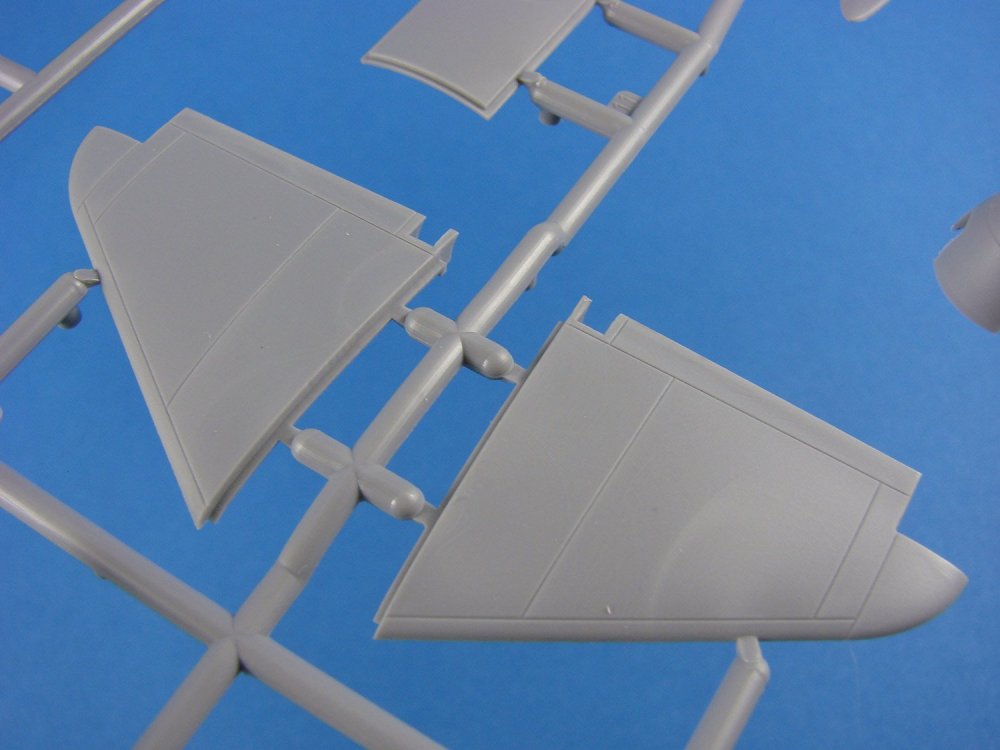
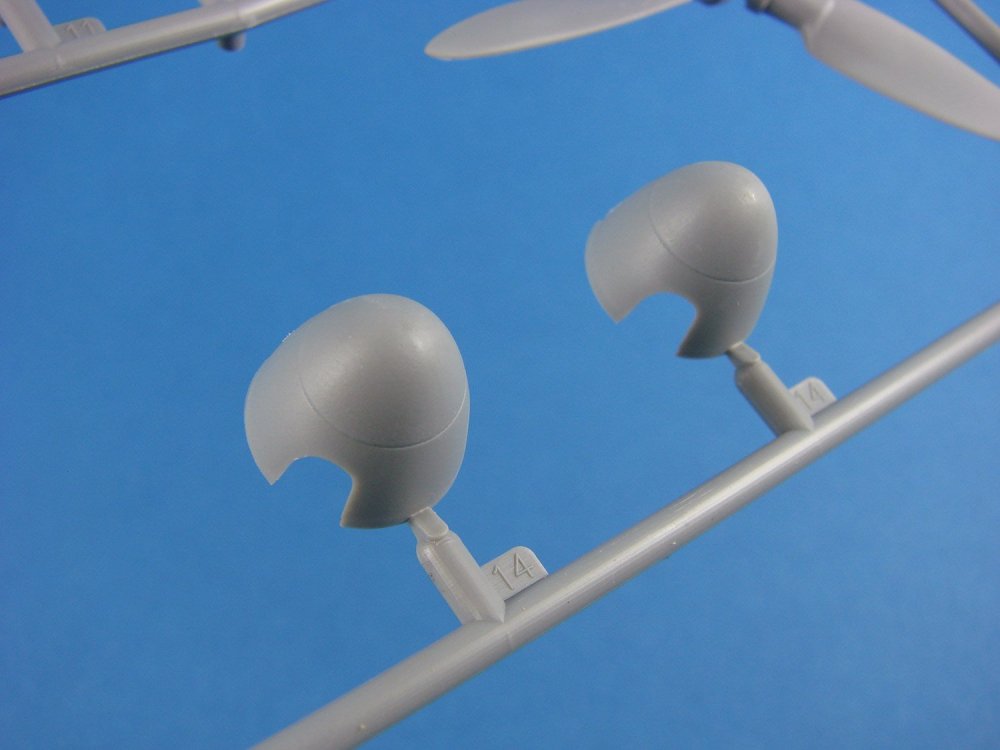
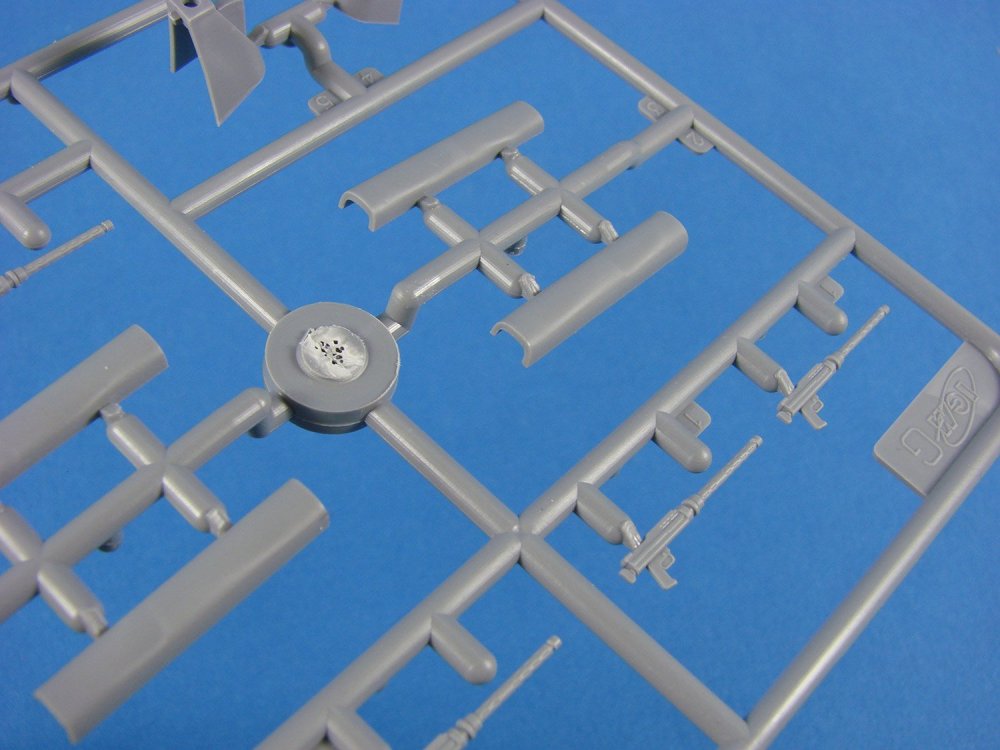
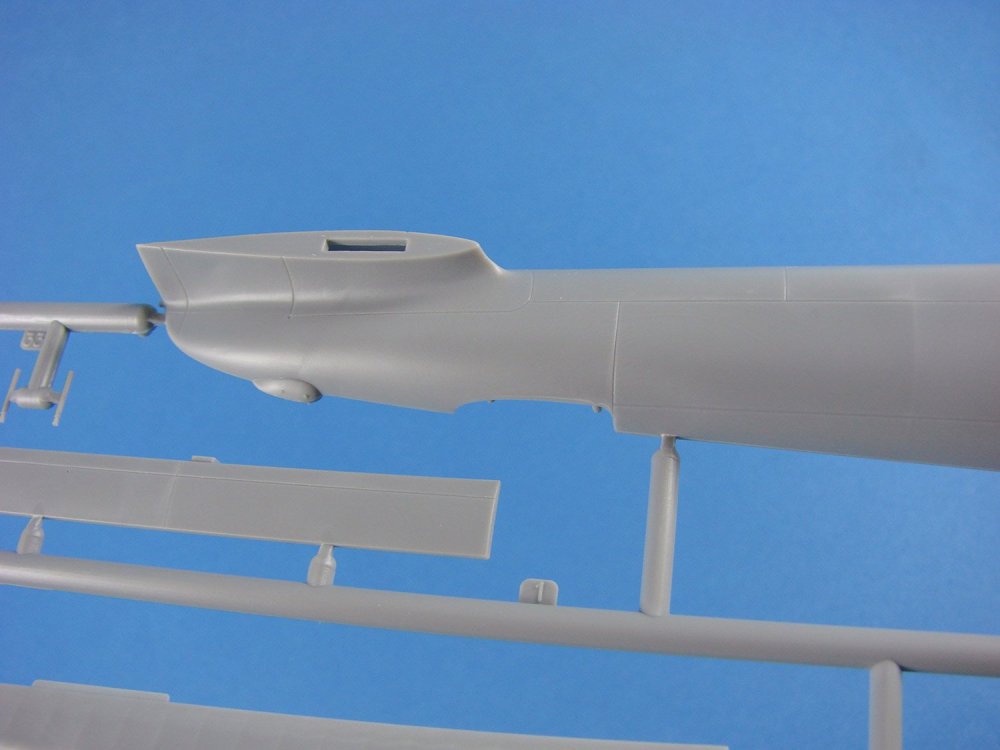
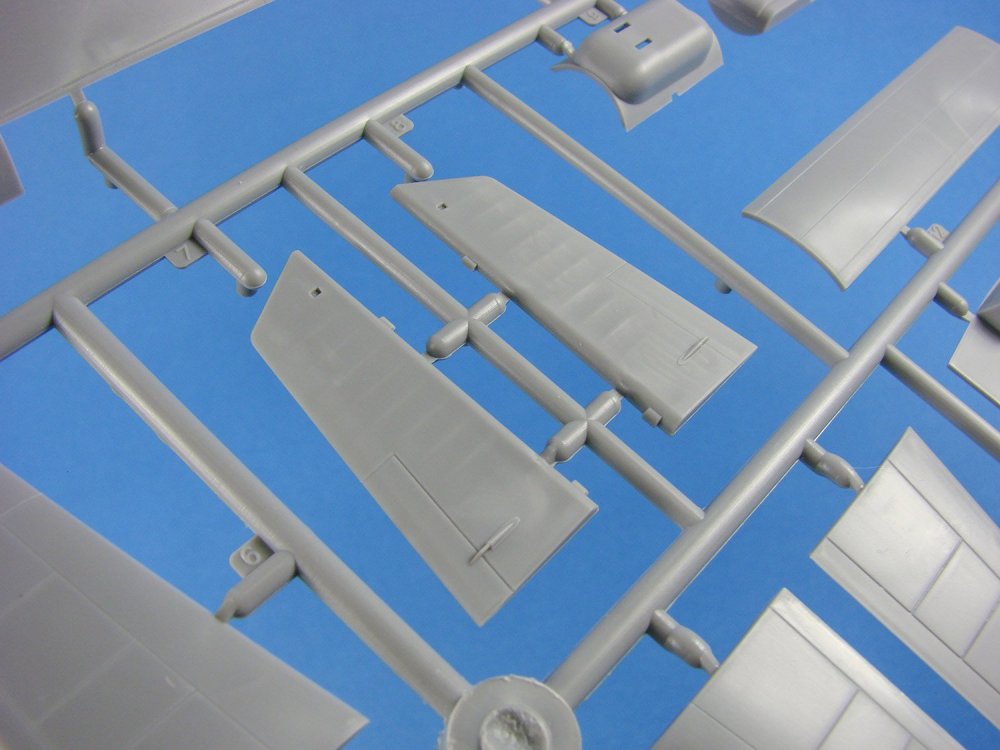
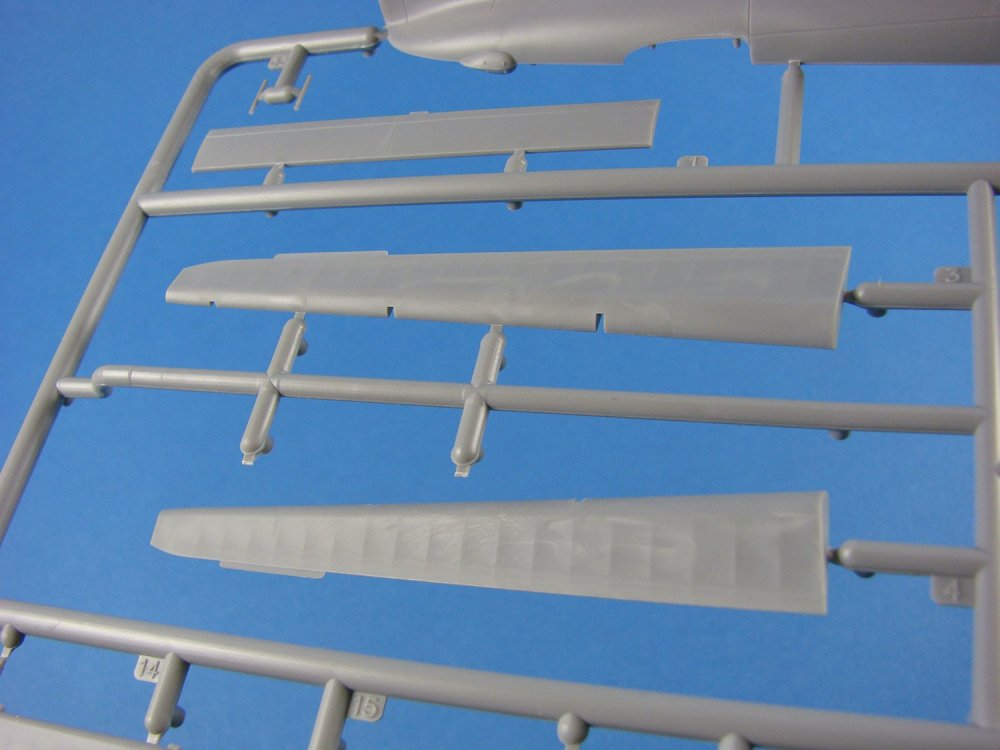
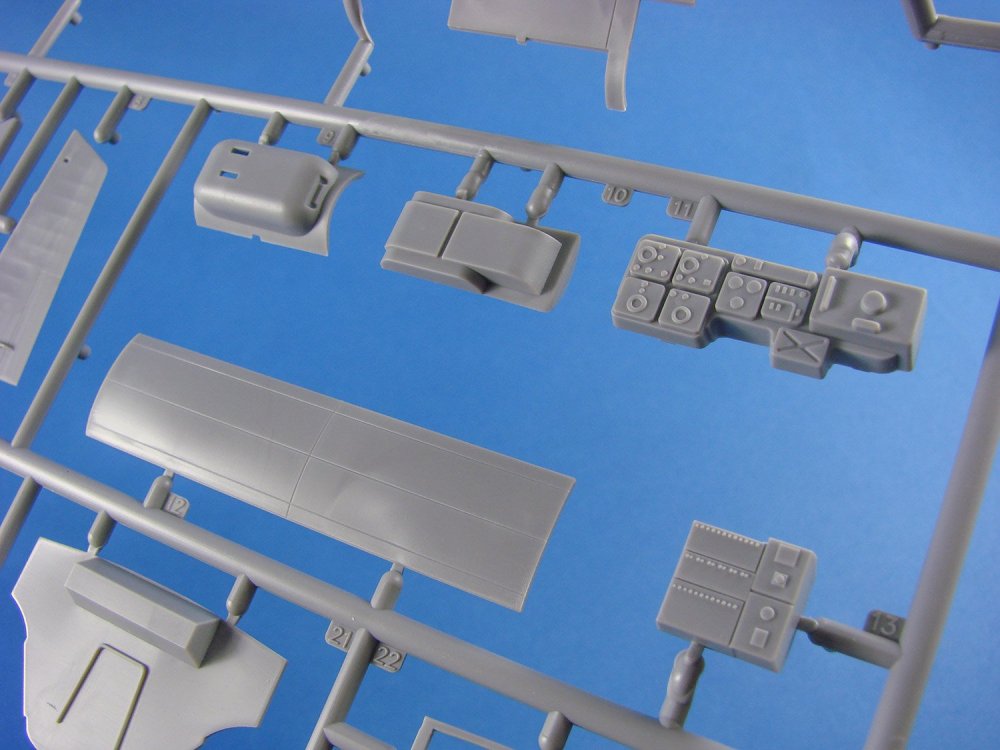
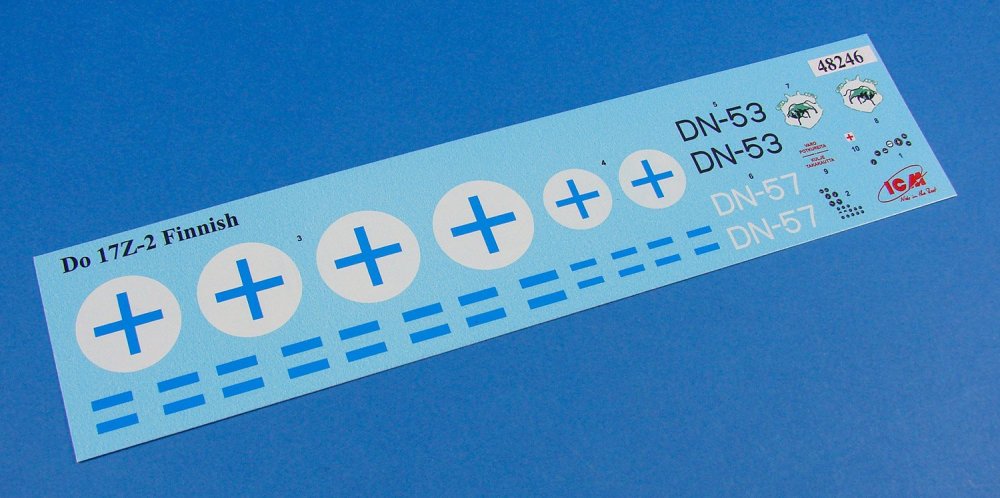
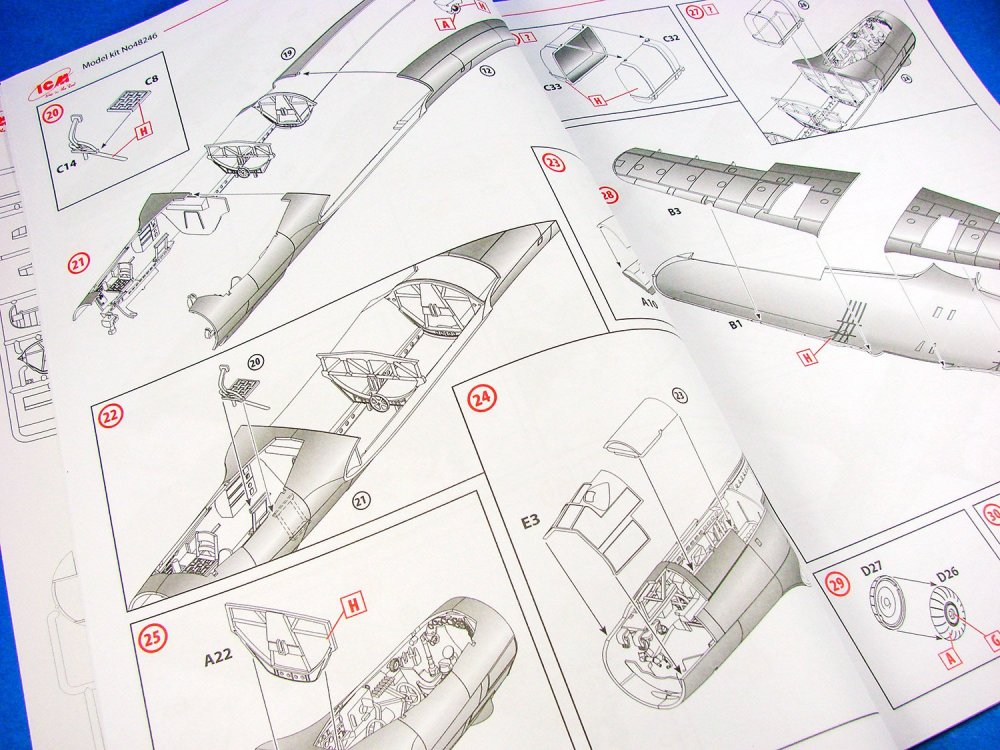
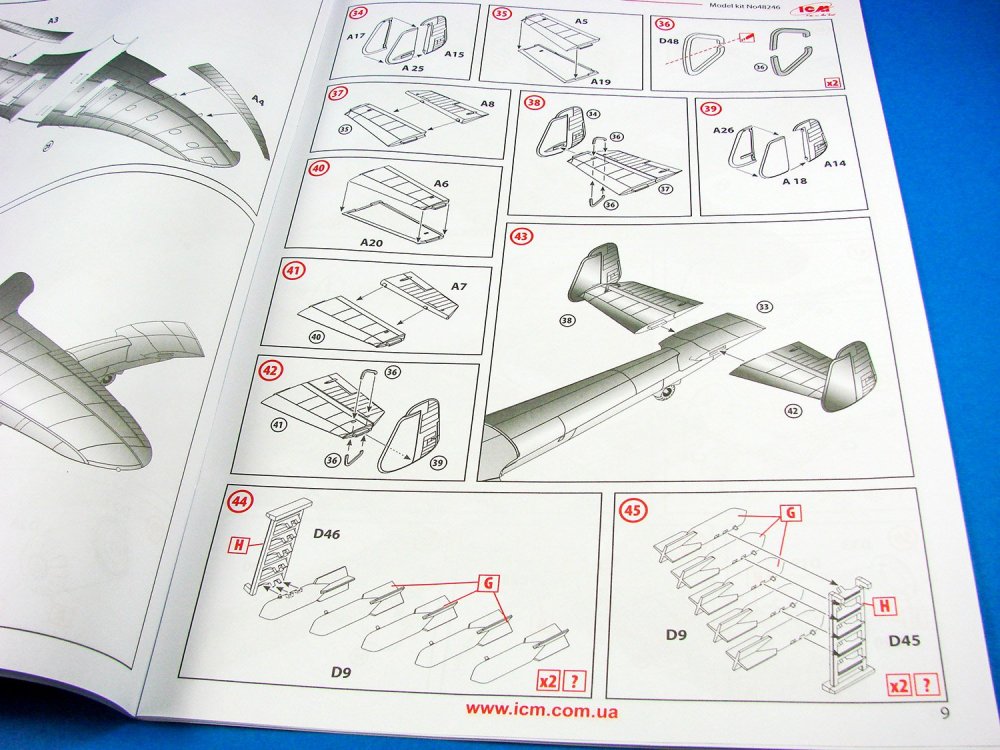
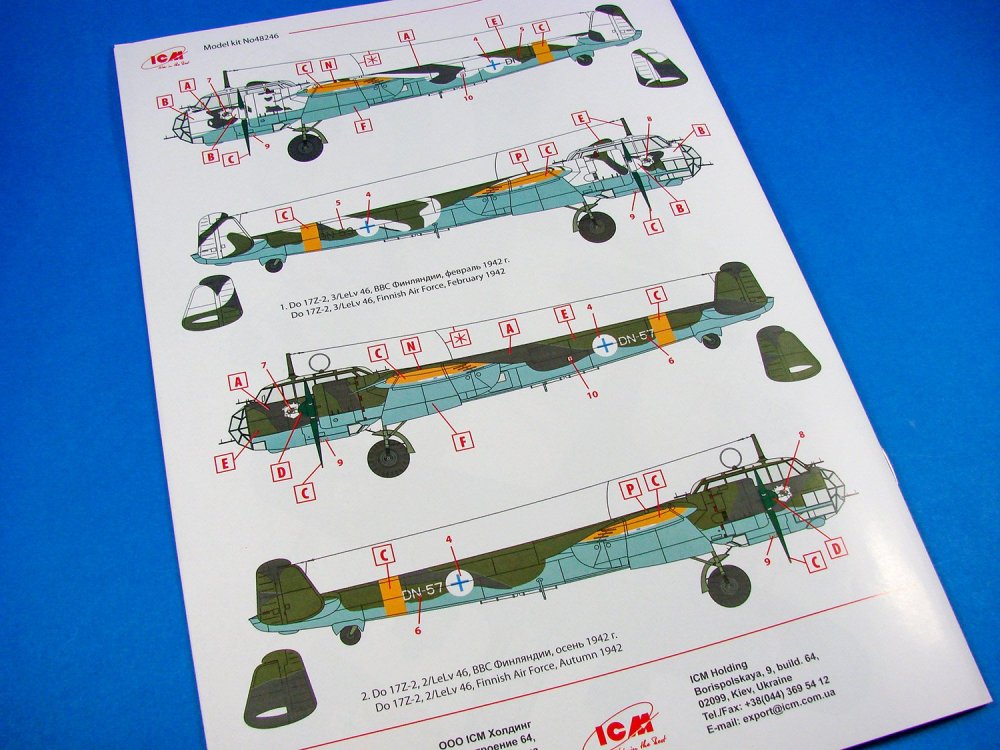
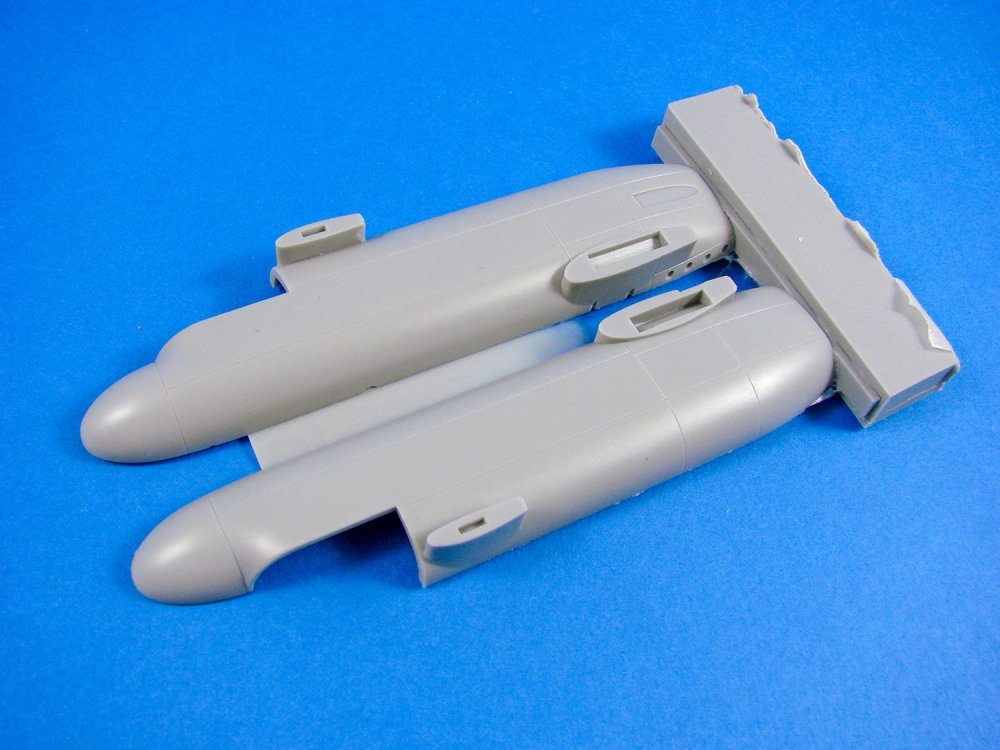
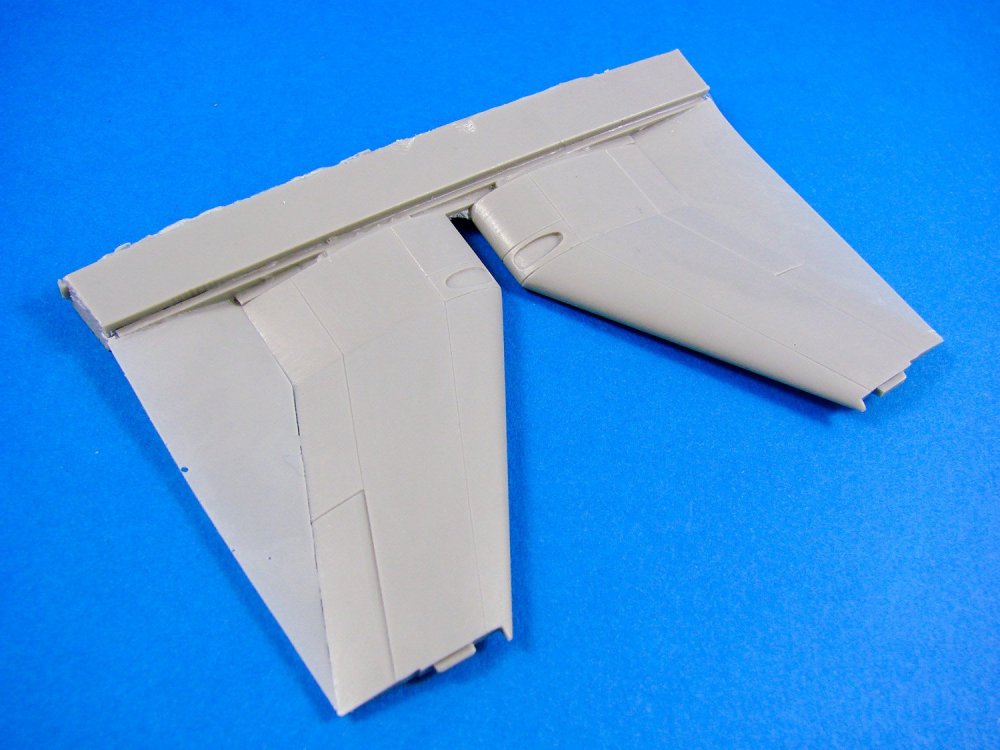
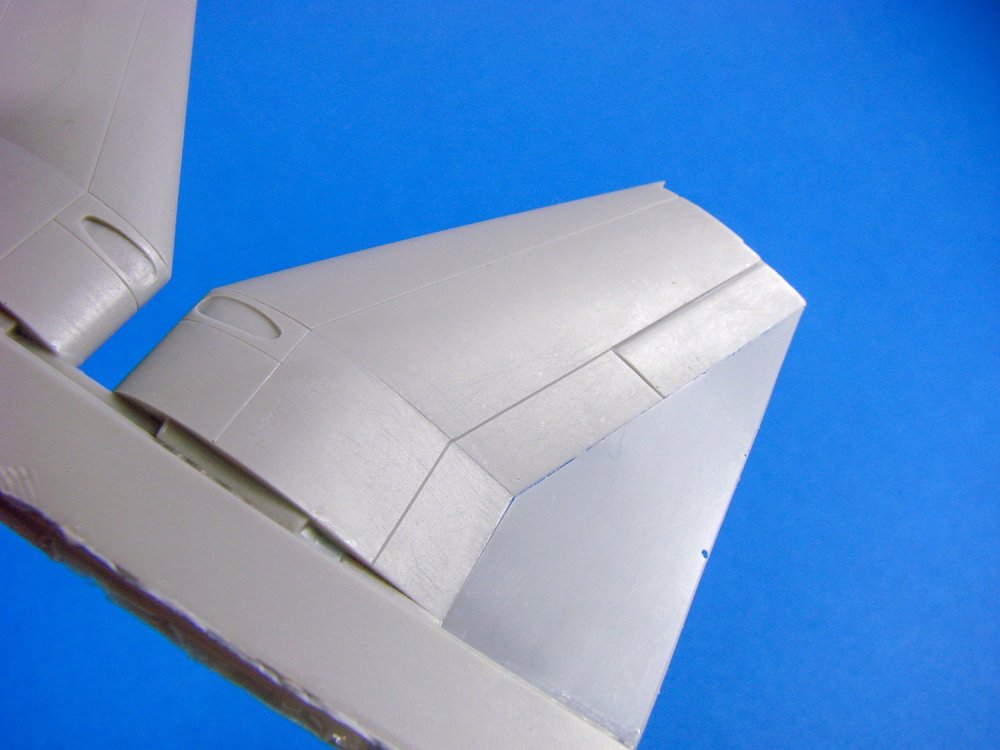
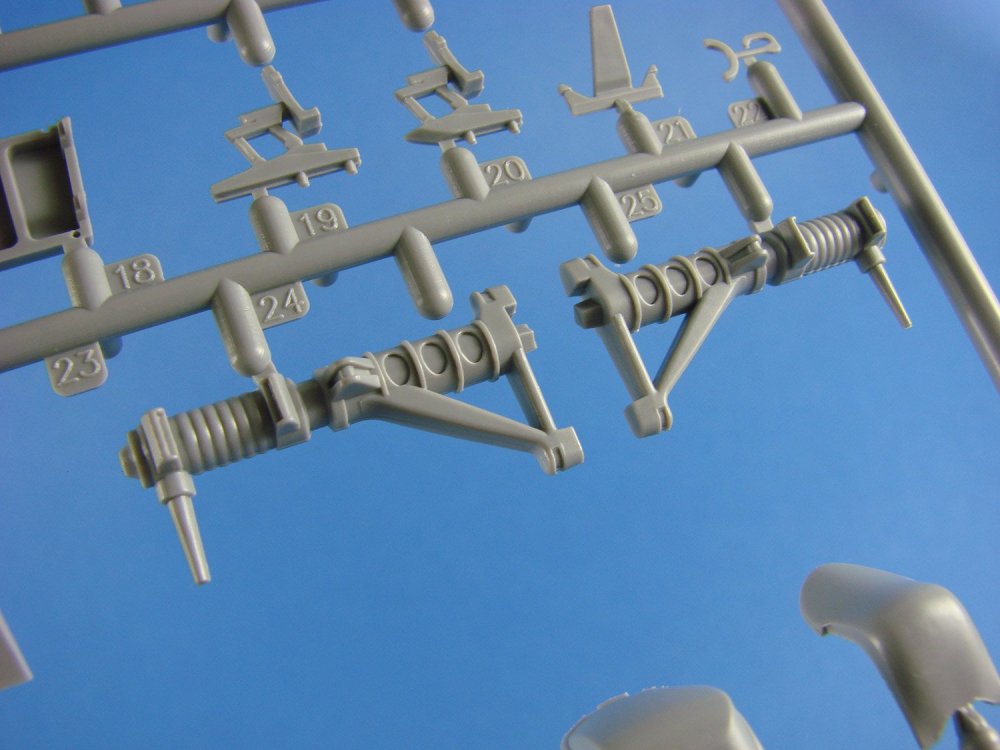
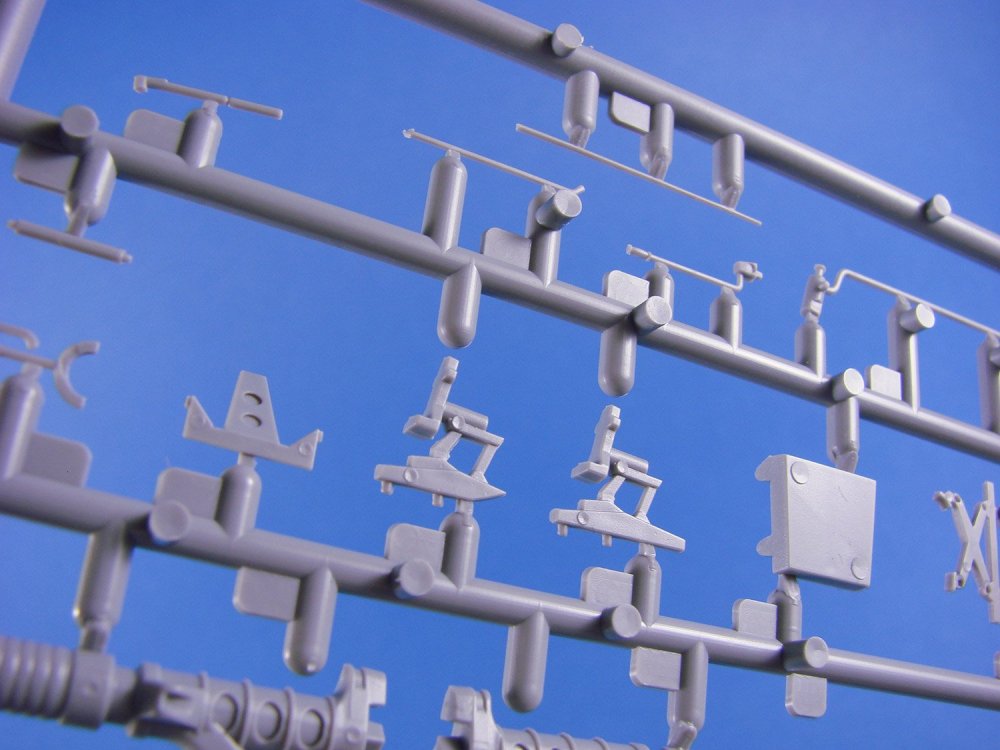
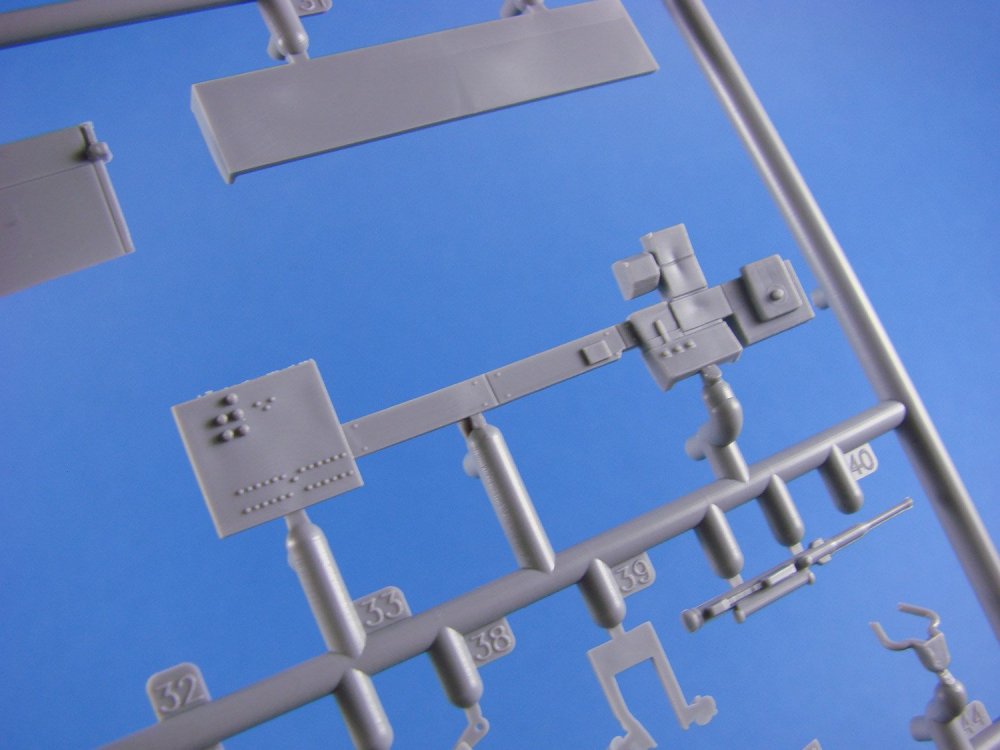
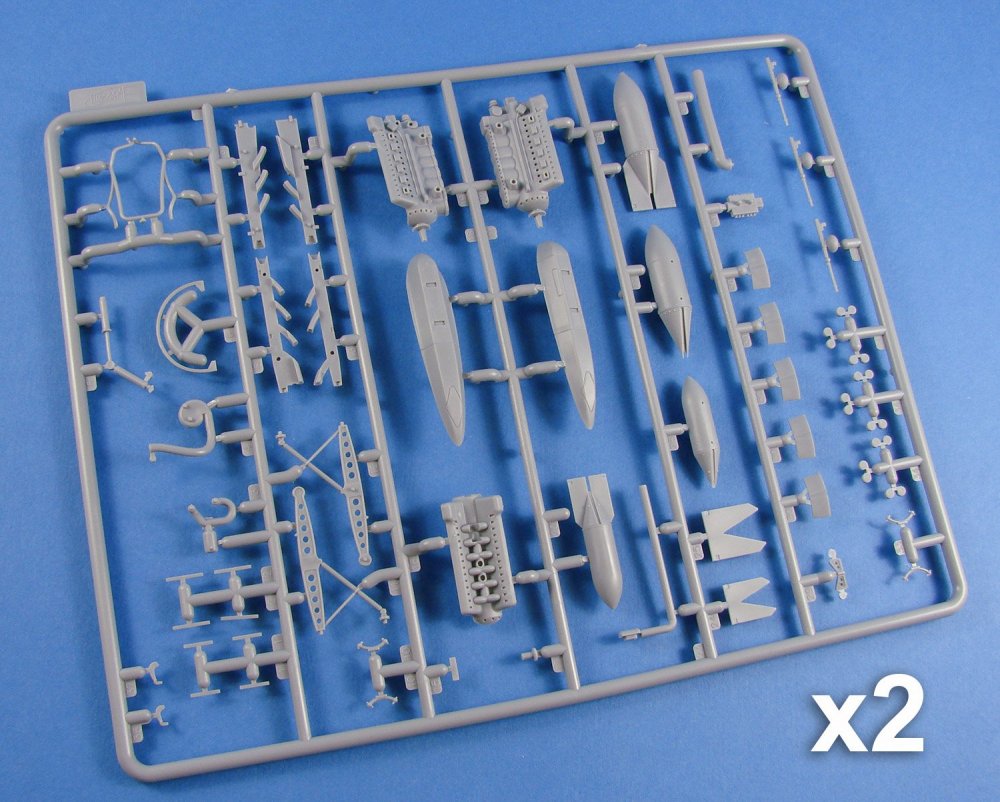
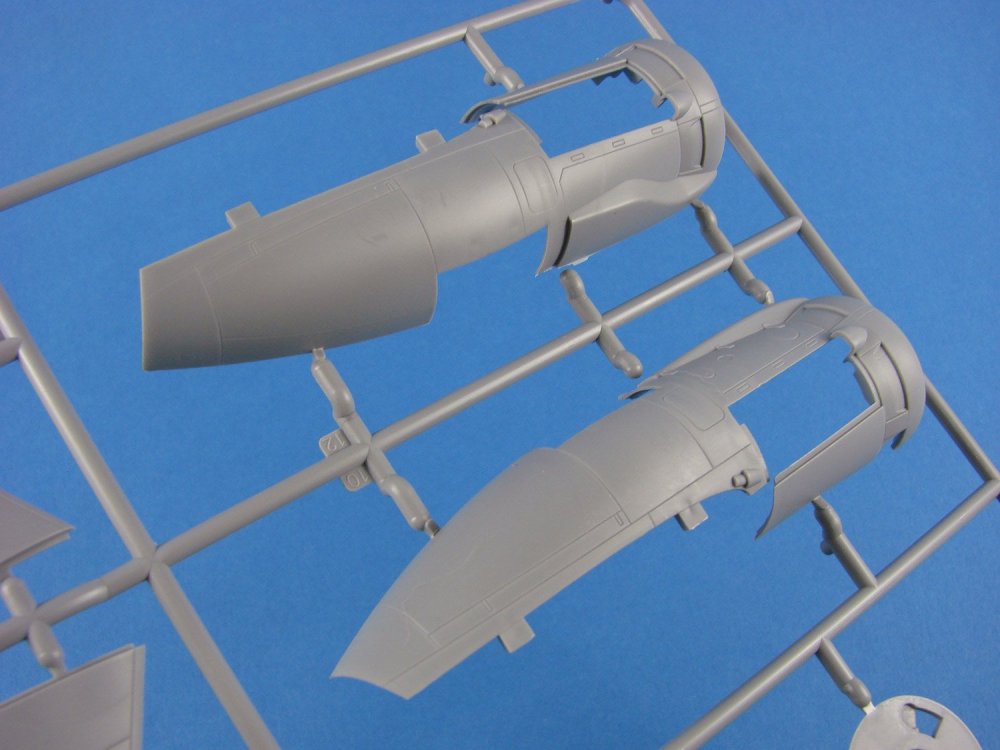
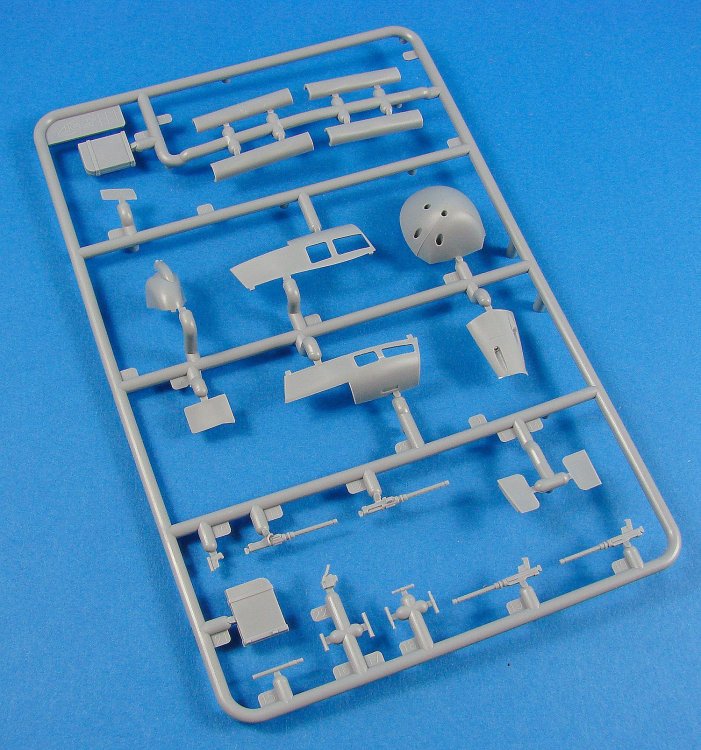
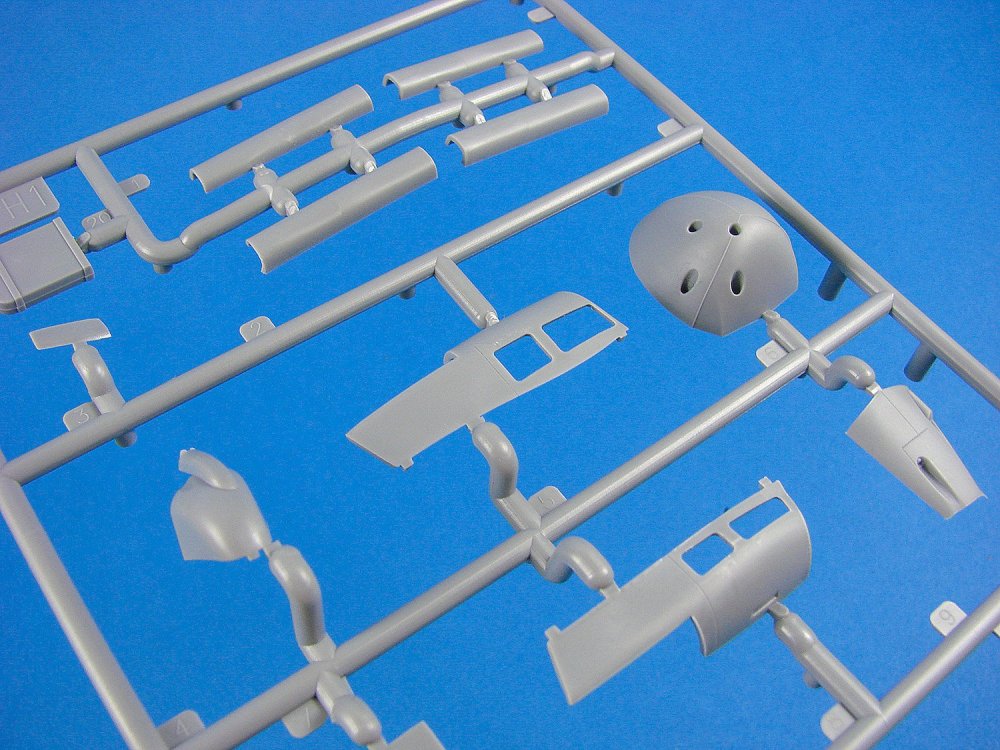
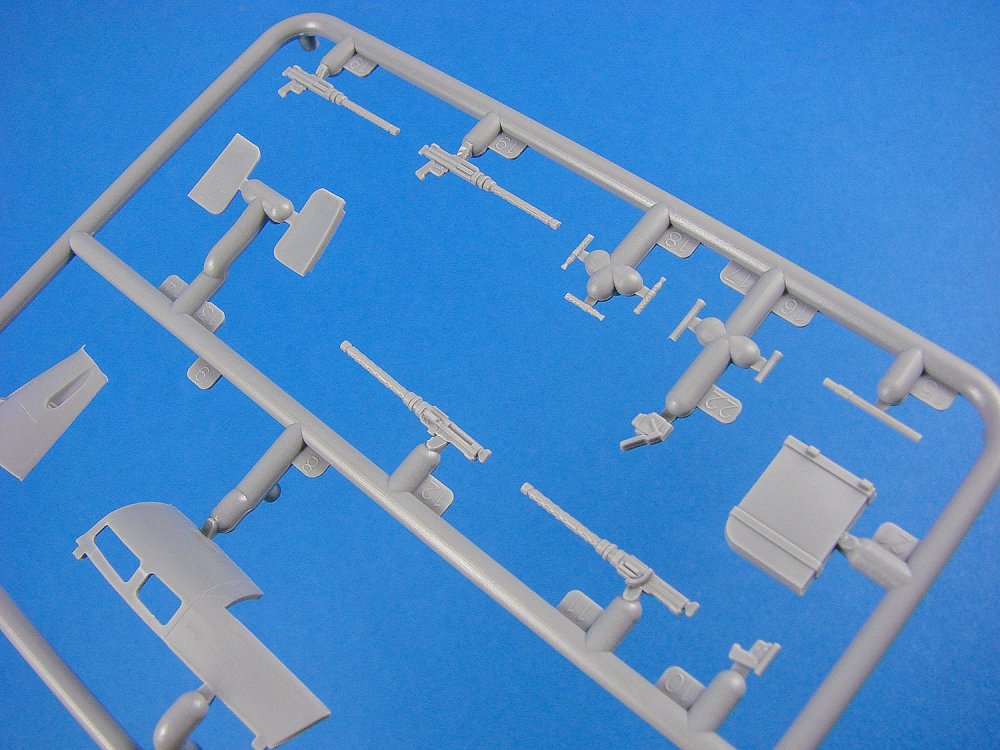
1:48 Do 17Z-2 WWII Finnish Bomber ICM Catalogue # 48246 Available from Hannants for £27.99 The Dornier Do 17 was designed as a lightweight, fast bomber that could, in theory, outrun any attempts by fighters to shoot them down. The long thin fuselage of the aircraft led to its nickname of ‘flying pencil’, and its shoulder mounted wing carried two engines, whilst its tail design was of twin fin/rudder arrangement, typical of that on the Bf 110. Initially powered by inline Daimler-Benz/BMW engines, but these were changed in favour of two Bramo 323 radials. A crew of three were carried, and up to 1000kg of bombs could be carried internally. Civil War in Spain saw the first baptism of fire for the Do 17, operating with the Condor Legion. Many of these pilots were unknowingly honing their skills for future operations against Poland, leading to the start of WW2, and eventually to the skies over Britain in 1940. It was here that the Do 17 became seriously outclassed by British fighter defence. The main version was the Do 17Z, which is the subject of this kit. The Z-2 mounted the new Bramo 323P-1 engine (1,000 hp), which was specifically tuned to the performance needs of the Do 17 by decreasing supercharger power at lower altitudes and thus improving low-level performance. The increase in take-off power allowed the bomb load to be increased from 500 to 1,000 kg However, the combat range with a full 1,000 kg bomb load was a very short 330 km. Armament was further upgraded by adding another pair of guns firing out of the sides of the upper part of the pod, but as the three guns were all fired by a single gunner, only one of them could be fired at a time. The kit At the time of writing, this is the fourth incarnation of this 1/48 release from ICM, with this being the second Z-2 variant. The first Z-2 release depicted this same aircraft in native Luftwaffe markings. ICM’s style of packaging is probably one of my favourites, with the kit being supplied in a one-piece, sturdy corrugated cardboard box with a locking tab, and a separate product lid which sits over this. The glossy lid depicts a single Do 17Z-2, resplendent in its Finnish markings, taking off from a snow-laden airfield in a blizzard. This scheme is also shown on the box side. There are two schemes with this release, both quite different, with in a flat black and olive camp ensemble, and the other being the same, but with a randomly applied white colour, creating a tricolour camouflage. Inside the box, a total of five light grey sprues are packaged into a single re-sealable clear wallet, and a clear sprue is also slipped into there, protected within its own sleeve. In the bottom of the box, a 20-page A4 instruction manual is to be found, with a long, narrow decal sheet tucked within it. This release contains no photo-etch parts, instead leaning on companies such as Eduard, should you want to detail your model further. This certainly helps to keep down overall costs. Sprue A You can certainly see why this aircraft was called the flying pencil when you look at the fuselage halves. This was supposed to be the very essence of the Schnellbomber, but alas, the Do 17 was easy prey whilst undertaking that particular role. The characteristic fuselage is moulded with an open belly for the various loadouts or fuel tank assembly (the latter, for the purpose of this kit), and of course, the upper fuselage is open due to the shoulder-mounted wing that will be fitted here. For the tail-plane, the traditional slots are included on both port and starboard. ICM has created some very fine external detail in the way of panel lines and various access ports and panels. These are both very narrow and even in depiction. They should take a wash beautifully. Note that the airframe is devoid of any rivet detail, leaving a blank canvas for those of us who wish to add this. Internally, the fuselage doesn’t have any detail to speak of, but instead location holes and slots for the separate detail parts. One thing I really do like about this release is the rib and fabric depiction of the control surfaces. This is superbly rendered and doesn’t look at all exaggerated. All control surfaces are separately moulded, and you will find them here, as well as the stabiliser and fin parts. It is worth mentioning too that the Z-10 nose cone is still on this sprue, as is the clear part (Sprue E) for the infrared detector for target illumination. Without delving further, I’m not sure if a Z-10 can be made from this release, but it does look pretty favourable. All the parts do seem to be here. Other parts you will find here are the fuselage bulkheads and two bomb bay door options (both open or closed). A small number of parts are slated as not for use in this release. Sprue B Only three parts here. These are for the full-span upper wing, and two lower wing panels. You will note that the ailerons are moulded separately, but the landing flaps are integral and not poseable without either aftermarket or with some surgery and scratch-work. ICM has designed the wing so the gear bay openings are moulded into the lower panels, with some rudimentary, corresponding interior detail on the underside of the upper wing panel. The nacelles and the remainder of the detail is separate. Externally, that detail is very neat, with thin and uniform panel lines and port details This model is not riveted, and for me, that leaves things looking pretty bare, so I will add the various rivet and fastener lines when it comes for me to build this kit. Sprue C Parts here mainly concern the engine nacelles and main gear interiors, plus the general internals for both the cockpit and bomb bay. A two-piece fuel tank is found here, moulded with its support straps. This will occupy half of the bomb bay. For the main gear bays, left and right walls are supplied, with moulded structural details, and also forward and rear bulkheads. The idea here is that these will be installed to the wing, complete with the retraction units for the main gear, and then the nacelles are built around these. Looking at the instructions, I do think that the retraction units can be fitted later, or at least I think so (don’t quote me!), making overall assembly and painting easier. Bar a couple of small parts, everything on this sprue is for use in this release. In amongst the numerous parts, you’ll find a lot of components for the cockpit, such as the two-part instrument panel, consoles, seats with their lattice weave, pilot floor and rudder pedals, control stick, avionics, machine guns, etc. Sprue D (x2) This sprue is supplied twice and deals with those items for which multiples are needed, such as the engine, cowls, propeller, spinner, main gear wheels, mudguards, oleo struts, engine bulkheads and mounting frames etc. Bombs are also found here, as are a couple of MGs and saddles, plus the bomb mounting racks. The engine is excellent and comprises an exhaust system for which separate manifolds and stubs are included. ICM has chosen to depict their wheels without any load, so you will need to sort the weighted appearance yourself. A few seams lines here and there on parts, but nothing out of the ordinary. Sprue E If you hadn’t already guessed, this is the clear sprue, and it is identical to all previous incarnations of this kit, including the glass nose. There are also two different greenhouse canopies included, with only one slated for use with this particular kit release (with the rear, side MG positions). For use here are the clear blister as well as the clear parts for around the nose, and the lower gondola glazing. Three parts are included for the latter, but only one is to be used for this variant. Transparency is excellent, with reasonably thin, distortion-free plastic that has no visible or unsightly patina. Framing lines are nicely depicted and those frames are frosted. Full marks. Decals The decals for this release are printed onto a long but narrow sheet and are very basic by nature. I’m not a fan of how ICM has chosen to break down the swastika on these, with the main decal being a blue cross on a white circle, but each blue swastika arm needing to be added separately. If you don’t add these precisely, they’ll look odd. Printing is nice and thin, with solid colour and minimal carrier film. Everything is also in register. No stencils are supplied, but decals are included for the instrument panel. The two schemes in this kit are: Dornier Do 17Z-2, 3/LeLv 46, Finnish Air Force, February 1942 Dornier Do 17Z-2, 2/LeLv 46, Finnish Air Force, Autumn 1942 Instructions This is a rather nice 20-page A4 publication with the schemes printed on the glossy cover, and the construction sequence within, broken down into 84 stages. Illustrations are by means of both shaded and line-drawn images, with paint references given throughout for both Revell and Tamiya colours. Conclusion I quite like this release as it gives plenty of detail out of box and still leaves areas to improve further, should you wish to. ICM are surely one of my favourite players in this hobby, releasing the sort of subjects that cry out for my attention. You may have seen their Ju 88 kits reviewed here, both in their own label and under names such as Special Hobby and Revell. Quality is excellent, my experience so far shows their kits to fit superbly. This really isn’t an expensive kit and provides amazing value for money in an age where everything seems to be getting more expensive by the day. I’ve always wanted a reasonably large scale Do 17, and with these new ICM releases, I’m certainly not disappointed! Highly recommended. My sincere thanks to ICM for supplying this kit for us to review. To purchase directly, click the link at the top of this article.


-
- 2
-

-
customscale Customscale 1/35 Wasserfall C2 W10 with launch cradle
James H replied to JeroenPeters's topic in Aircraft Reviews
Very cool! I'd love to see more of these wacky weapons released. -
Jerry Rutman P-51B build
James H replied to Clunkmeister's topic in LSM 1/35 and Larger Work In Progress
Makes such a change after endless D builds. Nice to see one of these being built! -
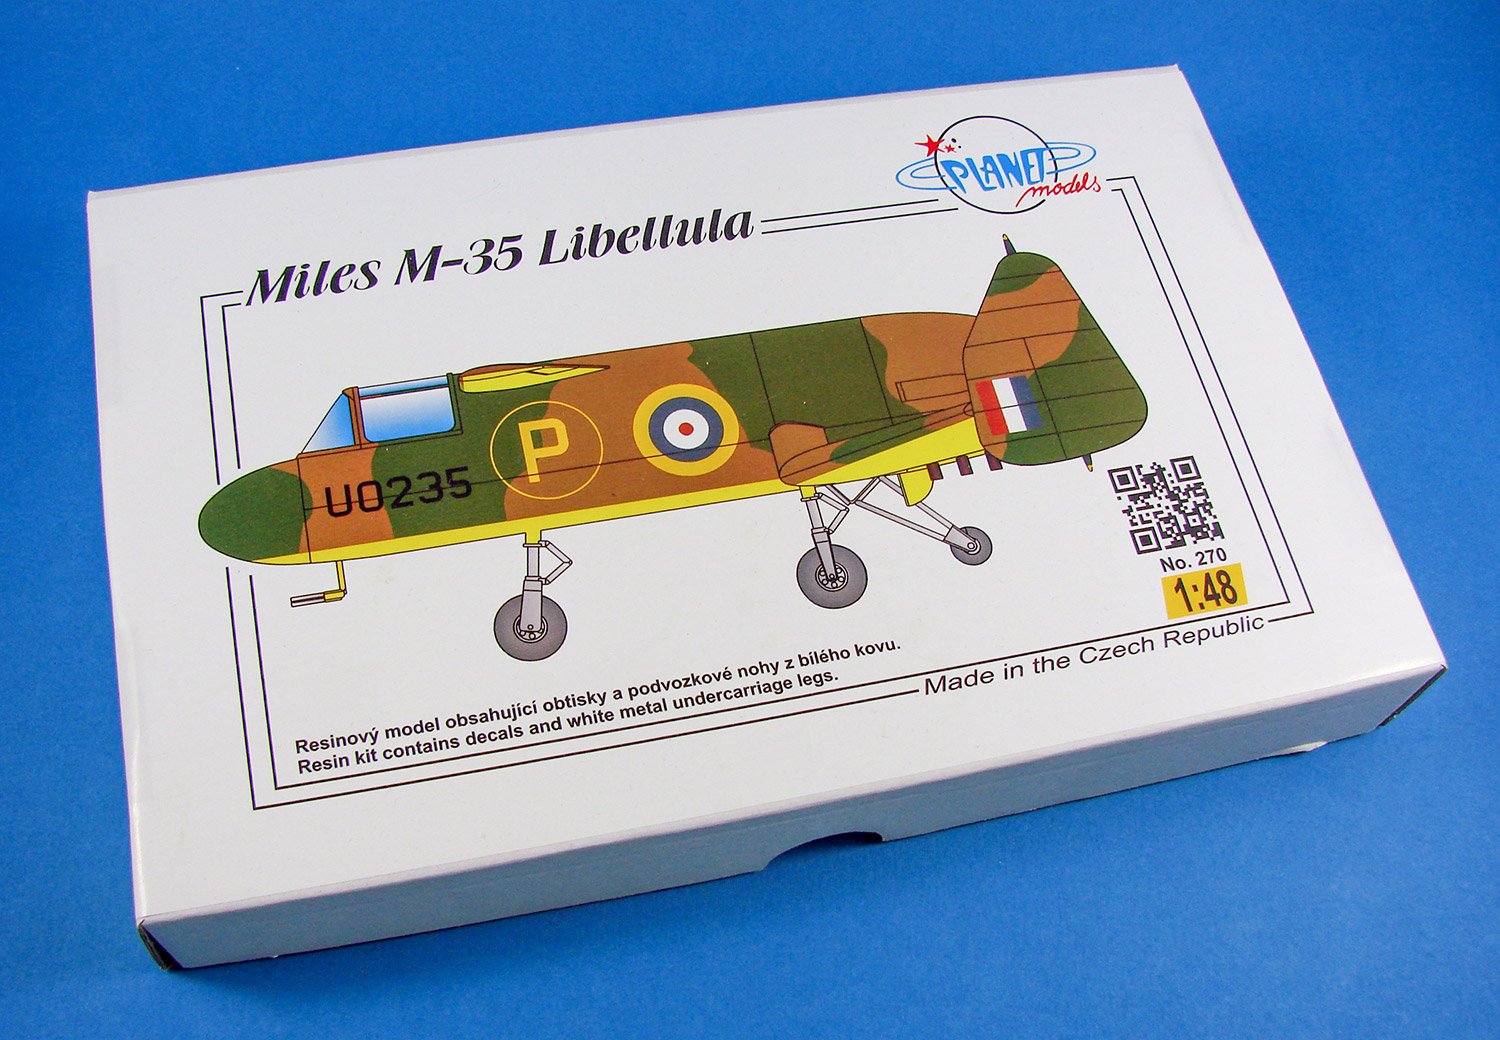
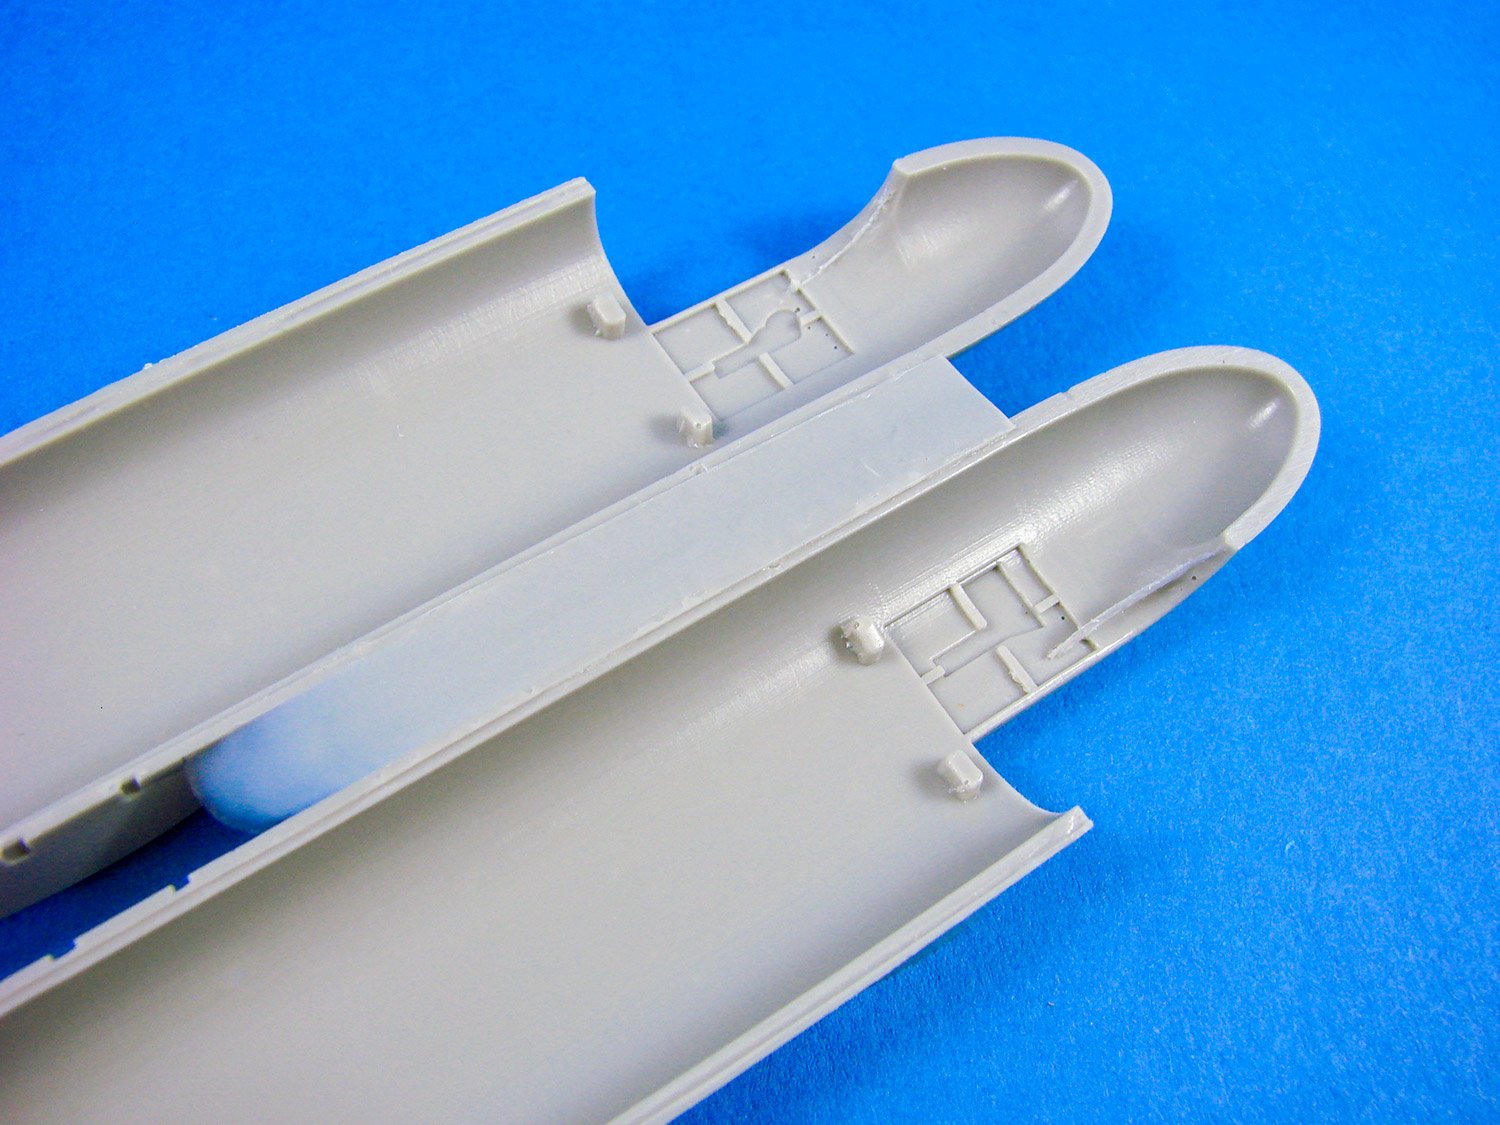
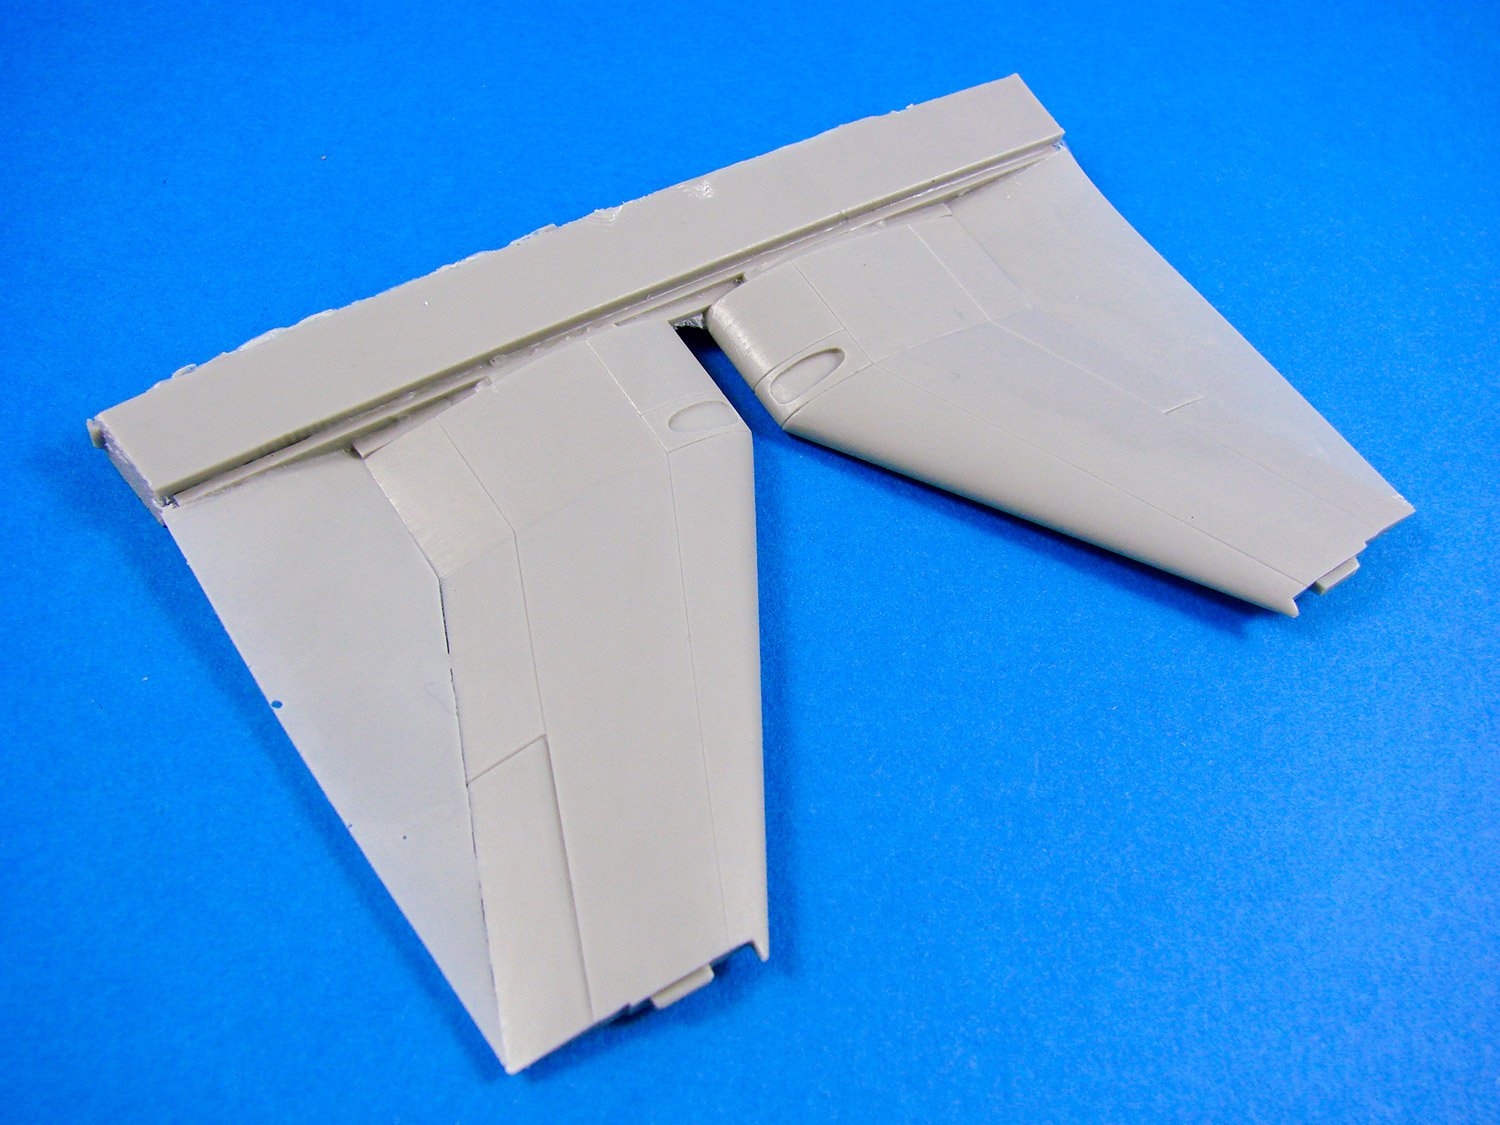
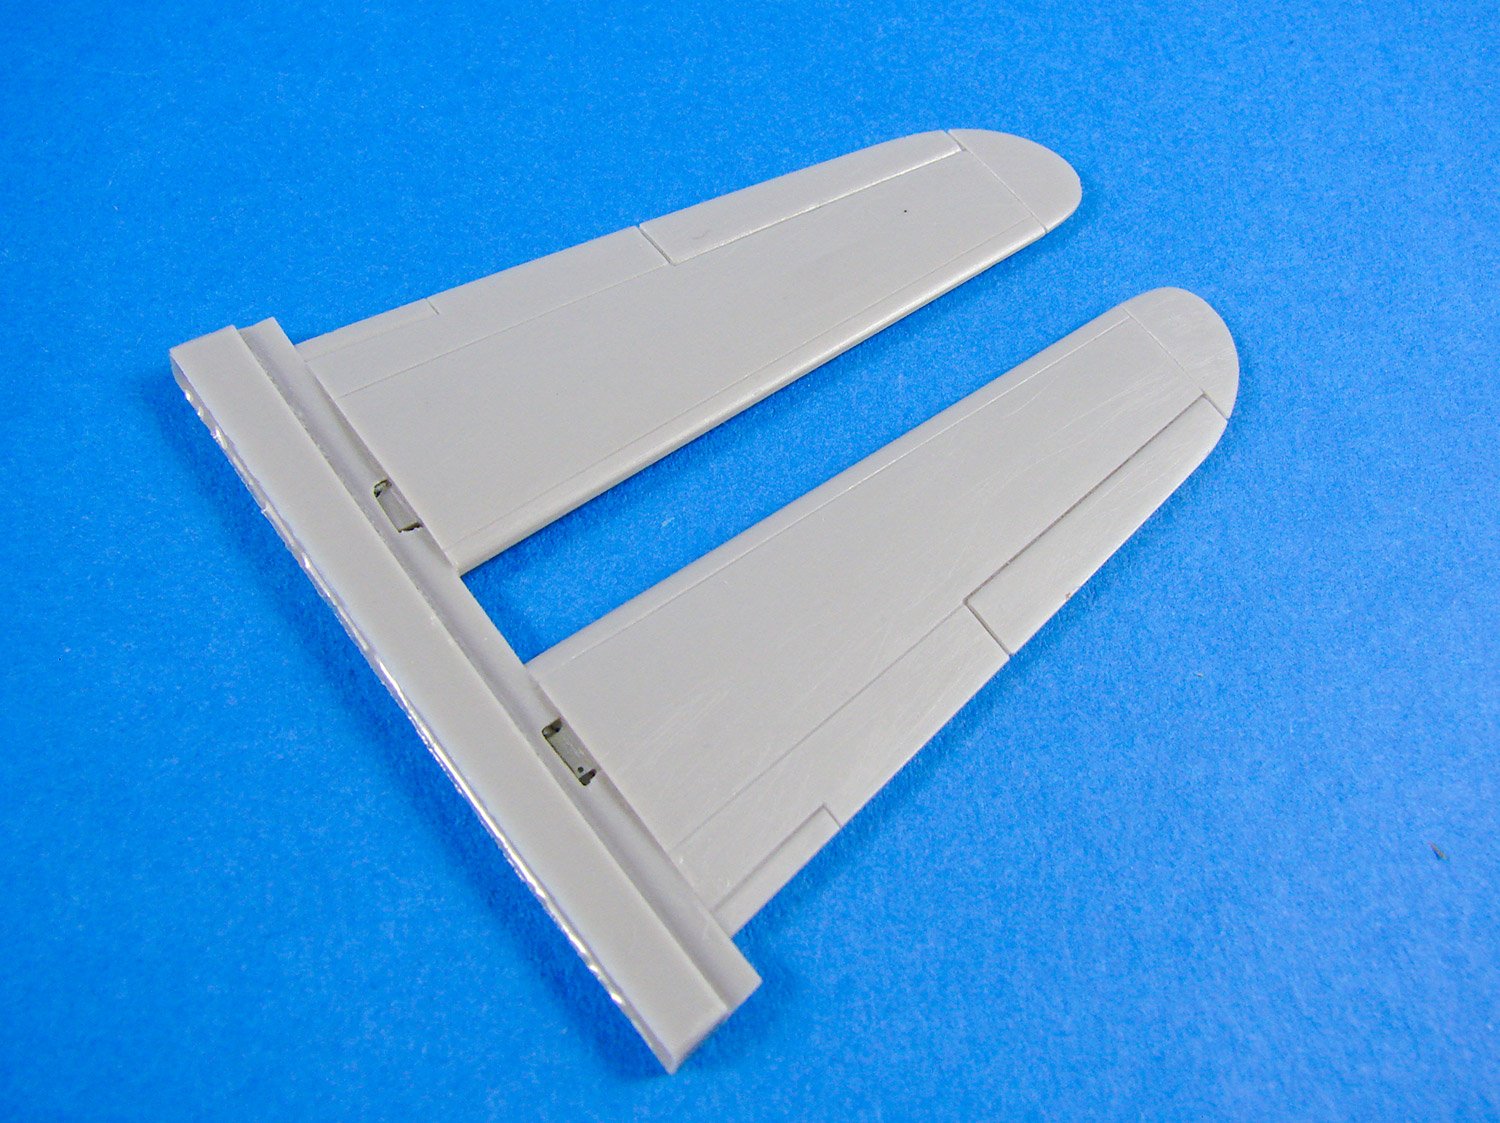
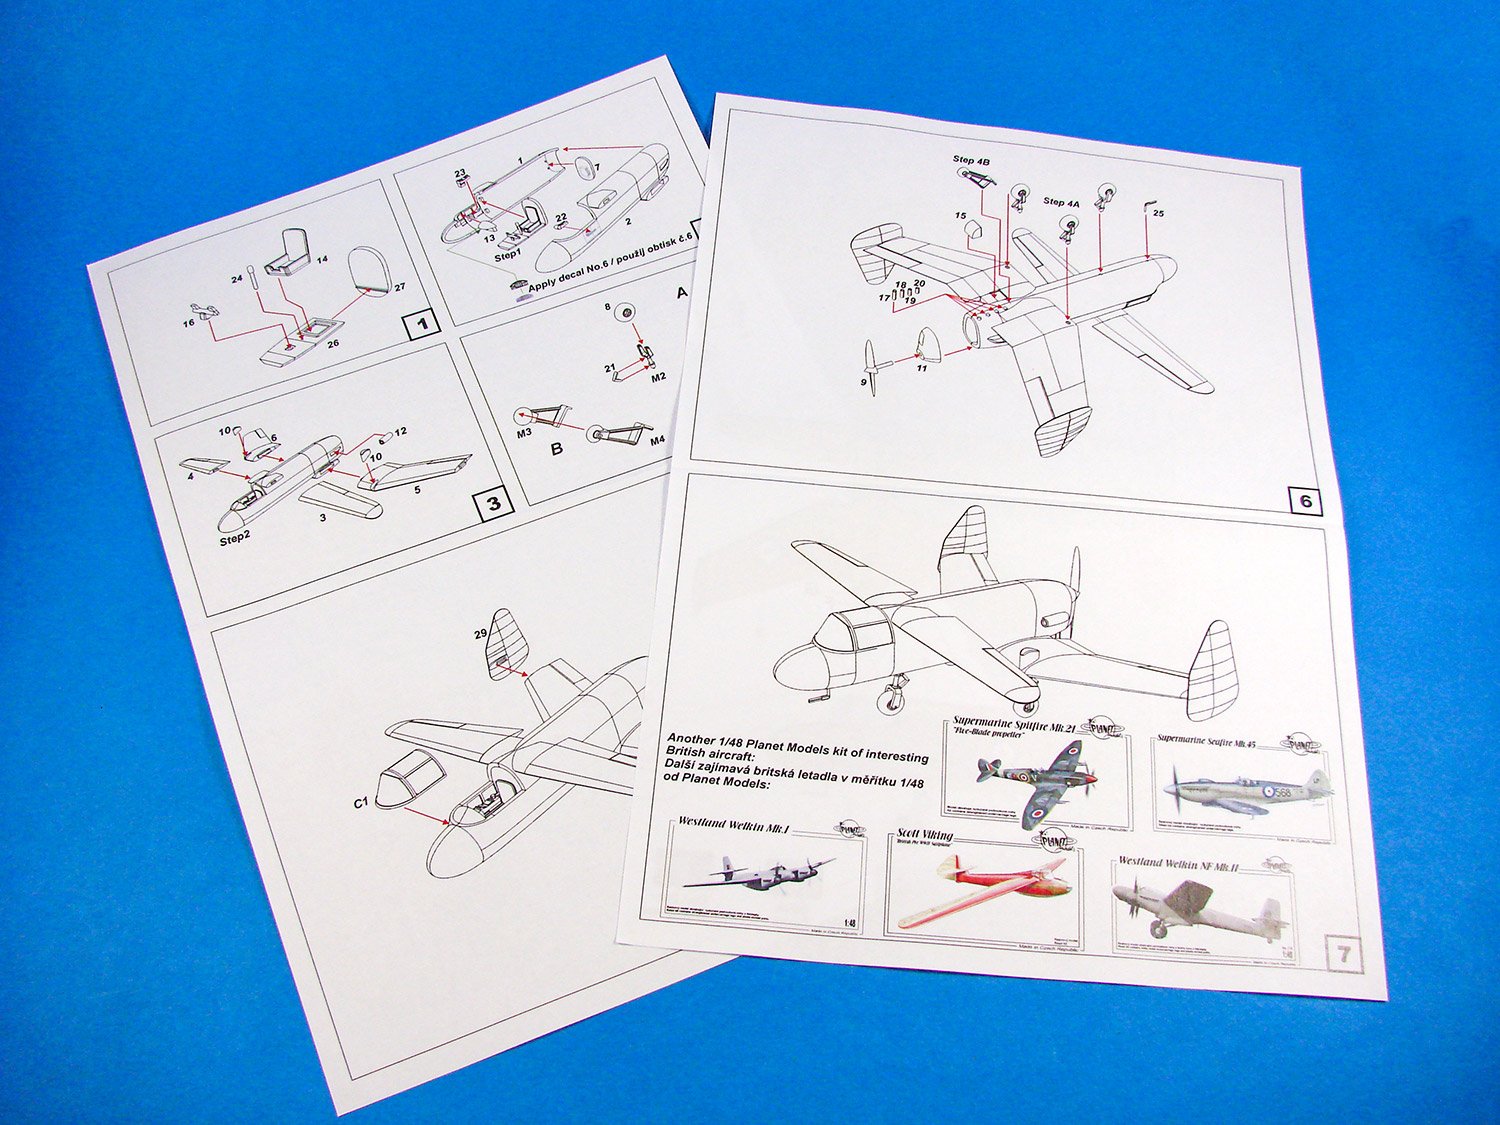
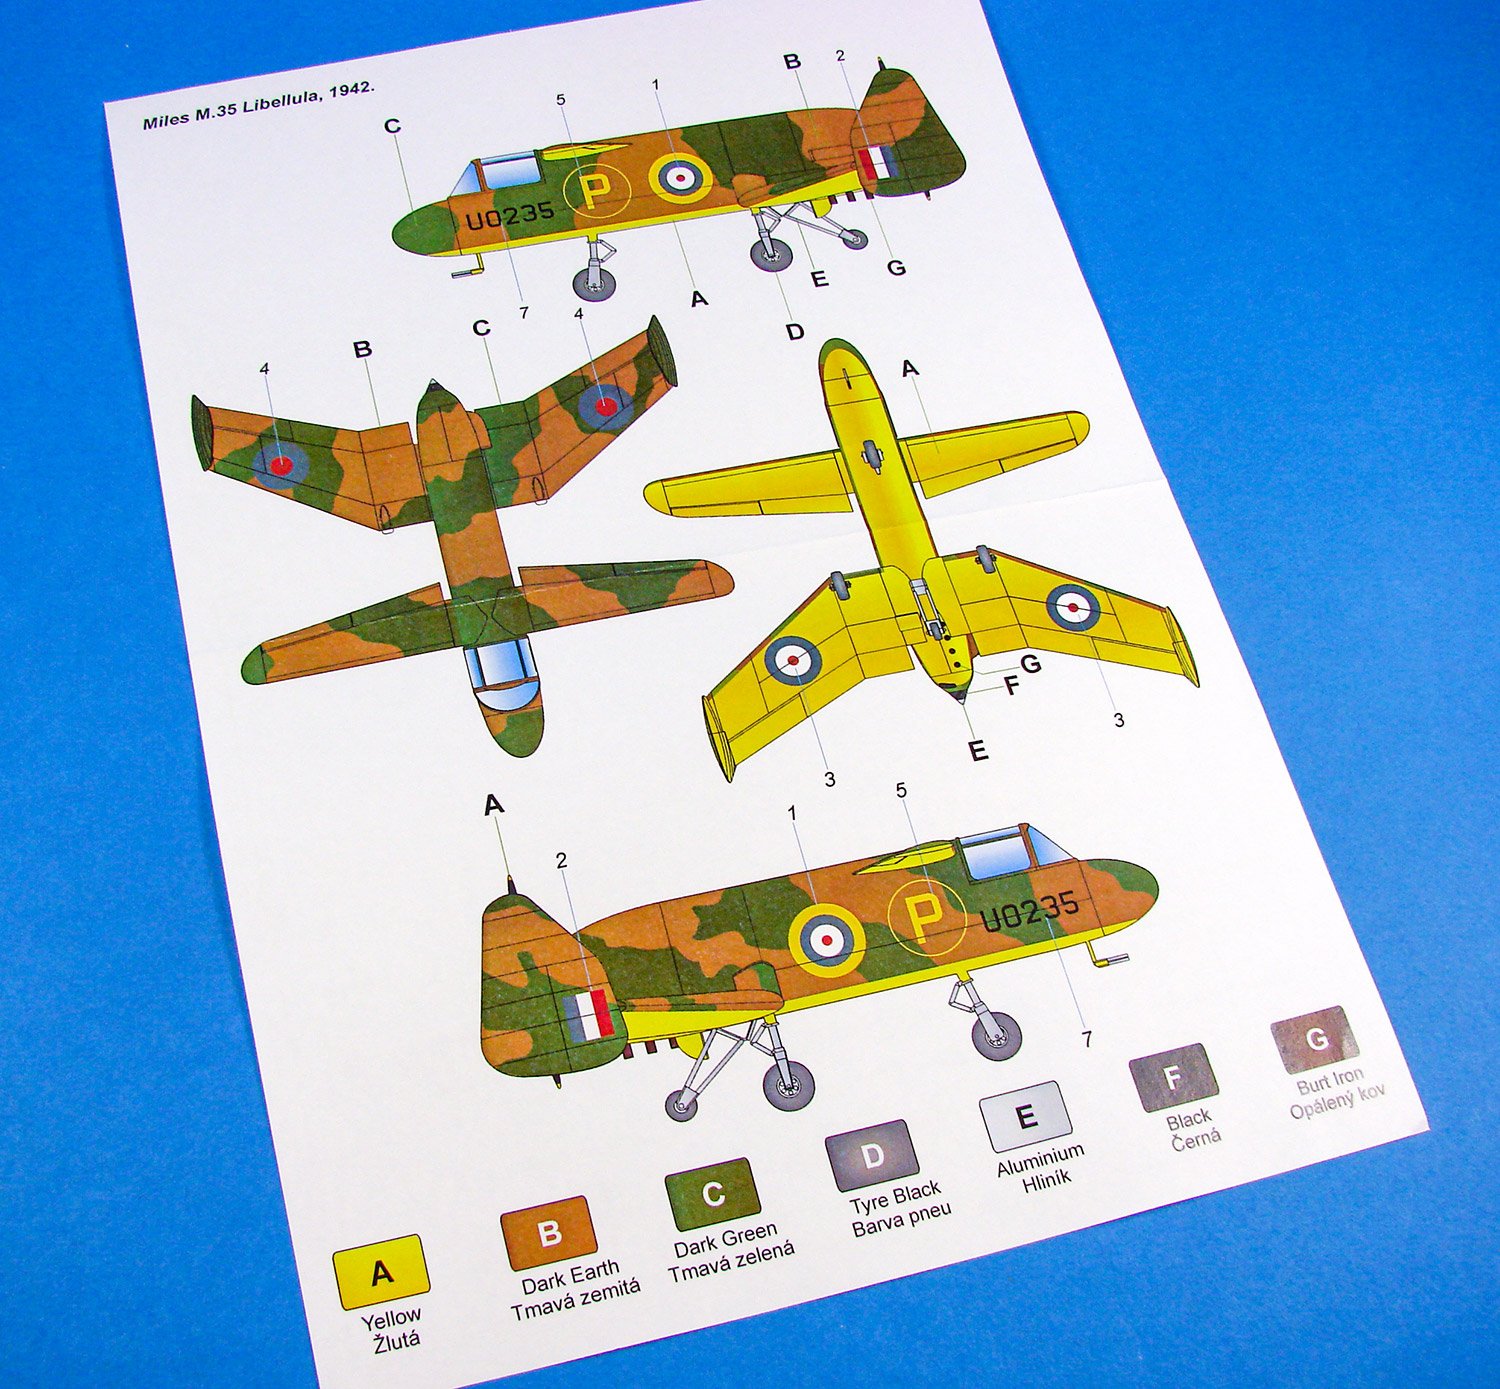
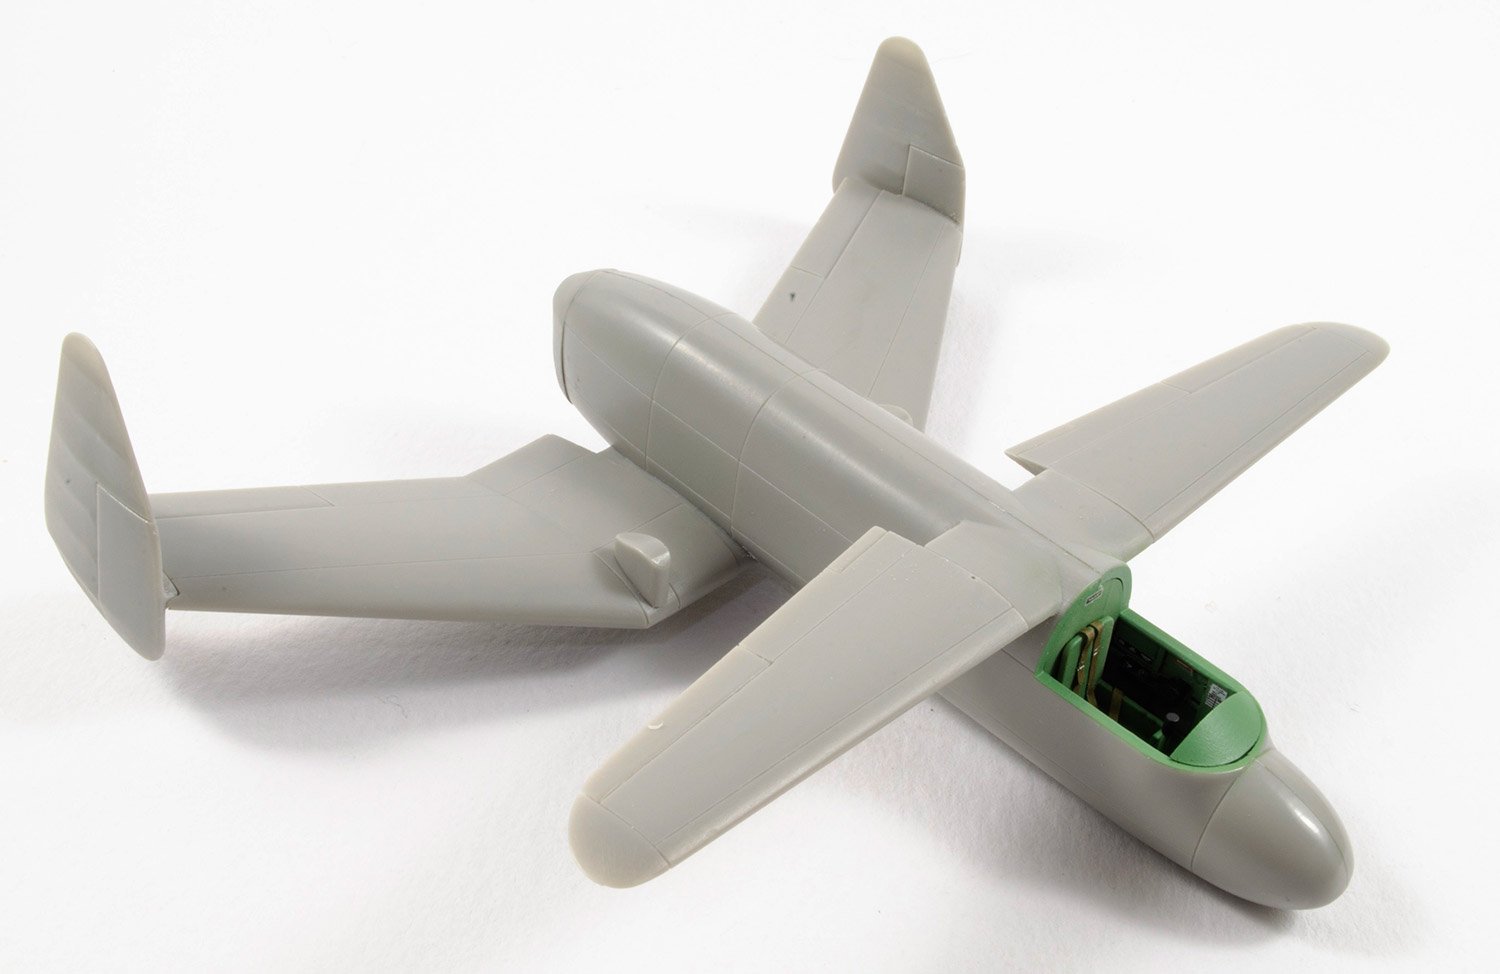
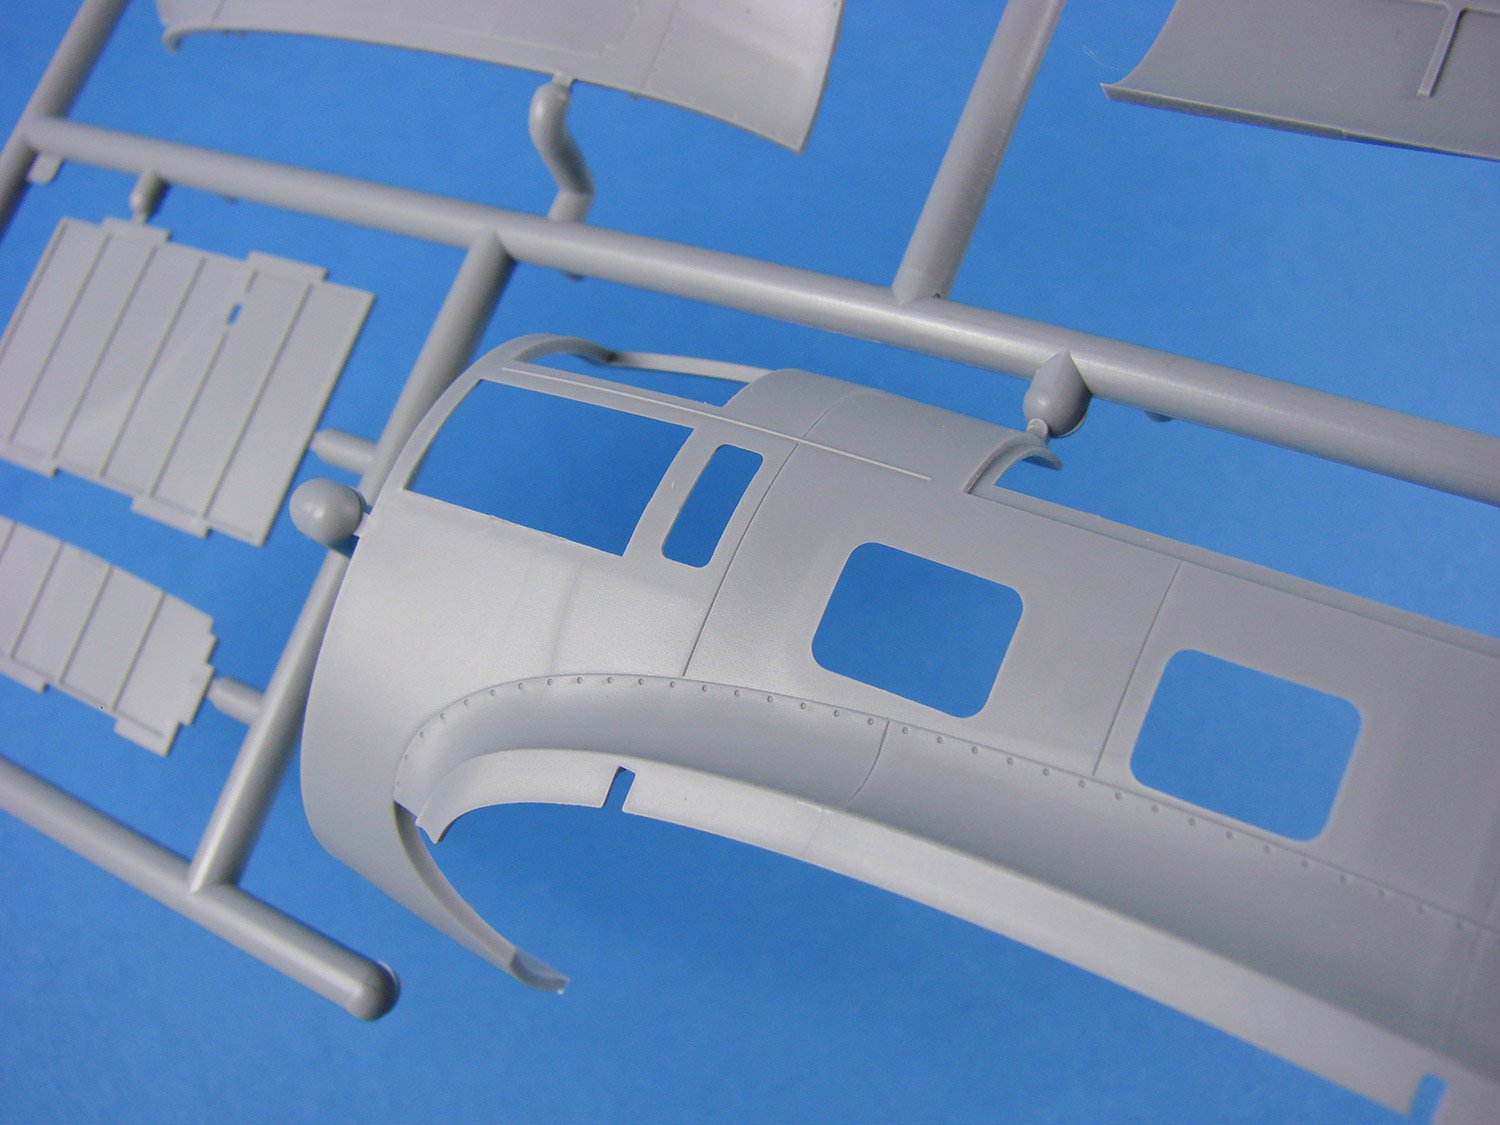
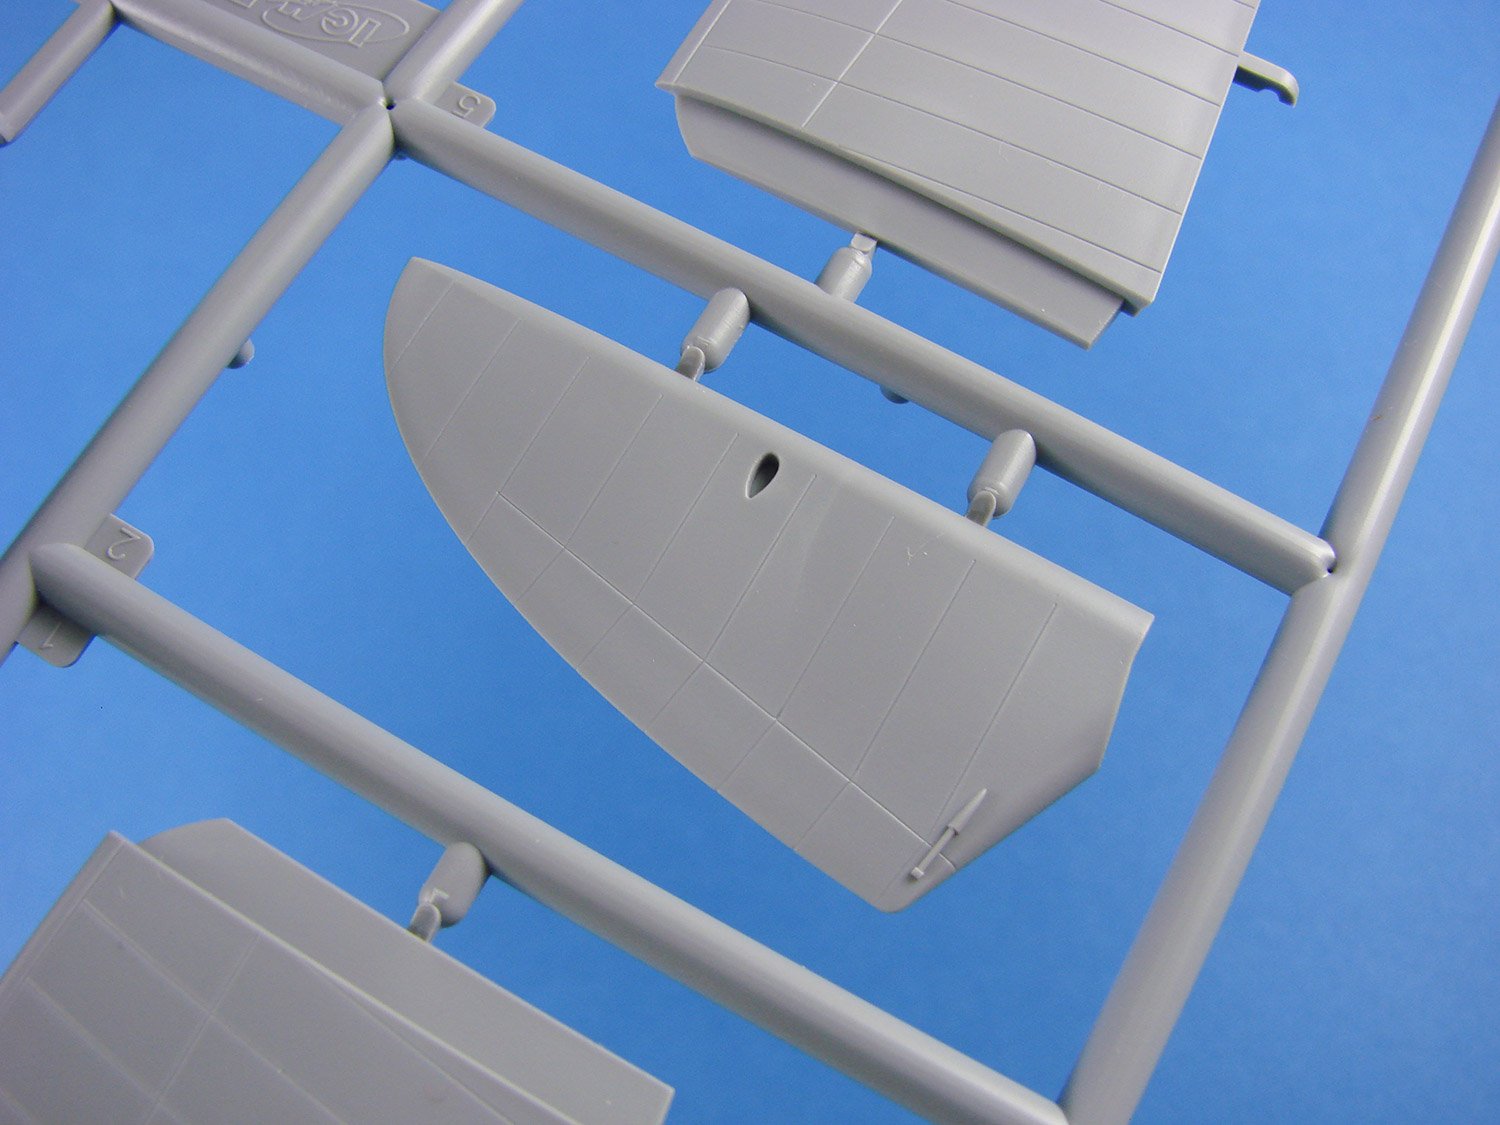
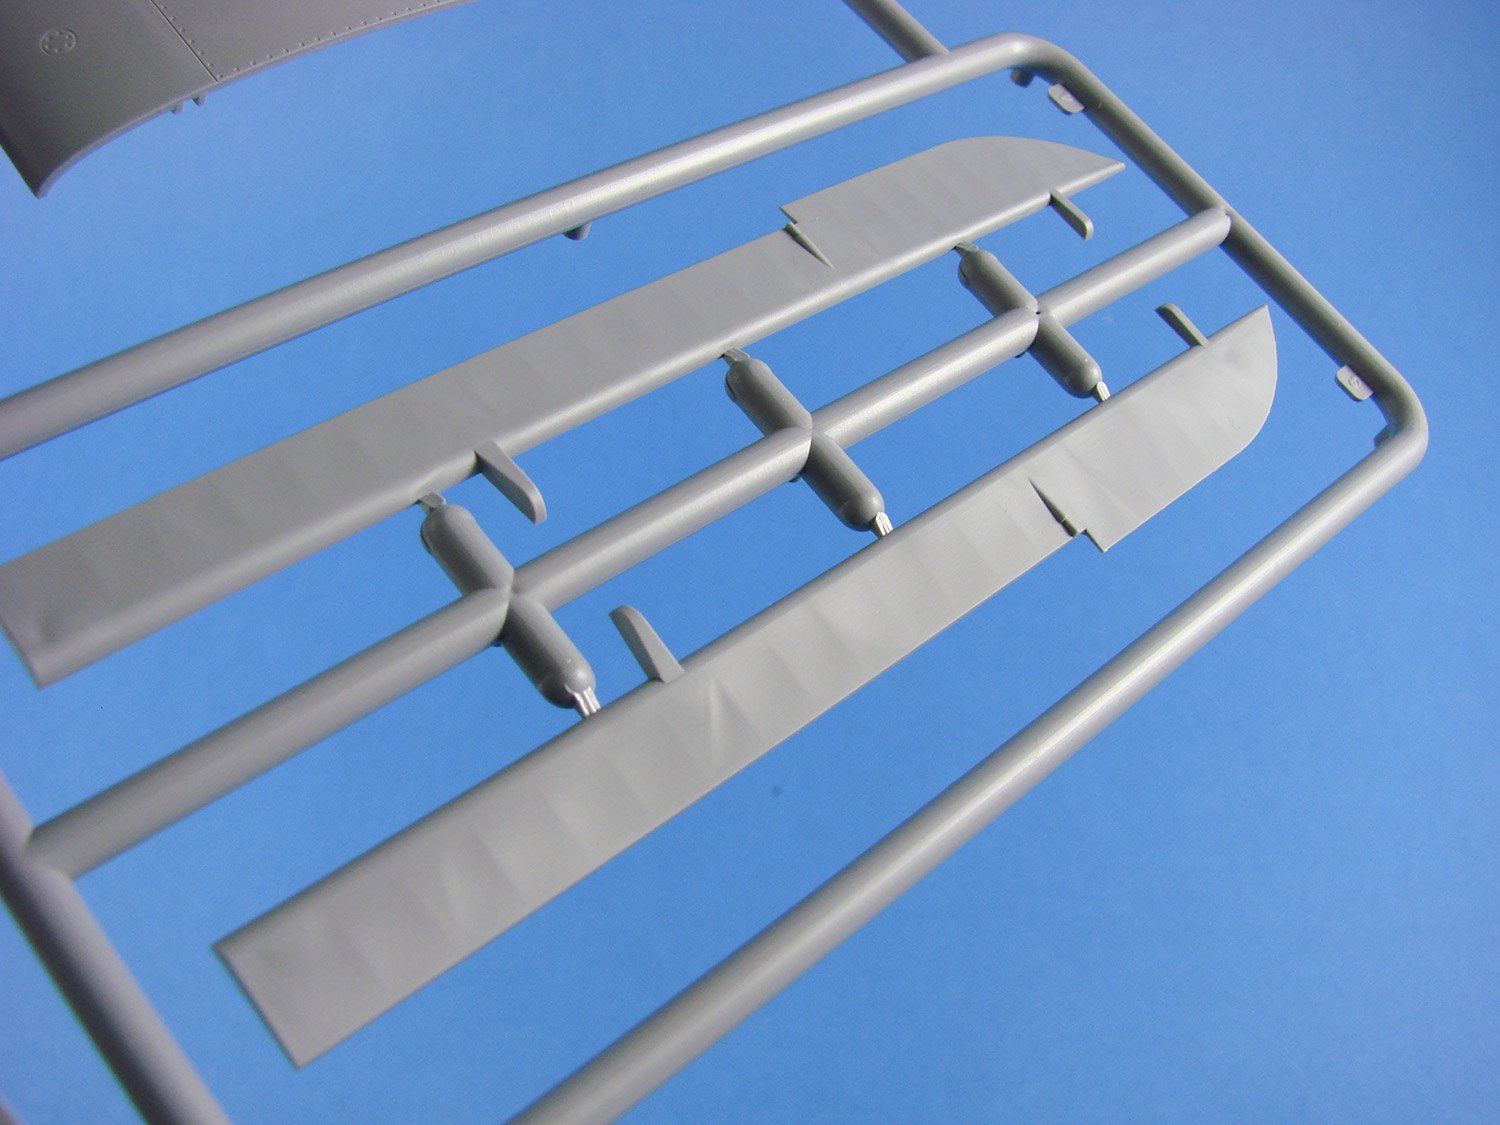
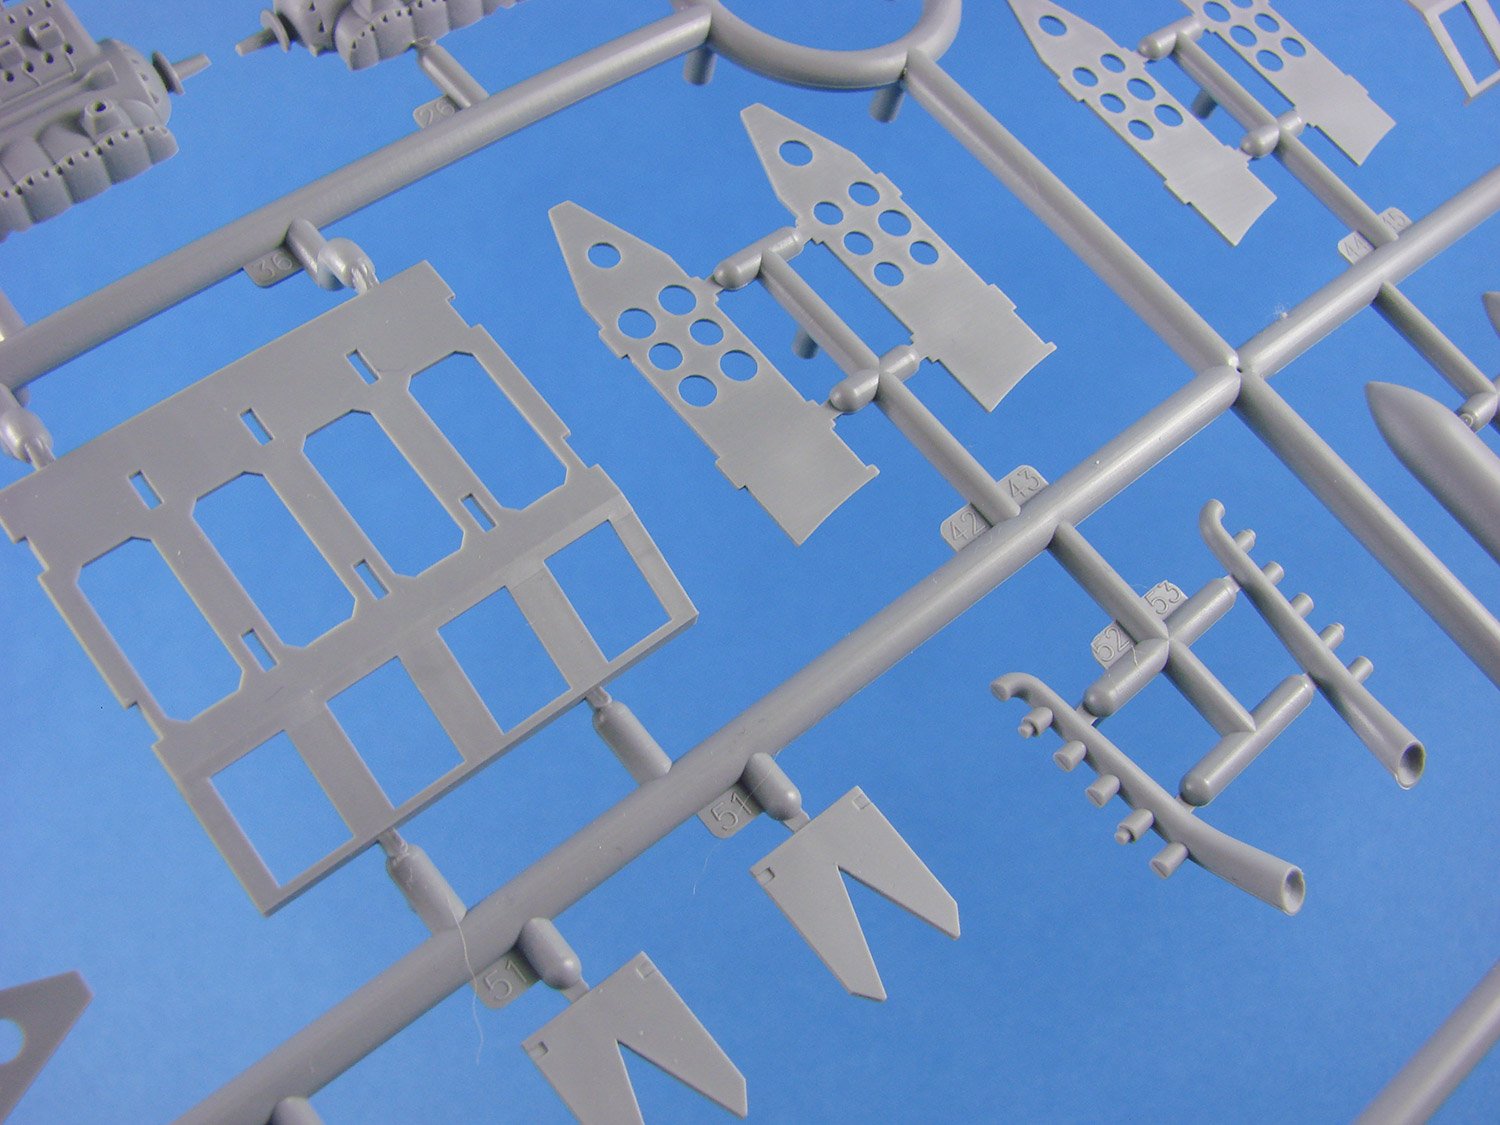
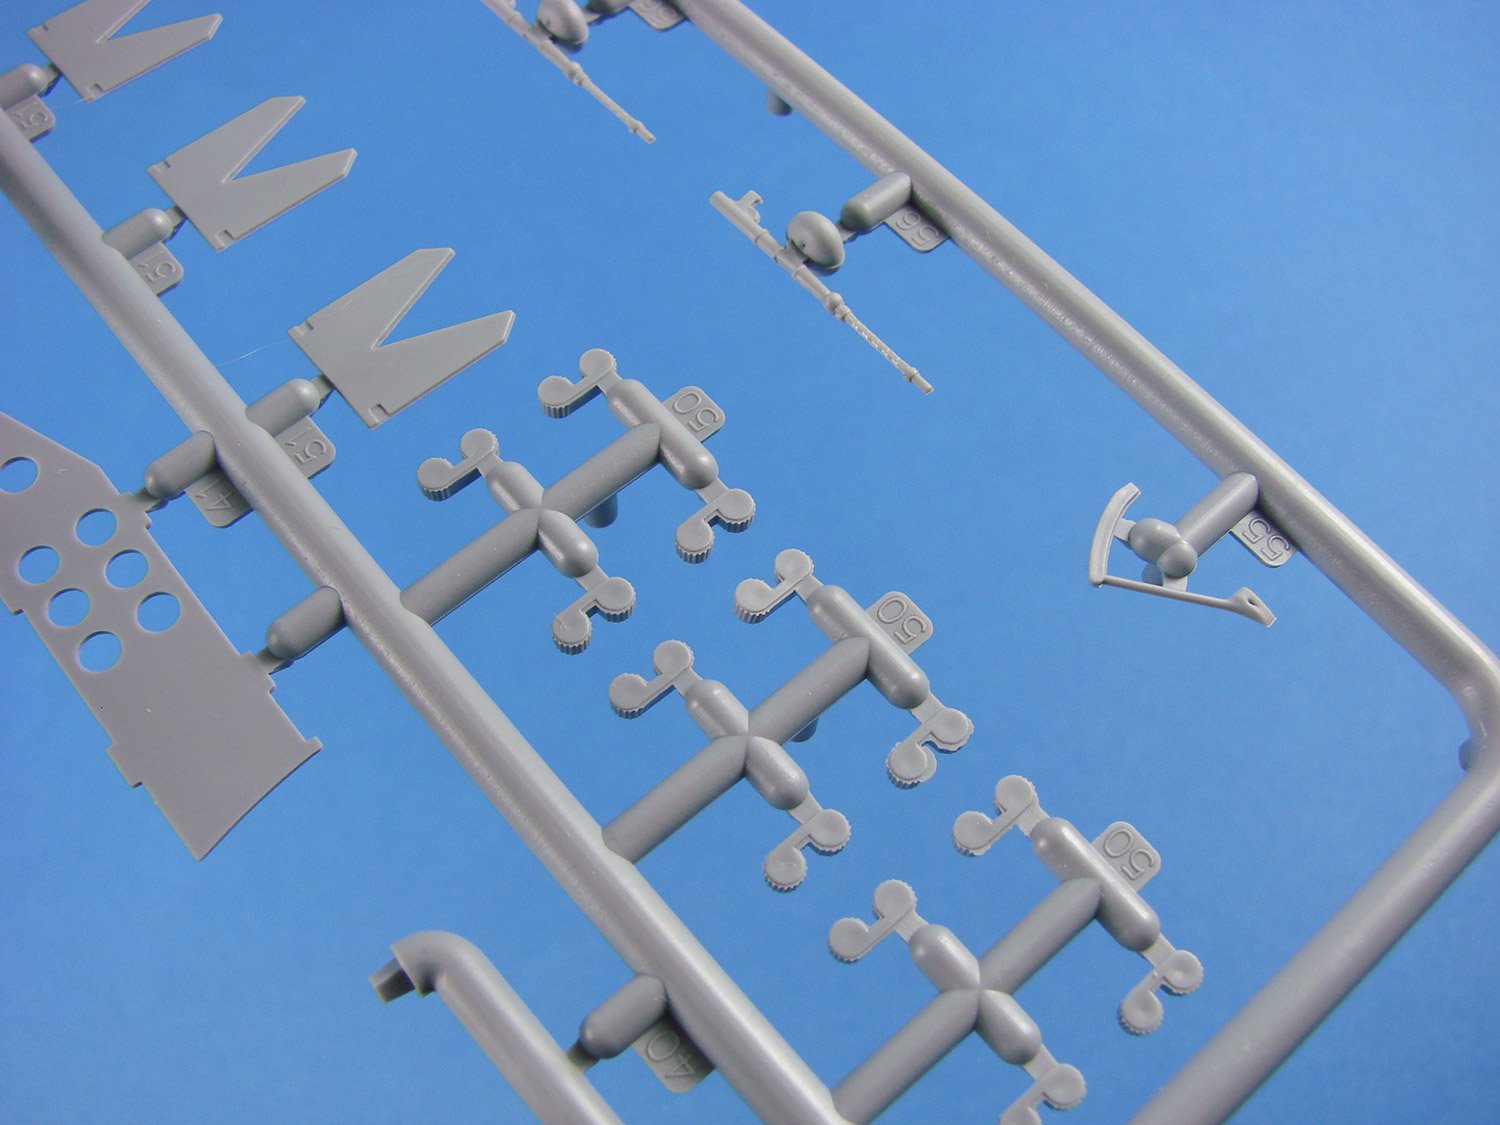
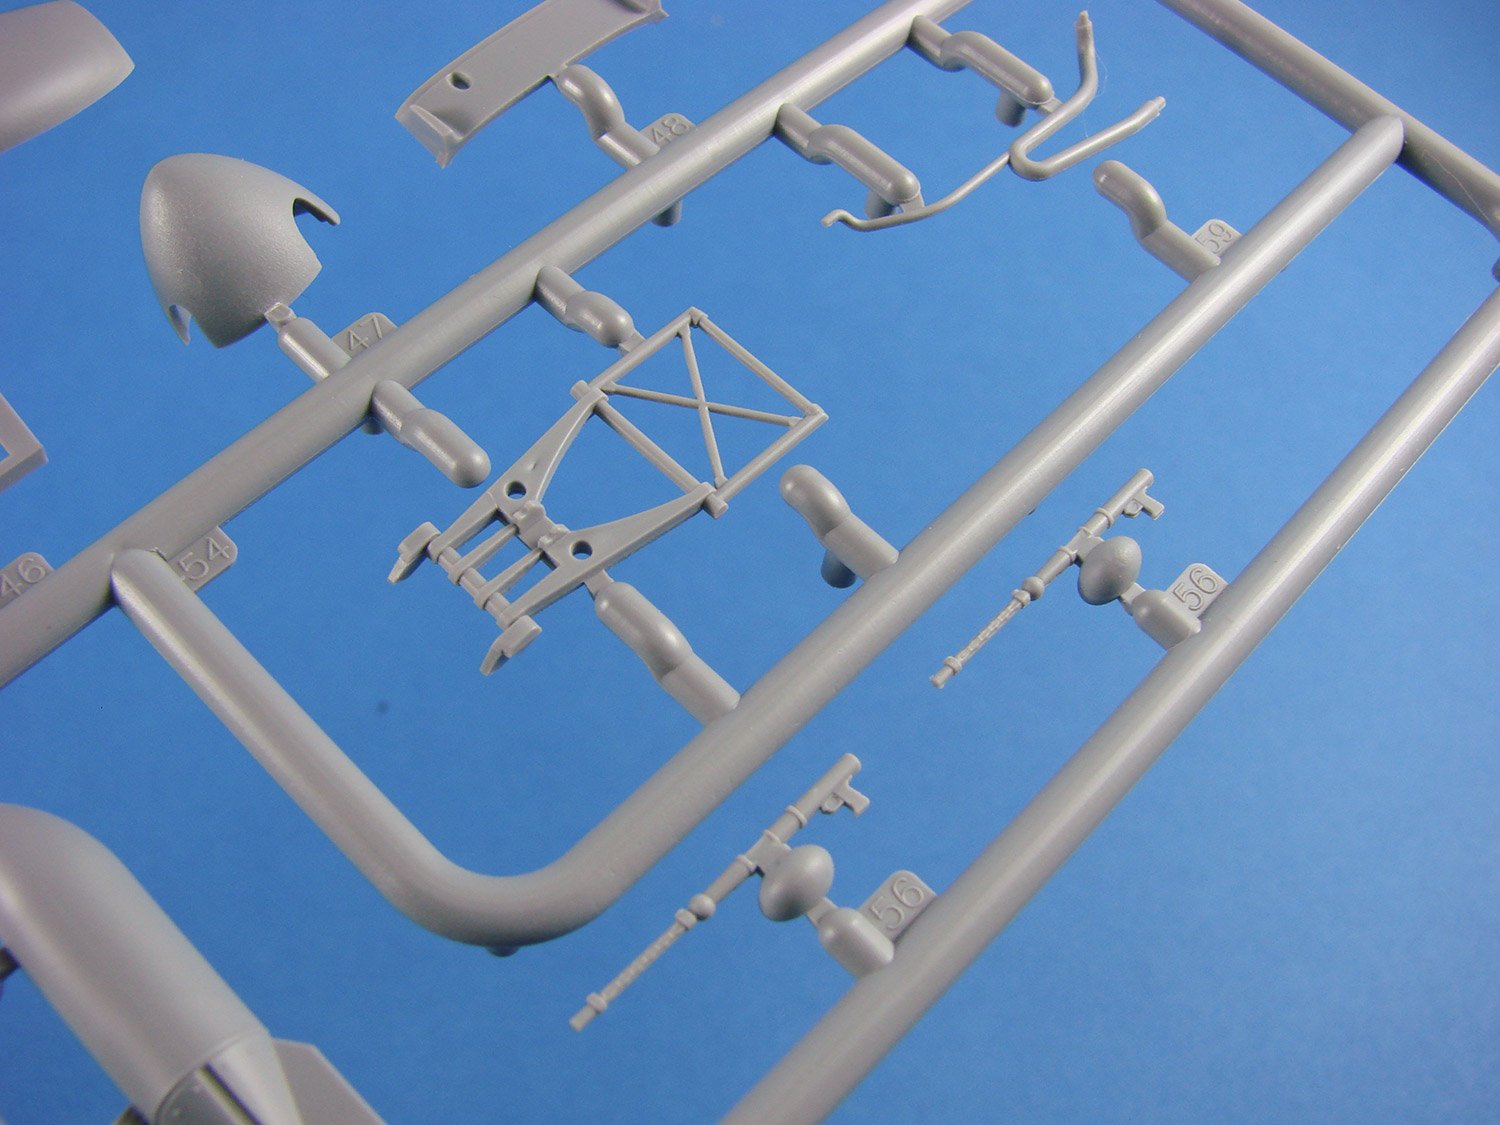
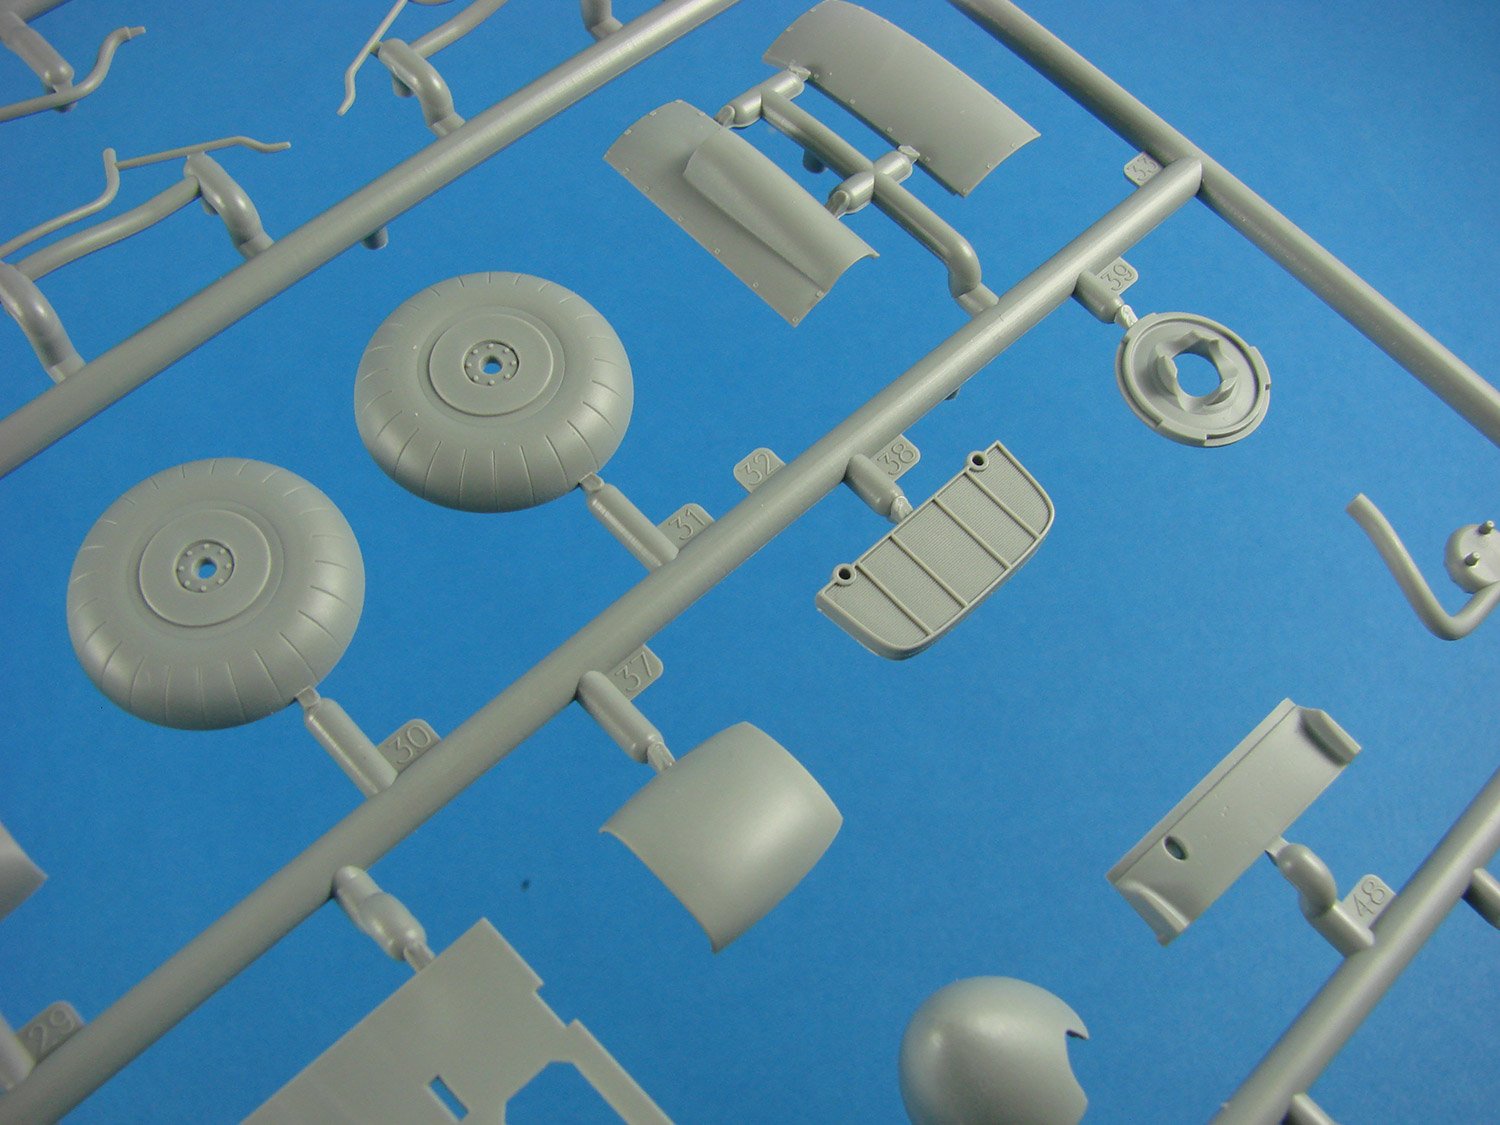
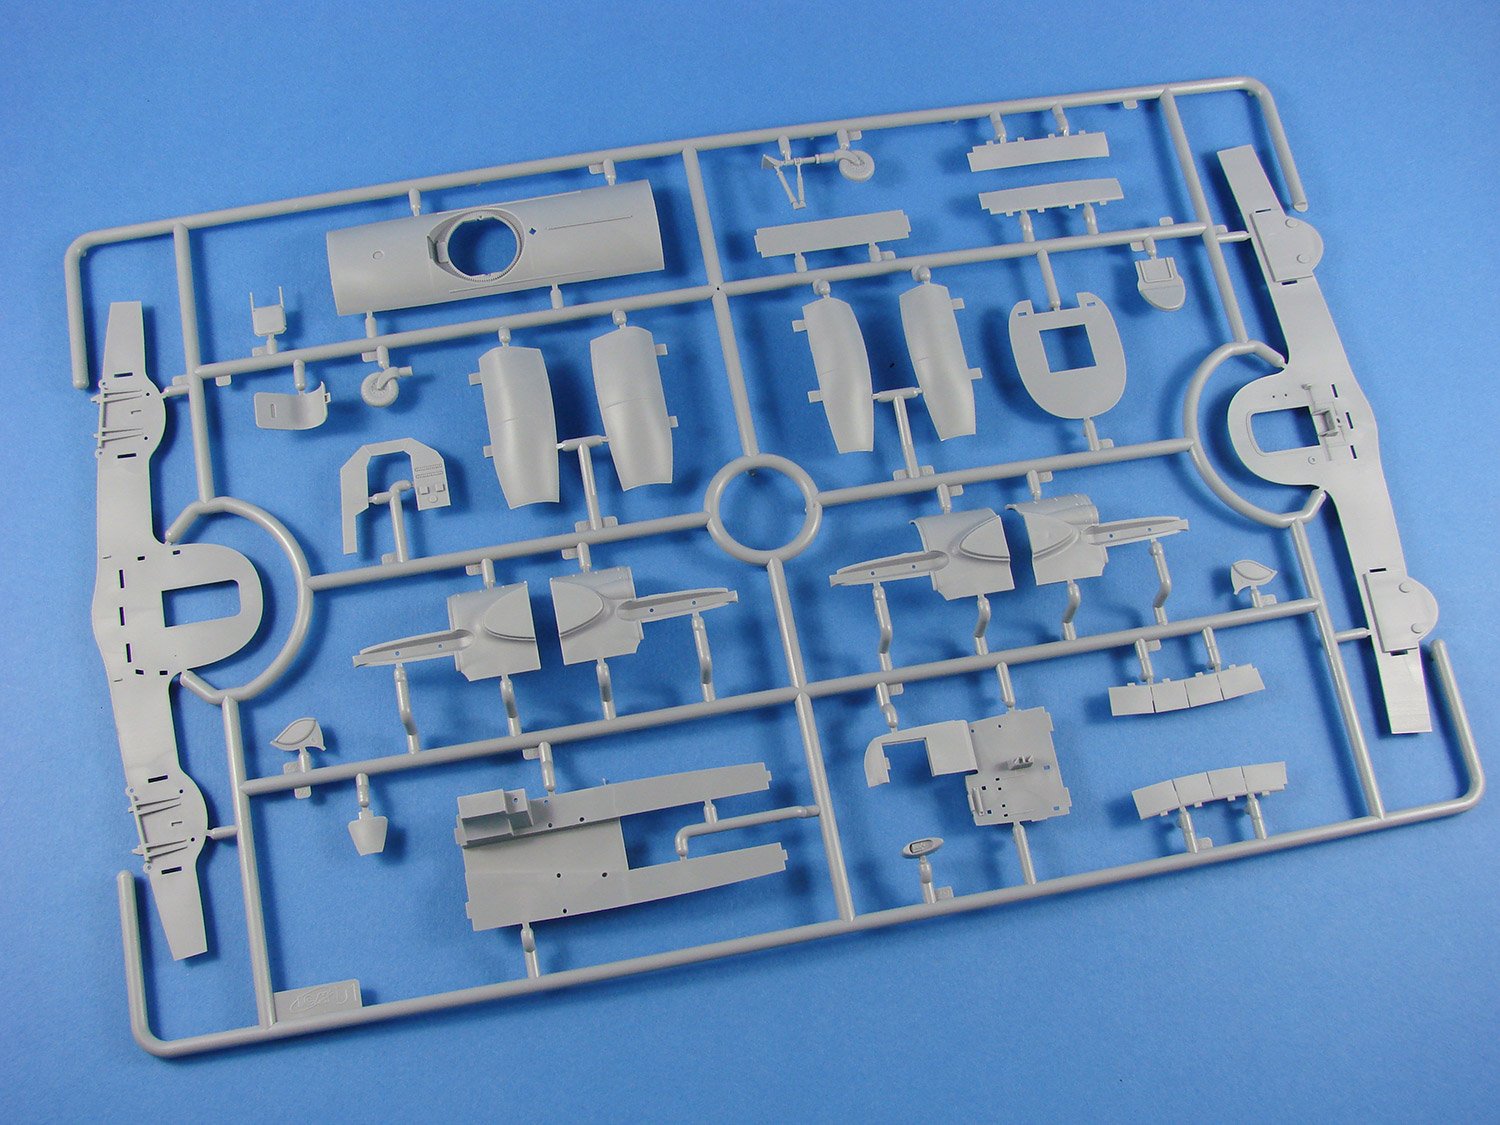
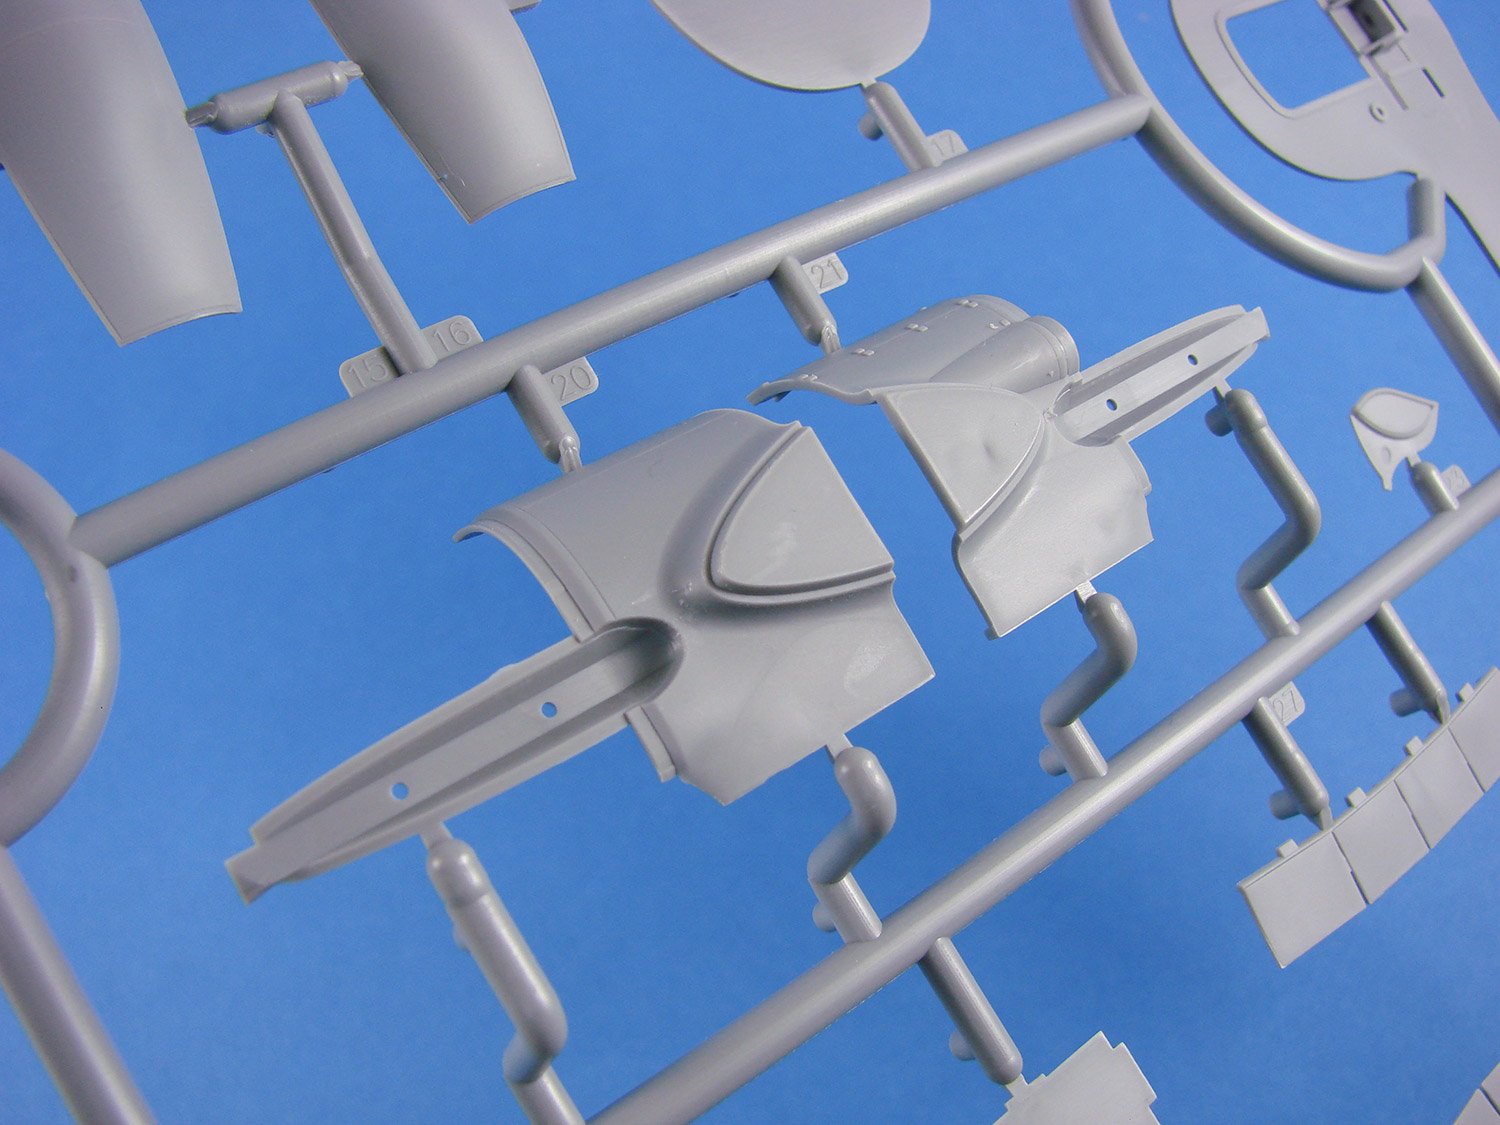
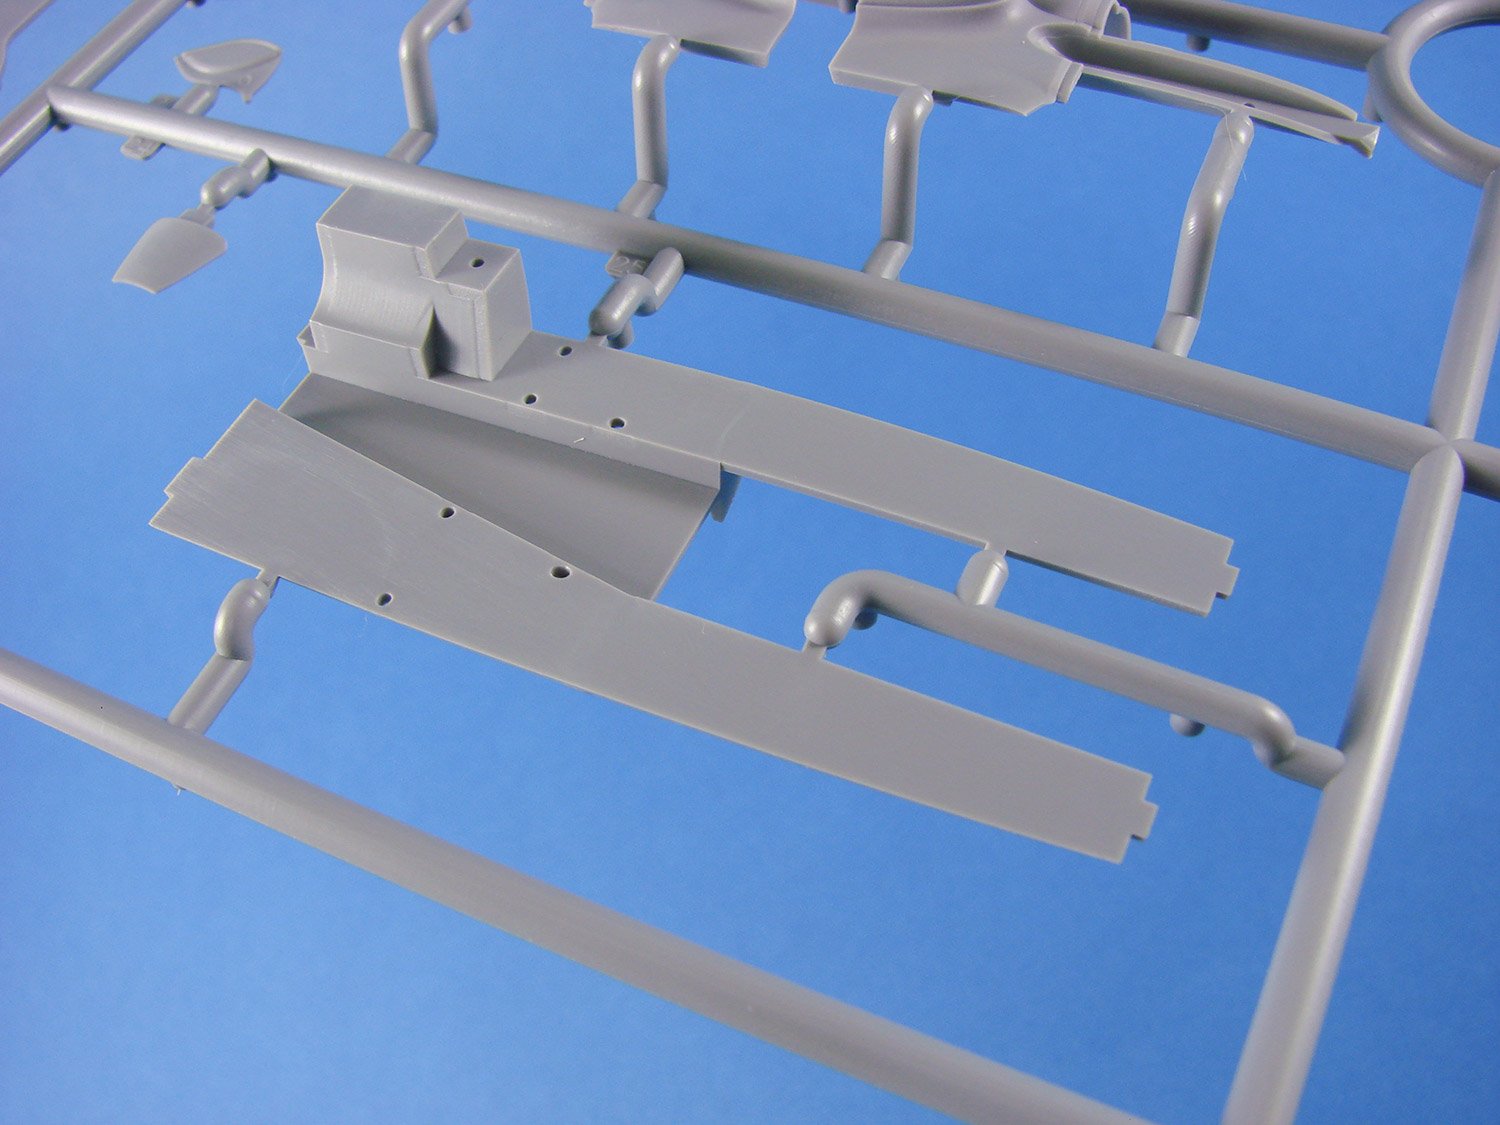
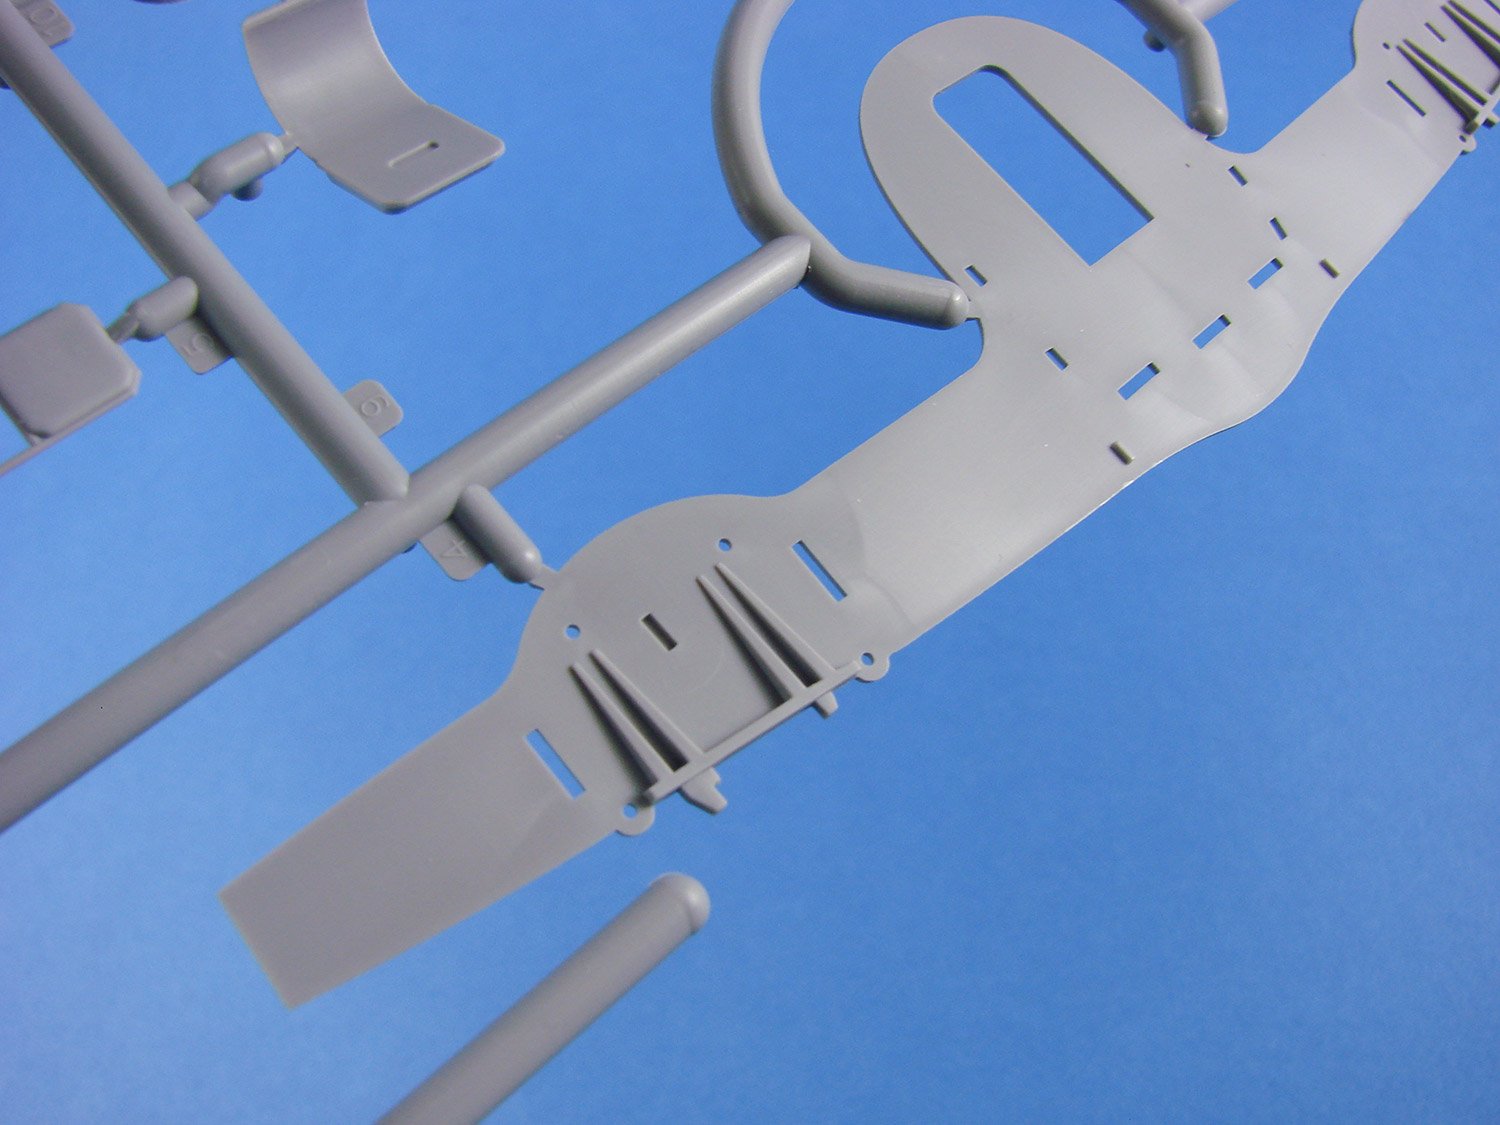
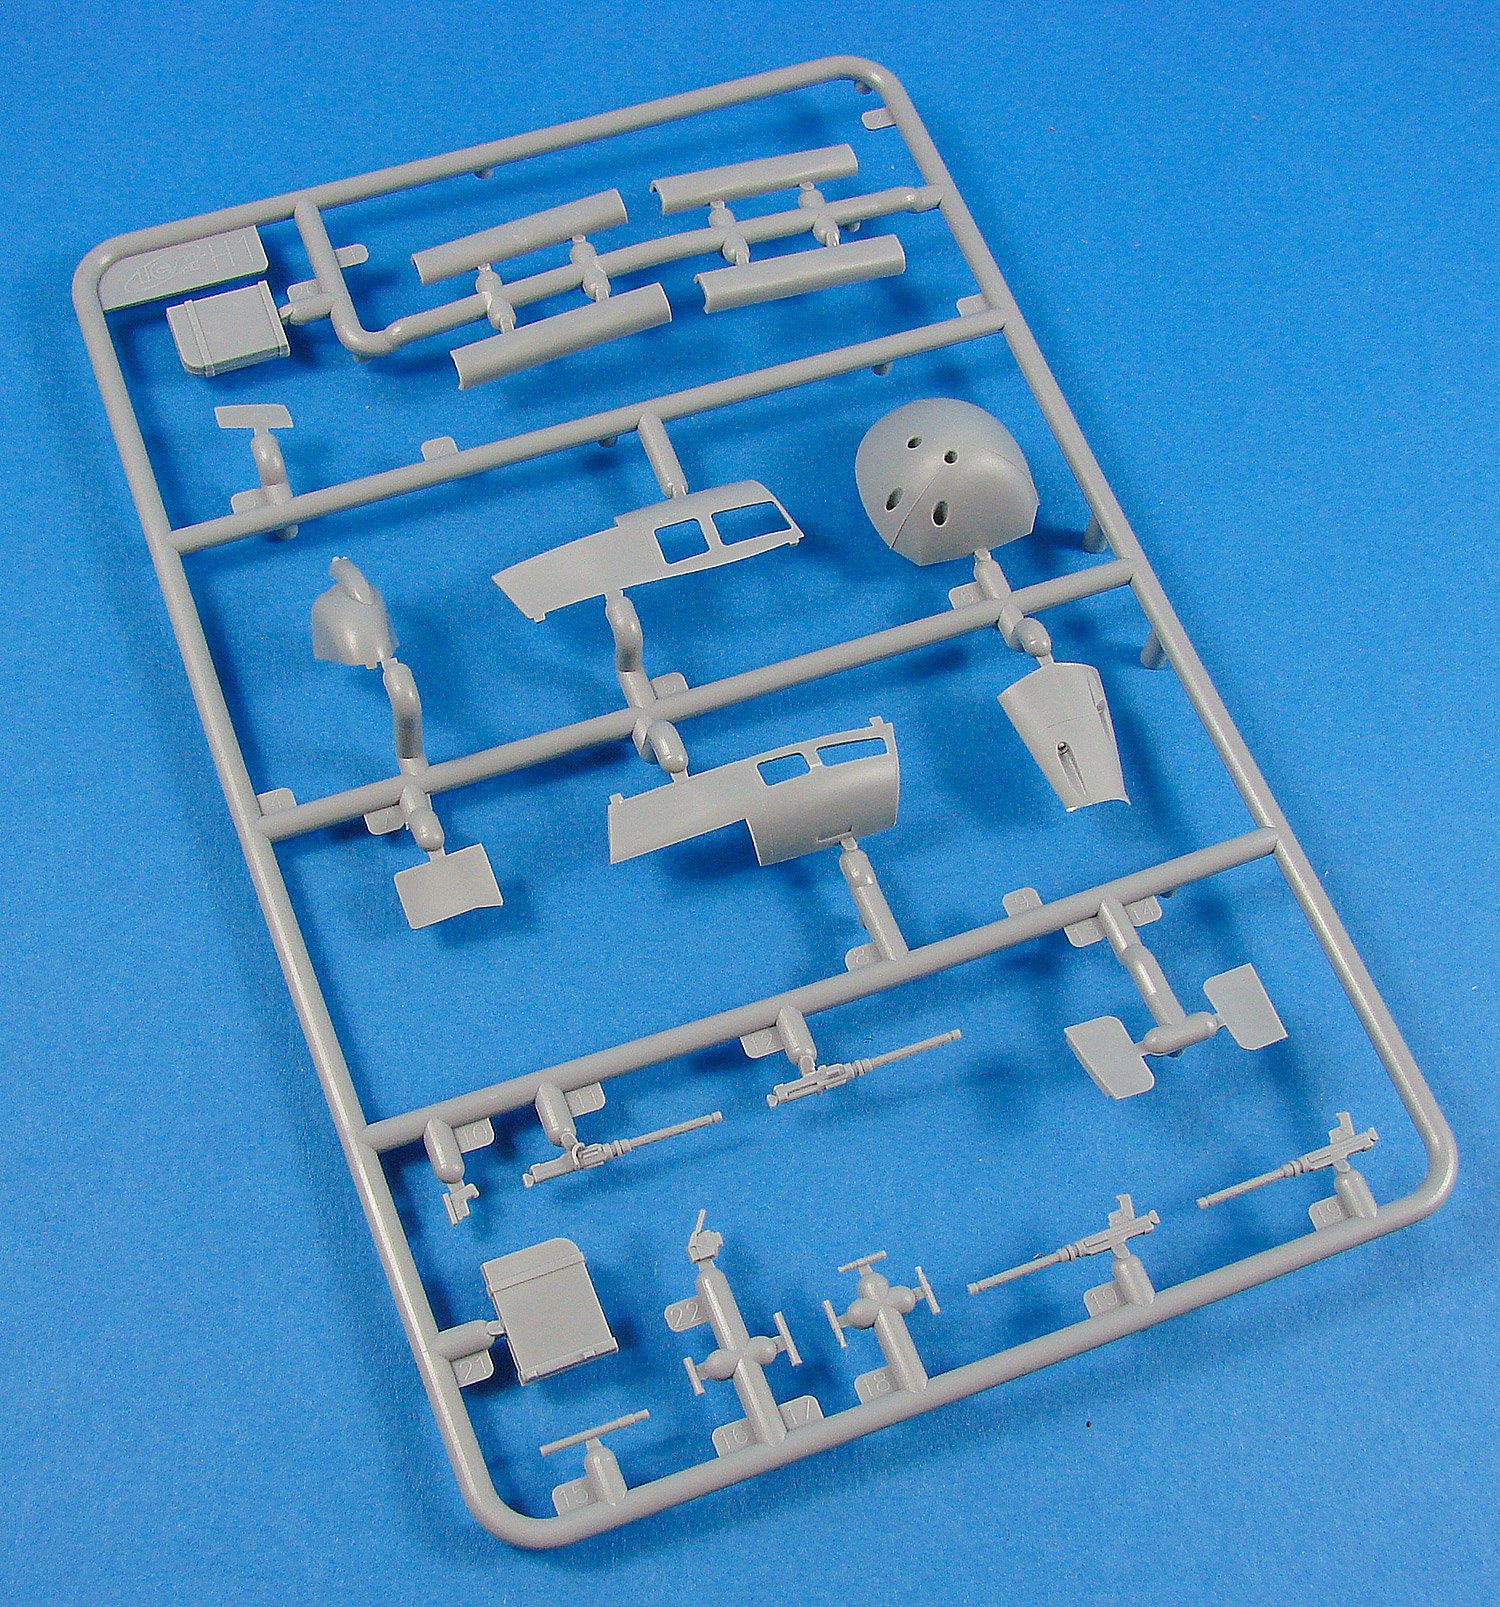
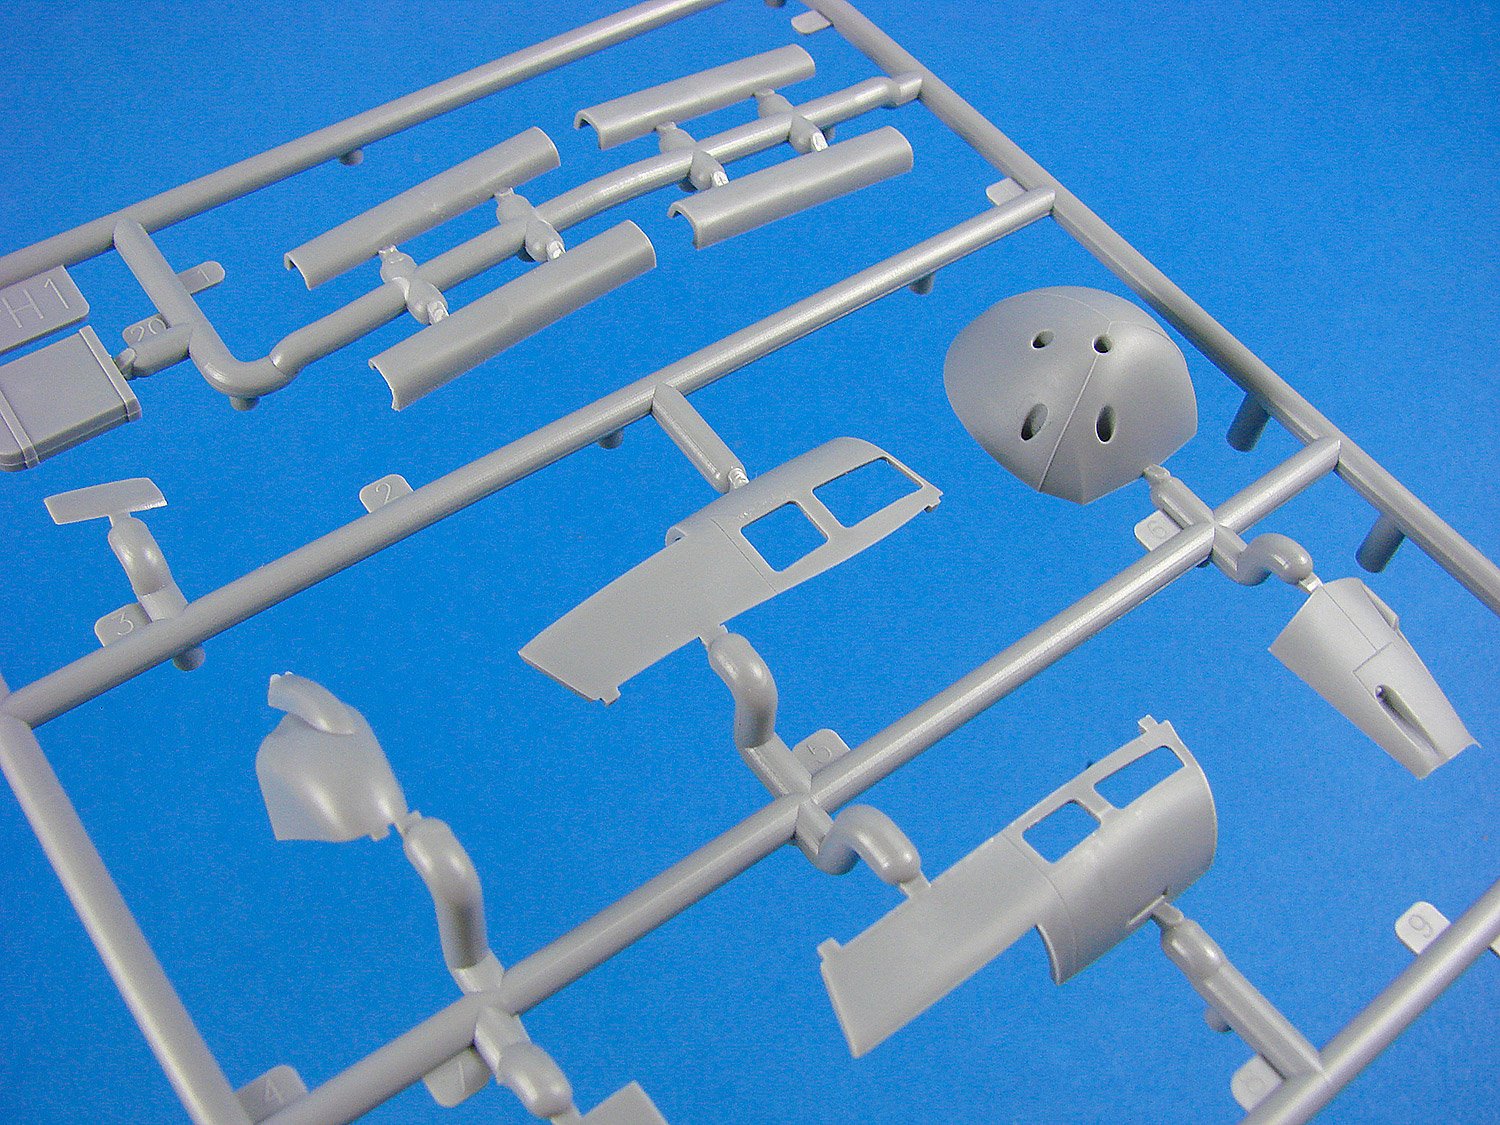
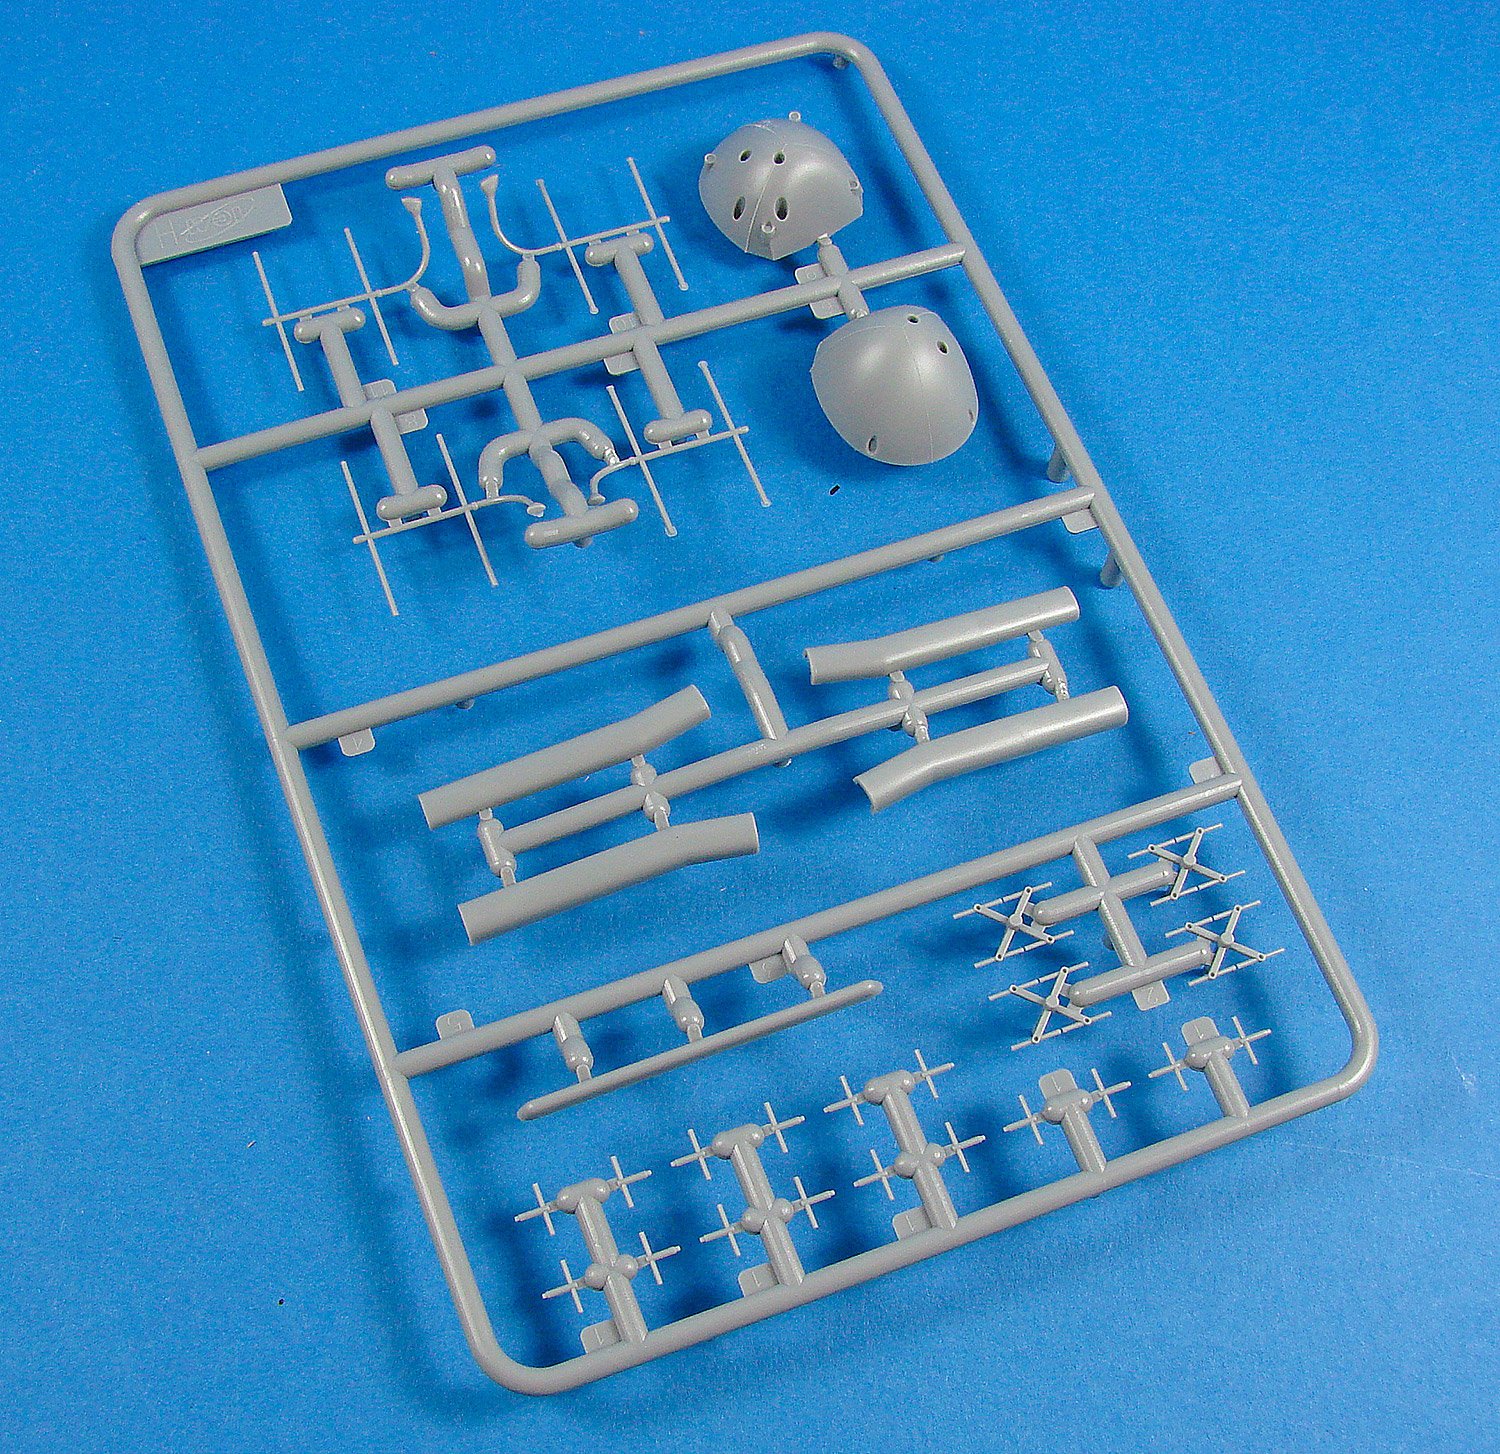
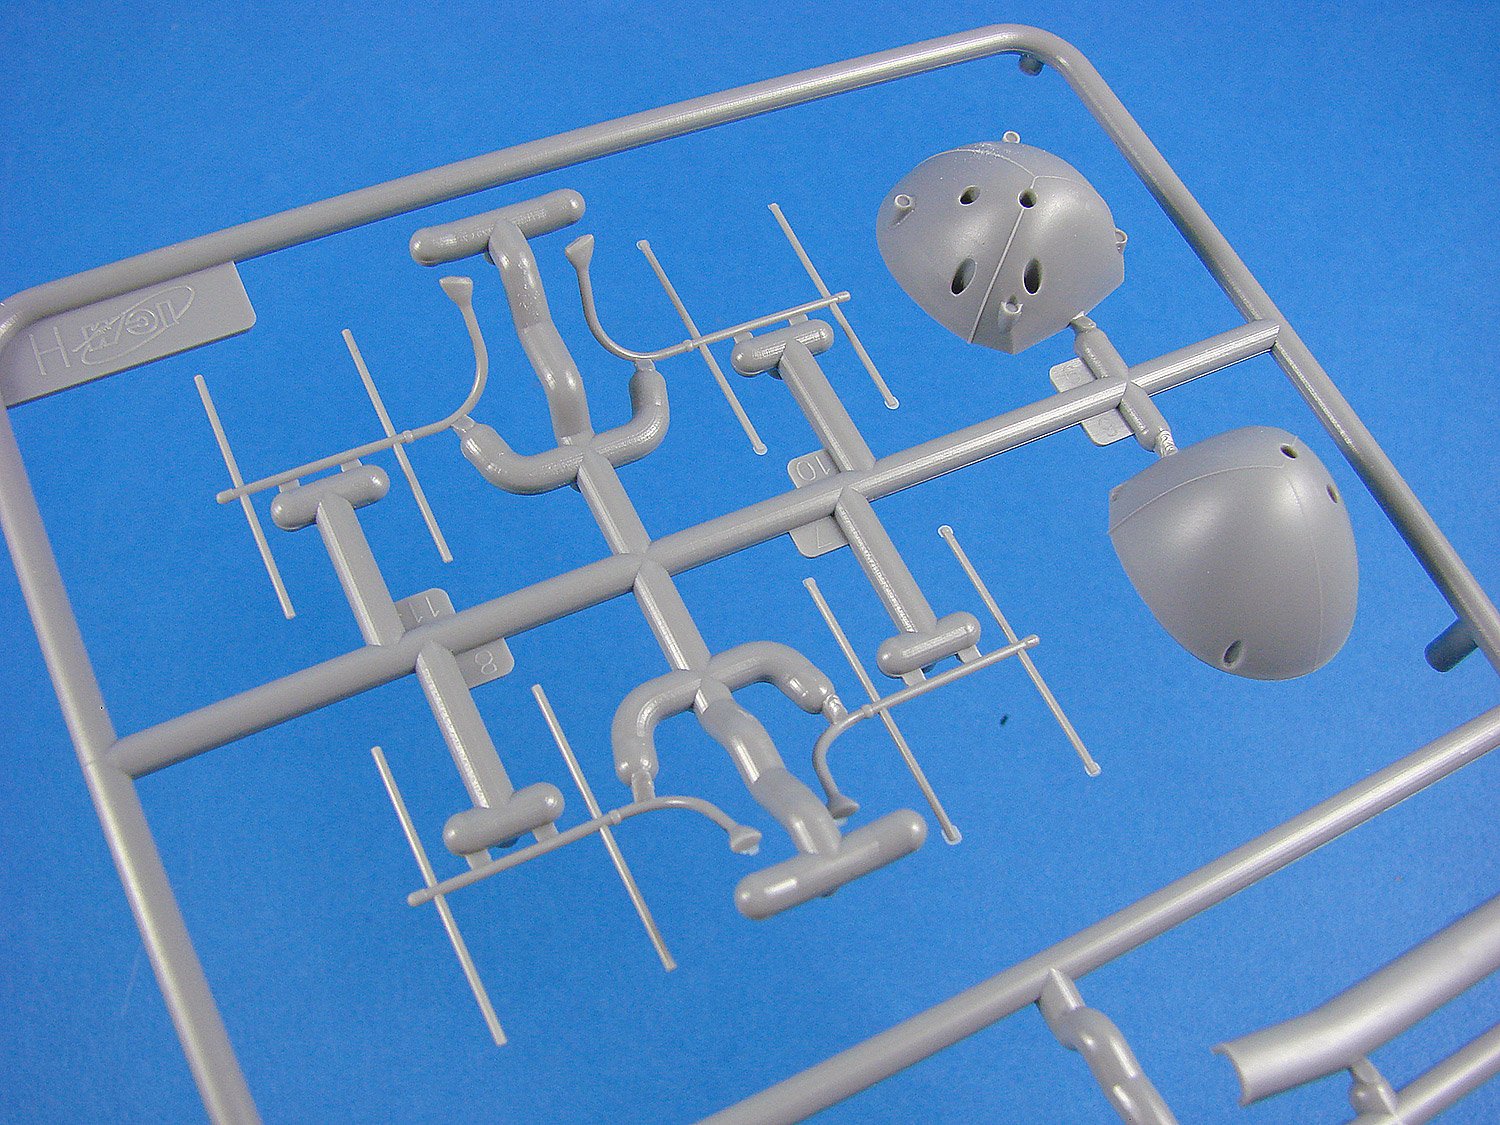
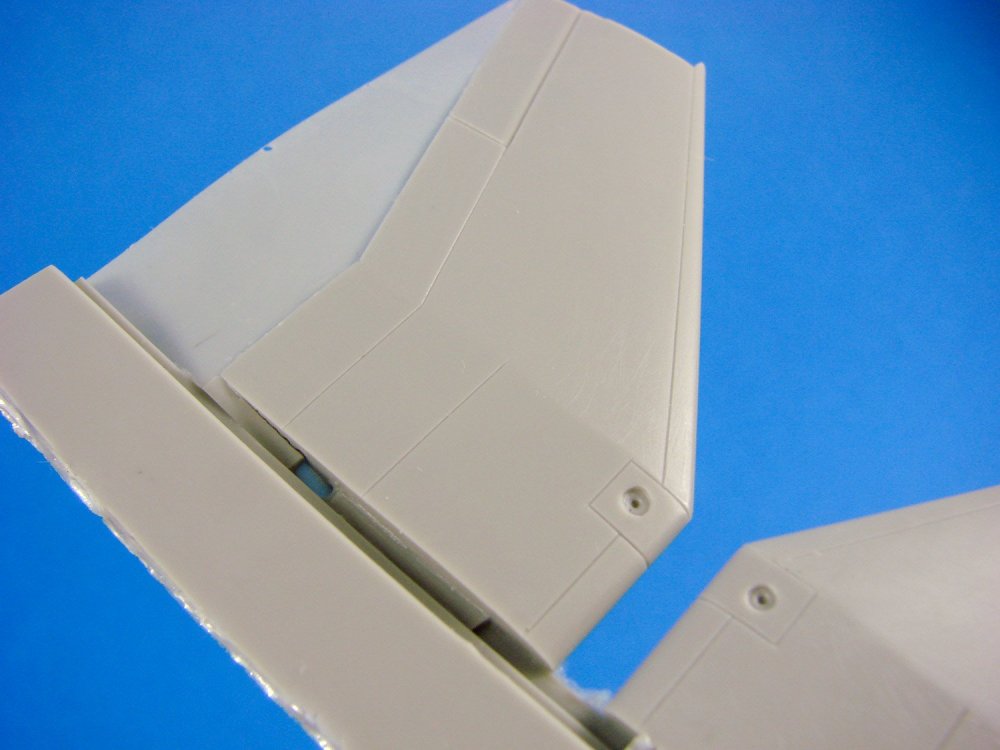
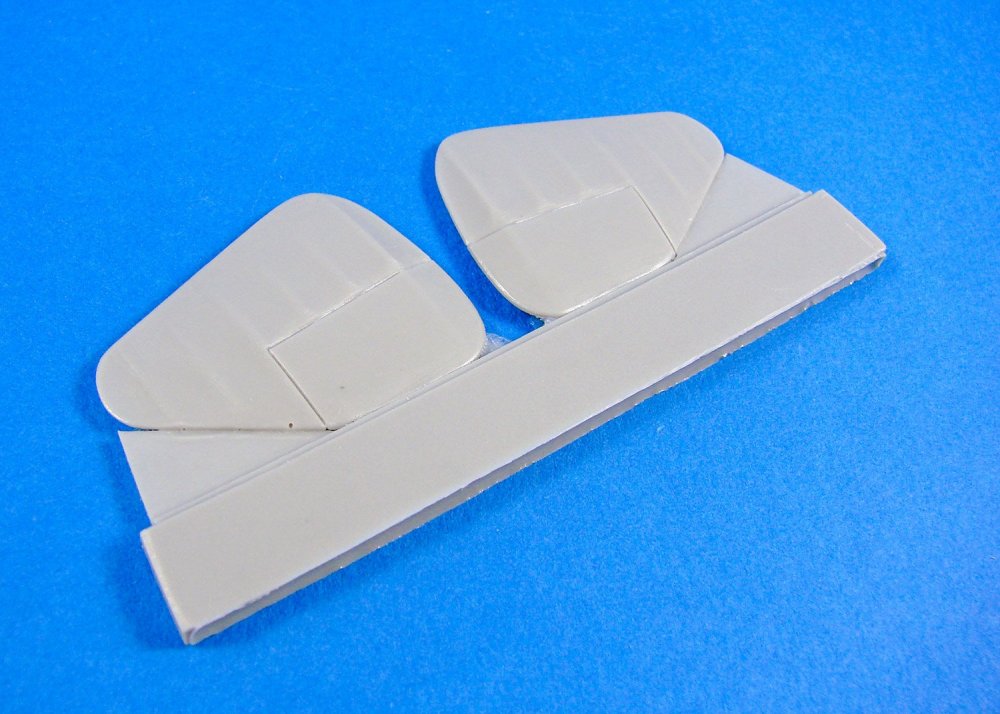
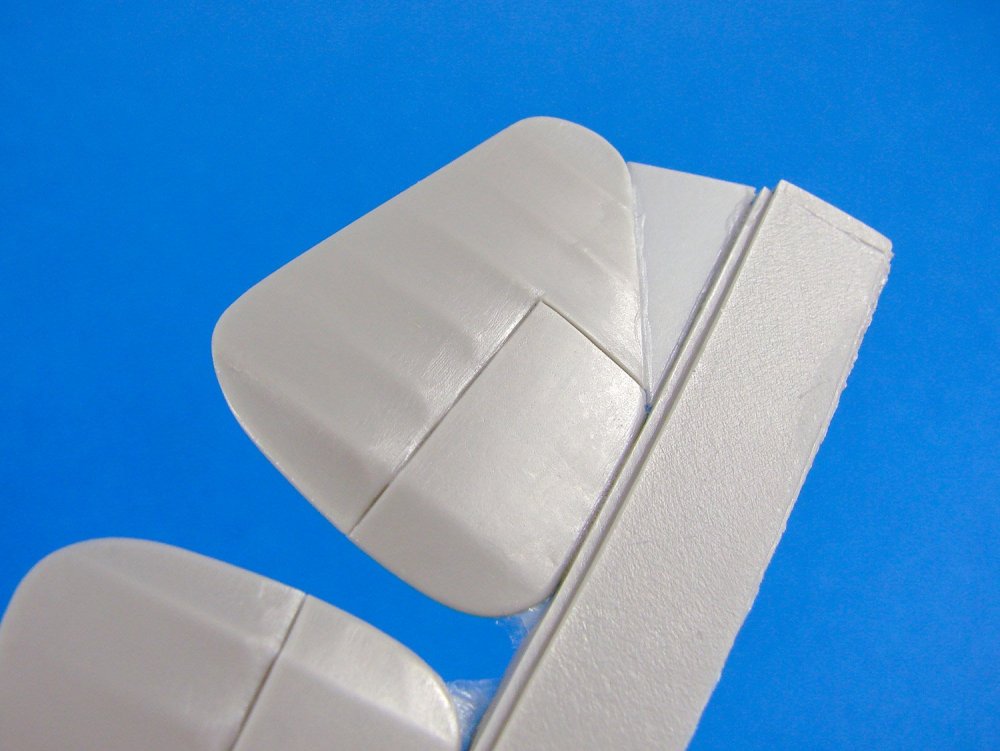
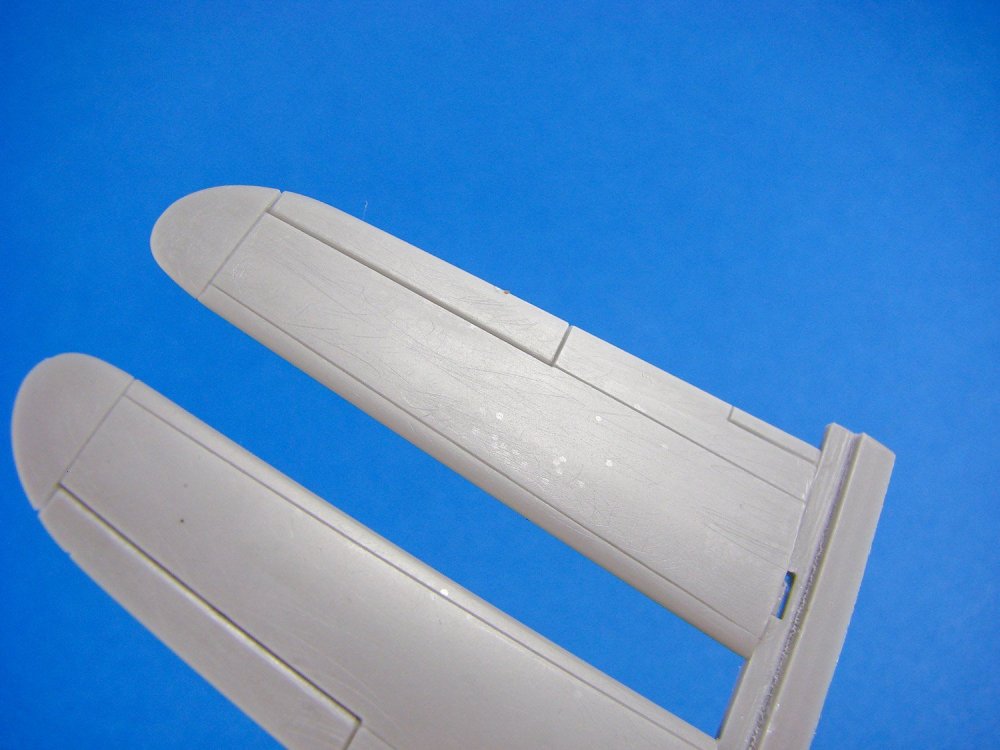
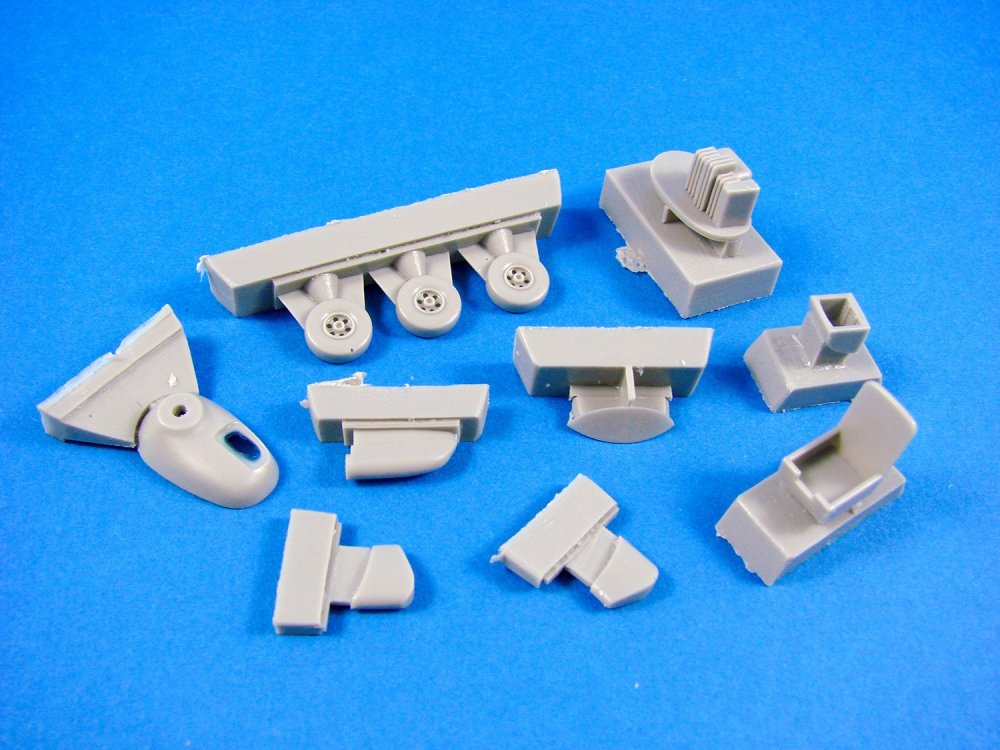
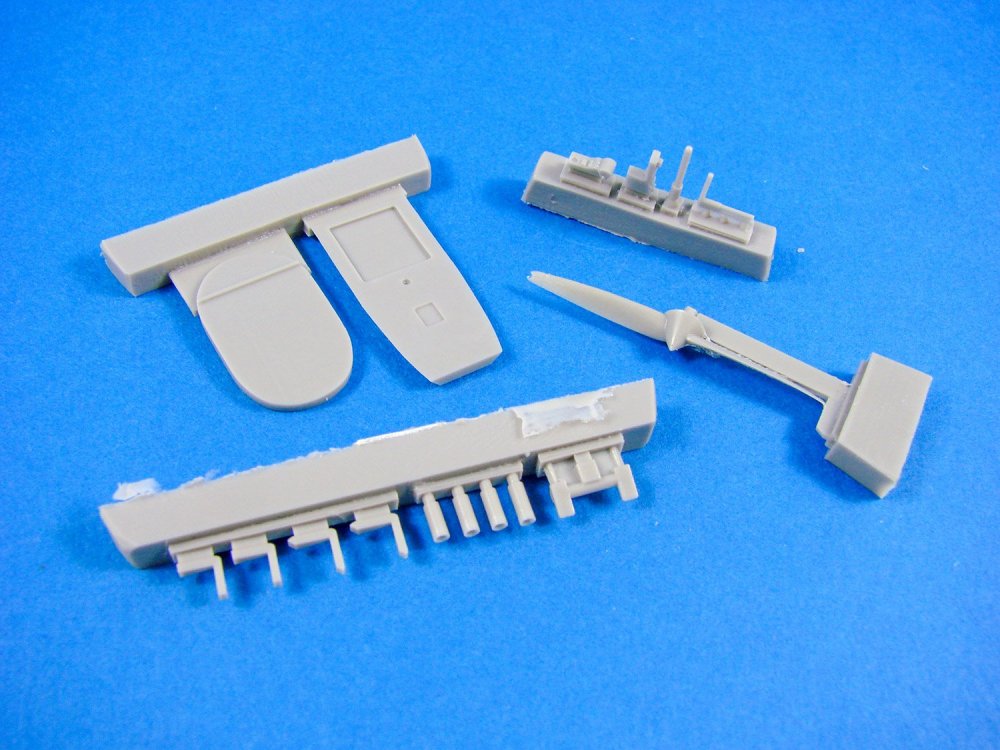
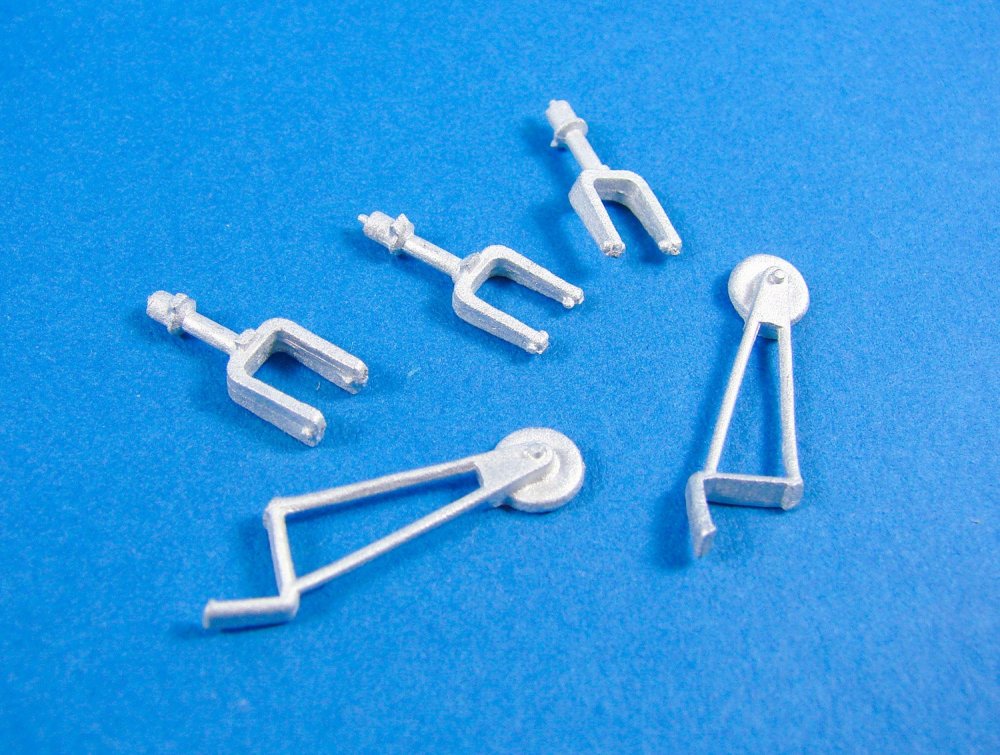
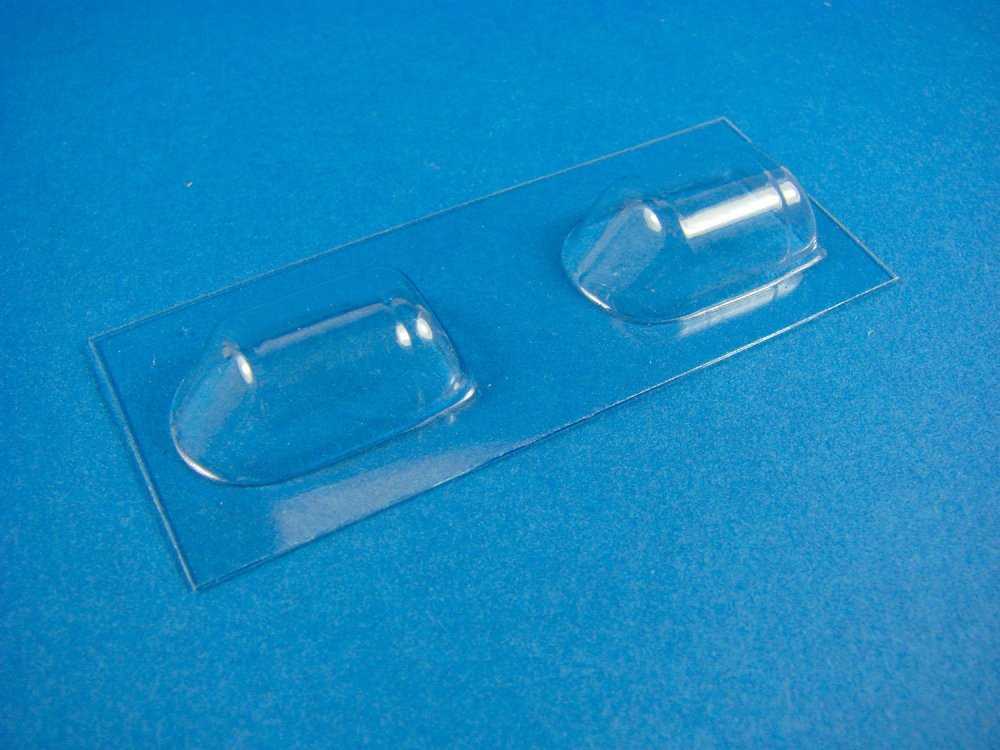
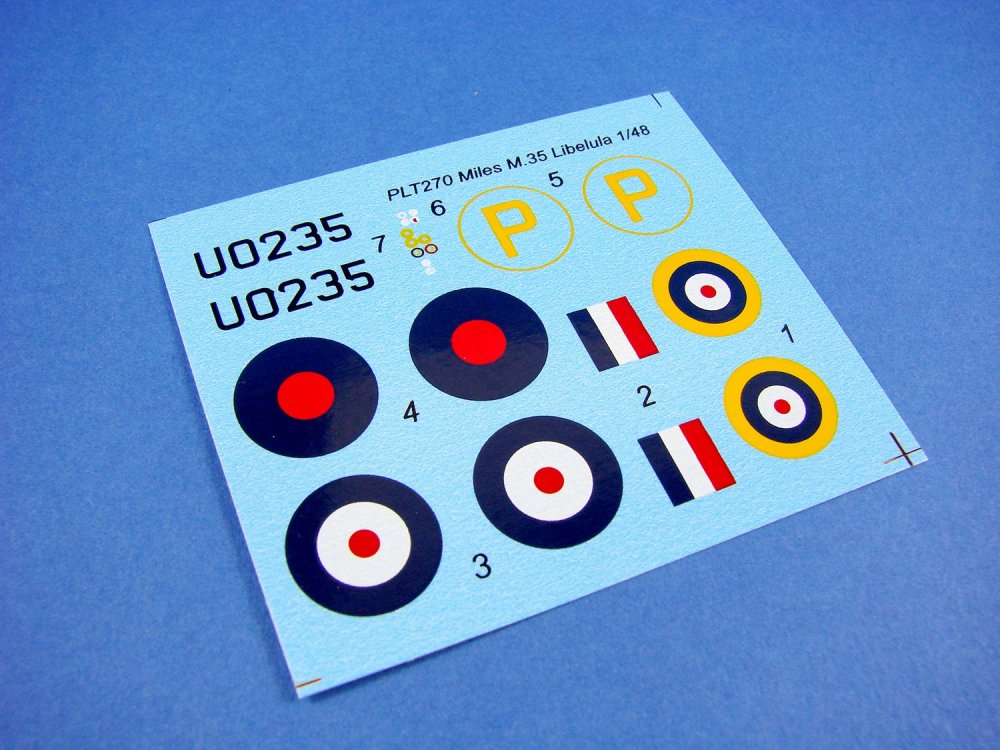
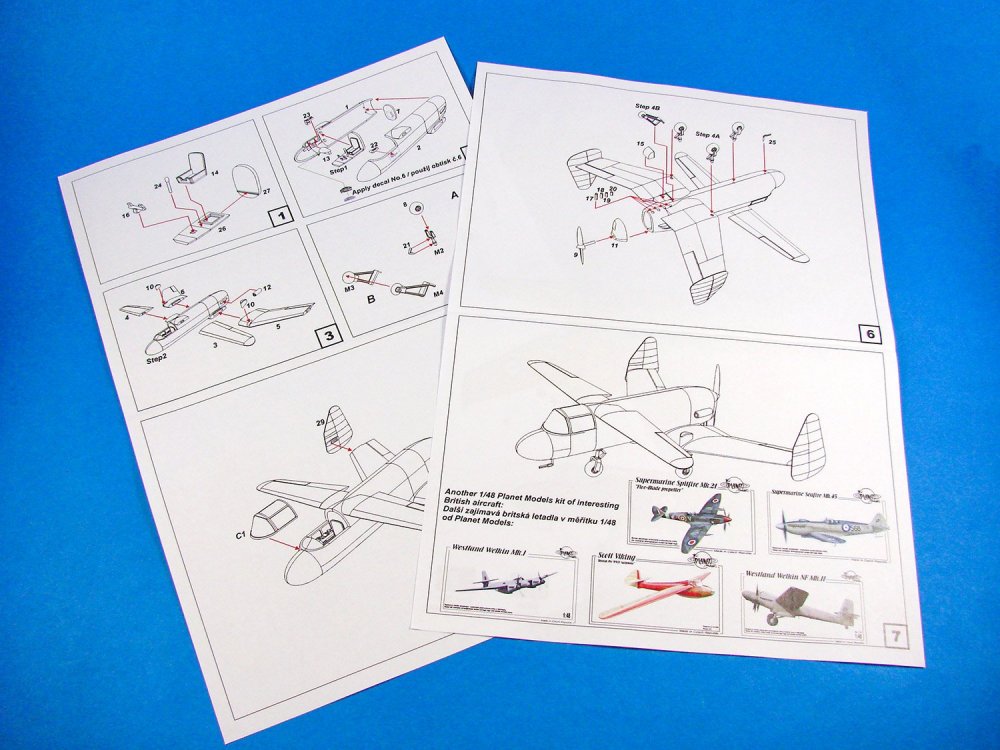
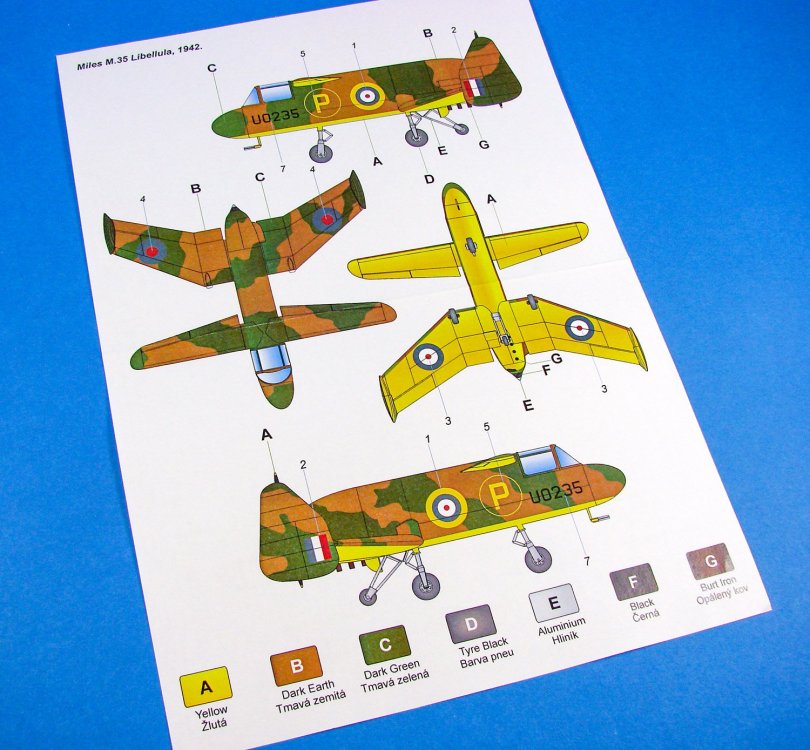
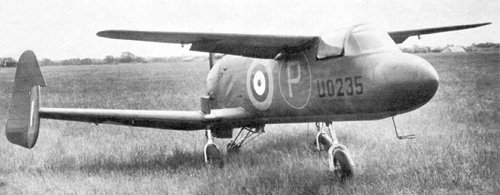
1/48 Miles M.35 Libellula Planet Models Catalogue # 129-PLT270 Available from Special Hobby for 1.231 Kč (approx. £43) Miles’ diminutive M.35 design has always been something that has intrigued me. This was an aircraft that earned George Miles a firm slap on the wrist from the Ministry of Aircraft Production, as it was conceived, designed and built without official sanction. Miles’ intention was honourable with the aircraft being inspired by the unusual tandem-wing Lysander test layout that was being trialled at the time. George Miles saw an opportunity to build an aircraft that could be carrier-borne, but without the usual problems that beset such aircraft, such as wing folding mechanisms and the problem with visibility when landing. As well as improved visibility and no need for complex and weighty wing-fold mechanisms, other advantages of a tandem layout would be lower drag, lower weight and drag factors, and good manoeuvrability. In 1941, Miles requested his designer, Ray Bournon, to come up with such a design, and within only 60 days, the Miles M.35 Libellula (so named after a genus of Dragonfly), took to the air. Now, when we say it took to the air, it was reluctantly. A badly placed centre of gravity prevented the machine from performing as it should, but this was soon corrected. Flying the aircraft on that day was George Miles himself as his test pilot was so concerned about the layout of the aircraft that he declined to fly it. The design which took flight was indeed diminutive, being only just over 20ft in span on both front and rear wings, plus roughly the same in length. It was also had a pusher layout with power being provided by a de Havilland Gipsy Major engine to the rear. The pilot occupied the nose of the aircraft, which sat on a non-retractable tricycle undercarriage, with another helperwheel to the rear of this to protect the propeller on landing. However, as Miles had designed this as an unauthorised, private project, any possibilities that could have arisen from his design, were stamped upon by the ministry, and the type never saw development as a fighter. Undeterred, Miles and Bournon designed the tandem-layout M.39B which was to meet an Air Ministry specification for a high-speed bomber, but this was cancelled in 1944 after two accidents forced the literal break-up of the only prototype. The kit Well, this is a subject you don’t see every day! I was pleasantly surprised when I saw this announced in the Special Hobby newsletter, and knew I just had to have a go at reviewing and building it. Of course, Planet Models is the brand of Special Hobby which deals with whole resin kits, and this is just what this release is, along with a vac-form canopy. The kit itself comes in a small box that is still quite large for such a tiny model, even in 1/48 scale. The tough corrugated box has a product label on the lid with a colour profile of the M.35. Inside, all parts are packed into two heat-sealed clear sleeves that are also sealed in between the main components. A small sleeve contains the vac-form canopies (x2) and a small decal sheet. A small zip-lock wallet holds some white metal parts for the undercarriage. Two A4 sheets are provided for the instructions and colour scheme profiles. All parts in this release are cast in a light grey resin. Generally, the parts are excellent, with nicely recessed panel lines, sharp details (such as the instrument panel etc.), and with little in the way of flaws. In fact, I noted just a couple of pinhead-size air bubbles that I would need to fill as I assembled. A quick lick with a knife, along the top of the heat-sealed wrap, and all of the parts are freed. Of course, there will be the inevitable parts clean-up, but with this kit, that time is thankfully low. In fact, I think it took me just over an hour and half to cut the parts from their casting blocks and trim them with a knife, ready for final assembly. The model breakdown is also so very simple as to possibly be a good first introduction to the world of full-resin kits. The fuselage is cast onto a single block, and presented as halves, with some cockpit wall detail already in place. Tabs are also present, against which the rear cockpit bulkhead will sit. Externally, the fuselage has little detail, save for panel lines. No rivets or any other detail is present. The engine area is open, in readiness for the separate rear cowl, and again, there are tags there to fit the engine bulkhead against. Having built the model, I can tell you that the positions of these are accurate and will aid the closing up of the fuselage. All flying surfaces are cast as individual and complete components, so once you remove a wing or fin from the resin block, and clean it up, you can install it. No fussy upper or lower panels to mate up. The rear wings are cast onto a single block and connected via a narrow web. A thin web of resin also extends to the wingtip and this comes away with almost zero effort. For main sawing, I would advise the use of a razor saw. The rear wings have tabs to install to the fuselage, and also onto which the fins will sit. Ailerons are cast in situ. Surface detail is naturally minimal for such a craft. The forward wings are very similar in their presentation. When it comes to the vertical tail fins, you are best removing these with a sharp knife, angles outwards and away from the part. The reason is that no thin web is present here and the parts are up against the casting block. Fin details are excellent with their rib and fabric representation. They also fit nigh-on perfectly to the rear wings. The remainder of the resin parts are cast across thirteen smaller blocks. These include the engine, engine cowl, intakes, exhaust stubs, cockpit parts, oleo scissors, propeller, pitot, wheels, undercarriage suspension housings etc. A few small pin-hole bubbles exist in some places, but nothing that a dab of CA won’t fill easily. The wheels are supplied as weighted (where they connect to the casting block), and some parts will need a little excess resin removing, such as the engine cowl intake. I will say that whilst the cockpit is quite nice in some respects, it is also very basic. There are no seatbelts, for instance. I used some wine bottle foil to make mine, as well as the rudder pedal straps. Another issue is that the side console parts are way too small. I would say by at least 30%. I fabricated replacements from plasticard and PE instrument dials. It’s a nice easy job, and you won’t see too much anyway, as the canopy is to be fitted in a closed position. For the undercarriage, this kit contains white metal parts. The rear stabiliser undercarriage strut is cast in two parts and includes the wheel. Only a little straightening is needed before glue, and all parts fit to the model with little effort. Casting is very good for their size. Two vac-form canopies are included, just in case you bork one of them whilst working on the model. There isn’t too much frame definition, so careful masking will need to be done to get them right. A single decal sheet is included for the single prototypical scheme. These look to be very good, but I’m questioning the colour density of the ‘P’ symbols. It might be worthwhile substituting these with some from Fantasy Printshop. Note that instrument panel decals are also included, but the Airscale ones would be a much better option. Two A4 instruction sheets are included, containing the simplistic construction illustrations and the colour scheme. As I said, this is a simple kit and the instructions signify that and work perfectly. Conclusion A great little kit which is superbly designed and cast, with the only real quibble being the undersized instrument consoles and lack of seatbelts. This would be a perfect introduction to a full resin kit as it has no nasty surprises afoot, and price-wise, it’s also fairly reasonable. The finished model is quite small and fits in the palm of an average-sized hand, so this will be extremely manageable to display. In fact, it may well get lost on a model club table! My sincere thanks to Special Hobby for the review sample seen here. To purchase directly, click the link at the top of the article. Please watch out for this build in the October 2018 issue of Military Illustrated Modeller.


- 1 reply
-
- 1
-
-
- special hobby
- libellula
- (and 1 more)
-
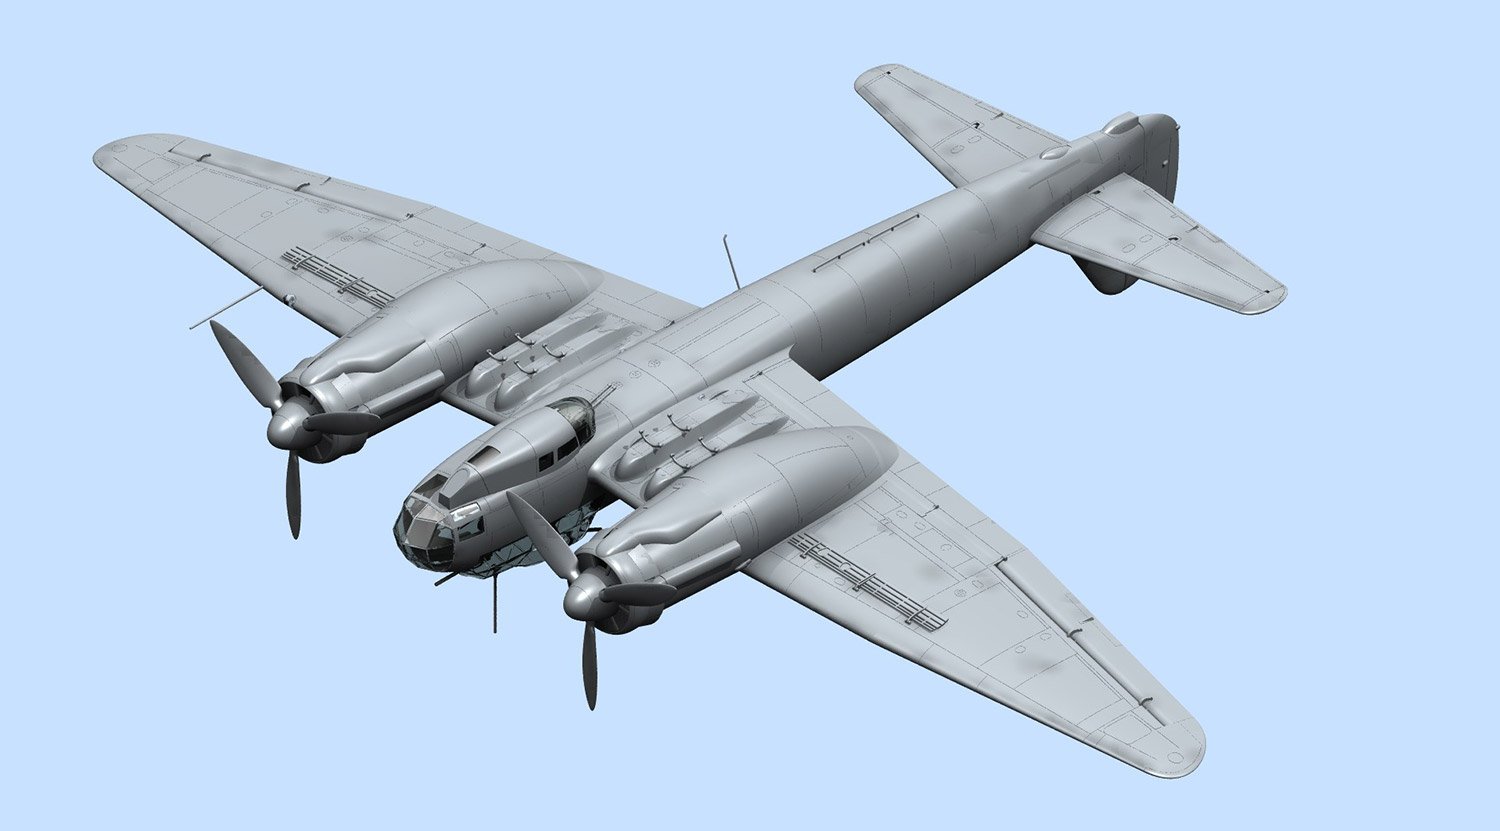
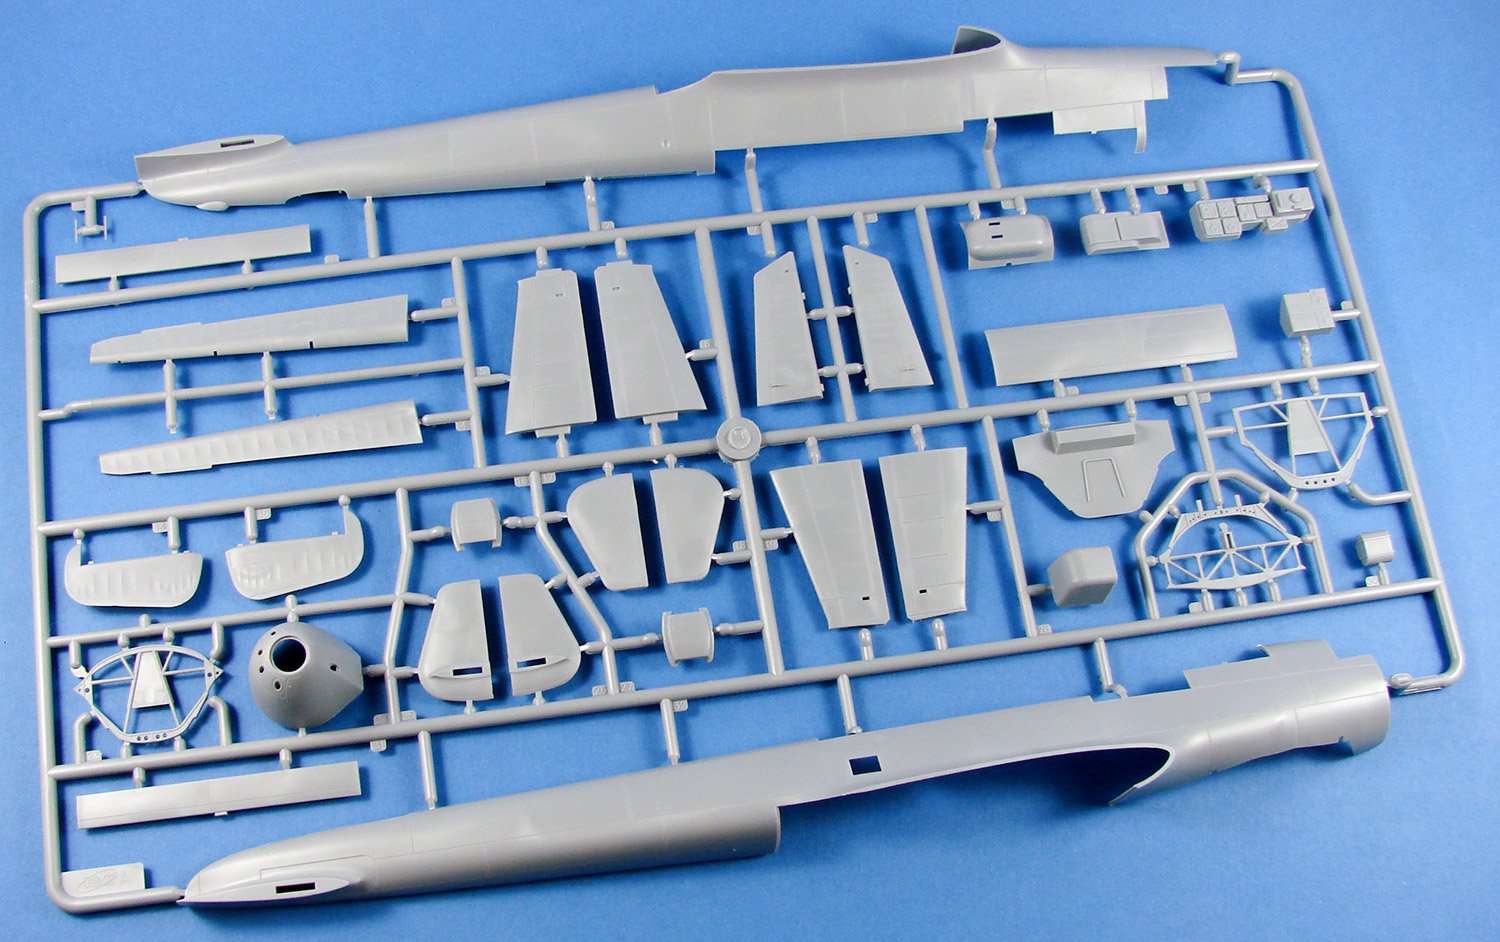
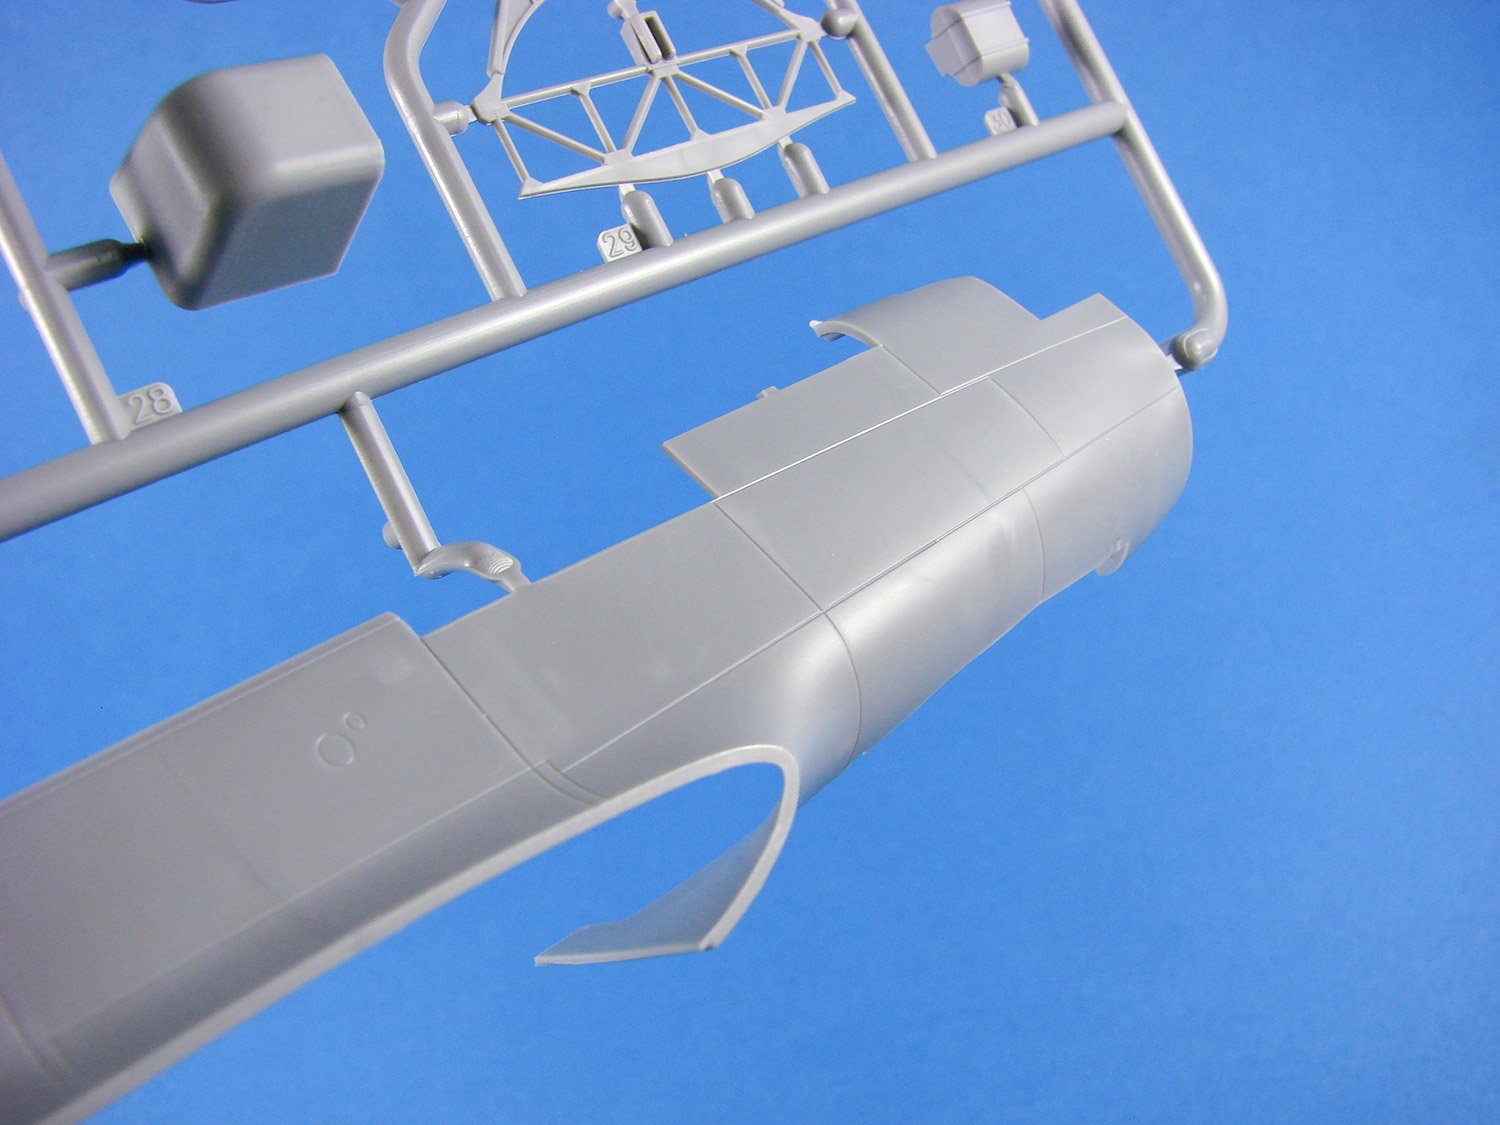
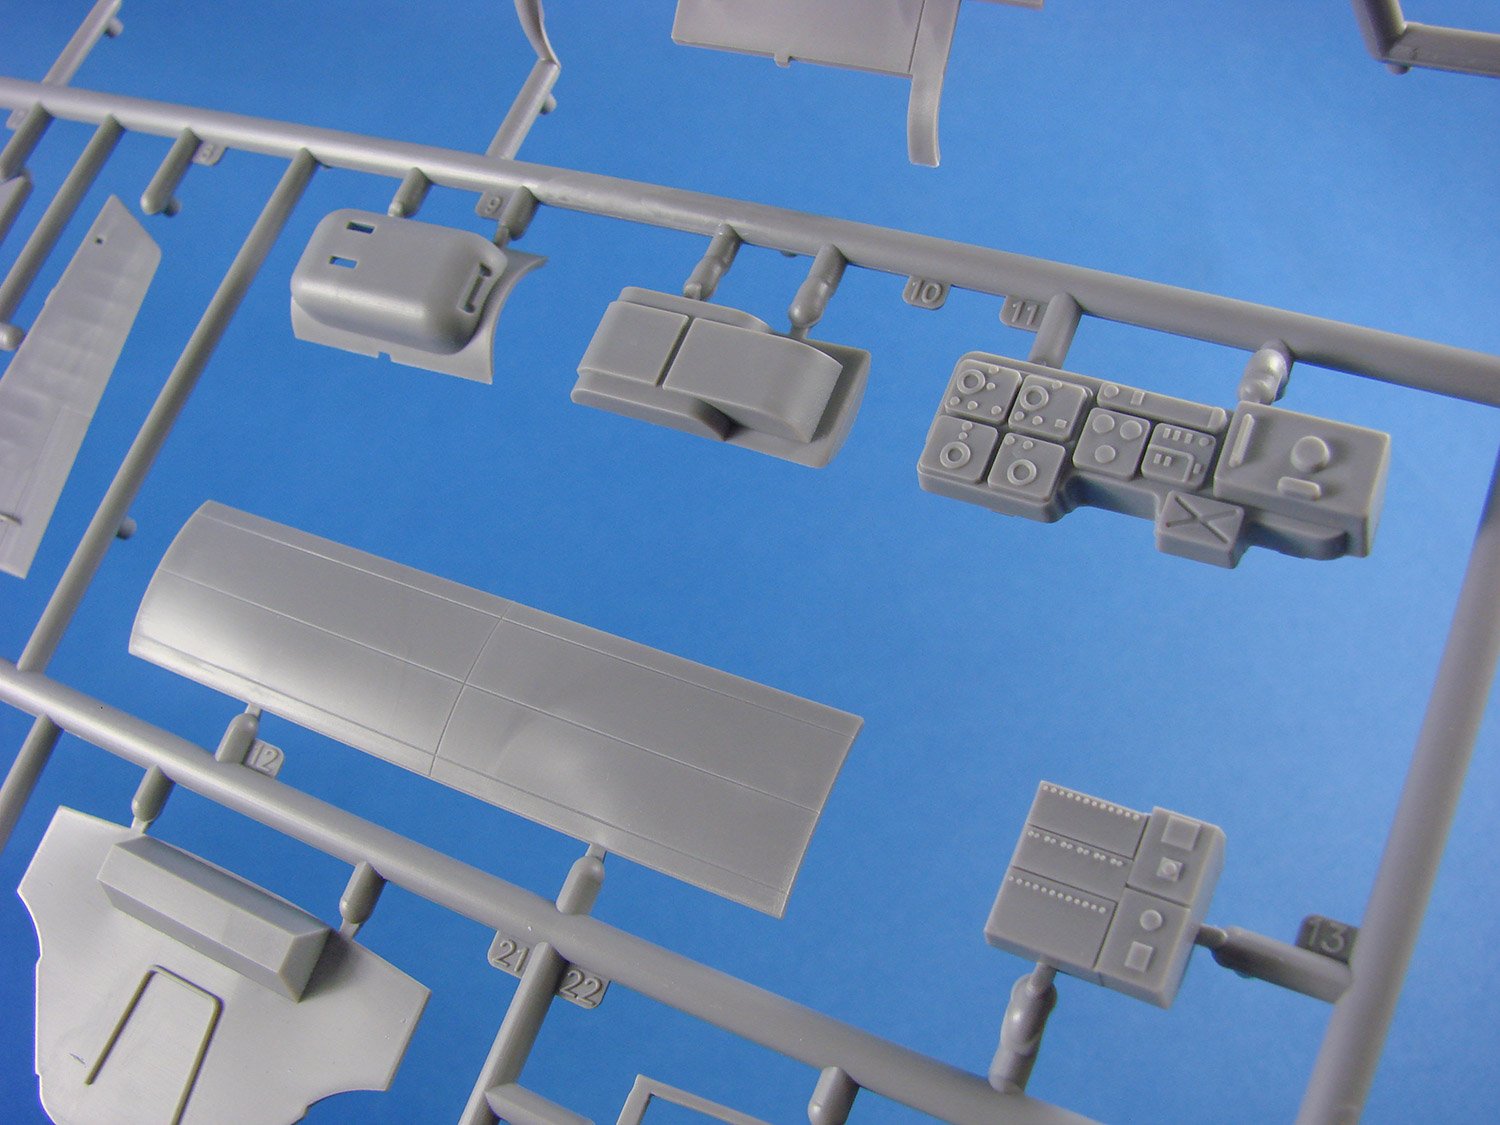
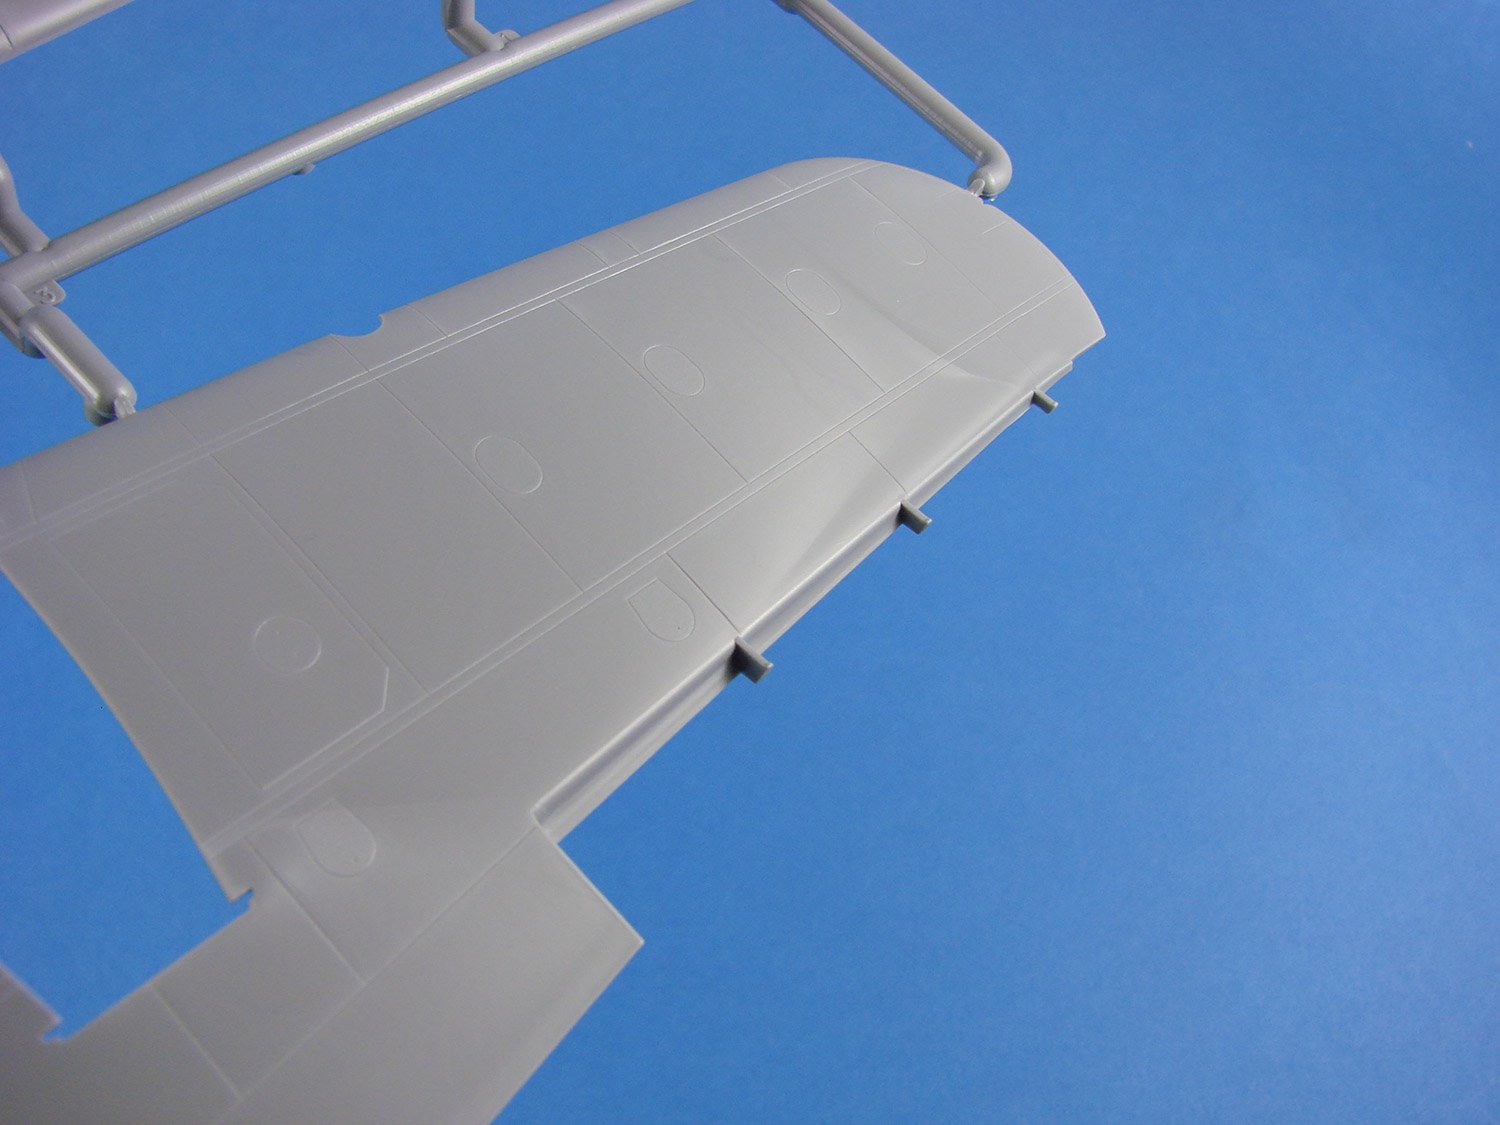
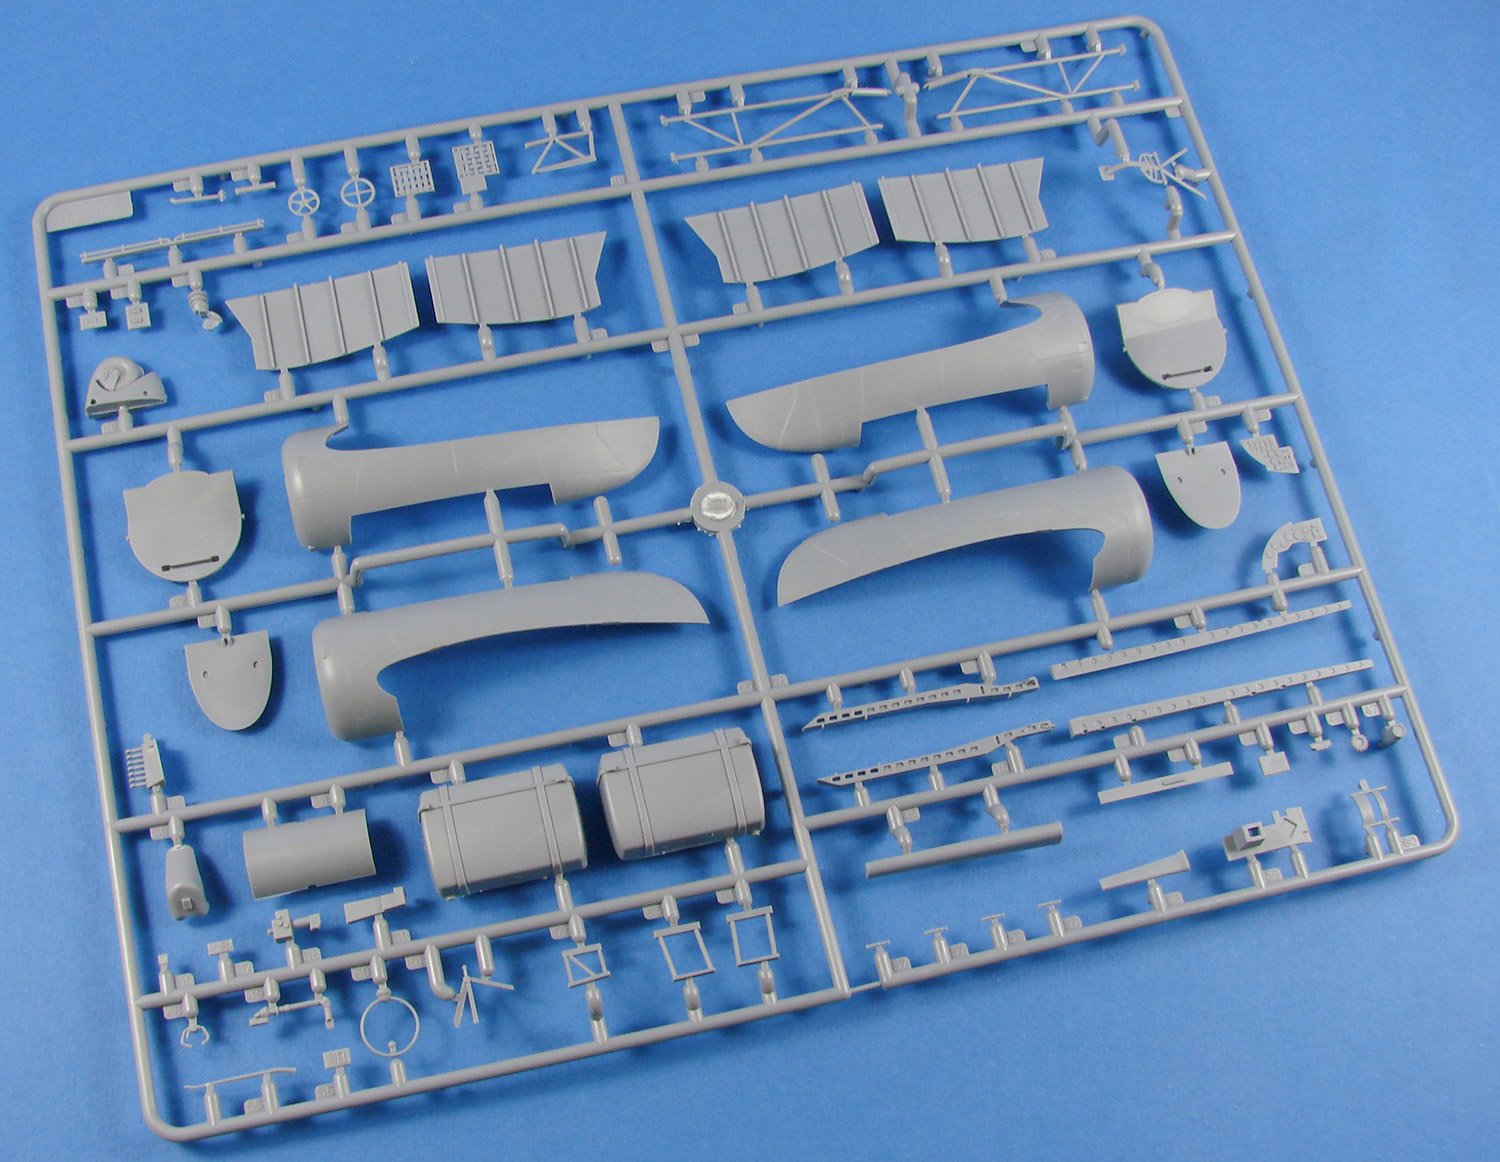
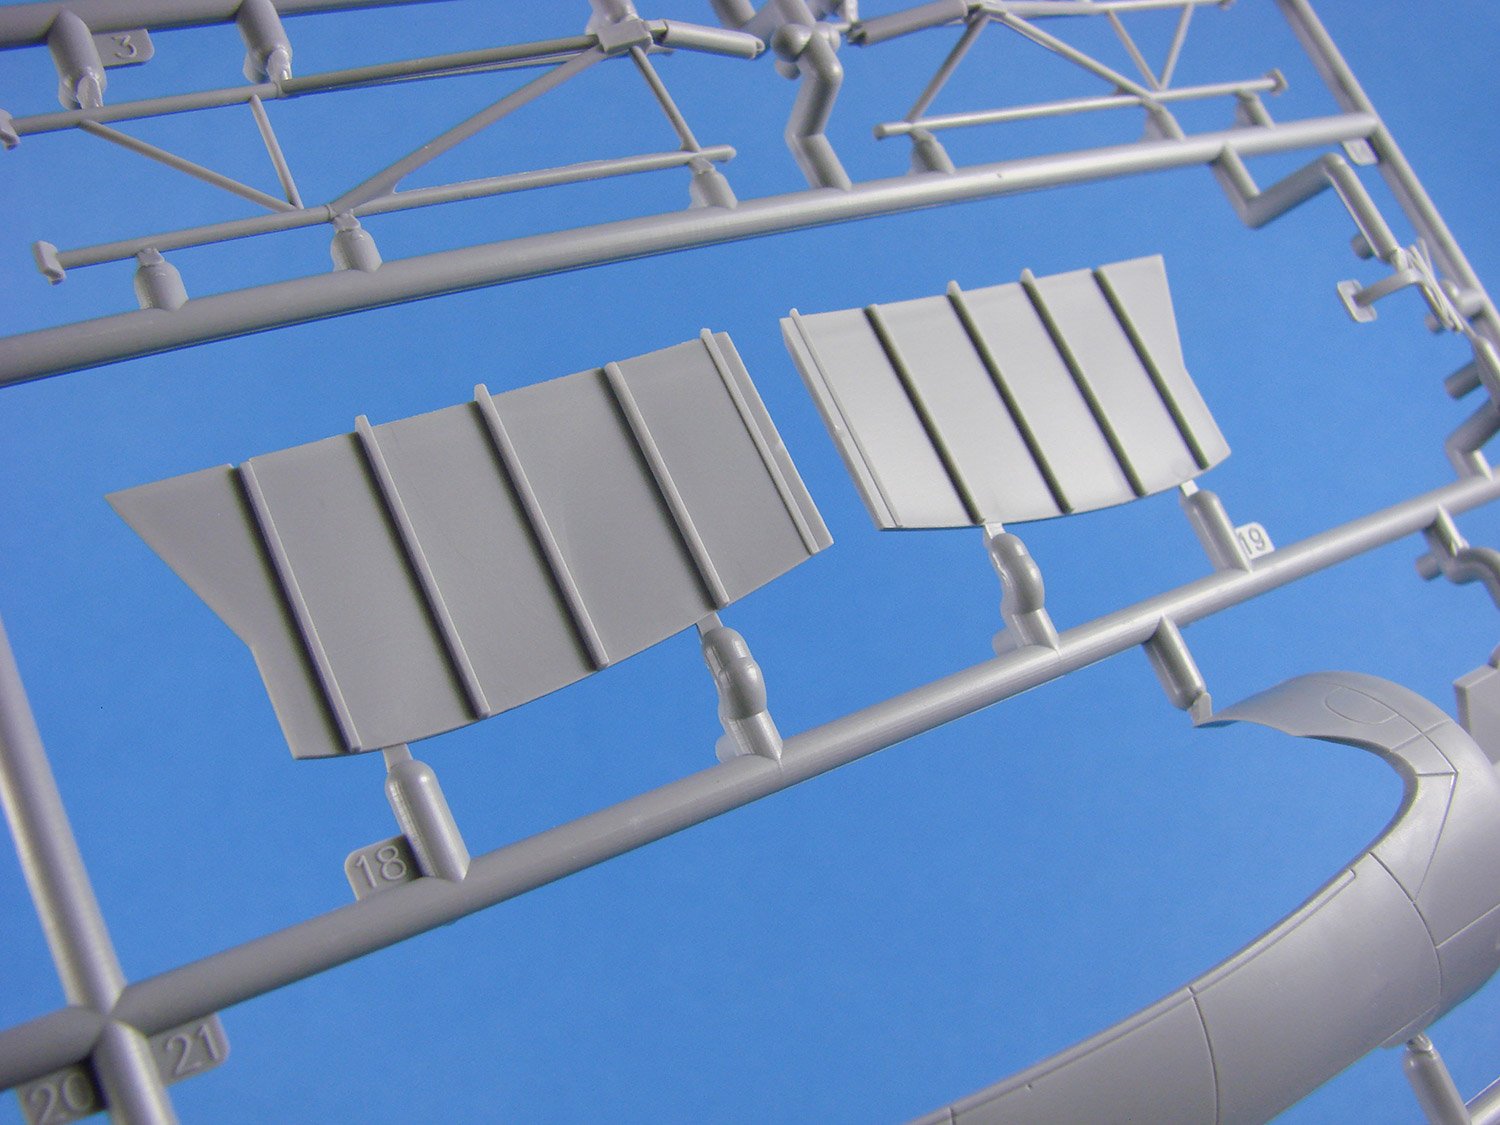
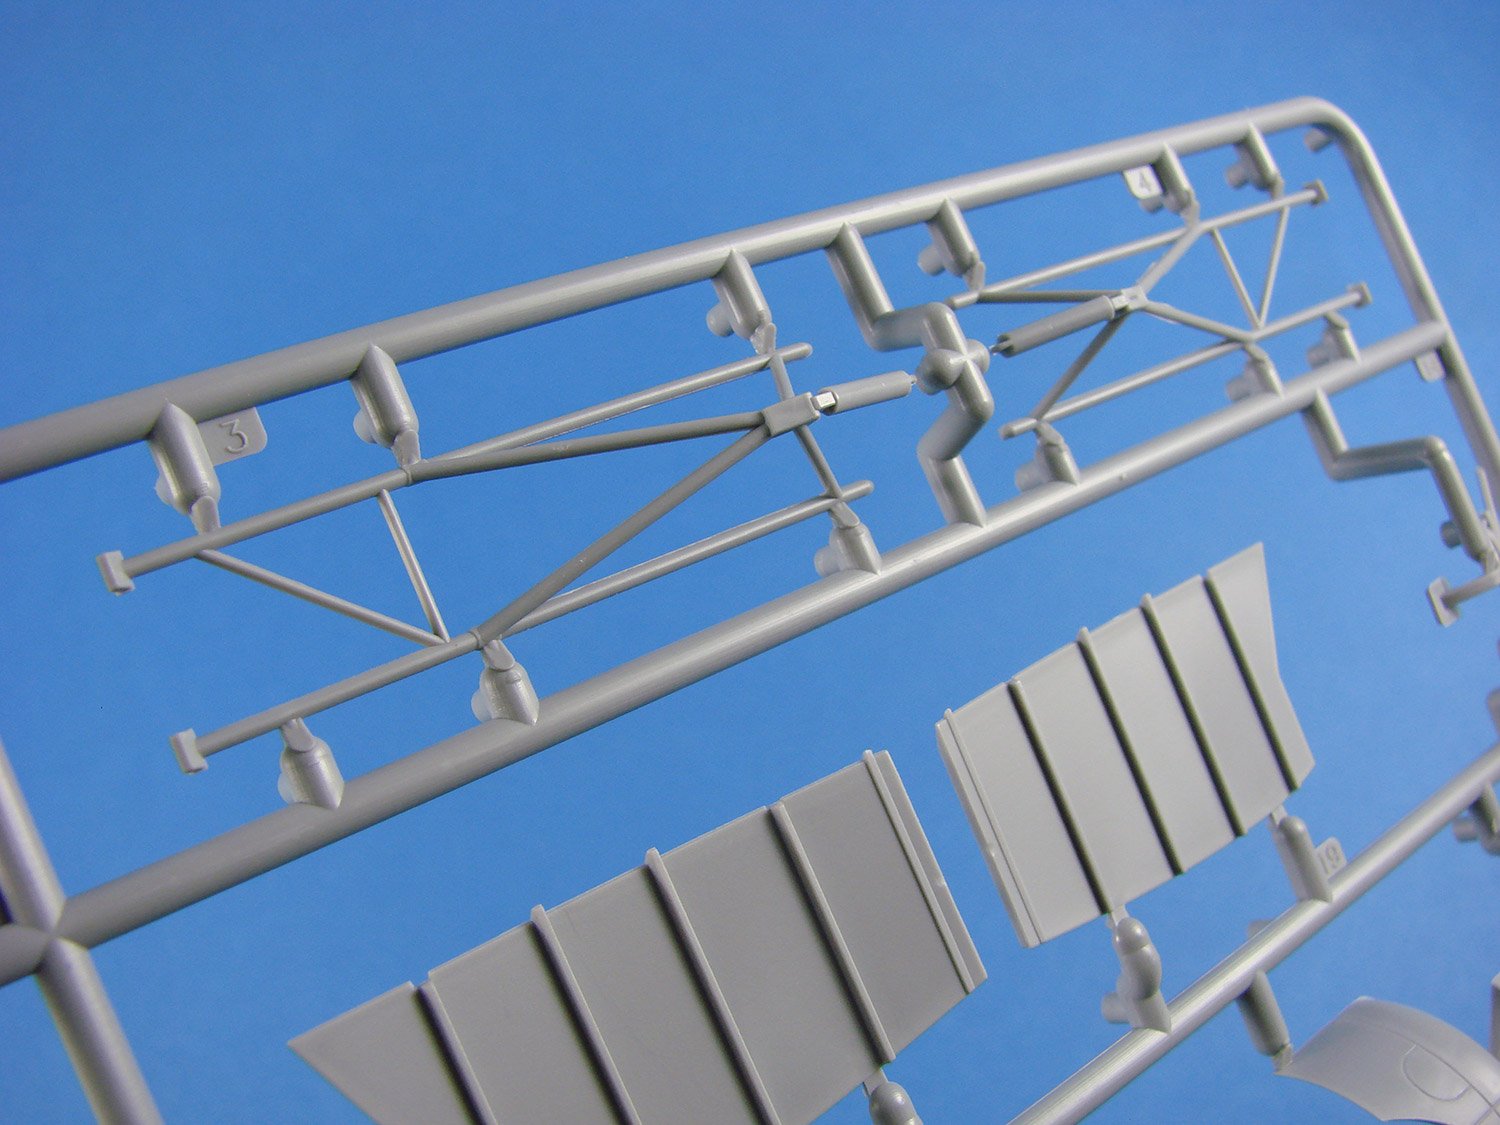
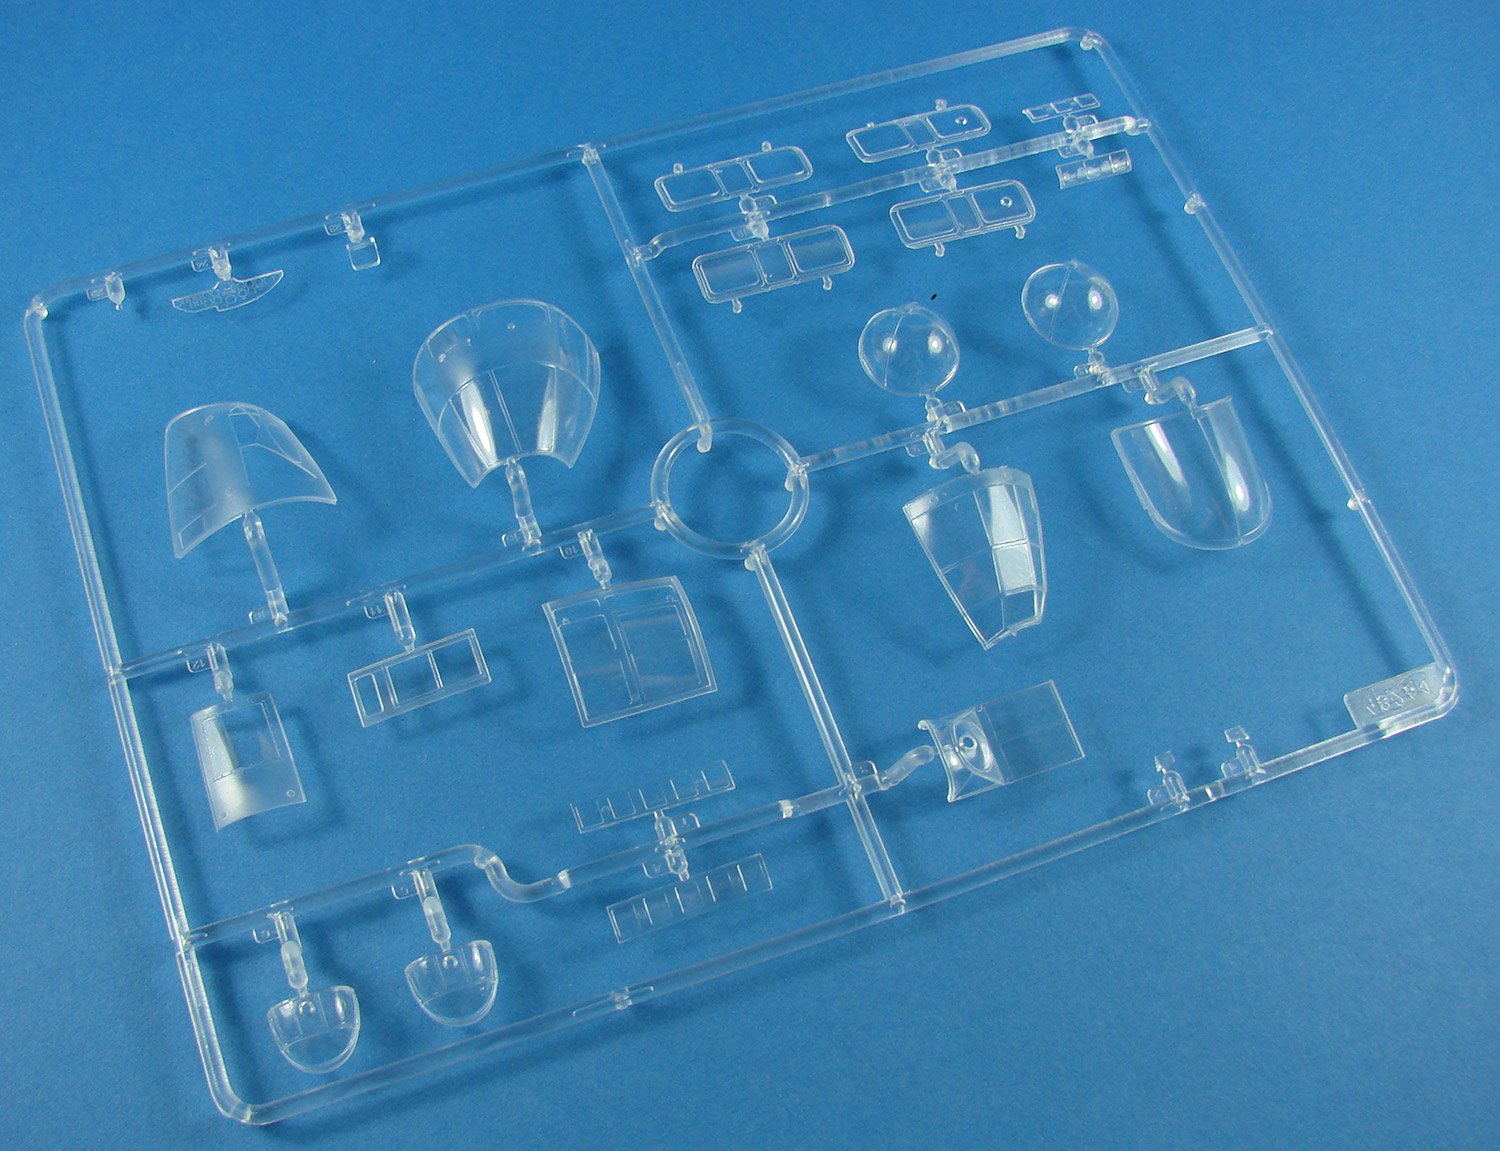
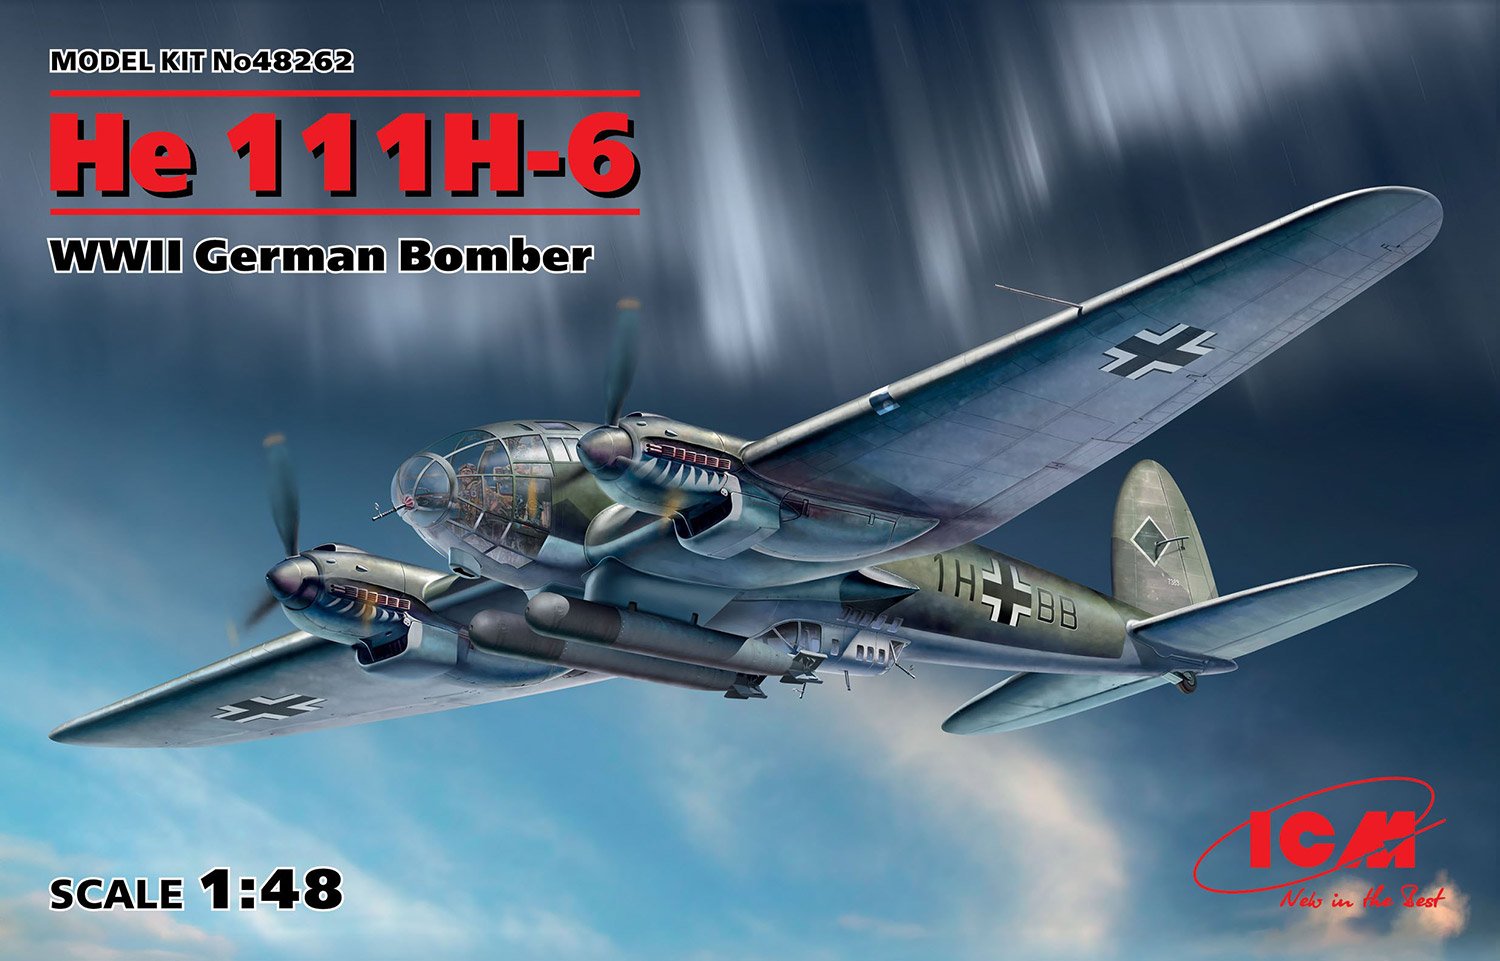
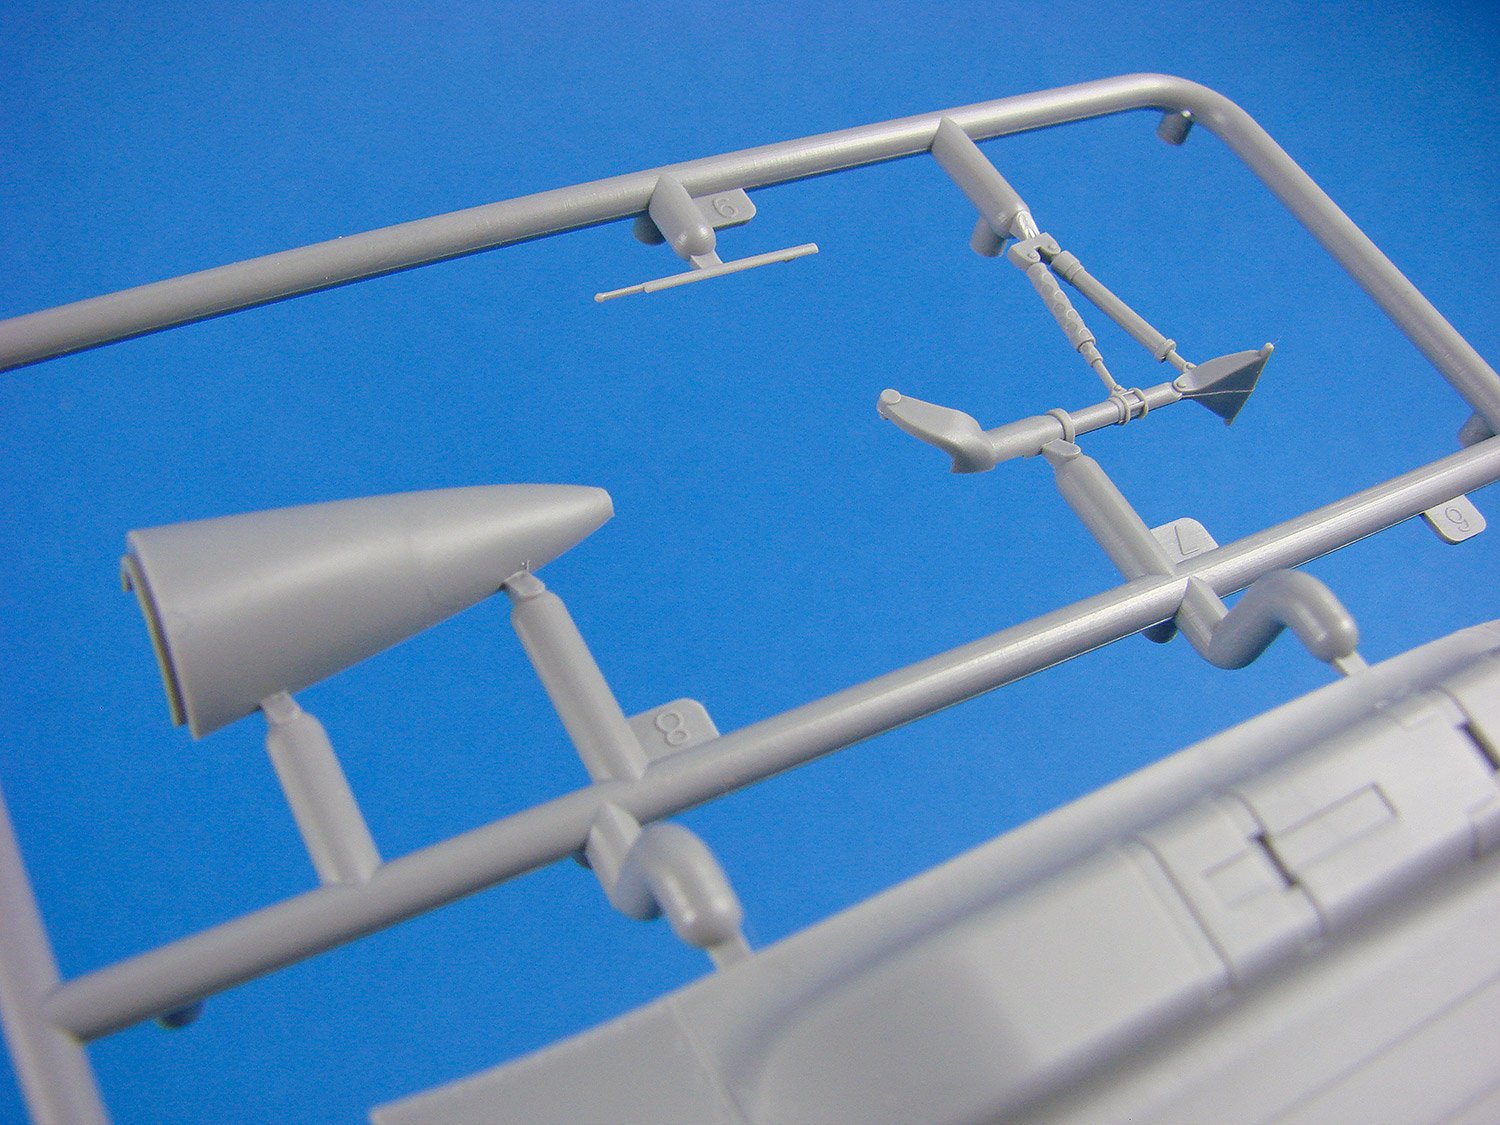
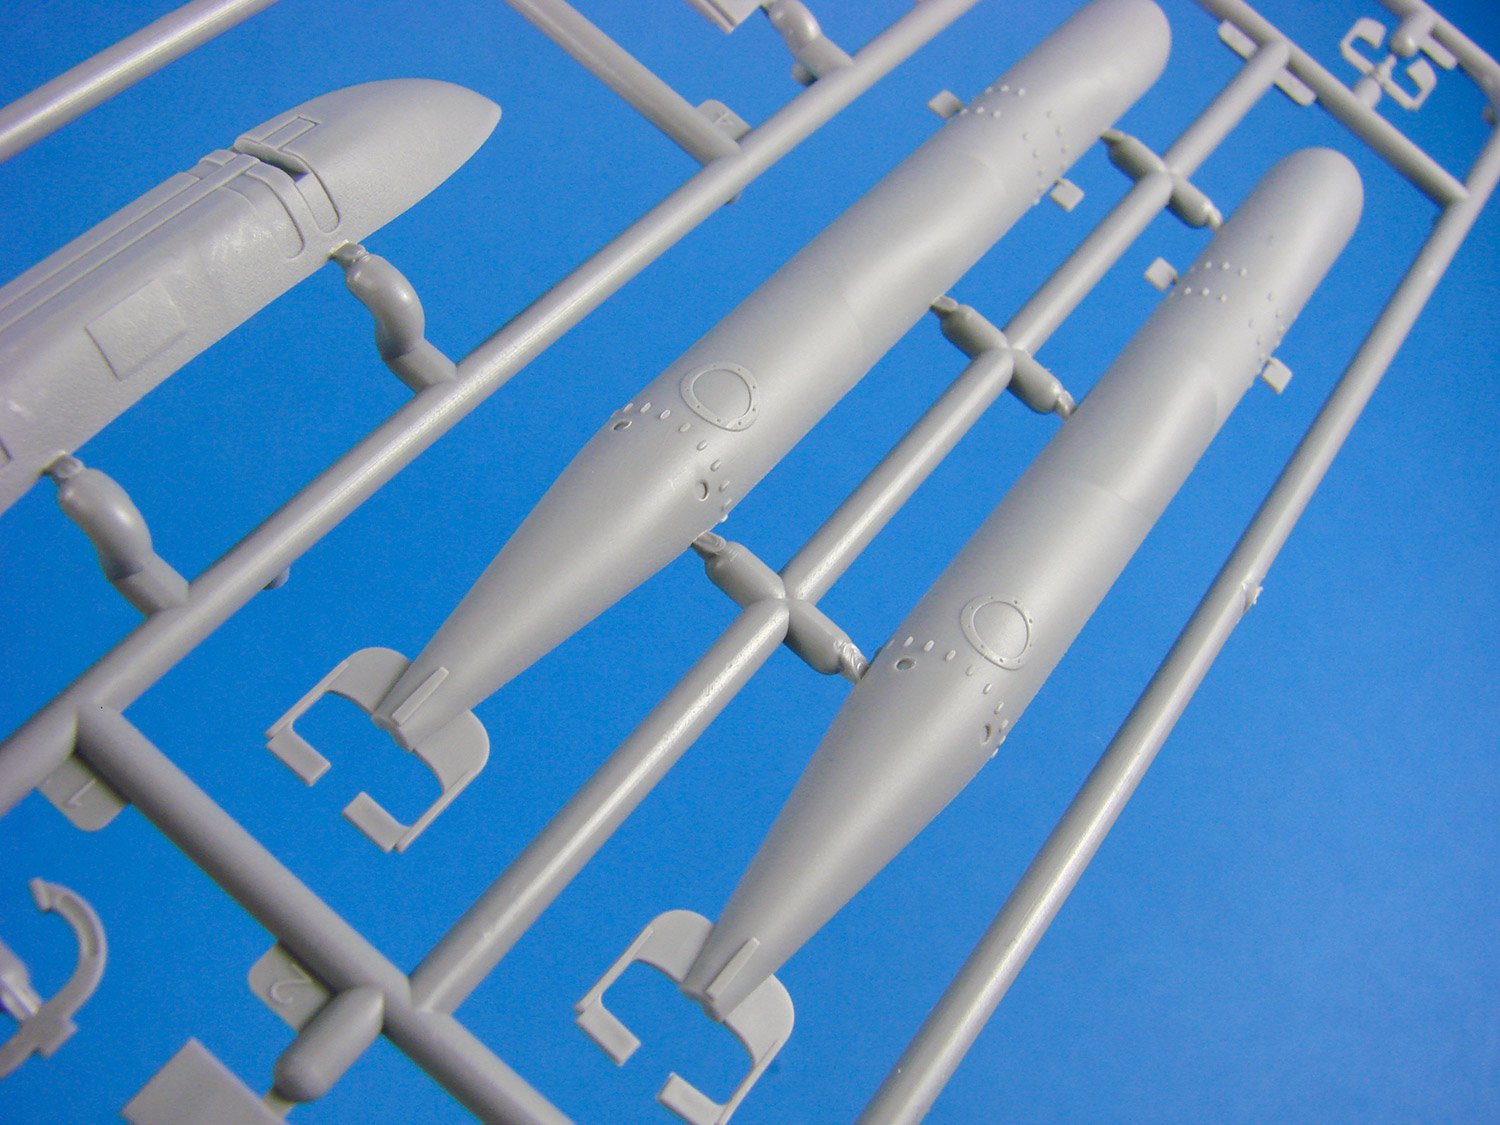
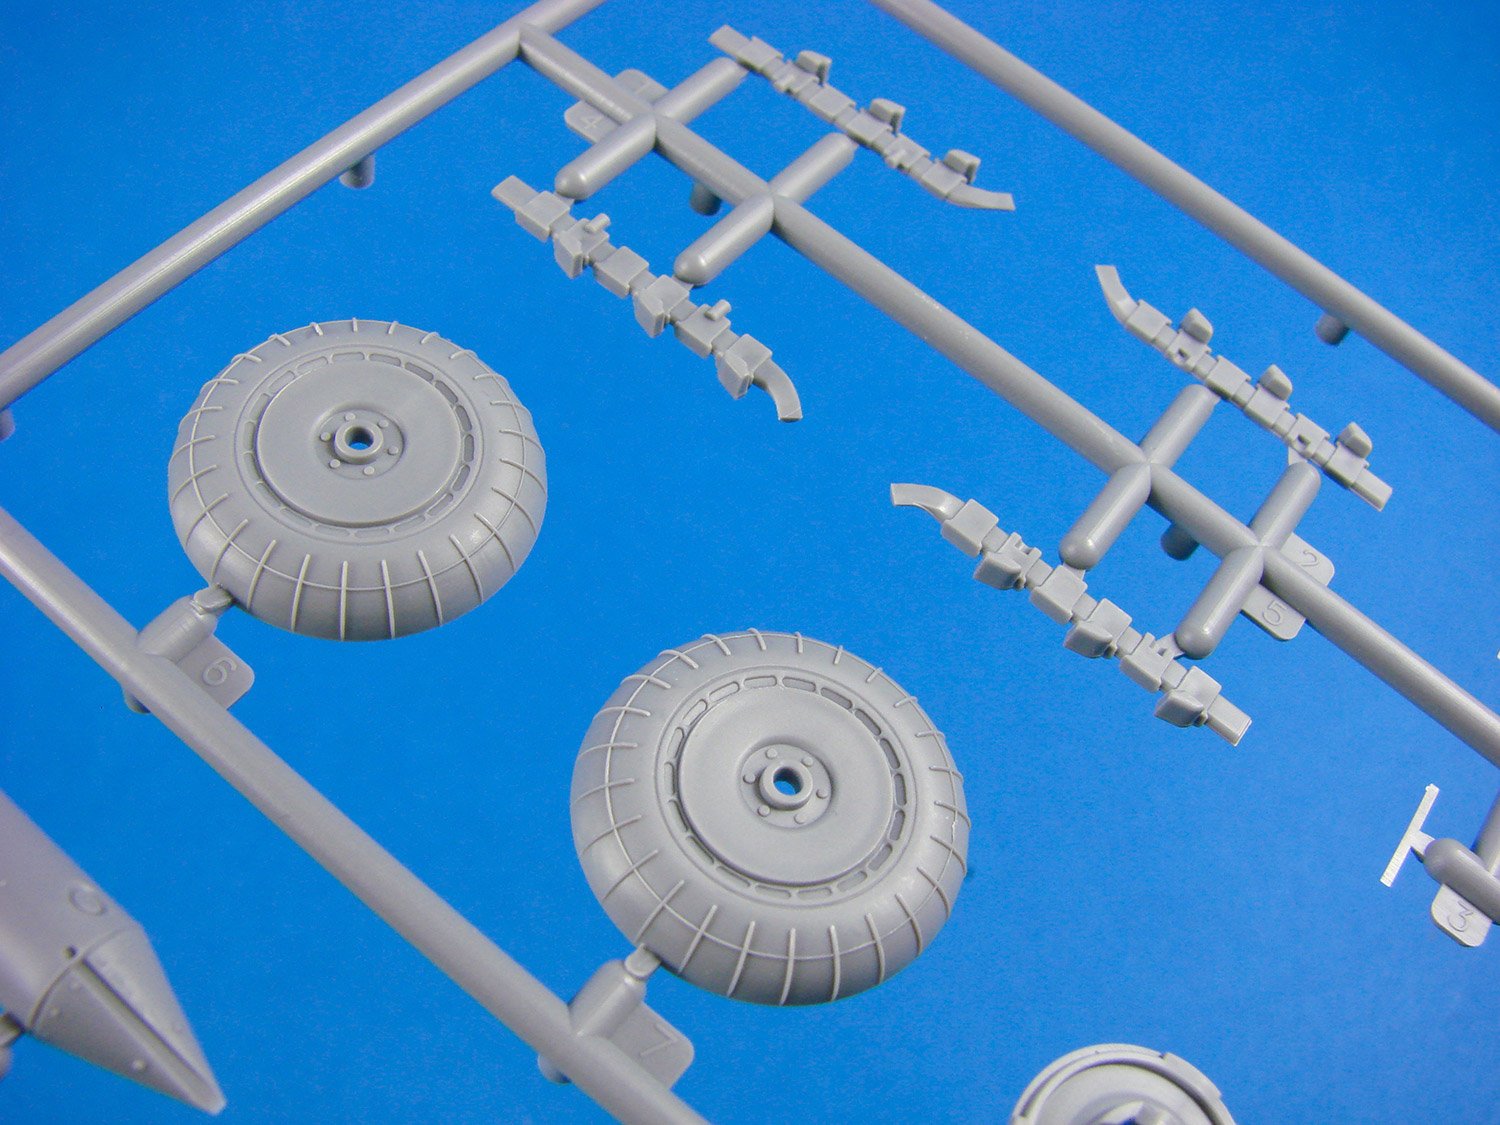
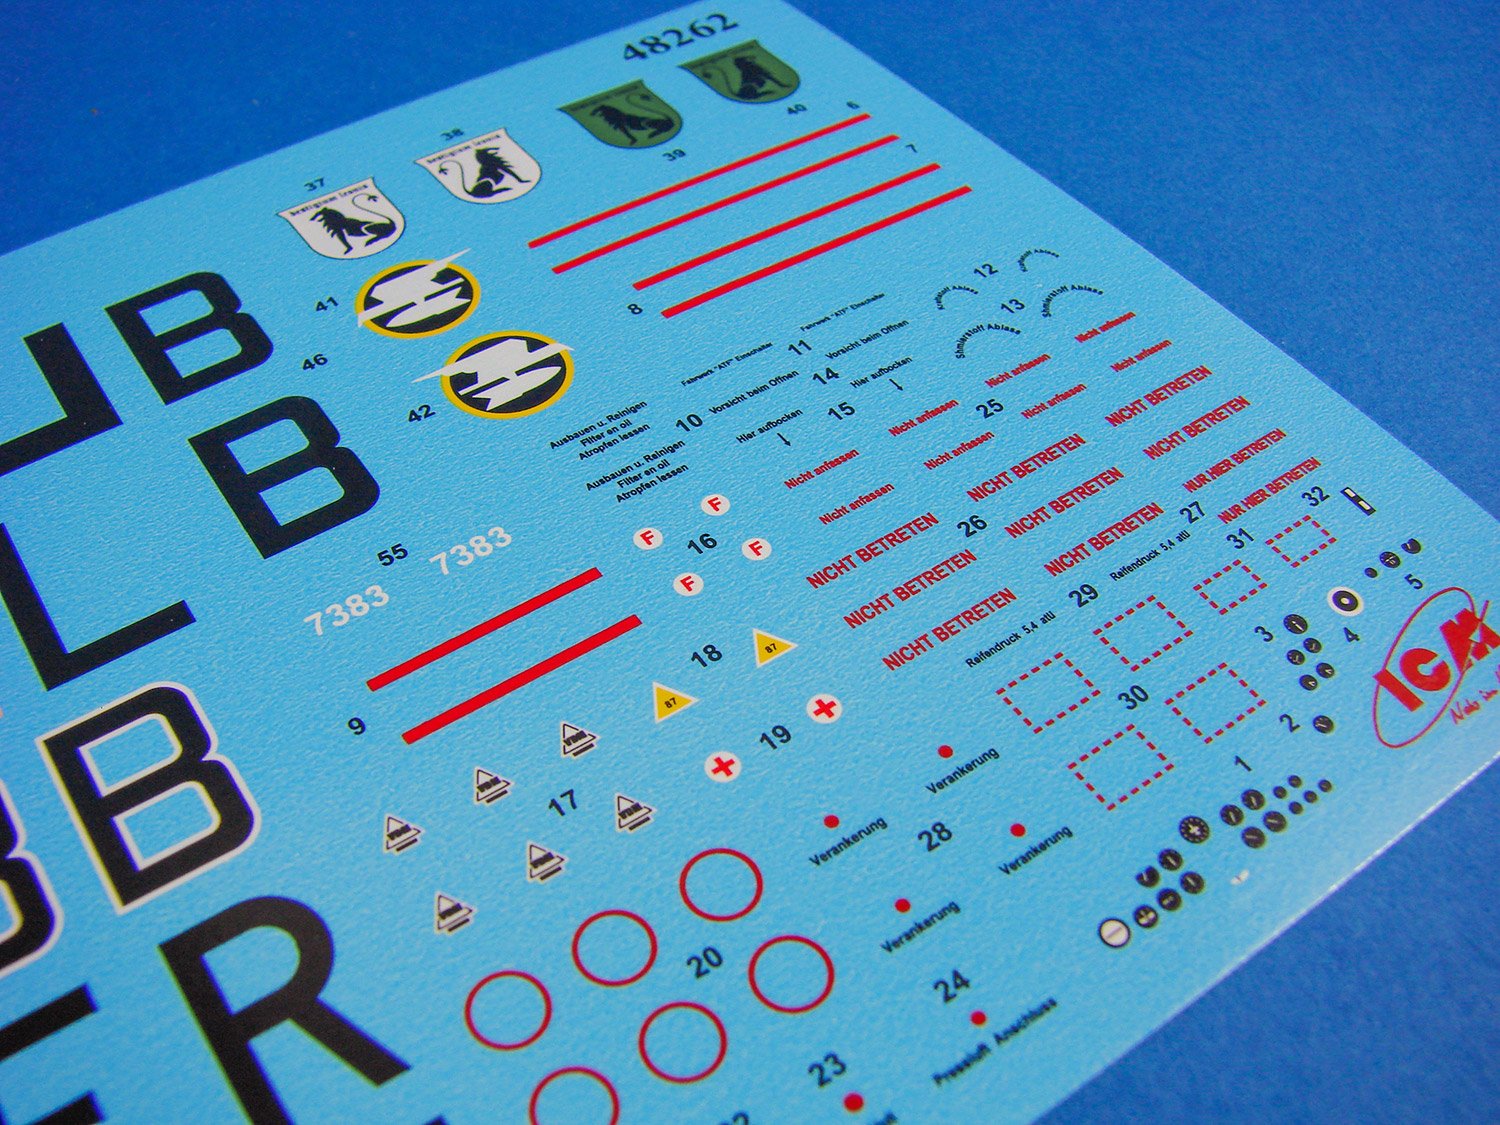
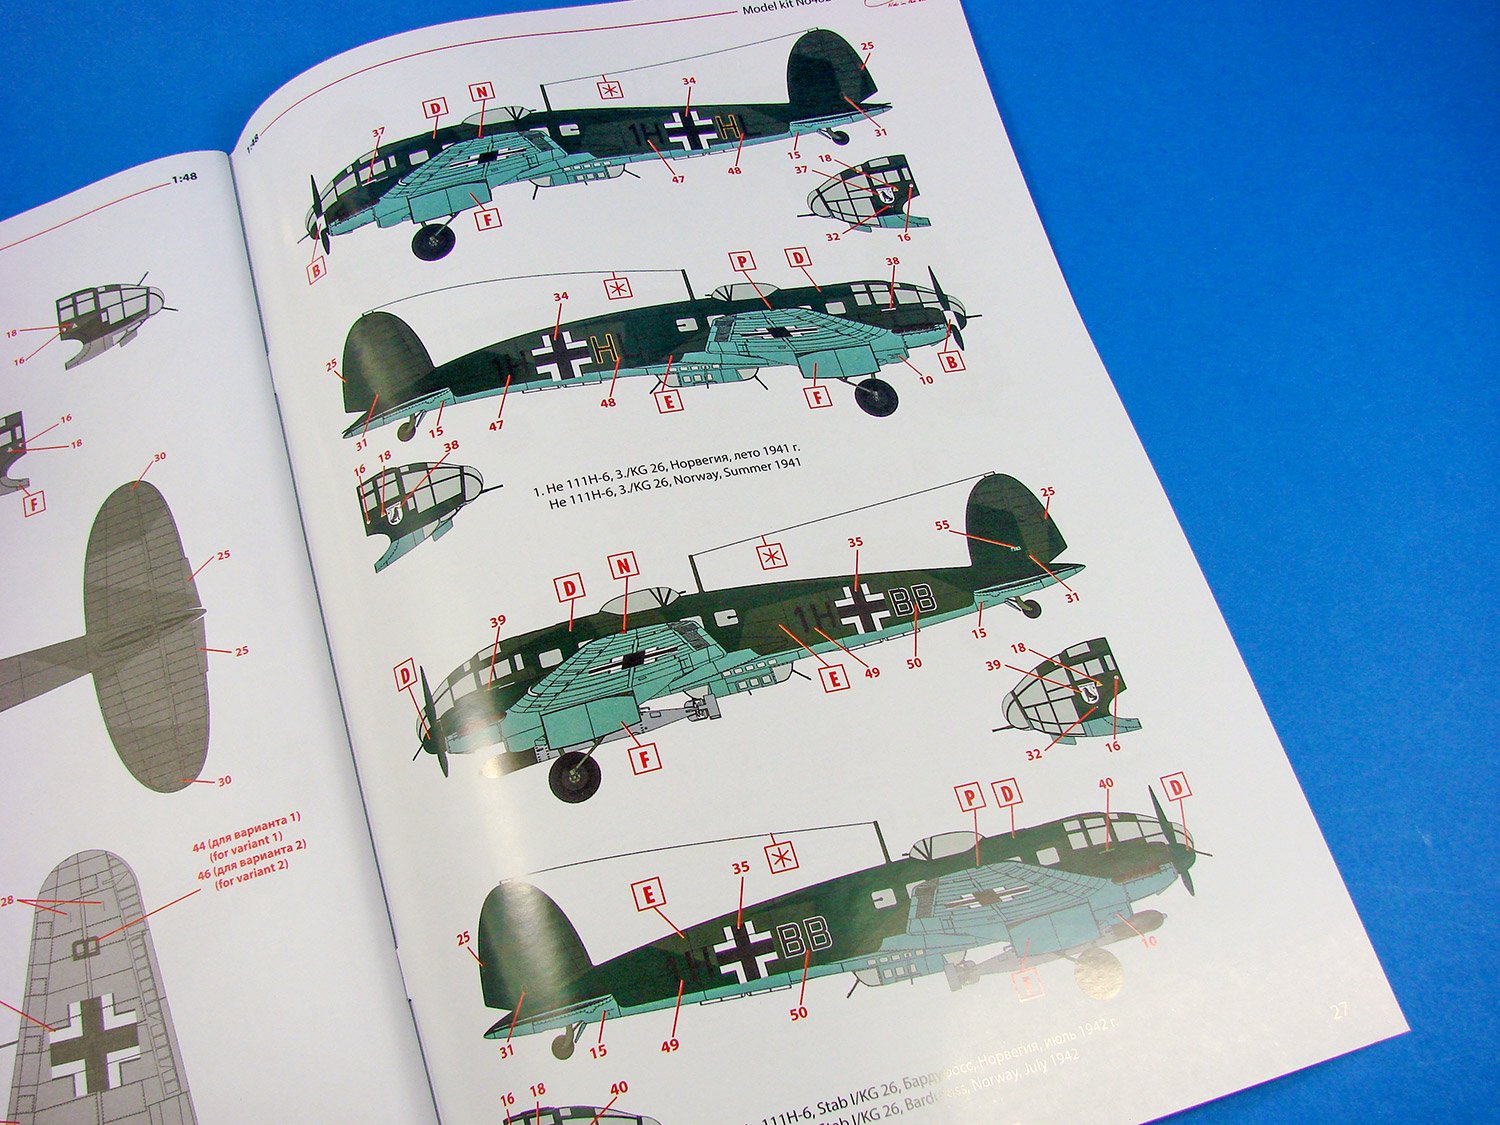
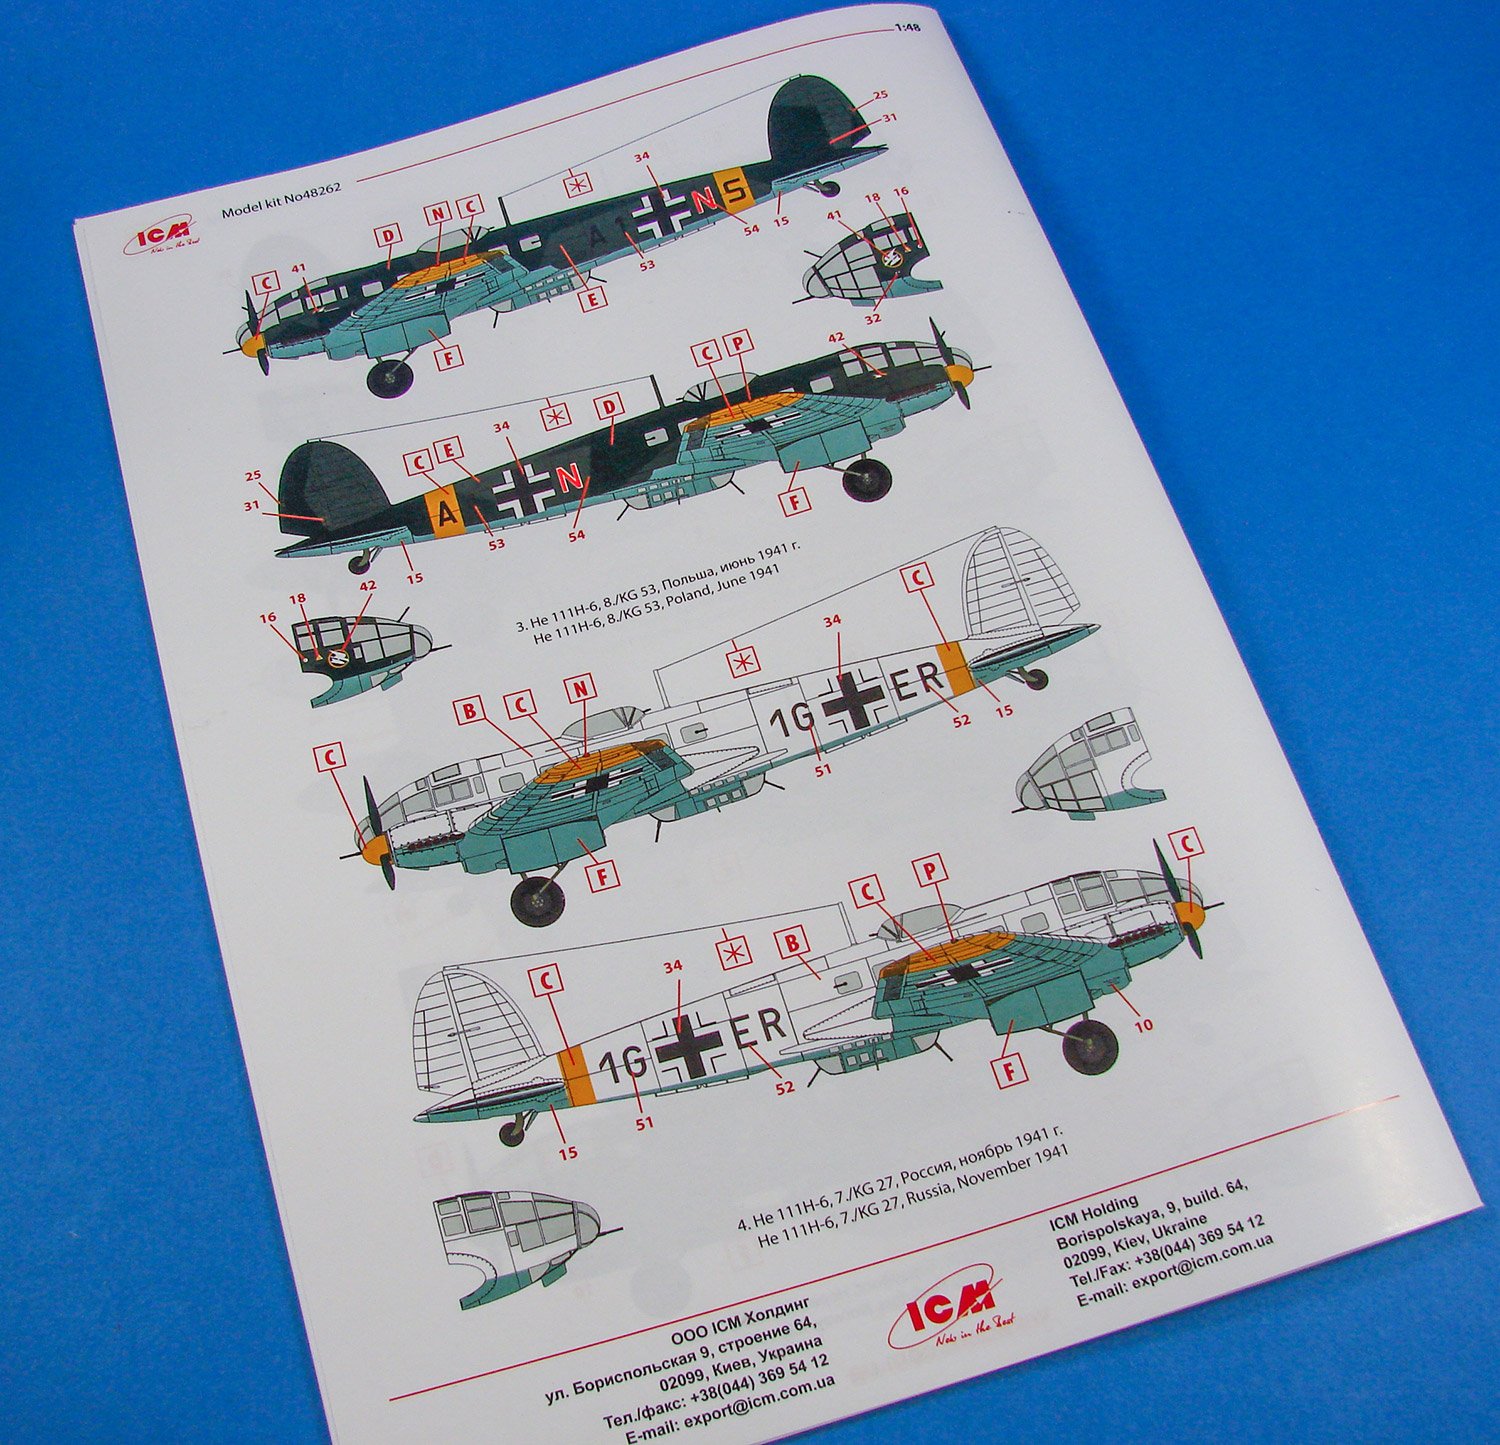
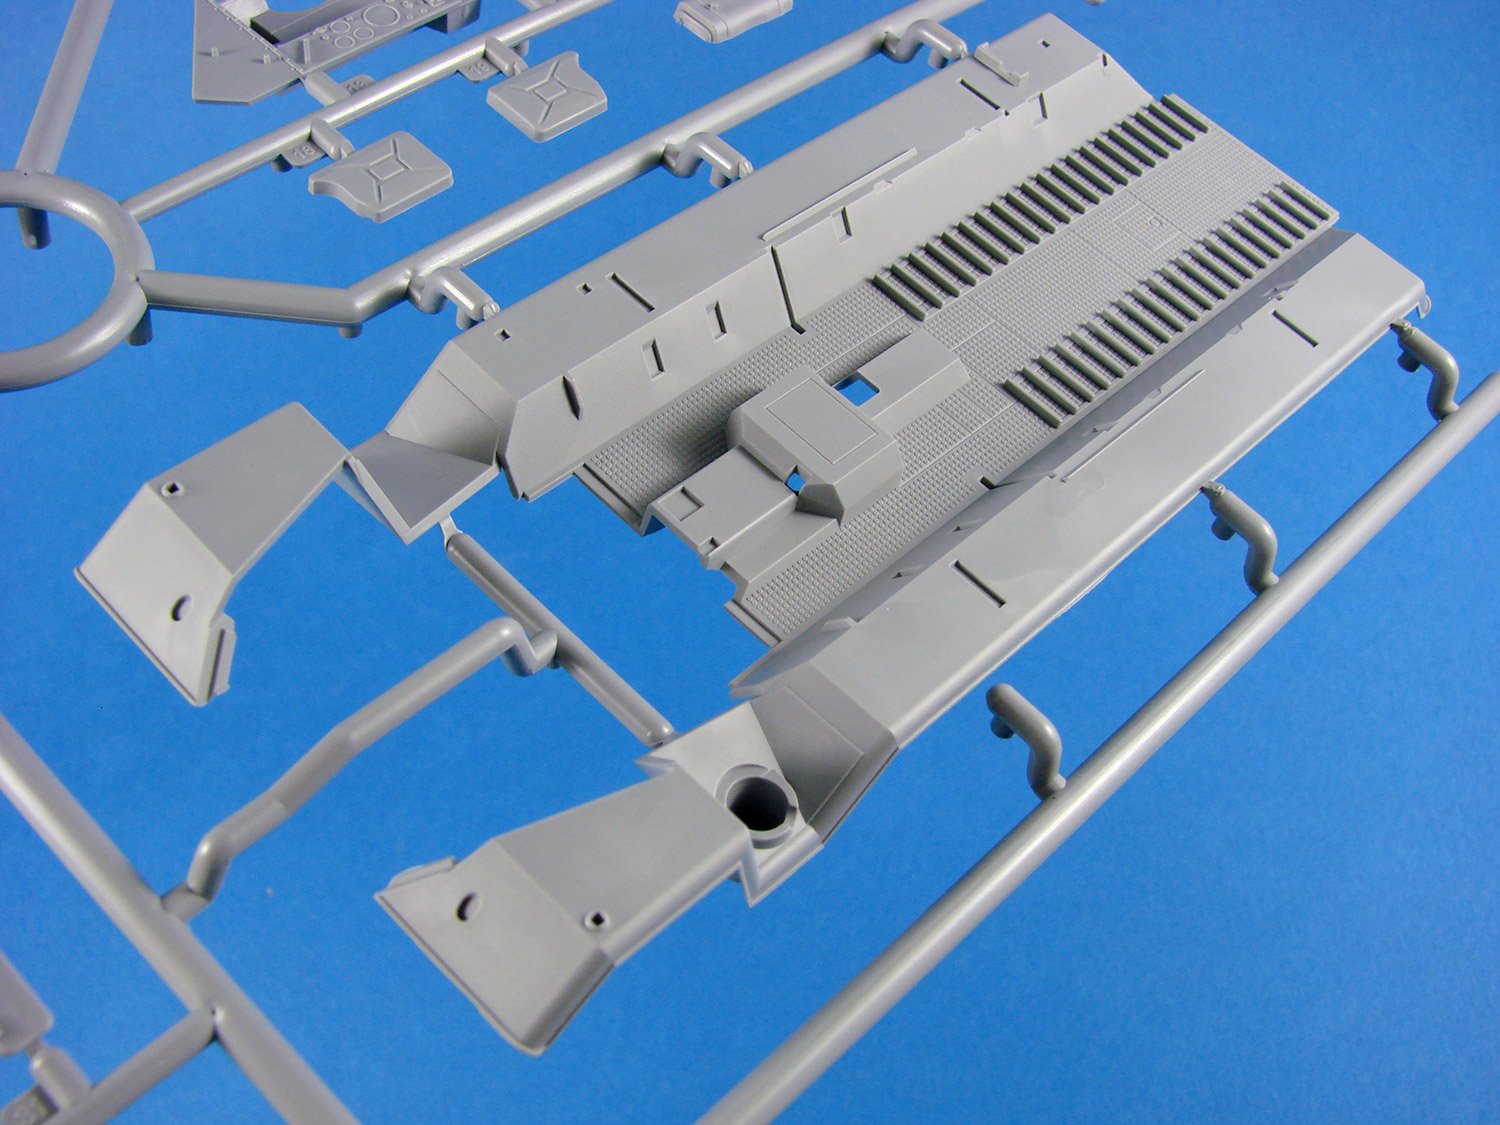
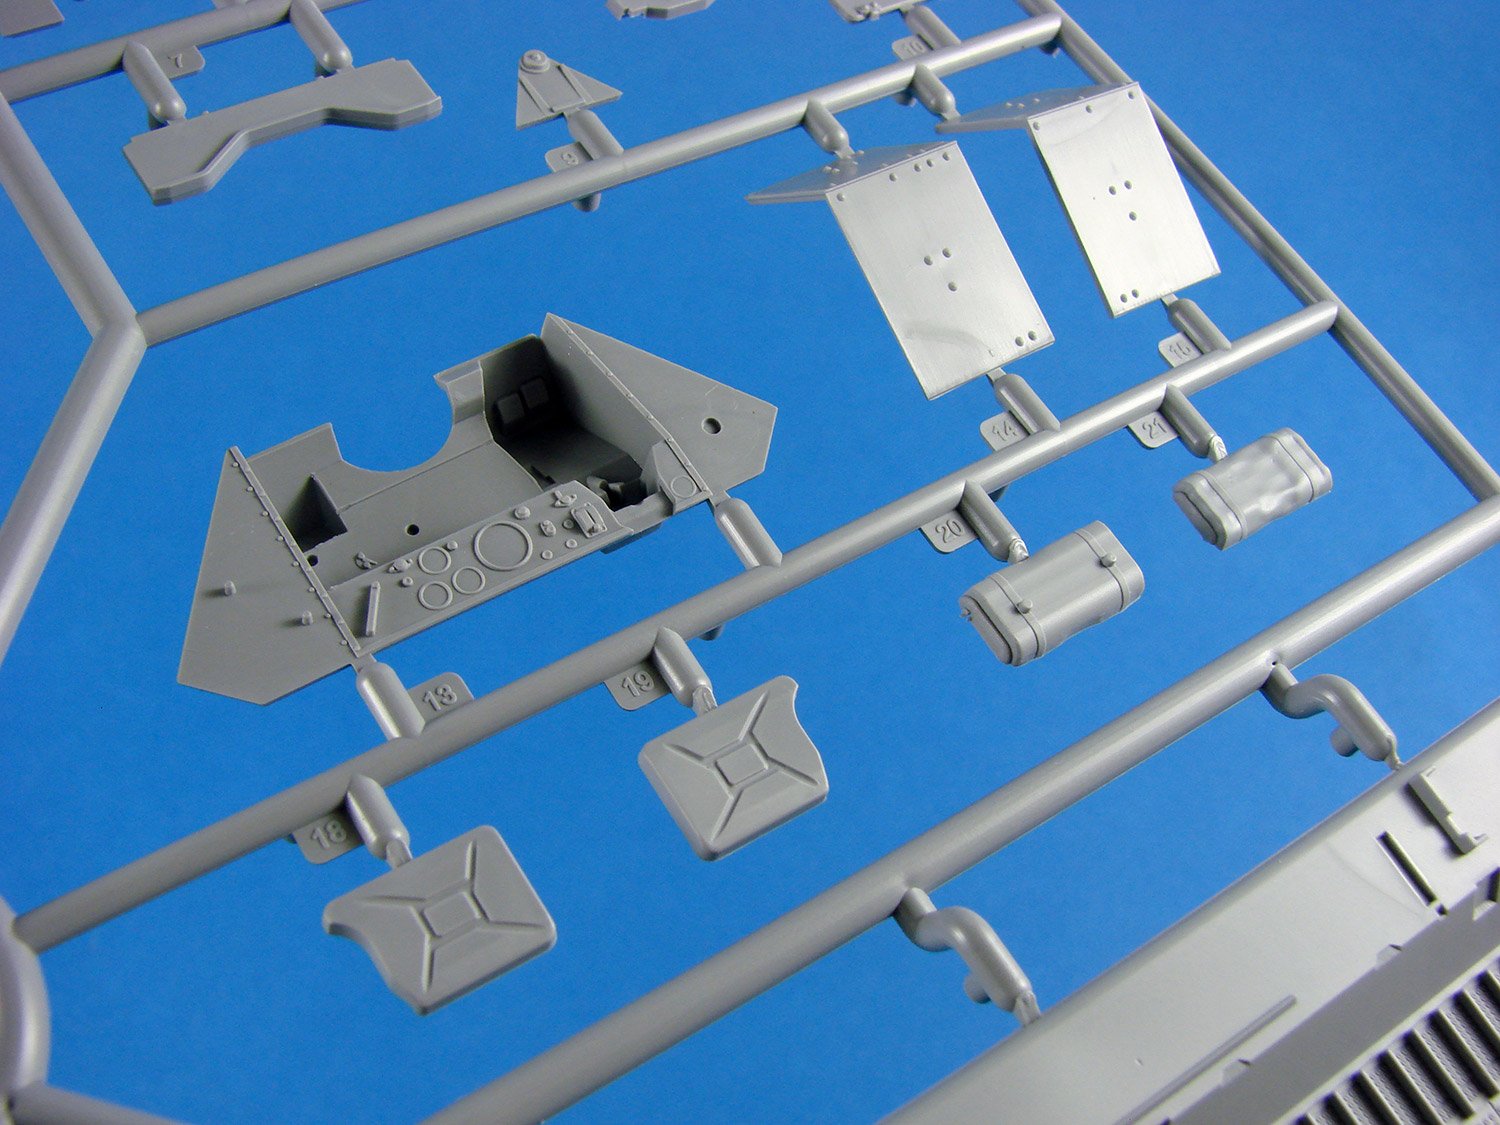
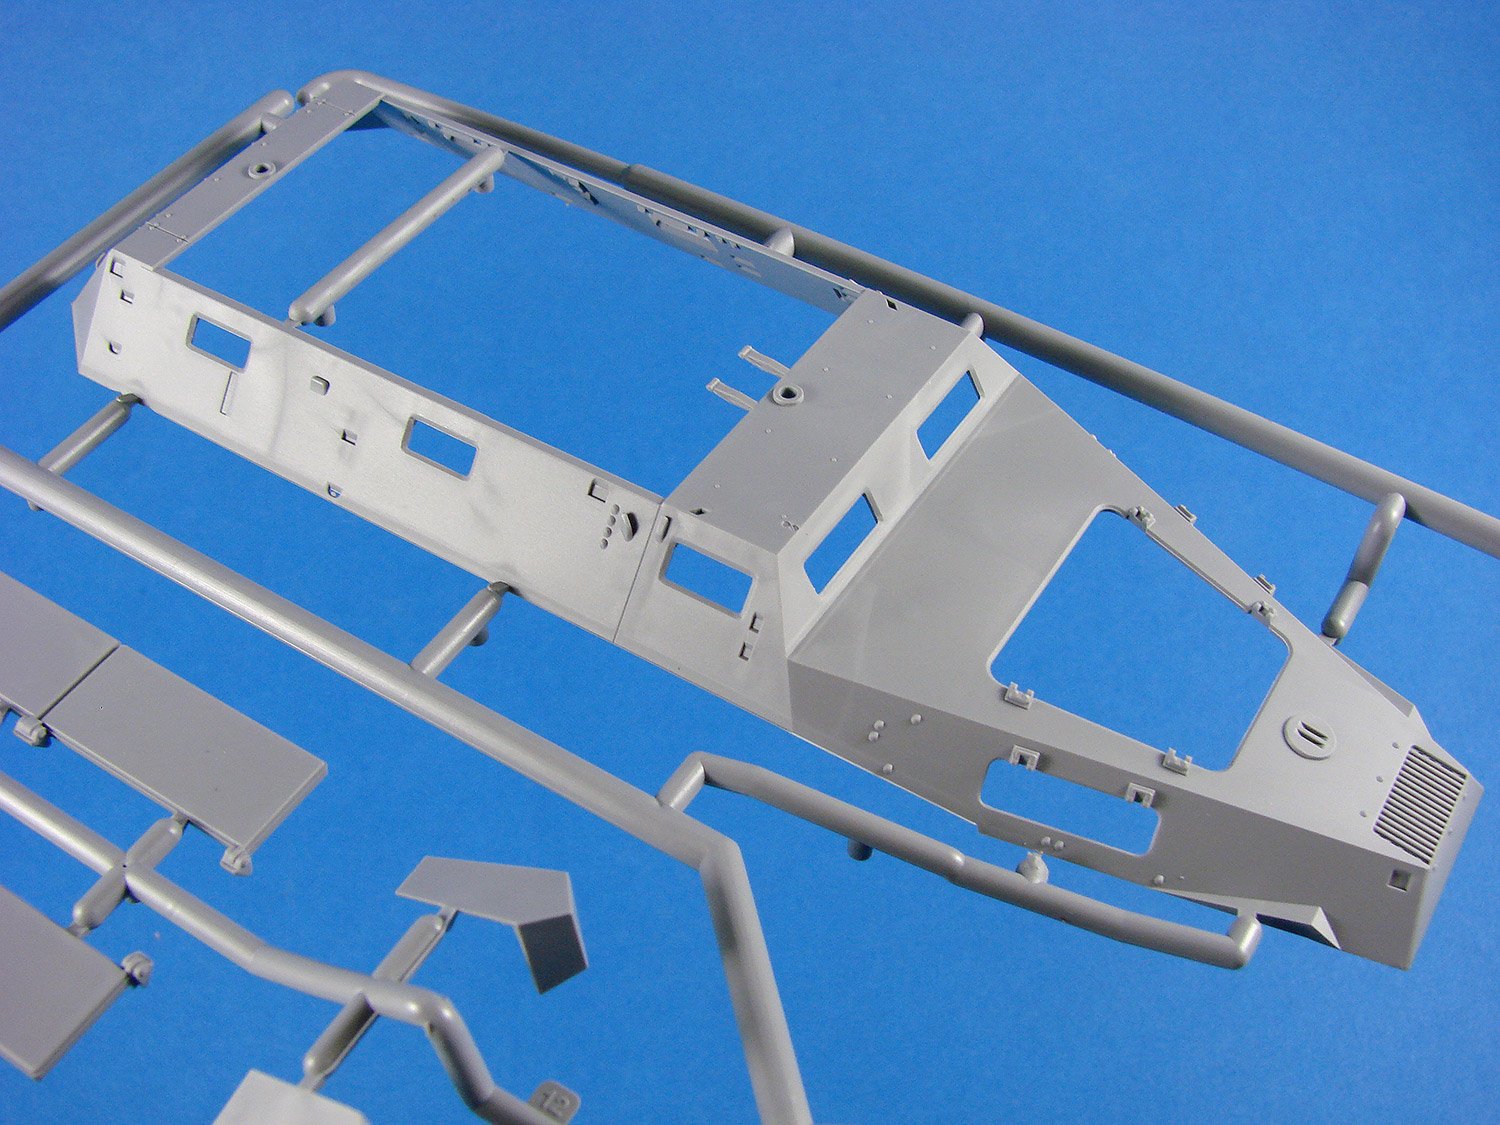
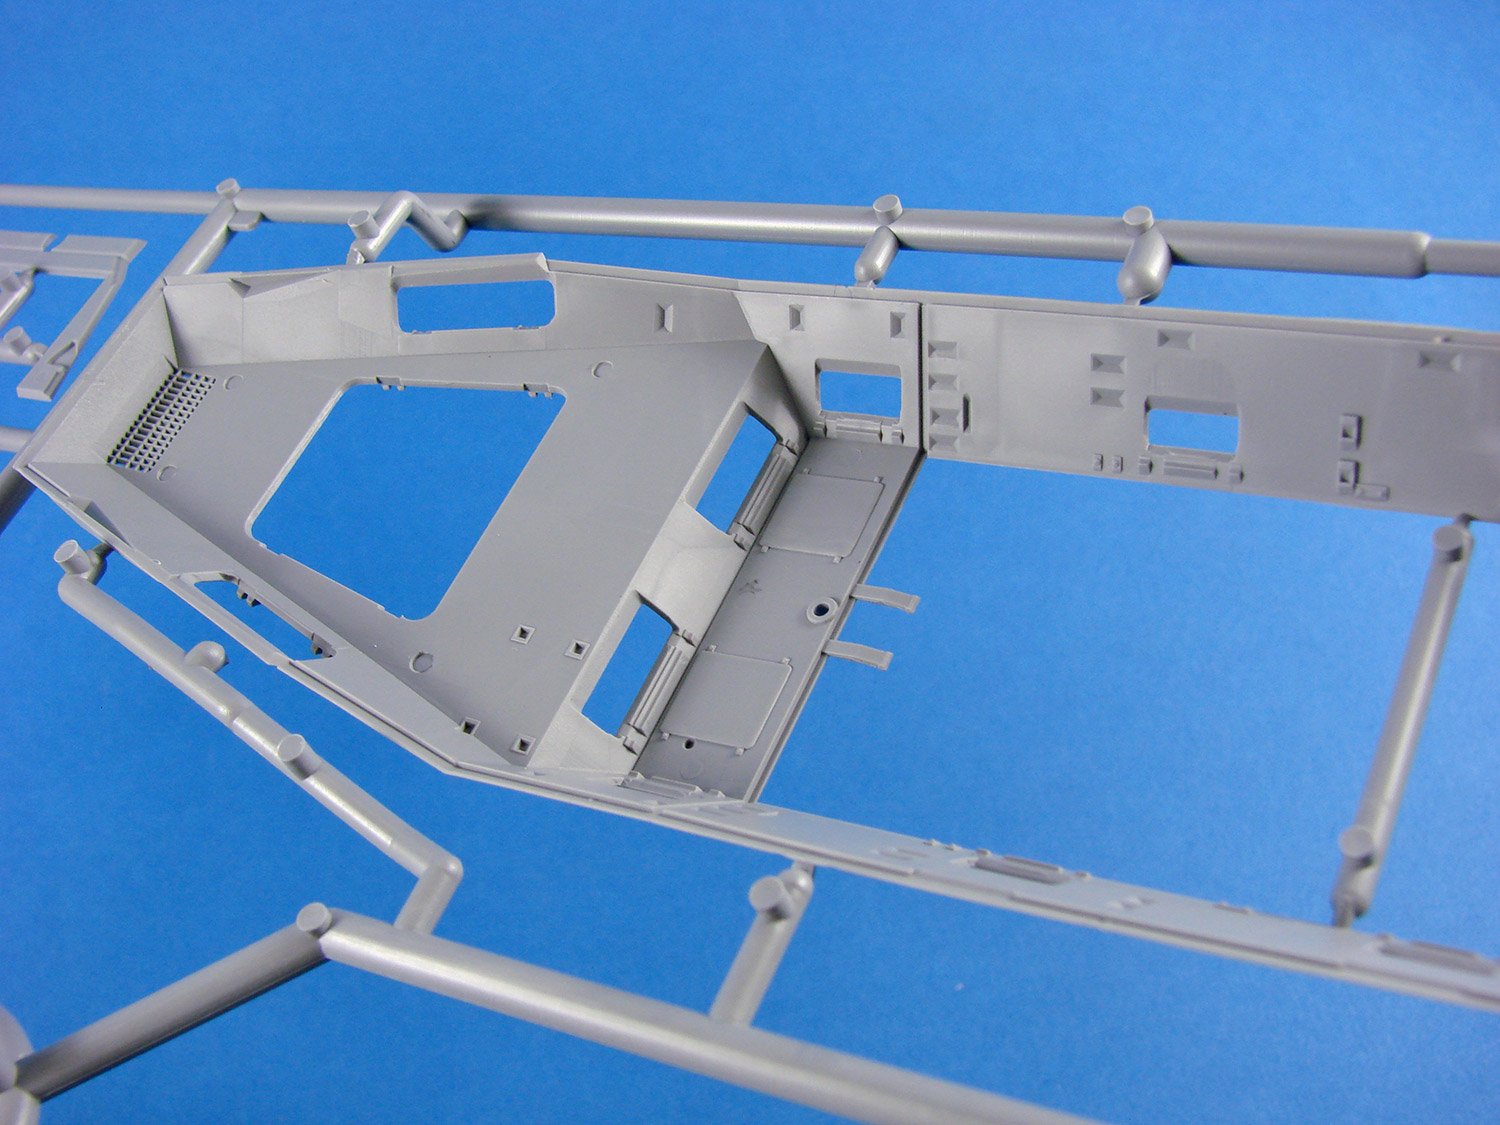
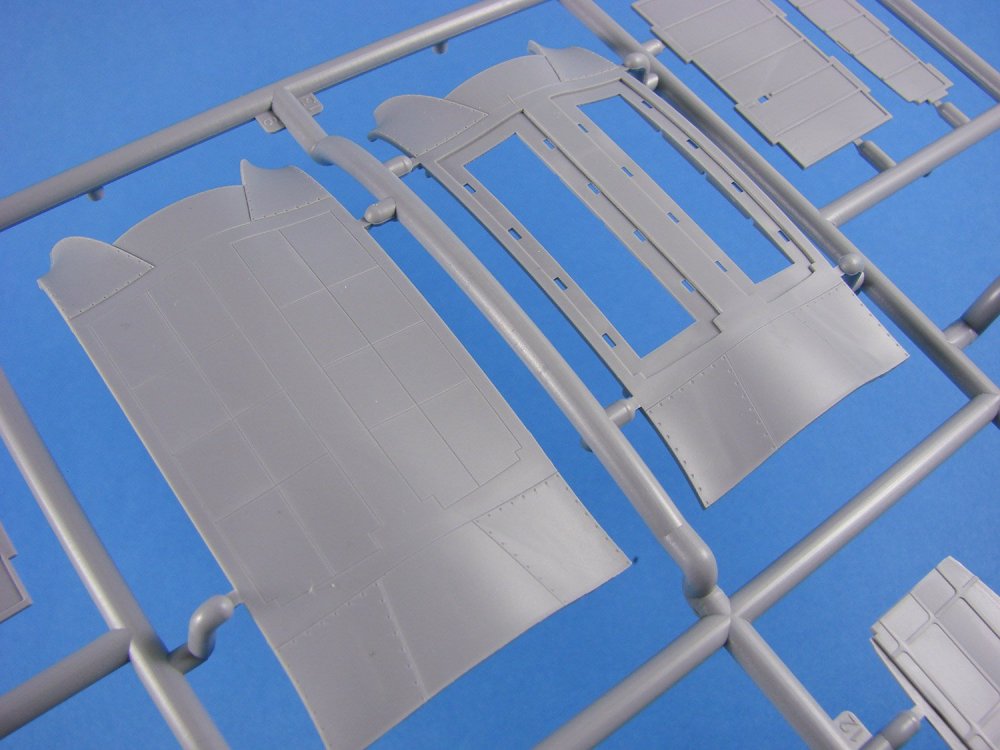
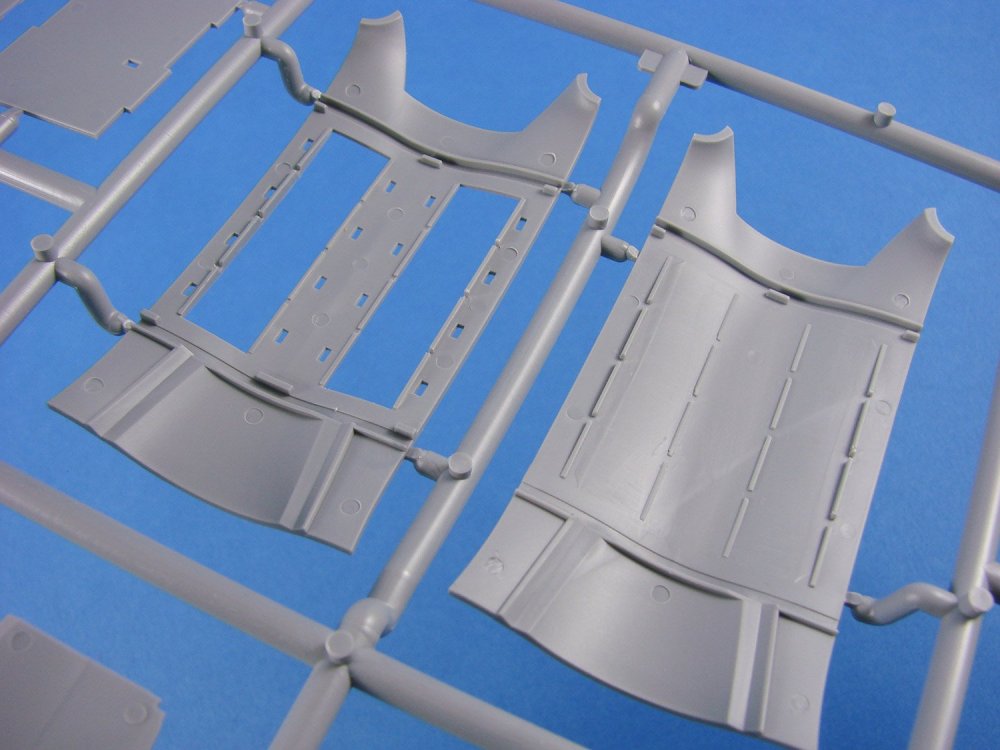
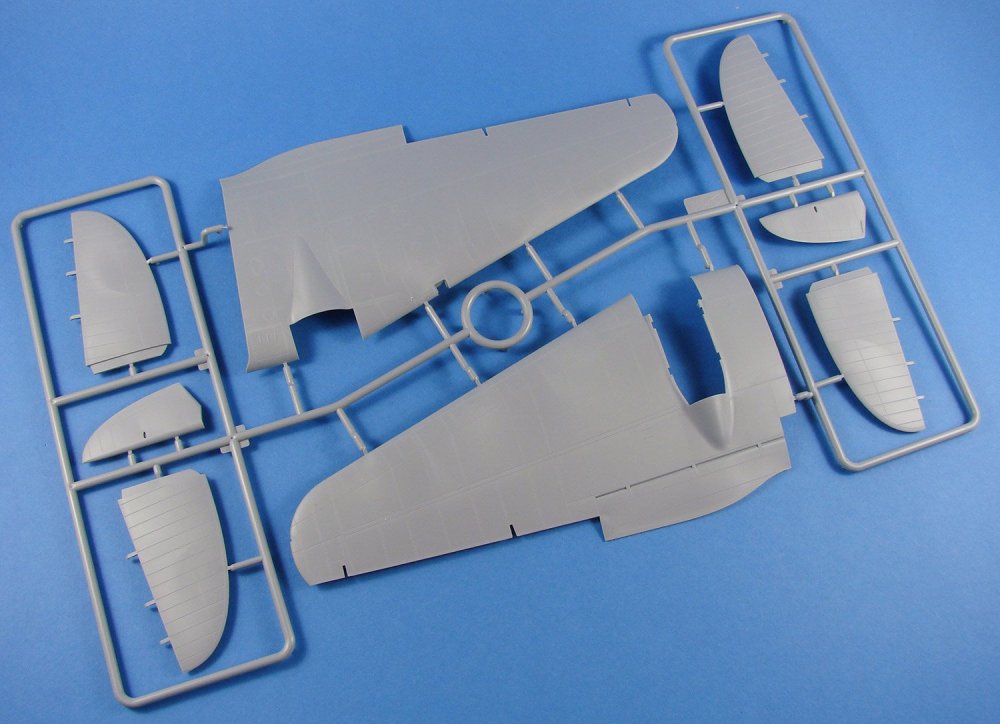
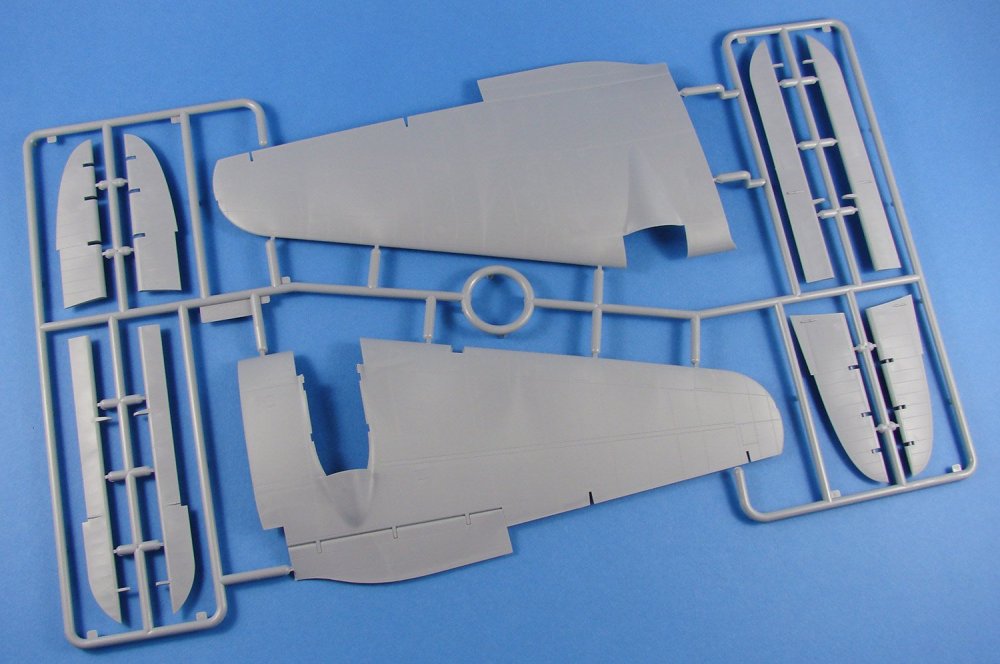
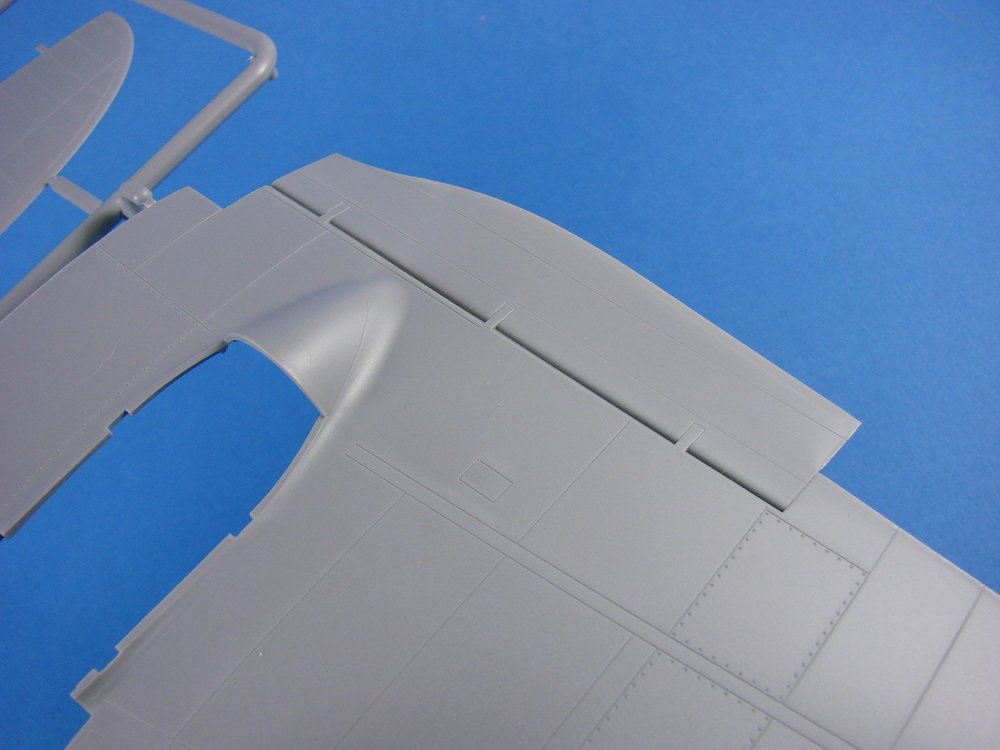
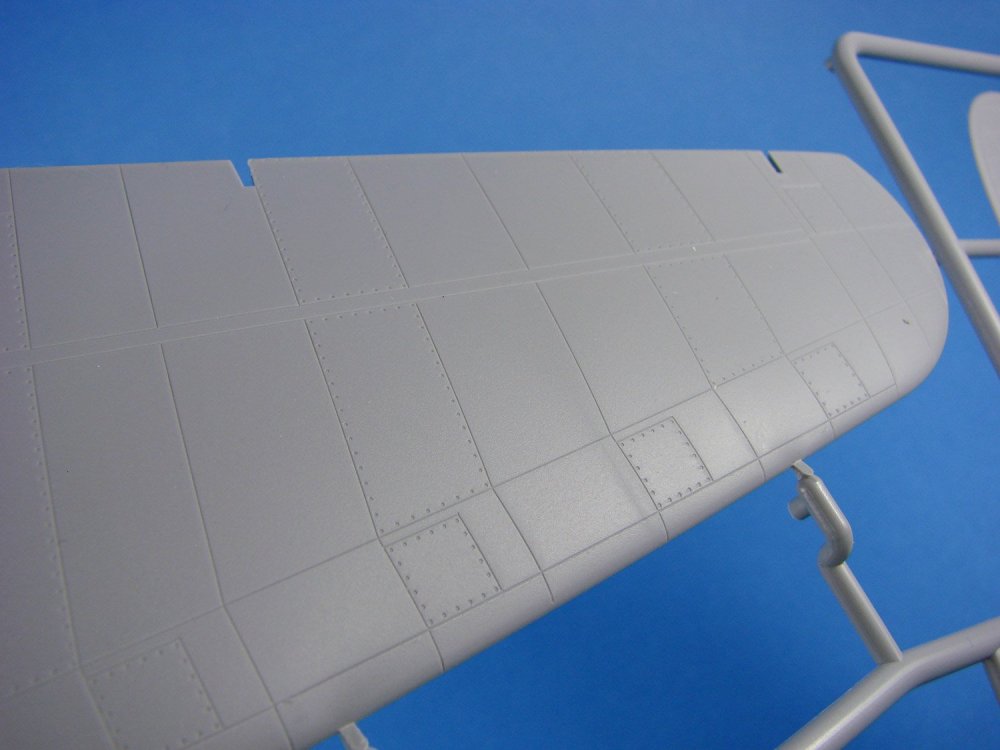
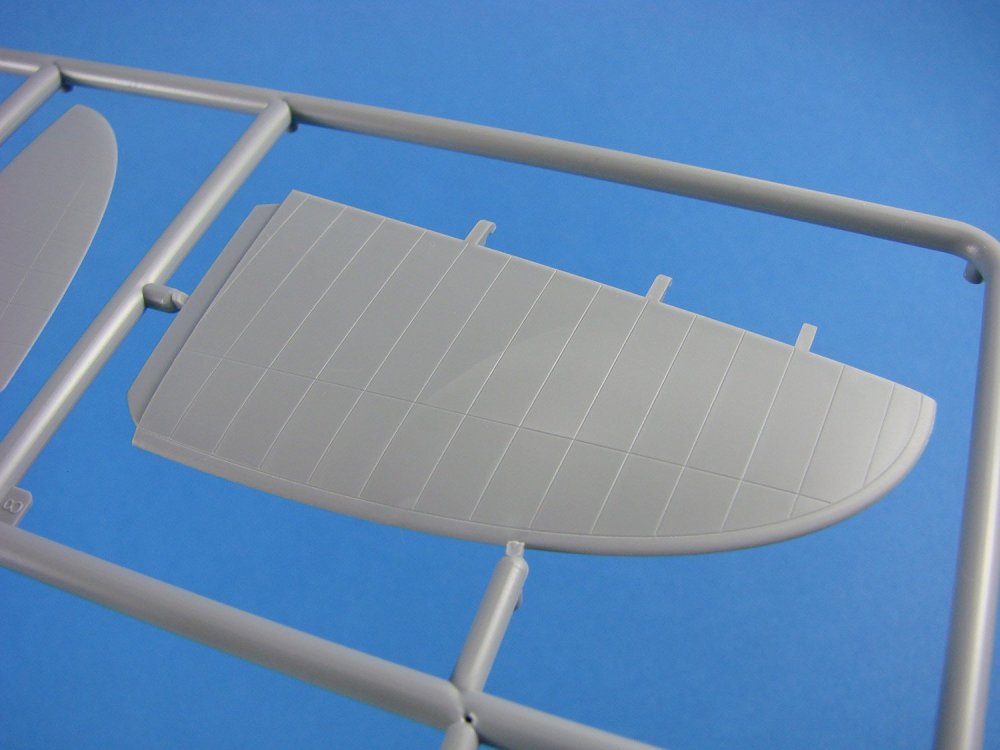
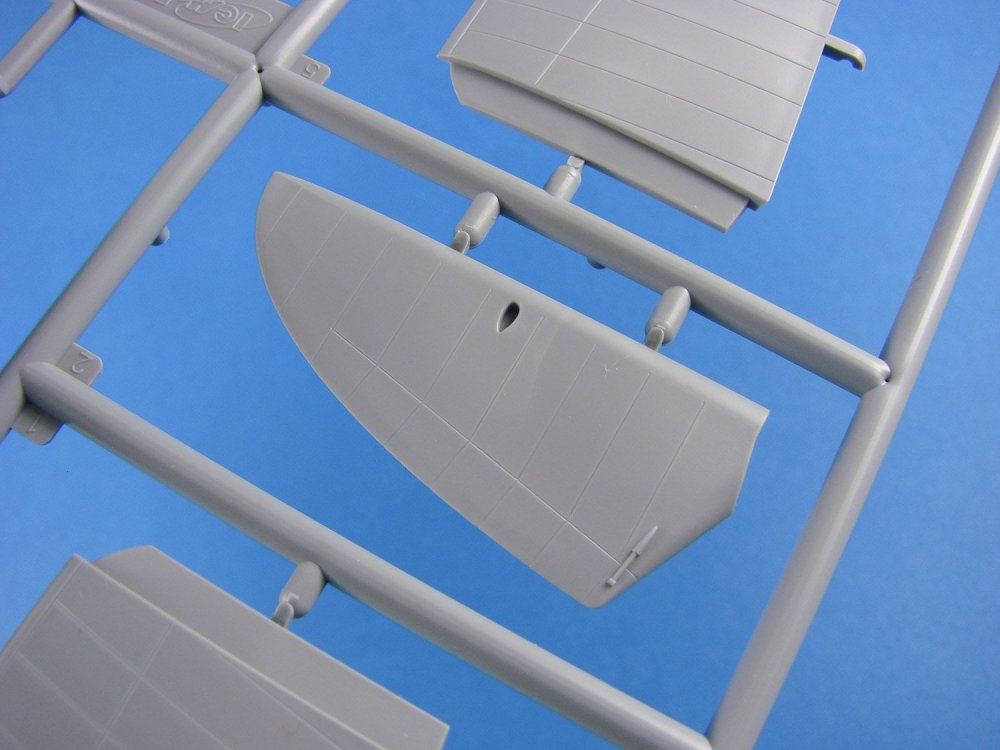
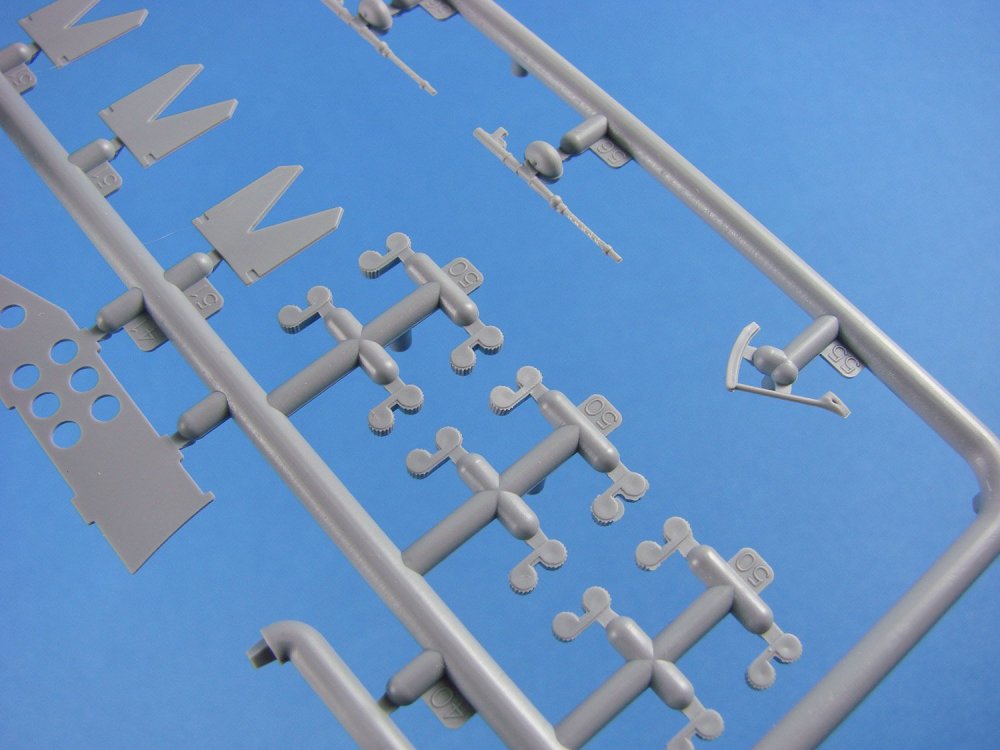
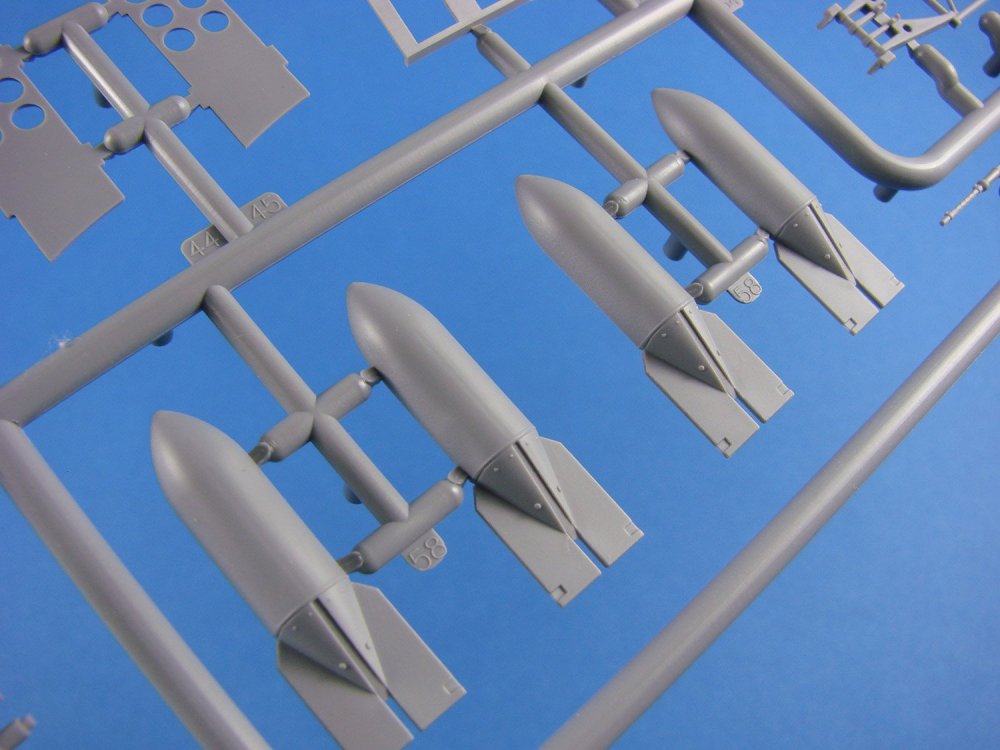
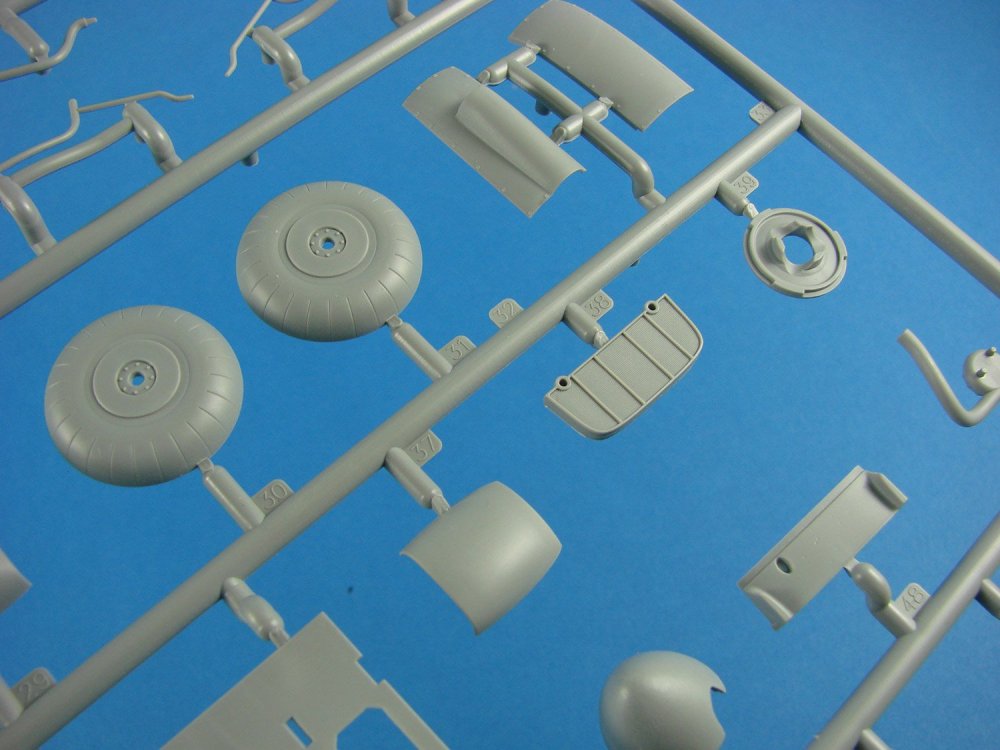
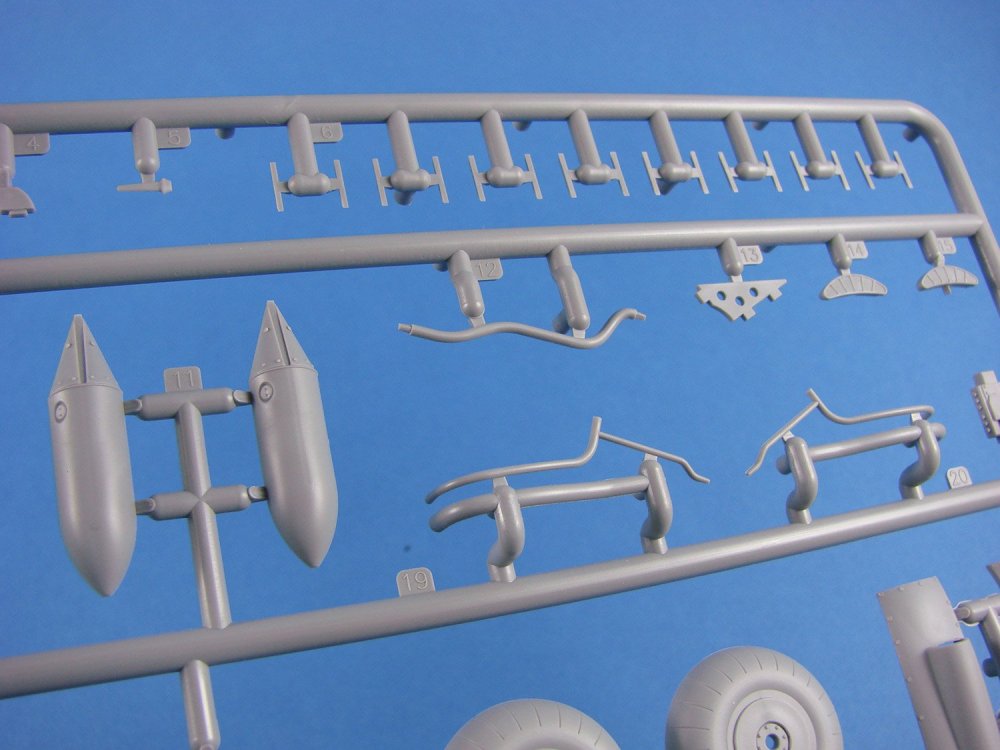
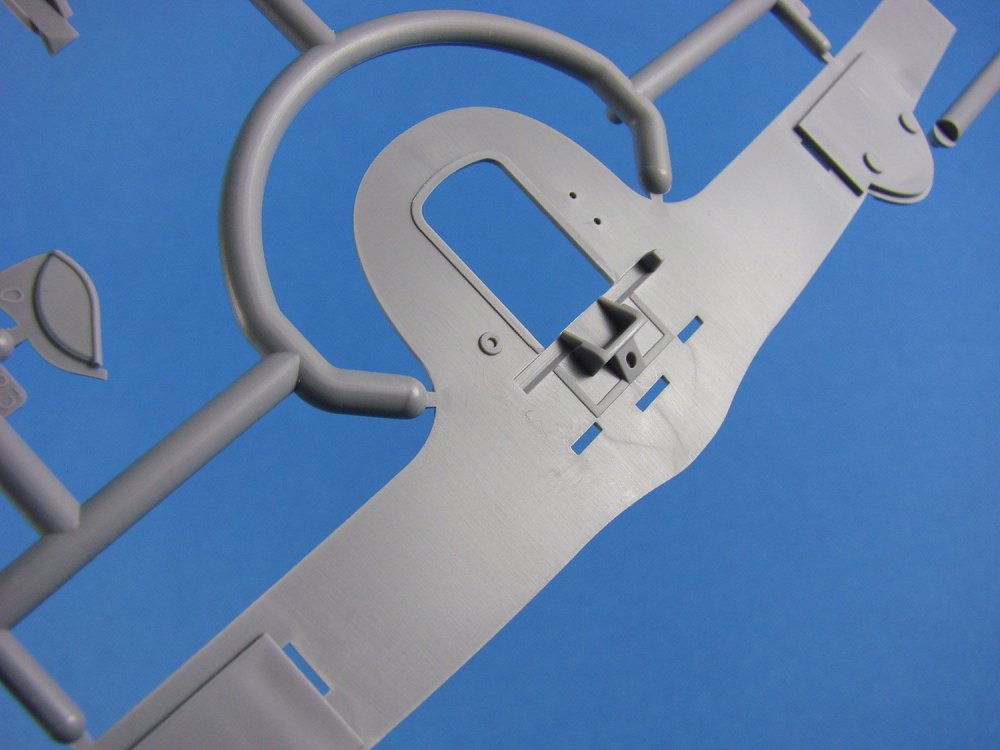
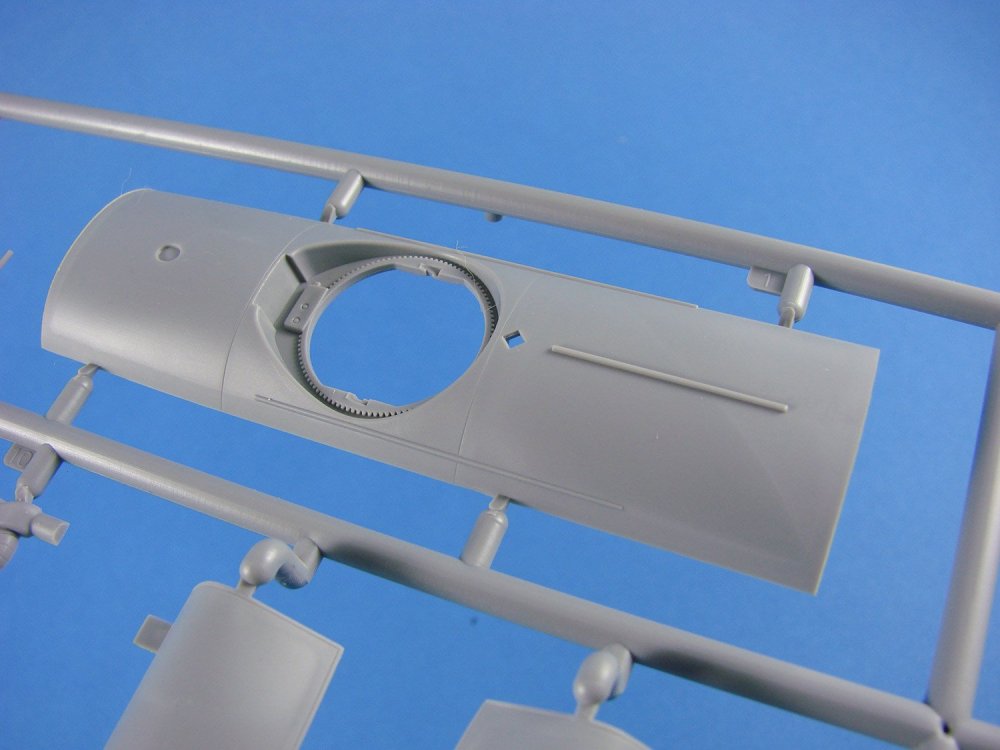
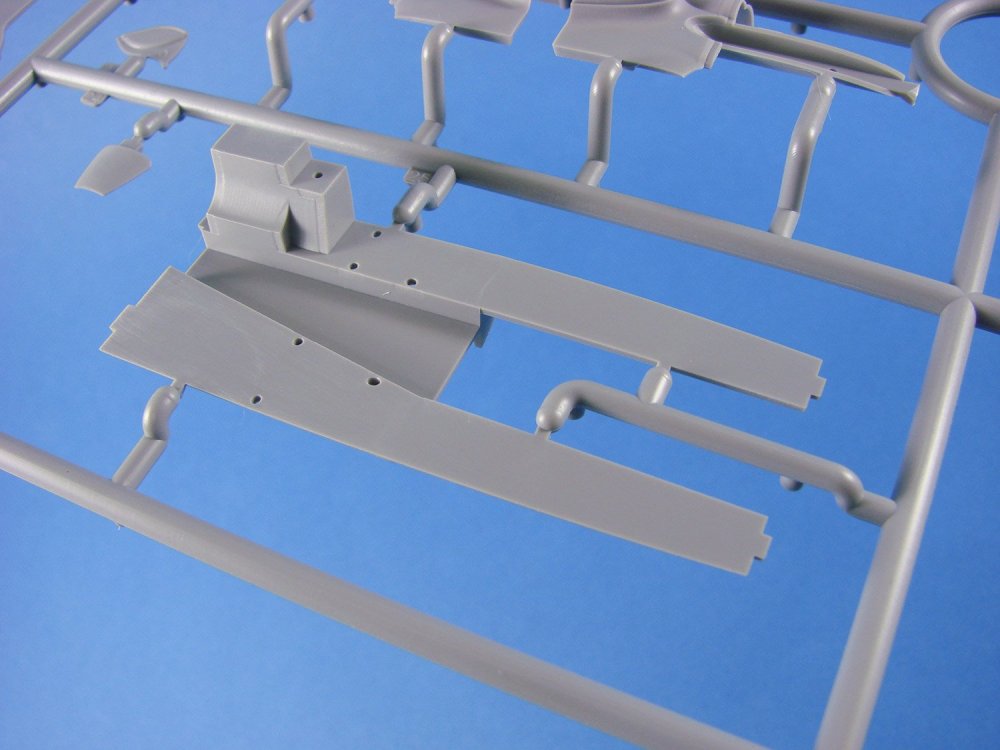
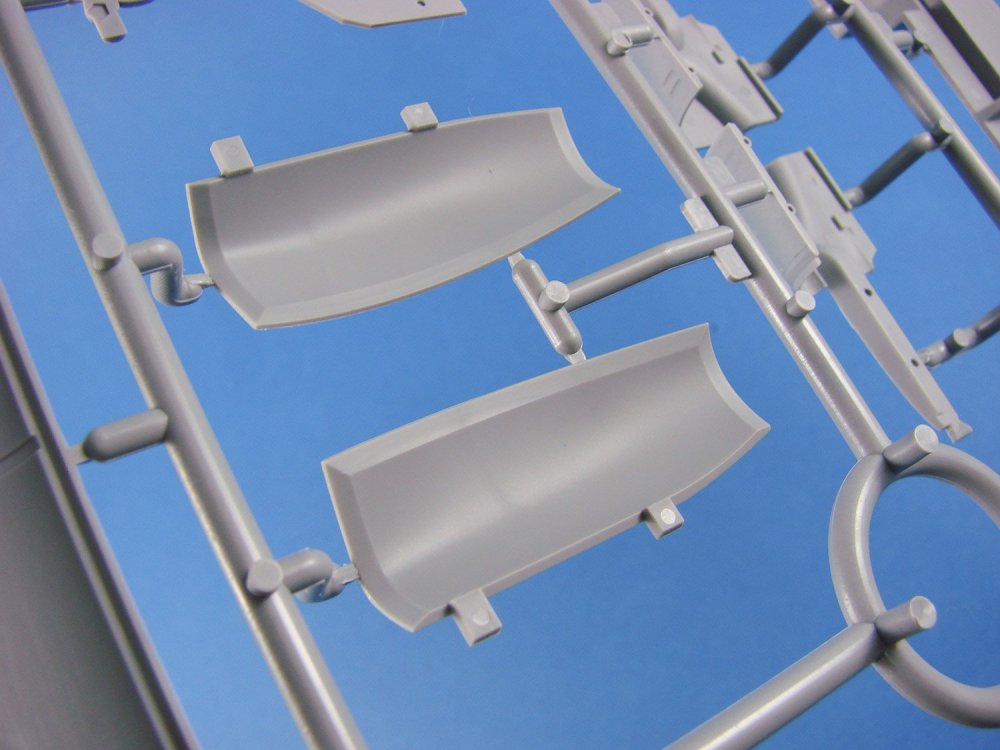
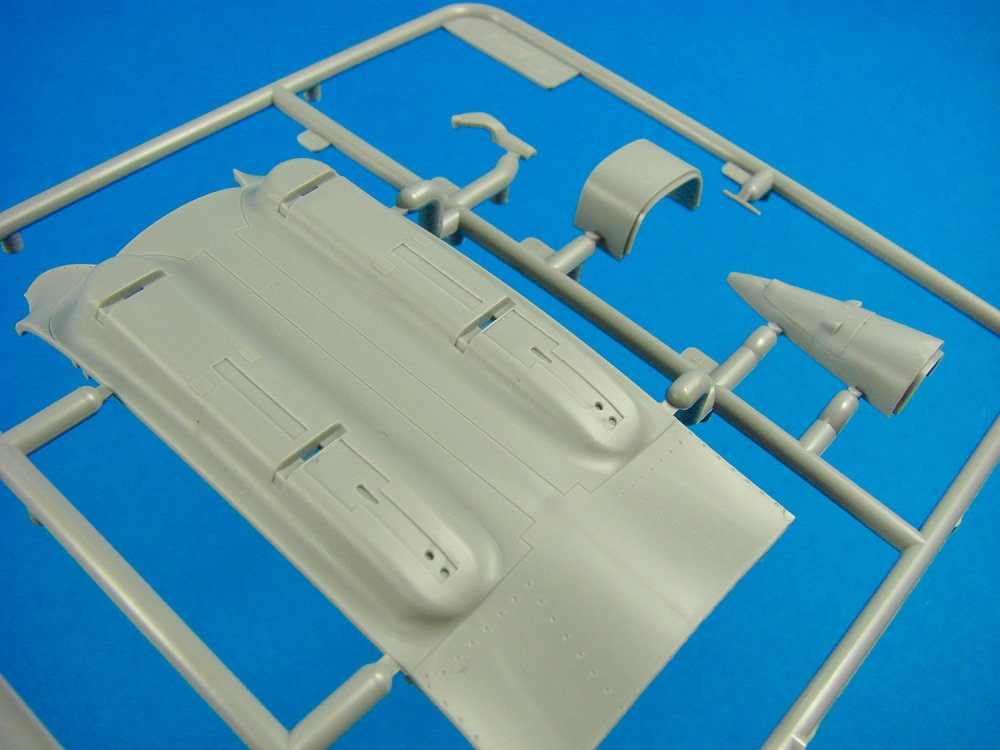
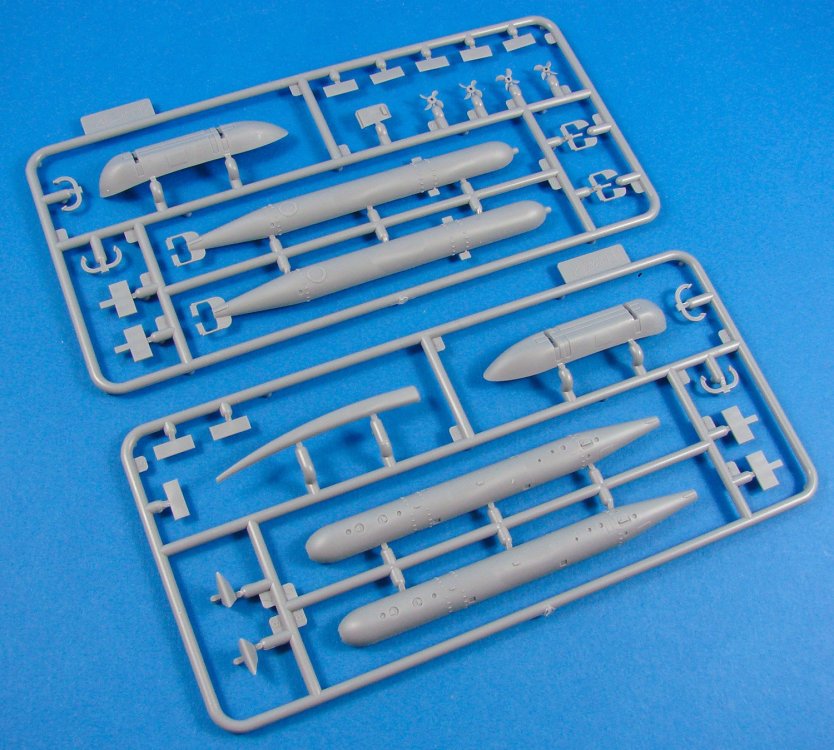
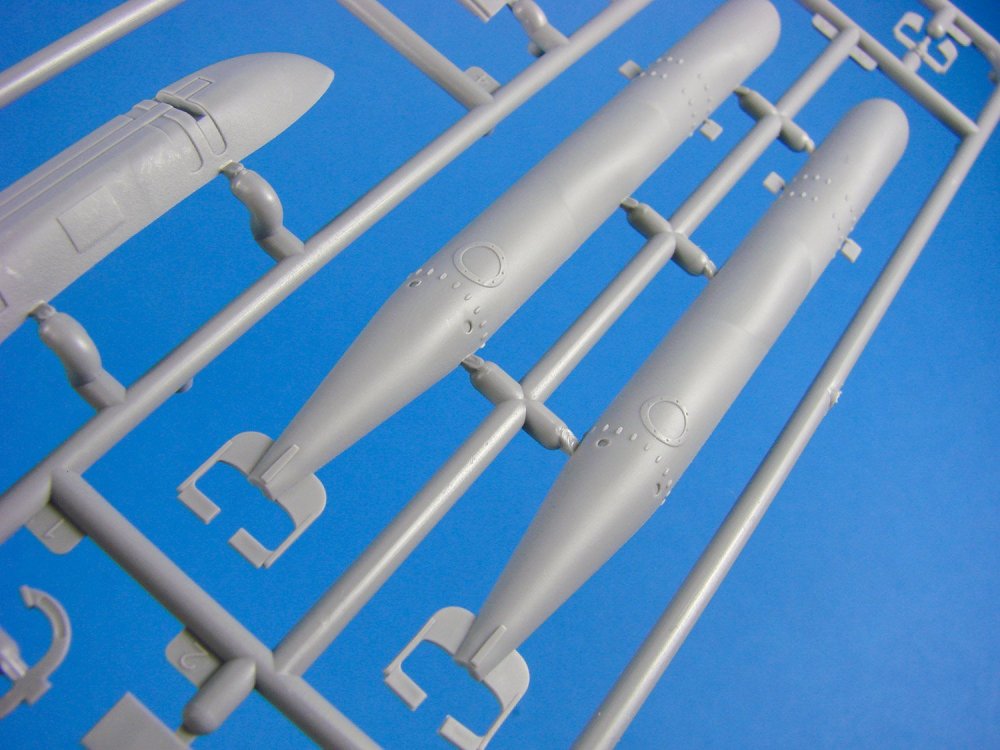
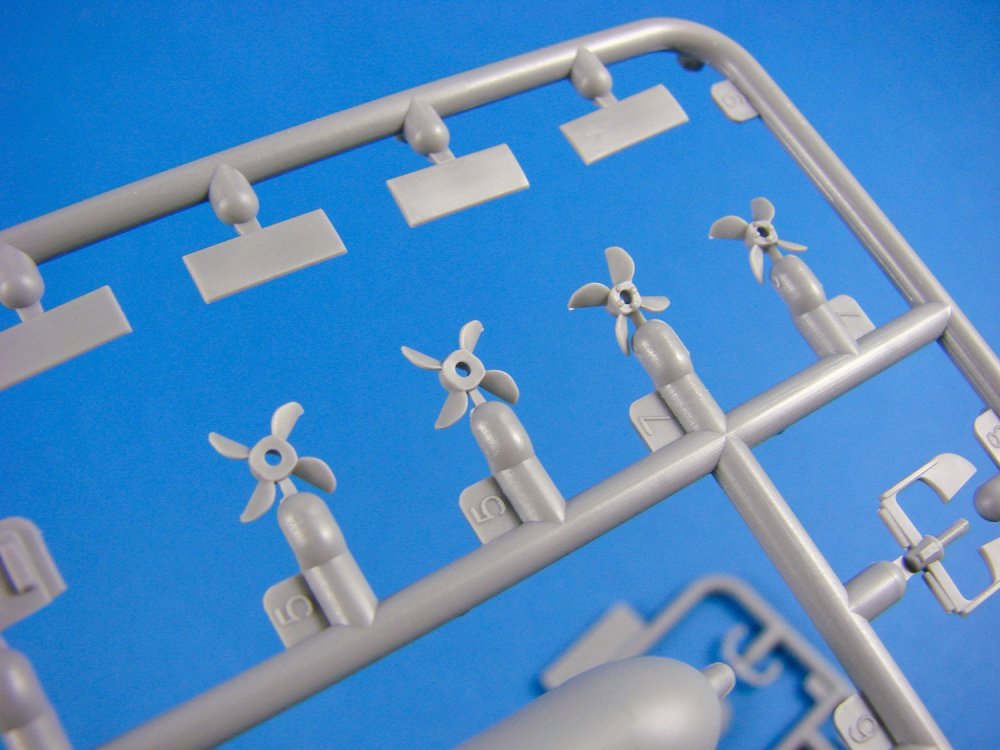
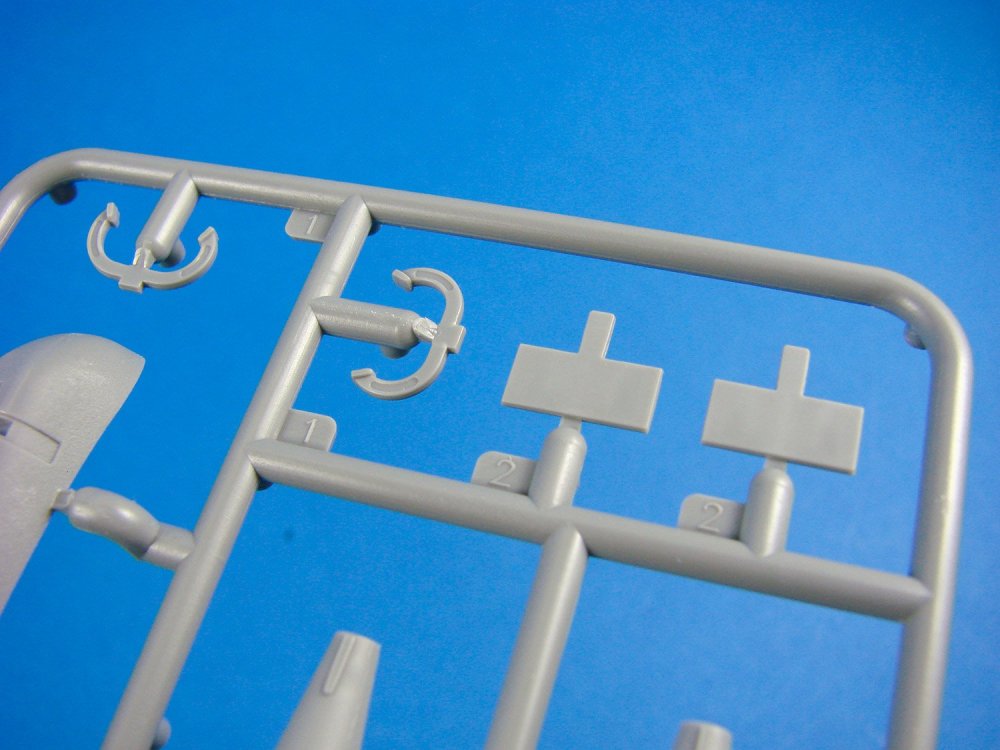
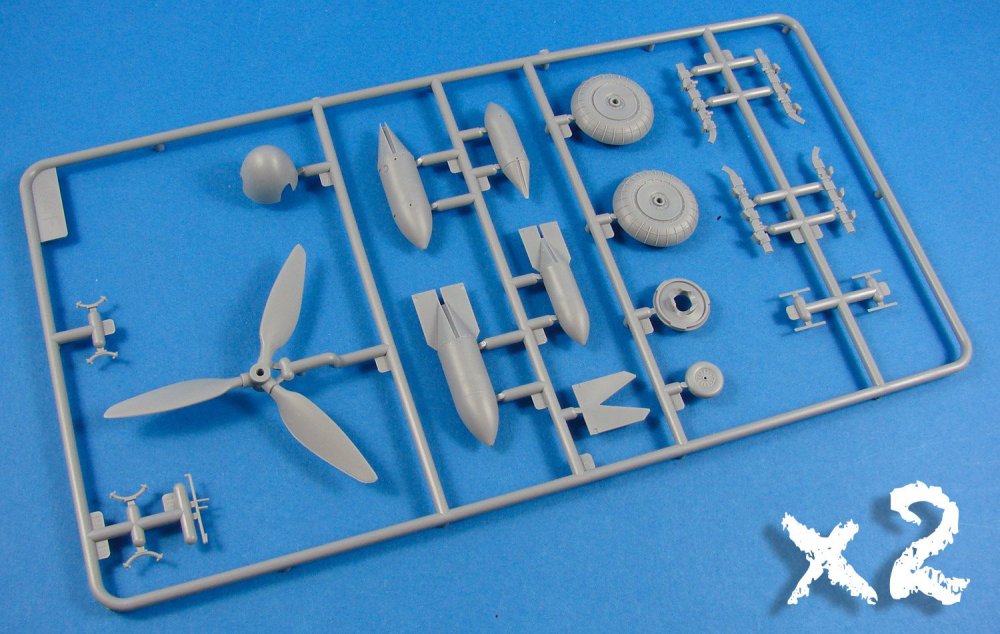
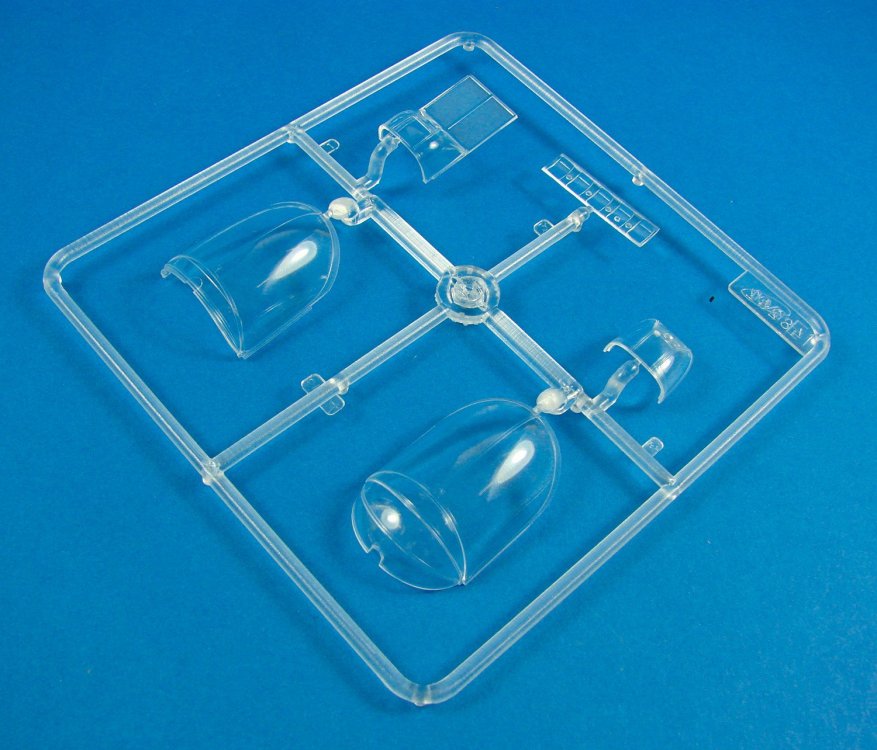
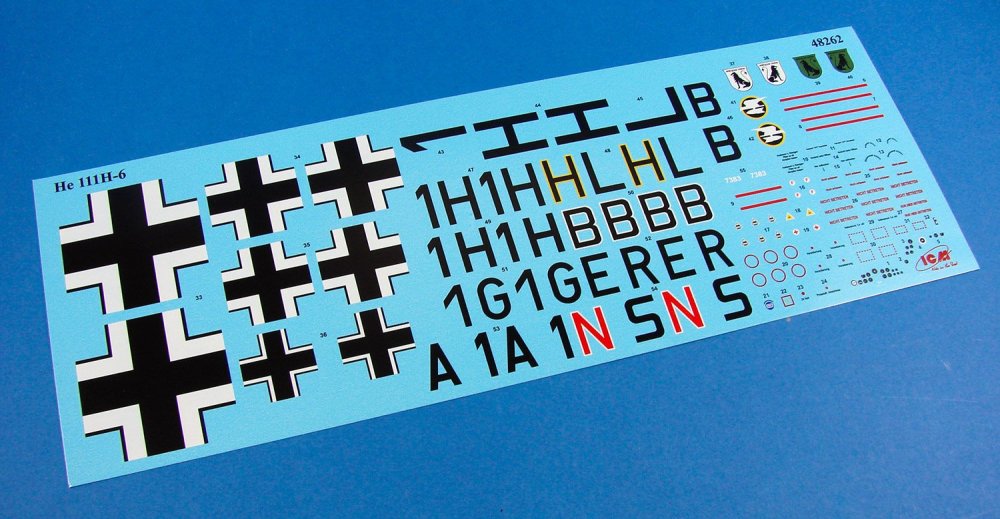
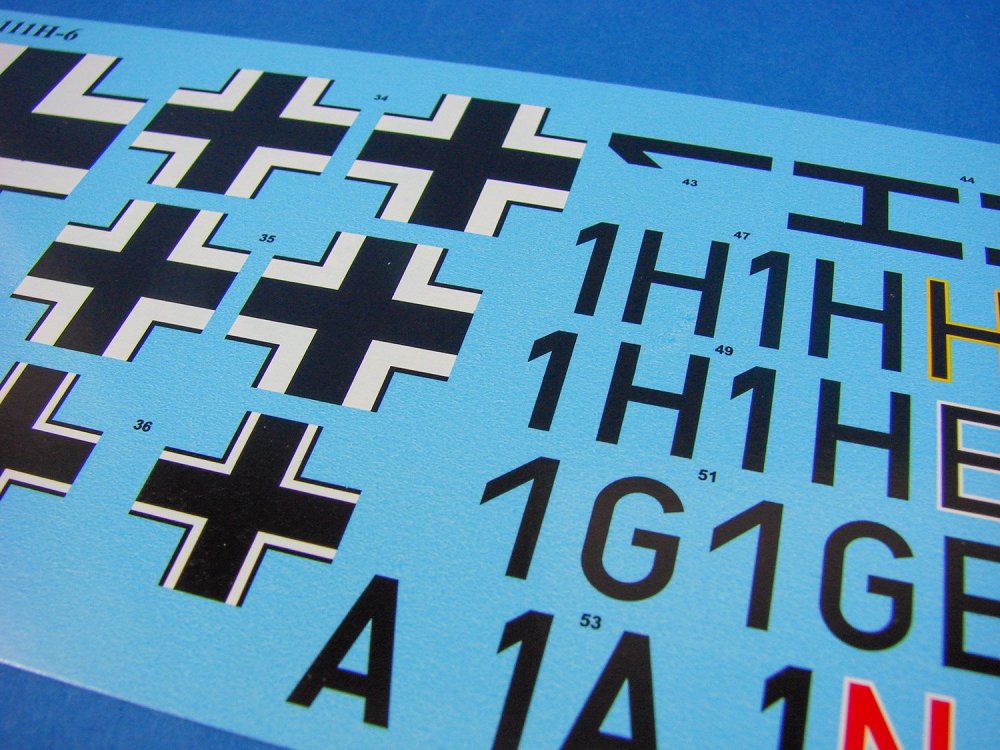
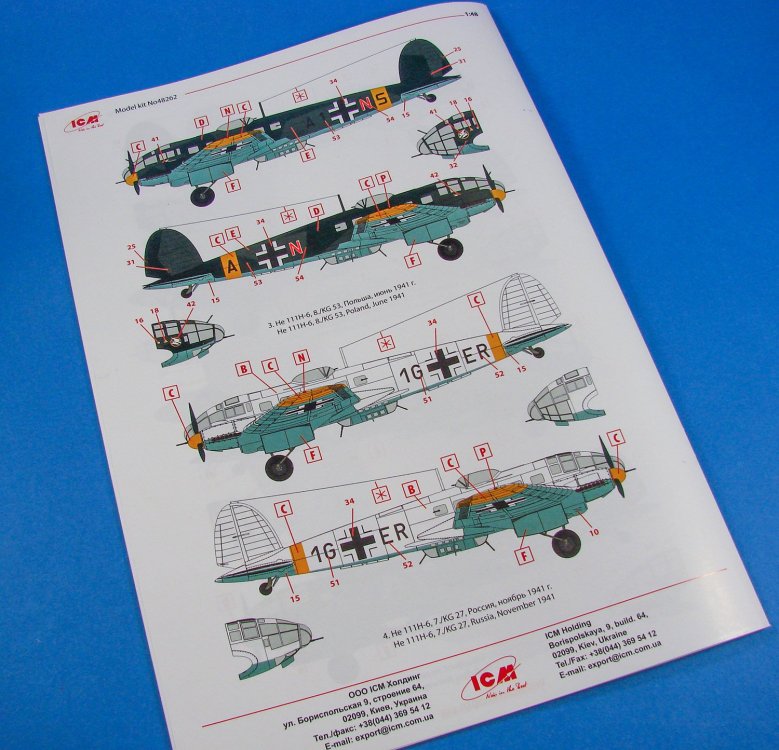
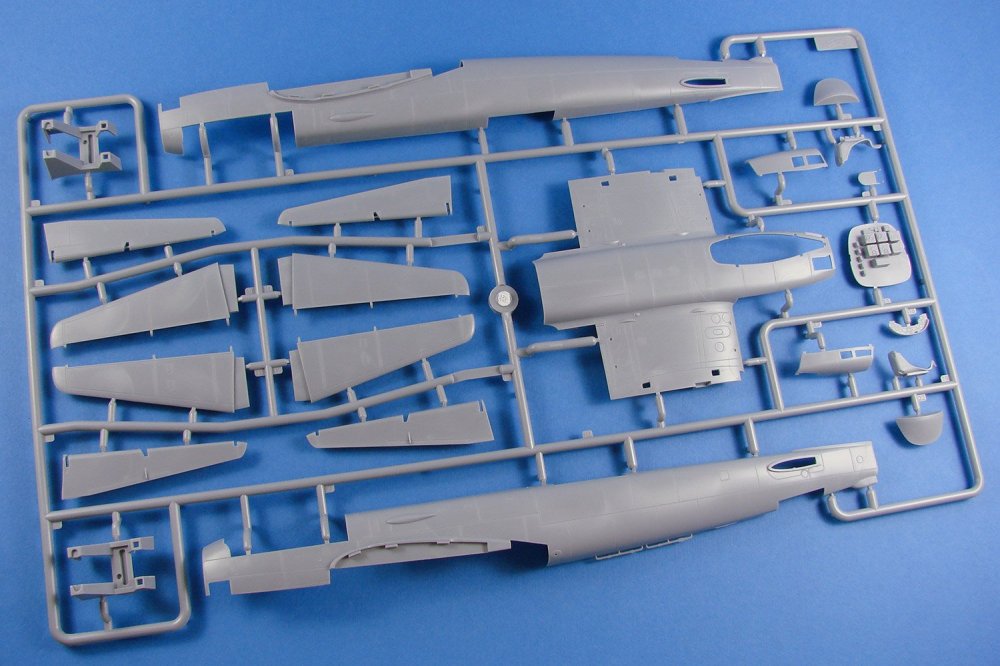
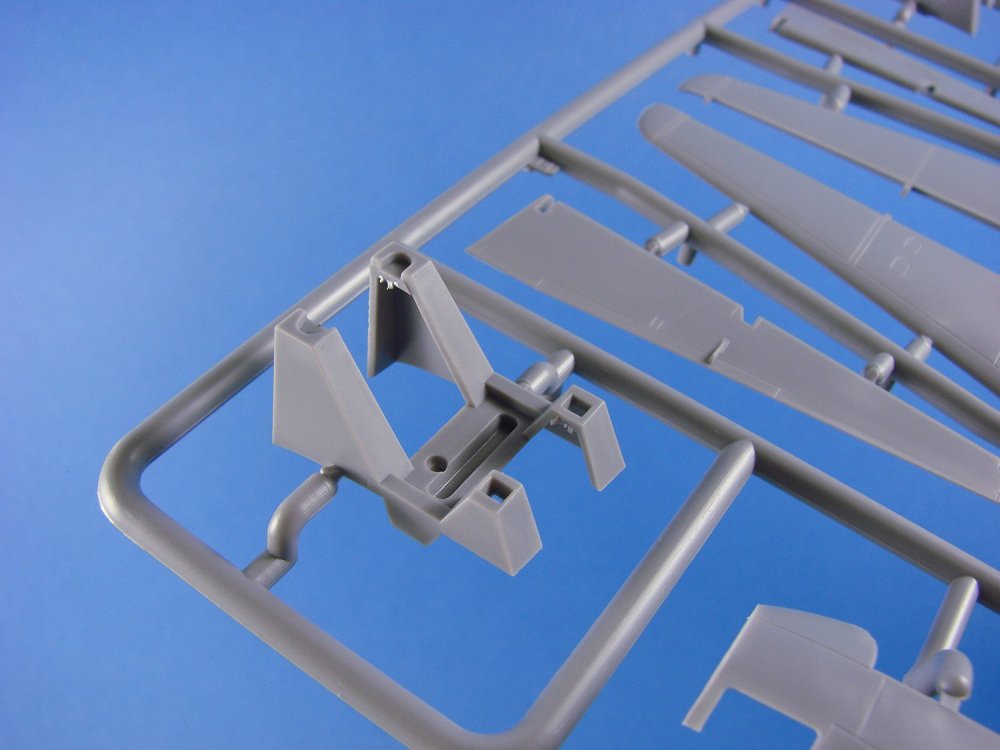
1/48 Heinkel He 111H-6 ICM Catalogue # 48262 Available from Hannants for £41.99 The Heinkel He 111 was a German aircraft designed by Siegfried and Walter Günter at Heinkel Flugzeugwerke in 1934. Through development it was described as a wolf in sheep's clothing because the project masqueraded the machine as civilian transport, though from conception the Heinkel was intended to provide the nascent Luftwaffe with a fast, medium bomber. Perhaps the best-recognised German bomber due to the distinctive, extensively glazed greenhouse nose of later versions, the Heinkel He 111 was the most numerous Luftwaffe bomber during the early stages of World War II. The bomber fared well until the Battle of Britain, when its weak defensive armament was exposed. Nevertheless, it proved capable of sustaining heavy damage and remaining airborne. As the war progressed, the He 111 was used in a variety of roles on every front in the European theatre. It was used as a strategic bomber during the Battle of Britain, a torpedo bomber in the Atlantic and Arctic, and a medium bomber and a transport aircraft on the Western, Eastern, Mediterranean, Middle Eastern, and North African Front theatres. The He 111 was constantly upgraded and modified but became obsolete during the latter part of the war. The German Bomber B project was not realised, which forced the Luftwaffe to continue operating the He 111 in combat roles until the end of the war. Manufacture of the He 111 ceased in September 1944, at which point piston-engine bomber production was largely halted in favour of fighter aircraft. With the German bomber force virtually defunct, the He 111 was used for logistics. The H variant of the He 111 series was more widely produced and saw more action during World War II than any other Heinkel variant. Owing to the uncertainty surrounding the delivery and availability of the DB 601 engines, Heinkel switched to 820 kW (1,100 hp) Junkers Jumo 211 powerplants, whose somewhat greater size and weight were regarded as unimportant considerations in a twin-engine design. When the Jumo was fitted to the P model, it became the He 111H. German-built He 111s remained in service in Spain after the end of the Second World War, being supplemented by Spanish licence-built CASA 2.111s from 1950. The last two German-built aircraft remained in service until at least 1958. The H-6 variant (the subject of this review) was a torpedo bomber and could carry two LT F5b torpedoes externally. It was powered by Jumo 211F-1 engines, had six MG 15s and one MG FF cannon in forward gondola. The kit I think it would be pretty fair to say that 1/48 Heinkel He 111 kits have been few and far between over the last years. In fact, before the initial ICM He 111H-3 version which was released towards the end of 2017, the last was another re-boxing of the old Monogram kit that dates back to 1994, and seen subsequently under Revell, Hasegawa, and Revellogram labels. It seemed that almost every other German twin had seen some release or other, apart from another Heinkel. Well, when ICM announced that they were to give us a newly-tooled He 111H-3, it was fair to say that many Luftwaffe fans were extremely pleased. The breakdown of the model also invited future versions to be released, and 6 months later, this is exactly what we got. ICM has a reputation for accurate model kits, with plenty of detail inside as well as refined external details. Their Ju 88 kits have seen numerous version releases, both with ICM themselves, and also with Revell and Special Hobby. No one can accuse ICM’s newer kits of having flimsy boxes, as per one German manufacturer. This one comes in a sturdy corrugated cardboard box with a locking tab, and with a separate, glossy product lid sat snugly over this. Box art depicts a France-based machine flying relatively low over the French countryside, towards dusk, with one box edge showing a couple of the FOUR schemes that can be built from this H-6 torpedo-carrying version. Once you cut through the clear disc tabs, remove the lid and open the box, you will find SEVEN sprues of medium-grey styrene and ONE of clear, tightly packed into a single clear sleeve. Normally I don’t like this approach, but there was pretty much no way these were going to rub over each other. The clear sprue was also packed into a separate sleeve within this main one. Now, those 7 sprues are actually common to the previous He 111H-3 release, as a second clear sleeve contains a further FIVE light grey sprues, and a separately bagged clear one. This brings the total sprue count to FOURTEEN! Of course, a healthy parts count is on definitely on the plate here. A heavy 28-page instruction manual lay in the bottom of the box, and tucked within this is a long and narrow decal sheet. This kit contains no PE parts. Sprue A Our first sprue brings us two of the main parts; namely the fuselage halves. It’s impossible to ignore these, so I’ll look at them first. These are very similar to how Revell went about their 1/32 kit, in that the upper forward fuselage is a separate piece, that can of course be an indication of other variants coming our way. Externally, detail is superb and very refined, with evenly and neatly recessed, narrow panel lines and a slightly proud wing root fairing with rivet fasteners. Elsewhere, however, no rivets are depicted. I quite like the difference that a riveted surface creates with a finished project, so will add these myself with a beading tool. The rudder is moulded separately, as is the belly. With the latter, two parts options are provided on this sprue, and those are for a bomb-doors closed, and doors open option. That certainly negates any ill-fitting doors that wouldn’t perhaps sit flush. Perhaps one thing that I’m not keen on are the aerial arrangement runners that are moulded to one of the lower fuselage halves. This makes removing seams a far more difficult task. Easy to fix though: slice off the detail and fit it later when seams are gone. Only a niggle really. Internally, I think ICM have made a very reasonable job of recreating the structural elements of this aircraft, with such detail extending from the nose, back to just aft of the belly gondola. There are some ejector pin marks though, but these are generally shallow enough to simply rub them away with a fibreglass pen, or other lightly abrasive tool. You will note that due to moulding limitations, ICM has had to produce a wing root insert to glue into position within the fuselage, and you might want to blend this in to the surrounding detail. This is the same solution that HK Models used on their 1/32 B-17 Fortress kits. Similar inserts exist for the lower bomb bay walls, but these sit primarily between the two main spar and bulkhead parts that form the basis of the construction. Note also the port and starboard wheel well walls, as well as the ceiling for this area. Fore and aft walls are moulded to the main spars. These walls will provide basic constructional elements and could/should be enhanced further by the modeller, with a little plasticard and wire. I’m not going to really criticise this due to the price of the kit, and the area providing a far more than adequate basis for detailing further. Other parts on this sprue are for the lower gondola, cockpit sidewalls, and radio equipment wall. Sprue B1 & B2 Both of these have the wing upper and lower panels as their main components, moulded with integral landing flaps. I would quite have liked to have seen these separate, and it will take some work for the modeller to achieve. However, the ailerons are separate items, moulded as halves on one of these sprues. As per the fuselage, external wing detail is very refined, with superbly thin and even panel lines and port access details. No rivets here again, except for key lines and those around fuel tank panels and upper nacelle fairings. Internally, positive channels are moulded for the main wing spars, creating what looks to be a very sturdy and unambiguous assembly. Going back to the ailerons, these have very subtle rib and fabric details, and shouldn’t need any toning down. Other flying and control surfaces are moulded here also. These are the stabiliser, elevators and rudder, moulded as traditional halves. These of course exhibit the same finesse as seen generally on external surfaces. Sprue C (x2) Where there are generally multiples of specific components, then these are the sprues on which you will find them. This model is equipped with two complete Junkers Jumo 211 A-3 engines, comprising of almost 20 parts each. I really am very impressed with the detail on these, and they certainly convincing against my reference material, including personal photographs of the 211. As with the wheel bays, just a little lead wiring should be all that’s needed to bring these to life. Unusually, the prop shafts are moulded into the main engine halves, instead of having a separate, captive pin that will allow the props to rotate. I did say this model had a full interior, and further evidence is seen here with multipart bomb bay cages, plus a full complement of eight SC500 bombs that sit within the cage’s vertical cells. Don’t get too excited though, as these AREN’T for use with this H-6 release! Nice additions to your spares box though. Other parts on this sprue include the numerous engine cowl parts, and the forward cowl ring with its characteristic lightening holes. Wheels are moulded as halves, but these aren’t weighted. They also aren’t used, as alternatives are provided on a new sprue, but they still aren’t weighted. Maybe Eduard will oblige us… Sprue D1 Unless it’s tied into more future releases, I admit that I don’t understand the nomenclature of the sprues D1 and D2. They seem unrelated. This particular sprue contains those two chunky main spars, complete with integral fuselage bulkheads and moulded bulkhead and main gear bay details. Note also other internal bulkheads, and for the cockpit itself. ICM has designed a rather tidy main cockpit, that is generally spread over both this sprue and D2, and should look great as it is, out of box. No doubt that Eduard will still be able to persuade us to invest further though. Decals are provided for enhancing the cockpit further, and these are clearly labelled on the instructions sheet. Internal parts on this sprue include the rear cockpit wall, cockpit floor, multi-part pilot seat with head armour, ammunition racks etc. Other parts here include the upper fuselage deck with moulded cupola gun traverse gearing, engine cowl to wing cowl fairings, splayed bomb bay door option, tail wheel that is moulded in situ with strut, and the main gear bay doors. Unusually, these last items have no detail moulded internally. This would definitely need addressing. Sprue D2 Someone at ICM had the foresight to include most of this kit’s more fragile and smaller parts on this sprue, meaning you can safely stash this to one side during the course of building. On here you will find the undercarriage struts and braces, ammunition rack components, rudder pedals and linkages, smaller cockpit components, control yoke and torsion tube, bomb aimer/co-pilot seat, MG mounts, etc. Sprue E This last sprue of generic He 111 parts contains all of the clear components. Where the varying items have sections that aren’t a part of a window etc. then these are frosted. Framing is pretty good, and this shouldn’t be too difficult to mask up for airbrushing. Even easier if Eduard release masks for this kit. What I do note is that whilst the clear areas have a good transparency, these areas look a little rippled, and more so when you look at through them to things in the distance. However, whilst this isn’t particularly good, if you look at things that are in close proximity to the clear areas, then this isn’t as noticeable. I have some faith that this won’t be too obvious when the model is complete, but don’t quote me. The He 111’s famous glazed nose is comprised of three parts. Care will definitely be needed in assembling these. Two options are supplied for the lower gondola glazing, as are weapons too. Note that the instrument panel is moulded here too. I’ve never seen the point of clear IPs, but that might only be my mileage. Instrument decals are supplied for this and other cockpit areas, but you may choose to punch out the individual dials and apply them separately. It certainly makes for a cleaner finish. Sprue E1 This new, clear sprue contains just four parts. Two of these are for the upper gunner position and the options here are for an open glazed area with a retracted canopy, or a closed version. I’m glad to see they provided optional parts instead of having to assemble this. The remaining two parts are for the front and rear of the ventral gondola. The standard of glazing here is actually nicer than the main canopy parts. Sprue G The first of our new grey sprues contains two underbelly sections. One of these is for the torpedo-carrying machine, and the other for the one carrying an external bomb payload. There are some slight differences here. Of course, the ETC racks sit over the He 111s bomb doors, and with this machine, you won’t fit the internal bomb racks. They are showed as not for usewith this release. Two scheme options provided in this kit have the tail with the rear-facing MG. Parts are provided here for that, but you will need to take a saw to the kit and remove the original tail. Maybe a slight oversight in ICM’s original modular design. The last parts are for the new tail wheel strut and ventral gondola. Sprue F (x2) These identical sprues contain the new props and spinners, two-part exhausts (thus hollow!), and external bomb load. Sprues H1 & H2 Not wanting to waste time and cost, of course, ICM has provided the same sprues in this release as for the Ju 88A-4/Torp. After all, they are the same weapons. Just remember that the racks won’t be needed as they are moulded to the underside of the new parts on Sprue G. The torpedoes themselves are moulded as halves, with separate propulsion impellors and a fin modification unit that is similar to the ones that the Japanese used on their torpedoes at Pearl Harbour, allowing the torpedo to operate very close to the water’s surface. Detail on these is excellent, and laden with two of these, this He 111 version should look particularly unusual and menacing. Decals One decal sheet is included, and there is no indication of where it is printed. I am assuming this is a homebrew ICM product. Printing is fairly thin and carrier film is minimal. Everything also appears to be in full register. No swastikas are included. A full set of stencils is included, along with the markings for the FOUR machines. These are: He 111H-6, 3./KG26, Norway, Summer 1941 He 111H-6, Stab I/KG26, Bardufoss, Norway, July 1942 He 111H-6, 8./KG53, Poland, June 1941 He 111H-6, 7./KG27, Russia, November 1941 Instructions I quite like ICM’s approach to the assembly manual, with the result being totally clean in approach and fuss-free. Starting with a history of the type, plus a colour chart for both Revell and Tamiya paints, a full parts plan is then printed, and then 116 constructional sequences. Assembly illustration is very clear, with colour annotation and selective use of shading to make some drawings clearer, such as where the 3D could mess with your mind! The last pages are taken over with a stencil drawing and four colour profiles for the supplied schemes. Decal placement and paint application is clear. Conclusion This appears to be a pretty accurate-looking kit with all the right curves in all the right places, and also a very intuitive and interesting assembly sequence. For example, you can’t build the wing separately to the fuselage, as the through-spars incorporate fuselage interior, and the bomb cells are loaded into the fuselage after main fuselage assembly, complete with the lower belly. Apart from the ripples in the glazing (which I don’t think will be too noticeable when assembled), the quality of this kit really is excellent, and ICM are setting new standards, outside of their Asian counterparts. This is also a kit with serious value for money, coming in at around £40. Plenty of buildability and one of those kits that really excites me. Hopefully, I’ll make a start very soon. My sincere thanks to ICM Model Kits for the review kit seen here. To purchase this one for yourself, click the link at the top of this article.


-
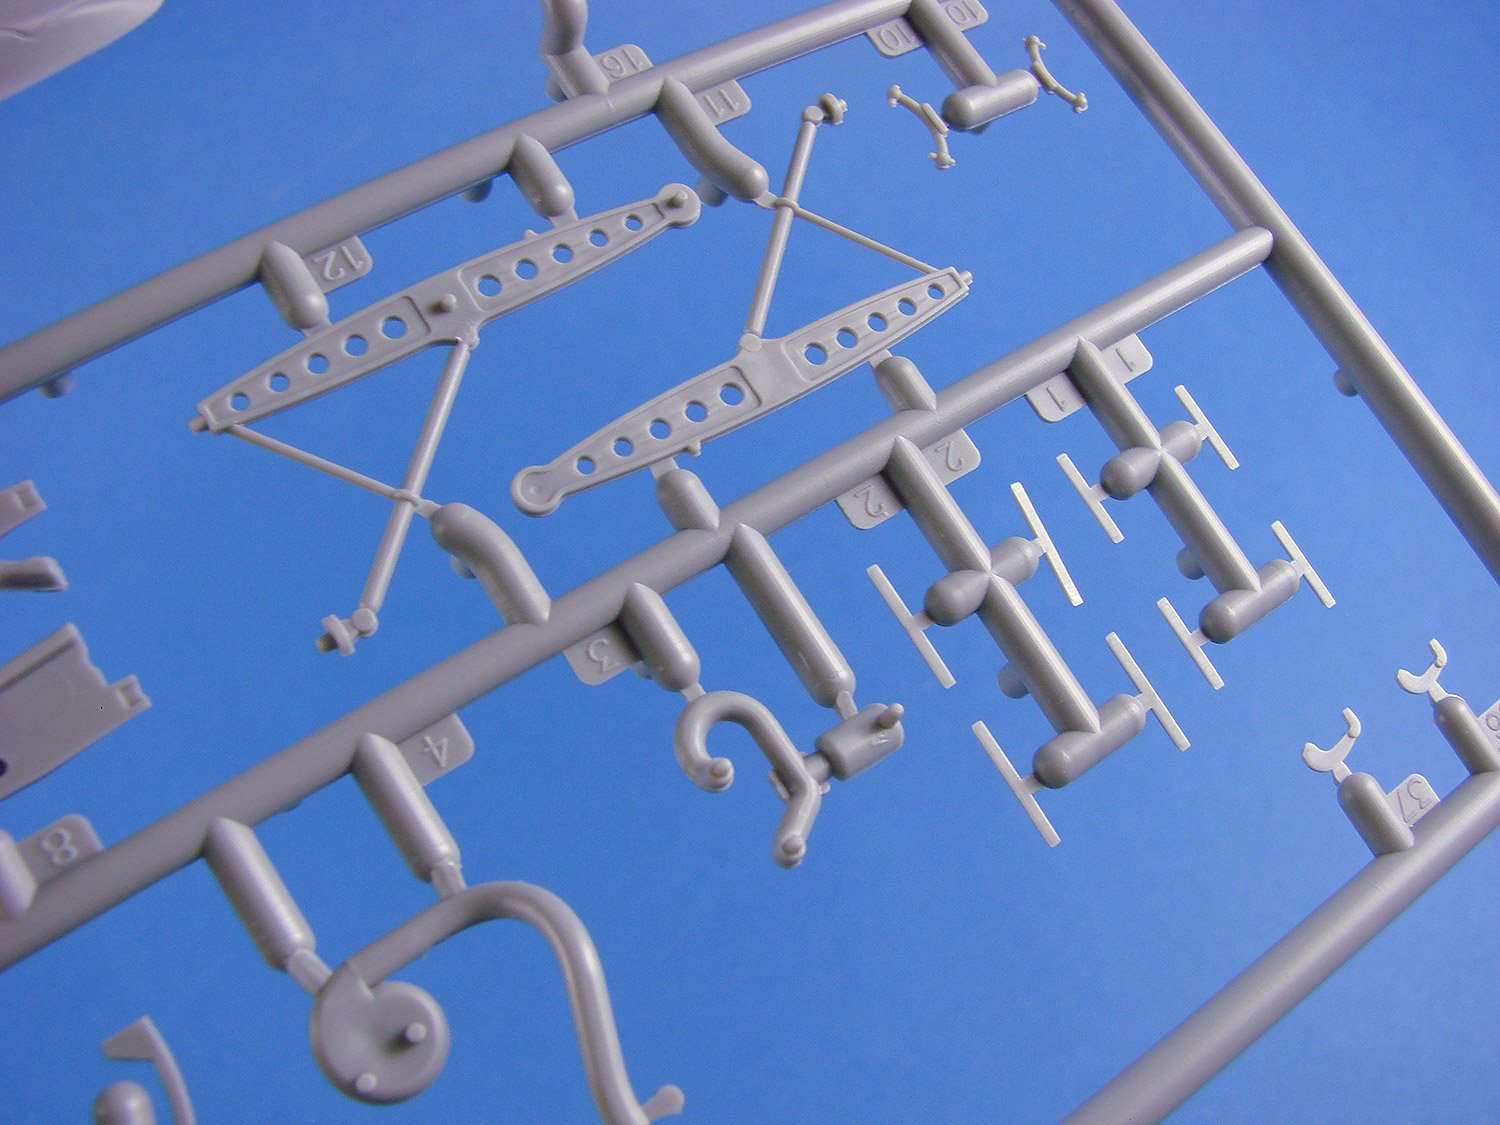
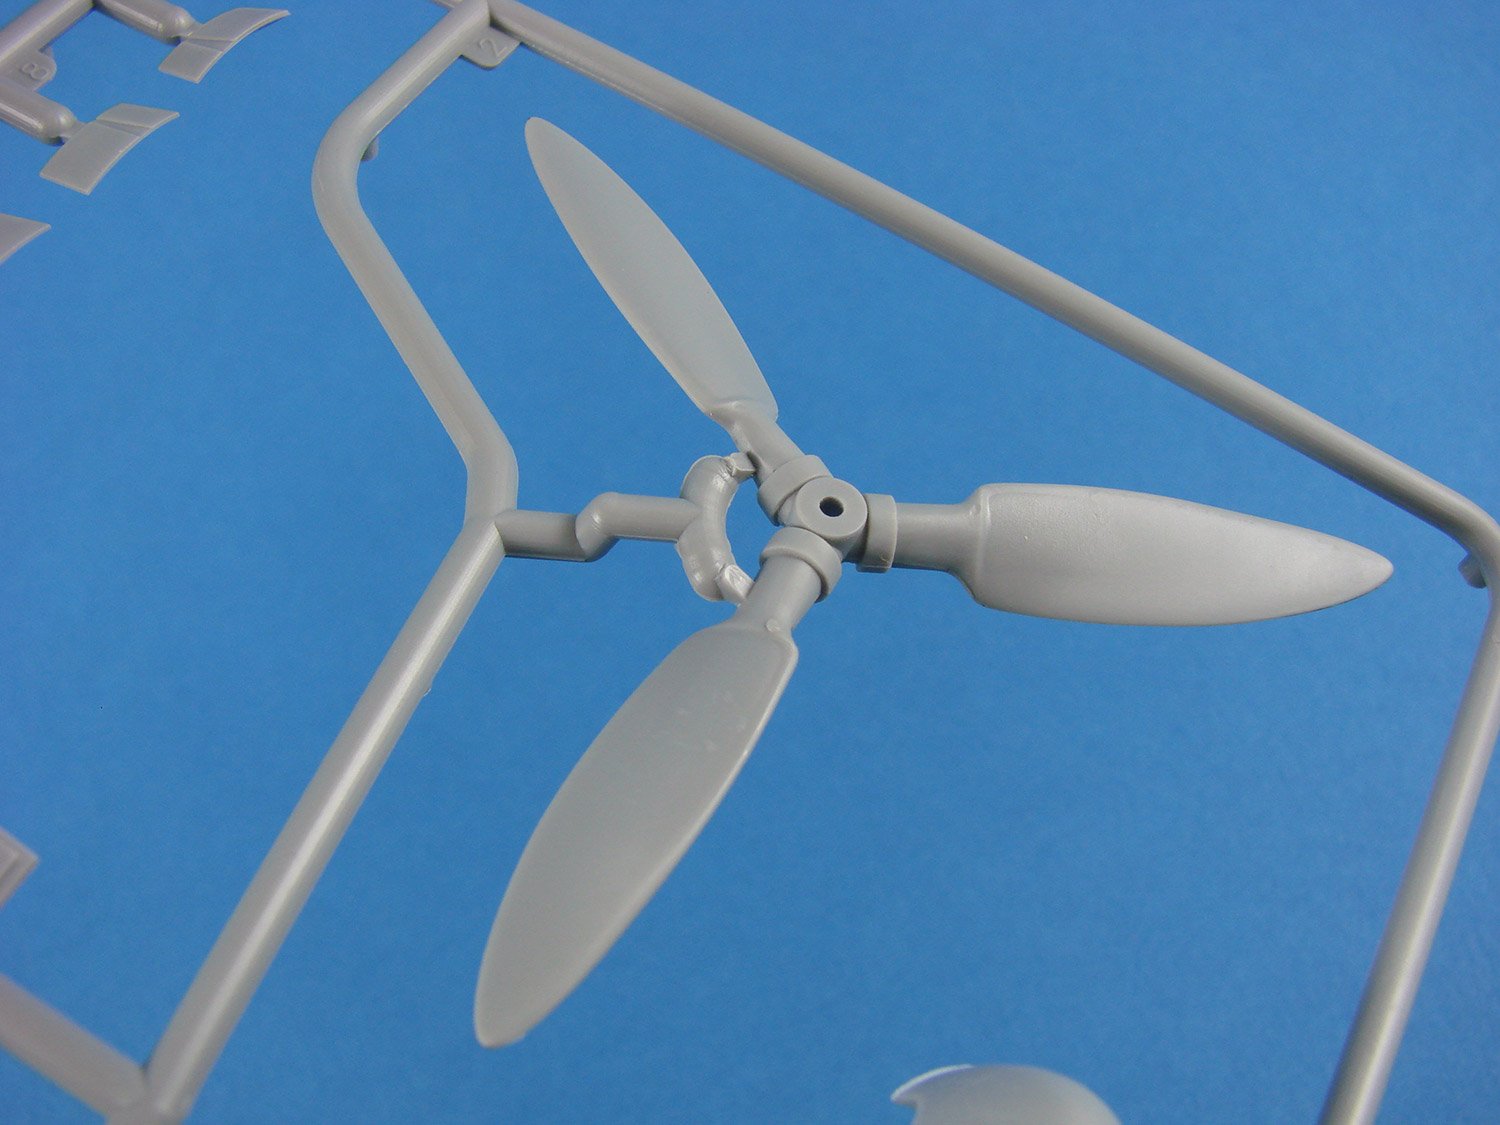
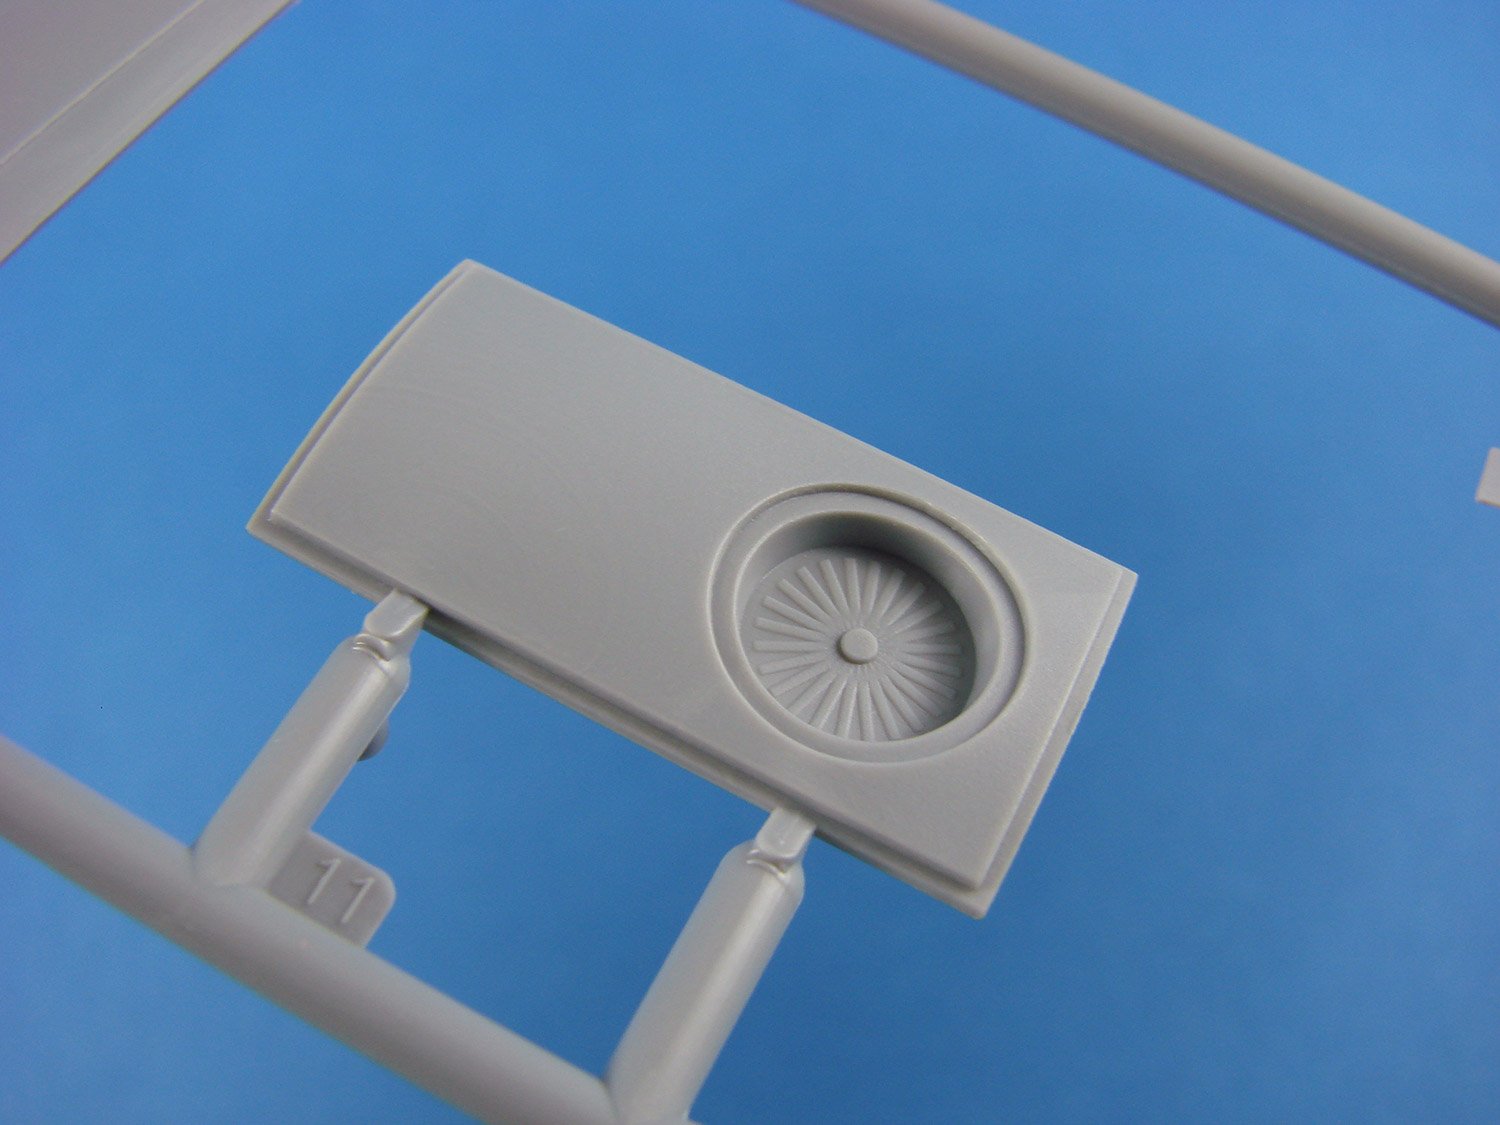
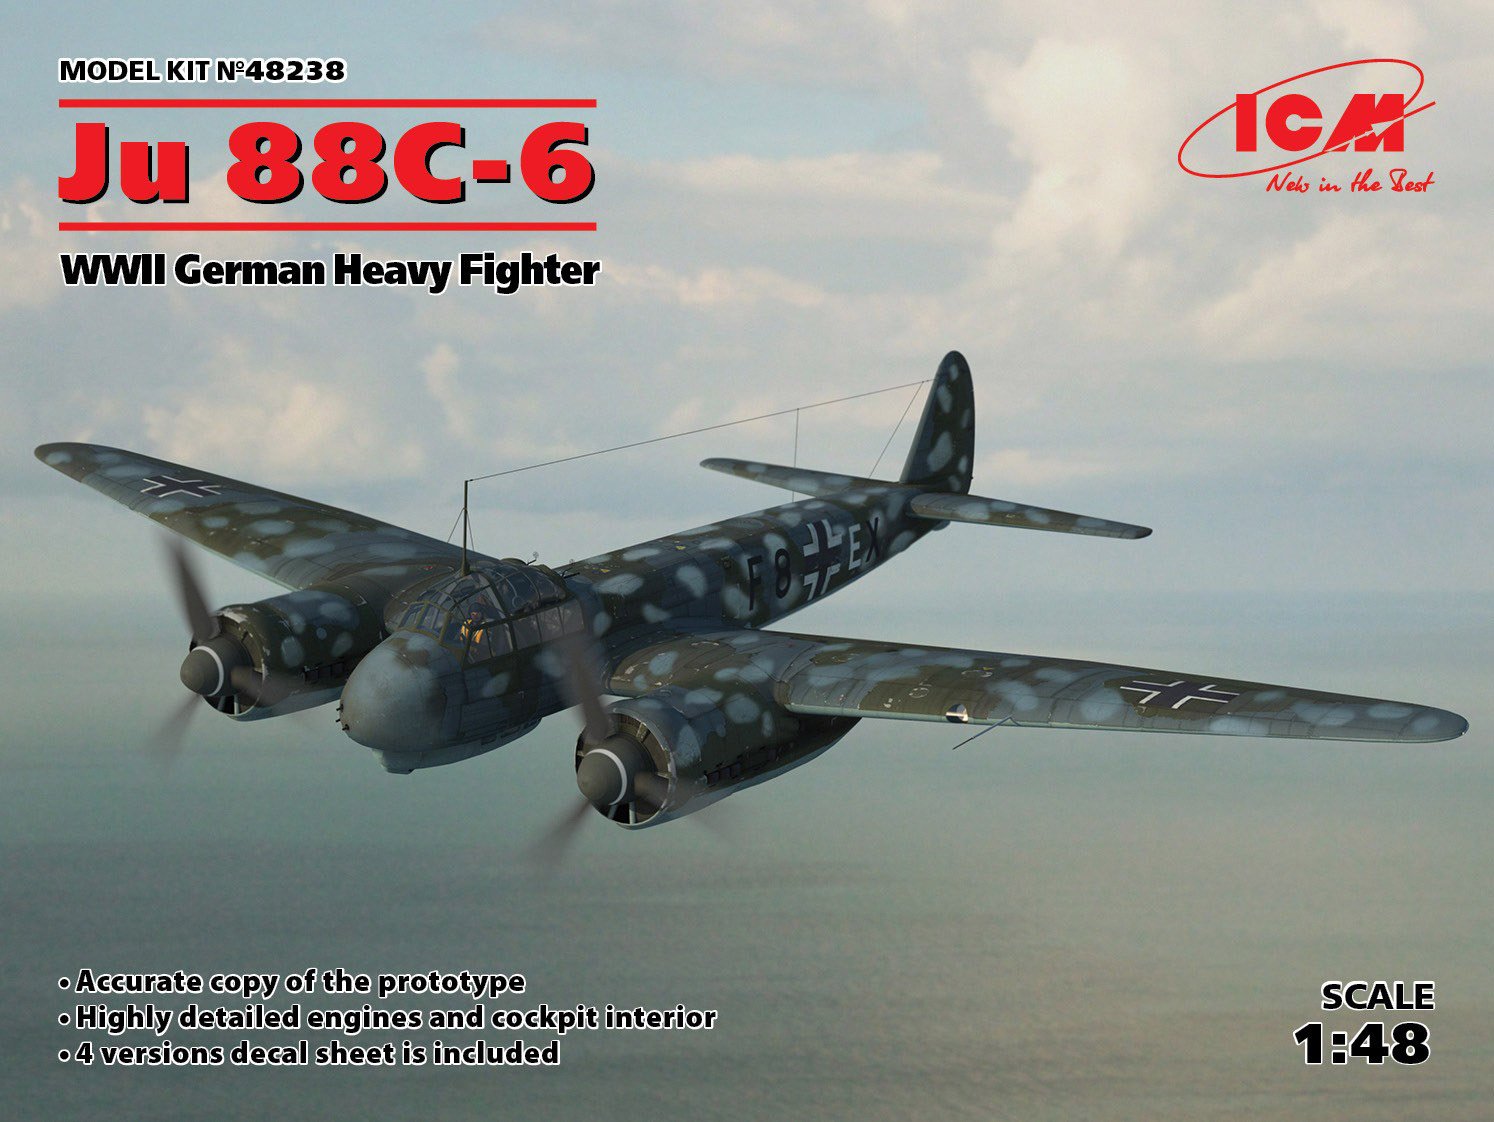
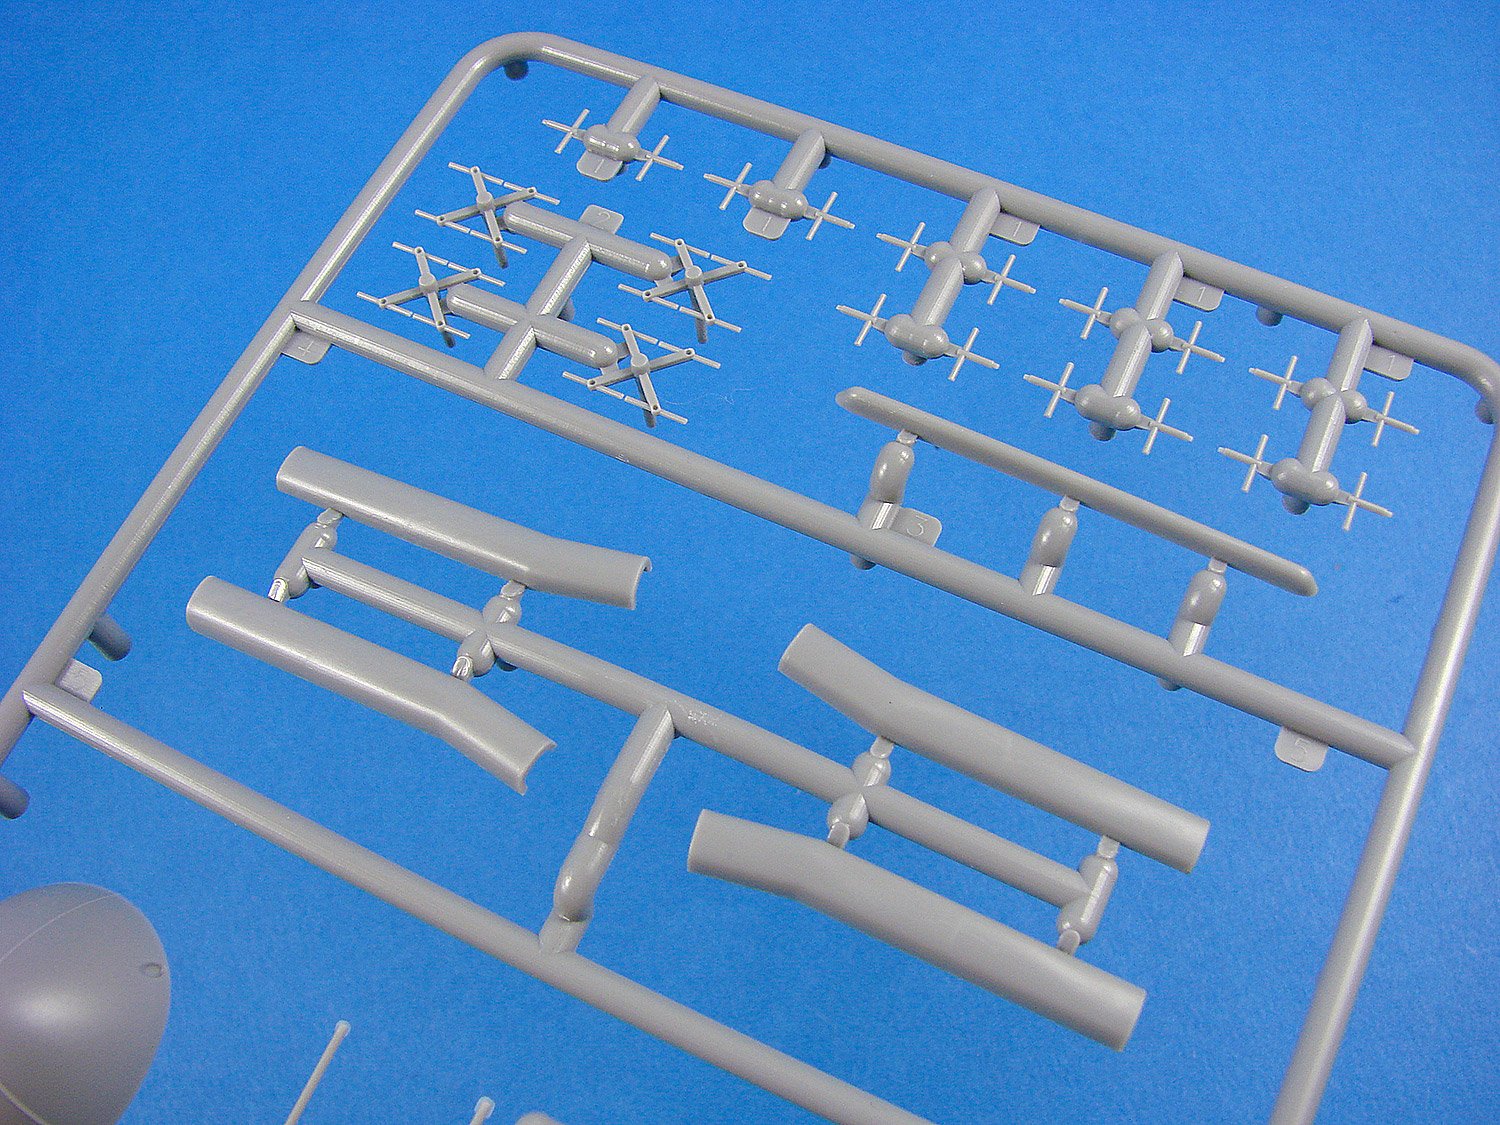
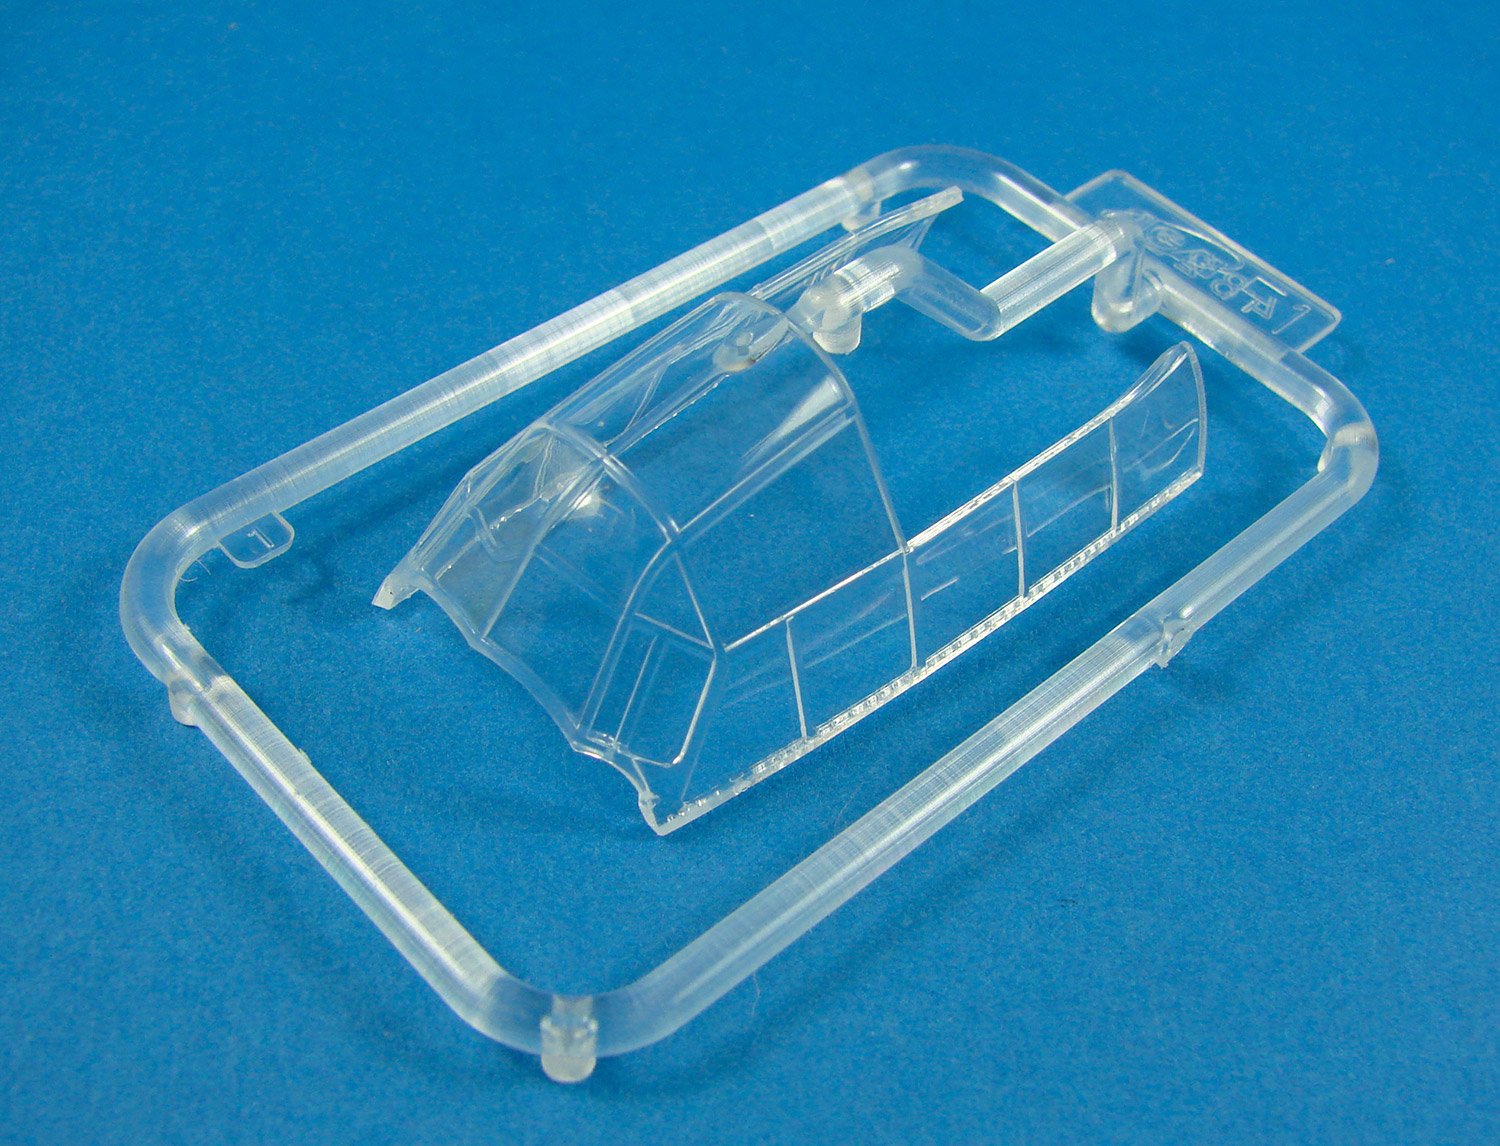
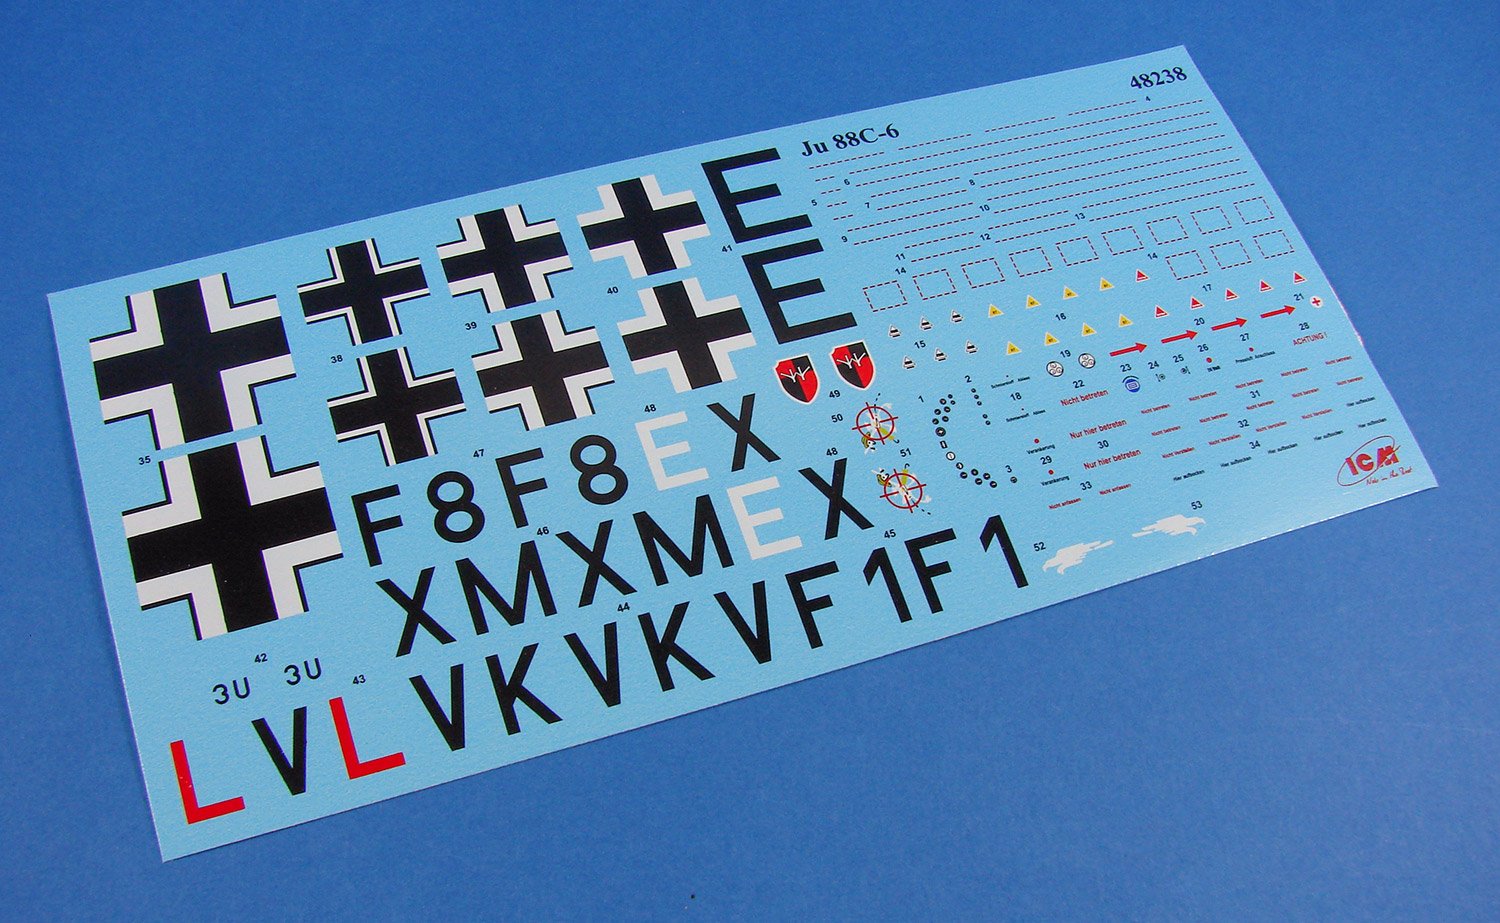
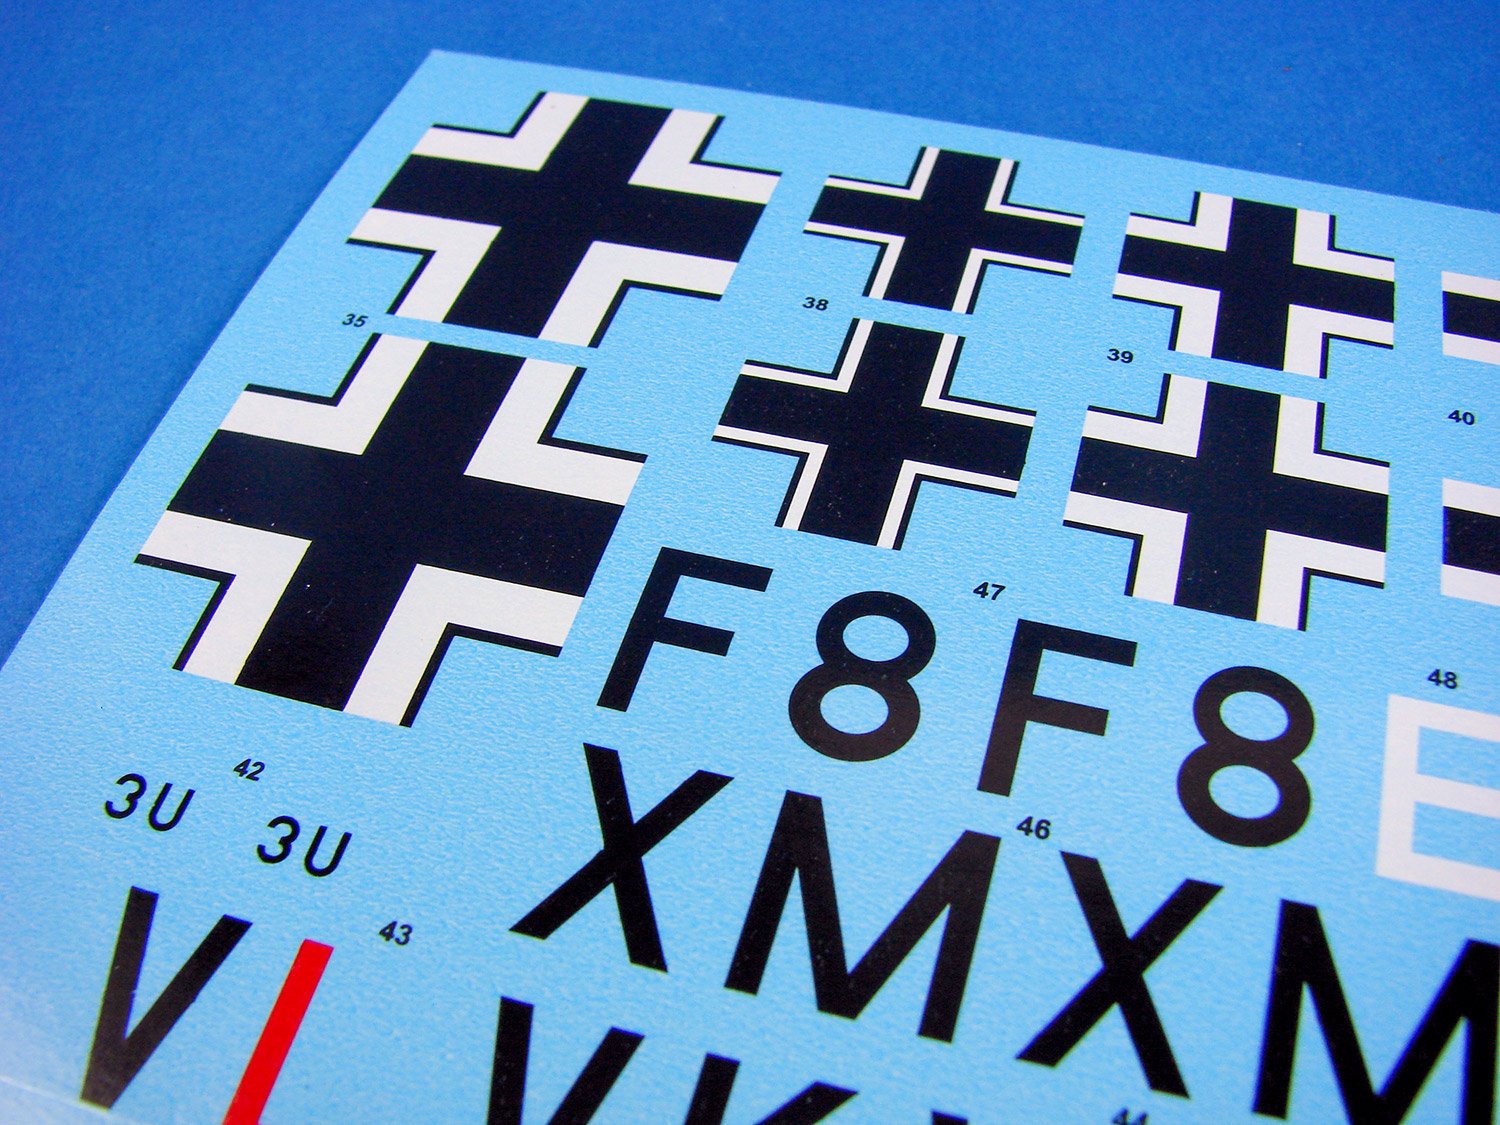
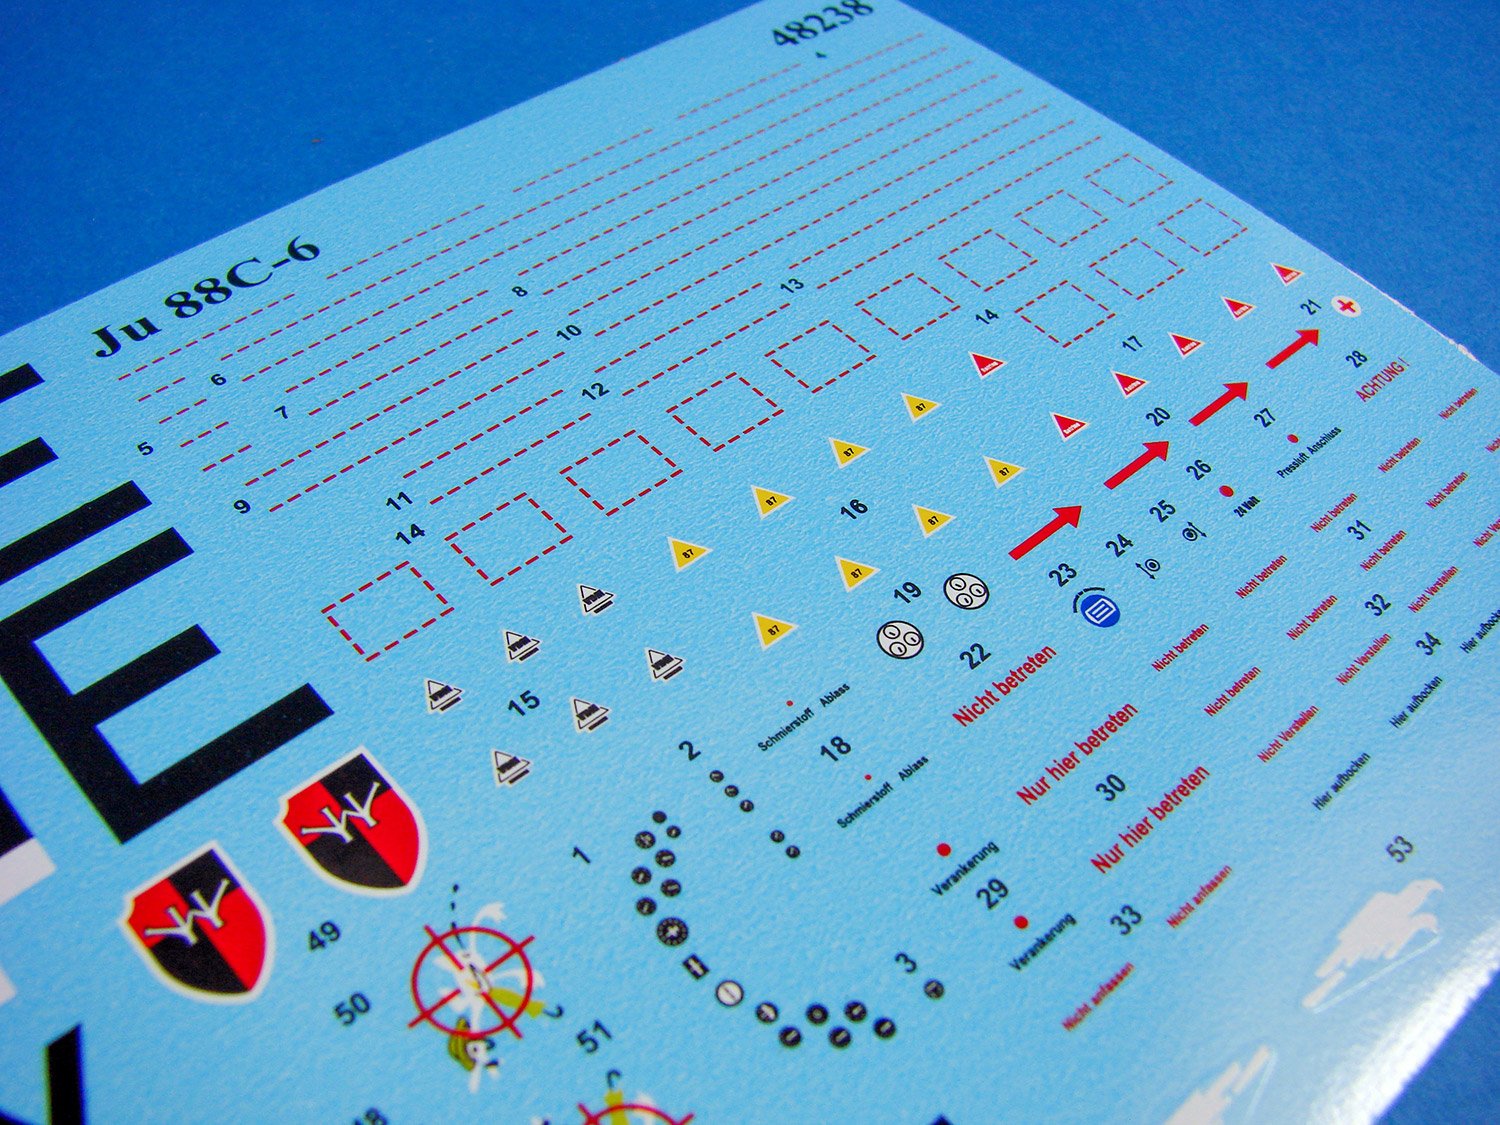
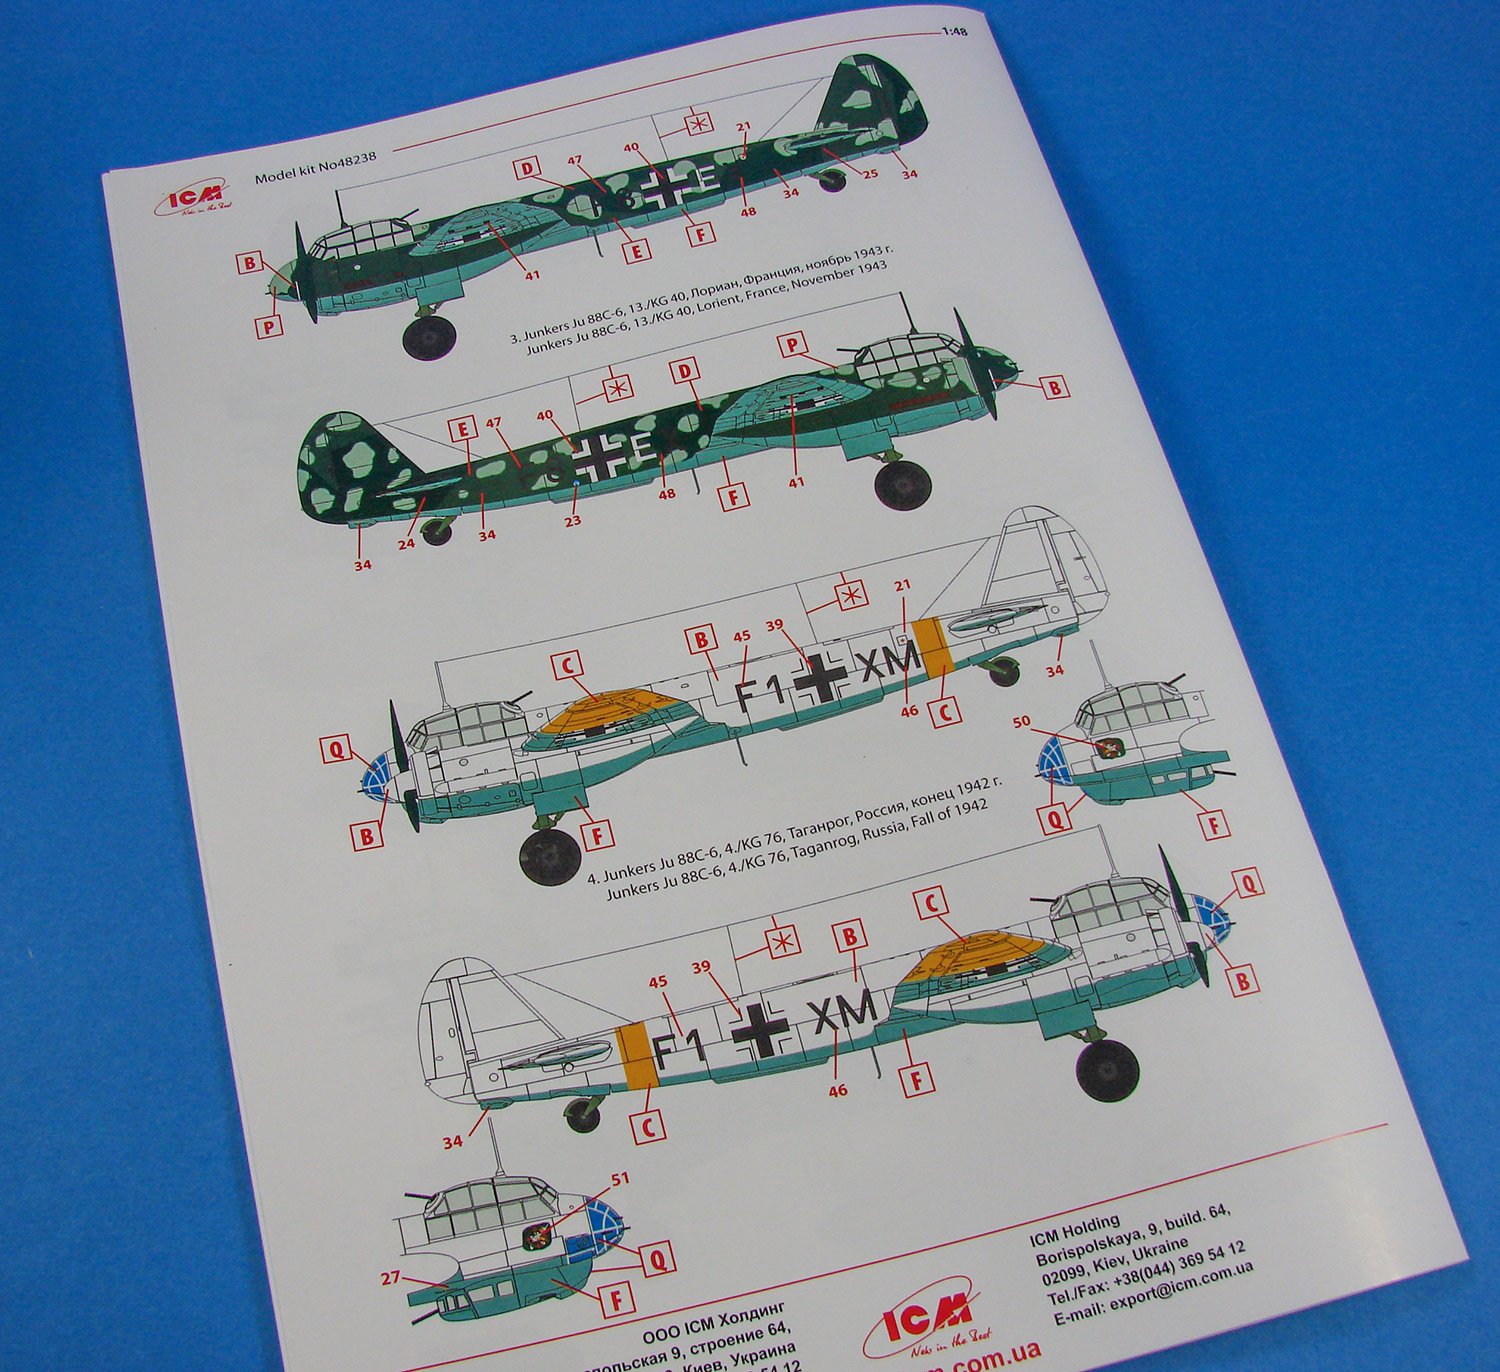
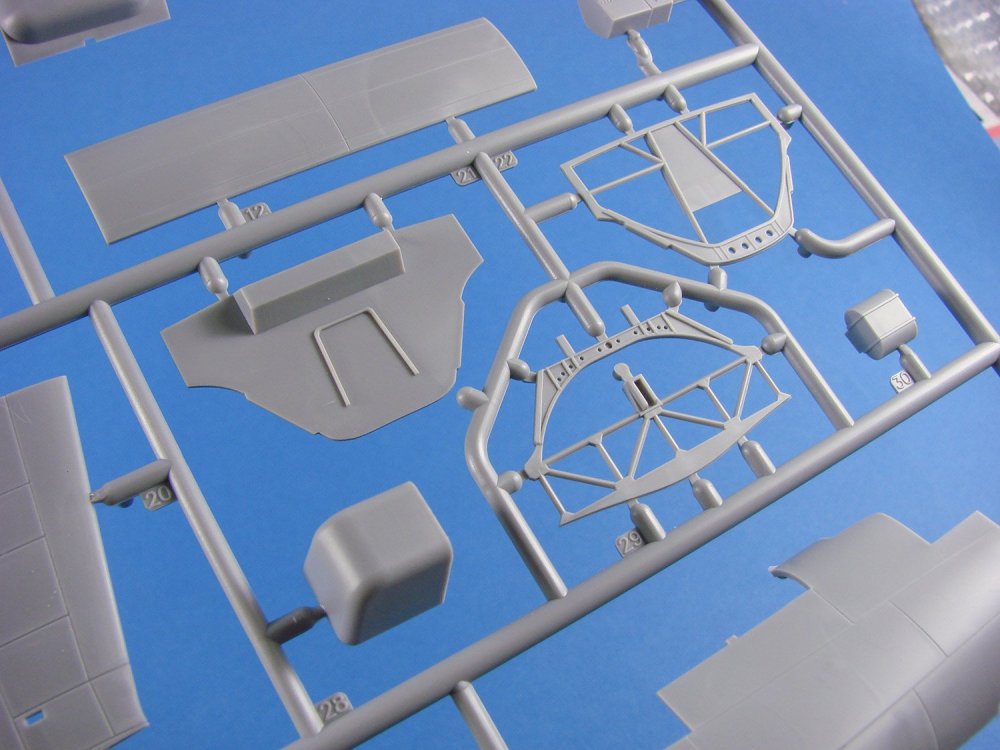
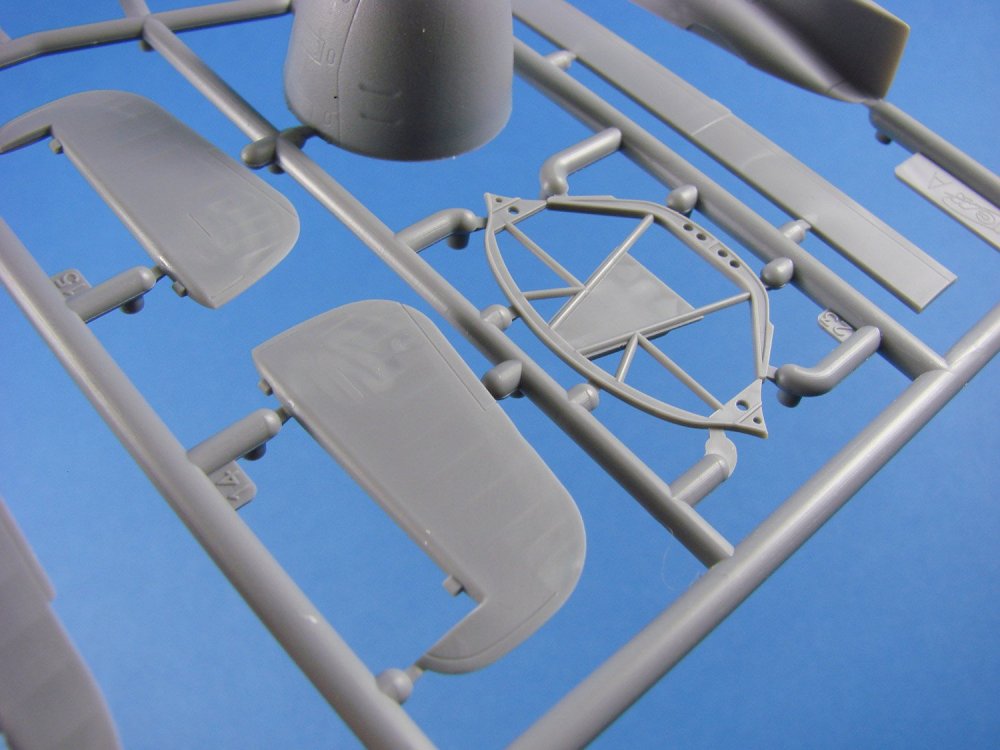
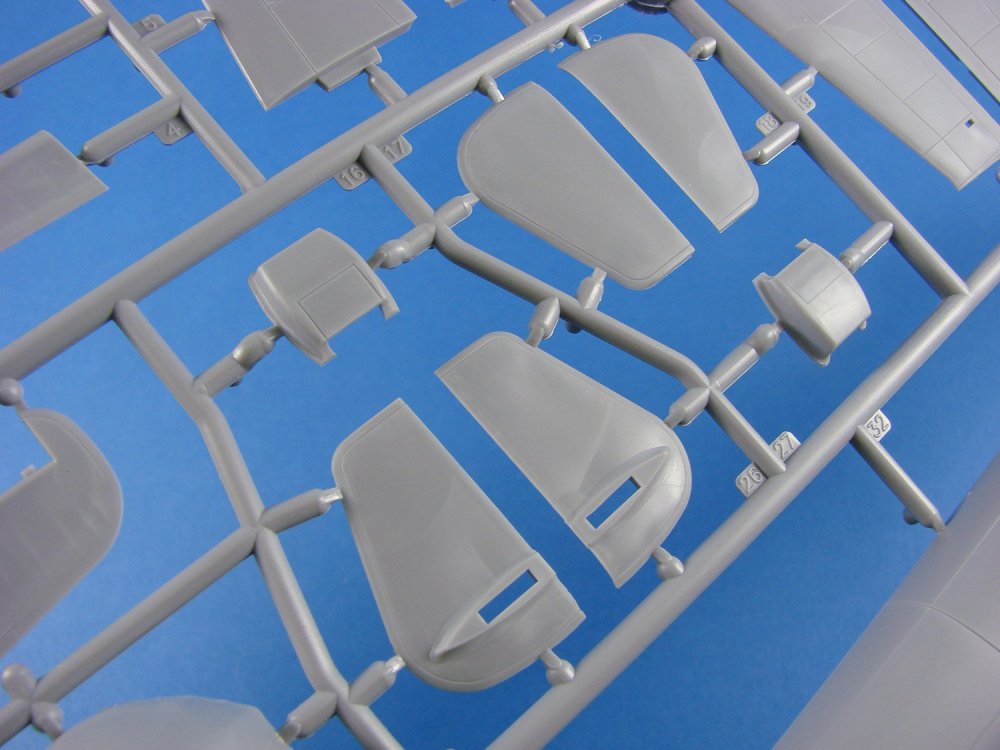
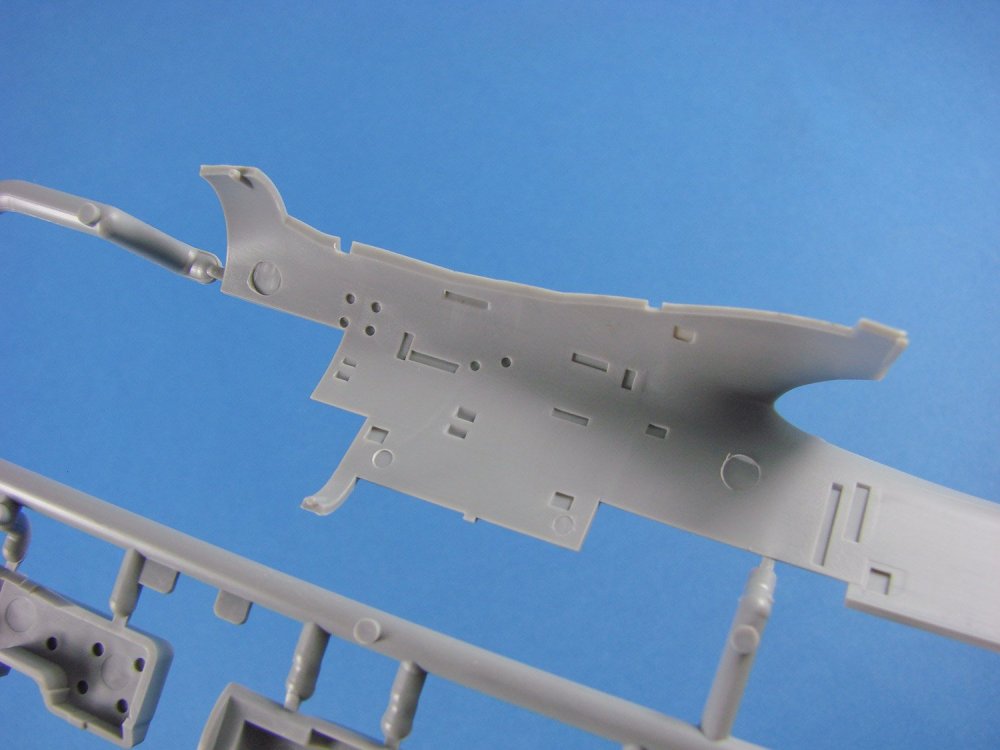
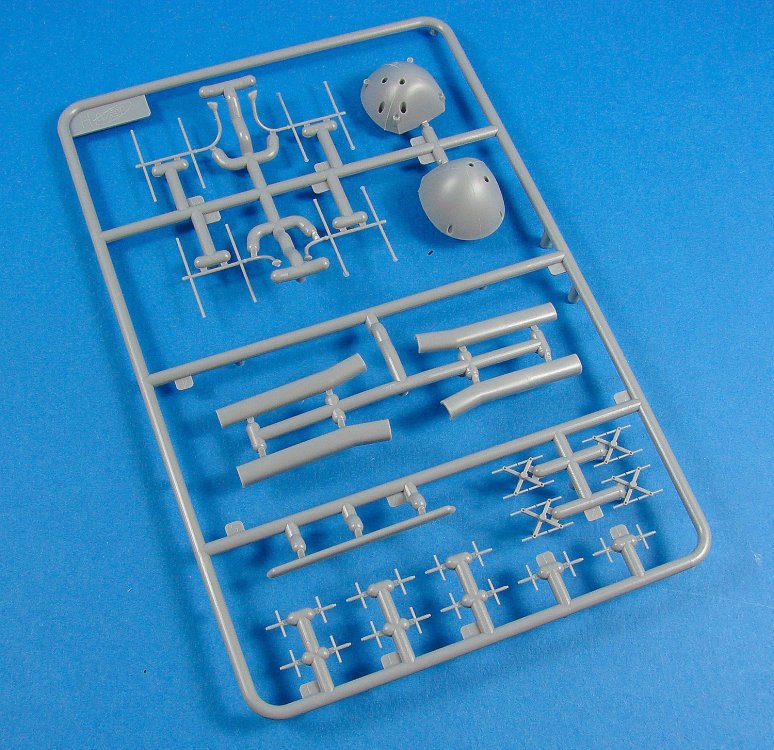
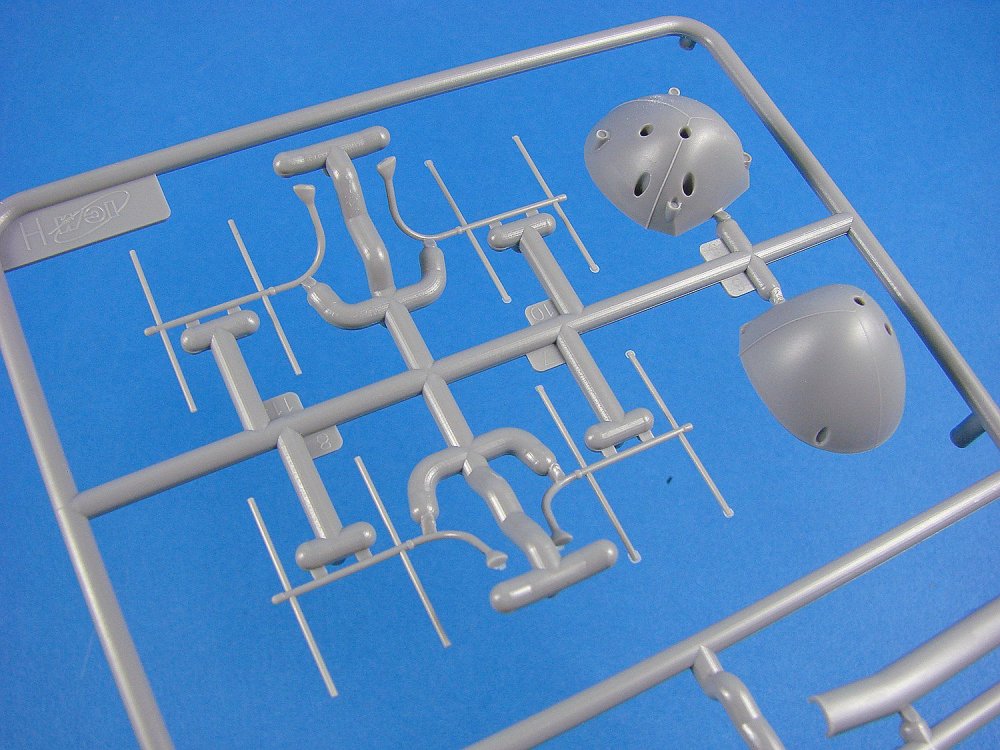
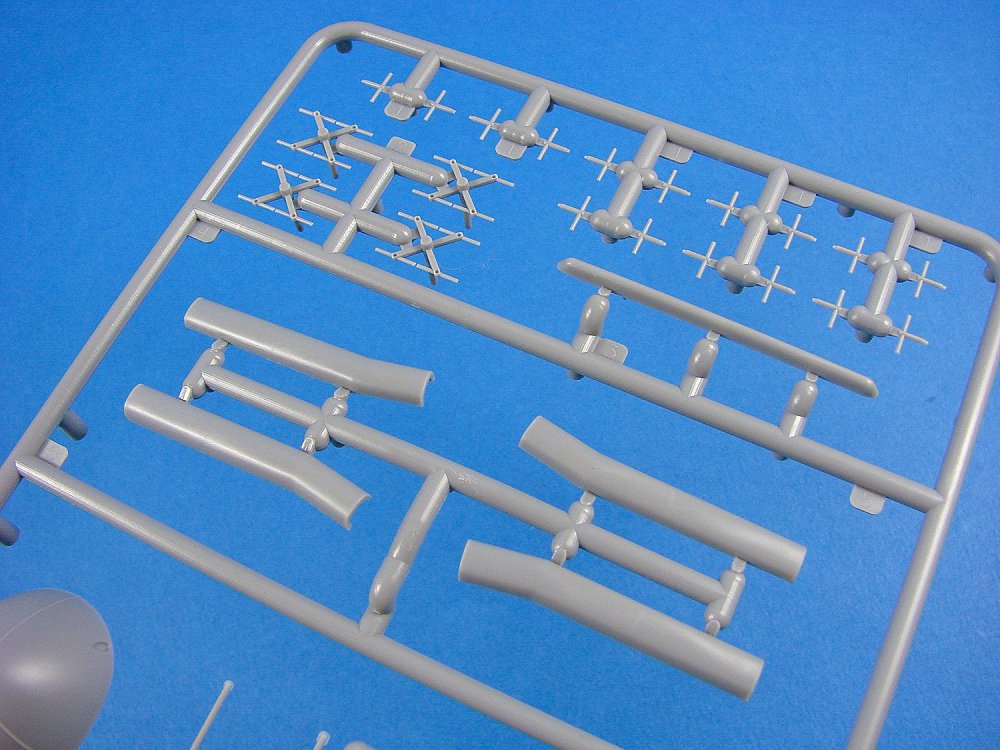
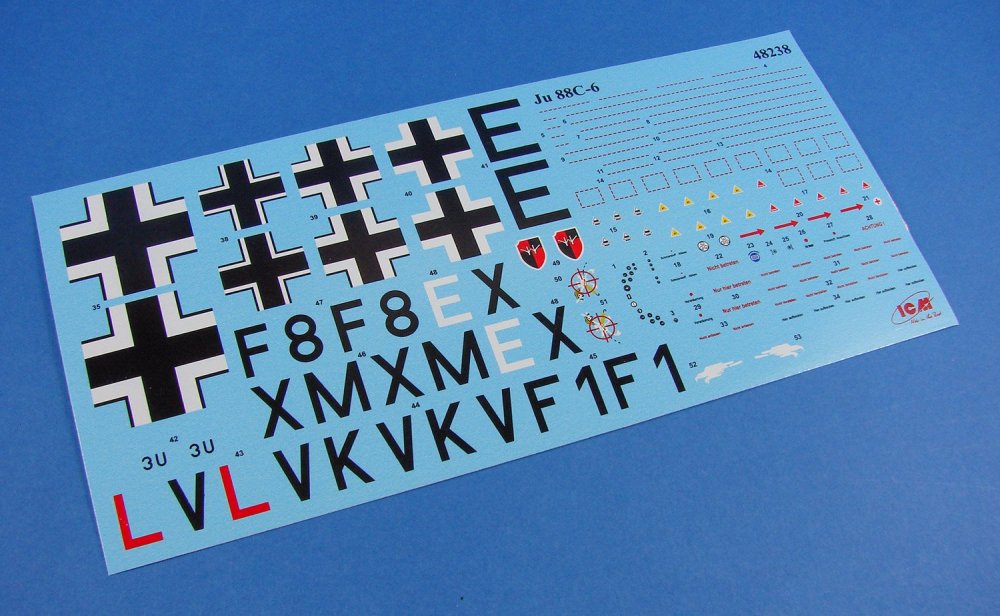
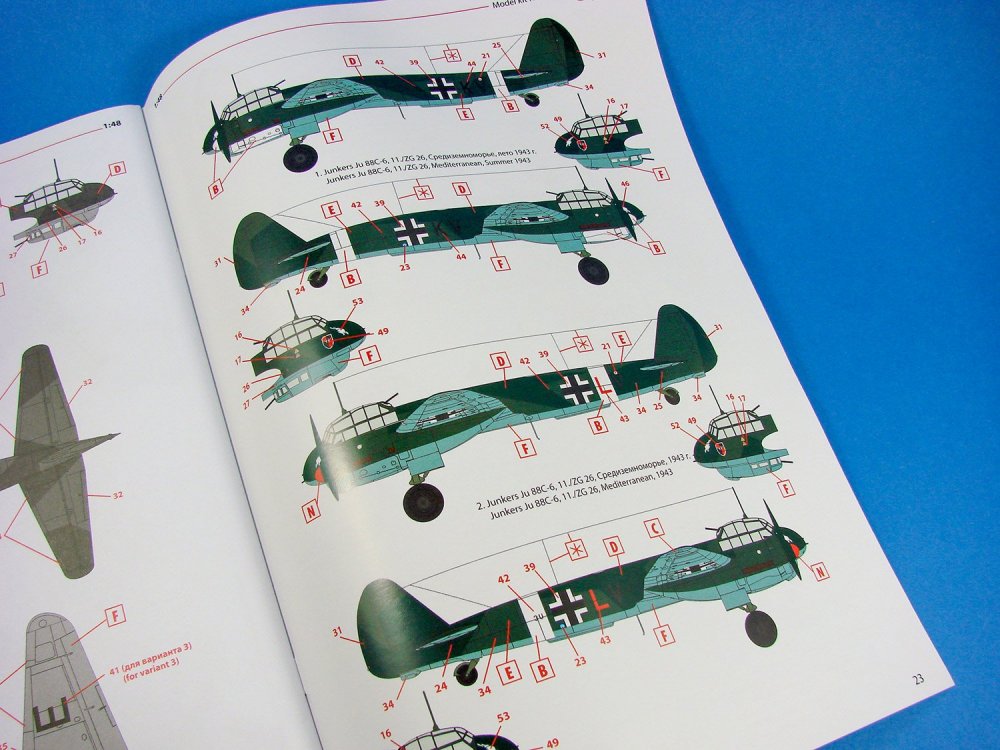
1/48 Junkers Ju 88C-6 ICM Catalogue # 48238 Available from Hannants for £27.99 The Junkers Ju 88 was a German World War II Luftwaffe twin-engine multirole combat aircraft. Junkers Flugzeug- und Motorenwerke (JFM) designed the plane in the mid-1930s as a so-called Schnellbomber ("fast bomber") that would be too fast for fighters of its era to intercept. It suffered from a number of technical problems during later stages of its development and early operational roles but became one of the most versatile combat aircraft of the war. Like several other Luftwaffe bombers, it served as a bomber, dive bomber, night fighter, torpedo bomber, reconnaissance aircraft, heavy fighter and, during the closing stages of the conflict in Europe, as a flying bomb. Despite its protracted development, the aircraft became one of the Luftwaffe's most important assets. The assembly line ran constantly from 1936 to 1945 and more than 16,000 Ju 88s were built in dozens of variants, more than any other twin-engine German aircraft of the period. Throughout production the basic structure of the aircraft remained unchanged. Without a doubt, the Junkers Ju 88 was one of the most versatile and adaptable aircraft to have been used during WW2. Entering service as the war was literally starting (on the day of the Polish attack), the Ju 88 became successful for its numerous famous and infamous roles, starting out as a light bomber/dive bomber, and when losses started to mount around the time of the Battle of Britain, it was moved into other theatres of war, such as North Africa, and against shipping in the Mediterranean with a torpedo-carrying variant. Where it is perhaps best known are for its roles as both a heavy fighter and night-fighter, in which it excelled. The Ju 88C series of standard fighter-bomber versions from the C-2 onwards culminated in the Ju 88 C-6, applying experience acquired with the A-4 bomber, equipped with the same Jumo 211J engines but replacing the "beetle's eye" nose glazing with a smoothly curved all-metal nose, pierced only by the barrels of its forward-firing offensive armament. The C-6 was used mostly as fighter-bomber and therefore assigned to bomber units. As a reaction to the increasing number of attacks on German shipping, especially on U-boats in the Bay of Biscay, from July 1942 it started flying anti-shipping patrols and escort missions from bases in France. V./Kampfgeschwader 40 being formed to operate the C-6. Courtesy of Wikipedia. The kit There has certainly been some mileage seen in the moulds for ICM’s rather sweet Ju 88 kit, with there now being TWELVE incarnations that have been released across the ICM, Hasegawa, Special Hobby and Revell labels. This particular Ju 88C-6 version was released about a month ago from the date of this review, and of course sees the original manufacturer’s progression through some of the key Ju 88 versions. I certainly wouldn’t be surprised to see more incarnations of this kit in future, hopefully covering a number of the other exotic machines that were derived from the base Ju 88 airframe. There is of course a reason why we are seeing this kit being given multiple releases and that is simply because it is the definitive tooling of this important aircraft that is currently available, and with so many Ju 88 versions that existed, modellers are going to want to build the one that is specific to their interests, such as the heavy fighter, torpedo aircraft etc. Packaged into ICM’s very sturdy, full corrugated cardboard box, with a colourful and glossy product lid that depicts a low flying C-6, possibly over the Bay of Biscay, this kit consists of a single clear sleeve that holds all NINE medium-grey sprues and two clear ones. A total of about 250 parts makes up this release. Thankfully, the clear sprues are separately bagged within the main sleeve and all of the others are tightly packed up against each other, so no space for them to jiggle and rub against each other. A 24-page A4 manual is included, and a single decal sheet finalises the contents. This release sees the addition of three new sprues, catering to the change in nose, equipment and canopy. I know that some modellers can be driven to frustration by the engineering choices that some companies make, but with this kit, ICM has boxed clever. As we know, it has been designed to accommodate other versions so as to maximise the tooling, but none of this is done to the disadvantage of the modeller. Some very intelligent design work can be seen here, such as the fuselage halves being full length, so no need to graft on different nose versions. The fin is also separate, indicating something from the 88G family, maybe. Wing root fairings are moulded to the fuselage and are tabbed, meaning that the upper wing panels can easily sit on these and provide a positive location point. Another touch of genius is a single piece lower fuse and inboard wing panel section. When this is fitted to the fuselage, and then the wing panels added, the lower seam will be totally hidden under the broad nacelle structure. The nacelles themselves will then locate into the undersides via tabs. If you’ve ever seen the Revell 1/32 kit, you’ll know that there is a sturdy structure within the nacelle that the undercarriage is mounted to. Looking at this model, I think that whilst you may need to fit that mounting structure prior to the nacelle, it appears that you can probably fit the landing gear later, after painting. All control surfaces on this model can be posed, with the rear of the nacelles being separate for this purpose. You may need to fiddle things with this, and I can’t comment further without test fitting this one. Two detailed Jumo211 engines are included in this kit, with the provision to display one/either of them. These really do look very good, with each unit containing around 15 parts per engine, including the firewall and associated plumbing. The engines must be installed within the nacelle before the whole assembly is offered to the wing. You’ll need to make sure your painting and masking regime is good here. Cowl radiator flaps are presented as open only, so to pose these in the more aesthetically pleasing closed position, you will need to do a little surgery. Propellers are supplied as single piece units, and the spinner comprises of the typical back-plate and front section. If you expect a lot from the cockpit area, in terms of detail, then this won’t disappoint. Whilst there is no specific Eduard sets for this release at the time of writing, some areas could still use some of the sets designed for the ICM release. As no seatbelts are included in this kit, you will definitely need to sort out that omission. The office area is very well-appointed, with nicely moulded fuselage sidewall details, superbly equipped radio rear bulkhead, ammunition racks and drums, detailed instrument panel, side consoles with delicately rendered instruments, two-piece control column, rudder pedal assemblies, seats with intricate mounting points etc. I don’t really think there would be much to add in here, with the exception of some colour PE, perhaps. When assembled the cockpit will most certainly be a very busy and visual area. The bola gondola is well-appointed too, and this area is moulded separately to the underside fuselage and can be fitted later in assembly. Surface detail is everything you would expect from a modern-tooled model, with finely engraved panel lines and port details. There are also no rivets at all, so if you do want them, then you’ll have to get out Rosie. Plastic quality here is excellent with no flaws or obtrusive ejector pin marks. Clear plastic parts, both ICM and Special Hobby, are superb, with excellent clarity and nicely defined frame details. Of course, this particular kit does vary in a number of aspects, from previous releases, and looking through the parts maps does indicate a large number of parts that should NOT be used with this particular release. In fact, the original Sprue C has been supplemented with Sprue C1. This contains whole new engine nacelles, propellers, spinners, annular radiator intakes, tabbed fin and rudder, fuselage spine section with dipole etc. Parts not to be used are clearly defined on the parts map by being shaded in pink. Another sprue that takes a major hit on unused parts is the engine sprue. Here, you can discount all of the bomb parts, and guns/ammo drums etc. There are THREE new sprues in this particular torpedo bomber version, and it will come as no surprise to find out that two of these, H & H1, contain the reworked gondola with fixed rear facing guns, solid nose with gun apertures, forward fuselage window blanking plates, machine guns, ammunition containers for forward guns, optional exhaust shrouds, etc. Whilst I note that a single MG has been provided for the lowermost nose gun position, the others are simply represented as stubs which fit into the nose apertures. The savvy modeller could possibly work out the remaining details and install them too. One of the new sprues (H) has only one part for use with this release, with the other solid noses and nightfighter aerial arrays being scheduled for a later release. The new clear sprue contains the main canopy area, minus the upper, rear glazed sections which are supplied on the original sprue. Again, clarity and framing definition is excellent. Decals An ICM-printed decal sheet contains markings for FOUR marking schemes, with all printing being in solid, authentic colour, with minimal carrier film and also being both nice and thin. Registration is perfect too. As well as markings, a full suite of stencils are included as are instrument decals. The instruments are probably better punched out from the decal and applied individually, so you don’t have to attempt to get the decal to conform to the raised panel details. No swastikas are supplied. The four schemes in this release are: Ju 88C-6, 11./ZG.26, Mediterranean, Summer 1943 Ju 88C-6, 11./ZG.26, Mediterranean, 1943 Ju 88C-6, 13./KG.40, Lorient, France, November 1943 Ju 88C-6, 4./KG.76, Taganrog, Russia, Fall of 1942 Instructions ICM’s instruction manuals are very attractive and easy to follow, with 96 easy-to-follow stages that shouldn’t present any issues with assembly. The first part of the manual highlights the colours needed for completing this model (Revell and Tamiya paints), as well as parts maps of the sprues. The rear of the manual has two pages for the four schemes, printed in colour and with good decal placement notes, plus a page denoting stencil placement etc. Conclusion Another excellent Ju 88 release. This kit currently retails for around £30 or less in the UK, and I think that relates to excellent value for money when you look at the detail levels that are provided here. The C-6, for me, is one of the more attractive versions of this aircraft and certainly paved the way for the later BMW-powered G versions with their nightfighter prowess. This kit doesn’t have any PE parts, so for at least the seatbelts, you might want to consider some of Eduard’s aftermarket sets for the other ICM/Revell variants. Most parts will be completely usable in this release. Of course, this is an in-box review, and I’ve not looked at the fit of this. I have seen a small number of Ju 88 kits built though, and spoken to modellers who have built others, and they claim no real problems in construction. ICM’s engineering seems to be logical and sensible, and without the annoyances of the earlier, unrelated Dragon releases. Highly Recommended My thanks to ICM for the review sample seen in this article. To purchase directly, click the link at the top of this article.


-
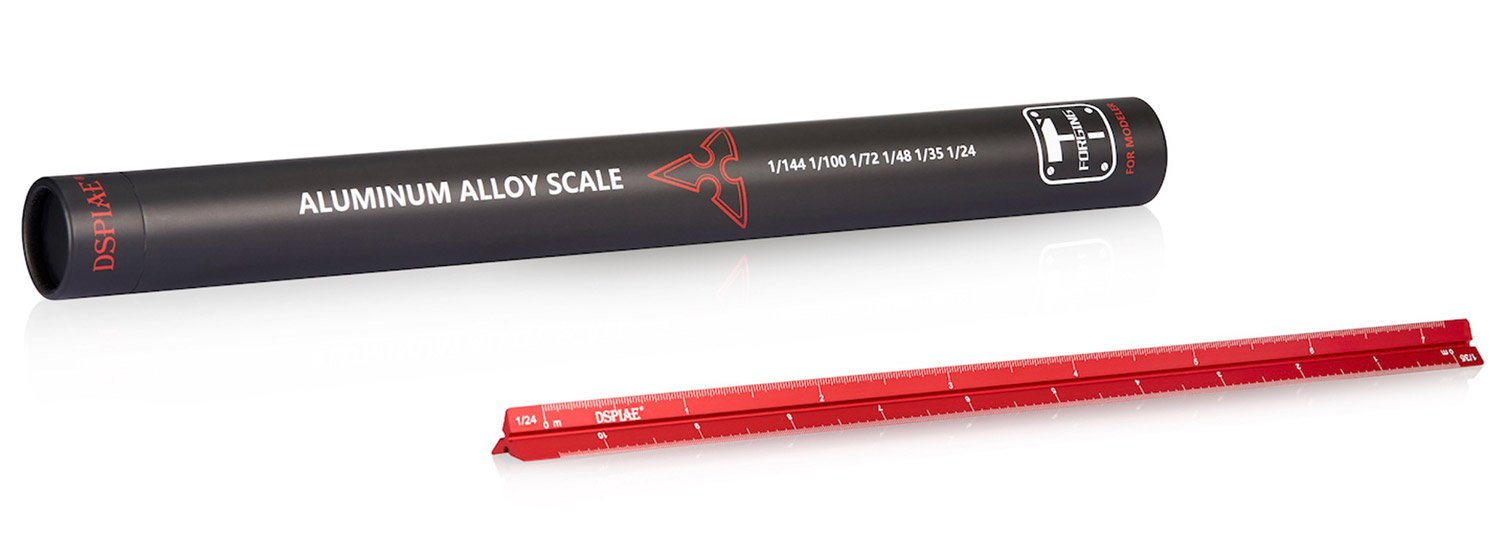
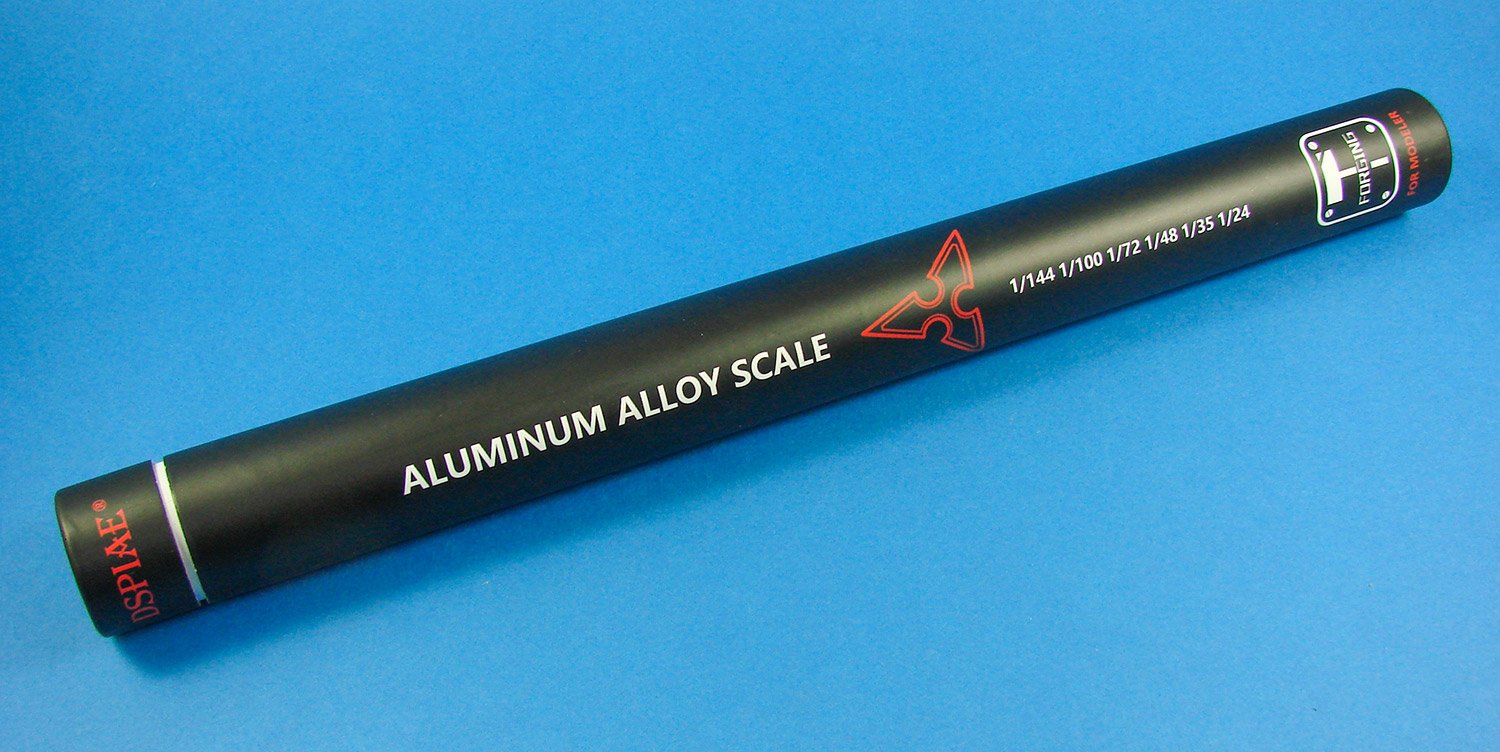
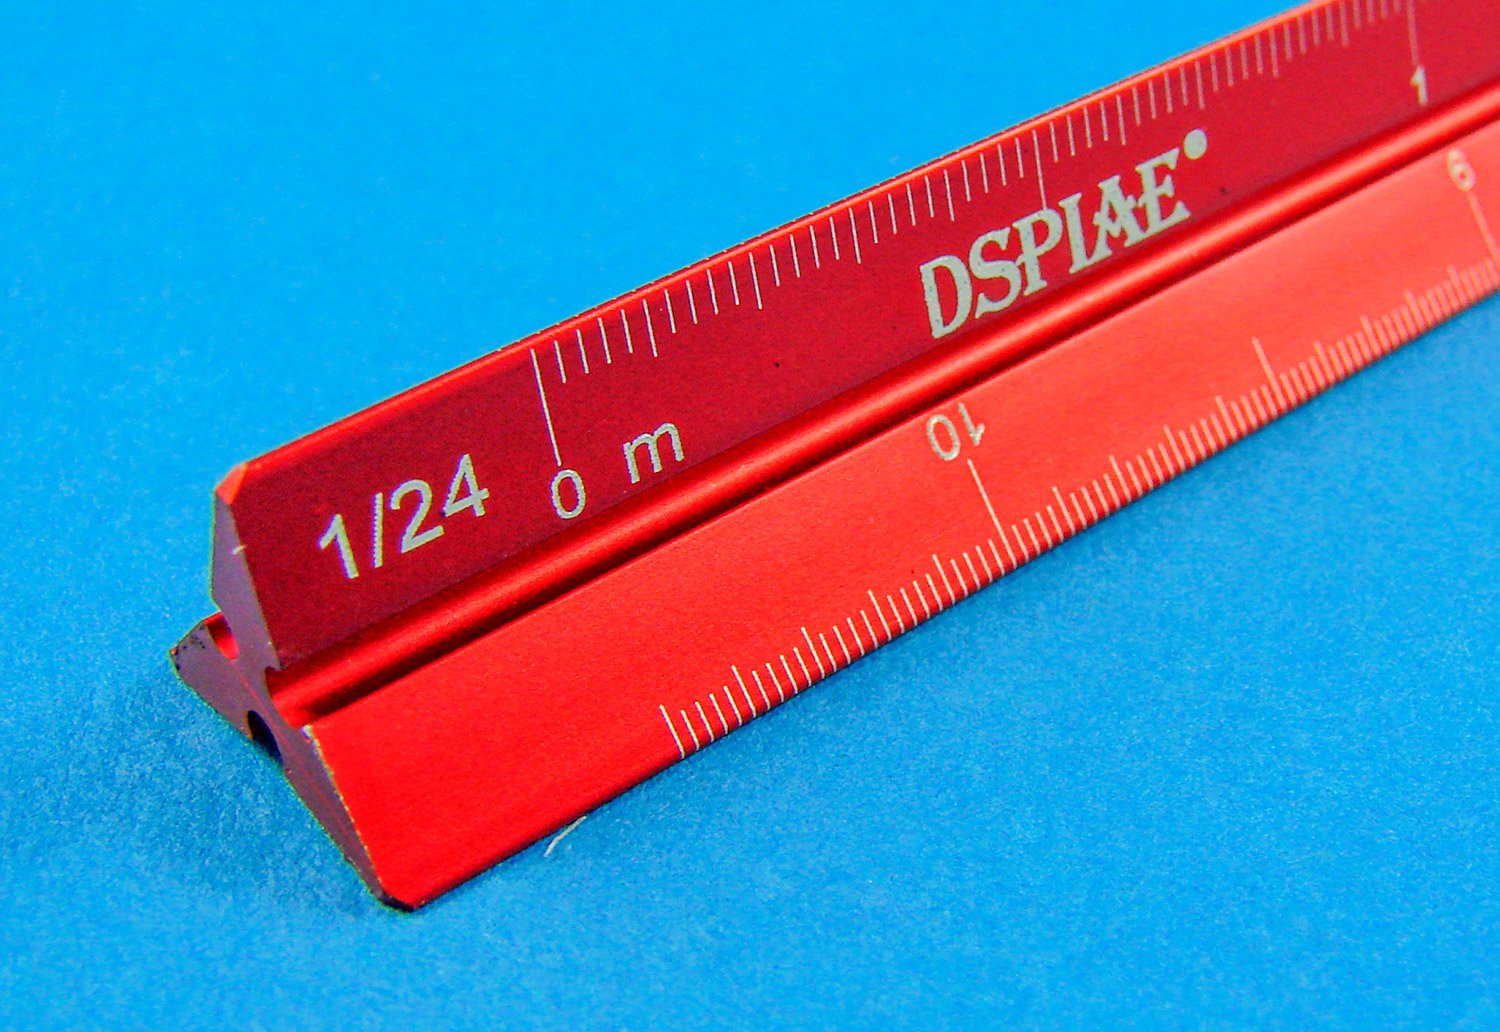
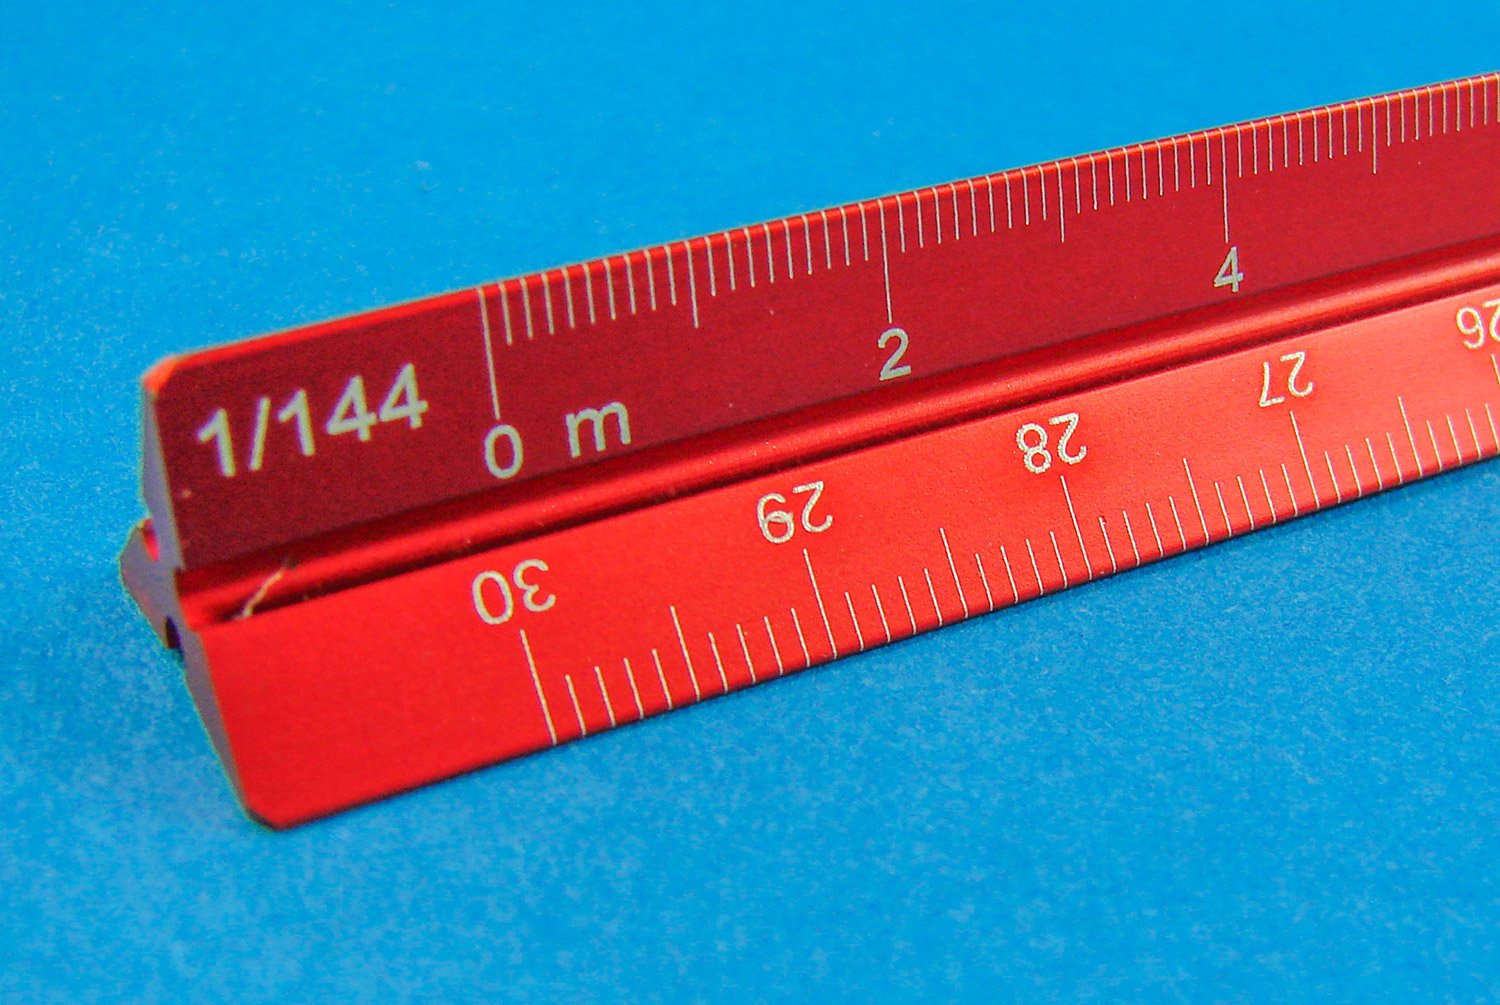
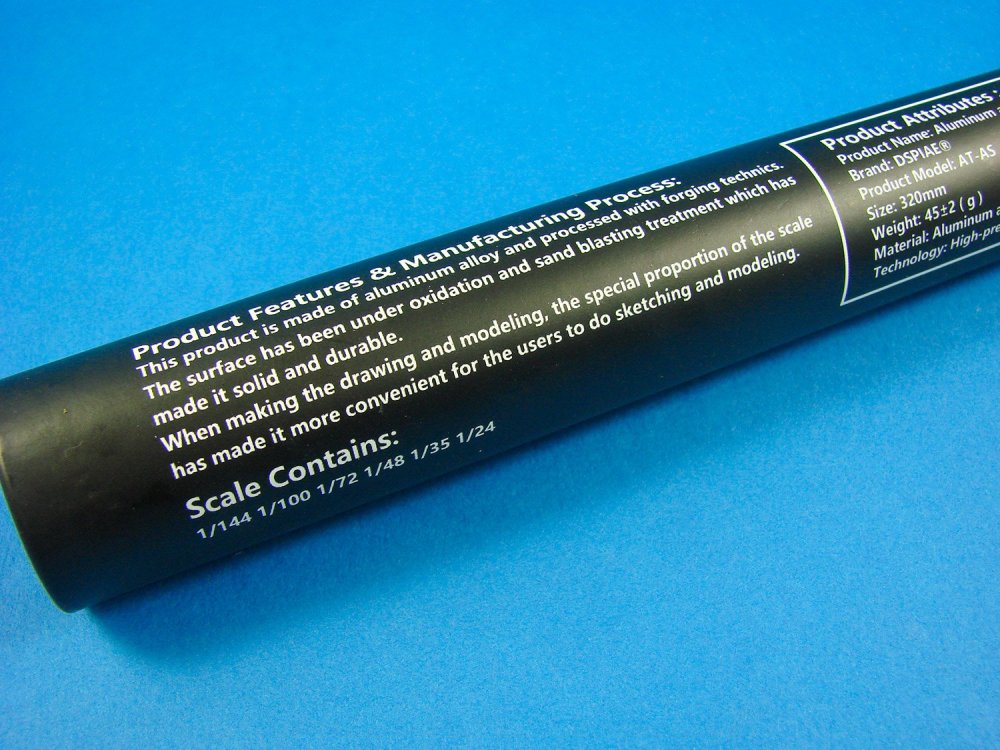
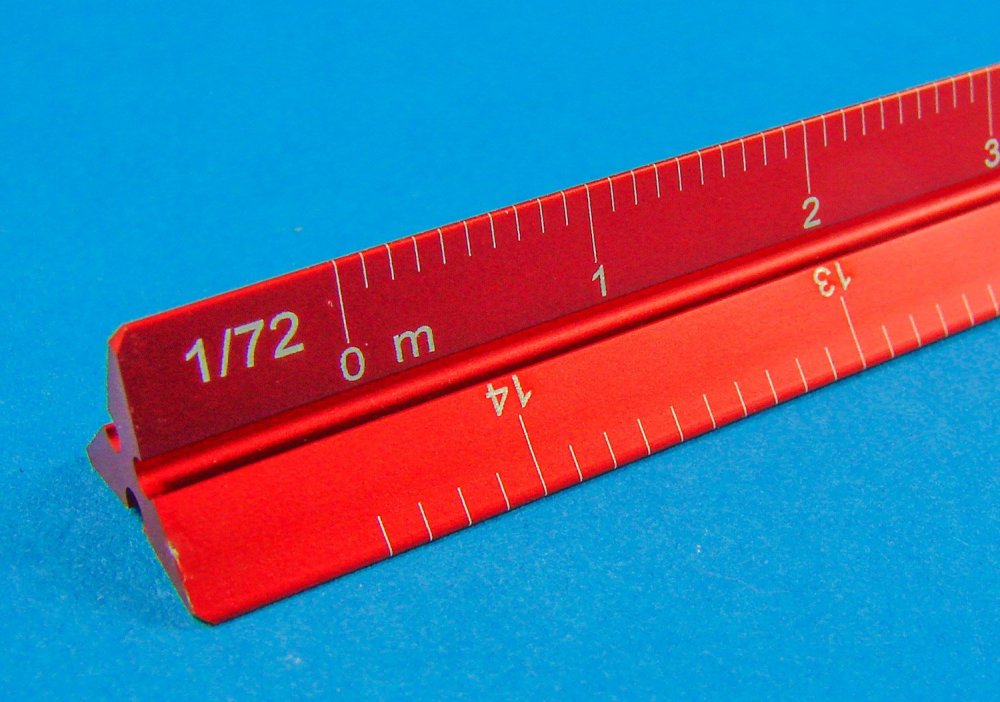
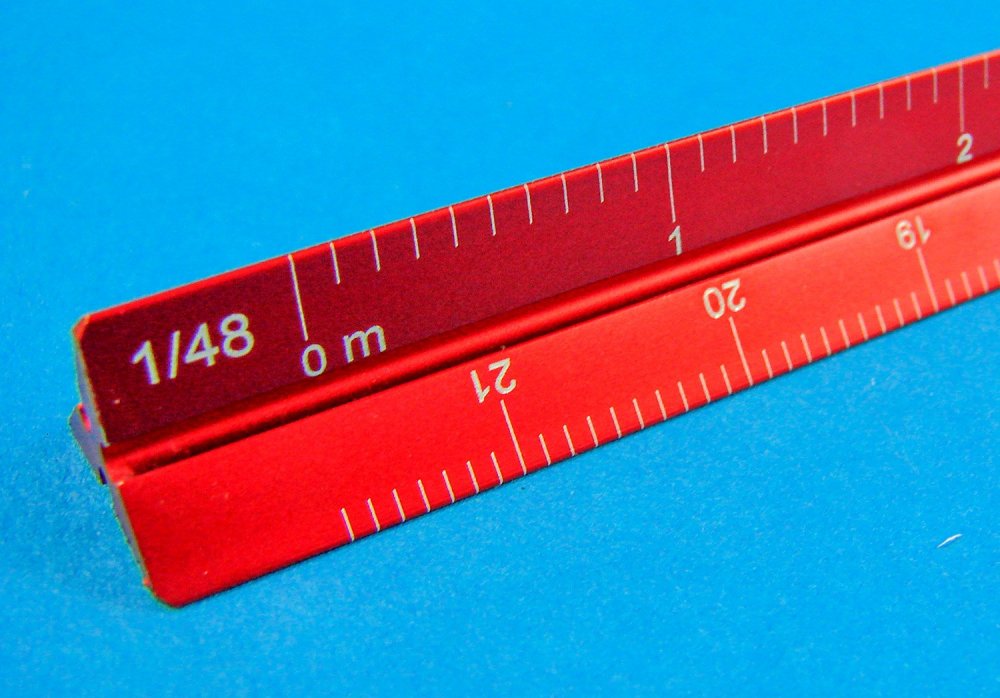
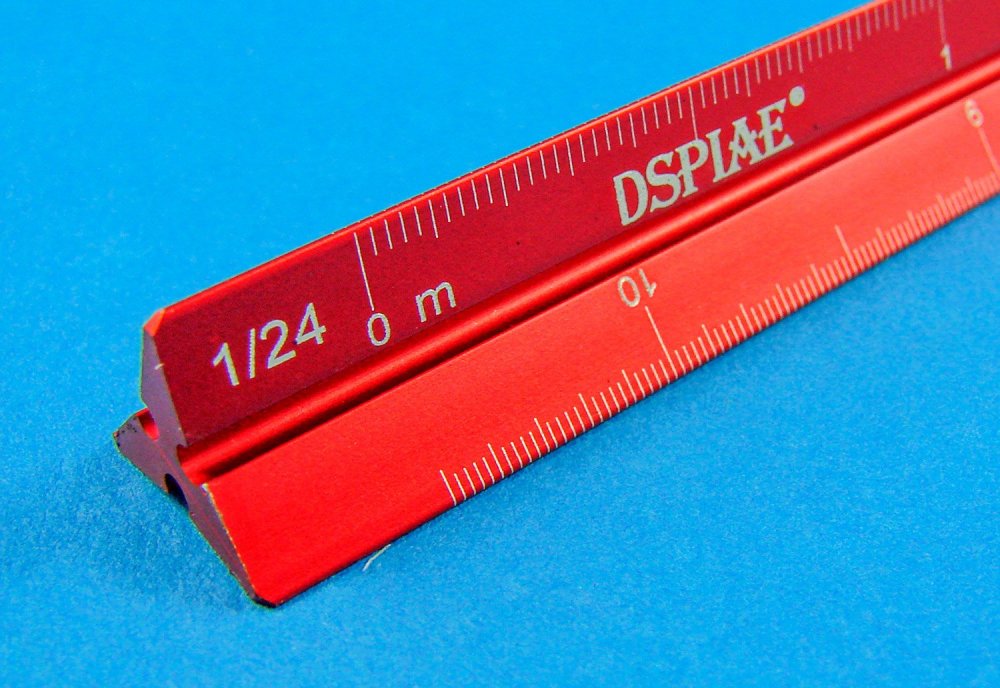
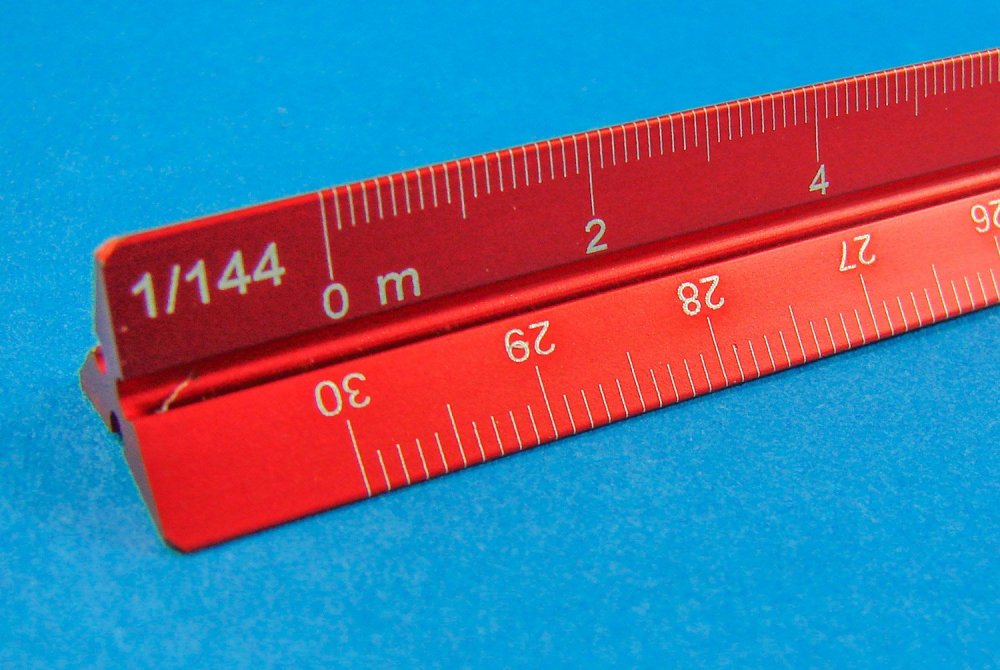
Aluminium Alloy Scale DSPIAE Catalogue # AT-AS Available from Breveco Modelling for 16,50€ For the last of my current batch of reviews of DSPIAE tools, we look at their new Aluminium Alloy Scale, or in simple parlance, ‘scale rule’. Scale rules have all sort of incredibly useful applications in any part of our hobby where we are looking at measuring things in particular scale quantities. The new DSPIAE tool is packaged into a robust cardboard tube with an end-opening cap. Gone is the Aztec-style décor here, but the all-black tube does have a little décor that shows the end profile of the scale rule, plus the scales listed that it is marked in. These are 1/144, 1/100, 1/72, 1/48, 1/35 and 1/24. Opening the tube up and sliding out the end cap reveals the familiar red anodising of the DSPIAE range, with the star-like profile of the rule inserted into a foam block within the cap to protect it. An identical foam block protects the opposite end of the rule, down within the tube. The rule itself measures 32cm and has a good weight to it that should make its use a breeze. If it was too light, I’d perhaps find it a little nondescript, but this has a good weighty feel that is reassuring. Also of note is that each scale isn’t printed right up to the edge, which is good in case you were to accidentally damage the end of the rule. DSPIAE has also removed the corners from the rule, so you won’t cut or stab yourself! This rule has been designed with that profile so as to accommodate the six scales mentioned above, and these are neatly printed on these in fine white lines with the accompanying scale easy to note. Each scale is broken down into 1 metre equivalences, with each metre again subdivided into 10 parts (10cm equivalences). In some cases, this is split down even further. Conclusion Another excellent tool that is superbly engineered and beautifully made. If I had only one question, it would be the lack of the popular 1/32 scale. Maybe this should have replaced 1/100 or 1/24. However, if you are in the market for a scale rule that is catered for by that this product offers, then I doubt you’d fine anything as good as this. My sincere thanks to Breveco Modelling for supplying the review sample seen here. To purchase directly, click the link at the top of the article.


-
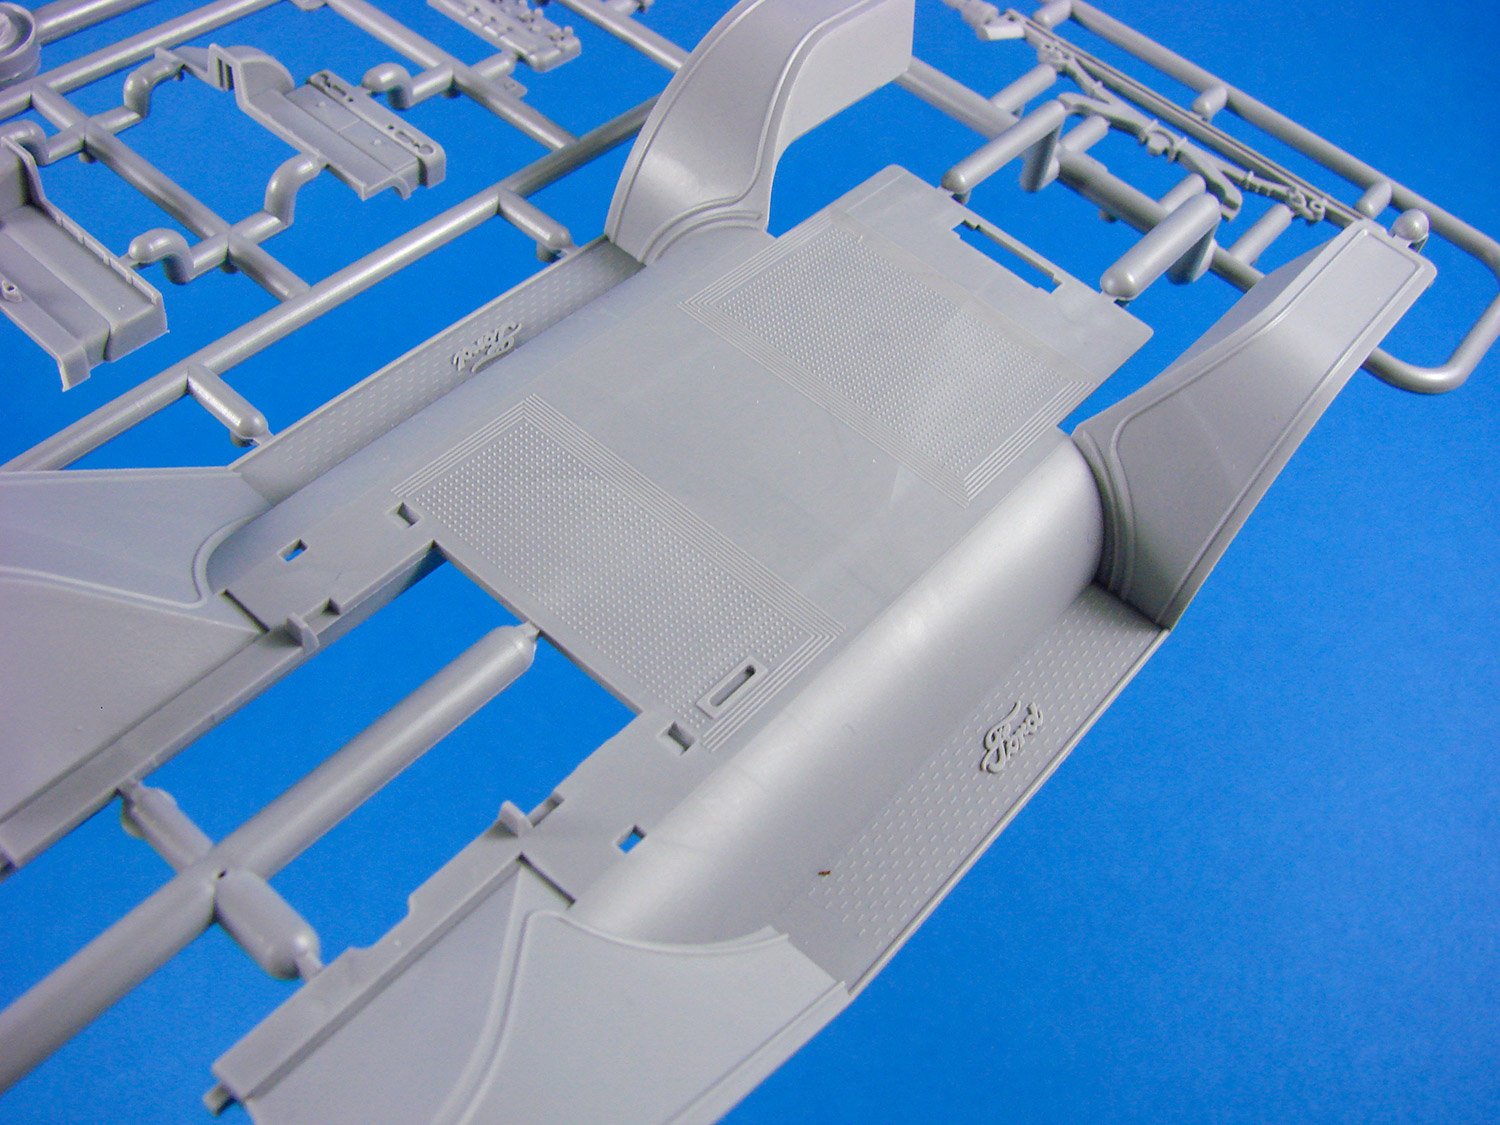
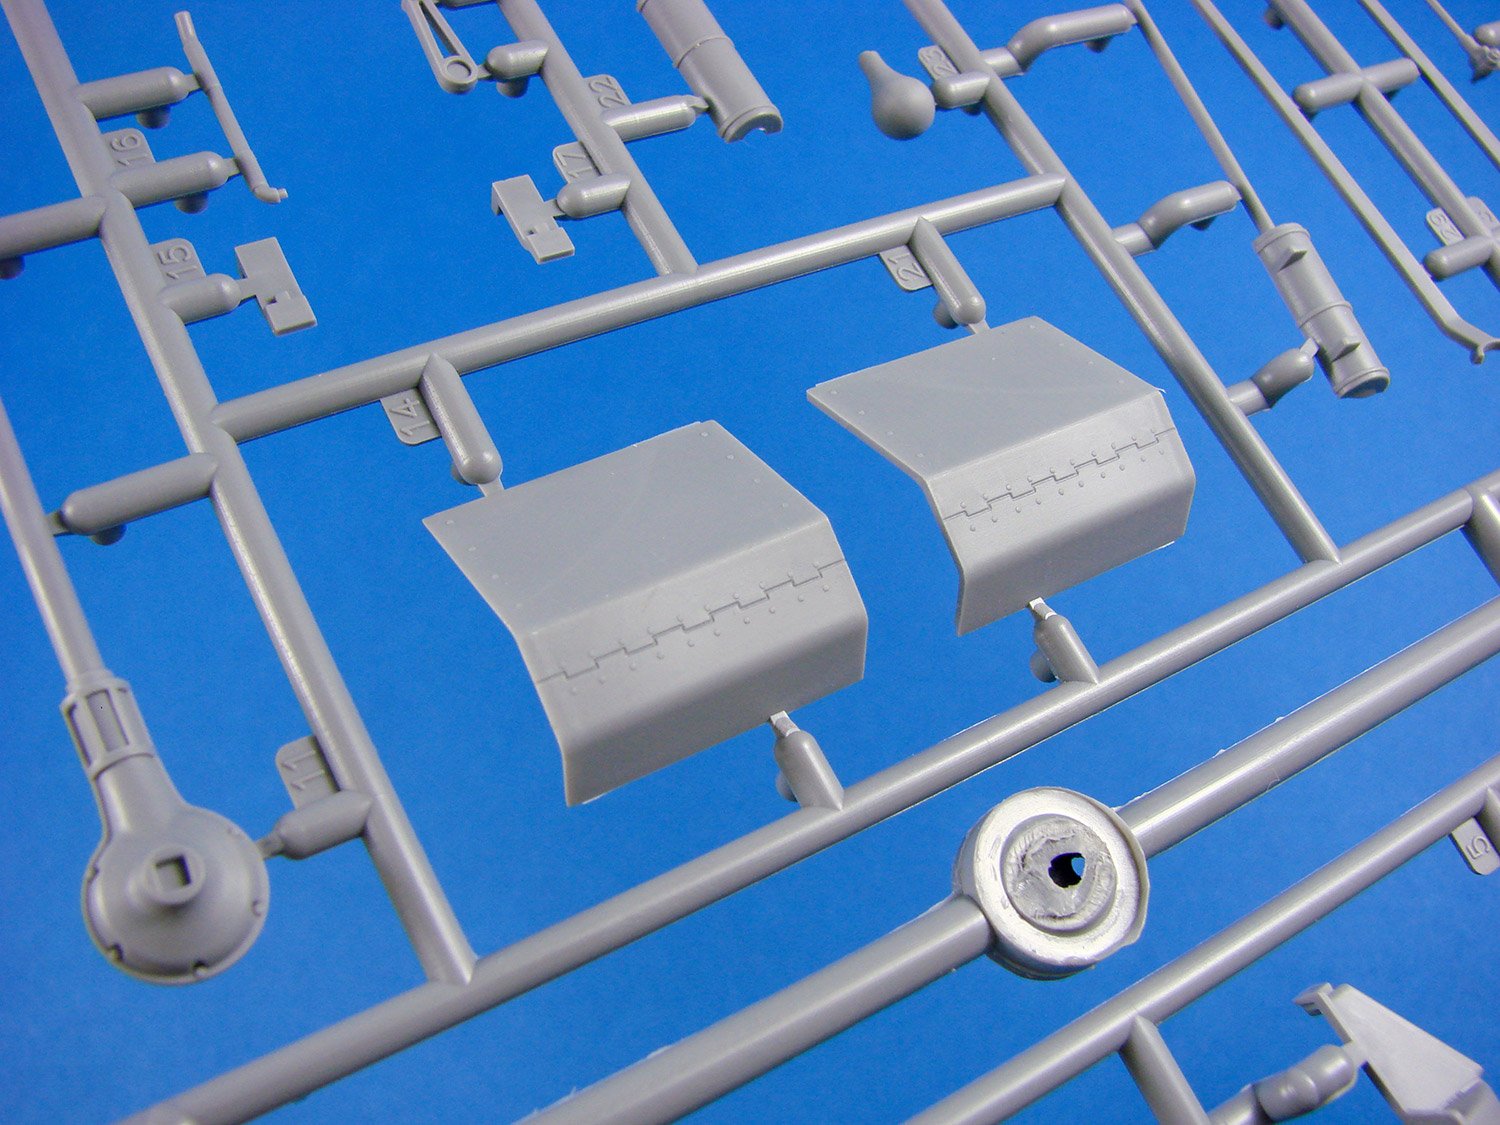
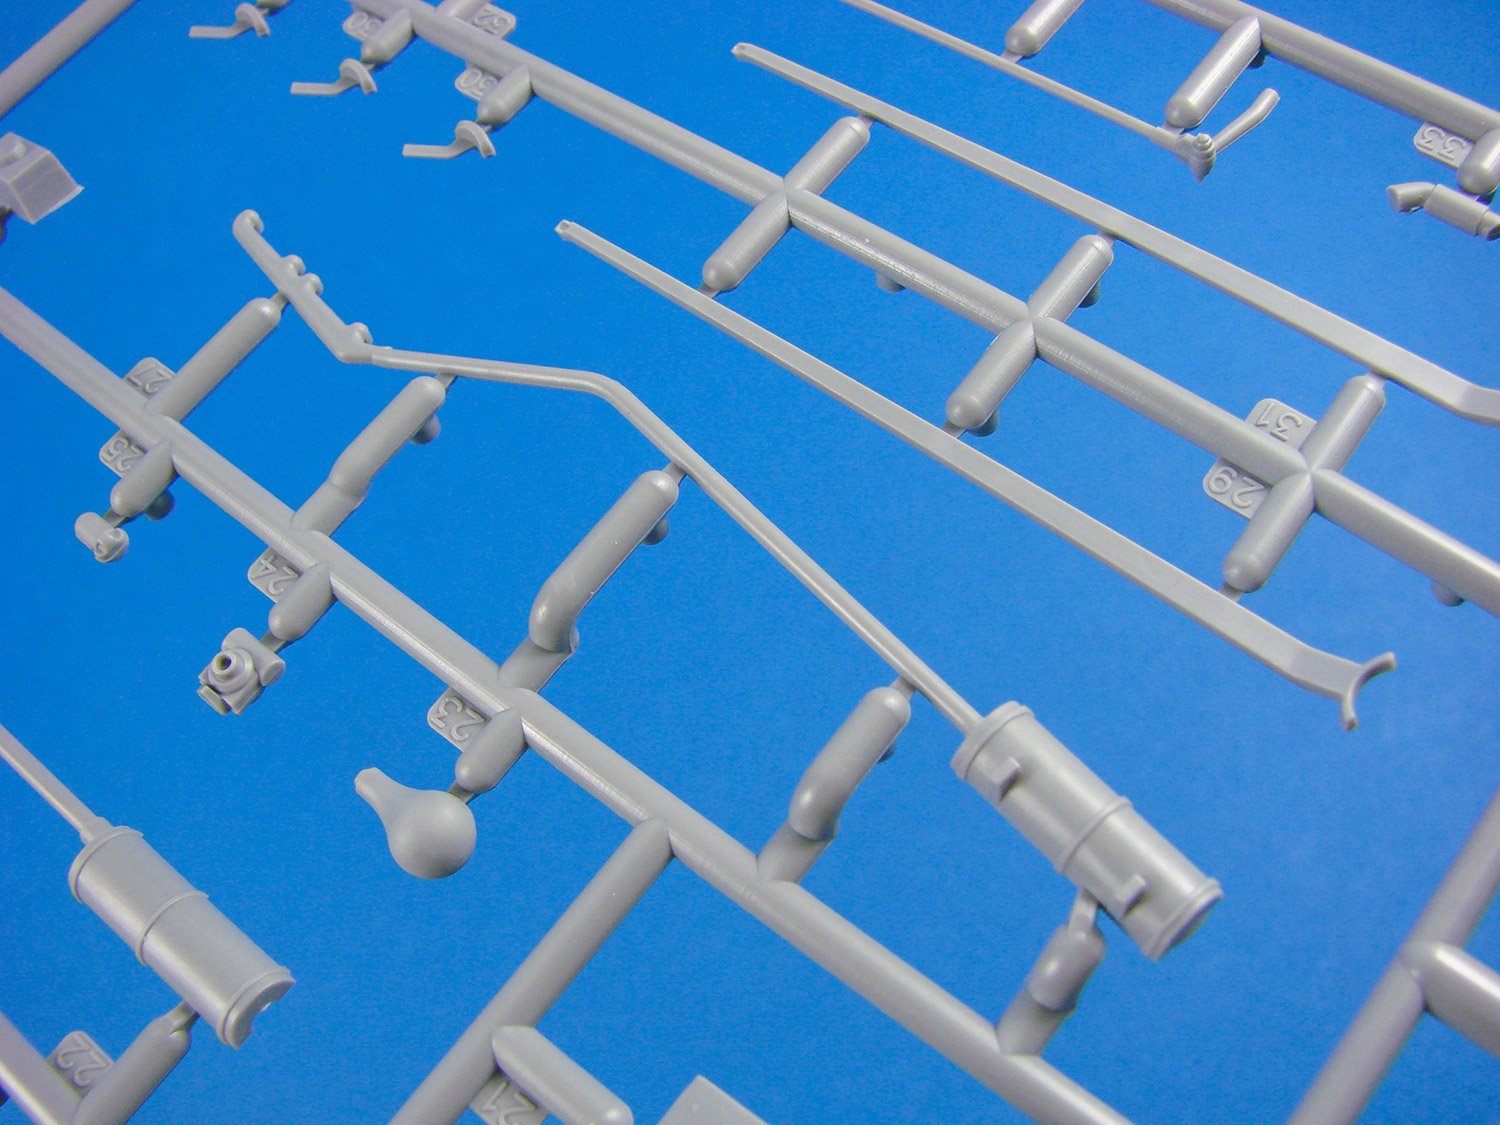
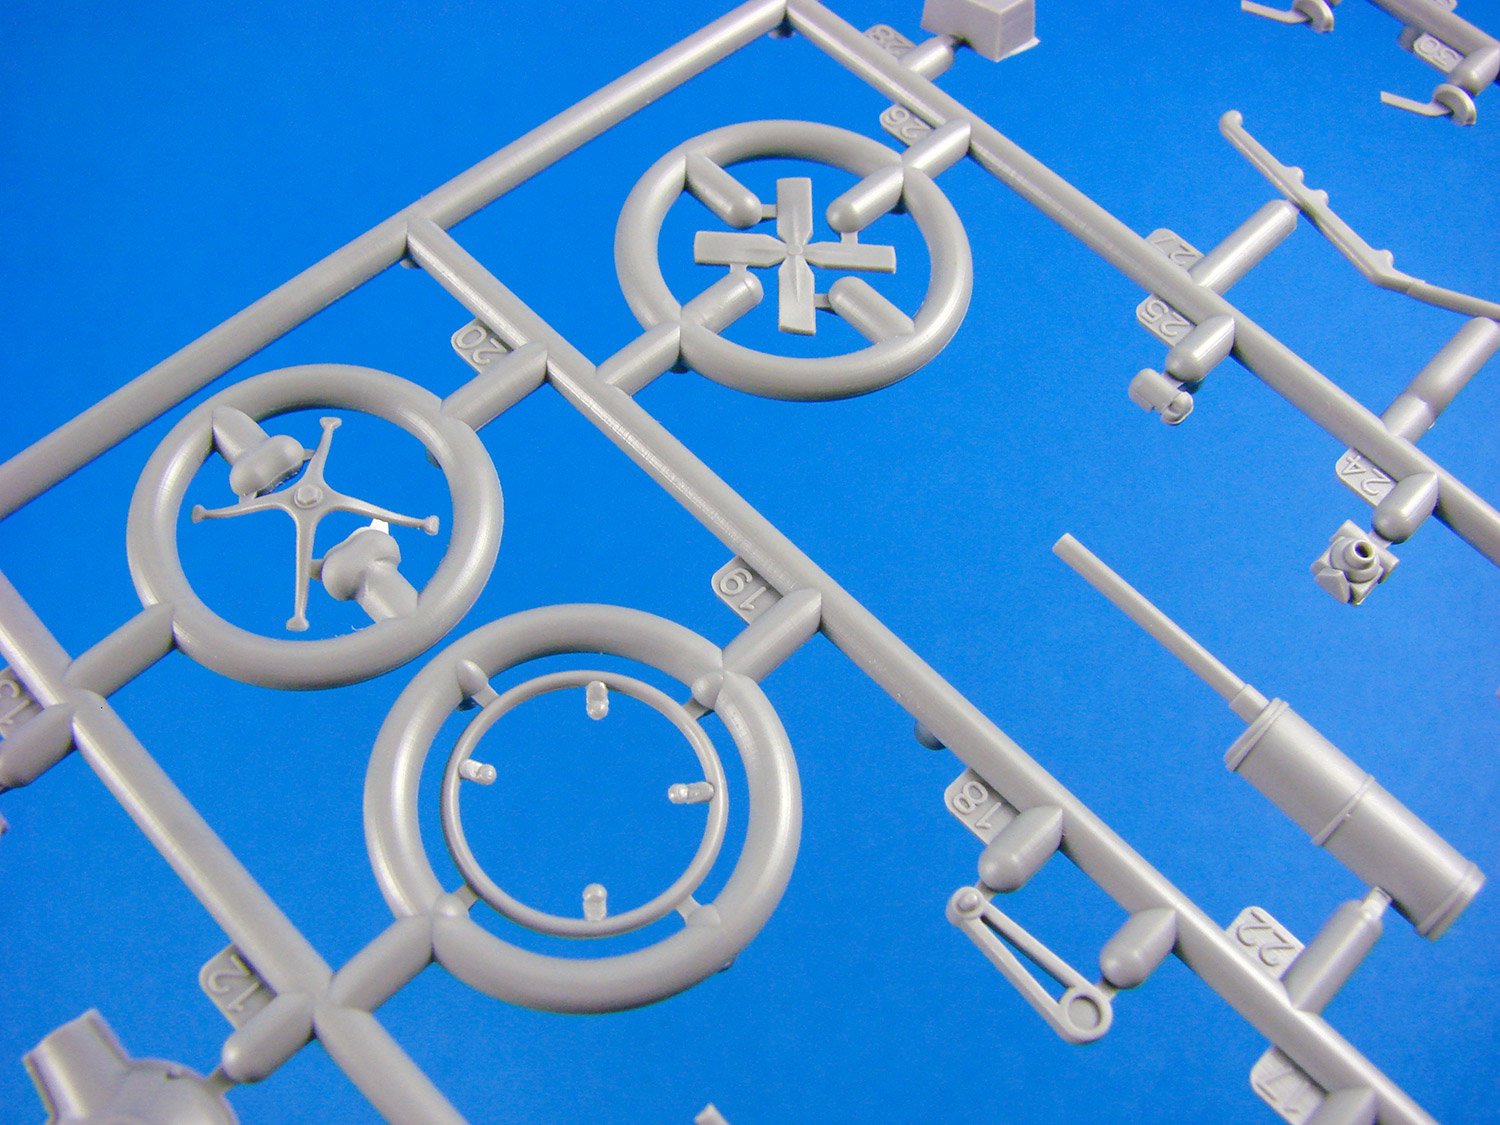
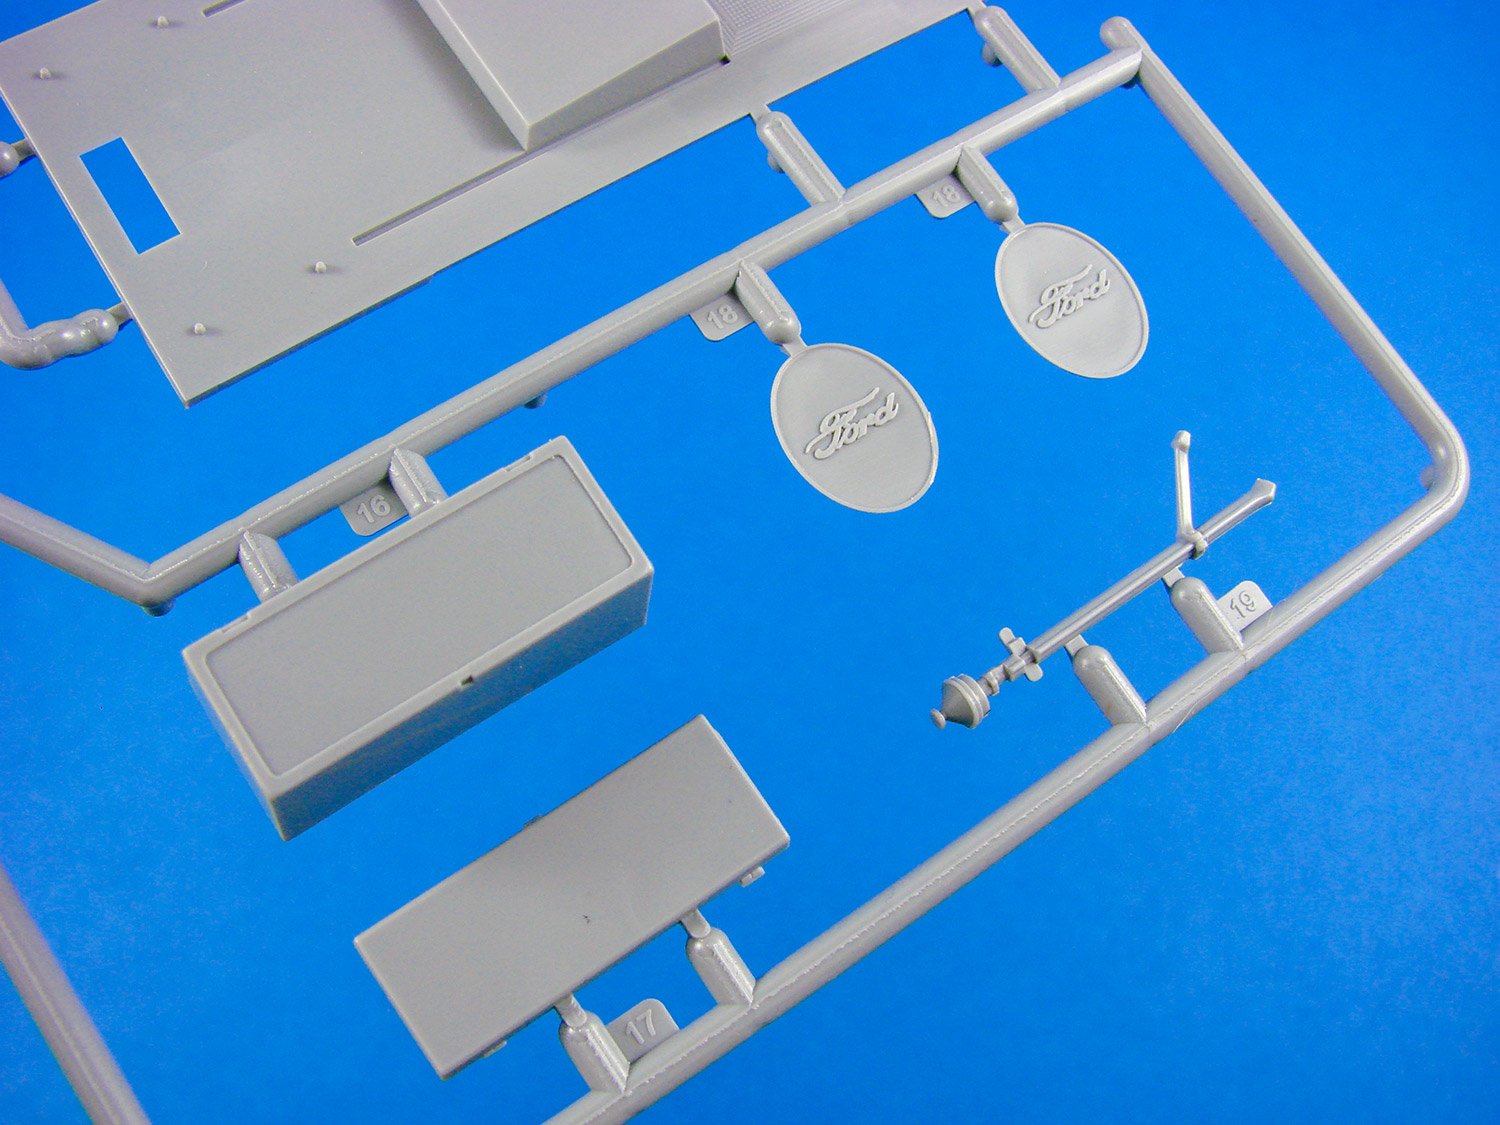
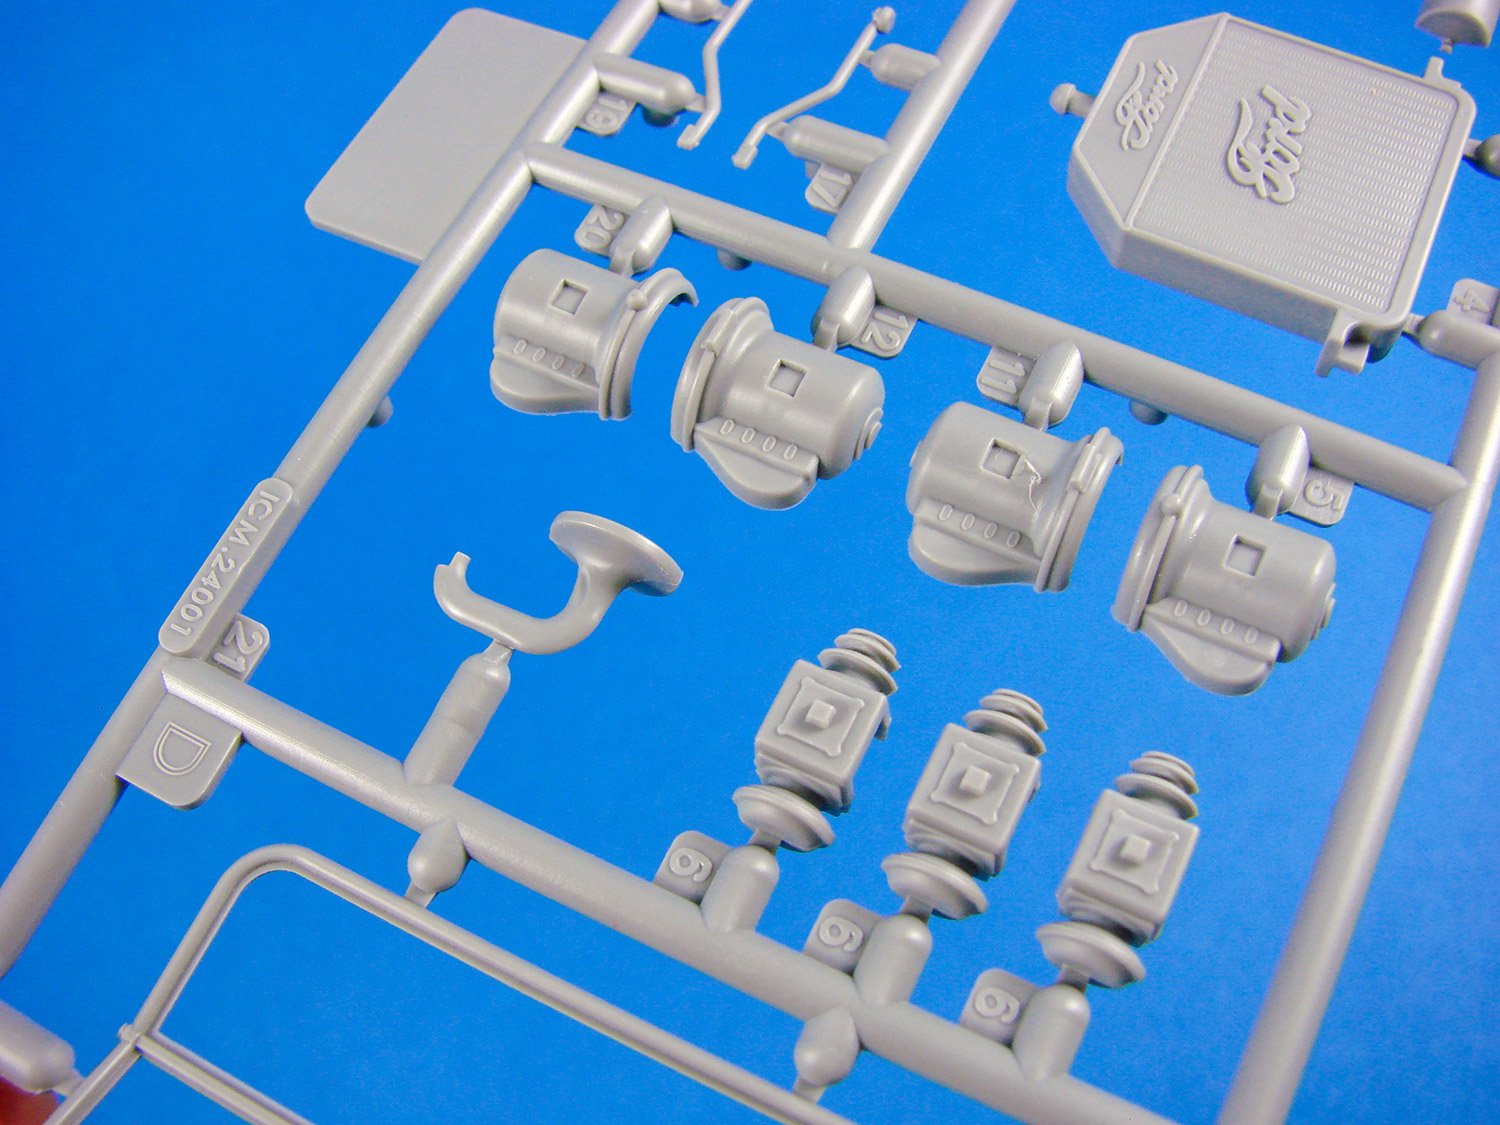
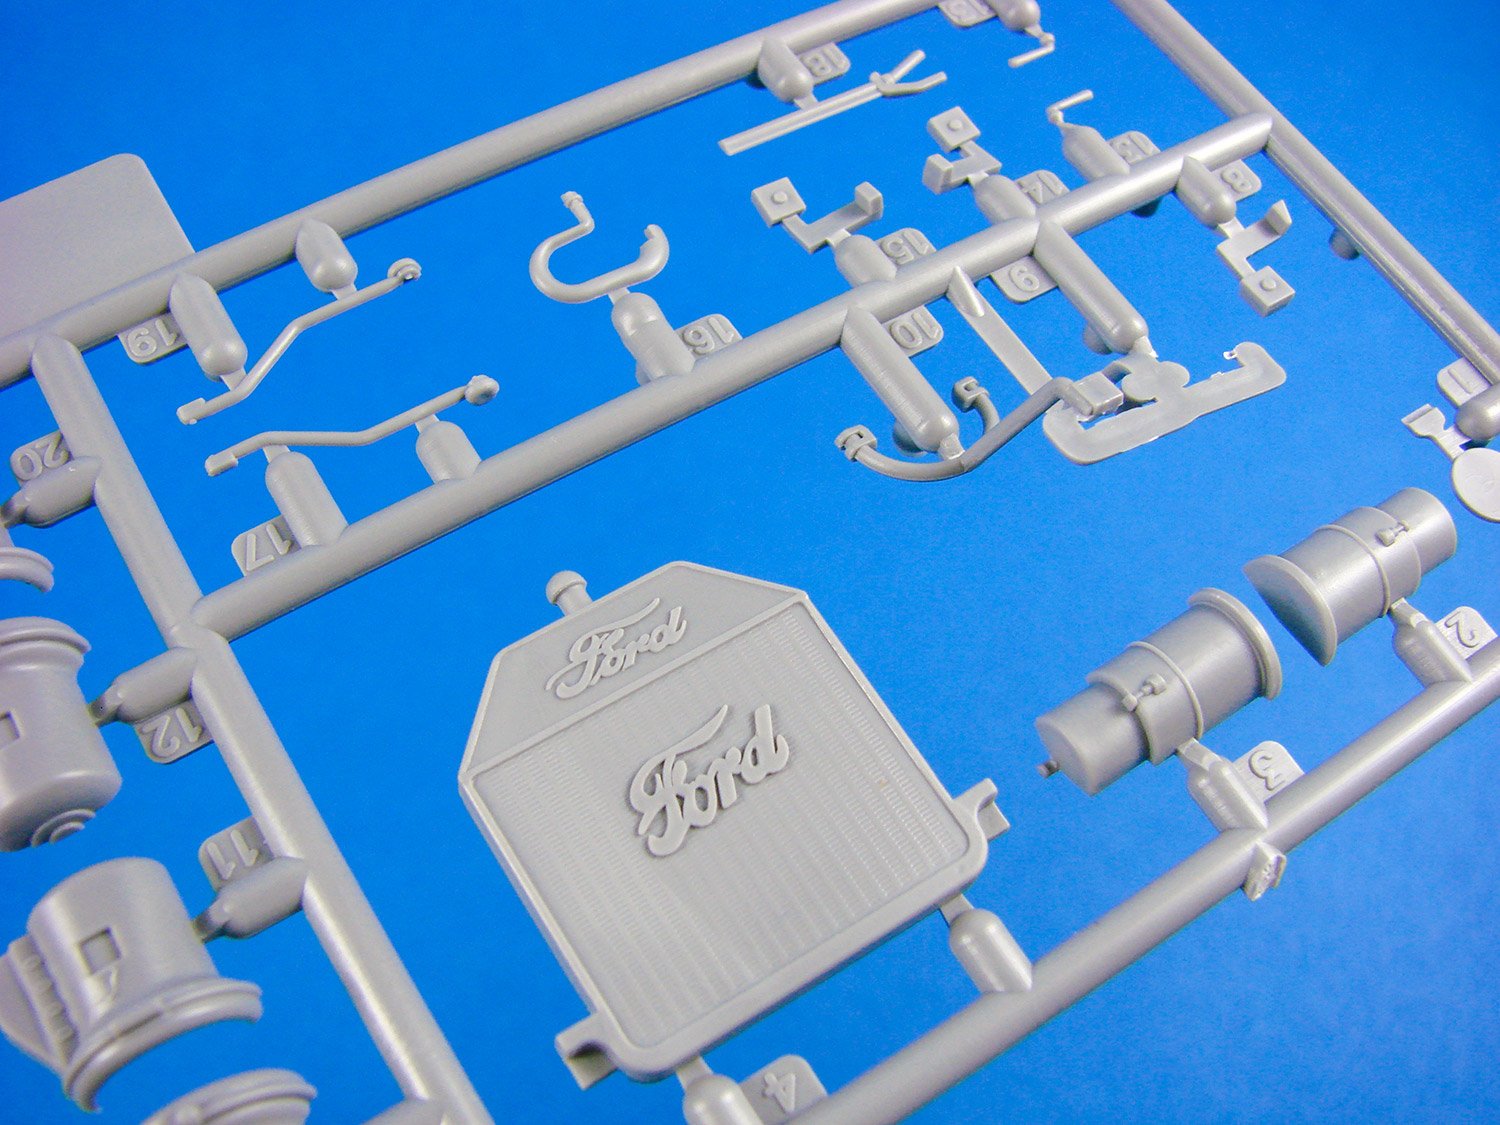
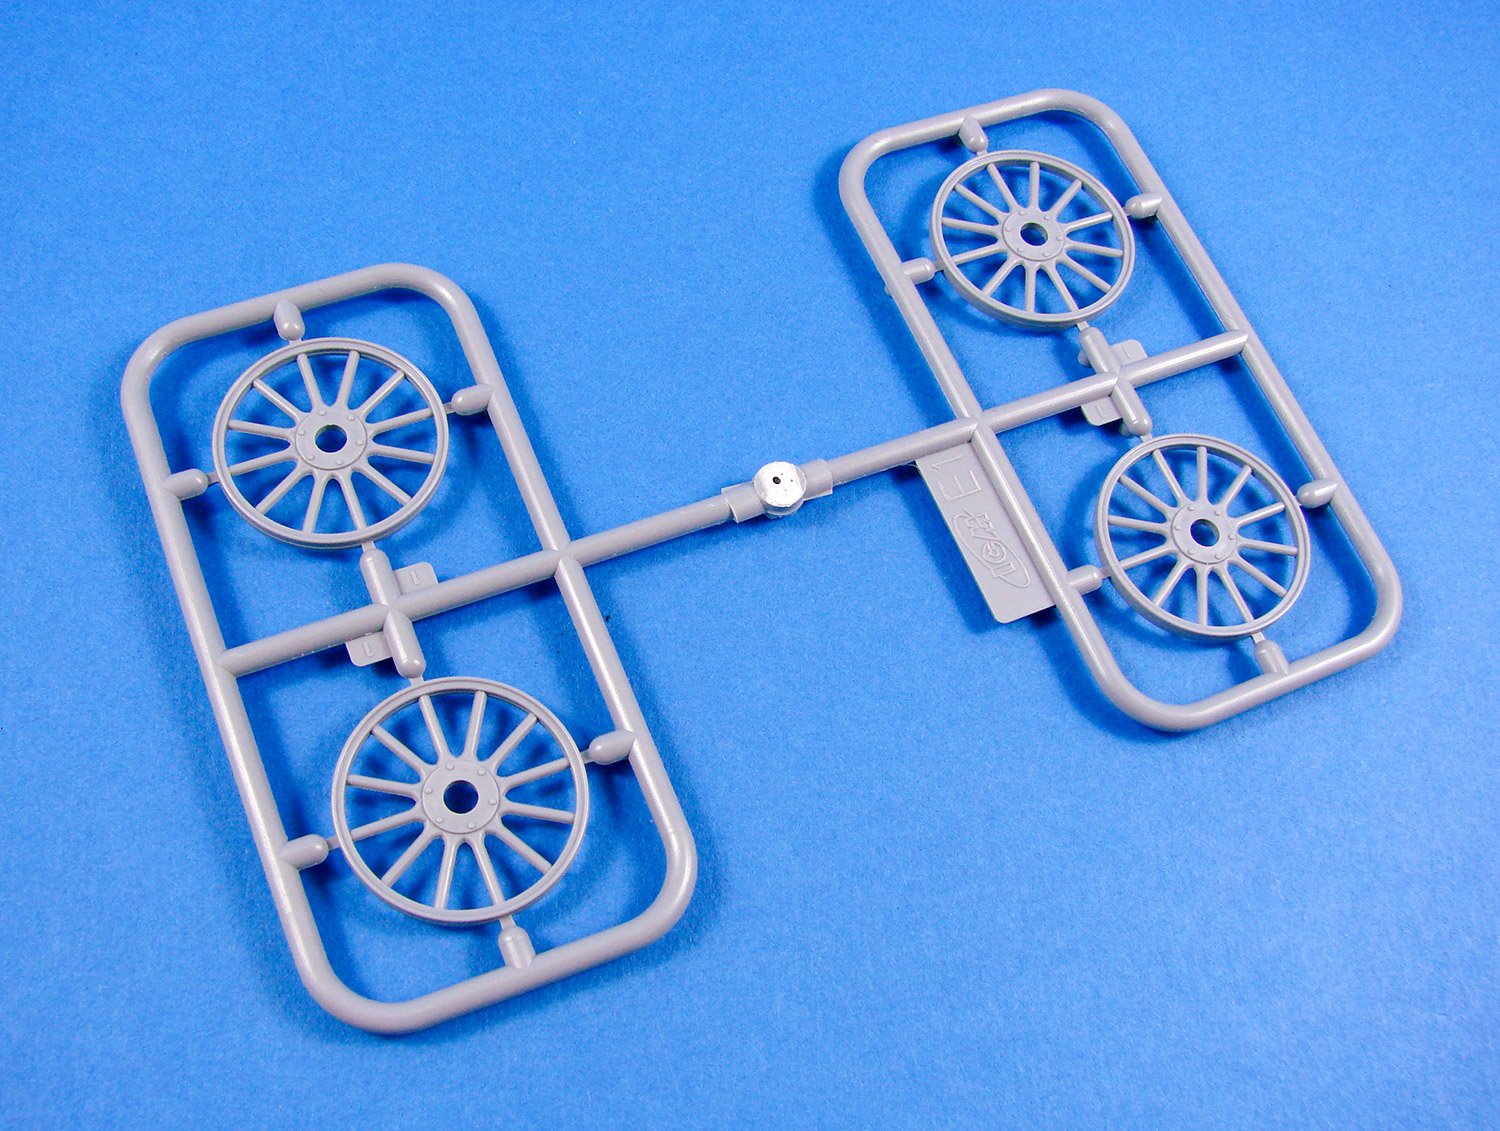
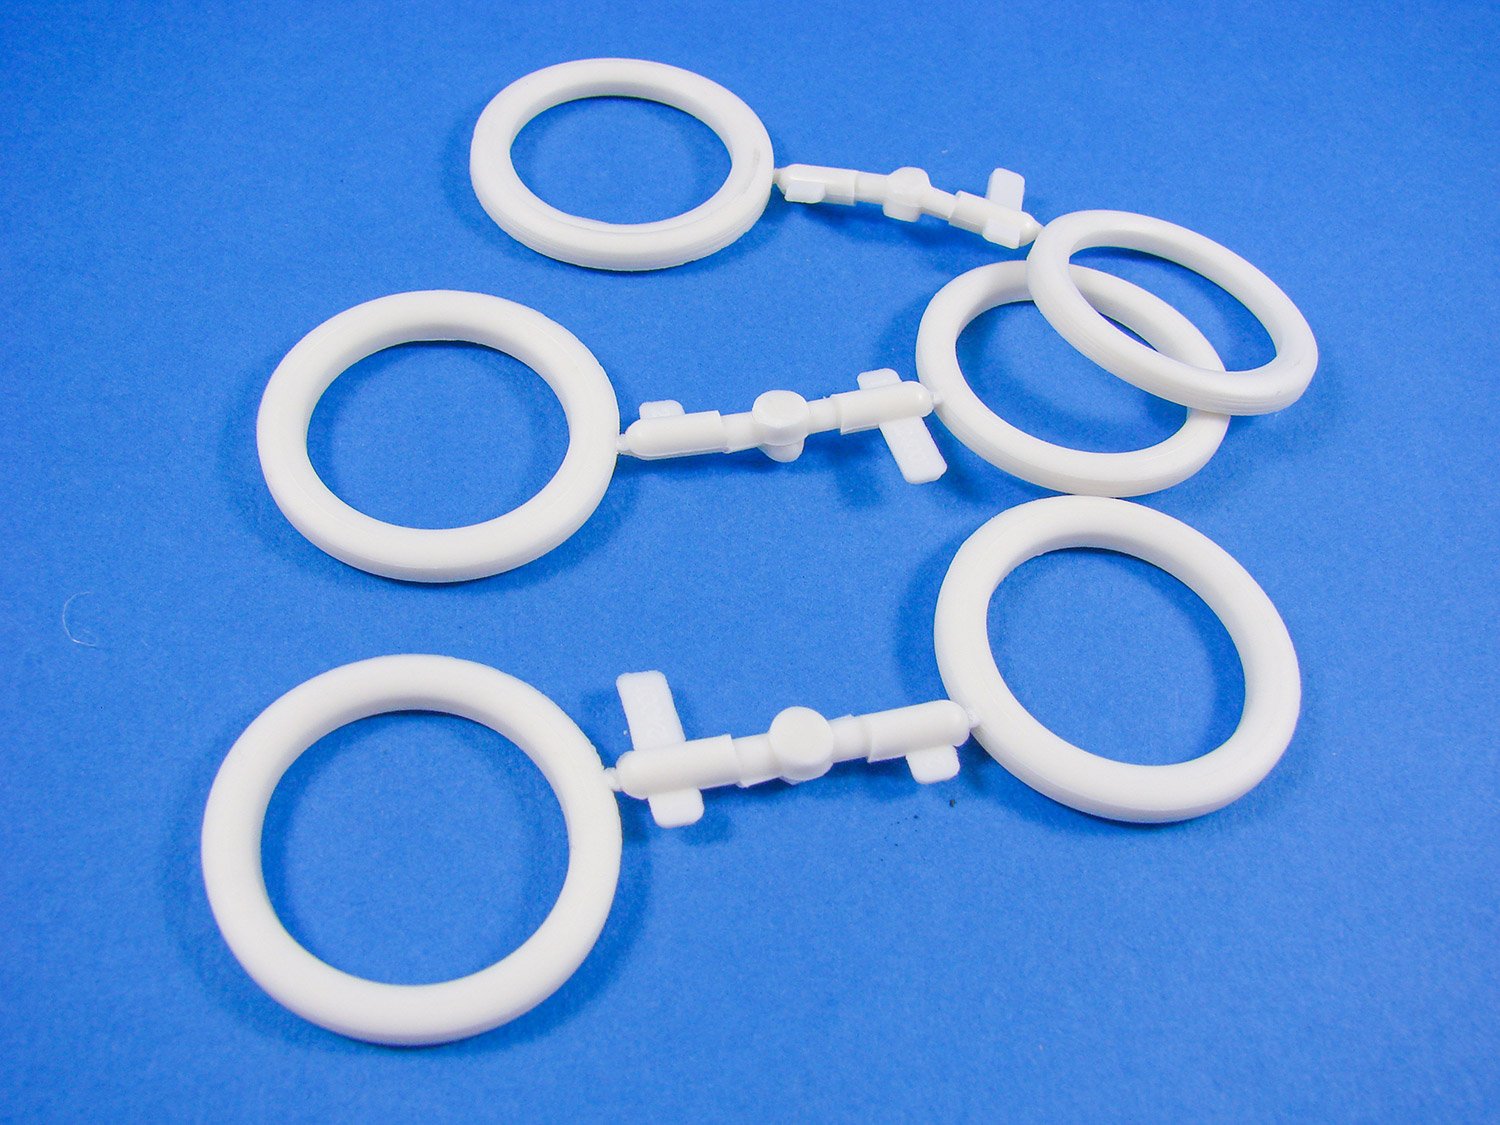
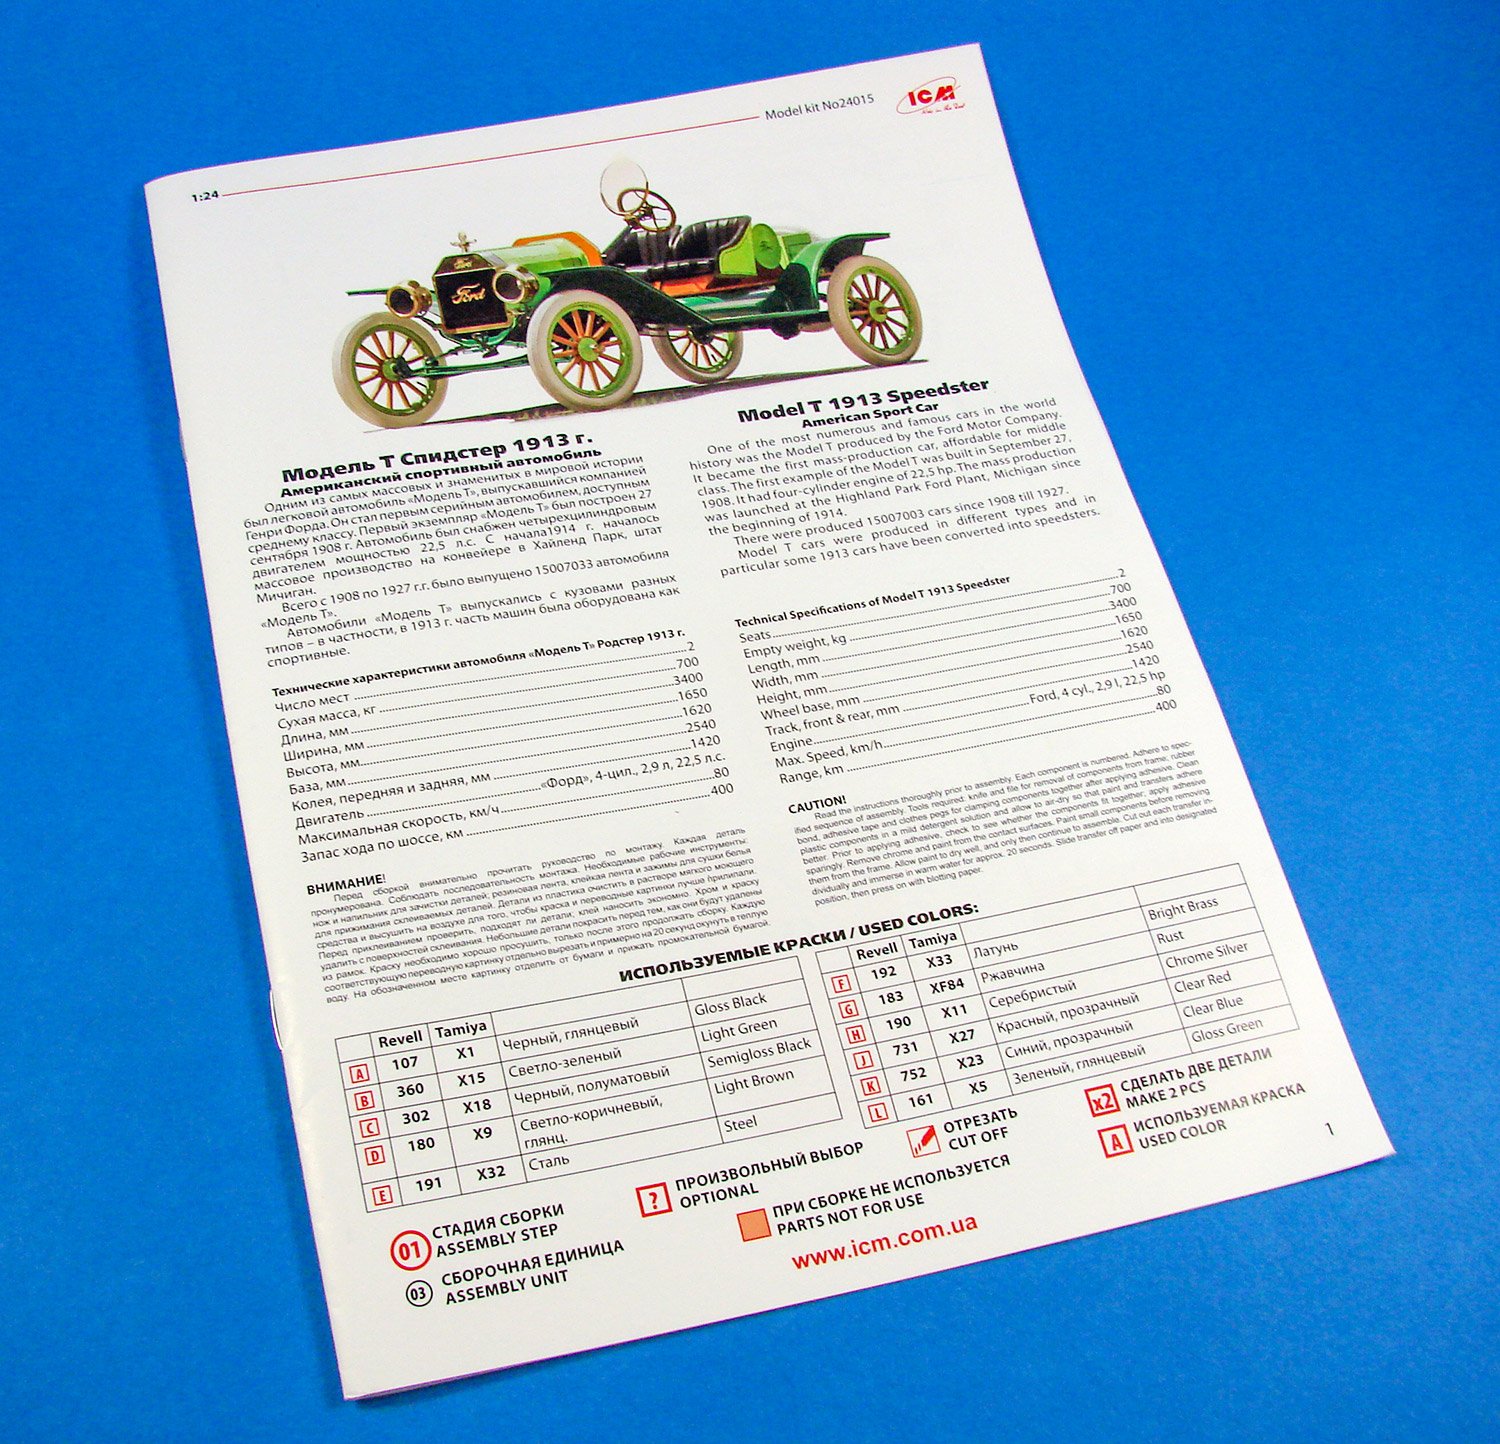
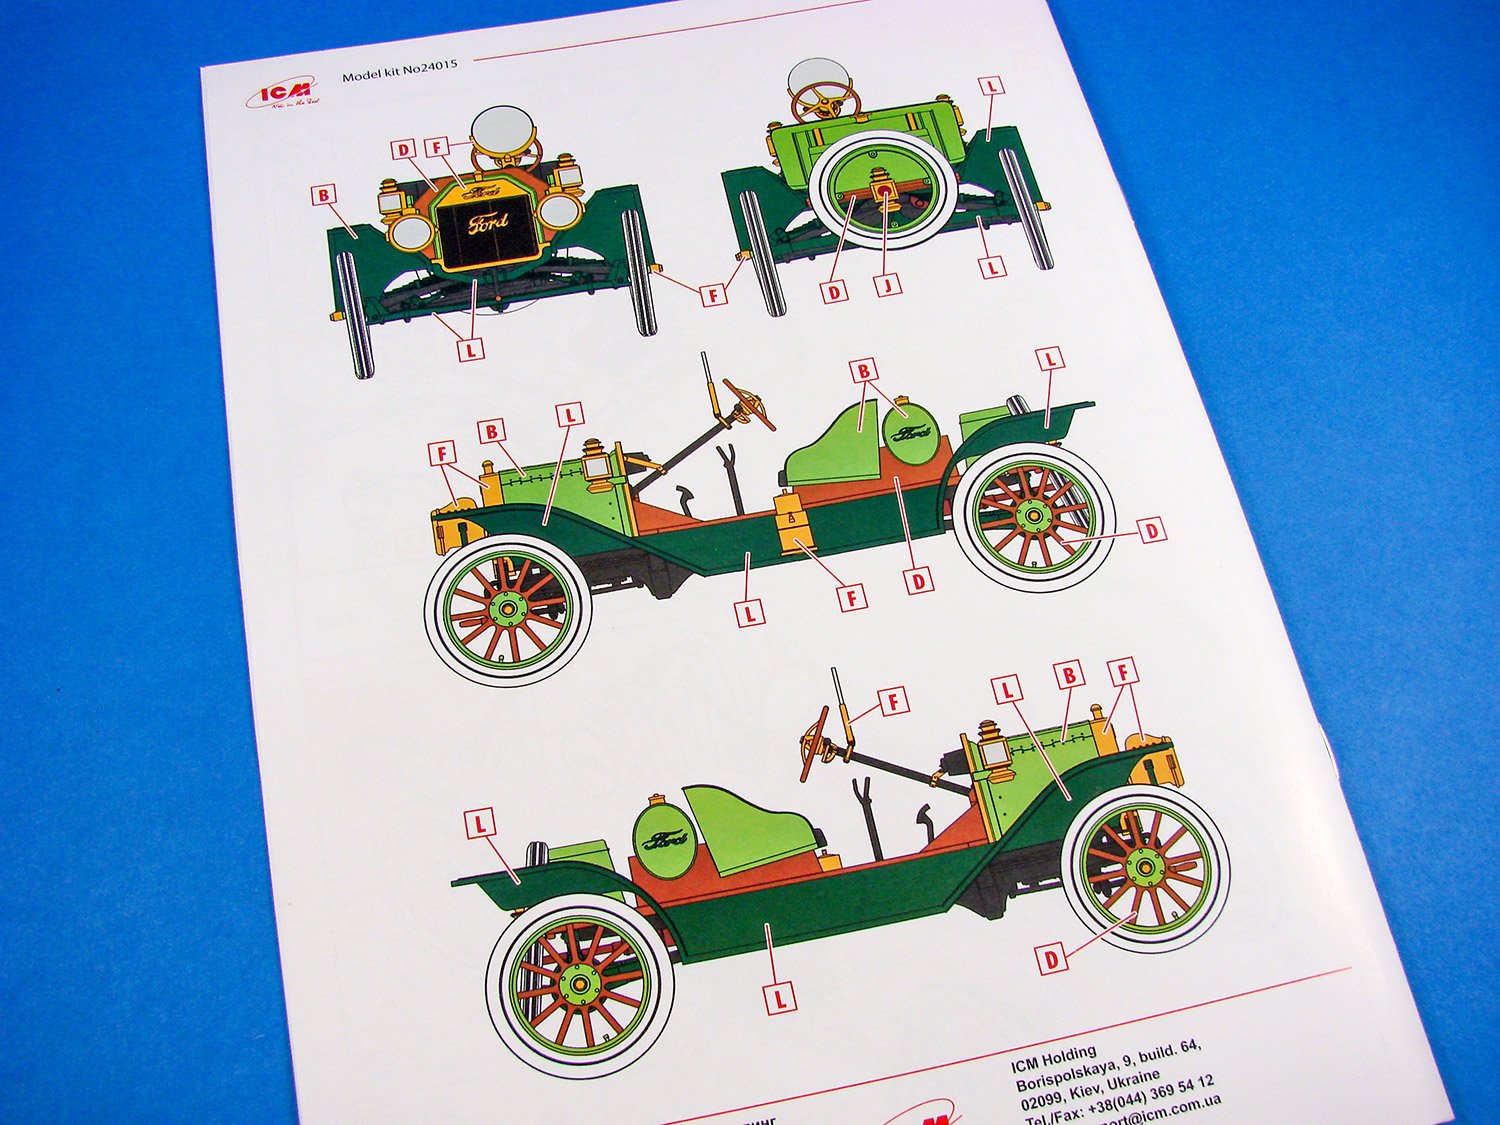
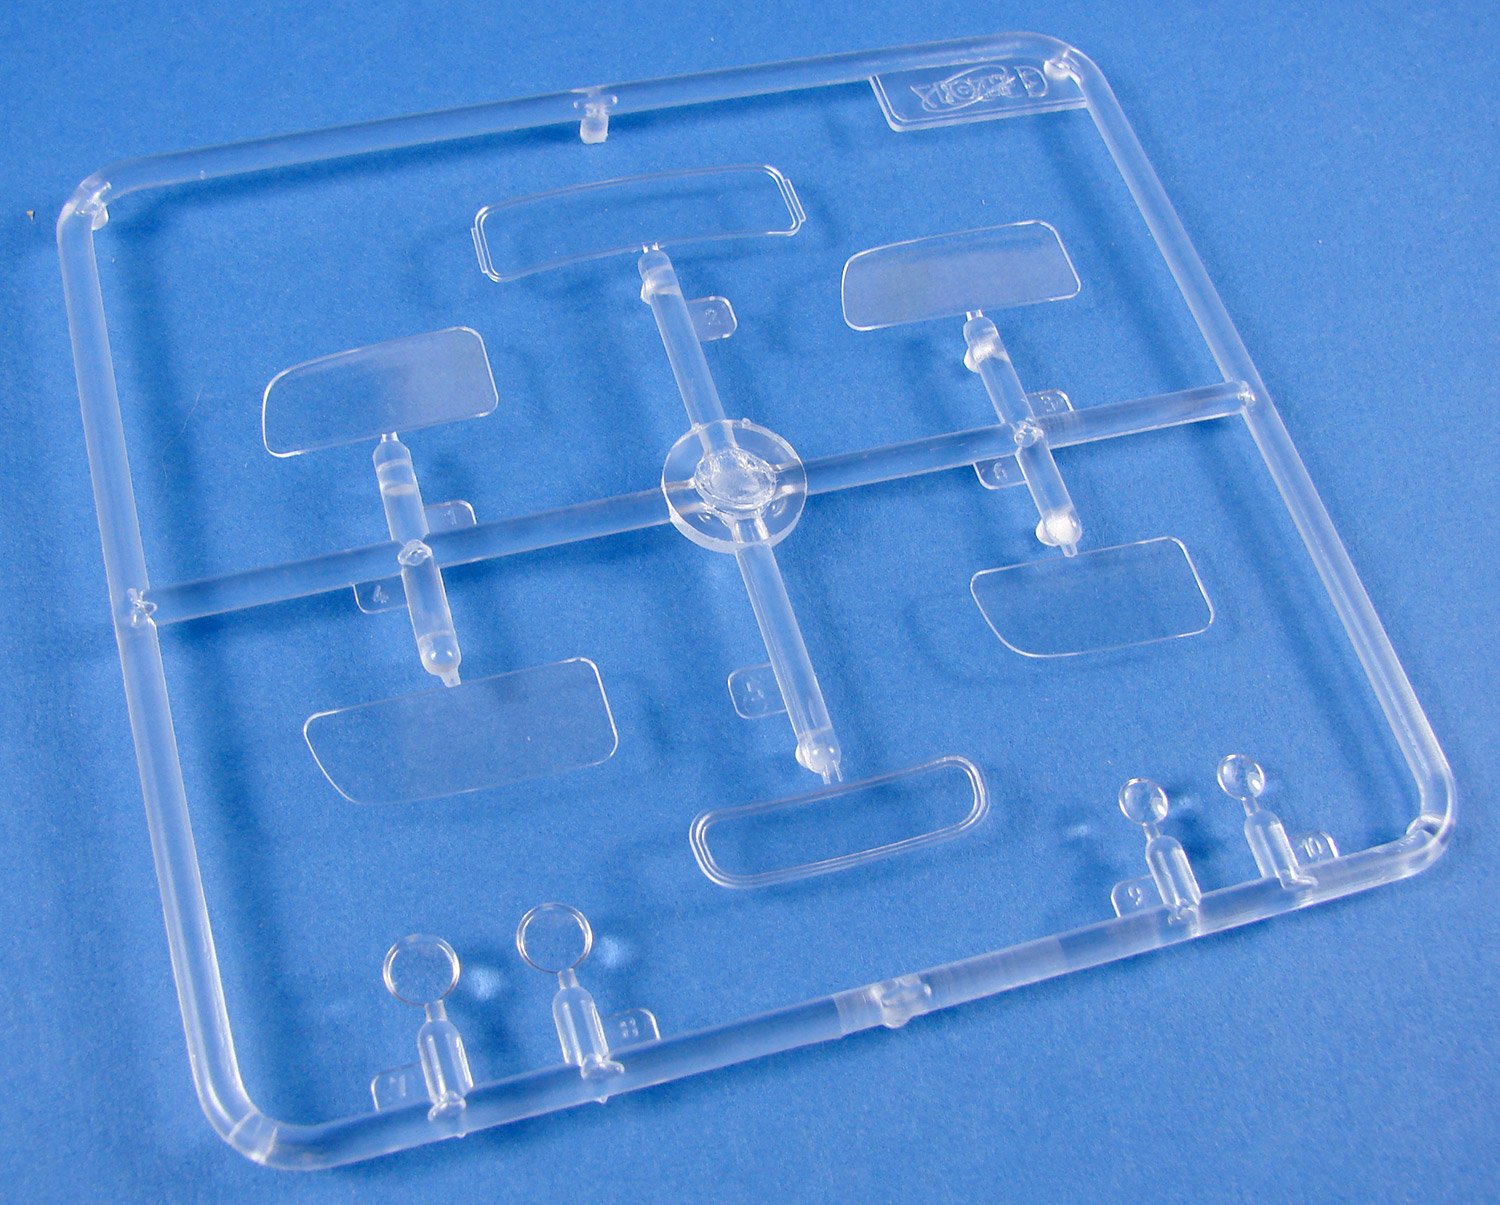
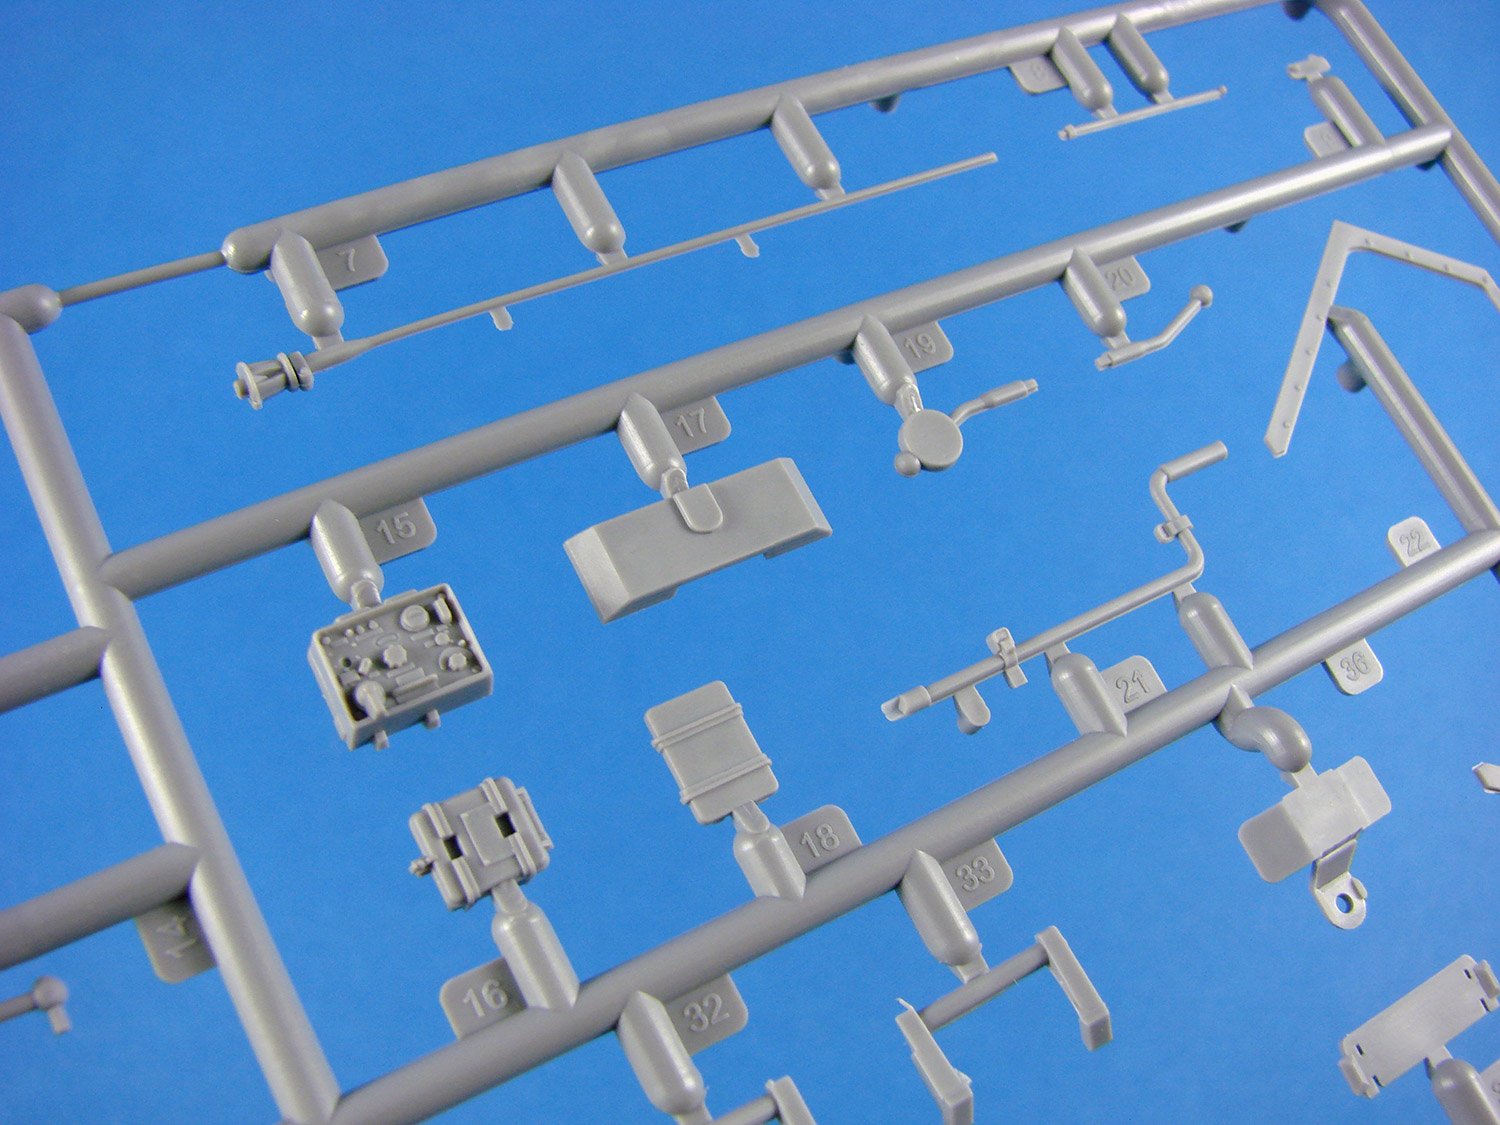
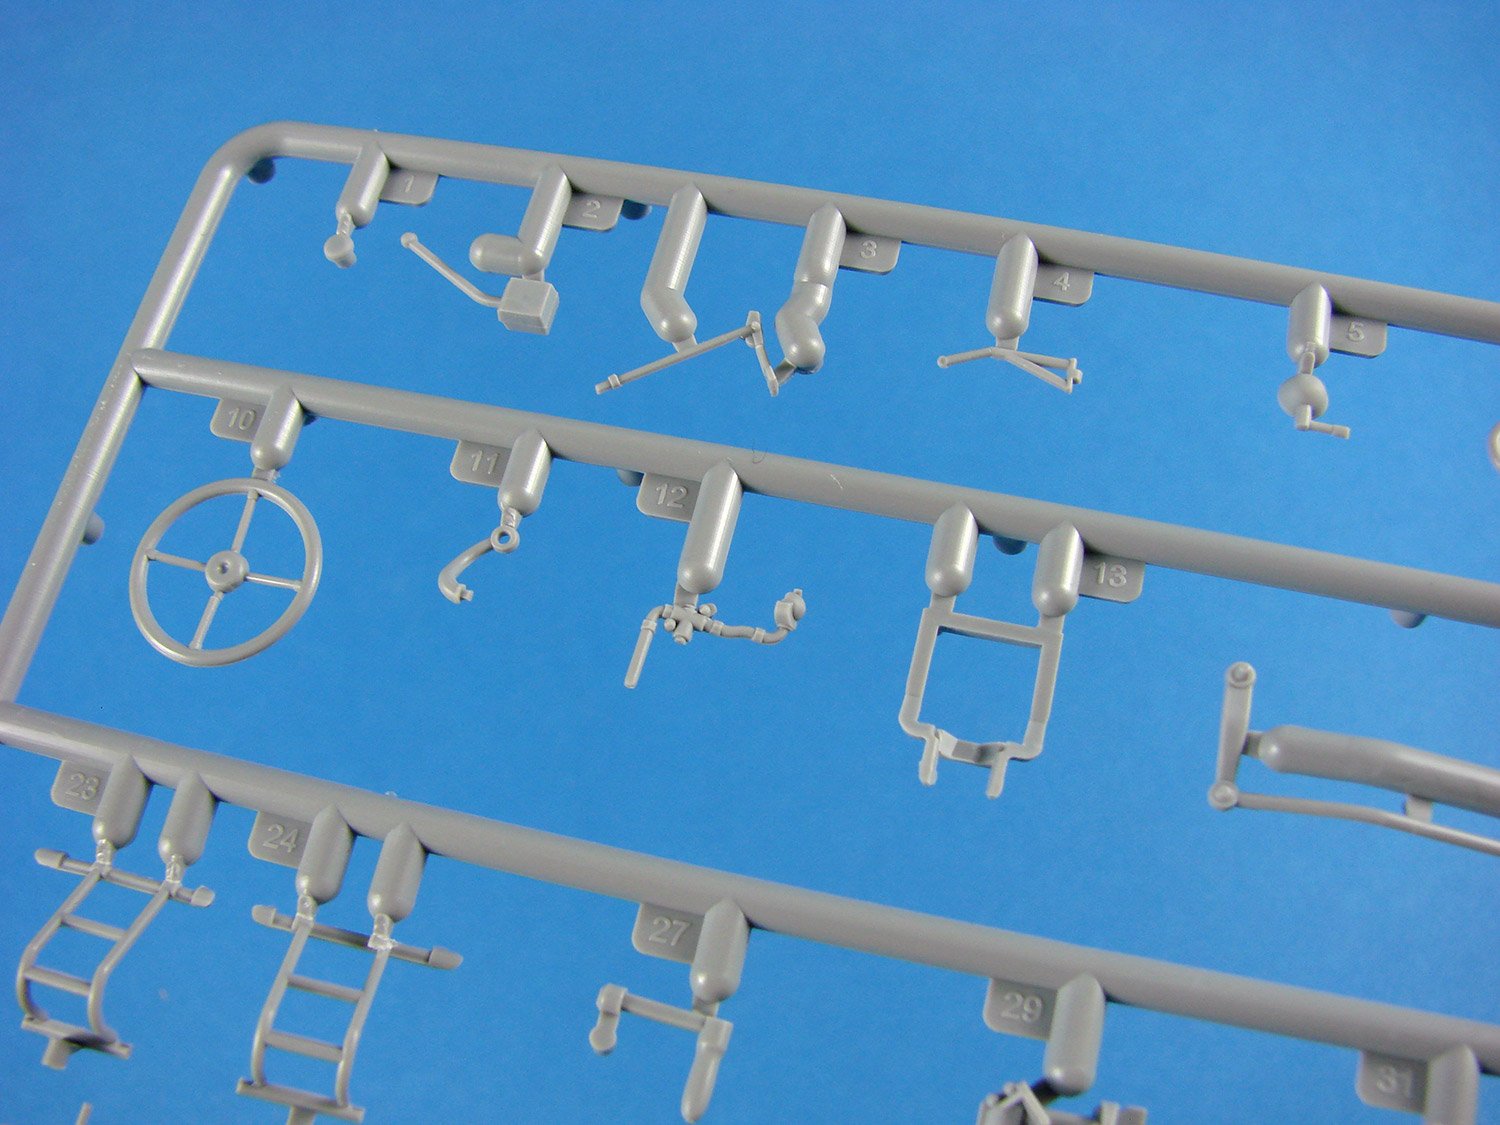
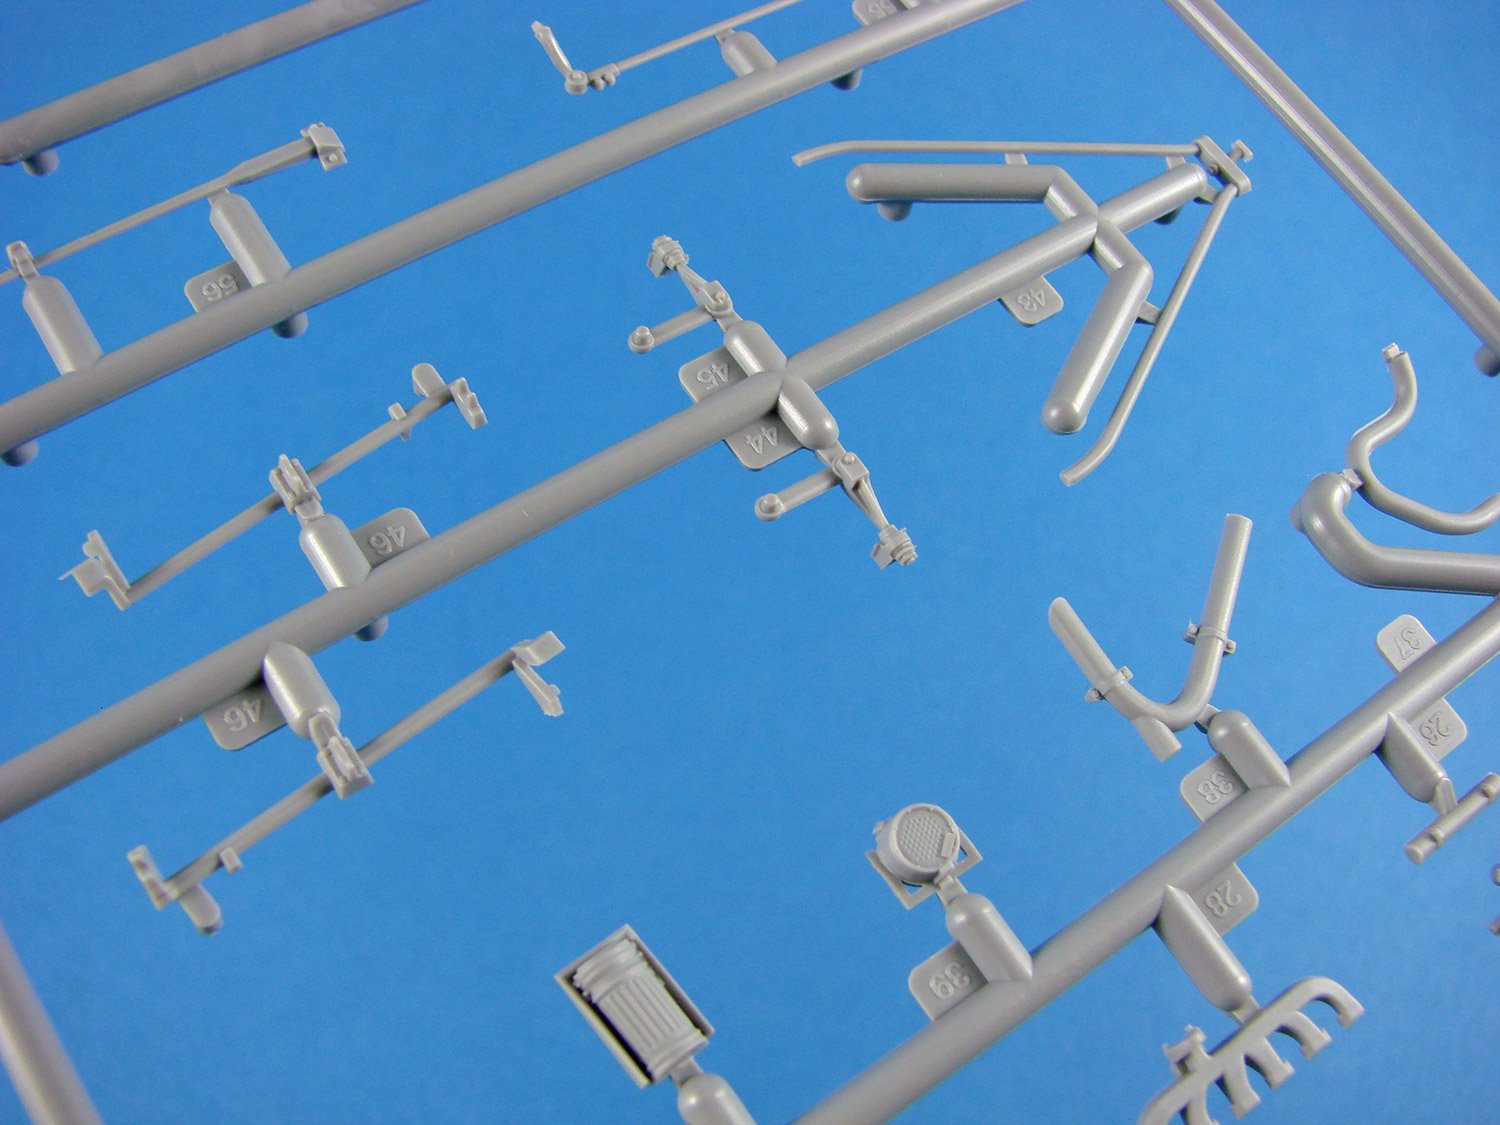
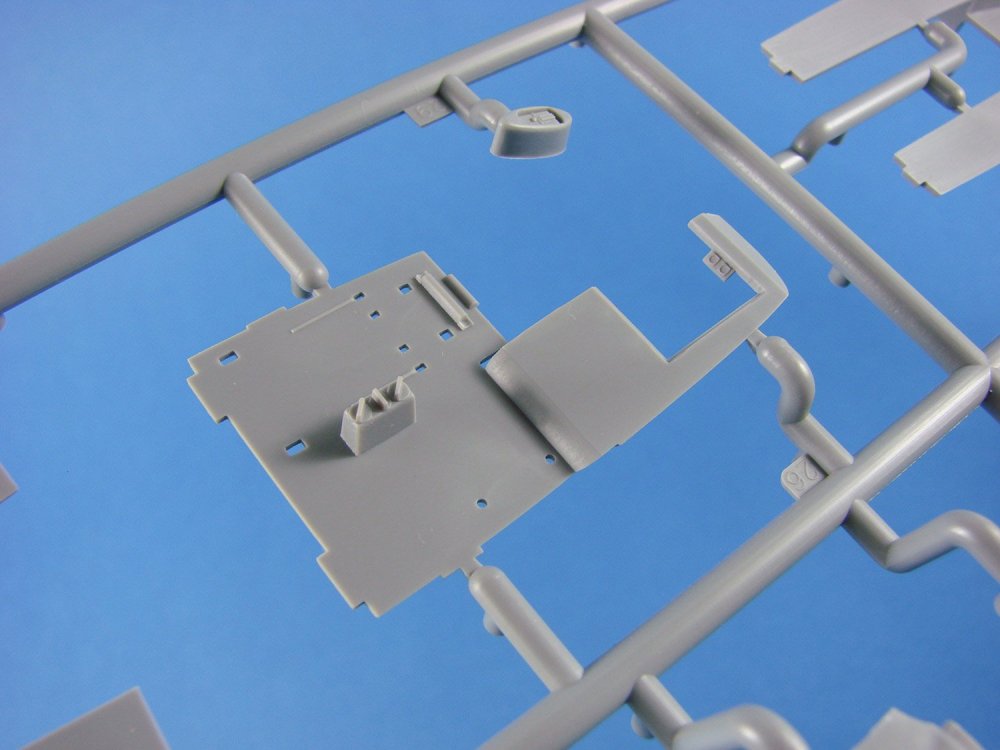
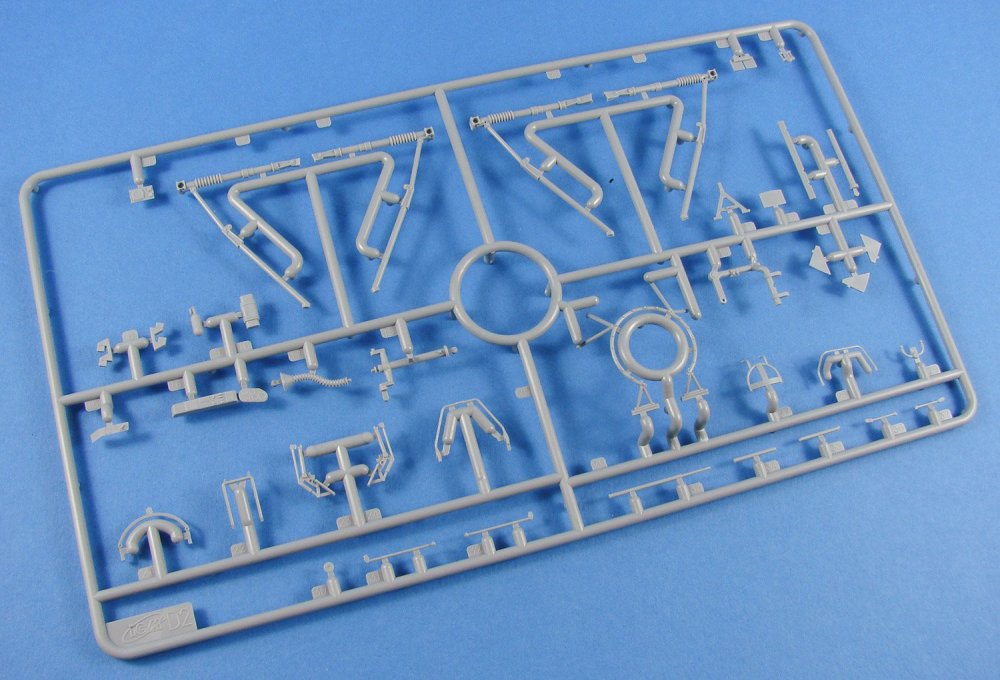
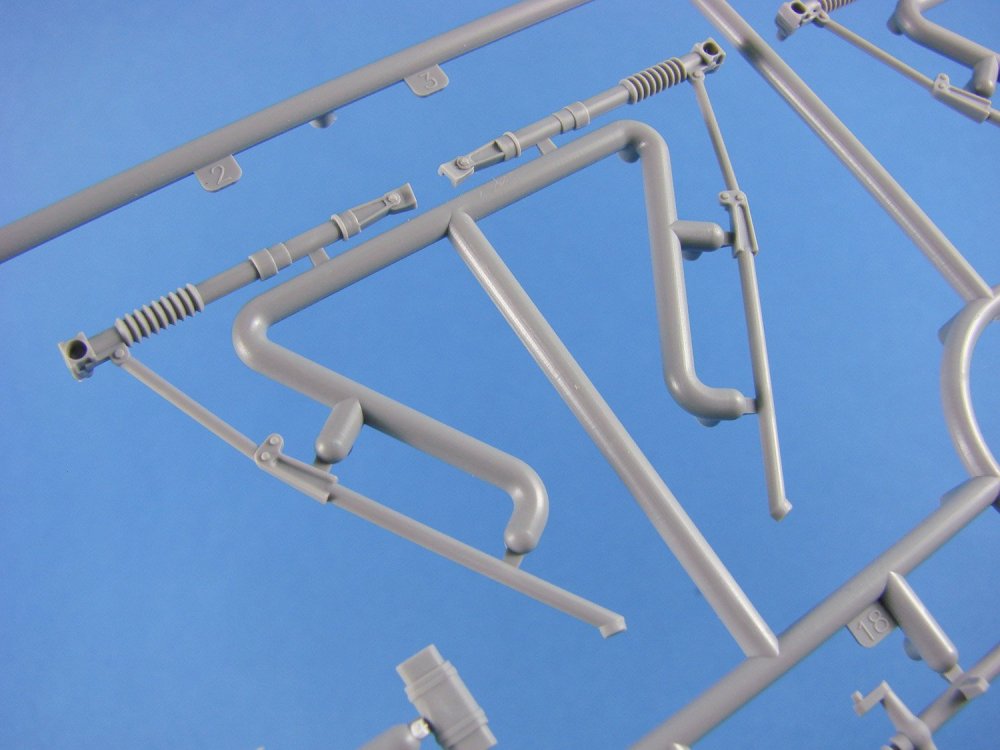
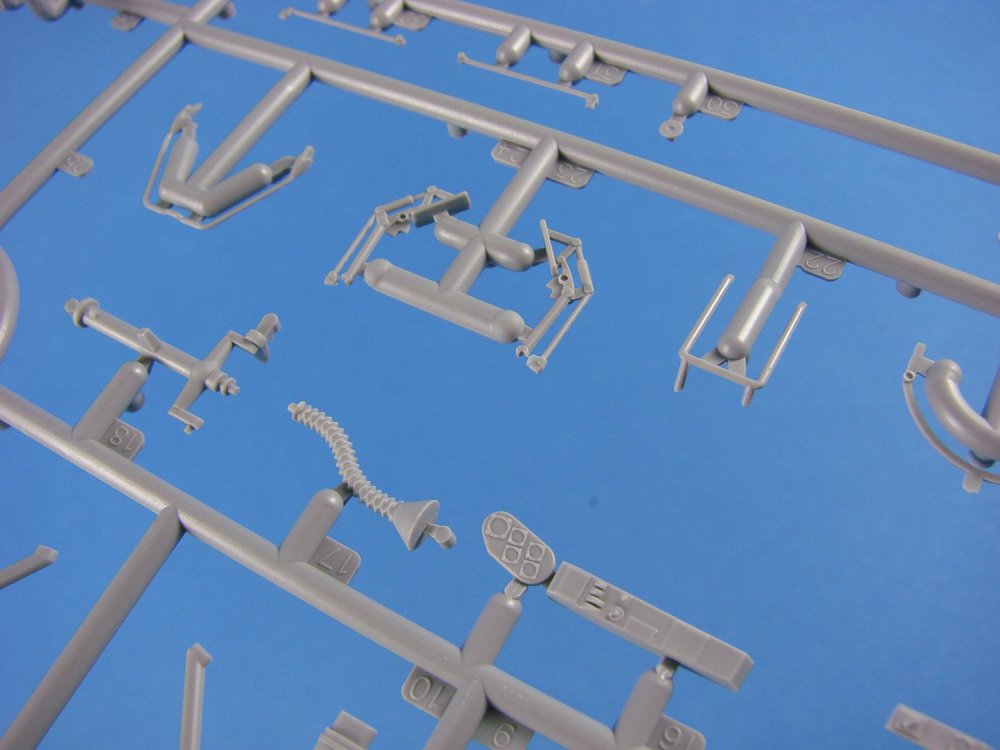
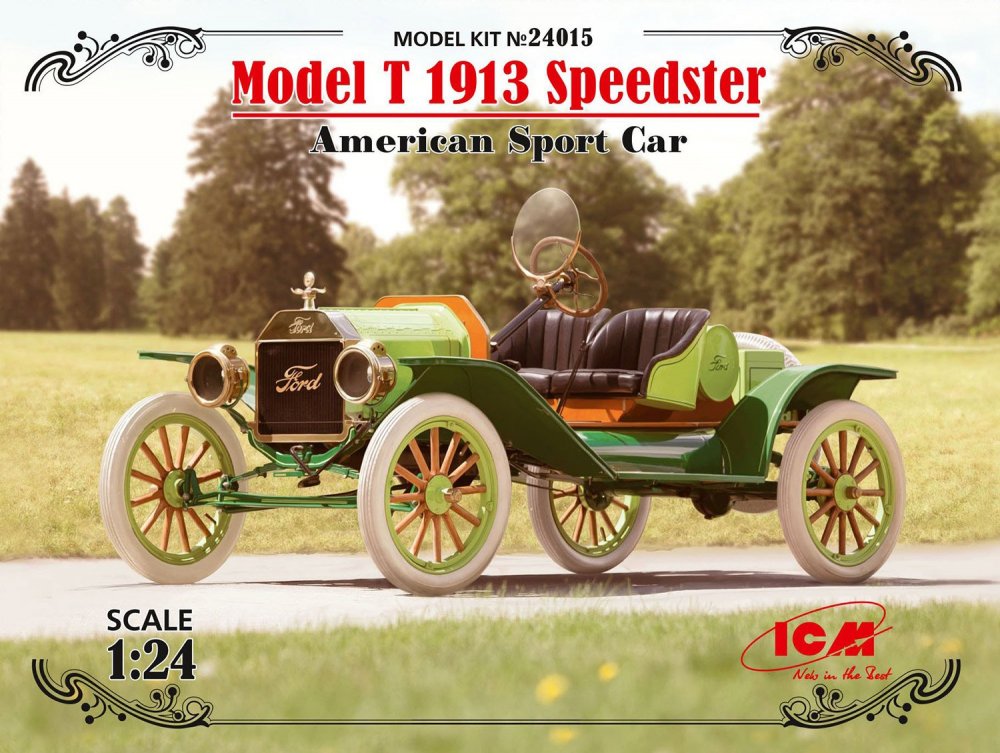
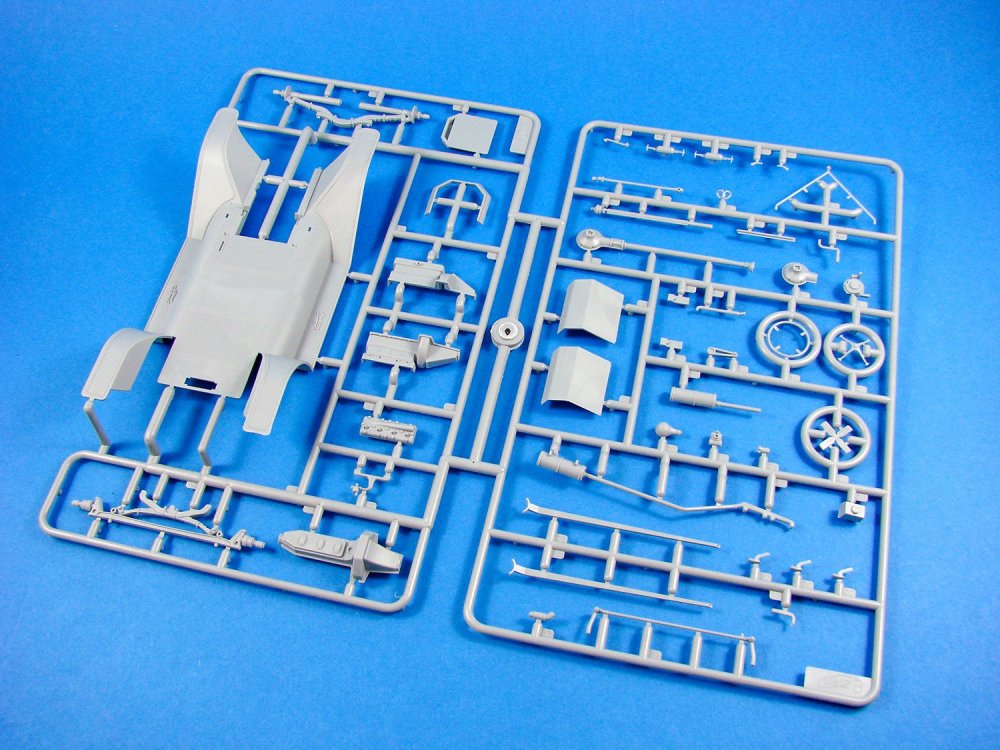
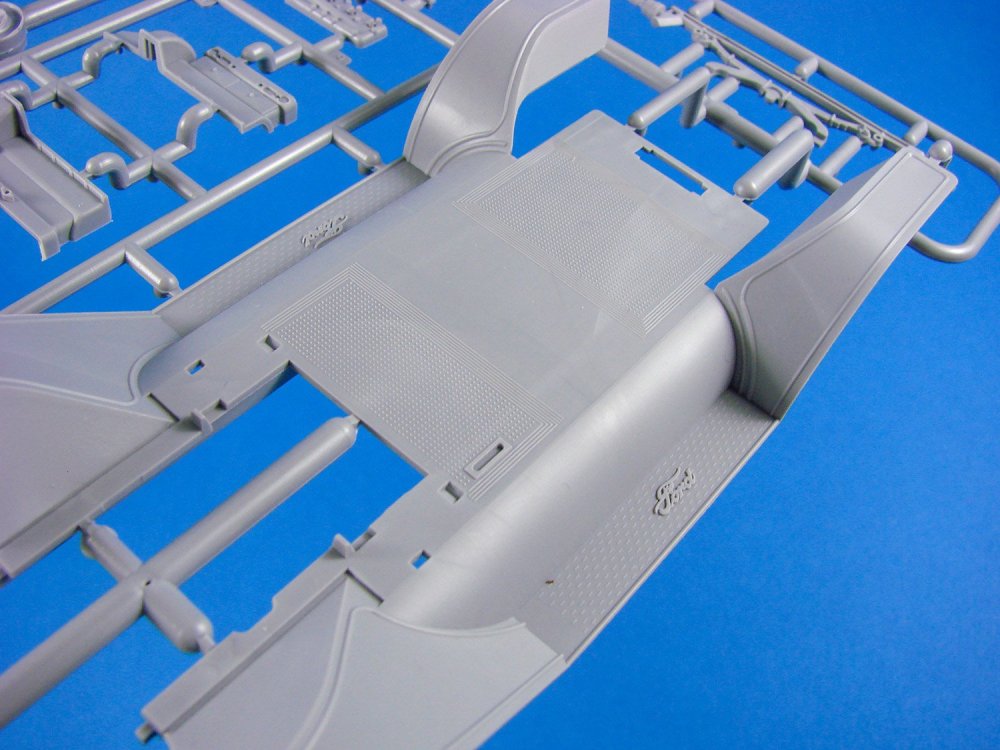
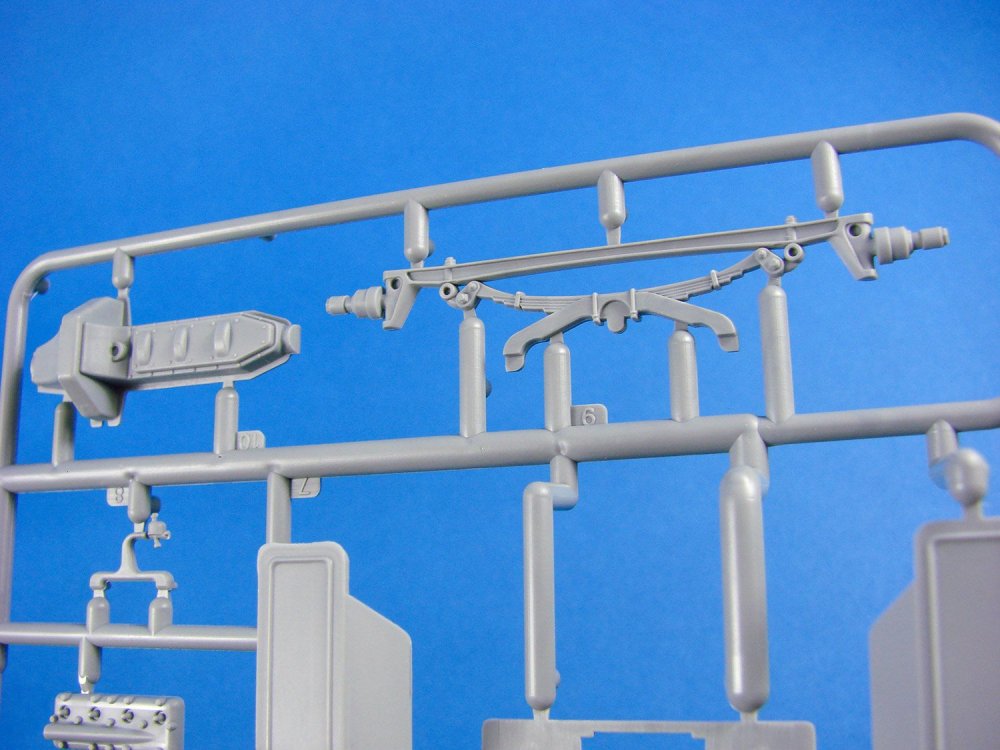
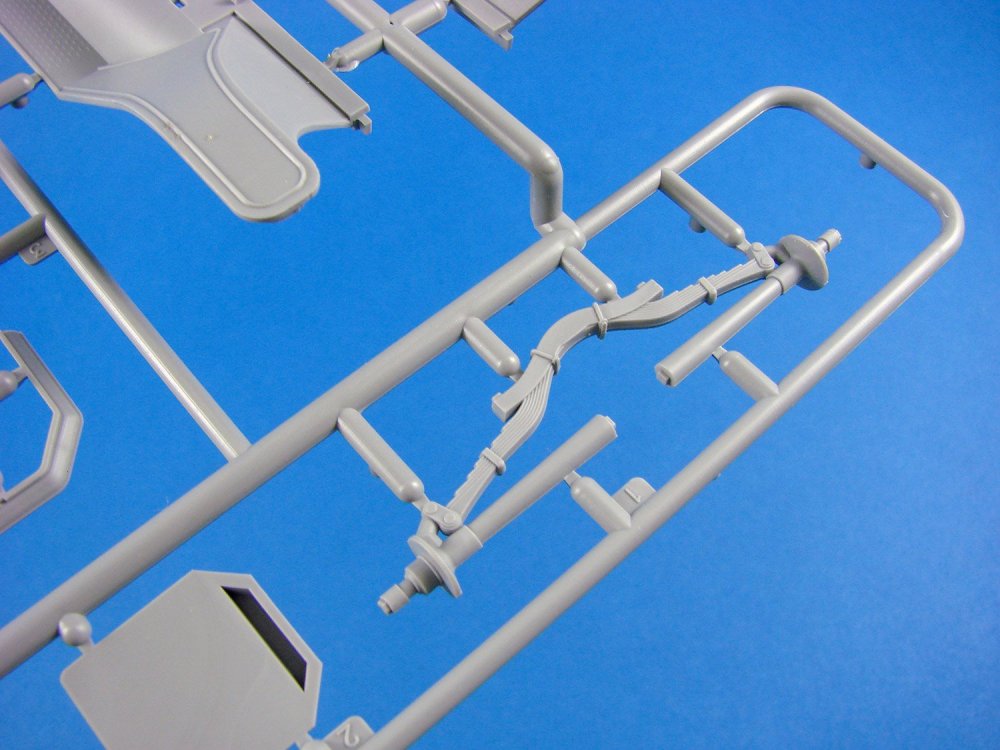
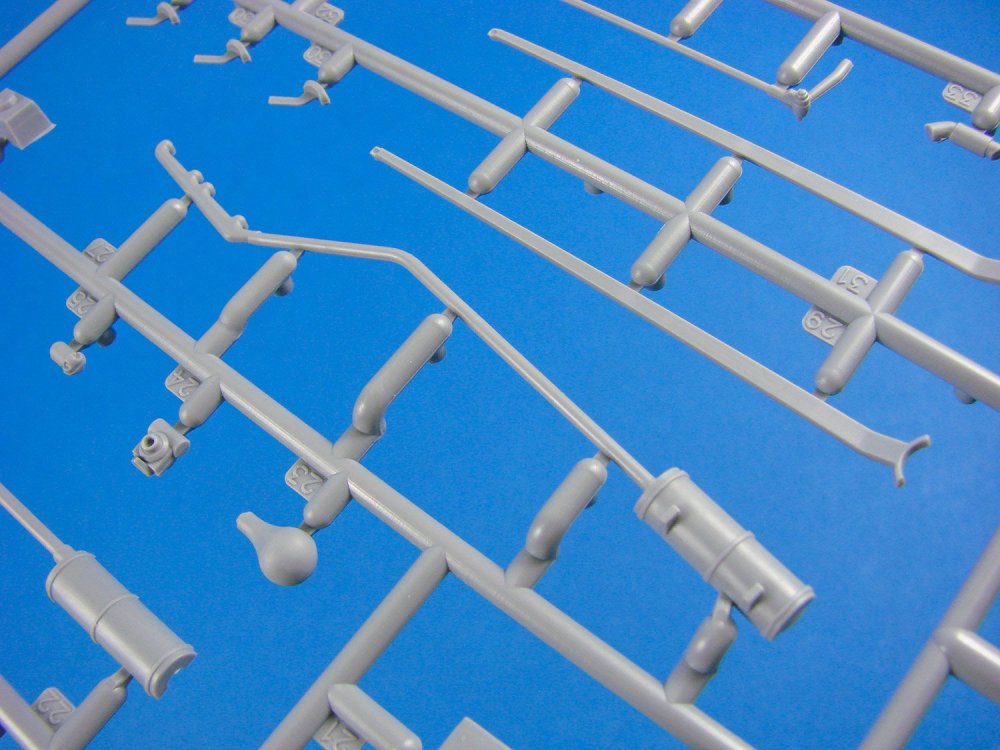
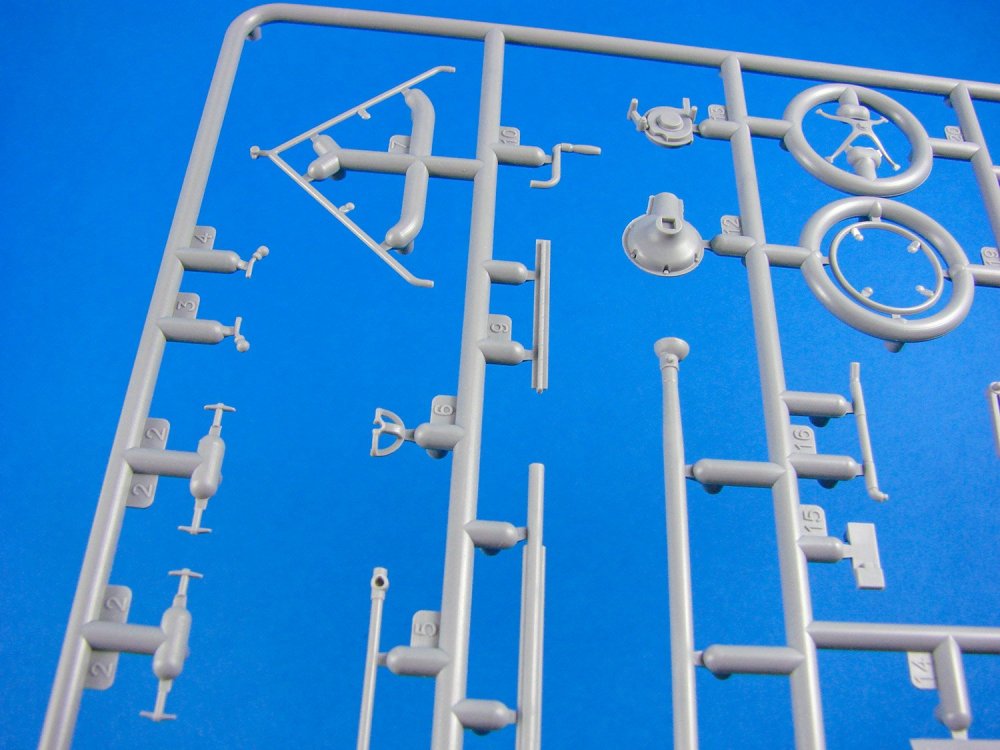
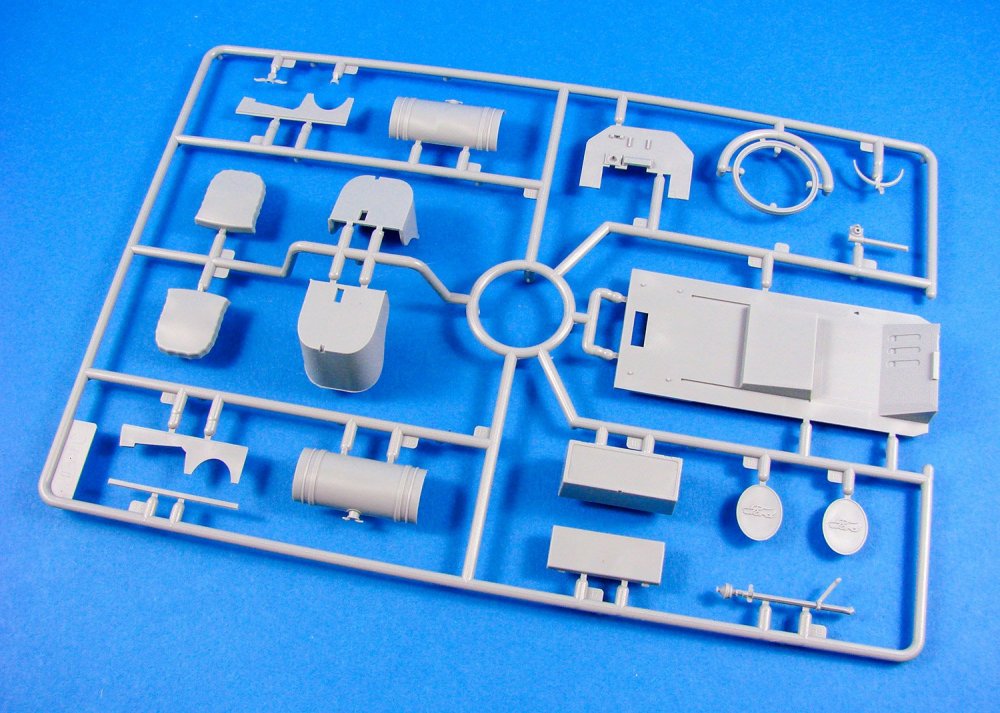
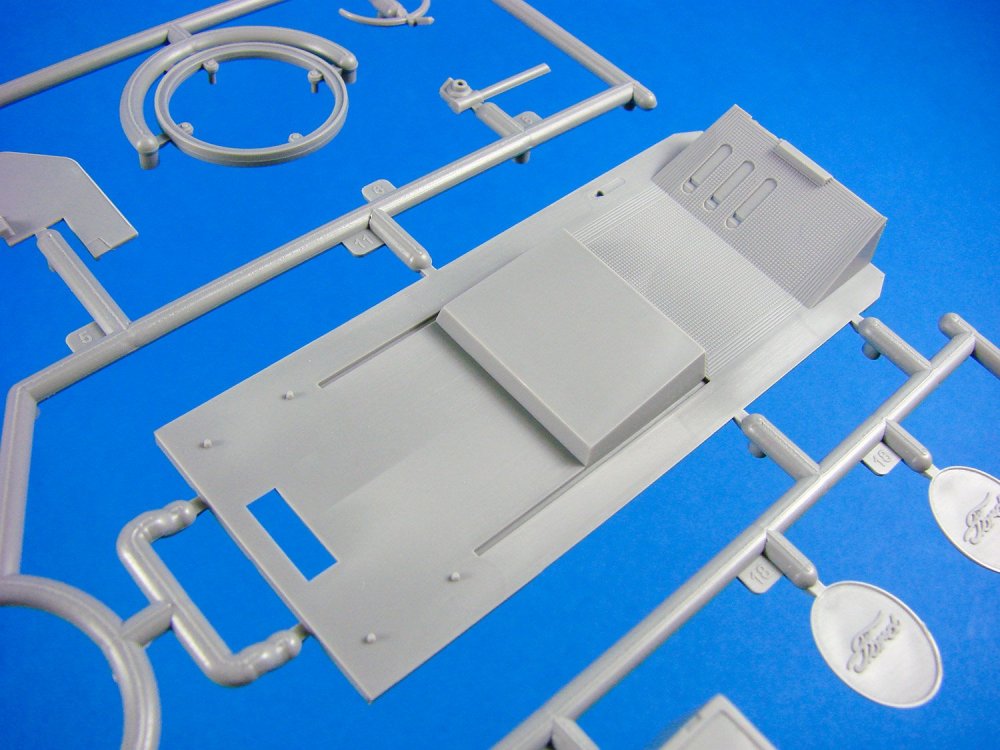
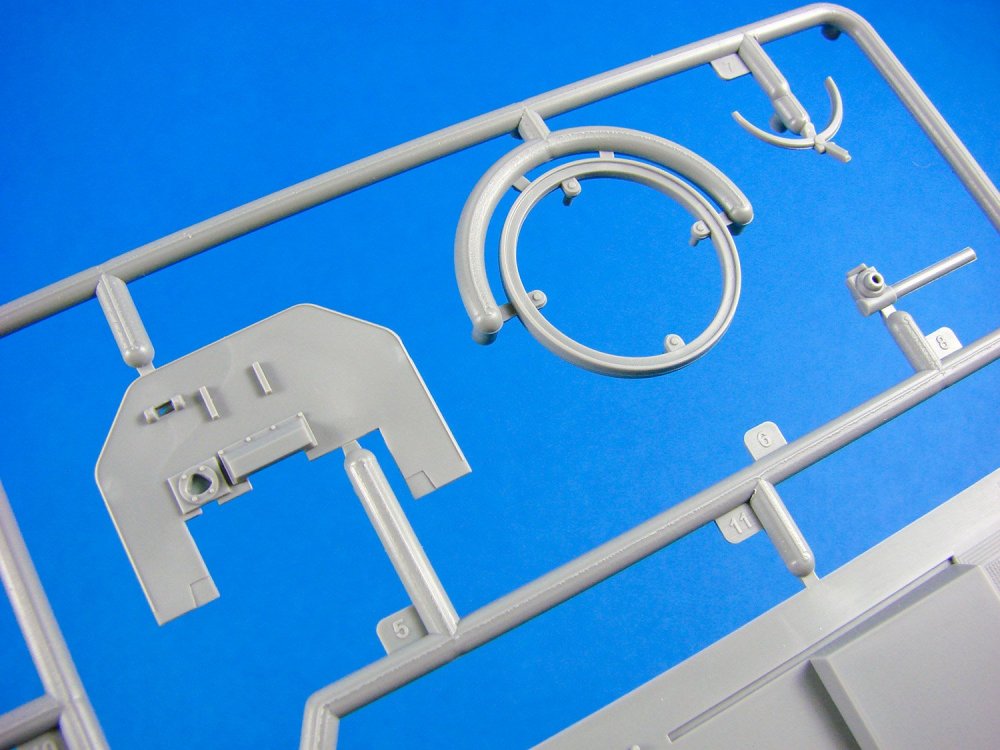
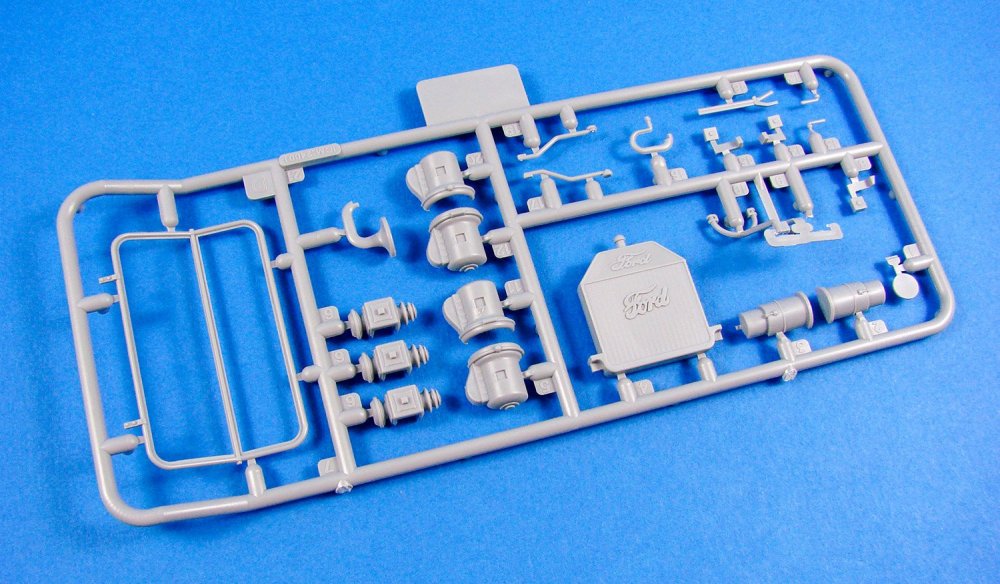
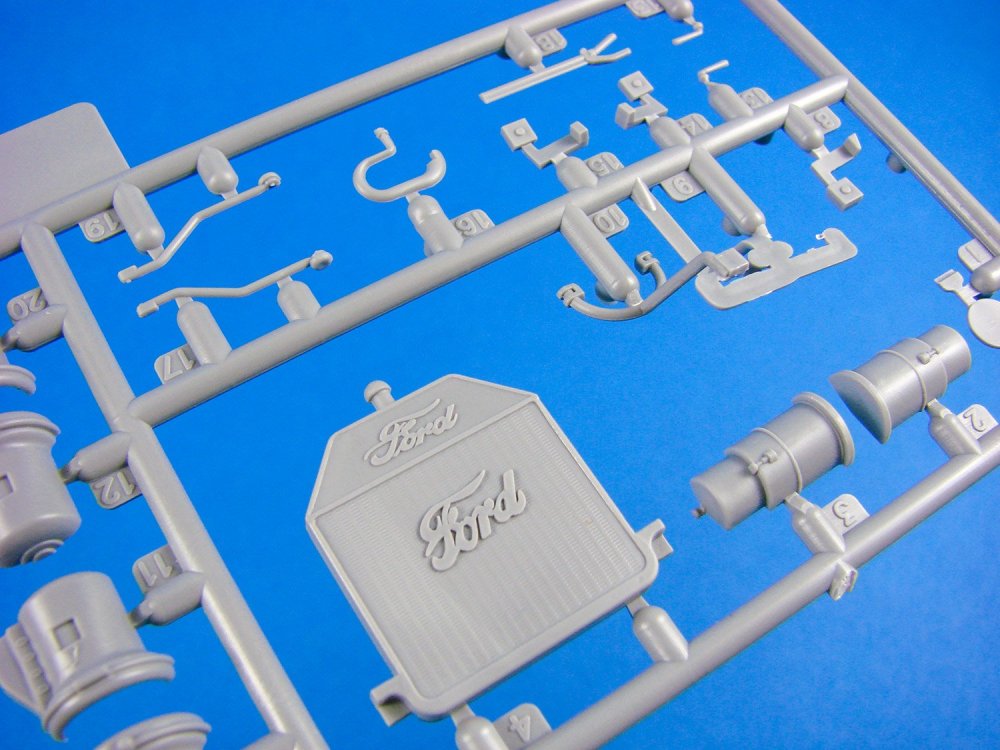
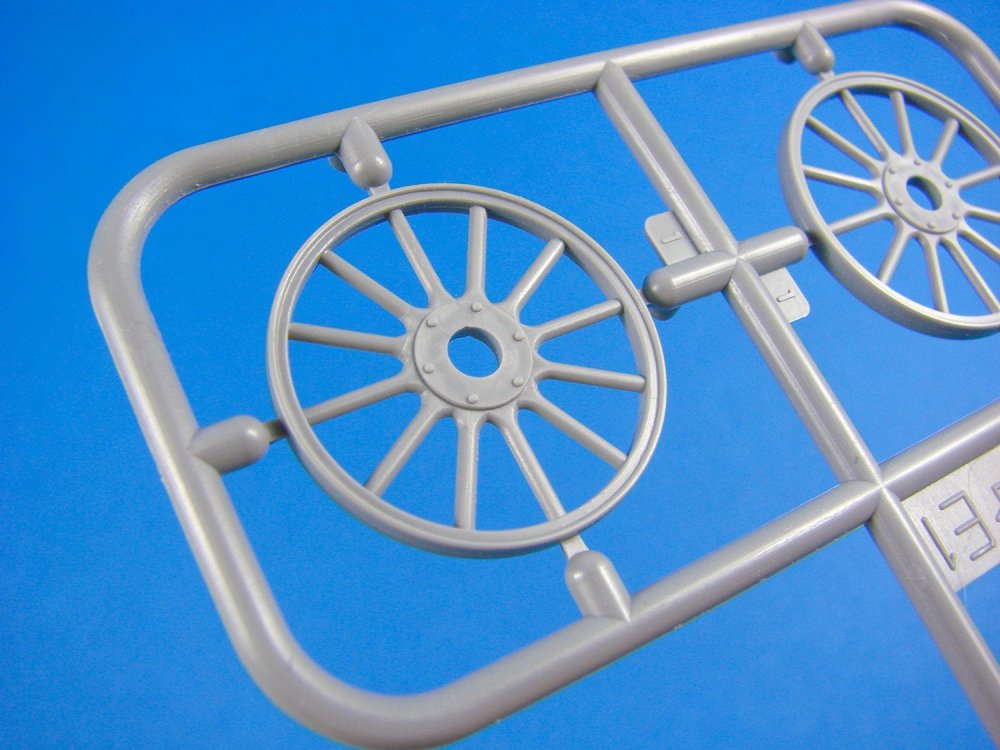
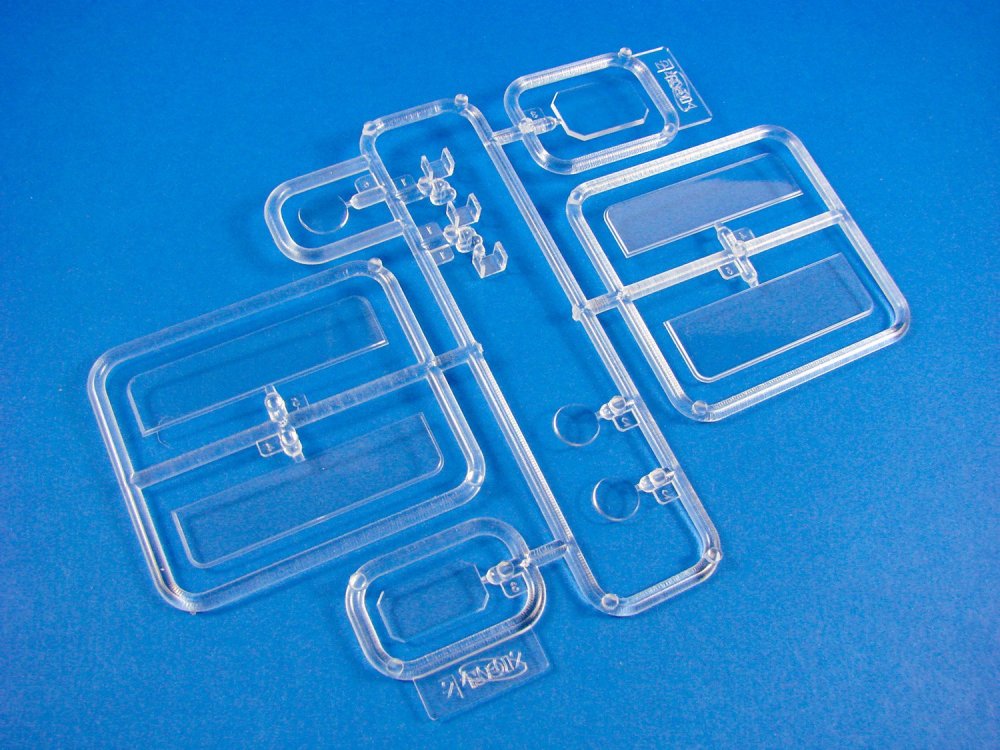
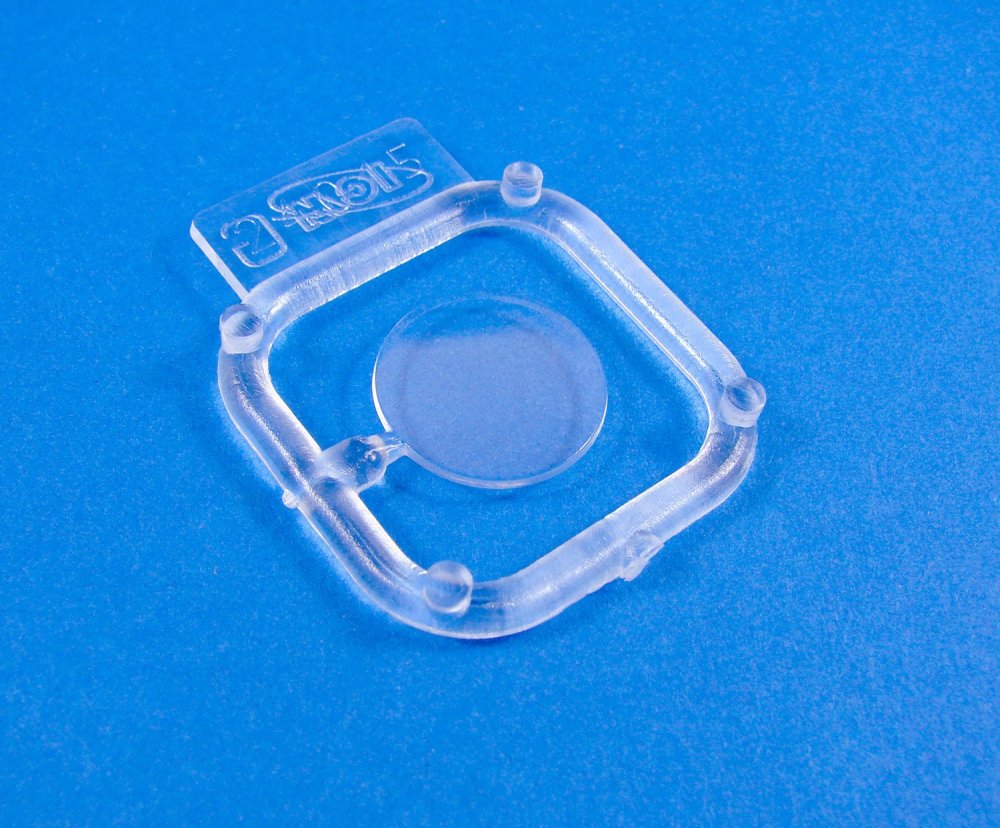
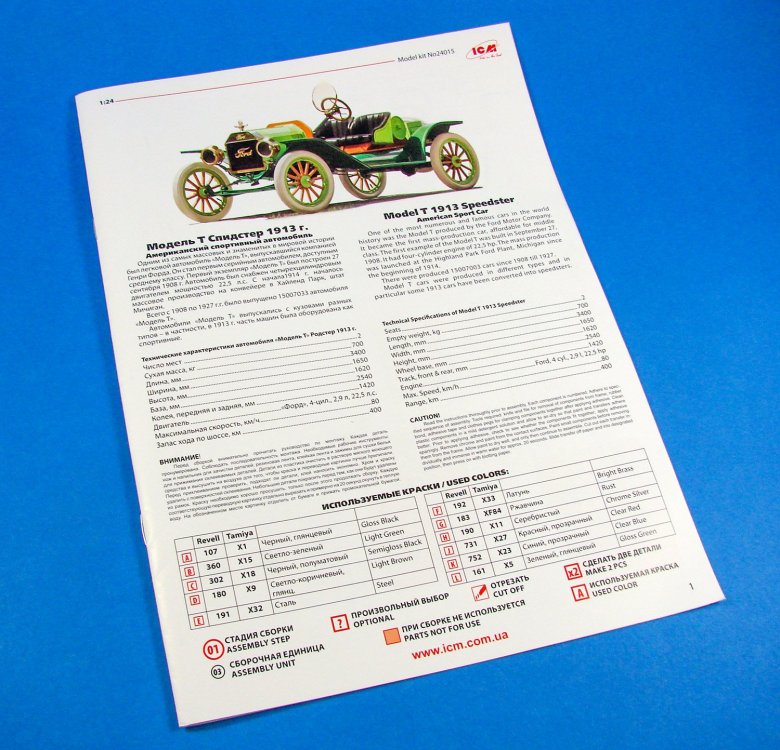
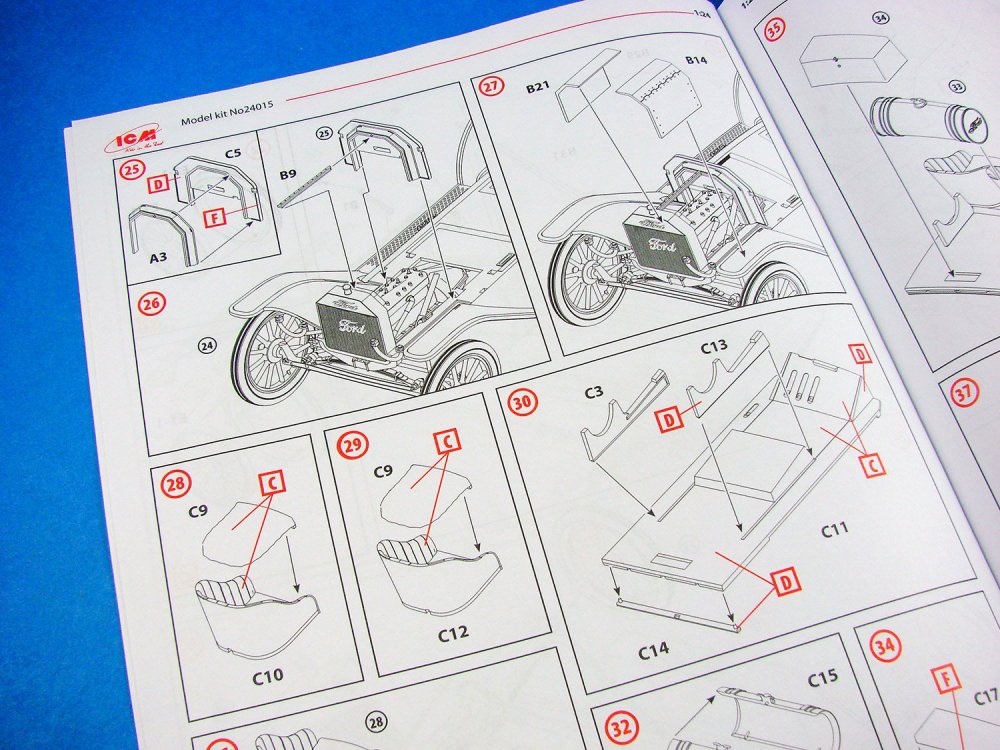
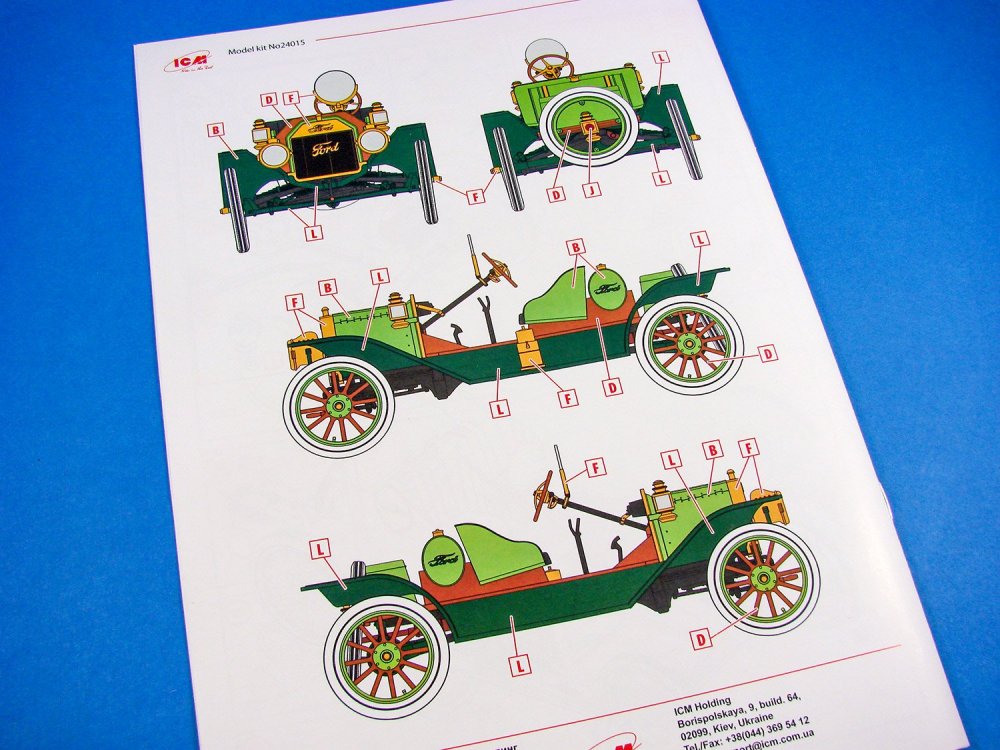
1:24 Model T 1913 Speedster ICM Catalogue # 24015 The Ford Model T (colloquially known as the Tin Lizzie, Leaping Lena, or flivver) is an automobile produced by Ford Motor Company from October 1, 1908, to May 26, 1927. It is generally regarded as the first affordable automobile, the car that opened travel to the common middle-class American; some of this was because of Ford's efficient fabrication, including assembly line production instead of individual hand crafting. The Ford Model T was named the most influential car of the 20th century in the 1999 Car of the Century competition, ahead of the BMC Mini, Citroën DS, and Volkswagen Type 1. Ford's Model T was successful not only because it provided inexpensive transportation on a massive scale, but also because the car signified innovation for the rising middle class and became a powerful symbol of America's age of modernisation. With 16.5 million sold it stands eighth on the top ten list of most sold cars of all time as of 2012. The Speedster was but one of many customs offered in 1913 by independent manufacturers, giving the owner a less expensive option to the very popular (and expensive) Stutz Bearcat and Mercer Raceabout. Usually the chassis was lowered four inches, called “underslinging”, the wheelbase slightly extended, and the basic 40 HP motor “hopped up” with a Roof or RAJO Overhead Valve Conversion (OHV), a hot cam, balanced crankshaft with pressure oiling, and side-draft or up-draft carburettors. And of course, the stock body was replaced with a sharp looking “Speedster Body” complete with a monocle windshield, and the heavy wooden wheels were replaced with strong and lightweight wire wheels. Some cars retained standard Ford wings, and some did away with them altogether. A complete kit of radiator, hood, floorboards, rear gasoline tank, and body could be purchased for around $100. The Speedster body wasn't just for looks; it made the Model T go faster by making it lighter, cutting down the frontal area, and streamlining it. Just making these changes could add 10 to 15 miles an hour to the top speed. Edit courtesy of Wikipedia and Speedsters.com The kit The Model T 1913 Speedster is packaged into ICM’s now familiar style, robust corrugated box with integral lid, covered by a separate glossy product lid that has an artwork of one of these beautiful little vehicles sat demurely on a path/road in either a country park or out in a rural area. The side of the box has three profiles of the vehicle. Removing the lid and opening the box, we find a single re-sealable clear sleeve containing FIVE sprues of light grey styrene (two sprues (A & are co-joined), two small sleeves each containing a clear sprue, and also a sleeve with the solid rubber tyres, moulded in an off-white/cream coloured vinyl. In the bottom of the box lies an instruction manual. No decals are supplied with this kit. They simply aren’t needed. It’ll be your painting job that will show this model off to its best advantage. Assembly begins with the engine. I’m not sure how this compares with other versions, bearing in mind that the Speedster engine is technically different. I don’t know how those changes would impact the exterior of the engine. This area comprises around a dozen parts, spread over the first two sprues. Construction of the engine centres around the main engine block which is assembled as halves, and then progresses to the cylinder head block, manifold, cooling fan and driver belt, and mounting lugs. Detail really is very fine and nice and sharp too, with sprue gates being thoughtfully placed so as not to interfere with any intricacy of any component. With the engine built, the characteristic FORD radiator is assembled and then secured to the forward leaf-spring suspension before being fitted to the Speedster’s lower body. This latter part is moulded with the forward and rear mudguards, and also the running boards with the Ford company logo on them. The mudguards have a decorative trim to them, and the interior floor has a very fine grip detail moulded into it. The engine can now be mounted into the lower body, along with radiator cooling pipes and rear axle and leaf-spring suspension. A two-part exhaust system is them installed, as are the various drive bars and rear axle bars that lock the unit into place, so it doesn’t move. Underneath the Model T, detail is quite rudimentary, but that is how the car was, and ICM has made a very nice job of recreating this. To cover the engine, a two-piece rear firewall is added to the chassis, followed by a hinge plate and two separate engine covers which look like they could be posed in an open position, albeit with no internal details. One sprue contains the wheel hubs, with their wooden spokes and wood/metal rims. These were actually artillery wheels, with the metal equivalent being produced in the late 1920s. The central mounting hub plate is also present, along with securing bolts. ICM has included three sets of cream/white vinyl tyres for this model, in roughly the correct colour as was used, and the tyres are different for front and back. The reason for three sets is that you’ll need a tyre for the spare that’s carried on the rear body. After all, you wouldn’t want to break the law!! Covering over the moulded floor details of the lower body is a secondary car floor onto which is fitted the four-part fuel tank with Ford logo, and the driver and passenger seats. The latter are moulded as two-part items with realistic upholstery and uneven cushions from the application of many human bottoms! With the floor and seating in place, the foot pedals and steering wheel can be added. This version doesn’t have a windscreen per sé, but does have a clear round window mounted onto a frame which attaches to the steering wheel column. An unusual but very elegant solution. Final details include the forward headlamps, front lamps and tail lamp, plus the spare wheel etc. Two clear sprues are included, with one of these being specific to this release (steering column-mounted window), and the other containing parts for the lamps etc. Most parts on the larger clear sprue aren’t for use on this release. Instructions are provided as a glossy 12-page A4 booklet, starting with a history of the type, paints reference for Revell and Tamiya colours, and a parts map with shaded out parts for those not in plat. Over 50 clear constructional stages illustrate the building of this model, and there’s nothing that should trip anyone up as everything looks nice and simple to build. The last page of the book shows the painting guide for this Speedster. Again, you should have no issues in completing this as the scheme looks straightforward. It may be easier to paint some parts before adding them to the overall kit. Conclusion ICM is making real headway with their range of Model T-based kits, and this is a little stunner. Beautifully detailed and straightforward in construction, this model will look like a gem is you take all the right precautions when applying that paint scheme. It will definitely benefit from some good high-gloss painting. One of the more attractive versions of Ford’s iconic vehicle, this one should definitely be on your shopping list. My sincere thanks to ICM for sending the review sample seen here.


-
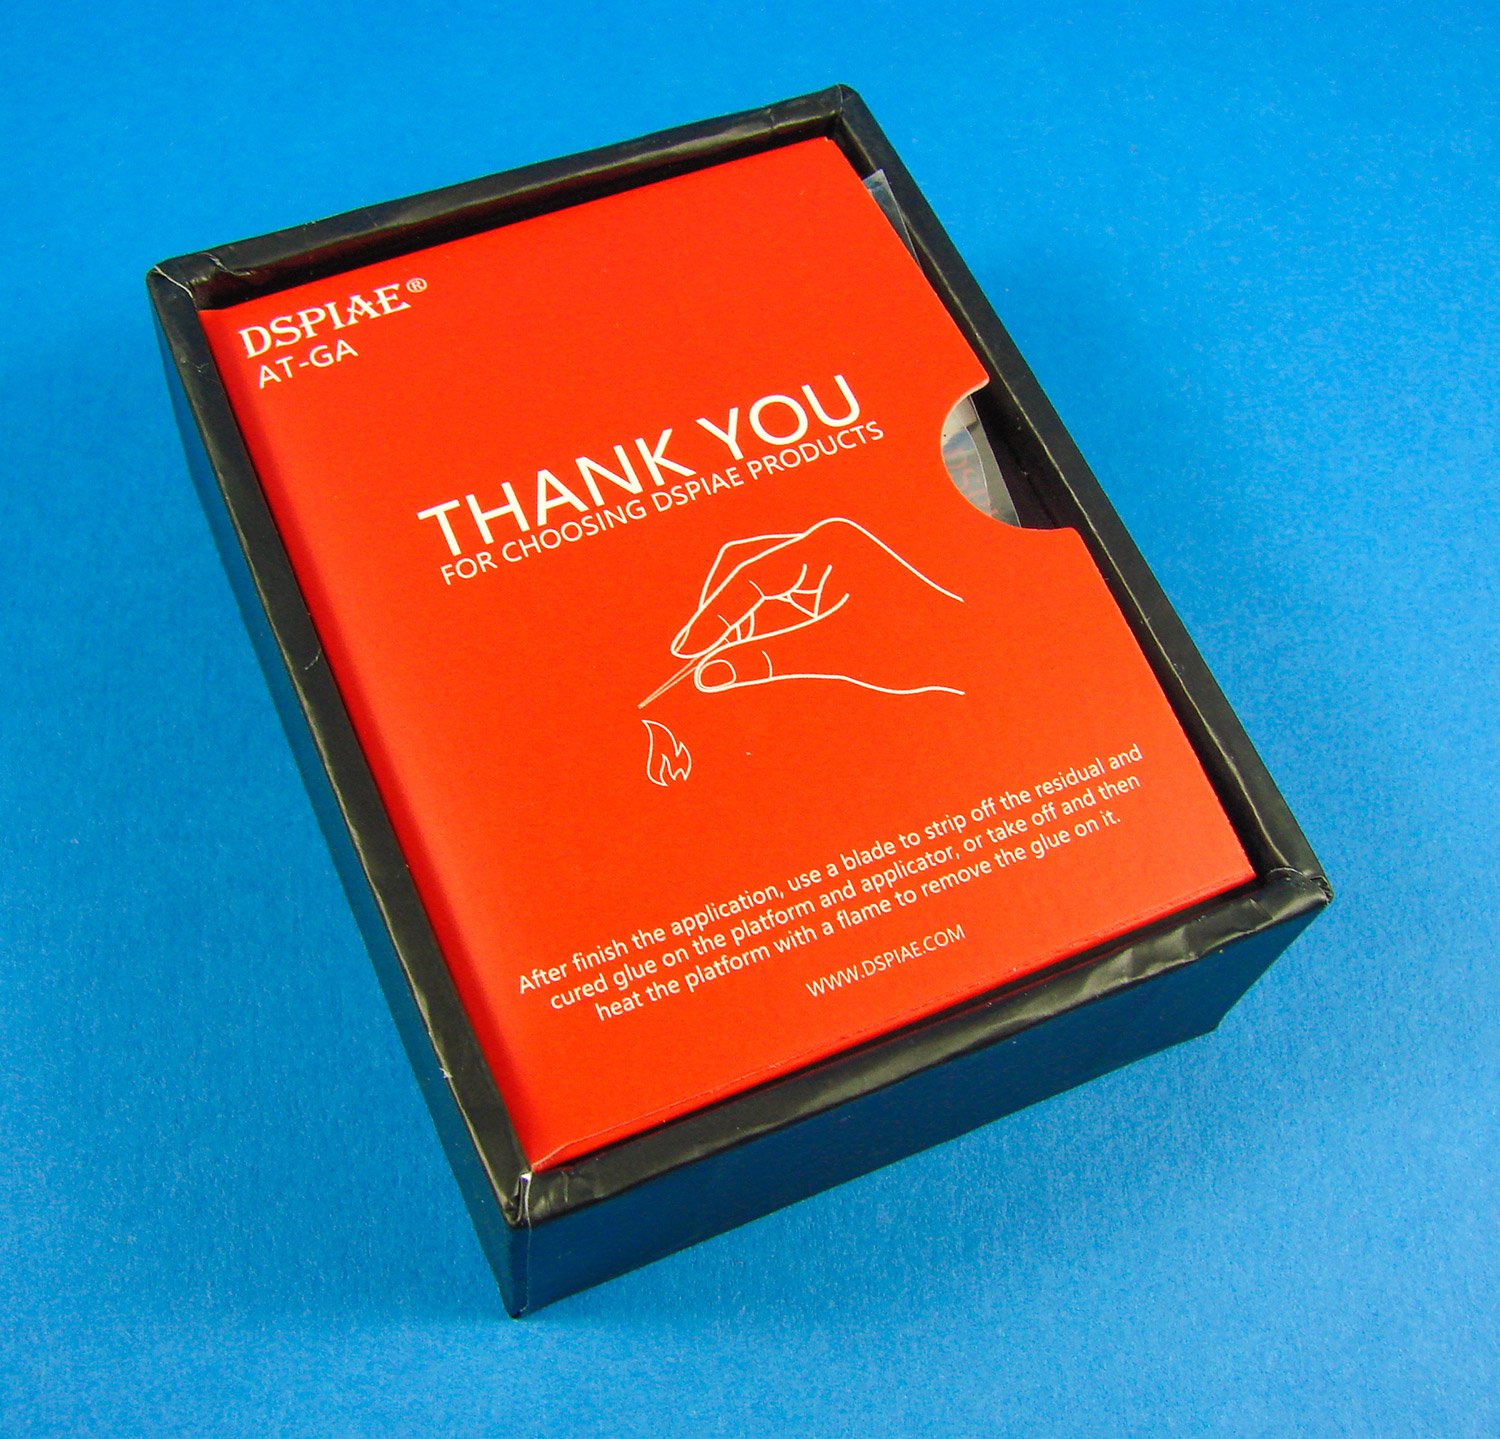
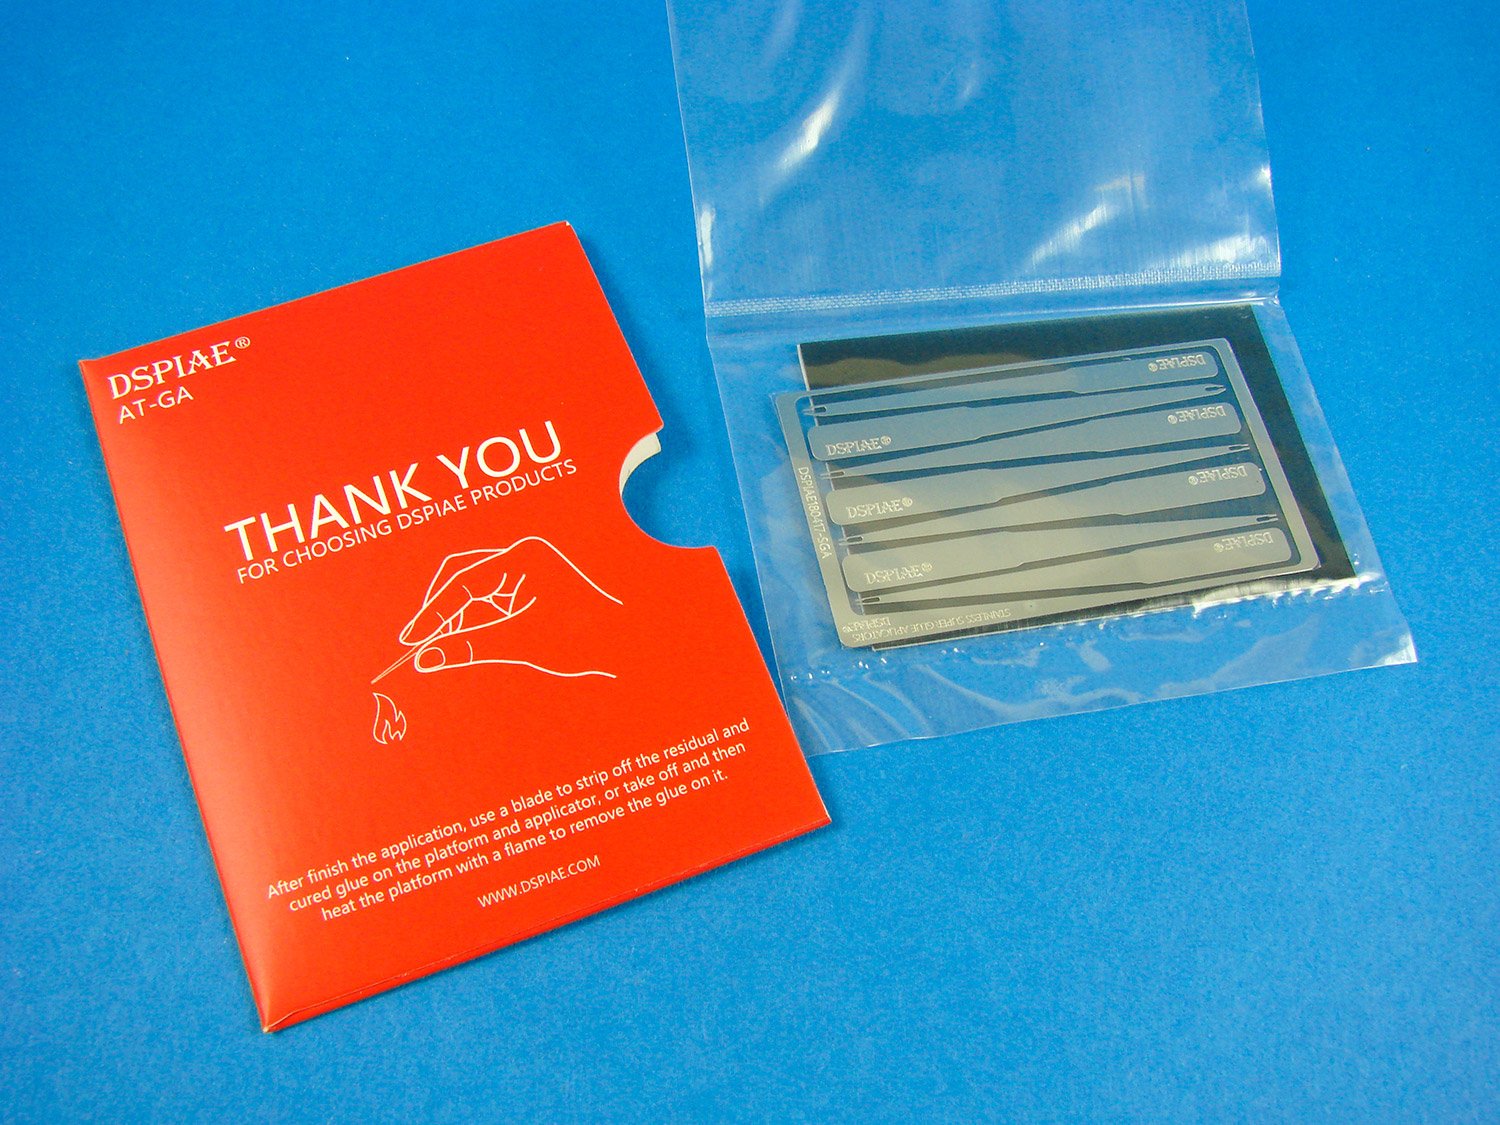
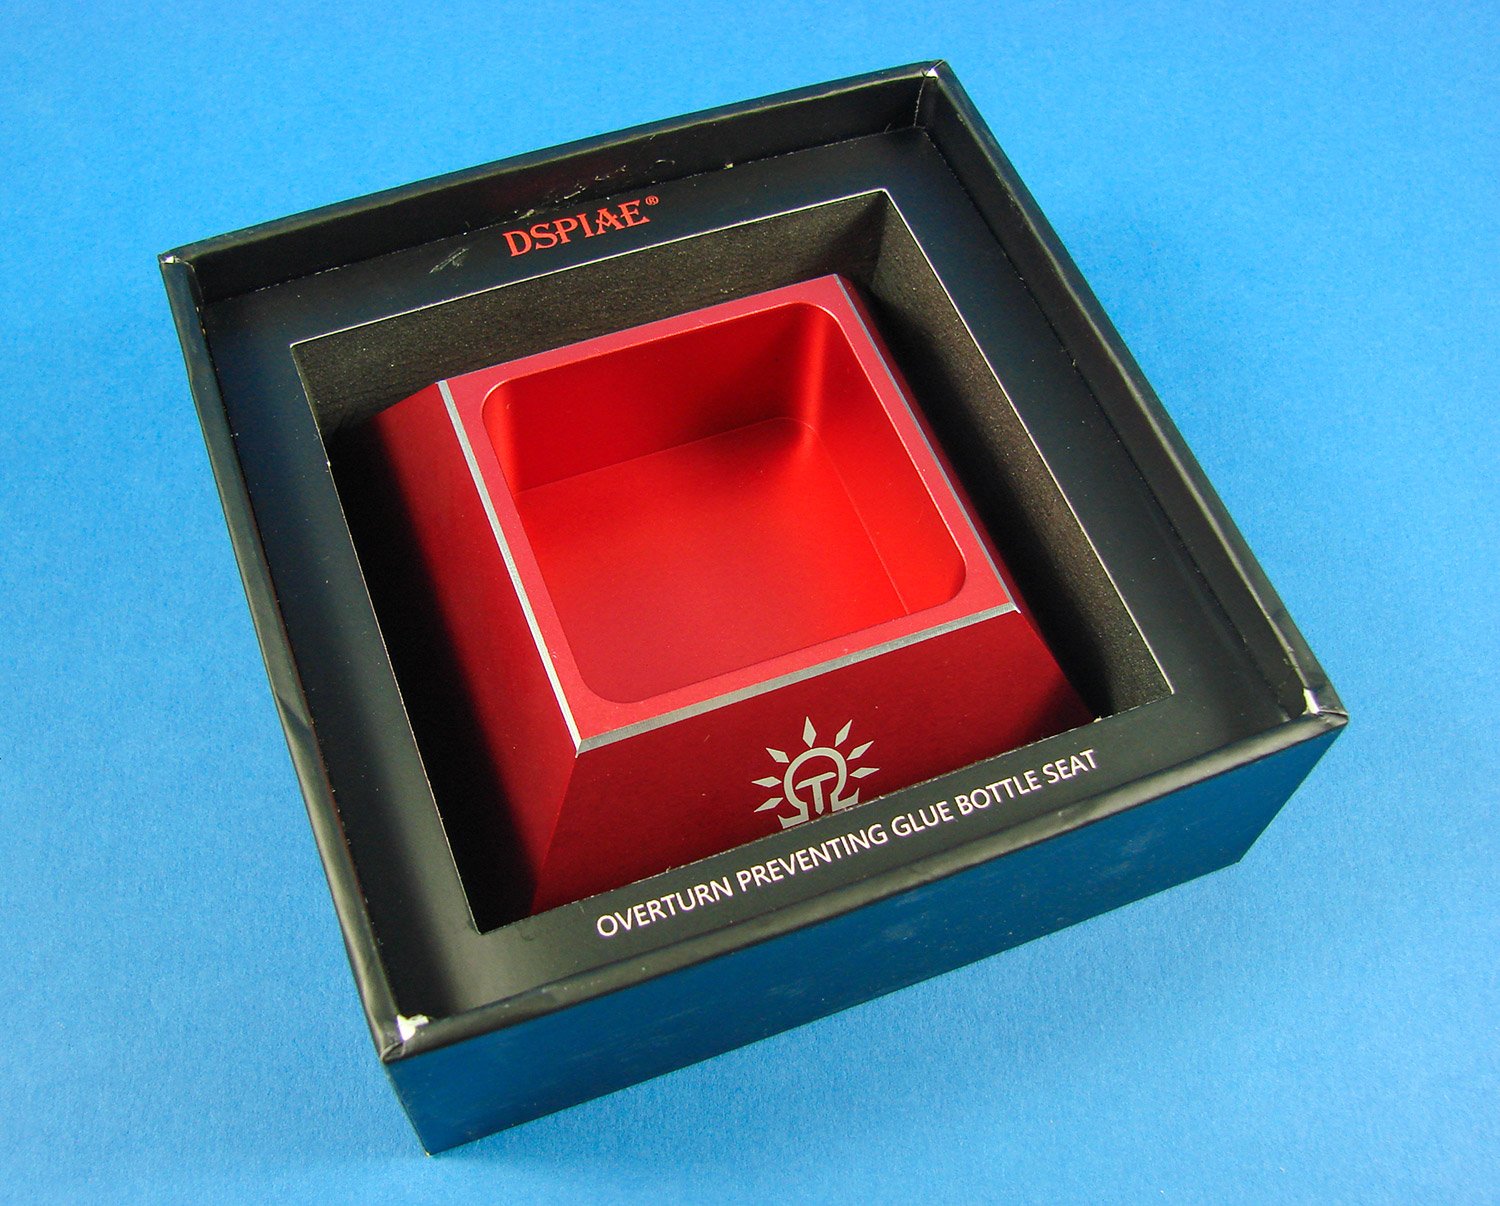
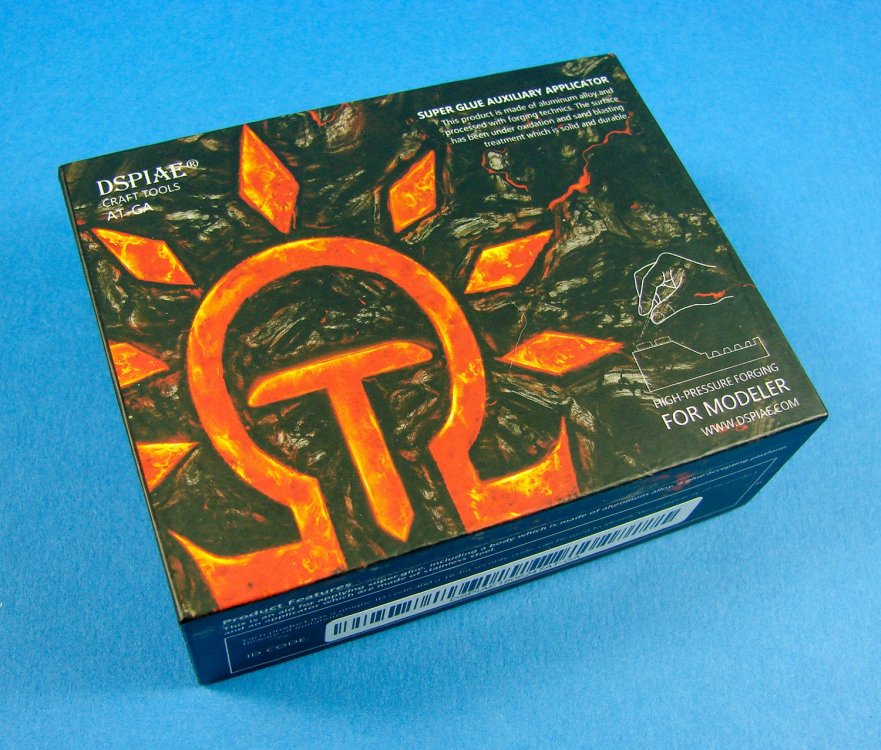
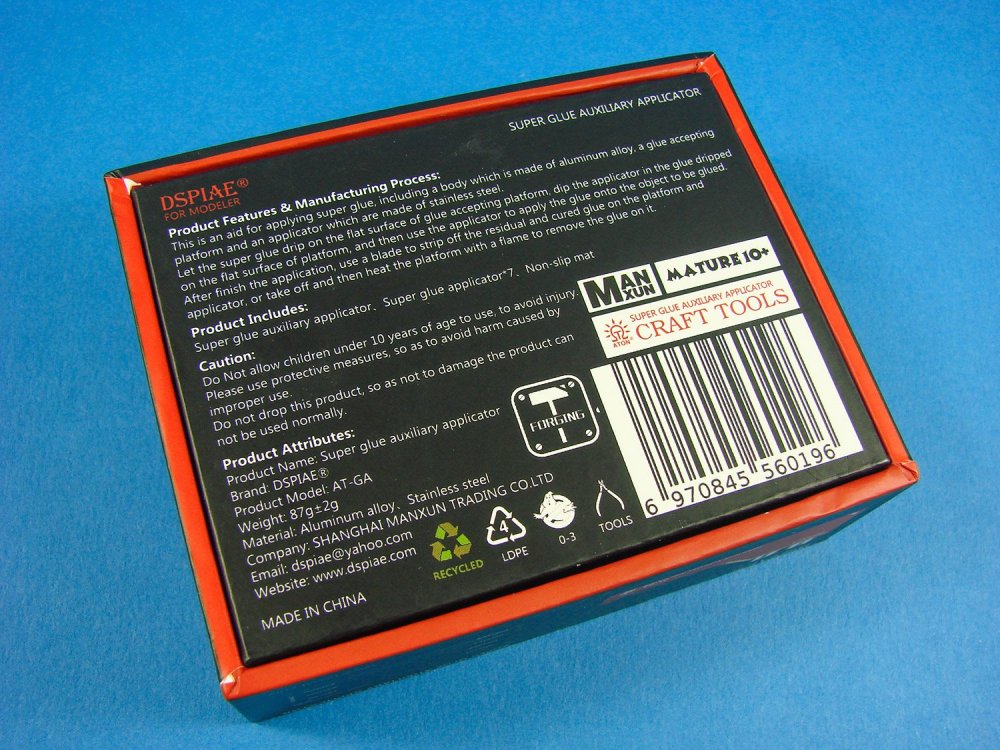
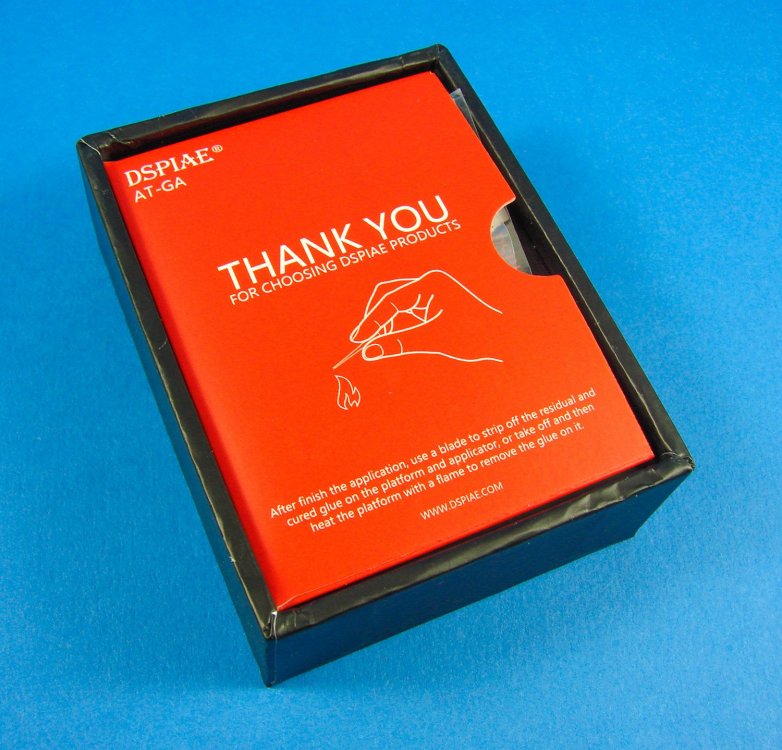
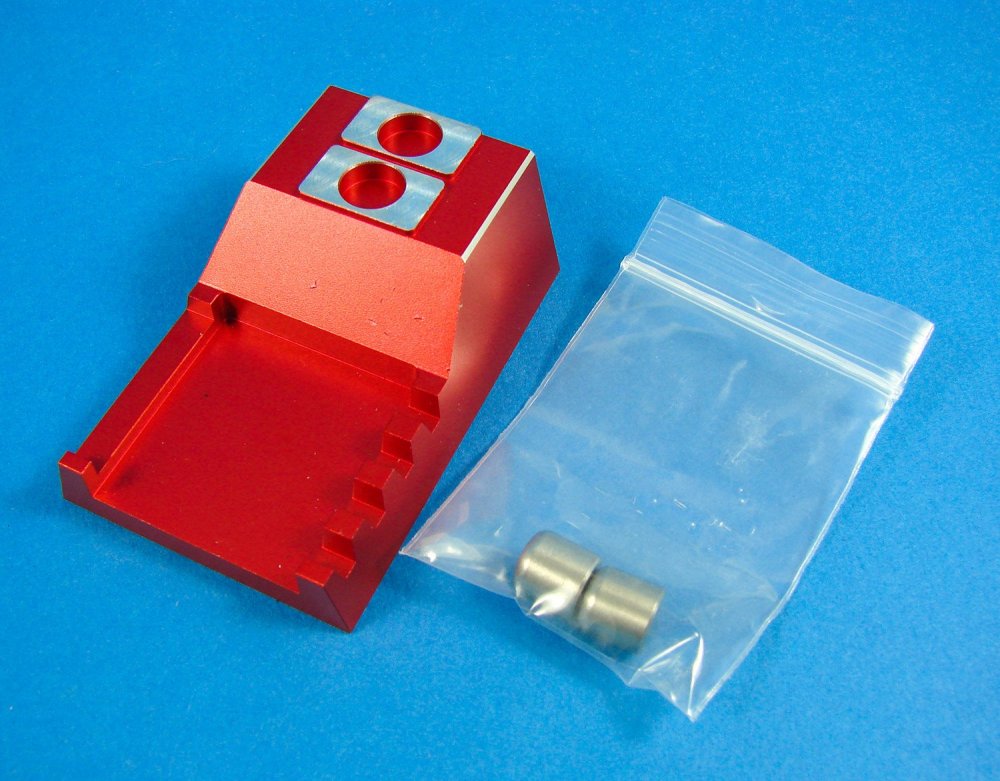
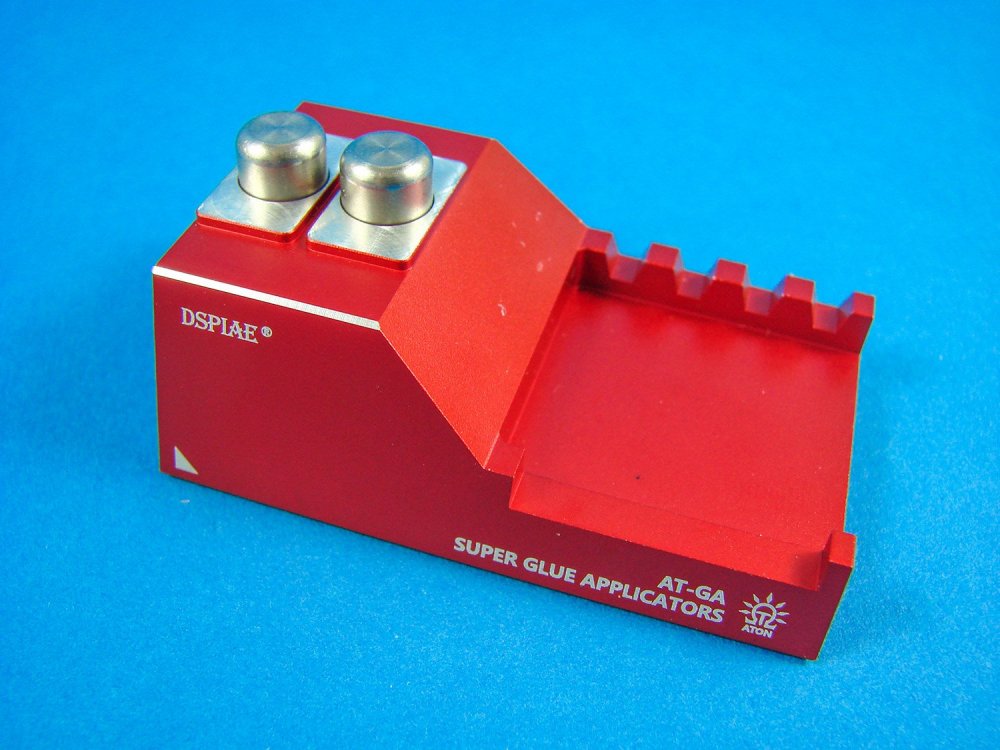
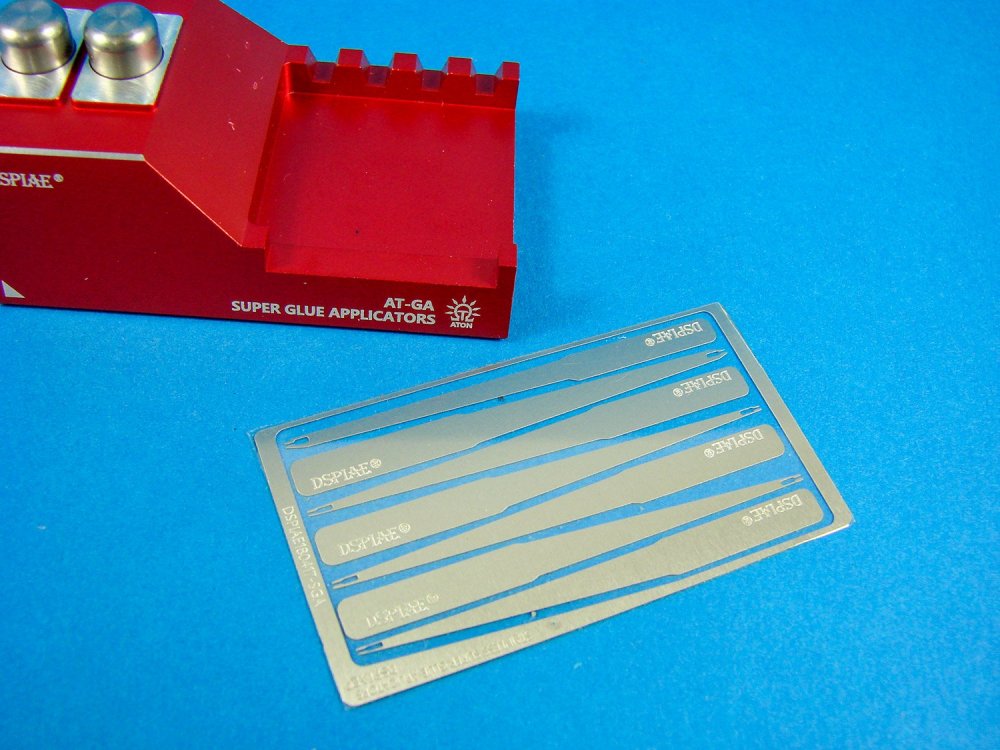
Superglue Auxiliary Applicator ‘CA Glue Applicator’ DSPIAE Catalogue # AT-GA Available from Breveco Modelling for 18,50€ DSPIAE seem to be quite prolific at the moment and have a solution for just about every one of our modelling needs. Today, they turn their attention to the humble application of superglue (CA) during the course of our modelling exploits. As is standard with products from this Chinese company, the Superglue Auxiliary Applicatoris packaged into a robust but small box with the usual Aztec-style imagery and from the outset is apparent that you are dealing with a high-quality product. Of course, this is confirmed by our previous reviews of DSPIAE products, such as the Circle Cutter, Single Blade Nipper, Craft Tool Rack and Hand Drill etc. Flipping the box over, some general product details are supplied in print, plus a synopsis of the tool itself, although this can be worked out pretty quickly once you have your hands on the supplied components. Lifting the lid reveals a cardboard envelope with the usual ‘Thank You’ message on the front, plus a tip for using the cleaning the business-end of the glue applicator. More on that soon. Inside the envelope is a stainless-steel photo-etch fret containing seven CA applicators, with varying size reservoirs. You will of course need to remove these from the fret using whatever means you normally do for PE parts. Inside the box, we find the base of the applicator, machined from aluminium alloy, and then anodised in the now familiar shade of red that we see with DSPIAE tools. The main block has two circular indents in the raised portion, and the lower area forms a rack for storing the CA applicators that you removed from the PE fret. A small clear zip-lock wallet contains what I originally mistook for two magnets, but are in fact stainless steel platforms onto which you’ll apply the CA. These are curved on the top edge, and you need to insert the squared edges into the indents on the main block. A self-adhesive rubber base is included, and you must peel this back and apply it to the underside of the main block. That’s it, we’re ready to roll! With the CA dripped onto the platform(s), your applicator of choice is then used to touch the edge of the superglue pool, filling up the small reservoir. You will then transfer this to your project work, with the CA running from the applicator via capillary action. You can use the racks to store the applicators, and when finished, DSPIAE suggest holding the tip of the applicator in a flame, to burn away any remnants of glue and leave it clean for your next use. Conclusion A nice and simple tool that will perform exactly as you expect. There are other photo-etch CA applicators on the market, but as far as I’m aware, this is the only one that incorporates a base with racks to hold the applicators, and also platforms onto which you will drip the superglue. A superbly made tool that isn’t too cumbersome for sitting in and amongst your ongoing project work. My sincere thanks to Breveco Modelling for supplying the review sample you see here. To purchase directly, click the link at the top of this article.


-
Overturn Preventing Glue Bottle Seat ‘Glue Bottle Holder’ DSPIAE Catalogue # AT-BS Available from Breveco Modelling for 19,50€ DSPIAE seem to be coming up with all sorts of ideas to neaten or improve the way we work, and if you’ve bought into their galaxy of red-anodised products, then this new one will undoubtedly find a place on your workbench. When I was recently building a test of Takom’s Panther kit, being the Klutz that I am, I knocked over a full bottle of Tamiya’s Extra Thin Quick Setting glue, all over a few of the interior parts, starting them off on their journey into styrene soup. That could’ve been avoided if I wasn’t rushing and taking more care, or if I’d made myself a block to sit it within. DSPIAE’s new product will prevent this is a very elegant way. Packaged into their now familiar heavy and heavy-duty style box with the unique Aztec-style imagery, you can’t help but be amused at the name they’ve given this new release: Overturn Preventing Glue Bottle Seat, or as their European importer and reseller Breveco Modelling, have sensibly called it, a ‘Glue Bottle Holder’. The rear of the box again describes the contents within, and opening the box reveals the now familiar ‘Thank You’ insert with images, instructions and text for the product. The main box area contains the glue bottle holder, manufactured in a very attractive red-anodised aluminium alloy, with the DSPIAE logo printed onto it. The shape of the holder is like a four-sided pyramid with the top half sliced off, meaning the widest part is at the bottom. This is an important design feature as it means the centre of gravity of this heavy metal item is quite low, so overturning it would be a real effort indeed. Underneath the main product is a self-adhesive rubber sheet which needs peeling and attaching to the underside of the bottle holder. The bottle holding space is big enough for my Tamiya and Gunze bottled liquid glues, and doubtless others which seem to be around the same size. There is wiggle-room too for very slightly larger bottles, should you need to use one. Conclusion As I have said, there are of course other ways of stopping your glue bottles falling over, but if you’ve already bought into the DSPIAE ecosystem, then this will doubtless be an addition you will want. As it stands itself, it’s superbly designed and manufactured and will do its job admirably. My sincere thanks to Breveco Modelling for sending this out for review here on LSM. To purchase directly, click the link at the top of the article.
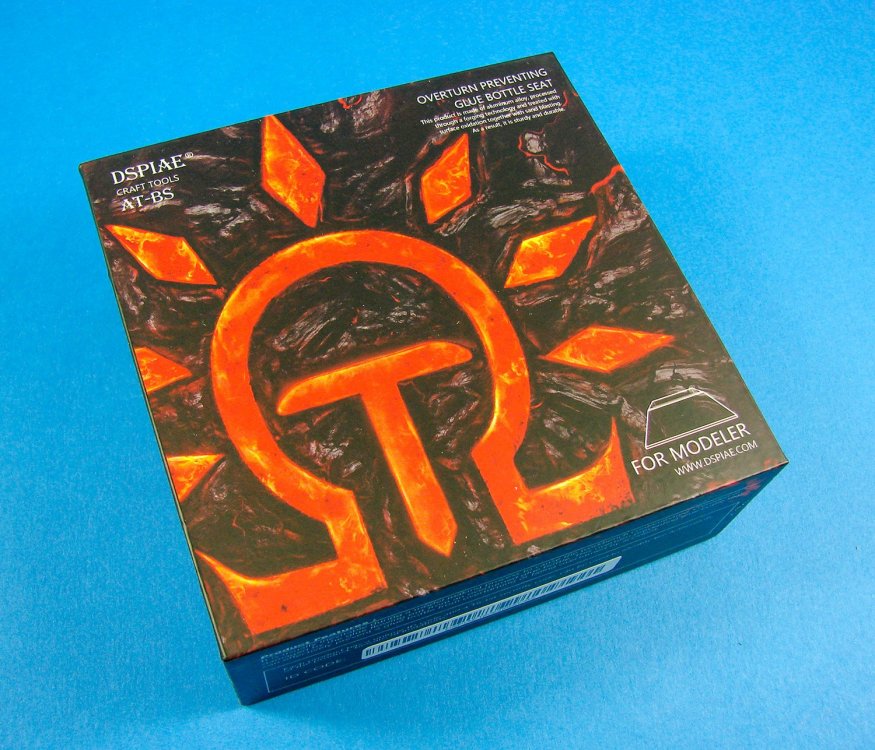
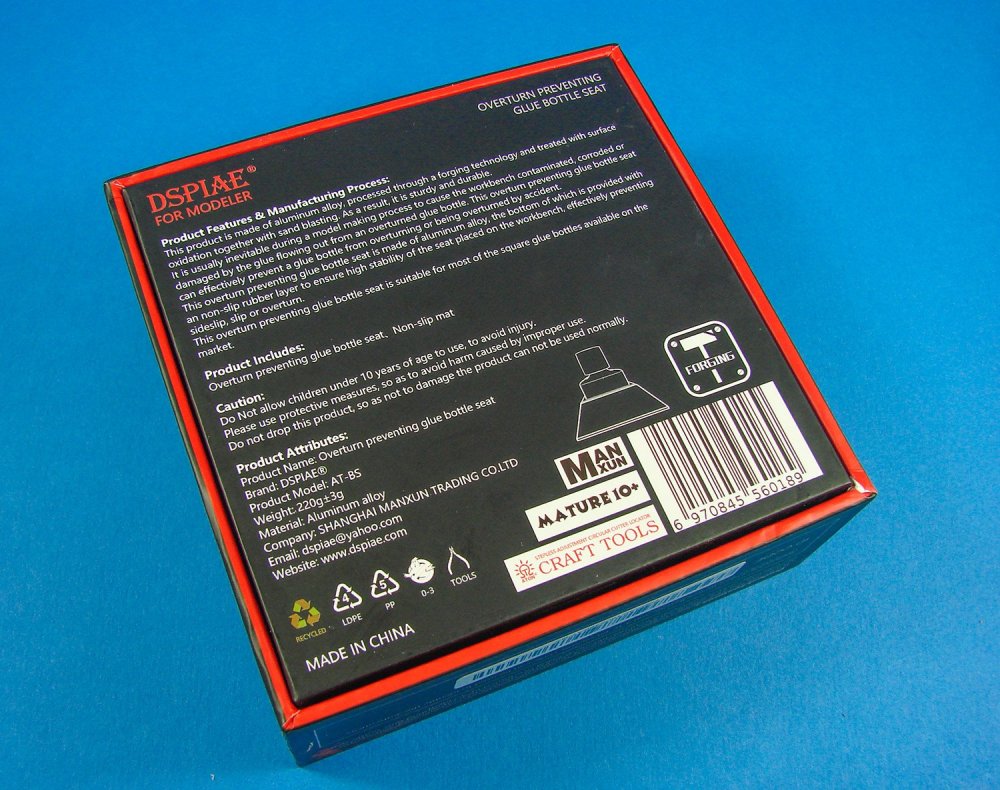
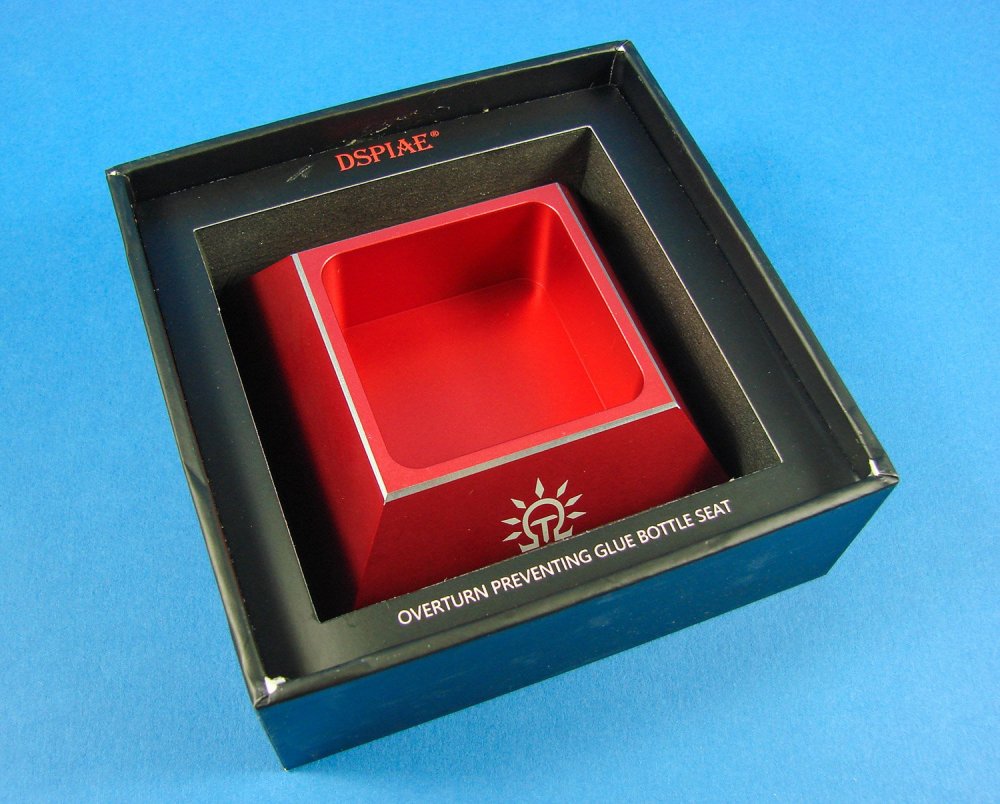
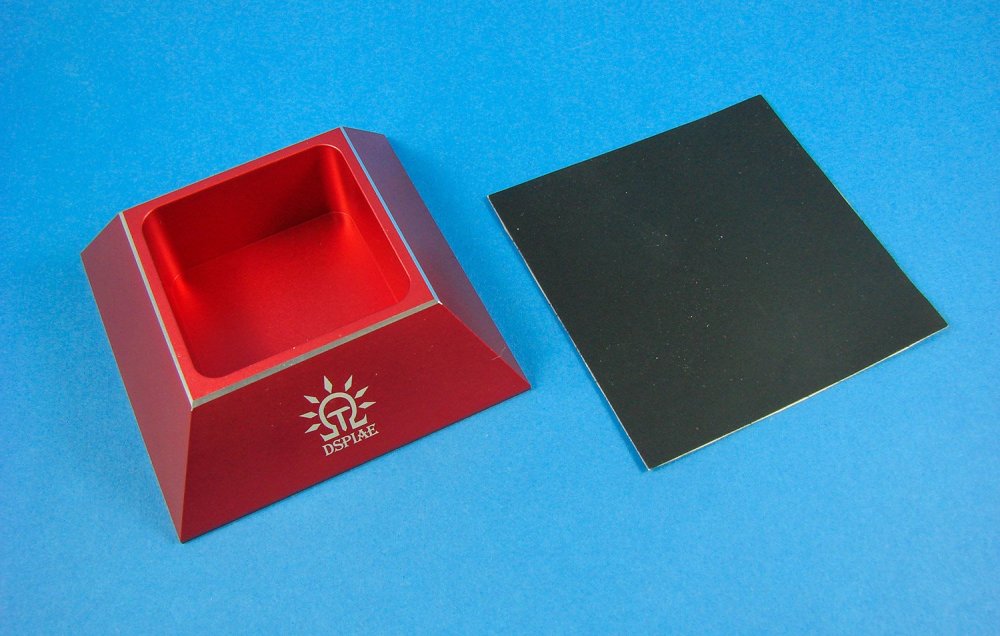


-
Nice to see you here Phil! Another waiting for the HKM Lanc?
-
Stepless Adjustment Circular Cutter Locator DSPIAE Catalogue # MT-CL Available from Breveco Modellingfor 18,50€ Some product names just roll off the tongue, and some don’t. This one definitely falls into the latter category, being called a ‘Stepless Adjustment Circular Cutter Locator’. For the purpose of this article, I’ll just refer to it as a ‘Locator’. This is designed to be used DSPIAE’s equally tong-twisting product, the Stepless Adjustment Circular Cutter, reviewed here. Like the other products that we’ve seen from this Chinese manufacturer, this is also packaged into an almost bomb-proof box that is constructed from MDF and then decorated for their unique and eye-catching brand that looks like something from a lost civilisation from South America! The back of the box has some rudimentary instructions and a description of what this tool actually does. In short, I’ll describe roughly what this accessory will do in conjunction with the circle cutter. I see this tool as having a number of similar functions. The most basic is to roughly locate the cutter on your masking film or masking tape media, allowing the modeller to maximise that material and reduce waste. However, there is a more significant reason for using this and that is to create concentric discs of masking material, allowing the modeller to create things such as roundels or masks for tank/aircraft wheel hubs etc. So, instead of just ripping away and making discs with the circle cutter, we now have a way to use it more completely as a tool and fulfilling its potential. Opening the box, we see a cardboard and foam cut-out into which the main components are sat, and on the opposite side, inner lid, we have a couple of instructional images. One of the components, a clear acrylic guide that sits into the L-shaped Locator, firstly sets the central position of the circle you will cut. There are grooves in this that, whilst not calibrated, help give the modeller the centre of the circle to be cut. You can of course measure that on the guide and perhaps mark it for future use. The acrylic guide is a perfect and exact match to the circle cutter, from its centre to the outside corner. Once you remove the guide, you can then place the cutter into the Locator and start your work! As the Locator provides a perfect reference point, you can now set the circle cutter for larger and smaller circles, and they will all be perfectly concentric! The shape of the cutter allows this, unlike the circular Thinnerline product which would take more effort to produce the same work. The Locator itself is made from red anodised aluminium allow and is extremely robust. When you remove this from the box, you’ll note a self-adhesive rubber base which needs to be peeled and affixed to the Locator. It really is as simple as that. Conclusion Whilst I was extremely impressed with the circle cutter itself, this new addition really gives it a new lease of life and allows to me make roundels etc. on the fly, and thus for me to mask and paint more of my markings. A very high-quality tool that is relatively cheap to buy and increases your options if you have the cutter. If you don’t own the cutter, I really suggest you purchase one and add this extra tool to your shopping cart. Just amazing! My sincere thanks to Breveco Modelling for sending this out for review on LSM. To purchase directly, click the link at the top of this article.
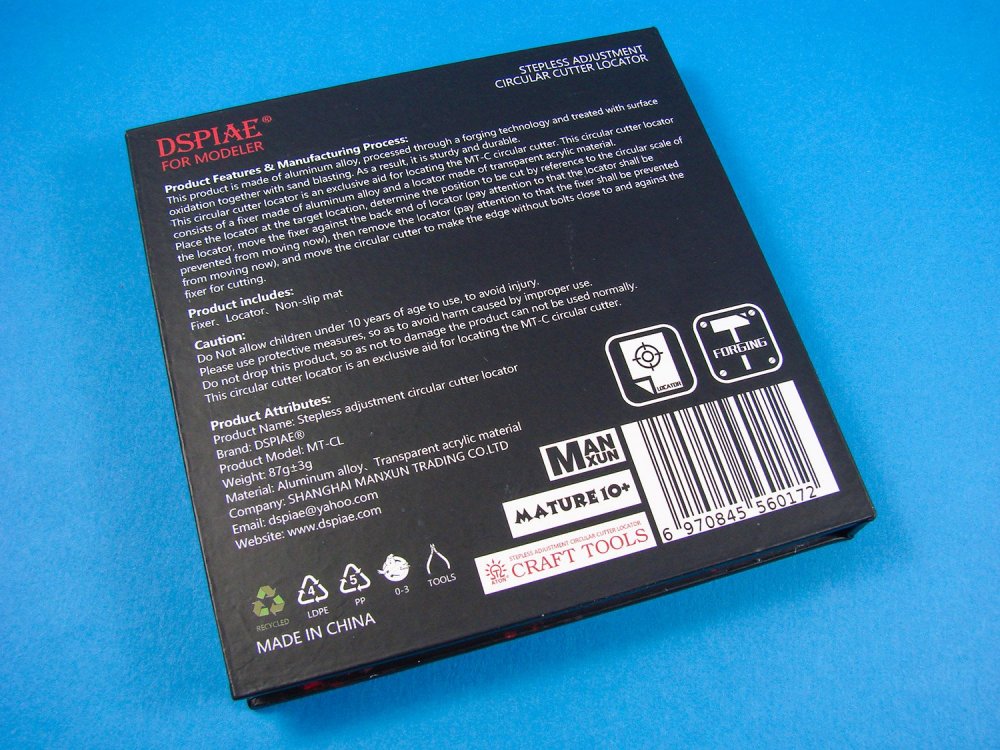

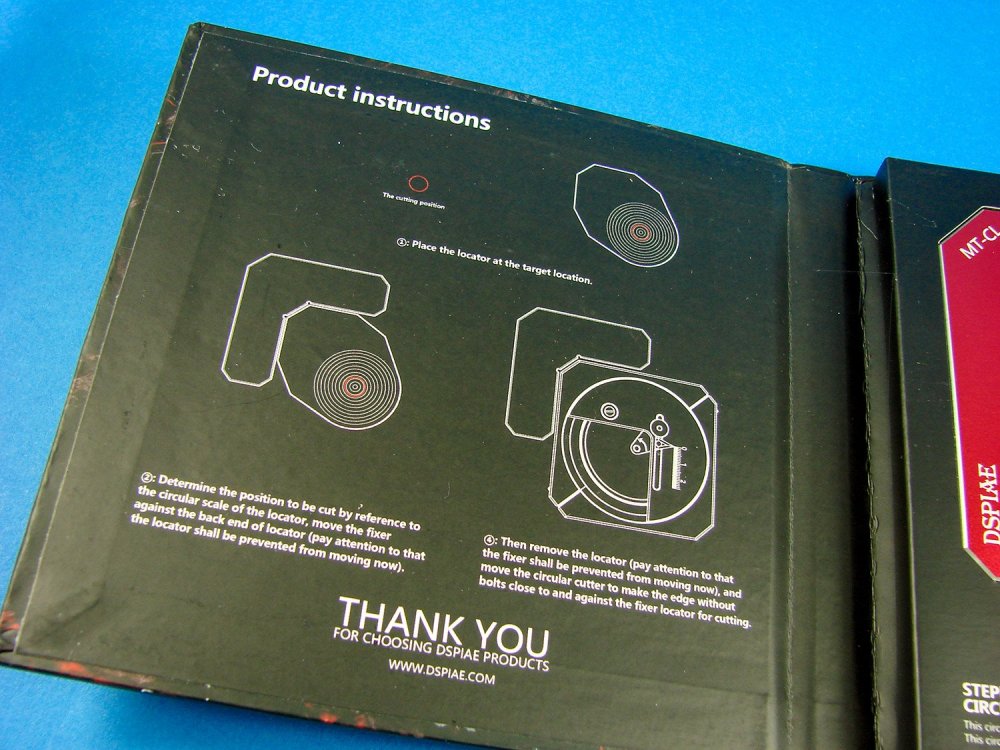


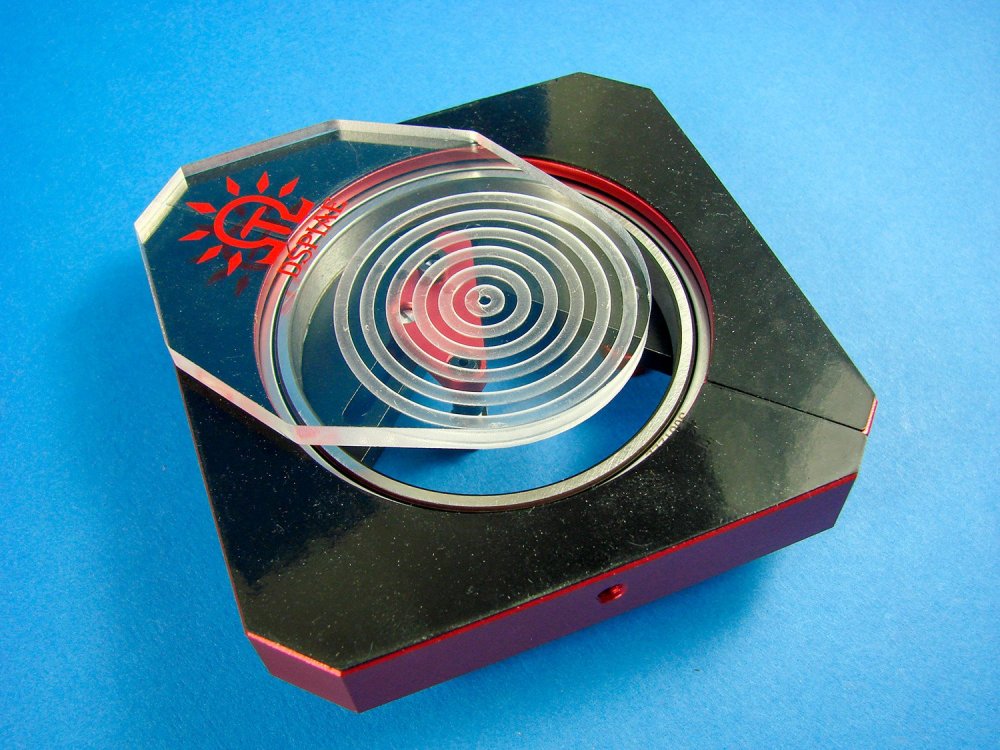
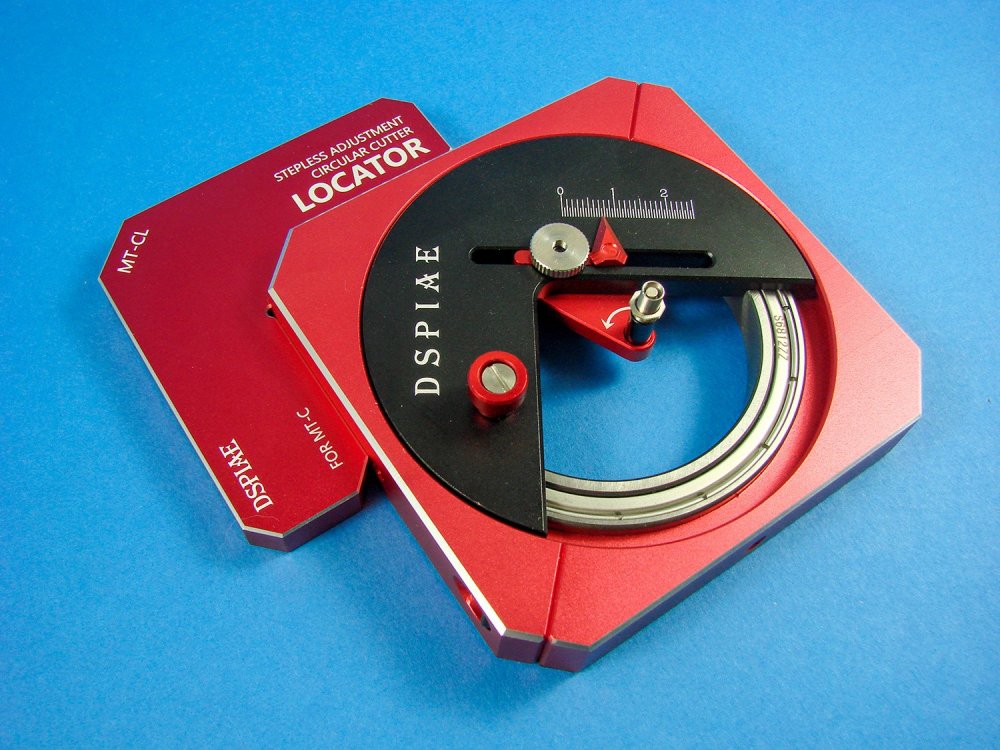
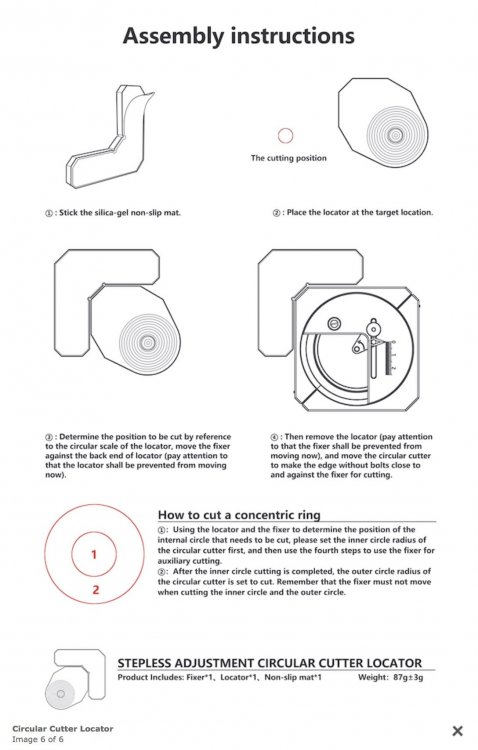

-
Fear no more, decaling worst nightmare solved
James H replied to DocRob's topic in Tools, Books & Misc.
You should market it! -
This is one kit that really appeals to me. I love the interior stuff, and this one looks like it's been designed by Trumpeter's A-Team.
-
Thanks Peter, I'll be posting an unusual project in the next day or two.
-
New registration notifications were being blackholed. Now fixed!
-
Hi guys, Always good to see familiar faces here at LSM. Now, get some builds posted up and make yourself at home!
-
Please check now.
-
1/35 Sd.Kfz.251/1 Ausf.A ICM Catalogue # 35101 The Sd.Kfz. 251 (Sonderkraftfahrzeug 251) half-track was a WW2 German armoured fighting vehicle designed by the Hanomag company, based on its earlier, unarmoured Sd.Kfz. 11 vehicle. The Sd.Kfz. 251 was designed to transport the Panzergrenadiers (German mechanized infantry) into battle. Sd.Kfz. 251s were the most widely produced German half-tracks of the war, with at least 15,252 vehicles and variants produced by various manufacturers and were commonly referred to simply as "Hanomags" by both German and Allied soldiers. There were four main model modifications (Ausführung A through D), which formed the basis for at least 22 variants. The initial idea was for a vehicle that could be used to transport a single squad of 10 Panzergrenadiers to the battlefield protected from enemy small arms fire, and with some protection from artillery fire. In addition, the standard mounting of at least one MG 34 or MG 42 machine gun allowed the vehicle to provide suppressive fire for the rifle squad both while they dismounted and in combat. The armour plates were designed to provide protection against standard rifle/ machine gun bullets (like the 7.92×57mm Mauser bullet). The front-facing plates were 14.5mm thick; the sides were steeply angled, V-shape 8mm thick plates. This level of armour provided protection against normal (non-tungsten) rifle AP round, which could pierce about 8mm of vertical armour. Positive aspects of the open top included greater situational awareness and faster egress by the infantry, as well as the ability to throw grenades and fire over the top of the fighting compartment as necessary while remaining under good horizontal cover. The downside was a major vulnerability to all types of plunging fire; this included indirect fire from mortars and field artillery, as well as small arms fire from higher elevated positions, lobbed hand grenades, even Molotov cocktails, and strafing by enemy aircraft. There were 23 official variants, and sundry unofficial variants. Each variant is identified by a suffix to the model number, however, there was some overlap in the variant numbers. The Sd.Kfz. 251/1 Schützenpanzerwagen was a standard personnel carrier, and the Ausf.A Ungepanzerte. This was made with plain steel 5mm plates instead of armour, to make up numbers due to slow initial 251 production. Around 350 made up to mid 1940. Extract from Wikipedia The kit ICM’s presentation is both attractive and robust, with the lid of this box simply being a product identifier, as there is a complete, lidded corrugated box beneath it. Artwork is up to ICM’s usual high standard with an image of the Hanomag on operations in France. Small clear tape tabs hold the lid in position and when these are cut through and removed, the box below is a single-piece affair with a tabbed lid. Inside, there are FIVE light grey styrene sprues packed into a single clear sleeve, one clear sprue individually packed, and a sleeve containing black vinyl parts for the tracks and wheels. A small decal sheet is enclosed, as is the instruction manual, of course. Construction begins with the lower hull plate and its port and bolt details. With the side panels and forward engine bulkhead attached, this assembly is then fitted to a part that comprises the fenders and crew compartment/interior. It does become clear at this stage that this particular model also has the complete interior, including engine. With the fenders loaded out with their stowage boxes, the interior assembly continues with the application of the fighting compartment sidewalls that sit up against the stowage bins, rear bulkhead into which the door will later fit, and armoured engine sump panel etc. Underneath the Hanomag, a lot of detail has been incorporated into the forward wheels assembly with the leaf-spring suspension bar and axle, plus the drive pinions. A really nice touch here is that the front of the Hanomag has a lower armoured plate with a maintenance panel that can be displayed in an open position, so you can create a detail diorama and show off all the effort within. The Maybach HL 42 6-cylinder petrol engine is next to be constructed, comprising of around 20 parts, and this will build up into a more than reasonable reproduction of the real thing, complete with fan belts, authentic crank case and block, magnetos and carburettors, etc. The drivers compartment has a forward bulkhead with blank gauge faces into which the decal instrumentation will affix. The fighting compartment is festooned with equipment such as blankets, ammunition canisters and boxes, weapons, jerrycans etc. ICM has moulded the upper hull with the various vision ports as separate parts, for both the driver and soldiers in the fighting compartment. Whilst the instructions show these as being closed, it looks easy enough to pose them in a lifted position. The two-piece engine access doors are also separate, as are the engine side panel access positions. Again, a dream for those who wish to finish their model in a diorama, or simply as a study of a vehicle with detailed interior. Internally, the upper hull is also very detailed, with the vision port mechanisms, rifles, battery and radio set etc. The rear doors are provided as separate parts, and although shown closed, I’m pretty sure you could model these in an open position without too much effort. Two identical sprues are supplied for the drive and road wheels, with other parts included for the fighting compartment benches, ammunition, weapons and those vision port mechanisms, but to name a few. Black vinyl tracks are included, as are the front drive wheels. Like vinyl, or loathe it, these are very nicely moulded and should look very good when fitted. If you hate making up track links, like me, then I’m more than happy with this for a vehicle such as the 251. Decals A small sheet contains the various licence plates, national markings and instruments for the driver’s compartment. I think these are printed by ICM too, with everything being suitable thin, with opaque colour, minimal carrier film and perfect registration. The four schemes supplied are: Sd.Kfz.251/1 Ausf.A, 1.Pz.D., France, May 1940 Sd.Kfz.251/1 Ausf.A, 2.Pz.D., Greece, May 1941 Sd.Kfz.251/1 Ausf.A, 1.Pz.D., Russia, July 1941 Sd.Kfz.251/1 Ausf.A, 1.Pz.D., Russia, November 1941 Instructions These are provided by means of a 28-page A4-size manual, with some colour artwork and history printed on the cover. A paint guide is also supplied here for Revell and Tamiya colours. Inside the manual, a parts map is supplied with unused parts shaded out. Construction itself takes place over 103 stages, using clear and uncomplicated line drawings, sans shading. The last two pages contain the four schemes, albeit almost identical except for the licence plates. One machine also has a radio mast fitted. Conclusion A superbly detailed model with a very respectful parts count, despite the tracks being vinyl. All areas of the 251 have been faithfully recreated and provide the modeller with many options that a kit from this particular price range would not normally cater to. Whilst I have a Dragon kit in stash, it certainly cost far more than this release, and most definitely a whole lot more. Despite the detail therein, this shouldn’t be tool challenging a project and will prove to be an ideal candidate for armour modellers ranging from newcomer to those who require that little extra. A superb kit! My sincere thanks to ICM for providing this kit for review on Large Scale Modeller.

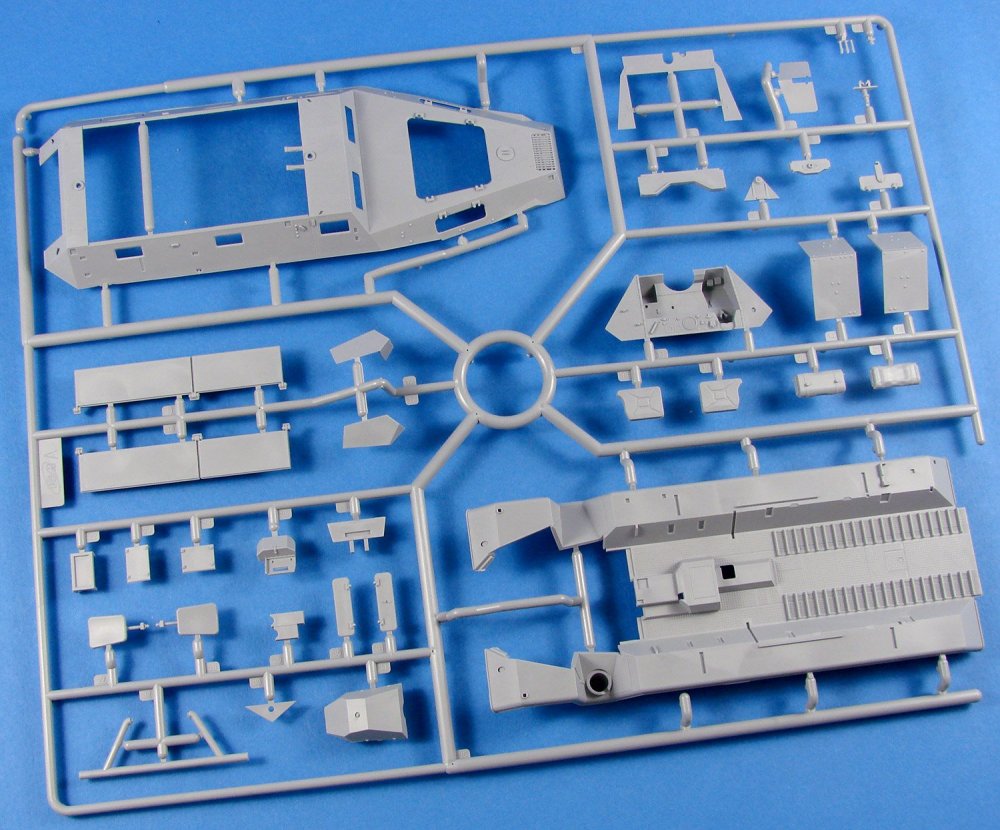


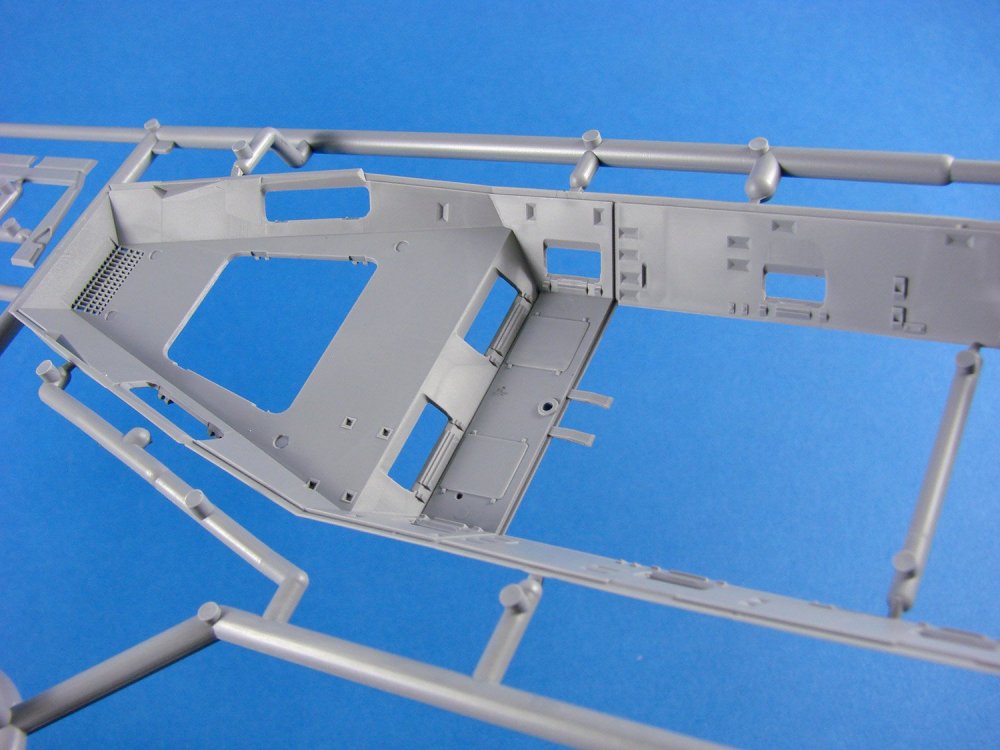

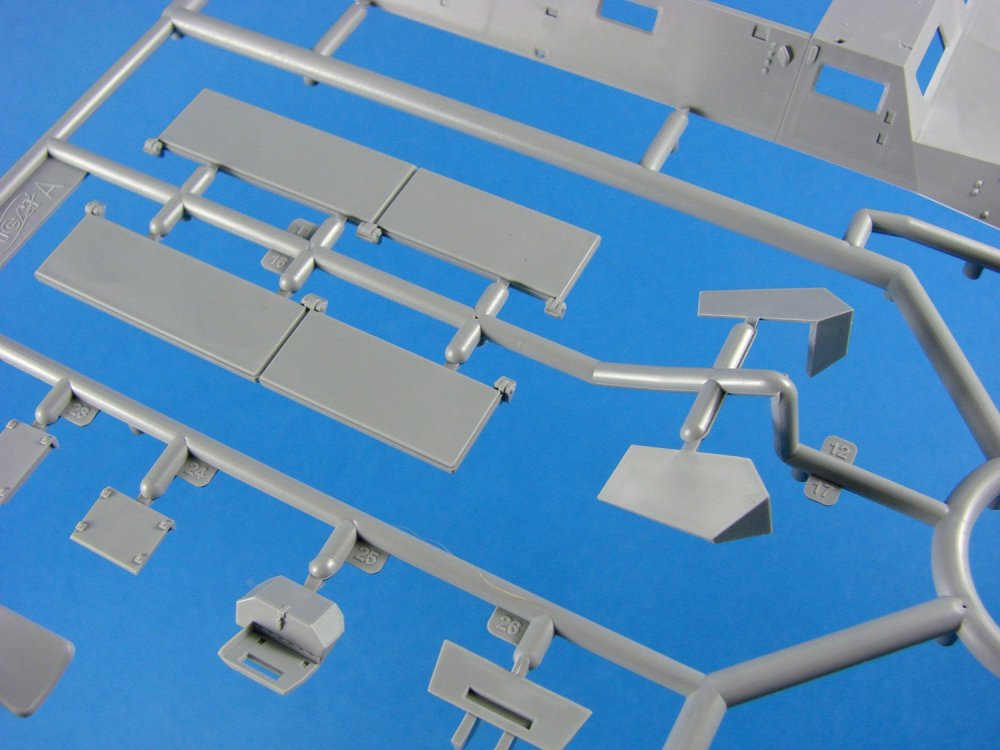
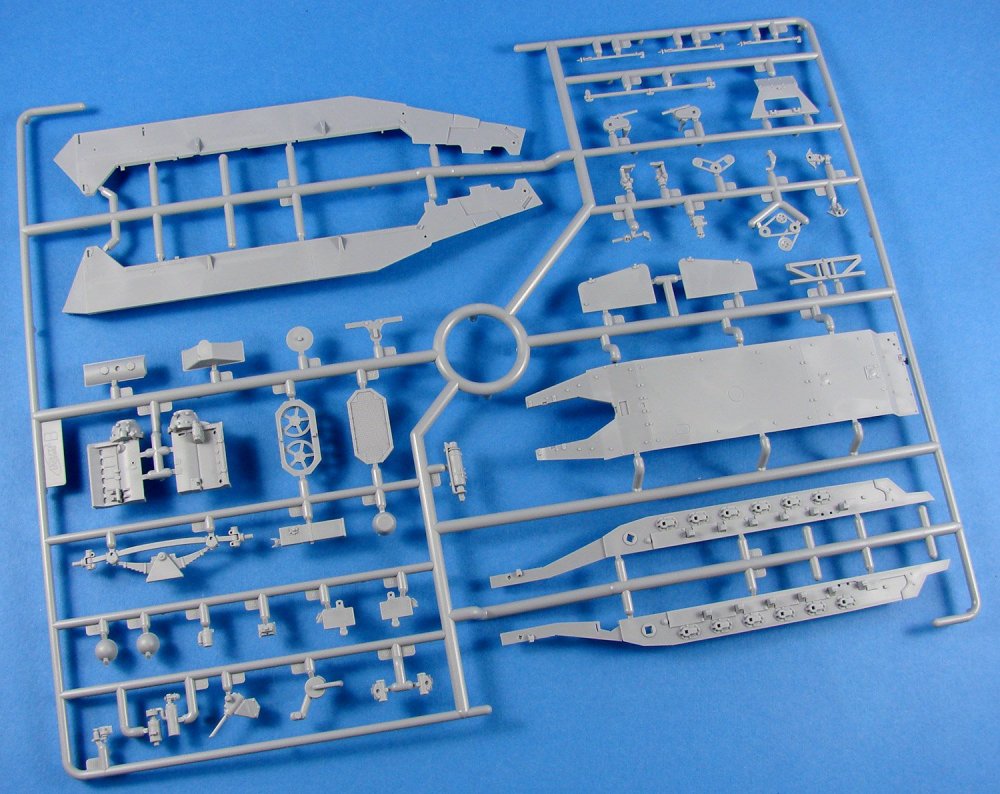

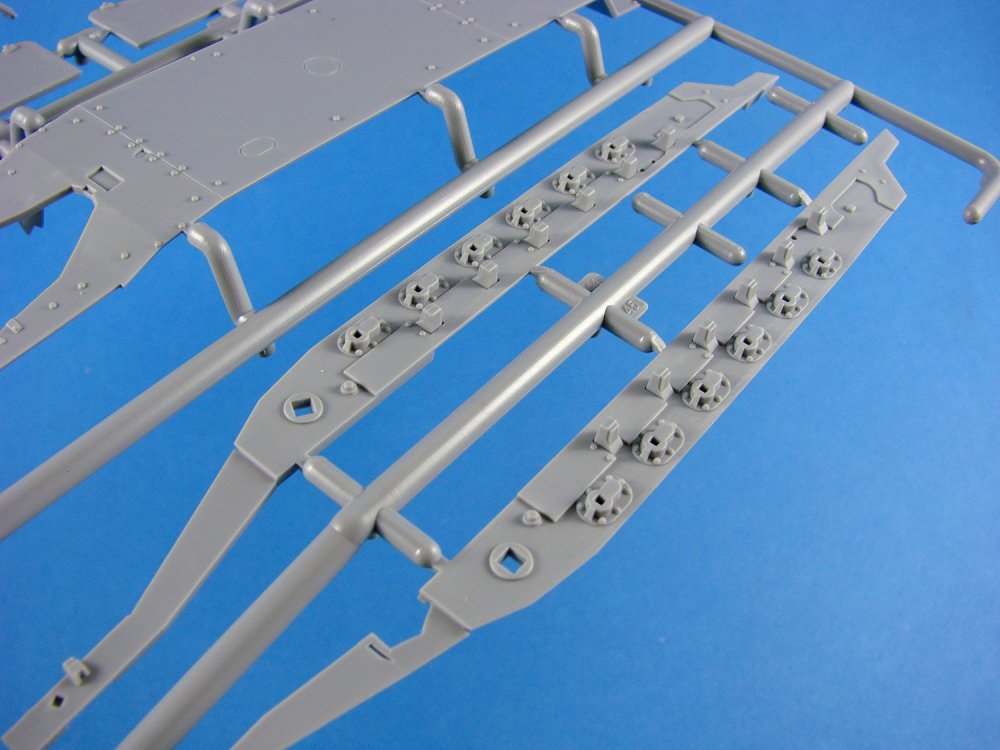
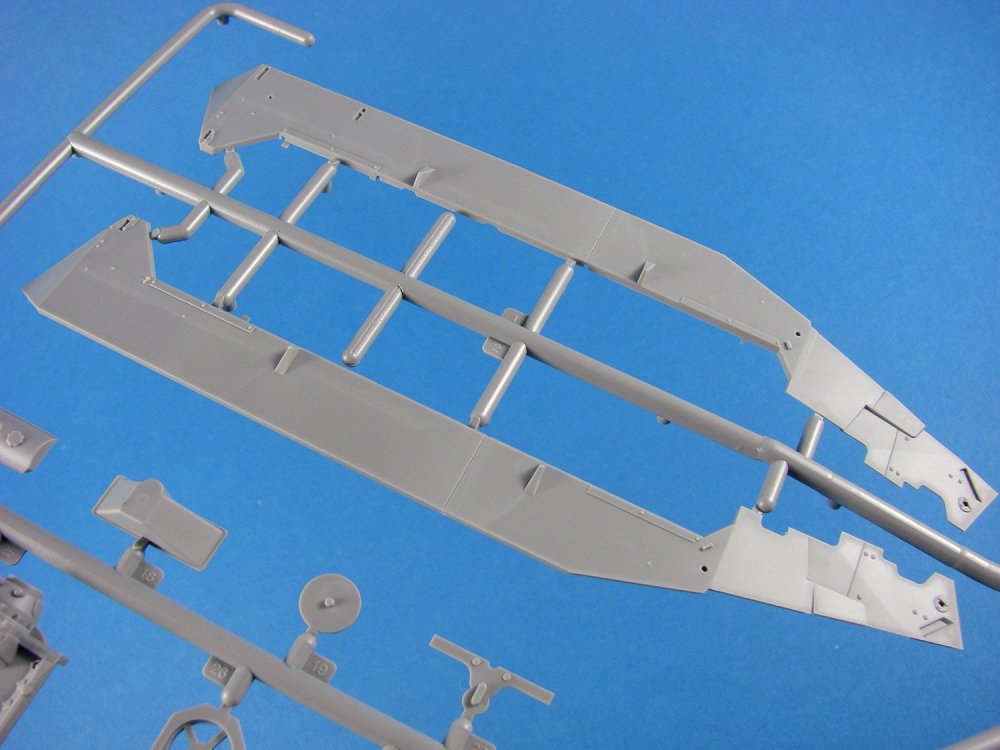

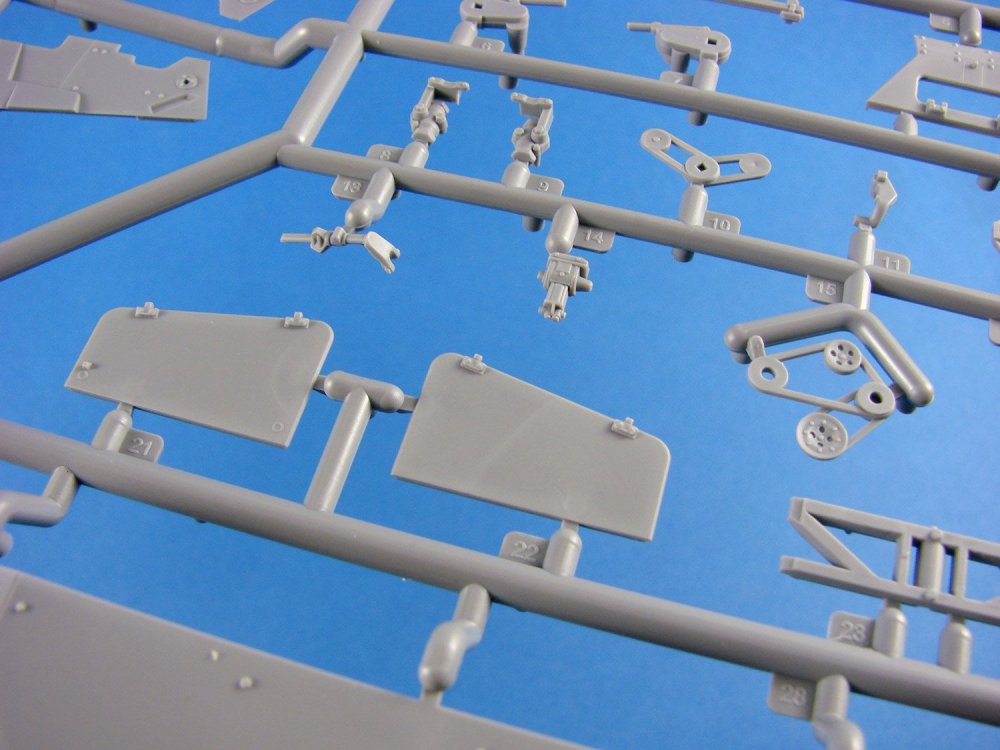
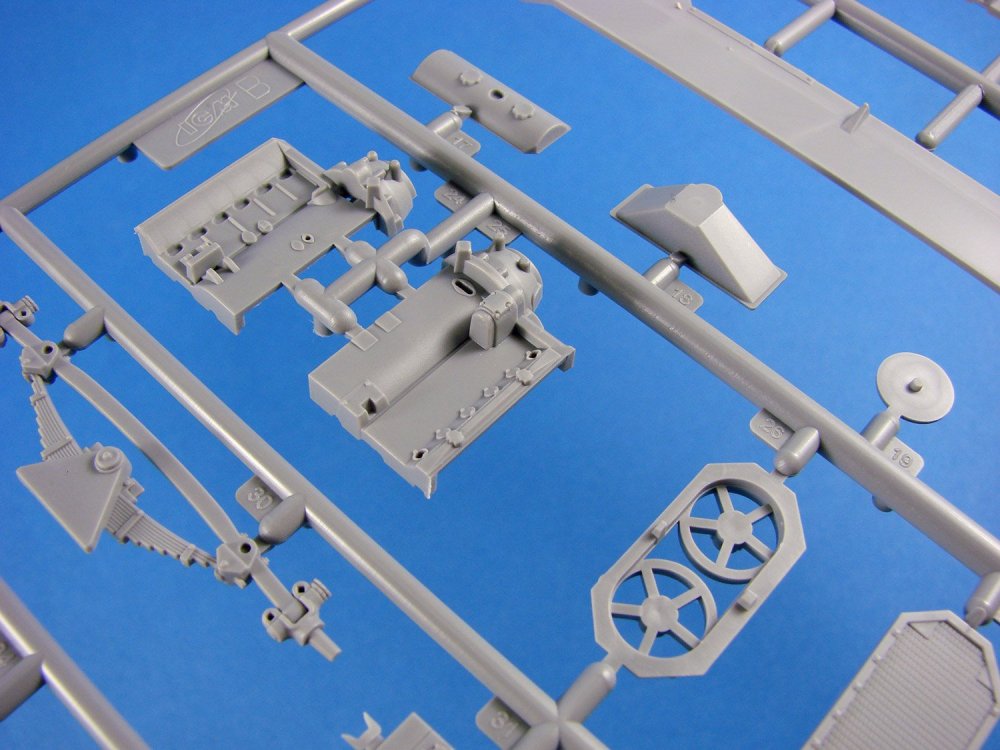

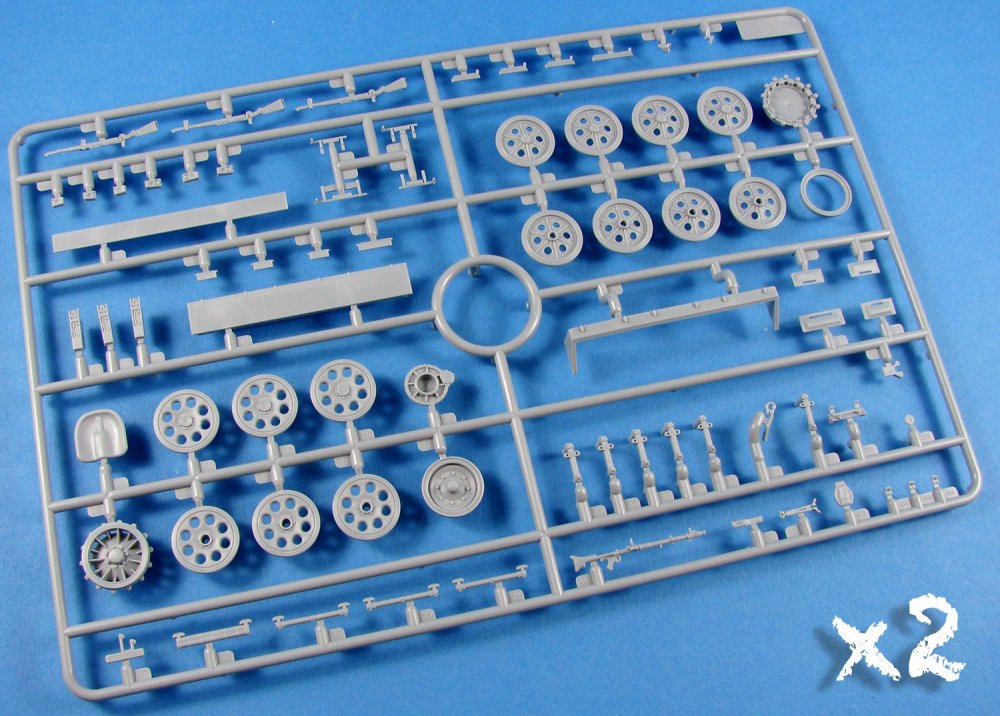

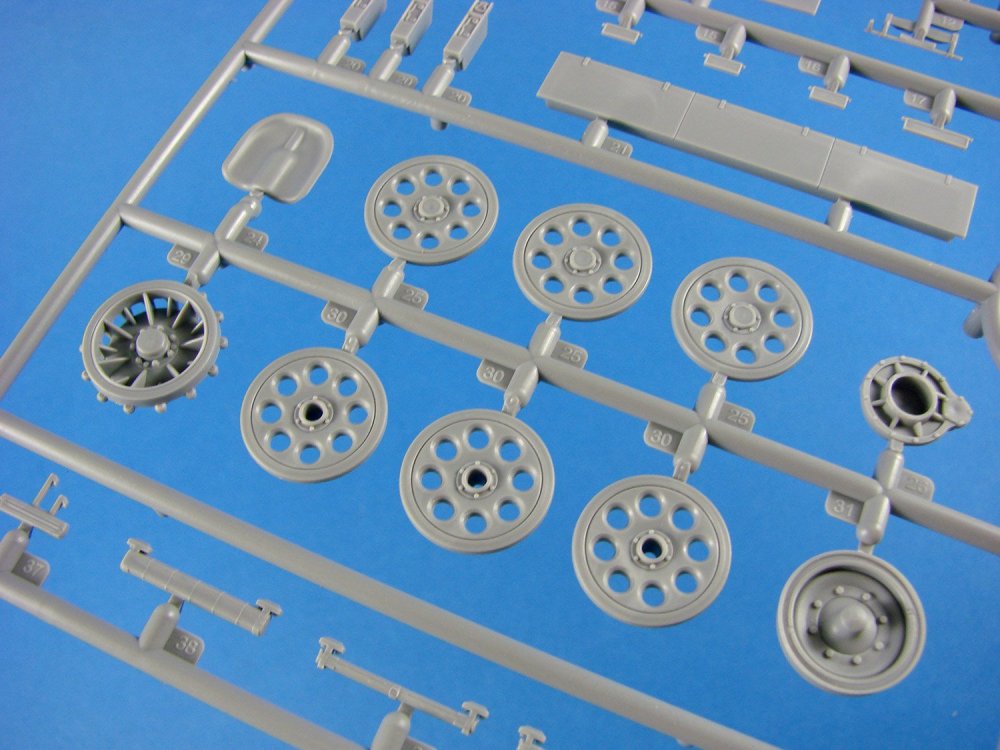
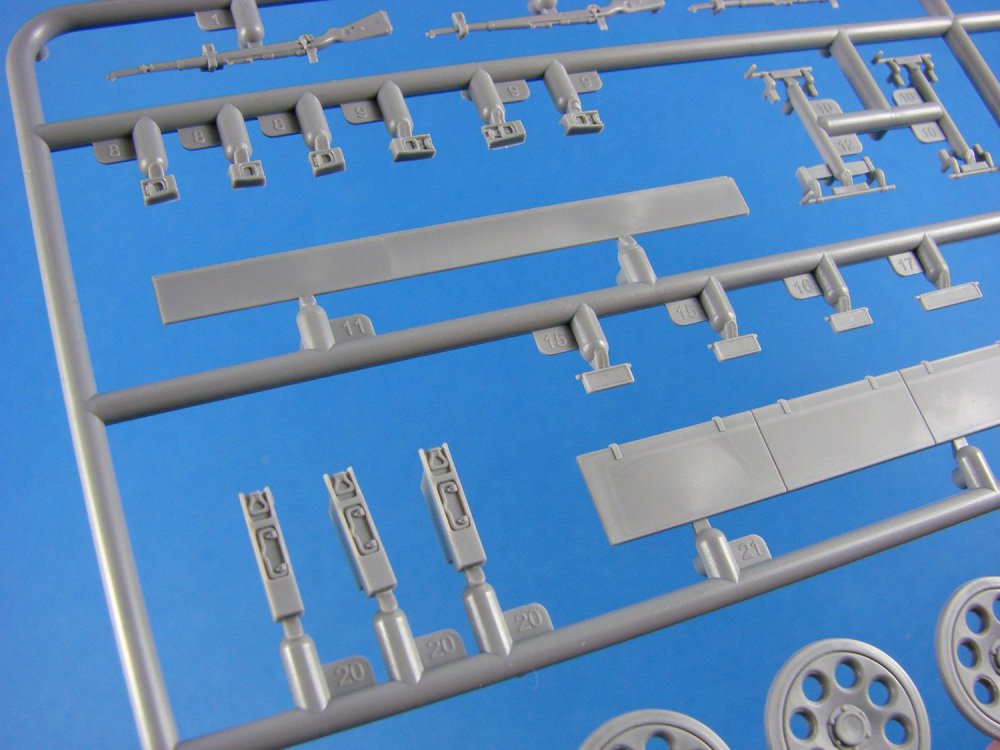

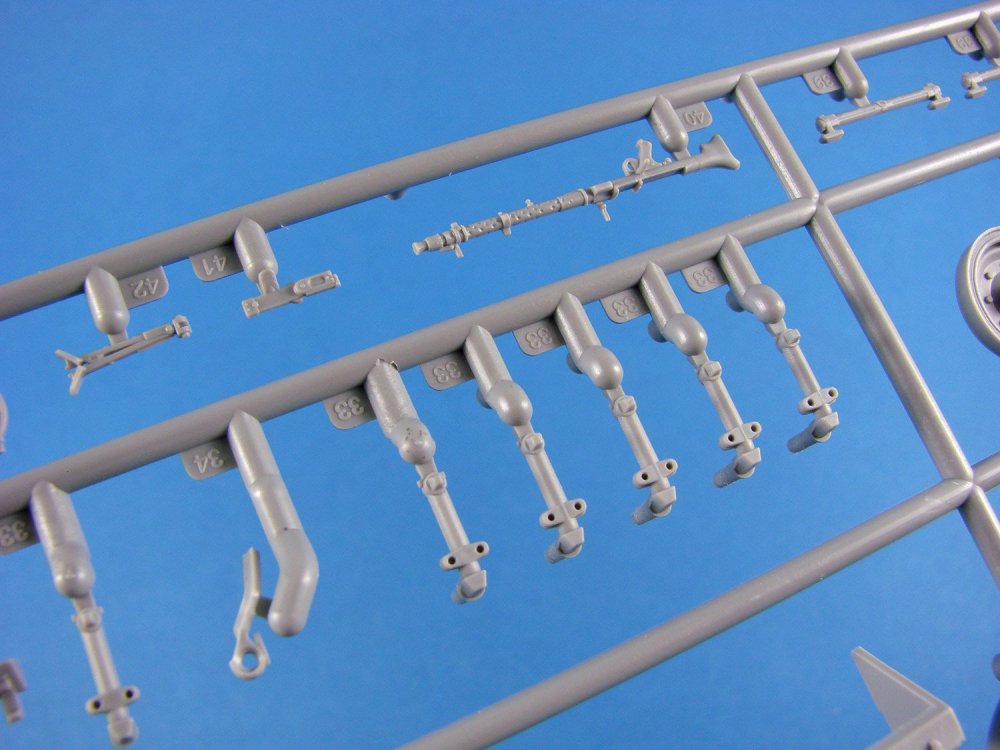
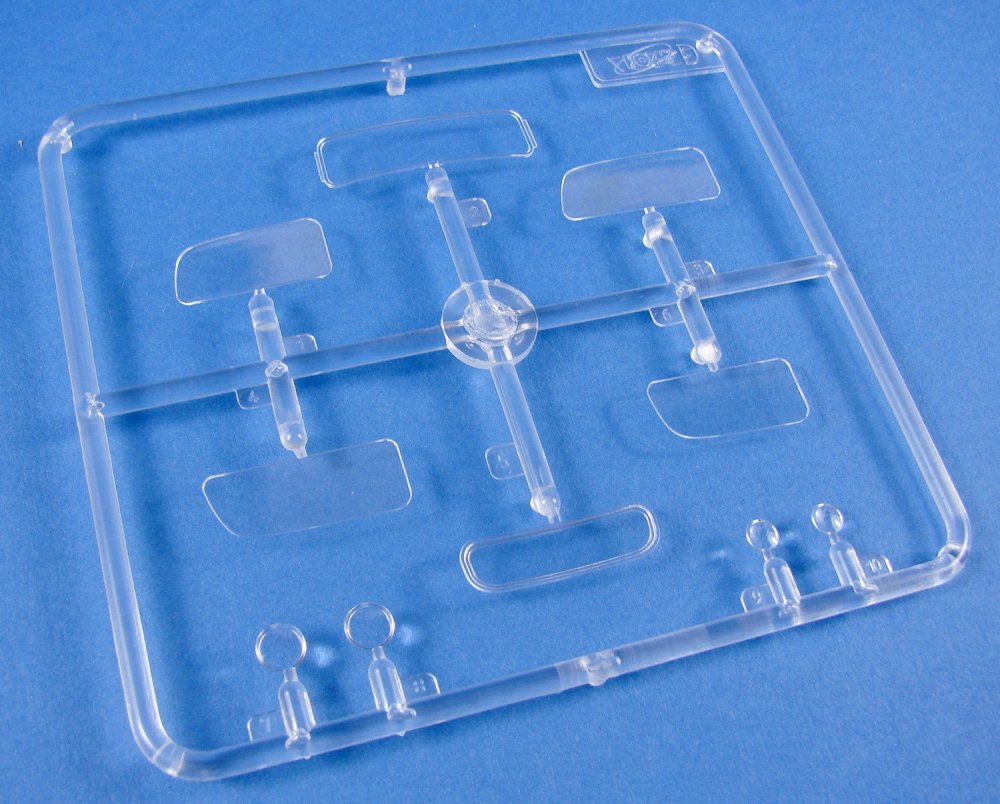
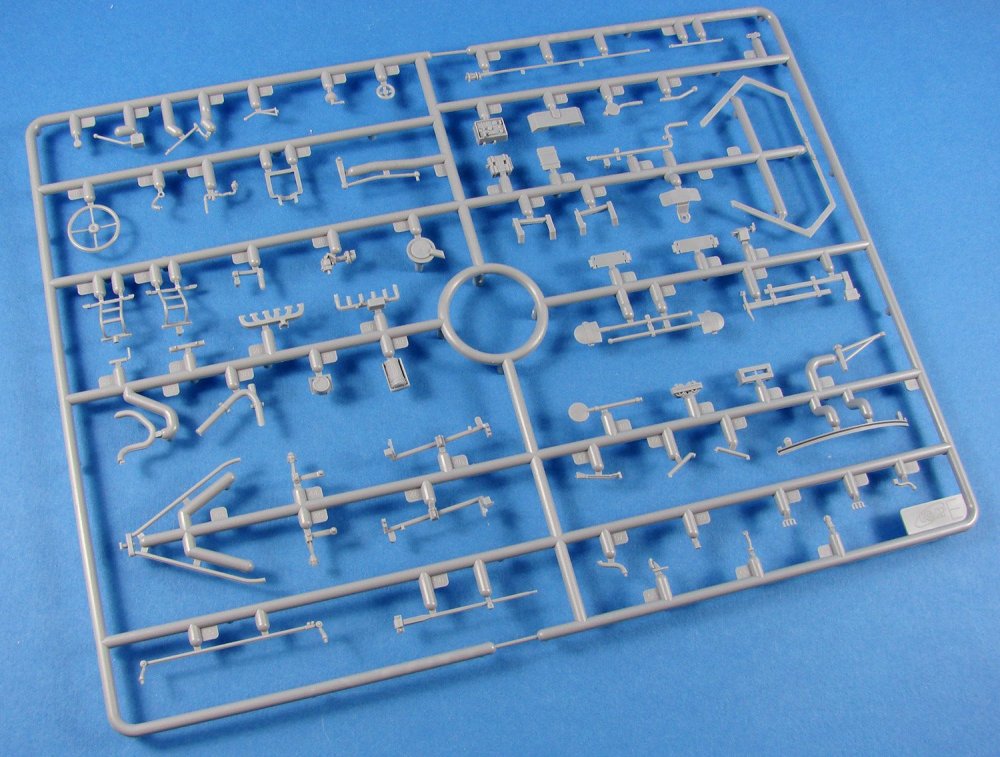
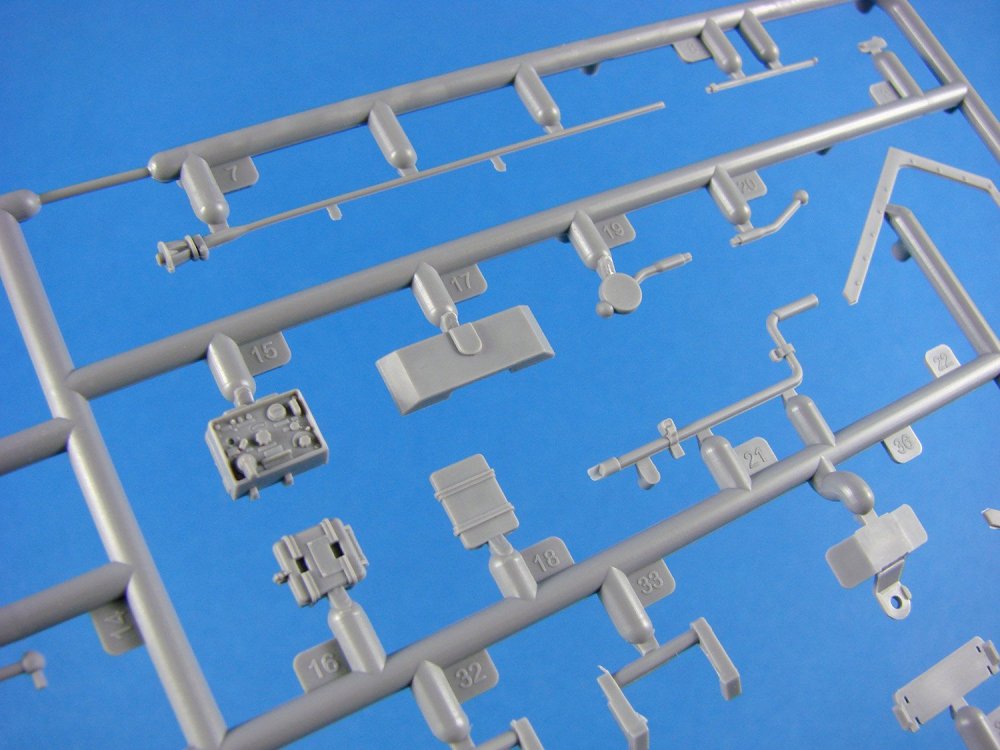
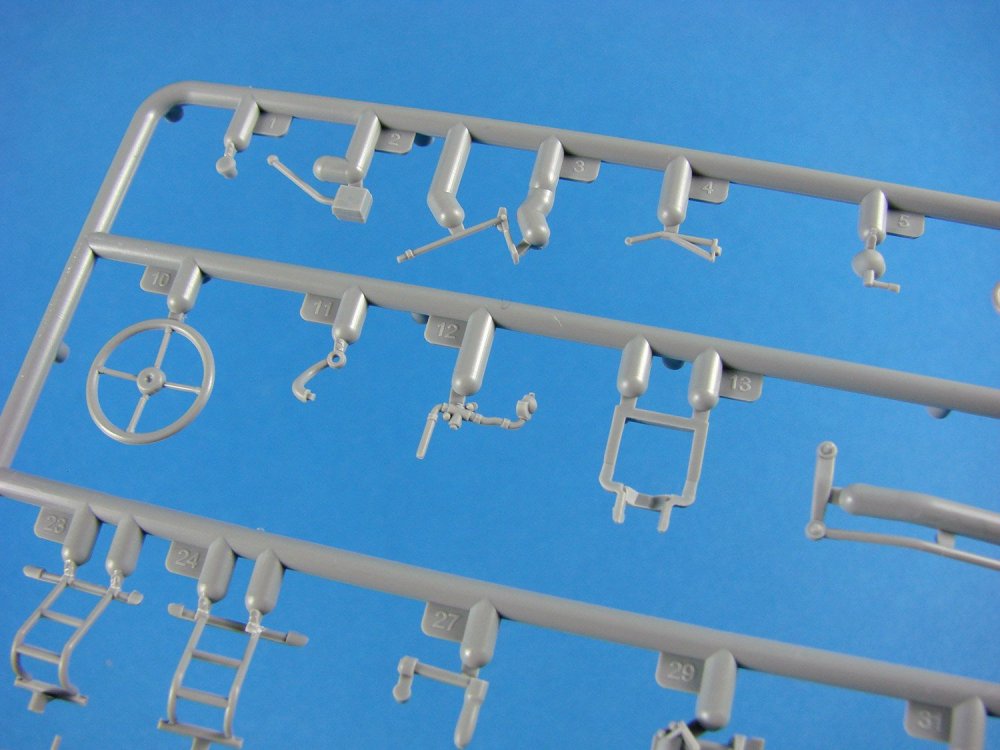
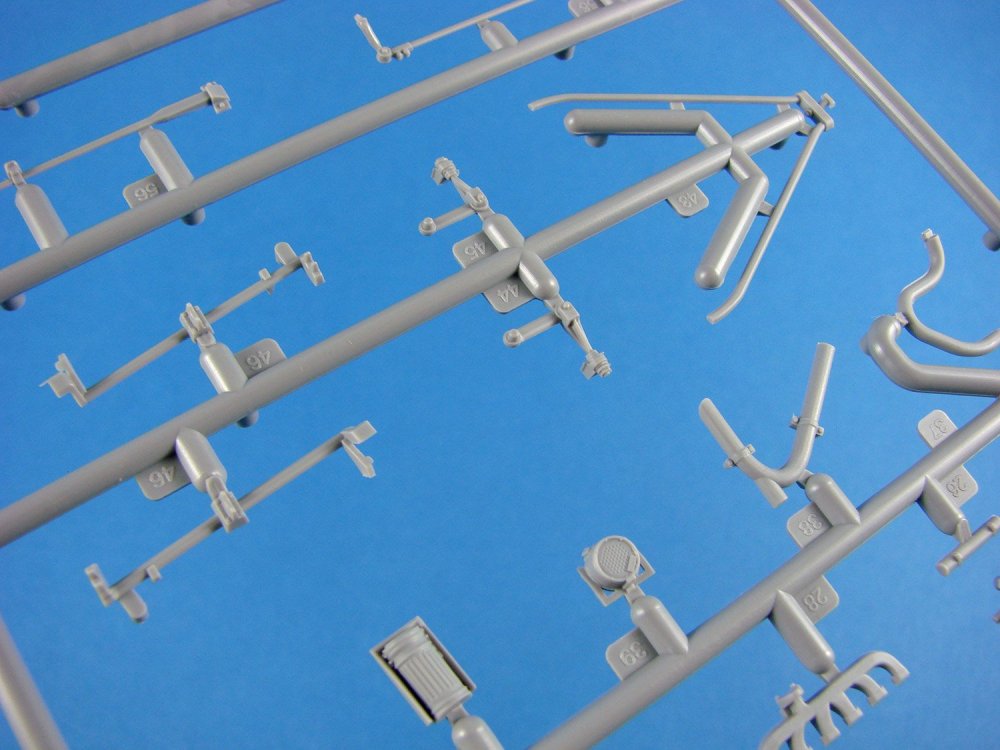
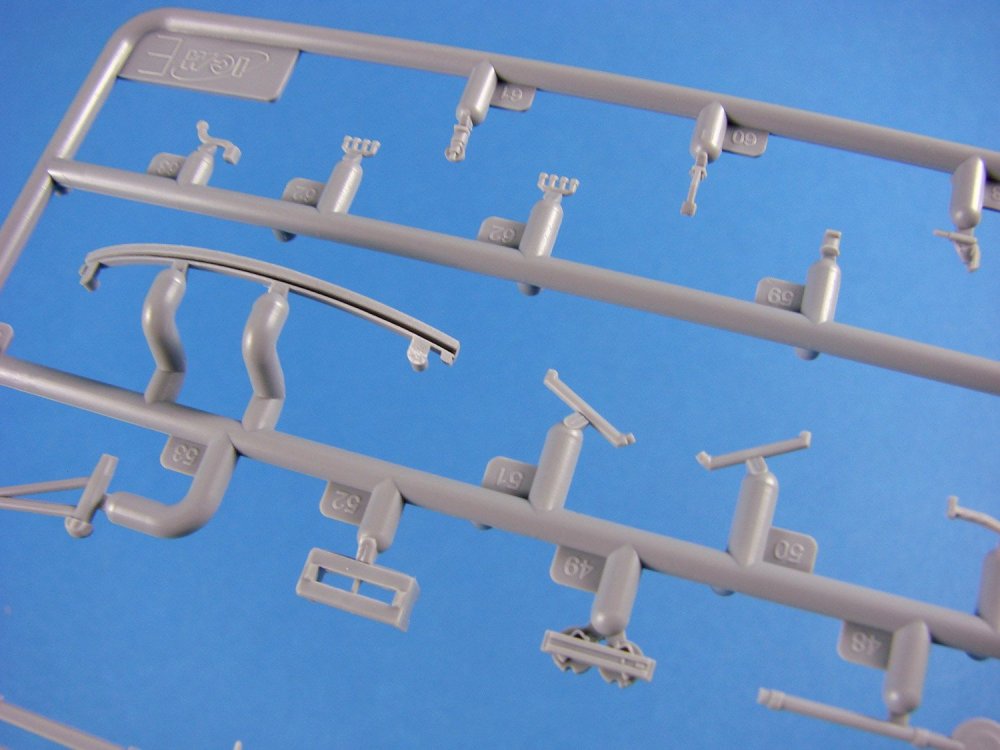
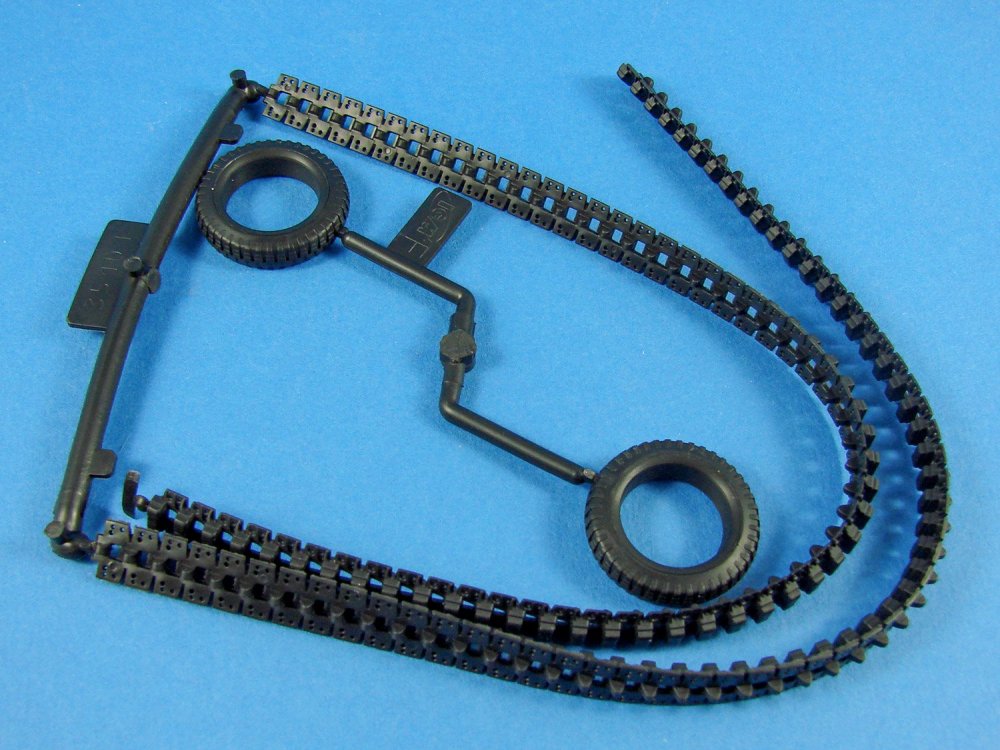
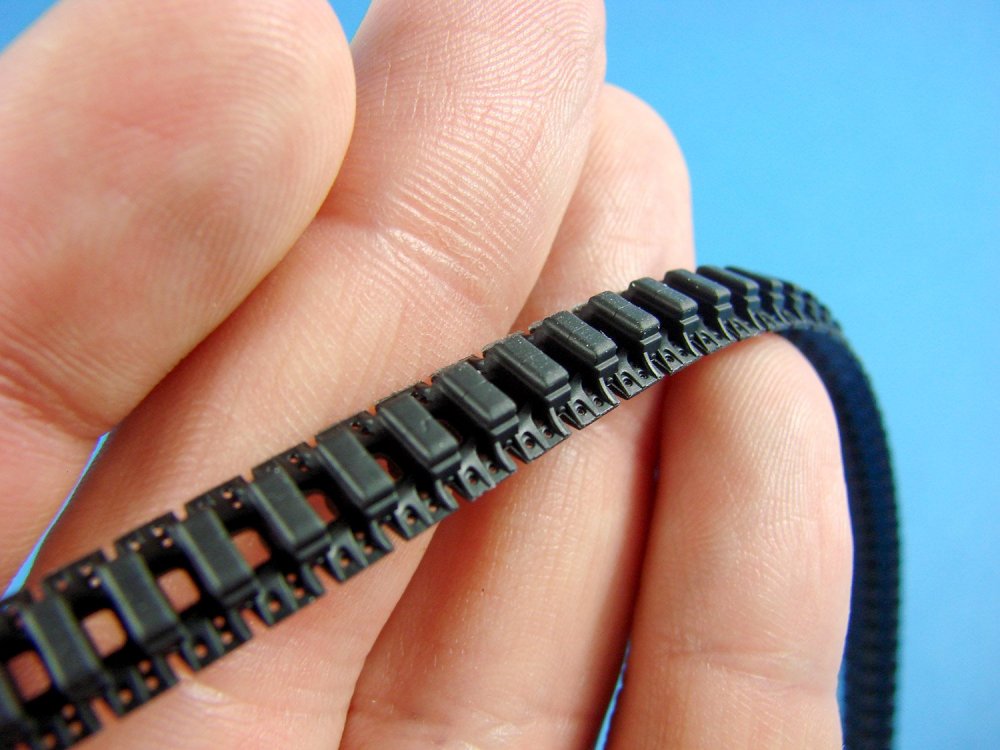

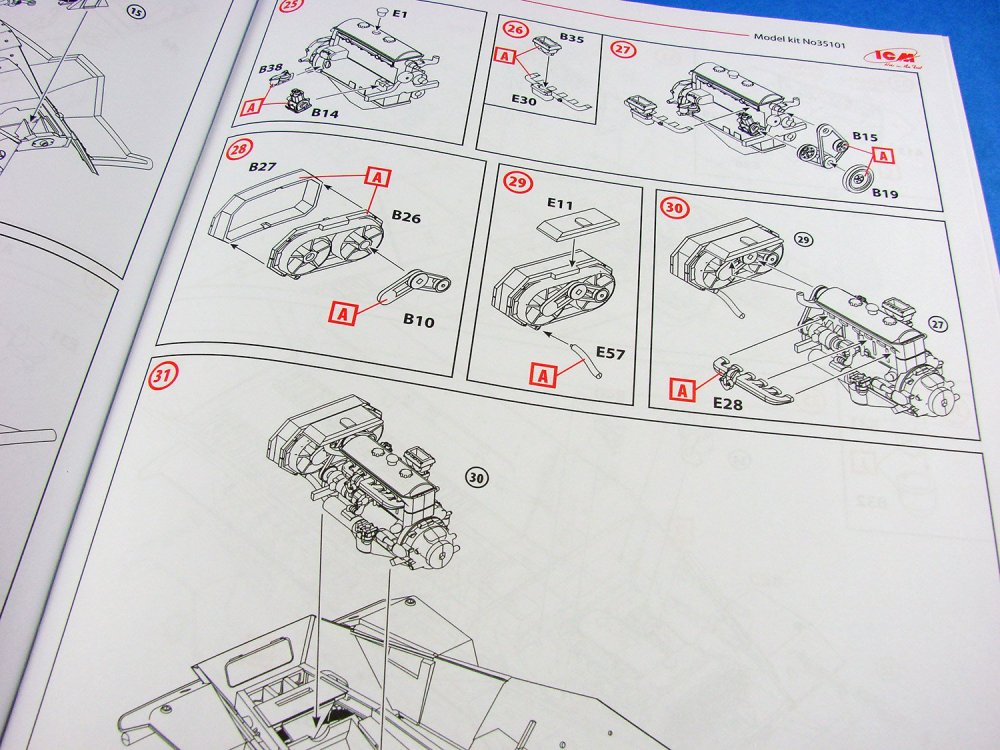

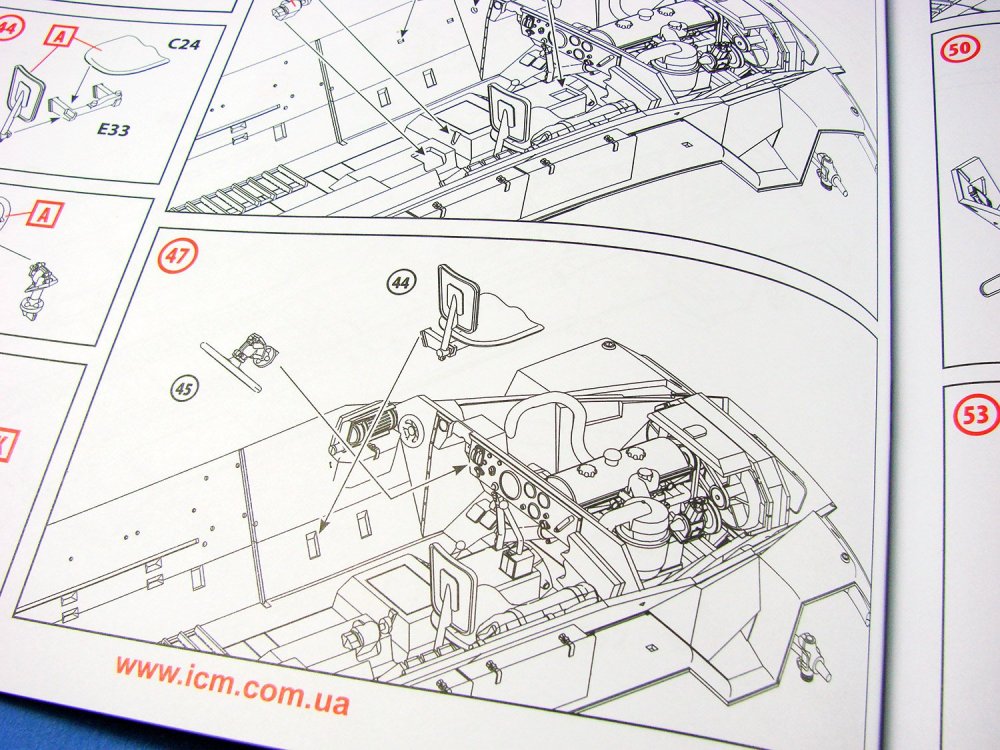
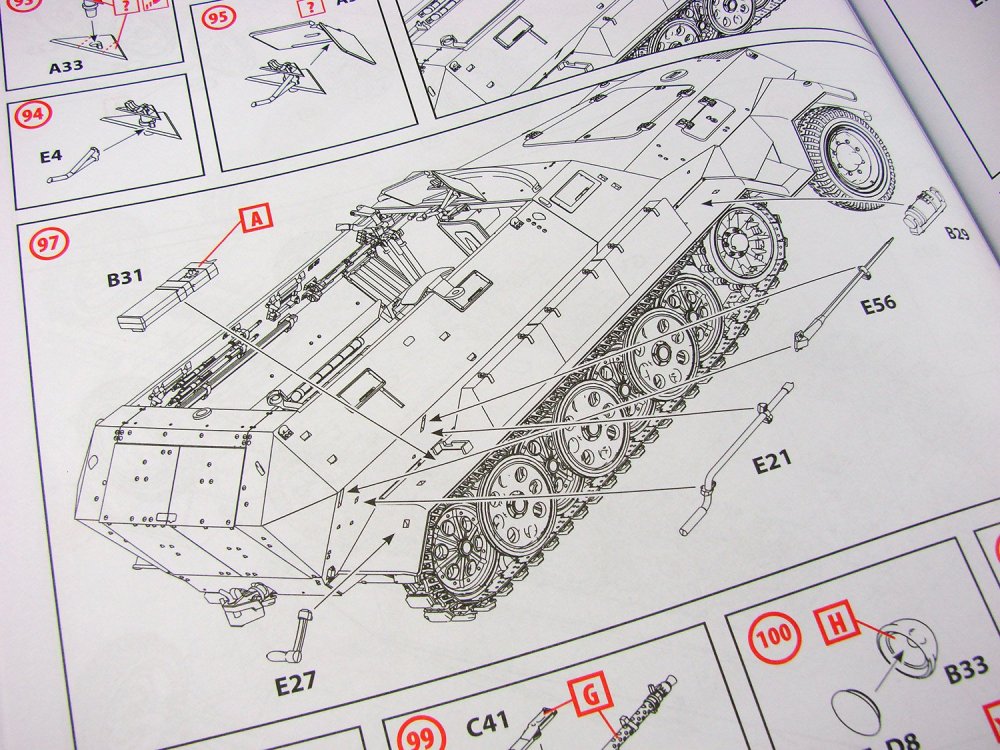


-
1/32 1929 Orient Express Sleeping Car No.3533 LX Amati Catalogue # 1714/01 The Orient Expresswas a long-distance passenger train service created in 1883 by Compagnie Internationale des Wagons-Lits (CIWL). The route and rolling stock of the Orient Express changed many times. Several routes in the past concurrently used the Orient Express name, or slight variations. Although the original Orient Express was simply a normal international railway service, the name became synonymous with intrigue and luxury travel. The two city names most prominently associated with the Orient Express are Paris and Constantinople (Istanbul) the original endpoints of the timetabled service. The Orient Express was a showcase of luxury and comfort at a time when travelling was still rough and dangerous. On June 5, 1883, the first Express d'Orient left Paris for Vienna. Vienna remained the terminus until October 4, 1883. The train was officially renamed Orient Express in 1891. In 1889, the train's eastern terminus became Varna in Bulgaria, where passengers could take a ship to Constantinople. On June 1, 1889, the first direct train to Istanbul left Paris (Gare de l'Est). Istanbul remained its easternmost stop until May 19, 1977. 1929 Sleeping Car shown from 4.00minutes (new upholstery) The onset of World War I in 1914 saw Orient Express services suspended. They resumed at the end of hostilities in 1918, and in 1919 the opening of the Simplon Tunnel allowed the introduction of a more southerly route via Milan, Venice, and Trieste. The 1930s saw the Orient Express services at its most popular, with three parallel services running: the Orient Express, the Simplon Orient Express, and also the Arlberg Orient Express, which ran via Zürich and Innsbruck to Budapest, with sleeper cars running onwards from there to Bucharest and Athens. During this time, the Orient Express acquired its reputation for comfort and luxury, carrying sleeping-cars with permanent service and restaurant cars known for the quality of their cuisine. Royalty, nobles, diplomats, business people, and the bourgeoisie in general patronized it. Each of the Orient Express services also incorporated sleeping cars which had run from Calais to Paris, thus extending the service right from one edge of continental Europe to the other. The kit Amati had been publishing videos and photos of this then-upcoming kit on Facebook for a few months, and even though trains aren’t really my thing, this one looked intriguing with its 1920s/30s wooden opulence, so when Amati said they would ship one out to me to look at, that was very exciting. I knew this was going to me one large kit, but I had no idea! The model itself is 1/32 and the box is the same size as their1/72 HMS Vanguardthat I recently took a look at. Whilst the box doesn’t weigh as much as that kit, it’s certainly packed out with some heavy metal. The box lid itself is decorative, depicting the finished model and some period imagery. You will also note that this model has a section of track on which to display the sleeping car. Lifting off that large lid uncovers a complete box with a tabbed, lift up lid, adorned in the Amati logo as standard for these large releases. Chassis parts Inside the box, we have plastic trays full of parts, two smaller Amati boxes, a large thick plastic sleeve with paper/wood/metal components, and sleeves full of timber strip and brass section strip. There are also a series of folded plans and TWO perfect-bound, full colour instruction books which look sumptuous. Lifting all of these out uncovers two card covers that when removed, show a whole swathe of photo-etch brass and nickel-silver sheets, and a bag holding three sections for the base onto which the rail tracks and sleepers will mount. Amati’s 1/32 Orient Express Sleeping Car kit consists of: 1x gloss card for carriage ceiling mouldings 1x decal sheet for carriage signwriting and stencils 2x gloss paper sheets with printed interior wood panelling and carpets. Also contains illustrations of exterior coach work for reference 2x laser-cut ply sheets for the carriage chassis 5x laser-cut ply sheets for all side and internal walls/construction of the carriage. 1x tape of yellow self-adhesive trim of different widths 2x white trays of cast and turned components, chain and wire. Parts include radiators, tissue dispensers, towel rails, wall mirrors, bottles and holders, soap racks, door handles, coat hooks, locks, eyelets, cabin lights, ventilation panels, electrical sockets, decorative cast exterior crest, spring-leaf shock absorbers, nuts, bolts, boiler, etc. 2x boxes of components, contains parts such as sofa/bed carcasses and cushions, cores for the armrests and hanging headrests, rolling stock wheels and axles, sink units, stools, carriage entry tunnels, etc. 1x pack of brass strut sections Various timber lengths of varying size and type 3x MDF track base sections and stirrups 4x sheets of photo-etch nickel-silver parts (internal main carriage wall panelling and hinges etc) 17x sheets of photo etch brass parts (chassis, bogies, roof and roof sheathing, exyerior main carriage walls, etc. 1x sheet of pre-cut acetate for windows 6x parts and plans sheets 2x full-colour instruction books Now, a little about the model itself. Whilst the Orient Express is known for its amazingly high standards, these sleeping cars only had a single WC for the whole carriage. Amati has created an entire, accurate interior to this model kit, of which the toilet and small boiler closet are also included. To be able to see all of these details, the lid, constructed from photo-etch and rolled brass, is removeable. White card inserts for she shaped interior ceilings are included, and this would provide an amazing opportunity to add some soft lighting which would set off each of the cabins. Each of those cabins is intricately detailed, and whilst have no per-cabin toilet facilities, each cabin does have facilities for passenger ablutions. These come in a stylish curved-door unit which contains sink and other things which you’d expect to see in this area, all intricately reproduced in this kit. The walls of the cabins are wooden panelled, and all of the cabin creature comforts are present, including seats, cushions for arms and head etc, and ceiling racks for storing luggage. Remember, these cabins were pretty compact as passengers spent the day in other areas of the train too. An access corridor runs alongside the cabins, and of course, these are fitted out with radiators etc. In all, an impressive piece of rail history that Amati has gone to pains to recreate here. The sleeping car is based on two lengths of laser-cut timber which sit atop each other to produce the main frame of the carriage. On the real thing, this would of course have been metal, so bear that in mind when building and ensure you seal any timber and rub down before filling, priming and painting in black. Added to the metal framework are lengths of heavy-gauge photo etch that create the authentic appearance of the carriage chassis. Other plates etc. are fitted out with miniature nuts and bolts. Brass section strips are also fitted to the entire length of the exterior frame, adding authenticity and some rigidity to the model. There is also a main bolt towards both front and rear of the carriage, onto which the moveable, wheeled bogies will mount. After all, your train won’t just roll in a straight line! The underside of the sleeping car is incredibly complex with some superbly engineered and cast leaf-spring suspension for the buffers, couplings, photo-etch battery housings, compressed air tank, etc. Assembling the rolling stock/bogies themselves is broken down into over EIGHTY separate stages in around 20 pages of the first construction manual. Of course, all of the parts for this are manufactured from either photo-etch, cast or turned parts, and a photo-etch bending tool really should be mandatory if you wish to tackle this model. After all, if you are willing to shell out 890€ for a kit, then it’s foolhardy not to progress with the required tools. For the base, Amati has supplied three parts on dovetailed MDF which is profiled for display purposes. The positions of the sleepers is also engraved onto the top. I have to say that the fit of these is so precise that virtually no joint can be seen when they are put together. If you flip them over, you’ll note that there is a pencil mark to show you which part is the best match. Two MDF splints are then to be glued into the underside channels. Now, I don’t think that MDF is a strange material for the base, as you may wish to paint this, but one omission, for me, is any material that can be used to infill between the buffers, such as the gravel/stones. This would have been a nice addition so as to hide the MDF. The tracks themselves are supplied as brass sections which need to be cut to length. As per the real thing, the tracks are attached to the sleepers by the correct hardware. I would use an assembled wheel/axle section to properly ensure that the tracks are equidistant at both ends, as well as traditional measuring. I would also look at either painting the tracks in an iron colour, or if you can immerse them in a shallow bath of burnishing fluid, then that would also fit the mark. With the base of the model now built, the time has come to assemble the carriage itself. This initially starts with the Head A and Head B bulkheads, followed by the fitting of the interior corridor wall. Onto this are fitted the interior compartment walls, creating the cabins. Please note that a lot of paper cutting will be required as the internal walls in their antique finishes, are printed matter and will need to be fixed to the pre-sealed internal plywood walls. This will also be enhanced with actual timber framing too. The printing of the wooden walls is very, very nice and should look as good as trying to emulate this using precious timbers. Besides, this approach means we all stand a level chance of success. Actual timber will be used to line the panels, adding to the realism. The carpets are also to be cut from paper. You will need to pick up some paper-crafting skills too as the numerous head rest and arm rest cores, sofa/bed chassis and stools, will need to be wrapped in the same matching paper and neatly fashioned around corners. There are some good techniques to be found online, such as dampening the paper to make it easier to mould around corners etc. Each cabin will also have its own wash locker, and these are constructed separately and then installed. As well as having all the mod-cons, for the 1920s, the doors on these will actually hinge open and closed. You won’t have this option for the cabin doors though, but these can be posed in any position using the nickel-silver etched parts. The main carriage exterior walls are sheathed in photo-etch brass which will be painted, and the trim/decals added. Internally, those same walls are plated with the nickel-silver panels. I don’t know the reasons for change in material from brass, but the panels are superbly produced. Remember, there’s no actual silver in those parts. Instead, it’s an alloy of zinc, copper and nickel. To construct the carriage’s roof, a series of photo-etch frames are interlinked with longerons that have raised pips. Once the basic frame is assembled, a series of individual brass panels are then rolled into shape and the holes in these used to lock over the raised pips of the longerons. Whilst you can use CA generally, I would suggest that the pip areas are soldered and filled before then being filed back flush to the roof. The roof is then painted white. Internally, the card mouldings are then shaped and sealed/sprayed white before decorative wooden edging is applied. Instruction manuals Two full-colour instruction manuals are included, showing the various stages using photographic images and clear text in English, with Italian also. Each step is very easy to understand, in the way that magazine part-works are designed to be straightforward. There’s nothing here that should catch any modeller out, meaning that the only thing you need to have some experience with is photo-etch. Each manual is landscape in format, and perfect-bound, as a novel would be etc. Paint references are used where necessary and supplied in FS codes. Plans A number of these sheets are simply for helping the user to identify the various PE parts and wood parts, with a couple of others showing the rail carriage in various plan formats. All line drawings are clear to understand shouldn’t provide the modeller with any issue. Decals A single sheet of waterslide decals is included for the exterior livery signwriting etc. Print quality looks excellent. It could be worthwhile trimming any of the clear carrier film as close to the actual decal as required. Conclusion This isn’t a cheap kit by any stretch of the imagination, but it is an epic one in every sense. The Orient Express kit is a sort of crossover between vehicle and doll’s house building, with some beautiful period features in the mix. It’s certainly a project that will command a lot of time from you in order to achieve the very best outcome. You really do have to be reasonably adept with photo-etch metal in bending, curving and folding, and although you don’t strictly need to, some elements would be better soldered than glued. A lot of attention to detail has been made here, from the kit detail itself, down to little things like the cut-out paper décor not lying across folds in the sheet paper. The instruction manuals are also a work of art and should be a cinch to follow. Projects like this are usually once in a lifetime, so if you fancy doing something pretty unusual, then this has certainly got to be a major contender. These kits are hot off the press, only having being released within the last 2 weeks, so get them whilst their fresh! My sincere thanks to Amati for sending this kit out for review on Large Scale Modeller. To purchase, check your favourite Amati shop or online retailer. Tell them you saw the review here on LSM.
-
Such a great looking plane. Nice review too. Looks a keeper.