
James H
-
Posts
3,257 -
Joined
-
Last visited
Content Type
Profiles
Forums
Events
Gallery
Everything posted by James H
-

rye field model 1/35 Panther Ausf.G ‘Early/Late with full interior’
James H replied to James H's topic in Armour/AFV Reviews
Added video from Nuremberg Toy Fair. Enjoy! -
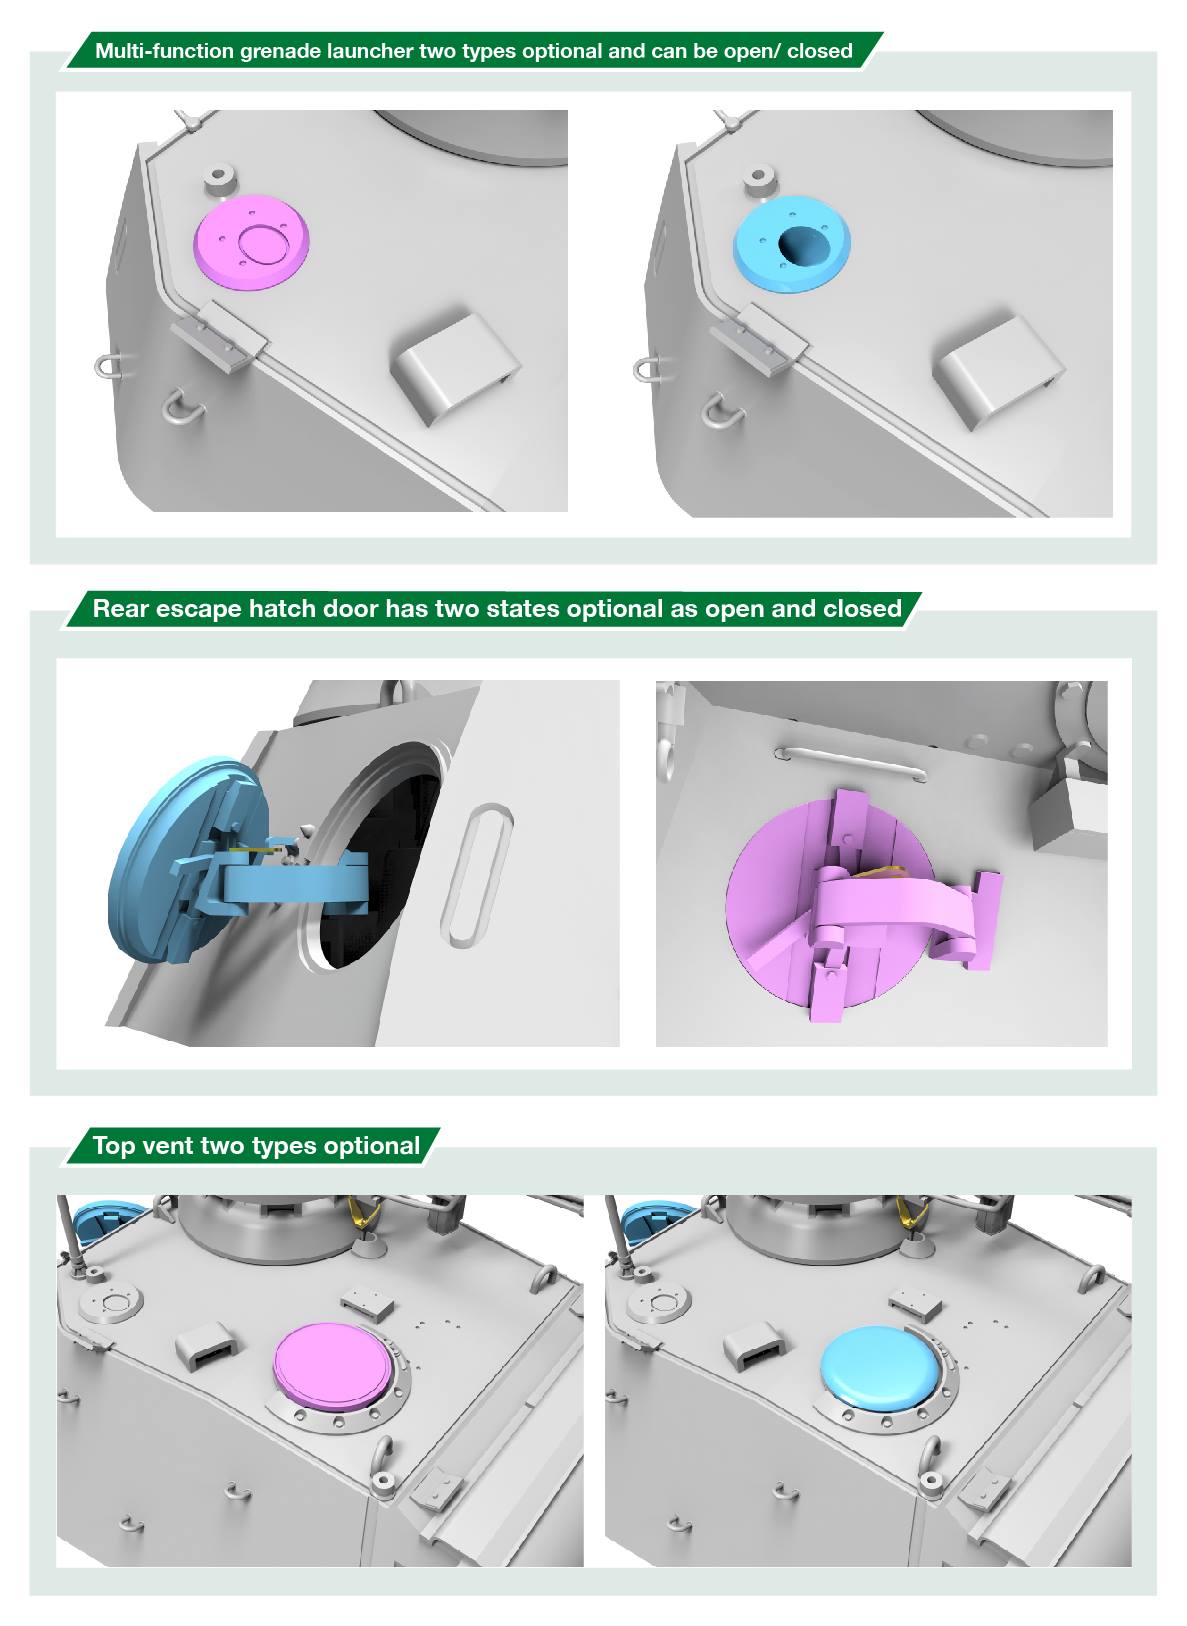
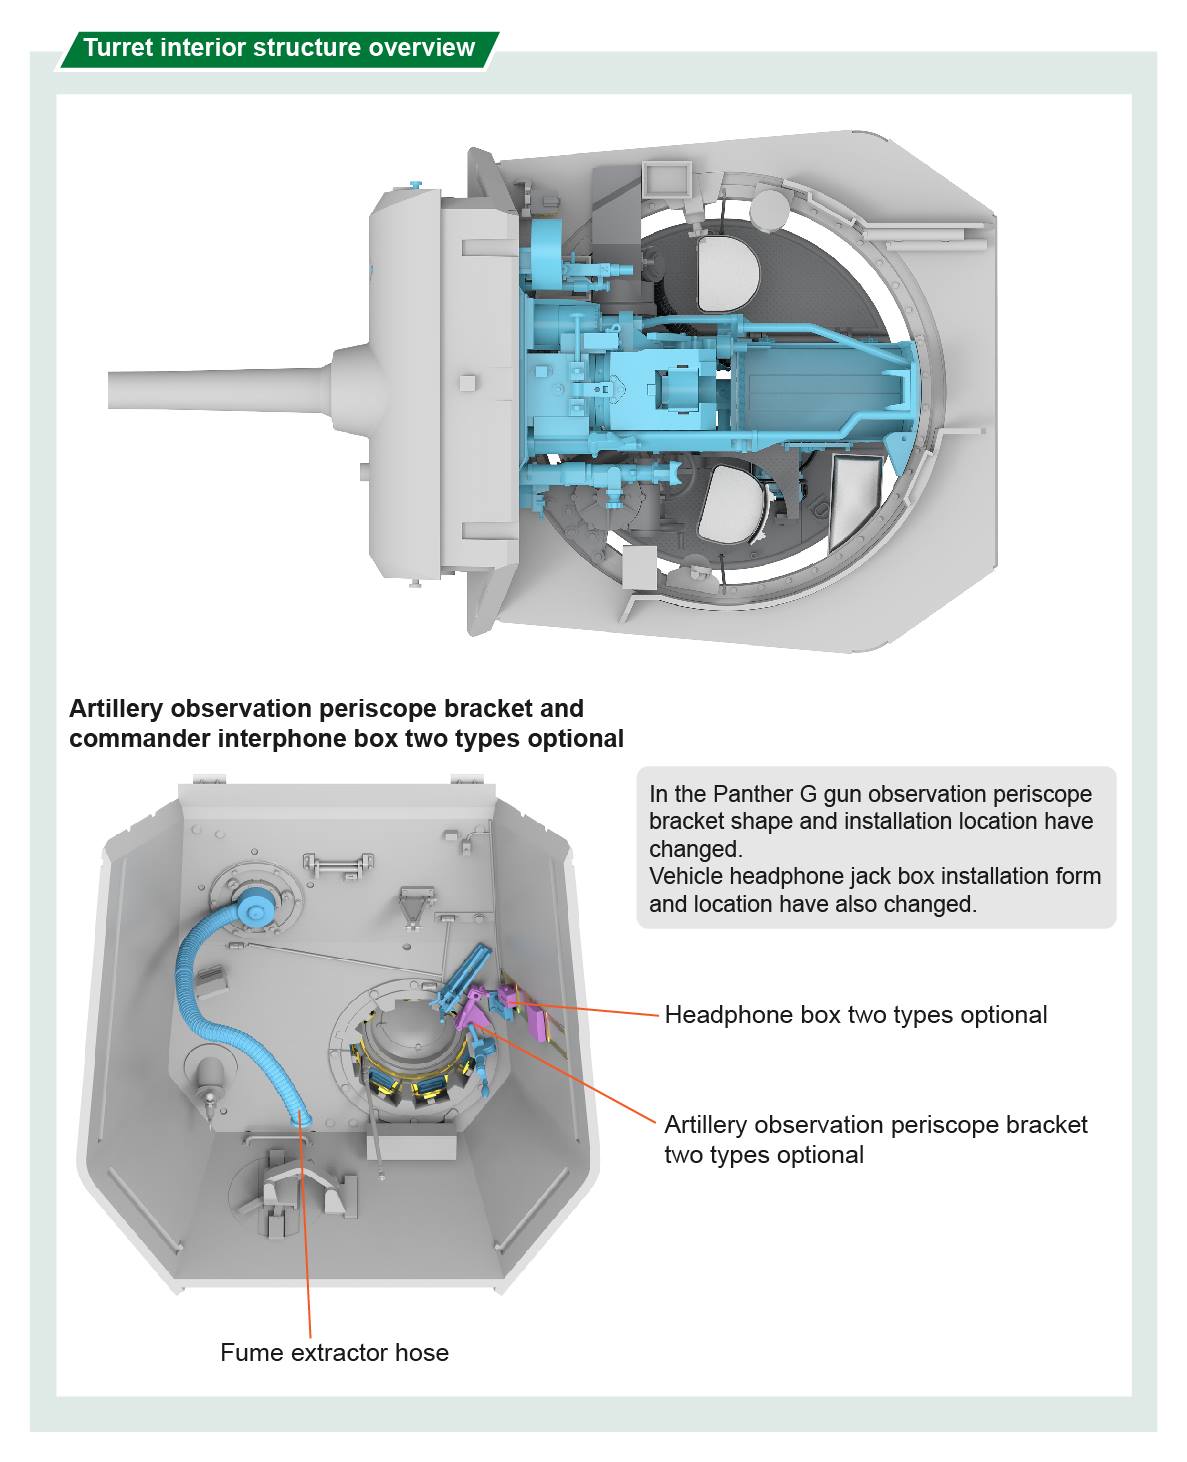
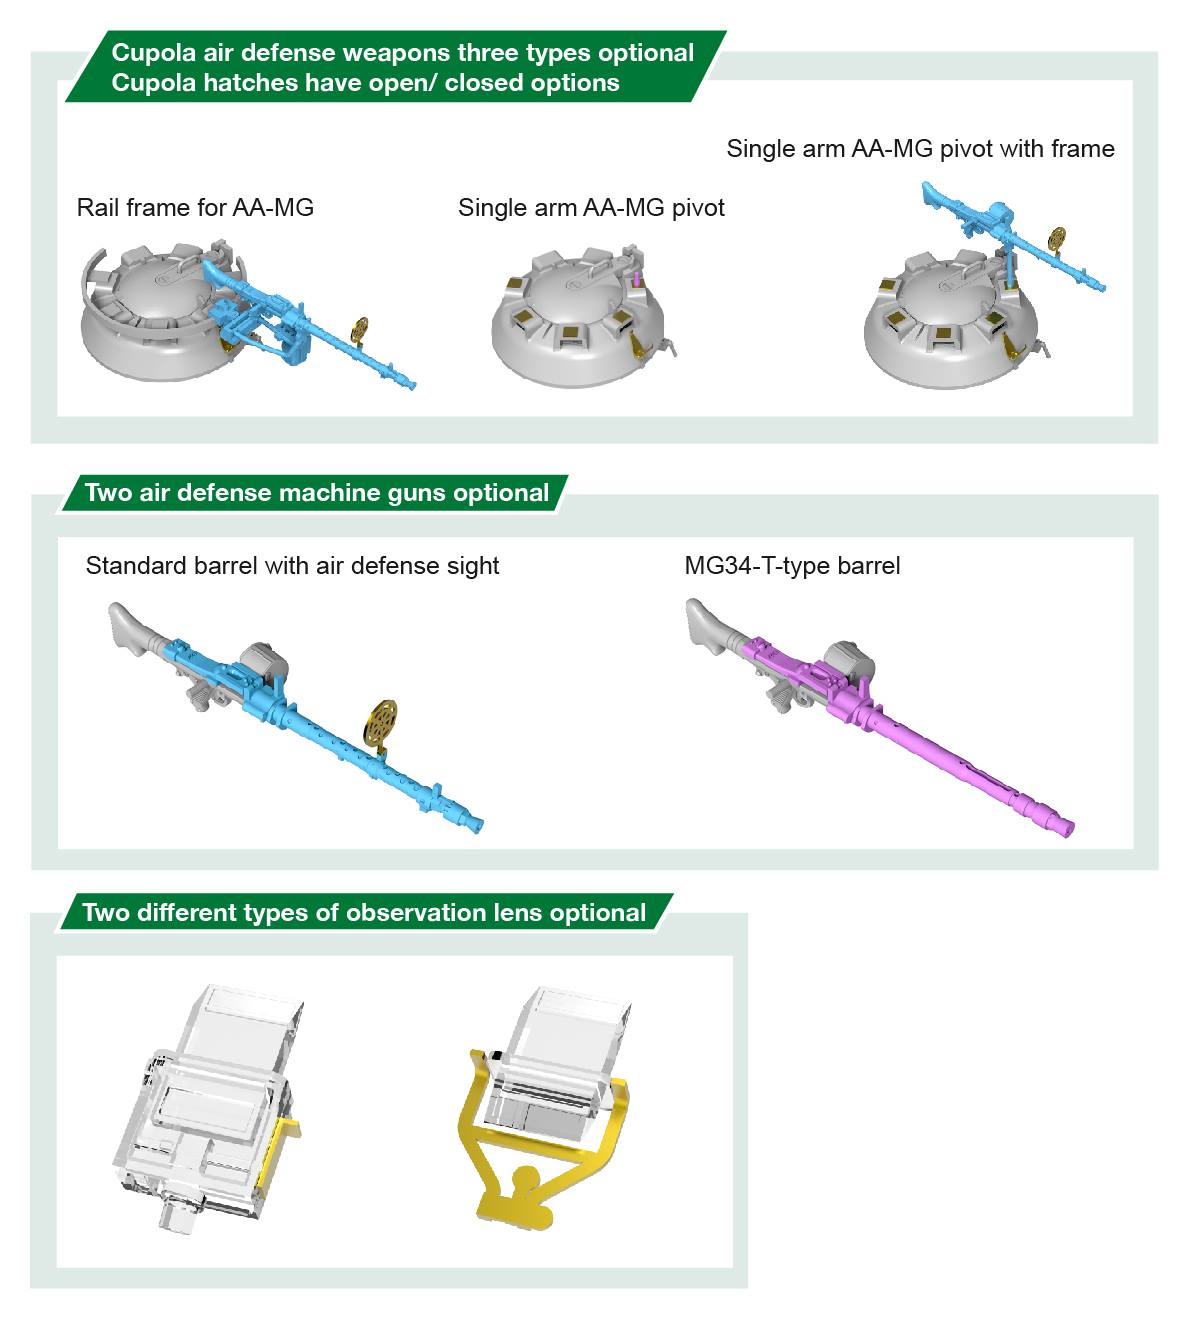
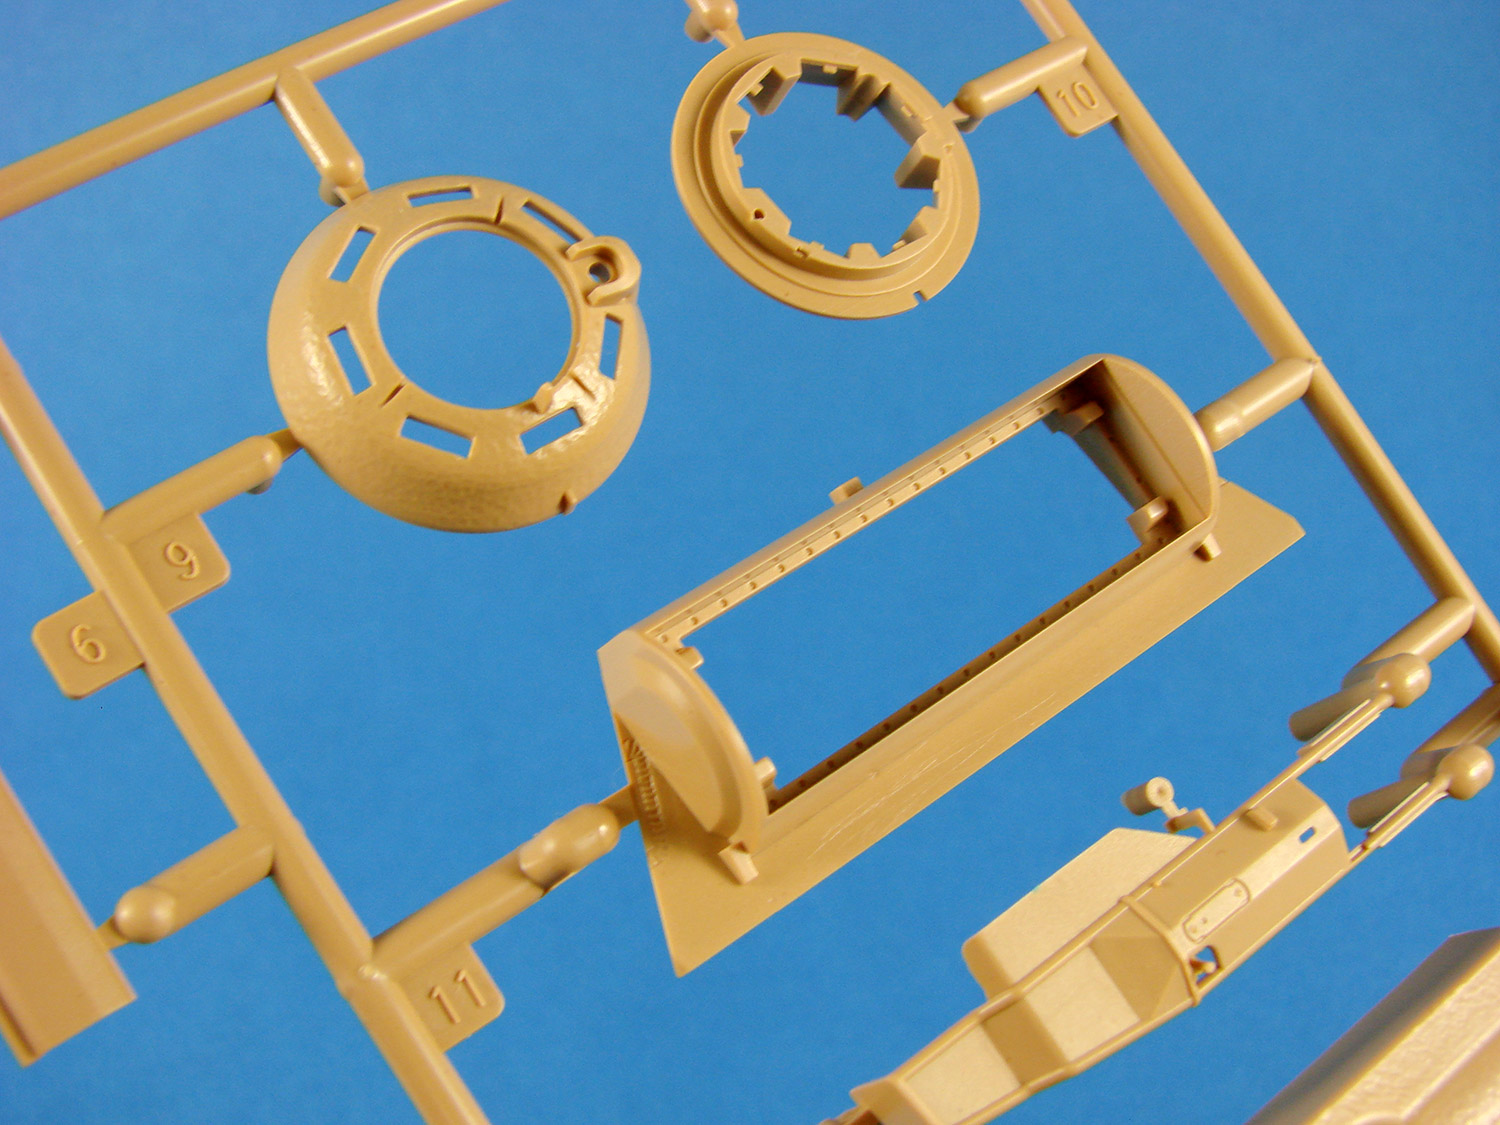
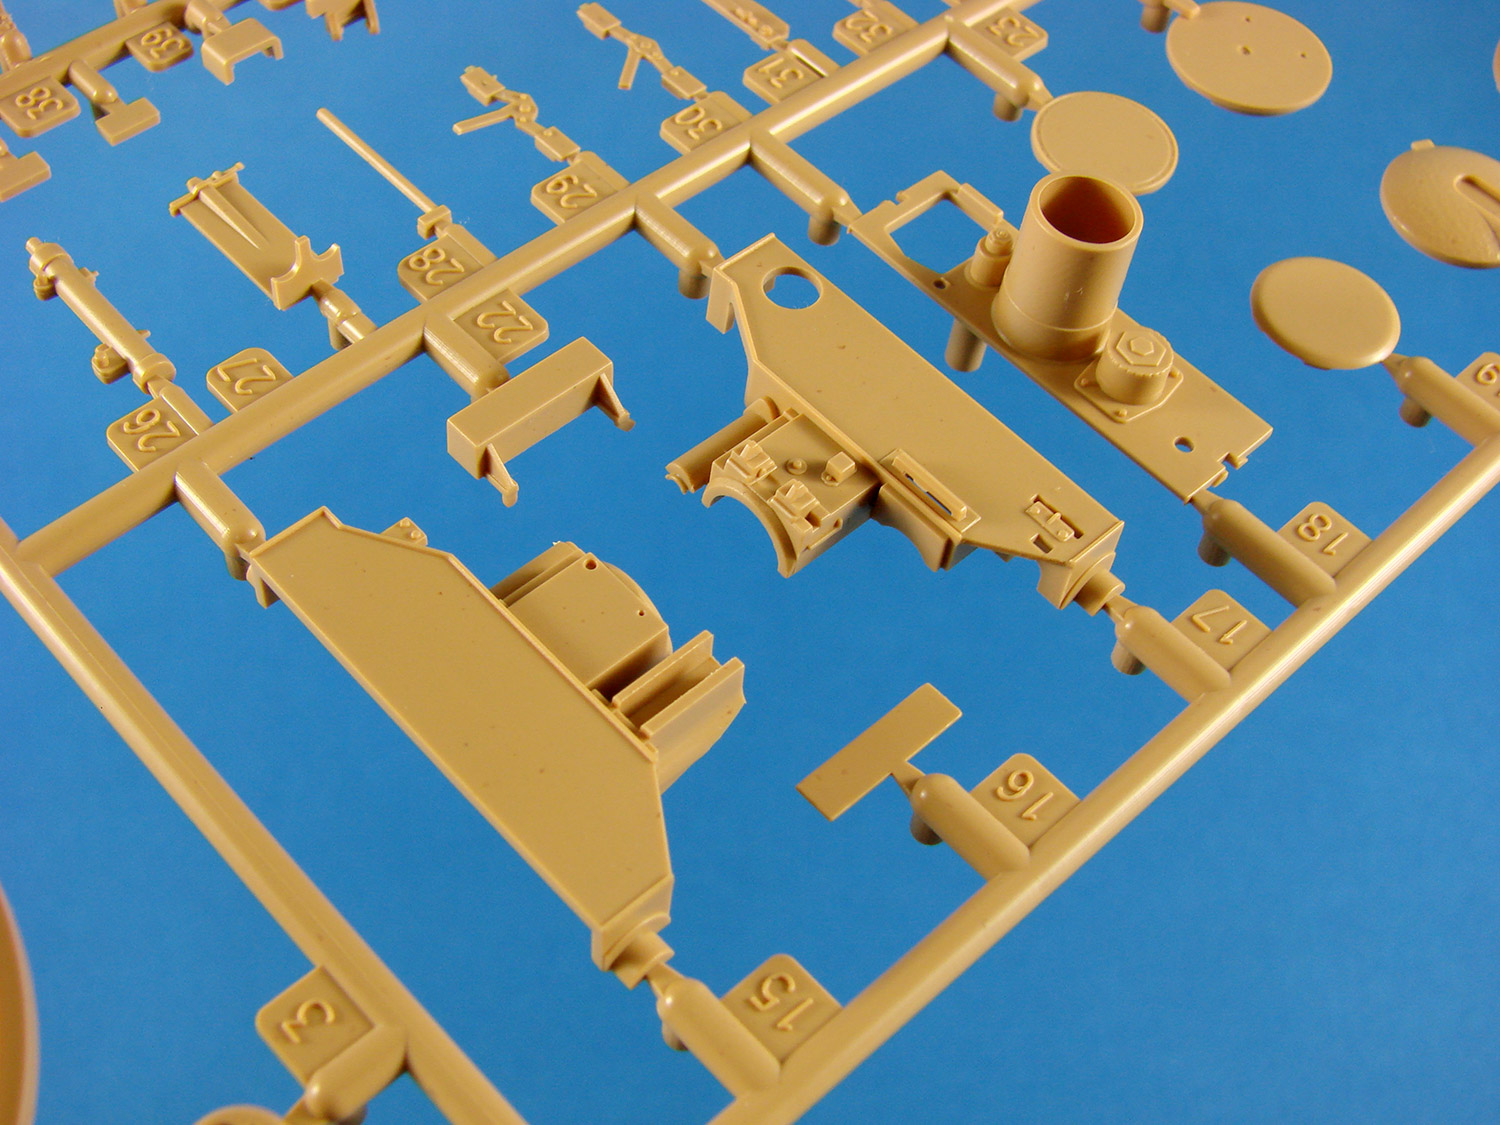
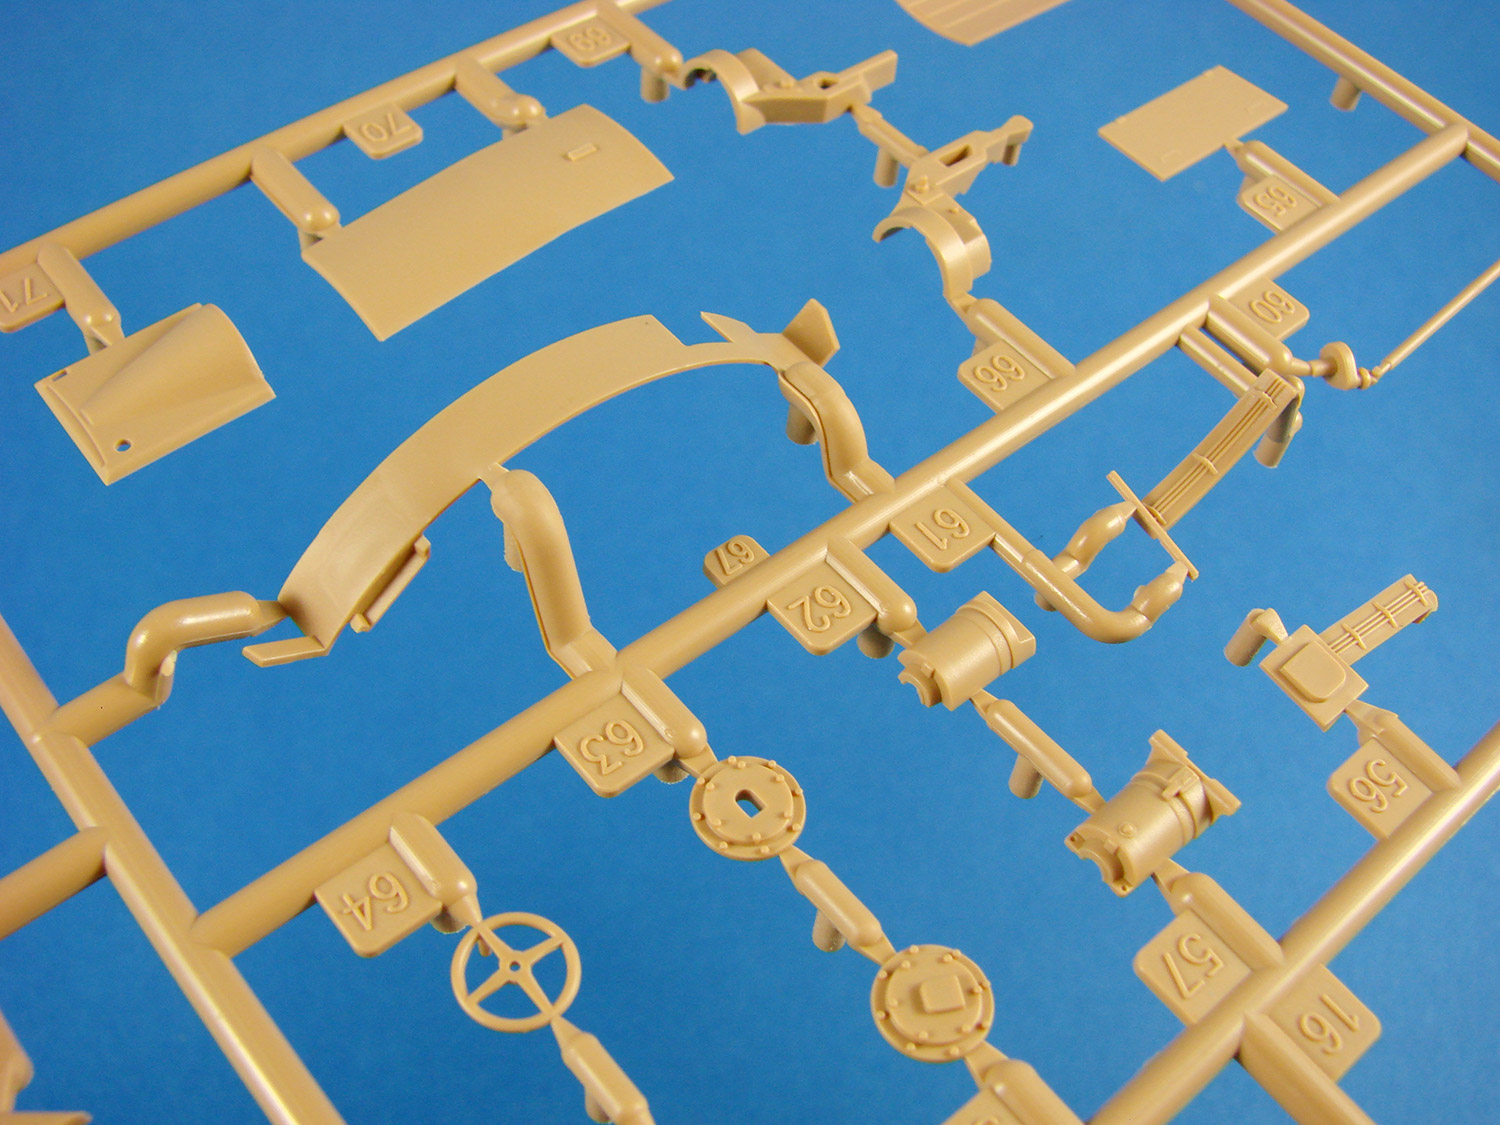
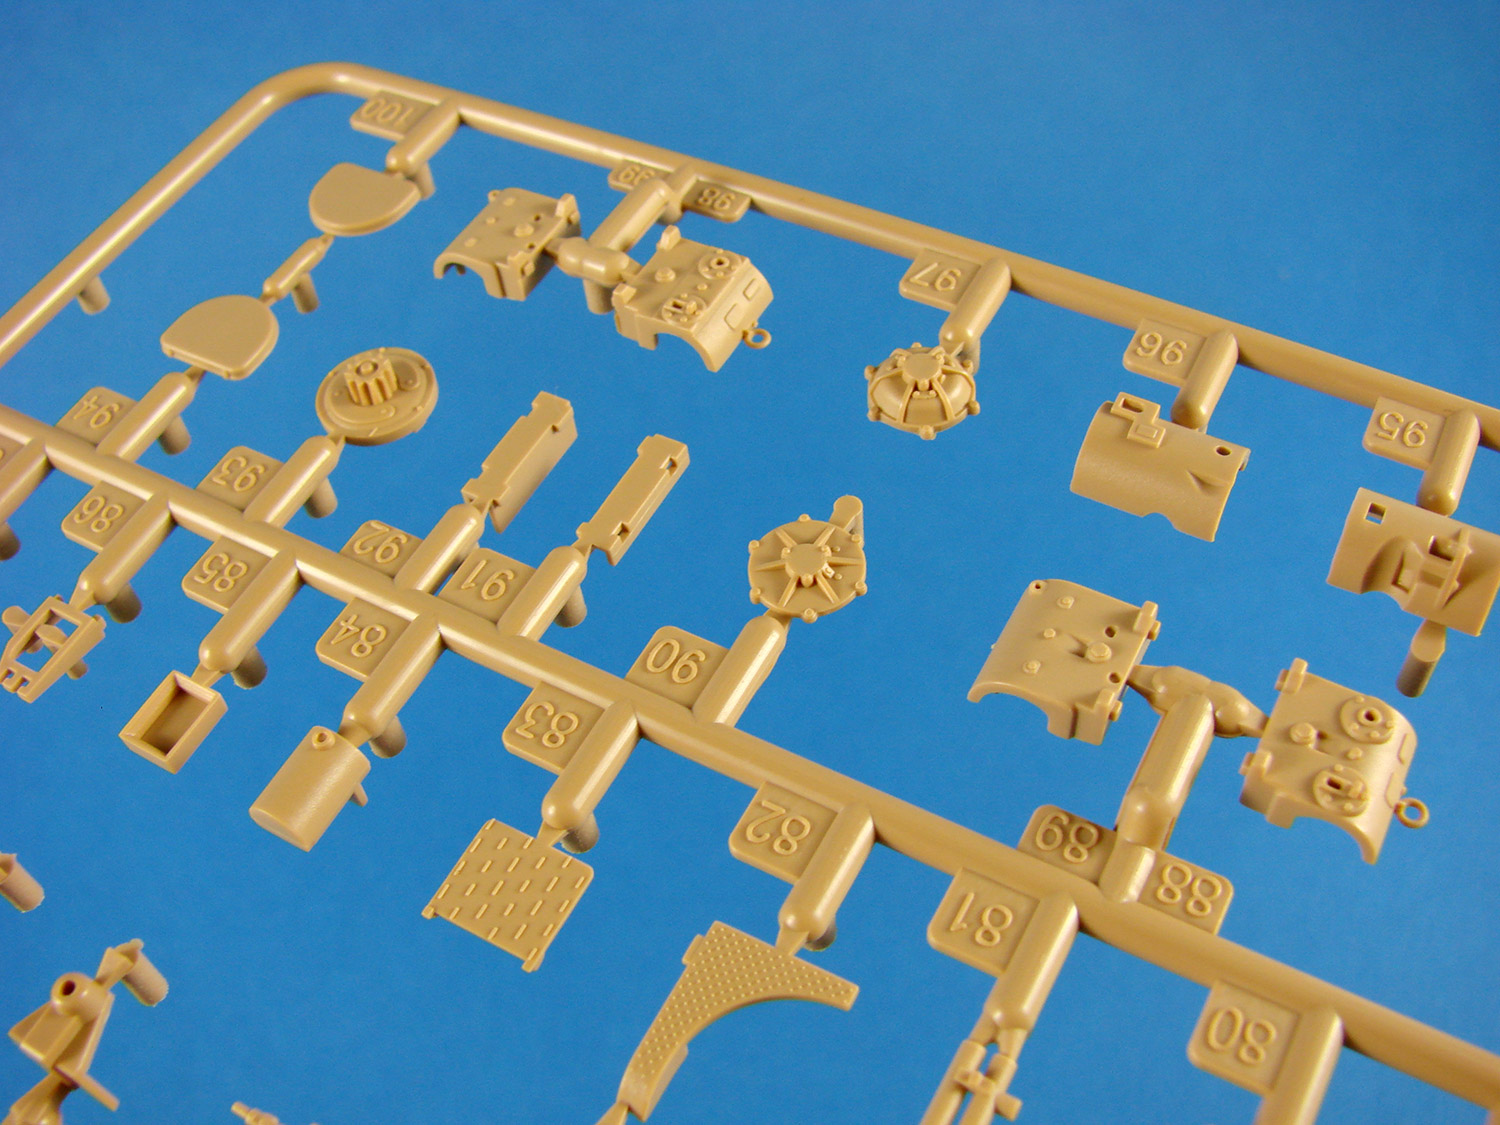
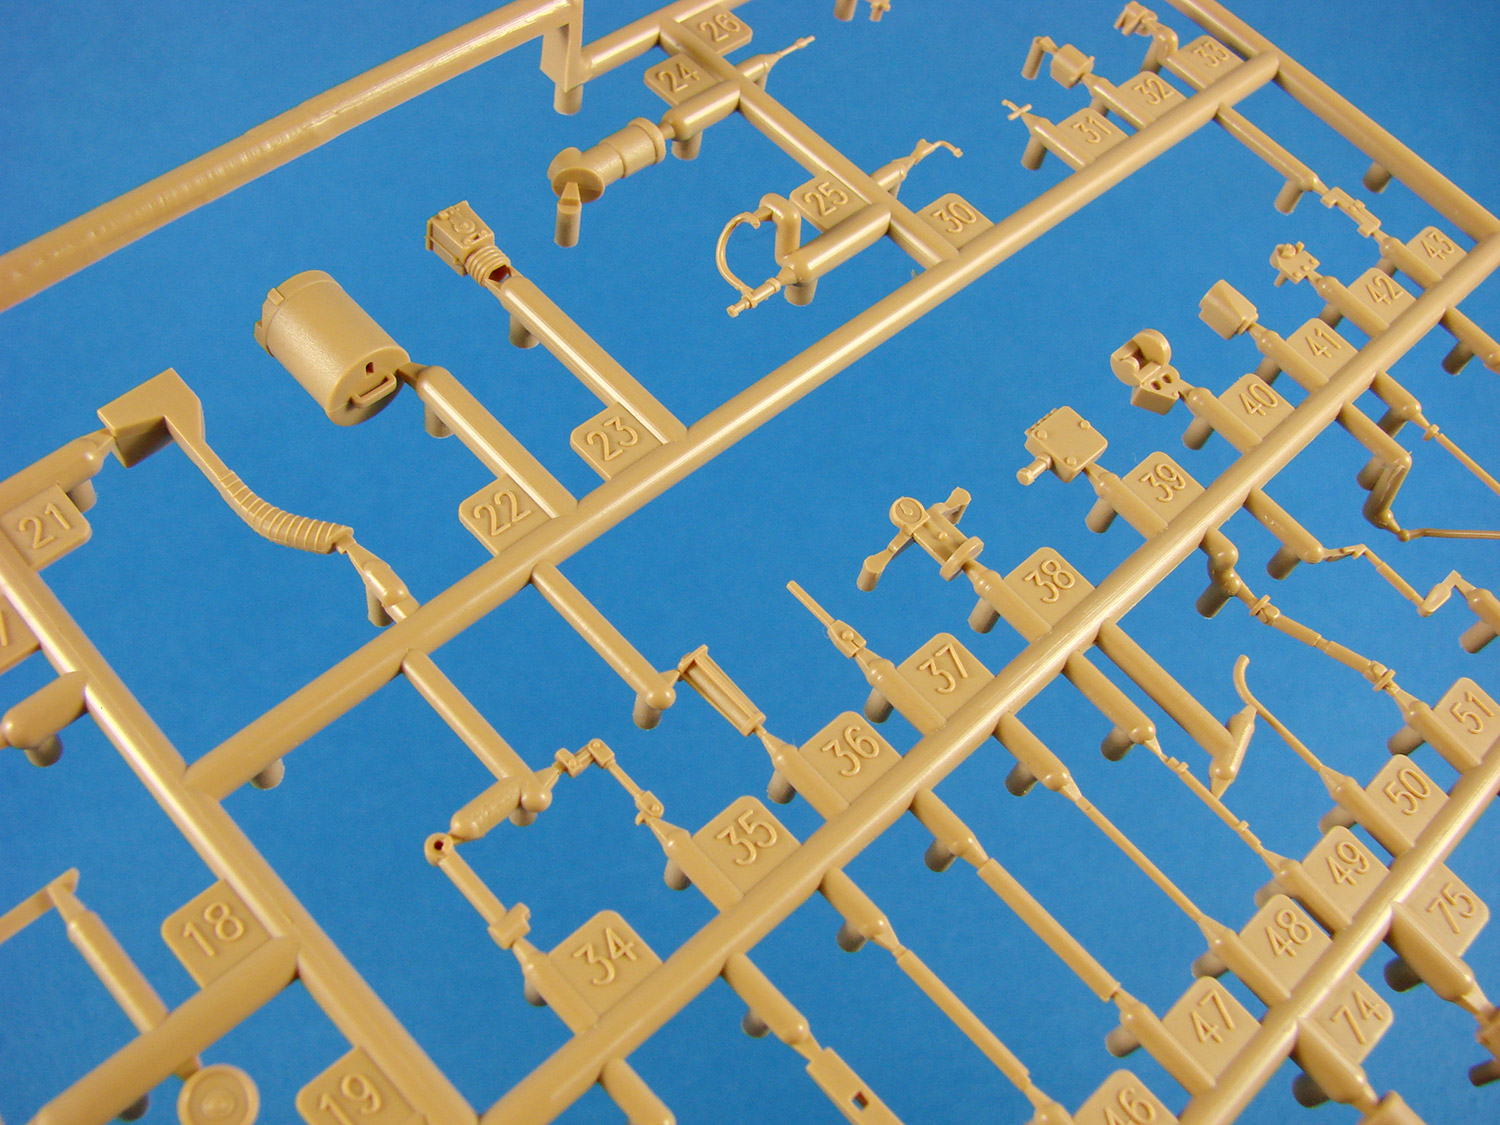
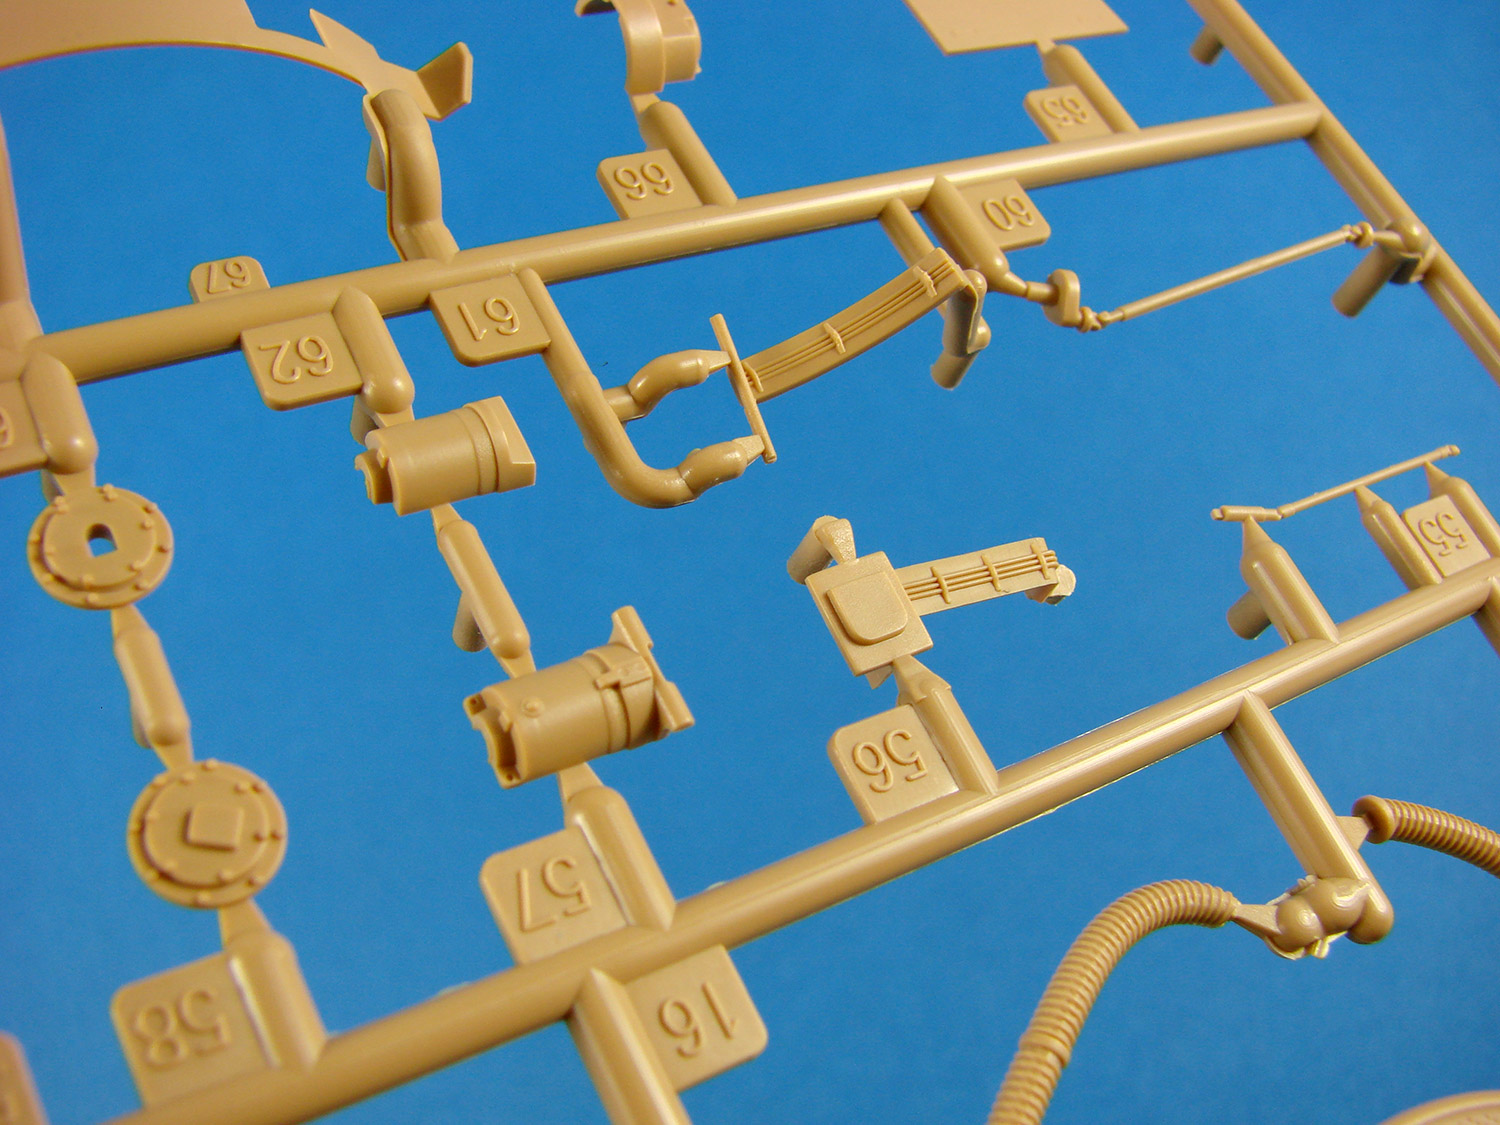
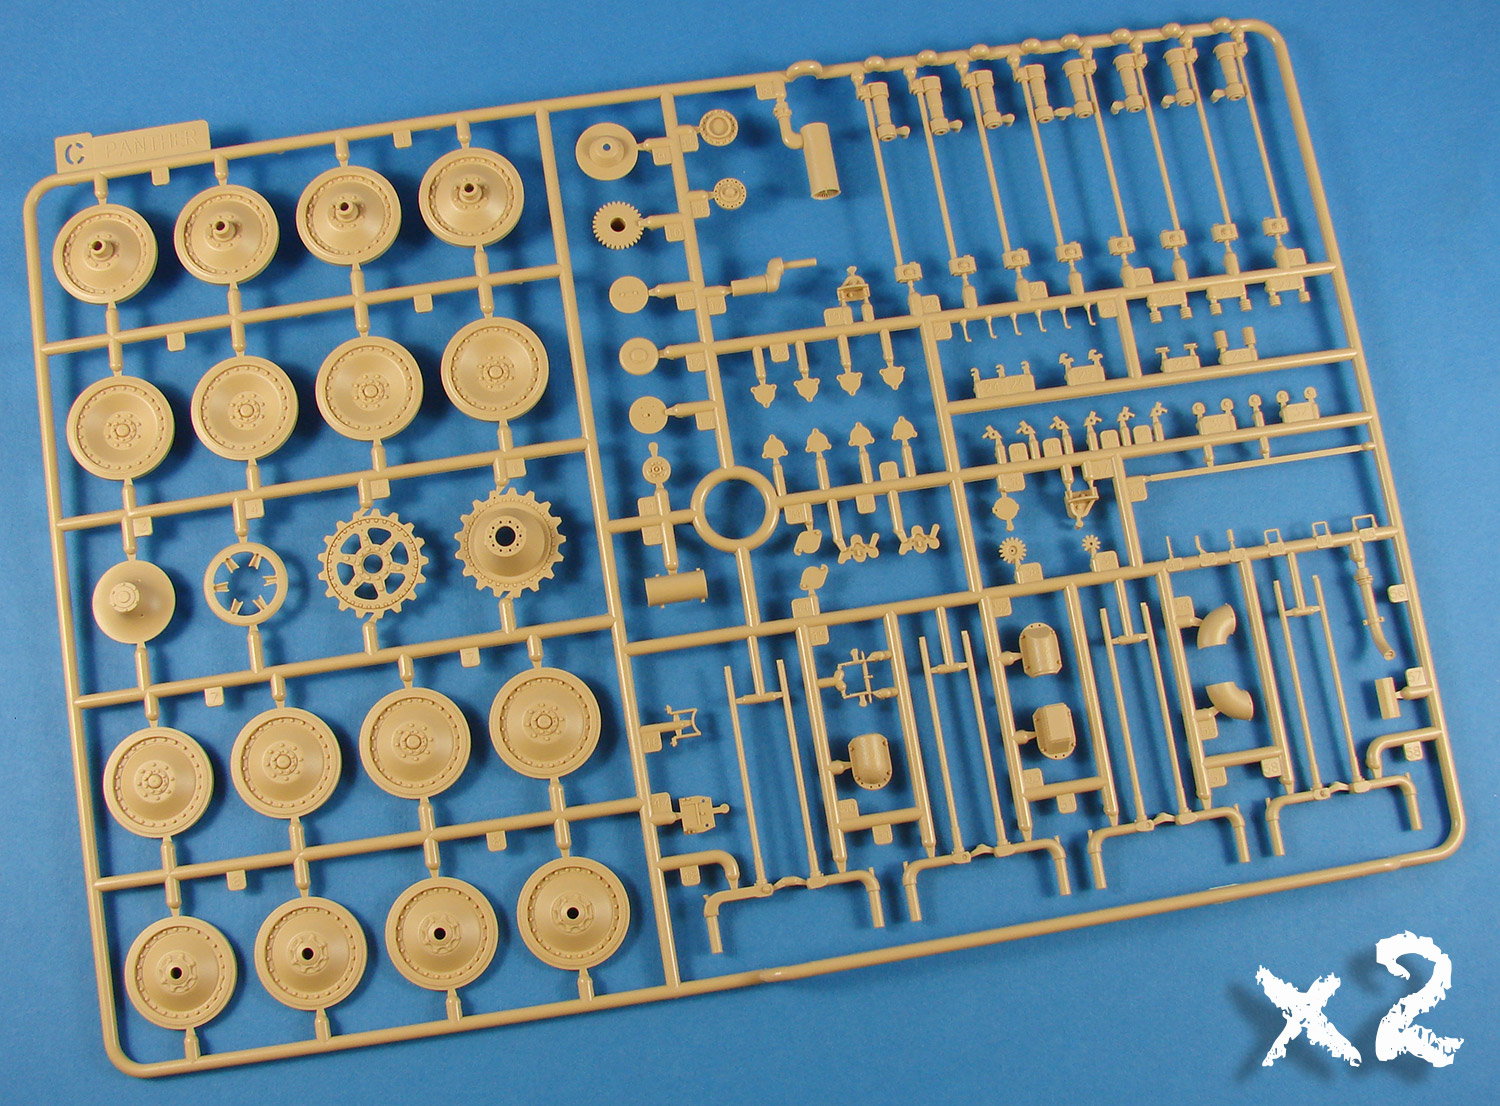
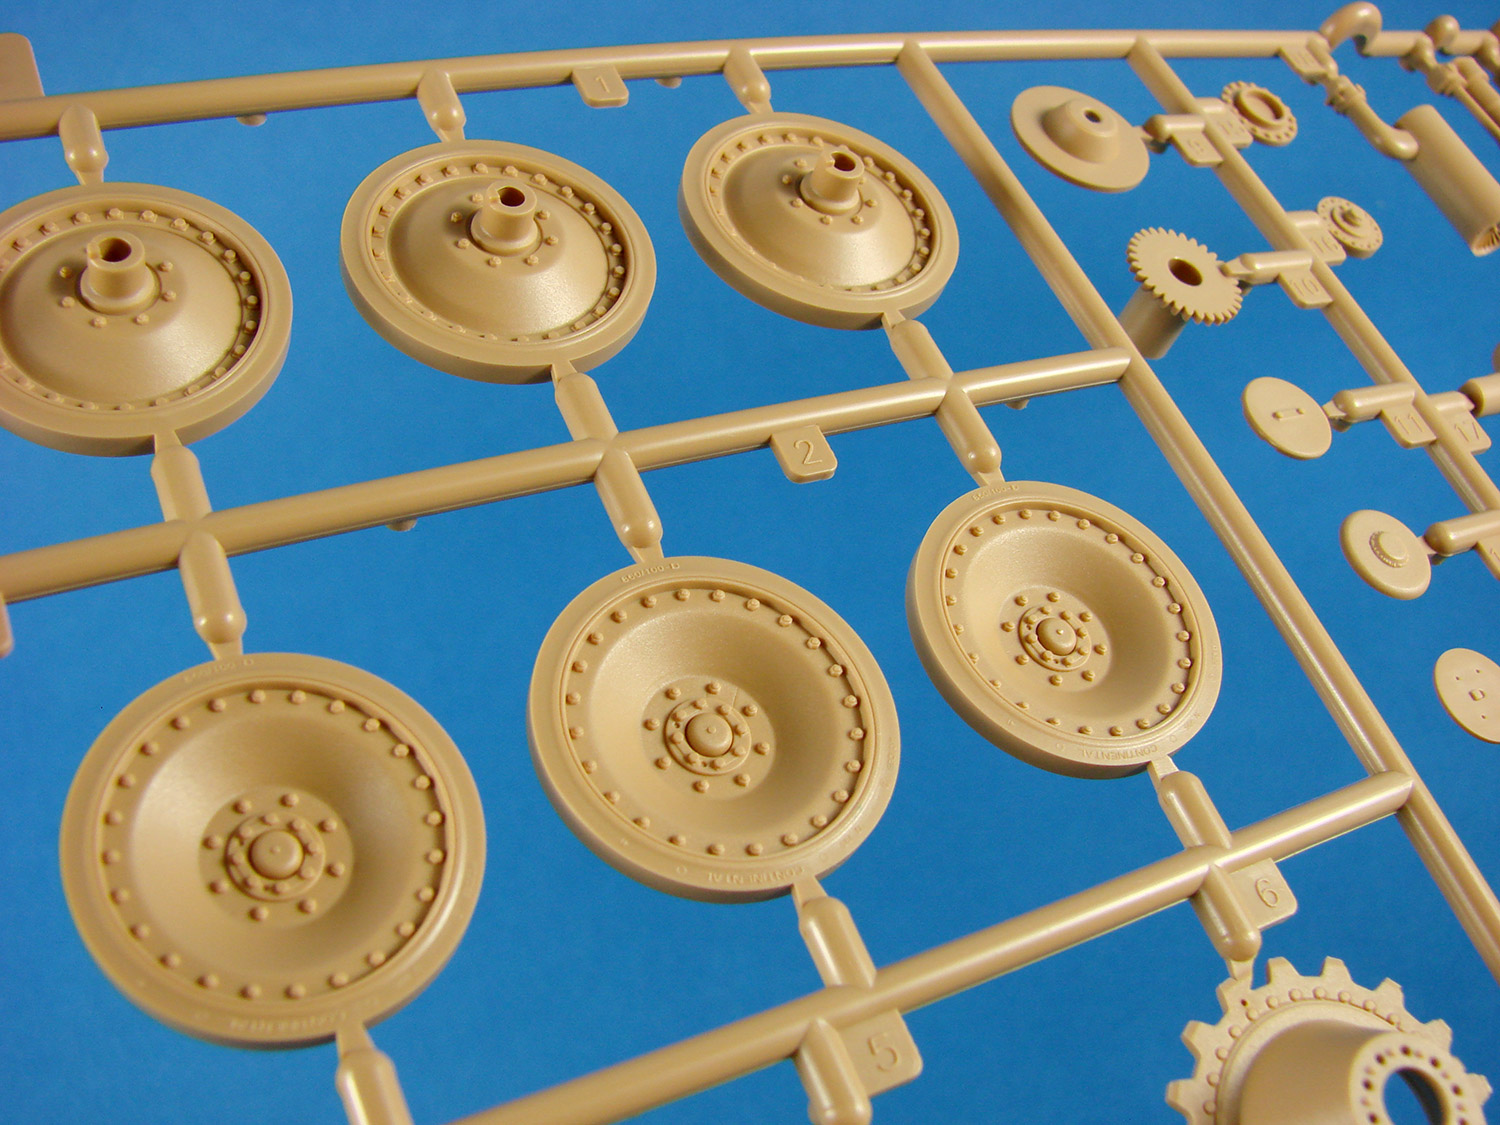
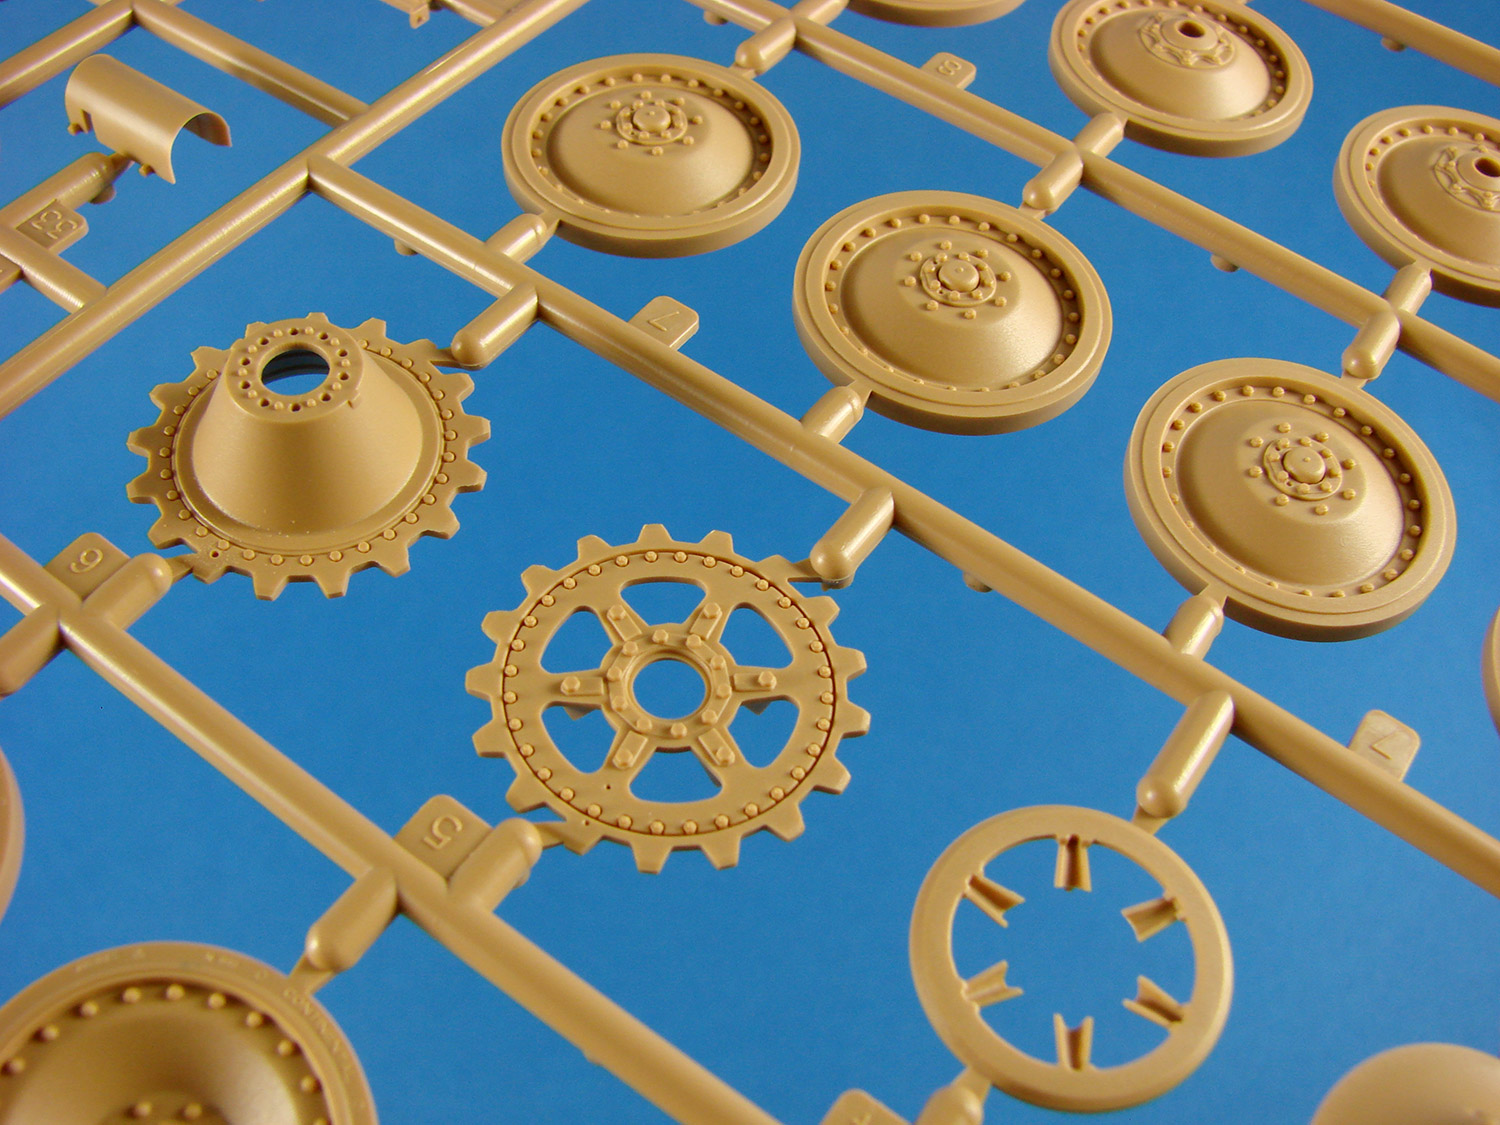
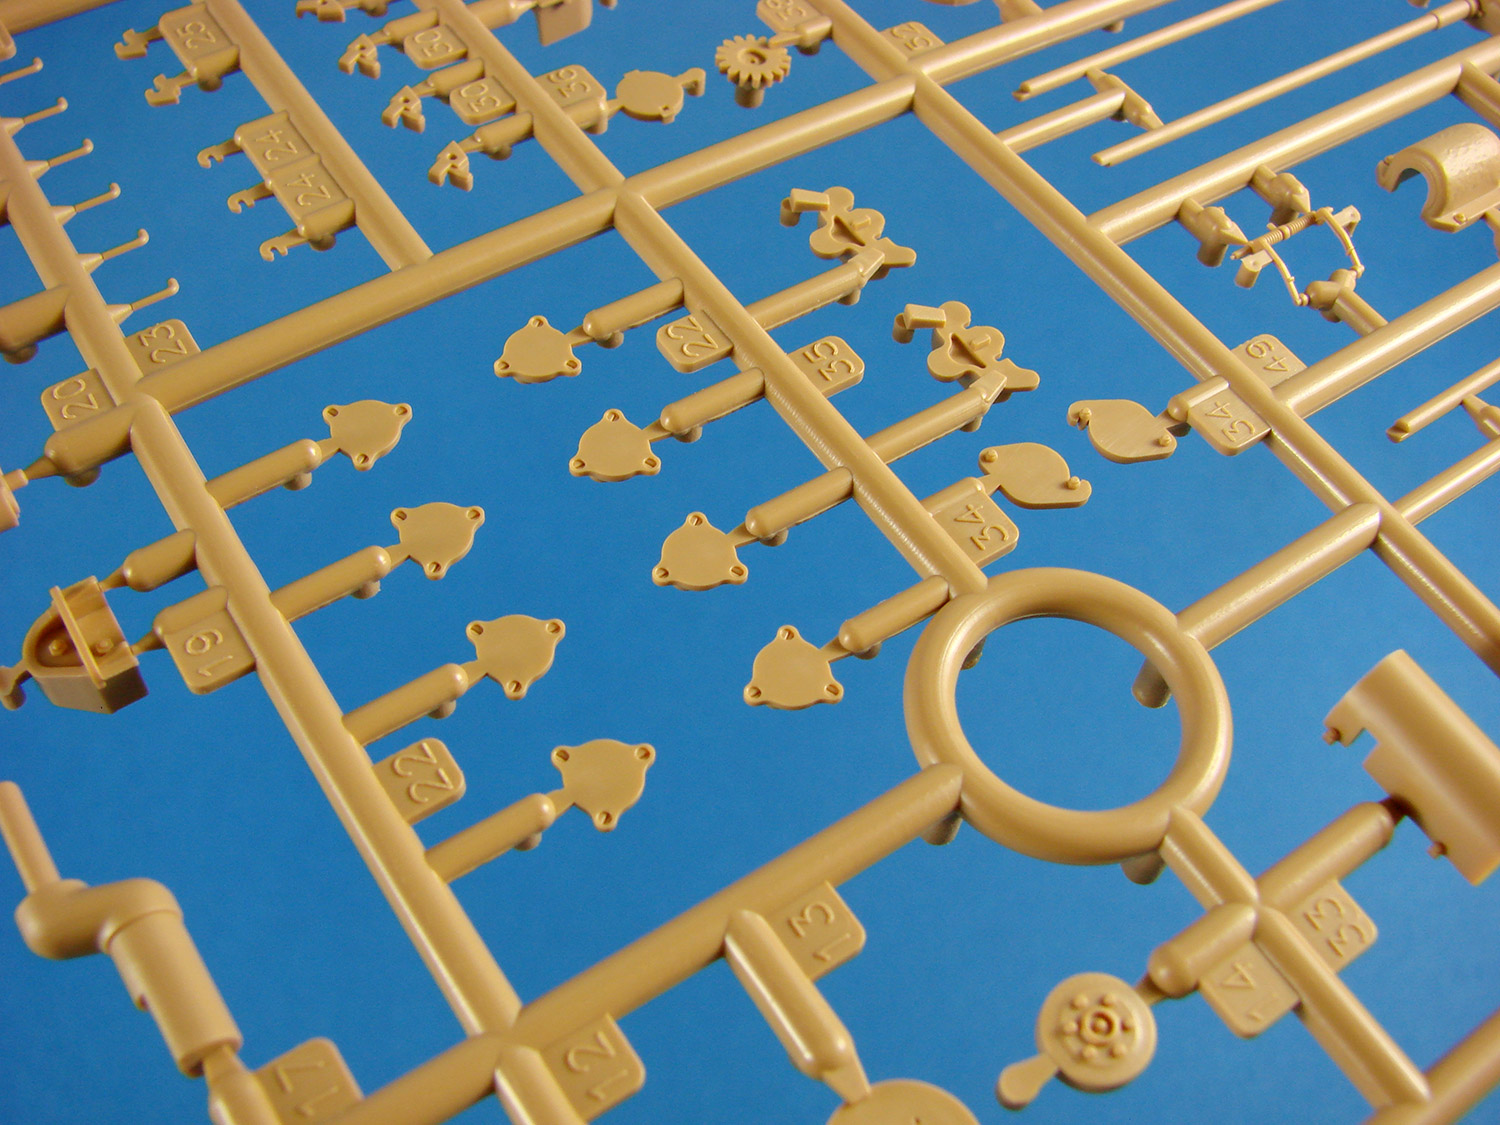
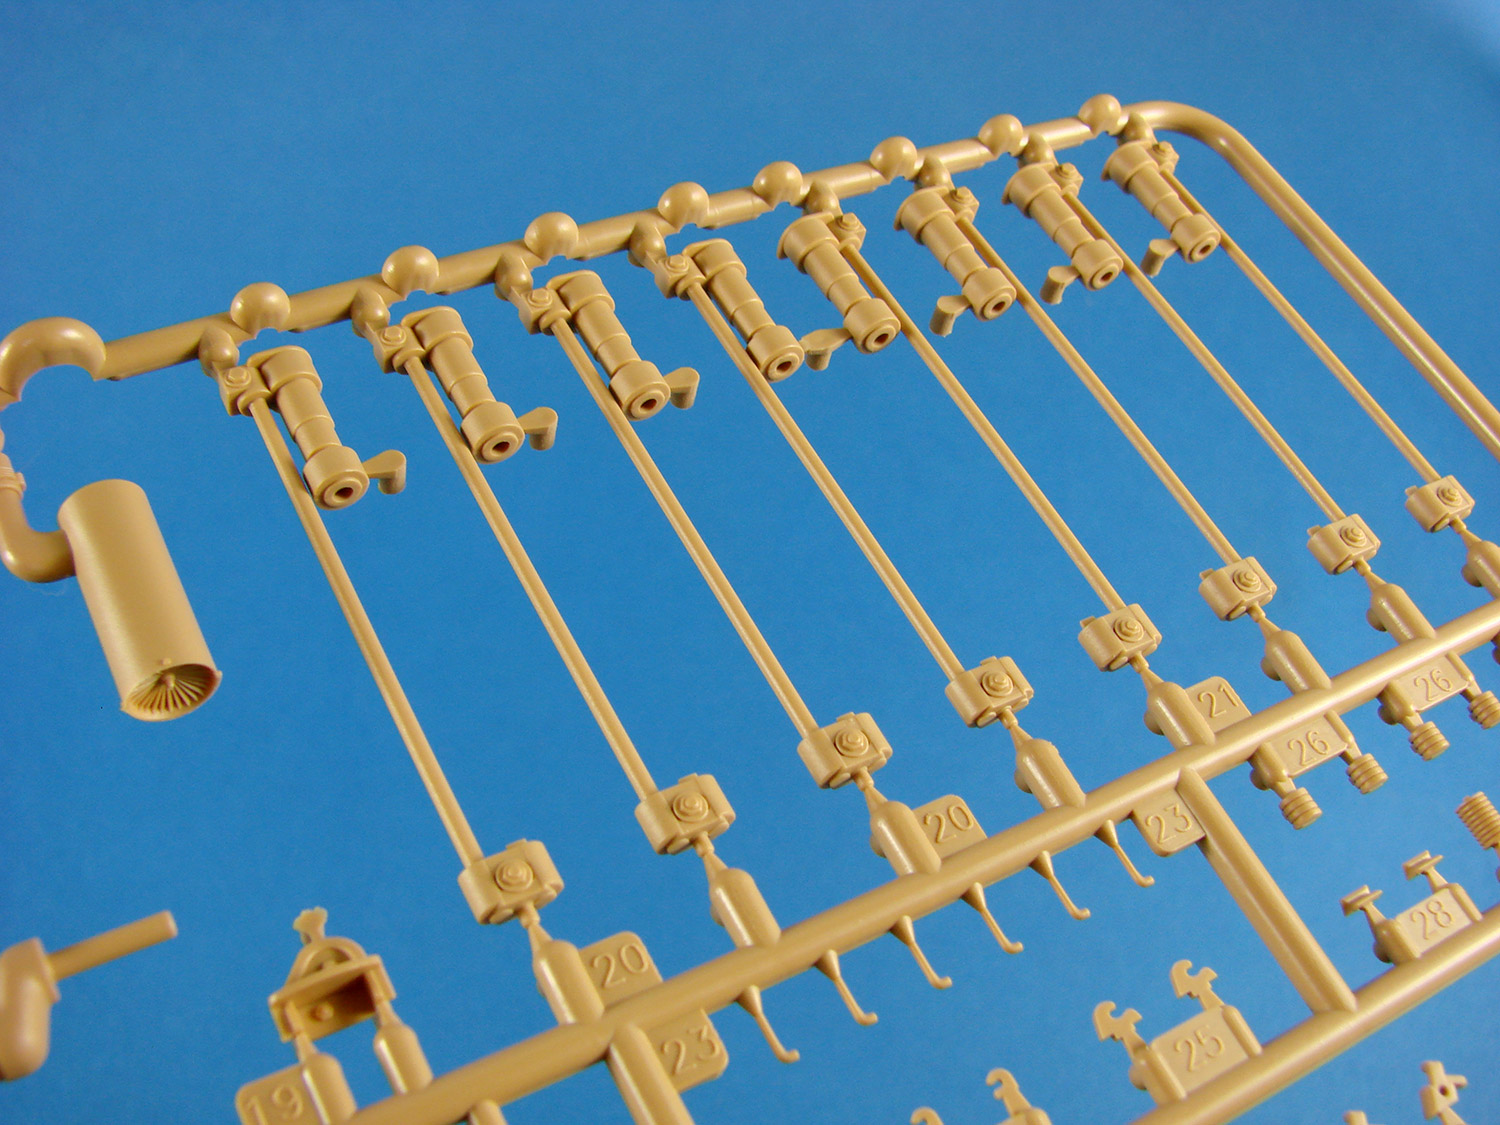
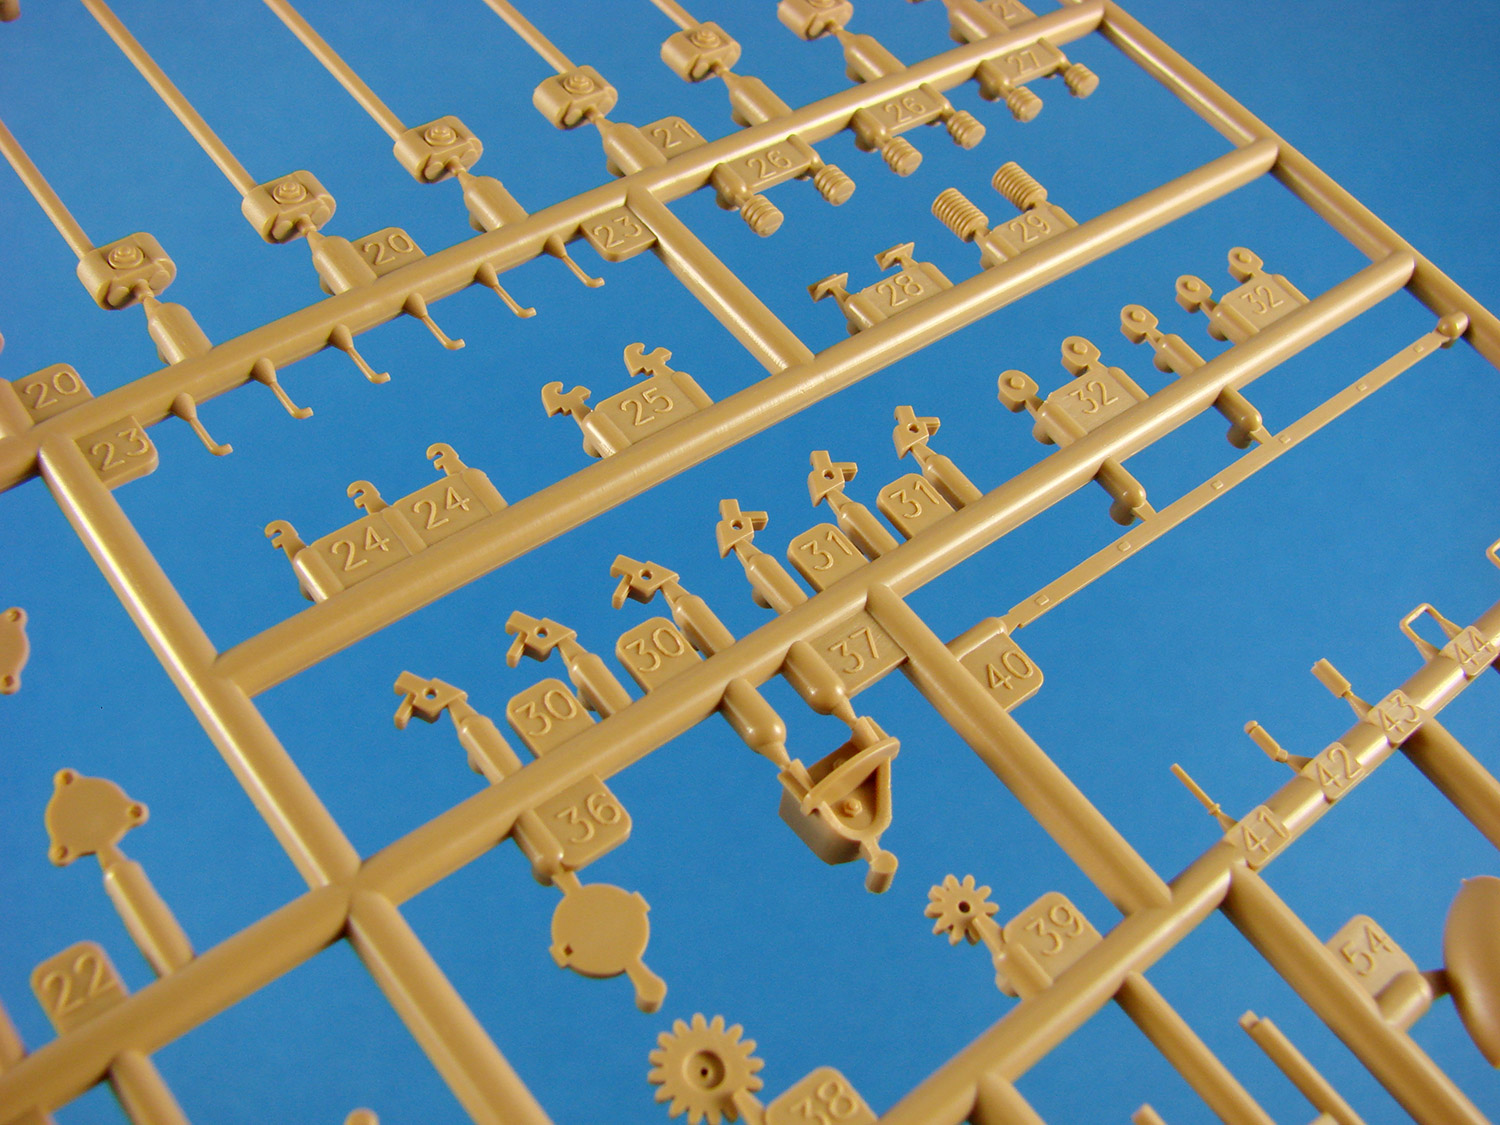
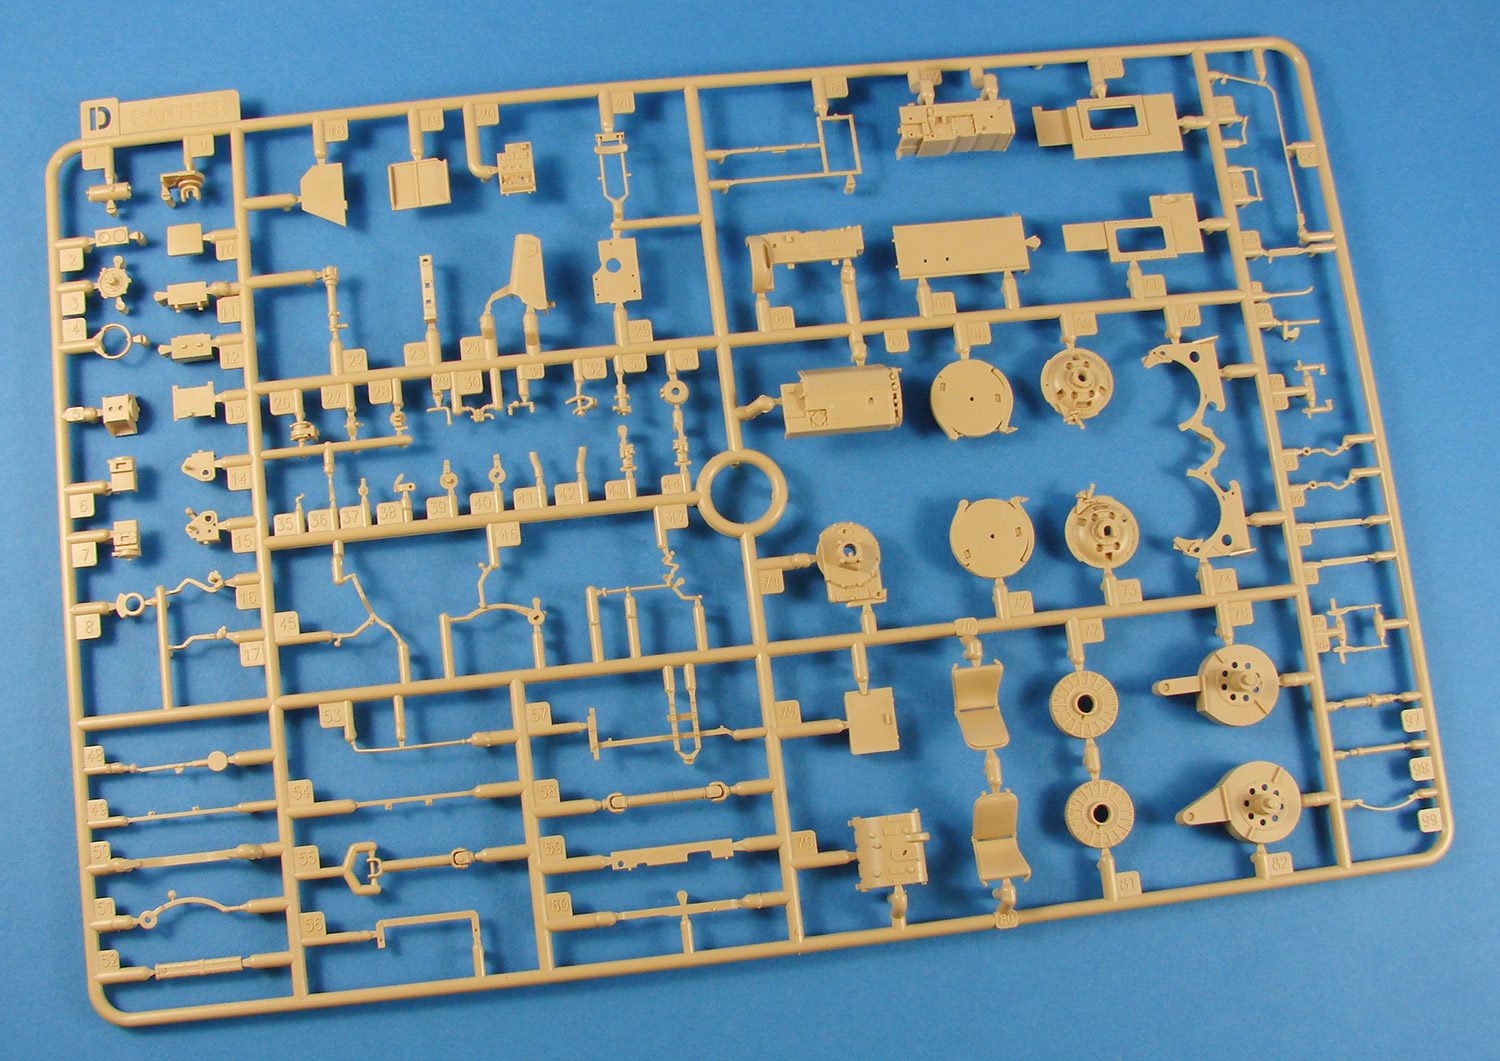
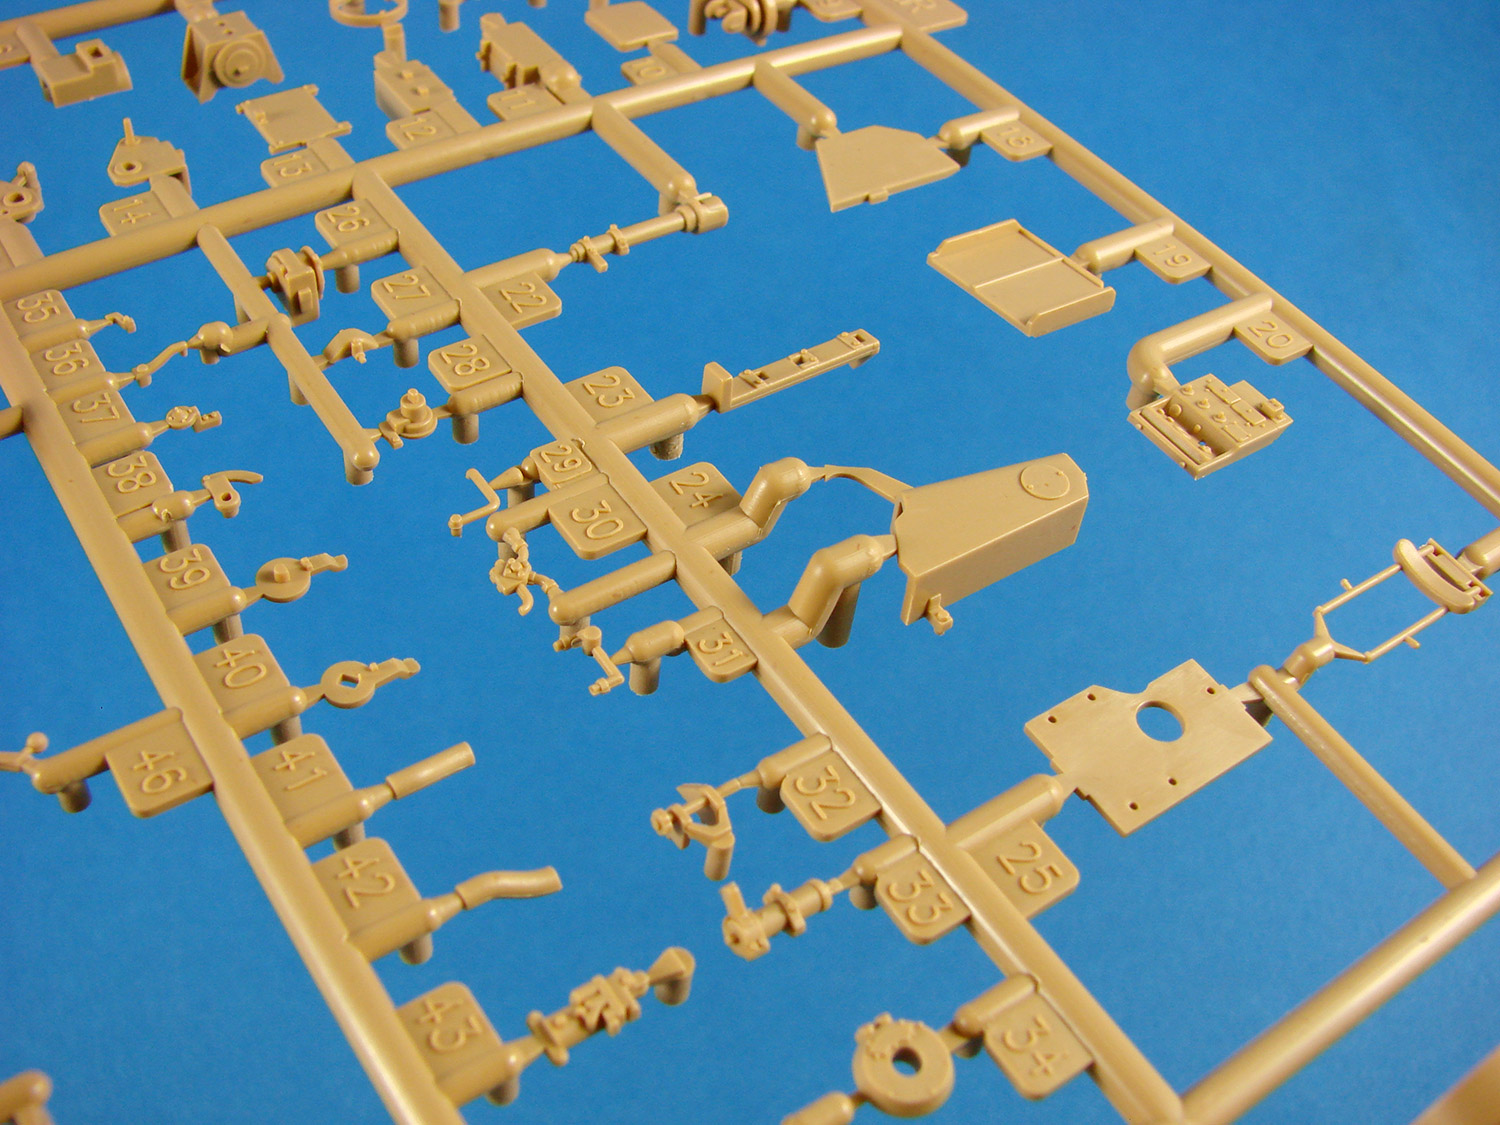
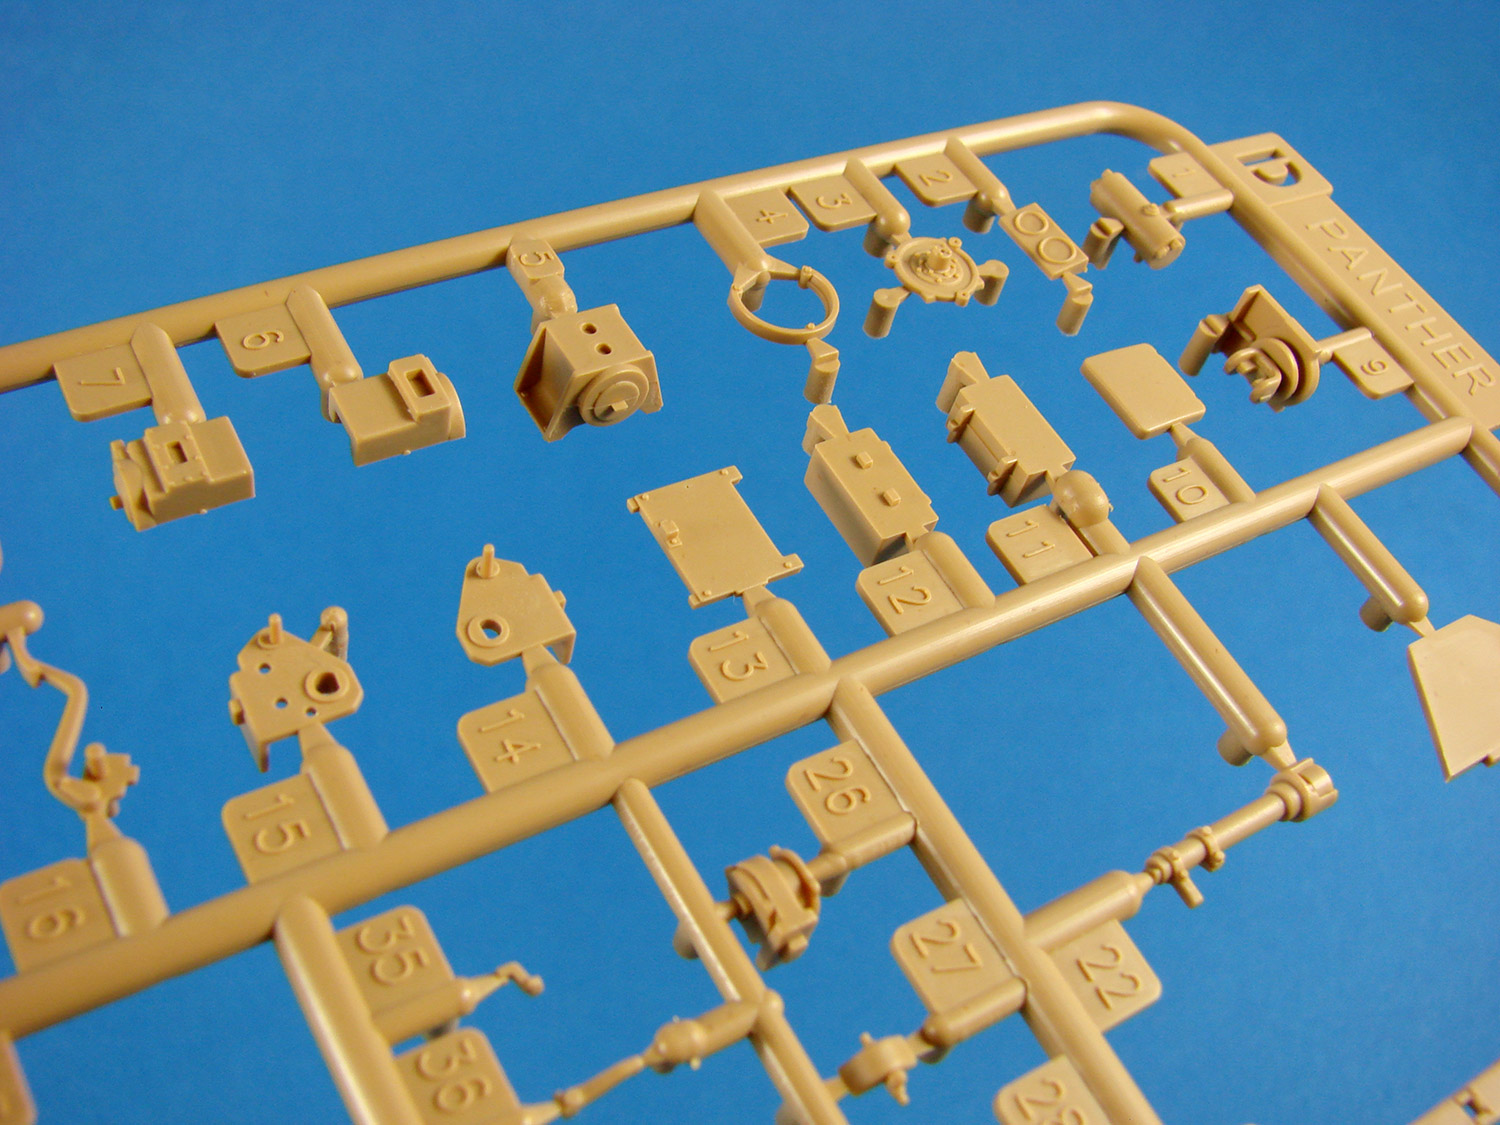
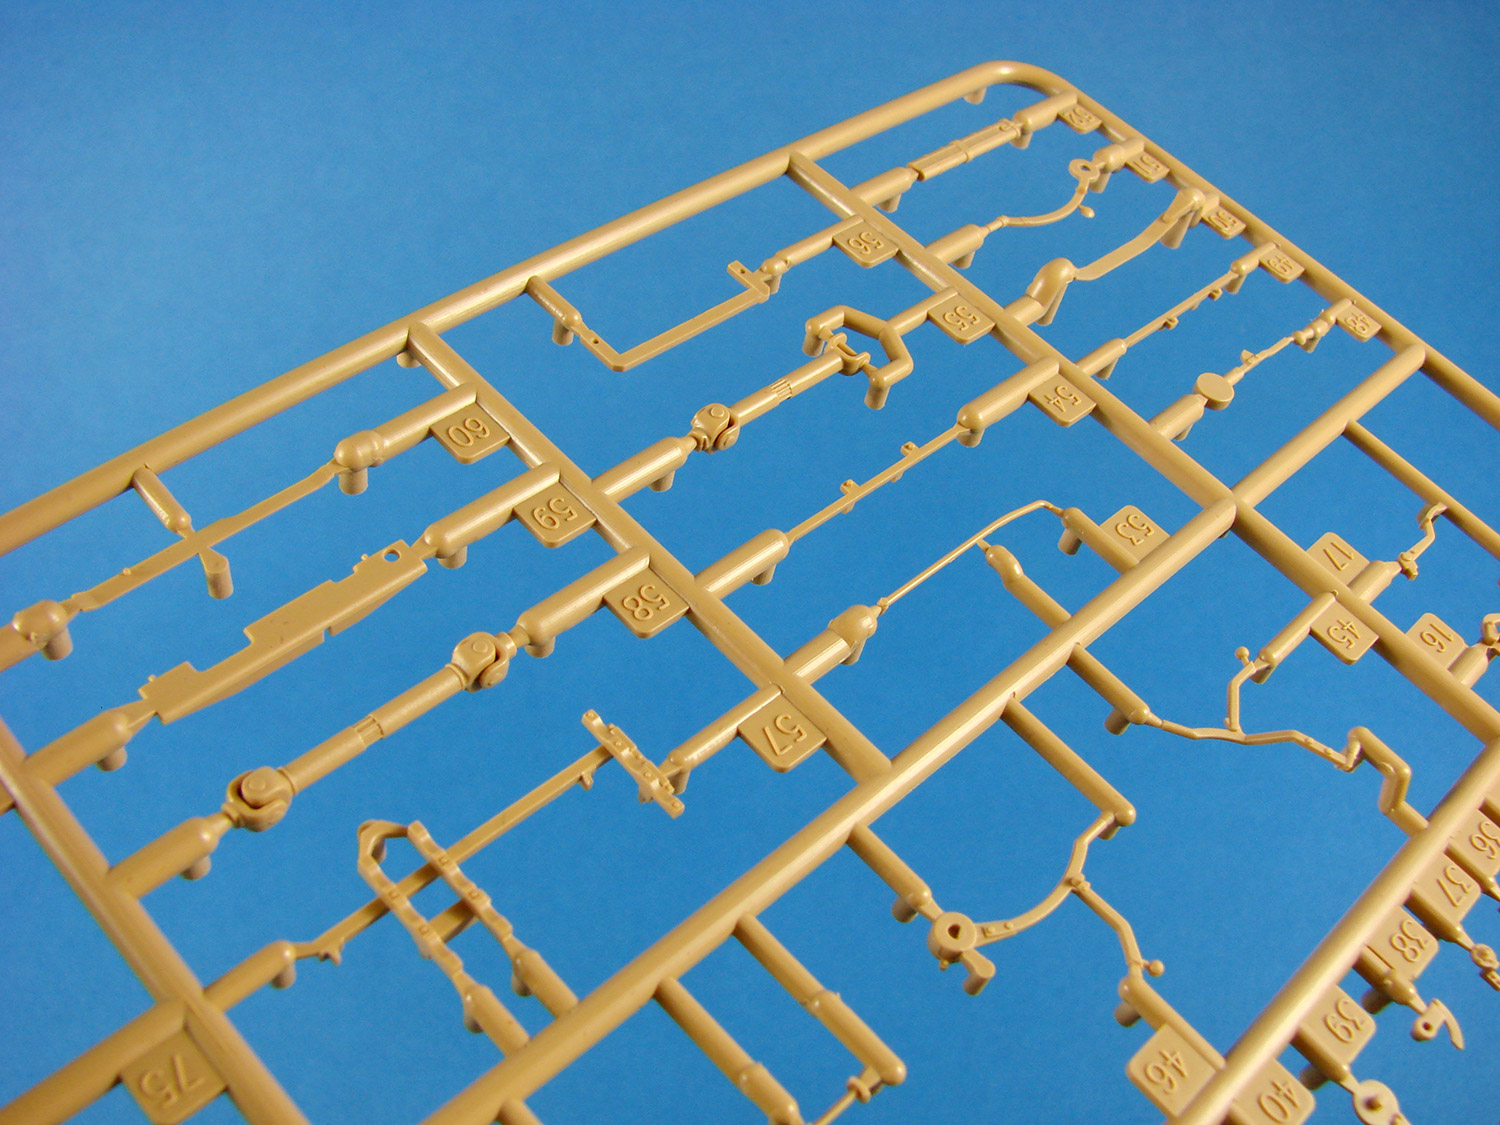
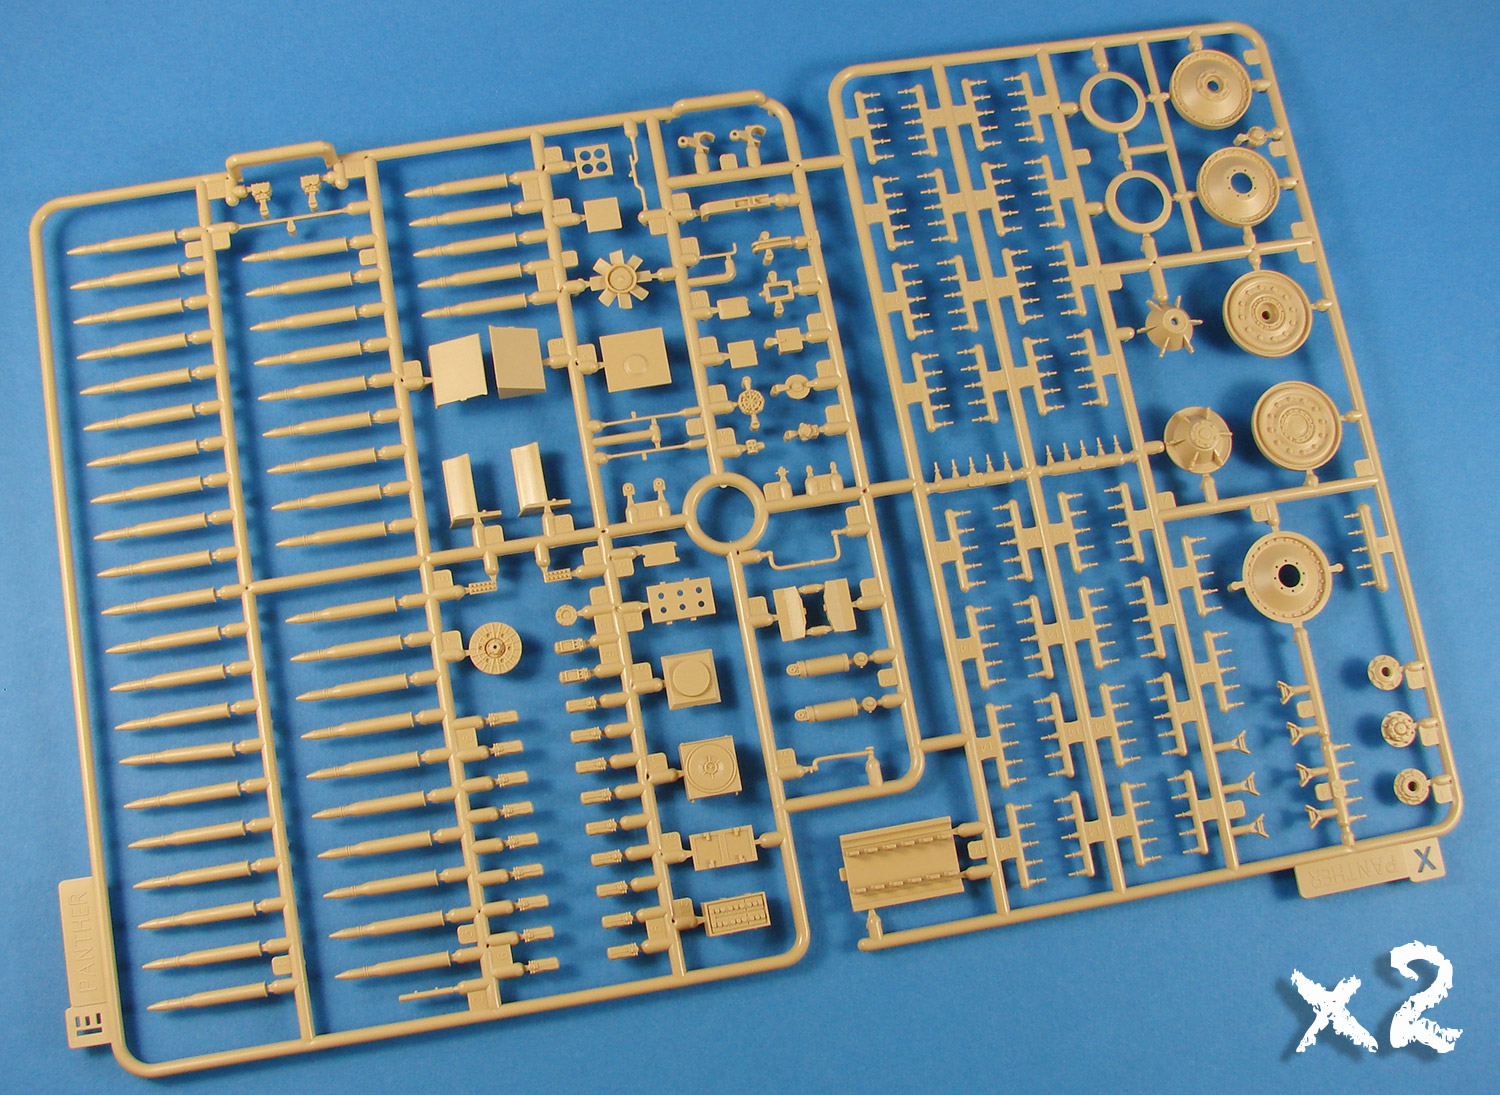
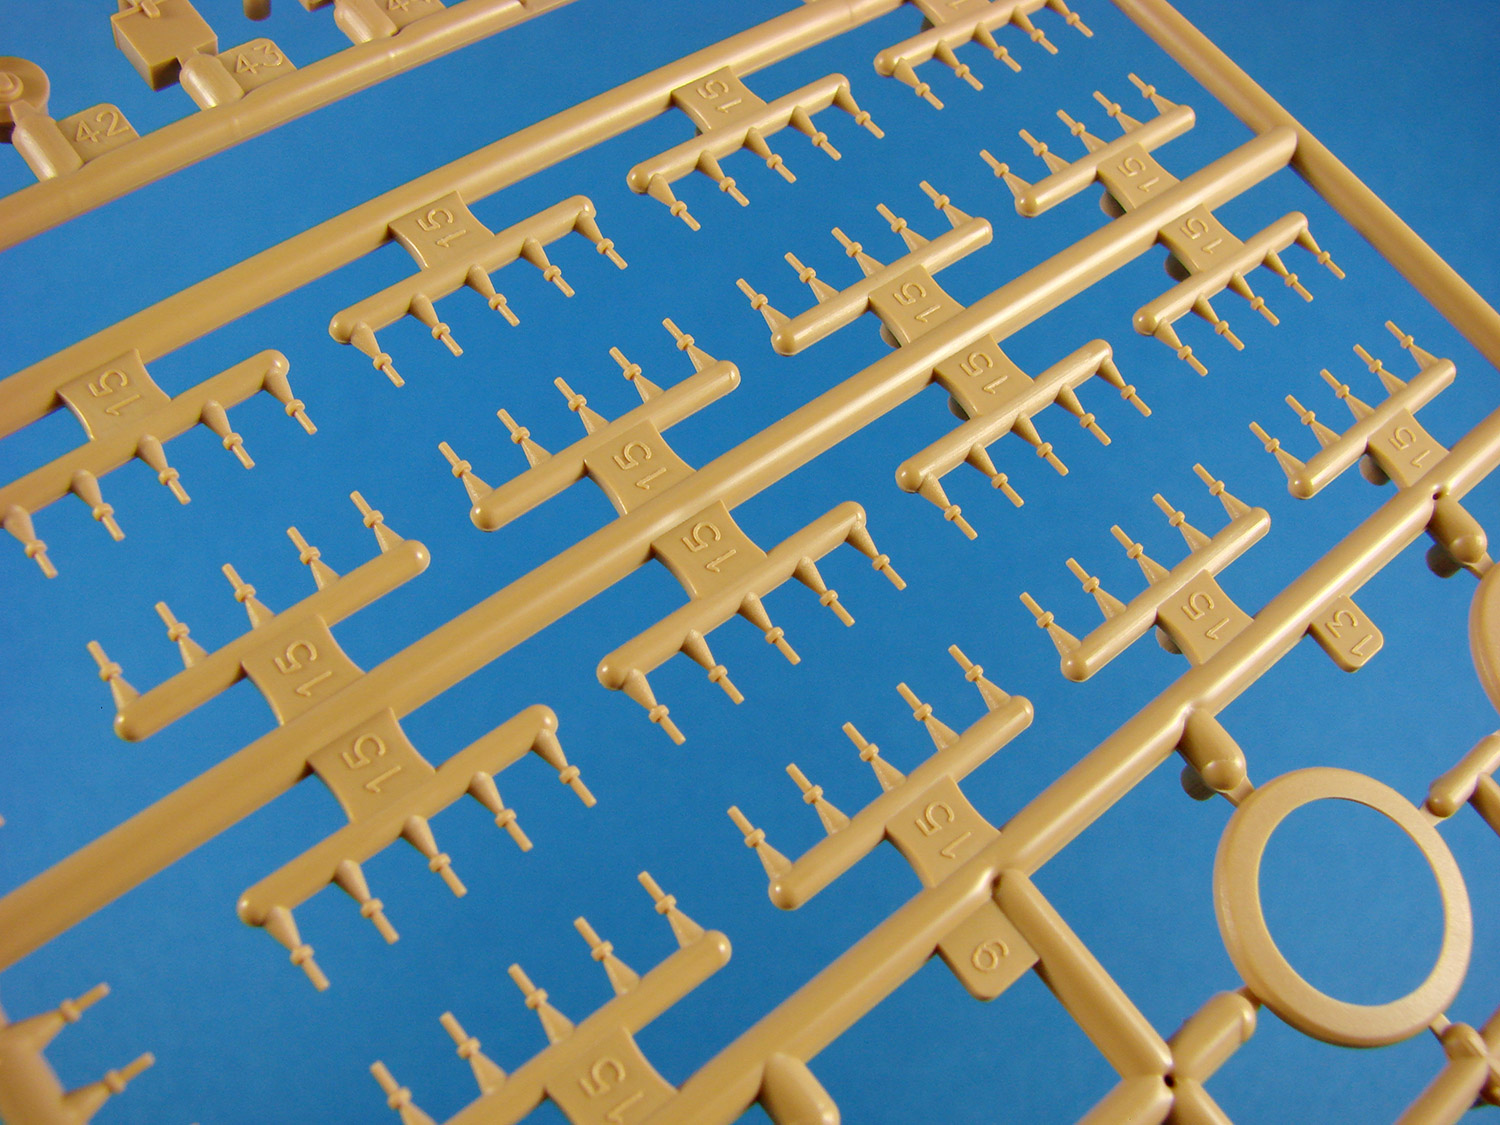
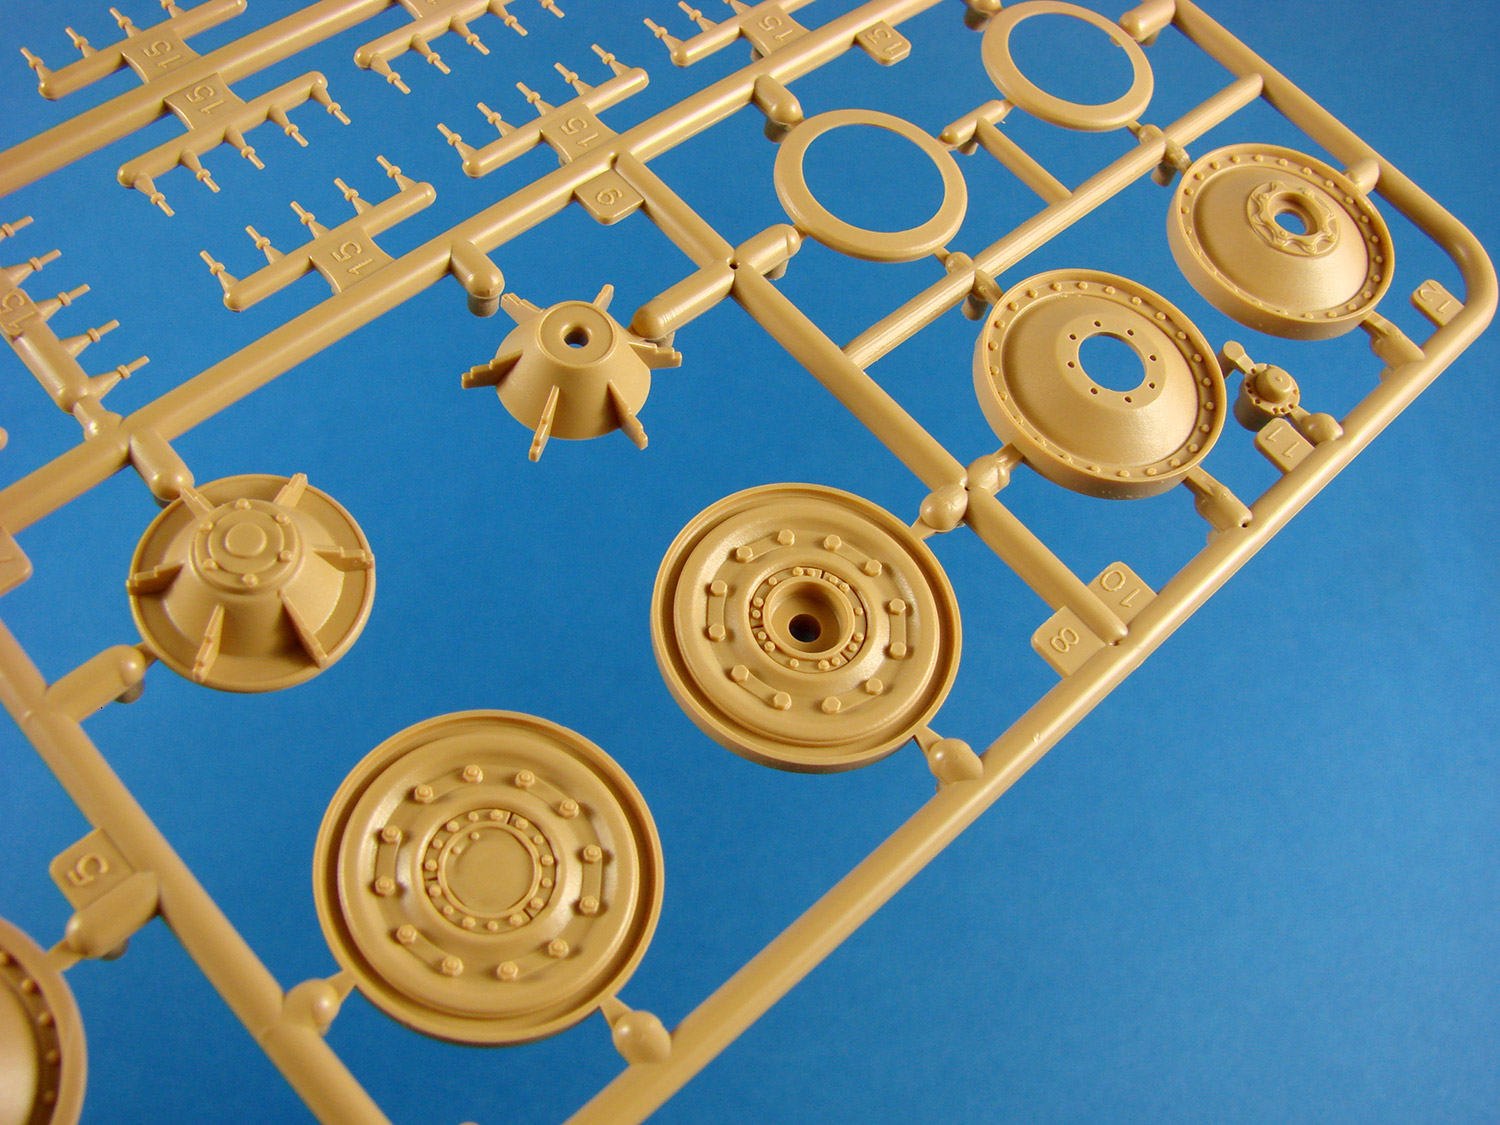
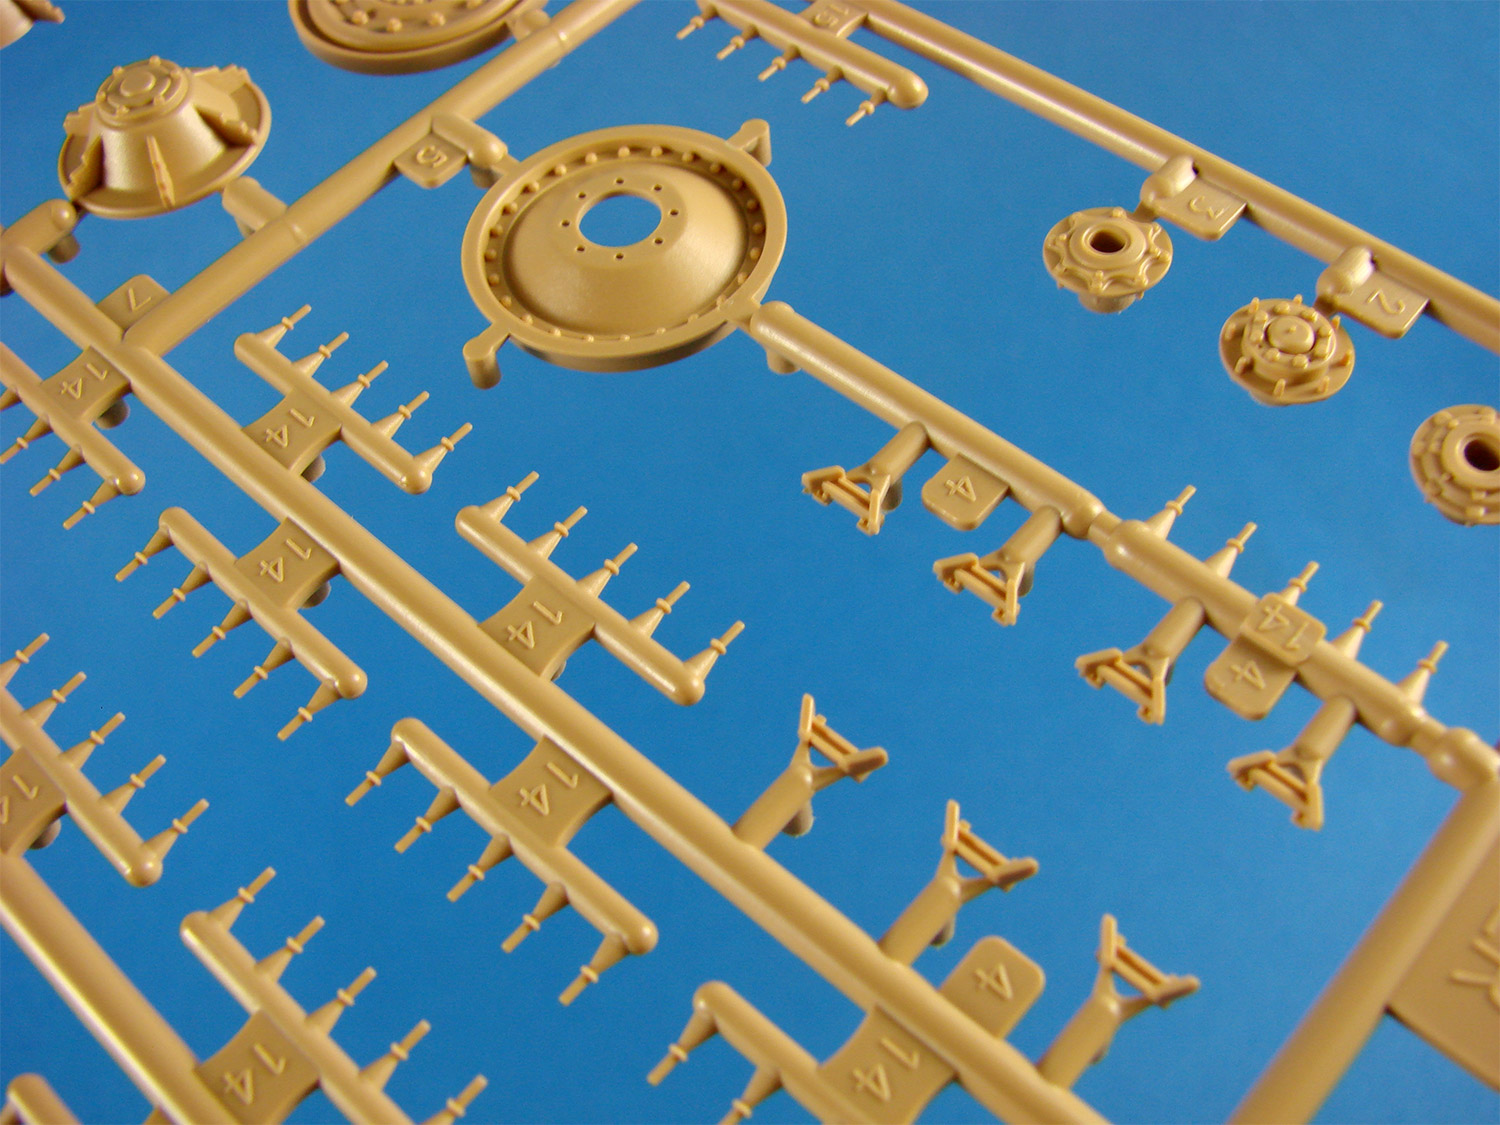
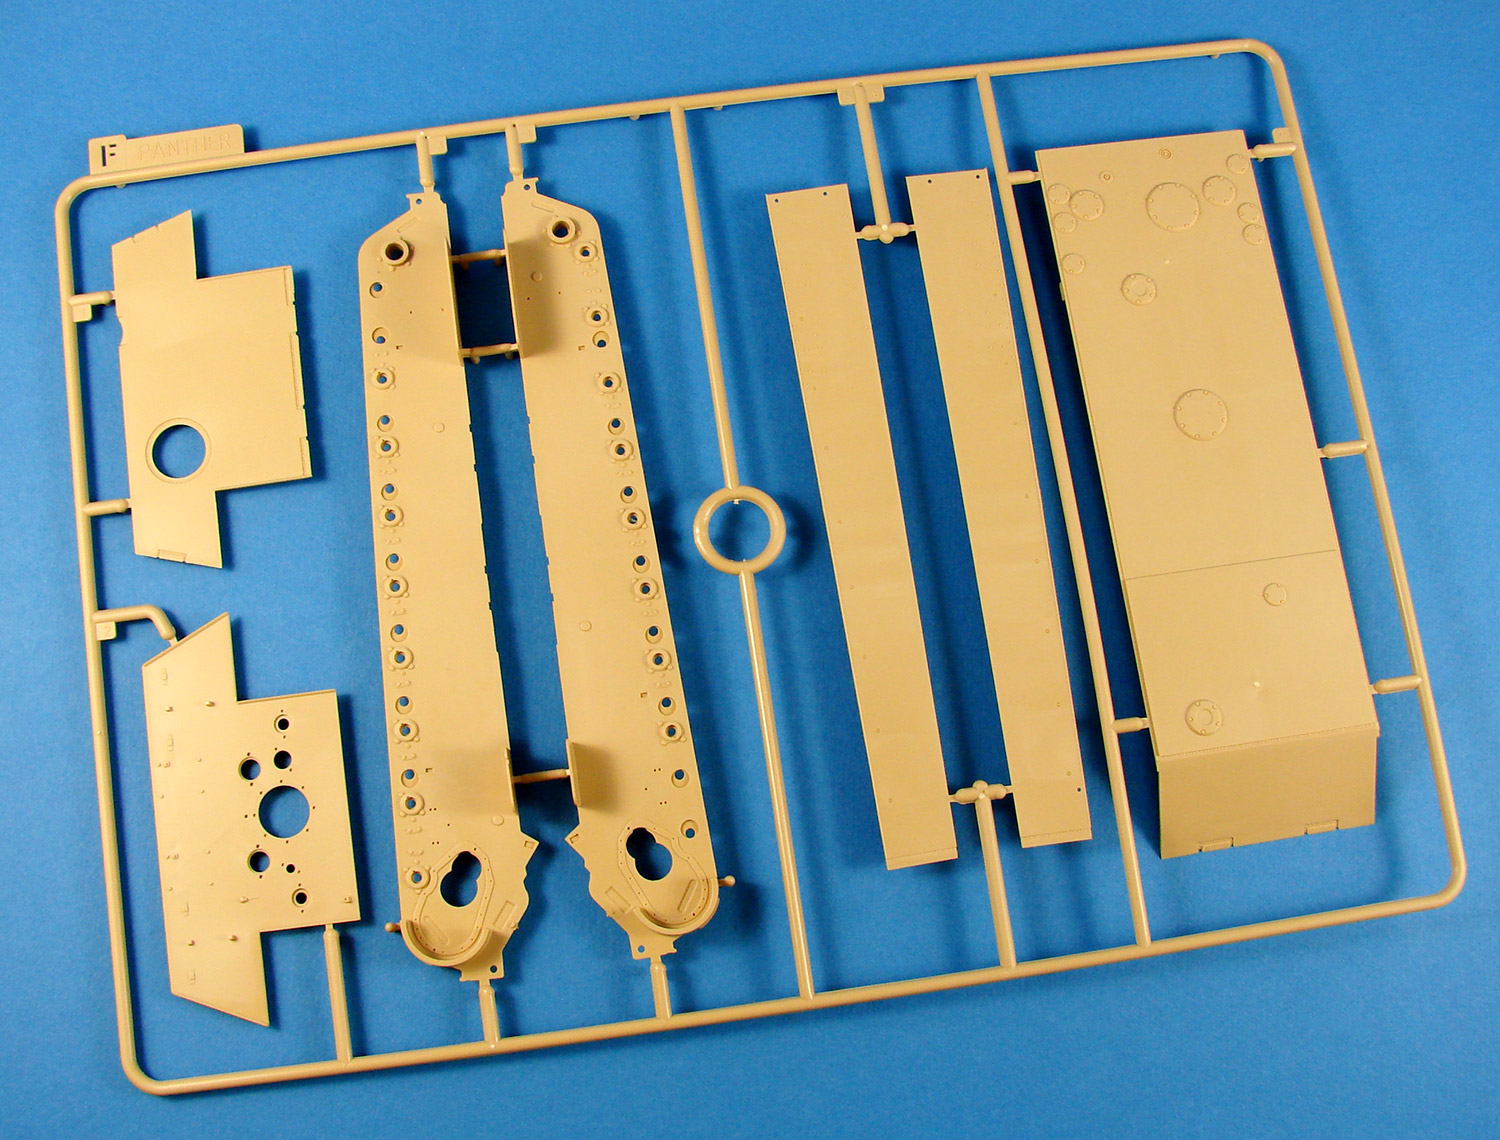
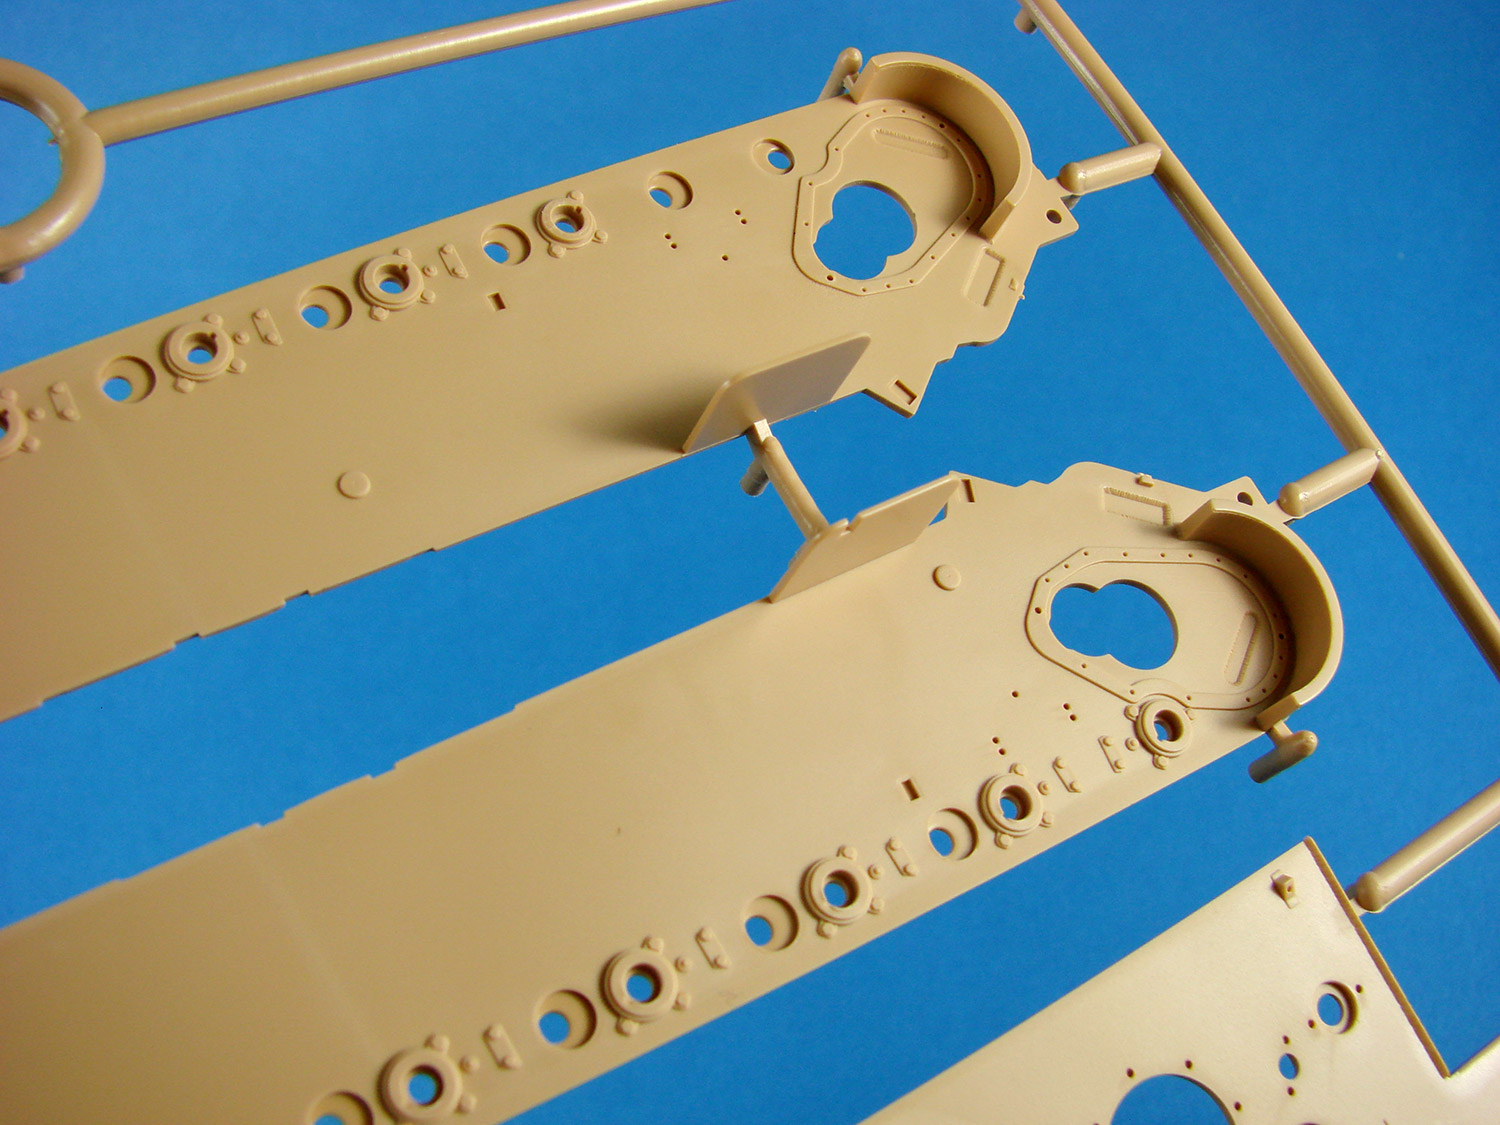
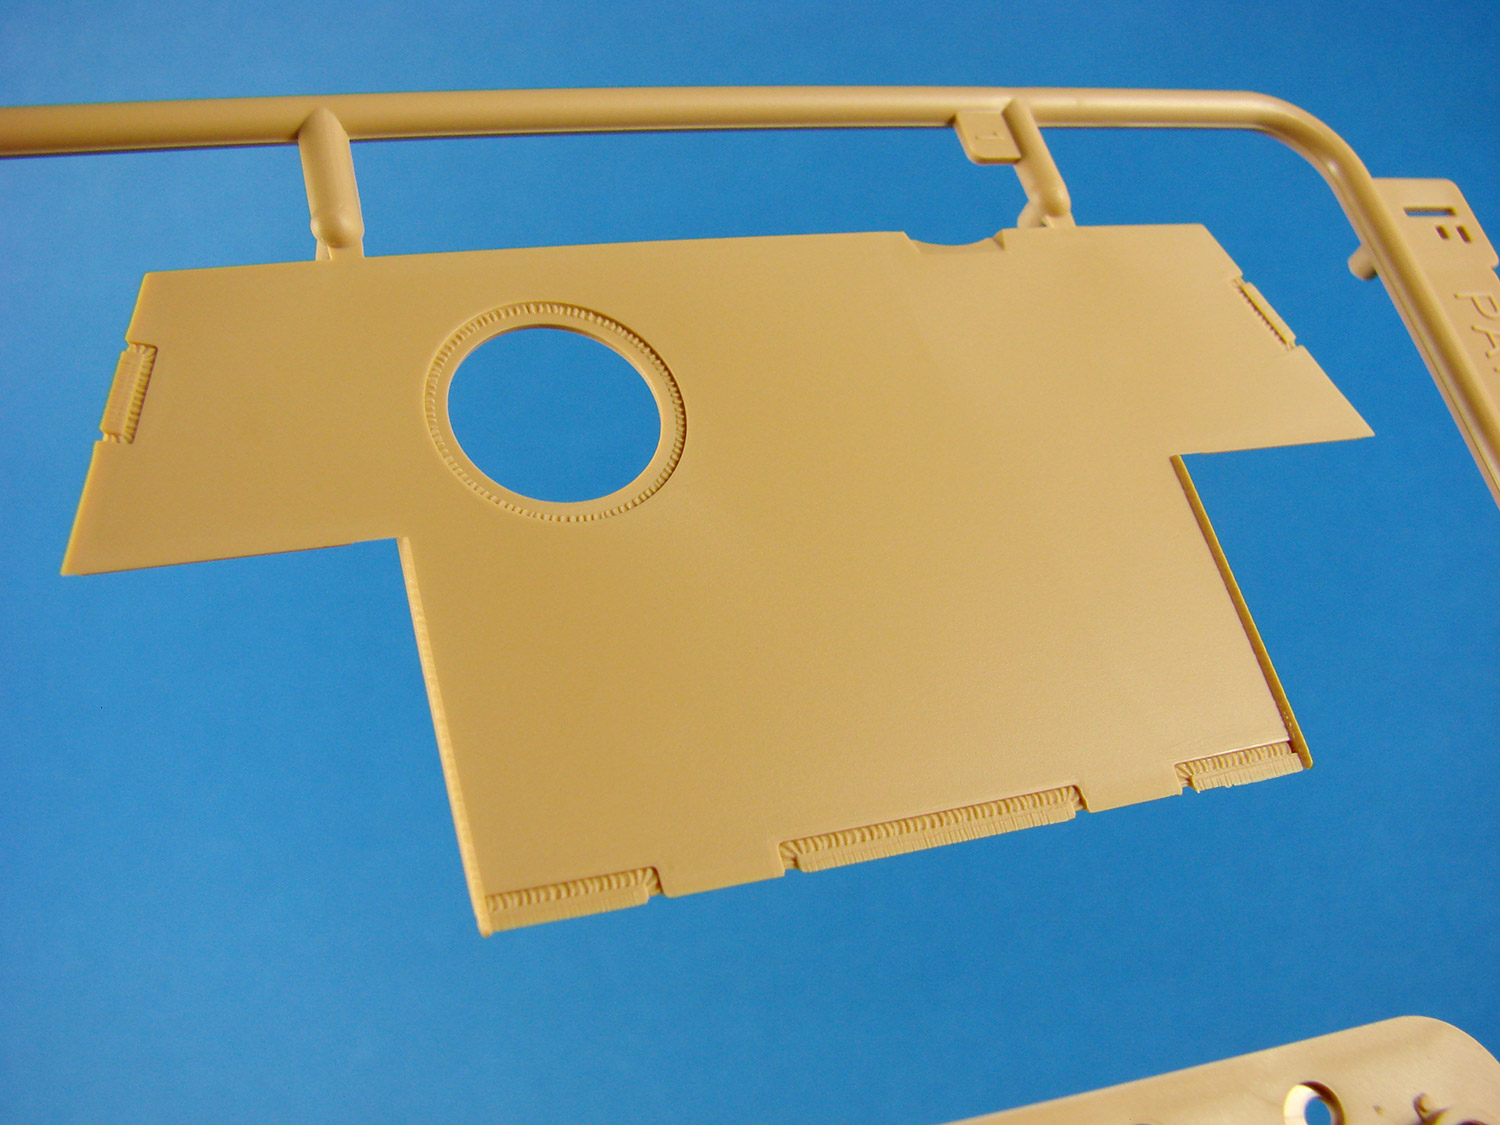
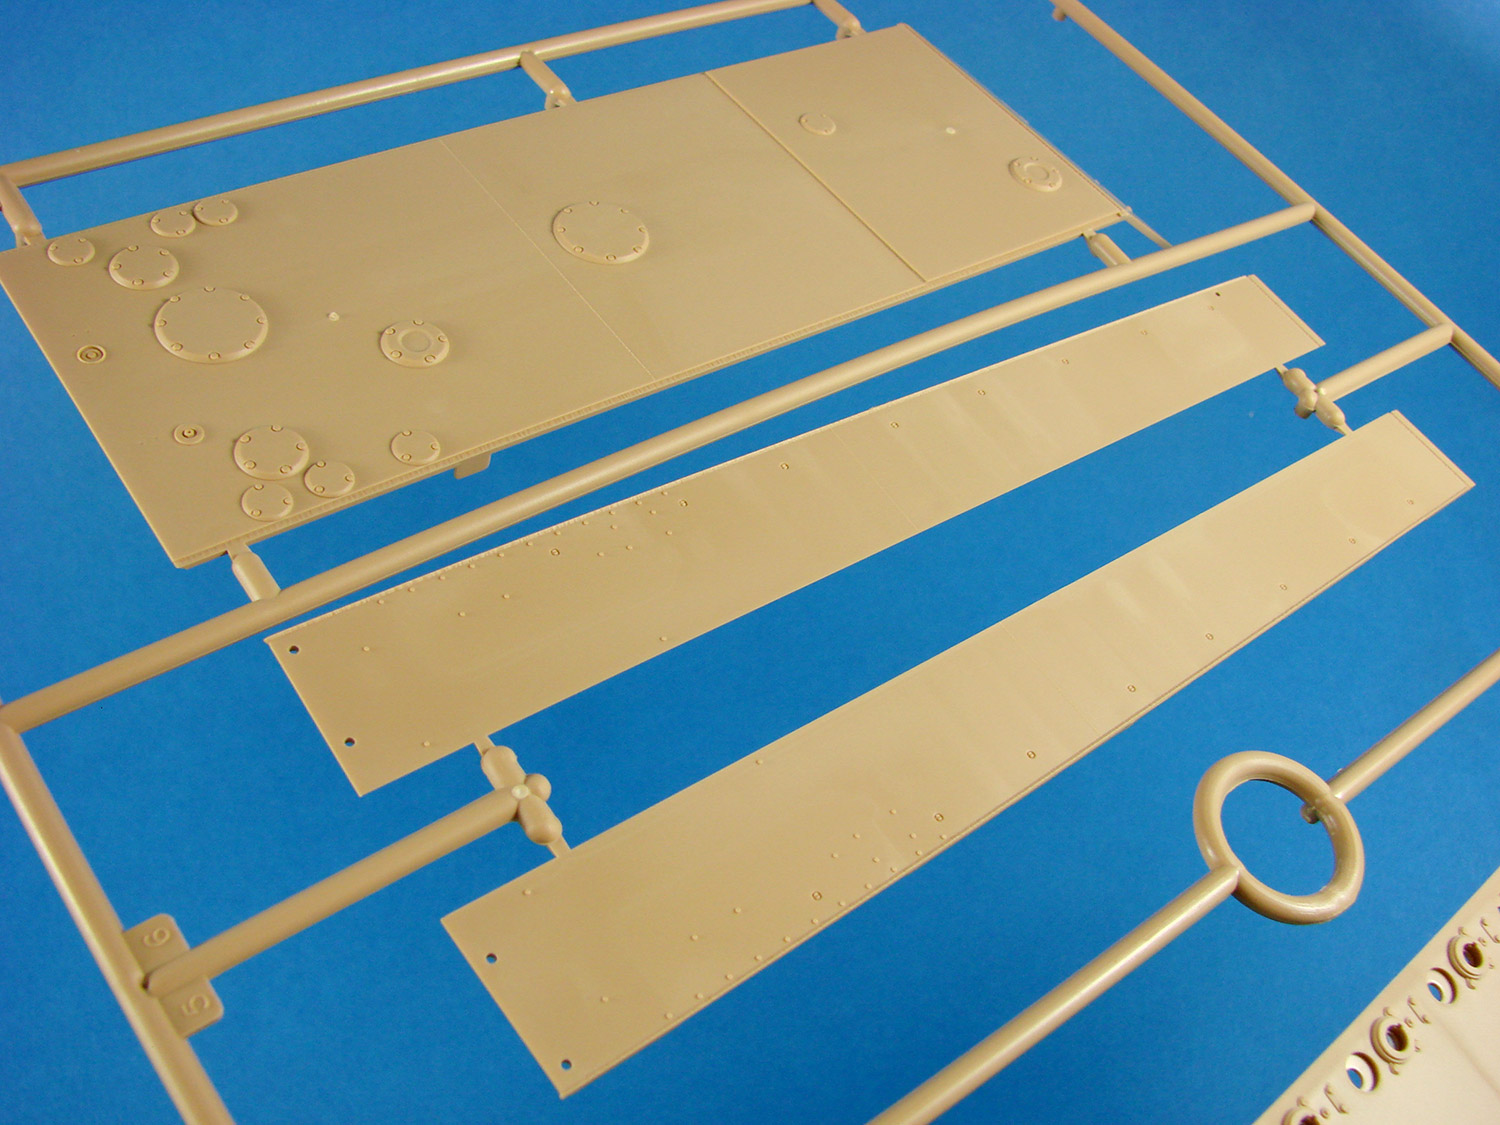
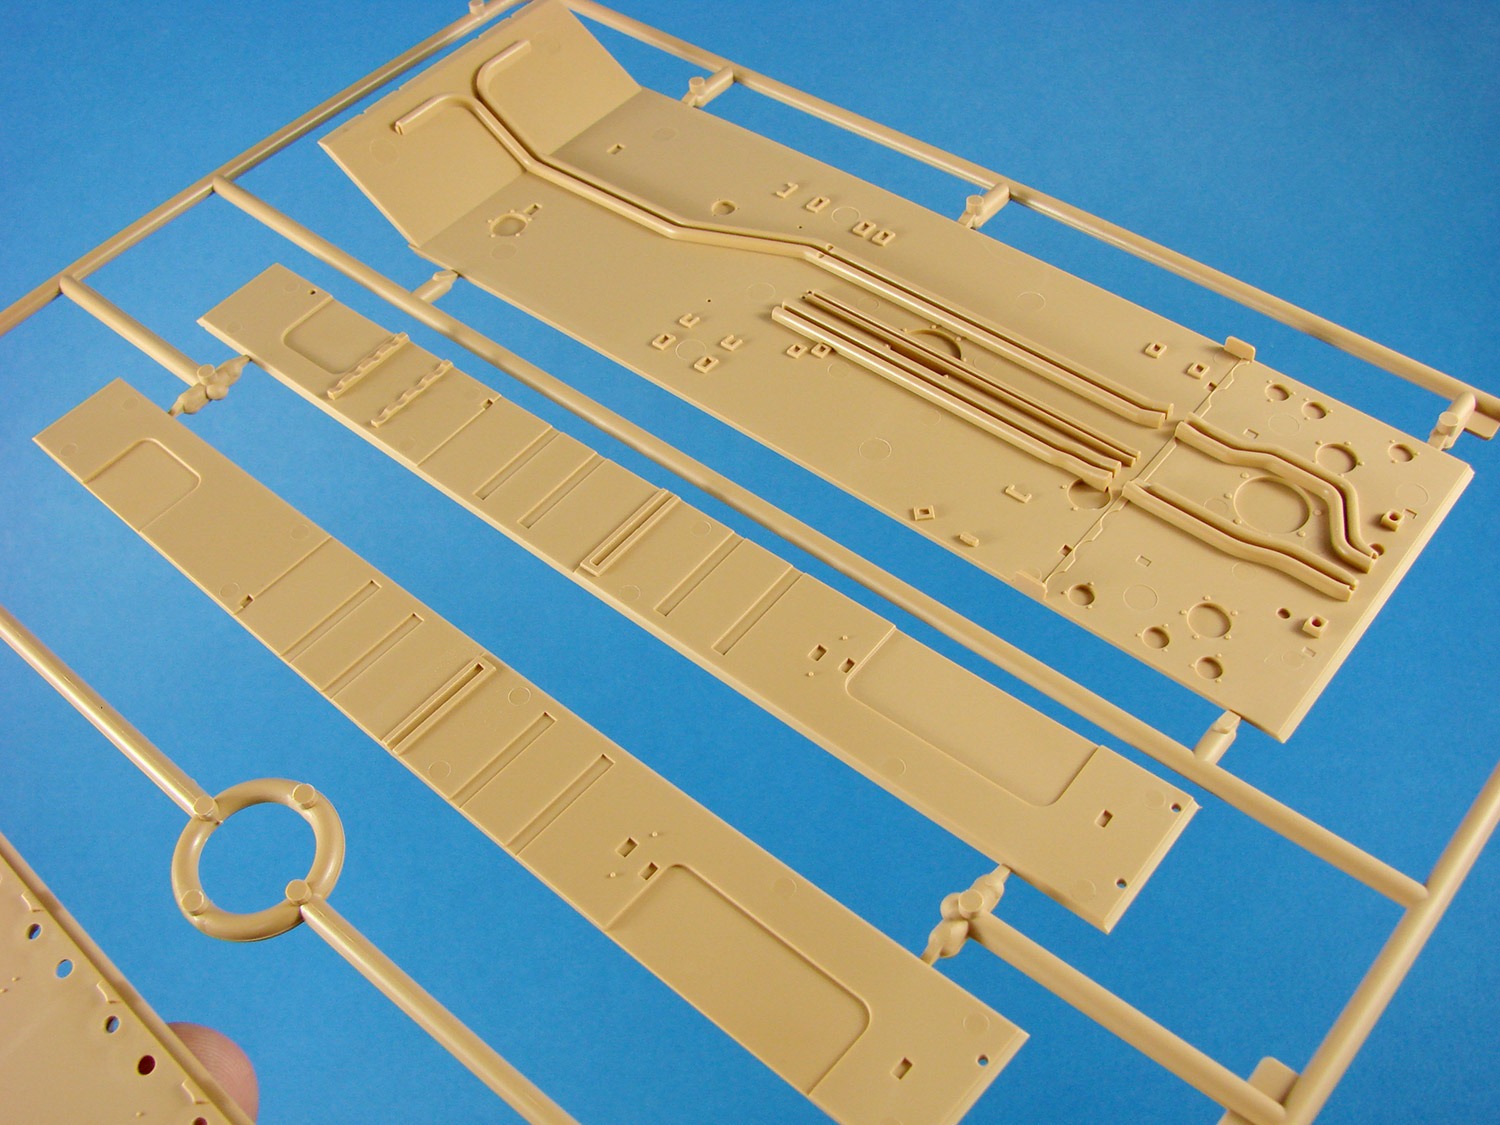
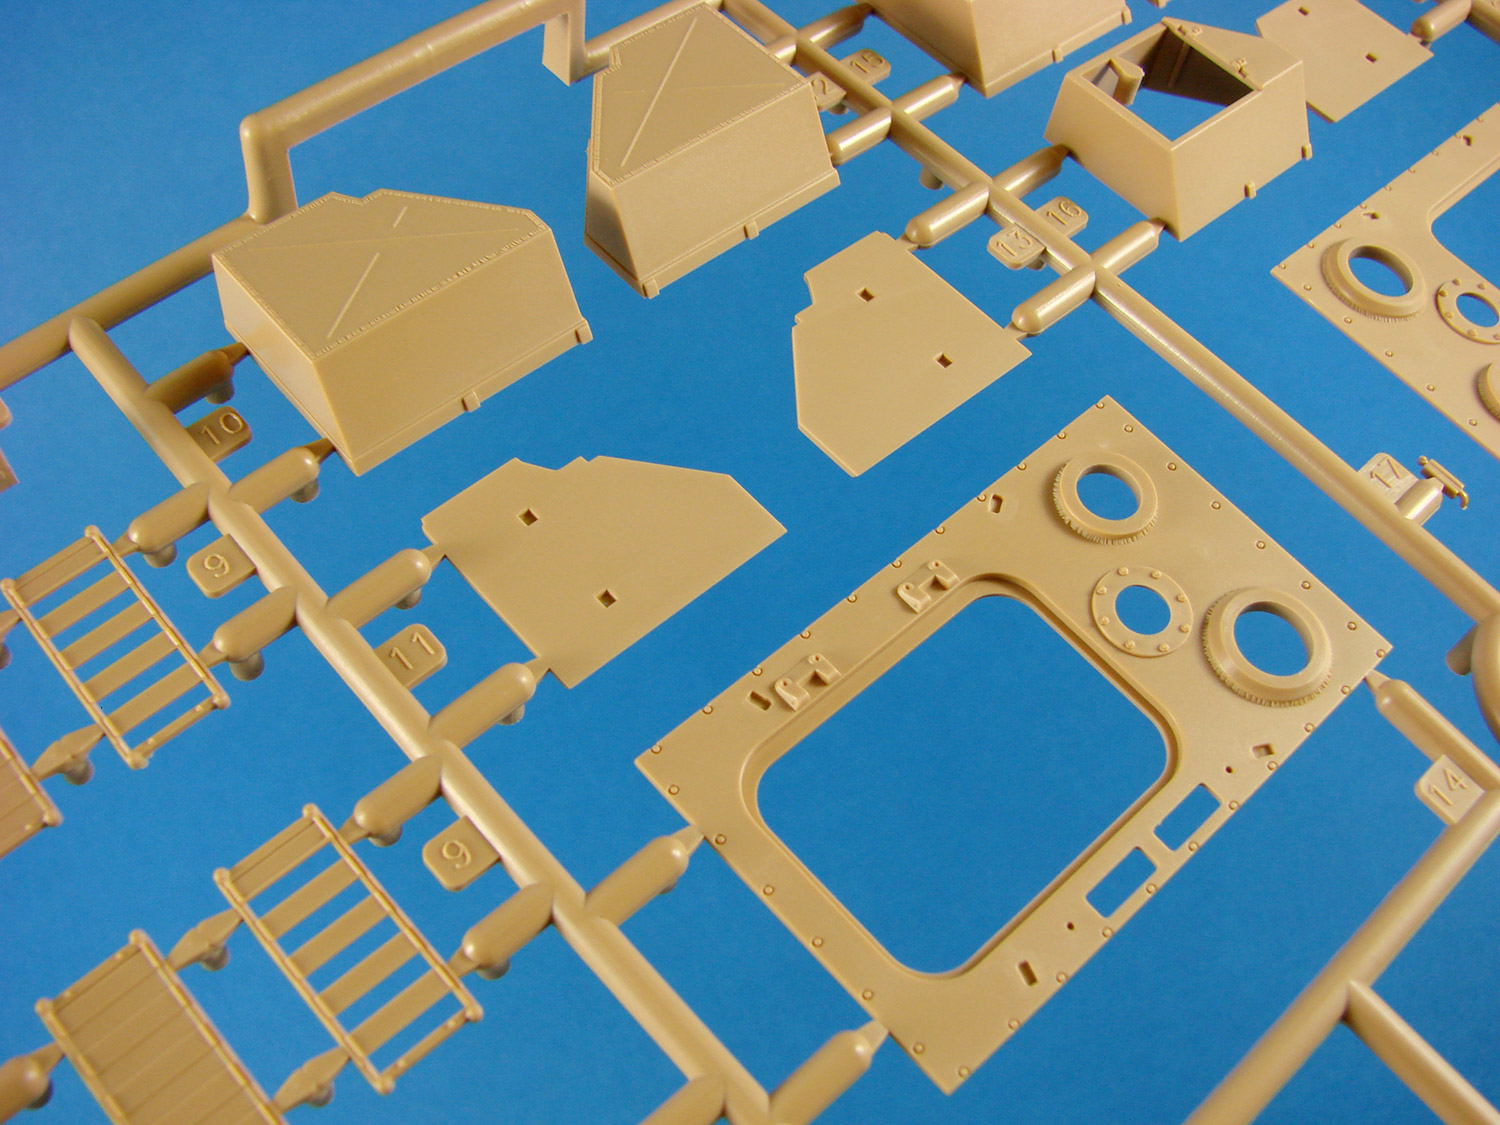
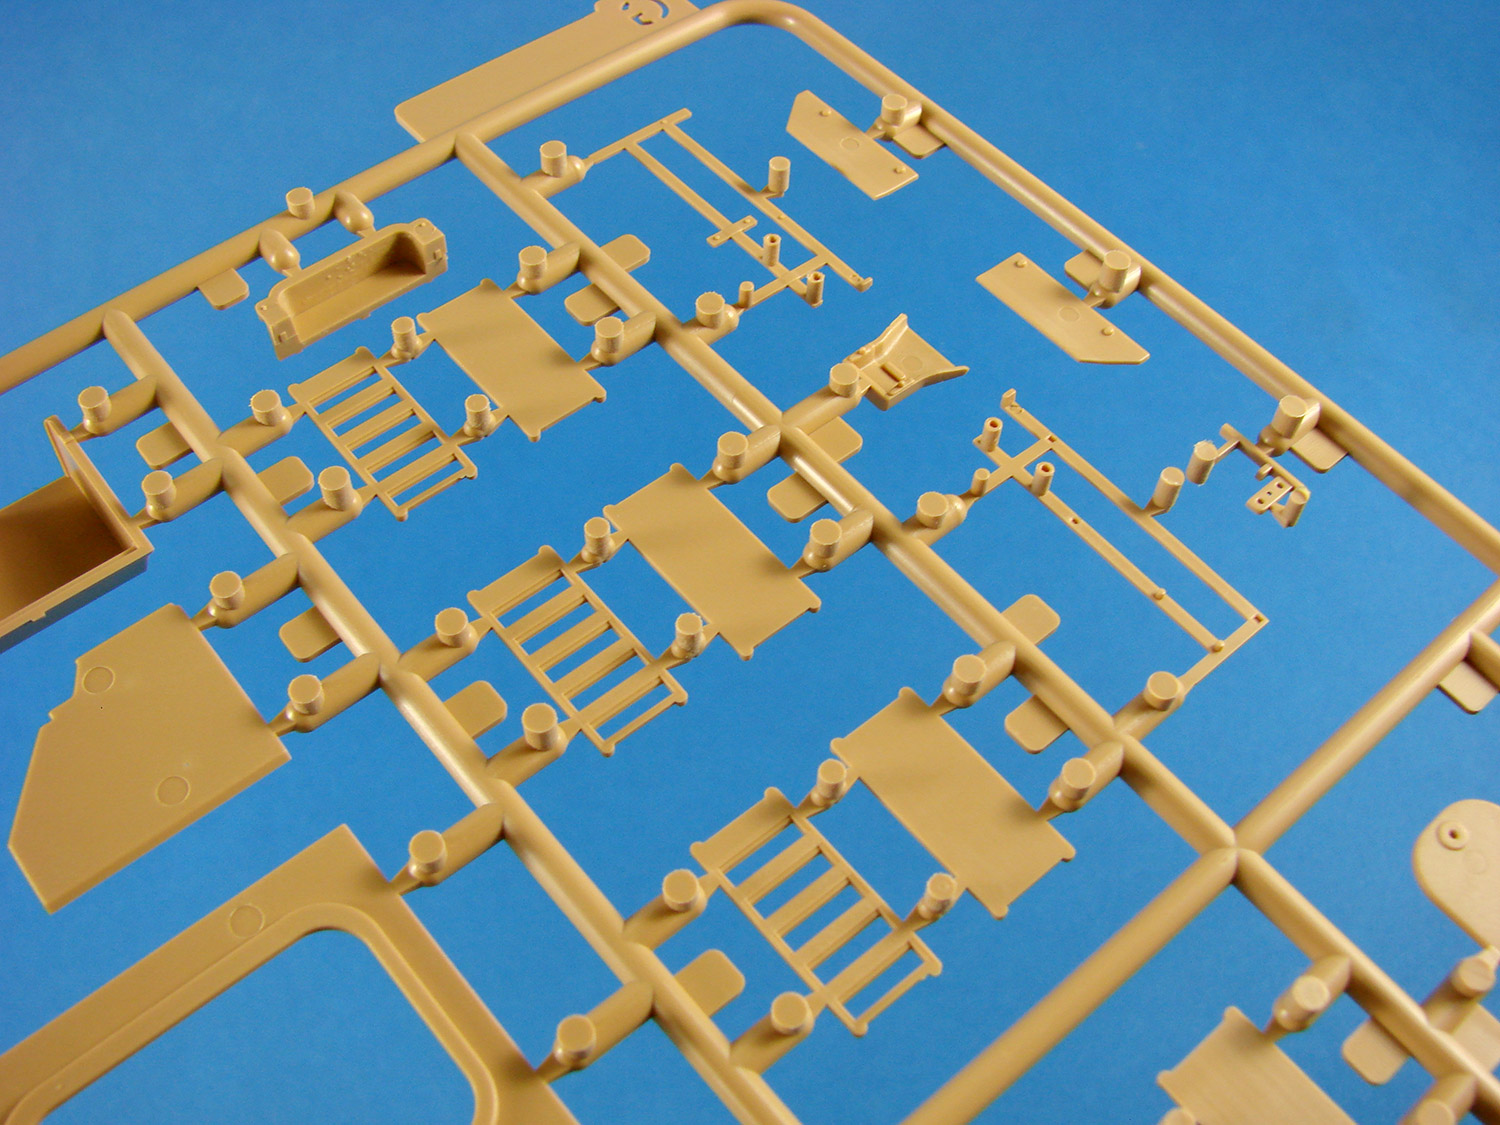
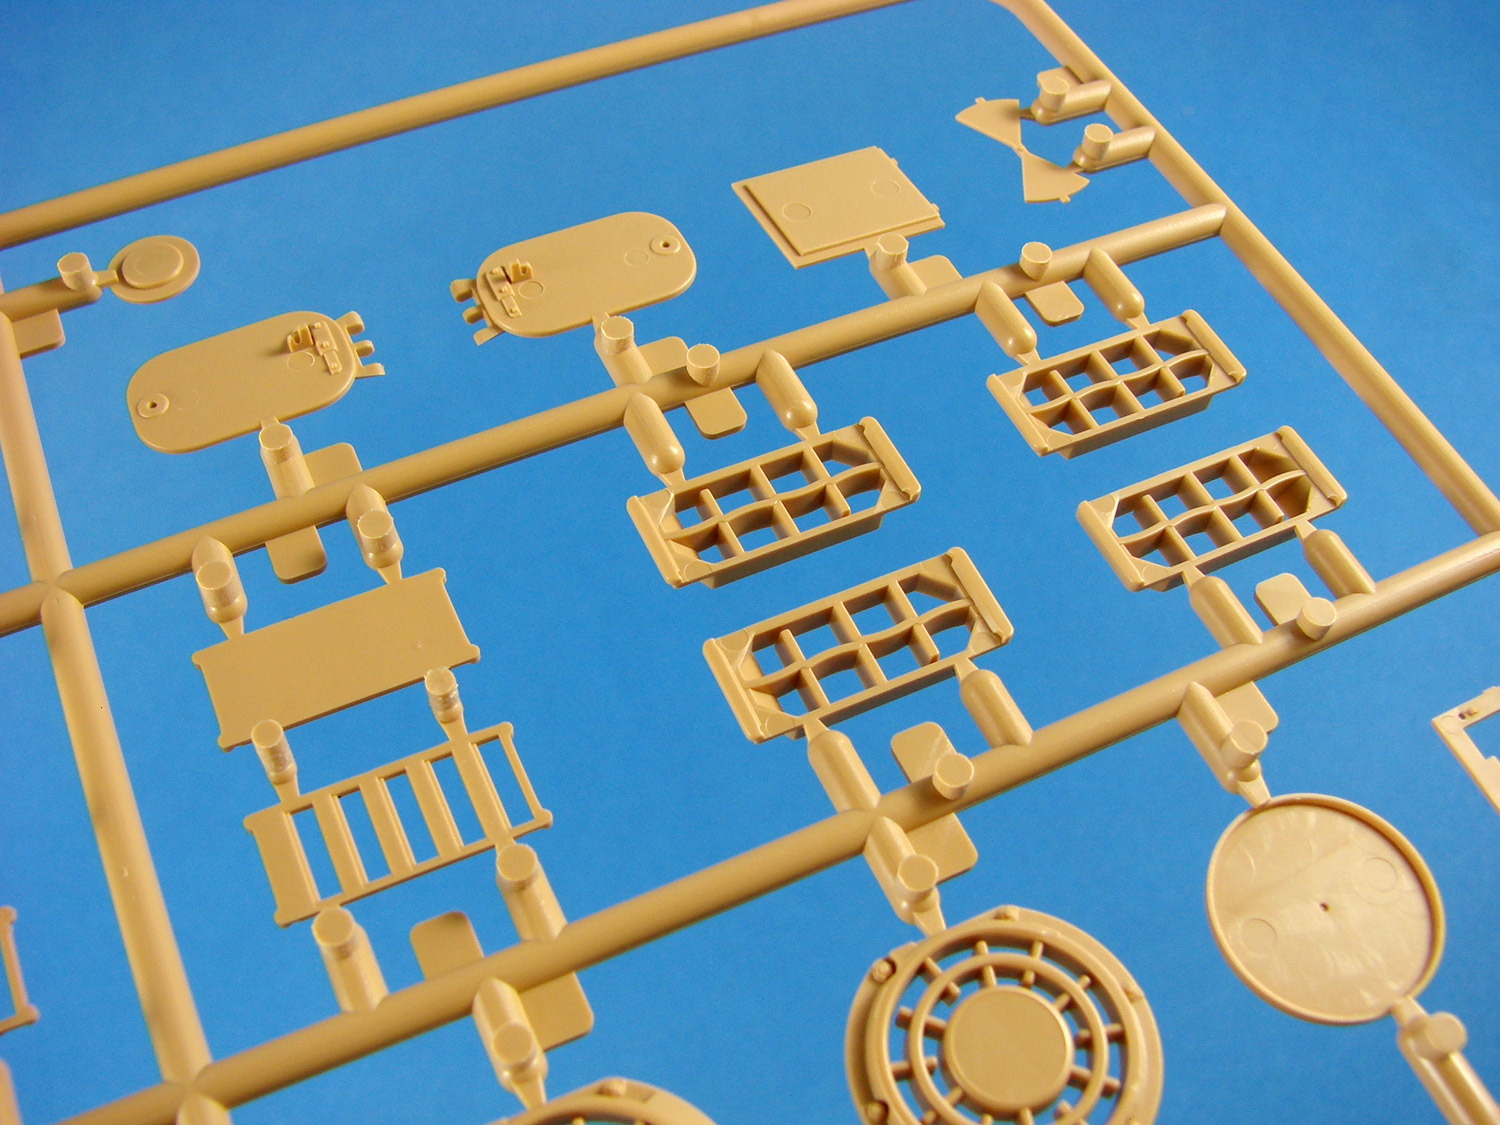
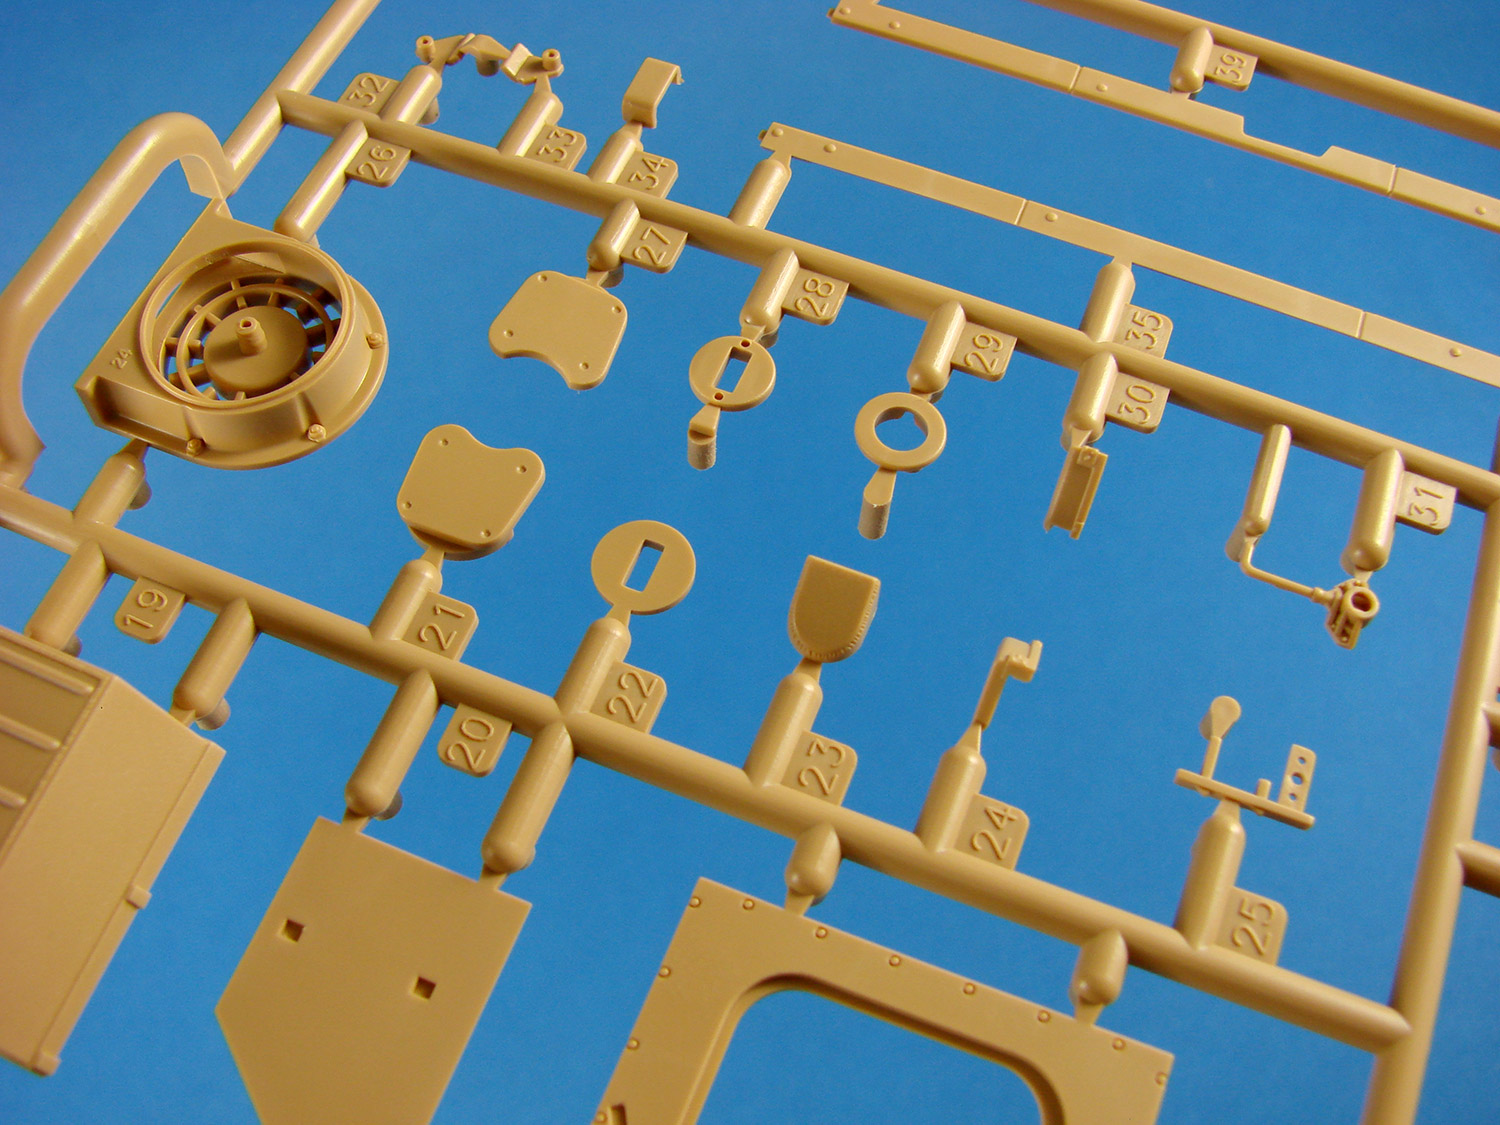
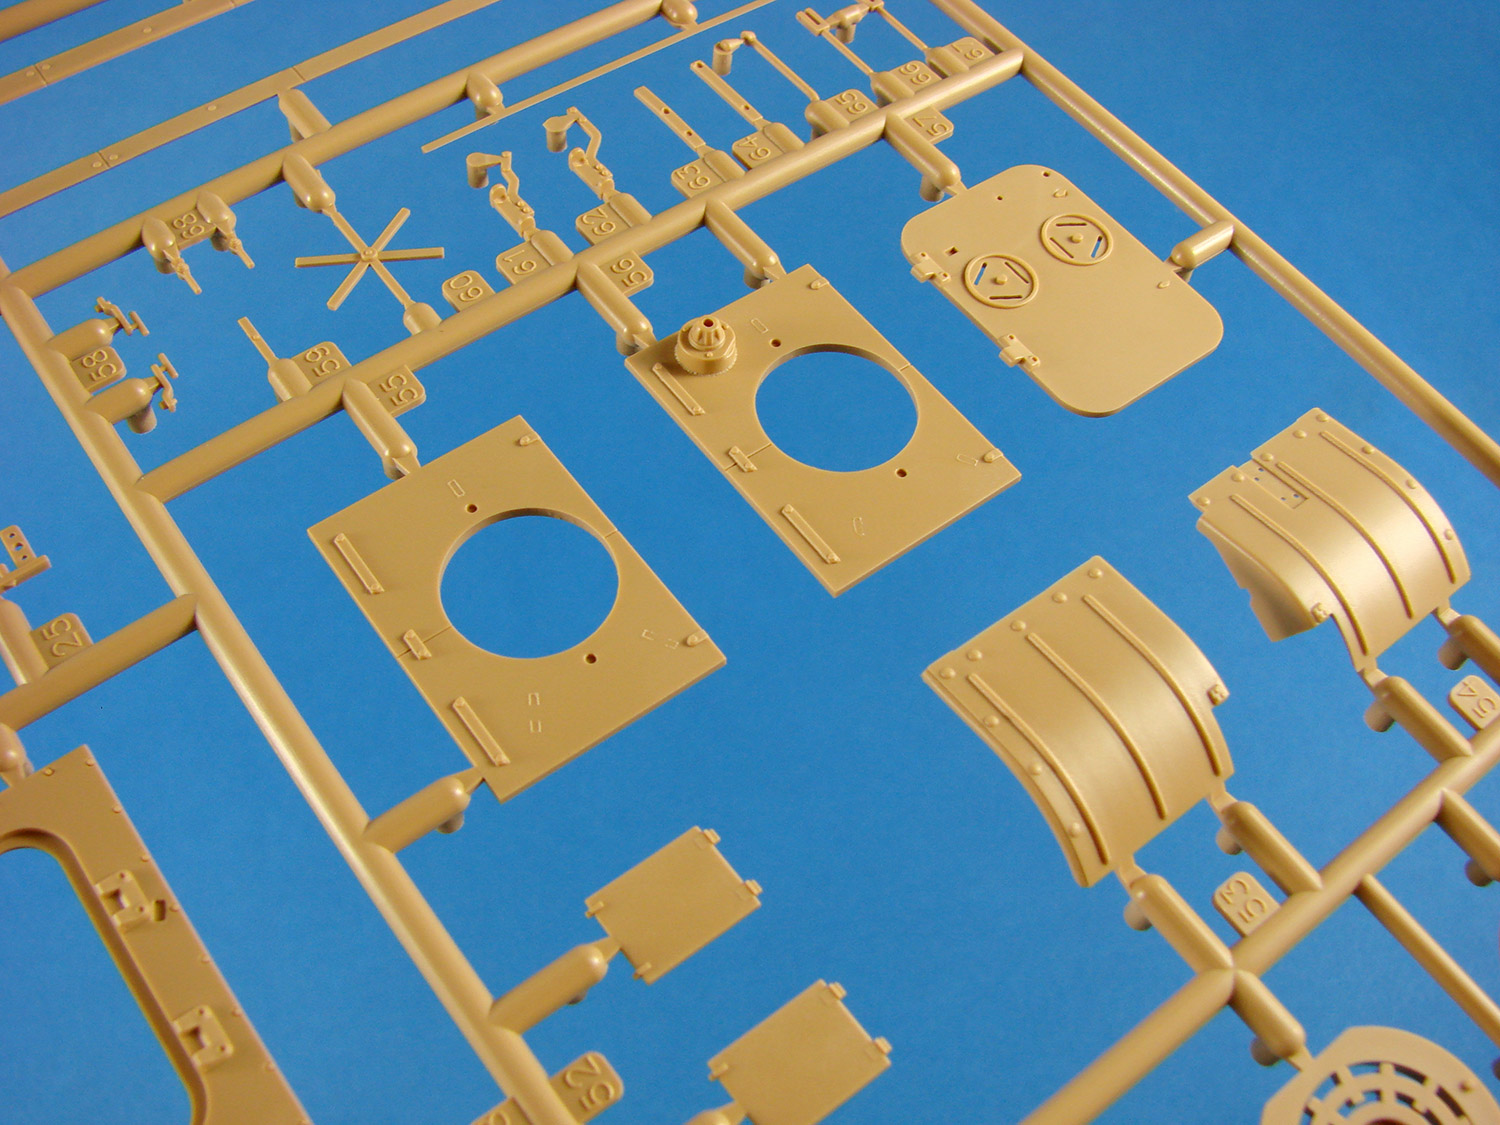
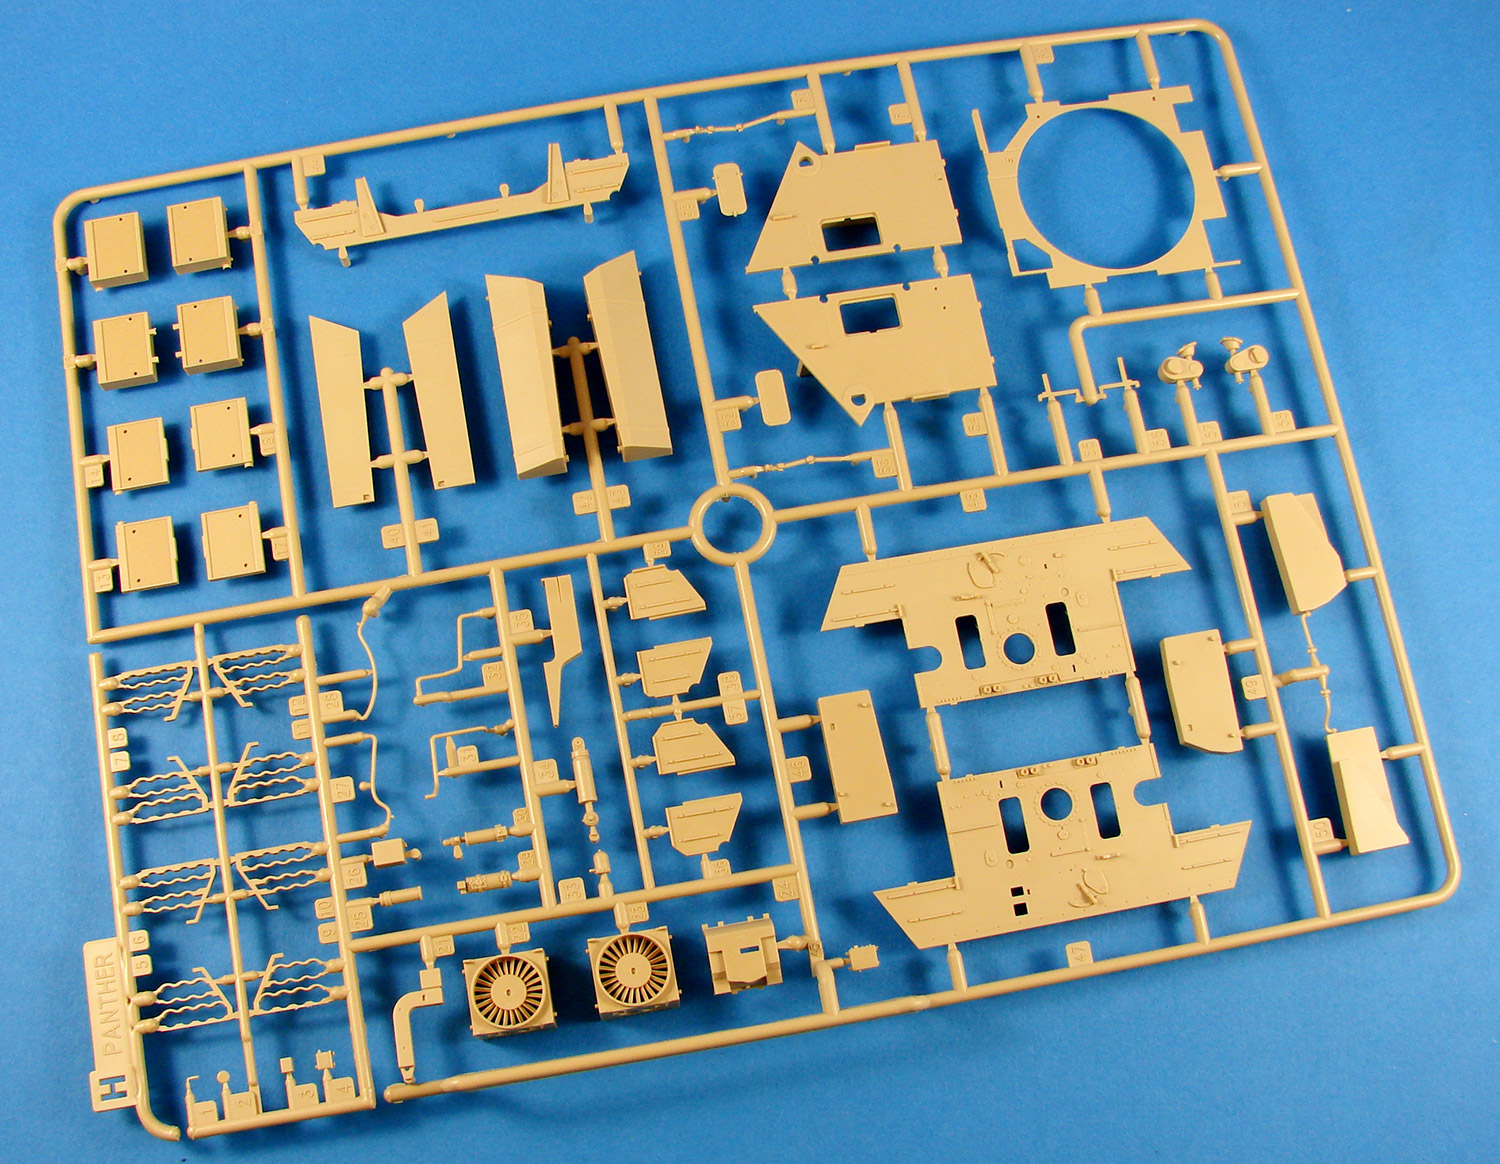
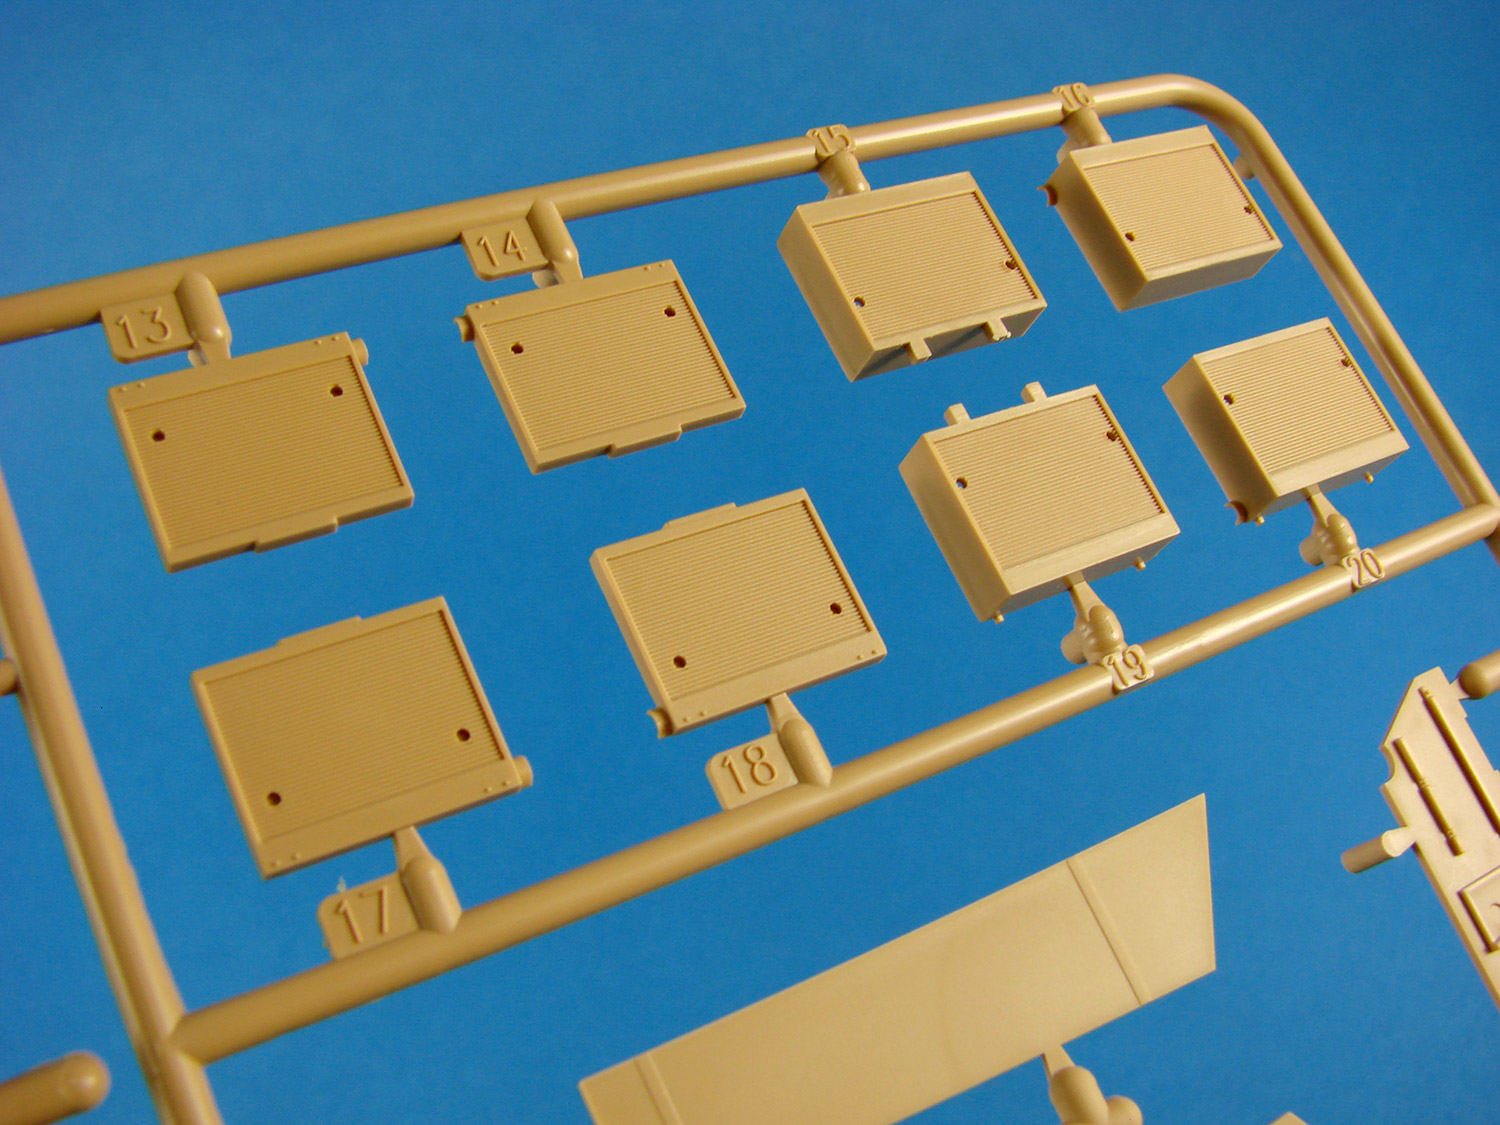
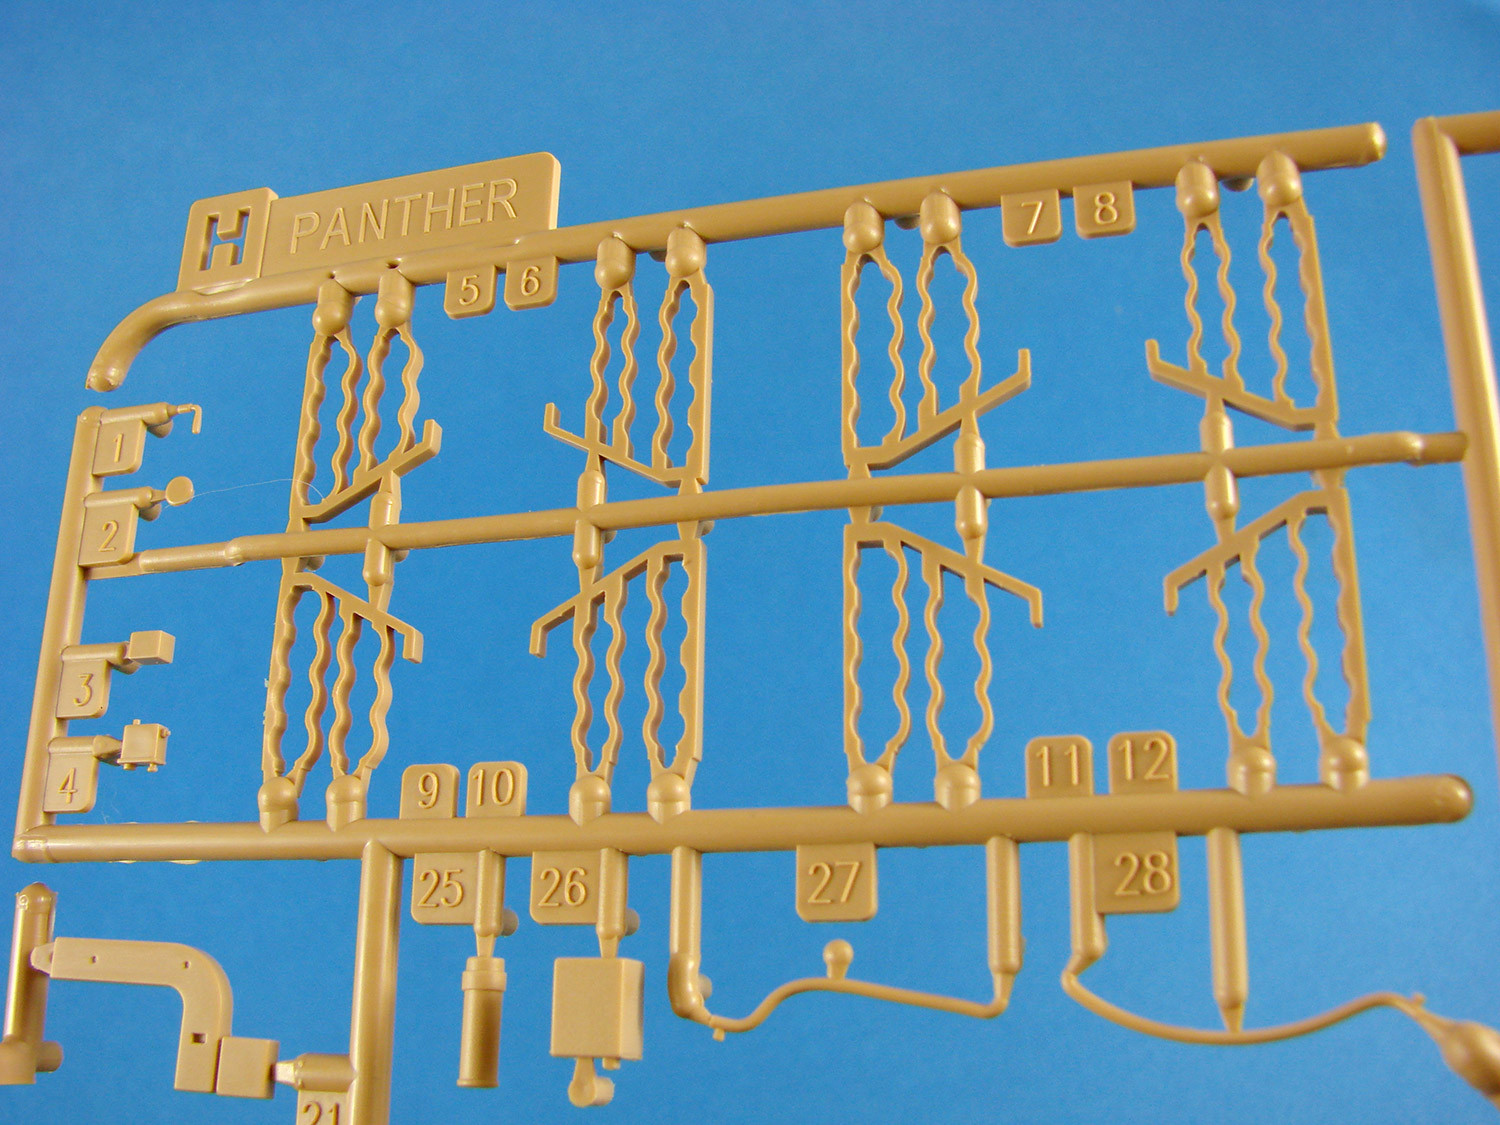
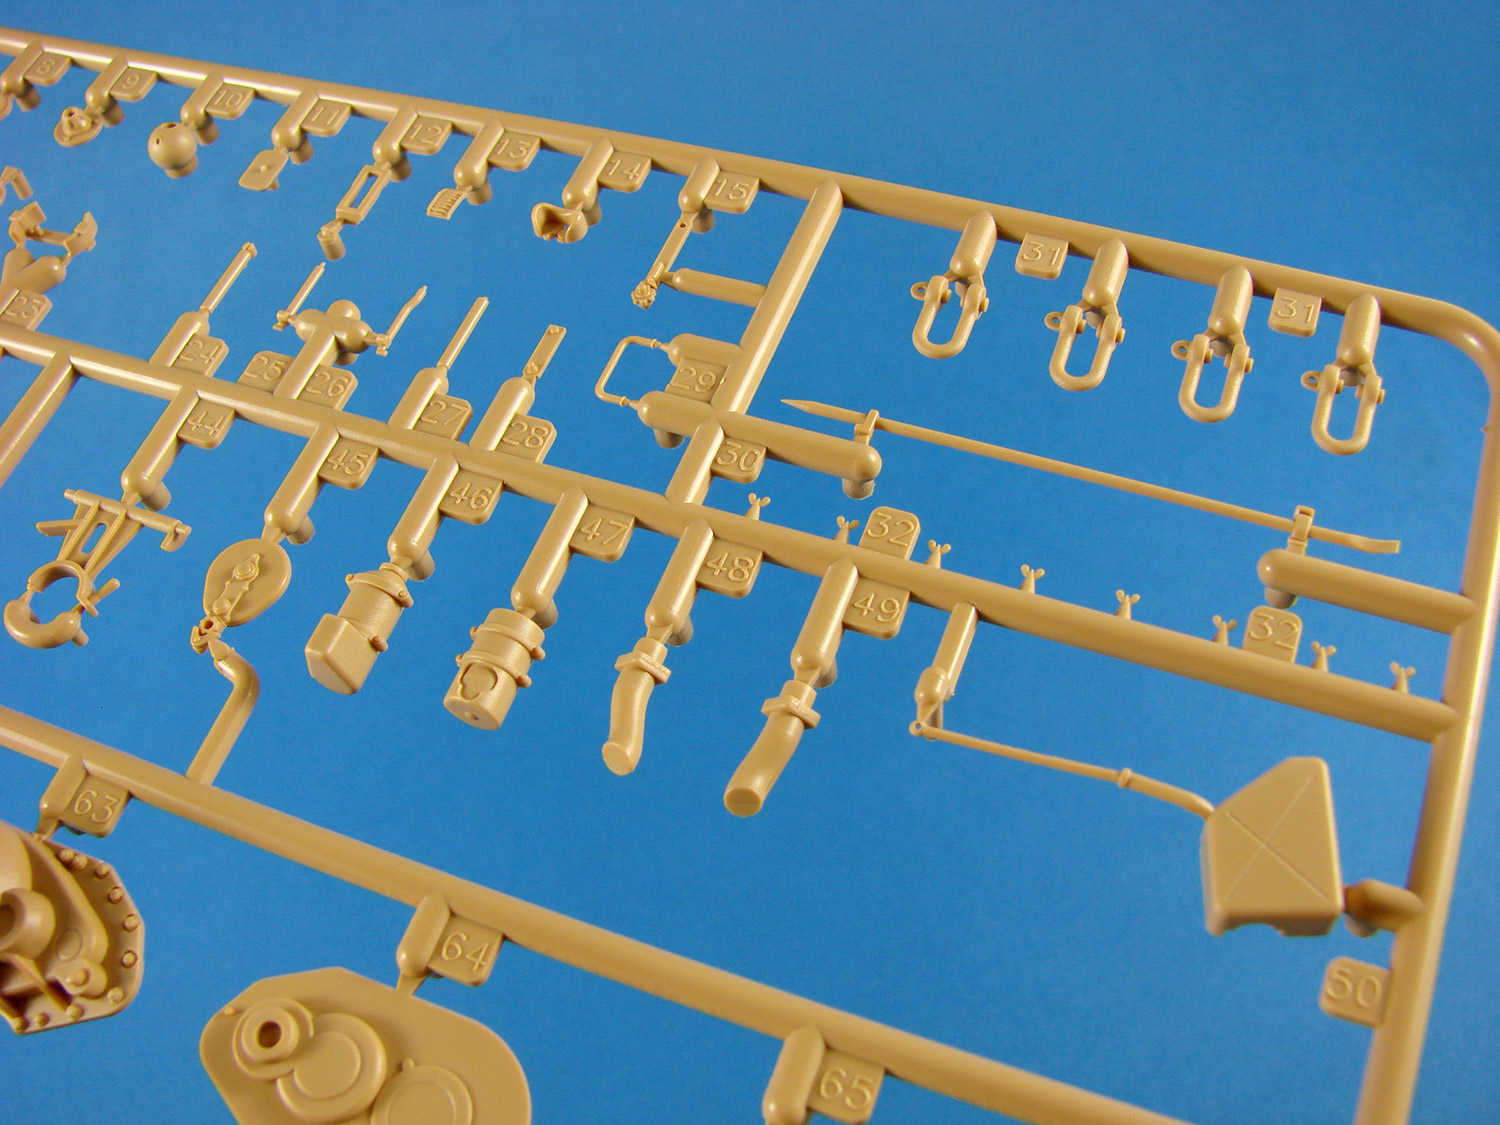
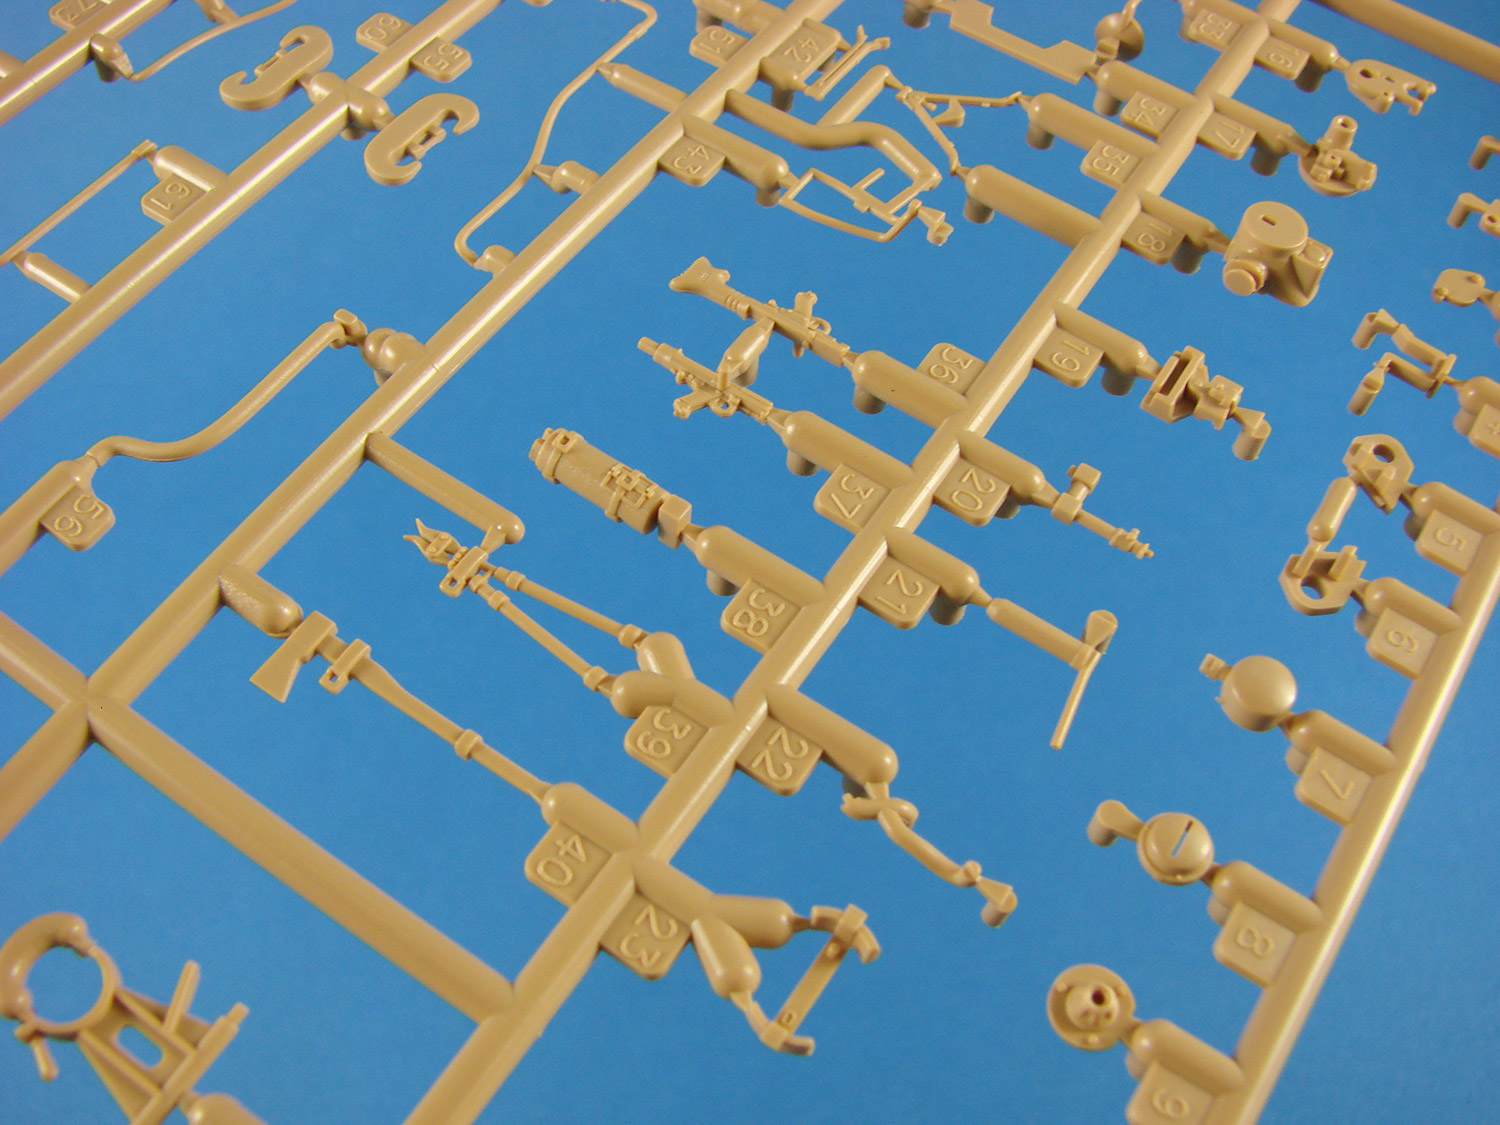
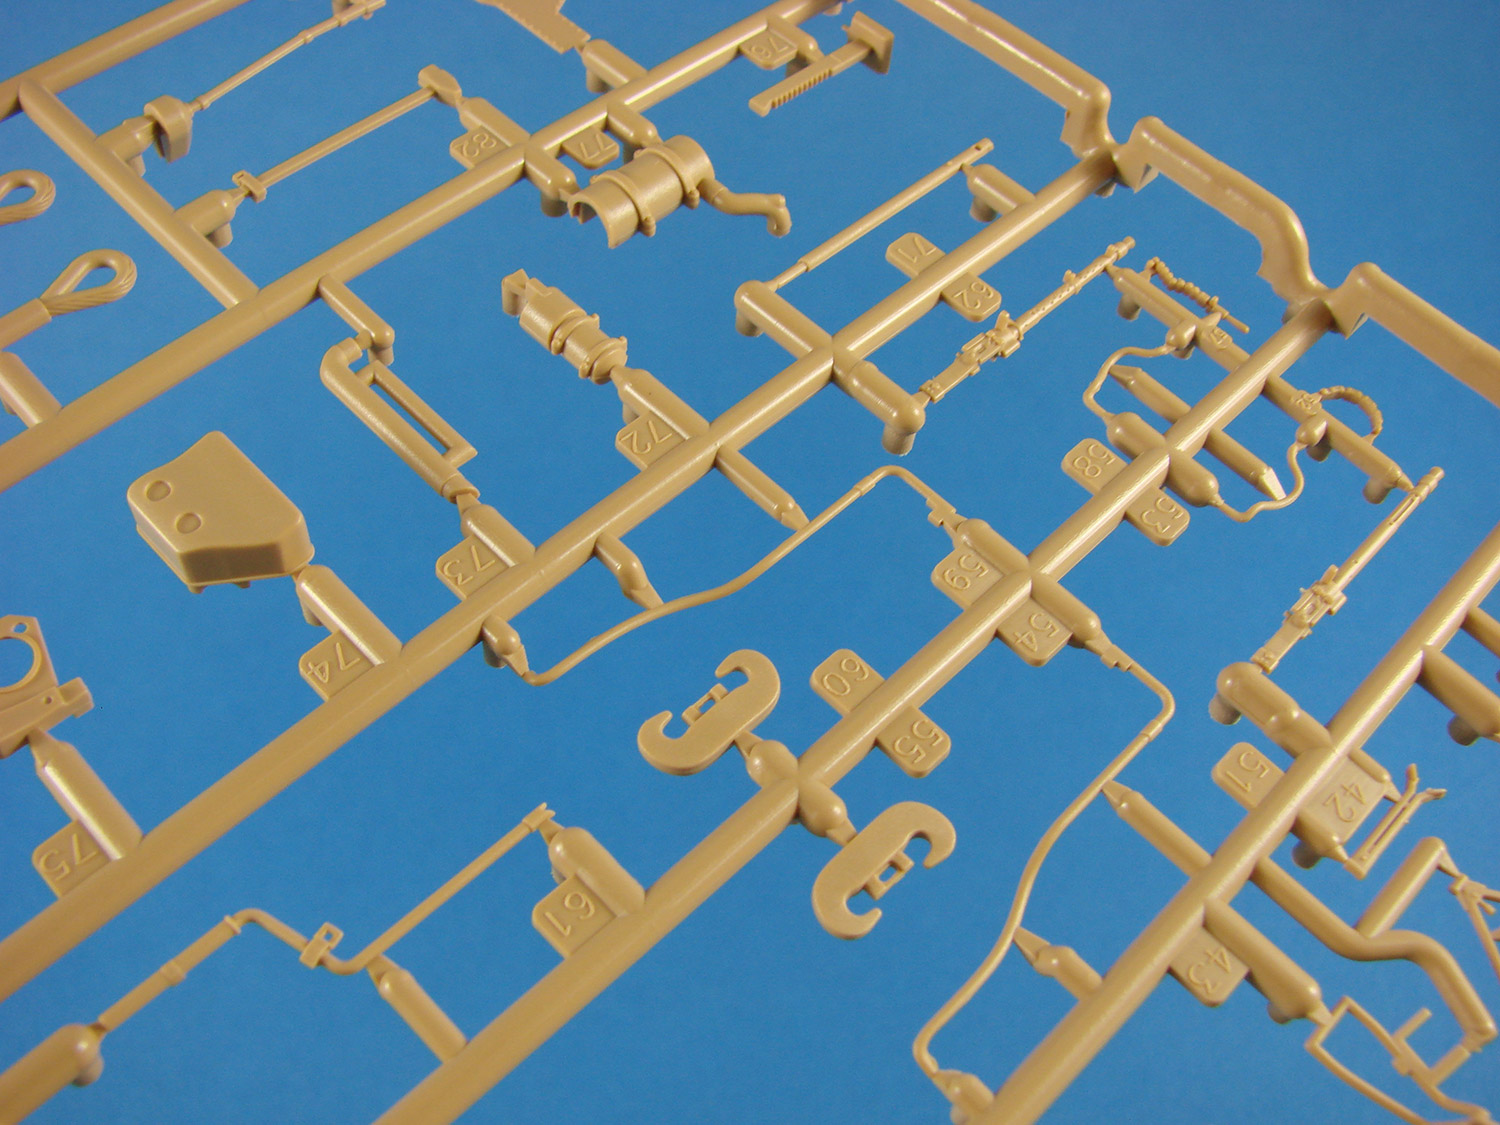
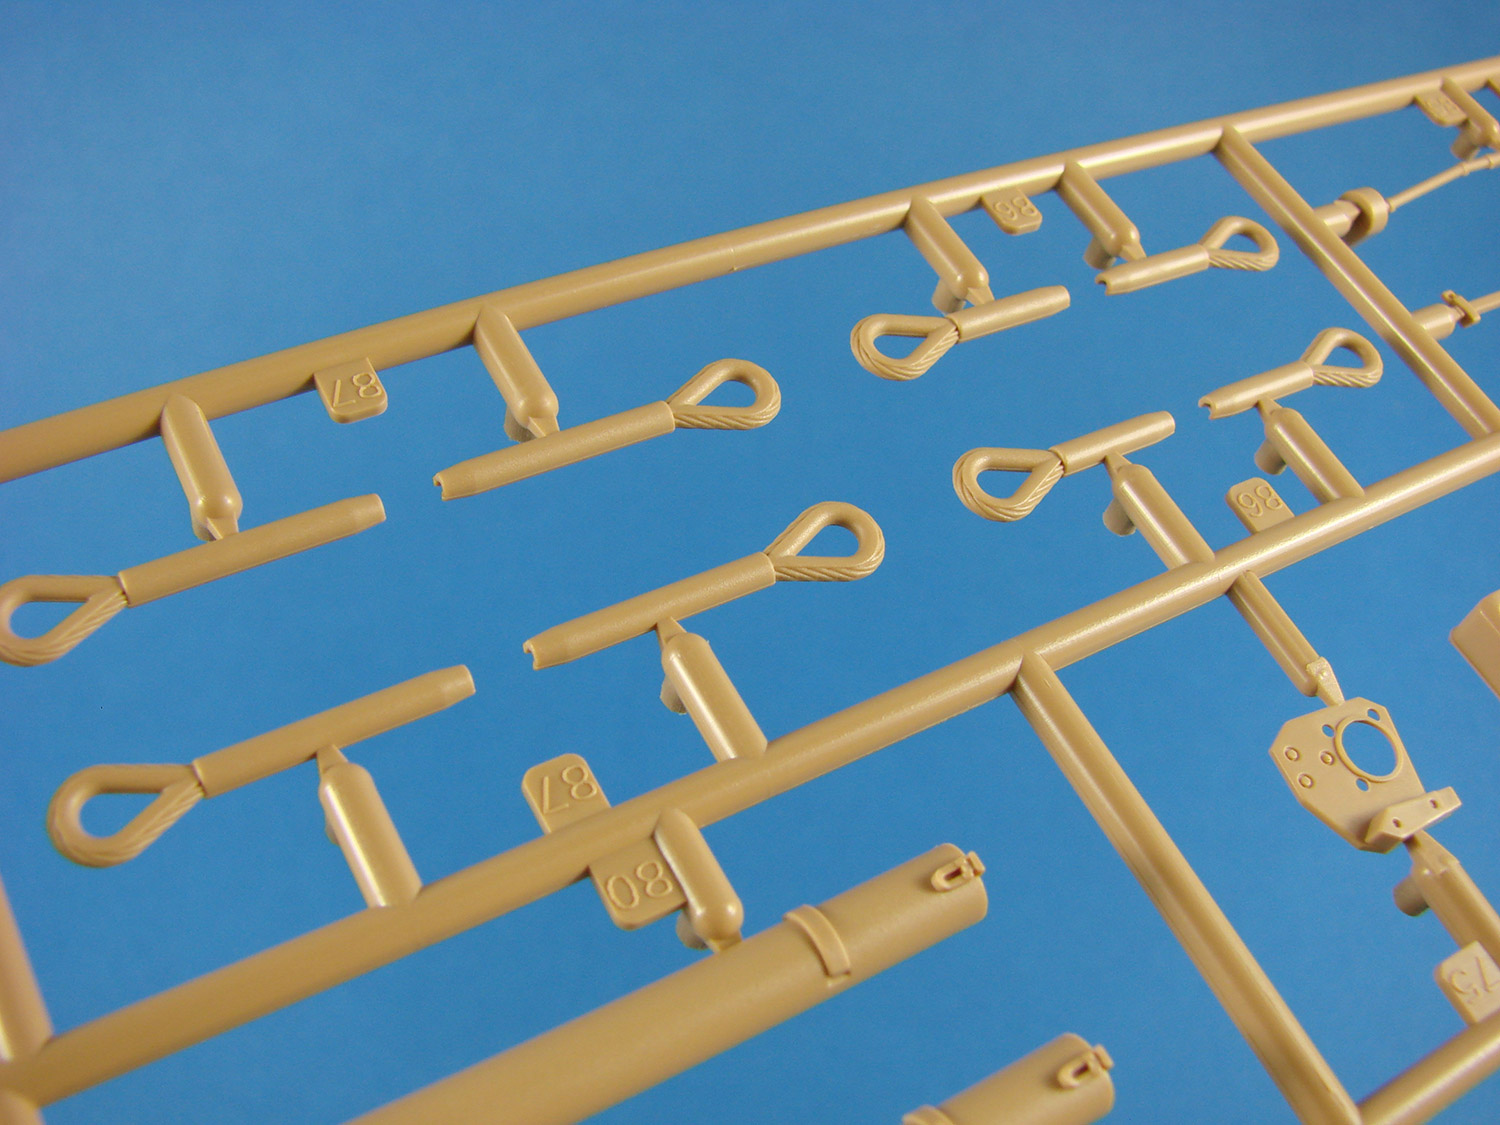
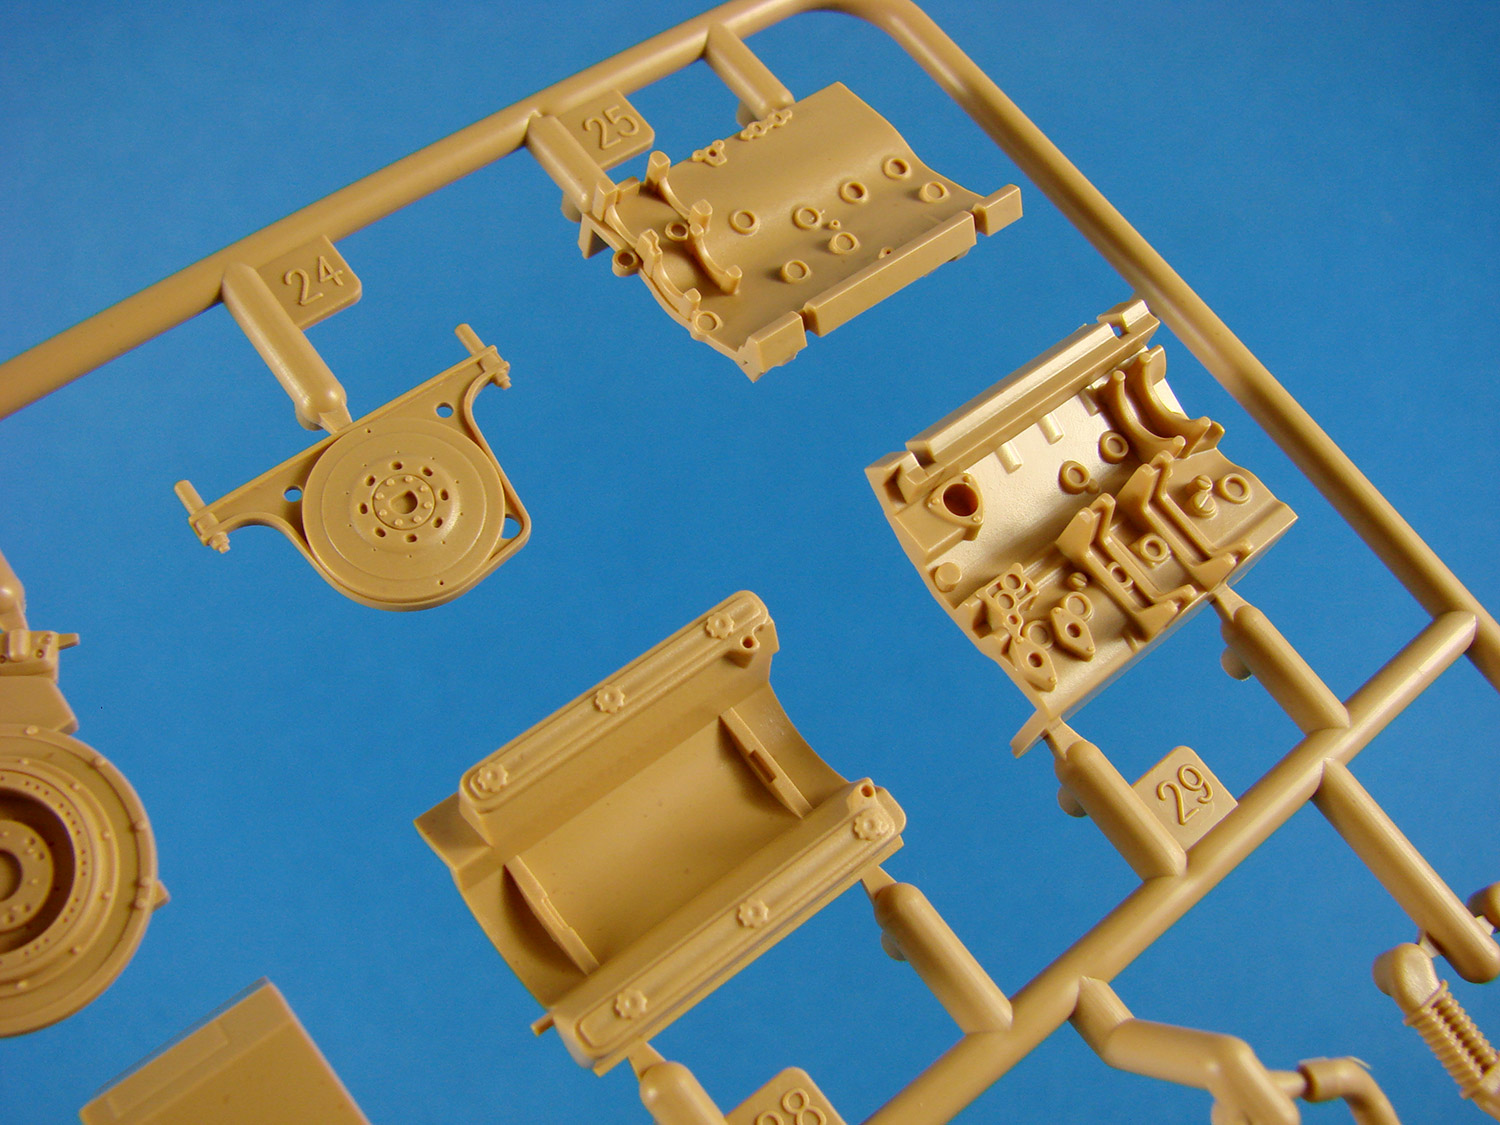
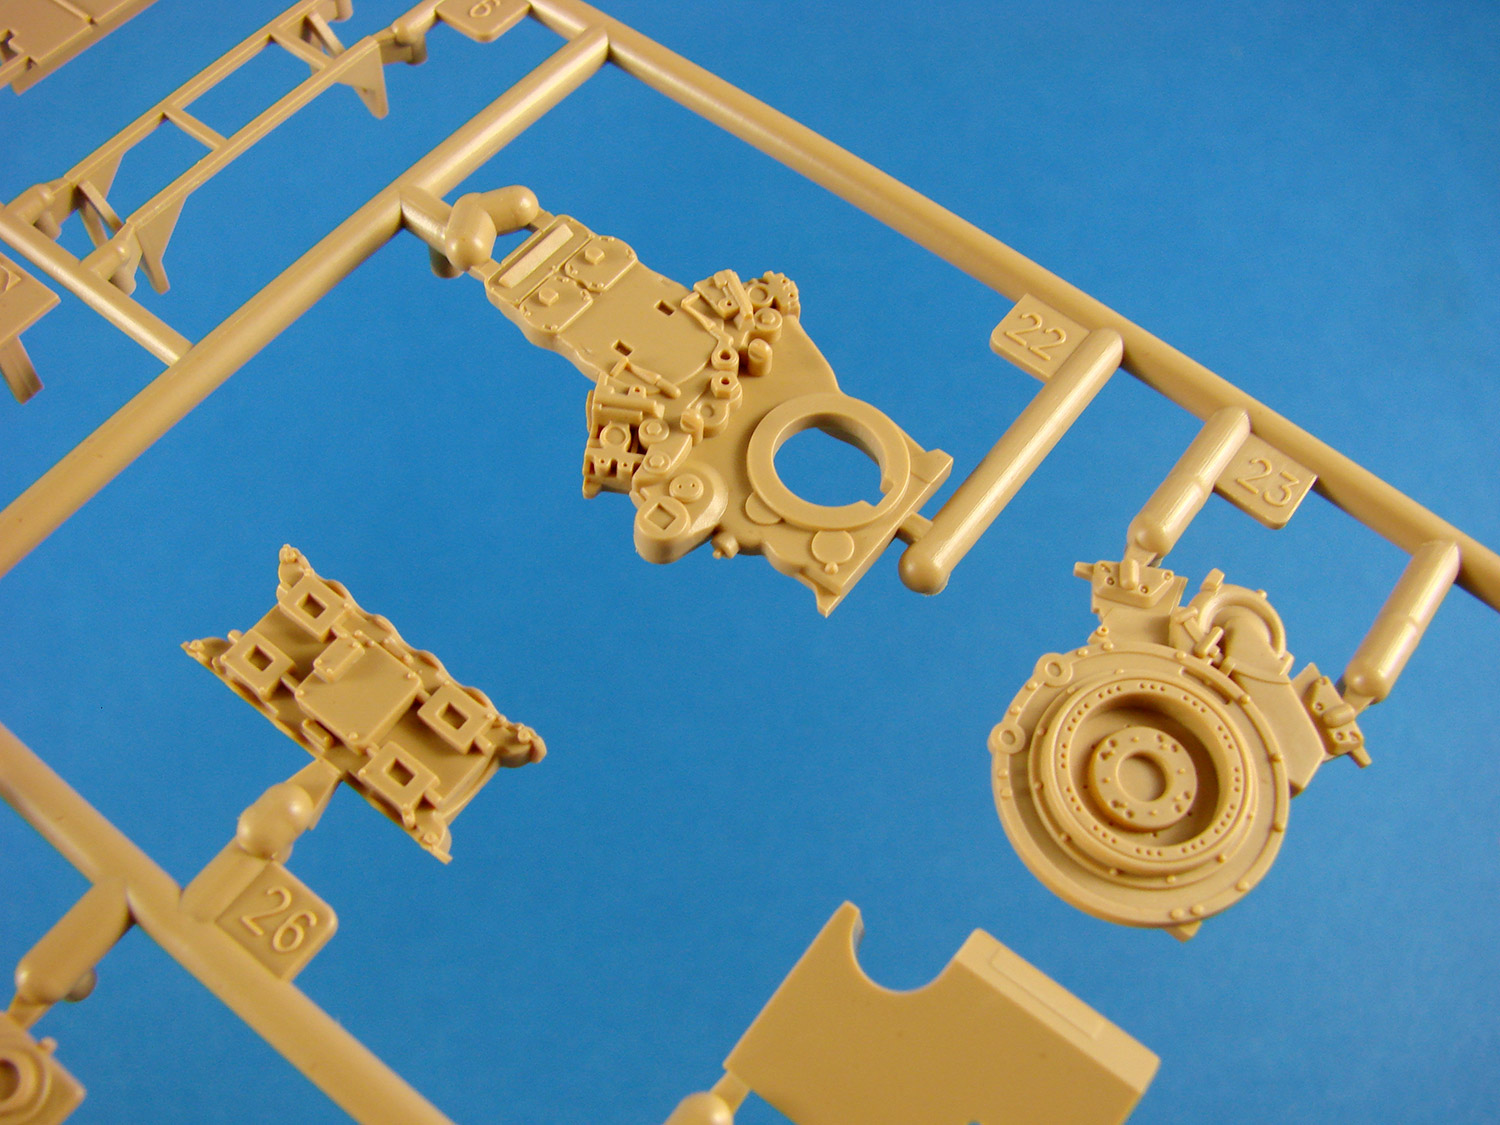
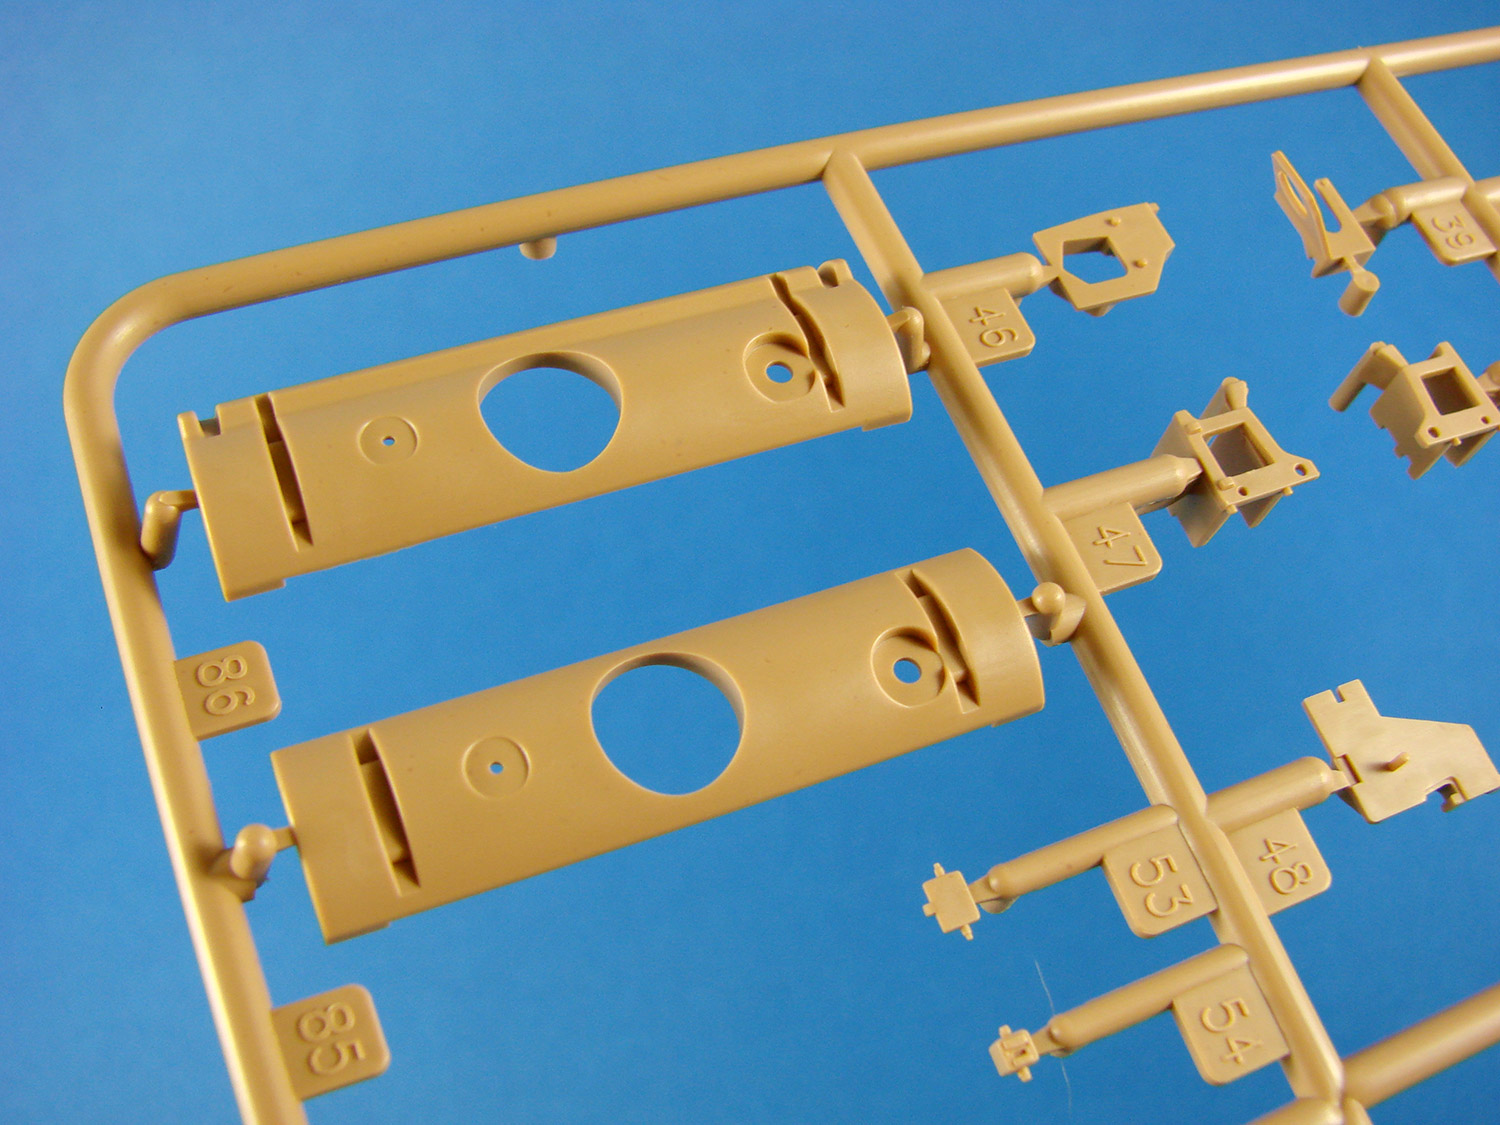
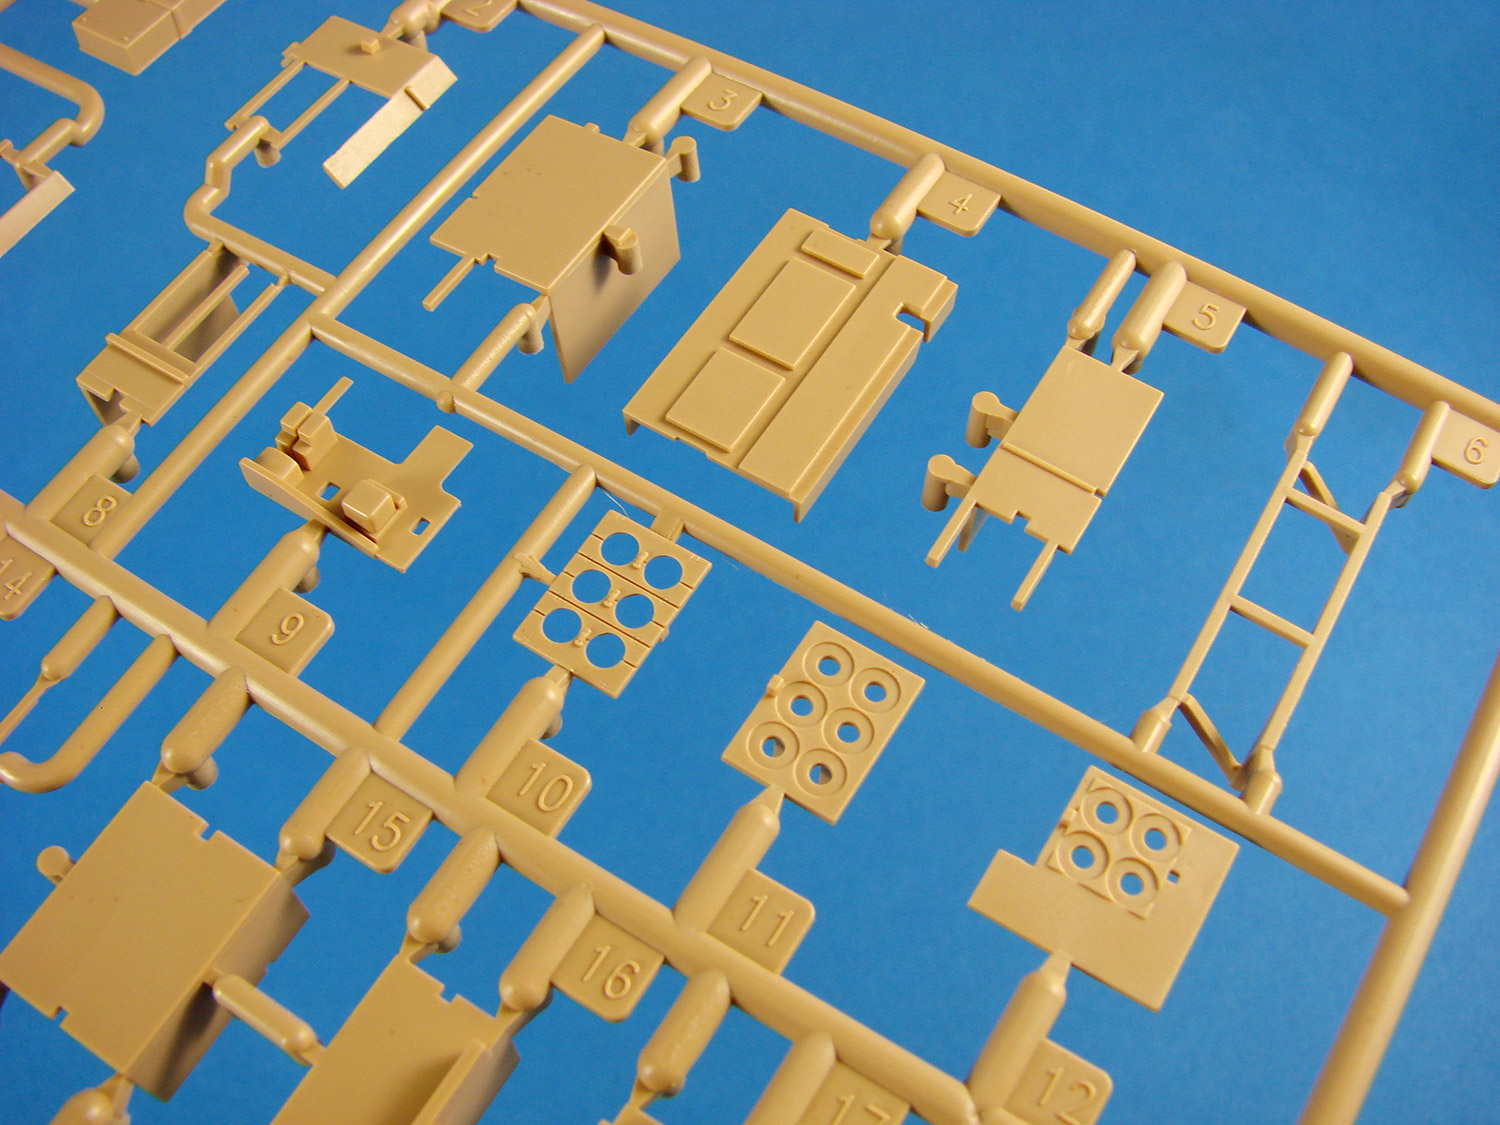
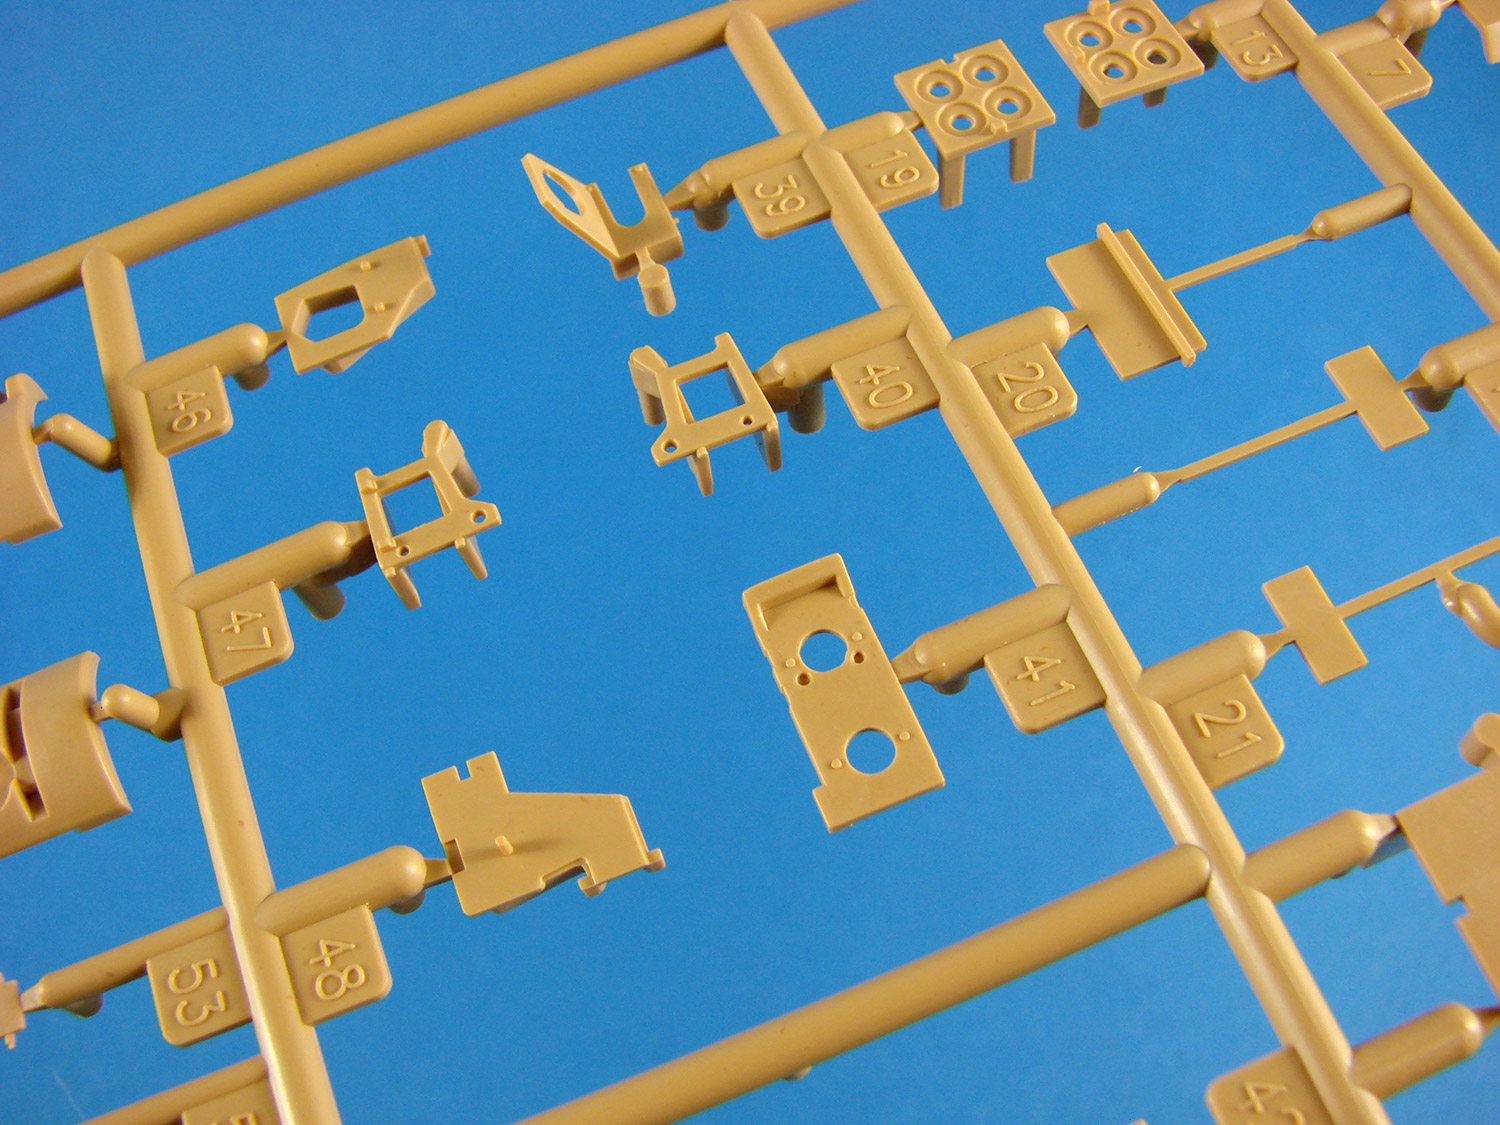
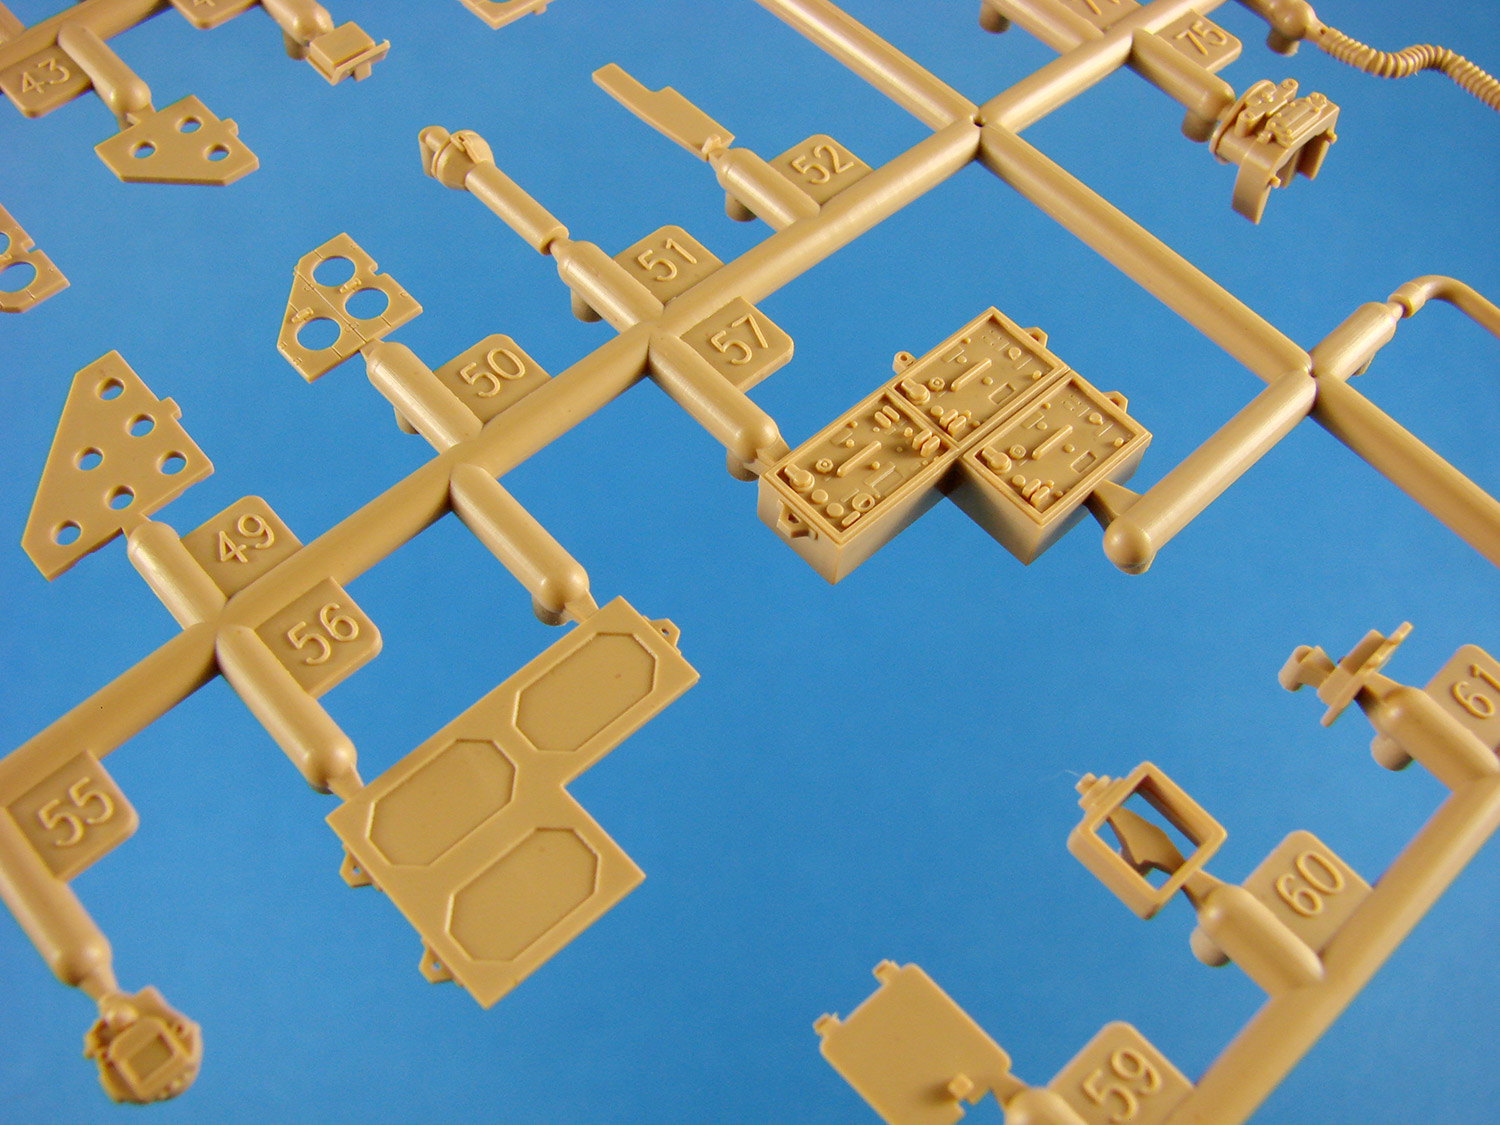
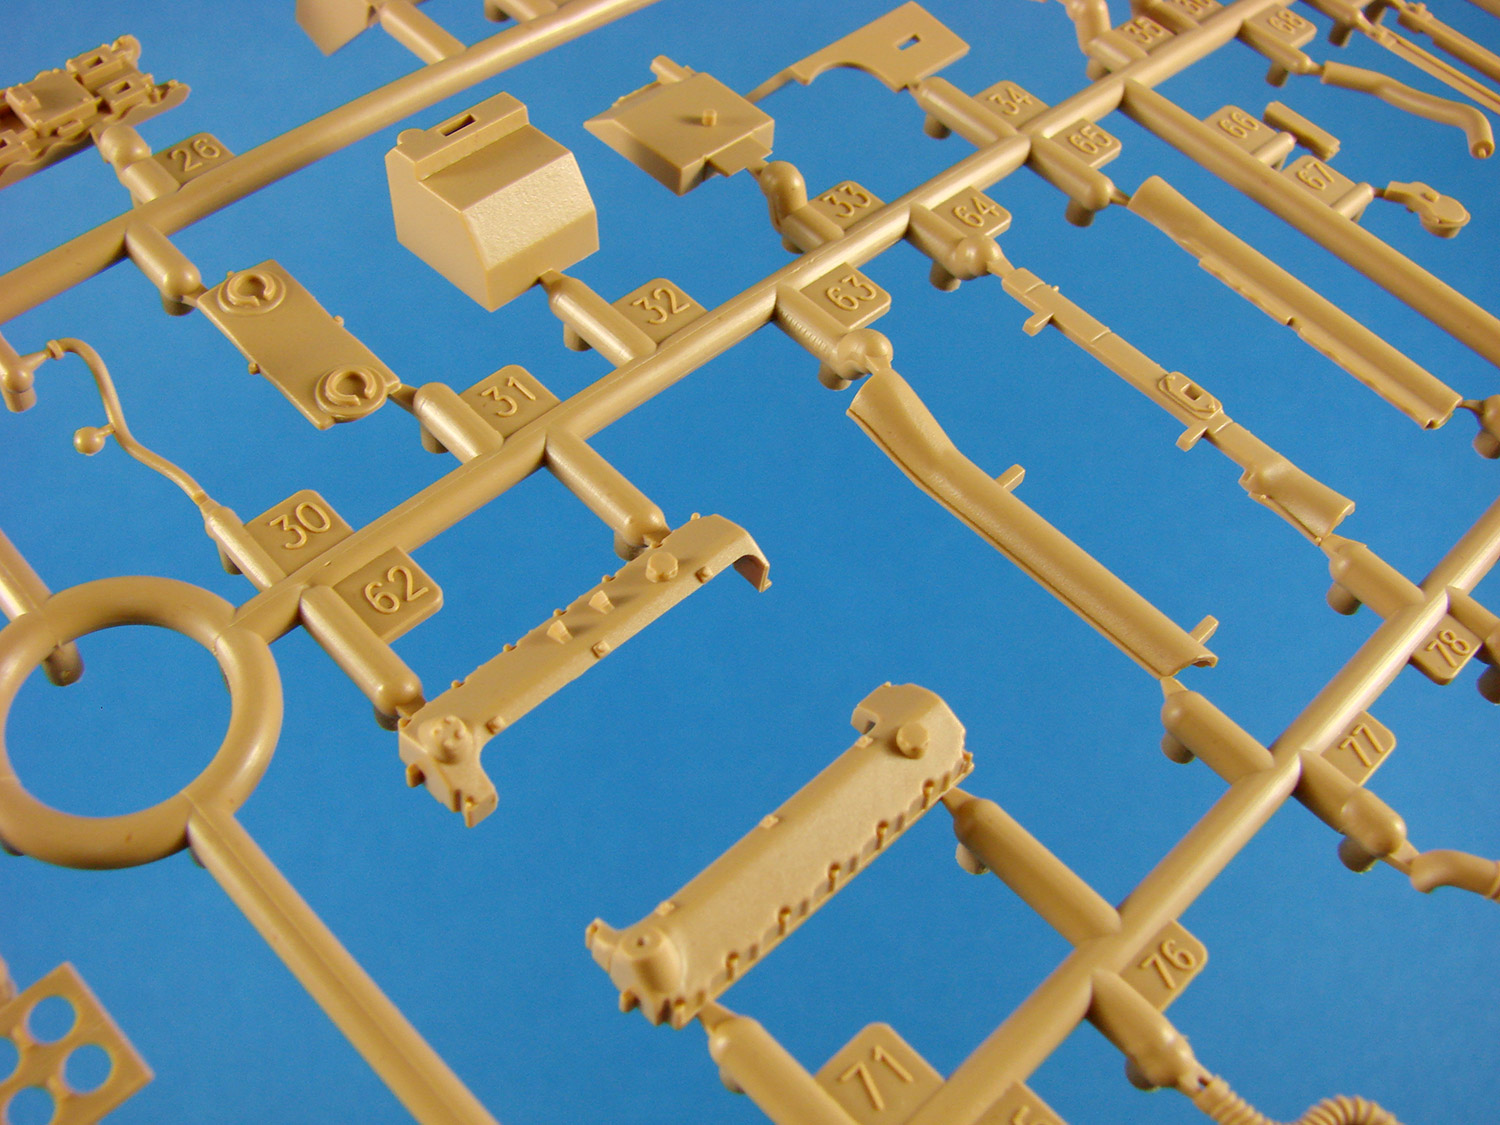
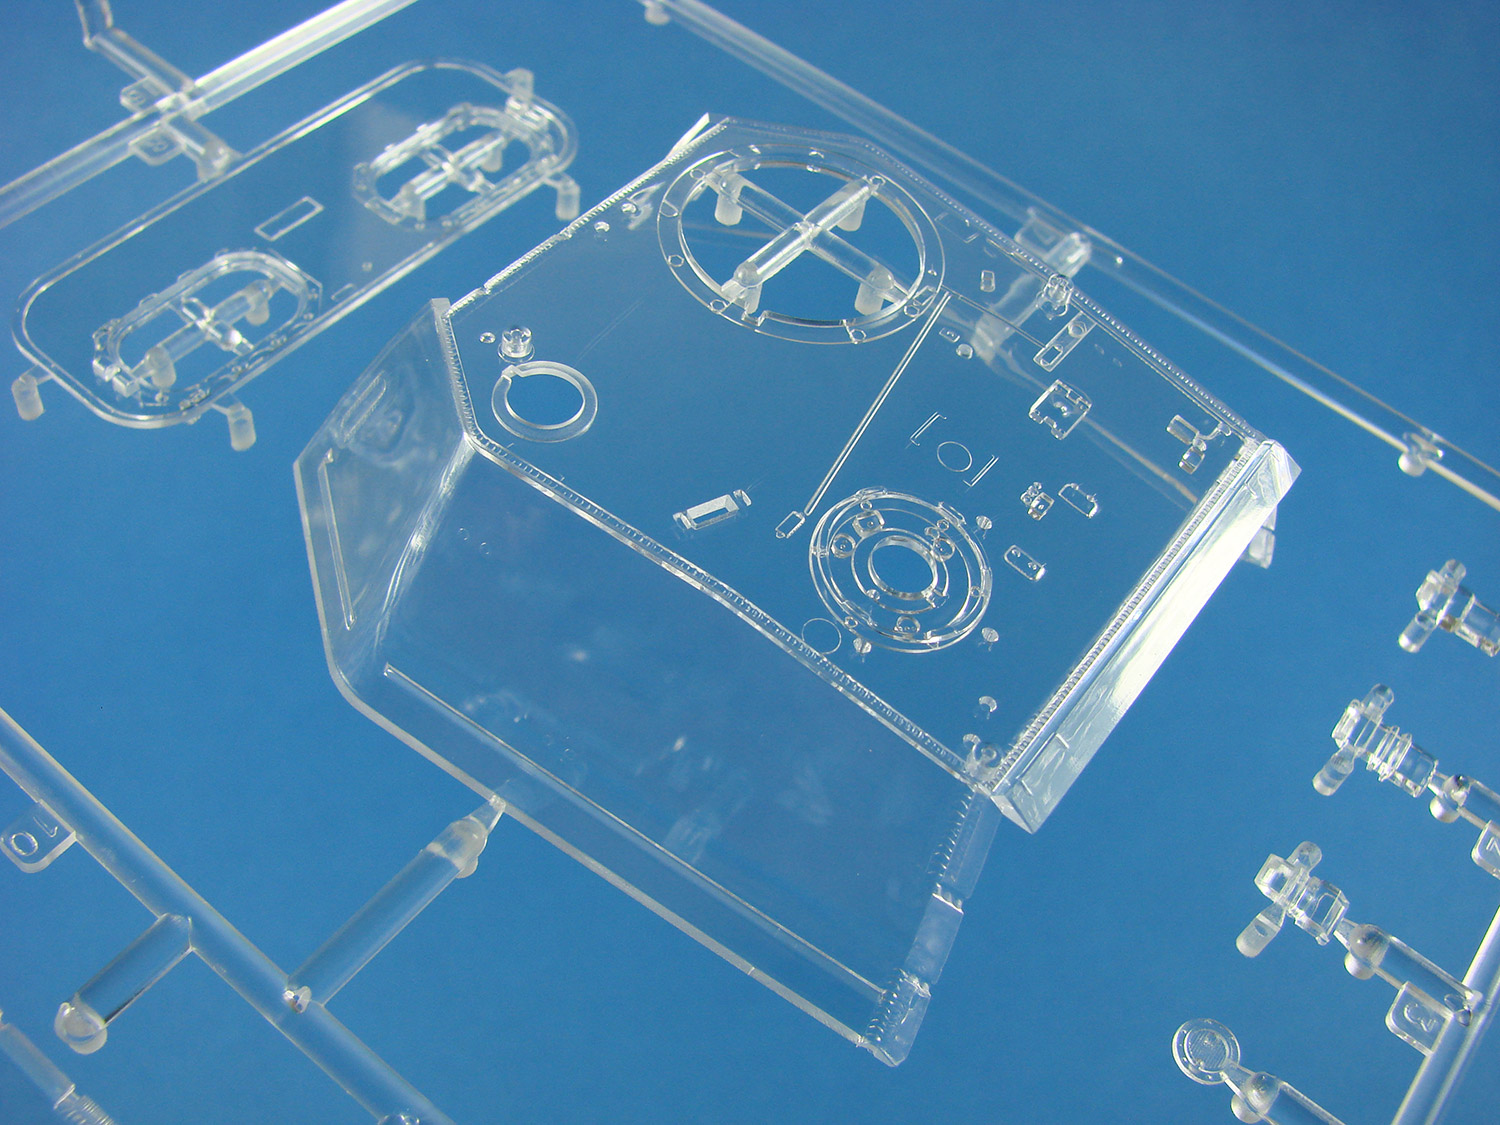
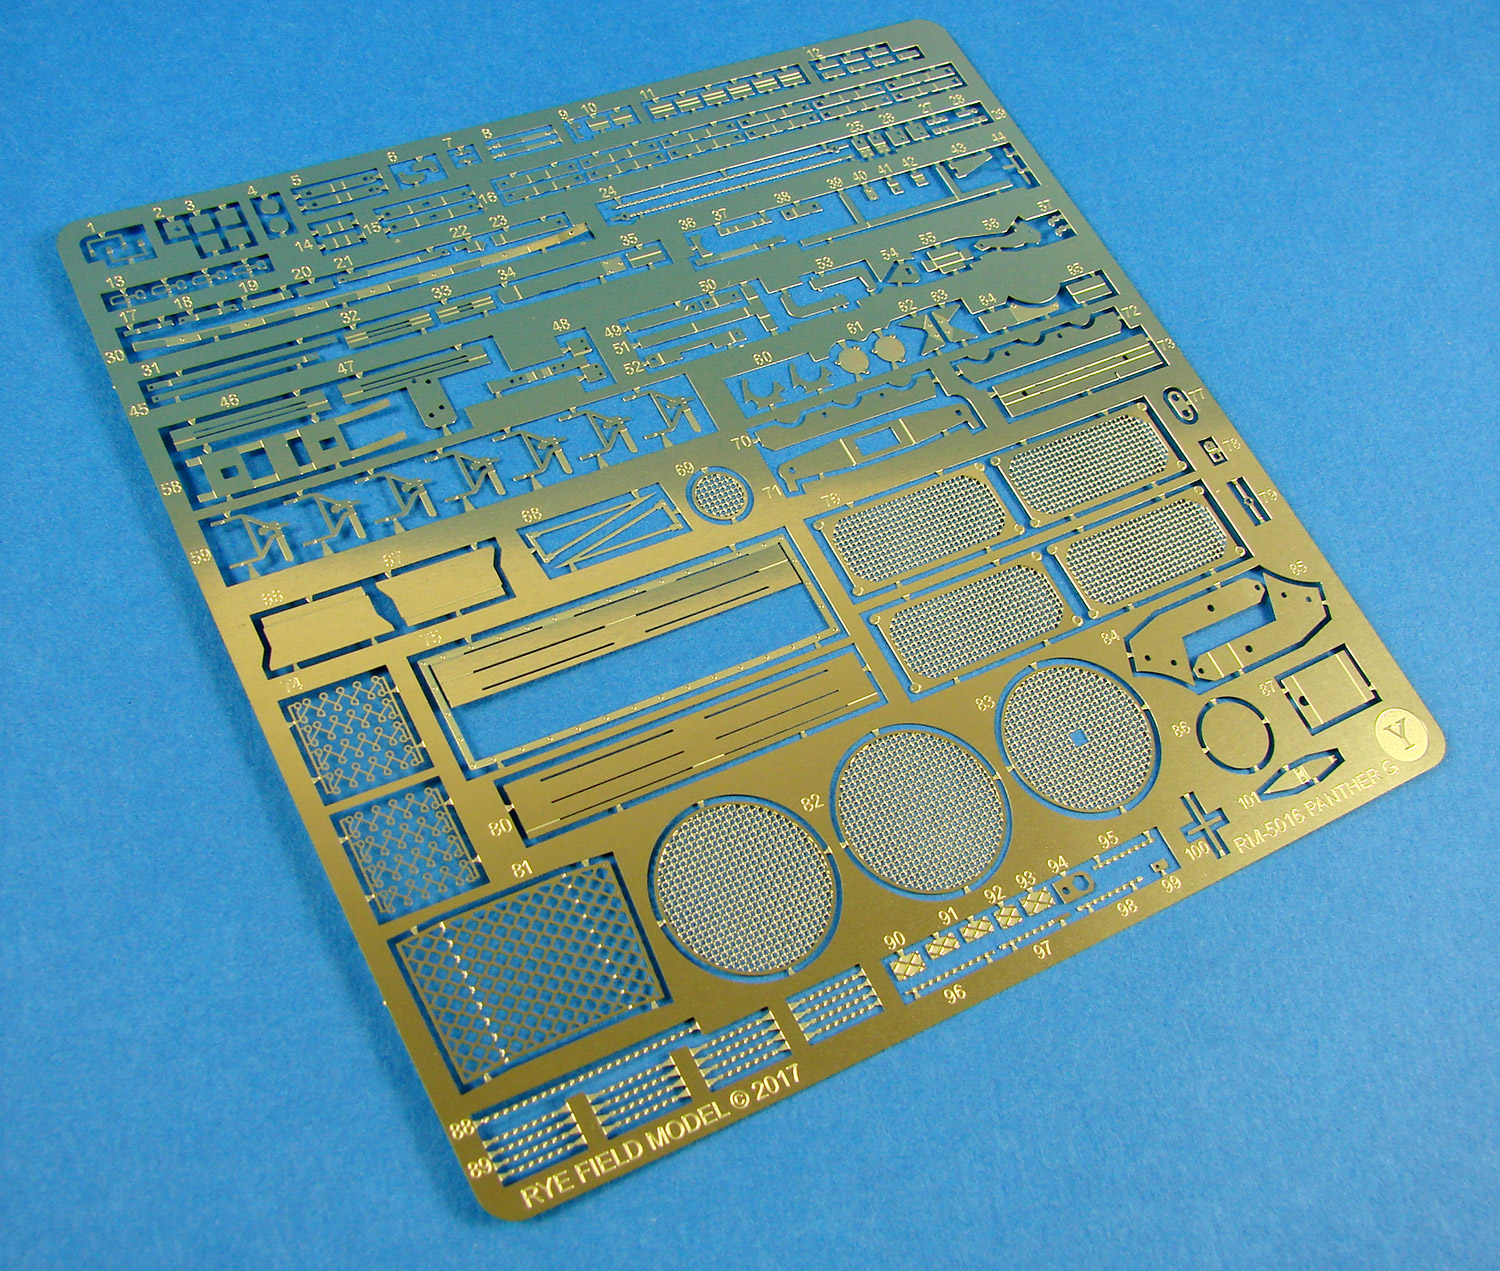
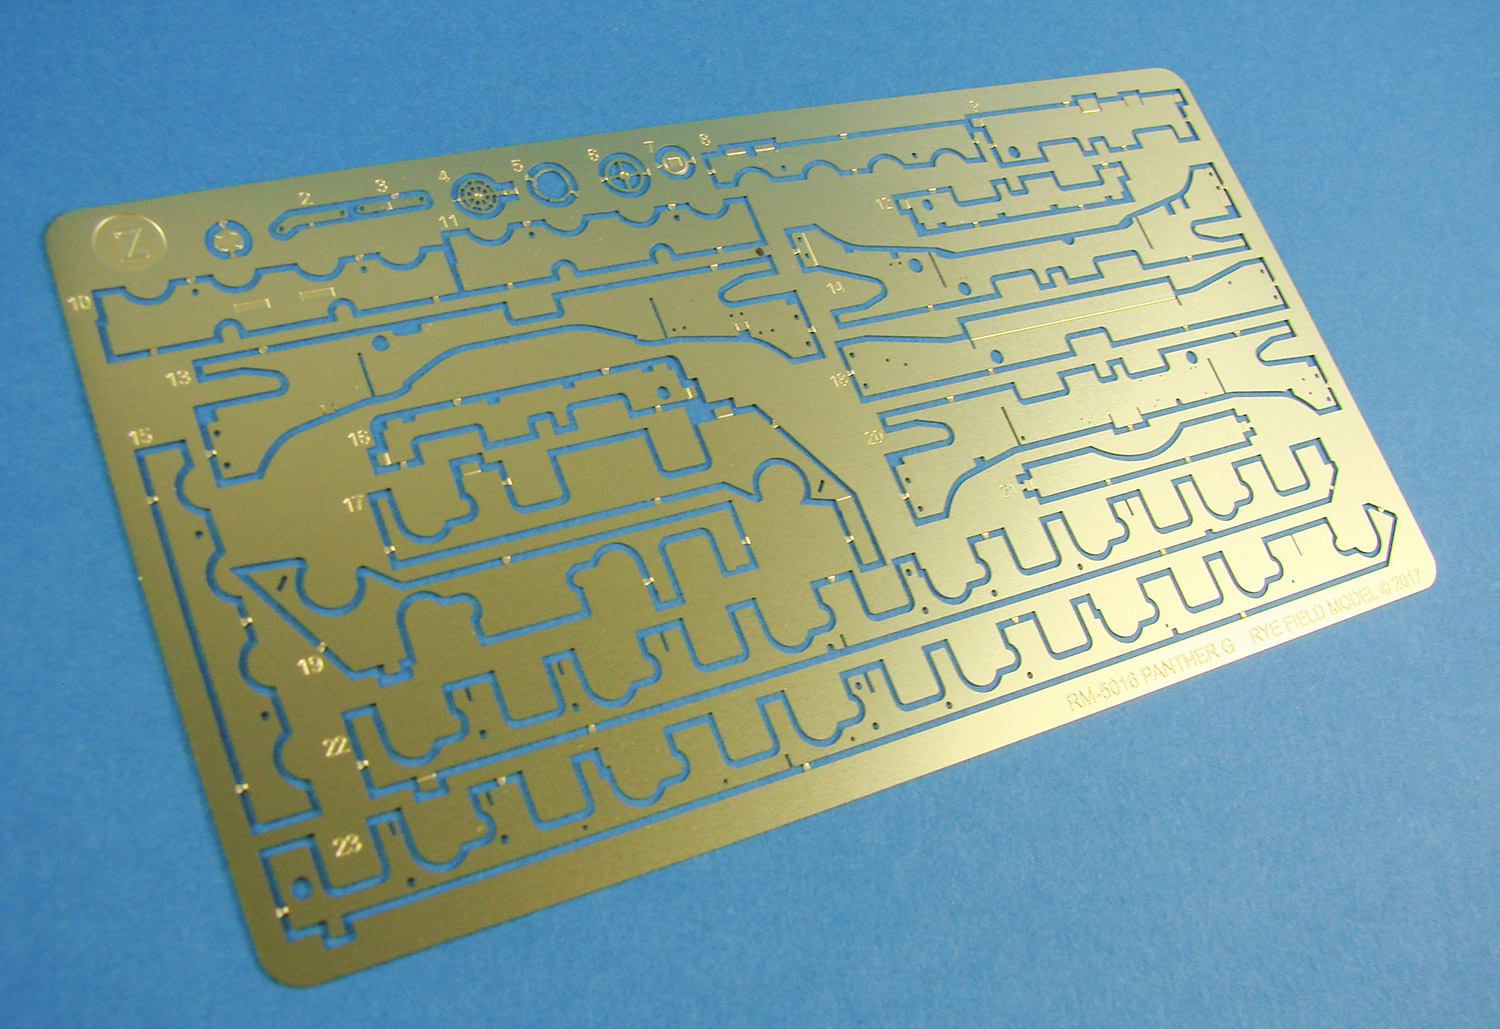
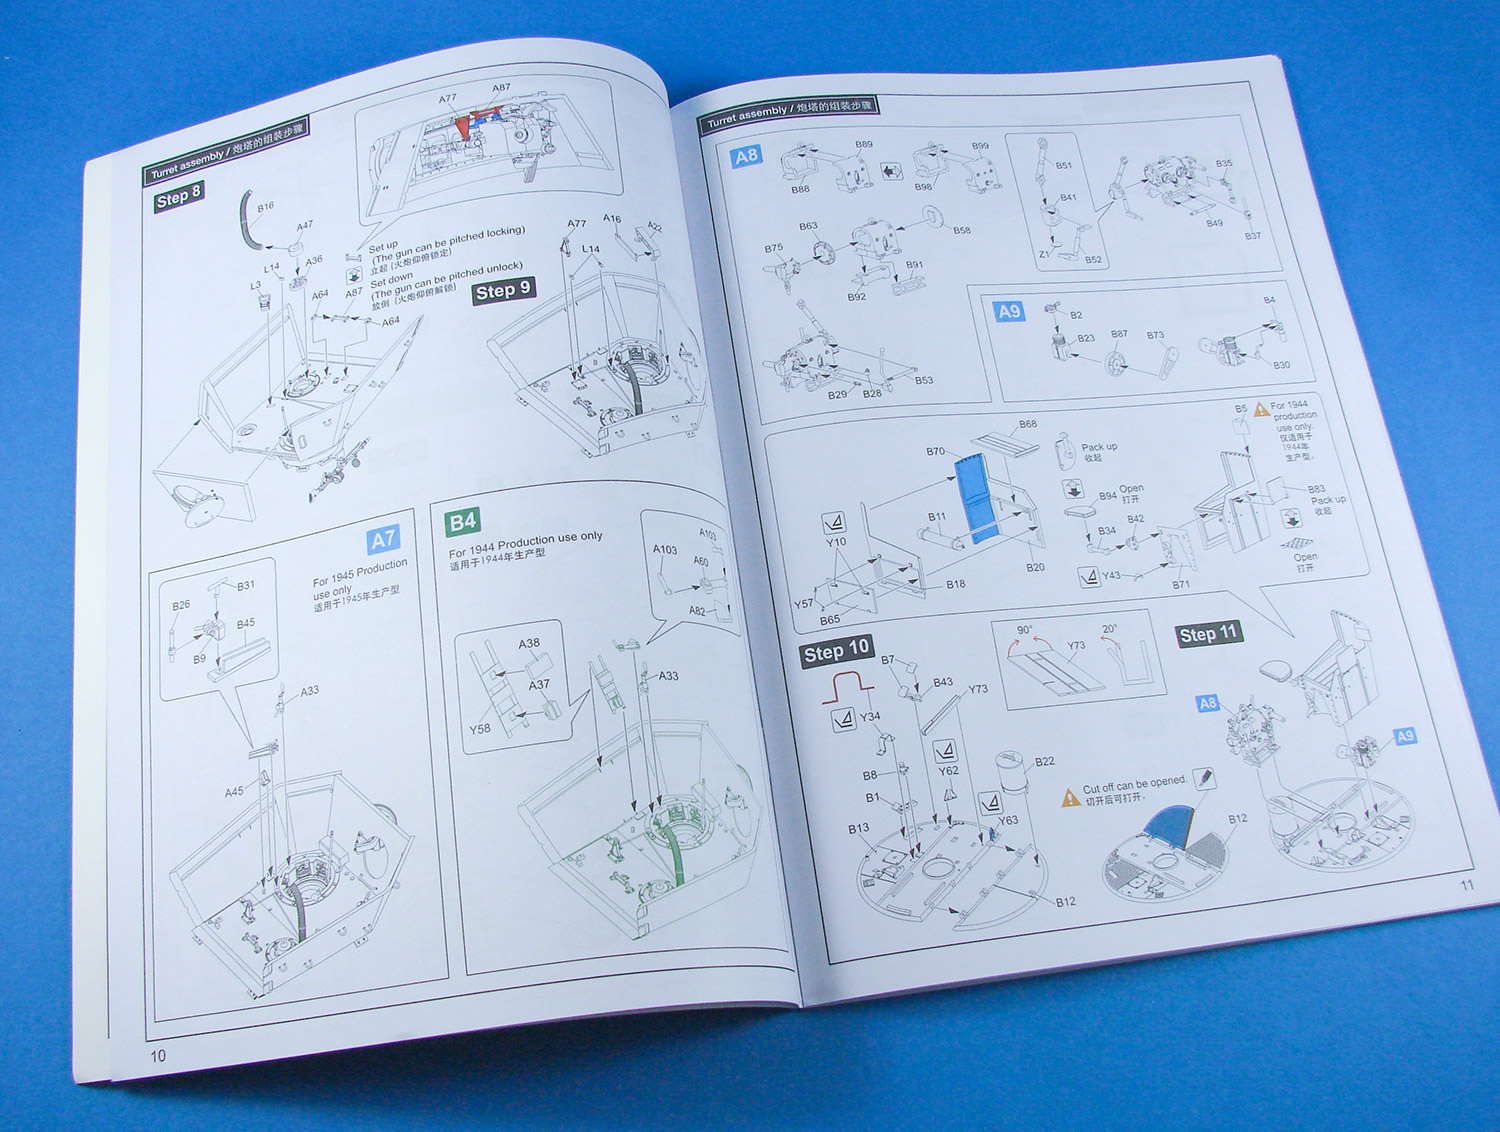
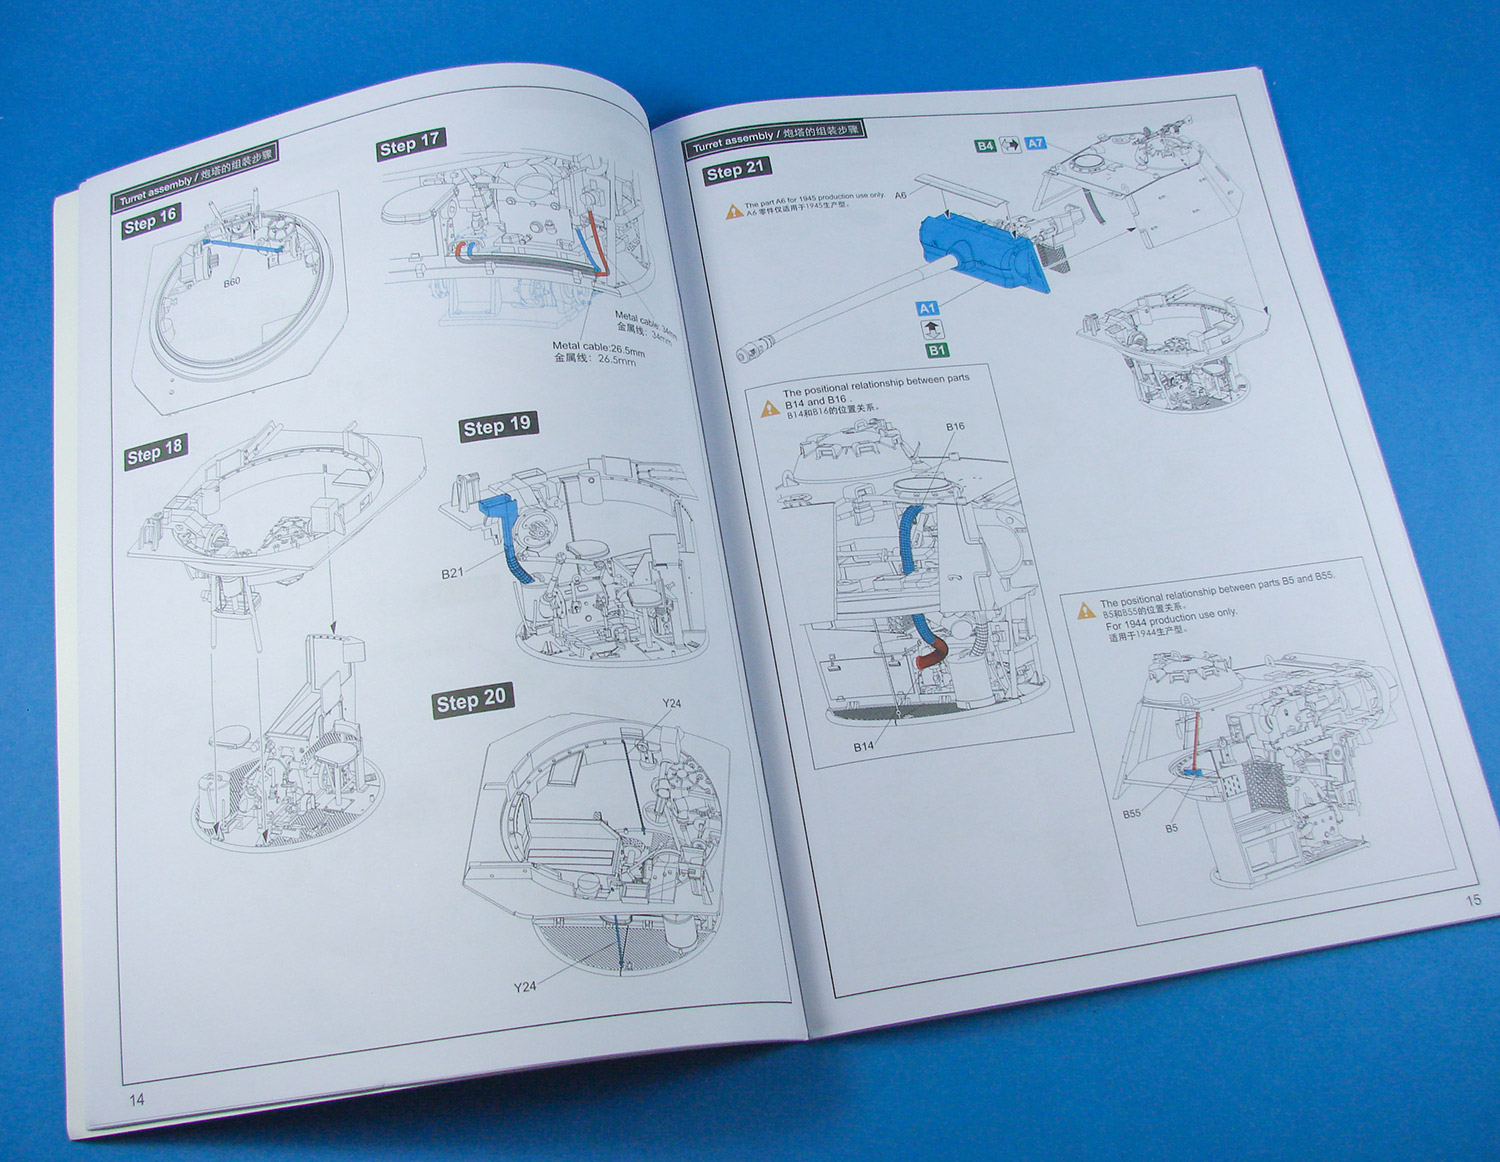
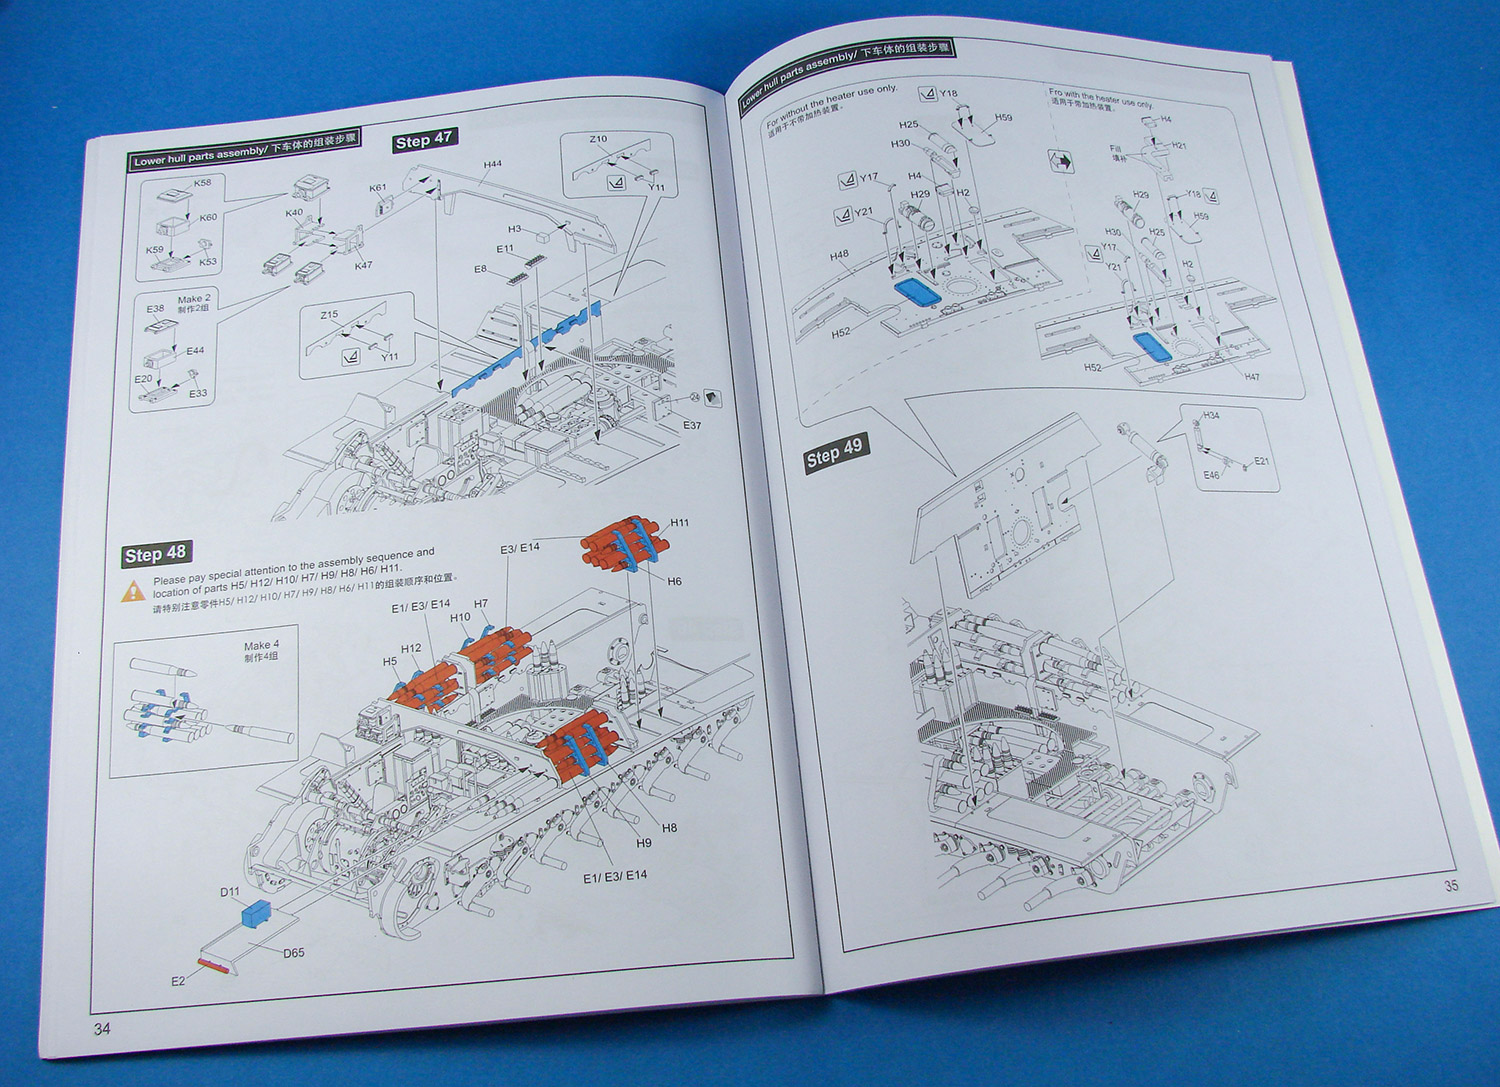
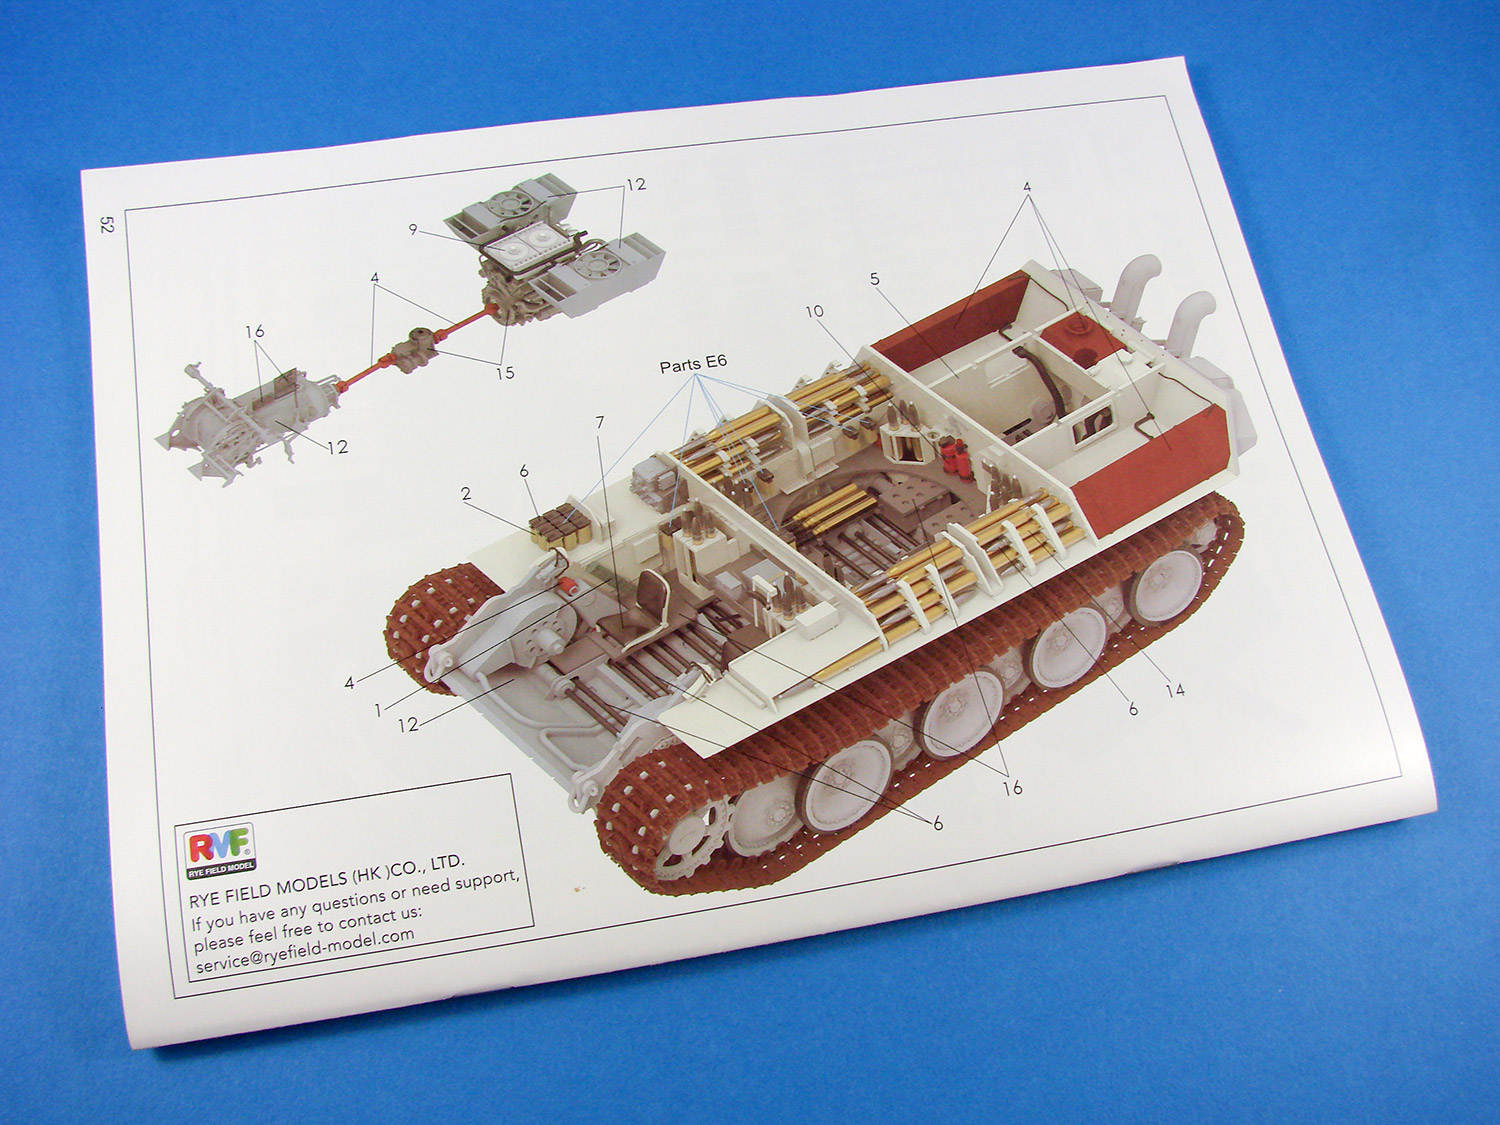
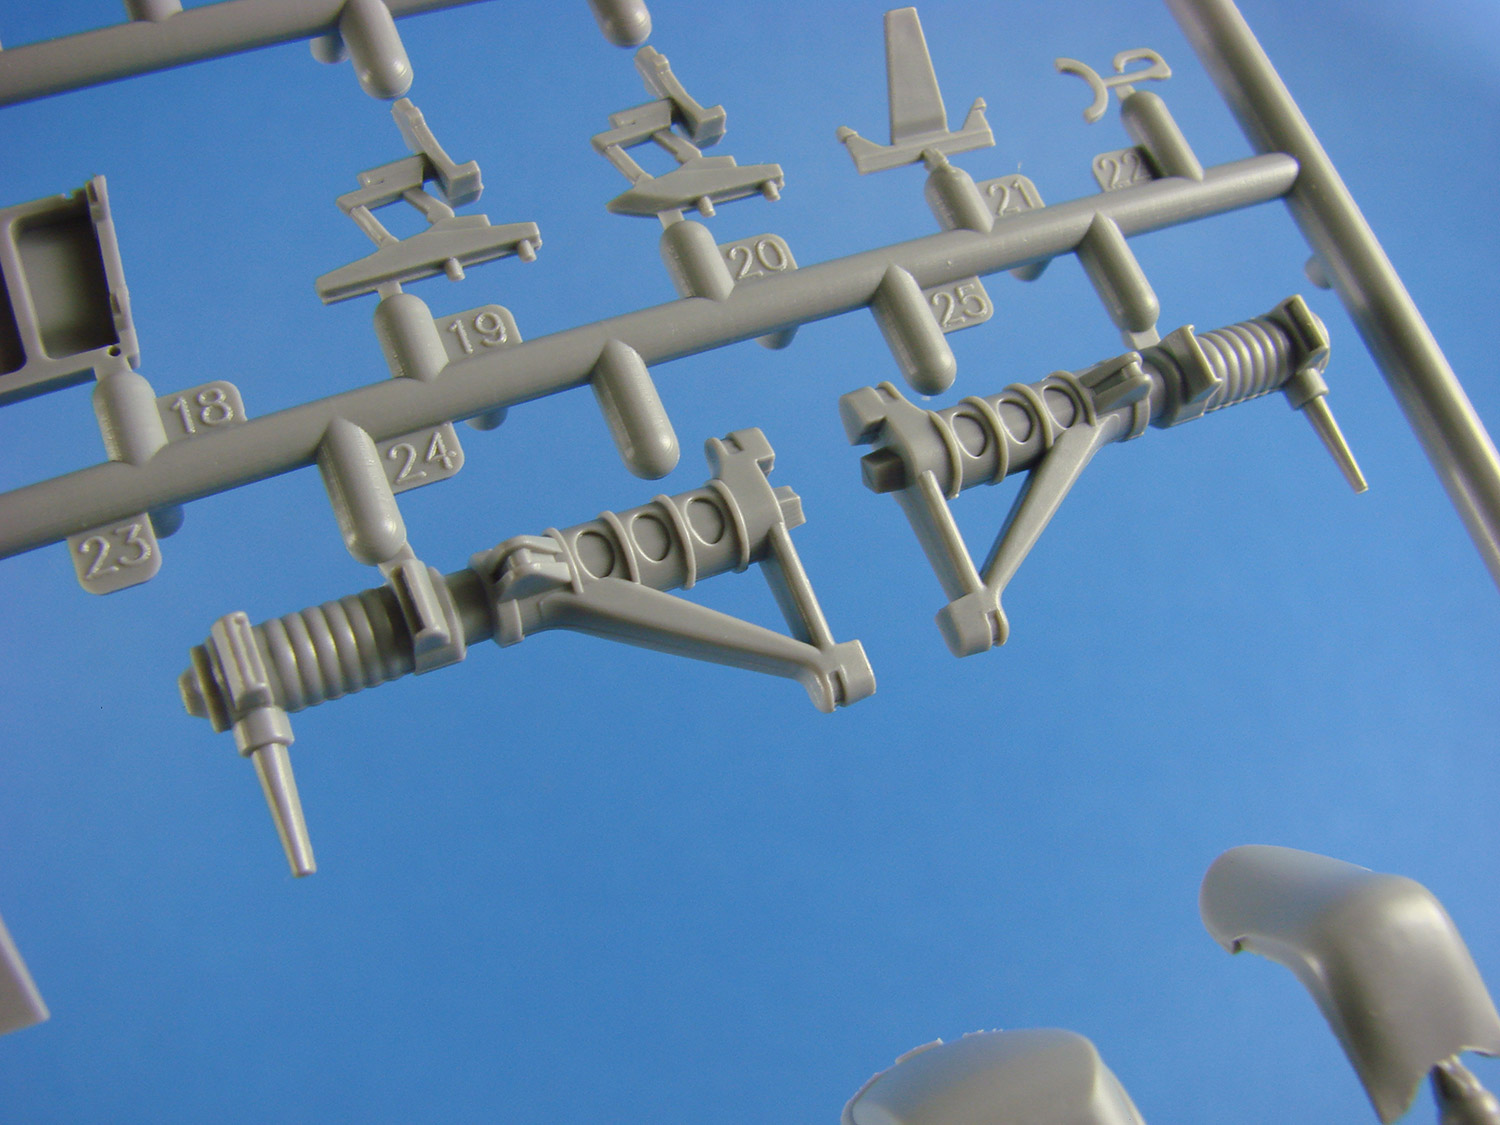
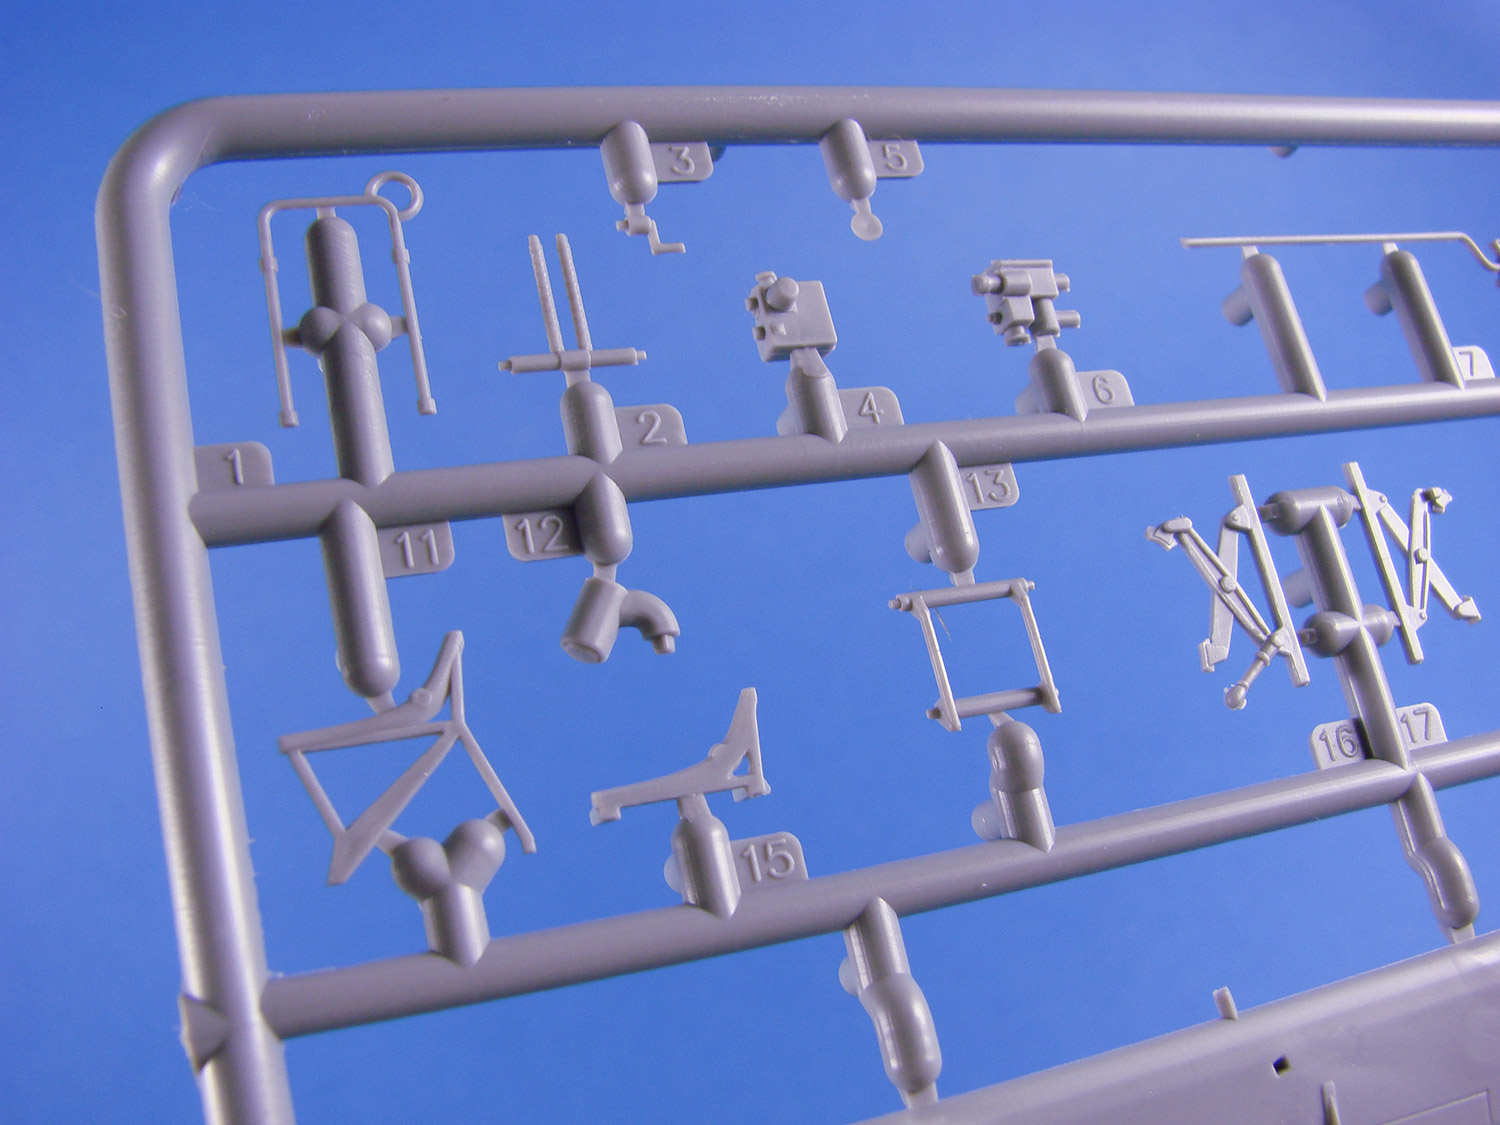
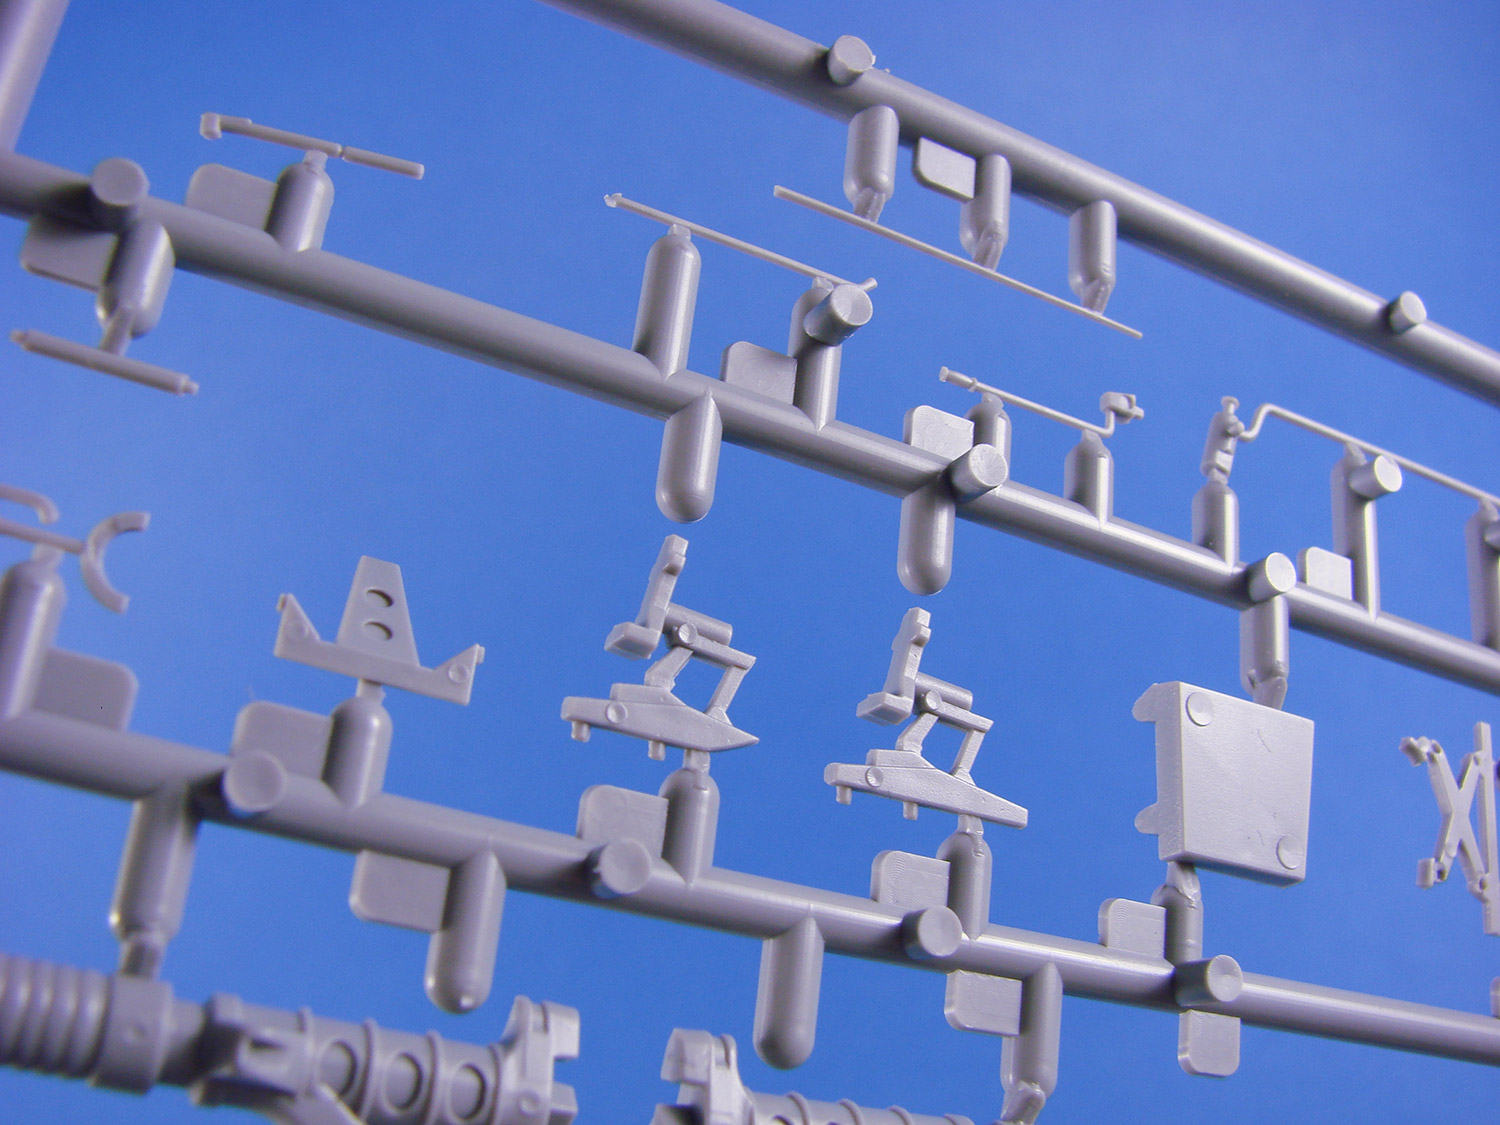
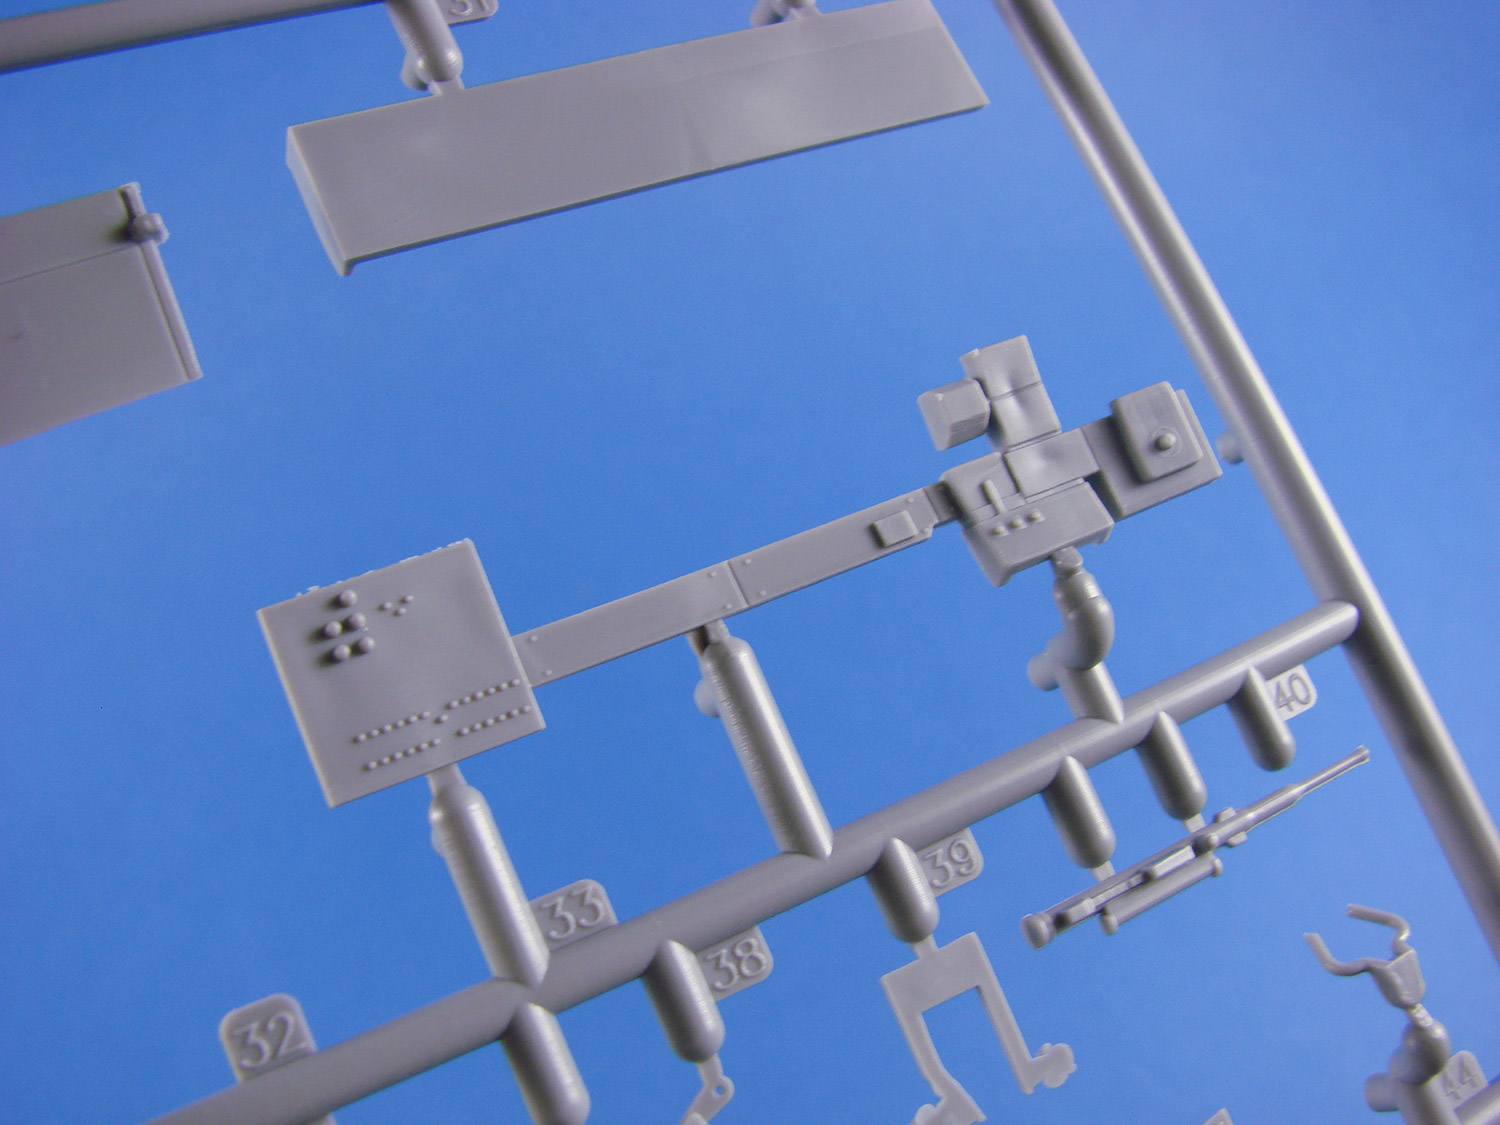
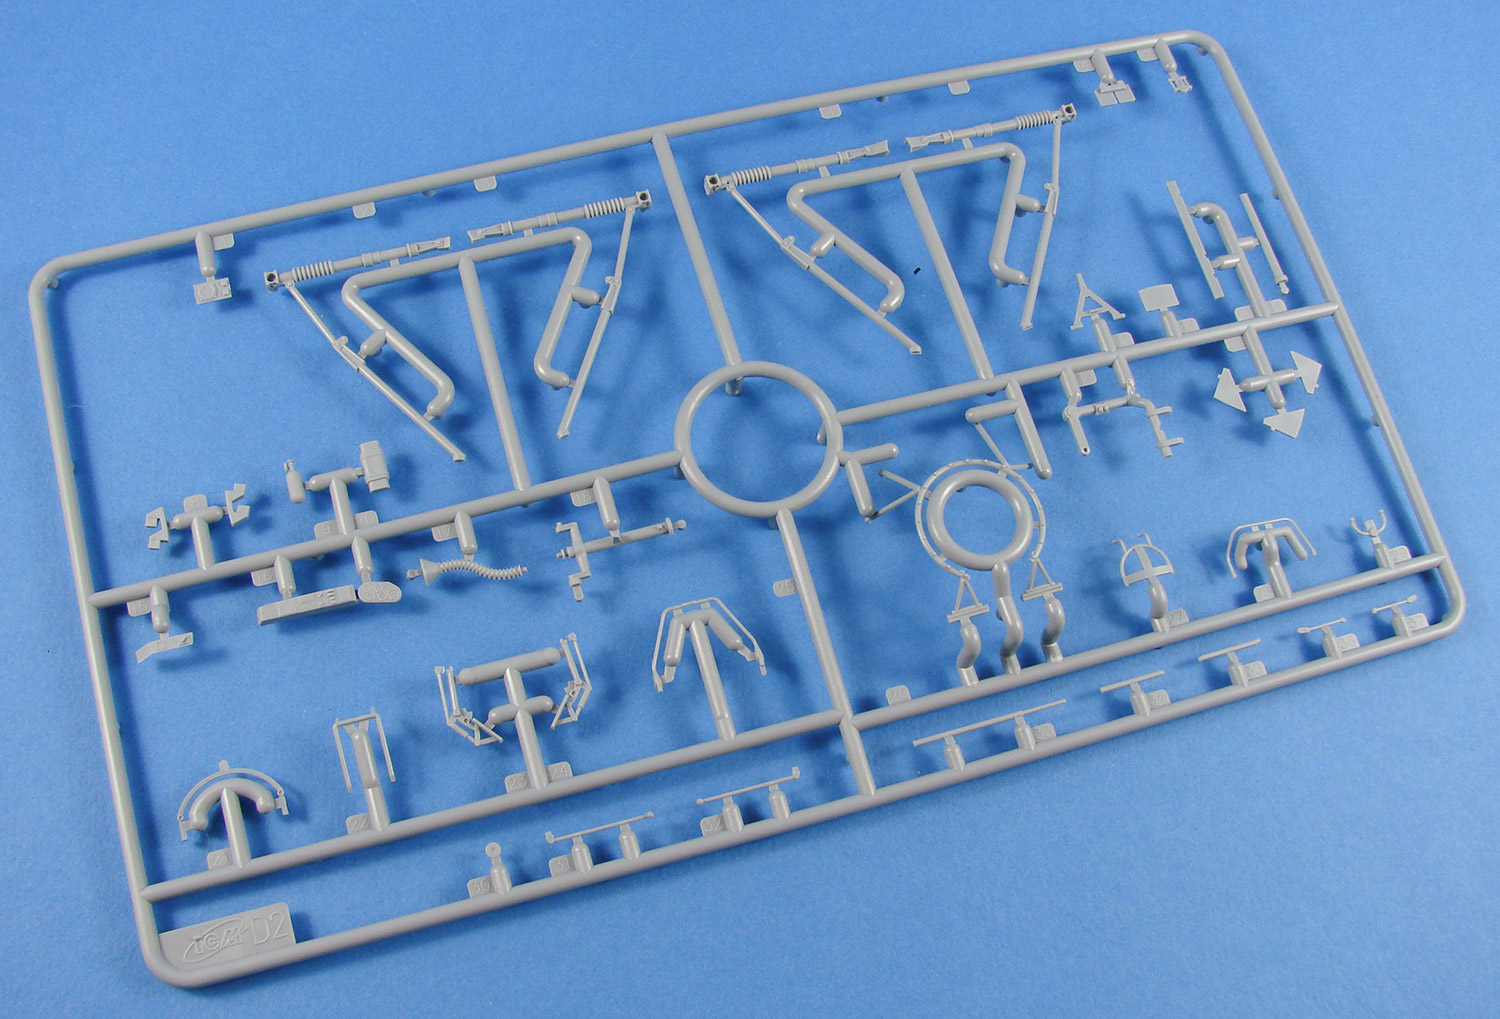
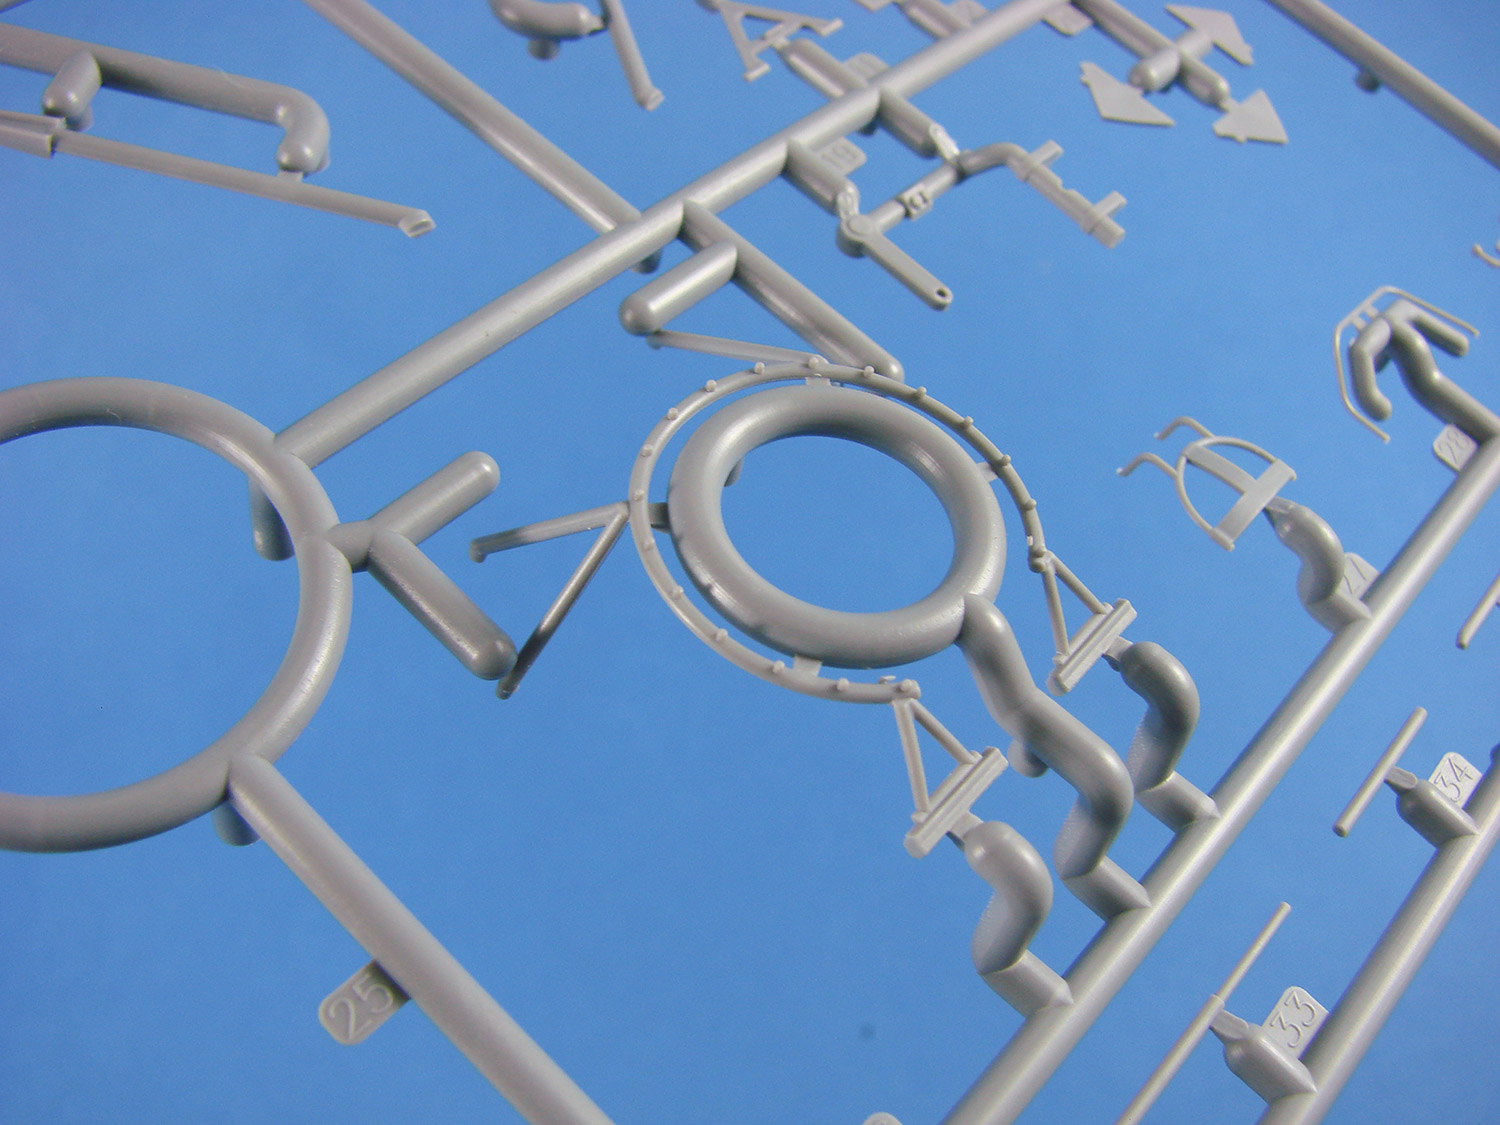
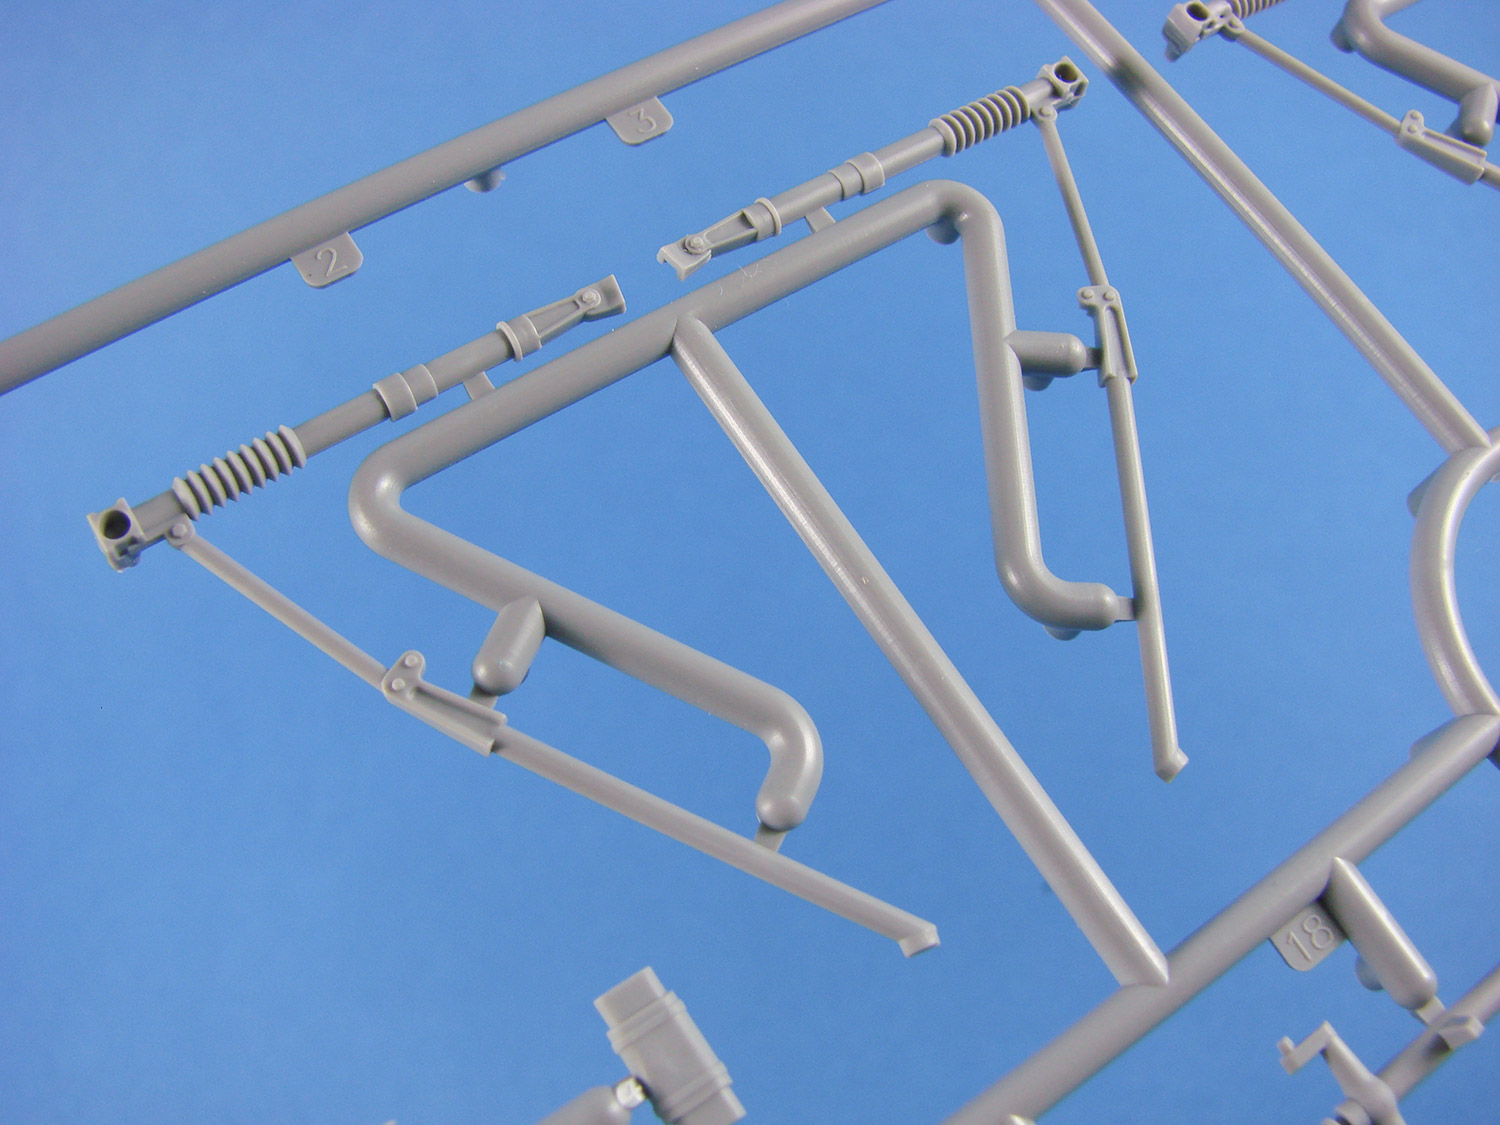
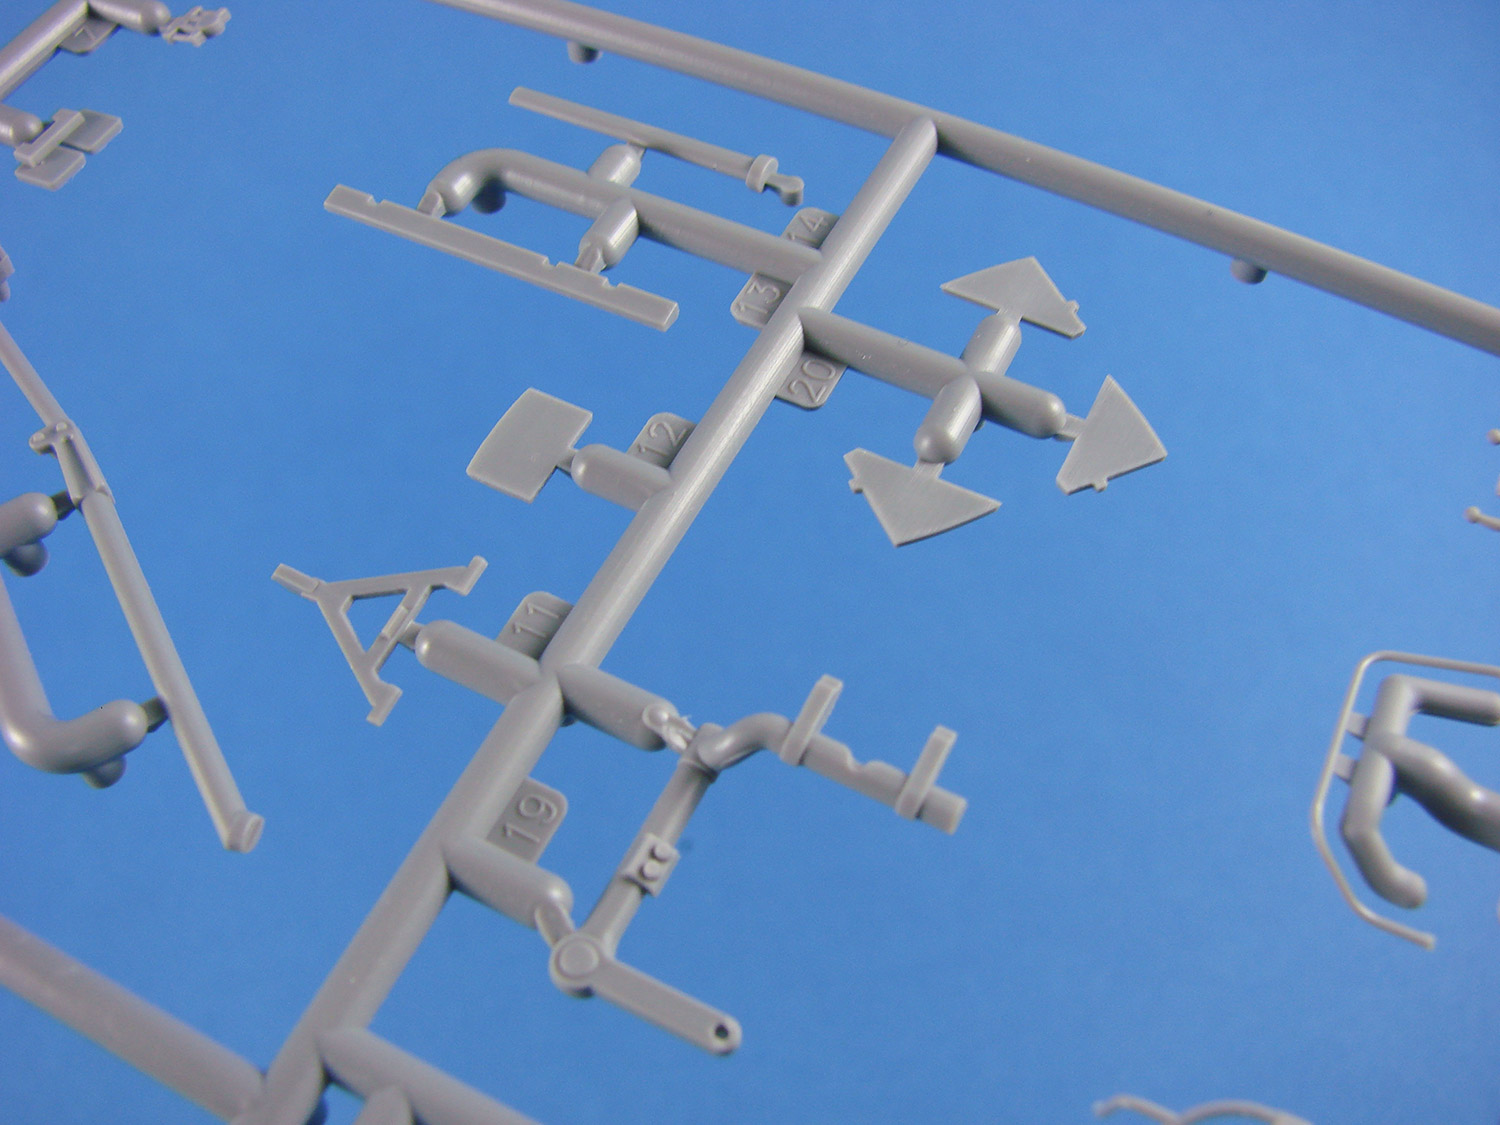
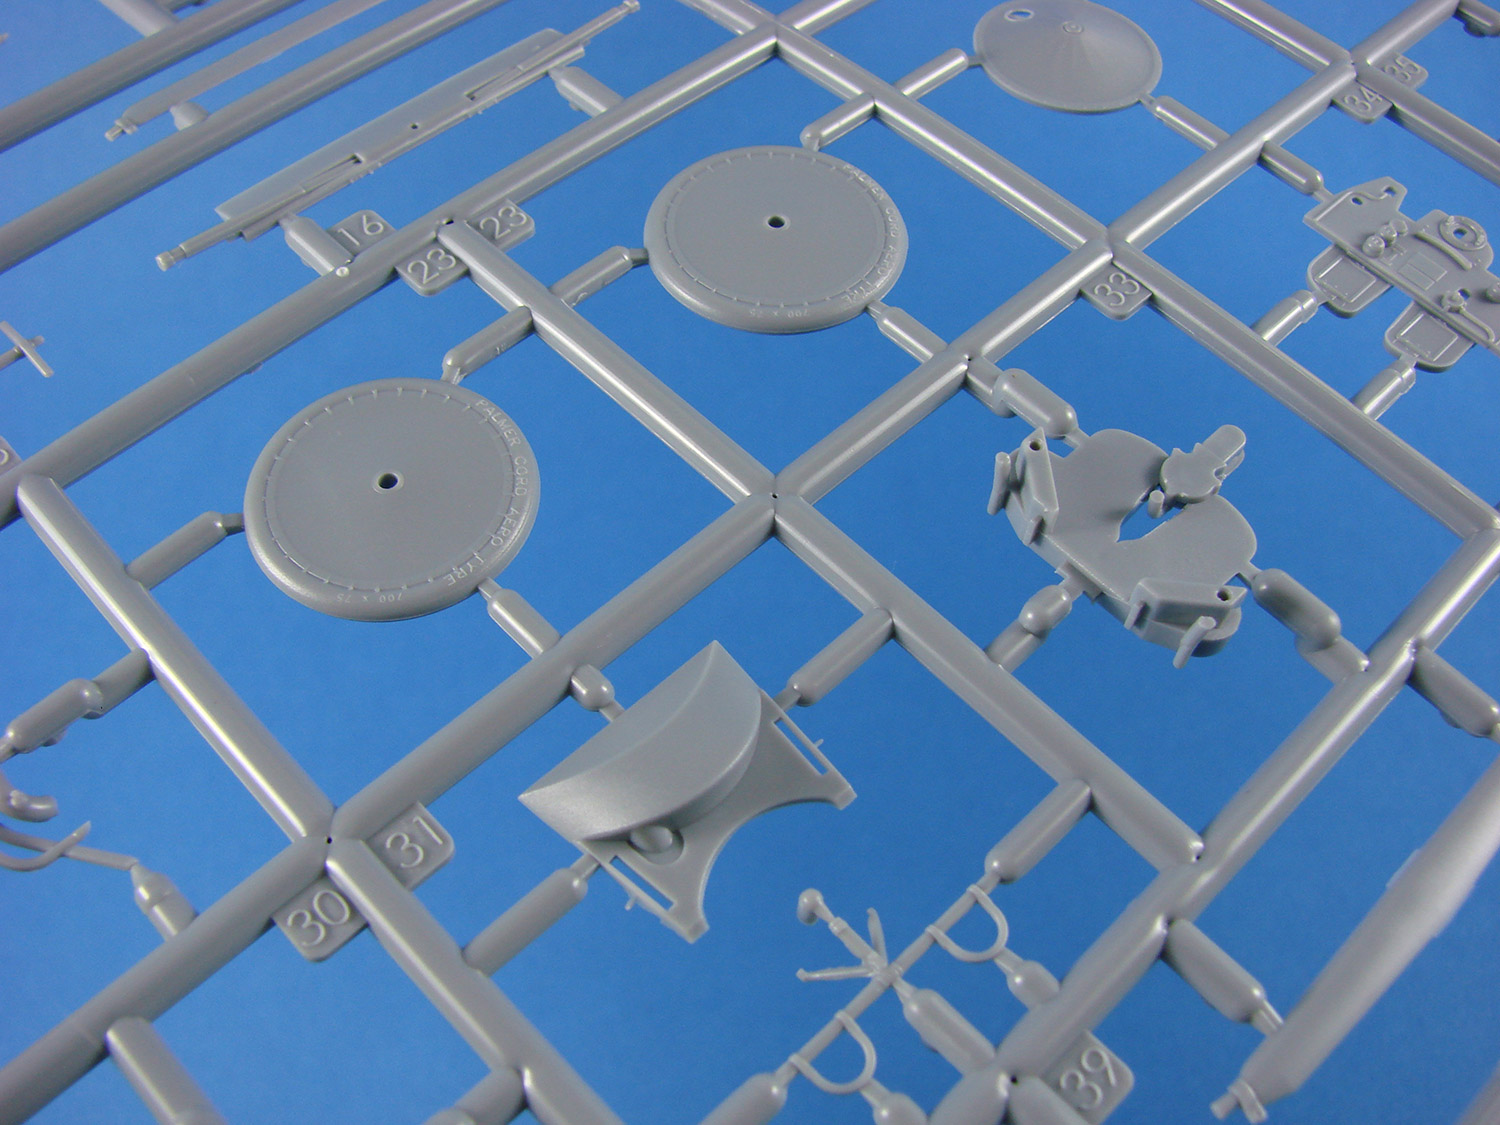
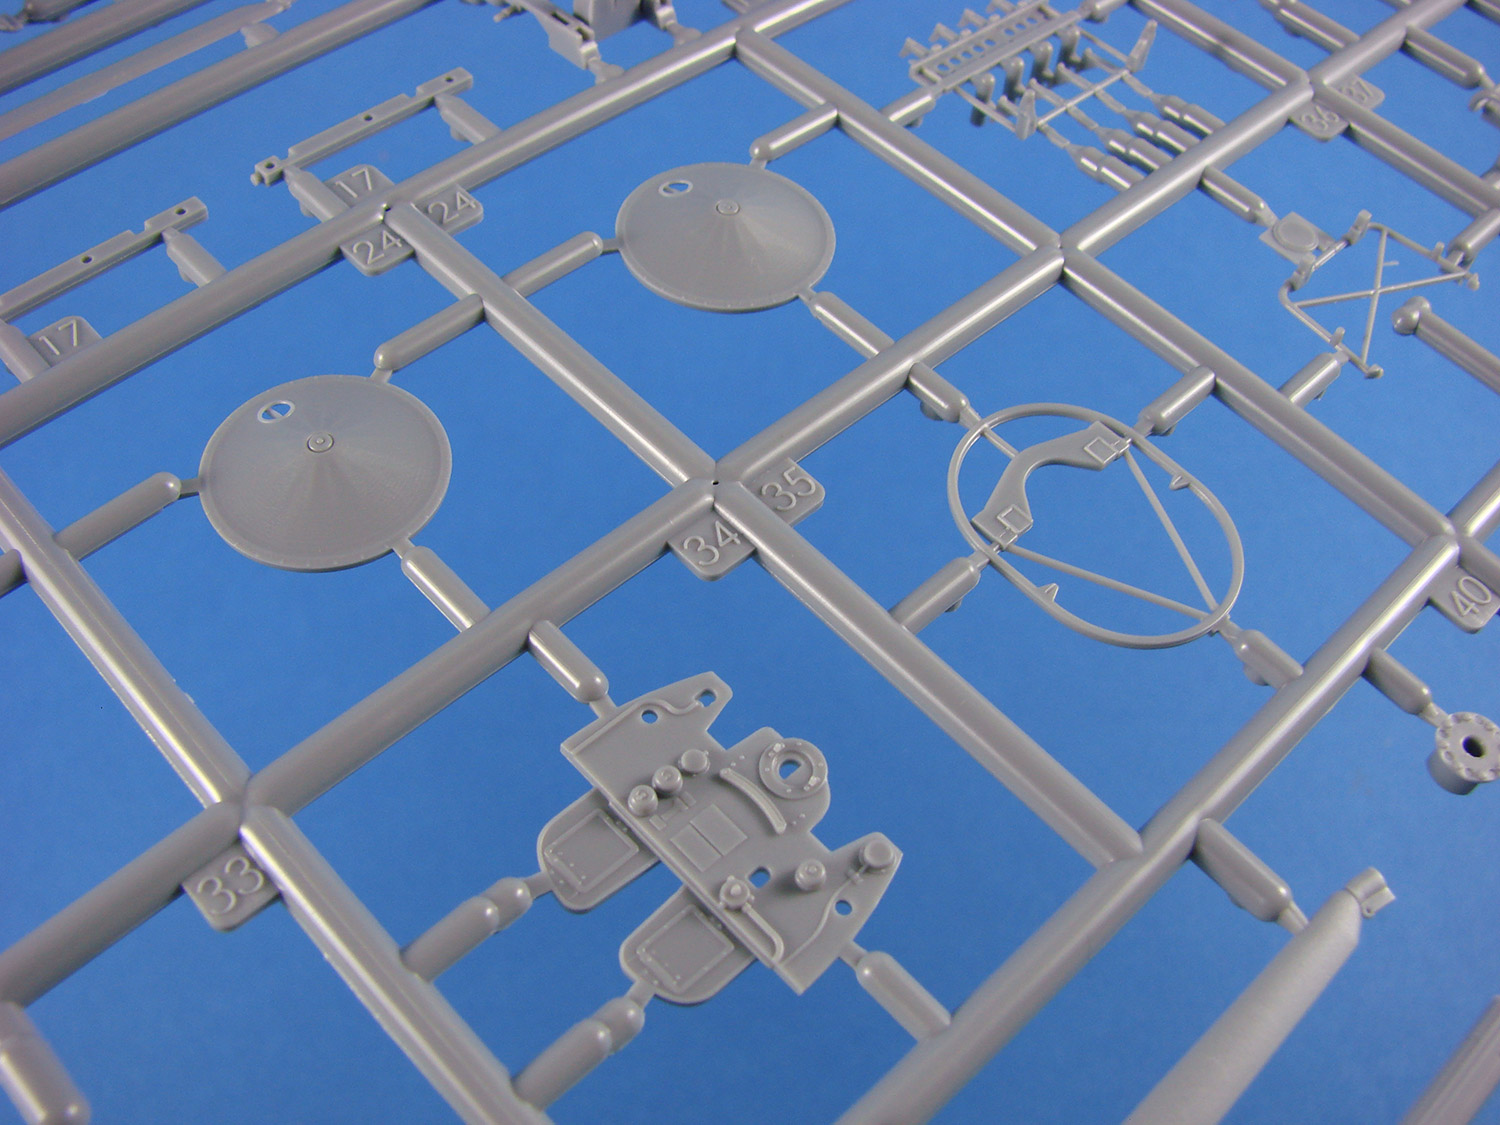
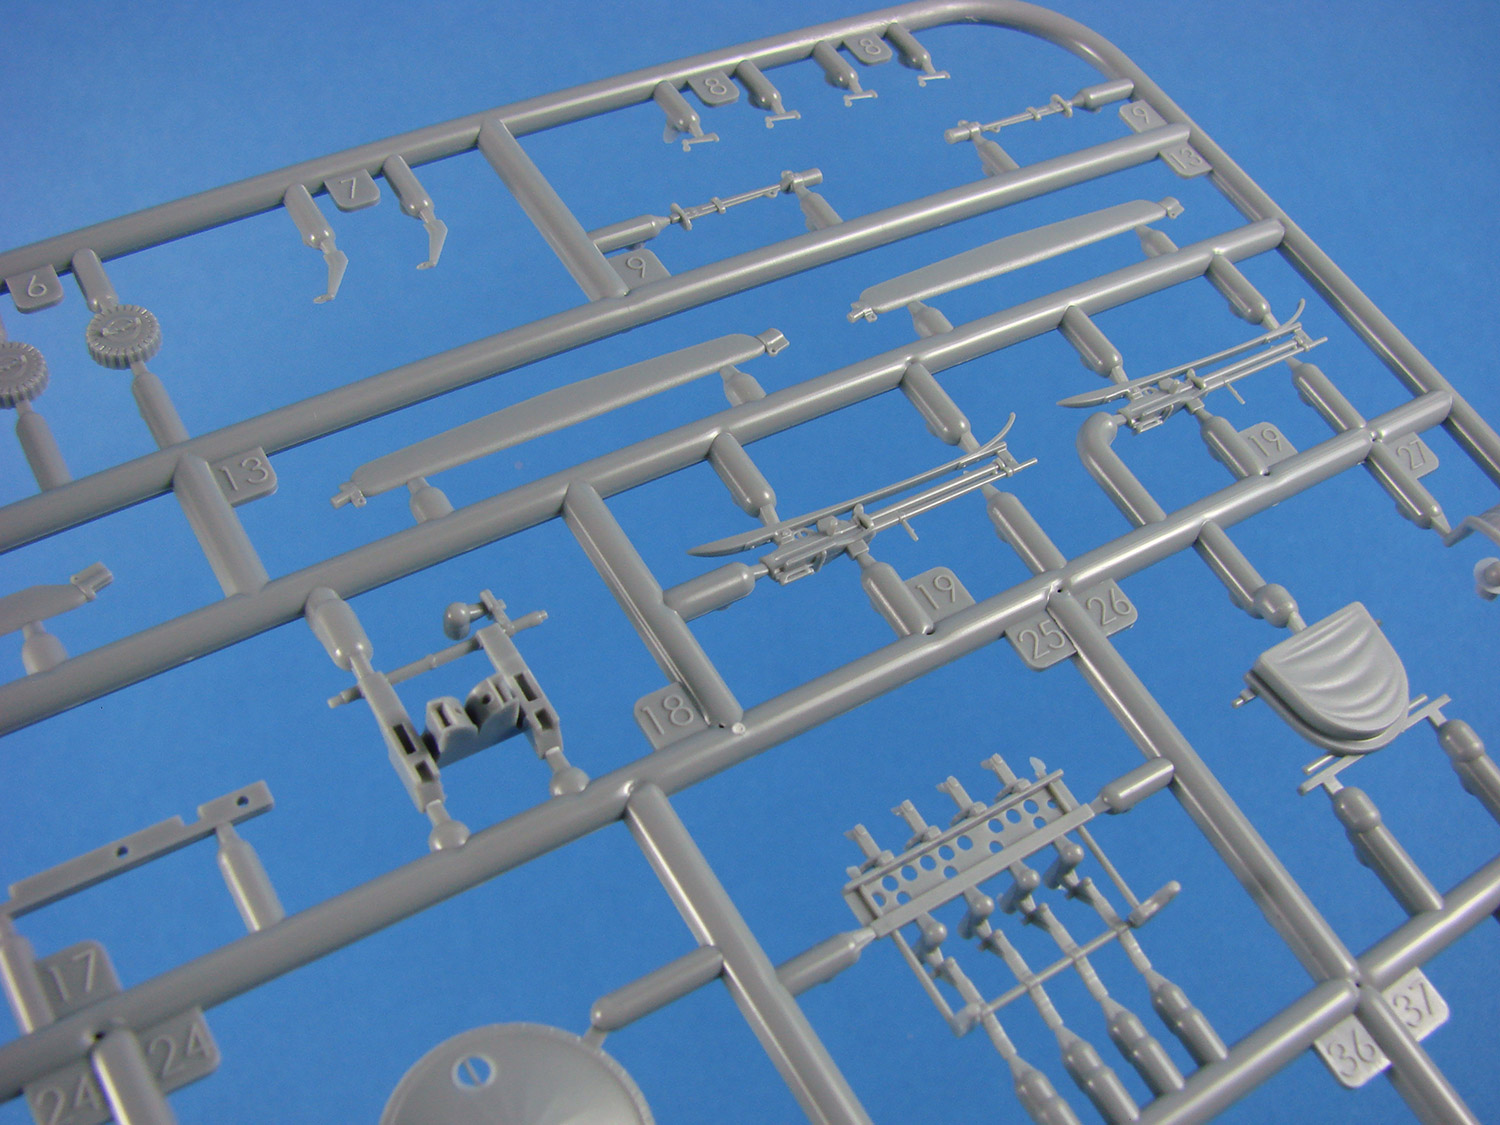
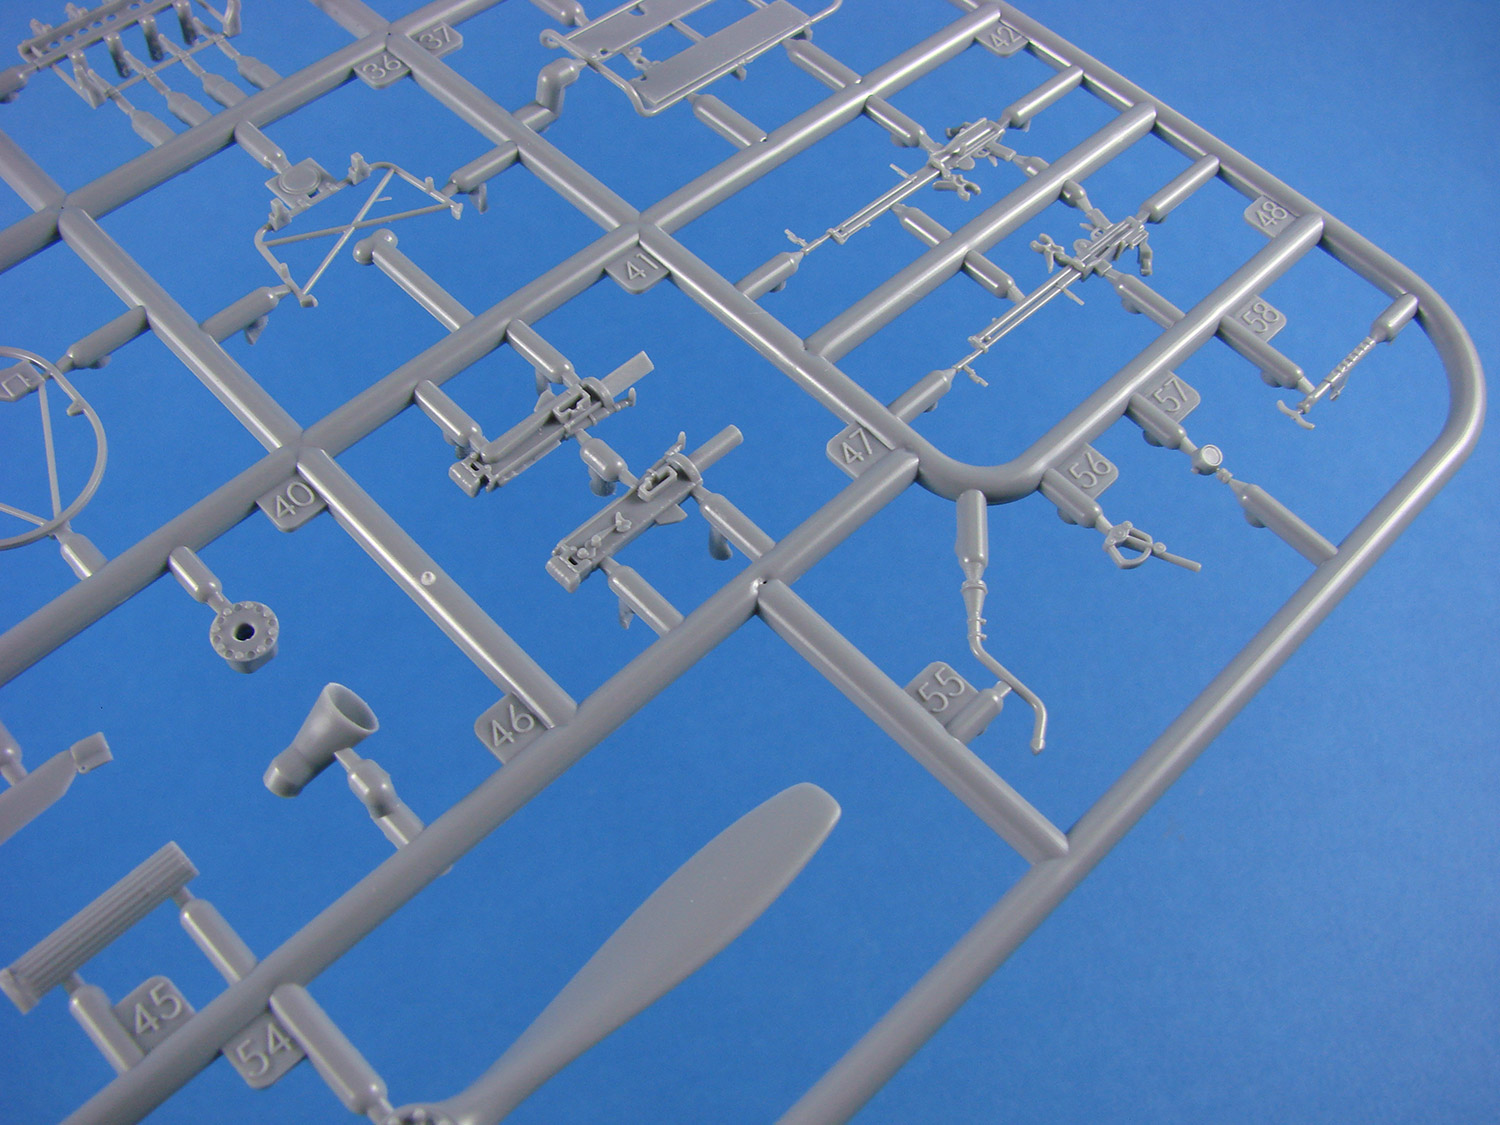
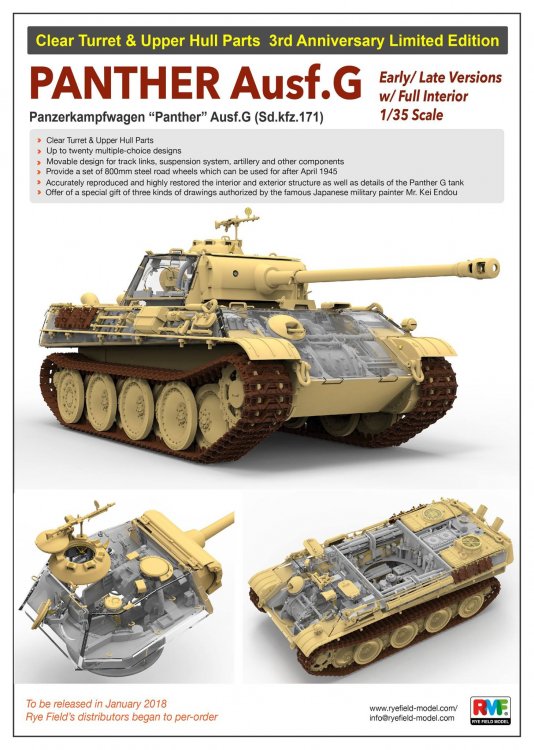
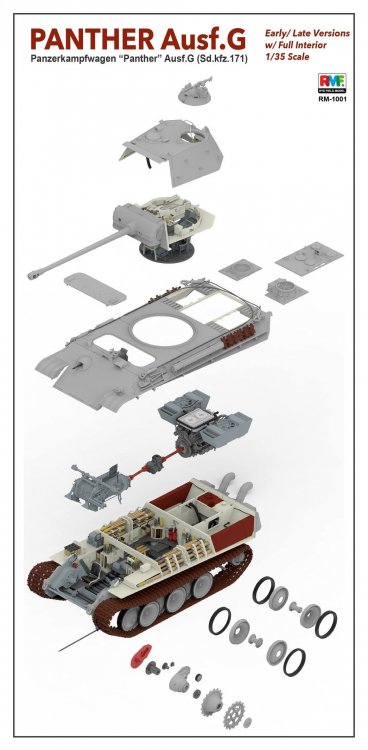
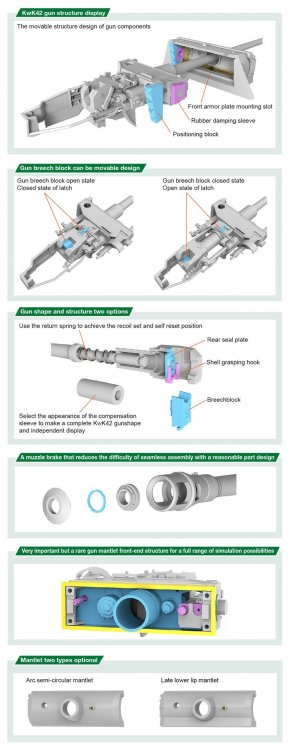
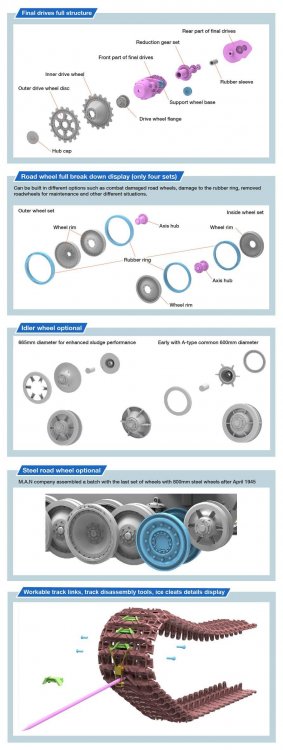
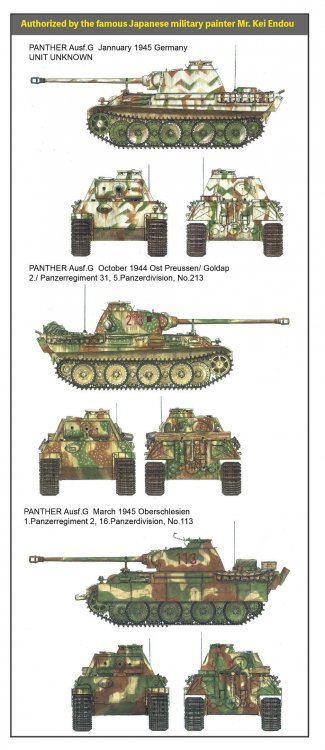
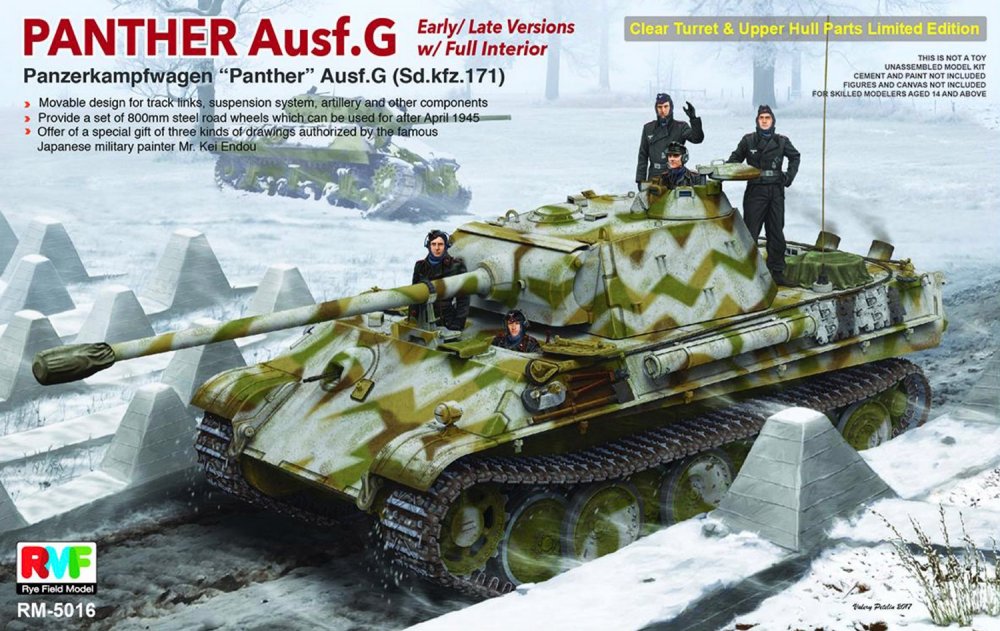
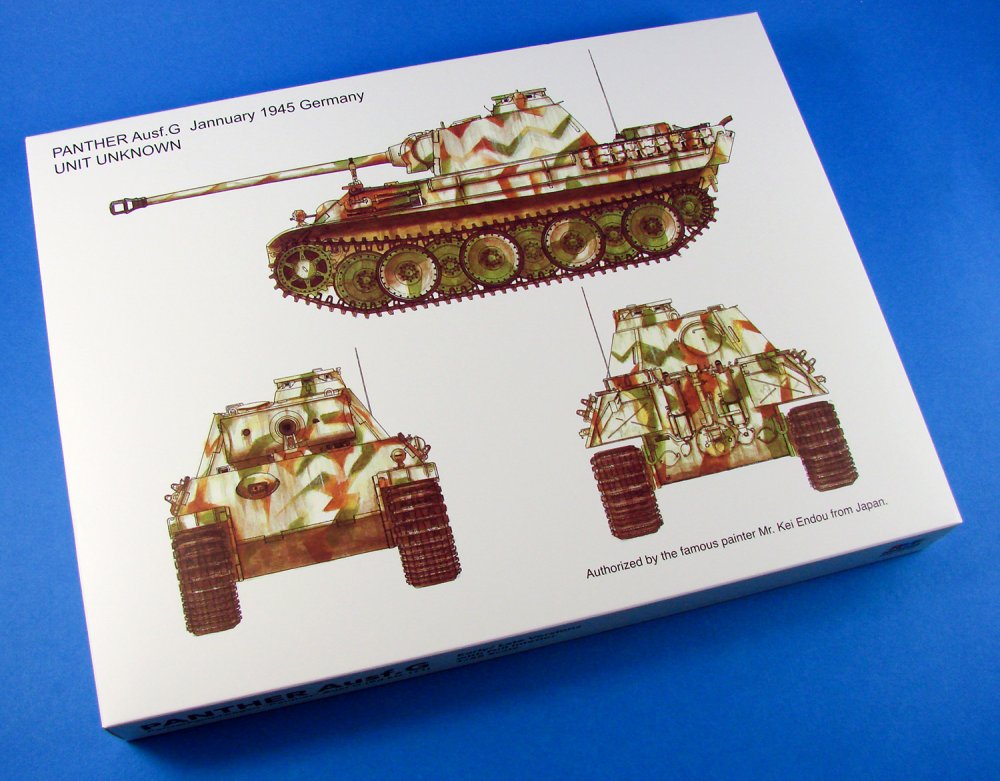
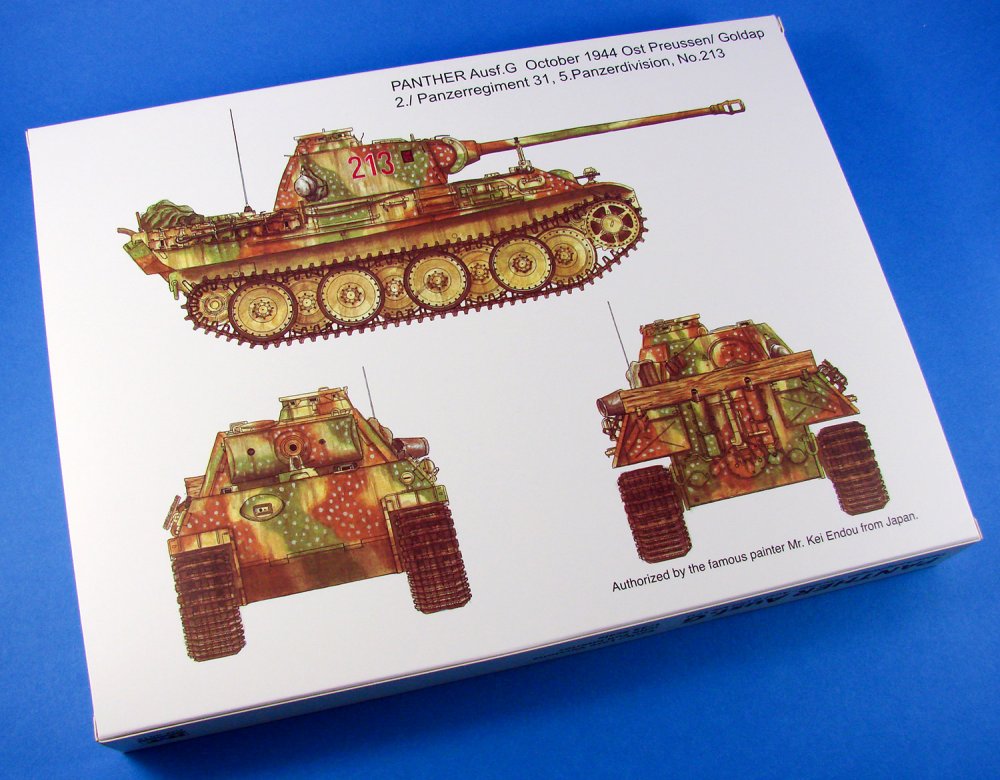
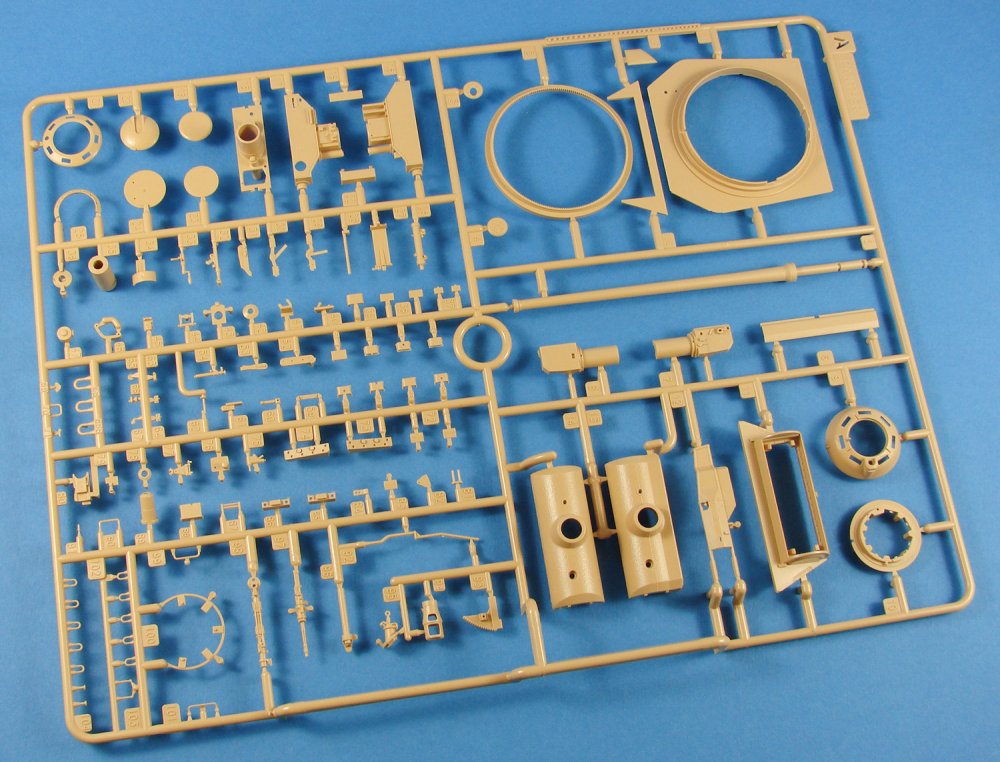
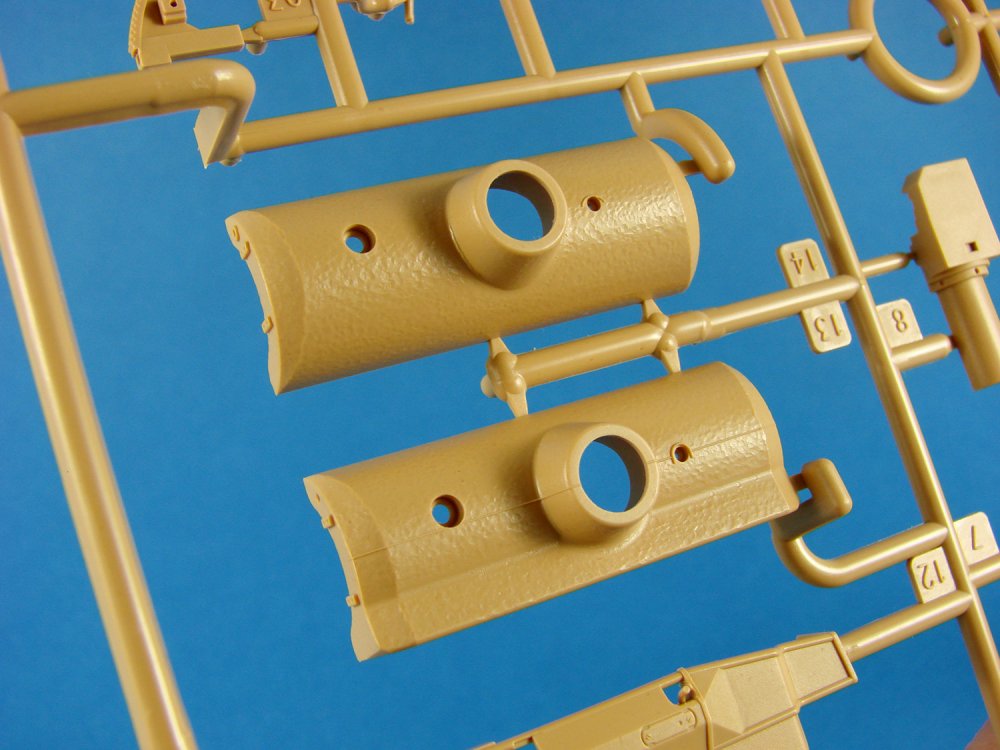
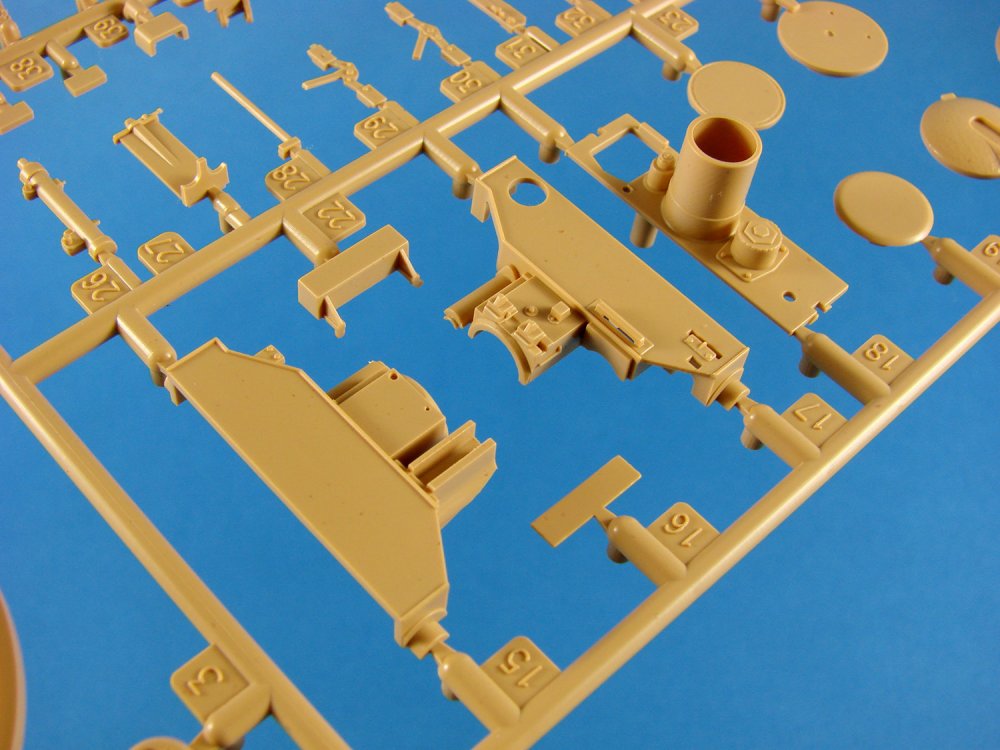
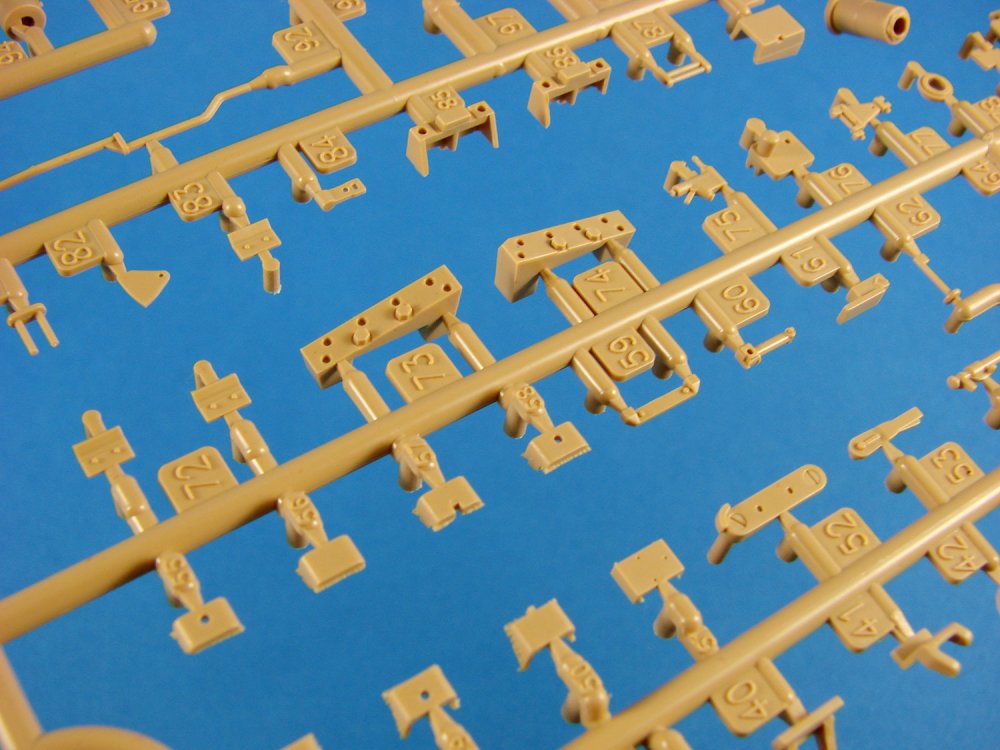
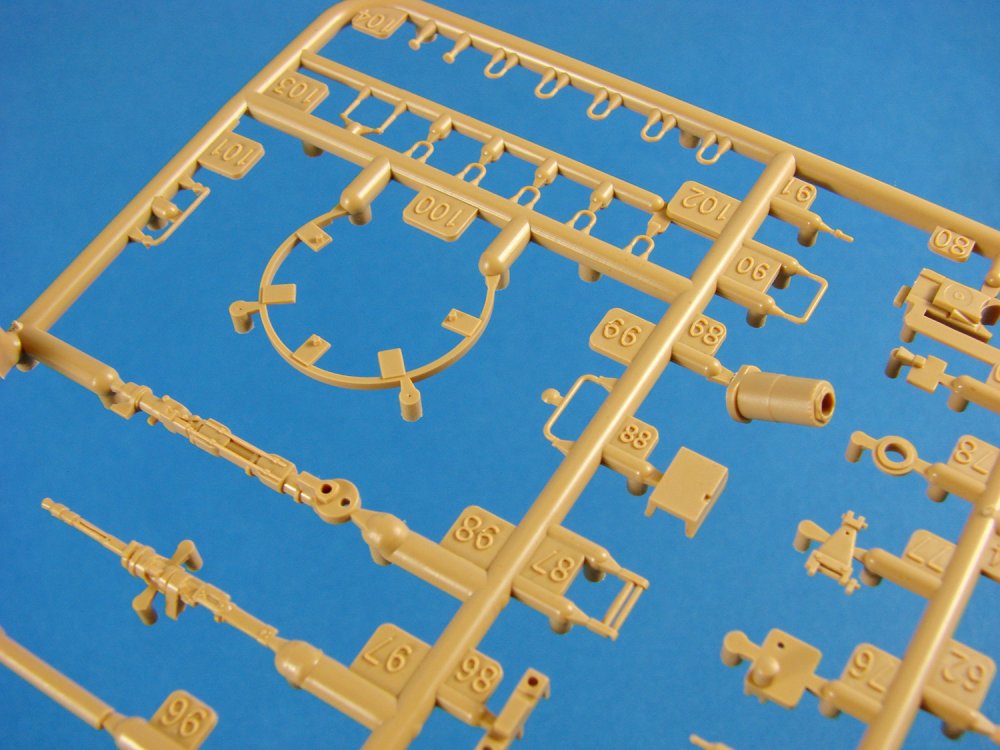
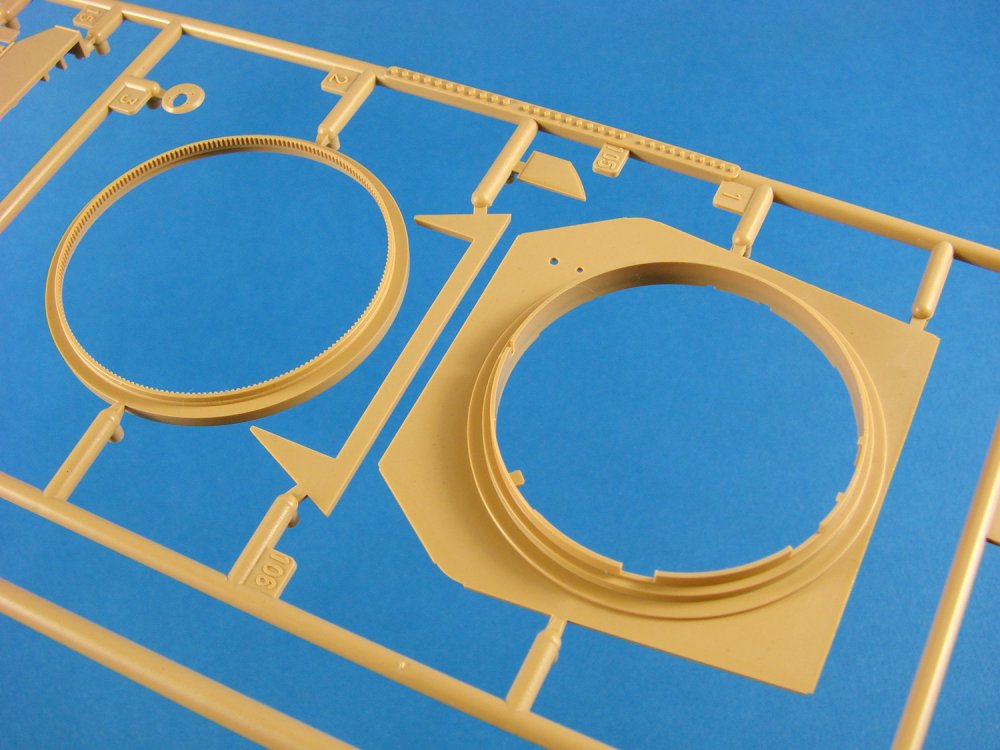
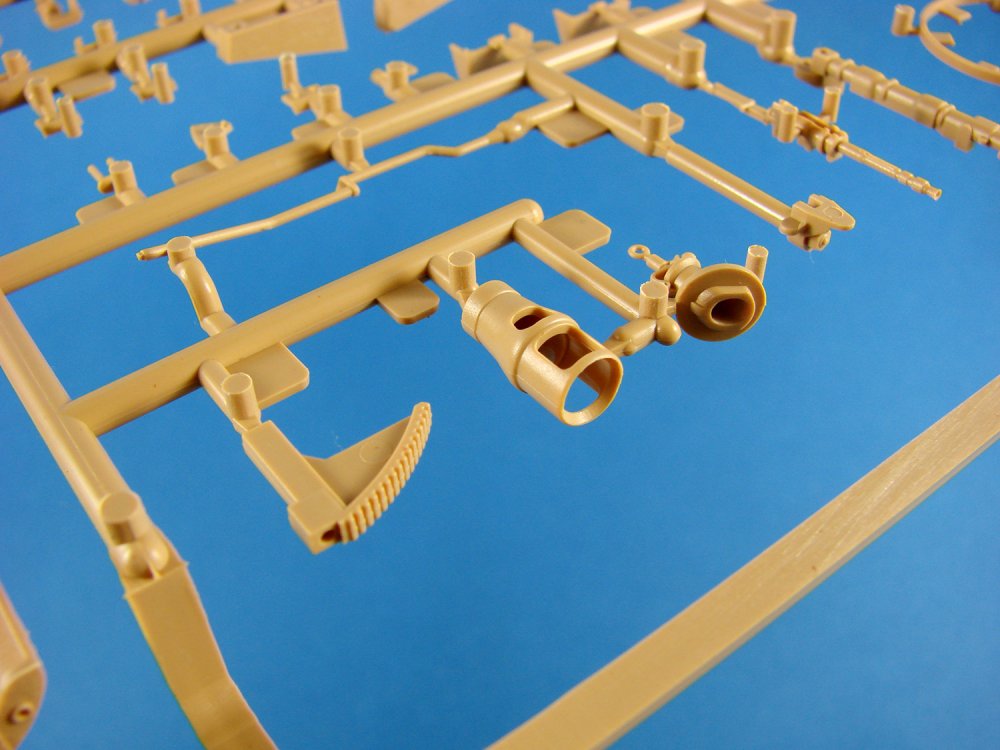
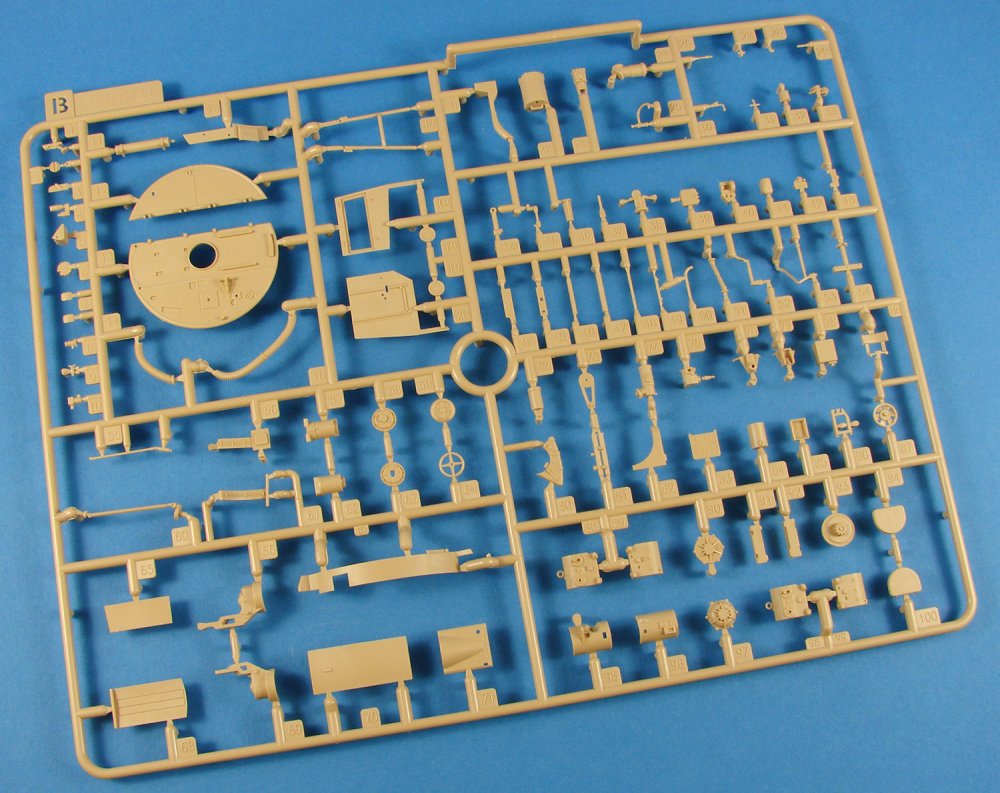
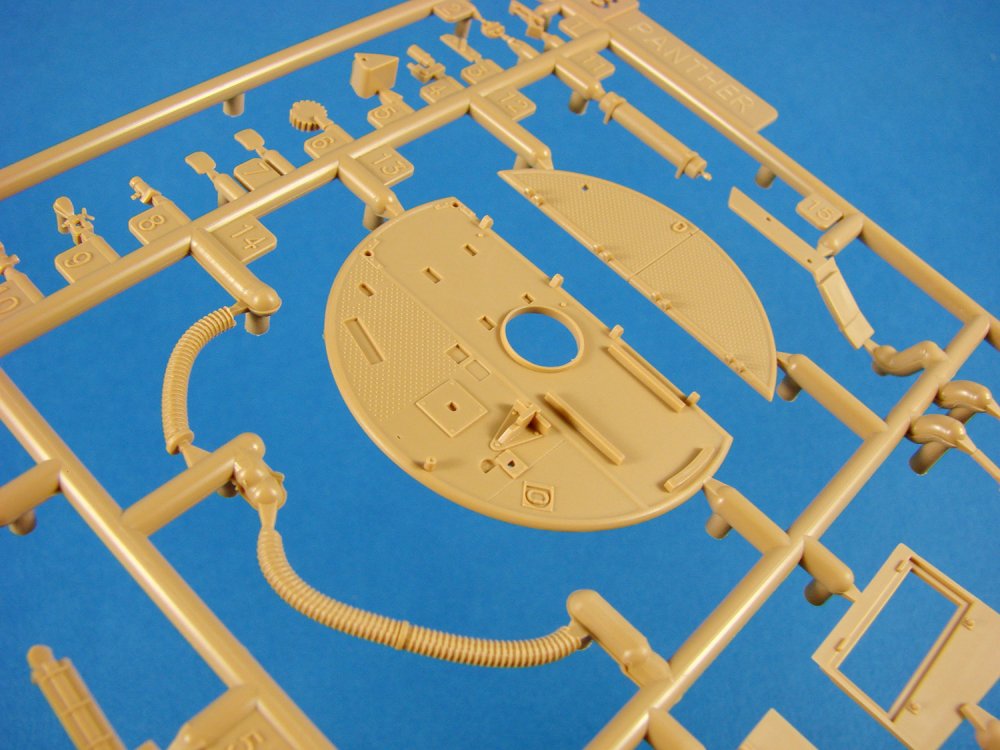
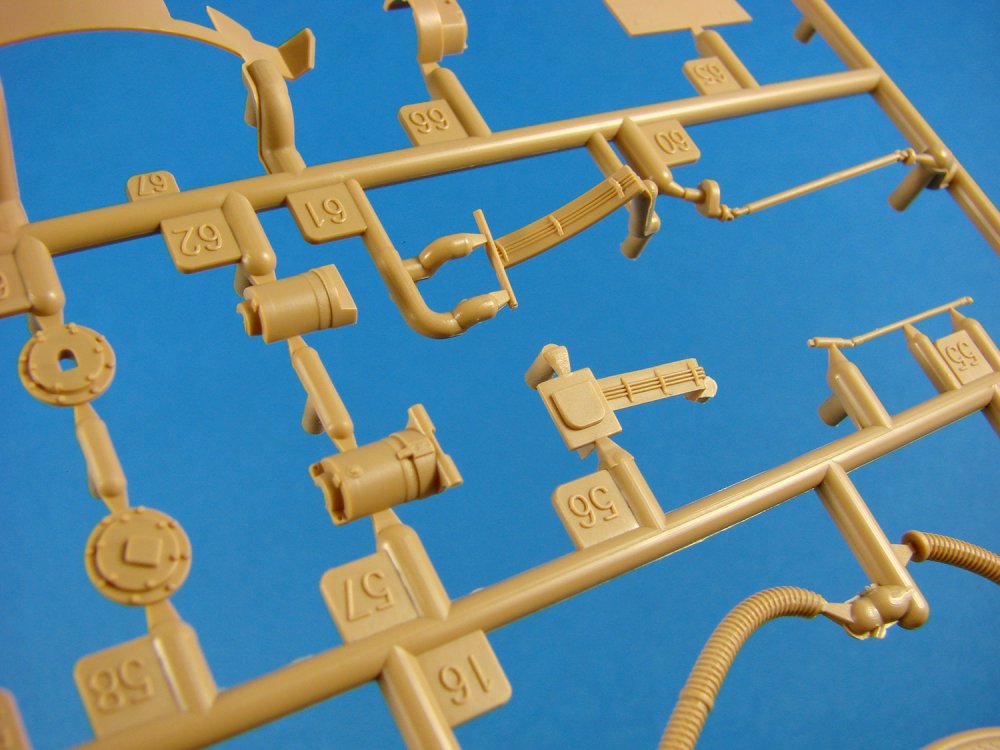
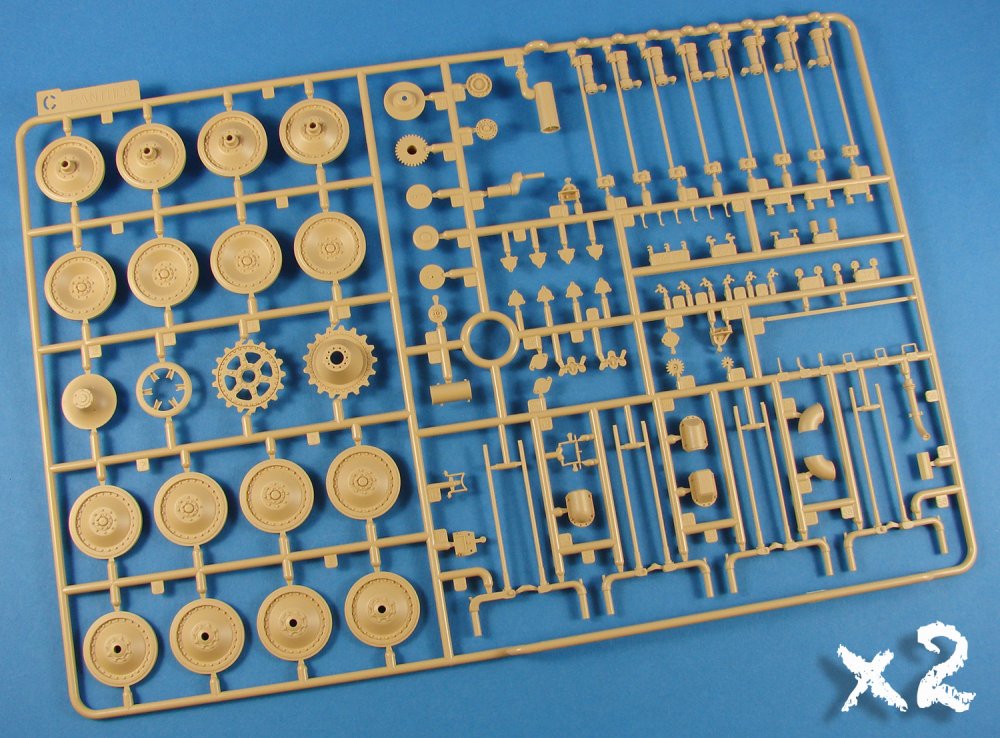
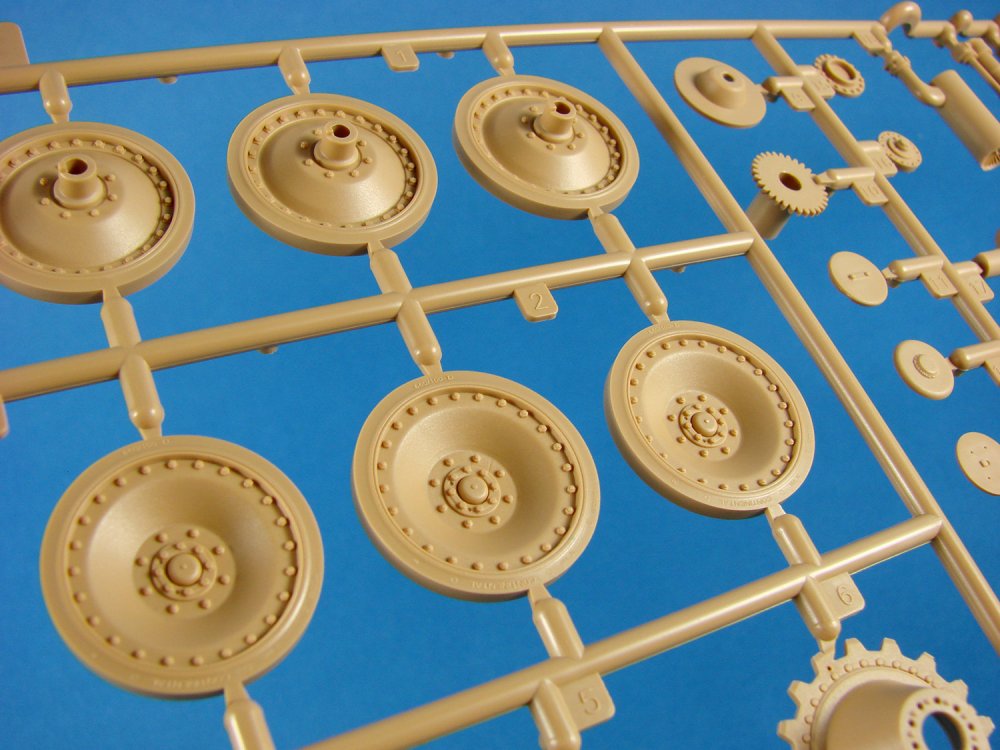
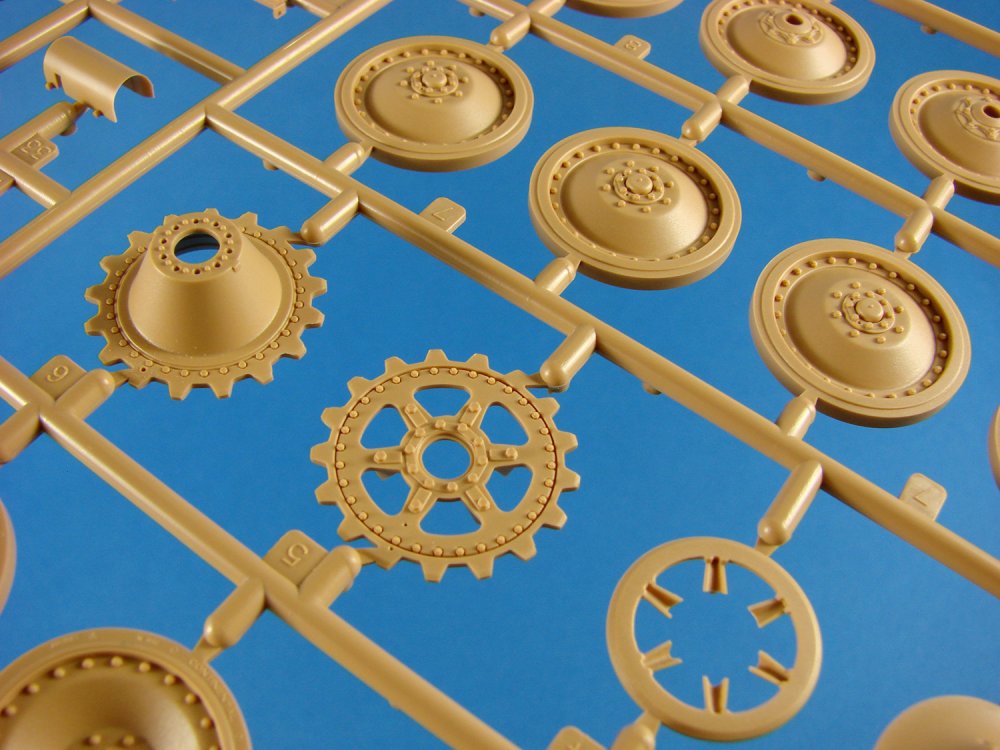
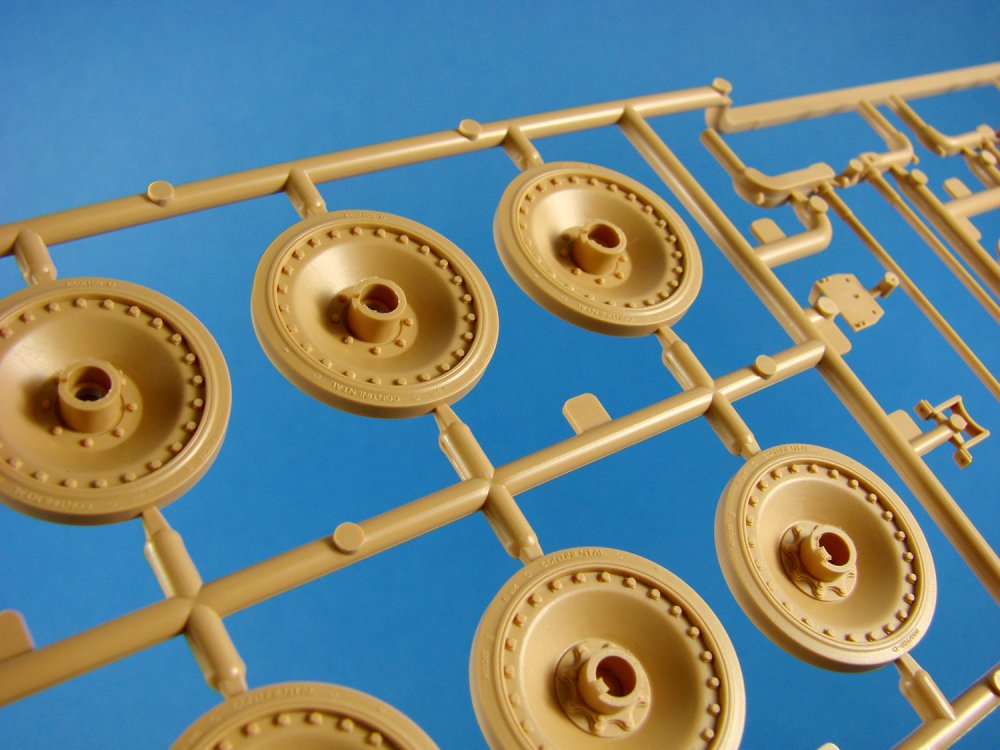
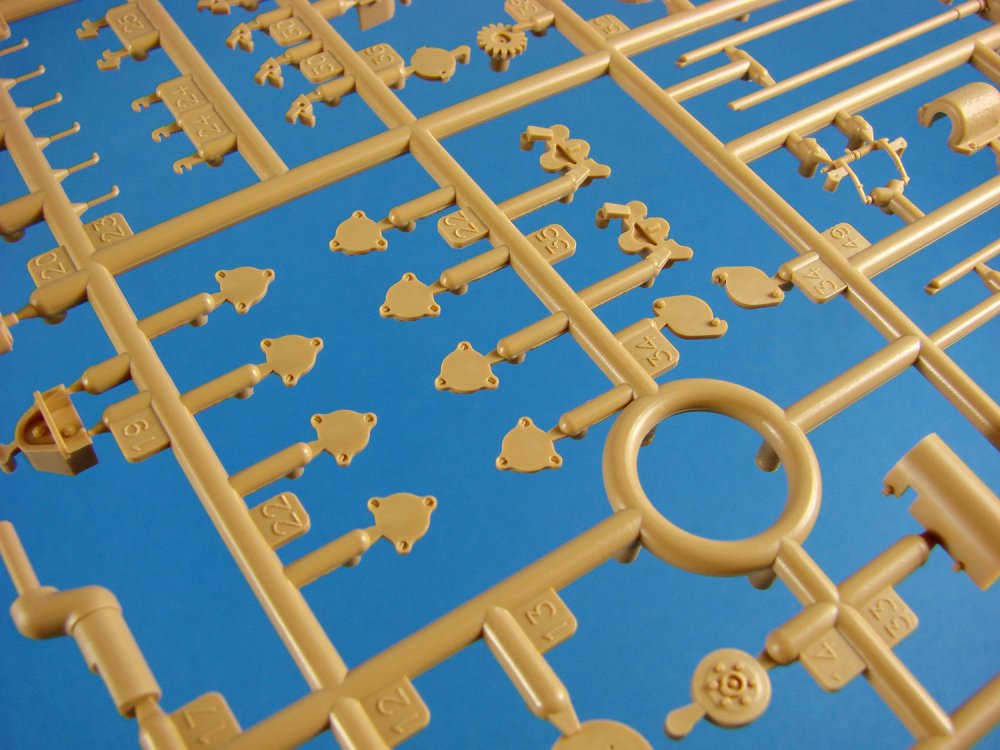
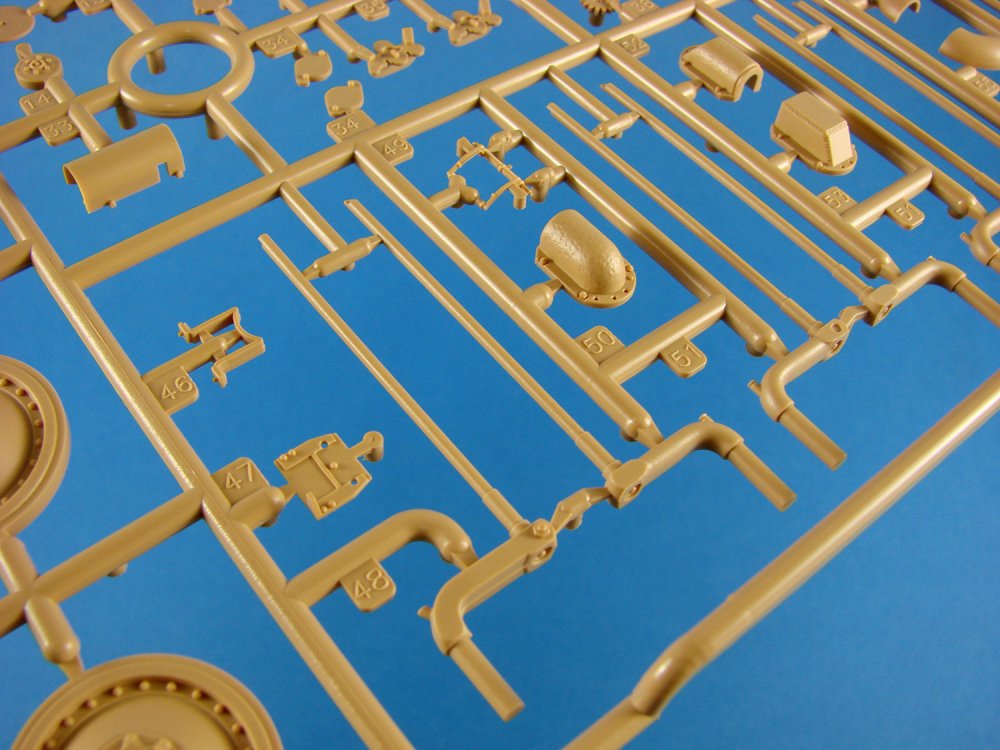
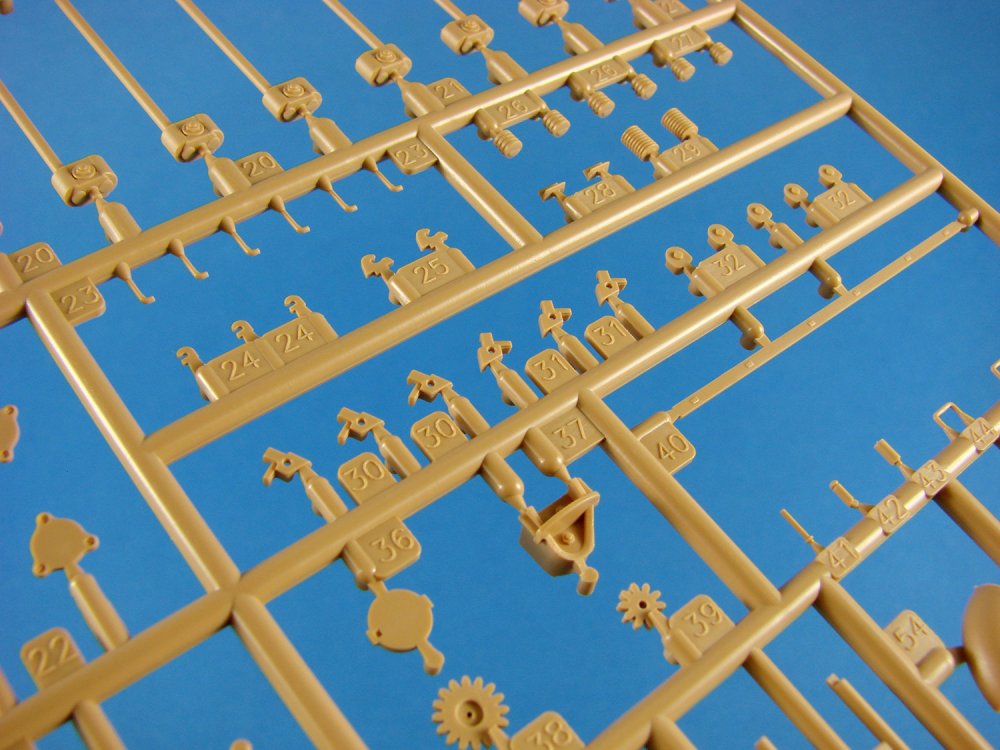
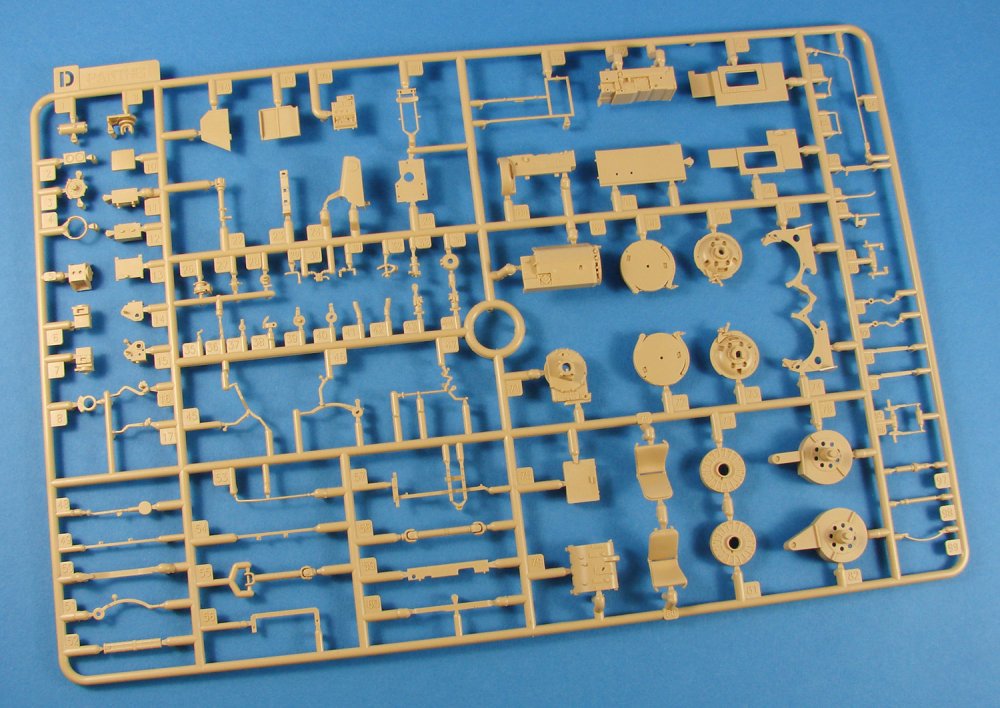
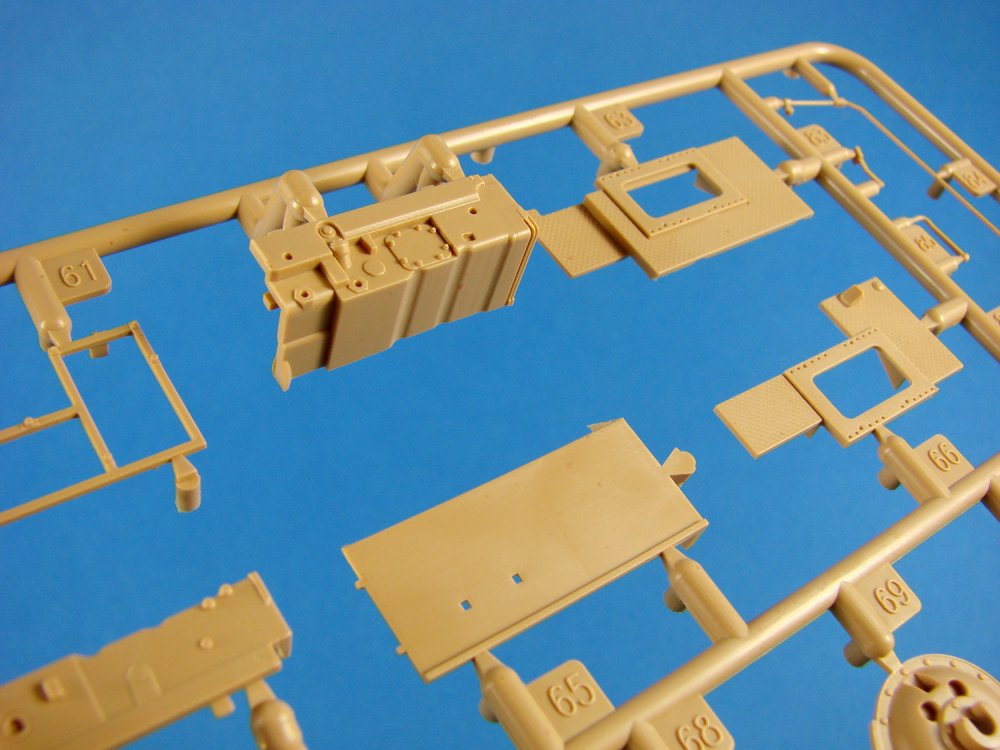
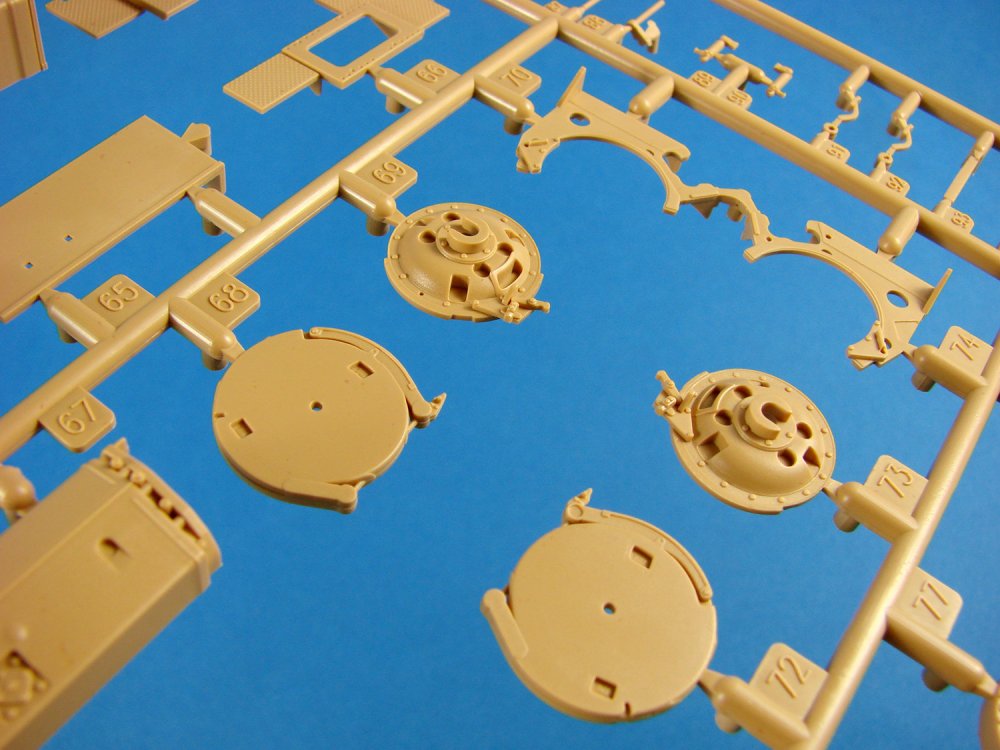
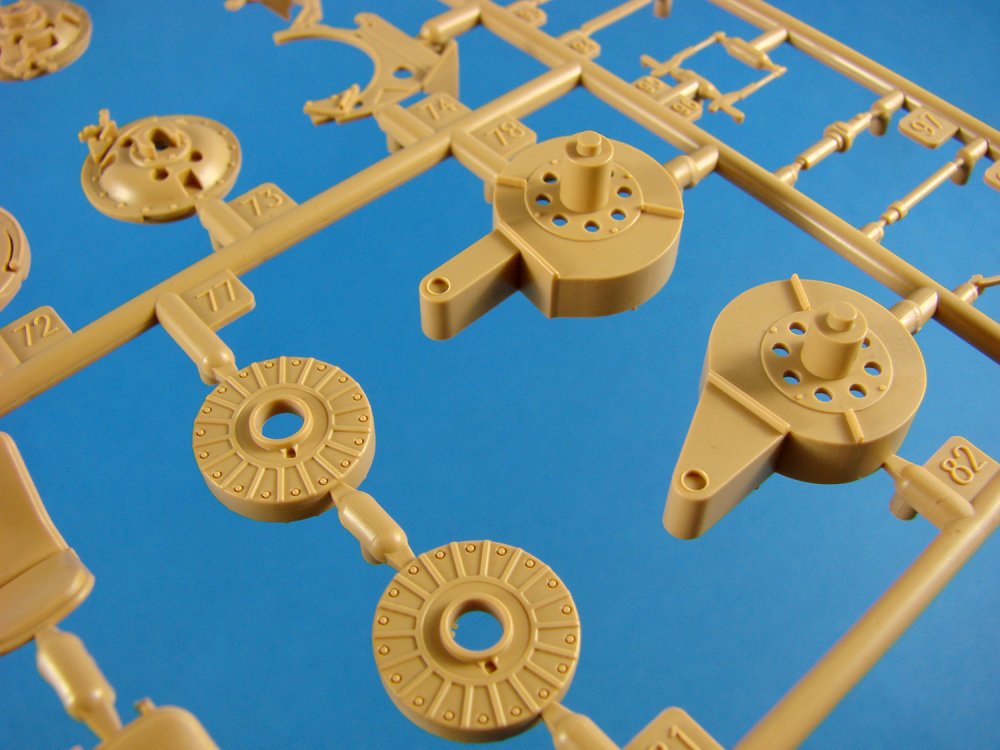
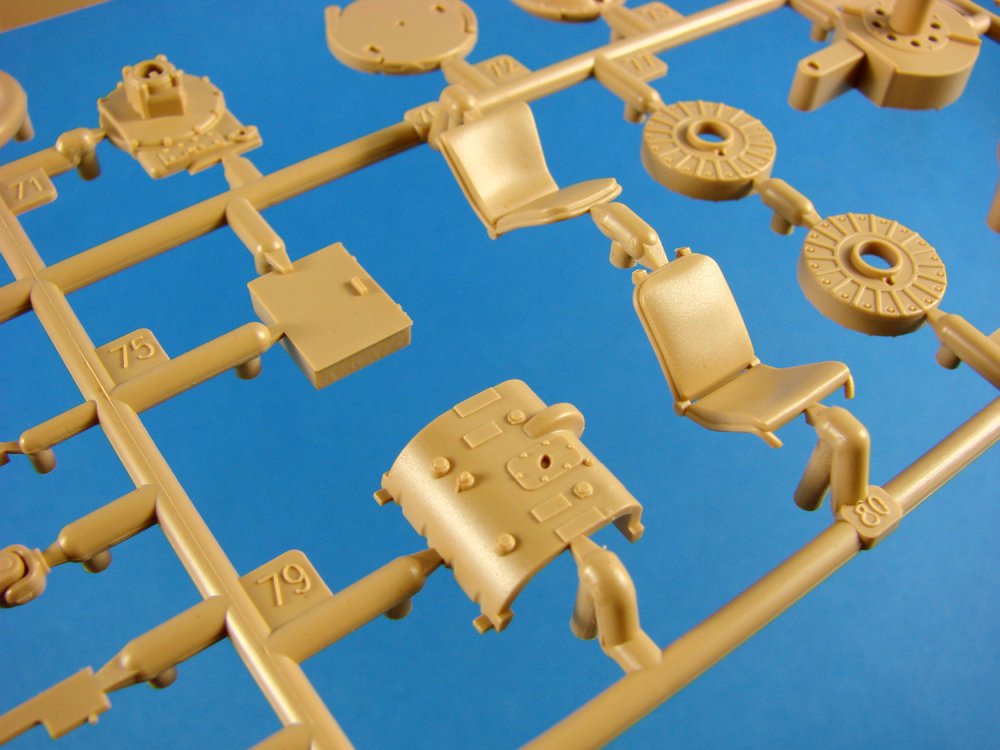
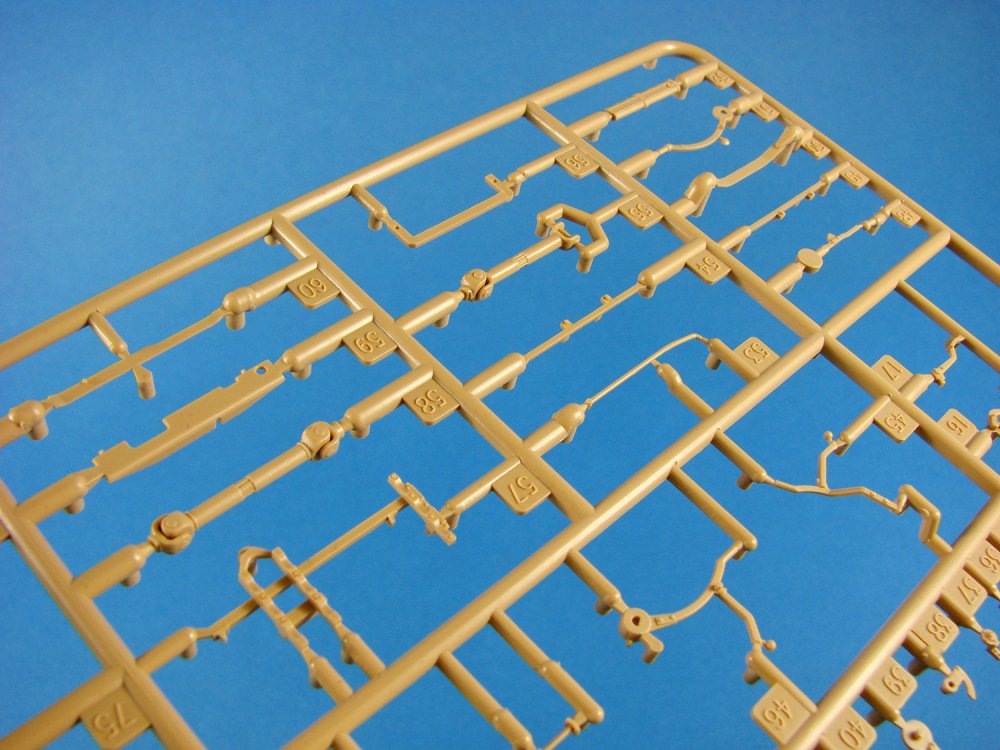
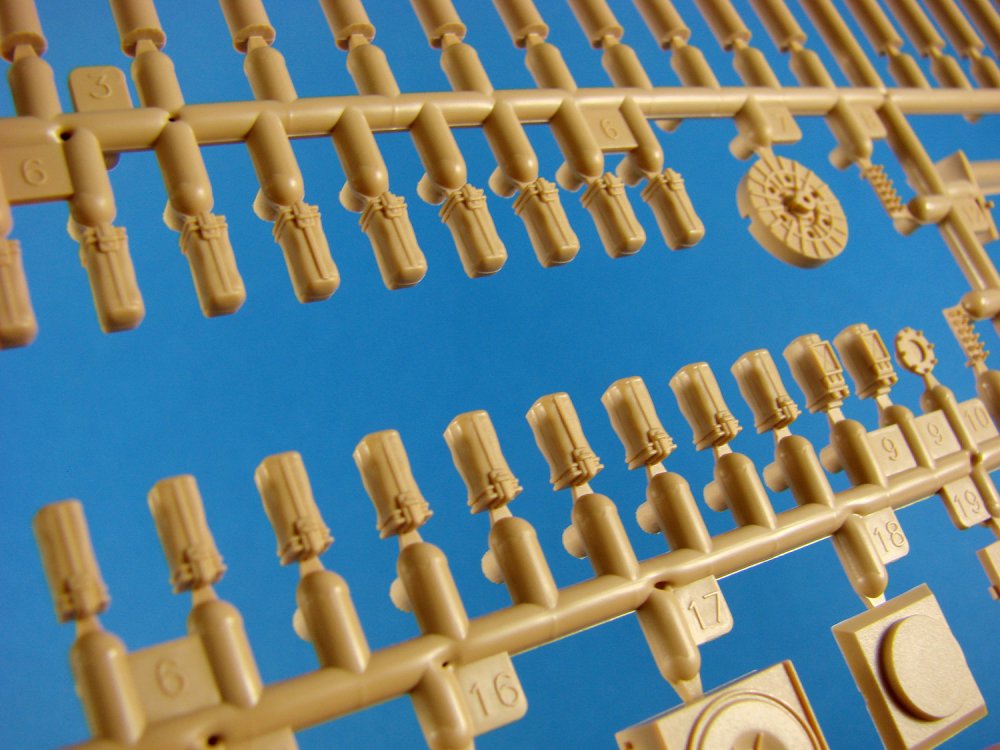
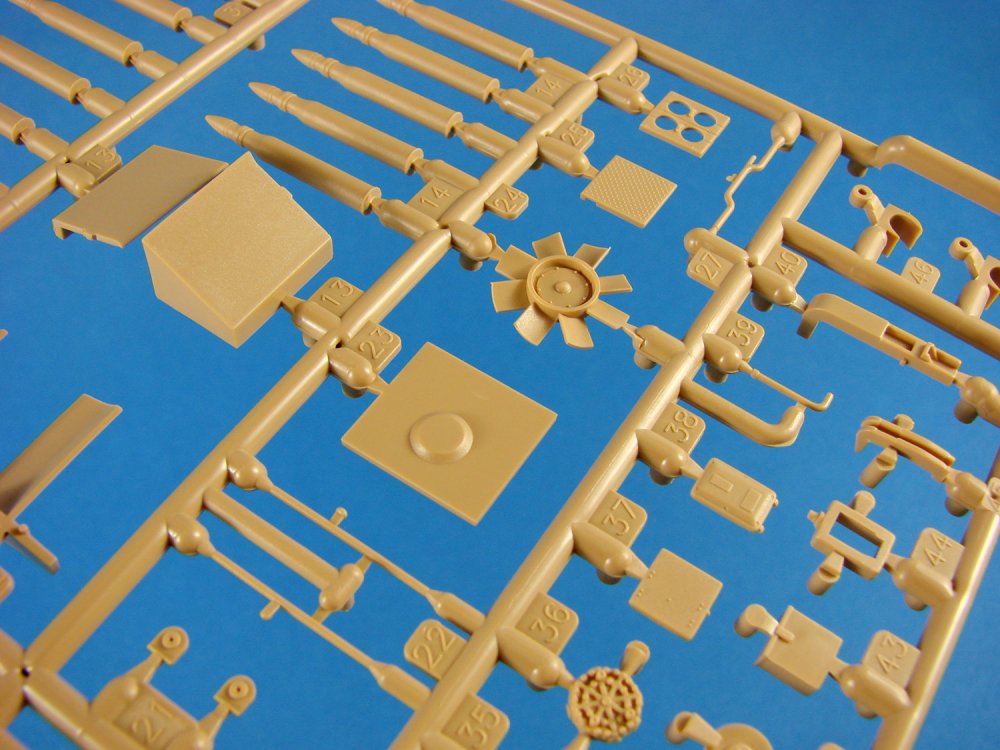
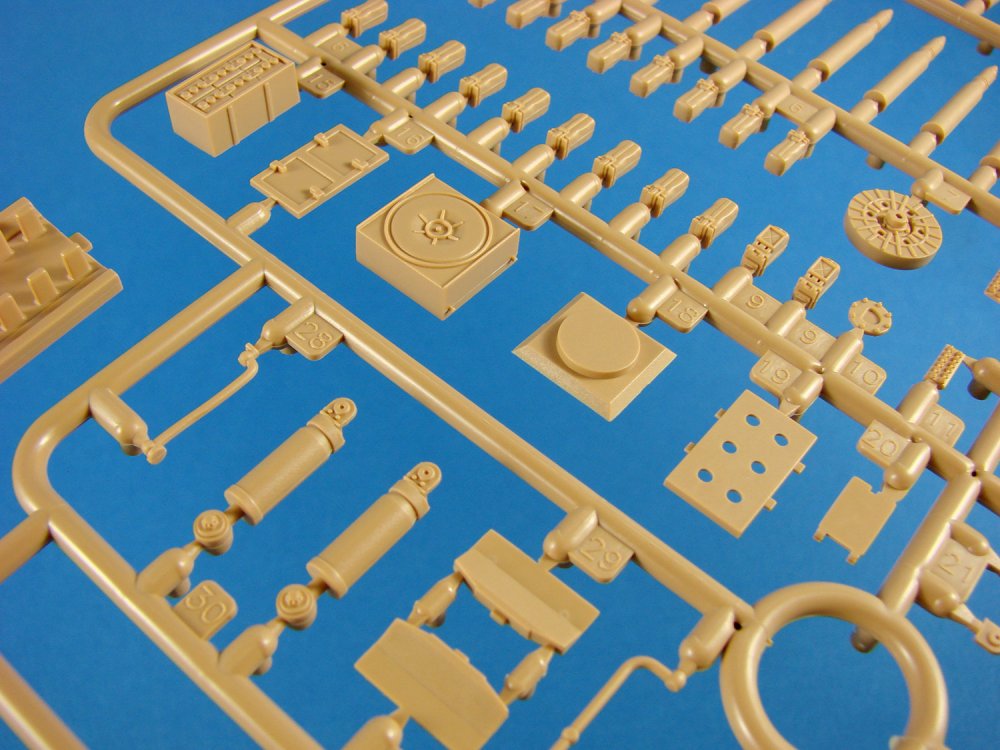
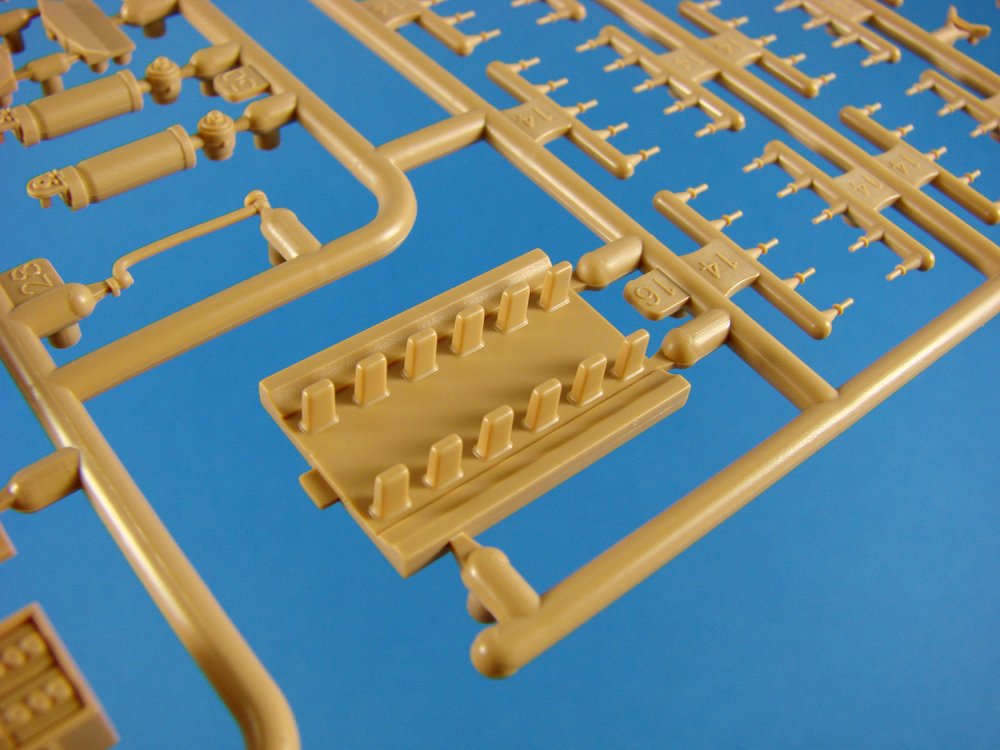
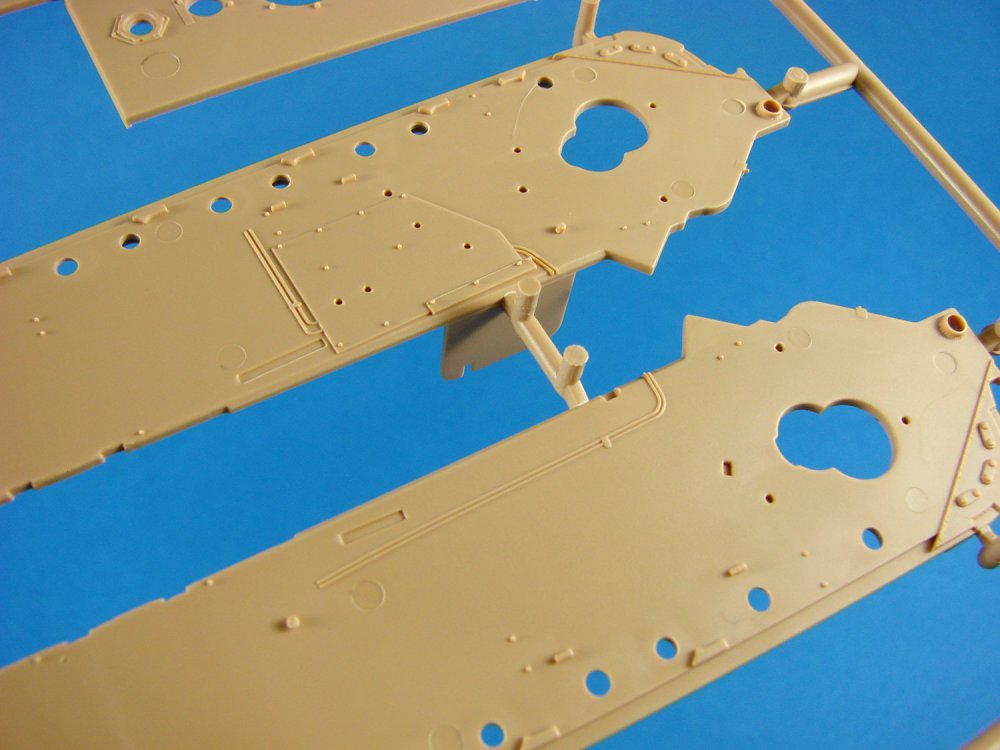
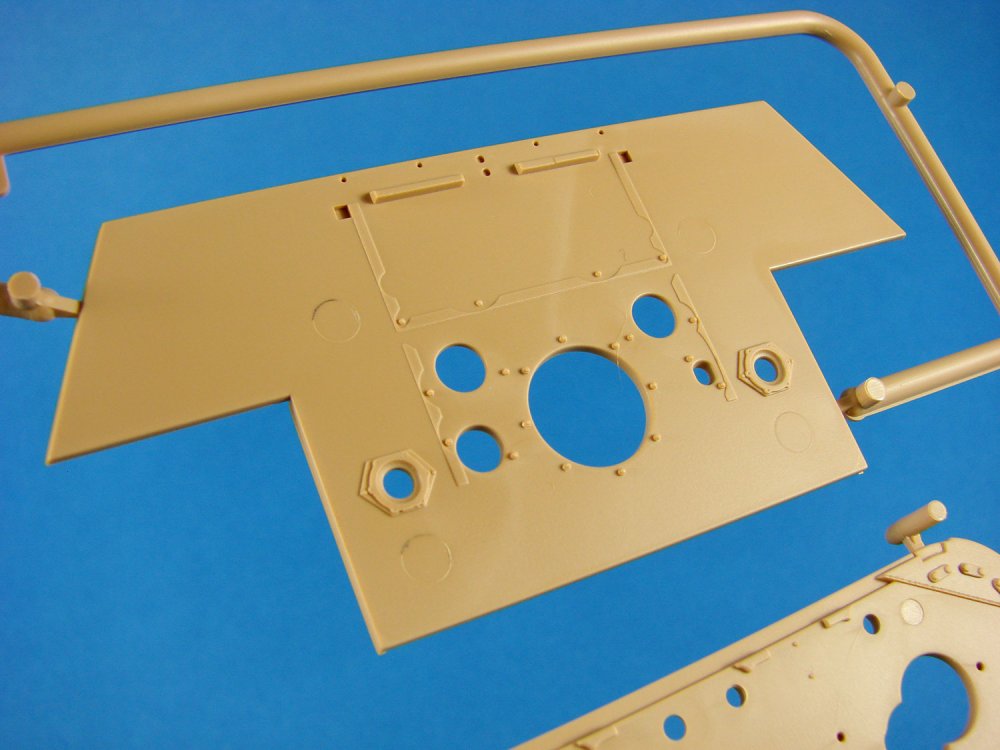
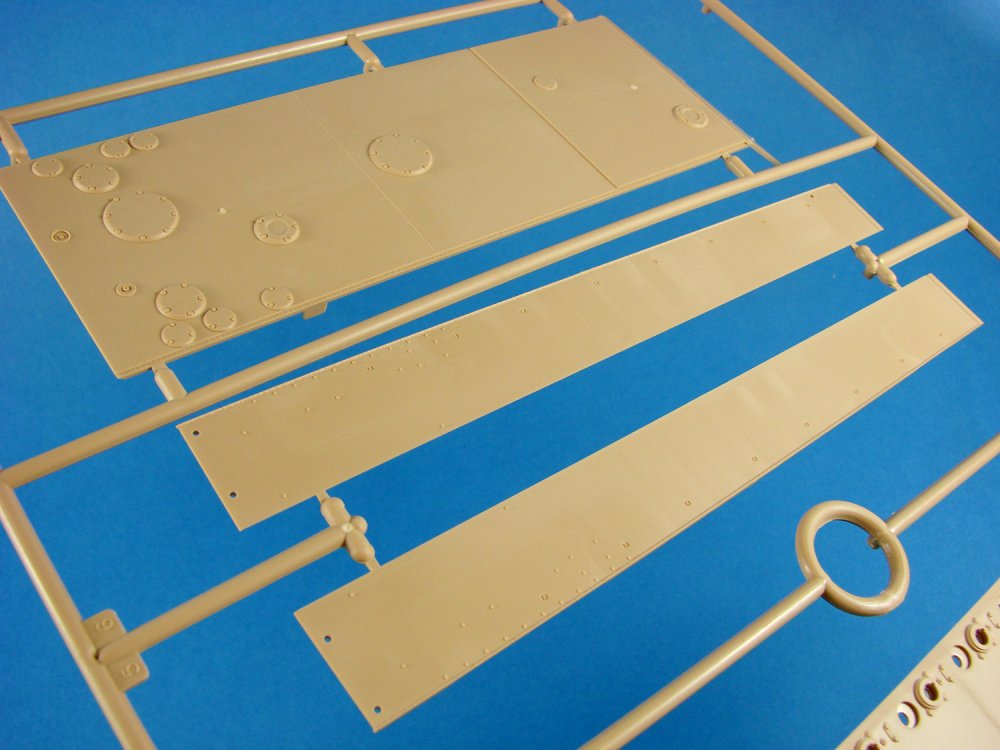
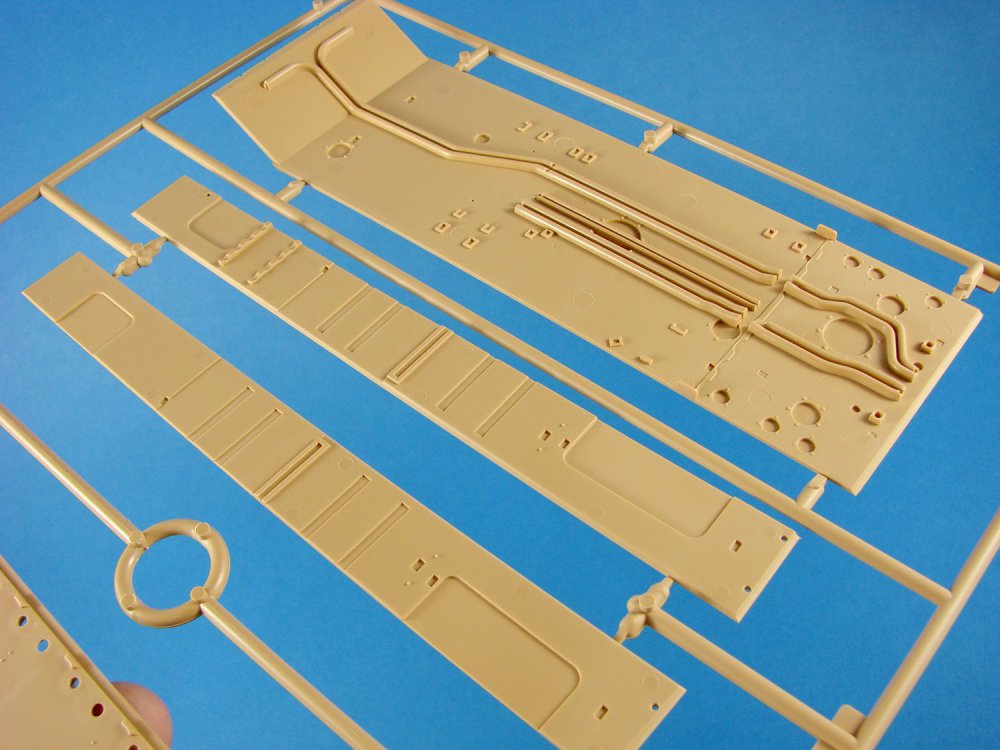
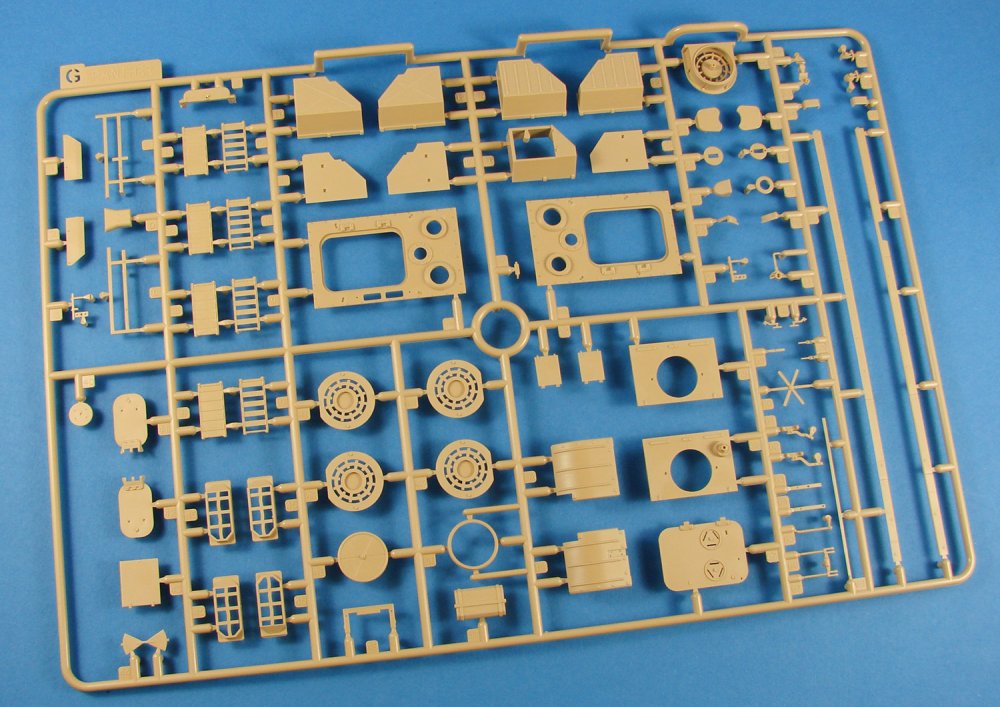
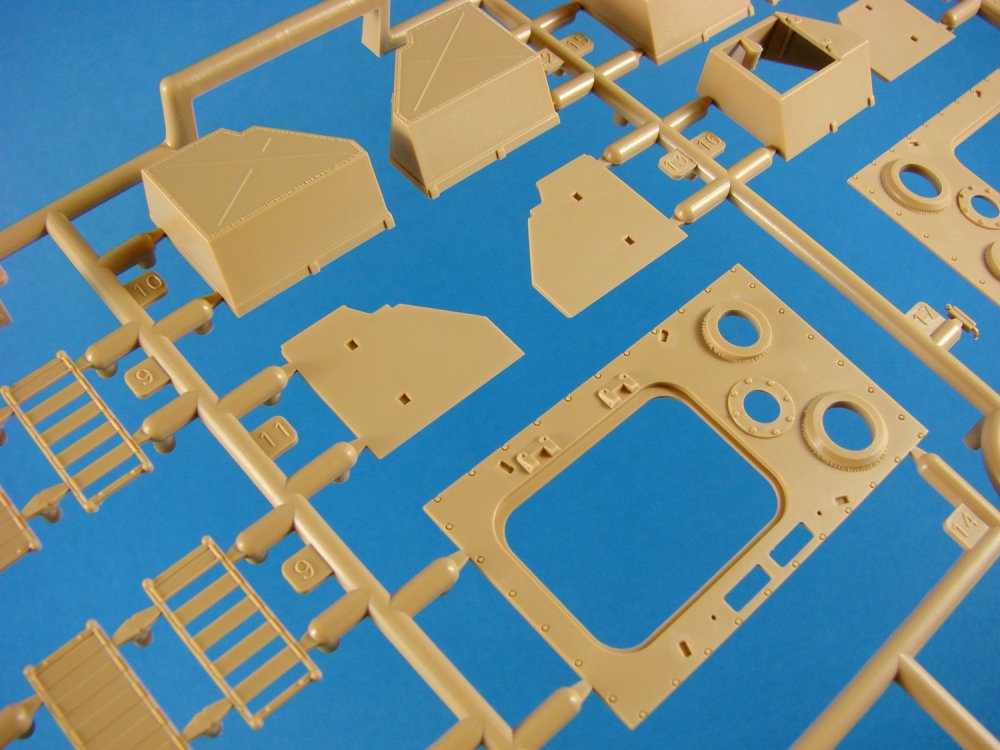
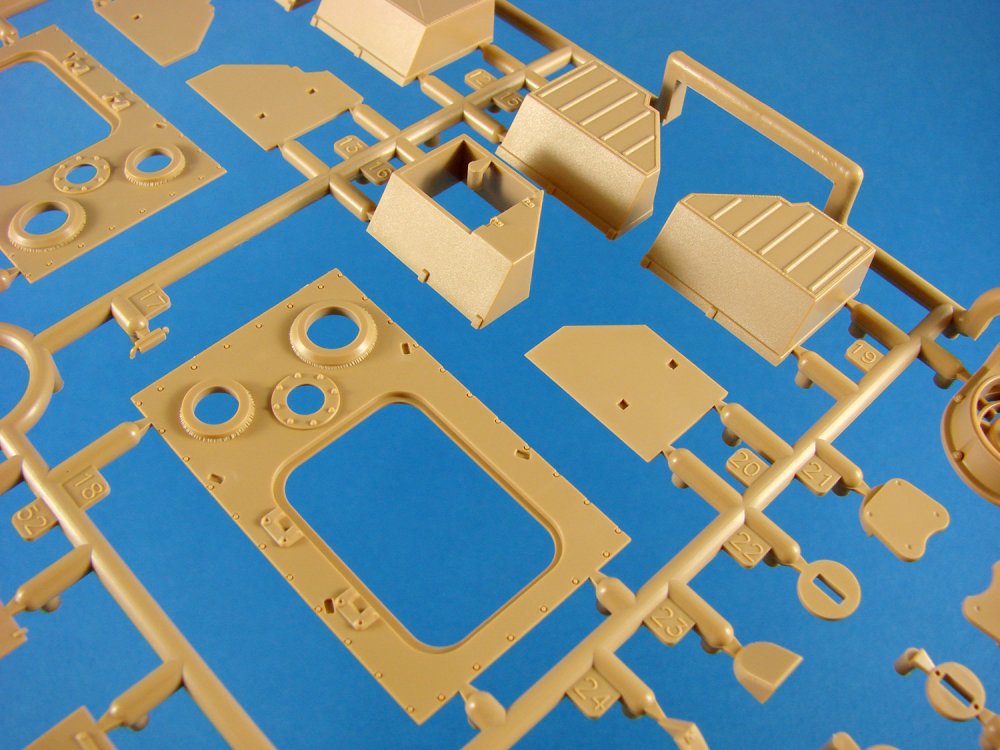
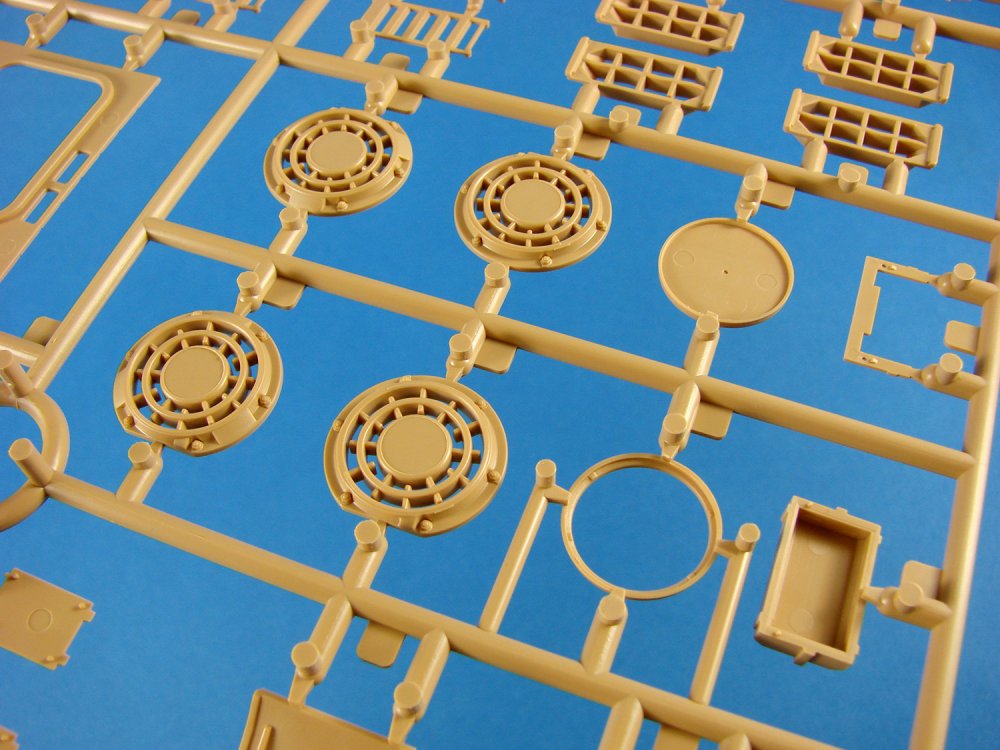
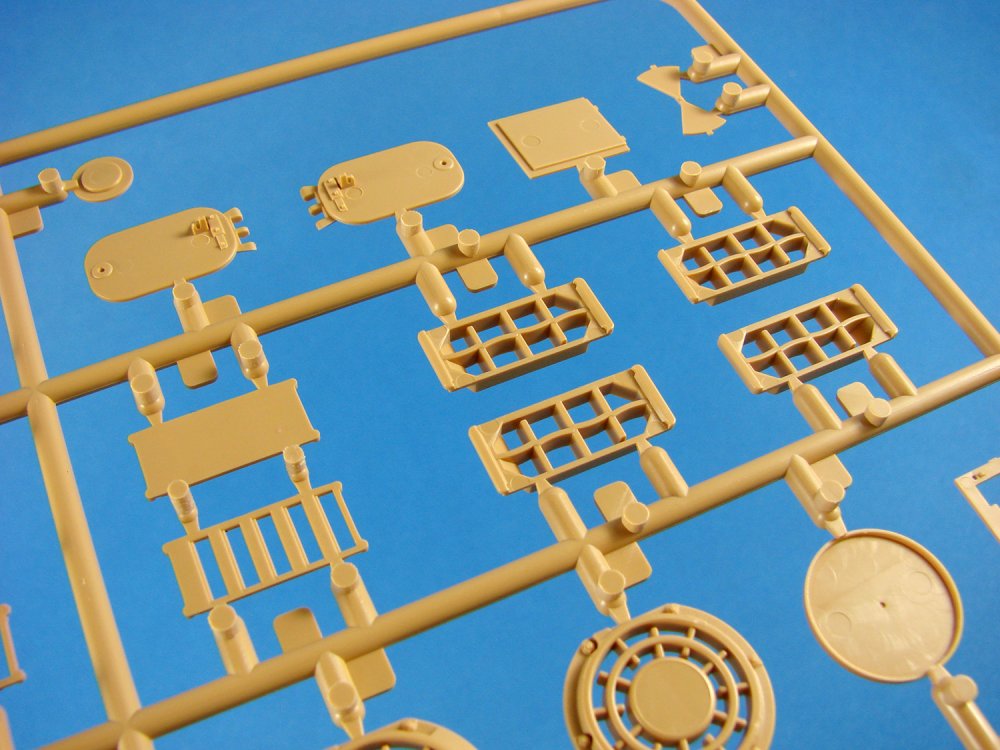
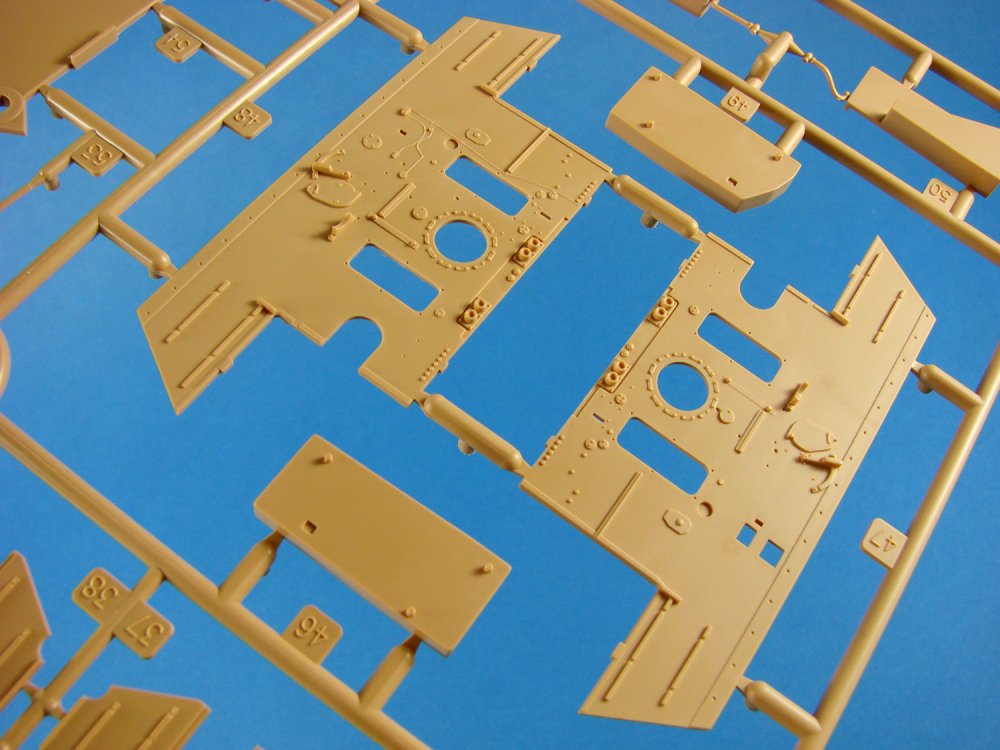
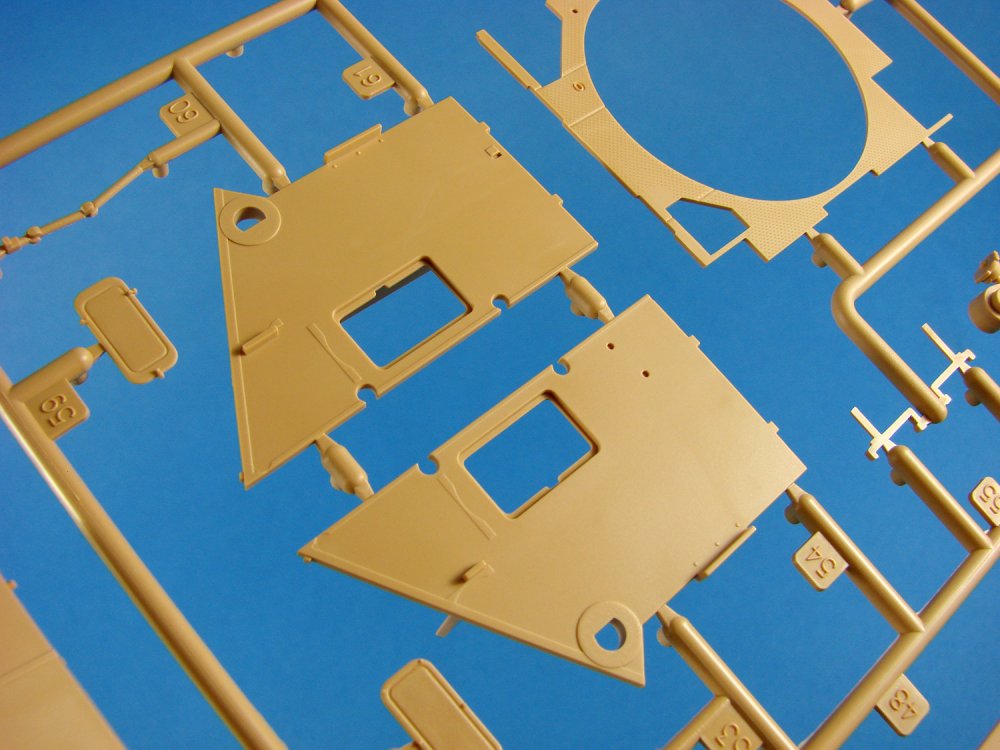
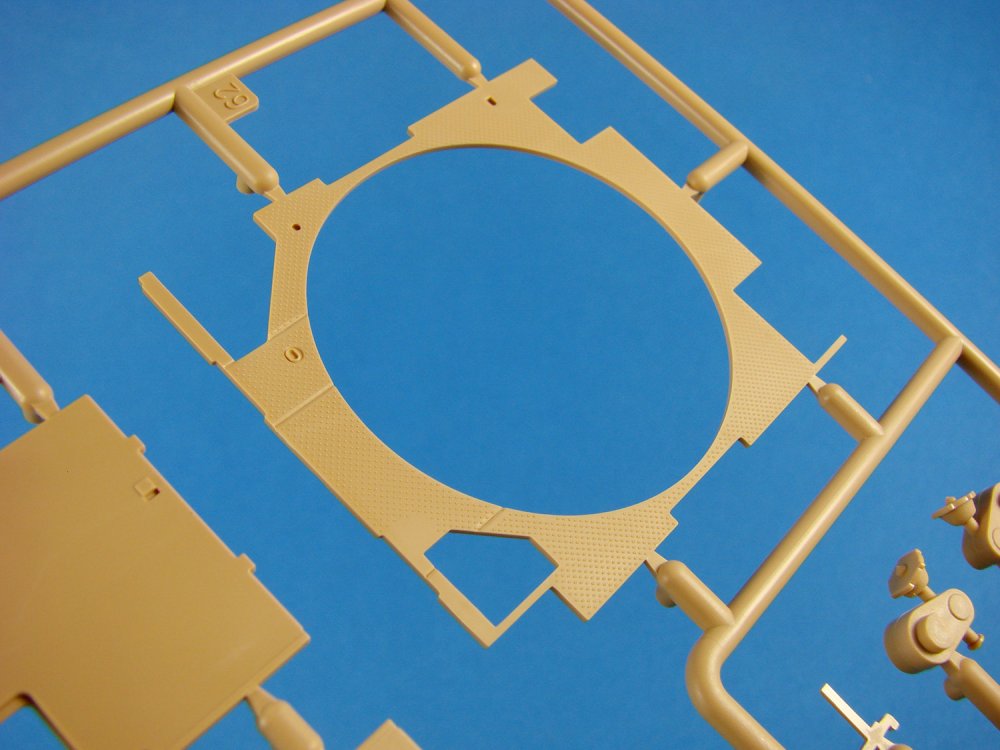
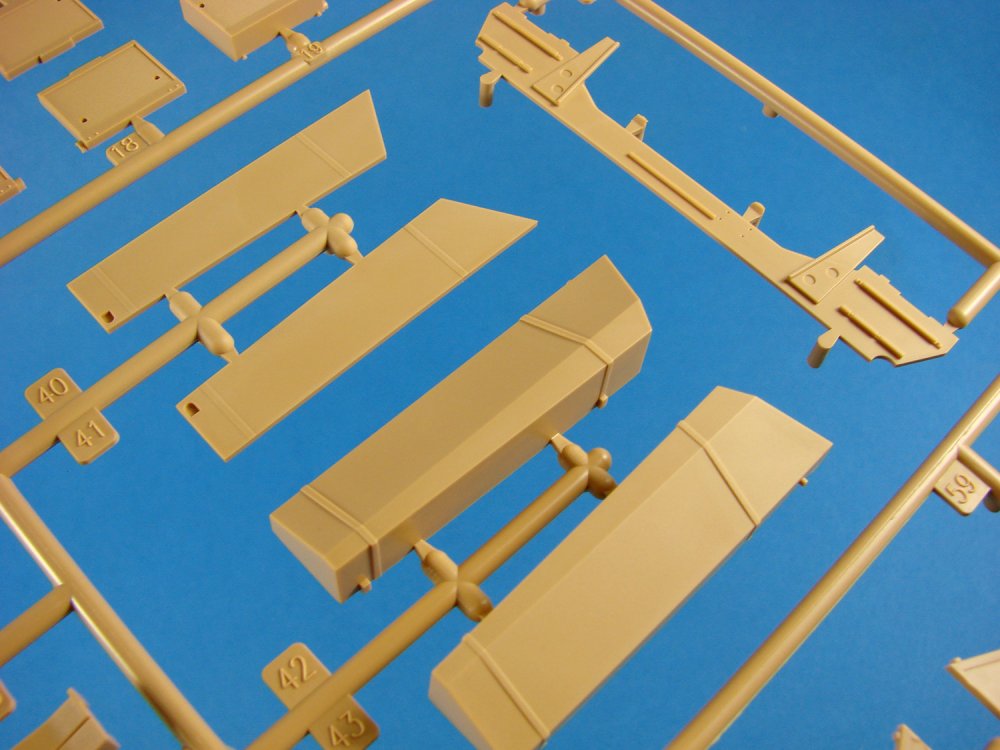
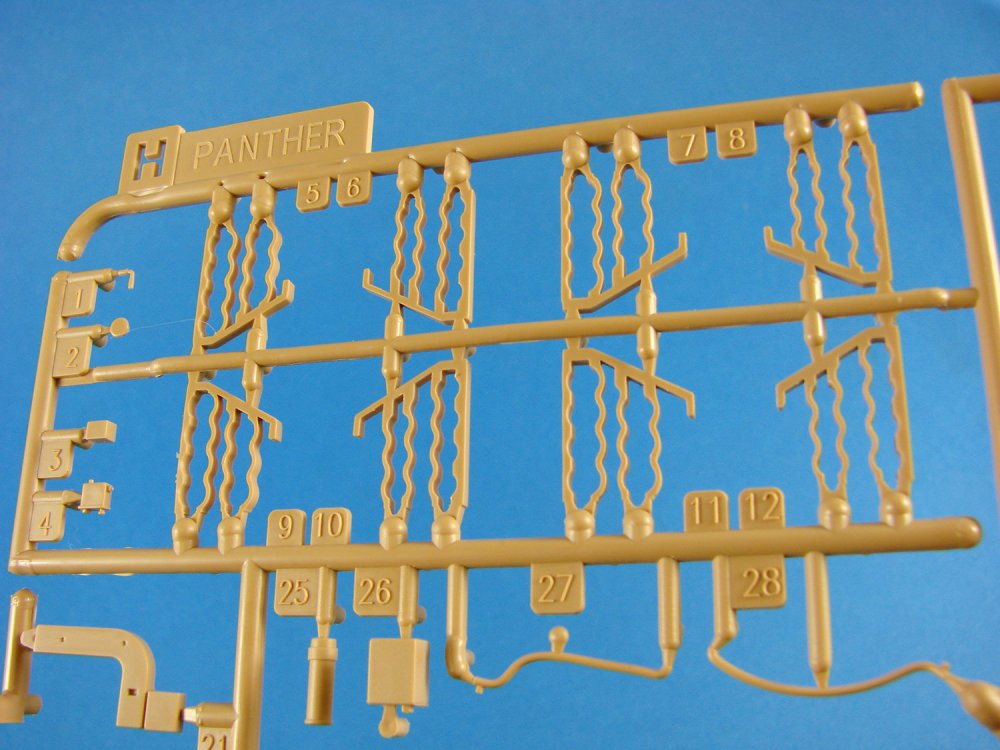
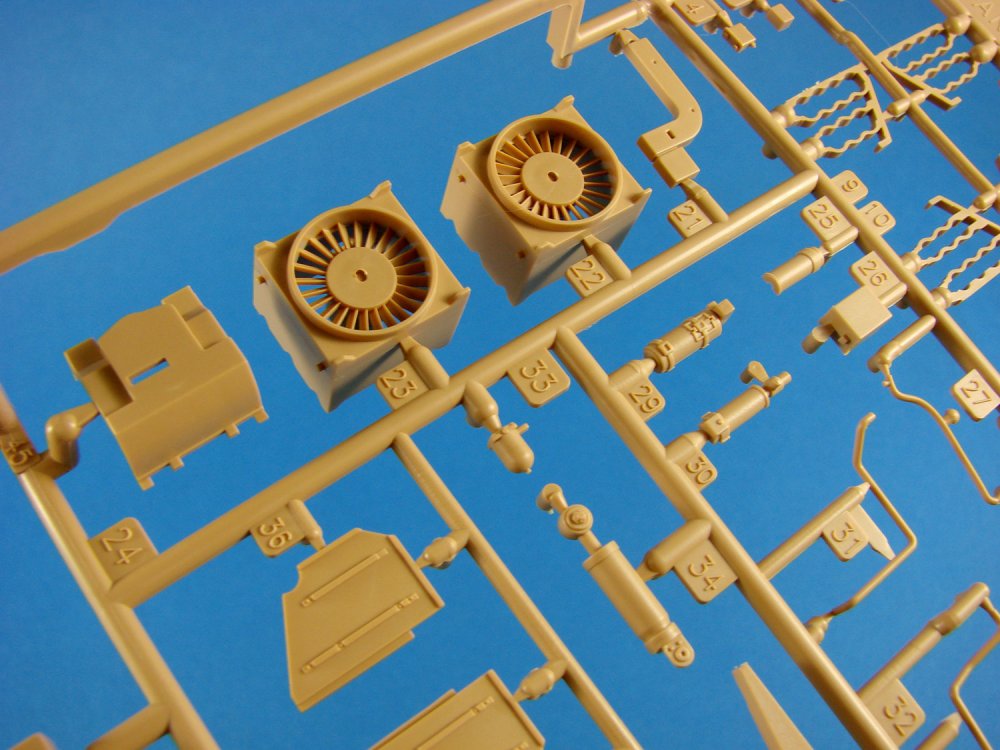
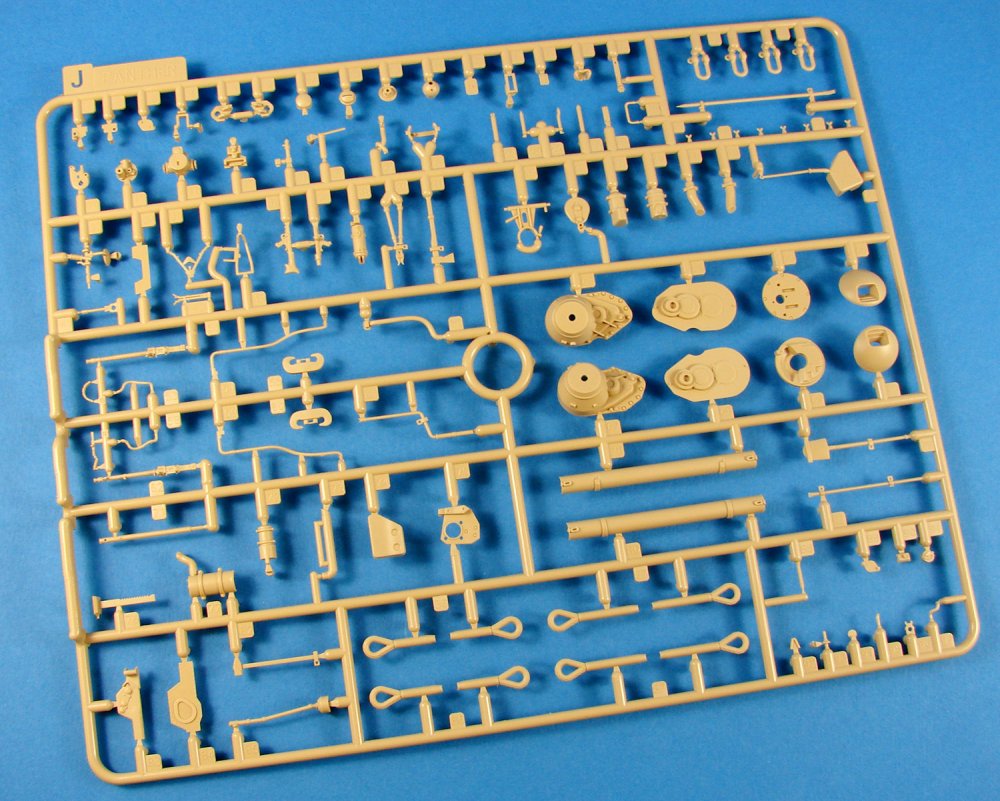
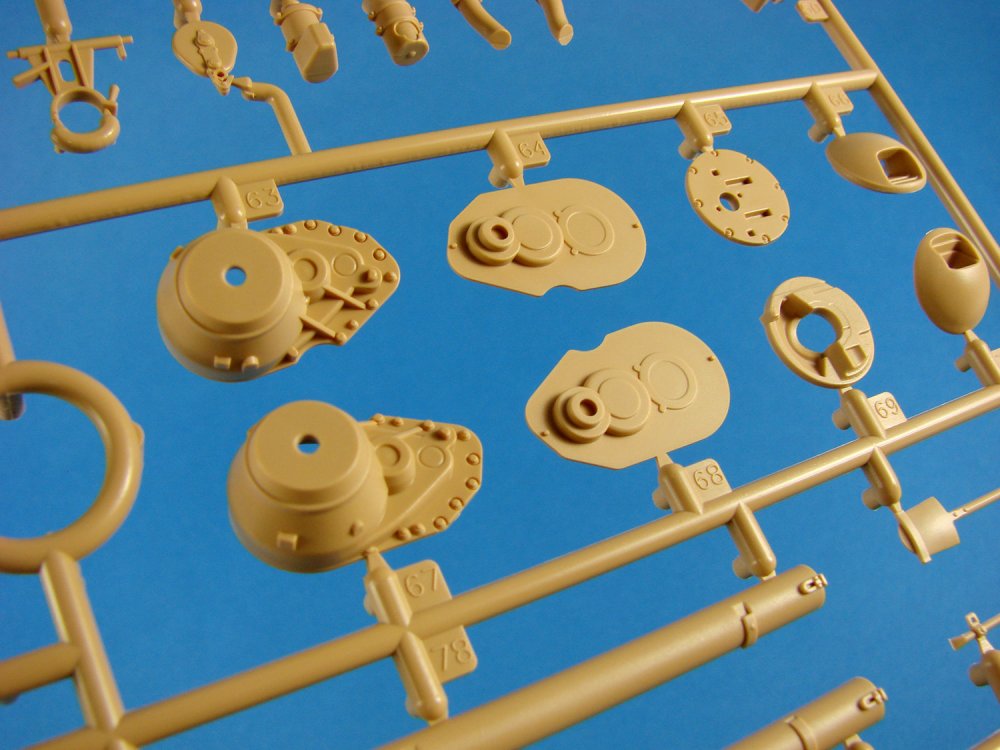
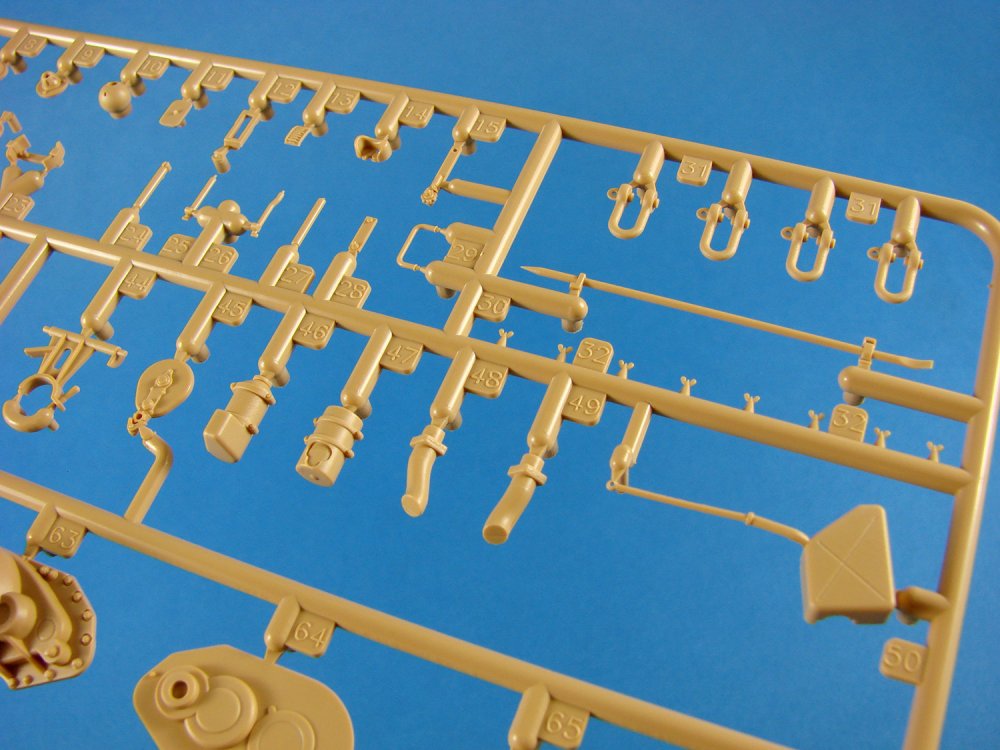
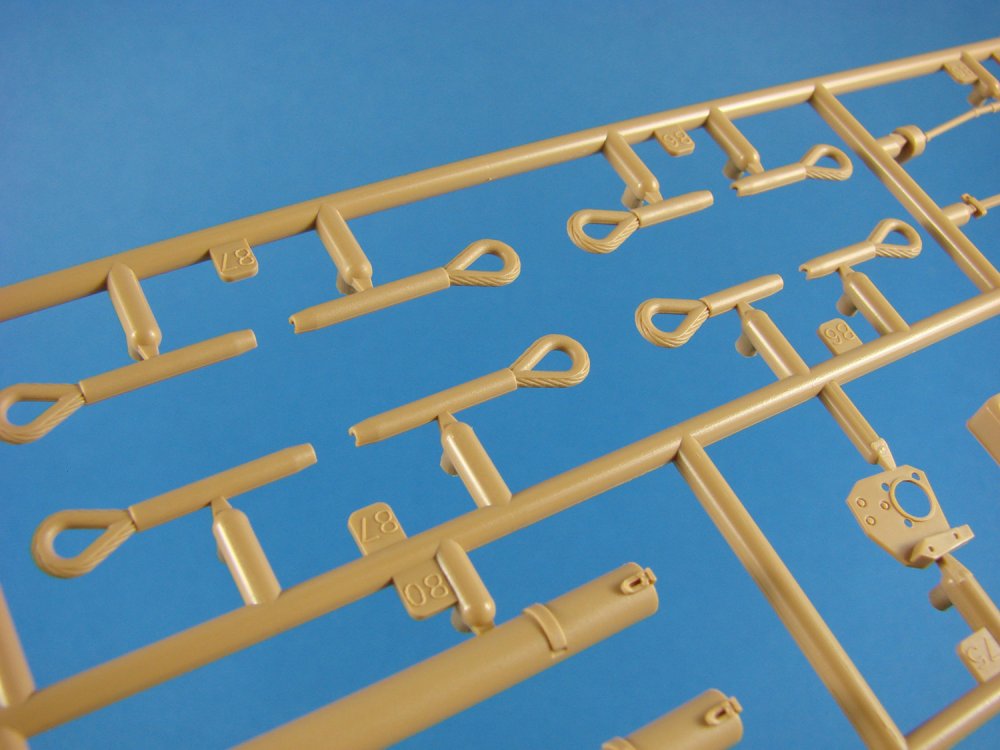
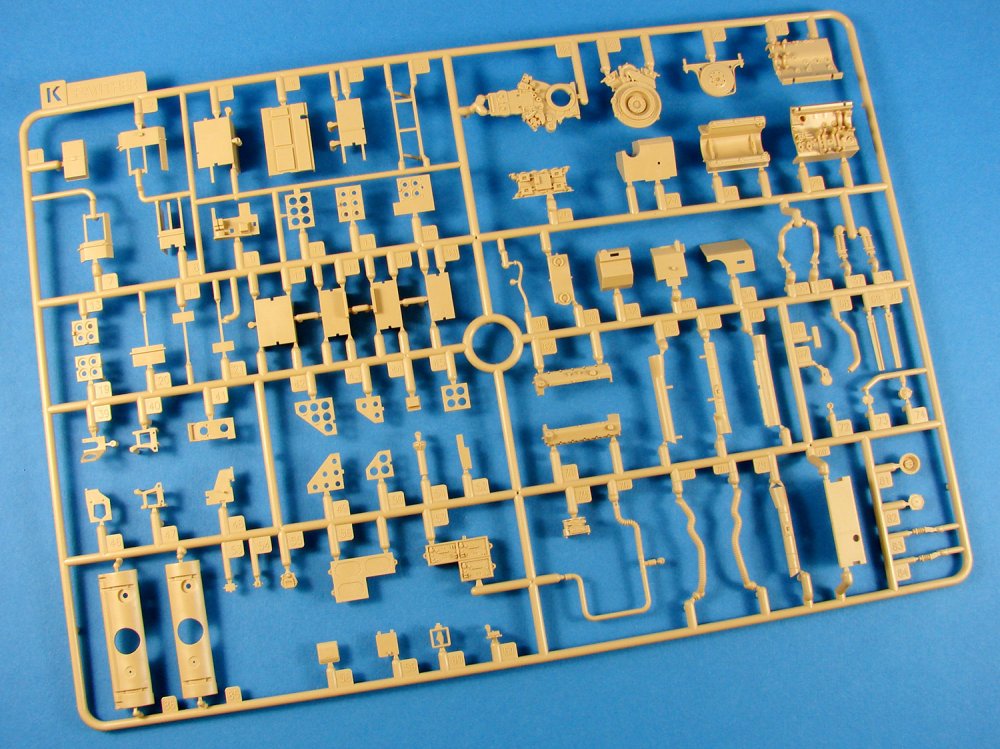
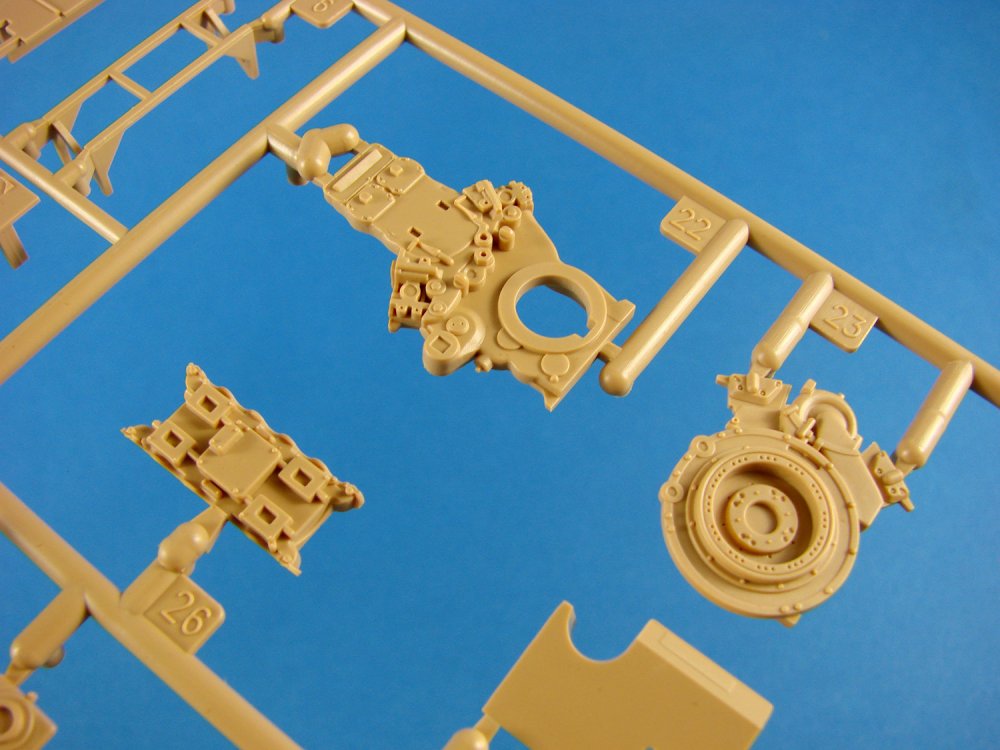
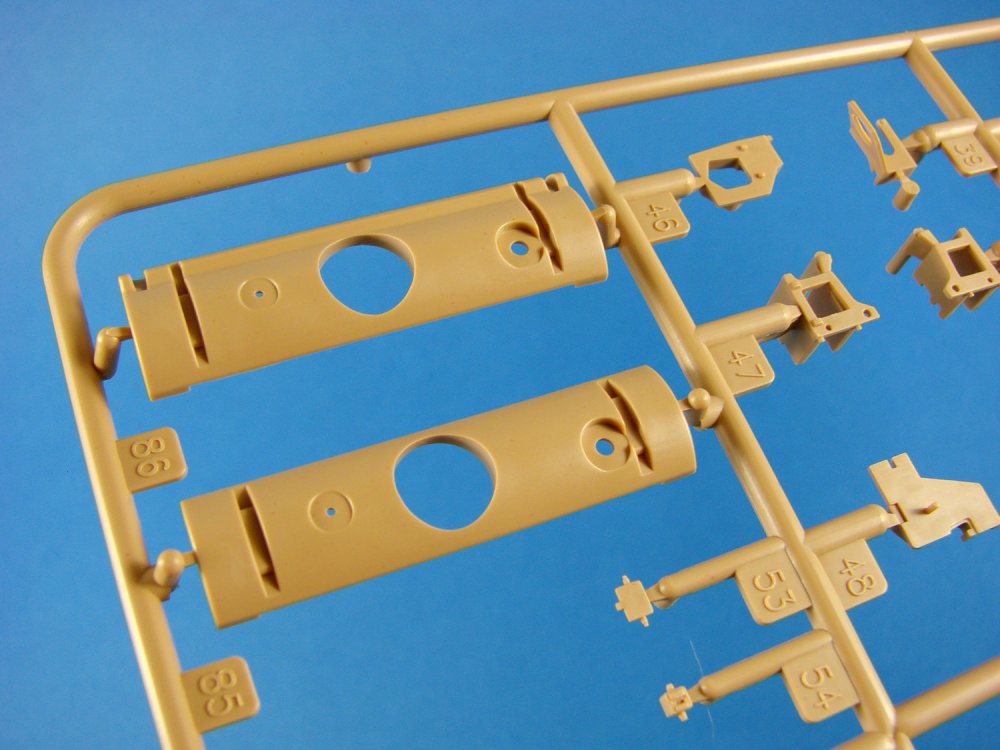
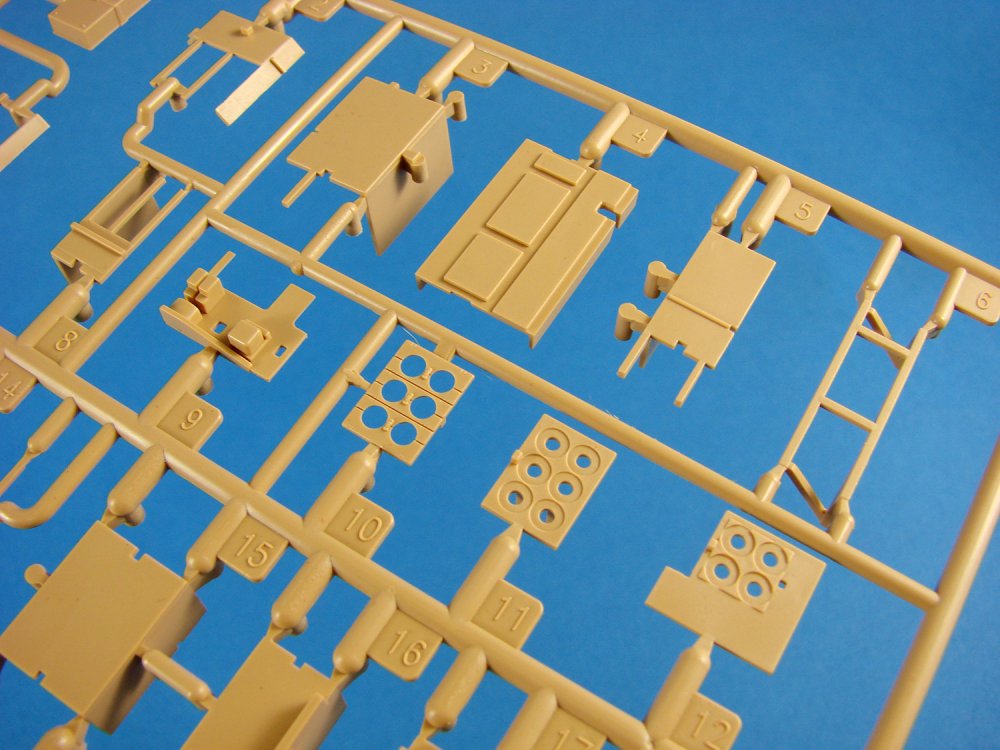
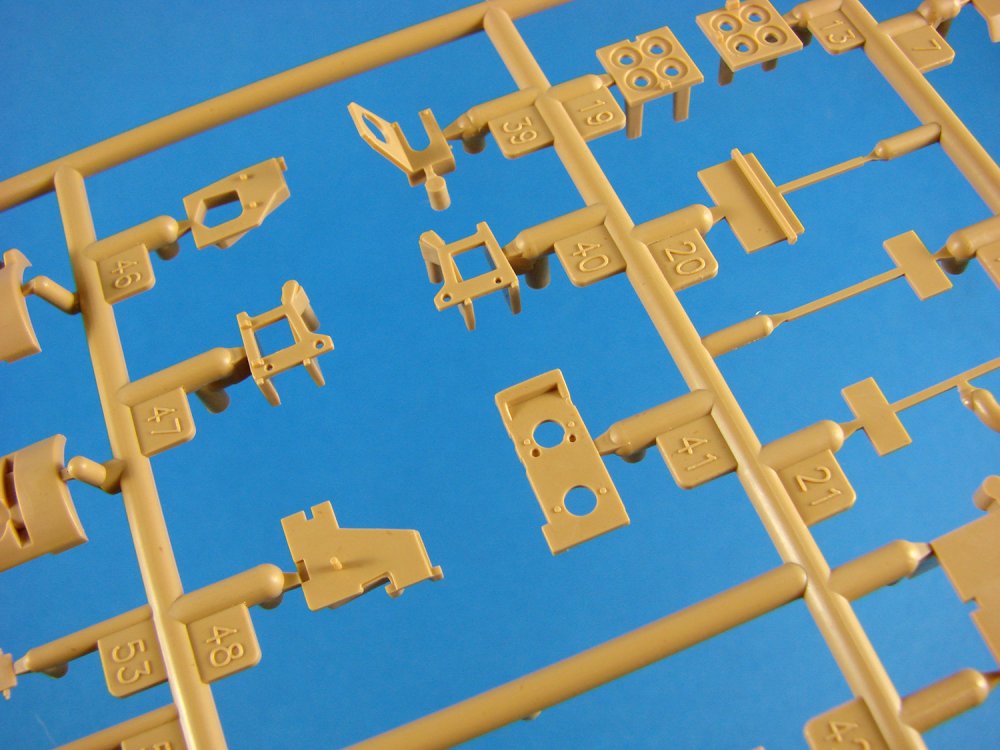
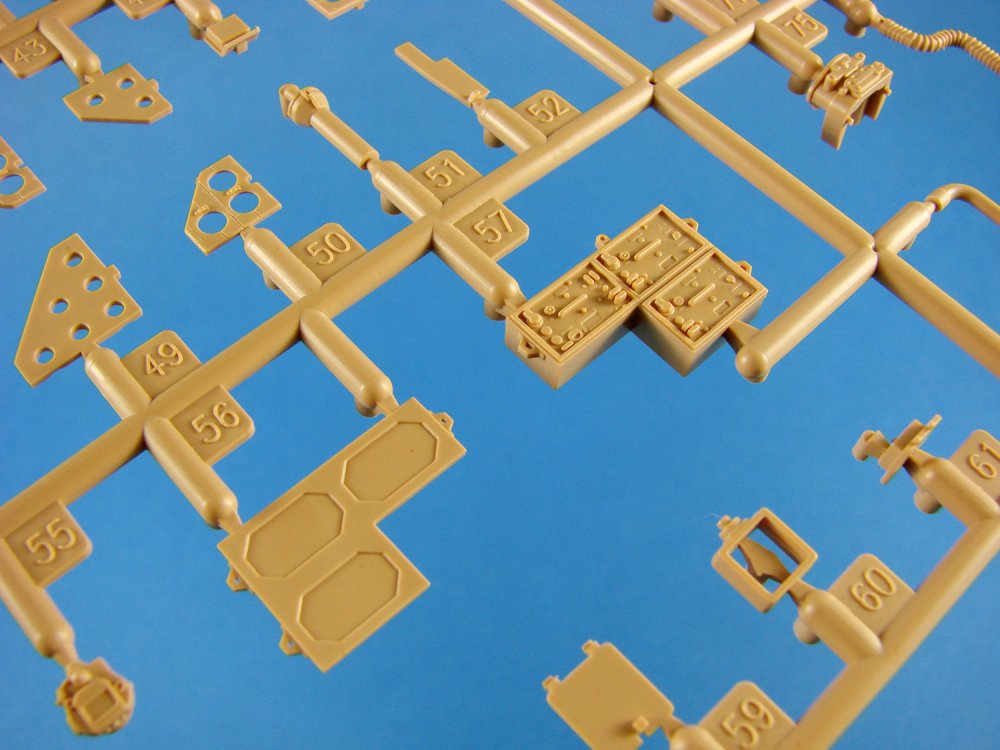
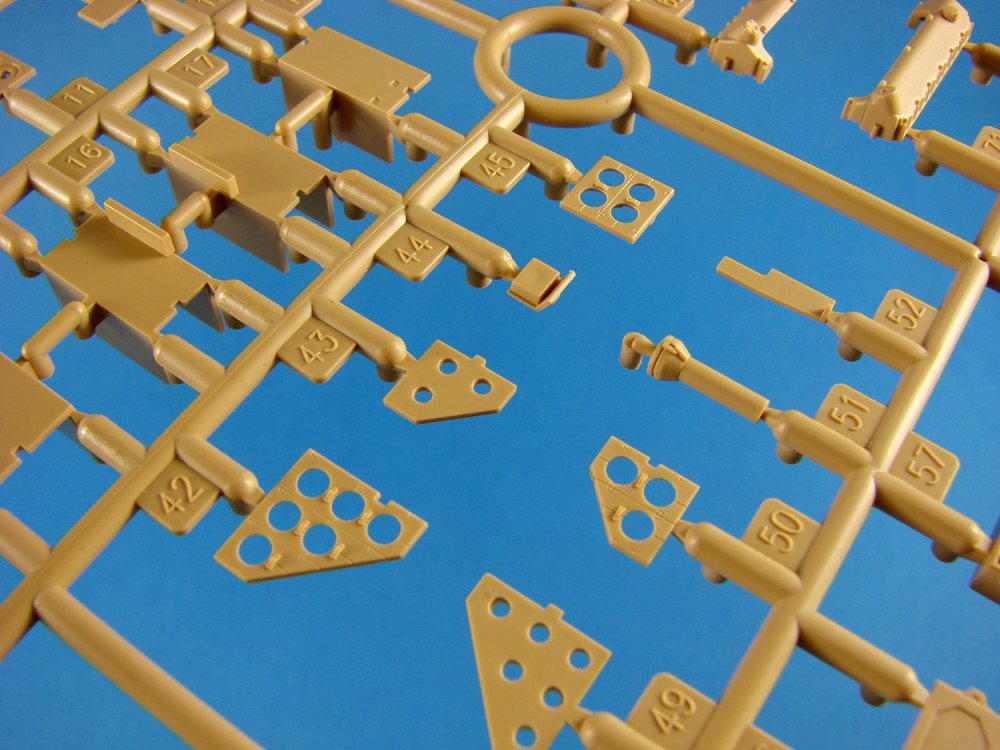
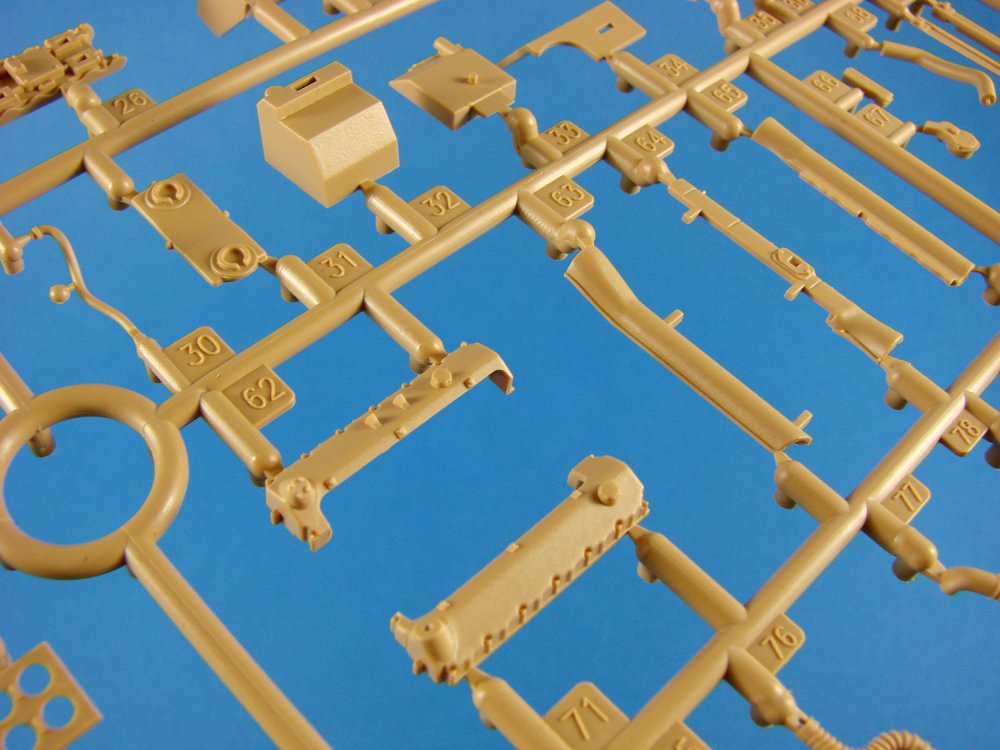
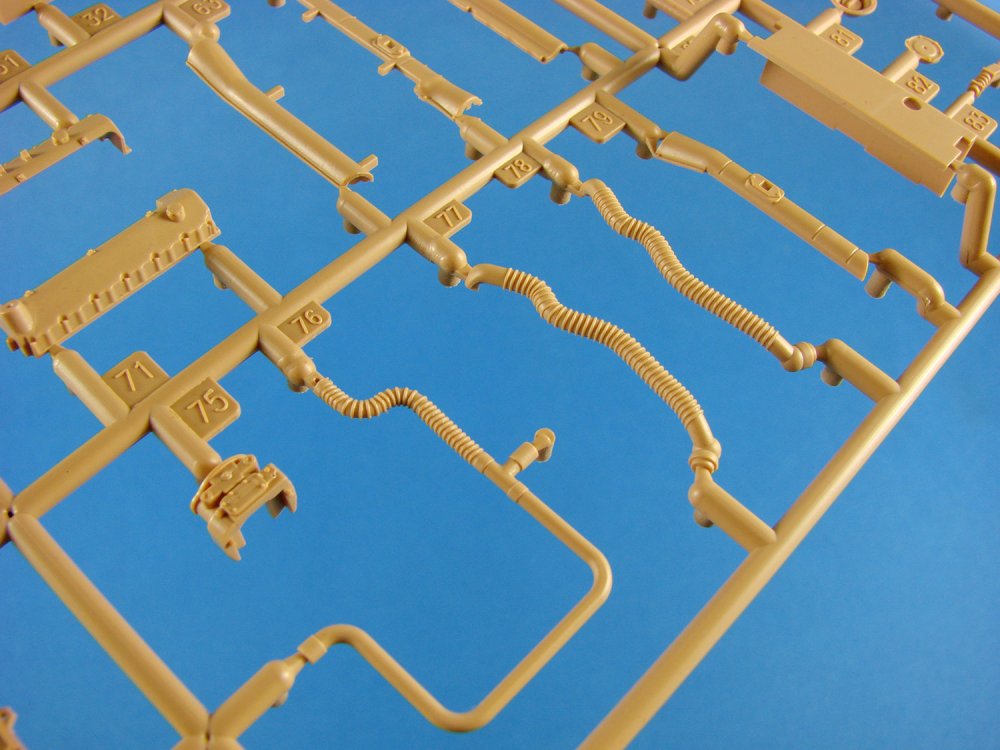
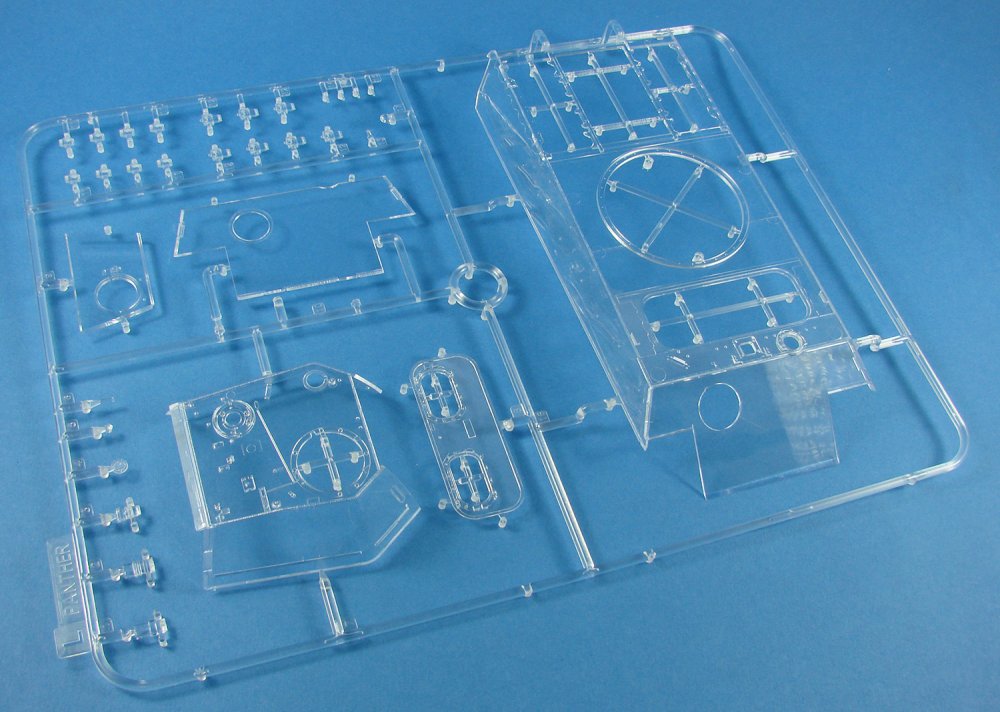
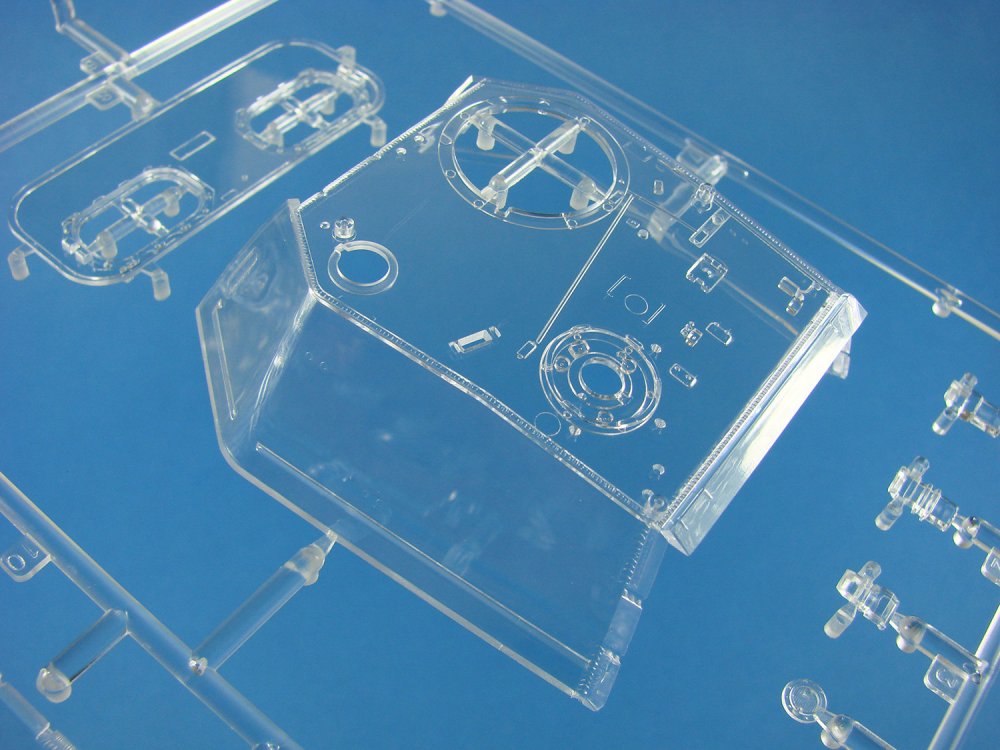
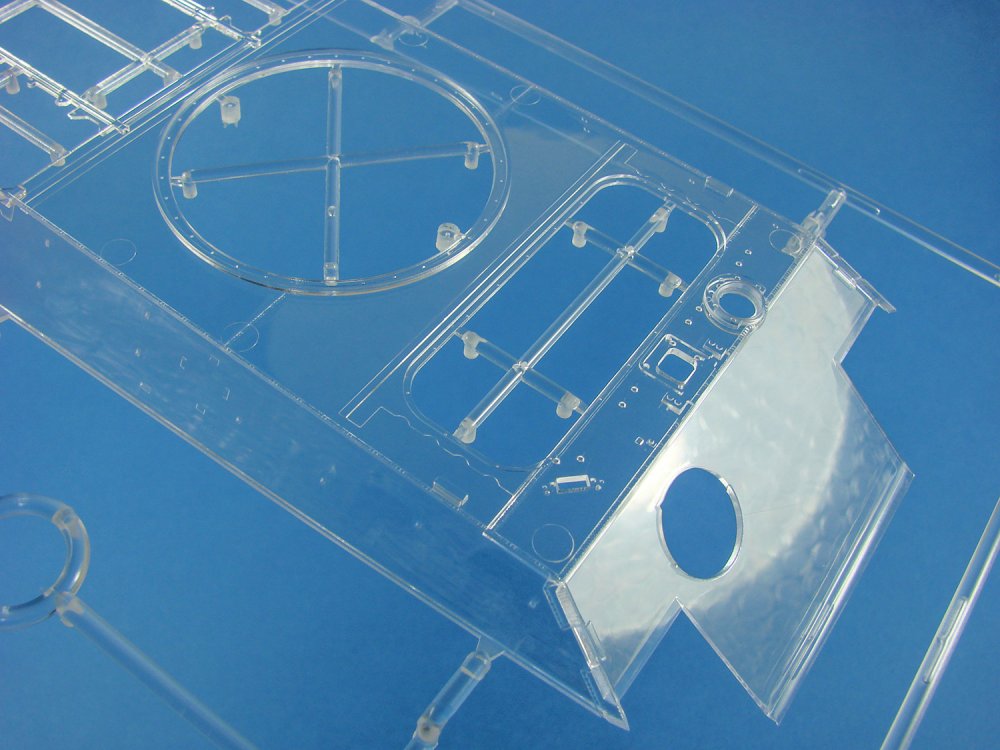
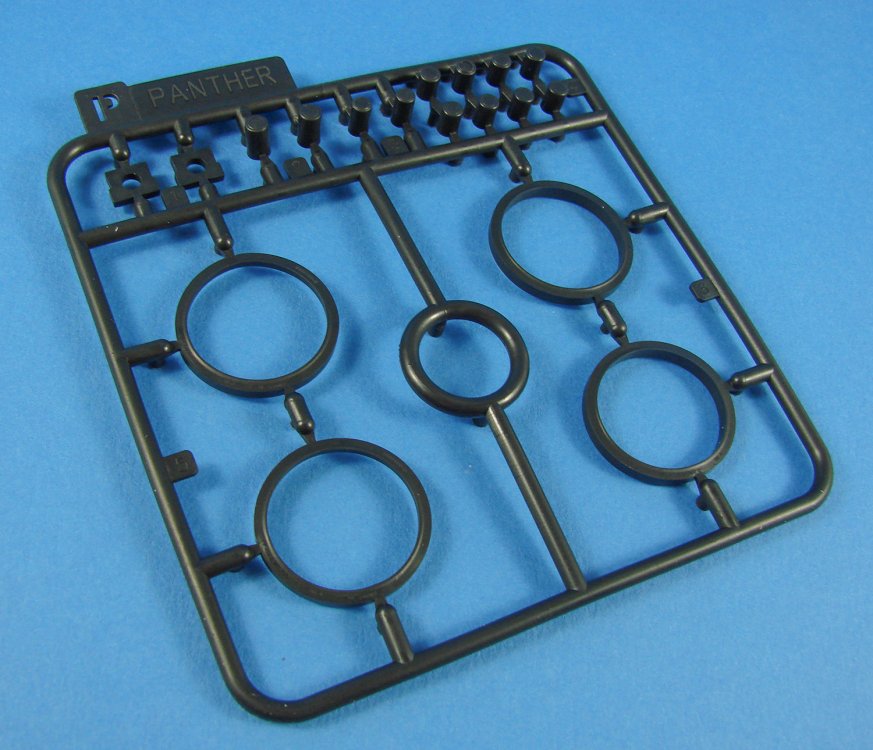
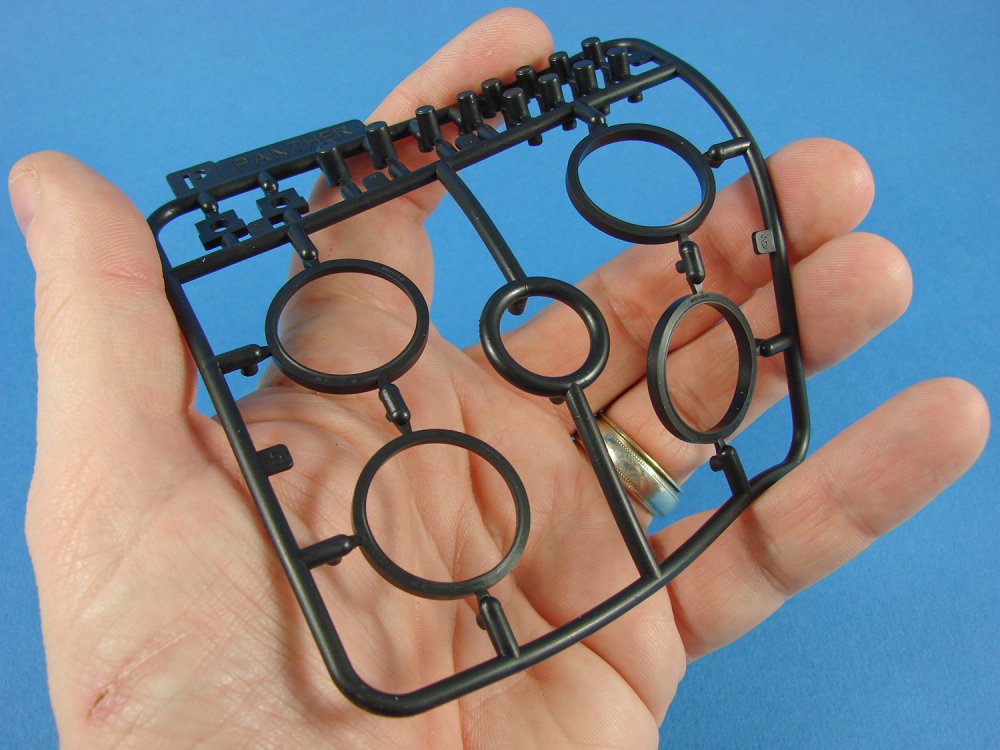
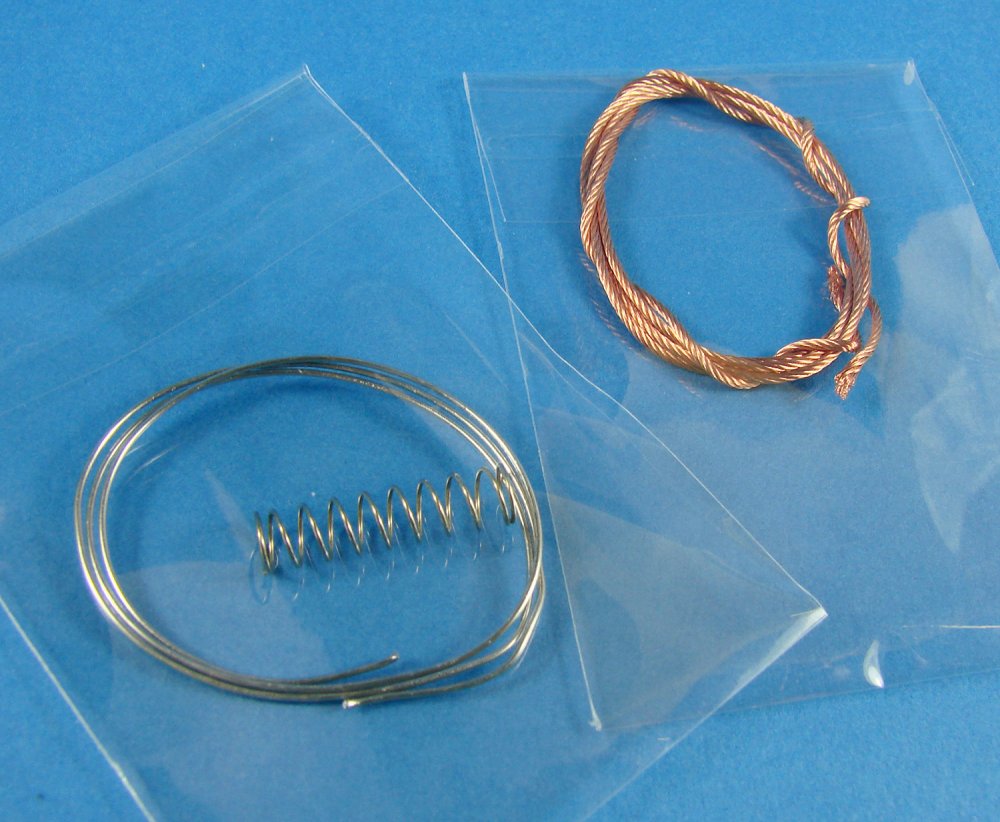
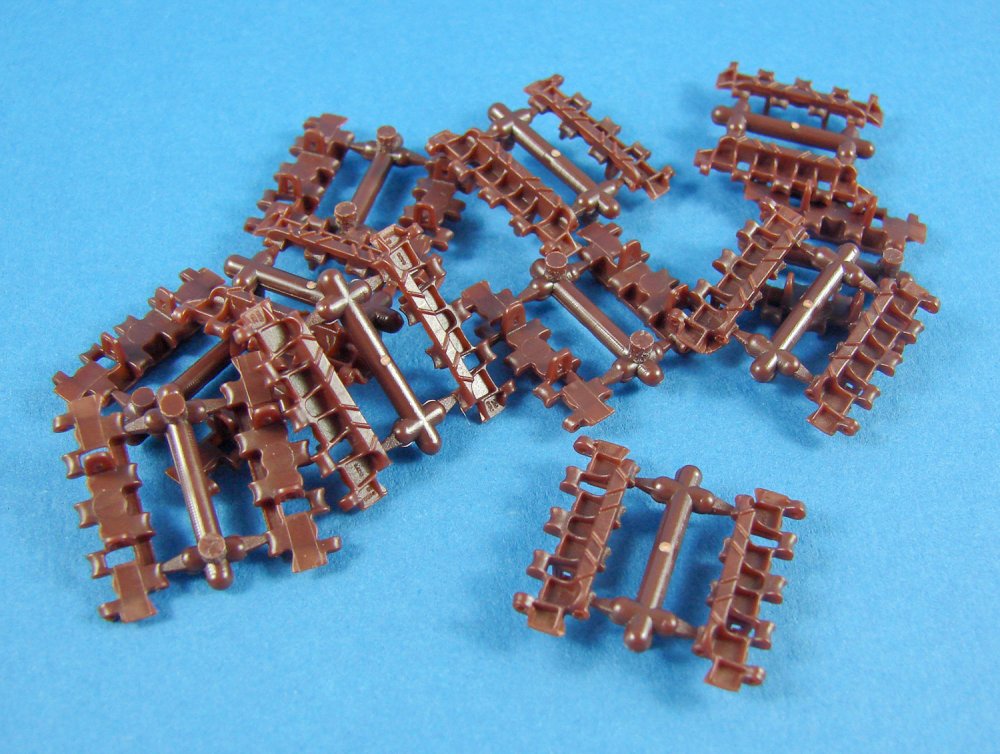
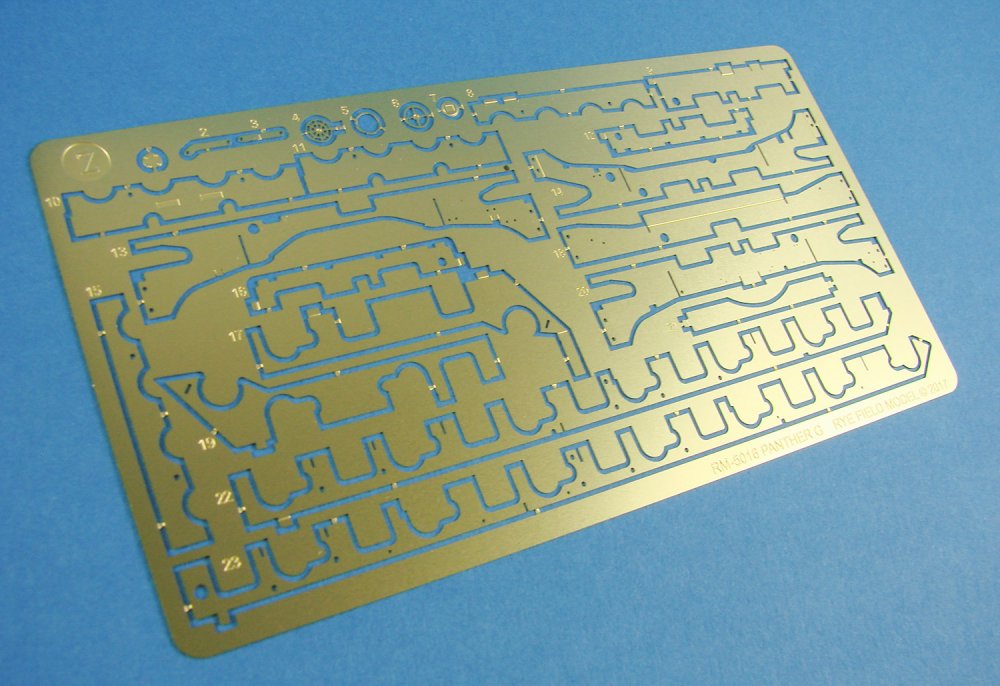
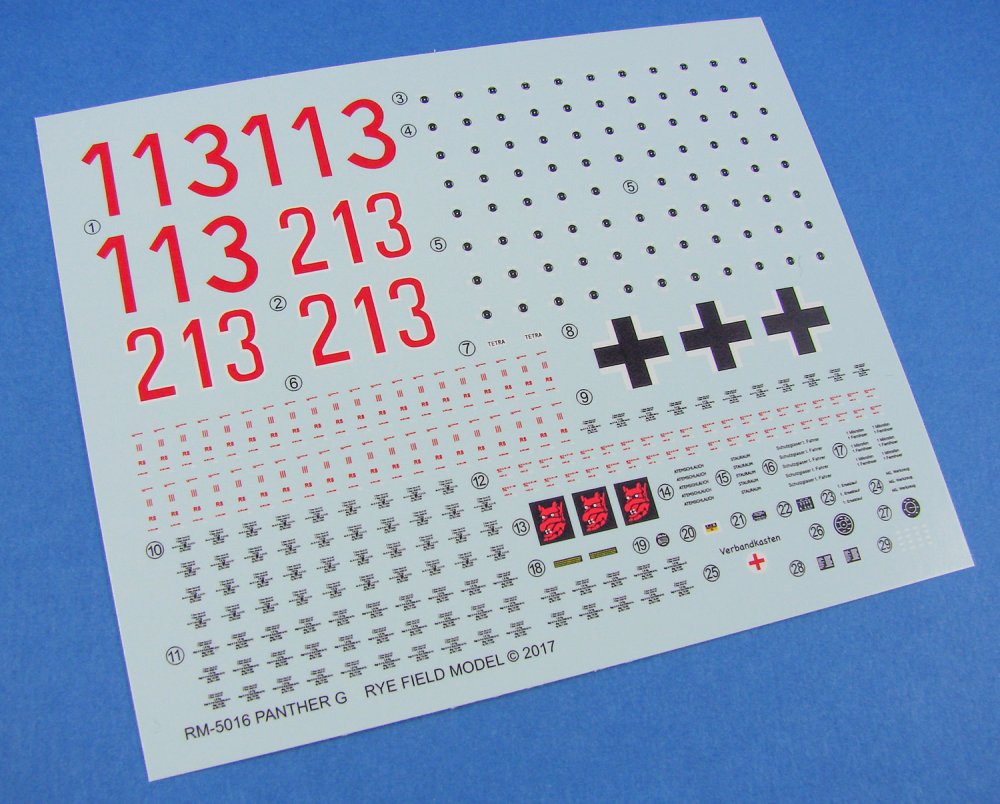
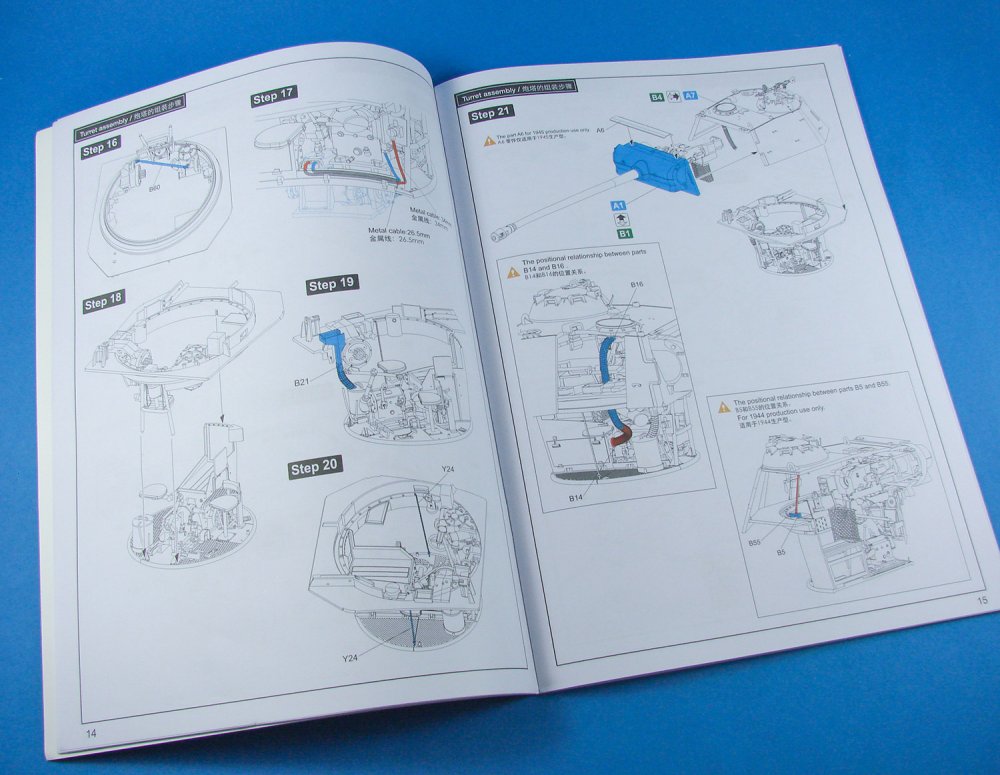
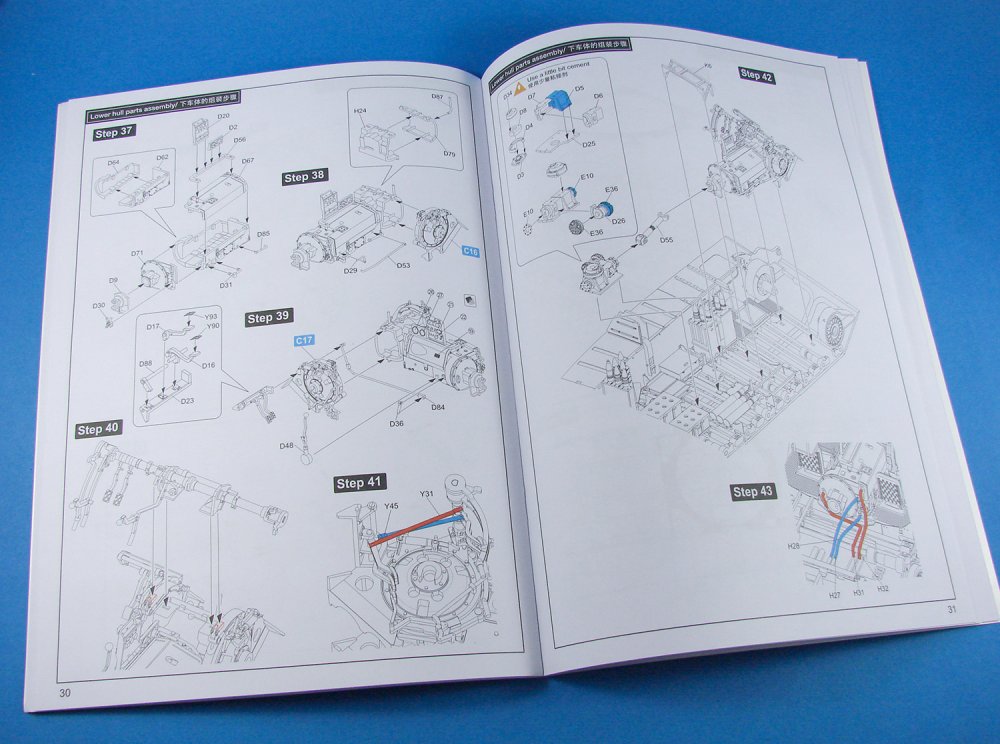
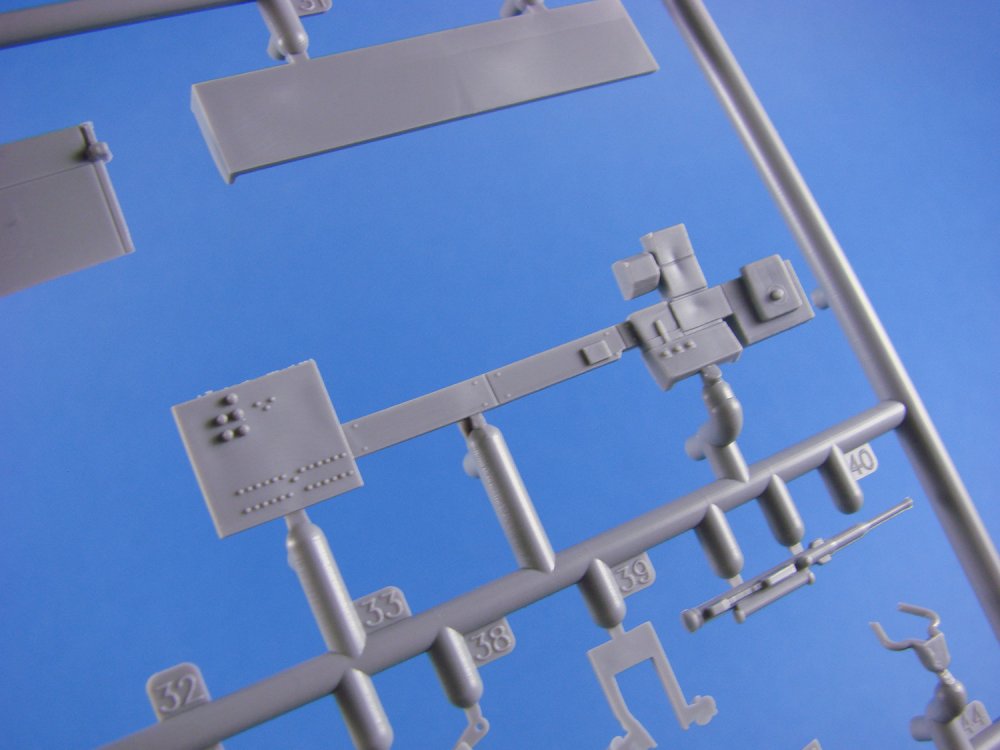
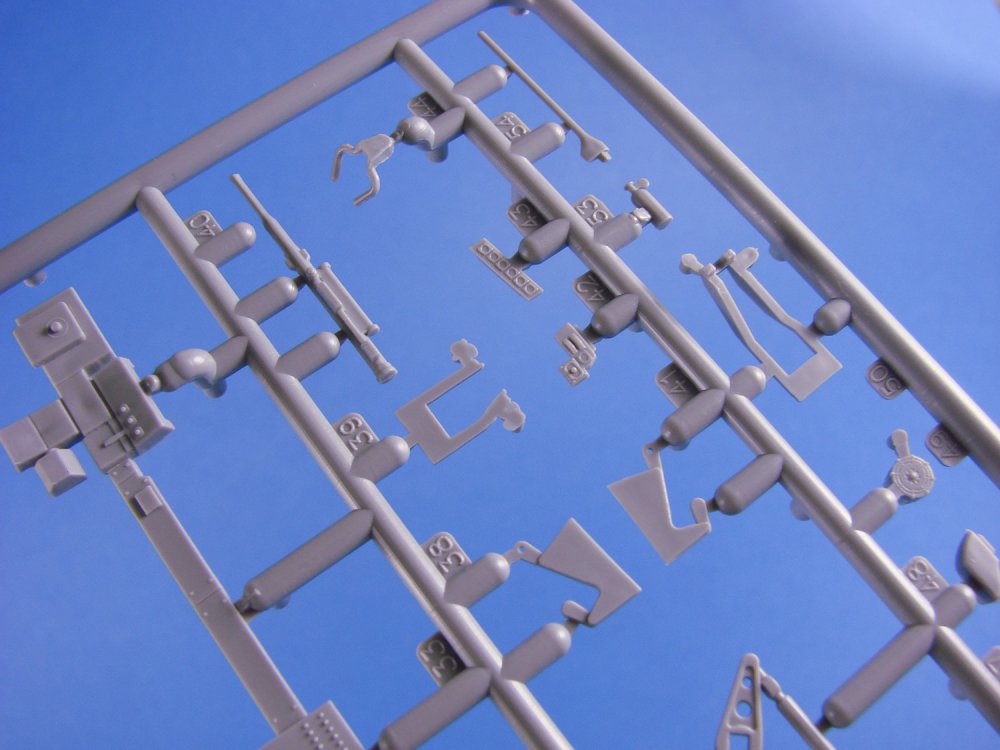
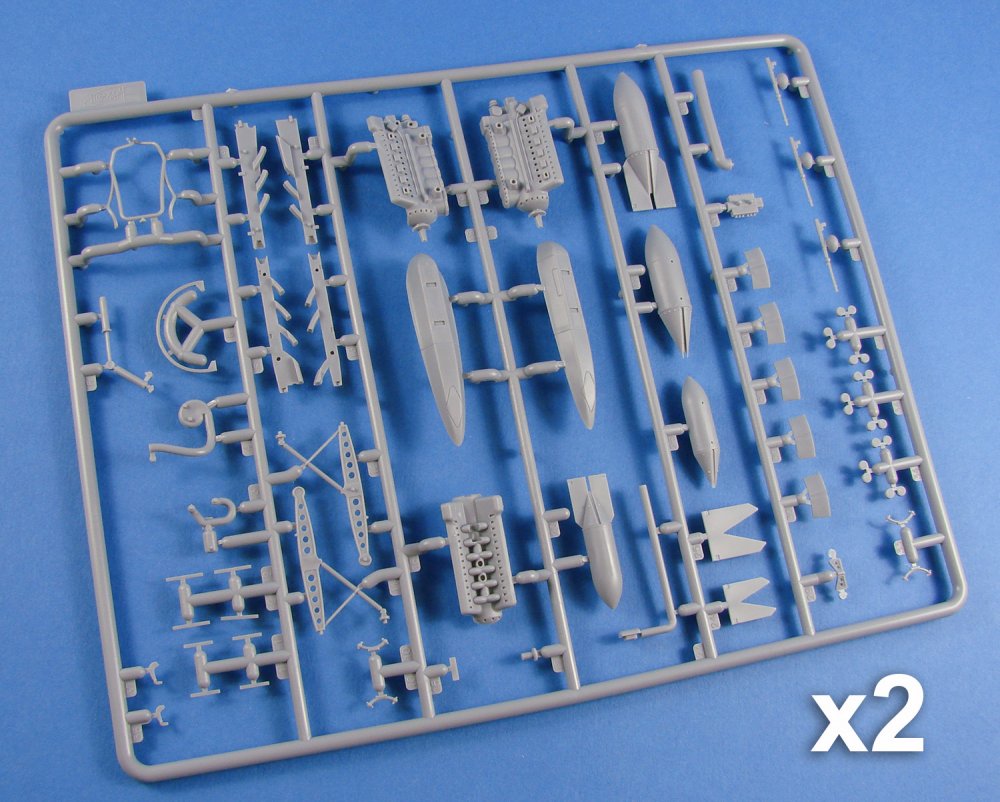
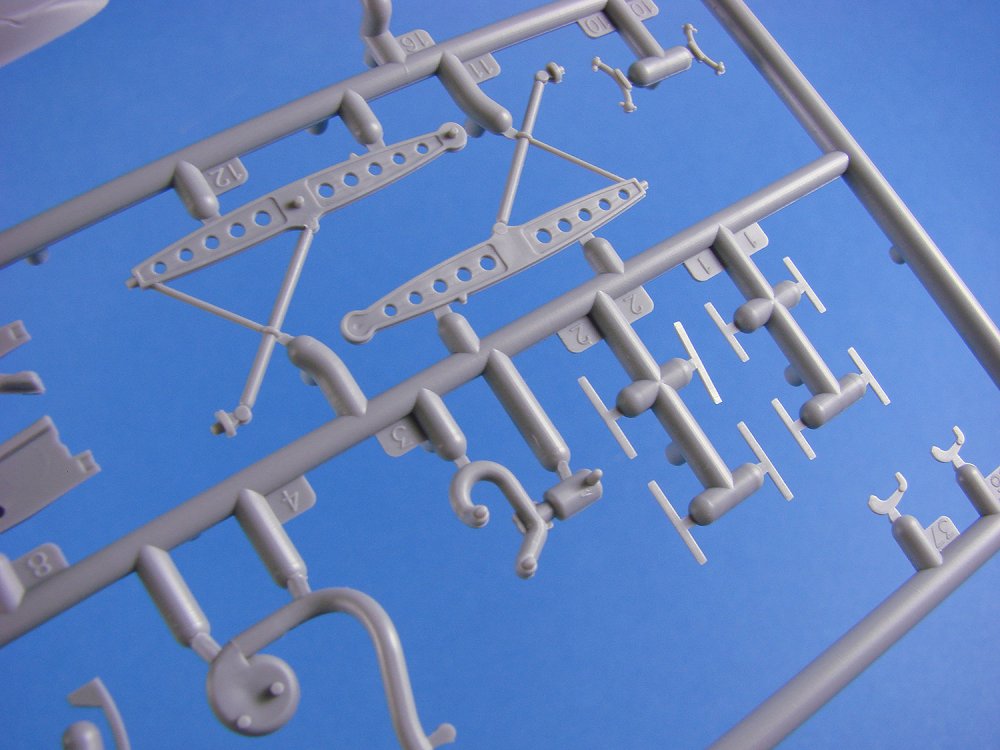
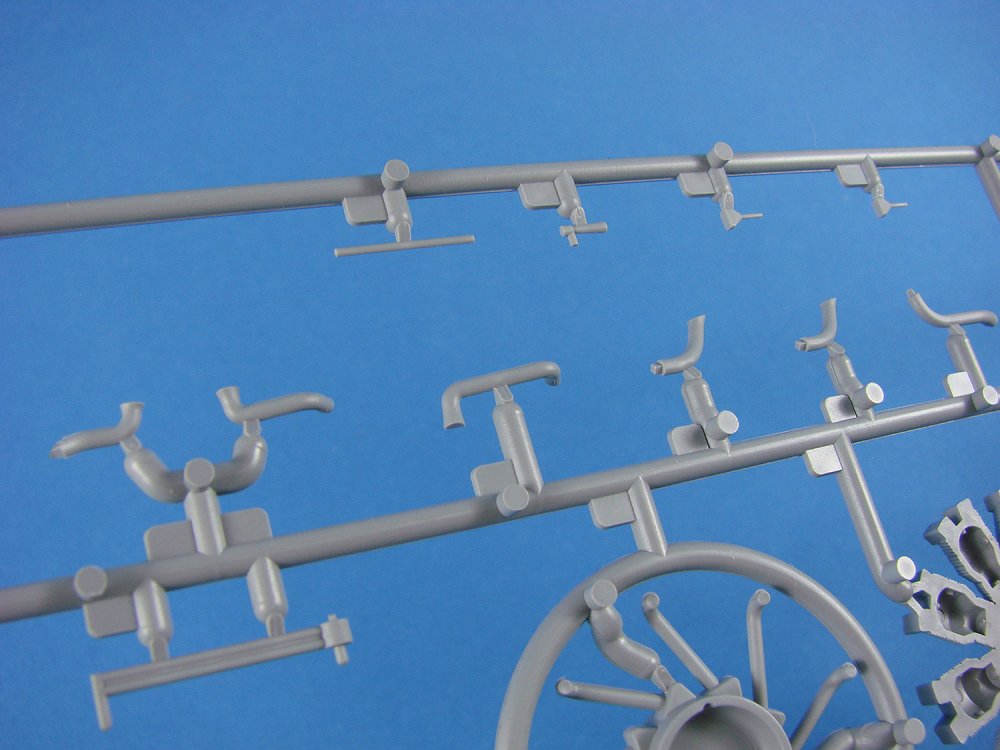
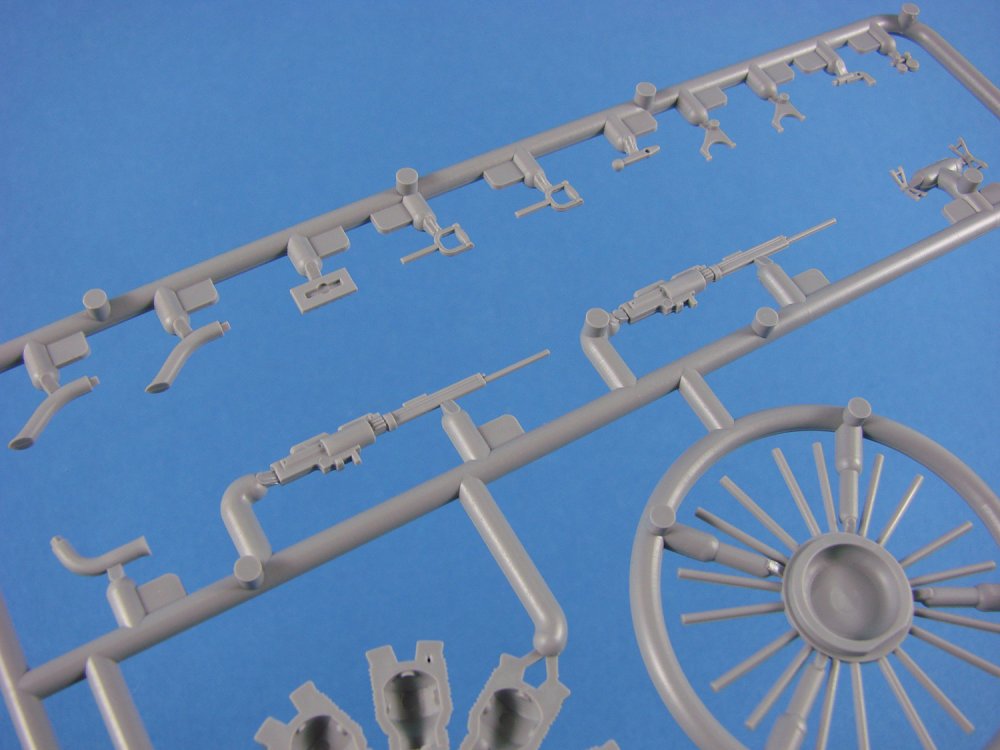
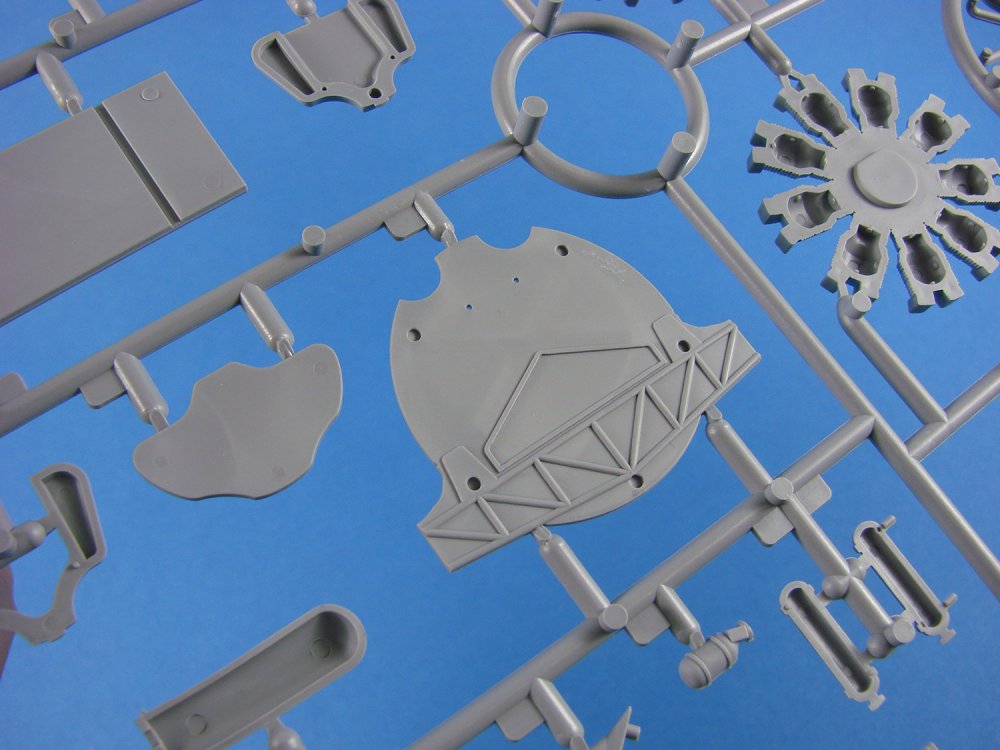
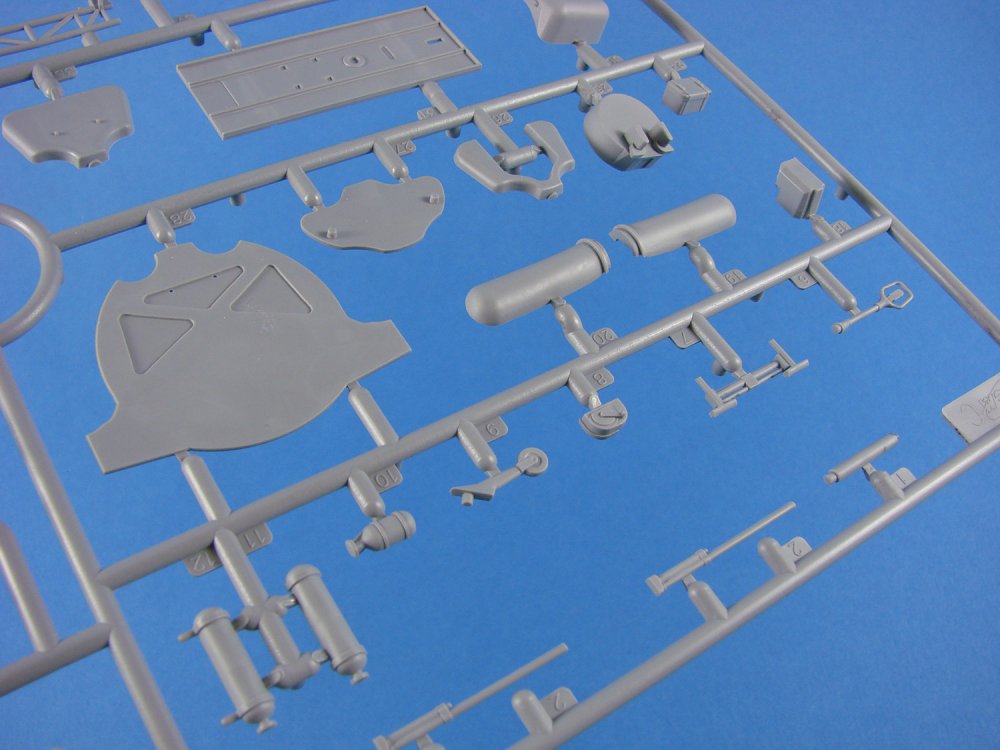
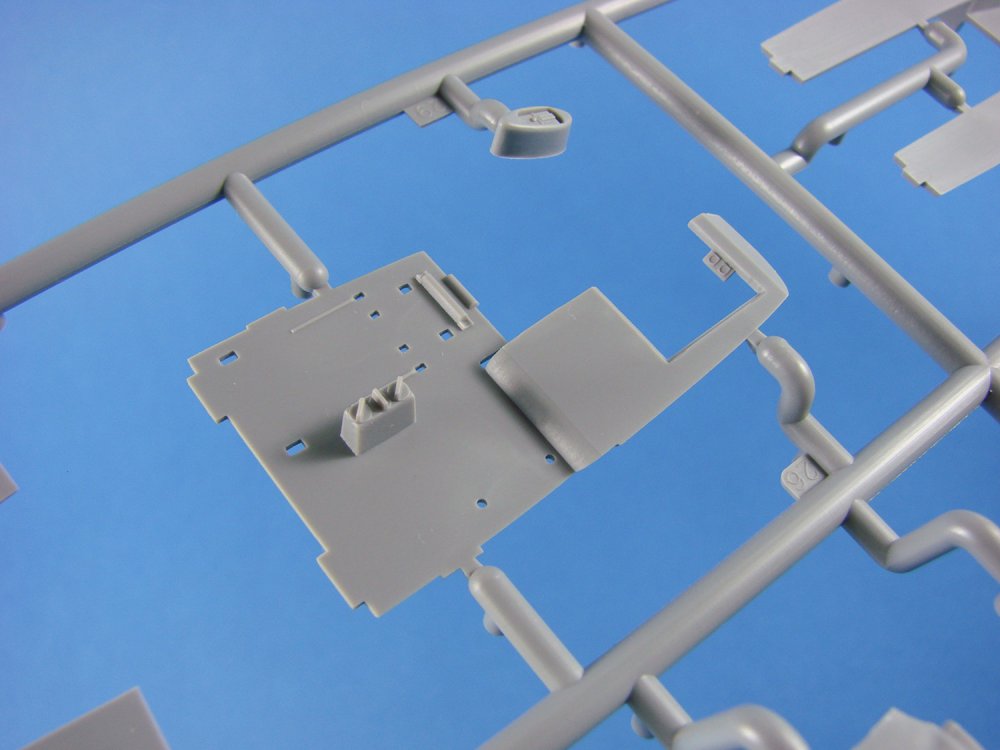
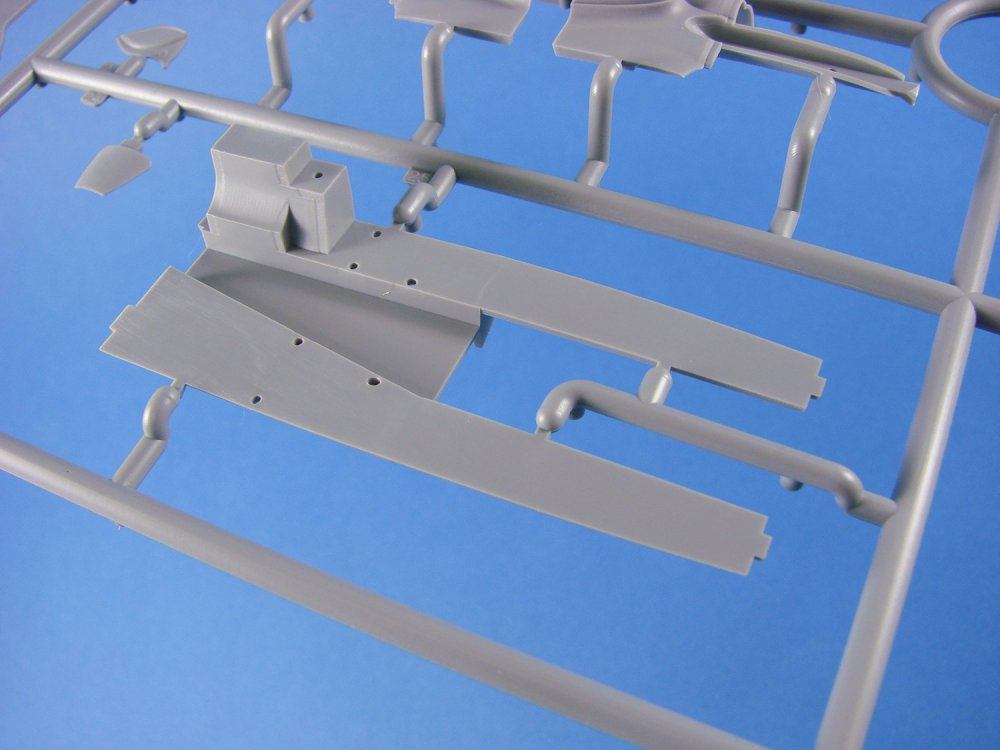
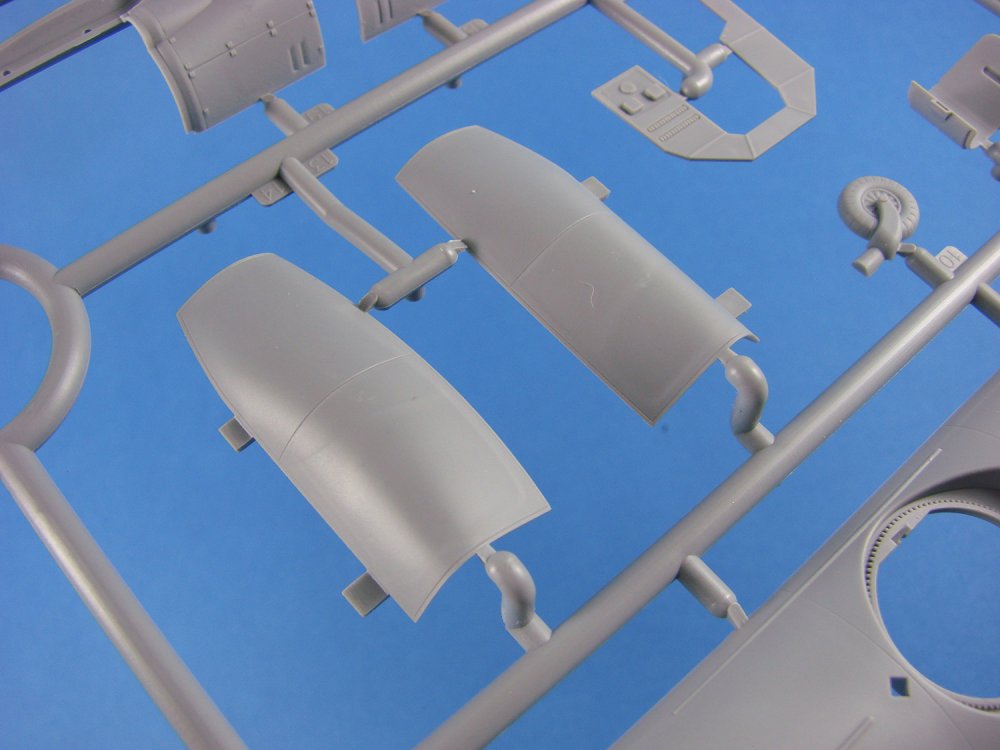
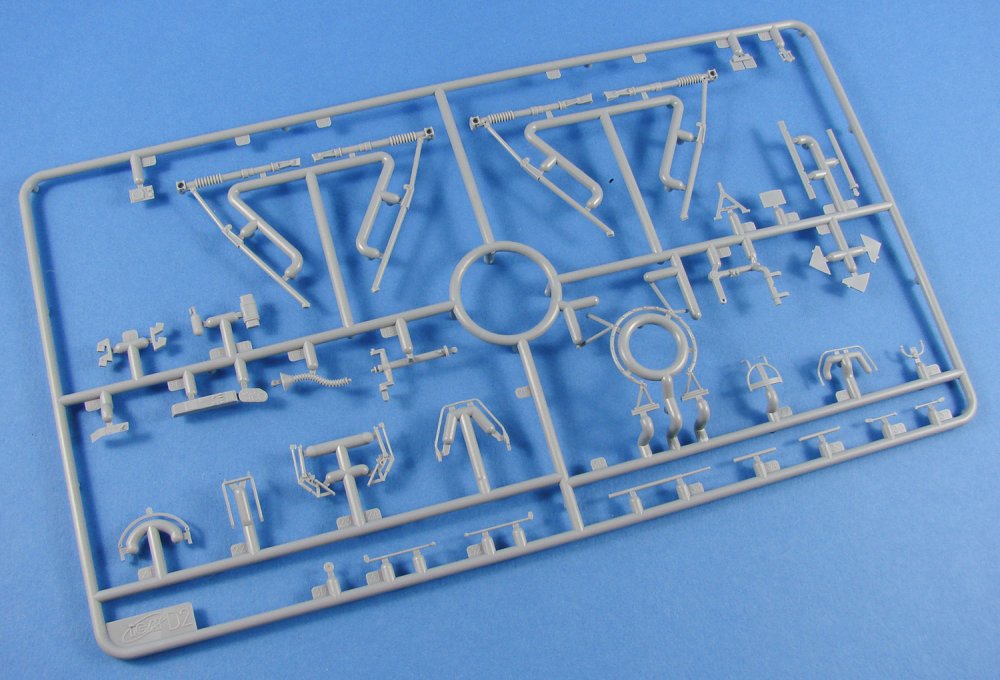
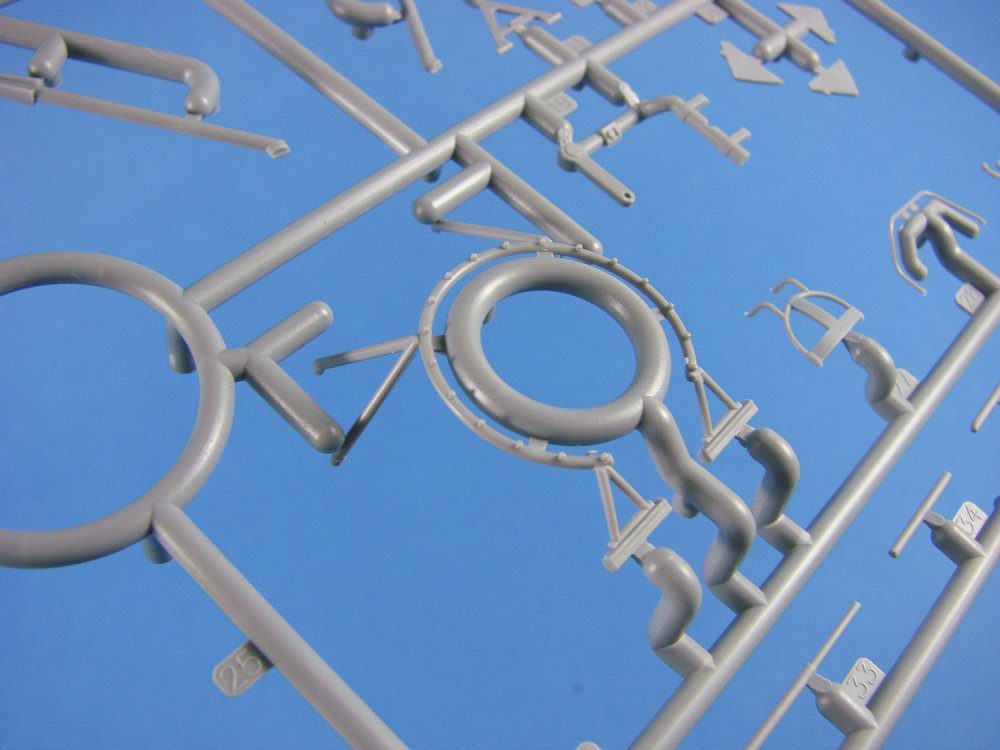
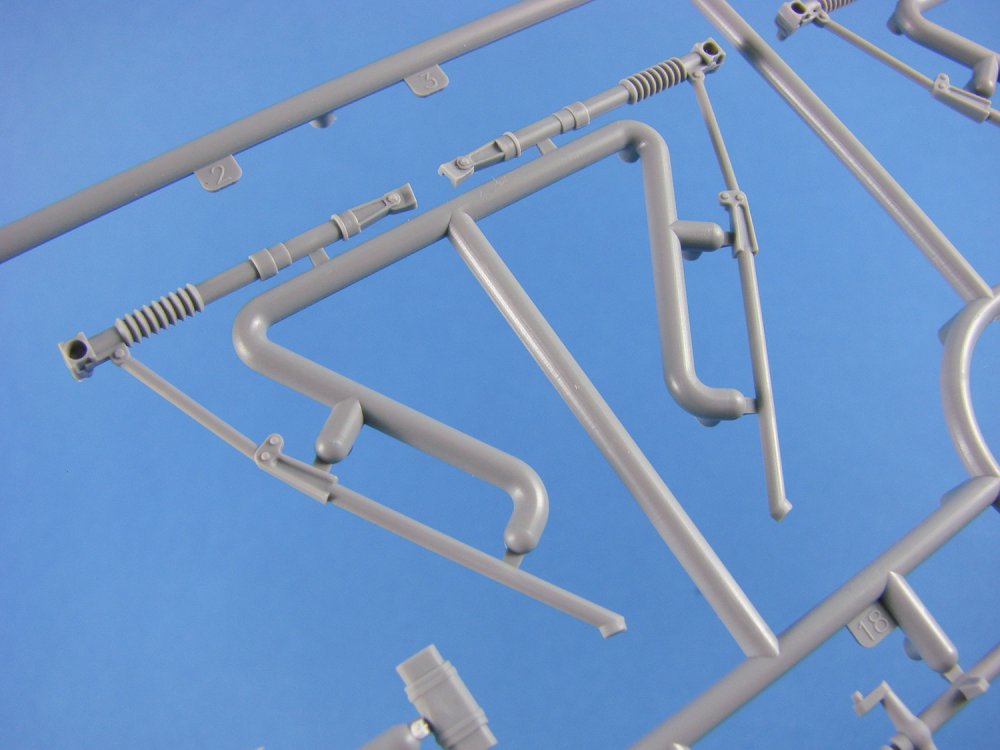
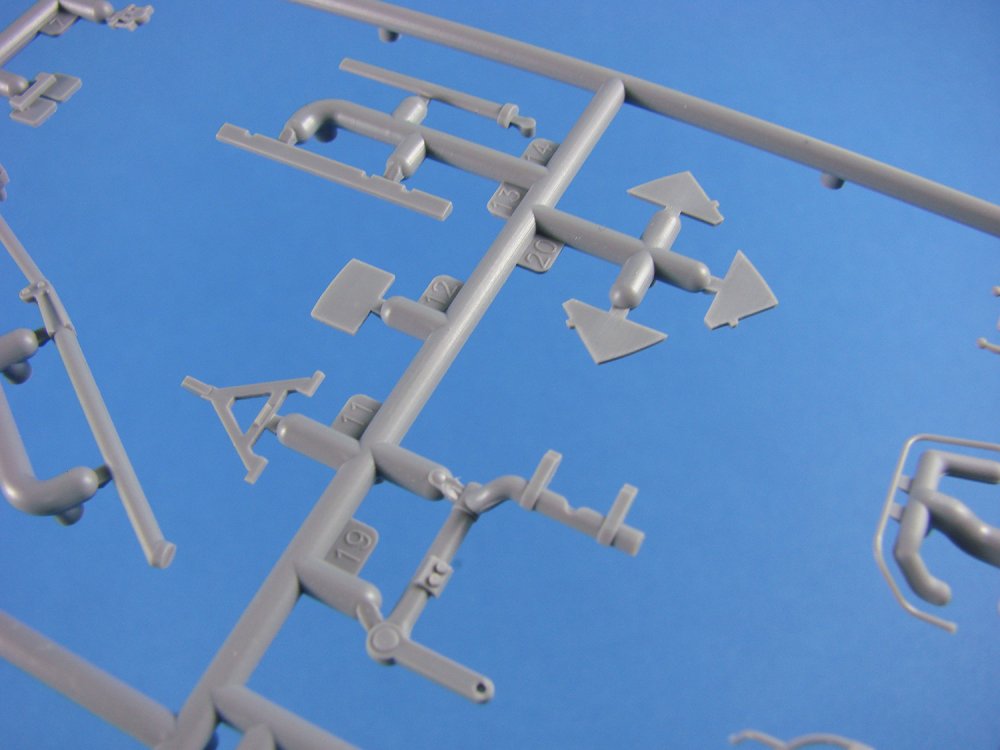
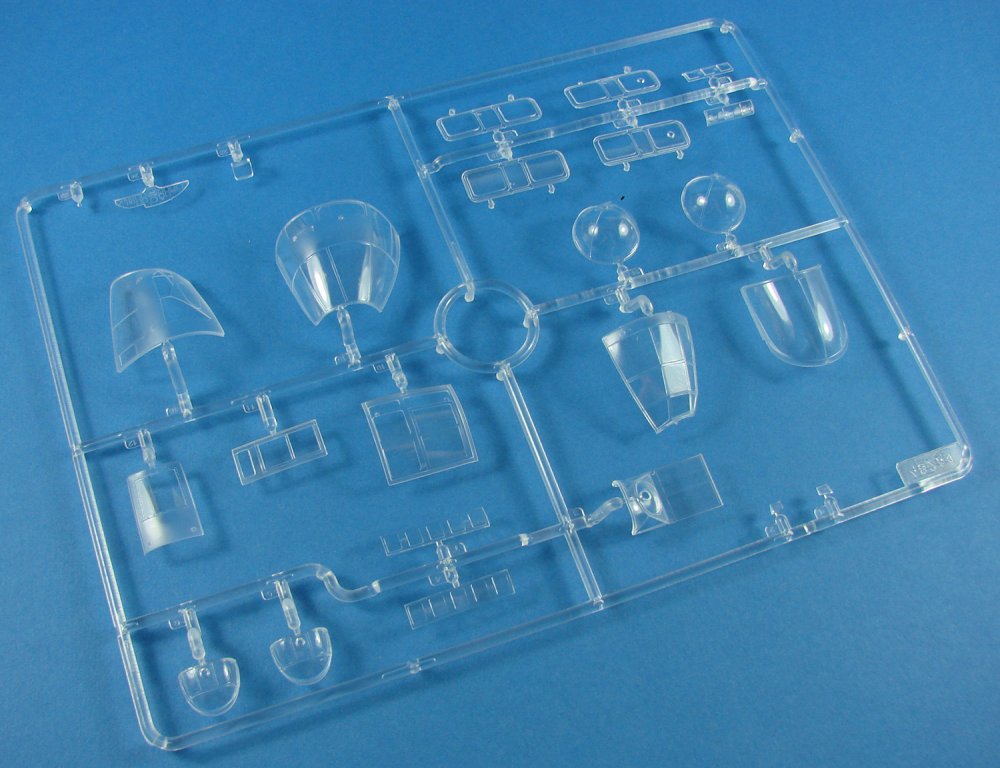
1/35 Panther Ausf.G ‘Early/Late with full interior’ Panzerkampfwagen “Panther” Ausf.G (Sd.Kfz.171) Rye Field Model Catalogue # RM-5016 Available soon from Model Kits for Less for £56.50 inc UK Hermes The Panther is a German medium tank deployed during World War II on the Eastern and Western Fronts in Europe from mid-1943 to the war's end in 1945. It had the ordnance inventory designation of Sd.Kfz. 171. It was designated as the Panzerkampfwagen V Panther until 27 February 1944, when Hitler ordered that the Roman numeral "V" be deleted. Contemporary English language reports sometimes refer to it as the Mark V. The Panther was intended to counter the Soviet T-34 and to replace the Panzer III and Panzer IV. Nevertheless, it served alongside the Panzer IV and the heavier Tiger I until the end of the war. It is considered one of the best tanks of World War II for its excellent firepower and protection, although its reliability was less impressive. The Panther was a compromise. While having essentially the same engine as the Tiger I, it had more efficient frontal hull armour, better gun penetration, was lighter and faster, and could traverse rough terrain better than the Tiger I. The trade-off was weaker side armour, which made it vulnerable to flanking fire. The Panther proved to be effective in open country and long-range engagements but did not provide enough high explosive firepower against infantry. The Panther was far cheaper to produce than the Tiger I, and only slightly more expensive than the Panzer IV. Key elements of the Panther design, such as its armour, transmission, and final drive, were simplifications made to improve production rates and address raw material shortages. The overall design remained somewhat over-engineered. The Panther was rushed into combat at the Battle of Kursk despite numerous unresolved technical problems, leading to high losses due to mechanical failure. Most design flaws were rectified by late 1943 and the spring of 1944, though the bombing of production plants, increasing shortages of high quality alloys for critical components, shortage of fuel and training space, and the declining quality of crews all impacted the tank's effectiveness. Though officially classified as a medium tank, its weight is more like that of a heavy tank, as its weight of 44.8 tons puts it roughly in the same category as the American M26 Pershing (41.7 tons), British Churchill (40.7 tons) and the Soviet IS-2 (46 tons) heavy tanks. The tank had a very high power to weight ratio however, making it extremely mobile regardless of its weight. Its weight still caused heavy tank-esque problems however, such as an inability to cross certain bridges. Extract from Wikipedia The kit If you like large kit boxes, you’ll not be disappointed. This one is almost twice the size of my Cyber Hobby 1/35 King Tiger, and the deep lid contains a superb artwork of the Panther G of what they say is an unknown unit, with zig-zag winter distemper covering the base camouflage. RFM have sent me the Limited-Edition kit with clear turret and upper hull parts, as labelled on the lid. One side of the lid has three colour CAD illustrations of the model with its complete interior (yes...complete!) and the other side has three colour profiles for the schemes on offer with this release. This is certainly no weekender project. I thought it apt to place a little of the blurb here that Rye Field has told us of this new kit, designed to celebrate their third year in the business. Clear turret and upper hull parts Up to twenty multiple-choice designs Moveable design for track links, suspension system, artillery and other components Provides a set of 800mm steel road wheels which can be used for after April 1945 Accurately reproduced interior and exterior structures of Panther Ausf.G tank Offer of special gift of three kinds of drawings by famous Japanese military painter, Mr. Kei Endou Multi-function grenade launcher can be posed open or closed Rear escape hatch door can be posed open or closed Optional turret vent types Complete interior, including Maybach HL230-P30 engine, transmission, fighting compartment, driver position etc. Option for seat and storage positions of shell box Two options for hydraulic drive units Spring-loaded recoil Two mantlet options Moveable gun Optional engine heater and comprehensive part options associated with this (firewall, roof vents, heater duct, spoiler etc. Optional artillery observation periscope bracket types Three options for turret cupola mounting for AA-MG Optional air-defence machine guns Optional observation lens types Moveable double torsion bat structure Optional bow machine gun ball shield Idler wheel options (665mm dia. and early 600mm A-type) Workable track links, track disassembly tools, and ice cleats Optional driver periscope rain cover Optional cockpit roof vent Multi-position barrel travel lock Two types of headlights Three types of rear stowage boxes Open/closed engine cover plate options Lifting hooks with two optional positions Two options for cooling air outlet grilles Four exhaust configuration options Deployed and stowed 20T jack options This information of course doesn’t even go into including the details of every single reproduced component within the interior of the Panther Ausf.G. If Rye Field Models wanted an epic for their anniversary release, then they got one. Please excuse the resolution of some of these company images. I couldn't get them any higher. Inside the box, the first thing I’m confronted with is another large but shallow box with colour illustrations of two of the schemes (I think this is the offer of drawing gift that RFM refer to), and inside here is a single, large, clear sprue that contains the Limited Edition parts, such as the upper hull, turret, glacis etc. as well as standard clear parts for the periscope et al. I do find the clear plastic pretty quirky and don’t intend to build this with a visible interior, but the option is there for you. The rest of the sprues are moulded in a light brown styrene, and there are FOURTEEN of these. Most are individually bagged except for the ones where there are multiples. Two sprues are interconnected, with two copies, counting as four sprues. A bag containing wire and a spring also contains a flexible black sprue with captive wheel nuts and four wheel rims. Track parts (x190) are included in a brown zip bag and these, moulded in dark brown plastic, come as two per sprue. TWO PE frets are supplied, one decal sheet, and lastly, a hefty 52-page instruction manual. As I said, this is no weekend project. You’ll need to set serious time aside. We’ll now take a look through the various sprues and focus in on those fine details which really set this release apart. Sprue A I could be wrong, but it does look like RFM has thoughtfully grouped the parts for specific areas mainly together on their respective sprues. This certainly beats the constant toing and froing between sprues, especially when there are so many as with this kit. Here we see parts that seem to exclusively concern the Panther’s powerful 7.5 cm Kwk 42 L/70 gun, including turret parts and two mantlet options. The latter are for the curved mantlet, and the later version with a vertical face below the upper curved section, providing extra armour to the lower quarters. Whilst some would decry the lack of a metal barrel in this kit, the plastic one is moulded in one piece instead of as halves. Of course, the muzzle is moulded as separate parts for which no seams exist. These details are supplemented by a little PE. Sprue B We generally have a lot of internal turret details here, ranging from the traverse motor to the gun counterbalance, hydraulic drive, loader/gunner/commander seats, azimuth etc. To say the turret interior is comprehensive is pretty much on the money. You’ll certainly need no aftermarket here. The instructions show lengths of wire that must be added using the supplied material. Sprue C (x2) Wheels, torsion bars and other associated parts are found on this sprue, of which two are supplied. I do note a few parts from other areas of the hull, but generally this is where the rolling stuff happens. I’ve already said that the wheels/torsion bars do work, but not as they are initially moulded. If you don’t want to simply build this with static, non-moving torsion, then that is the default position. If you want them to articulate, then a small tab of plastic needs to be removed from each bar. Quite a simple task and one that satisfies all builders of this kit. Sprue D Many general interior parts here, such as the driver’s seat, transmission, comms system power supply, periscope storage, front drive brake units etc. In fact, many items from the lower hull forward interior will be found here. Sprue E & X (x2) Both of these sprues are supplied connected, and there are two frames included. The most obvious inclusion here are the many shells that will be distributed around the hull interior. That much explosive in one space must’ve played on the minds of the crews. Note also a jig for building the tracks, and the multitude of track pins. The individual links are first sat on the track jig and then each bank of pins is installed whilst on the sprue. When in situ, the sprue will then be removed. Genius! Other parts here include wheels, engine fan amongst many other small components. Sprue F This sprue provides the rear and front glacis, lower hull sides, fenders and the hull floor. As this kit has a full interior, the hull floor has details moulded within. I can’t understand the reason for the forward glacis as this is moulded in situ on the clear upper hull, as the non-clear F1 part is designed to fit over the top of this, despite the test models showing it without F1 attached. Detail is excellent, especially on the hull sides. Some very nice weld seam details to be seen too. Sprue G Many items here that appear to be associated with the rear engine decal, with numerous options provided, such as those for the four different permutations of exhaust layouts, heaters, tool racks, access doors (poseable), front fender mudguards etc. Note also options for the rear stowage bins. Sprue H This Panther kit can be fitted with the heated duct system as an option. This means that RFM needed to be able to enable the modeller to easily install these parts. Note here two internal bulkhead options which provide the means to display the model with or without the heat duct system. Certainly better than having to mod the part yourself. Internal rear compartment walls, shell racks, lower hull central floor, fuel tanks, filters etc. Sprue J Another multitude of small and key components to be found here. Everything from the 20T jack (that can be posed deployed or stored), drive gear housings, rear glacis parts (including towing mechanism), hull tools, towing cable ends etc. Sprue K Here you find the mighty Maybach and other associated parts. A variety of other components are moulded here too, such as the rear mantlet plates (two options), ammunition storage rack parts, hoses and ducting, radio sets, and the remainder of parts that are scattered around the interior. Sprue L (clear parts) As I already stated, this particular kit is a Limited-Edition version with these parts being moulded in clear styrene. From this, I can only presume that regular editions will have this in the same colour as the rest, with the periscope parts etc. being moulded separately. I honestly don’t know. However, that’s a story for a different day. Like or loathe clear parts, these really are superbly moulded with exceptional clarity, should you wish to finish your model, so the interior can be viewed through the plastic. Sprue P This is a rubberised sprue containing four wheel rims and a series of captive collars for holding the wheels in place on the torsion bar arms. Tracks Moulded in a dark brown plastic, these are moulded in twos, interconnected with a small sprue. There are 85 each of these, totalling 190 separate track links. I can’t comment on how easy these will be to assemble at this stage, but they look straightforward enough with the supplied jig and method of applying the track pins that I mentioned earlier. Photo Etch Two frets are included in this release, packed into a wallet with a card protector. Quality is excellent, with narrow part gates that will make it easy to remove and clean the individual components. Included in PE form are the heater grilles, internal hull lower chassis frames, clasps, etc. There are a lot of parts to keep you occupied. Extras Only a few bits here, namely different diameter wires and a spring for the main gun recoil. Decals A single sheet is included with decals for the three schemes included. A whole load of stencils are also included. Printing is excellent, with the decals being nice and thin and with minimal carrier film. Colour is solid and in register. Instructions RMF provide a 52 page A4 manual for this release, with there being a total of 71 constructional sequences. However, many of these include enough assembly to have merited further breakdown. All drawings are in line format and are clear to understand. Coloured ink is introduced to illustrate some of the finer nuances of construction, such as new part placement and where parts are only to be dry-fit at certain stages. Some of the English annotation is a little messy and could do with having been corrected, but the general gist is easy to follow. Paint references are given for Mig AMMO and Gunze paints. Conclusion Well, what can I say? Firstly, I don’t think I’ve ever seen a kit with as many options available to the builder, nor one with this incredible amount of full interior detail in 1/35. You’ll need your wits about you as you progress through the build in order that you use the correct permutation of parts, plus any component modifications that are required to common parts. It’s a minefield, but at least it’s a fun one! Perhaps one of the most complicated kits I’ve yet encountered. Moulding quality is up there with the very best, with hardly a seam to be seen, and zero flash that I can determine. Any ejector pin marks should also be hidden behind installed equipment, so again, no concerns there. There’s no doubt that Rye Field Model have created a masterpiece and if the images and videos from the recent Nuremberg Toy Fair are anything to go by, then this will look simply amazing when complete. As I have said, this is a complicated kit and you need to check assembly at each turn with relation to parts options, so ensure you know exactly which vehicle you’ll be building, right at the outset. All I can say is this is just stunning! HIGHLY recommended! My sincere thanks to Rye Field Model for the kit sample seen in this First Look article. At the time of writing, the kit only seems to be dribbling through Asian suppliers but should be available in the rest of the world over the next weeks.


-
luga Luftwaffe Gallery – JG54 Special Album 1939-1945
James H posted a topic in Tools, Books & Misc.
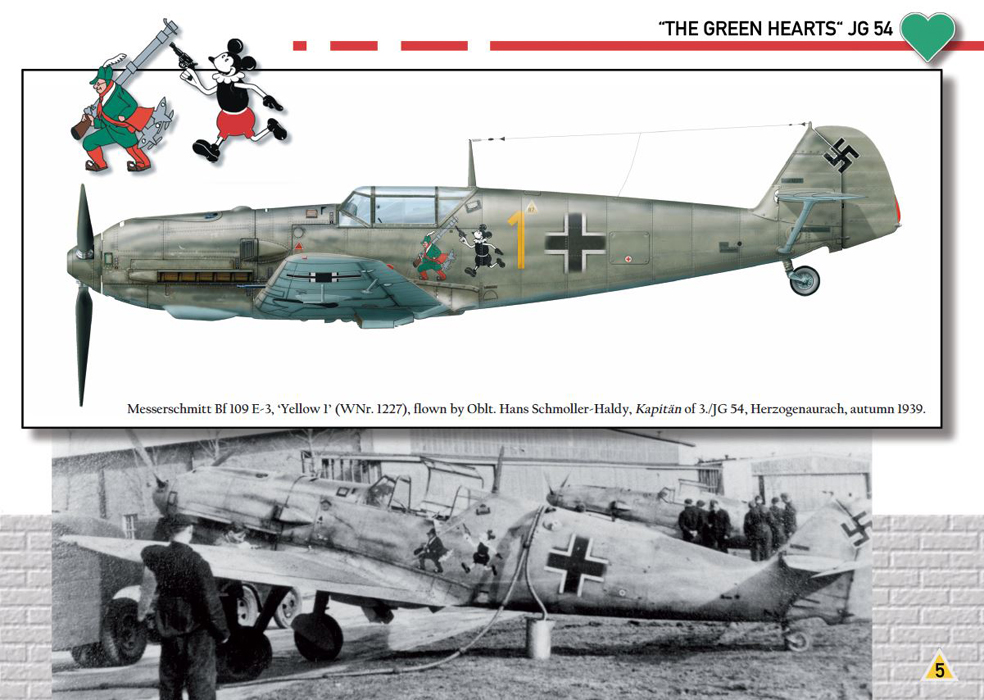
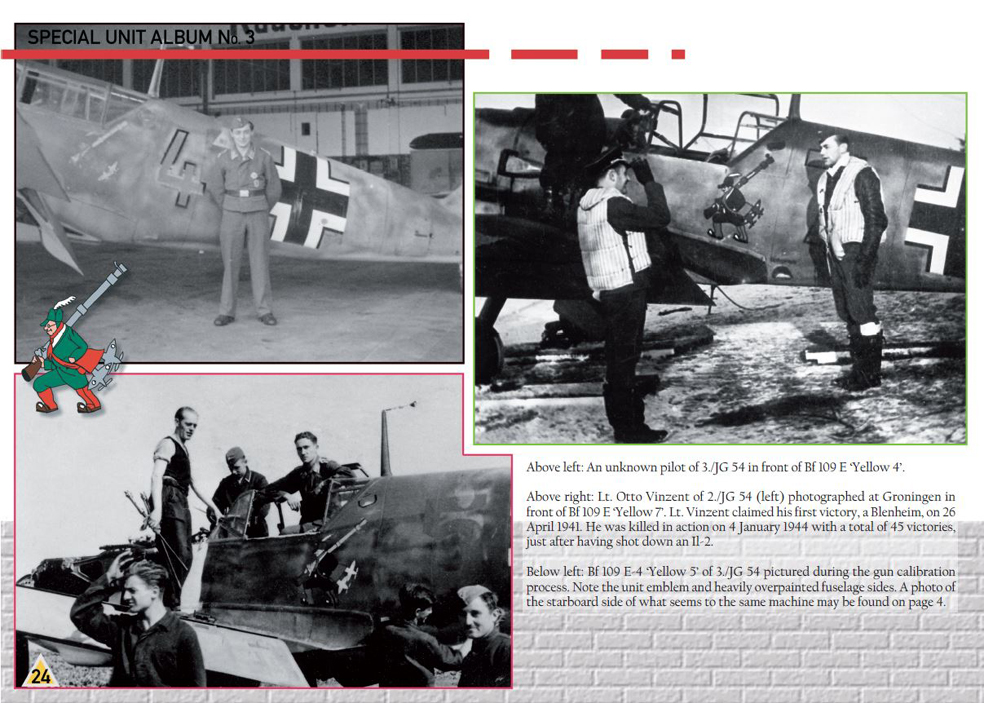
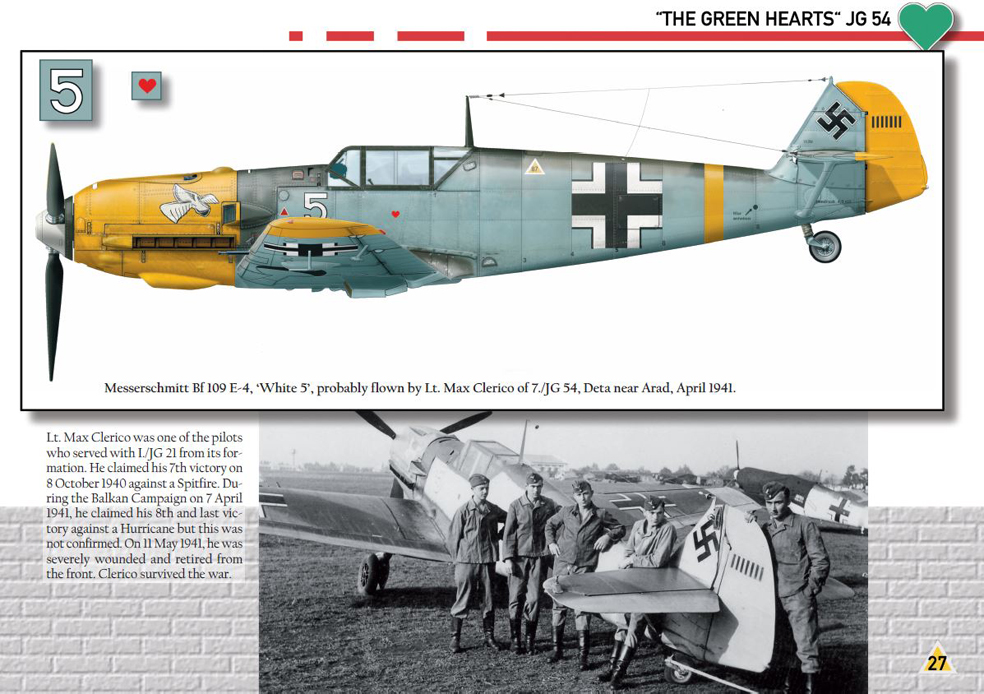
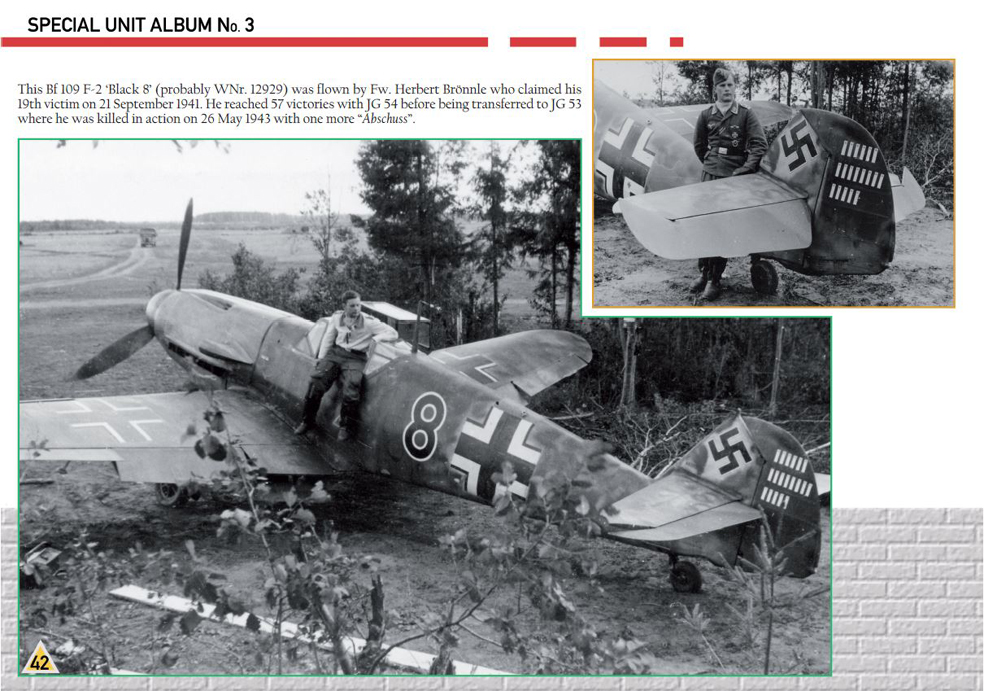
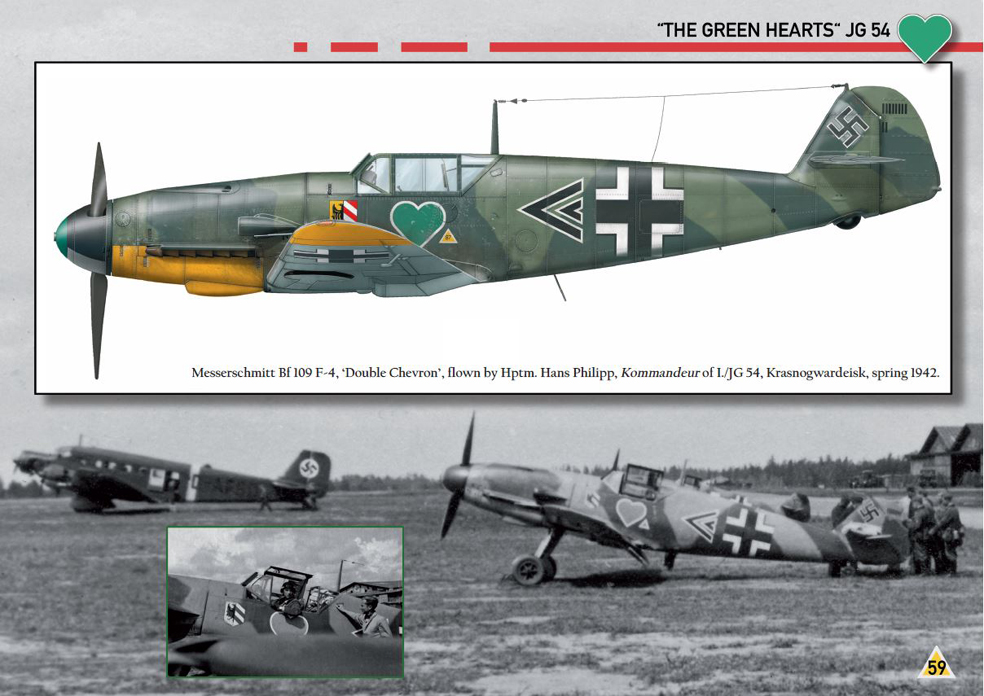
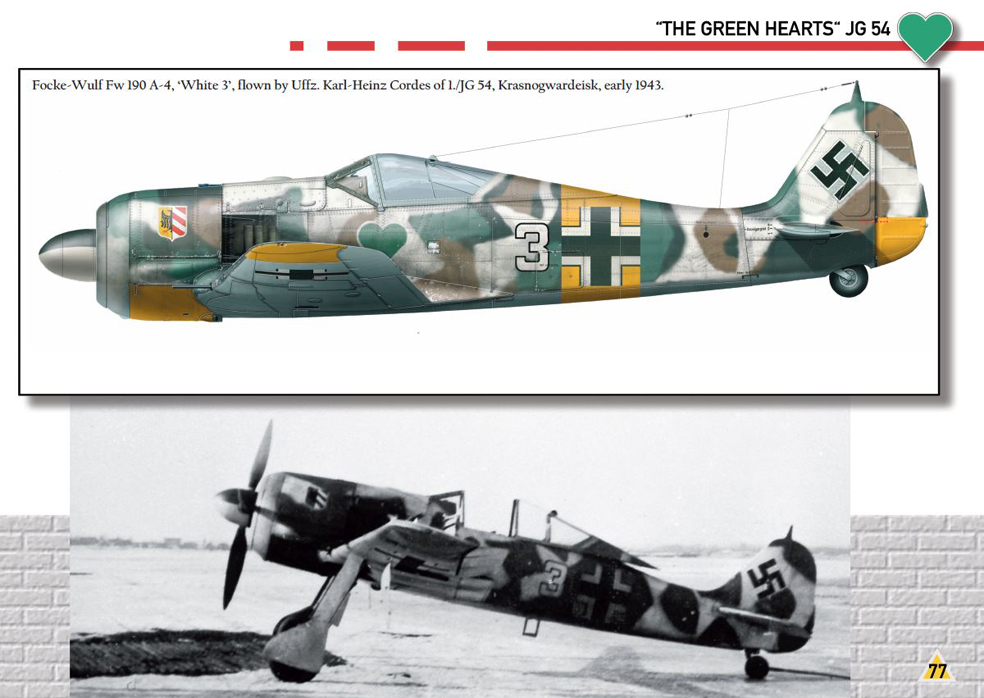
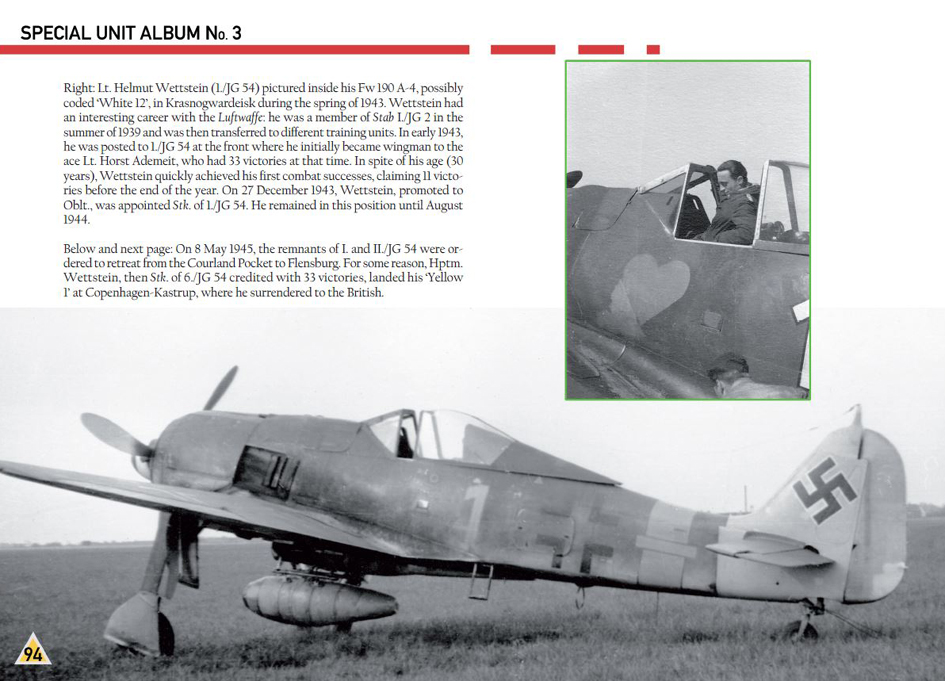
Luftwaffe Gallery – JG54 Special Album 1939-1945 Lu/Ga Erik Mombeeck & Maciej Góralczyk ISBN: 978-2-930546-19-3 Available directly. See info at end of article. Jagdgeschwader 54 is perhaps one of those units that has fascinated both modellers and historians alike. This is a unit with a rich tapestry of service history, interwoven with stories of famous pilots that have served with it, such as Hannes Trautloft, Walter Nowotny, Max Hellmuth Ostermann, and Hanns Phillip. For me, there is perhaps more material interest in this Jagdgeschwader than there is with Galland’s JG26, but that is of course open to personal opinion. JG54 didn’t fall to earth fully-formed, as we say, but instead was composed of three Gruppen with totally different origins. What eventually became known as ‘Grünhertz’ (Green Hearts), had its famous unit symbology derived from these initial Gruppen, with the original Teutonic Knights cross emblem being changed and adapted until 1944, when the last Jesau Cross incarnation was finally overlaid on the Green Heart background, and a real legend was born. Lu/Ga’s books, of which this is the third title in their Special Album series, covers the formation and eventual demise of JG54, the highest scoring Luftwaffe wing of WW2, first serving and fighting on the Western Front, and taking part in skirmishes over the south of England in 1940, right up until its transference to the Eastern Front in 1941 during Barbarossa, and finally its almost complete destruction in the Courland Pocket. Remnants of JG54 escaped to Flensburg, and a disbanded heavy fighter unit became the nucleus of what was to then become III./JG54 which then operated from Berlin against heavy odds before being absorbed into JG26 before the war’s end. This book doesn’t so much tell an ongoing story of JG54 but instead looks at it through the eyes of those who participated, with the book progressing in a chronological way, from the sitzkrieg in the West, up to those final days of the war. Navigating your way through this book certainly highlights the changes not only in aircraft variant (mostly Me/Bf 109 and Fw 190), but also in the vast changes in applied camouflage. Some of the schemes are quite startling and most definitely are manna from heaven, for the Luftwaffe modeller. It’s also a haven for those interested in the emblems that were applied to Luftwaffe machines, with JG54 perhaps being the most diverse in this respect. This particular title is printed in a roughly A4 format and in a landscape format, making it quite easy to manhandle, especially with it also being softcover and perfect-bound. The cover itself is glossy, and the pages within having a very slight satin sheen. Printing quality is excellent. There are 96 pages within the covers, containing around 216 mostly original (and unpublished until now) photographs that have been derived from personal collections and family albums, and these are interspersed with the most amazing colour profile artworks from French artist, Thierry Dekker (http://dekker-artwork.blogspot.co.uk). Over 30 of these profiles are included, and they tie directly to the period images that are printed alongside these profiles, complete with historic notes, and the aforementioned personal accounts. Noting the actual colours of the aircraft, in contrast to the black and white photos, is quite interesting. Many different types of film were used during the war, and it will have been a labour of love to translate those images into an accurate colour profile. This particular title is a little different to Erik’s previous books in that this is a collaboration effort with renowned Luftwaffe historian, Maciej Góralczyk, with a pool of many other collaborators who were willing to share their time, effort and material for this book. This title is the result of several collective years of their lives, dedicated to collating and producing a pictorial and historical archive for this most famous of Luftwaffe fighter wings. Of course, the title is written in English, and is very easy to read. Conclusion It’s often been said that one can never have enough reference books. In reality, there are reference books and there are goldmines of pictorial information. This is certainly one of those, providing a title that will be used time and again, if only for the amazing and unique content within. A vital purchase for Luftwaffe fan and modeller alike. My sincere thanks to Erik Mombeeck and Maciej Góralczyk for the opportunity to review this new title. To purchase directly, email Erik at hoves@telenet.be, and check out the his website here: http://www.luftwaffe.be/luftwaffe-gallery/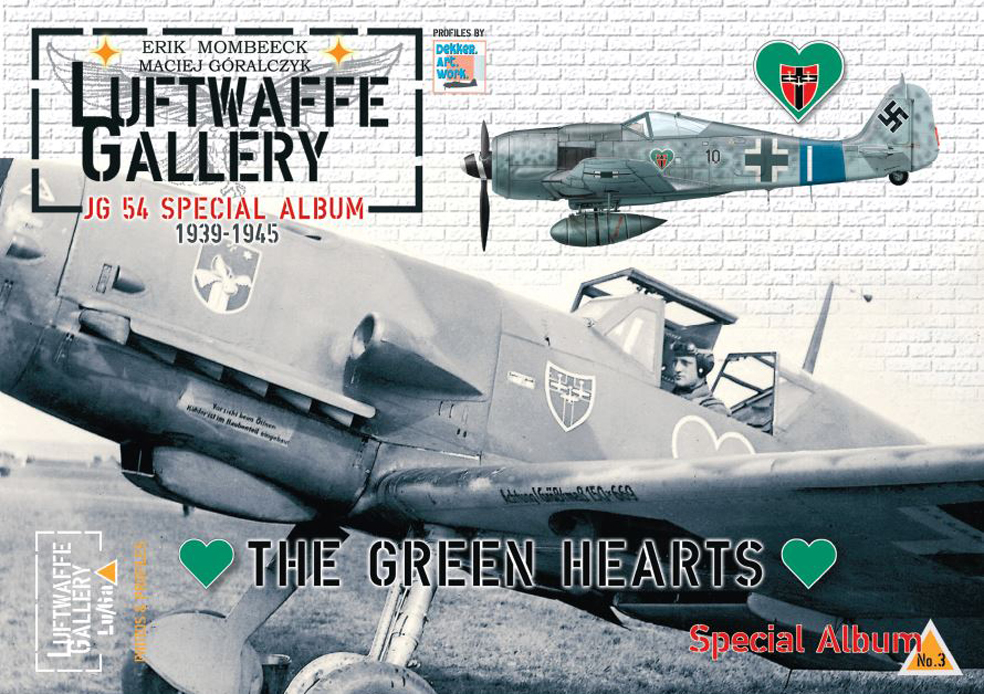
-
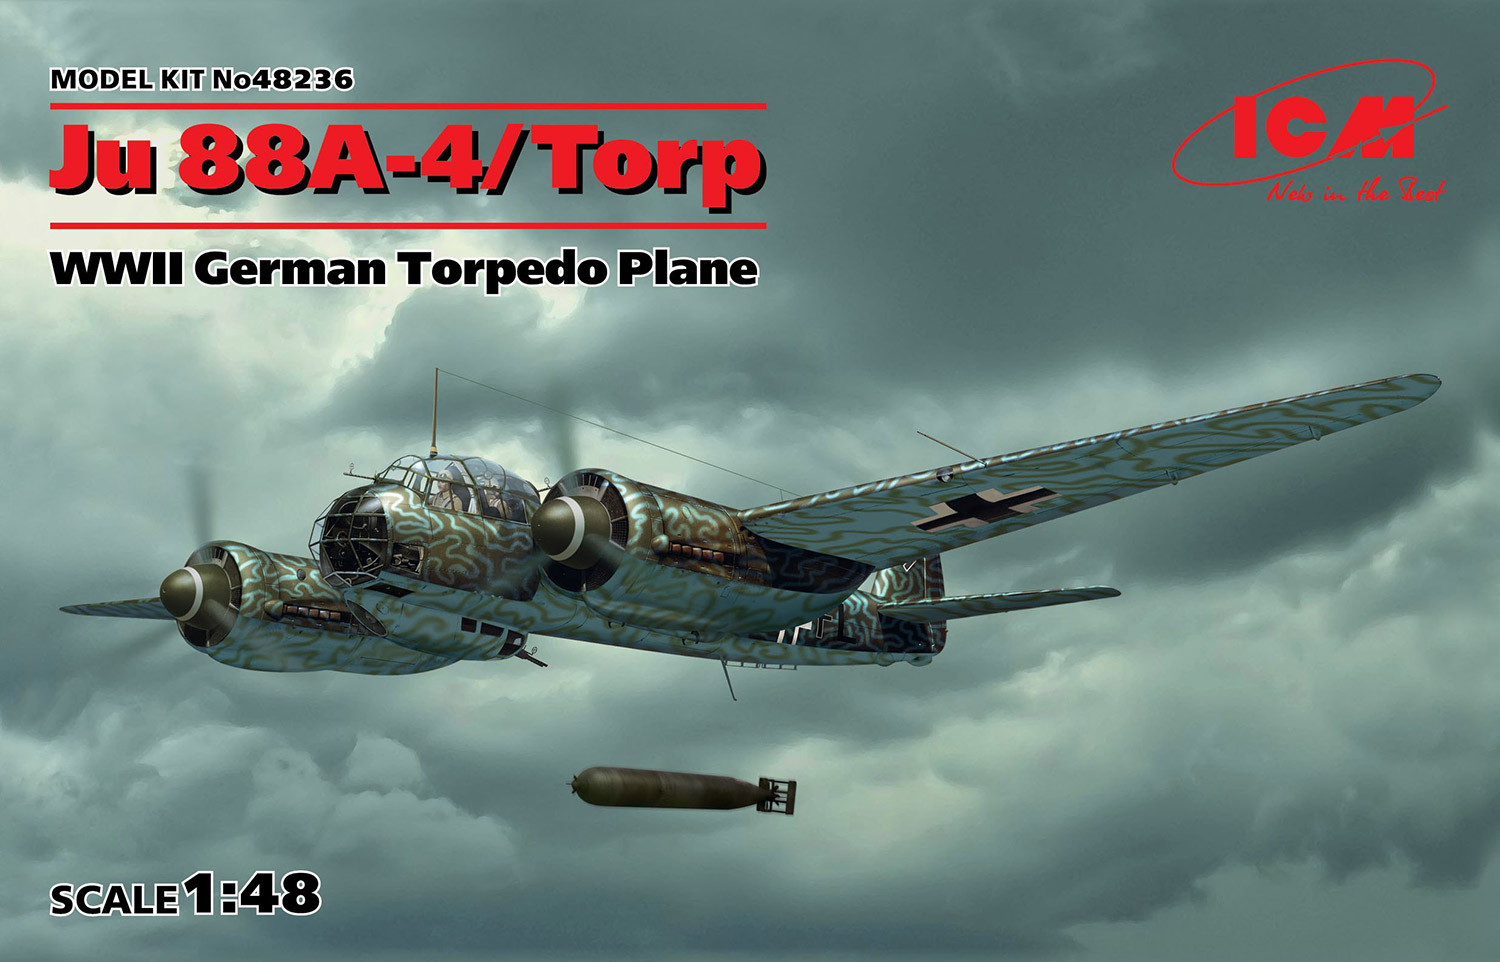
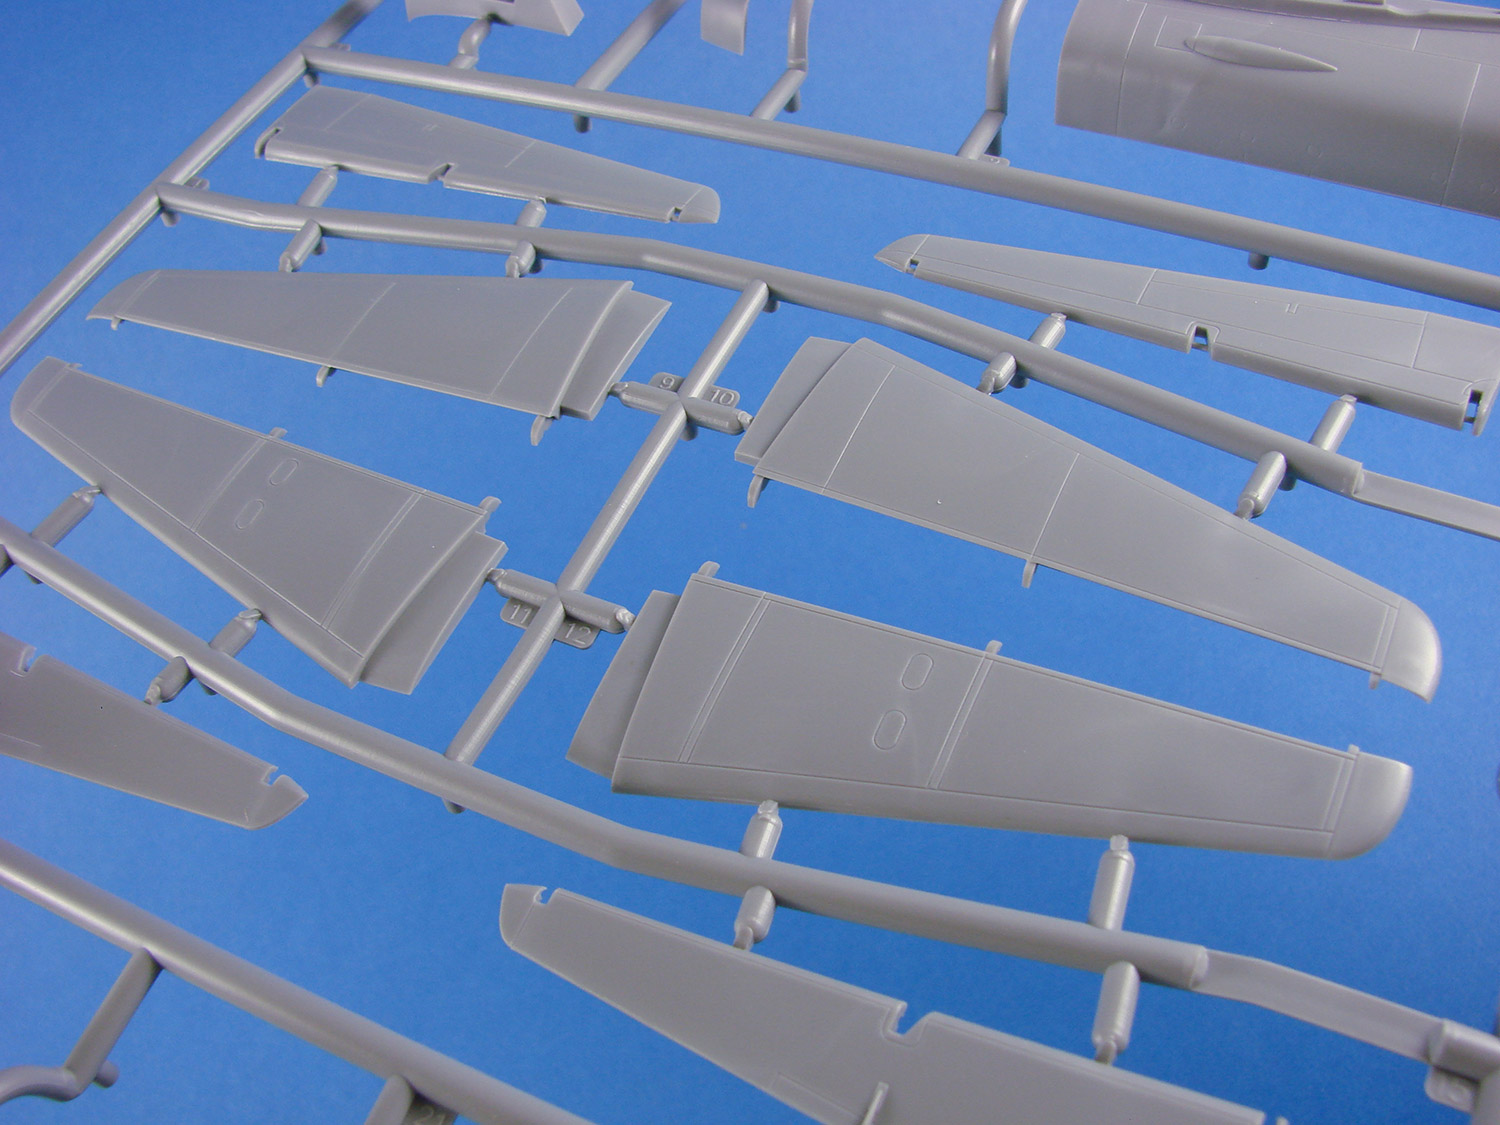
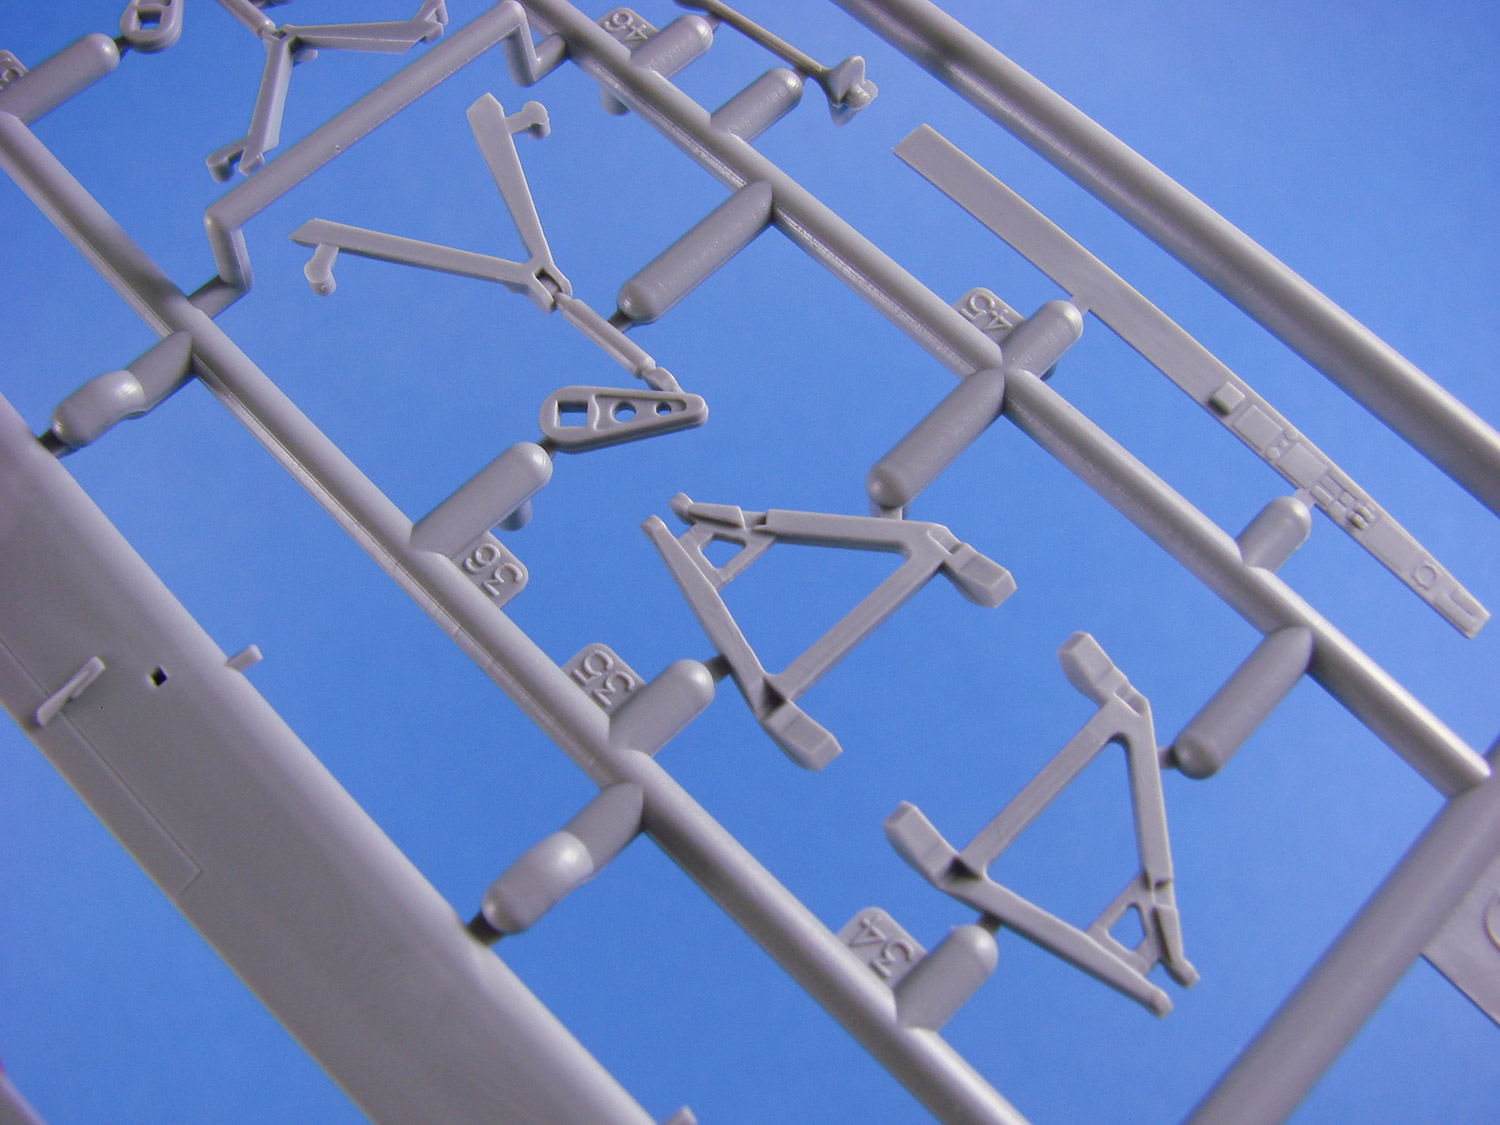
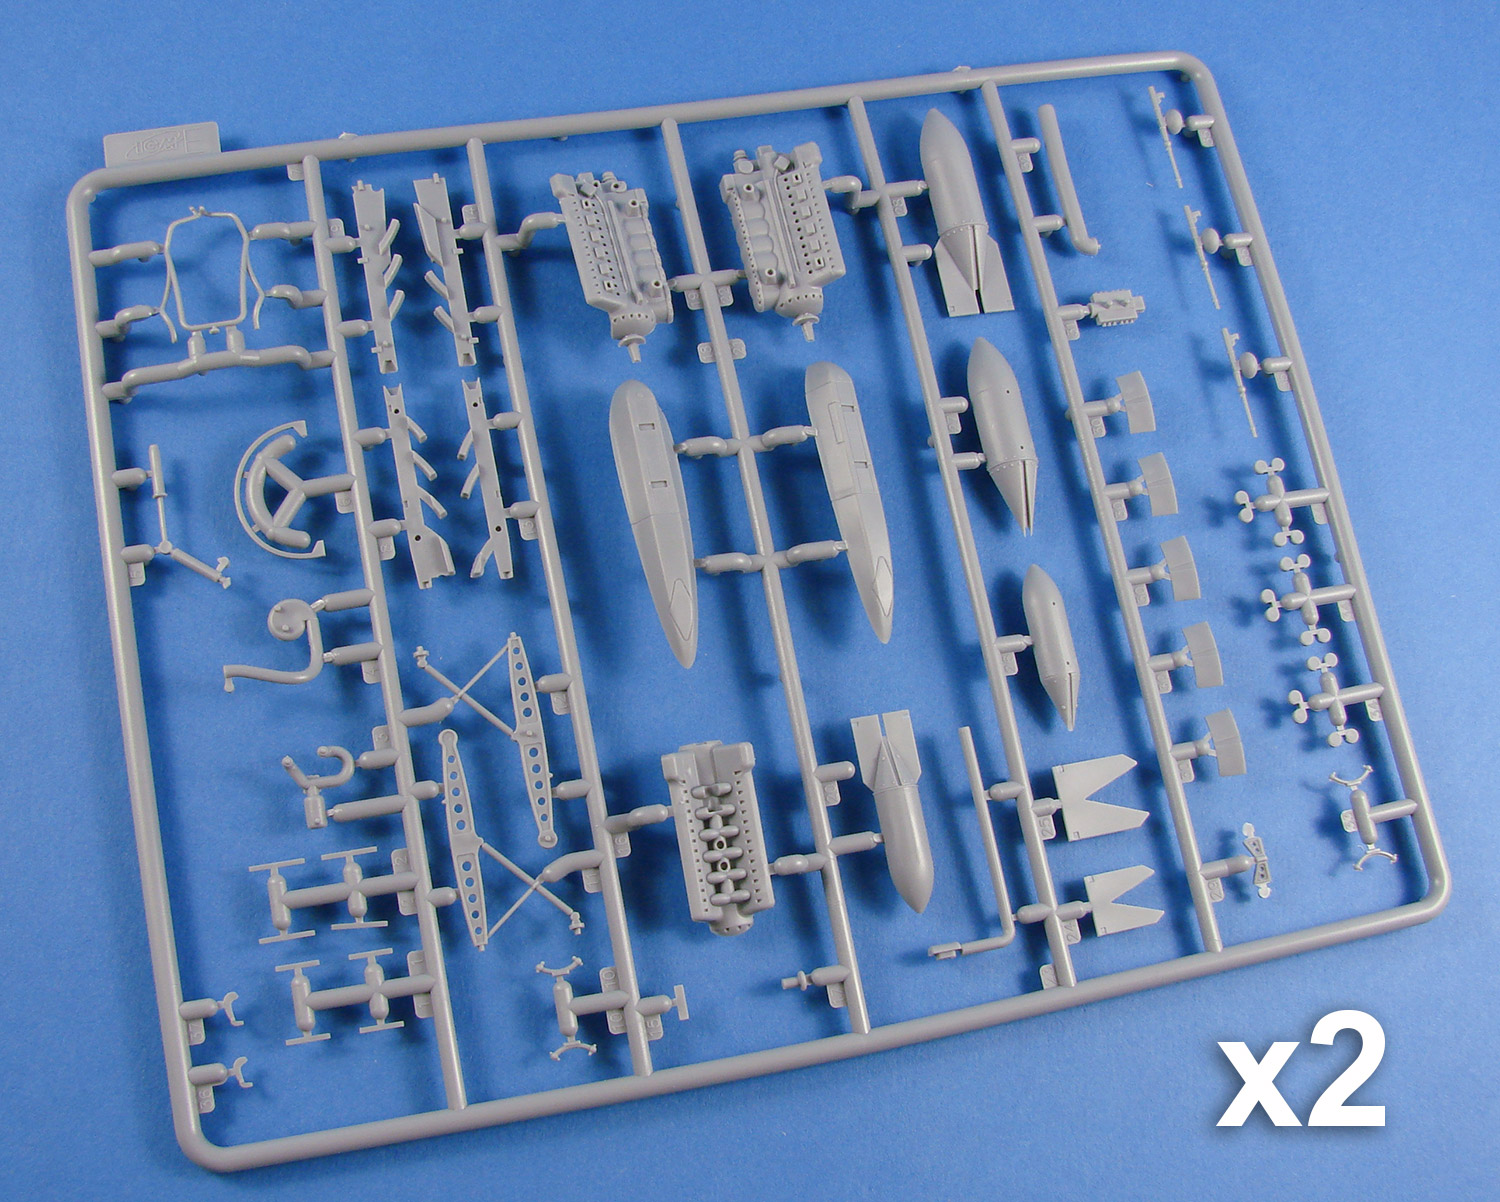
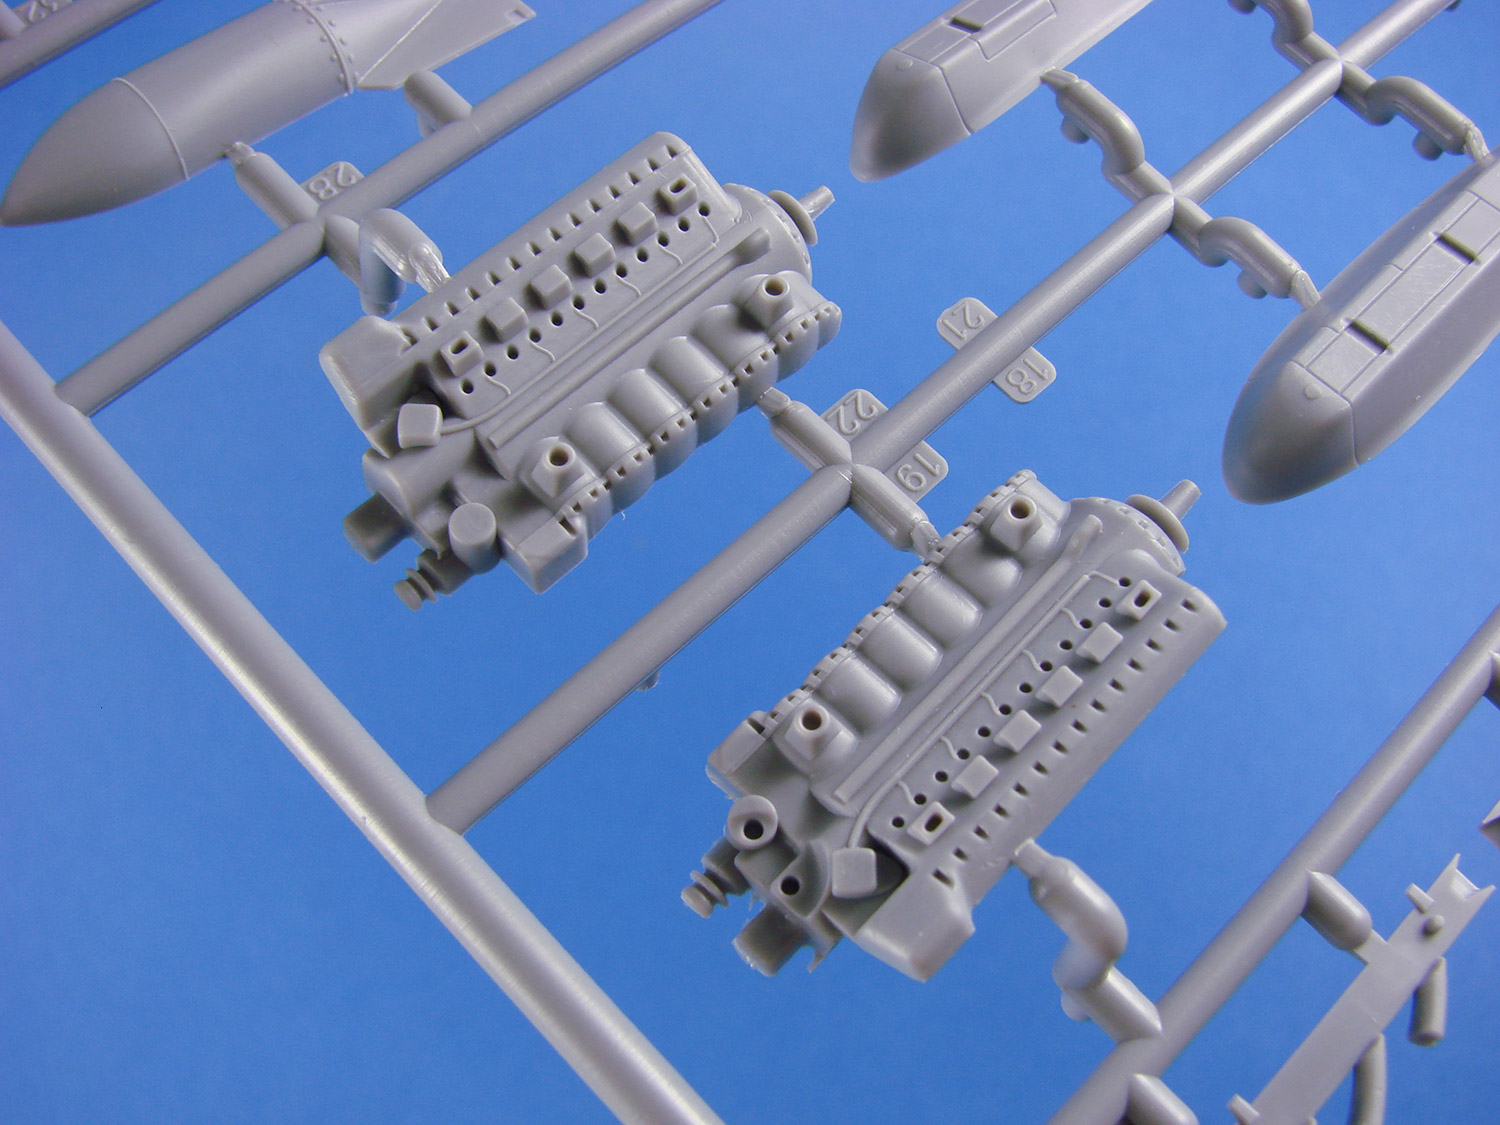
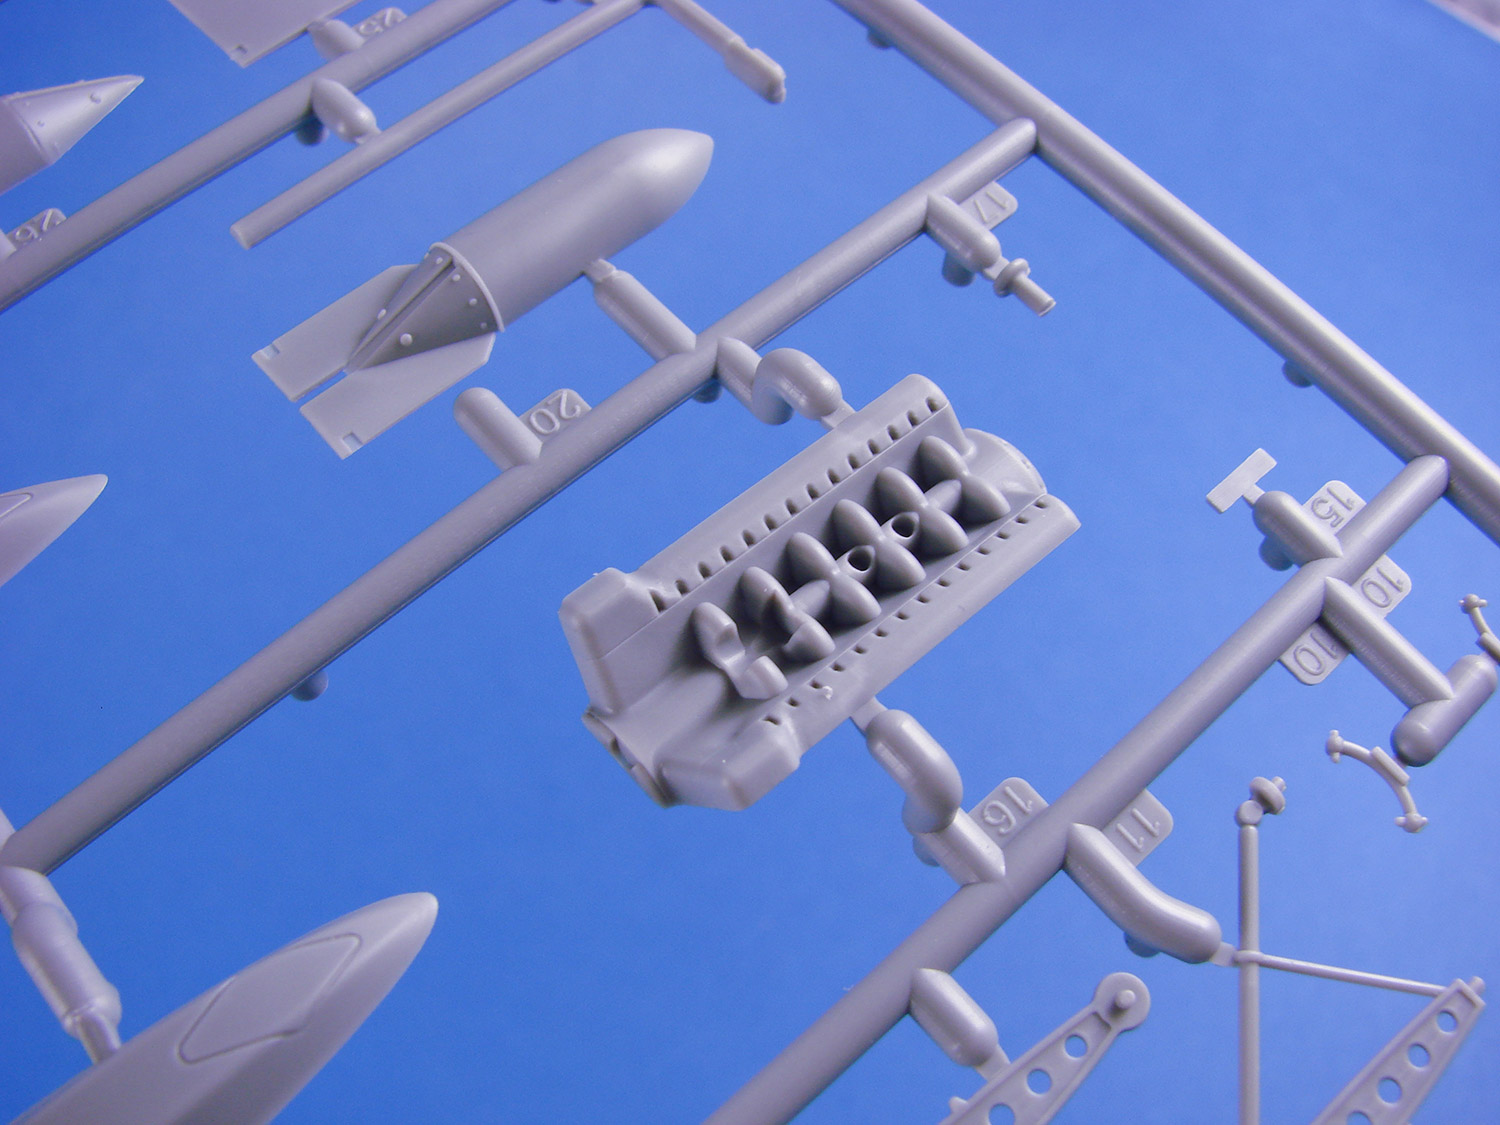
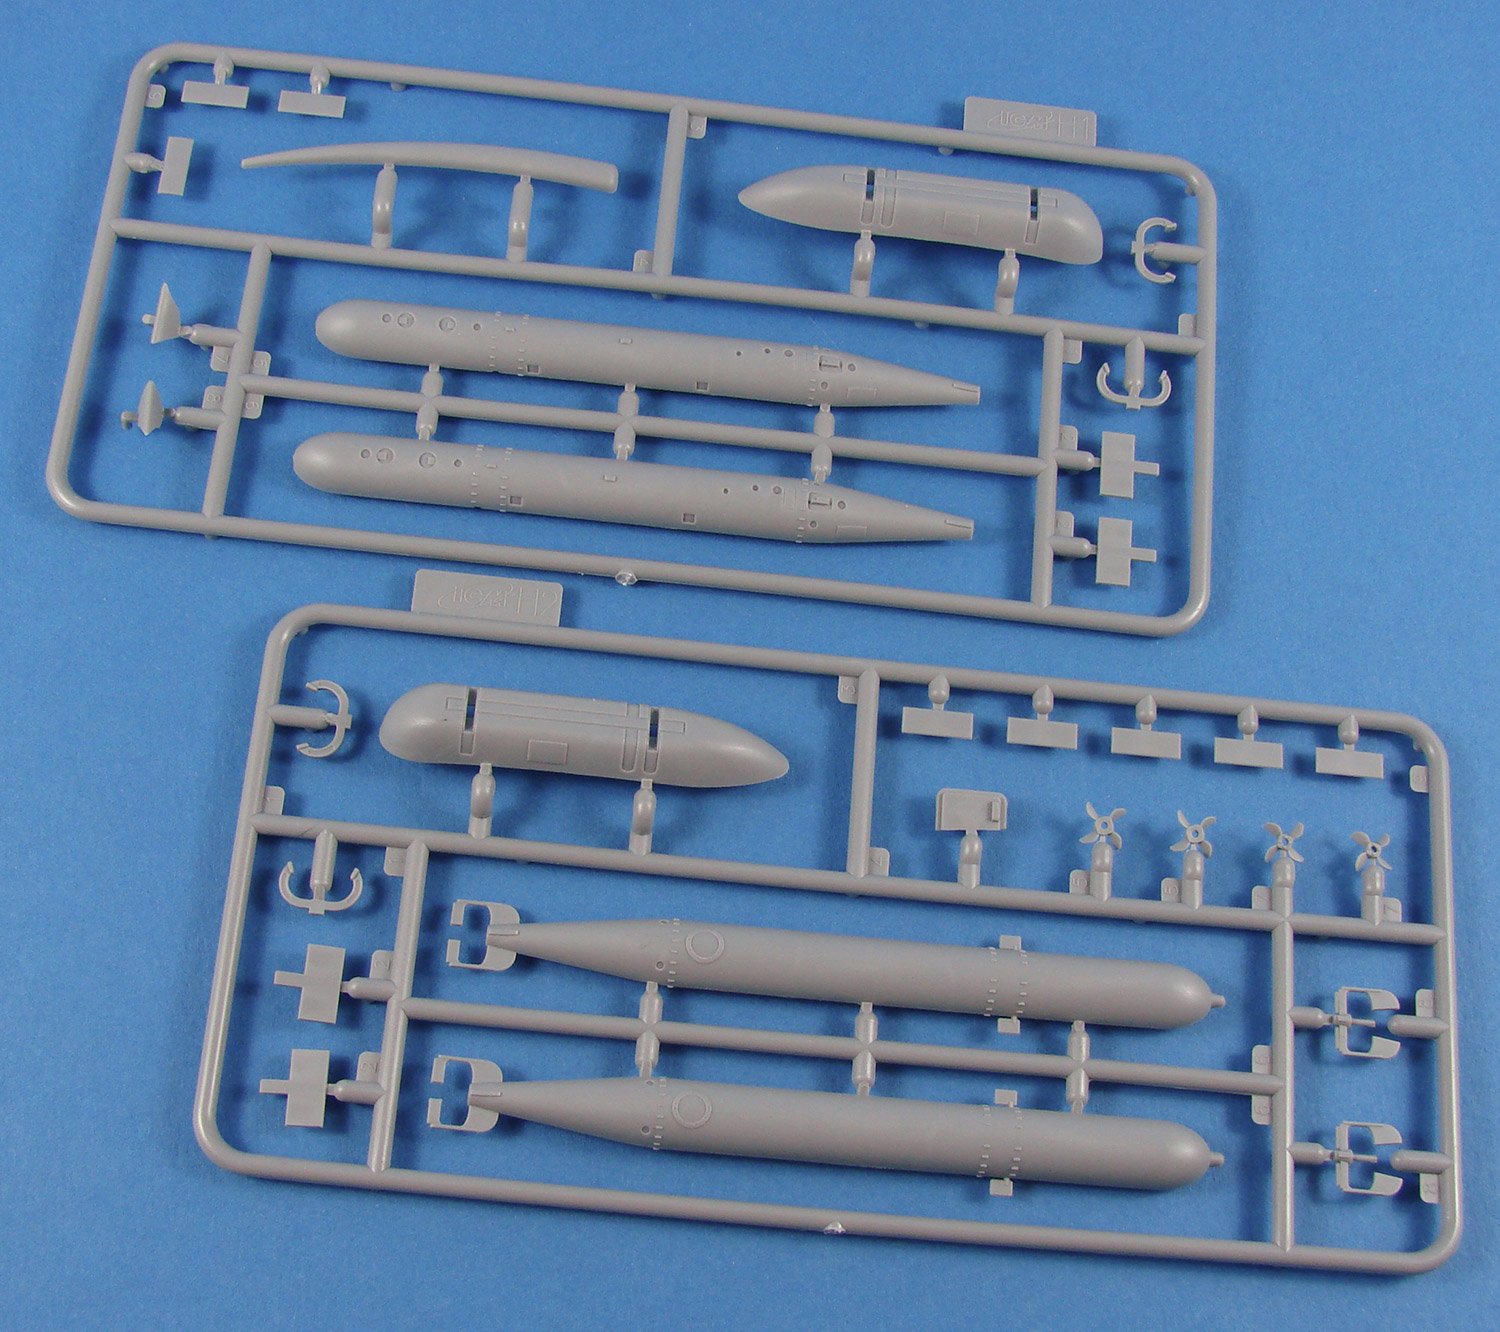
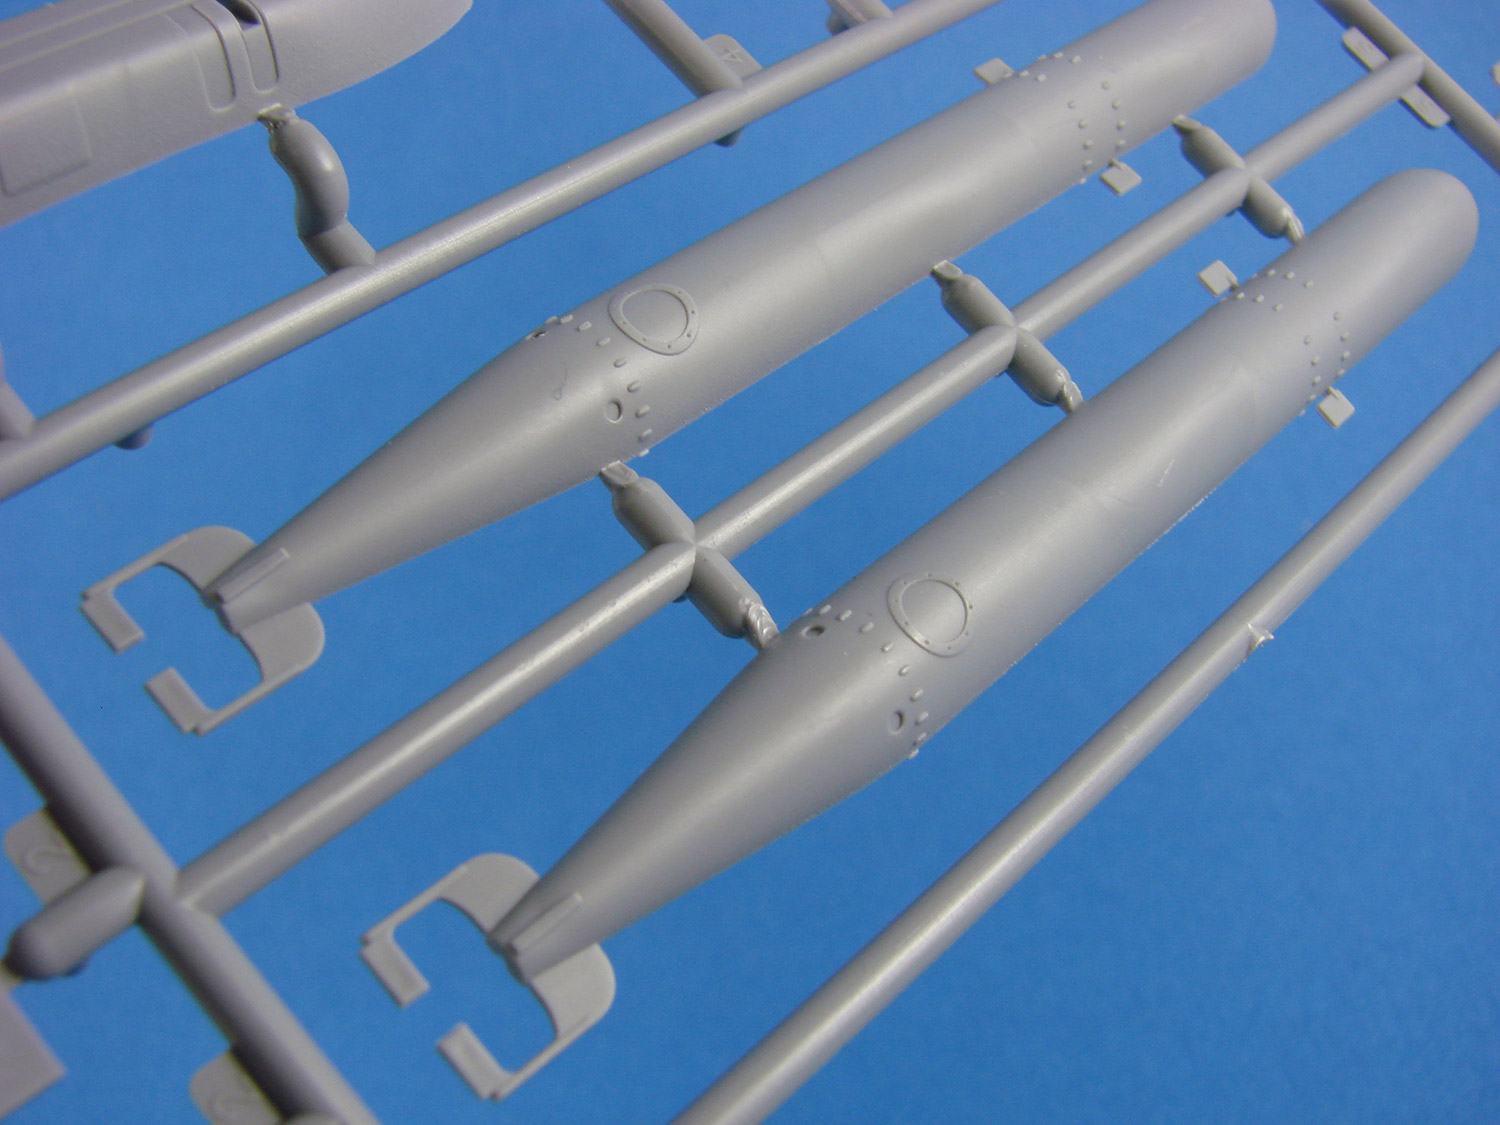
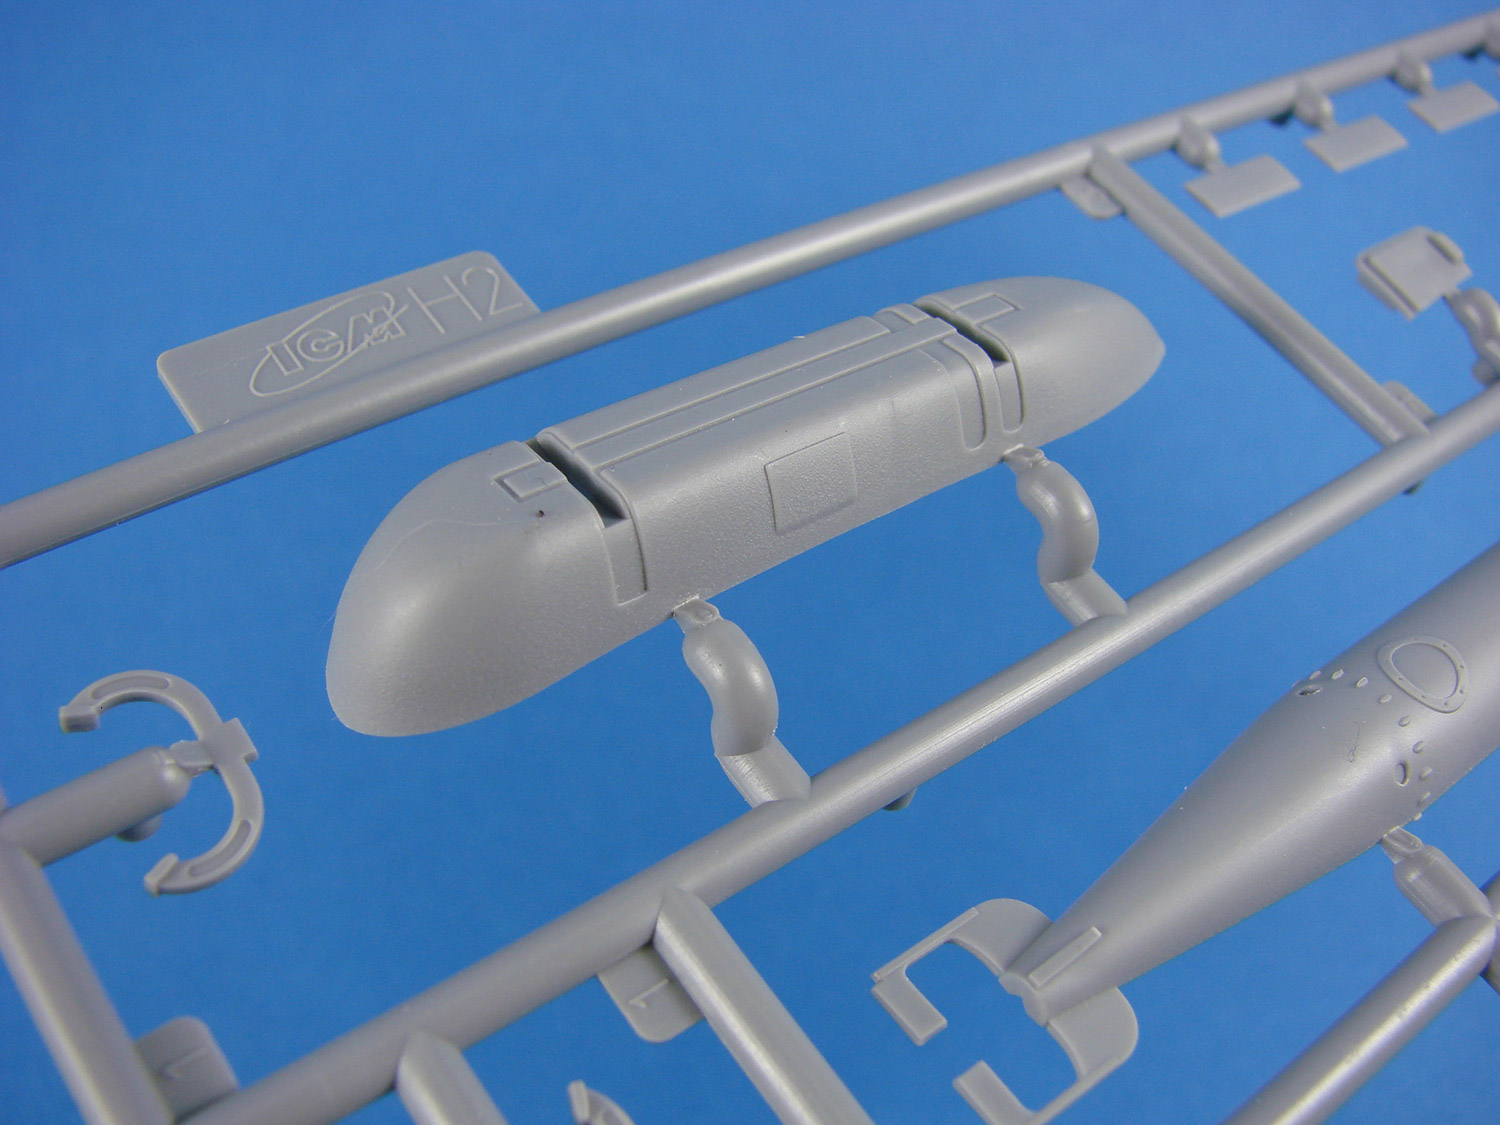
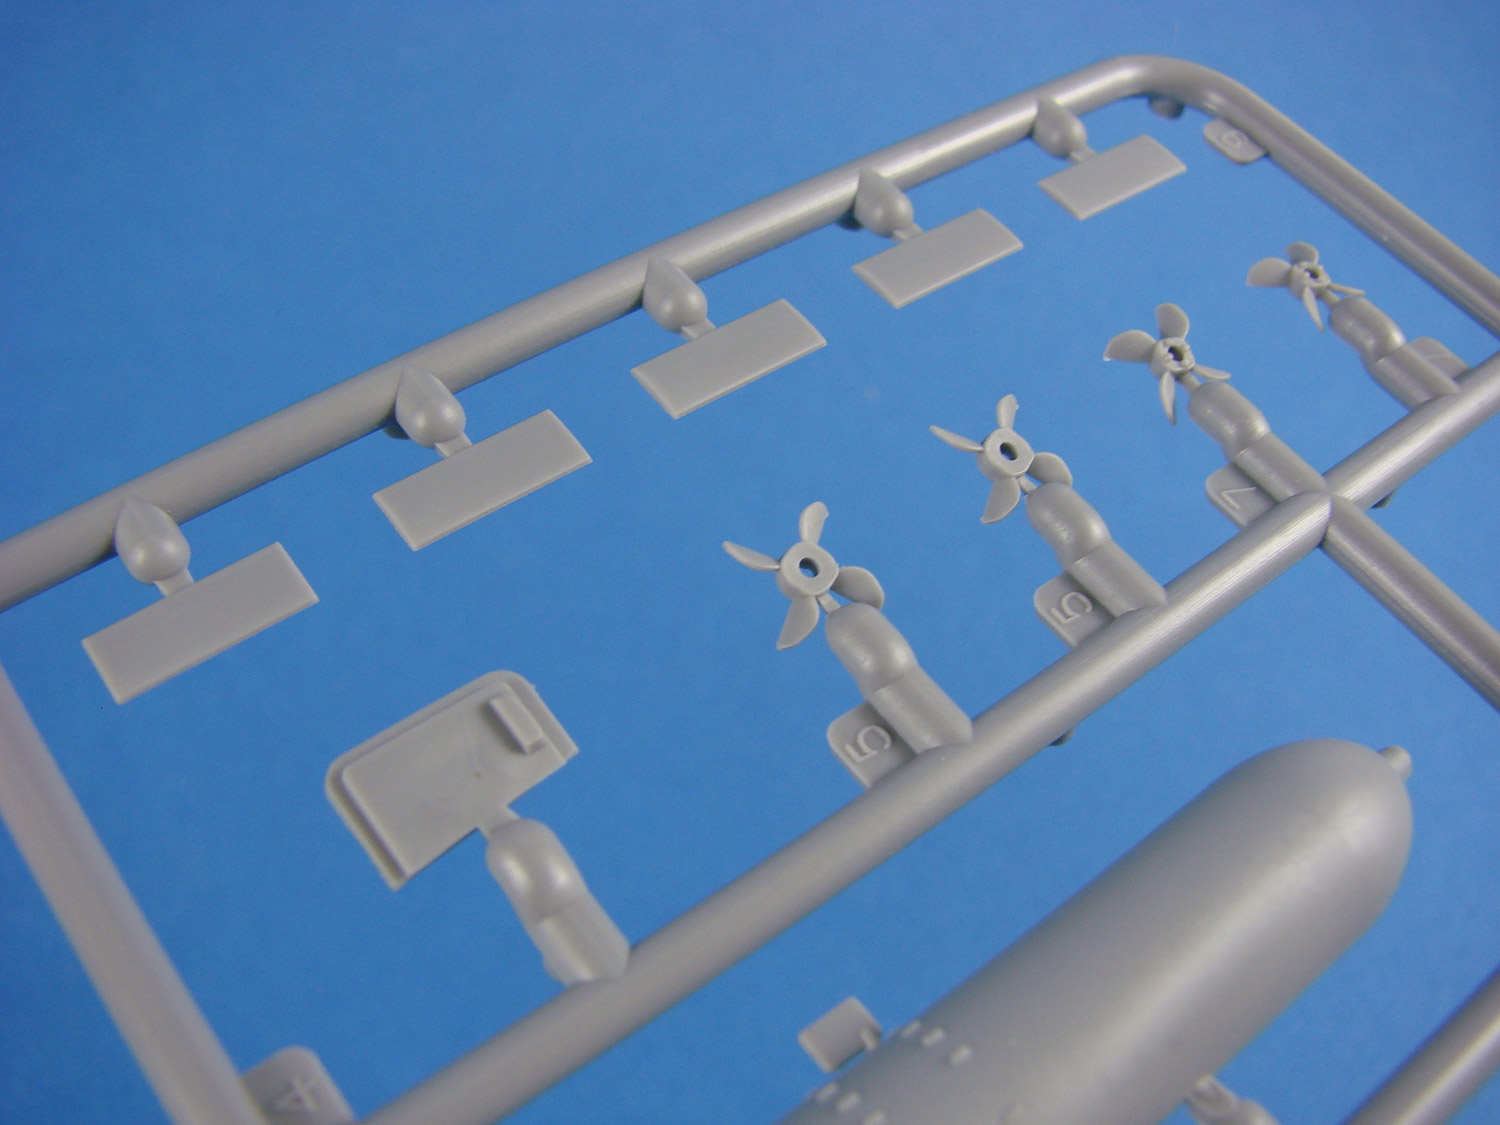
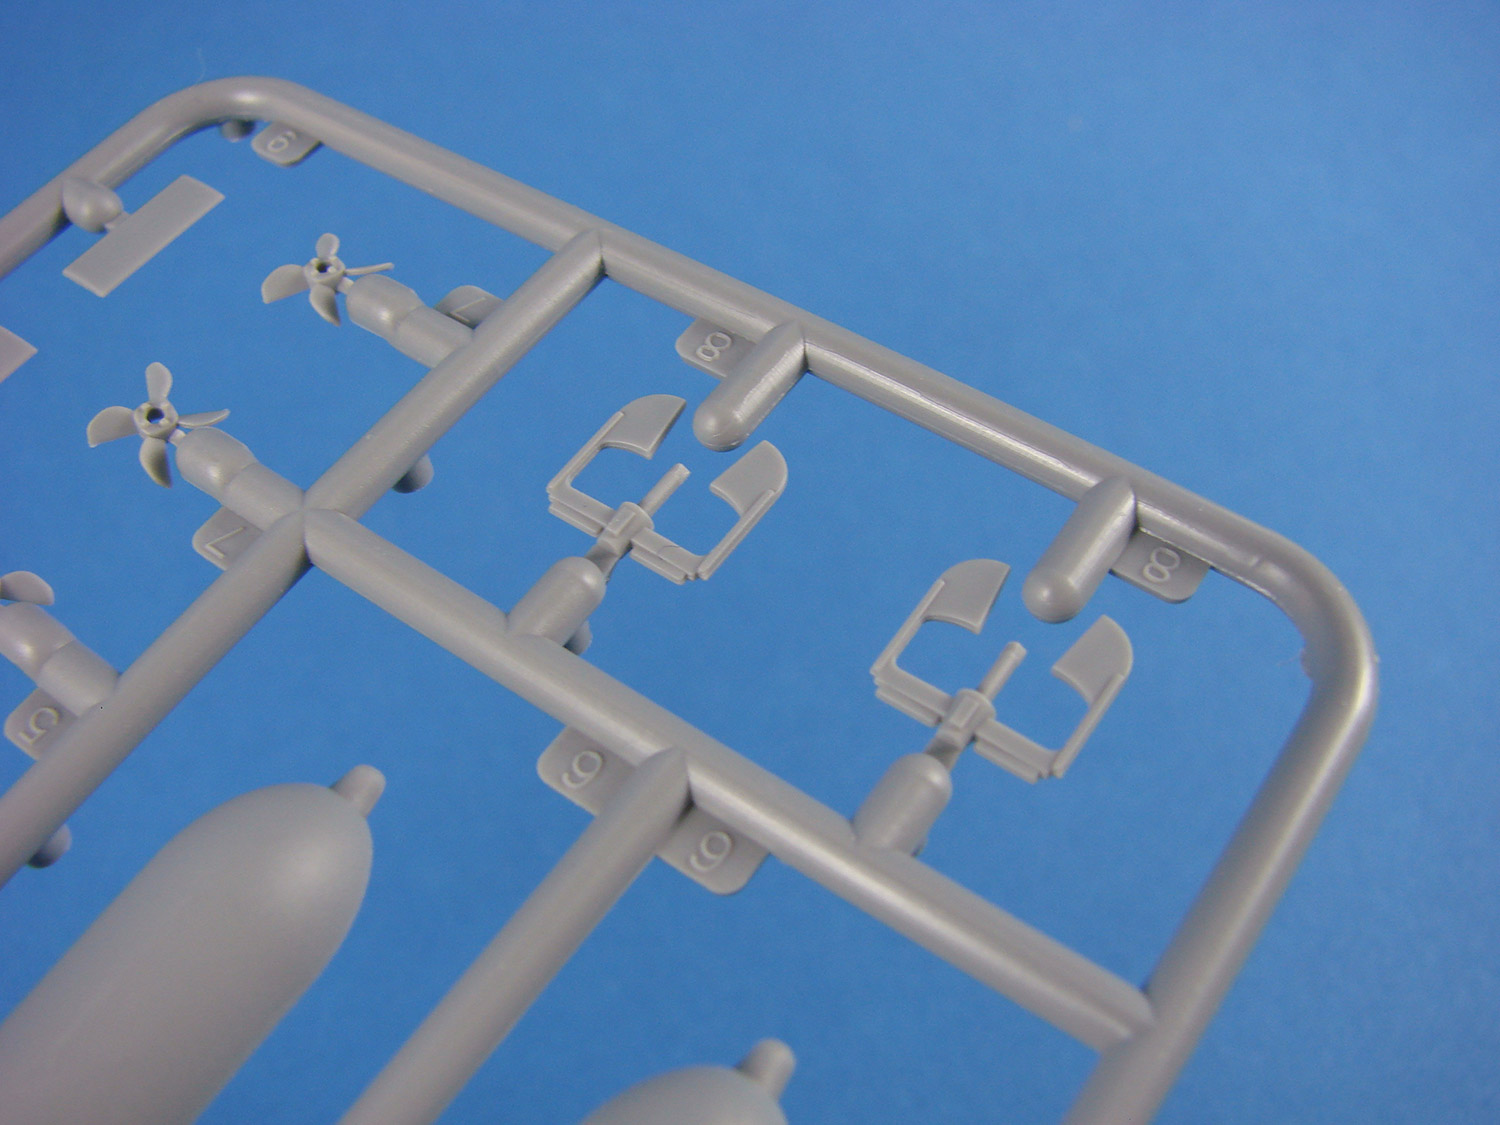
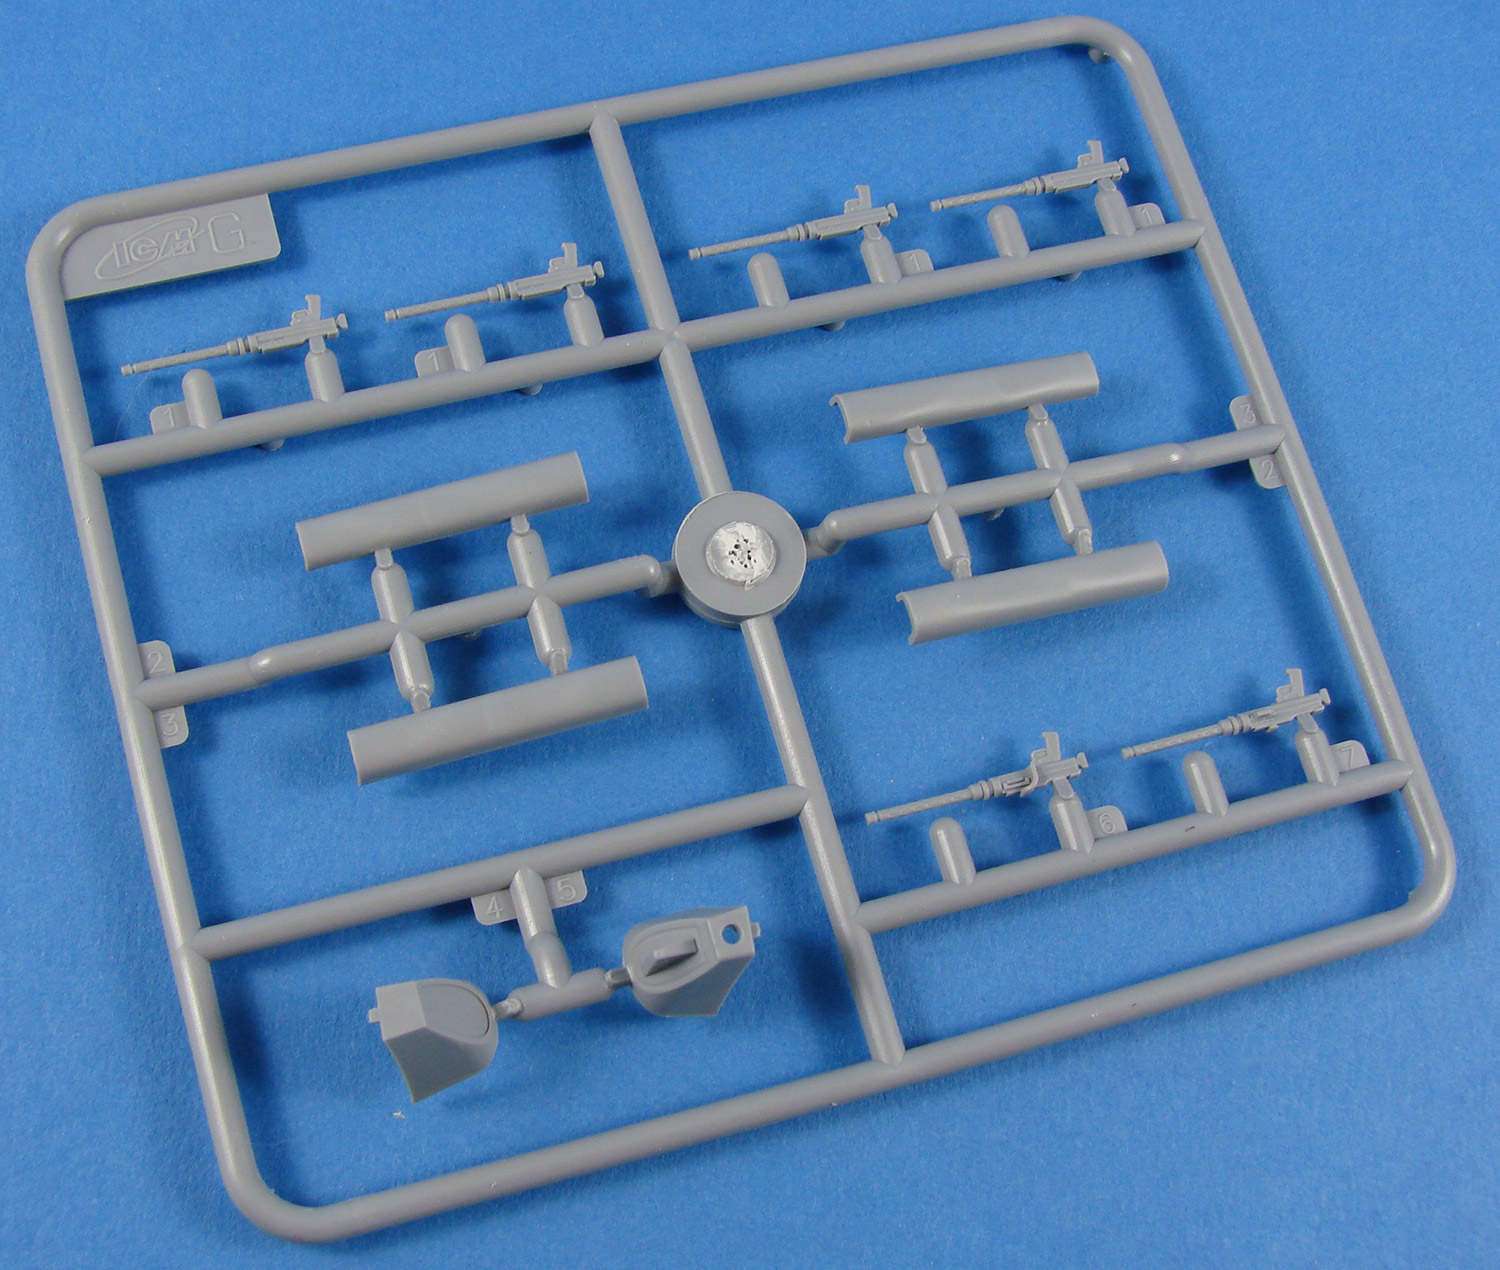
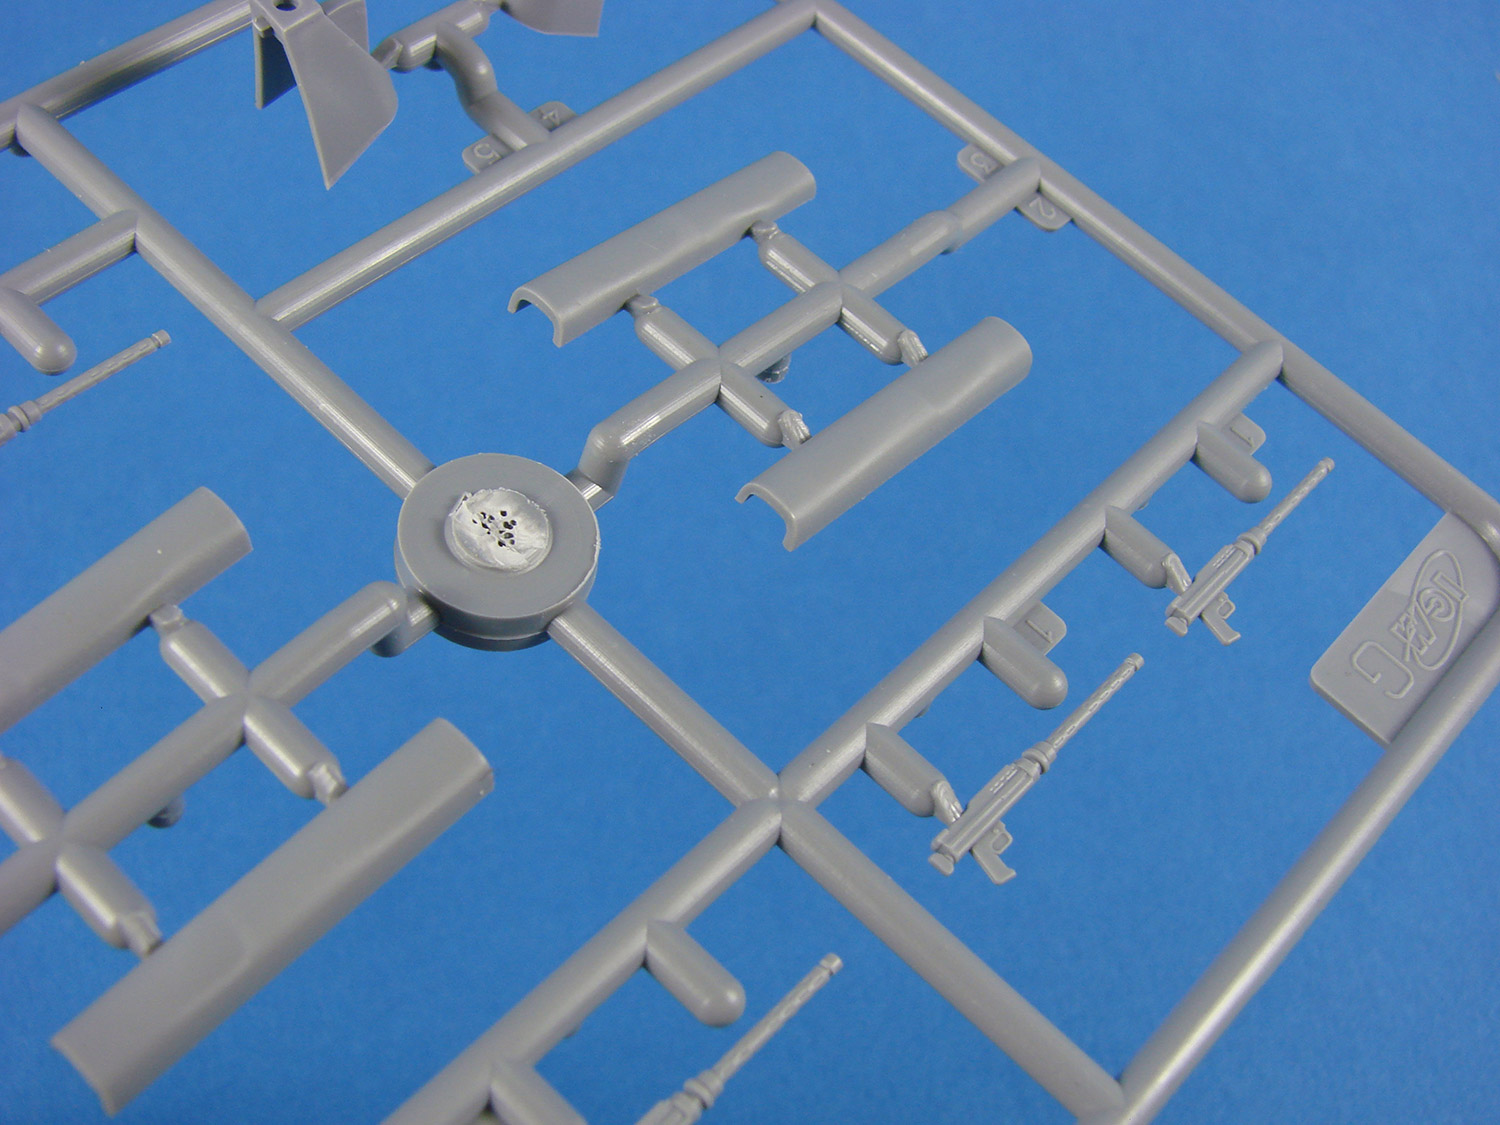
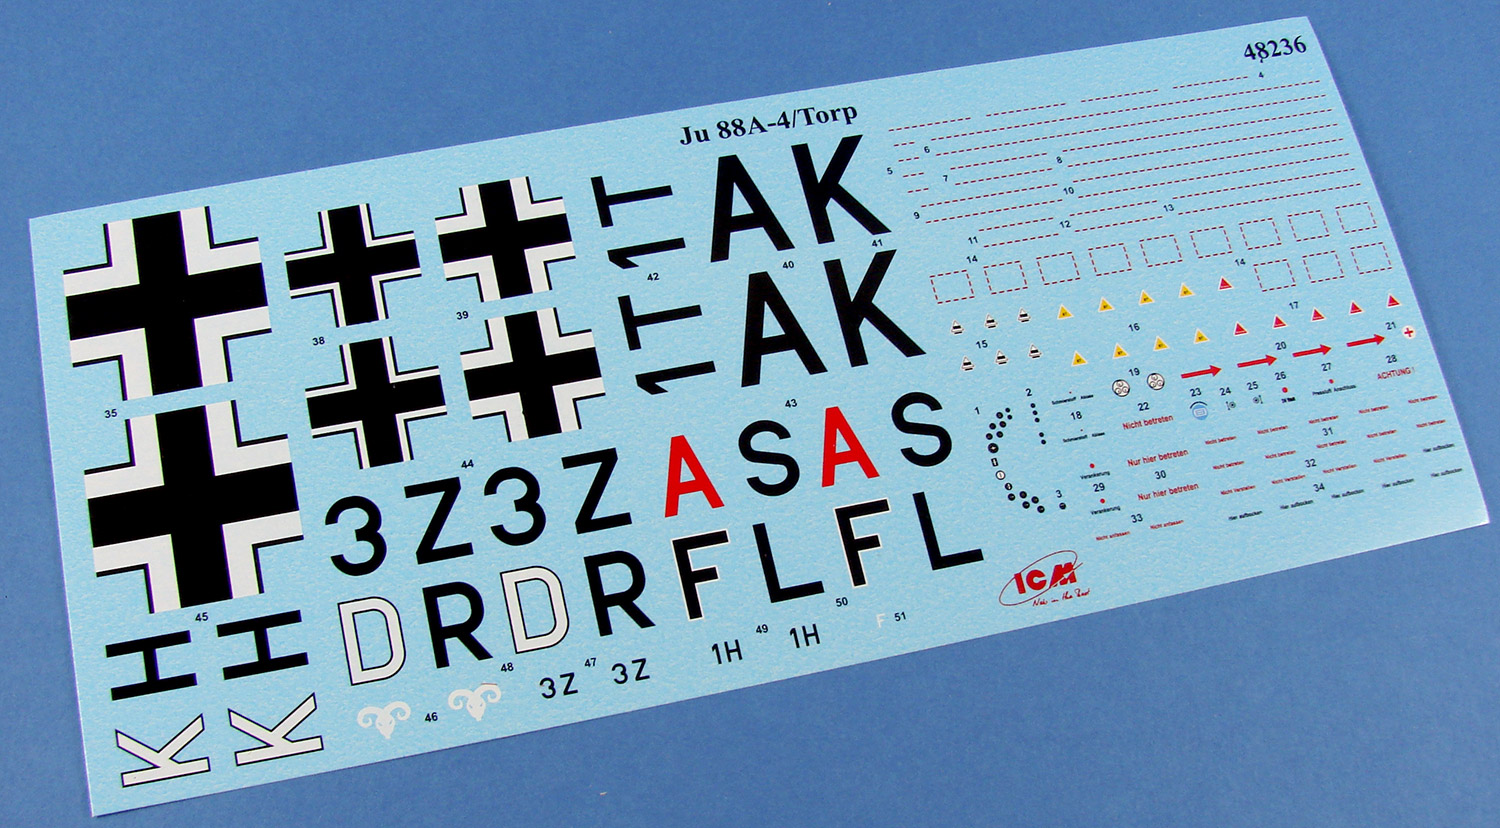
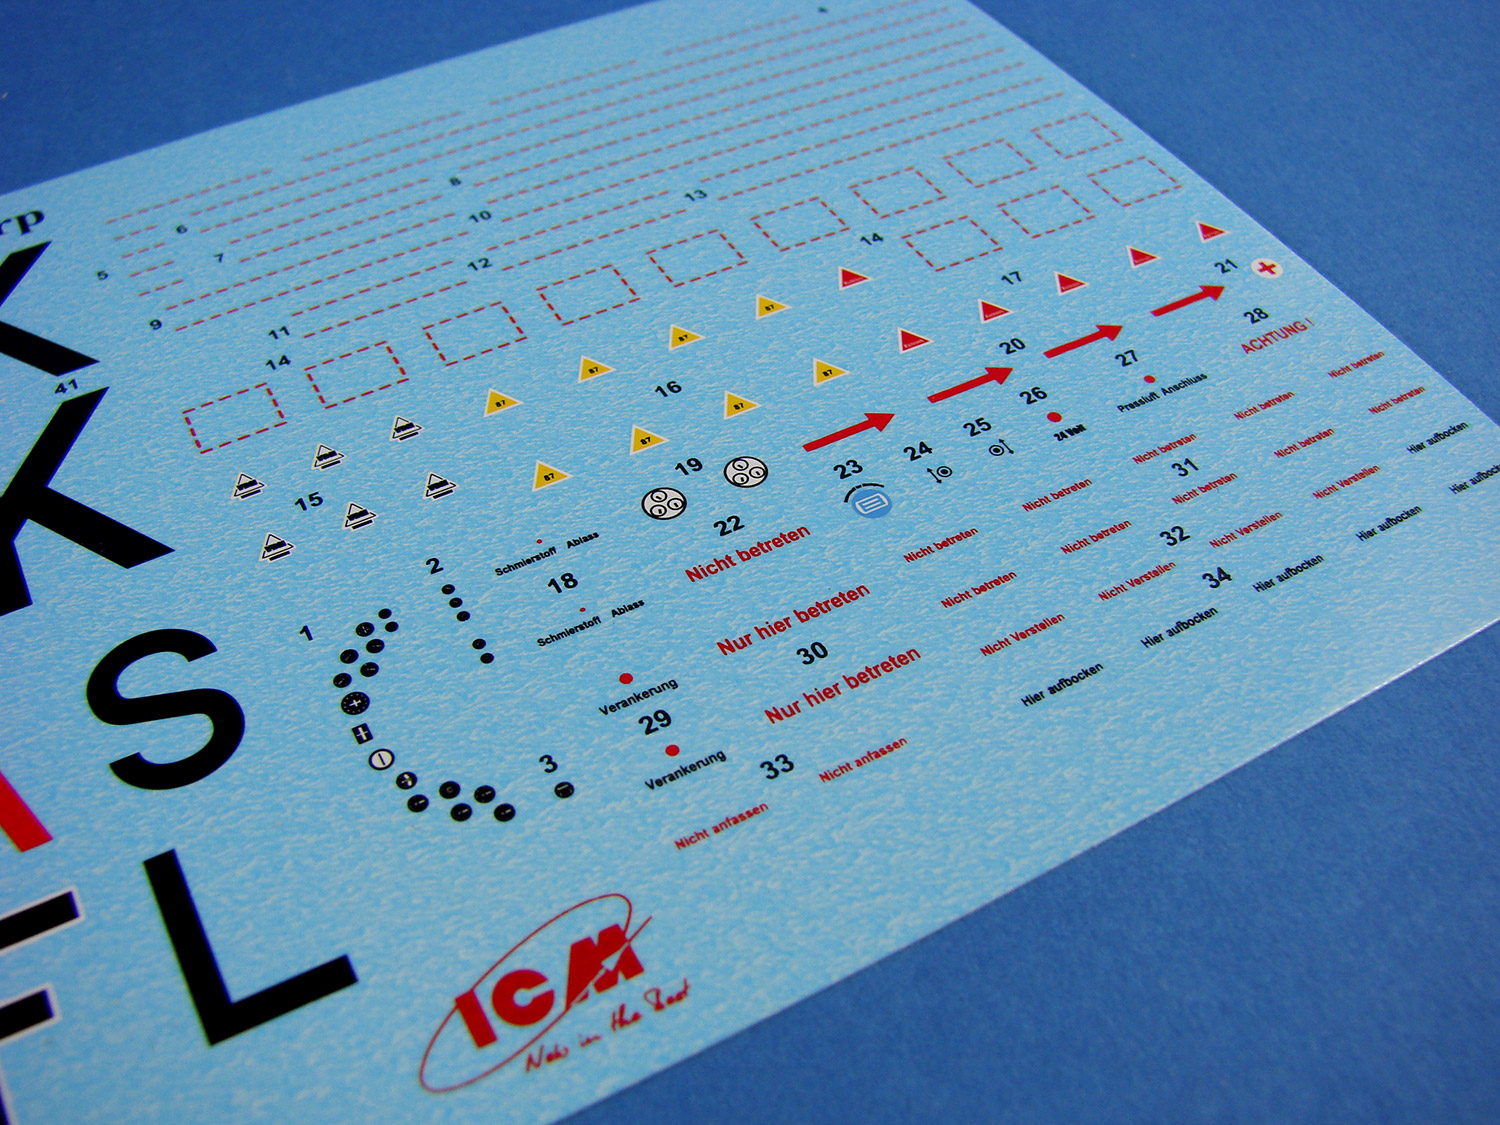
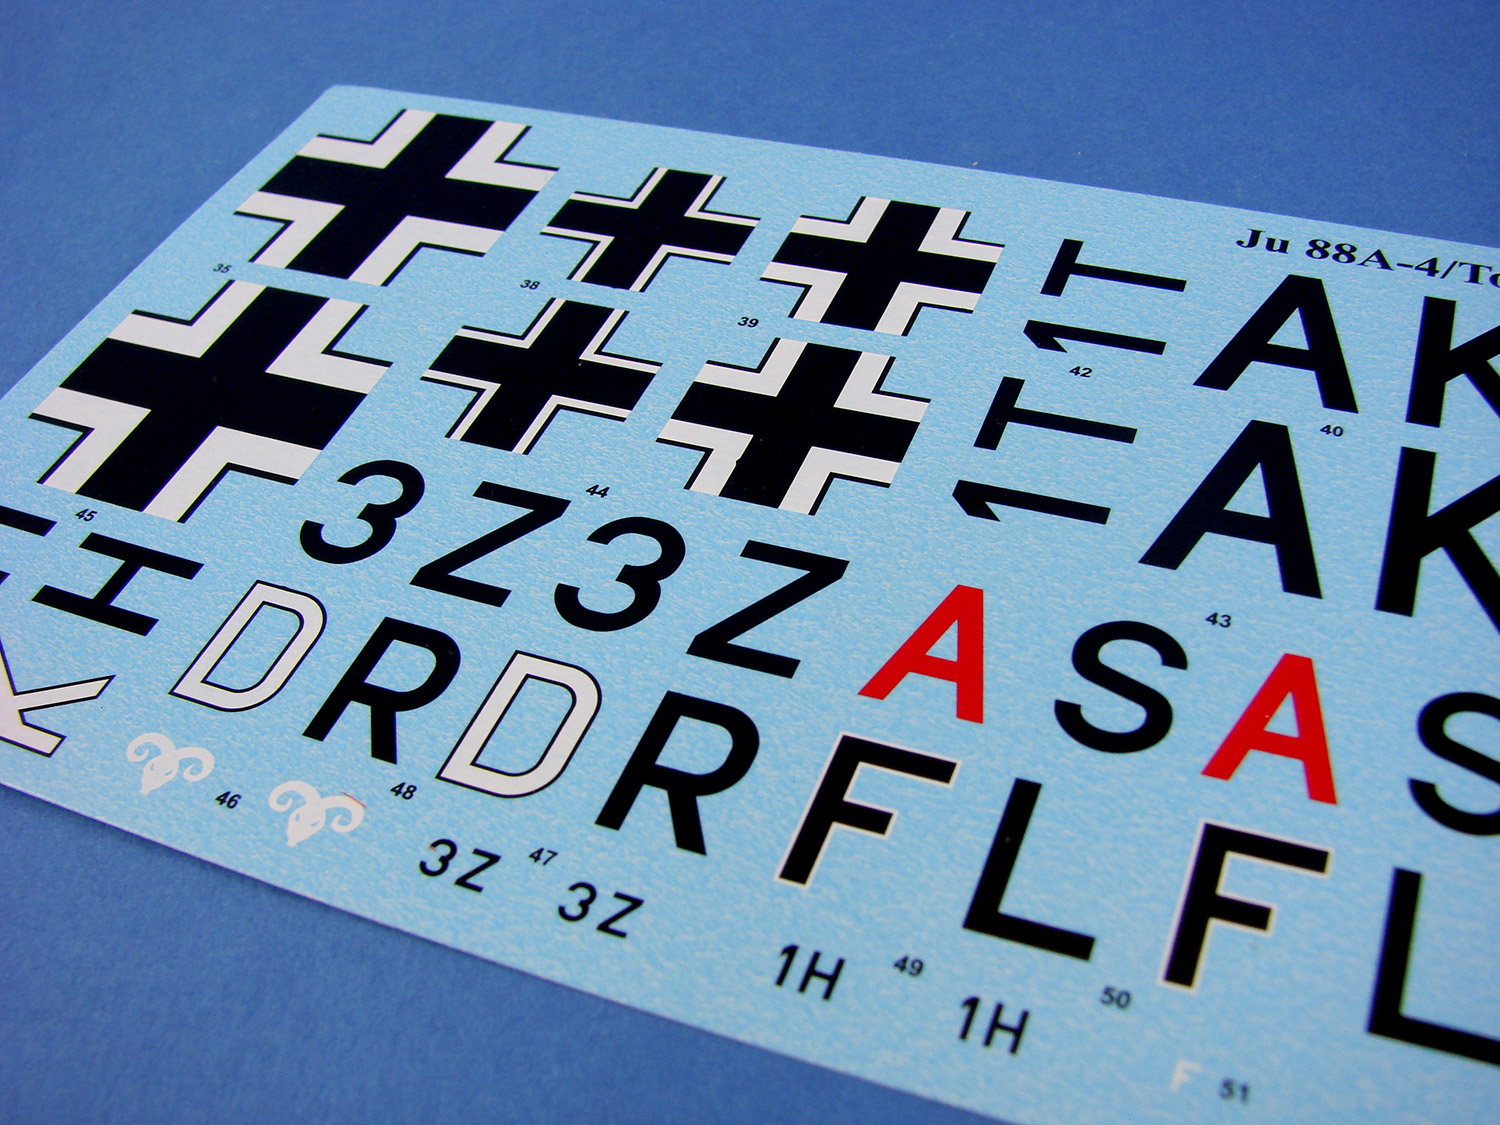
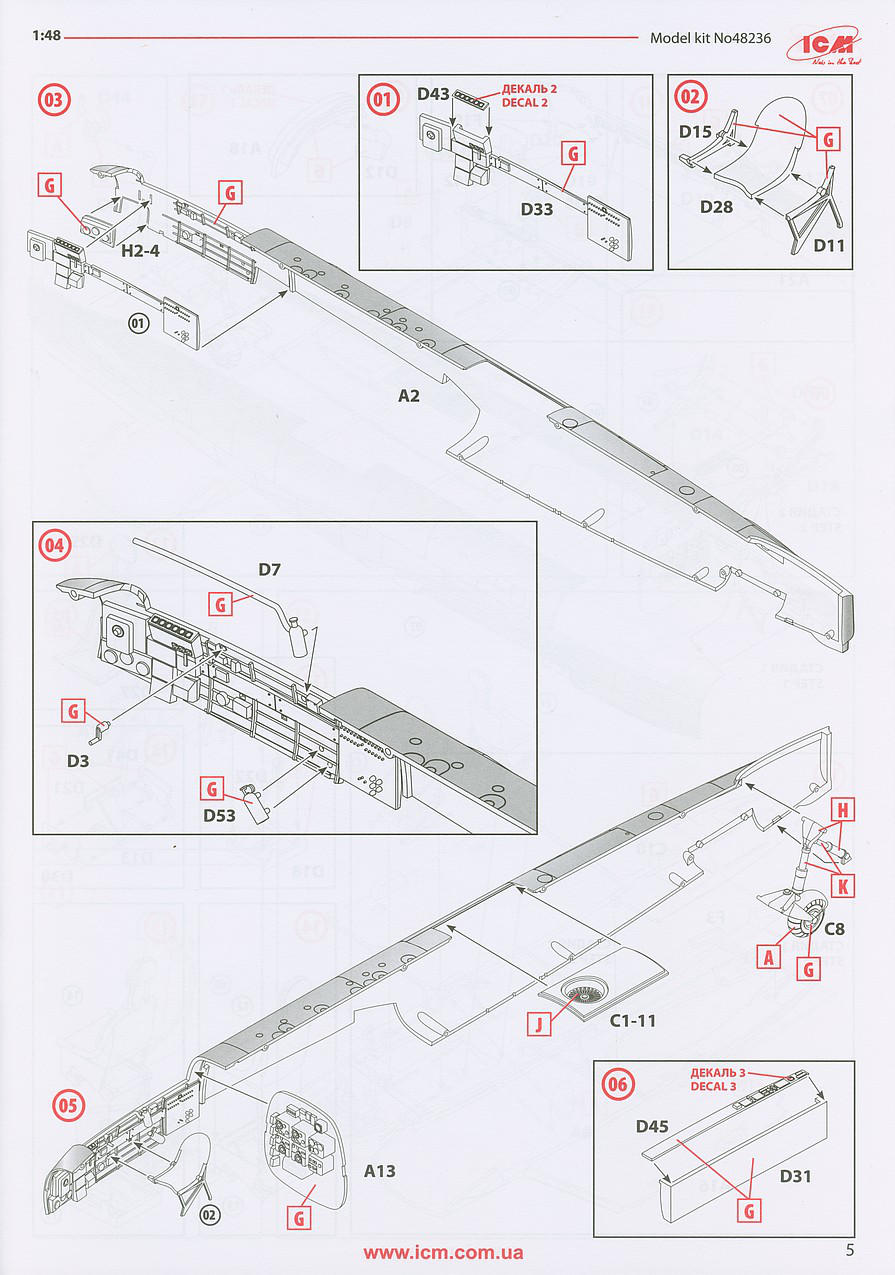
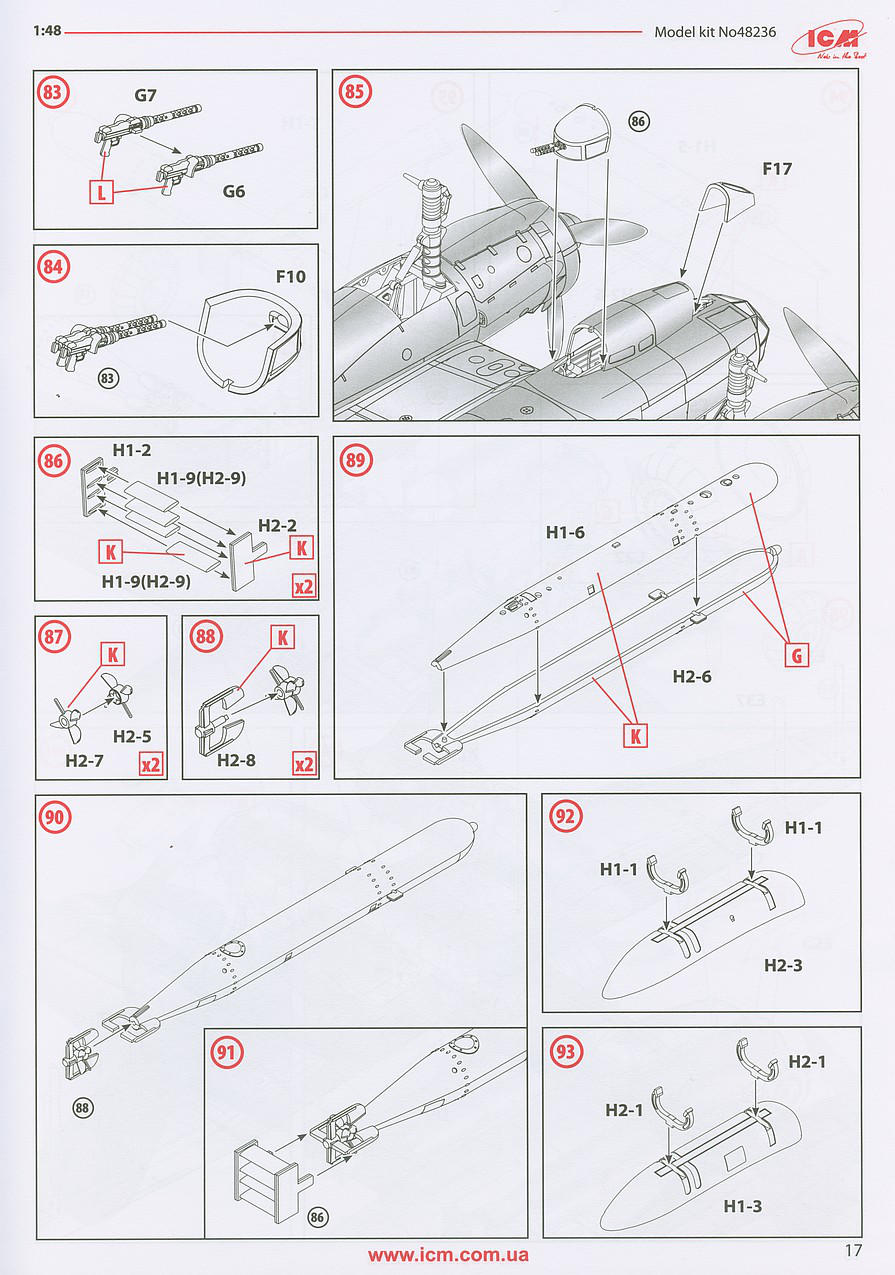
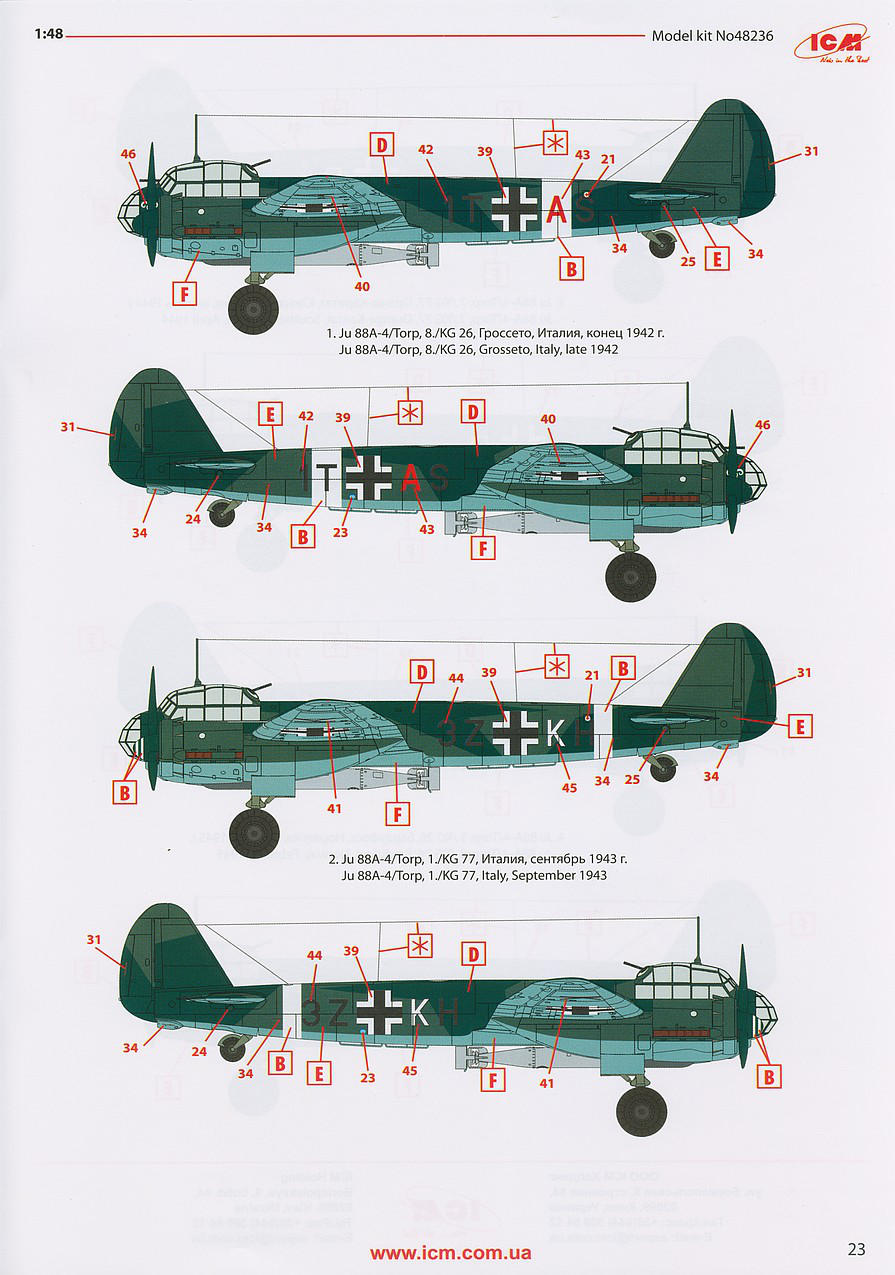
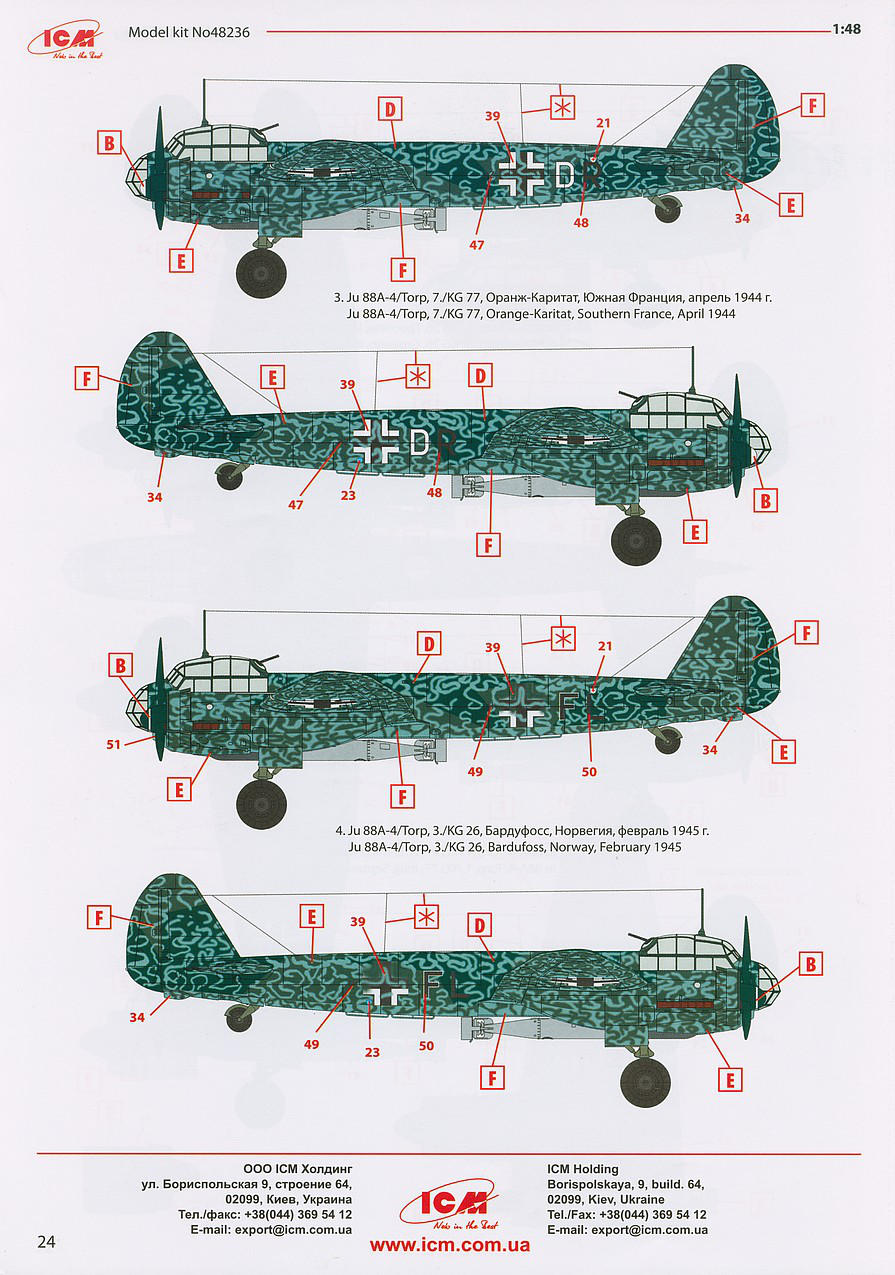
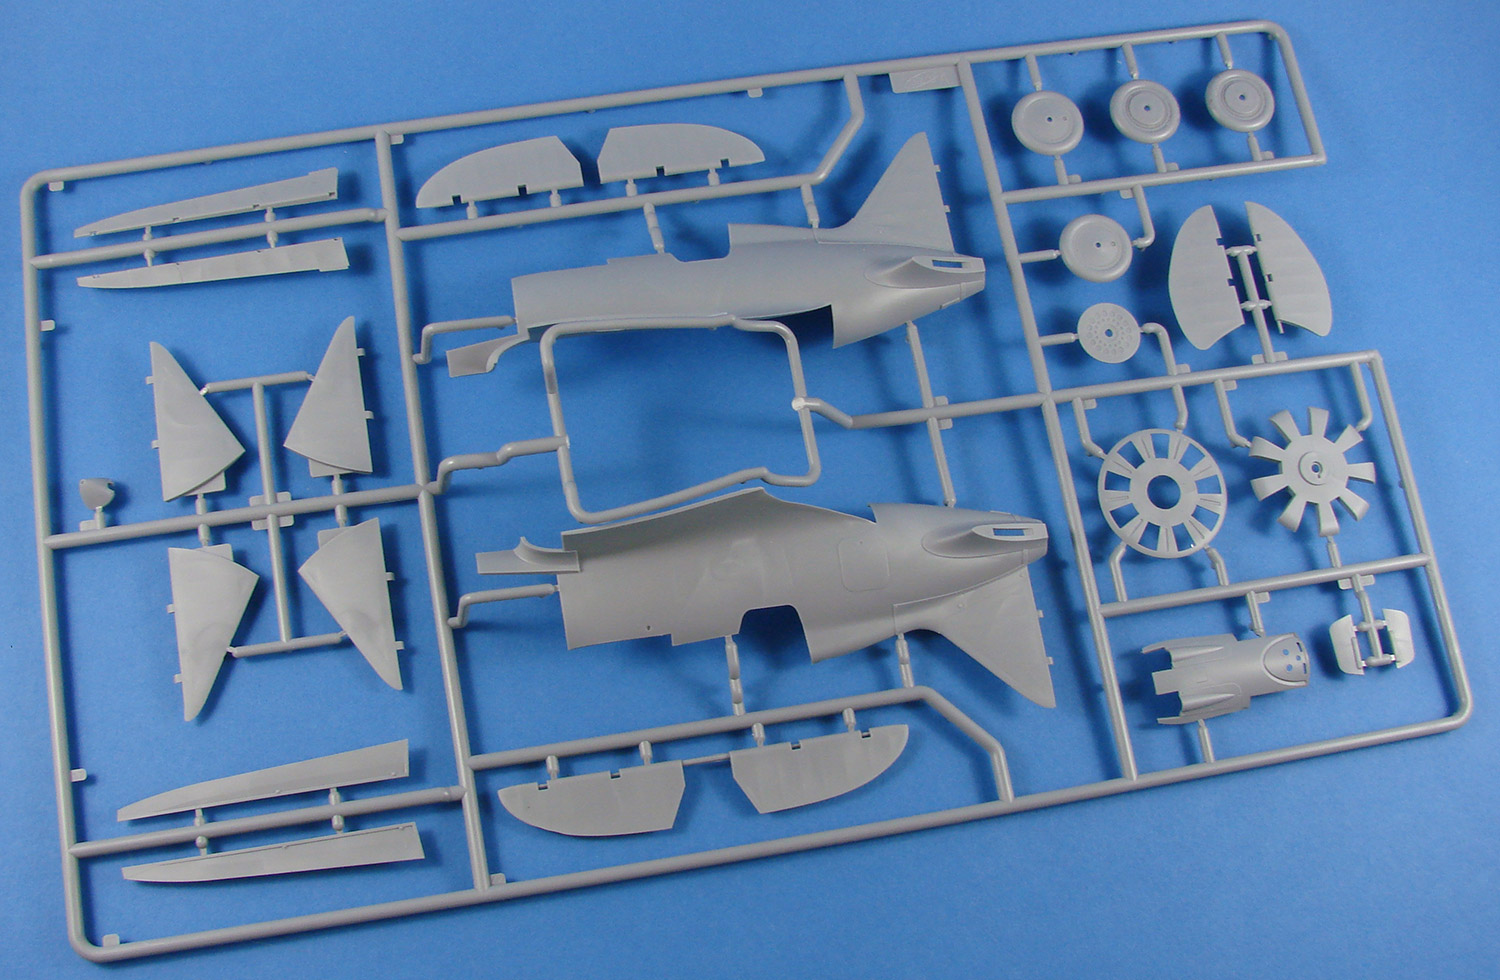
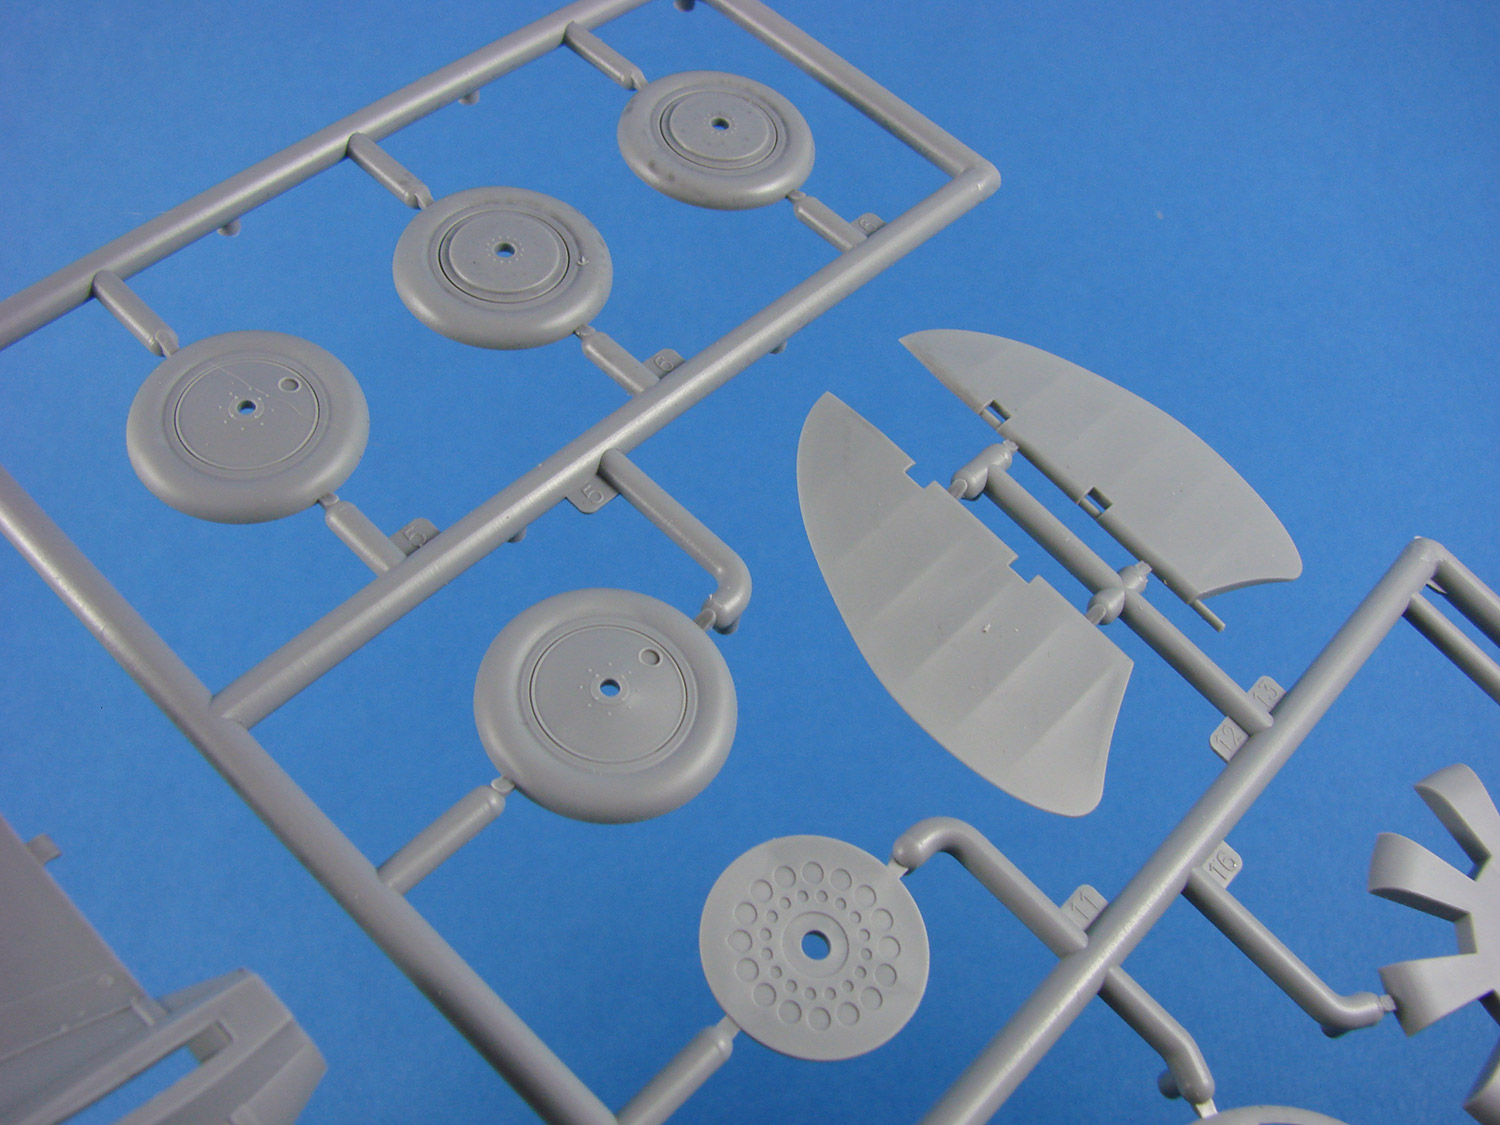
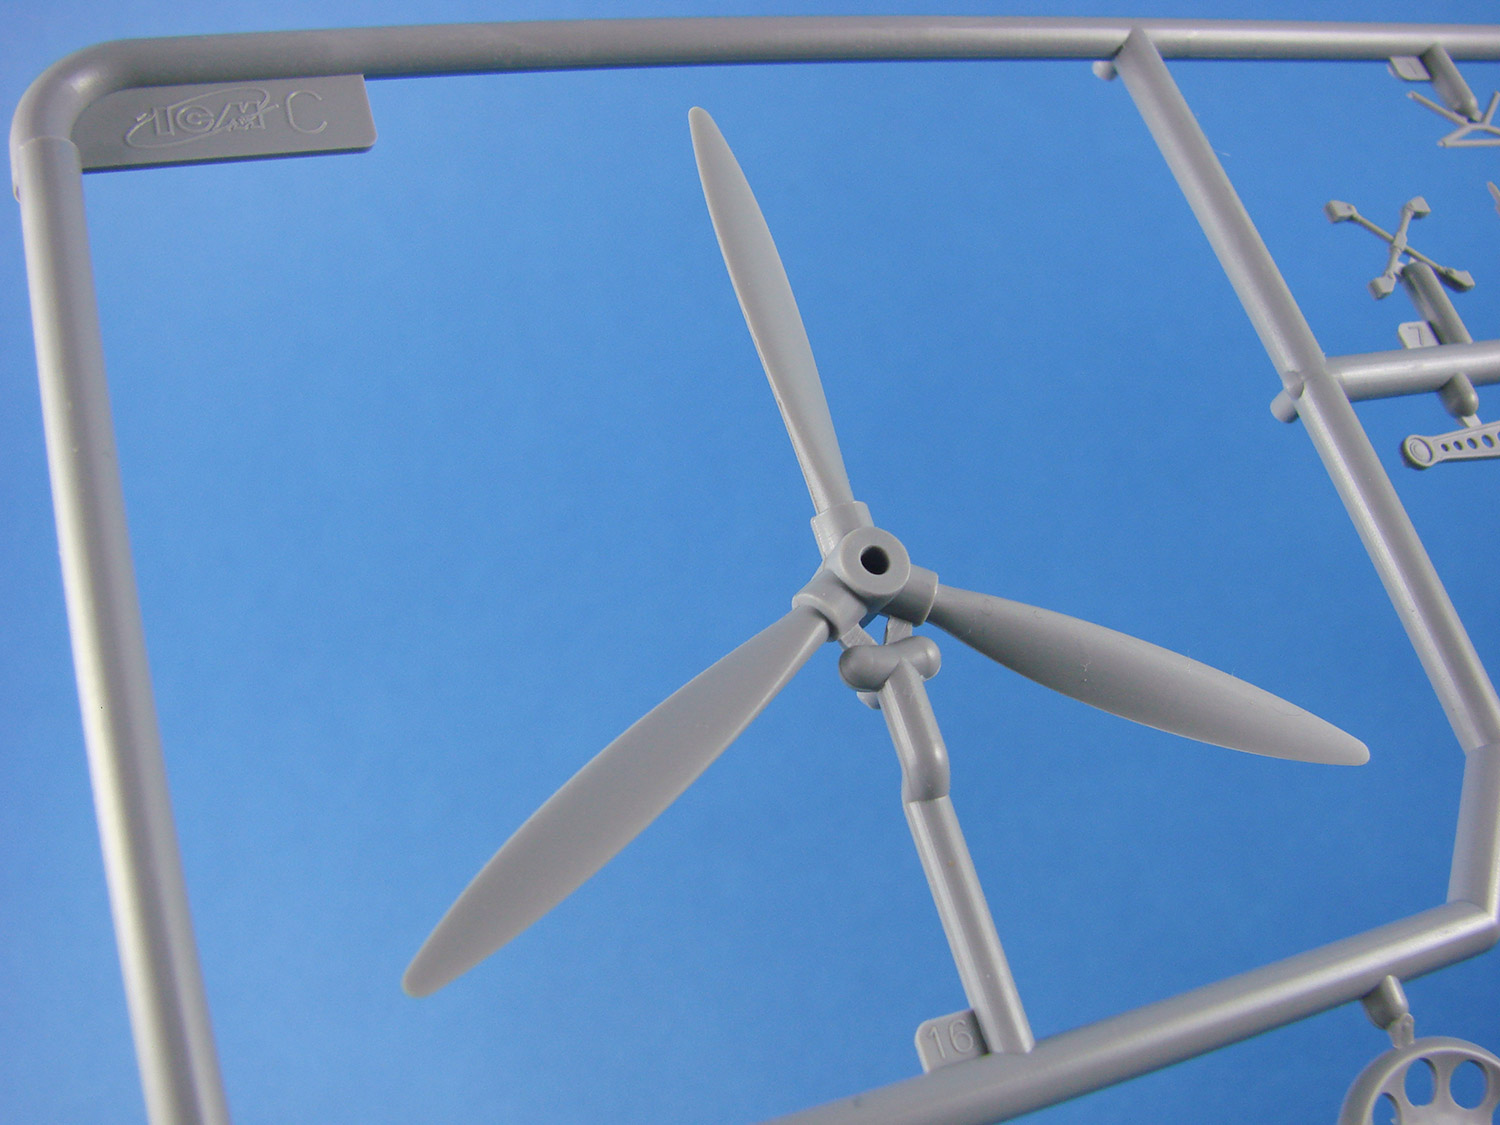
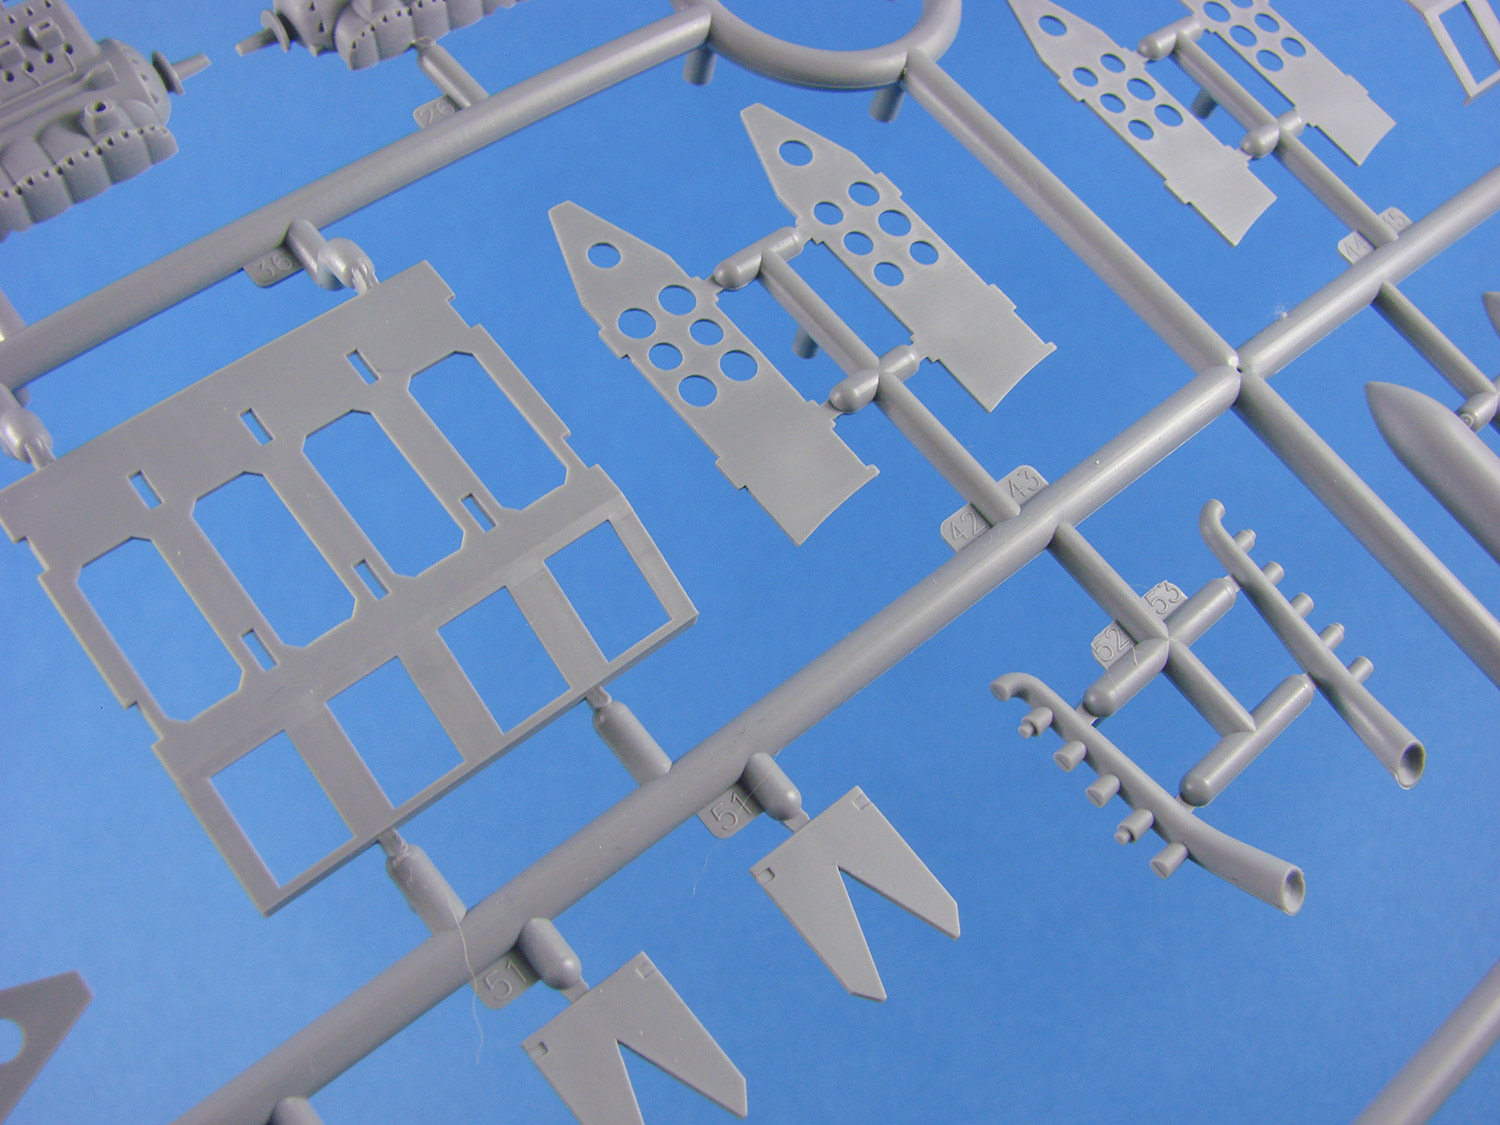
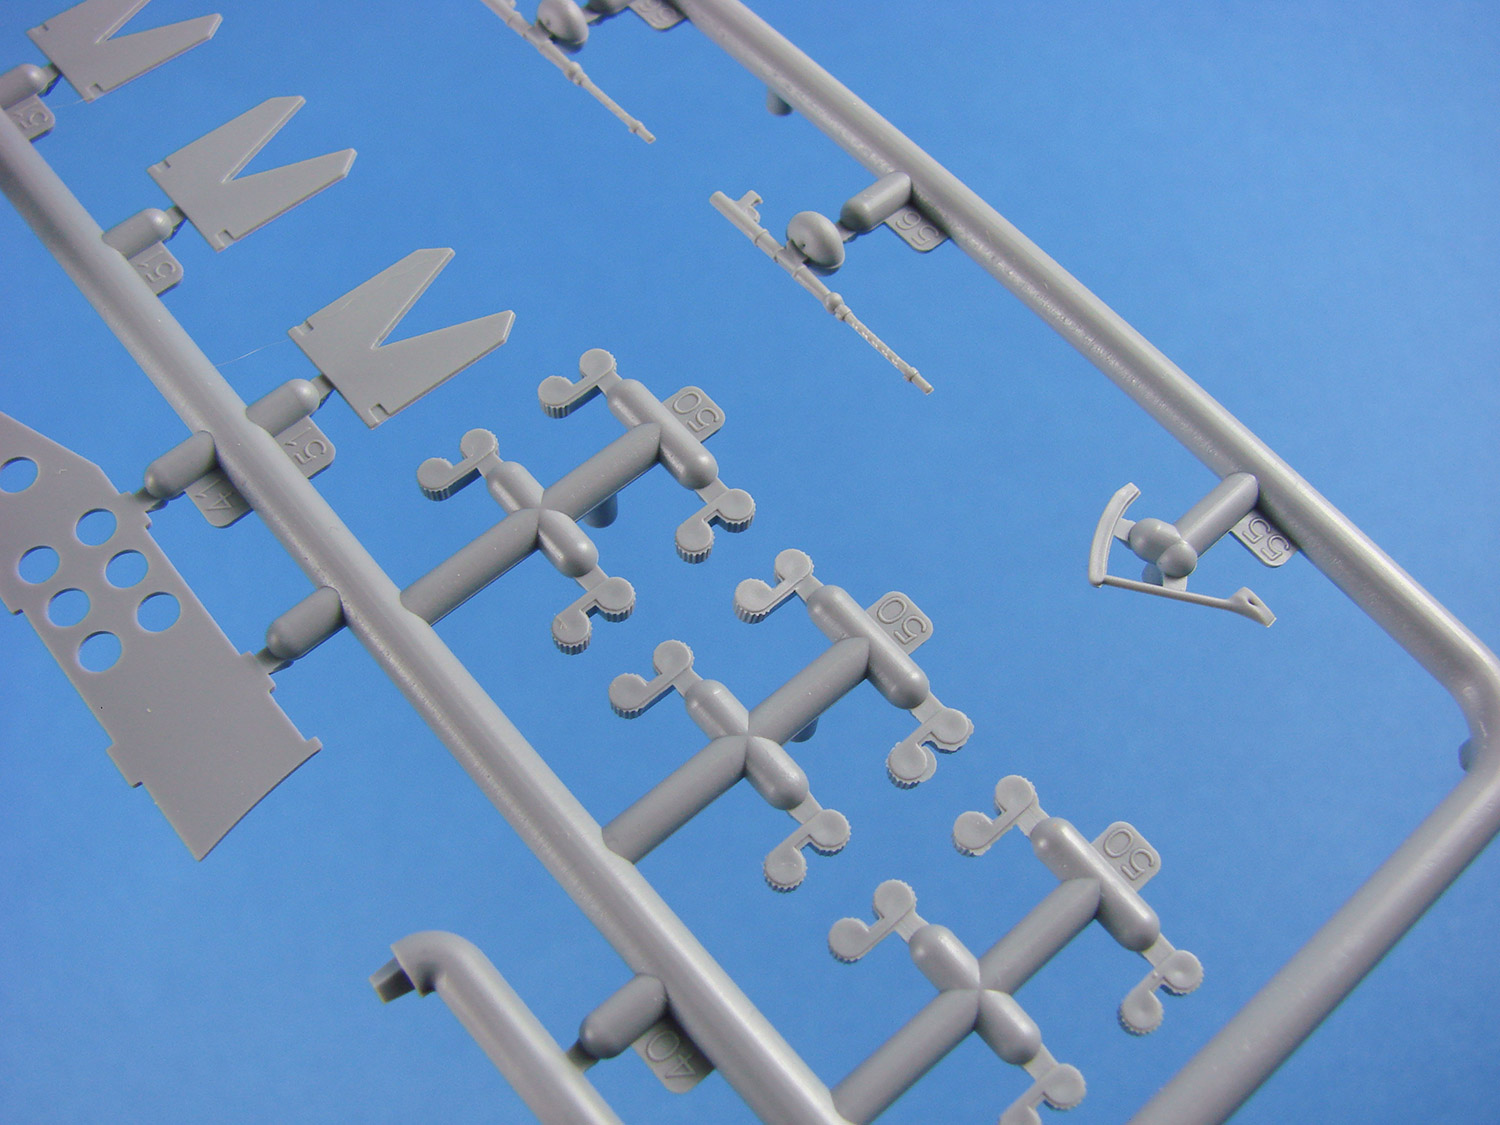
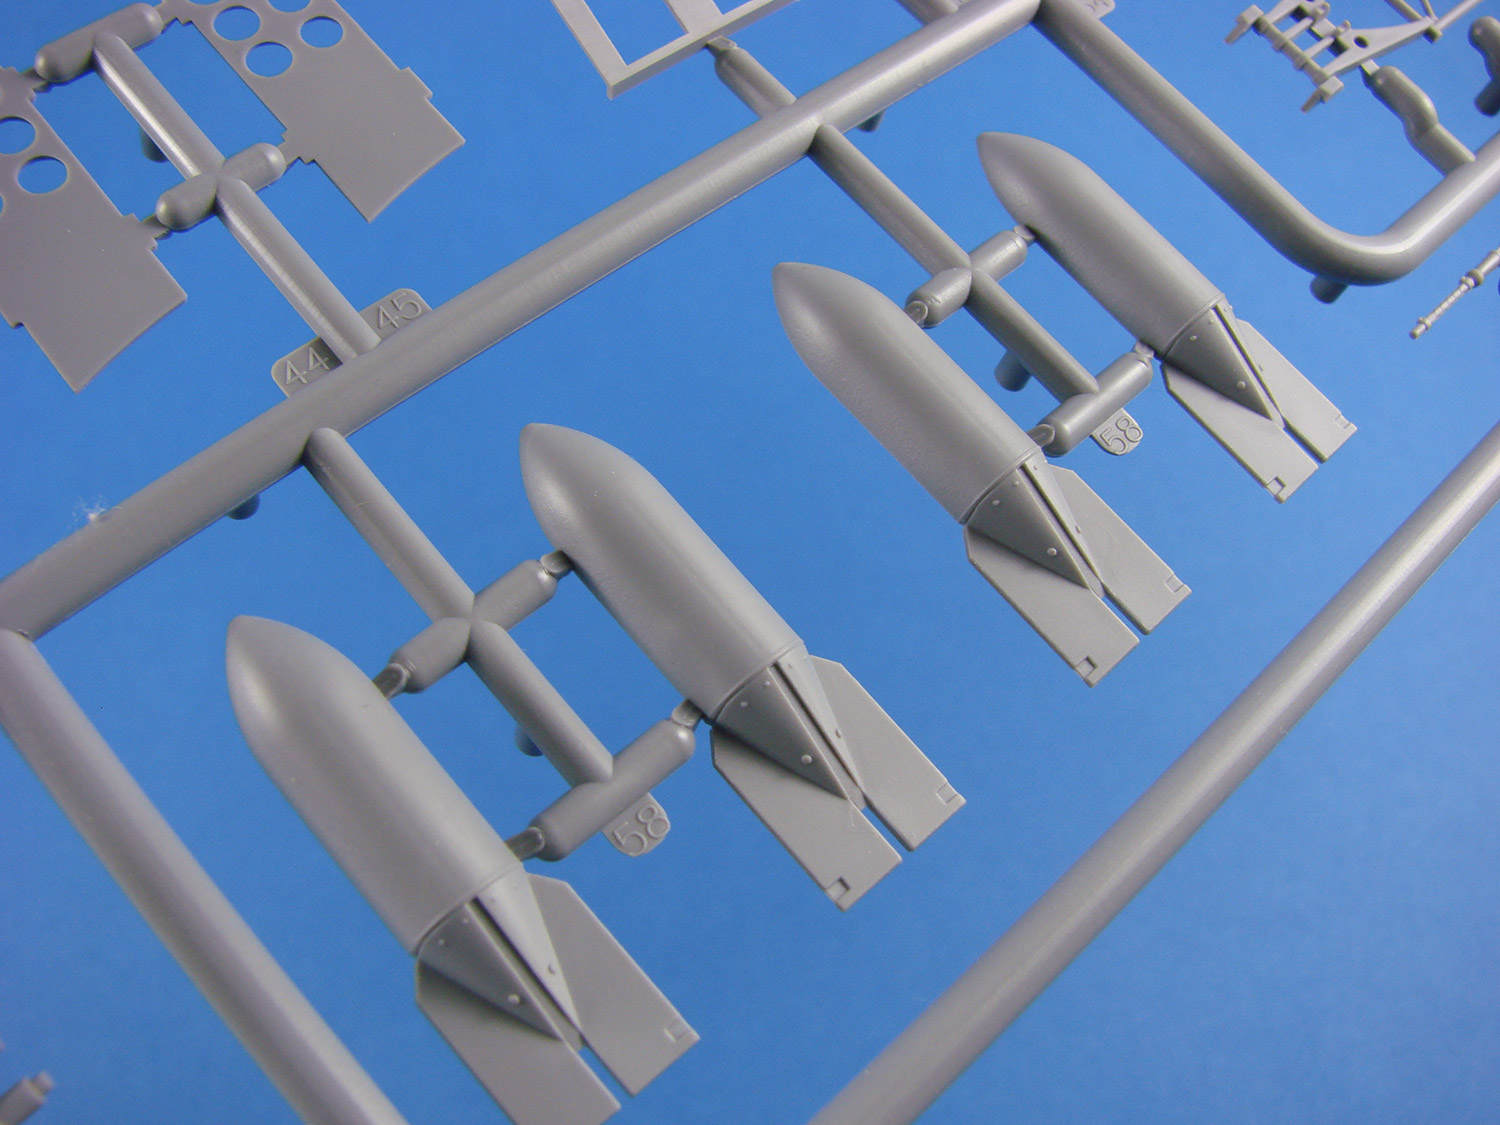
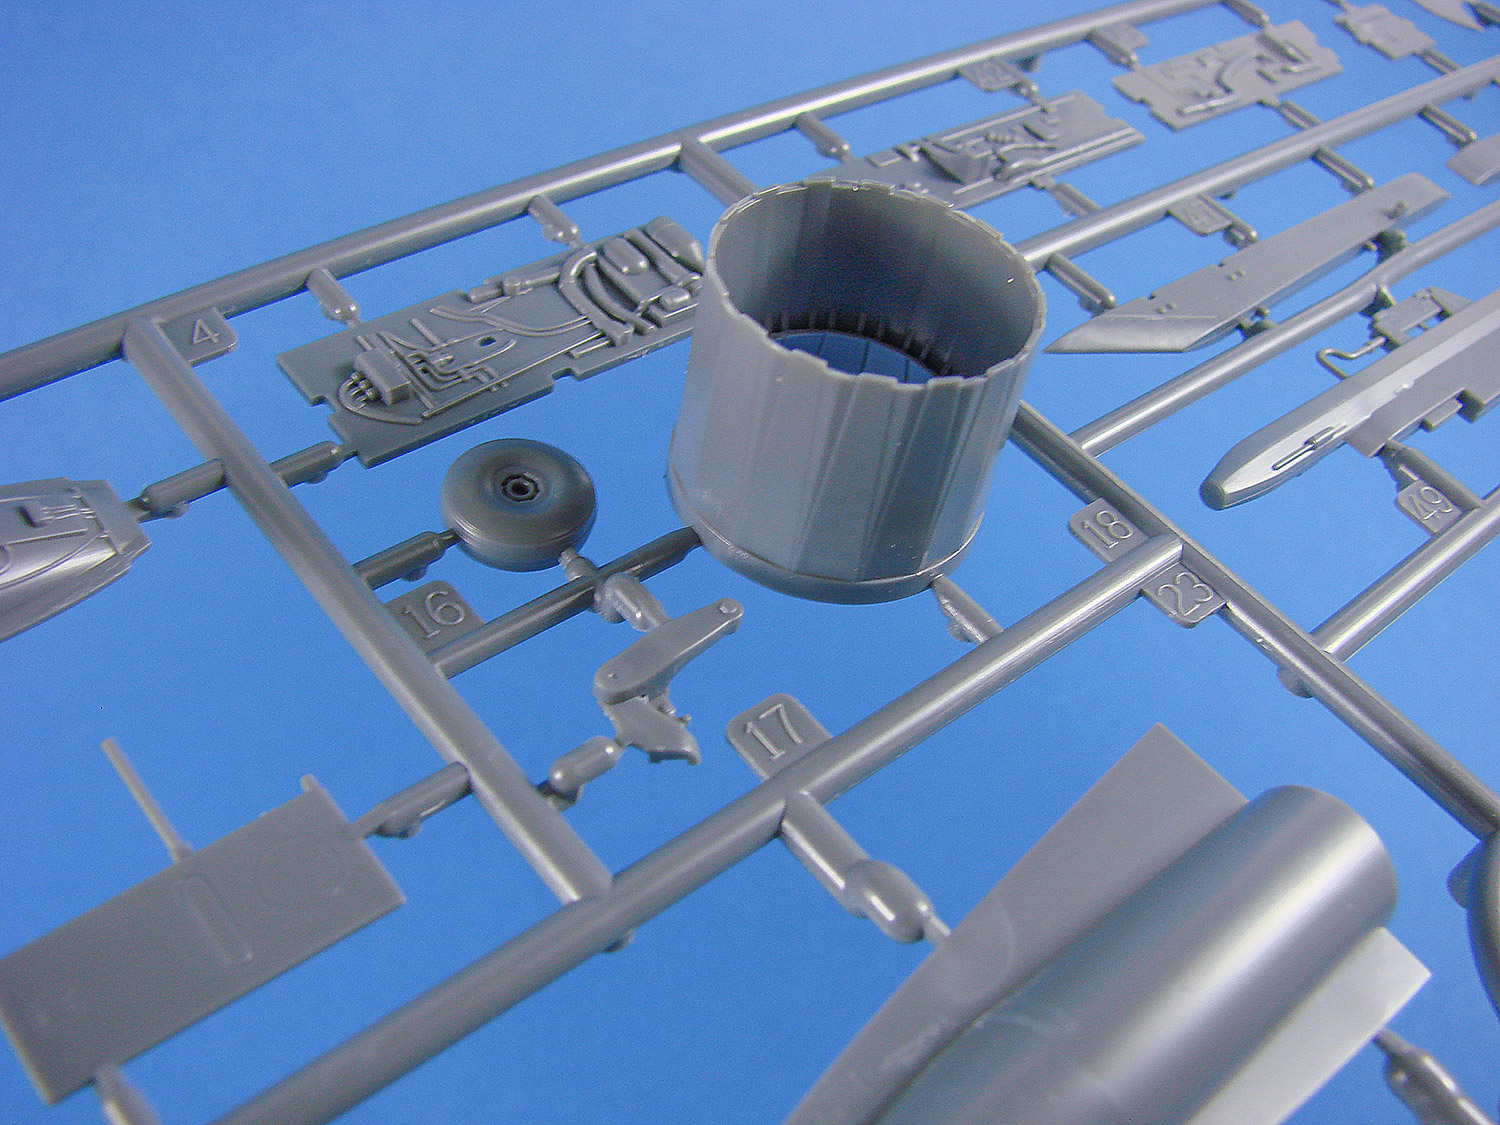
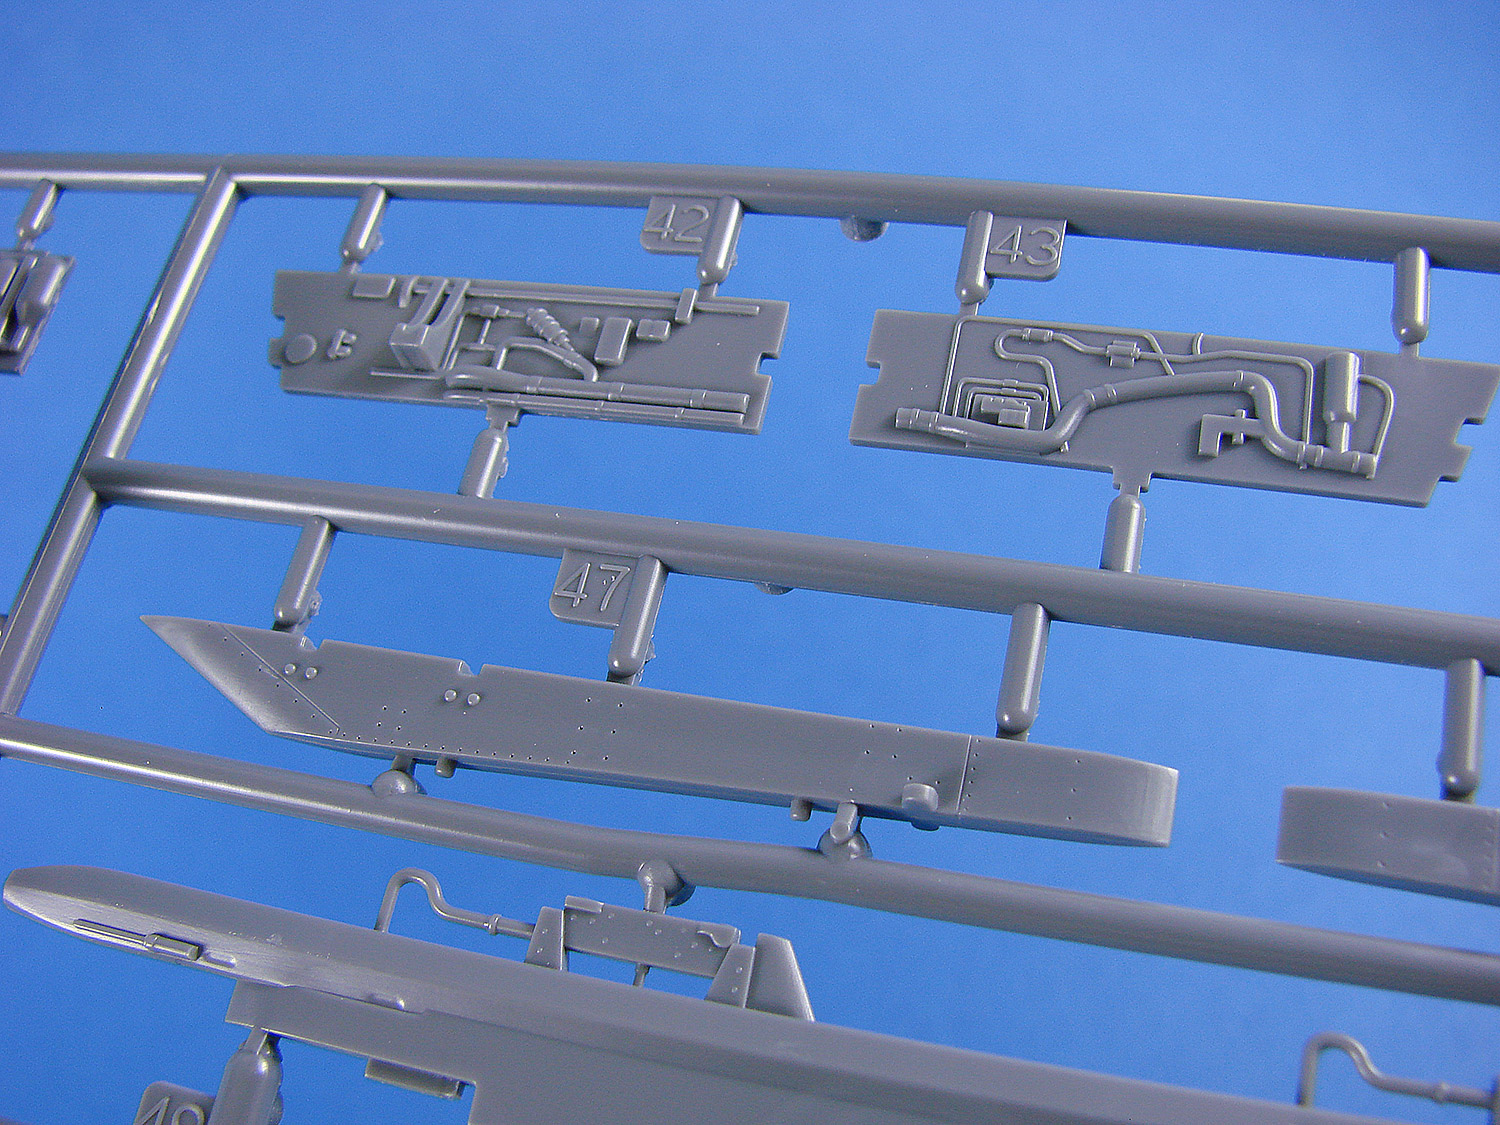
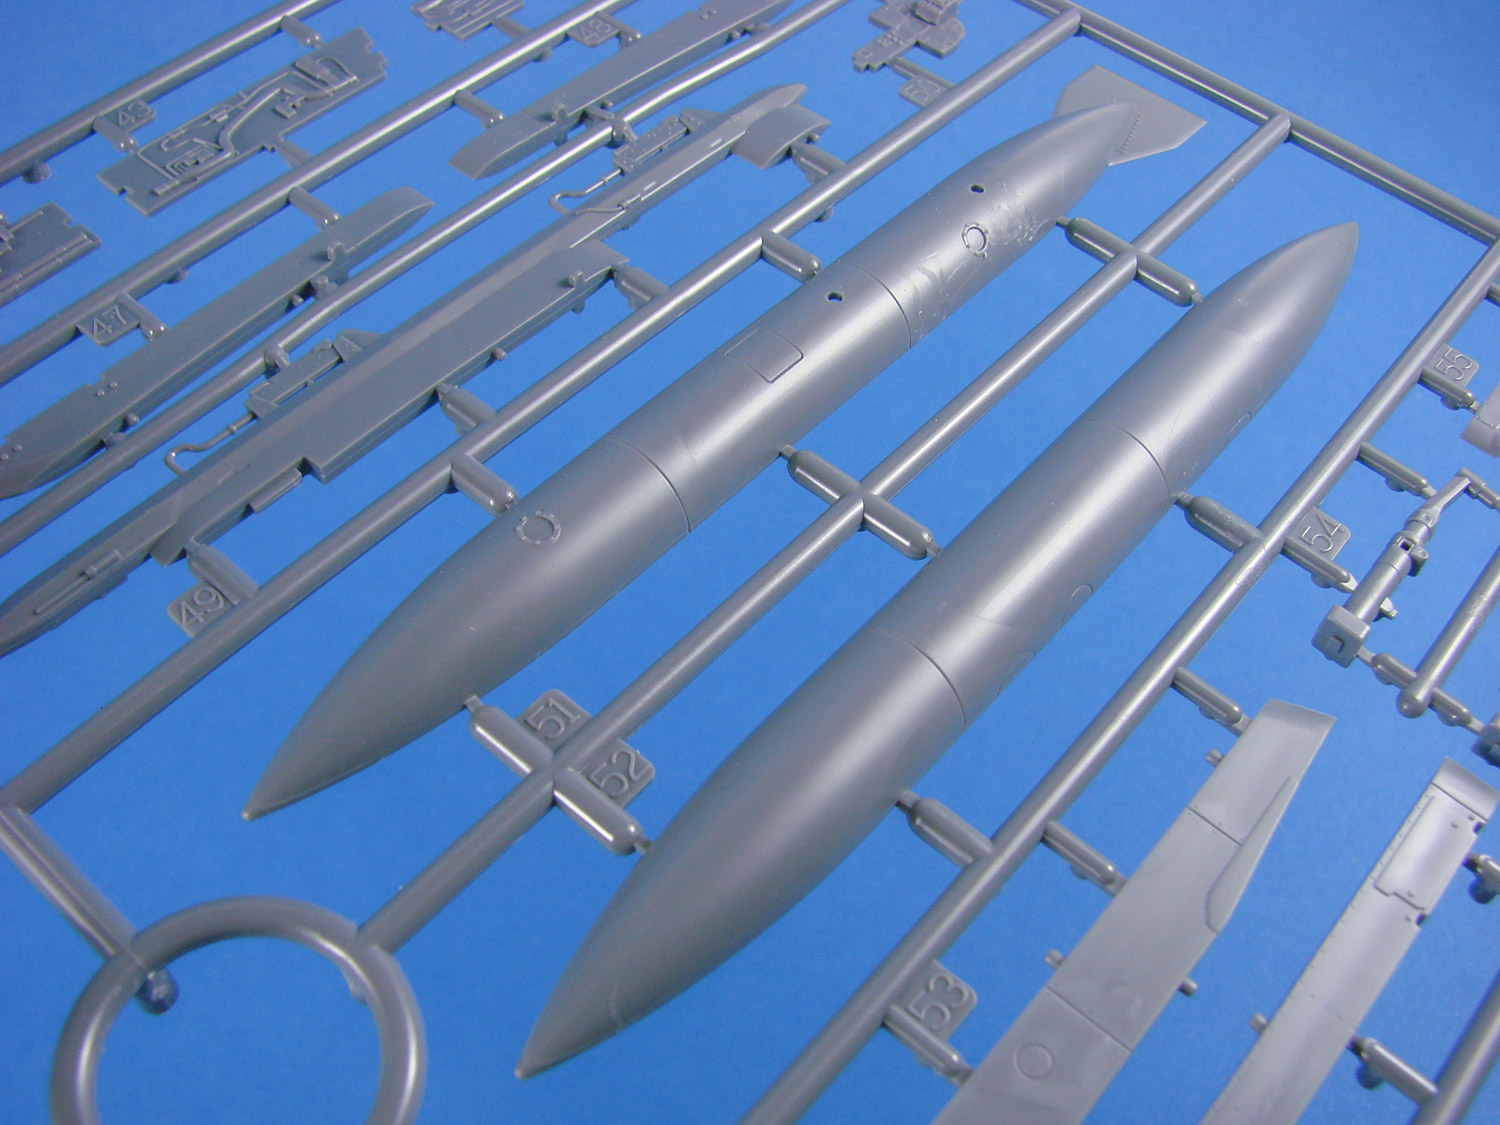
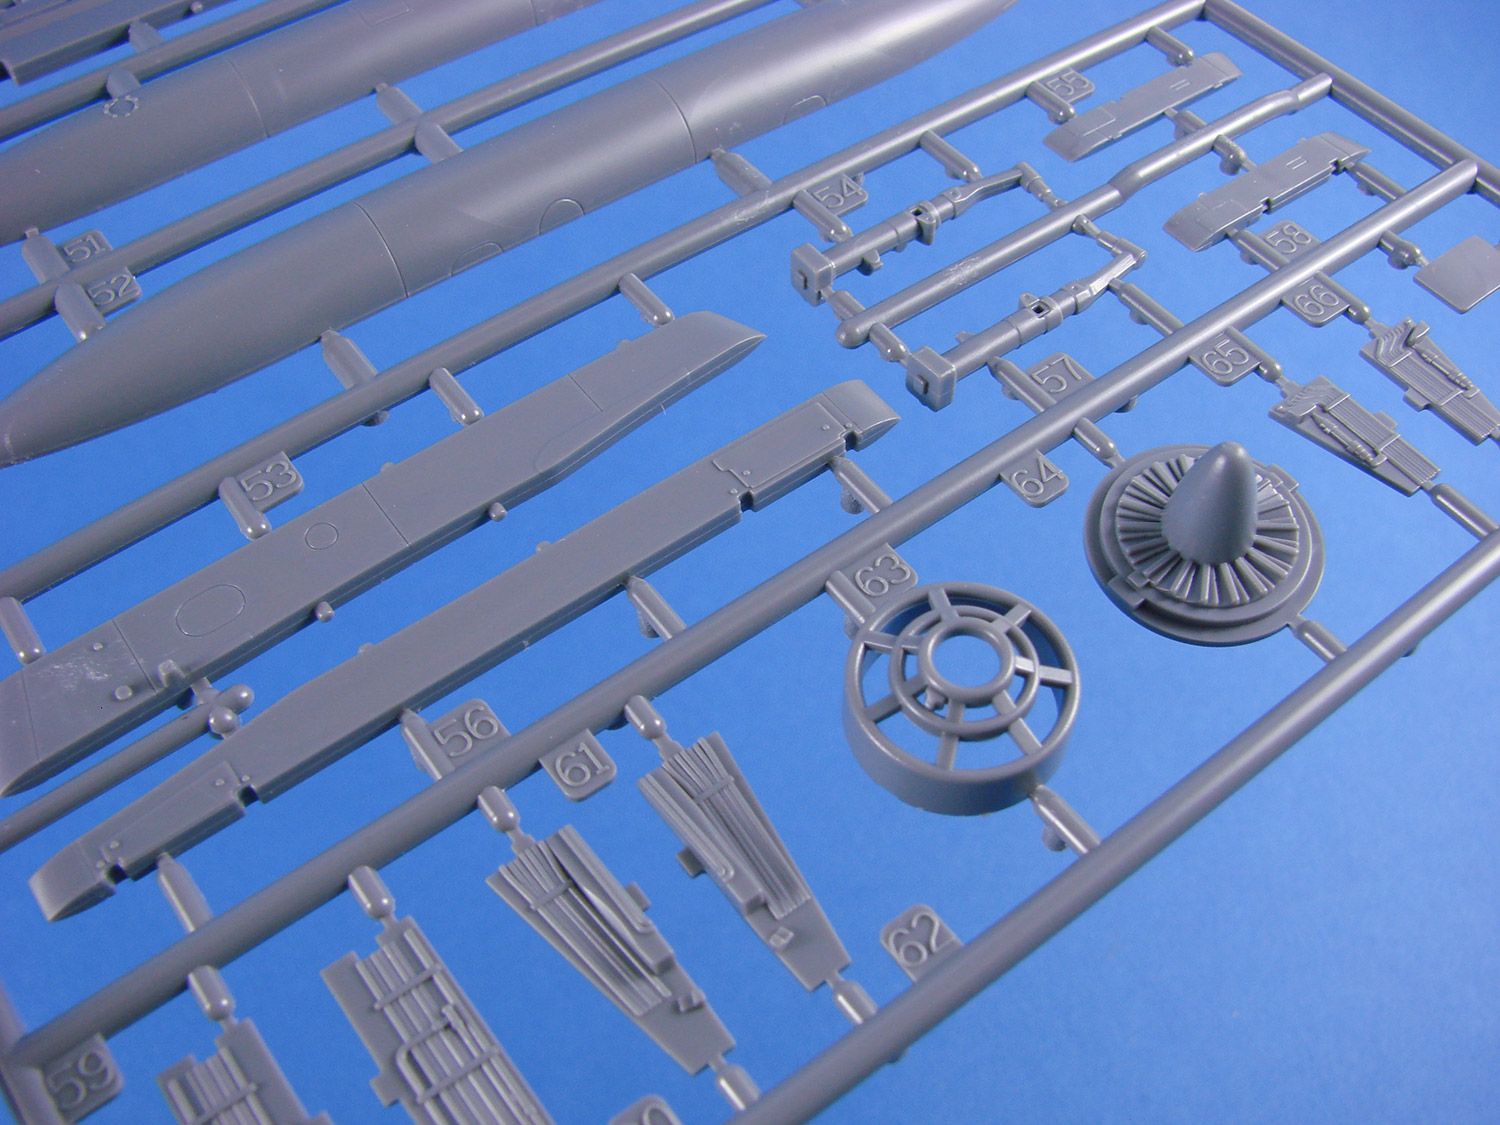
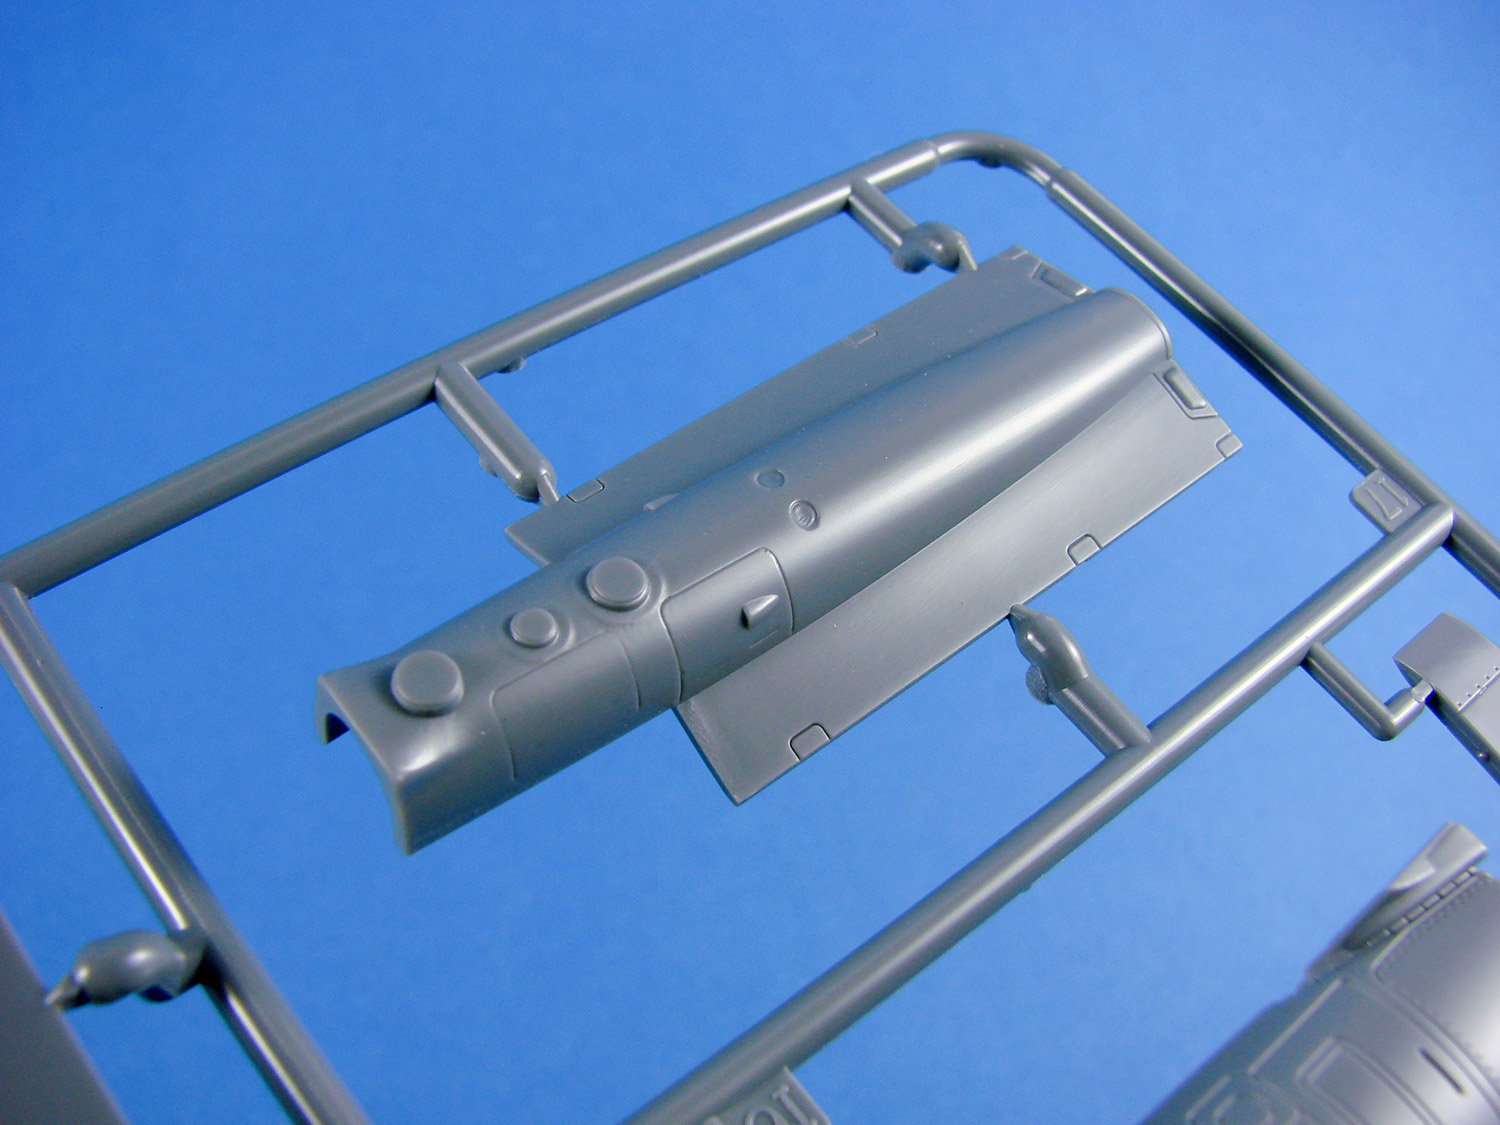
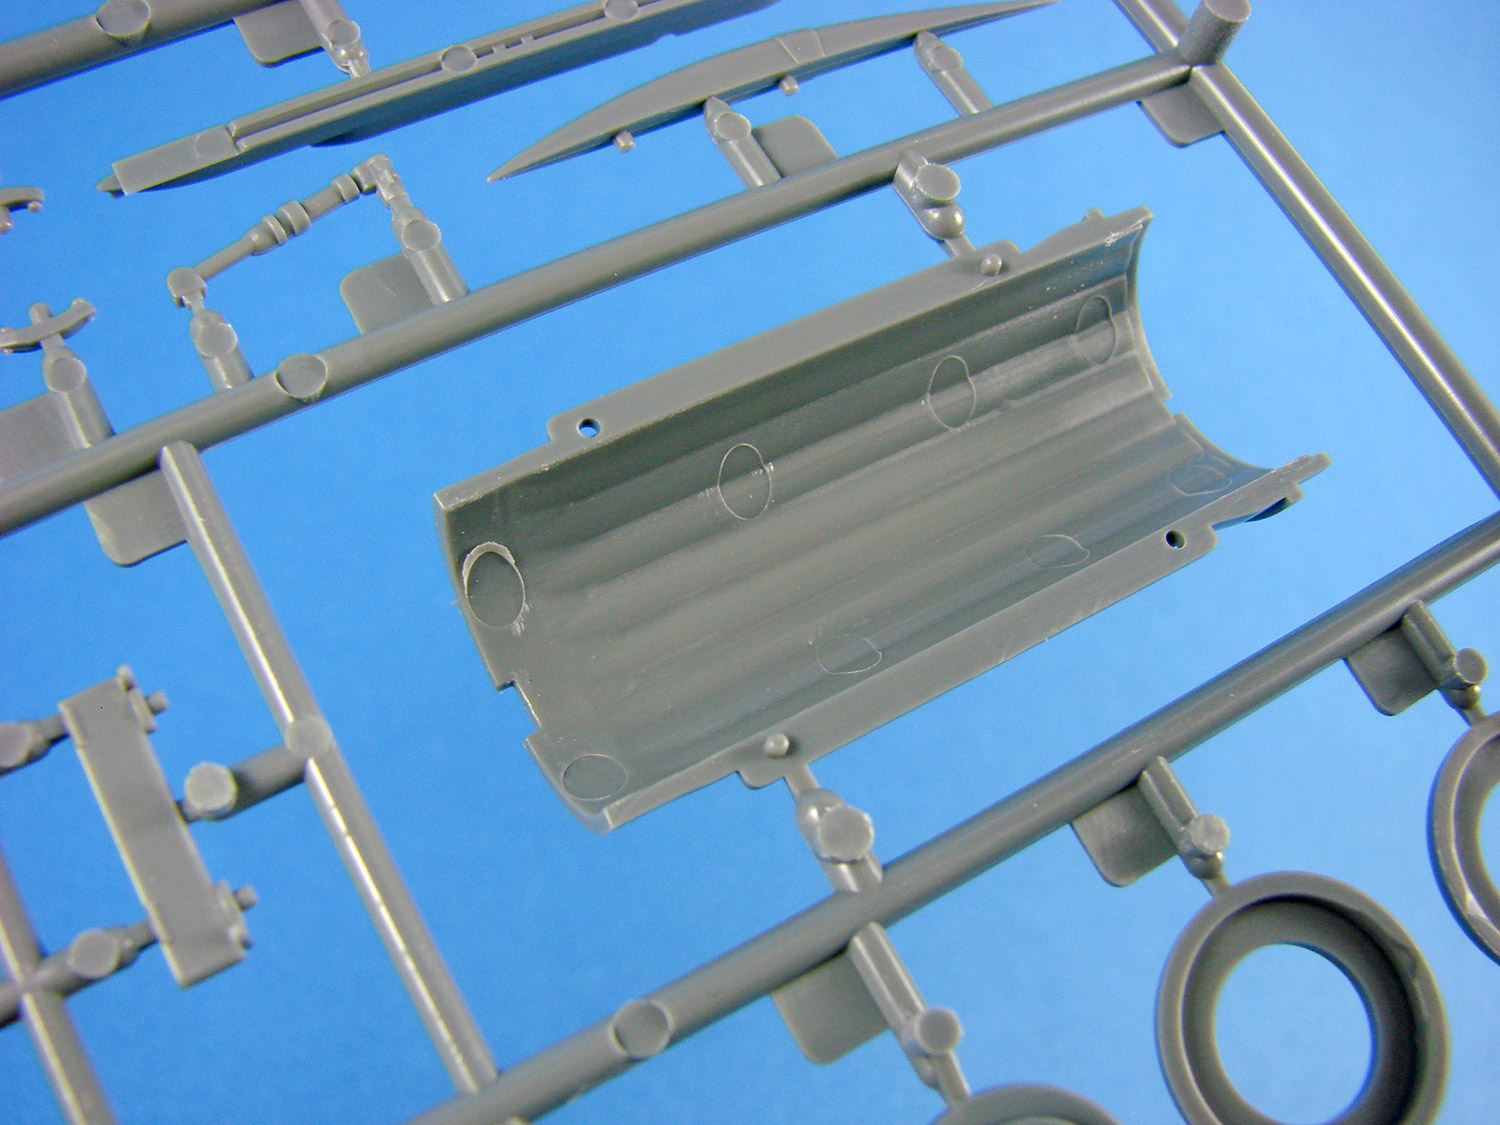
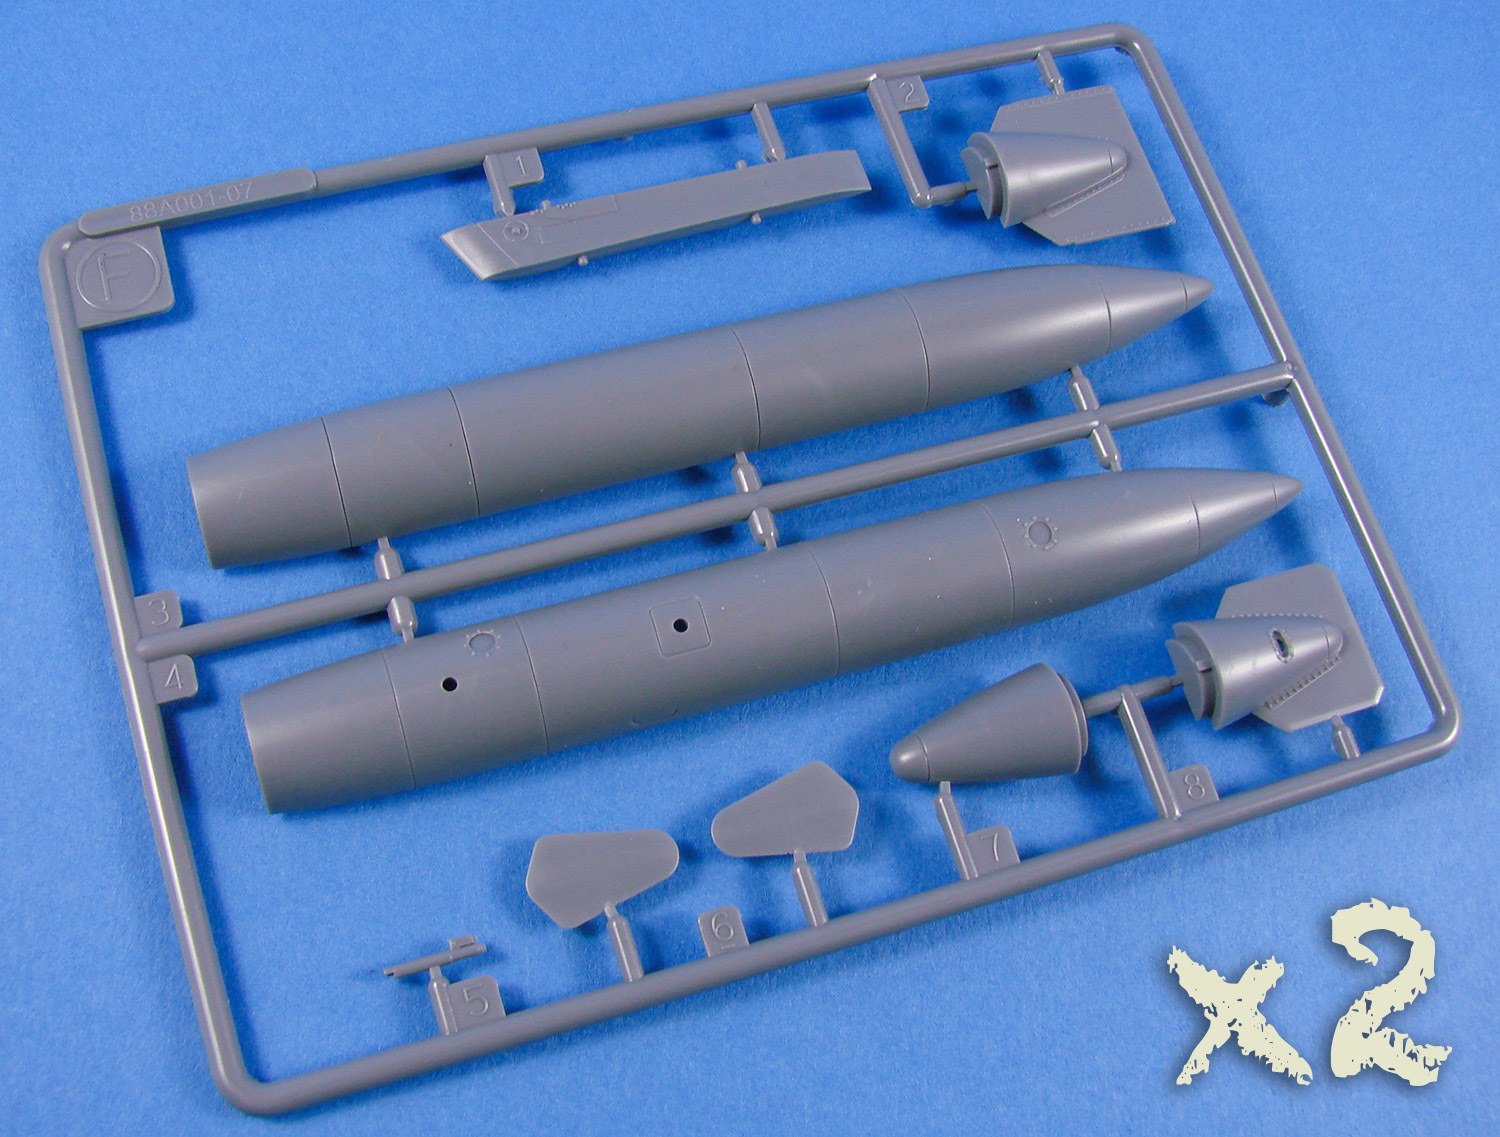
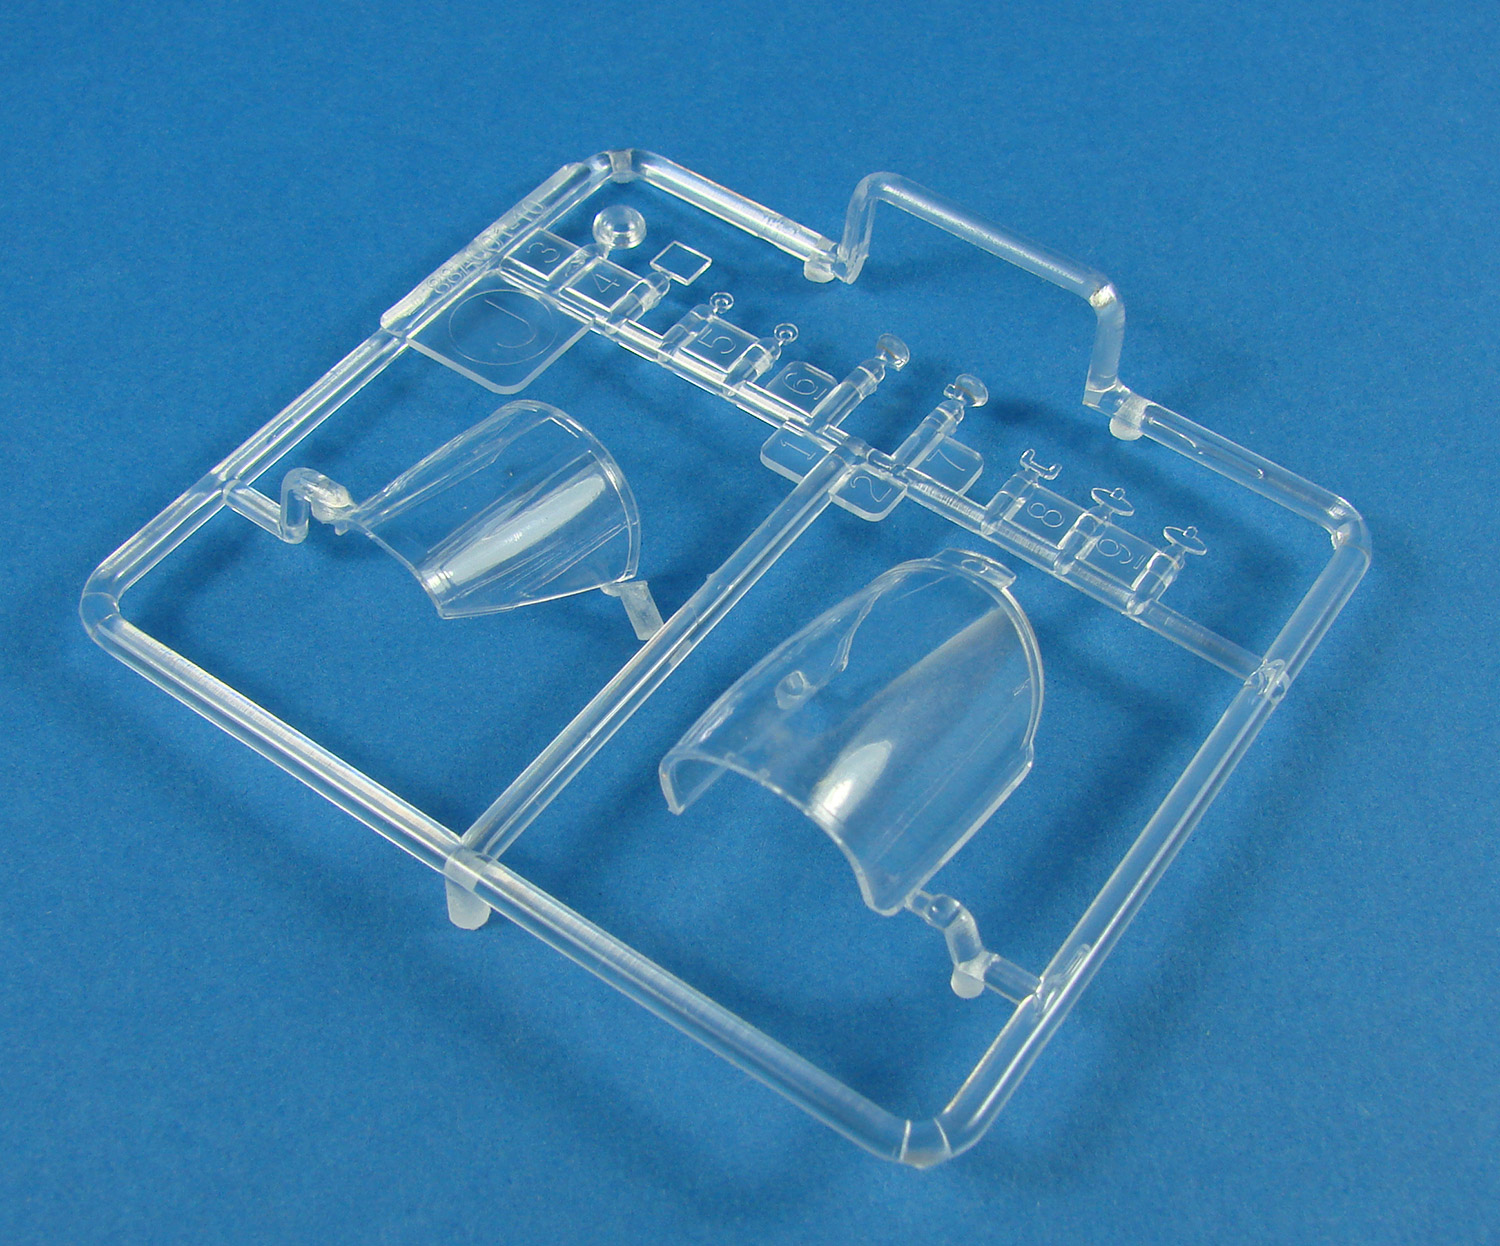
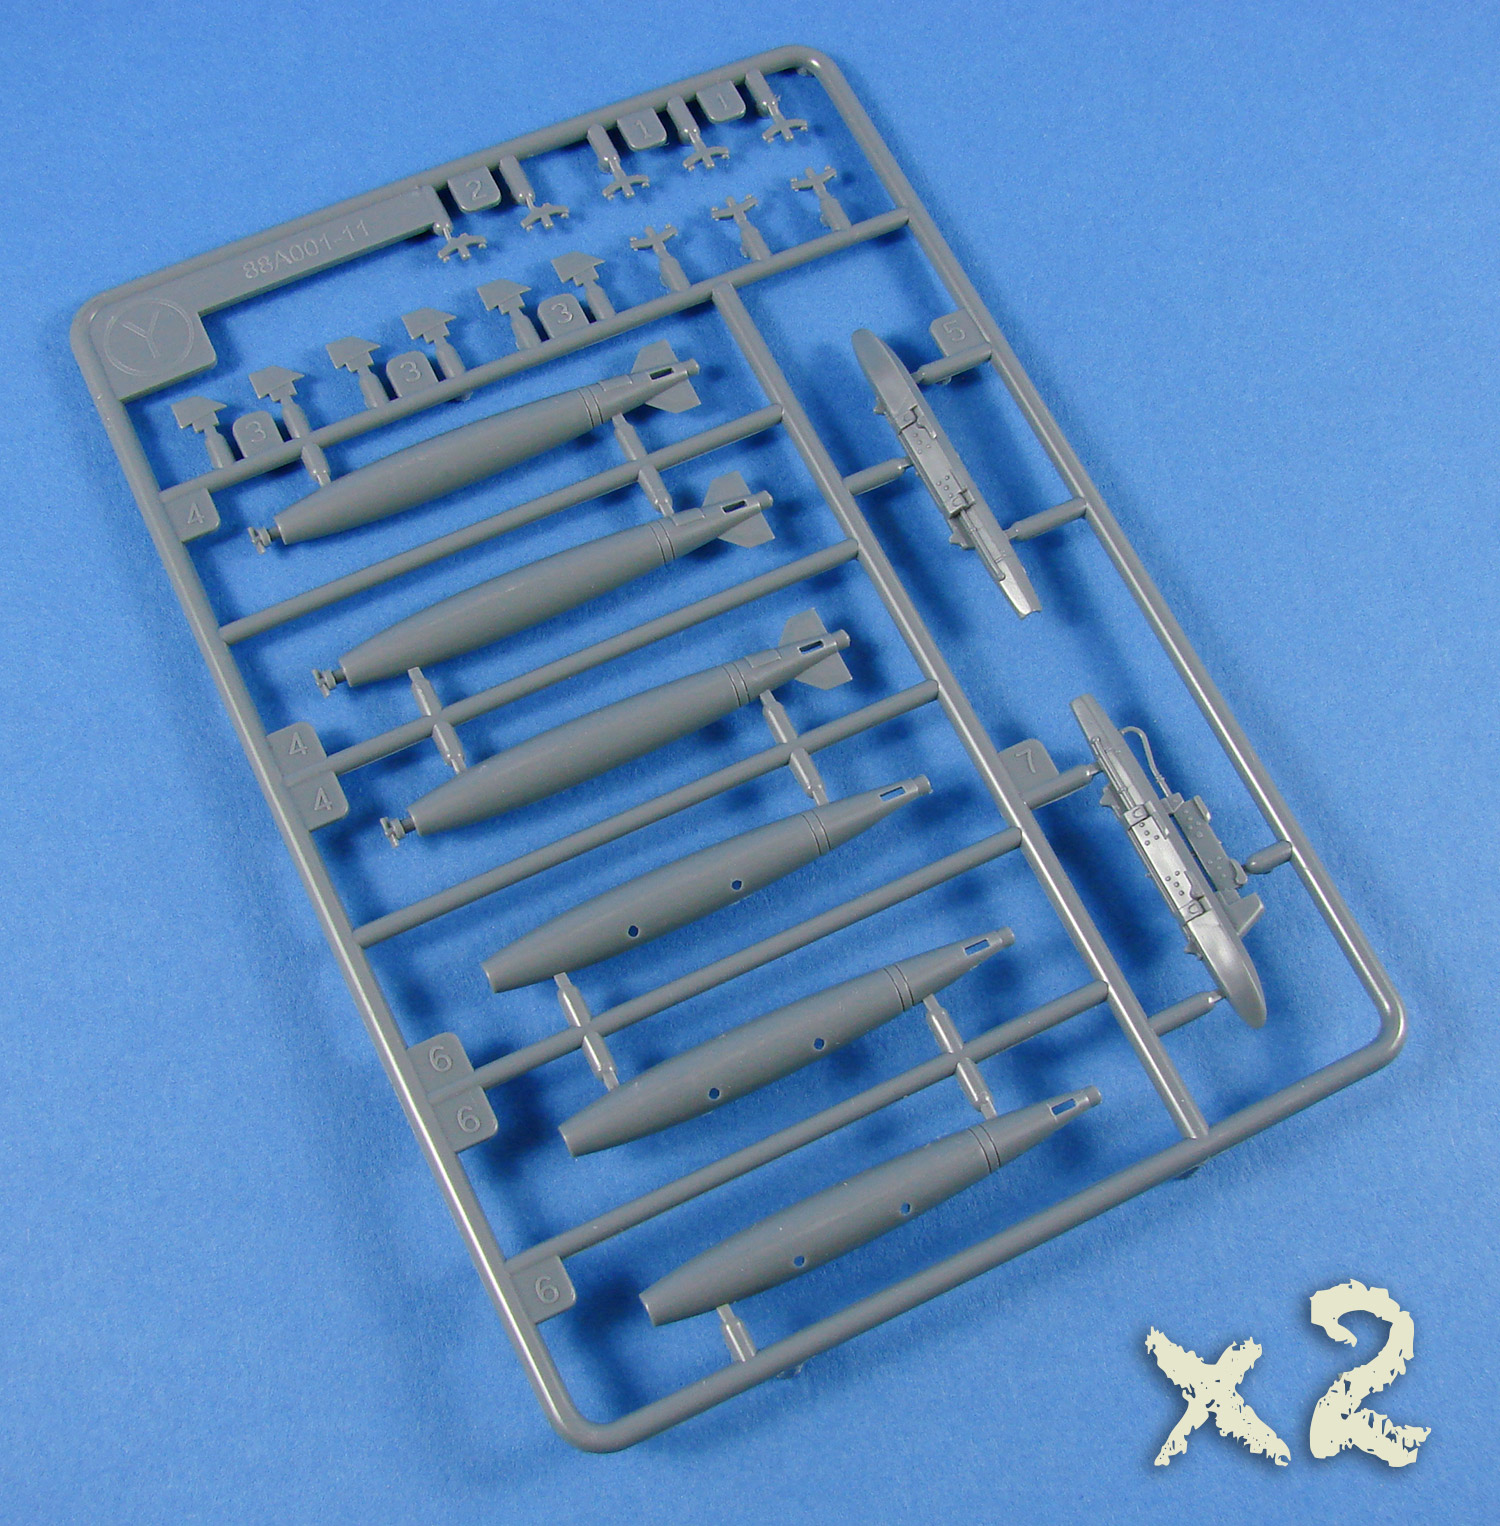
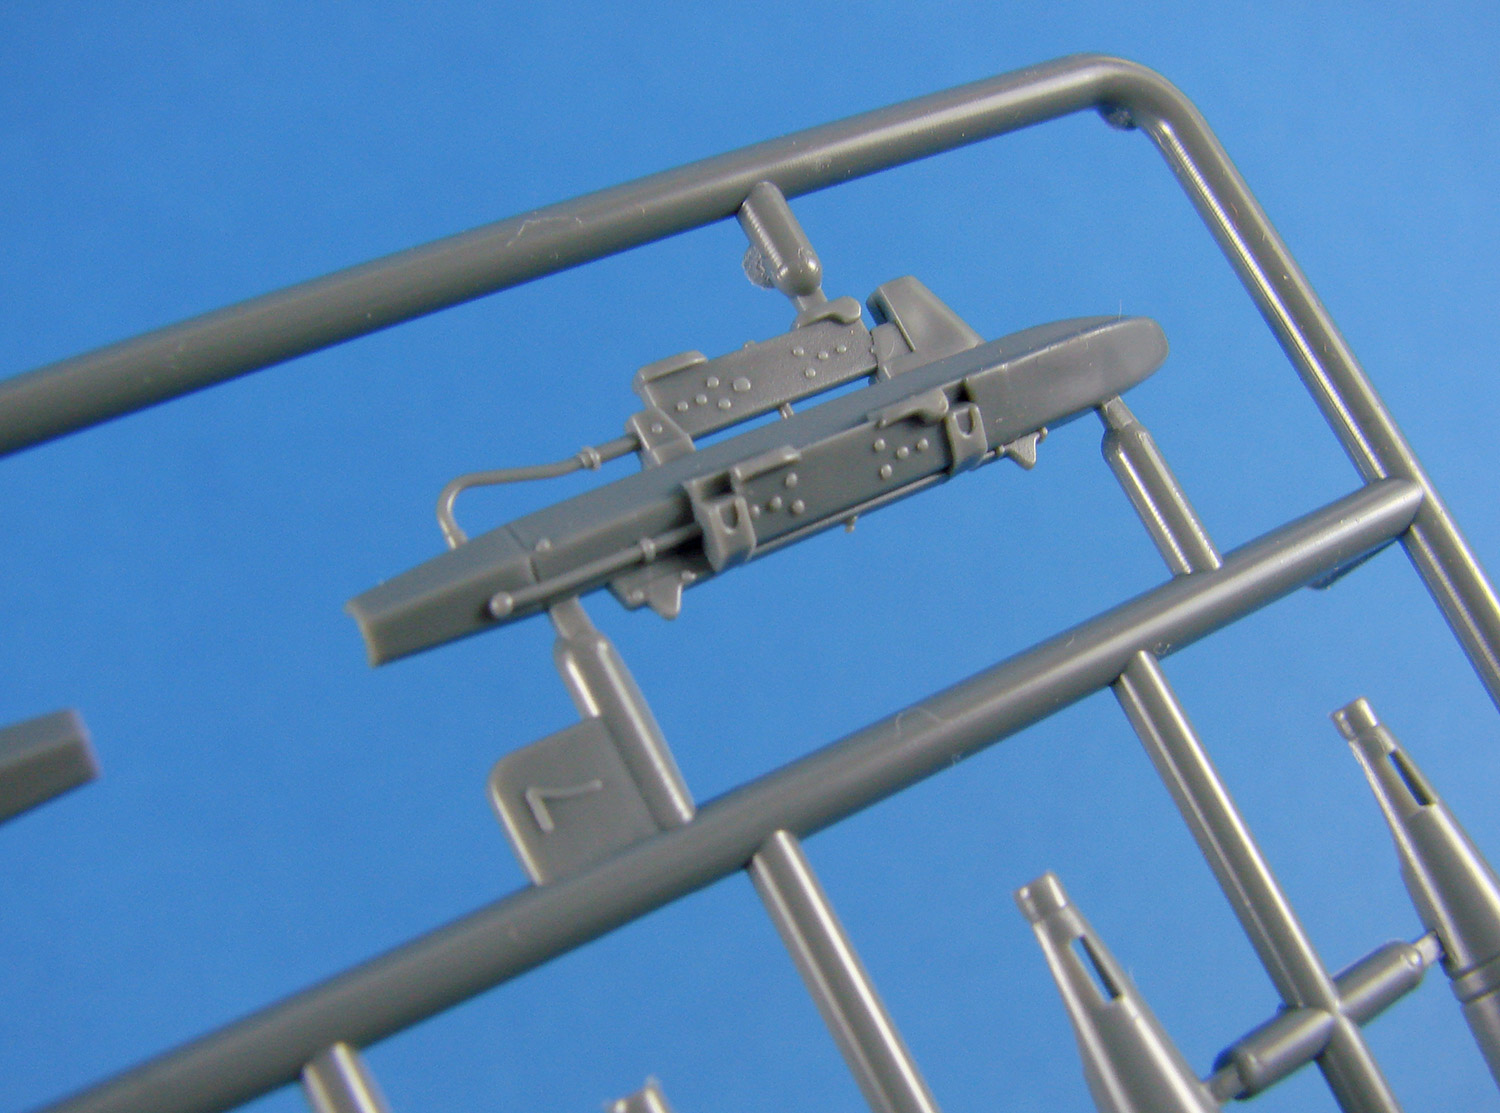
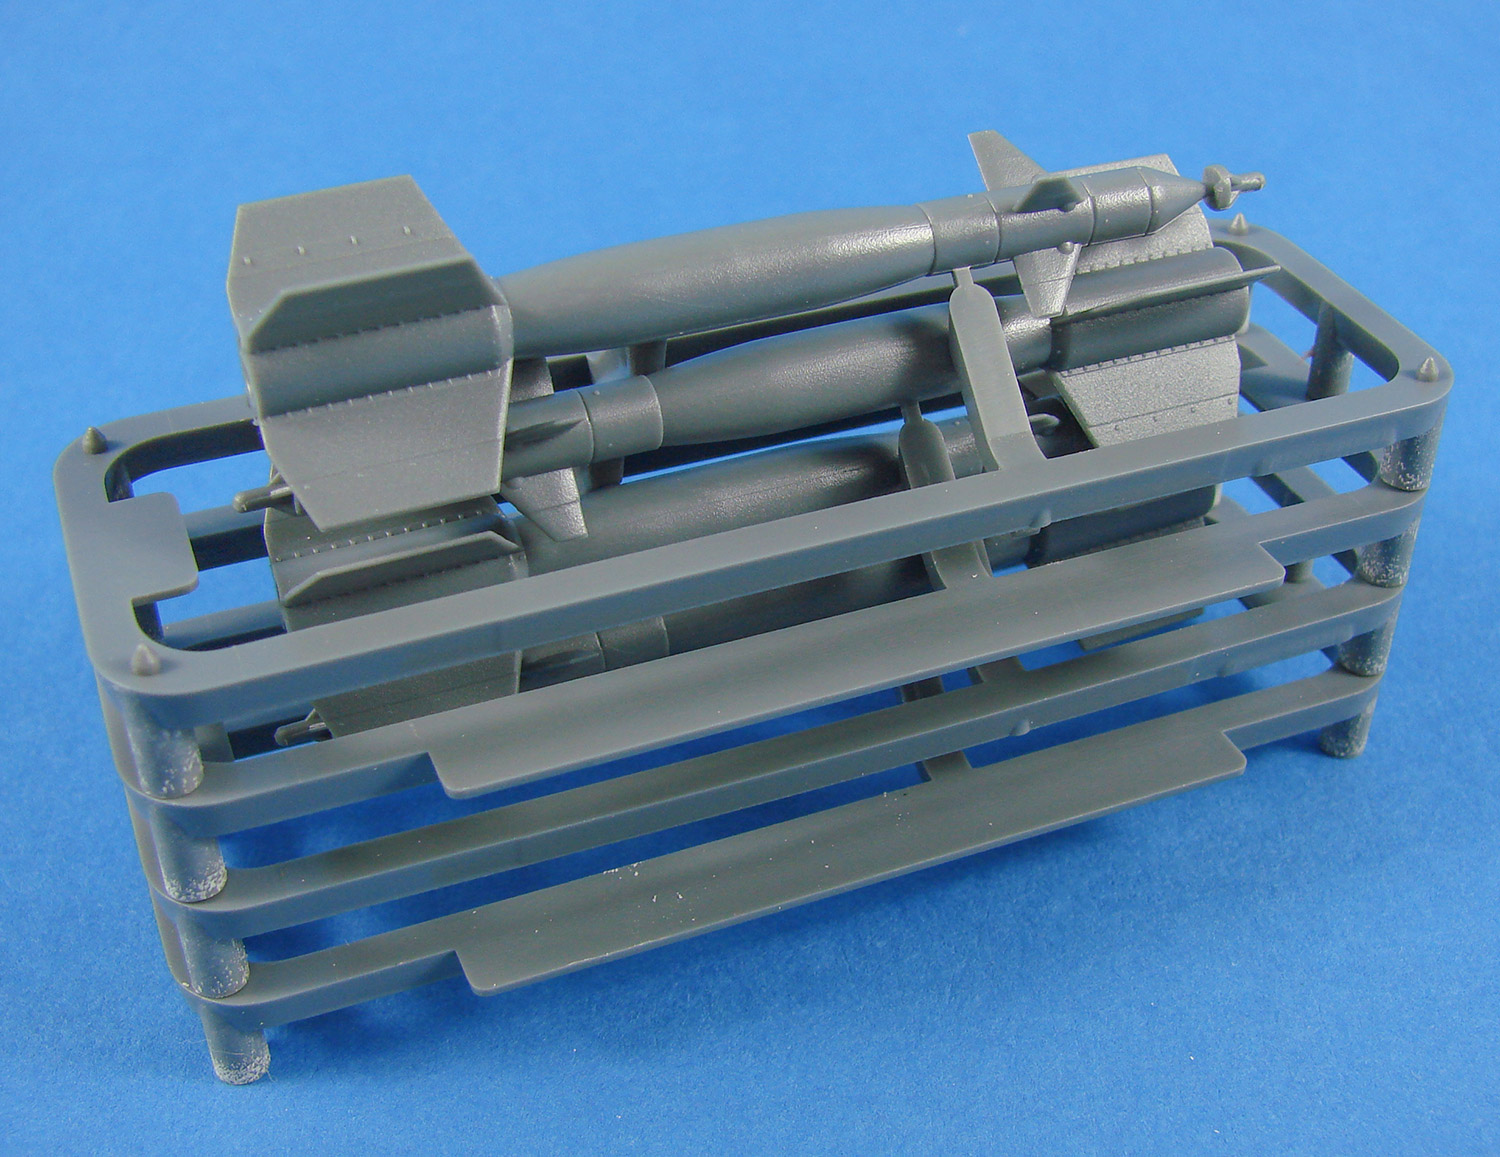
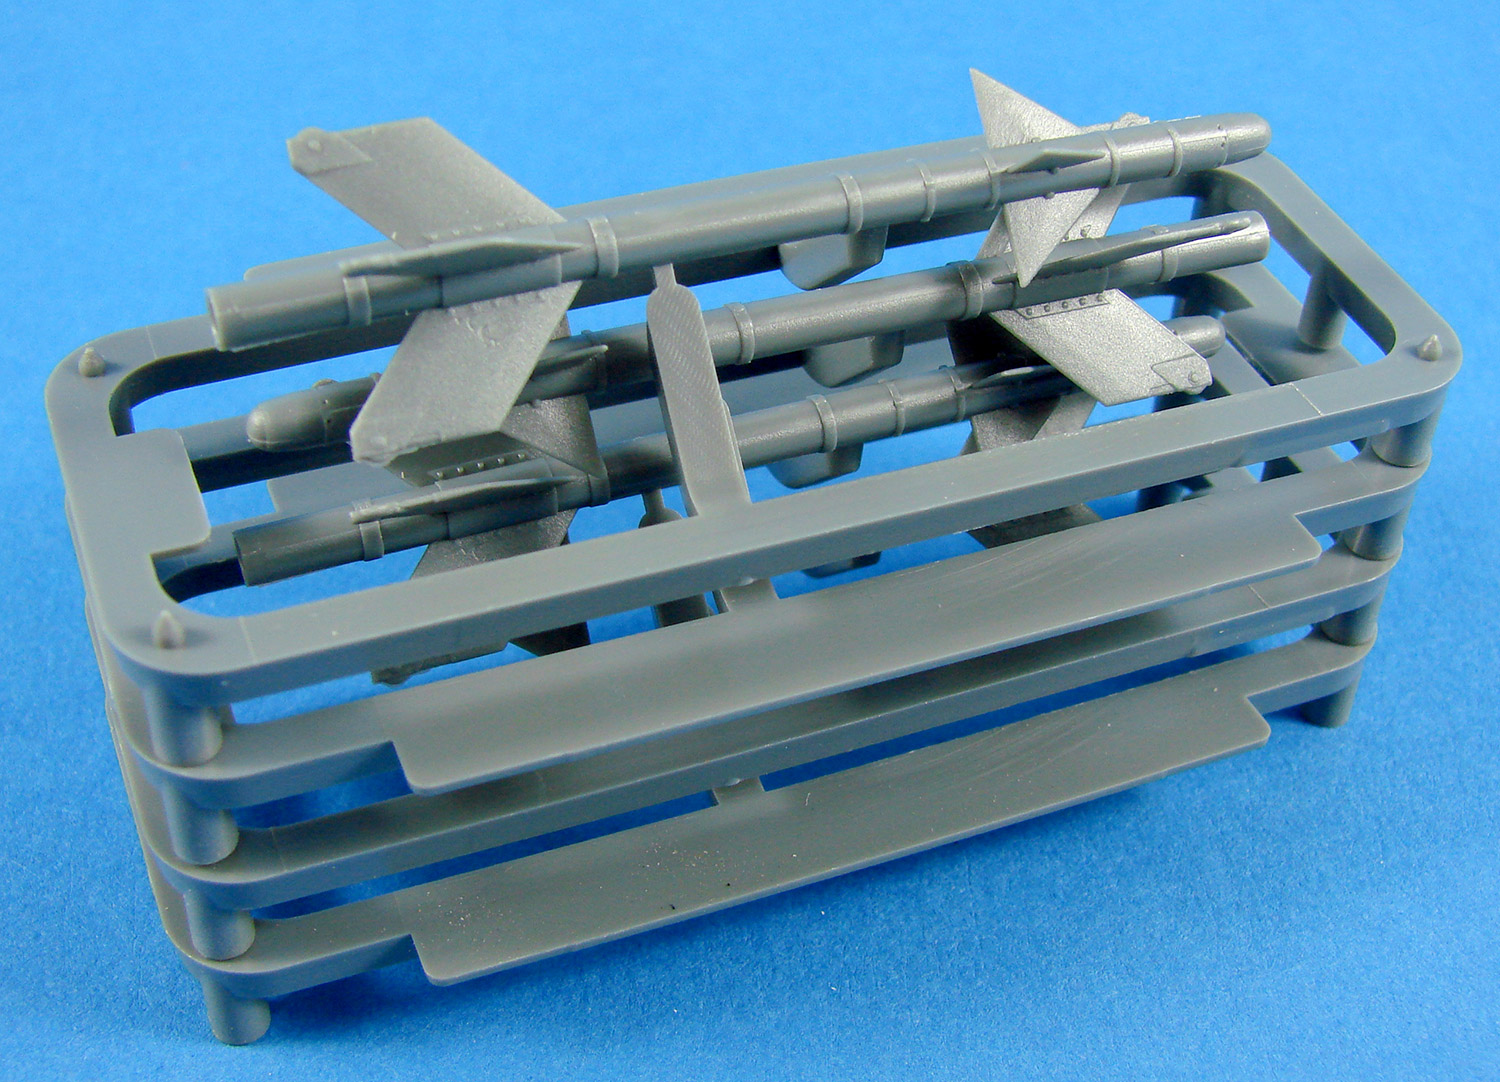
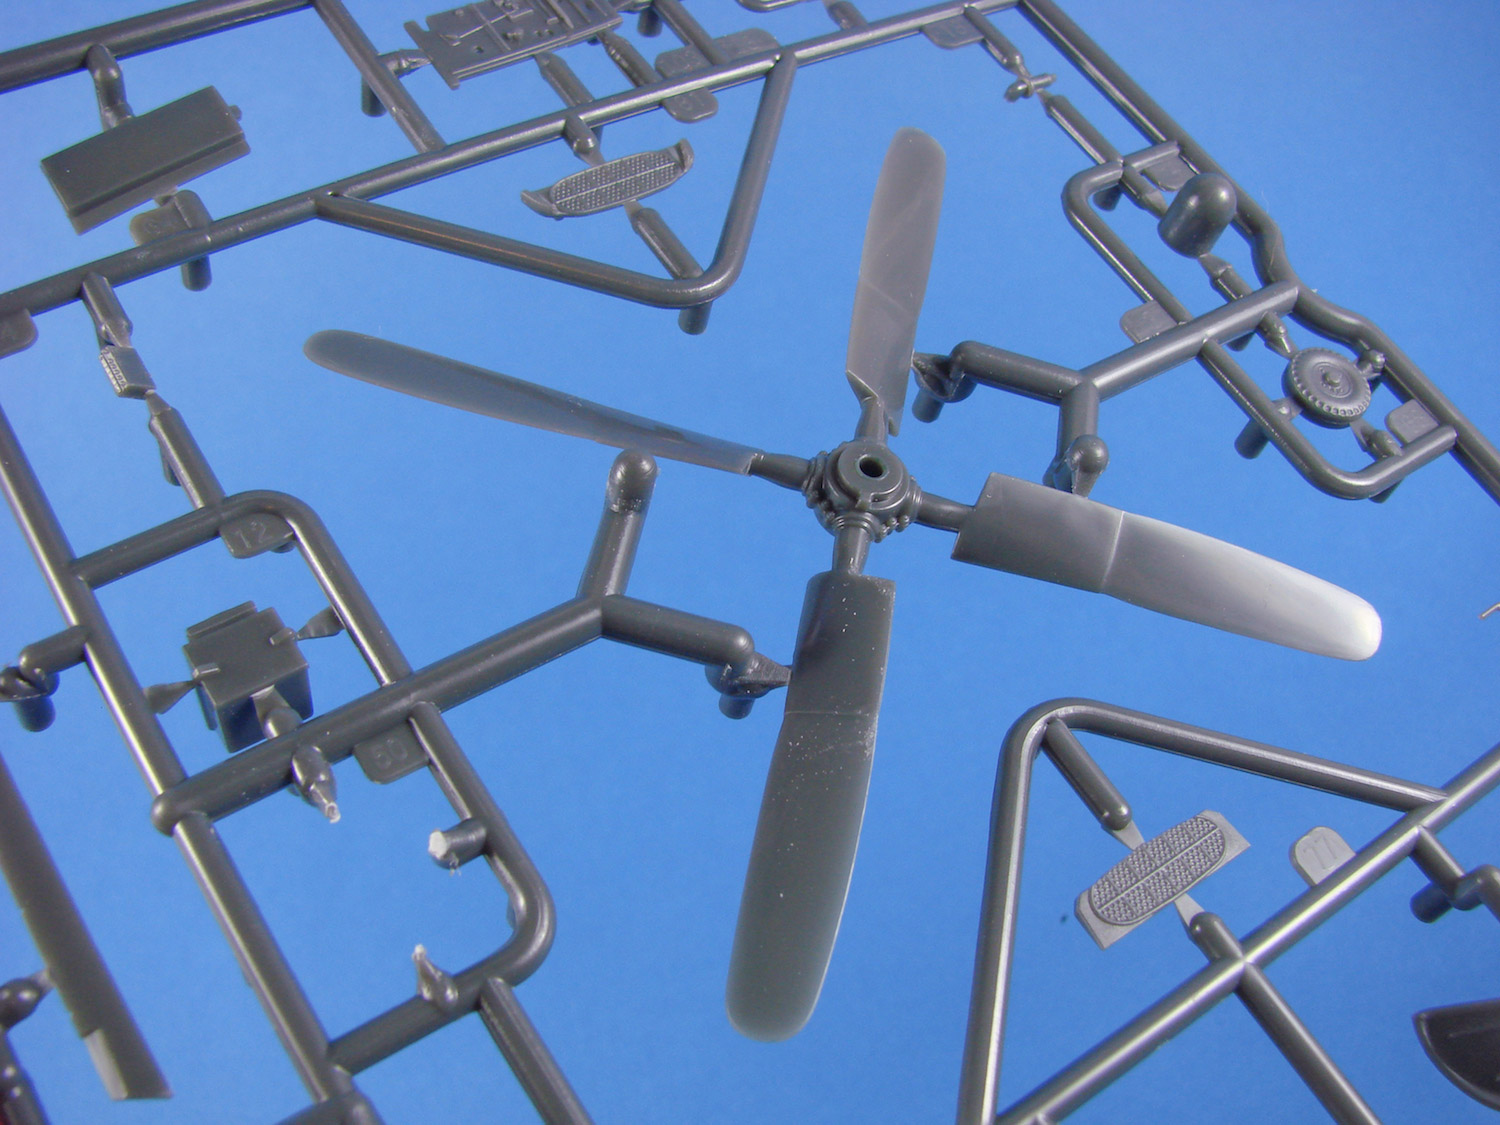
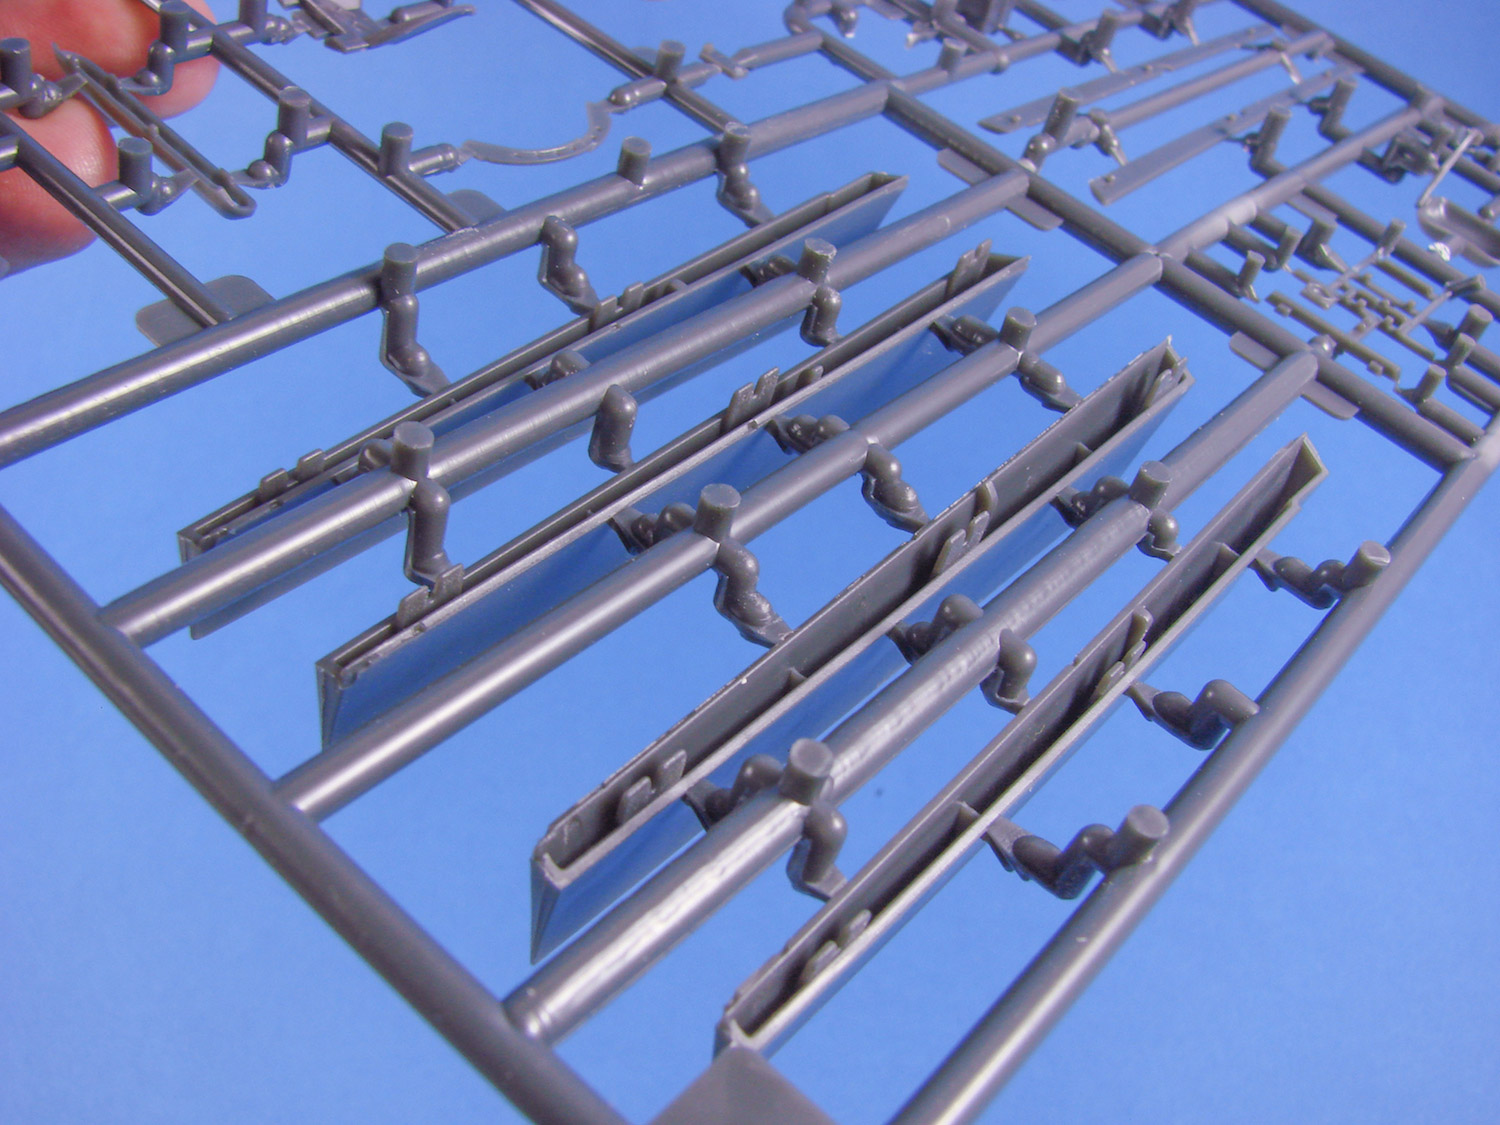
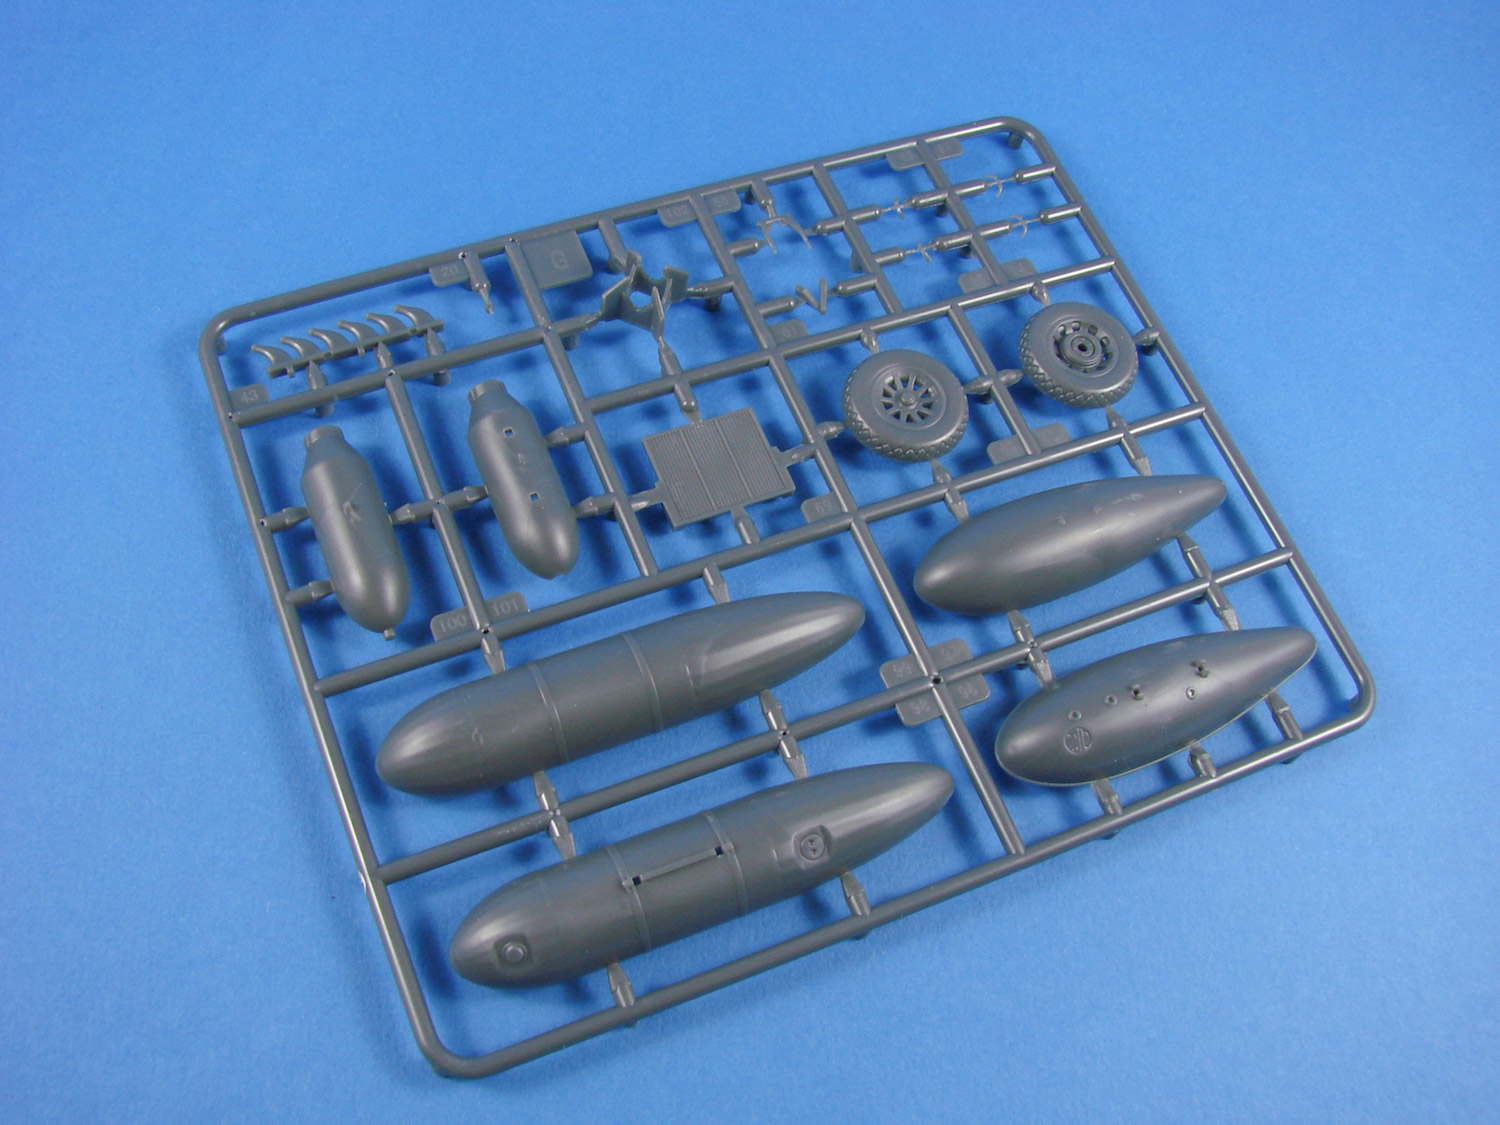
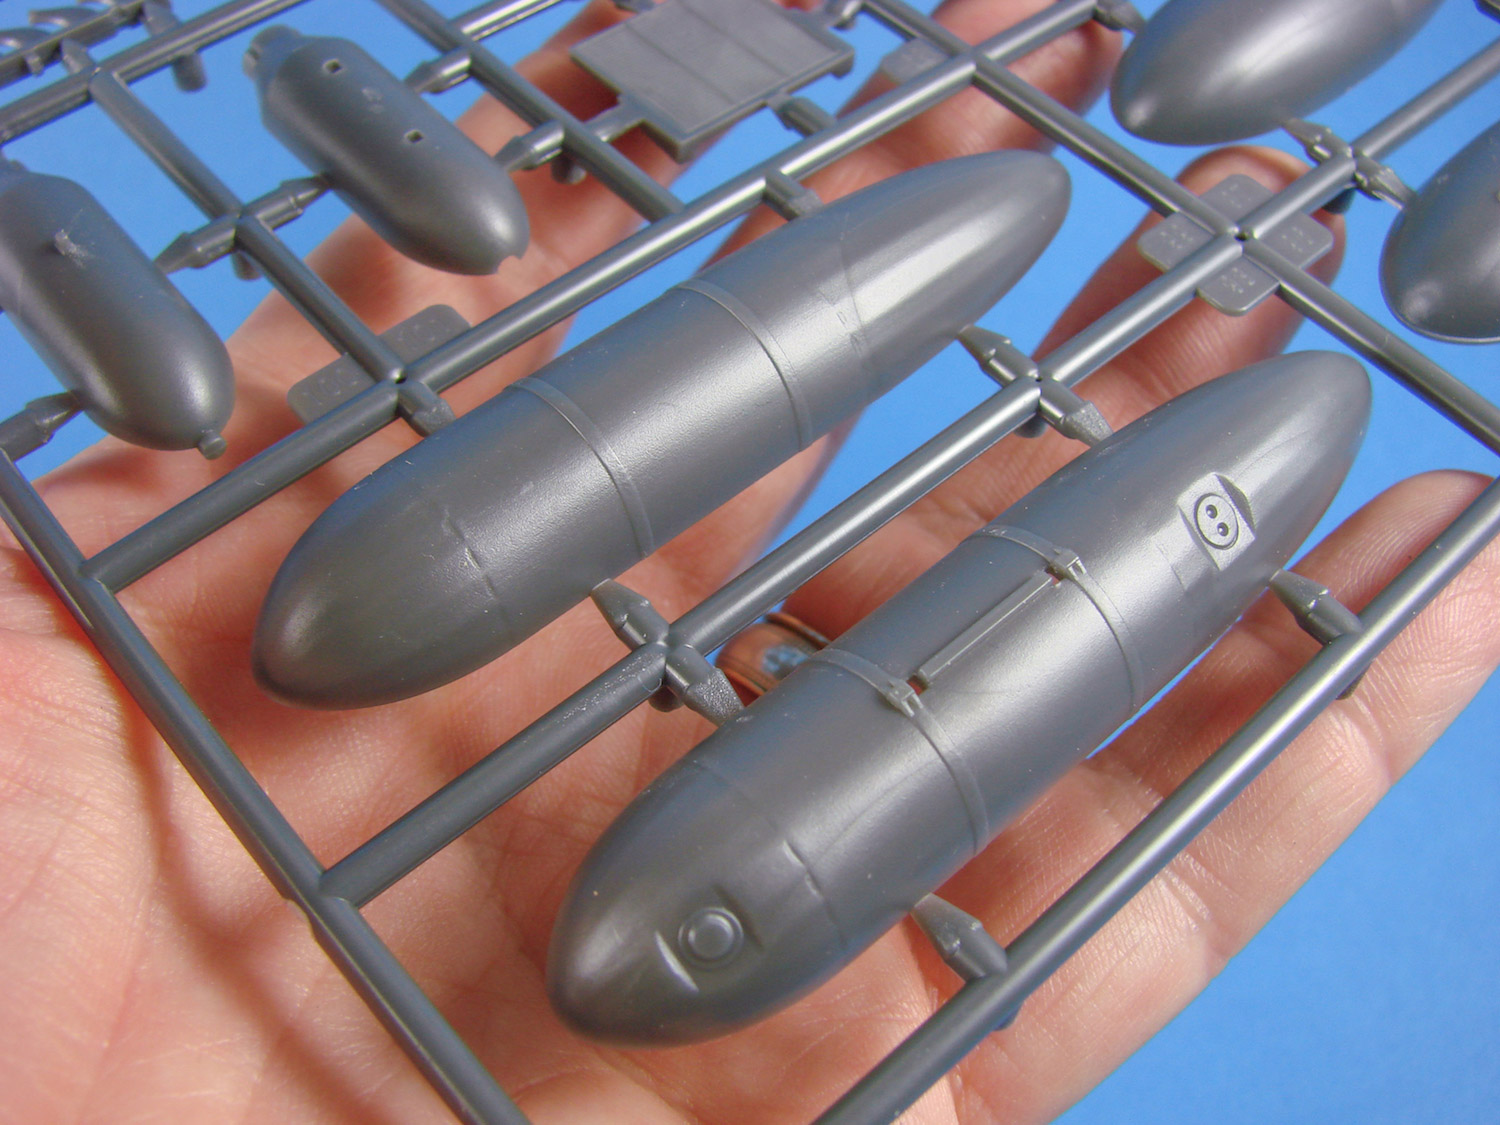
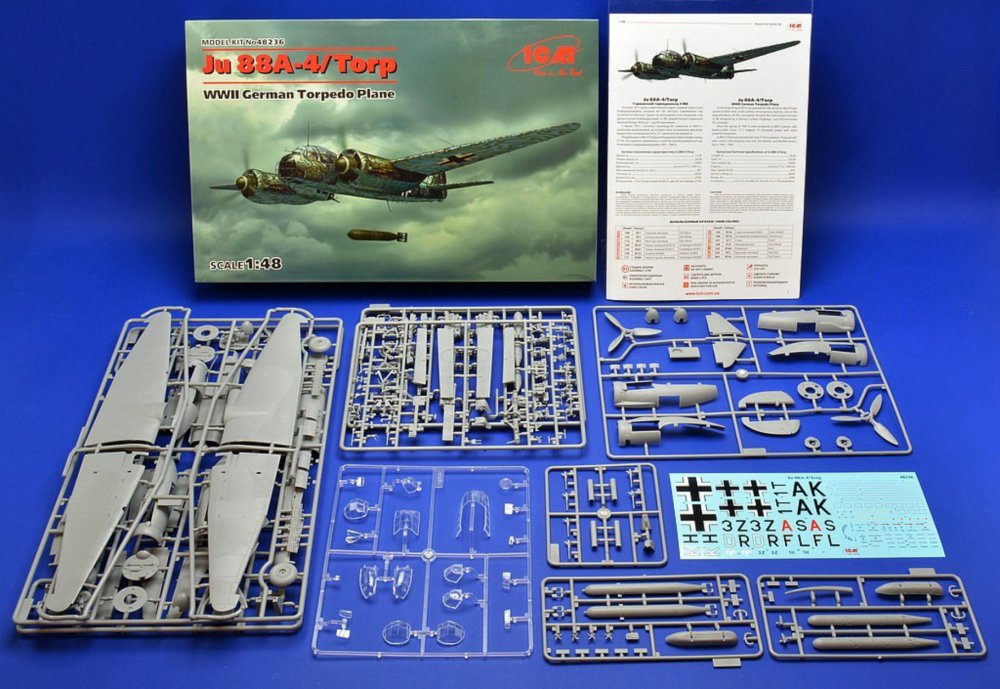
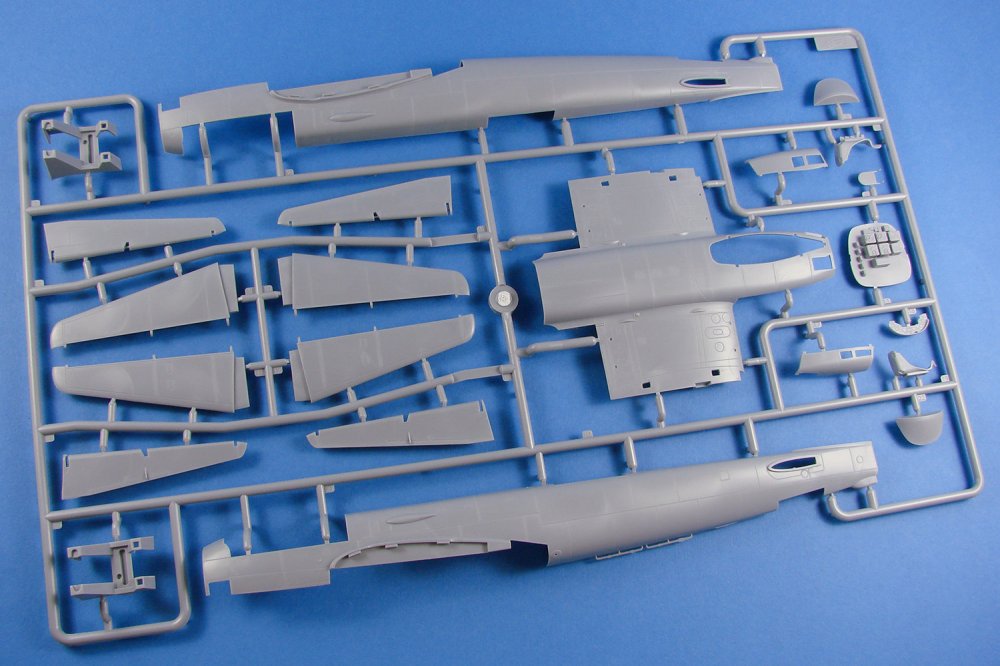
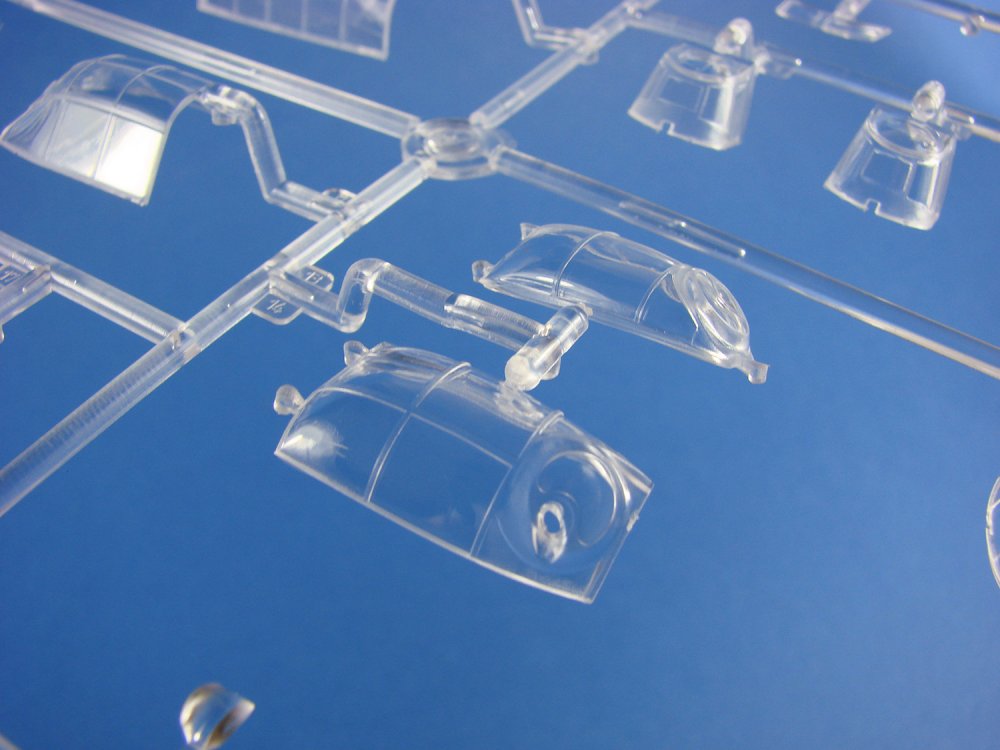
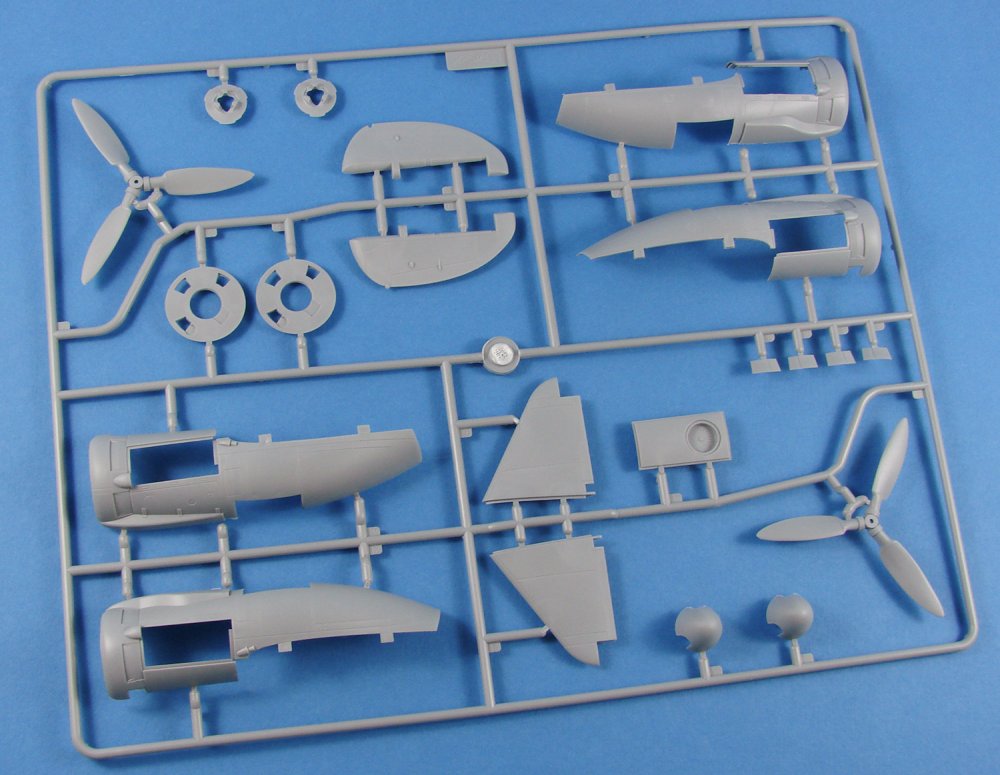
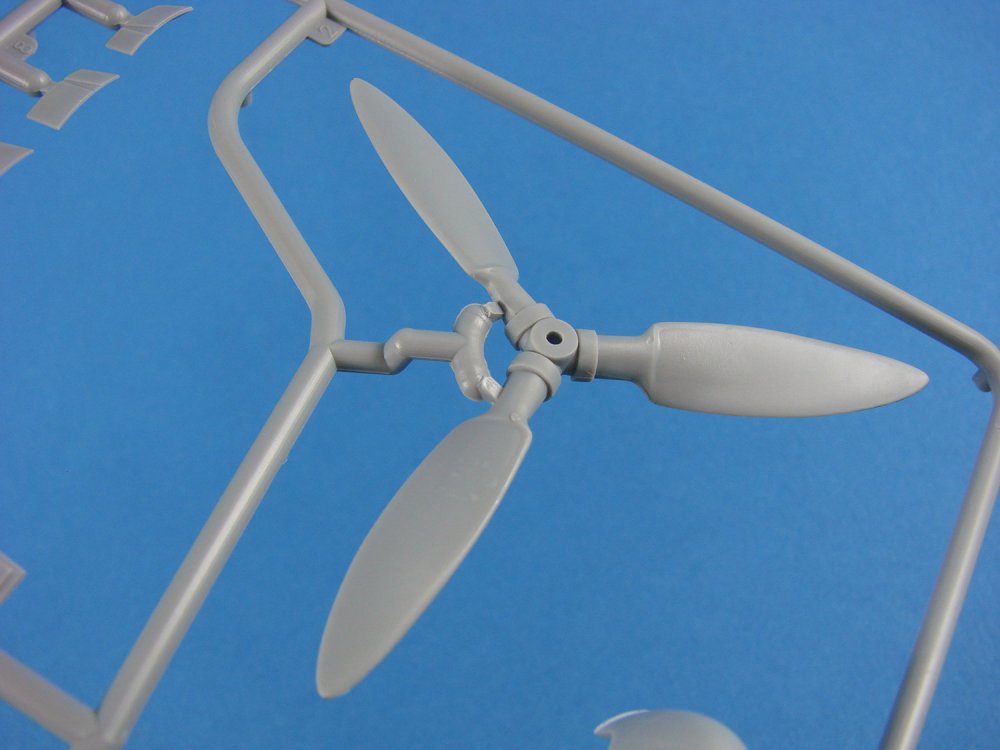
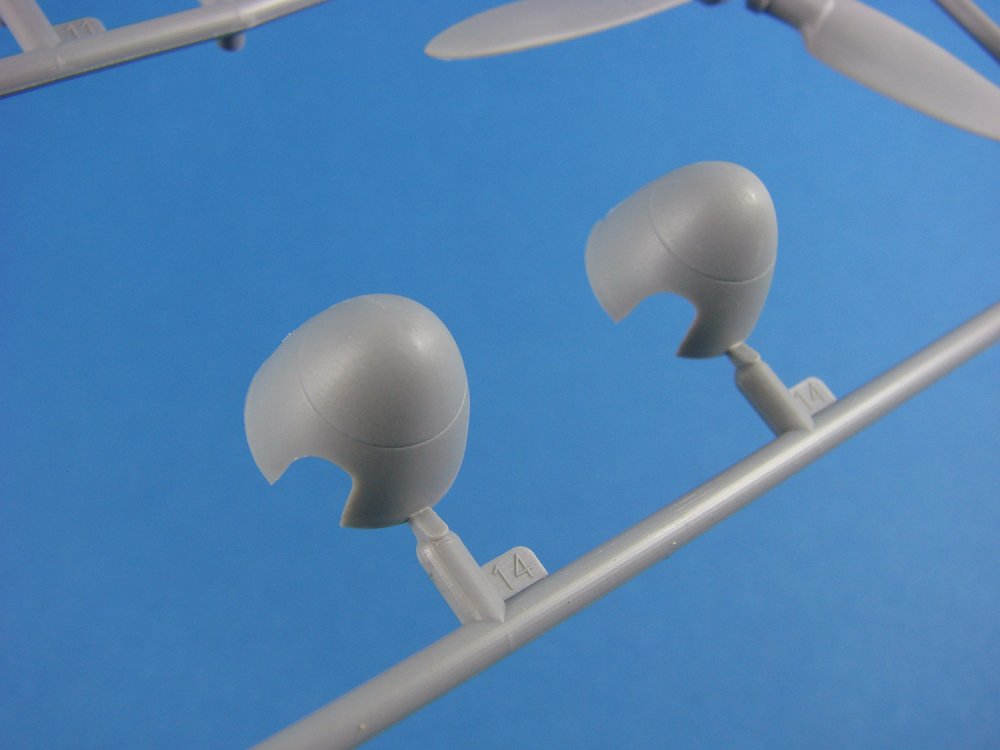
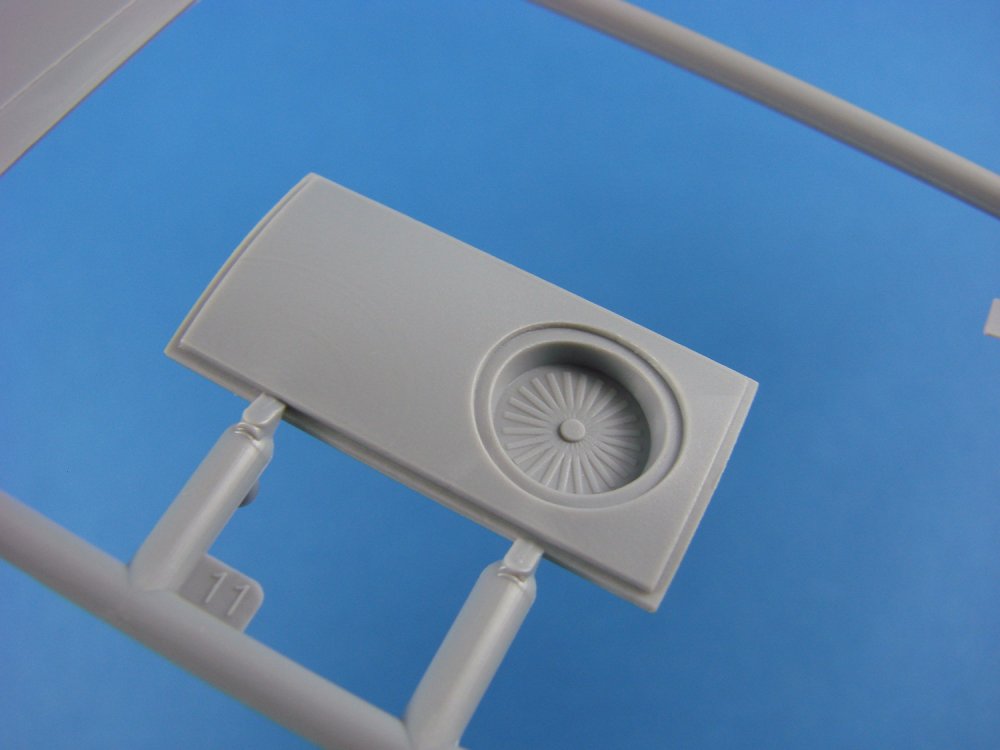
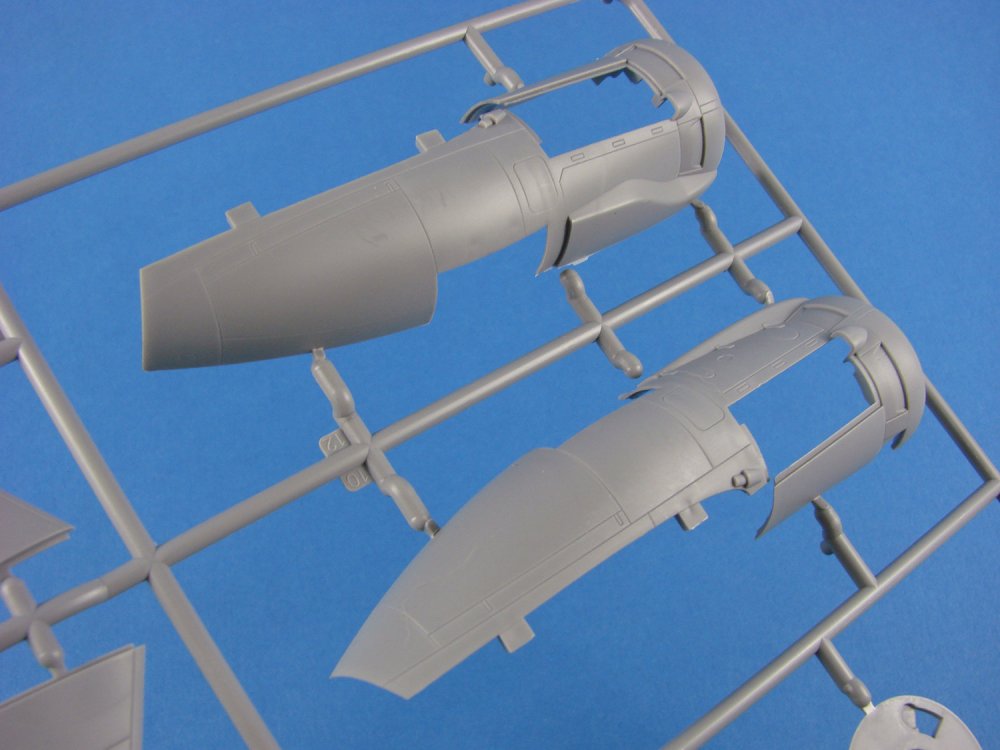
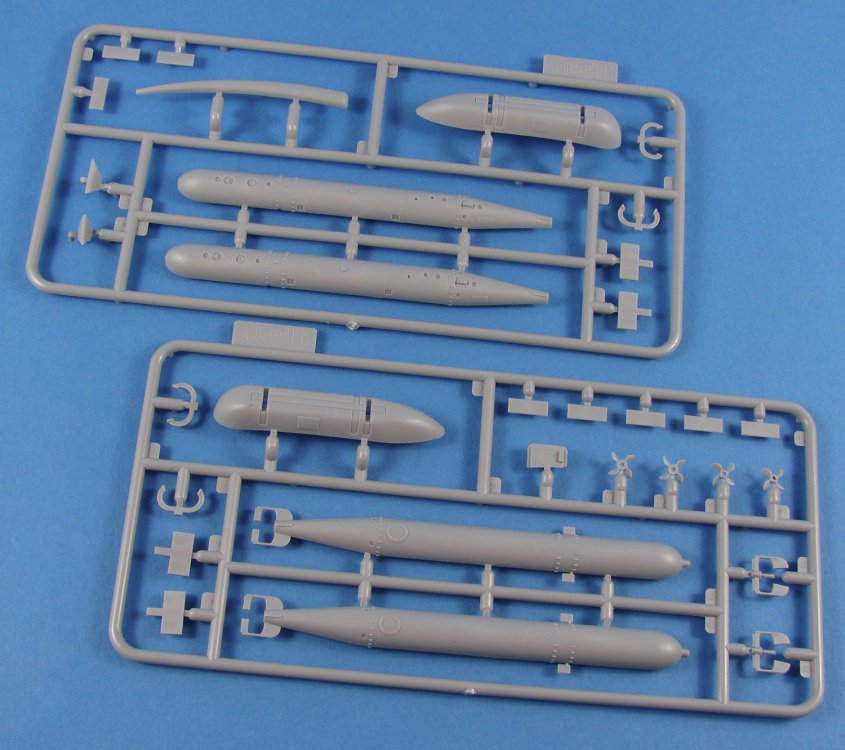
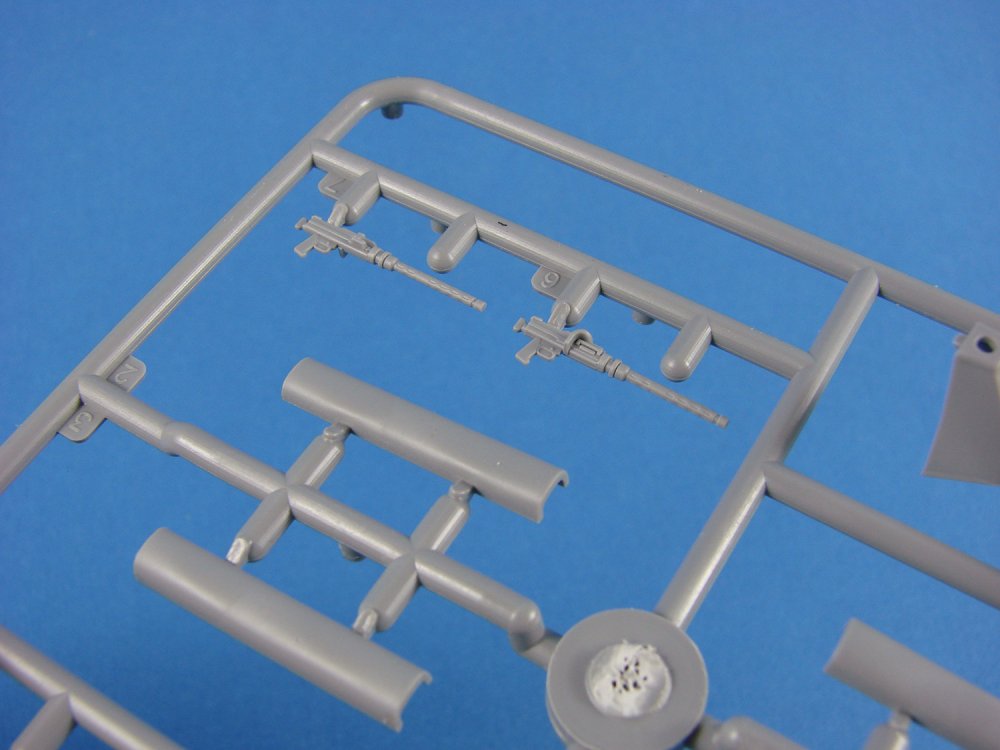
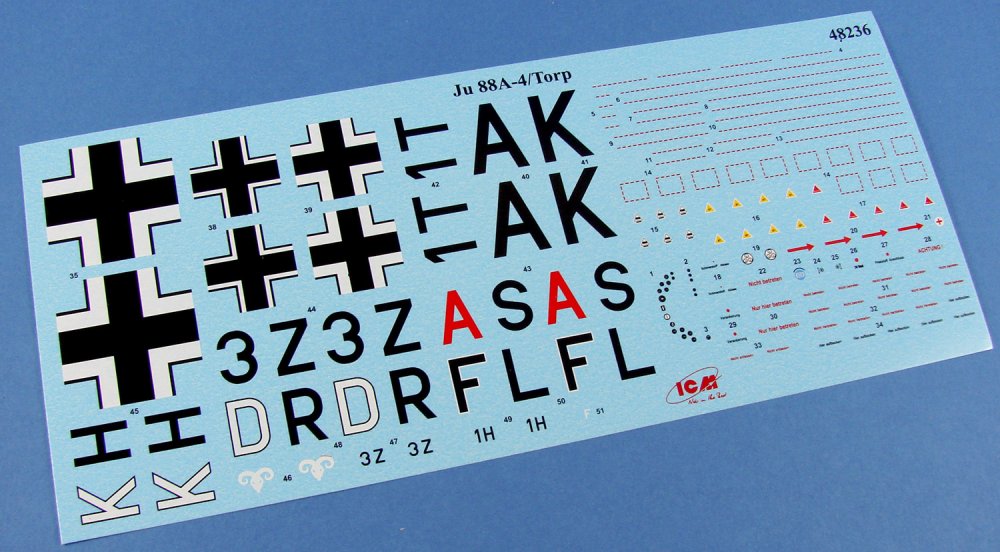
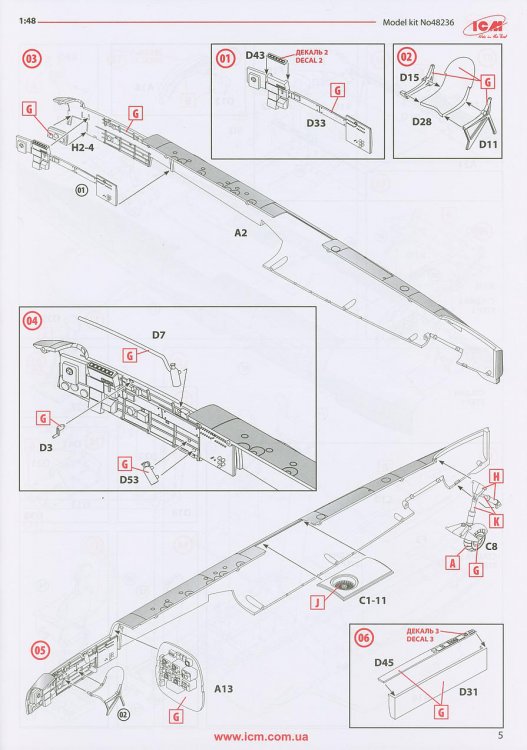
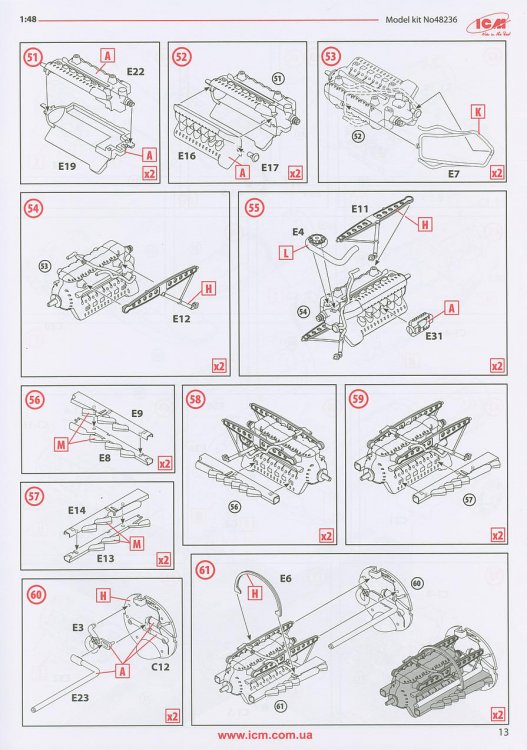
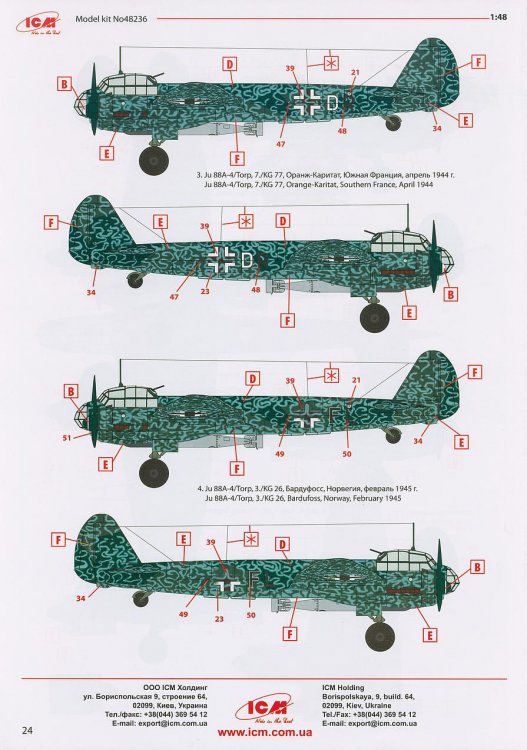
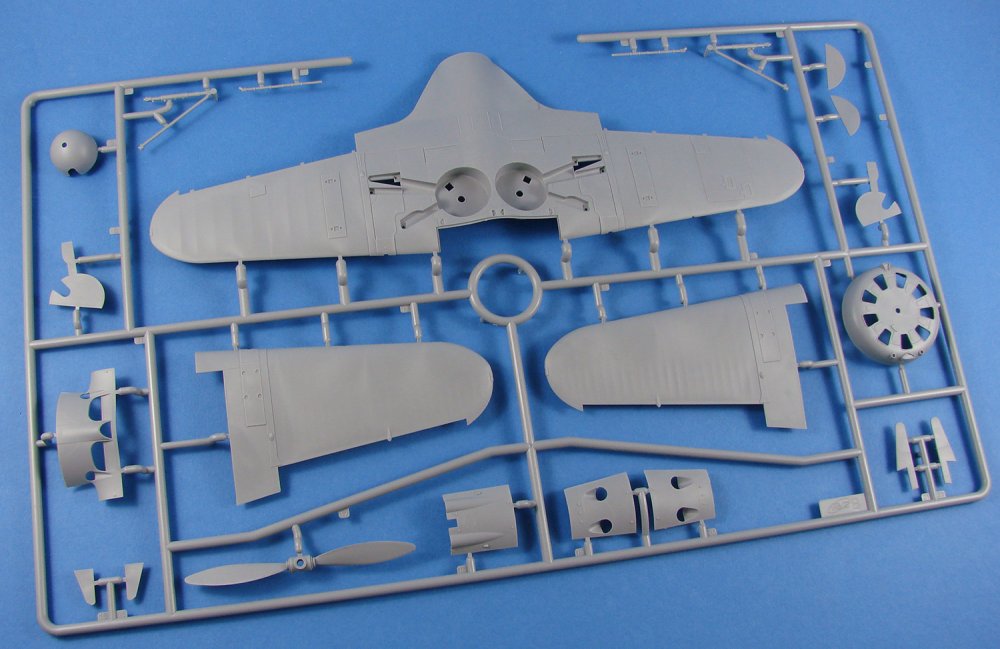
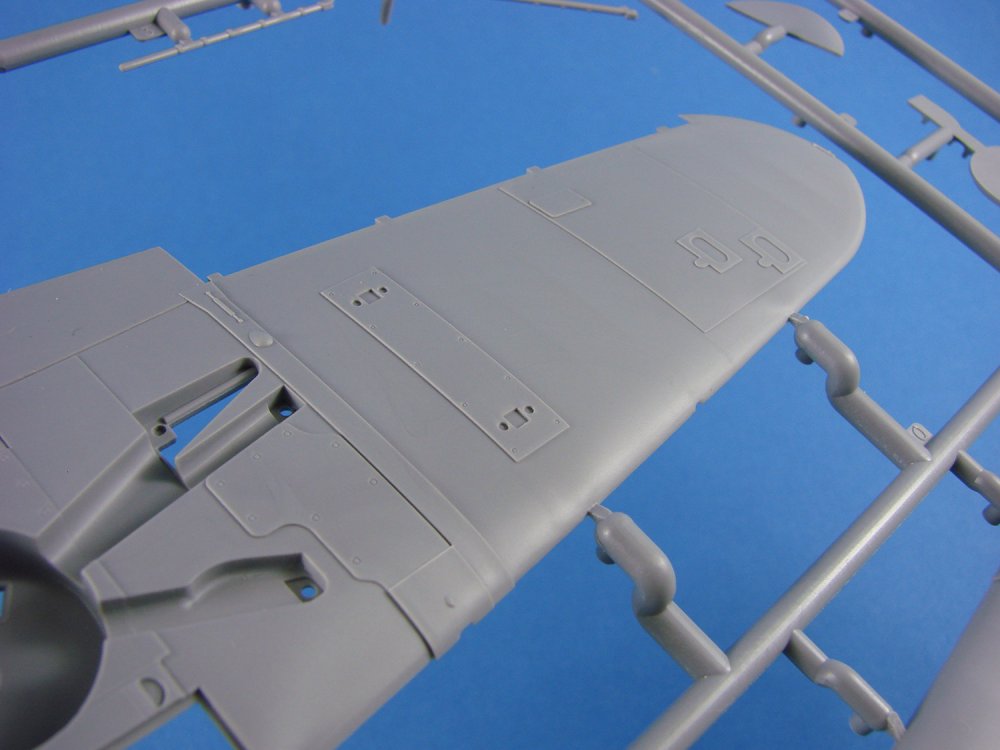
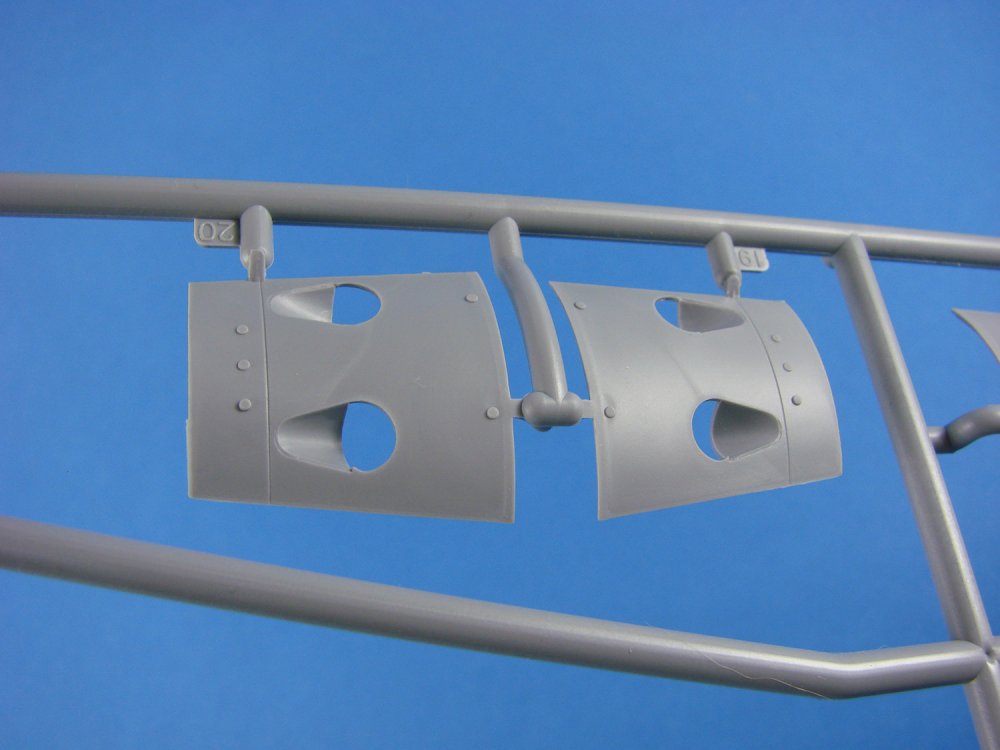
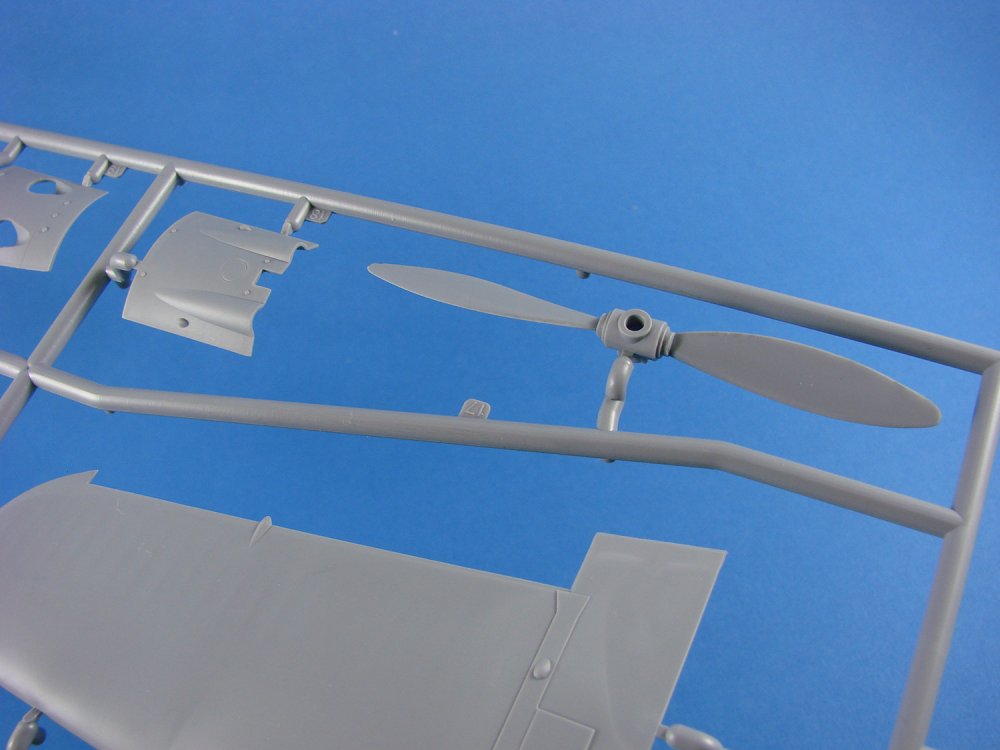
1/48 Junkers Ju 88A-4/Torp ICM Catalogue # 48236 Available from Hannants for £27.99 The Junkers Ju 88 was a German World War II Luftwaffe twin-engine multirole combat aircraft. Junkers Flugzeug- und Motorenwerke (JFM) designed the plane in the mid-1930s as a so-called Schnellbomber ("fast bomber") that would be too fast for fighters of its era to intercept. It suffered from a number of technical problems during later stages of its development and early operational roles, but became one of the most versatile combat aircraft of the war. Like several other Luftwaffe bombers, it served as a bomber, dive bomber, night fighter, torpedo bomber, reconnaissance aircraft, heavy fighter and, during the closing stages of the conflict in Europe, as a flying bomb. Despite its protracted development, the aircraft became one of the Luftwaffe's most important assets. The assembly line ran constantly from 1936 to 1945 and more than 16,000 Ju 88s were built in dozens of variants, more than any other twin-engine German aircraft of the period. Throughout production the basic structure of the aircraft remained unchanged. Without a doubt, the Junkers Ju 88 was one of the most versatile and adaptable aircraft to have been used during WW2. Entering service as the war was literally starting (on the day of the Polish attack), the Ju 88 became successful for its numerous famous and infamous roles, starting out as a light bomber/dive bomber, and when losses started to mount around the time of the Battle of Britain, it was moved into other theatres of war, such as North Africa, and against shipping in the Mediterranean with a torpedo-carrying variant. Where it is perhaps best known are for its roles as both a heavy fighter and night-fighter, in which it excelled. Perhaps a lesser-known role for the Ju 88 was that of torpedo bomber. The A-4 was modified to carry two LTF5b torpedos, and were used in anti-shipping operations in the Mediterranean and Atlantic. The A-4/Torp was also converted to the A-17, with the ventral gondola removed and a nose housing for the aiming mechanism. This particular machine also had a dedicated torpedo rack instead of the bomb racks used on the A-4/Torp. Courtesy of Wikipedia. The kit There has certainly been some mileage seen in the moulds for ICM’s rather sweet Ju 88 kit, with there now being TEN incarnations that have been released across the ICM, Hasegawa, Special Hobby and Revell labels, with Special Hobby creating their own resin and injection plastic parts to accompany the base ICM plastic. This particular Ju 88A-4/Torp version was released about mid-2017, but I’ve only just managed to get my hands on a sample. I certainly wouldn’t be surprised to see more incarnations of this kit in future, hopefully covering a number of the other exotic machines that were derived from the base Ju 88 airframe. There is of course a reason why we are seeing this kit being given multiple releases and that is simply because it is the definitive tooling of this important aircraft that is currently available, and with so many Ju 88 versions that existed, modellers are going to want to build the one that is specific to their interests, such as the heavy fighter, torpedo aircraft etc. Packaged into ICM’s very sturdy, full corrugated cardboard box, with a colourful and glossy product lid that depicts a low flying A-4/Torp that has just dropped a single torpedo, this kit consists of a single clear sleeve that holds all TEN medium-grey sprues and a single clear one. A total of about 250 parts makes up this release. Thankfully, the clear sprue is separately bagged within the main sleeve and all of the others are tightly packed up against each other, so no space for them to jiggle and rub against each other. A 24-page A4 manual is included, and a single decal sheet finalises the contents. I know that some modellers can be driven to frustration by the engineering choices that some companies make, but with this kit, ICM has boxed clever. As we know, it has been designed to accommodate other versions so as to maximise the tooling, but none of this is done to the disadvantage of the modeller. Some very intelligent design work can be seen here, such as the fuselage halves being full length, so no need to graft on different nose versions. The fin is also separate, indicating something from the 88G family, maybe. Wing root fairings are moulded to the fuselage and are tabbed, meaning that the upper wing panels can easily sit on these and provide a positive location point. Another touch of genius is a single piece lower fuse and inboard wing panel section. When this is fitted to the fuselage, and then the wing panels added, the lower seam will be totally hidden under the broad nacelle structure. The nacelles themselves will then locate into the undersides via tabs. If you’ve ever seen the Revell 1/32 kit, you’ll know that there is a sturdy structure within the nacelle that the undercarriage is mounted to. Looking at this model, I think that whilst you may need to fit that mounting structure prior to the nacelle, it appears that you can probably fit the landing gear later, after painting. All control surfaces on this model can be posed, with the rear of the nacelles being separate for this purpose. You may need to fiddle things with this, and I can’t comment further without test fitting this one. Two detailed Jumo211 engines are included in this kit, with the provision to display one/either of them. These really do look very good, with each unit containing around 15 parts per engine, including the firewall and associated plumbing. The engines must be installed within the nacelle before the whole assembly is offered to the wing. You’ll need to make sure your painting and masking regime is good here. Cowl radiator flaps are presented as open only, so to pose these in the more aesthetically pleasing closed position, you will need to do a little surgery. Propellers are supplied as single piece units, and the spinner comprises of the typical back-plate and front section. If you expect a lot from the cockpit area, in terms of detail, then this won’t disappoint. Whilst there is no specific Eduard sets for this release at the time of writing, some areas could still use some of the sets designed for the ICM release. As no seatbelts are included in this kit, you will definitely need to sort out that omission. The office area is very well-appointed, with nicely moulded fuselage sidewall details, superbly equipped radio rear bulkhead, ammunition racks and drums, detailed instrument panel, side consoles with delicately rendered instruments, two-piece control column, rudder pedal assemblies, seats with intricate mounting points etc. I don’t really think there would be much to add in here, with the exception of some colour PE, perhaps. When assembled the cockpit will most certainly be a very busy and visual area. The bola gondola is well-appointed too, and this area is moulded separately to the underside fuselage, and can be fitted later in assembly. Surface detail is everything you would expect from a modern-tooled model, with finely engraved panel lines and port details. There are also no rivets at all, so if you do want them, then you’ll have to get out Rosie. Plastic quality here is excellent with no flaws or obtrusive ejector pin marks. Clear plastic parts, both ICM and Special Hobby, are superb, with excellent clarity and nicely defined frame details. Of course, this particular kit does vary in a number of aspects, from previous releases, and looking through the parts maps does indicate a large number of parts that should NOT be used with this particular release. In fact, the original Sprue C has been supplemented with Sprue C1. This contains whole new engine nacelles, propellers, spinners, annular radiator intakes, tabbed fin and rudder, fuselage spine section with dipole etc. Parts not to be used are clearly defined on the parts map by being shaded in pink. Another sprue that takes a major hit on unused parts is the engine sprue. Here, you can discount all of the bomb parts, and guns/ammo drums etc. There are THREE new sprues in this particular torpedo bomber version, and it will come as no surprise to find out that two of these, H1 & H2, contain the torpedoes and bomb racks. The torpedoes themselves are moulded as halves, with separate propulsion impellors and a fin modification unit that is similar to the ones that the Japanese used on their torpedoes at Pearl Harbour, allowing the torpedo to operate very close to the water’s surface. Detail on these is excellent, and laden with two of these, this Ju 88 version should look particularly unusual and menacing. The last new sprue here, G, contains guns for the various flexible mounts, and also optional exhaust shrouds. Decals An ICM-printed decal sheet contains markings for FOUR marking schemes, with all printing being in solid, authentic colour, with minimal carrier film and also being both nice and thin. Registration is perfect too. As well as markings, a full suite of stencils are included as are instrument decals. The instruments are probably better punched out from the decal and applied individually, so you don’t have to attempt to get the decal to conform to the raised panel details. The four schemes in this release are: Ju 88A-4/Torp, 8./KG26, Grosseto, Italy, late 1942 Ju 88A-4/Torp, 1./KG77, Italy, September 1943 Ju 88A-4/Torp, 7./KG77, Orange-Karitat, Southern France, April 1944 Ju 88A-4/Torp, 3./KG26, Bardufoss, Norway, February 1945 Instructions ICM’s instruction manuals are very attractive and easy to follow, with 103 easy-to-follow stages that shouldn’t present any issues with assembly. The first part of the manual highlights the colours needed for completing this model (Revell and Tamiya paints), as well as parts maps of the sprues. The rear of the manual has two pages for the four schemes, printed in colour and with good decal placement notes, plus a page denoting stencil placement etc. Conclusion Another excellent Ju 88 release, and as this is Revell, you know that the price point is spot on. This kit currently retails for around £30 or less in the UK, and I think that relates to excellent value for money when you look at the detail levels that are provided here. The A-4 was a pretty common variant from around the end of the BoB until the latter stages of the war, so I’m pleased to see this rather unusual variant counting itself amongst them. I certainly hope to see more in future. This kit doesn’t have any PE parts, so for at least the seatbelts, you might want to consider some of Eduard’s aftermarket sets for the other ICM/Revell variants. Most parts will be completely usable in this release. Of course, this is an in-box review, and I’ve not looked at the fit of this. I have seen a small number of Ju 88 kits built though, and spoken to modellers who have built others, and they claim no real problems in construction. ICM’s engineering seems to be logical and sensible, and without the annoyances of the earlier, unrelated Dragon releases. Highly Recommended My thanks to ICM for the review sample seen in this article. To purchase directly, click THIS link.


-
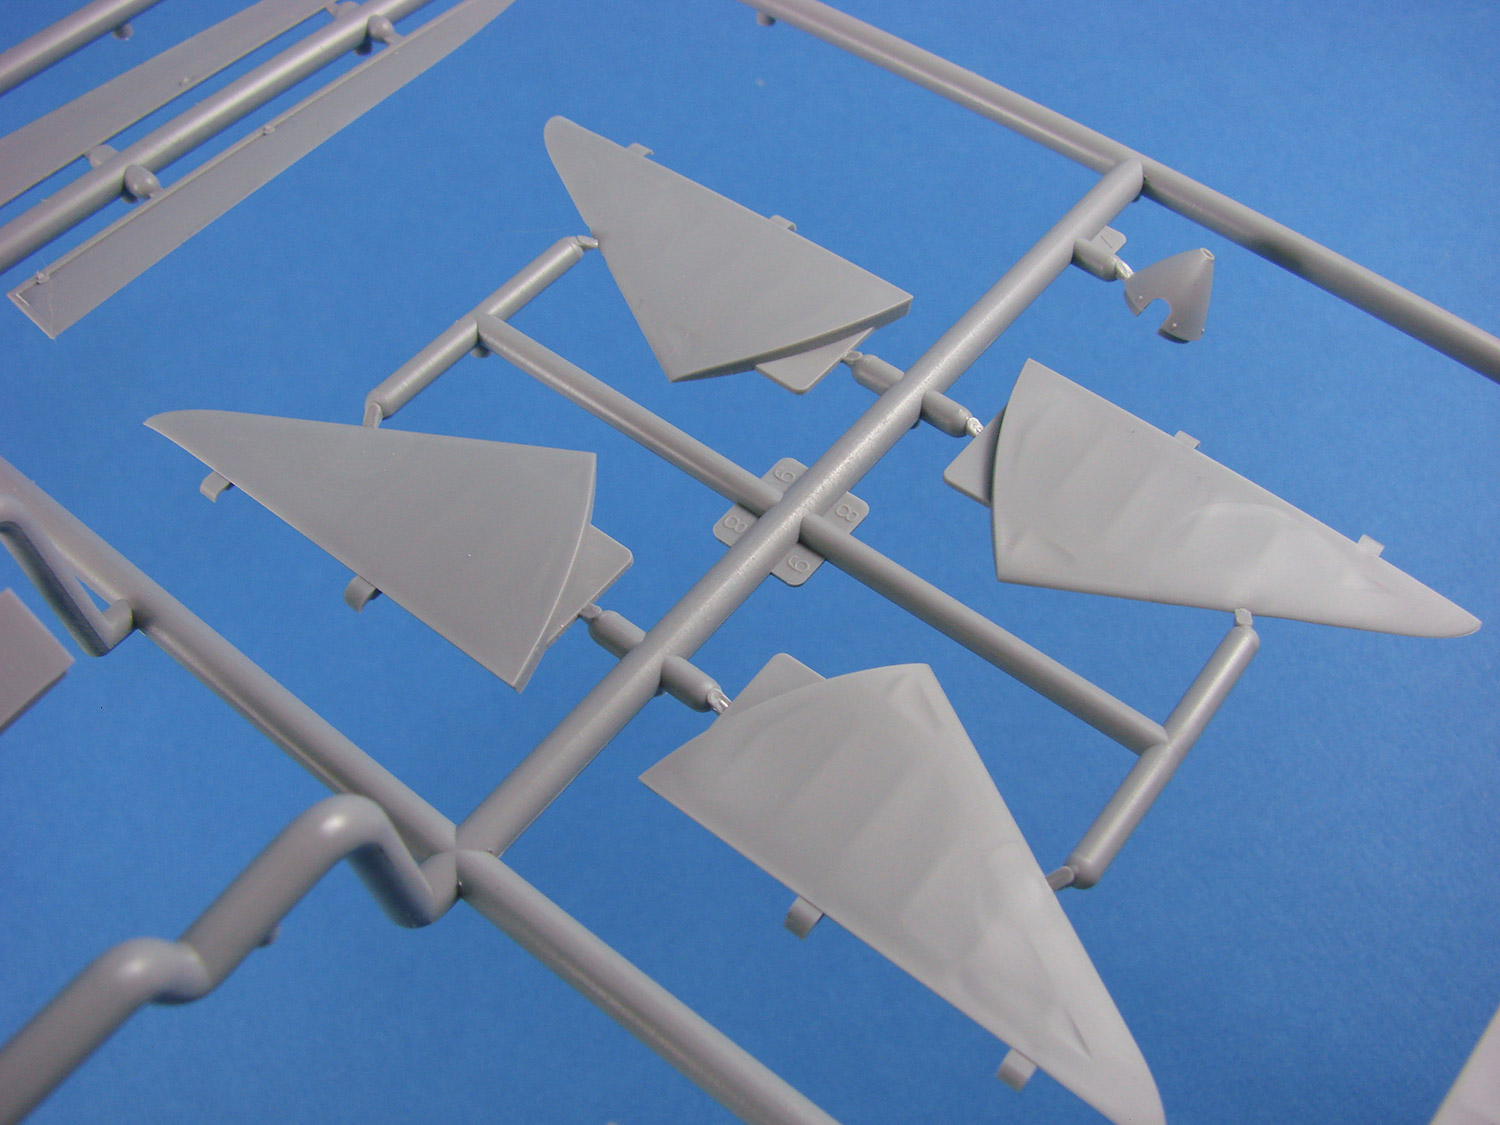
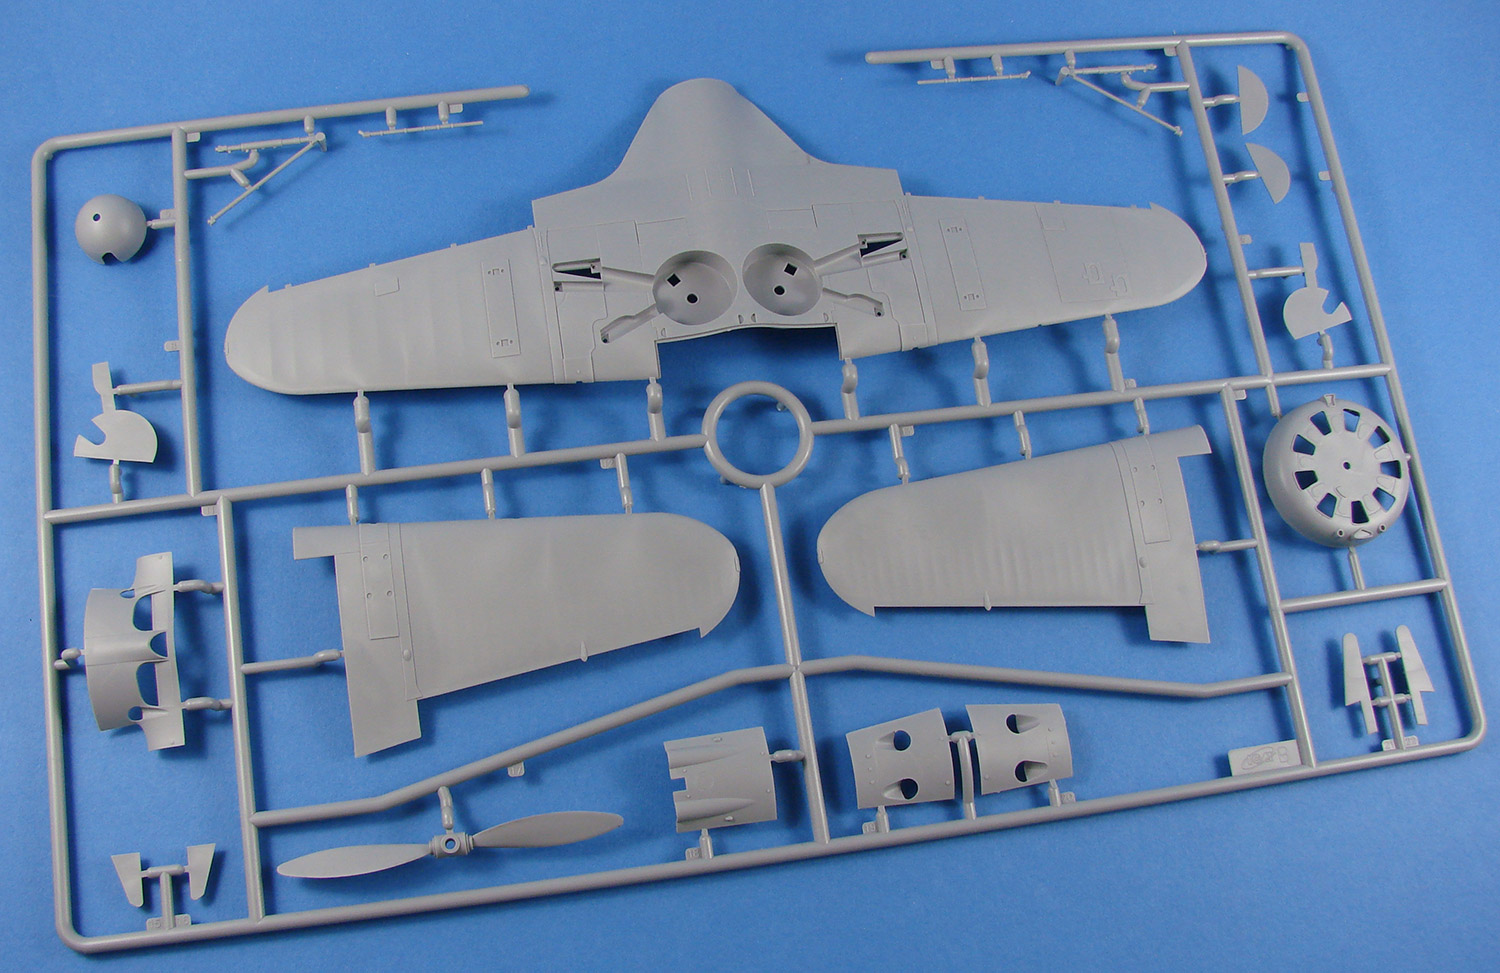
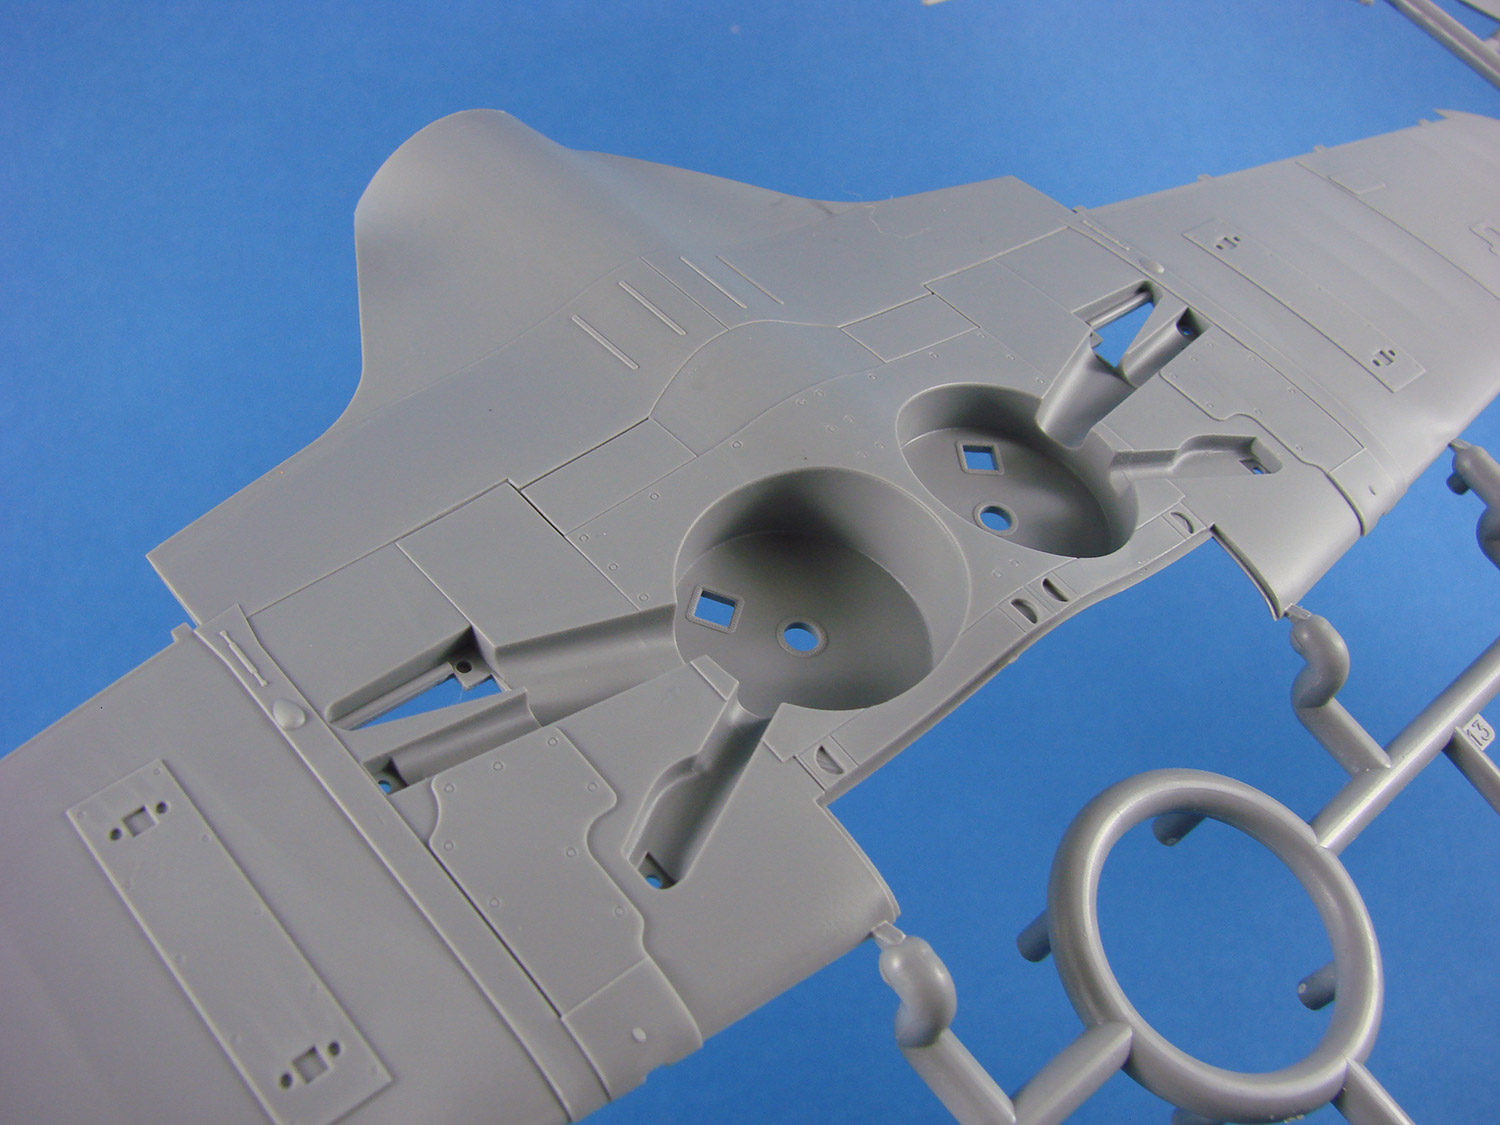
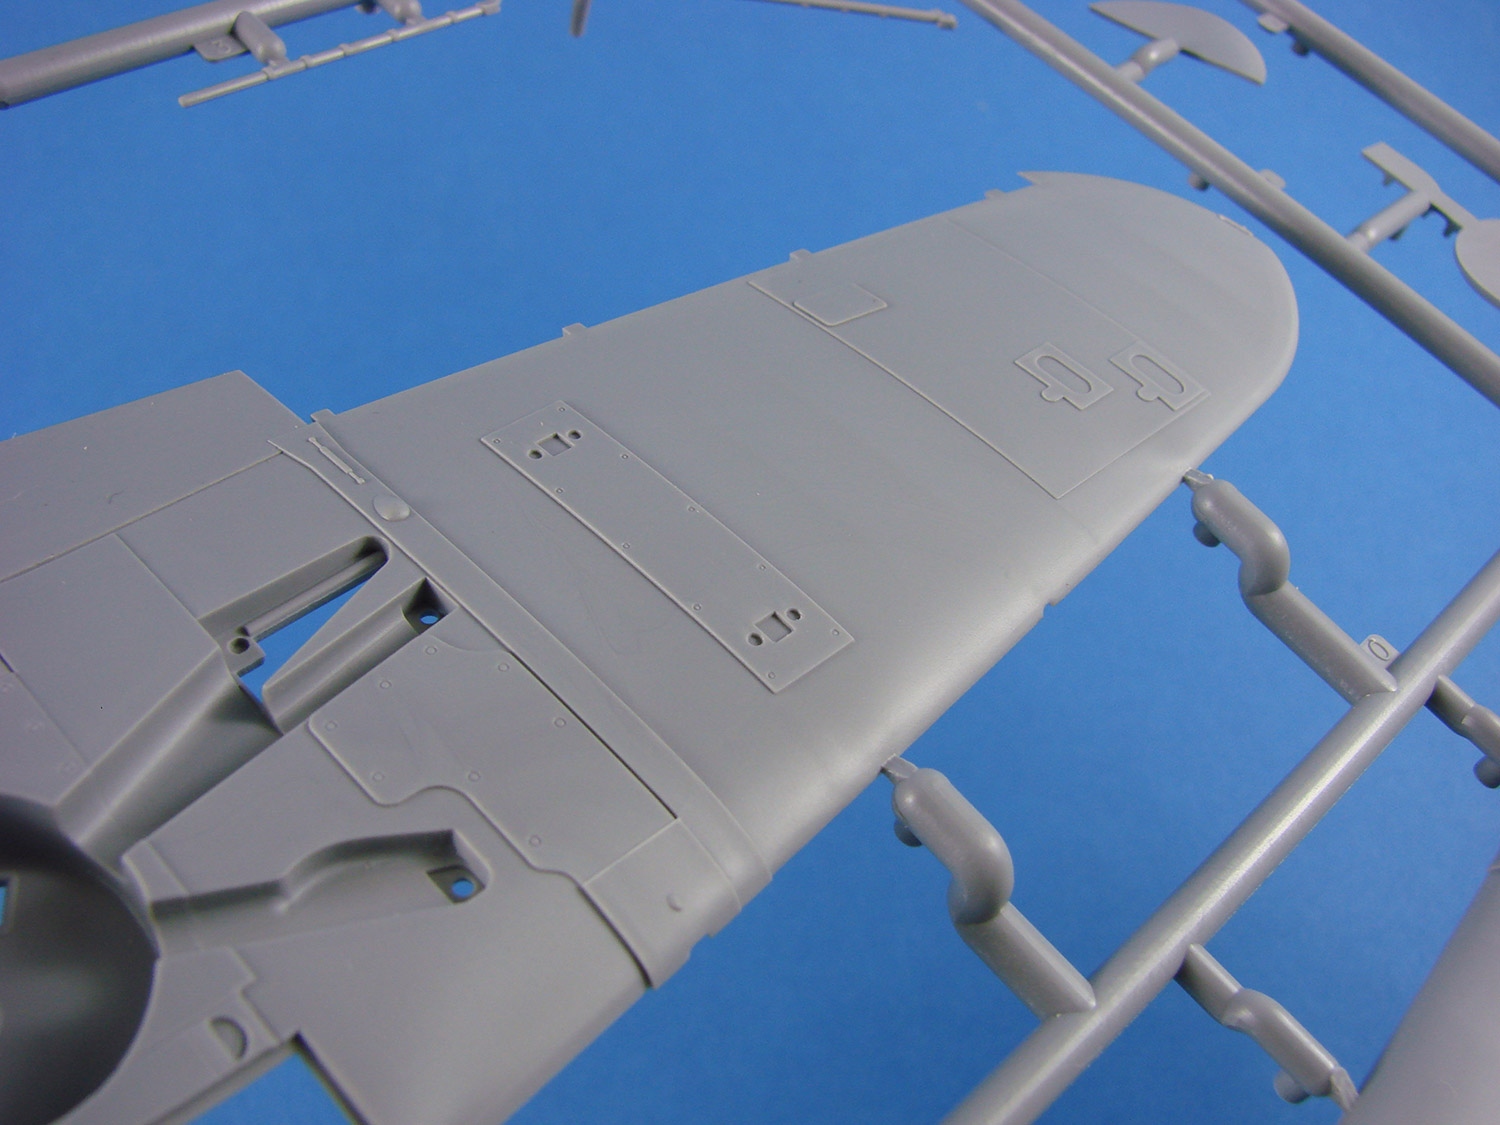
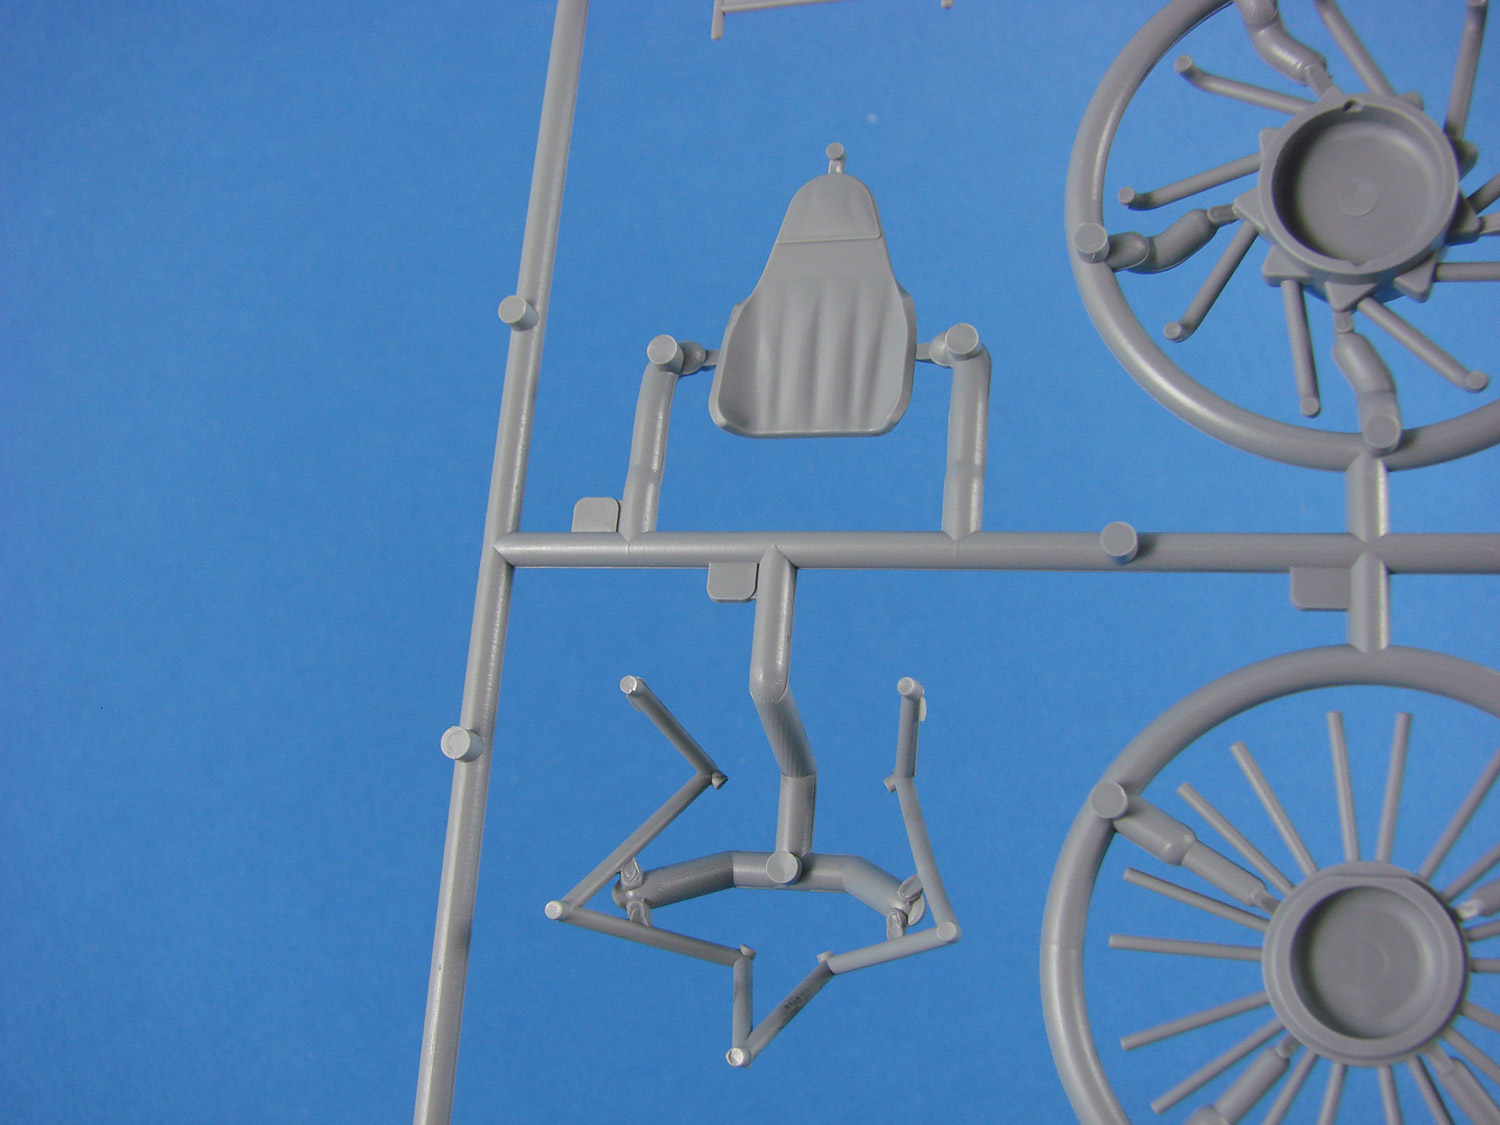
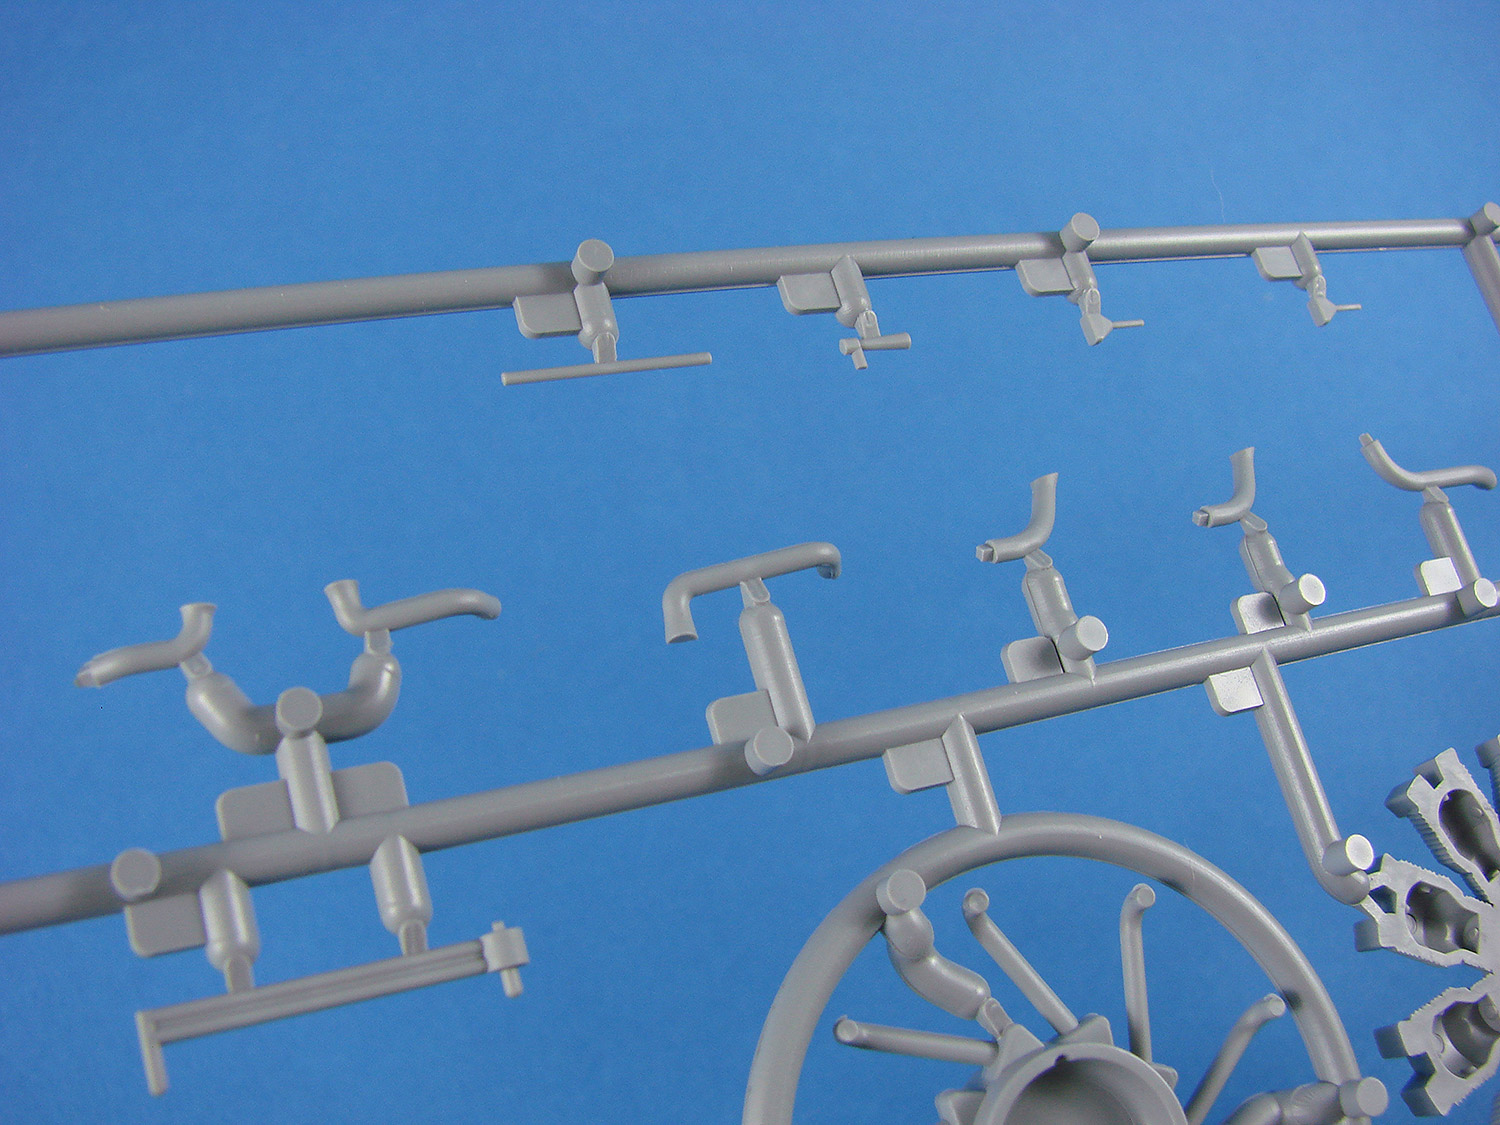
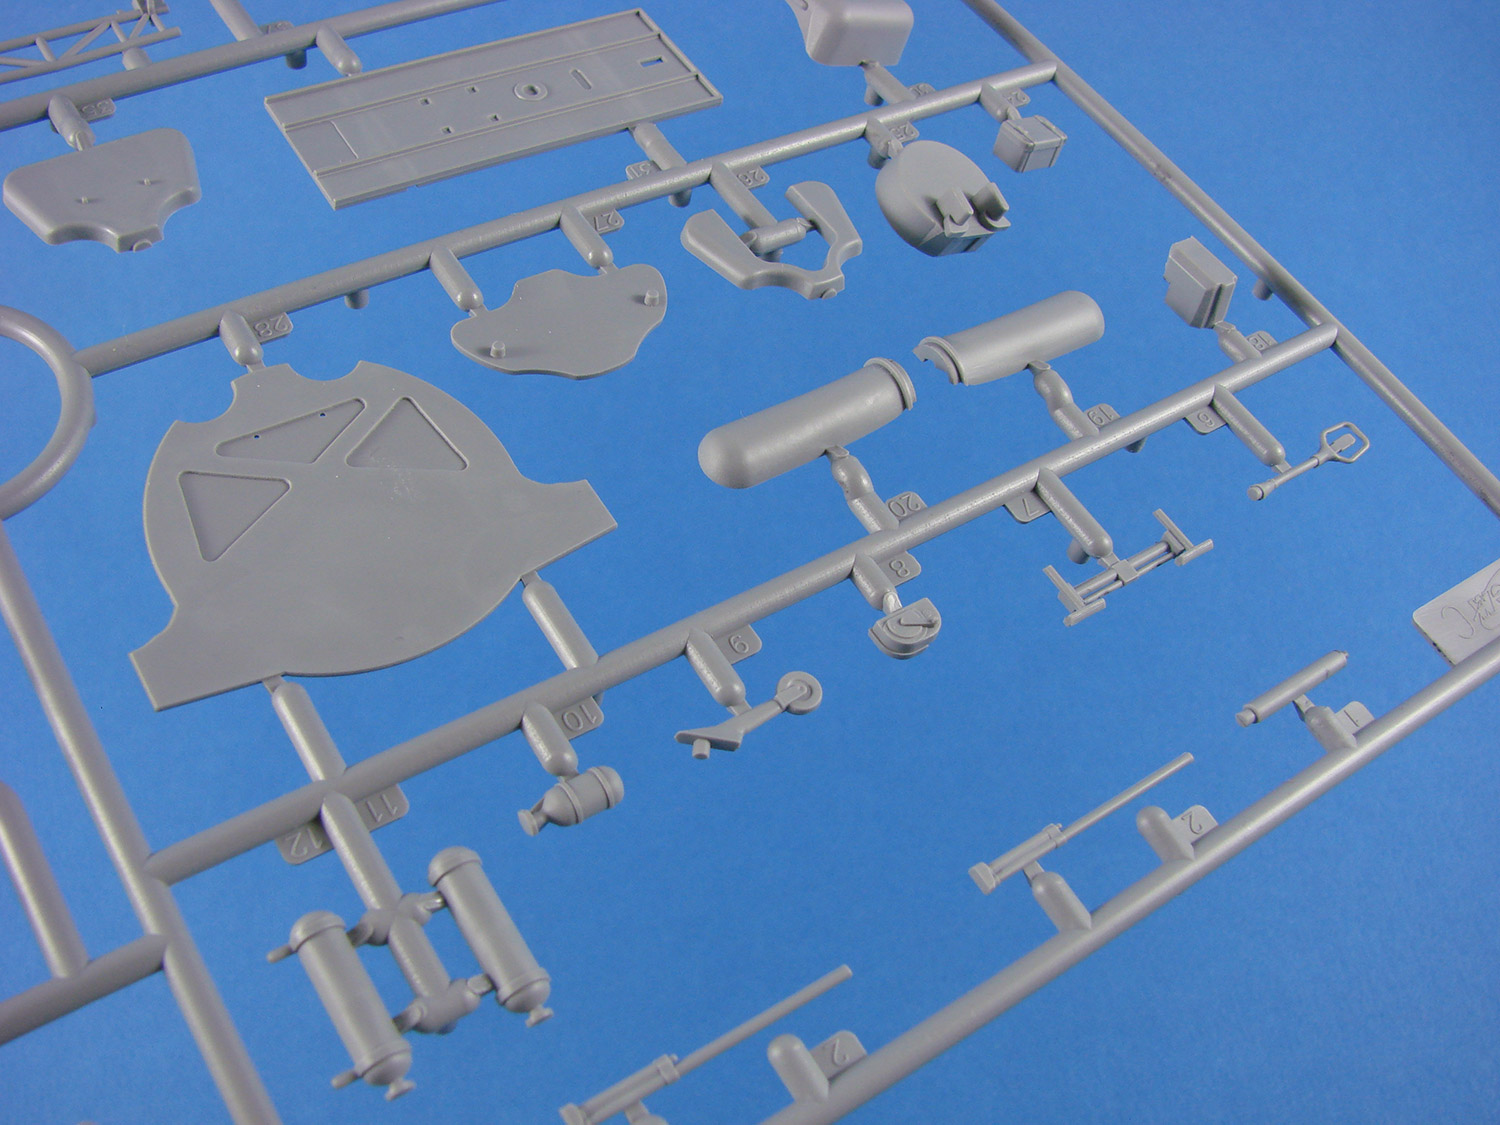
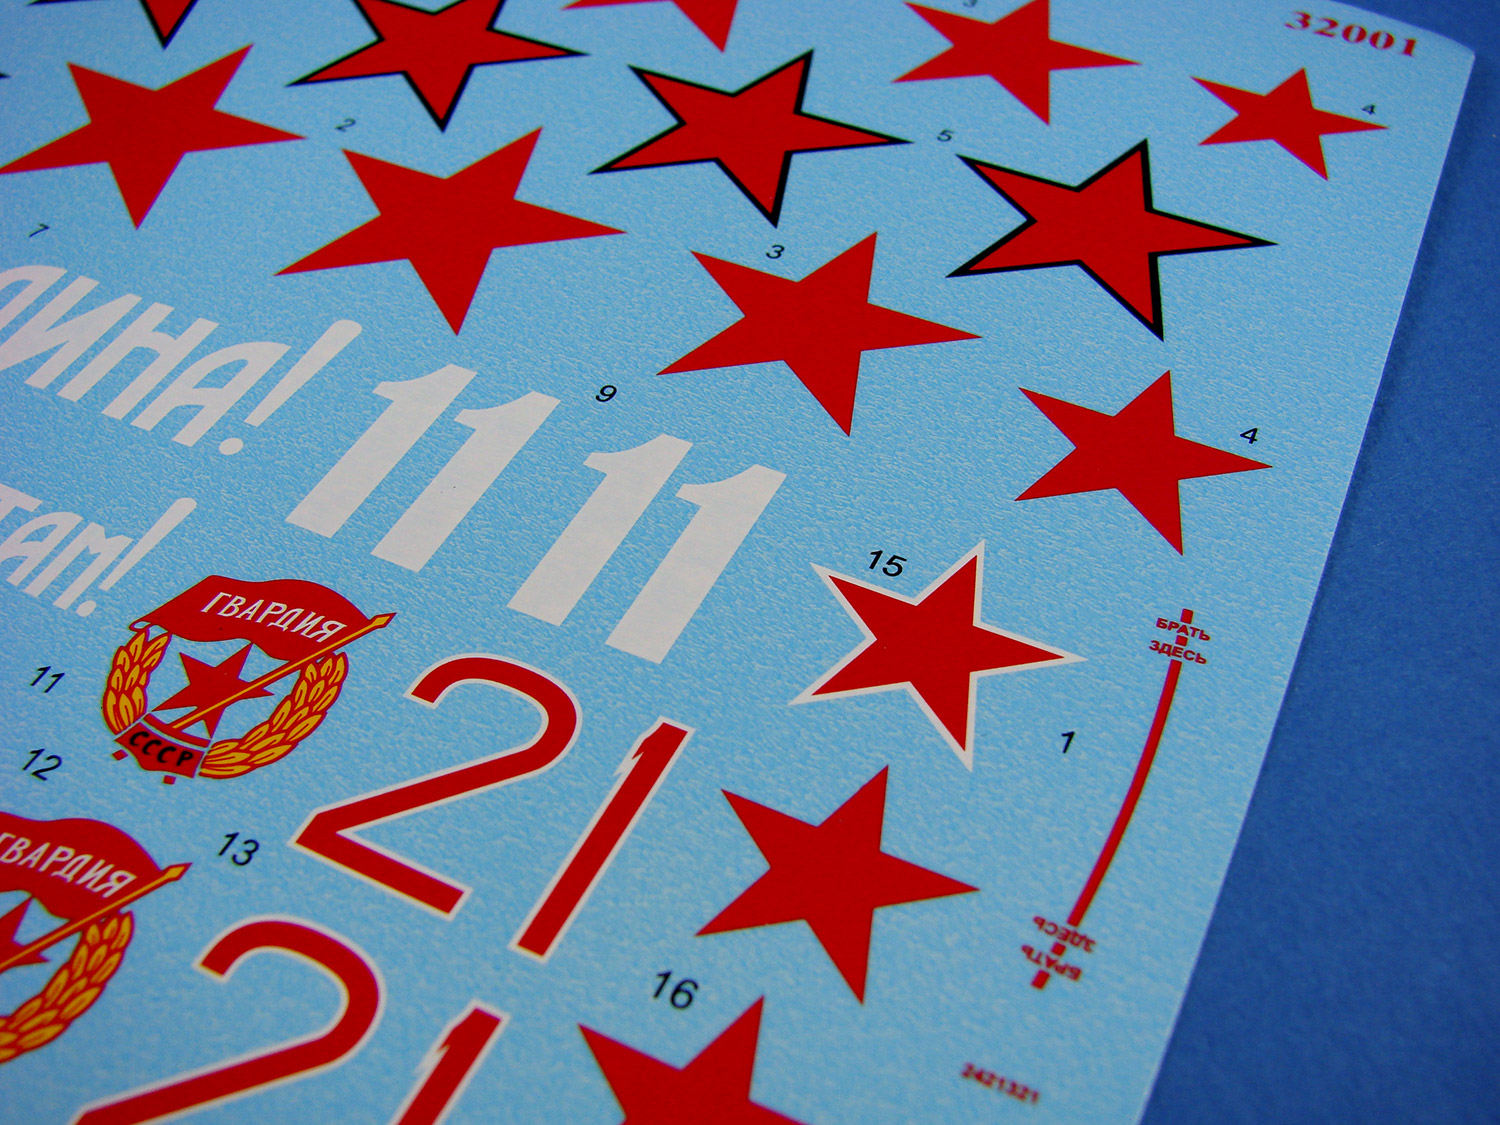
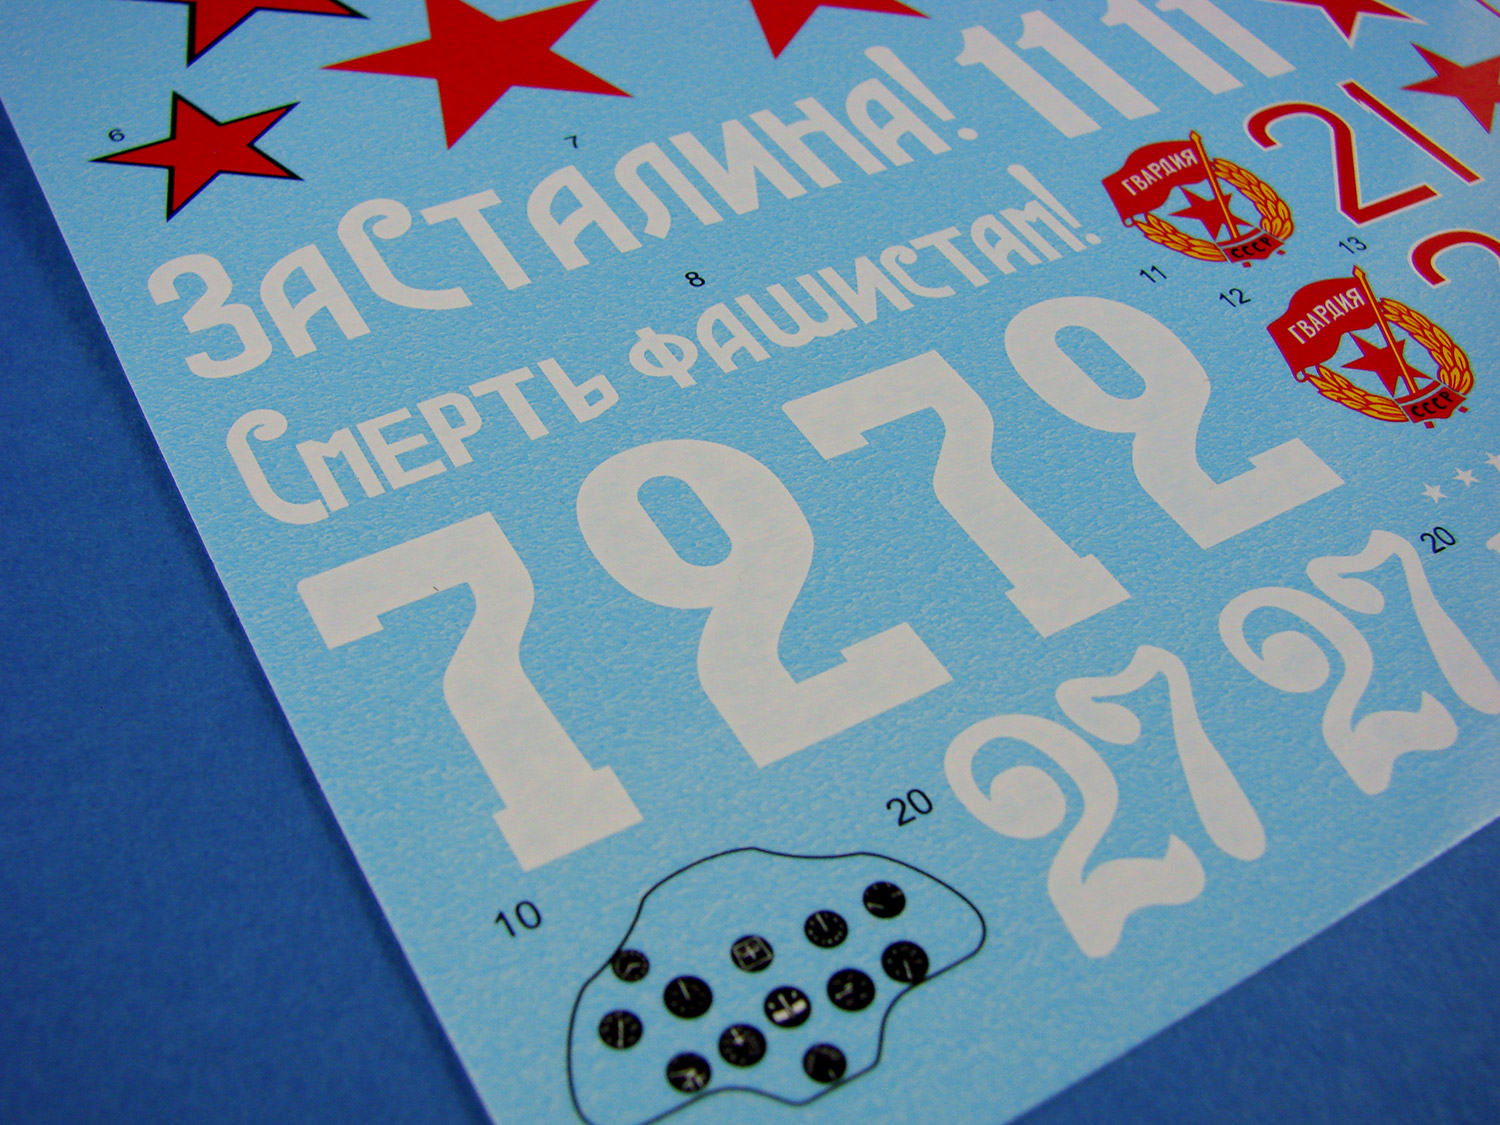
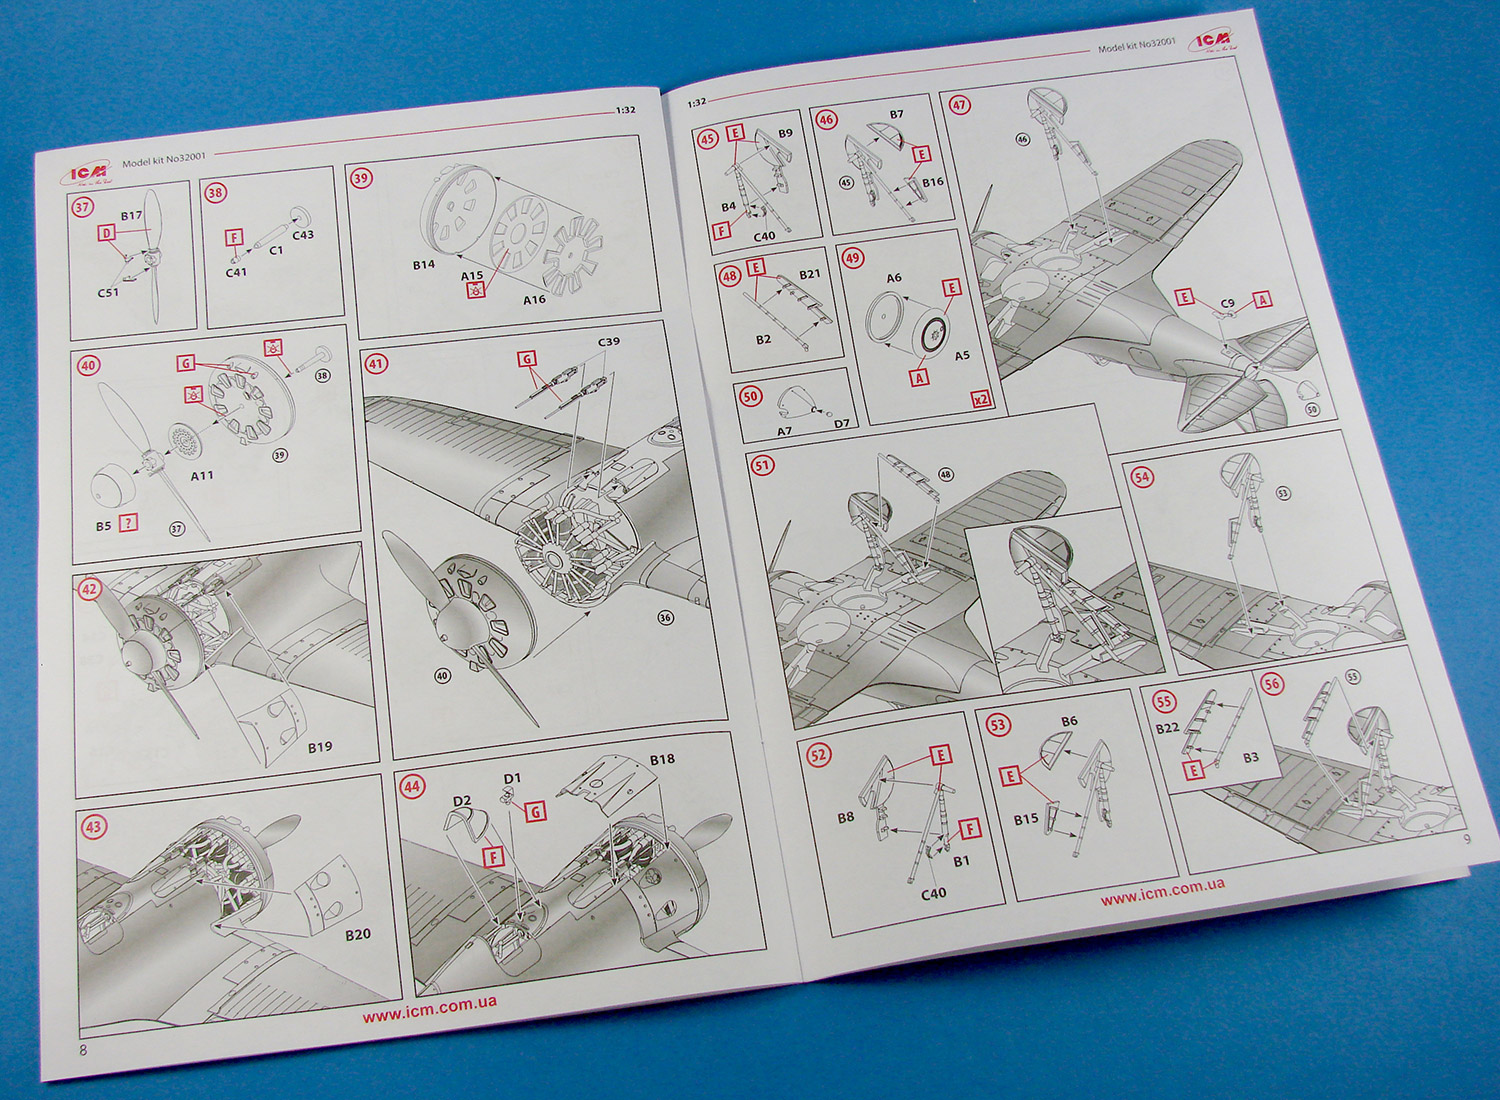
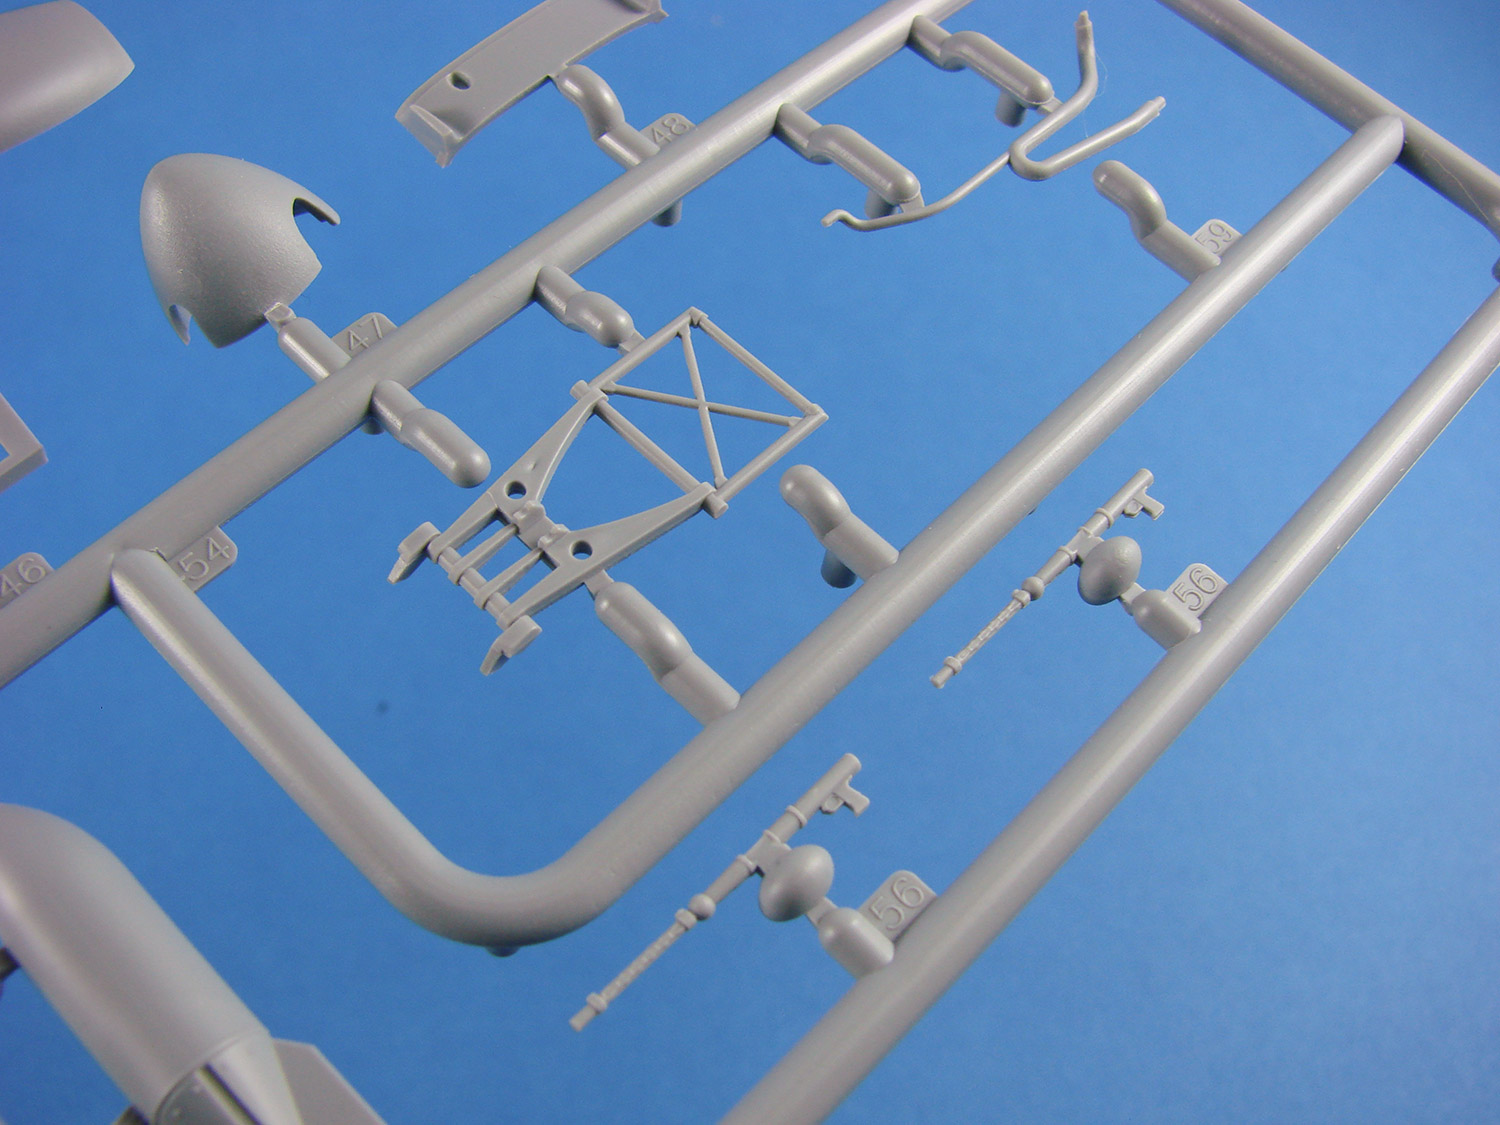
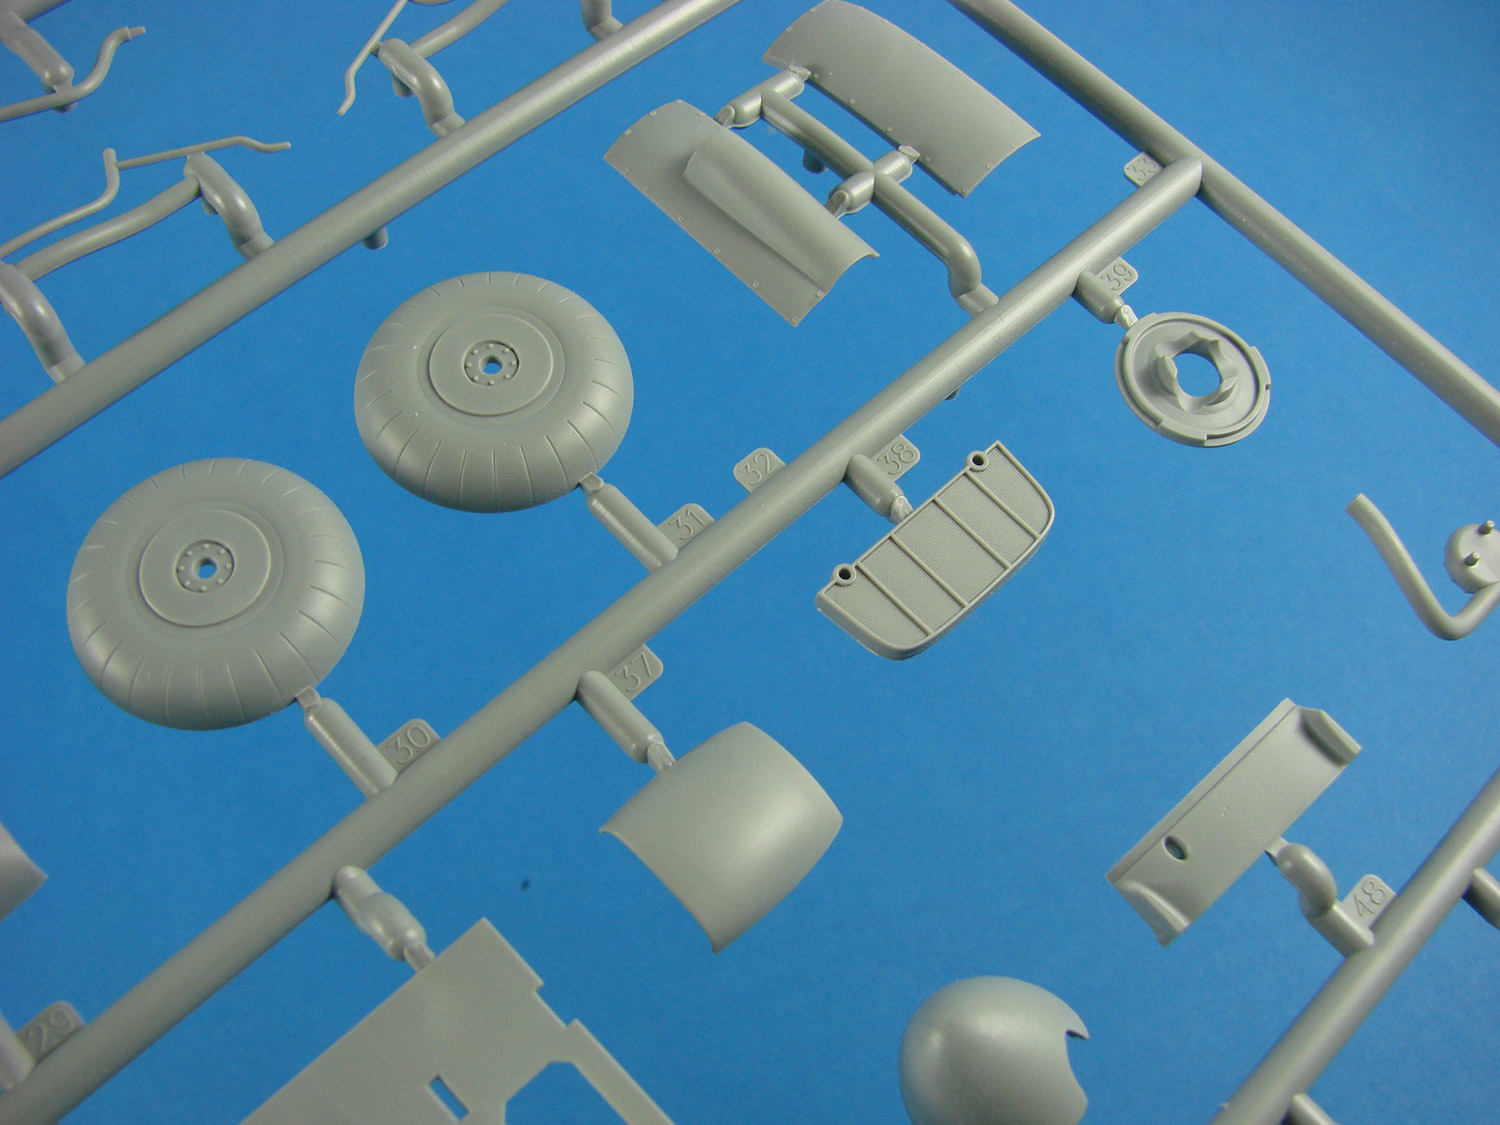
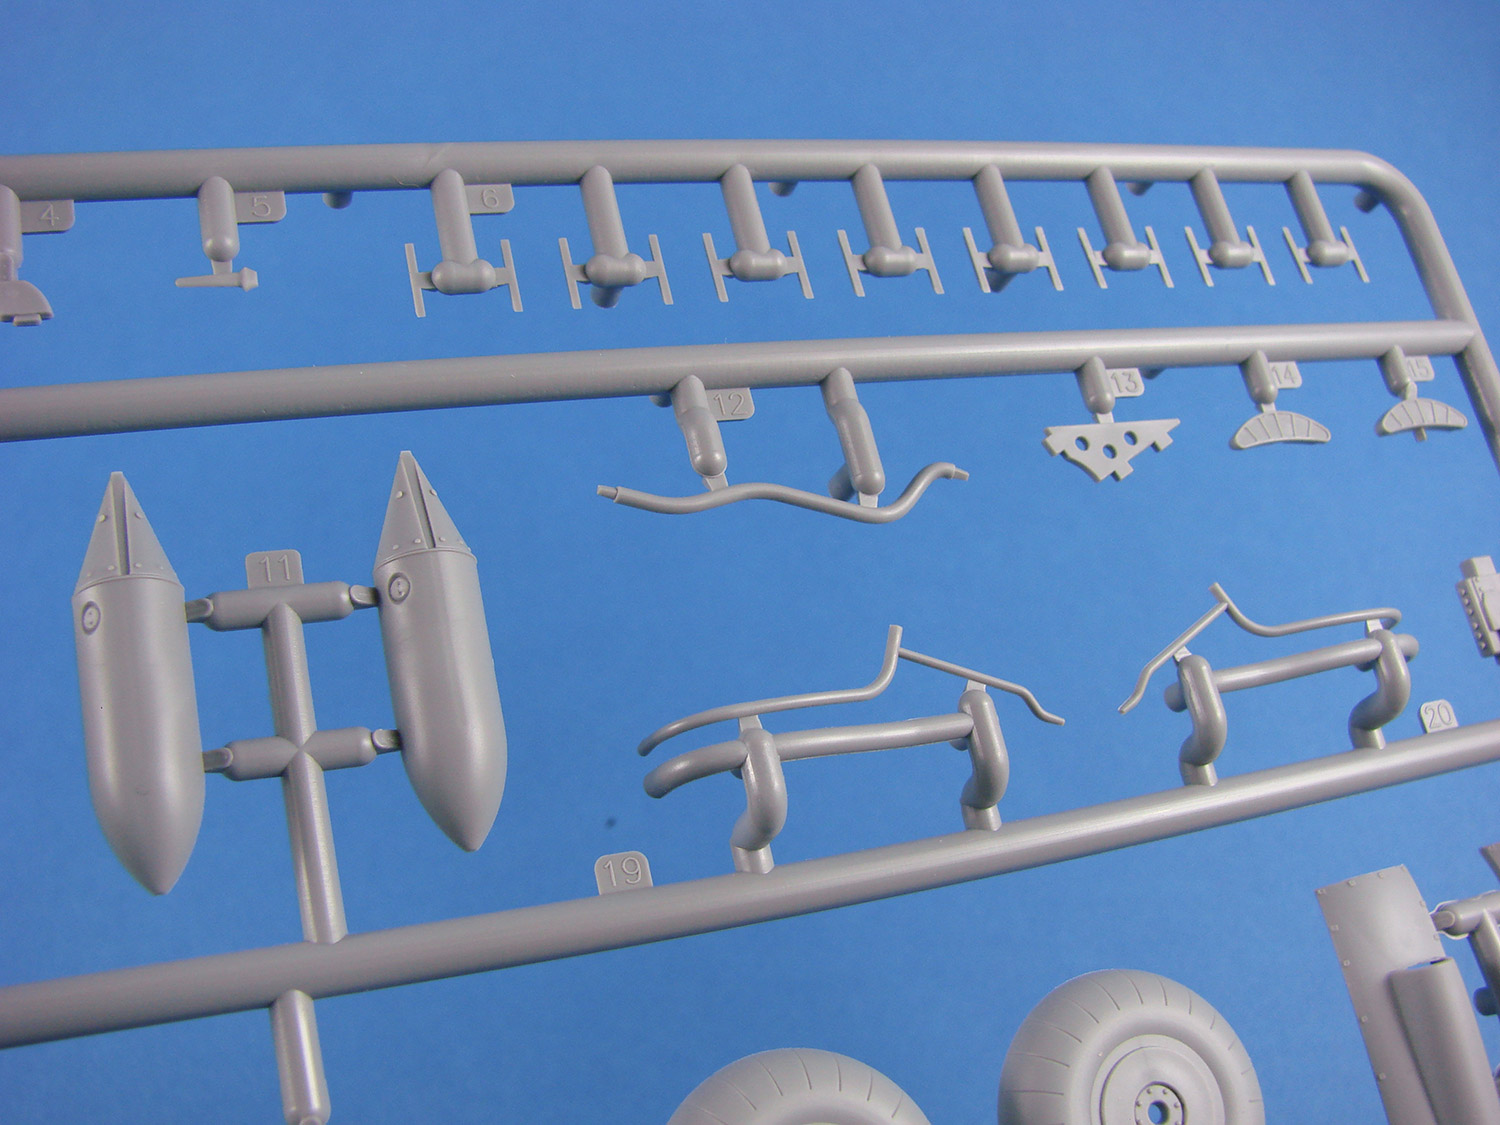
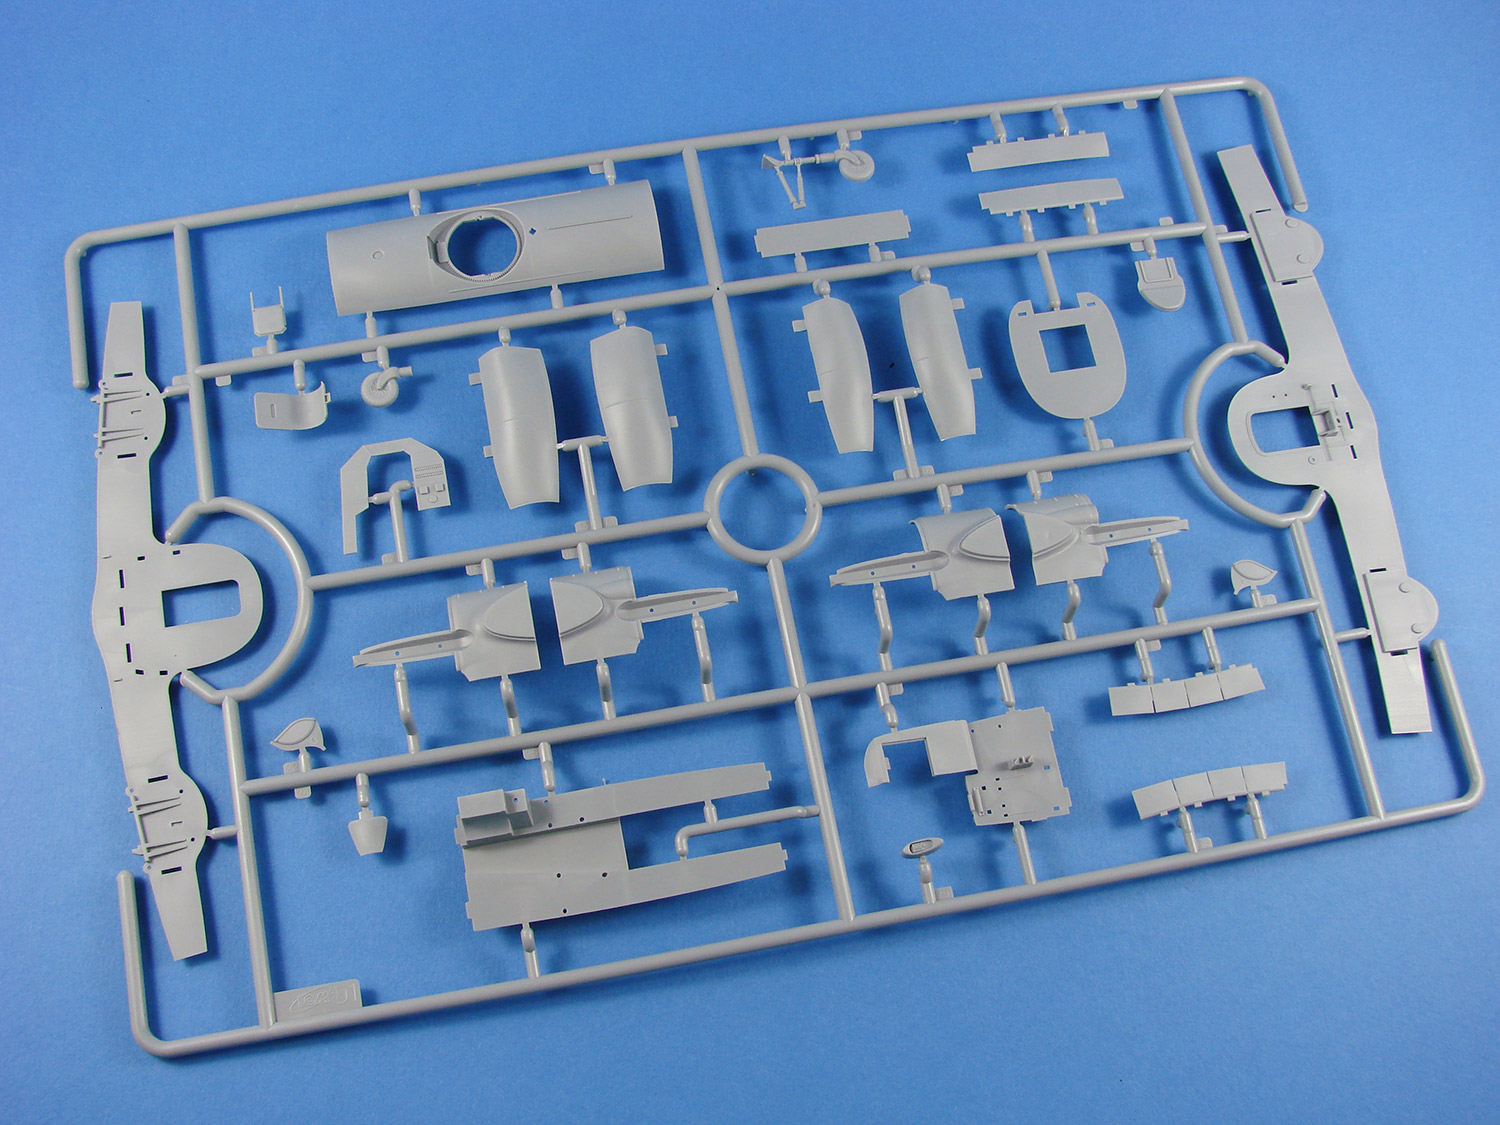
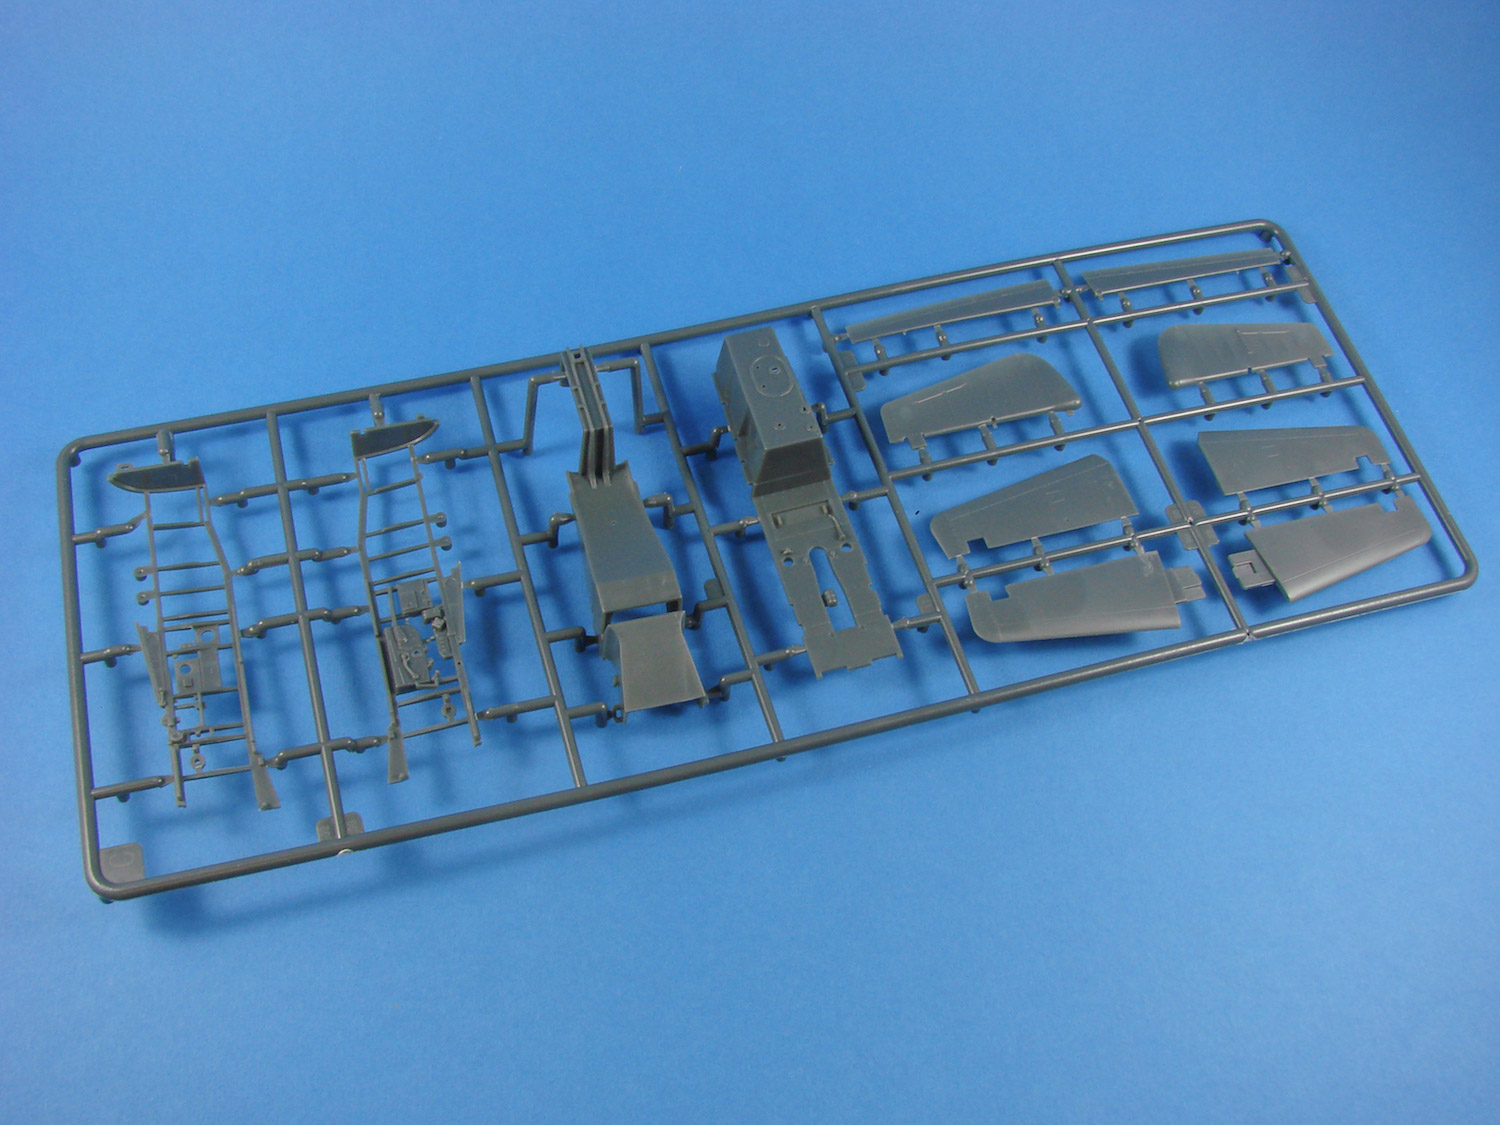
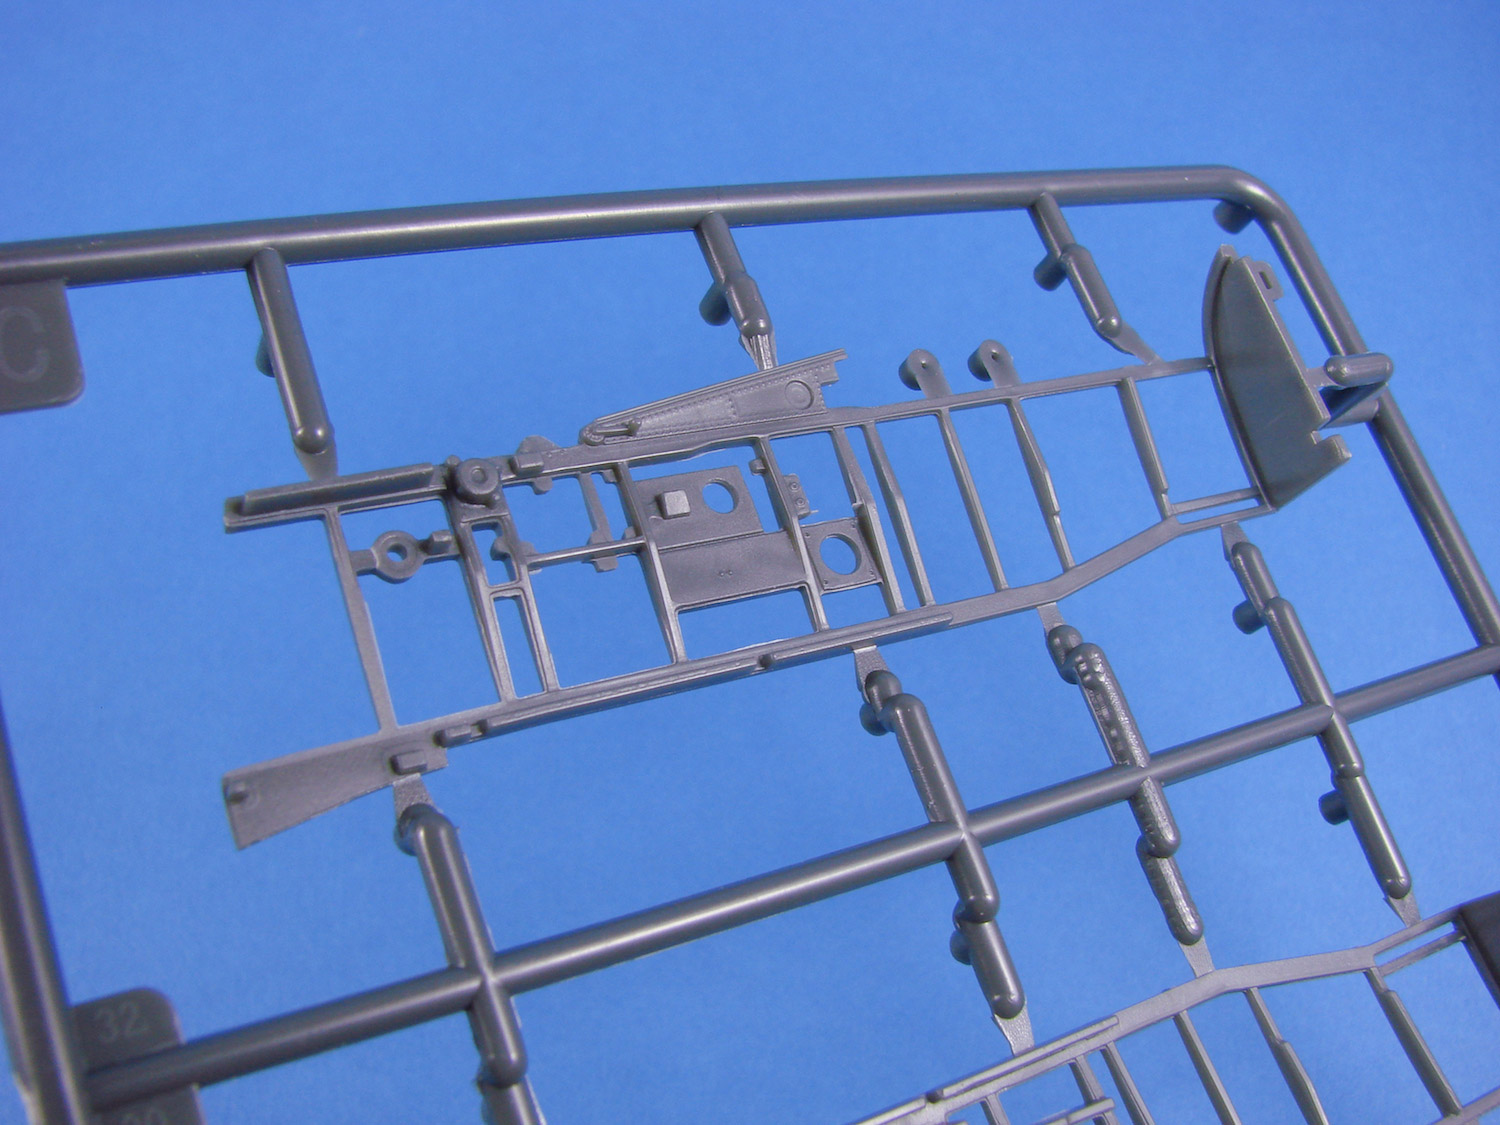
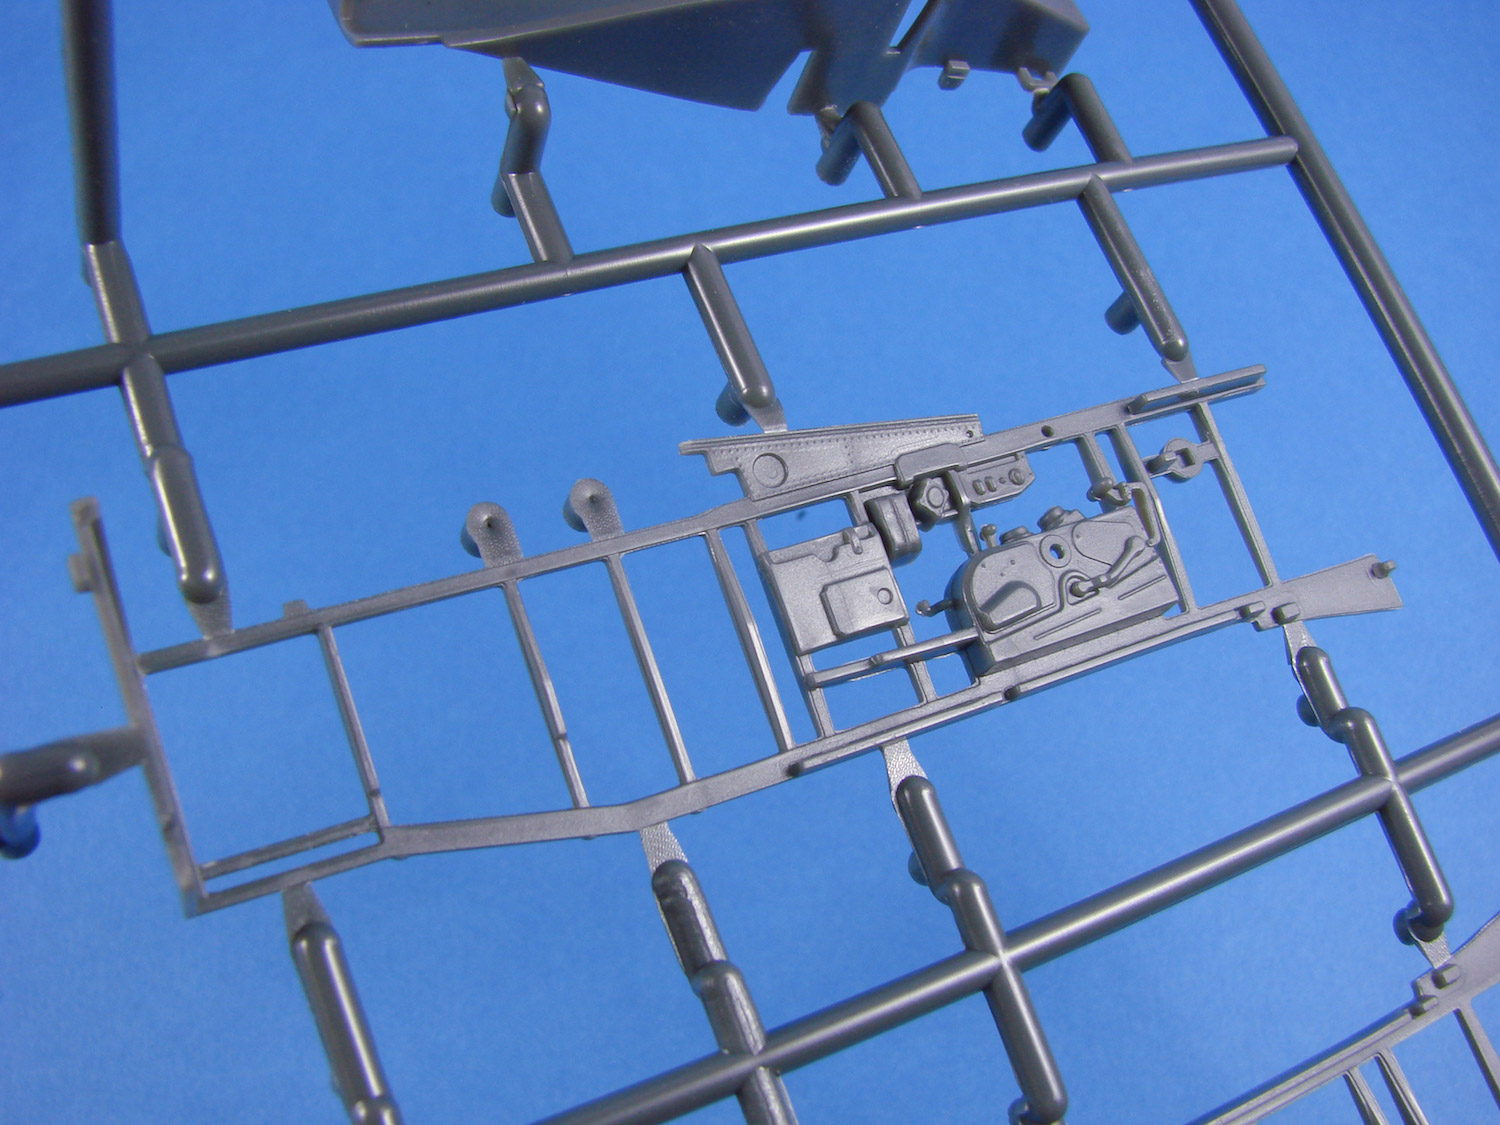
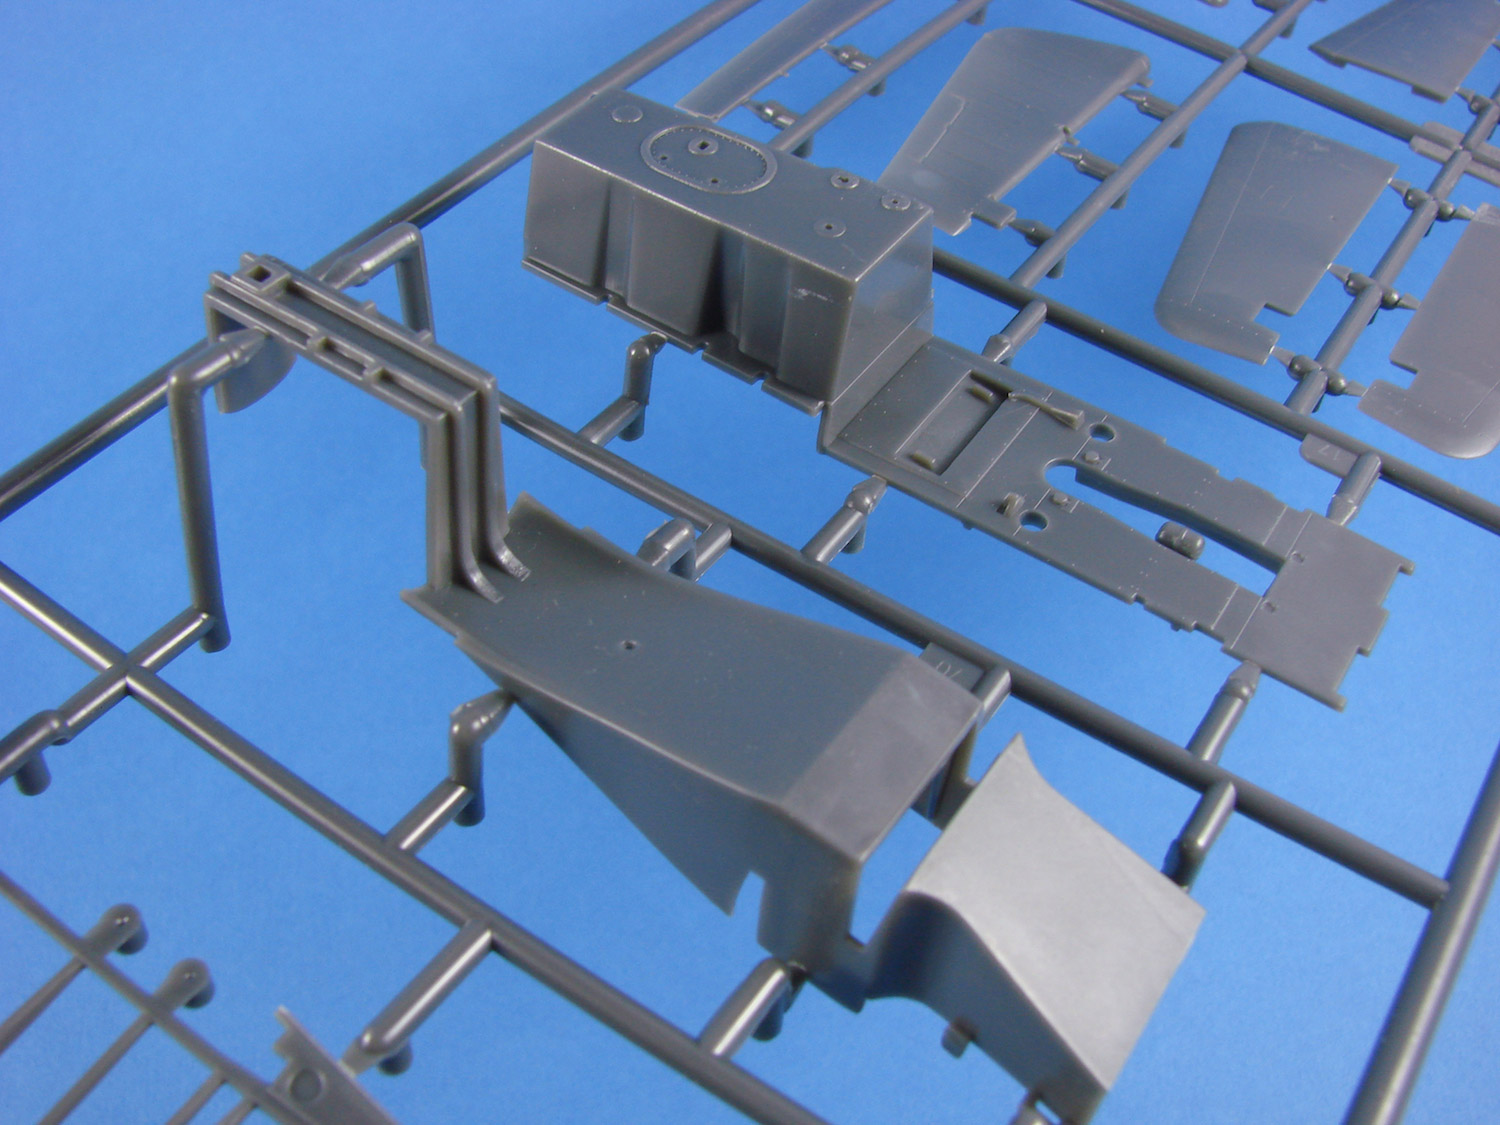
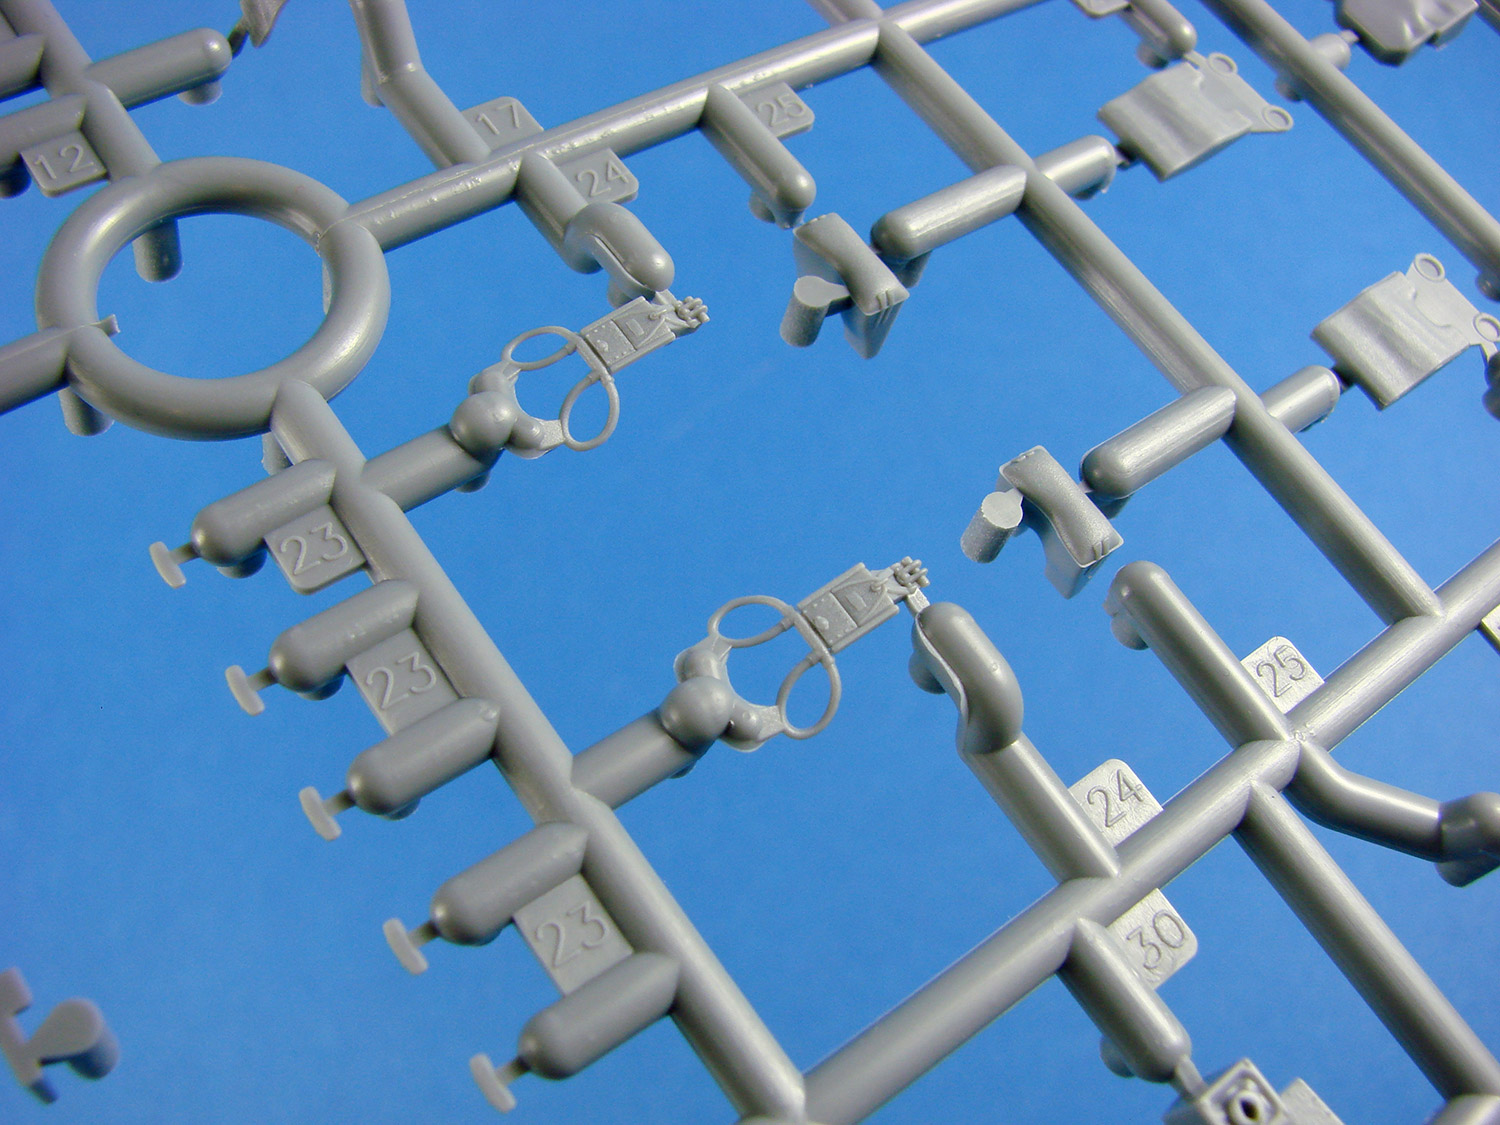
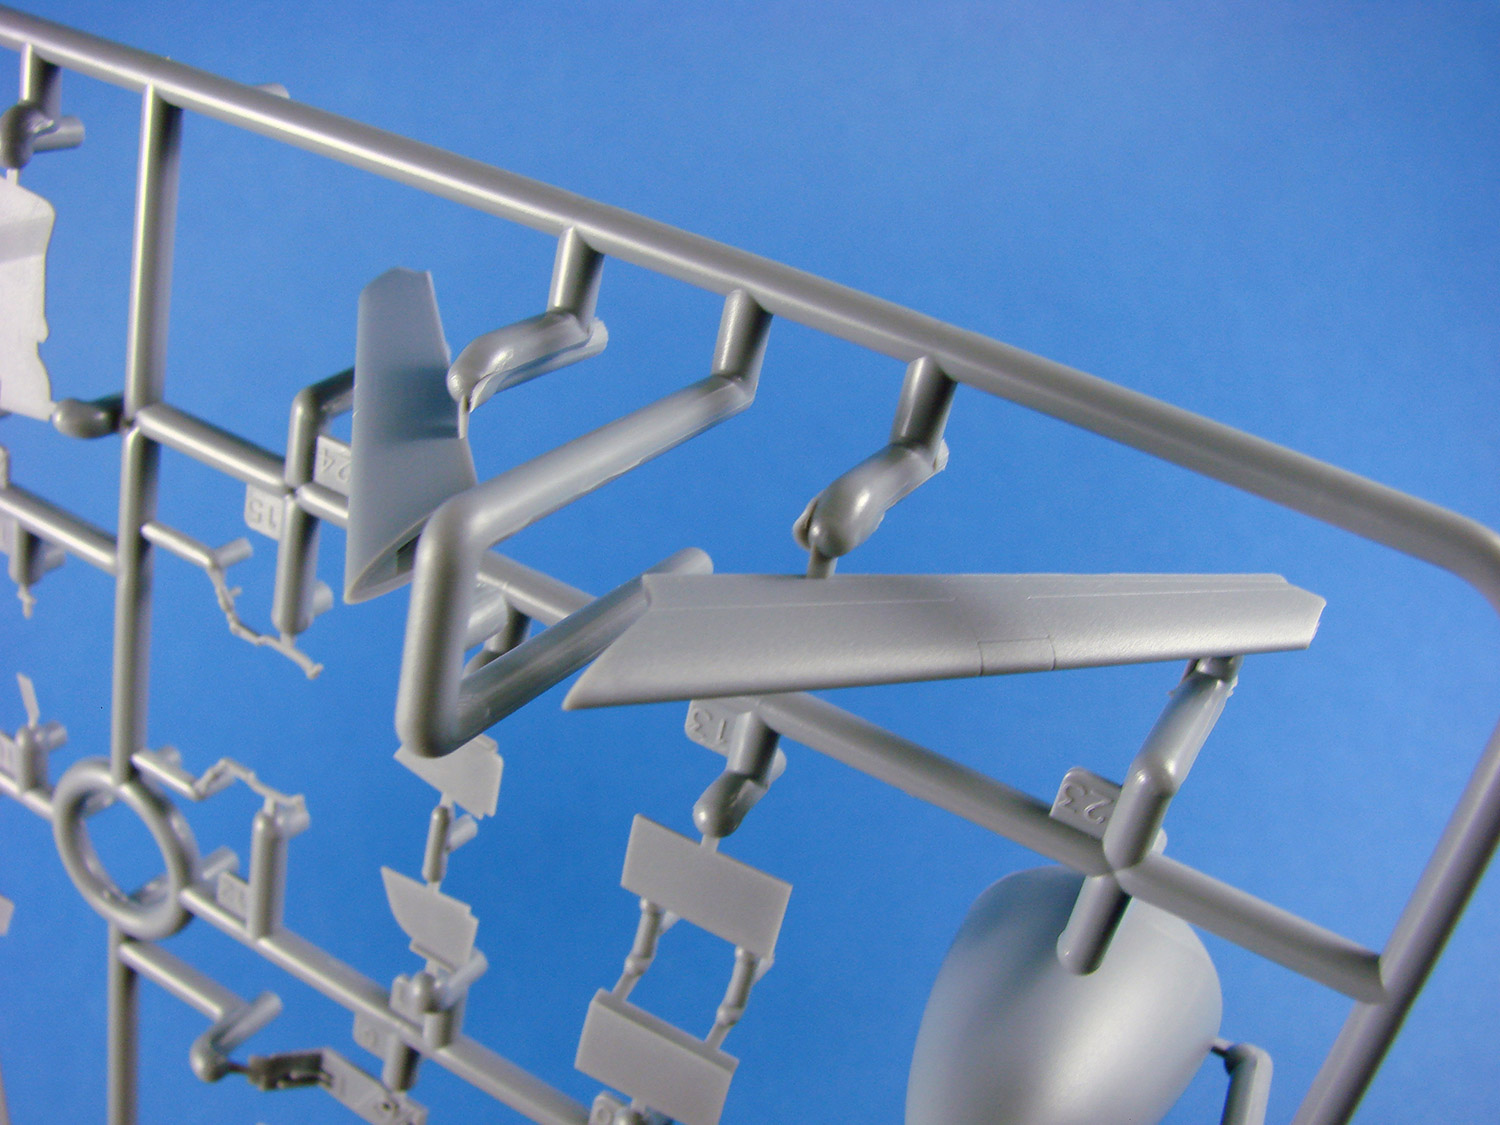
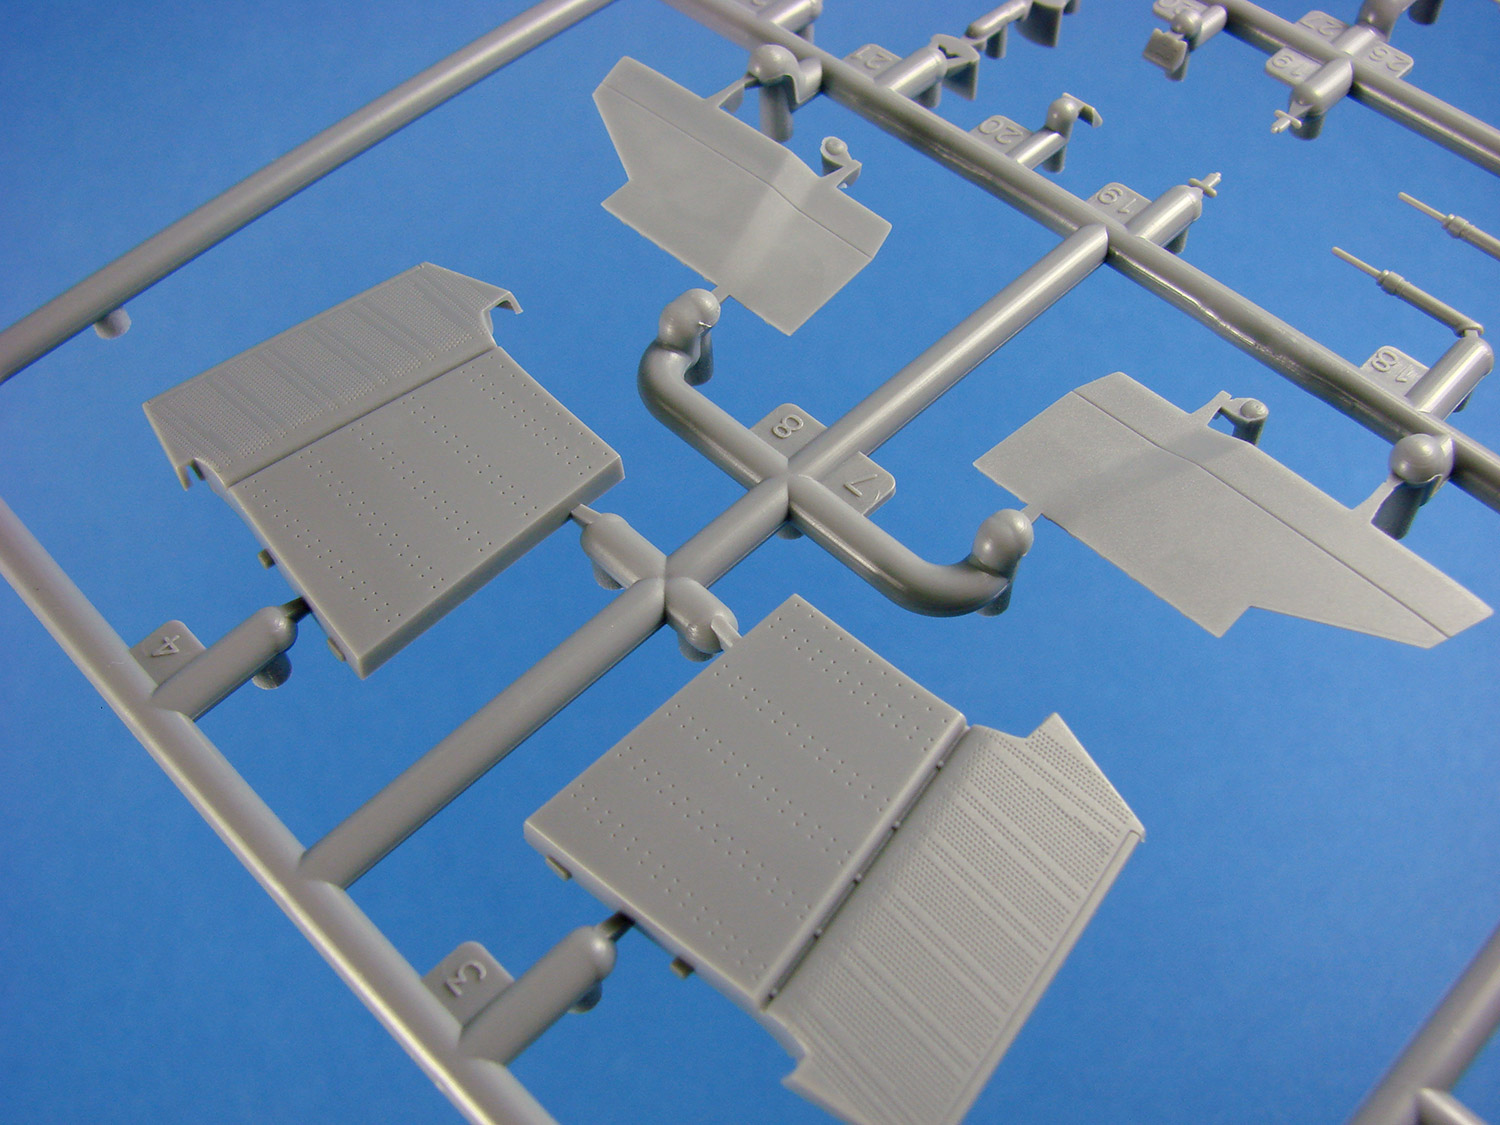
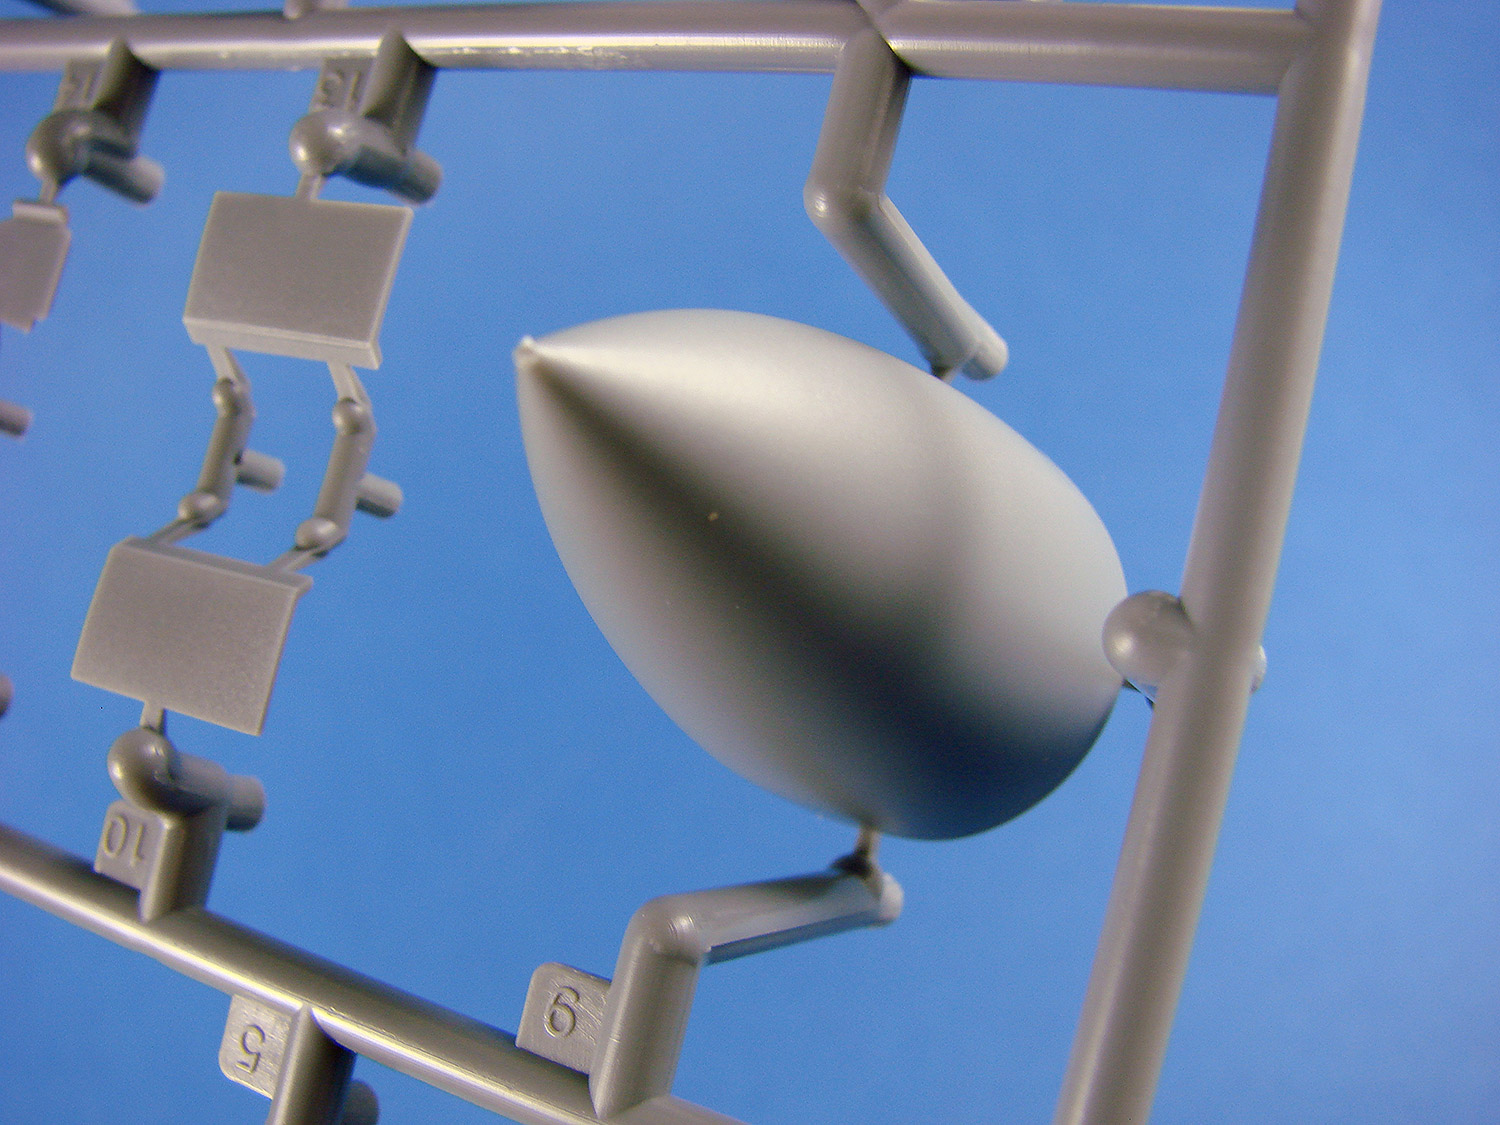
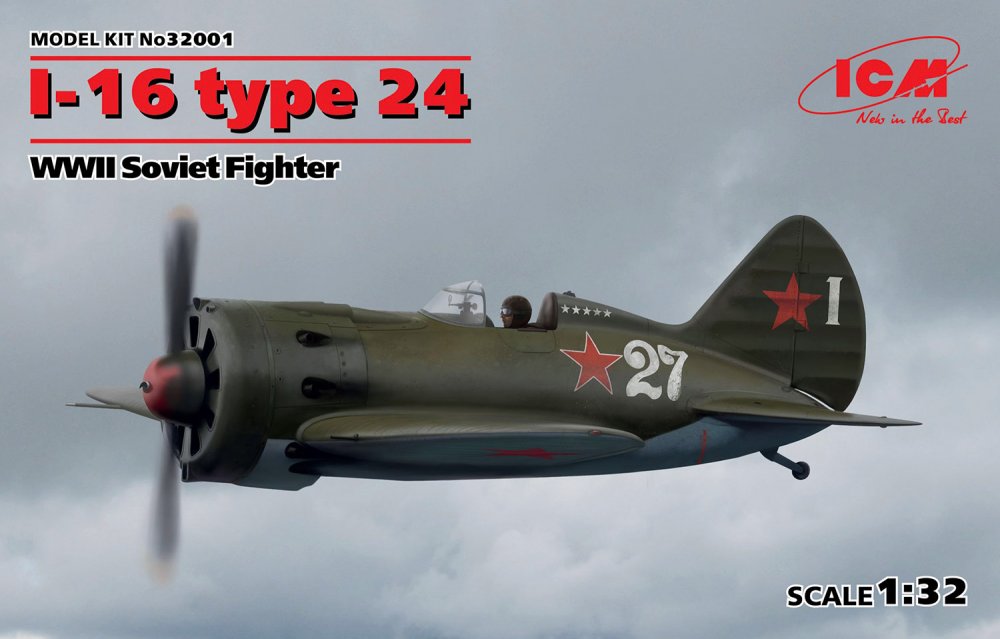
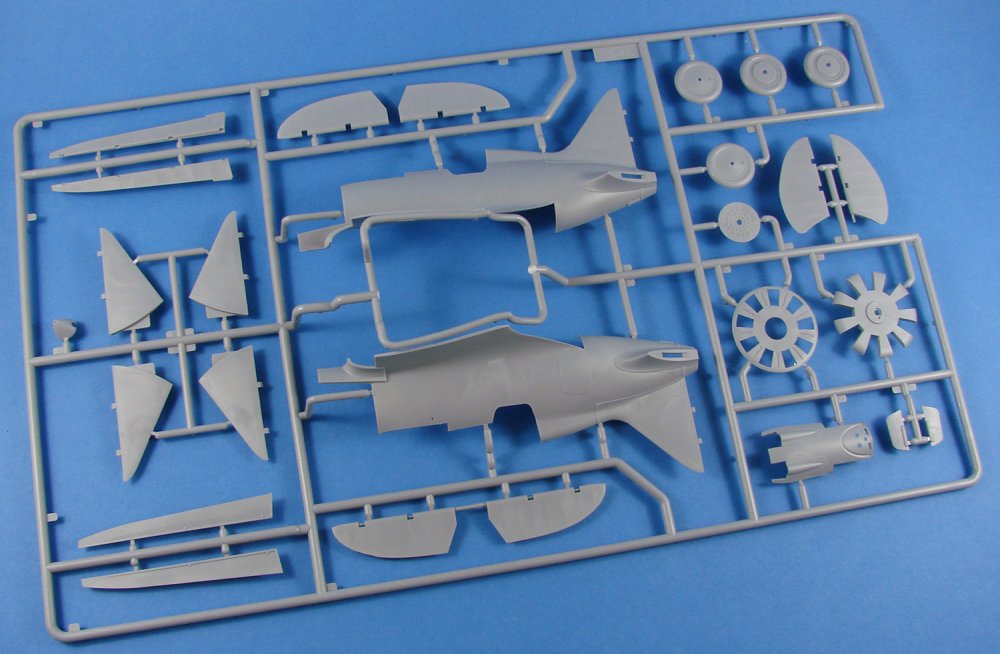
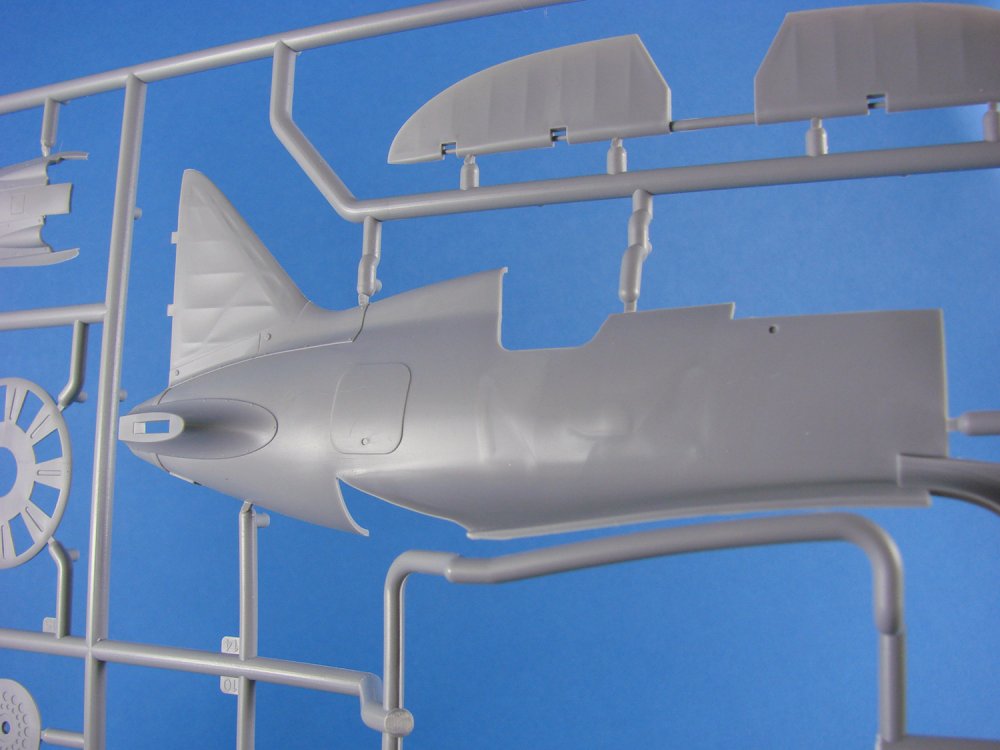
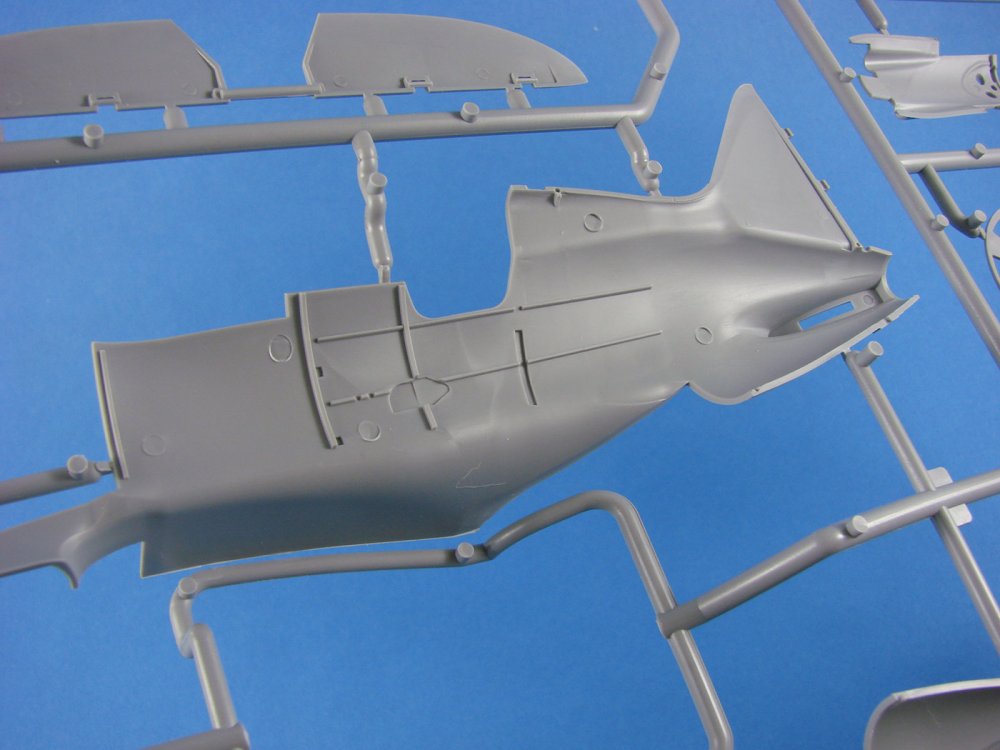
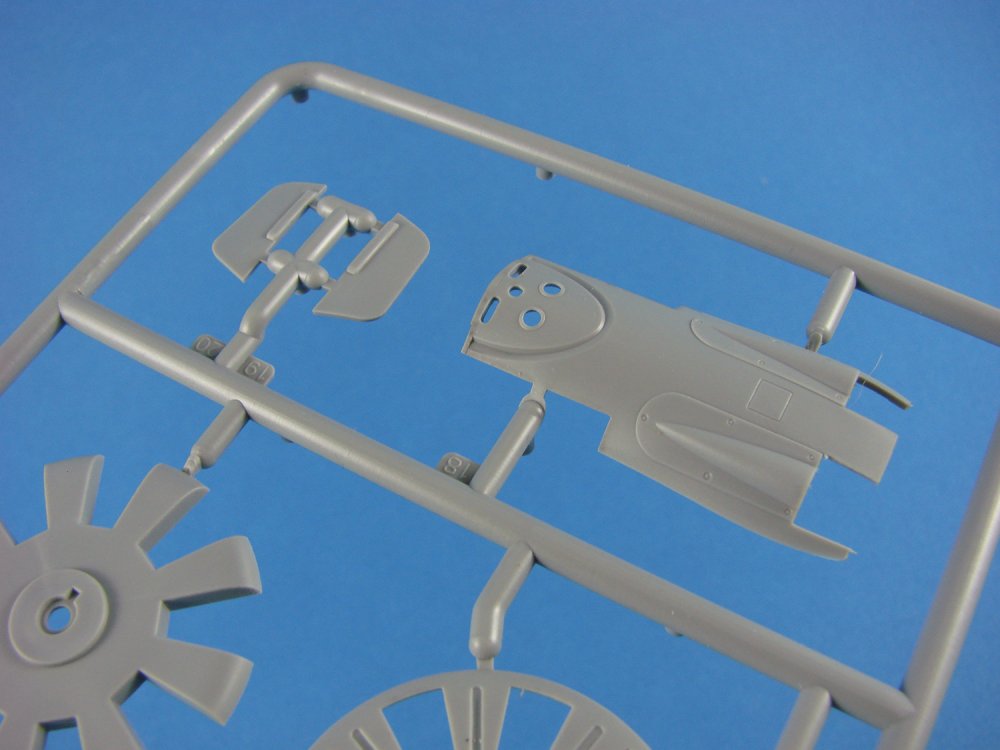
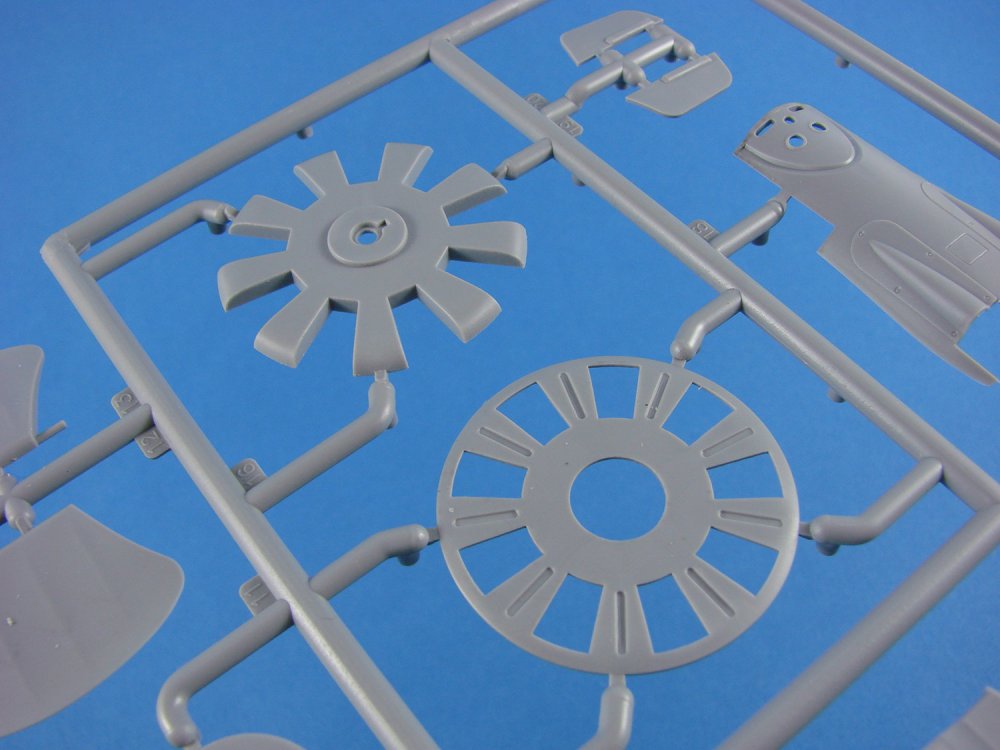
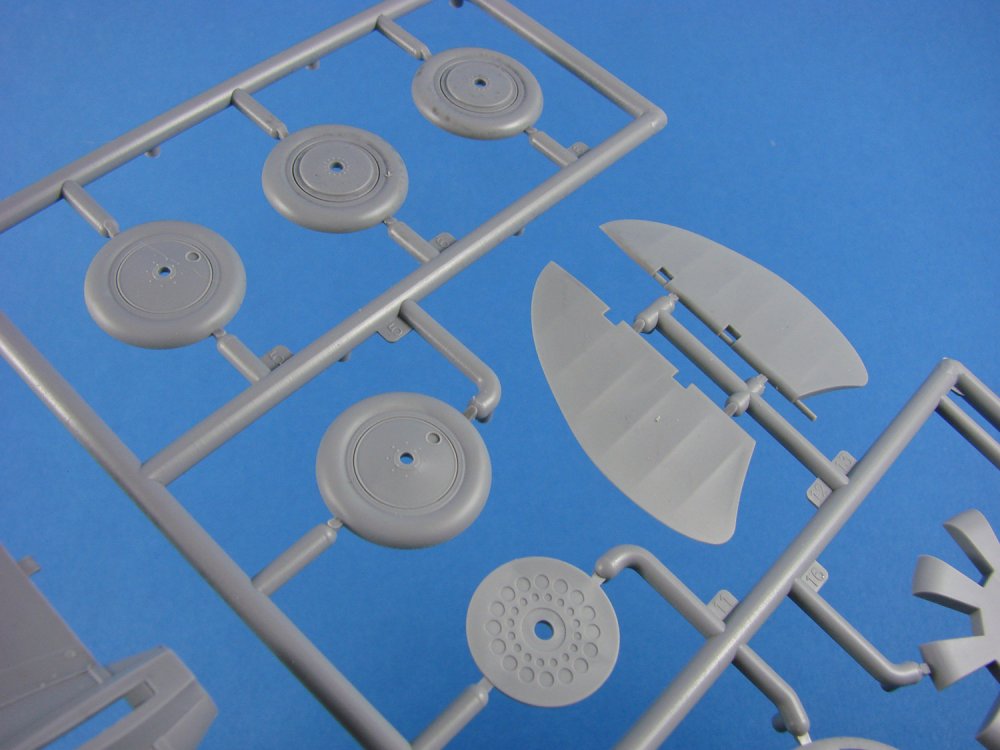
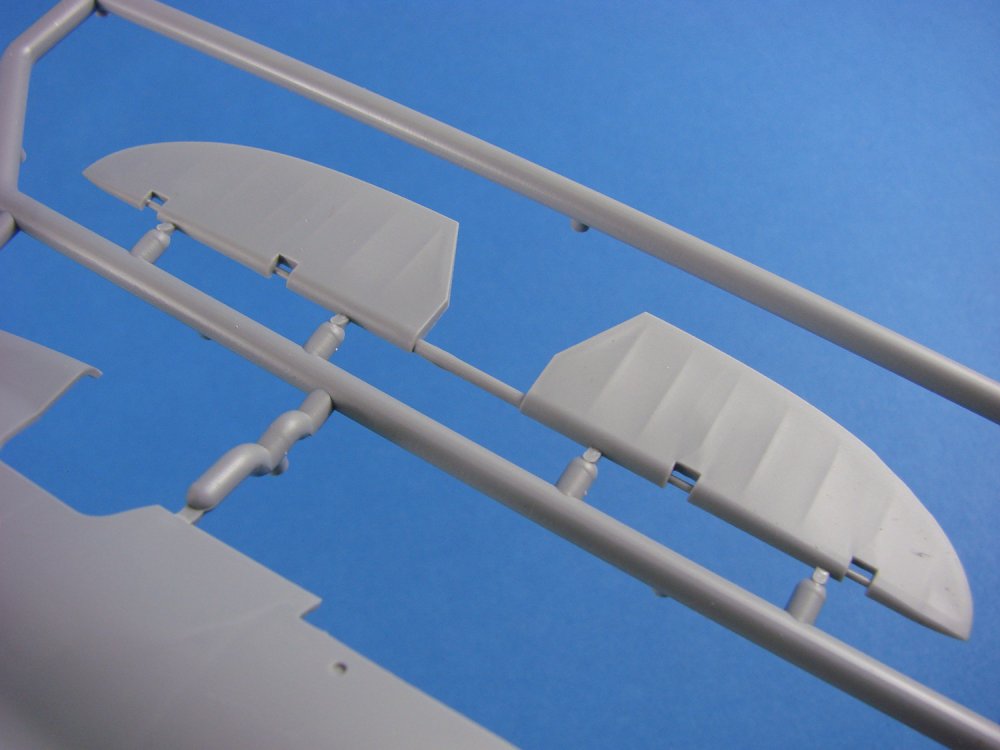
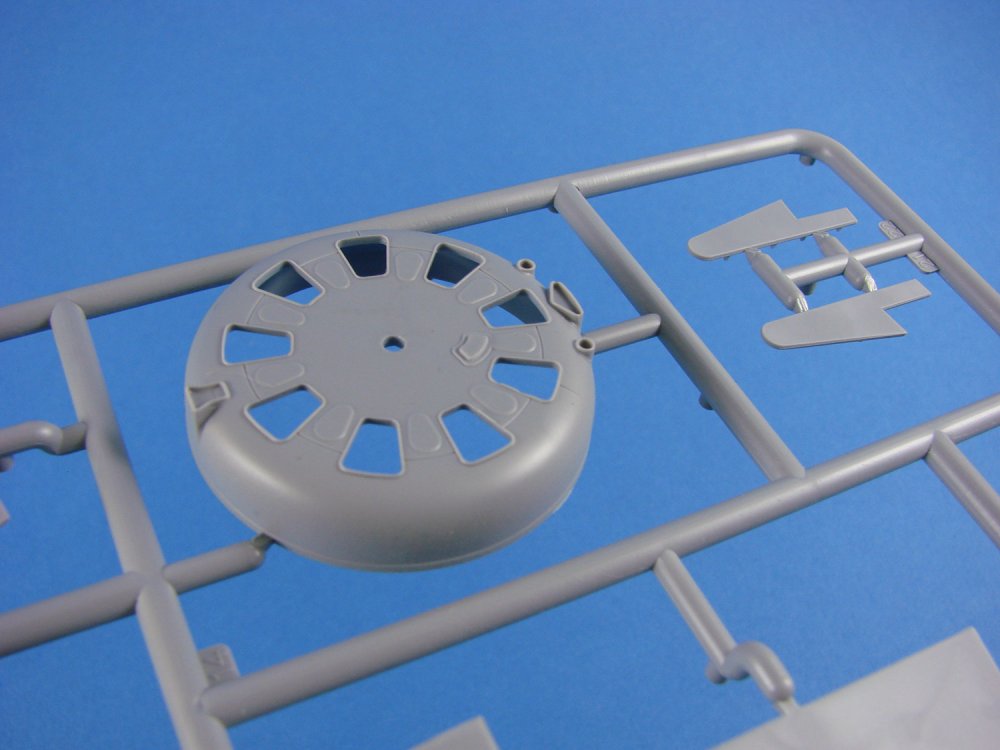
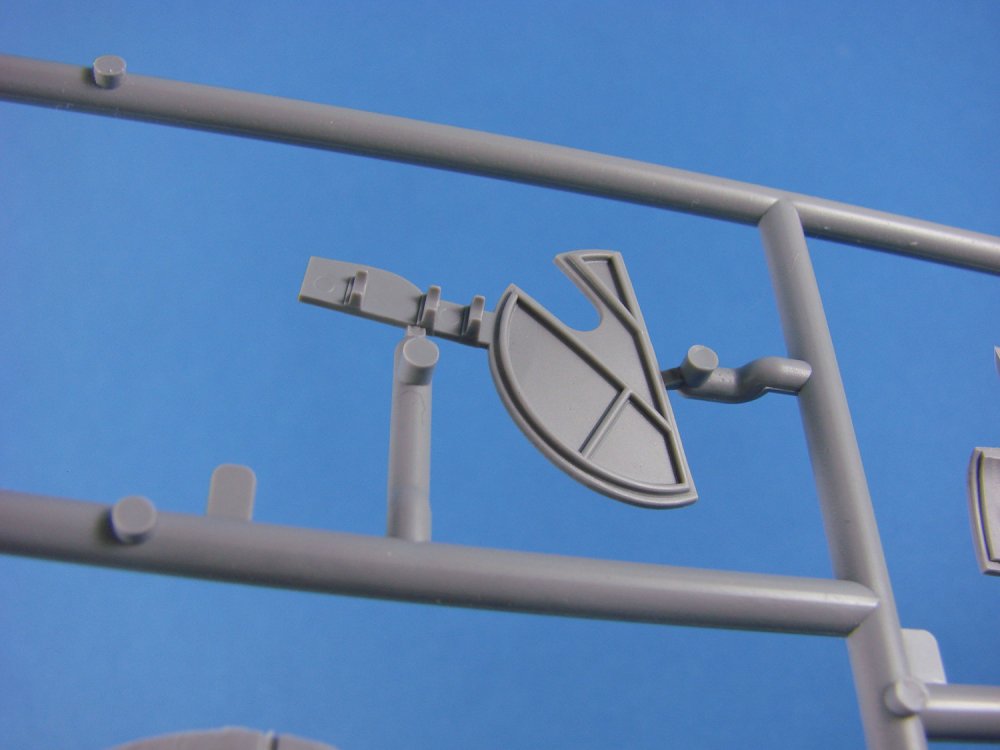
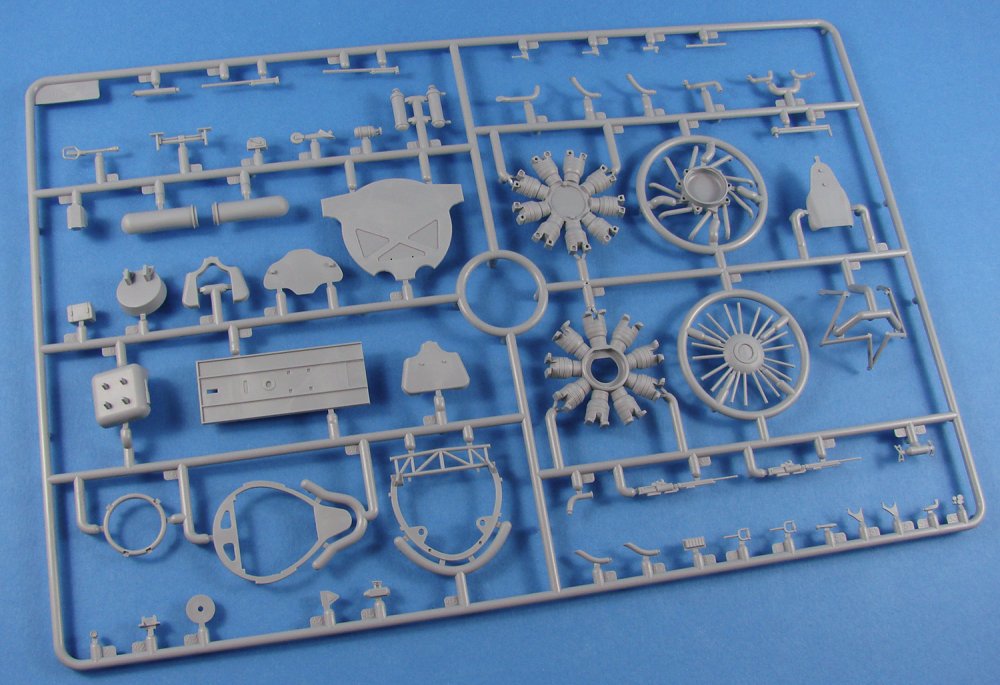
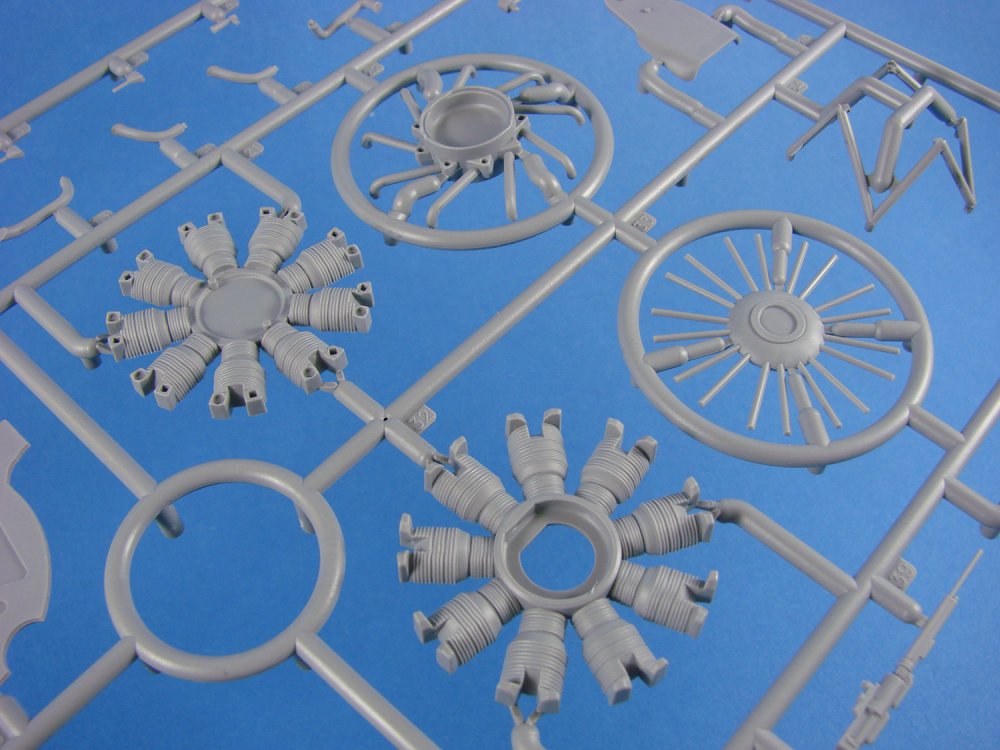
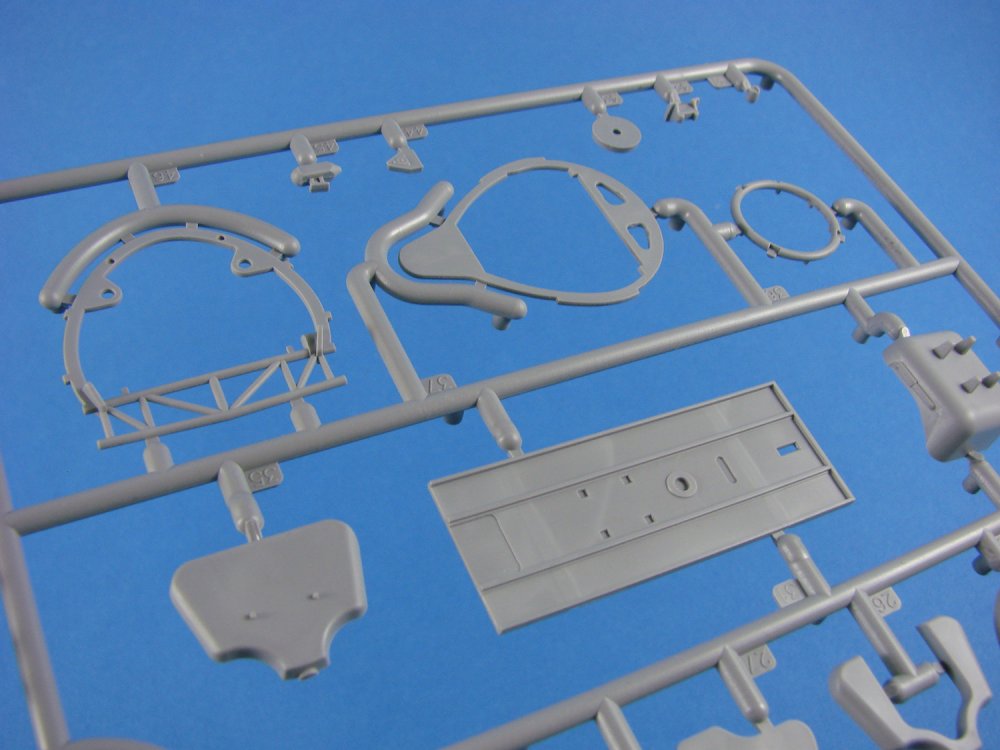
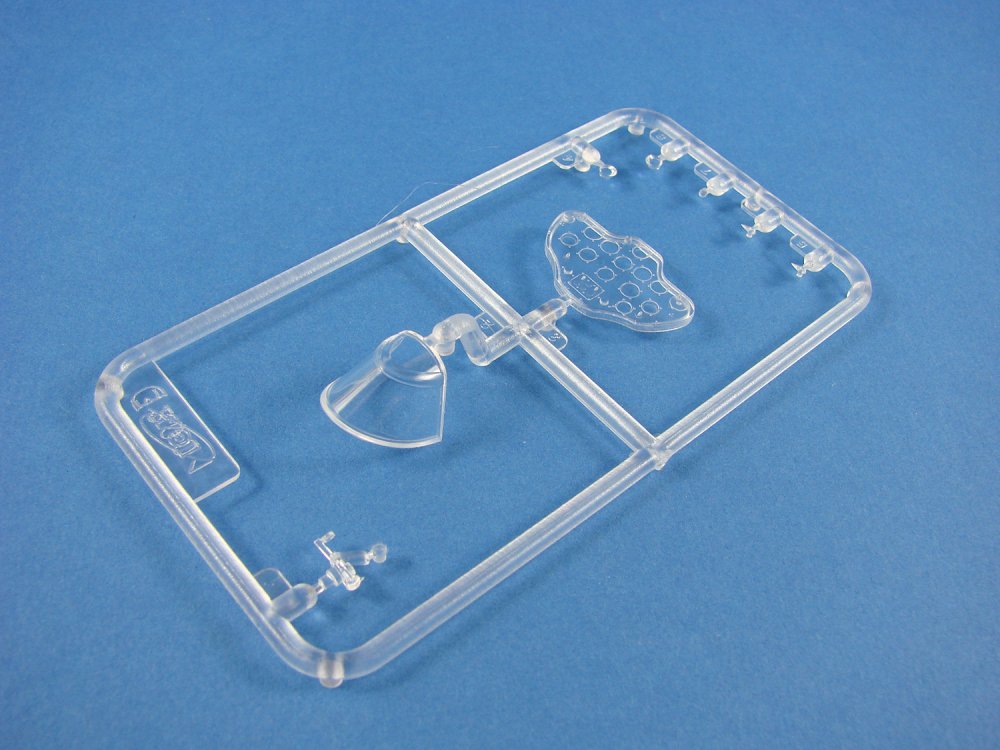
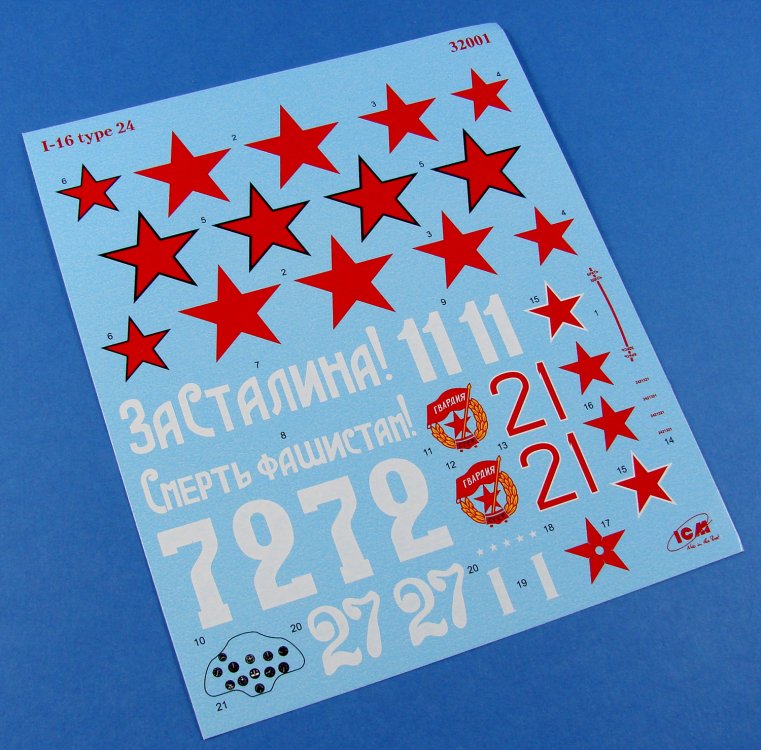
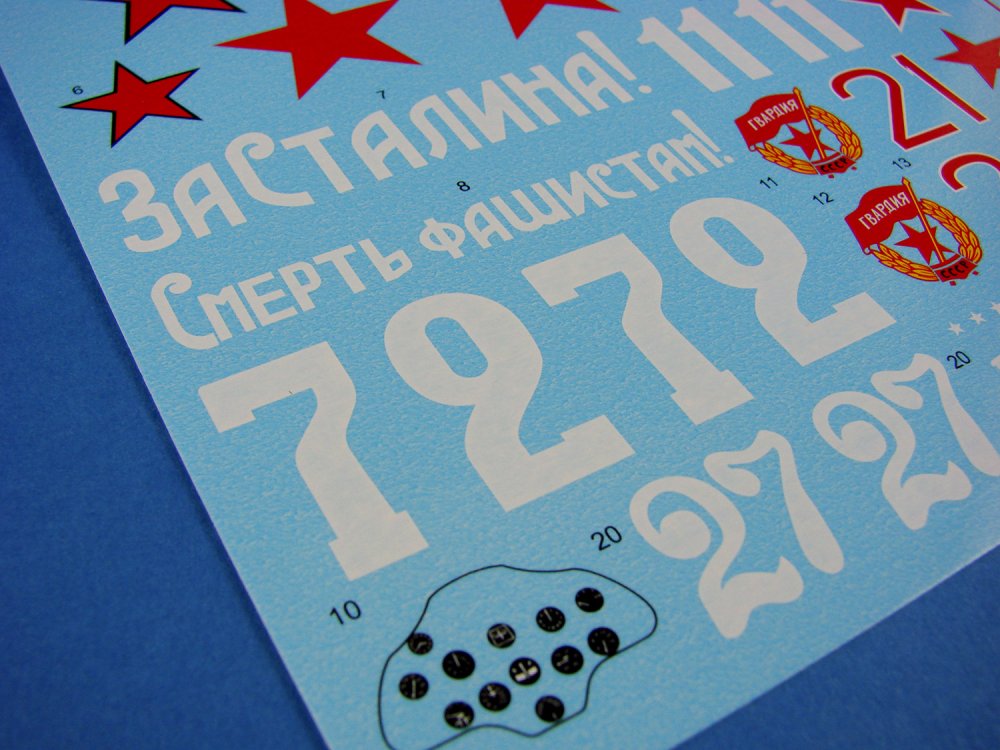
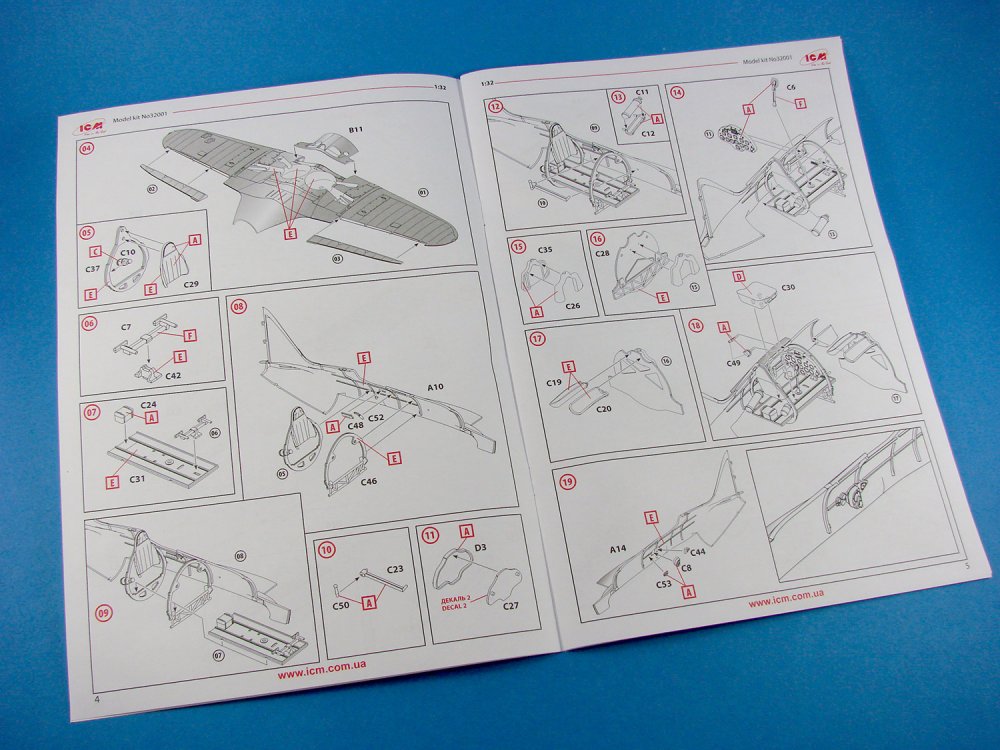
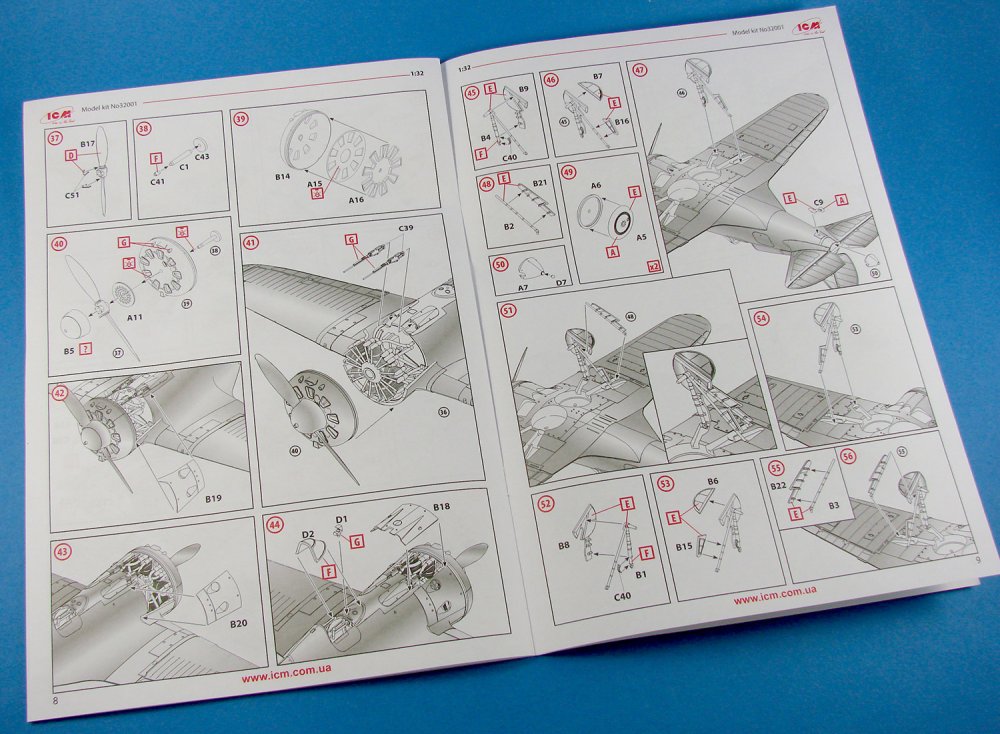
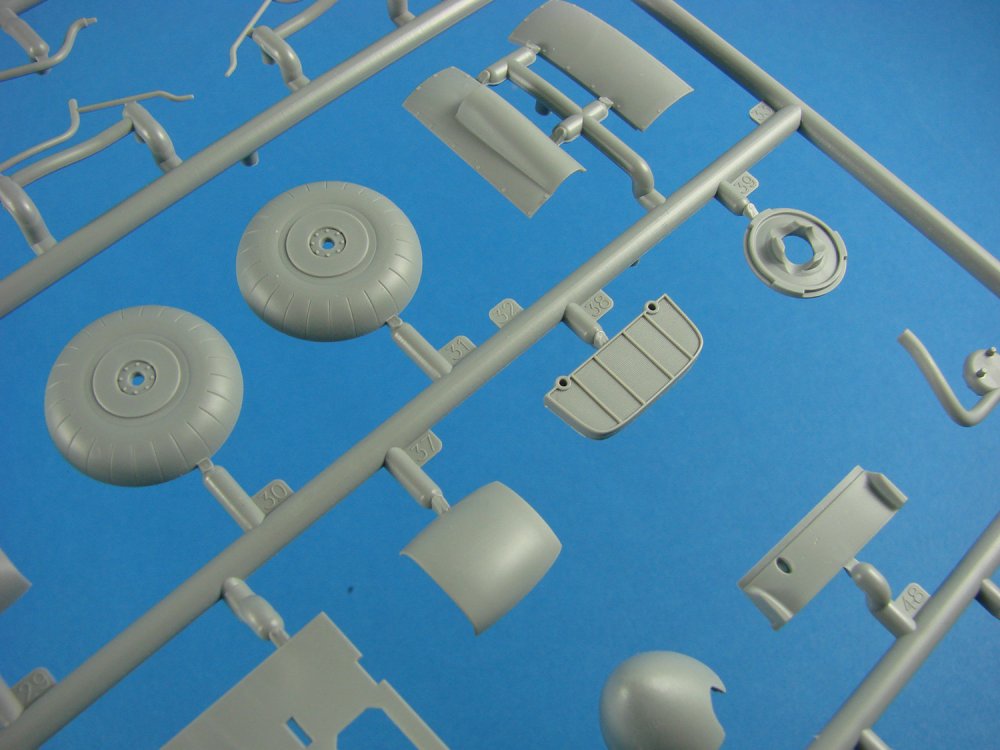
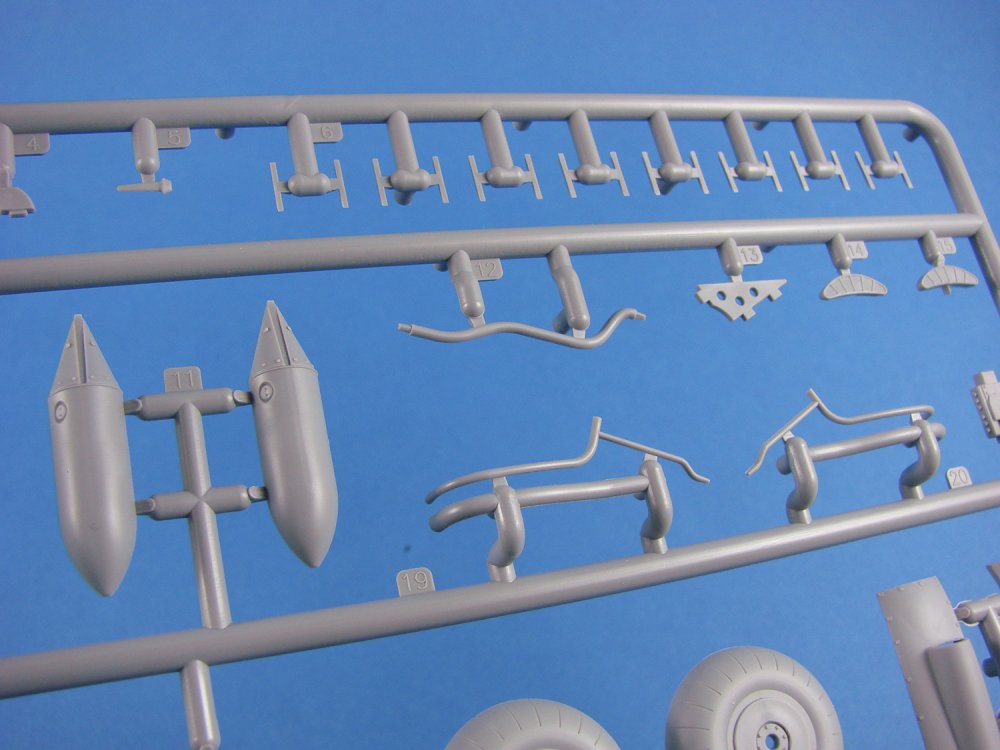
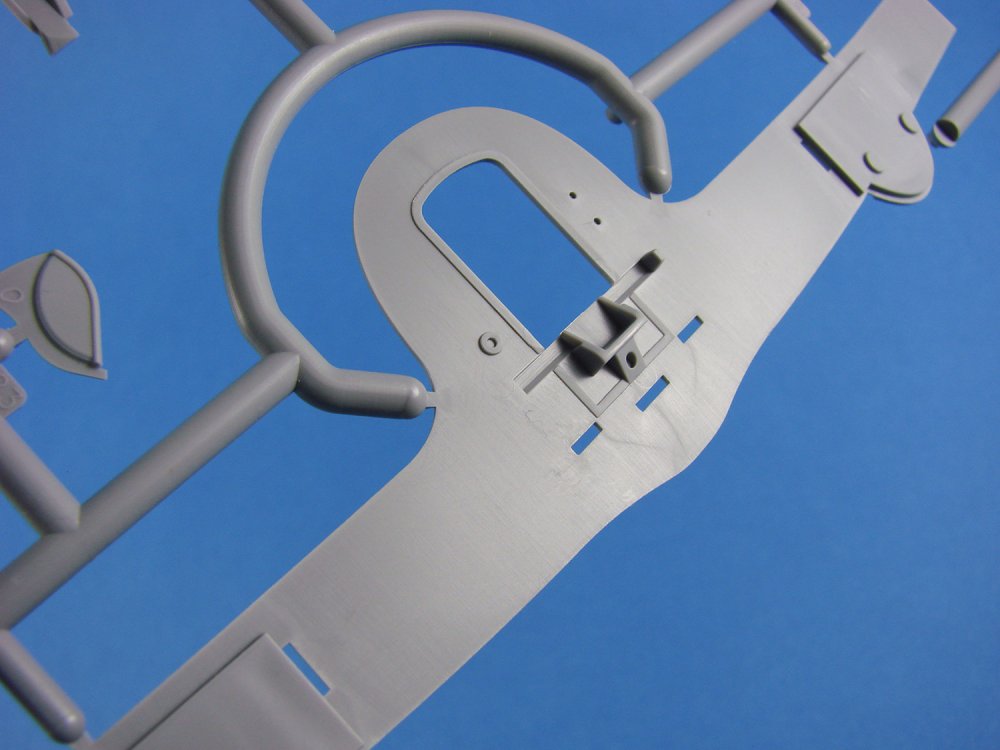
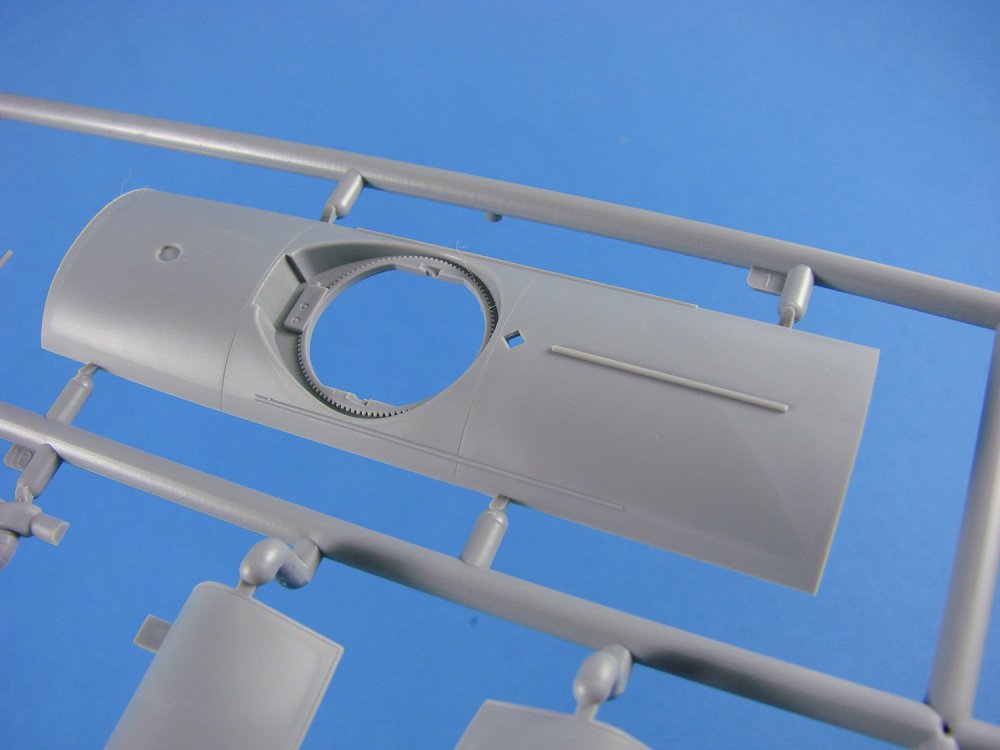
1/32 I-16 Type 24 ICM Catalogue # 32001 Available from Hannants for £27.99 The Polikarpov I-16 was a Soviet fighter aircraft of revolutionary design; it was the world's first low-wing cantilever monoplane fighter with retractable landing gear, to attain operational status and as such has been described as having "introduced a new vogue in fighter design. The I-16 was introduced in the mid-1930s and formed the backbone of the Soviet Air Force at the beginning of World War II. The diminutive fighter, nicknamed "Ishak" (Donkey) or "Ishachok" (Burro) by Soviet pilots, figured prominently in the Second Sino-Japanese War, the Battle of Khalkhin Gol, and the Spanish Civil War, where it was called the Rata (Rat) by the Nationalists or Mosca (Fly) by the Republicans. Full-scale work on the TsKB-12 prototype began in June 1933, and the aircraft was accepted into production on 22 November 1933, a month before it took to the air. The TsKB-12 was of mixed construction, using a wooden monocoque fuselage and wings employing a KhMA chrome-molybdenum steel alloy wing spar, duralumin ribs and D1 aluminium alloy skinning on the centre and leading edges, with the remaining portions of the wings fabric covered. Another modern feature were the ailerons which ran along almost the entire trailing edge of the wing and also operated as flaps. The cockpit was covered by a 16” wide canopy which featured an Aldis-type tubular gun sight which could slide back and forth on runners fitted with rubber bungee cords. The main landing gear was fully retractable by means of a hand crank. The armament consisted of a pair of 7.62×54mmR (0.30 in) ShKAS machine guns in the wings, mounted on the outboard side of the main gear and 900 rounds of ammunition. Service trials of the new fighter, designated I-16, began on 22 March 1934. The M-22 prototype reached 223 mph. The manually retracted landing gear was prone to jamming and required considerable strength from the pilot. Most of the test flights were performed with the gear extended. On 1 May 1934, the M-22 prototype participated in the flyover of Red Square. Engine improvements etc. pushed the types top speed to 326 mph for the Type 24, that we see in this article. Initial service experience revealed that the ShKAS machine guns had a tendency to jam. This was the result of the guns being installed in the wings upside-down to facilitate the fit. The problem was addressed in later modifications. The I-16 was a difficult fighter to fly. The pilots had poor visibility, the canopy tended to become fouled with engine oil, and the moving portion was prone to slamming shut during hard manoeuvres, which caused many pilots to fix it in the open position. The front section of the fuselage, with the engine, was too close to the centre of gravity, and the pilot's cockpit too far to the rear. The Polikarpov had insufficient longitudinal stability and it was impossible to fly the aircraft "hands off". Production lasted from between 1934 to 1942, and totalled over 8600 machines. The kit I’m quite a fan of ICM’s approach to boxing their products, and here we see their first foray into 1/32 with the I-16 Type 24. As per the current crop of samples that we have been sent for review, this kit is packaged into a very sturdy corrugated cardboard box that opens via a tab, and the box itself has a product lid which sits over the top of this. The artwork here shows a single I-16 in level flight with a cloud base background. On the lid sides, two out of the FOUR supplied schemes, are shown in profile format. Inside the box, a single, large cellophane sleeve contains the THREE medium-grey styrene sprues that make up this diminutive little fighter aircraft, plus a single clear sprue that is further protected by another sleeve. There are no PE or resin parts in this release, and this package is completed with a 12-page A4 instruction manual and one decal sheet that is placed within. I saw a Rata a few years ago at Duxford, close up and personal, and then had the pleasure of seeing the little tin can fly afterwards. This was always going to be a subject that would appeal to me, so to see a modern tooling of this important type was always going to excite me somewhat. Sprue A You really do get an idea of just how squat the I-16 was when you take a look at the fuselage halves on this sprue. Even more so if you then contrast those dimensions against the wing itself. Note how ICM has tooled this kit, with those fuselage parts standing very high on this sprue. The run of the sprue itself protects the relatively vulnerable wing root protrusion whilst not actually being connected. Due to the nature of the I-16’s wooden construction, there isn’t much in the way of detail on the fuselage halves, except for the tail fin and fairings for this and the stabiliser. The fin has a rather nice representation of the fabric and rib structures, with this perhaps being a tad heavy in places, but nonetheless very nice in its depiction. Some rivet and fastener detail exists around the fairing, and the rear starboard fuselage has raised access panel detail. The rudder and forward engine cowls are moulded as separate parts. Internally, fuselage detail is straightforward and simple, but sharply executed. This consists of formers and longeron strips, and you will have to eliminate a single ejector pin mark in these areas, but that’s not too bad. To quote an oft-used and maligned phrase….simple modelling skills. Also moulded here are the stabilisers, ailerons, elevators and rudders. In traditional construction style, these are supplied as upper and lower parts, with the elevator itself being full-span. Rib and fabric details of course extend onto these parts, and to me at least, these look perfectly acceptable. All control surfaces are designed to be moveable too. Within the engine cowl are two plates that go to make part of the cooling shutter mechanism, and this is designed to be left free of glue so that it may be positioned. Other parts on this sprue include the upper gun cowl, both cockpit entry doors, and also the main wheels. These are supplied as halves, but they aren’t weighted. Sprue B ICM has sensibly designed this model to have a full span lower wing, and this is packed with details, from the basic rib and fabric structures, to the various plates that are moulded in situ, representing the panels that cover the ShVAK cannon locations and the undercarriage bay etc. The main gear wells are simply that….wells, but look very reasonable when you reference this to photos of the actual thing. Note that there is a circular hole in each well, coinciding with the central wheel hub. This was there for a reason. That gear was cranked upwards by hand, and this is where the cable would pass through to the wheel hub. However, ICM make no reference to this, and to the cable you would need to add for this to look accurate. Take note! As was noted earlier, the ailerons are separate parts here and can be posed however you wish. The upper wing panels exhibit the same degree of detail as the lower span part, with good plate detail over the cannon areas, looking suitably agricultural, as befitted the I-16. The rest of the undercarriage parts are found here, and these do look a little fragile, but are simply and authentically detailed. This also applies to the undercarriage doors, but I do wonder if there are some small bracing details missing from the rear of the upper semi-circular plate, as my references tend to show these. I could be wrong, and they may or may not pertain to the Type 24. Check your references. Other parts on this sprue include the cowl plates with their open scoop details, the main front engine cowl with cooling apertures, lower cowl to wing fairing, and the squat spinner and separate propeller with hub details. Sprue C For a 1/32 model, this kit sure doesn’t have masses of parts, but it has that detail exactly where it counts. Here we see parts that are for both the engine and cockpit. The Soviet Ash-62 engine that powered the Type 24, actually had its roots in the Wright R-1820 Cyclone. That engine in particular had been built under licence in Russia, and the Rata’s engine was a development of that powerplant. ICM has produced quite a nice representation of this engine, comprising of about 18 parts, including the separate exhaust stubs and engine mount. Cylinder cooling fin detail is fine, and about the only thing I think this wold benefit from would be some ignition wiring and the missing ignition distribution ring….that’s if you plan to maybe pose a cowl section off the model, so you can see at least some of this engine. Apart from the two cowl-mounted ShKAS machine guns (which look incredibly good), pretty much everything else on this sprue is to do with the cockpit, which really is superbly detailed. In here you will find detailed forward and rear bulkheads, cockpit floor, pilot seat with cushion, compressed gas tanks, rudder bar and control stick, plus the various pieces of equipment that were bolted to the inner sidewalls. About the only thing that will be required here is some lead wire etc. to plumb these items in. Reference photos tend to show cables that were clipped to the various internal structures. Other parts seen here are the engine firewall and oil tank, propeller counterweights, tail cone, static air chamber, pitot, and the channels for the machine guns. Sprue D Only eight parts are moulded on this clear sprue. These are for the windscreen, instrument panel, gunsight and various lamps. Windscreen framing is subtle but should be easy enough to mask, and the instrument panel is quite simple, as befits this machine. A decal is supplied for the instrument panel, but I suggest punching out the individual dials and adding them separately. Decals Just one medium-sized sheet is included here, with markings for FOUR aircraft. These are suitably thin, printed with solid and authentic colour, and with minimal carrier film. Everything looks to be perfect register too. I’m particularly pleased that one machine is emblazoned in Cyrillic graffiti too. That would be my build of choice! The schemes included in this release are: I-16 Type 24, 67th Fighter Regiment, South Front, Summer 1941 I-16 Type 24, 72d Mixed Regiment of the Northern Fleet Aviation, Summer 1941 I-16 Type 24, 4th Guard Fighter Regiment of the Baltic Fleet Aviation, Winter – Spring 1942 I-16 Type 24, 254th Fighter Regiment, Leningrad Front, Summer 1943 Instructions The Rata’s construction is broken down into 59 sequences of assembly, which are all clearly drawn and very easy to follow. There are paint references given for Revell and Tamiya colours, and these are very clearly annotated throughout the 12-page instruction manual. The last two pages are taken over with the scheme profiles and decal placement guides for each machine. Conclusion It really is good to see a modern tooling of this stubby little aircraft, and with the beautiful details what ICM has furnished the kit with. They really do seem to have captured the agricultural look of the machine, but with the finesse of both the cockpit and the engine areas. This doesn’t look a difficult kit to build, but I do suggest you look towards when Eduard’s sets can offer, especially with regard to things such as the missing seatbelts. In all, a great little kit, and not too expensive either. Certainly a good number of hours of modelling to be had with this release. Highly recommended My sincere thanks to ICM for the review kit seen here. To purchase directly, click THIS link.


- 2 replies
-
- 2
-

-
- polikarpov
- i-16
- (and 1 more)
-
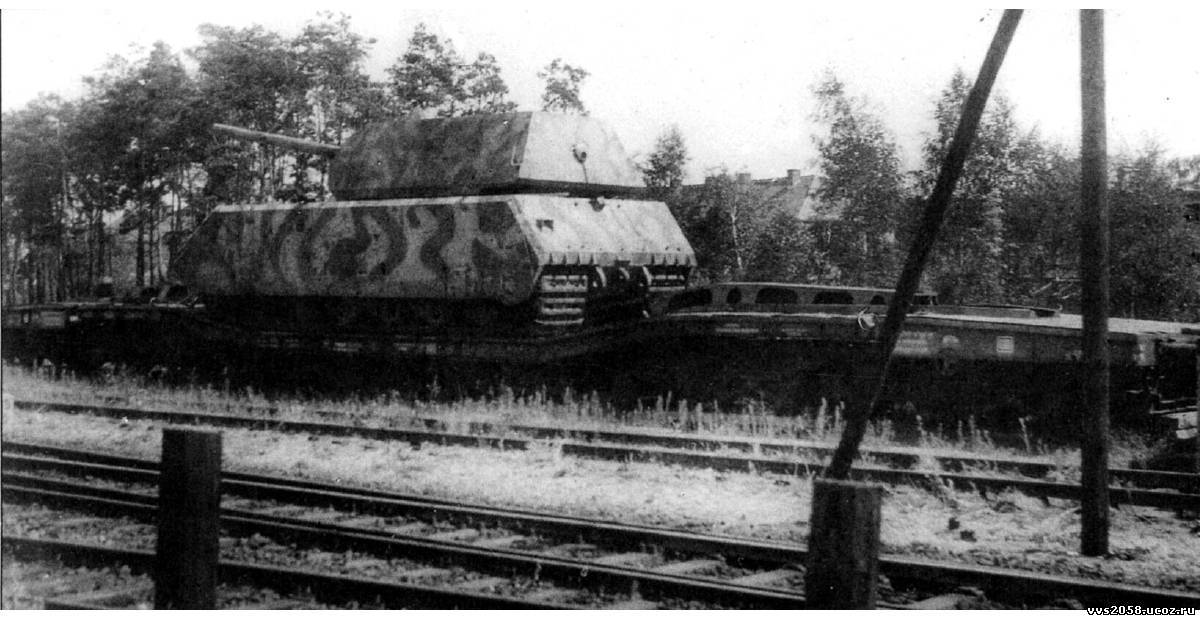
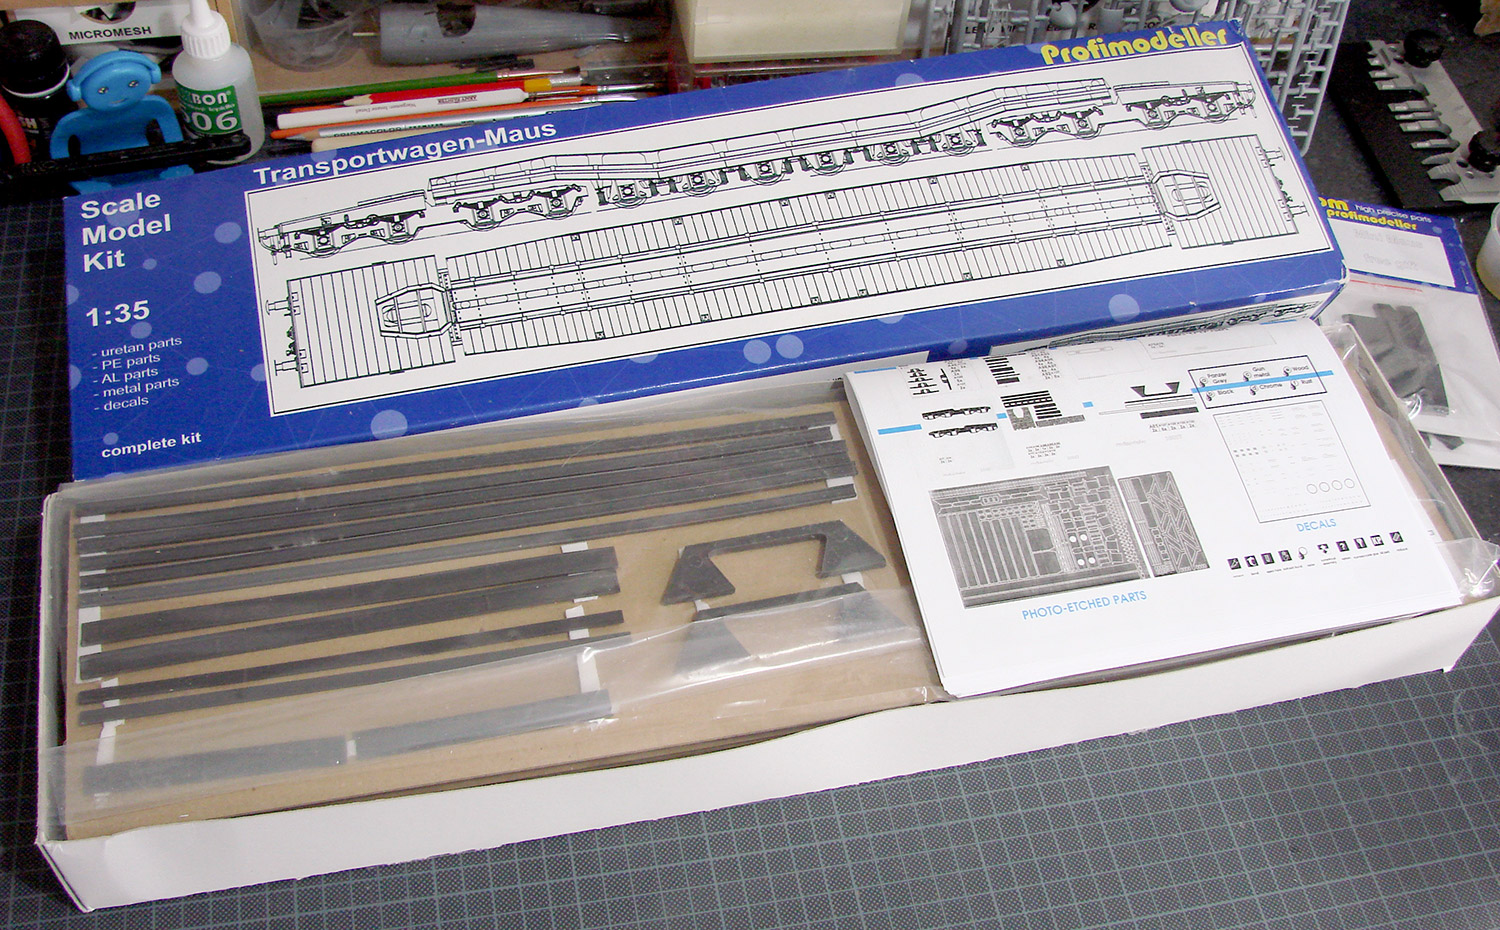
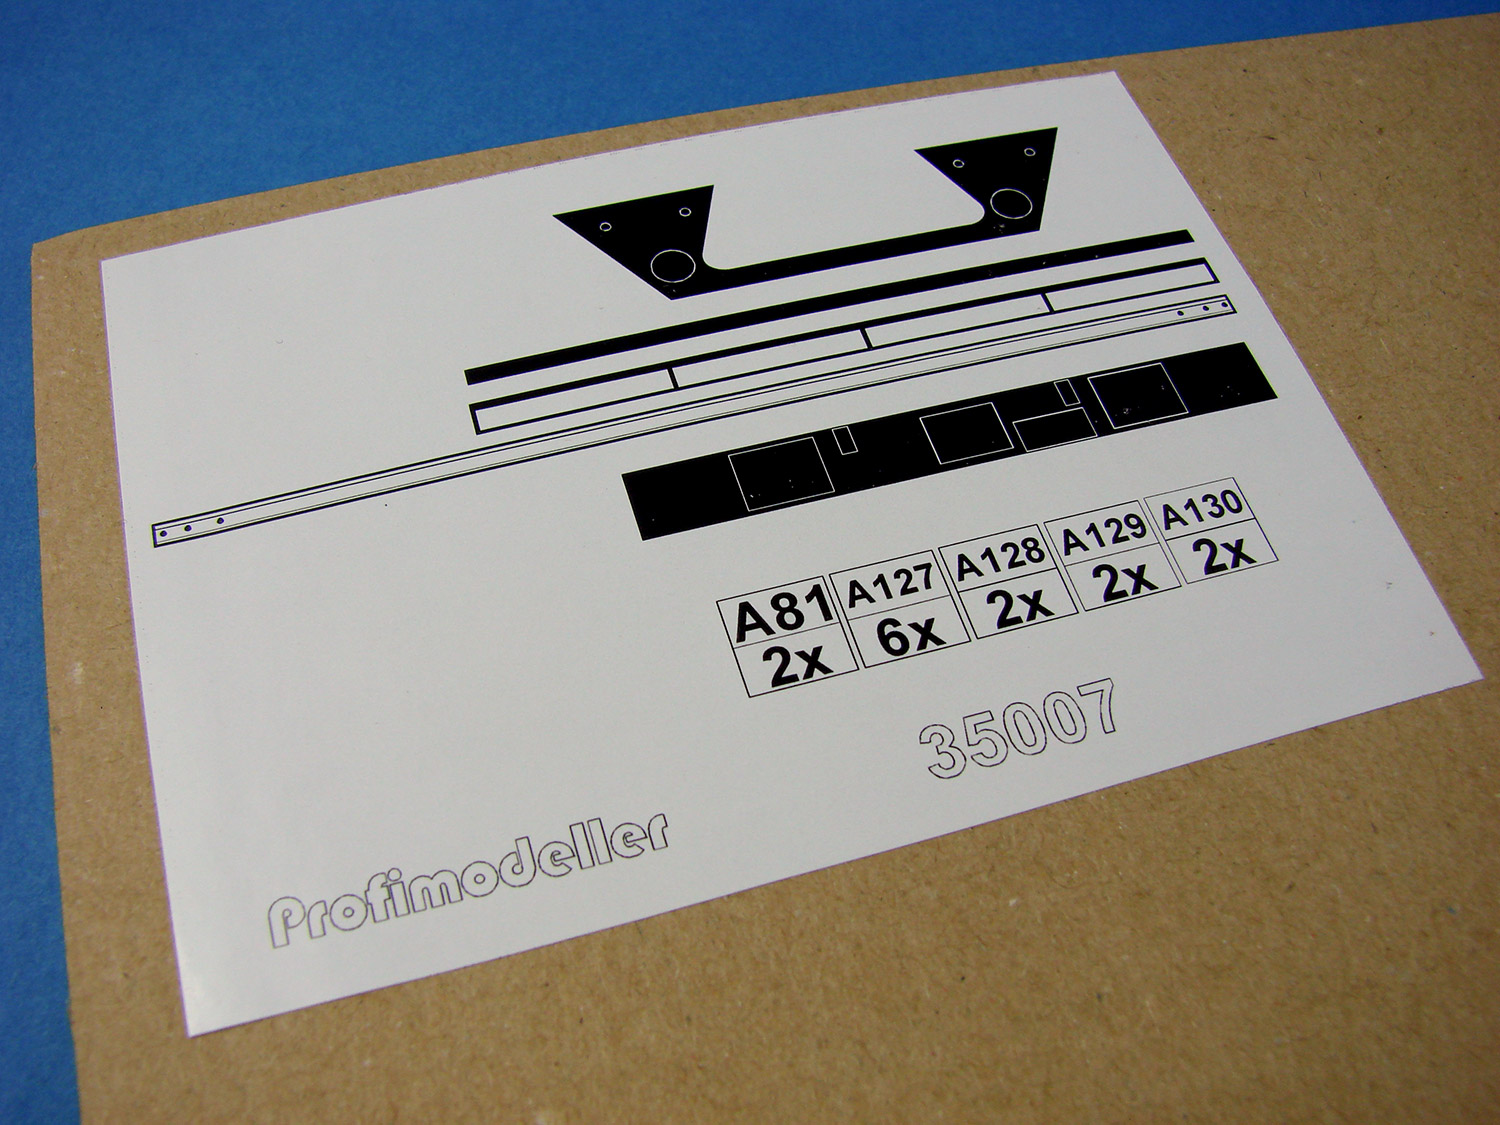
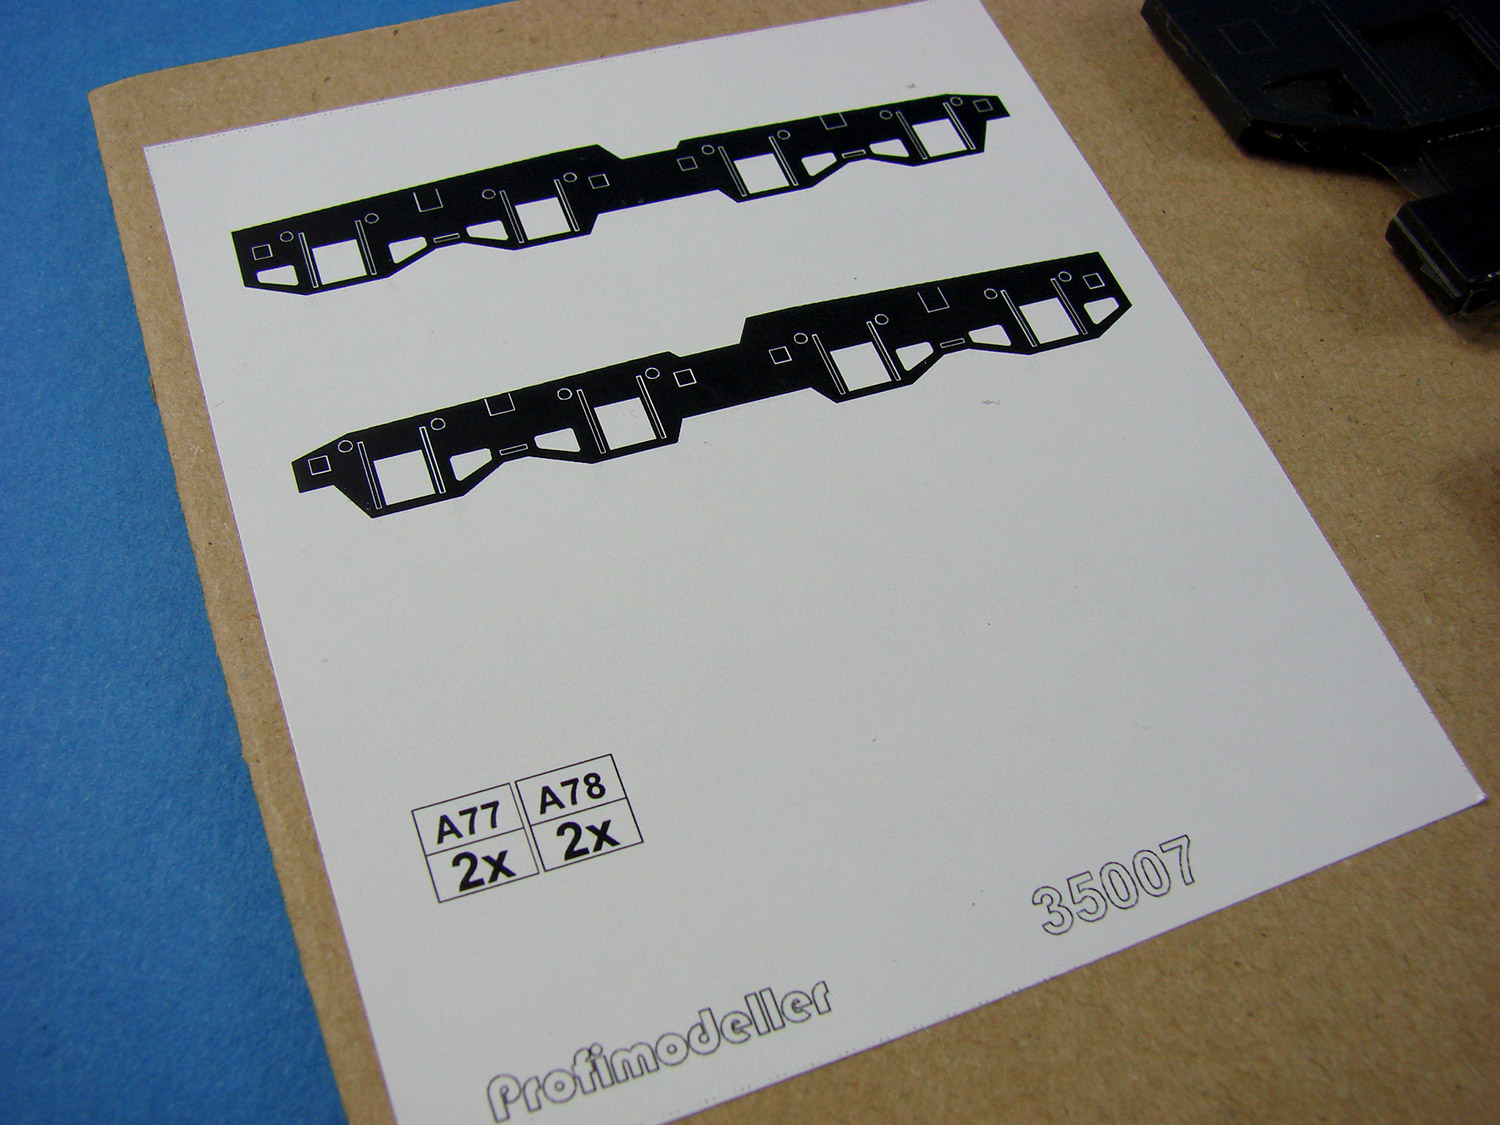
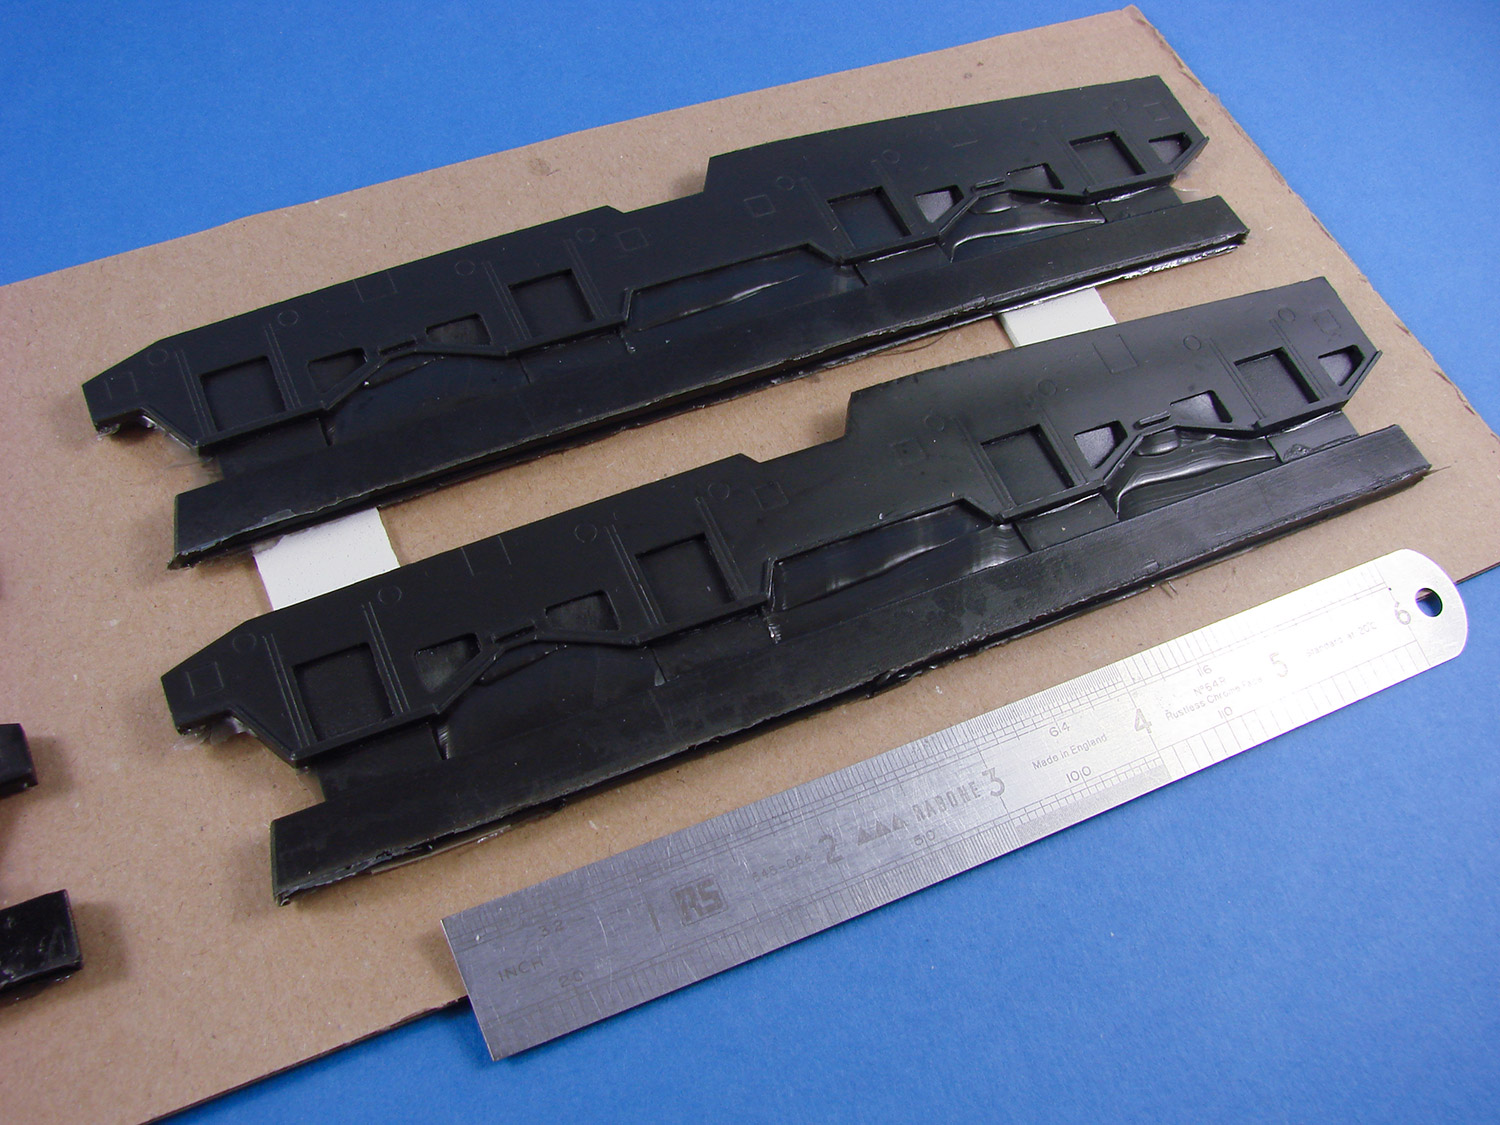
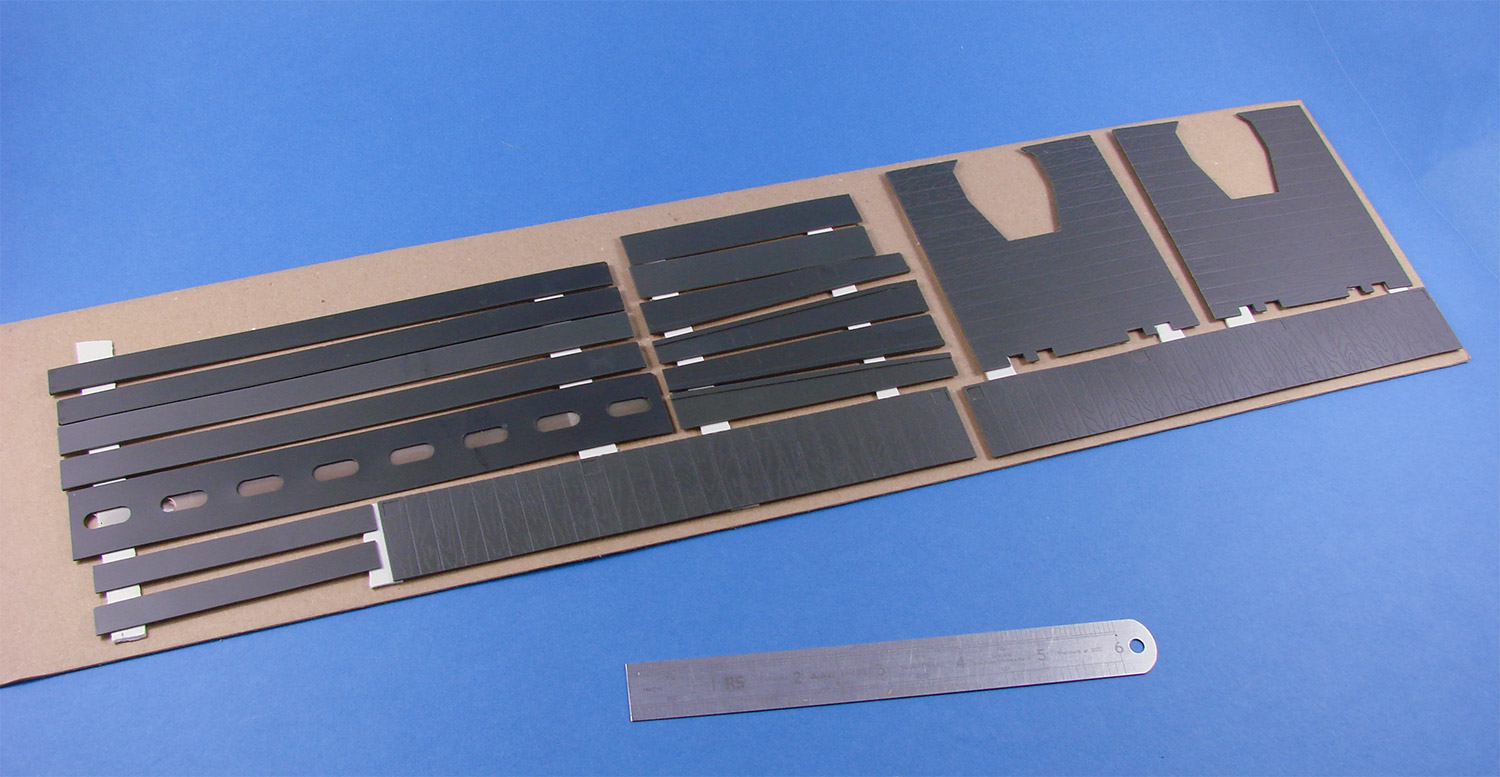
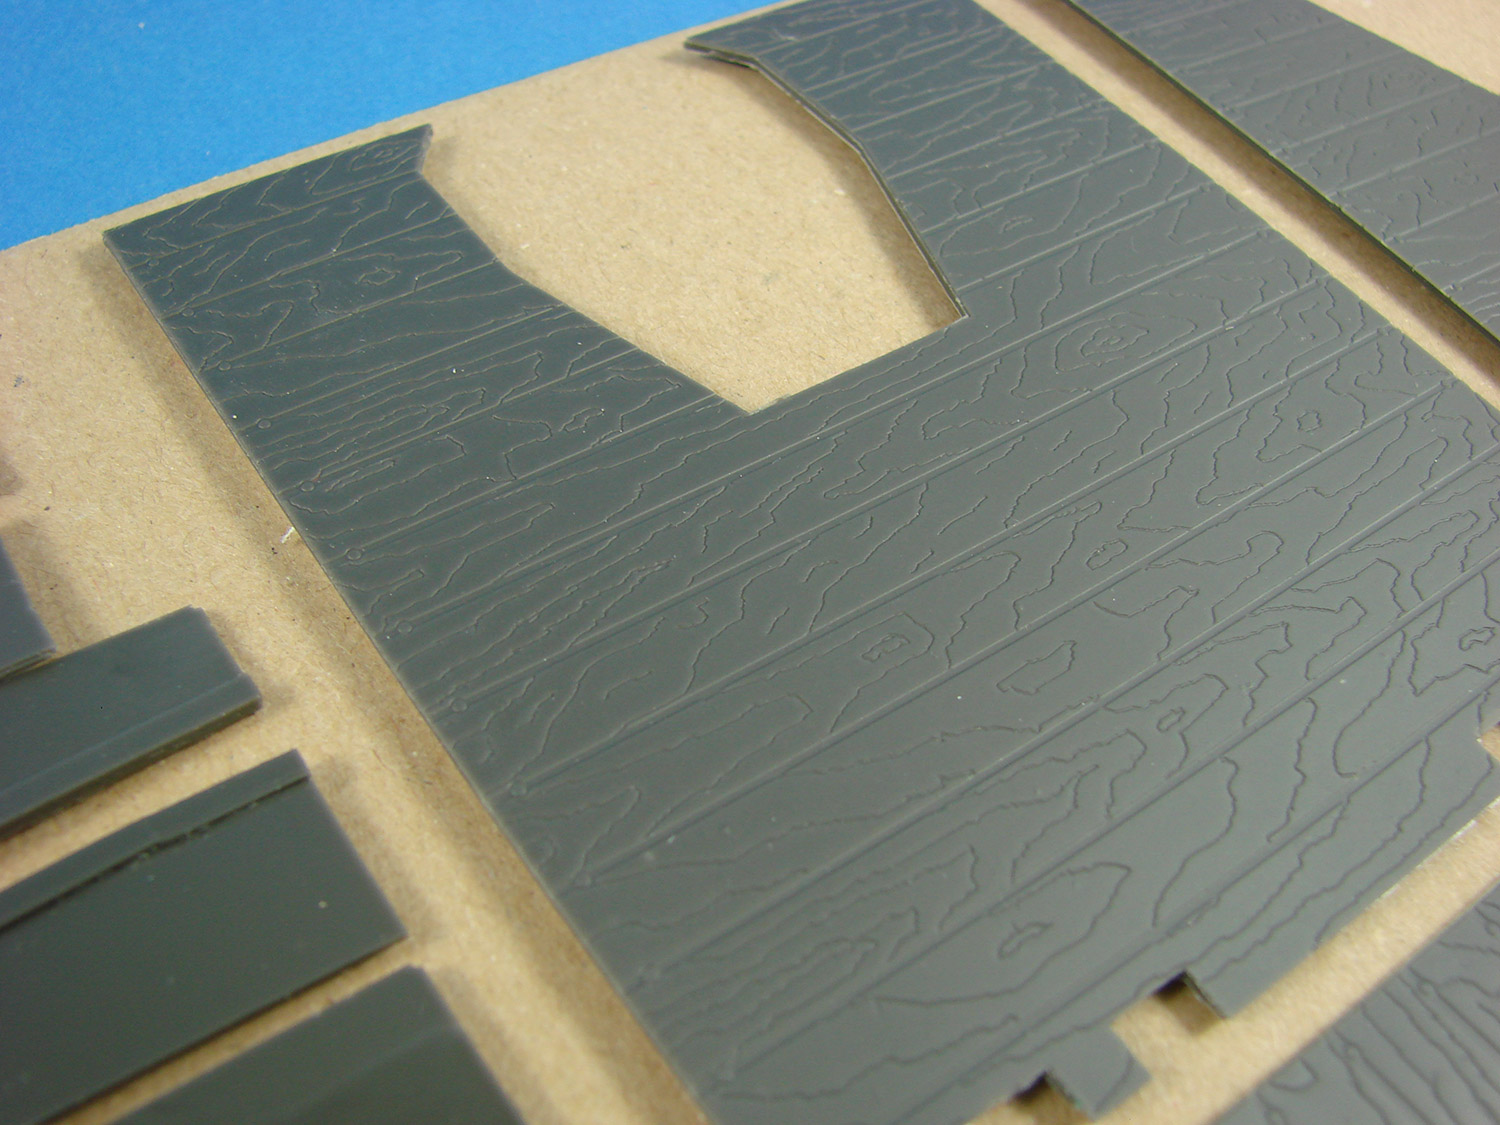
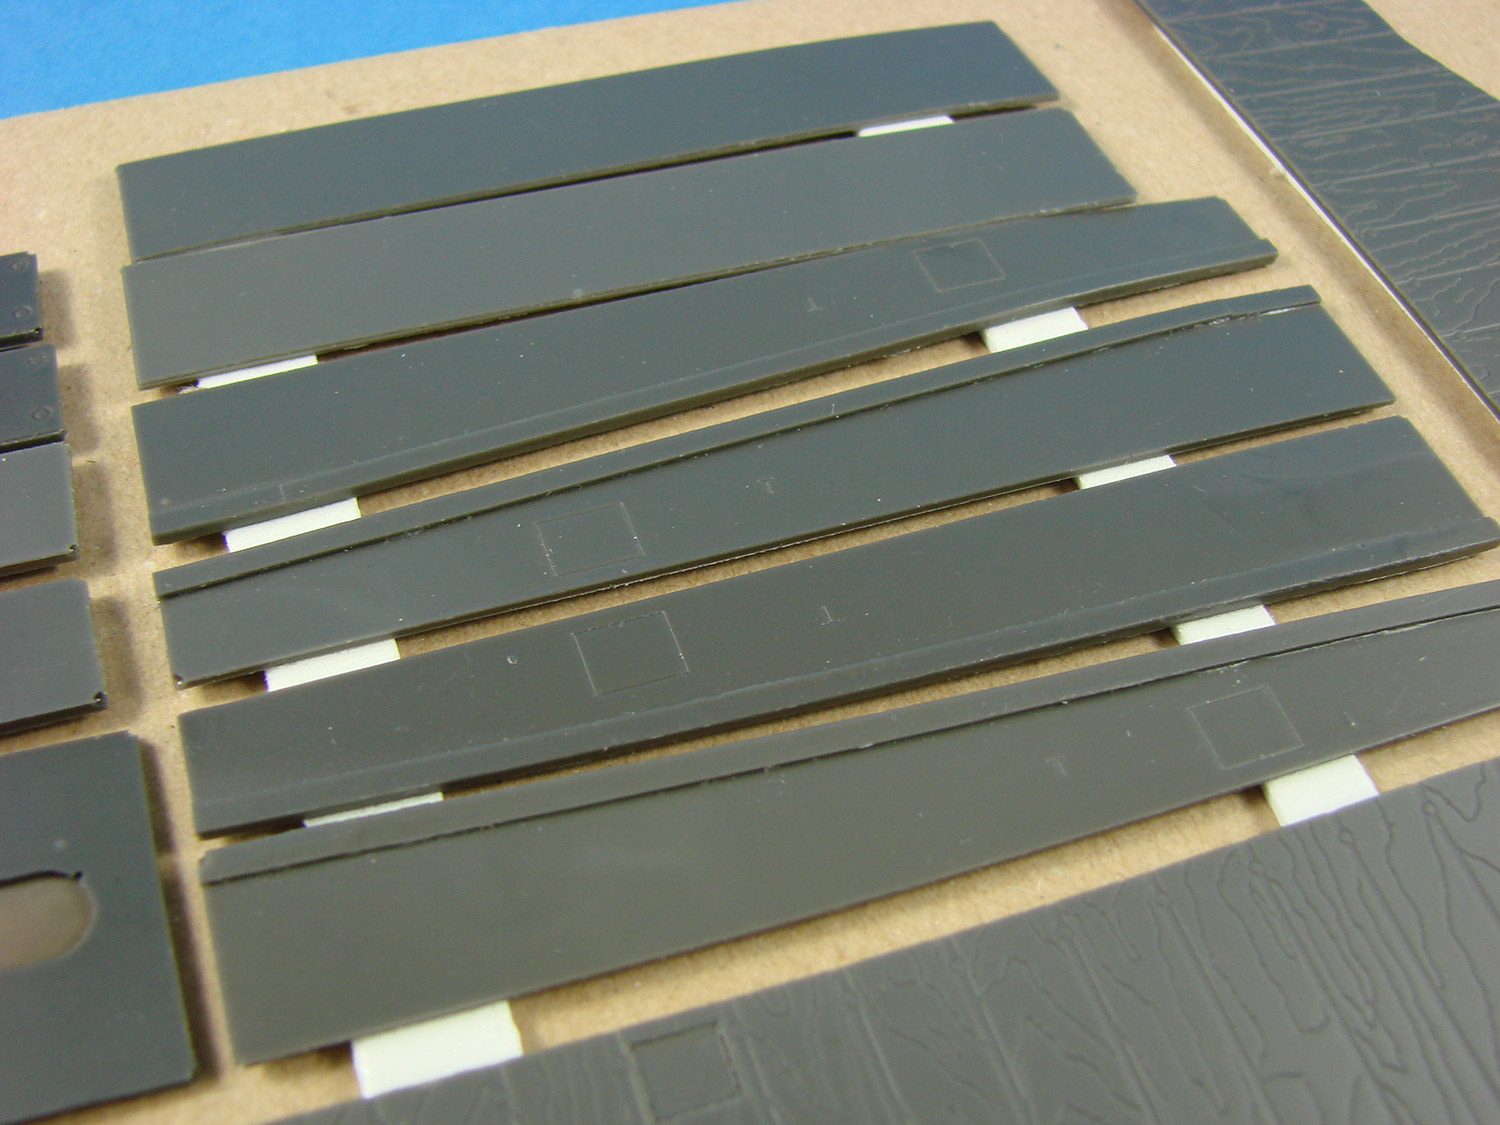
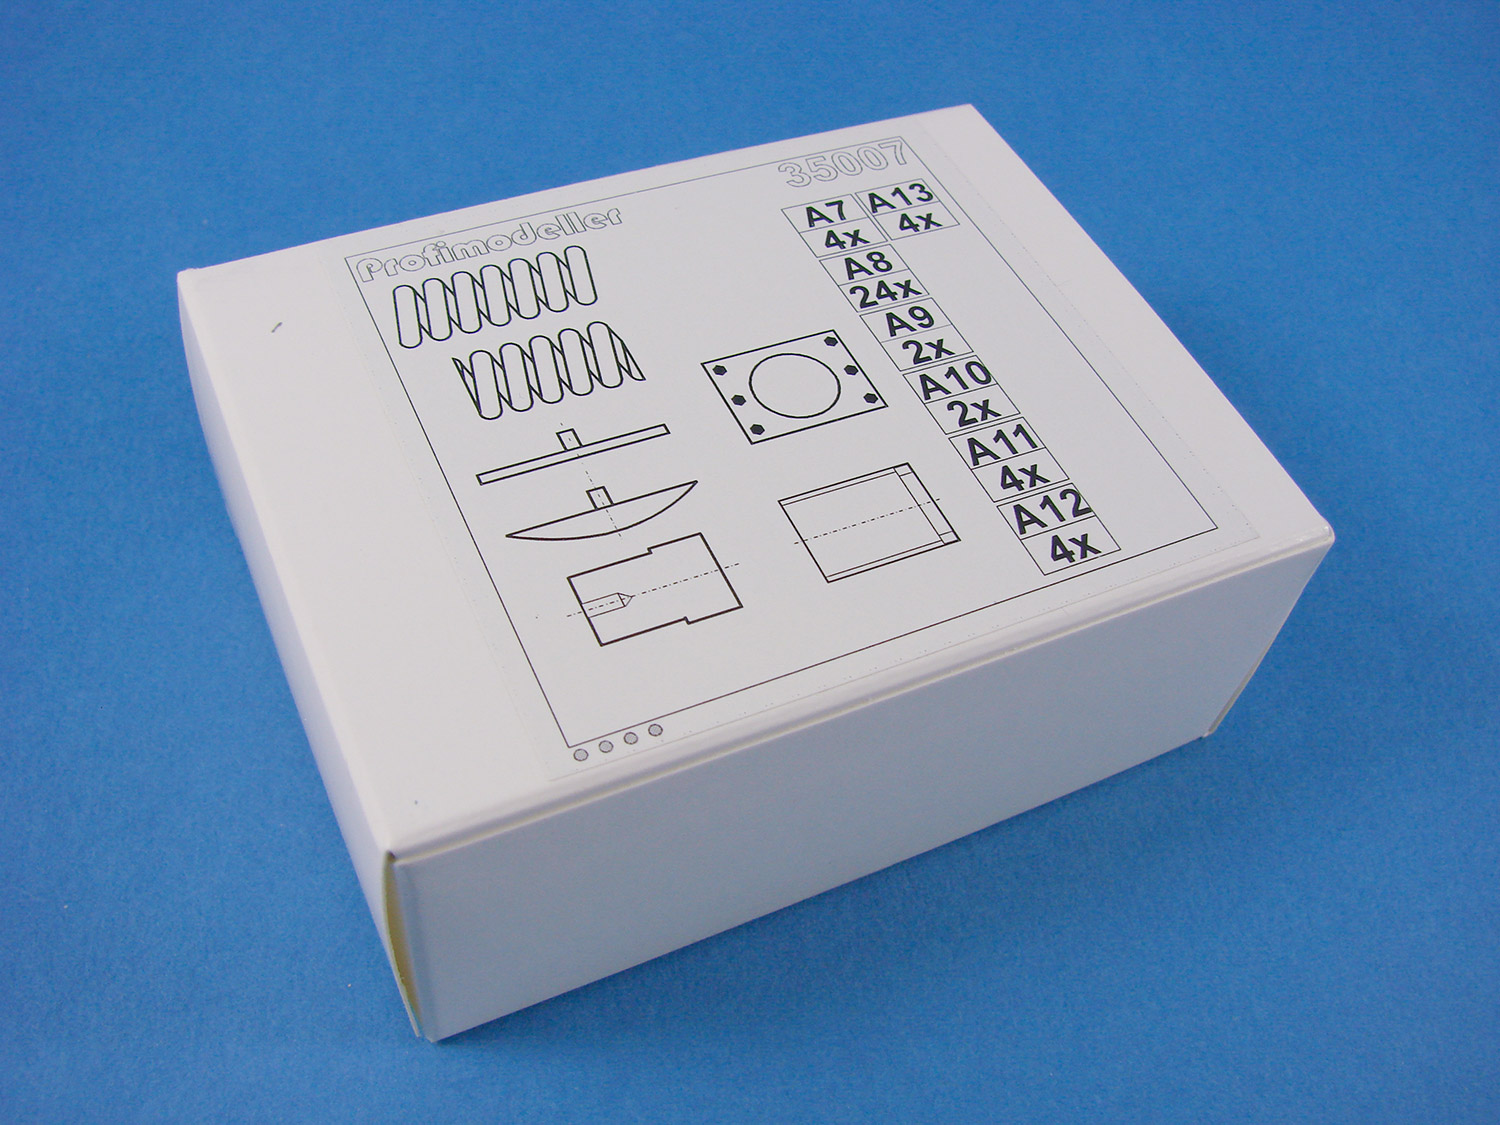
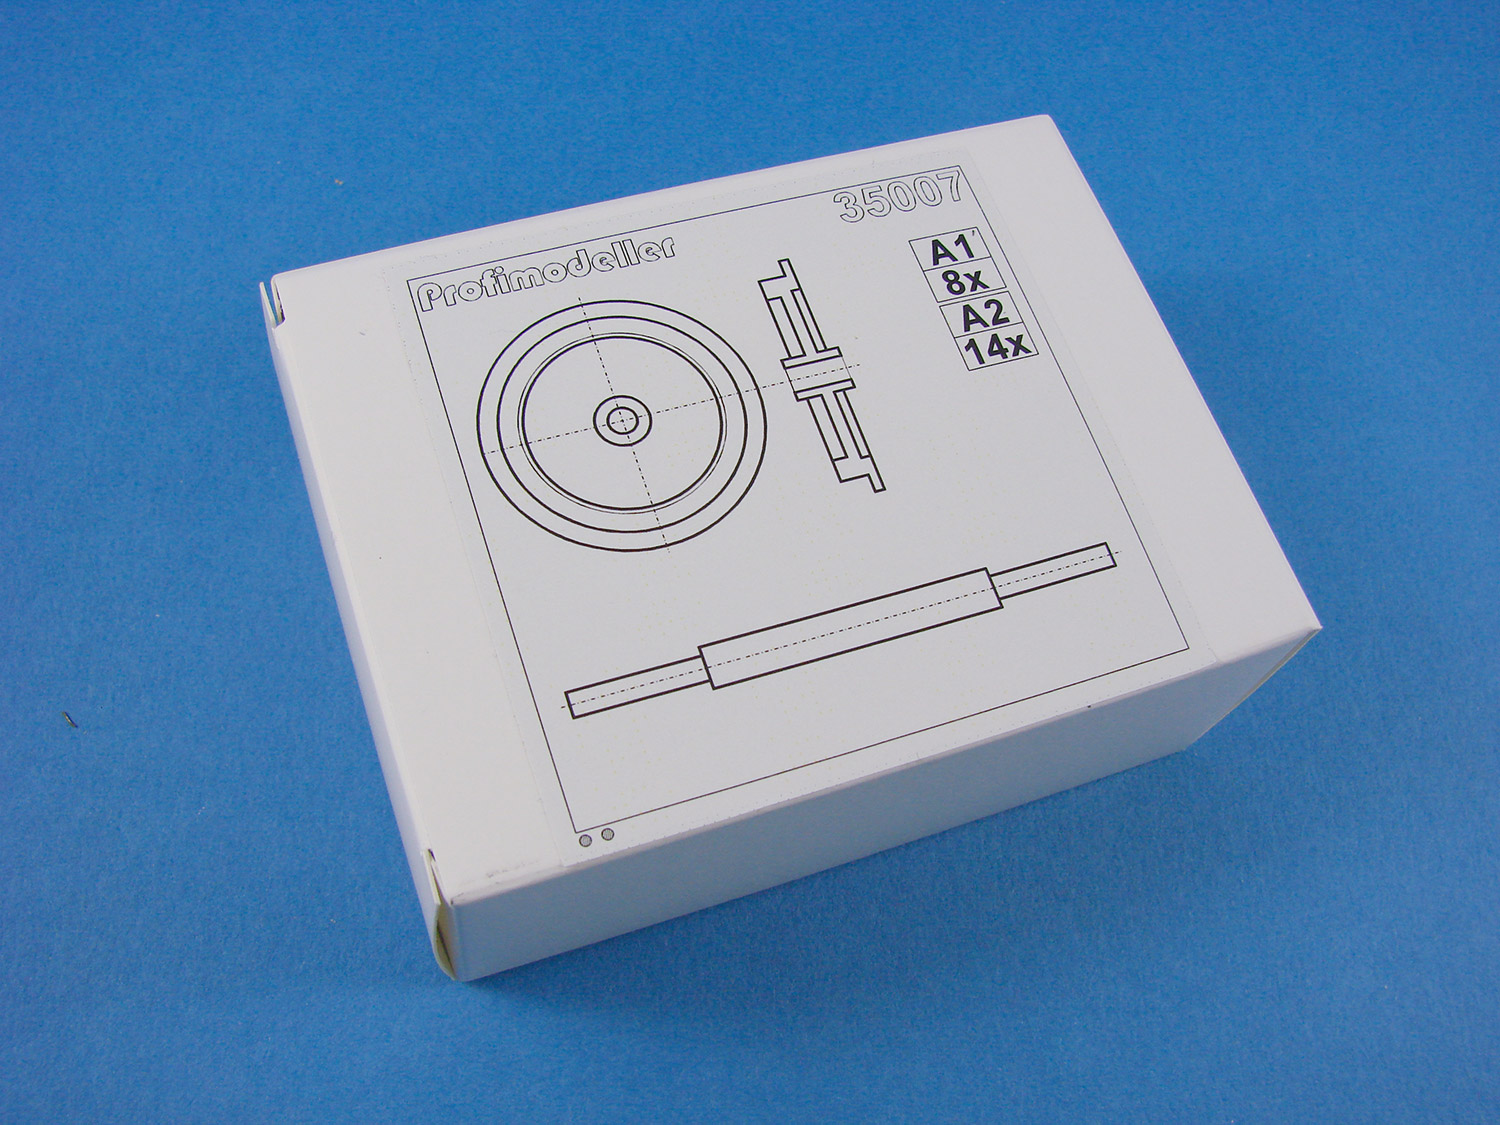
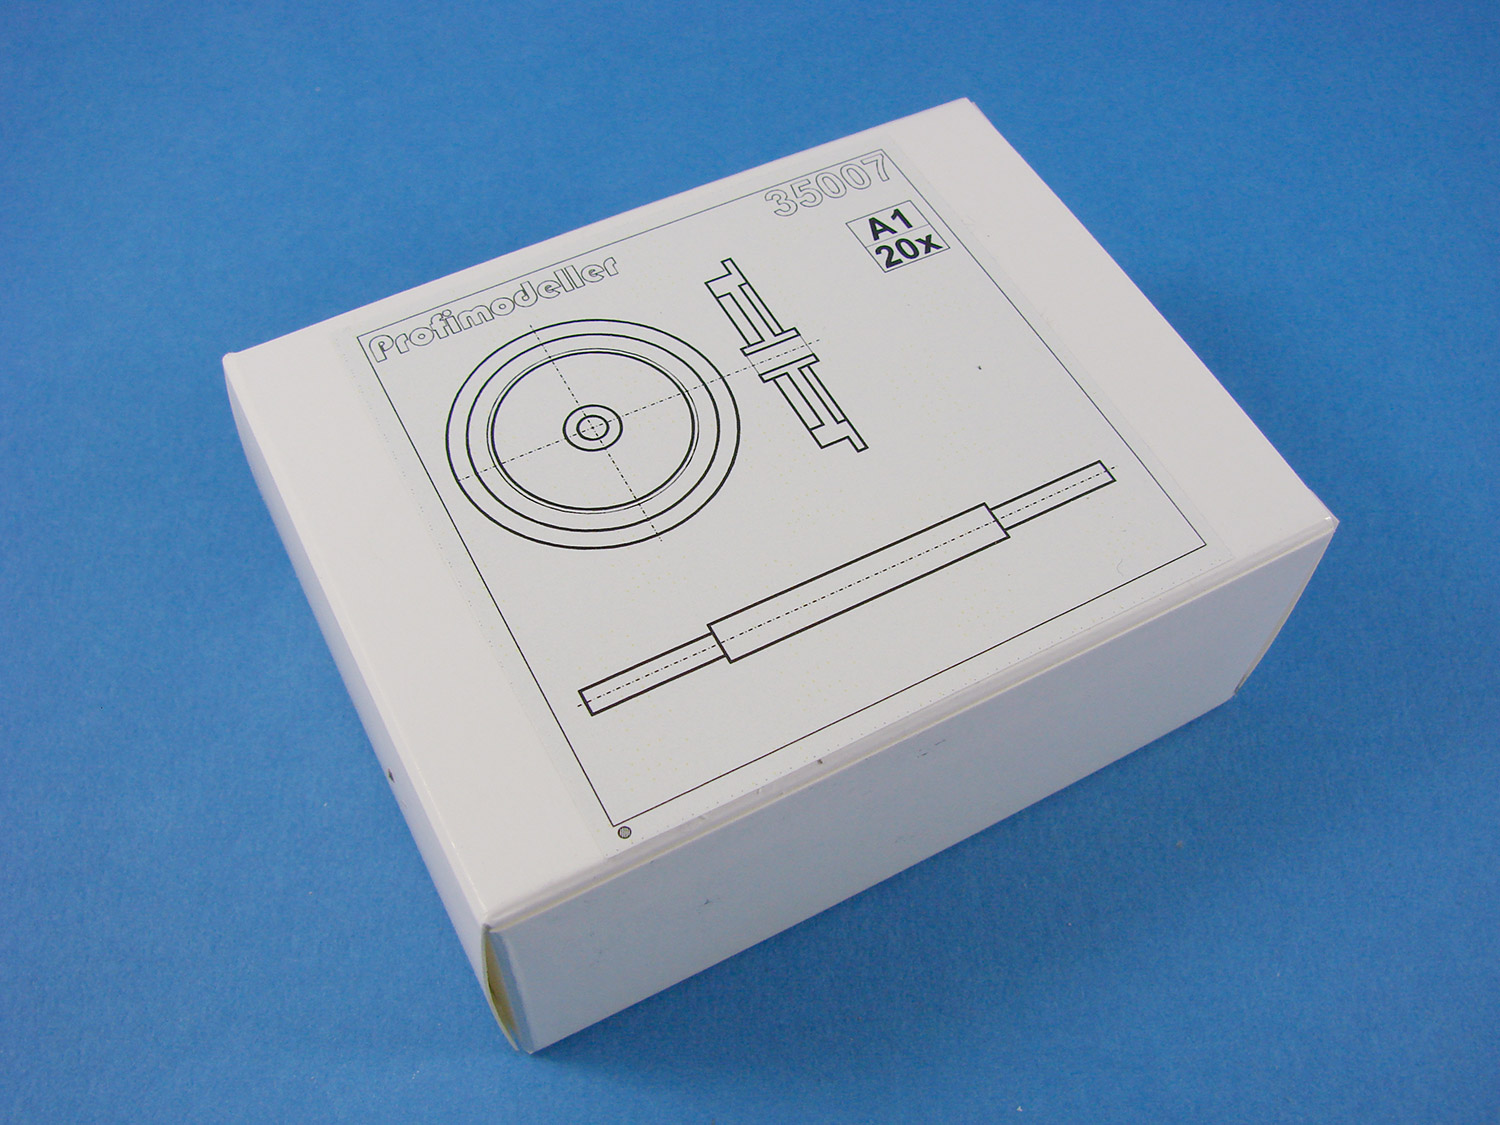
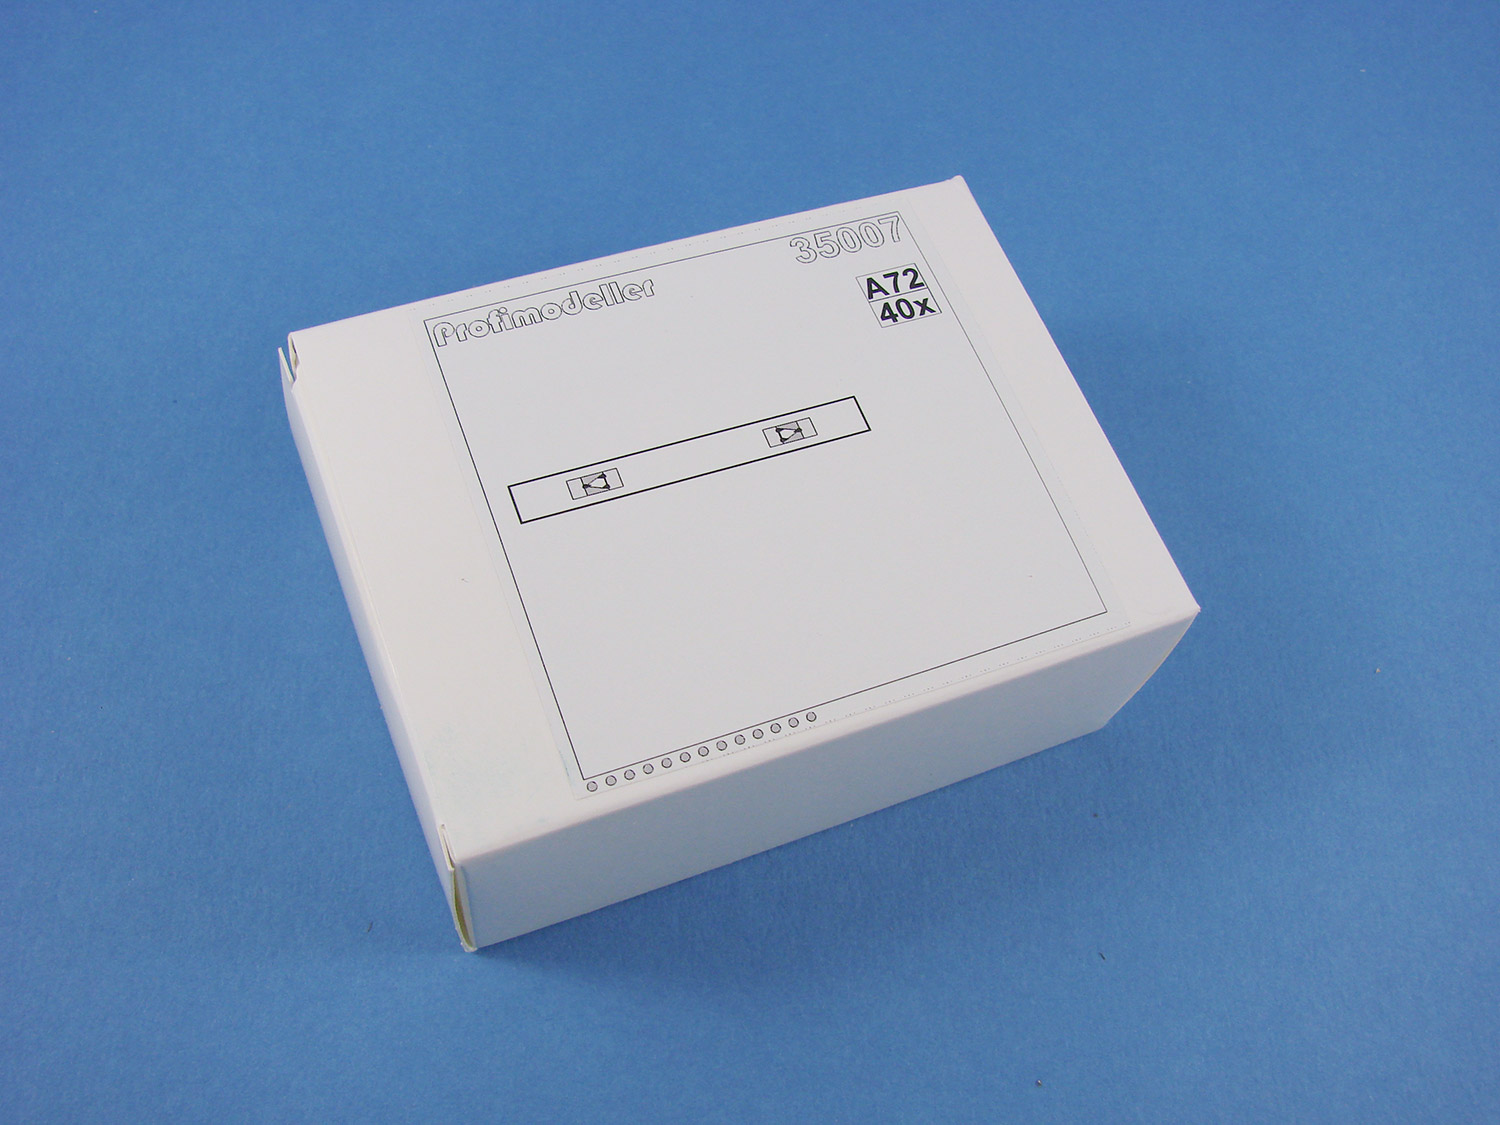
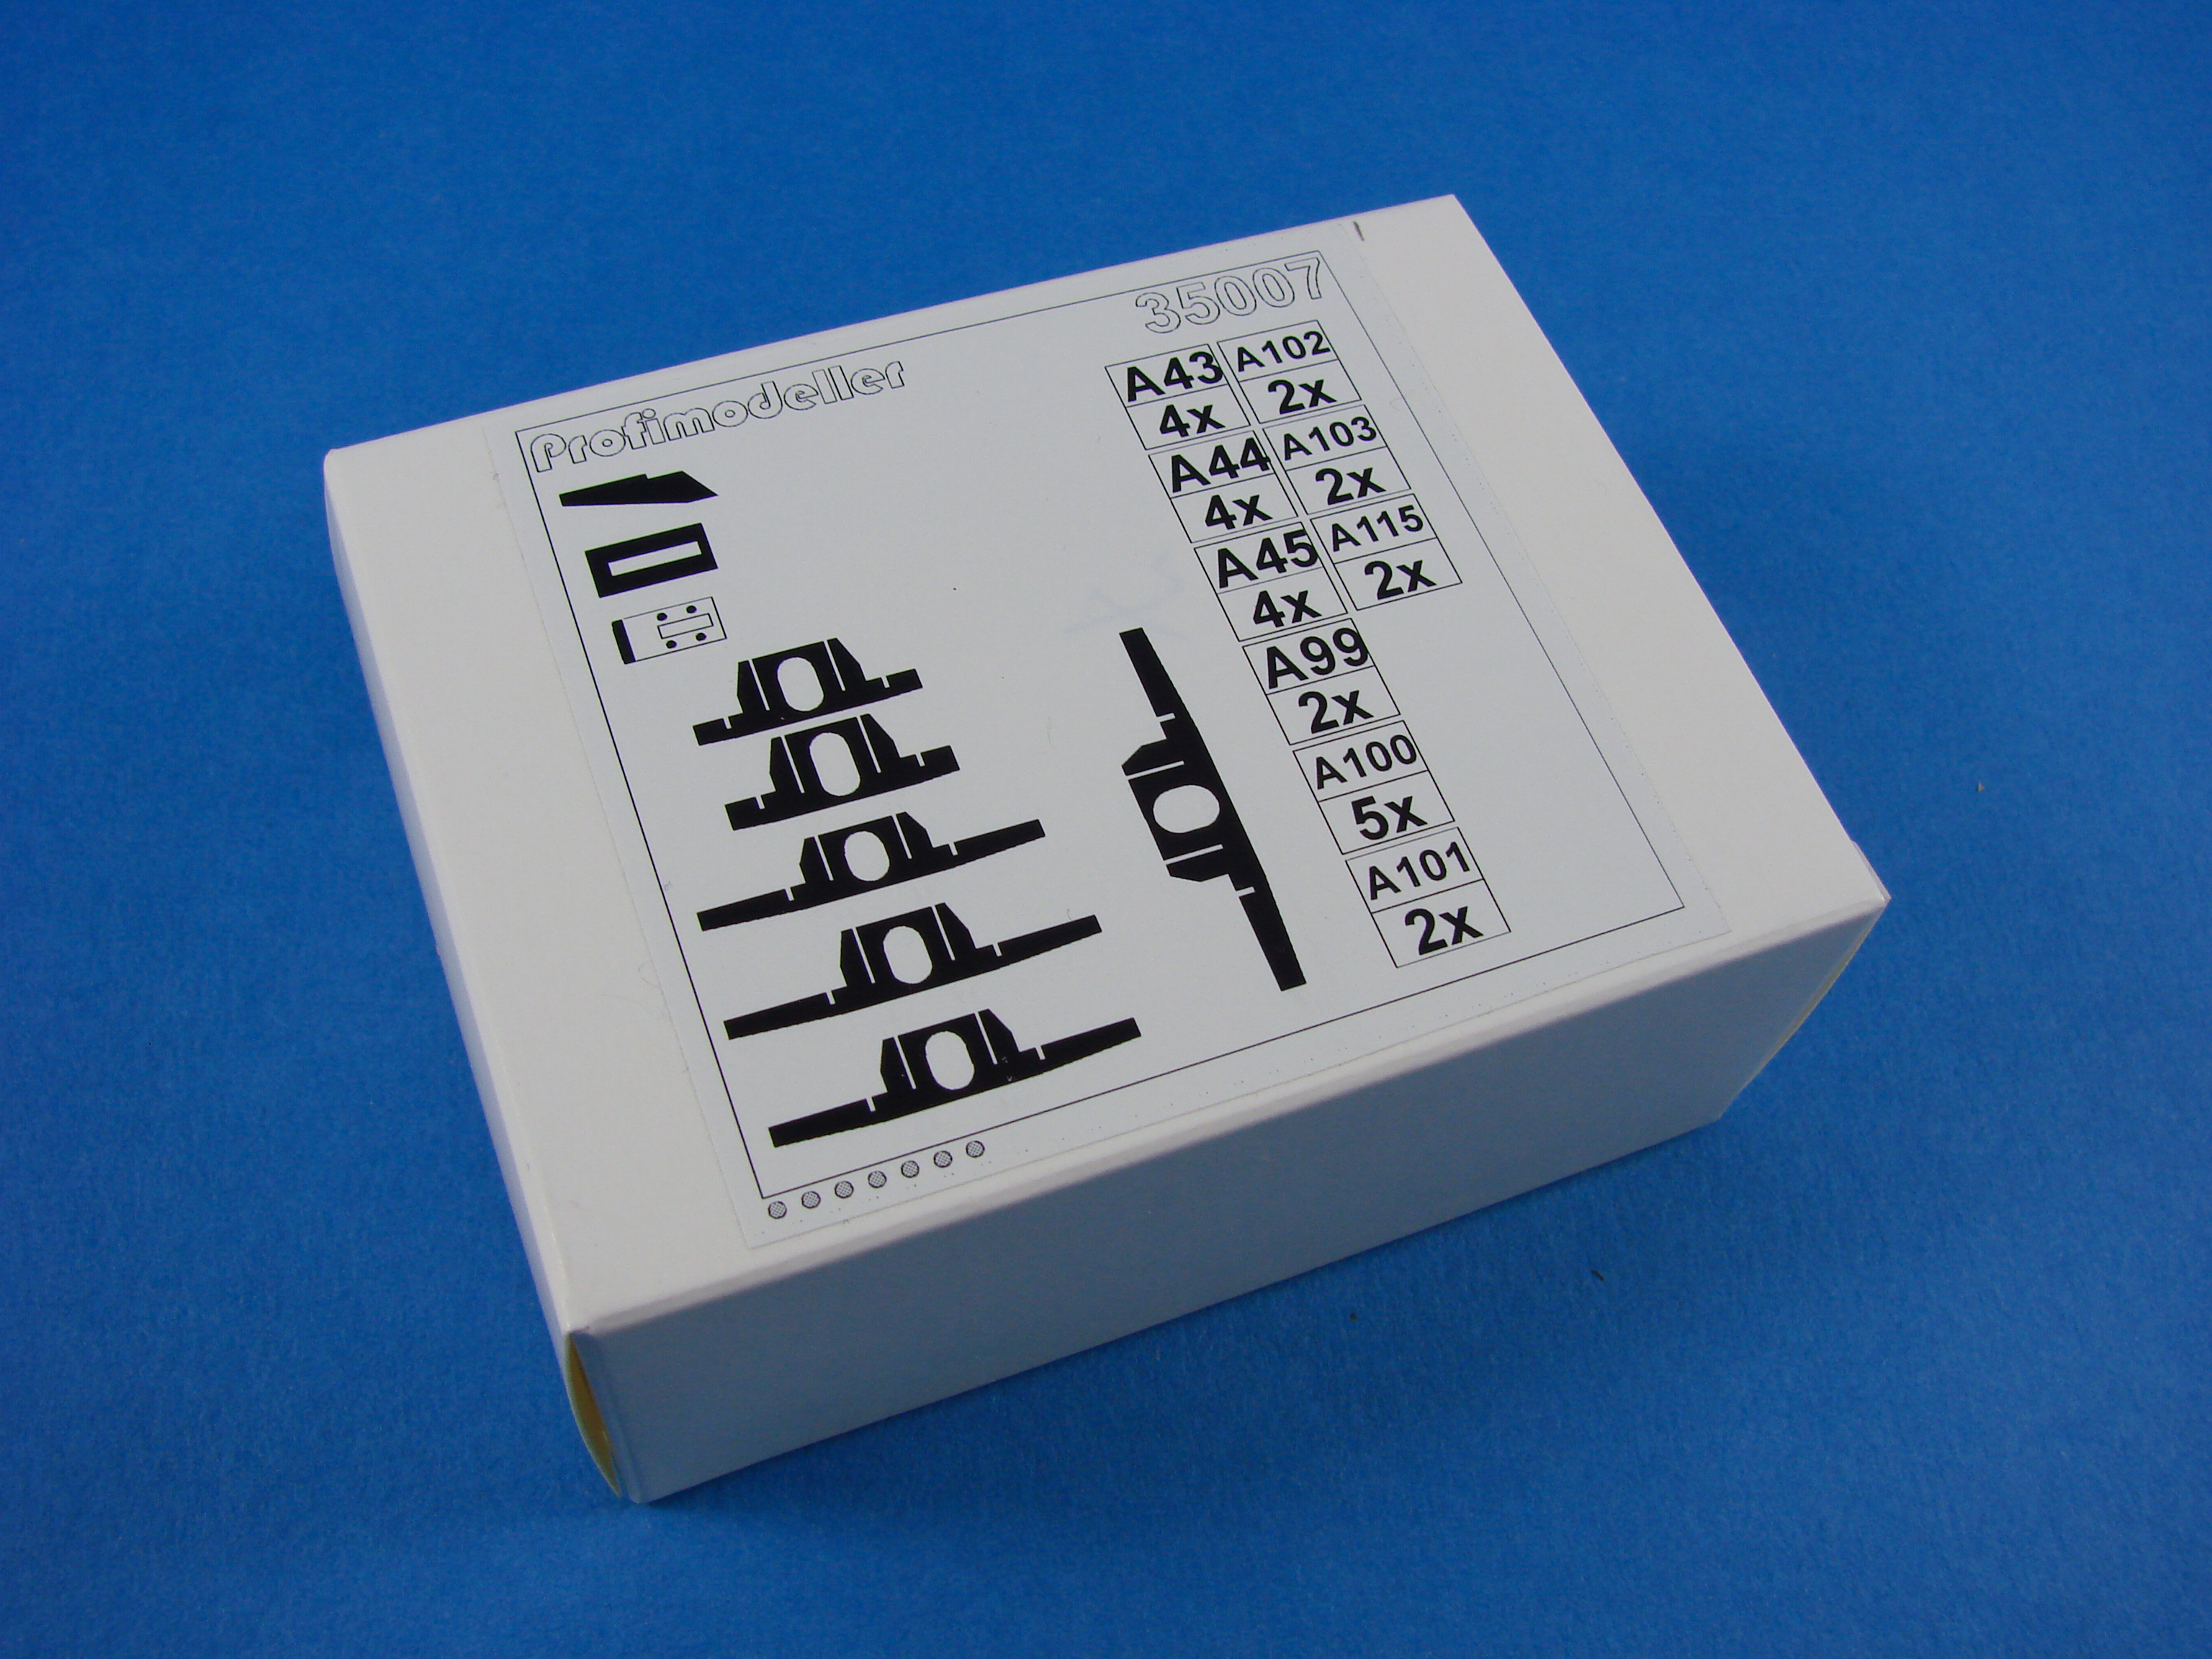
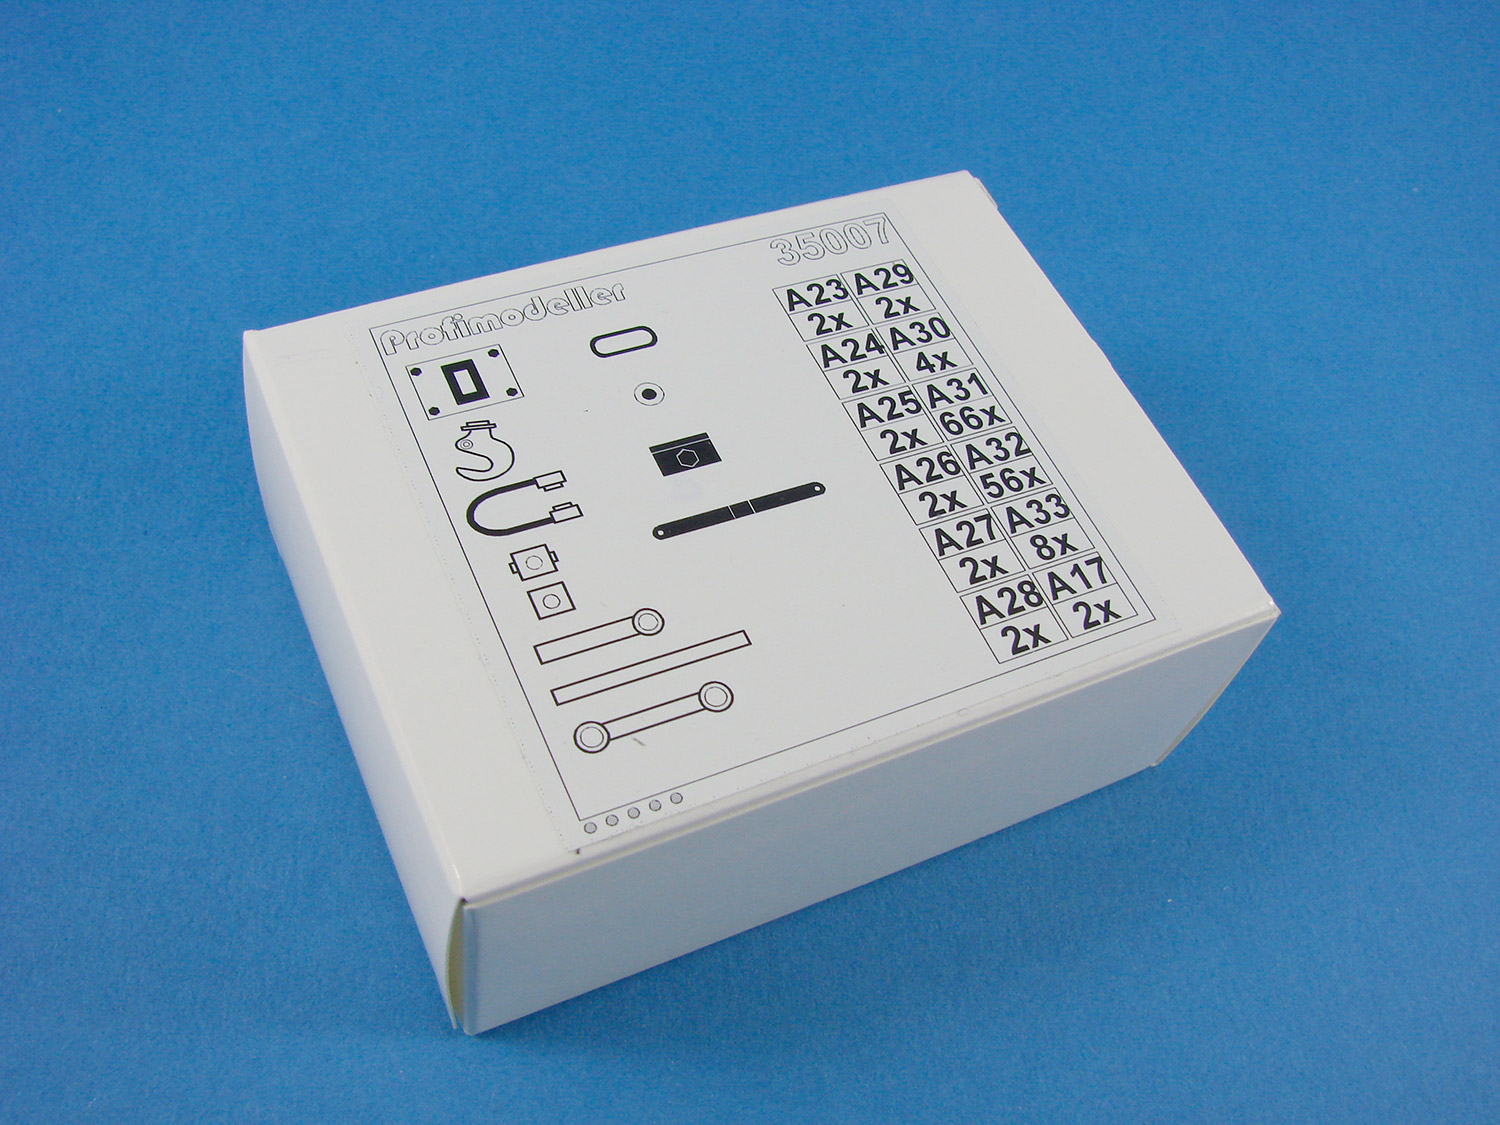
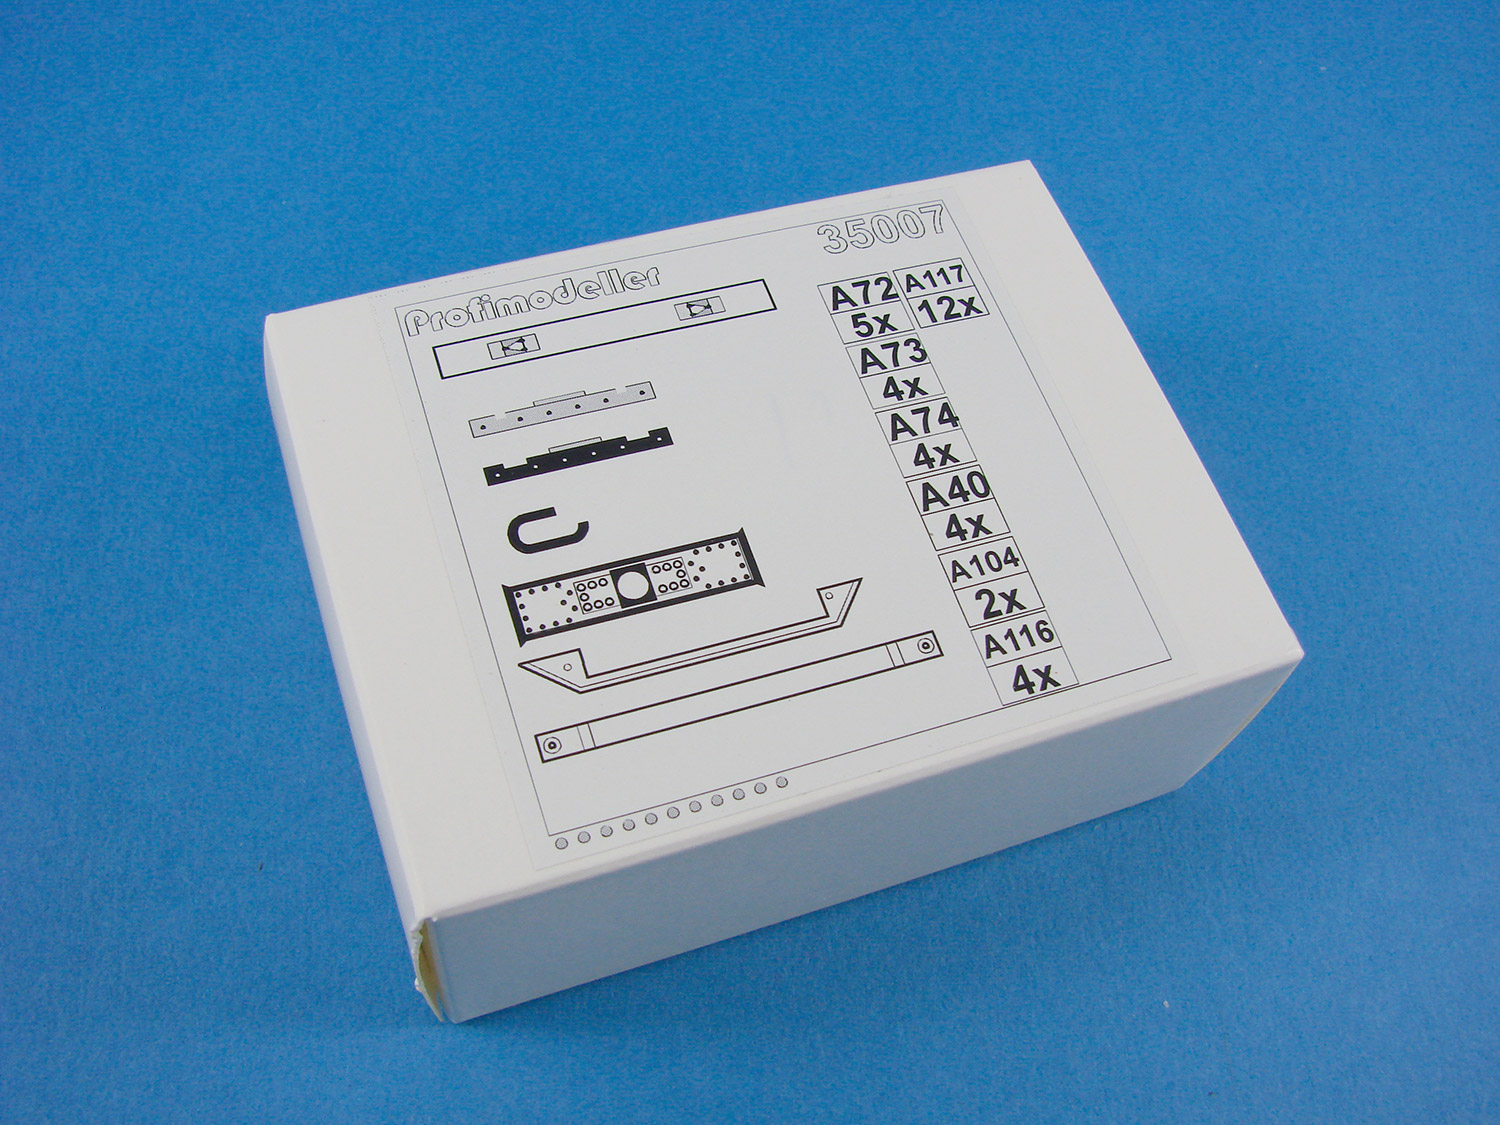
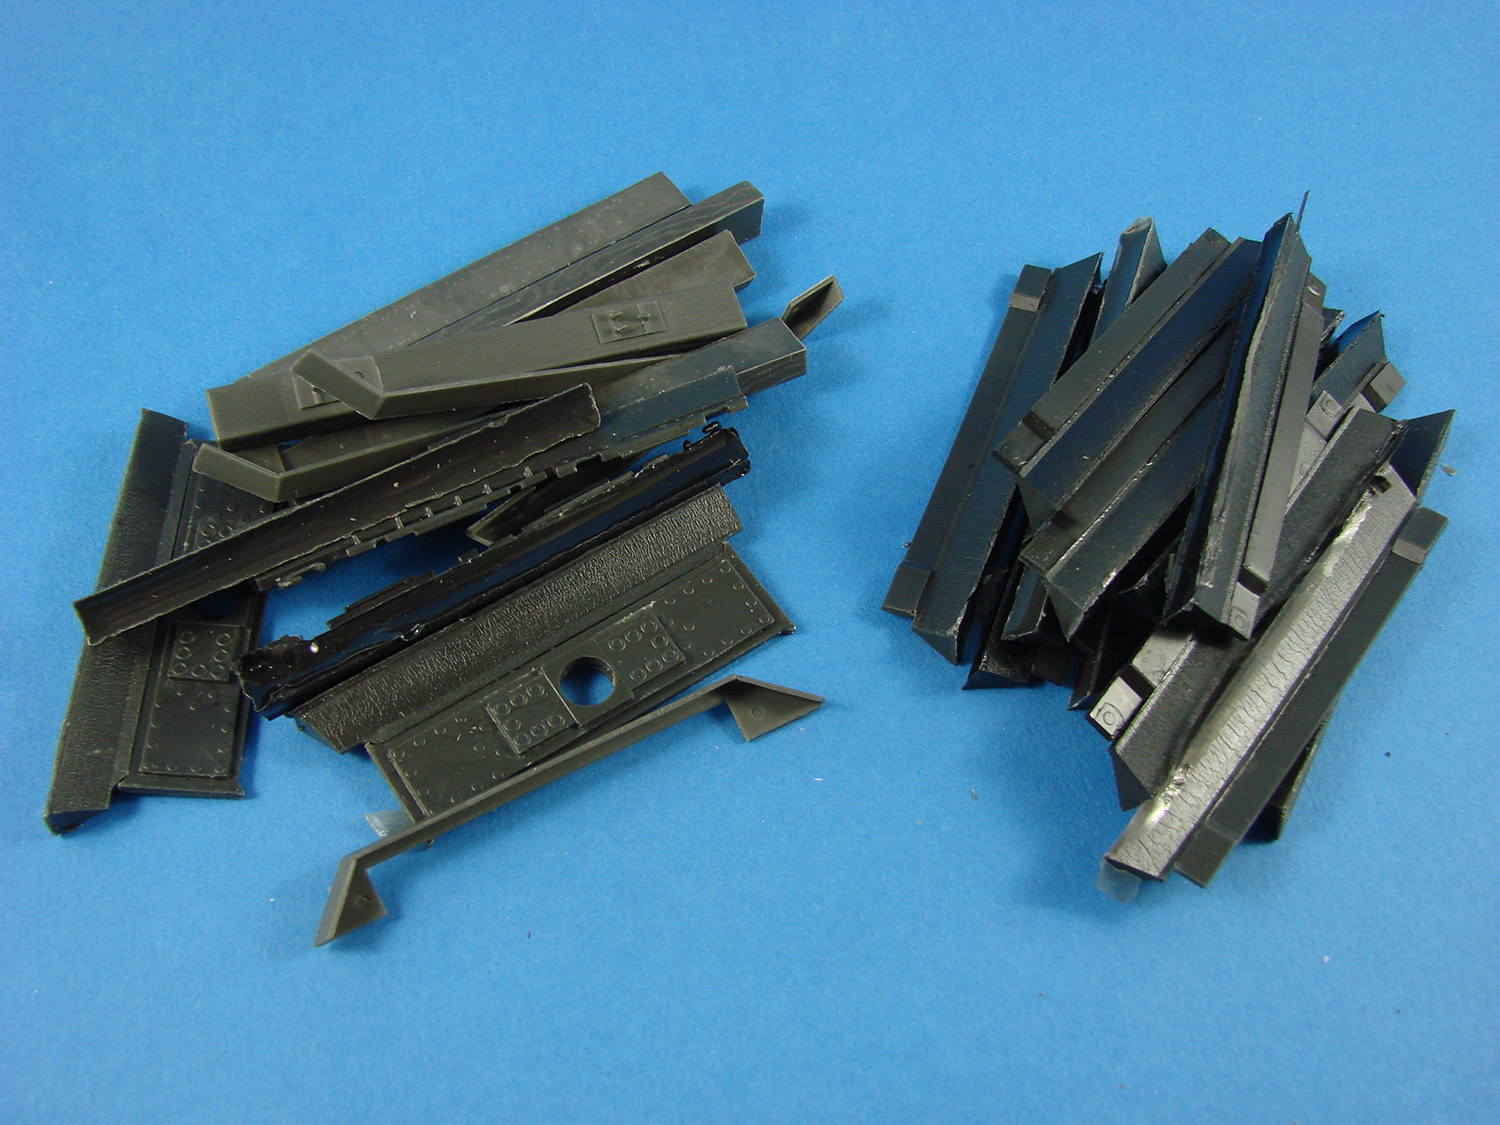
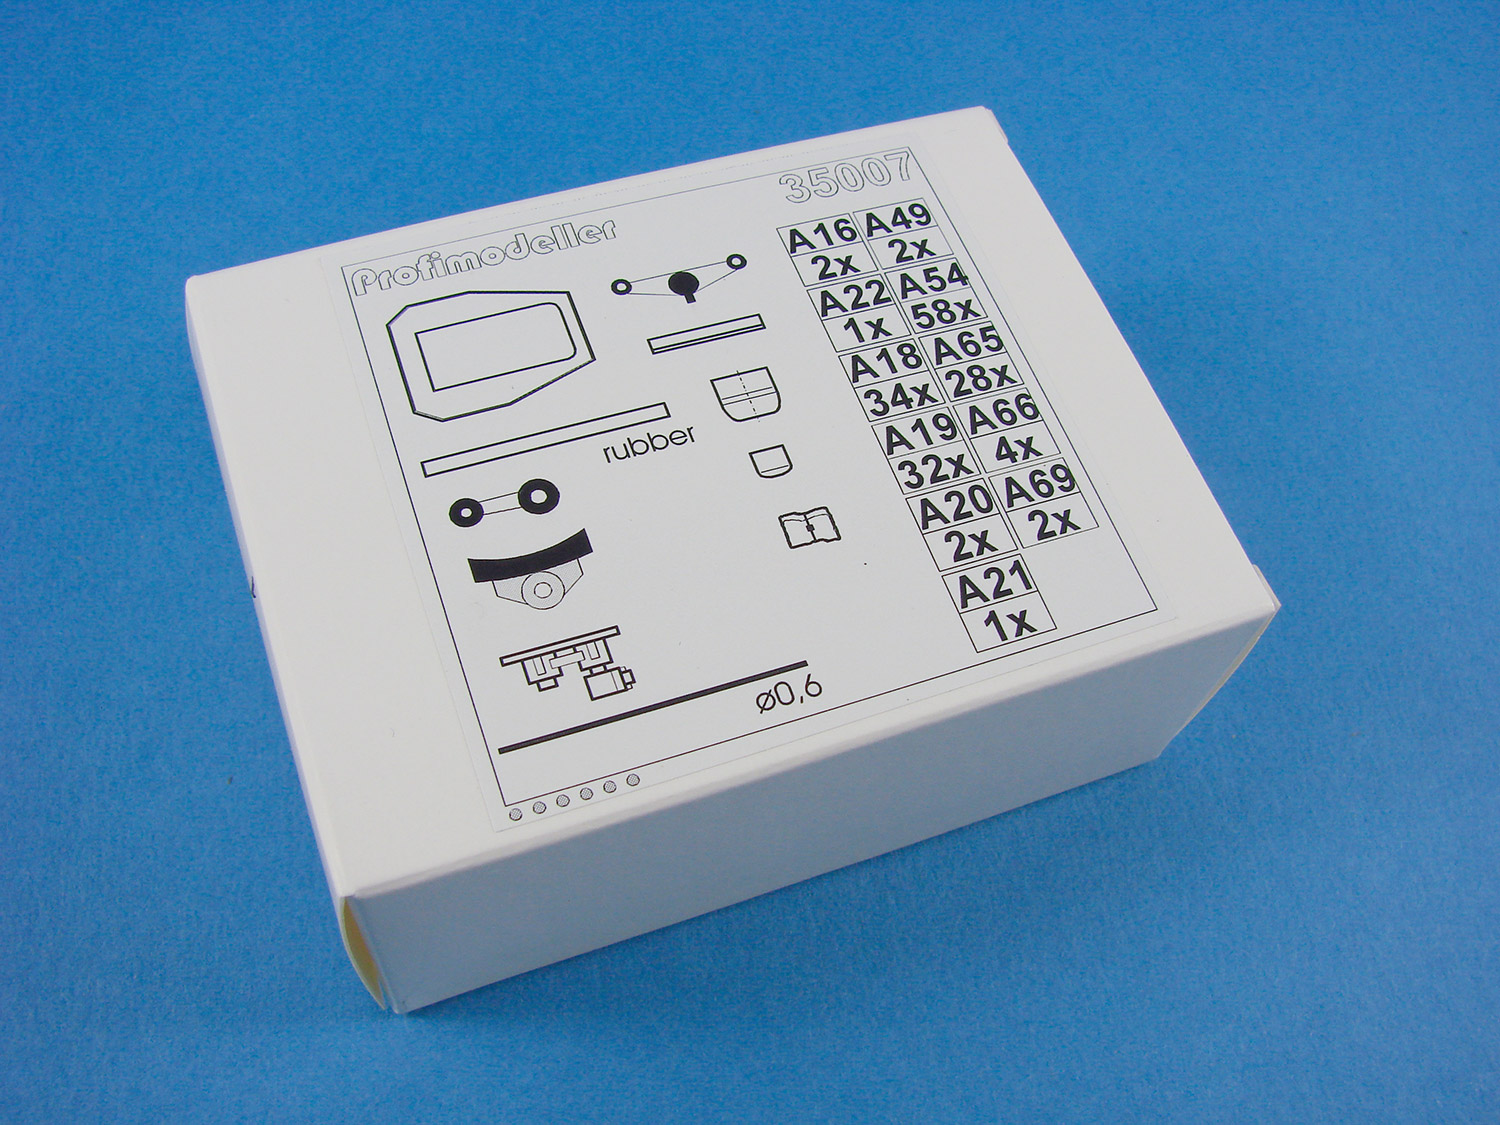
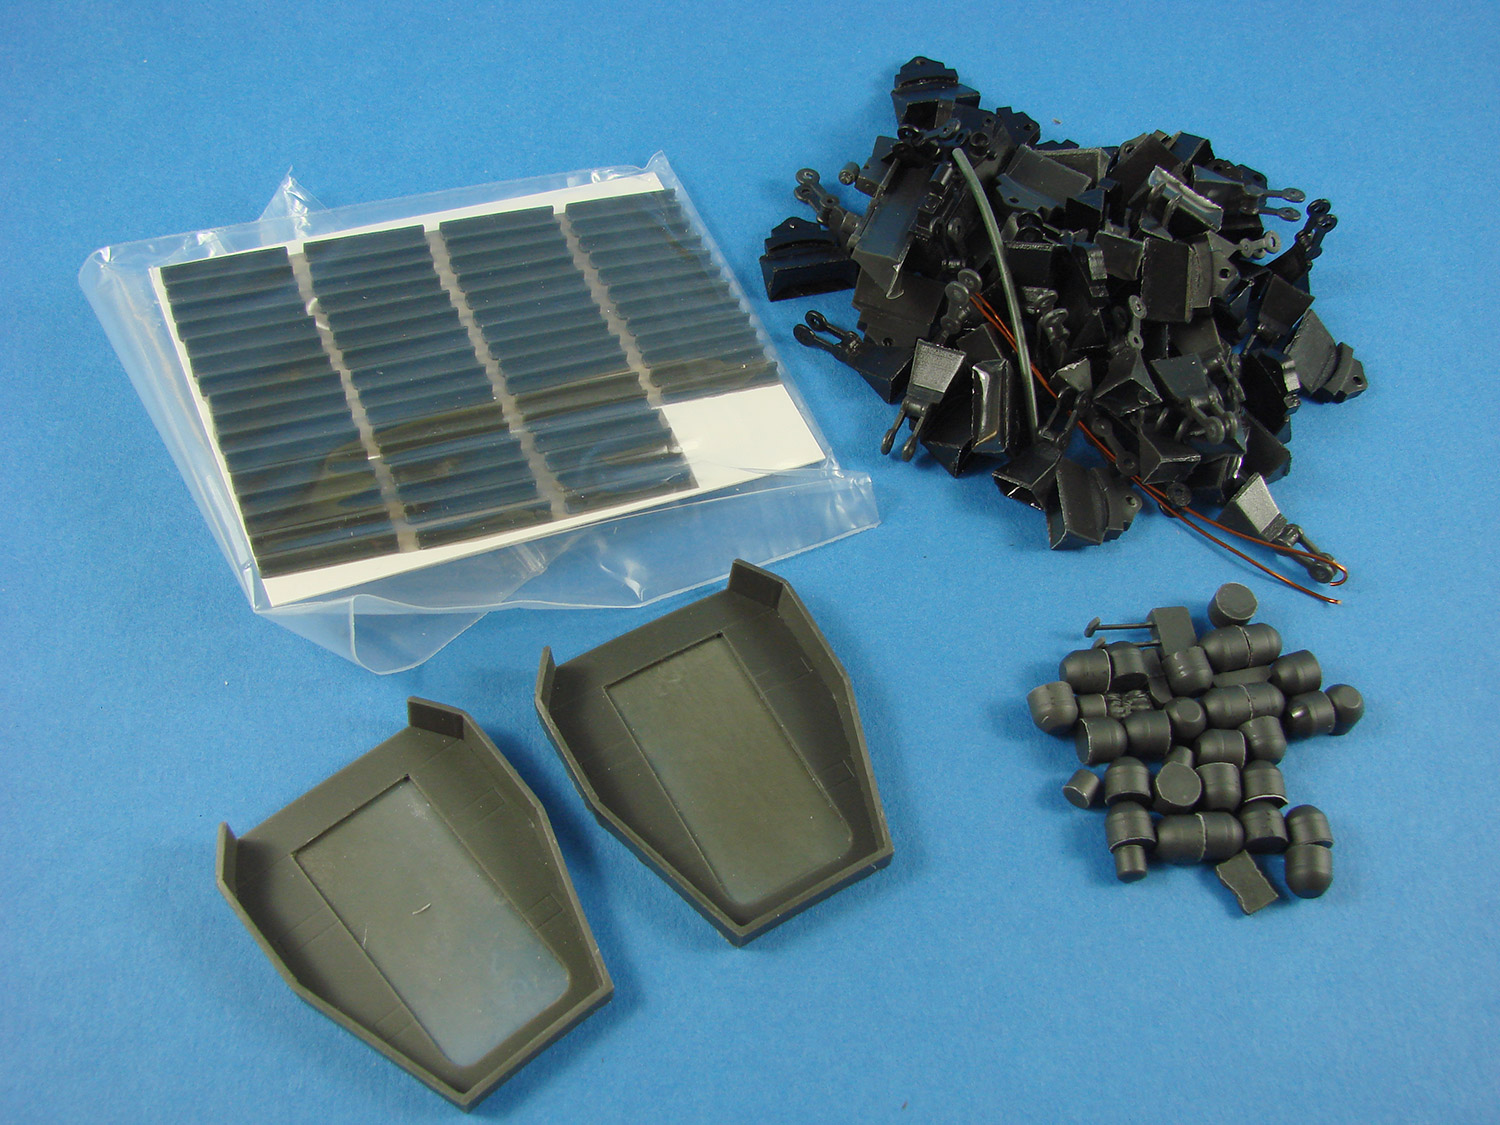
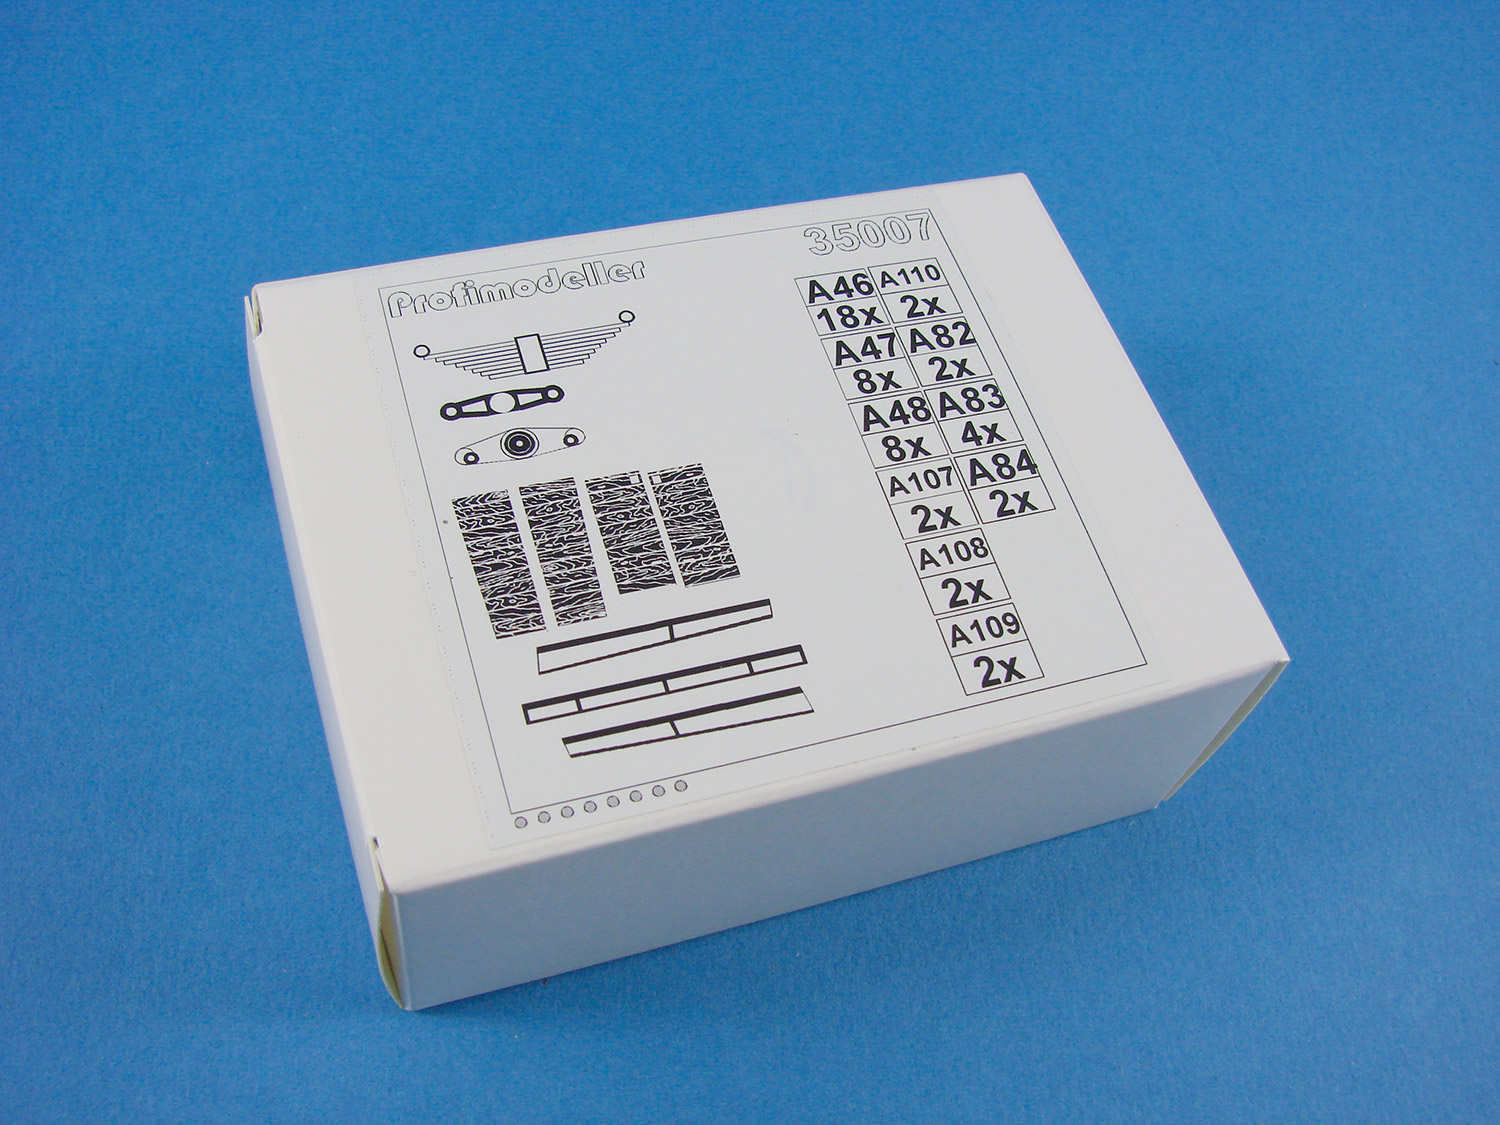
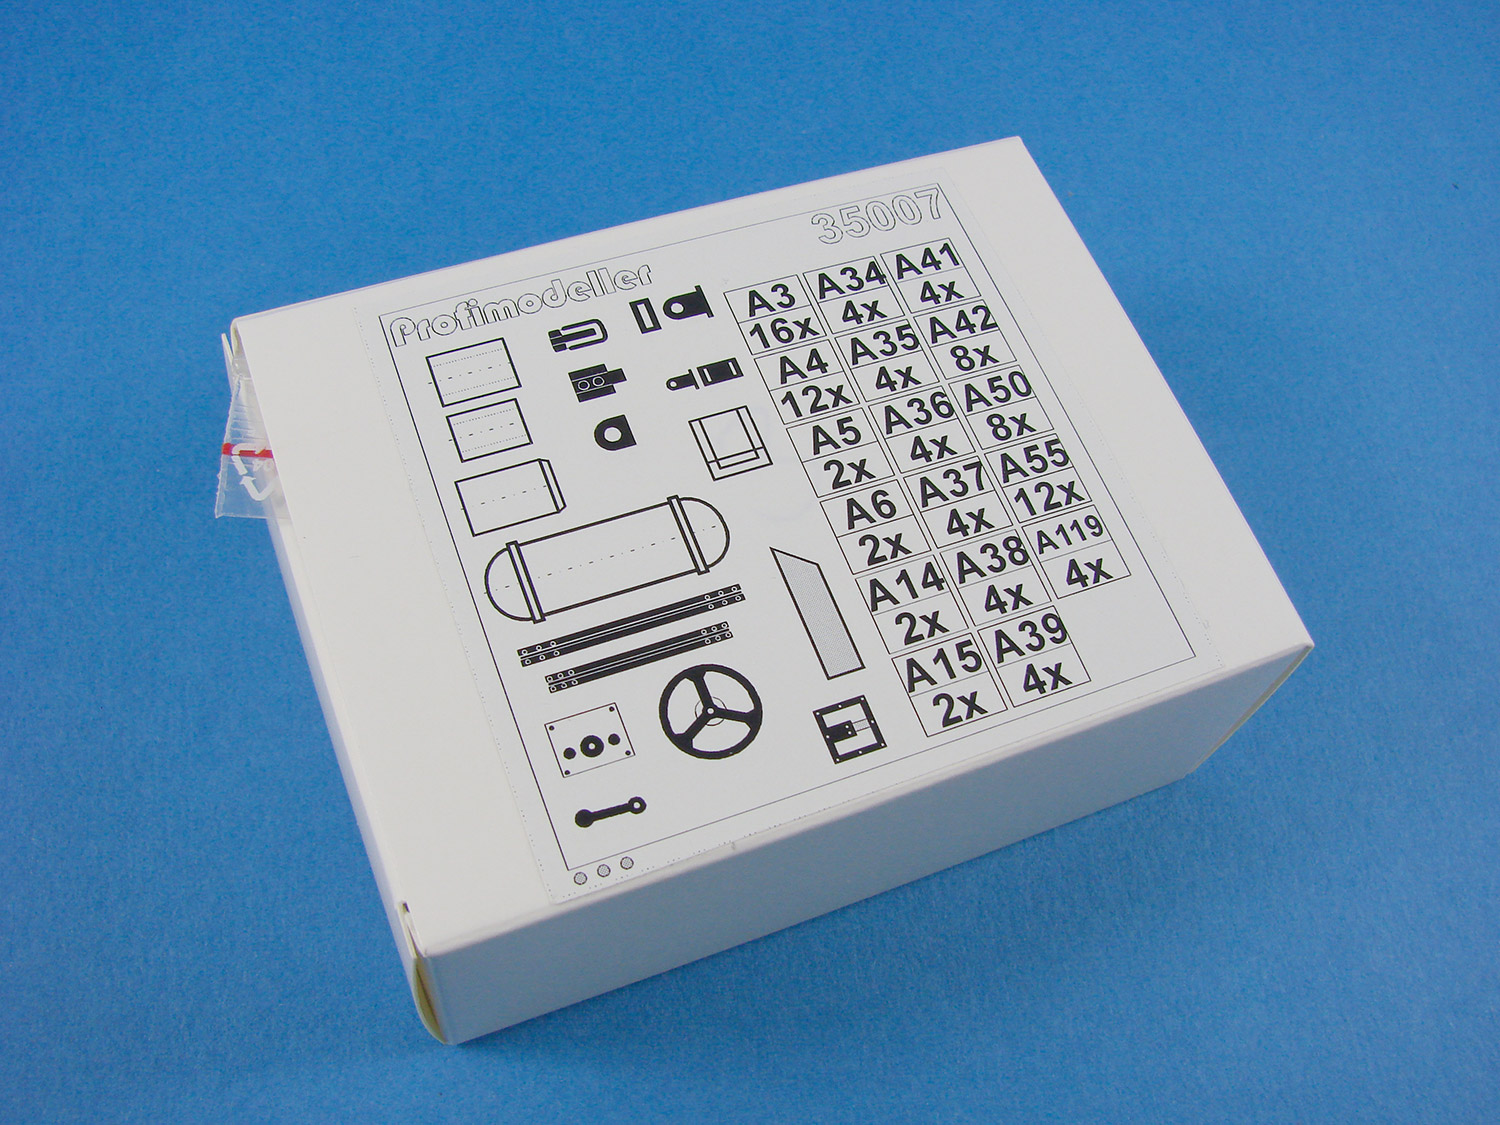
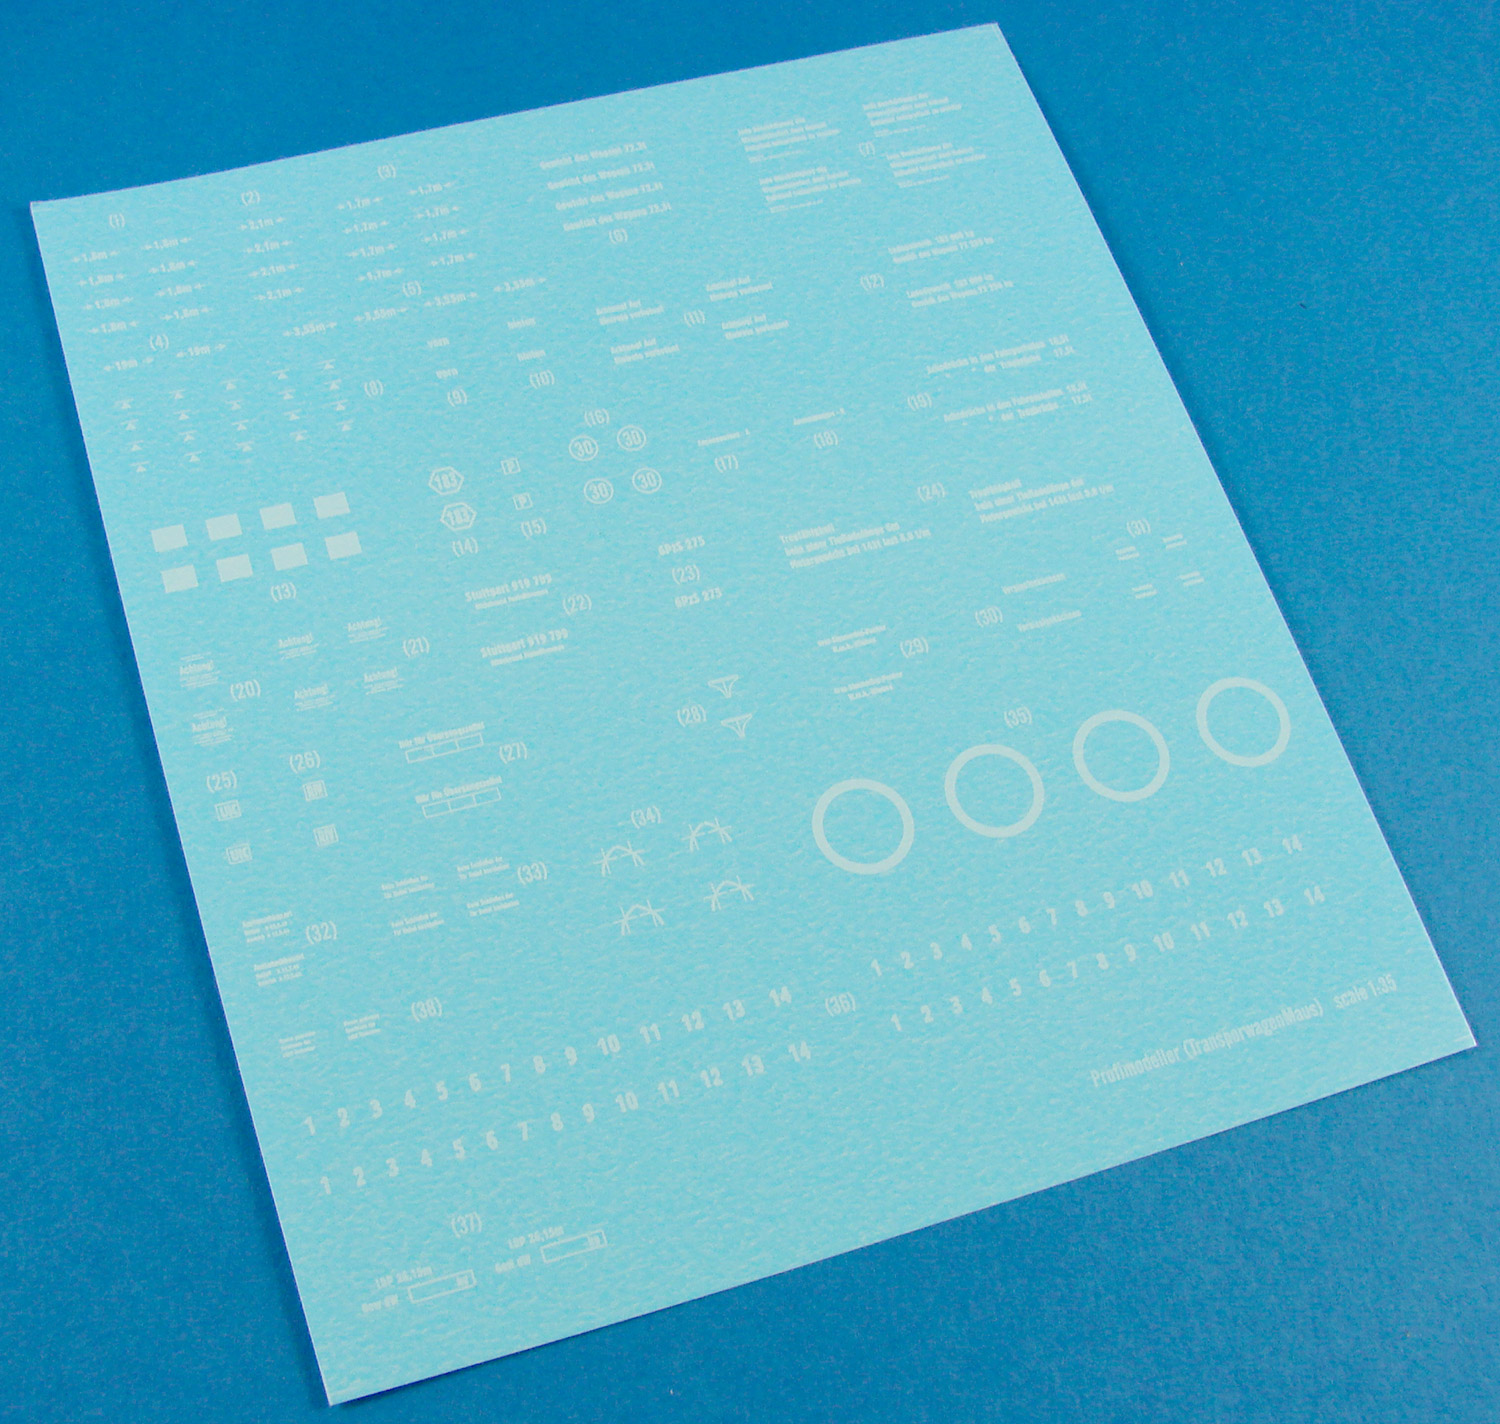
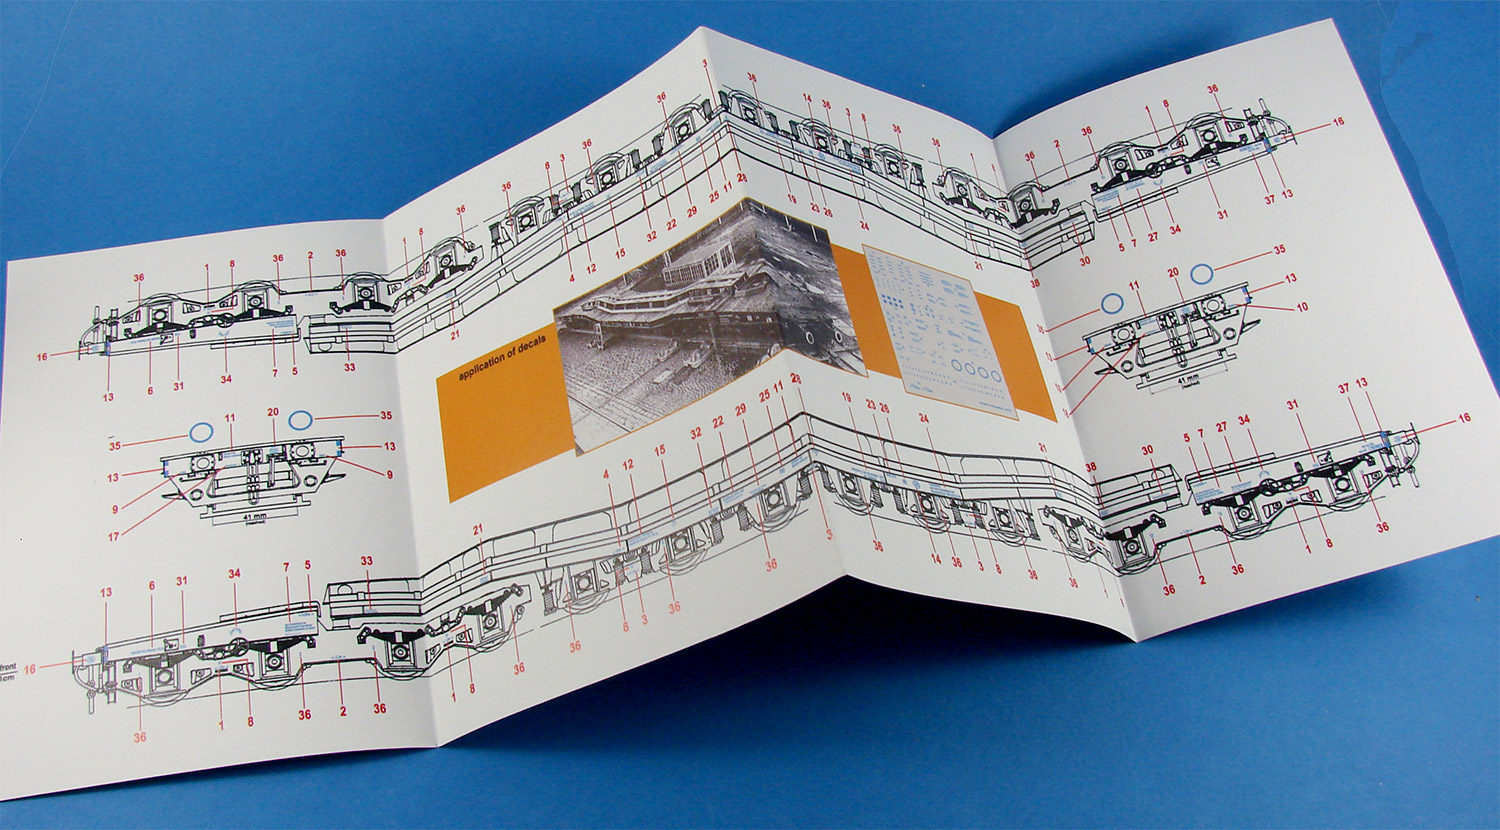
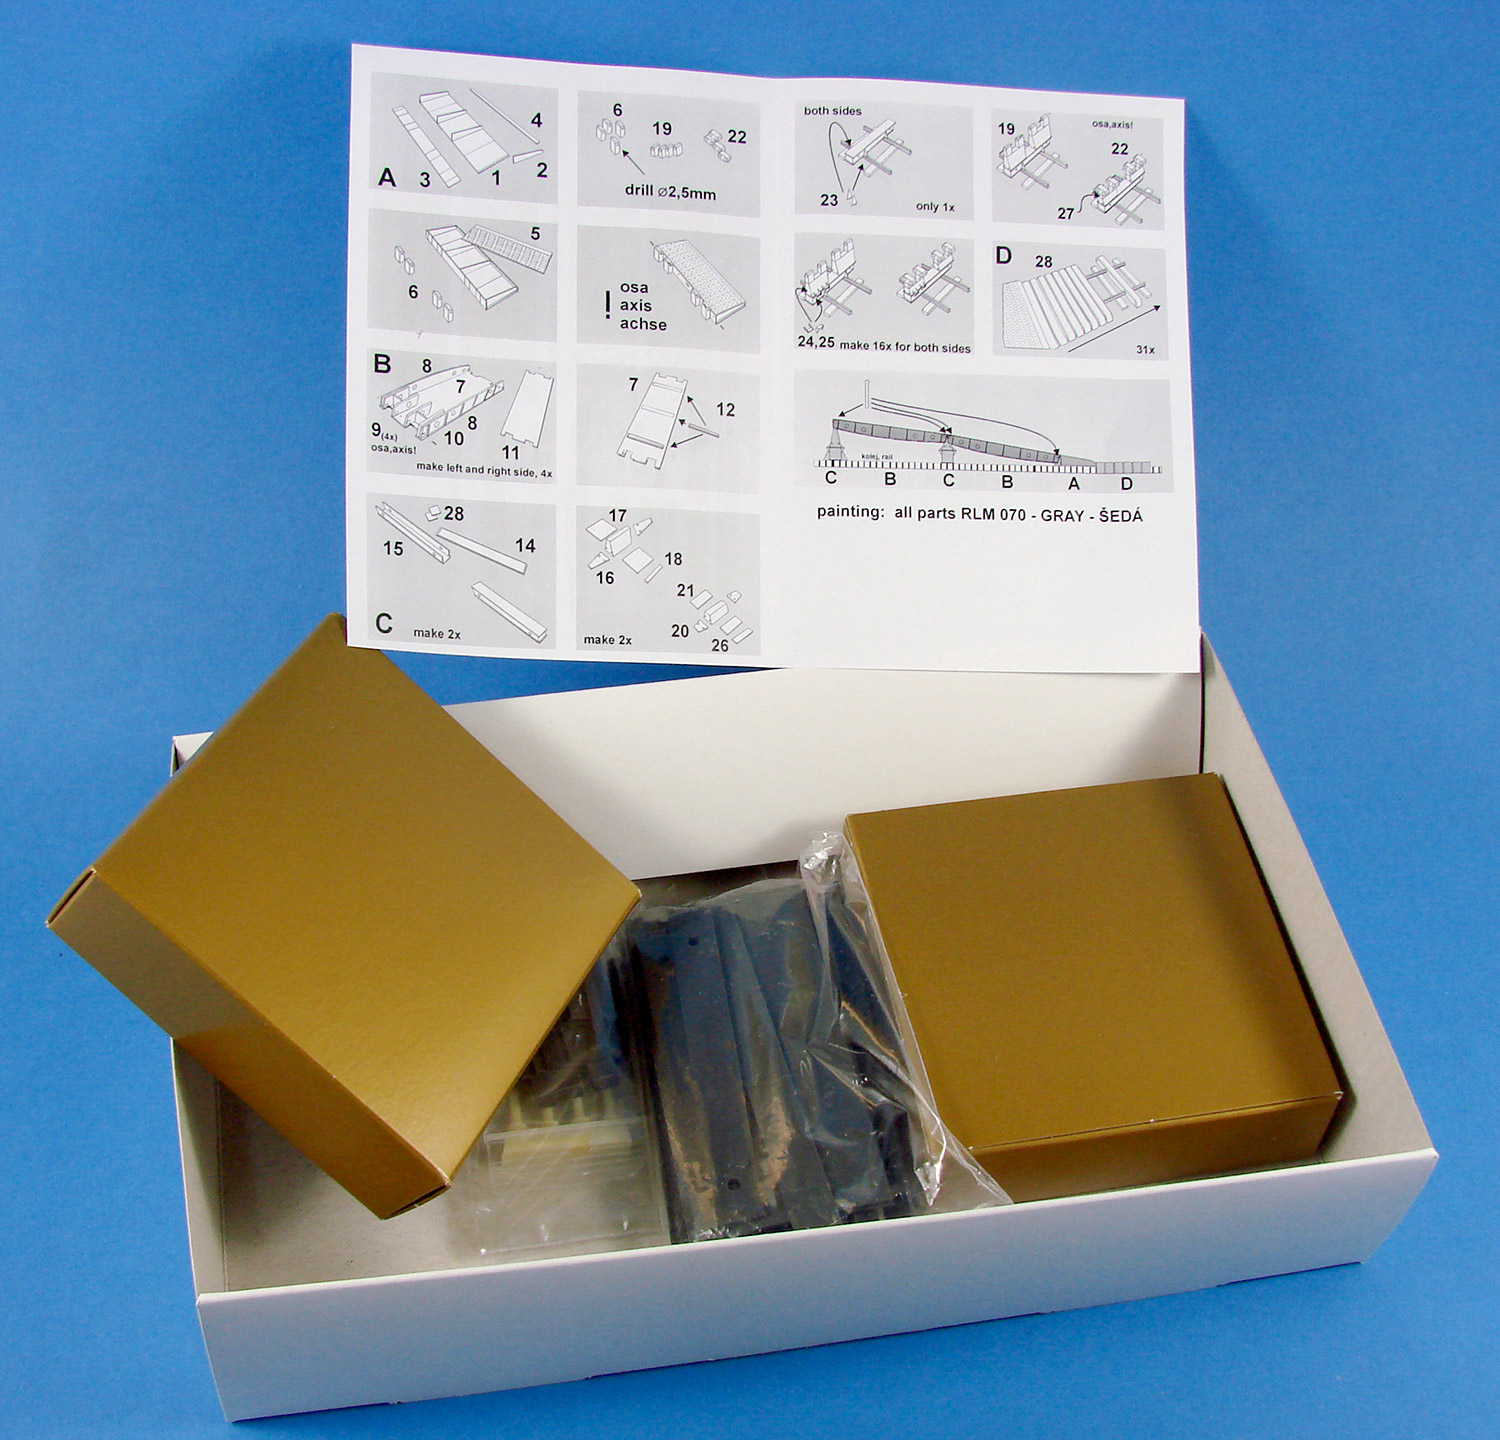
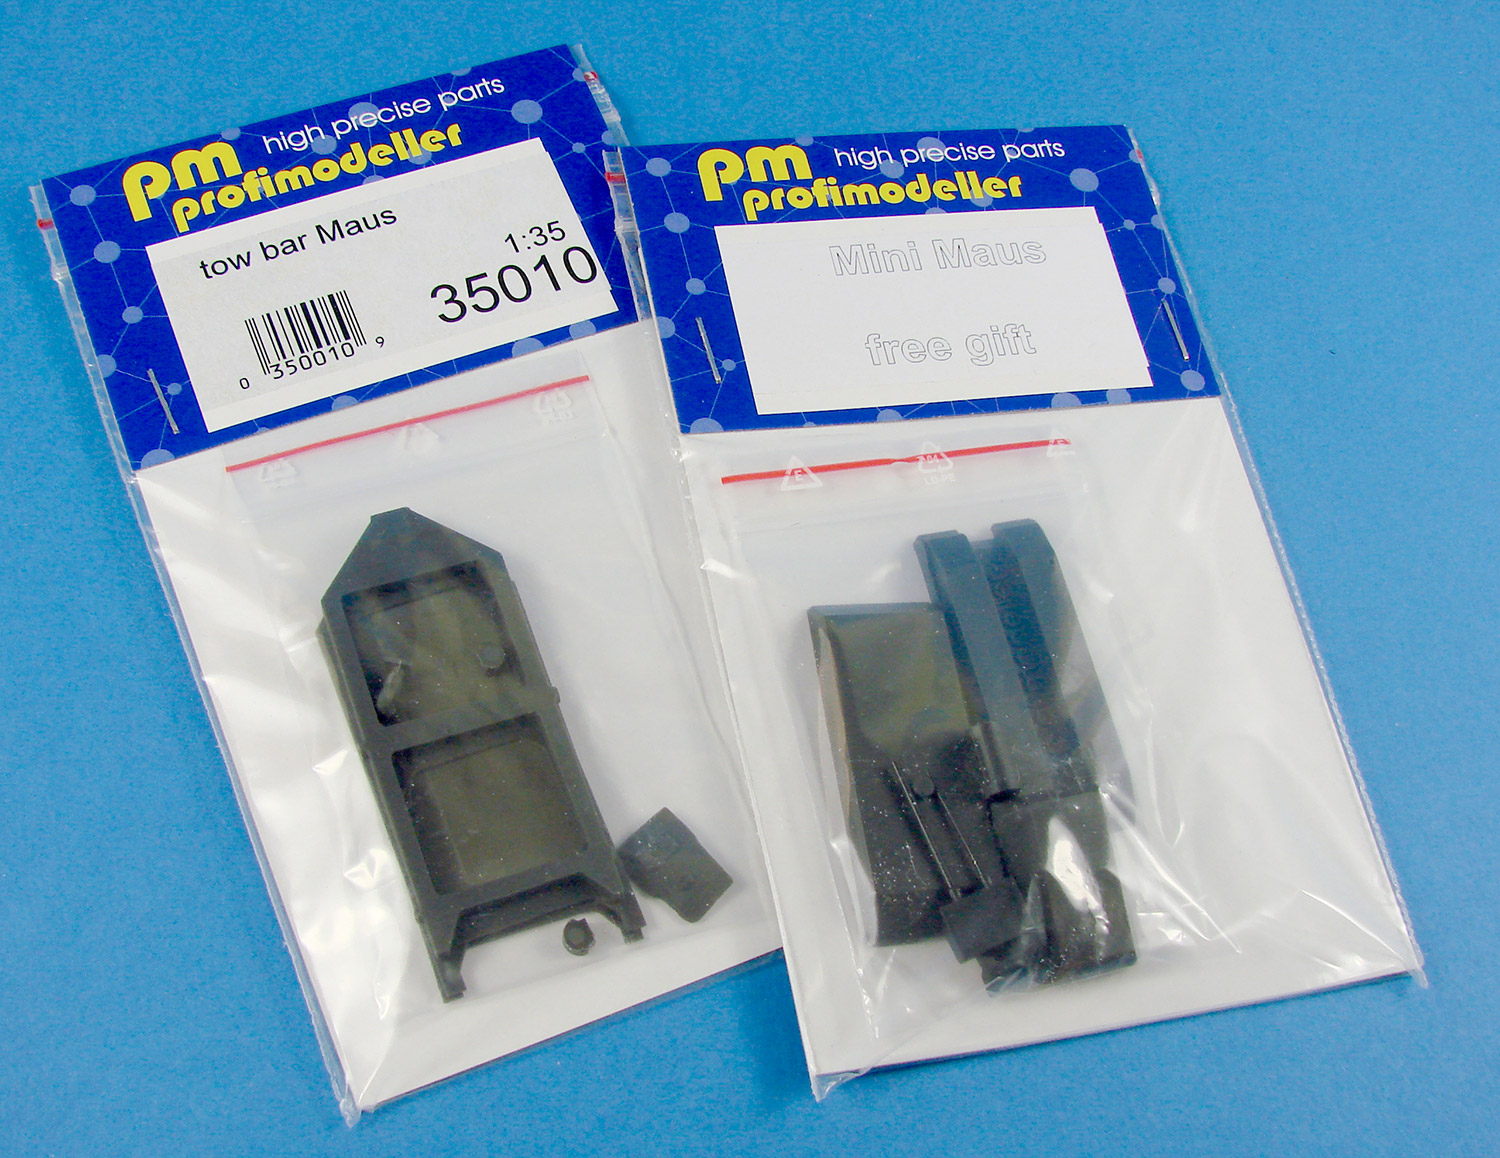
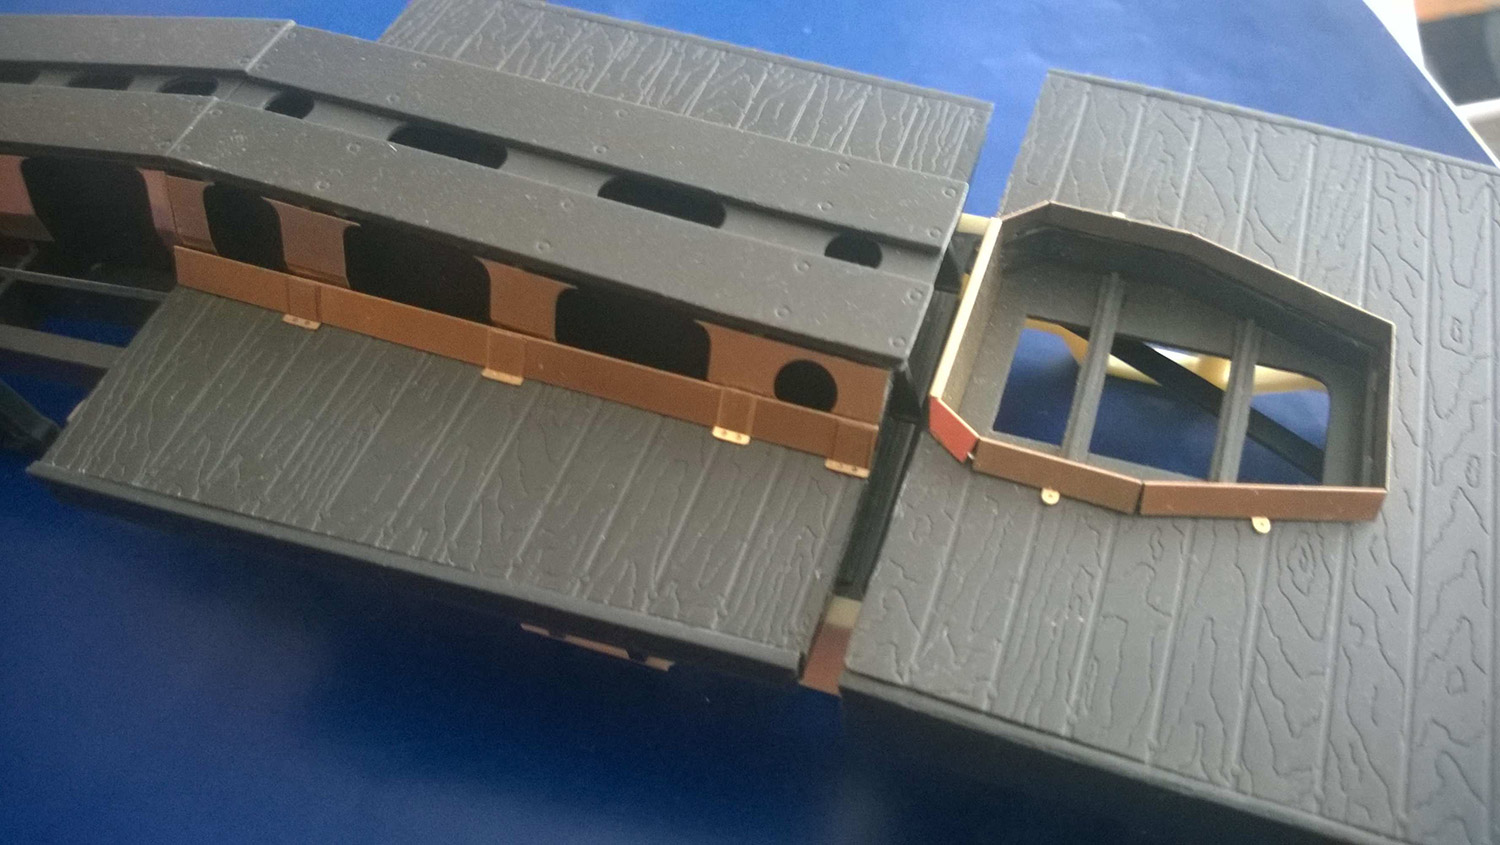
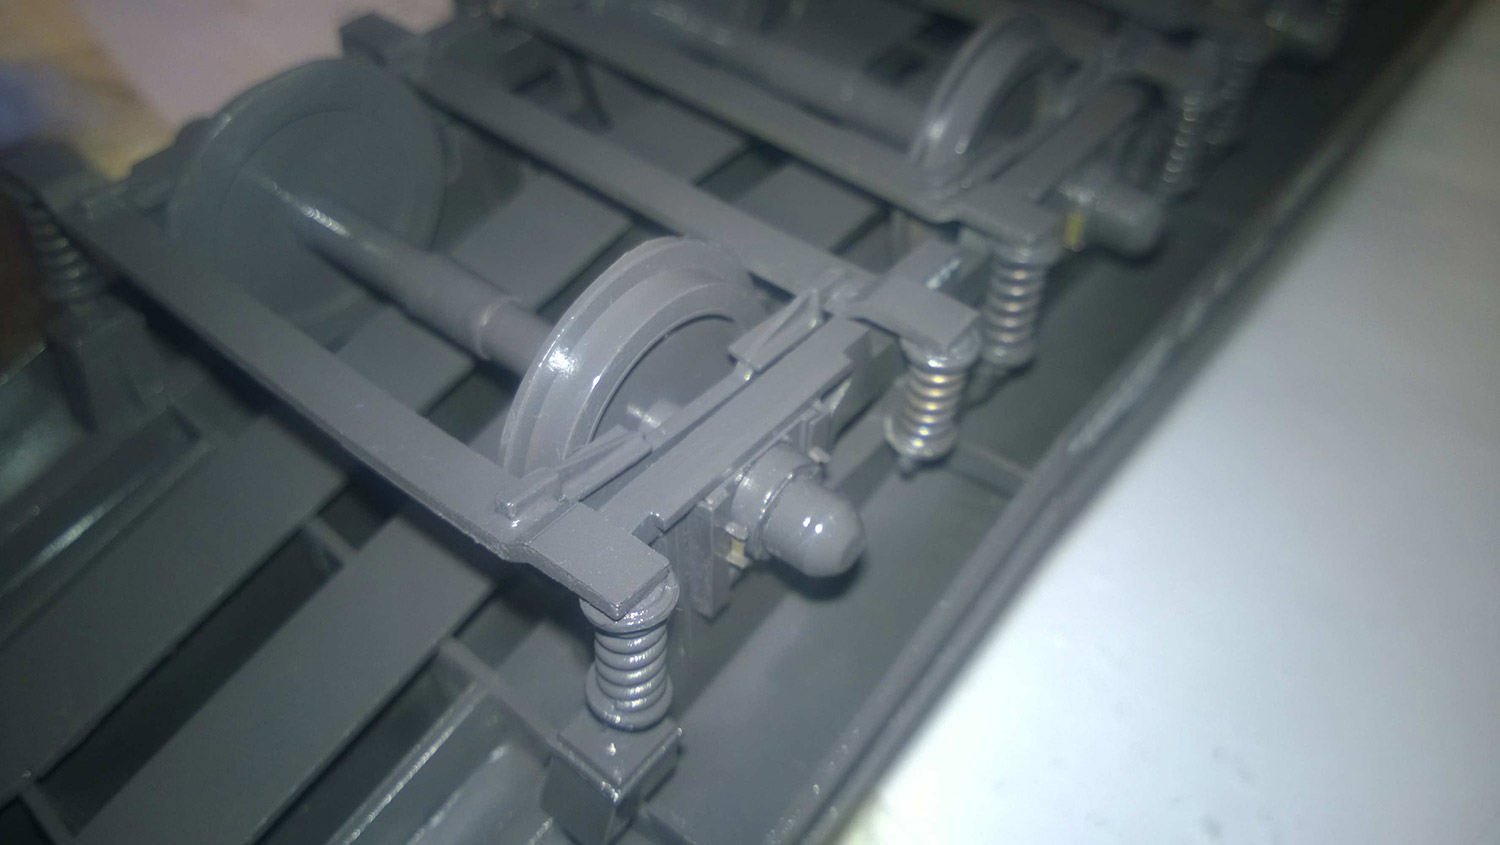
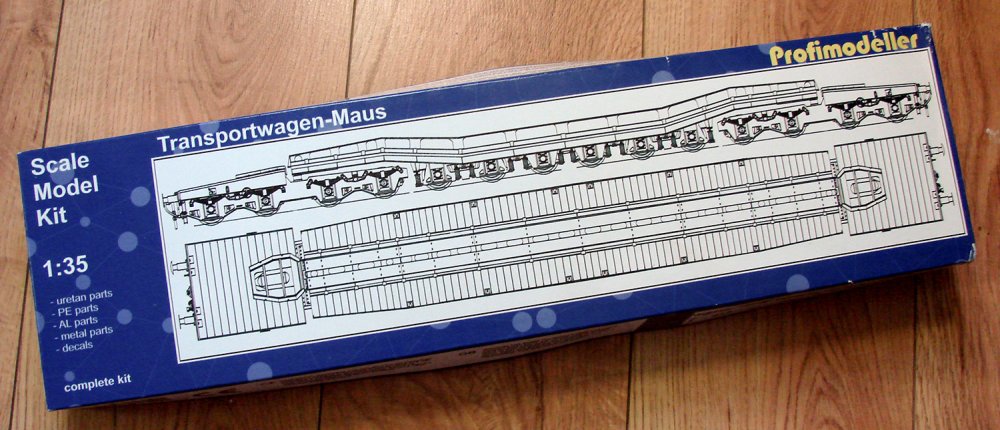
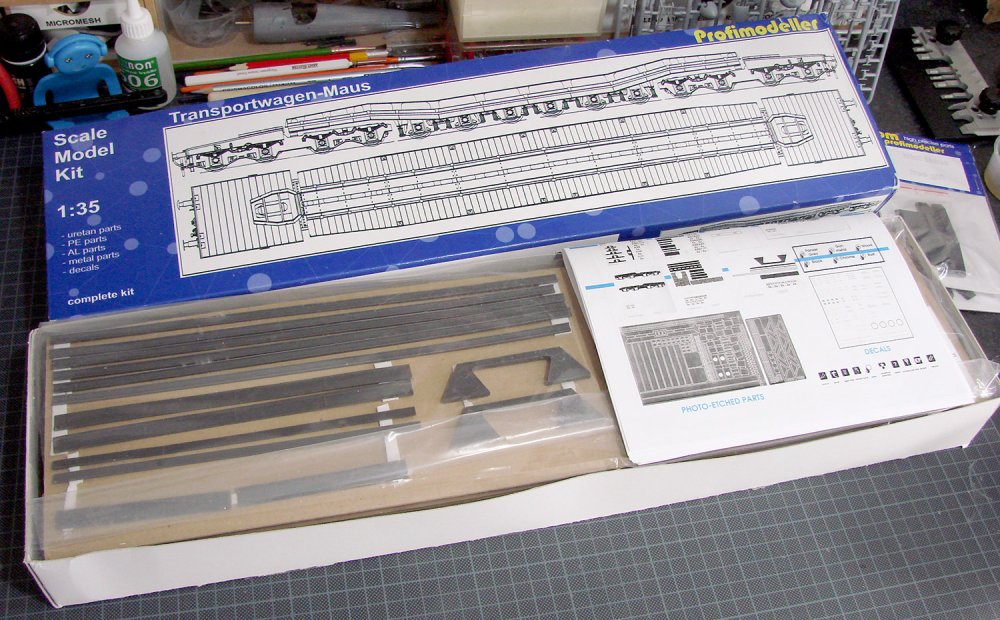
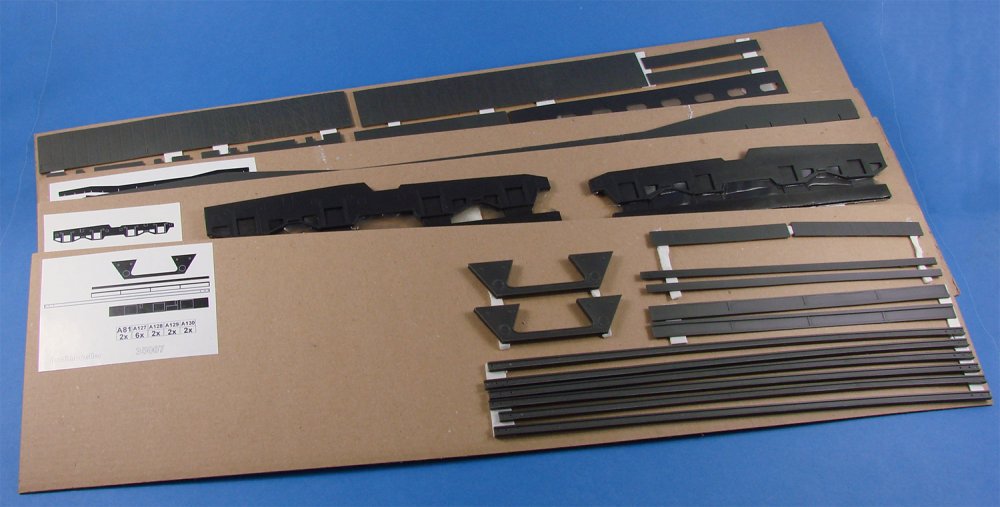
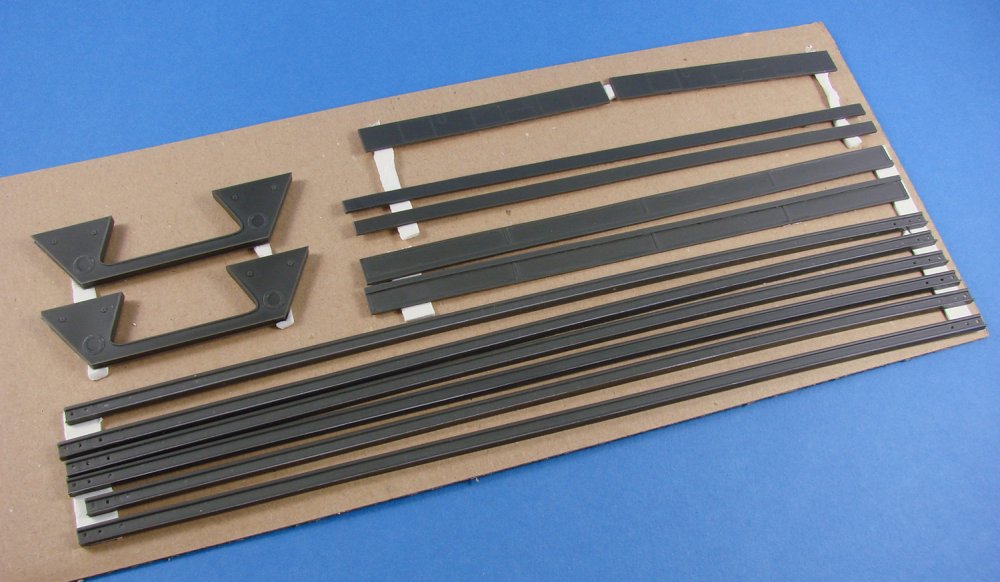
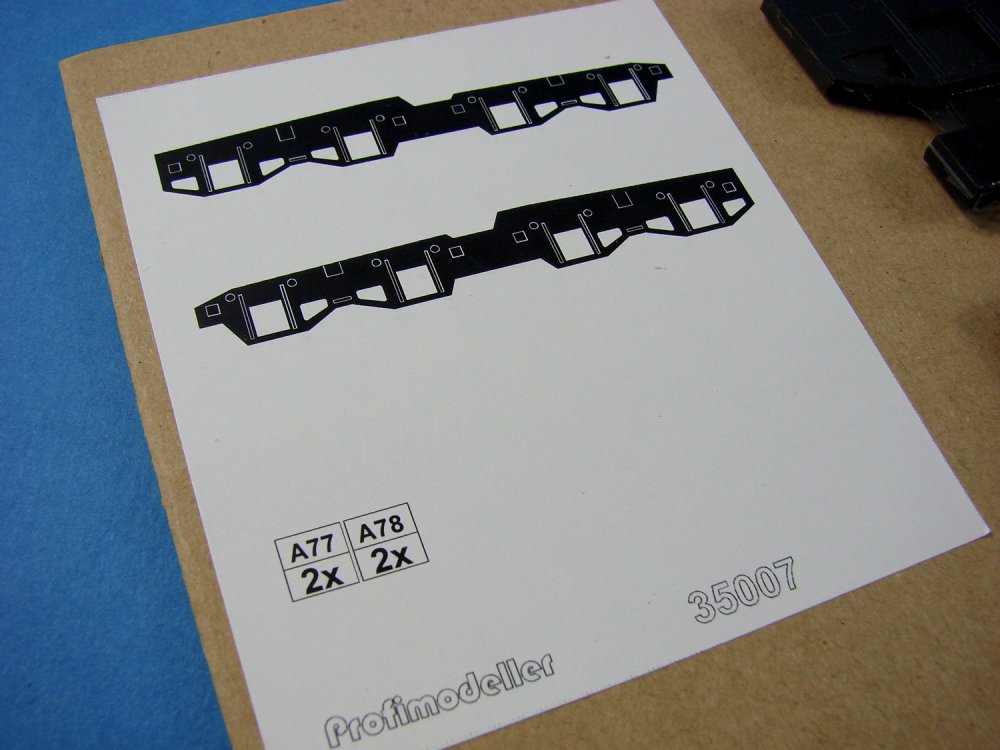
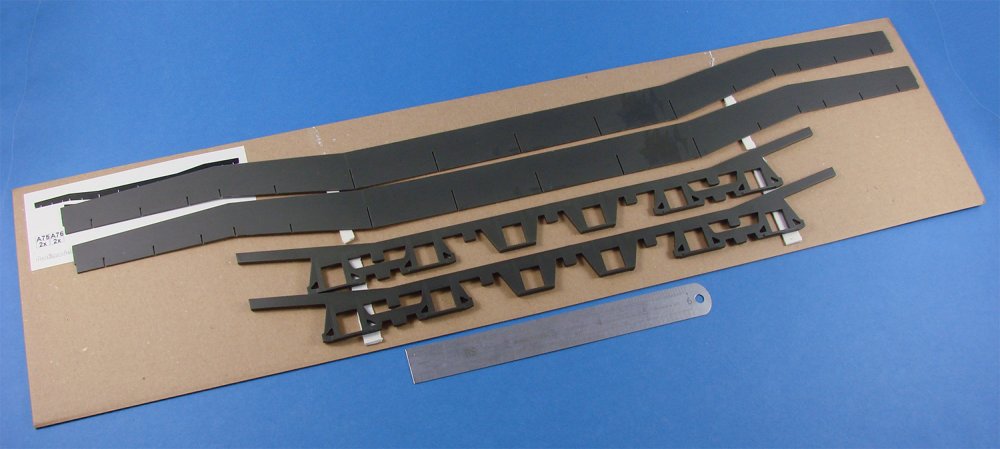
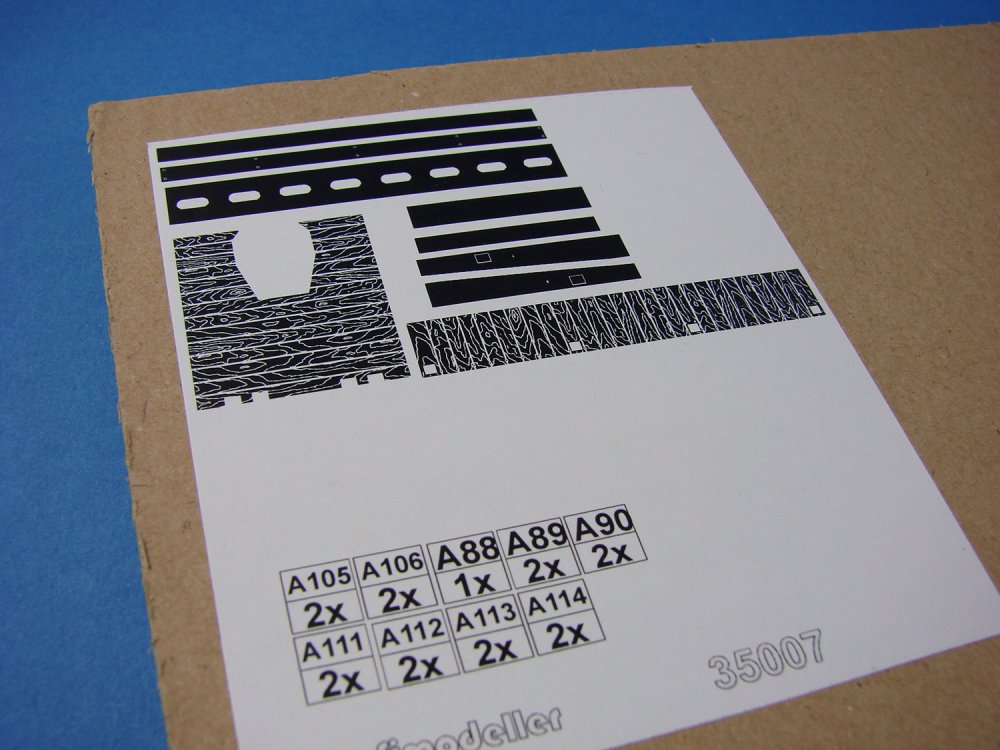
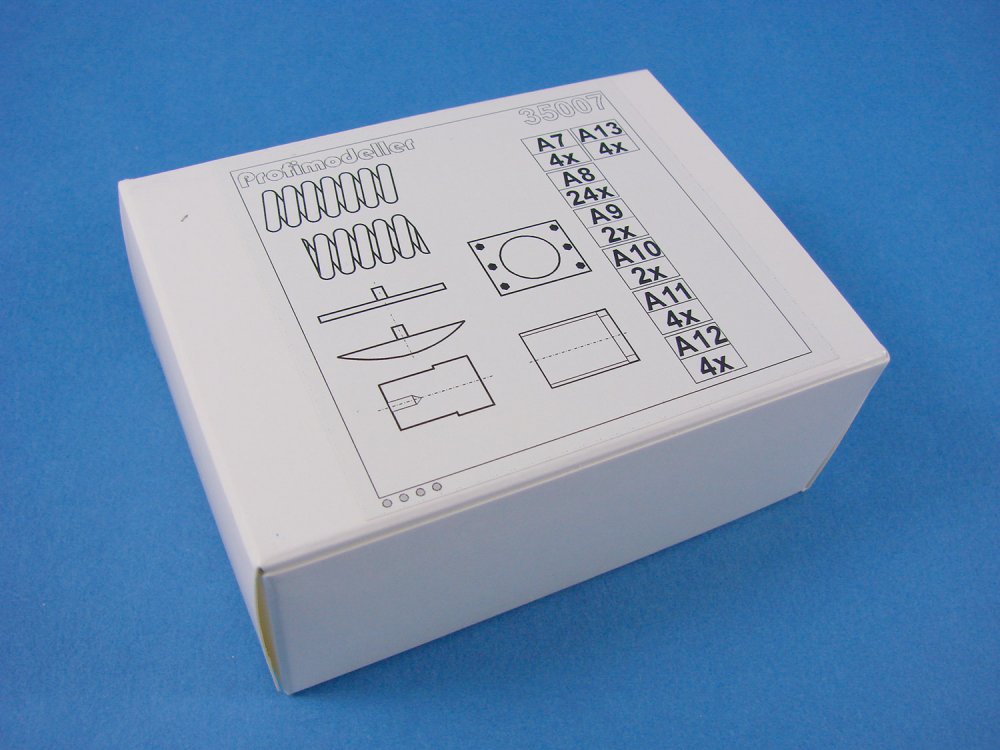
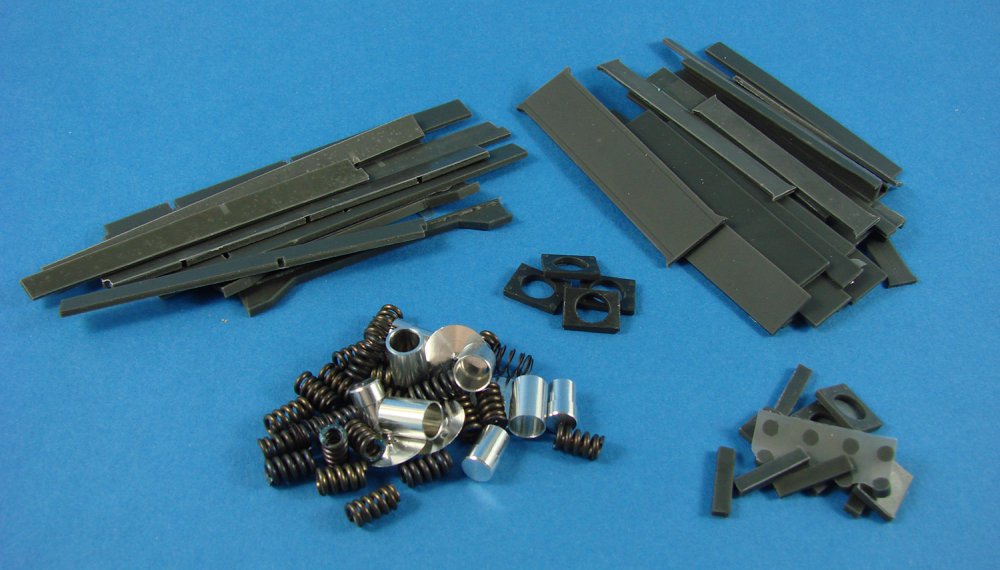
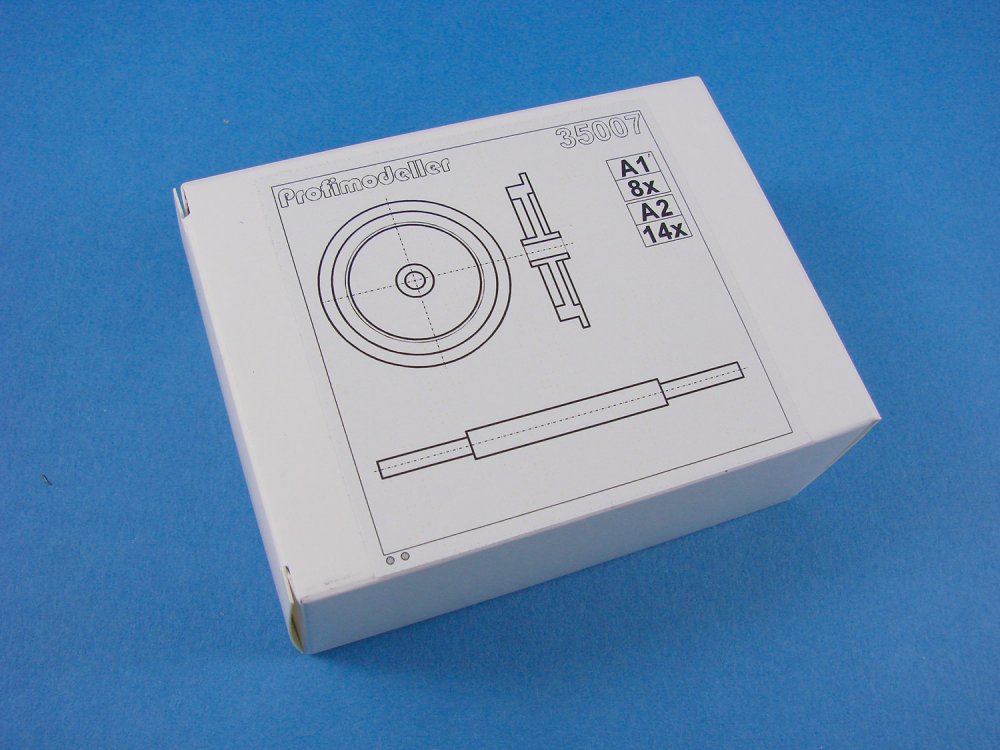
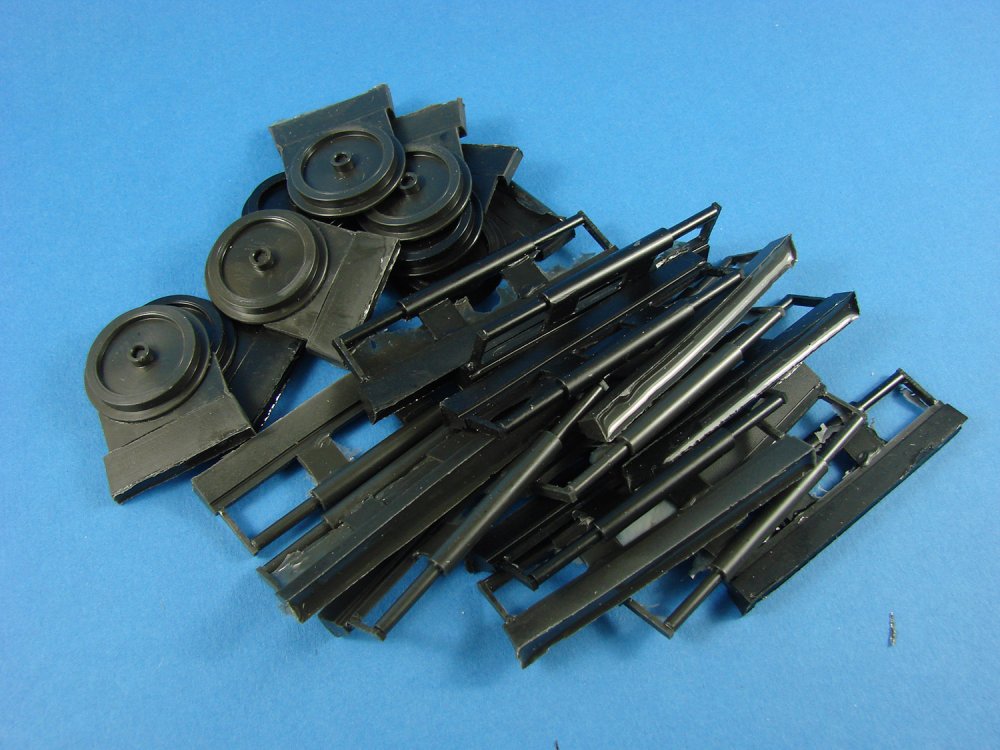
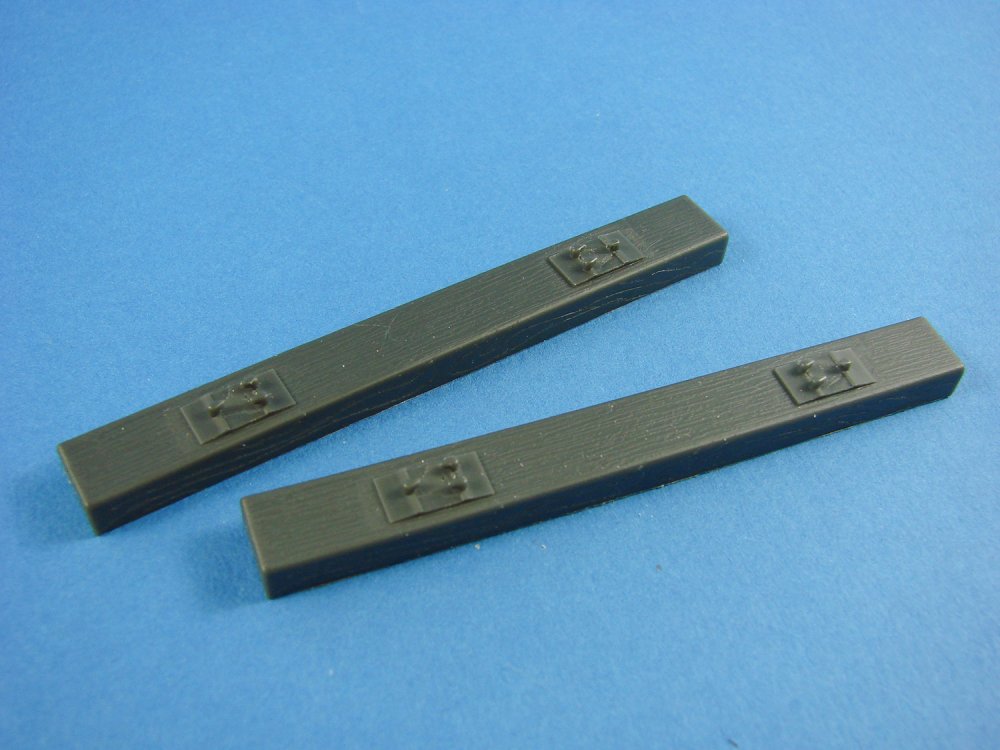
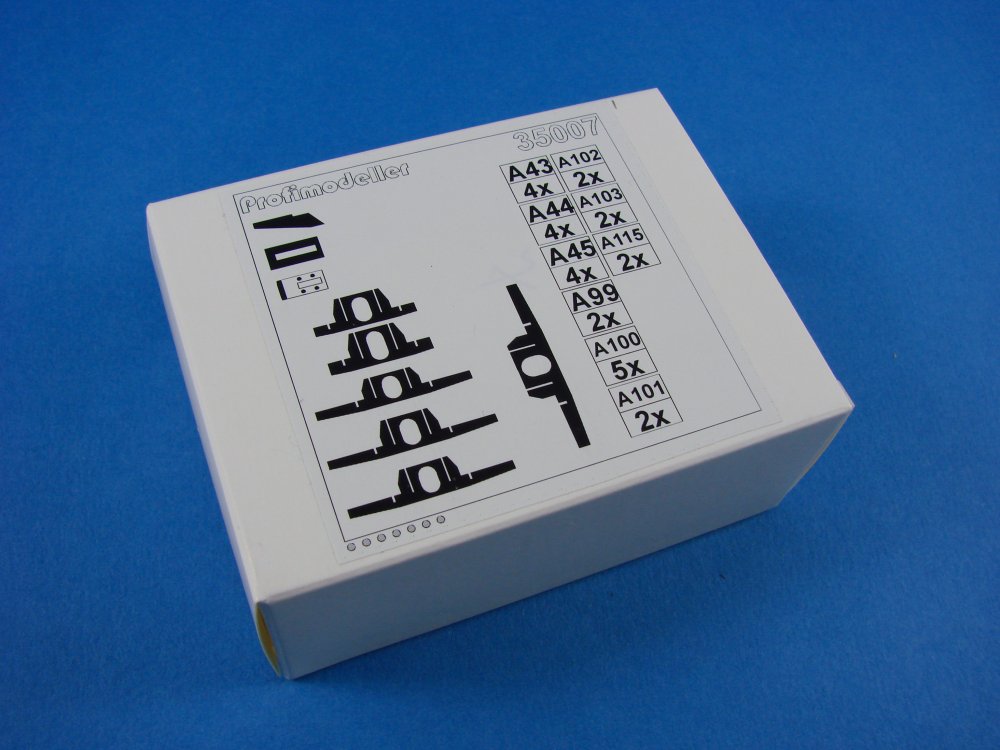
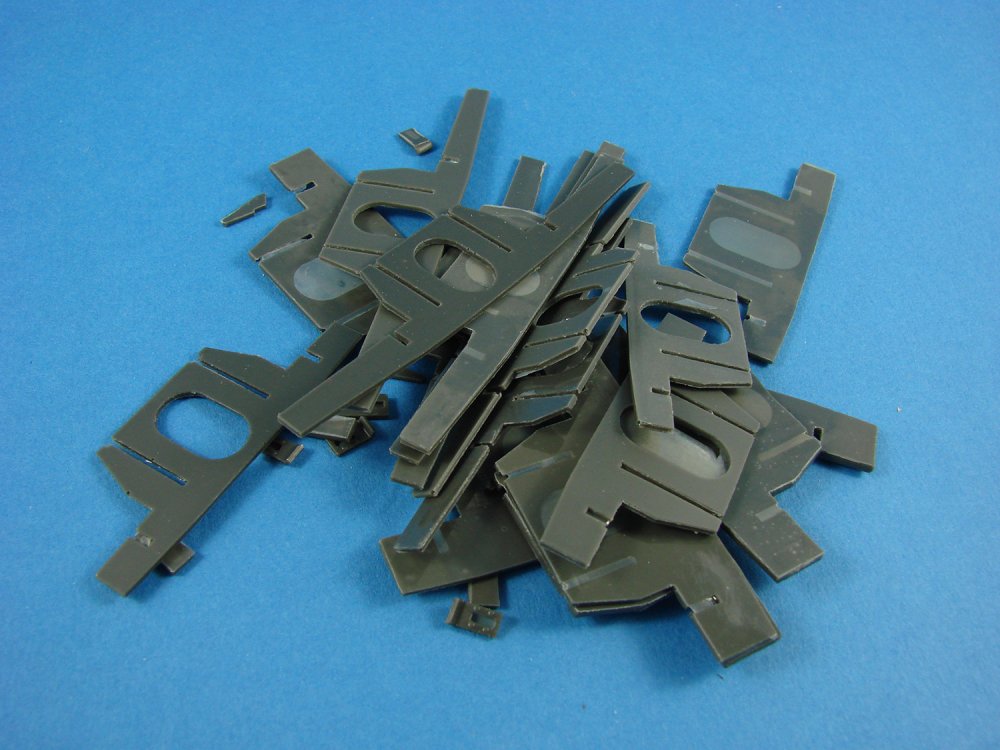
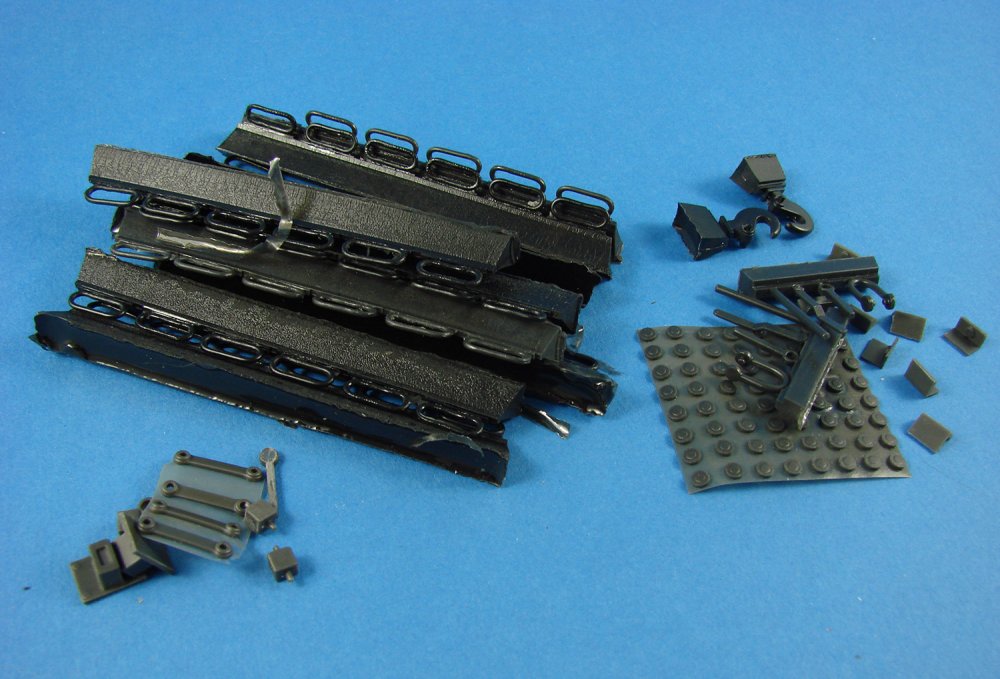
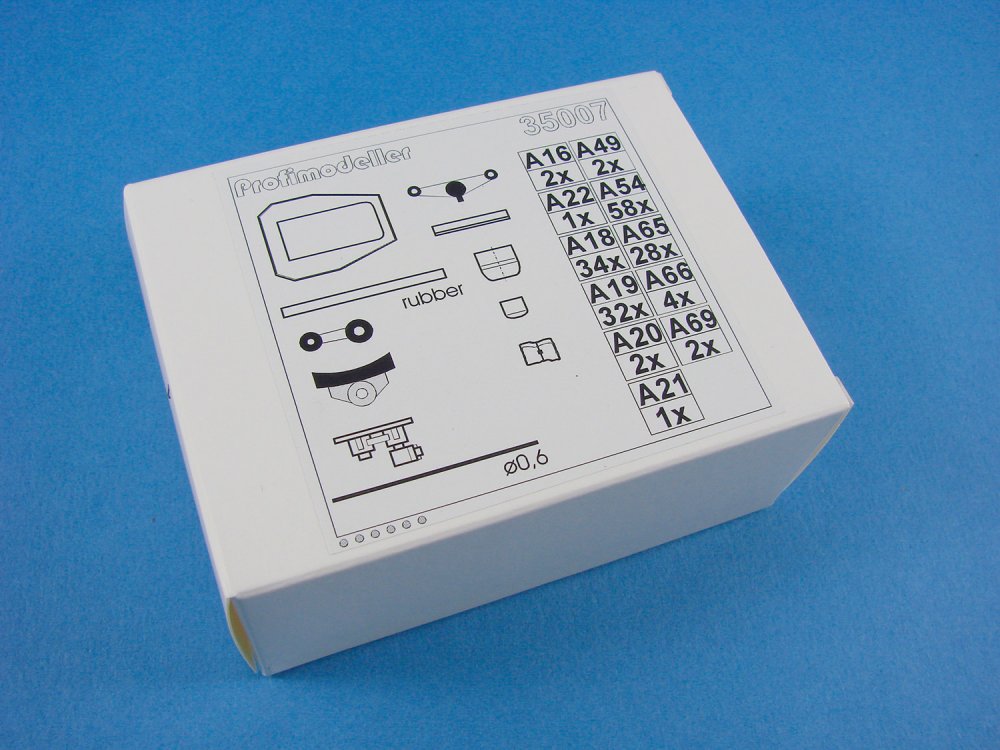
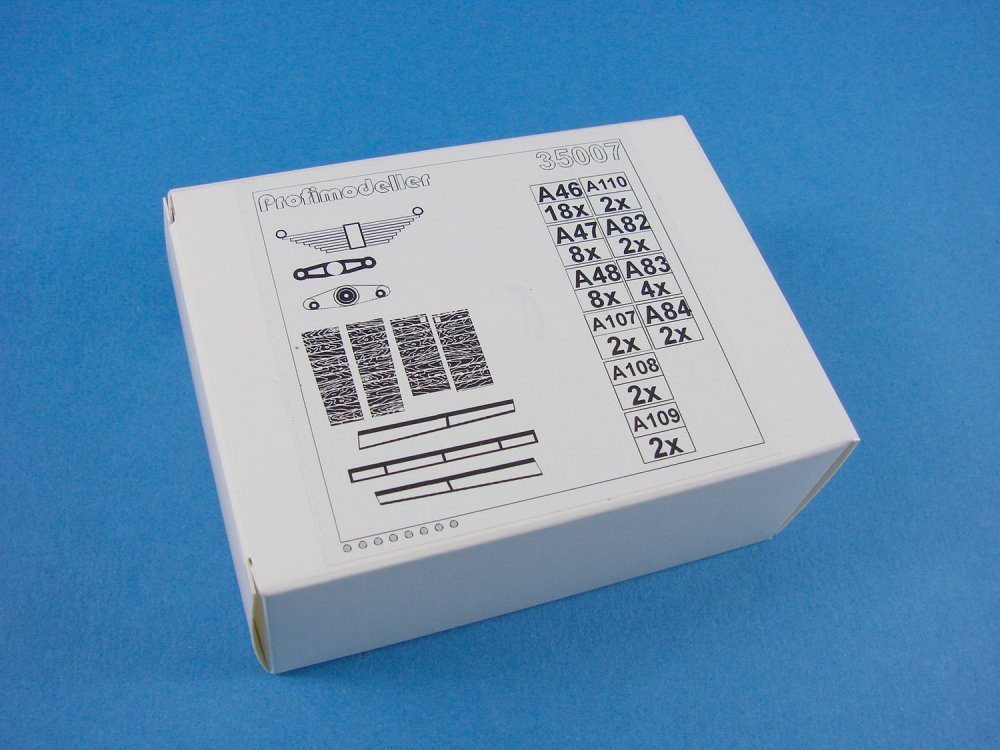
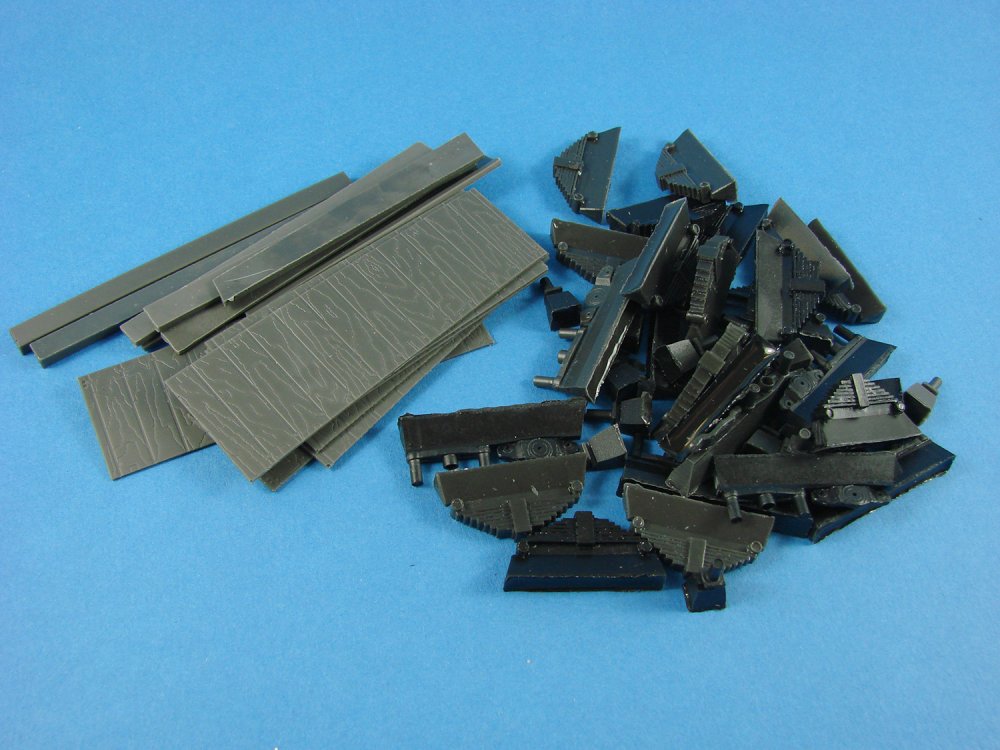
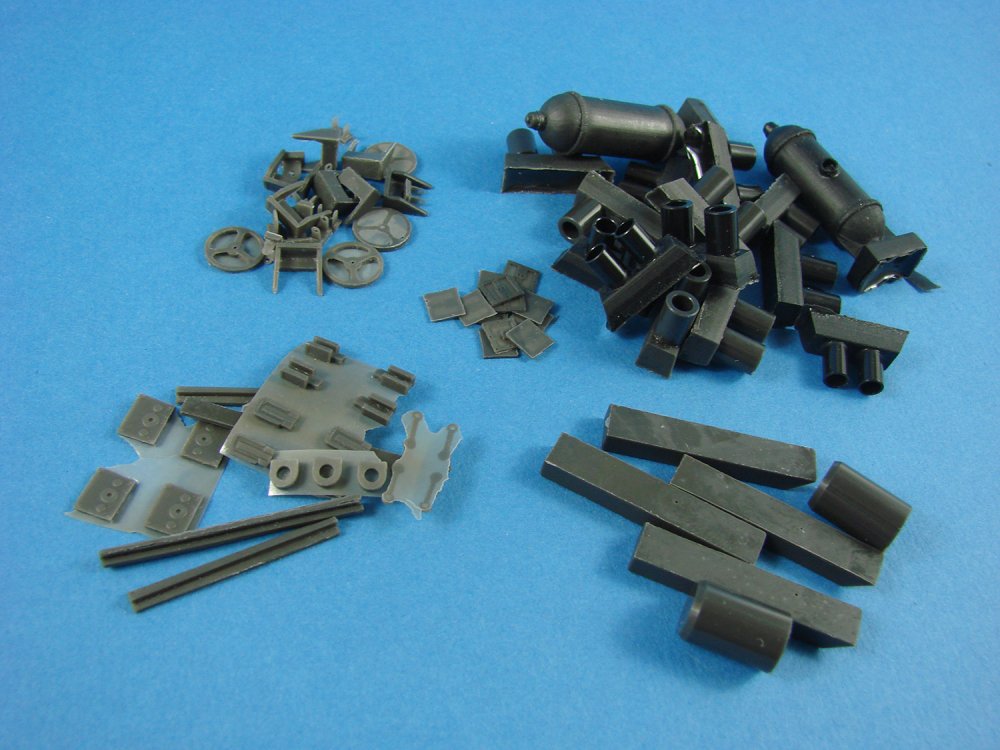
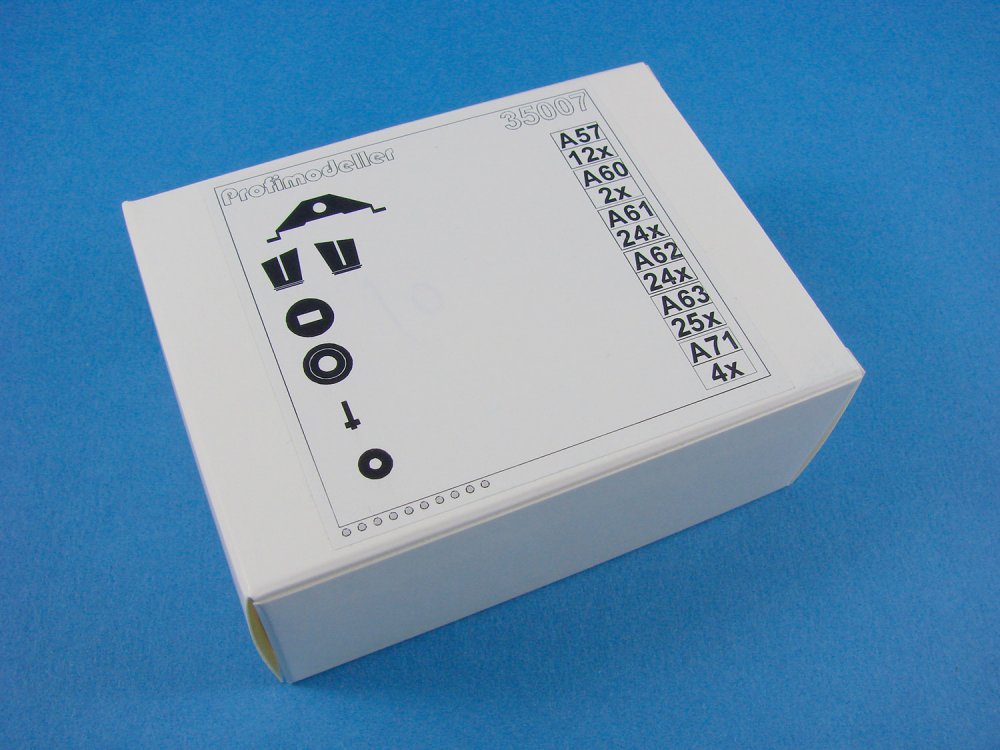
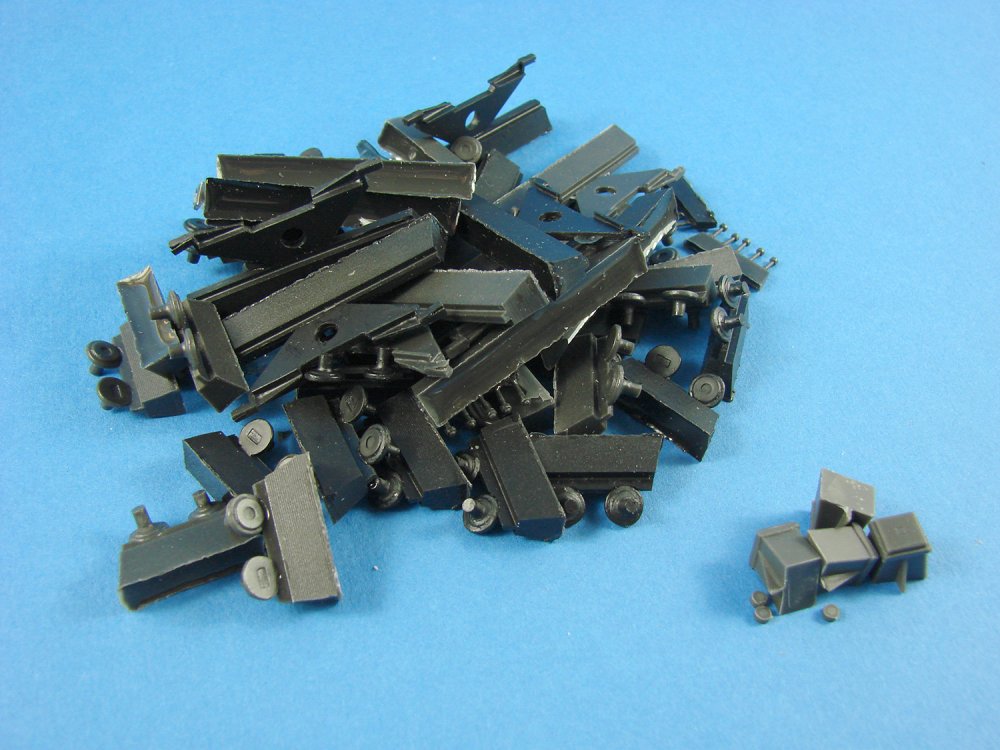
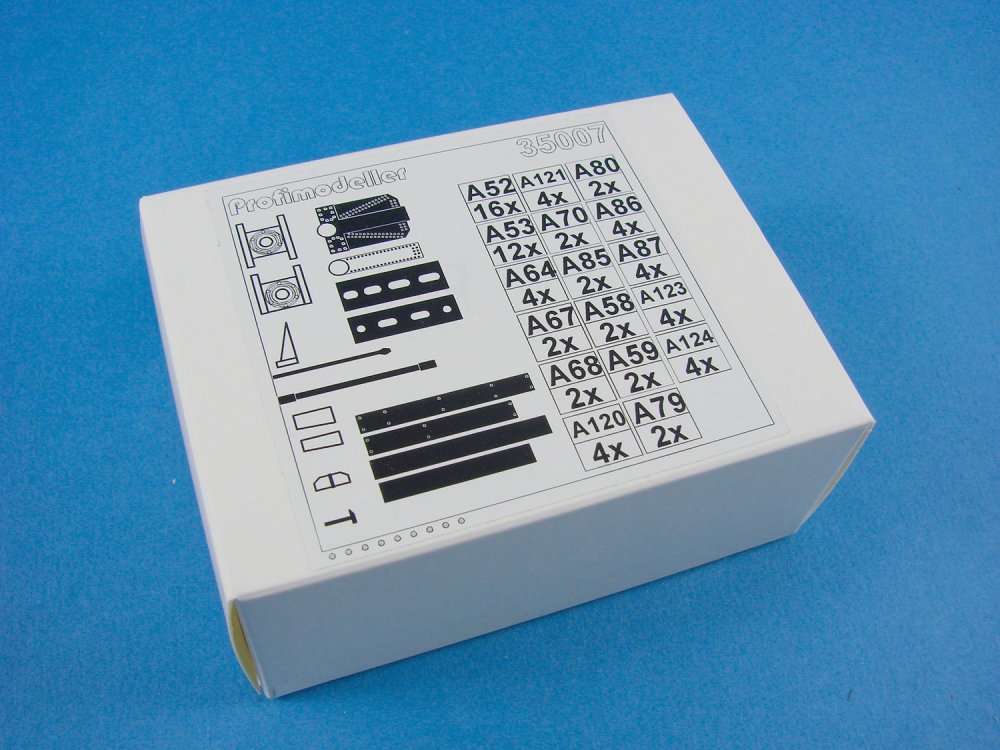
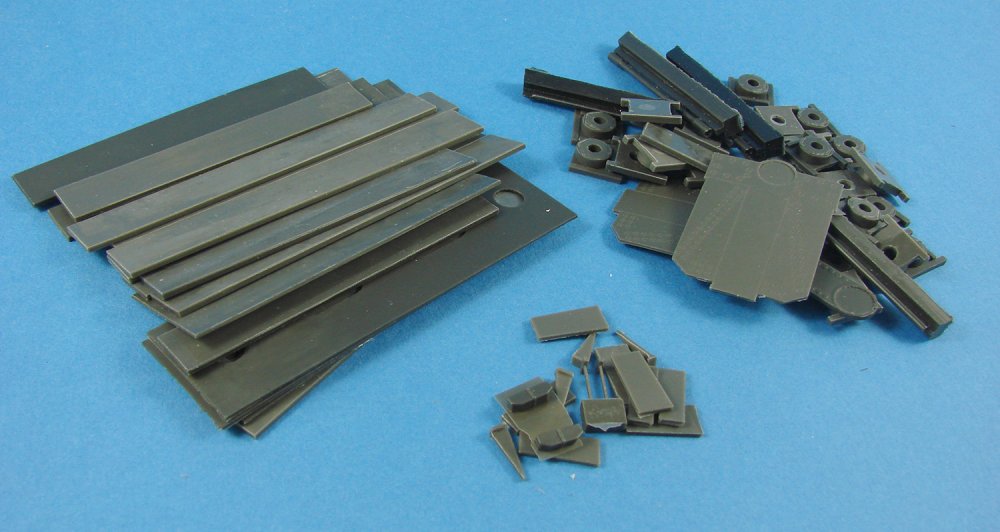
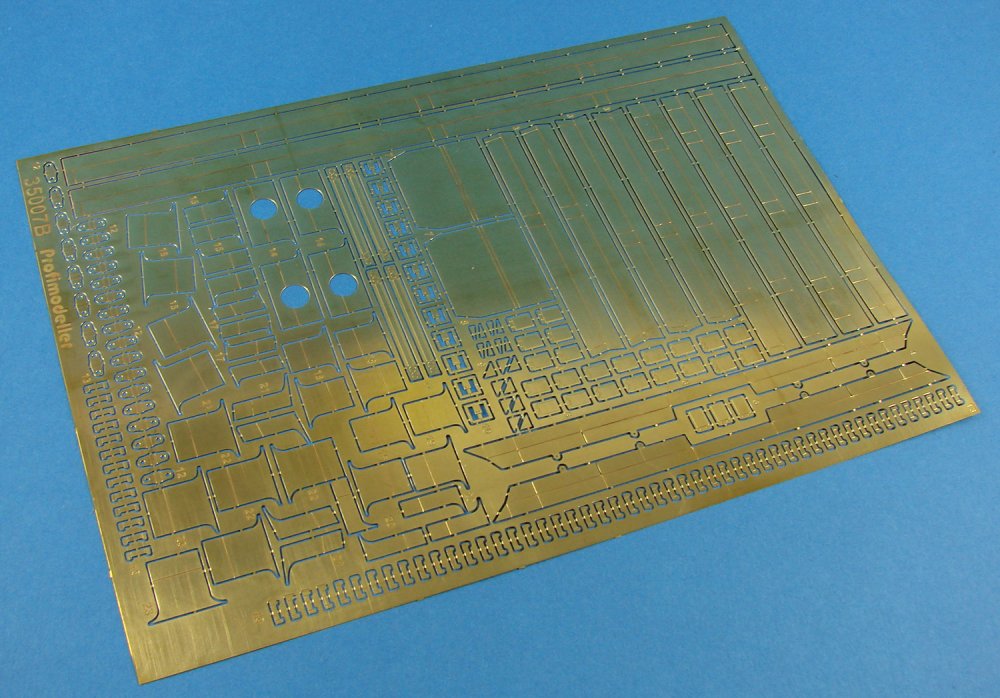
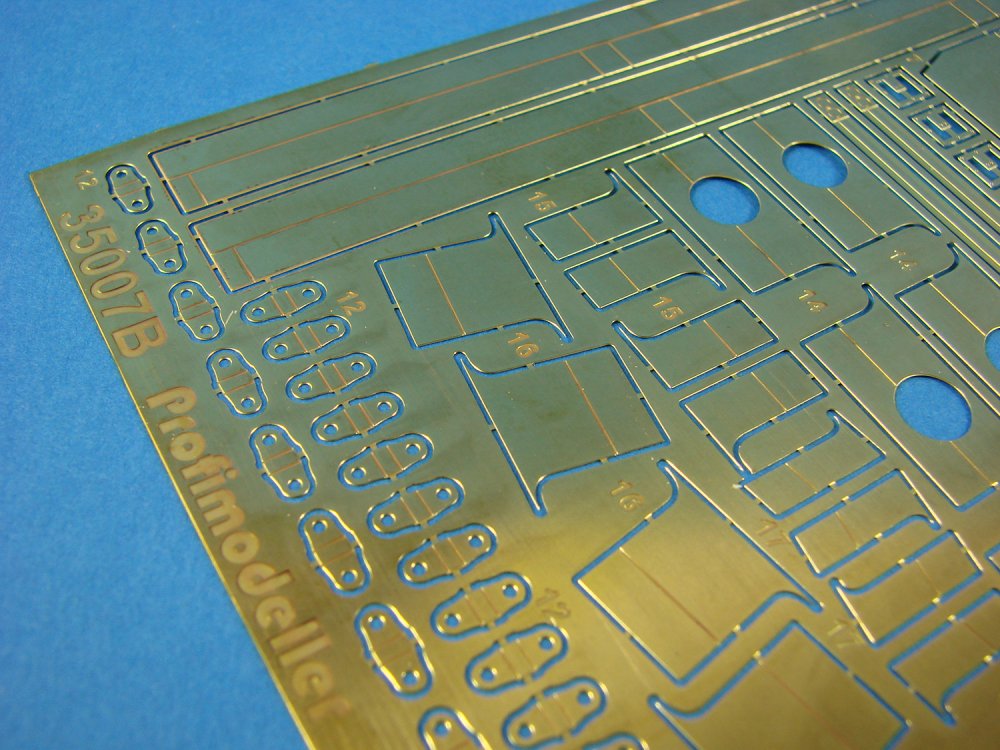
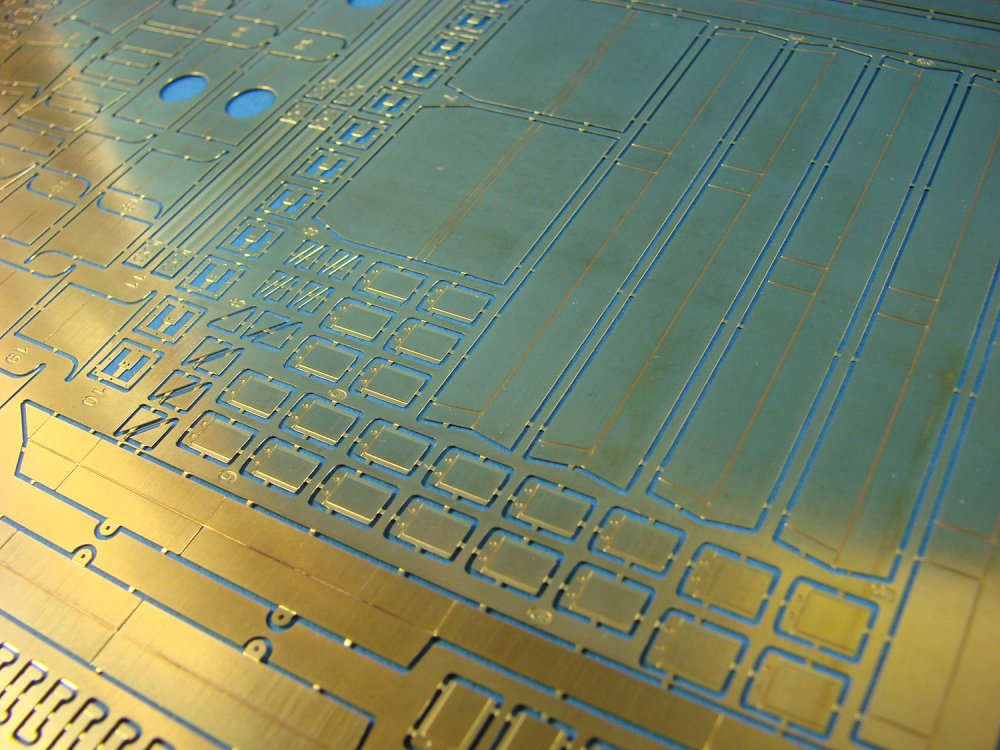
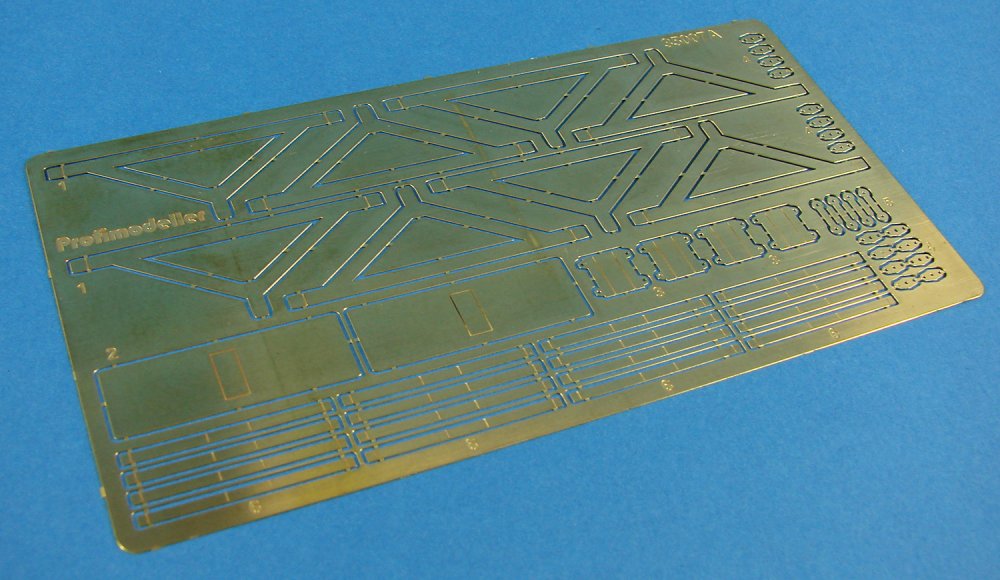
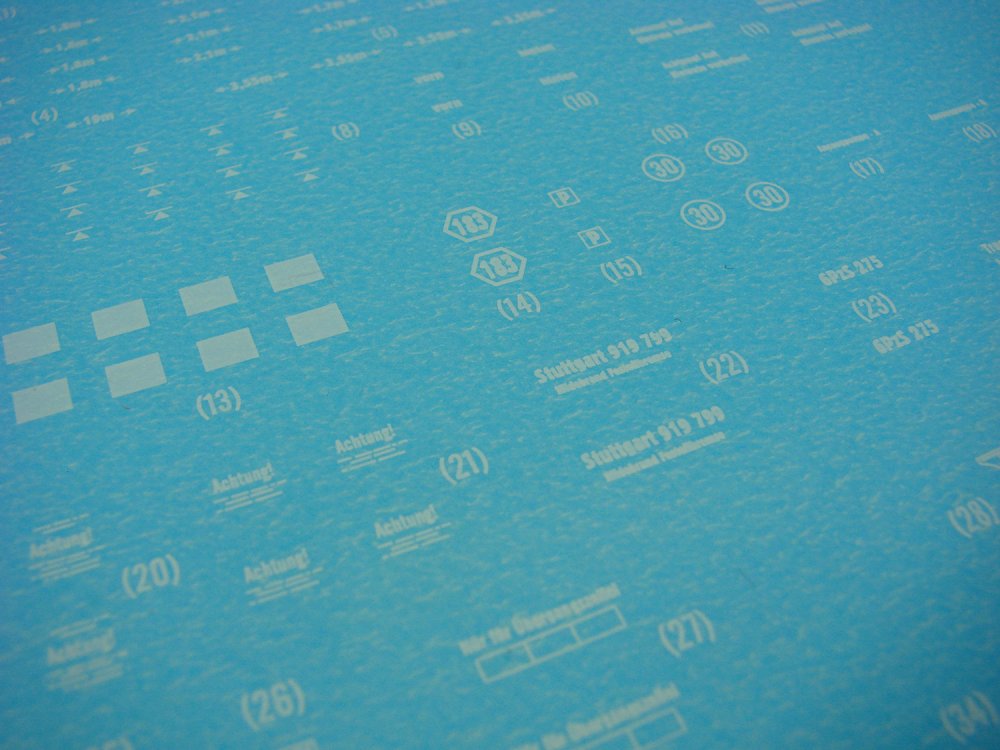
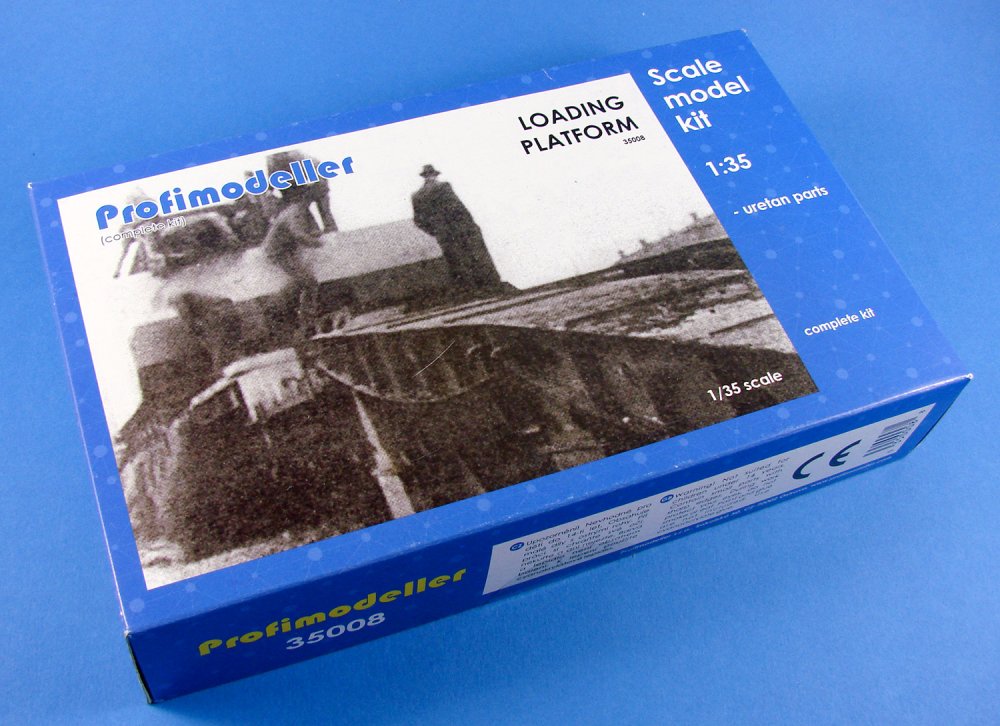
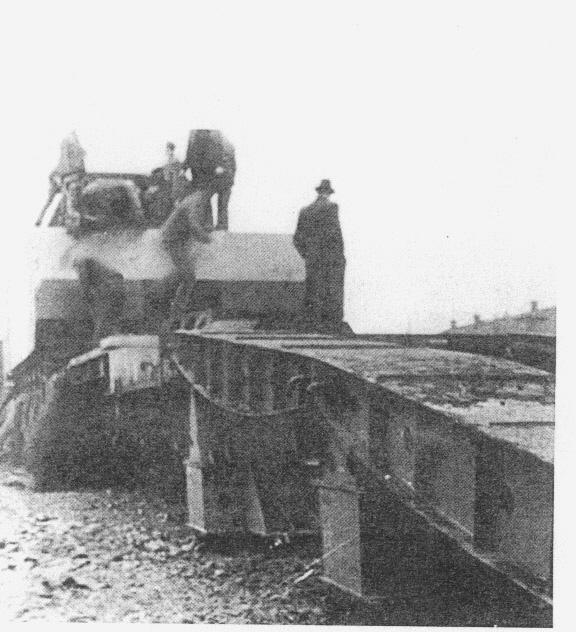
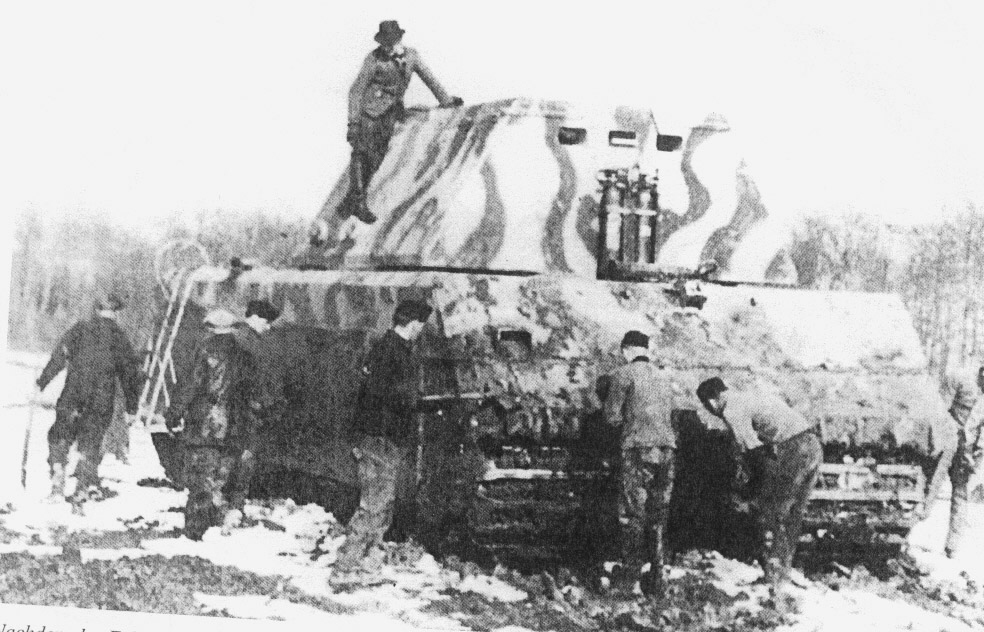
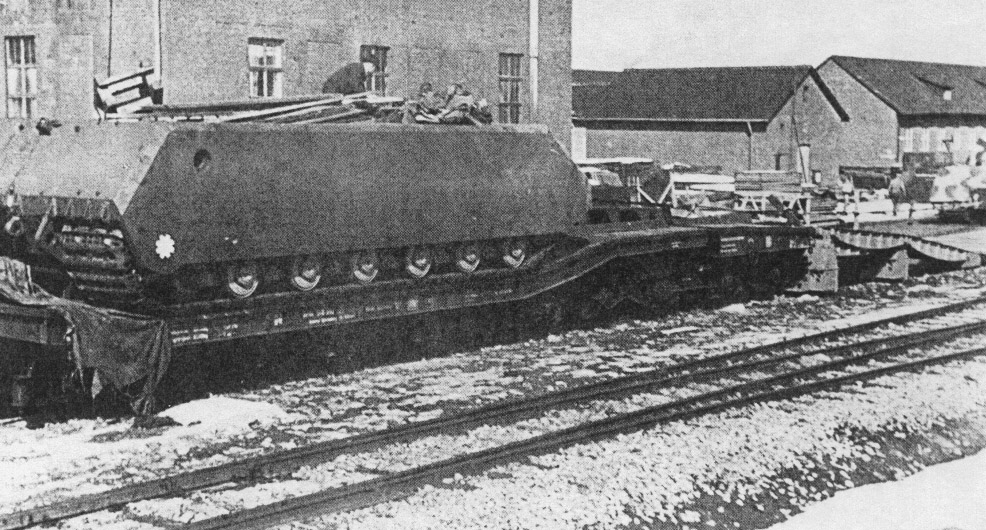
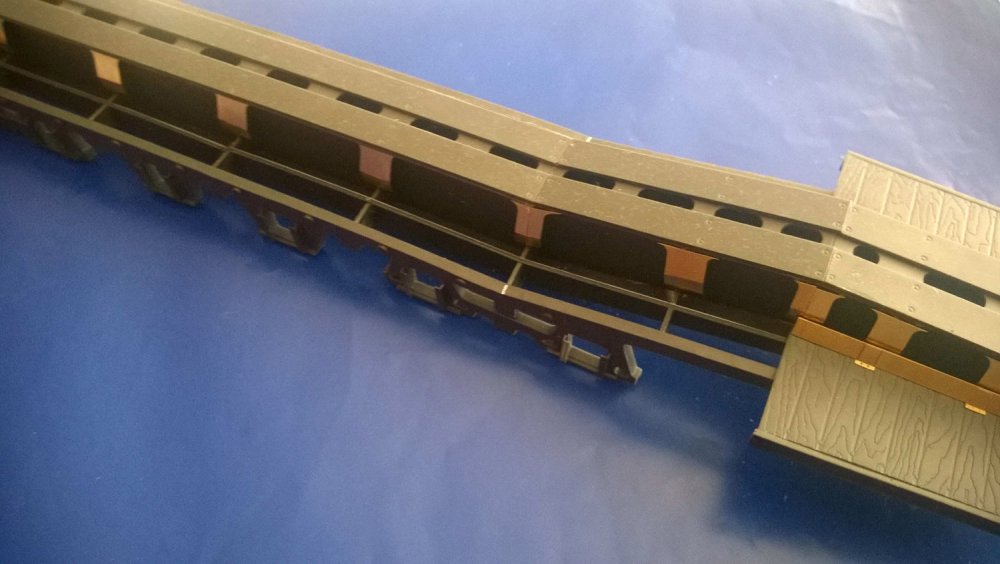
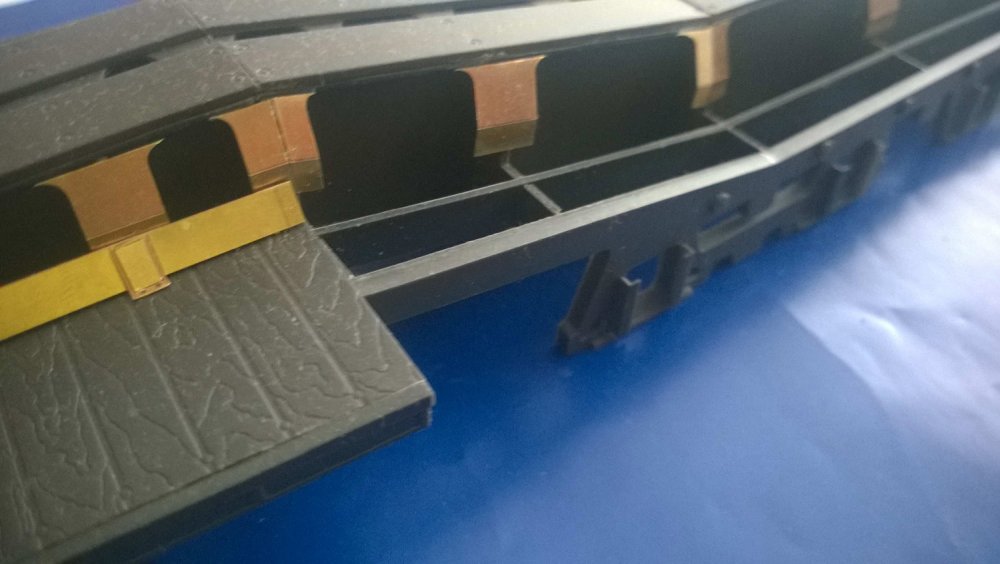
1/35 Transportwagen-Maus Profimodeller Catalogue # 35007 Available from Profimodeller for 6 990,00 CZK (approx. £245) The Transporterwagen-Maus was a 14-axle special transport vehicle of the German railways (Reichsbahn), which was developed and built to transport the Maus by the Graz-Simmering-Pauker works in Vienna. On account of the tank’s size and weight, a rail route between Berlin and Böblingen, had to be found, avoiding all tunnels and large bridges. This wasn’t at all an easy accomplishment, and resulted in an extremely convoluted route. Well, where do I even begin when it comes to this behemoth? Without a doubt, this is the largest, heaviest and most parts-numerous resin kit that I’ve ever been asked to take a look at. It’s also a subject that I know very little about, being primarily an aircraft modeller (with a spattering of Sci-Fi), so this review can only really look at what is presented, and compare the photos of the completed model, alongside the few images I have of the real thing. When I said this thing was large, it’s actually 720mm in length, with a track width of 41mm. This is a multimedia kit which is largely resin, but also has metal and PE elements, along with a small decal sheet. There are 930 resin parts. Yes, you read that correctly! Profimodeller’s Transportwagen-Maus is packed into a long and heavy carton with illustrative line drawings adorning the lid, and upon opening, a 28-page manual is found in the top, folded in half so that the narrow packaging can accommodate it. Underneath this is a plastic back that contains four large cardboard trays onto which the larger, longer and slab-sided components are secured. Each tray also contains an illustration of its contents. Removing this package reveals a set of TWELVE small boxes, each with a lid sticker that again highlights the package contents. Underneath these boxes lays a sleeve with two PE sheets and a single decal sheet, and a decal placement guide is folded neatly next to this. Lastly, some lengths of wire complete the contents inventory. Tray parts There are FOUR trays of very dark grey resin parts included, with adhesive foam being used to hold them in place. This is a neat method of fixing as the parts are slightly elevated from the card surface, so it is therefore easy to slip a knife underneath them and through the foam, in order to release the parts before you clean them up. Boxed parts There are TWELVE boxes of equal size, included with this release. Each box has a label attached to the top, showing an illustration of the included parts, and also a list which includes how many parts are within. I quite like this approach, and for something of this complexity, it’s a welcome inclusion. Most of the boxes have the parts within inside small zip-lock wallets. The only exceptions to this are some of the larger or more numerous parts, such as the railways sleepers etc. Most of these boxes are choc-full of parts, with most of them being connected to some sort of casting block. These look easy enough to remove, especially with a fine razor saw. Some smaller parts are cast onto a sheet, such as is seen with HpH model kits. A small number of other materials are also to be found in these boxes, such as rubber and copper wire. Parts quality is excellent, with only a small number of annoyances, such as some track sleeper clips broken away due to the mass packing of these parts into one of the small boxes. However, this is easily fixed. Photo etch and metal parts TWO PE sheets are included in this release, and whilst some folding is essential, there’s nothing here which will cause any headaches. It all looks like simple bending is all that is required, and the parts are generally large enough not to cause eye strain. PE production is excellent, with clean fold lines and edges. All parts are held in situ by small tags that shouldn’t cause any problem with cutting. A small file will be useful for finally cleaning up the locating points though. Two lengths of what looks like piano wire, are also included. This appears to be for various axels. Decals A single sheet is included, printed solely in white, and containing various stencils and serials that will be applied to the chassis etc. Printing is quite glossy and also suitably thin. There is no indication as to where these are printed, but having used Profimodeller decals before, I don’t foresee any issue at all. A sheet is included which clearly shows where the many stencils are to be placed around this model. There’s certainly enough to enliven what could otherwise have been an empty-looking finish. Instructions This comes in the forum of a series of A4 sheets, stapled together, and comprising 28 pages. All illustration is extremely concise in its line drawing depiction, with all parts being clearly annotated, meaning that they will be easy to locate within the numerous boxes and trays supplied in this kit. Colour references are given throughout construction, but not in any specific manufacturer paint codes. Illustrations are supplied at the end of the manual, showing the Transportwagen-Maus in various elevations. No photographic material is provided in the manual, but you can still find a number of historic images in an online search. Conclusion This build will be no walk in the part, whatsoever. It is both a complex and involved build that will dictate the modeller needing experience of working with this media. Of course, it will also require plenty of space for displaying the final result, but I’m not going to insult anyone’s intelligence as they should already have worked that small detail out. It’s also a very expensive kit, and you should be confident of your own skillset before contemplating a purchase. Having said this, if you want a 1/35 trailer for a Maus, then this is not only the only deal in town, but it is also superbly designed and accurate to the reference that I have been sent with regards to this release, but the kit is also very high quality. All resin is nicely cast, and the whole kit is thoughtfully packaged for ease of finding the parts you need amongst the 930 on offer! Current exchange rates put this kit at about £240, and of course, you will need to purchase your own Maus with which to display the trailer. Highly recommended (for the very experienced modeller) My sincere thanks to Profimodeller for the review sample seen here. To purchase directly, click THIS link. Please note that other related sets are available to use with this, and are available separately. These are: Maus Loading Ramp for 990,00 CZK (approx. £35) Tow Bar for 159,00 CZK (approx. £6) We did actually receive a little something extra with our sample, with the emphasis on the word ‘little’. This was a mini-Maus, seen here in the photos. This was a free gift which I presume comes with the main Transportwagen-Maus.


-
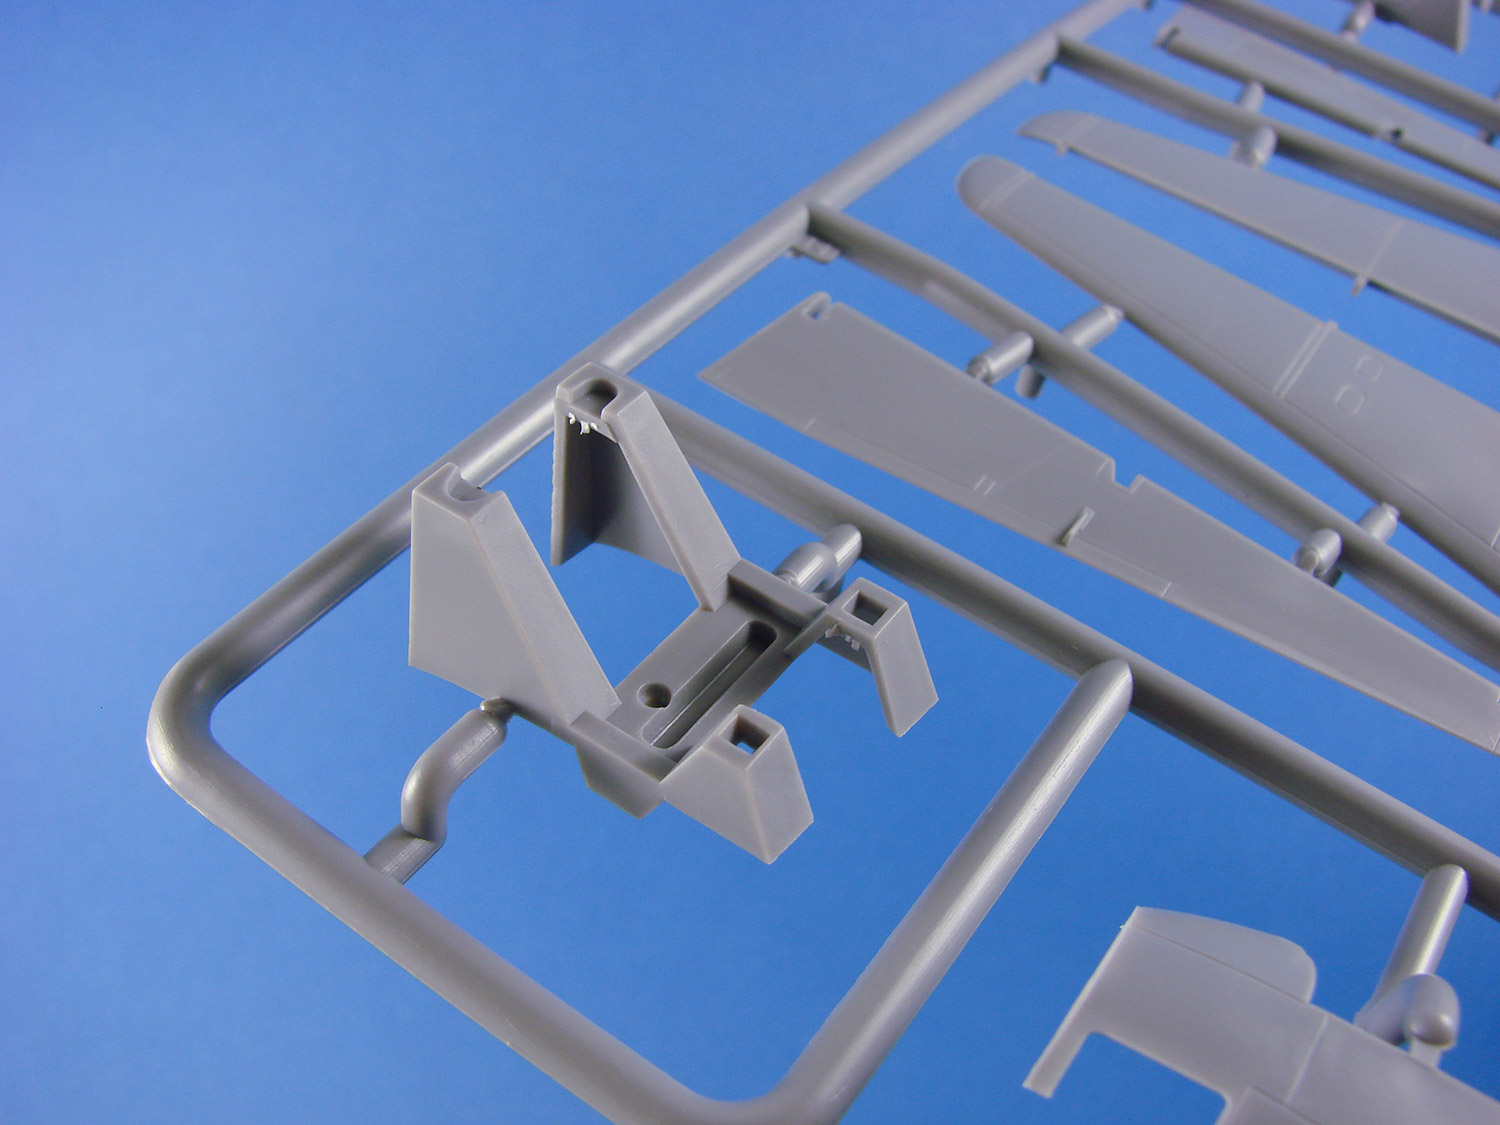
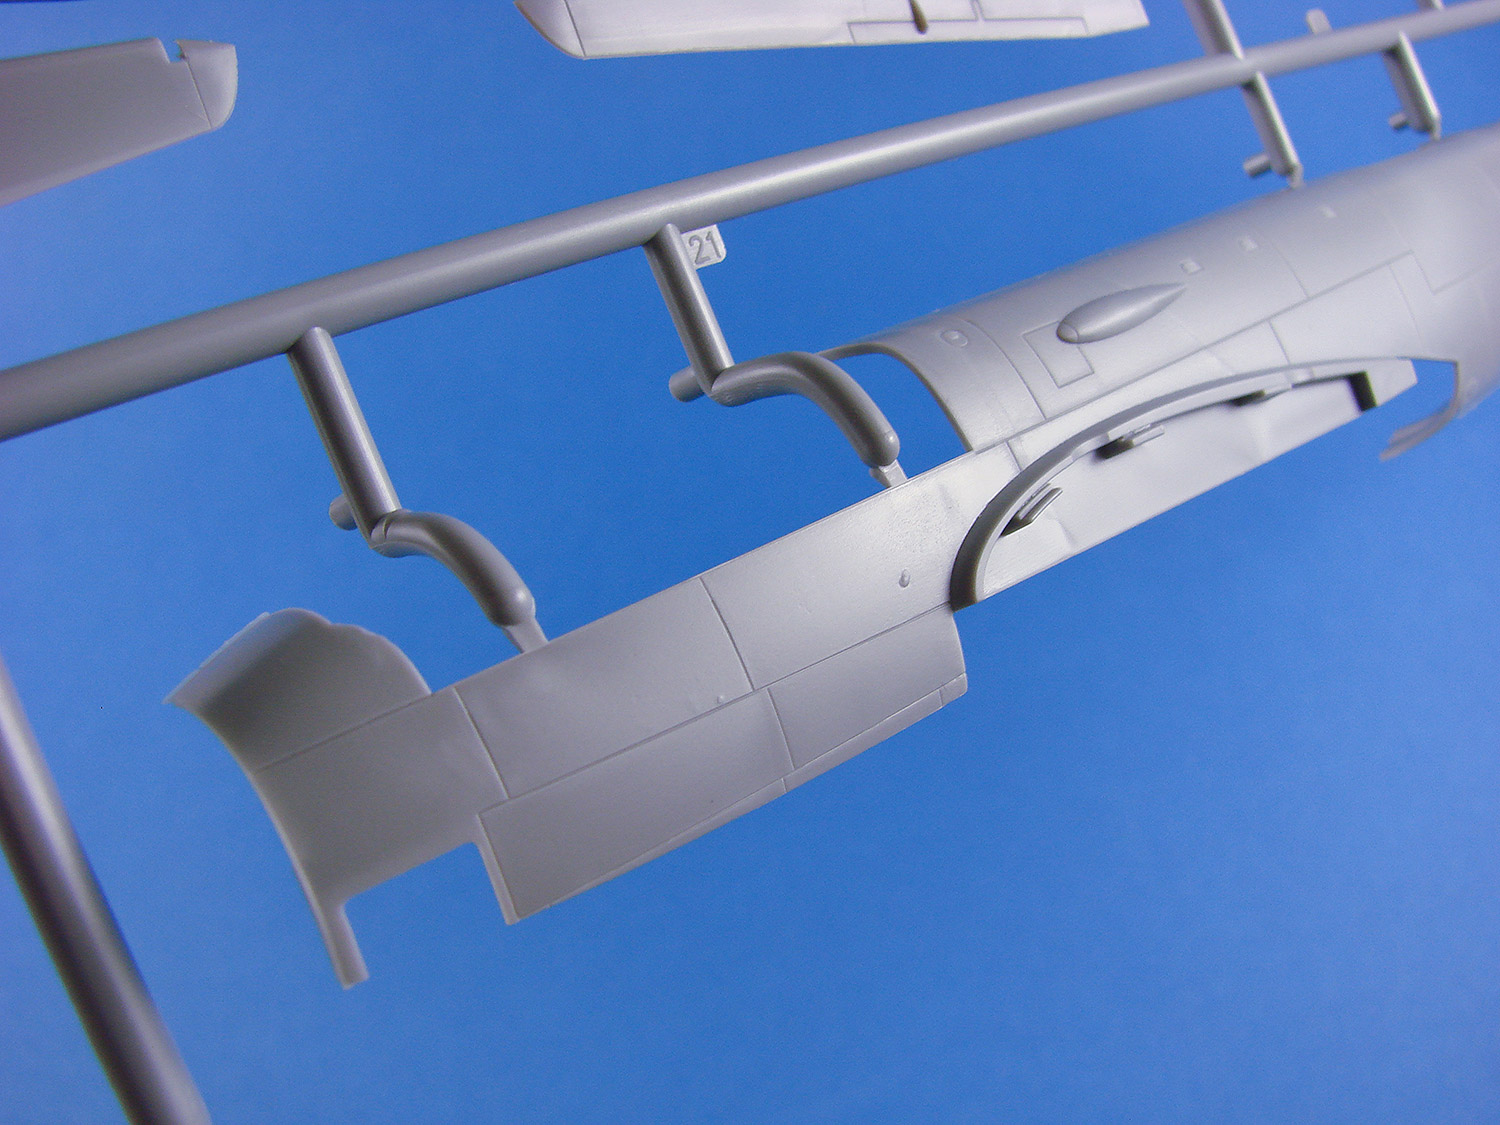
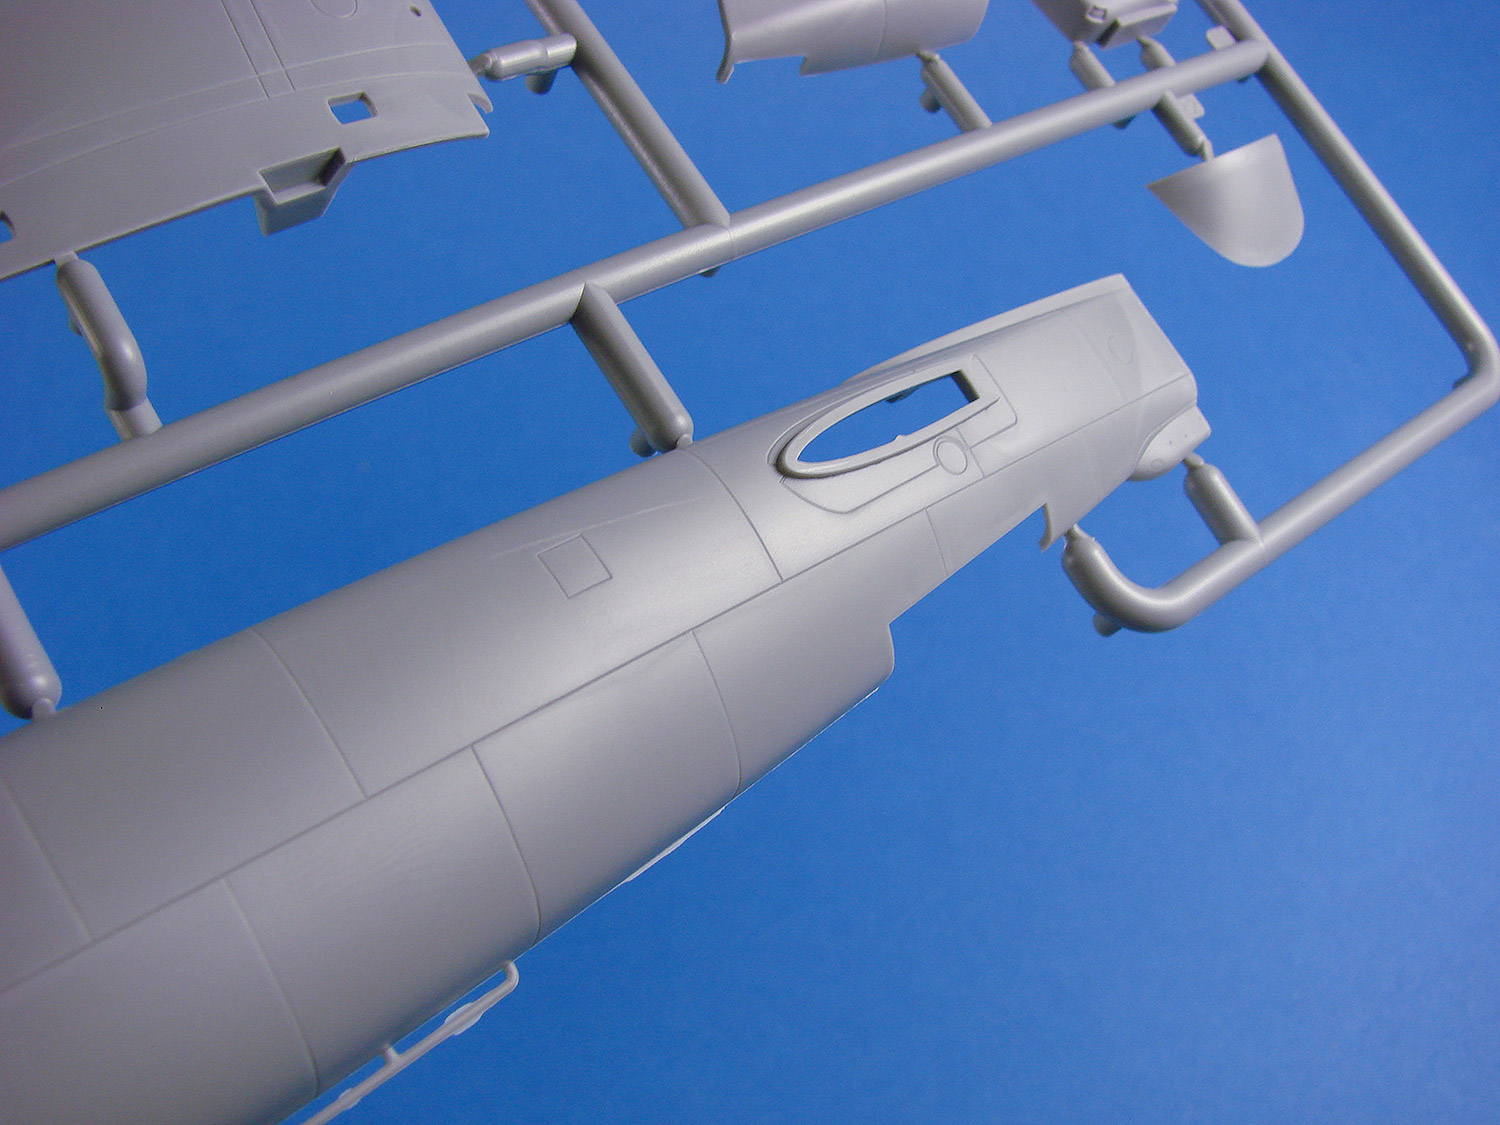
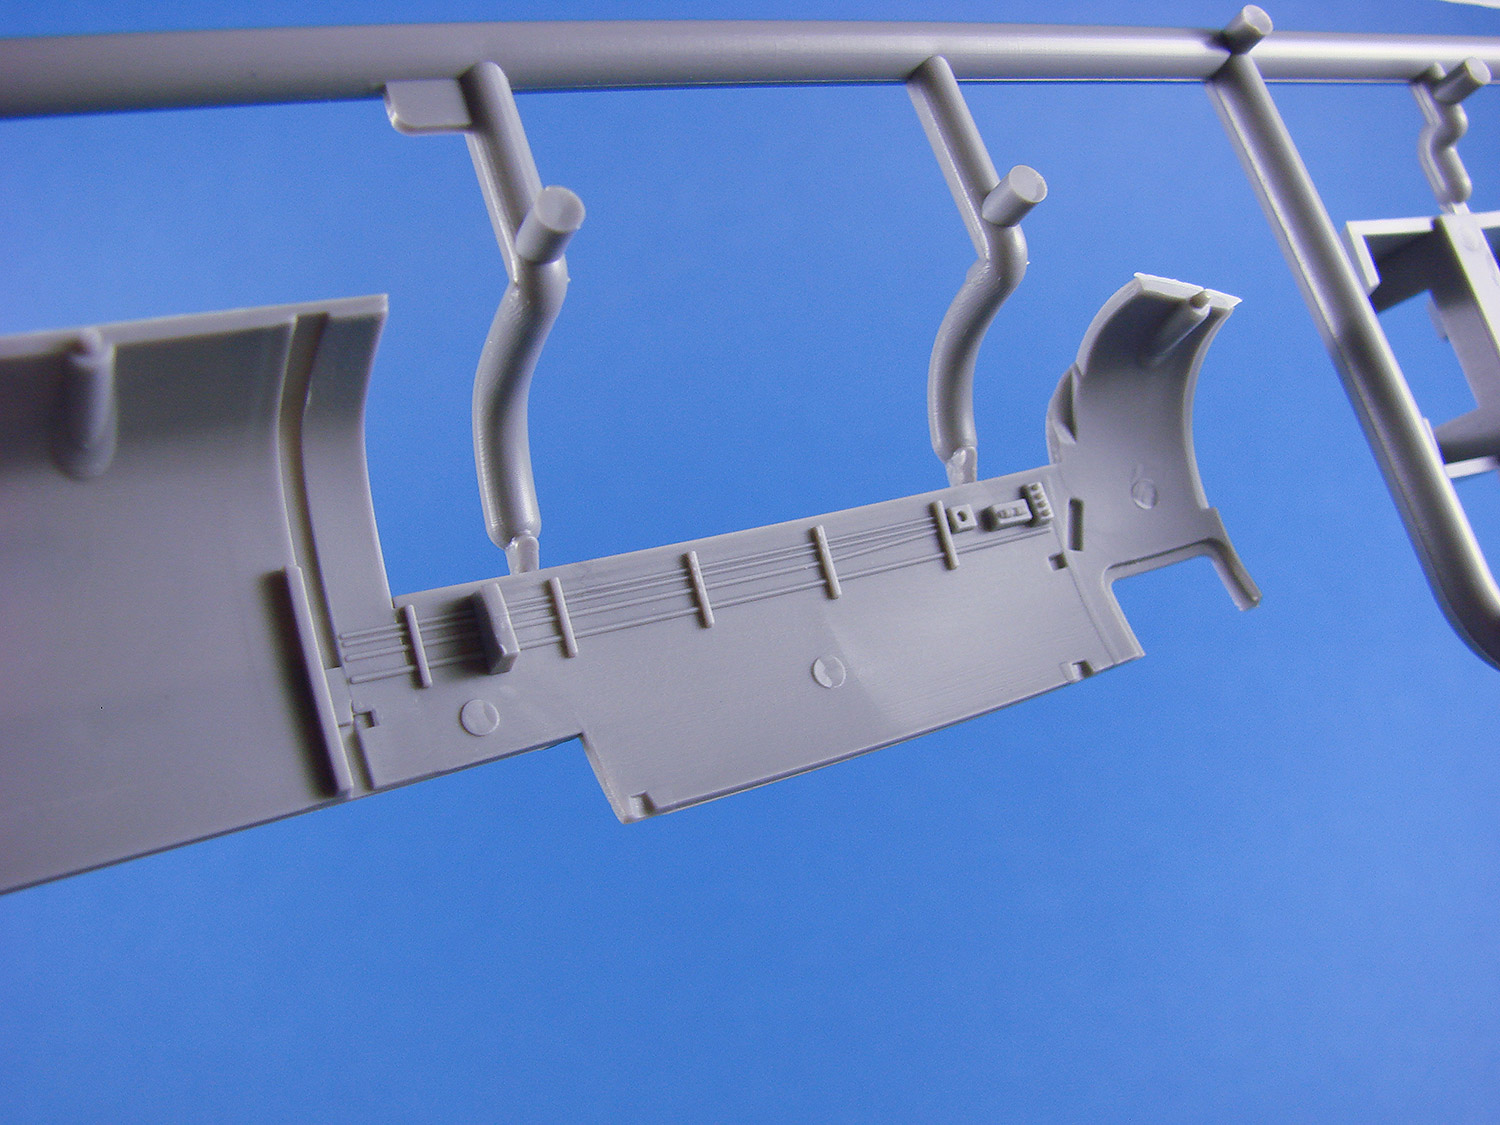
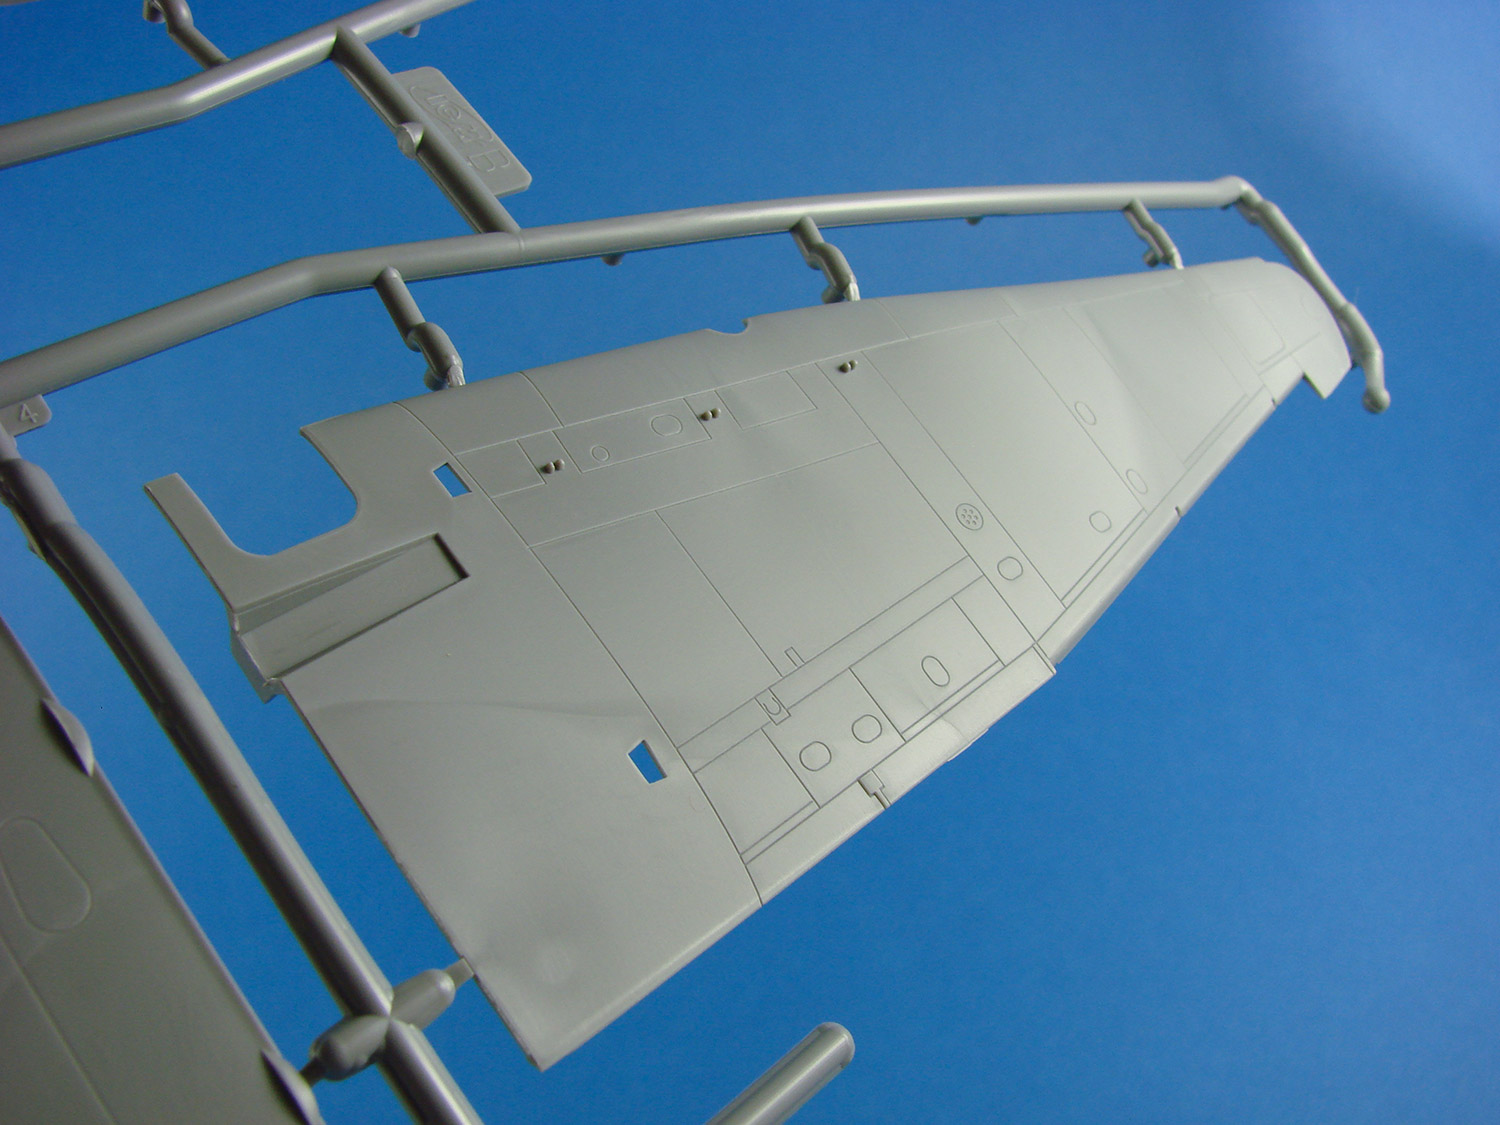
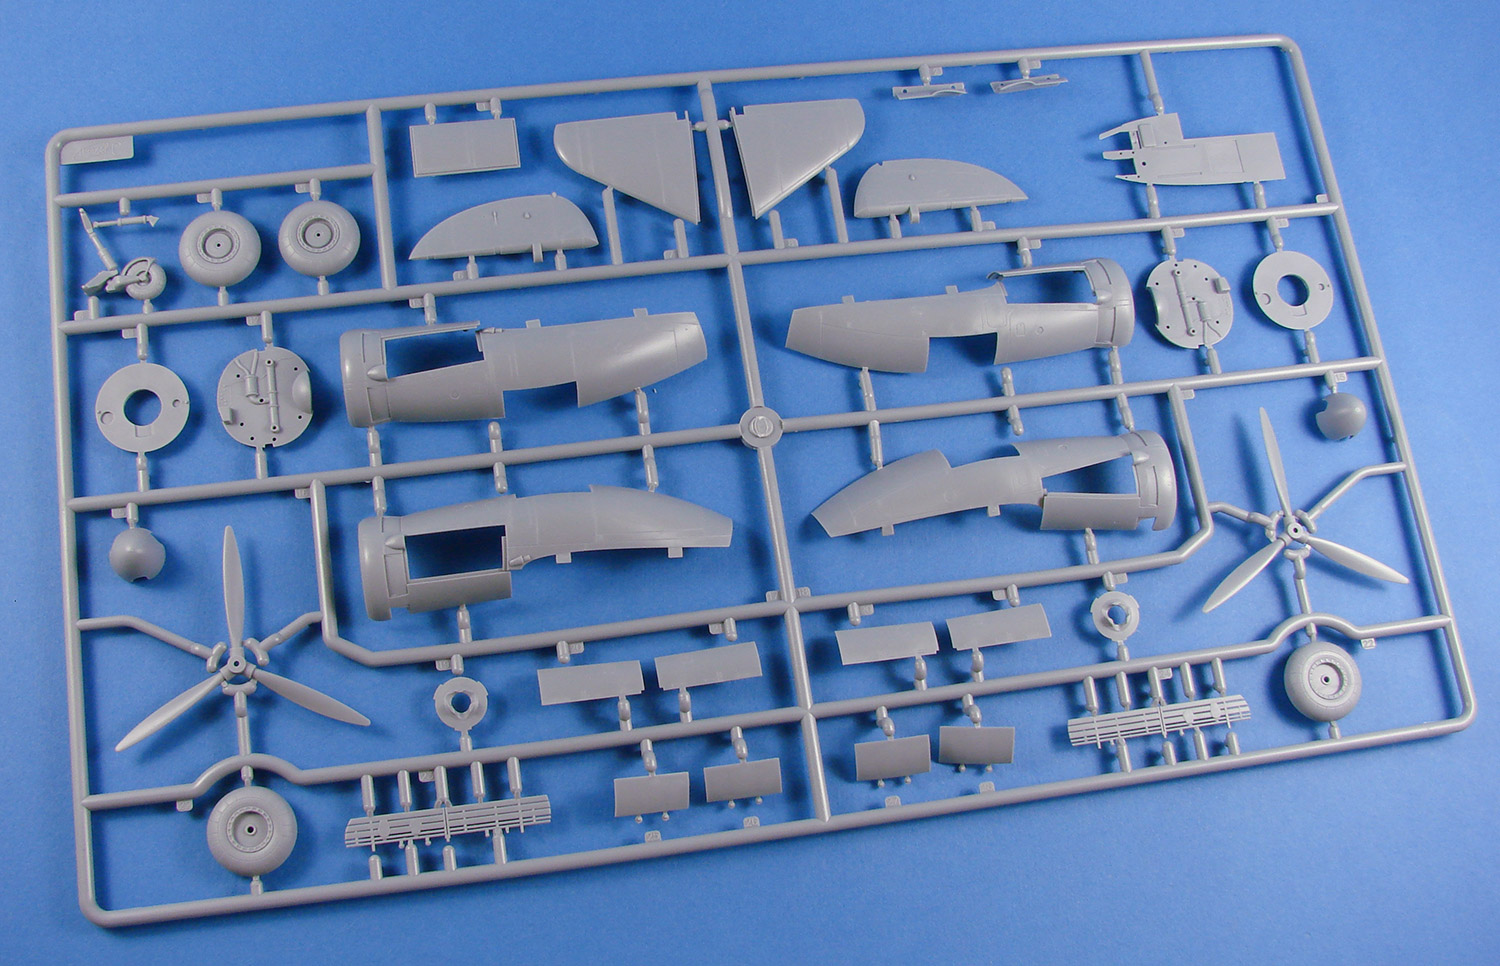
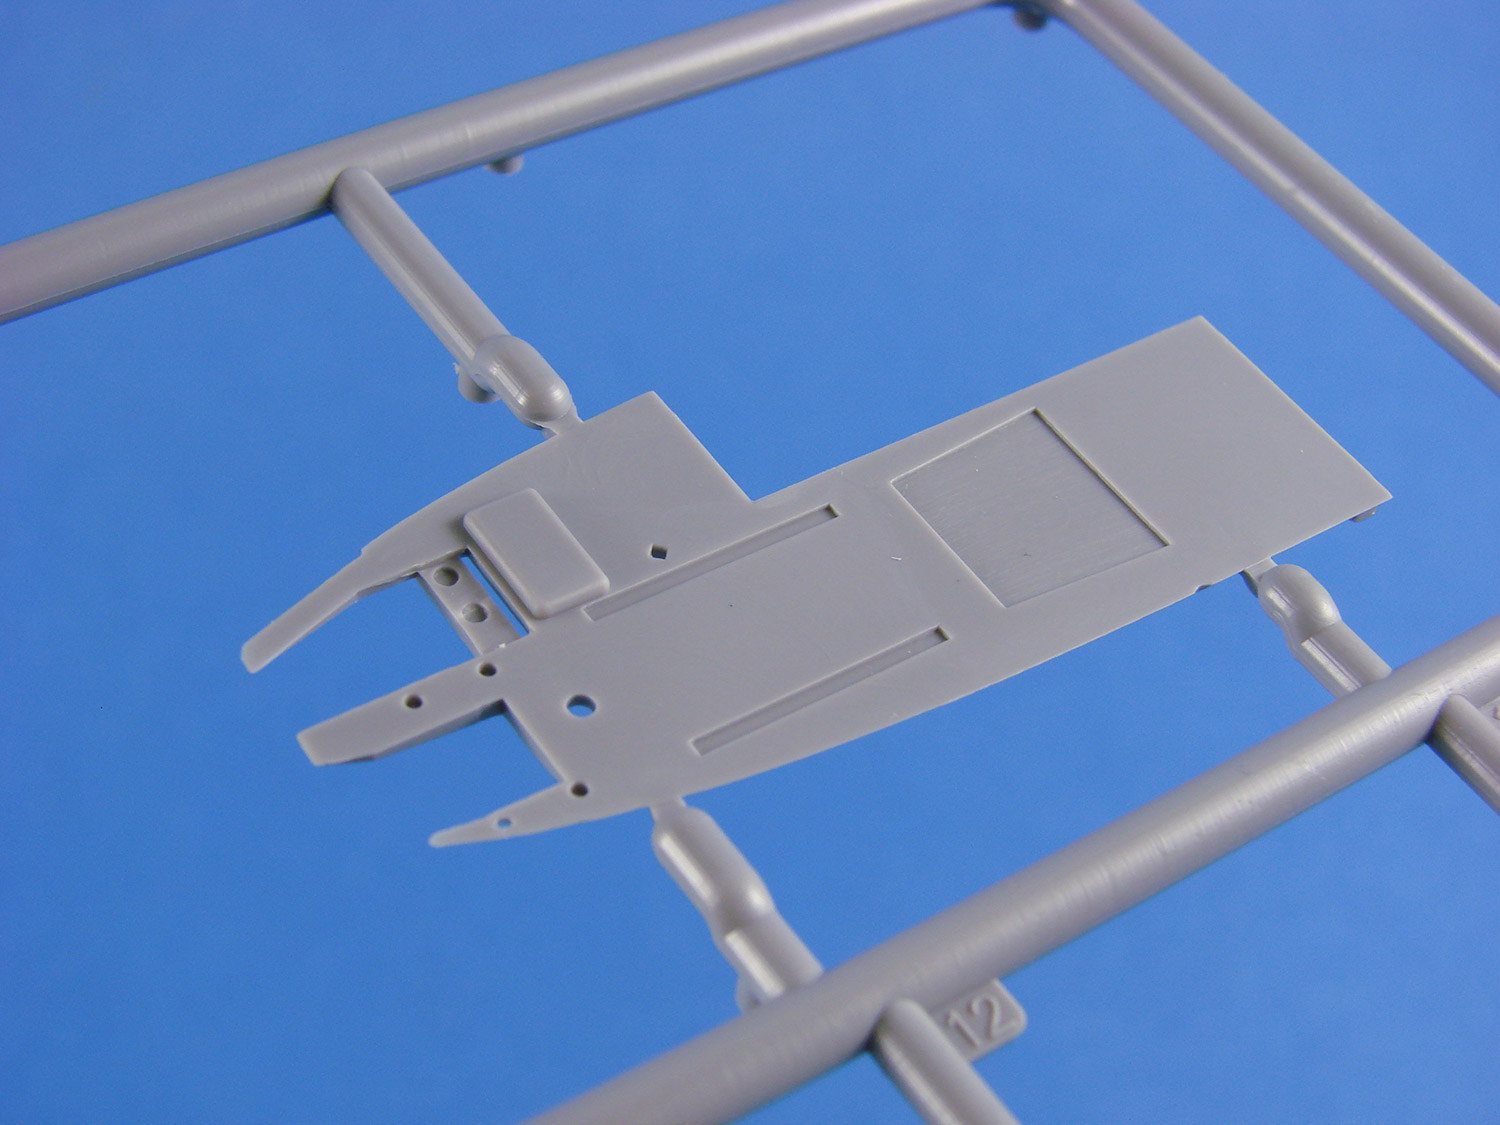
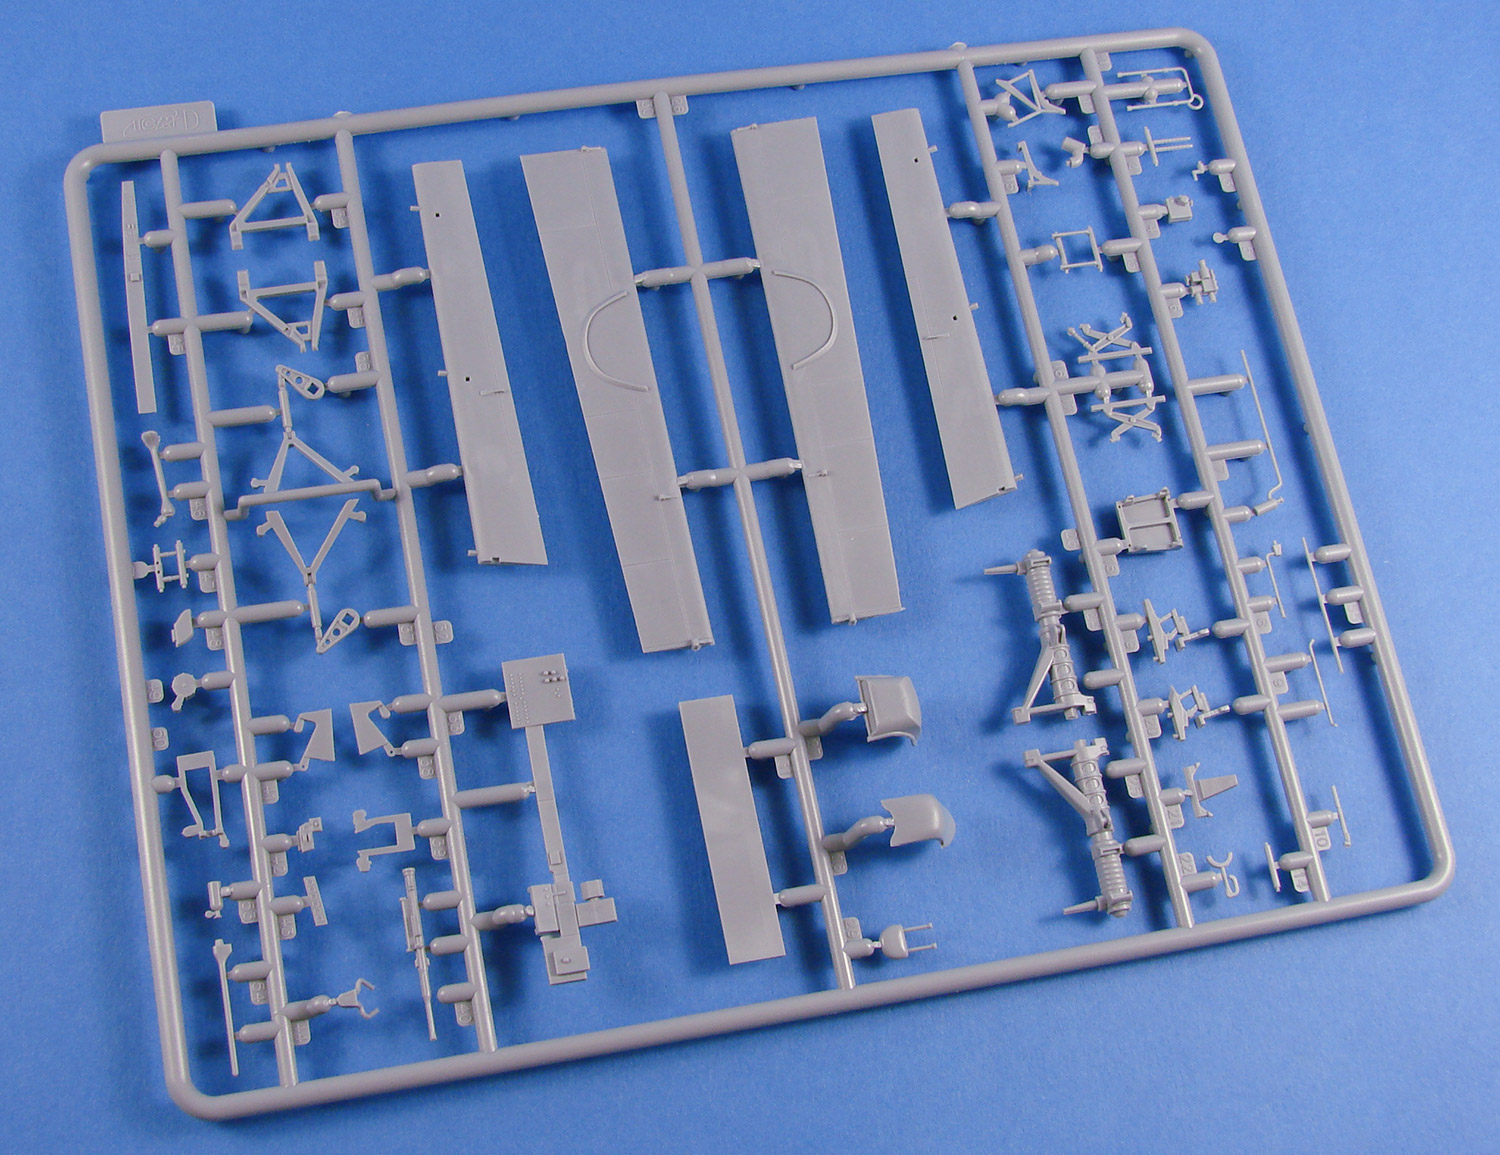
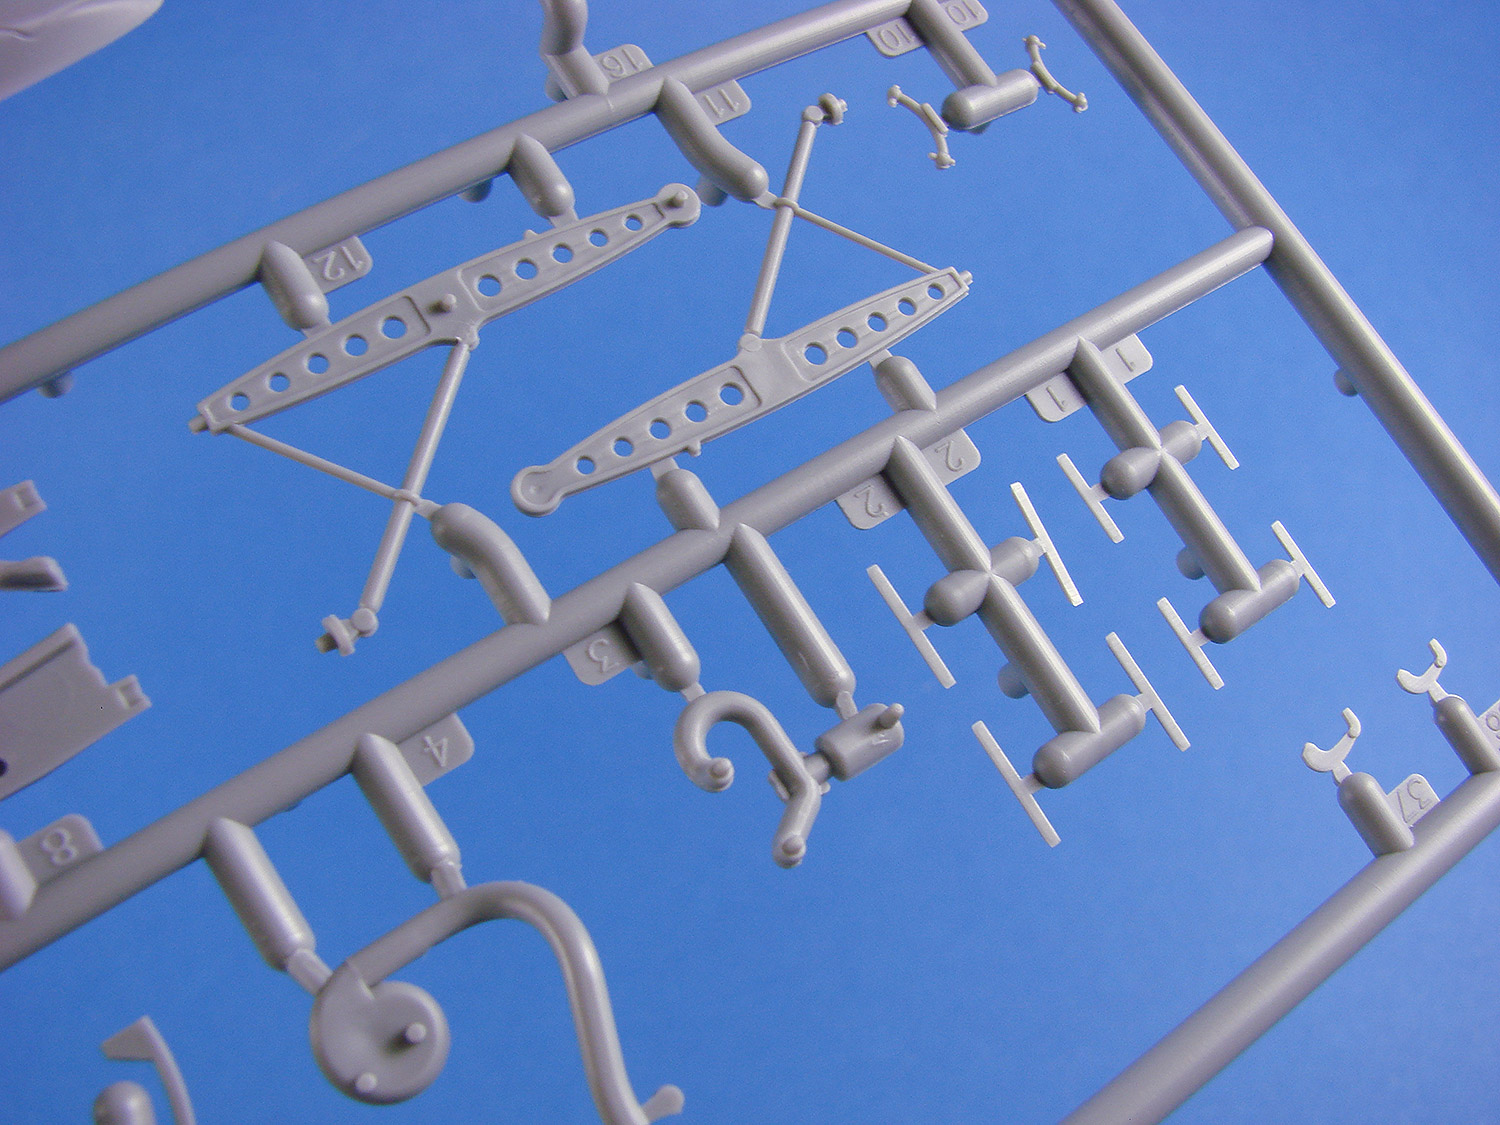
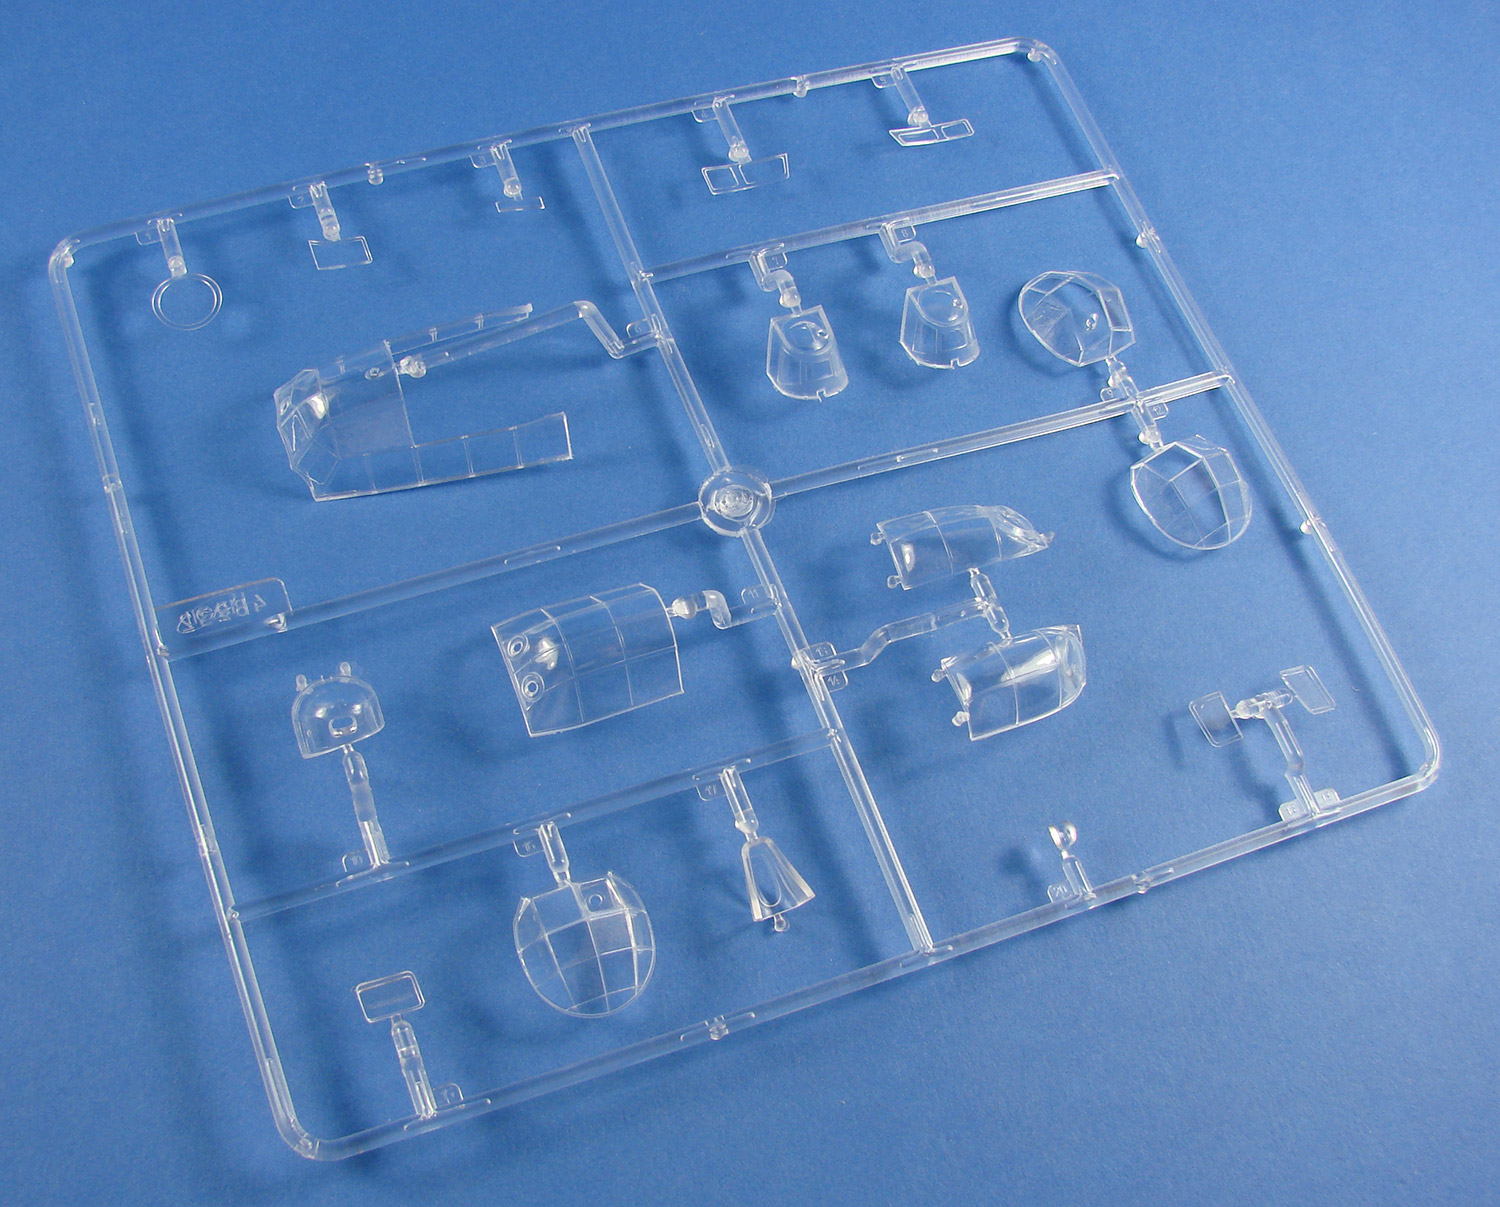
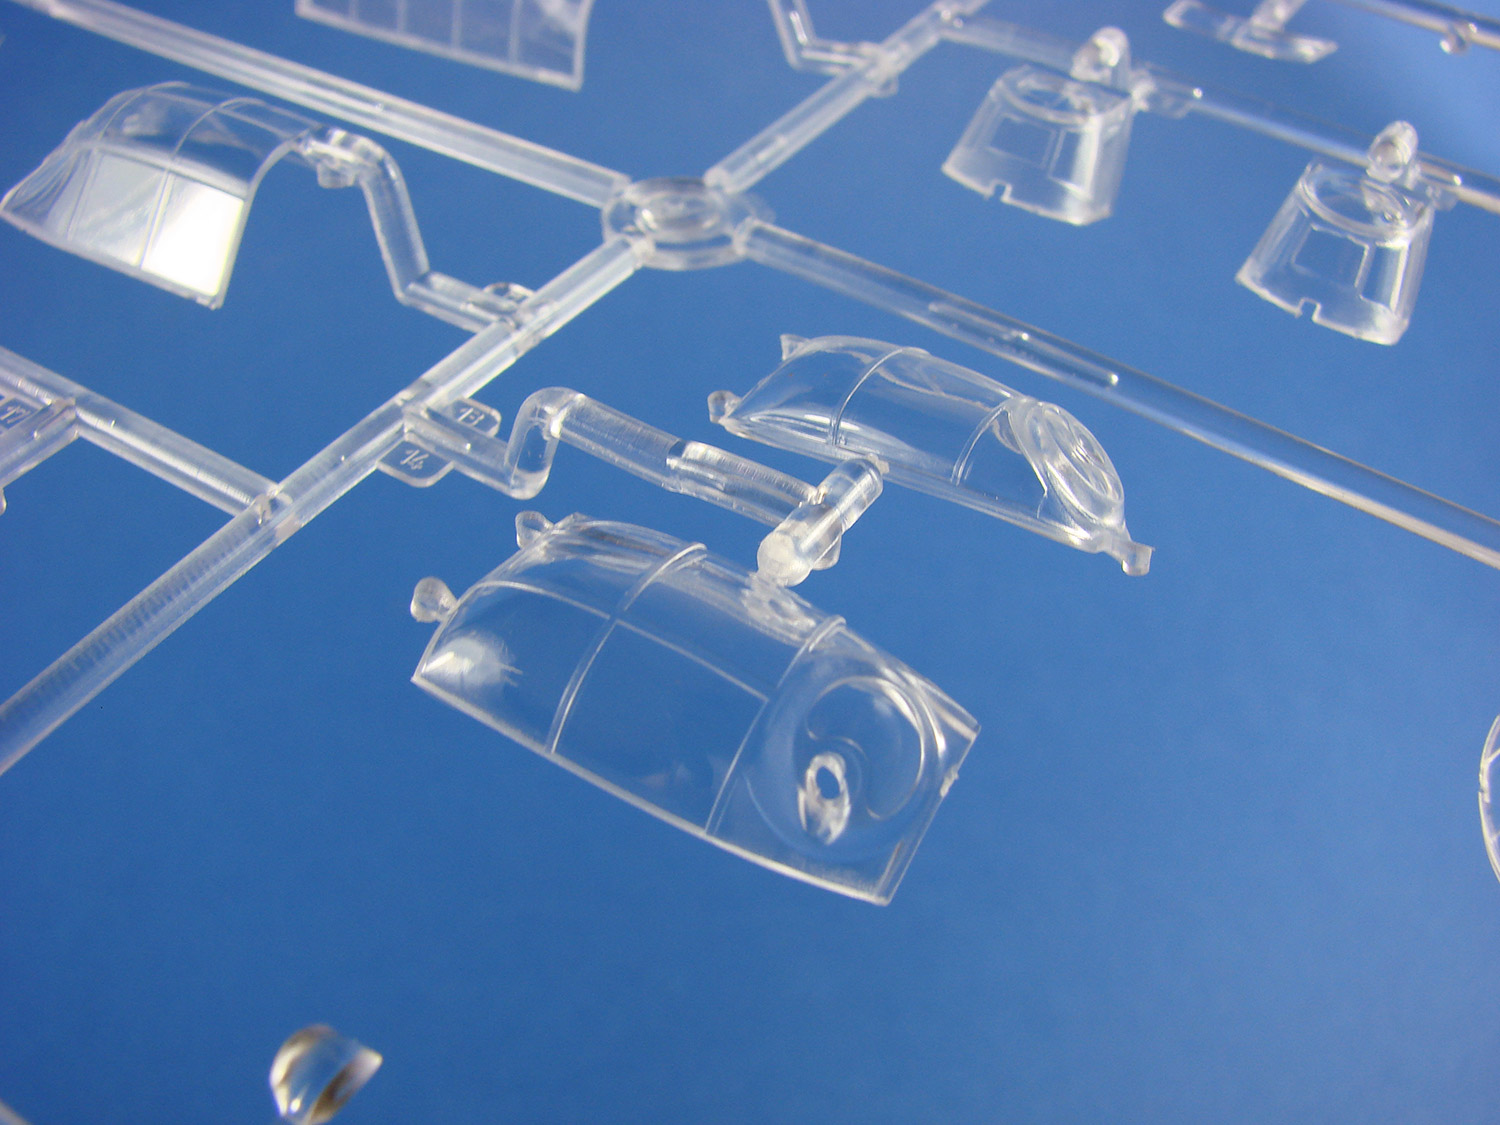
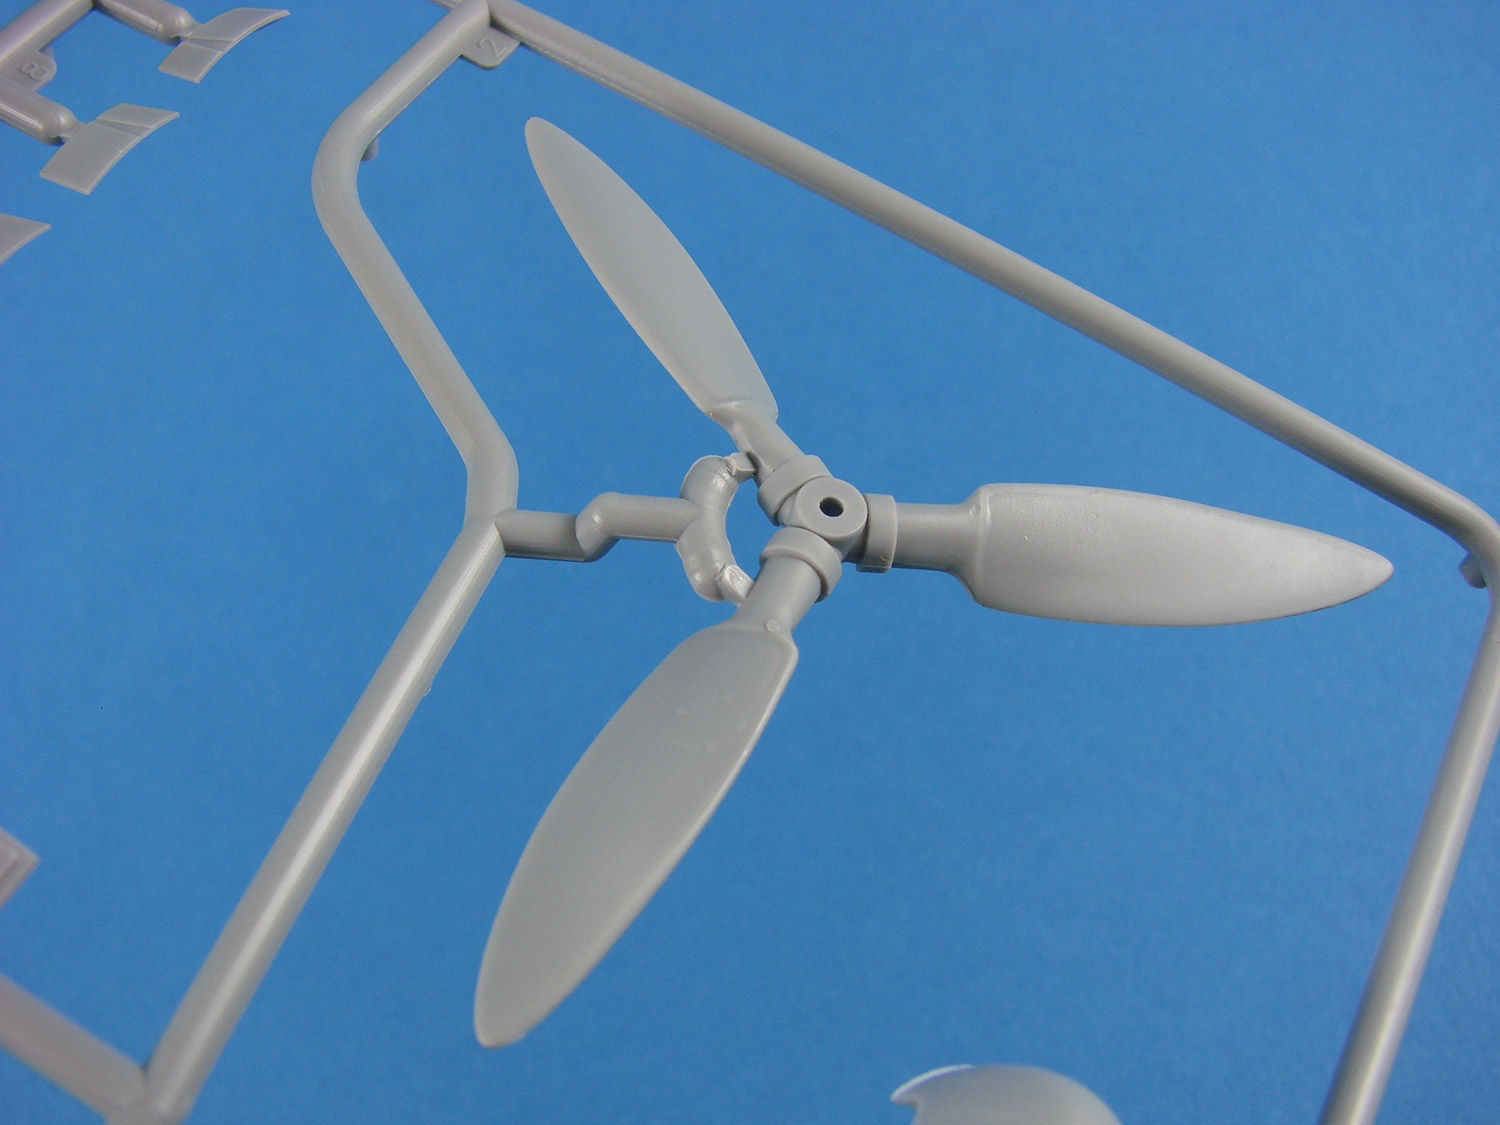
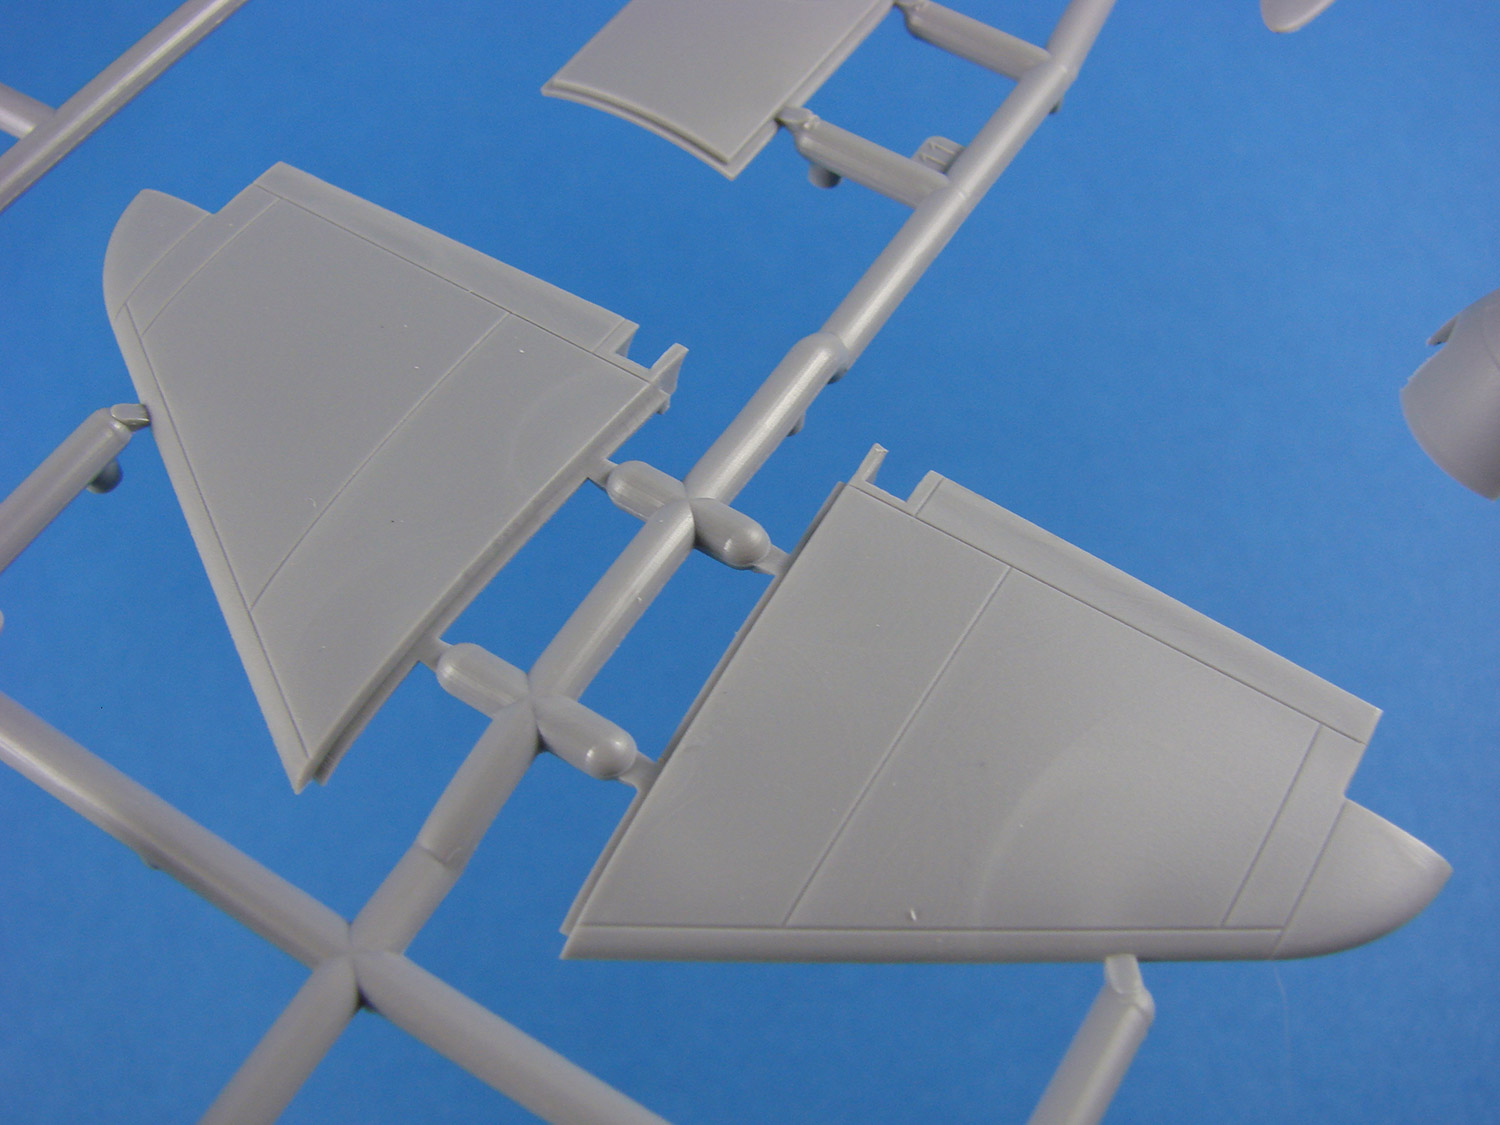
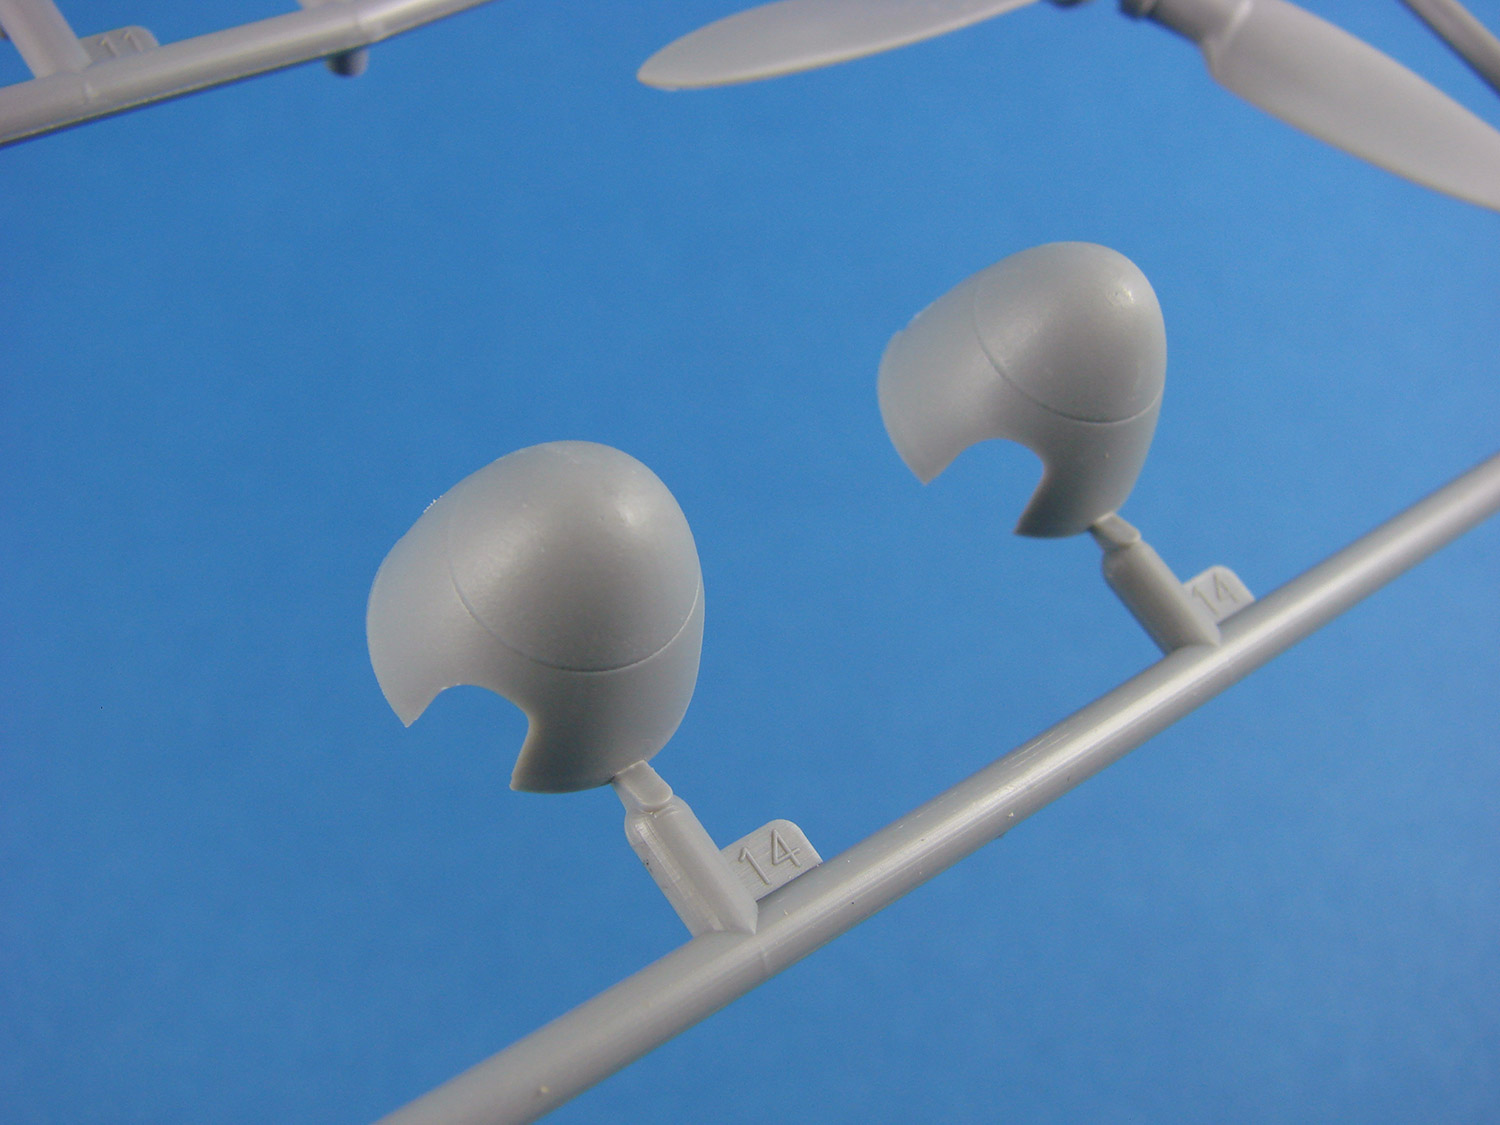
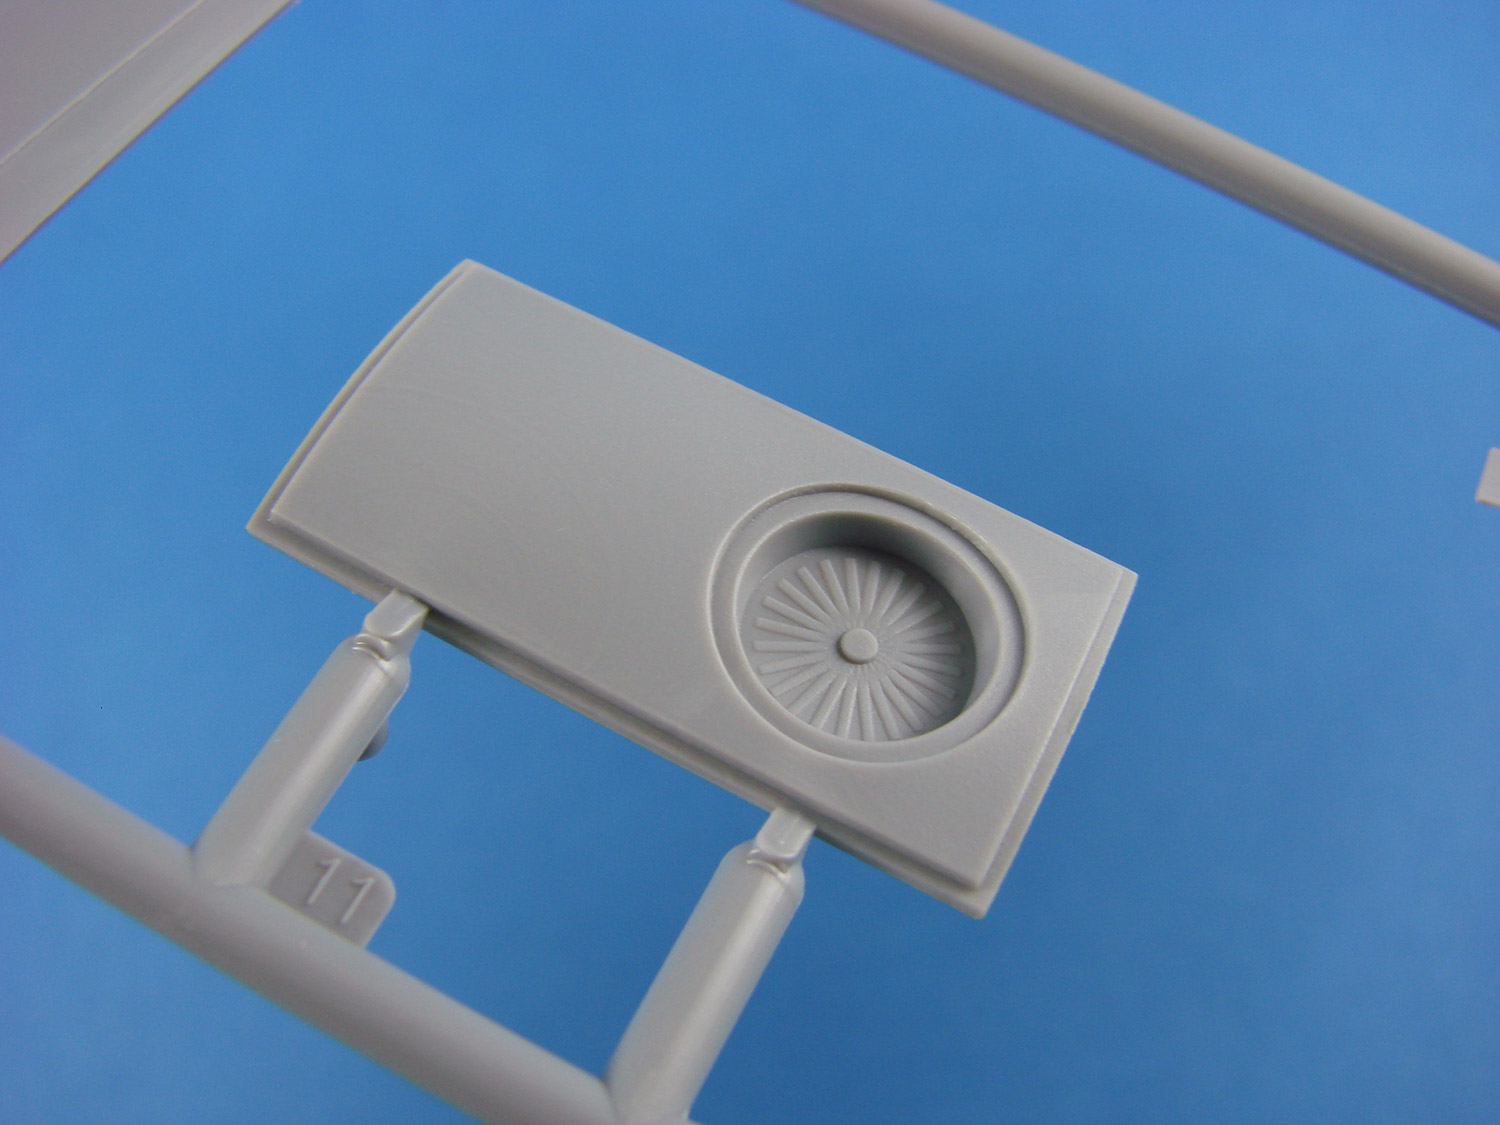
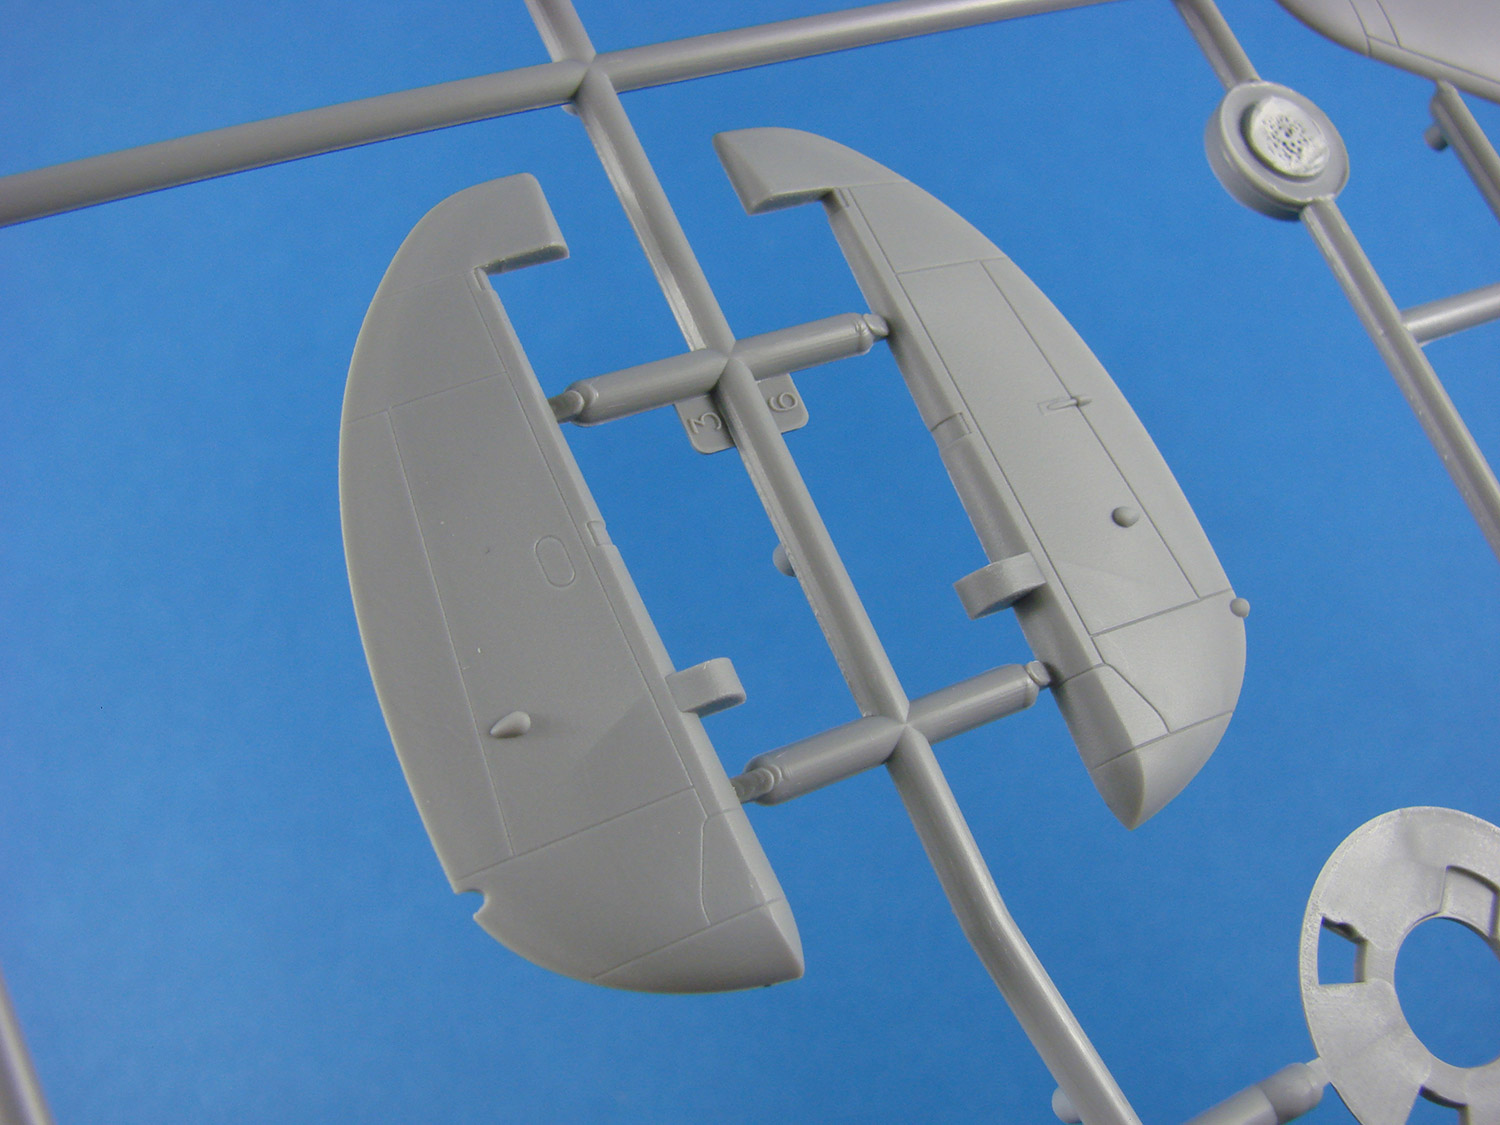
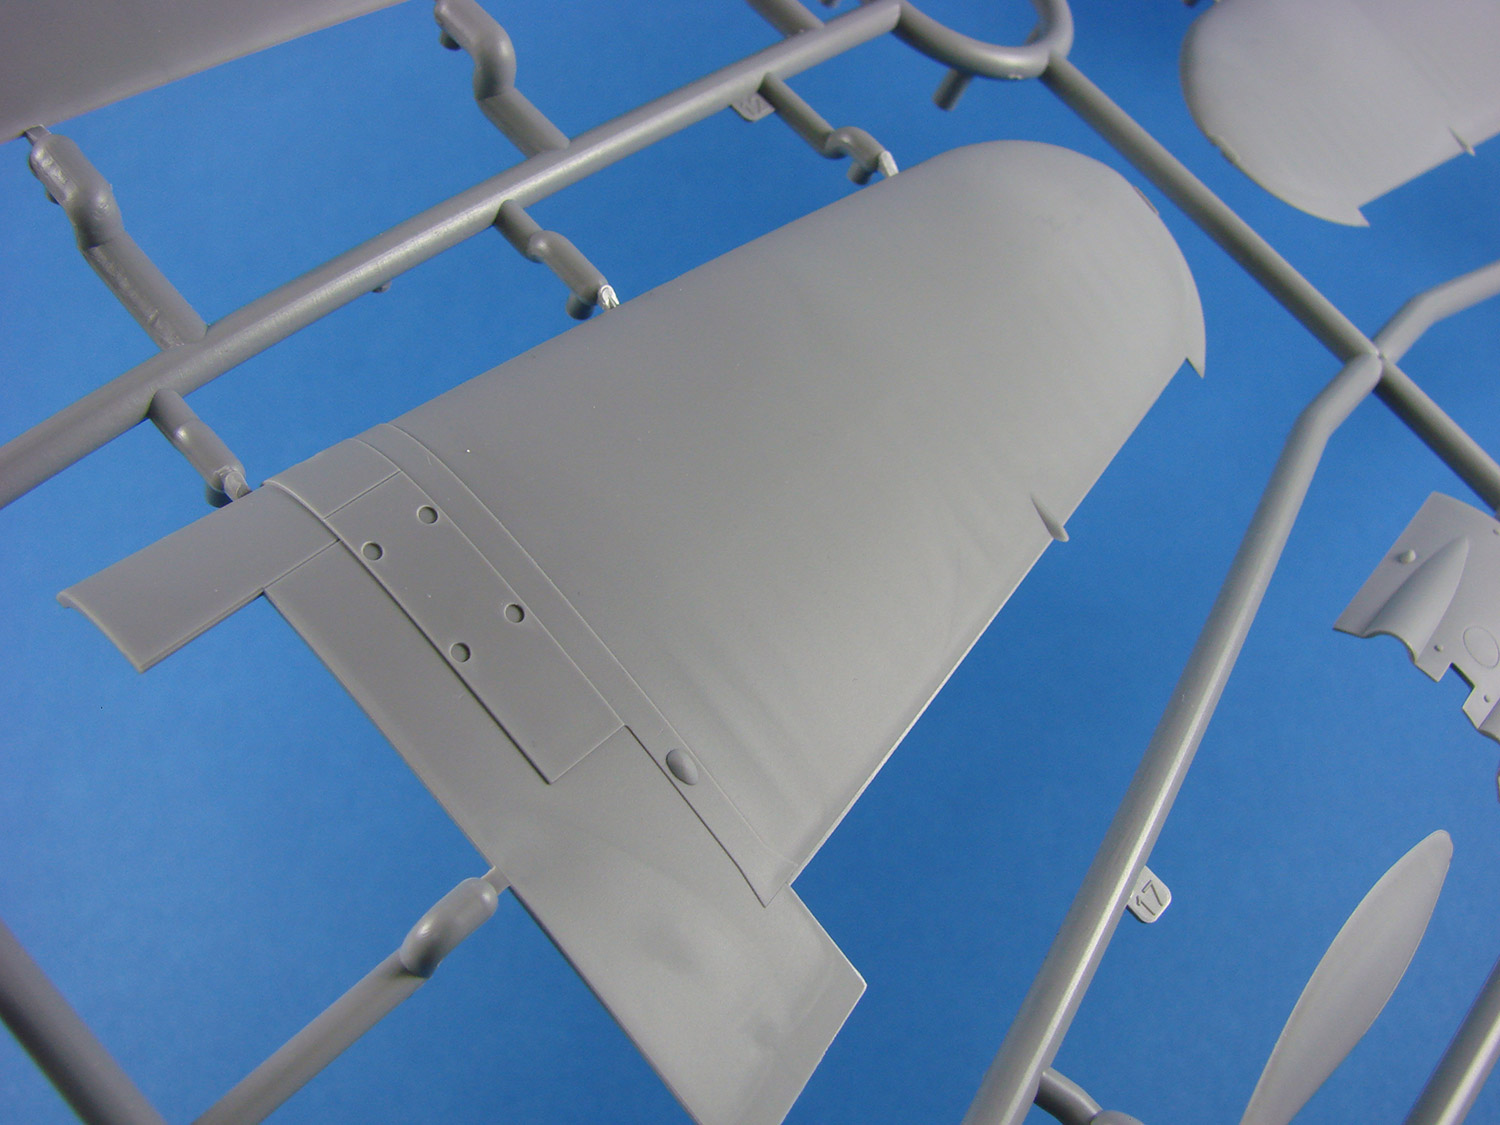
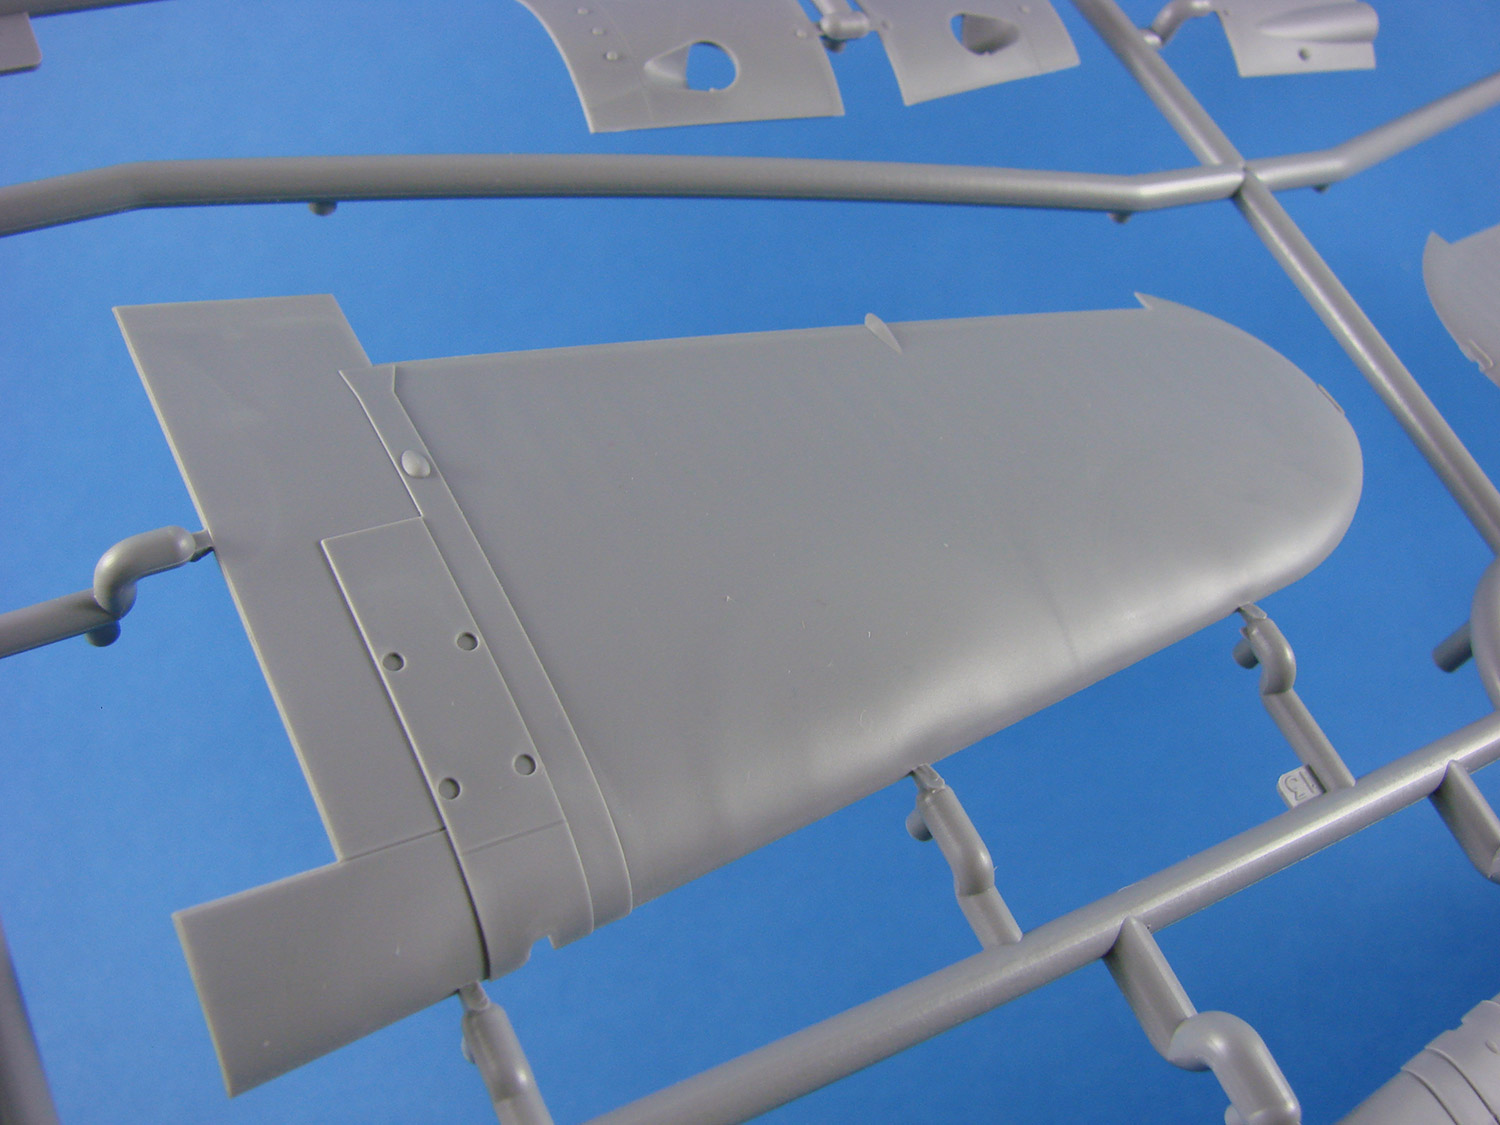
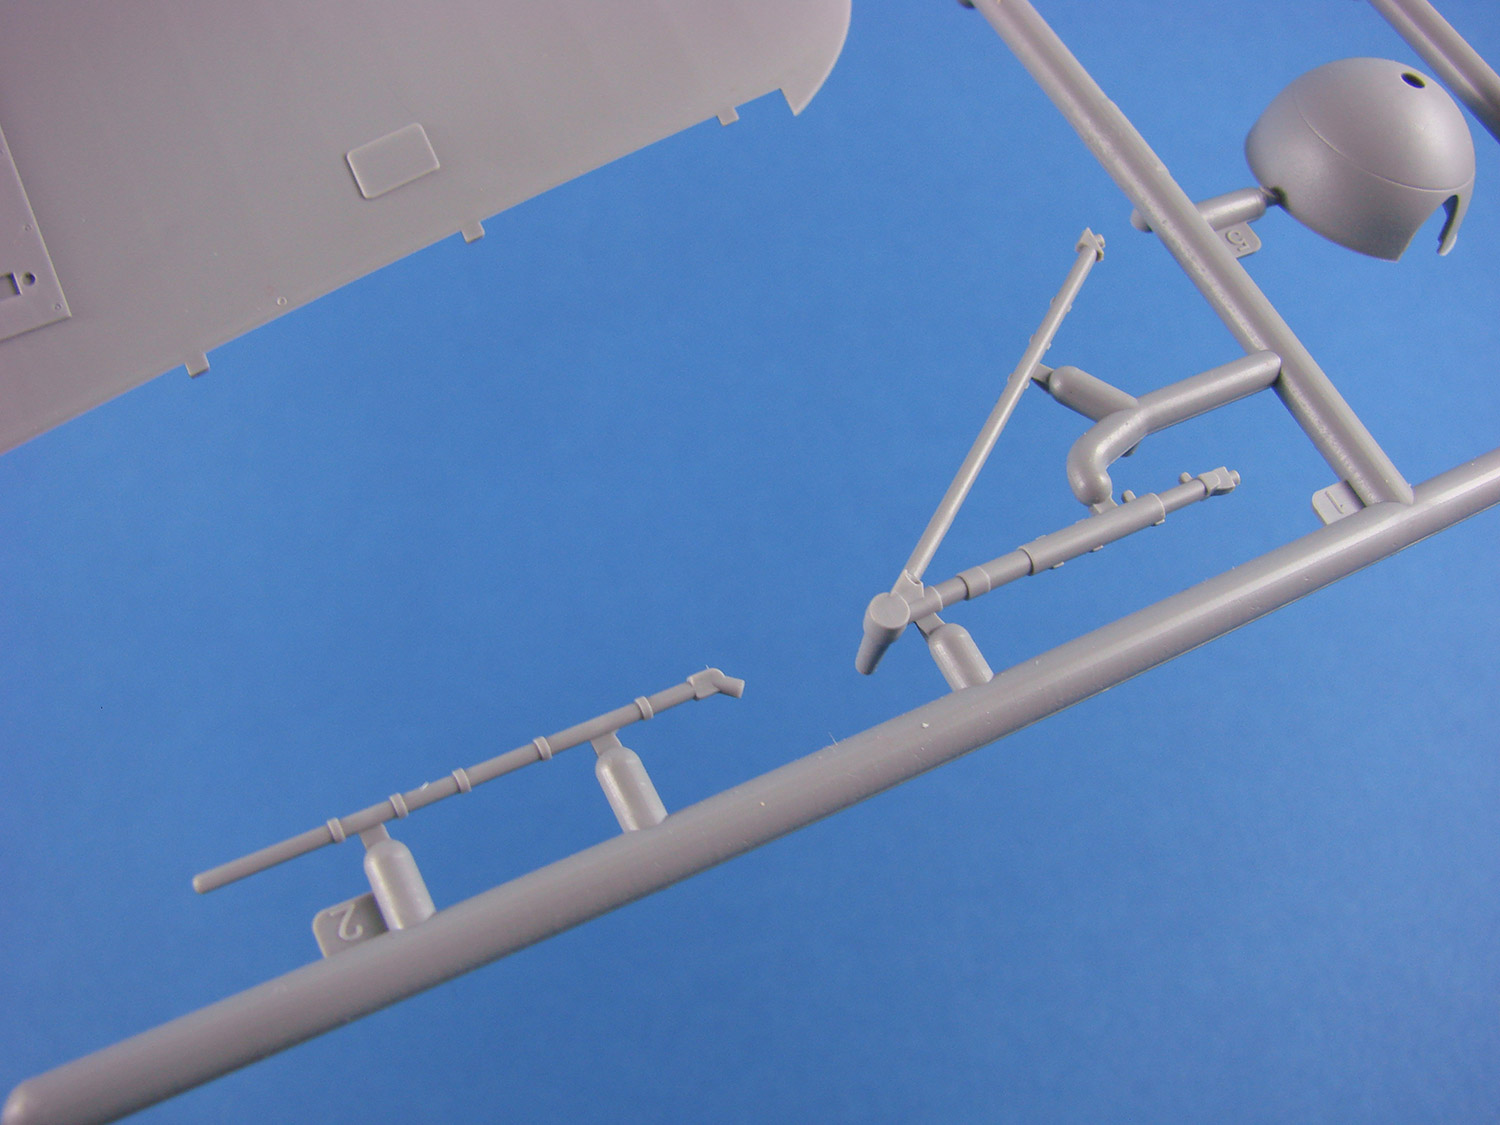
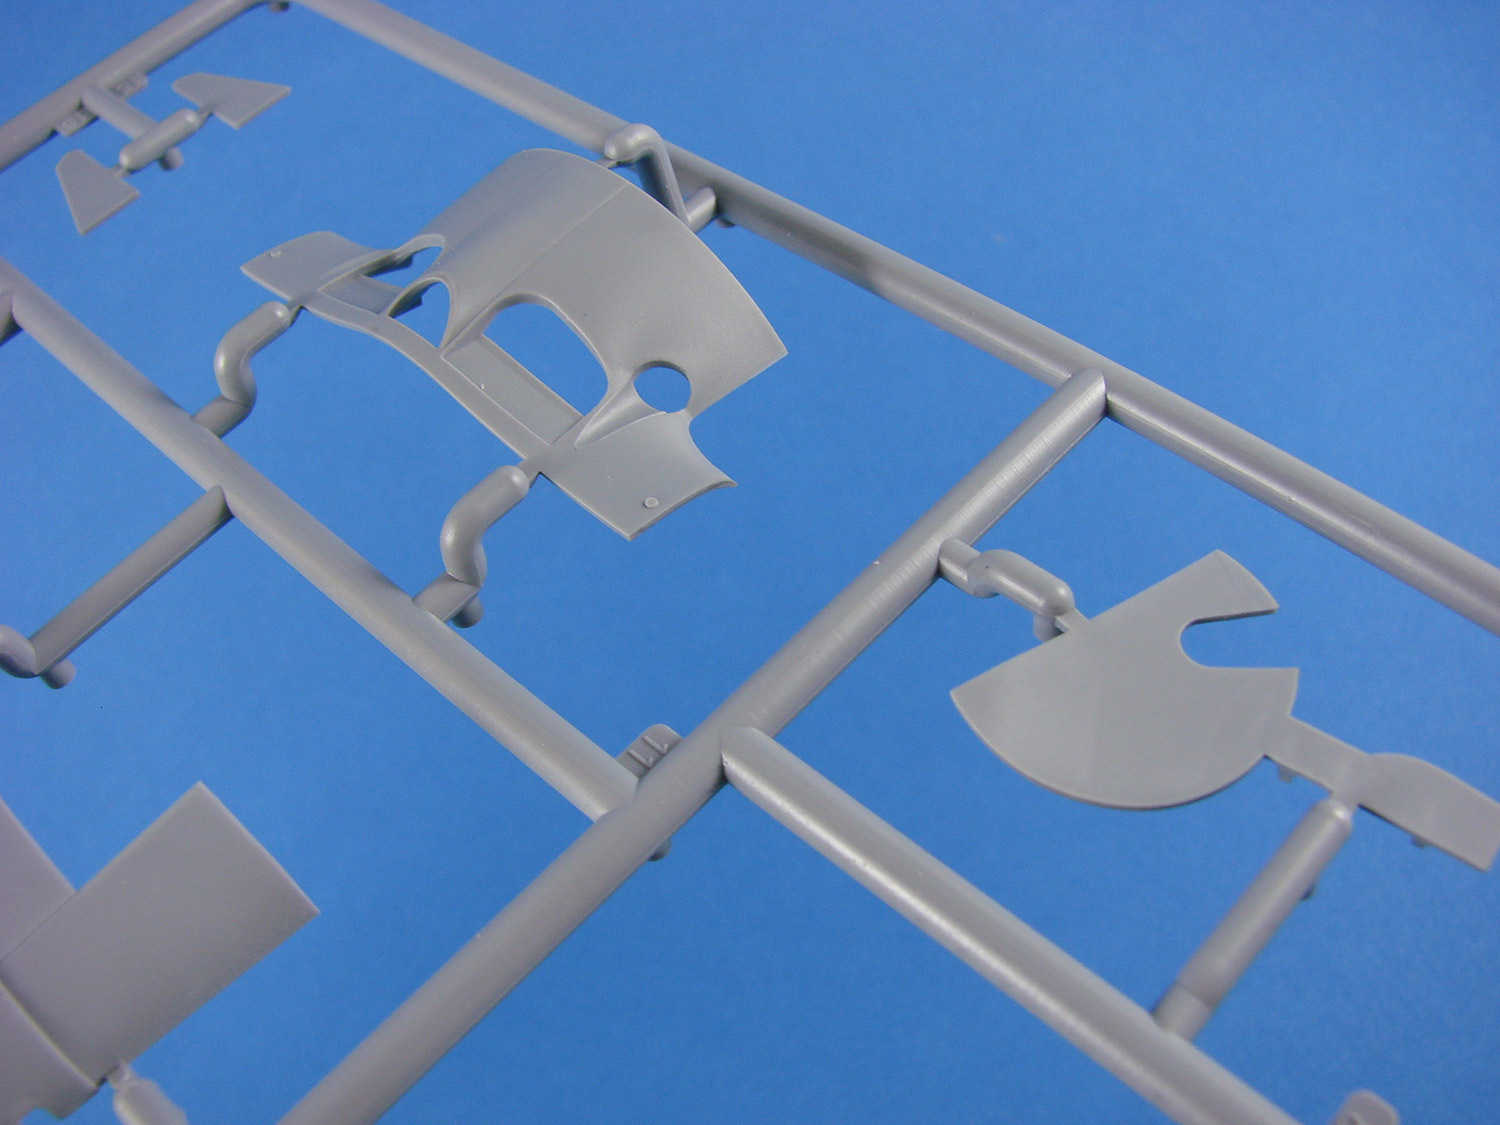
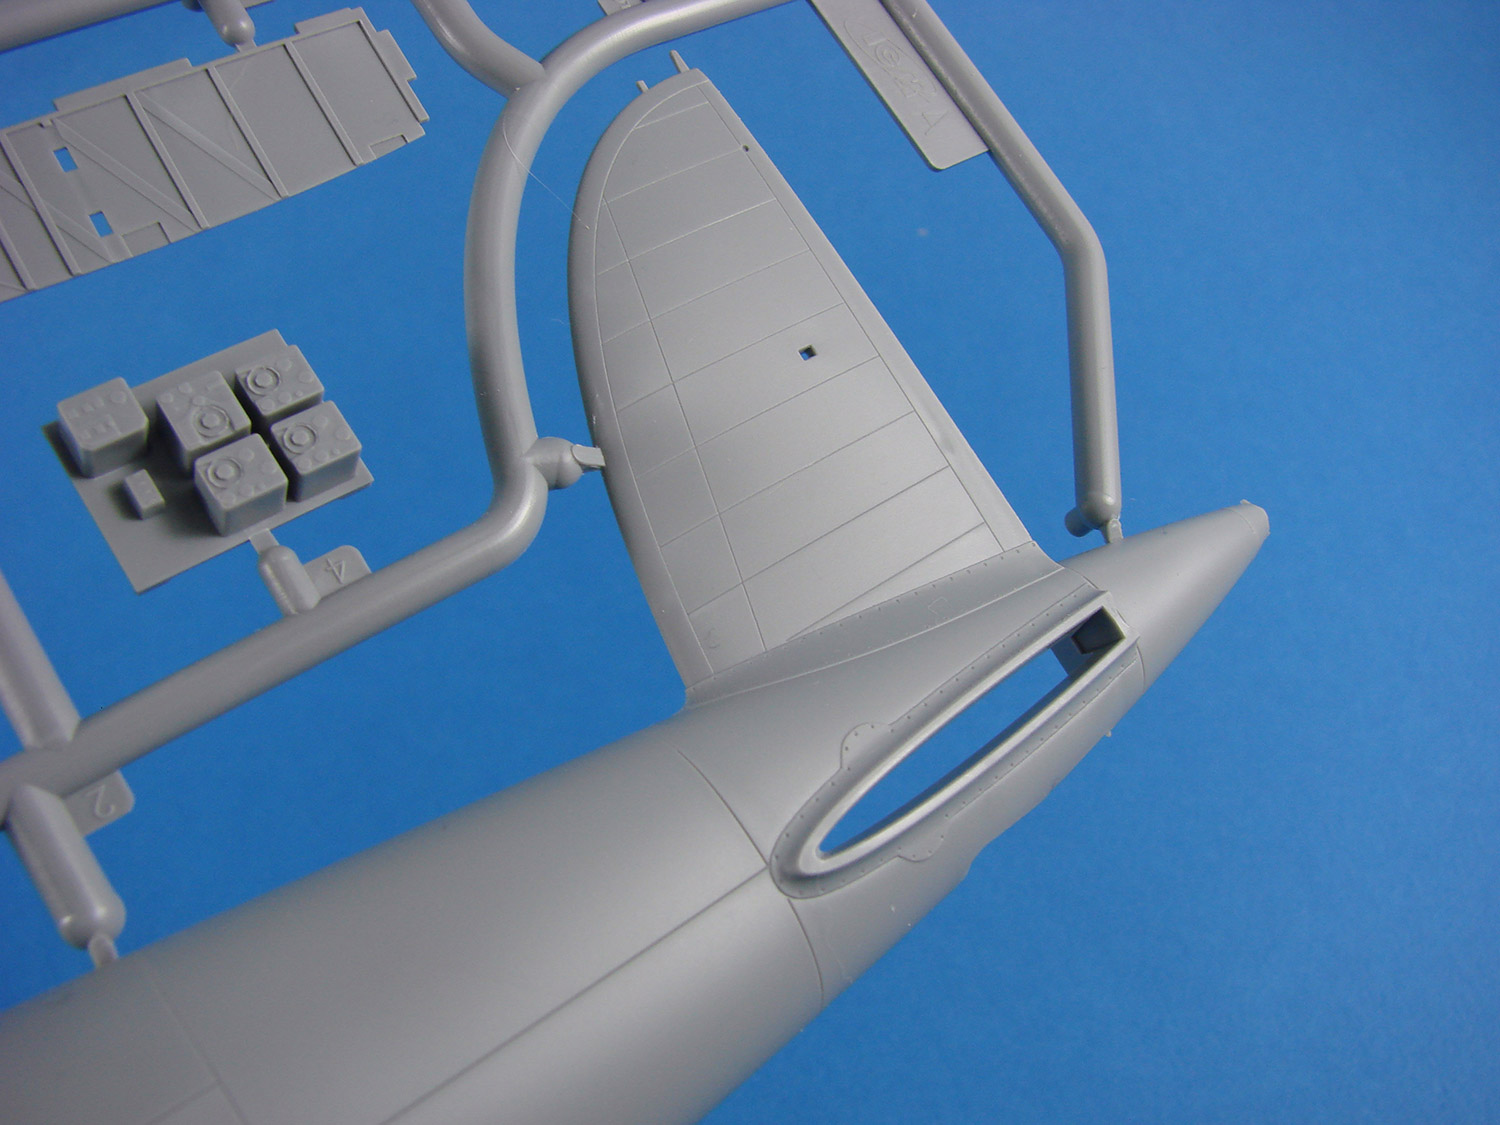
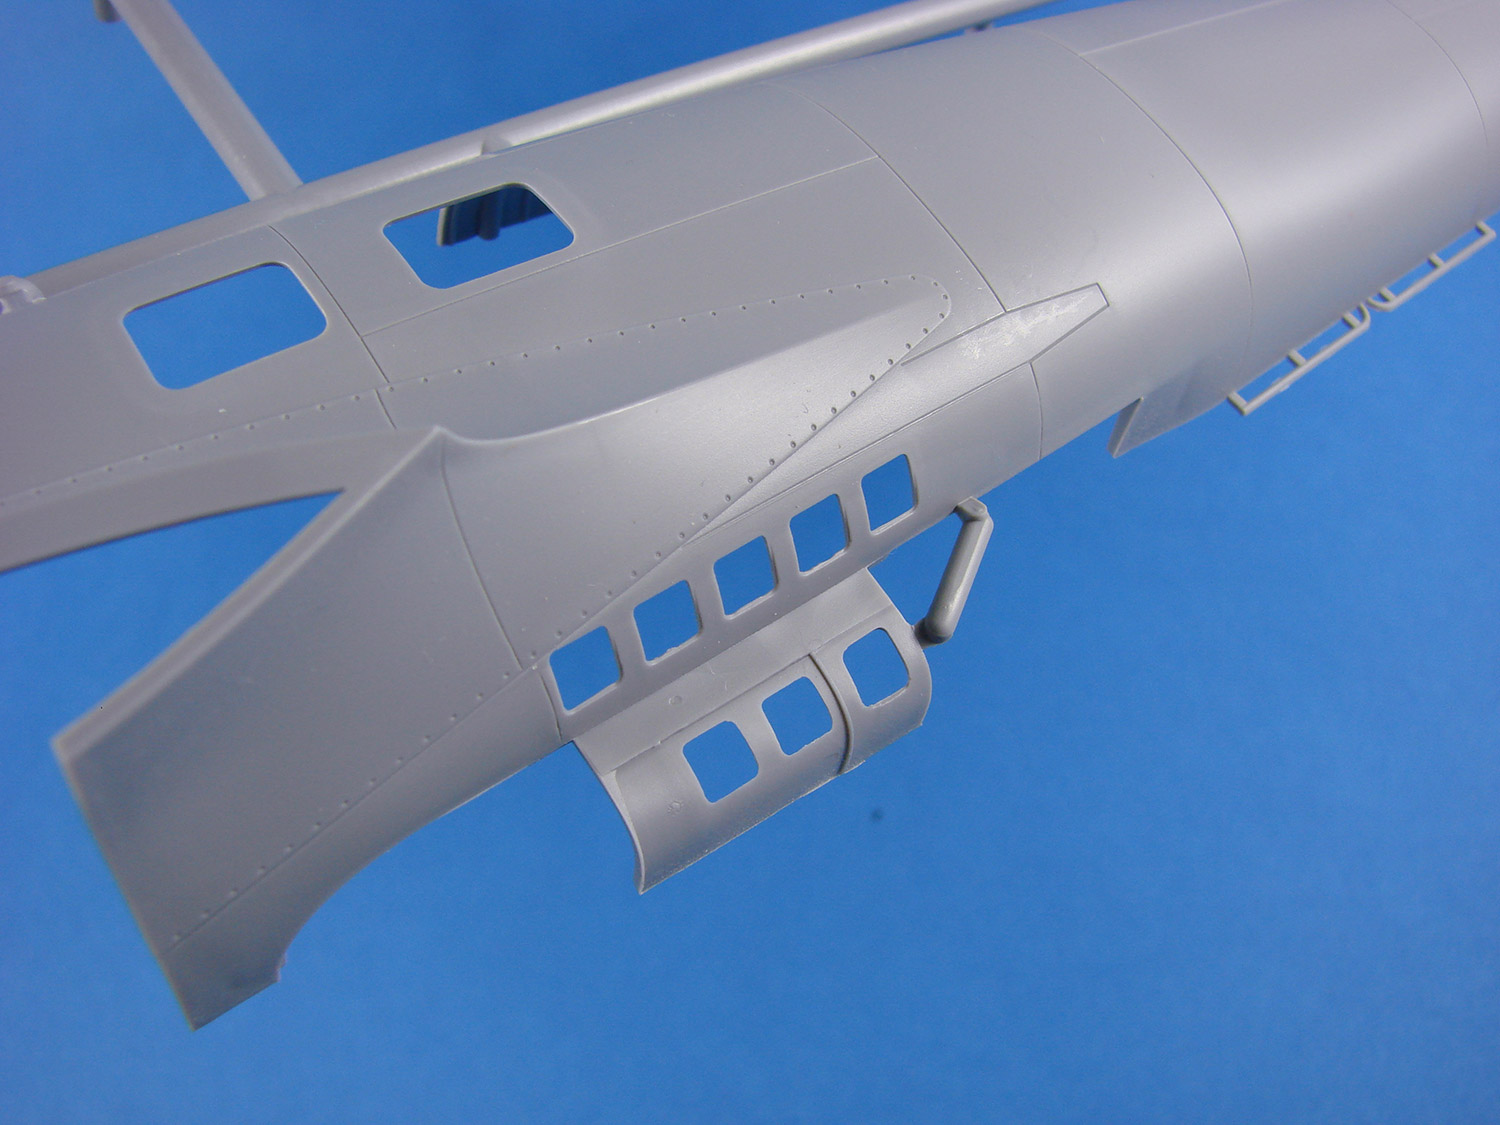
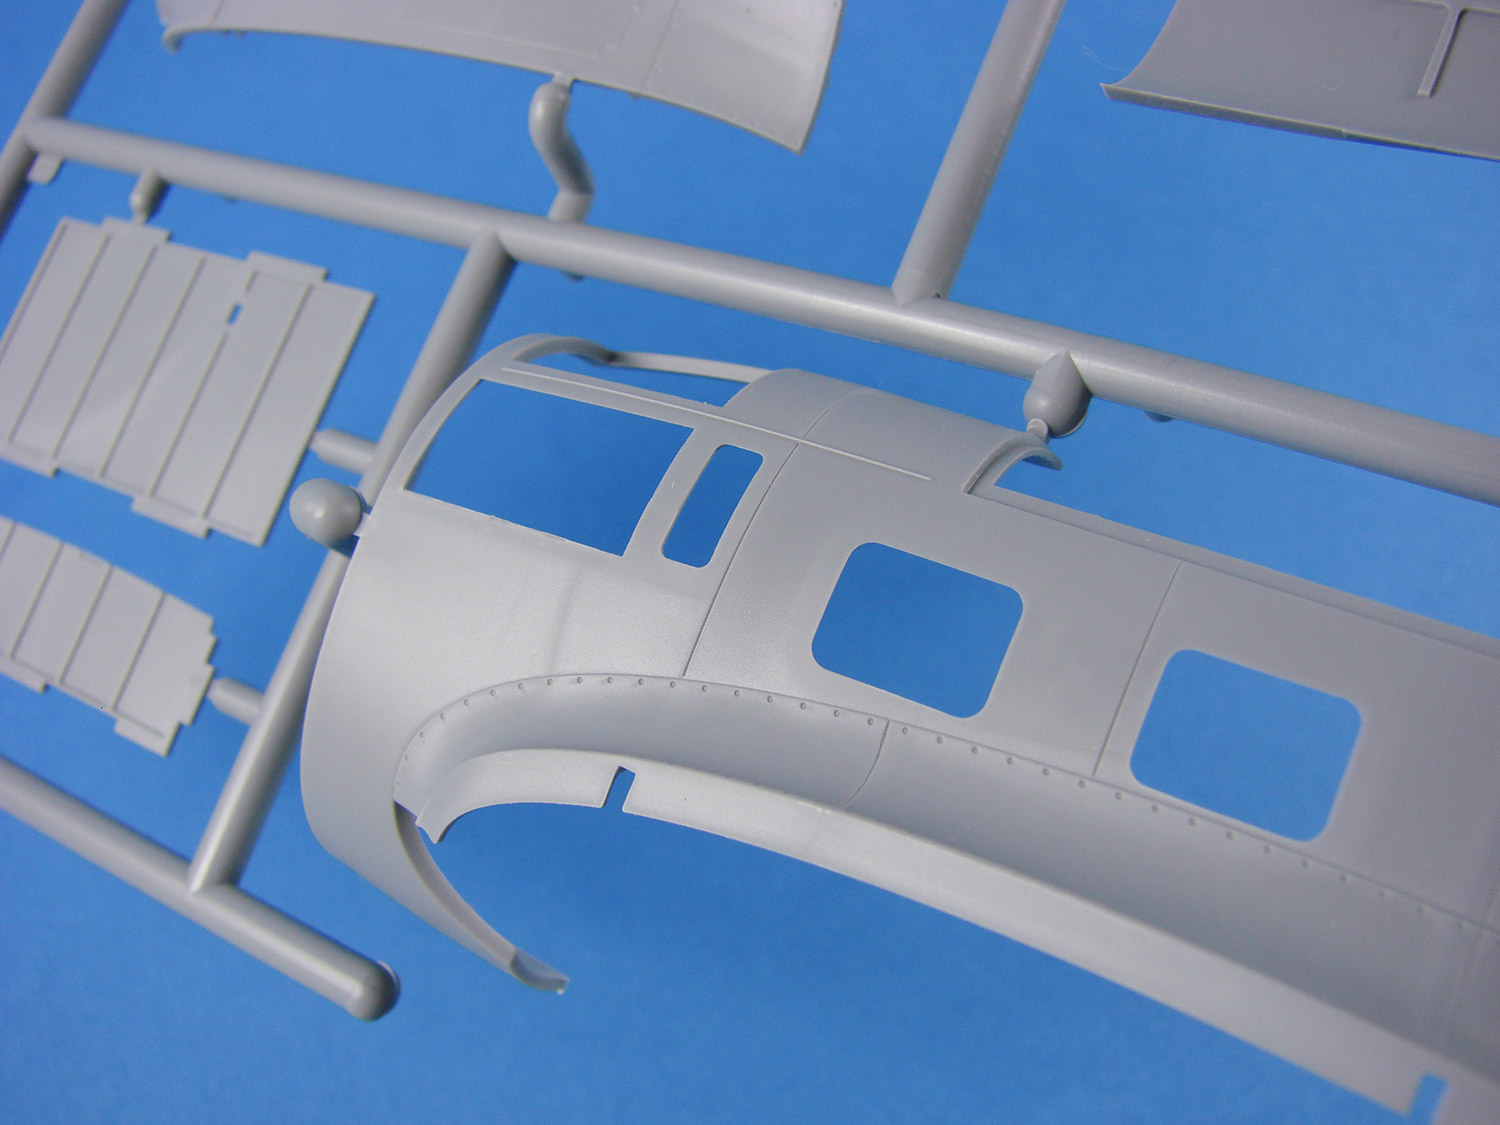
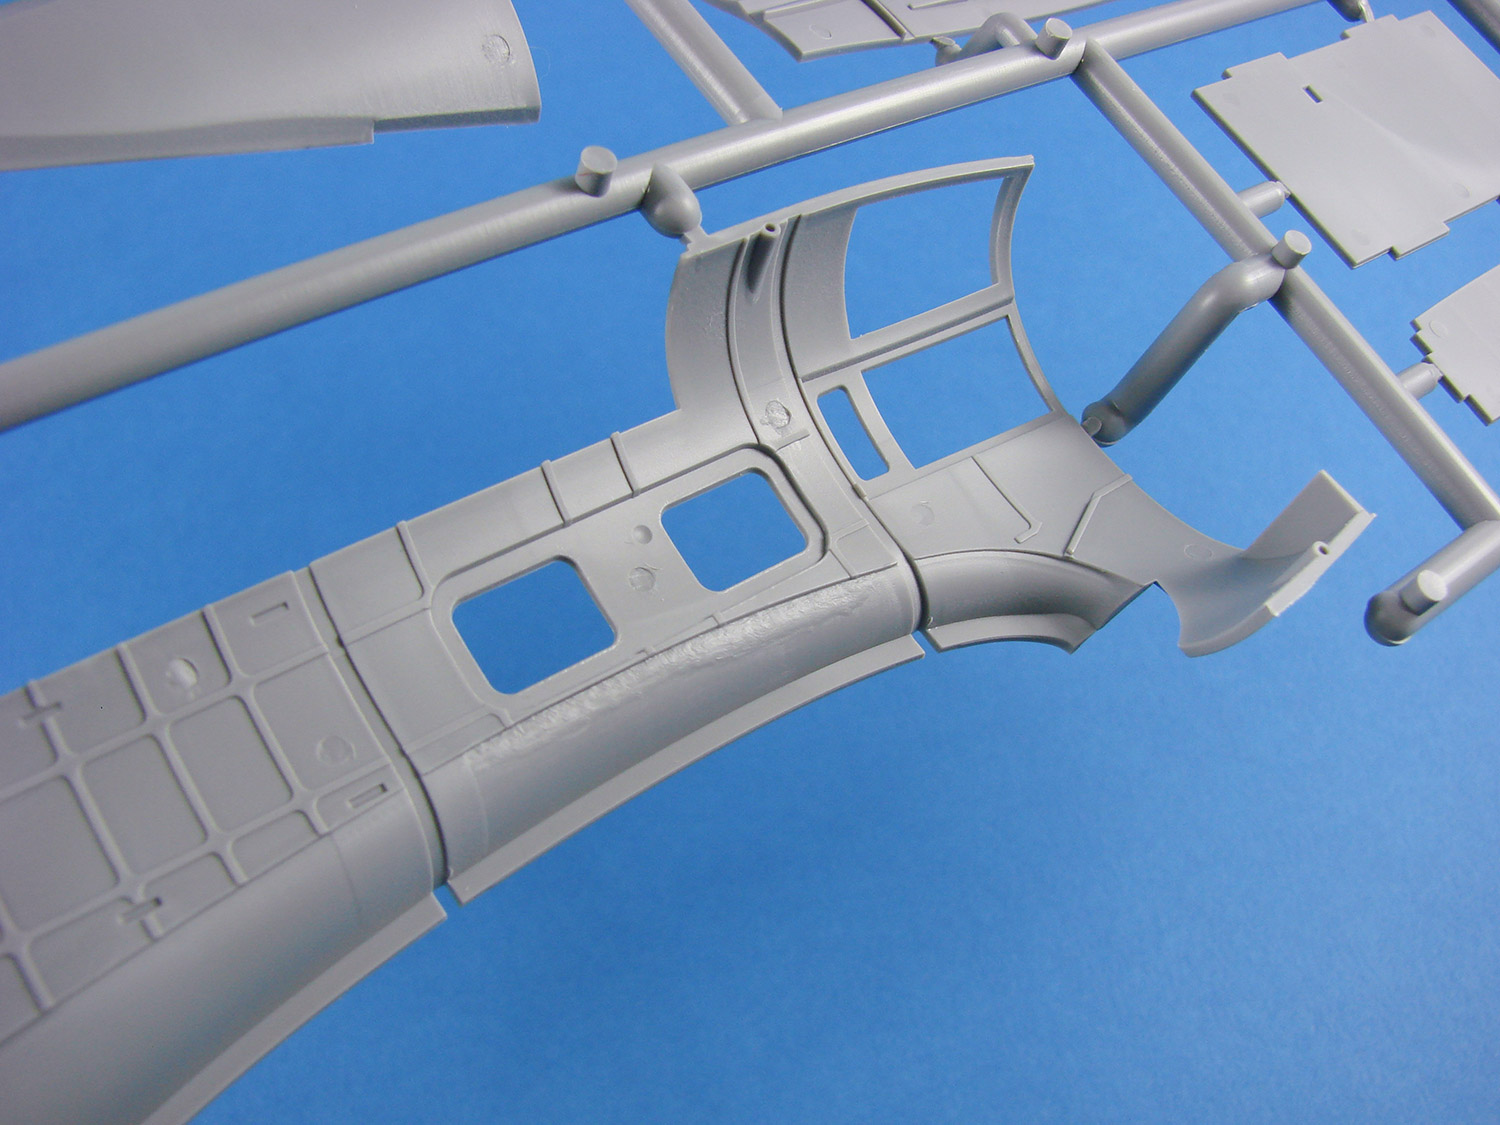
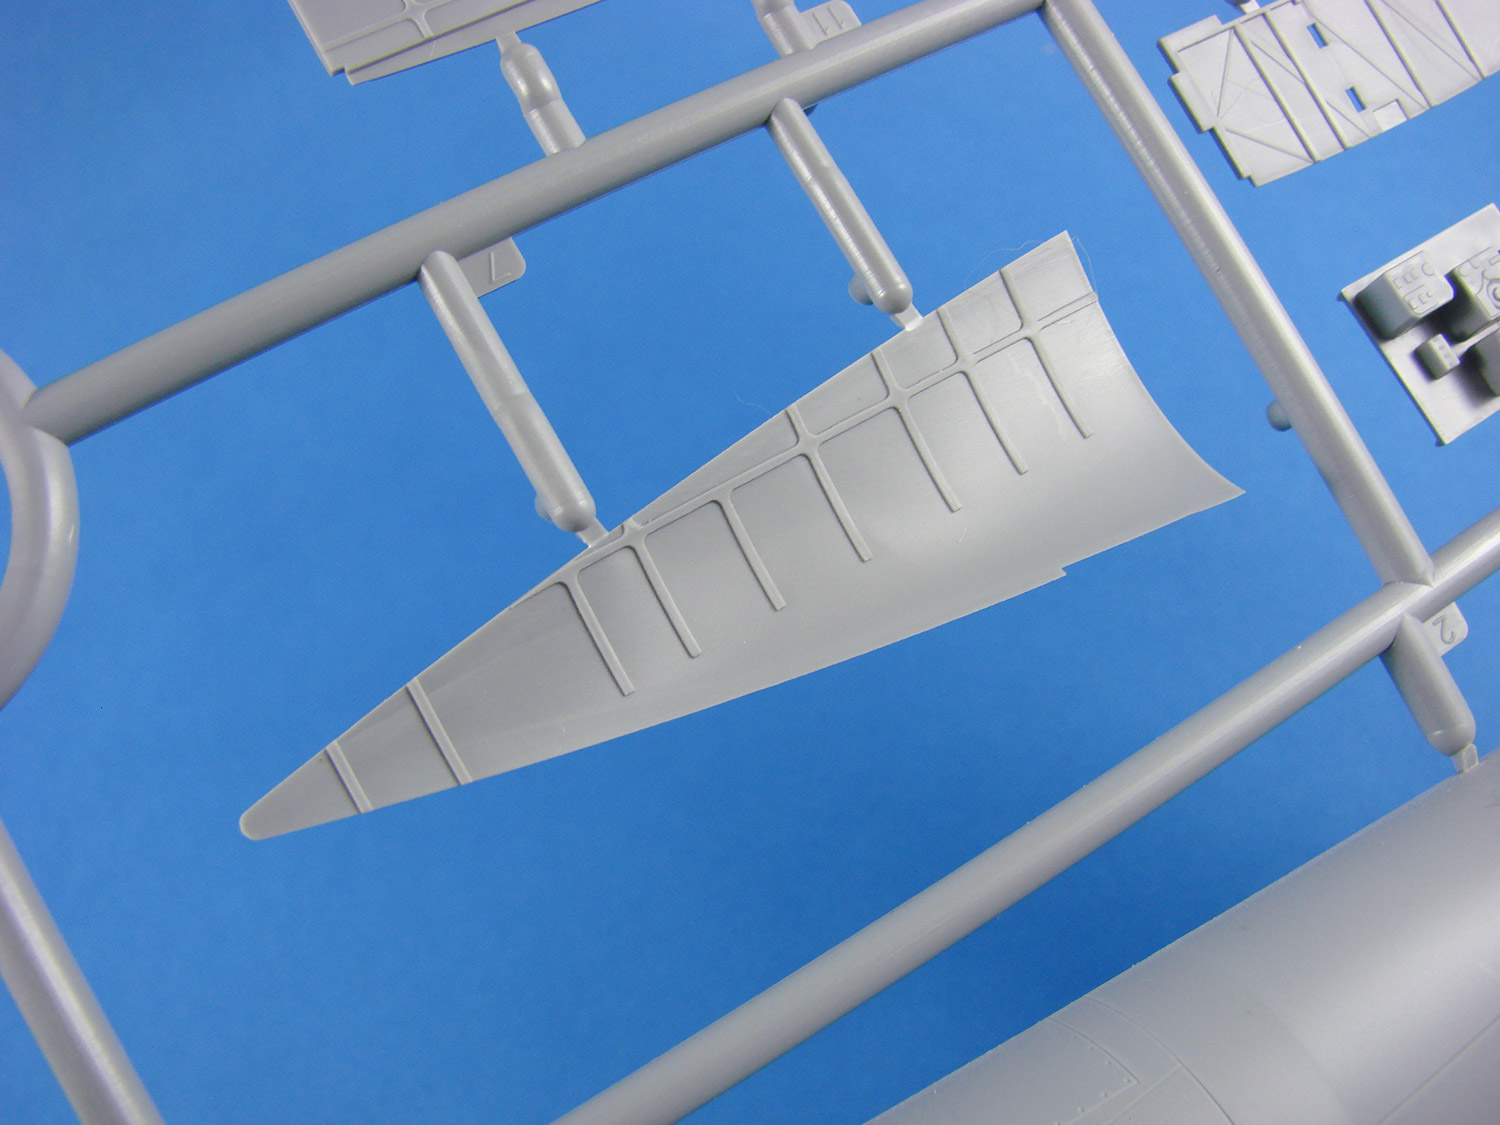
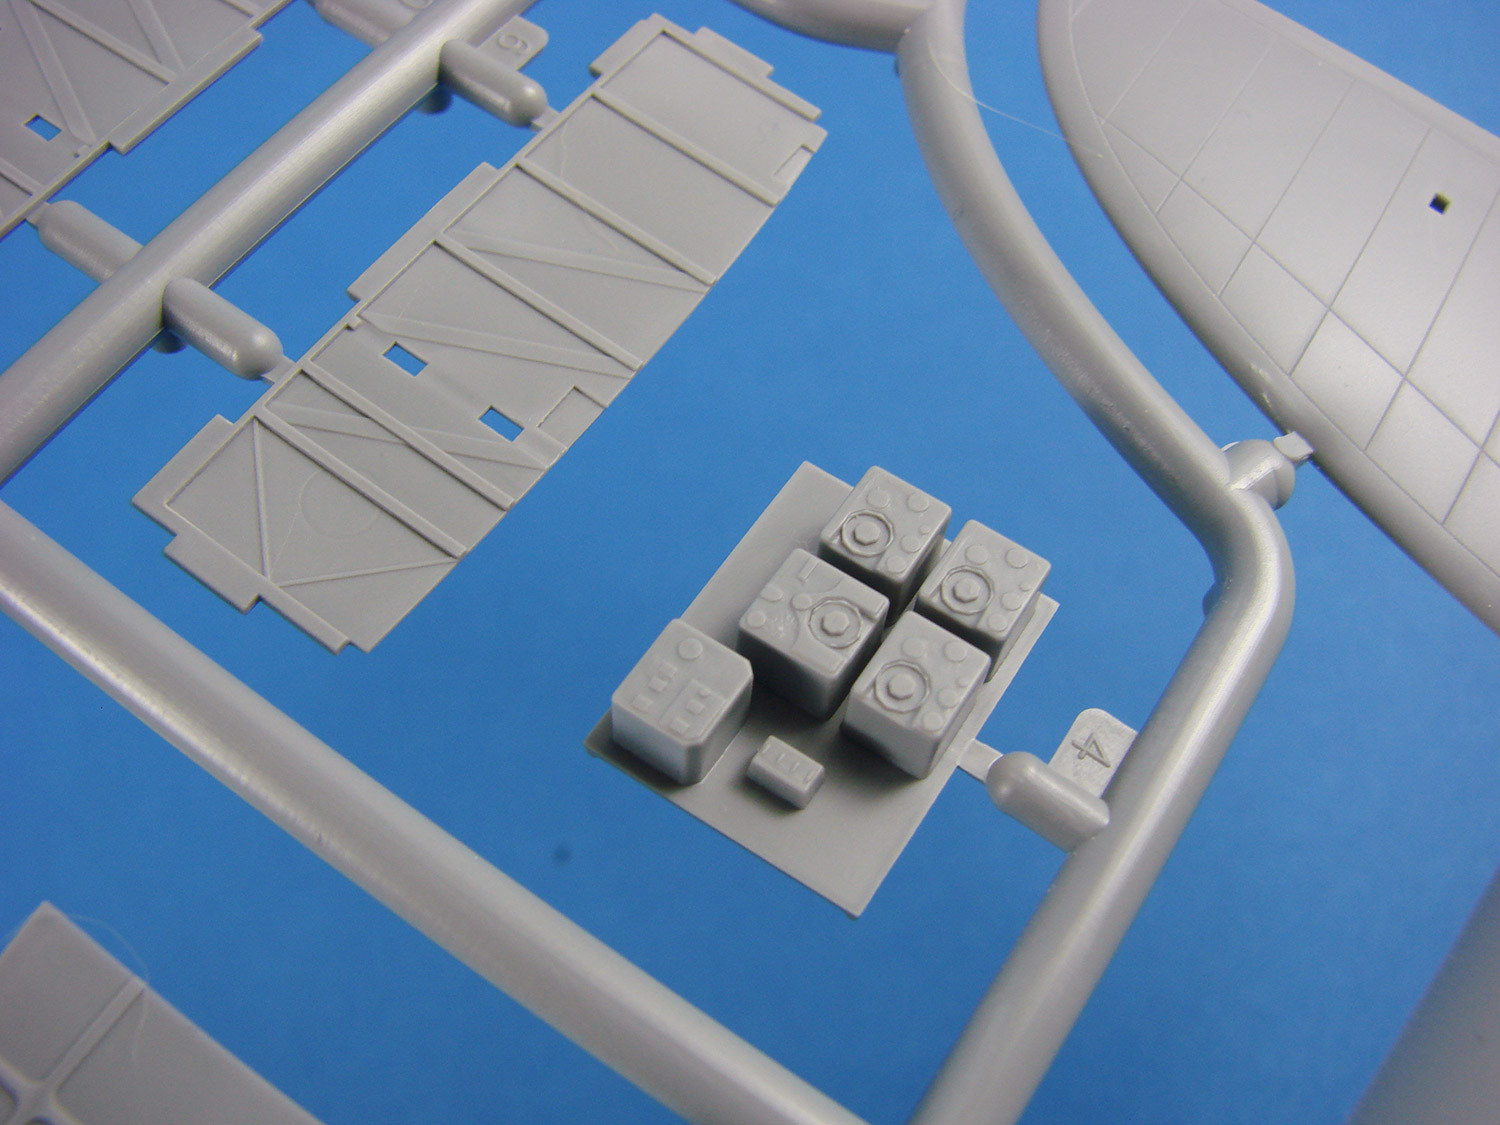
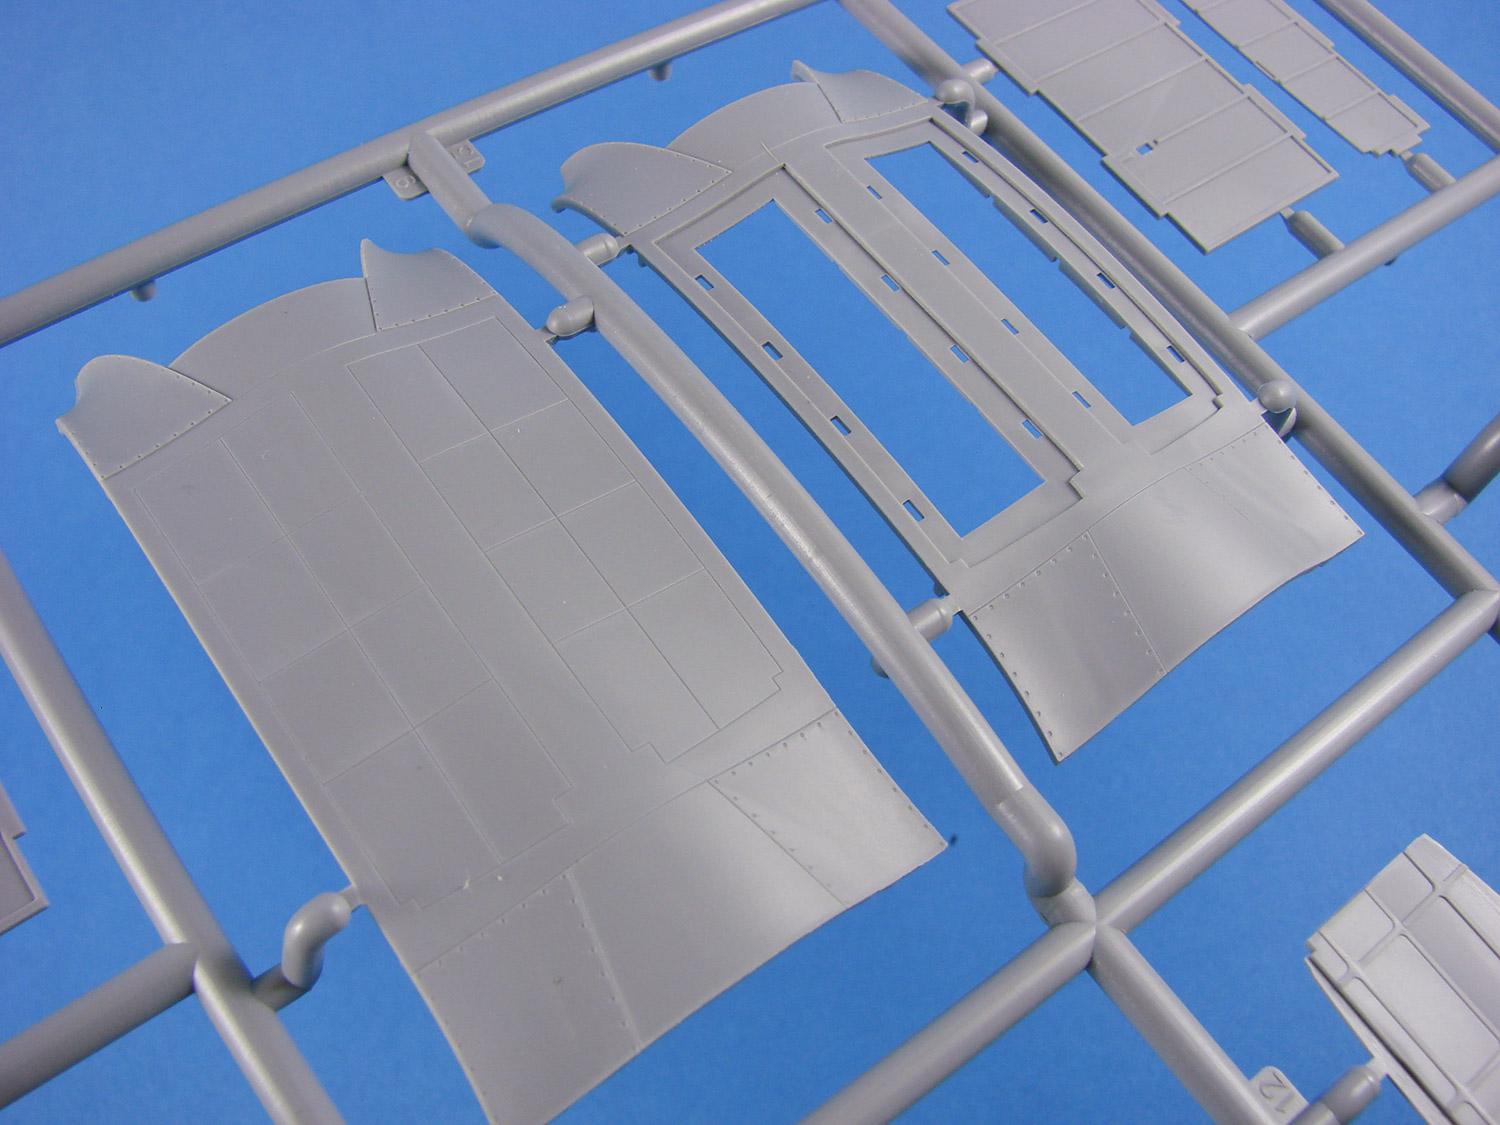
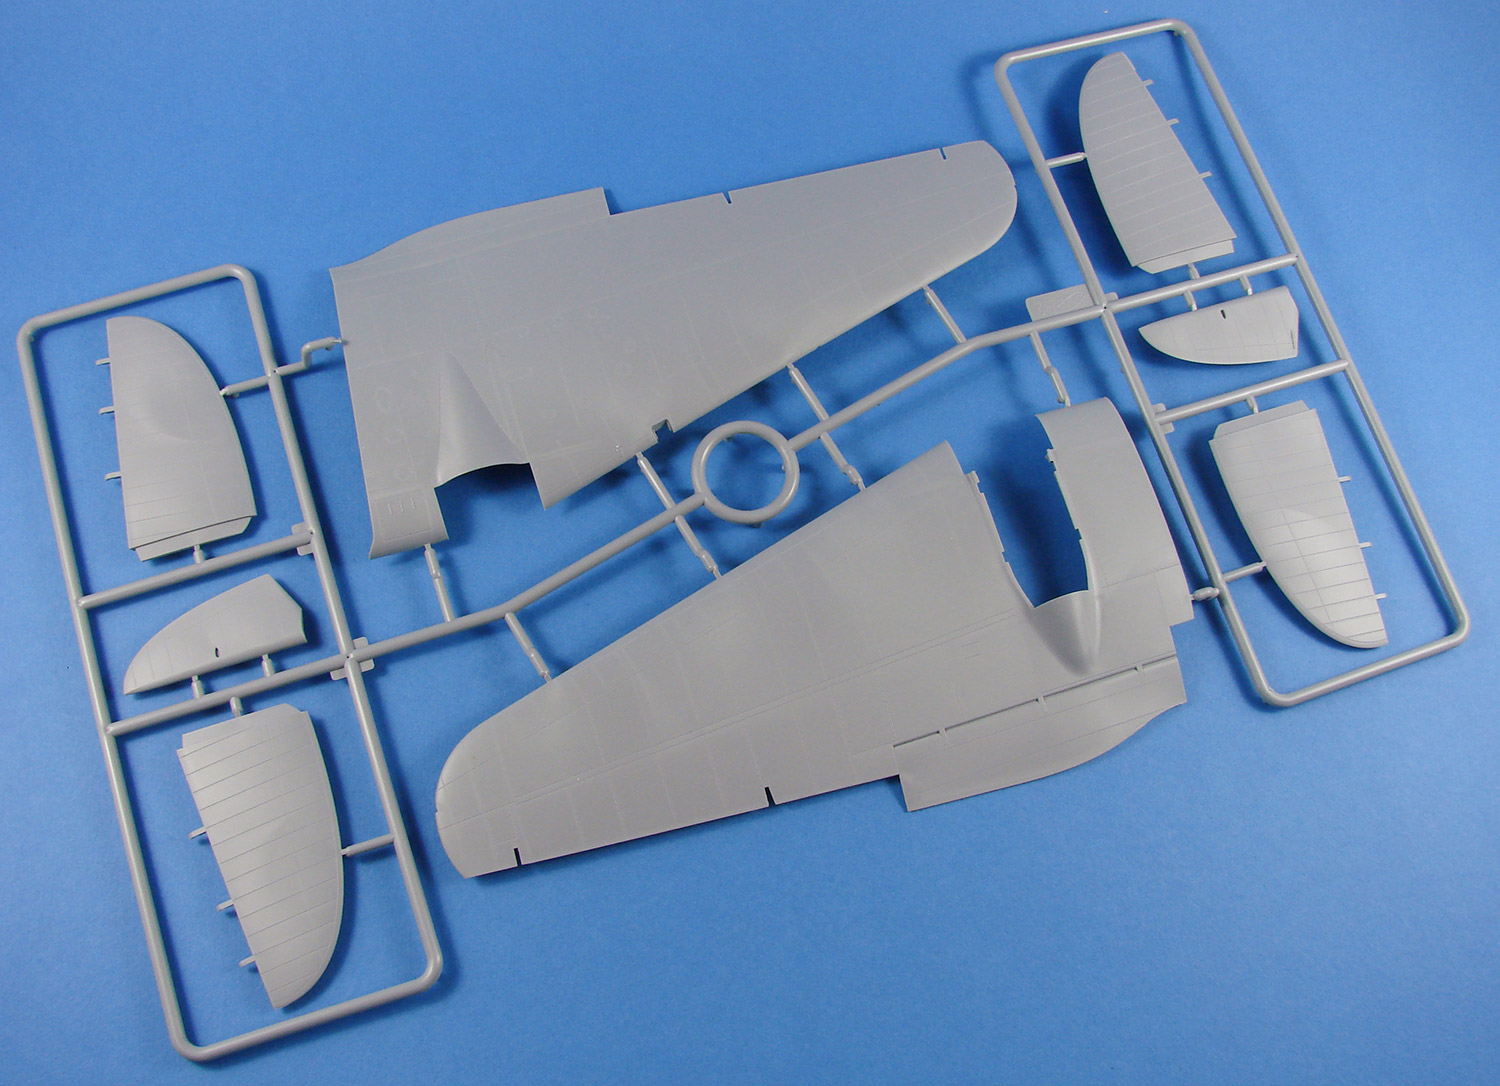
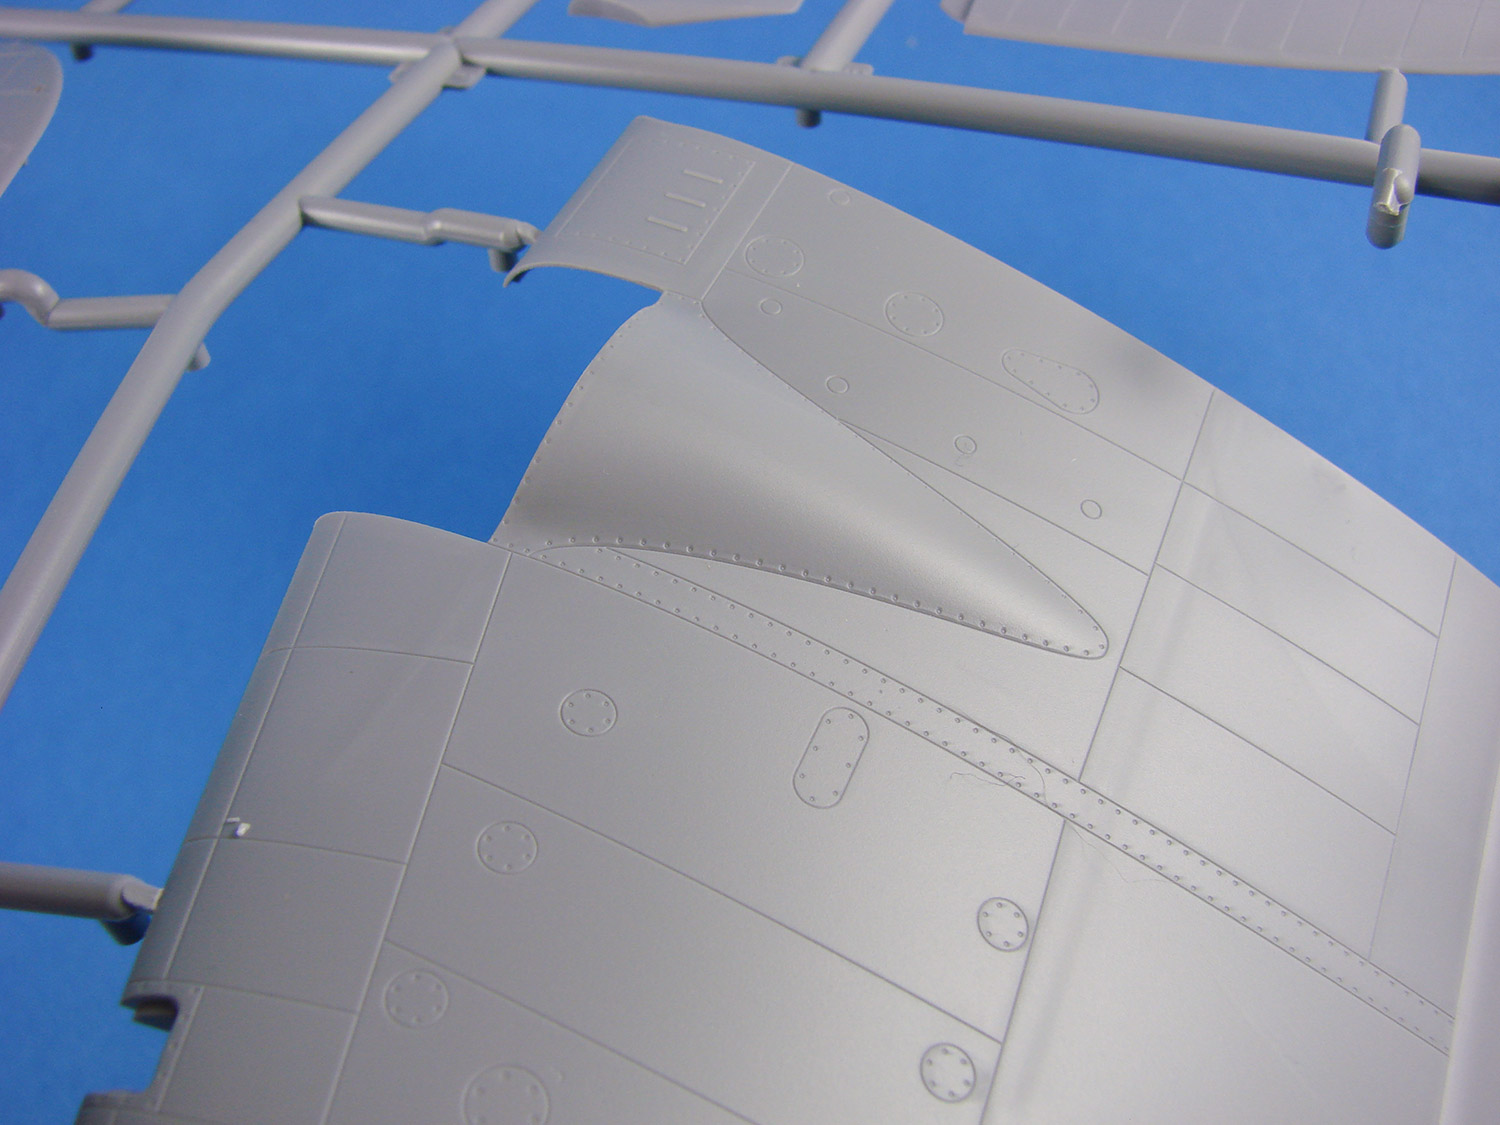
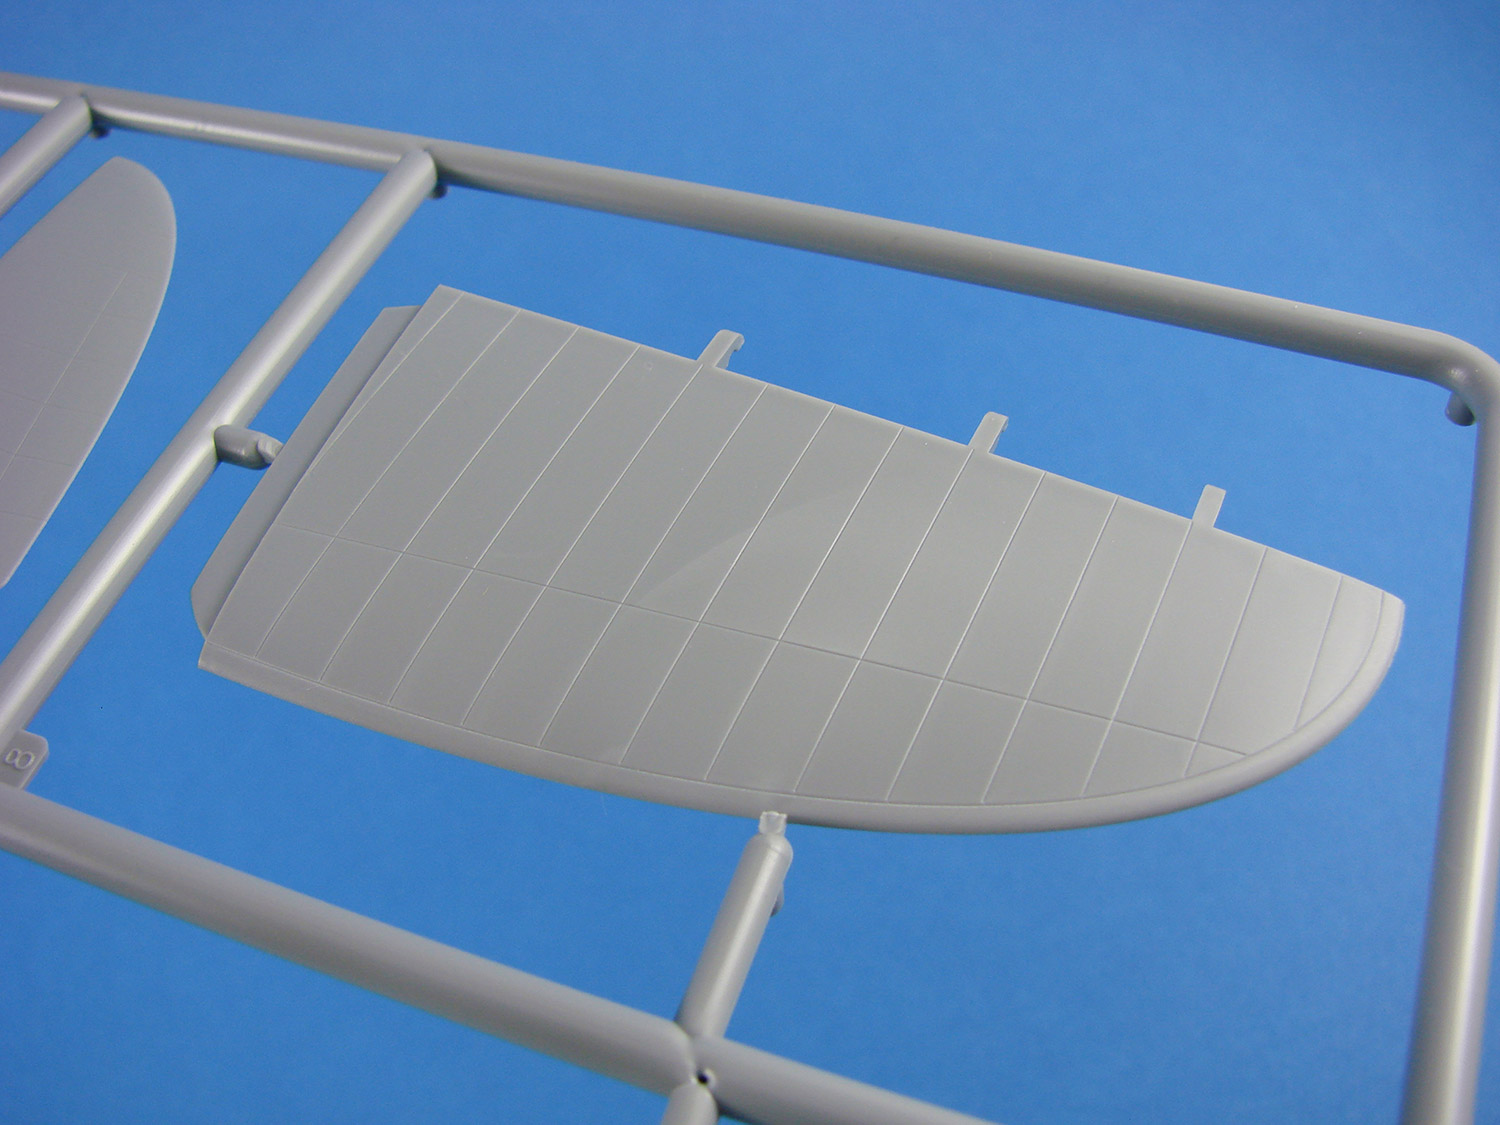
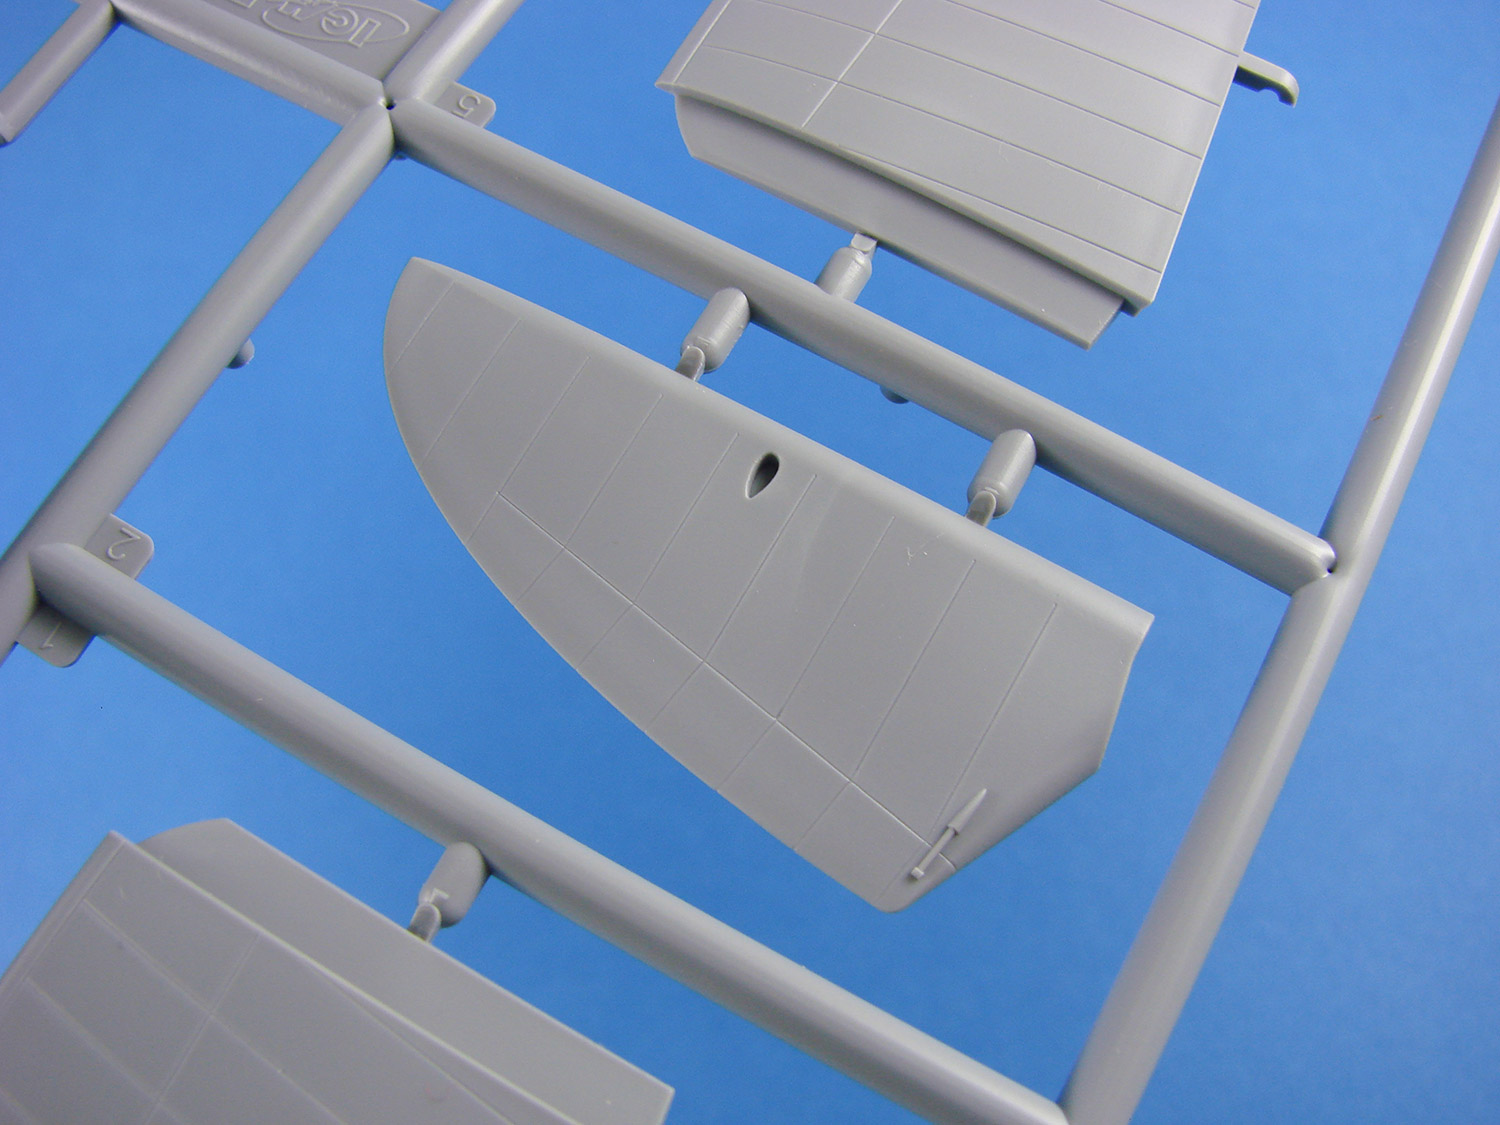
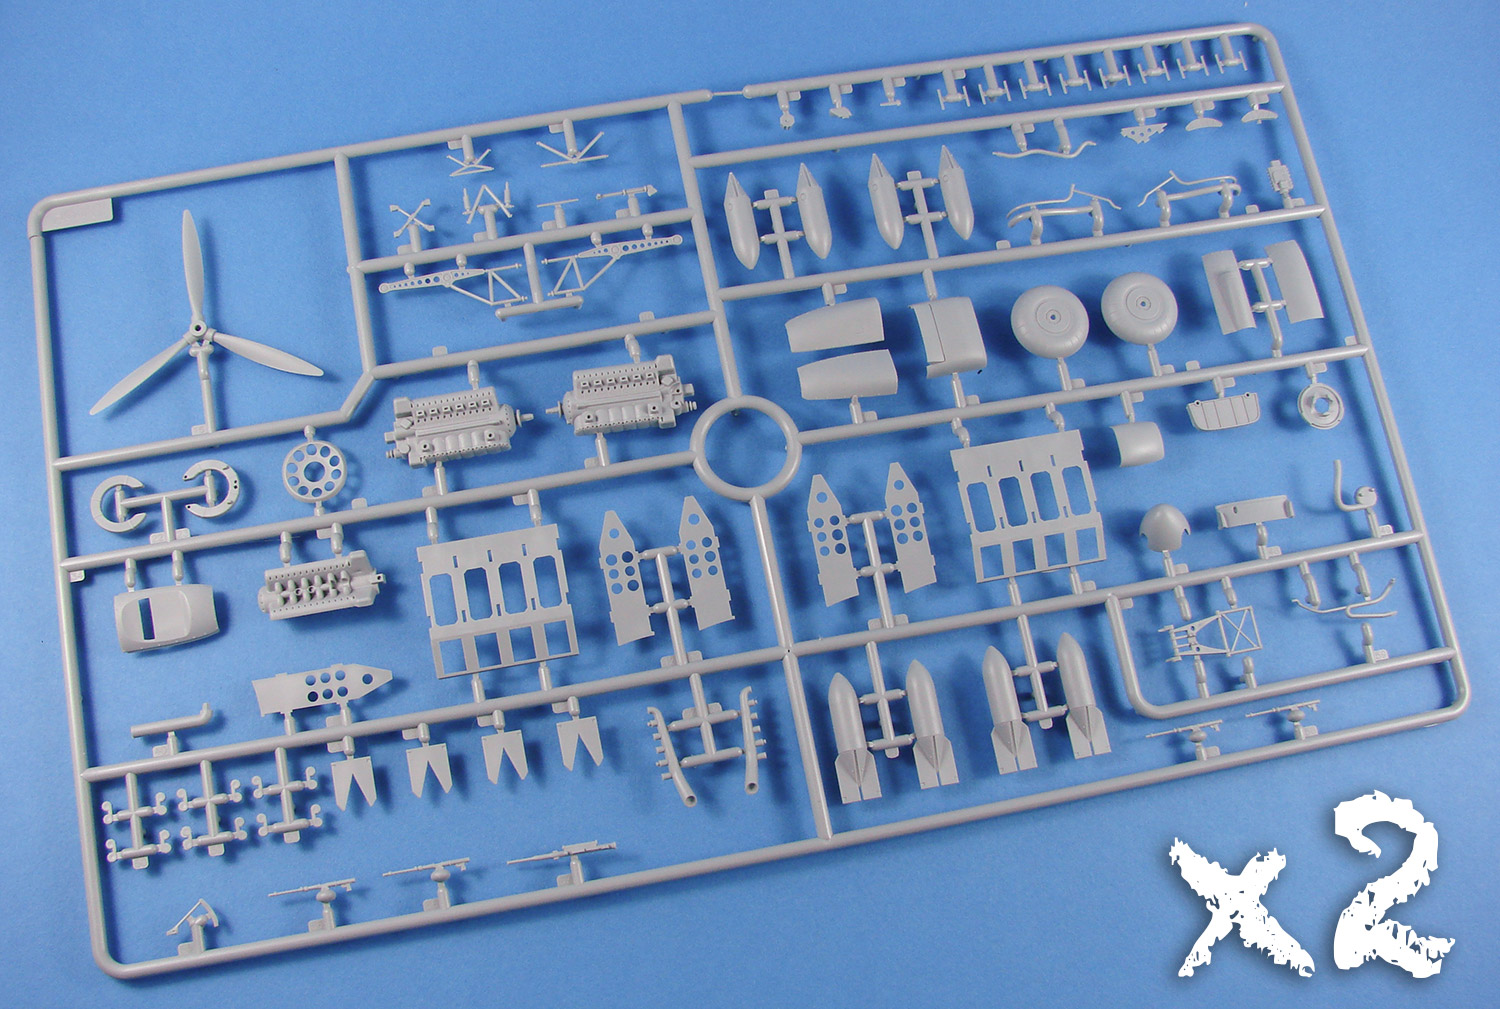
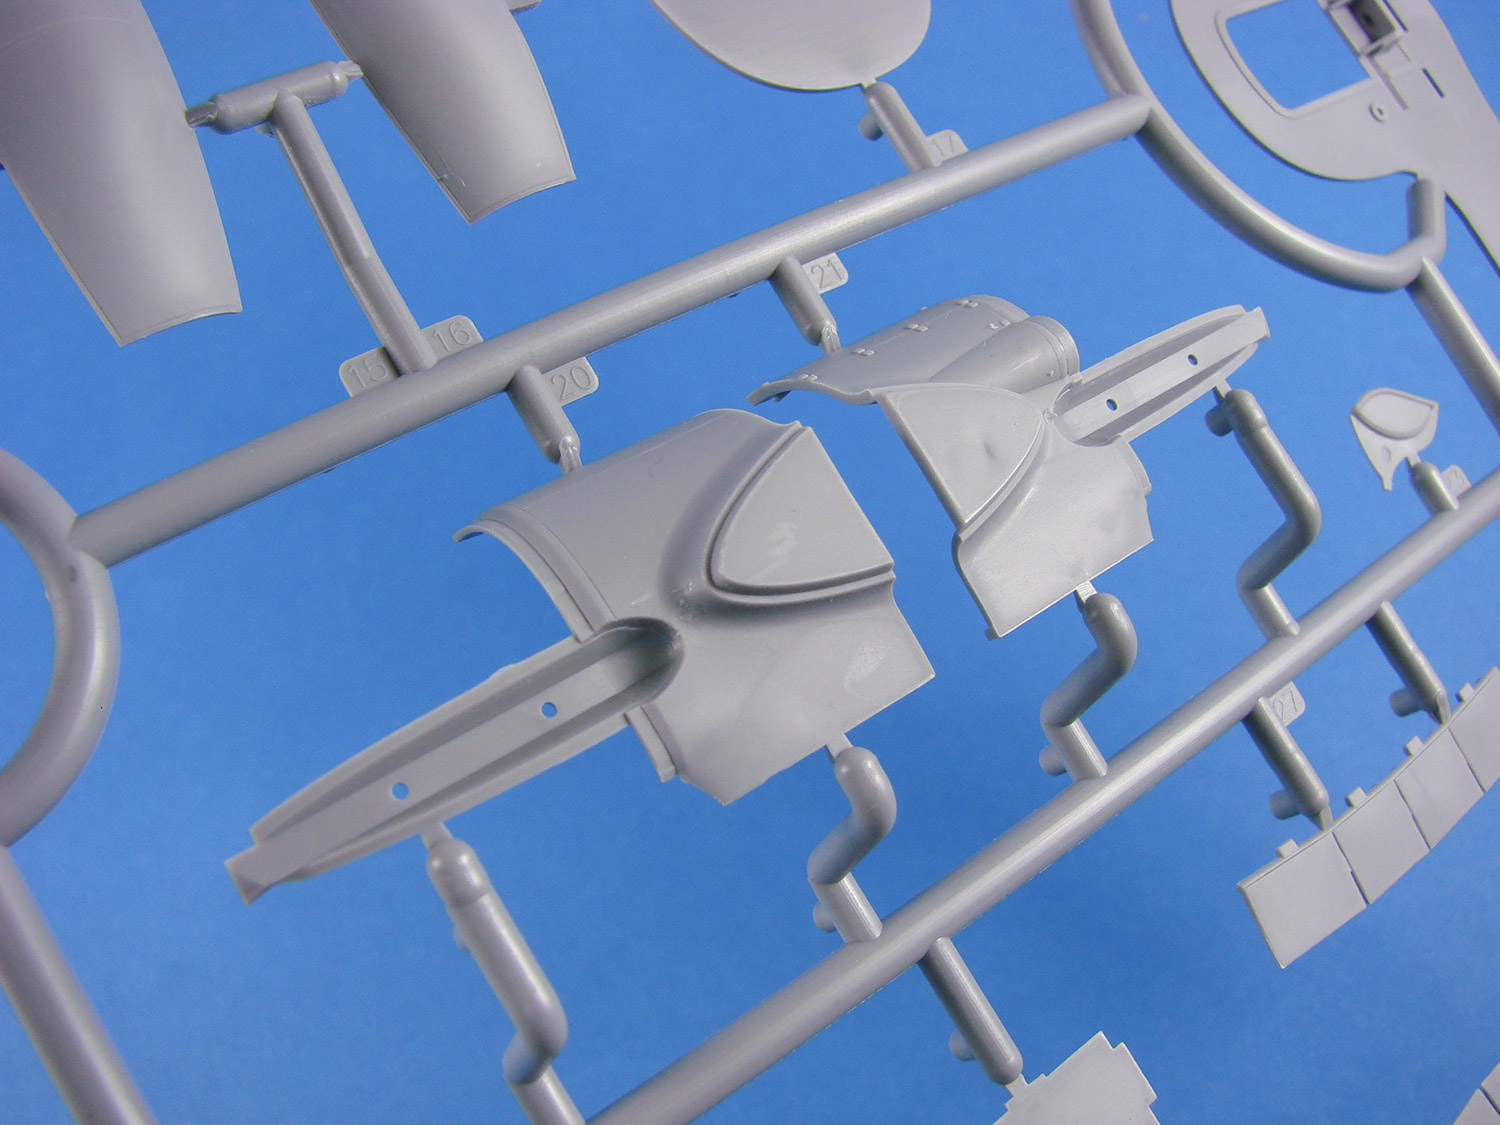
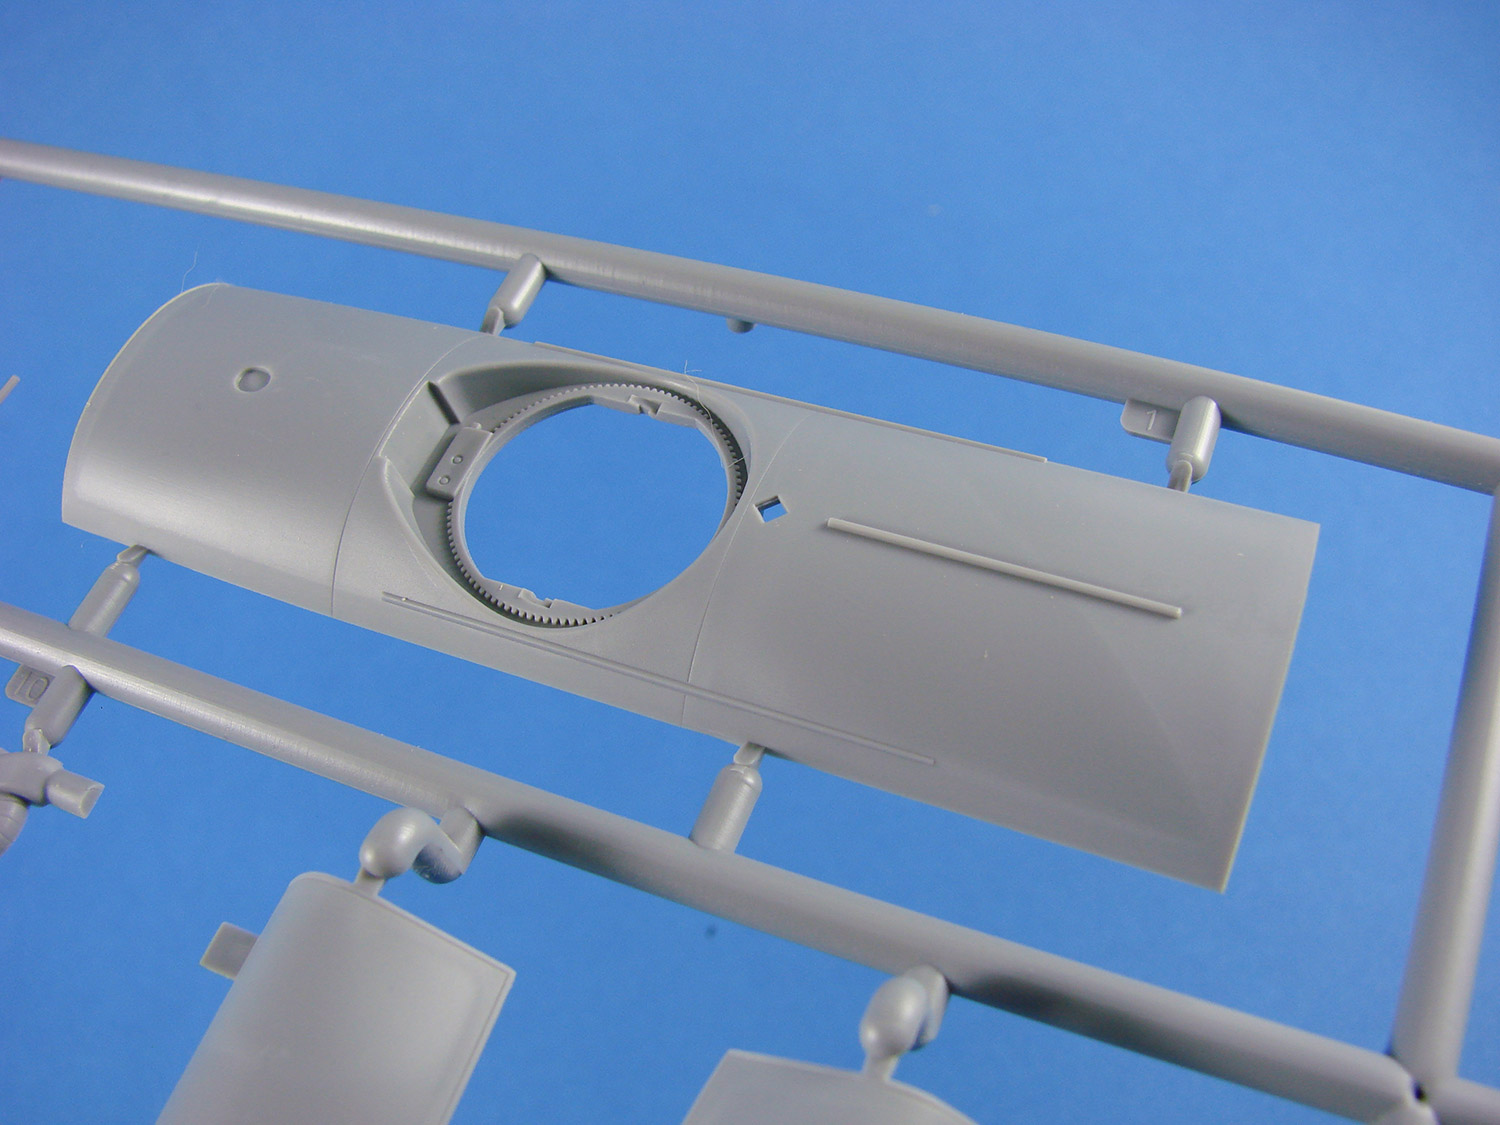
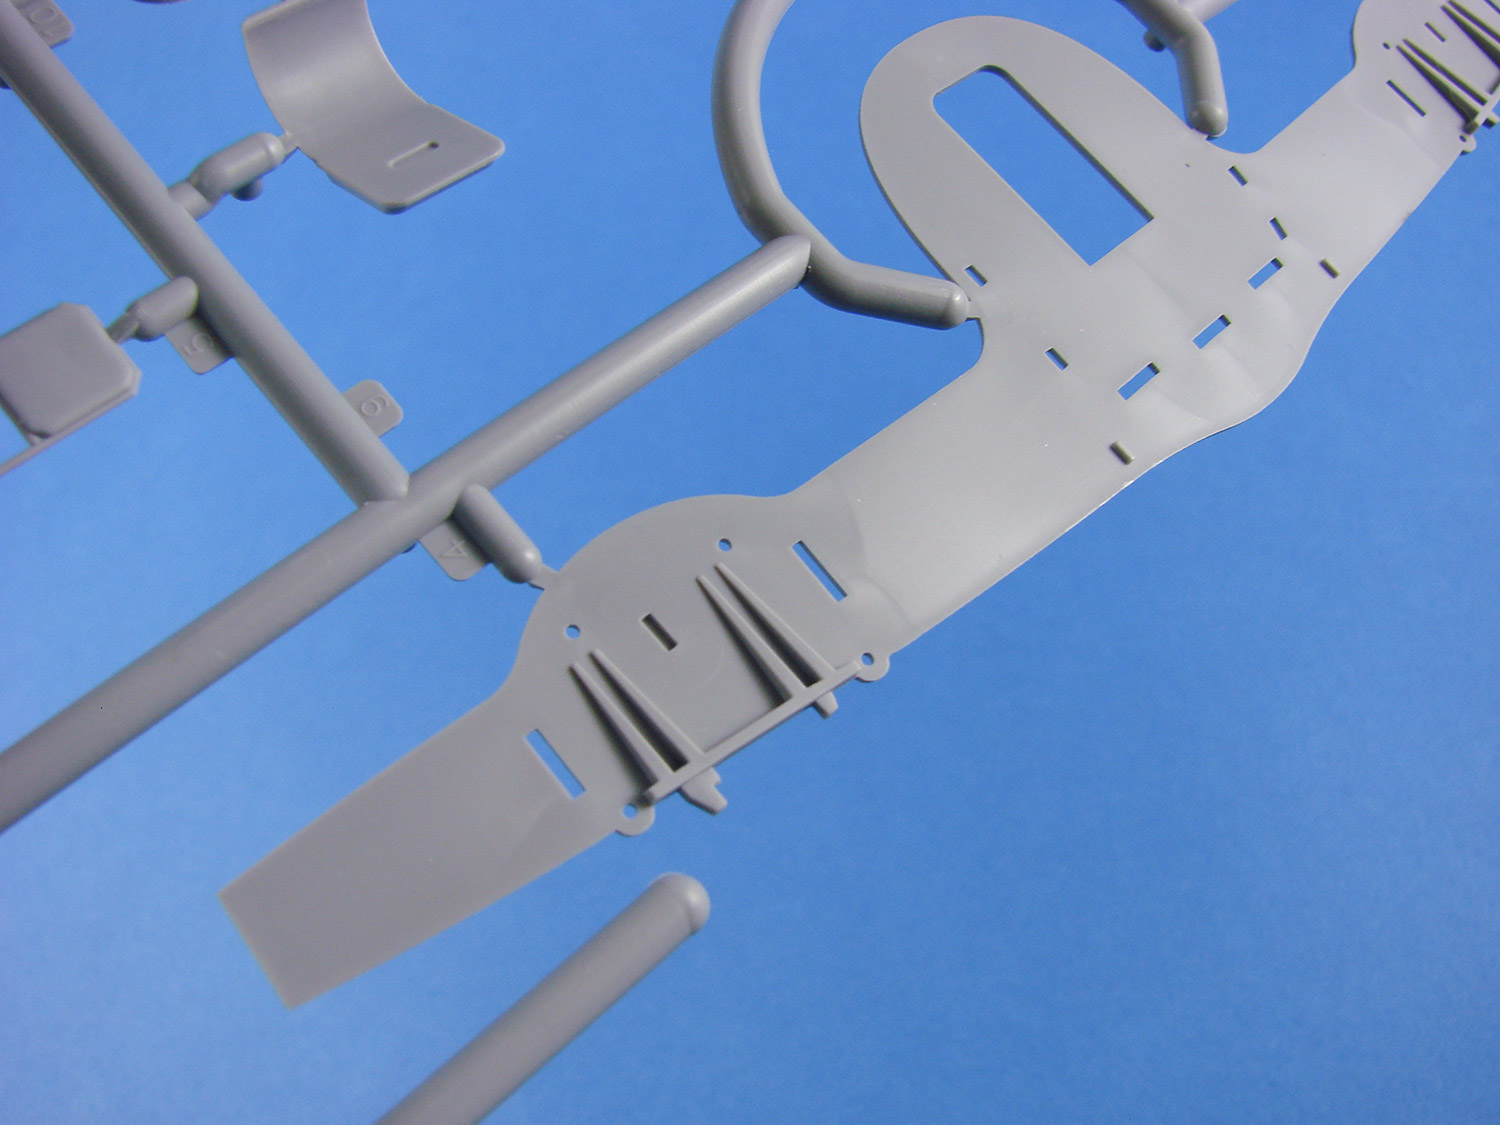
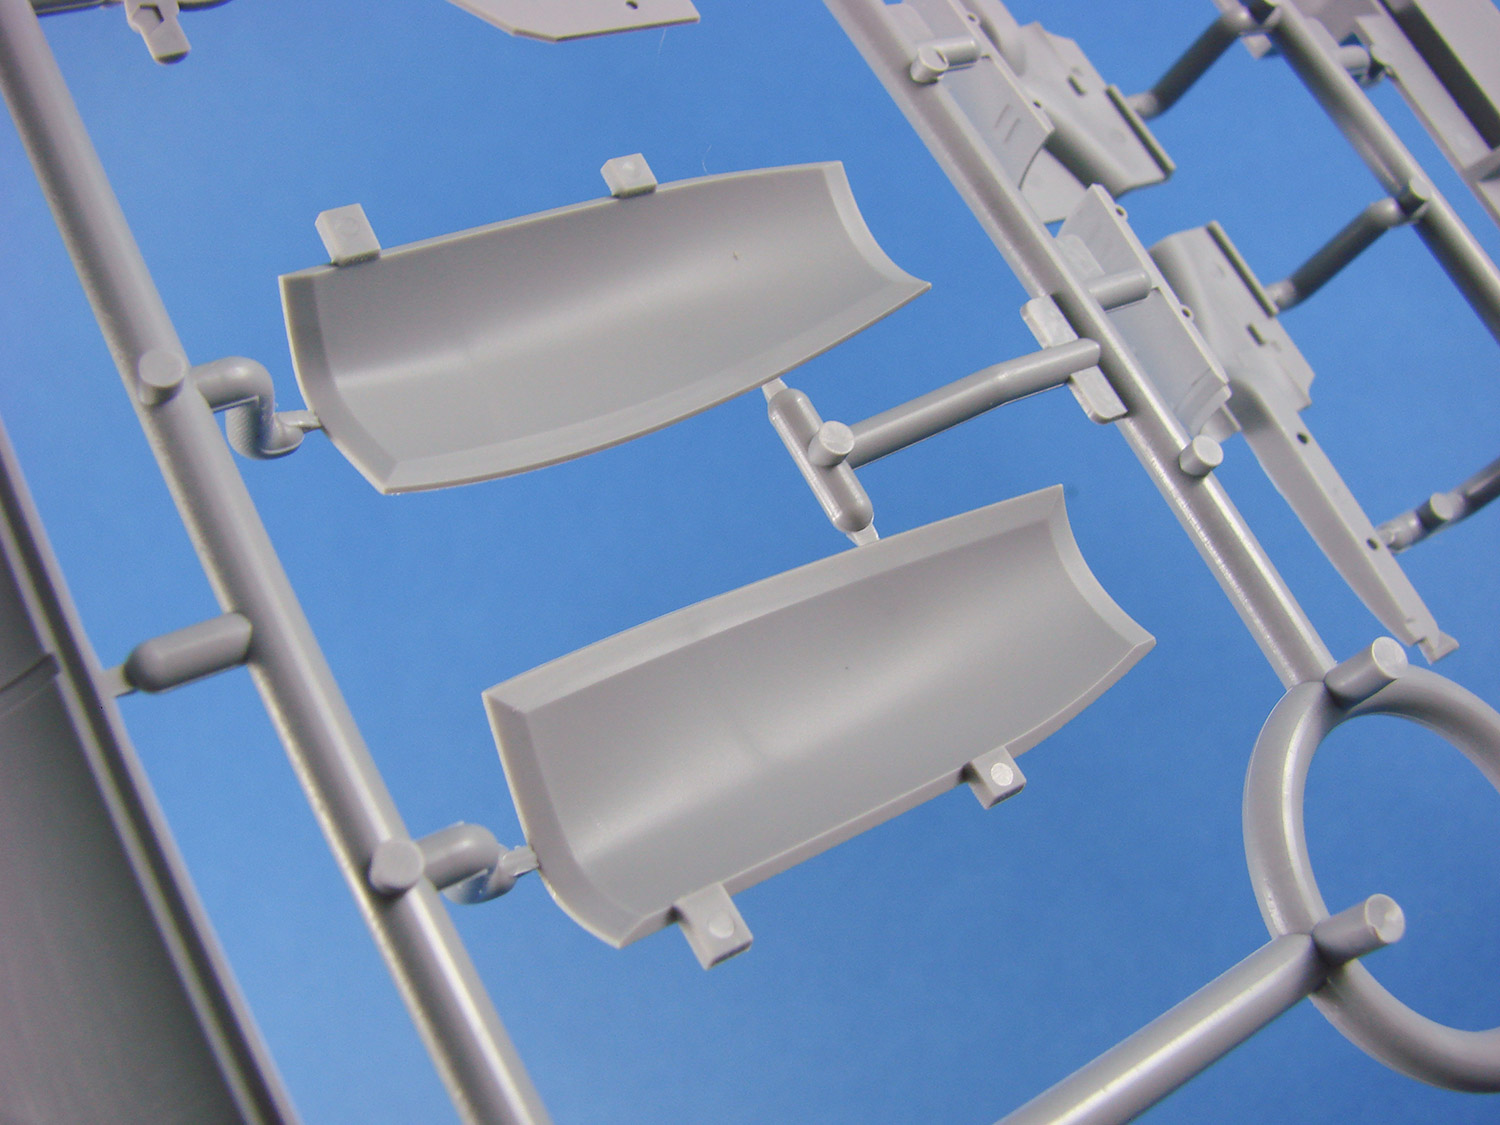
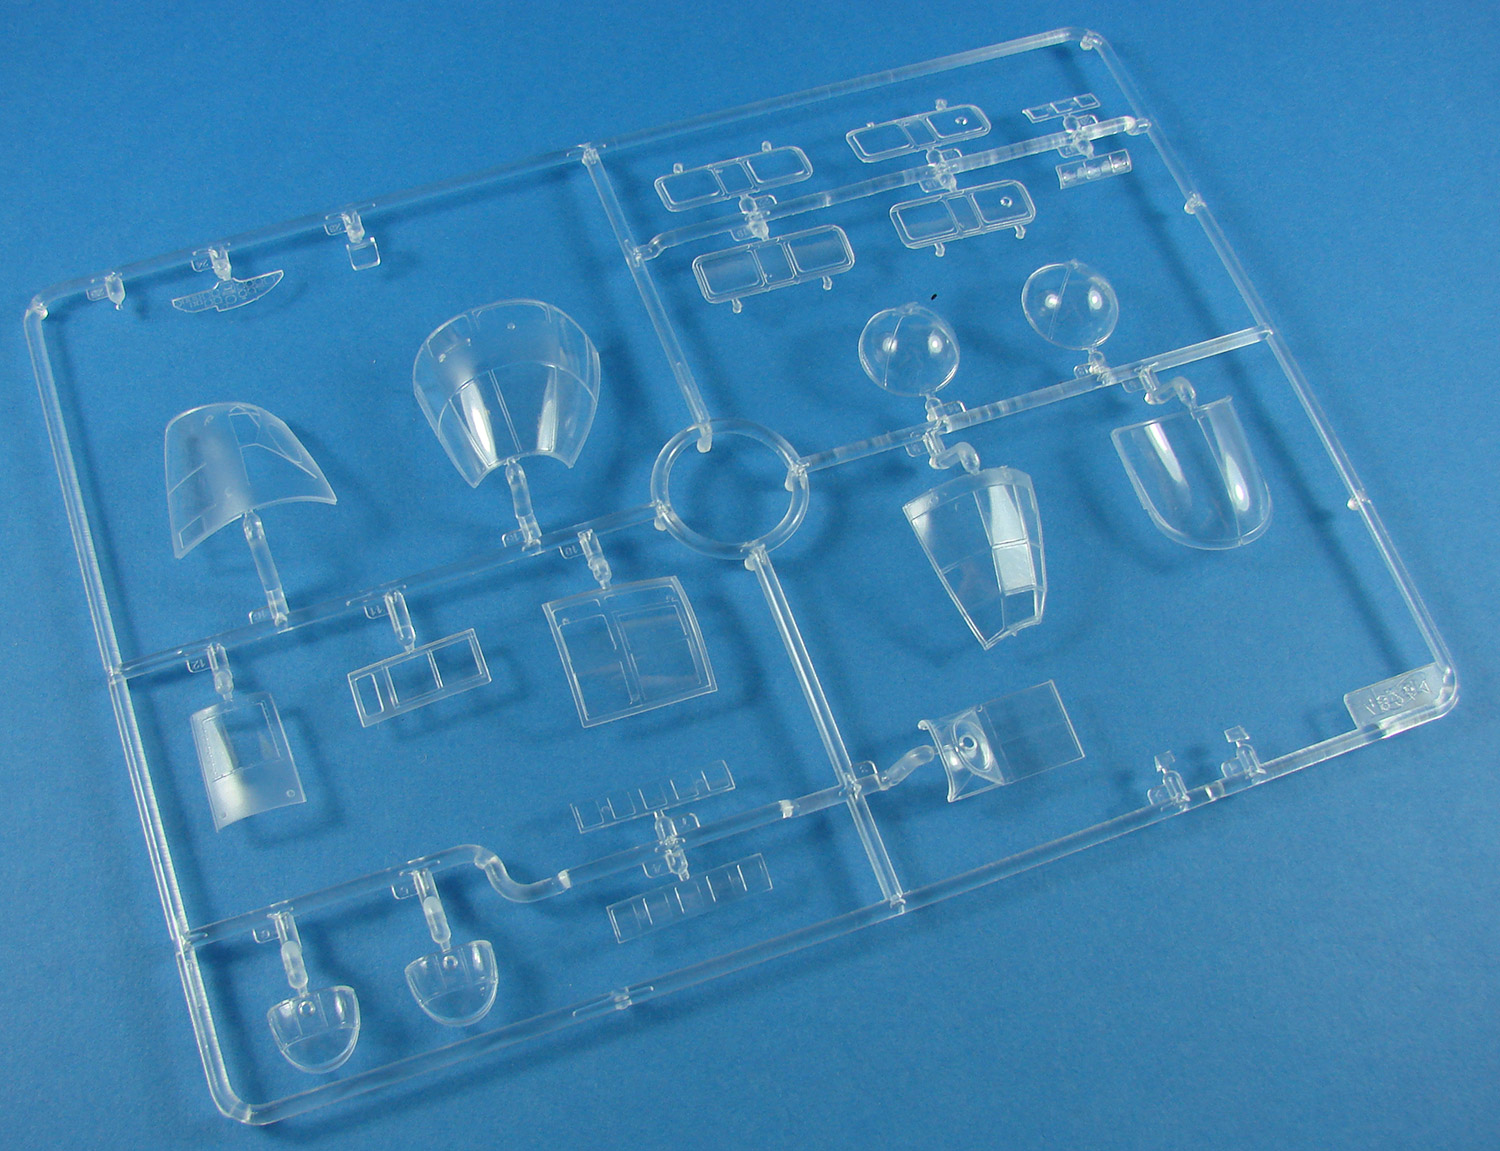
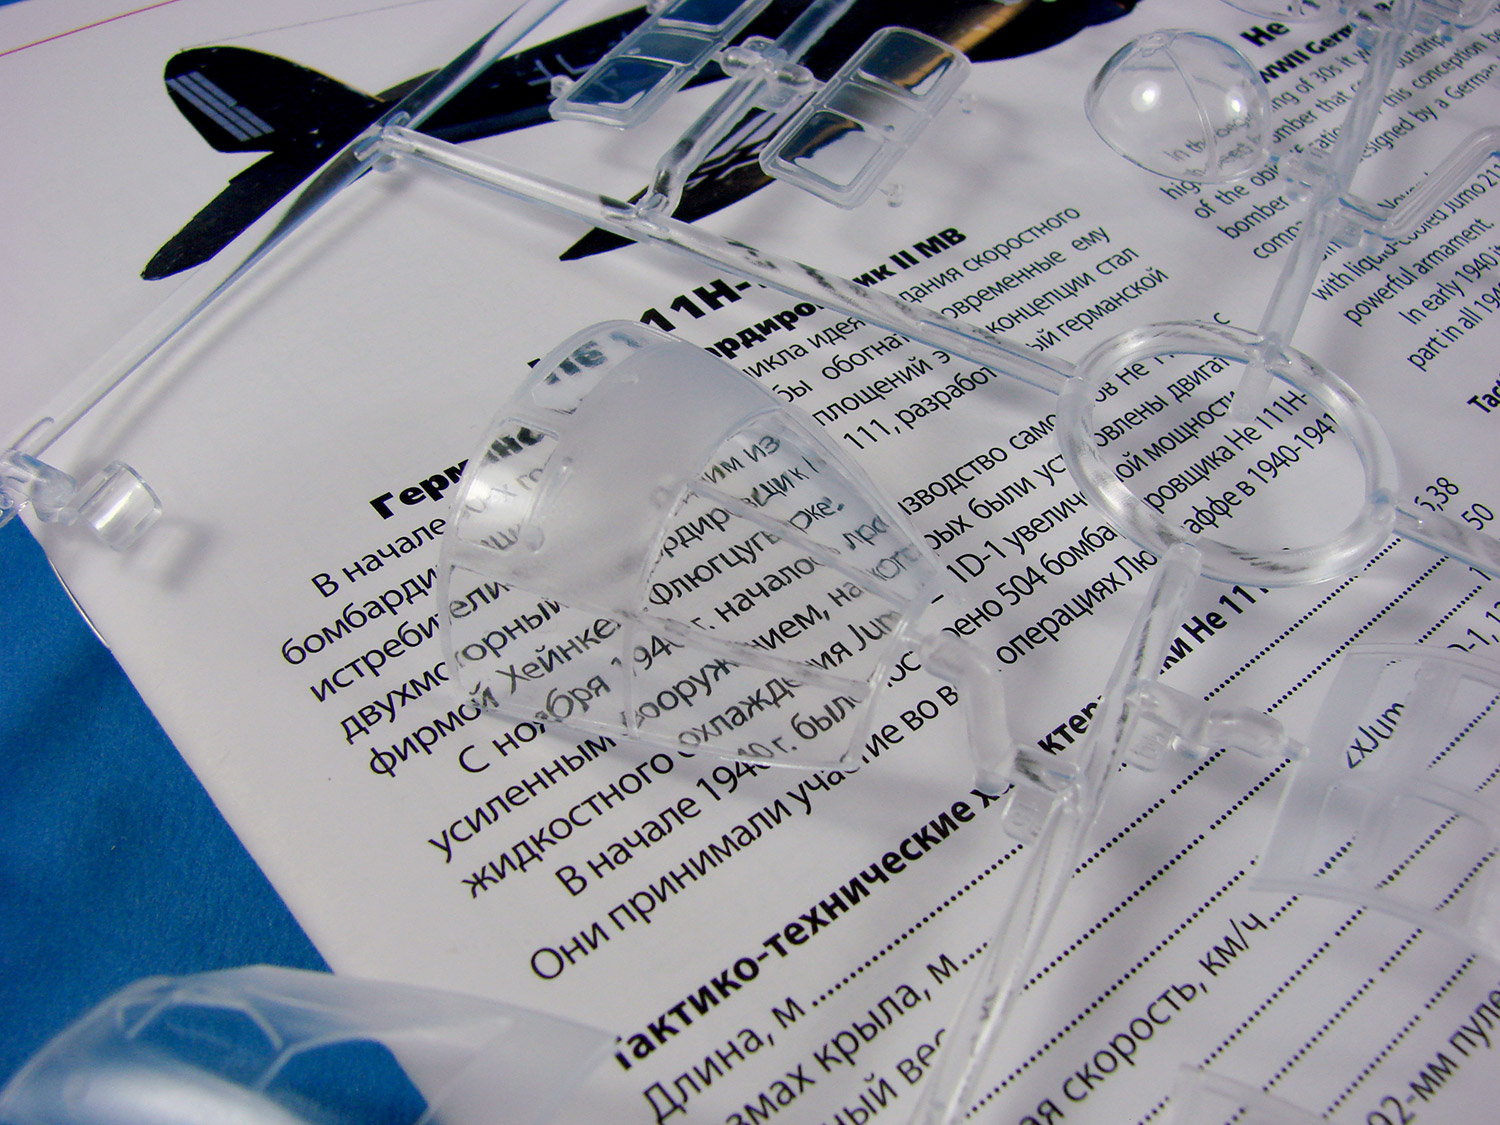
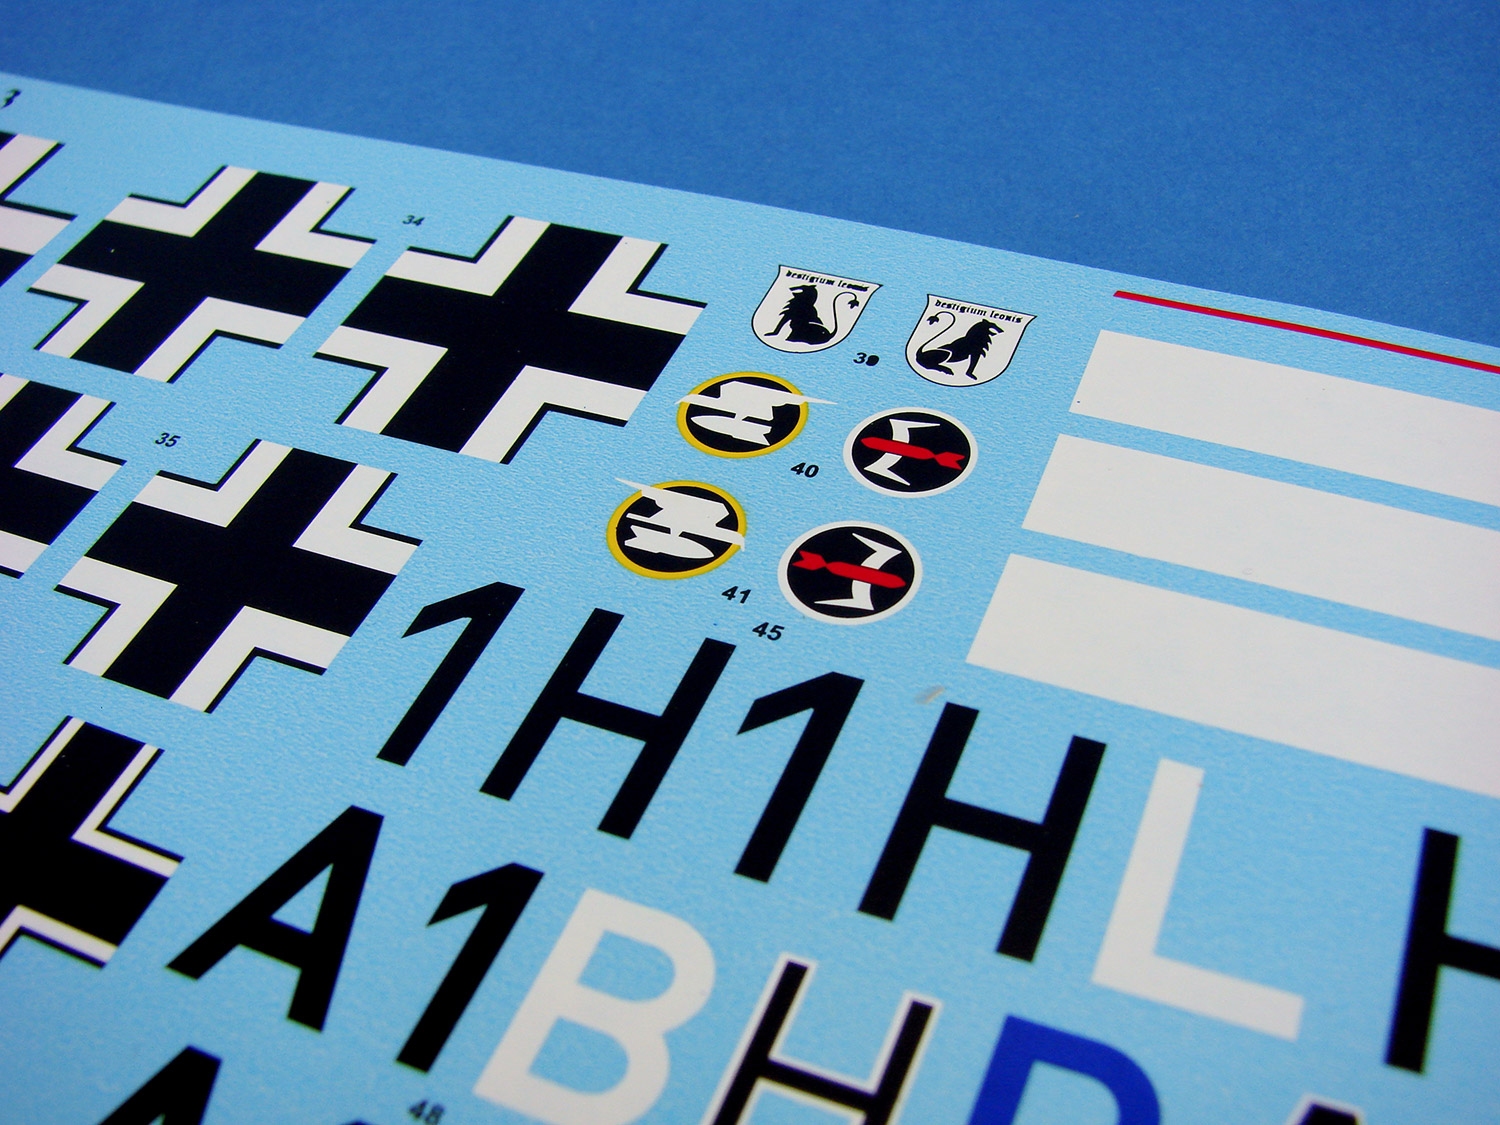
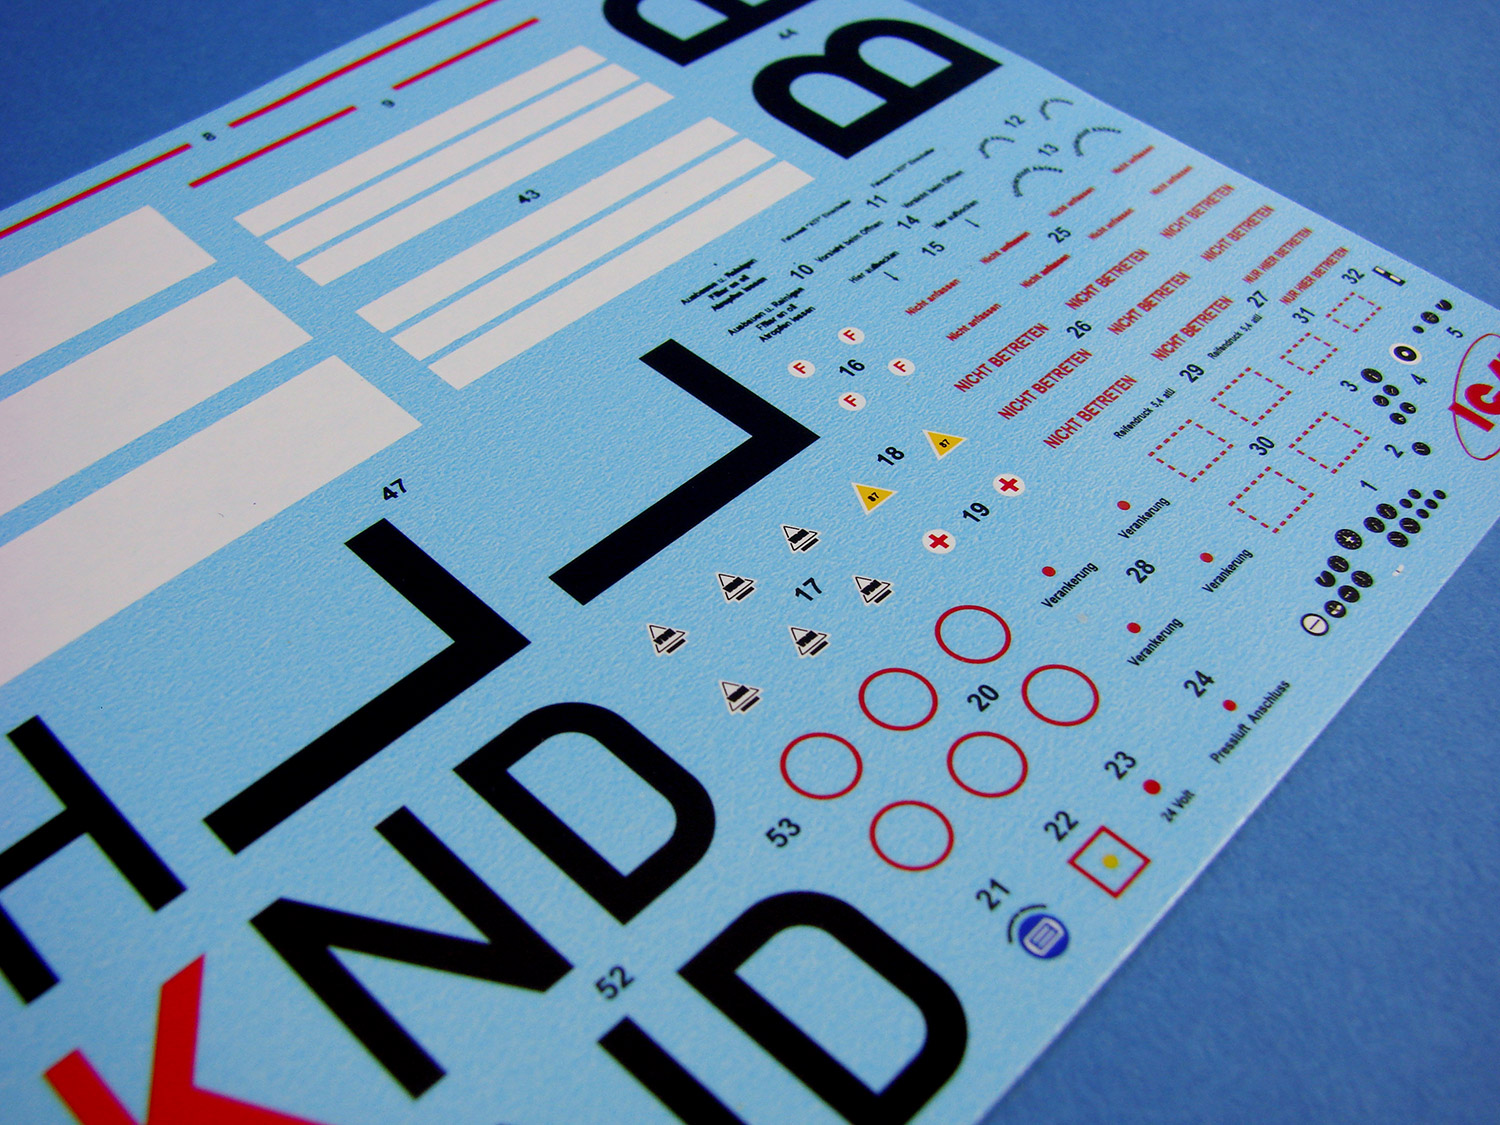
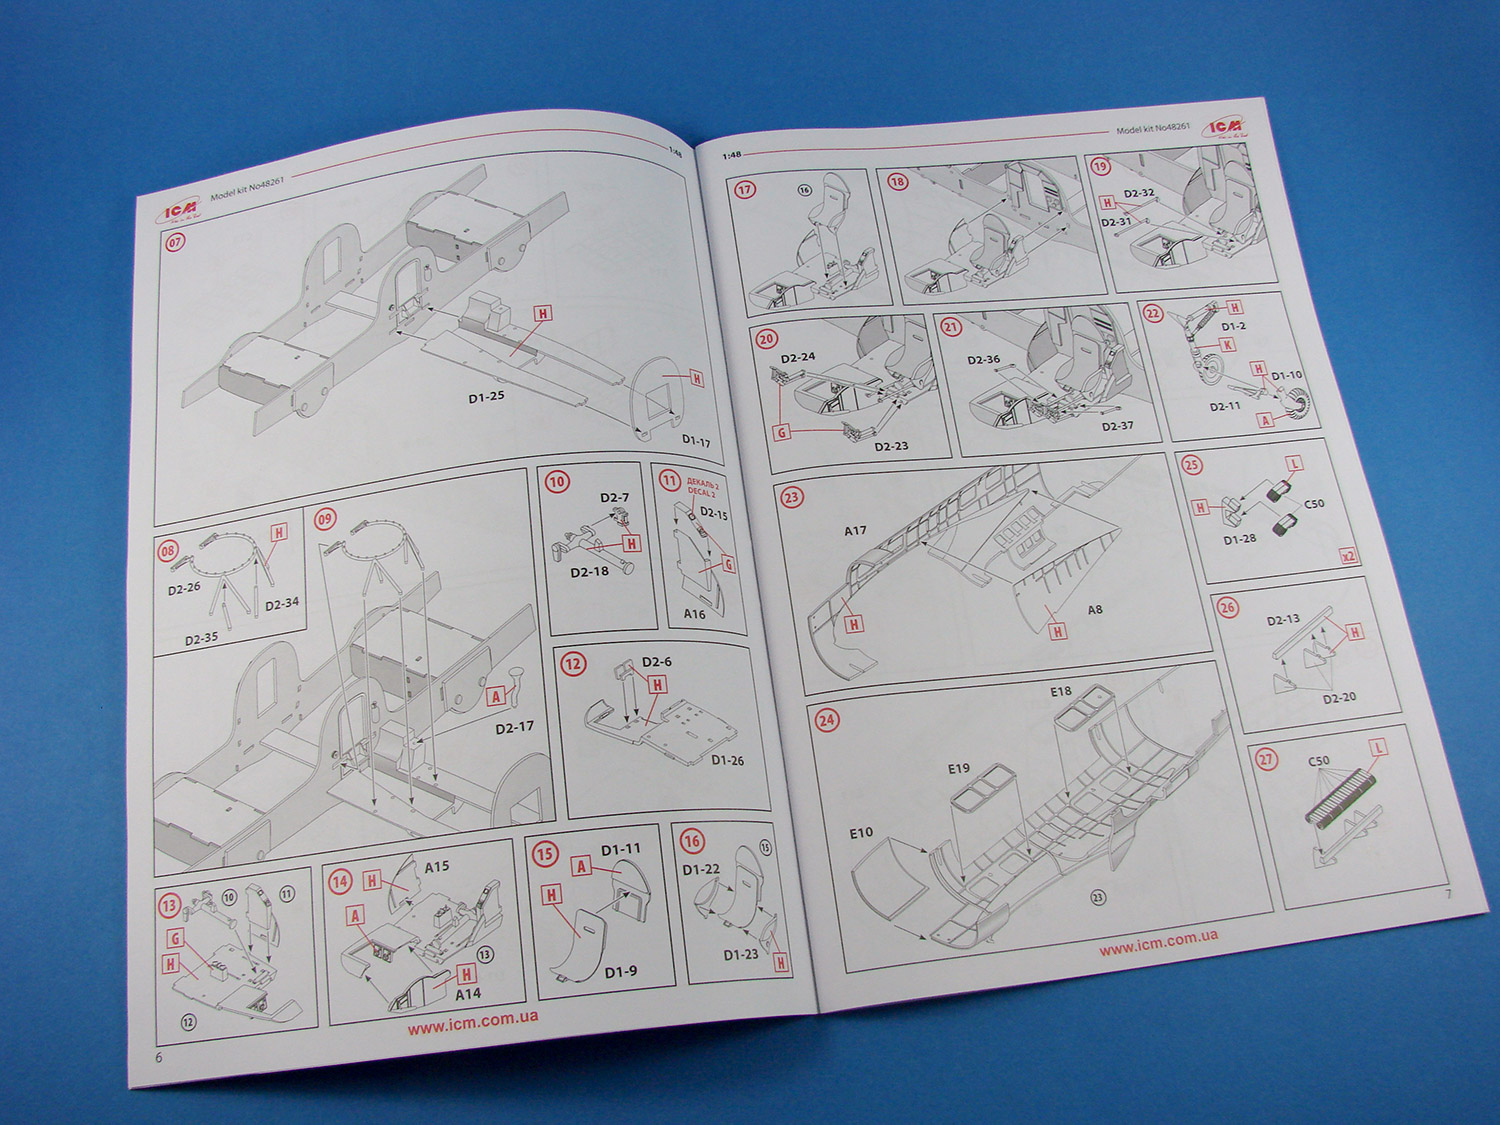
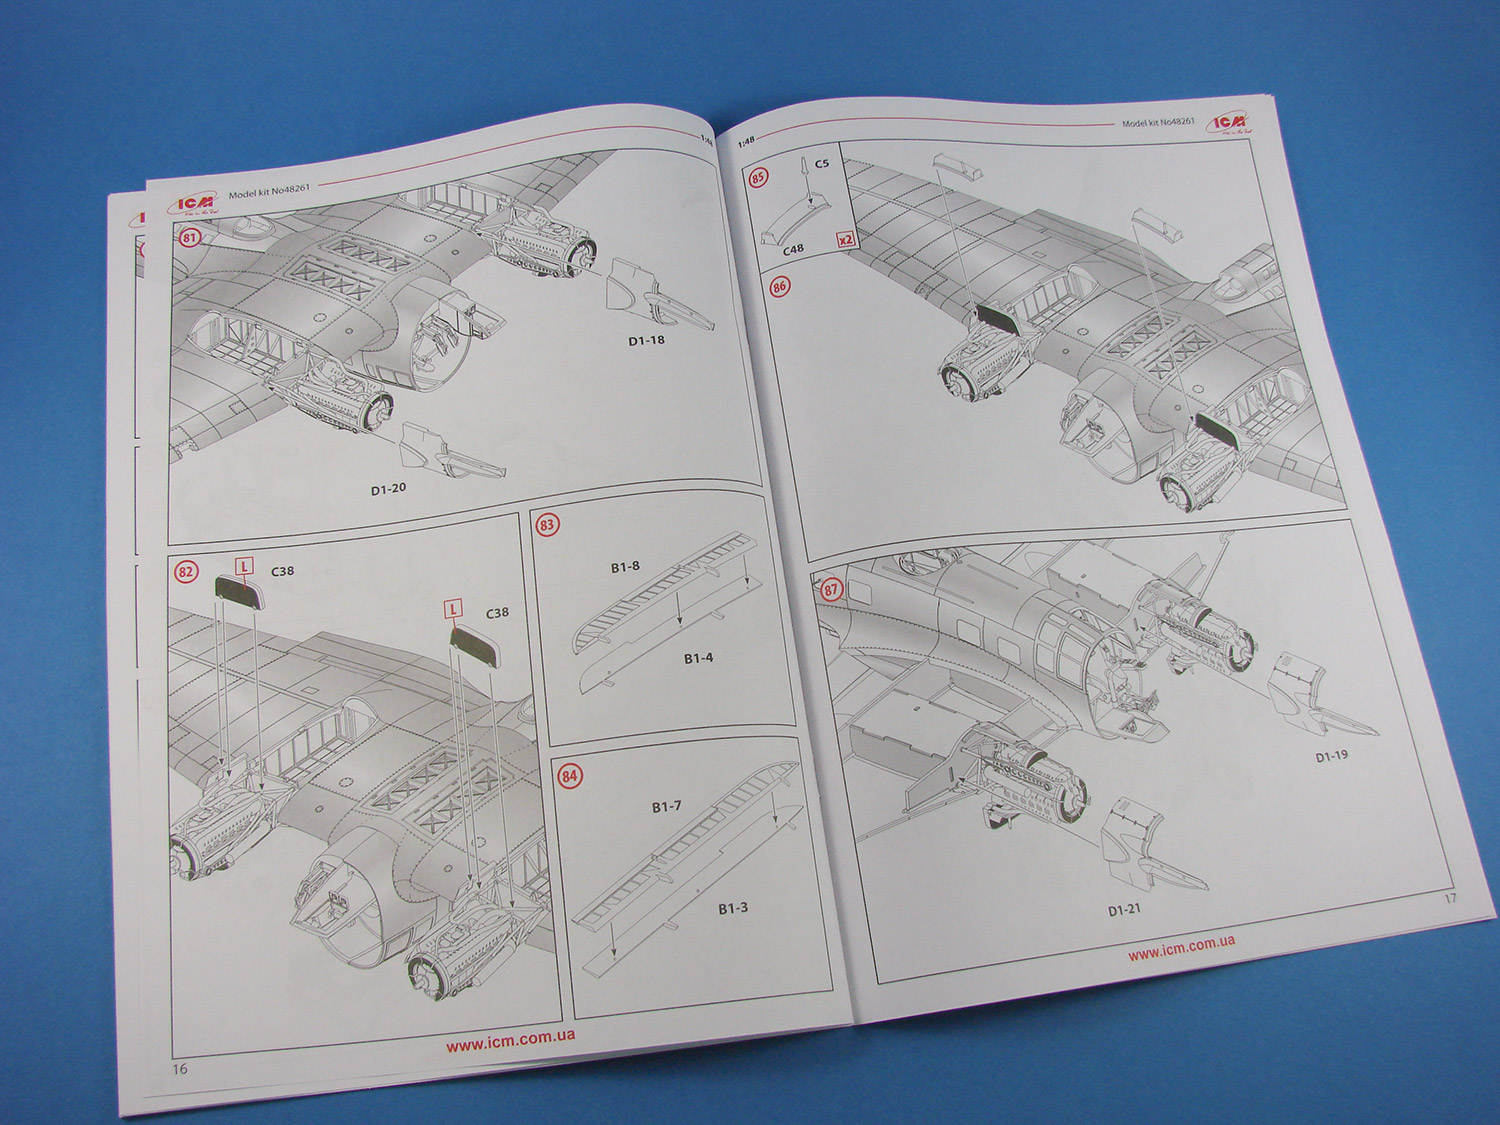
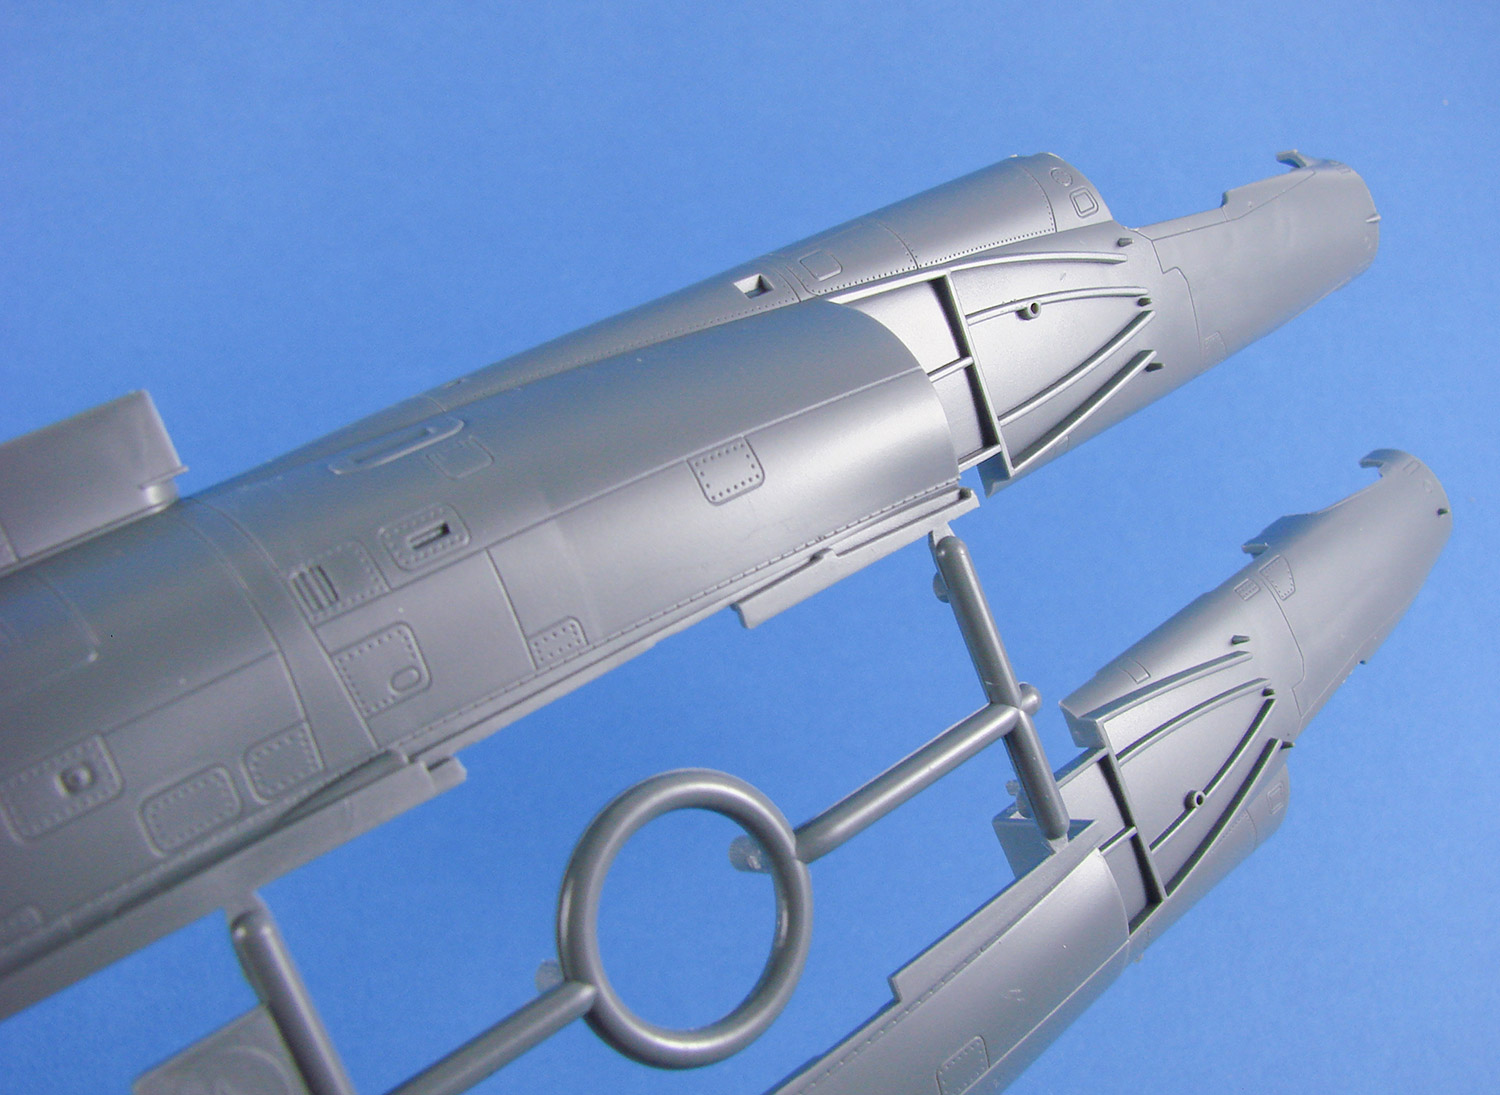
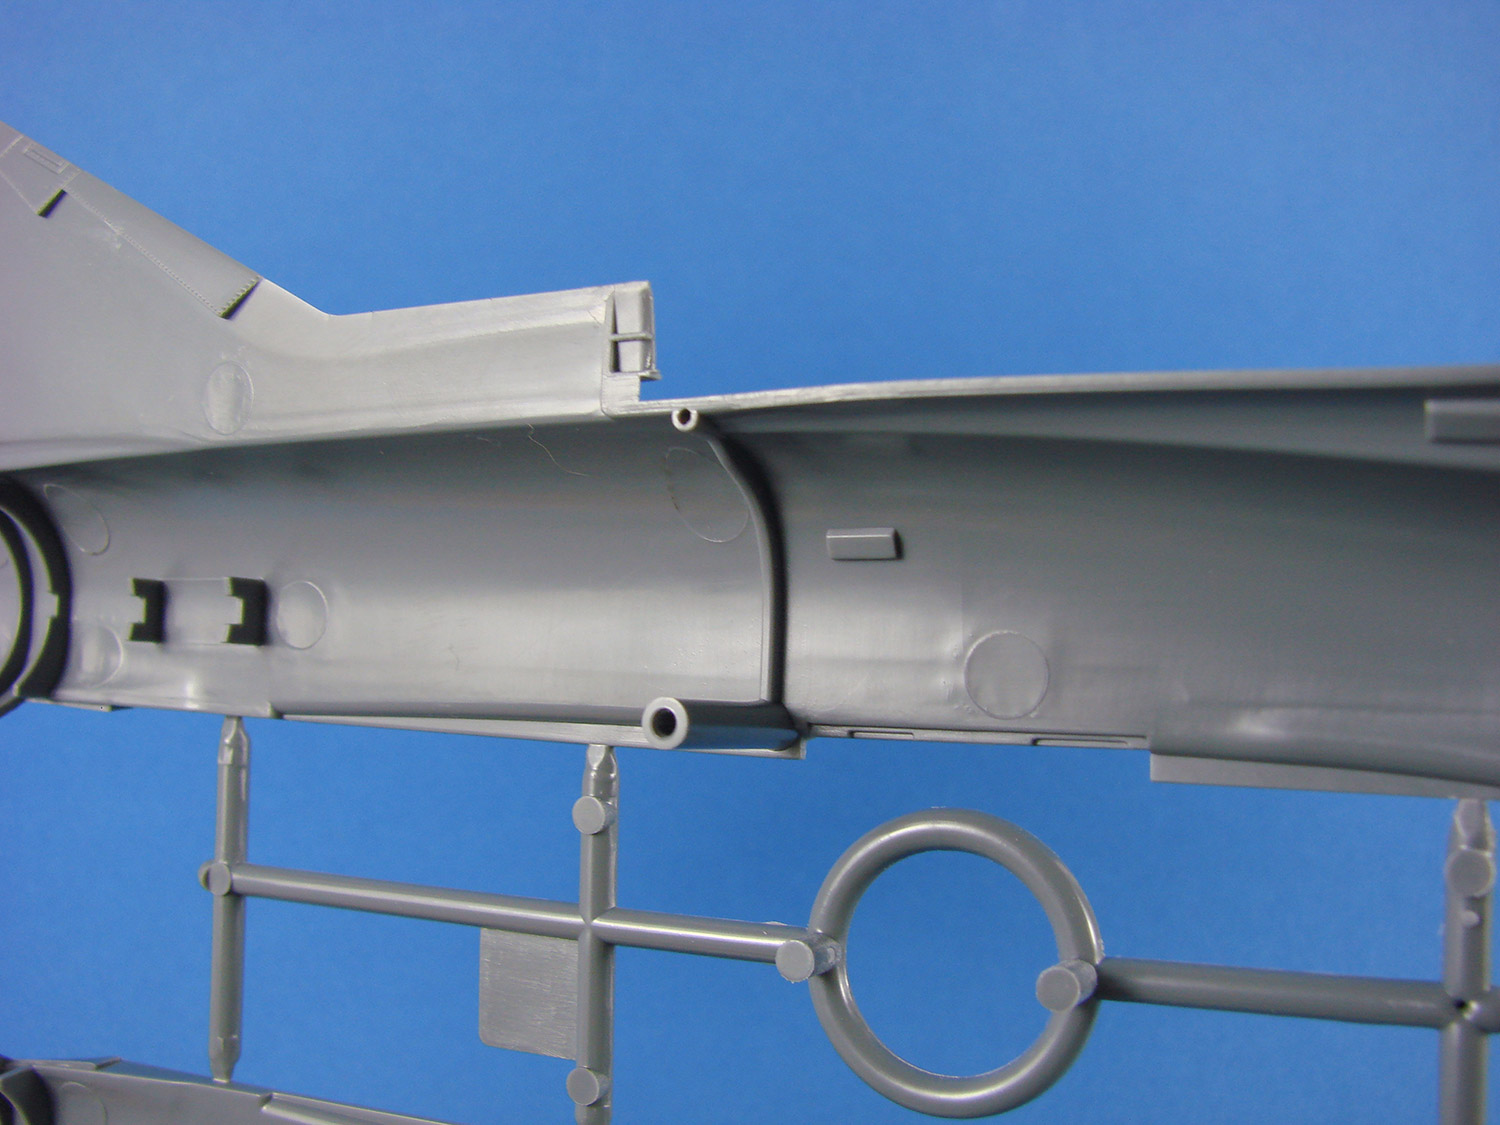
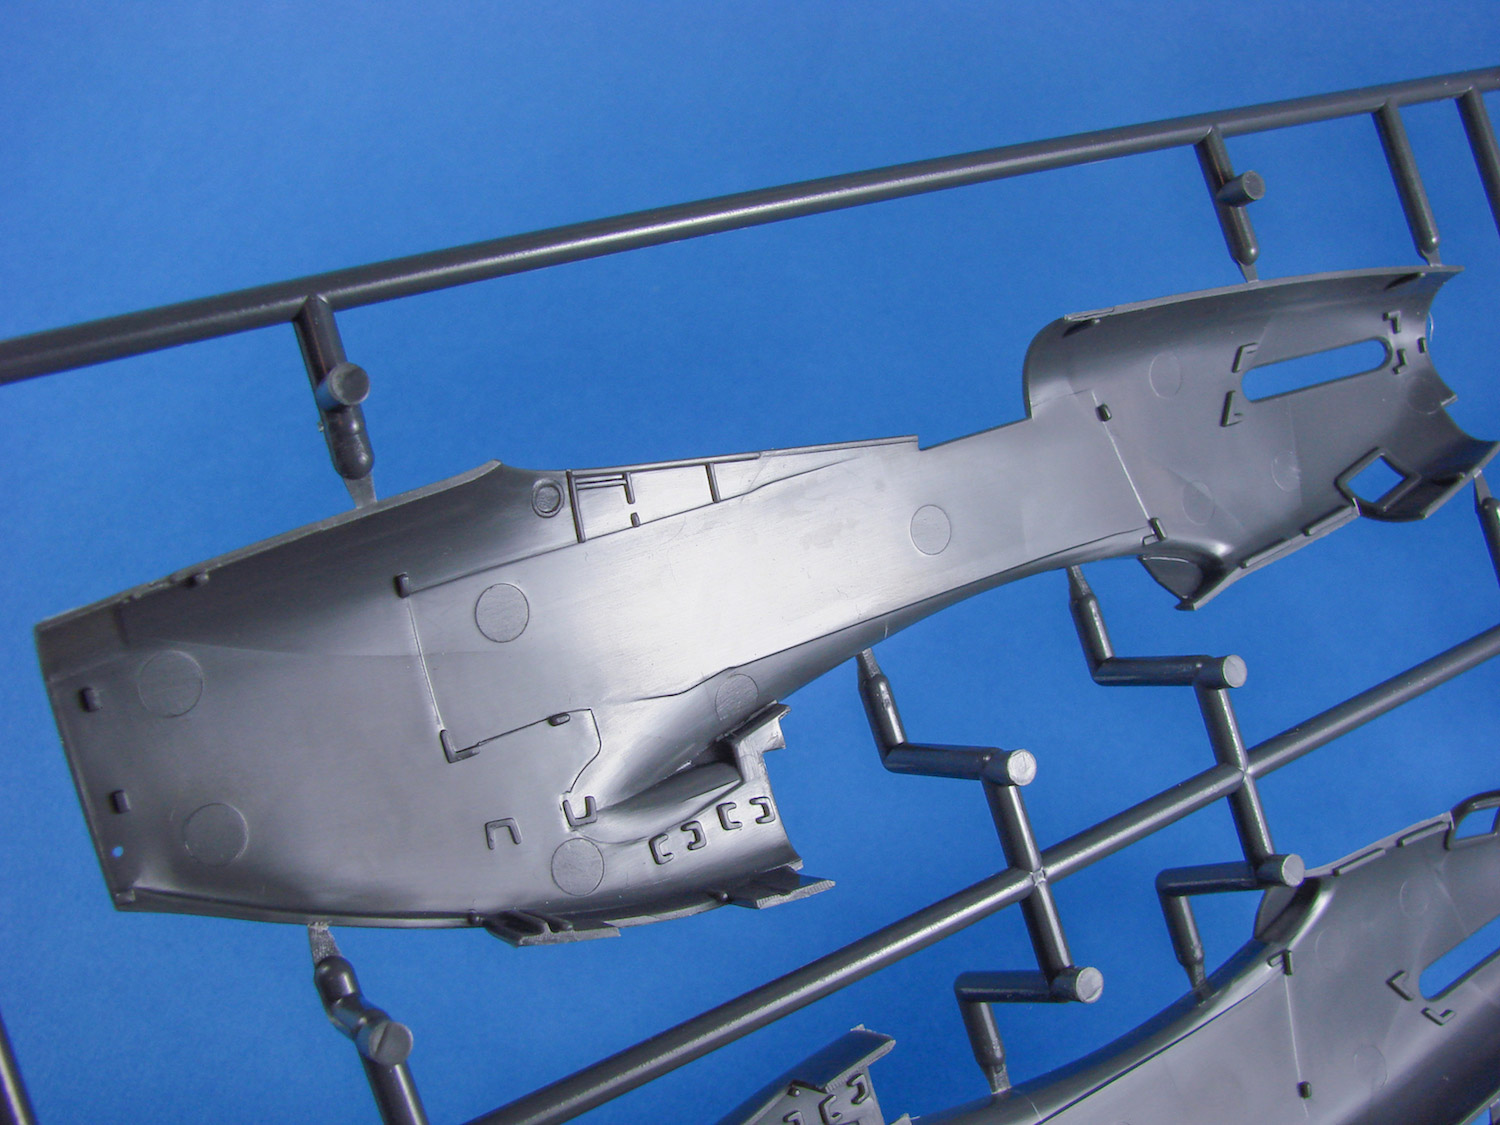
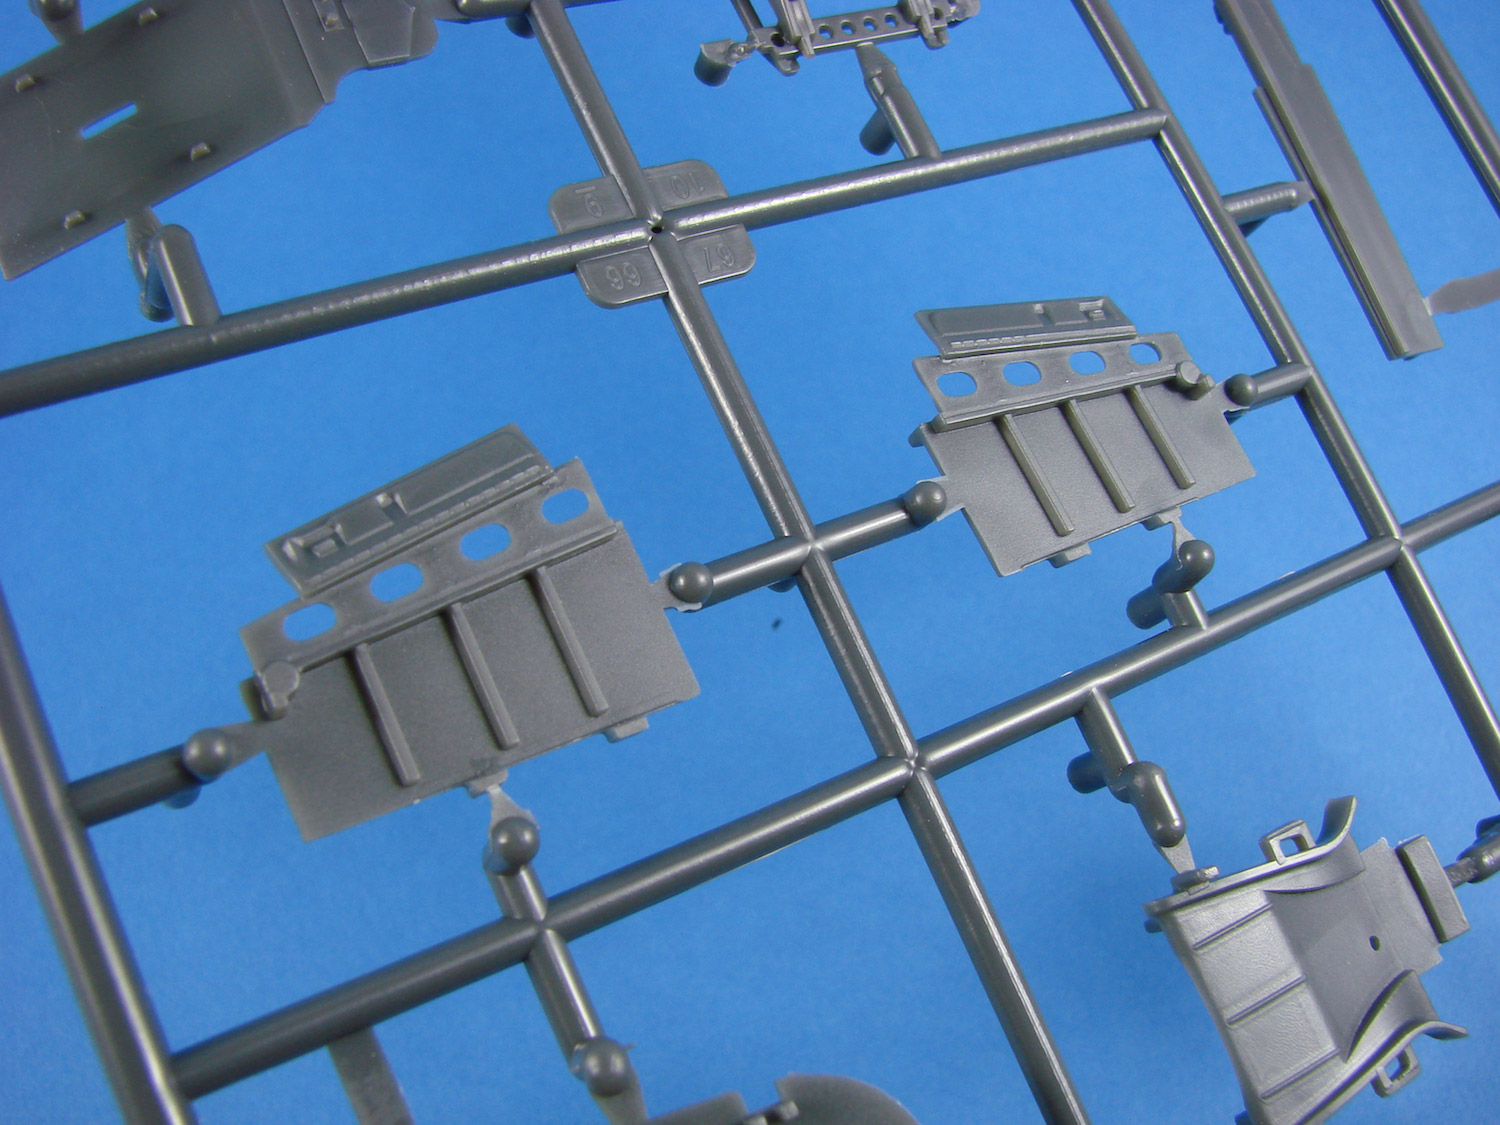
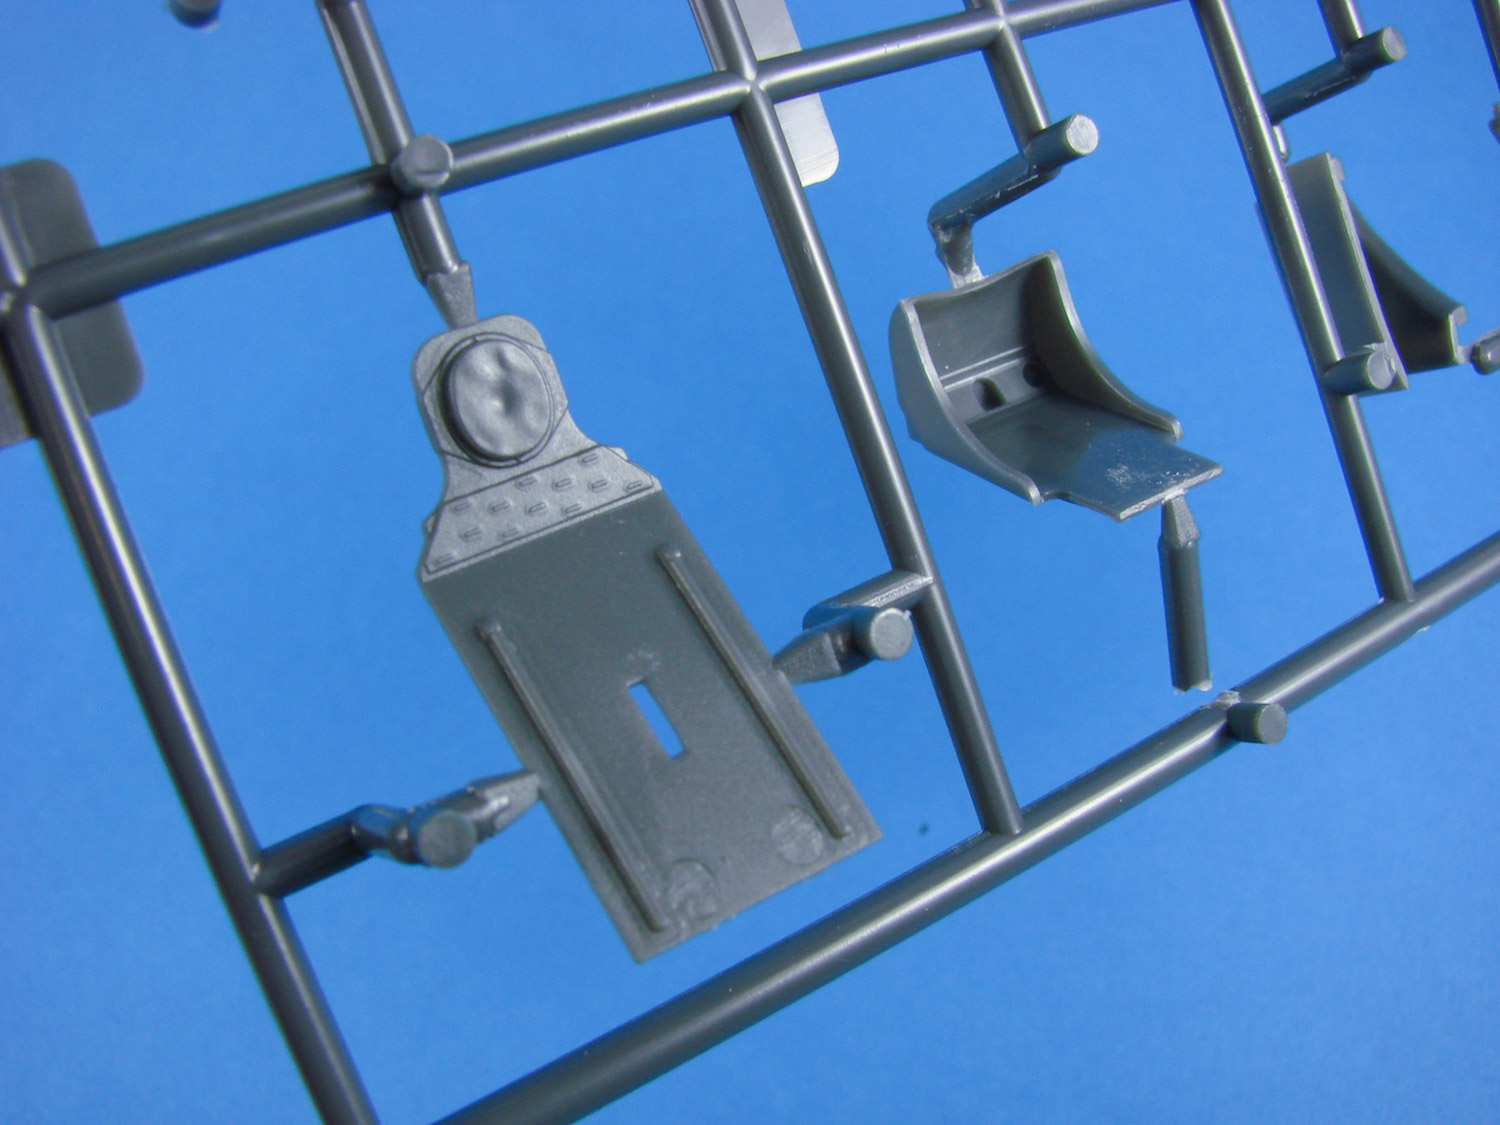
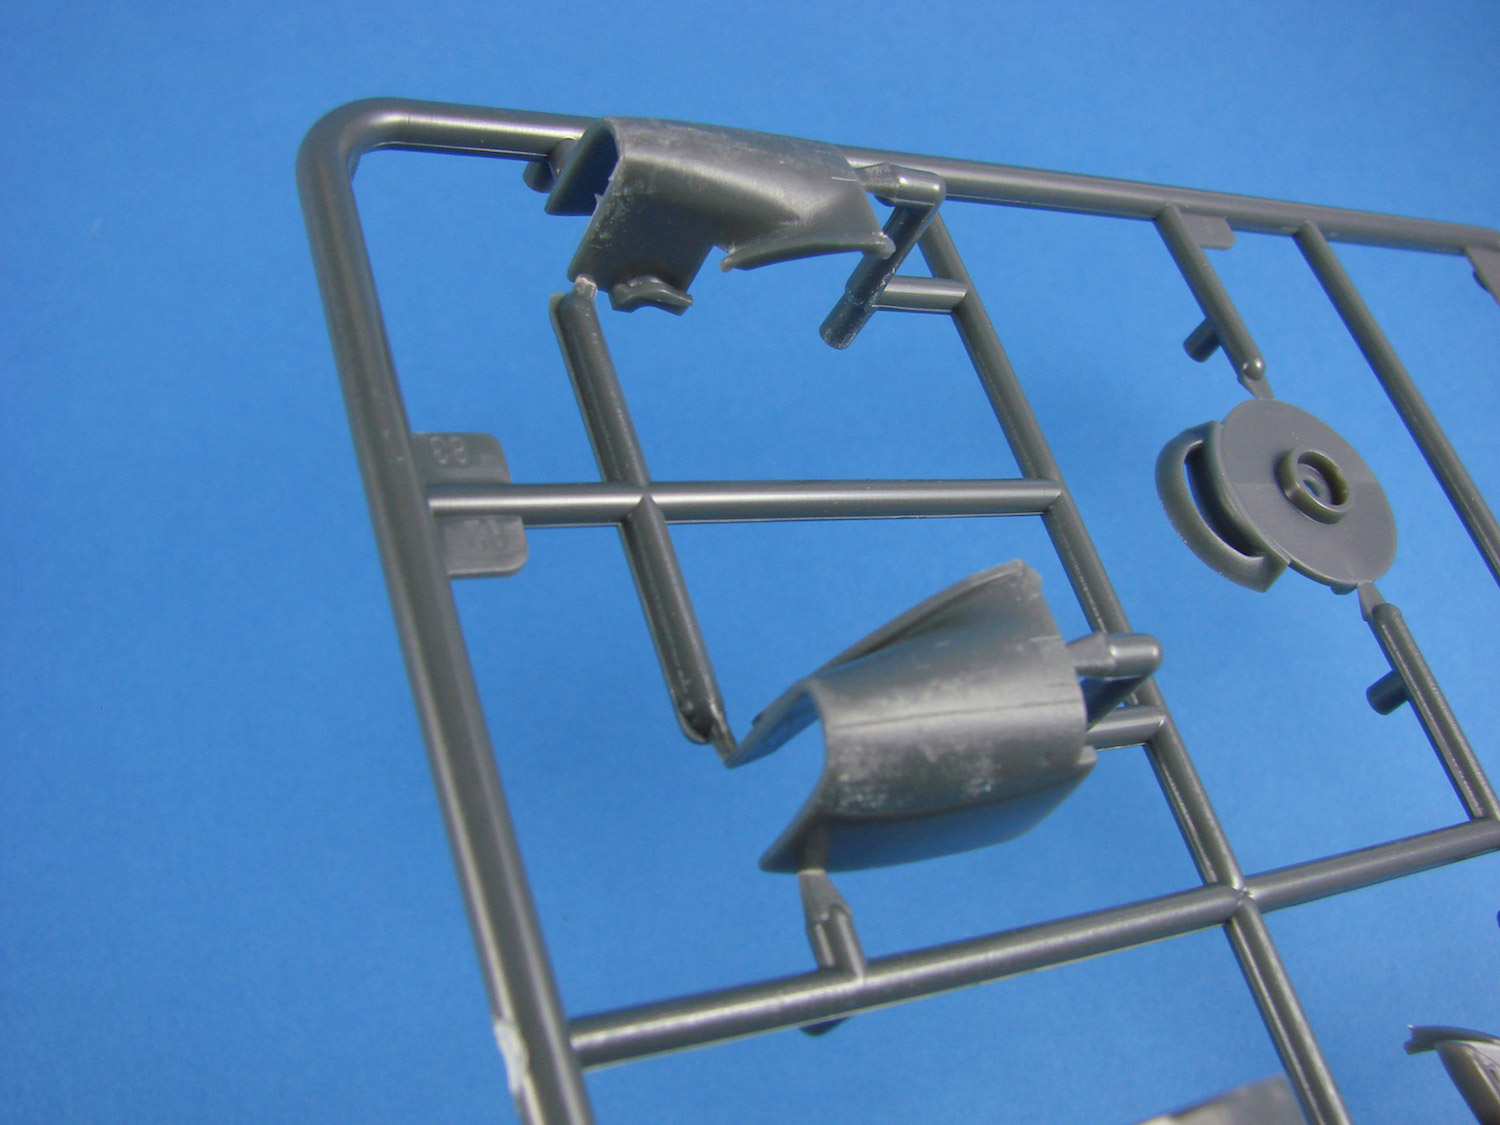
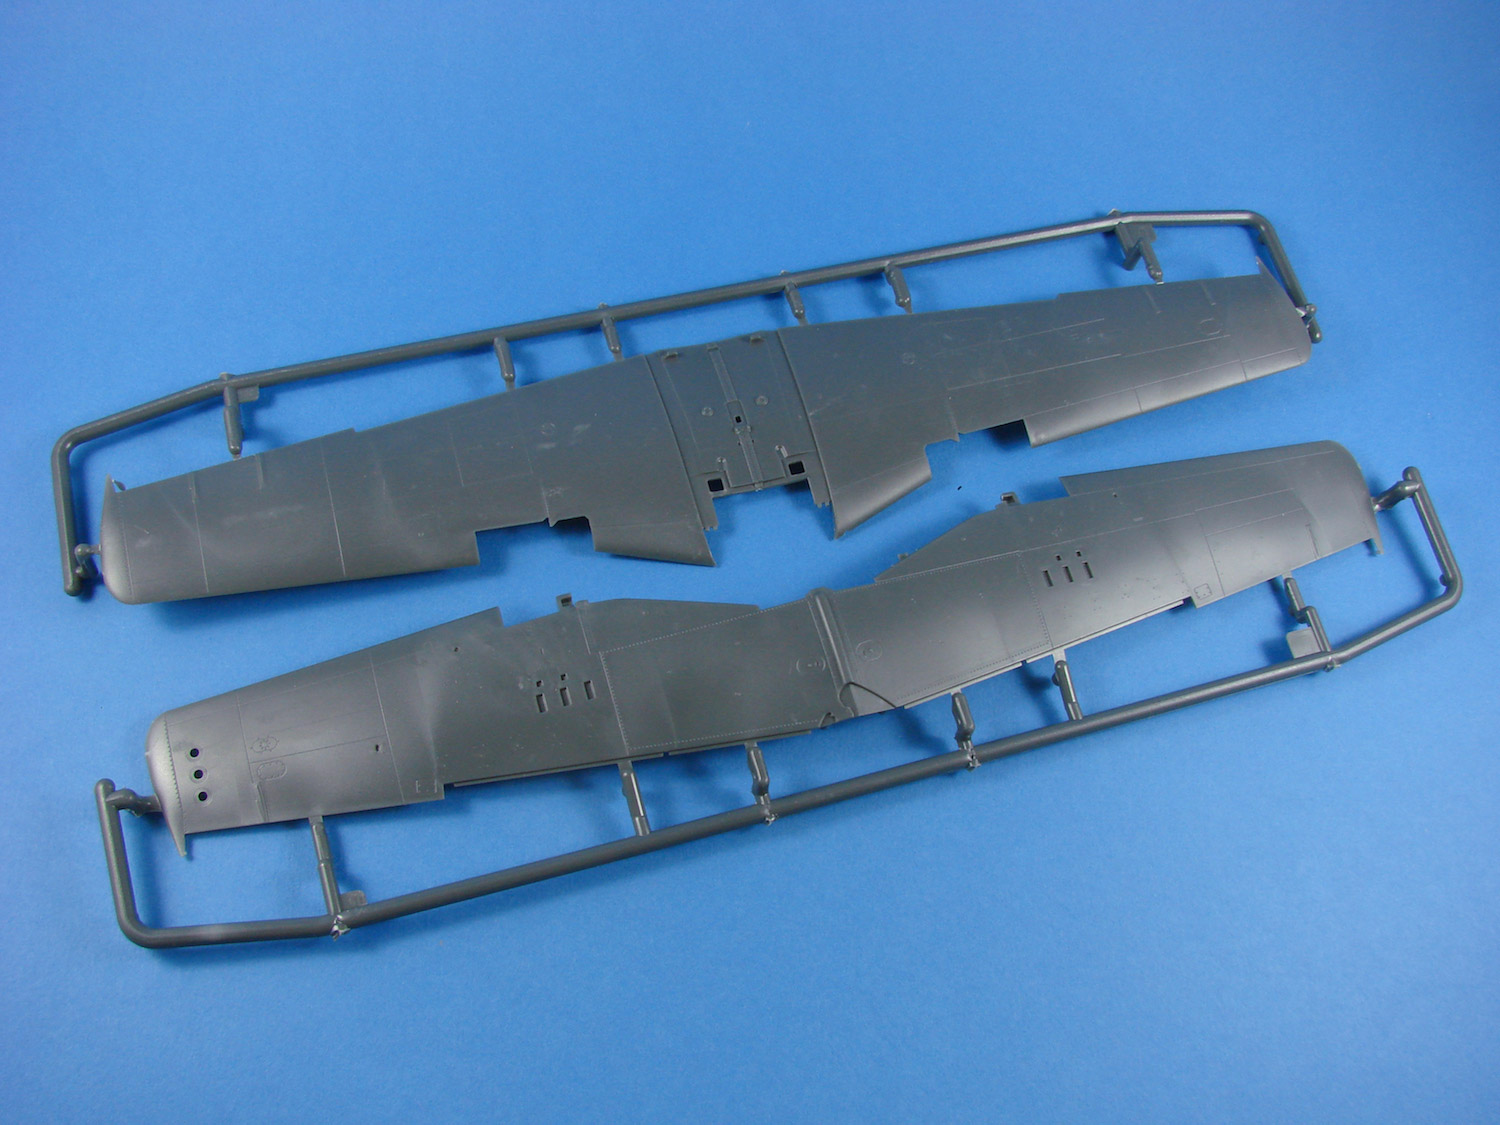
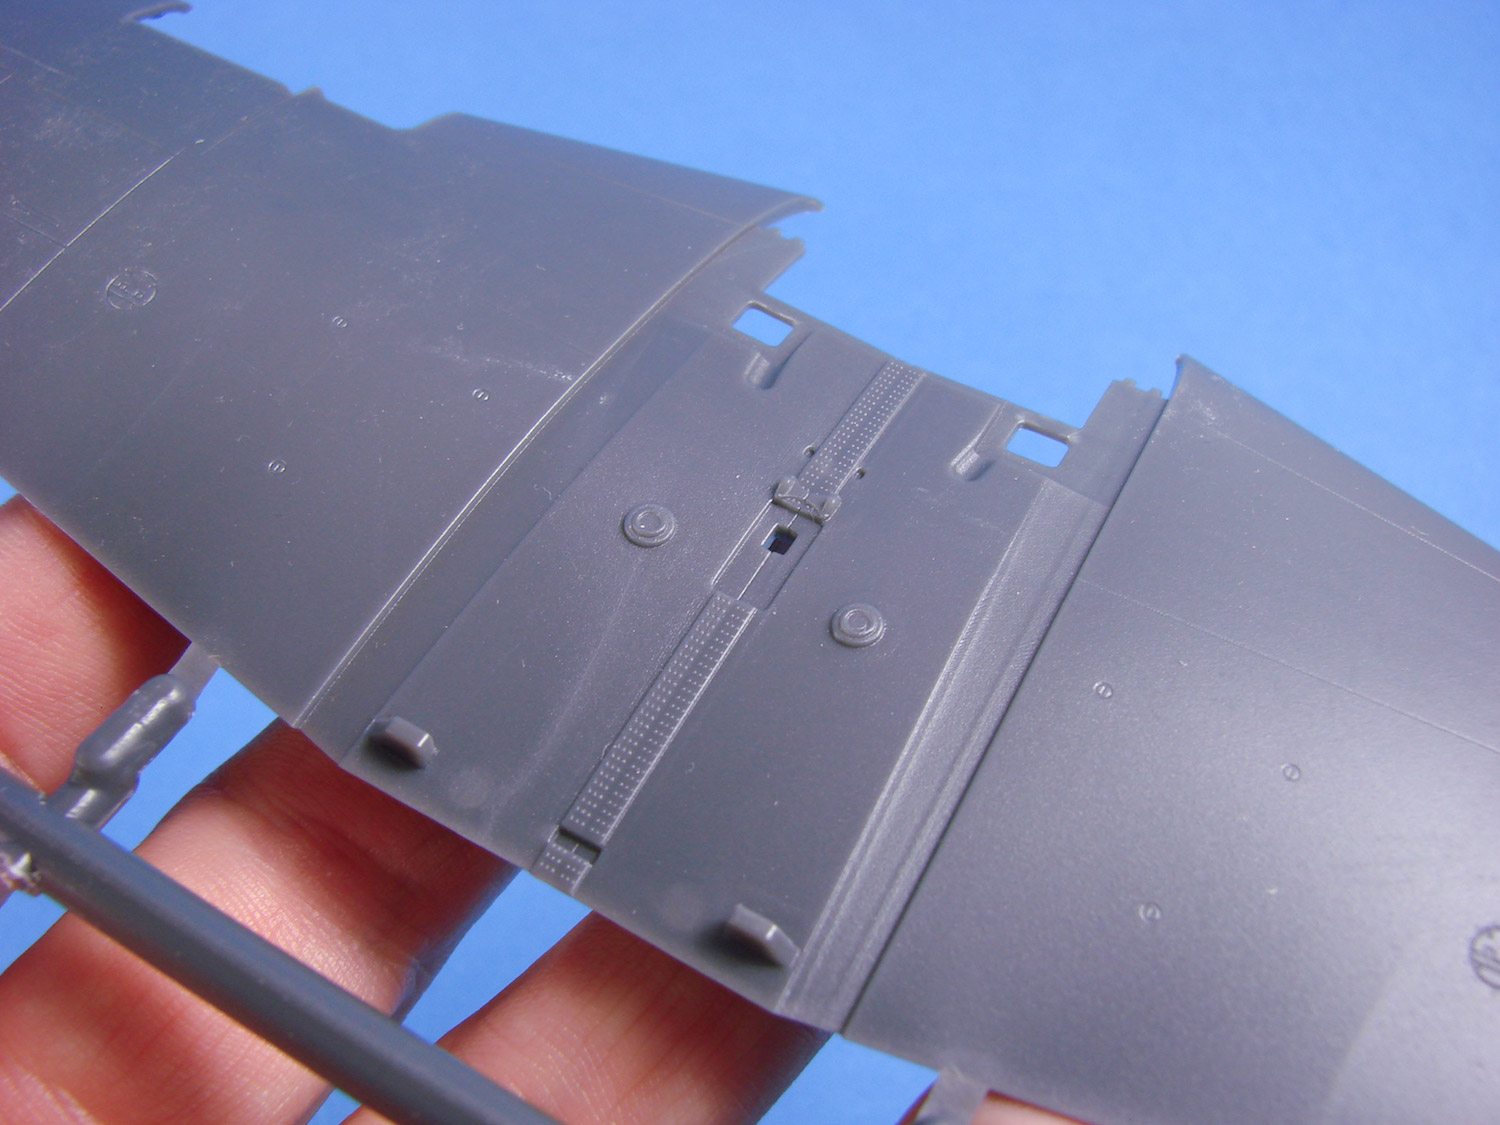
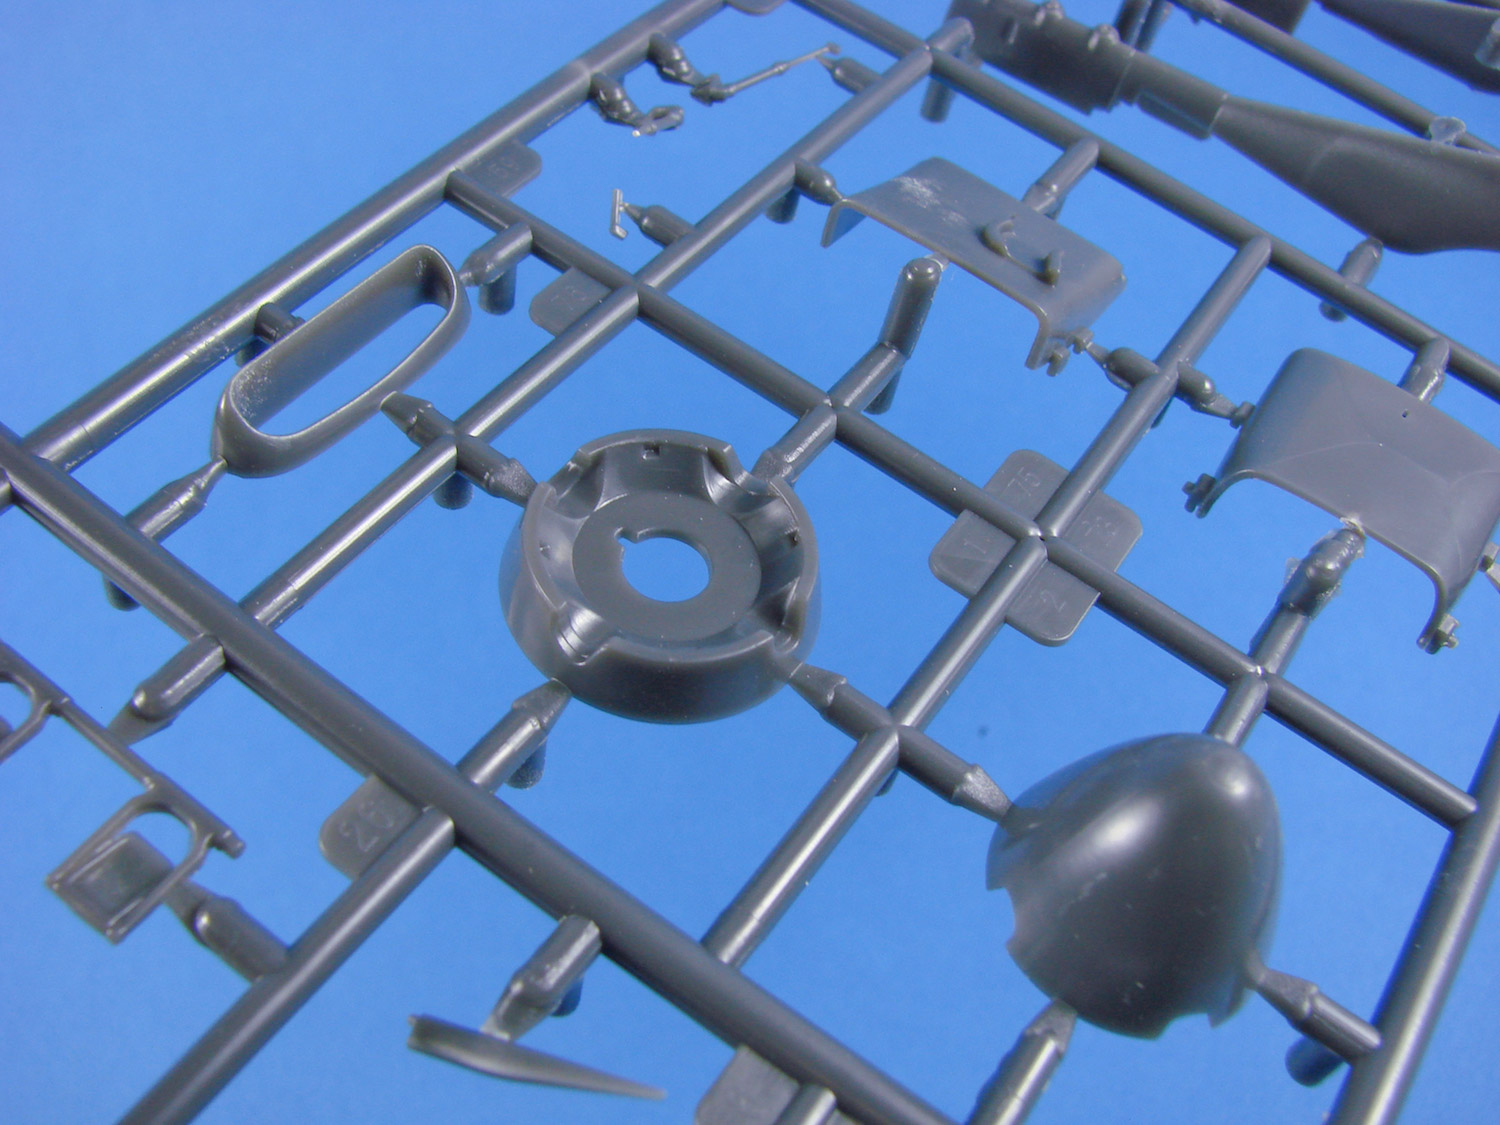
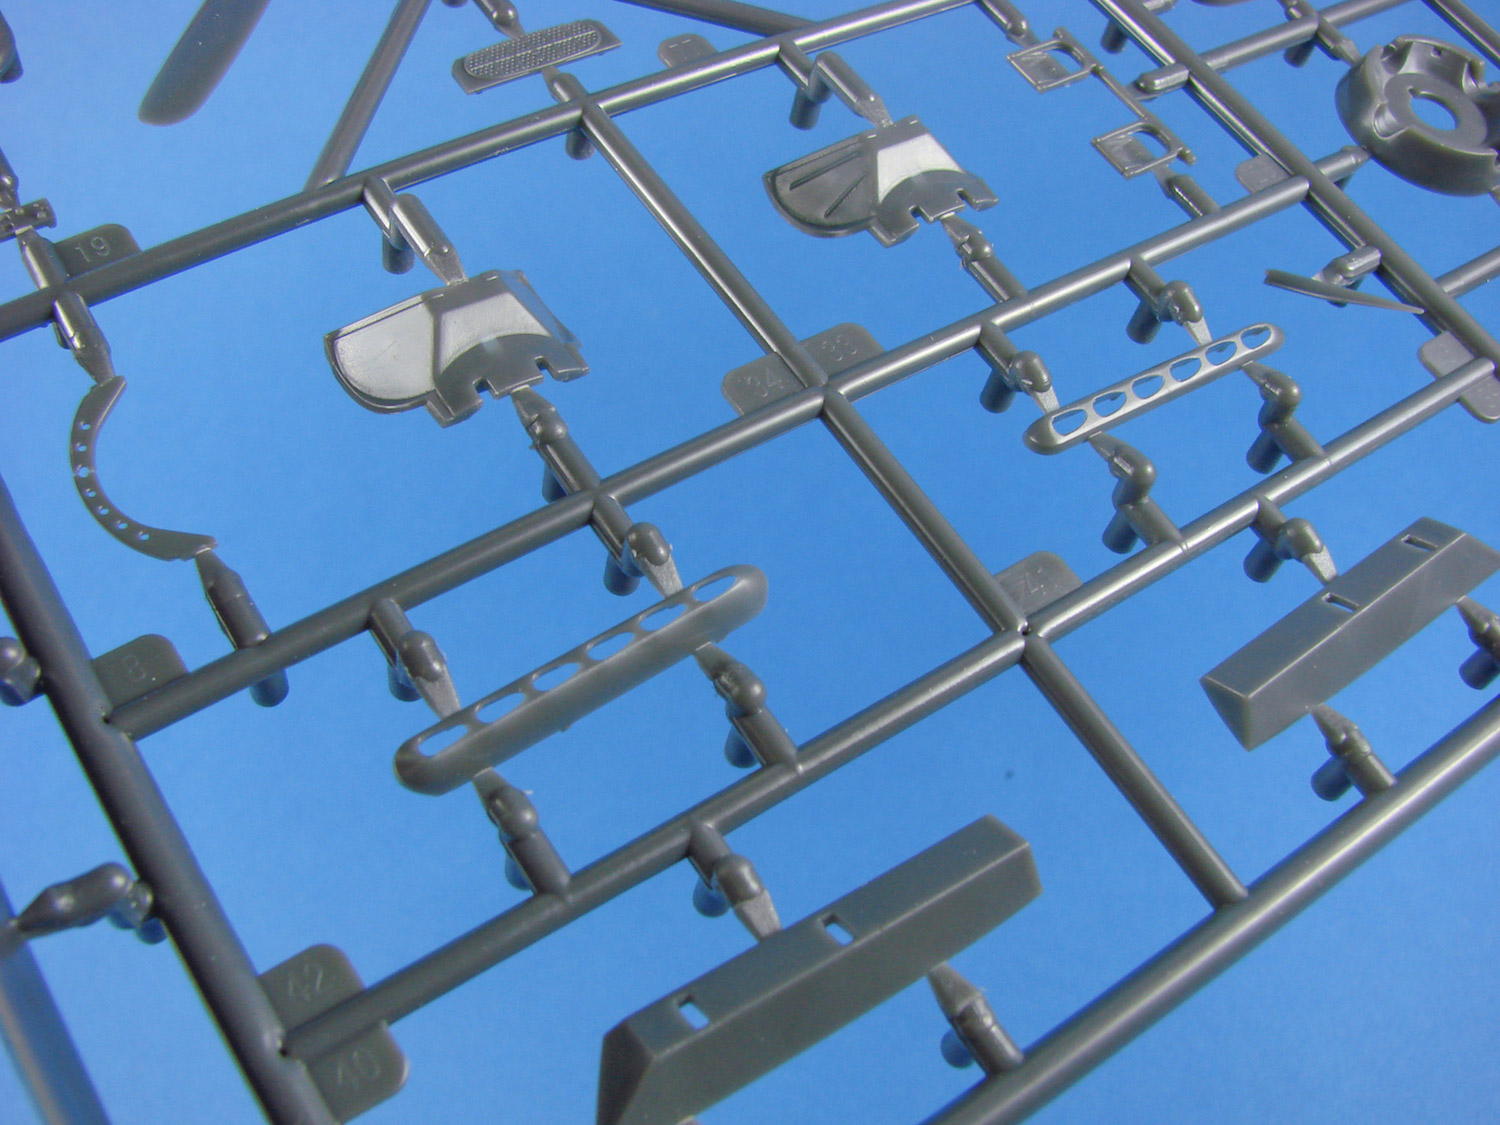
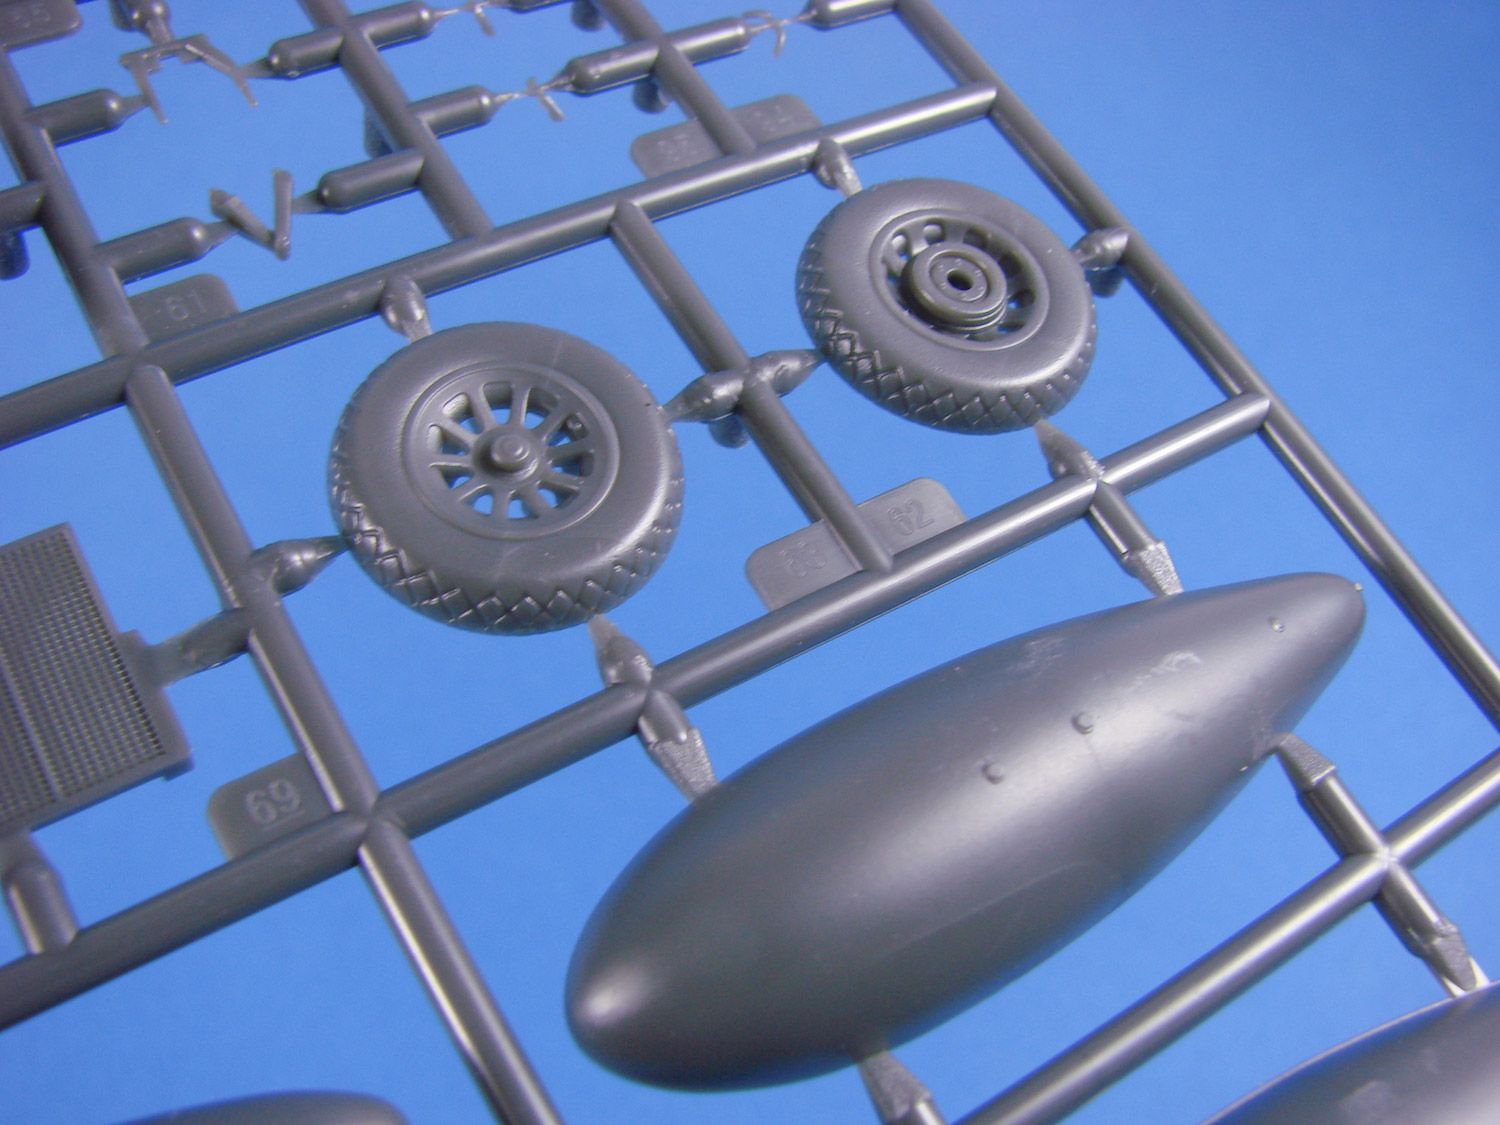
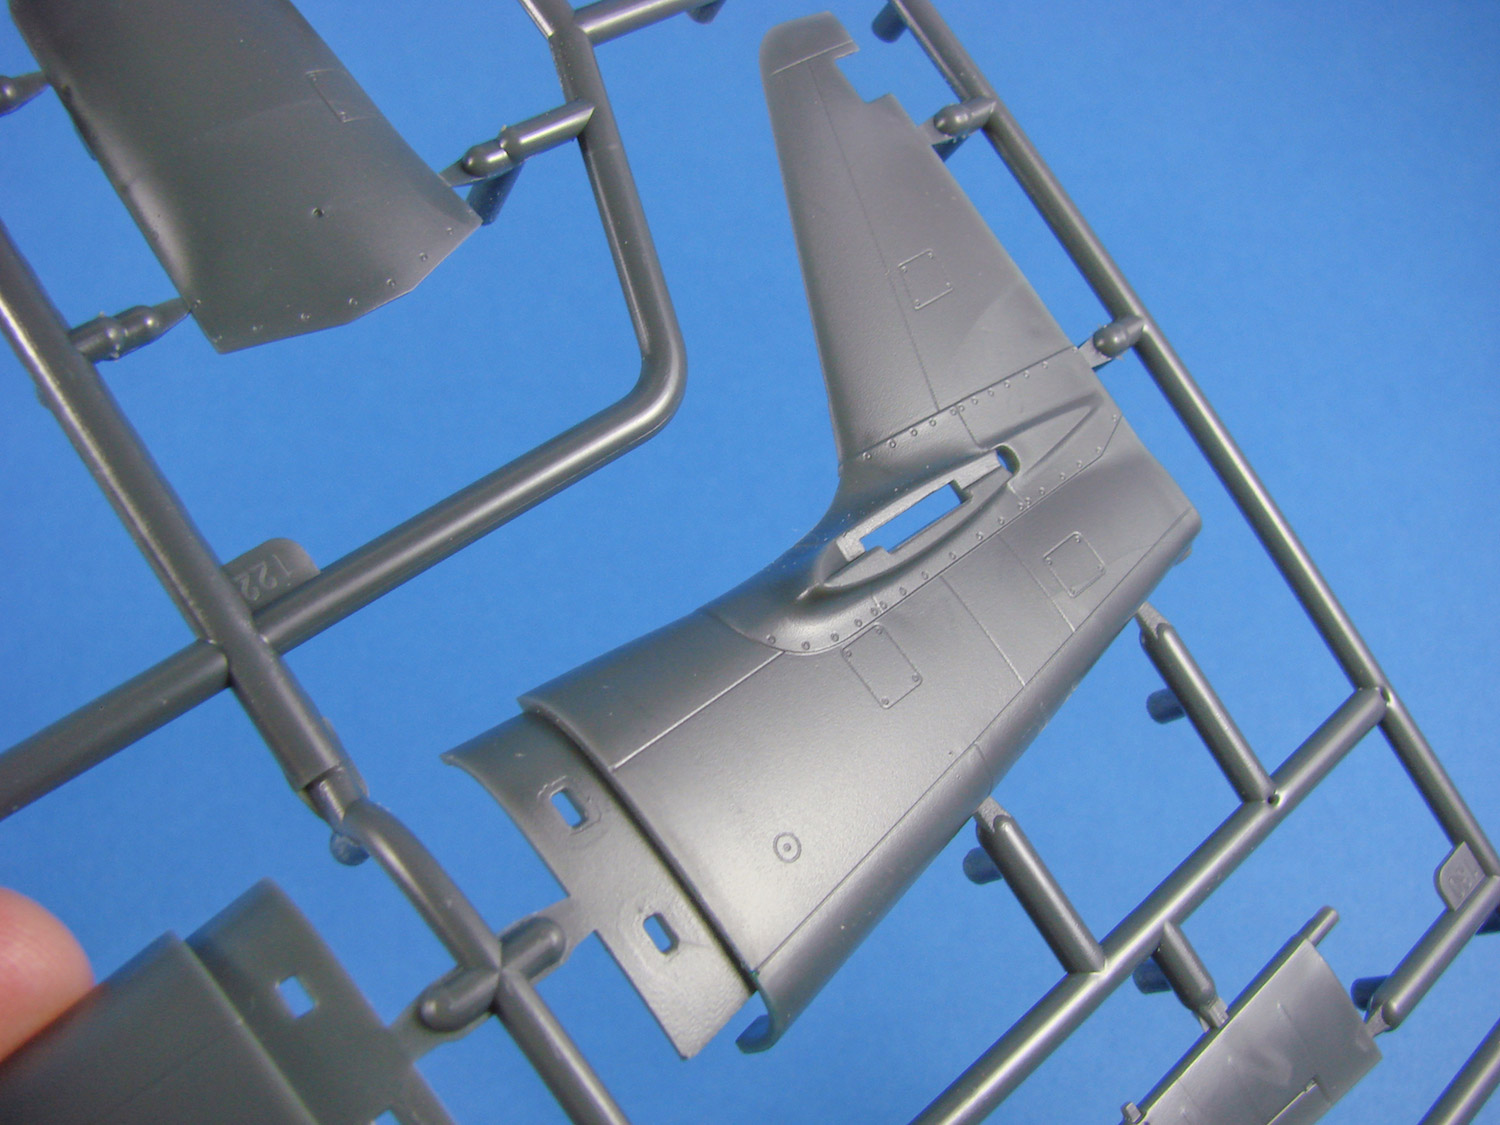
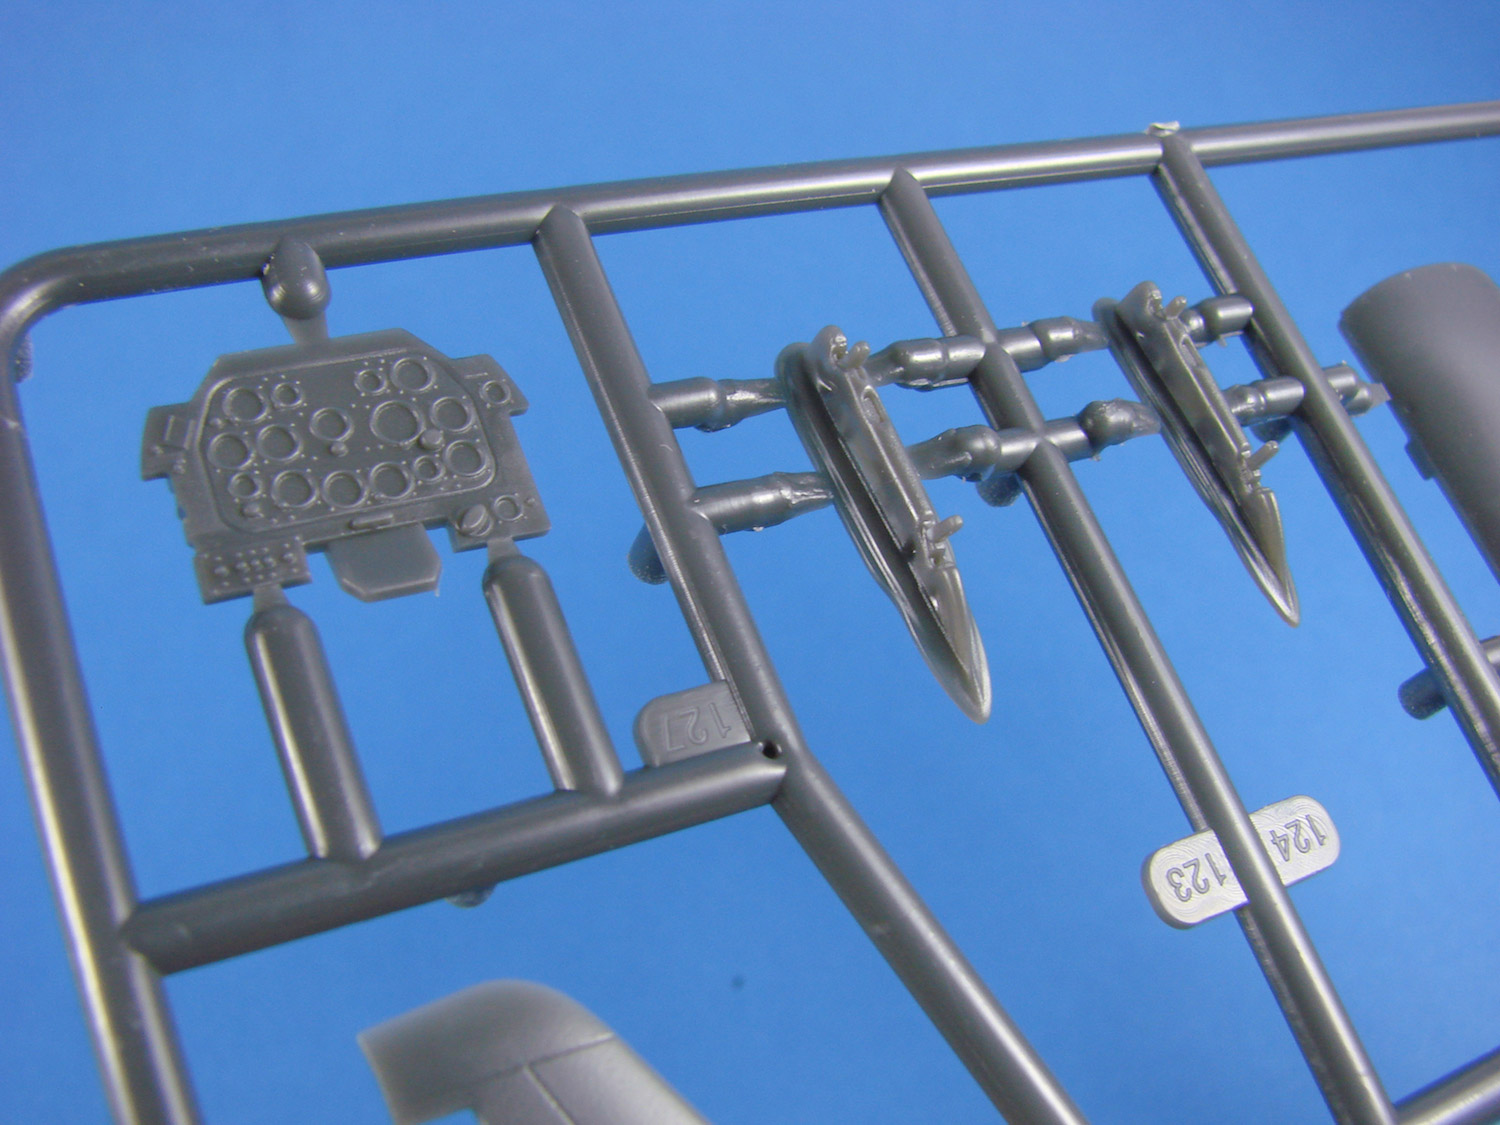
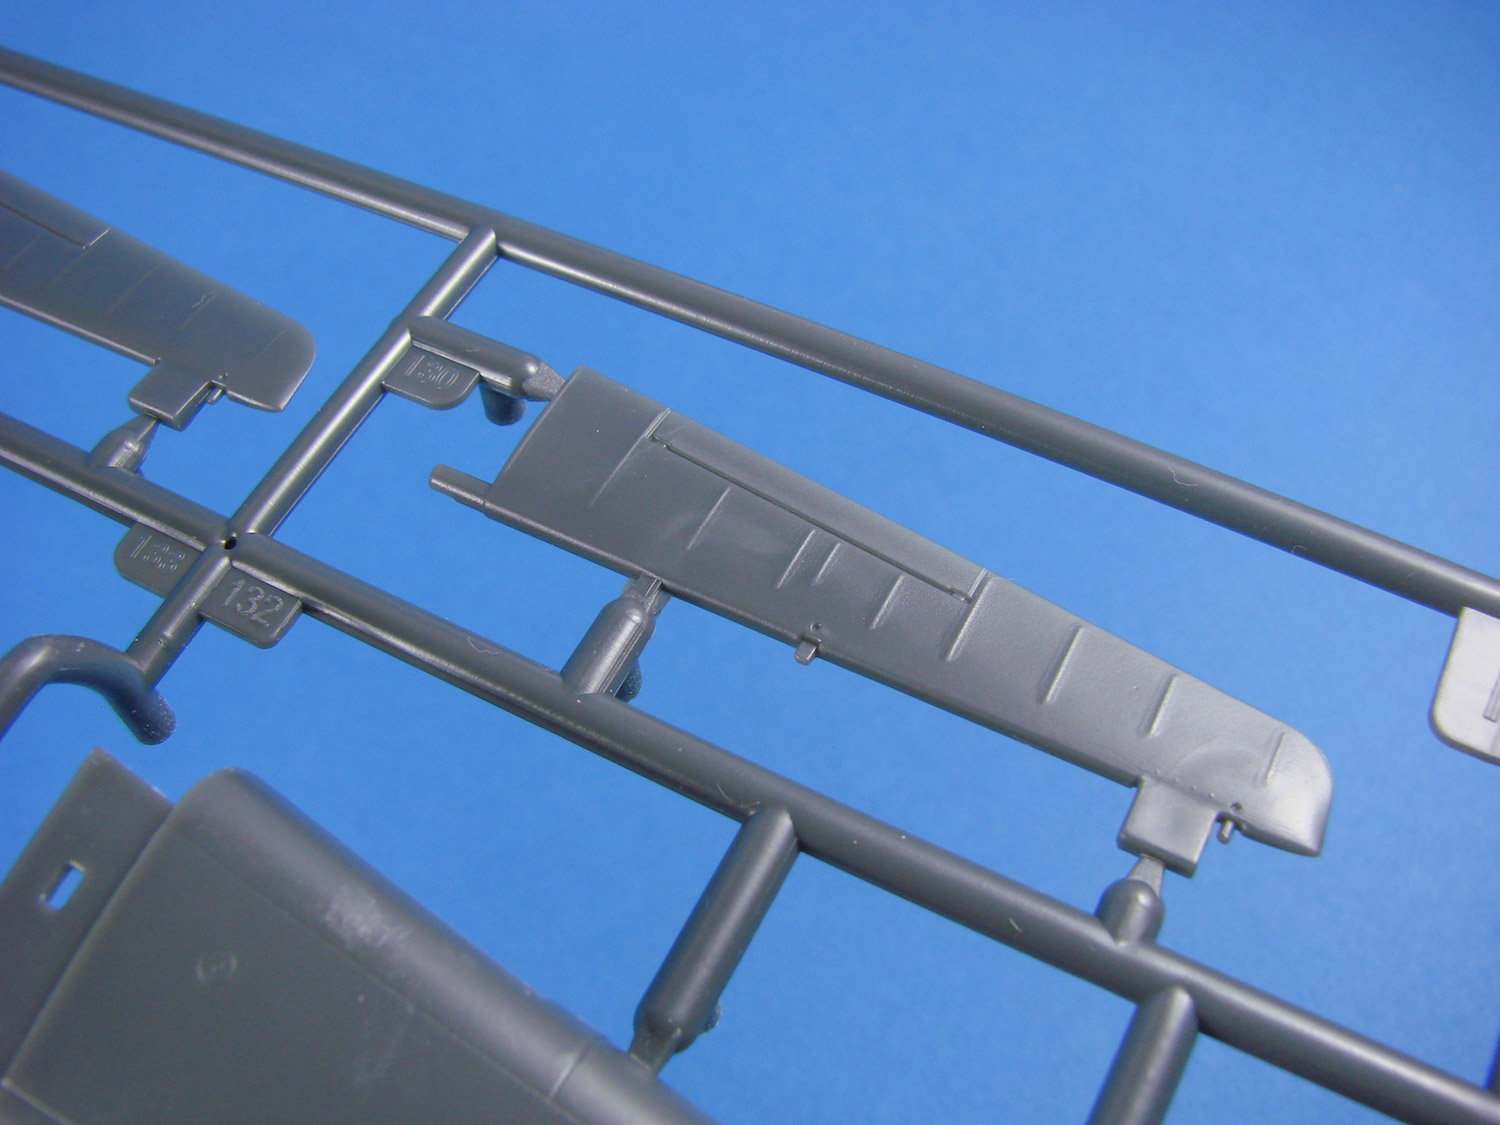
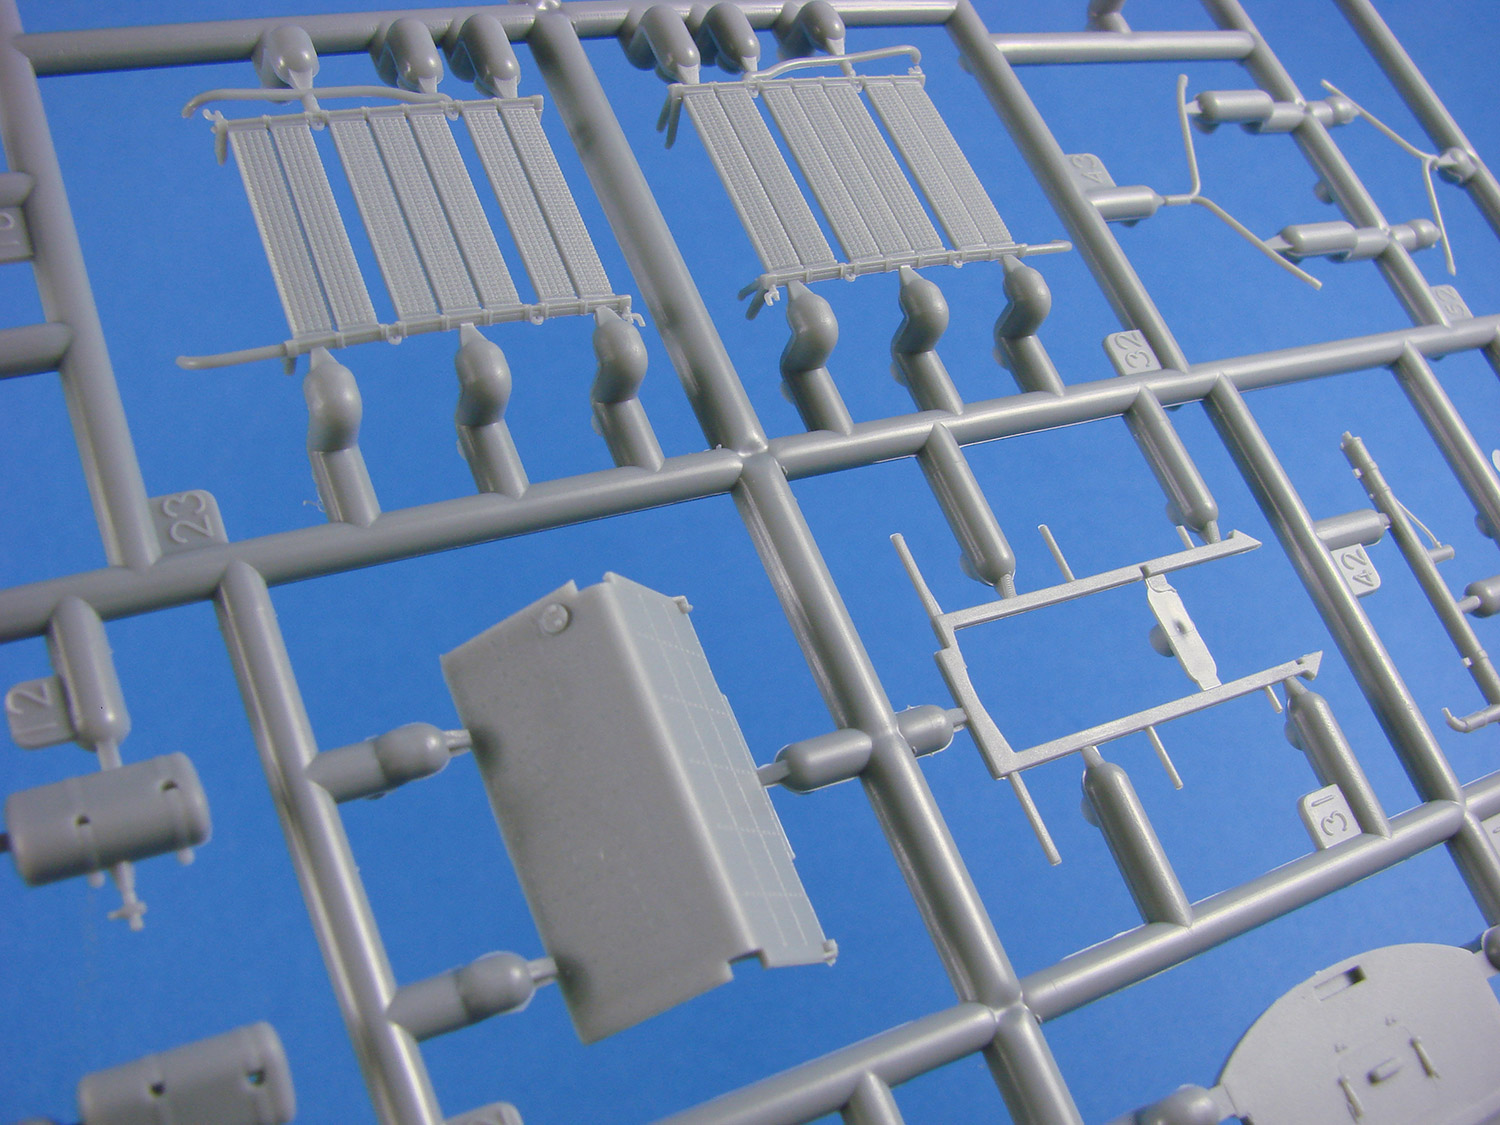
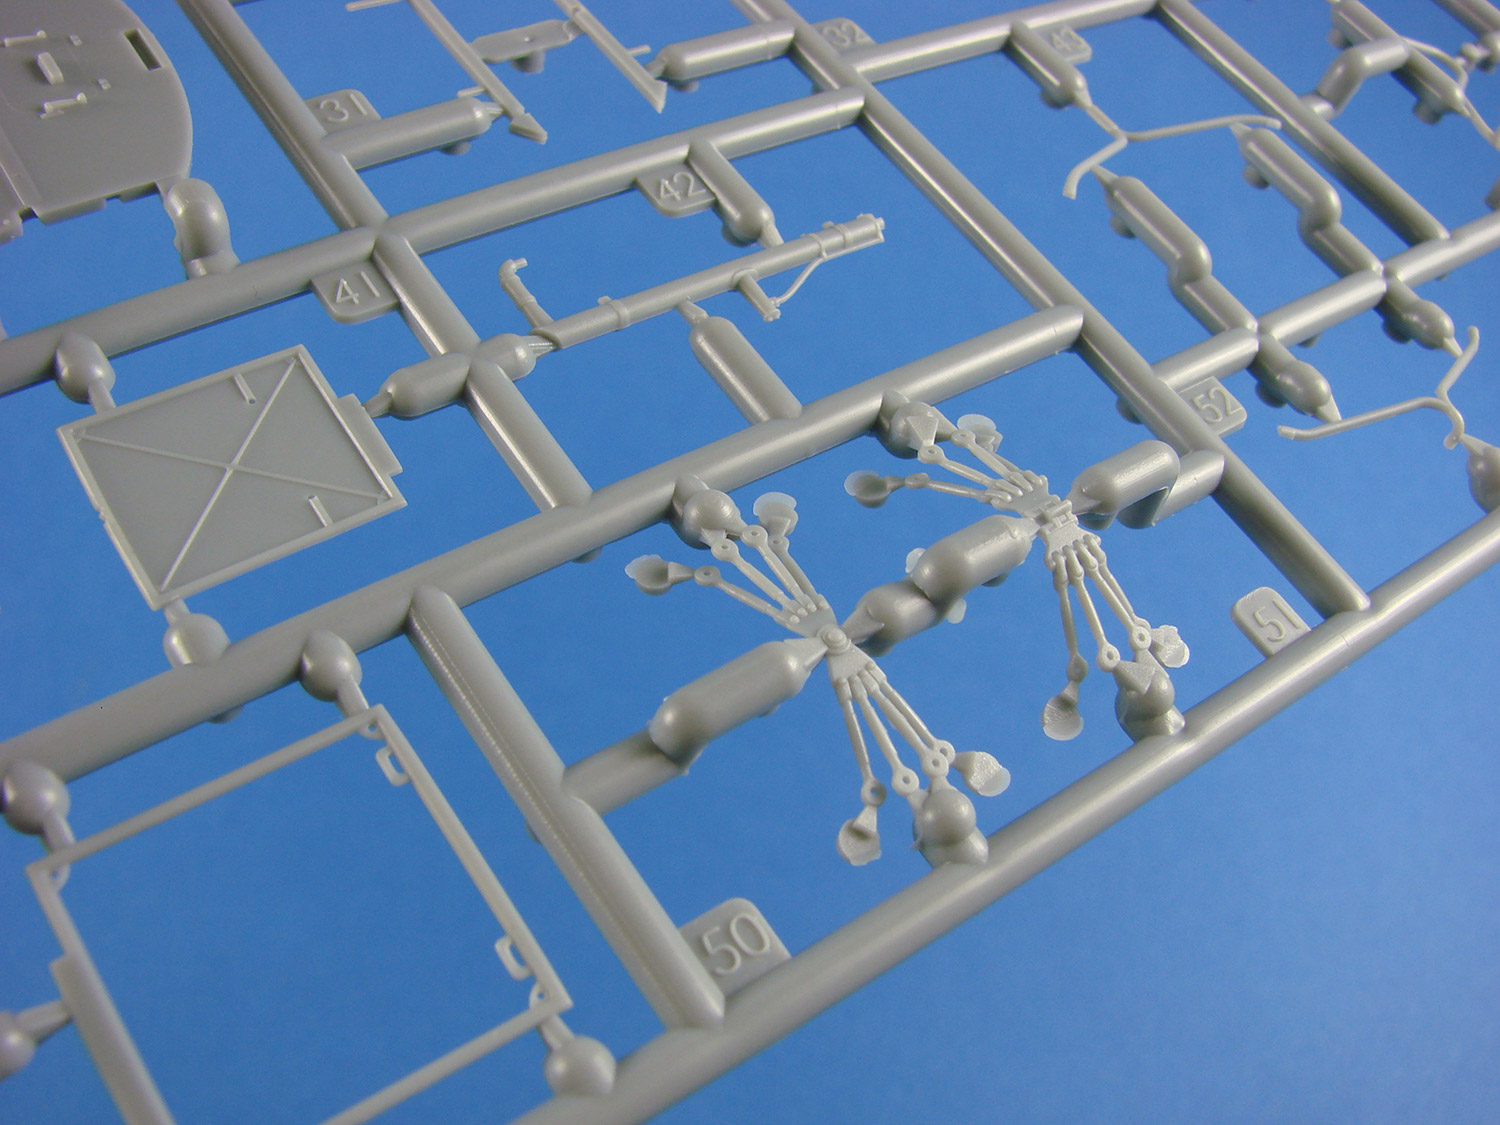
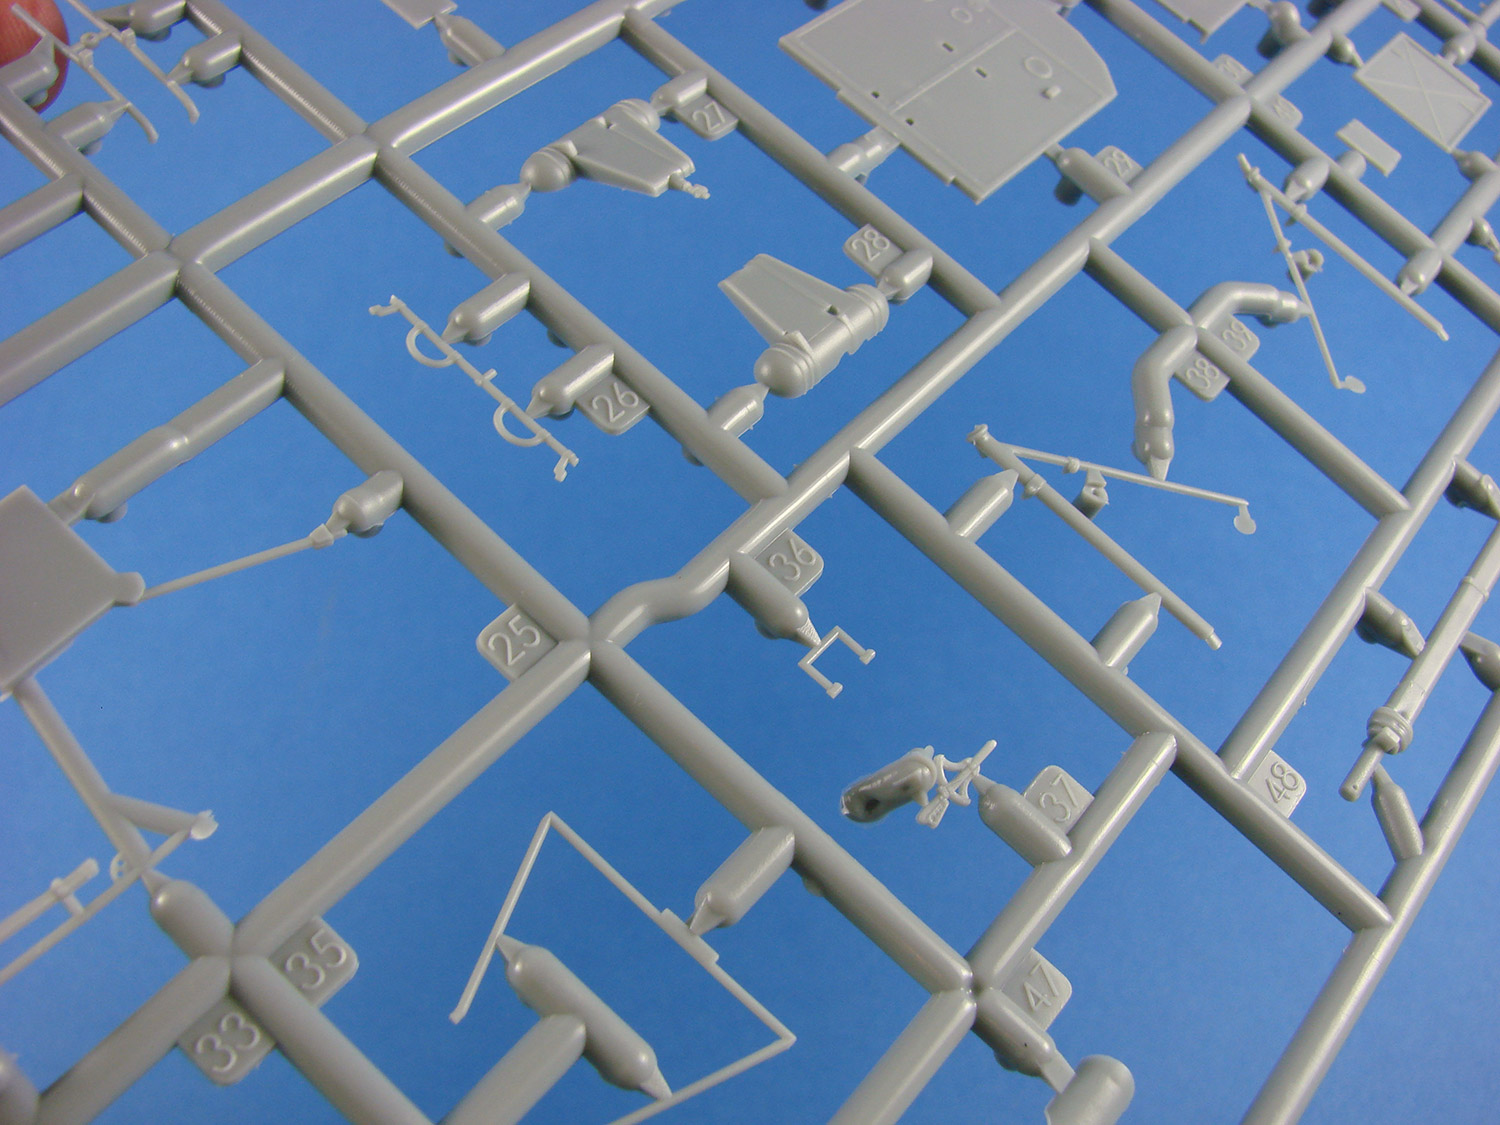
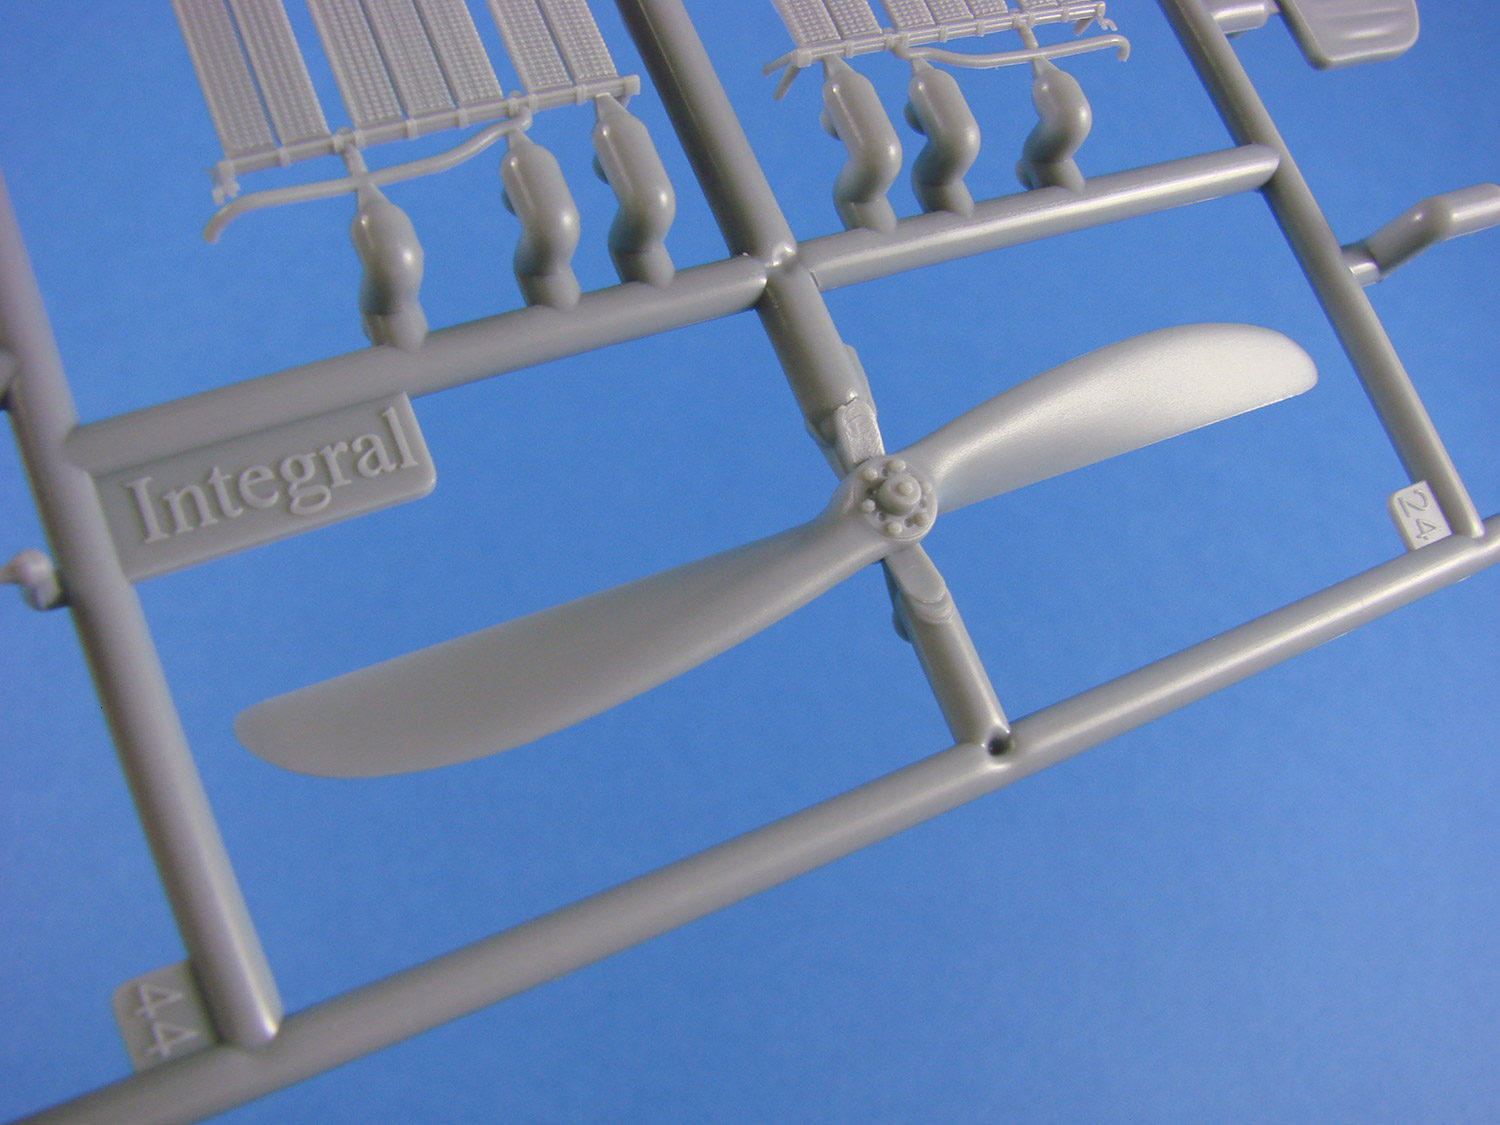
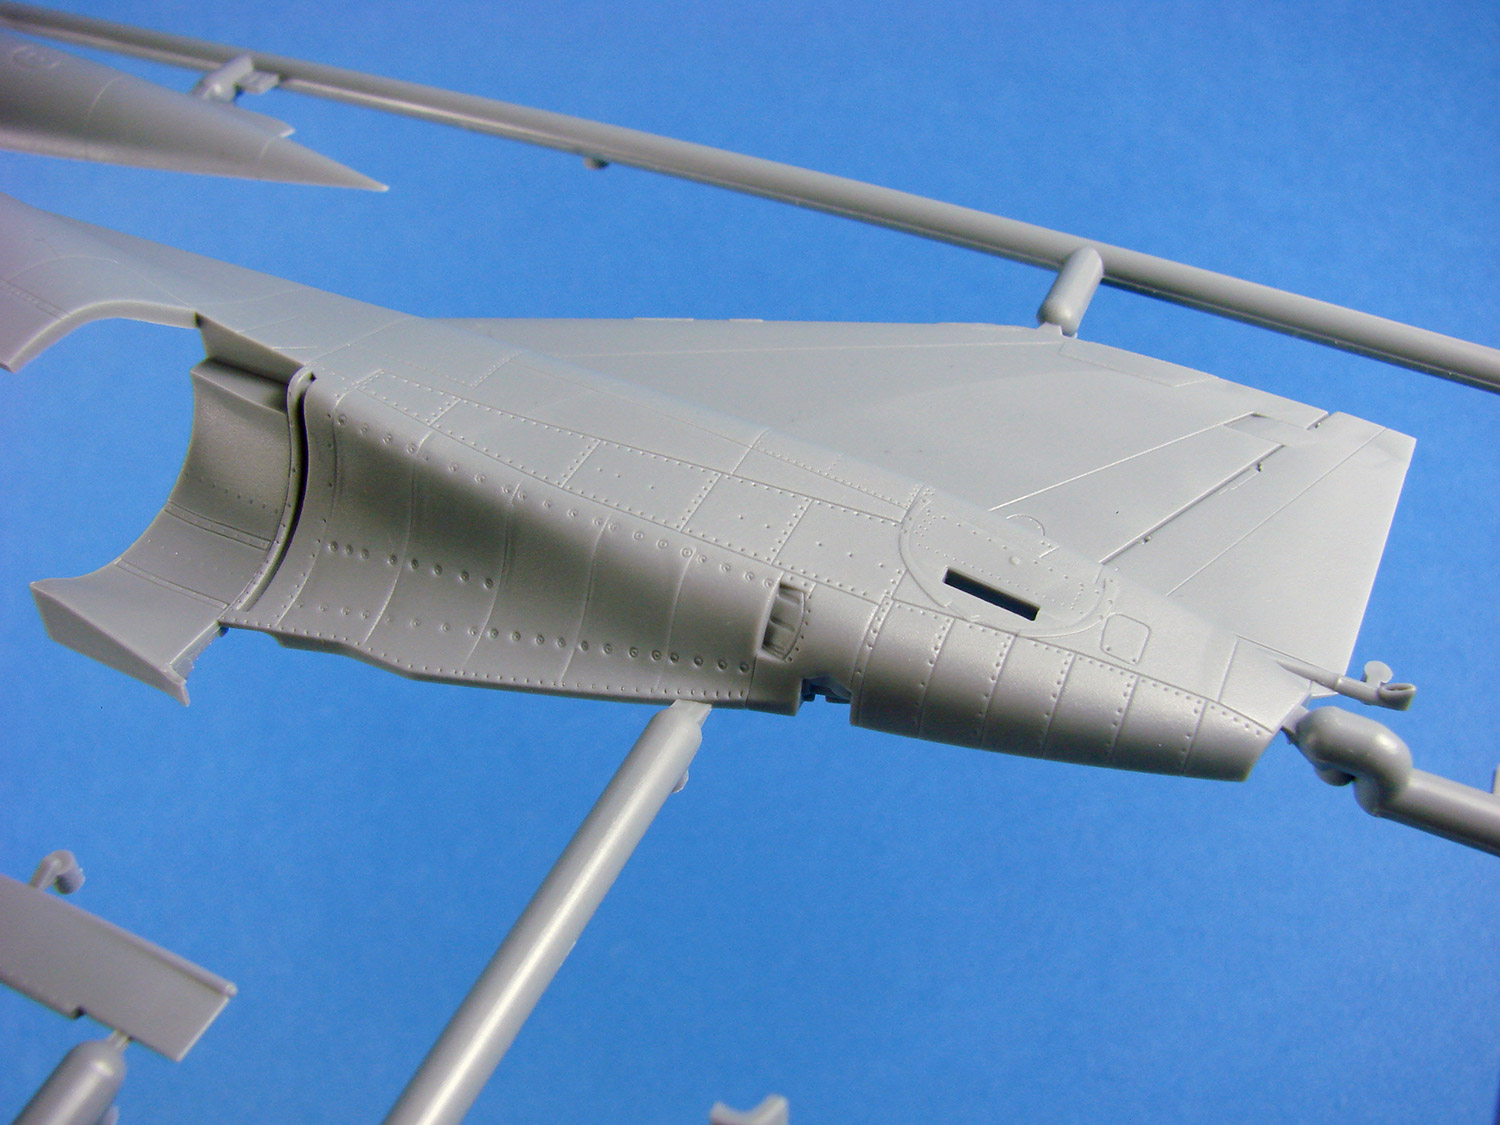
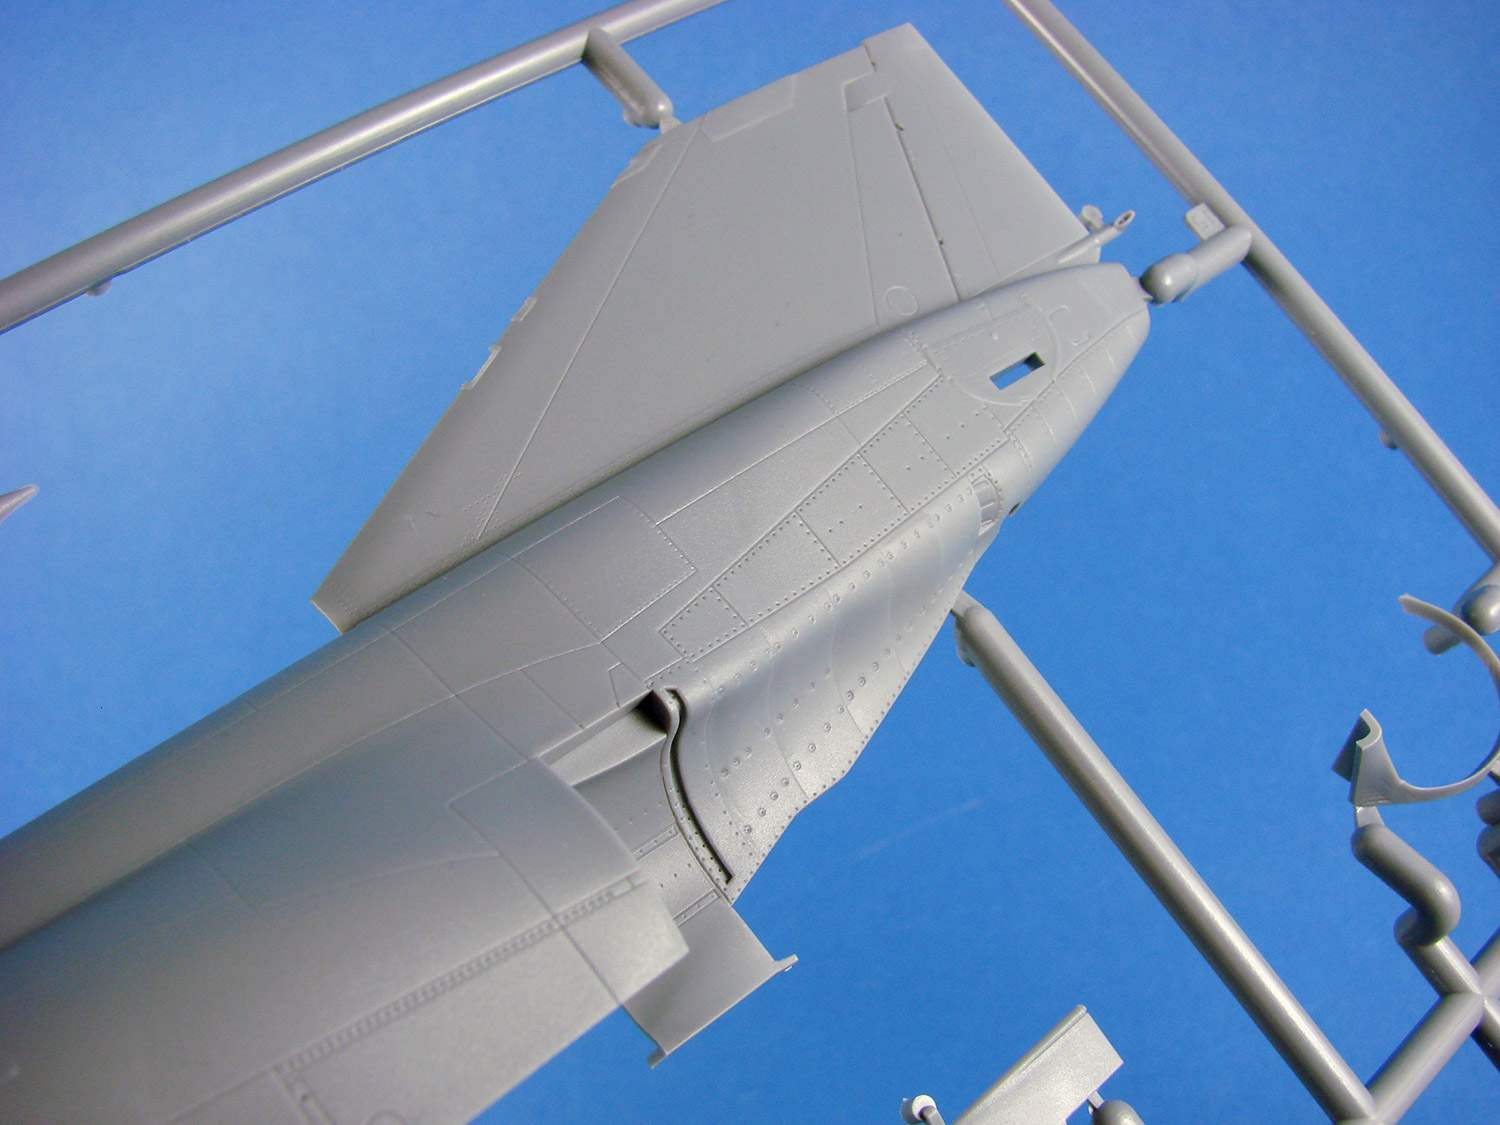
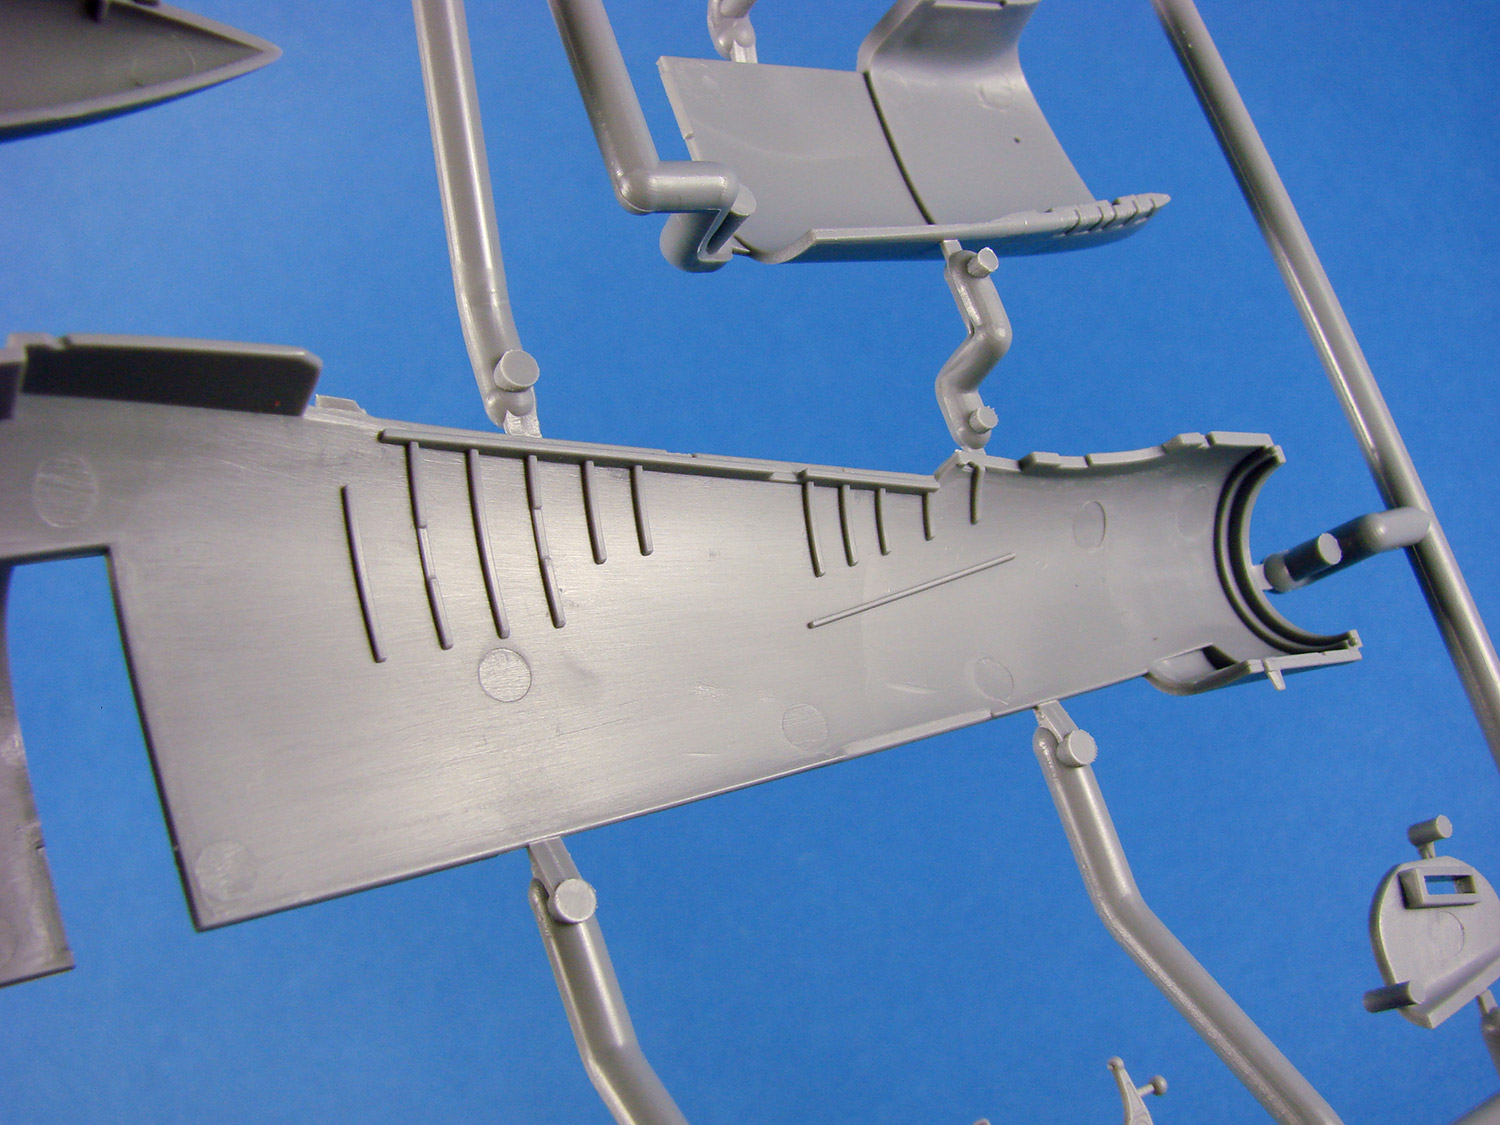
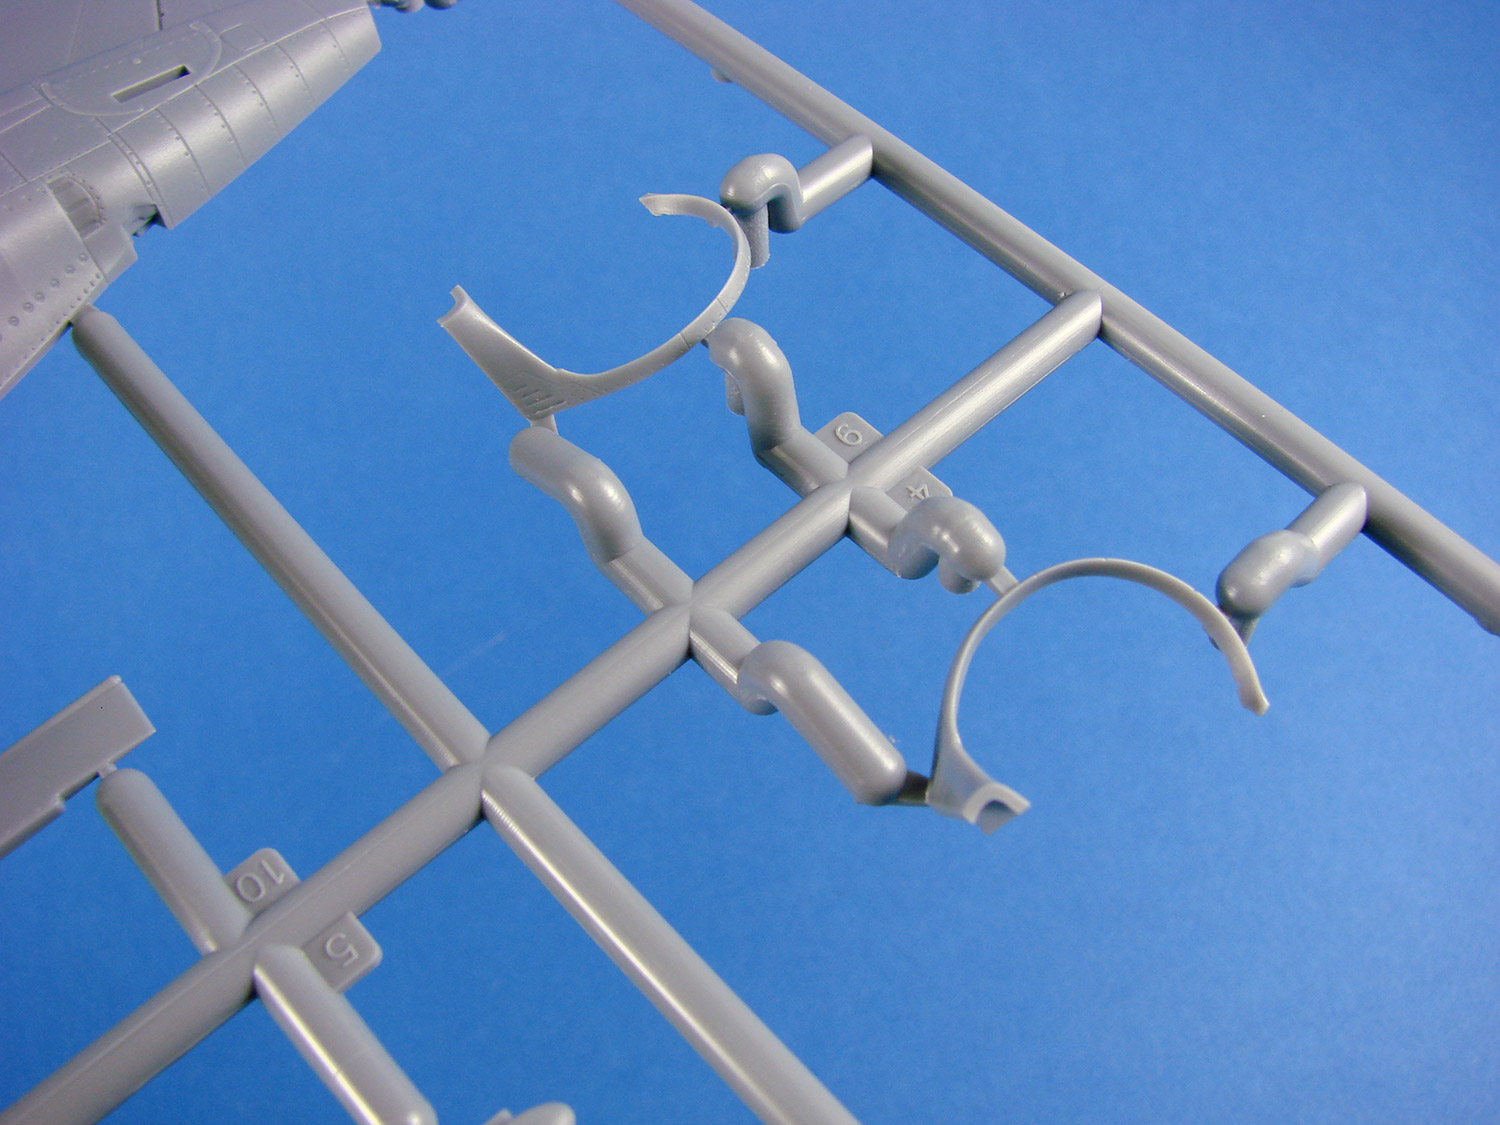
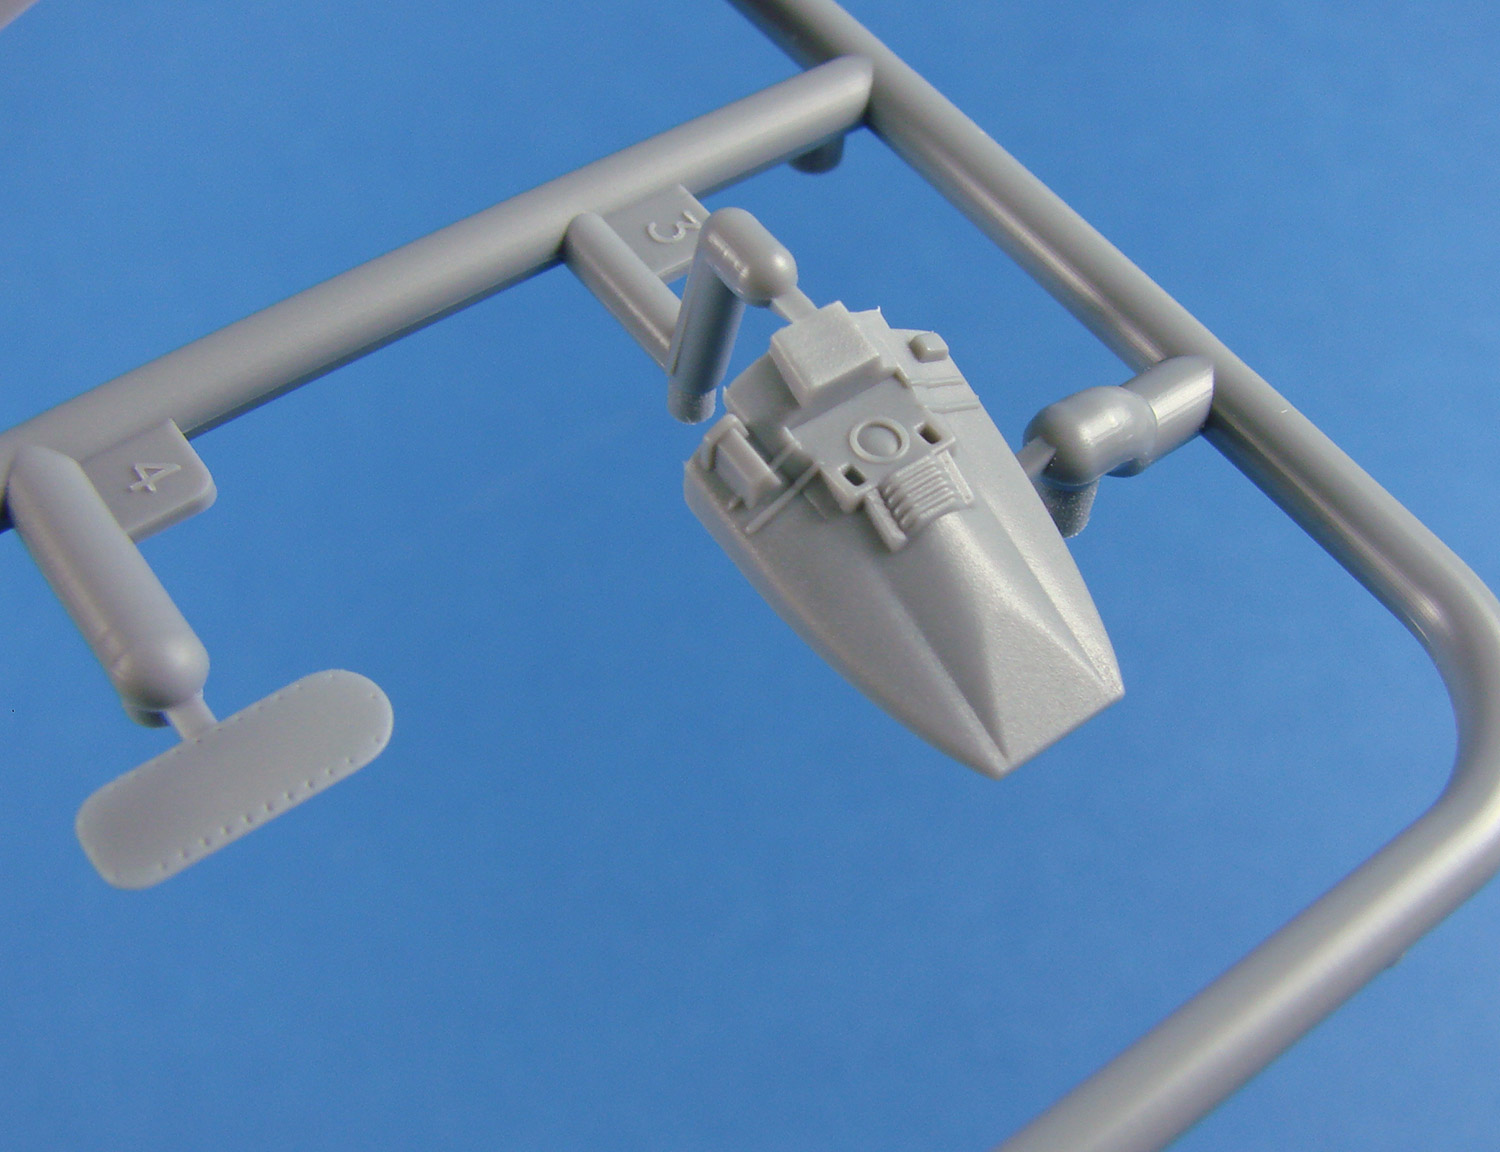
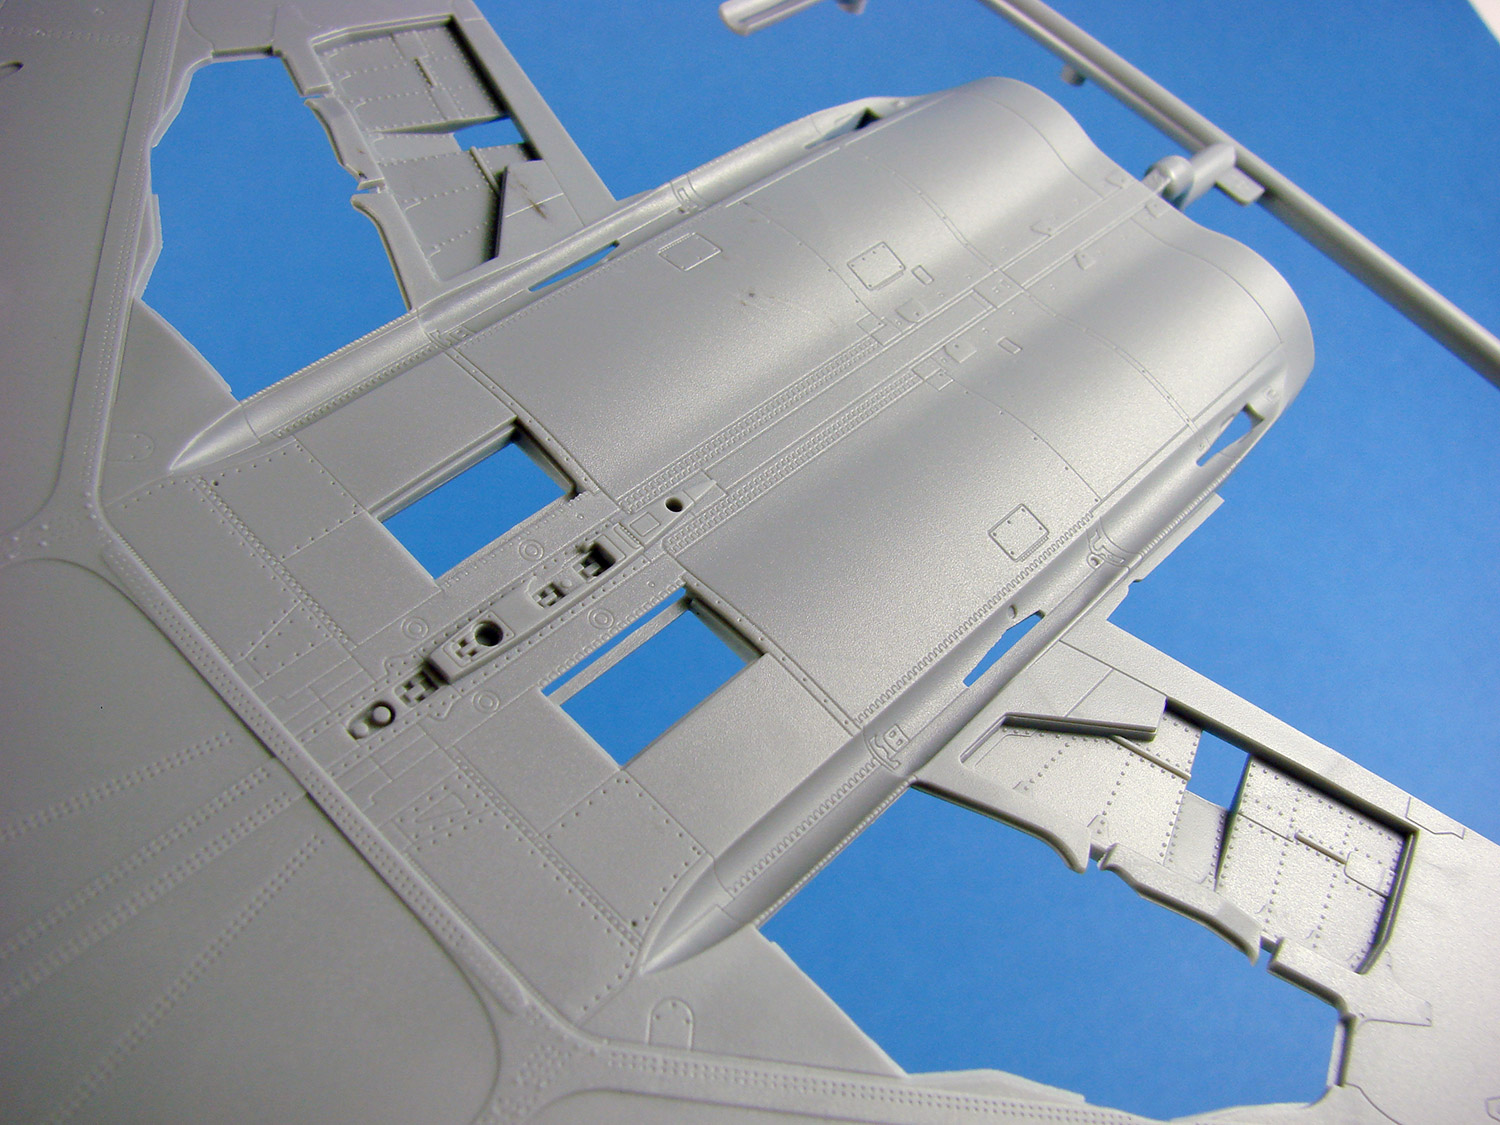
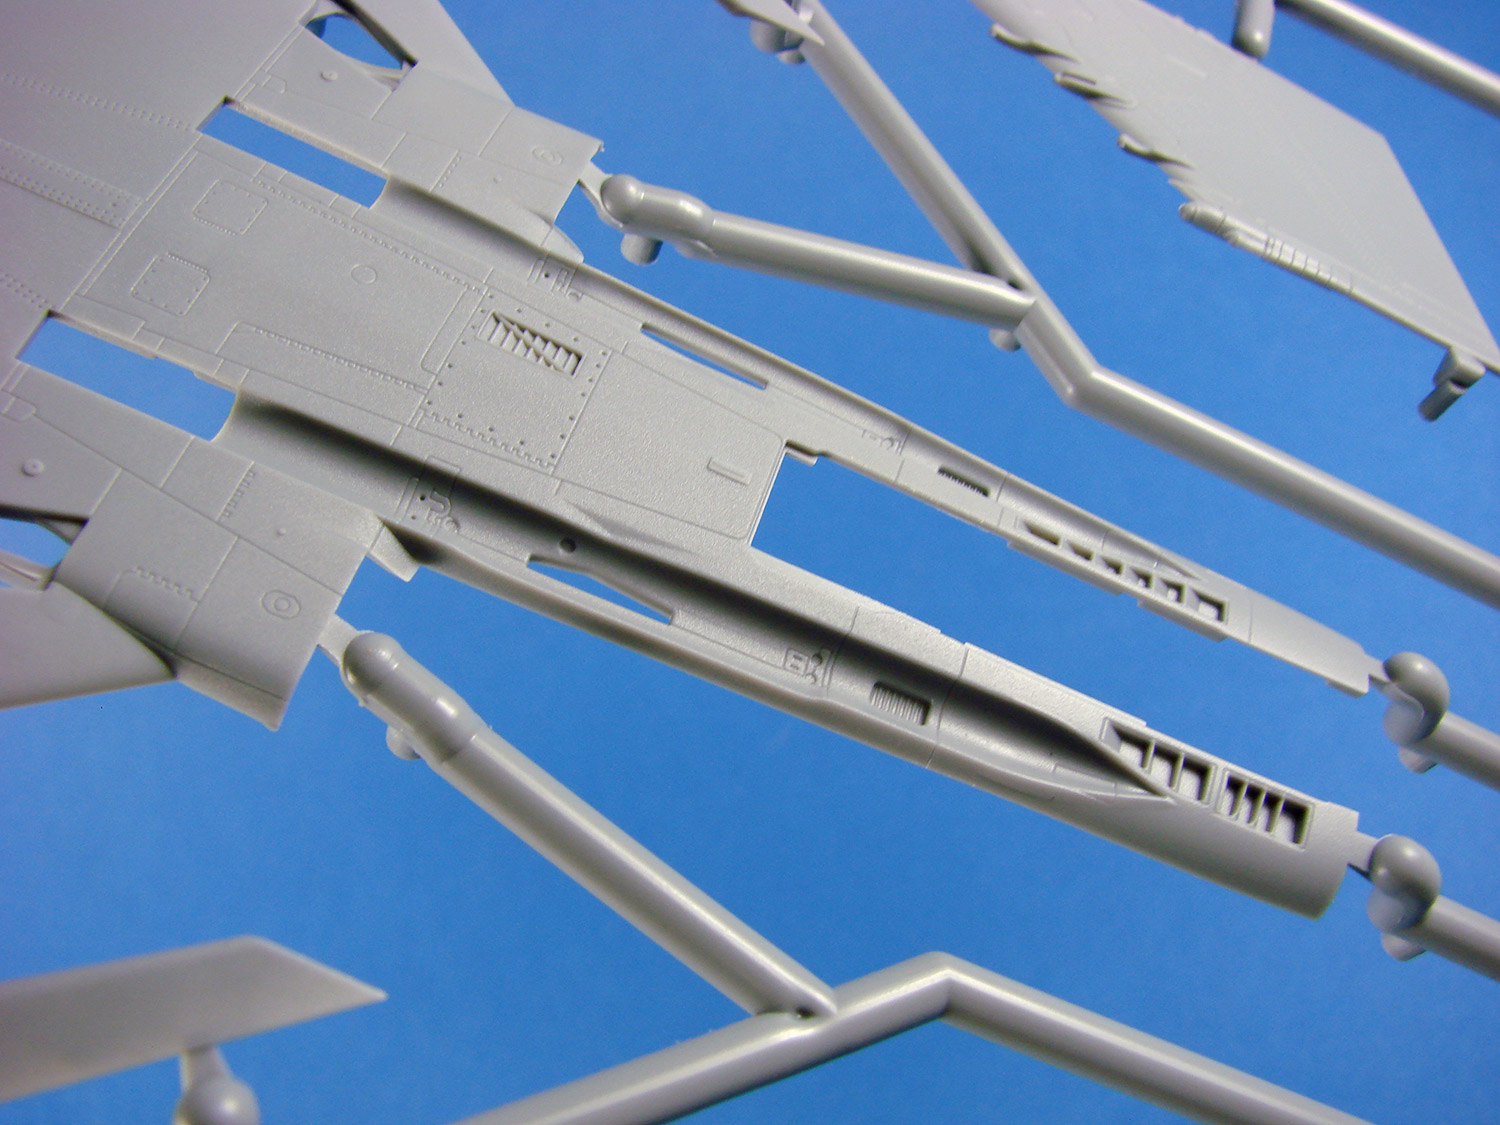
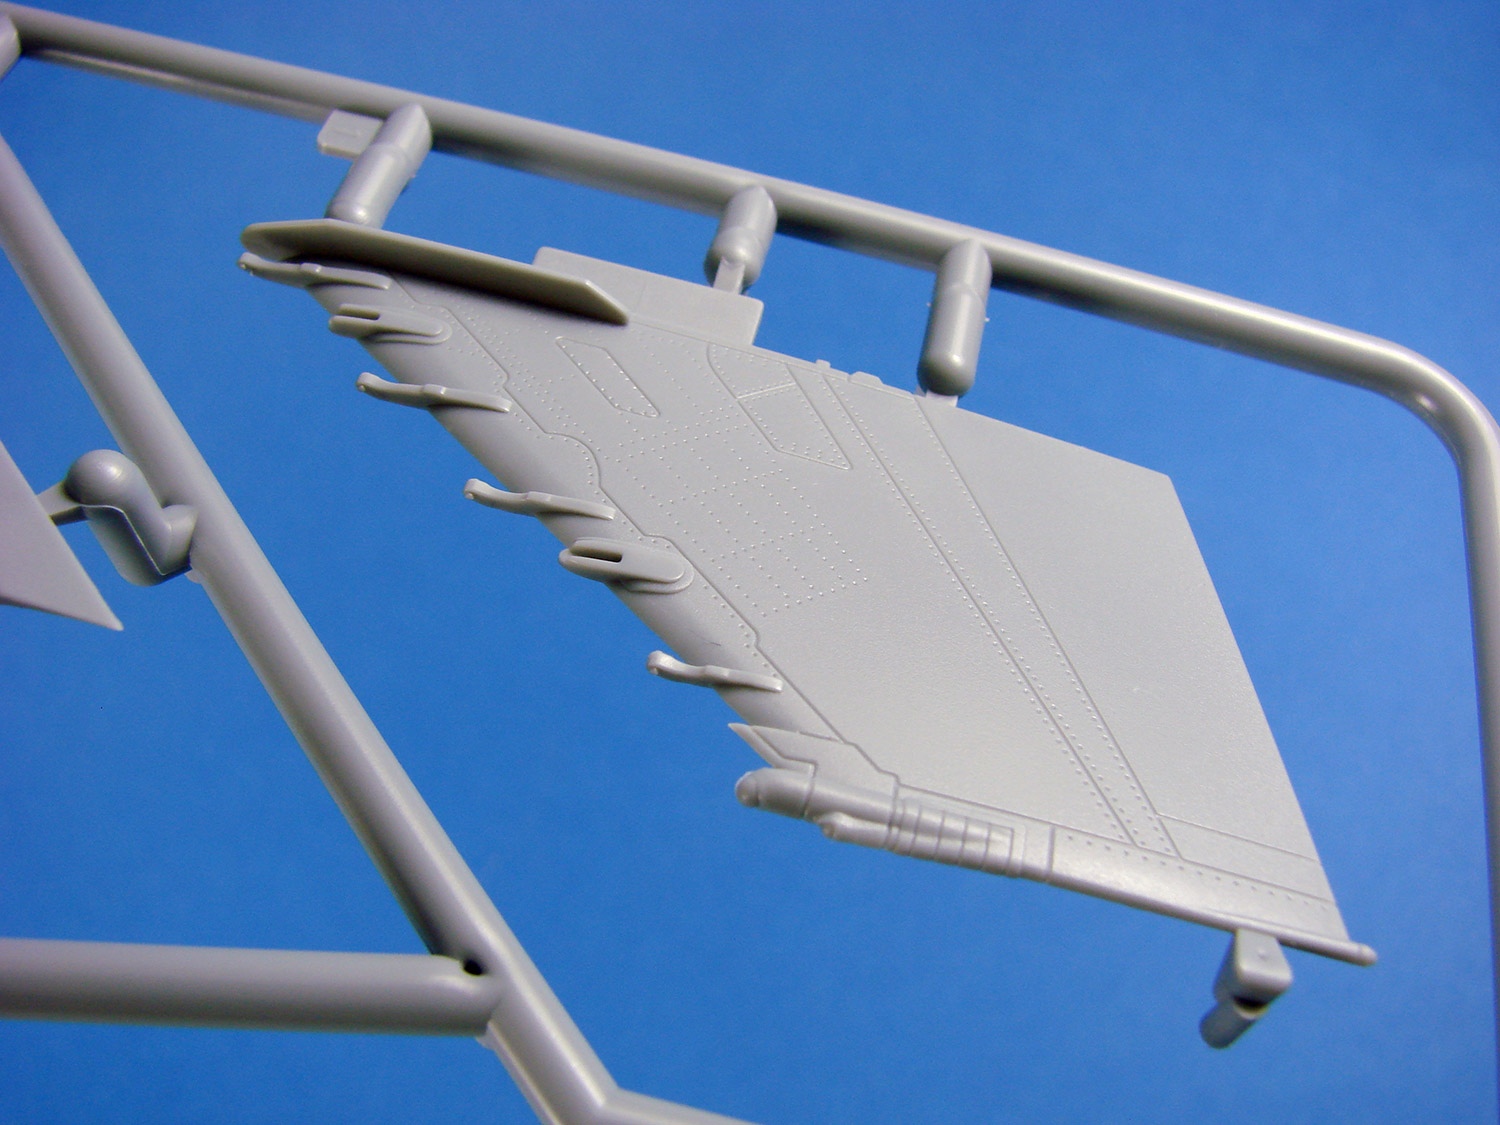
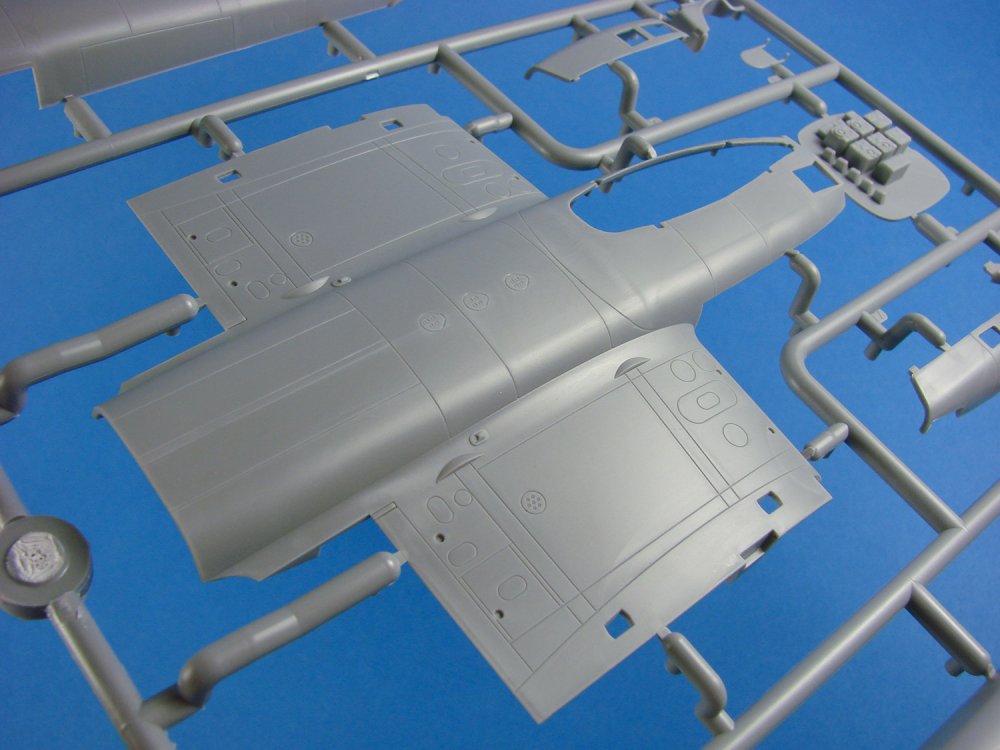
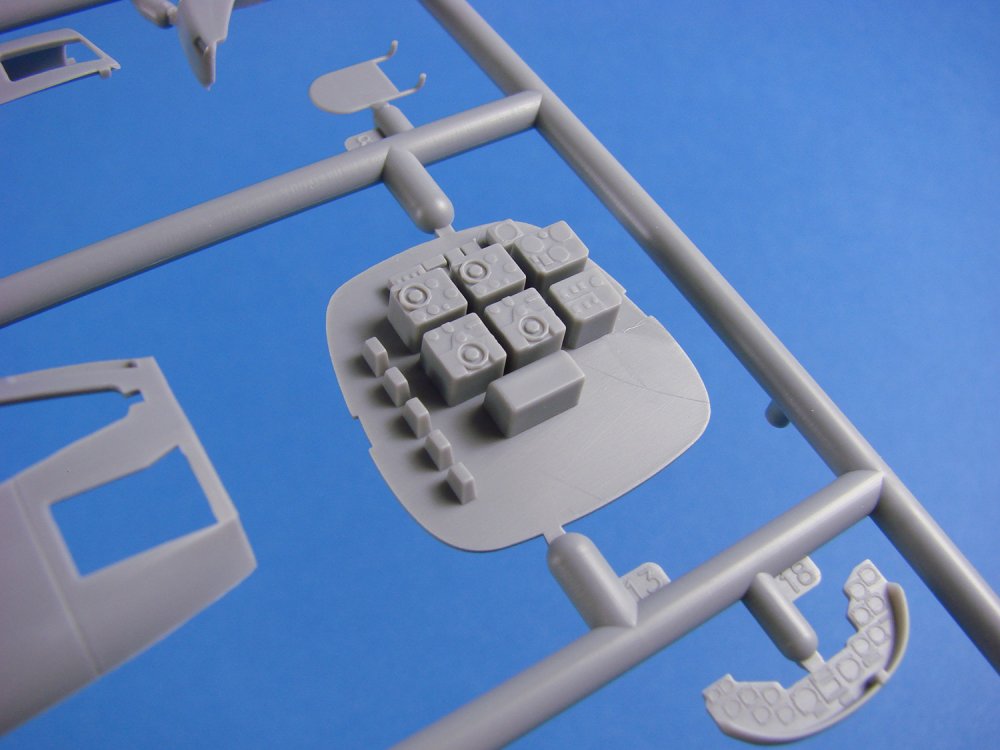
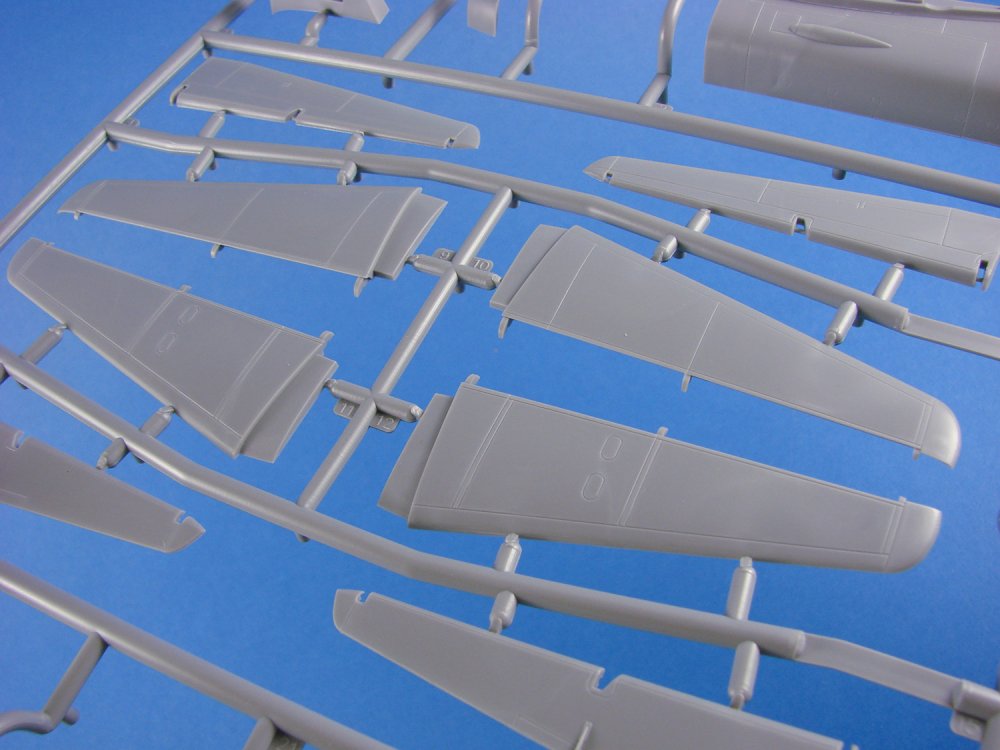
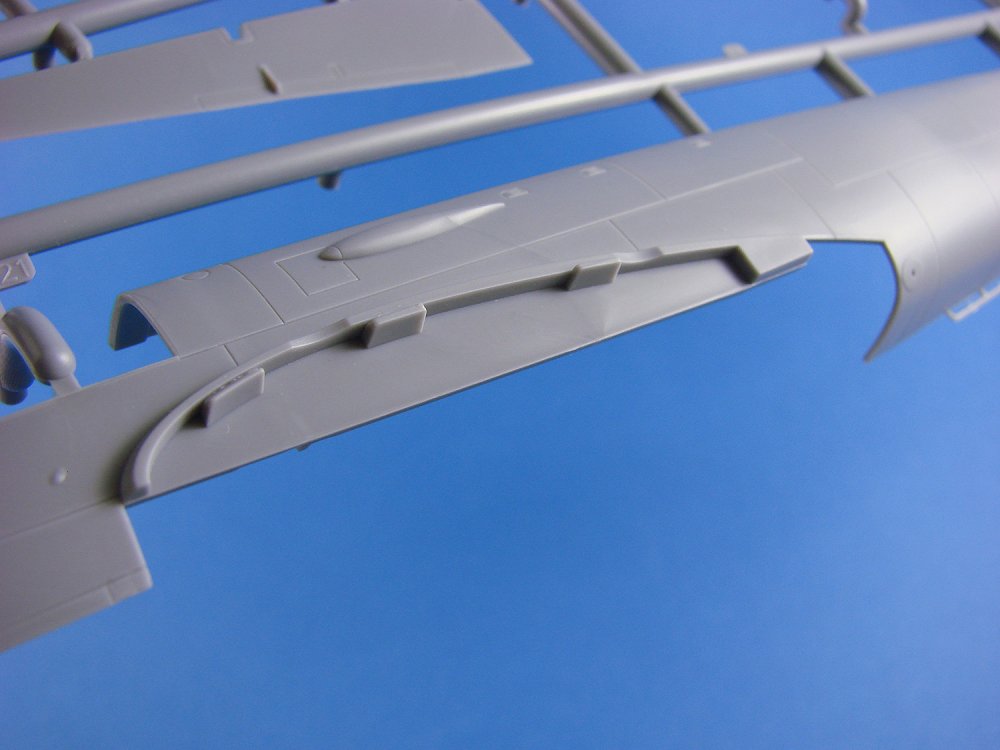
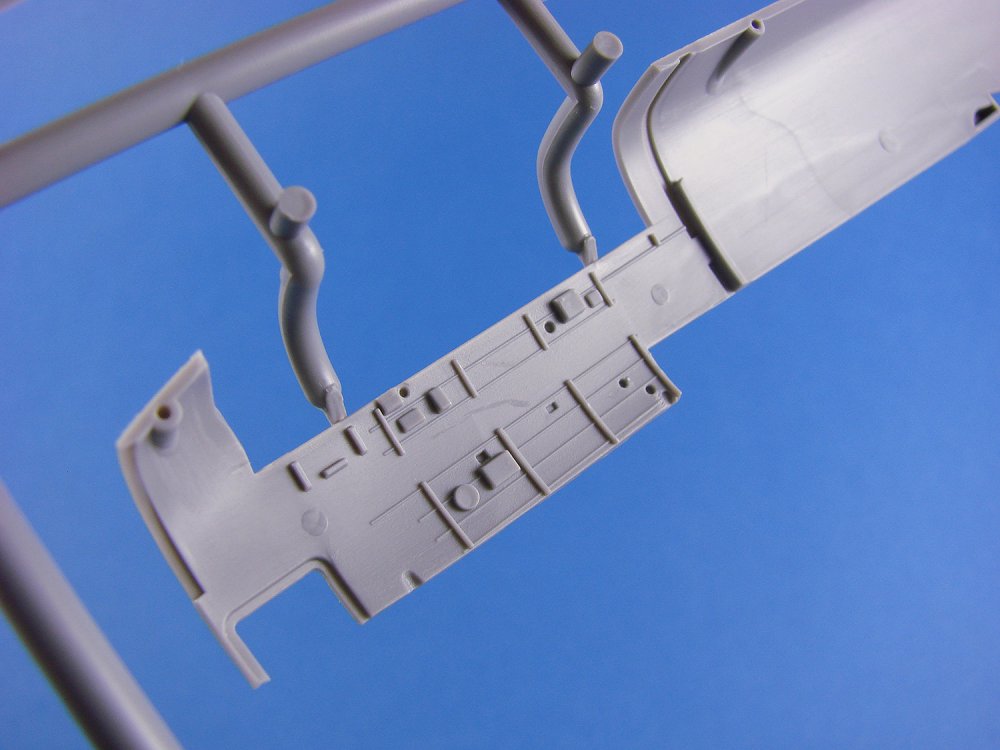
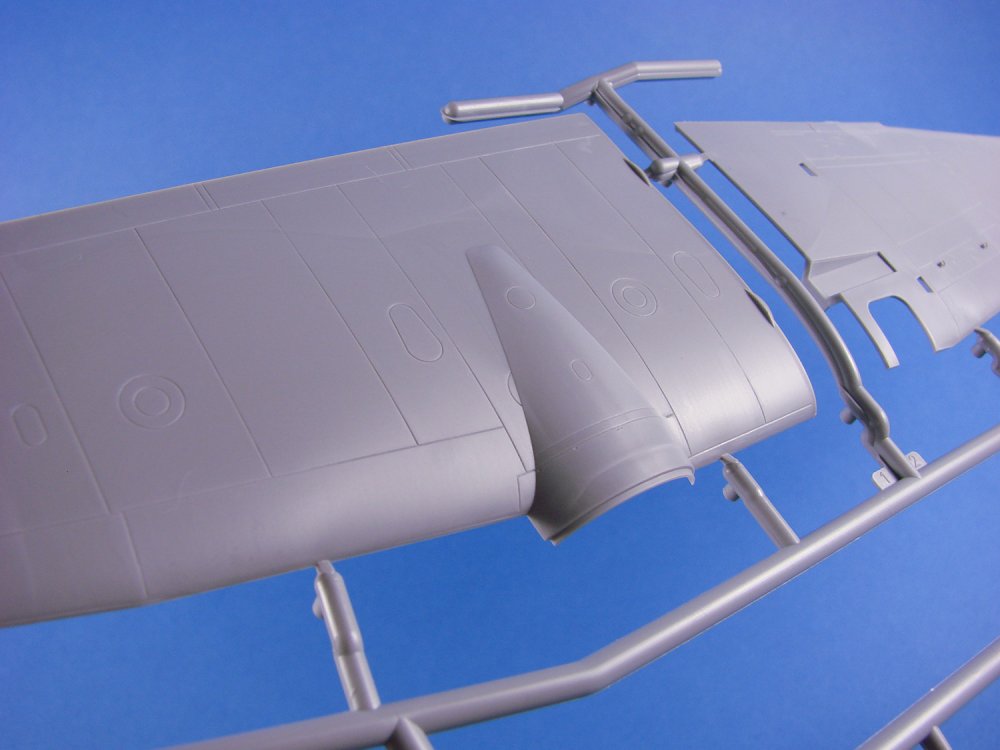
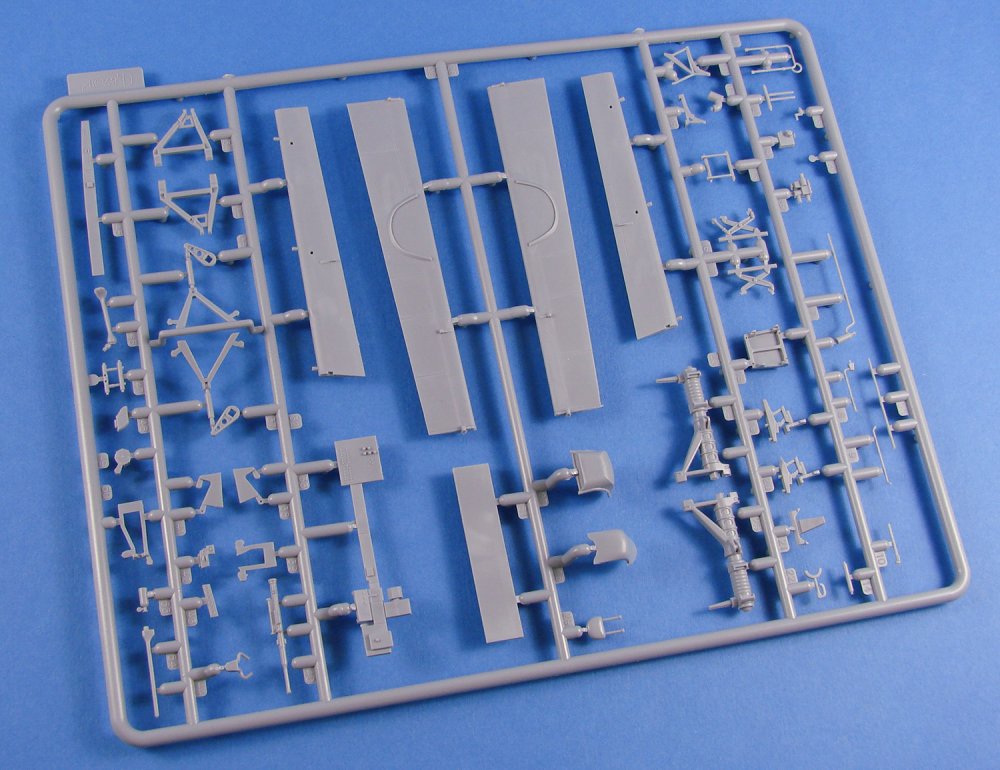
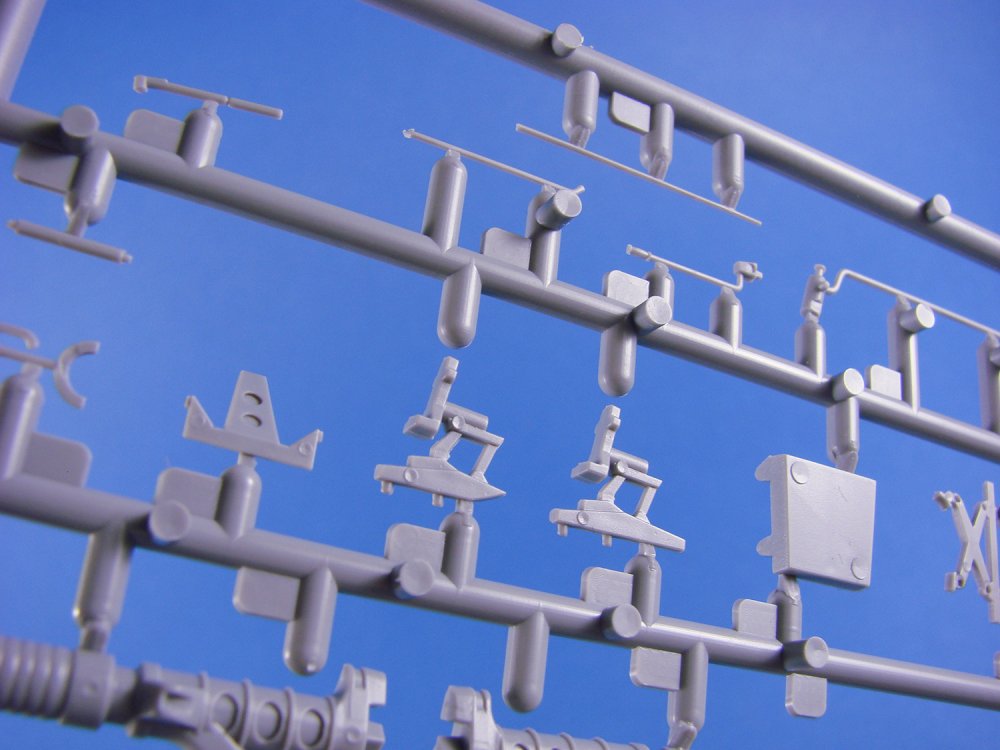
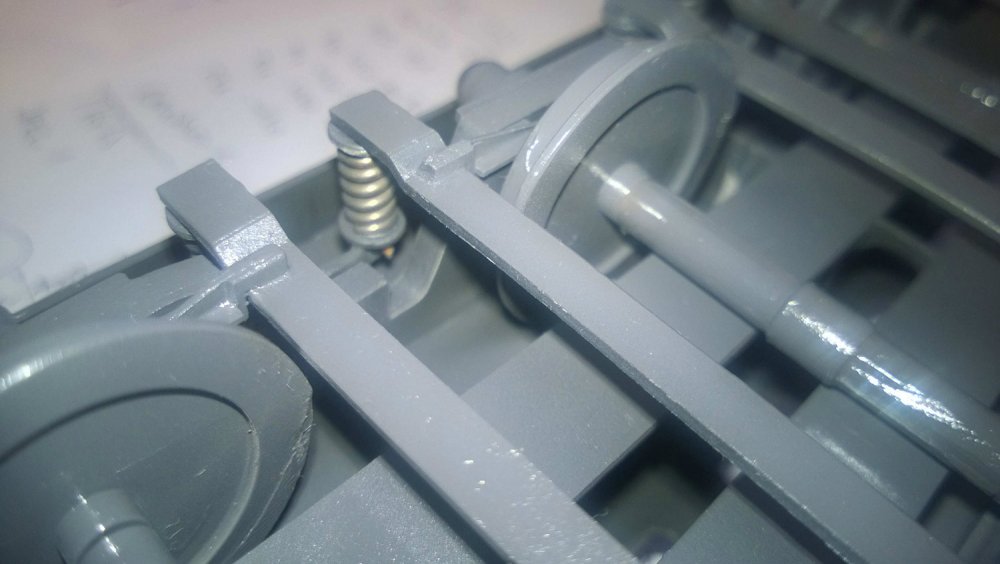
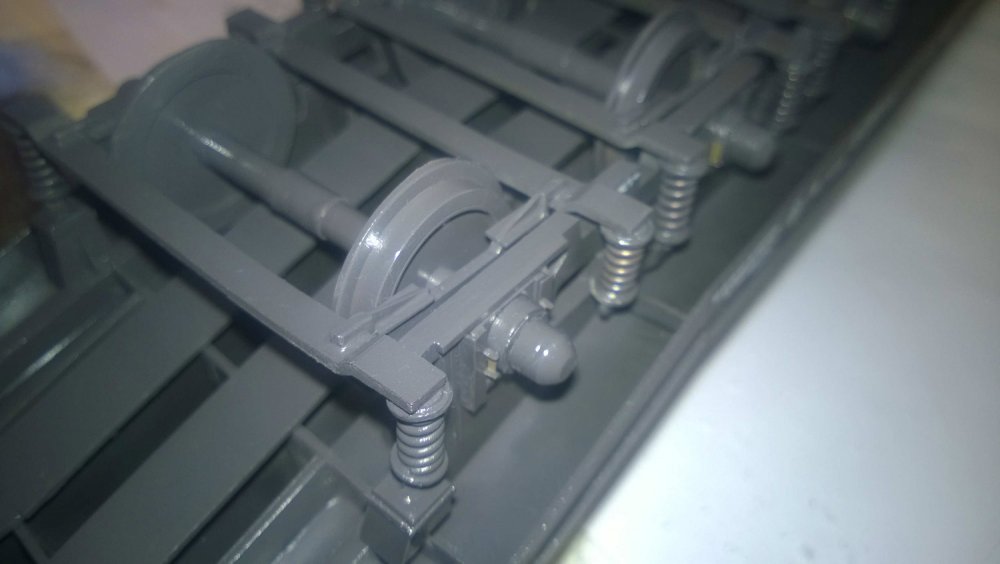
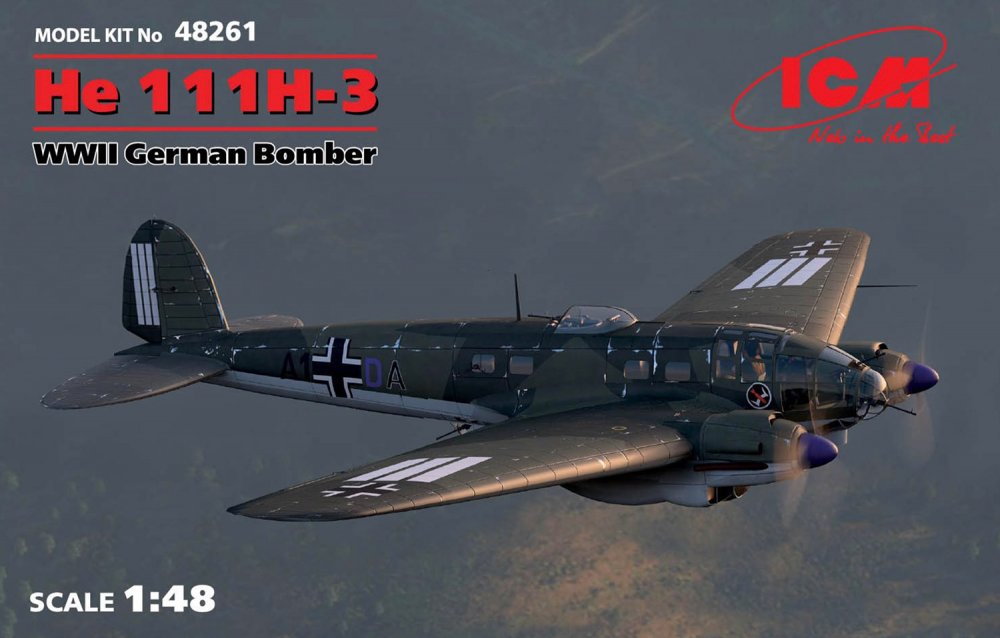
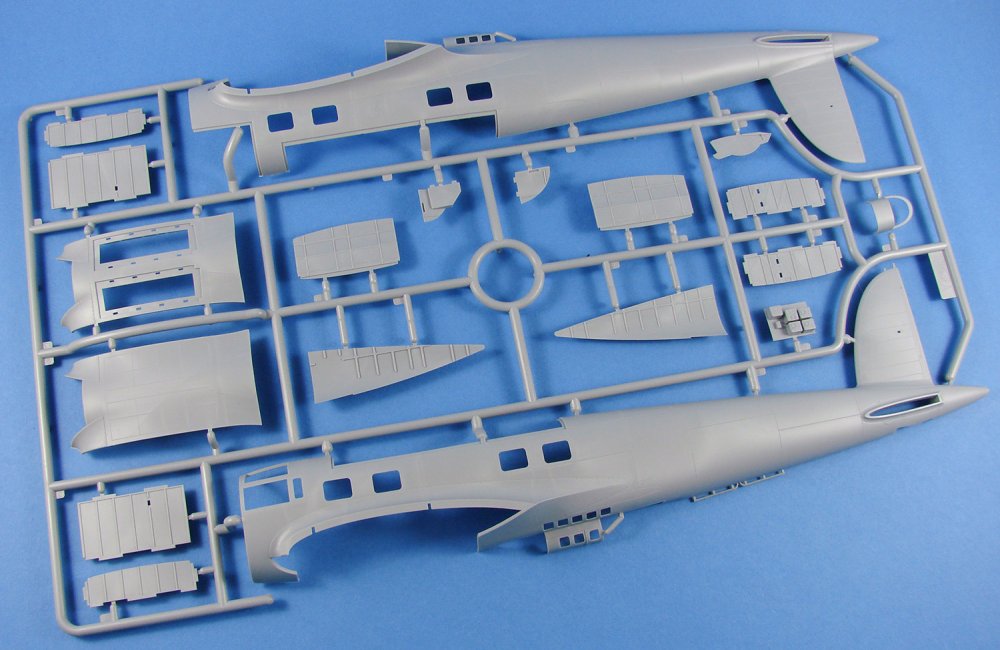
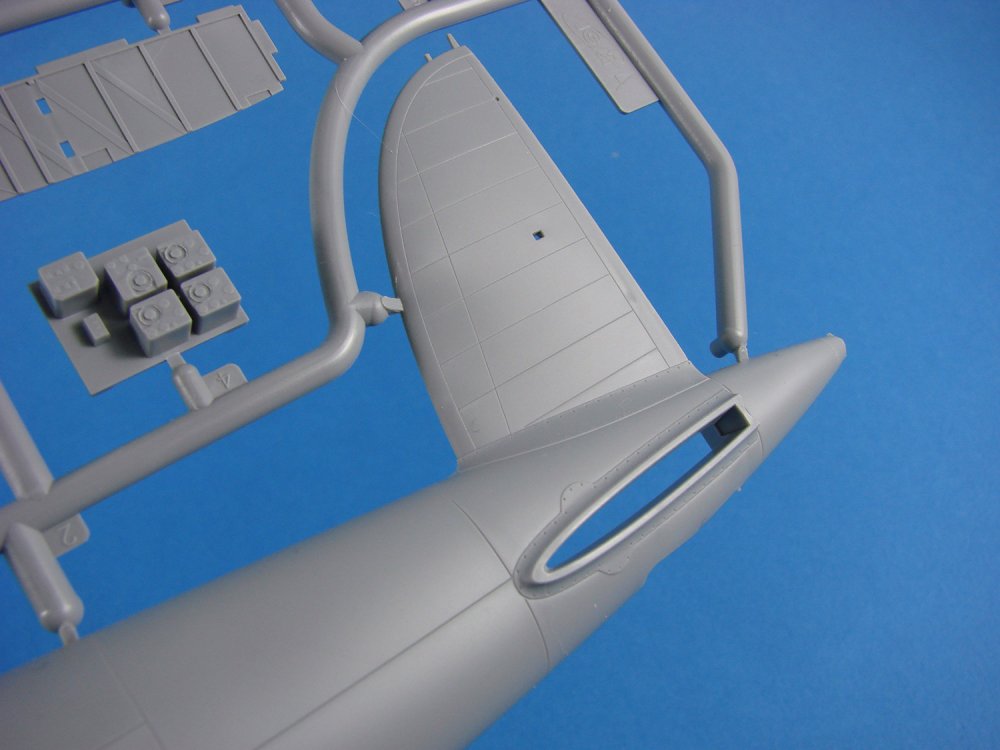
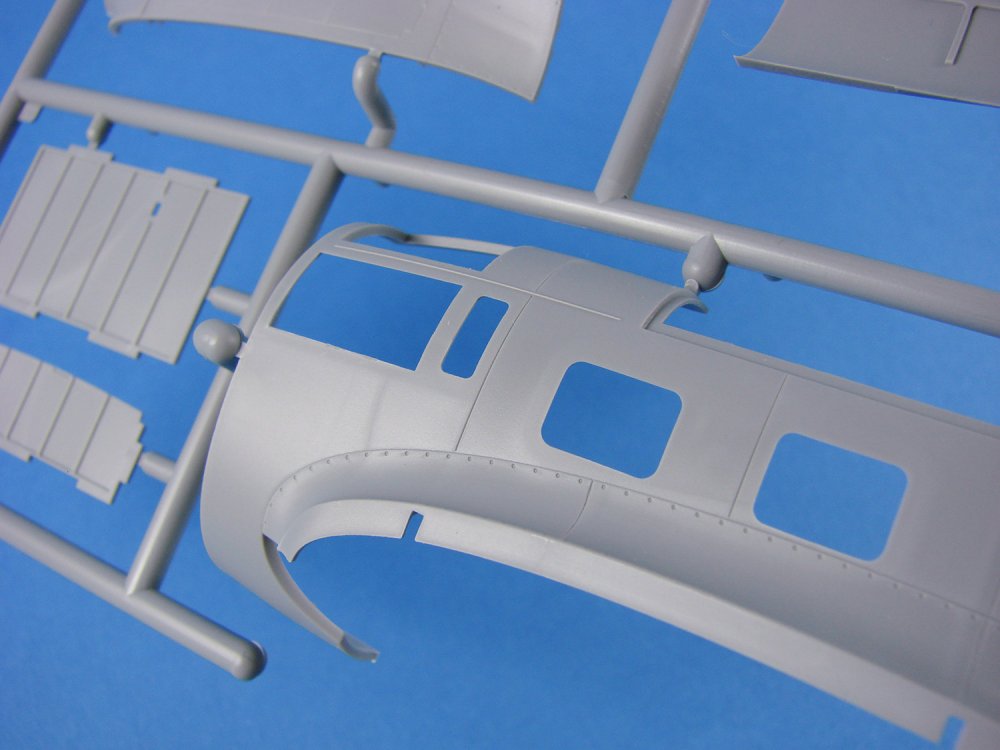
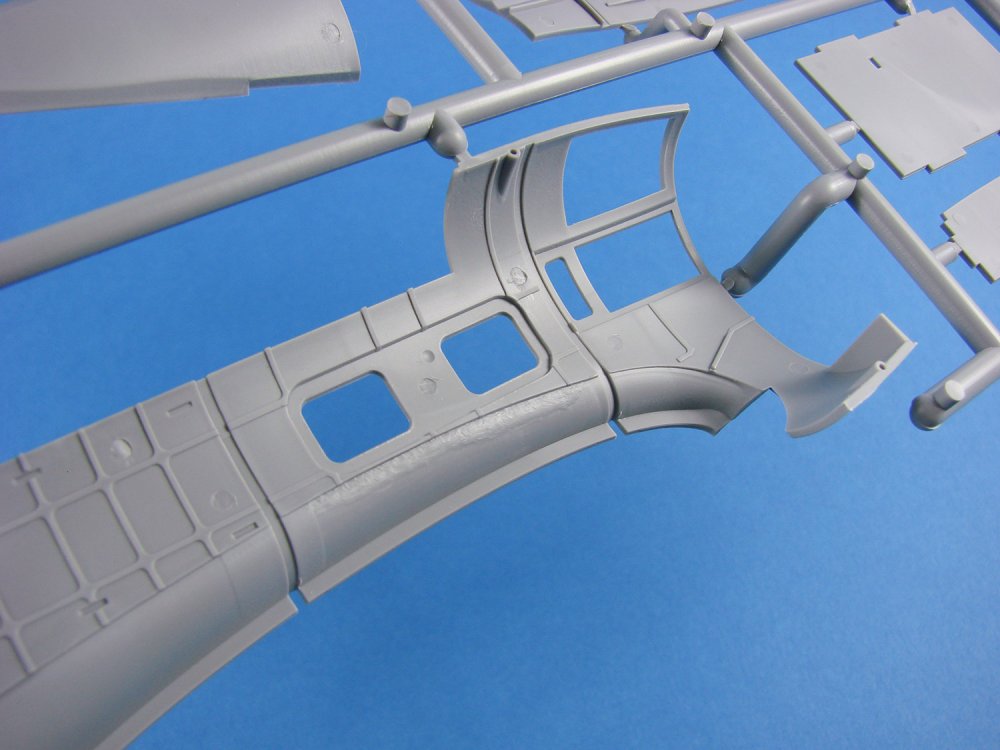
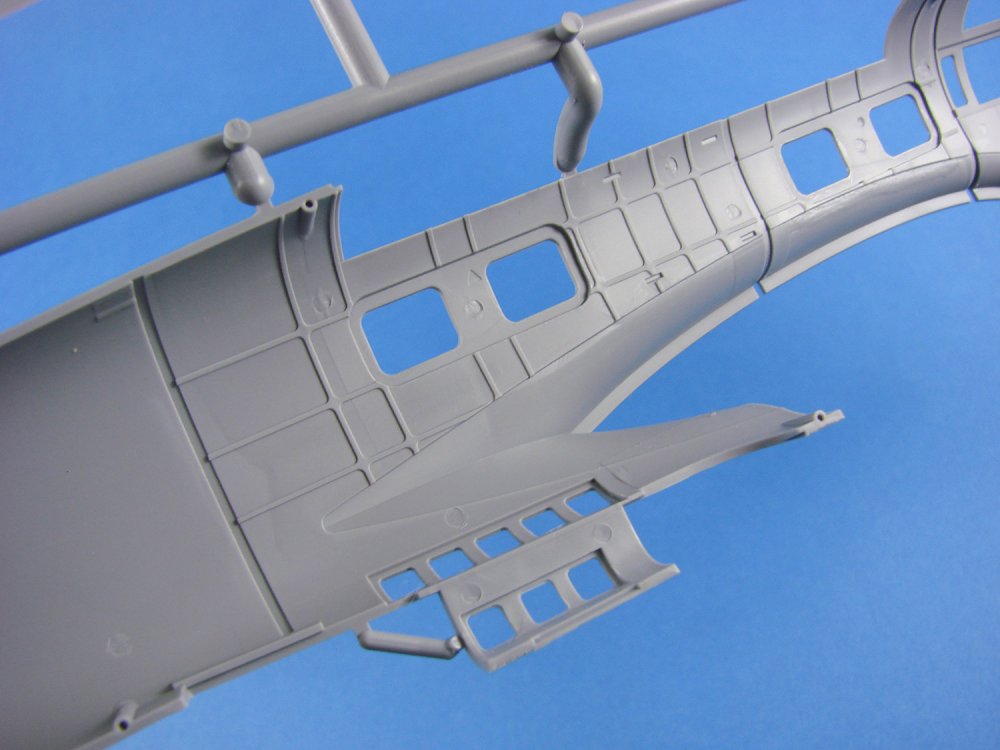
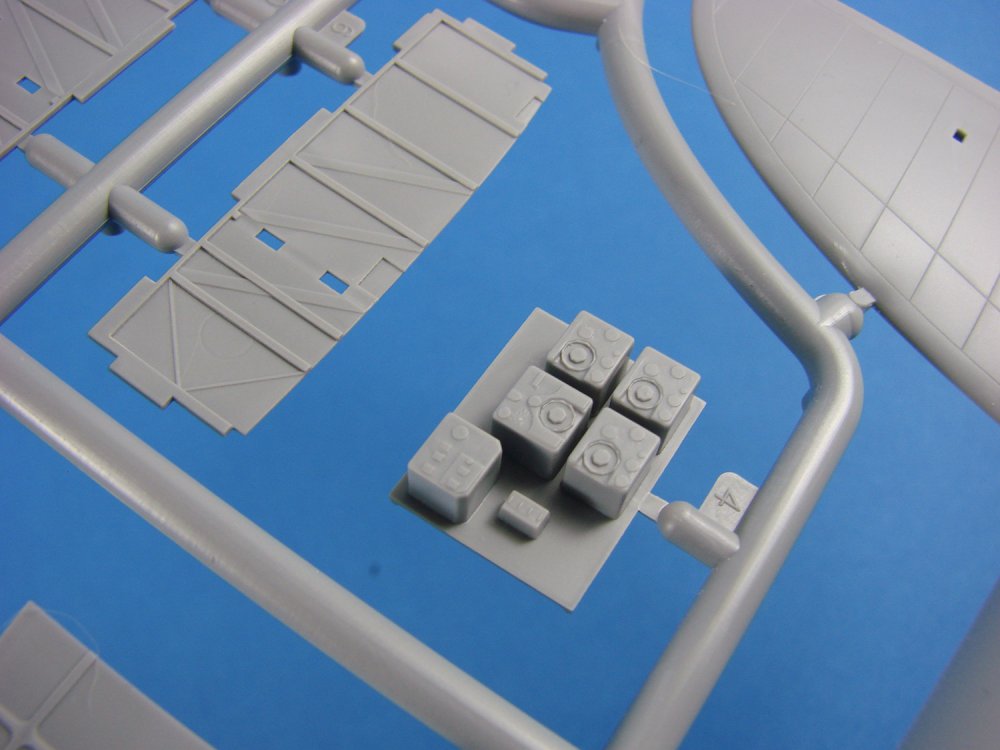
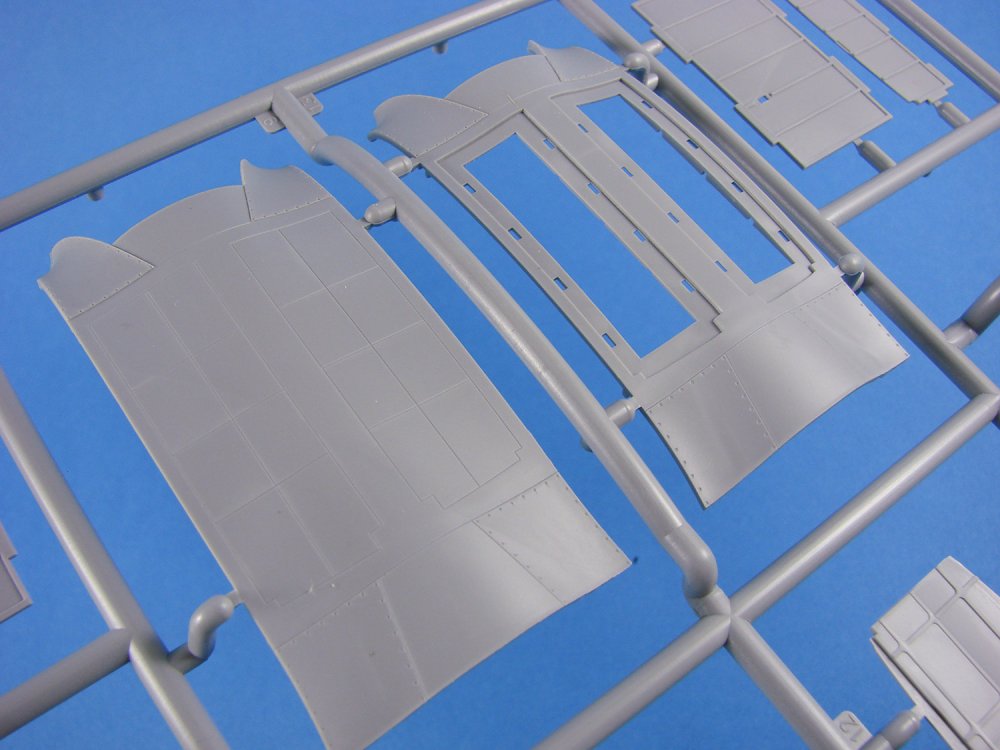
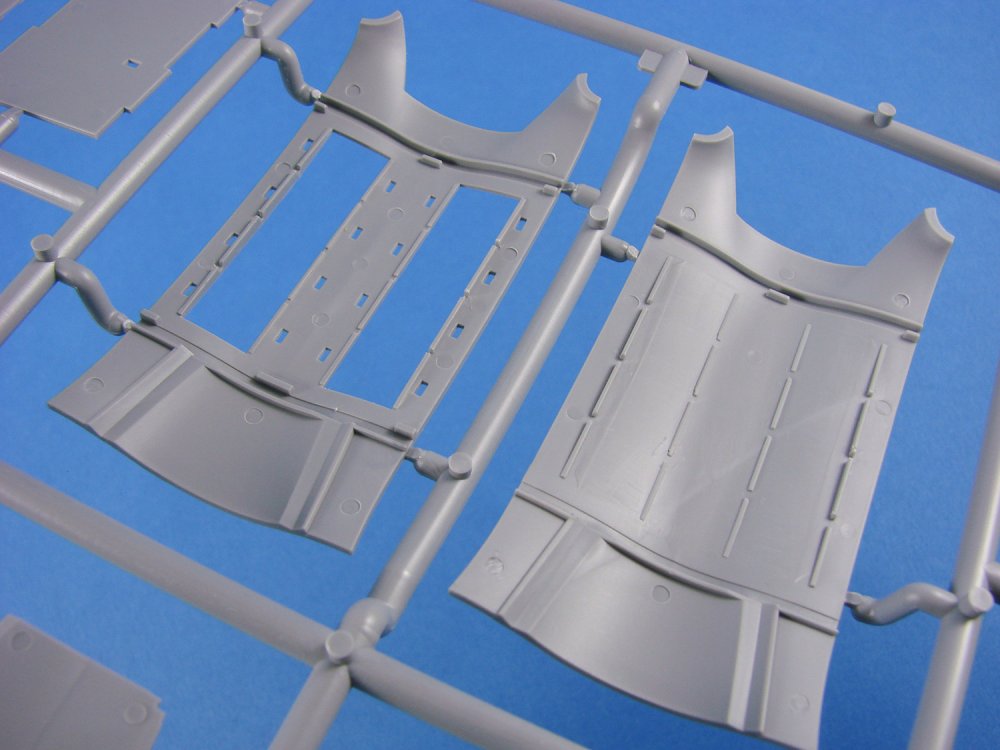
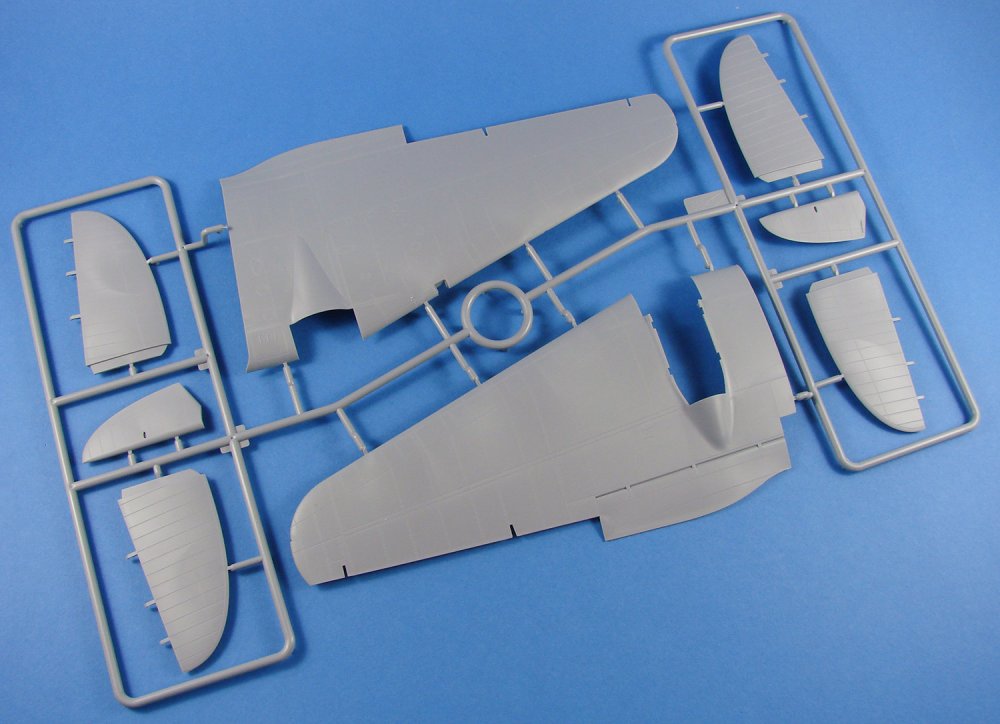
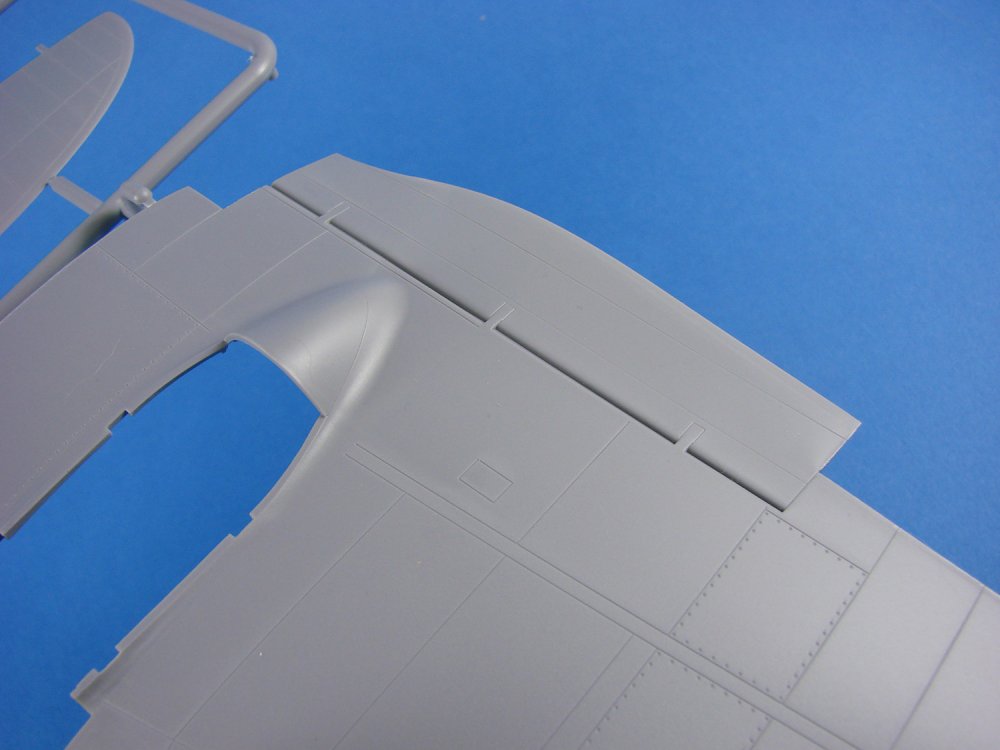
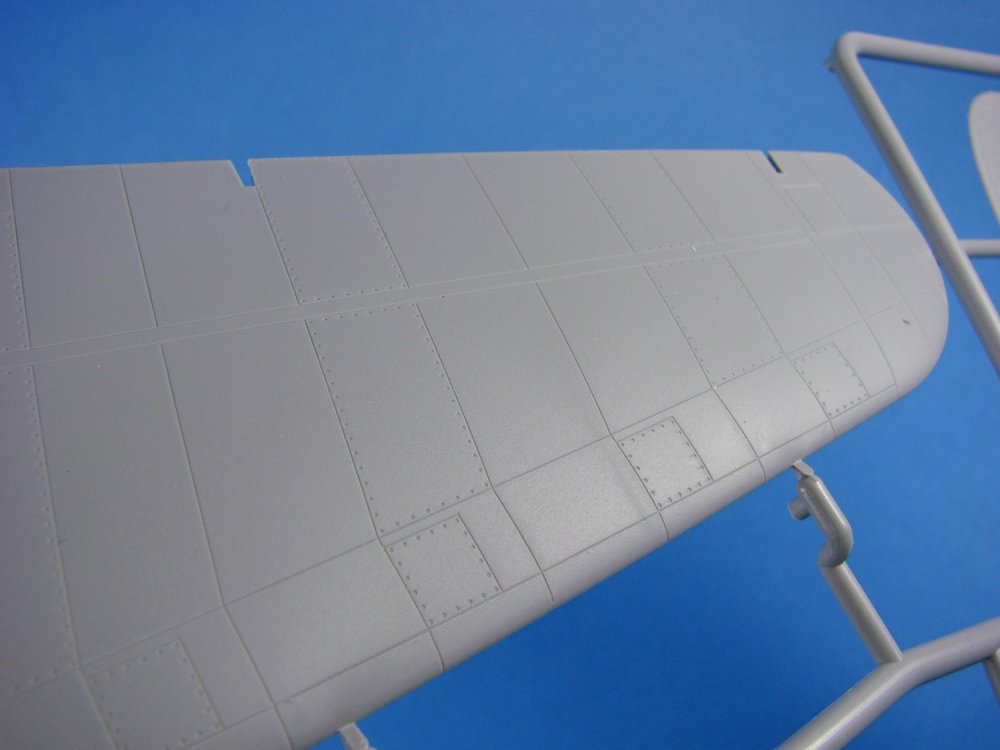
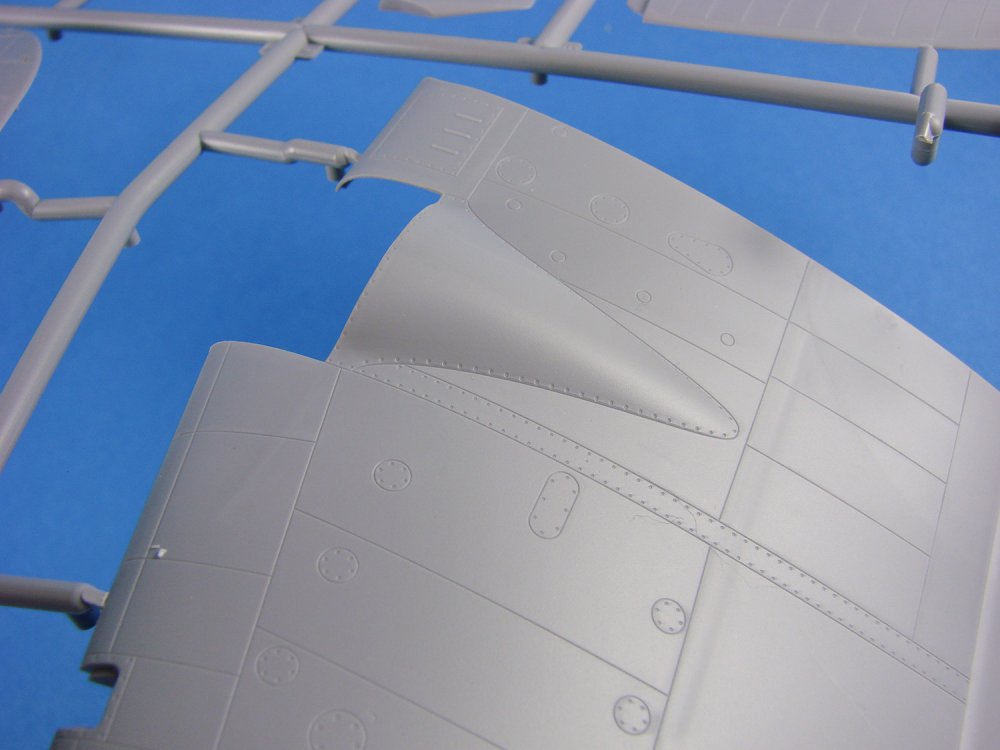
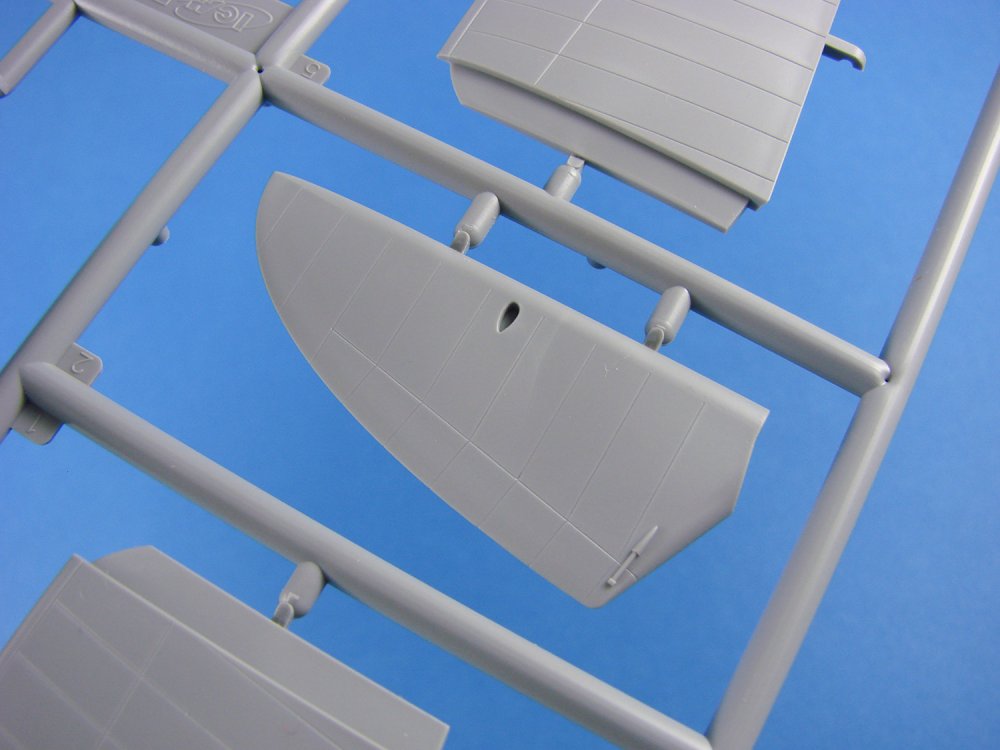
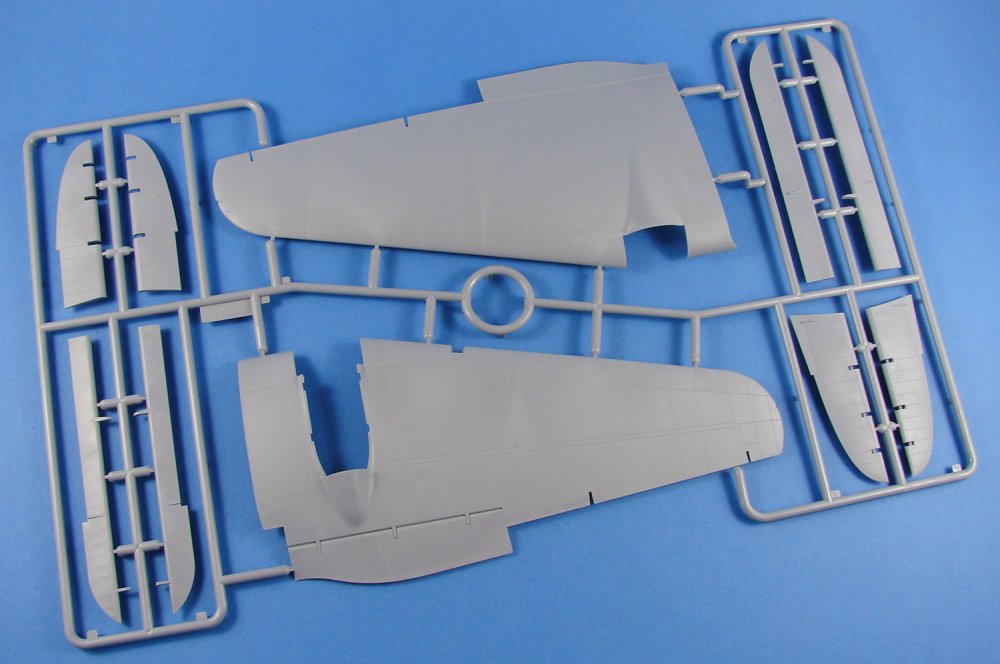
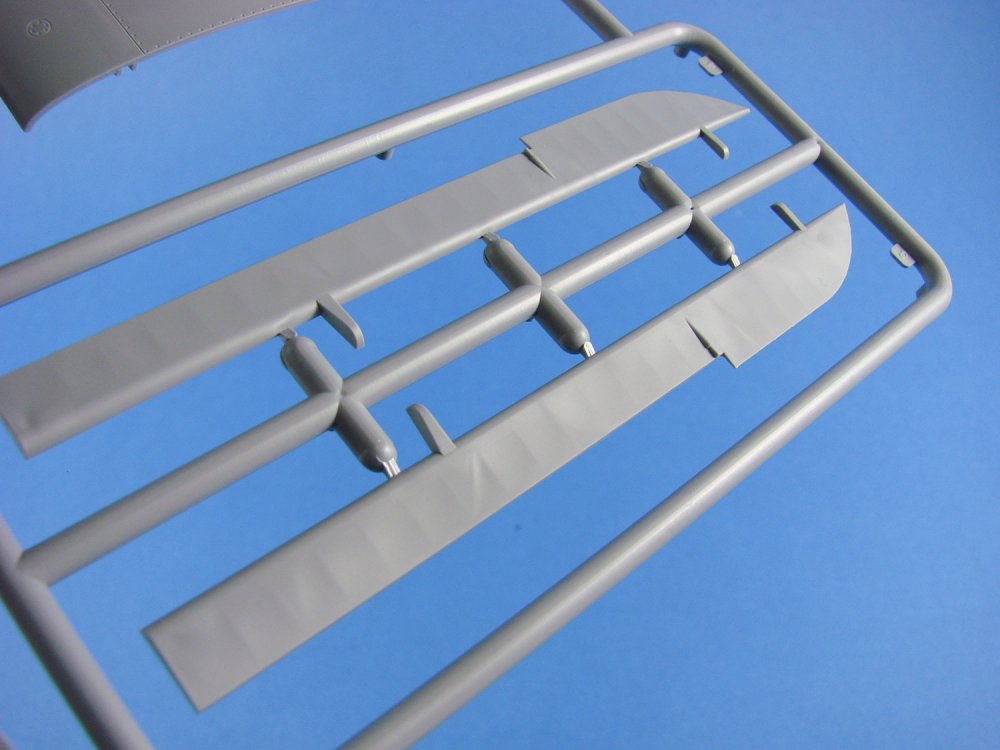
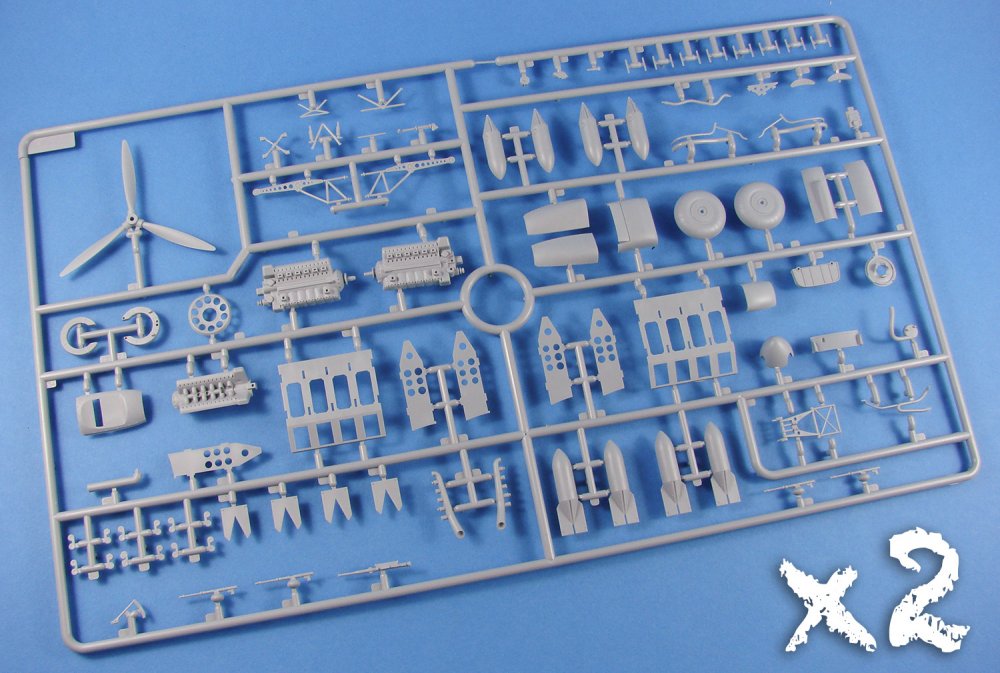
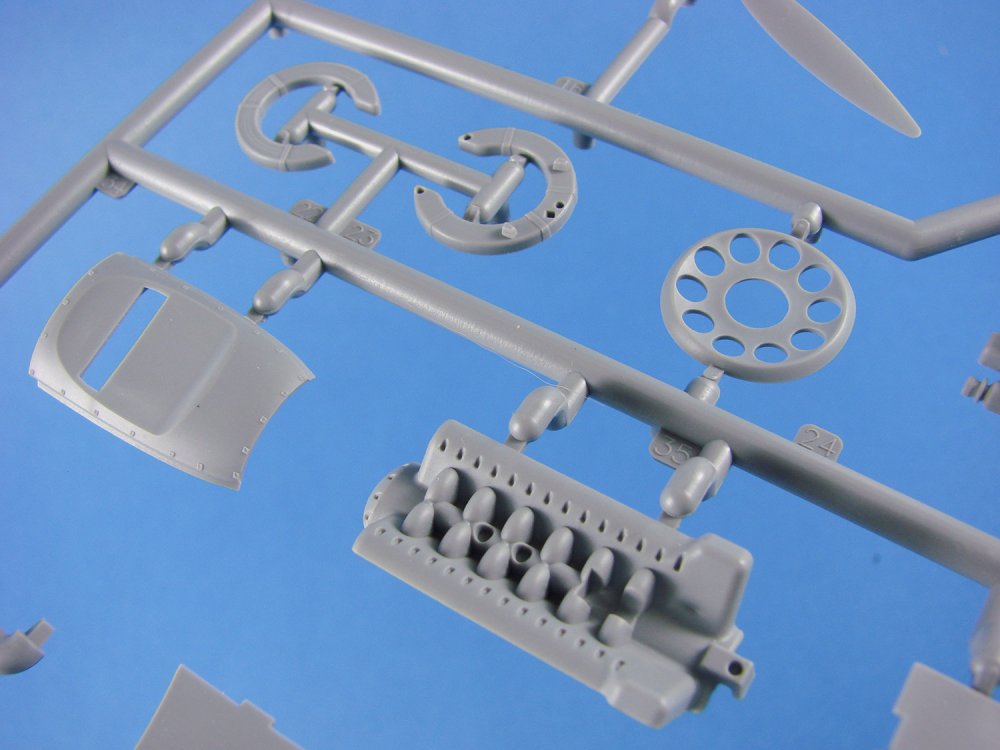
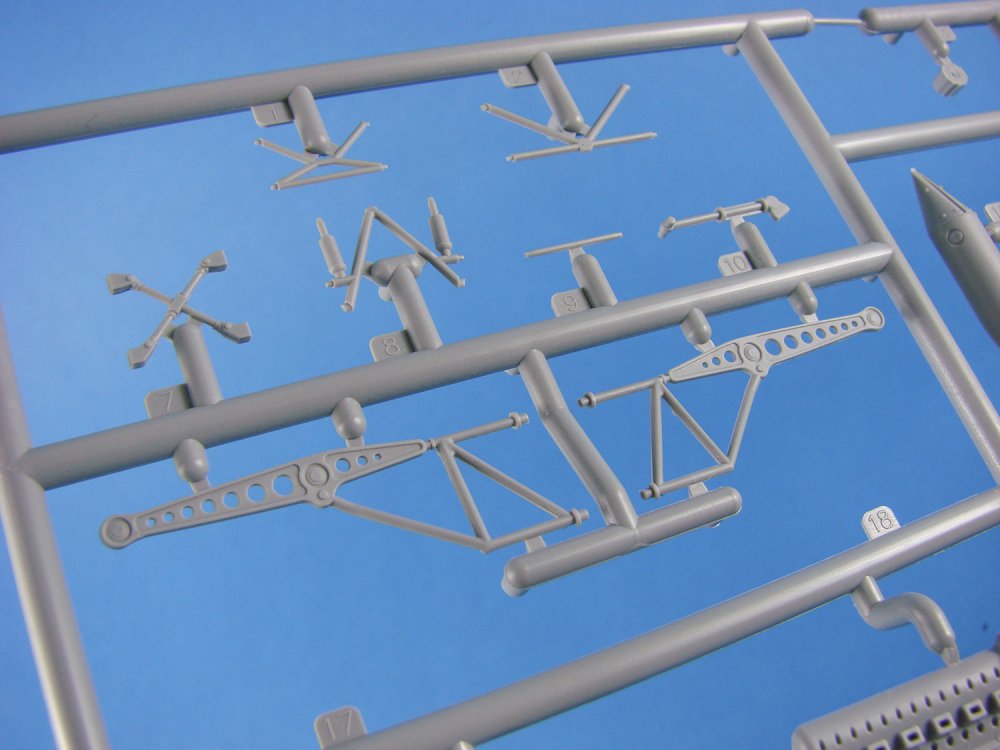
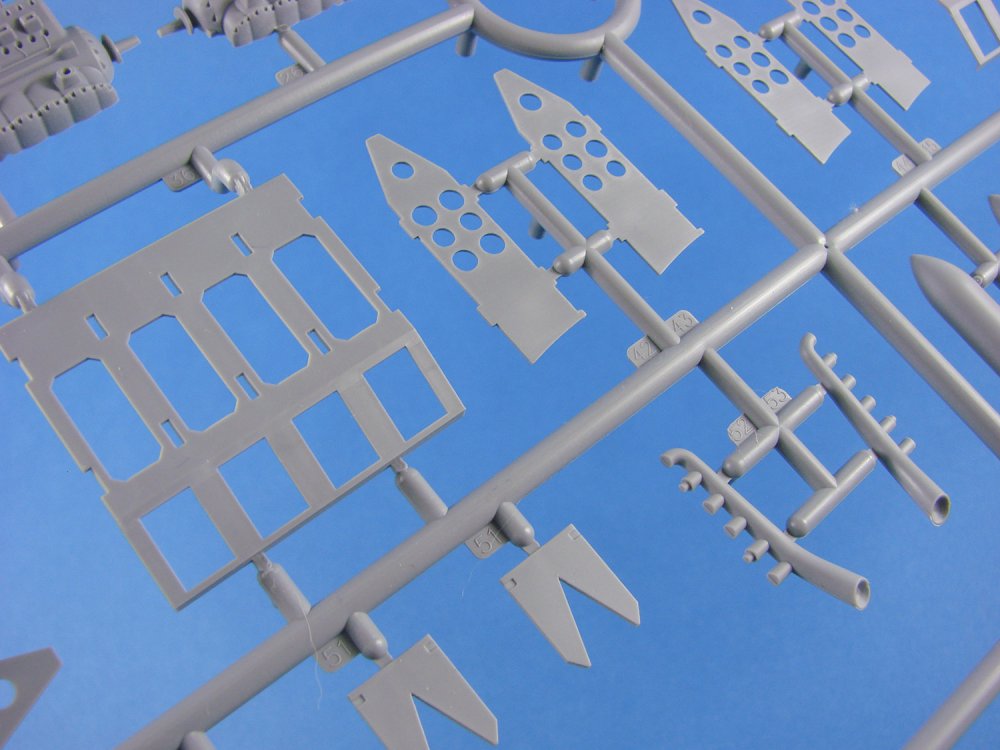
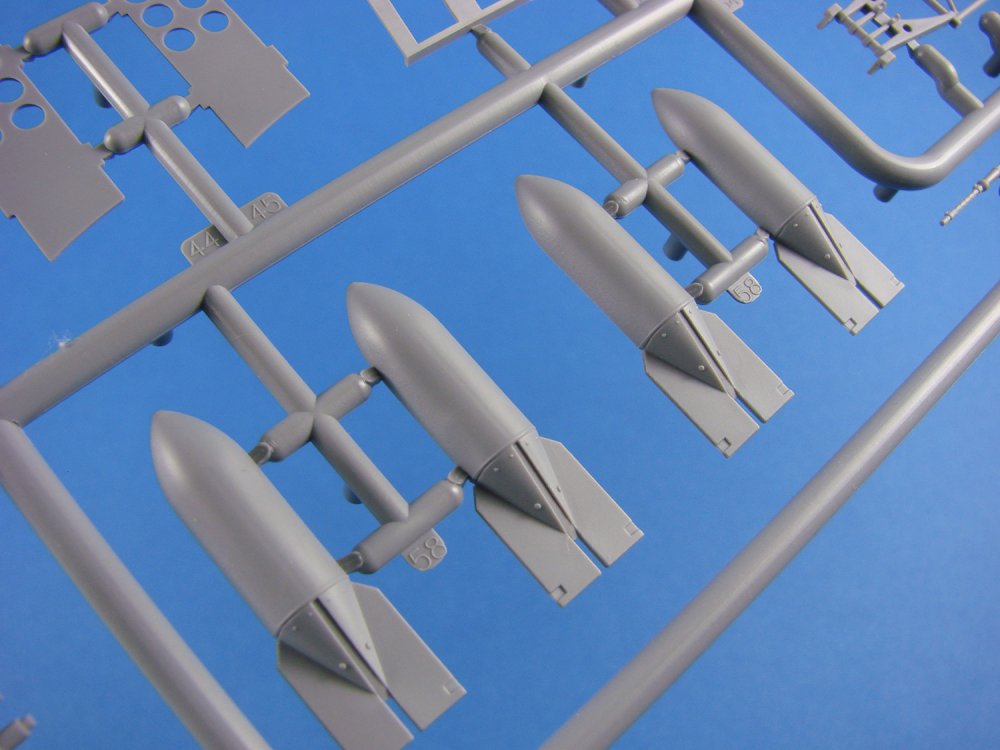
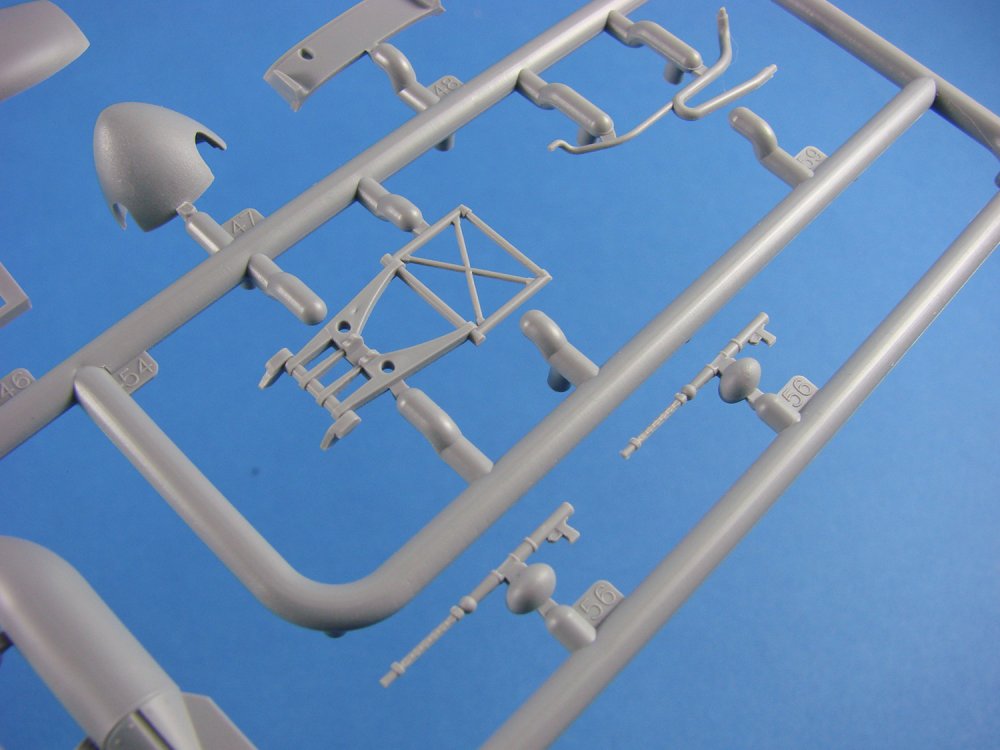
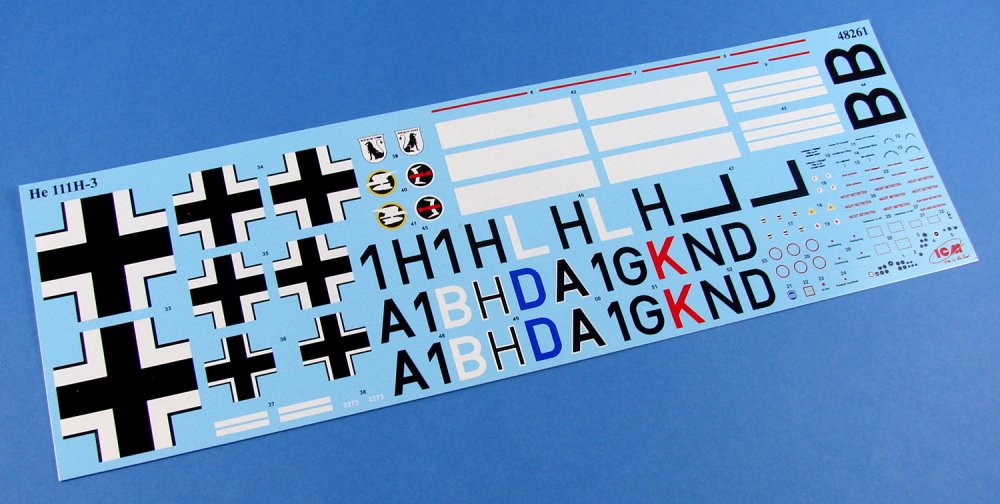
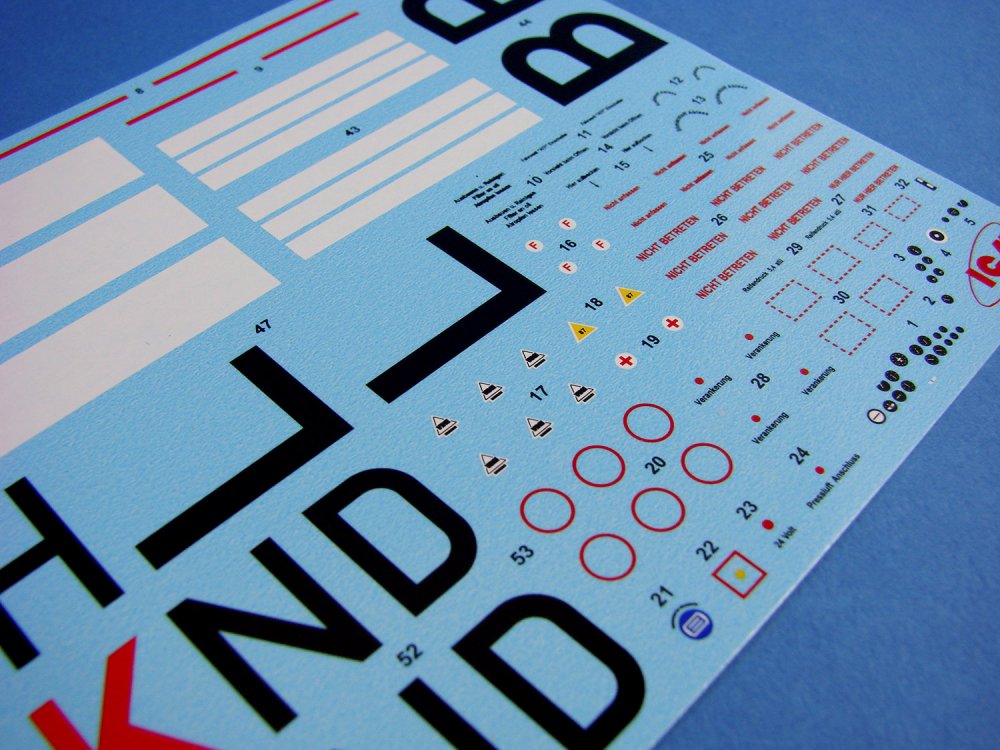
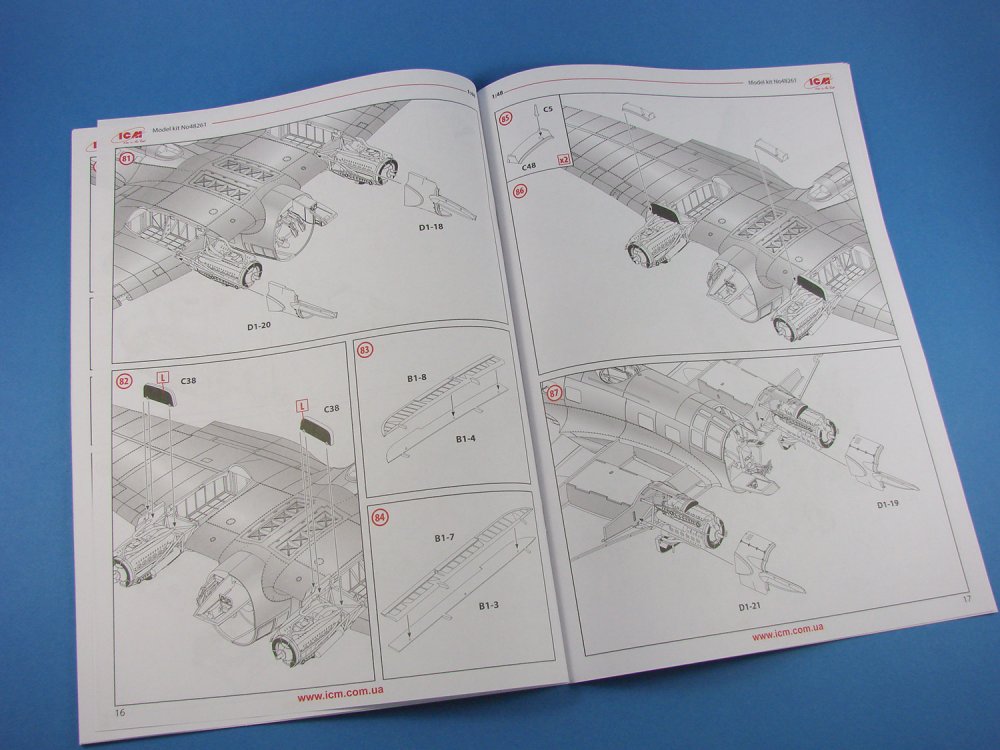
1/48 Heinkel He 111H-3 ICM Catalogue # 48261 Available from Model Kits for Less for £30 The Heinkel He 111 was a German aircraft designed by Siegfried and Walter Günter at Heinkel Flugzeugwerke in 1934. Through development it was described as a wolf in sheep's clothing because the project masqueraded the machine as civilian transport, though from conception the Heinkel was intended to provide the nascent Luftwaffe with a fast, medium bomber. Perhaps the best-recognised German bomber due to the distinctive, extensively glazed greenhouse nose of later versions, the Heinkel He 111 was the most numerous Luftwaffe bomber during the early stages of World War II. The bomber fared well until the Battle of Britain, when its weak defensive armament was exposed. Nevertheless, it proved capable of sustaining heavy damage and remaining airborne. As the war progressed, the He 111 was used in a variety of roles on every front in the European theatre. It was used as a strategic bomber during the Battle of Britain, a torpedo bomber in the Atlantic and Arctic, and a medium bomber and a transport aircraft on the Western, Eastern, Mediterranean, Middle Eastern, and North African Front theatres. The He 111 was constantly upgraded and modified, but became obsolete during the latter part of the war. The German Bomber B project was not realised, which forced the Luftwaffe to continue operating the He 111 in combat roles until the end of the war. Manufacture of the He 111 ceased in September 1944, at which point piston-engine bomber production was largely halted in favour of fighter aircraft. With the German bomber force virtually defunct, the He 111 was used for logistics. The H variant of the He 111 series was more widely produced and saw more action during World War II than any other Heinkel variant. Owing to the uncertainty surrounding the delivery and availability of the DB 601 engines, Heinkel switched to 820 kW (1,100 hp) Junkers Jumo 211 powerplants, whose somewhat greater size and weight were regarded as unimportant considerations in a twin-engine design. When the Jumo was fitted to the P model, it became the He 111H. German-built He 111s remained in service in Spain after the end of the Second World War, being supplemented by Spanish licence-built CASA 2.111s from 1950. The last two German-built aircraft remained in service until at least 1958. The kit I think it would be pretty fair to say that 1/48 Heinkel He 111 kits have been few and far between over the last years. In fact, the last was another re-boxing of the old Monogram kit that dates back to 1994, and seen subsequently under Revell, Hasegawa, and Revellogram labels. It seemed that almost every other German twin had seen some release or other, apart from another Heinkel. Well, when ICM announced that they were to give us a newly-tooled He 111H-3, it was fair to say that many Luftwaffe fans were extremely pleased. ICM has a reputation for accurate model kits, with plenty of detail inside as well as refined external details. Their Ju 88 kits have seen numerous version releases, both with ICM themselves, and also with Revell and Special Hobby. The new He 111 was to have a detailed interior as well as bomb bay and two complete engines. The CAD images certainly looked impressive. Well, in November 2017, this kit was finally unleashed on an eager modelling community, and after the festive mail snarl-ups, the good guys at ICM finally managed to get one over to us to take a look at. No one can accuse ICM’s newer kits of having flimsy boxes, as per one German manufacturer. This one comes in a sturdy corrugated cardboard box with a locking tab, and with a separate, glossy product lid sat snugly over this. Box art depicts a France-based machine flying relatively low over the French countryside, towards dusk, with one box edge showing a couple of the FOUR schemes that can be built from this H-3 version release. Once you cut through the clear disc tabs, remove the lid and open the box, you will find SEVEN frames of medium-grey styrene and ONE of clear, tightly packed into a single clear sleeve. Normally I don’t like this approach, but there was pretty much no way these were going to rub over each other. The clear frame was also packed into a separate sleeve within this main one. A heavy 28-page instruction manual lay in the bottom of the box, and tucked within this is a long and narrow decal sheet. This kit contains no PE parts. Frame A Our first frame brings us two of the main parts; namely the fuselage halves. It’s impossible to ignore these, so I’ll look at them first. These are very similar to how Revell went about their 1/32 kit, in that the upper forward fuselage is a separate piece, that can of course be an indication of other variants coming our way. Externally, detail is superb and very refined, with evenly and neatly recessed, narrow panel lines and a slightly proud wing root fairing with rivet fasteners. Elsewhere, however, no rivets are depicted. I quite like the difference that a riveted surface creates with a finished project, so will add these myself with a beading tool. The rudder is moulded separately, as is the belly. With the latter, two parts options are provided on this frame, and those are for a bomb-doors closed, and doors open option. That certainly negates any ill-fitting doors that wouldn’t perhaps sit flush. Perhaps one thing that I’m not keen on are the aerial arrangement runners that are moulded to one of the lower fuselage halves. This makes removing seams a far more difficult task. Easy to fix though: slice off the detail and fit it later when seams are gone. Only a niggle really. Internally, I think ICM have made a very reasonable job of recreating the structural elements of this aircraft, with such detail extending from the nose, back to just aft of the belly gondola. There are some ejector pin marks though, but these are generally shallow enough to simply rub them away with a fibreglass pen, or other lightly abrasive tool. You will note that due to moulding limitations, ICM has had to produce a wing root insert to glue into position within the fuselage, and you might want to blend this in to the surrounding detail. This is the same solution that HK Models used on their 1/32 B-17 Fortress kits. Similar inserts exist for the lower bomb bay walls, but these sit primarily between the two main spar and bulkhead parts that form the basis of the construction. Note also the port and starboard wheel well walls, as well as the ceiling for this area. Fore and aft walls are moulded to the main spars. These walls will provide basic constructional elements, and could/should be enhanced further by the modeller, with a little plasticard and wire. I’m not going to really criticise this due to the price of the kit, and the area providing a far more than adequate basis for detailing further. Other parts on this sprue are for the lower gondola, cockpit sidewalls, and radio equipment wall. Frame B1 & B2 Both of these have the wing upper and lower panels as their main components, moulded with integral landing flaps. I would quite have liked to have seen these separate, and it will take some work for the modeller to achieve. However, the ailerons are separate items, moulded as halves on one of these frames. As per the fuselage, external wing detail is very refined, with superbly thin and even panel lines and port access details. No rivets here again, except for key lines and those around fuel tank panels and upper nacelle fairings. Internally, positive channels are moulded for the main wing spars, creating what looks to be a very sturdy and unambiguous assembly. Going back to the ailerons, these have very subtle rib and fabric details, and shouldn’t need any toning down. Other flying and control surfaces are moulded here also. These are the stabiliser, elevators and rudder, moulded as traditional halves. These of course exhibit the same finesse as seen generally on external surfaces. Frame C (x2) Where there are generally multiples of specific components, then these are the frames on which you will find them. This model is equipped with two complete Junkers Jumo 211 A-3 engines, comprising of almost 20 parts each. I really am very impressed with the detail on these, and they certainly convincing against my reference material, including personal photographs of the 211. As with the wheel bays, just a little lead wiring should be all that’s needed to bring these to life. Unusually, the prop shafts are moulded into the main engine halves, instead of having a separate, captive pin that will allow the props to rotate. I did say this model had a full interior, and further evidence is seen here with multipart bomb bay cages, plus a full complement of eight SC500 bombs that sit within the cage’s vertical cells. Other parts on this frame include the numerous engine cowl parts, and the forward cowl ring with its characteristic lightening holes. Wheels are moulded as halves, but these aren’t weighted. Maybe Eduard will oblige us… Frame D1 Unless it’s tied into future releases, I admit that I don’t understand the nomenclature of the frames D1 and D2. They seem unrelated. This particular frame contains those two chunky main spars, complete with integral fuselage bulkheads and moulded bulkhead and main gear bay details. Note also other internal bulkheads, and for the cockpit itself. ICM has designed a rather tidy main cockpit, that is generally spread over both this frame and D2, and should look great as it is, out of box. No doubt that Eduard will still be able to persuade us to invest further though. Decals are provided for enhancing the cockpit further, and these are clearly labelled on the instructions sheet. Internal parts on this frame include the rear cockpit wall, cockpit floor, multi-part pilot seat with head armour, ammunition racks etc. Other parts here include the upper fuselage deck with moulded cupola gun traverse gearing, engine cowl to wing cowl fairings, splayed bomb bay door option, tail wheel that is moulded in situ with strut, and the main gear bay doors. Unusually, these last items have no detail moulded internally. This would definitely need addressing. Frame D2 Someone at ICM had the foresight to include most of this kit’s more fragile and smaller parts on this frame, meaning you can safely stash this to one side during the course of building. On here you will find the undercarriage struts and braces, ammunition rack components, rudder pedals and linkages, smaller cockpit components, control yoke and torsion tube, bomb aimer/co-pilot seat, MG mounts, etc. Frame E This last frame of parts contains all of the clear components. Where the varying items have sections that aren’t a part of a window etc. then these are frosted. Framing is pretty good, and this shouldn’t be too difficult to mask up for airbrushing. Even easier if Eduard release masks for this kit. What I do note is that whilst the clear areas have a good transparency, these areas look a little rippled, and more so when you look at through them to things in the distance. However, whilst this isn’t particularly good, if you look at things that are in close proximity to the clear areas, then this isn’t as noticeable. I have some faith that this won’t be too obvious when the model is complete, but don’t quote me. The He 111’s famous glazed nose is comprised of three parts. Care will definitely be needed in assembling these. Two options are supplied for the lower gondola glazing, as are weapons too. Note that the instrument panel is moulded here too. I’ve never seen the point of clear IPs, but that might only be my mileage. Instrument decals are supplied for this and other cockpit areas, but you may choose to punch out the individual dials and apply them separately. It certainly makes for a cleaner finish. Decals One decal sheet is included, and there is no indication of where it is printed. I am assuming this is a homebrew ICM product. Printing is fairly thin and carrier film is minimal. Everything also appears to be in full register. A full set of stencils are included, along with the markings for the FOUR machines. These are: He 111H-3, 1./KG53, France, Spring 1940 He 111H-3, Geschwaderstab/KG53, France, August 1940 He 111H-3, KG26, Norway, Spring 1941 He 111H-3, 5./KG27, Russia, April 1943 Instructions I quite like ICM’s approach to the assembly manual, with the result being totally clean in approach and fuss-free. Starting with a history of the type, plus a colour chart for both Revell and Tamiya paints, a full parts plan is then printed, and then 116 constructional sequences. Assembly illustration is very clear, with colour annotation and selective use of shading to make some drawings clearer, such as where the 3D could mess with your mind! The last pages are taken over with a stencil drawing and four colour profiles for the supplied schemes. Decal placement and paint application is clear. Conclusion This appears to be a pretty accurate-looking kit with all the right curves in all the right places, and also a very intuitive and interesting assembly sequence. For example, you can’t build the wing separately to the fuselage, as the through-spars incorporate fuselage interior, and the bomb cells are loaded into the fuselage after main fuselage assembly, complete with the lower belly. Apart from the ripples in the glazing (which I don’t think will be too noticeable when assembled), the quality of this kit really is excellent, and ICM are setting new standards, outside of their Asian counterparts. This is also a kit with serious value for money, coming in at between £30 and £35 locally. Plenty of buildability and one of those kits that really excites me. Hopefully, I’ll make a start very soon. My sincere thanks to ICM Model Kits for the review kit seen here. To purchase this one for yourself, check out your local hobby retailer or online shop. This can be purchased in the UK for £30 (at time of writing) from MJR Hobbies (Model Kits For Less) at https://www.facebook.com/groups/271077163071577/


-
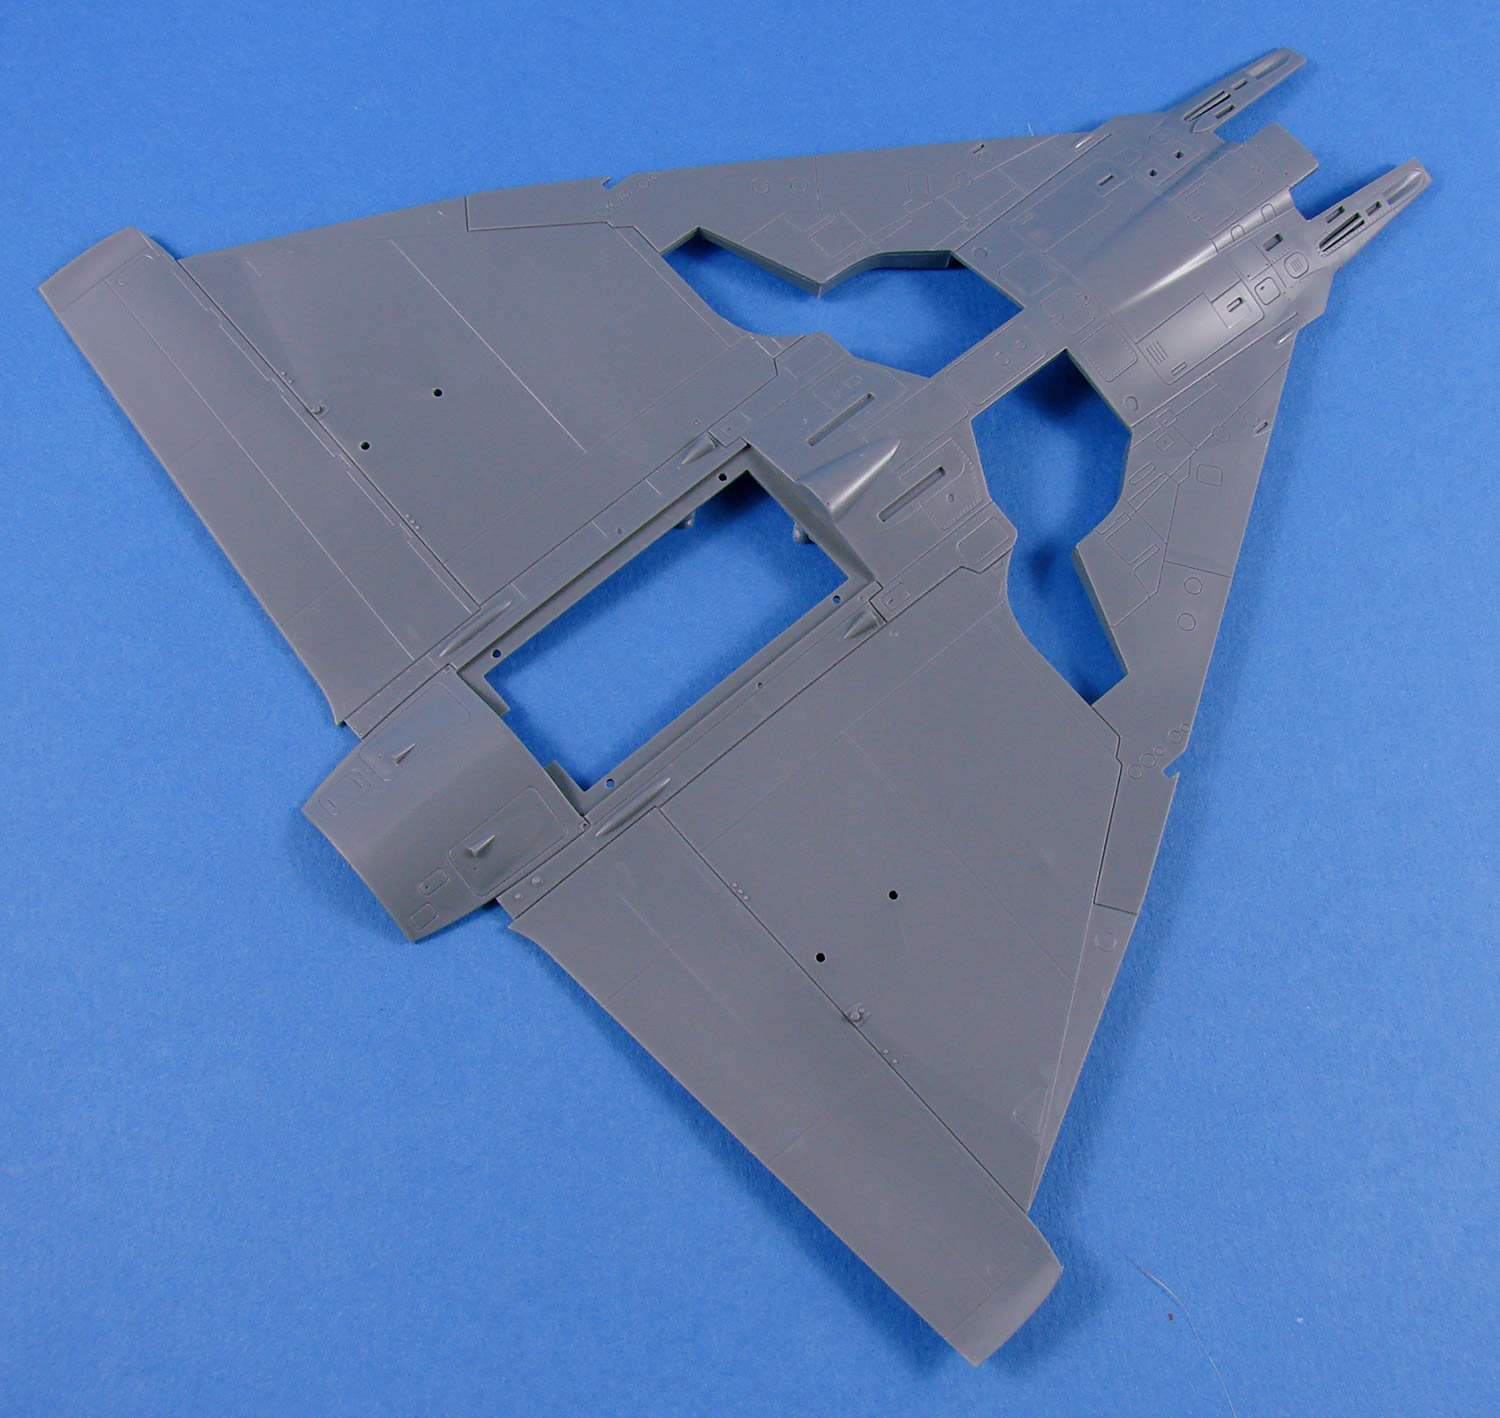
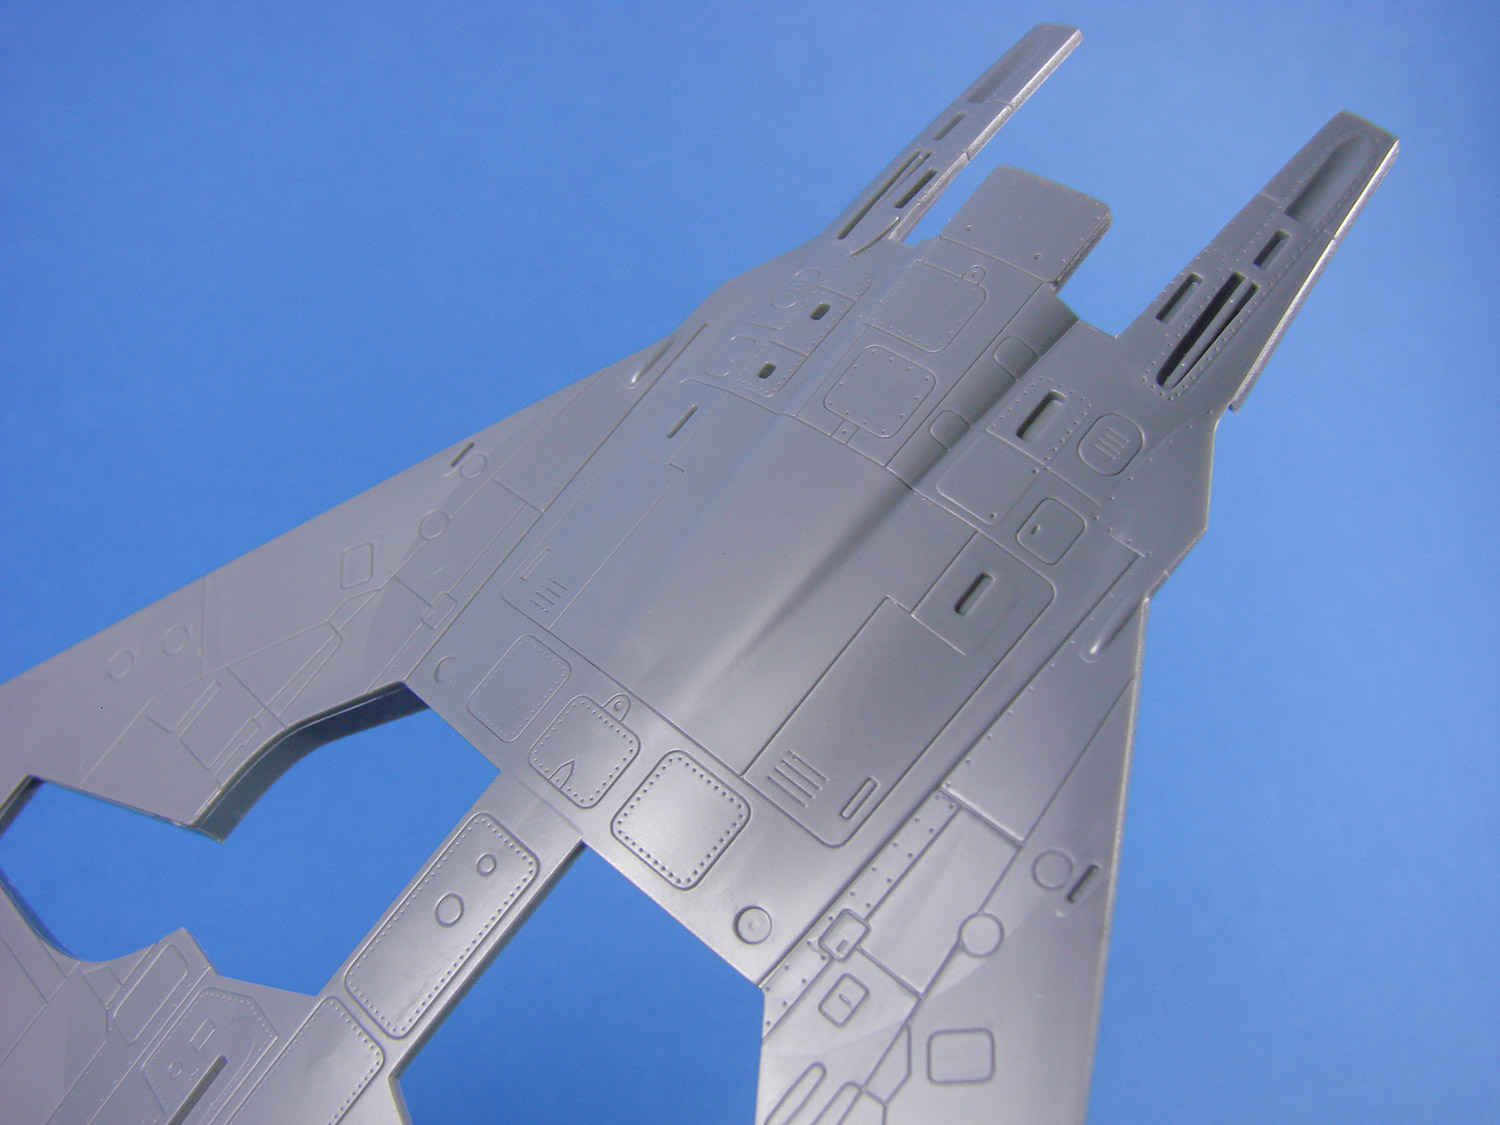
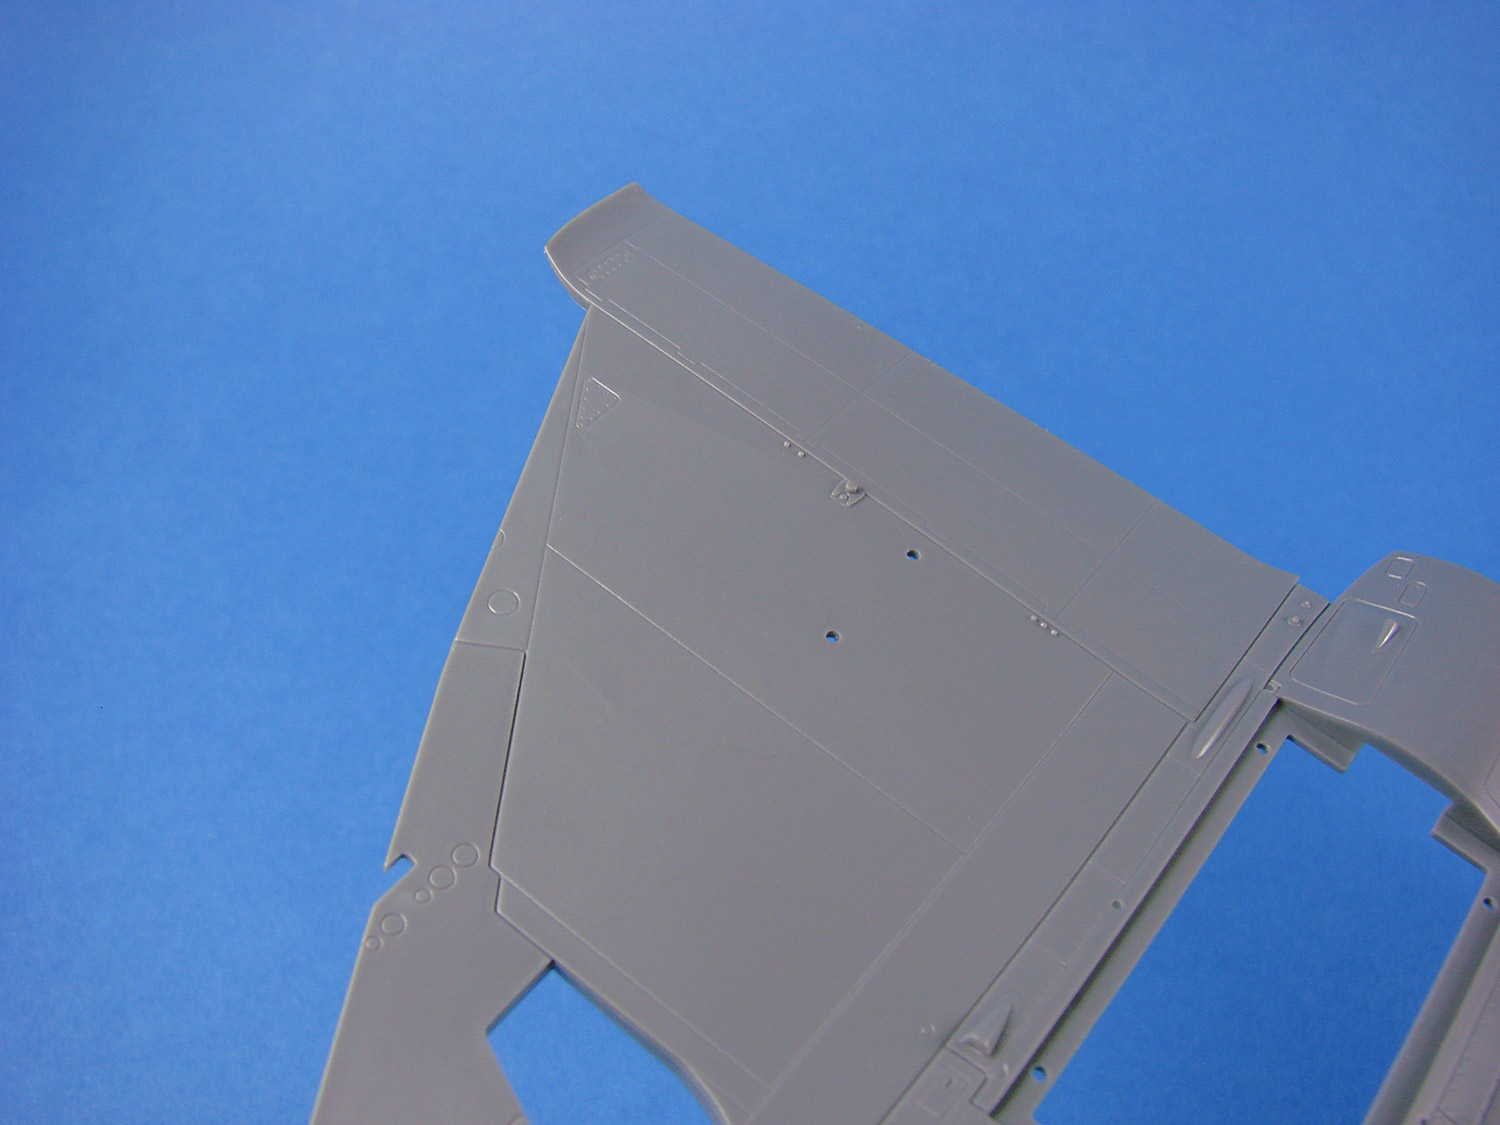
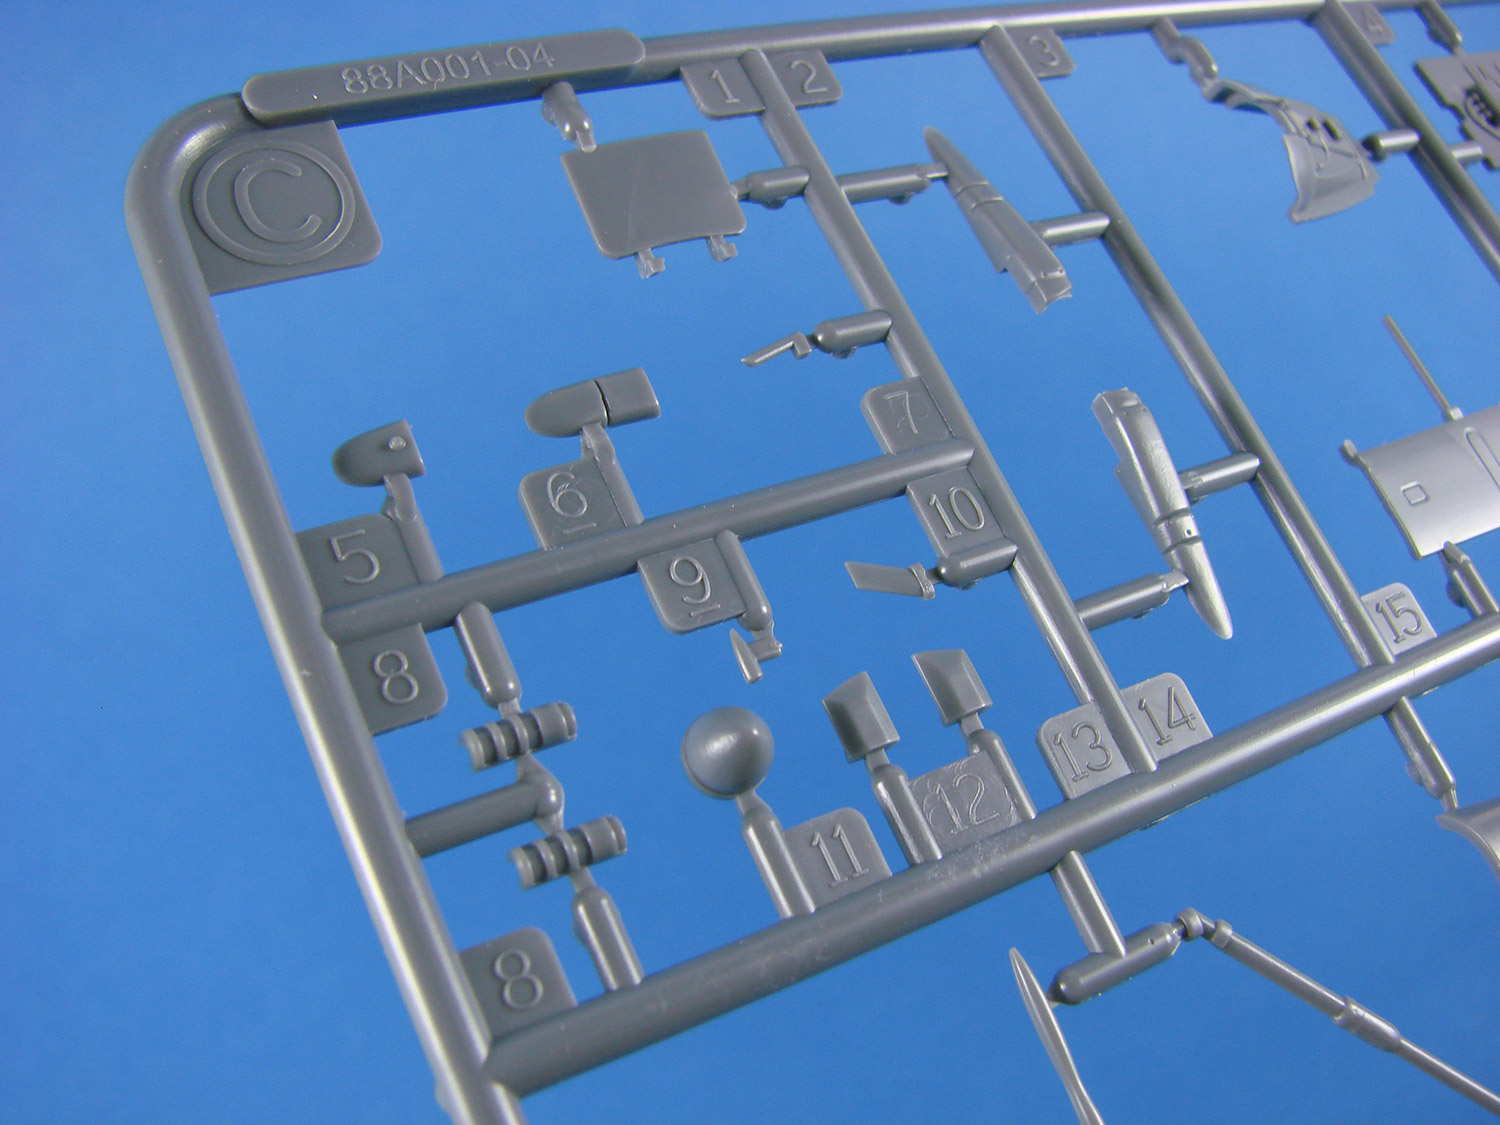
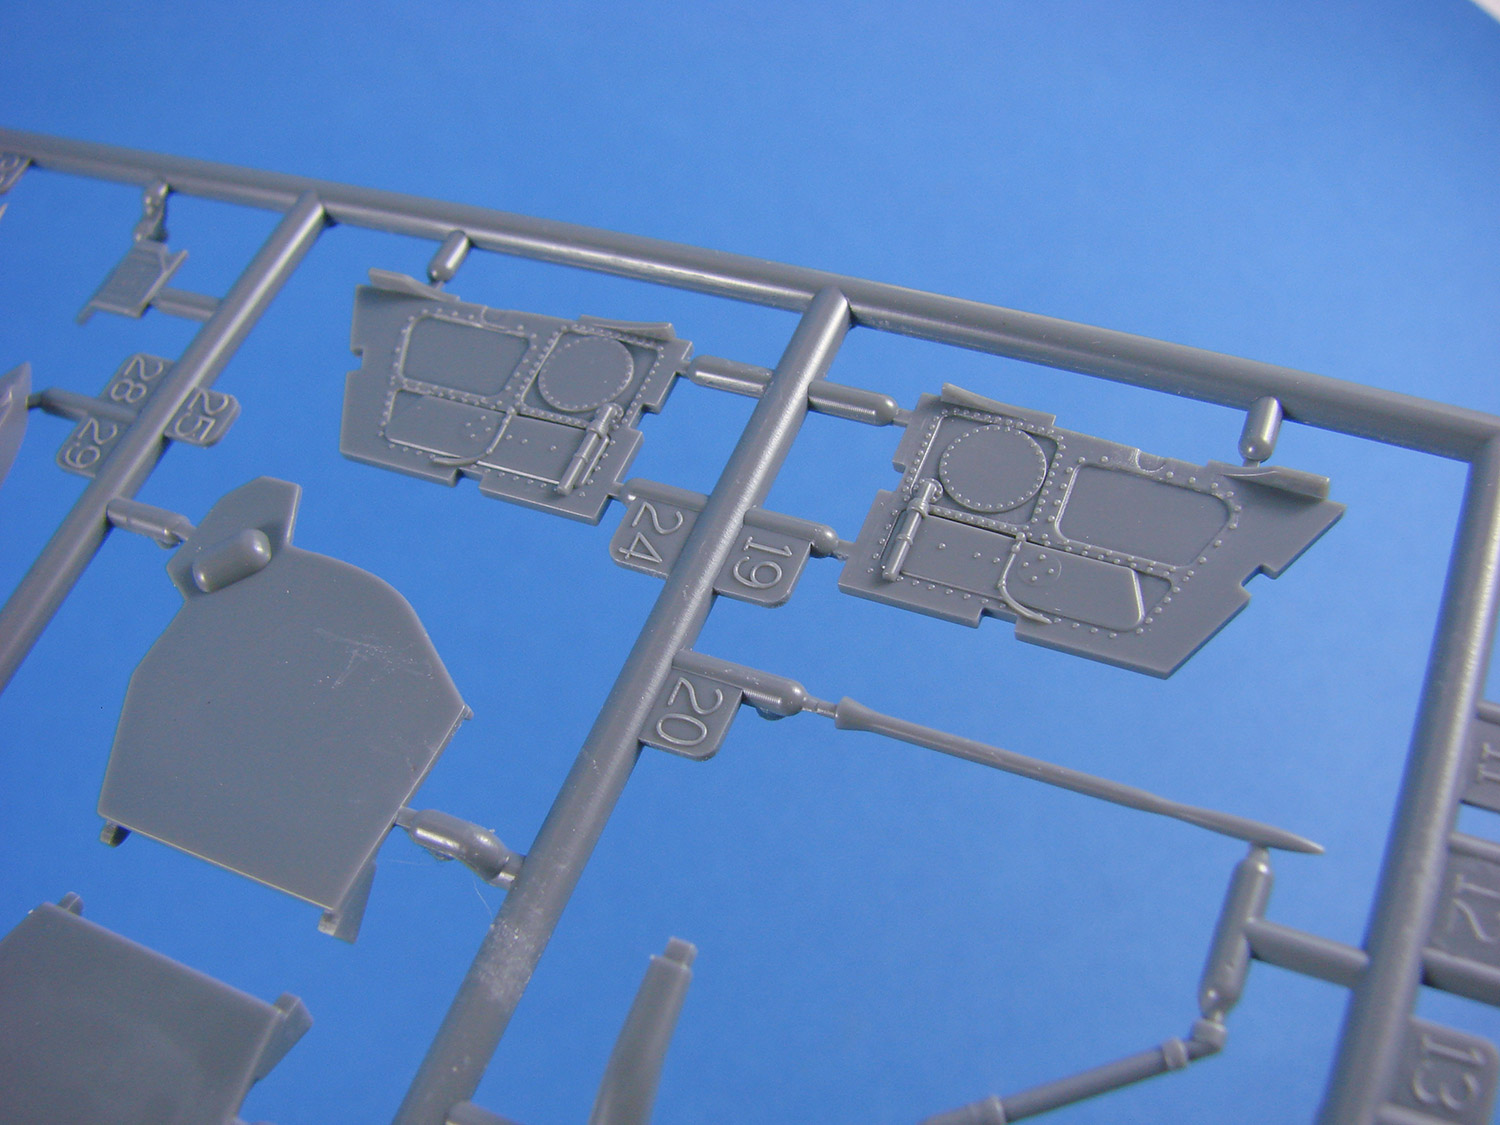
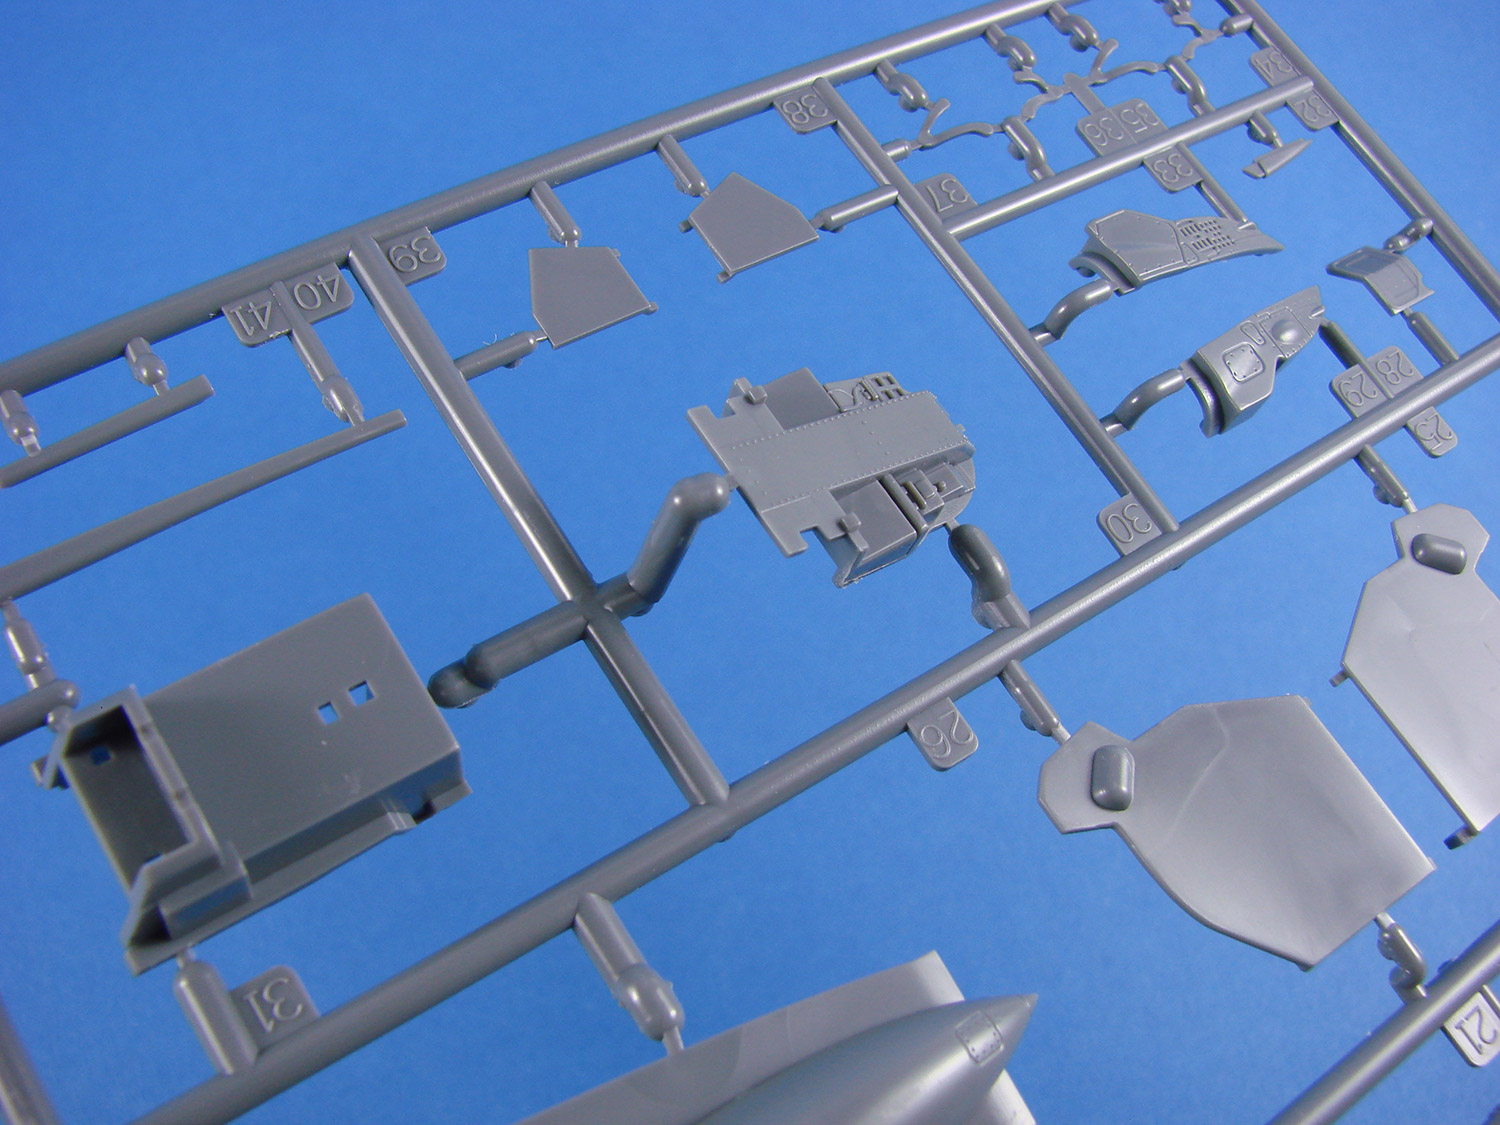
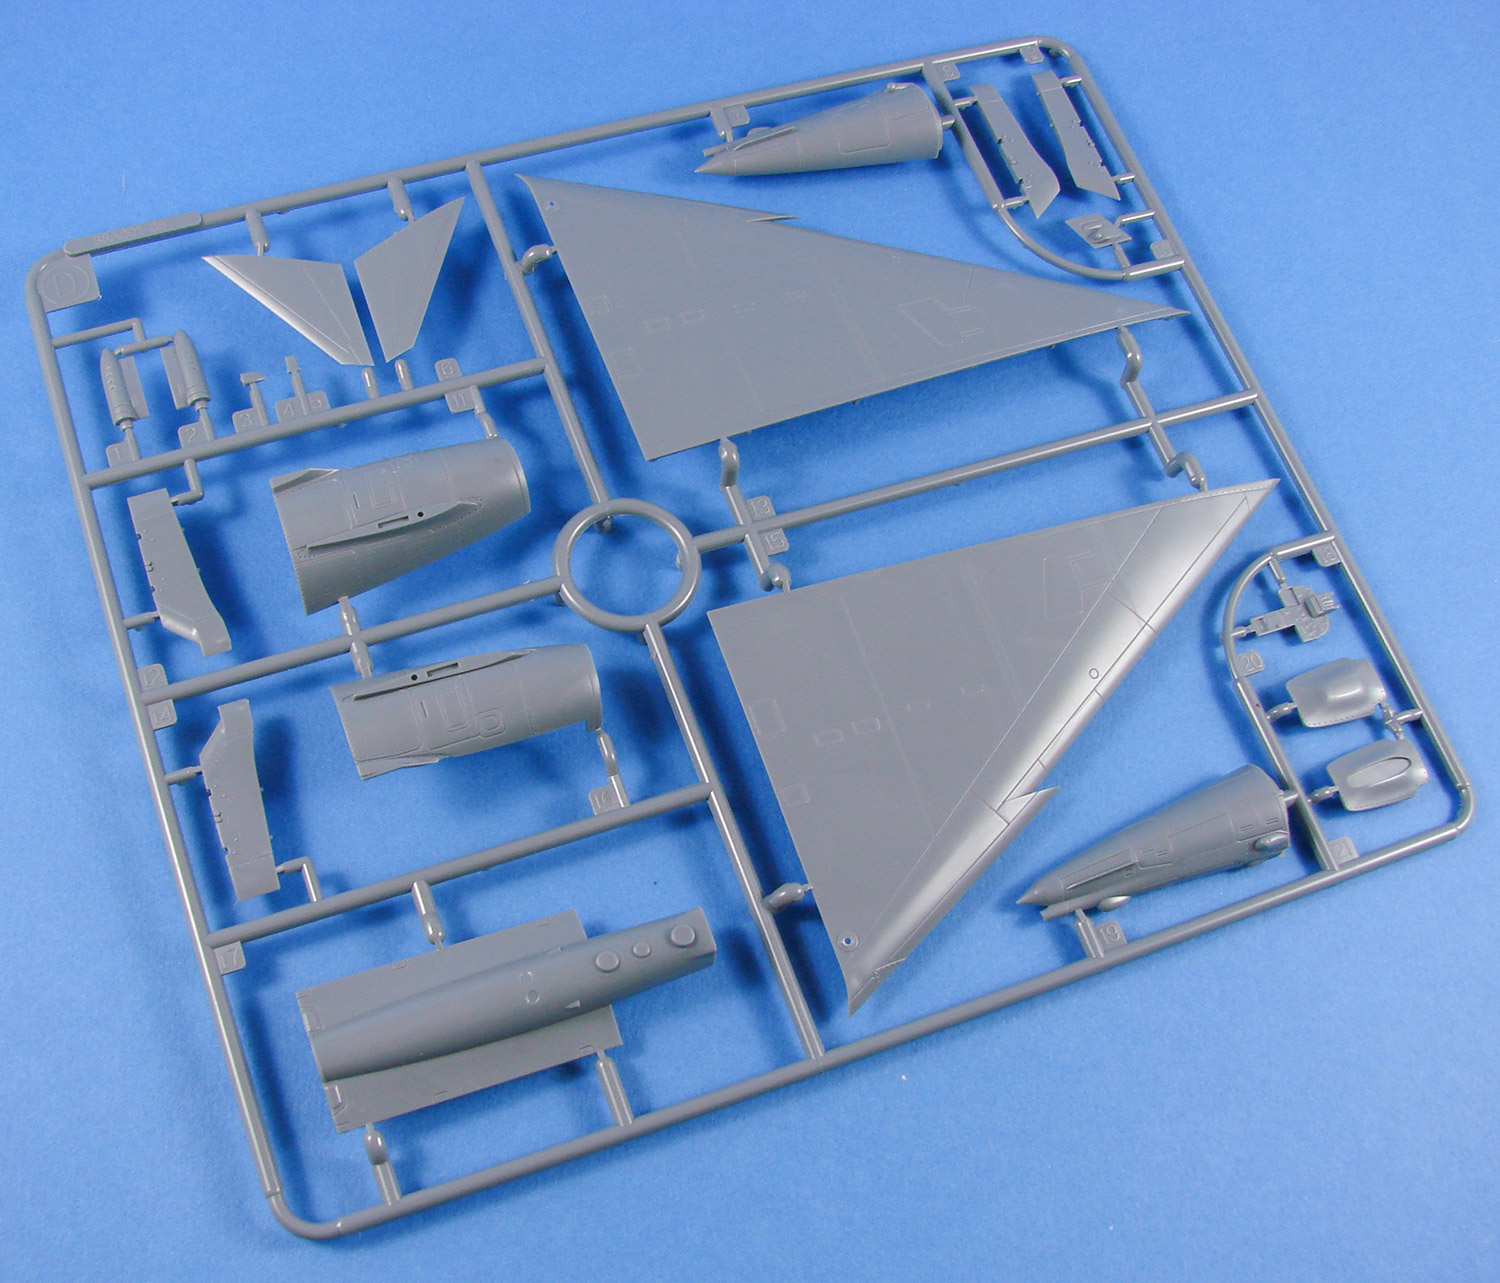
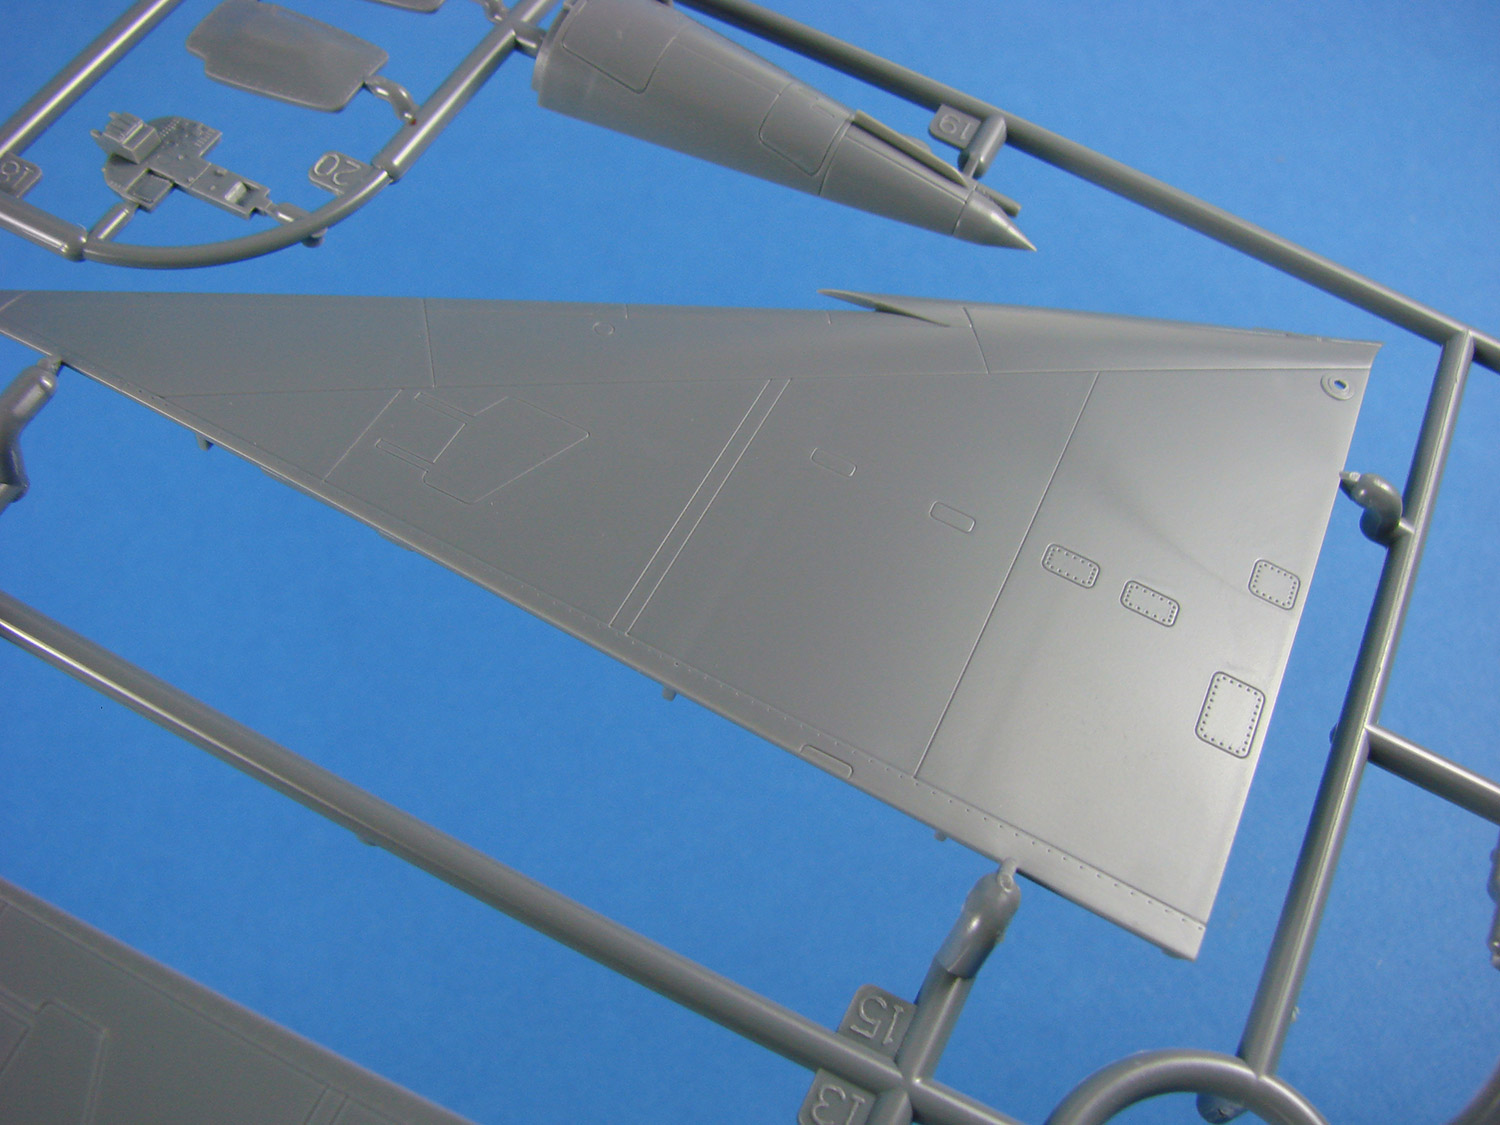
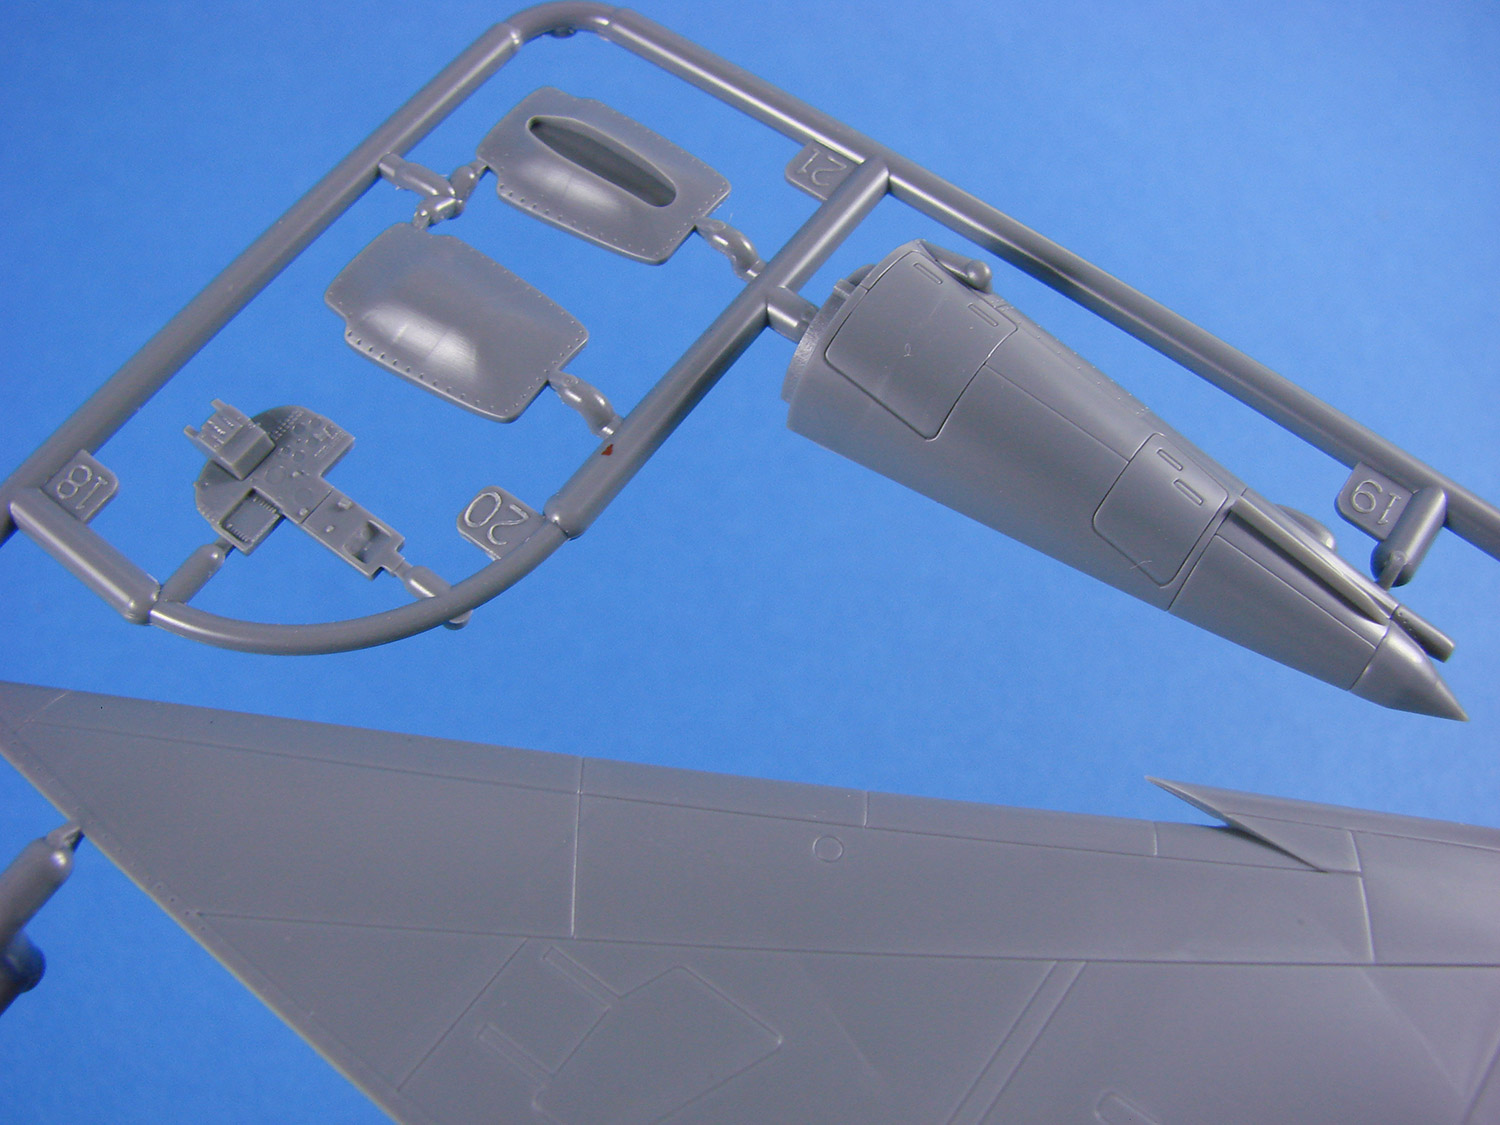
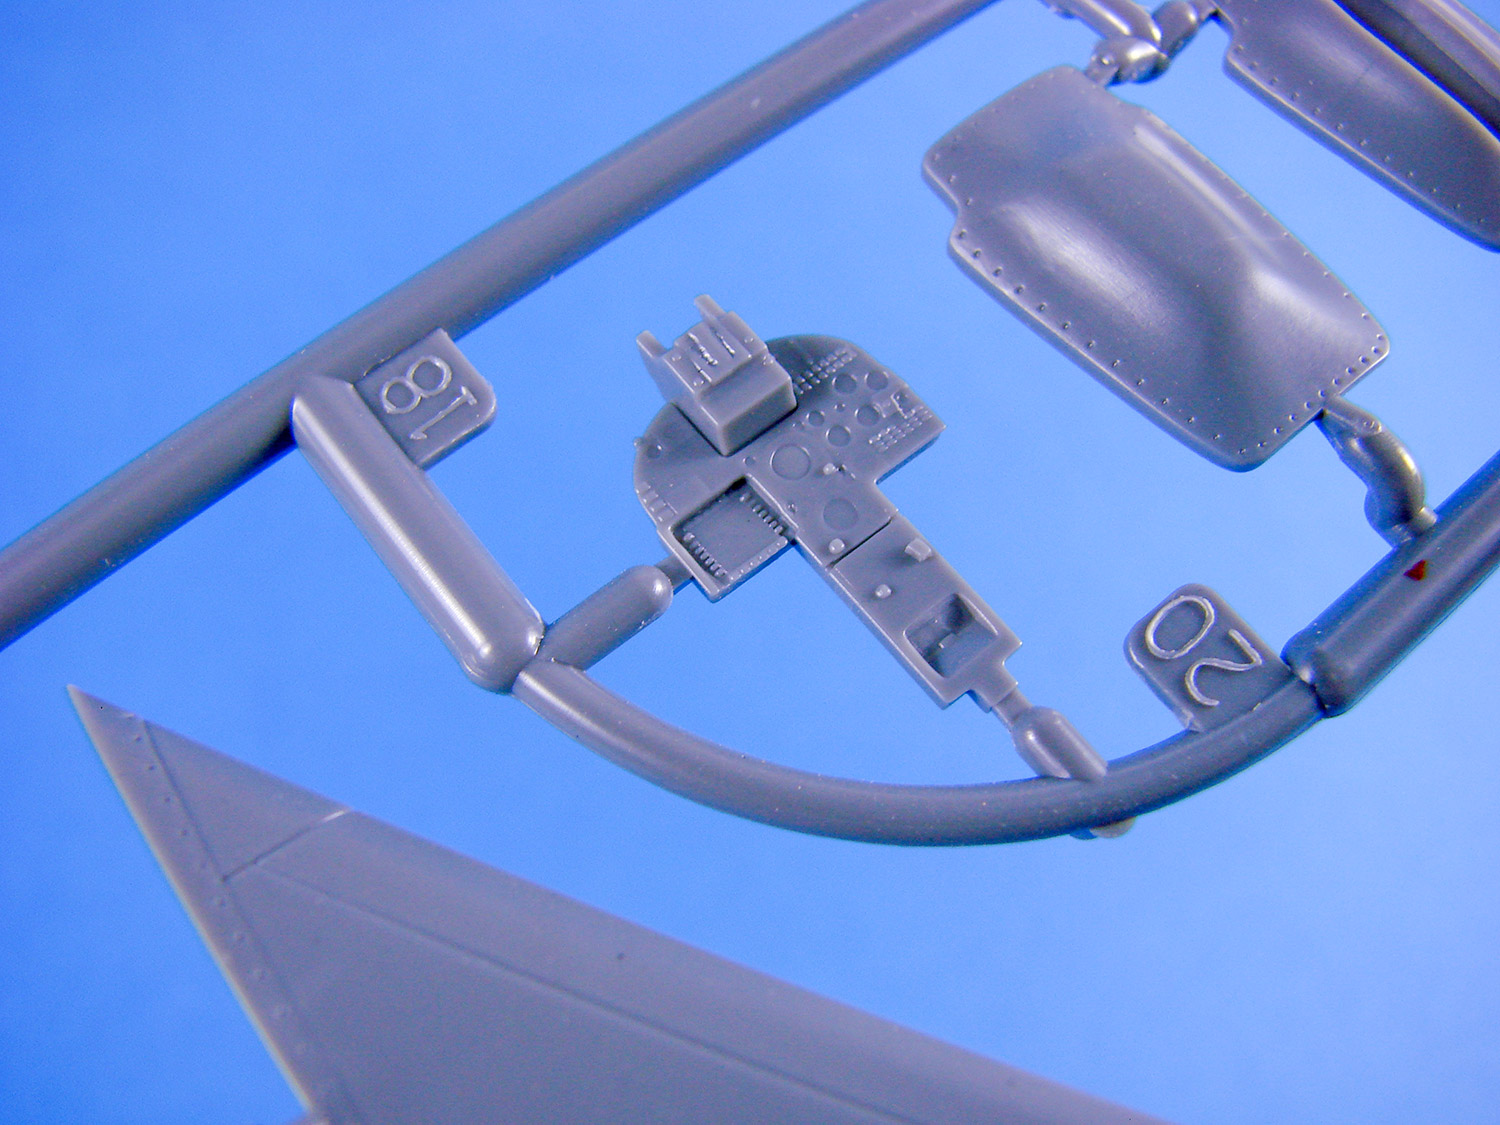
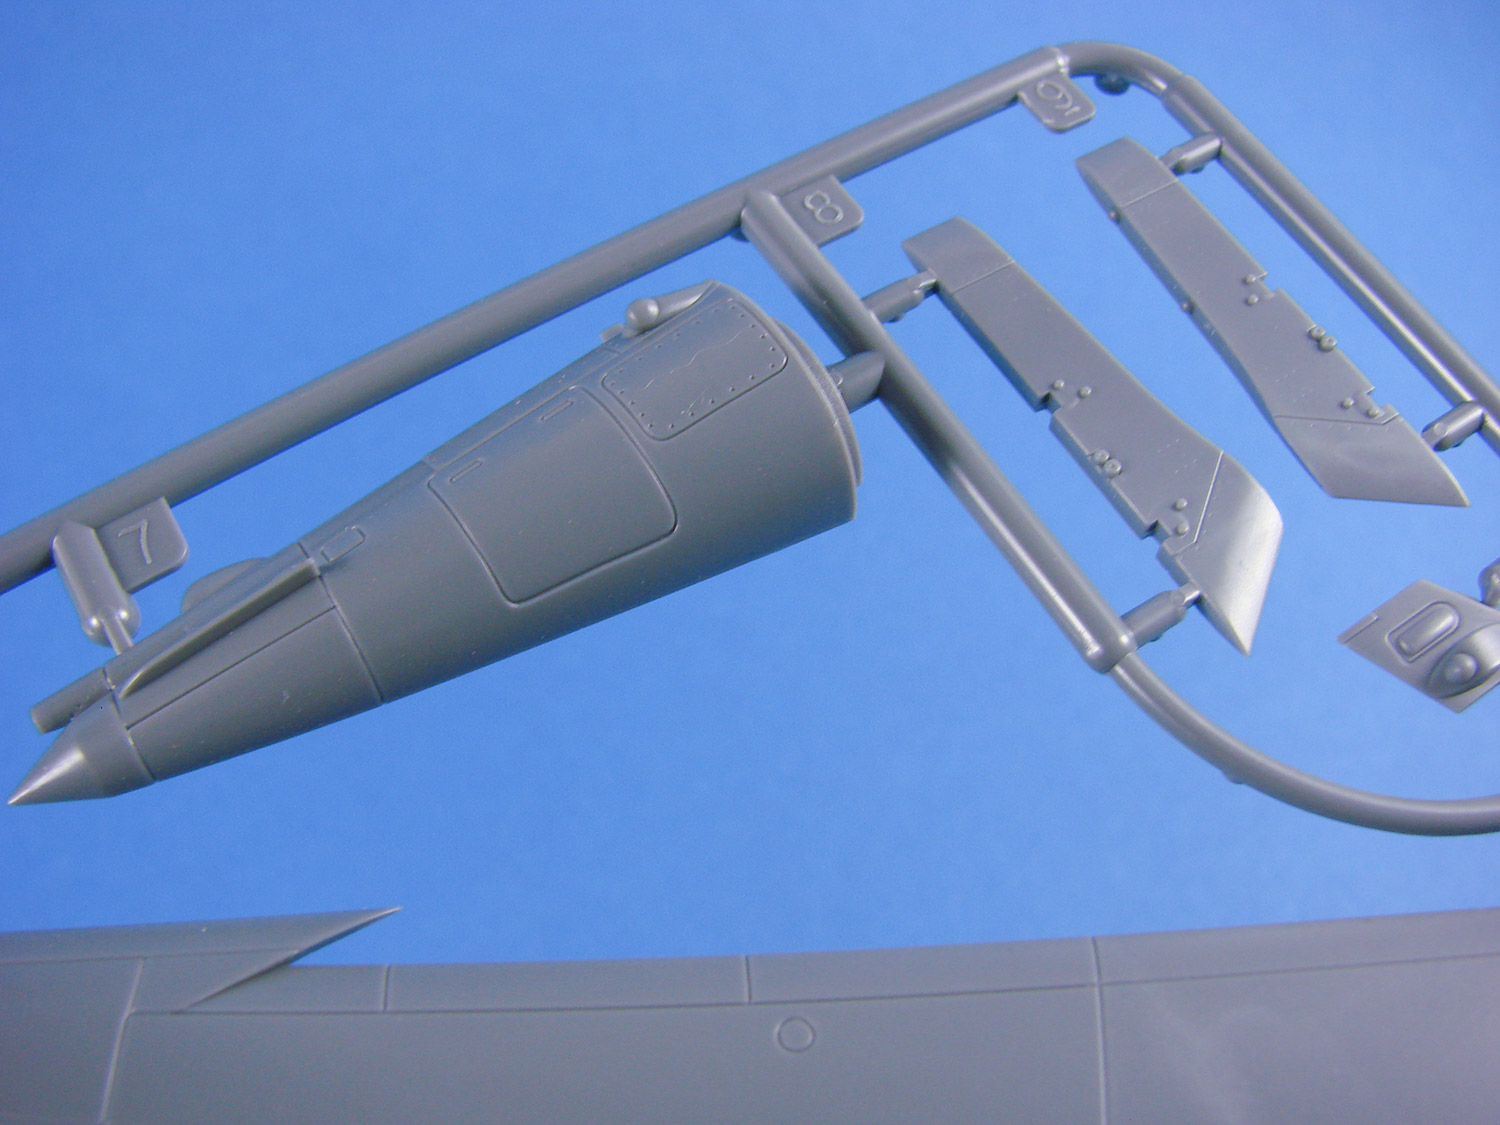
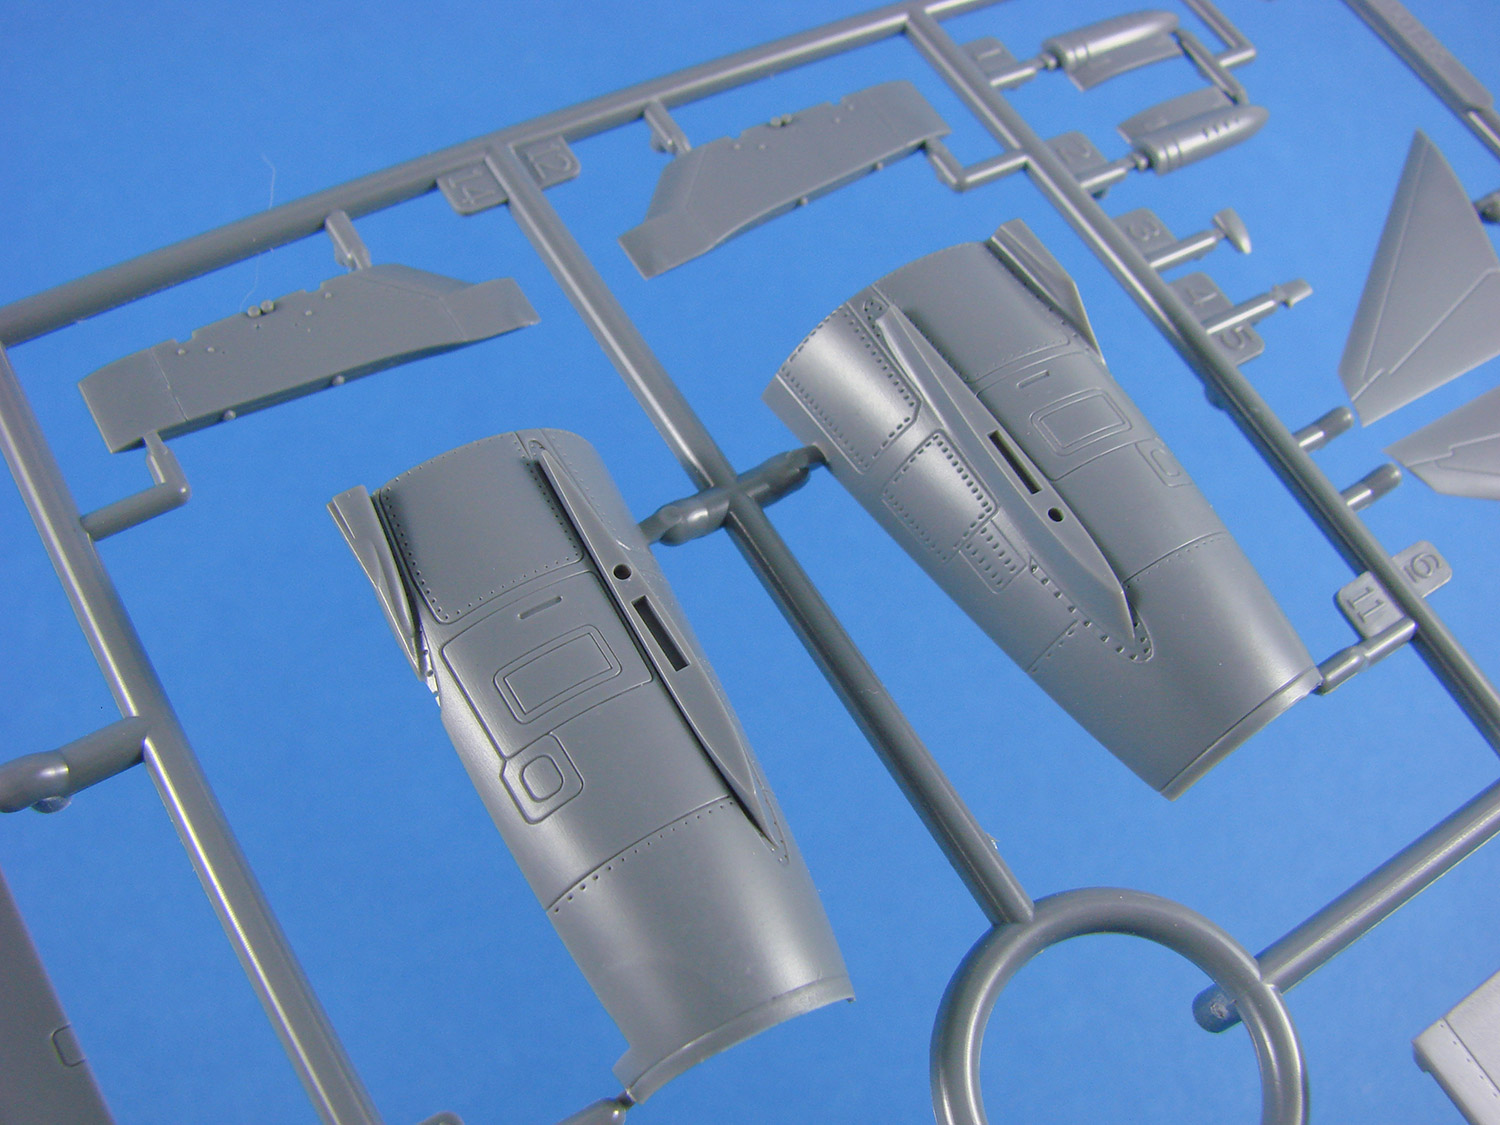
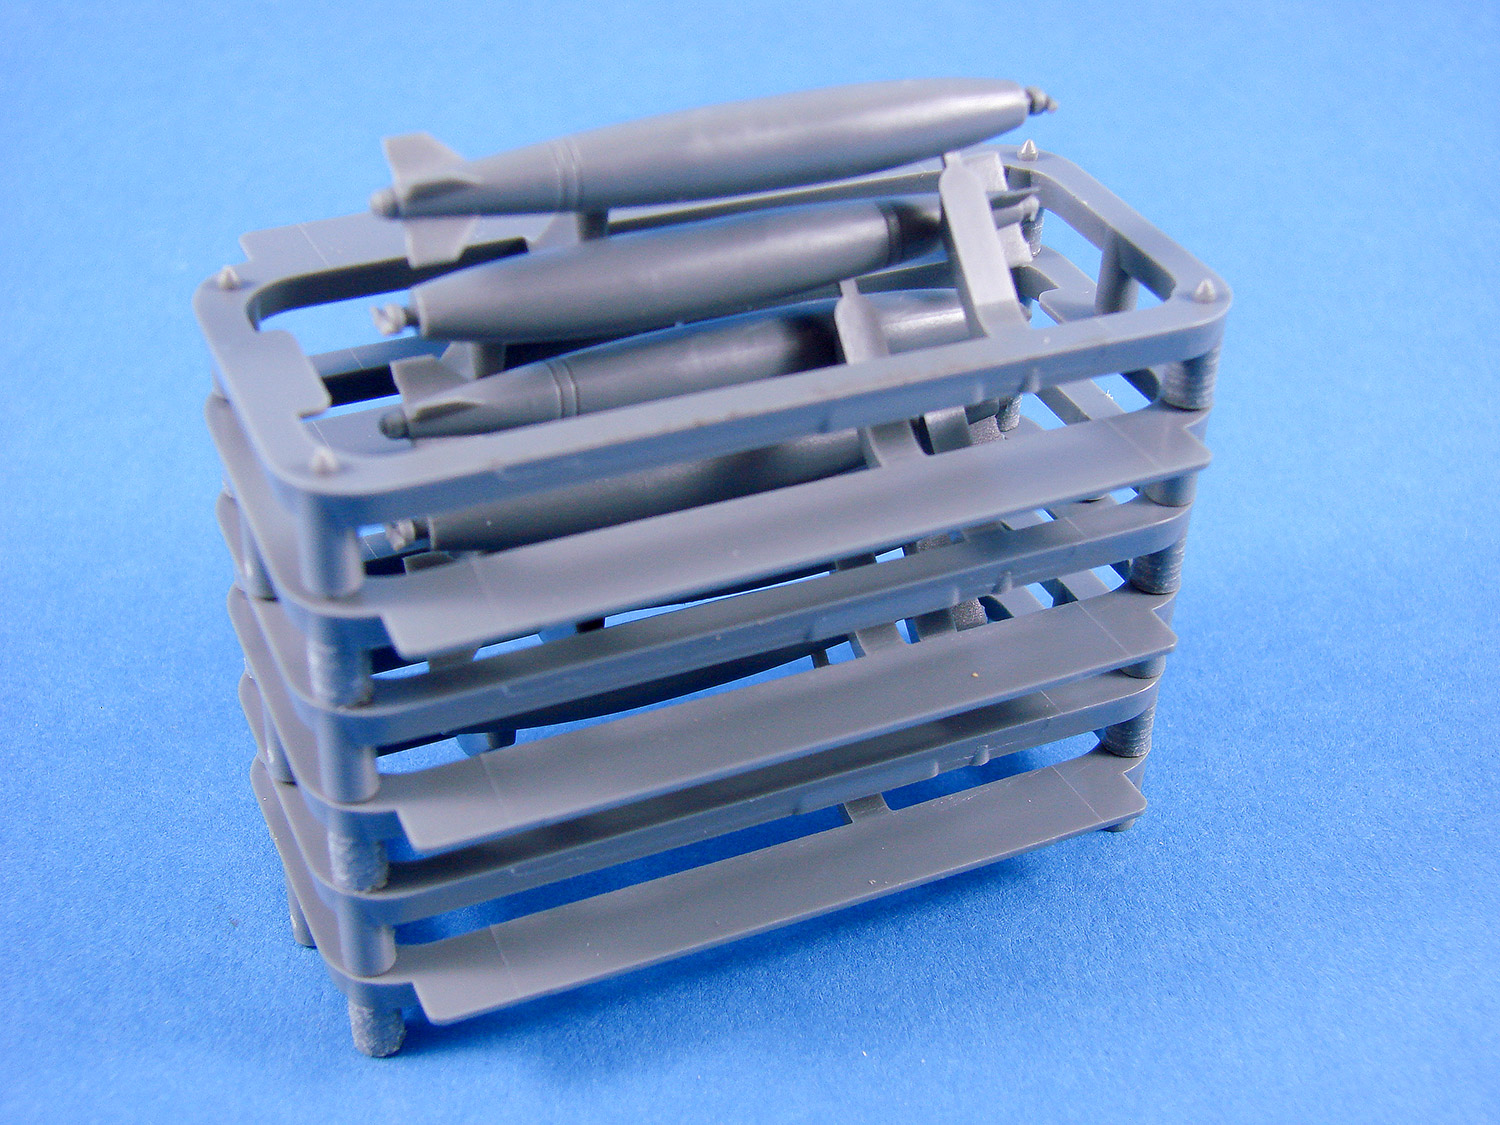
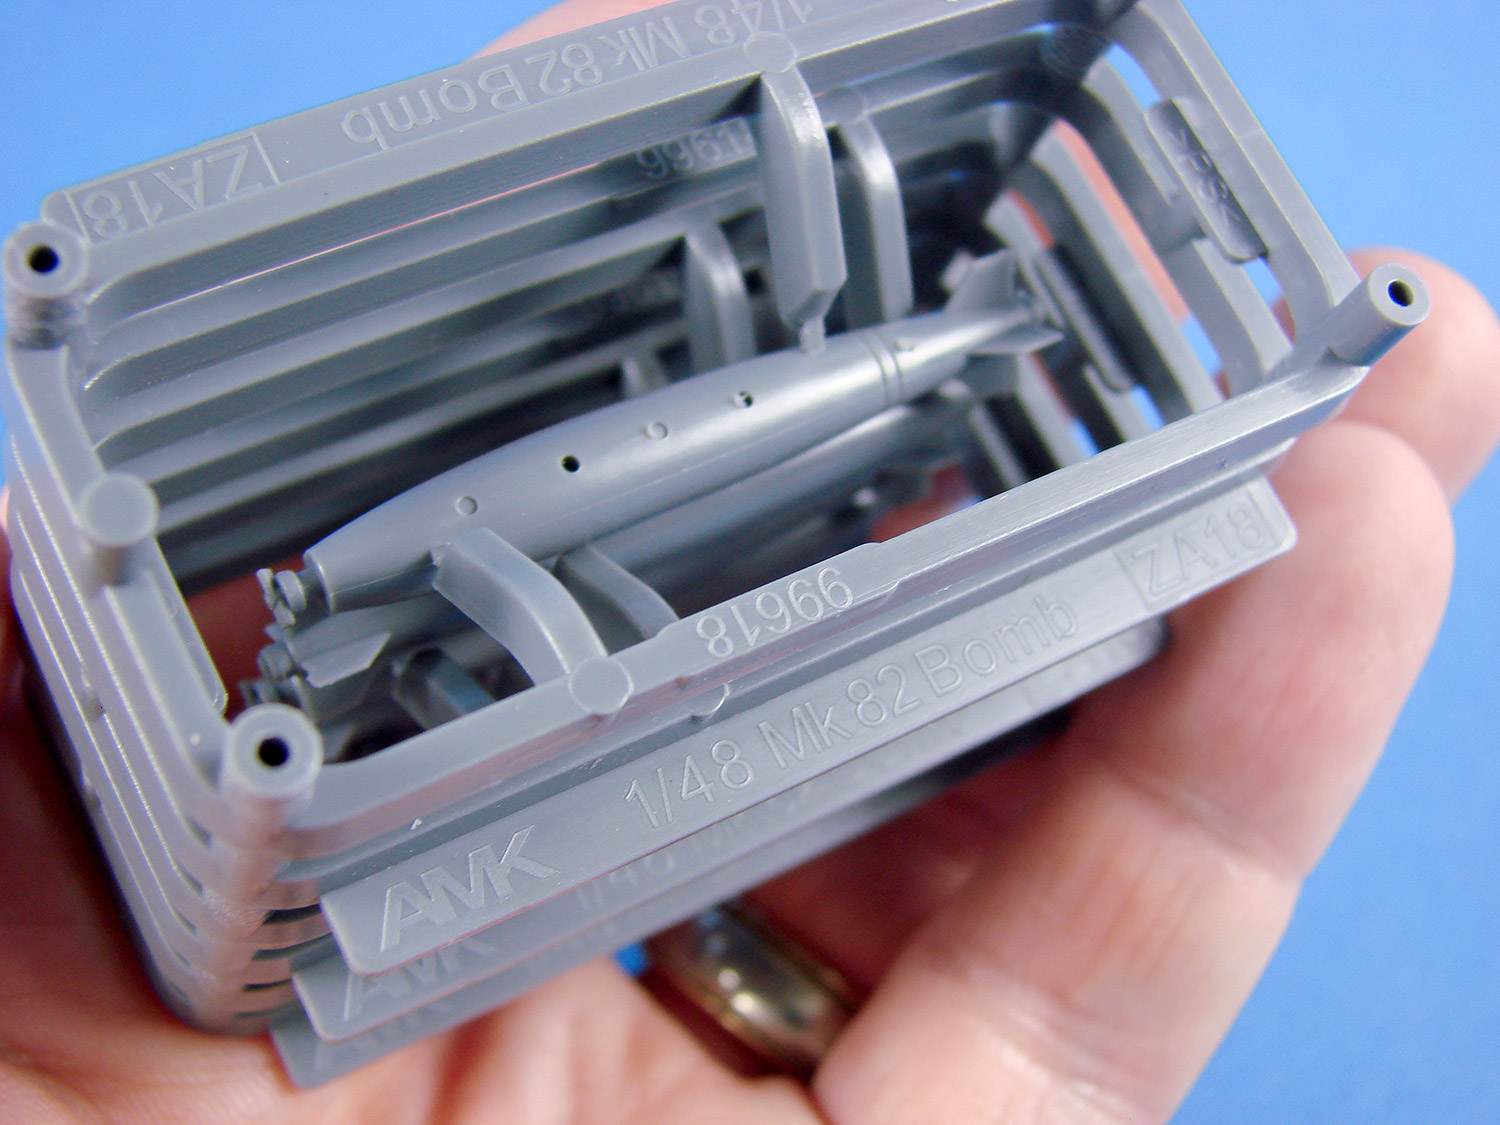
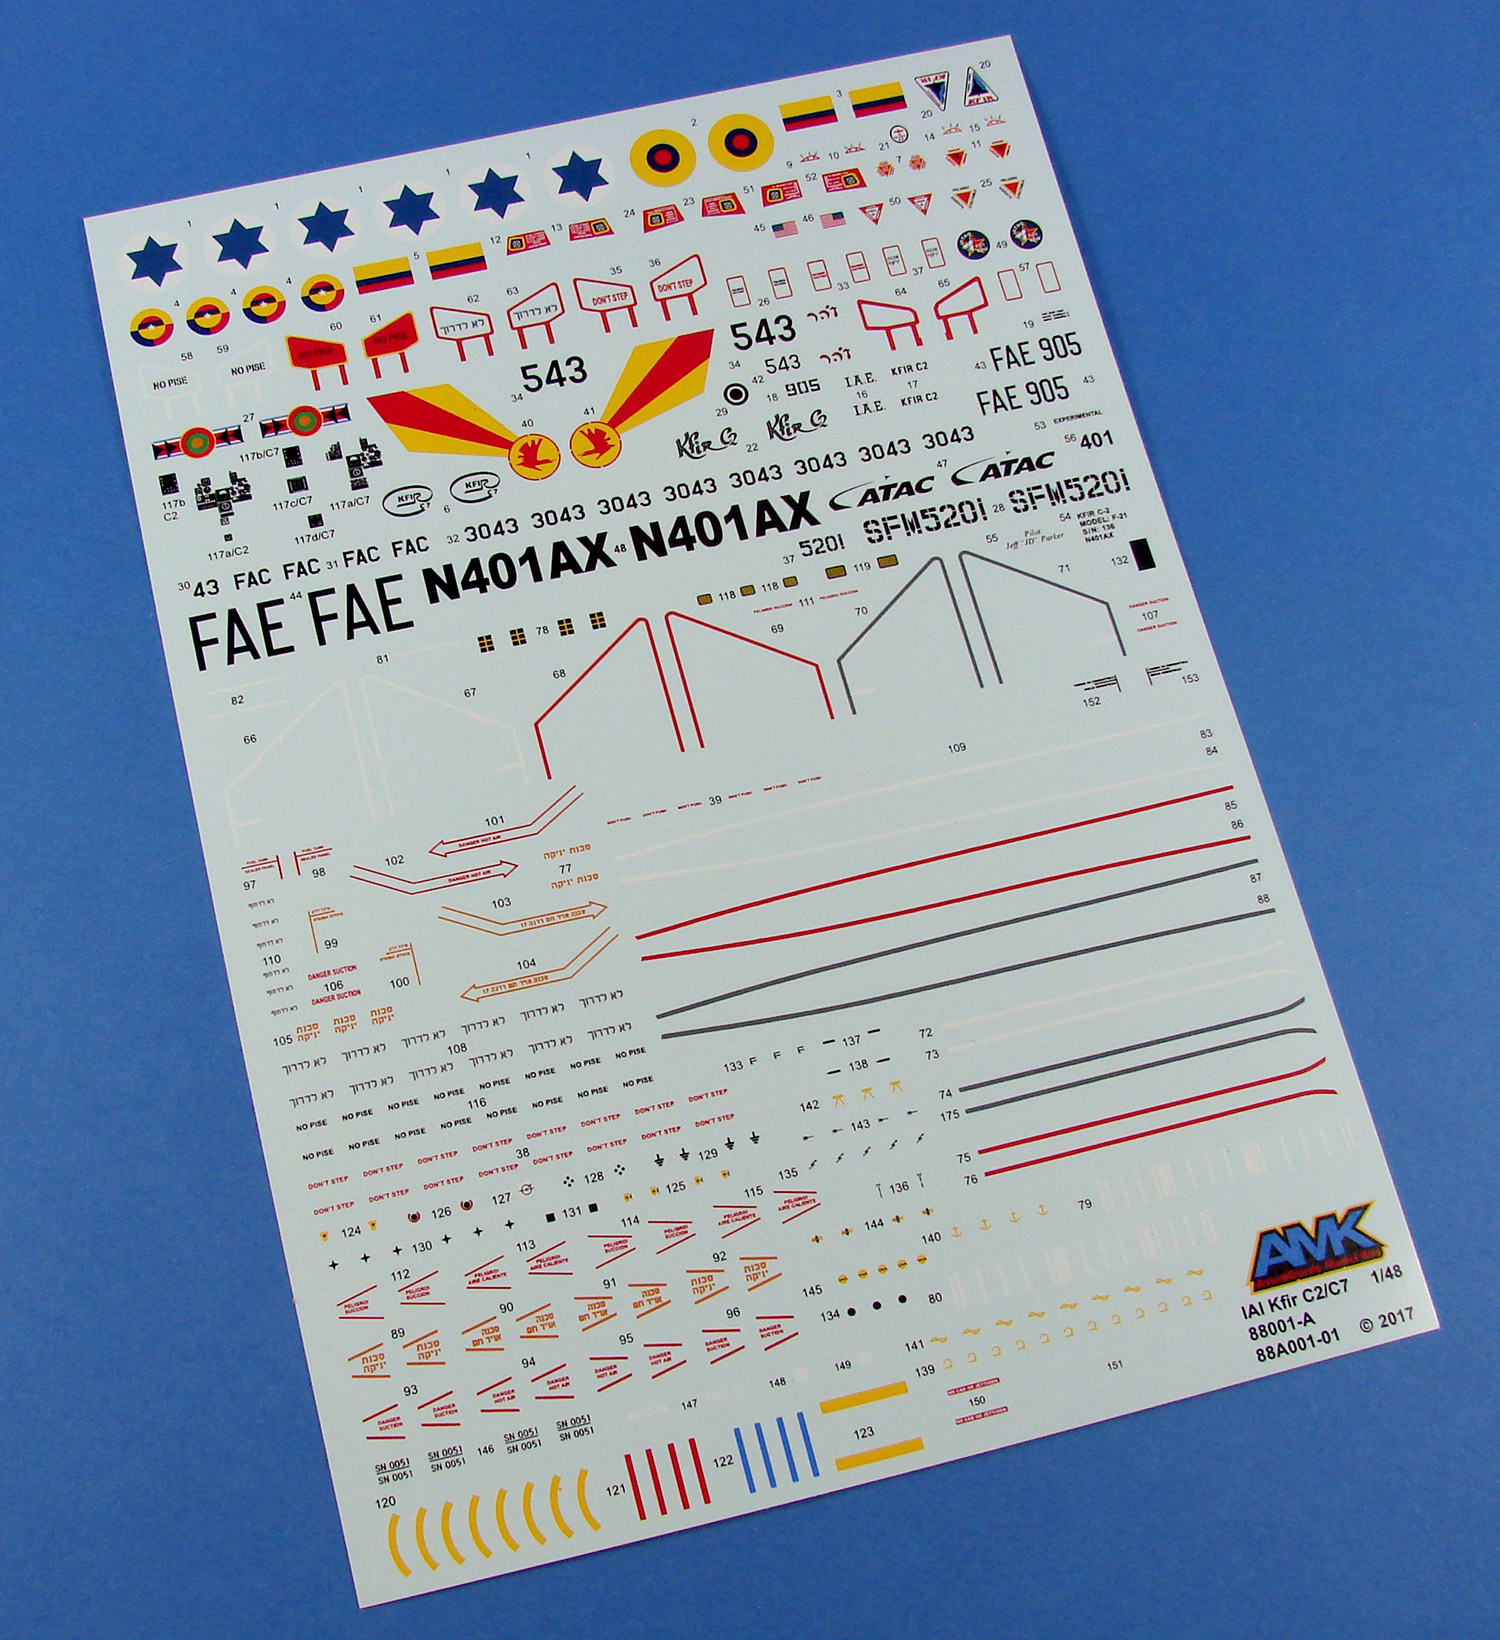
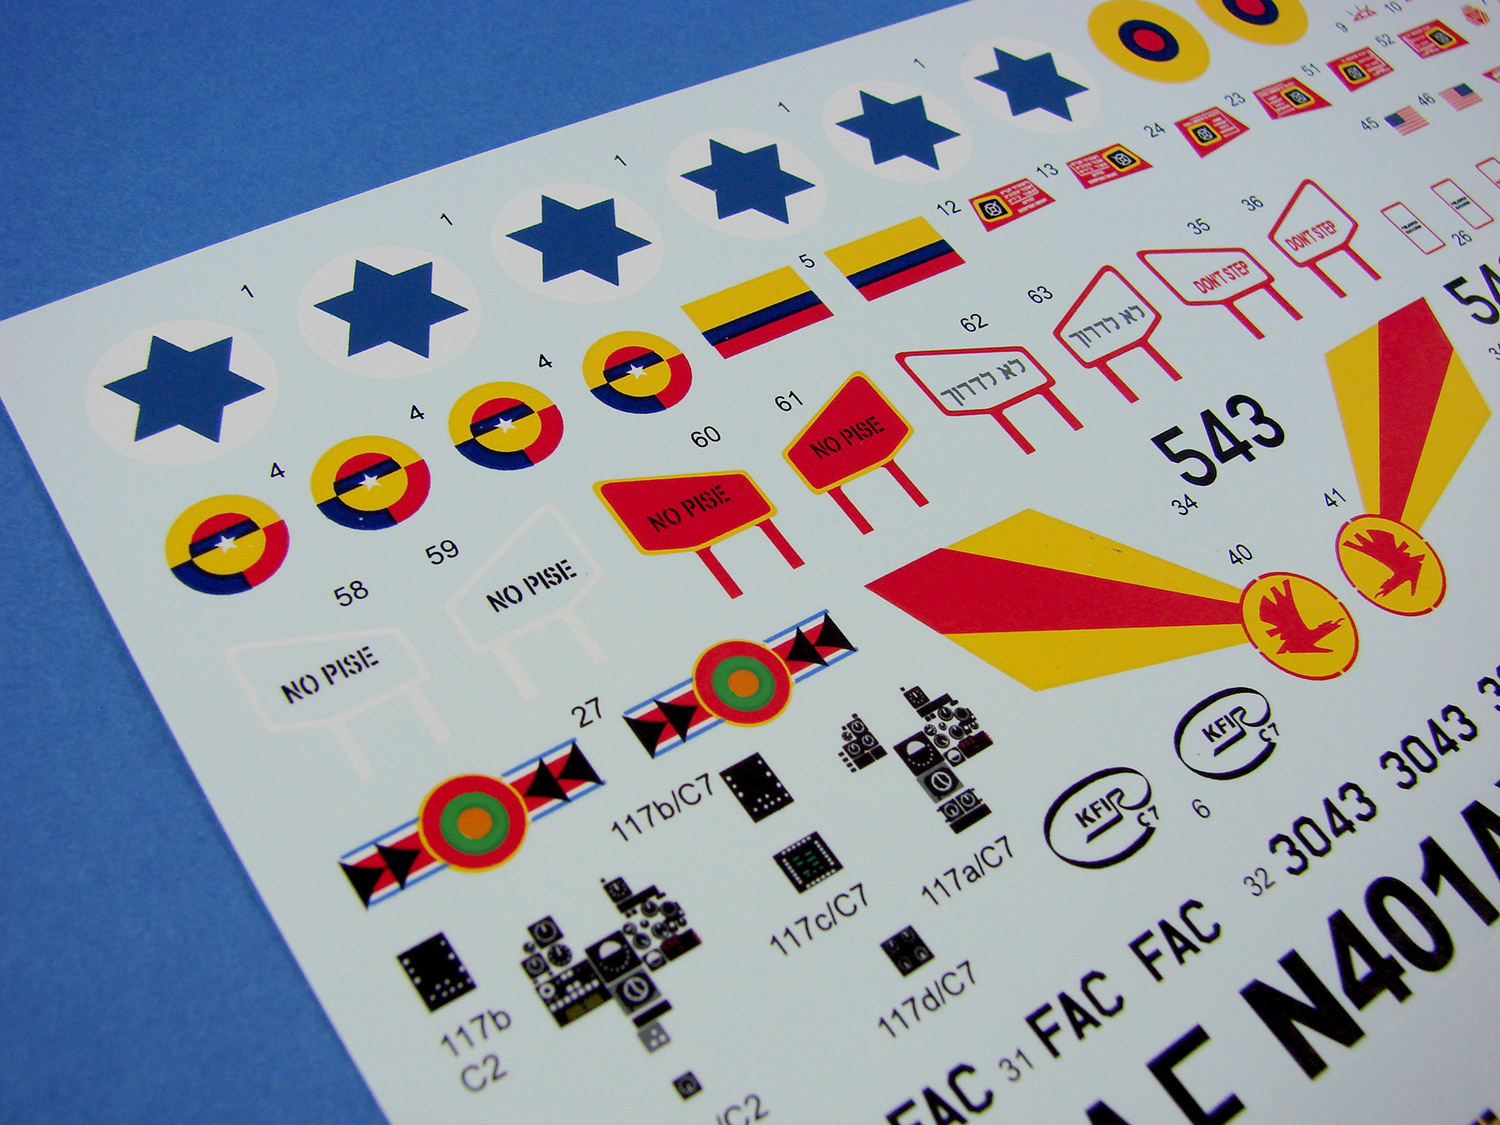
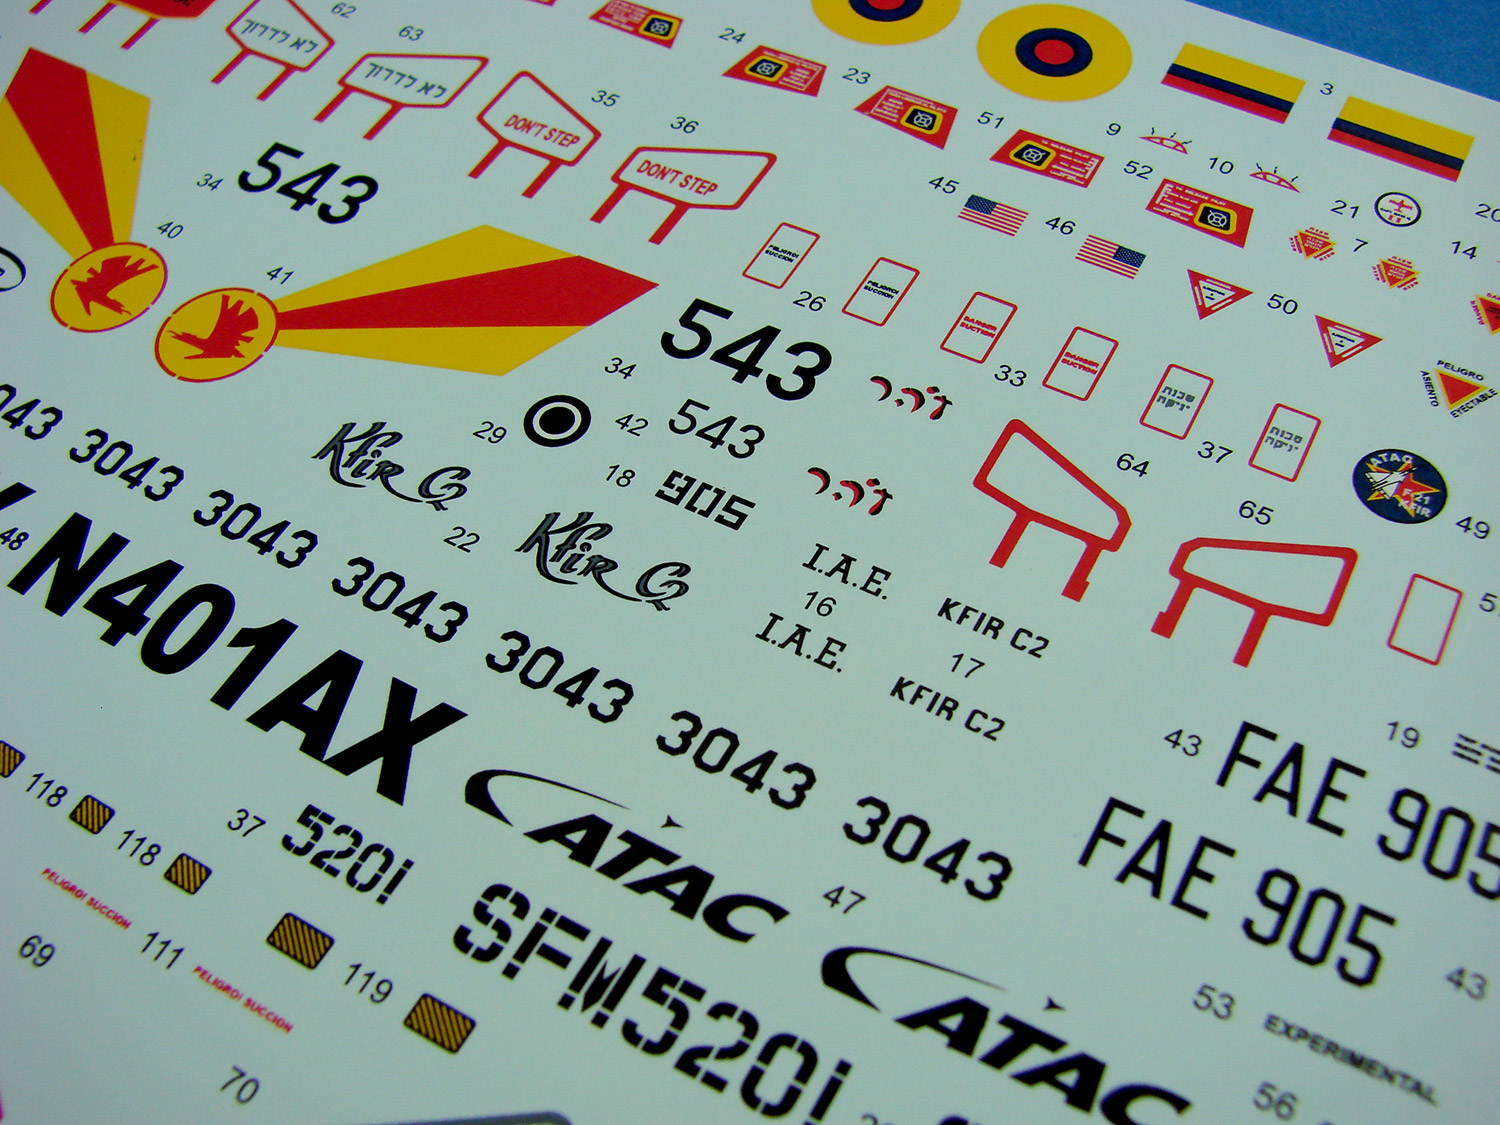
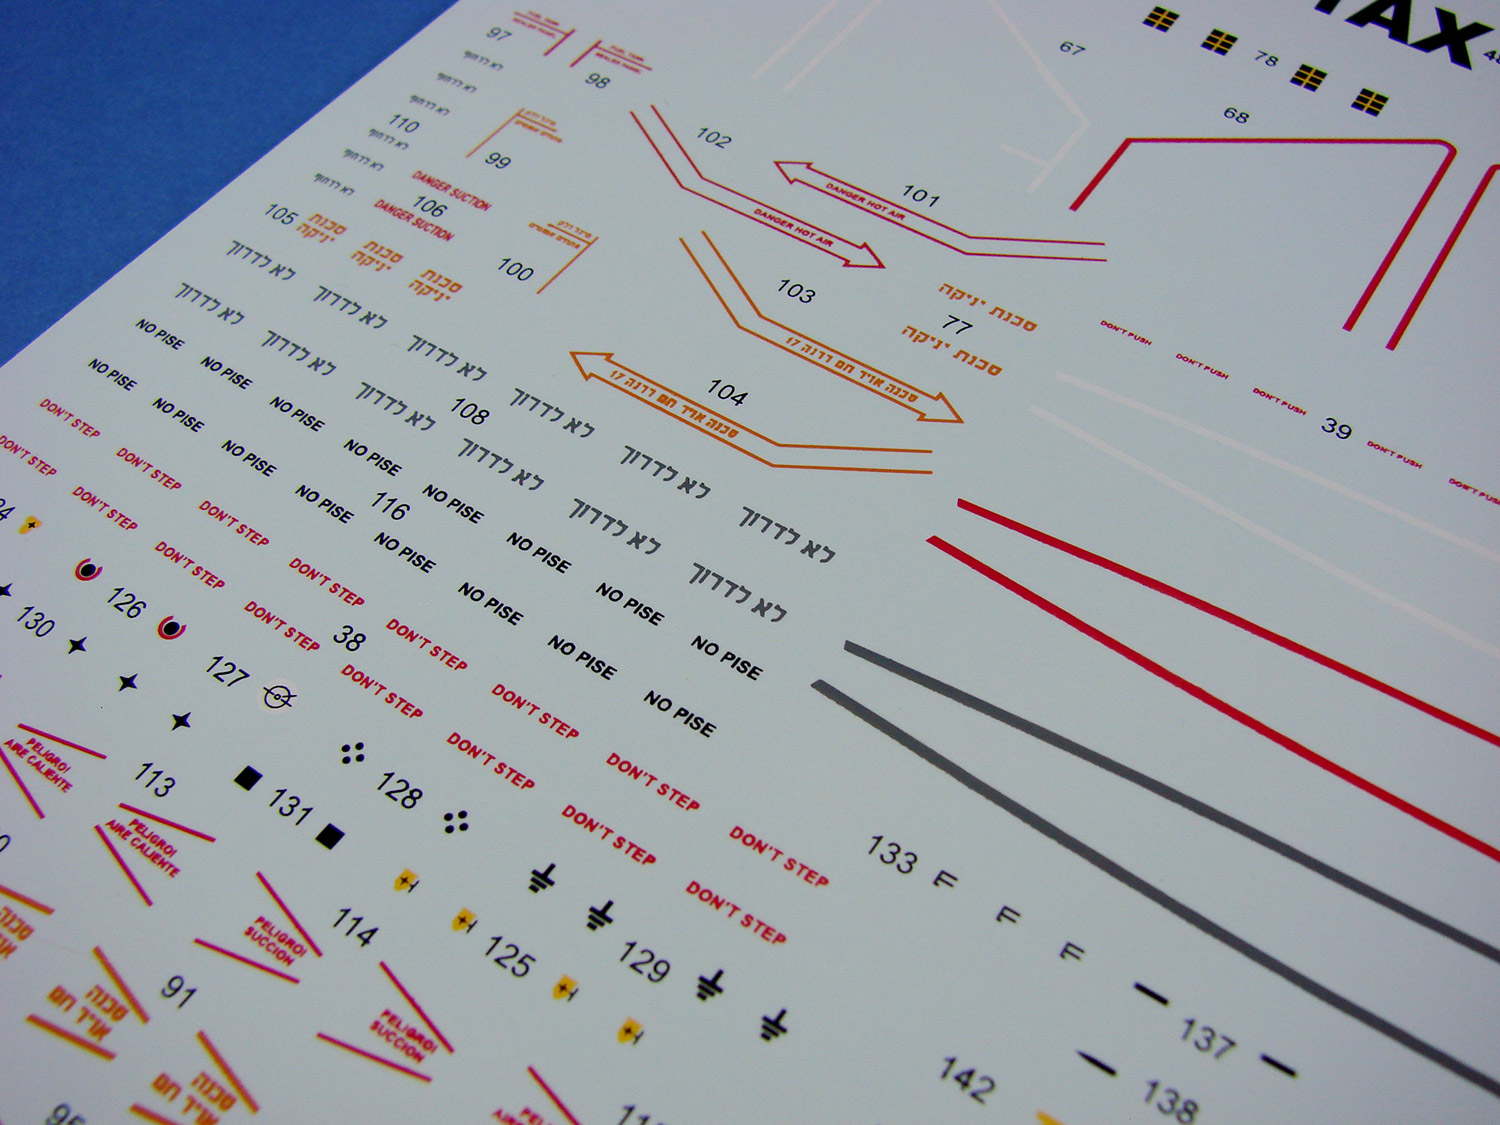
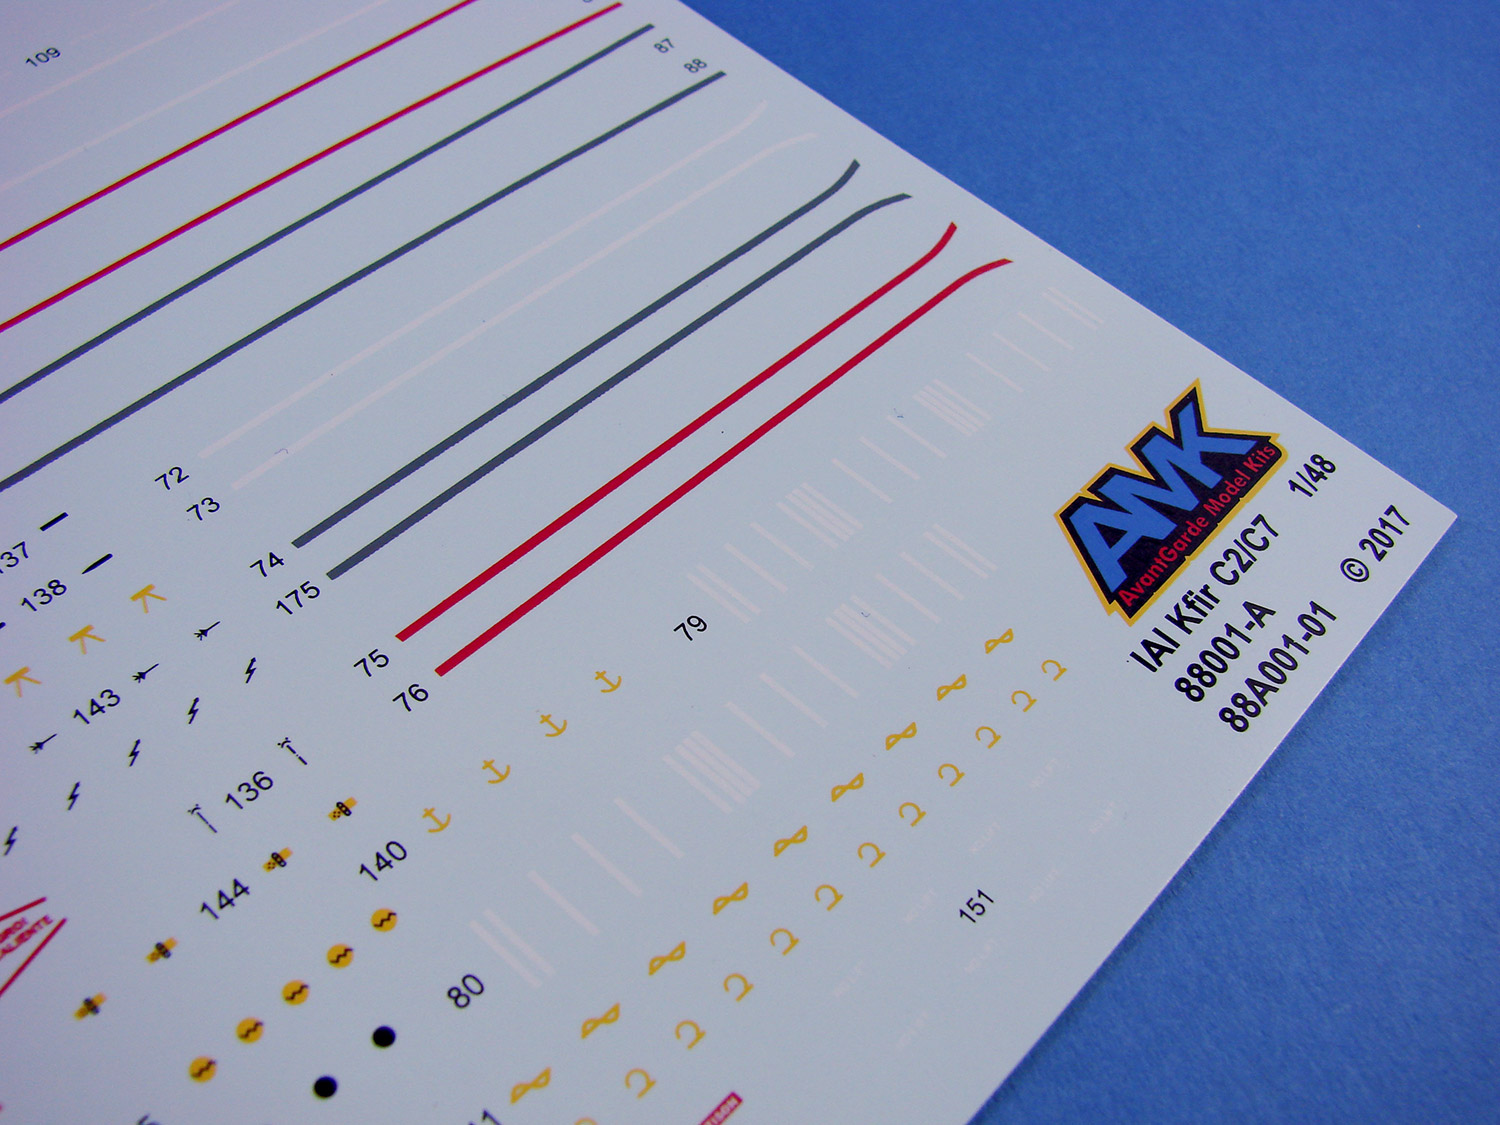
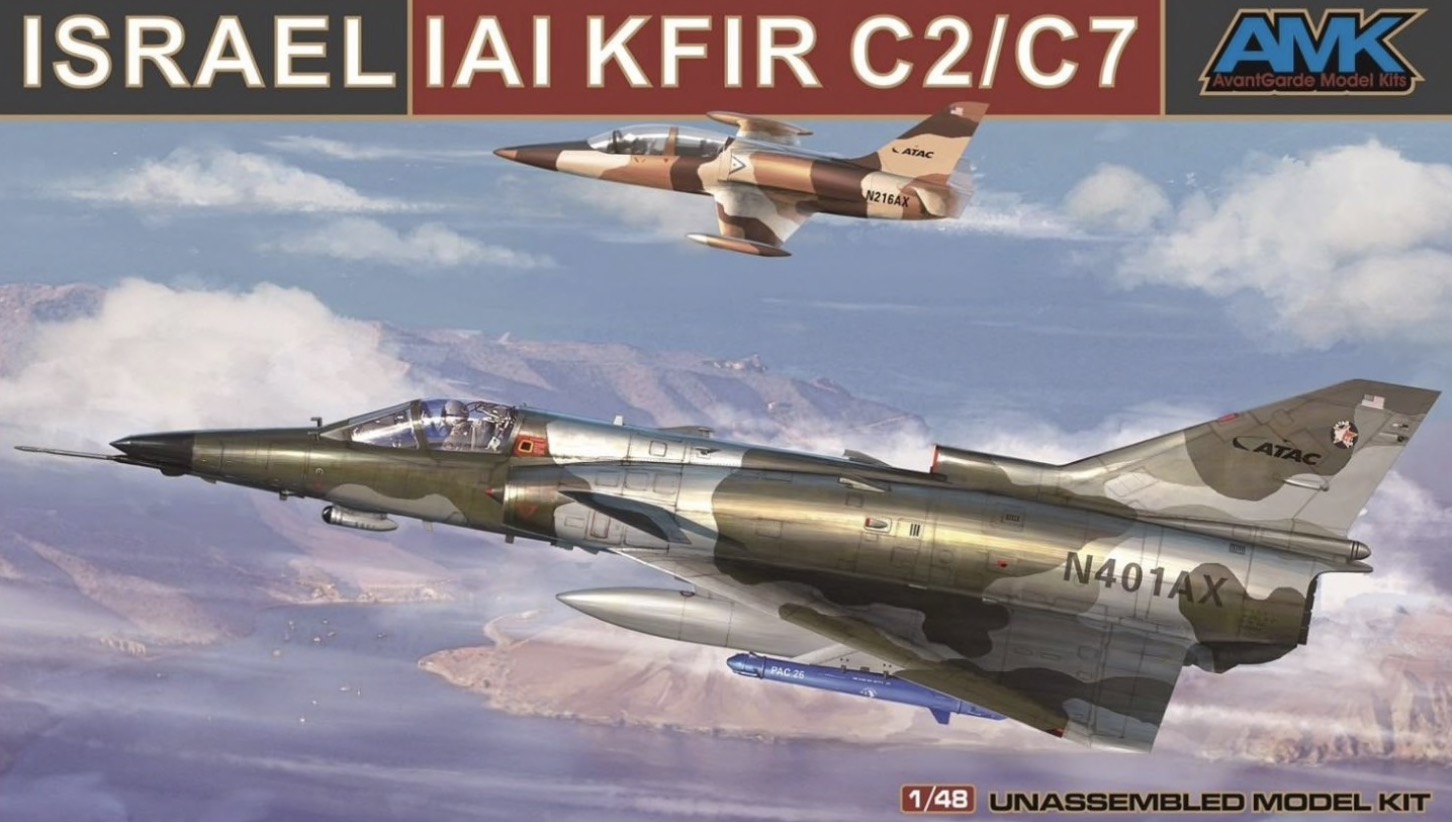
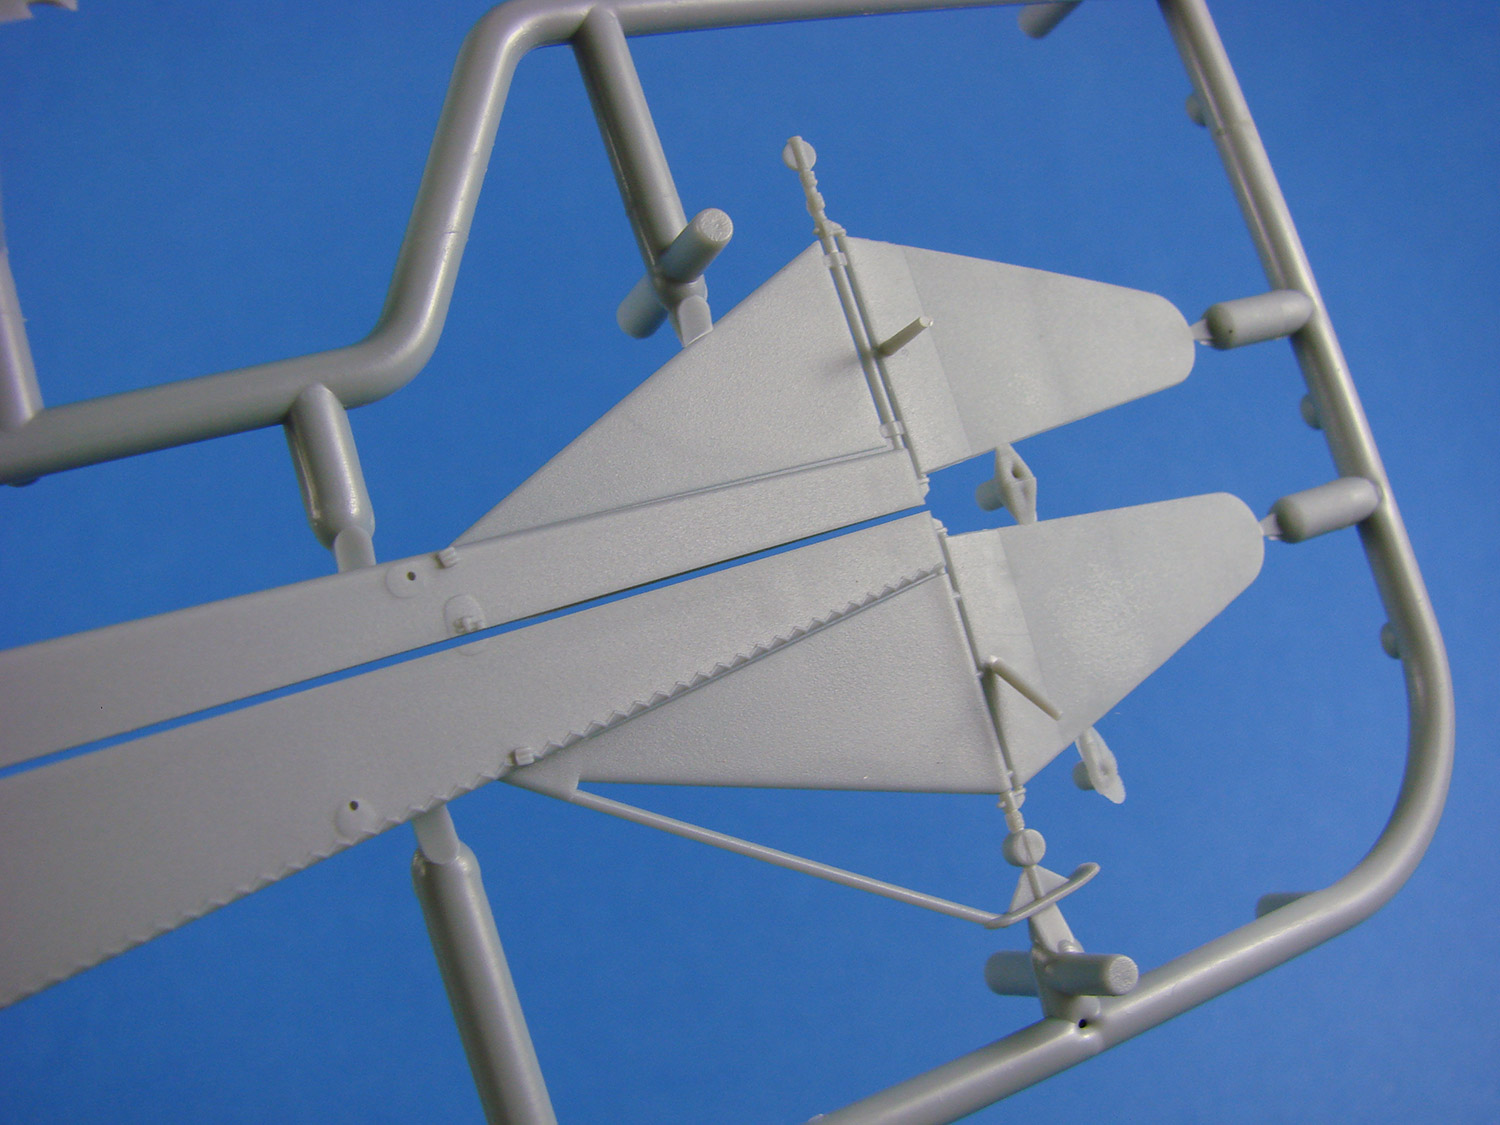
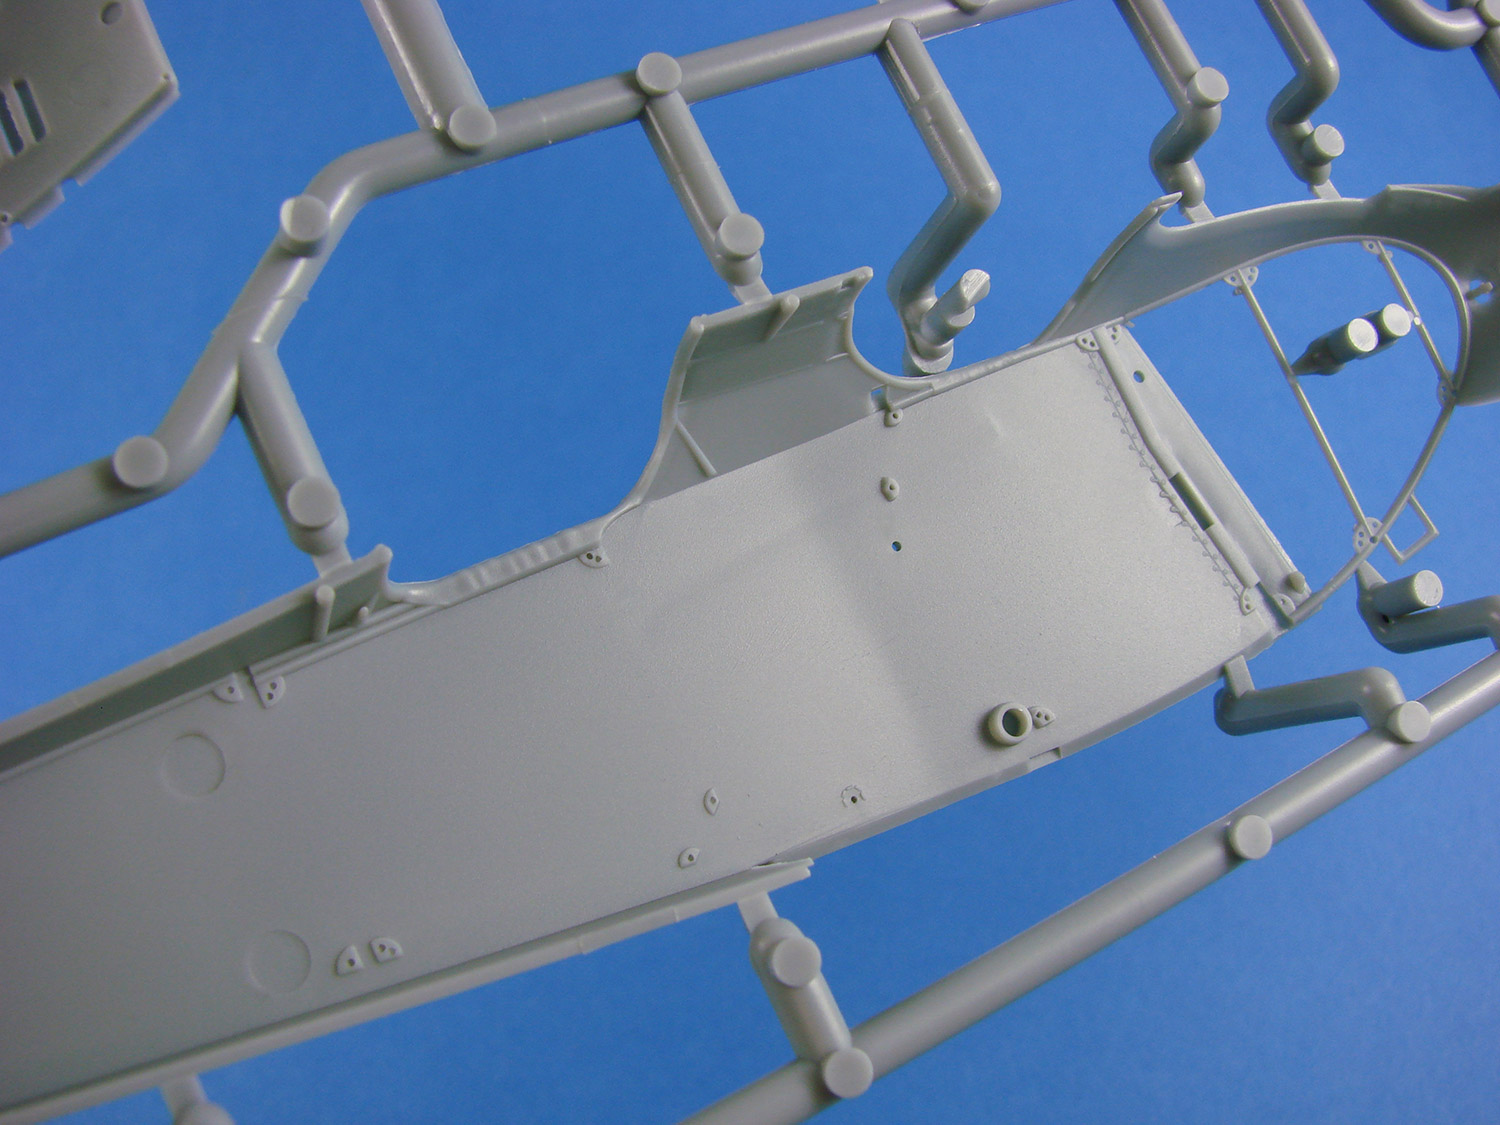
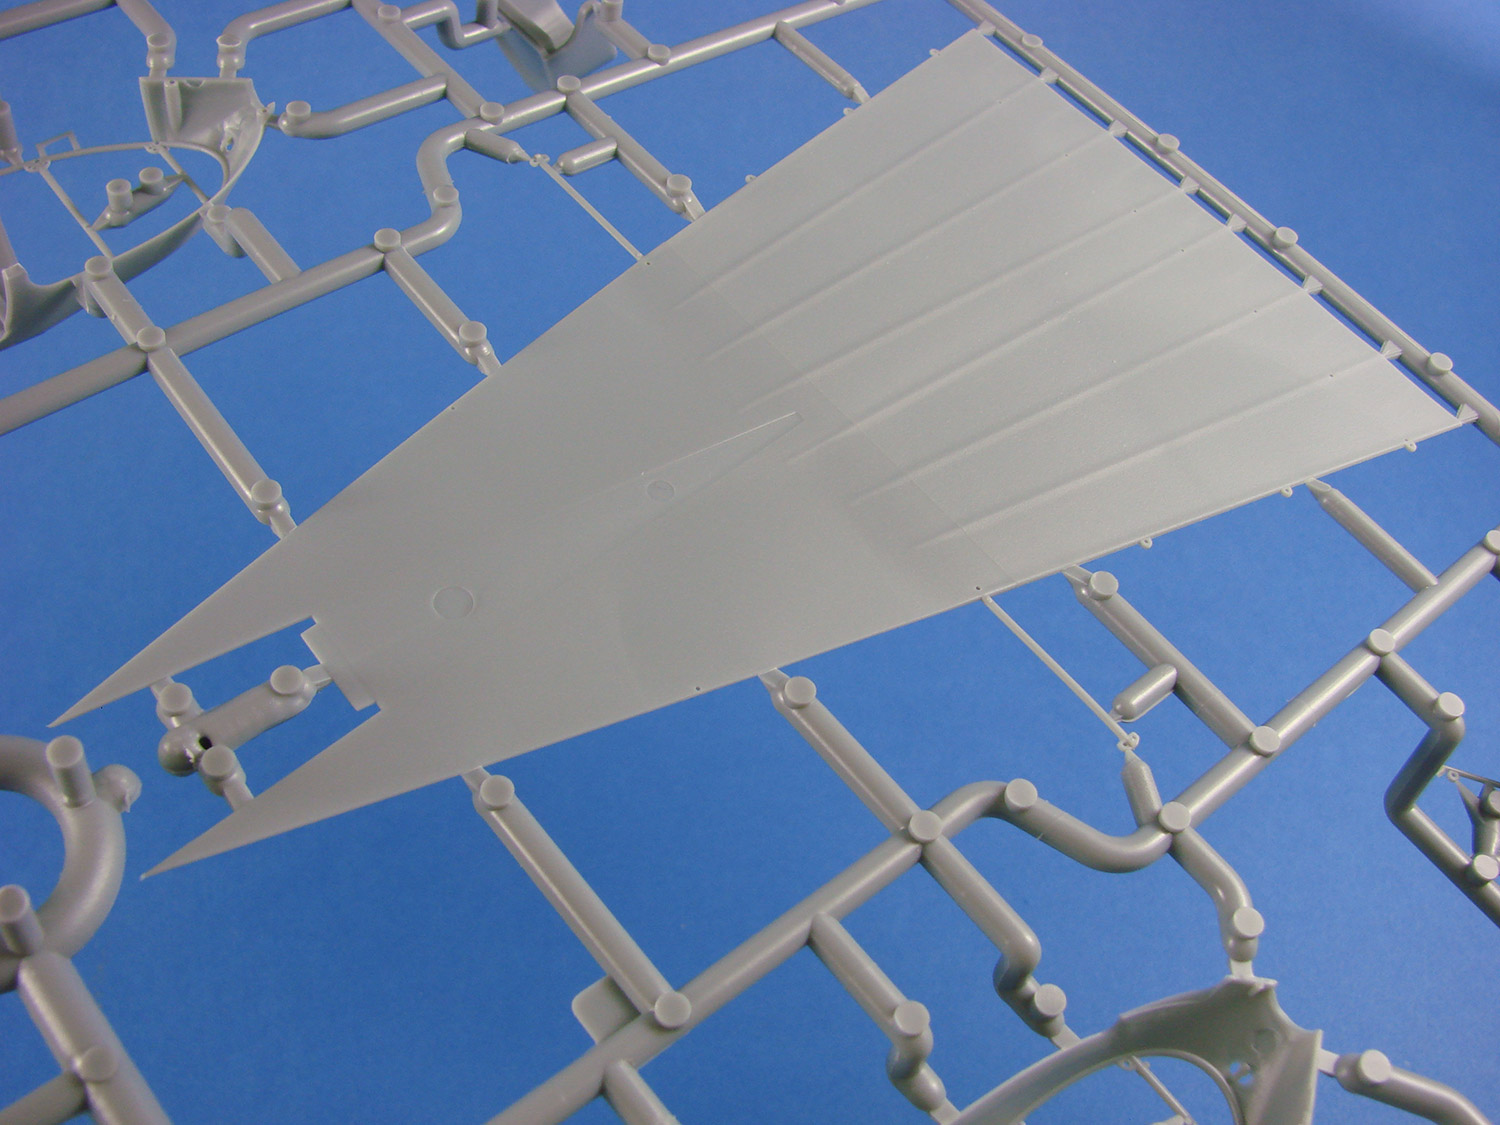
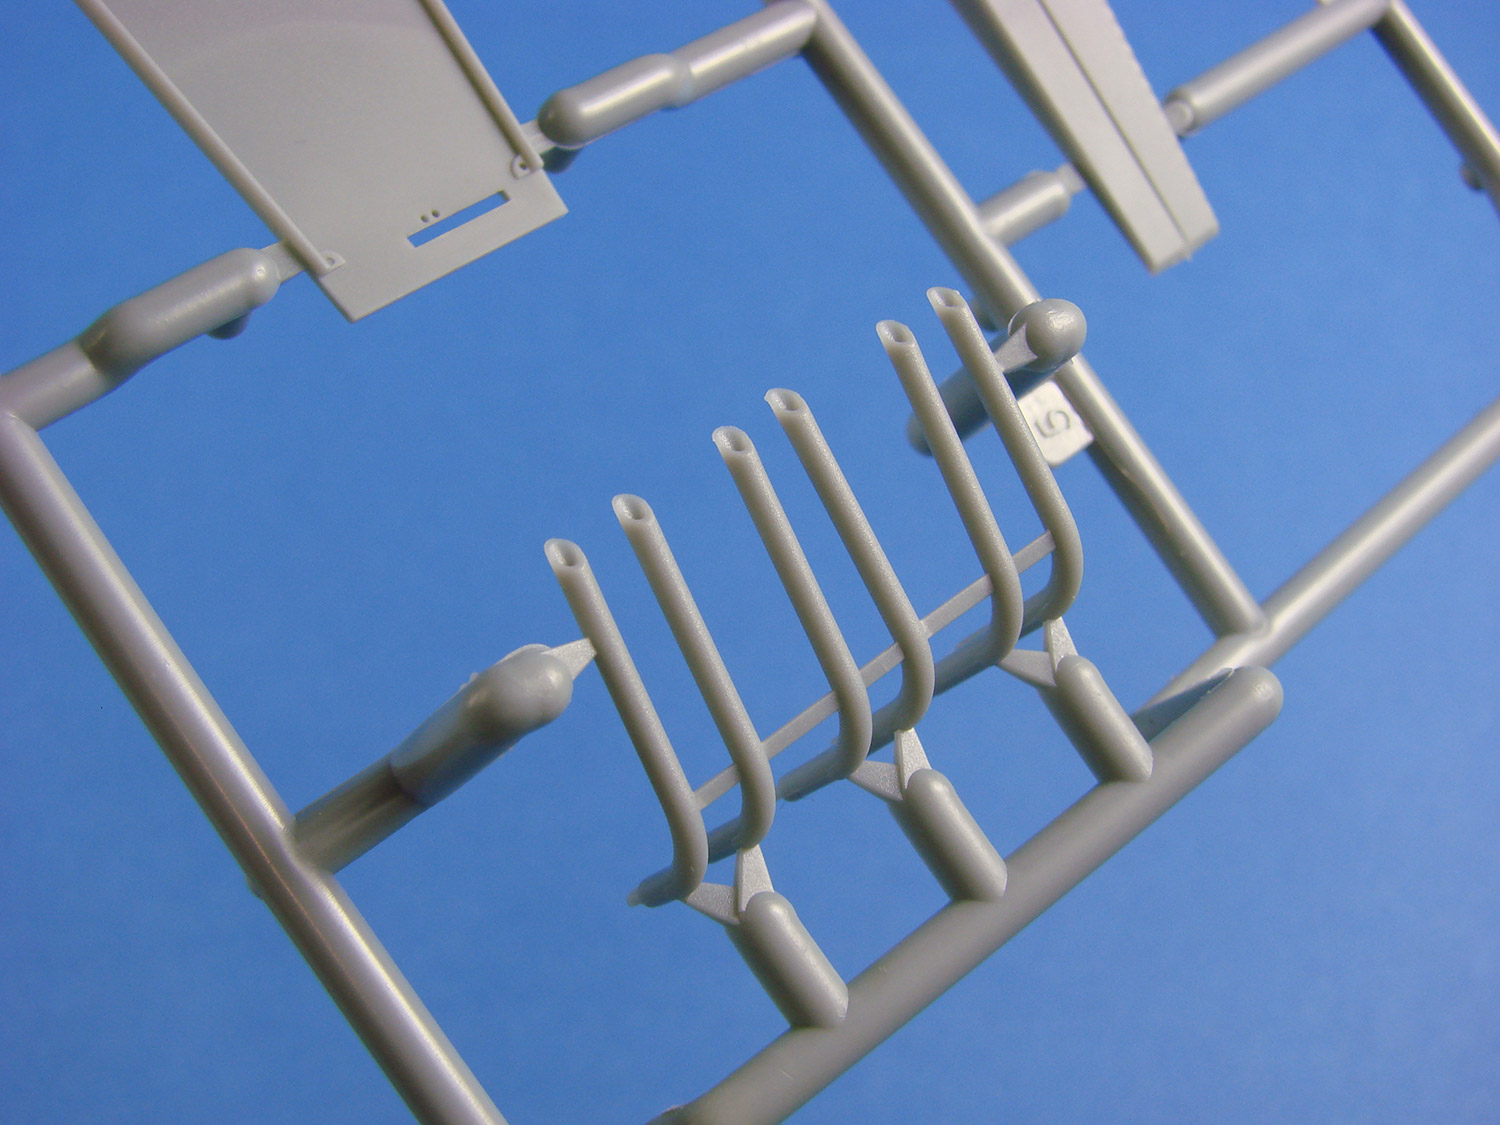
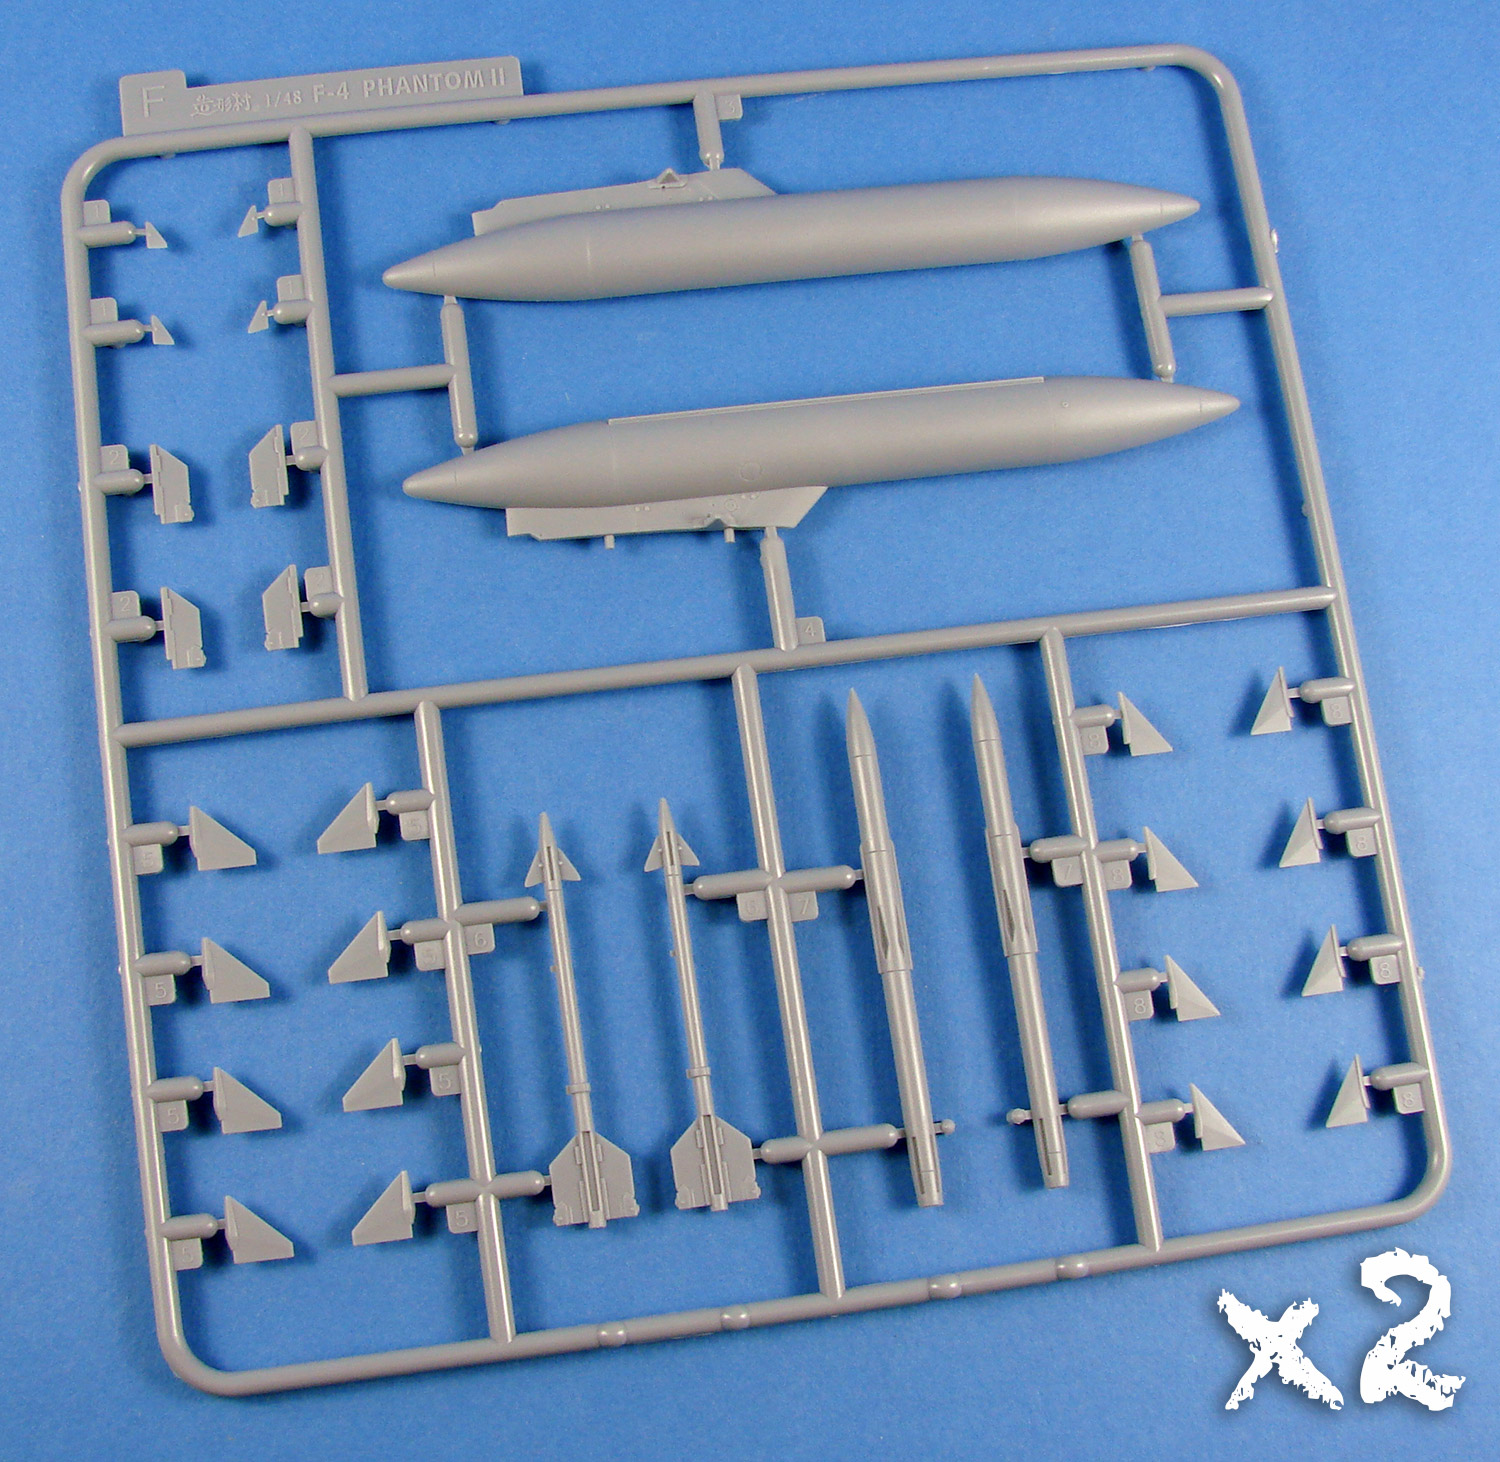
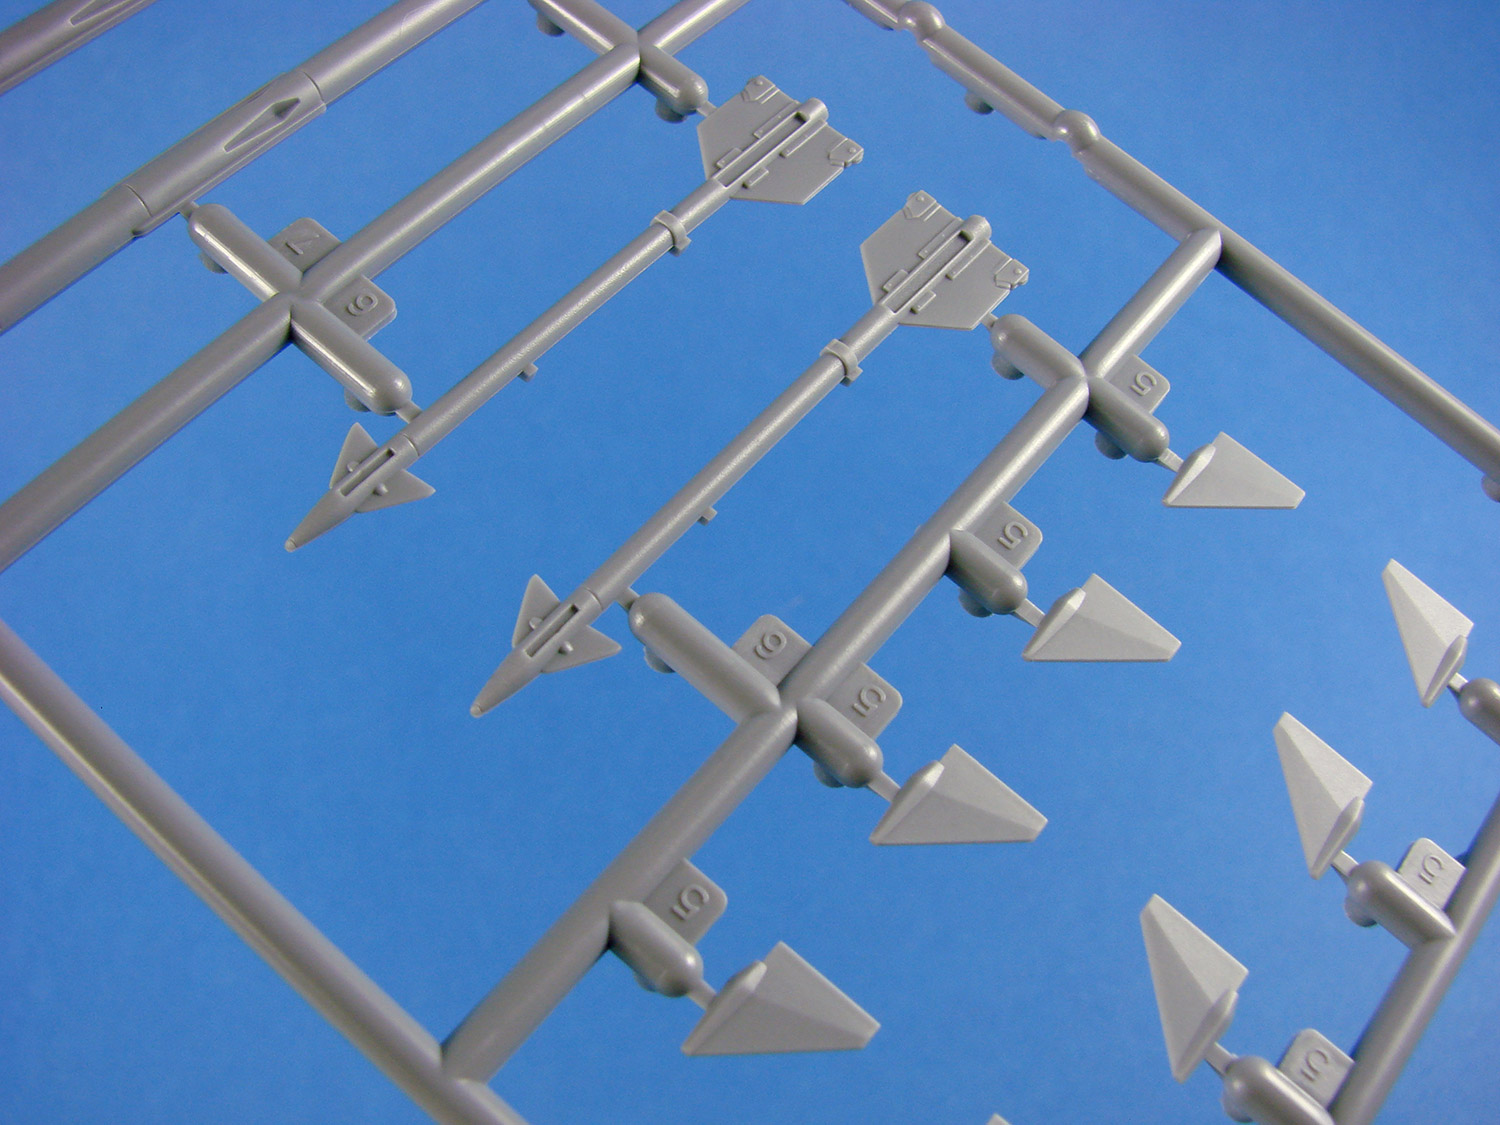
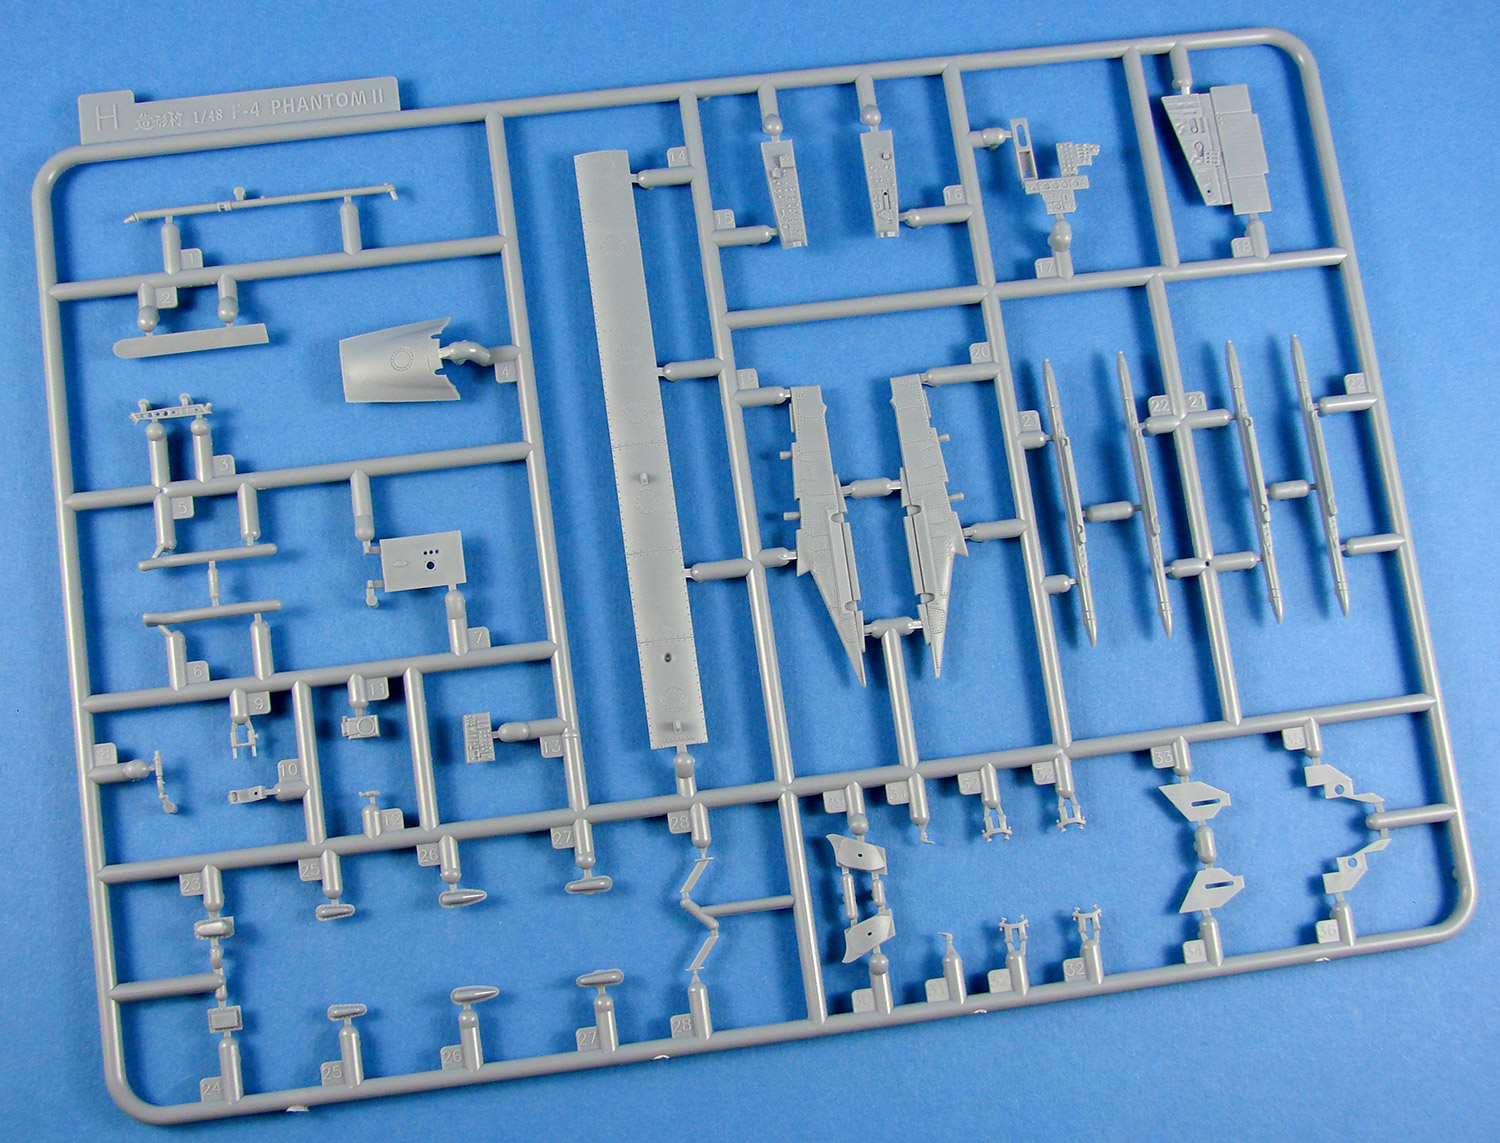
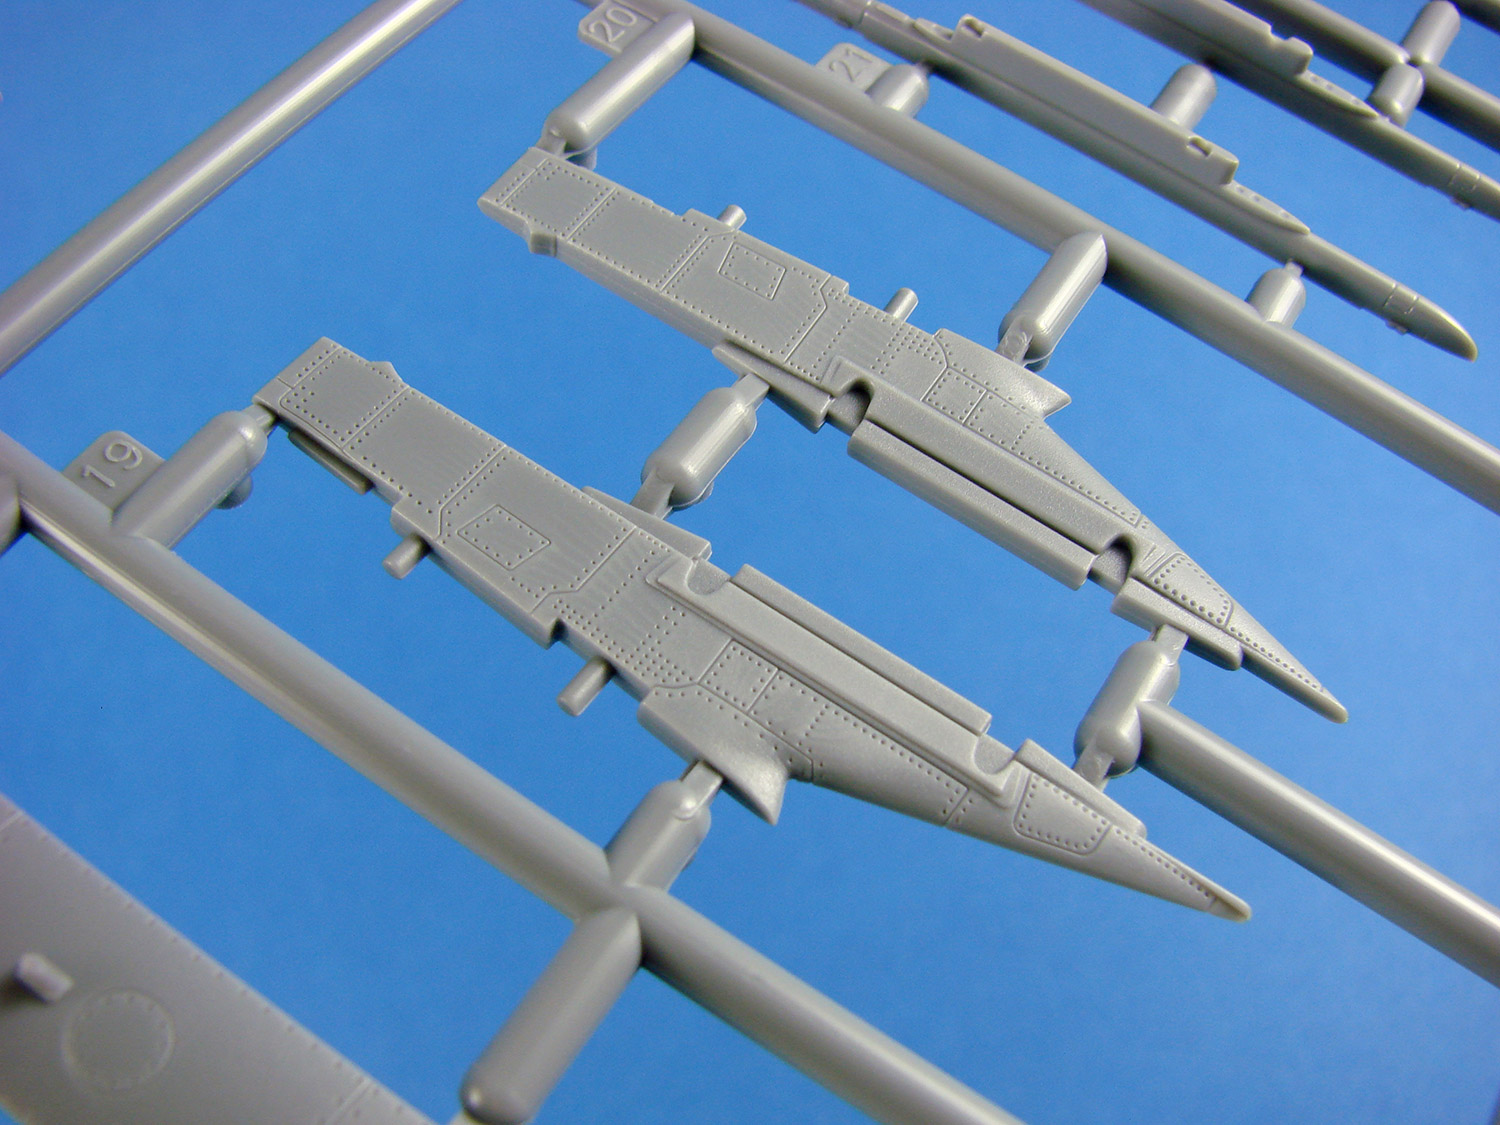
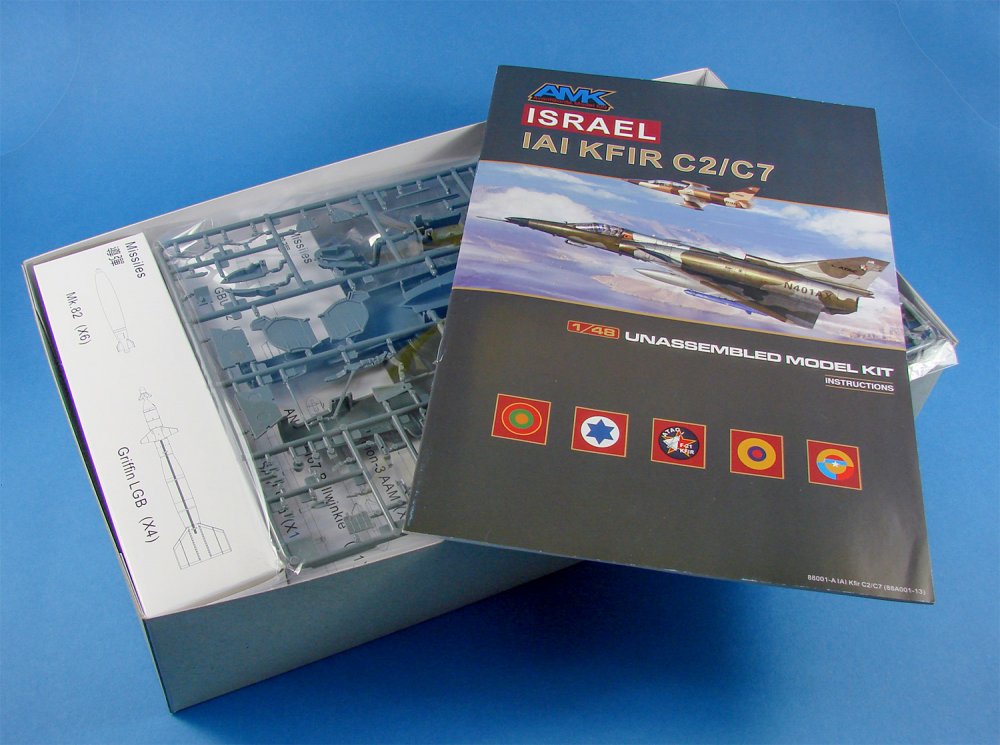
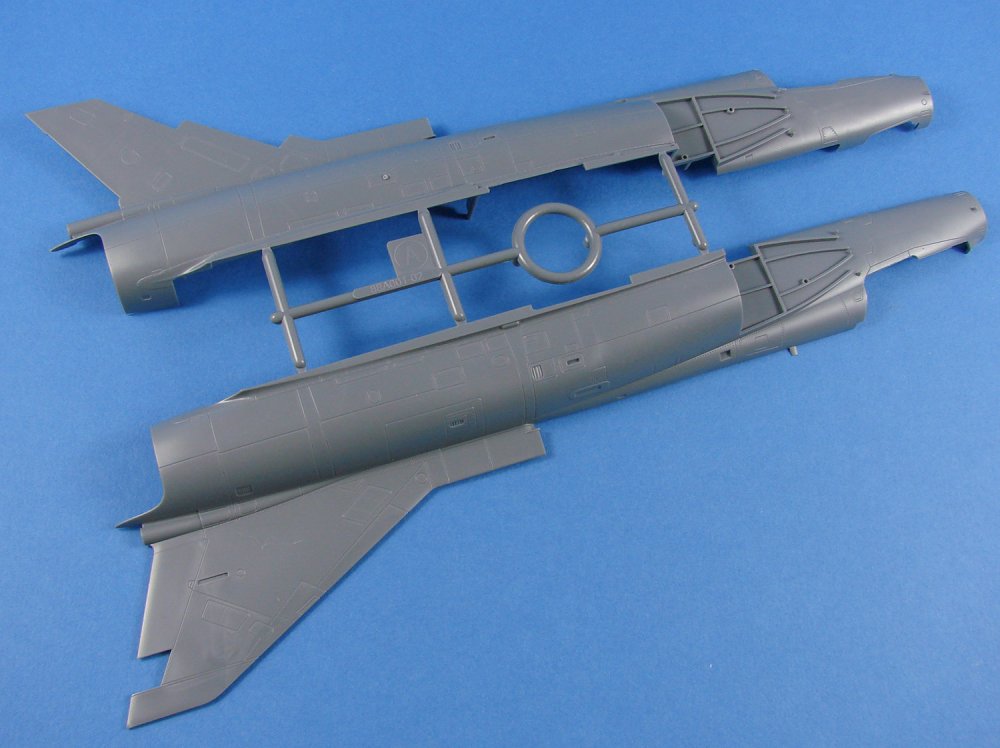
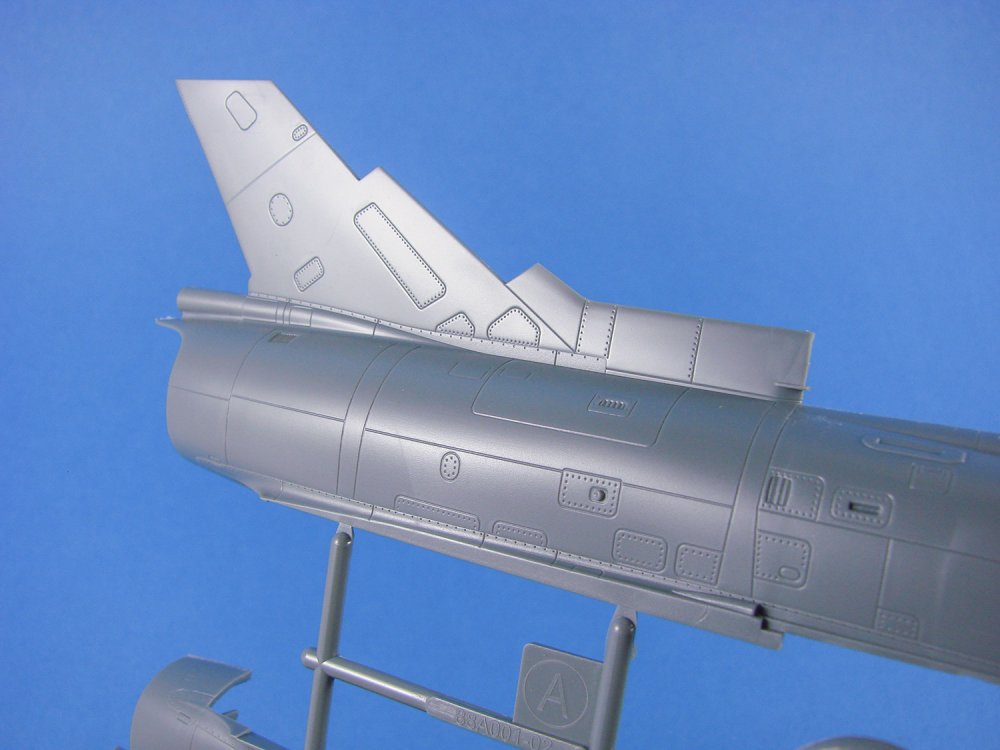
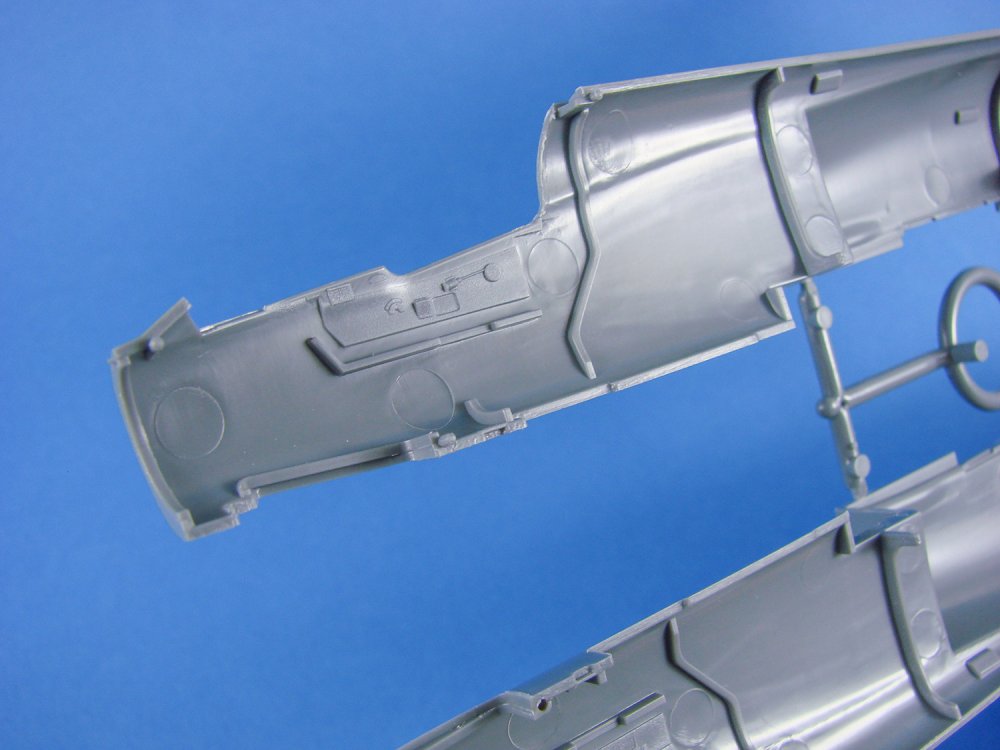
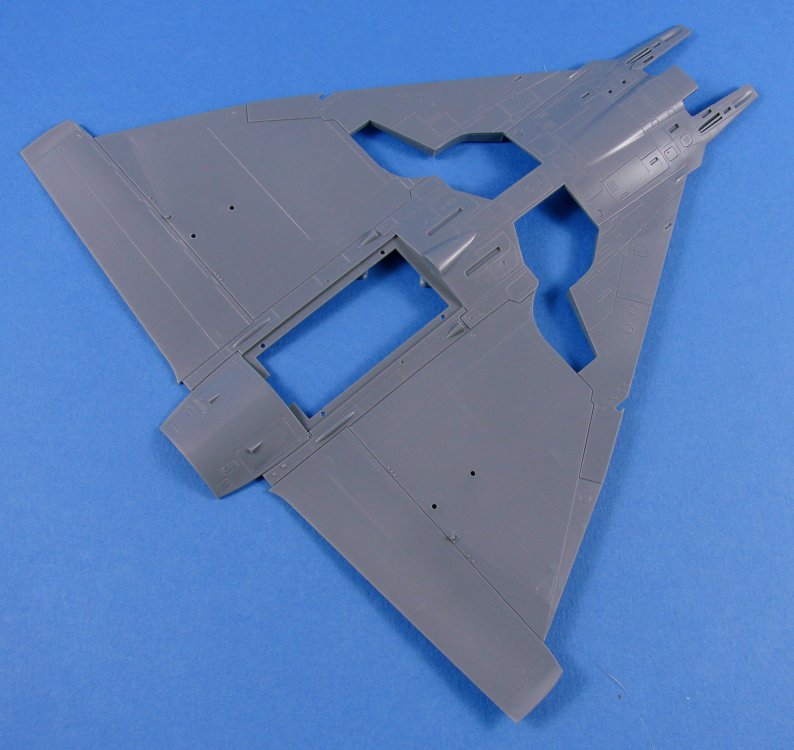
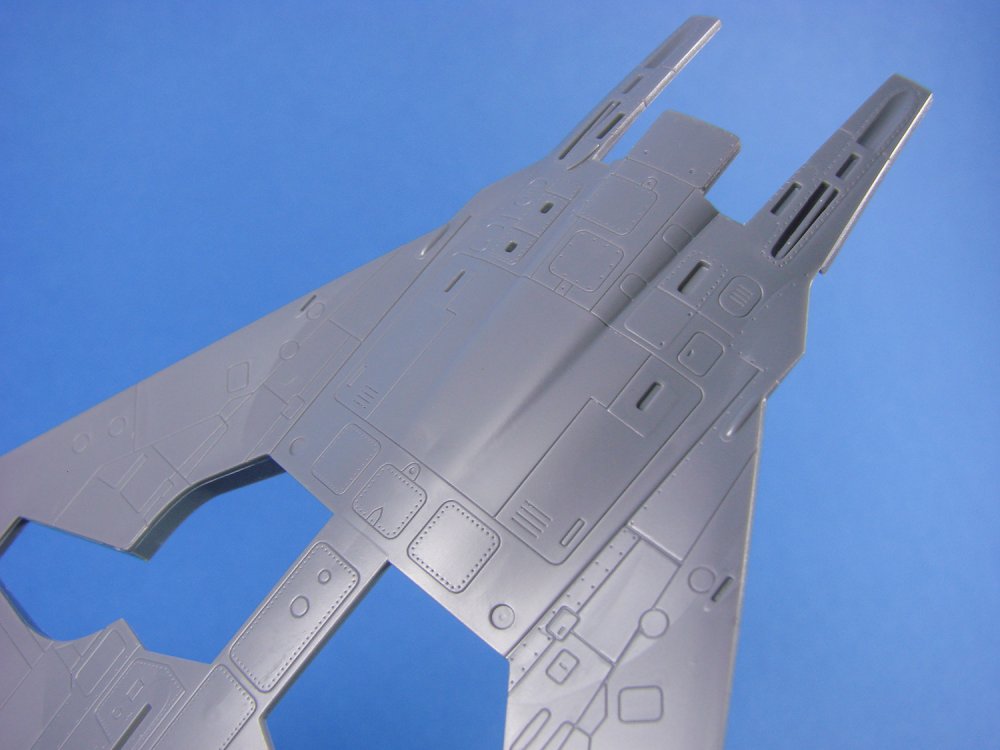
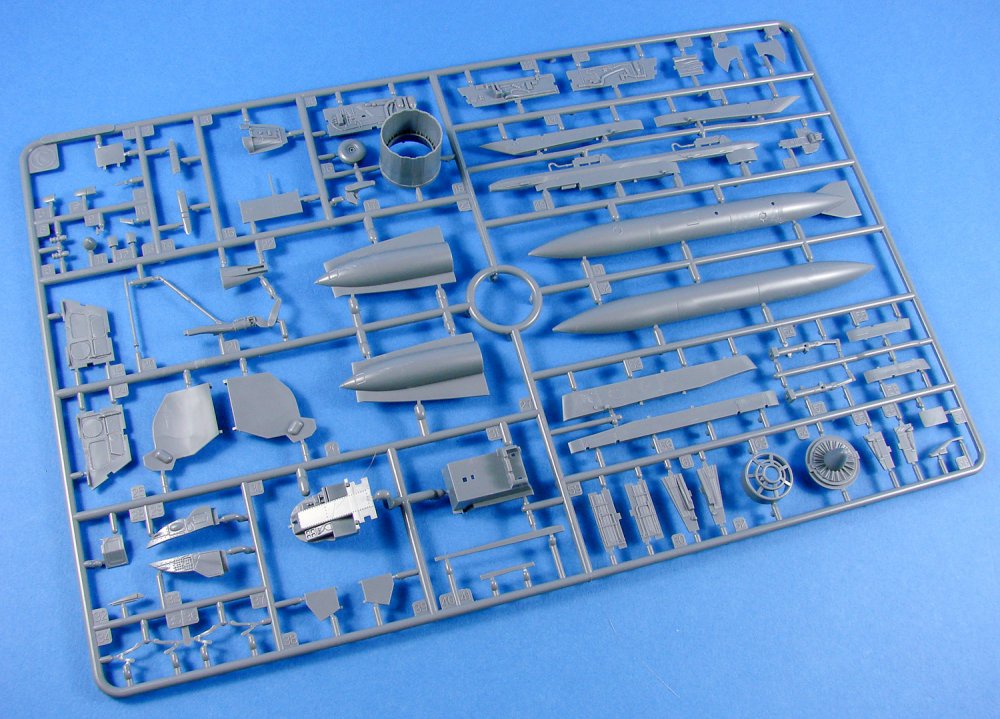
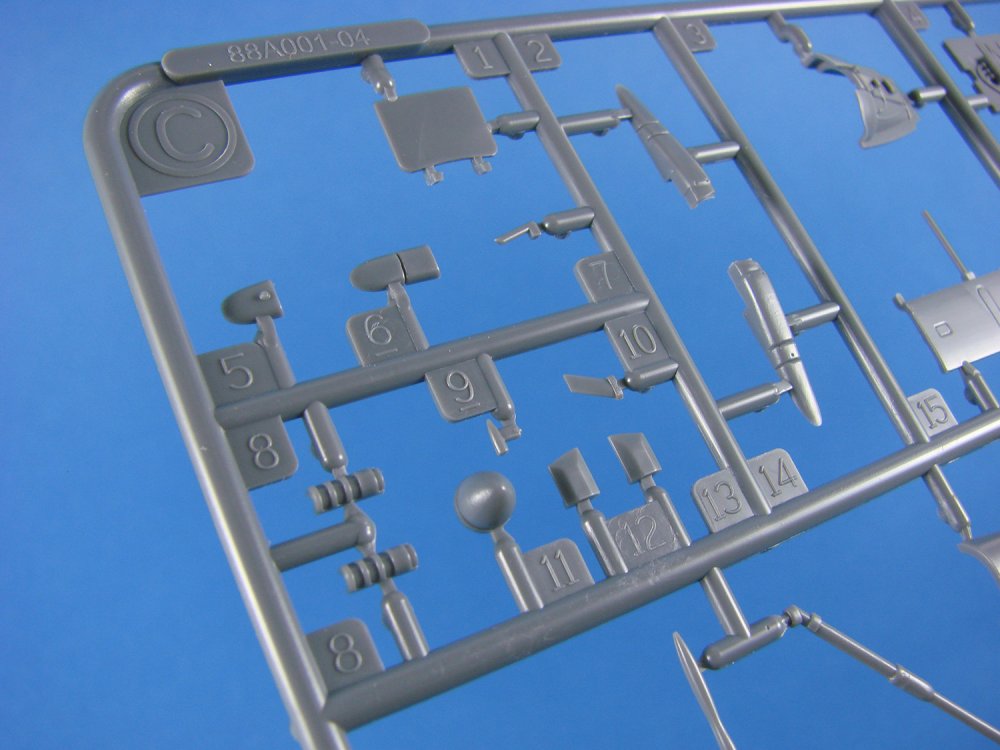
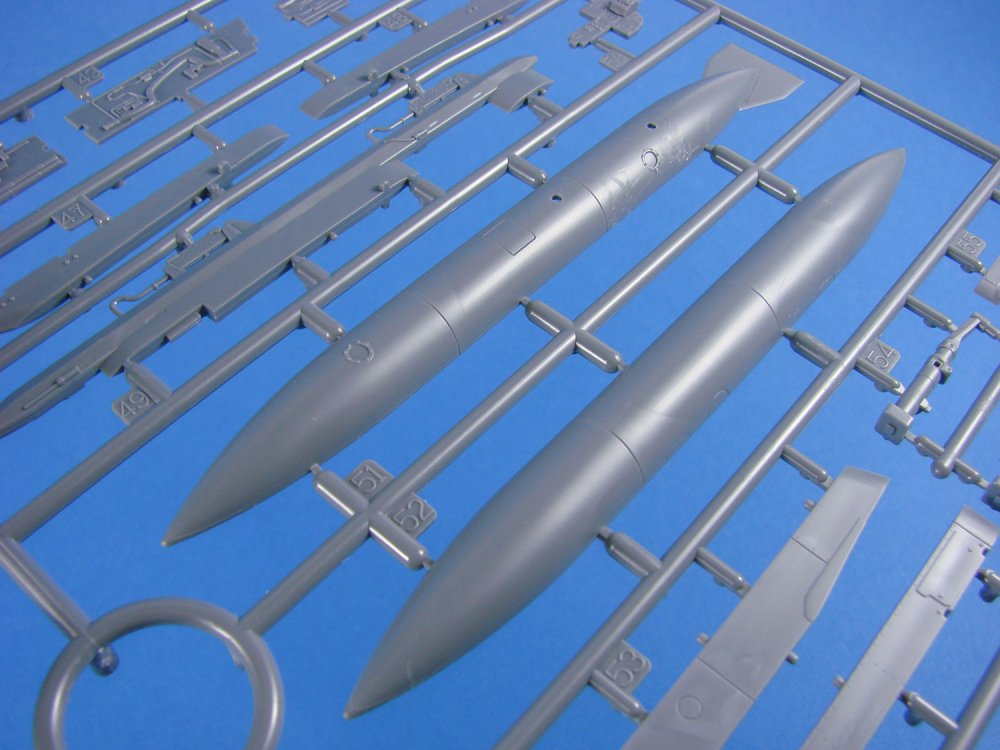
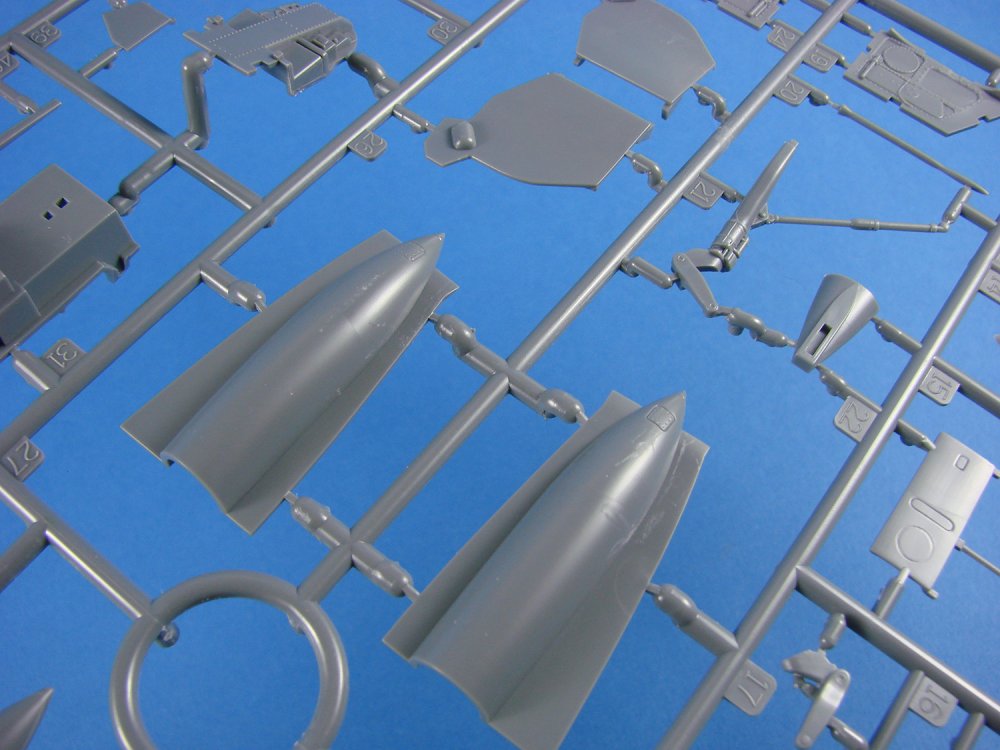
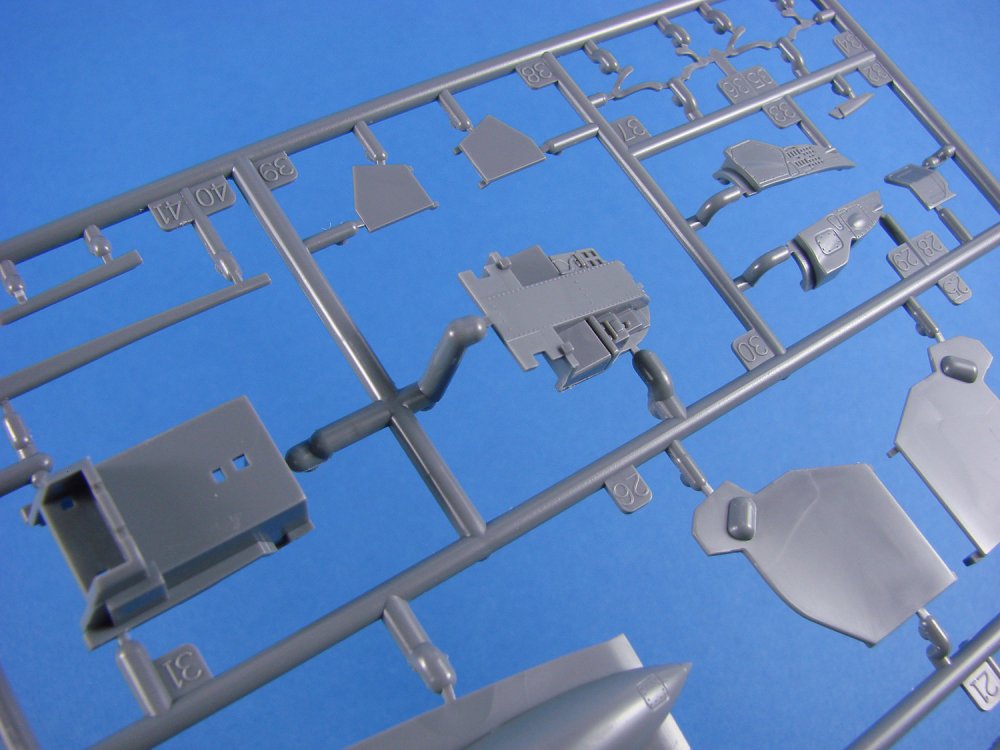
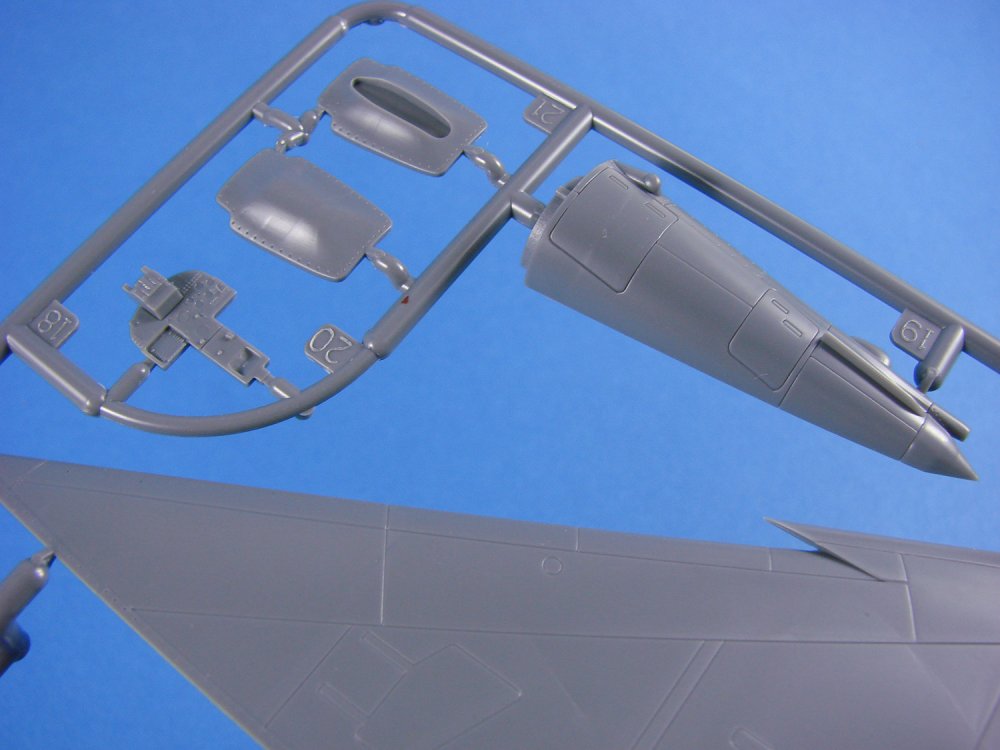
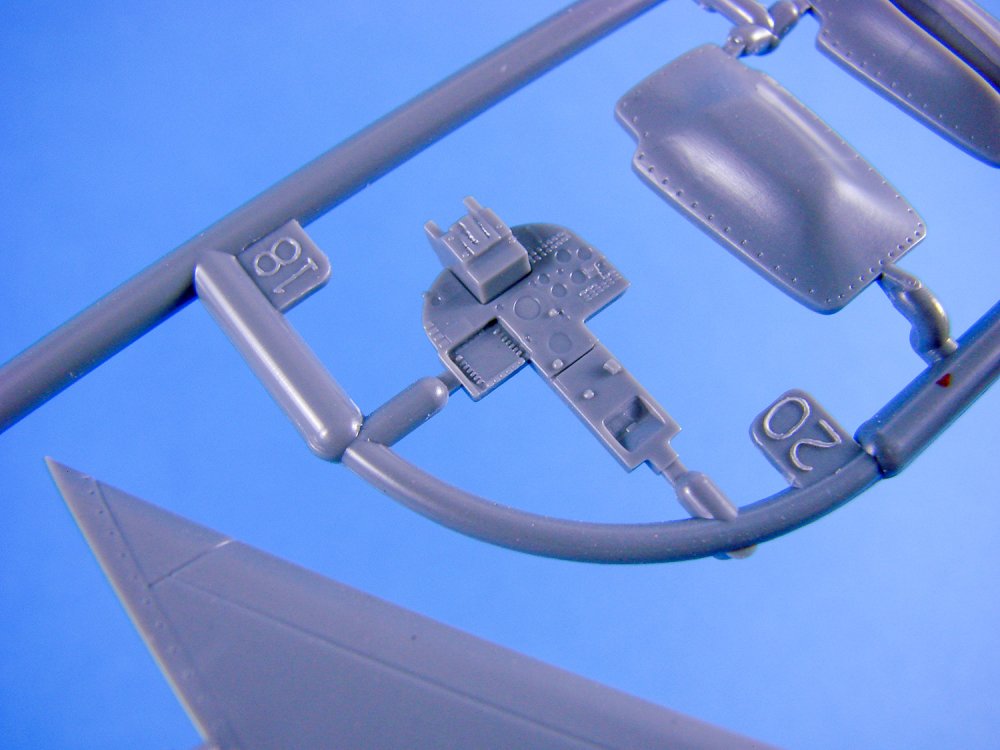
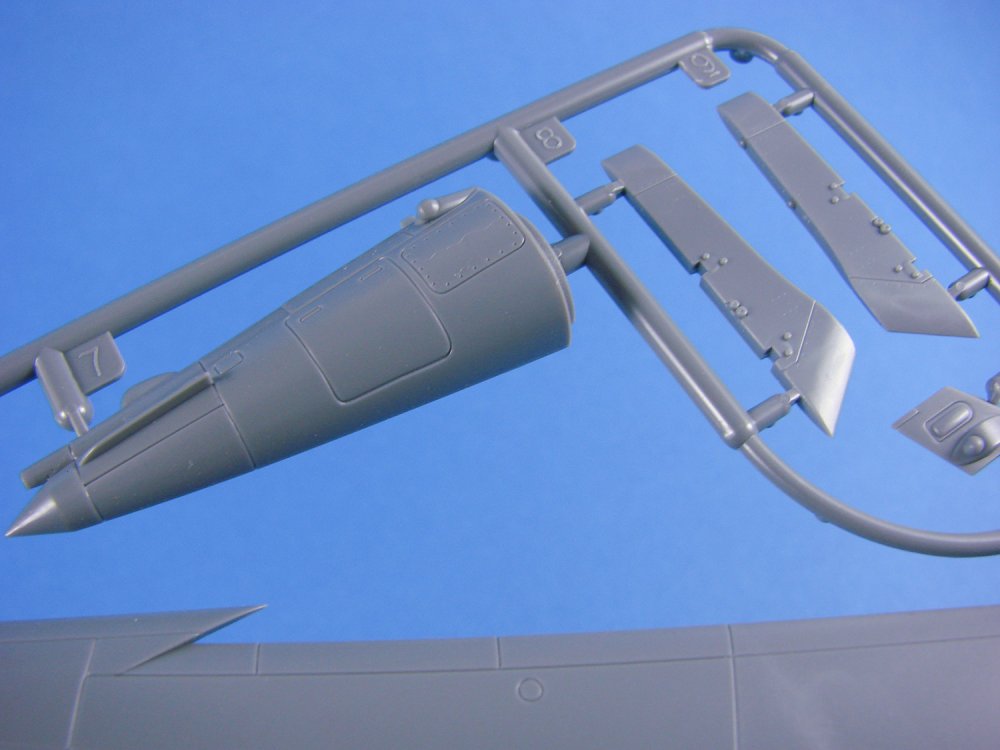
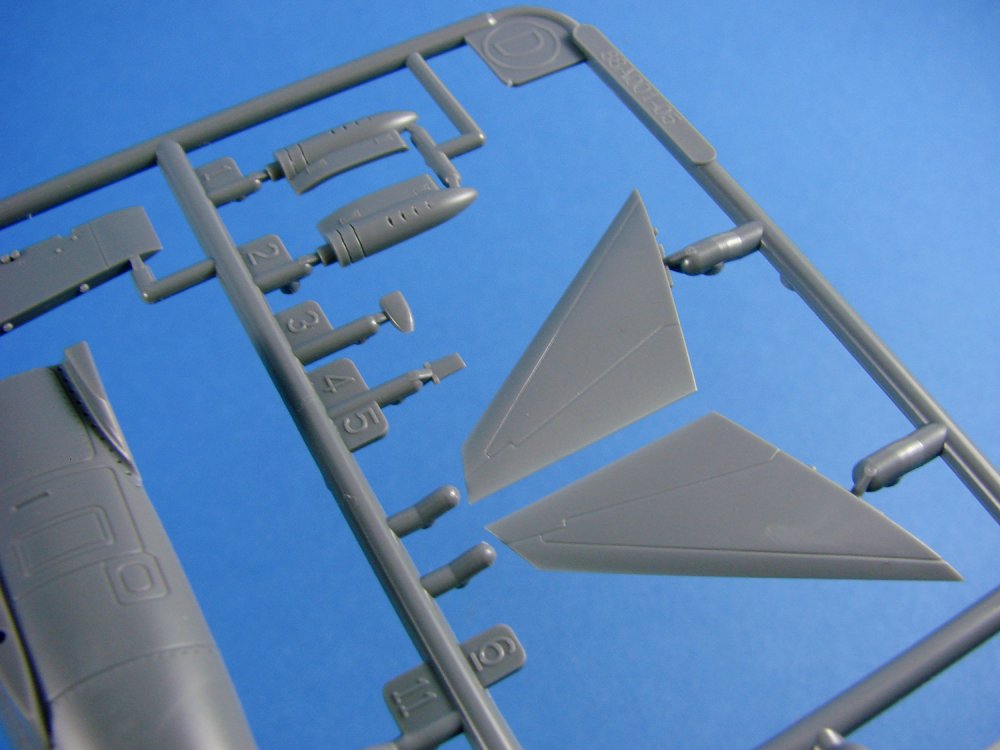
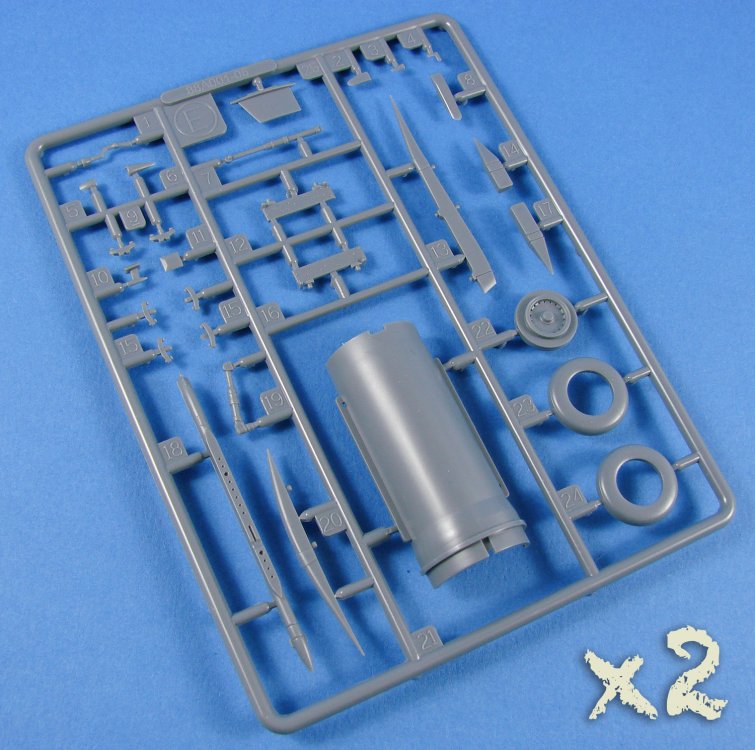
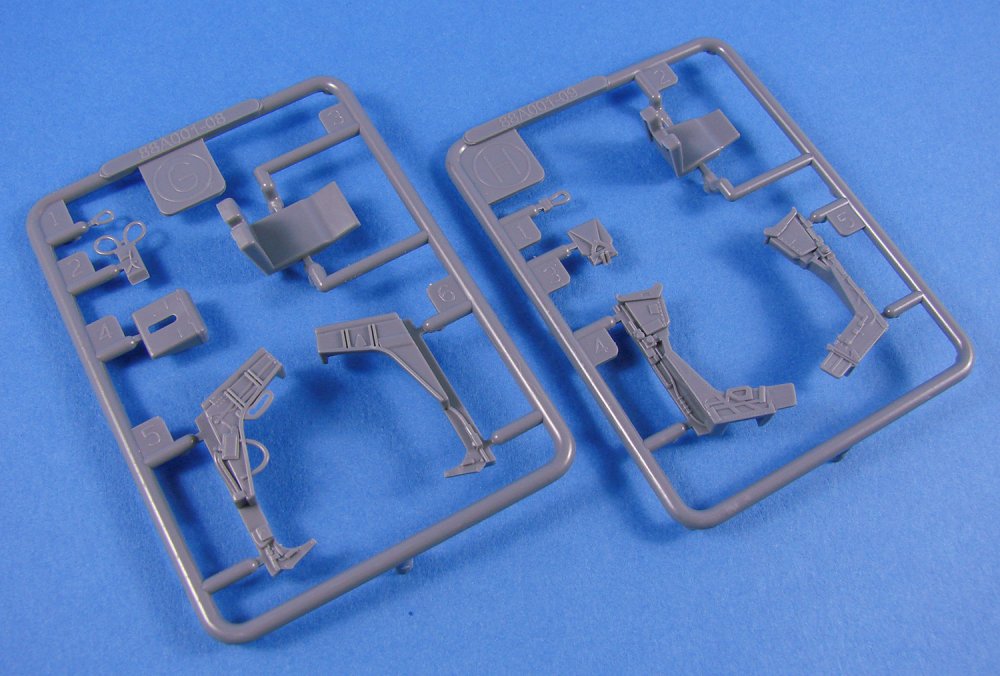
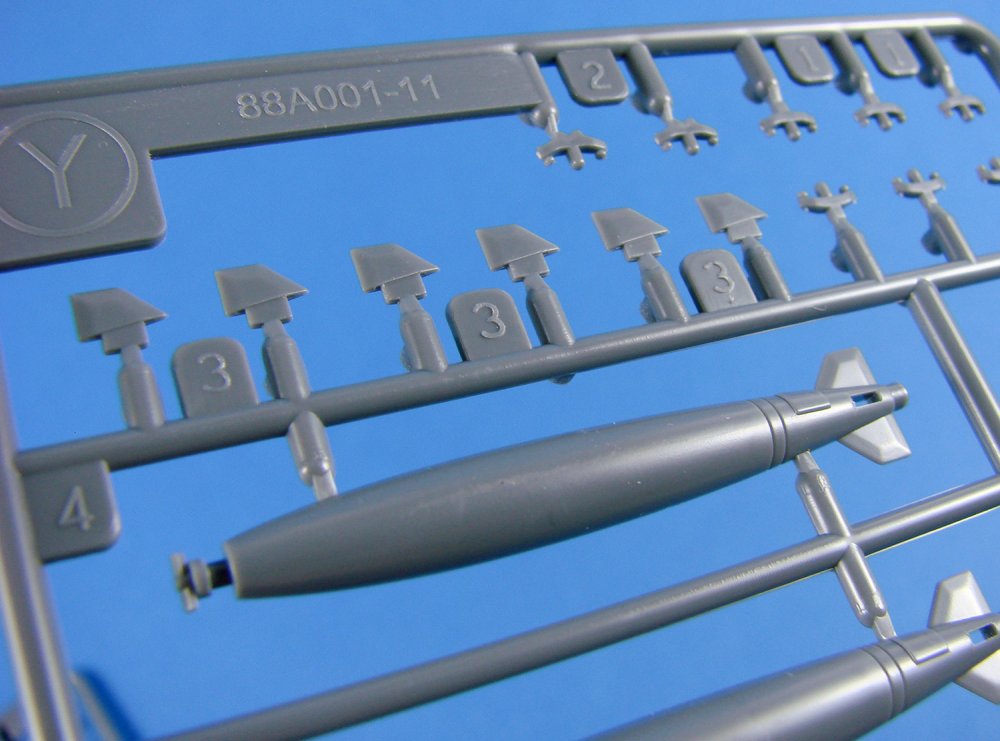
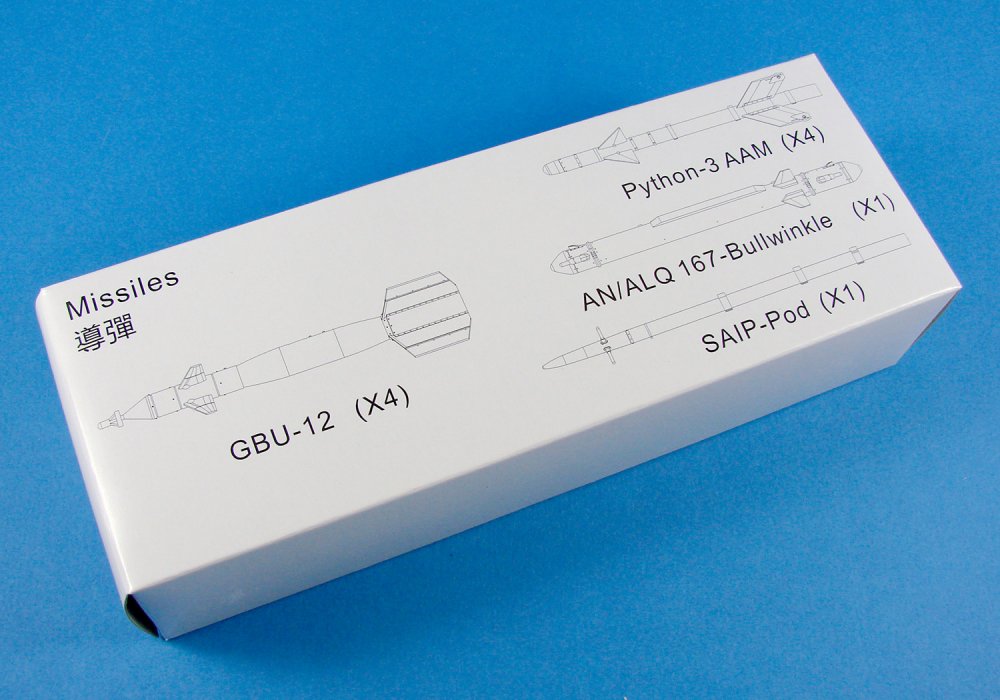
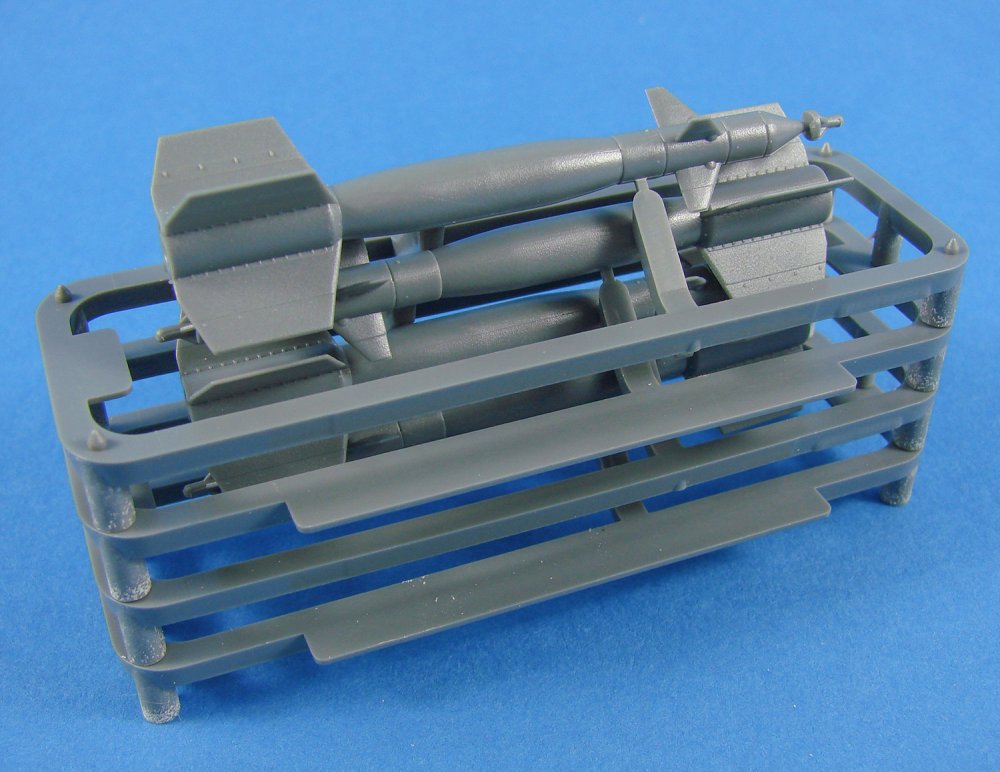
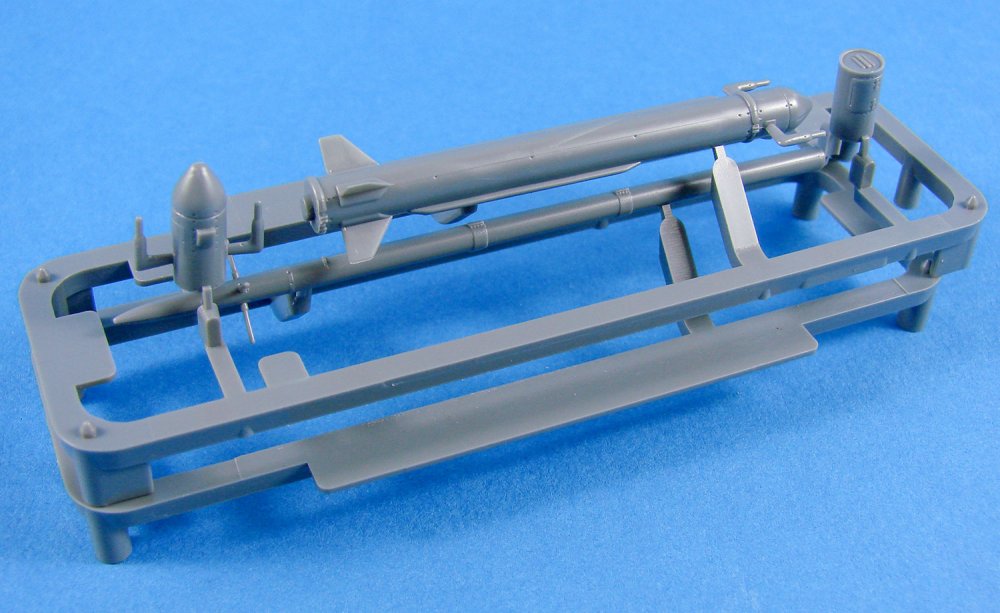
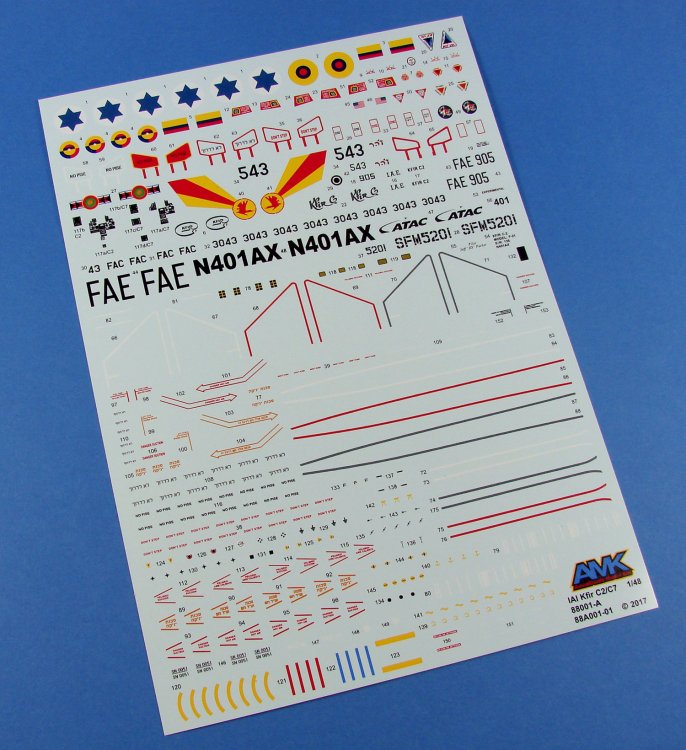
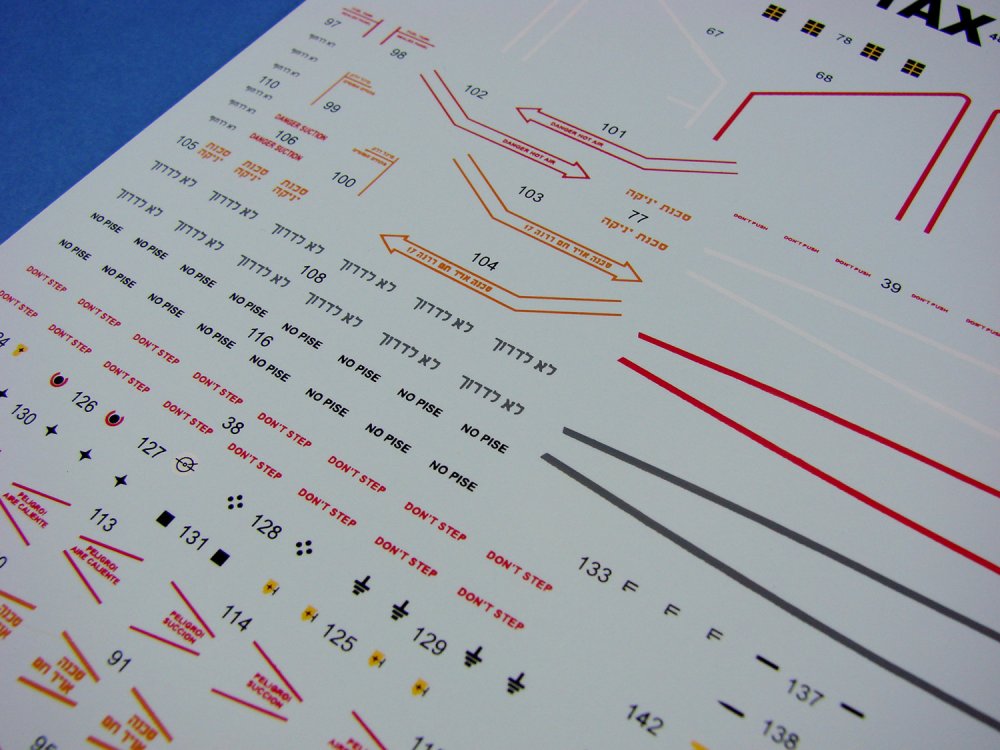
1/48 IAI Kfir C2/C7 AvantGarde Model Kits (AMK) Catalogue # 88001-A The Israel Aircraft Industries Kfir (Hebrew: כְּפִיר, "Lion Cub") is an Israeli-built all-weather, multirole combat aircraft based on a modified French Dassault Mirage 5 airframe, with Israeli avionics and an Israeli-built version of the General Electric J79 turbojet engine. The project that would ultimately give birth to the Kfir can be traced back to Israel's need for adapting the Dassault Mirage IIIC to the specific requirements of the Israeli Air Force. he Kfir programme originated in the quest to develop a more capable version of the IAI Nesher, which was already in series production. After General De Gaulle embargoed the sale of arms to Israel, the IAF feared that it might lose qualitative superiority over its adversaries in the future, which were receiving increasingly advanced Soviet aircraft. The main and most advanced type of aircraft available to the IAF was the Mirage, but a severe problem developed due to the Mirage fleet's depletion due to attrition after the Six-Day War. Domestic production would avoid the problem of the embargo completely; efforts to reverse engineer and reproduce components of the Mirage were aided by Israeli espionage efforts to obtain technical assistance and blueprints from third party Mirage operators. The Kfir entered service with the IAF in 1975, the first units being assigned to the 101st "First Fighter" Squadron. Over the following years, several other squadrons were also equipped with the new aircraft. The role of the Kfir as the IAF's primary air superiority asset was short-lived, as the first F-15 Eagle fighters from the United States were delivered to Israel in 1976. The Kfir's first recorded combat action took place on November 9, 1977, during an Israeli air strike on a training camp at Tel Azia, in Lebanon. The only air victory claimed by a Kfir during its service with the IAF occurred on June 27, 1979 when a Kfir C.2 shot down a Syrian MiG-21. Israel Aerospace Industries announced in August 2013 it will offer pre-owned Kfir fighter jets to foreign customers, with a 40-year guarantee. Unit price is reported to be $20 million. A few Eastern European and Latin American countries have expressed interest, Israel’s Globes business daily reported. Since the J79 turbojet engine is a U.S design, although manufactured under license in Israel, all export sales of the Kfir are subject to prior approval being granted by the U.S. State Department, a fact that has limited the sale of the Kfir to foreign nations. As of 2006, the IAI Kfir has been exported to Colombia, Ecuador, and Sri Lanka. Edit courtesy of Wikipedia The kit This isn’t the first 1/48 Kfir that AMK has released. Their first incarnation was released in 2013, but suffered from inaccuracies that related to the shape of the fuselage and the pinched ‘coke bottle’ shape that was evident when looking at the aircraft from above and three-quarters views etc. This was quite a shame when you consider the model itself was a very nice release of this important type. In the last half of 2017, AMK released a 1/72 new-tool Kfir, so it was hardly surprising that within a short period, we would see a new, corrected release of their original Kfir. We weren’t left disappointed. From my research, a good number of parts of the original model kit are still packaged with these release, apart from the obvious fuselage. The nomenclature of the lower wing panel is different to the original release, but one observer couldn’t detect any visible differences in shape or surface textures. AMK also now like to mould their weapons sets into stackable runners, and these are included, replacing the conventional and traditional style of parts in the original 2013 release. The kits itself is packed into a box that appears small for the aircraft within, but with a very attractive box-art that focuses on an American machine instead of the typical Israeli. Images on the side of the box let us take a look at the FIVE schemes on offer with this release, and all different from the original 2013 kit. The original AMK Kfir kit was actually their first release, and the box style is certainly a massive improvement over the original, being far more attractive, without the strange camouflage panel on the lid! Let’s take a look at the kit: Frame A This frame simply comprises the fuselage halves, newly tooled, as already mentioned. All parts are moulded in a medium-grey styrene, with a satin finish. Having looked carefully at finished builds of the original Kfir kit, and indeed reviews of the same, the new pinched fuselage on this is quite evident and should certainly please those who criticised the original. Also very impressive of AMK to go back to that release after 4yrs and make amends with it instead of consigning it to history. The separate nose does suggest of course that other versions will follow, and they want the accuracy errors ironed out. Externally, the kit benefits from neatly recessed panel lines and panel access details. Whilst the model isn’t riveted in general, rivet/fastener detail is moulded along certain routes, such as the spine and access ports. Nicely thought out is the seam along the fin, with this darting off to coincide with a panel line on the starboard side. A moulding seam still exists on the port fin edge, but this is easily removed with a sanding sponge. Intakes, nose and RWR unit housing on the fin trailing-edge. Internally, this kit now benefits from numerous strengthening features, whereas the original kit had none. Also, a mid-fuselage beam is now moulded in situ, creating just the right width at that point, instead of having to stuff your own plastic props/spacers in there. Cockpit sidewall detail is also included, albeit quite simplified. Should you wish to enhance this, and the rest of the cockpit, then Eduard have a very reasonably priced colour PE set available. Frame B Here we don’t so much as have a frame, but just a single piece lower wing, ready to use. The original sprue gate has been removed from the open panel within the belly of the part, in the same way that Academy moulded the single piece F-4 Phantom fuselage. This will be blanked off with a large insert. Note that the ailerons are integrally moulded, with the tip wash-in (or is it washout? I can never remember.) The locating points that you can see mid-wing, are for the aileron actuators. To fit the weapons pylons, you will need to open up these points from within, although the instructions don’t actually mention this. A cursory and obvious search later in the manual will show you the various loadouts, and the pylon part numbers to fit. There is also a weapons painting/markings page with the colour schemes, and this does actually have a wing plan showing which holes to open for various loadouts. Points also exist for optional C2 bomb pylons. As with the fuselage fin, the upper wing panels fit with the seam running along a lower wing face panel line. I must admit that I do like this approach. Frame C From what I can gather here, there is no difference in this frame, from the last 2013 issue. This is a general collection of parts, with items here for the cockpit, main and nose gear bays, undercarriage, gear doors, engine fan and flame holder, centreline supersonic fuel tank, centreline fuel tank and bomb pylons, etc. Those main gear bays consist of a ceiling that has three wall parts attached to it. Detail really is excellent, with perhaps only a little lead wire needed. These bay parts coincide with the fuselage location, with the remainder of the detail moulded to the inside of the upper wing panels. This same level of detail attention extends to the nose gear bay, which sits underneath the cockpit tub. Here you will see plumbing of various sizes, complete with connectors. Some careful painting and washing here will really make this go pop. Of course, it’s advisory that each panel is painted prior to assembly for this area. Other parts I note on this frame are the side intake vanes, optional C2 bomb pylons, exhaust nozzle, and a two-part camera and chaff flare dispenser unit, amongst others. Of note is the instrument panel. This is specifically for the C2 version, with the C7 panel being found on the next frame. You will also need to decide whether you want the canopy open or closed, as an optional part is included, plus a slight modification to the rear cockpit bulkhead if you wish to pose it closed. Frame D Again, I am presuming this is identical to the original kit release. The main players here are the upper wing panels with more finely engraved details and the wrap-round leading edge that joins via an underside panel line. Of note are the nose halves for the C2/C7 machines, and also the C7 instrument panel that I mentioned just above. More optional parts are included in the shape of the lower cockpit underside fairings. The blanked off fairing is for the C2, whilst the bulged pertains to the C7. On the latter machine, this bulge covered the uprated avionics that were specific to this particular type. Also here are the small canard wings, belly insert, intake fairings, Pave Penny laser designator, and stores pylons for both the TER and GBU-12 weapons. Frame E (x2) These are fairly small frames that contain the jet tail pipe with basic internal details (some ejector pin marks too), wheels (unweighted) with separate hubs, more weapons pylons and numerous parts associated with them. Frame F (x2) Another small frame, holding parts for subsonic fuel tank. Frames G & H This kit has two seat options. Again, these are for the C2 and C-7. Be warned, these seats are very different in appearance. One niggle is the lack of seatbelts. However, you will find them on that Eduard set that I mentioned. It’s well worth the purchase. Frame J This clear frame contains not just the windscreen and hood, but also various lights, HUD screen and also the internal rear-view mirrors. Optically, these are excellent, but there is a small scuff on my hood. That will easily buff out, but it’s annoying. Frame Y (x2) These are the Mk.82 conical fin bombs that fit to the NAPGACH centreline pylon. A fair few parts are associated with this assembly, but it will look mighty impressive if you choose to fit it. Weaponry Here you can see the various weapons that are supplied to loadout and load up your Kfir. These come in the small boxes within the main package, and contain stackable frames. Most of these are single-part weapons, or only require minor assembly. Take note that the SAIP-pod has 4 protrusions which are very fragile. This is packaged so that the piggyback frame protects it. Again, be careful here. Some weapons have slightly bent fins, but no real damage, or certainly nothing that can’t be quickly rectified. Decals A single decal sheet is included, and this is pretty packed with stencils, serials, individual aircraft markings and emblems. I can’t vouch for the Hebrew stencils as I simply can’t understand it! Decals are also supplied for the instrument panels, as single pieces. I’d be tempted to dissect this and punch out the instrument gauges, then apply individually. Printing looks very good with things being pretty thin, with solid colour and in register. There are a couple of areas where edges look a little fuzzy though. The schemes in this release are: Kfir C2, SMF5201, 10th Fighter Squadron, Sri Lanka AF, Katunayake AB, 2011 Kfir C7, #543, “Zohar”, The Arava Guardians Squadron, Israeli AF, 1990 Kfir C2, NA401AX, ATAC, USA Kfir C2, FAE 905, 2113 Squadron, Ecuadorian AF, 1998 Kfir C7, FAC 3043, 111 Squadron, Columbian AF Instructions After the introduction history, this manual unusually begins with the FIVE schemes on offer, with a page dedicated to each, clearly showing the paint via FS codes. There is another code, but I can’t relate it to any specific paint brand. (*NB, since found this is GSI) I’m sure someone will put me right. Assembly sequences look pretty easy to follow, with nice, clean line drawings and references to the versions available. Maybe go around with a highlighter first to ensure all the nuances are clear and you don’t fit the wrong option part. Conclusion I’m quite partial to these delta-winged fighters, with the Mirage being perhaps the most iconic of them. The Kfir certainly does fit that remit too, with its obvious lines and pedigree being there for all to see. AMK has produced a super little kit of one of Israel’s most successful military ventures. There are areas where I think Eduard’s magic will pay off, such as the cockpit and seatbelts, but I’m pretty sure this kit could stand on its own with just some handmade belts. In all, a beautiful little project that appears to capture all the lines of this important fighter, especially with that reworked fuselage and re-tooled weapons! This is a very new kit at the moment, so you might need to ask your hobby retailer to get one in for you. My sincere thanks to AMK for the review kit seen here.


-
You can guarantee it will be finished before anything rolls out of Erik's workshop!
-
1/32 Sopwith 5F.1 Dolphin Wingnut Wings Catalogue # 32073 Available from Wingnut Wings for $79 plus shipping The Sopwith 5F.1 Dolphin was a British fighter aircraft manufactured by the Sopwith Aviation Company. It was used by the Royal Flying Corps and its successor, the Royal Air Force, during the First World War. In early 1917, the Sopwith chief engineer, Herbert Smith, began designing a new fighter (internal Sopwith designation 5F.1) powered by the geared200hp Hispano-Suiza 8B. The resulting Dolphin was a two-bay, single-seat biplane, with the upper wings attached to an open steel cabane frame above the cockpit. To maintain the correct centre of gravity, the lower wings were positioned 13” forward of the upper wings, creating the Dolphin’s distinctive negative wing stagger. The pilot sat with his head through the frame, where he had an excellent view. This configuration sometimes caused difficulty for novices, who found it difficult to keep the aircraft pointed at the horizon because the nose was not visible from the cockpit. The cockpit was nevertheless warm and comfortable, in part because pipes ran alongside the cockpit walls to the two side-mounted radiator blocks. Shutters in front of each radiator core allowed the engine temperature to be controlled. The Dolphin Mk I became operational with 19 and 79 Squadrons in February 1918 and 87 and 23 Squadrons in March. The Dolphin’s debut was marred by several incidents in which British and Belgian pilots attacked the new aircraft, mistaking it for a German type. New pilots also voiced concern over the Dolphin’s wing arrangement, fearing serious injury to the head and neck in the event of a crash. Despite early problems, the Dolphin proved successful and generally popular with pilots. The aircraft was fast, manoeuvrable, and easy to fly, though a sharp stall was noted. When functioning properly, the Hispano-Suiza afforded the Dolphin excellent performance at high altitude. Accordingly, the Dolphin was often sent against German reconnaissance aircraft such as the Rumpler C.VII, which routinely operated at altitudes above 20,000ft. The Dolphin entered service on the Western Front in early1918 and proved to be a formidable fighter. The aircraft was not retained in the post-war inventory and was retired shortly after the war The kit Yes, the Sopwith 5F.1 Dolphin is the surprise Christmas kit for 2017, from Wingnut Wings, and its announce was certainly welcomed, especially for what many would consider to be a rather leftfield subject. Whilst I have had an interest in Great War aviation since I was a kid, the Dolphin has always been one of those subjects that has sat on the periphery of my knowledge of this era, perhaps overshadowed by other famous Sopwith types, such as the Pup, Camel and Triplane. However, for a company such as WNW to bring this oft-forgotten fighter back to our attention is certainly a wonderful Christmas surprise. Wingnut Wings’ new Sopwith 5F.1 Dolphin falls amongst the company’s lower priced kit releases, and occupies a box that is the same size as their Eindeckers etc. The box lid teasingly shows us an artwork of a Dolphin in combat with a Fokker Dr.I, leading me to yet again hope they release this kit too. Steve Anderson’s work has adorned the lid of each WNW kit since their very first four releases, back in 2009. Ronny Bar provides us with the scheme profiles that are shown on the box sides. Wingnut Wings press release for this kit has the following data: High quality Cartograf decals for 5 aircraft 144 high quality injection moulded plastic parts Optional propellers, 20lb Cooper bombs & carrier, Holt flares & lights and Lewis gun armament Optional early and late production radiators, centre sections, tail skids and front cowls Highly detailed 18-part 200hp Hispano-Suiza engine (originally available in 32003 1/32 SE.5a “Hisso”) 12 photo-etched detail parts Fine in scale rib tape detail Full rigging diagram. Inside the box, there are FOUR frames of light grey styrene, and a single clear frame, all individually bagged so as to protect those delicate parts. A small PE fret is included, as is one large sheet of decals that covers all FIVE schemes. Wingnut Wing’s now familiar and high quality instruction manual completes the kit contents. Frame A It’s always the first frame of any Wingnut release that is the one packed with the majority of the small and detail parts, and this kit is no exception. Here you will find many cockpit parts, such as the optional Lewis Gun magazine rack, pilot’s wicker seat, main petrol tank and reserve tank, synchronising system hydraulic pump, engine bearers, instrument panel with separate compass and air pressure/oil pressure gauges, control stick, machine guns and installation assemblies, and throttle etc. Two types of propeller are supplied with this kit, as well as optional Cooper bombs and their rack for the centreline fuselage position. Another option are the wing mounted guns that sit atop the lower wings of C8163. Other parts to be found here include the wheels with their separate outer hub, undercarriage V struts and spreader bar, wing struts, control horns etc. Frame B The frame purely concerns the wings, with the lower wing presented as a full-span part, incorporating the cockpit floor. Of course, the upper wing panels are separate parts due to the Dolphin’s layout. Surface textures are very fine and incredibly realistic, with a convincing representation of the rib and fabric construction of the real thing. Look closely along the leading edge and you will notice the positions of the shorter leading-edge ribs themselves, sat two in between the main, full chord ribs. The main ribs also have superb and finely rendered details. Ailerons are moulded separately to the ribs, and these exhibit the same finesse of detail. One thing that can put folk off biplanes are fitting the fiddly struts, but here we see that the locating holes for the struts are keyed to accept the specific part that is required, and the holes themselves are clean, making for easy and trouble-free assembly. I usually place a dot of Blue-Tack in these holes when painting, so as not to make things harder for myself when it comes to things fitting together. Frame C This single, clear frame holds nine parts, and unusually, is packed into a stiff cellophane sleeve and also protected with a protective foil. A single windshield is included which has a hole to accommodate the Aldis sight, and the remainder of the parts are for the pulley inspection doors, rudder light and wing-mounted Holt lights. All parts are superbly clear, and the mouldings are perfect. Frame D Notice here how this frame has two small frames attached to a larger one? I’m perhaps thinking here that one or both of these would be snipped off for a future release of this kit. After all, there are parts already in this specific kit that aren’t for use. However, I digress. Looking at the largest of the three frames, it’s not hard to miss the distinctive lines of the Dolphin’s stubby-looking fuselage. Detail is very fine, with nicely rendered lacing/stitching, rivet/fastener, and panel details. Some details will need to be removed or filled in, depending on which machine you will build. It’s pretty important from the outset that you make that particular choice. The foot step hole has two different positions, one of which will need to be opened up to represent your given scheme. Interior detail is limited due this being presented with the cockpit tub that installs into here via a circular locator at the rear of the cockpit, presenting another nice, positive key that ensures a trouble-free build. As with a number of other WNW kits (Pup, Triplane etc.), the detailed side frames are moulded with integral cabane struts, onto which the centre section wing mount frame is attached. For four of the five machines, a little surgery will be needed to remove some side wall detail. Included detail on the side walls is for the plumbing and various brackets, fuel pump, and pipe connectors. Engine bearers are separately moulded and will be fitted to the tub during main assembly. Both the tailplane and fin are moulded with their control surfaces (elevators, rudder) in situ, so if you wish to pose these, then you’ll have a little extra work to do. As with the wings, the rib and fabric textures are totally convincing, with the taughtness and sag of the fabric looking correct and not exaggerated. A single upper engine top shield is included, with cut-outs for the Vickers MGs, plus two forward engine cowls. Only one of the latter is to be used, indicating a future other release of the Dolphin. Looking at the smaller attached frames, it is clear that these are for early and late parts options, such as the upper wing mounting frame, tail skid (early wood and late metal), 4” and 8” radiators, and two Aldis sight options. Frame E As you will have noted from the introduction text, this isn’t a new frame, but it was one that released with the SE.5a ‘Hisso’ kit, that formed one of this companies four initial releases back in 2009. It’s sure good to see this one again, and I hope it makes another appearance in a possible SPAD (hint hint). Most parts on this this frame are to be utilised with the Dolphin, with the exception of a part that is only applicable to the SE.5a kit. A total of fifteen parts go to make up this beautiful little representation of the 200hp geared V8 Hispano-Suiza engine, with superbly detailed sump/crankcase, cylinder blocks, as well as ancillary items such as the carburettor and magnetos. A little surgery will be needed in cutting down the water pipes so as to suit the Dophin’s configuration There are a small number of other parts that will need to be used from Frame A. These include the intake manifold and water tank, oil breather pipe and cap, and the carburettor air intake. Photo Etch One small PE fret is included, containing thirteen parts, in bare, bright brass. These parts include the pilot’s lap-belts, foot hold plate, MG cocking levers, and reticules etc. All parts are cleanly etched and are held in place with tiny gates that need to be clipped through. As with many WNW releases, and certainly those for a good long while, a nameplate is also included, should you wish to use it with your display. Decals A single, large Cartograf-printed decal sheet is supplied, with the specific decals for individual machines being printed together and with a dashed line to help you identify the portion of the sheet you will need. Of course, there are also come common decals, such as instruments and stencils. Printing is thin, with solid and authentic colour, as well as having minimal carrier film and having perfect register. The finish is gloss. There are FIVE schemes in this release, and these are: Sopwith 5F.1 Dolphin, C3785, RNAS Dover, early 1918 Sopwith 5F.1 Dolphin, C3803, “Red Star”, SARD, March 1918 Sopwith 5F.1 Dolphin, C3824, “U”, J.W. Pearson (12 victories) & C.E. Walton (possible 1 victory), C Flight, 23 Sqn RAF, May to July 1918 Sopwith 5F.1 Dolphin, C3879, “Q”, R.B. Bannermann, C Flight 79Sqn RAF, August to November 1918 (12 victories) Sopwith 5F.1 Dolphin, C8163, “A”, H.J. Larkin, A Flight 87Sqn RAF, August to November 1918 (11 victories) Instruction manual This is a glossy, high-quality 24 page publication that is on a par with the standards that WNW have set themselves. These manuals are a delight to flick through and are an event in themselves. All constructional sequences are beautifully illustrated in ink-style drawings that are easy to follow, with blue ink being used to denote new parts placement, and full colour illustrations of completed assemblies so as to give a better understanding of how various sequences are supposed to look. Colour references is given throughout, using Tamiya, Humbrol, and FS codes. All optional parts are easily denoted due to the format used, and PE parts are also easy to denote. Period photos are used throughout, highlighting various areas of the airframe and equipment installations. I do note that WNW has been cautious in not supplying contemporary photos of the composite airframe that resides at the RAF Museum, Hendon. This is presumably due to the possibly inaccurate and modern realisation of the airframe. But then again, maybe not. A rigging diagram is also included towards the rear of the manual. The last pages of the manual are taken over with the five schemes, complete with Ronny Bar illustrations. Colour and marking applications are easy to follow, and each scheme comes with historic notes on the machine, and also the pilots that flew them. Conclusion Of course, we have learned to expect the unexpected when it comes to Wingnut Wings releases. A Christmas kit is sort of expected these days, but the subject is certainly one that I don’t think anyone really thought they’d see, or certainly not at the moment. Despite the Dolphin’s unglamorous appearance and awkward stance, this is actually a very attractive model, with some excellent options thrown into the mix. Being WNW, you know the research will be impeccable, and the engineering is as innovative as we are now used to seeing. There is an amount of rigging to get your head around, but that’s the nature of the beast with most Great War subjects, but it really doesn’t look too daunting (hey, I built a DH.2 as my first WNW!!). For $79USD, this also represents good value for money for your next happy bench hours, and it must surely be a contender for one of your most unusual WW1 subjects. Get one whilst they’re hot! My sincere thanks to Wingnut Wings for the review sample seen here. To purchase directly, please click THIS link.

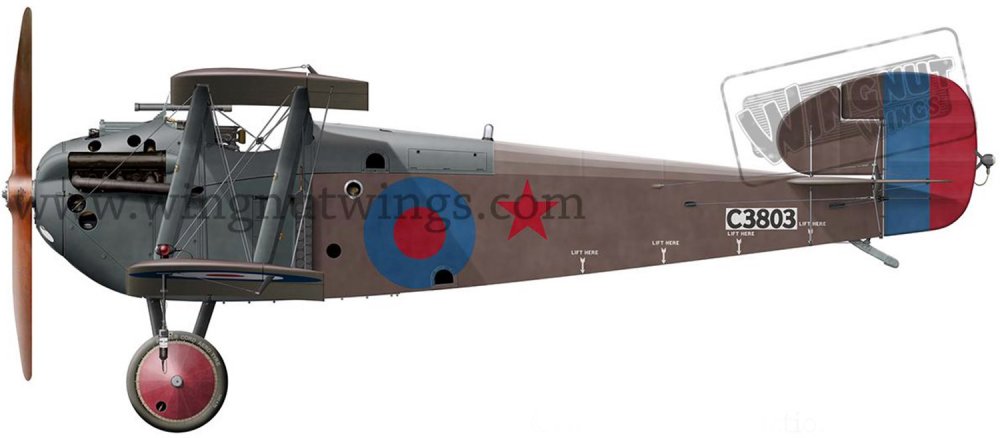
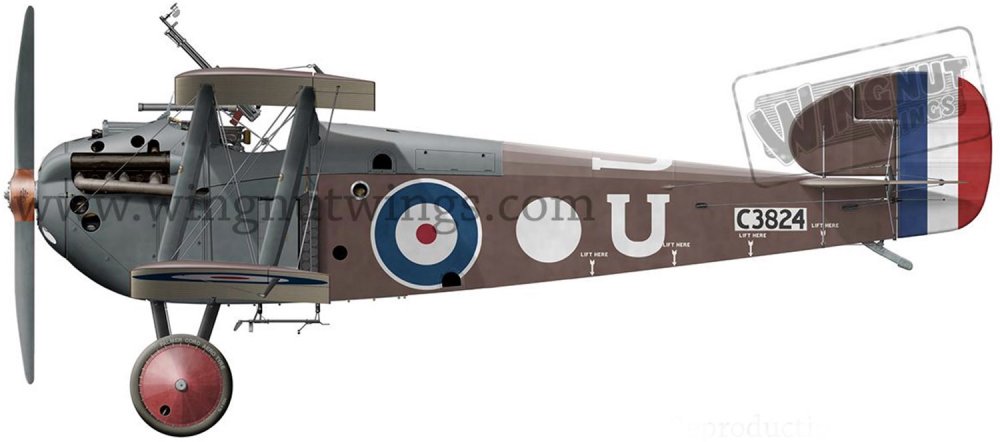
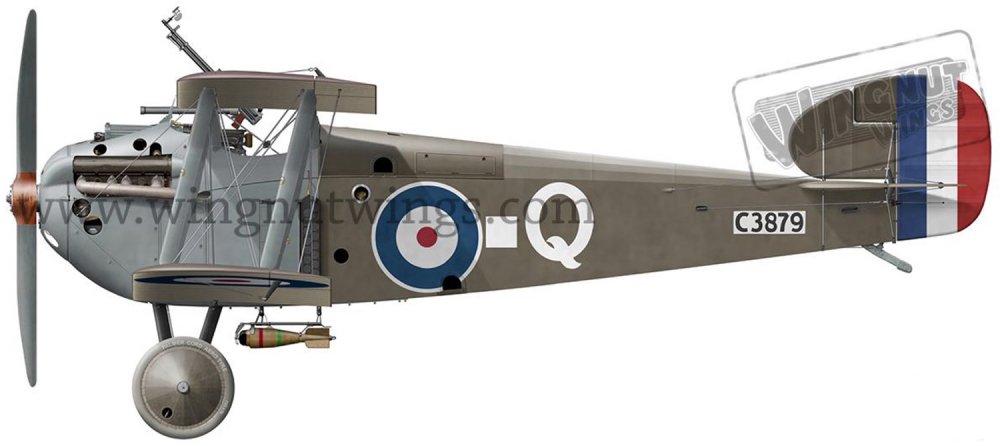

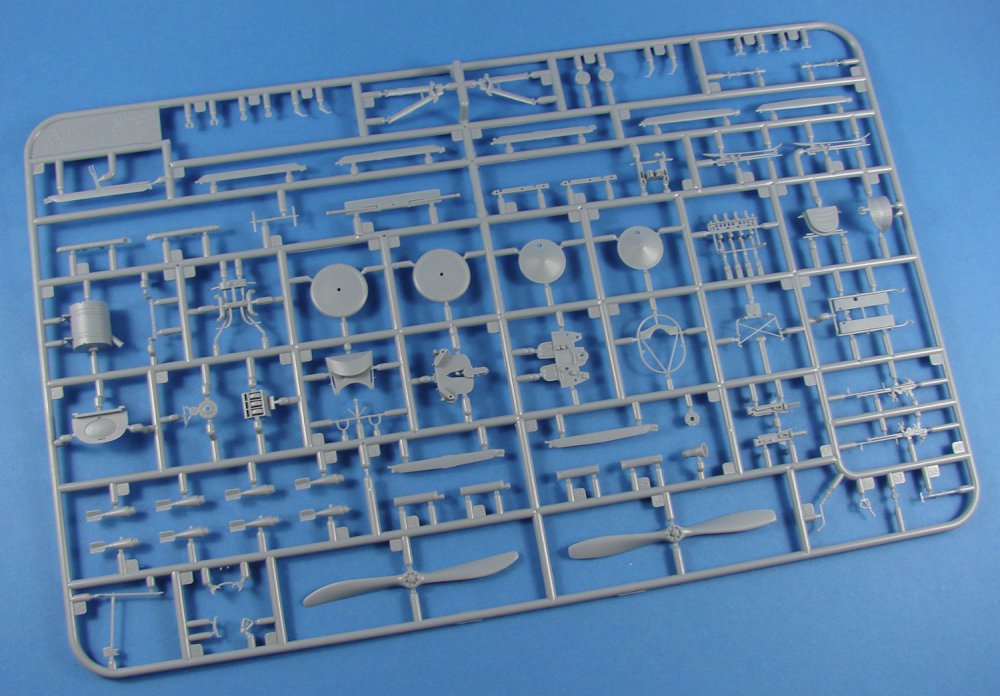
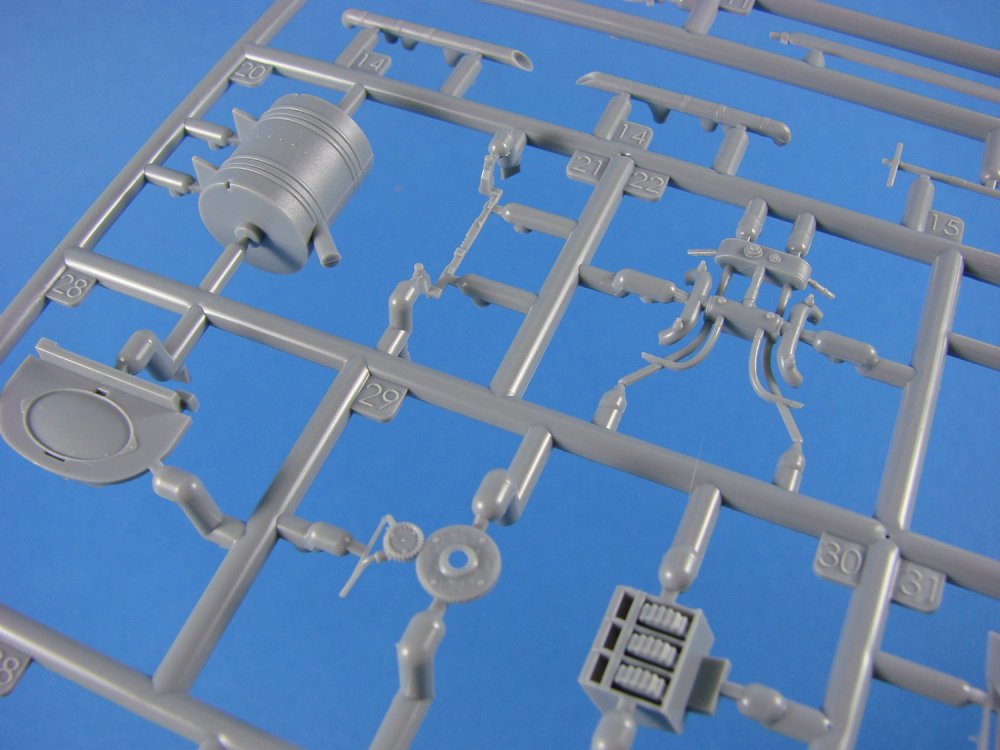

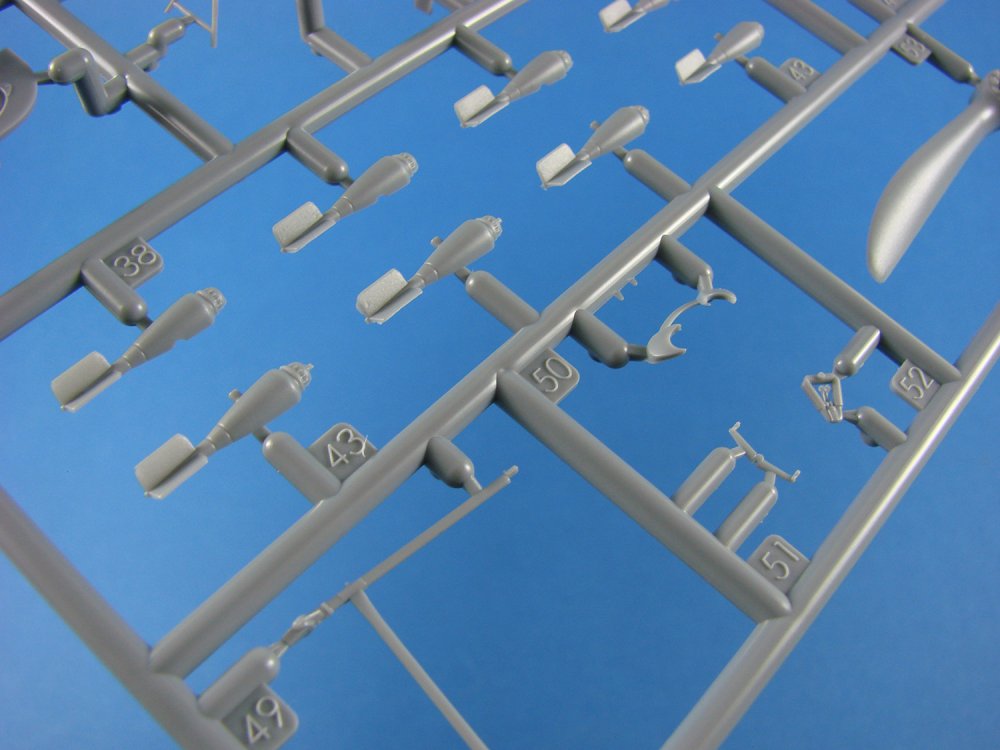

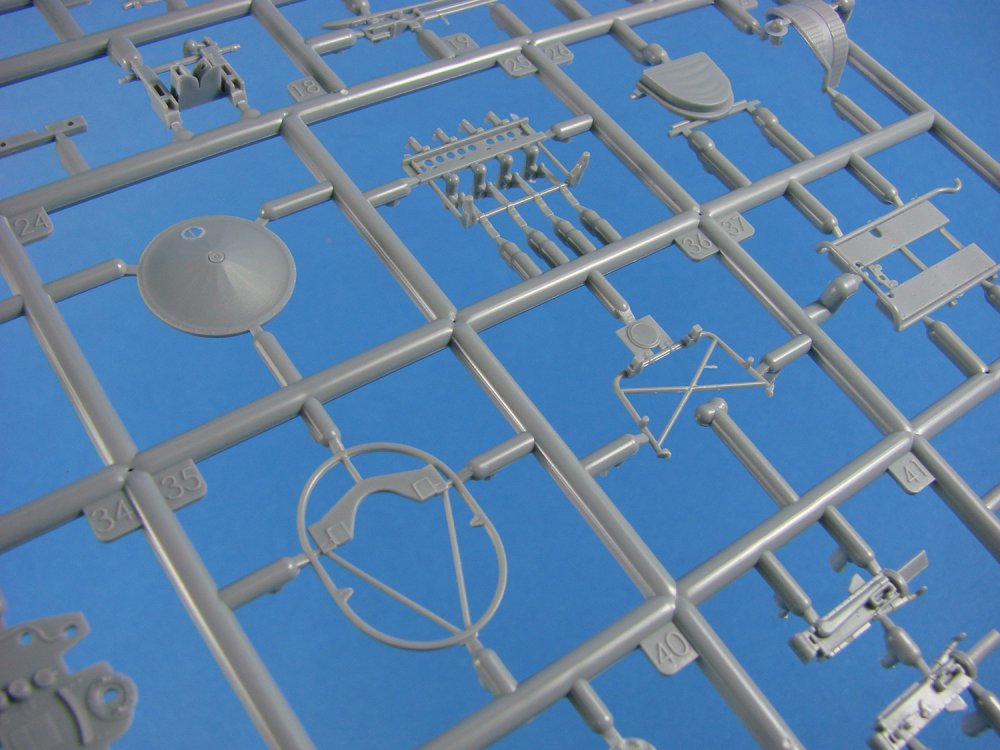

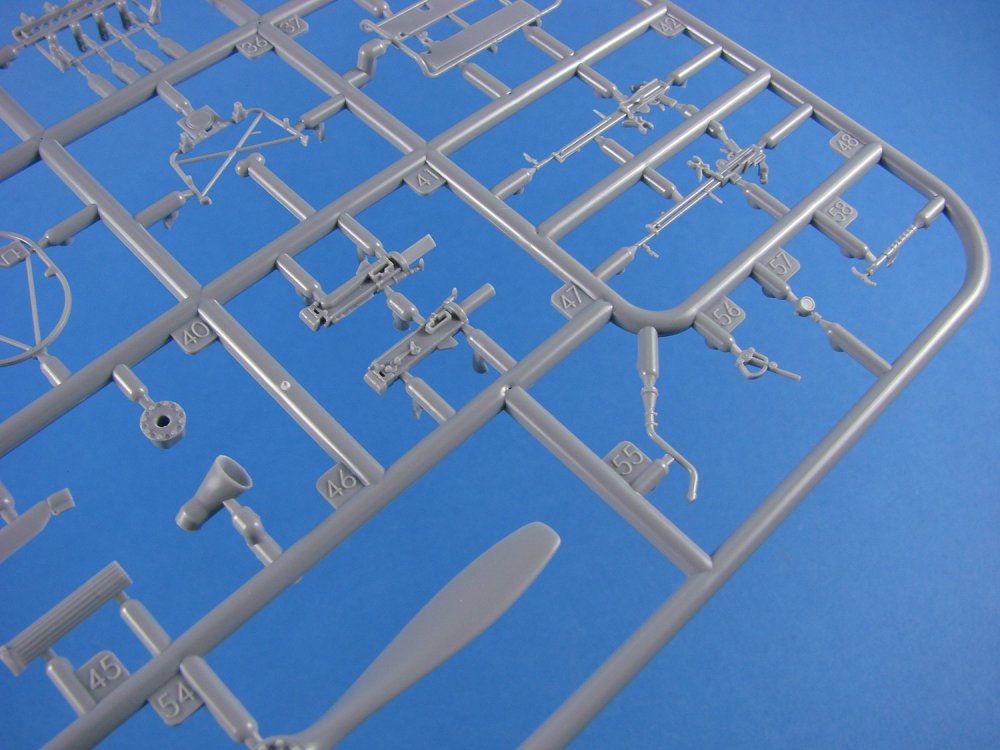

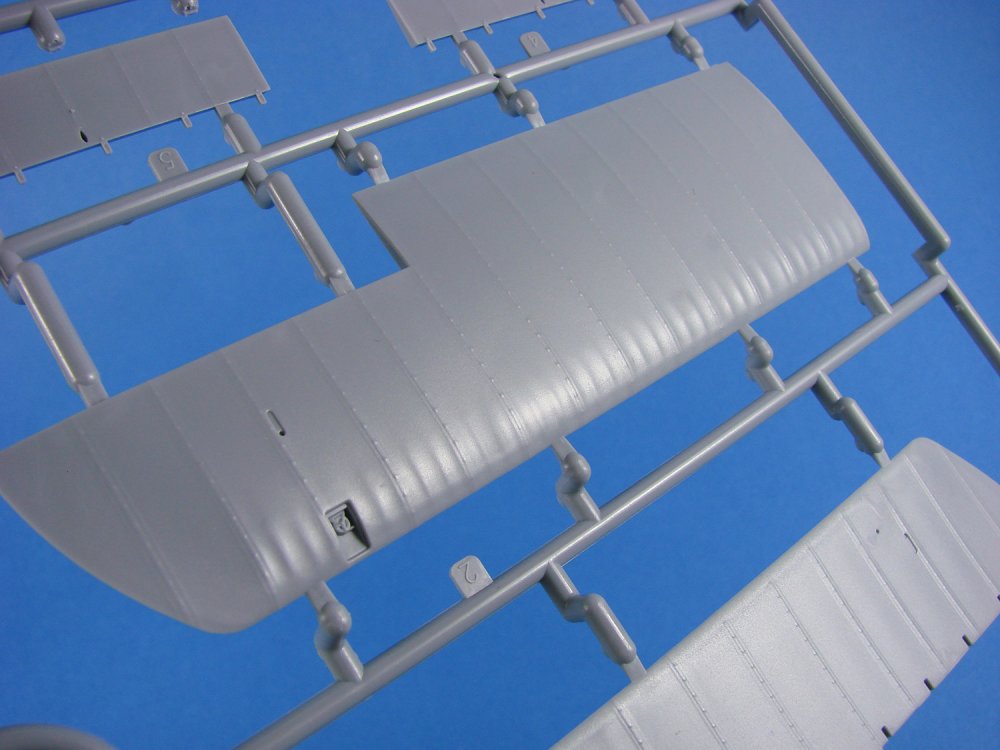
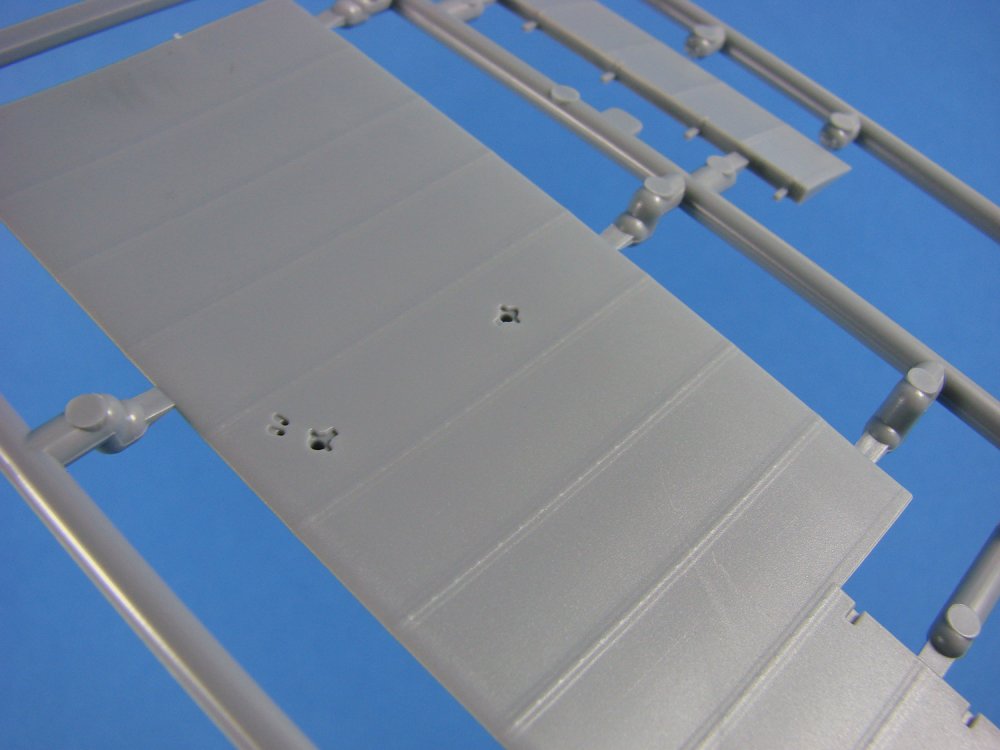
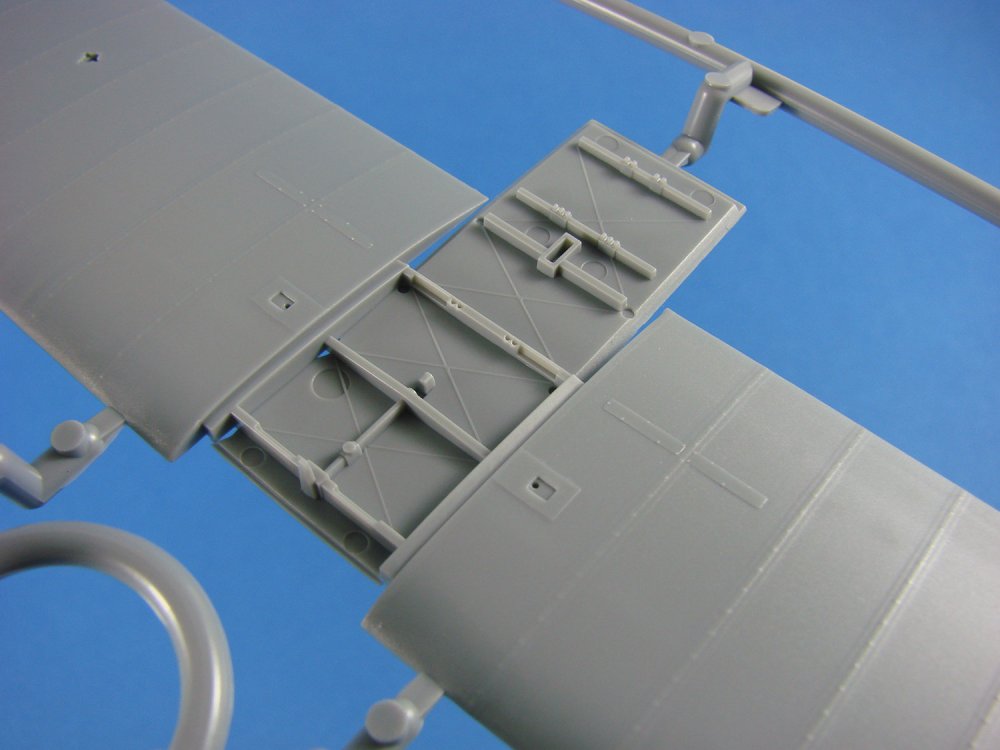
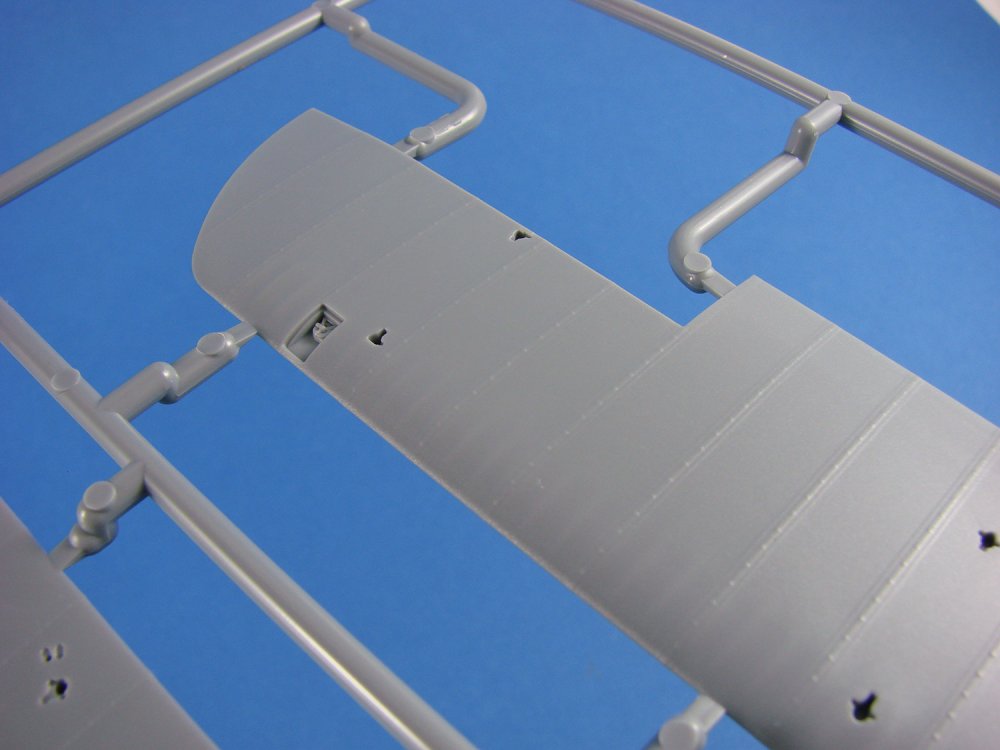

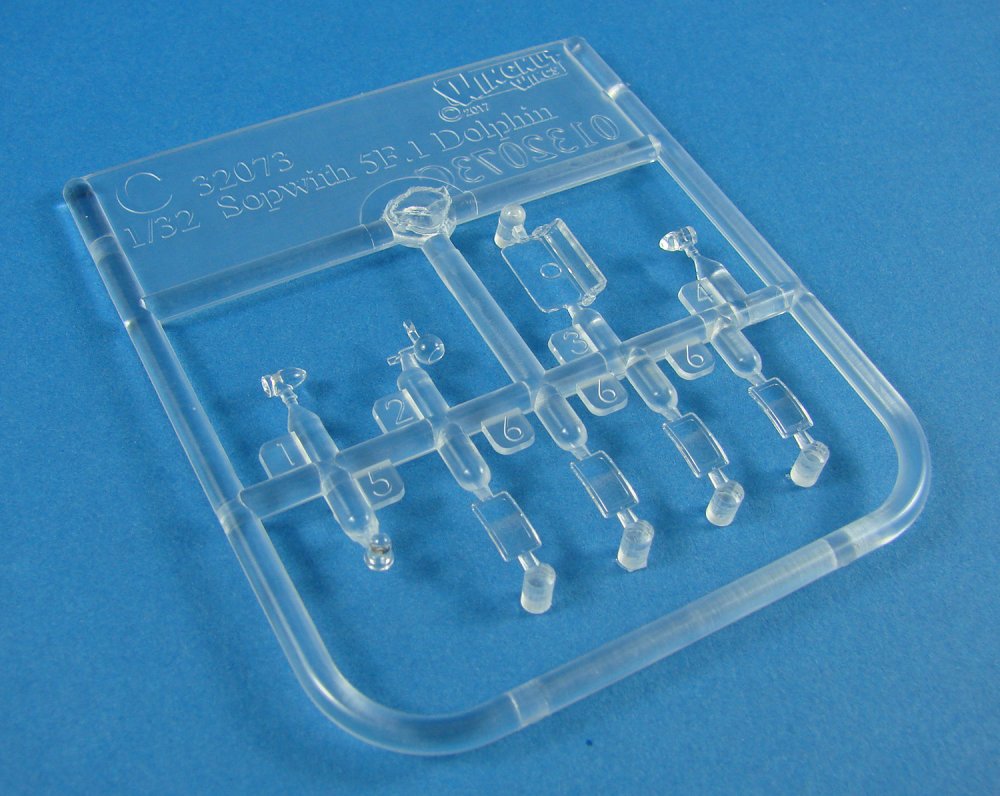
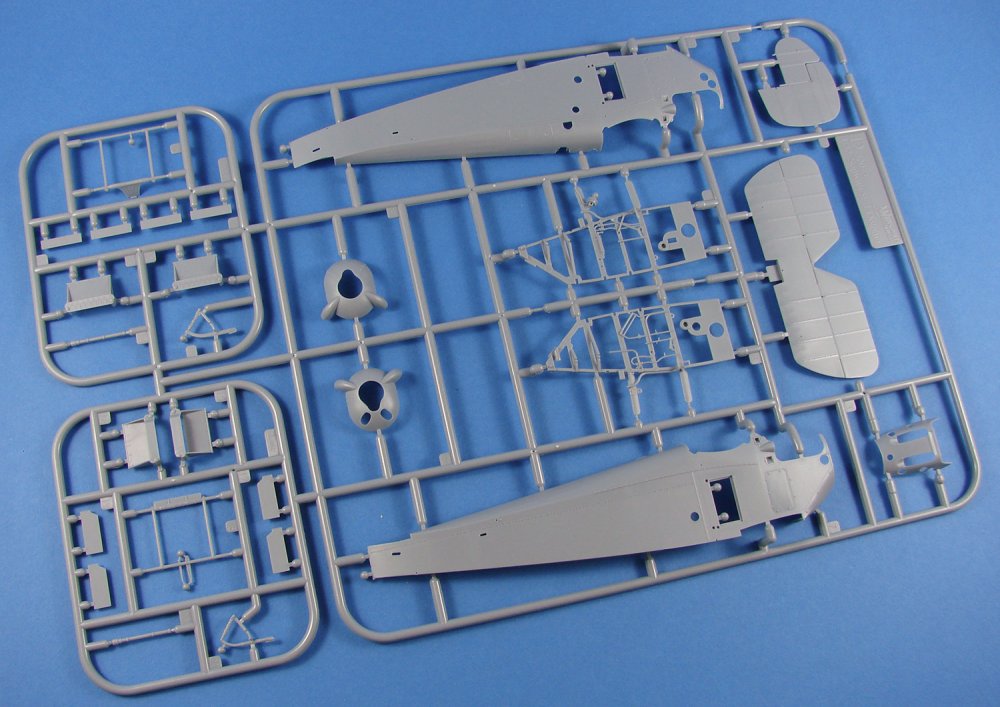

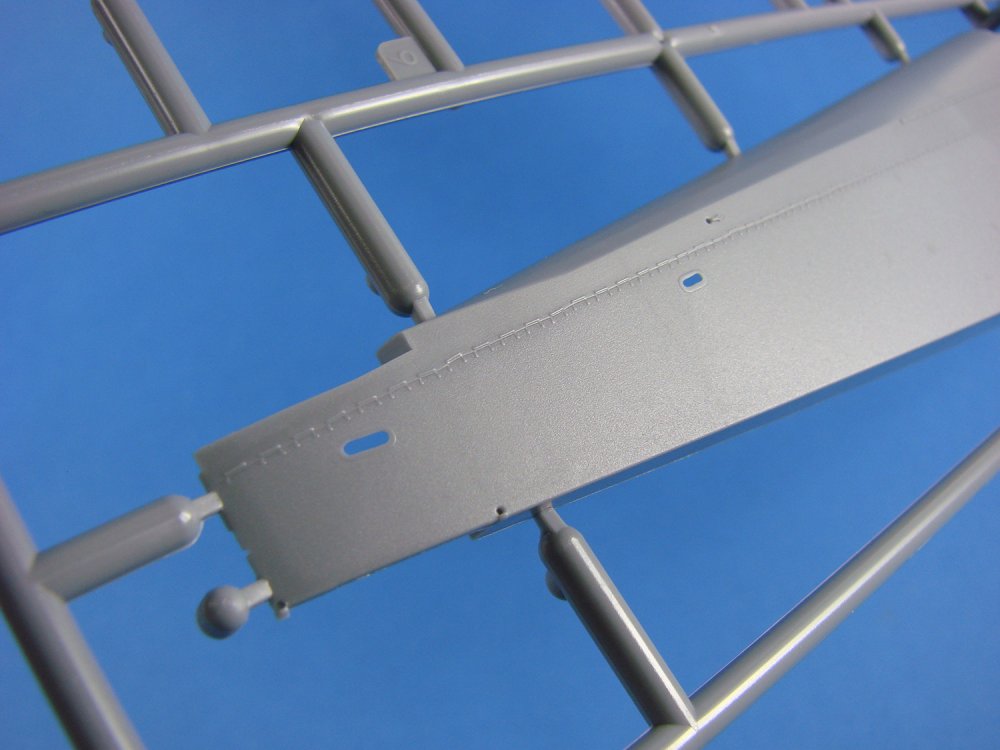


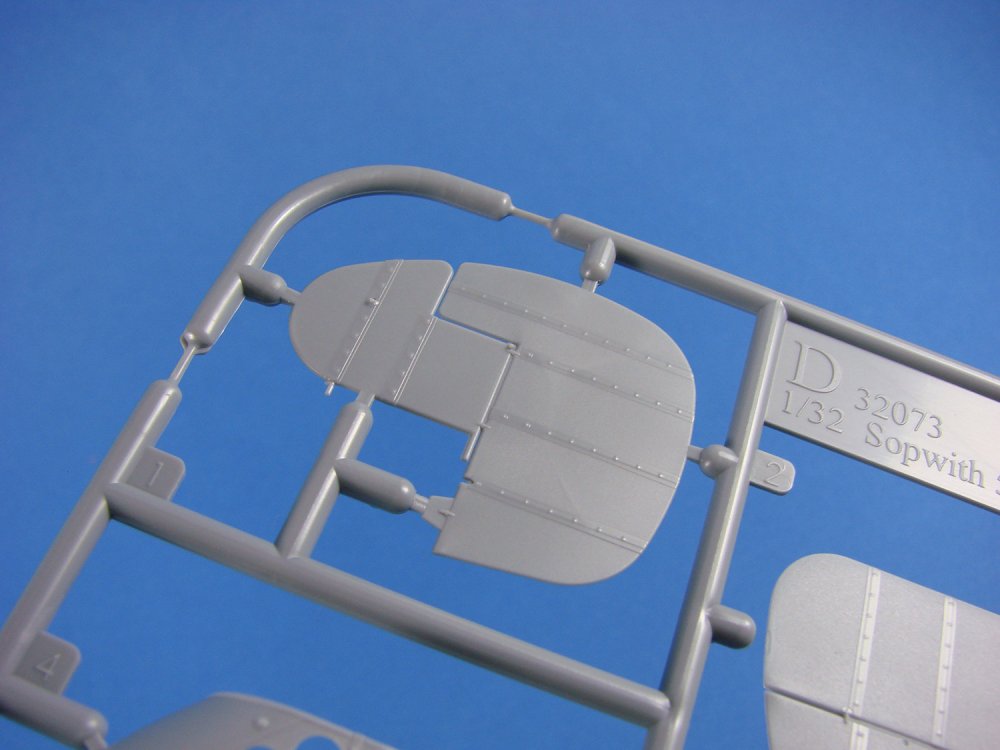
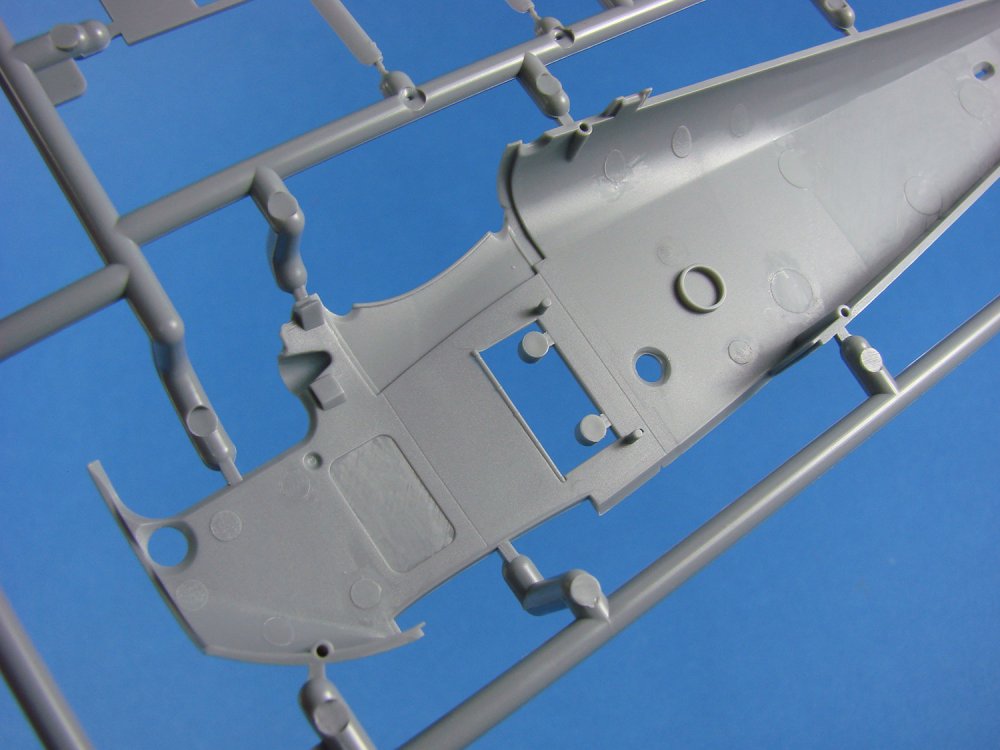

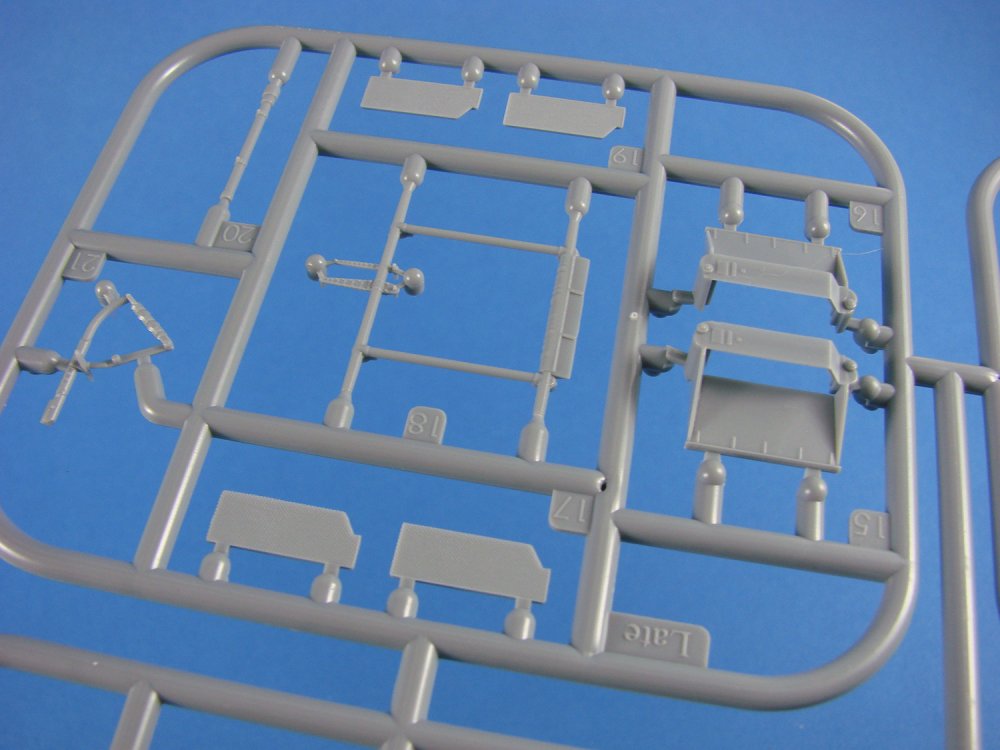

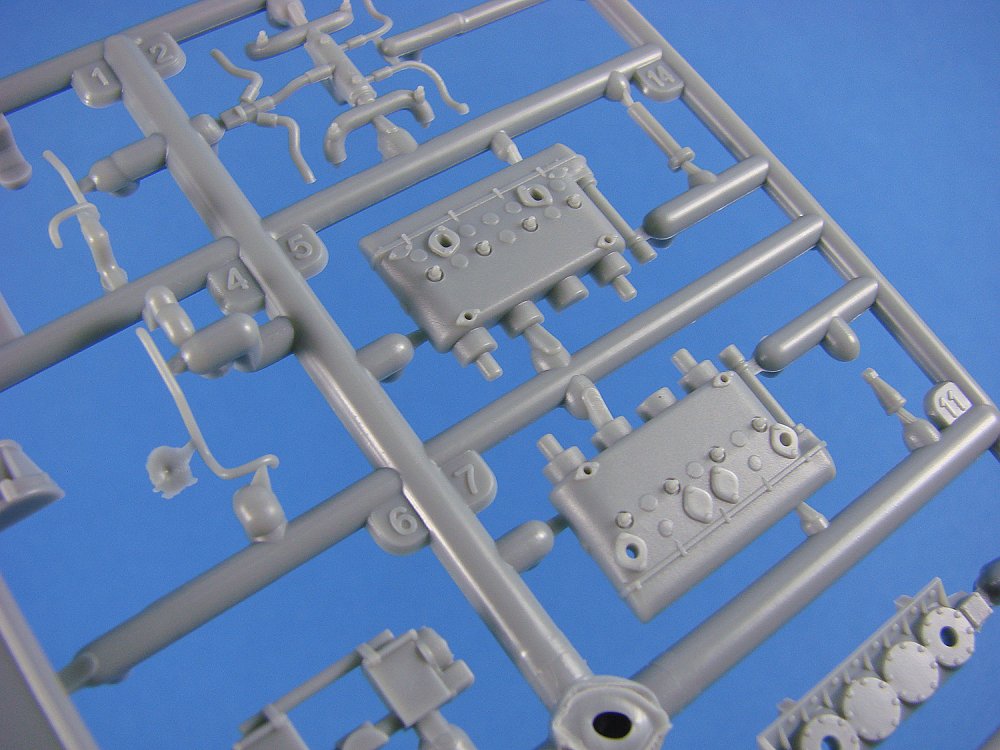


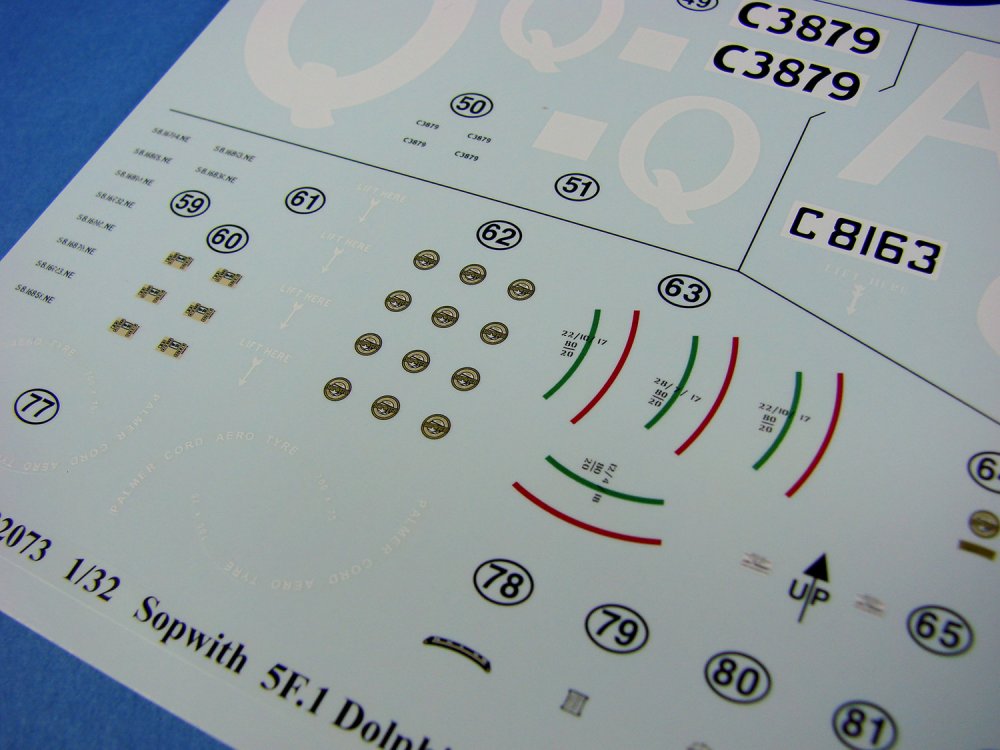
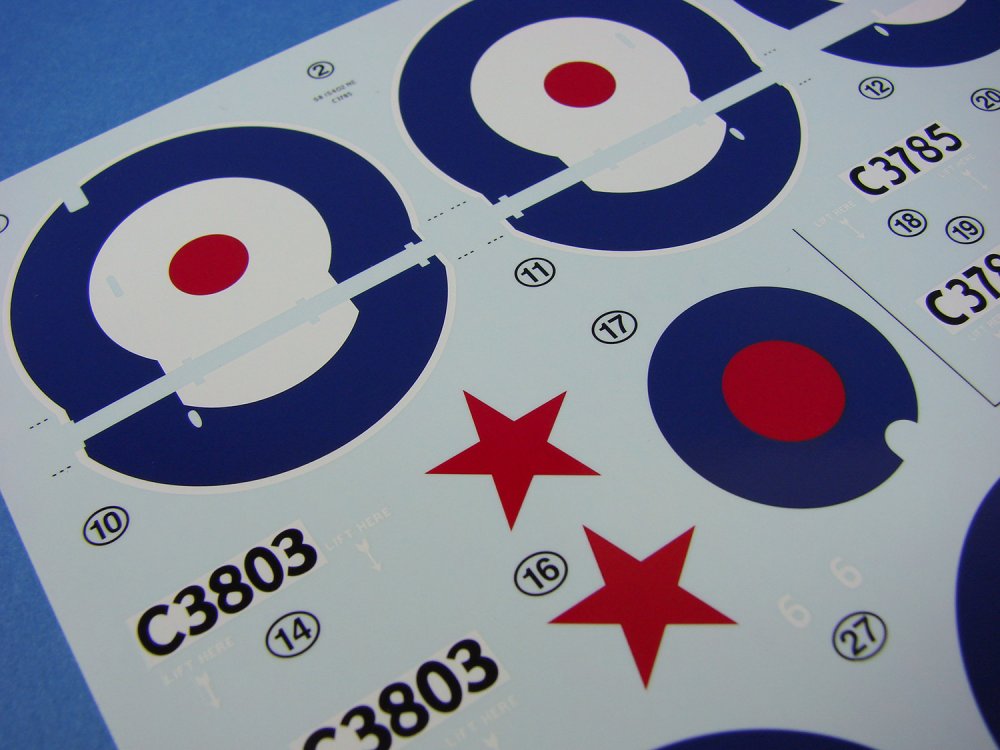

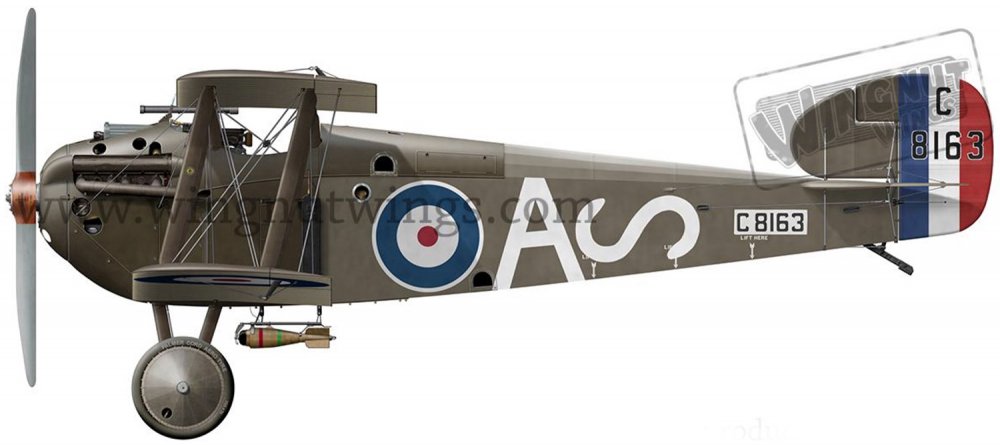
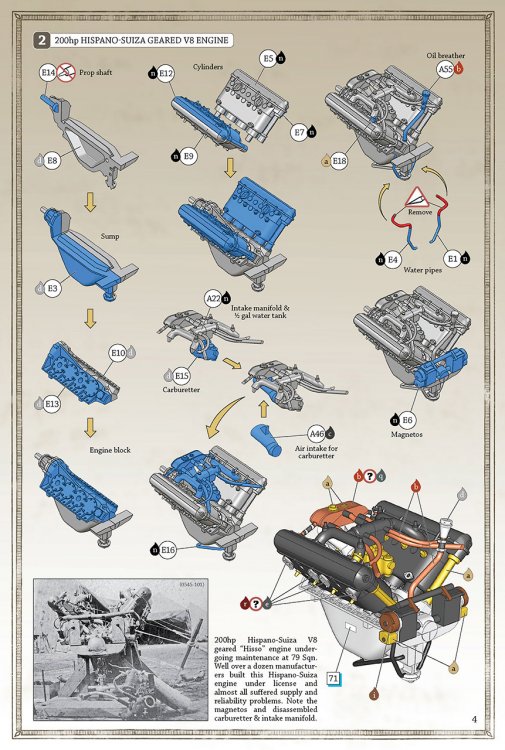
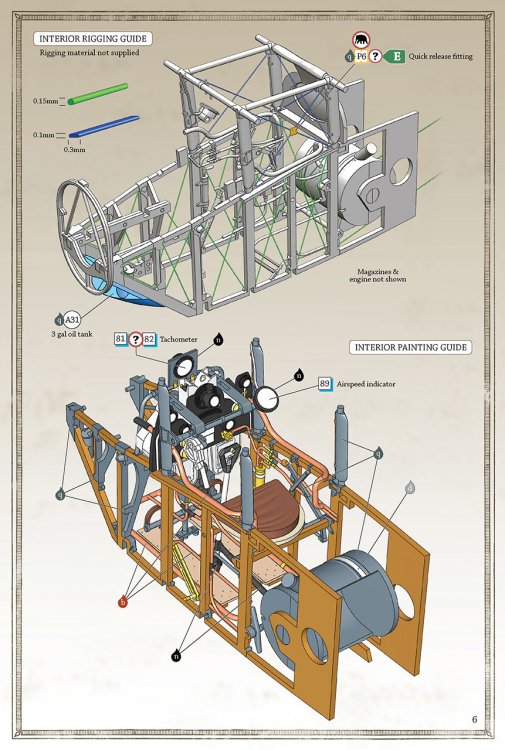
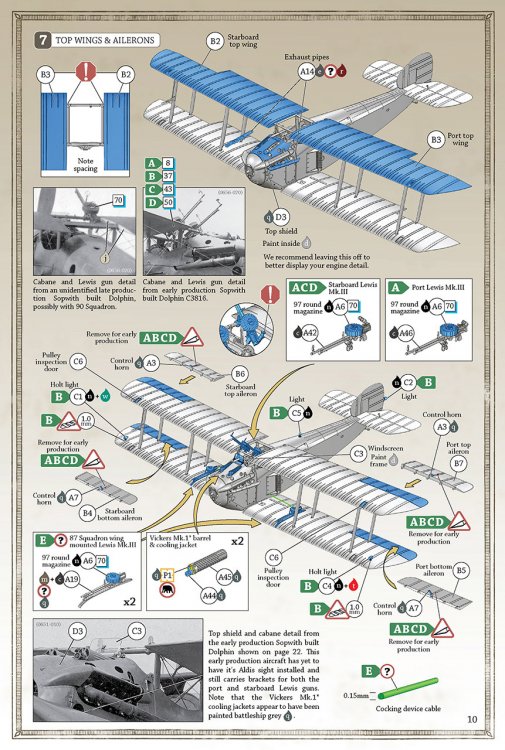


-
Can't wait to see this one.
-
Craft Tools Rack DSPIAE Catalogue # AT-R Available from Breveco Modelling for €44,50 My workbench is always a clutter, despite it being fitted with a whole array of HobbyZone modules that store paint, brushes, tools etc. As modellers, we always tend to pull the same small number of key tools and things back to our bench as soon as we start work on our next project, or after a well-needed mid-project tidy. I’d been after a small tool rack so that I could keep just a few regular bits and pieces together. My good friends at Breveco Modelling told me that they had such an item in stock, from DSPIAE. This is the same company whose Stepless Adjustment Circular Cutter and Single Blade Nipper, that I recently reviewed here on Large Scale Modeller. As luck would have it, Breveco were visiting Scale Model World 2017 at Telford, so I took the opportunity to pick one up from them in person. Now, this is no flimsy or lightweight box. This little package is actually quite heavy, and the box is built to withstand a nuclear blast, or so it would seem. The same high-quality presentation has gone into this product as it did with the others. Box art is a little unusual from the lid, with only a small number of words, and a side drawing of the rack is present. The box sides do give a little more away, with photos and some explanation of the product itself. The extremely robust lid took some effort to remove from the tray, such is the airtight fit of this. Underneath this lies a removable panel which shows the various parts within, and instructions on assembly of the tools rack (not that it’s too difficult to fathom yourself!). Lifting out the foam backed panel reveals a precisely cut foam block into which the various components are inserted, and each is named, just in case you had become confused at some point. All along, there’s no doubt at the level of quality that DSPIAE has employed here, but does that carry over onto the tool rack itself? Well, the answer is a resounding YES! Each part is now lifted carefully from the box, including a small wallet with a number of screws, sticky feet and a hex-key. All of the main components of the rack have a super smooth finish and a red-anodising to them, creating a striking appearance. For an extra touch, the outer edges of the main rack are bevelled, removing the anodising, and allowing the shine of the aluminium to come through. Assembly is very straightforward. I start by taking the baffle plate, and slotting this inside the rear part of the main rack. Two knurled screws now hold this in place from the rear of the rack, with two plastic washers to protect the red anodised finish of the parts. This baffle can be moved up and down within the stand, due to the slotted nature of the fixing point. This can be suited to fit your own particular tools. The two large openings in the front part of the rack now need to be tackled. A tool tray (bottom case) slots into the open side of the rack, and this is secured from underneath with three countersunk screws, tightened with the hex-key. Whilst I’m at this point, I also peel off the 3M sticky rubber feet and add these to the underside so that the rack isn’t scratched by any workbench debris. I am pretty fussy about things like that, and want to maintain something in the best way possible, for as long as humanly possible. Lastly, there is an optional module which can fit into the smaller of the two tray areas (well, it’s designed for the smaller, but will fit the larger area if you wish), and this is the modularised slot block. This is designed to fit brushes etc. What I like about the areas at the front is that the larger one fits a bottle of Tamiya Extra Thin Cement perfectly, so you won’t knock it over on your bench and melt your work in the process. Conclusion I’ve already got this stuffed with all manner of tools that I want to keep close at hand, including my razor saw, small brushes, sprue cutters etc. This takes the desk-tidy idea a step further and makes it both flexible and elegant. The weight of it, plus the rubber feet, means that it won’t skirt and slip around your bench accidentally. It firmly stays put, which is also useful if you store your cement bottle in there too. Putting the lid back on and screwing tight whilst in the stand, is straightforward. This is a quality tool, and that is reflected in the price, which I still think is very, very reasonable for a chunk of heavy, precisely machined metal and the other included parts. These aren’t something which I tend to see every day, but I’m sure if you drop Evert or Corien a message at Breveco Modelling, they’ll be able to sort out your requirements. My sincere thanks to Breveco Modelling for the sample seen here. This item isn’t yet on the website, but please contact them to register your interest.

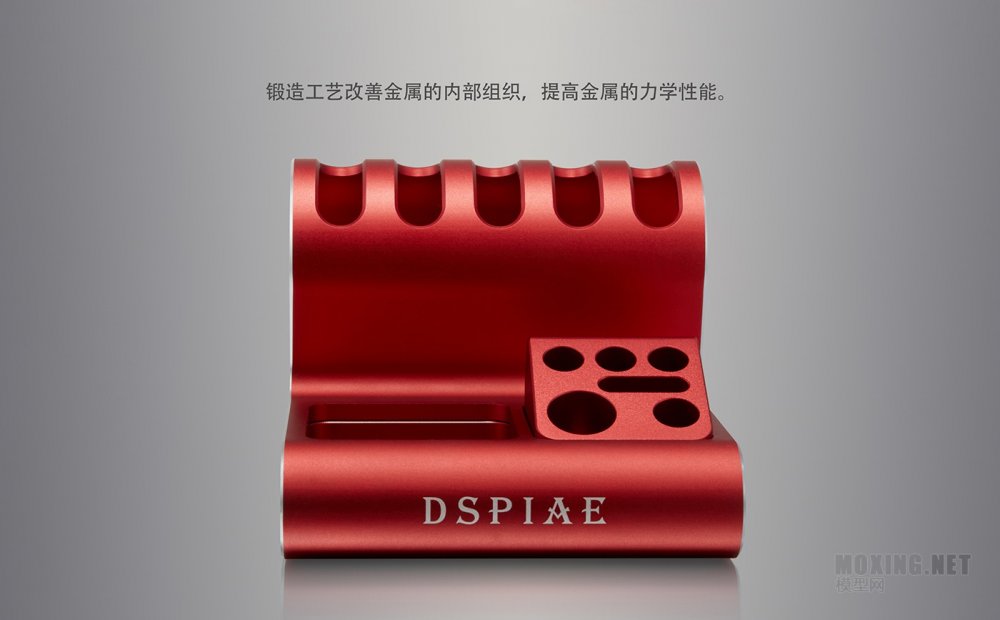

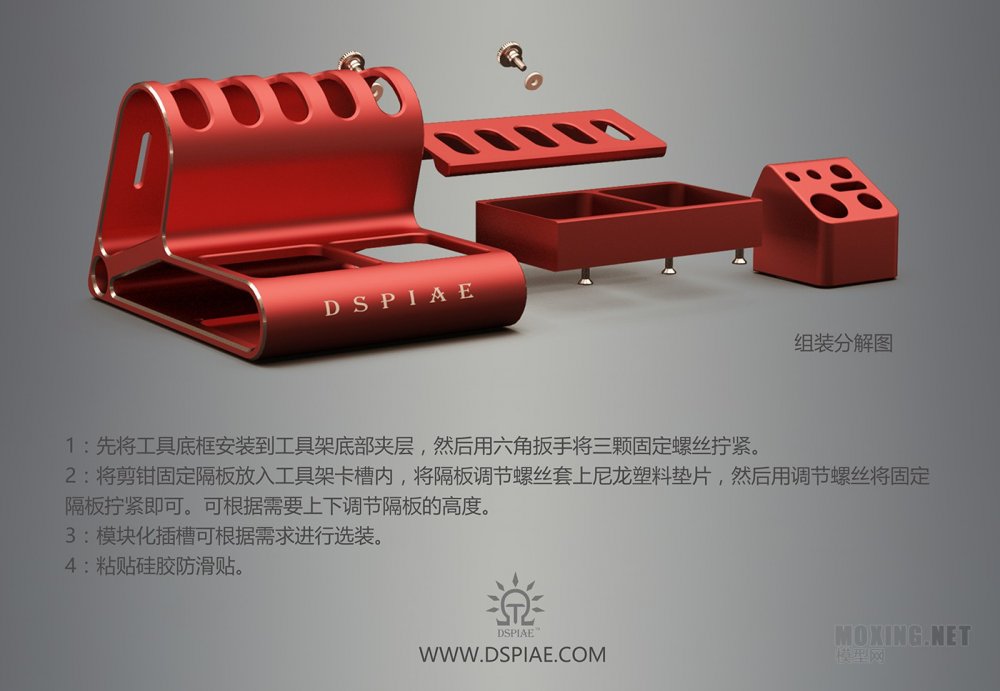
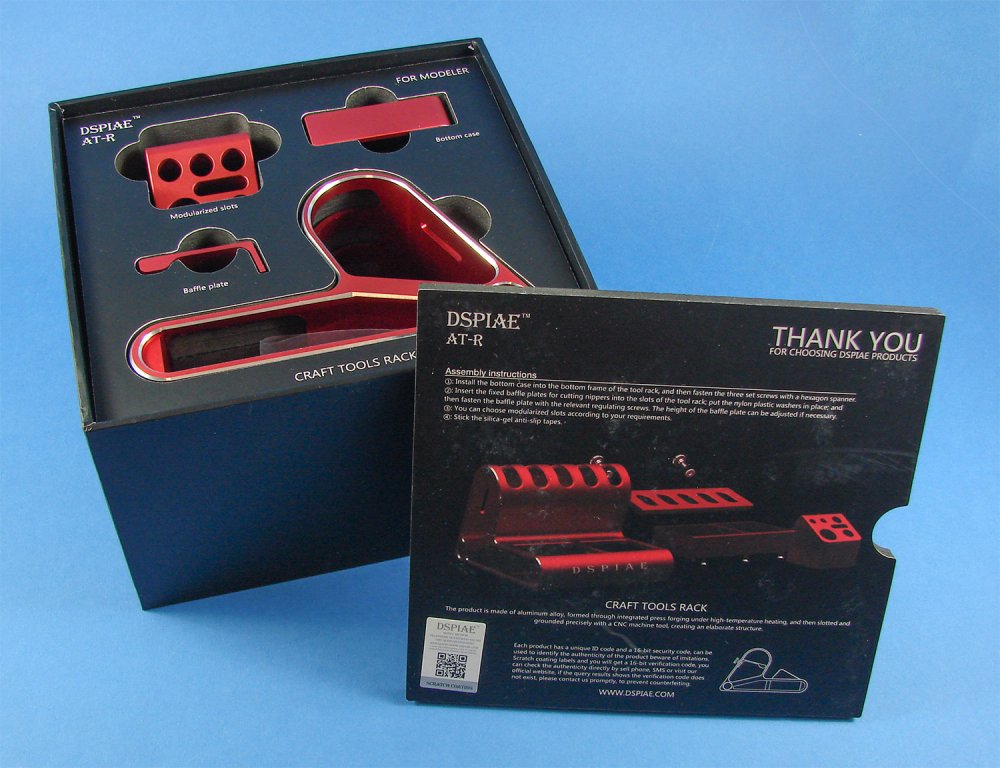

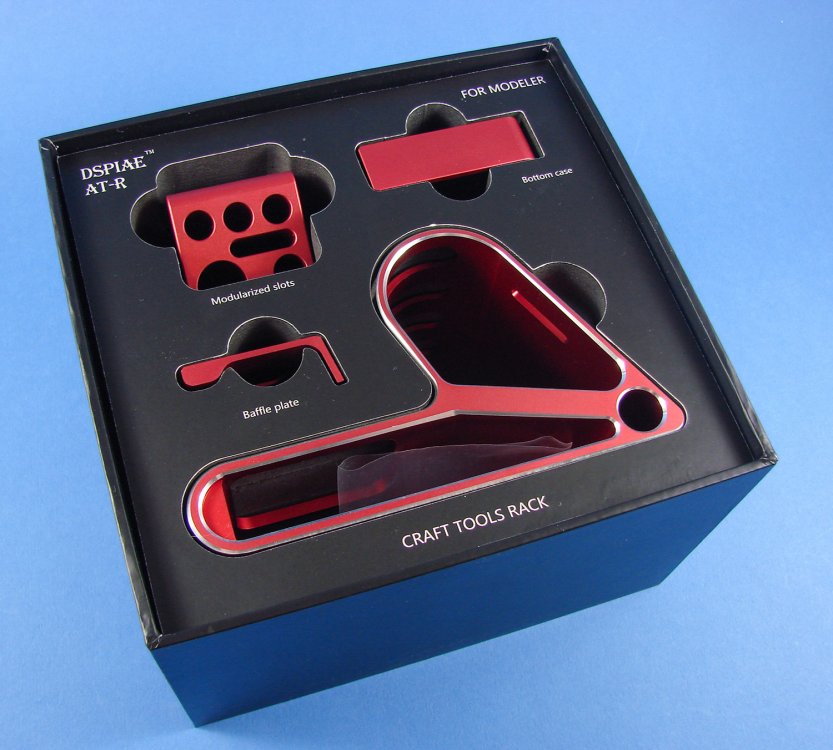


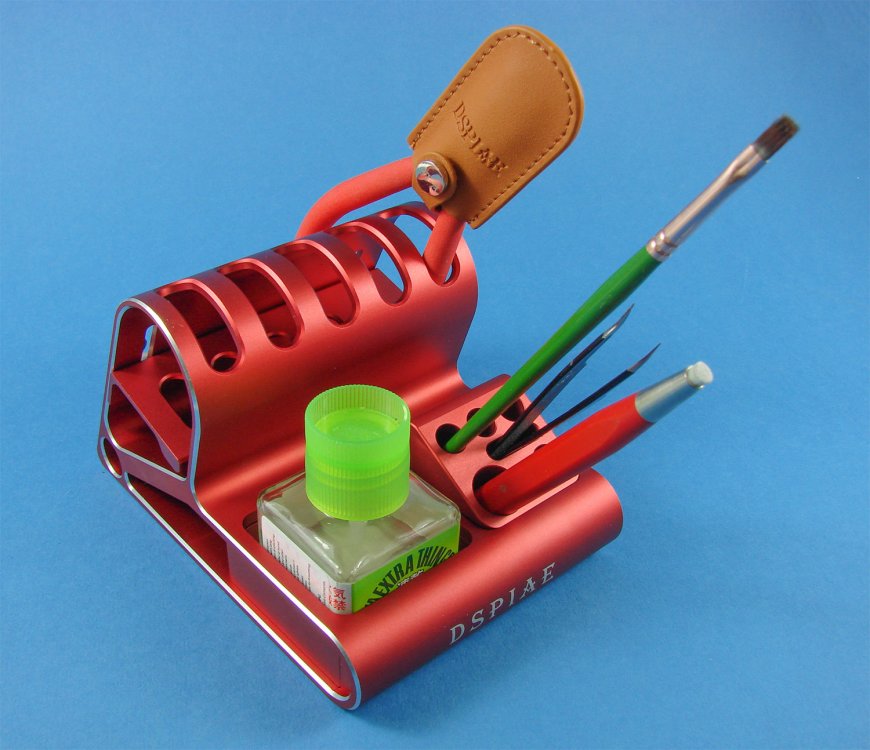

-
revell Focke-Wulf Fw 190A-8/R11
James H replied to James H's topic in LSM 1/32 and Larger Aircraft Ready for Inspection
No problems at all. This is the second of these kits I built as I did the test shot for the original F-8. Makes me wonder if this release is the reason why the ZM 190 seems to have fallen from radar. -
Hi all, I recently finished another rush build for Tamiya Model Magazine International. This time it was the new tool Fw 190A-8/R11 in 1/32. I built the F-8 2 or 3 years ago and loved it. This has the same fun factor. I also fitted it with numerous Eduard PE and resin sets. Paint is MRP. Look out for this one in the December issue of TMMI, out on November 16th.
-
Is this permanent?
-
1/32 Revell P-51D Mustang TEST SHOT First Look I've been asked to build a test shot of the forthcoming P-51D from Revell. This will be for TMMI, and be finished in the kit decals for LOU IV. Permission has been given for me to publish these images of the test shot here on LSM. Please remember though that there are quite a few scuffs on this model as they aren't treated with the same kid gloves as a production standard kit, and the plastic is also darker, harder and a little more brittle than what you will see in your own kits. So, take a look at what we have here and ready your wallet for a right royal bashing.

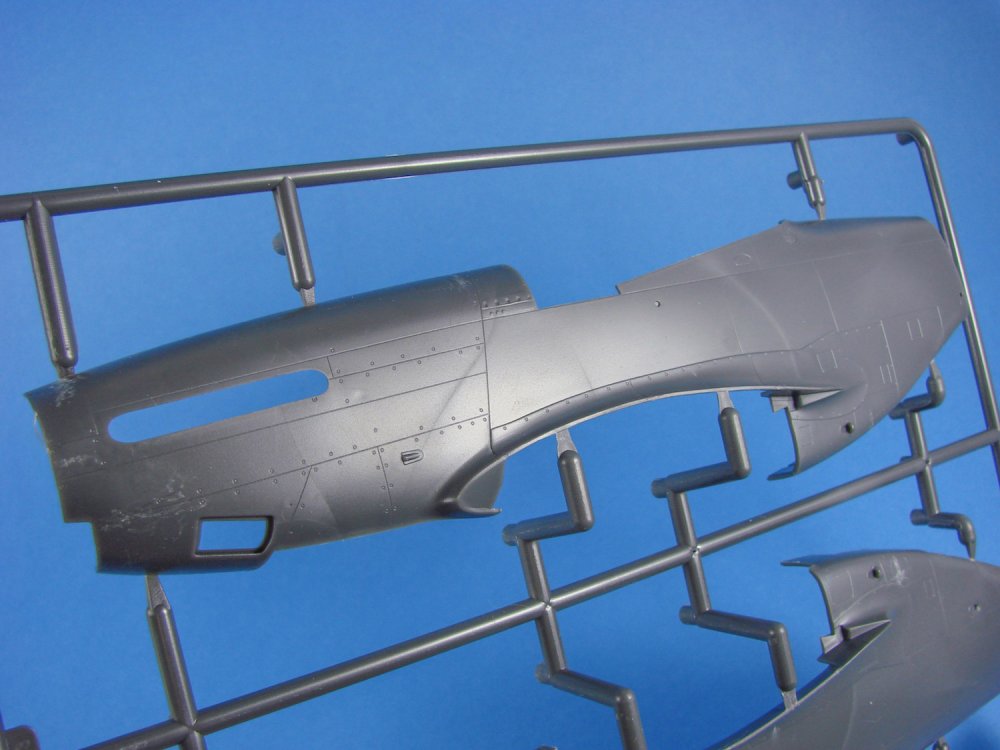
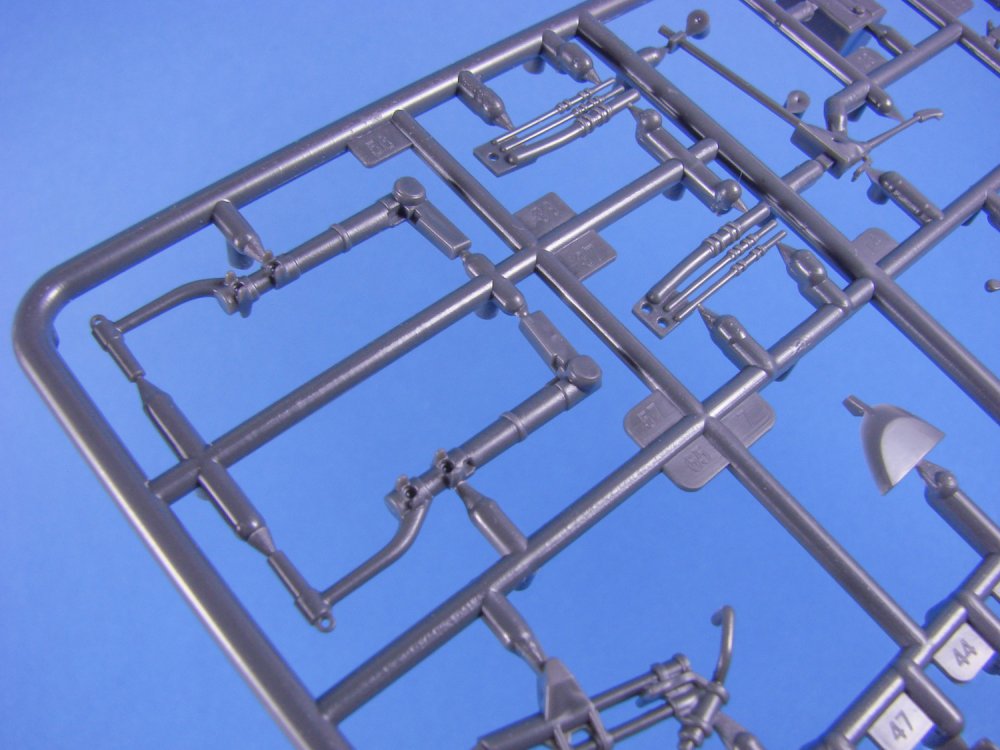
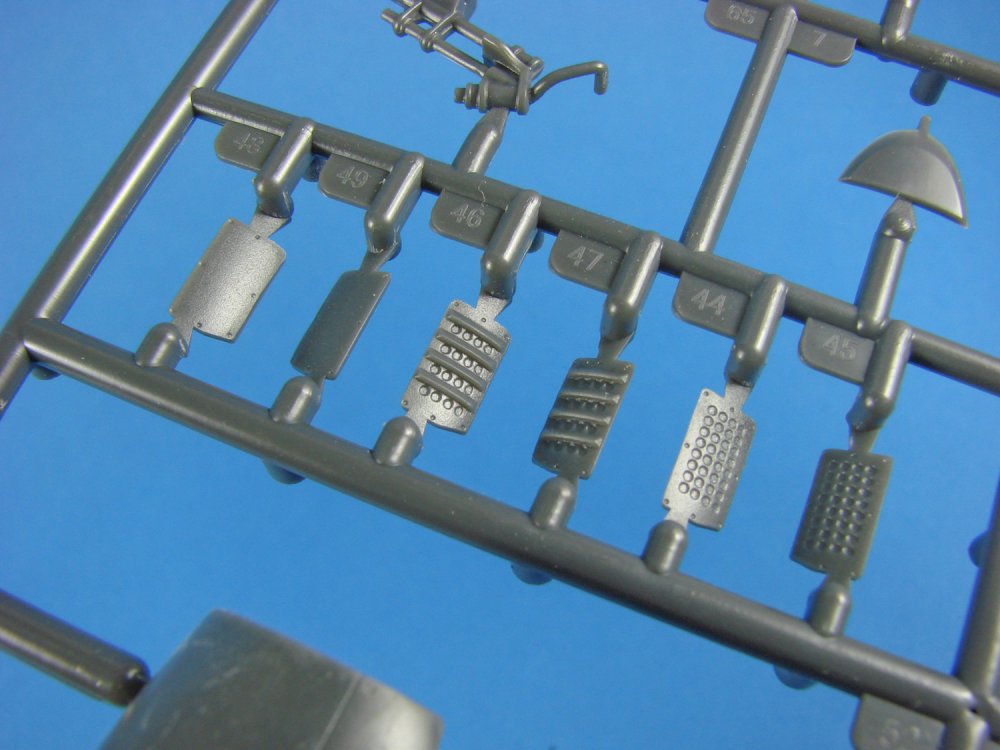

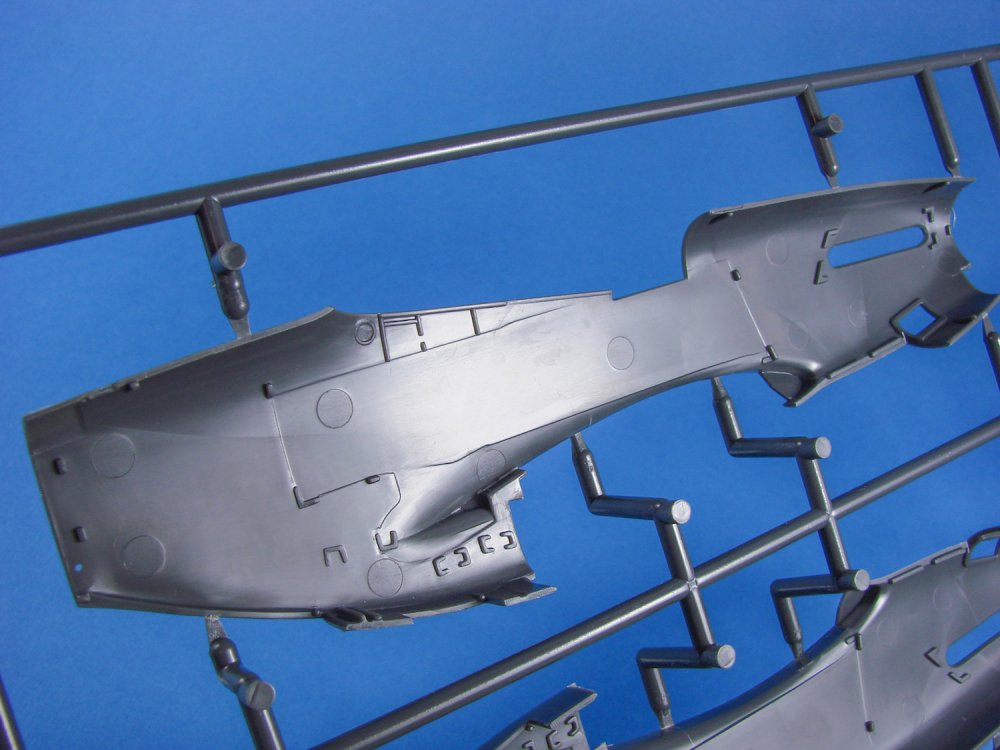
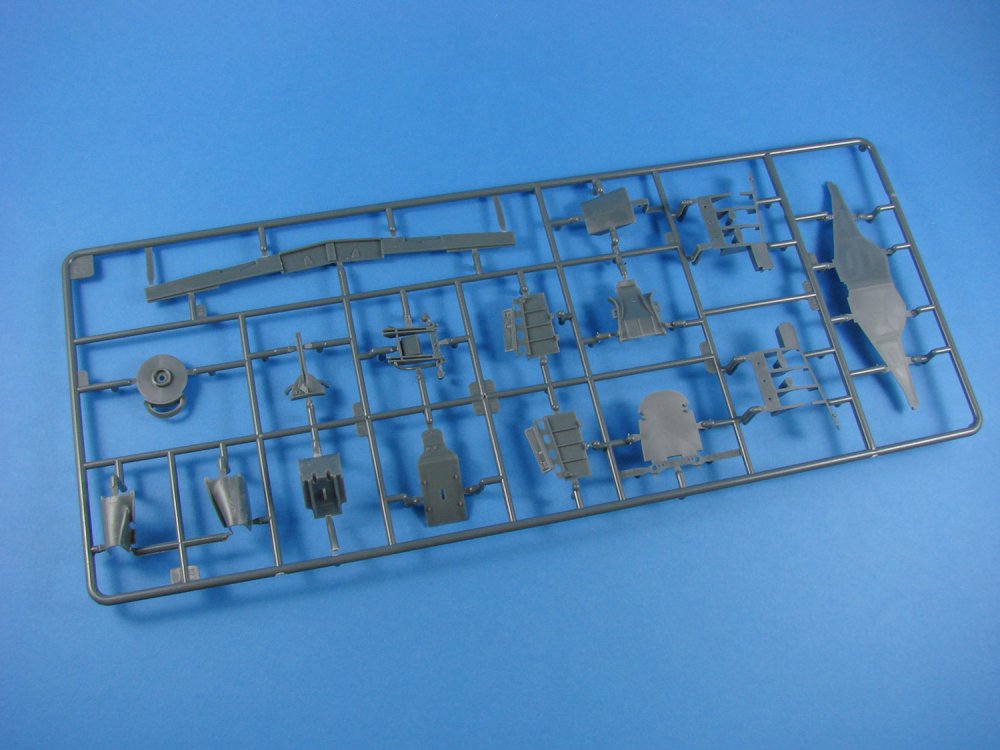
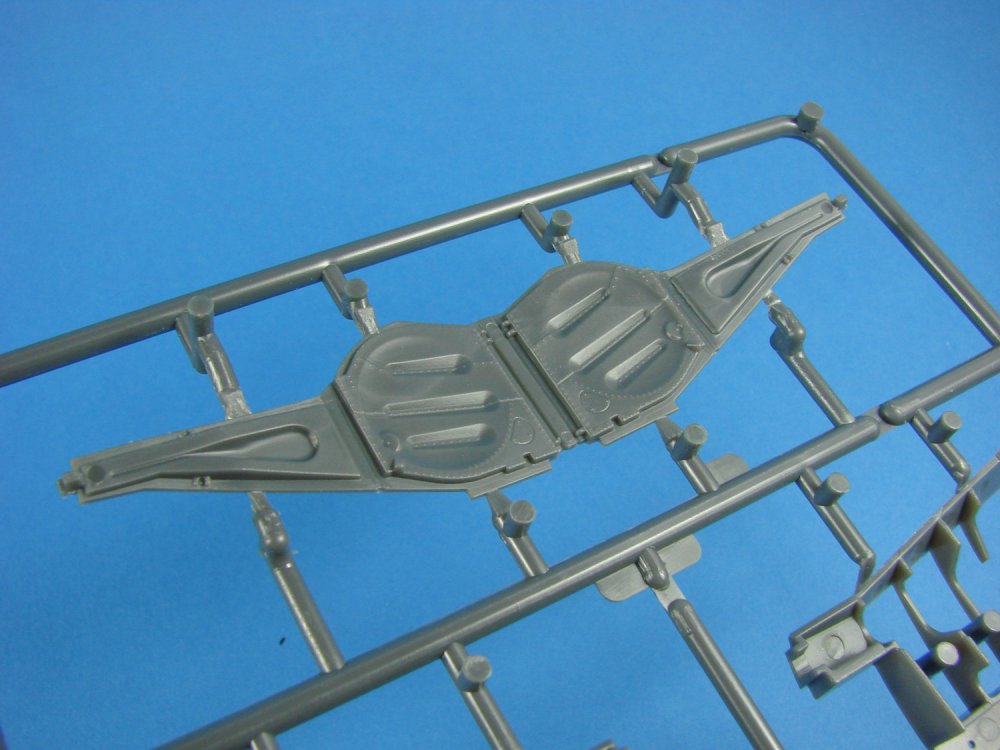
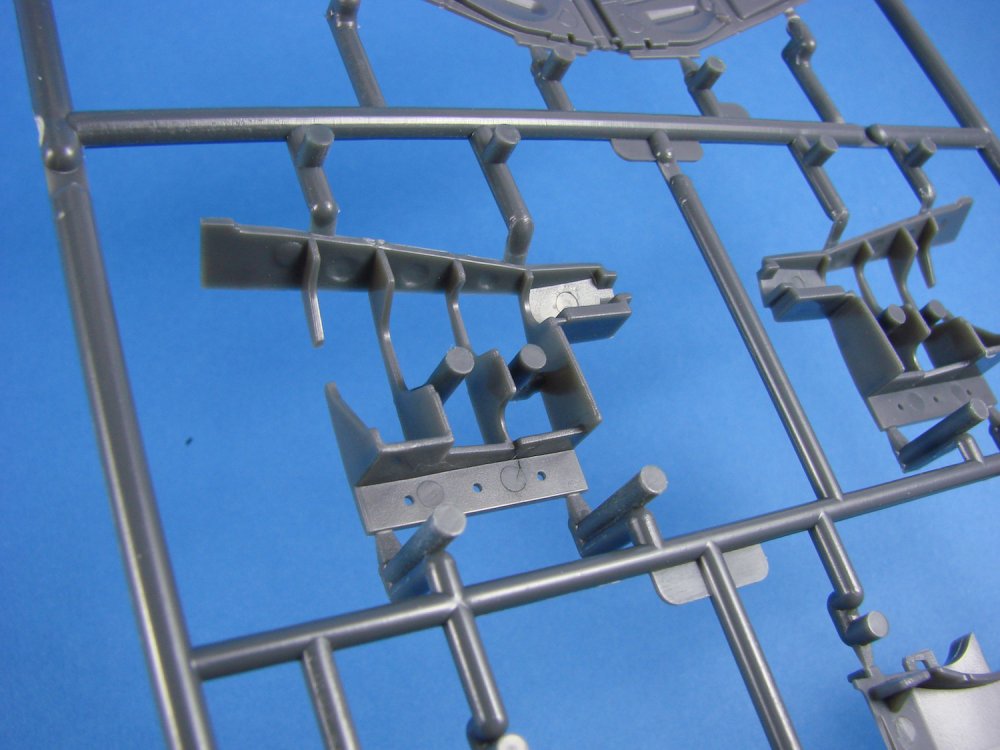

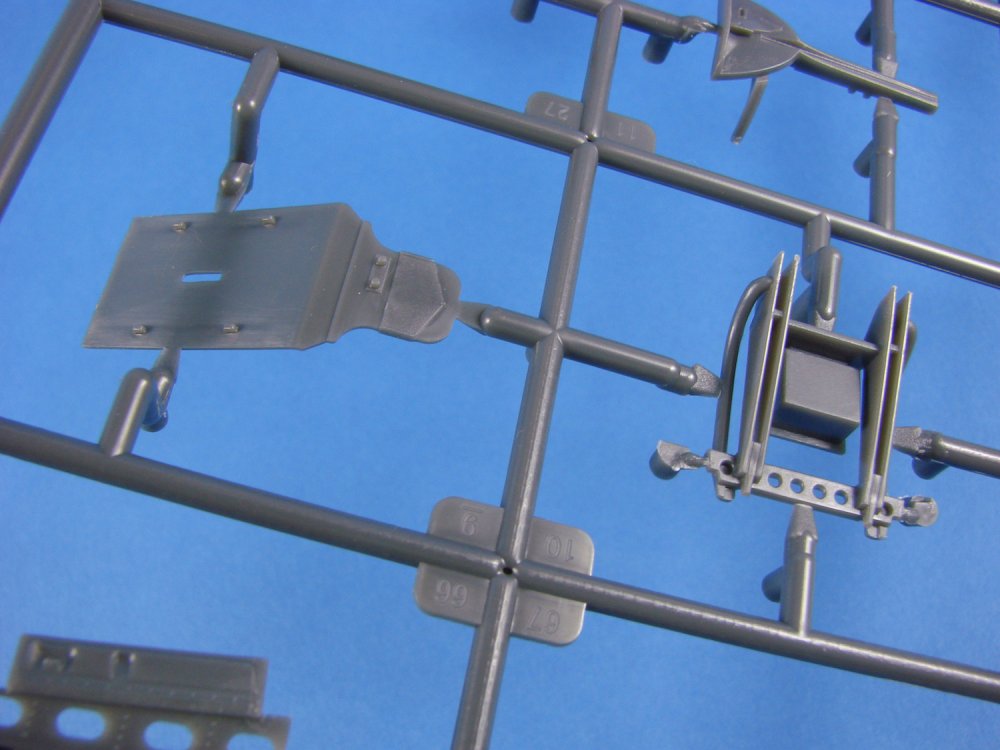
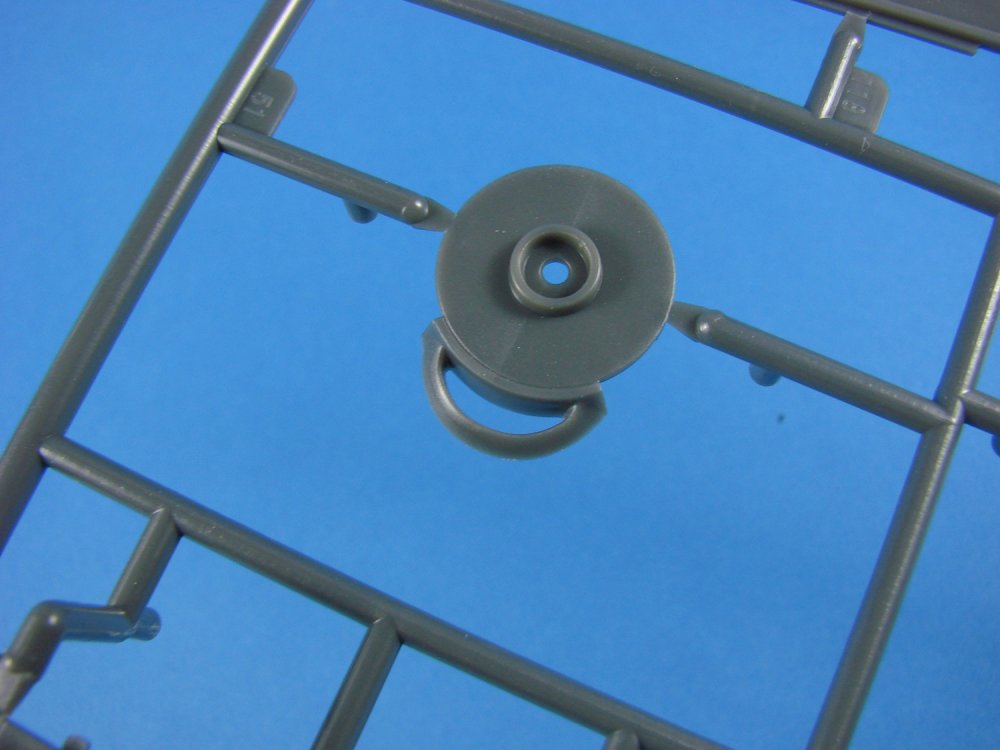
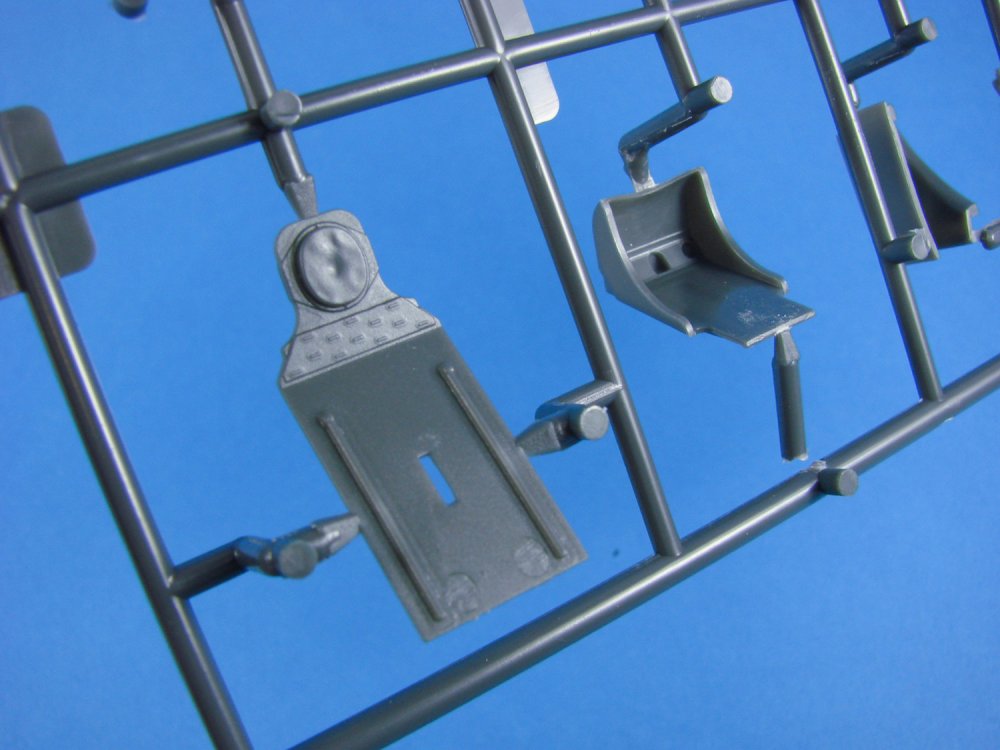


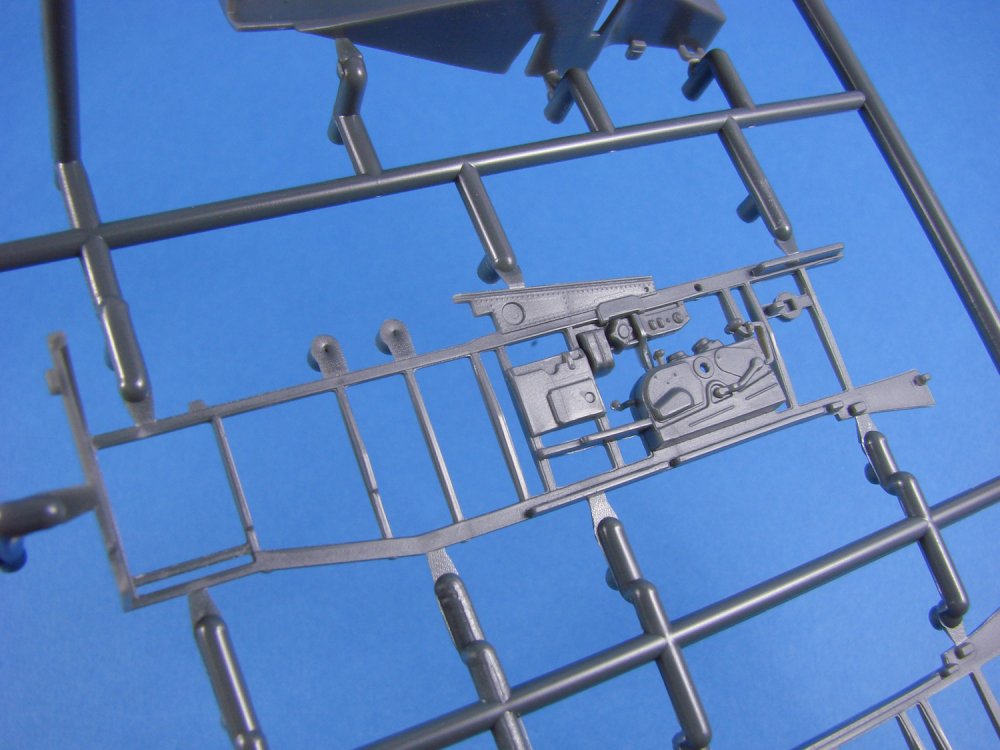

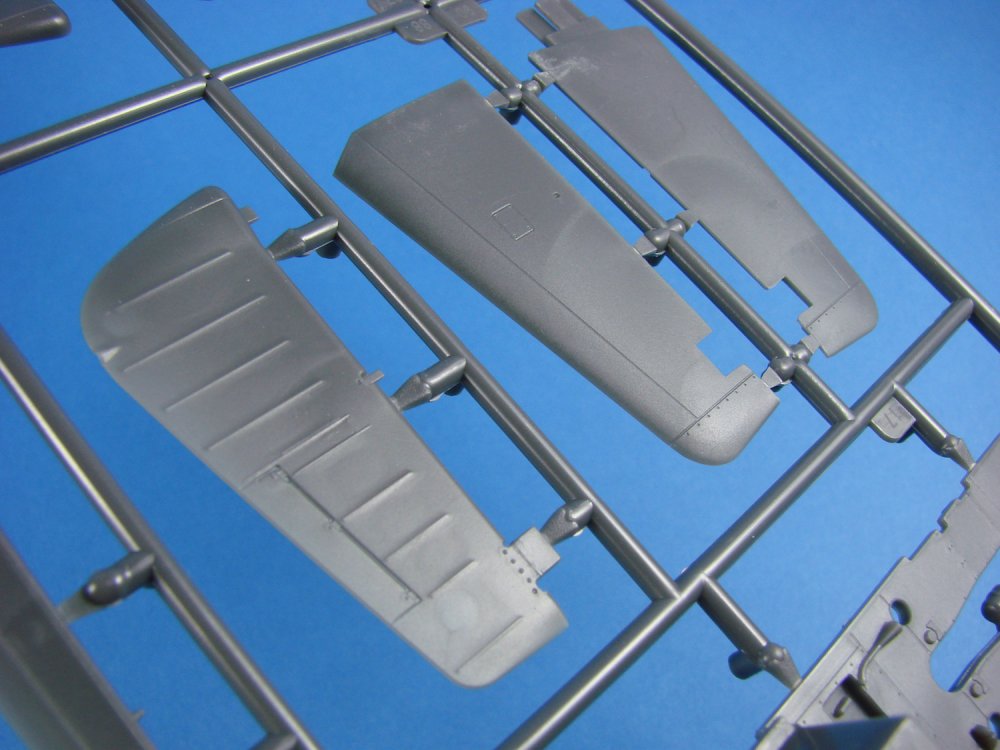
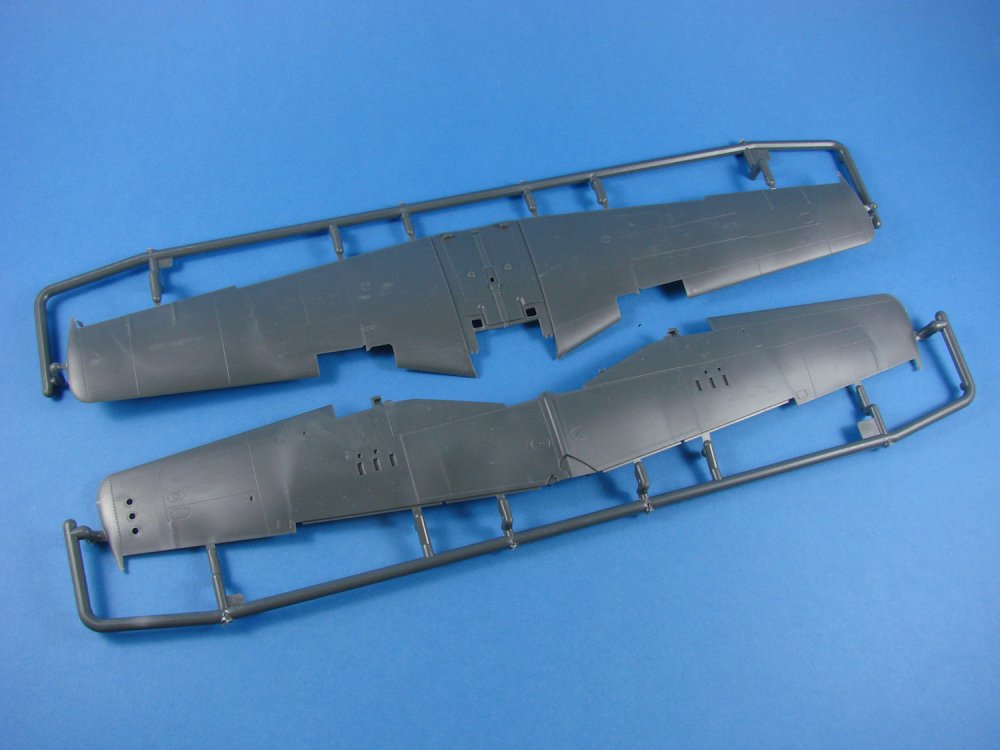
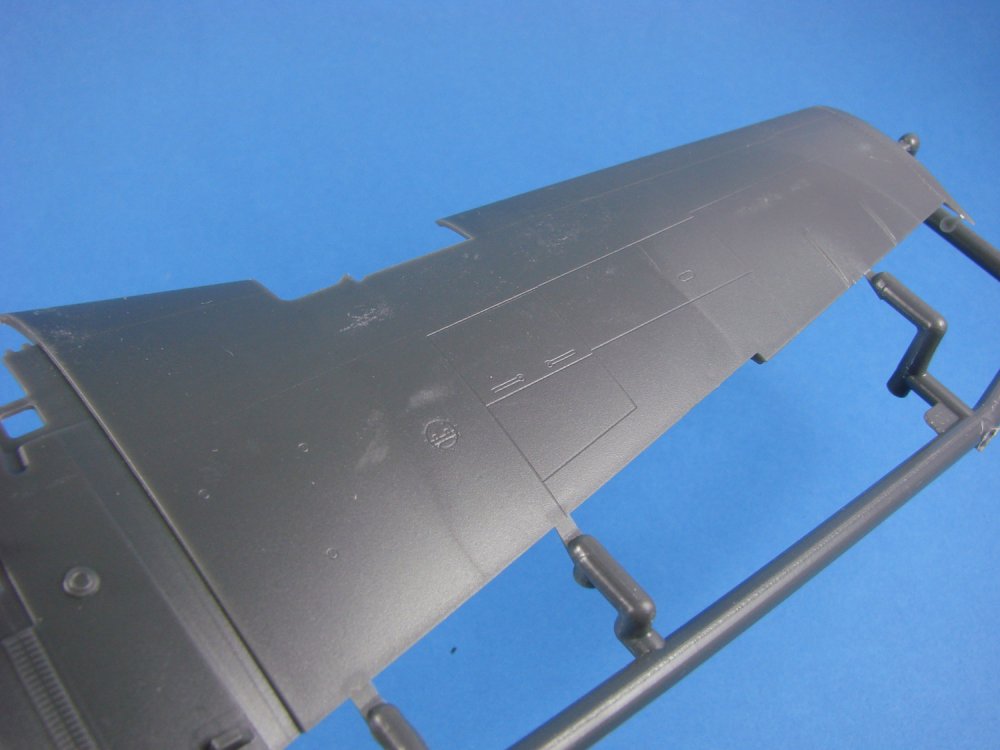
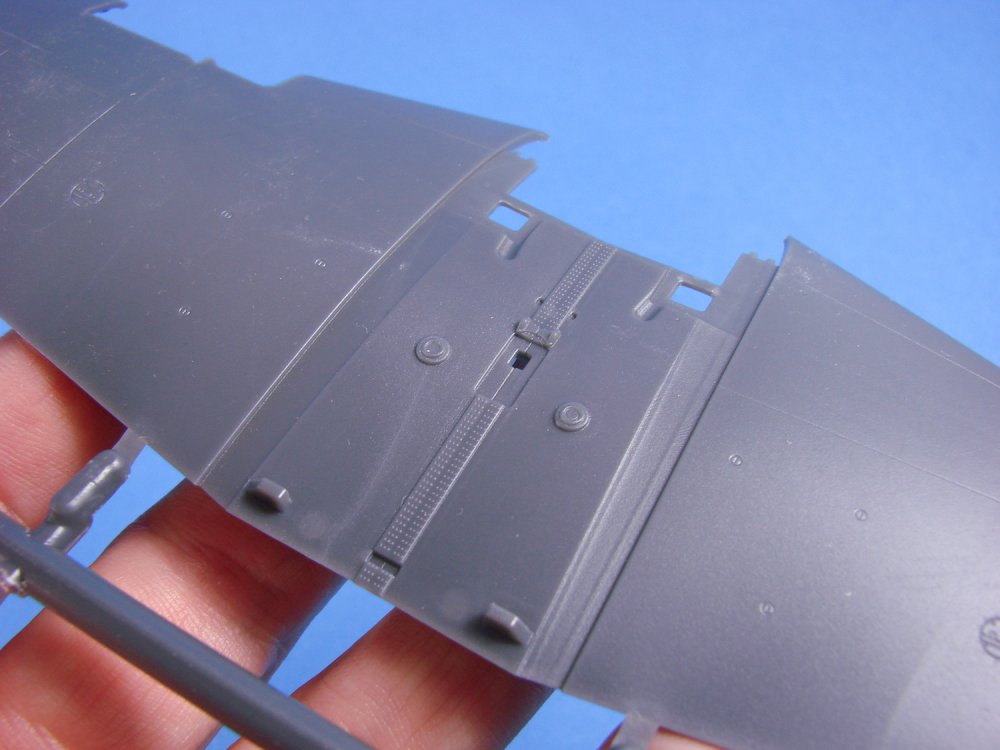
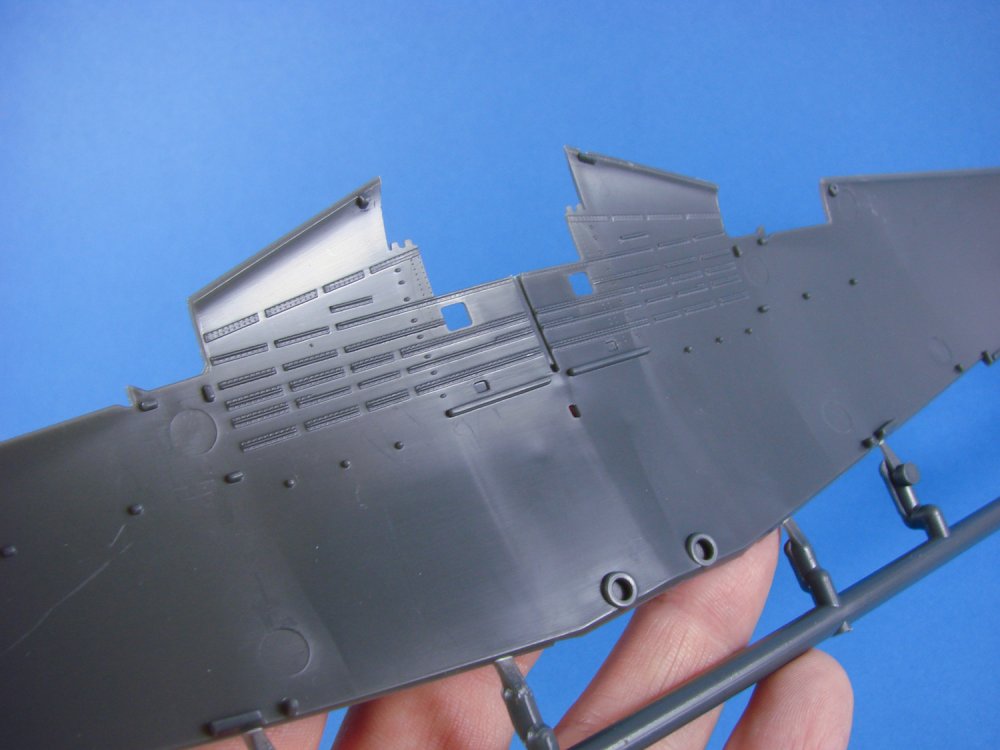
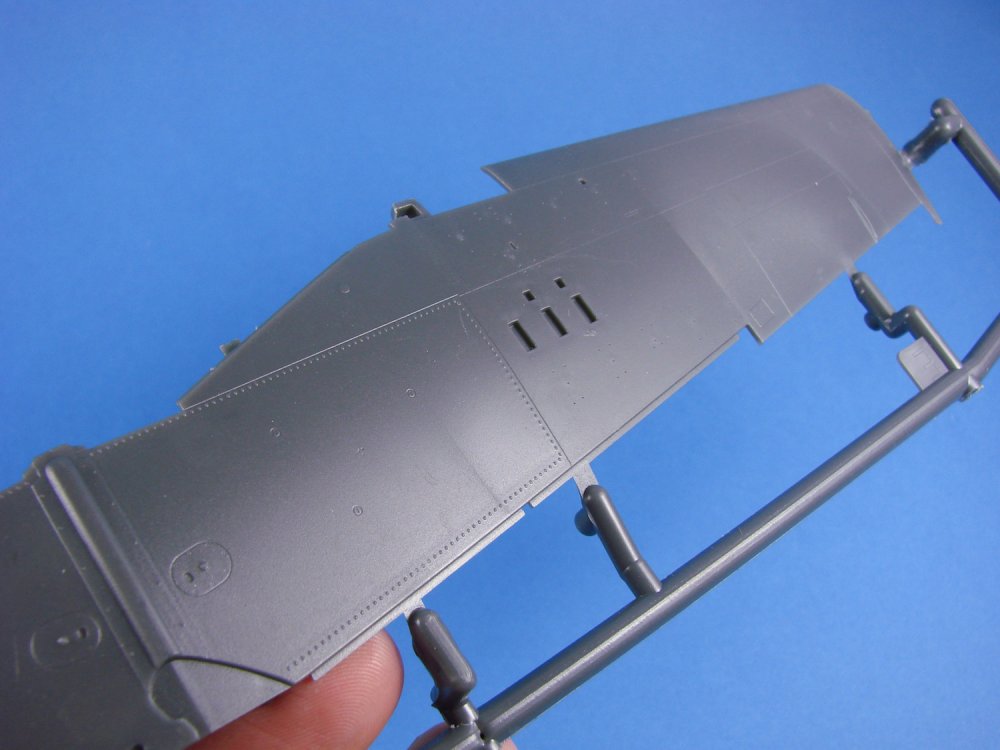

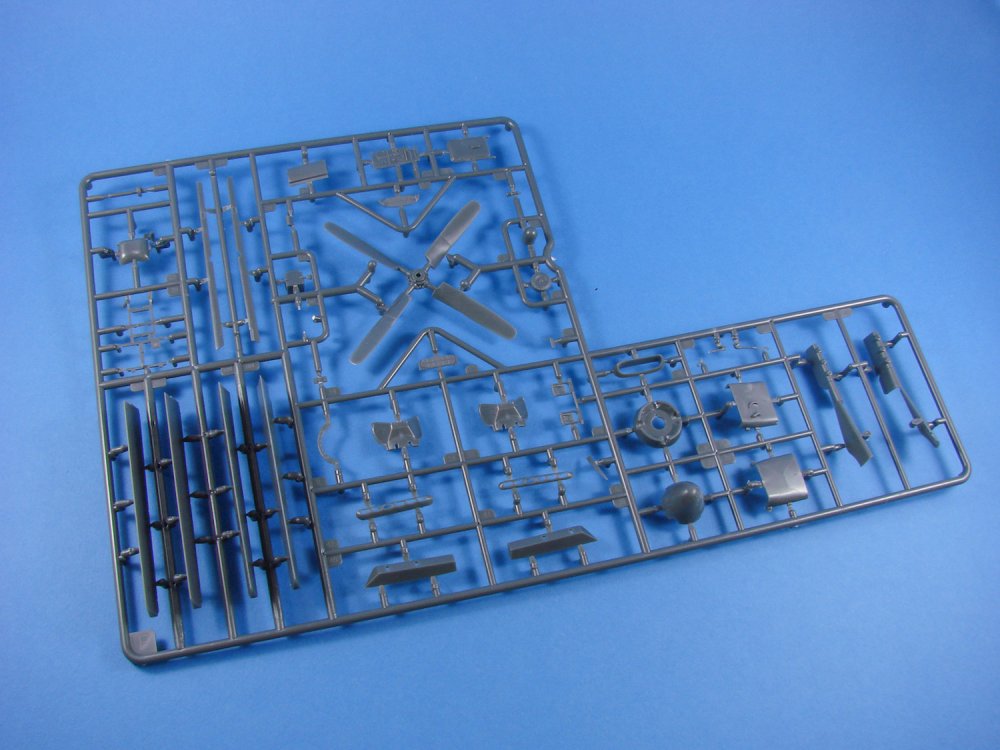
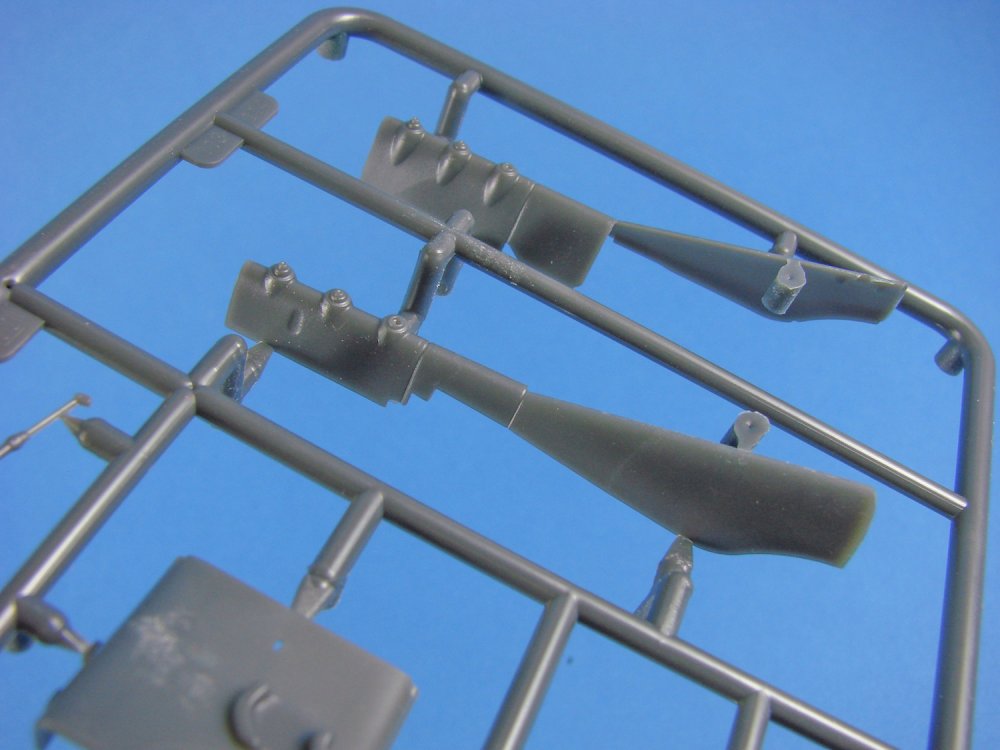
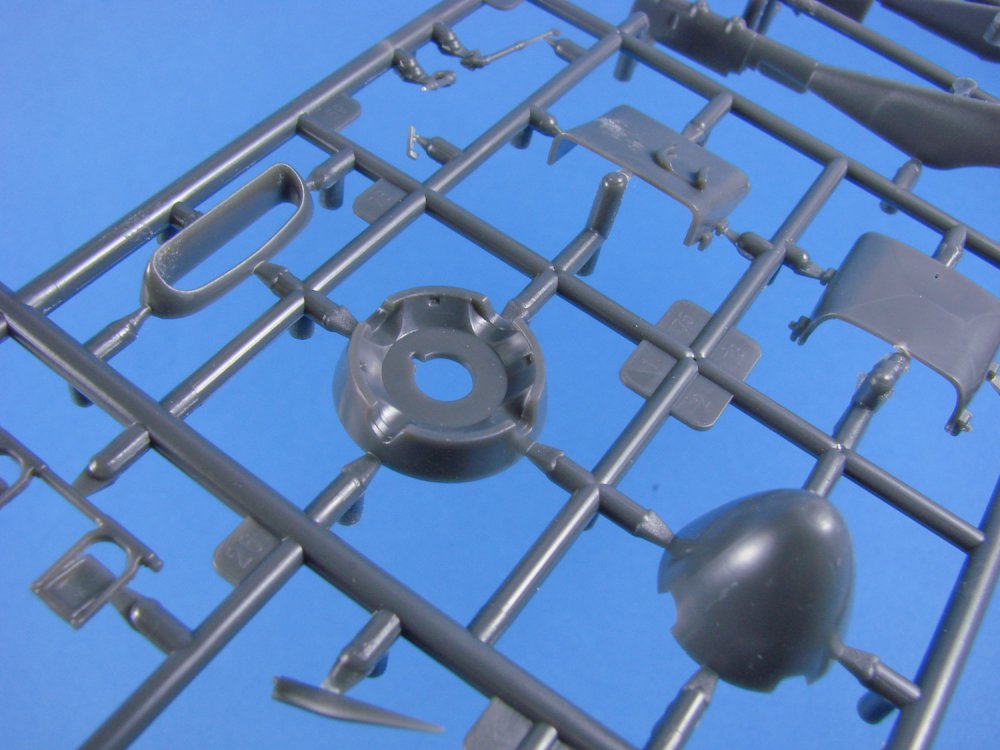


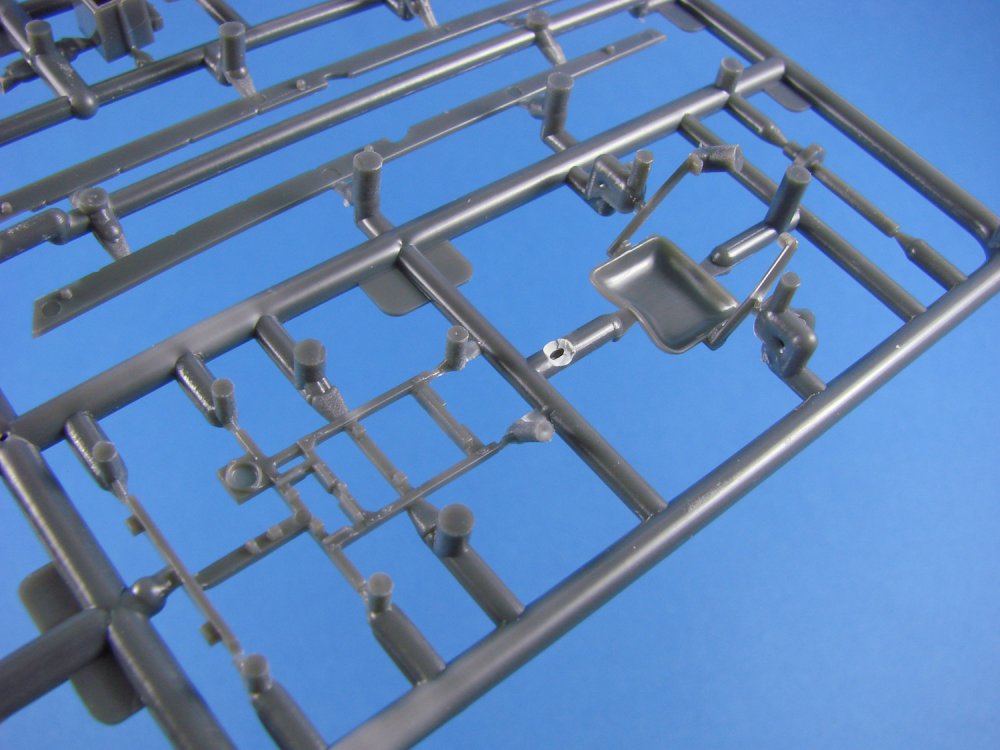
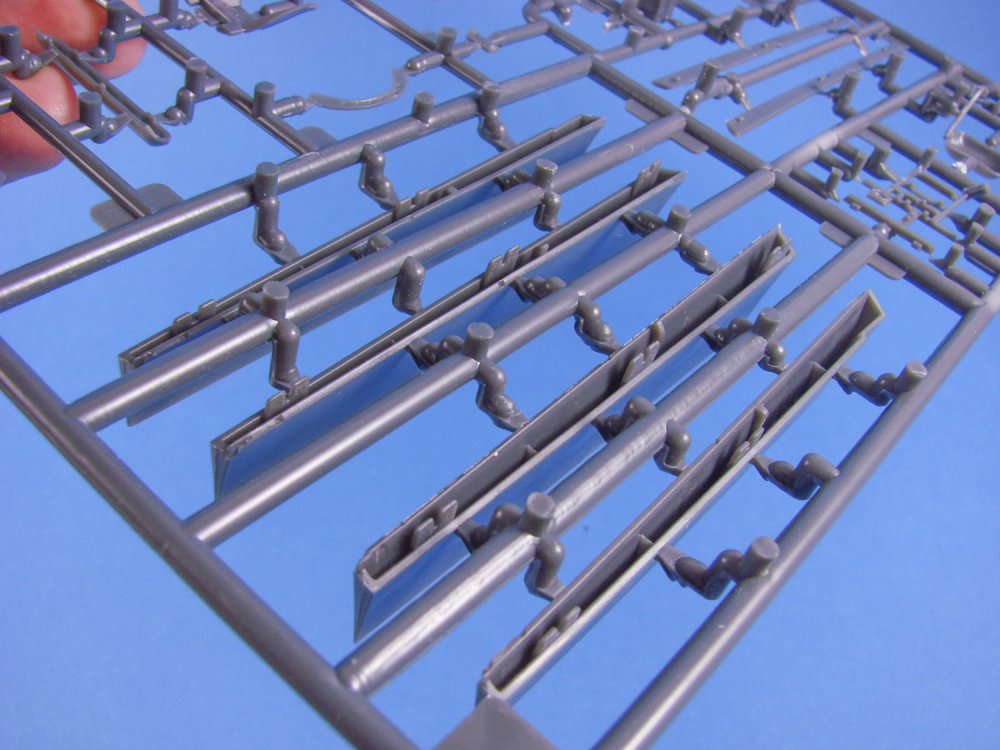
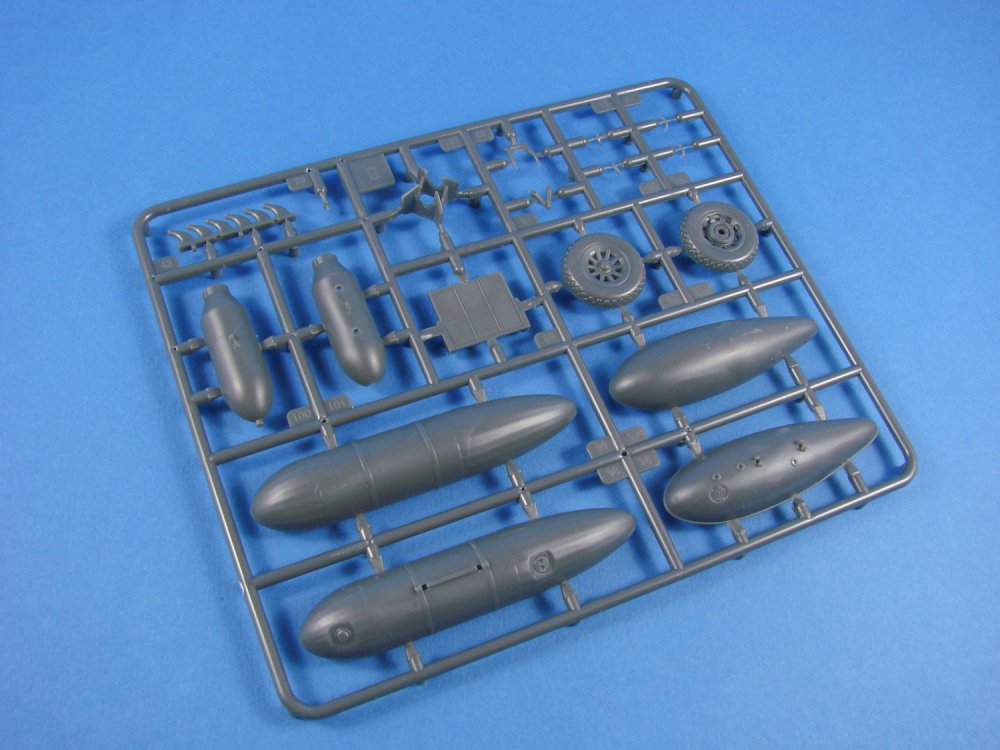
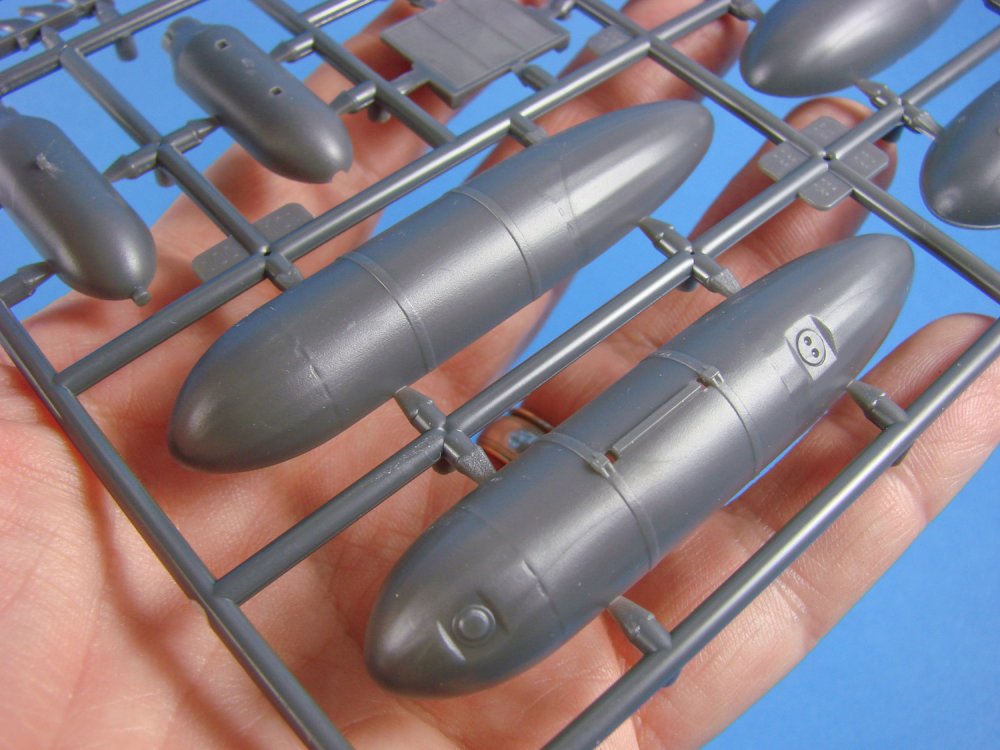
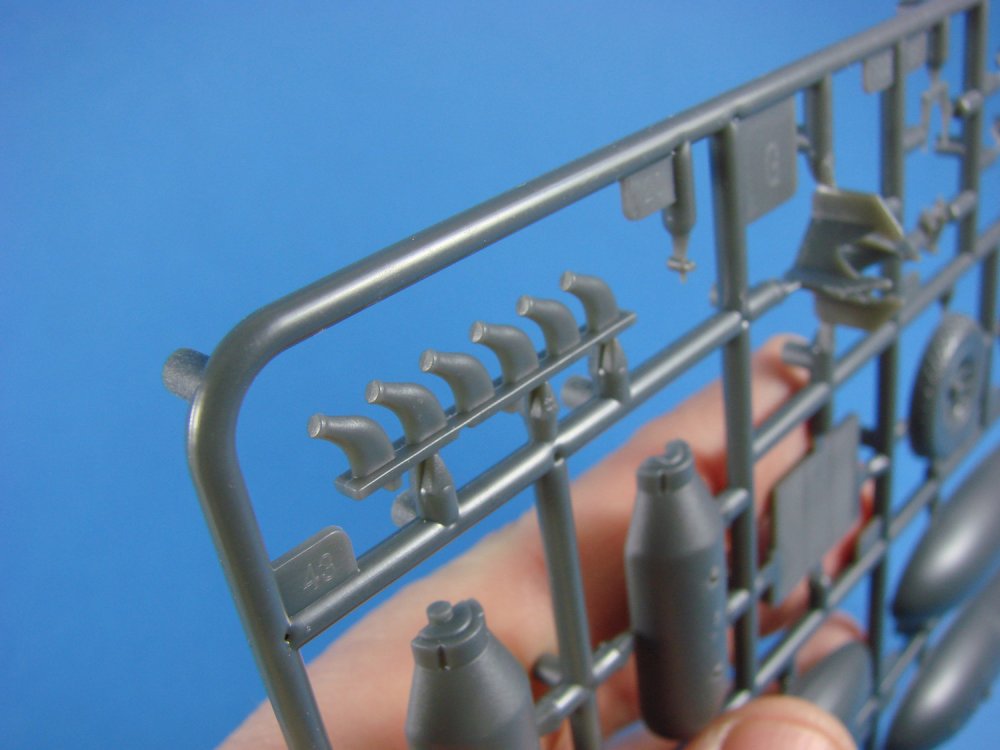

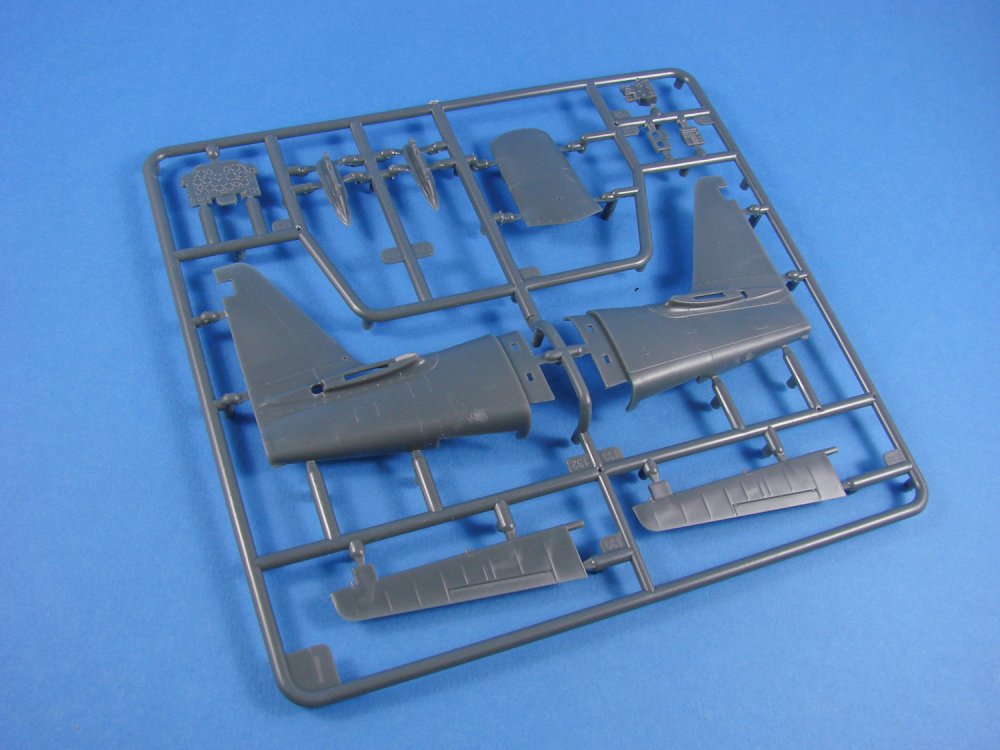
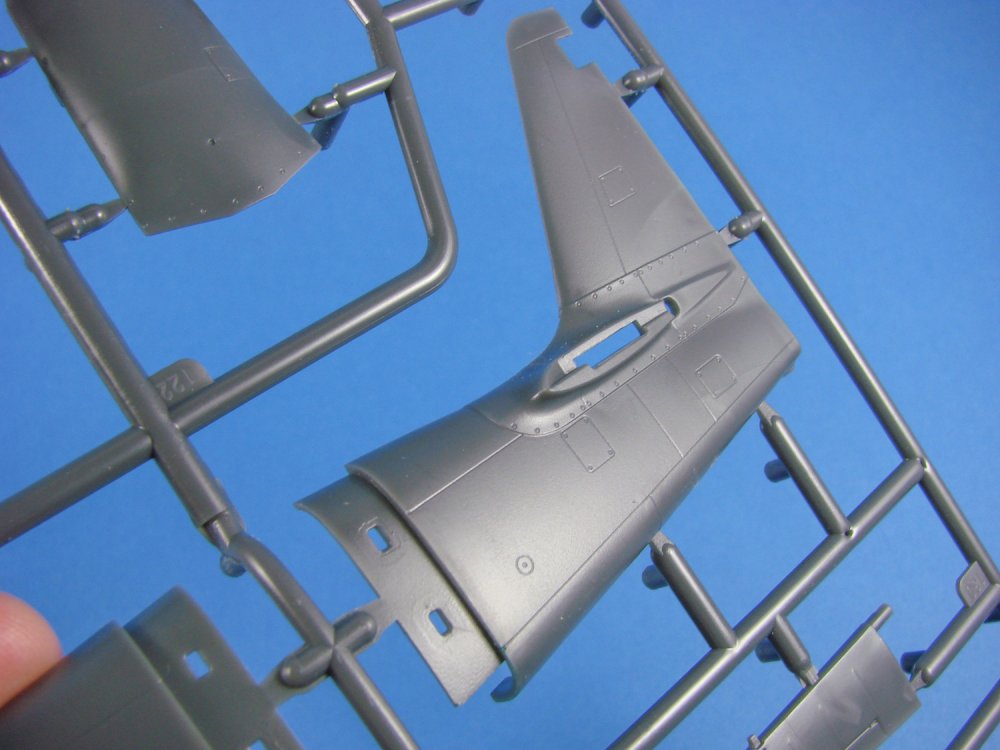

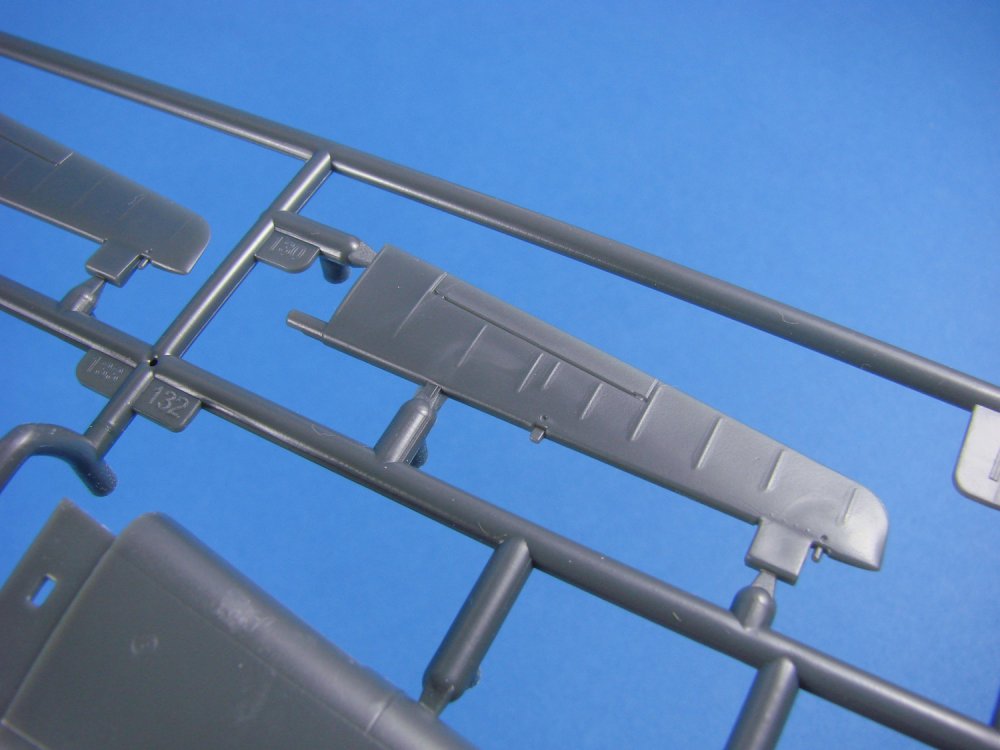
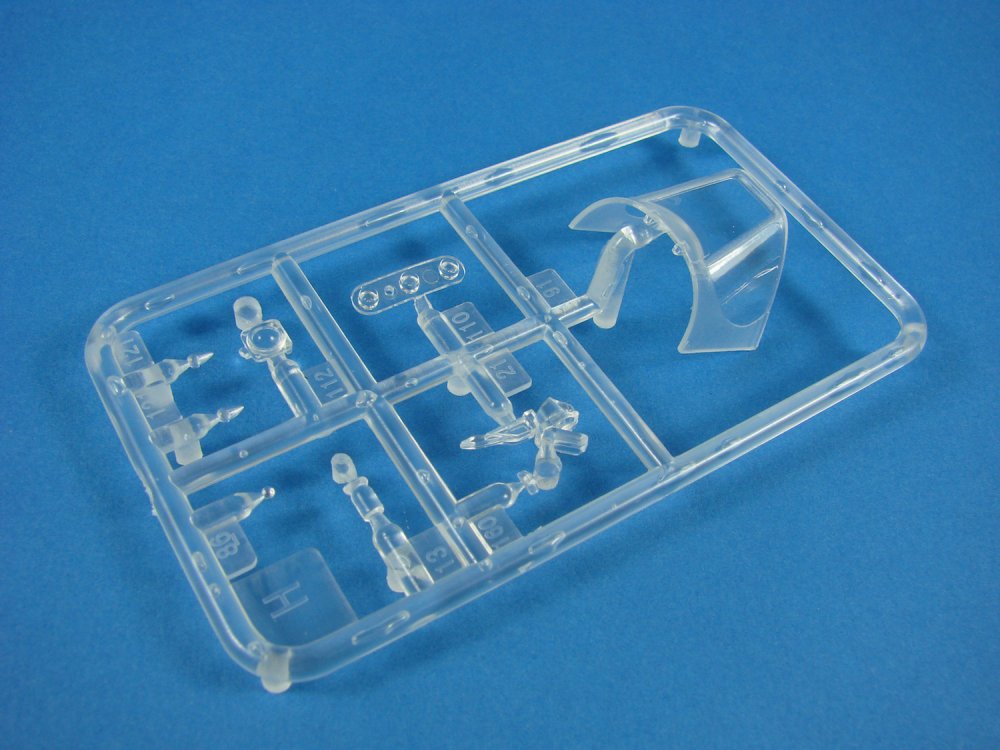

-
1/48 North American P-51D Mustang Airfix Catalogue # A05131 Available from P&S Hobbies for £21 The North American Aviation P-51 Mustang is an American long-range, single-seat fighter and fighter-bomber used during World War II and the Korean War, among other conflicts. The Mustang was designed in 1940 by North American Aviation (NAA) in response to a requirement of the British Purchasing Commission. The Purchasing Commission approached North American Aviation to build Curtiss P-40 fighters under license for the Royal Air Force (RAF). Rather than build an old design from another company, North American Aviation proposed the design and production of a more modern fighter. The prototype NA-73X airframe was rolled out on 9 September 1940, 102 days after the contract was signed, and first flew on 26 October. The Mustang was originally designed to use the Allison V-1710 engine, which, in its earlier variants, had limited high-altitude performance. It was first flown operationally by the RAF as a tactical-reconnaissance aircraft and fighter-bomber (Mustang Mk I). The addition of the Rolls-Royce Merlin to the P-51B/C model transformed the Mustang's performance at altitudes above 15,000 ft, allowing the aircraft to compete with the Luftwaffe's fighters. The definitive version, the P-51D, was powered by the Packard V-1650-7, a license-built version of the Rolls-Royce Merlin 66 two-stage two-speed supercharged engine and was armed with six .50 calibre (12.7 mm) M2/AN Browning machine guns. From late 1943, P-51Bs and Cs (supplemented by P-51Ds from mid-1944) were used by the USAAF's Eighth Air Force to escort bombers in raids over Germany, while the RAF's Second Tactical Air Force and the USAAF's Ninth Air Force used the Merlin-powered Mustangs as fighter-bombers, roles in which the Mustang helped ensure Allied air superiority in 1944.[10] The P-51 was also used by Allied air forces in the North African, Mediterranean, Italian and Pacific theatres. During World War II, Mustang pilots claimed to have destroyed 4,950 enemy aircraft. At the start of the Korean War, the Mustang was the main fighter of the United Nations until jet fighters, including the F-86, took over this role; the Mustang then became a specialized fighter-bomber. Despite the advent of jet fighters, the Mustang remained in service with some air forces until the early 1980s. After the Korean War, Mustangs became a popular civilian warbird and air racing aircraft. Except for the small numbers assembled or produced in Australia, all Mustangs were built by North American initially at Inglewood, California but then additionally in Dallas, Texas. Extract courtesy of Wikipedia The kit This is my third Airfix review in the last week or so. A few years ago, I wouldn’t have been interested in their output, but they seem to be pushing all of my buttons at the moment. I have to say that when I saw this in P&S Hobbies in York, I knew it was going to leave with me. Whilst the artwork style of these new kits is very different to the Airfix kits of my youth, they still manage to draw the modeller to them with their gorgeous computer-generated imagery. Again, this is another sturdy and glossy box with which incorporates a parts tray and separate lid, and one where you need to get your fingernails under the lid to prise it off. Inside, all of the six frames of light grey styrene are packed into a single heat-sealed polybag. Another bag within this contains the single clear sprue. I’m always very vocal about all parts frames being packed into a single bag, and with good reason. My sample kit had a few parts that were skewed on the frames due to the packing. A reasonably large decal sheet is included, as is the instruction manual, printed in Airfix’s new format. Airfix don’t include any PE in their releases, but the detail within should be more than enough for the average consumer. If you want a further detail-fest, then Eduard has a full suite of resin and PE for this particular release. Frame A It’s interesting to see the part’s breakdown and engineering of this kit. Airfix seem to be offering some very nice options with their new kits….even single seat fighters such as this one. Note the fuselage is moulded without a tail section? If that’s a hint that we might see an early un-filleted tail in a future release, then that would only be an extra bonus to us, as this kit offers two styles of the later filleted tail. Yes, two styles. Modelling is certainly an education in itself. Looking at the exterior of the fuselage, you will see some very neat panel line depiction and fairing and fastener details. I think these panel lines are perhaps a tad heavier than they could be, but certainly not in the realms of a few of their kits of recent years. I also think my photography seems to emphasize it a little too. It’s certainly not a deal breaker for me, in the slightest. Note that the exhaust manifolds fit into a recessed slot from the outside of the fuselage, meaning you can add them after painting. The cowl also has a hole into which one of two options of breather plate can be added. Within the fuselage, there is no detail, but a recessed area indicates where the separate cockpit wall panels will sit. The most unusual part on this frame is the cockpit floor area and fuel tank section, which extends back to, and incorporates the tail wheel well. Coincidentally, this is pretty much the same method that Revell has employed with their new P-51D Early release in 1/32. Anyway, this part forms the base into which the various other parts will sit, including the battery and radio gear. There are some ejector pin marks, but these are in the area to the rear of the fuel tank, and don’t form part of anything that can be seen. Mustang wings. This is always a subject that draws debate and argument, pretty much every time a P-51D kit hits the shelves. To putty, or not to putty, is undoubtedly the question at all times. Now, whilst this model isn’t riveted, per se, it does have key rows of rivets and fasteners that are recreated. This also includes the wings. We have to remember that Tamiya’s own Über-kit had riveted wings, albeit very faint. You can of course choose to fill this particular detail if it goes against your own personal taste. It can also be seen that the leading-edge MG section is a separate piece. Internally, there is no wheel well detail moulded as this will be separate too. Both regular and paper drop tanks are included. The texture on the paper tanks is very nice. This will probably be the option I use. I also quite like the texture on the fabric rudder, although it could benefit from a few light strokes of a sanding sponge. Frame B This larger frame shows that Airfix has designed the wings to have a full-span lower part, which is complete apart from the separate front wing to cowl fairing that forms the leading edge of the inboard wing area and main gear bay. I’m not absolutely sure of the reason why at this stage of an out-of-box review, but nothing leads me to think that this isn’t done with good reason. Again, wing surface textures are very nice, depicting key panel lines and rivets. There are positions here for what look like rockets, but with this release, you are asked to fill these and sand these flush. Should you wish to install the bazookas, bombs or drop tanks, then you will need to open up the locations from within the wing panel. The upper engine cowl on this model is a separate part, meaning that it installs along a natural cowl panel line, and of course, you won’t need to remove any troublesome seams that would otherwise run right down the middle of this area. There is some nicely innovative engineering going on at Airfix, these days. Here you can see the tail wheel walls which fit into the rear of the aforementioned cockpit tub area. I’m still amazed that they did this in the same manner as the new 1/32 Revell kit. Great minds think alike! Detail is very good, despite you not really seeing too much in the way of anything once installed. Note the detail on the main gear bay doors too. These incorporate part of the main well wall details. Earlier, I did say that there are two versions of the filleted tail, and here they are. The differences here are fillets themselves, and the stabiliser fairing area. These parts will install along a natural panel line. The cockpit walls are moulded here. I am more than happy with the detail which is depicted, plus the extra parts which enhance them, but there are a couple of what appear to be ejector pin marks in awkward places. Not all of these circular marks are pin marks. Some are actual details, but I fear not all. That is a little disappointing. If you want to take this model to another level, then Eduard’s replacement pit will not only remove this issue, but improve things yet further. This is a very reasonably-priced kit, so you might have a few coins left with which to invest. Lastly, the scoop intake is moulded as halves and simply installs within the belly of the model, before you bring the fuselage together. Frame C Instead of moulding the gear bay detail on the ceiling of the upper wing, Airfix has chosen to engineer this as a separate part, as did Meng with their recent 1/48 release. This is quite nice in depiction, but could perhaps do with a little extra detail added, such as plumbing etc. Squared sockets exist for the main gear struts to locate to. Two landing flap options have been provided for this kit. Of course, these are for the neutral and deployed positions. The flaps themselves are identical, bar the angle of the plug tab that fits into the socket on the trailing edge of the wing. There’s no doubt this provide a very solid approach to fitting these parts. A little panel line detail is moulded here, as well as some leading edge detail, but no rivets. Another part on this frame is for the forward centre wing to engine cowl section with the same cowl fastener details as generally seen on both the fuselage sides and upper cowl. Lastly, Airfix has included a three-part pilot figure (quite average), a wing spar that incorporates gear bay detail for the rear face of this area, and also the four-blade, cuffed propeller. The blades on this are nice and thin too, but the connection gates are on the blade cuffs, so care will be needed when cleaning the part for use. Frame D We have quite a large parts count with this frame, with most of the cockpit being found here, plus the undercarriage and other extraneous airframe parts. I did say earlier that Airfix’s rendition of the cockpit is certainly more than adequate. In fact, it should look very good built straight from the box, with its fairly high parts count and nice detail. The instrument panel itself should provide a good centrepiece to your work, the seat being provided with moulded belts. Note the quilted effect on the backrest, along with the draped harness. You will also find the battery and radio pack plus frame here. There are two exhaust options here; shrouded and unshrouded. Neither are moulded with hollow stubs, so you’ll need a micro drill bit and some patience. Two breather plate options are also provided. If you want more options, then there are also two types of wheel with different tread patterns. The hubs on these are integrally moulded and the wheels are weighted. I think the undercarriage legs are reasonable….not great, but reasonable. They have a mixture of both sharp and soft detail and the prominent seams will need to be removed. This is where I hope Eduard have plans for a bronze alternative. It could certainly benefit from such. The tail gear strut is very nicely detailed. Other parts on this frame include bombs, belly scoop fairing, undercarriage trouser doors, two-part spinner, radiator shutter and numerous other cockpit parts. Frame E This frame is for the clear parts. Note that Airfix supply THREE hoods, all with slight variations in profile. I can’t see the Dallas hood, unless I’m mistaken. There are also two forward windscreen options. Both of these incorporate a small section of fuselage skin, as per Tamiya’s 1/32 kit, providing a better way to fit these parts without gaps or glue smears being had. Framing detail is sharp, and clarity is excellent. The parts are also nice and thin. You’ll notice this frame also contains wing underside lamps and gunsight options etc. Frame F One of the kit options provides for underwing bazookas. These are very reasonable, despite the seams you’ll need to remove, and there appears to be an indentation at the point where the connection gate is. Decals A reasonable-sized decal sheet is included with this release, and would appear to be printed by Cartograf (Italy). The sheet is split into common decals (national insignia and stencils), and the two schemes. The stencils themselves are numerous and will certainly take up a couple of bench sessions to apply. Included with the individual machine markings are the various black bars and stripes. I would probably mask these and airbrush them instead of using decals, but the option is there. Printing has a satin finish, and the decals are thin, with solid colour reproduction and minimal carrier film. Everything is also in perfect register. The two schemes are: P-51D, ‘Little Indian’, 2nd Air Commando Group, 10th Air Force, United States Army Air Force, Kalaikunda, India, 1945 P-51D, 44-15152, ‘Jersey Jerk’, Captain Donald Strait, 361st Fighter Squadron, 356th Fighter Group, United States Army Air Force, RAF Martlesham Heath, Suffolk, England, 1945 Instructions A sixteen page booklet is included, breaking down construction into seventy stages. All illustration is CAD-generated, grey-scale shaded, with good use of red ink to denote new part assembly. Colour references are given throughout for Humbrol paints, and two glossy sheets are supplied which show paint and decal application, plus a stencil guide. Conclusion It’s nice to see Airfix revisit the subjects that I slavishly built as a kid when most of my money went on the old boxed and packet kits from this veteran manufacturer. They obviously know what should sell very well, and I imagine the Mustang is one such kit. What also sells this for me are the various options, such as the canopies and exhausts/breather plates too, plus some innovative engineering. The schemes are quite nice, but not particularly varied, although the addition of the underwing bazookas certainly adds to the mix. A very nice kit with plenty of detail and very well moulded. It’s not a perfect release with some softness here and there, but it’s most certainly worth £20 of anyone’s money! Give it a shot. My sincere thanks to P&S Hobbies for the review kit seen here. To purchase, contact them via their website, here, or visit them on Walmgate in York, or Castle Road, Scarborough, UK.
-
1/48 Gloster Meteor F.8 Korea Airfix Catalogue # A09184 Available from P&S Hobbies for £36.99 The Gloster Meteor was the first British jet fighter and the Allies' only jet aircraft to achieve combat operations during the Second World War. The Meteor's development was heavily reliant on its ground-breaking turbojet engines, pioneered by Sir Frank Whittle and his company, Power Jets Ltd. Development of the aircraft began in 1940, although work on the engines had been under way since 1936. The Meteor first flew in 1943 and commenced operations on 27 July 1944 with No. 616 Squadron RAF. The Meteor was not a sophisticated aircraft in its aerodynamics, but proved to be a successful combat fighter. Gloster's 1946 civil Meteor F.4 demonstrator G-AIDC was the first civilian-registered jet aircraft in the world. Several major variants of the Meteor incorporated technological advances during the 1940s and 1950s. Thousands of Meteors were built to fly with the RAF and other air forces and remained in use for several decades. The Meteor saw limited action in the Second World War. Meteors of the Royal Australian Air Force (RAAF) fought in the Korean War. Several other operators such as Argentina, Egypt and Israel flew Meteors in later regional conflicts. Specialised variants of the Meteor were developed for use in photographic aerial reconnaissance and as night fighters. The Meteor was also used for research and development purposes and to break several aviation records. On 7 November 1945, the first official air speed record by a jet aircraft was set by a Meteor F.3 of 606 miles per hour. In 1946, this record was broken when a Meteor F.4 reached a speed of 616 mph. Other performance-related records were broken in categories including flight time endurance, rate of climb, and speed. On 20 September 1945, a heavily modified Meteor I, powered by two Rolls-Royce Trent turbine engines driving propellers, became the first turboprop aircraft to fly. On 10 February 1954, a specially adapted Meteor F.8, the "Meteor Prone Pilot", which placed the pilot into a prone position to counteract inertial forces, took its first flight. In the 1950s, the Meteor became increasingly obsolete as more nations introduced jet fighters, many of these newcomers having adopted a swept wing instead of the Meteor's conventional straight wing; in RAF service, the Meteor was replaced by newer types such as the Hawker Hunter and Gloster Javelin. As of 2013, two Meteors, WL419 and WA638, remain in active service with the Martin-Baker company as ejection seat testbeds. The kit Airfix released their newly-tooled Meteor F.8 in 2016, and until I walked into P&S Hobbies in York a few days ago, I had no idea that a new incarnation had just been released. In fact, it was fresh into the shop and in the owner’s hands! I thank them for the review kit seen here. This is a reasonably large and very sturdy box with an artwork depicting a No.77 Sqn. Royal Australian Air Force Meteor F.8 having successfully engaged a North Korean MiG-15. The whole package has a superbly glossy and high-quality finish. The box sides depict the THREE schemes available, as well as some CAD renders of the completed model. It really does take patience to remove the lids of the new Airfix kits, such is the sturdiness and tight fit of things. Once inside, all SIX frames are packed into the same bag which is folded and heat sealed. I sound like a cracked record, but I really so wish they would bag frames in separate sleeves to prevent damage. There are a couple of very minor marks on my sample, and they will need a little buffing out. Nothing lost, but hey! Last year’s original F.8 release contained only 5 frames of plastic. The whole kit is identical to the previous release with the exception of this having a frame that contains the rockets. We now get chance to use the older, faired canopy, and to make use of the flashed over rocket positions on the wings. Note also that this styrene is darker than what we are currently seeing from Airfix, including their brand-new P-51D that I will look at very soon. Certainly strange in the current scheme of things, so perhaps an indication of a new moulding facility being utilised? There is a single clear frame, within its own sleeve. The windscreen has come adrift from the frame, but all is still in good order. In the bottom of the box is the now familiar styled Airfix instruction manual, some glossy sheets for the schemes, and a single decal sheet. Frame A As certainly tends to be the case with Meteor kits I’ve seen, Airfix also adopts the full span lower wing approach. They have moulded the landing flaps in the retracted position, but Eduard do have a very set of PE alternatives if that floats your boat. Airbrakes are moulded separately and can be posed, as can the ailerons. Note that the nacelles are without the front intake portion. We’ll look at the reasons a little later. Surface detail is very fine, as befits the improved trend that Airfix has adopted with their new releases. One thing I will mention is that the parts have the same slight patina as their light grey-moulded counterparts of recent, i.e. they haven’t polished the tools as much as Tamiya, Eduard or Hasegawa etc. I find it reminiscent of the degree that Revell polish their tooling to. Into the interior of the wing fit two spars, with rear one incorporating the rear engine bay firewalls. Yes….engine bay! This model comes complete with two reasonably detailed Rolls-Royce Derwent 8 turbojets. A very nice touch. This spar, as with the shorter front spar, also contain detail that makes up two walls of the main gear bay. The remaining gear bay detail is moulded across four ribs that can be found on this frame. The first two cockpit parts are also moulded here and these form the port and starboard office walls with detail that is certainly commensurate with the larger scale HKM 1/32 kit. As a cockpit aficionado, I’m certainly more than pleased with what Airfix has presented here. Note that these connect at the rear, where the walls form the rear cockpit wall. Also on this frame are optional underwing drop tanks. To accommodate these, or the rockets included in this release, you will need to open up the moulded location points that exist inside the main wing lower plate. Frame B The eyes are immediately drawn to the fuselage halves. These are moulded sans nosecone, weapons panels and rudders. The MG fairing panels have a very slightly rippled texture, representative of stressed skin, and this also appears on the panel to the rear of the weapons bays. I originally thought they were minor sink marks, but can confirm they are not. The effect is very subtle and should look very nice with the high-speed aluminium that will be applied to this particular release. External details are extremely fine, including panel lines and access ports. Whilst the model isn’t riveted, it does have various fastener lines reproduced. Something I have noticed is the raised circumferential line which runs around the fuselage from the point of the trailing edge fairing. I must admit that I’ve not noticed this on a Meteor before. Internally, it also coincides with a stepped ridge. I really don’t know the reasons for this, nor the external raised line. No other internal detail is moulded as everything is added from the modular cockpit and gun bays. Also provided as separate parts are those rear wing roots. These are also moulded here with a raised rivet detail. Other parts on this frame include the exhaust pipes for each nacelle (split into halves and with scribed internal detail), rudder parts with more raised riveting, and also the elevators. These have the same raised rivet detail, and something I can’t discern…..this is whether they have stressed skin finish or maybe small sink marks. If they are the latter, then I’m not overly concerned as the finish looks quite nice. Frame C You can clearly see from the upper wing panels that the nacelles are moulding with separate engine access covers so you can display those Derwent engines. Note those engine panels moulded on this frame. Again, more airbrake area detail to facilitate the positioning of those parts. The wing leading edge extends across the intake area, as this forms a vane for the intake. All remaining wing flying/control surfaces are moulded here too, with the later having the same raised rivet detail that we saw before. Note that the nosecone is moulded here, as halves, with their forward gun channel trough. You will need to decide from the outset whether you will build your model with the gear up or down. This is because Airfix had designed the closed bat doors to fit from within the wing and inner cone. If this is your preferred mode, then also note that you may not be able to have the engine bay opened without surgery (and why would you with a model in flight!), because the main gear door looks like it would foul the spar areas for the other option. Should you wish to pose gear down, then note the two main gear bay ceilings on this frame. Again, detail really is excellent. Frame D This frame concerns itself almost entirely with parts that are required for either the cockpit, gun bays, and undercarriage. The cockpit tub itself, is constructed from the sidewalls we previously saw, fitted to a lower floor onto which the nose gear bay sits and the well protrudes into the pit, and the two gun bays that flank the outside of the cockpit walls. Onto this fits a nicely detailed rear turtle deck. Those gun bays are also very nice with some excellent constructional/plate/rivet details within. The guns themselves are separate, as are the ammunition drums and ammunition feeds. I quite like the moulded instrument panel in this release, but Airfix also supplies a decal for this. You’d struggle to get it to conform to the raised details, I fear. Eduard also has a colour PE option in one of their aftermarket sets. I also think the seat is a very nice representation, and two are included; one with and one without seatbelts. It appears that the undercarriage itself is simplicity when it comes to construction, with all units have a left and right half that includes the mudguard etc. I also think there will be enough spring in these units to allow them to be prised apart so that the completed wheels can be put in situ later in the build. Those wheels are also supplied weighted, and are moulded with hub detail. Other undercarriage-related parts here are the doors for open bay options as well as closed nose bay parts, nose gear mount frame and bulkhead, main gear door actuators and other well details. Frame E You can clearly see that Airfix has provided this kit with two different intake options. These are for the short-chord intake, and the narrower opening long-chord variety. Which you use will depend on which scheme you decide upon, and the options are clearly stated within the instructions. Both options have a common intake liner that must first be inserted before being fitted to the model. Apart from the gun bay doors and a very small number of other parts (internal and external), everything else here is dedicated to the engines, including a rather nice service cart onto which you may display one of these. Whilst the engines might not be the most detailed, they certainly do pass muster, with the majority of parts being more than adequately represented in styrene, along with ancillary pipework, exhaust vane, starter motor, pump, filter and oil tank. More than an admirable effort for an out-of-box build. The parts themselves are very nice with the combustion chamber depiction and the mesh filter intake area. A dark wash over a metal coat, should make this pop. Frame F Here we have the clear parts. Unlike the original release in 2016, we now get to use the faired canopy. This was included last year, but not slated for use. The windscreen on my sample has come adrift, but nothing is damaged, thankfully. All clear parts are beautifully thin and crustal clear. On the canopy parts, framing is very good, and it shouldn’t be difficult to mask these parts. Interestingly, there are a couple of clear parts here which look like they are scheduled to be used in a future PR version….or at least I’d like to think so. Frame G This frame is the real difference between this and last year’s initial release. In fact, apart from the decals (of course), it’s the only difference in plastic. Eight rockets are provided, along with their pylons. The rockets are provided as two parts each, with one part being a separate cross-fin. One of those fins is missing on mine, unfortunately, so I’ll need to contact Airfix’s spares dept. The only non-rocket part on this frame is an additional framework that sits underneath the windscreen, and is only applicable to the rocket-equipped versions (not surprisingly). Decals A single sheet is provided, printed in Italy (probably Cartograf), and this includes not only national markings for three schemes, but also a comprehensive set of stencils, and I really mean that! I’ve not counted them, but I imagine there are over 200 small decals here. There is quite a lot of orange on the Dutch machine, and forward fuse arrows and nacelle flashes. My own concern here is matching your orange paint to these, especially the flashes where the colours meet. I would perhaps mask and airbrush these instead. Decals have a satin finish, and are thinly-printed. They have solid and authentic colour and minimal carrier film. Decals are included for: Meteor F.8, A77-851, flown by Sergeant George Spaulding Hale, No.77 Sqn, Royal Australian Air Force, Kimpo, Korea, March 1953 Meteor F.8, No.77 Sqn, Royal Australian Air Force, Kimpo, Korea, 1953 Meteor F.8 (Fokker-built), No.327 Sqn, Ruiten Vier (Diamonds Four) display team, Koninklijke Luchtmacht (Royal Netherlands Air Force), Commando Lucht Verdediging (Air Defence Command), Soesterberg Air Base, The Netherlands, 1952 Instructions I quite like Airfix’s new style of instruction manual. They are clear, concise and whilst printed in greyscale, a good use of red ink denotes new parts placement. Humbrol colour references are supplied throughout. Parts options for specific schemes are posing modes, are easy to follow. Colour schemes are supplied on two glossy sheets, along with a stencil placement guide. Conclusion I really do like the Meteor, having recently built the HKM kit with the T.7 Fisher conversion set, for the current issue of Military Illustrated Modeller. When I was handed this new release in York a few days ago, I really couldn’t say no, even though it wasn’t in my usual 1/32 format. I have quite a liking for the new Airfix 1/48 range, having recently reviewed the 1/48 Walrus that I’m now building, so I really couldn’t resist this. These current kits have everything…..lots of superb and finely portrayed detail, good parts options and some attractive schemes. They also play on my heartstrings for subjects that I fondly remember from my childhood, but being created in a state of the art way that I could only have dreamt of back then. Bravo Airfix! I really want to see more kits of this standard. My sincere thanks to P&S Hobbies for the review kit seen here. To purchase, contact them via their website, here, or visit them on Walmgate in York, or Castle Road, Scarborough, UK.
-
Gloster Meteor Mk.III
James H replied to joeg's topic in LSM 1/32 and Larger Aircraft Ready for Inspection
Nice work. I'd like to see the wing work you did. I love this kit. One of my favourites. -
Airfix hawker typhoon Mk.1B 1/24
James H replied to coolboxx's topic in LSM 1/35 and Larger Work In Progress
Beautiful build. You really are nailing this one. -
1/32 Jeannin Stahltaube (1914) Wingnut Wings Catalogue # 32058 Available from Wingnut Wings for $119 + shipping The Taube. Now there’s a story, indeed. I think it would be fair to say that most people with a reasonable knowledge of WW1 aviation would immediately think ‘Etrich’ when the word Taube (Dove) was mentioned. That is of course entirely fair, and I fall squarely into that category too, but behind the beautiful and graceful lines of the Taube comes a story of one man’s lack of foresight when it came to his aircraft design that was based on the publication of German papers concerning the aerodynamic theories behind the gliding abilities of the Alsomitra Macrocarpa seed. Sound bizarre? Igo Etrich was a wealthy Austrian industrialist who wanted to use those flight capabilities in his own aircraft design, and together with his engineer, Franz Wels, designed a number of gliders and engine-powered aircraft. The Etrich II Taube was a beautiful design that was very reminiscent of both a bird and the shape of the seed from the 1897 papers. It flew superbly, being operated by a warping system that twisted the bamboo trailing edges of the wings and tail. The rest of the aircraft was wooden, with Spruce and Ash being used in the wings. So, everything was going great so far, and in 1910, the successful design attracted another Austrian, Edmund Rumpler. Rumpler of course went on to become a main protagonist in aircraft design and manufacturer during WW1, but seeing the Etrich Taube, he obtained an exclusive 5yr licence to produce the aircraft himself in Germany, and then going on to sell militarised versions to the Germans. Now things start to unravel for Igo Etrich. As his design was based upon principles that were published in the German public domain in 1897, his design patent application in Germany was rejected. This now caused numerous companies to essentially copy the Etrich design and build their own versions. Being a little aggrieved at this, Rumpler didn’t see a reason to honour licence payments to Etrich, and the two men ended up in court several times over the original agreement. In the meantime, Taube-influenced aircraft, using the name Taube, were becoming more common. The Stalhtaube was of course another similar design, but as the name suggests, this military aircraft had a steel fuselage framework, with the de rigueur flexible bamboo warping surfaces for the wings, and tailplane. The wings and main tail were again constructed from wood. This was actually designed by a Frenchman, Emile Jeannin, whose home territory became part of Germany after the Franco-Prussian war of 1870-71, and his design impressed the German military so much that his company became one of the main Taube manufacturers, despite Jeannin’s own imprisonment during WW1 (due to his French heritage and a minor charge that provided an excuse for internment). These Taube aircraft were unarmed reconnaissance machines, but it wasn’t long before their crews would improvise by using pistols and small bombs to finally sow the seeds of the lethal air war that was to happen. After mid-1915, remaining frontline Stahltaubes were relegated to other duties. Model features High quality Cartograf decals with markings for 5 aircraft. 165 high quality injection moulded plastic parts including very fine 0.3 to 0.5mm thick wing warping control surface areas. Optional propellers, exhaust manifolds, engines, header tanks, gravity fuel tanks, wire wheels in injection moulded plastic or photo-etched metal, 20kg Carbonit bombs and Luger pistol armament. Highly detailed 100hp Daimler-Mercedes D.1 and 120hp Argus As.II engines. 21 photo-etched metal detail parts including optional wire spoke wheels. Fine in scale rib baton detail. Full rigging diagrams. The kit I’ve long wanted Wingnut Wings to release an Etrich Taube, as have many others, but I’m pretty sure that the Jeannin Taube is a more than acceptable alternative. Finally a change to build something that looks more like a bird than a military machine. As usual, Steve Anderson’s beautiful artwork adorns the box lid, with an image of this two-seat creation flying high over fields in the vicinity of Adlershof-Johannisthal, as the wings hadn’t received their paint at this stage. Ronny Bar’s profile work shows the five schemes available for this model kit. Inside the box, there are a total of SIX sprues of light grey plastic, and ONE small sprue containing two clear parts. All of these are individually bagged to prevent damage, and in the bottom of the box is a single decal sheet, PE fret and of course, the instruction manual. I think I’ll do a sprue-by-sprue of this release, so let’s take a look. SPRUE A It’s standard practice for WNW to use the first sprue for the lion’s share of internal and other small, key parts. This is no different here. The Taube’s cockpit is by its very nature, a simpler affair when compared to other aircraft of the period, and this is reflected here of course, but in amazing detail. All cockpit parts are to be found on this sprue, and the cockpit itself is built upon the lower fuselage floor instead of being a separate module. The floor is on Sprue F, but here you will find the rear and forward bulkheads, instrument board wall, fuel tank, map board, rudder pedal bar, magneto, tachometer and fuel filter frame, throttle, control column with separate wheel, seats and pilot’s cushion, and the short sidewall frame that sits across the two crew positions. Detail is extremely fine, with nicely clean holes for rigging cables on the sidewalls. Instrument board detail has the bare gauges, with instrument decals being supplied for these, as well as a map decal for the map board. Other parts on this sprue include the undercarriage V-struts and spreader bar, engine mount, external radiators, turnbuckle clusters, Integral propeller, engine side panels with fastener detail, optional access hatch for specific machines, parts for two different gravity-fed fuel tanks, and wing/fuselage mounted cabane struts etc. SPRUE B We are firmly in Taube-land here with this sprue, containing just the two elegant wing panels, moulded as single piece, port and starboard units. These really have to be seen to be appreciated, but the elegance of the wings is entirely captured here with the thin panels and their under-camber, fabric and rib representation and the rib capping strips. Note the positions for the cabane struts and the two rods that extend from each tip, which are rigging aids for the wing warping system. You’ll also see little pulleys on the leading edges. The trailing edges are a real feat of moulding. They are incredibly thin, and light is clearly seen through them when held to a window or my photography lamps. I’ve photographed this for you to see. Just make sure you don’t damage these fragile surfaces as you construct/paint your model. SPRUE C Here we have the only clear sprue, containing just two parts. One of these is the windscreen with its delicate framing, and the other is a sight window for the fuel level in one of the gravity tanks. Both parts are crystal clear with no visual flaws. SPRUE D You will note that this is an Albatros B.II sprue, but in reality, you will use very little from this set of parts, as most of them are NOT for use with this release. In fact, the only parts for use here are either the plastic spoke wheels (moulded as halves so to replicate the two rows of spokes), or the spoke-less type which enables use of the photo-etch spoke option, plus the hubs. Oh, there are a series of bombs here too, but these are entirely optional as they were only every carried internally by the crew, and then lobbed over the side when they wanted to hit either a ground or air target. They certainly weren’t standard issue! SPRUE E (both engines) This kit allows the modeller to build his/her Stahltaube with either a 100hp Mercedes D.1, or a 120hp Argus As.II engine, depending on the scheme you choose. Not only this, but scheme-dependent again, there will be a number of options for the exhaust (elephant, high and individual pipes), and also variation in the header tank plumbing. Both engines are very similar to assemble, with highly detailed crankcases, cylinder banks, magnetos, camshaft/rocker box, water pump, intake pipes, plug lead tubes, etc. A very small amount of surgery will be needed on a couple of parts to make these engines suitable for use on this machine, but this consists mostly of a little snipping and scraping. Nothing at all too taxing for the average modeller. Each engine is a project in its own right, and you could maybe complete the other engine and display on a stand, or simply keep for spares. A small number of decals are set aside for each engine too, such as data plates. Alternative propellers are to be found here too, such as the Niendorf, Garuda and Reschke. To which scheme these are fitted, is clearly seen. SPRUE F You tend to get an idea about the size of this model when you see the fuselage halves against the very long tail-plane. The exterior of the fuselage doesn’t have too much in the way of detail due to the method of construction, but what detail there is, is finely executed, such as the lower edge stitching, the cockpit leather coaming, leather grommets, and the detail around the open engine panel area. Tabs are present onto which the wings will sit. A long slit exists where the super-thin tail-plane will slide into. Fin and rudder detail is only moulded onto the port-side fuselage, due to how incredibly thin this is. Here you will also see the tail skid moulded in situ. One rigging bar on my rudder was snapped backwards, but this was easily fixed with a quick brush of extra thin cement. There isn’t really much in the way of internal detail due to the method of construction, but you will note a series of location points for internal rigging/bracing wires to be added. The fuselage is moulded with the front underside supplied as two separate, interlocking parts, containing the cockpit floor. These parts are also moulded on this sprue, with the forward most part having some excellent open louvre detail. A small number of Stahltaubes had a hole in the underside cowl, and sometimes this was in cross-form. Instructions, and a PE template are included for those schemes that had this feature. You will also need to carefully trim the upper, forward engine cowl so that the Argus As.II engine fits without fouling the sides. A crowning glory on this sprue is that seriously long but thin and streamlined tail-plane. As with the wing, this is very, very thin, with light easily being seen through the part. Detail is excellent again, with the flexible, warping portion clearly having the bamboo and fabric construction. Rigging posts and loops are present too. You sort of get a real idea for the rigging task ahead, and I feel this one will be time-consuming. Other parts on this sprue are the pilot and observer’s seats, and the single tube row of exhausts, with the ends being slightly hollowed out. You may want to go a little further. Photo-Etch A set of lap belts are included for both the pilot and observer. Detail is great, and you’ll just need to anneal them in a candle or lighter flame so that you can manipulate them into a realistic pose. The wheel spokes are also here, with a broken circumference that allows you to bend these into a very shallow cone shape before fitting to the wheels. There are then some outer wheel hub rims that sit over the circumference and hides the joins. These parts look quite delicate, so again, take your time here. A small number of rigging aids are supplied here, through which collective lines will run, as well as the template for creating the hole in the underside of the engine cowl. Production of the PE is consistent with everything I’ve seen from WNW, and the gate attachment parts are suitably thin so that parts will be easy to detach. Decals A single, Cartograf-printed sheet is included (dated 2016!), and this contains all of the permutations of national markings and serials, including decals for the cockpit, engine, propeller, grommets and numerous other external areas. Printing is glossy, thin and with minimal carrier film. Colours are solid and authentic and the printing is in perfect register. Decals are provided for the following schemes: Jeannin Stahltaube 172/14, Lt. Fritzlohn(?), Adlershof-Johannisthal, late 1914 - early 1915 Jeannin Stahltaube 180/14, Deutches Technikmuseum, Berlin Jeannin Stahltaube 271/14, Emil Wendler, Adlershof-Johannisthal, late 1916 – early 1917 Jeannin Stahltaube 284/14, Adlershof-Johannisthal, 1915 Jeannin Stahltaube 319/14, Armee-Flug-Park 9b, early 1915 Please note that 271/14 can be built with alternative exhaust and header tank details. When WNW send review kits to websites, they always include a covering letter which contains some useful details. In the case of the Stahltaube, one piece of information is quite pertinent. This relates to the differences between machines, and that no two Stahltaubes were the same. This means that whichever machine you choose to model, ensure you have the photographic material for that specific machine. It simply isn’t enough to have a photo of ‘machine X’, and then go onto build ‘machine Y’ using incorrect photographic references. Instructions Wingnut Wings always produce the most gorgeous instruction manuals in the business, with a slick, glossy publication that starts with the history of the type and aircraft data, followed by a sprue plan and colour chart with paint references given for Tamiya and Humbrol paints, plus a series of FS codes. All constructional sequences are superbly illustrated in greyscale, with the use of colour for newly added parts, as well as defining photo-etch addition etc. Numerous full colour assembly illustrations are also supplied, and reference to paint colour is supplied throughout. Internal rigging is also tackled as the project progresses. Period images are used to illustrate specific areas of construction too, making things very easy for the modeller, as well as providing great historical interest. The last pages of the manual are given over to the Ronny Bar profile illustrations, complete with more historical imagery. Ronny’s work is clear to follow, and decal placement is clear and precise. Some historical and modeller-specific details are supplied with each profile illustration. A full rigging diagram is also provided. Conclusion A Taube is something I’ve wanted to see in my preferred scale for a long, long time, along with a Dr.I from WNW. I sure hope to still see the latter aircraft. This is a very, very nice kit, and the building should be quite straightforward, despite the amount of bare wood in the cockpit. Where the modeller will be challenged here is in making the thin wing trailing edges and wing section look translucent (paint shop trickery), and also the many, many rigging wires that warped the various flying surfaces. Detail is everything you’ve already come to expect from Wingnut Wings, and nowhere at all does this disappoint. I’ve already planned to cut plastic for an article in Military Illustrated Modeller. So, WNW….how about that Dr.I now, please! My sincere thanks to Wingnut Wings for the review sample shown here. To purchase directly, click THIS link.


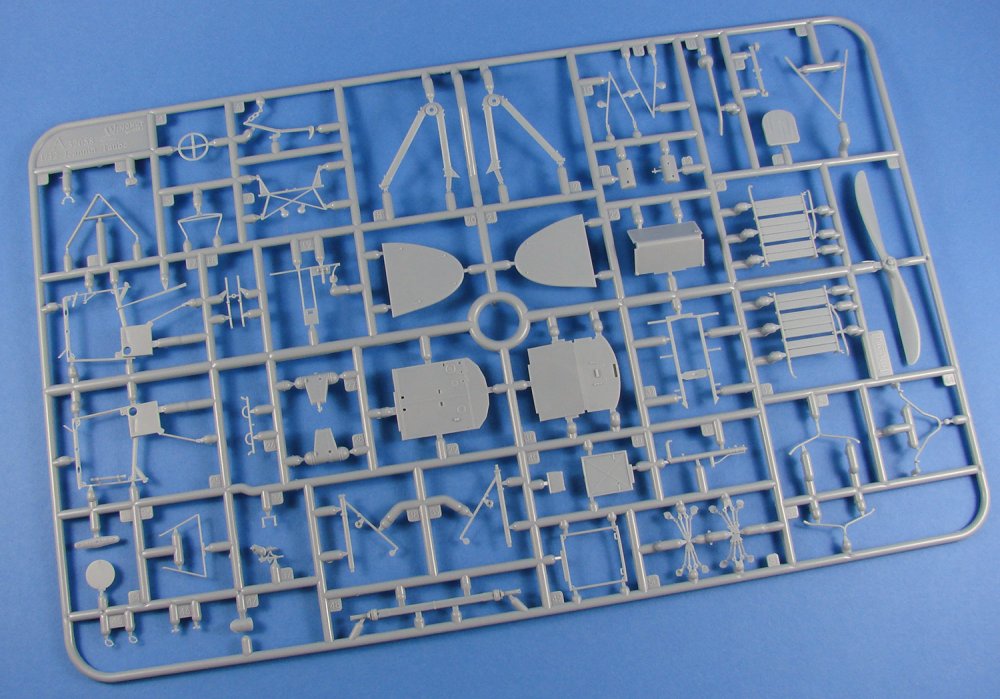

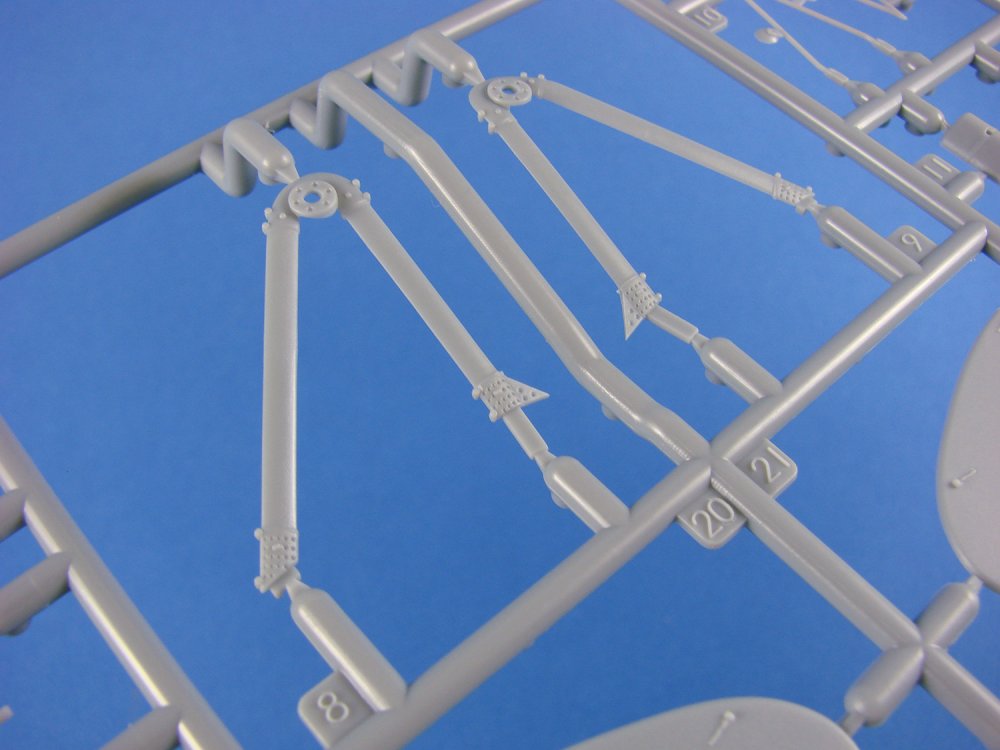

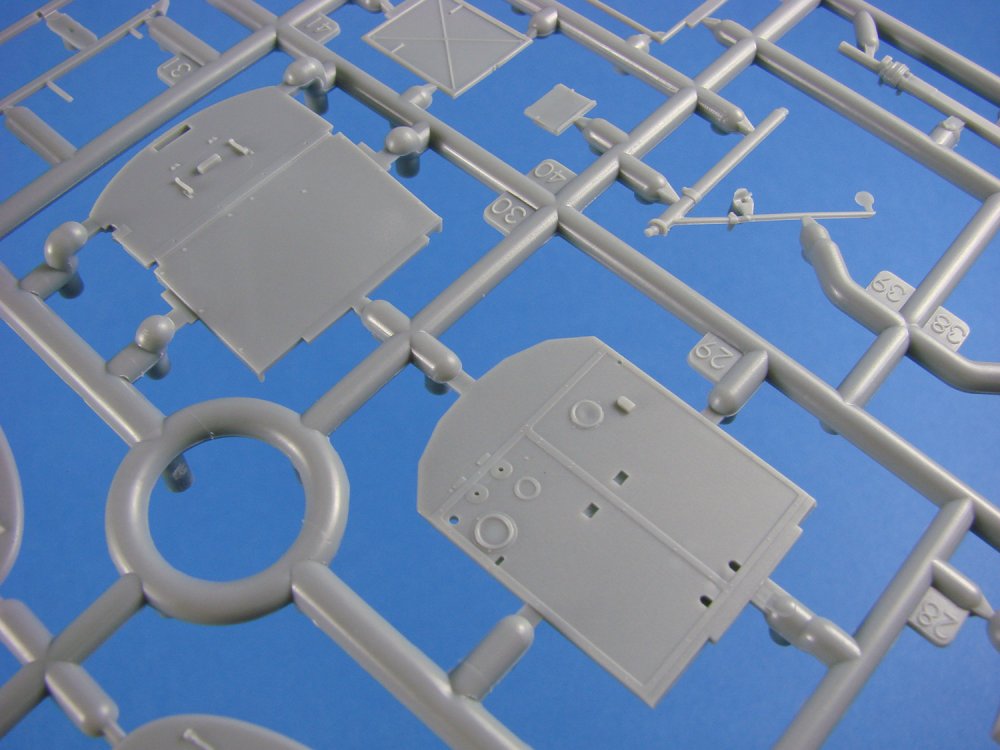
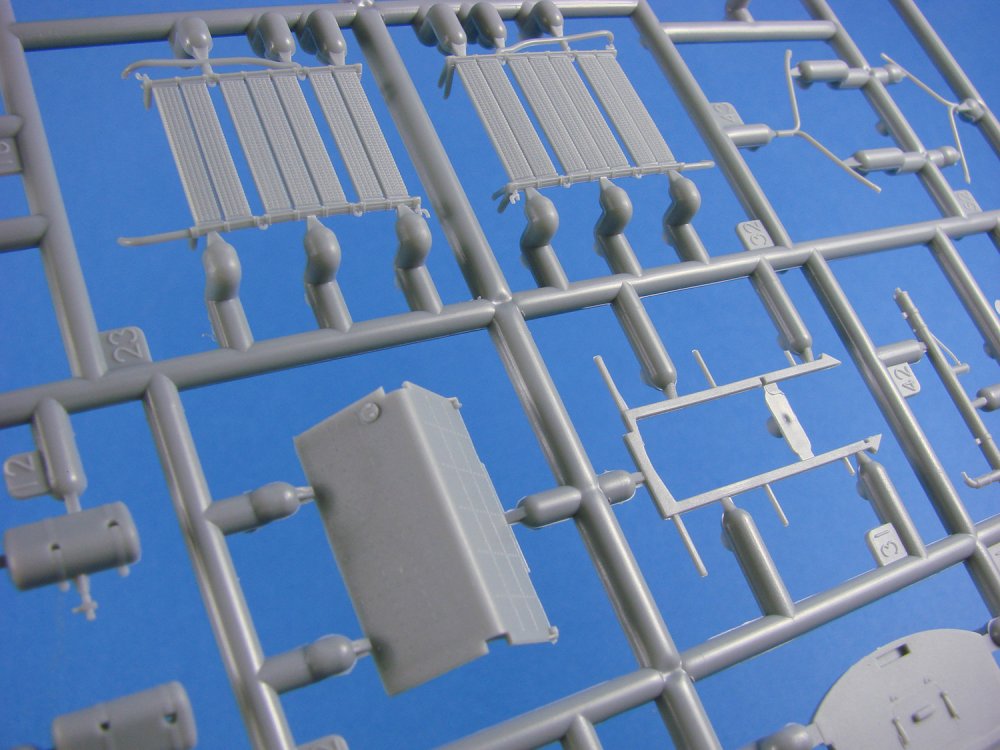
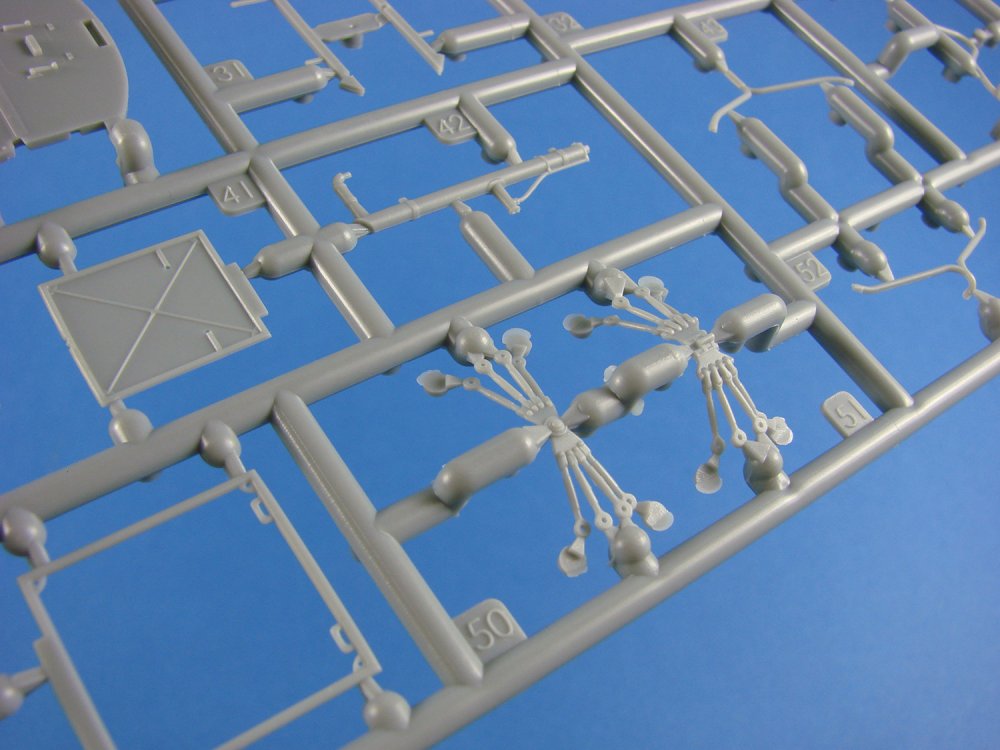
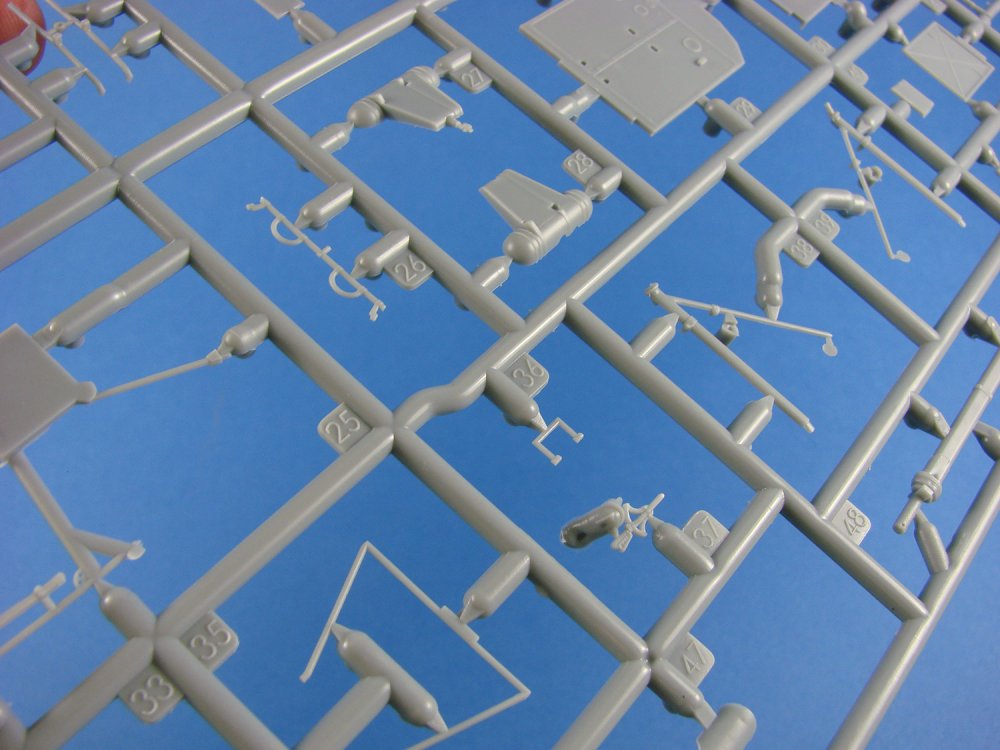

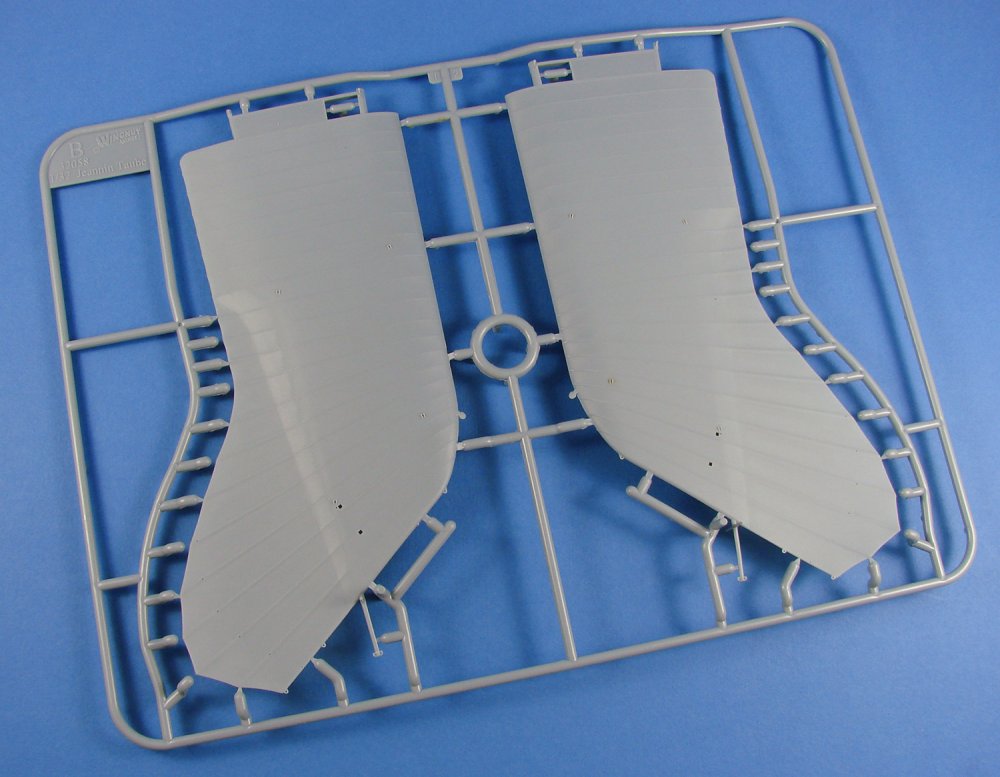
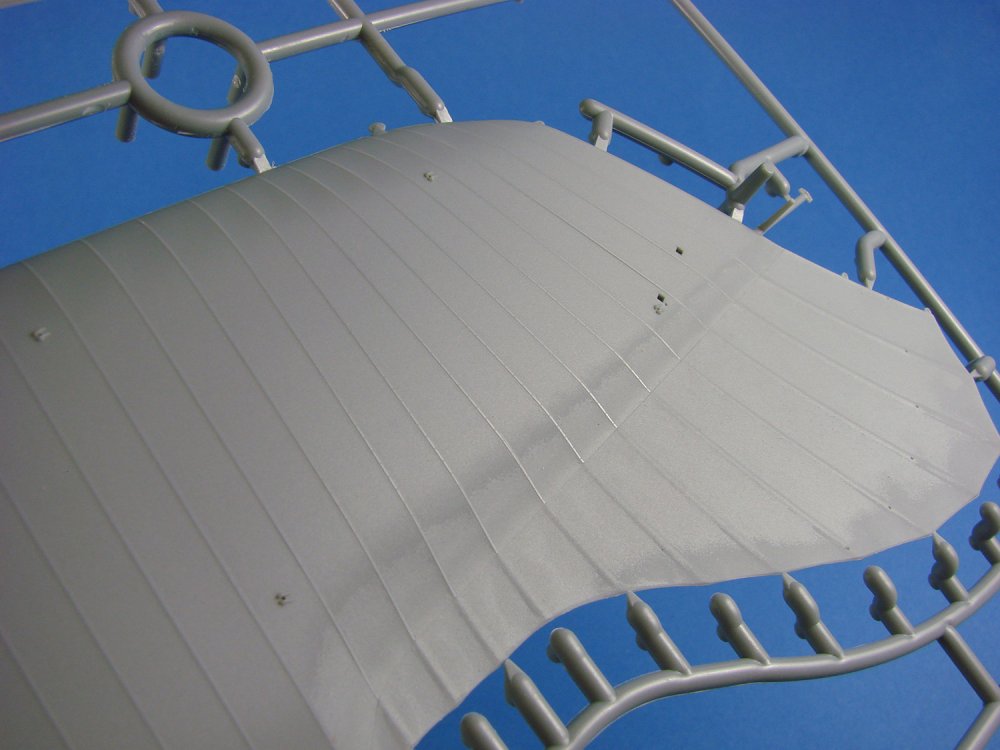
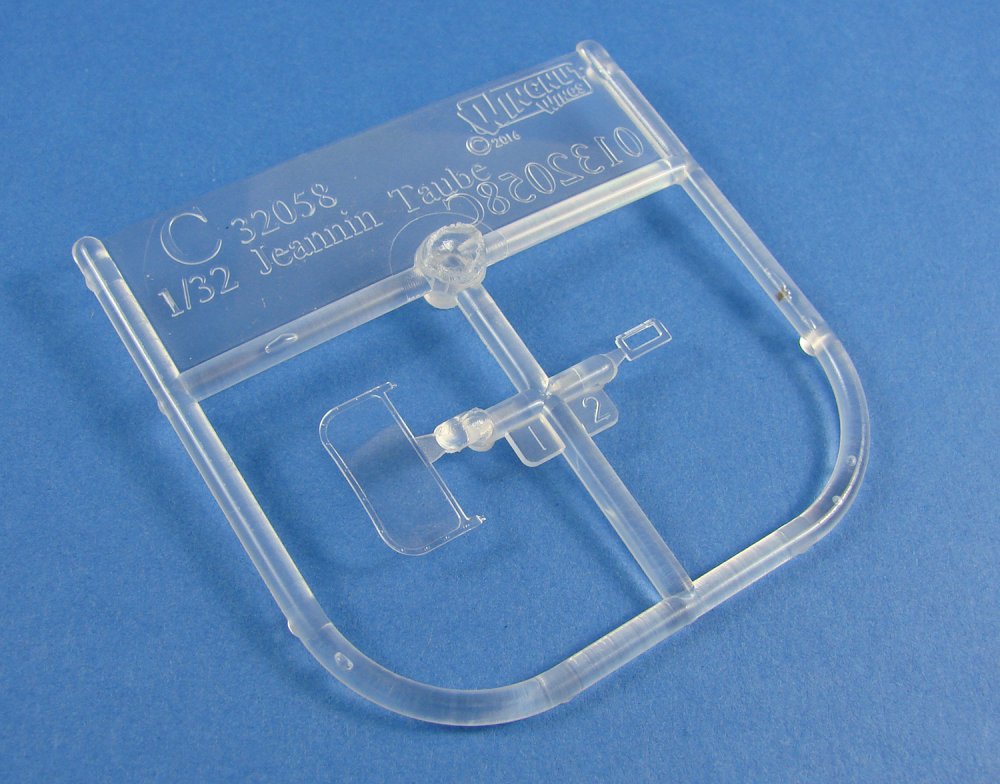

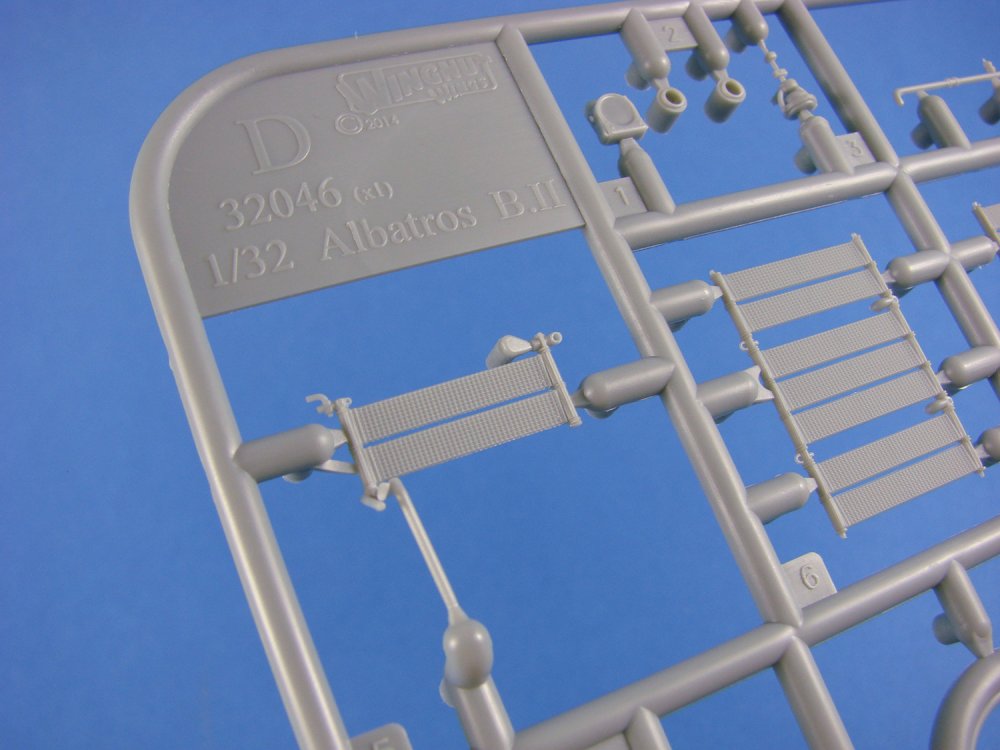
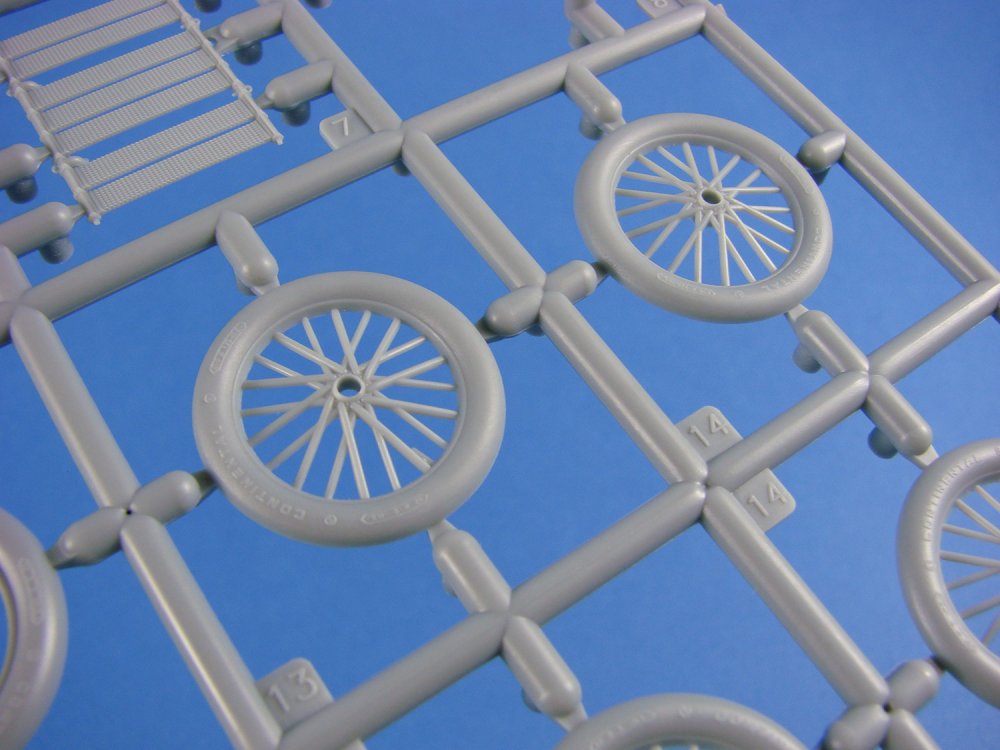
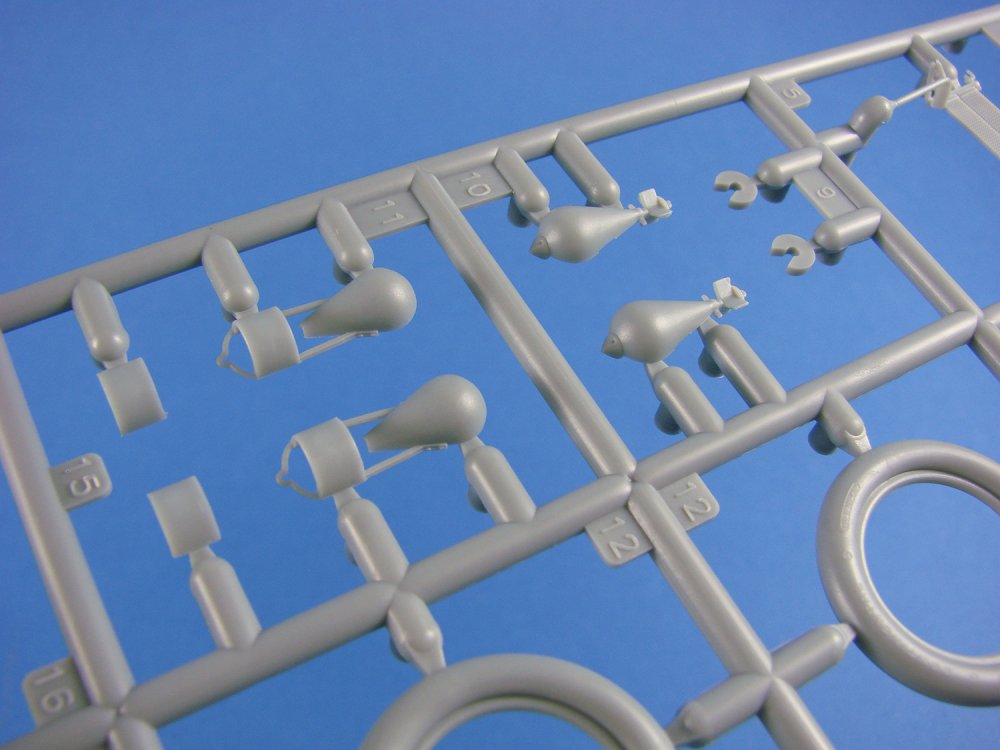
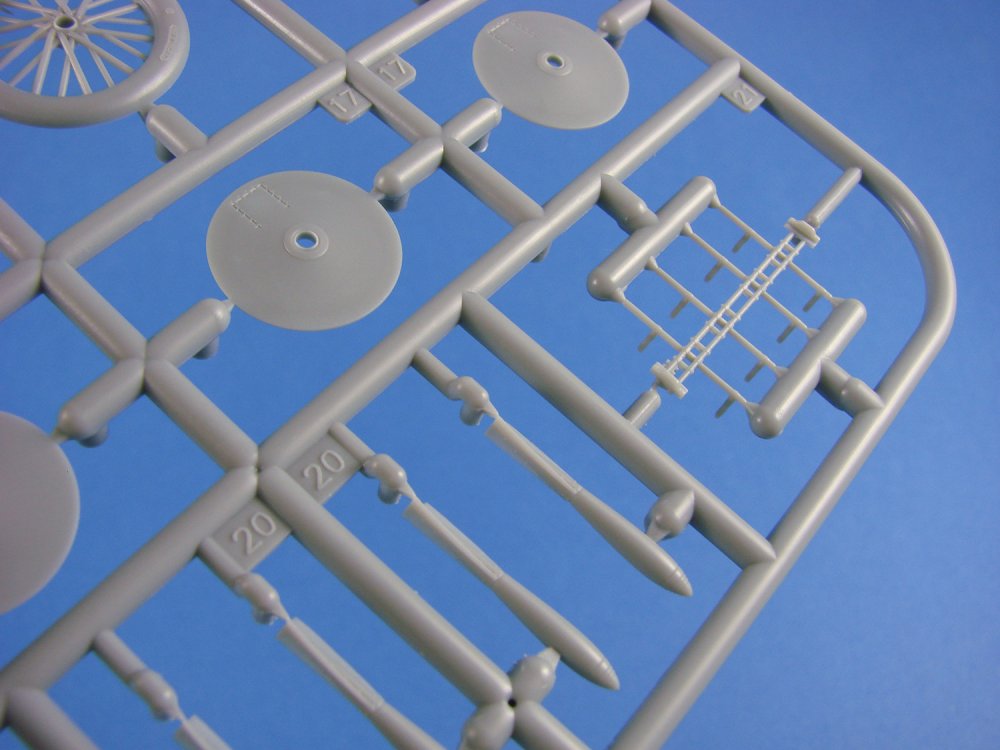
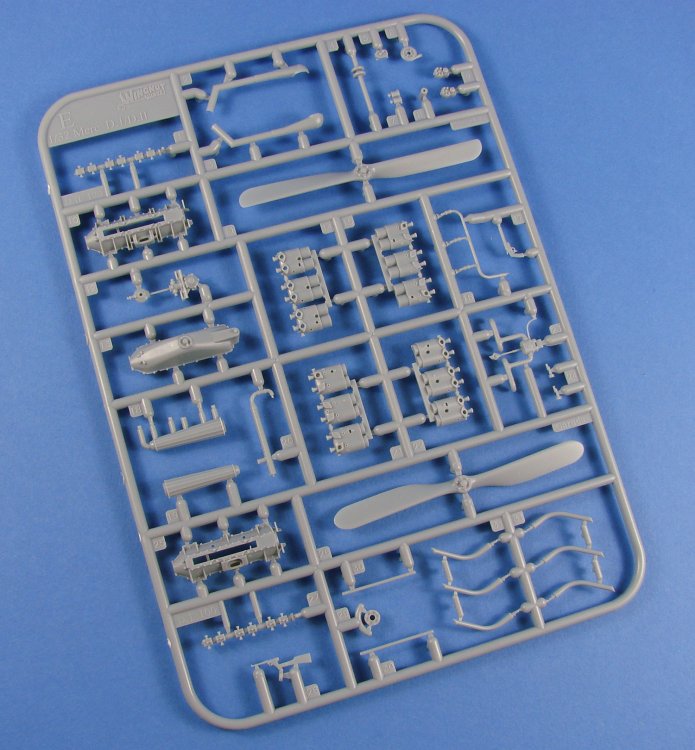

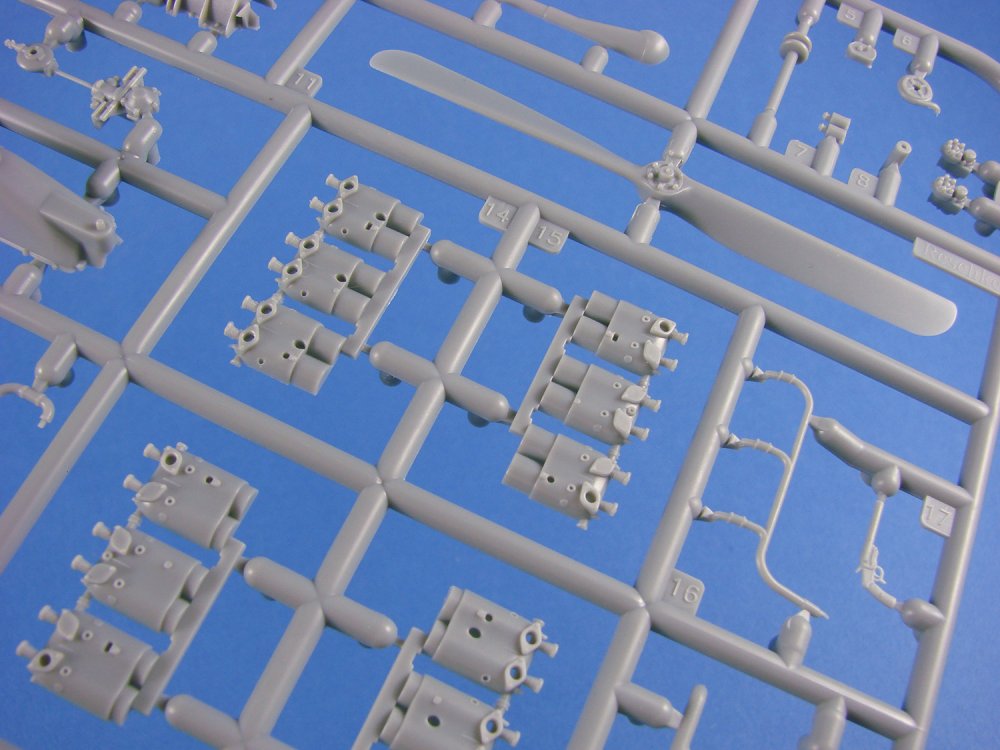
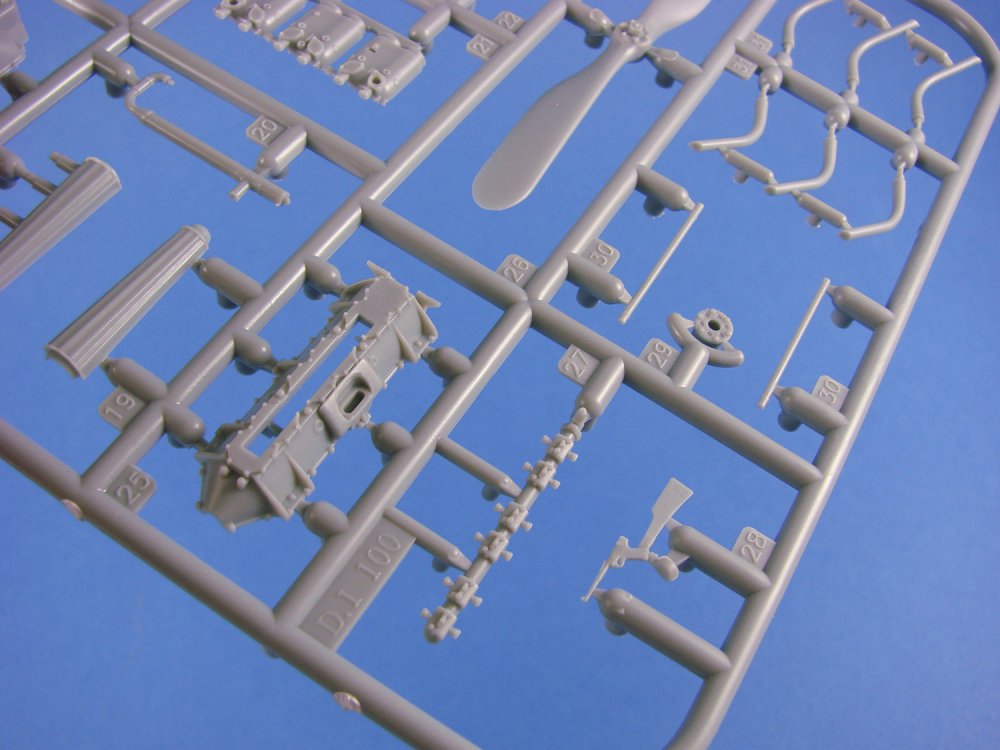
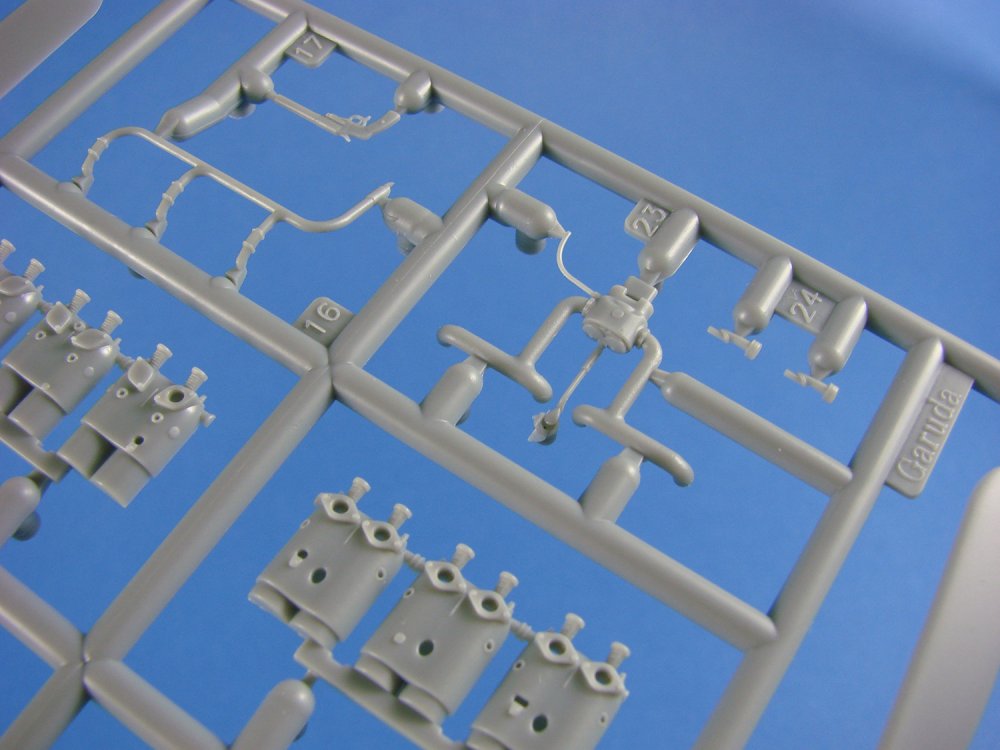
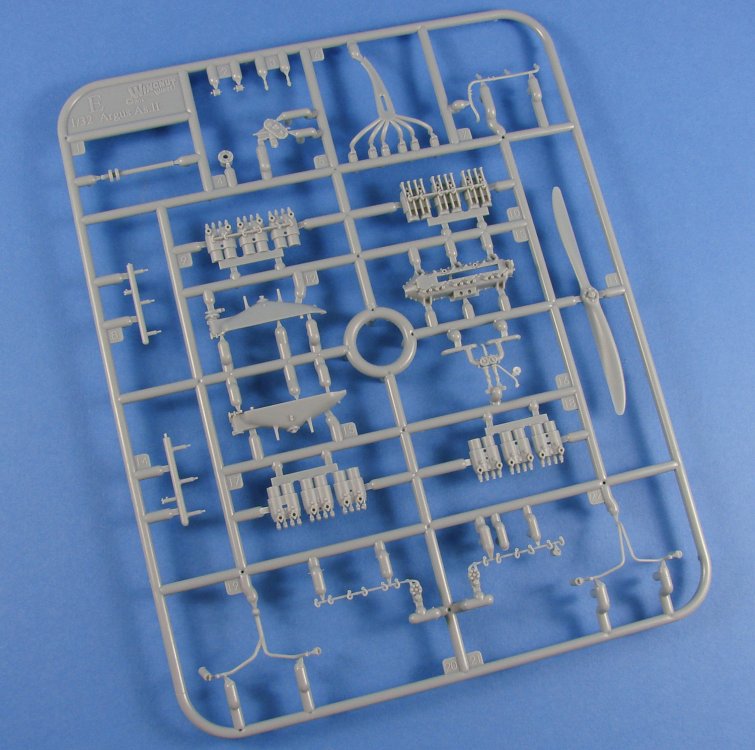
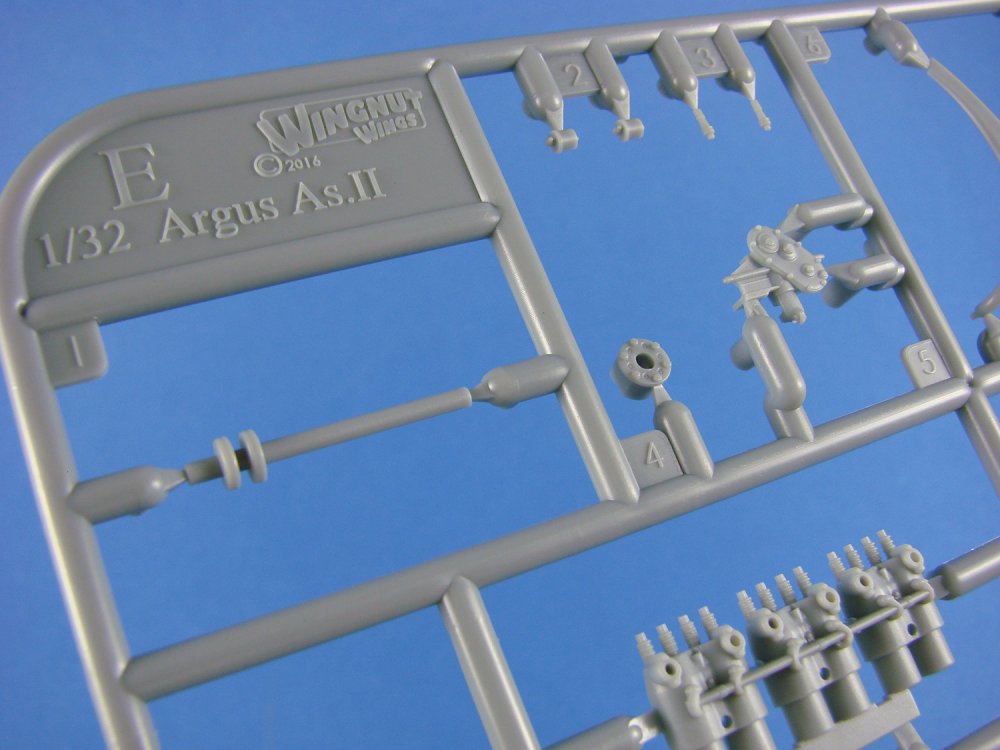


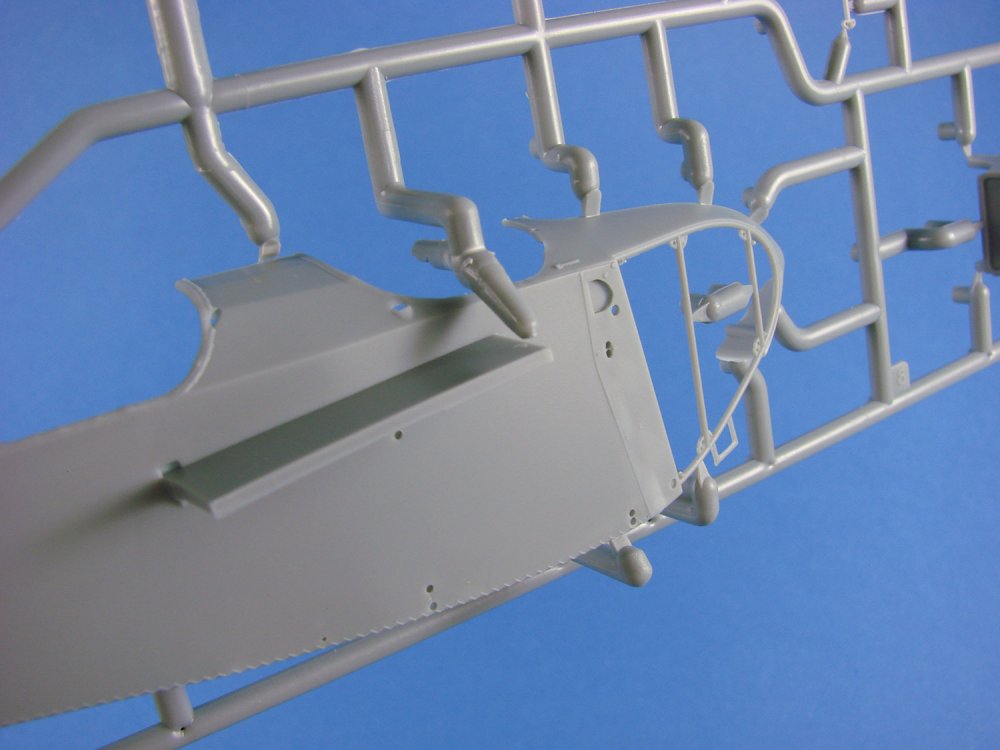

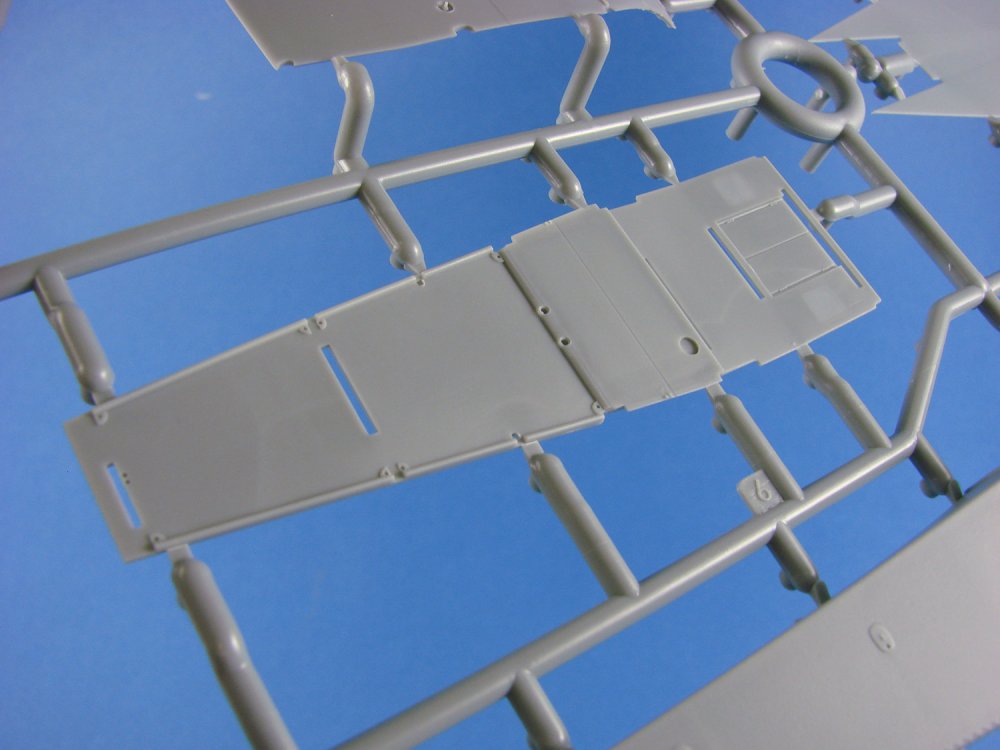


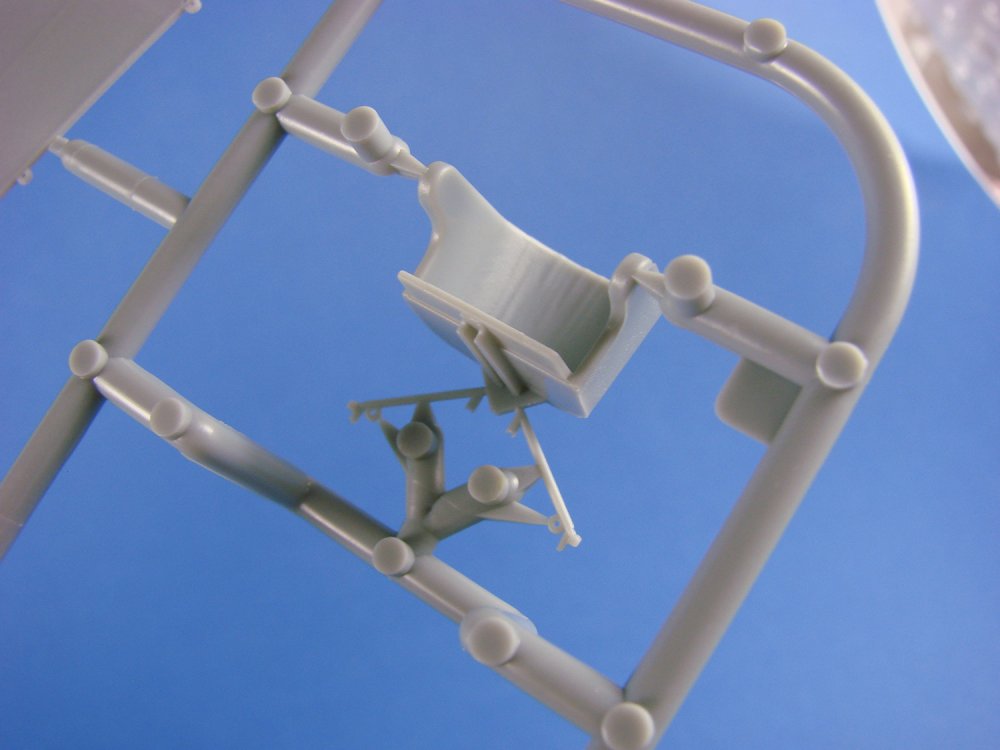


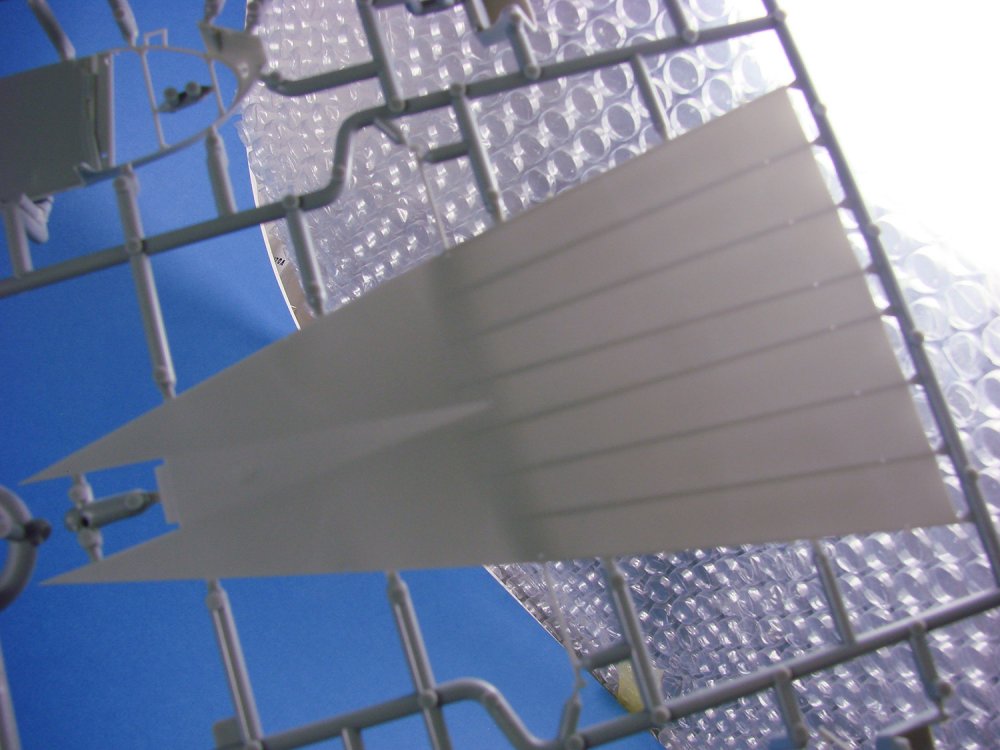


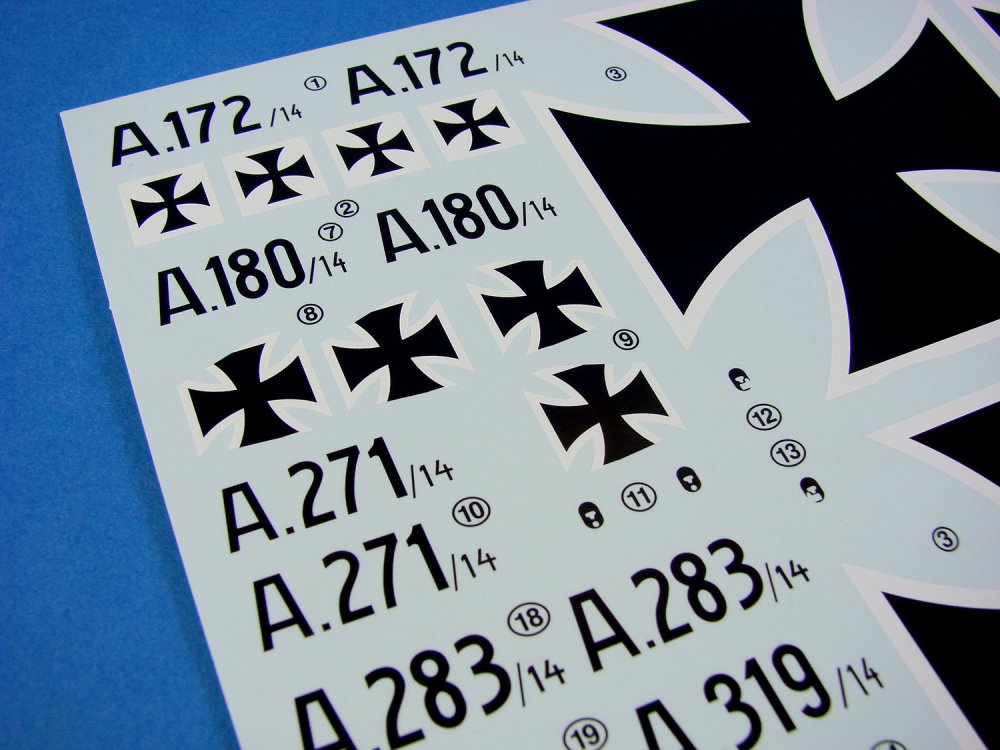

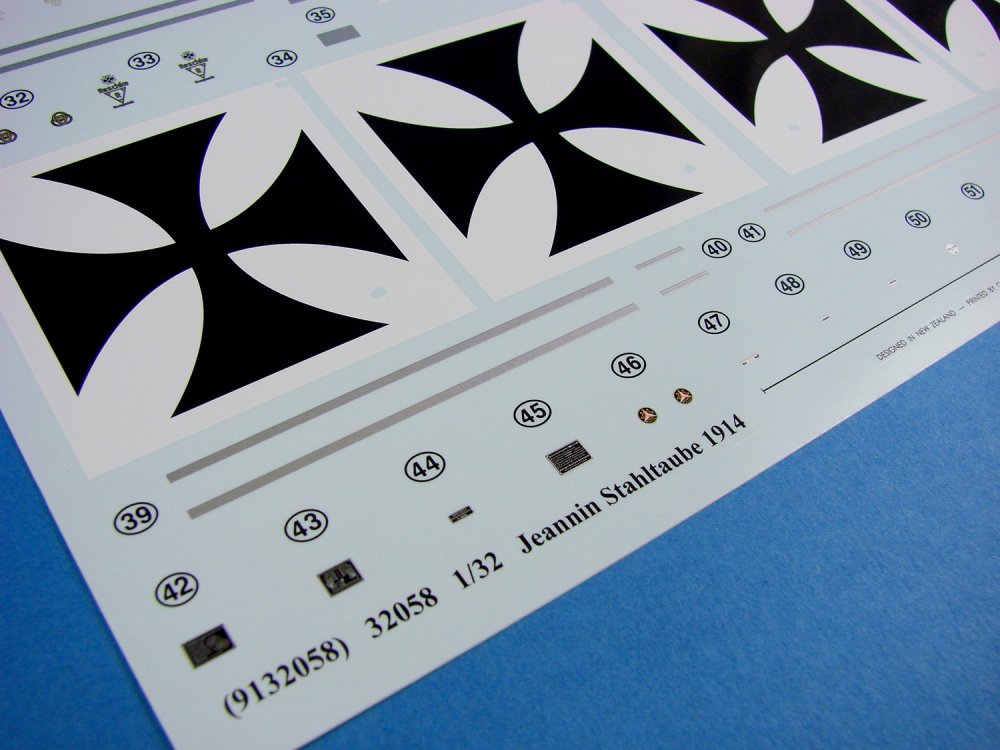


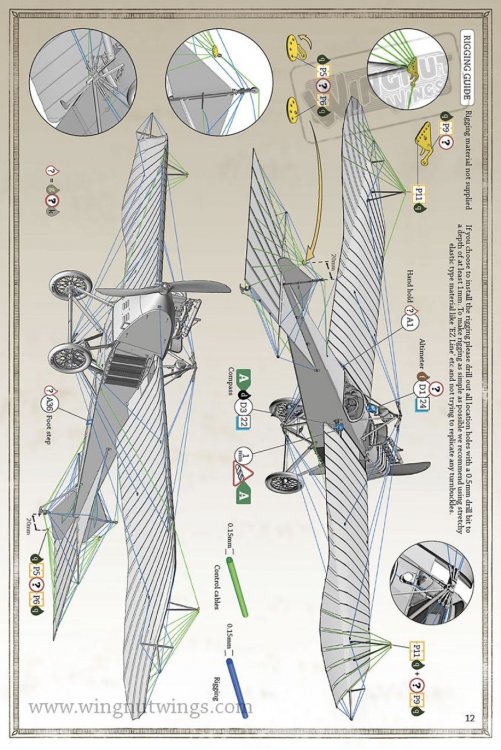
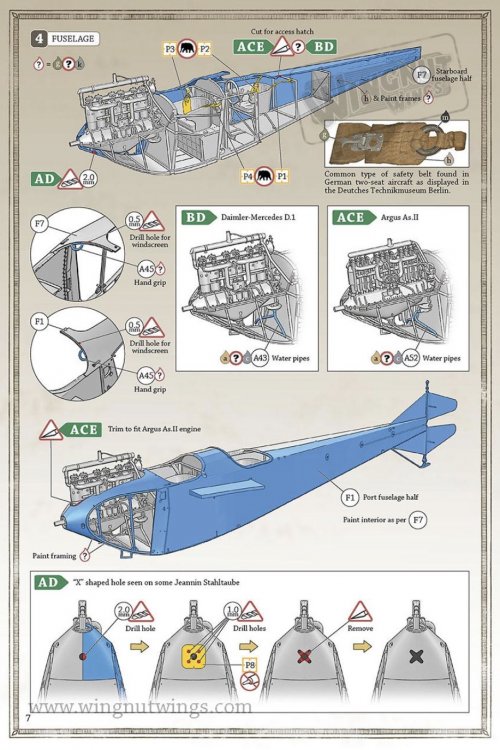

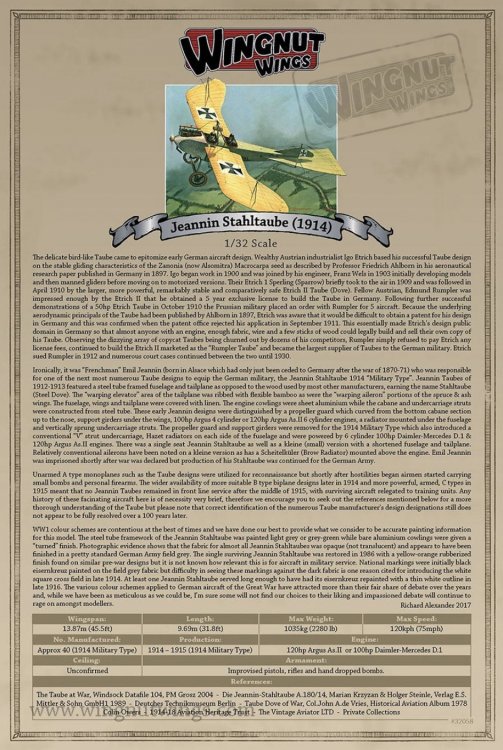

-
1:48 F-4S Phantom II Zoukei-mura Catalogue # SWS05 Available from BlackMike Models for £69.95 The McDonnell Douglas F-4 Phantom II is a tandem two-seat, twin-engine, all-weather, long-range supersonic jet interceptor and fighter-bomber originally developed for the United States Navy by McDonnell Aircraft. It first entered service in 1960 with the U.S. Navy. Proving highly adaptable, it was also adopted by the U.S. Marine Corps and the U.S. Air Force, and by the mid-1960s had become a major part of their air wings. The Phantom is a large fighter with a top speed of over Mach 2.2. It can carry more than 18,000 pounds (8,400 kg) of weapons on nine external hard-points, including air-to-air missiles, air-to-ground missiles, and various bombs. The F-4 was used extensively during the Vietnam War. It served as the principal air superiority fighter for both the Navy and Air Force, and became important in the ground-attack and aerial reconnaissance roles late in the war. The F-4 continued to form a major part of U.S. military air power throughout the 1970s and 1980s, being gradually replaced by more modern aircraft such as the F-15 Eagle and F-16 in the U.S. Air Force, the Grumman F-14 Tomcat in the U.S. Navy, and the F/A-18 Hornet in the U.S. Navy and U.S. Marine Corps. The F-4 Phantom II remained in use by the U.S. in the reconnaissance and Wild Weasel (Suppression of Enemy Air Defences) roles in the 1991 Gulf War, finally leaving service in 1996. It was also the only aircraft used by both U.S. flight demonstration teams: the USAF Thunderbirds (F-4E) and the US Navy Blue Angels (F-4J). The F-4 was also operated by the armed forces of 11 other nations. Israeli Phantoms saw extensive combat in several Arab–Israeli conflicts, while Iran used its large fleet of Phantoms in the Iran–Iraq War. Phantoms remain in front line service with five countries. Phantom production ran from 1958 to 1981, with a total of 5,195 built, making it the most numerous American supersonic military aircraft. The F-4 remains in service with Iran, Japan, South Korea, and Turkey. It has been used in combat against the Islamic State. The kit Zoukei-mura’s F-4S Phantom II kit comes in a sizeable and weighty box with the box-art depicting Bu.No.153808, VF161, USS Midway, 1981, taking off from the deck of the carrier. This is actually the only scheme available in this release, so if you wanted variation, you will need to look at aftermarket decals. Inside the box, there are TEN runners of medium grey plastic, and a single runner of clear plastic. All of these are individually wrapped so as not to risk any breaking or scuffing of parts. A single decal sheet and an instruction manual complete the contents inventory. Note that ZM don’t include photo-etch parts, as they deem the kit contents to be sufficient for the average customer. If you do want to adorn your model with extras, you can purchase photo-etch and resin parts separately. As I write this, Zoukei-mura has just released the F-4C version of this kit, and I’ll bring you that as soon as I can get my hands on it. Sprue A Unlike the Academy releases, with their single-part fuselages, Zoukei-mura has chosen the traditional method of moulding these as halves. The jury was sort of out for me until I saw the first builds of this, and the approach works very well. ZM has produced the whole spine as a separate piece which fits along panel lines, and when assembled, you really can’t tell that it’s an insert. Another insert is supplied for the point at which the spine and base of fin meet, plus the small panel to the rear of the cockpit. The only seams to remove are the narrow fin seam, a small length in front of the canopy, and the area on the rear underside. A nose cone is supplied as a separate part, so no seams there. External detail looks just perfect, with subtle and even panel lines, port access details, and fasteners/rivets where appropriate. I’m quite taken with the representation of the plating at the tail end, forming the exhaust tunnels. Note that the rudder is integrally moulded to the fuselage, and the intake sections are separate parts, also included here with slide-moulding technology. Internally, the cockpit is moulded with vertical ribs which just seem to be supportive for the cockpit tub sidewalls. If you want to pose the tail planes where they angle downwards towards the front, you will need to drill out the panel that is moulded on the fuselage, and insert two new parts from this sprue. This seems odd. Why didn’t ZM make inserts for both positions? Other parts on this sprue include the tail pipe seals, arrestor hook, extended nose-gear for catapult take-off position, centre drop tank, forward cockpit ladder fin top section, etc. Sprue C This is pretty much a cockpit sprue, with parts here for the seats (6 parts each, but no belt representation), lower consoles, bulkheads, rudder pedals, ejector seat guide rails, upper coaming, etc. No instruments or console apparatus are moulded here. Detail is first rate, with plenty of scope for detail painting without the need to add anything further. The ZM kit certainly excels in this respect, as the Academy cockpit is fairly basic and in need of Eduard’s goodies to make it shine. Sprue D The most obvious part here is the single-piece nose cone, thankfully held in place by three gate points so that it doesn’t twist and cause damage to those areas. You’ll also notice the intake vanes for both sides (2 parts each), pitot tube, undercarriage doors and actuators, part of the undercarriage bay liner, RAM air intake, blade antenna, air brakes, air brake actuators, auxiliary air door, rear facing lens, etc. Both external and internal detail for the gear doors is exemplary, as are the textures applied to the intake vane forward sections. You will note that dotted around the various parts are little nodules that will need snipping off. You’ll see these on more or less every sprue. These are mentioned clearly in the instructions, and they should be snipped off. These are ejector pin points, instead of having your parts festooned with marks you’d need to fill and sand away. Sprue E This almost certainly stands for engine, as the main parts for both of the General Electric J79 axial flow turbojets, are to be found here. These are typically moulded as halves, with all of the external details being moulded in situ. You will of course need to remove seams across some awkward detail, so patience and care will need to be exercised in large amounts. Intake vanes, and the turbine frame/afterburner ring are separate parts that fit within the engine tube. If you want to display one of these engines by itself, then as with their Ho 229 kit, parts of the sprue can be made up into a nifty little engine stand. For later in construction, you can also see the engine nozzles. These look a little clunky to me, with the various petals looking thick and ill-defined, so maybe you can swap these out with Eduard’s resin parts, designed for the Academy kit. At this point, I don’t know how displaying an engine outside of the model will work in terms of leaving a large internal gap within that could be seen from within the nozzles etc. Still, I’m sure that the creative modeller could fathom that. Another obvious pair of parts are the main intake channels, moulded as upper and lower halves. I don’t think the intakes are suitable wide enough to see any seams in there, but you can easily remove at least a portion of it from the forward area. A good number of parts for the wheel bays and undercarriage are to be found here. Note that the main gear bays are moulded from a single detailed part that just needs to be supplemented by the liner part I mentioned just before. Again, detail really is very good, with this being added to with the nicely detailed main bay ceilings that are moulded on the underside of the top wing panels. Further gear well parts are included here, as well as the wheels themselves, moulded without hubs, but also without any weighted effect. Sorry, but you’ll need to sort that yourself, or buy an aftermarket solution. Sprues F & N (x2 each) These are weapons, tanks sprues, and contain parts for the various load-outs. Available are parts for: AIM-7 Sparrow AIM-9 Sidewinder Under-wing drop tanks The AIM-7 and AIM-9 have their bodies moulded with separate fins, and sprue gate attachments are thankfully unobtrusive. Detail is as everywhere on this kit, beautifully rendered. Sprue G This is the clear sprue. What I really like here is that ZM has provided separate options for both open and closed canopy, with the latter being provided as a single-piece glazing. Of course, the open option provides each section separately. Canopy clarity is excellent, with the parts being suitable thin, and with small sprue attachment gates. Other parts on this sprue are for the position light, landing lights, etc. Sprue H This one is a mixed bag of parts from numerous construction areas, but the long centre part that you see is for the spine of the Phantom, covering up the seam line. In a similar vein, you also find the panel for the area to the rear of the cockpit. Other parts here include the DECM Antenna, electrical box for landing lights, front gear door, under-fuse antenna (3 options), catapult hooks, refuelling probe/door/actuator, pylons, launchers, sway braces, radar antenna controller, etc. We can also see the detail expended on the instrument consoles, but be careful as it appears that a number of parts on this and other sprues, aren’t for use with this particular version. I would’ve liked to have seen these greyed out on the parts plans. Sprue I More cockpit parts are found here, such as the instrument panels, control stick, radar scope, rear cockpit sidewall, etc. Detail is king in the cockpit, and these look superb, with details being pronounced enough to be able to tackle them with a fine paintbrush. Decals are supplied for the consoles and instrument panels, but these are as an alternative to painting as they cover the whole part. I would also ignore these decals as they look poor in detail. You are best to punch out some instruments from the Airscale range of cockpit decals, and take it from there. The stabilisers are also moulded here, with minimalist panel lines and only specific rows of rivets on the forward, inboard panel. These are moulded as single parts, so no clumsy upper and lower halves. Sprue M As tends to be the case with Phantom models, ZM has moulded the lower wing panel to include the fuselage centre section, but in this case, the outboard angled wing panels are moulded separately. The modeller will need to open specific holes in this part, so suit the pylon arrangement being fitted to their model. This sprue also contains the upper wing panels and the outboard, angled wing panels. The slats are also included here, as are the various actuators for them, and the flaps and ailerons. Of course, it was the slats that were specific to the F-4S. External detail consists of many fine panel lines and appropriate rivet/fastener lines, plus some raised detail too. Note the riveted, recessed area to the rear of the gear bay area. This is where the auxiliary air flaps will fit. I have to say that the detail on these really does beat the Academy kit, hands down. Absolutely stunning! Decals A single decal sheet is included, printed by Cartograf. I really am thankful for them using this company to make their decals, as their own tend to be thick, with poor definition. No problem here though! Remember…this is a large sheet, and only for the one scheme too, so everything you see here, more or less, will have to be added to your model. Factor in some serious bench time for your decaling. Printing is thin, in register, and with minimal carrier film. Colours are solid and authentic. The only decals I don’t like are the instrument and console ones, as I have already mentioned. As you can see, a full suite of stencils is included. I hope you have good eyesight and lots of patience. The single scheme is: F-4S, Bu.No. 153808, VF-161, USS Midway, 1981 A colour chart is included to help you with paint reference and as a guide for decaling. Instructions This is the second 1/48 SWS kit I’ve had, and I note that in this scale, all printing is black/white/greyscale, with no colour as per used in the 1/32 kits. Apart from that, everything remains the same, with excellent CAD-generated constructional sequences that are chock full of not only tips for building, but notes on the real aircraft too. The instructions do look rather busy, with them being an assault on the senses in parts with so much annotation, but this is very much their style, and I’d rather have too much information than not enough. Paint references are given throughout in Vallejo and Mr. Color codes. Conclusion Zoukei-mura’s new range of Phantoms really does usher in the next generation of this aircraft in quarter scale, having an entirely different constructional approach to the Academy kits that were the best on the market, until now. Of course, you can opt for one of the Eduard re-boxings, complete with resin and photo-etch accessories, and whilst these are still highly desirable kits to build, I think it’s fair to say that the ZM kit piques them in many ways, in terms of detail, approach and buildability. My only negative is the single decal option, whereas with an Eduard release, you are spoilt for choice. At least the decals are Cartograf this time though! Highly recommended My sincere thanks to BlackMike Models for the review kit seen here. To buy directly, click THIS link.
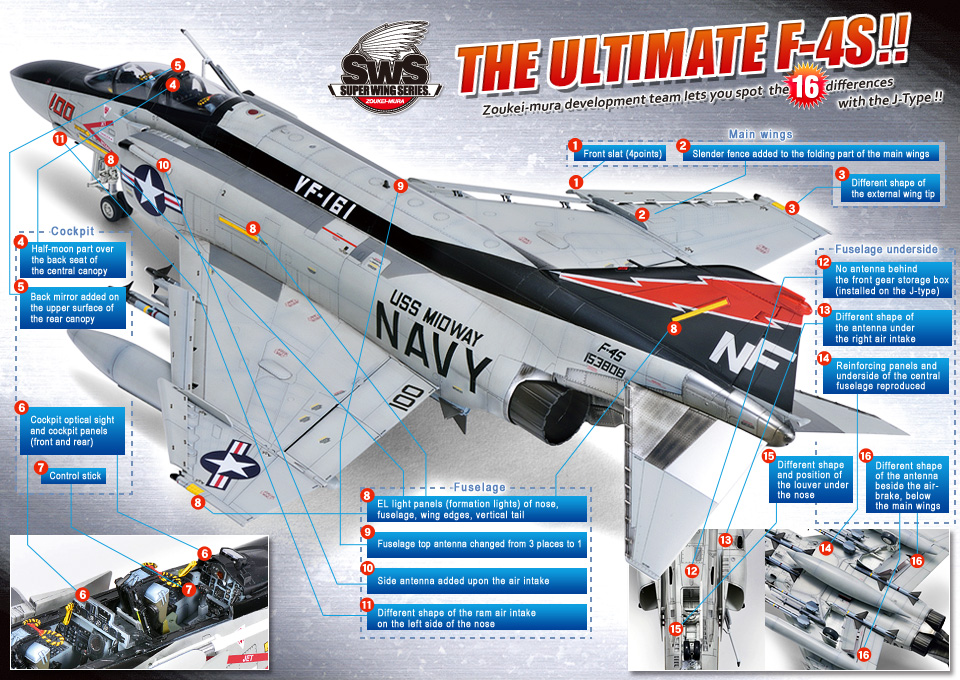
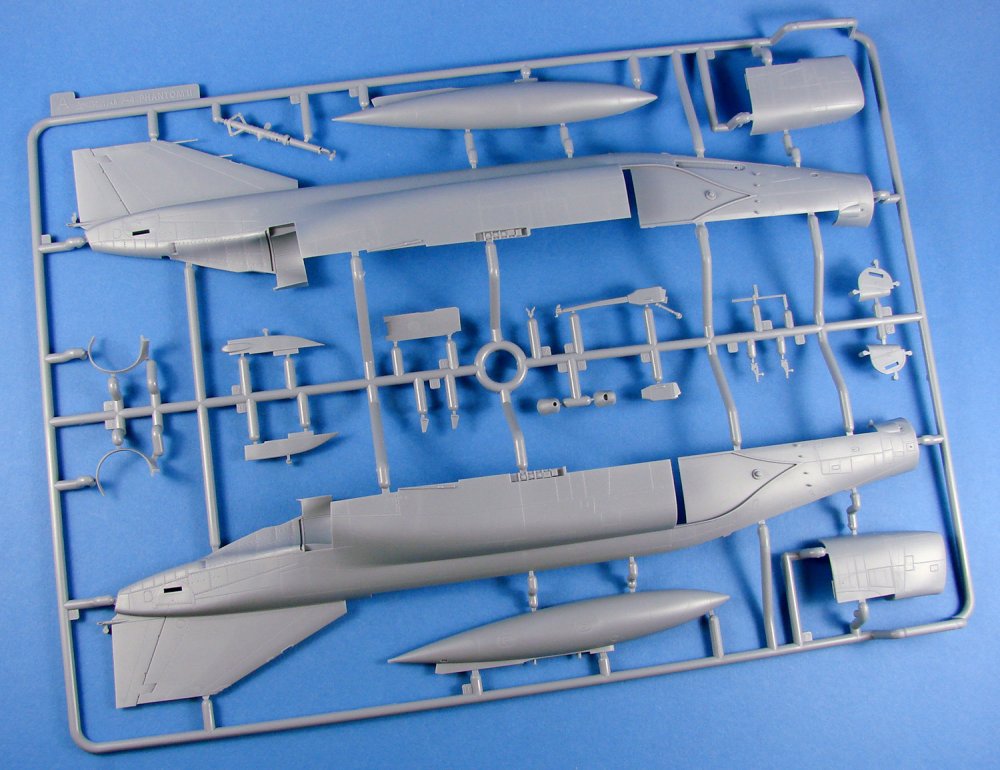
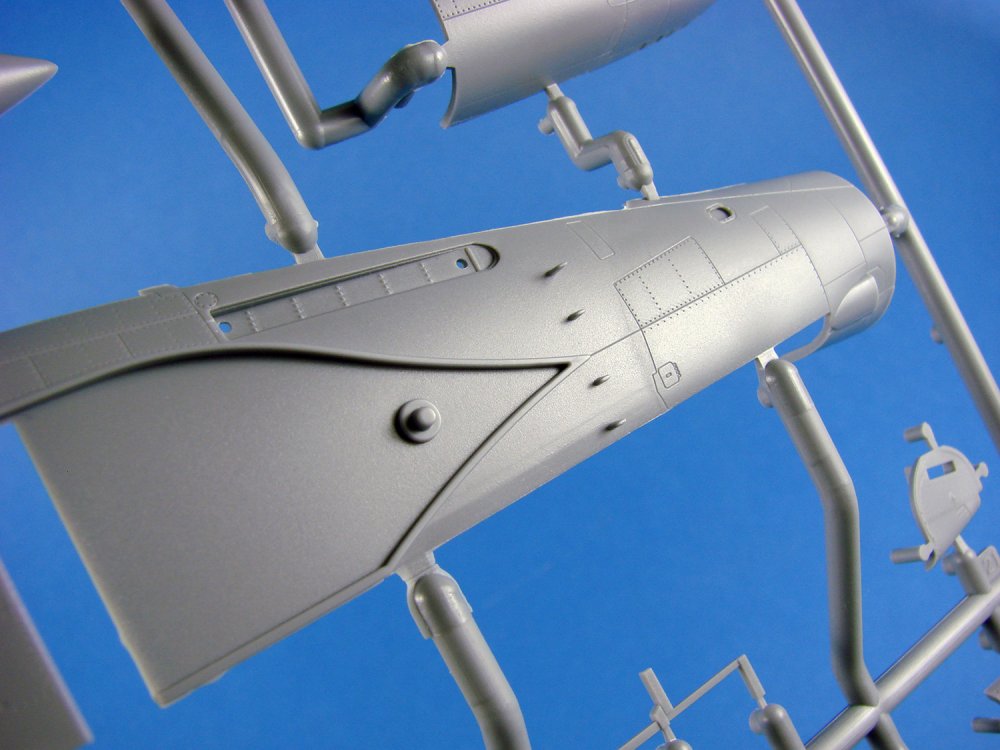
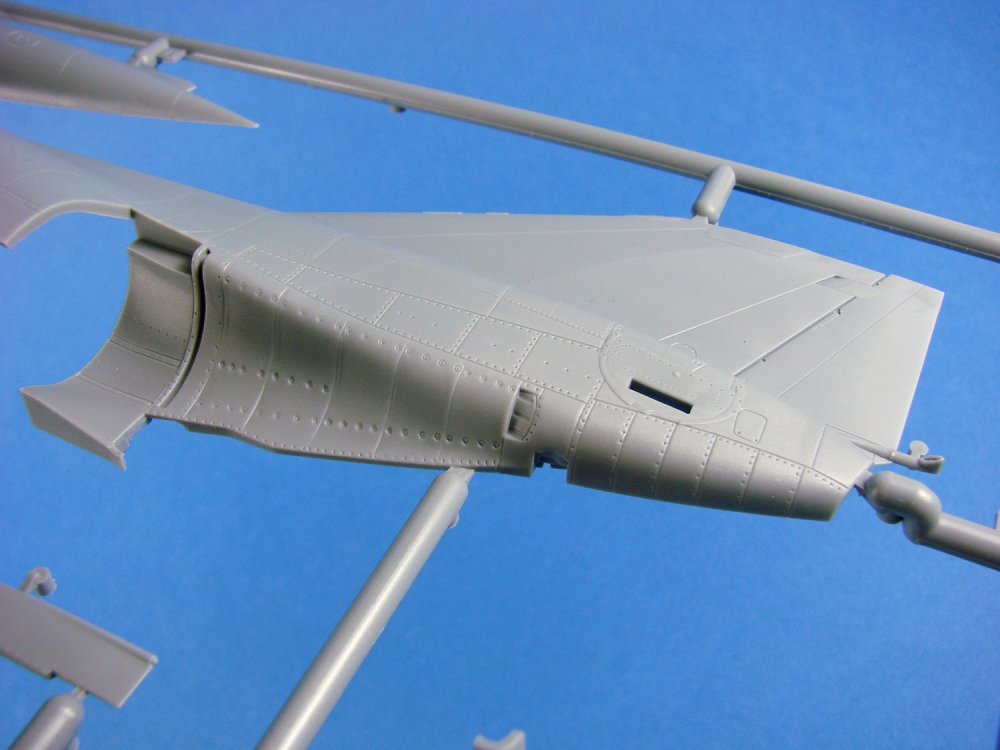


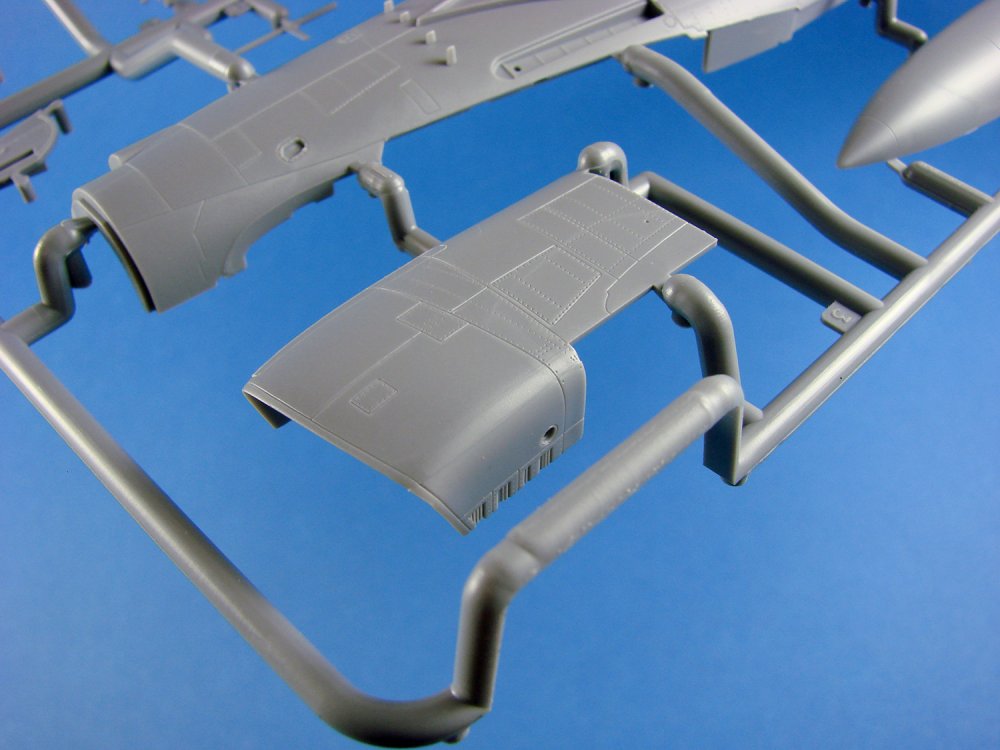
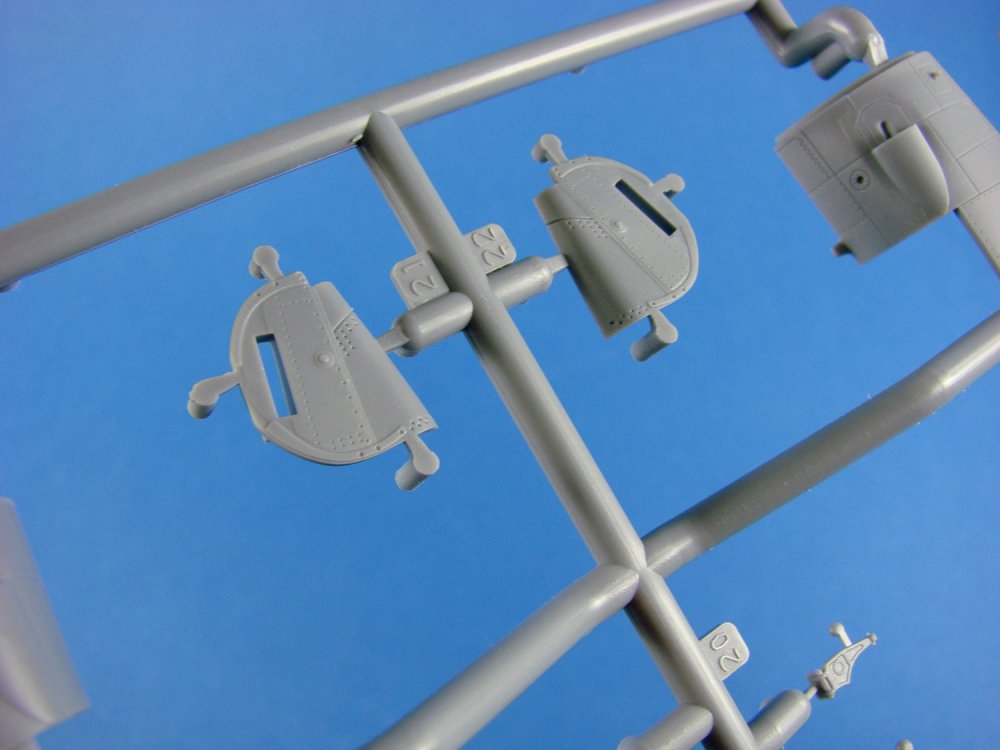


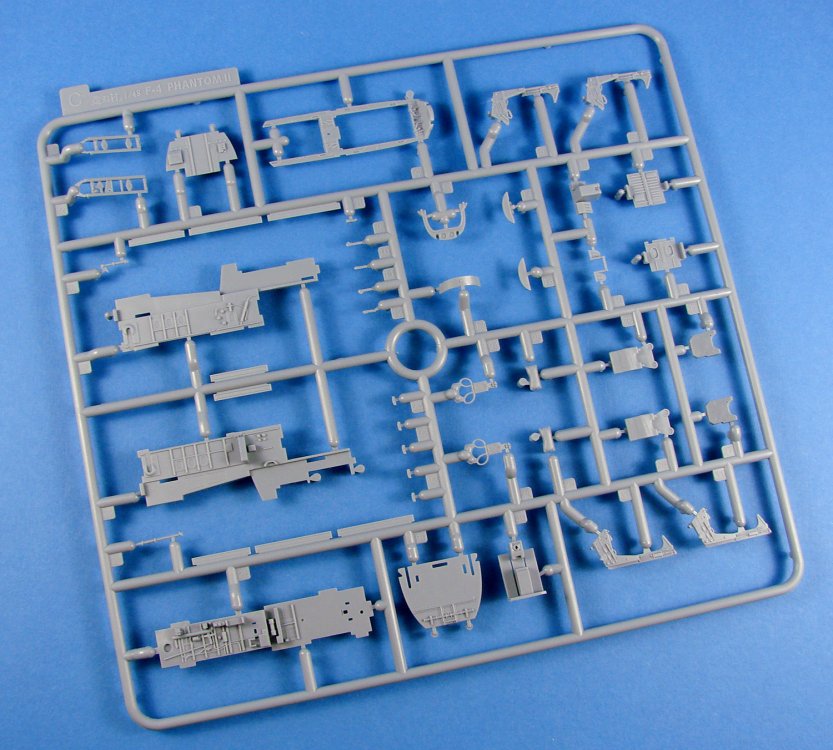
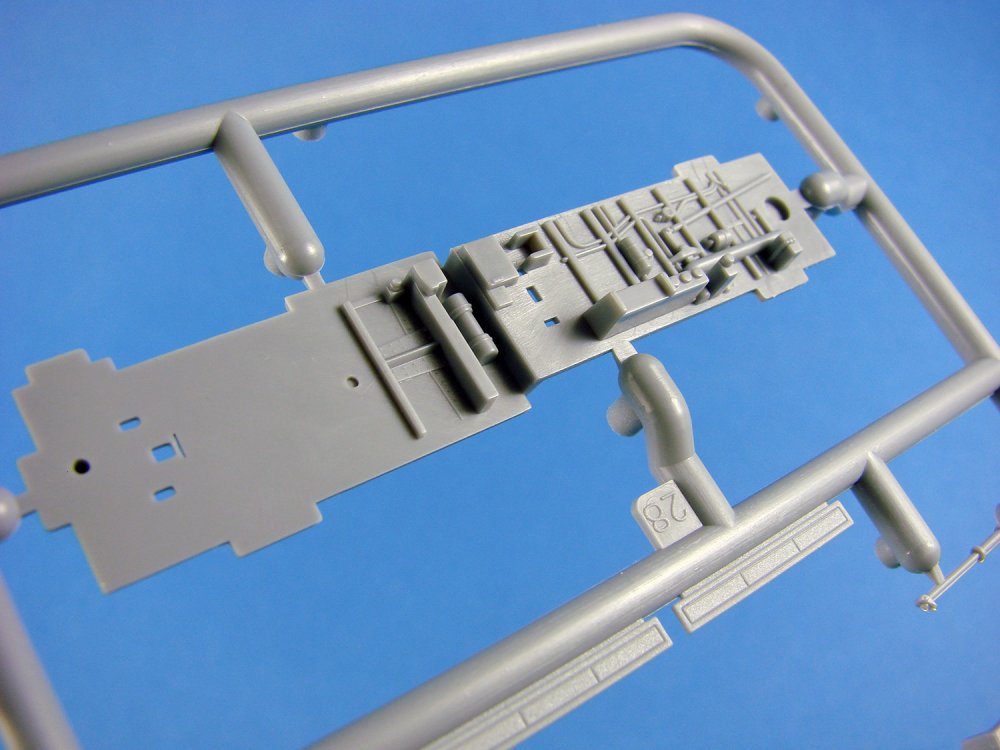

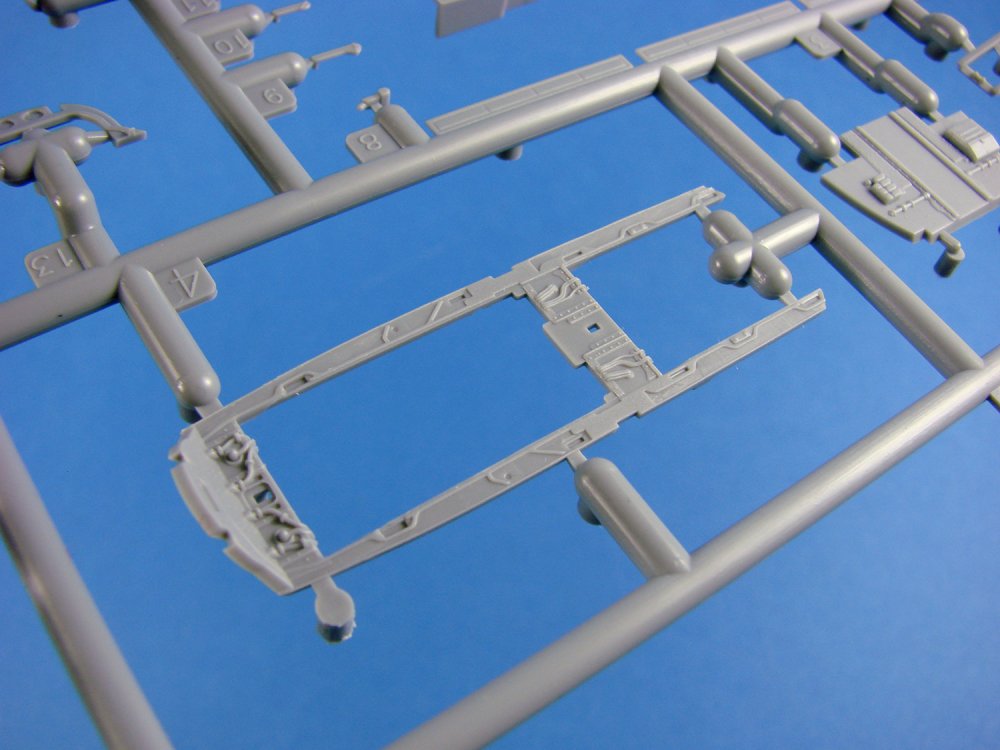

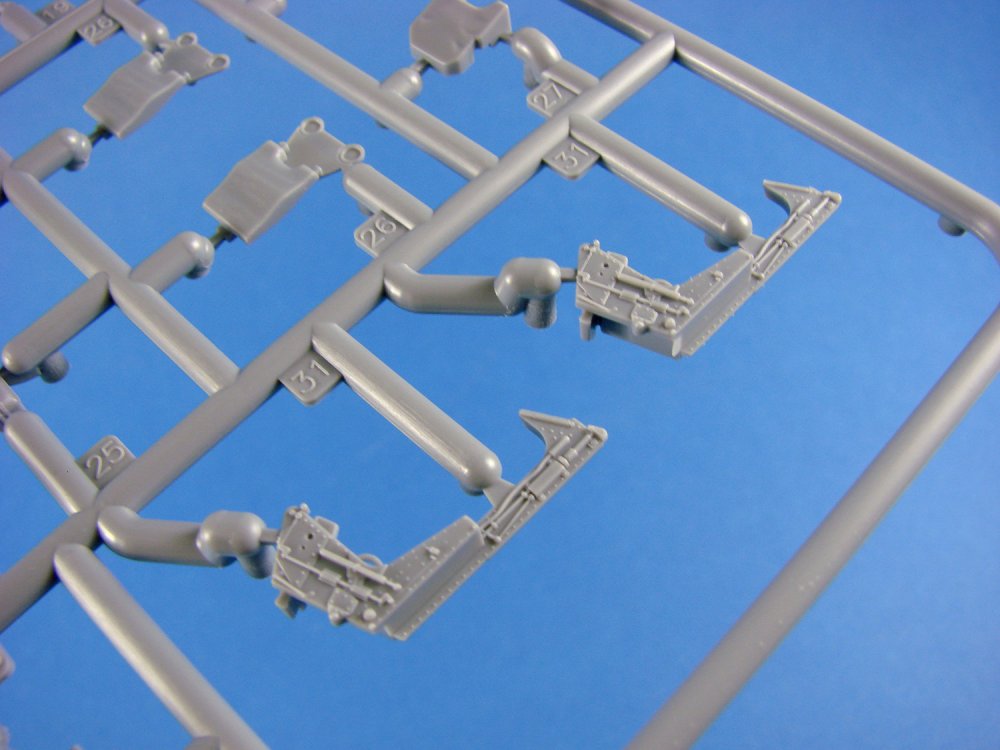
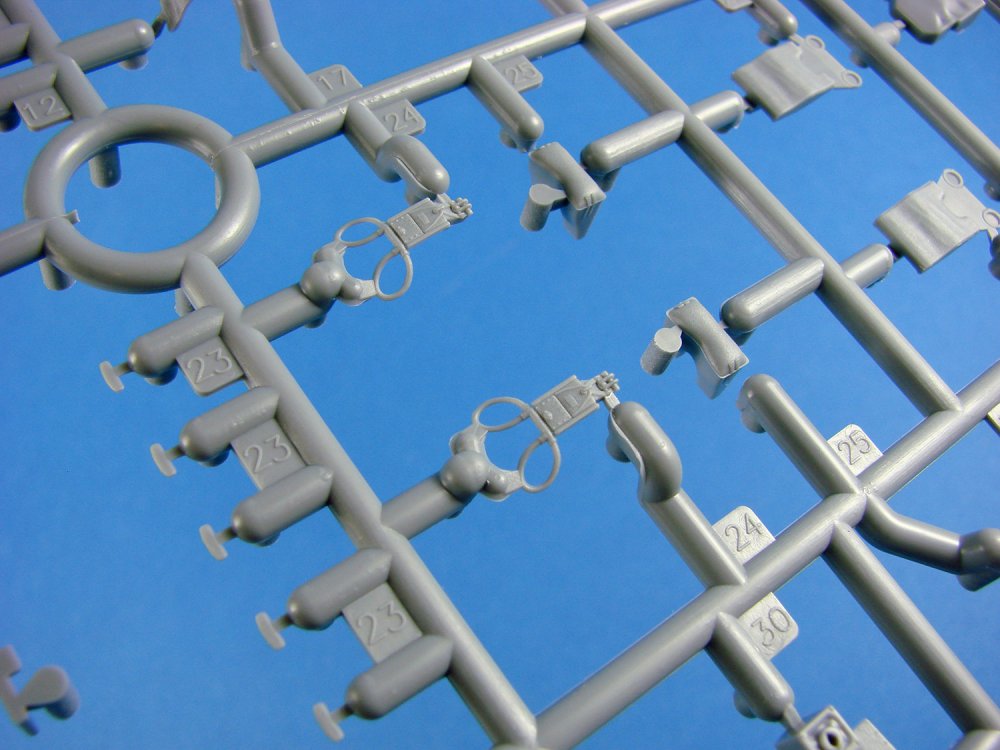
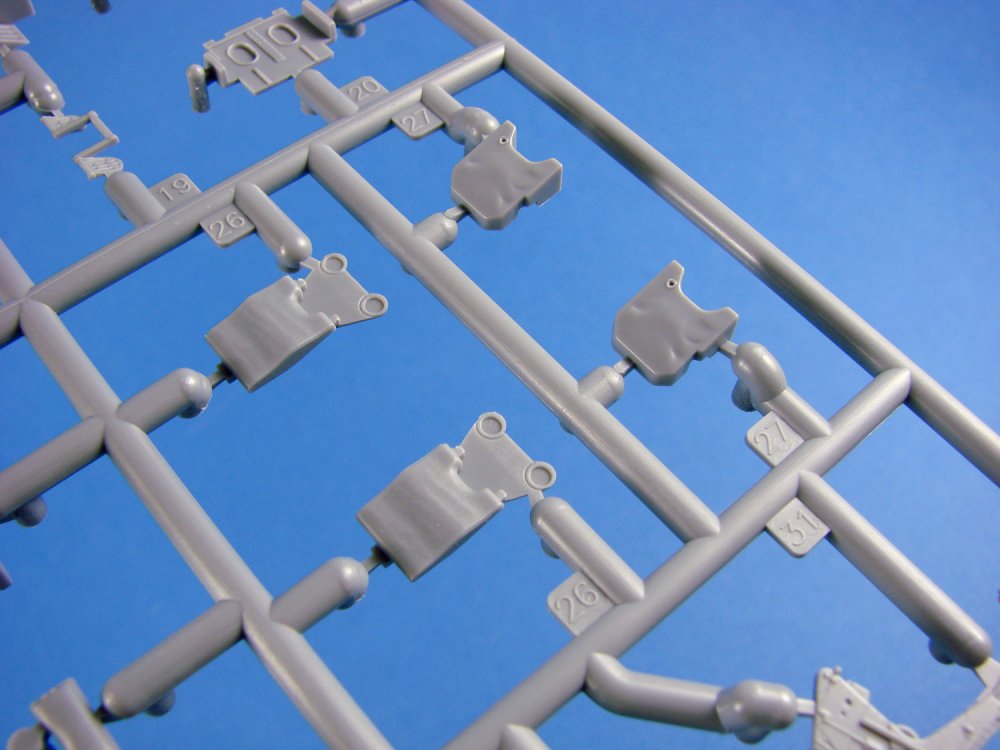
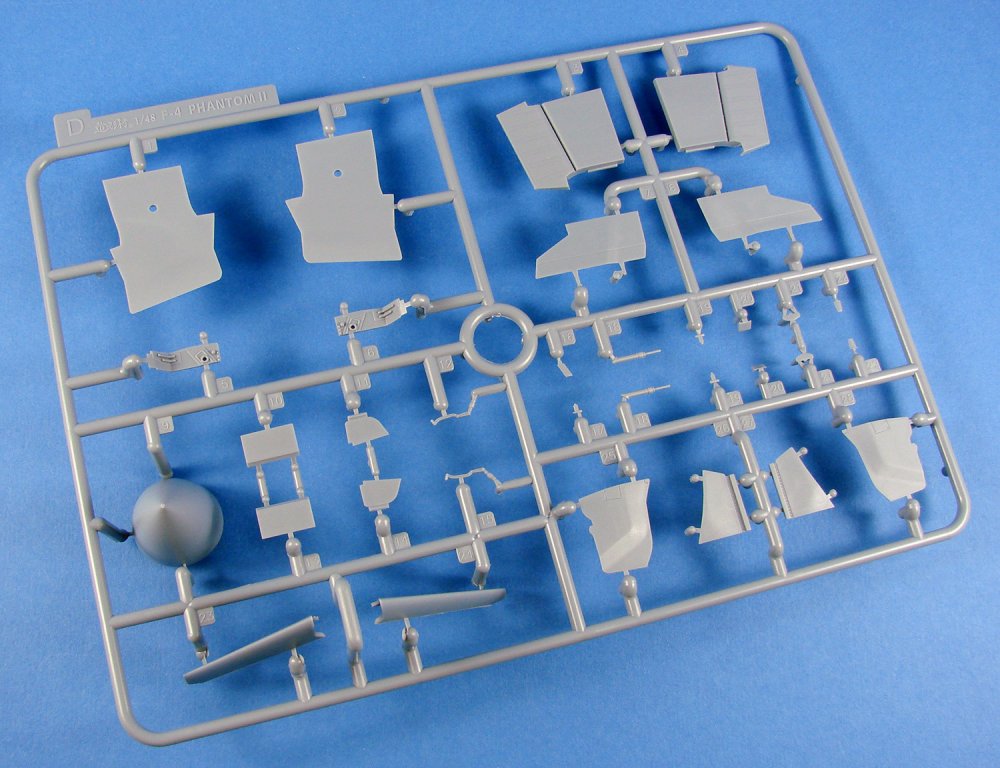
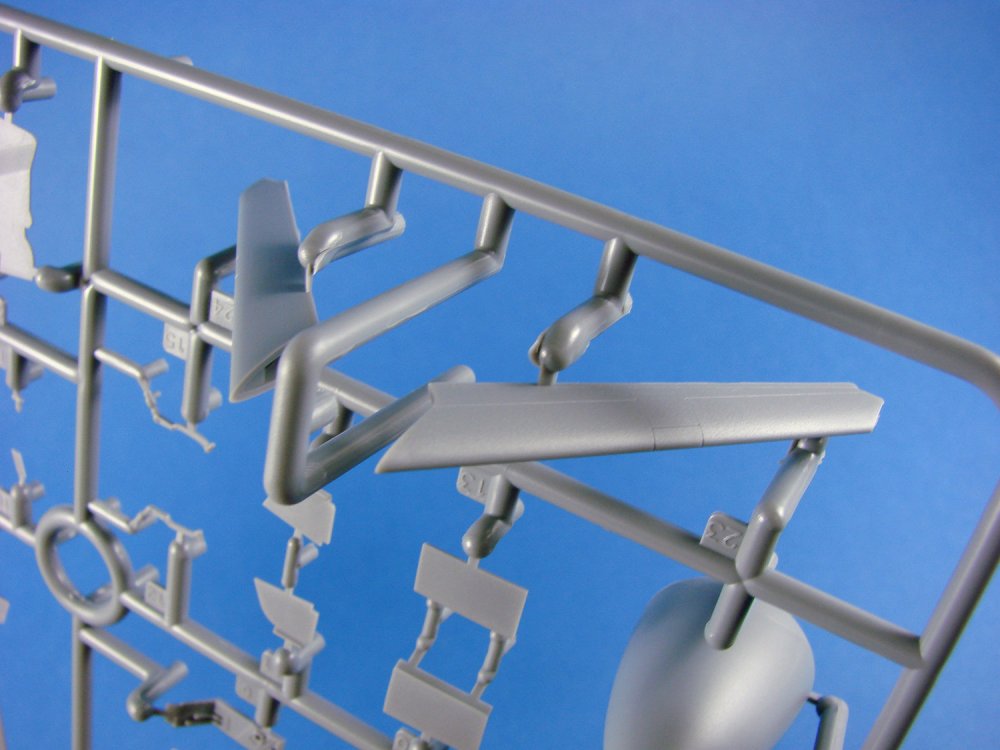
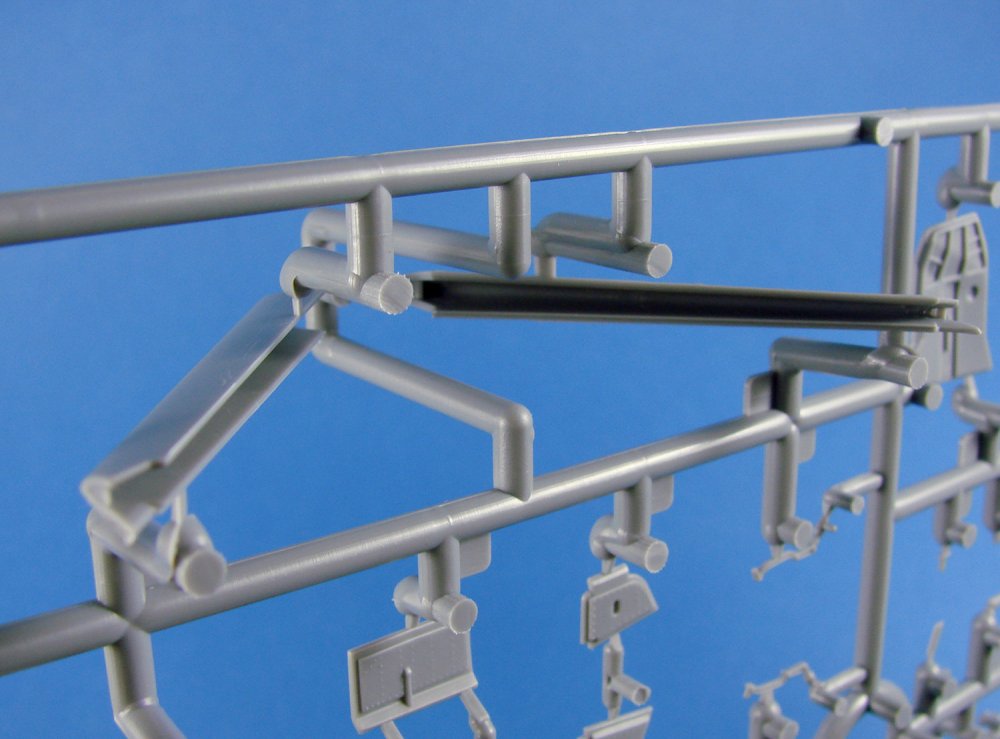
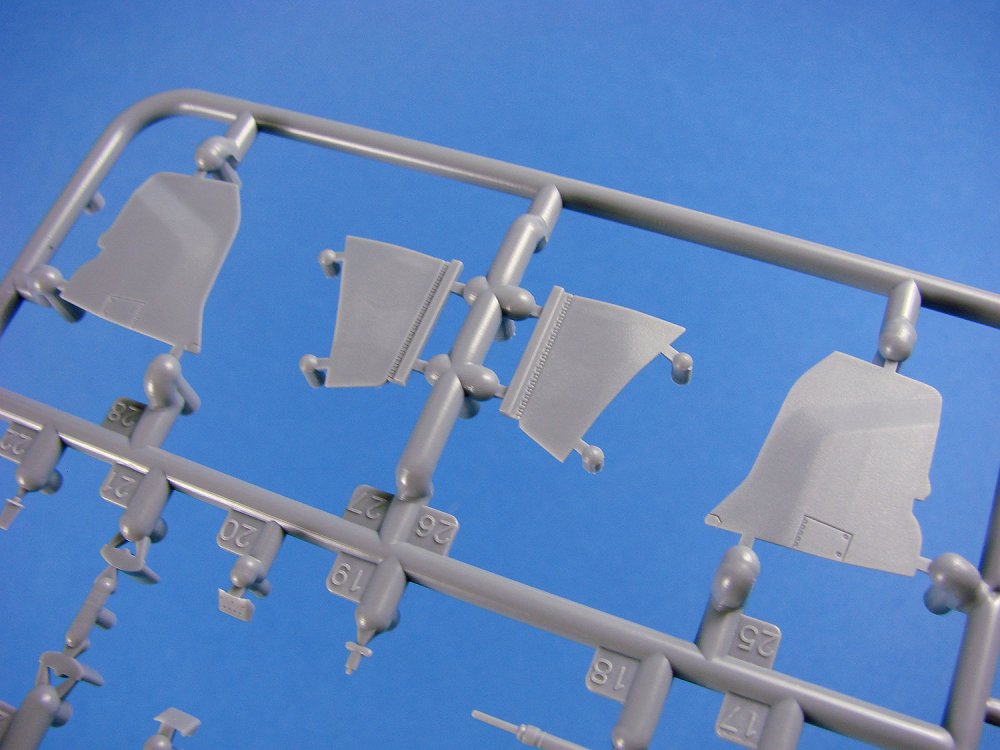


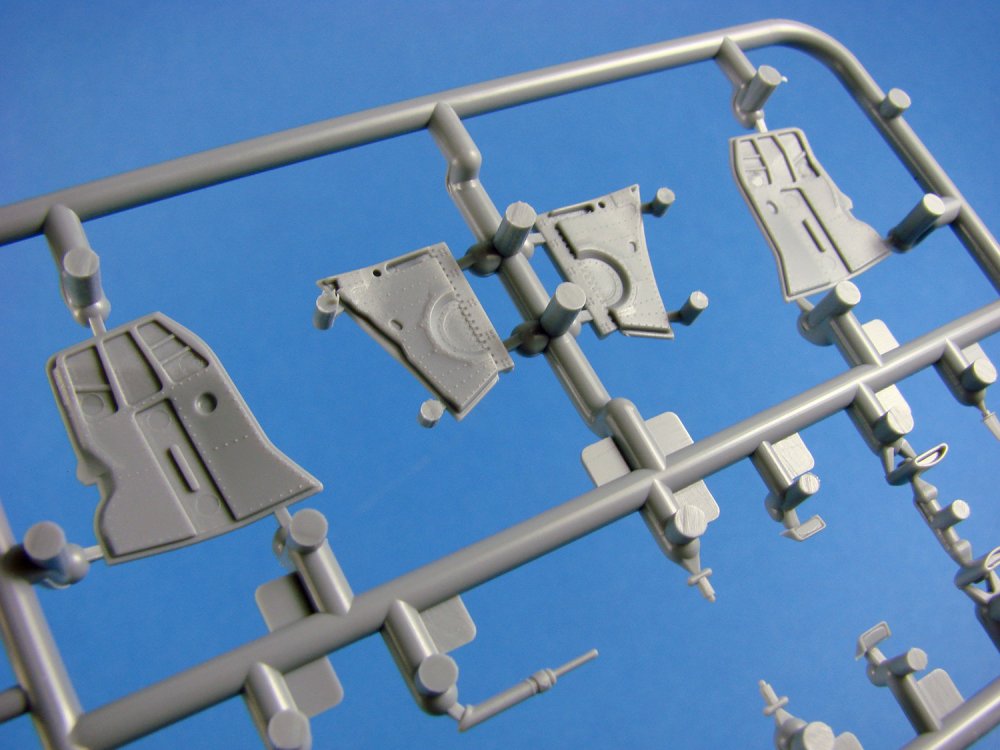
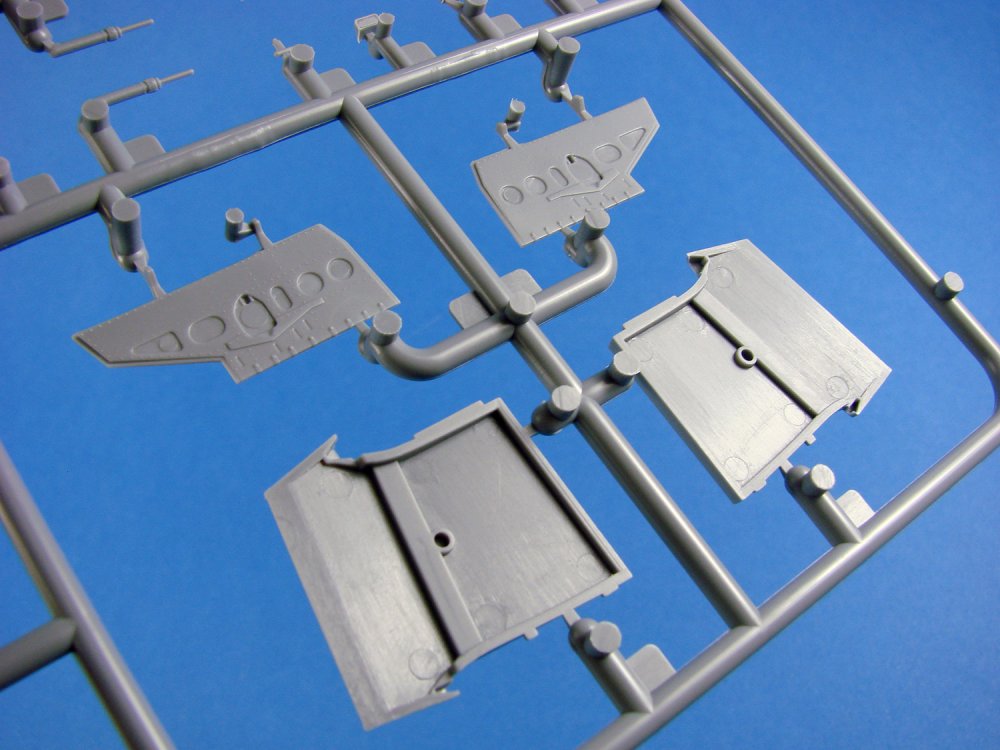

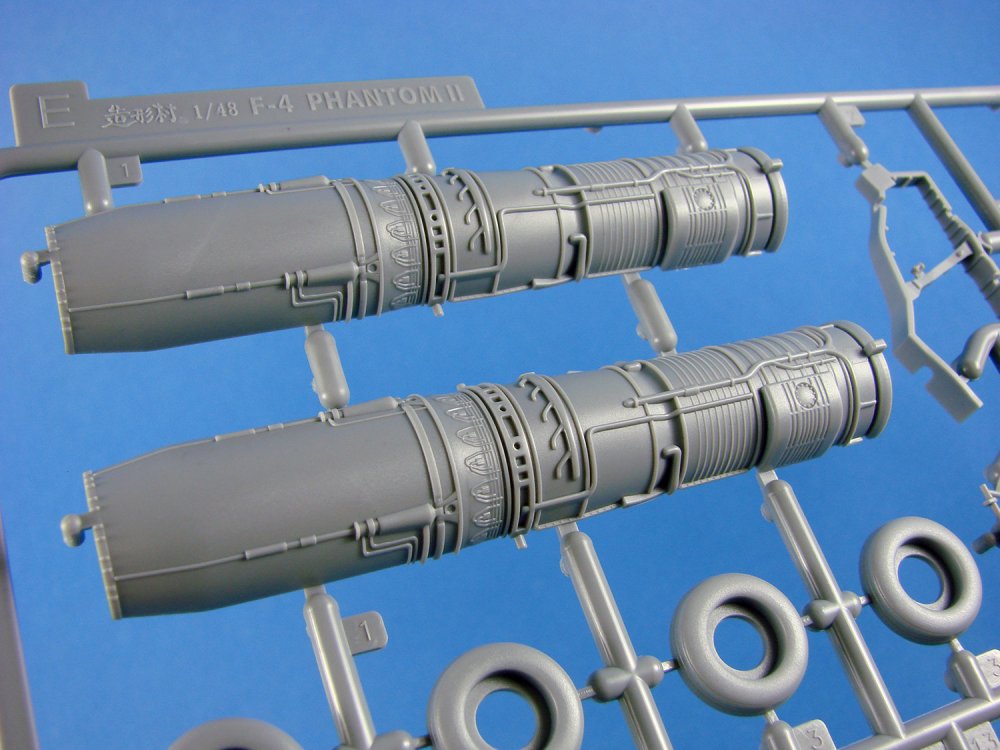
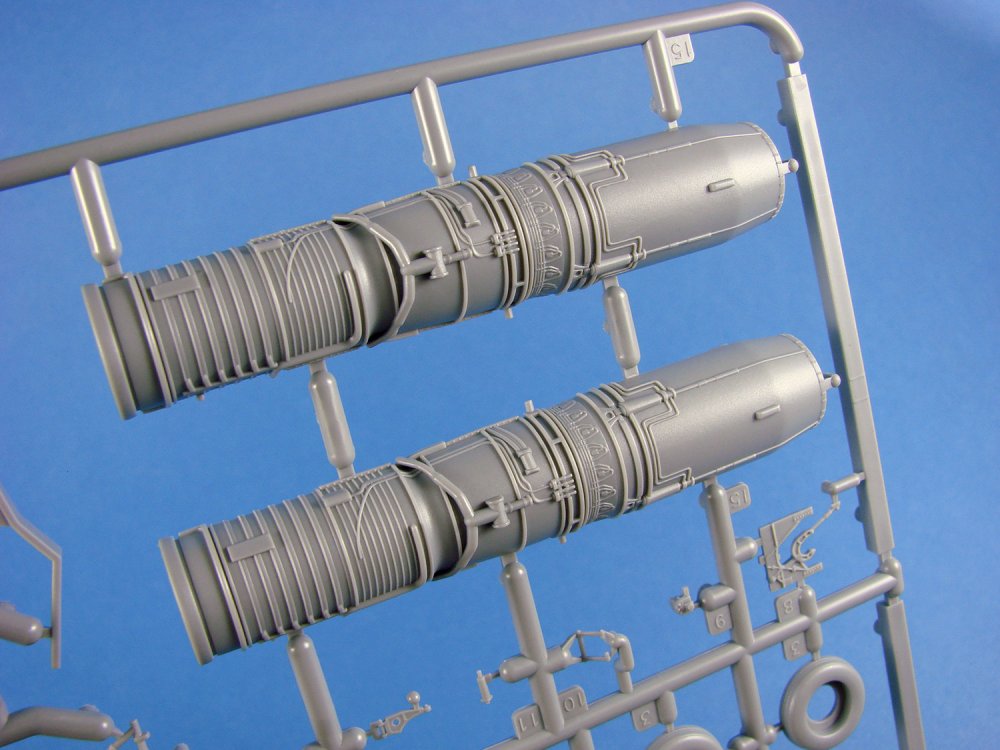
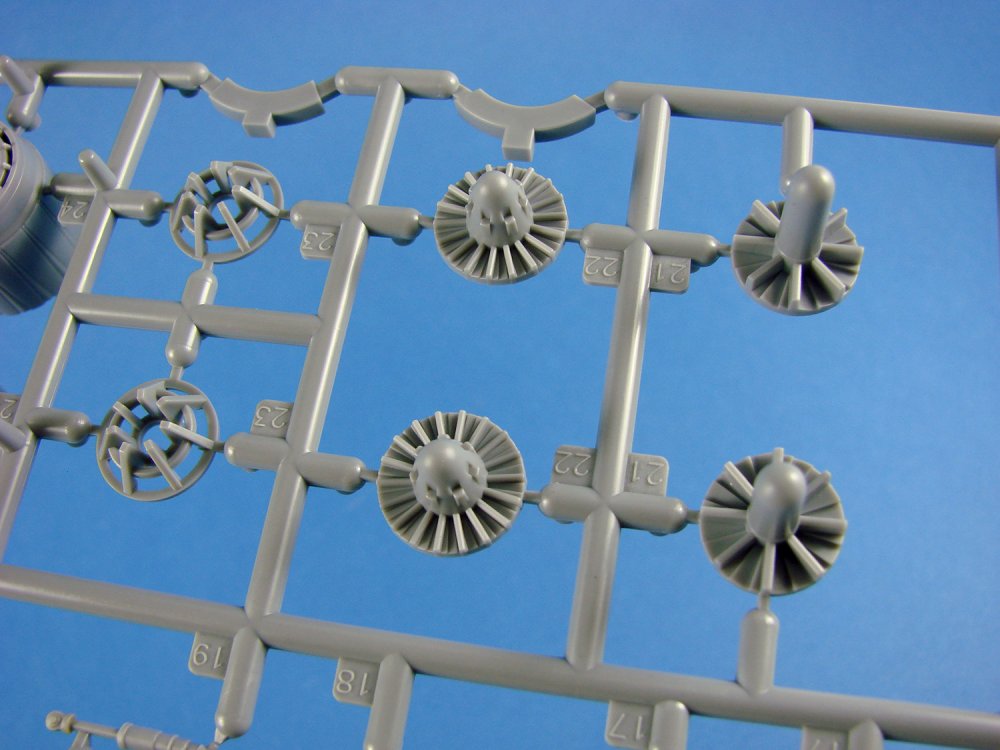
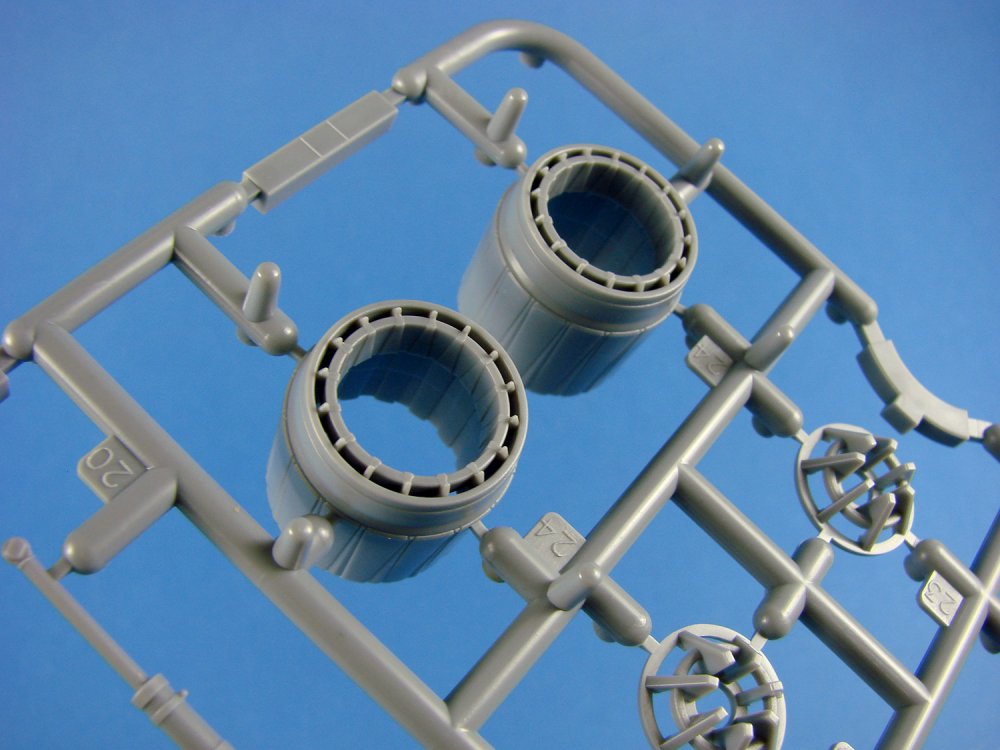

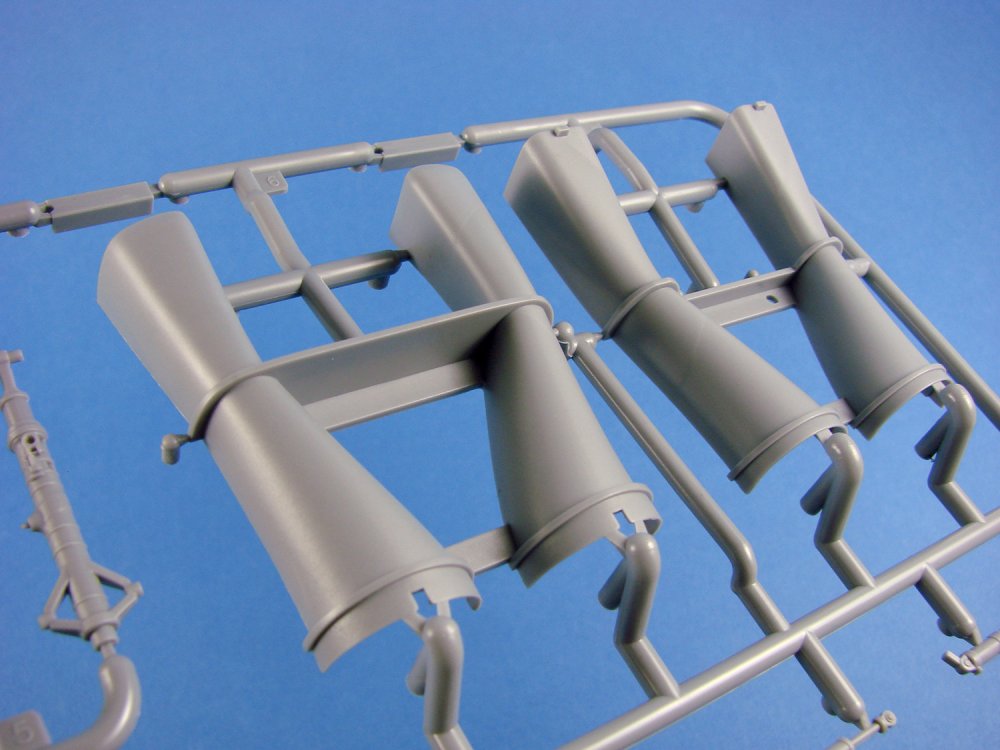
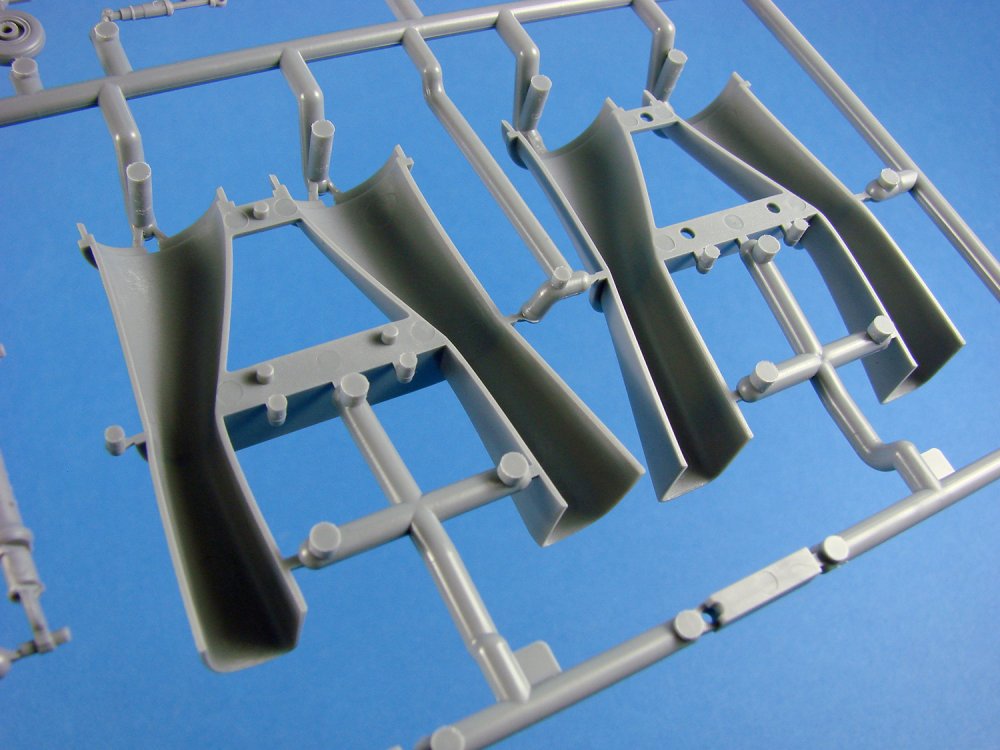
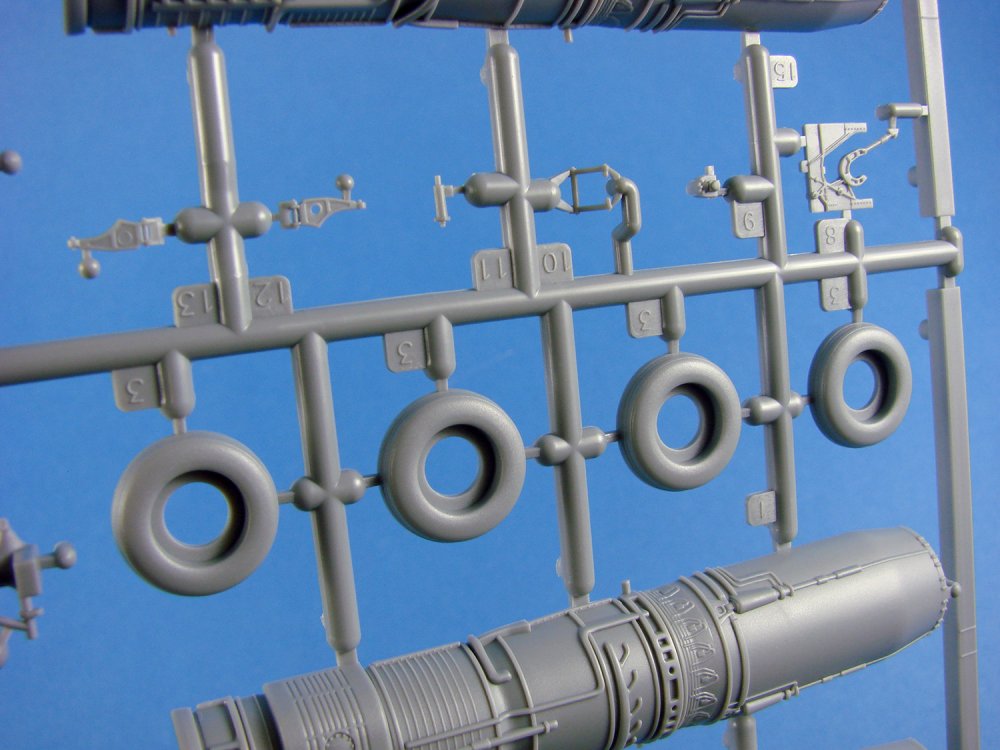
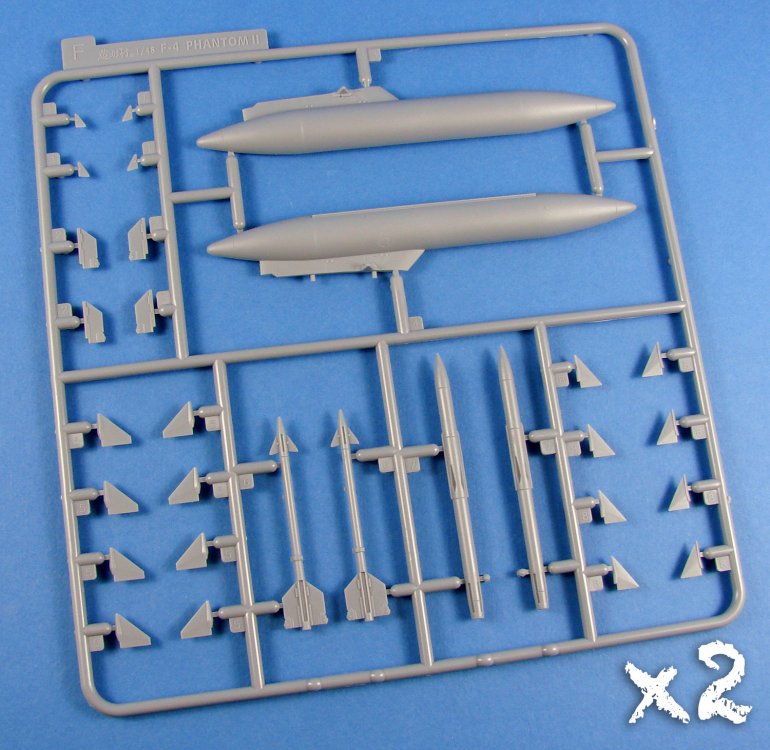
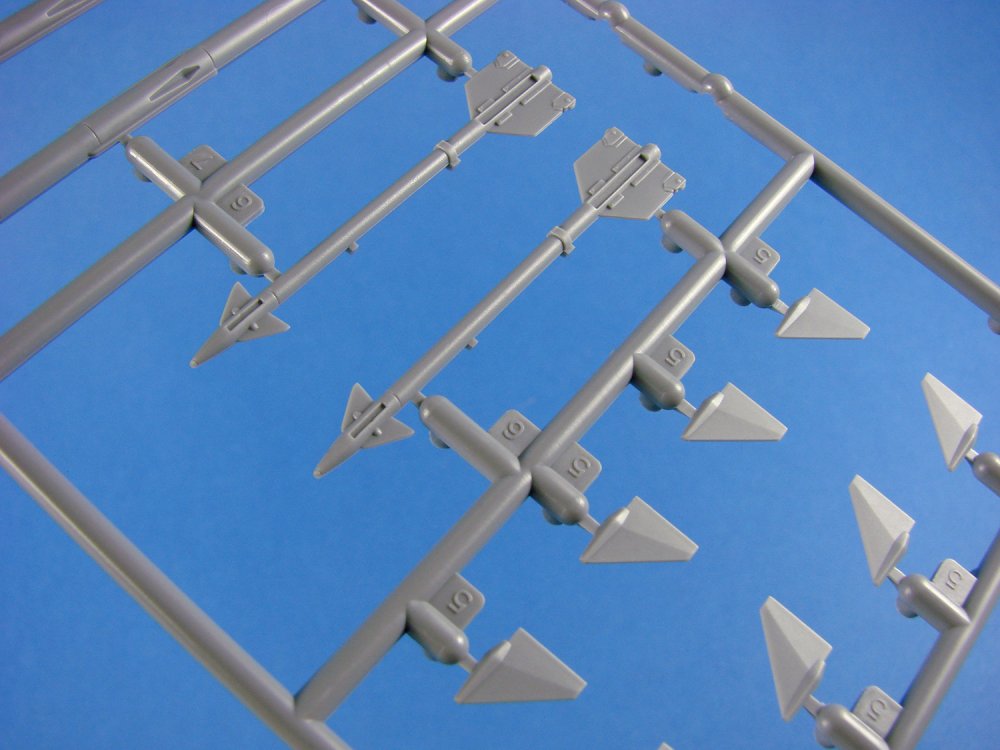
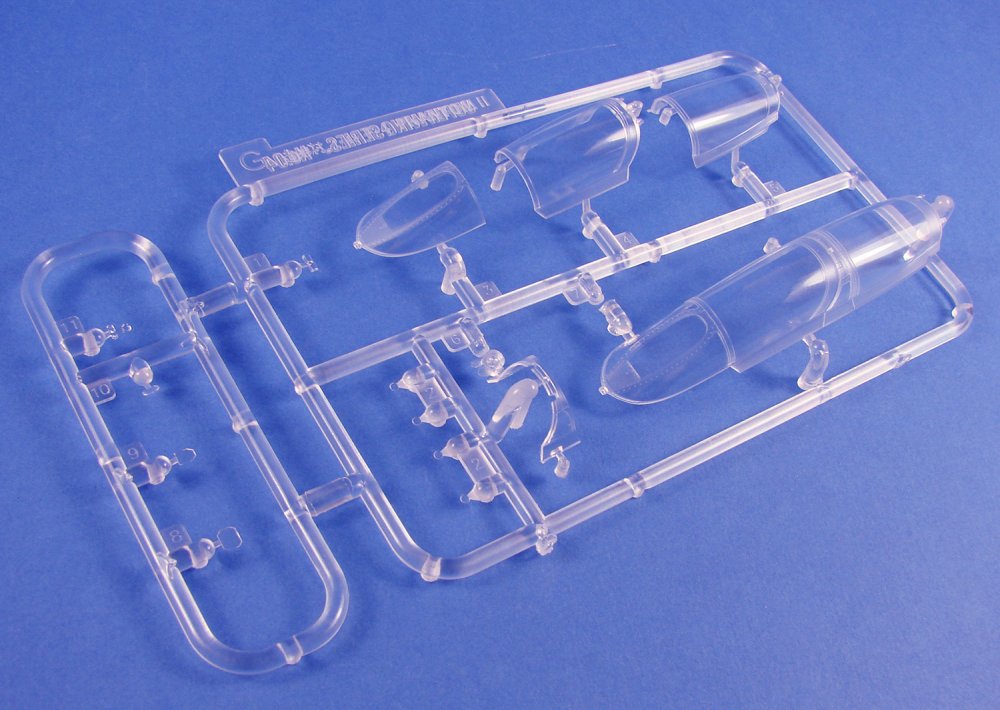
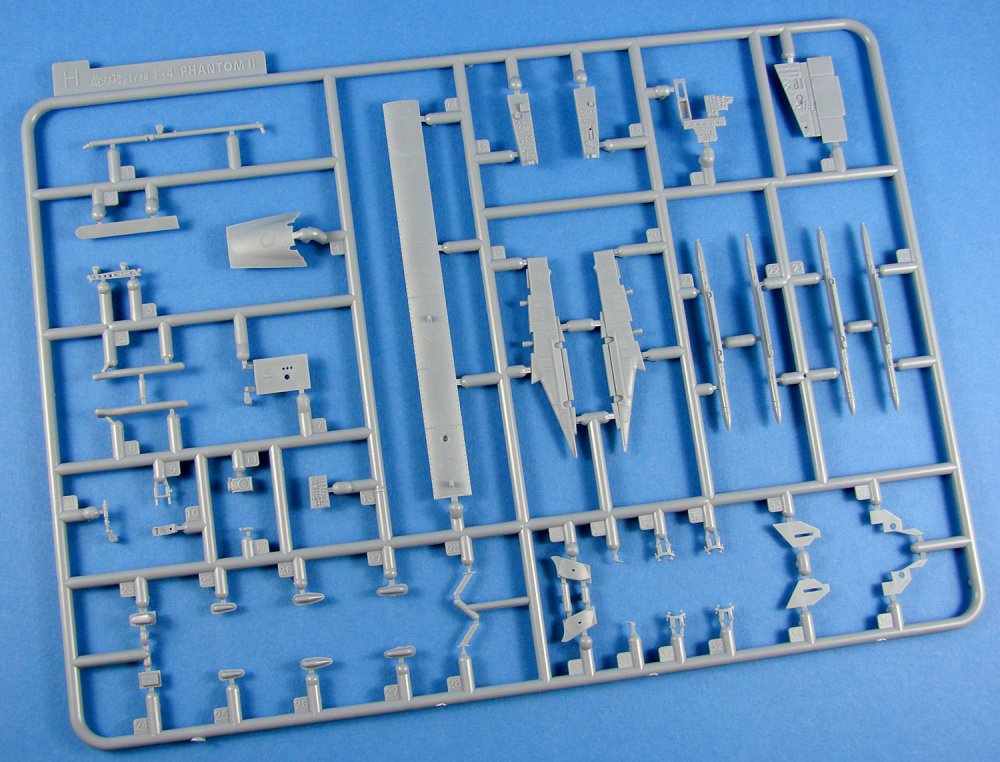
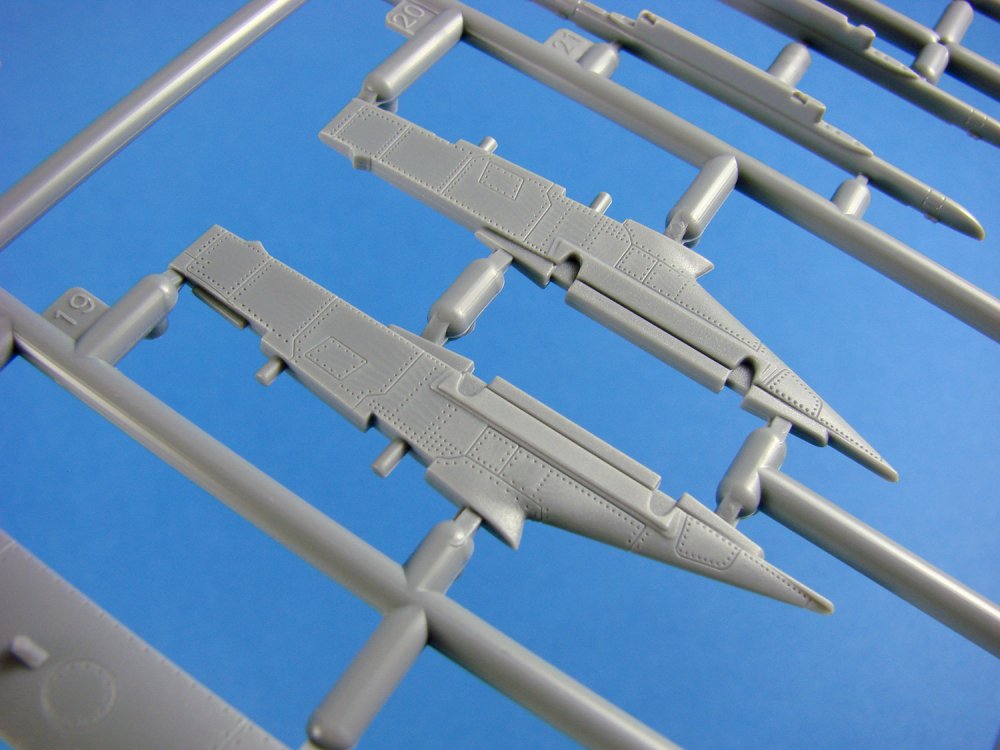
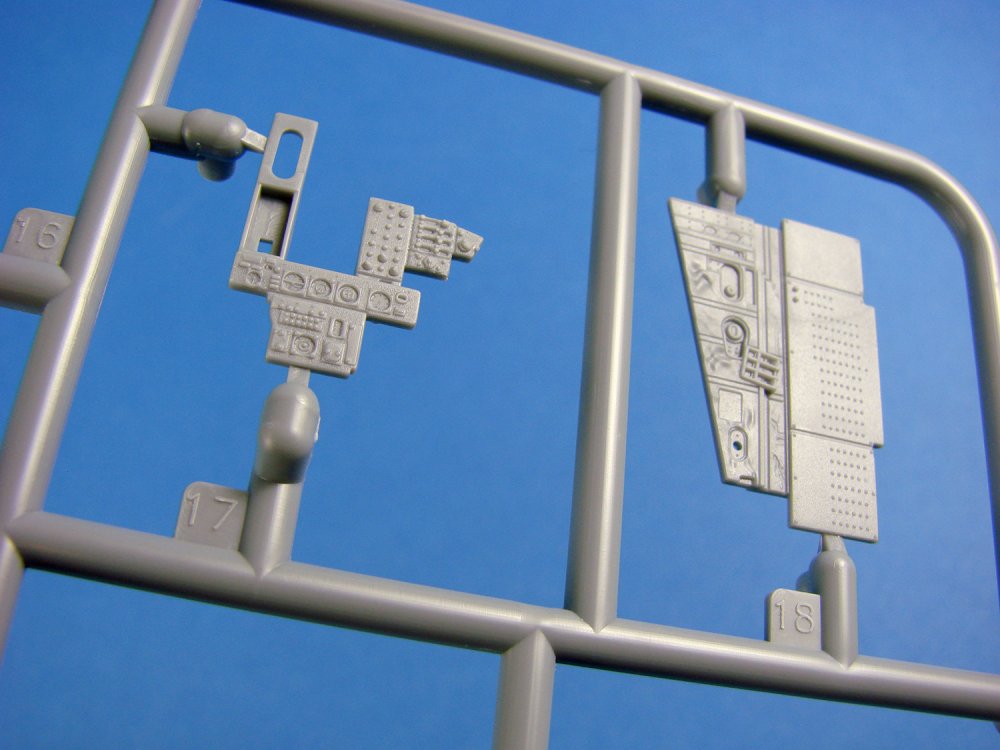

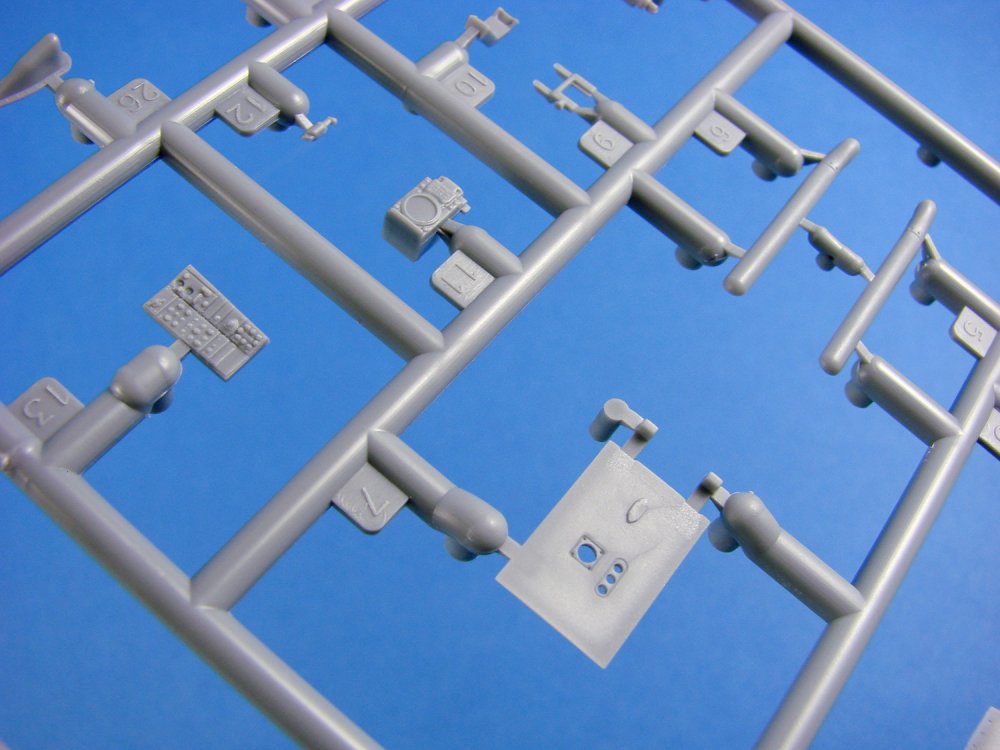

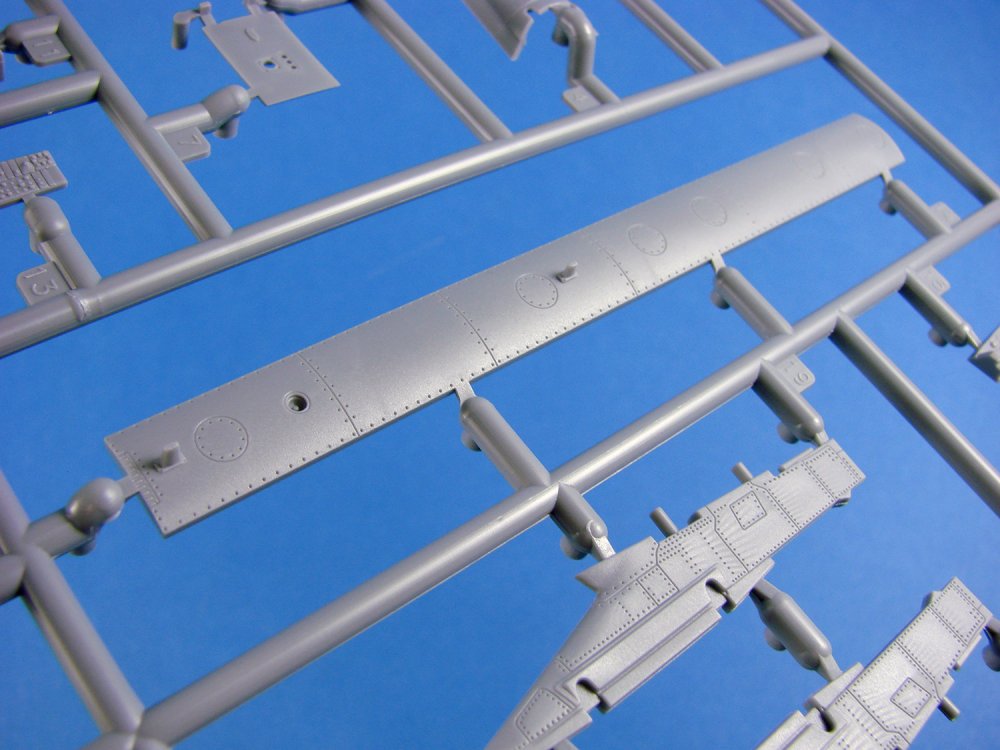

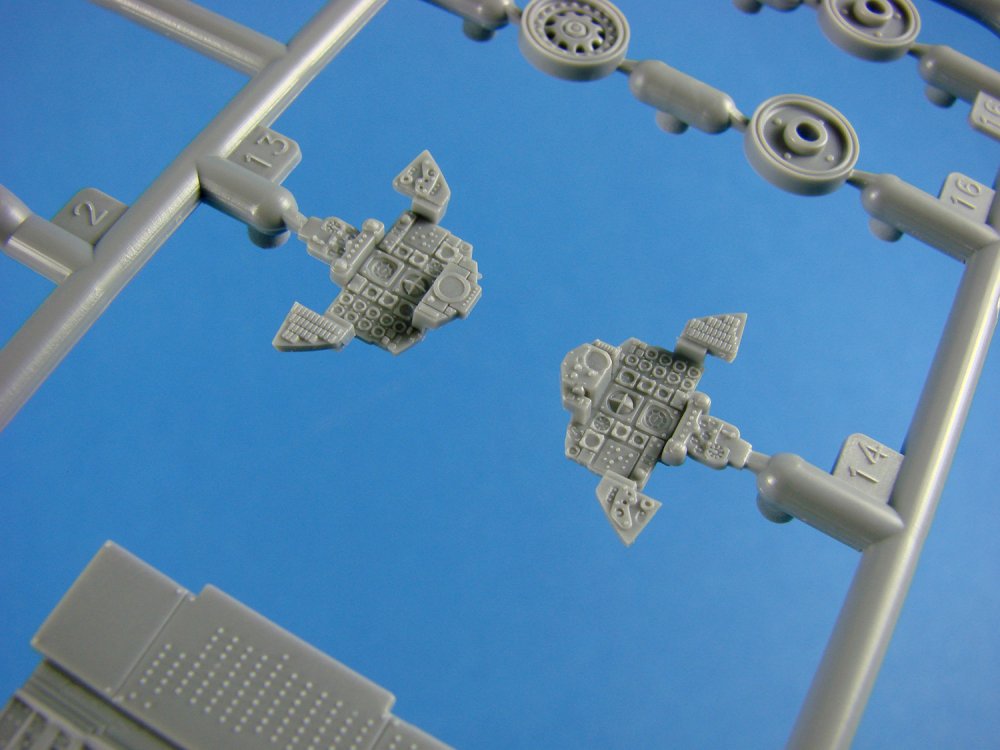
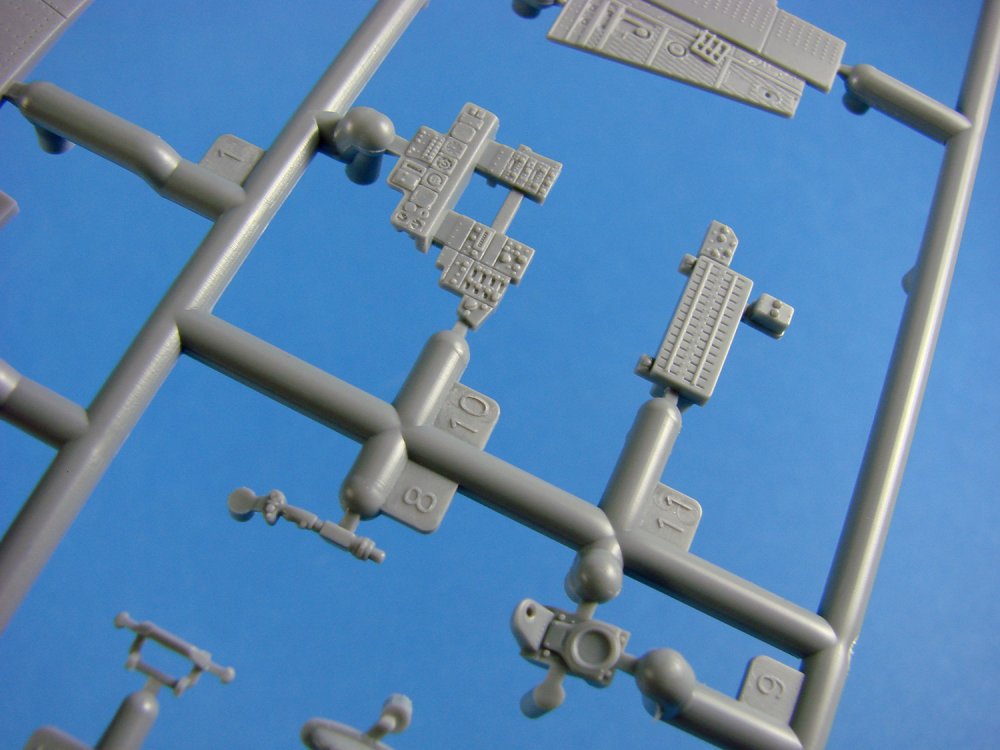
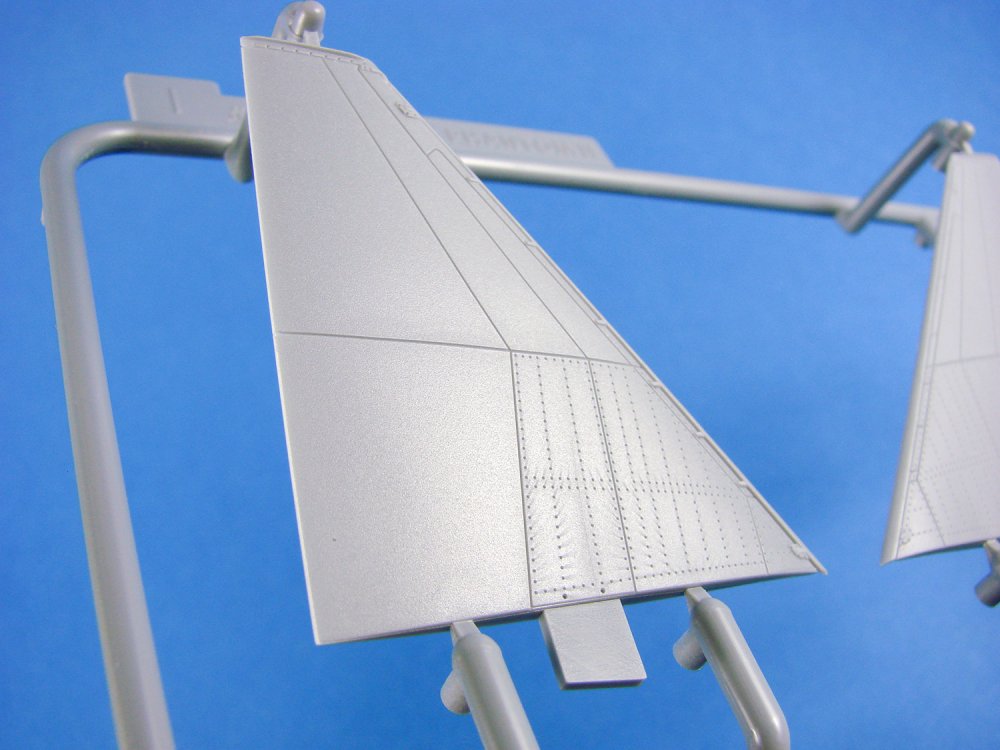

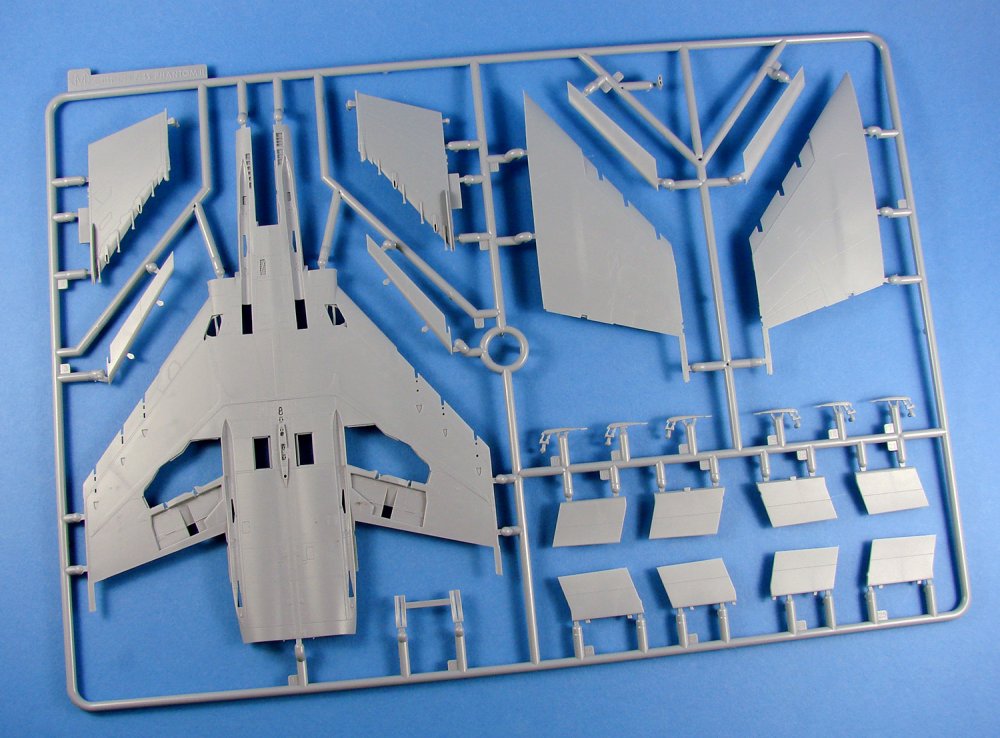
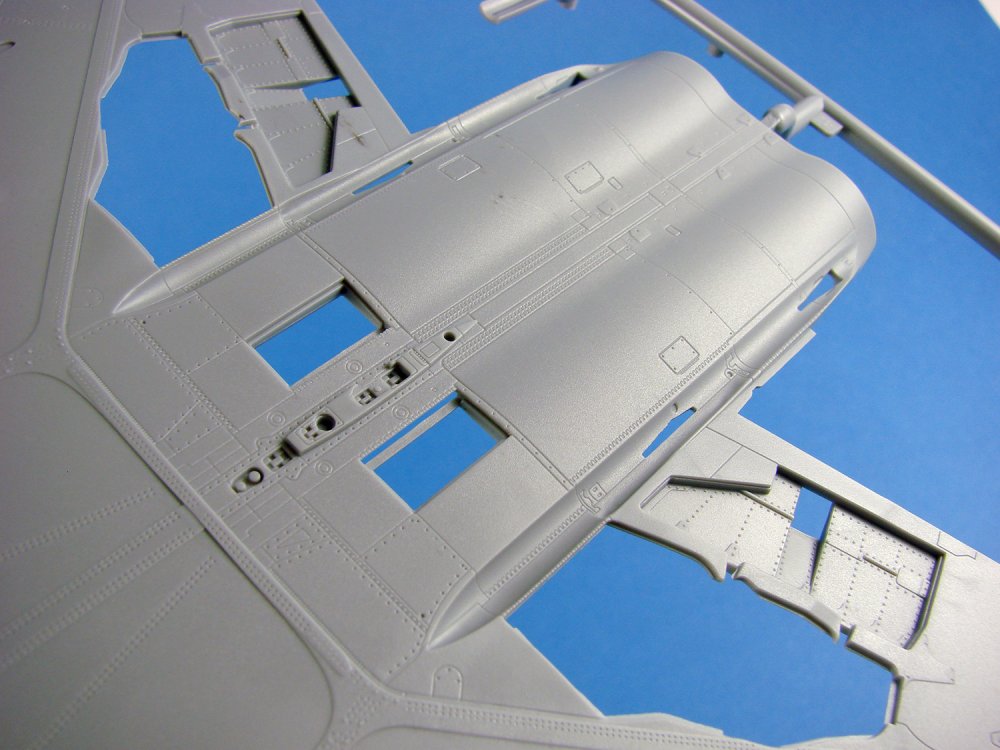

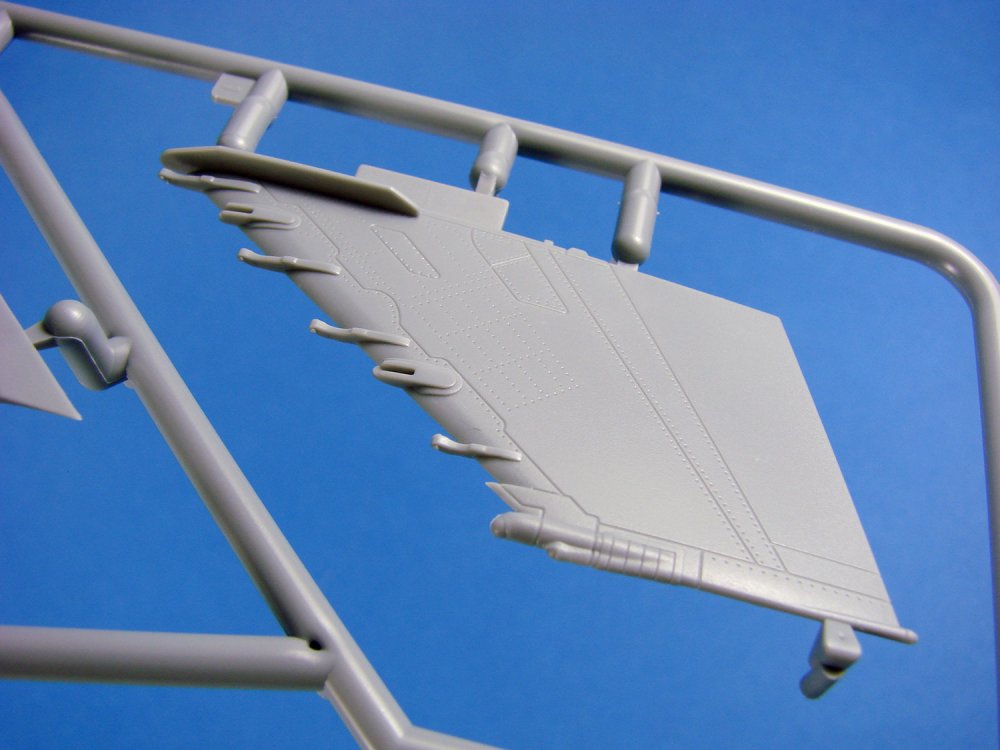
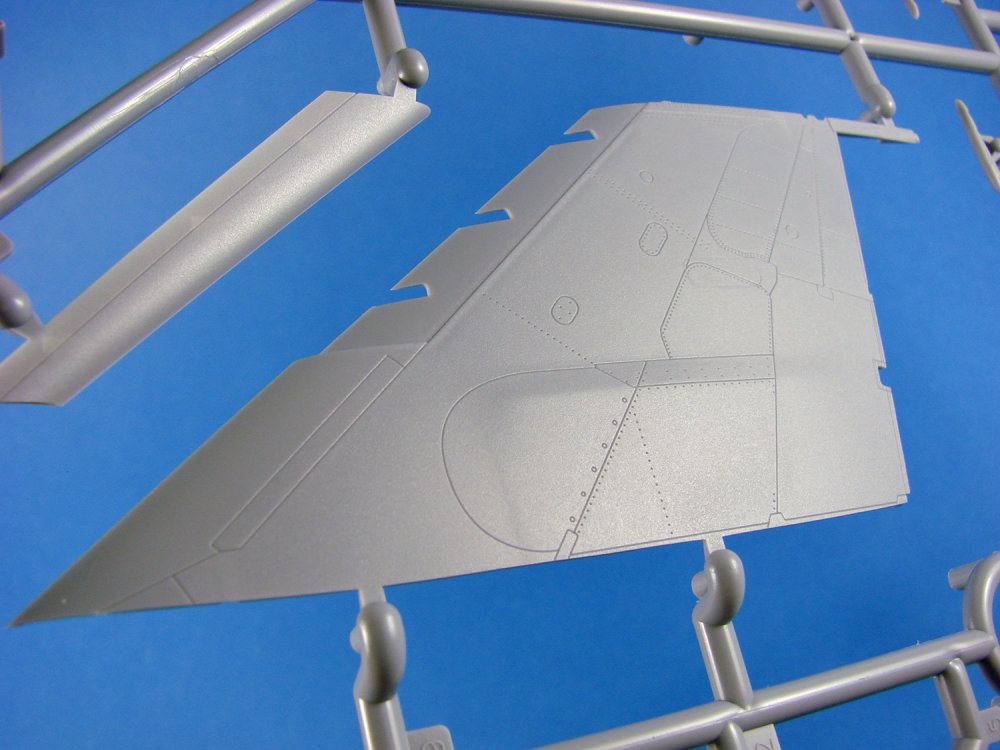


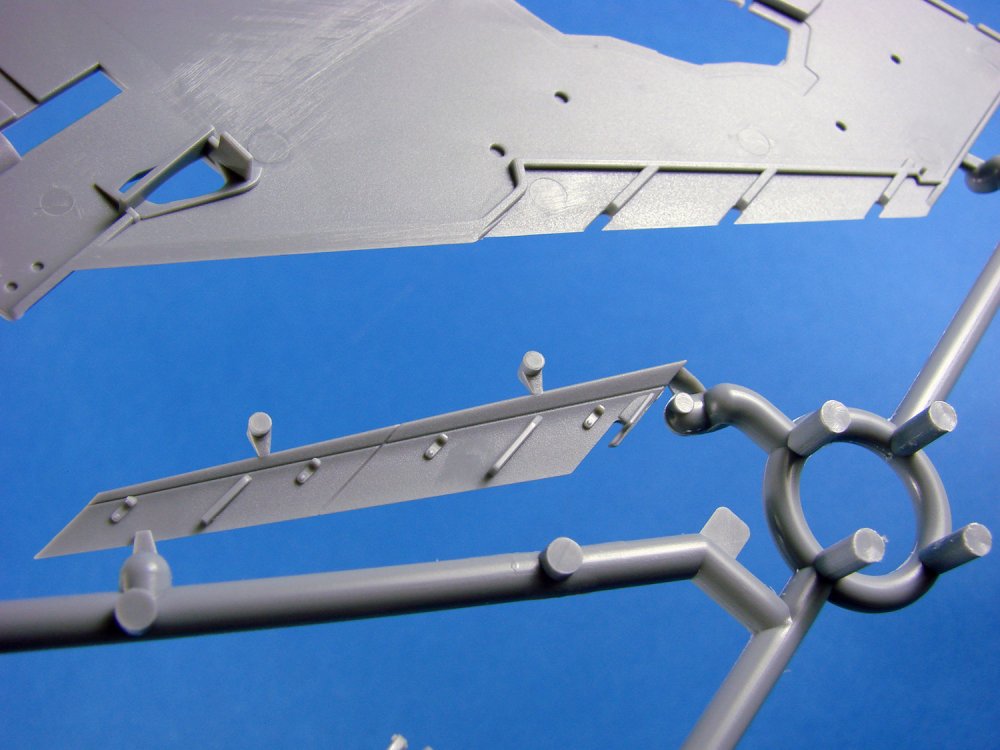
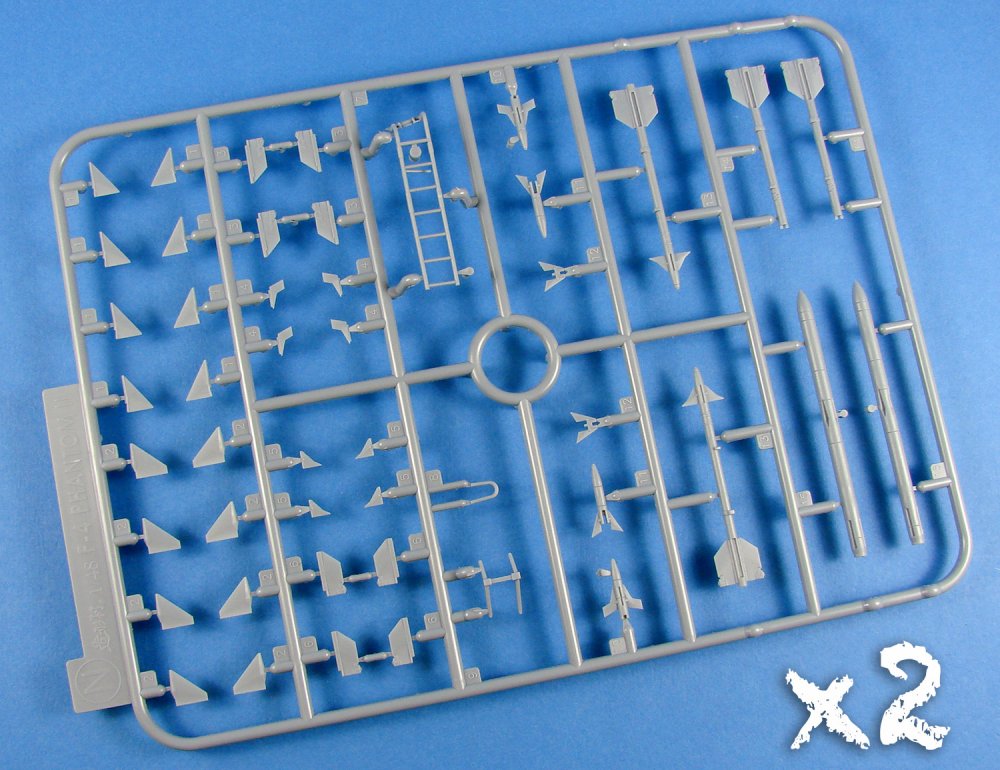

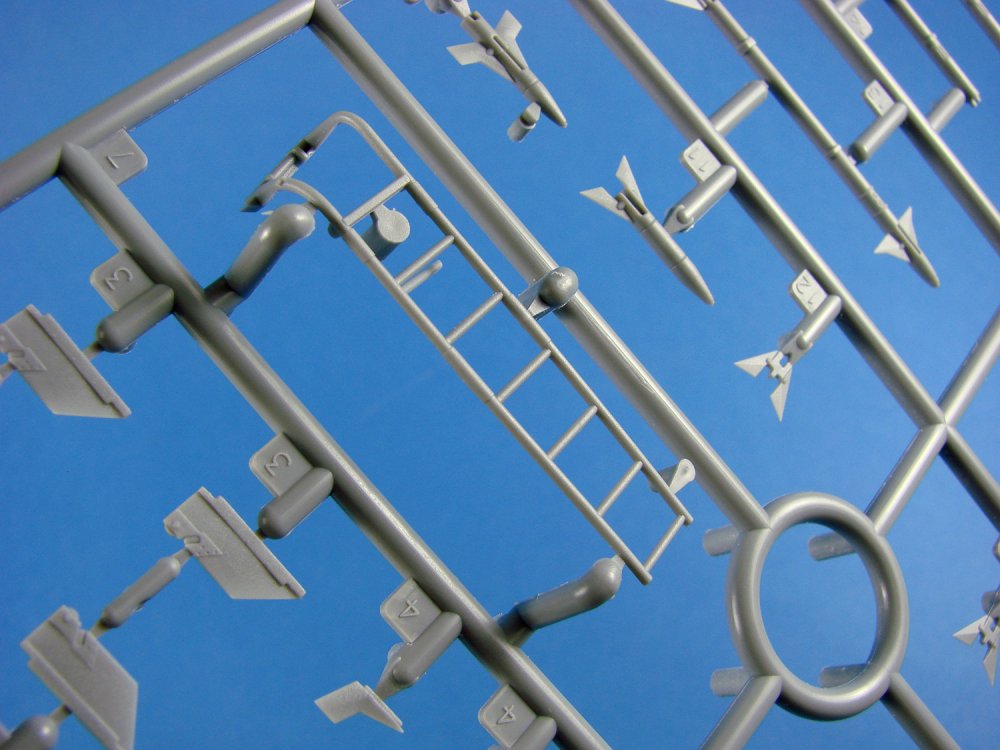

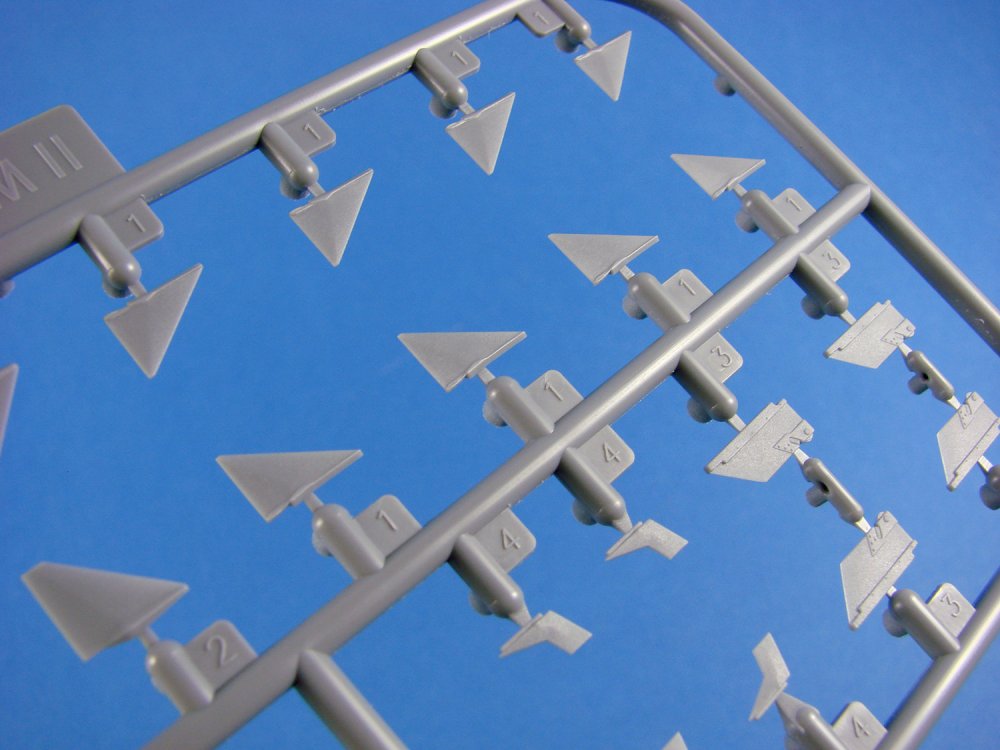


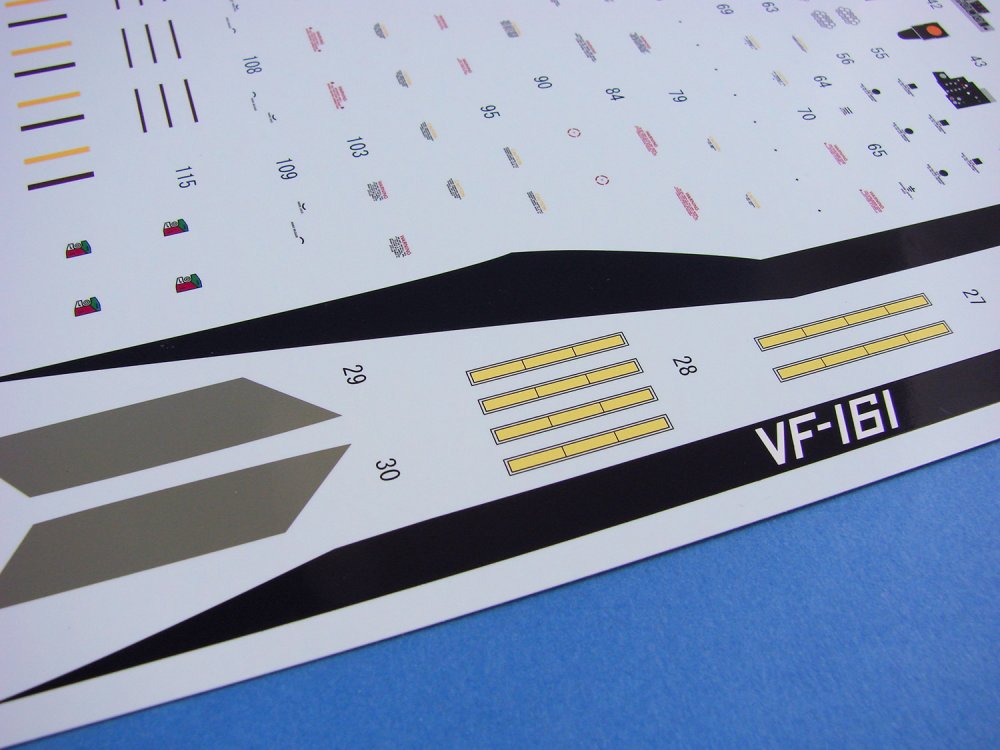

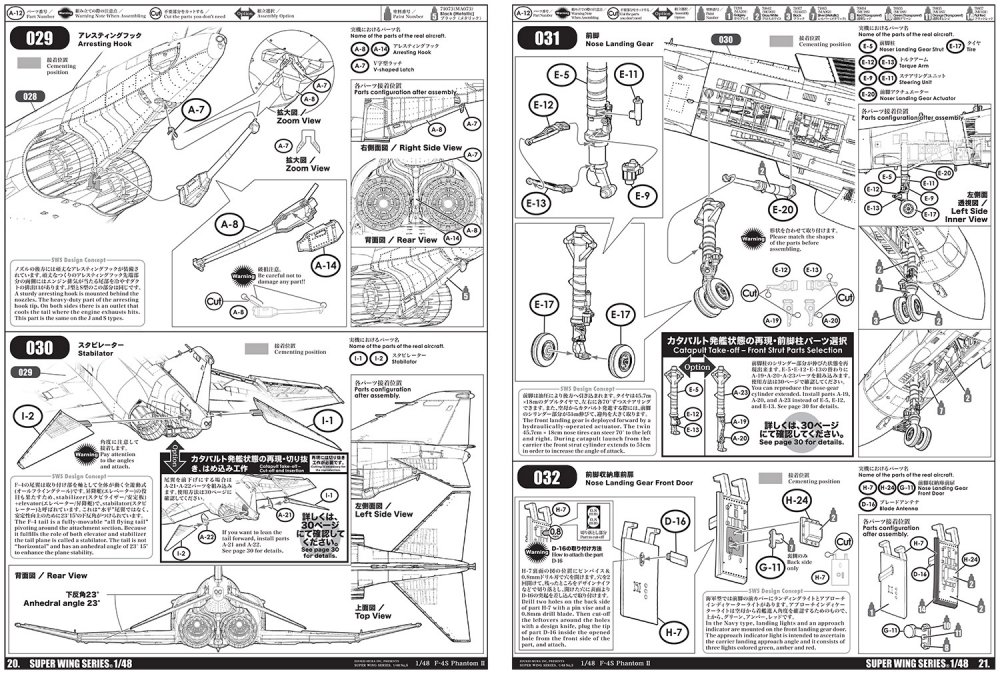
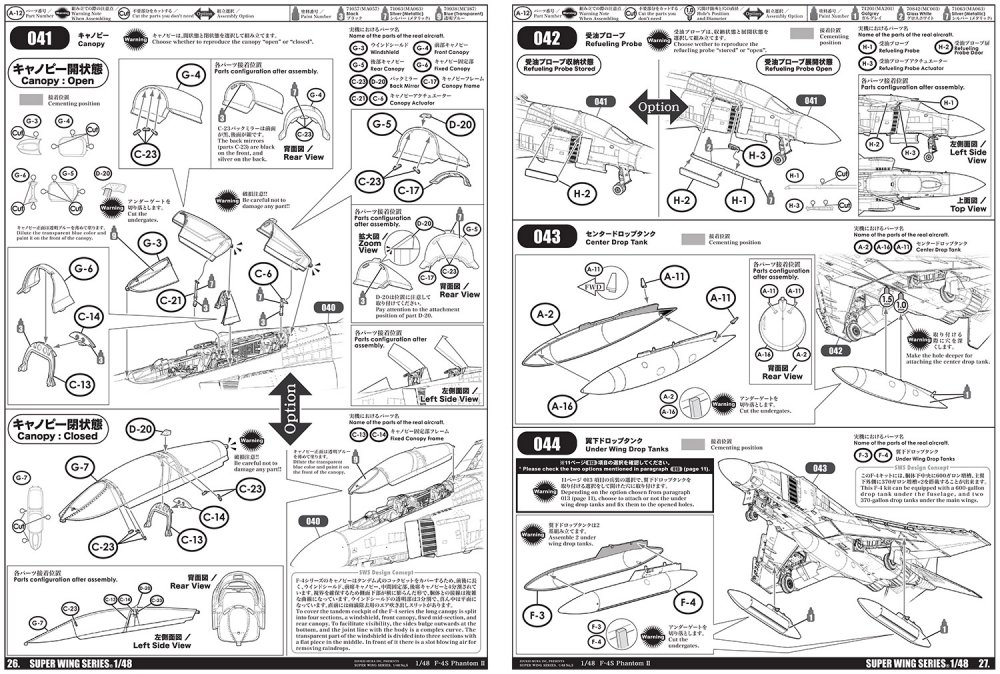
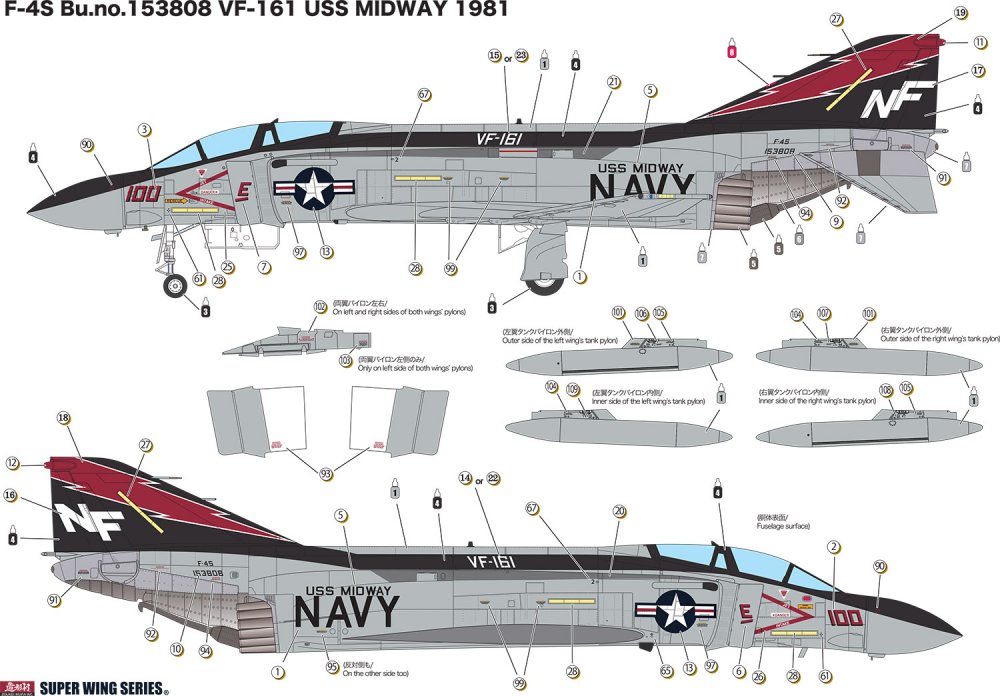
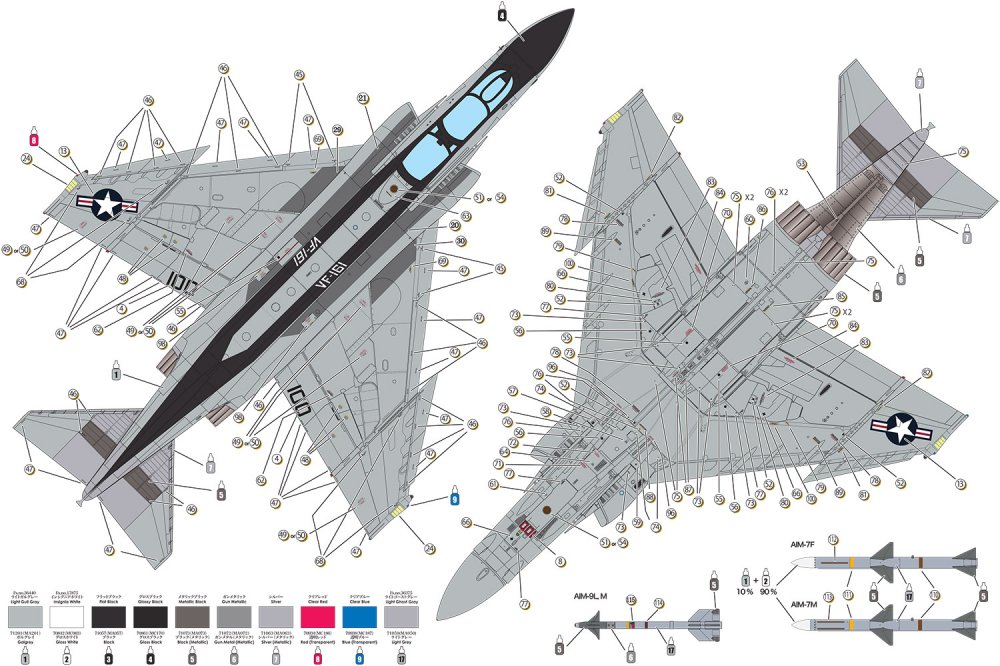

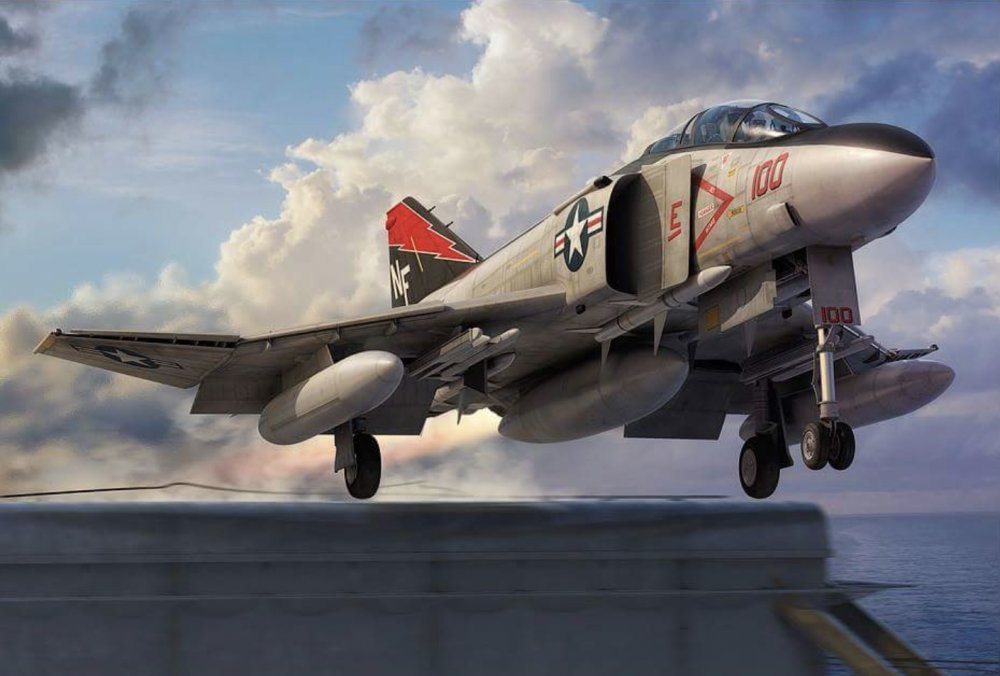
-
You have my attention....
-
Stepless Adjustment Circular Cutter DSPIAE Catalogue # HRC64~75 Available from Breveco Modelling for €62,50 I was recently lucky enough to be sent the Thinnerline circular cutter for test. If you don’t know what these tools do, then it’s quite simple…they allow the modeller to cut out discs in masking paper and very thin plasticard etc. from around 1mm to 50mm in diameter. Having found the Thinnerline an amazing tool, I couldn’t turn down the offer to try out the brand new DSPIAE tool kindly sent to me for review from the Netherlands, by Corien and Evert from Breveco Modelling. DSPIAE’s new Stepless Adjustment Circular Cutter (long name!) comes in a very attractive, robust and heavy box whose quality is pretty reminiscent of the way Apple packages its products. The box lid contains a line drawing illustration of the circle cutter, and the edge of the box has a unique 16-didgit identifier that you can use to verify that this is a genuine DSPIAE product, and not a counterfeit. Certain elements of our hobby have succumbed to piracy, so this is a very nice touch. The only thing I can pick up on is that the box lid states the minimum size is 1mm, whilst the maximum is 7.8! I am pretty sure that this is more like 50mm. The lid is a seriously snug fit, and once you overcome the suction when you remove it, you’ll find a removable tray with foam cut-outs. This contains three different cutting tools in their own plastic box, tool assembly components and a screwdriver. Yes, you will need to assemble this cutter, but it won’t take more than a few minutes. For information, the tray lid tells you the cutting angle for each blade. These are colour-coded for ease of recognition. Assembly After lifting out the tray, you will find a foam-backed instruction card, with everything clearly shown in line drawing format. The cutter is assembled in six easy stages. Unlike the Thinnerline tool which is essentially based upon a bearing, with internal parts, the DSPIAE tool is also enveloped in an aluminium case that protects the bearing. This is machined in high quality material and has a red/crimson appearance to it, applied probably through anodization. The sharp corners are then machined at 45 degrees, exposing the metal again. Very attractive indeed. The two-part aluminium housing is now bolted to the exterior of the bearing, and tightened with the supplied tools. Four grub screws are now applied, securing the bearing so it doesn’t slide. Don’t fasten these too tight. They only need to nip. Now the adjuster and gauge are fitted. I did find a washer left over and a small neodymium magnet. They aren’t on the instructions. Use After fitting the blade into the tool (yellow 45 degrees) and adjusting its position, I dial the size of circle I want into the cutter, and the cutter is sat on a sheet of masking paper. I then use the small handle to turn the inner bearing and a perfect circle is cut. It really is that simple. The gauge works so that the close to the centre of the bearing you adjust the pointer, the smaller the mask. Move it outwards towards the circumference, and your masks are larger. The cutting tools are amazingly sharp and should be kept in their plastic protectors when not in use. Conclusion Does exactly what it was designed to do, and flawlessly. An amazingly high quality tool for which you will find endless masking applications in your hobby, from wheel hubs to inner radius curves for canopies etc. You really should treat yourself! My sincere thanks to Breveco Modelling for the opportunity to try out this new tool. To buy it directly, click HERE.


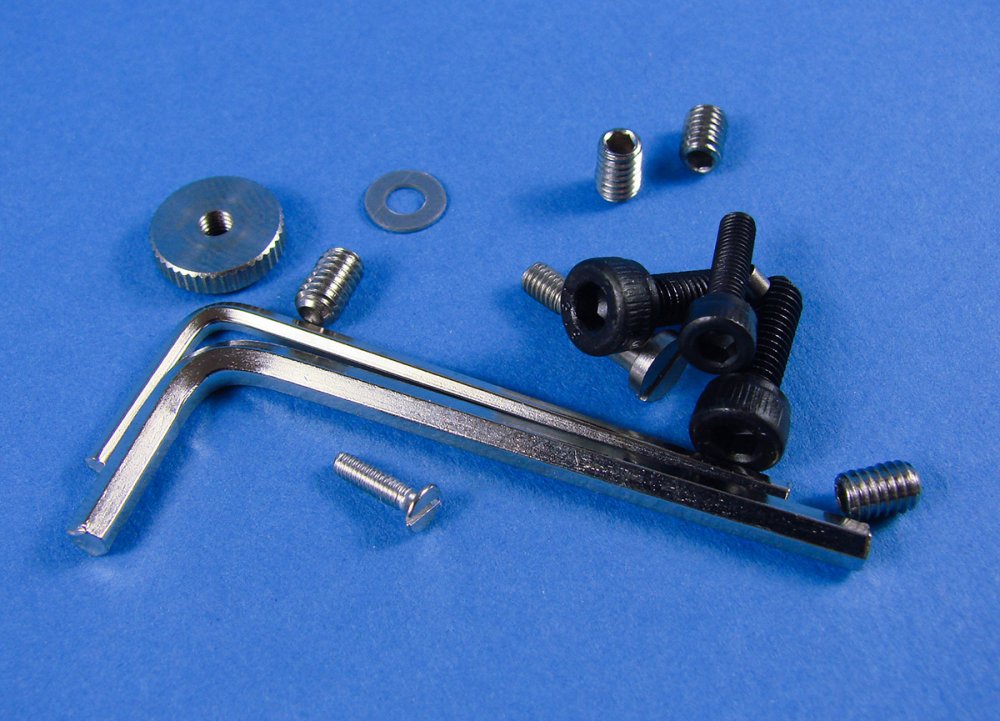
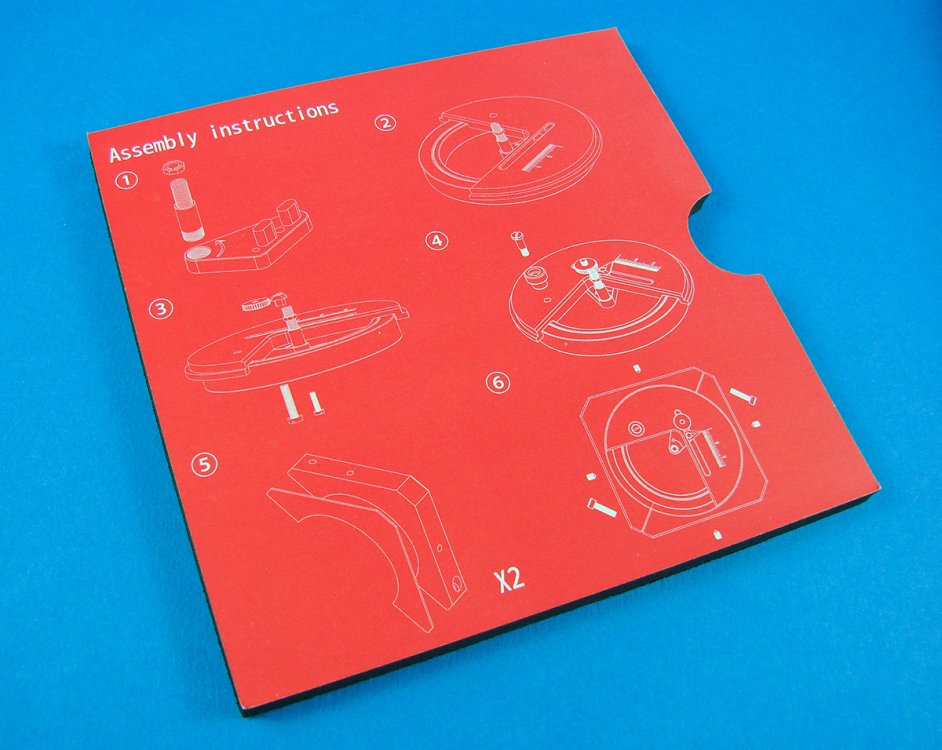


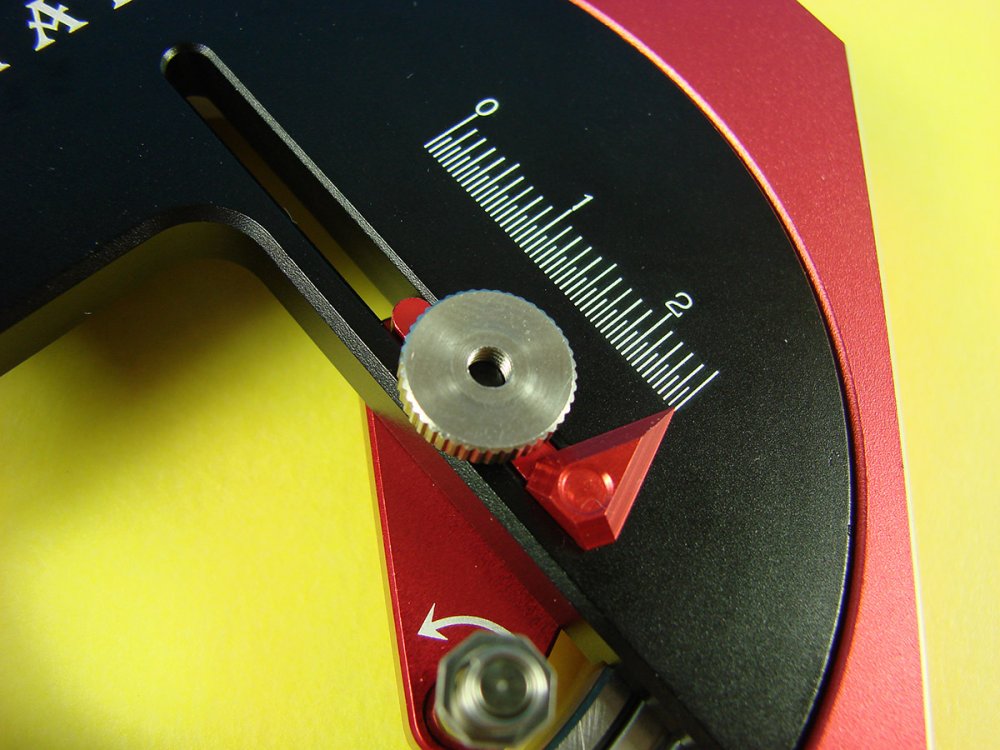


-
Single Blade Nipper 2.0 DSPIAE Catalogue # HRC58~64 Available from Breveco Modelling for €34,50 Without a doubt, my finest pair of cutters was a 80s pair of Lindstrom electronic side-cutters. These seemed to be built to last an entire lifetime, and their cutting edges, even after time trimming resistor and capacitor legs, were still like brand new. They weren’t cheap either. I remember in the 1990s, these were still around £70. Unfortunately, they now seem lost, and for a while now I’ve been using a Xuron sprue cutter. Very recently, Evert and Corien at Breveco Modelling, asked me if I would like to take the new DSPIAE Single Blade Nipper 2.0 for a spin. I’d heard good things about these in terms of quality and operation, so thought this was a perfect opportunity to lay the ghost of my old lost Lindstrom to rest. This tool comes in a box which I can only say is as good as anything Apple produce, and very reminiscent of the Beats headphones I recently got with my MacBook Pro. Construction of the packaging is hard-core, with an explosion-proof tray with a lid that holds itself almost through air suction! The attractive packaging has an outline drawing on the lid, and an ID number on the side, to indicate this is a genuine DSPIAE tool. When you lift the lid, the first thing you see is a removable tray that contains a holster for the tool. This appears to be leather, or something similar, and it’s embossed with the company name. An explanation is also given for the design of the tool, having only a single blade. More on that soon. This tray also contains an inventory that says there is a cleaning cloth in the packet, although I can’t see one in mine. Also in this tray is a plastic cap for the cutter, presumably in case you don’t use the leather holster. Removing this tray reveals the tool itself, sat neatly into a foam cut-out, plus an adjustment tool. The tool is there so you can a small limit regulator that prevents the user from forcing the cutting edge and cutting face together too hard, and possibly lessening the life of the tool. This is adjusted by holding the tool to the light, and setting the screw so that the blade and face only just come together. One thing that hits you is that the spring on these isn’t particularly high tension, meaning that little force is needed to close the cutter and cut plastic. The handles are also very ergonomic and extremely comfortable to handle, unlike the square appearance of my old Lindstrom tool. As for the cutter part, only one blade is present, and this is super sharp. The opposing face, instead of being another blade, is simply a flat, stopper surface. To test, I cut plastic from various manufacturers. These were Zoukei-mura, Eduard, Hasegawa and Tamiya, and what I found with all of them was an almost zero-resistance result during cutting, even with the low tension spring. Generally, you could barely tell you were cutting through any plastic, and that includes some of the thicker sprue plastic. Removing individual parts, from fuselage halves, down to small detail parts, was less than effortless. Quite remarkable. The cuts themselves are very neat, with no crushing, and if you look at the cut sprue image, you’ll see that both faces are practically vertical, almost as if separated with a razor saw. Of course, you need a clean cut, and this is exactly what this tool delivers. Conclusion You can probably tell that I’m very impressed with these. In fact, I’d say these are the most precise cutters I’ve used in 40yrs of modelling, and it’s actually a total pleasure to use and handle them. If you are doing a lot of parts removal, it could well be worth investing a little time during each session to ensure that the limit regulator is still set correctly so that you can’t force the cutting edges together too hard. I really can’t praise this useful tool highly enough. It really is superb. Very highly recommended My sincere thanks to Breveco Modelling for the opportunity to road-test this cutter. To purchase directly, click THIS link.