JayDee
-
Posts
3,272 -
Joined
-
Last visited
Content Type
Profiles
Forums
Events
Gallery
Everything posted by JayDee
-

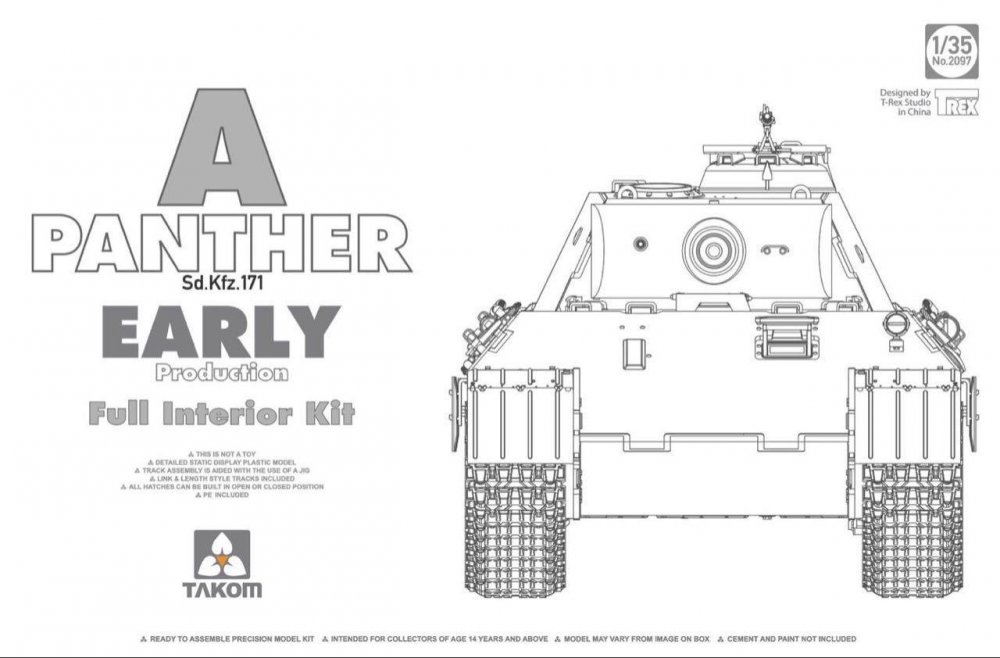
takom LSM Pilots: Panther Ausf. A Early Production, full interior
JayDee posted a topic in LSM Pilots
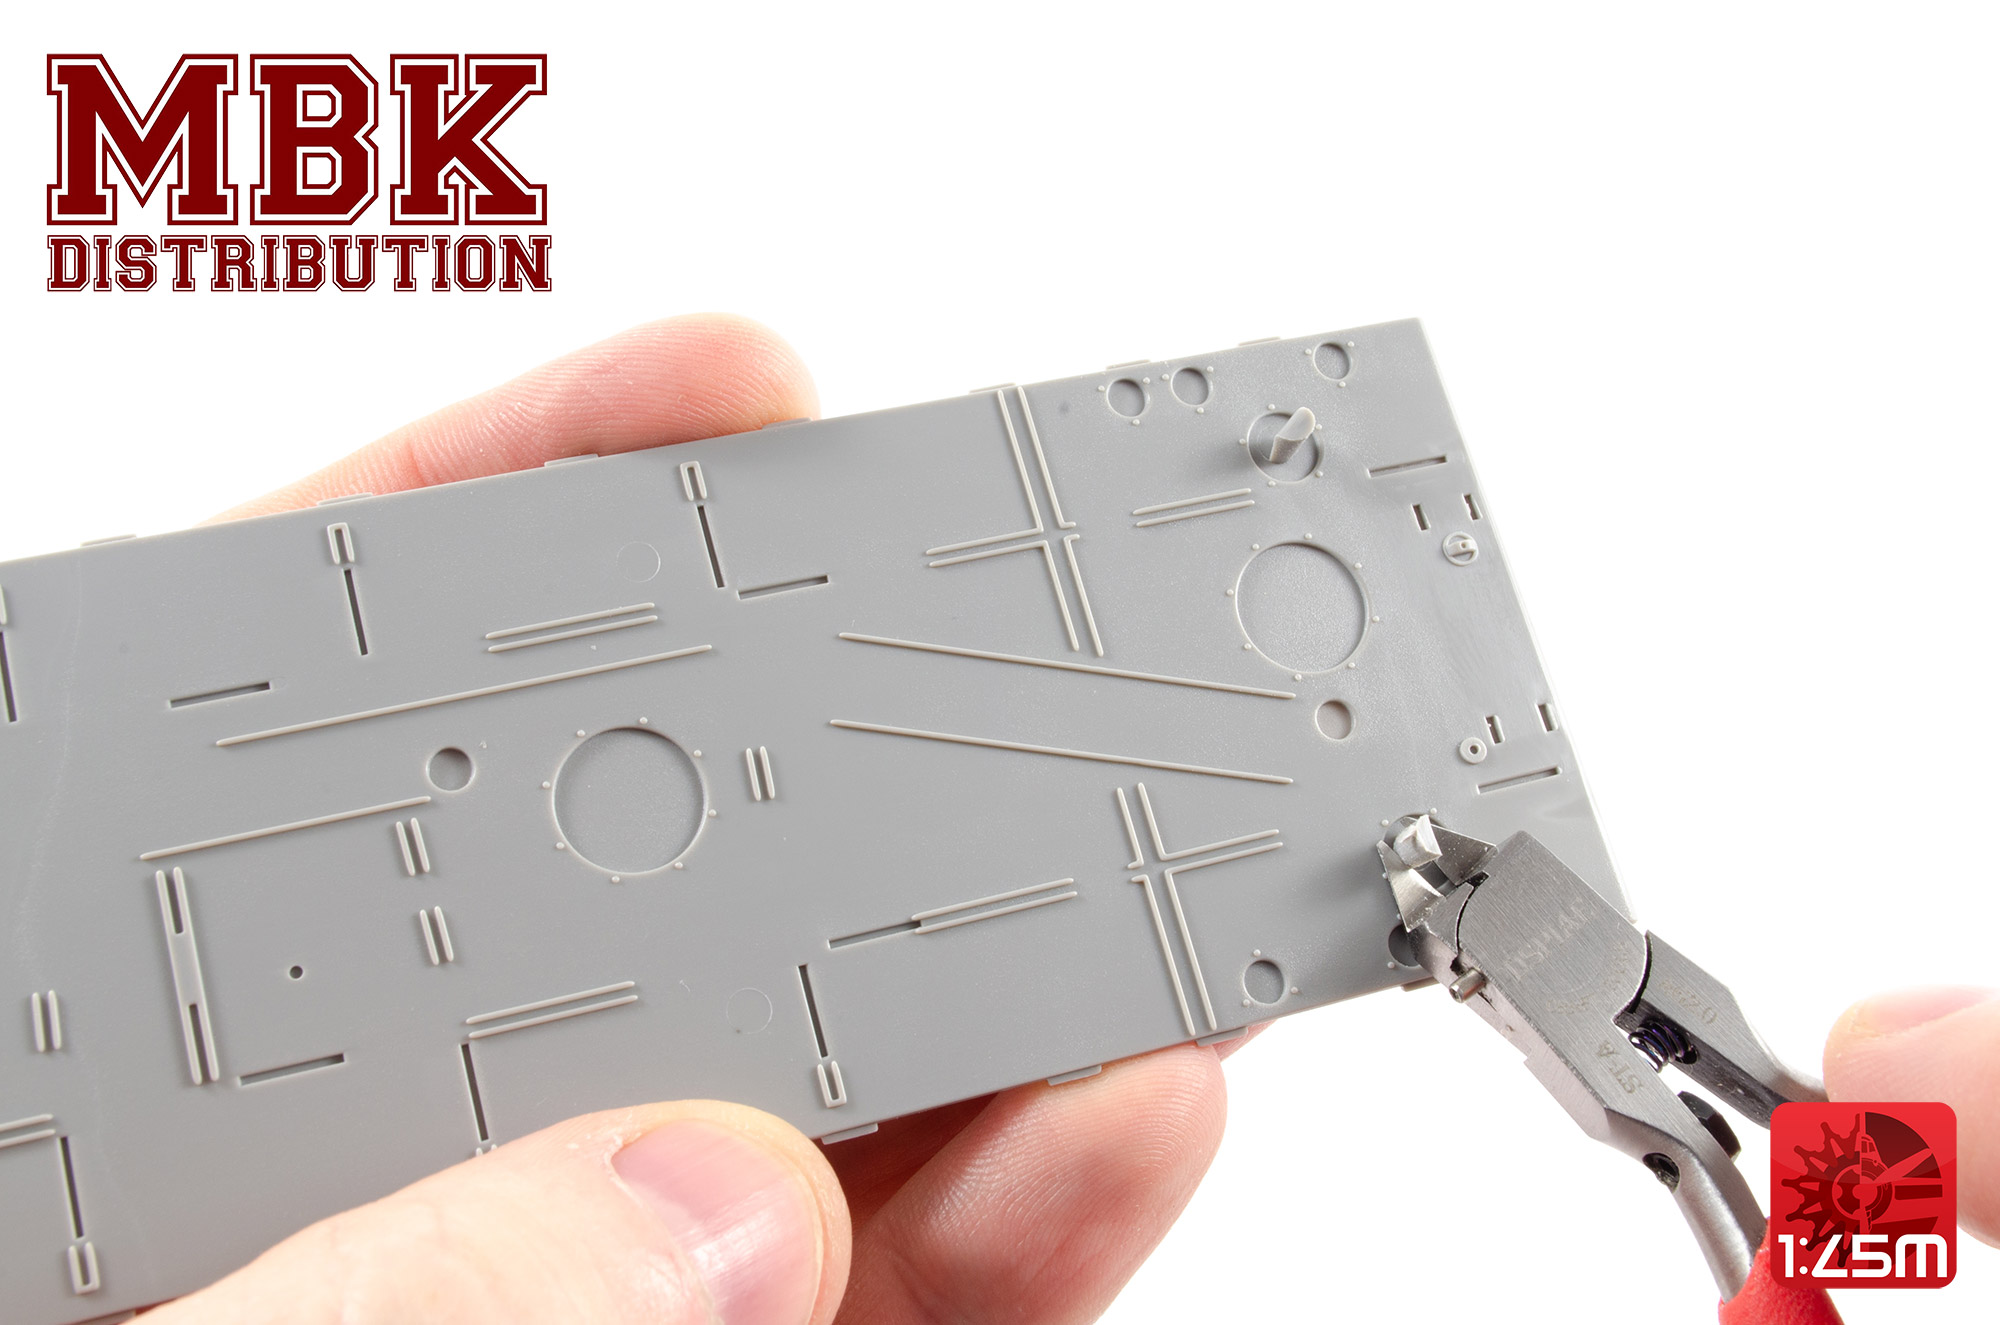
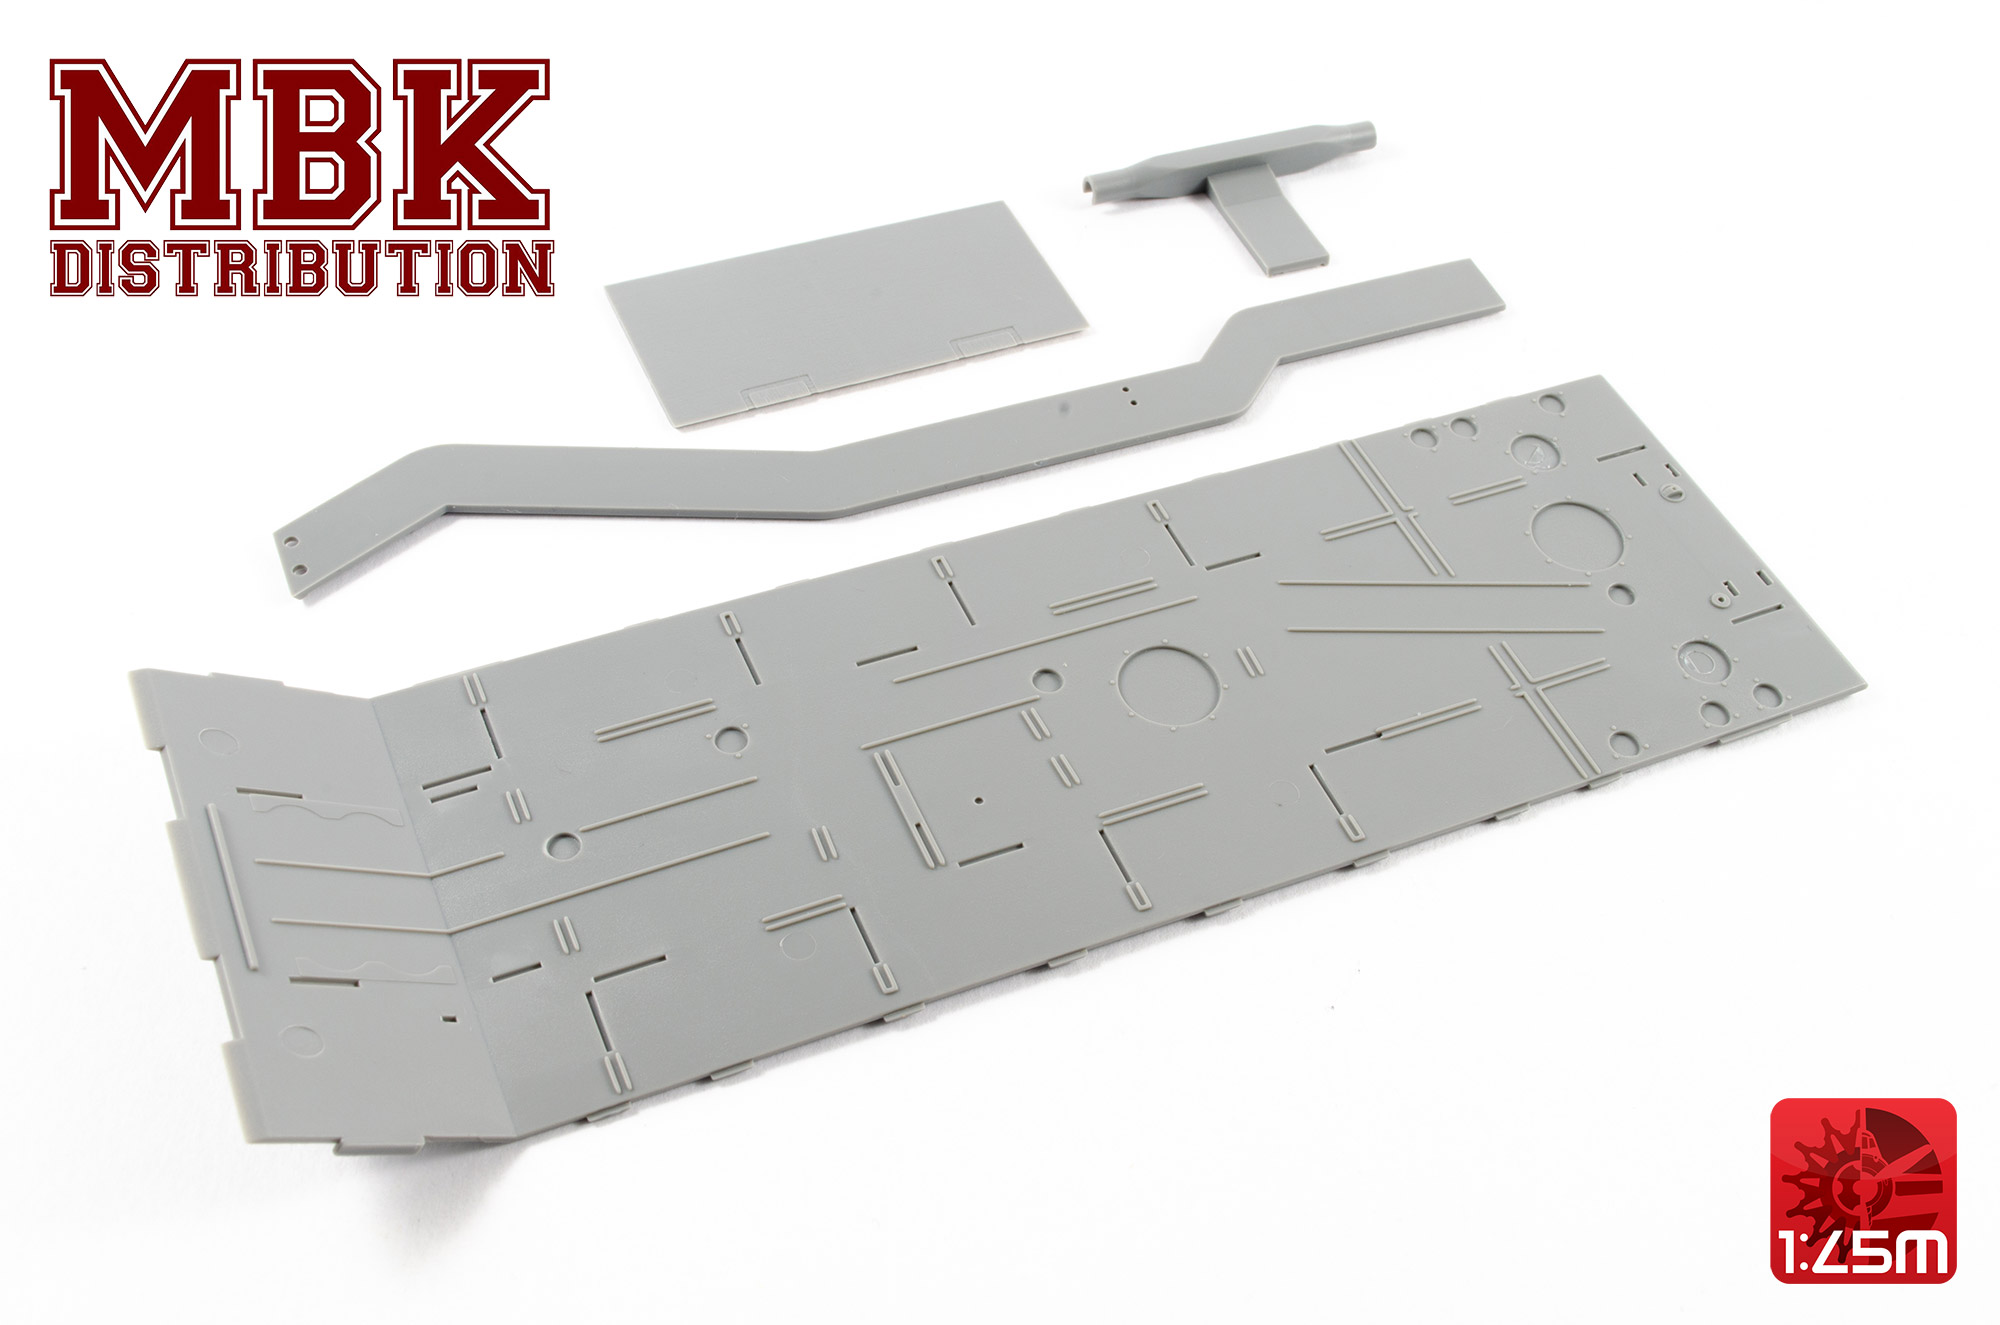
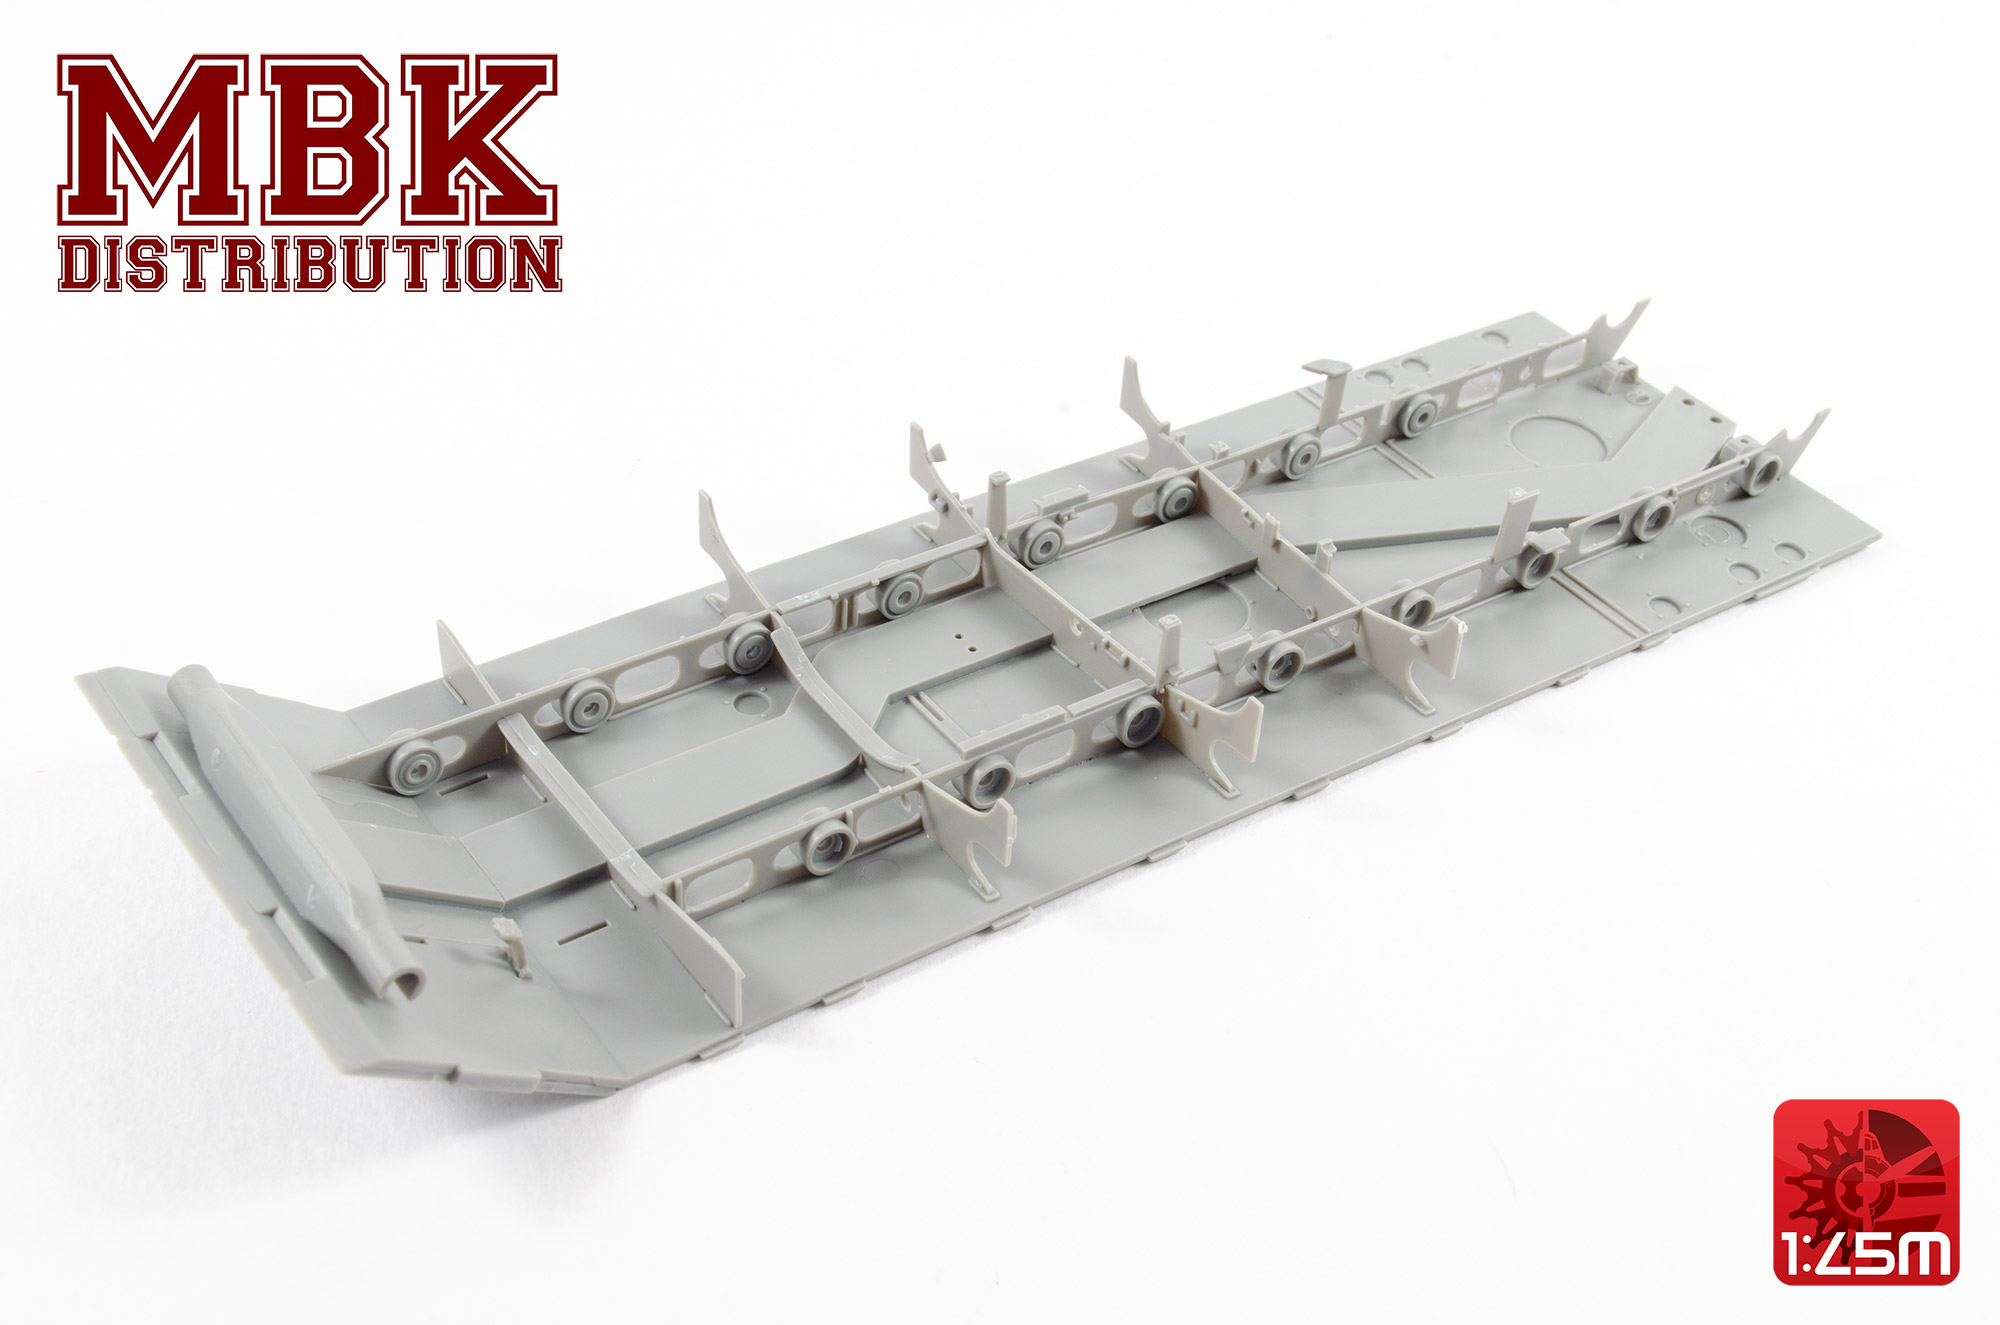
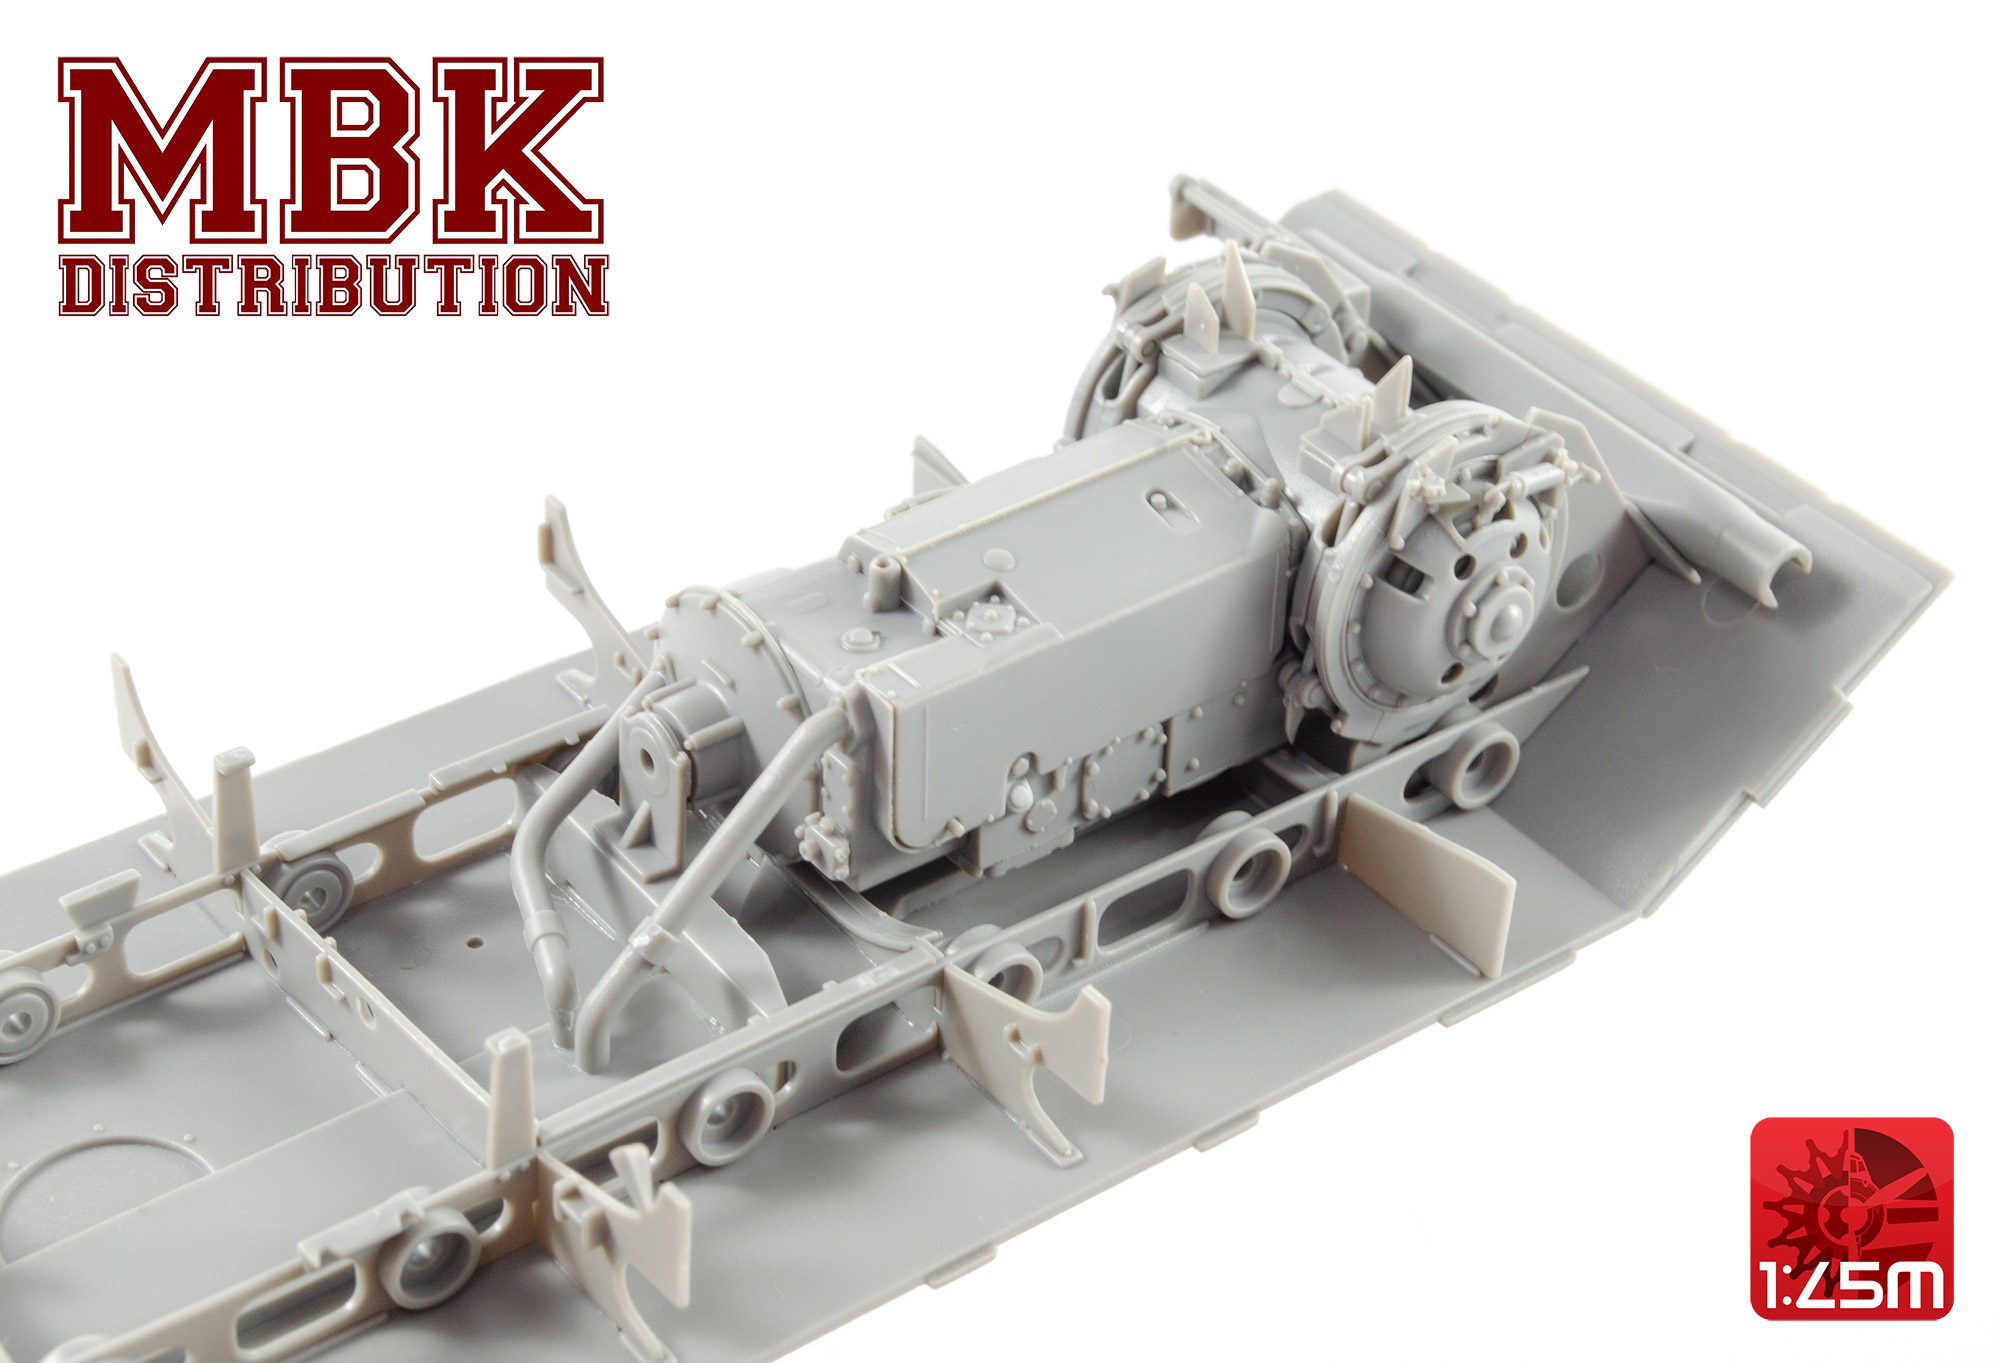
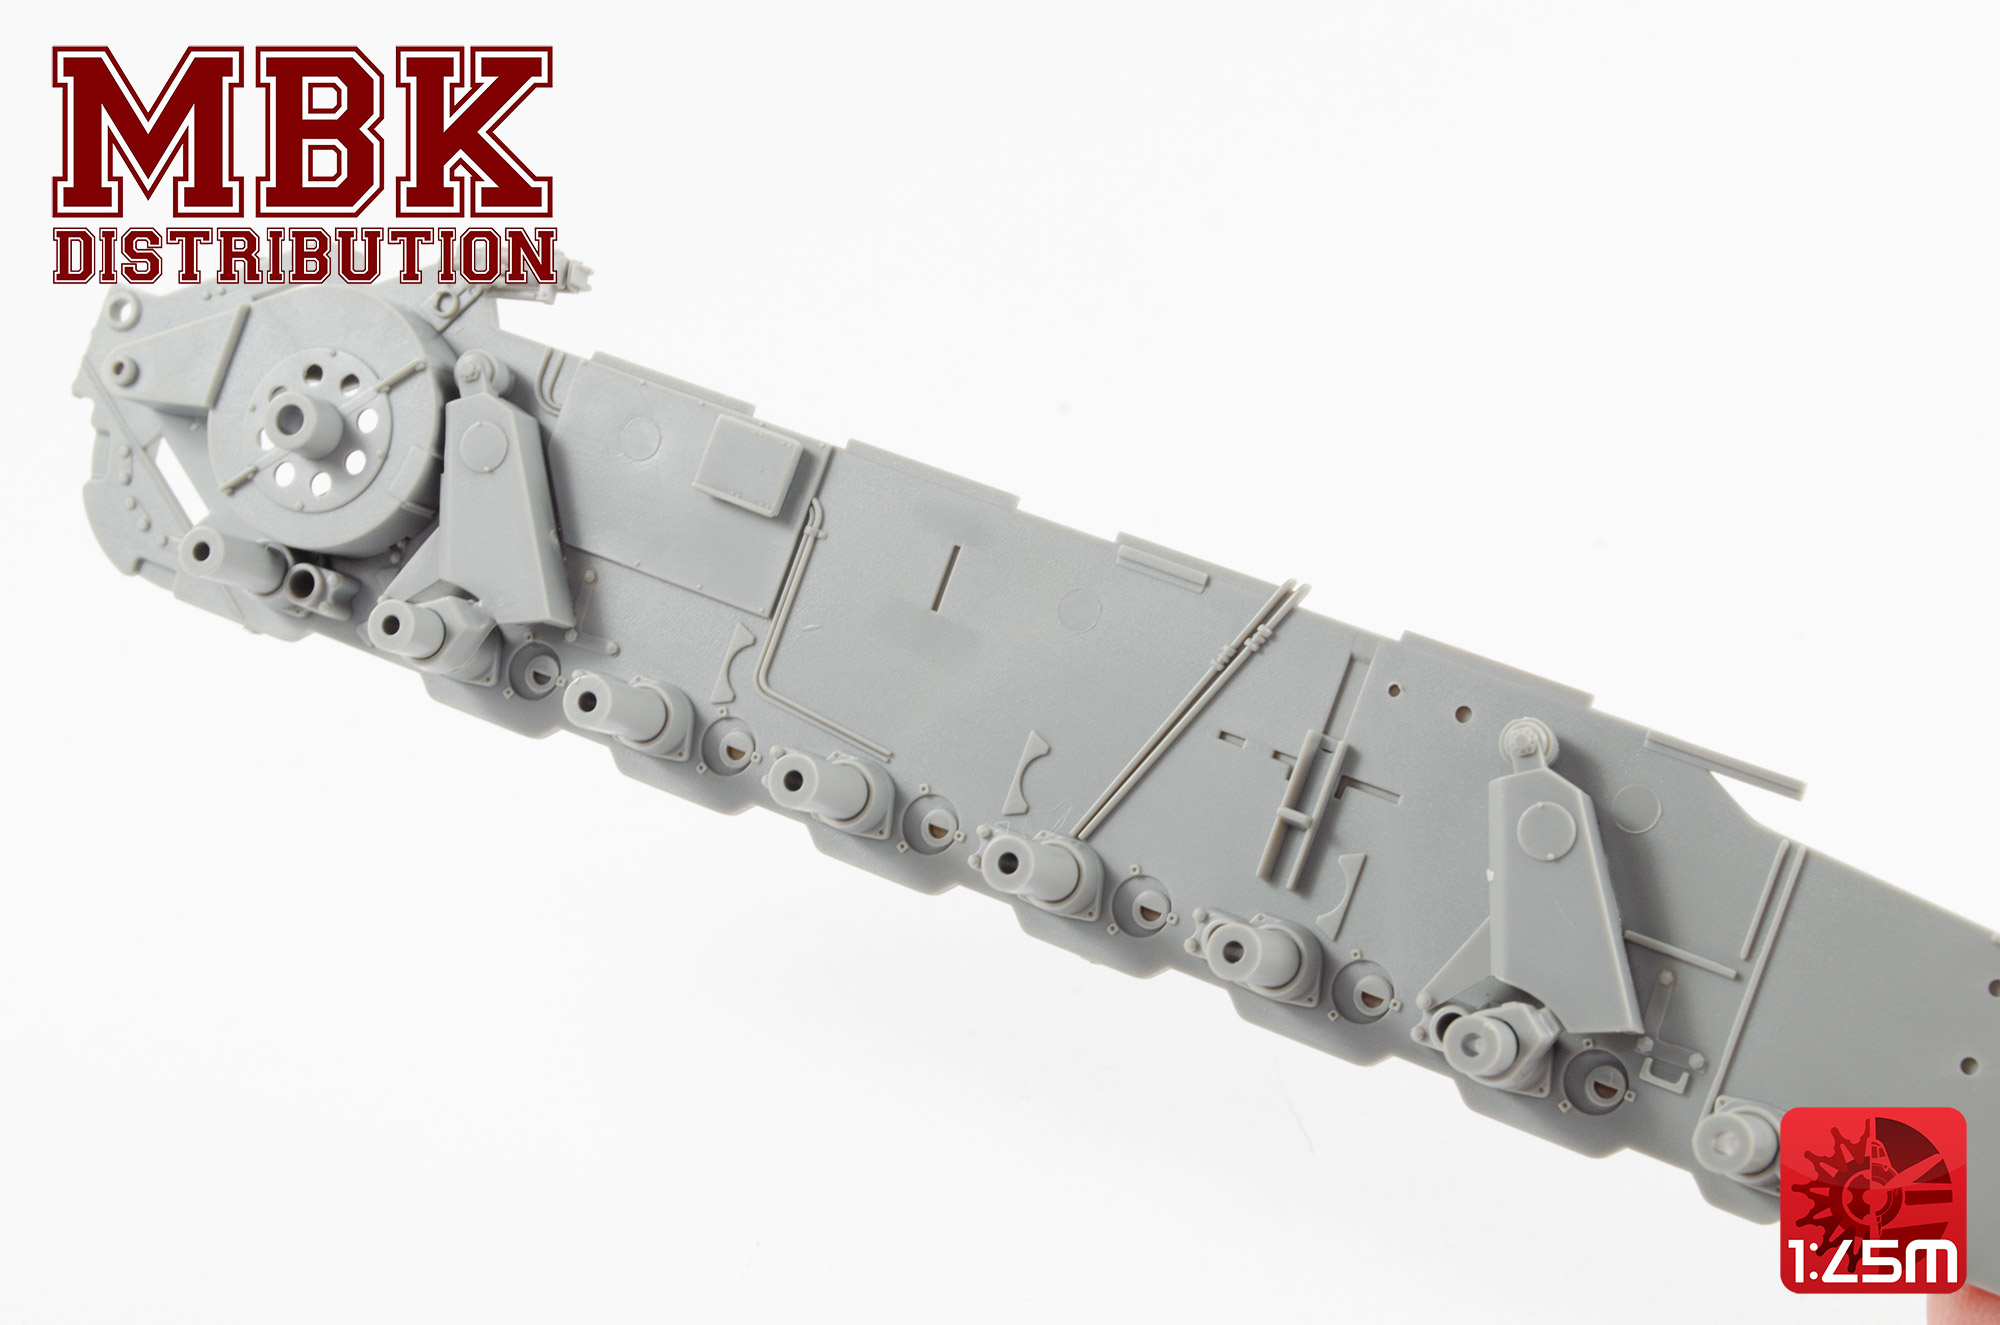
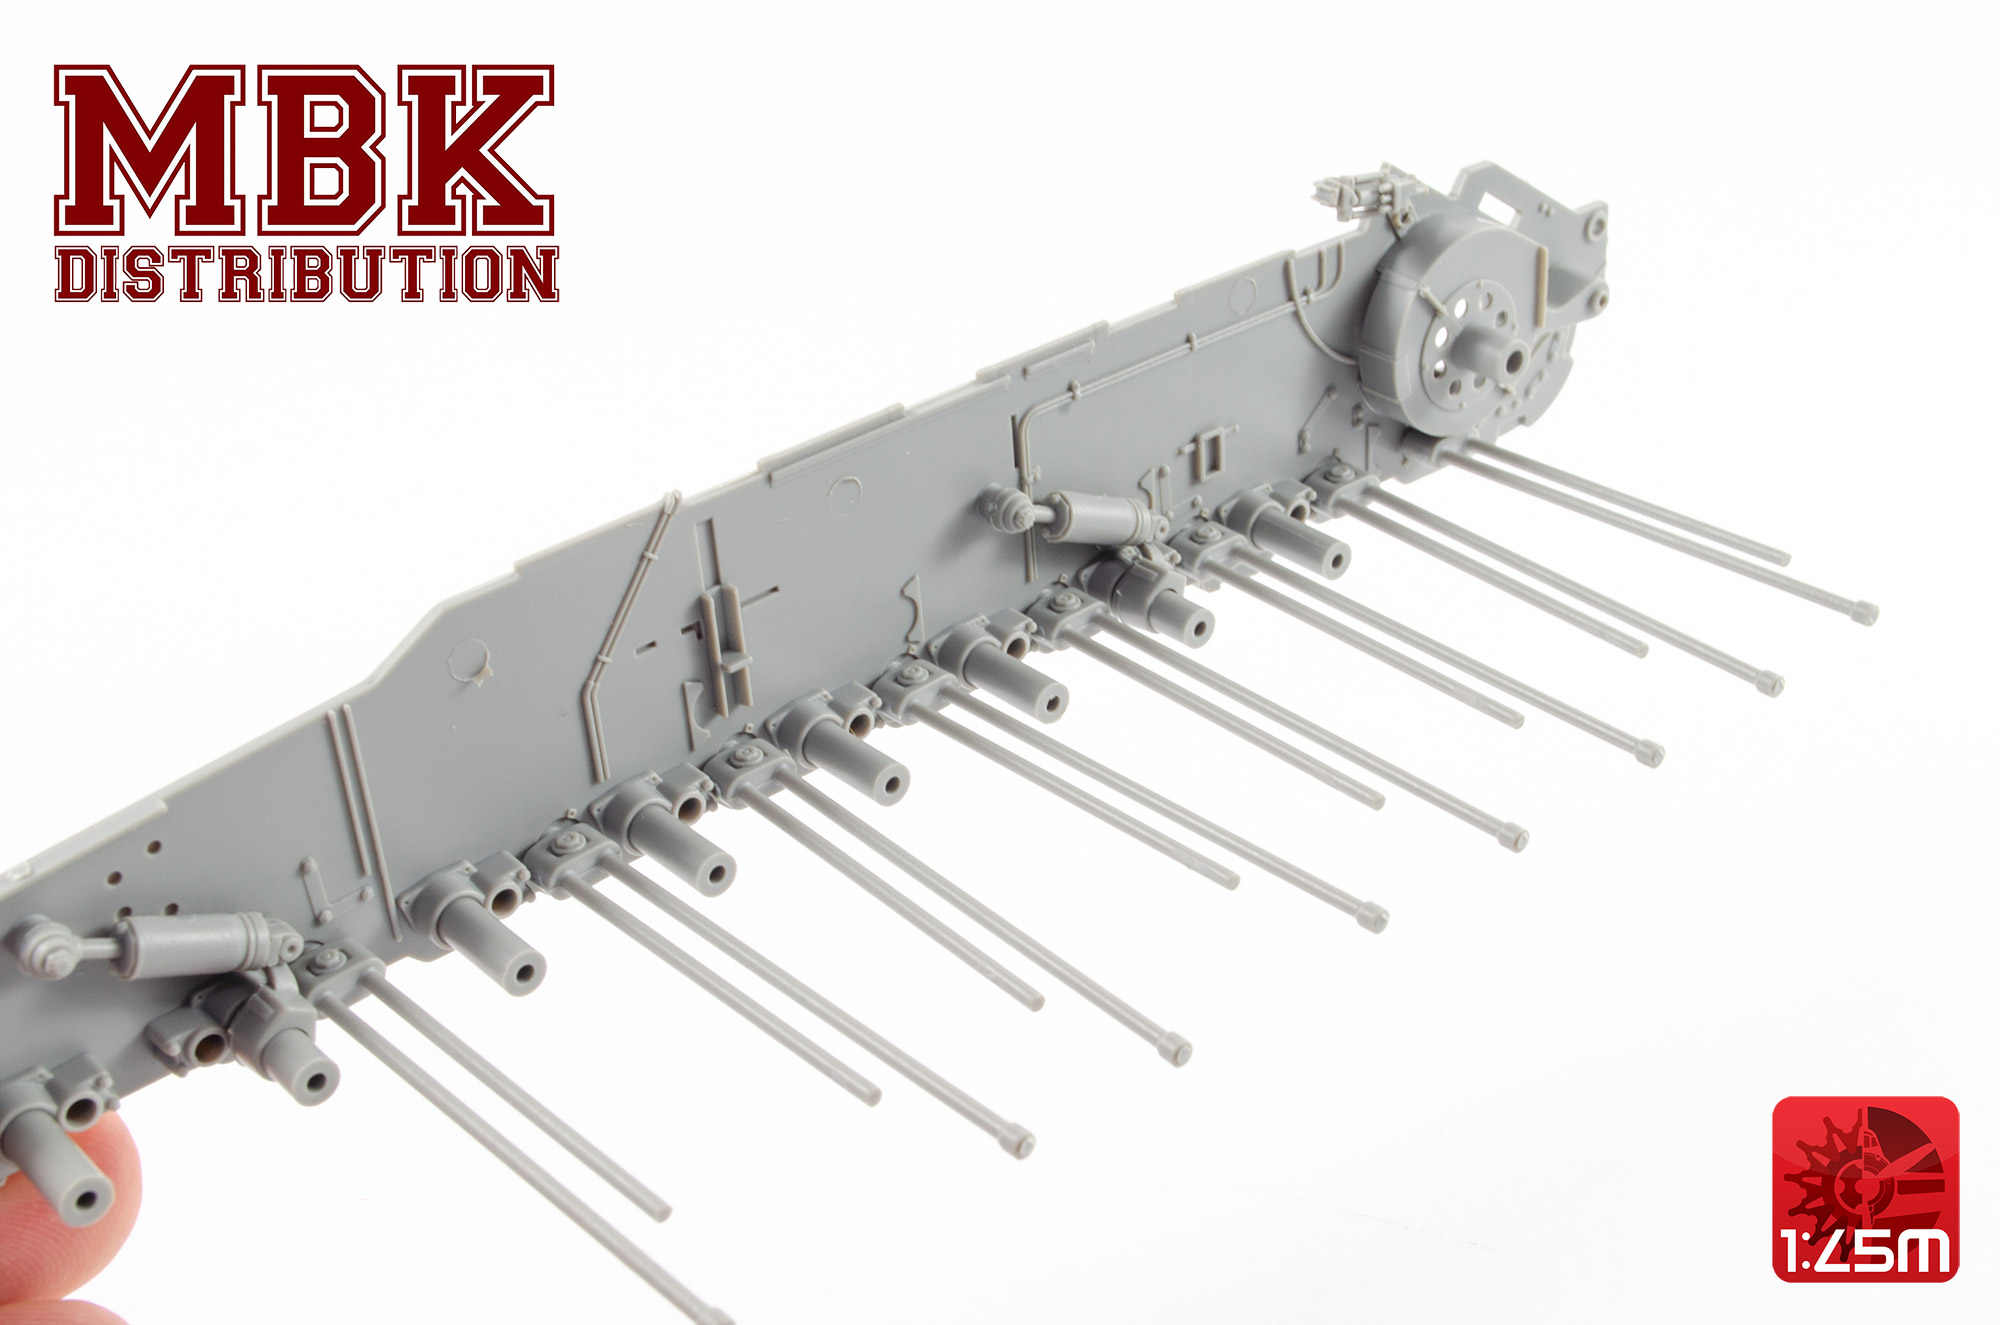
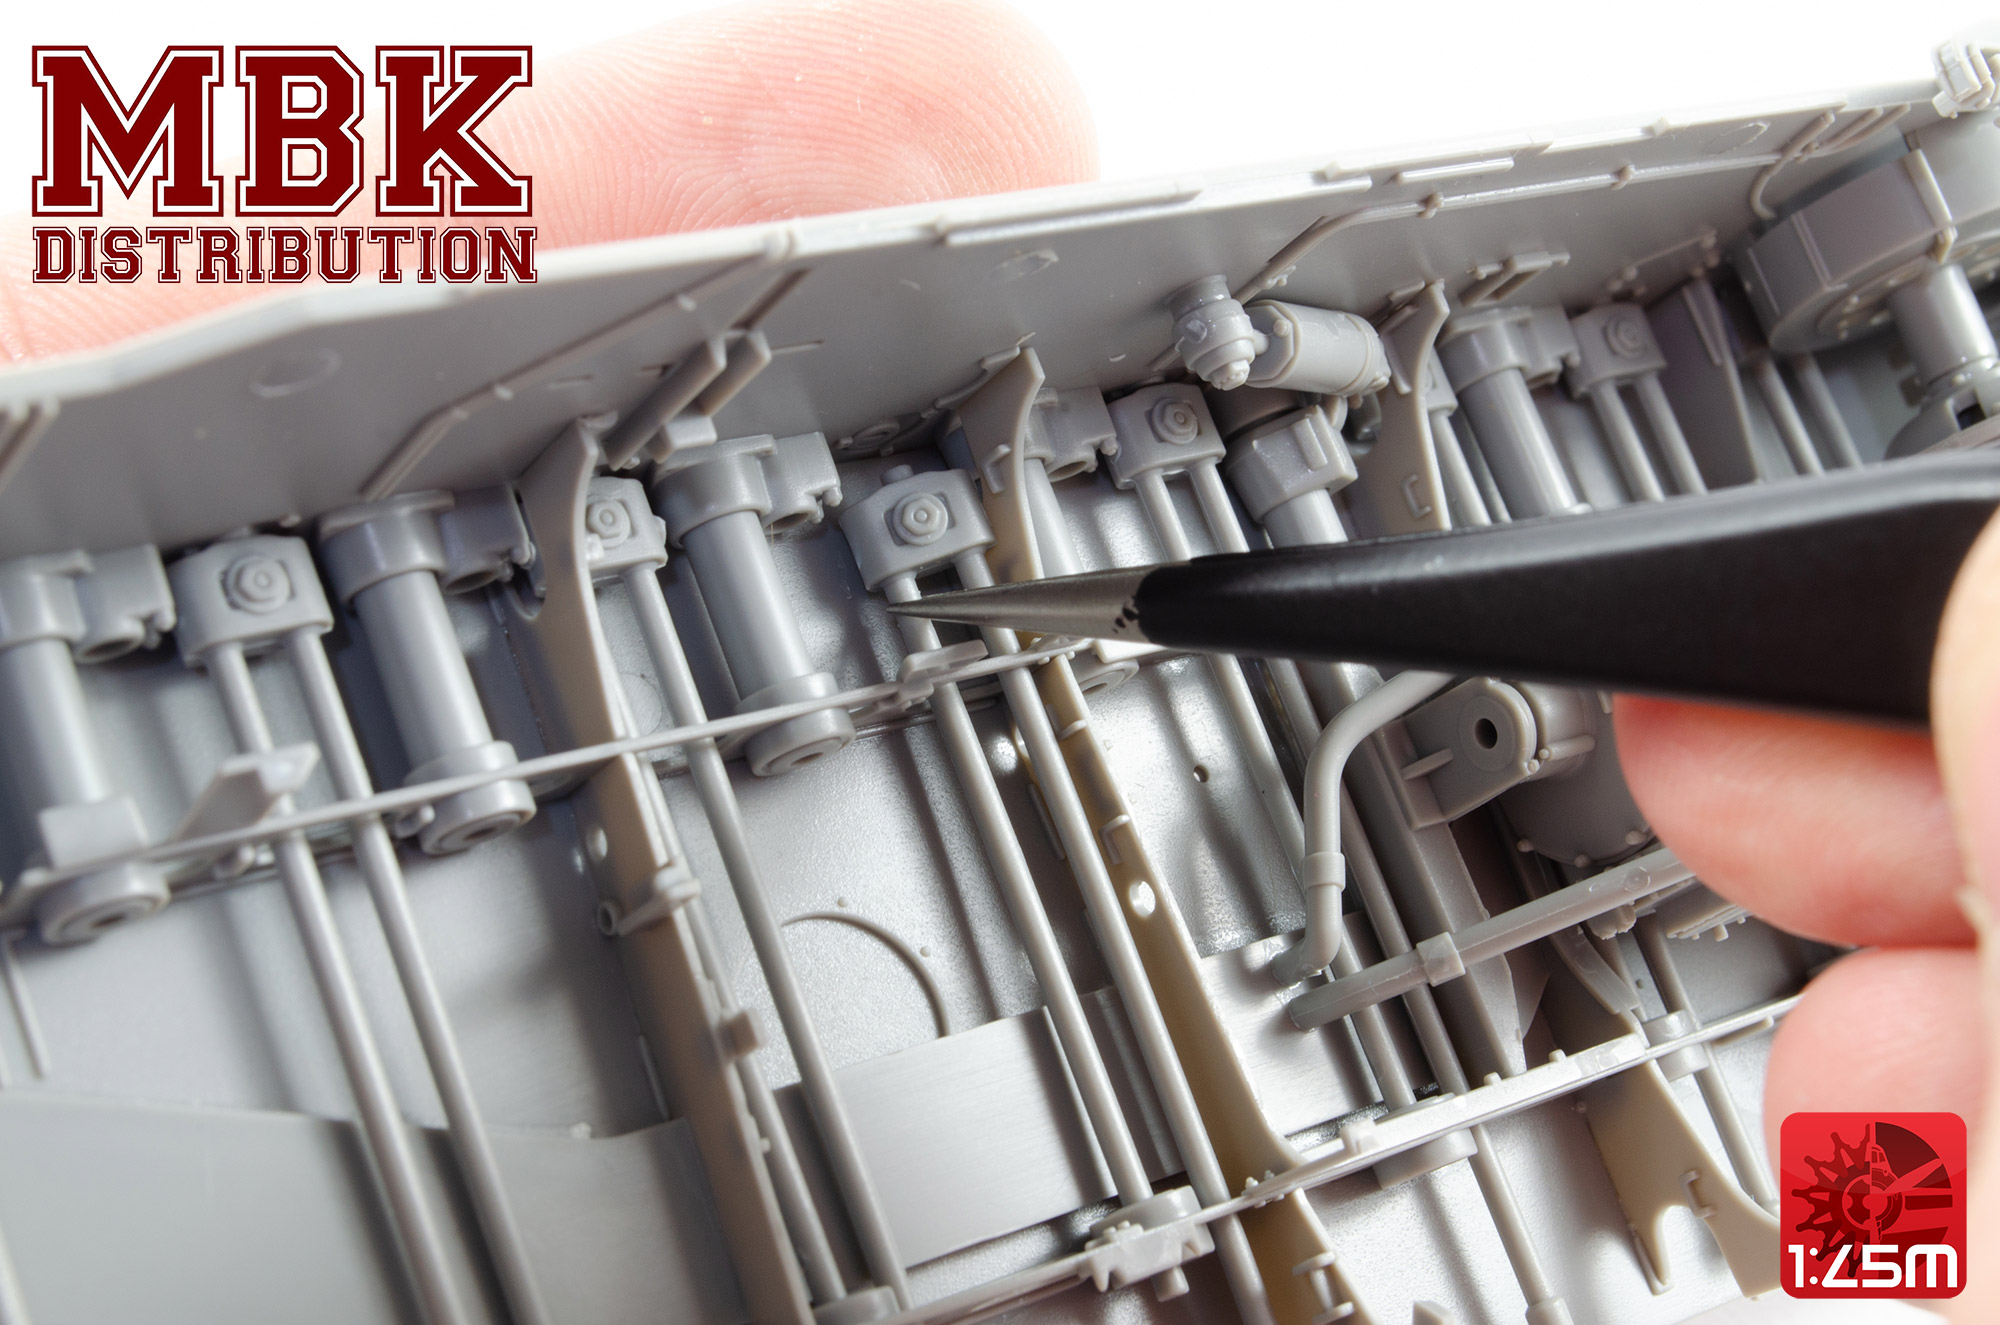
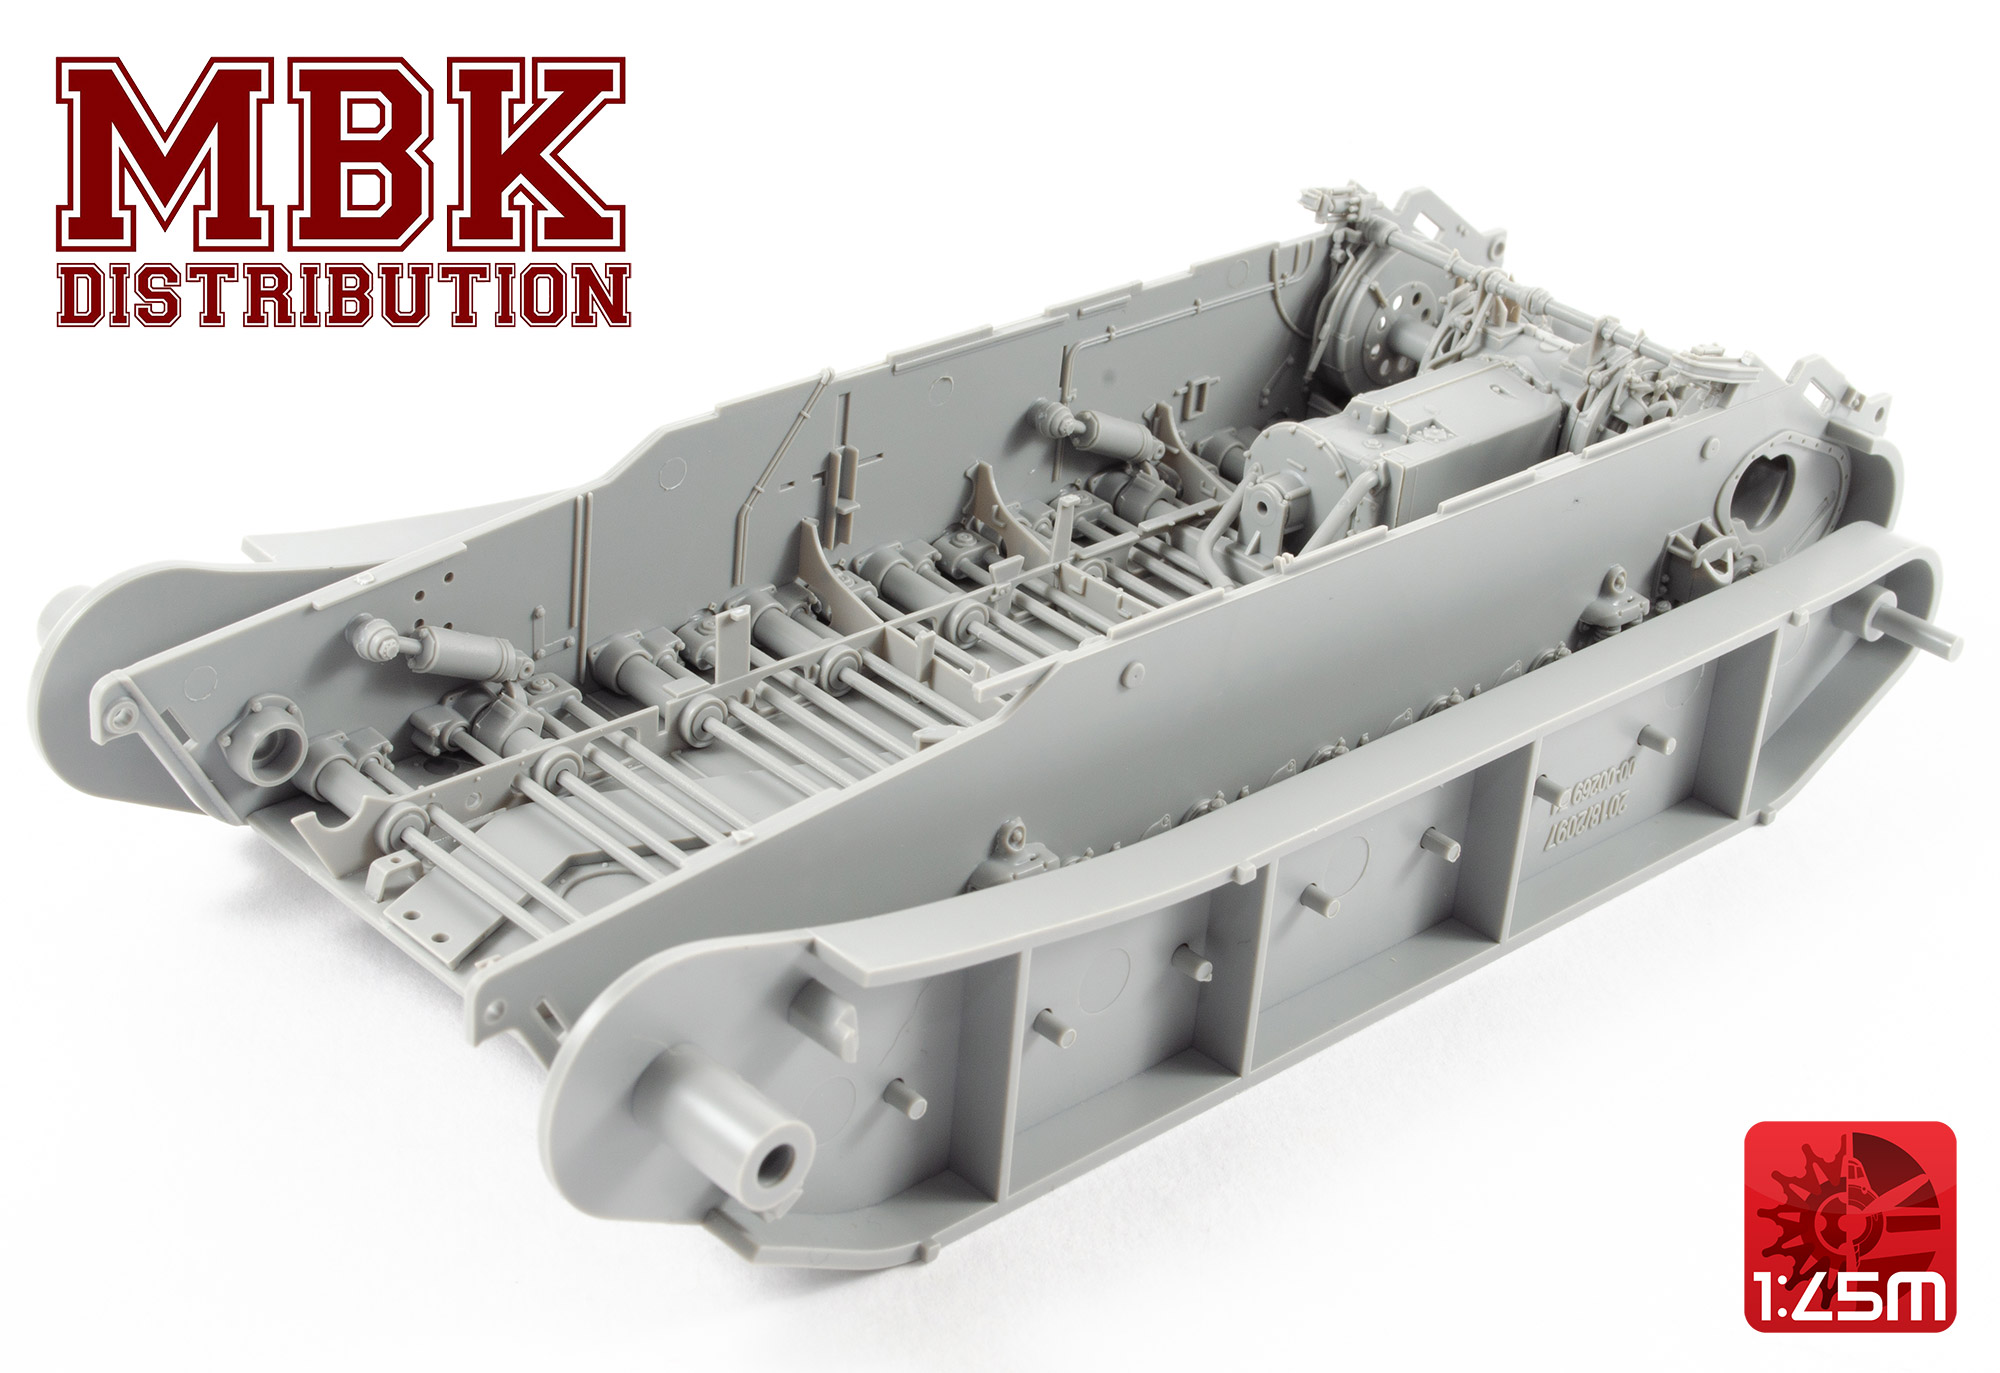
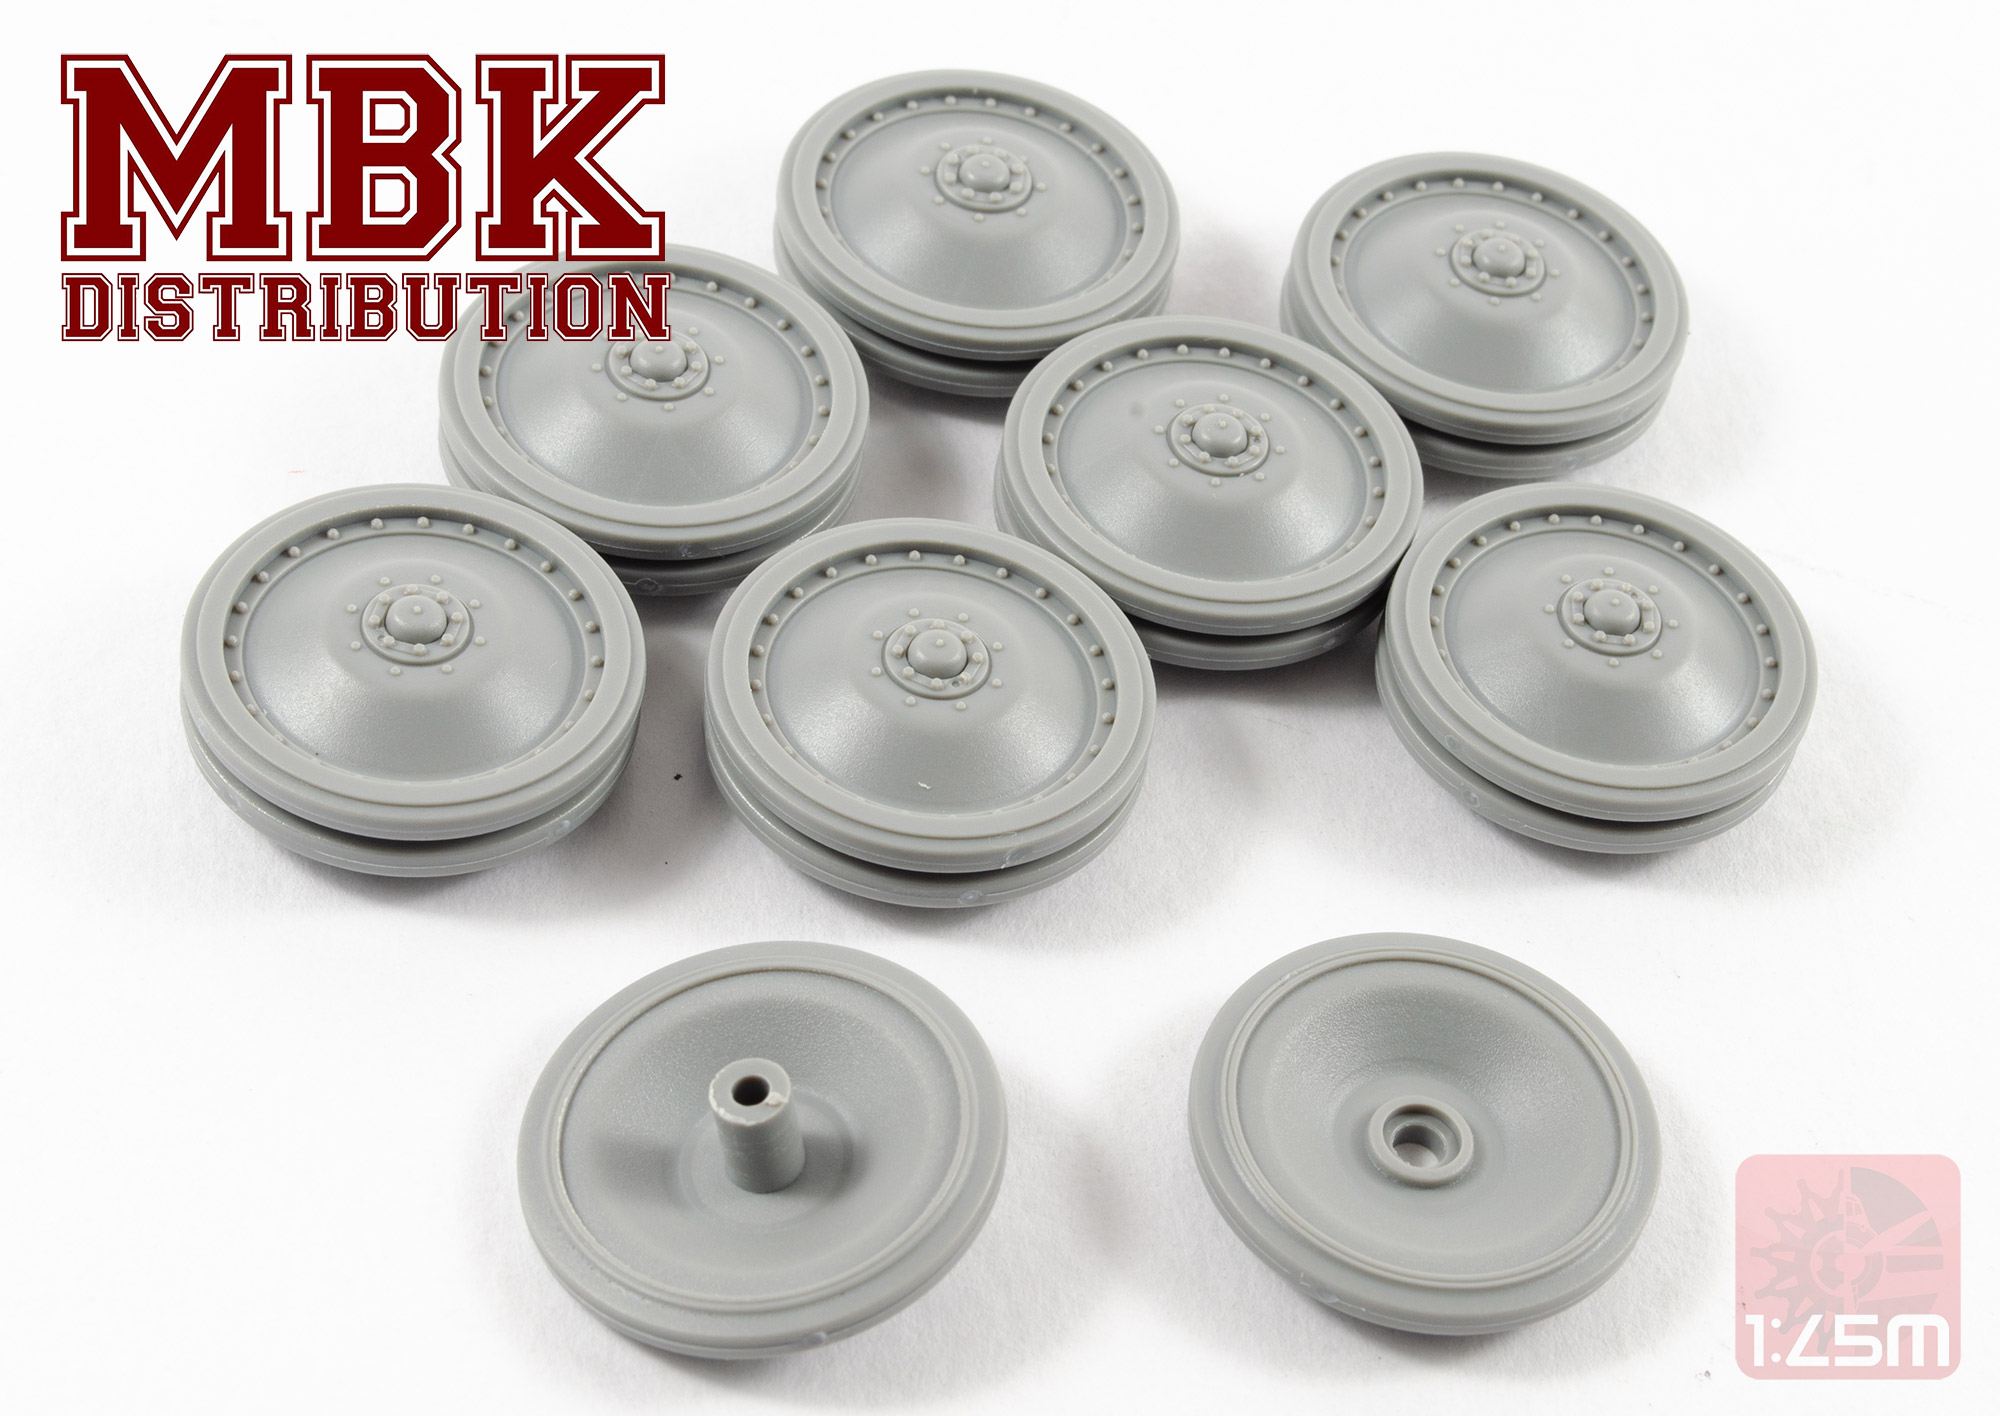
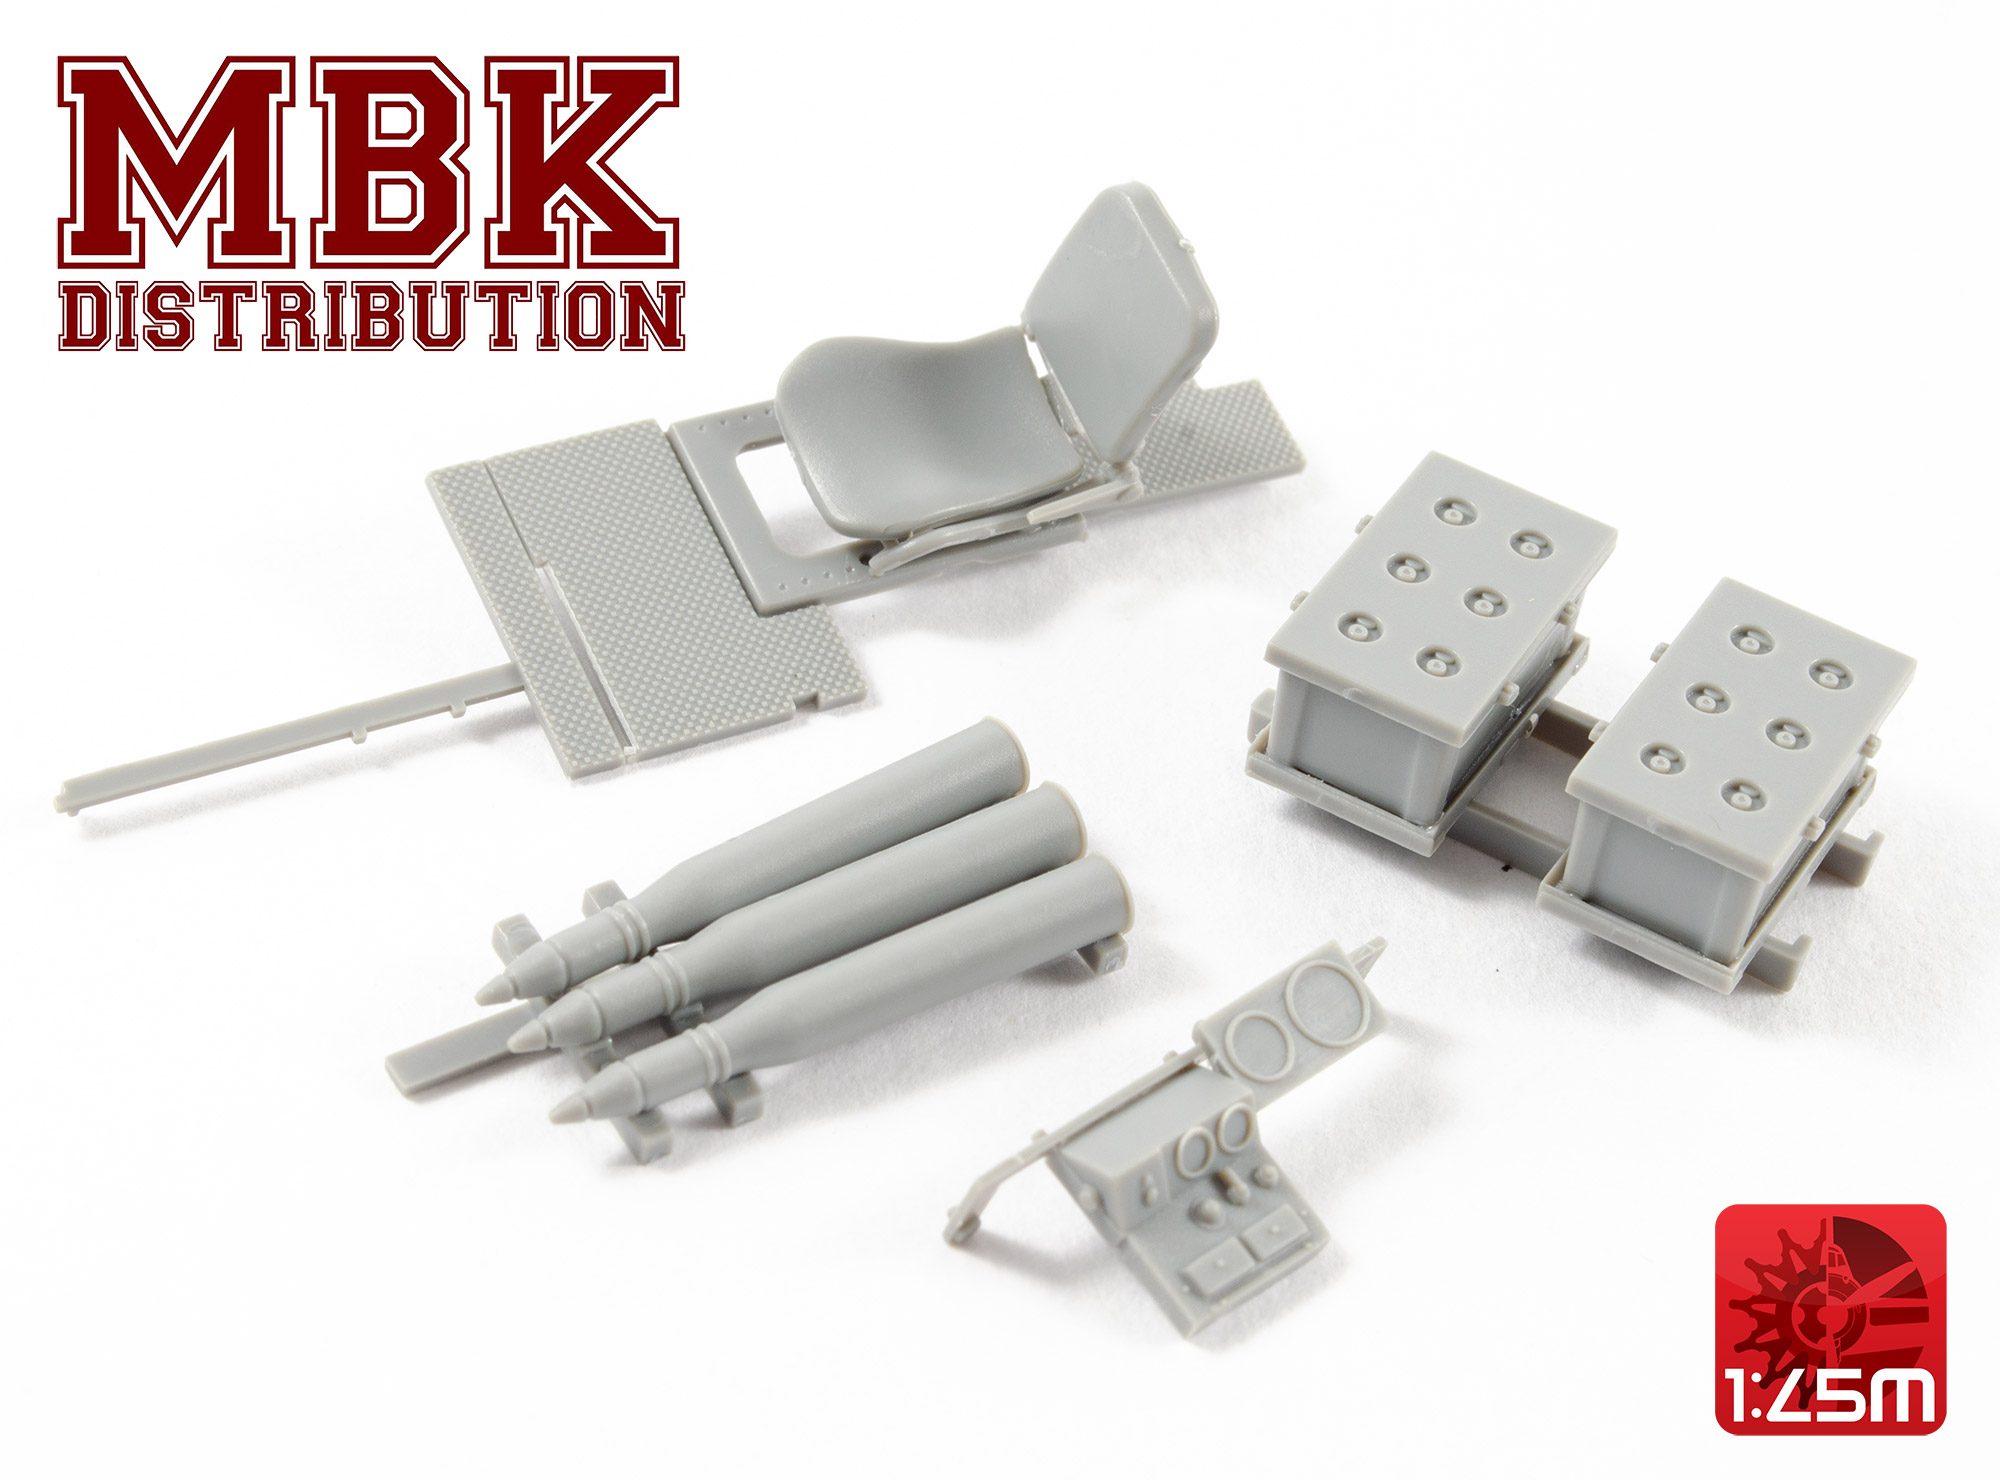
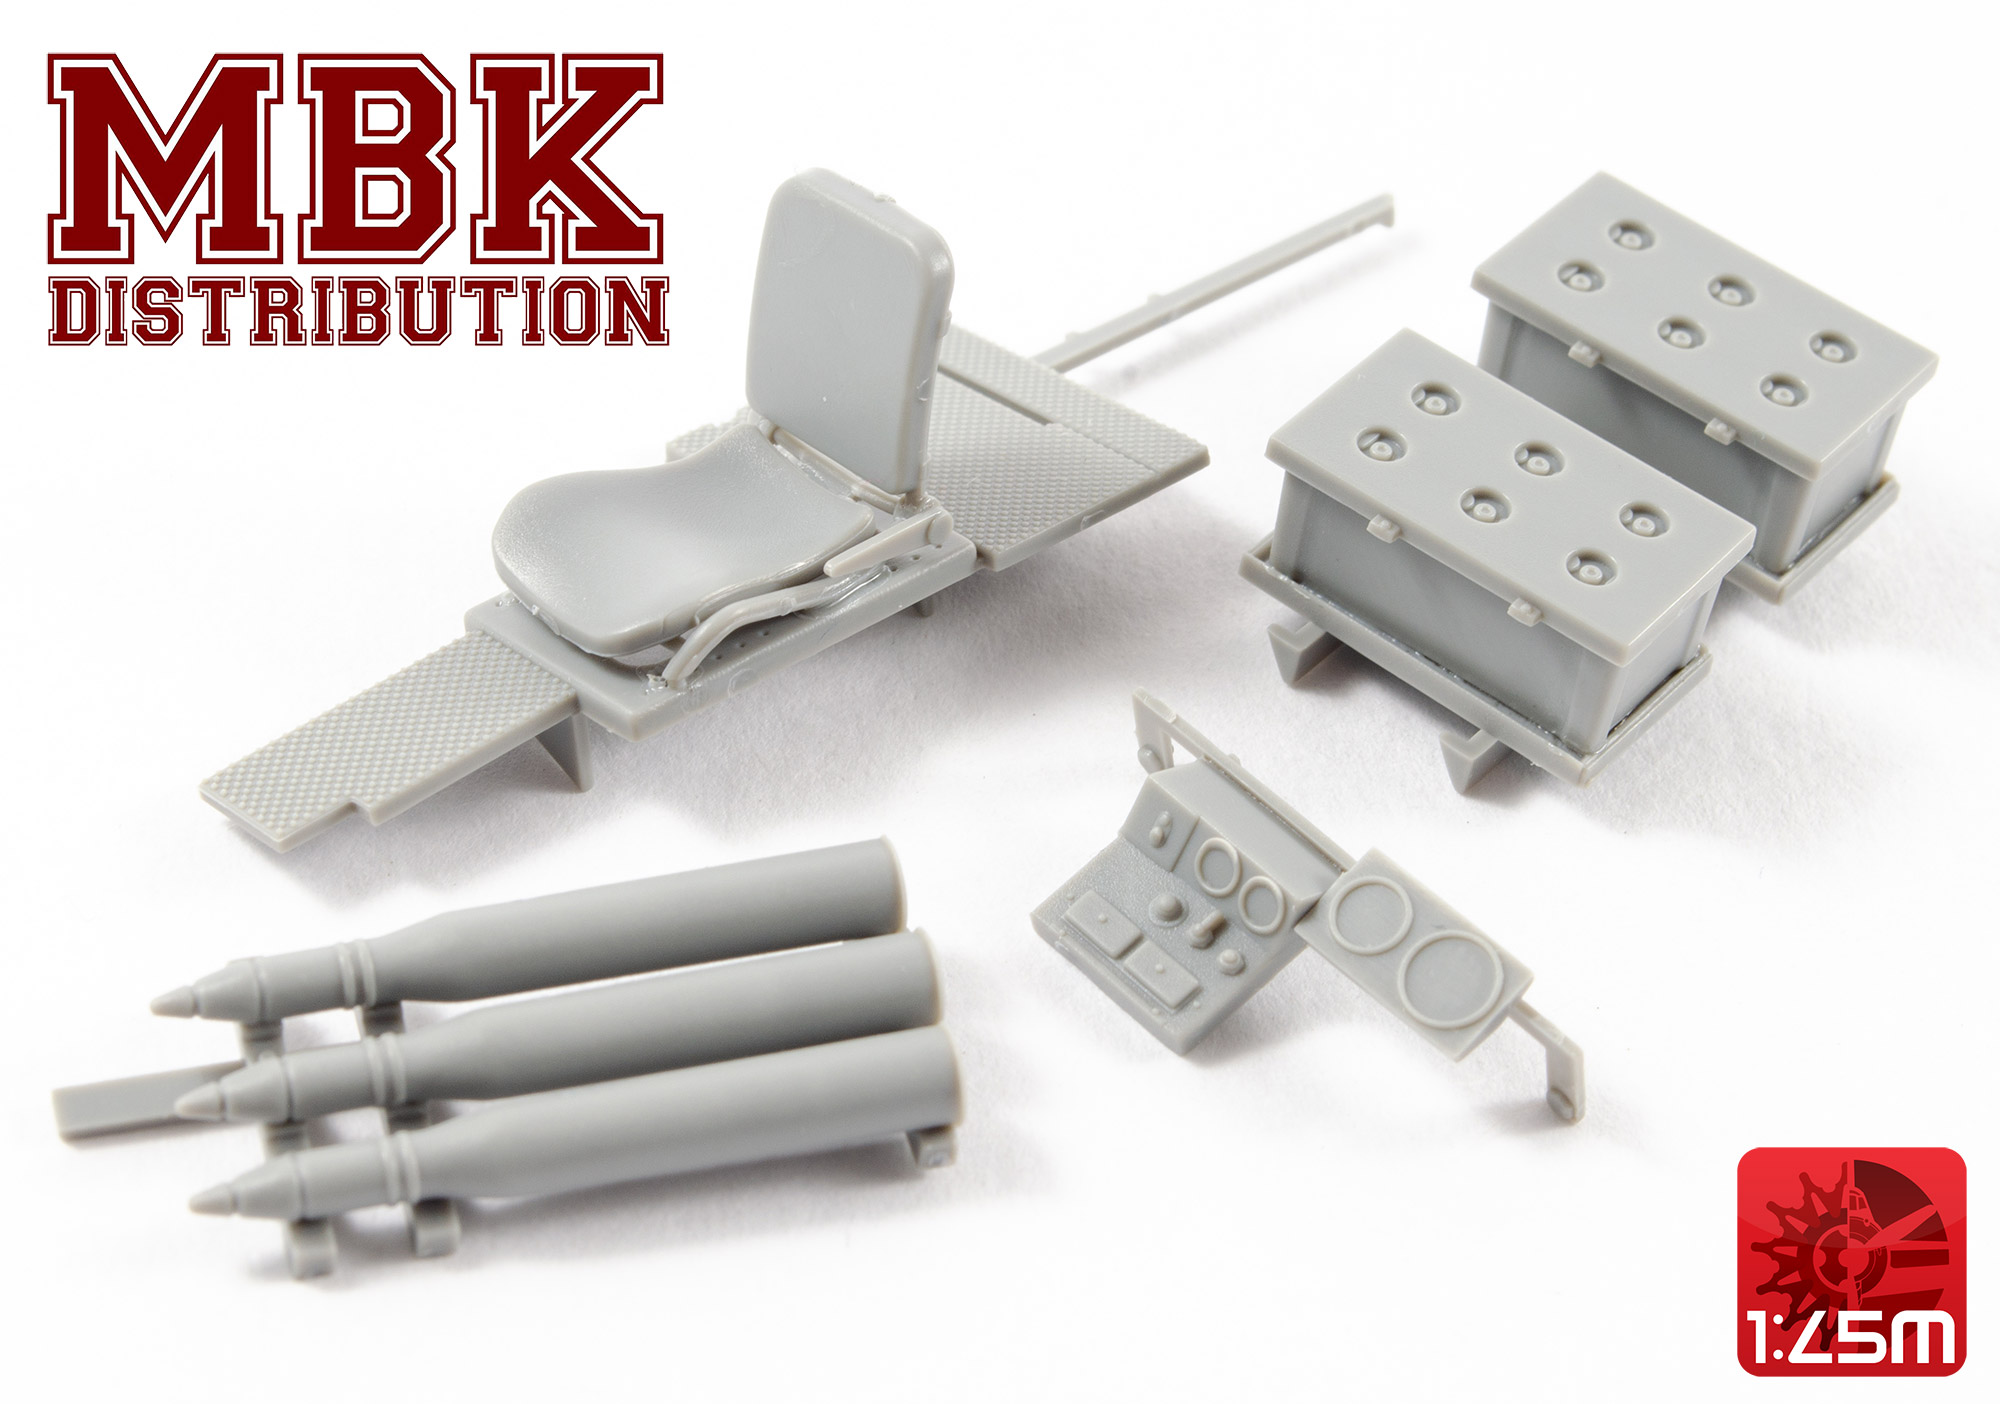
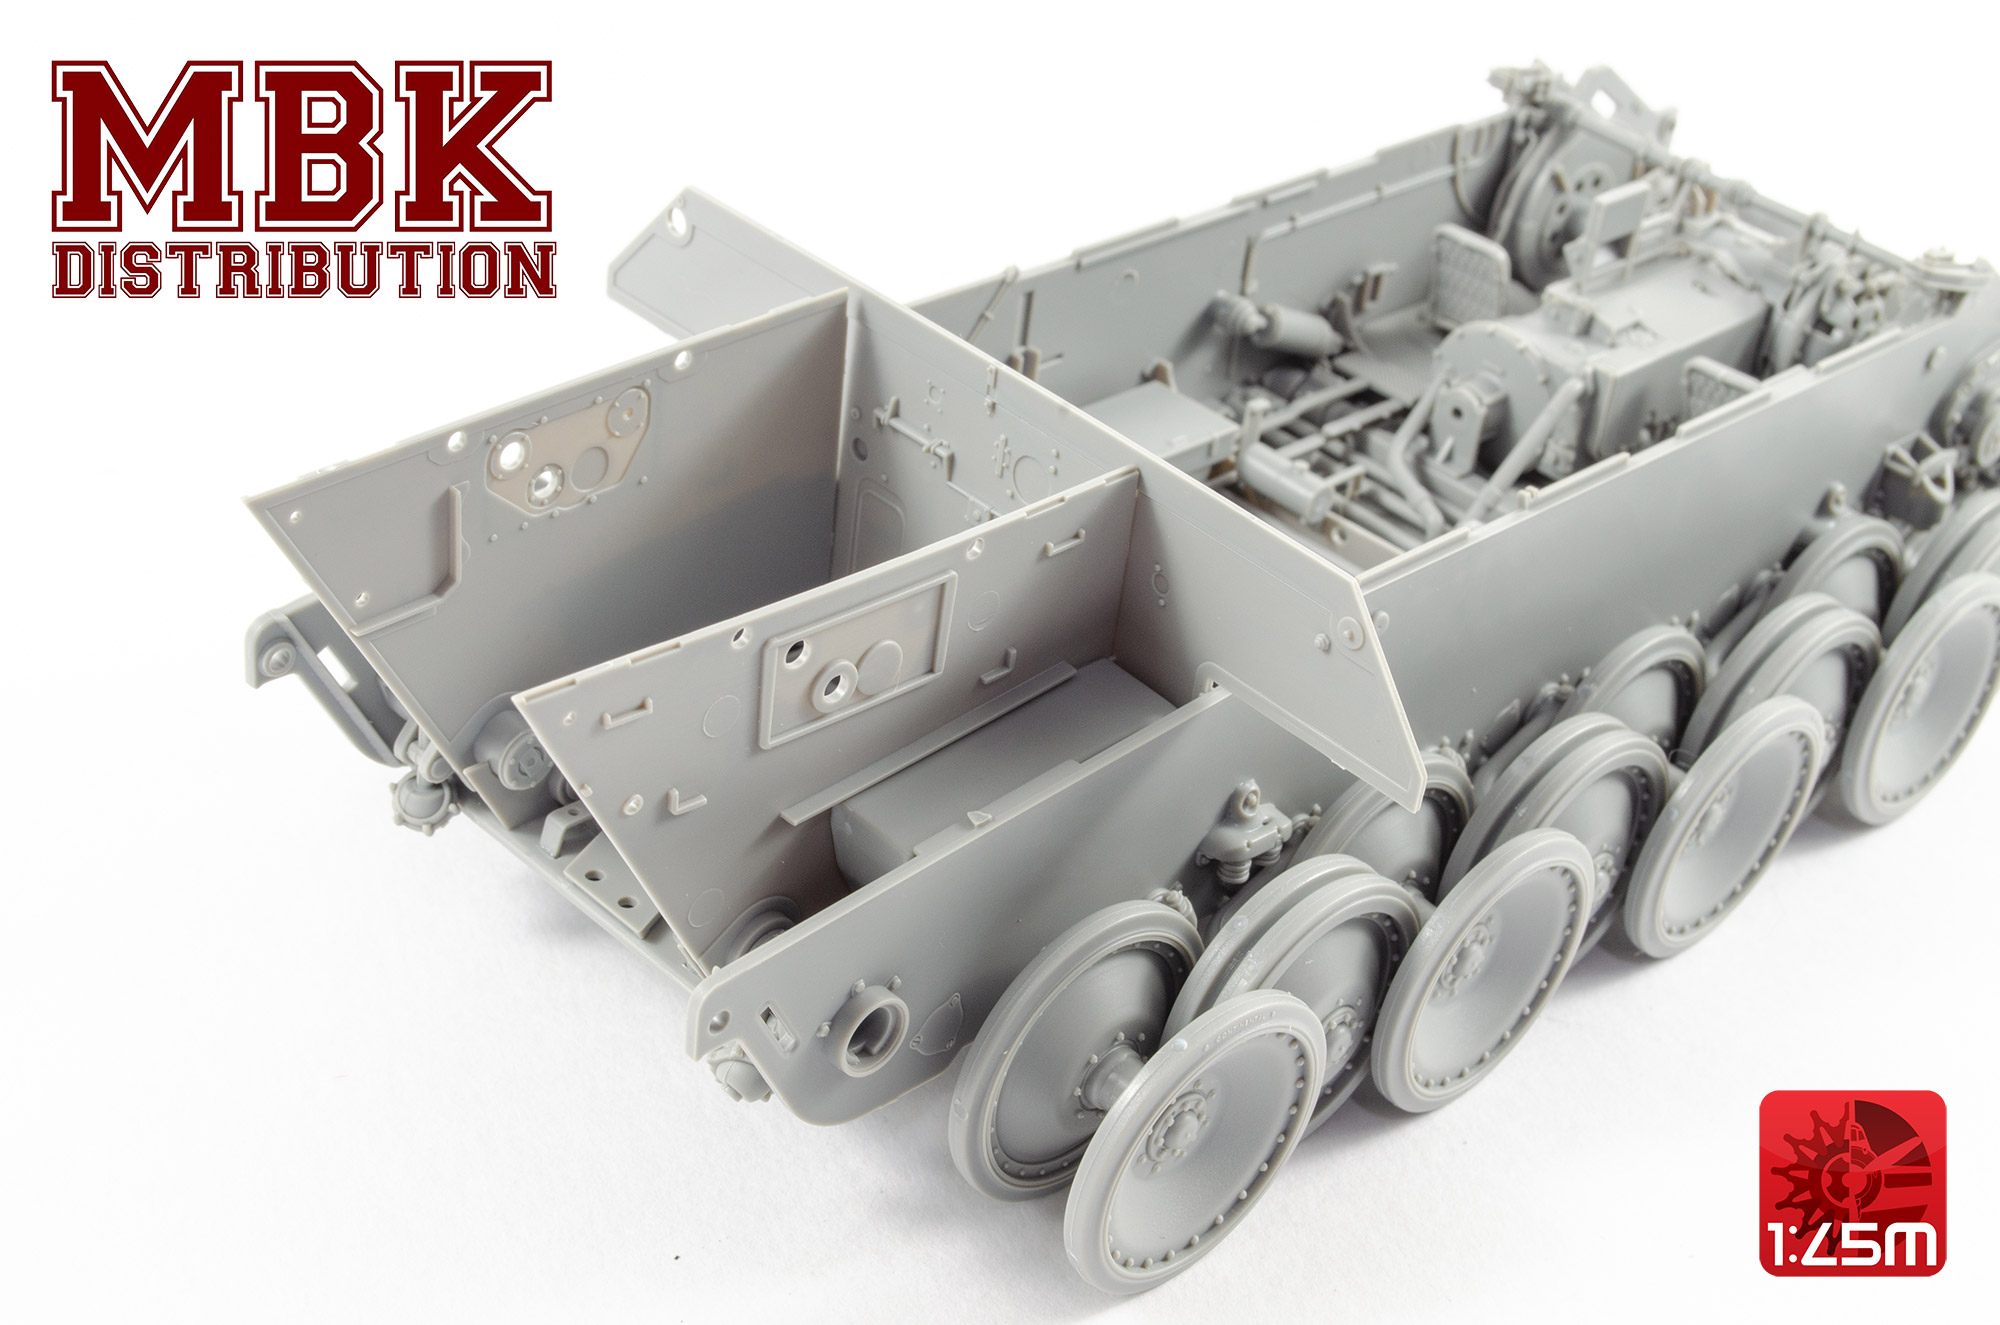
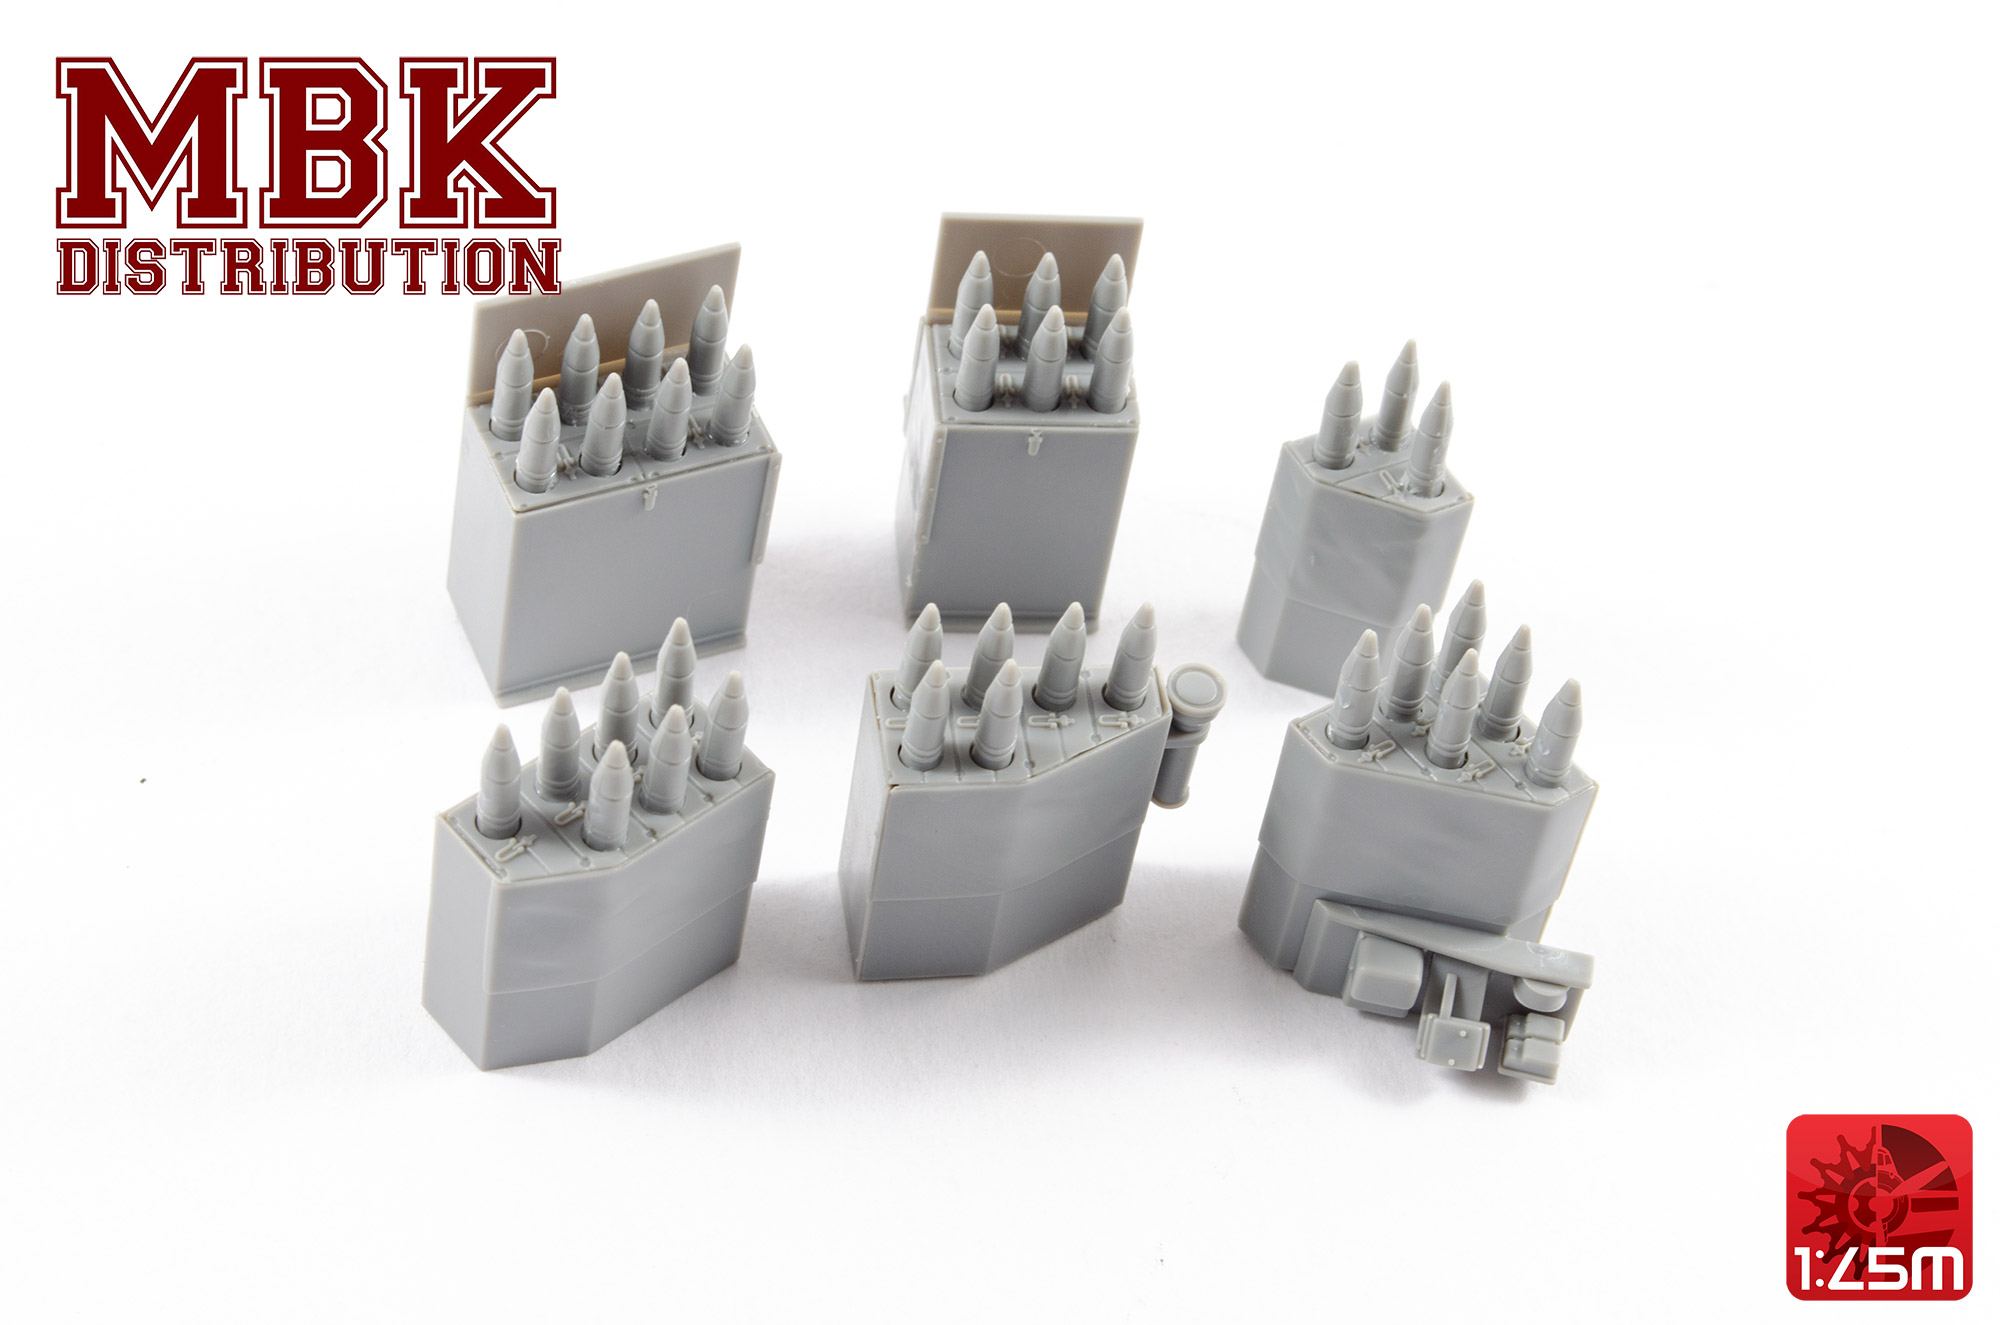
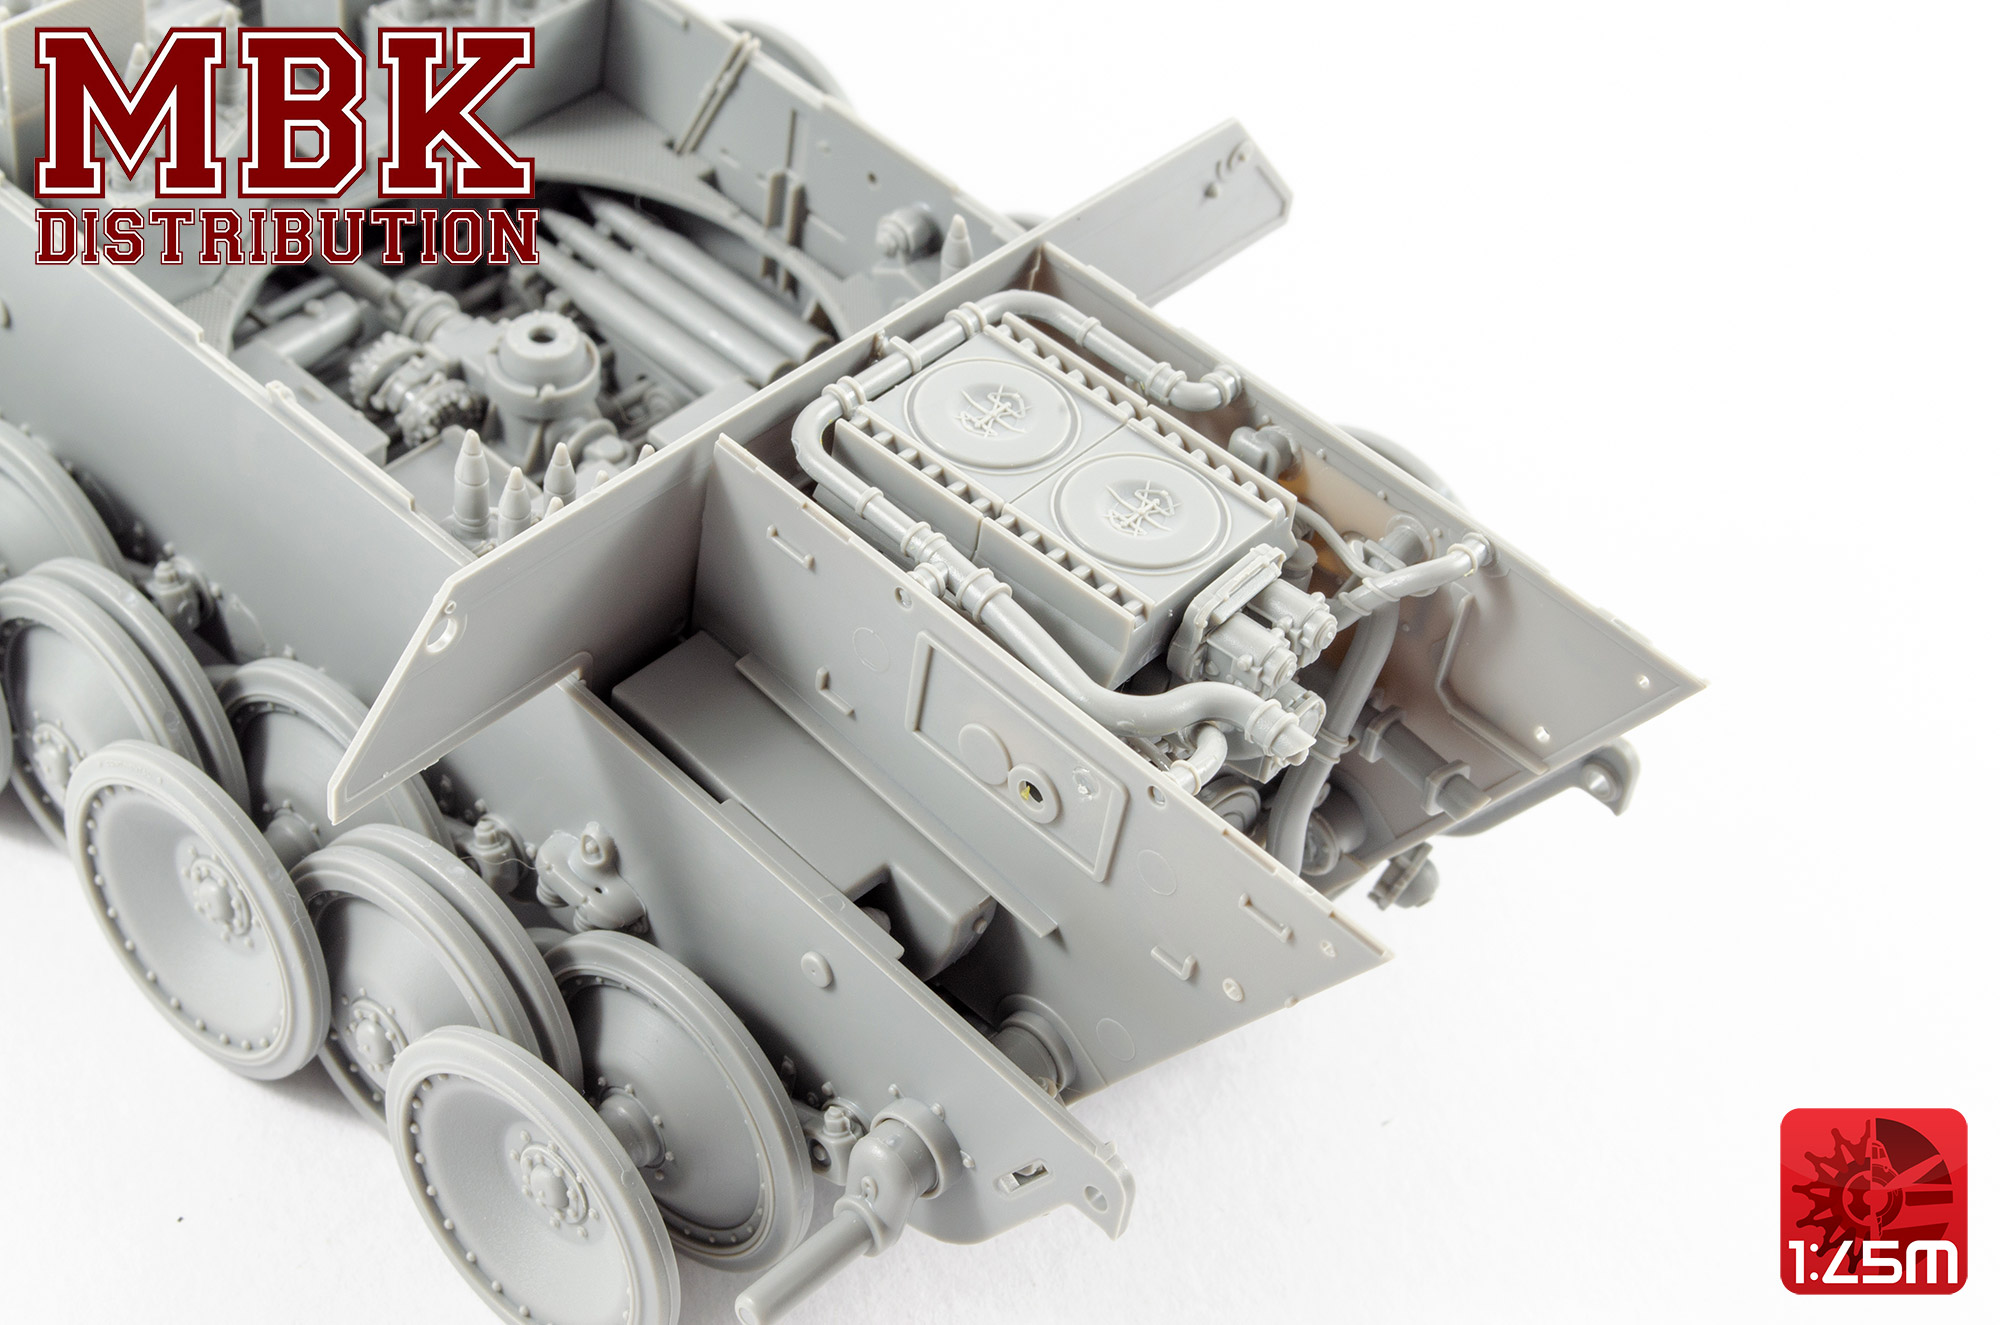
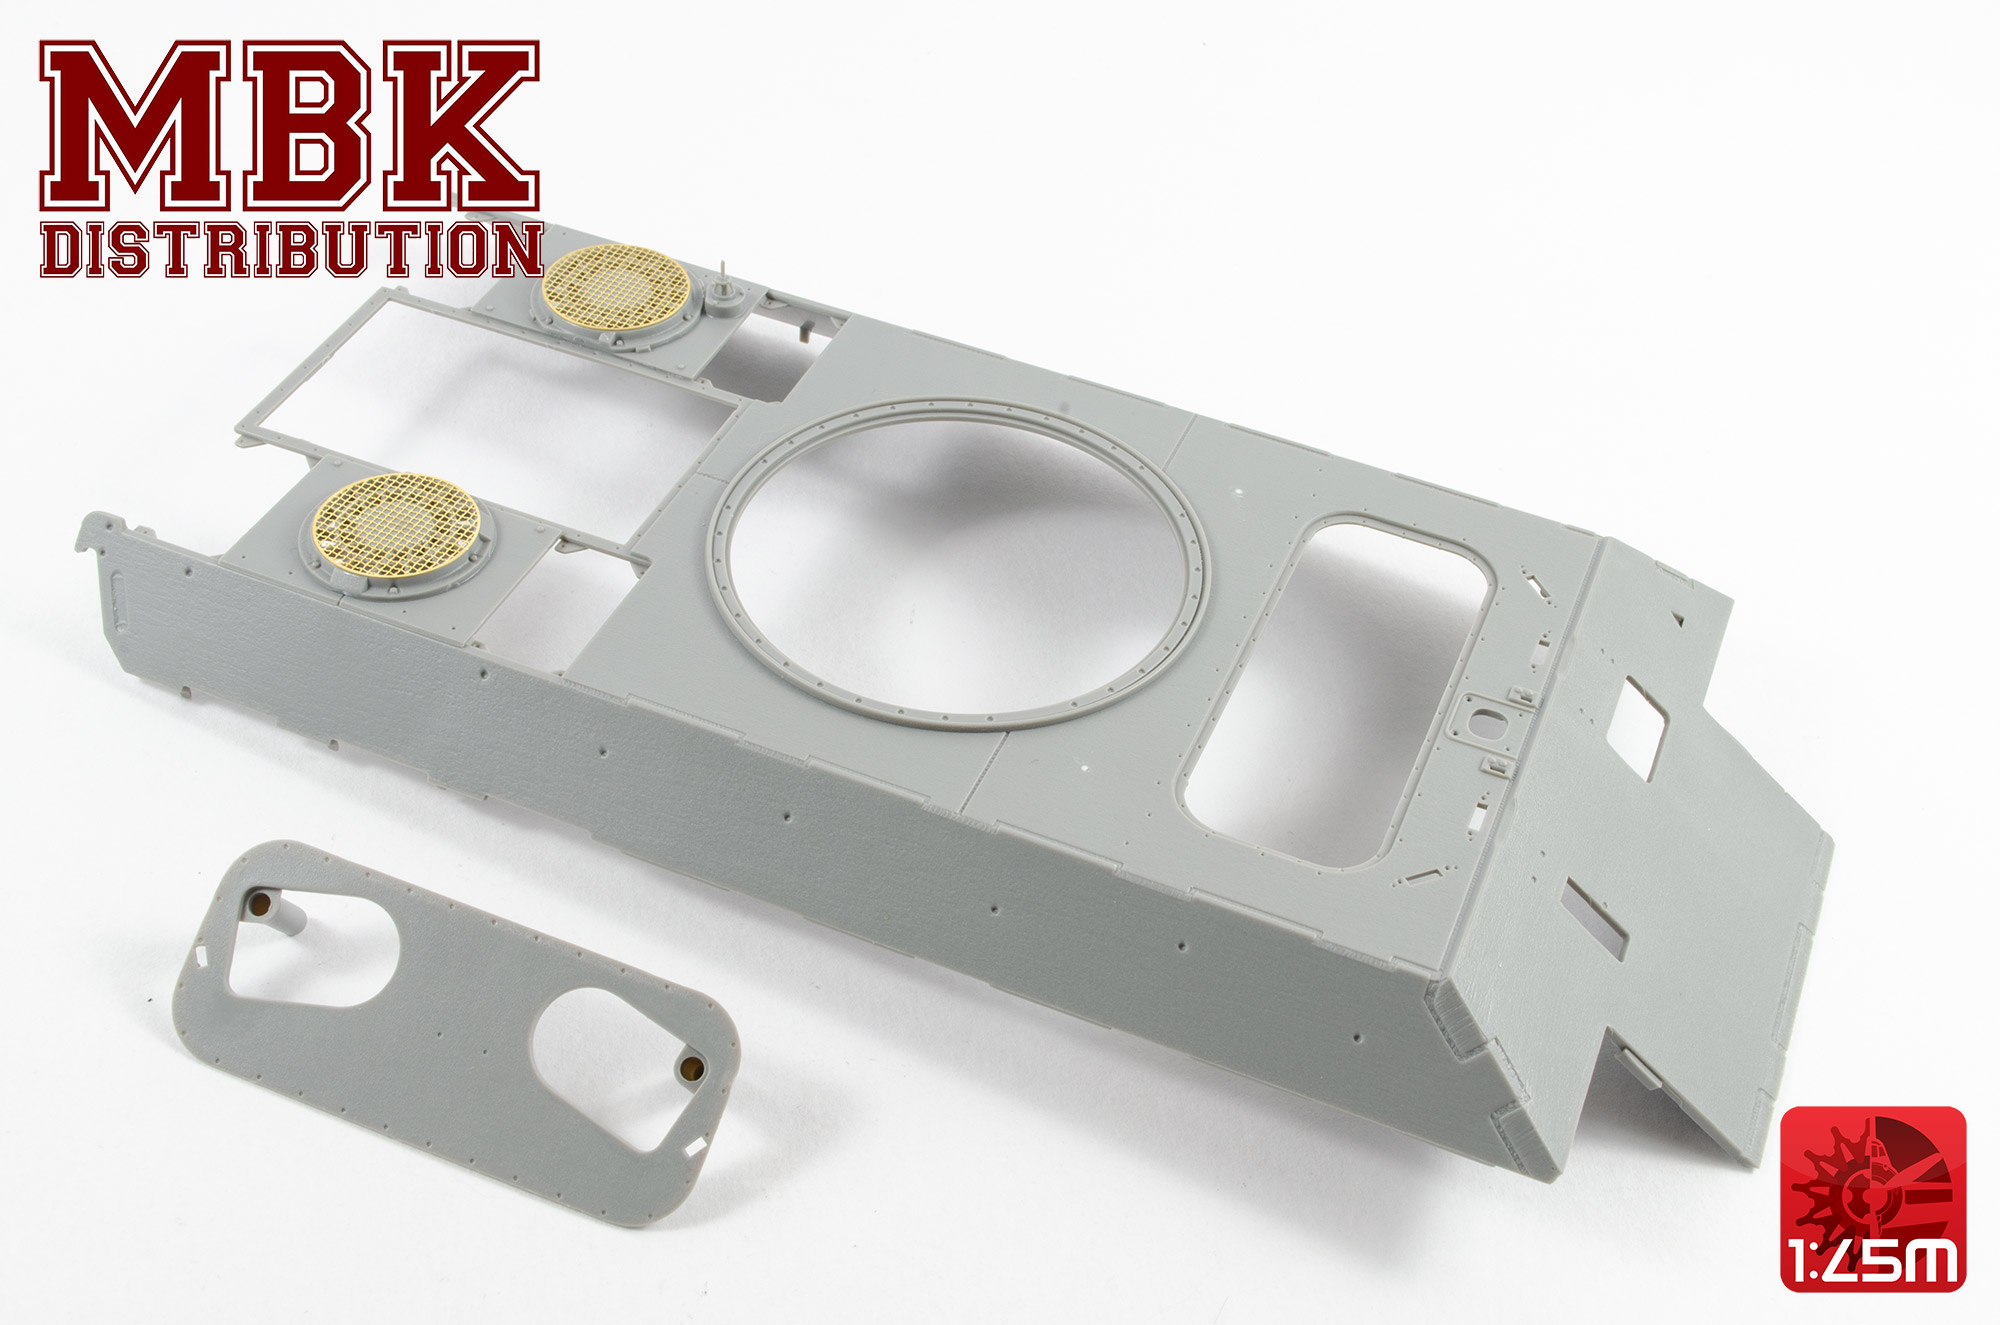
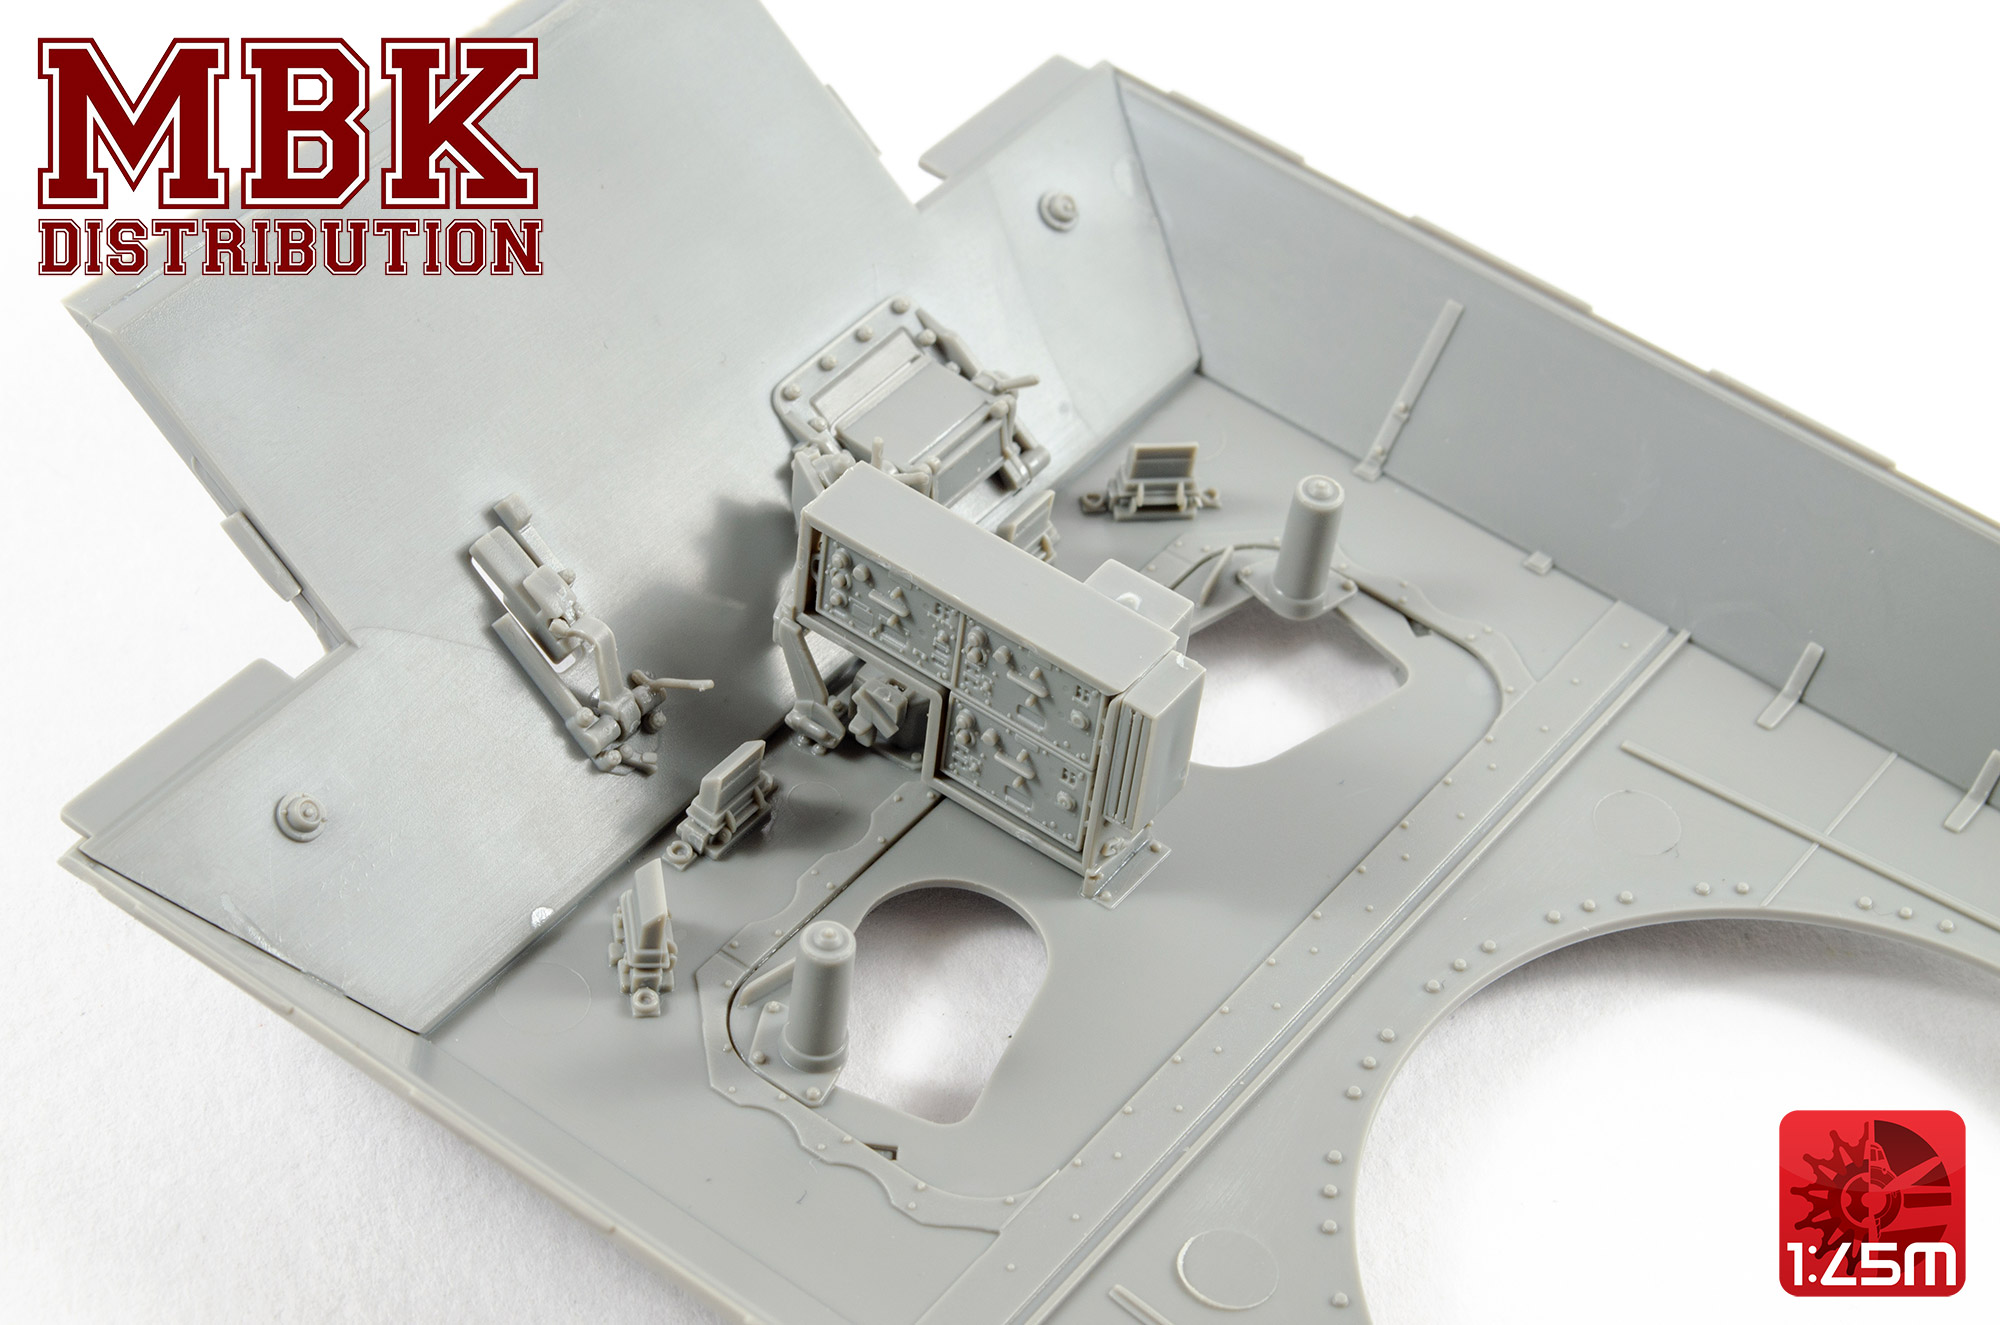
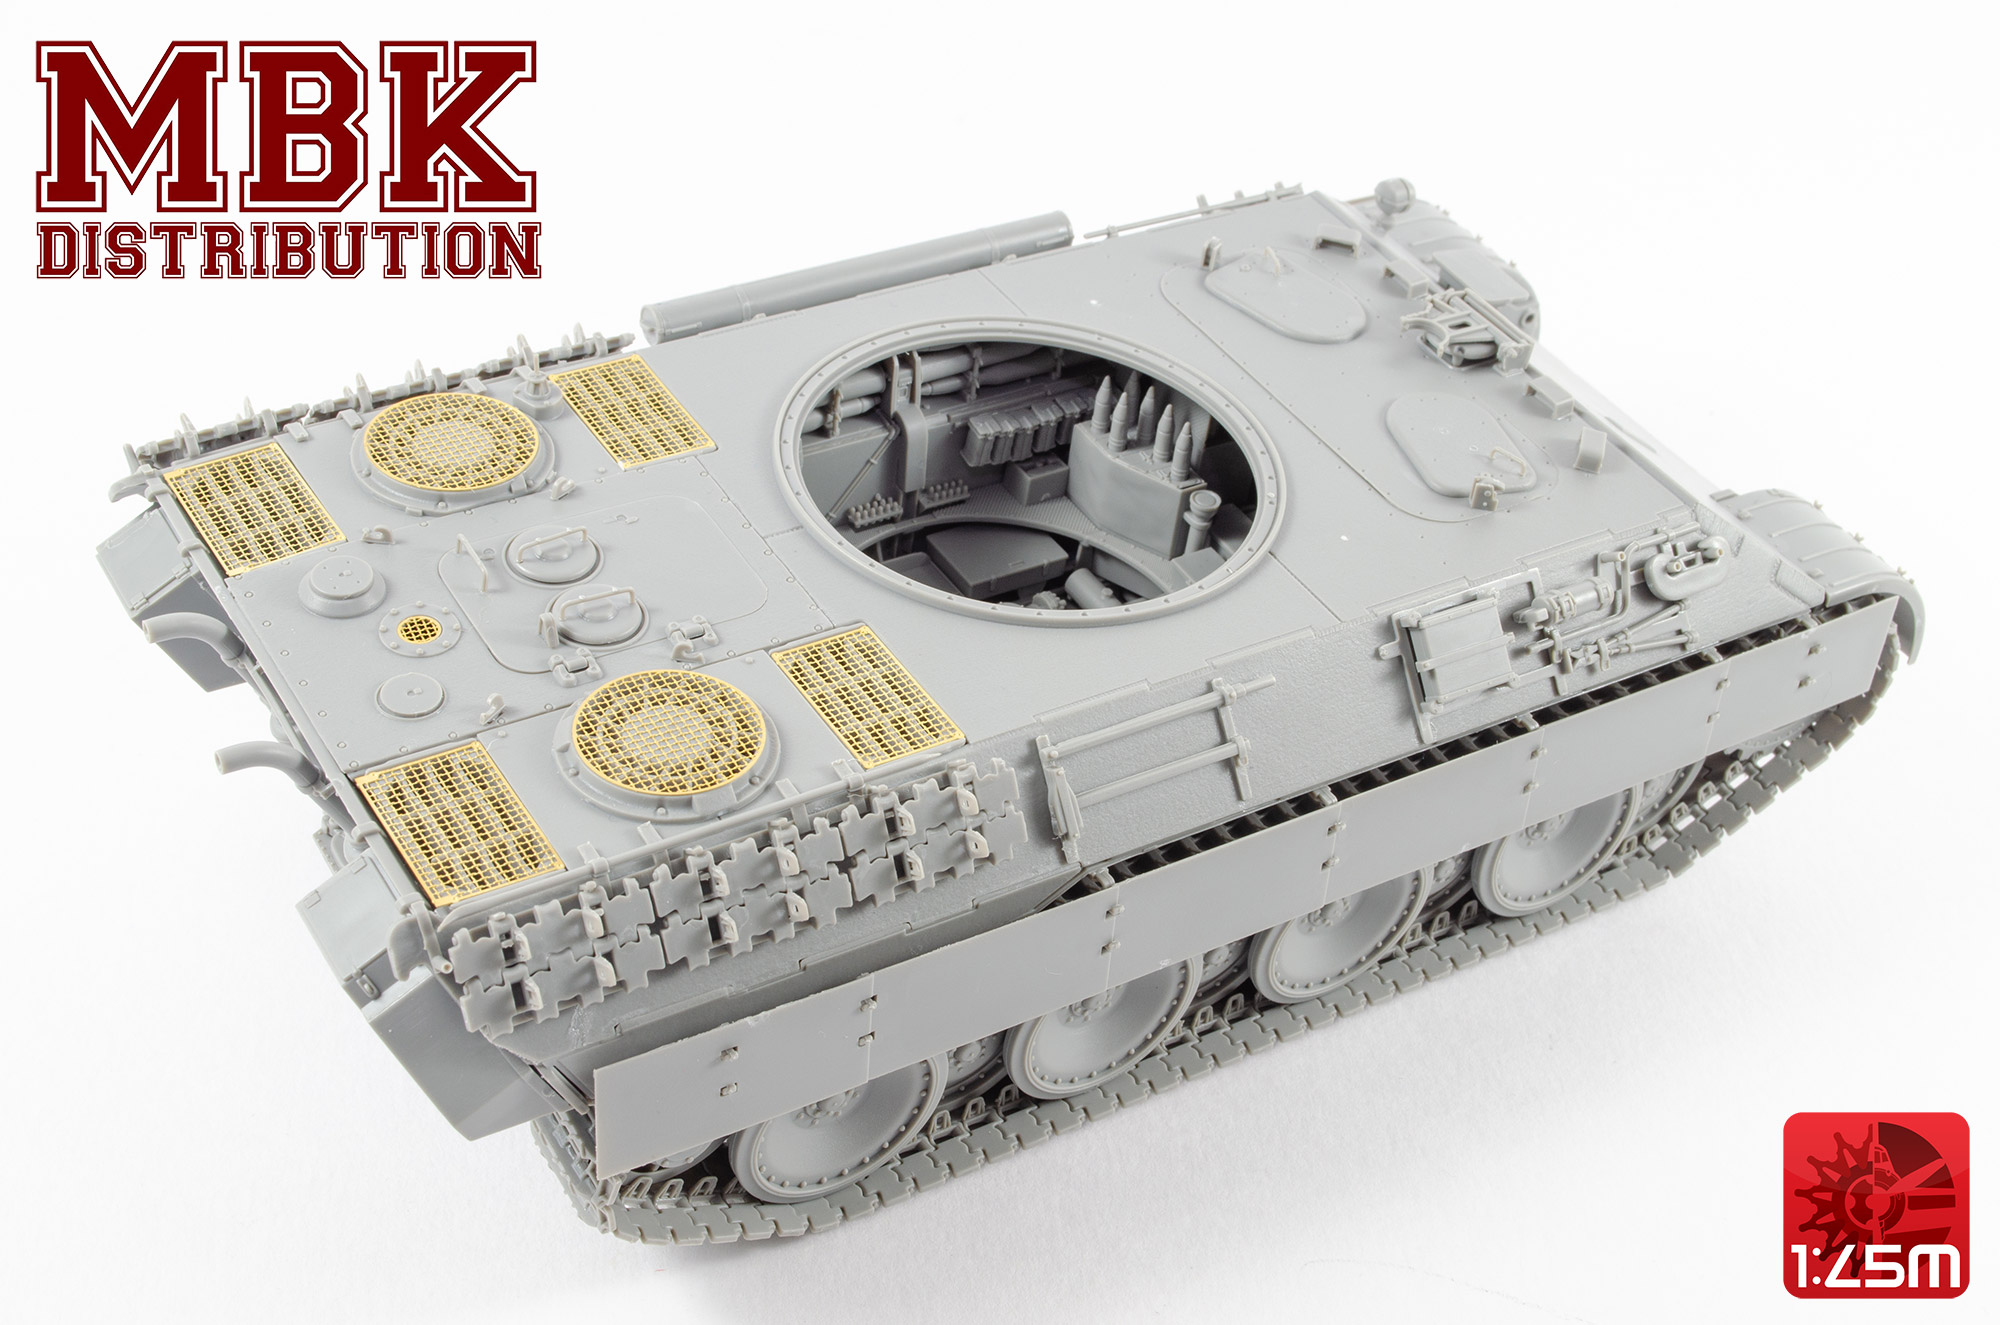
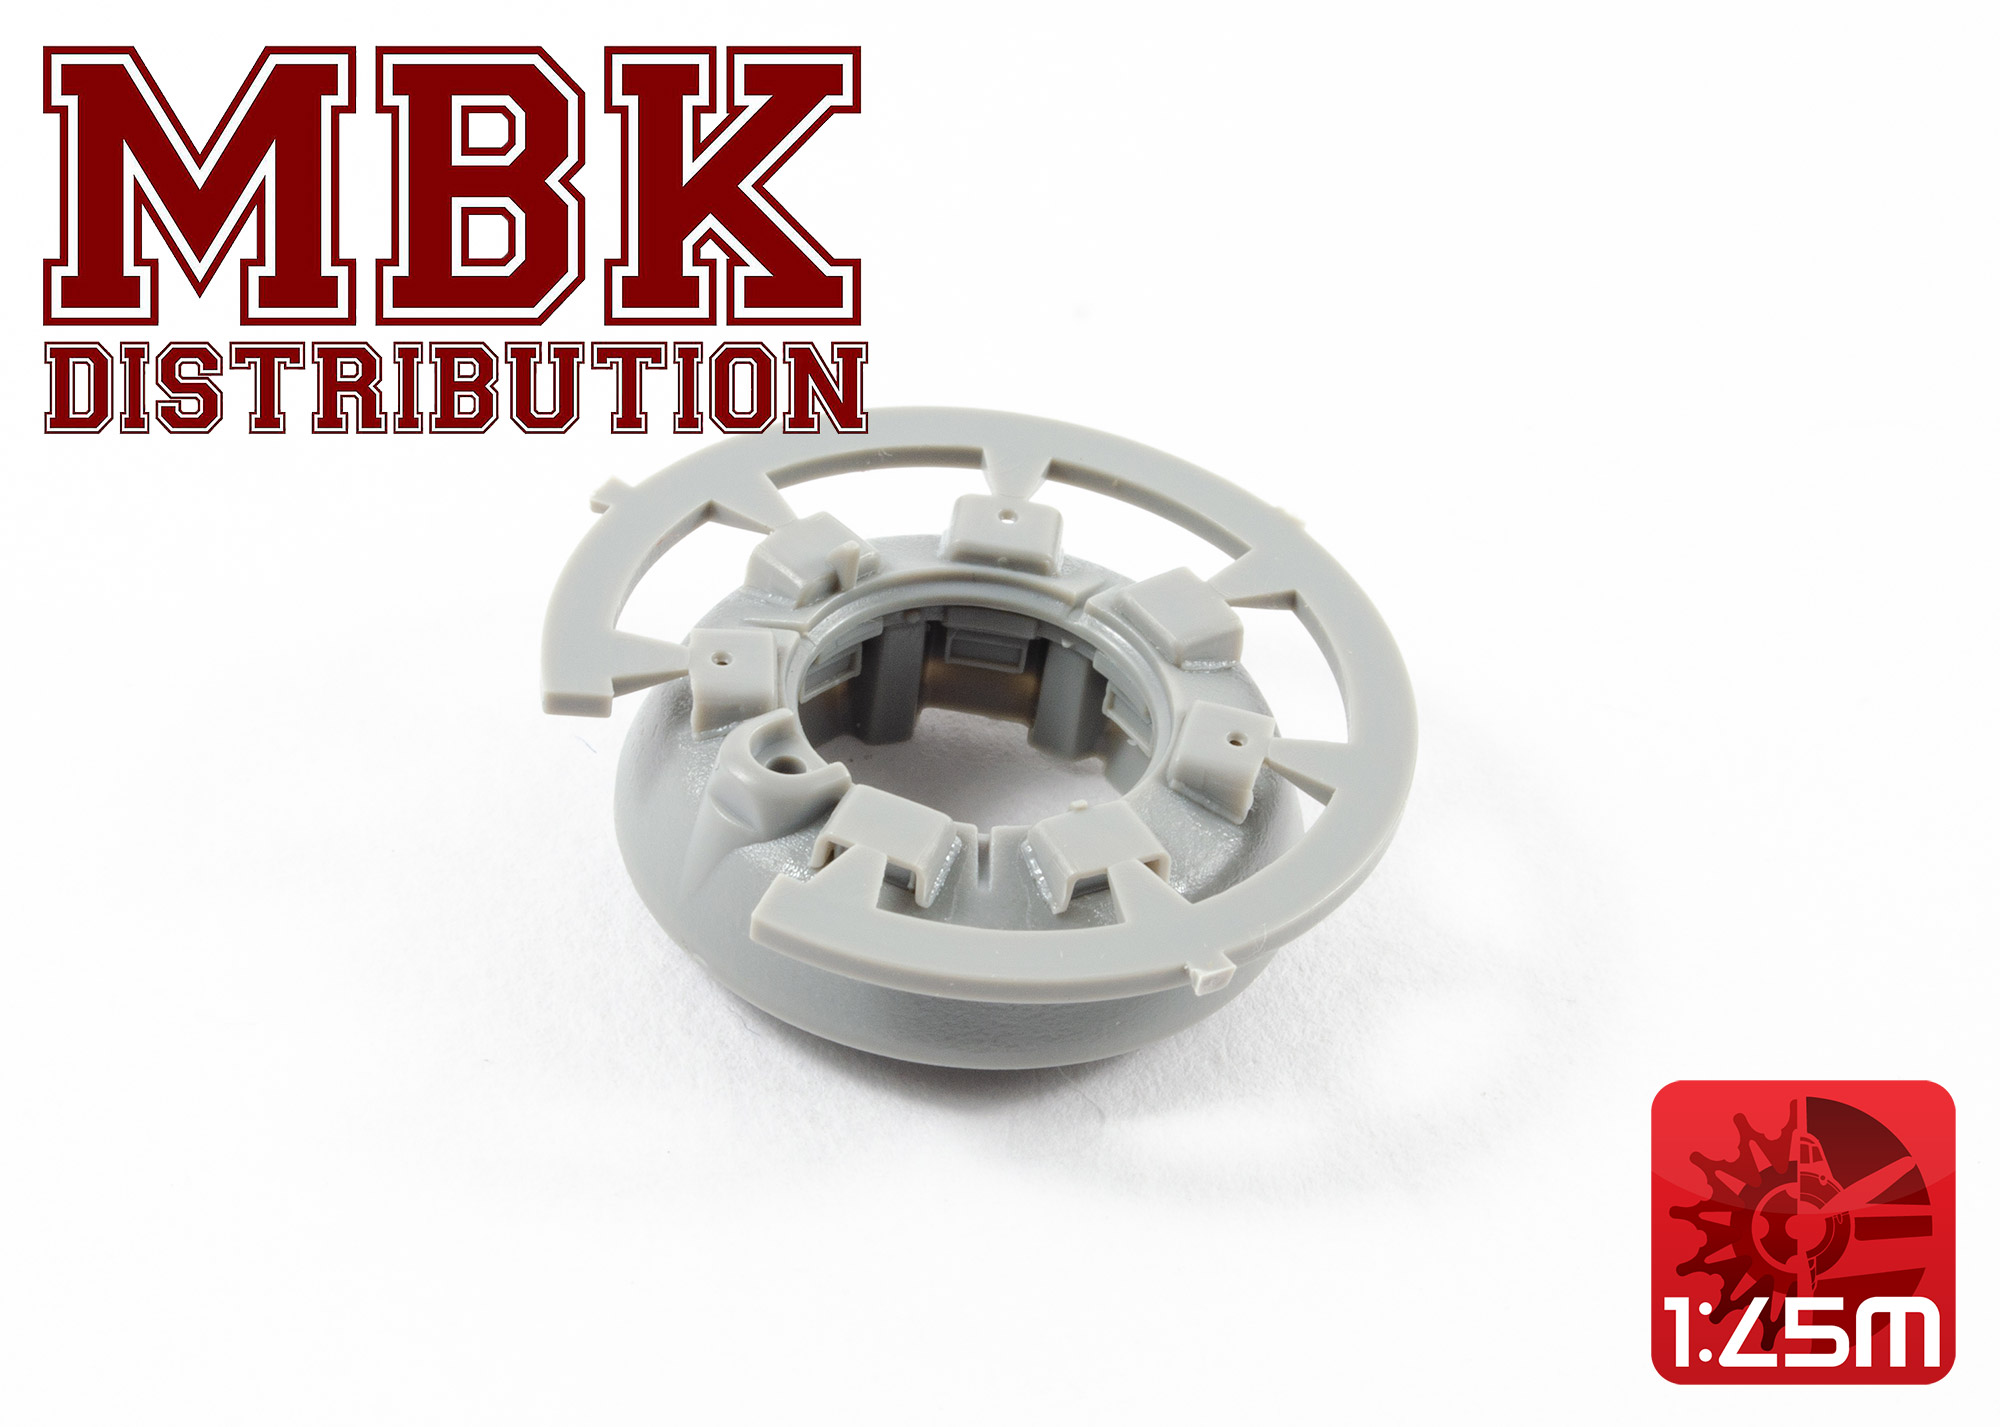
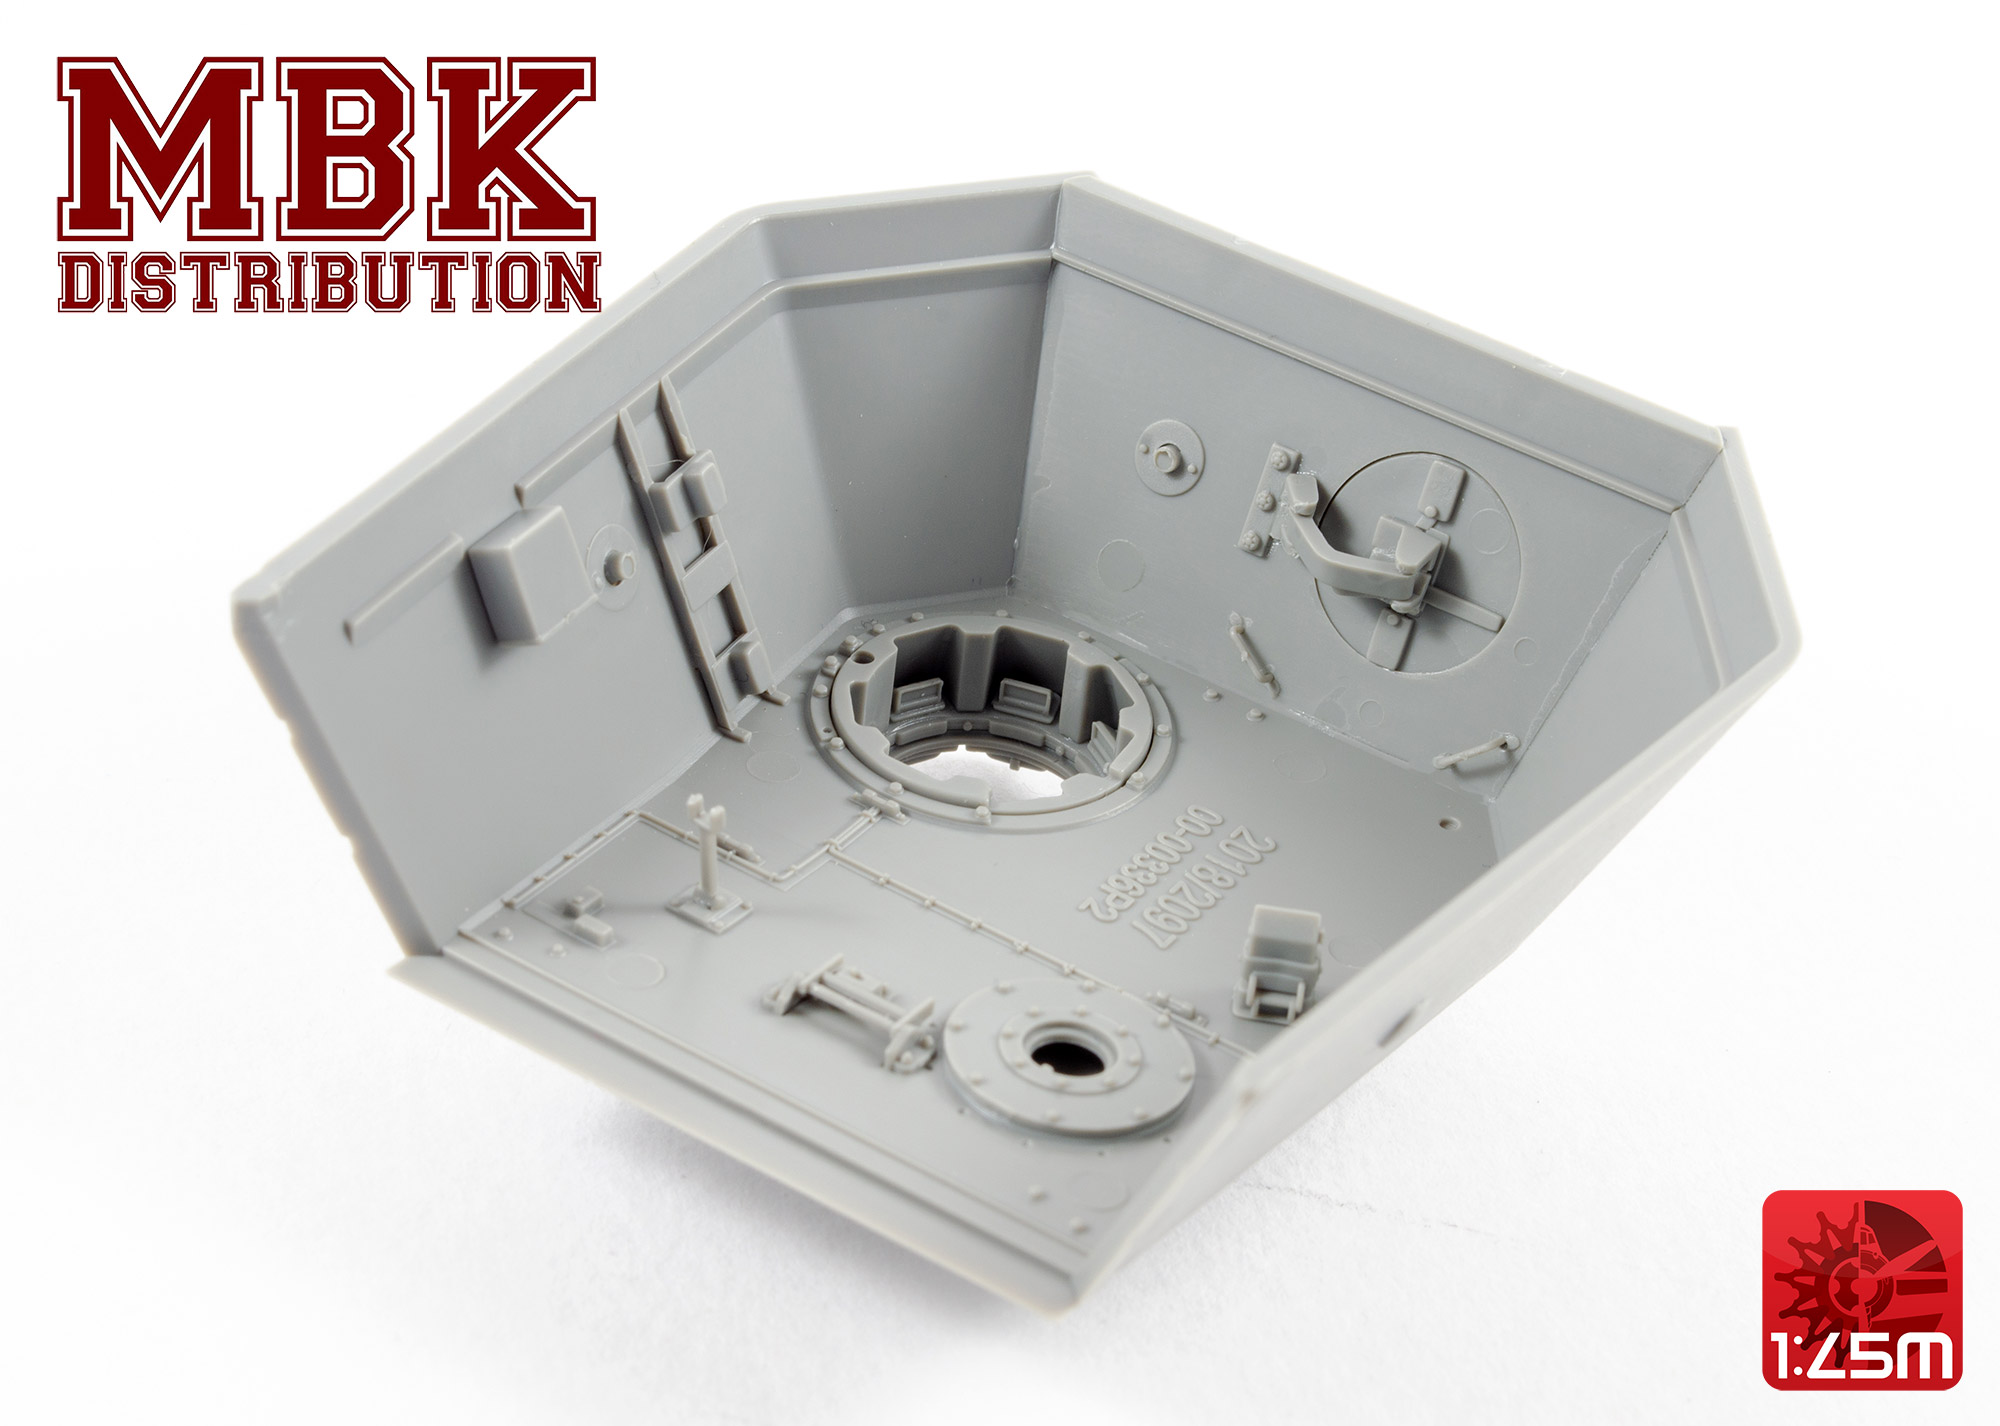
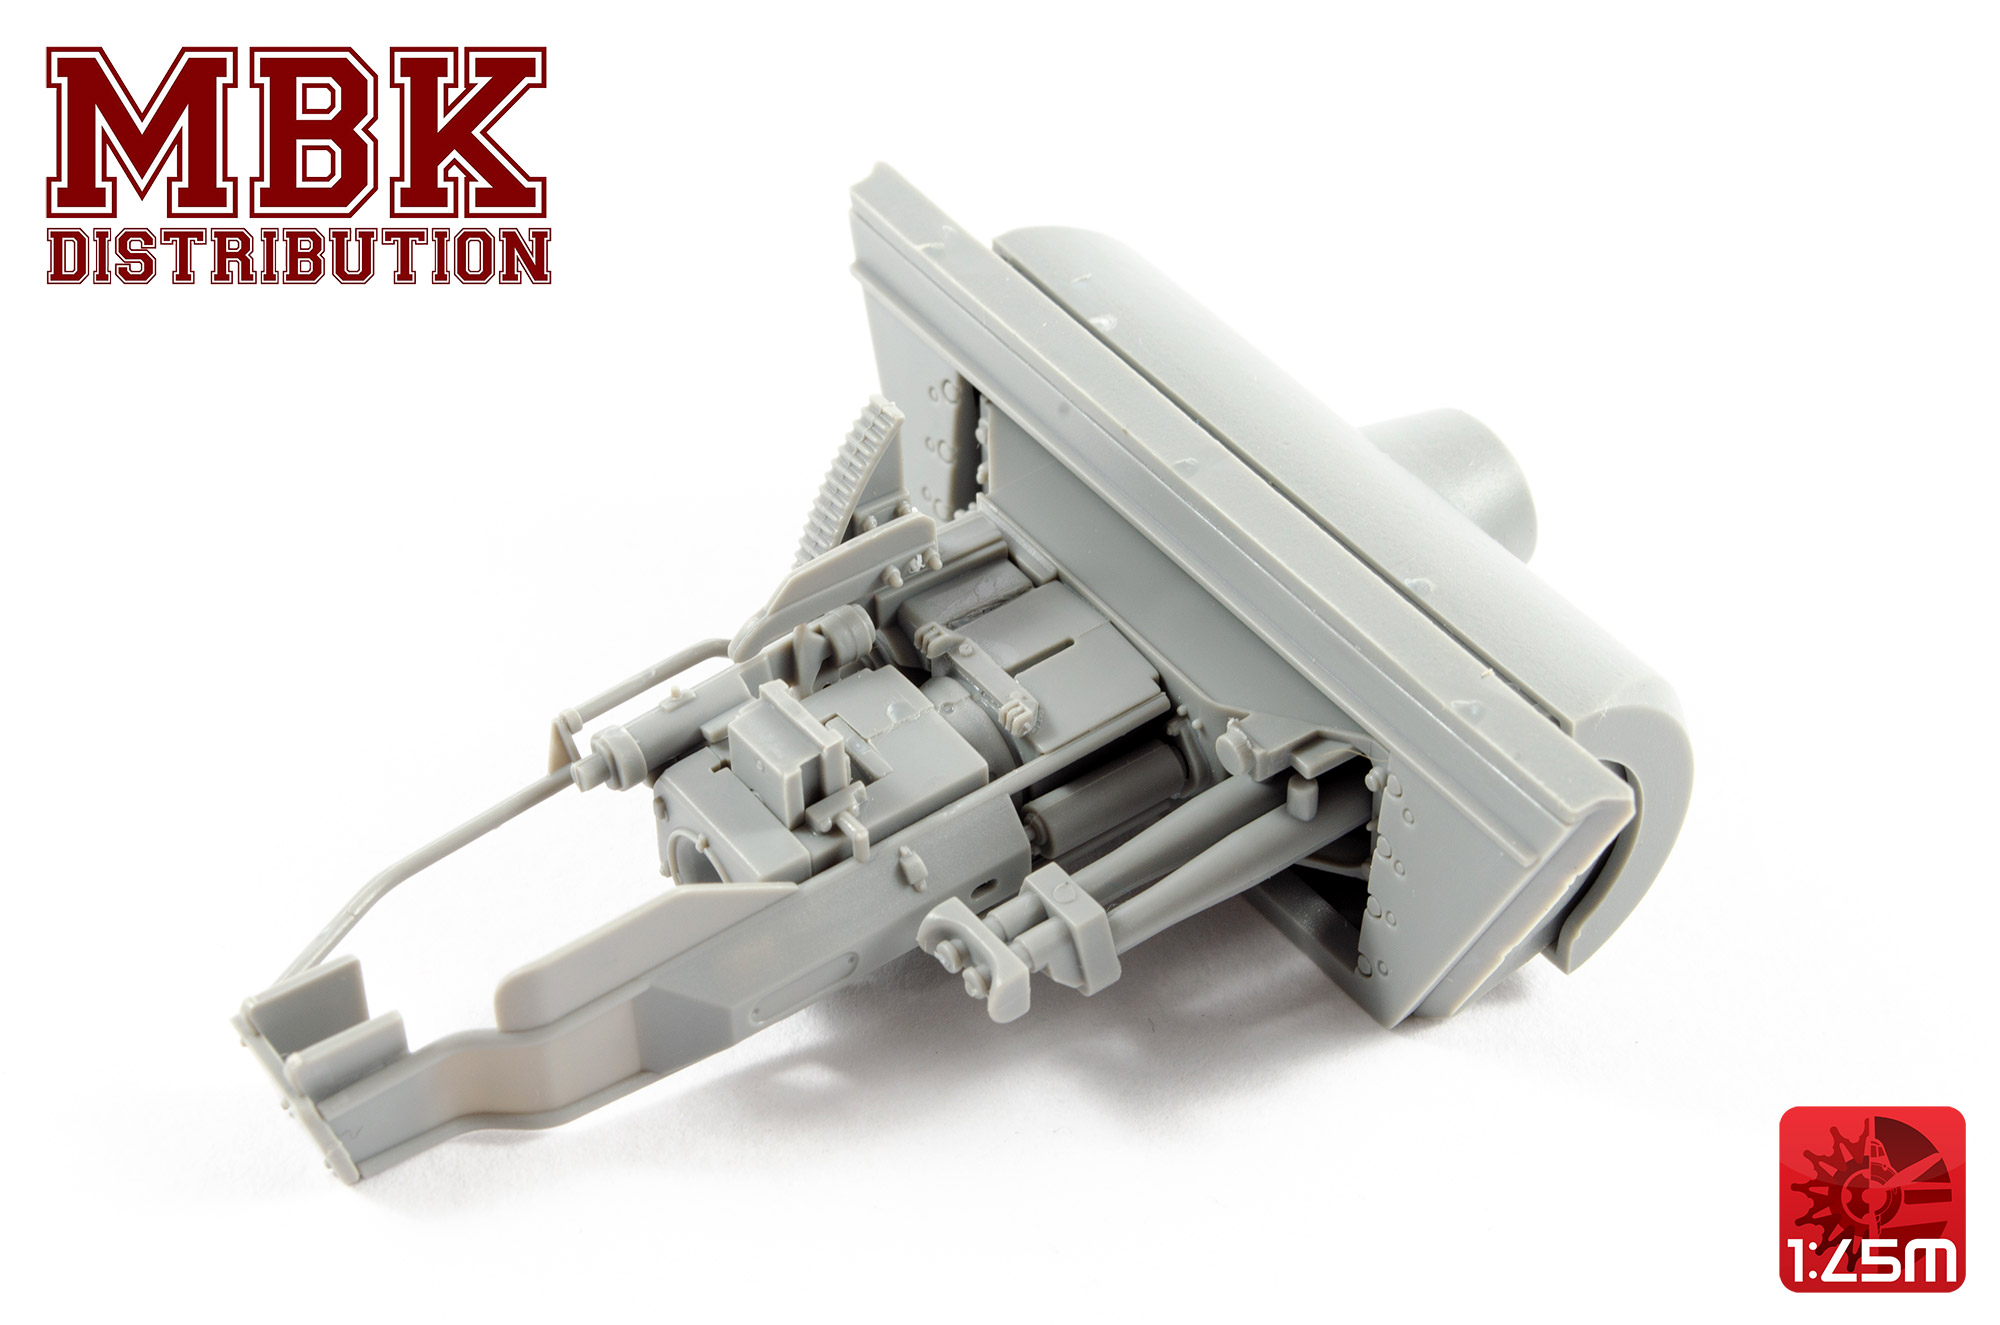
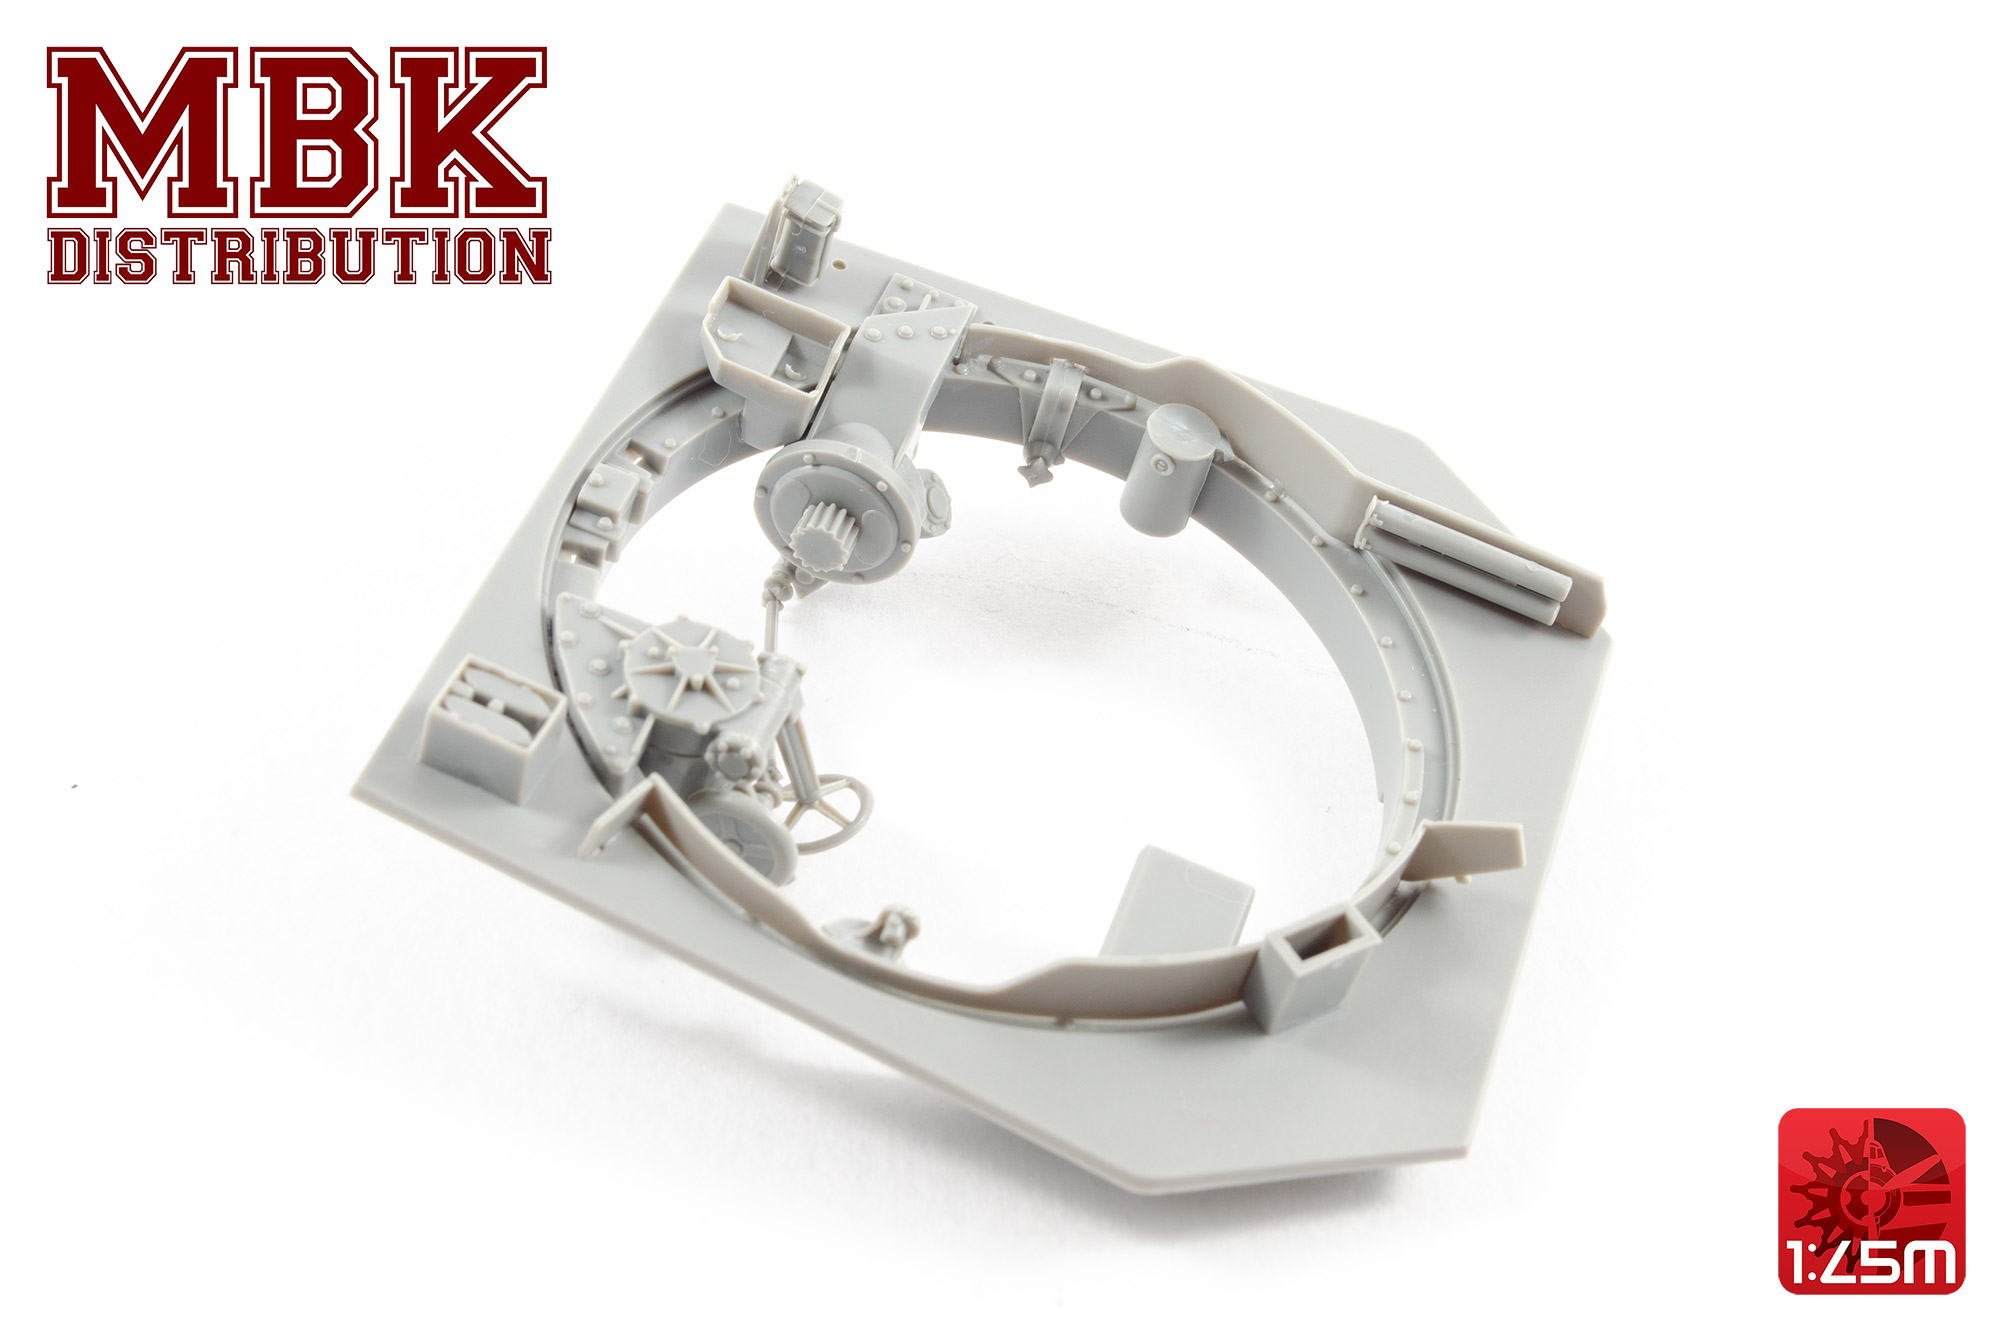
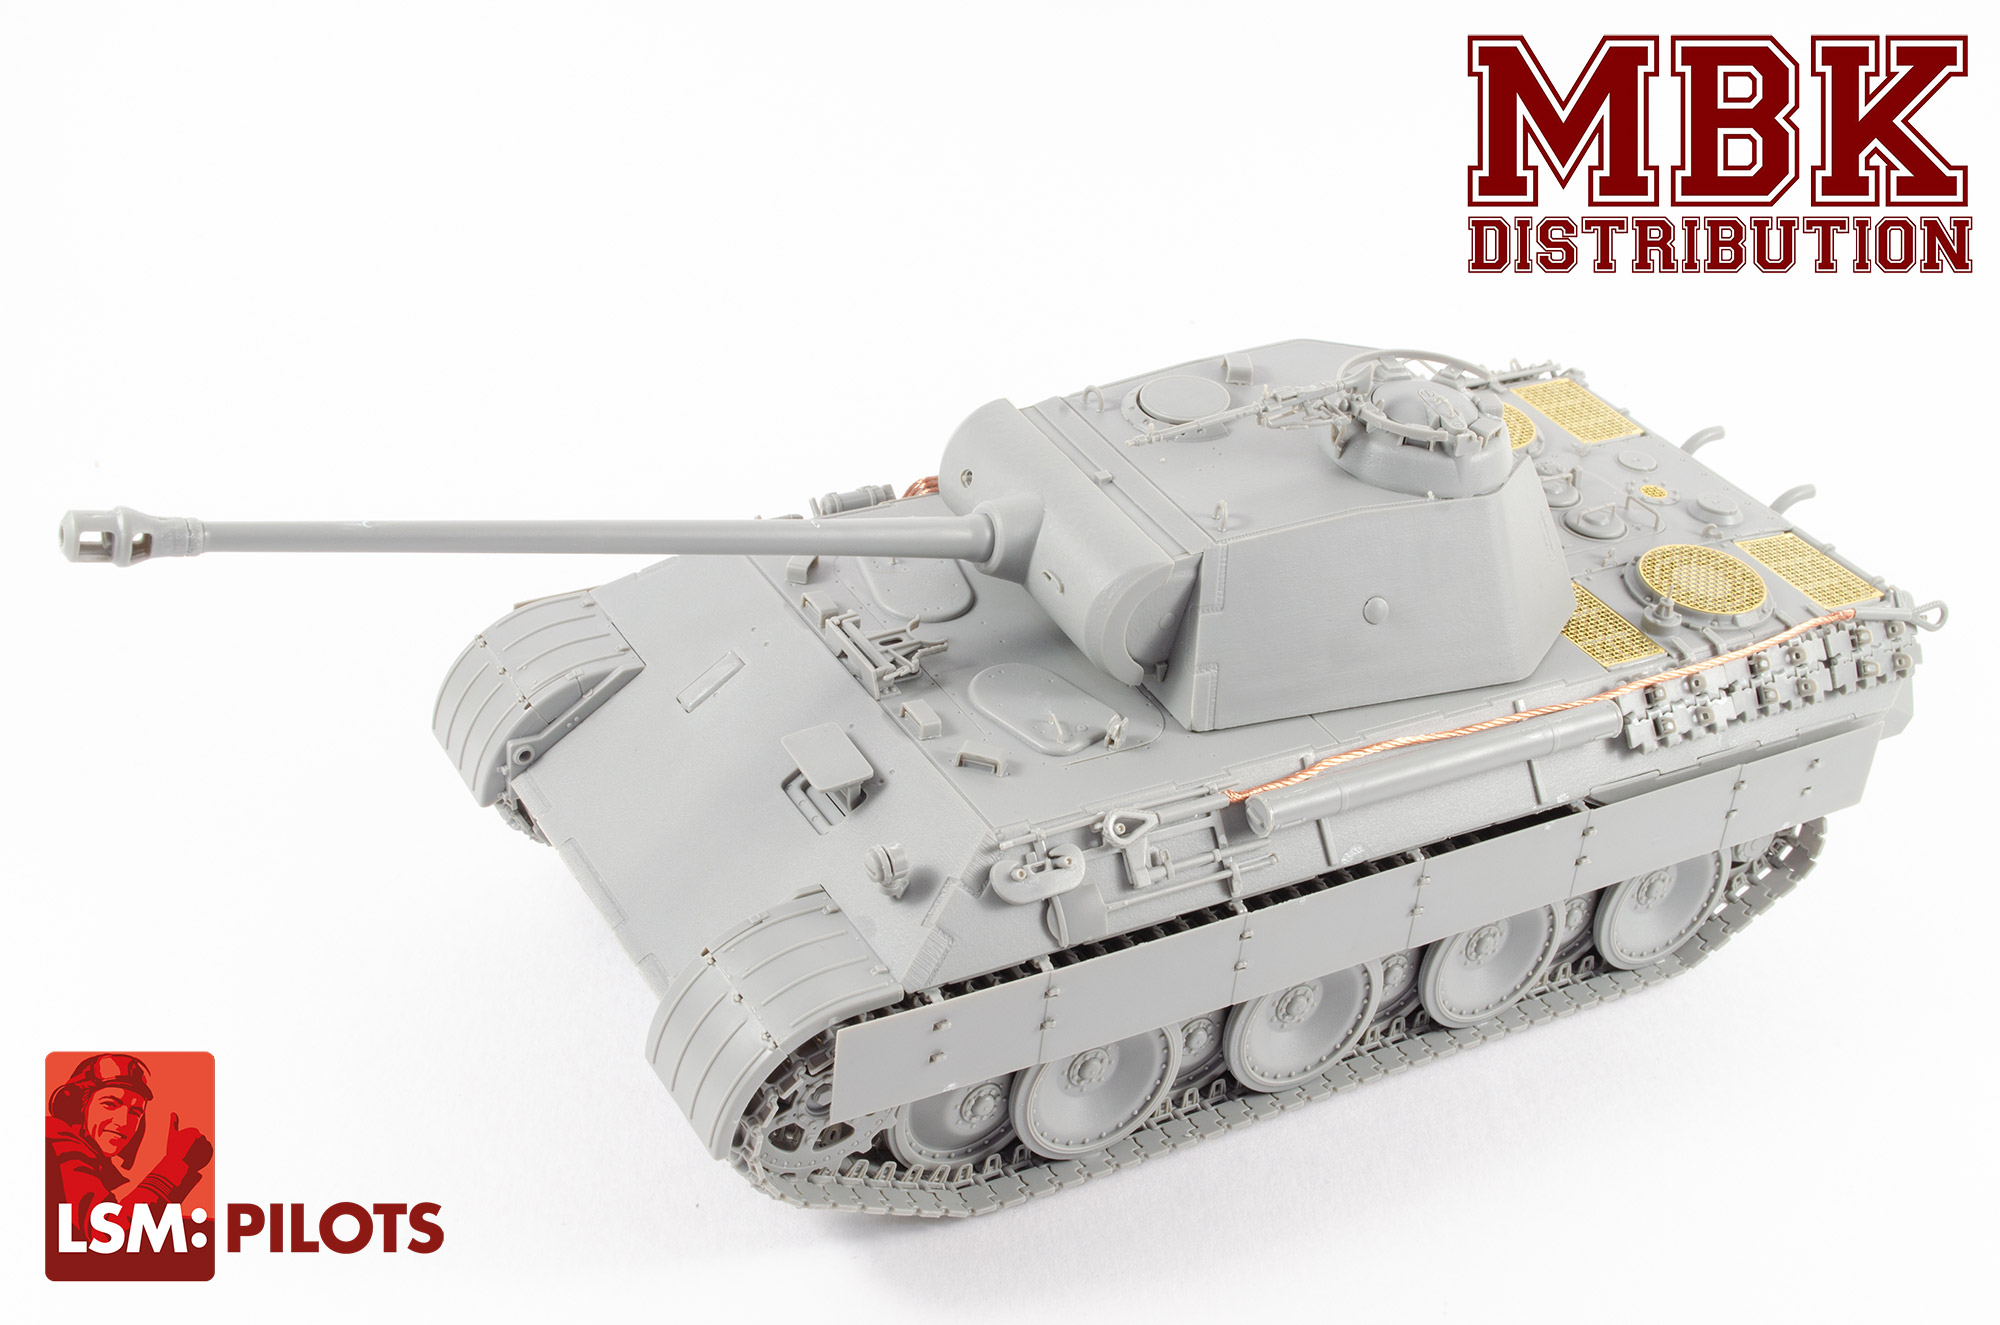
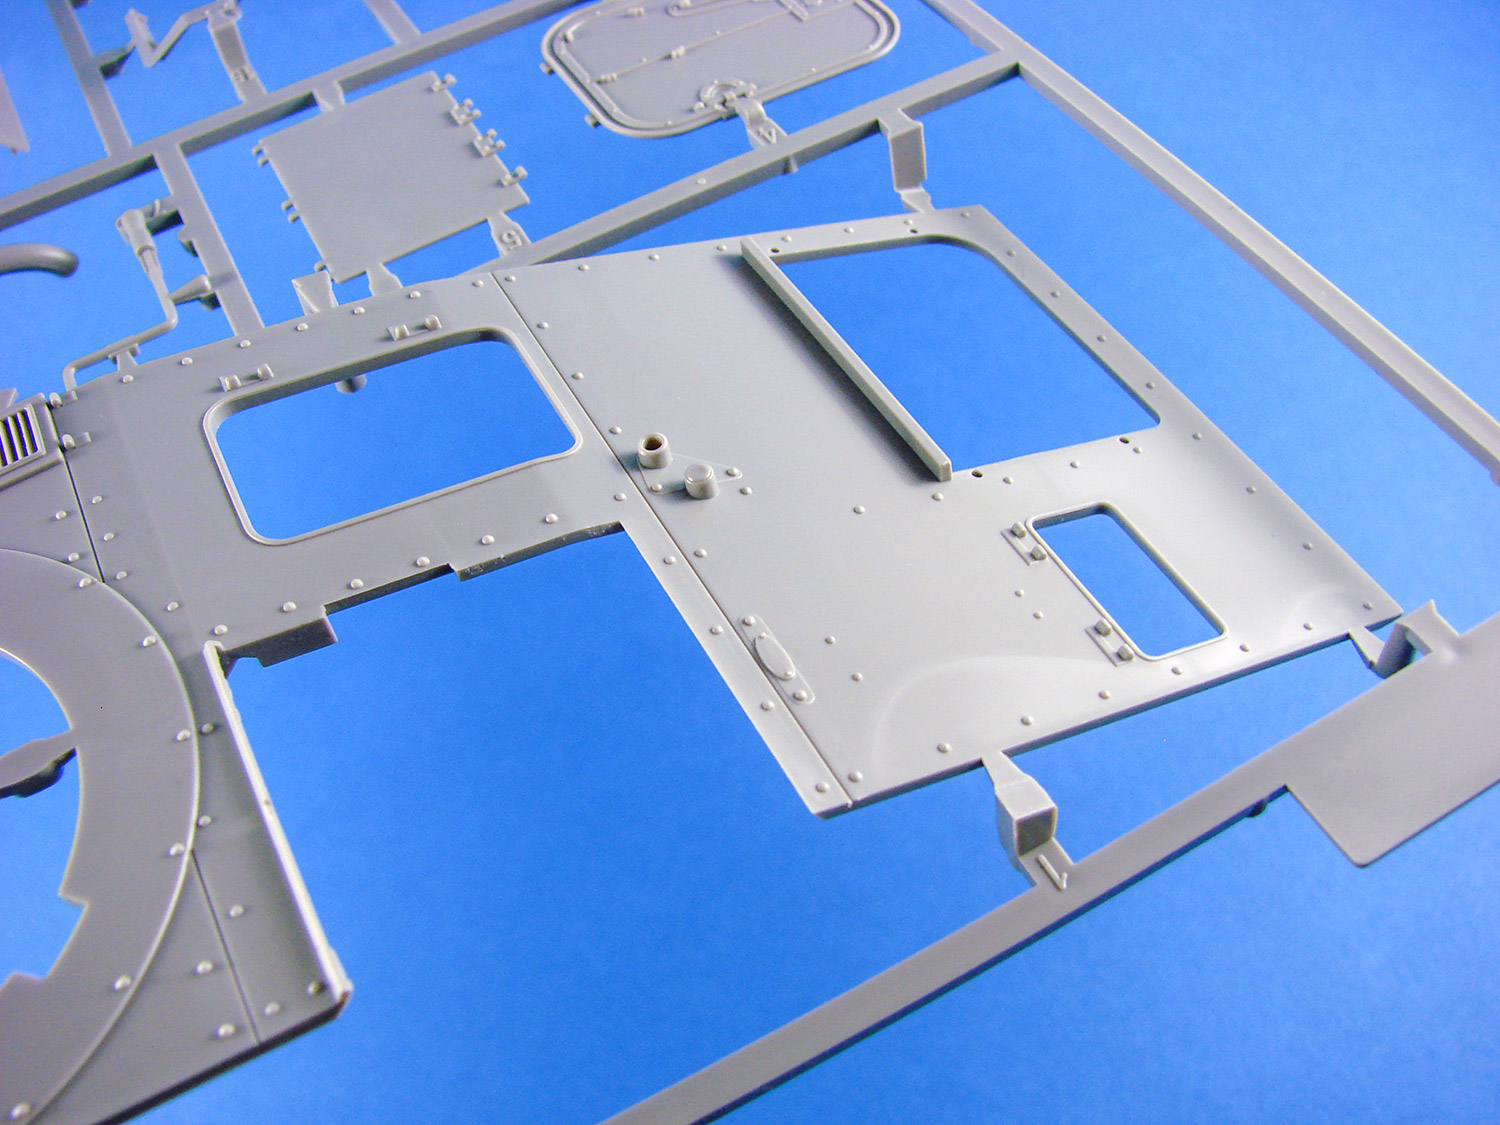
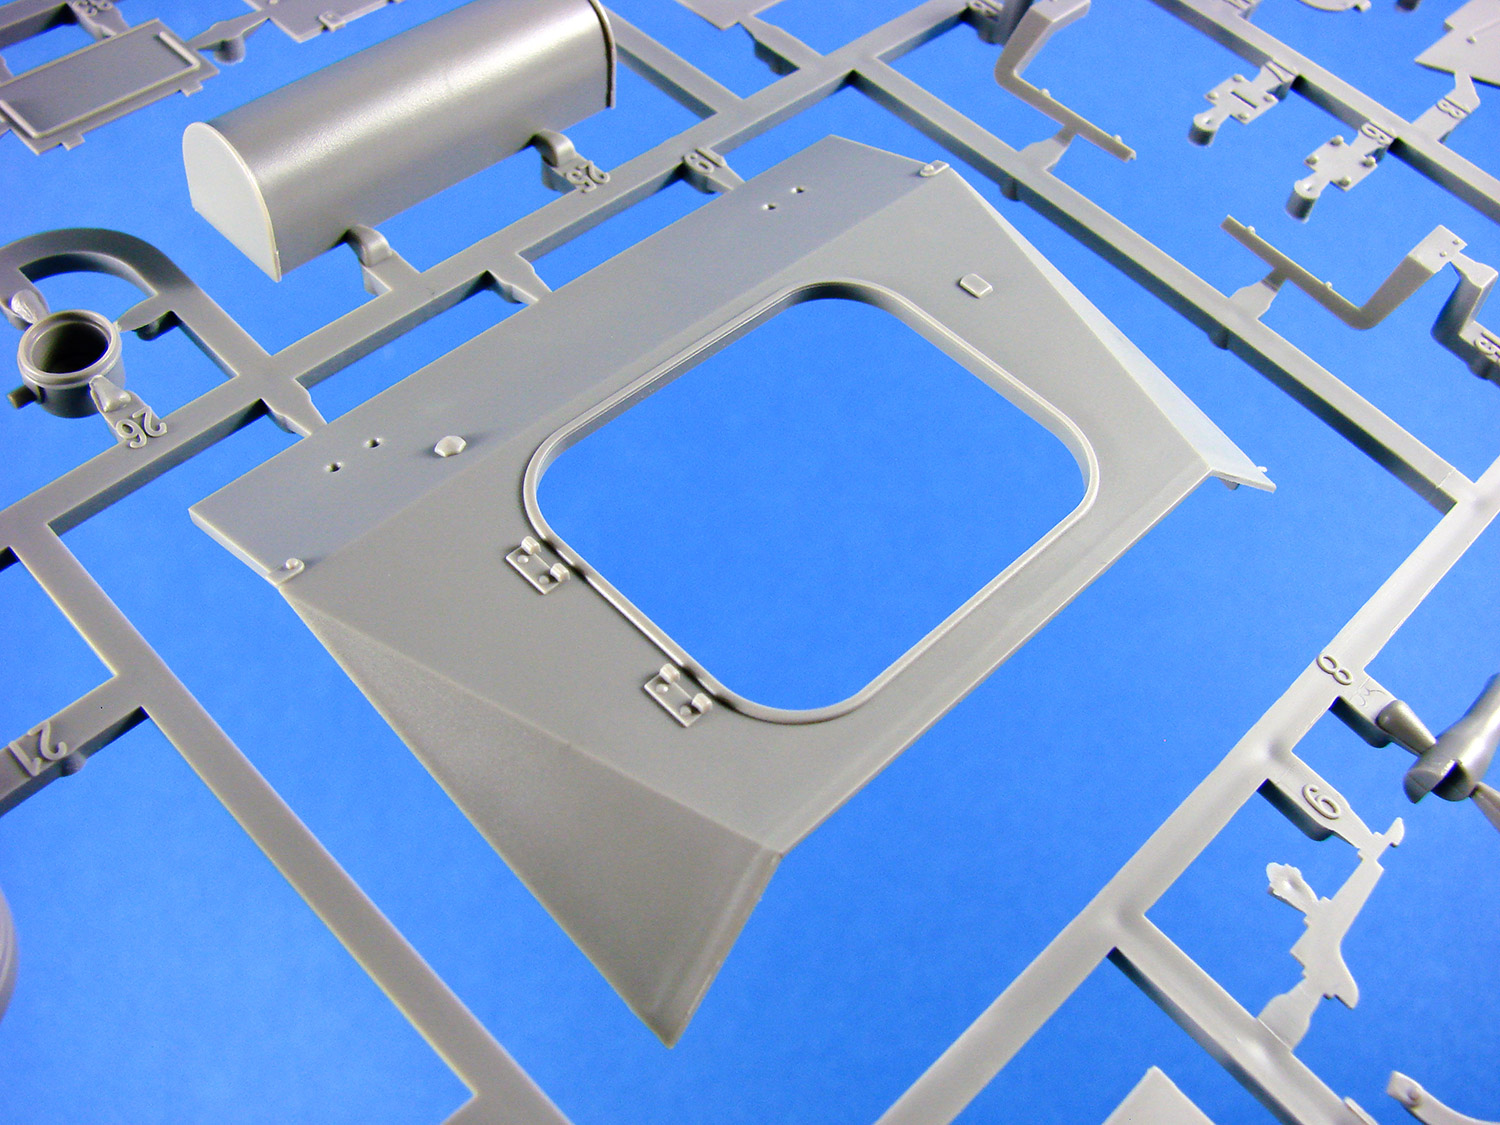
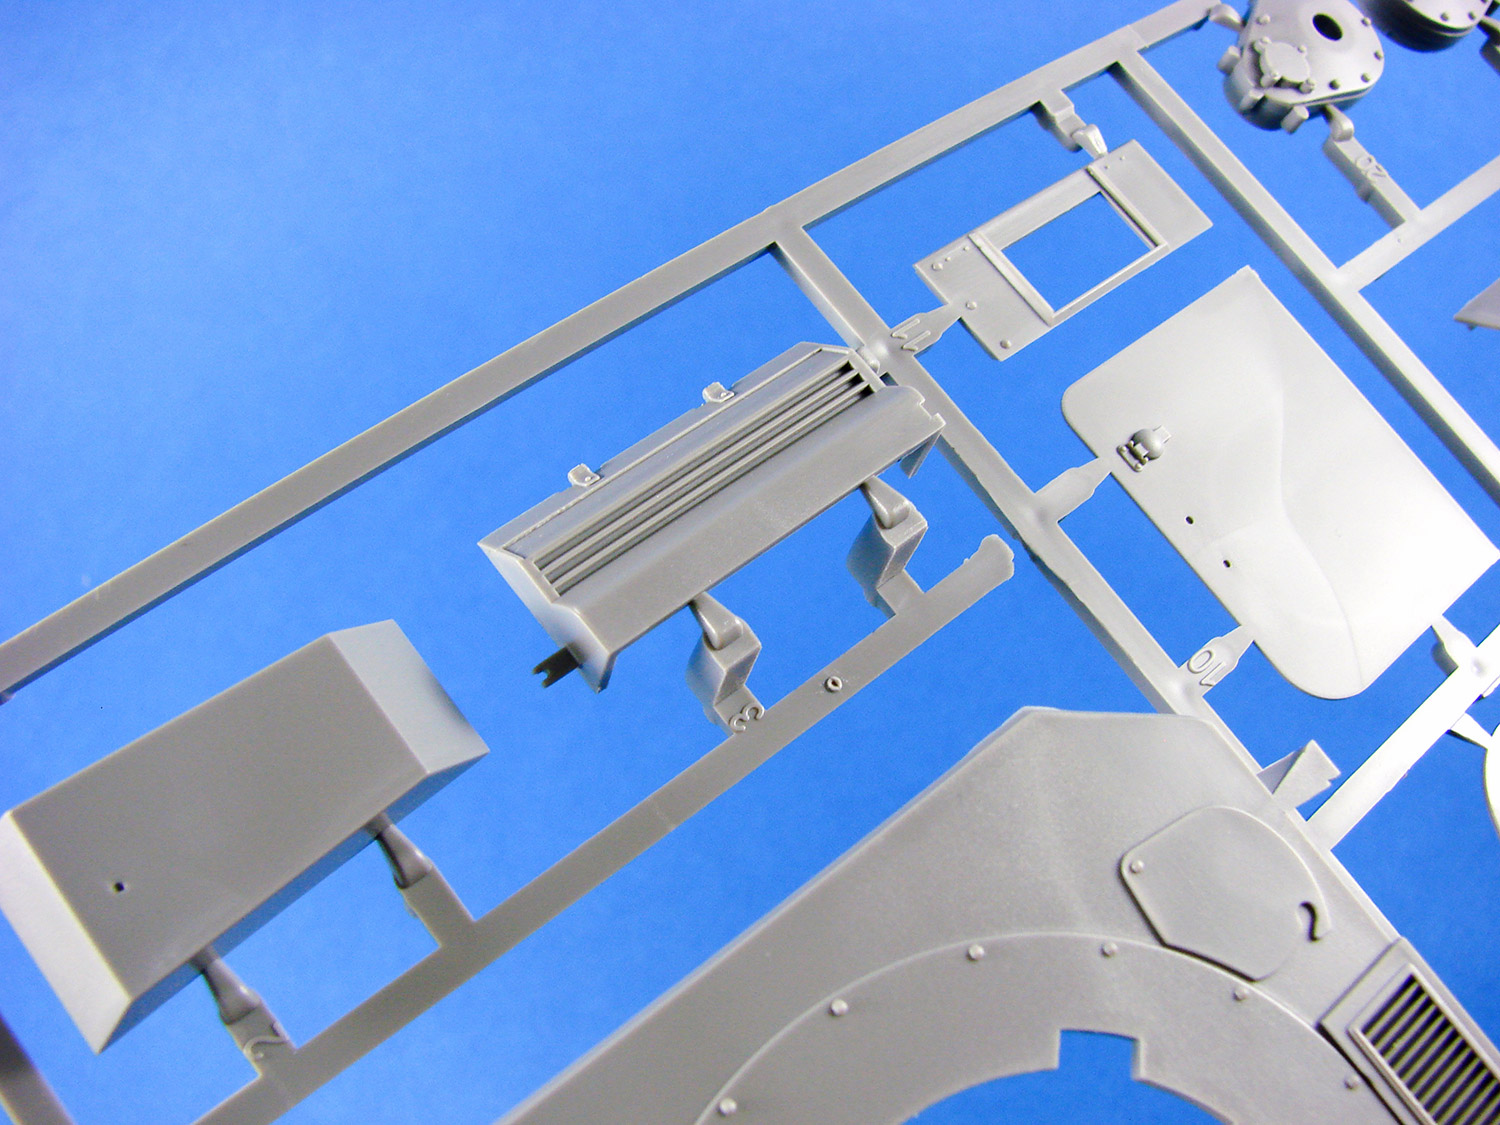
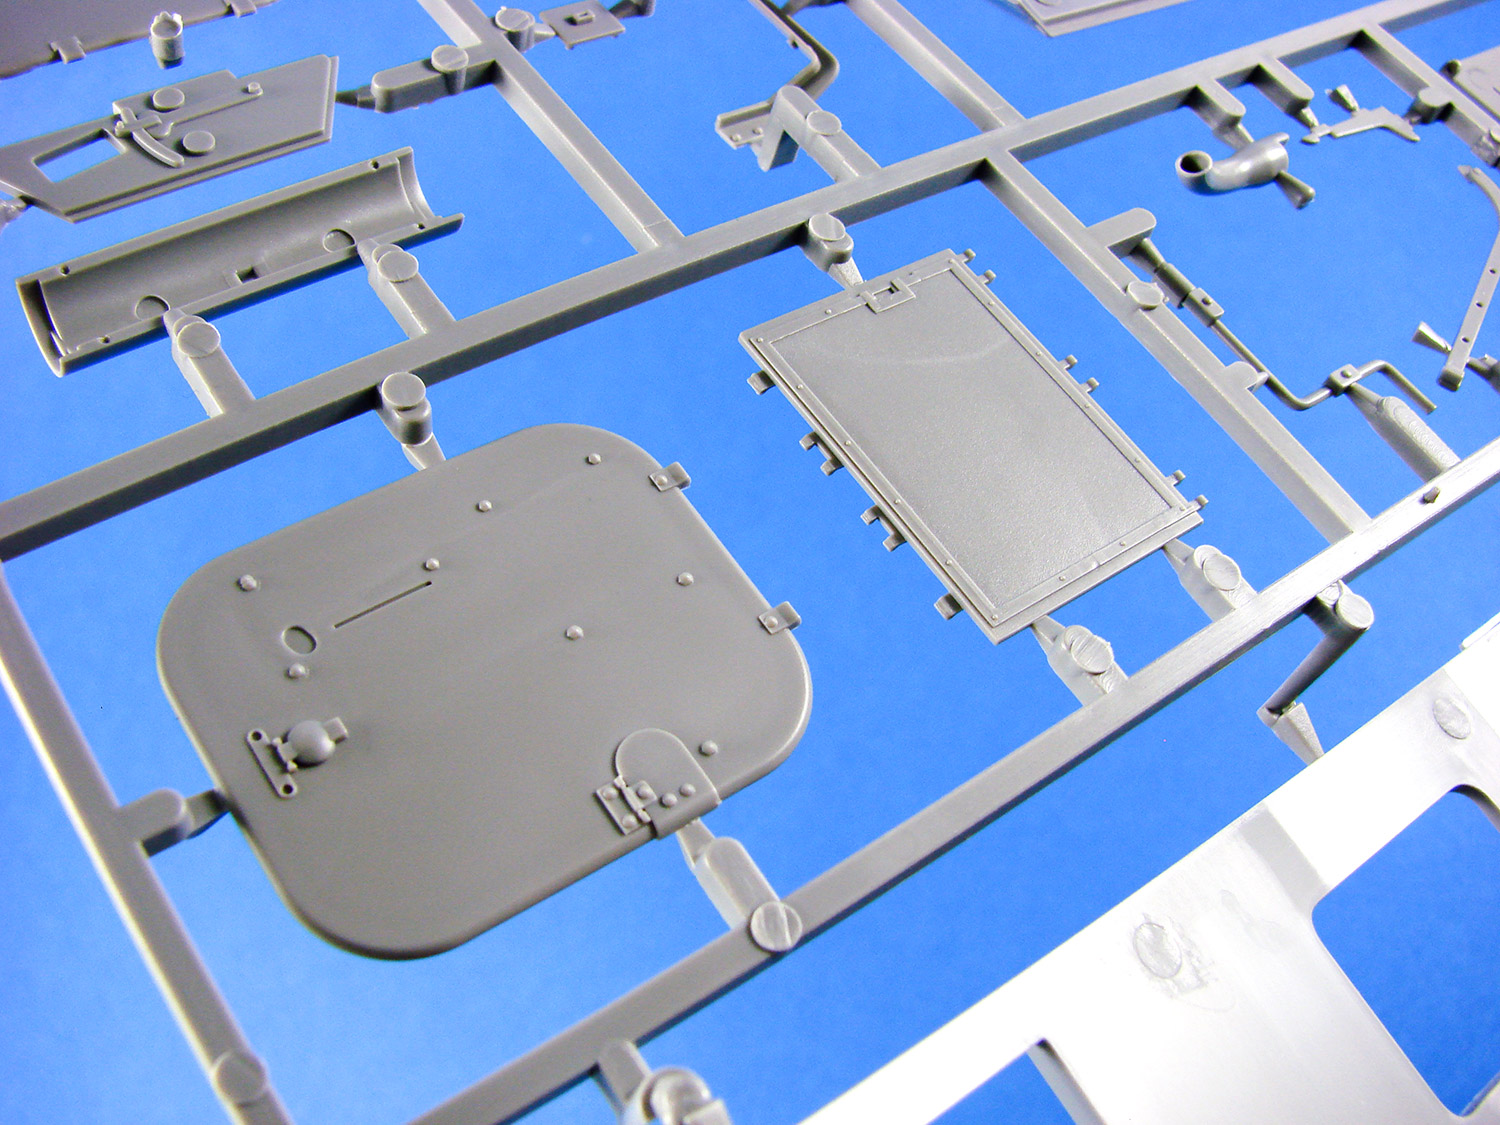
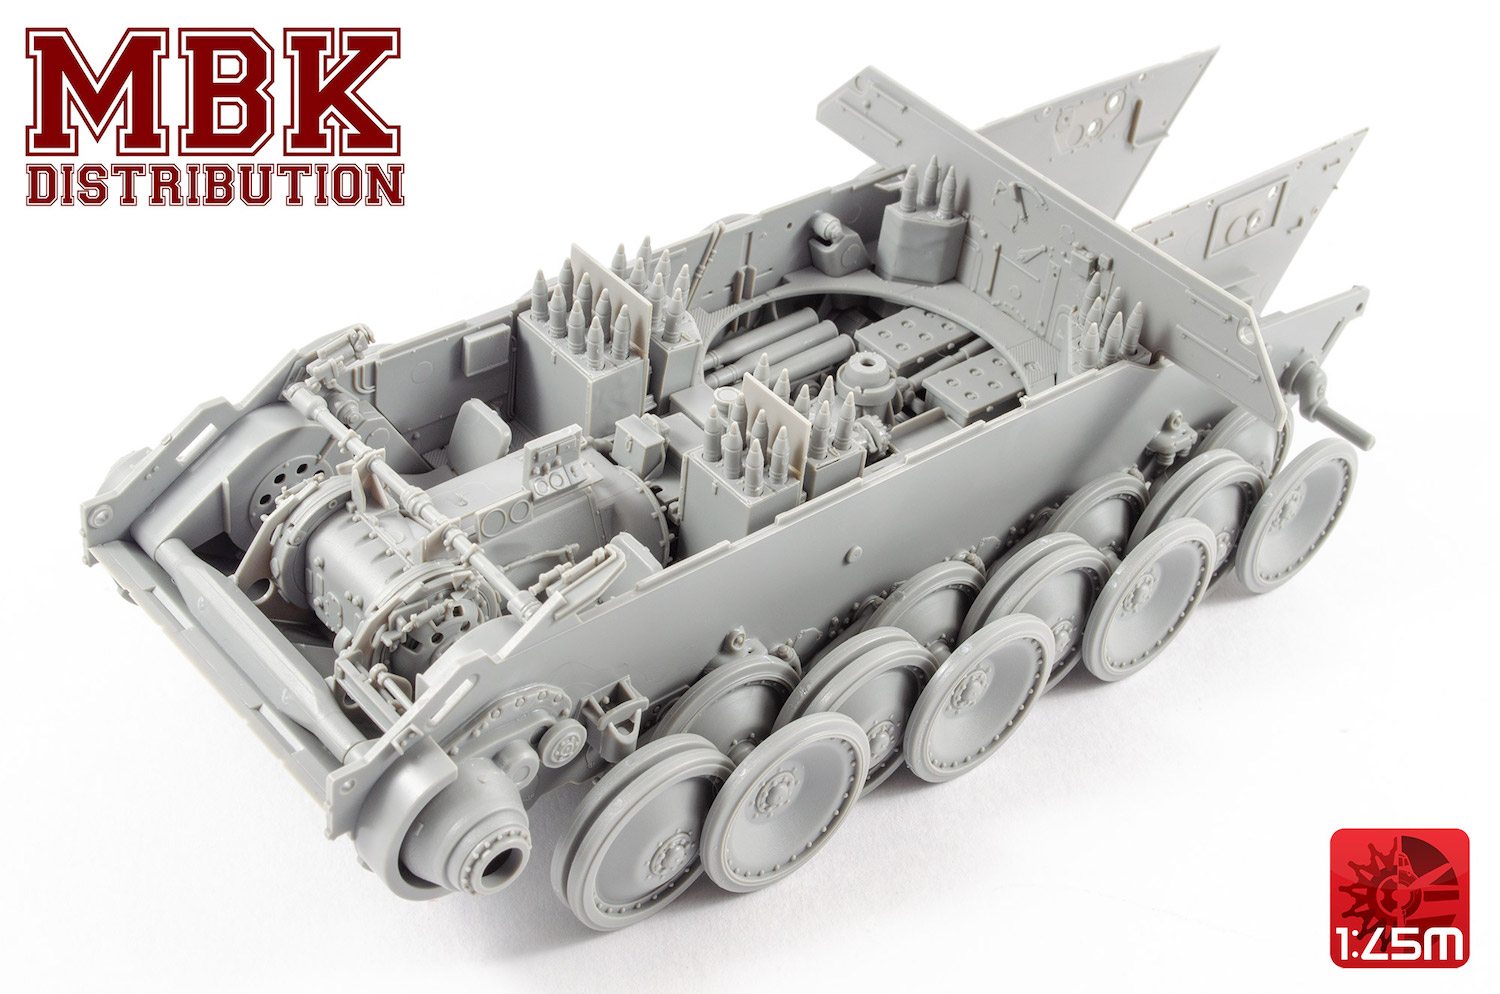
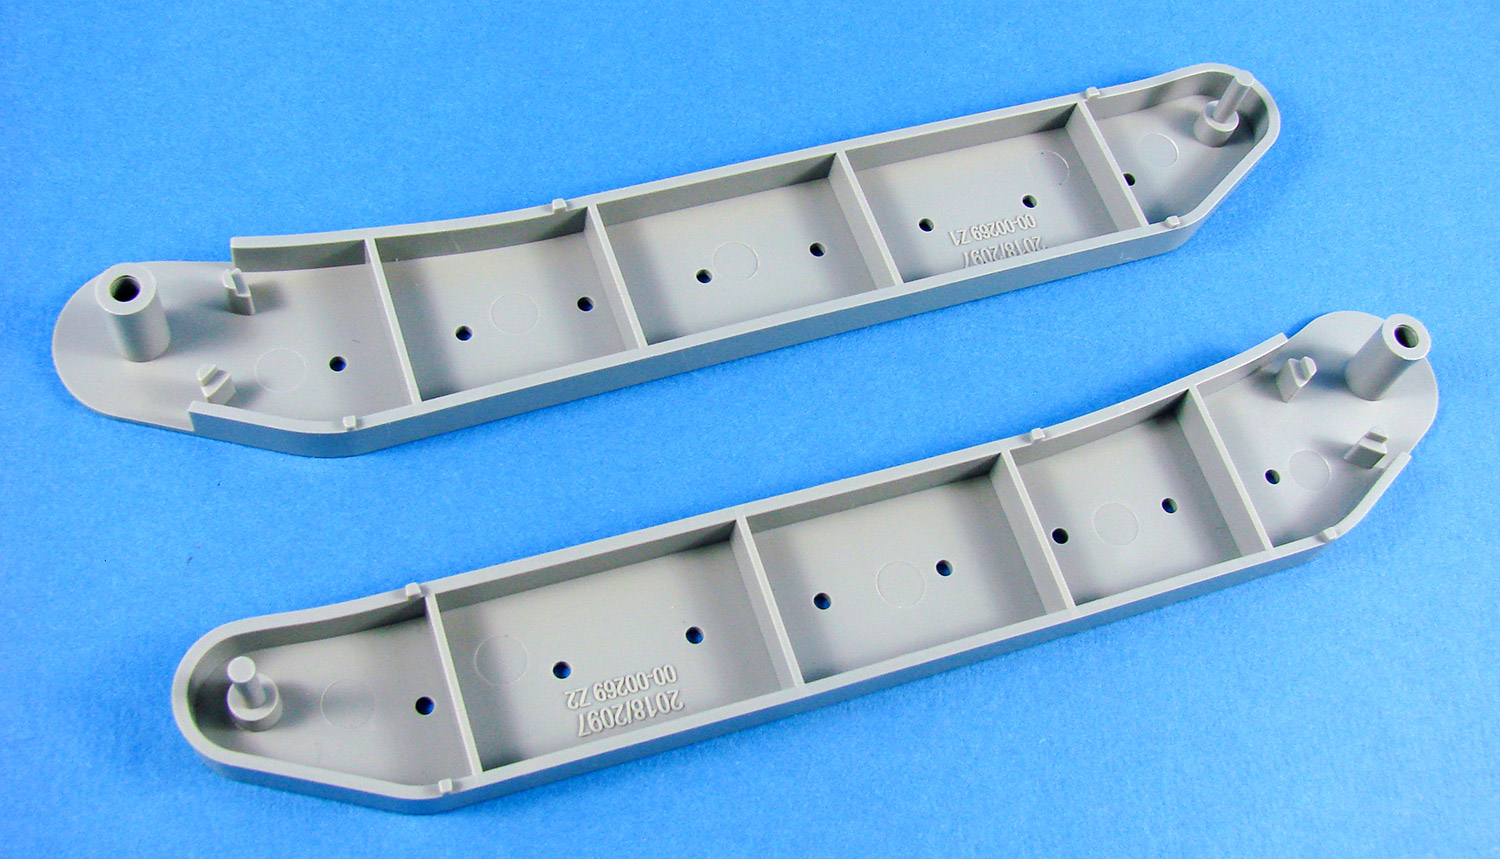
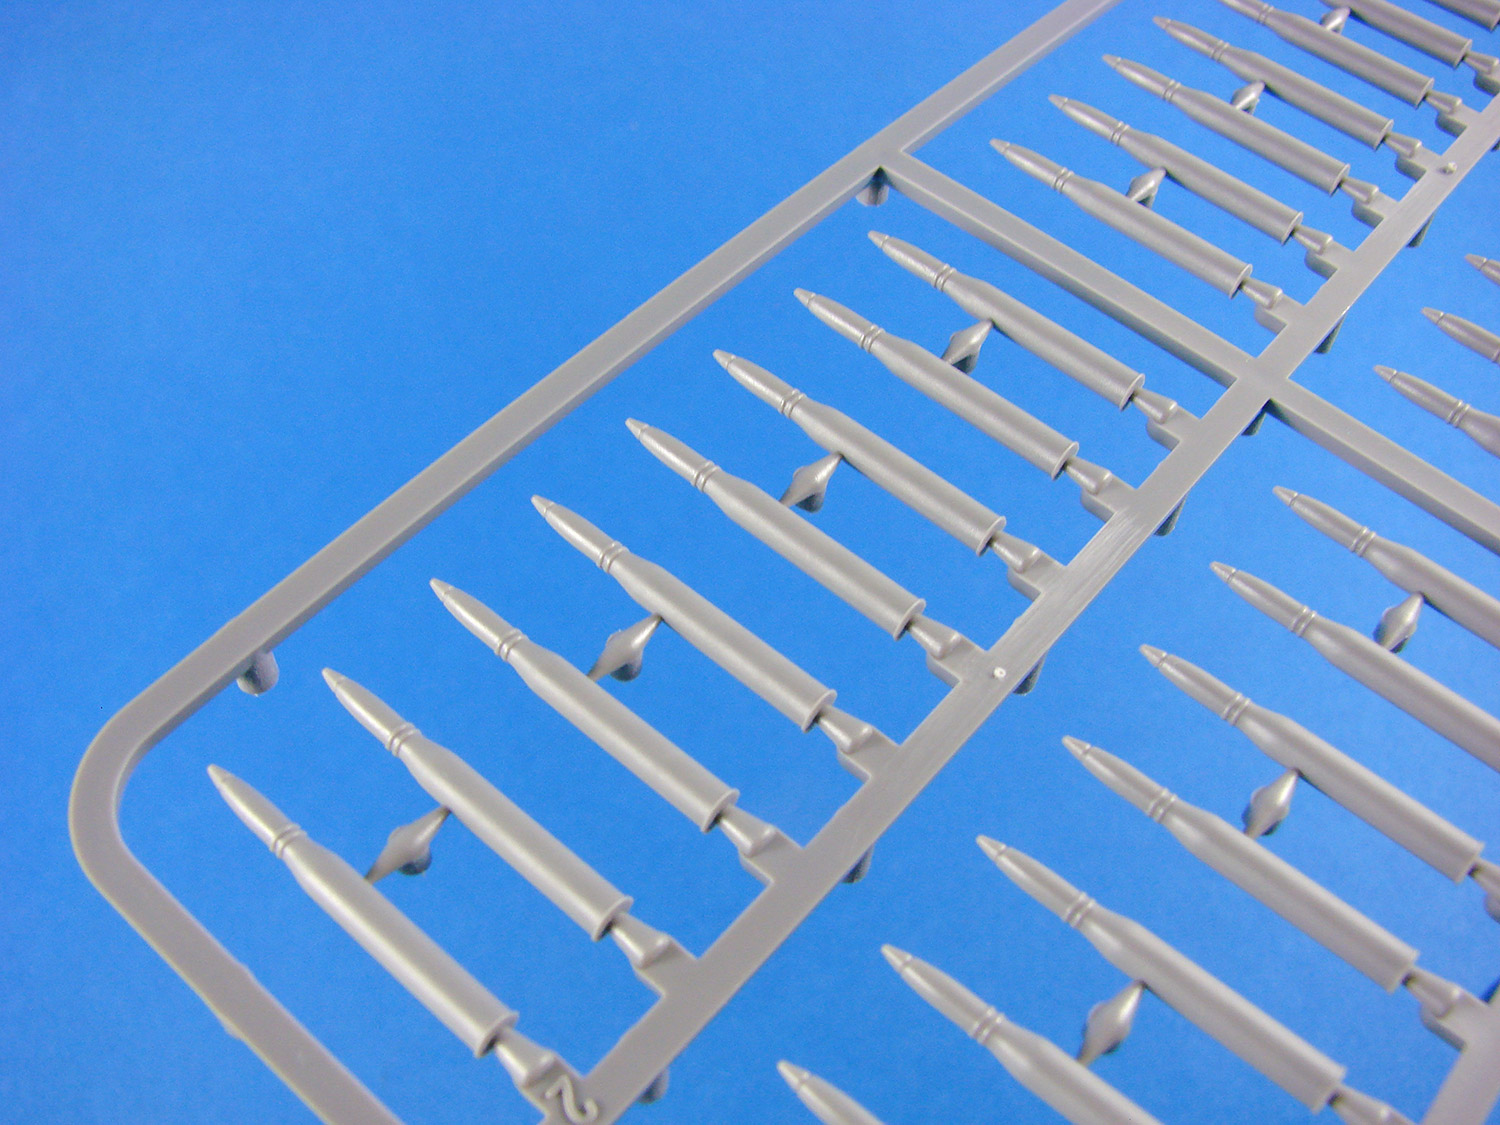
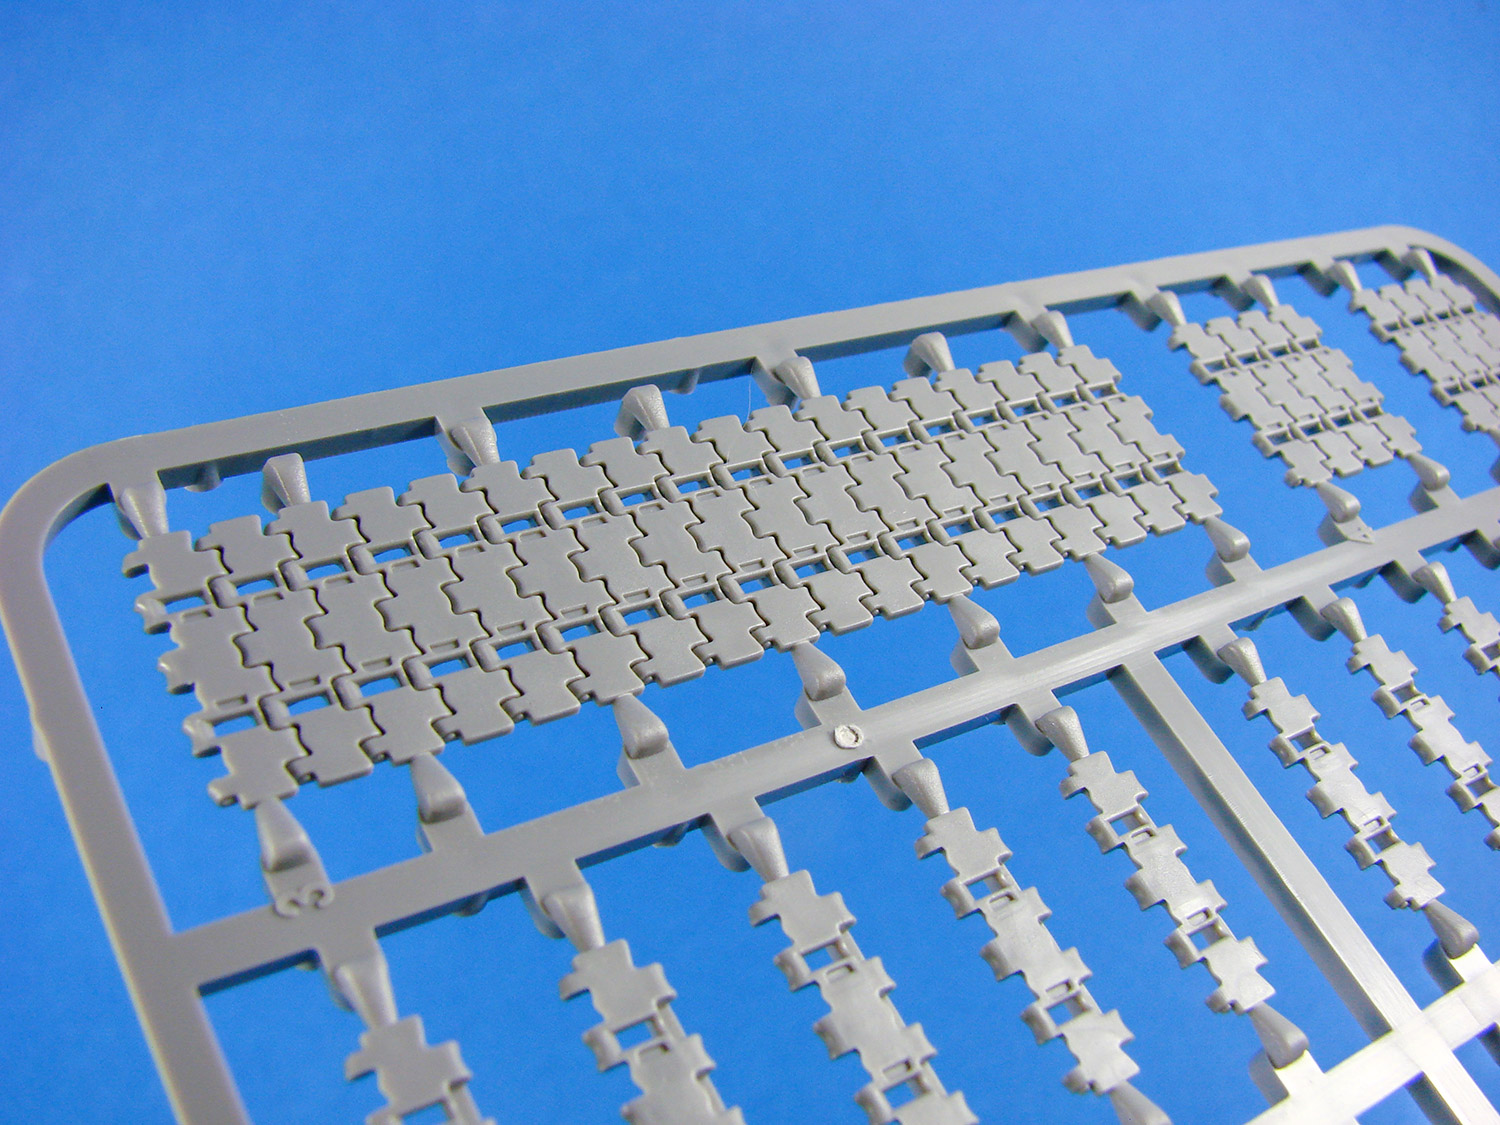
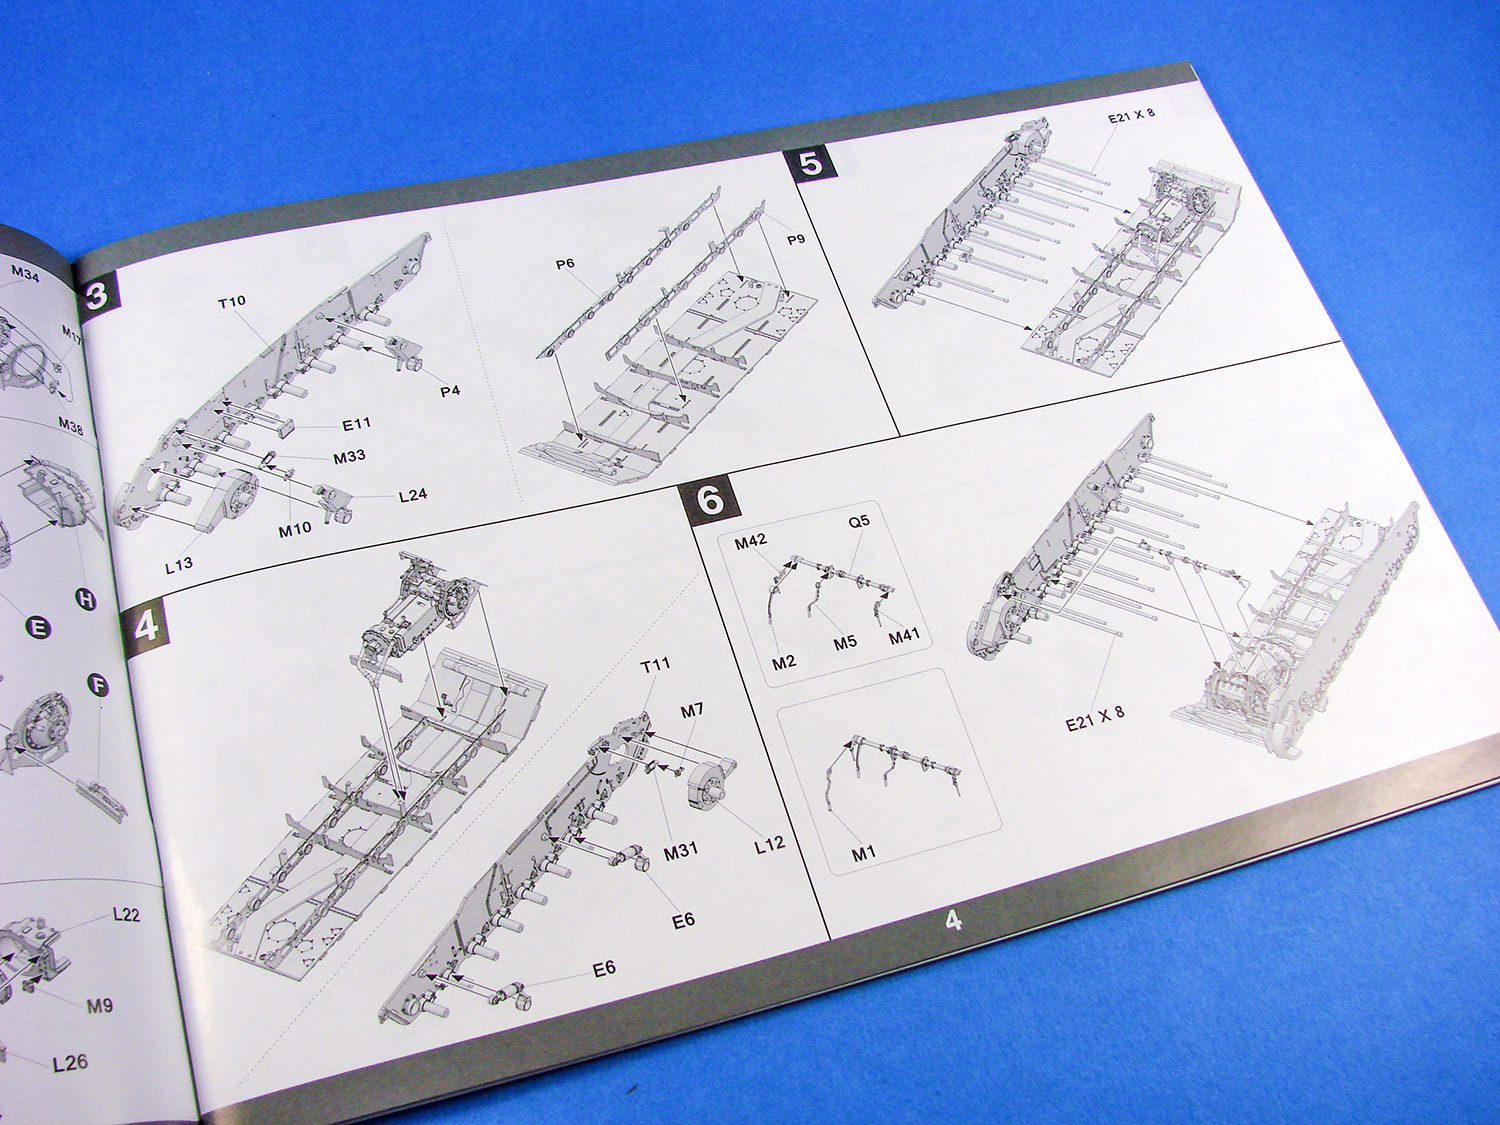
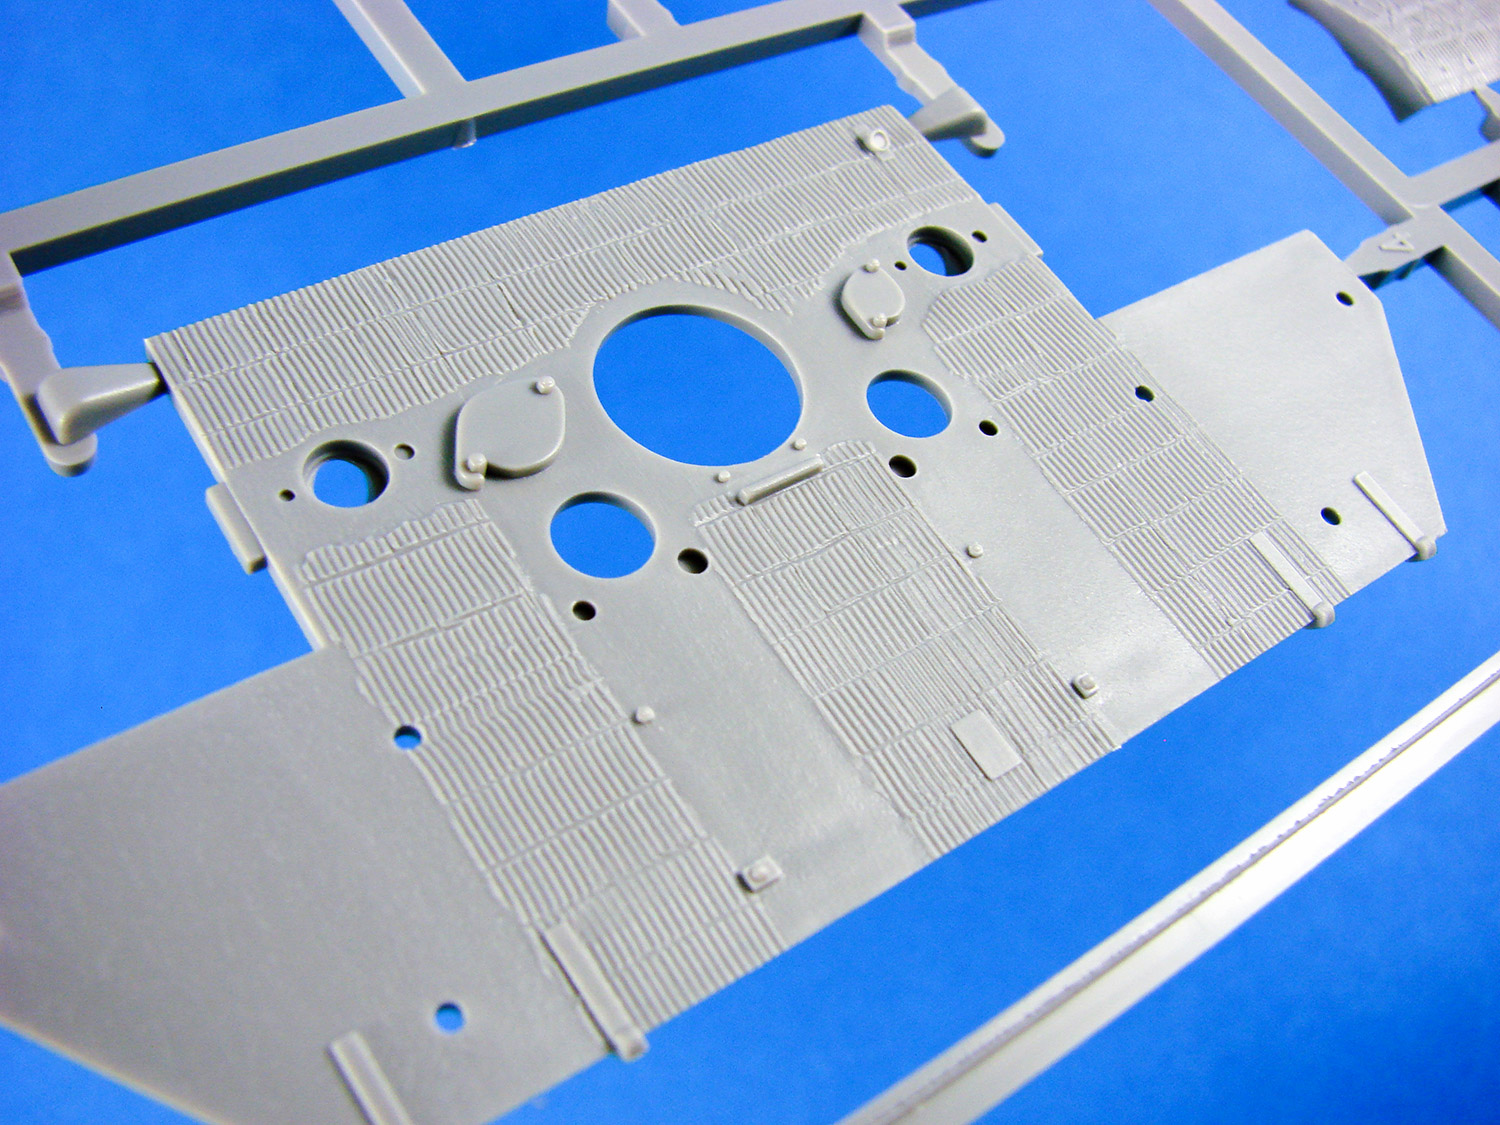
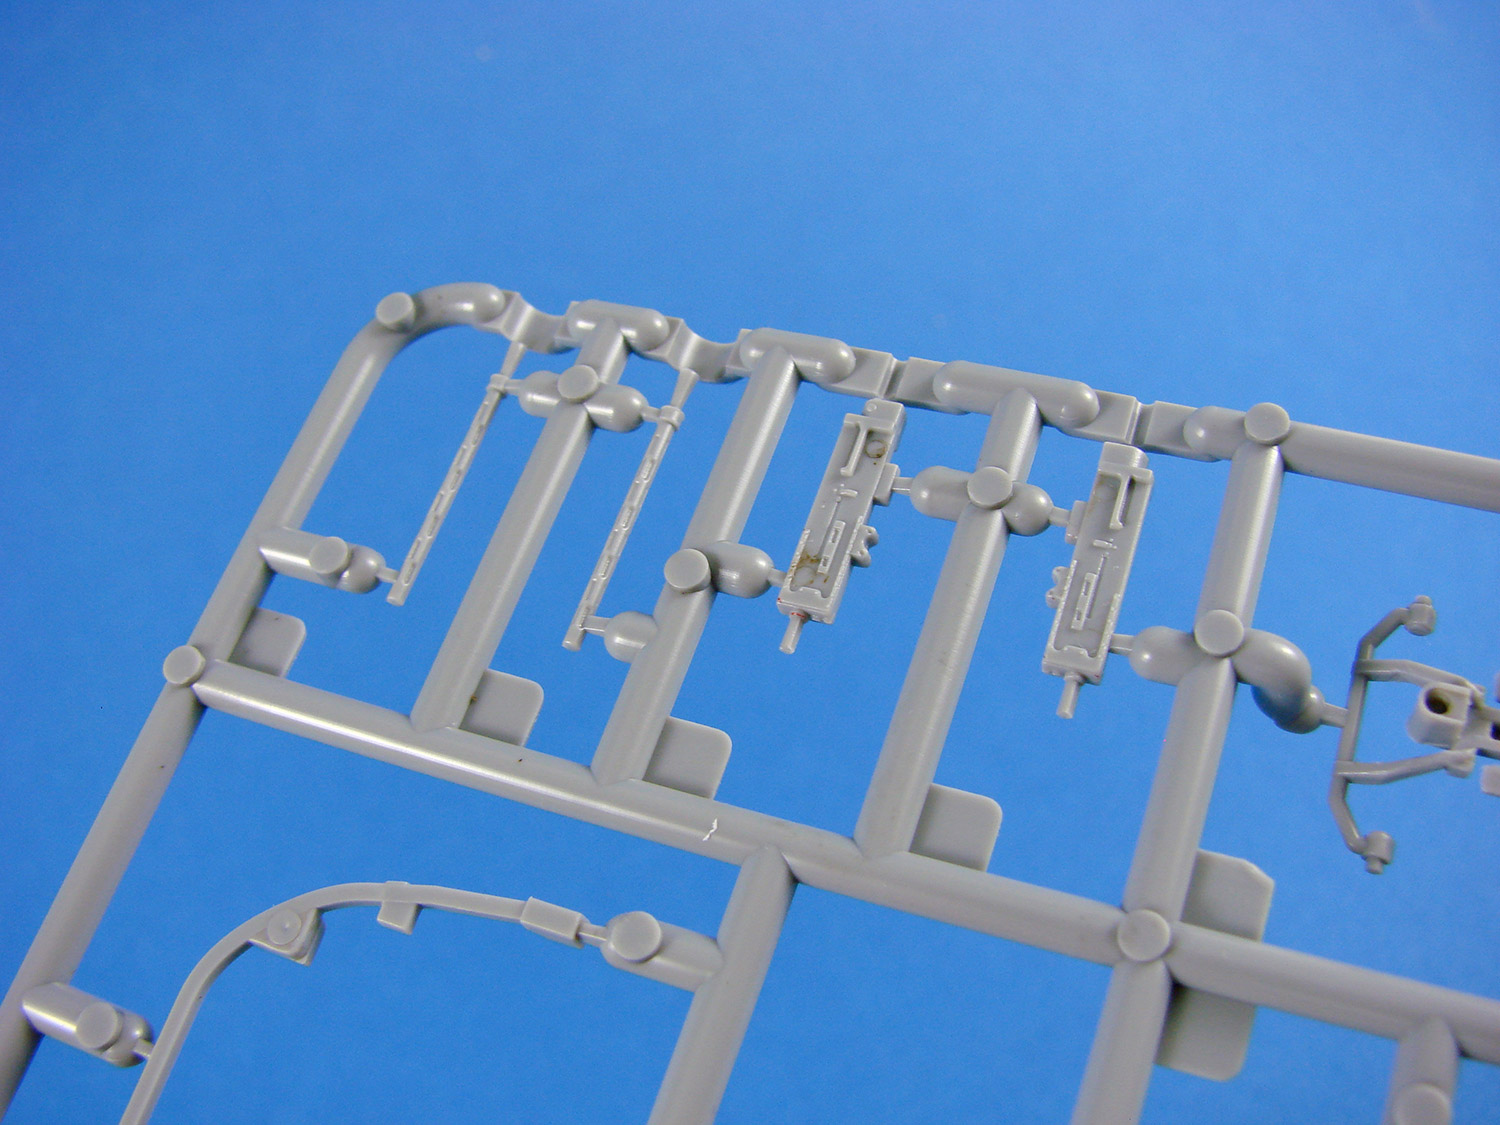
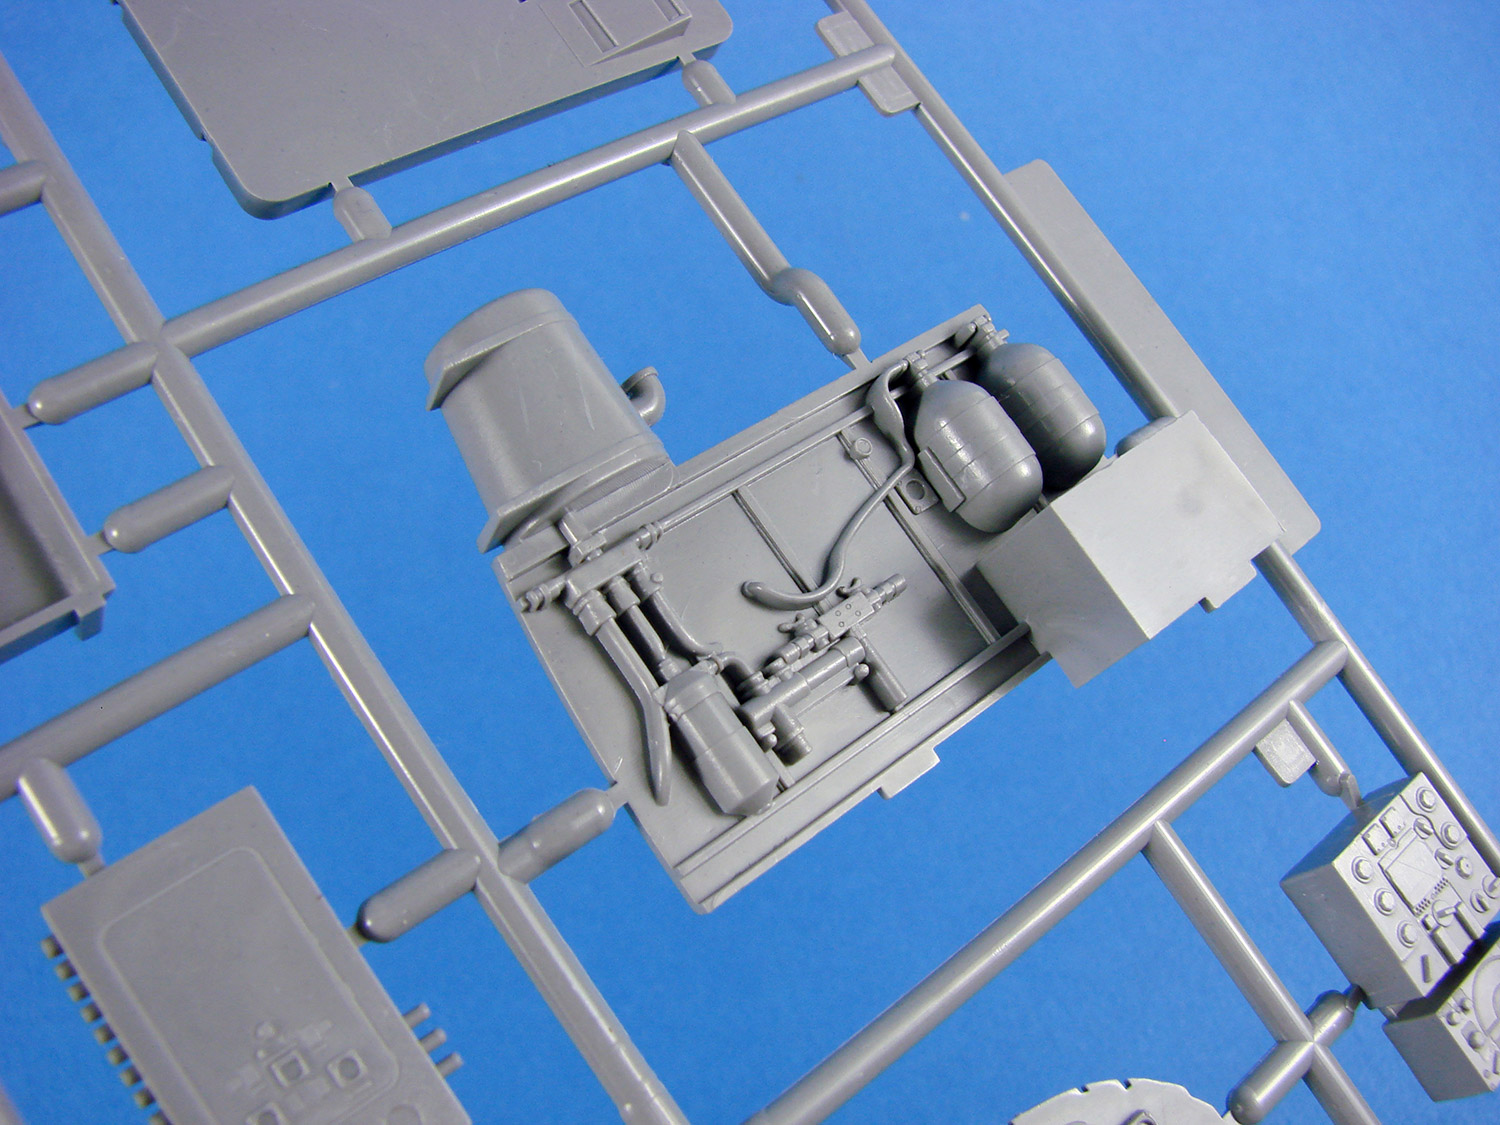
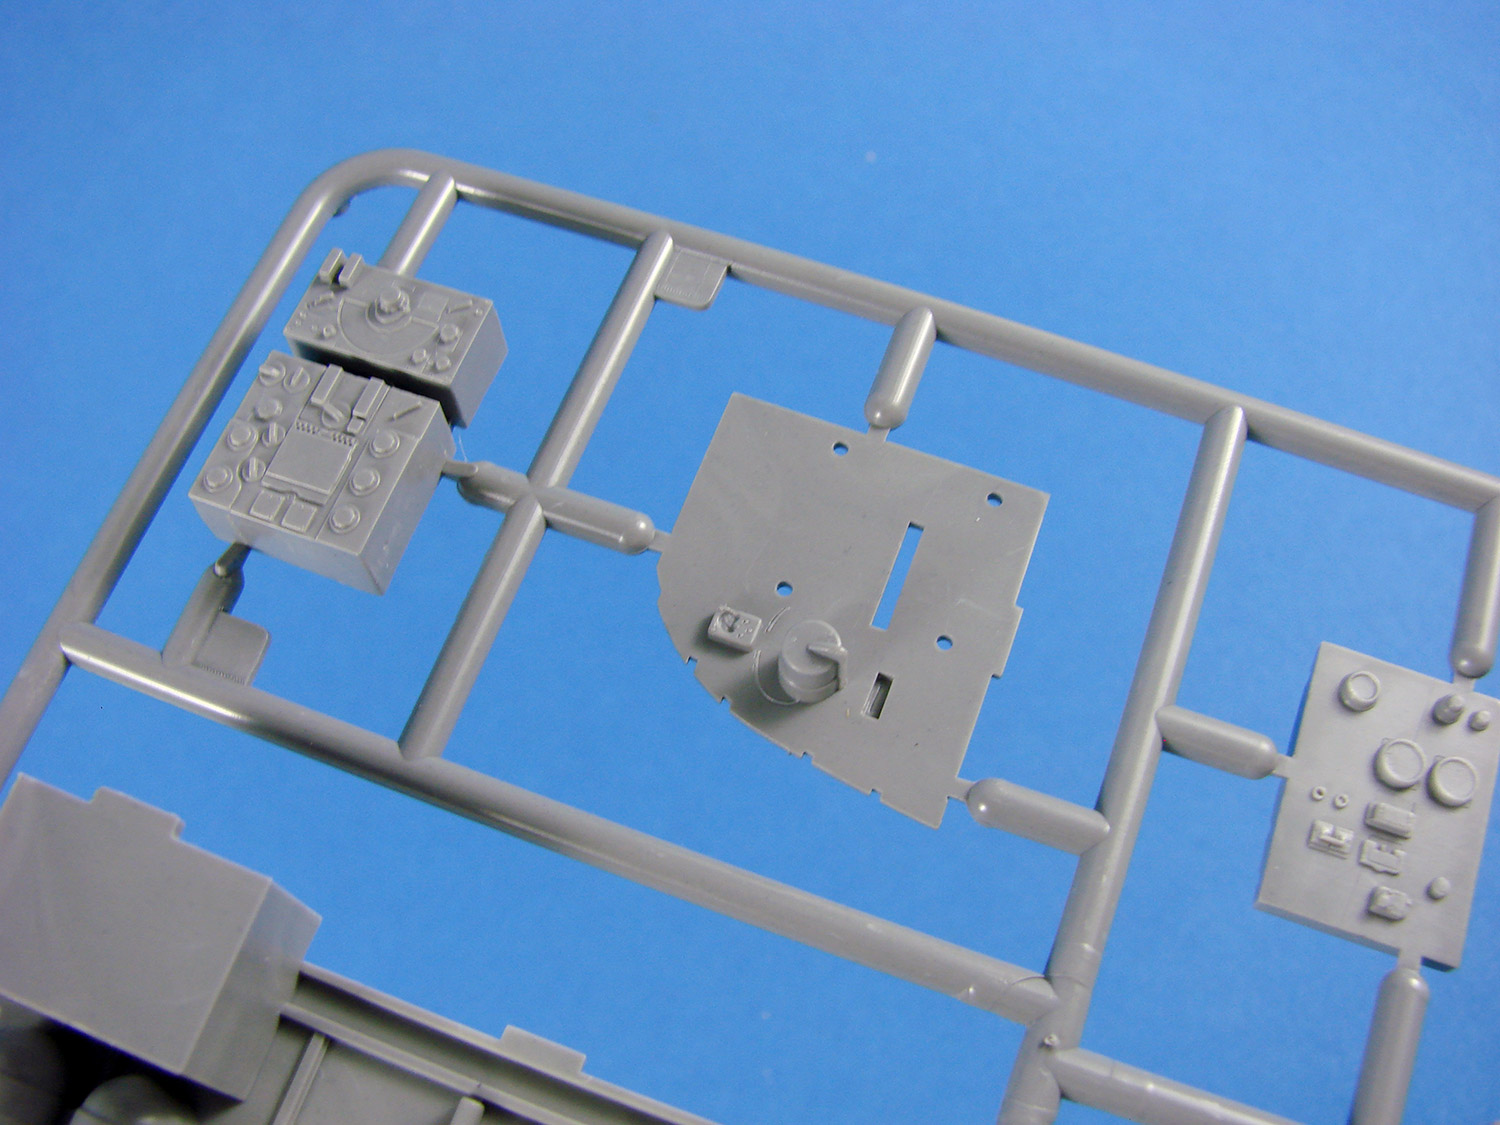
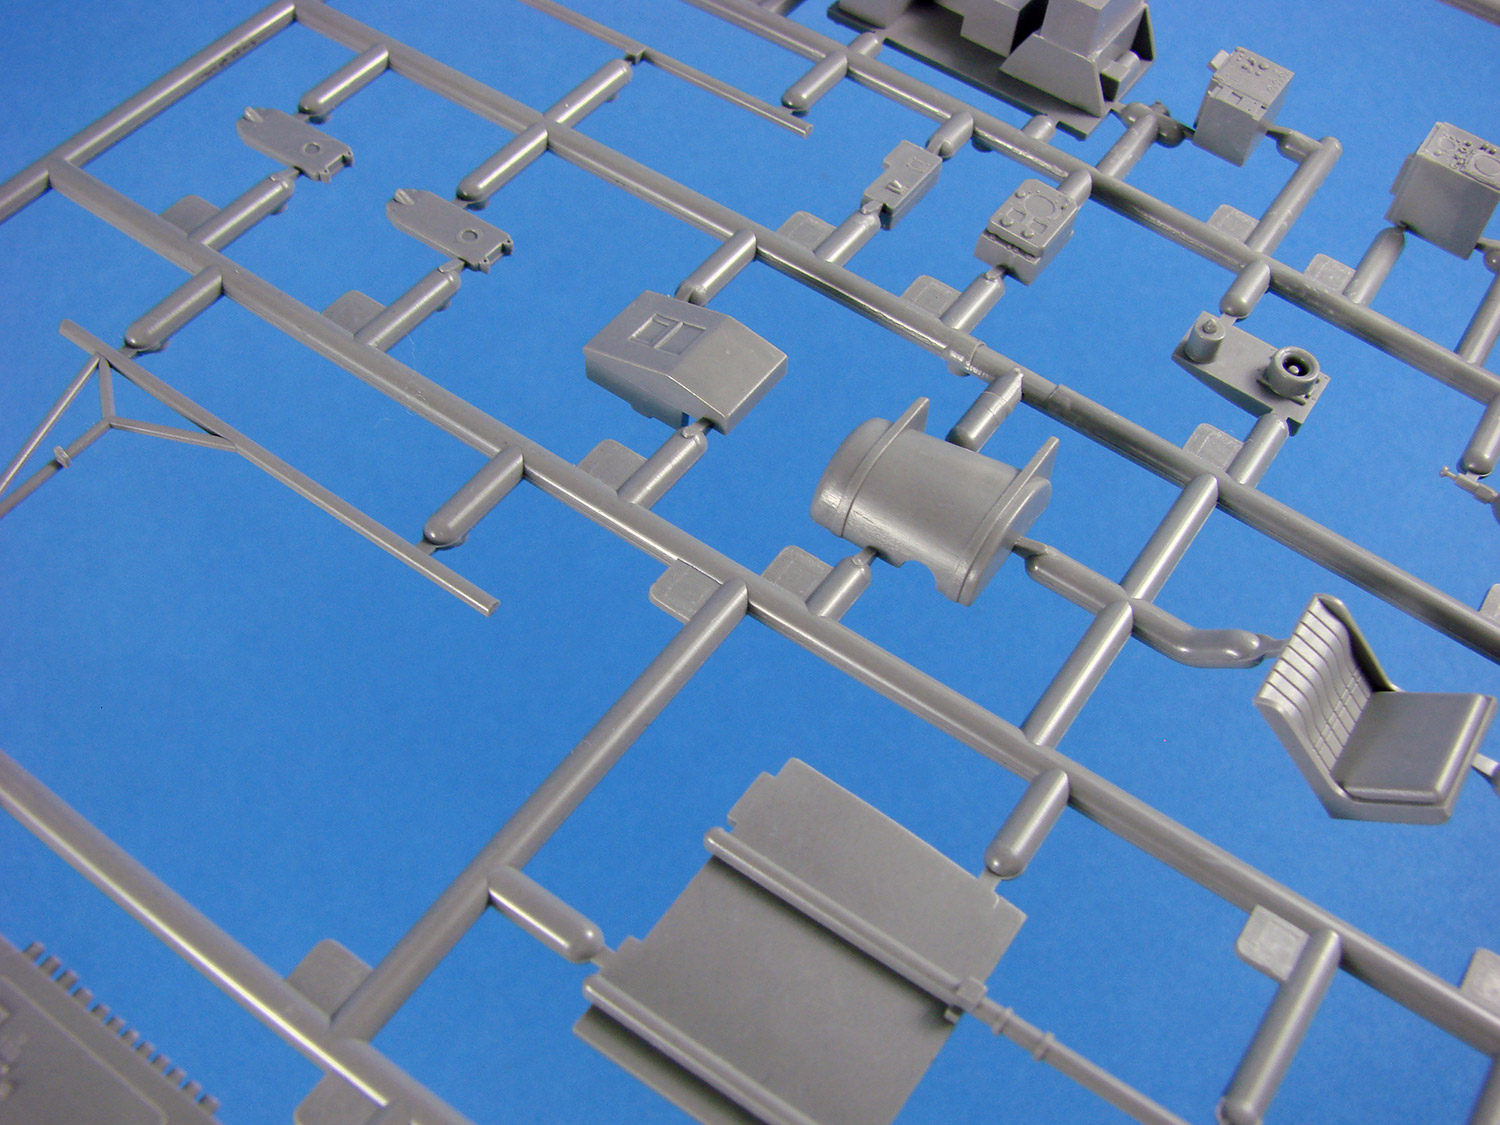
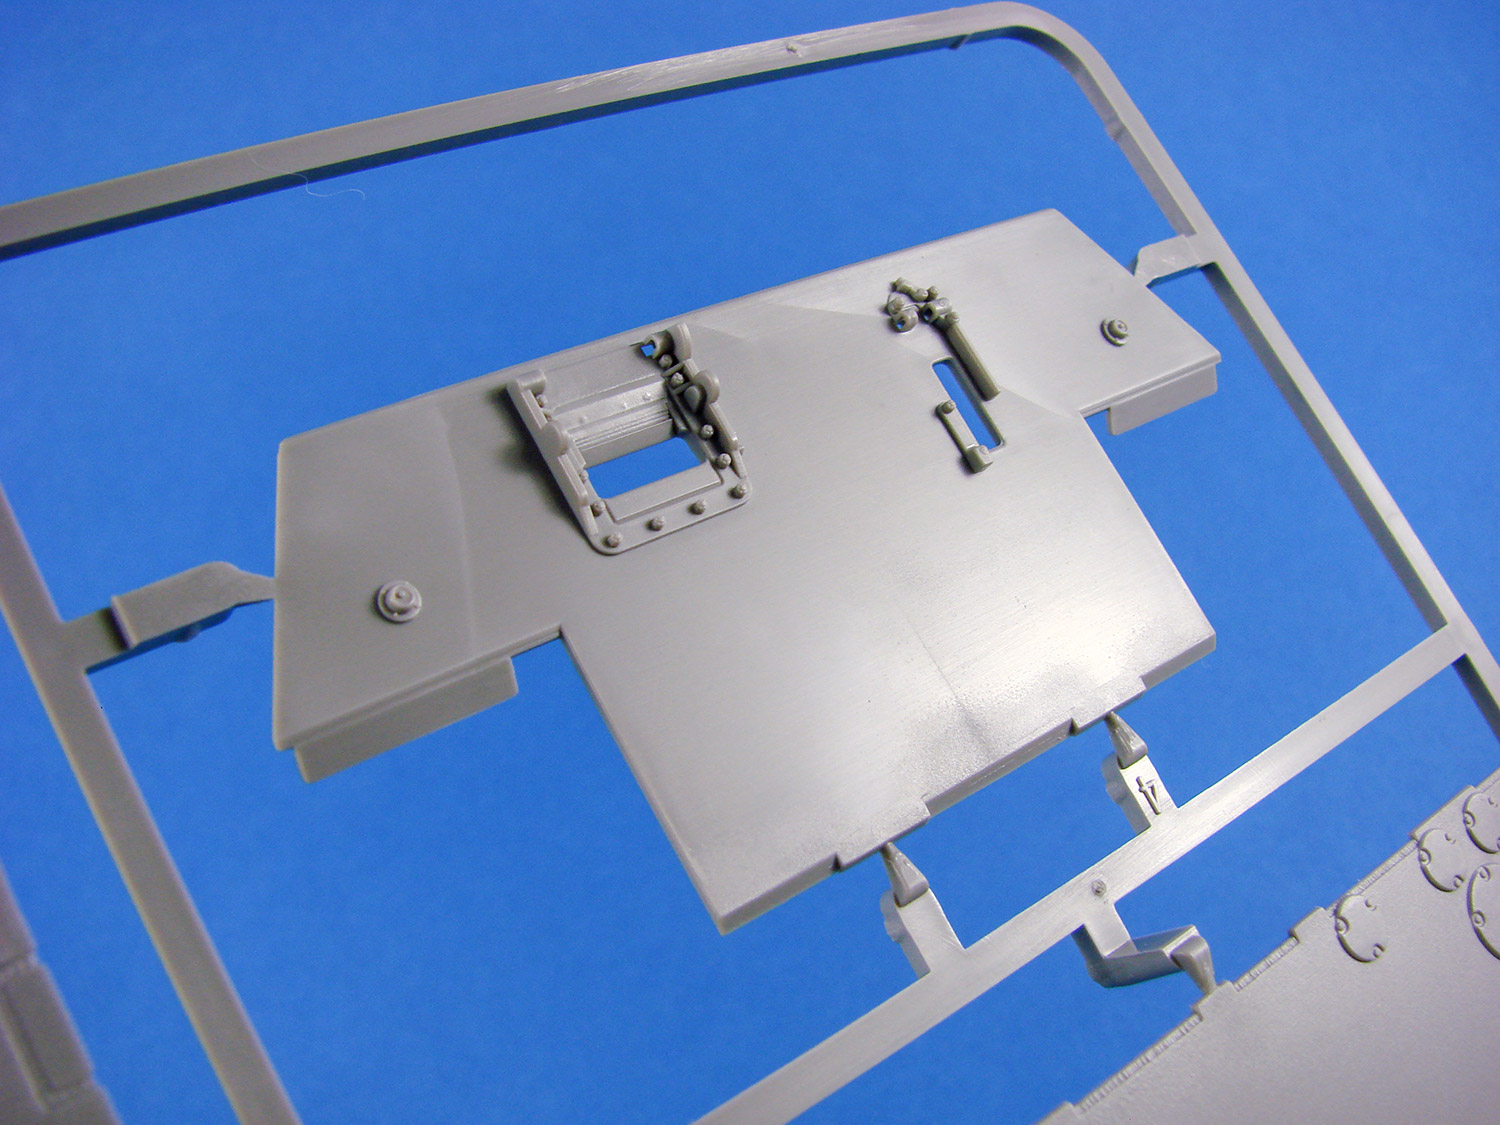
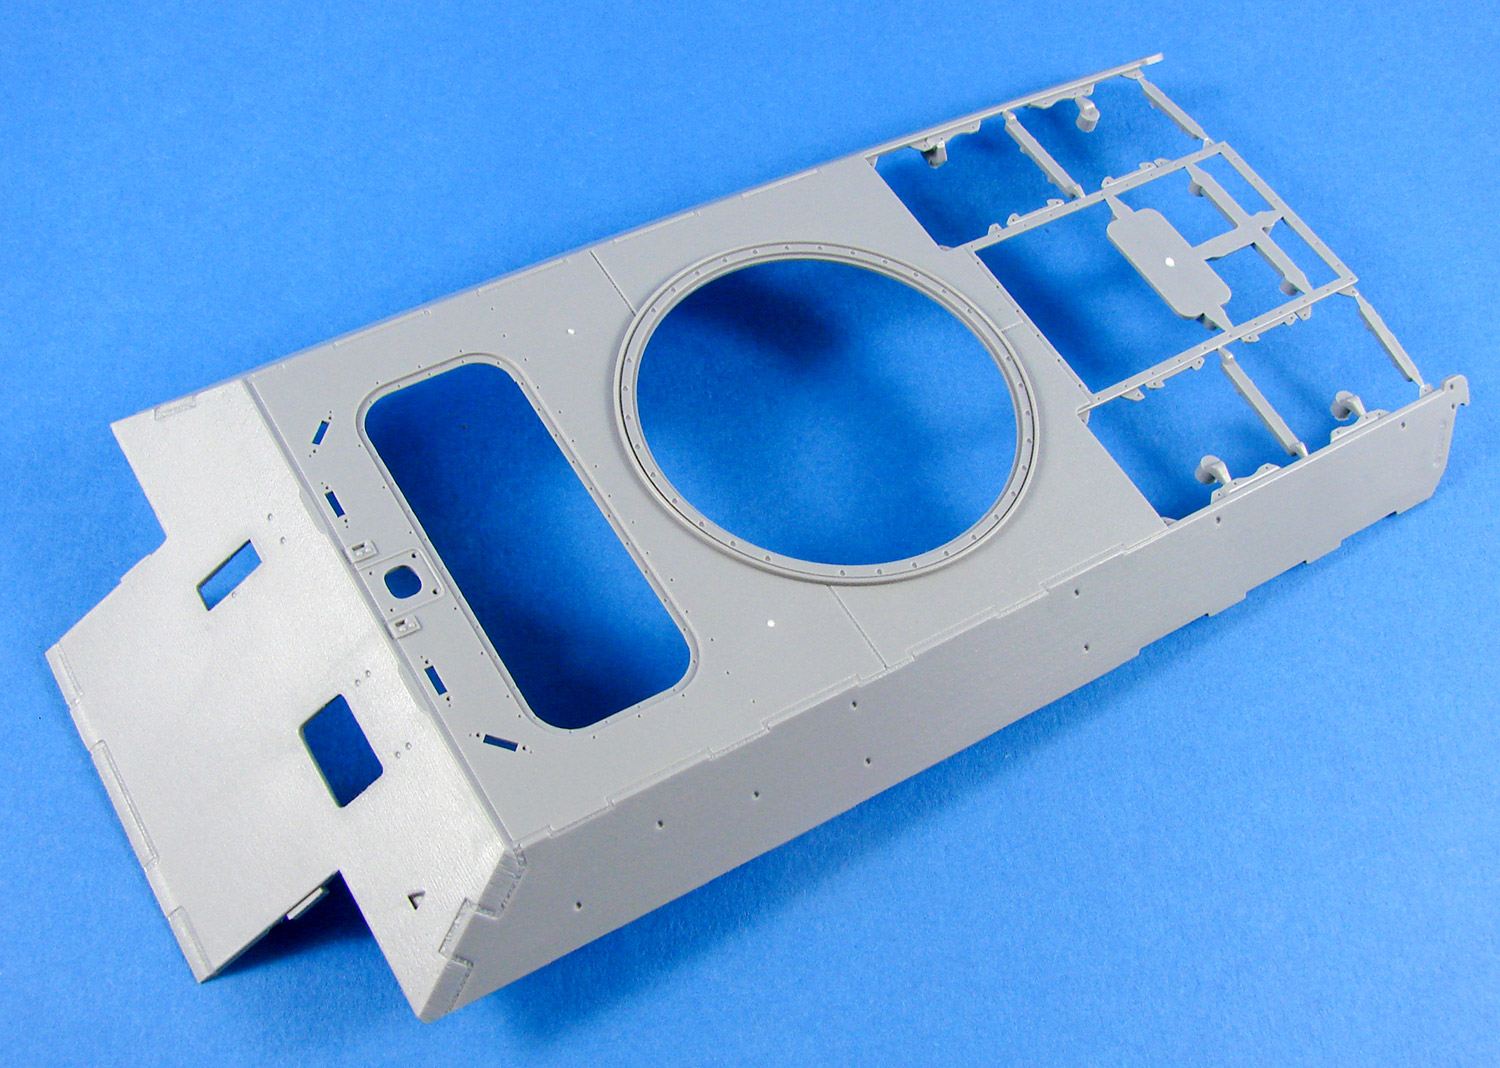
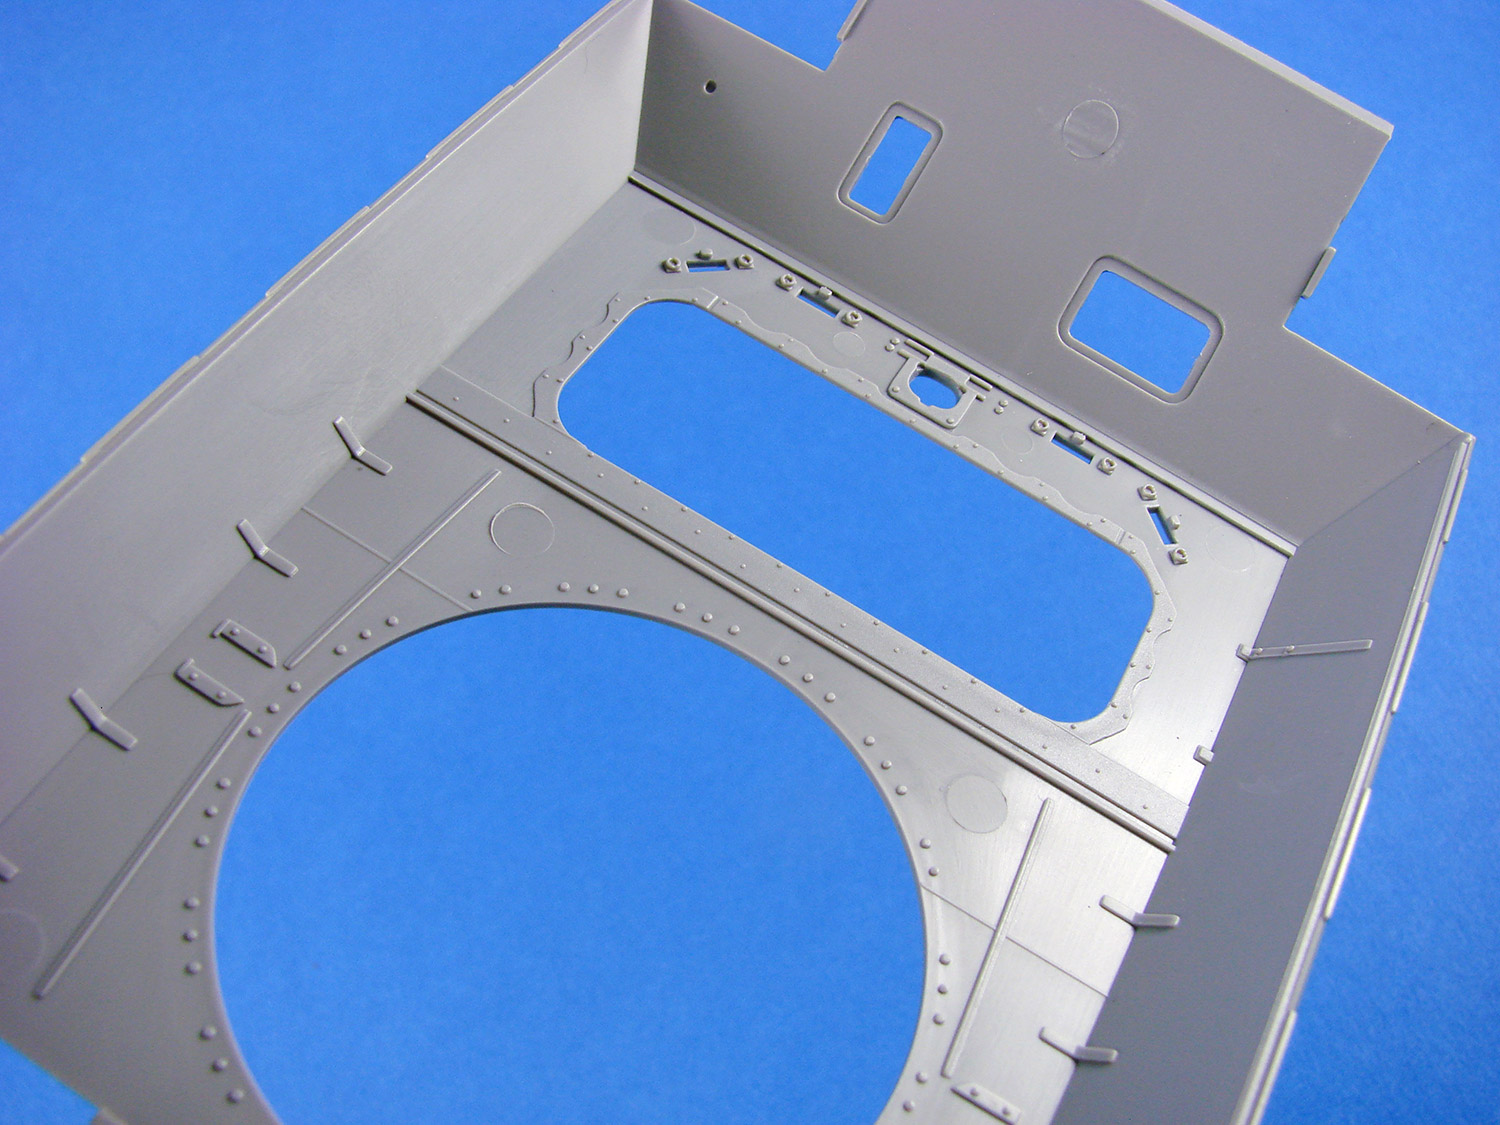
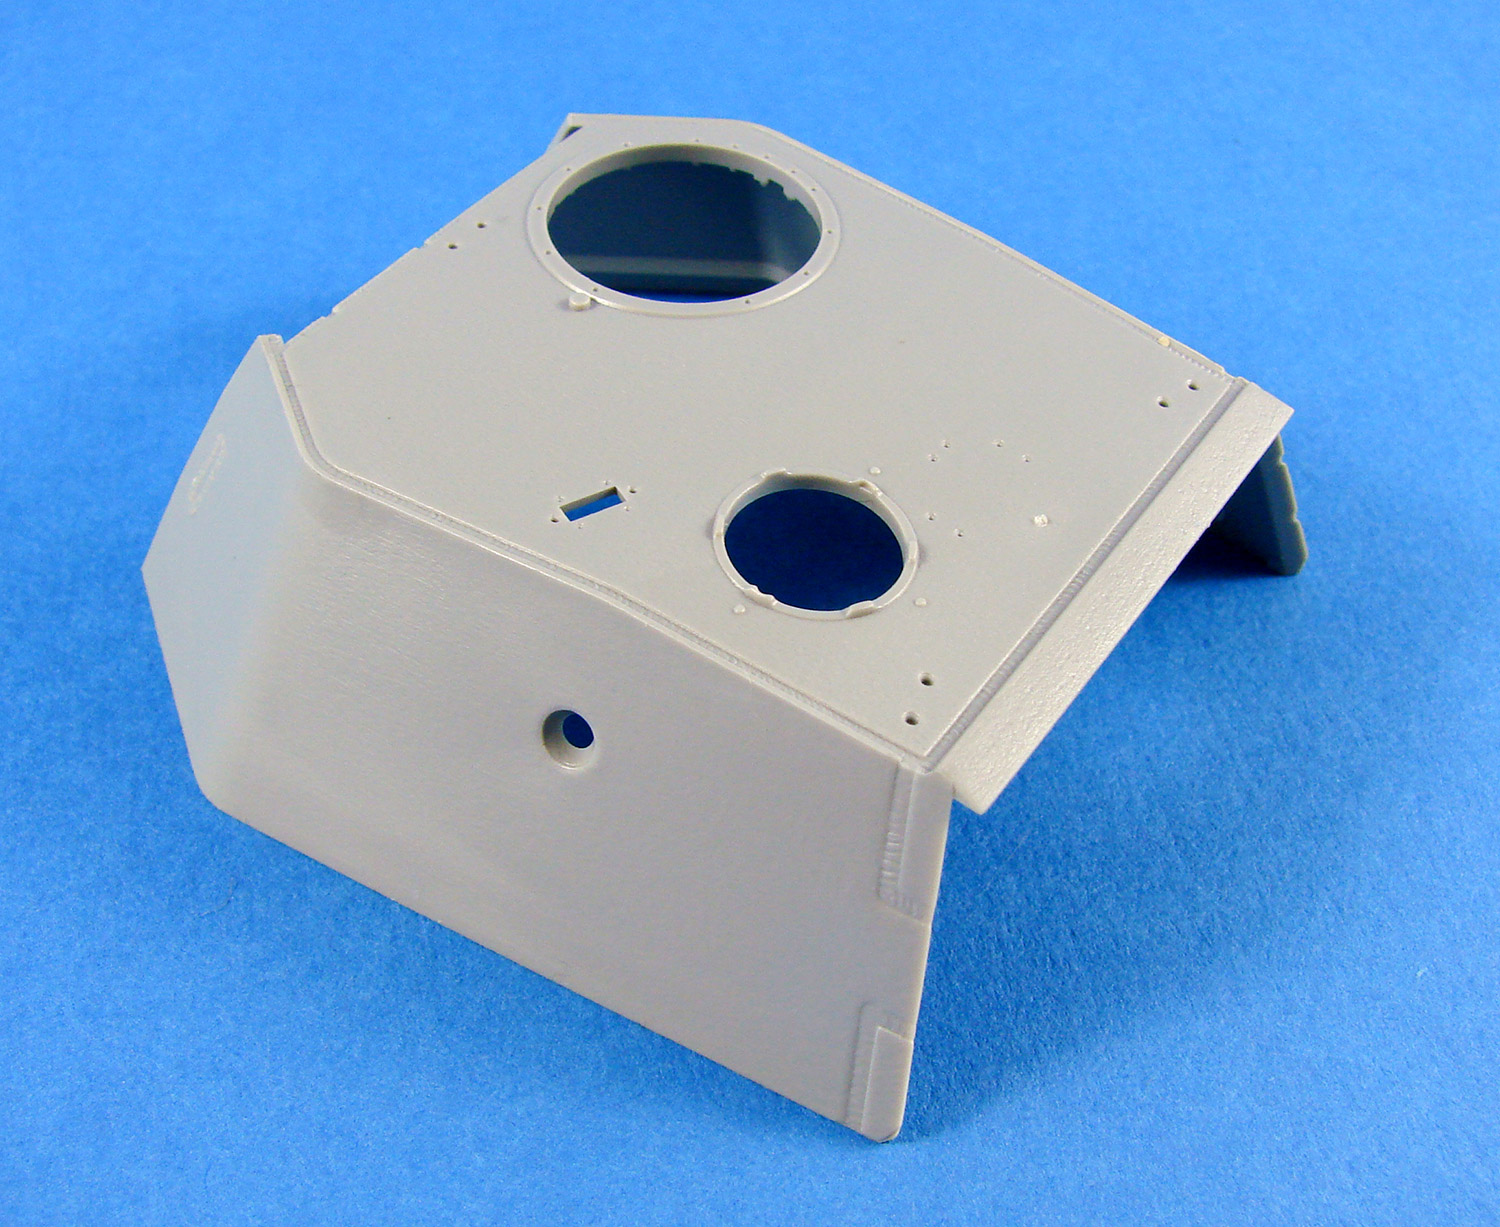
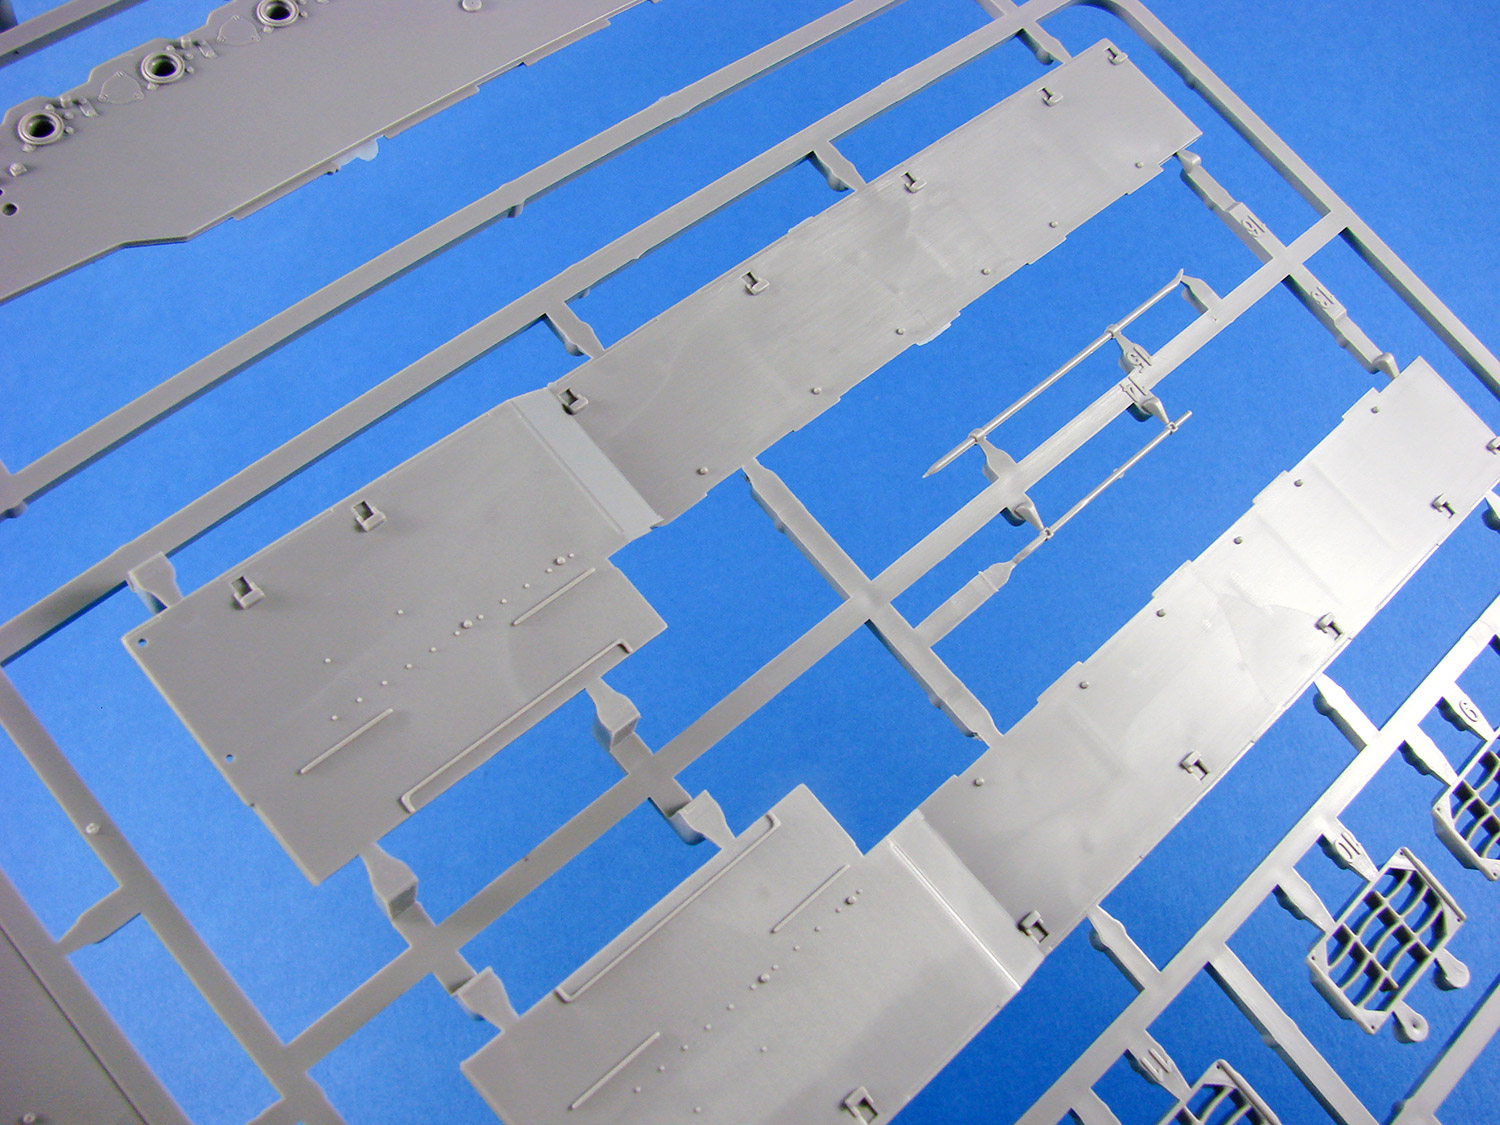
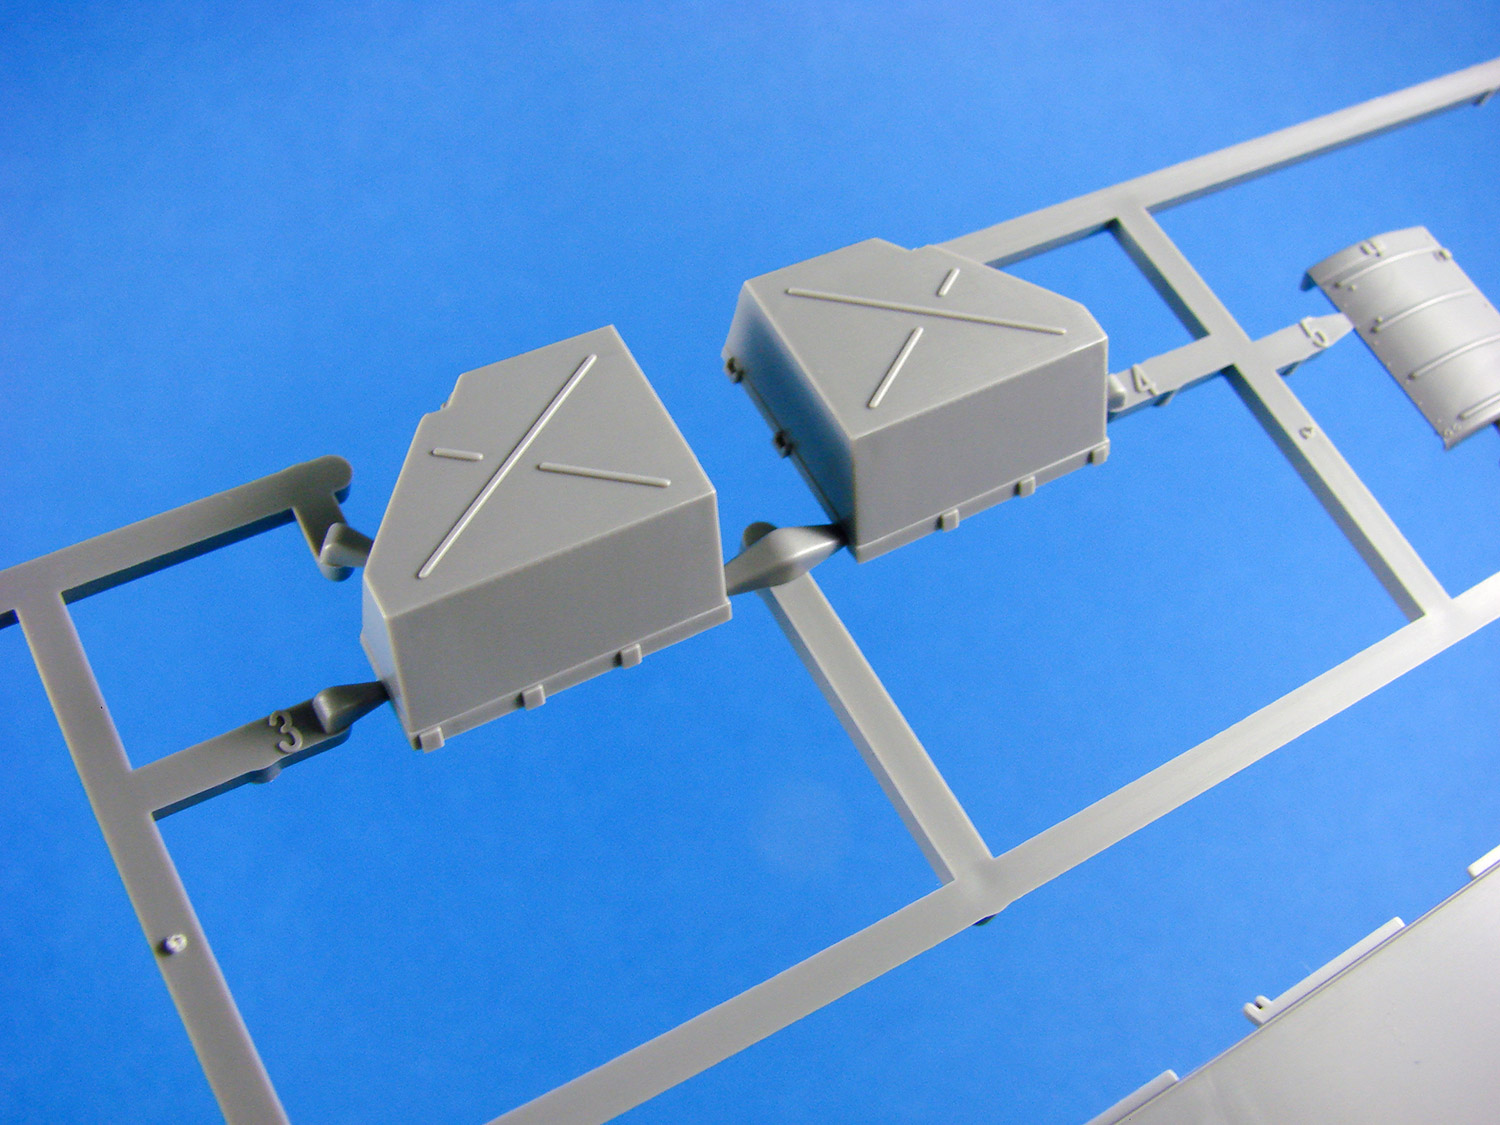
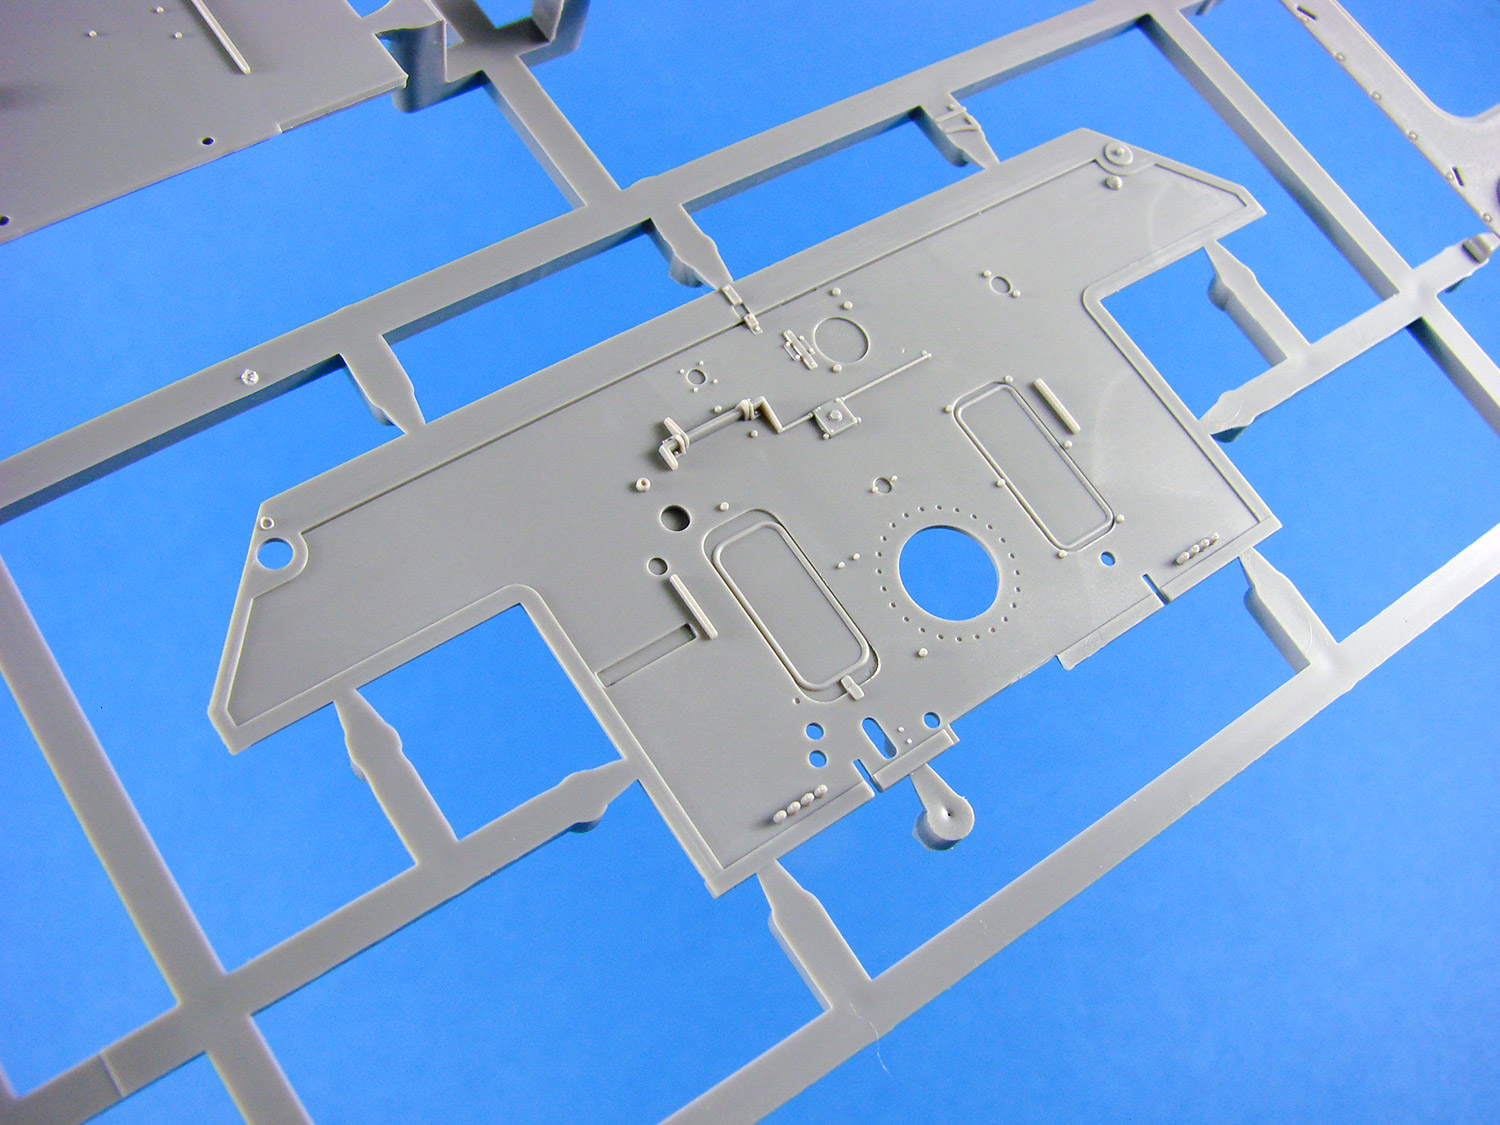
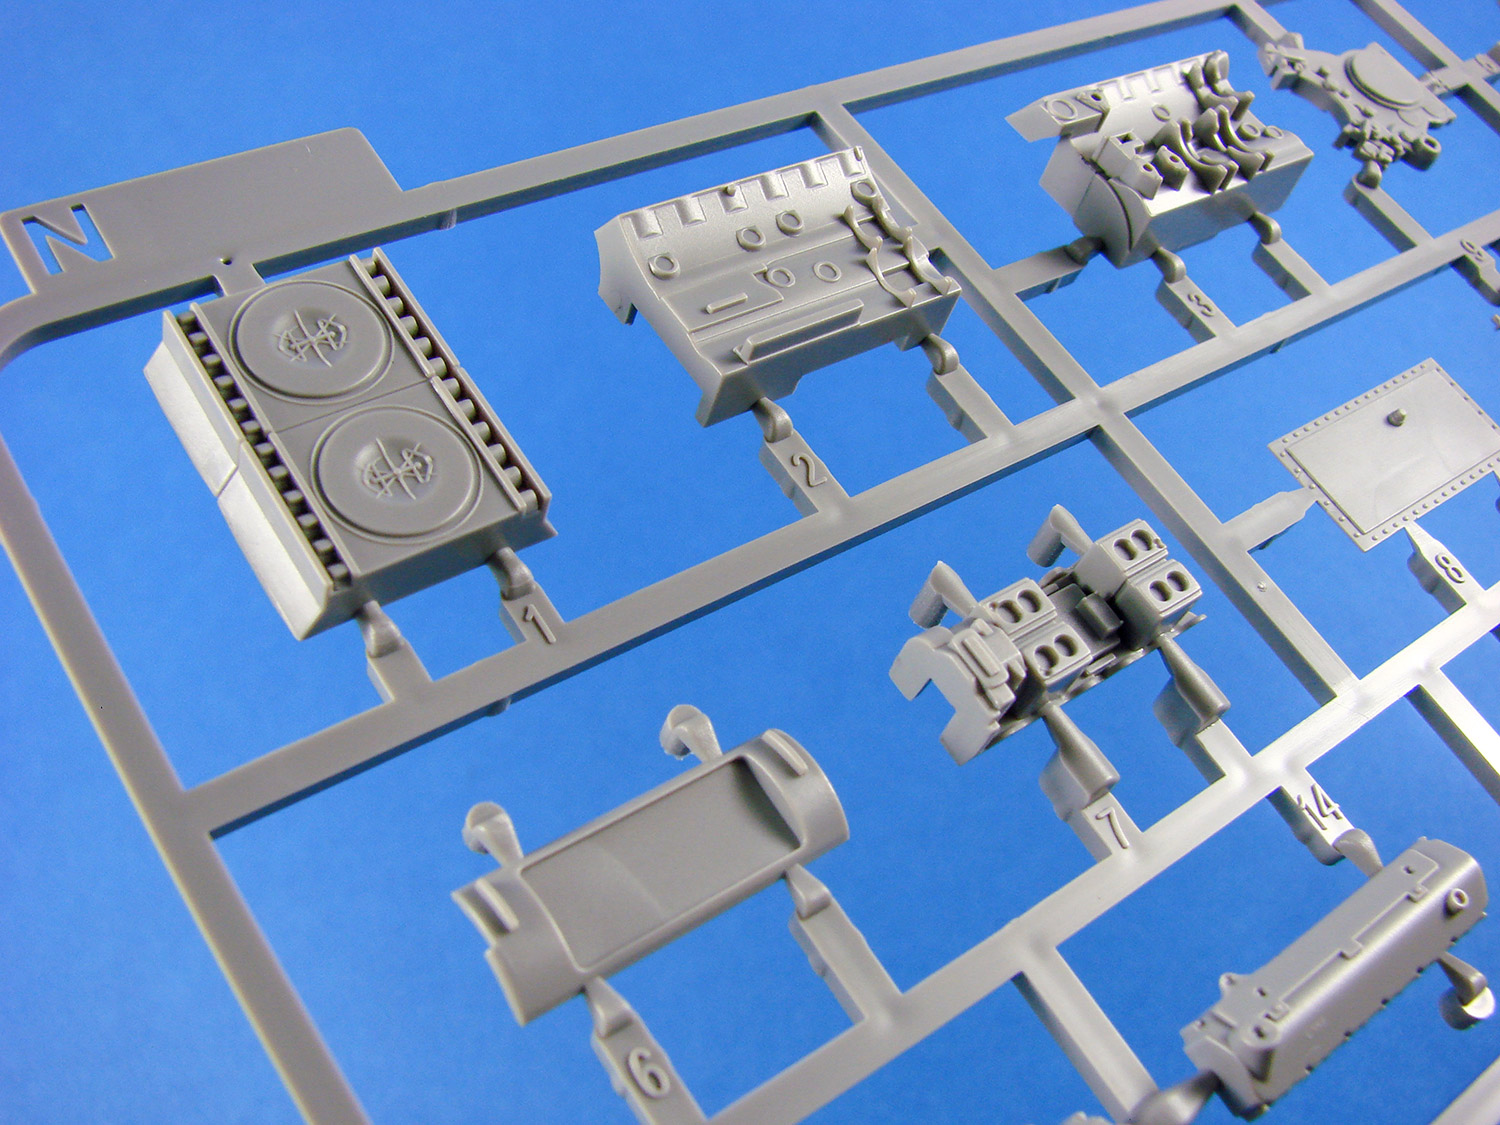
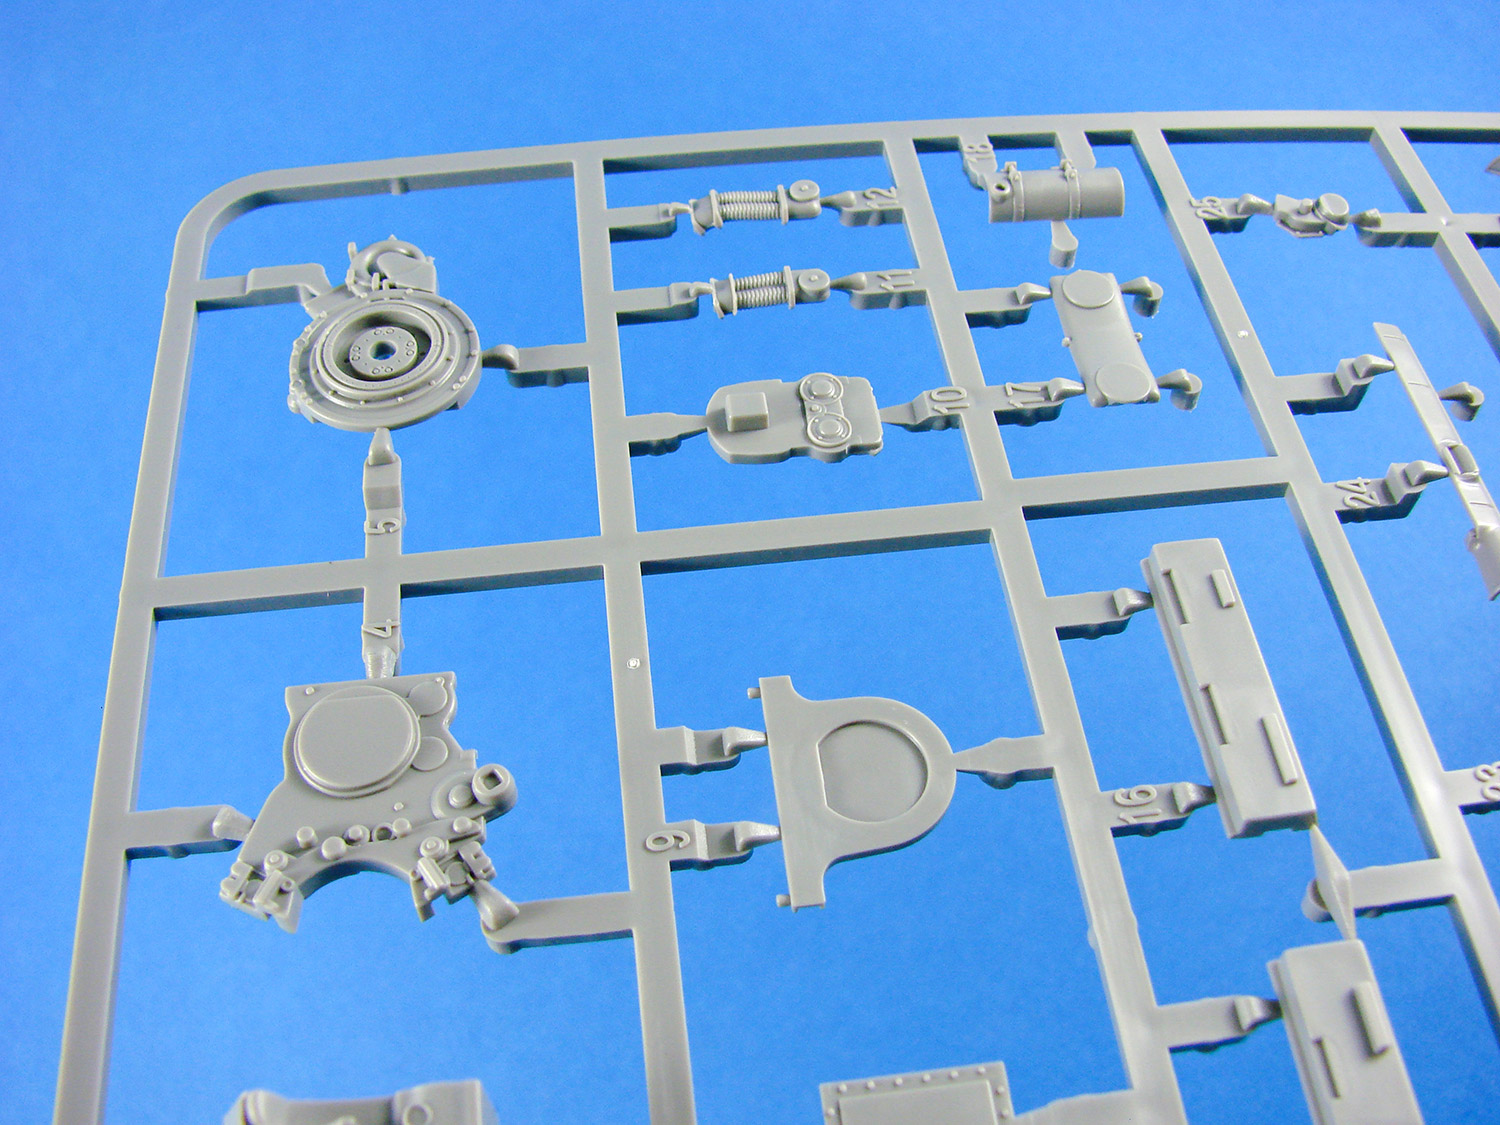
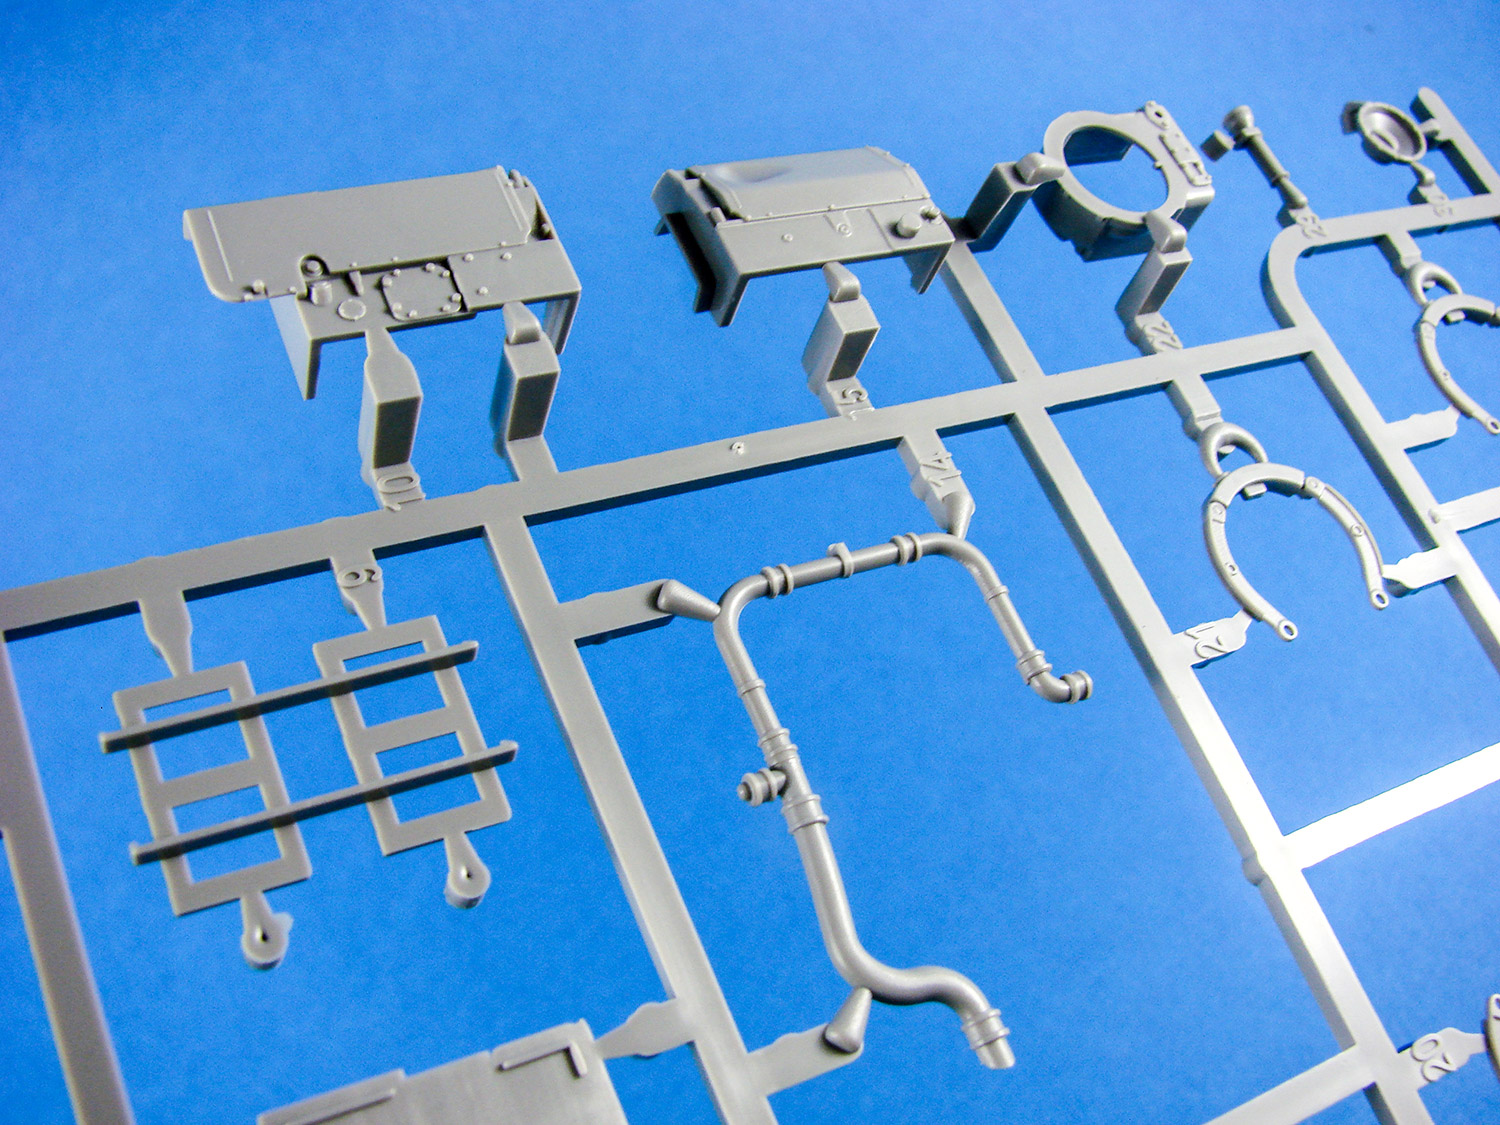
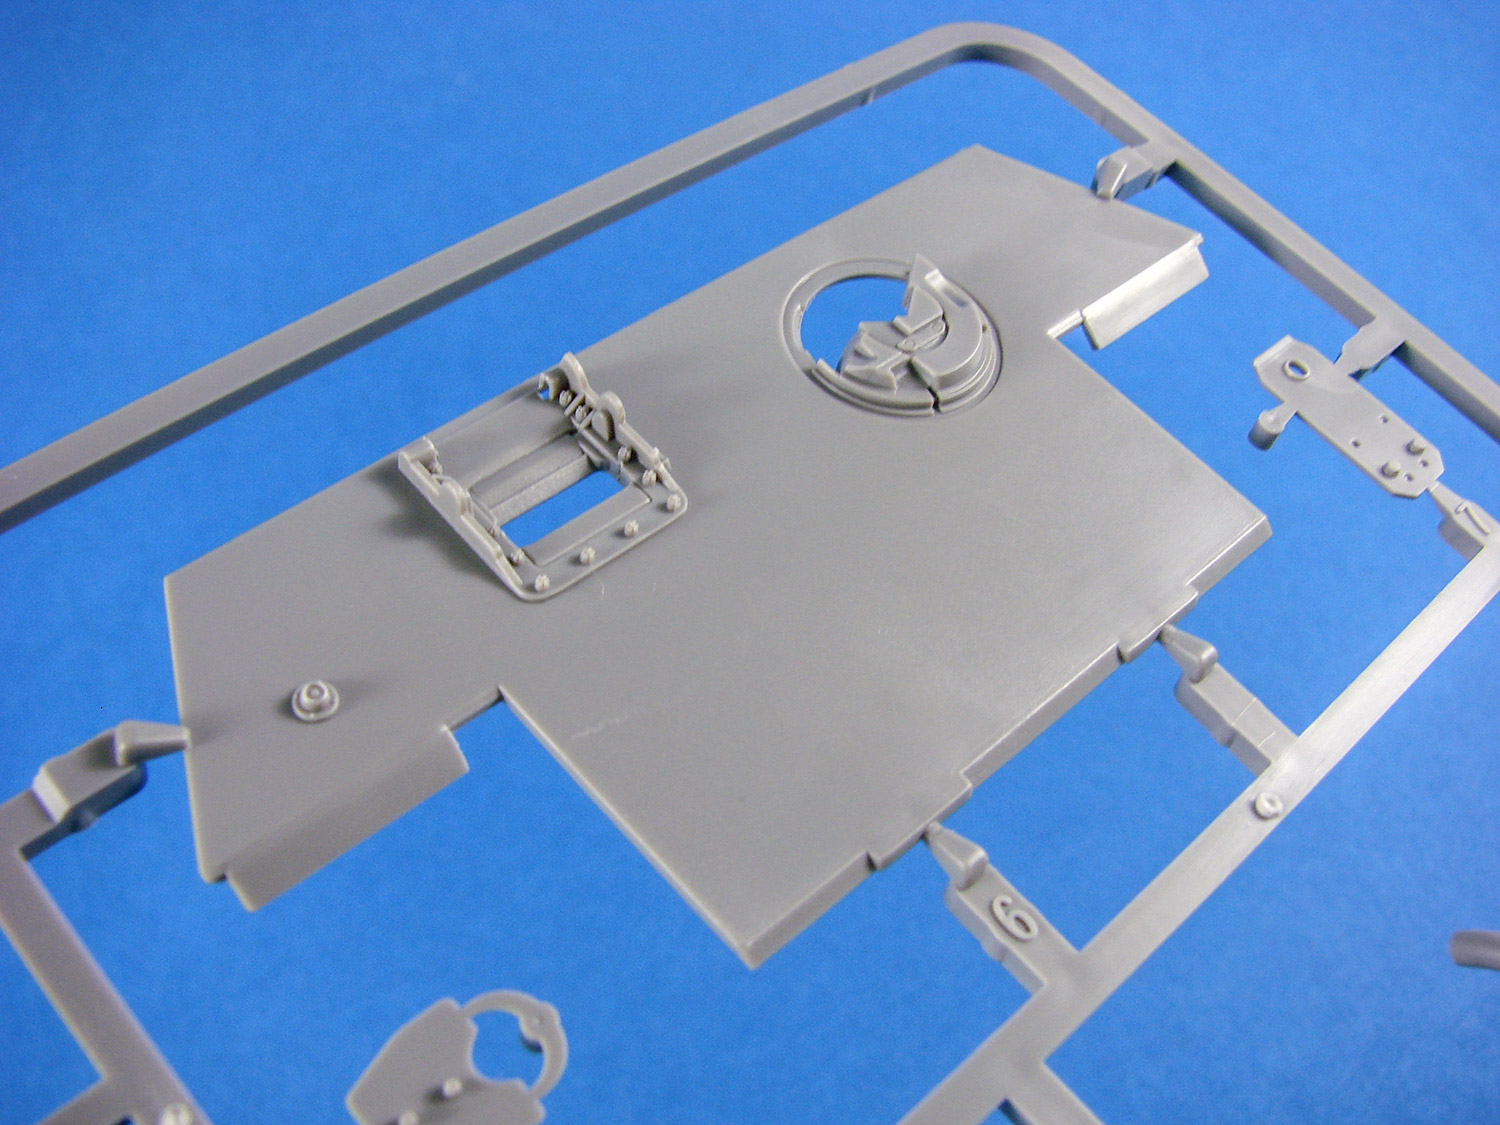
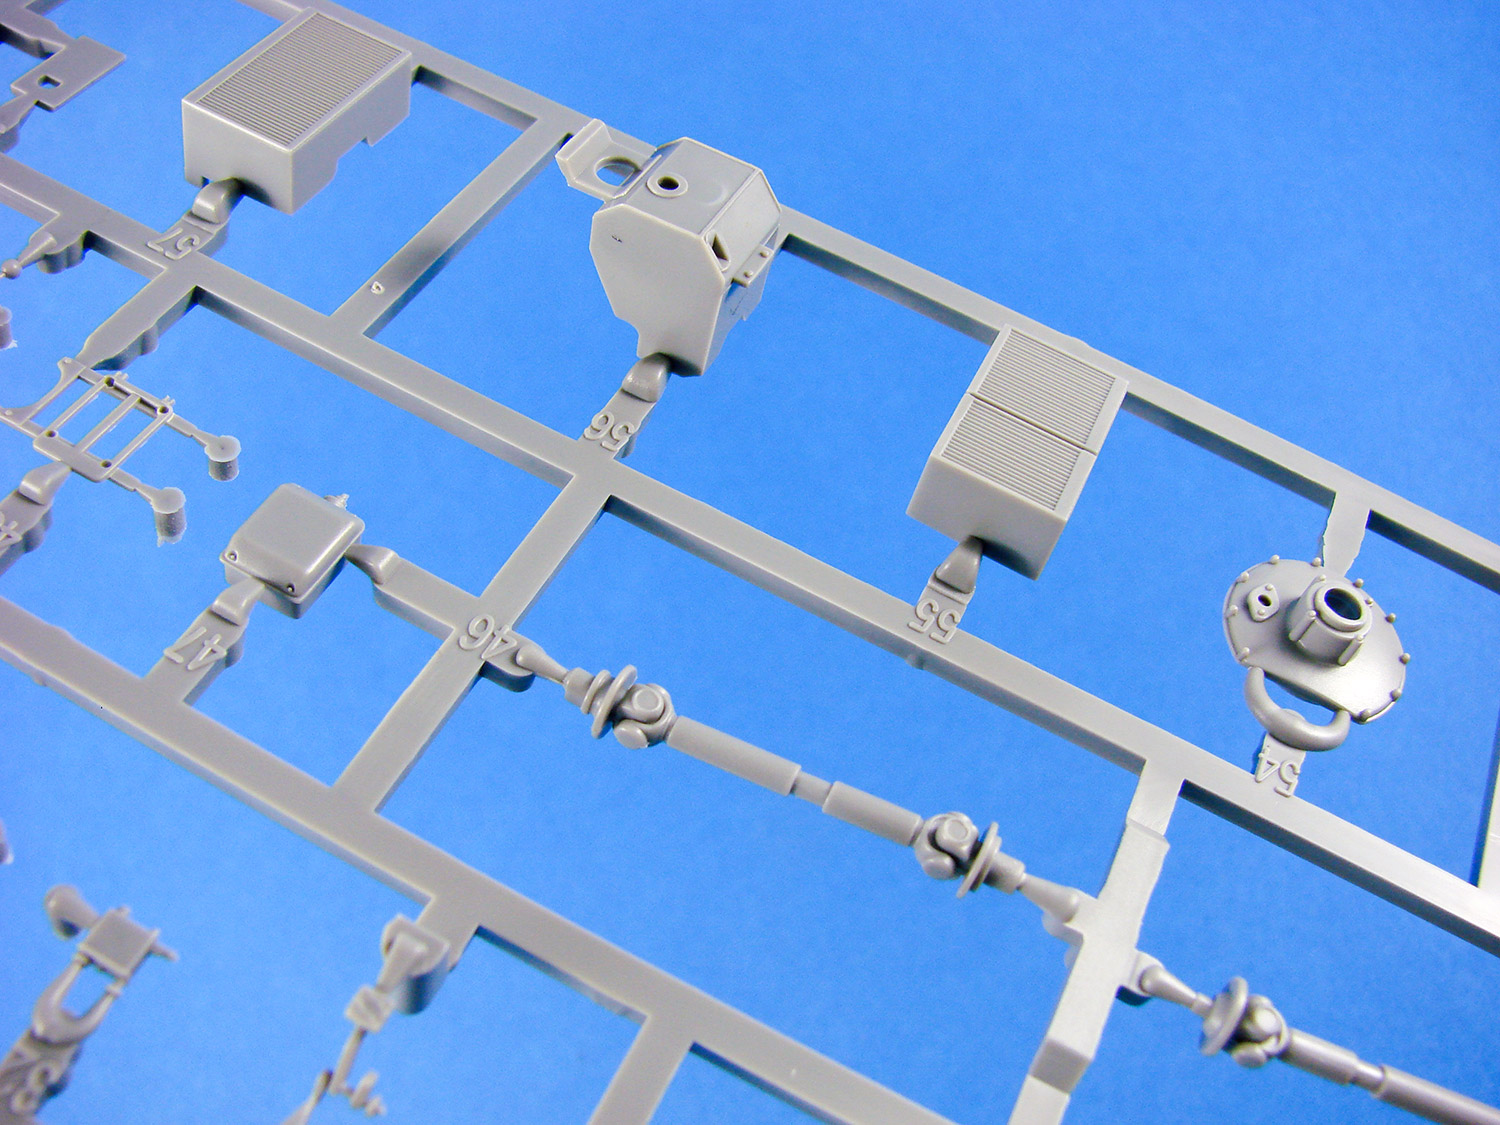
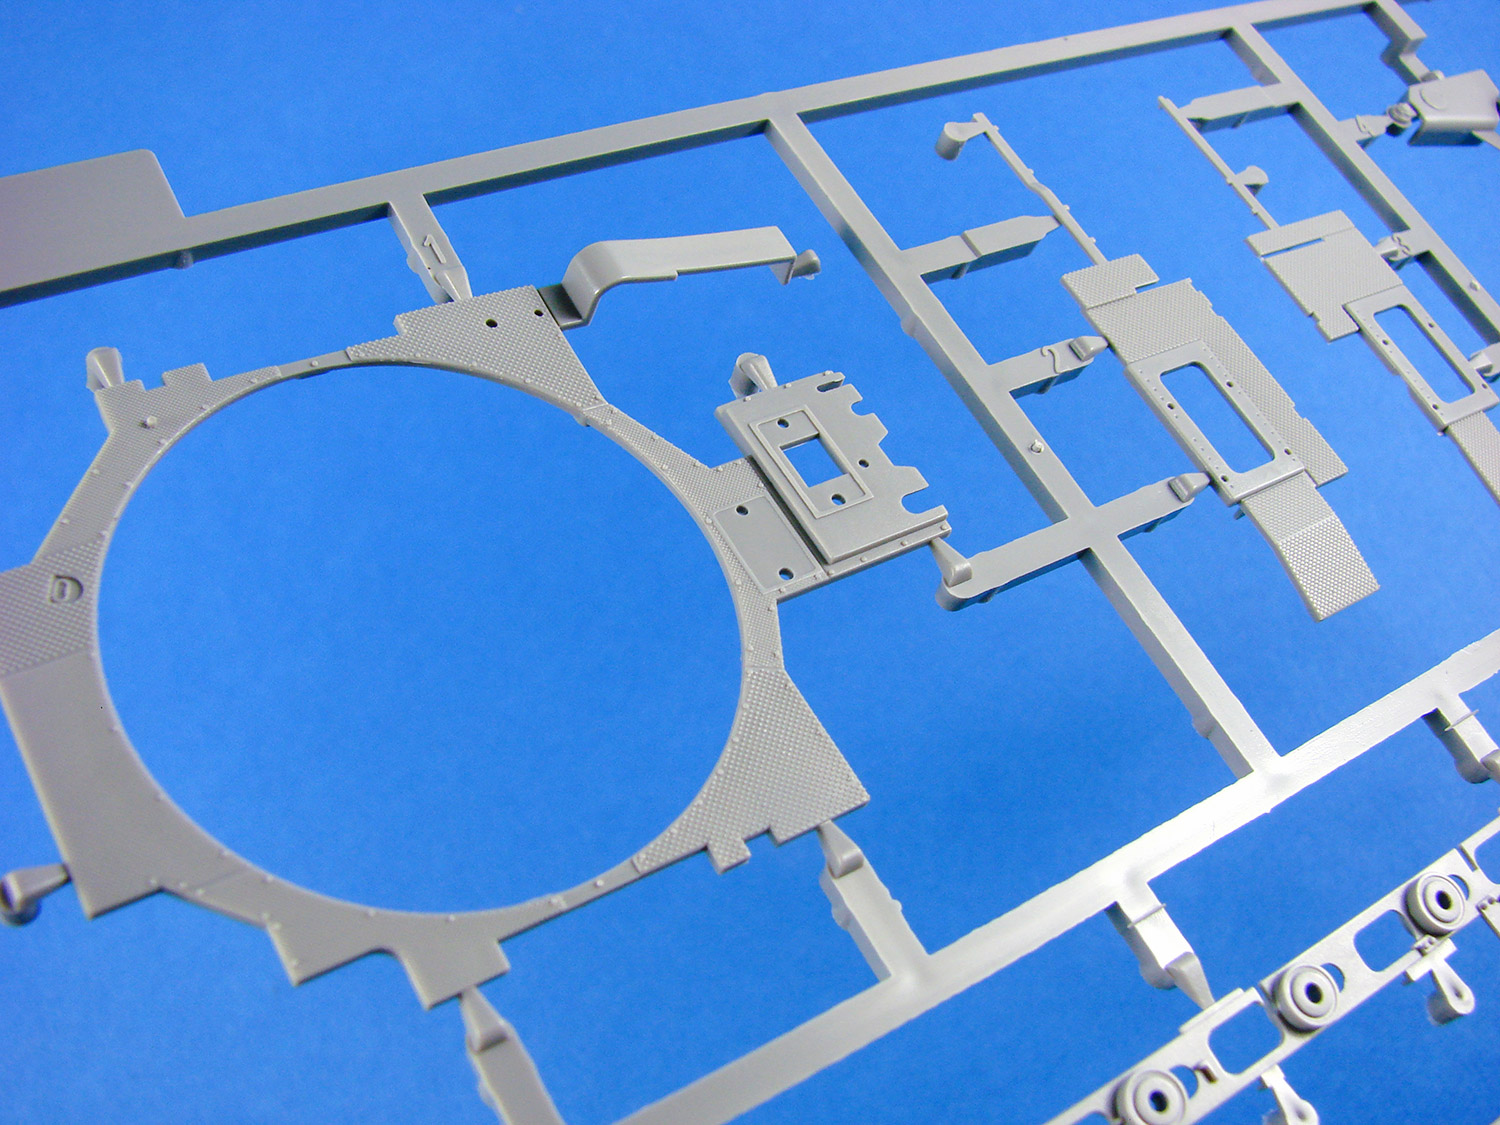
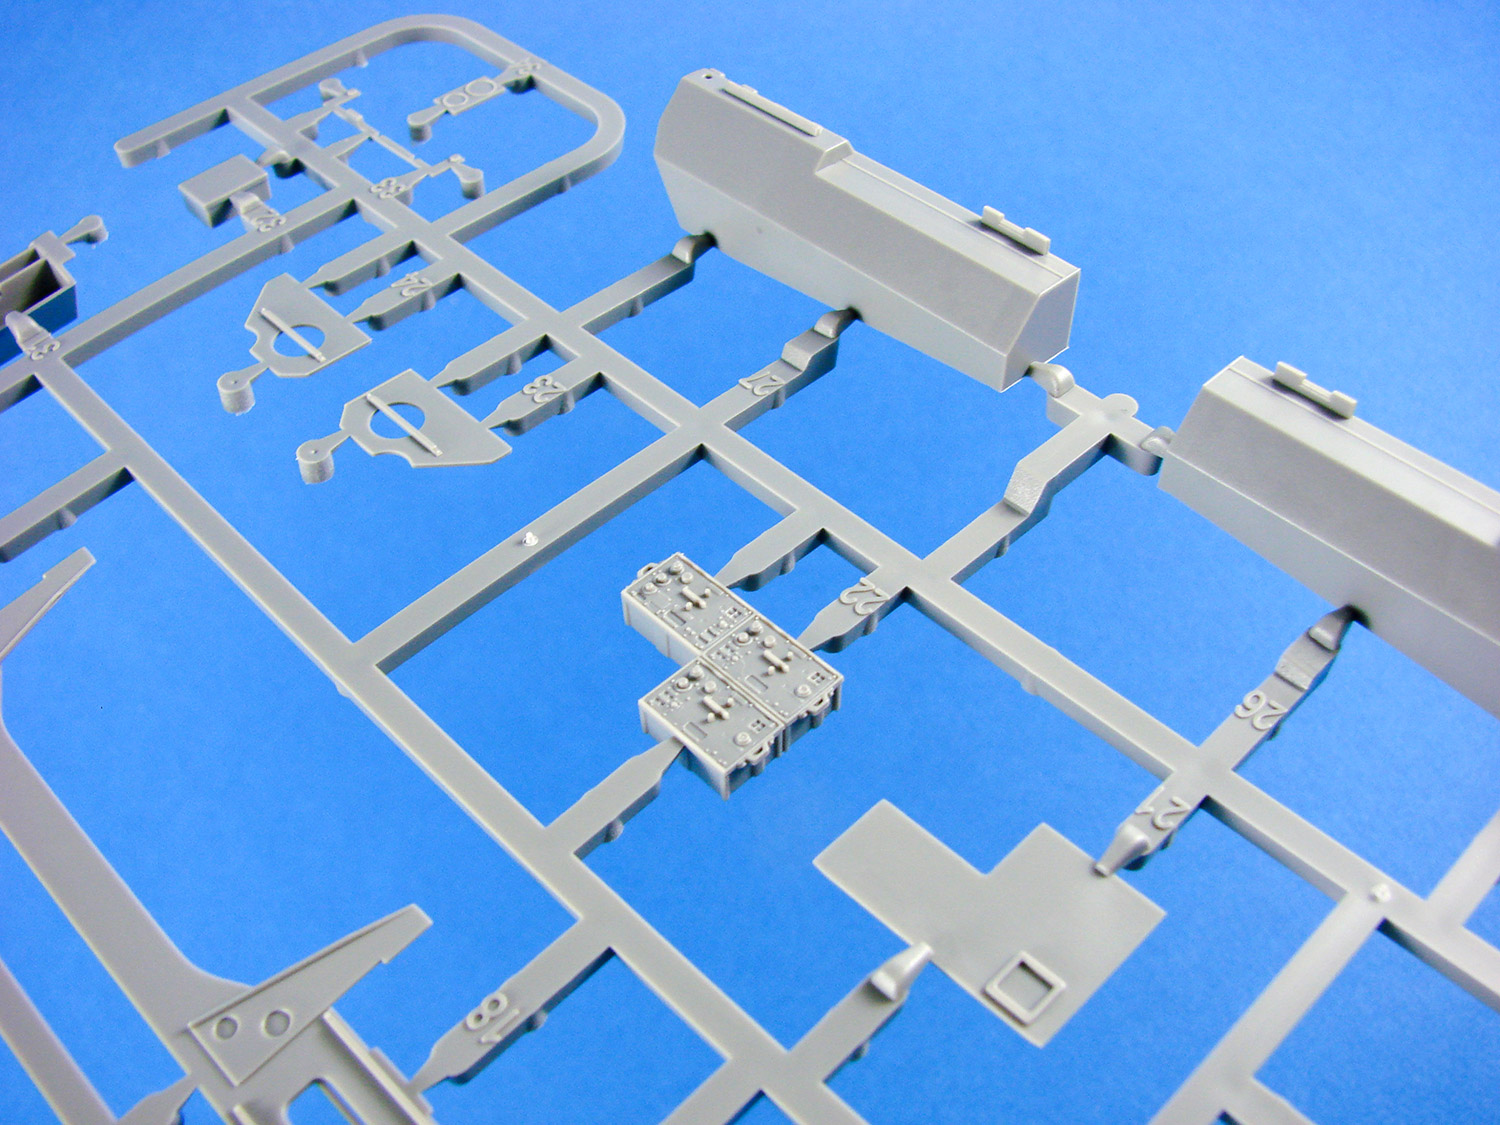
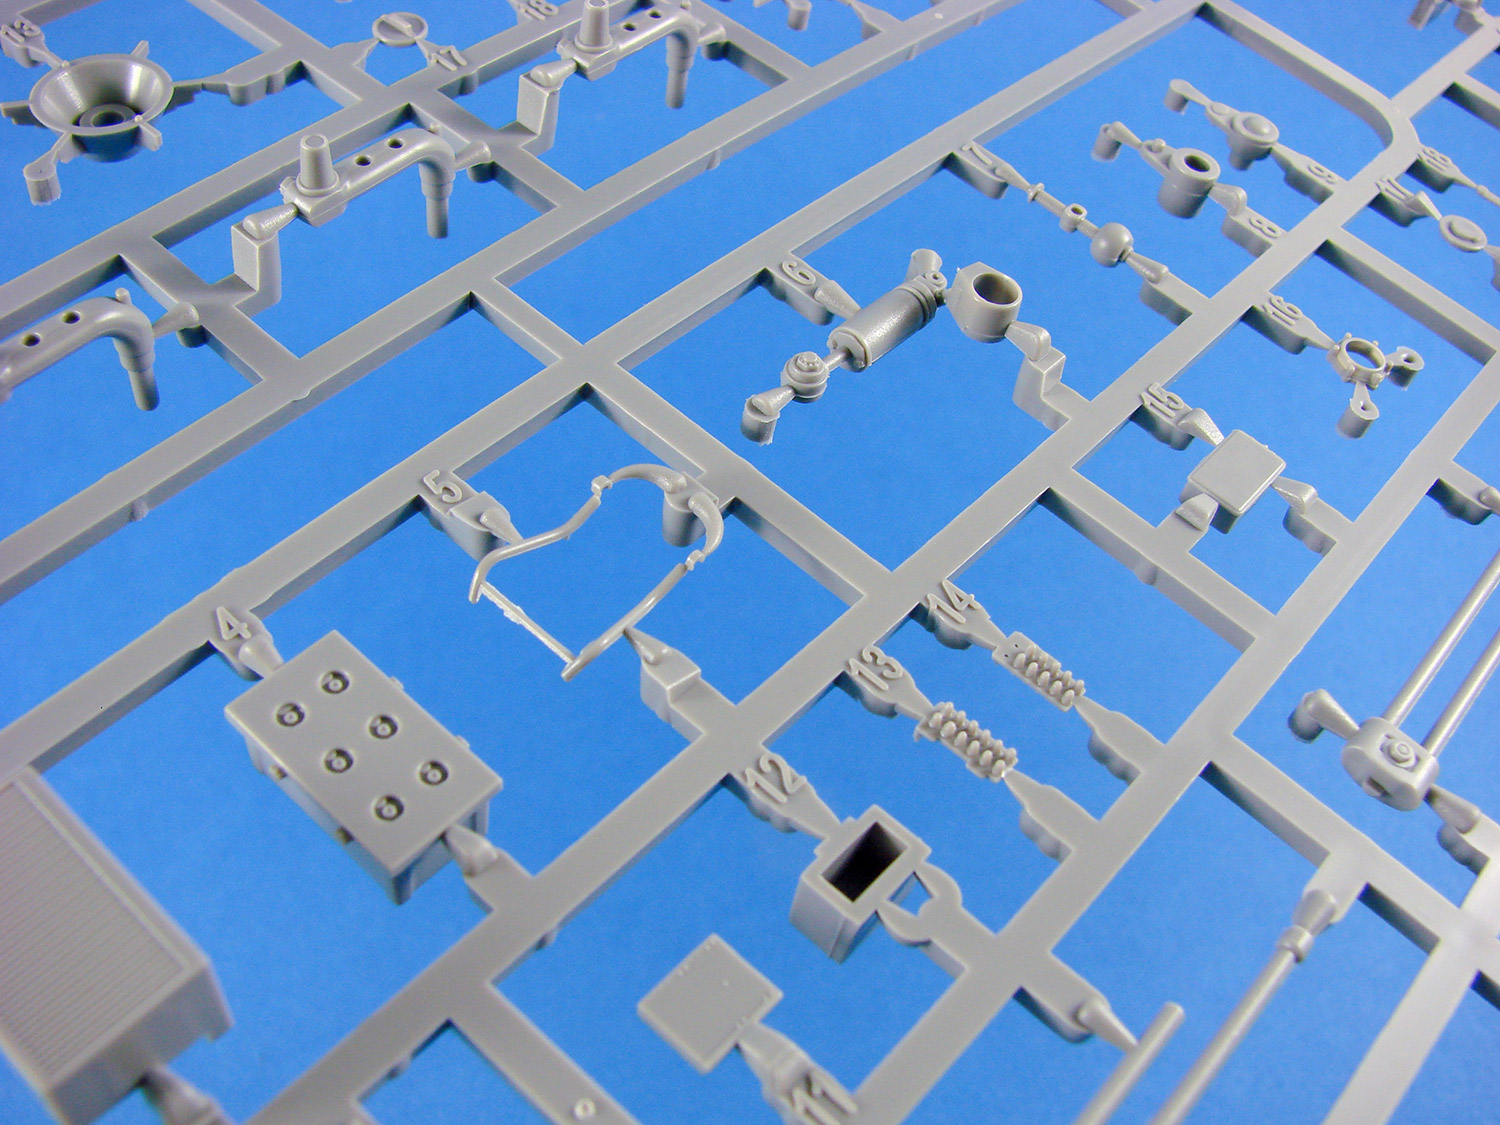
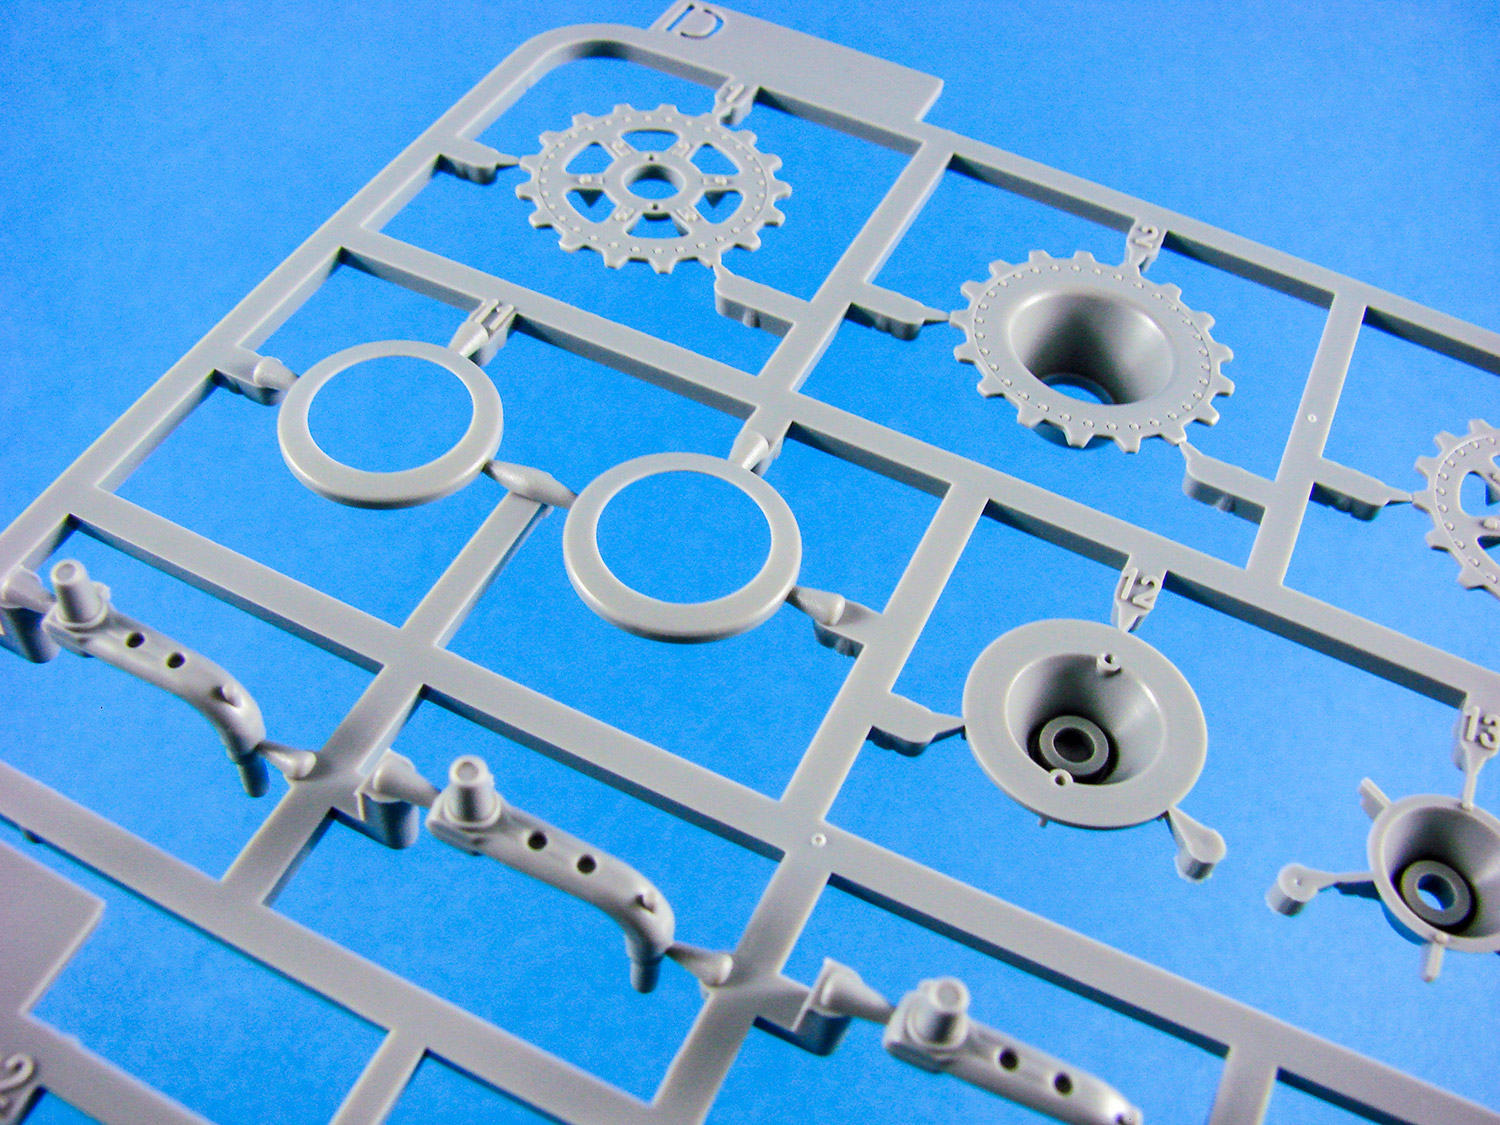
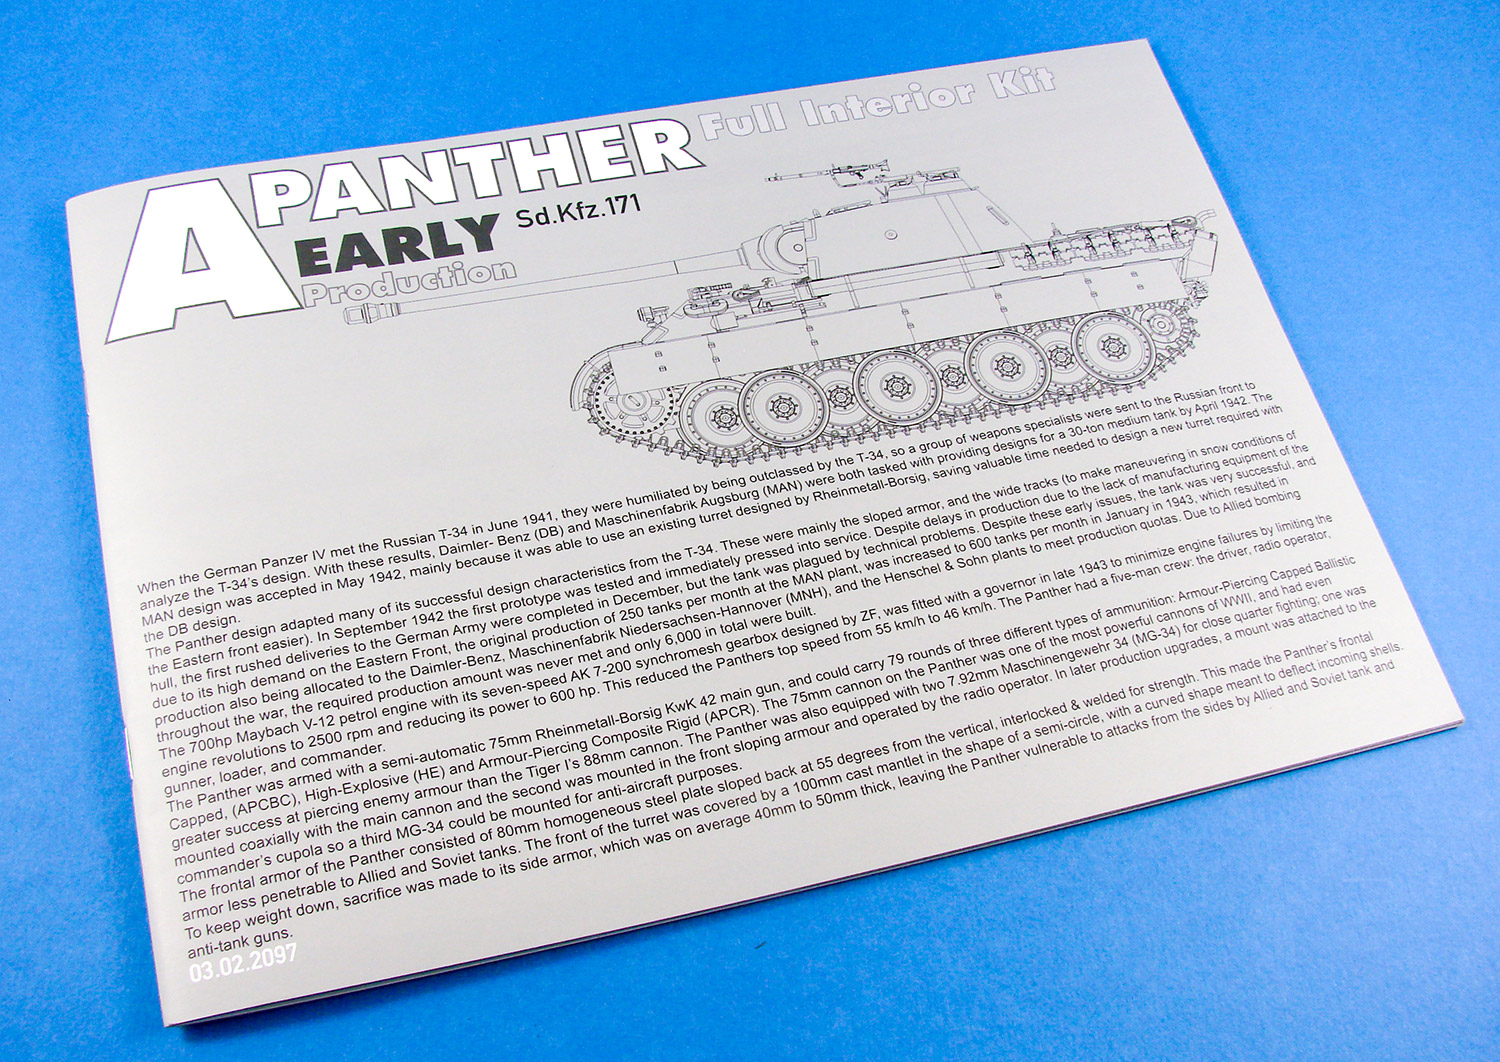
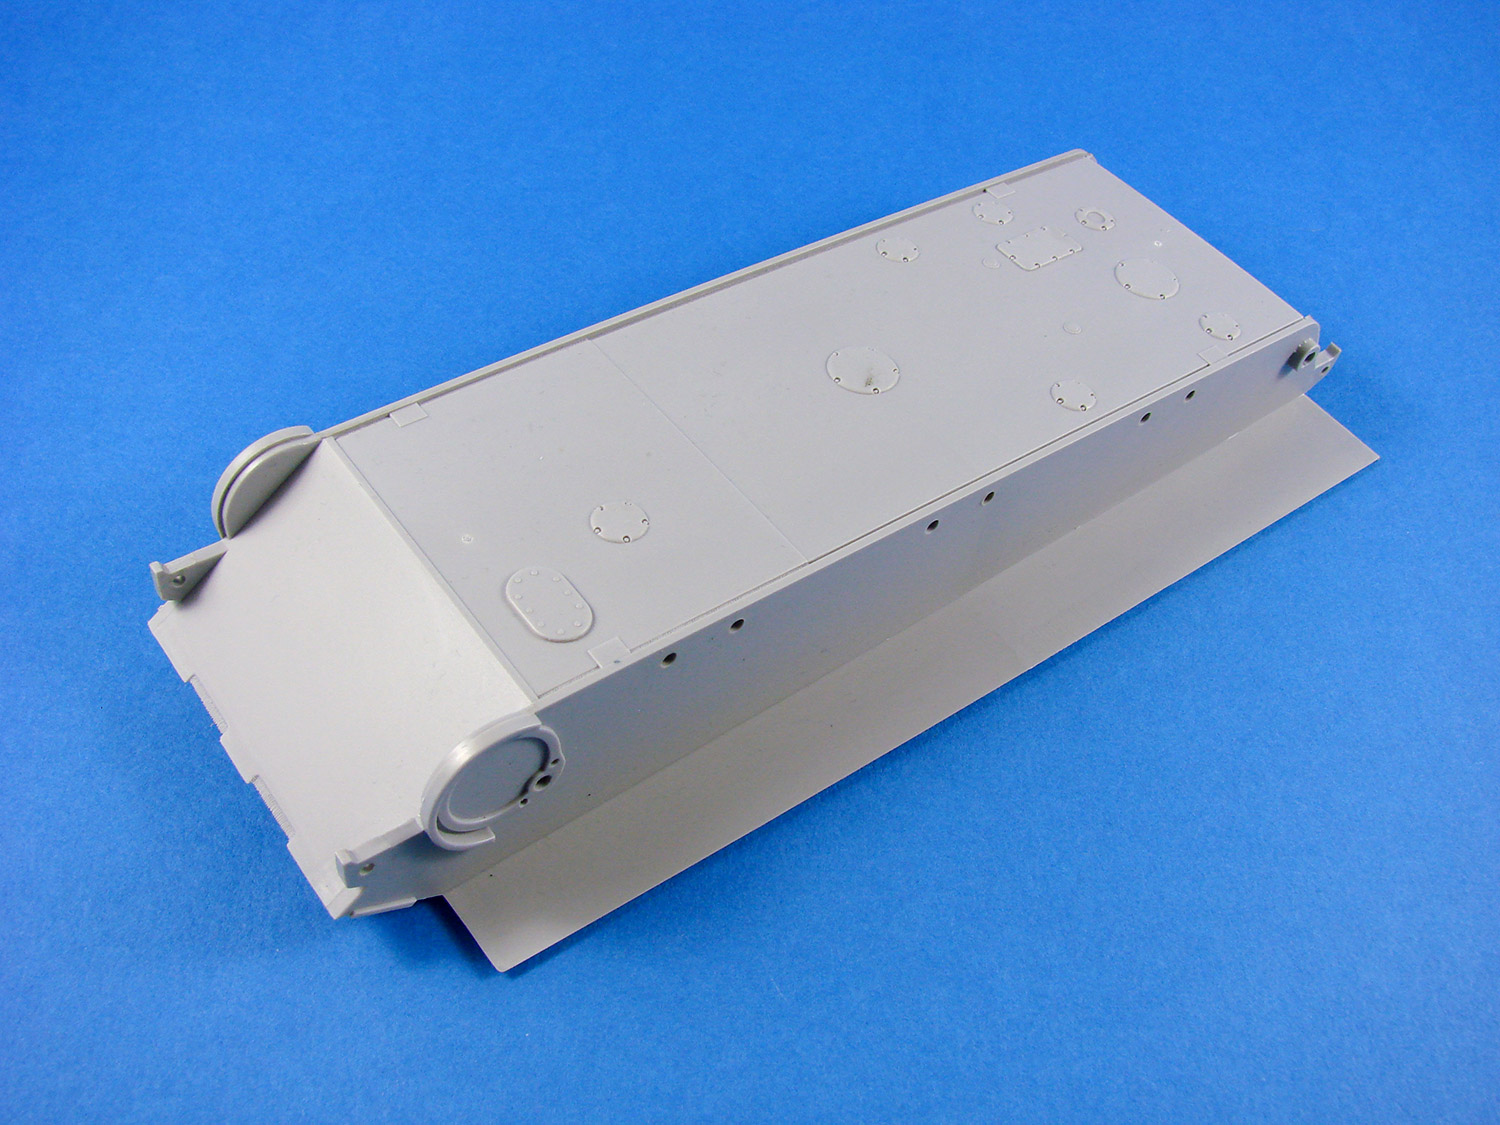
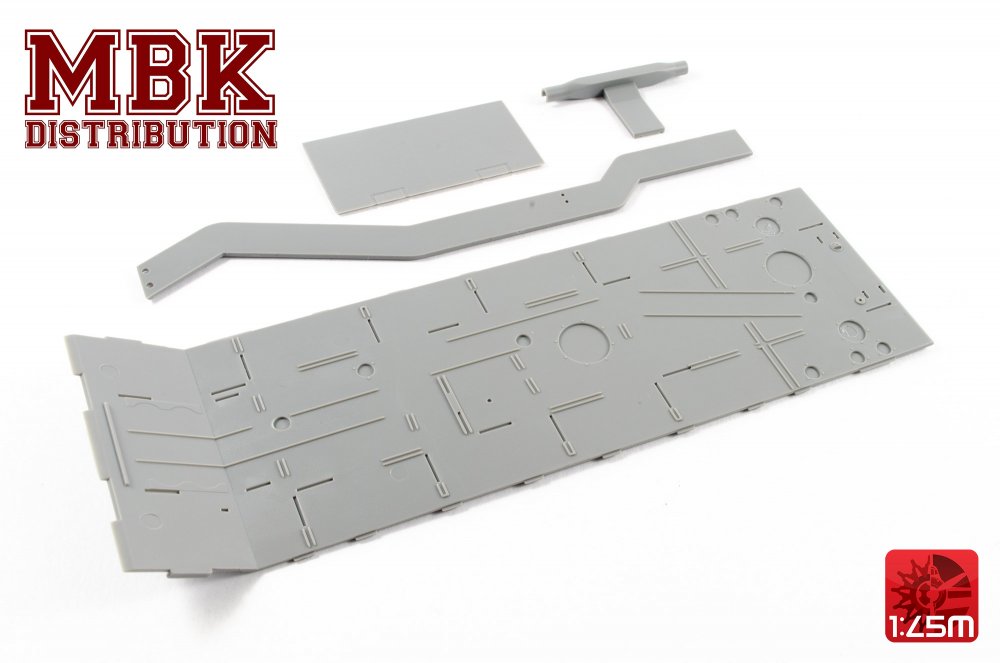
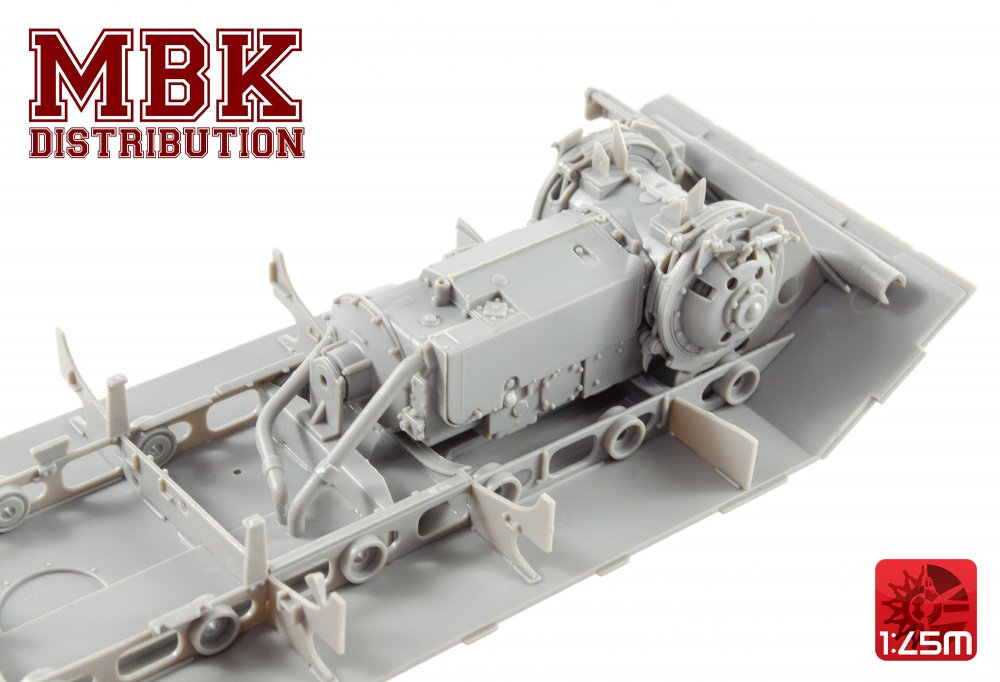
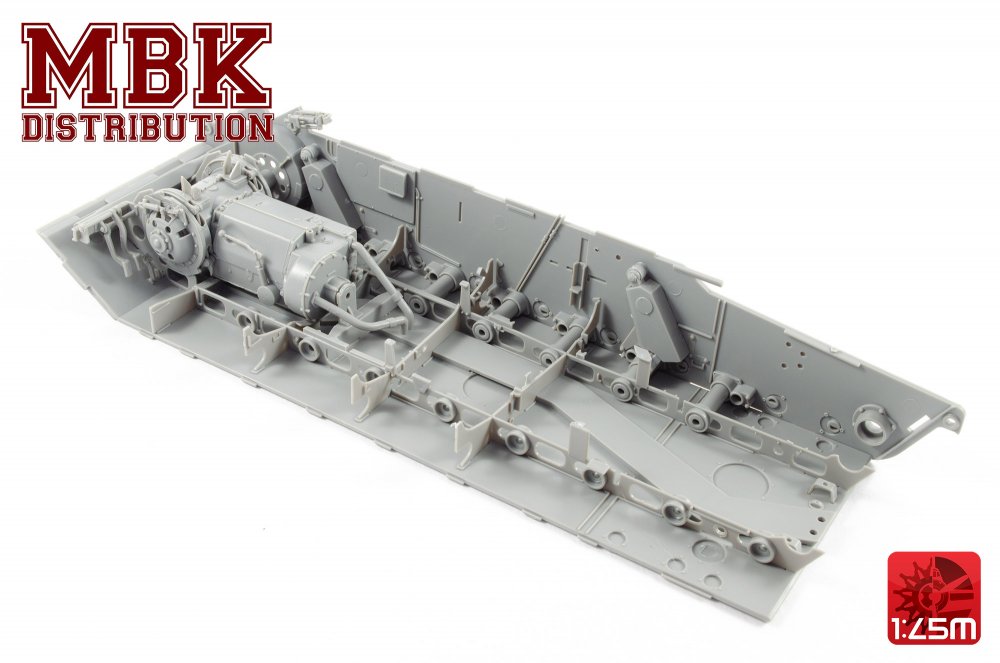
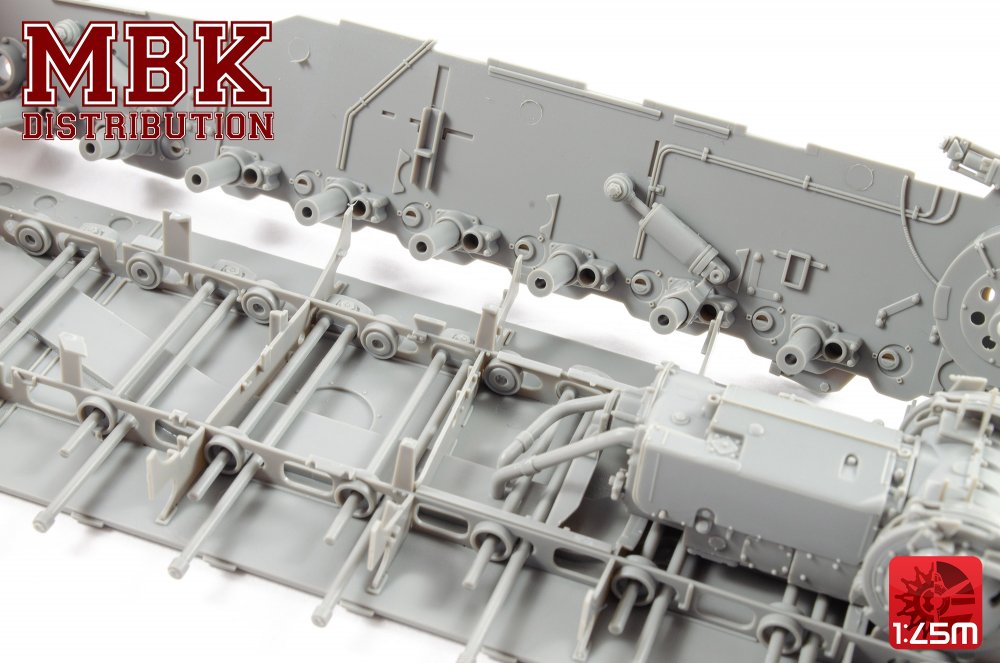
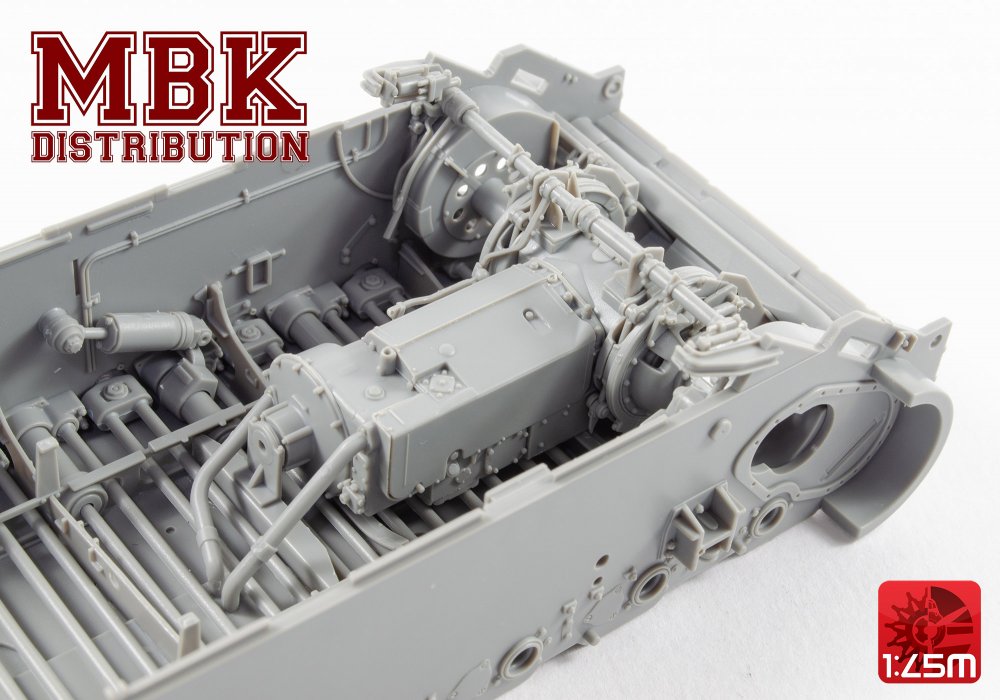
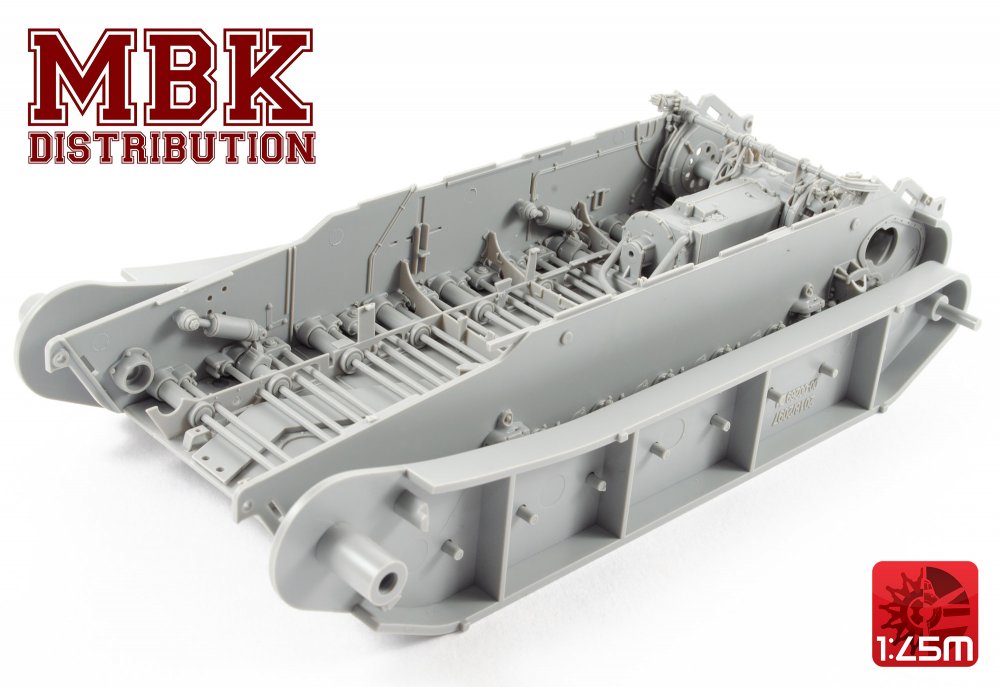
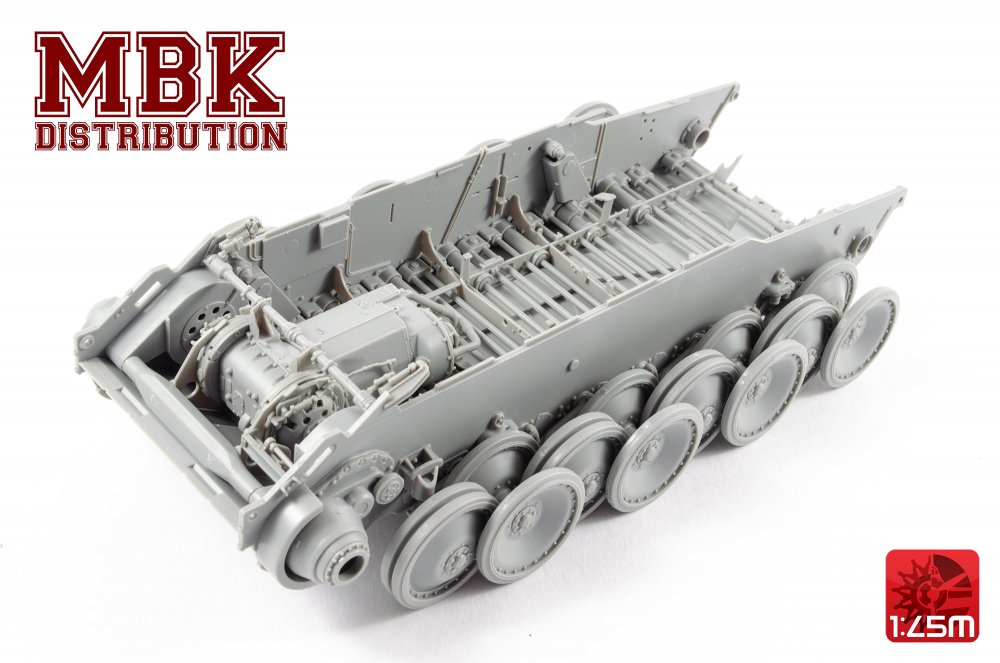
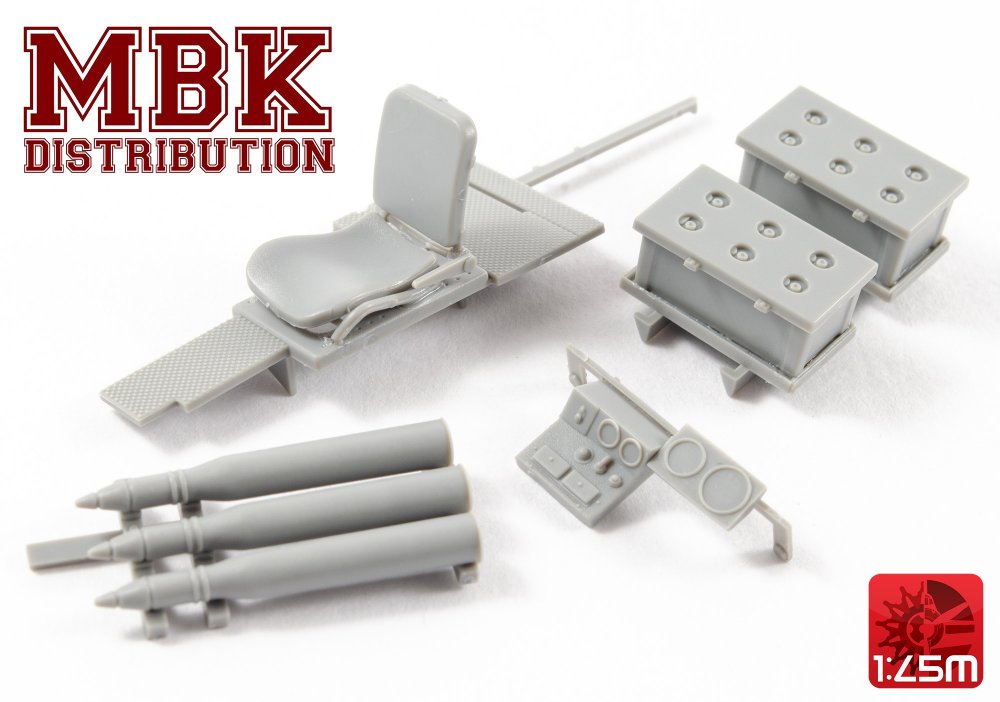
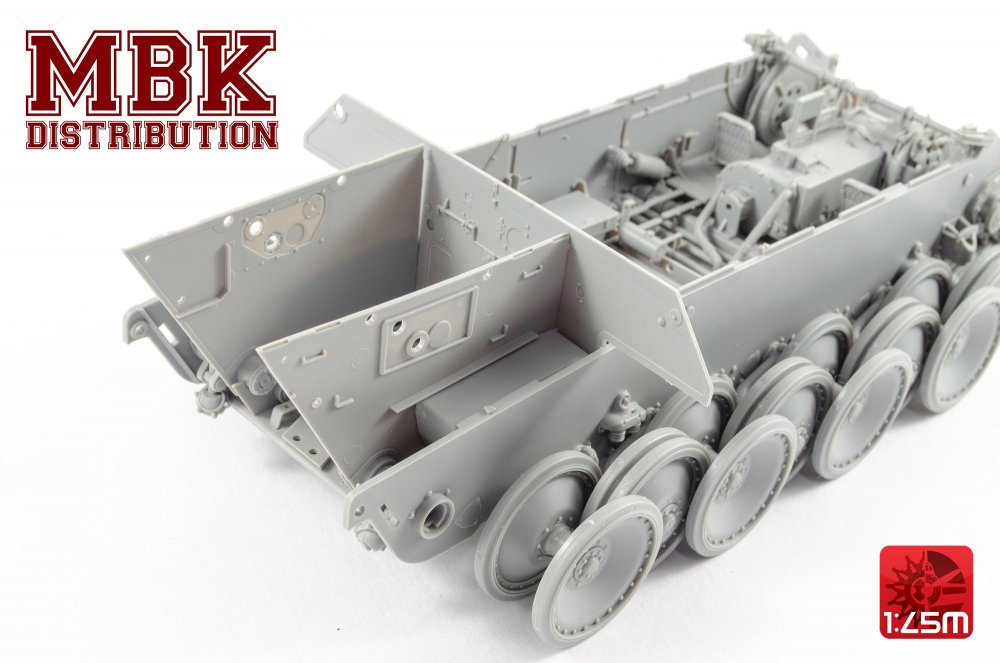
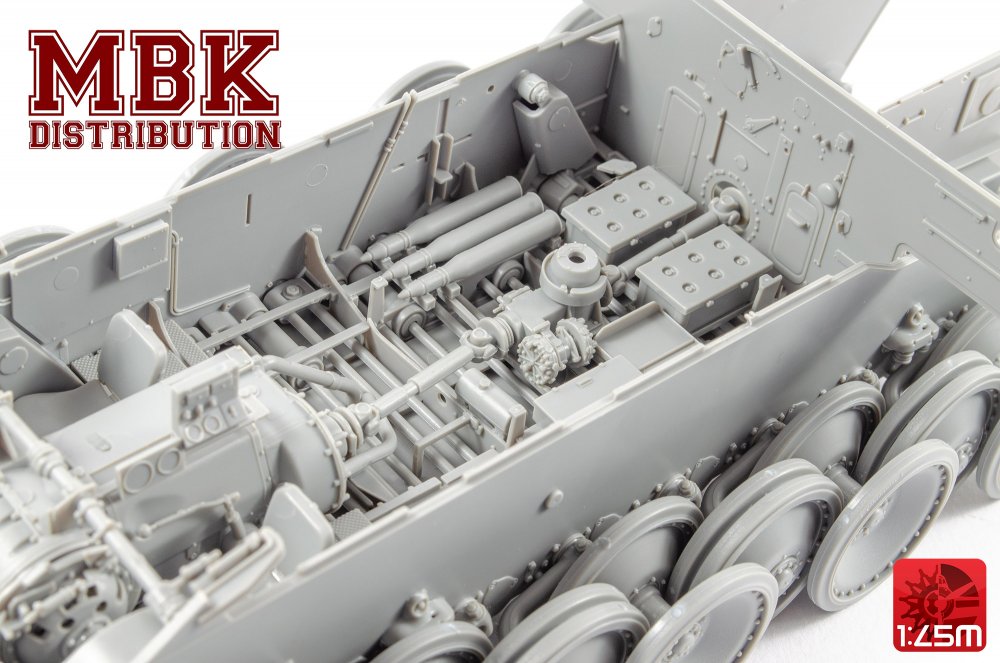
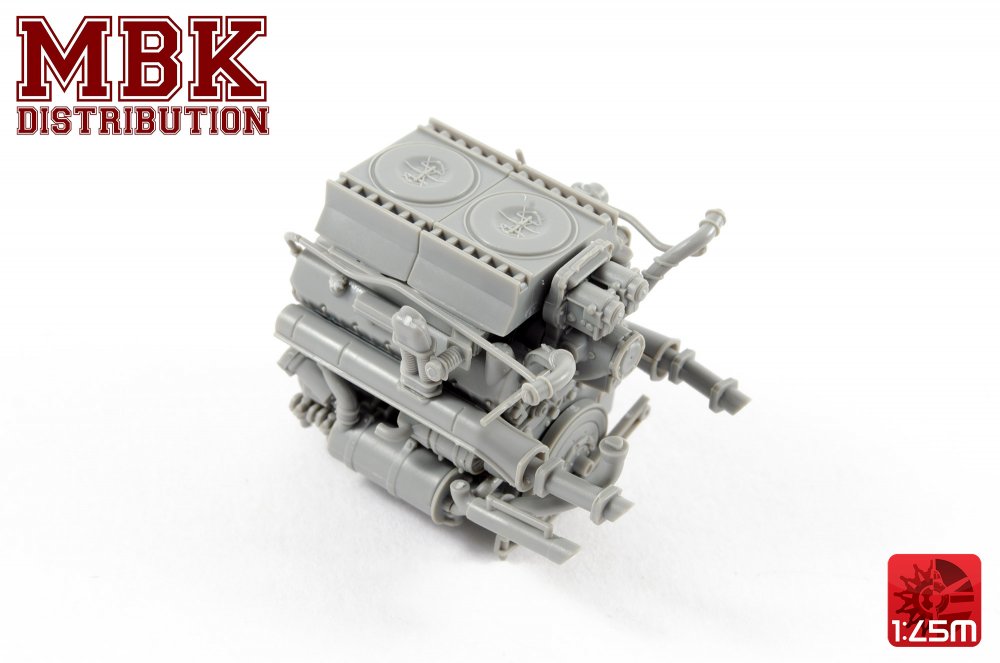
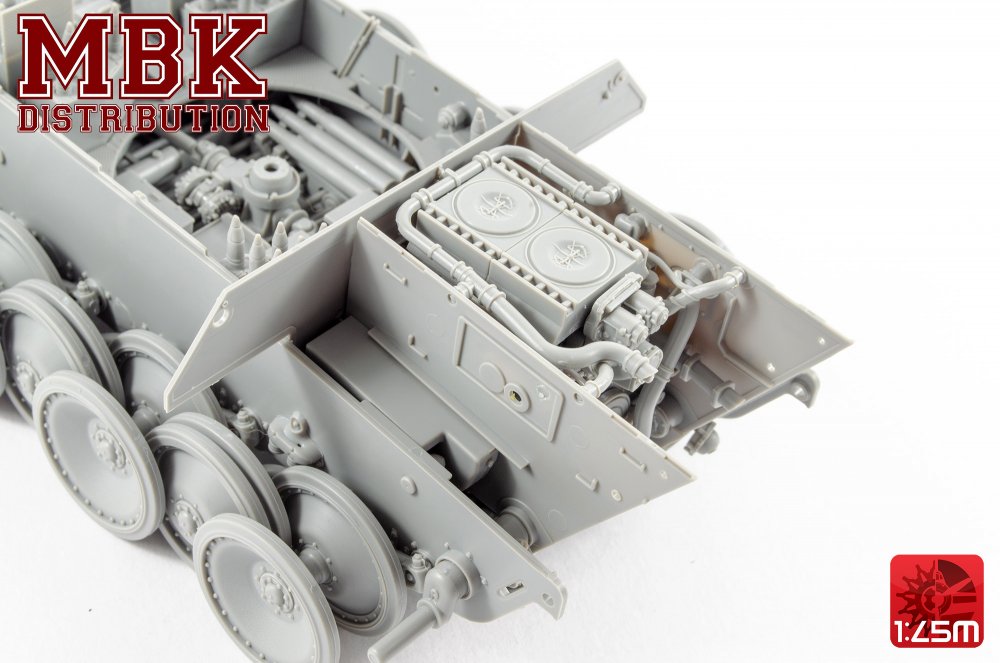
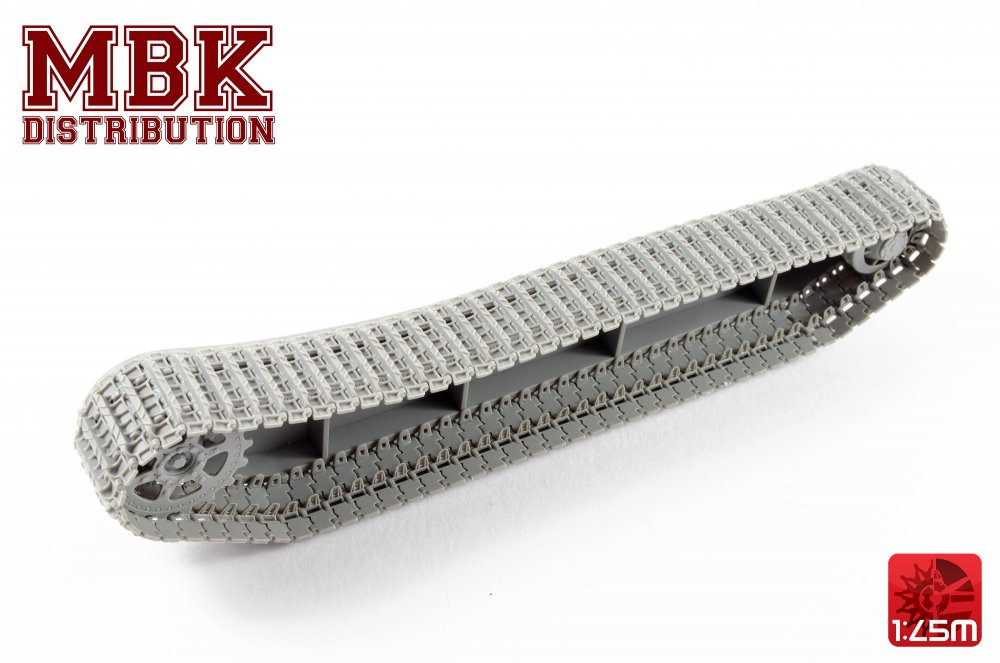
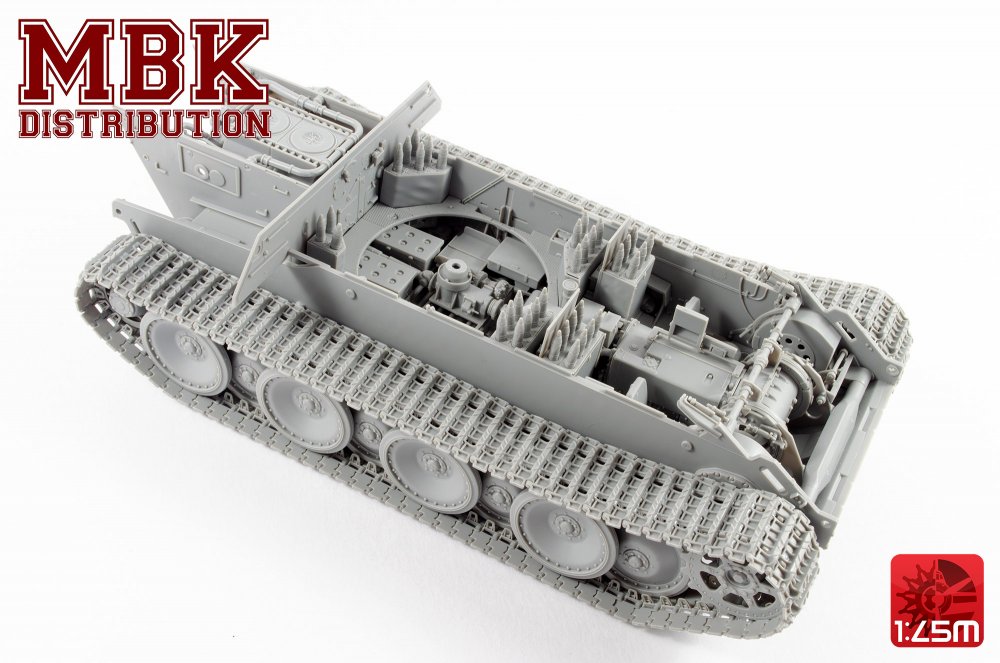
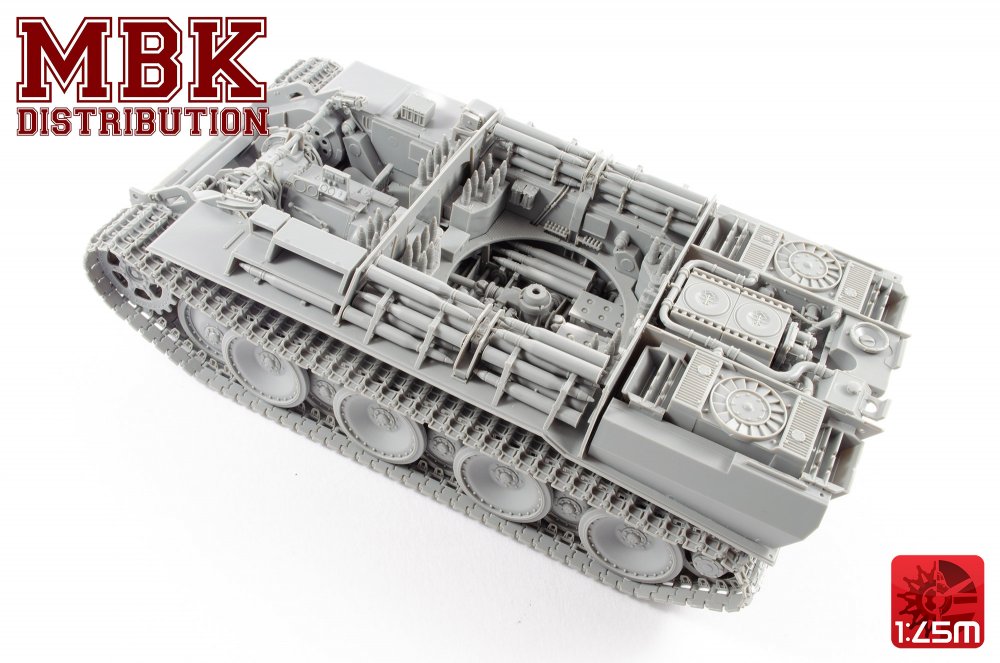
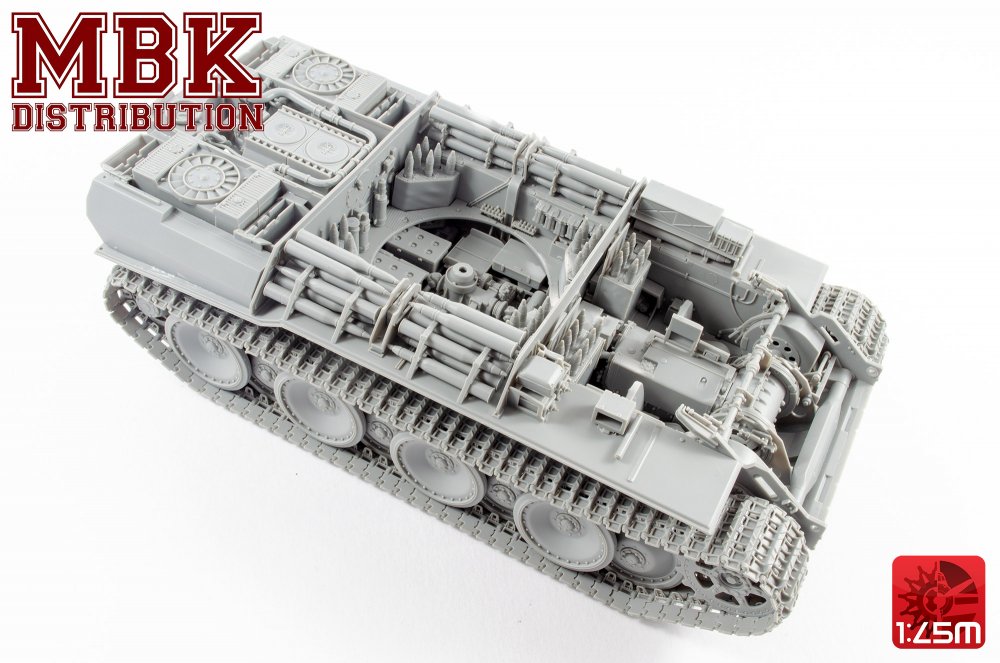
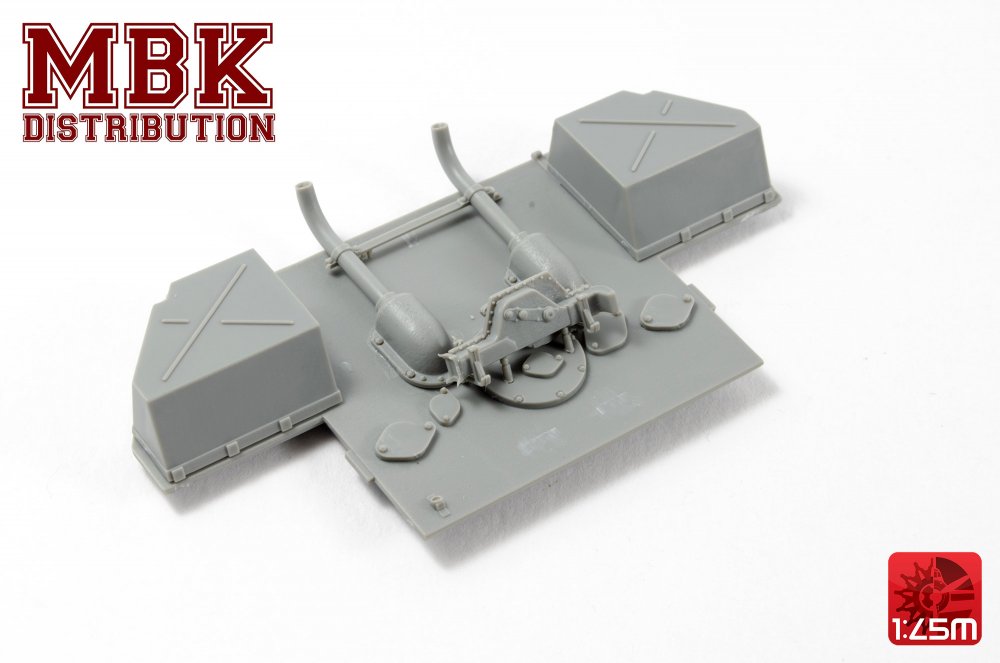
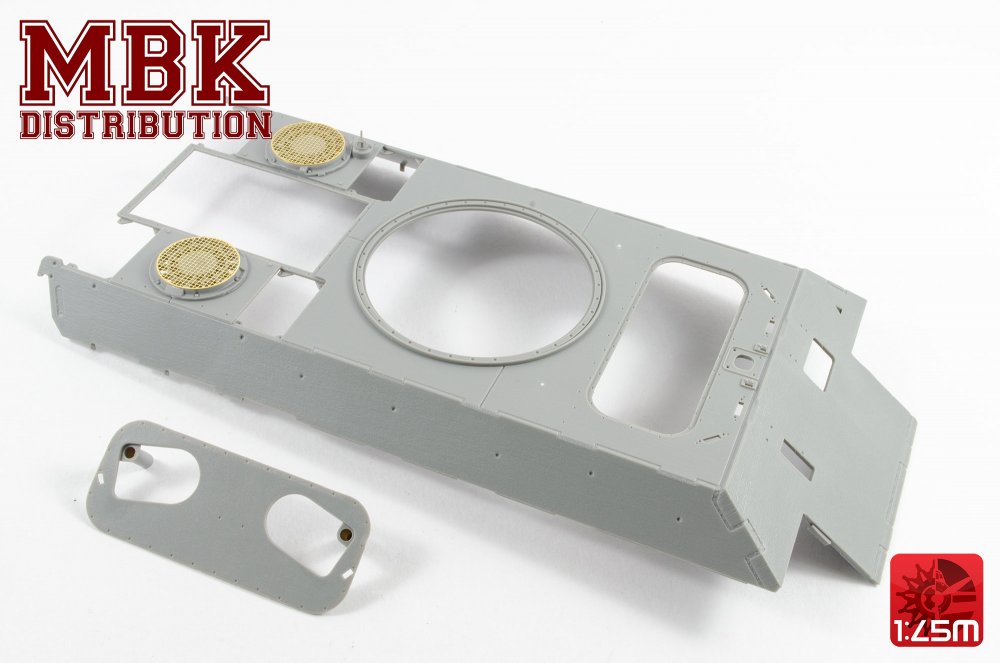
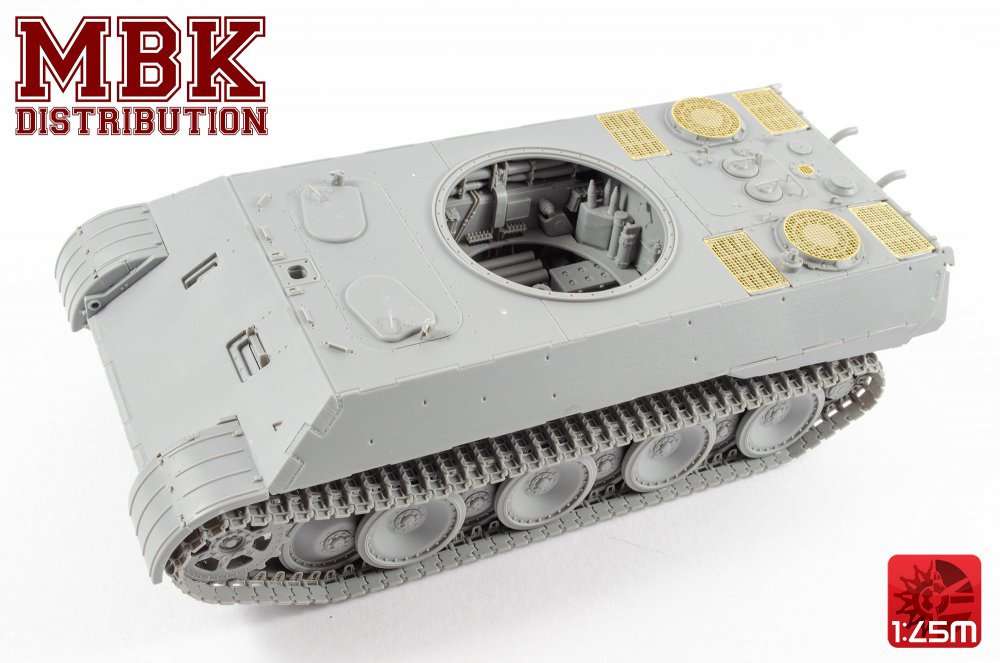
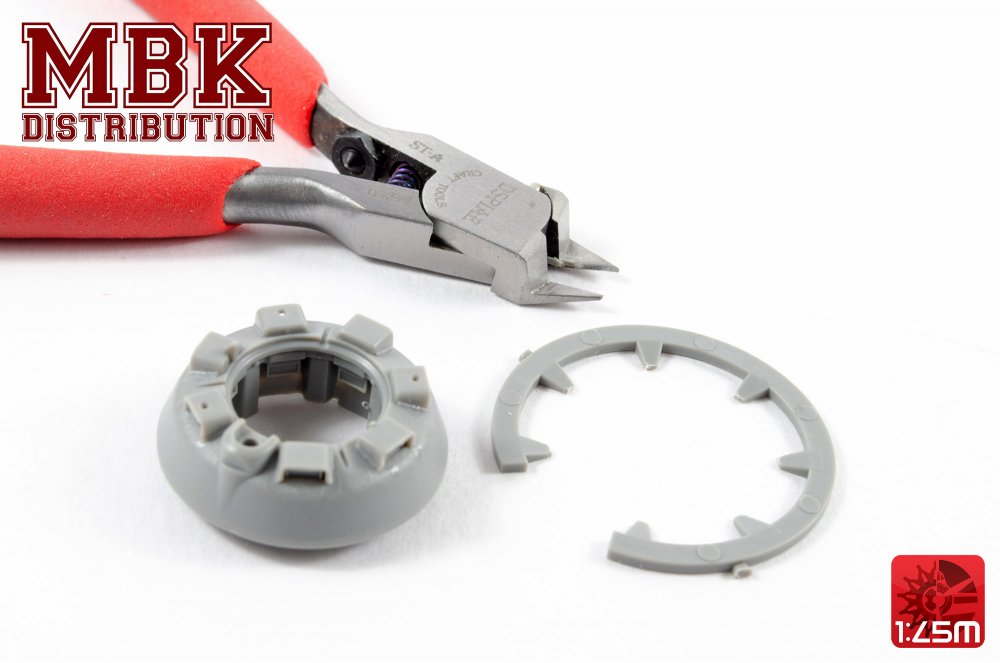
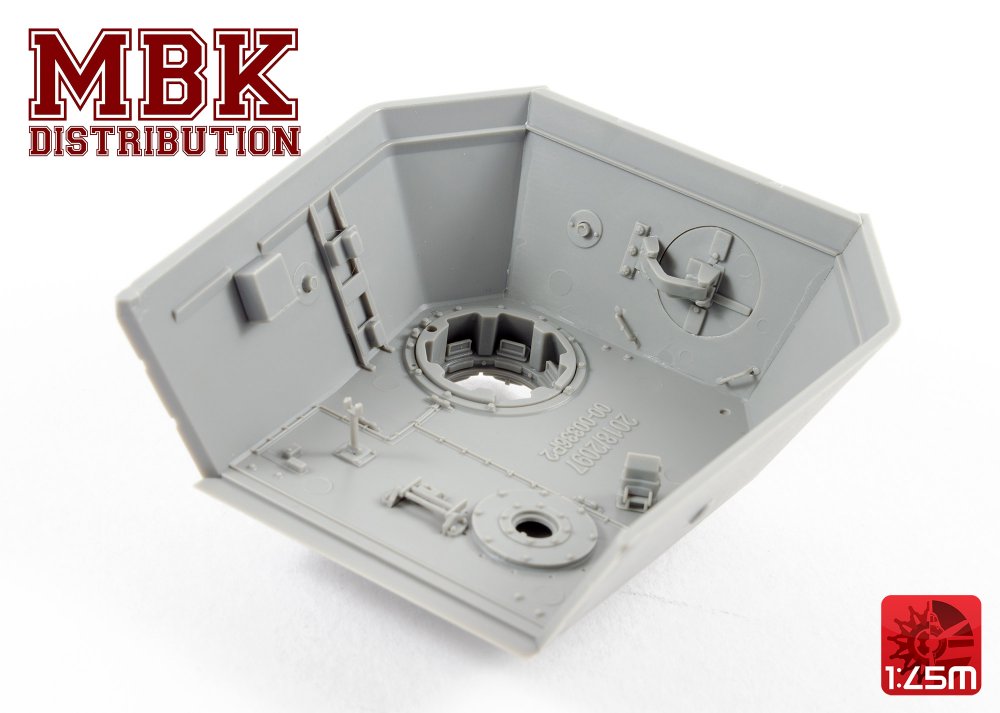
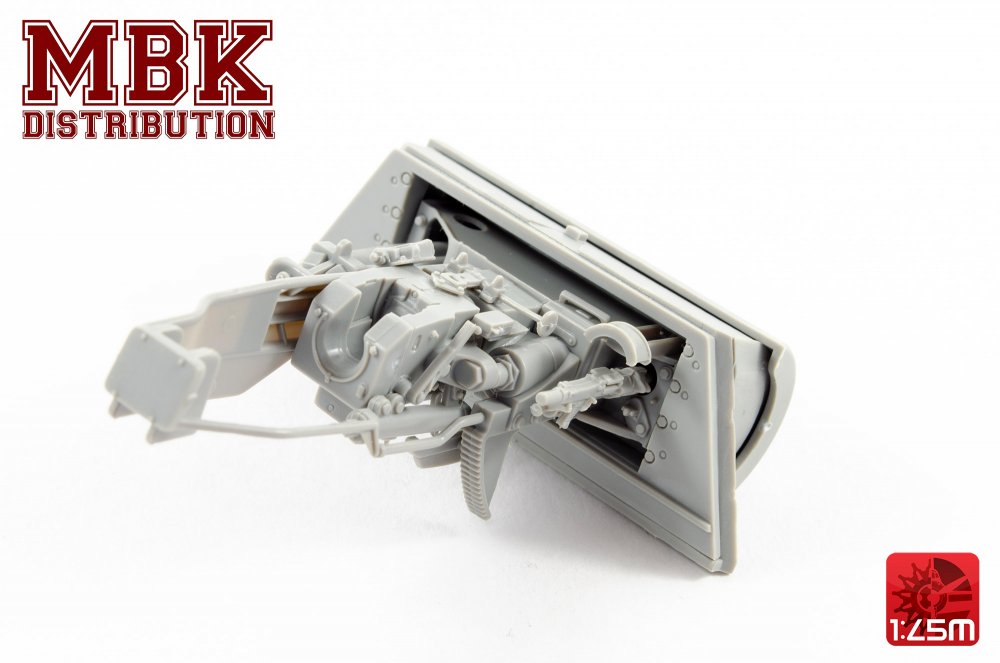
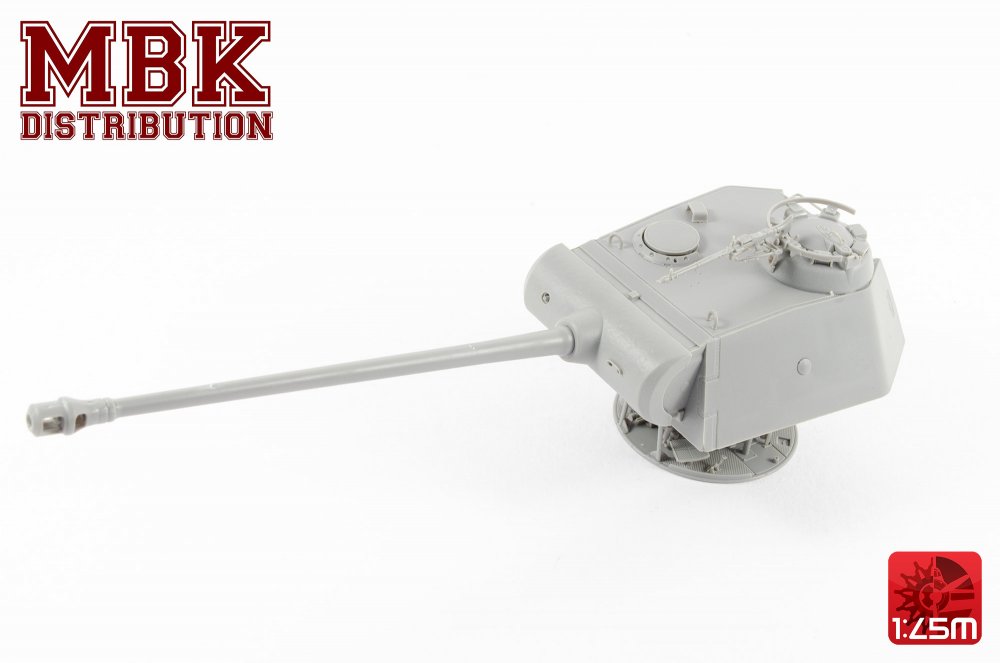
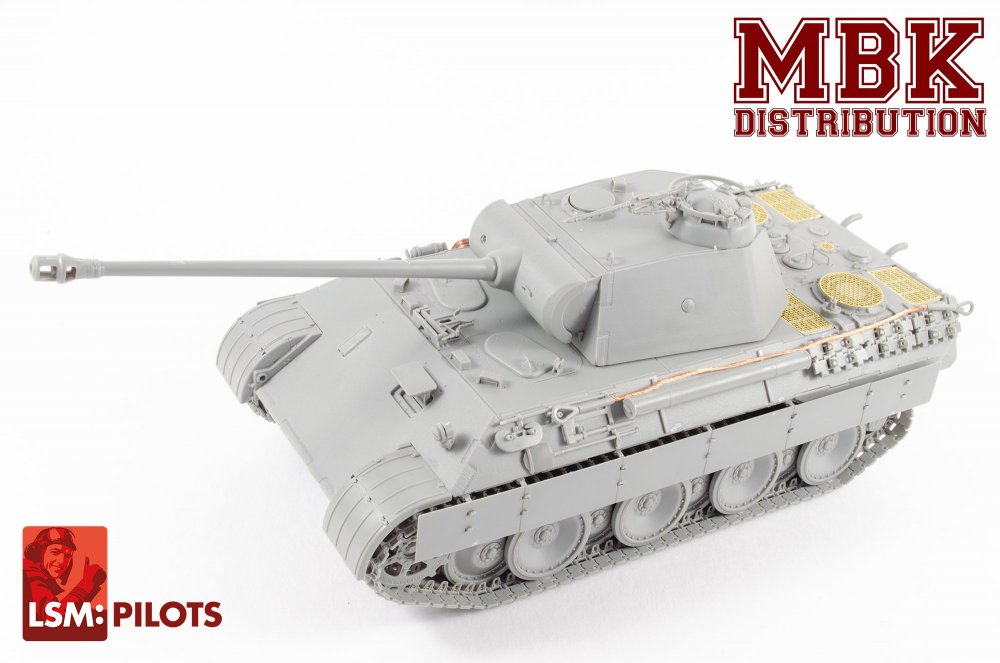
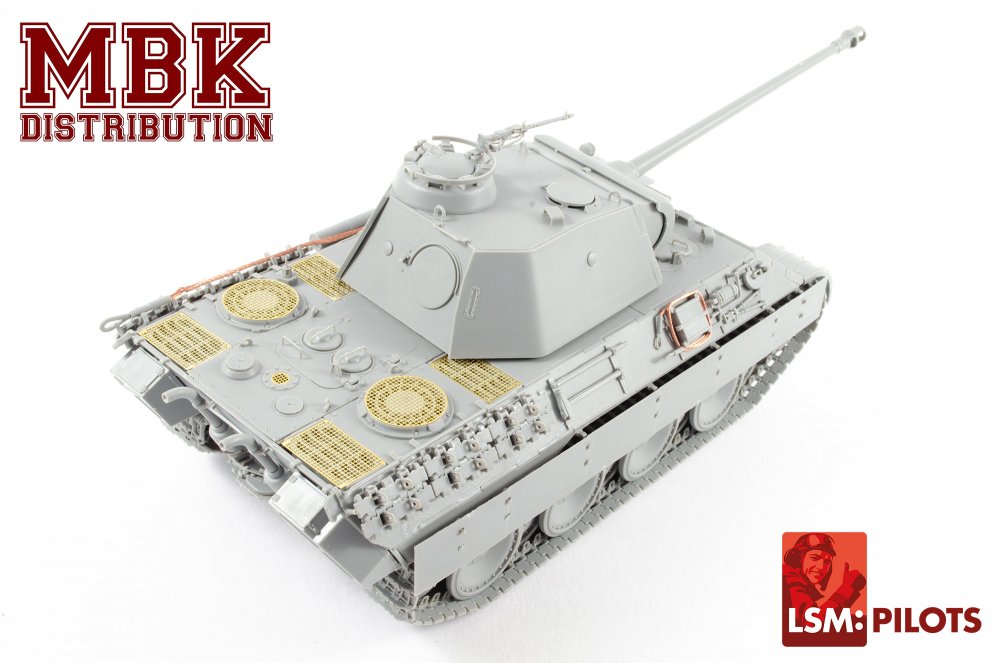
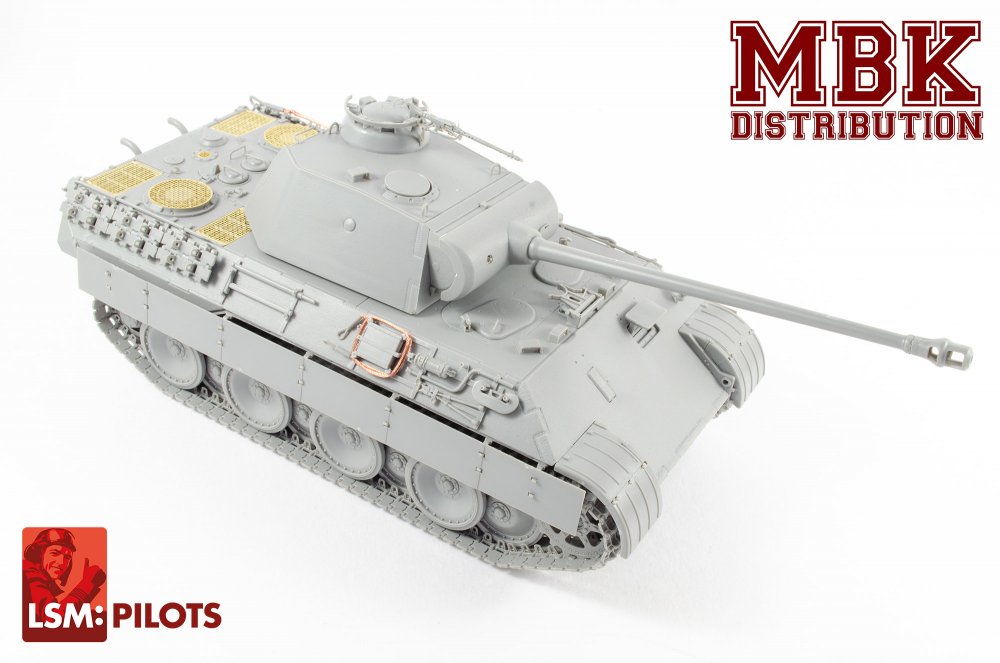
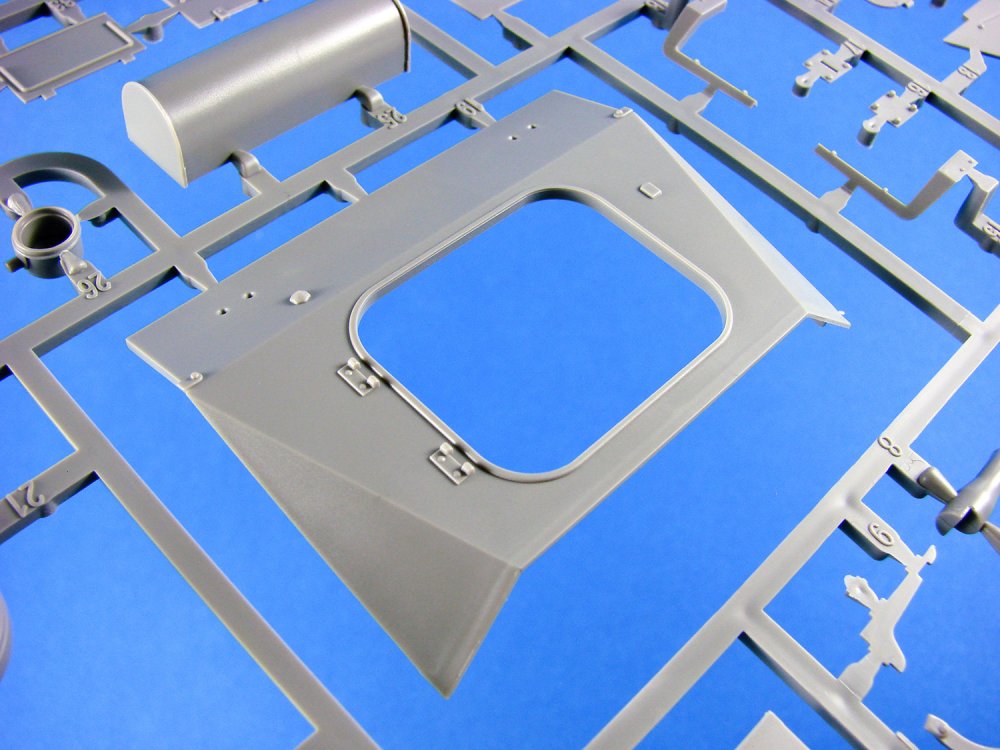
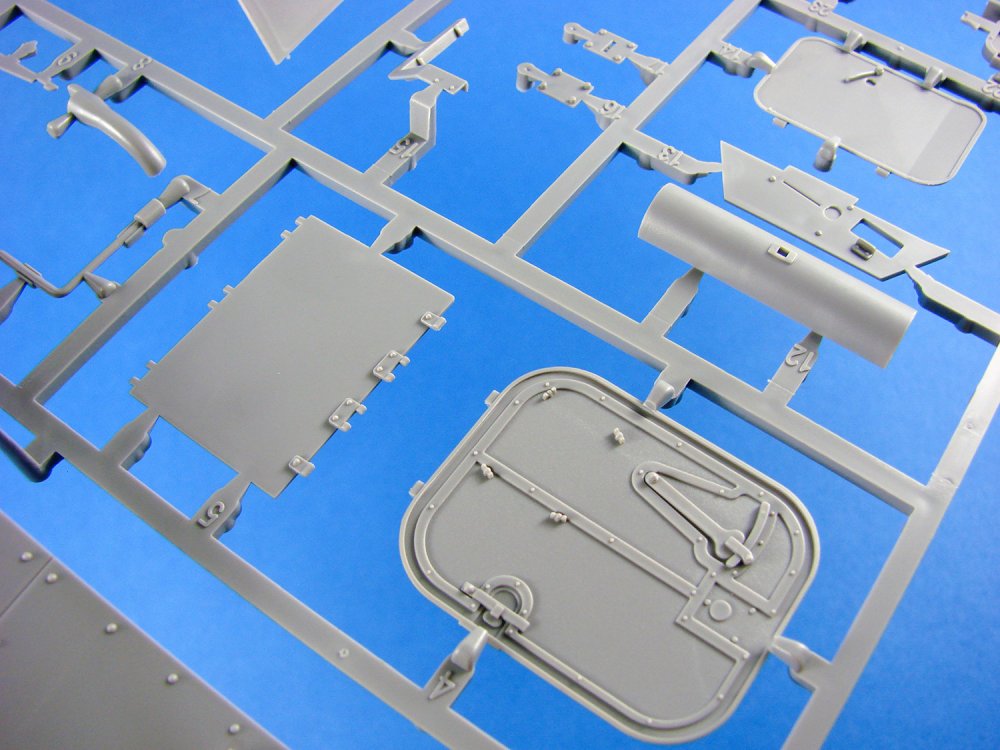
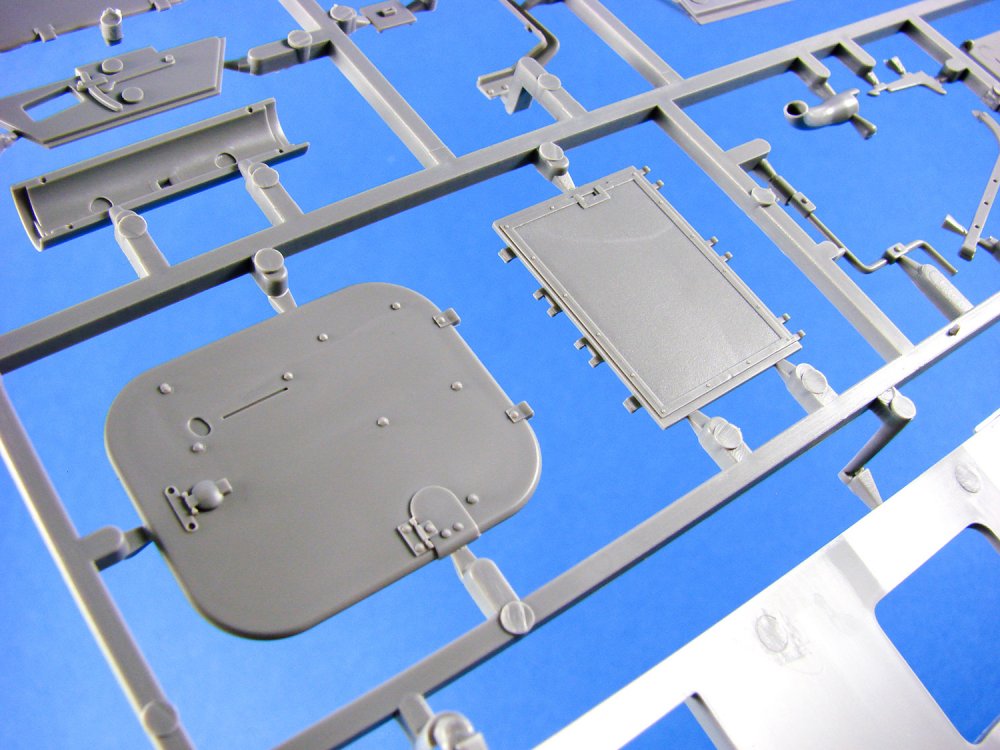
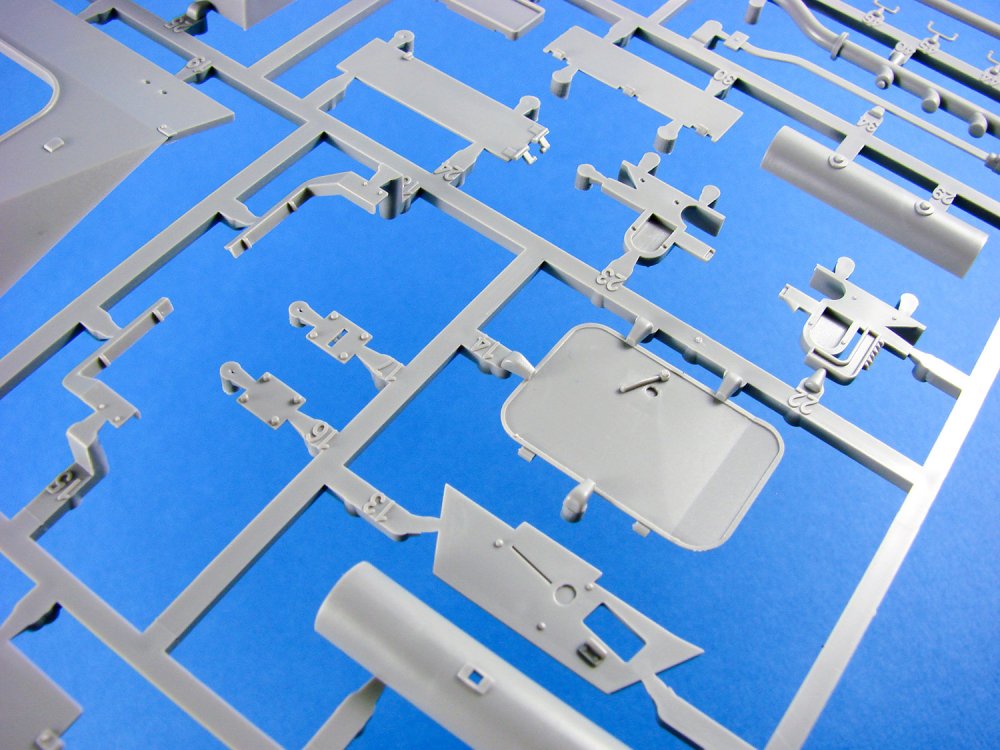
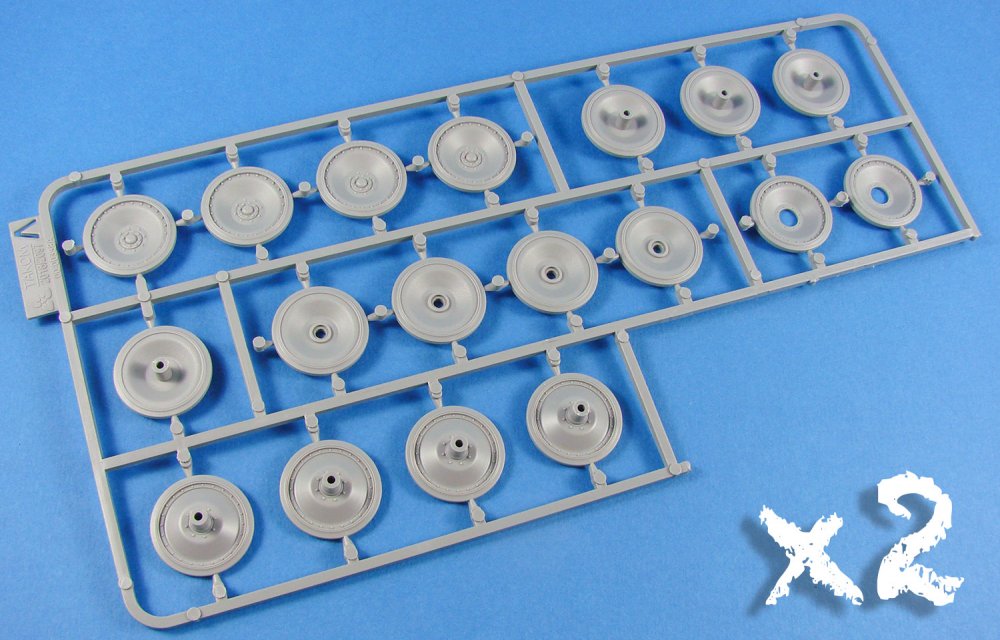
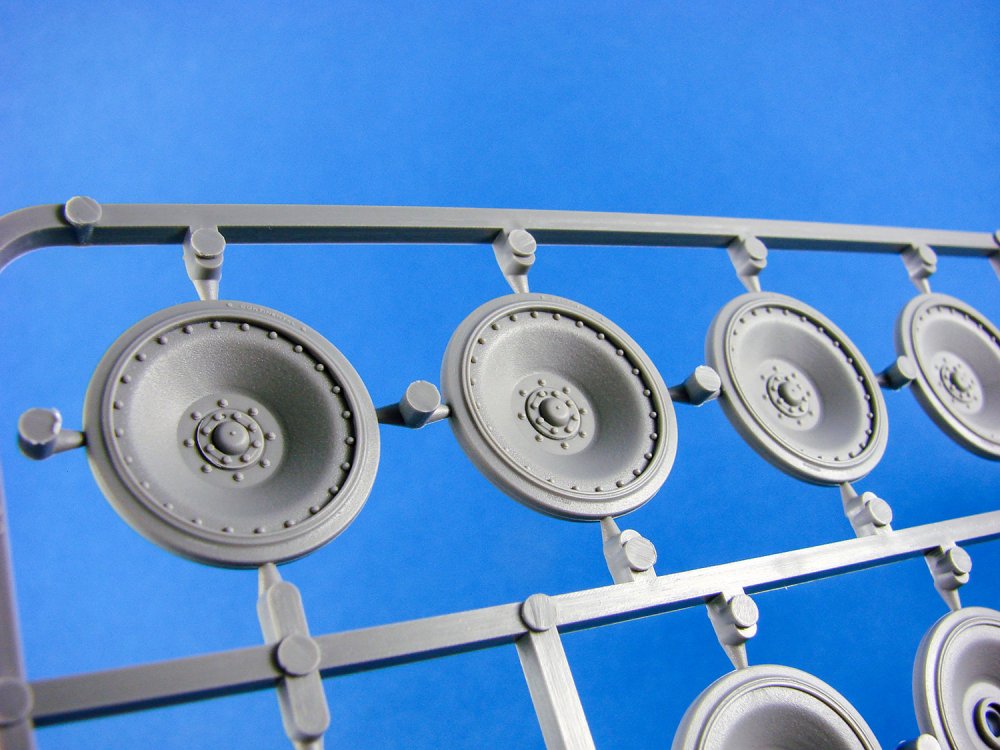
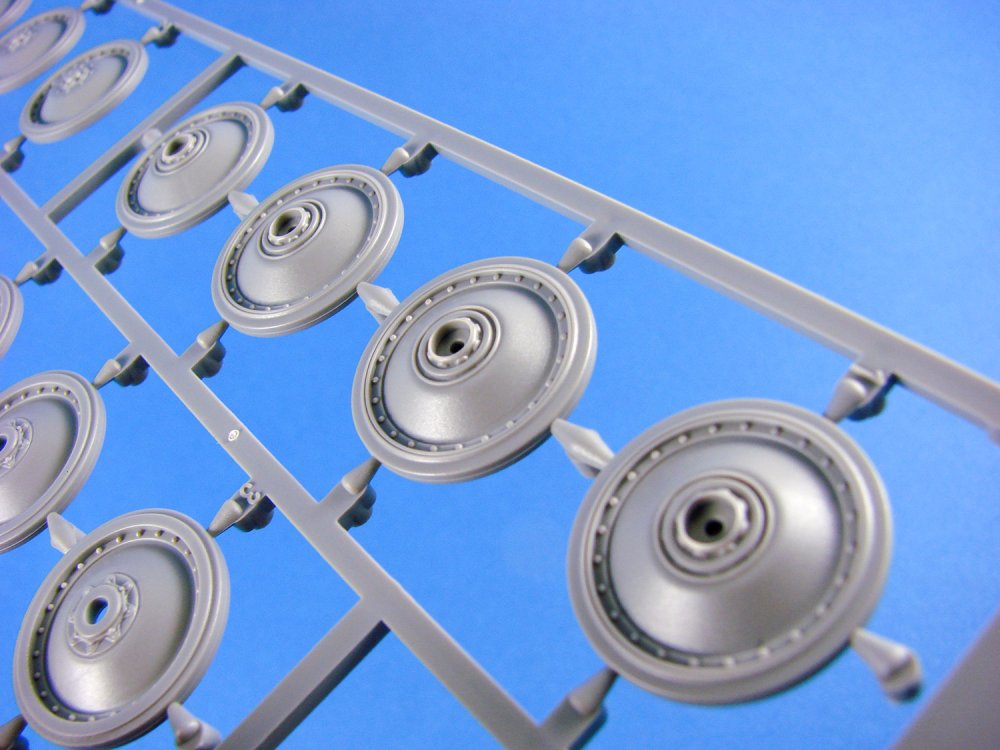
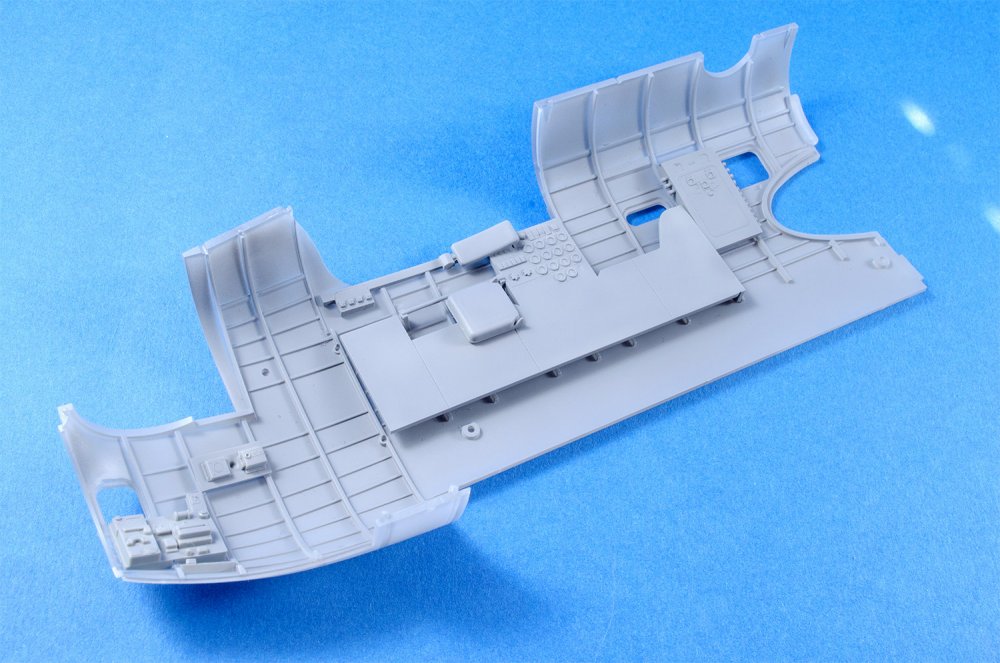
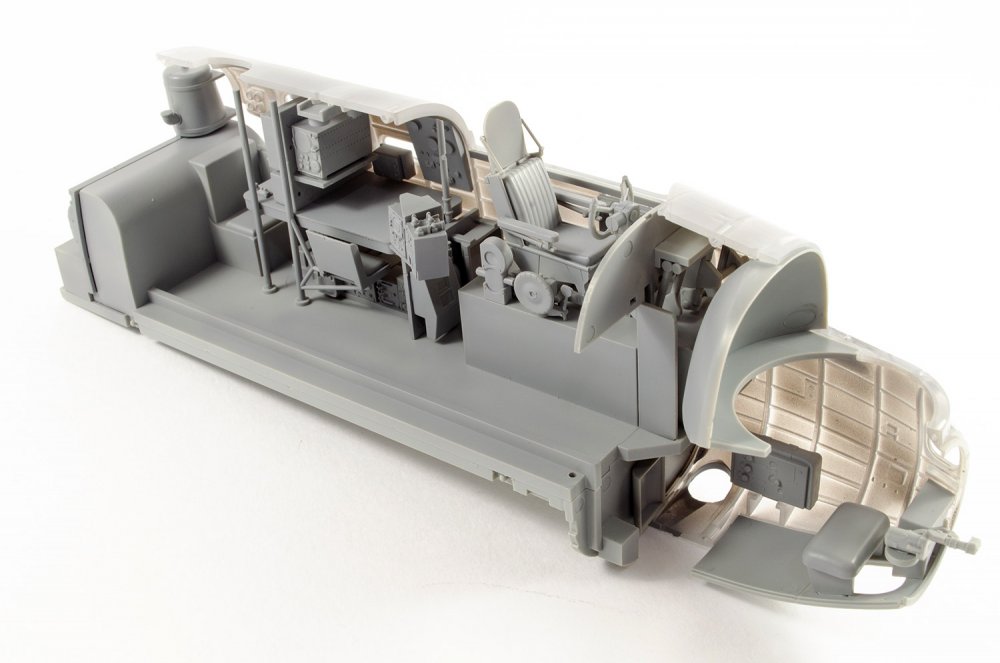
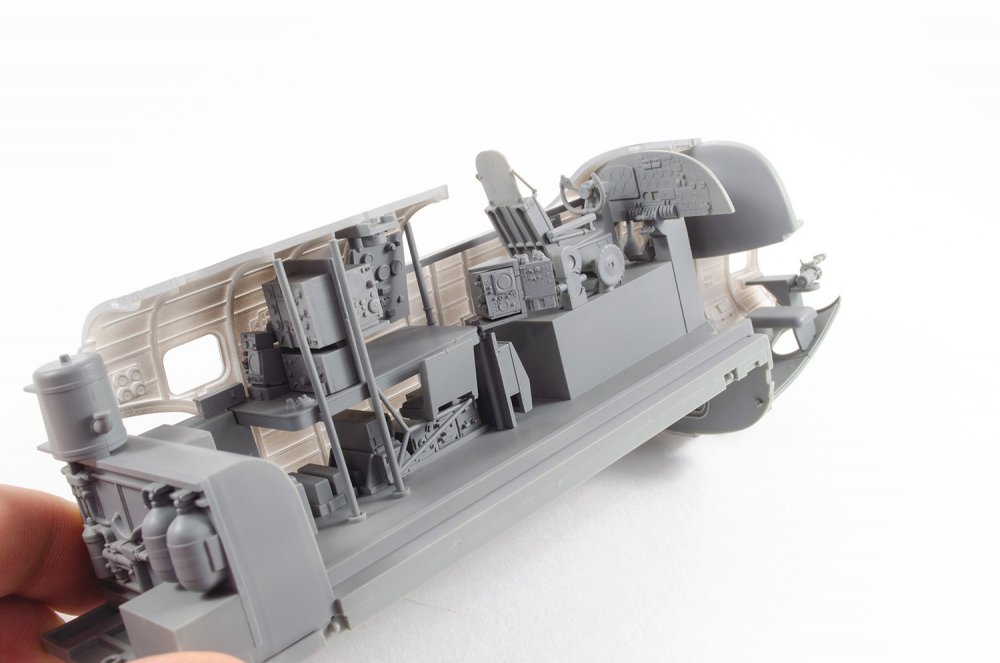
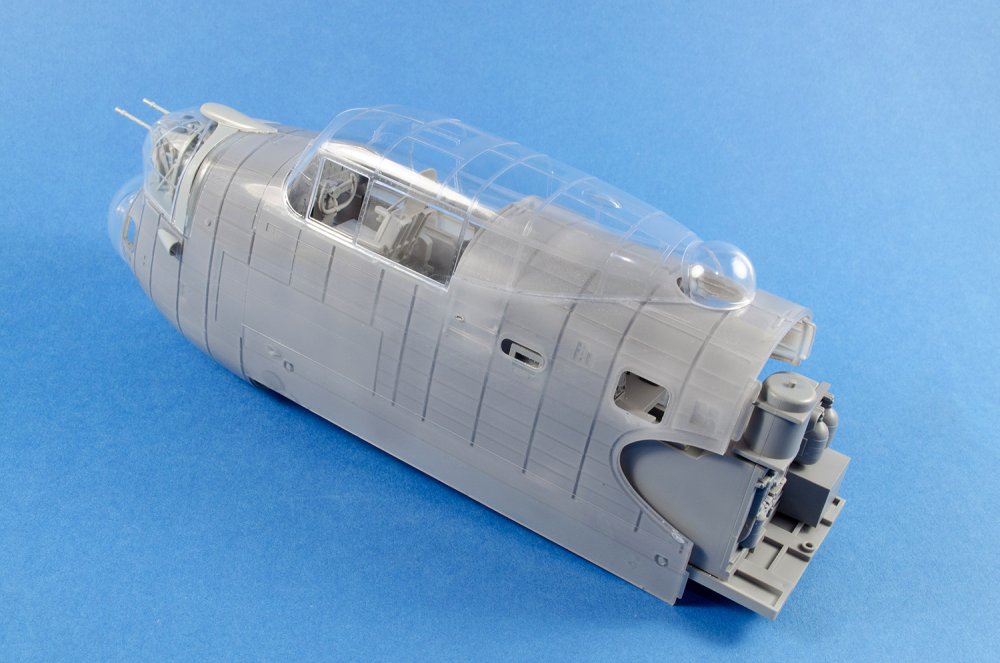
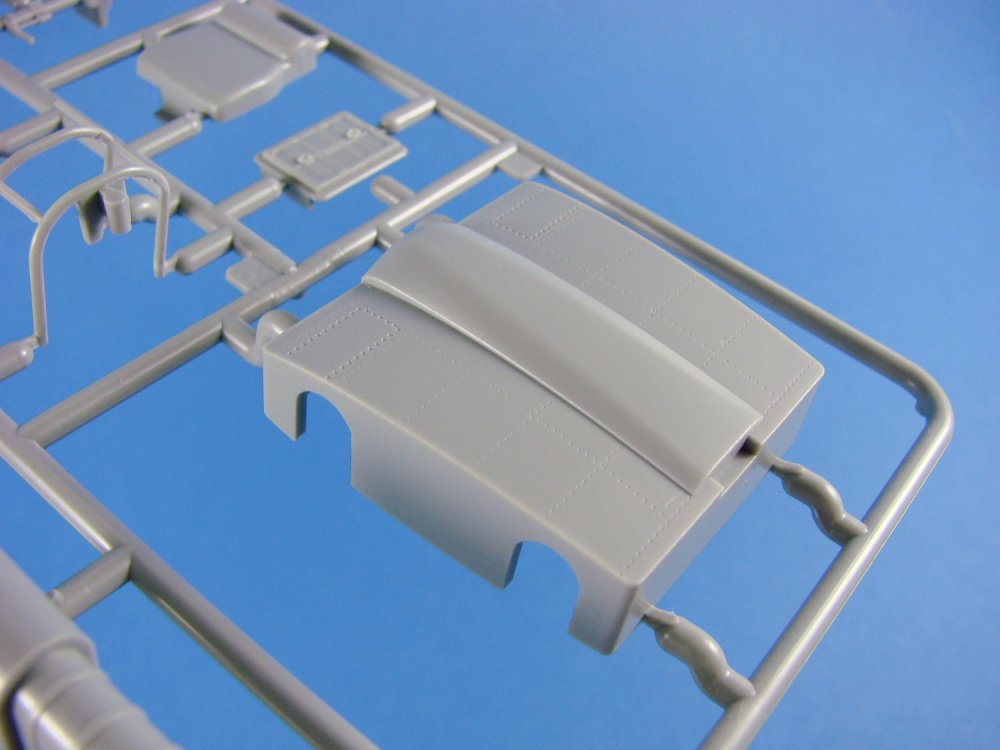
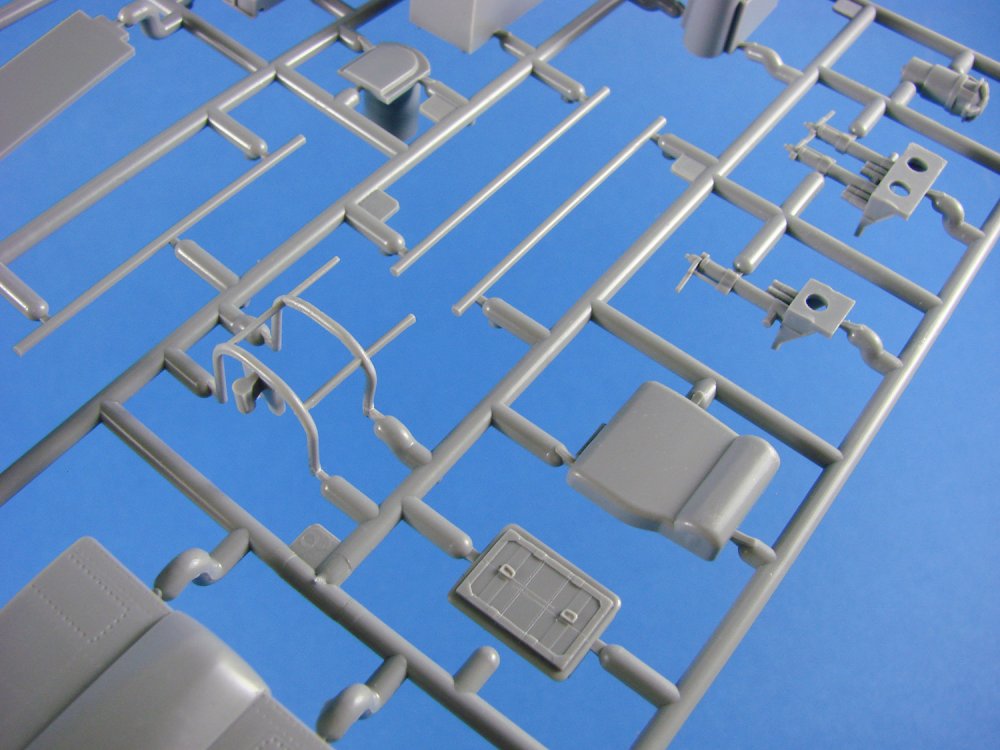
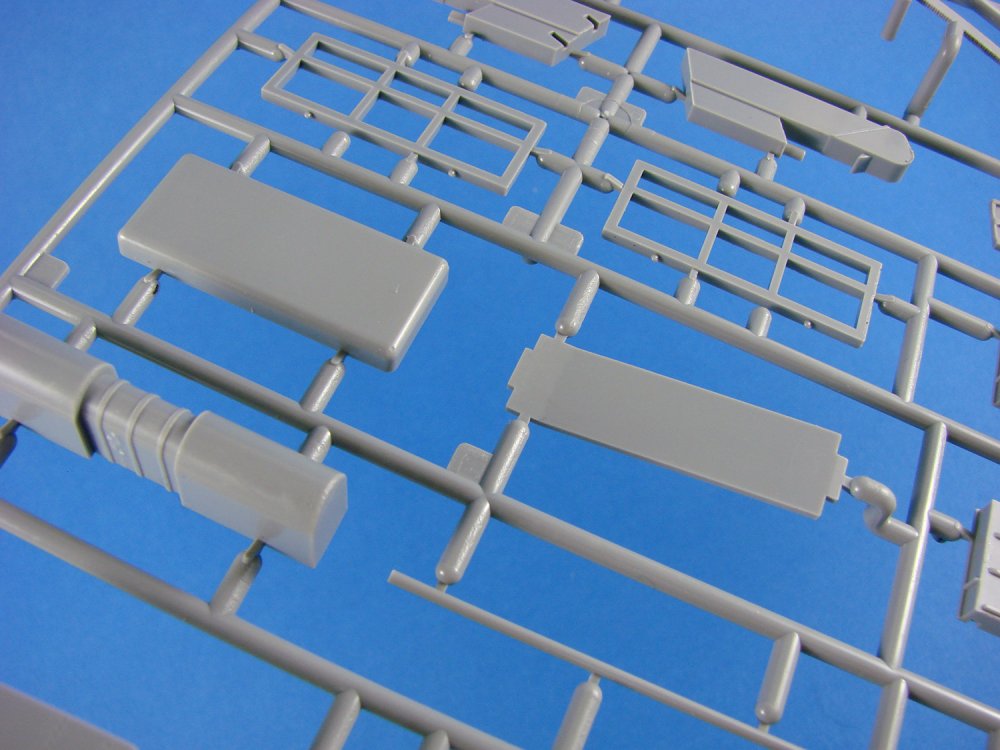
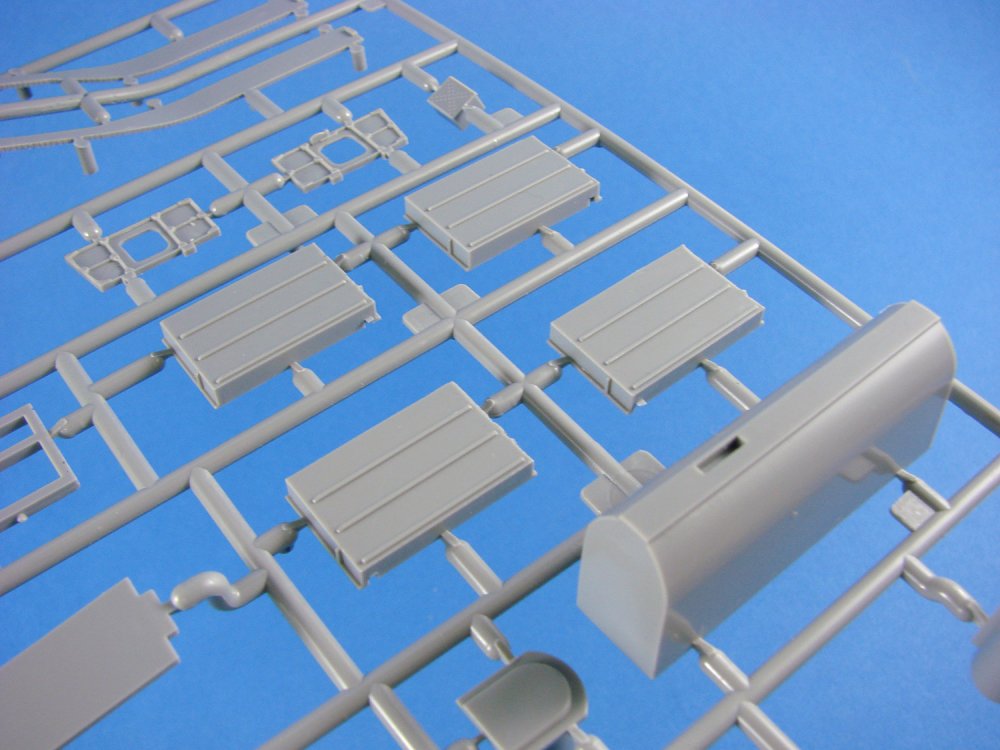
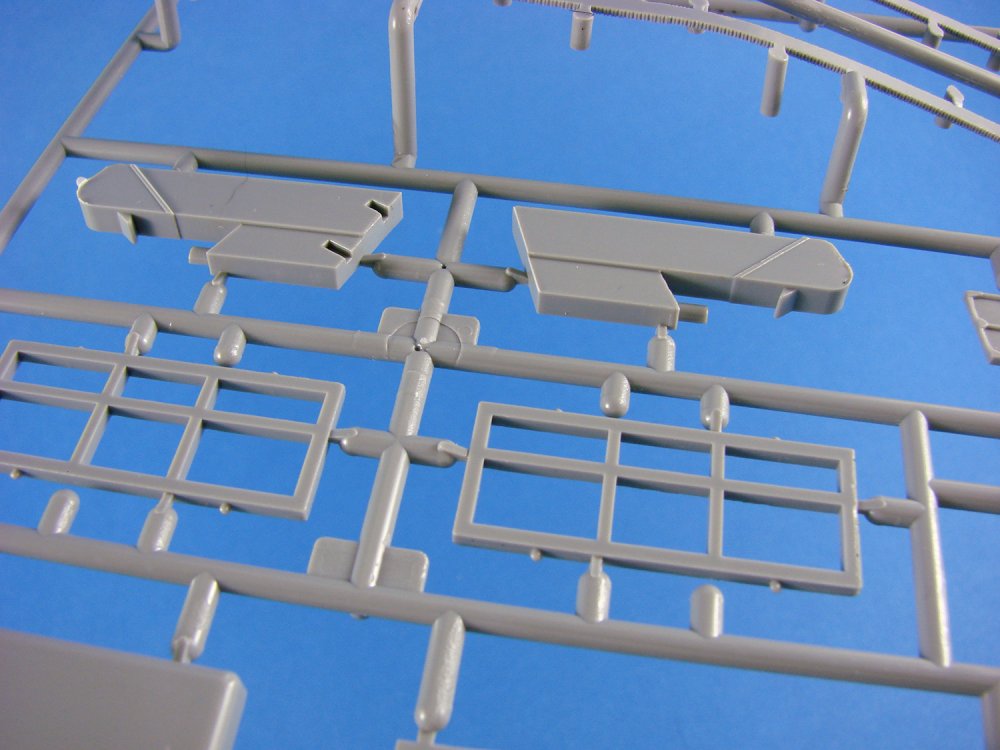
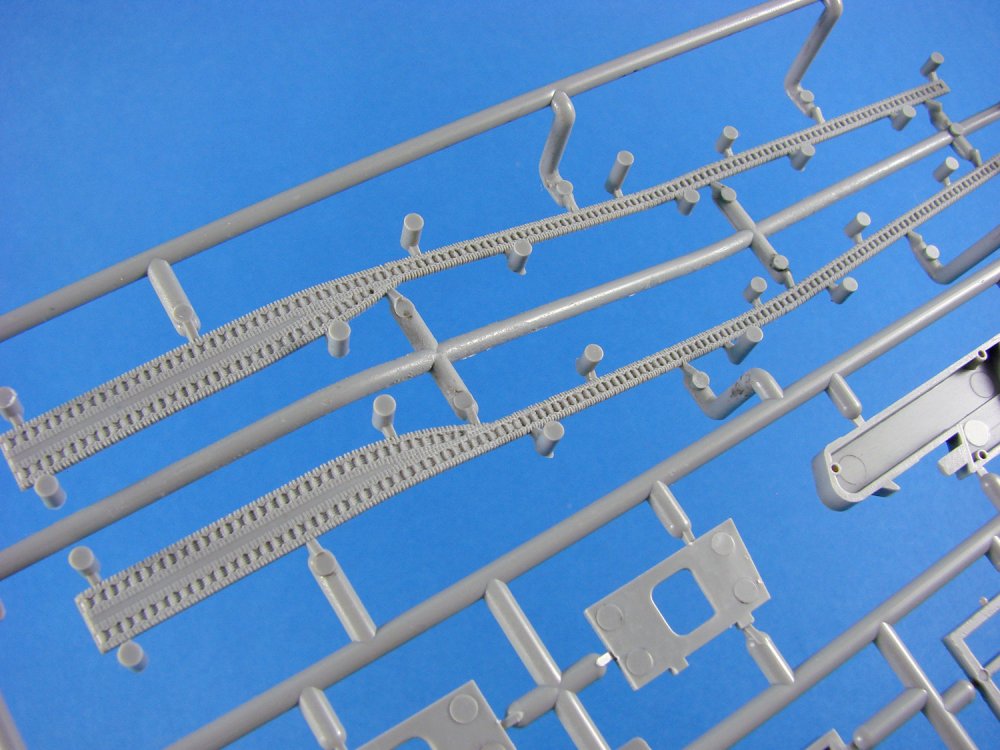
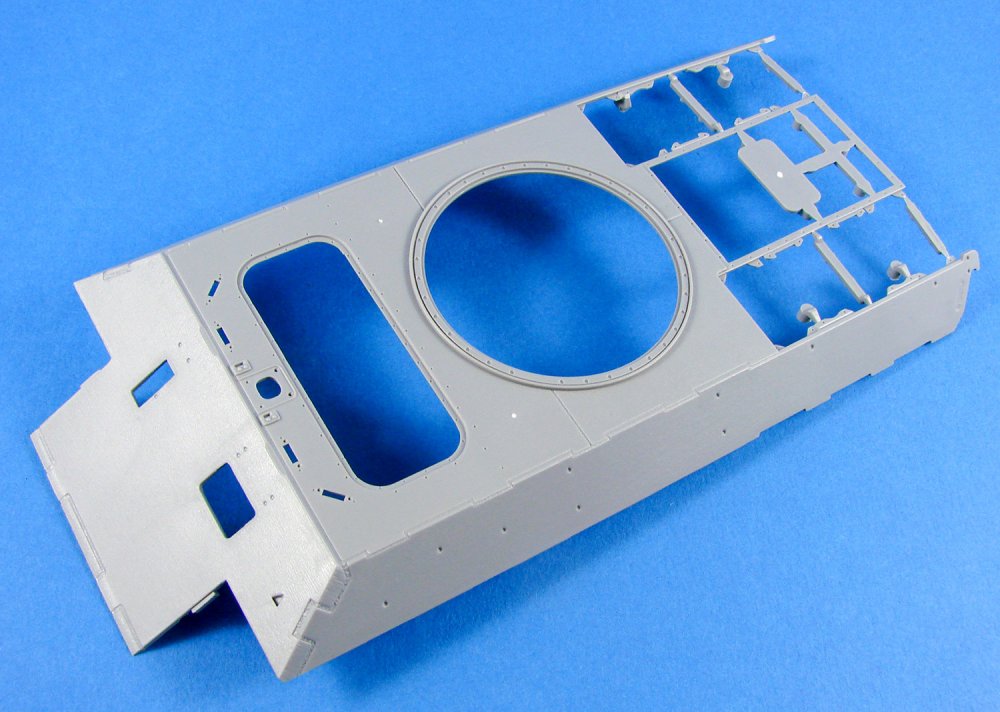
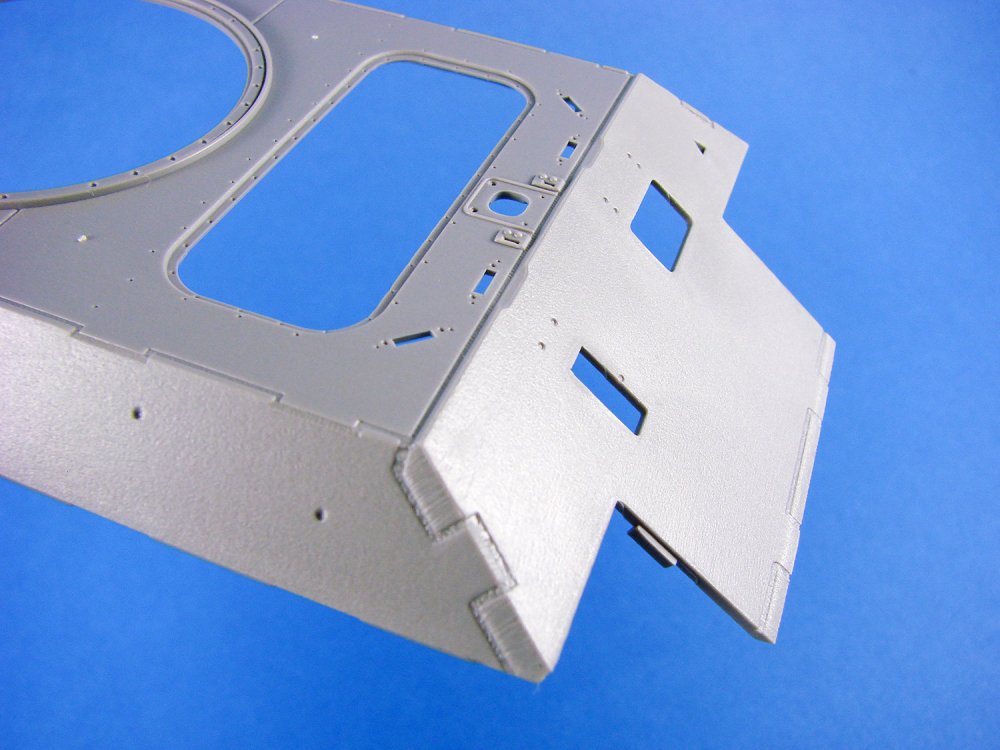
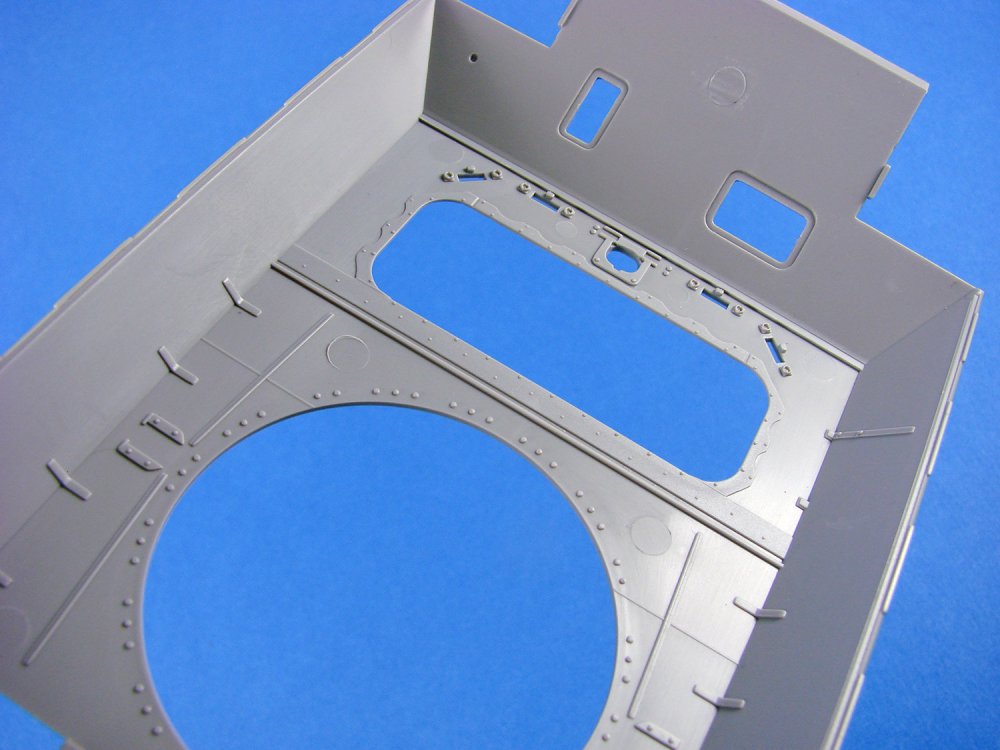
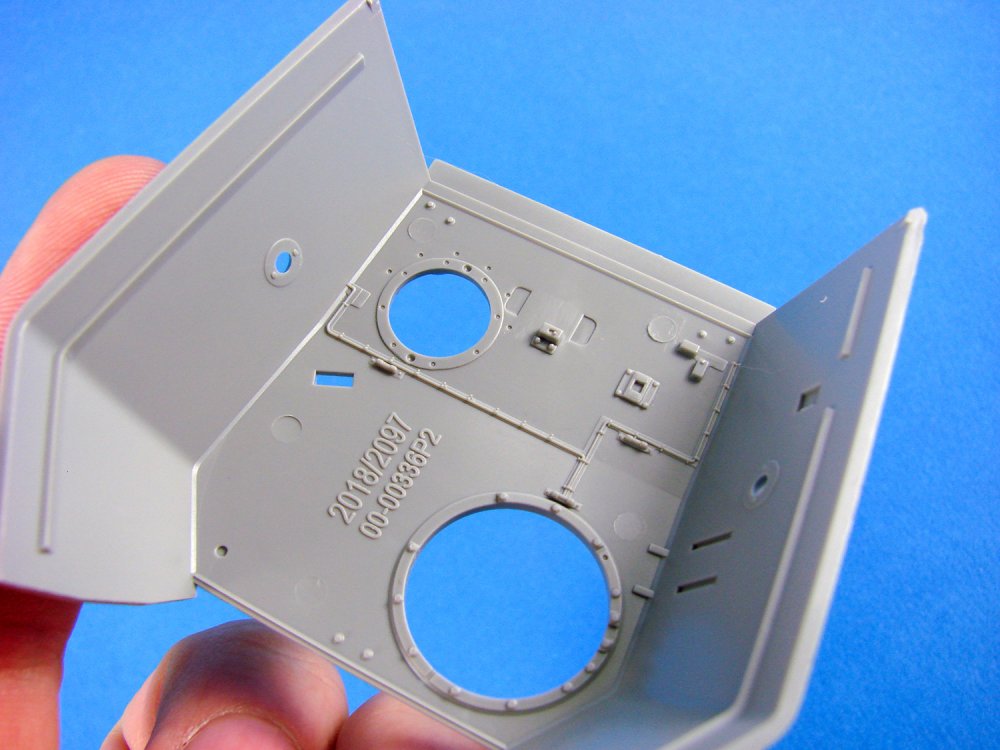
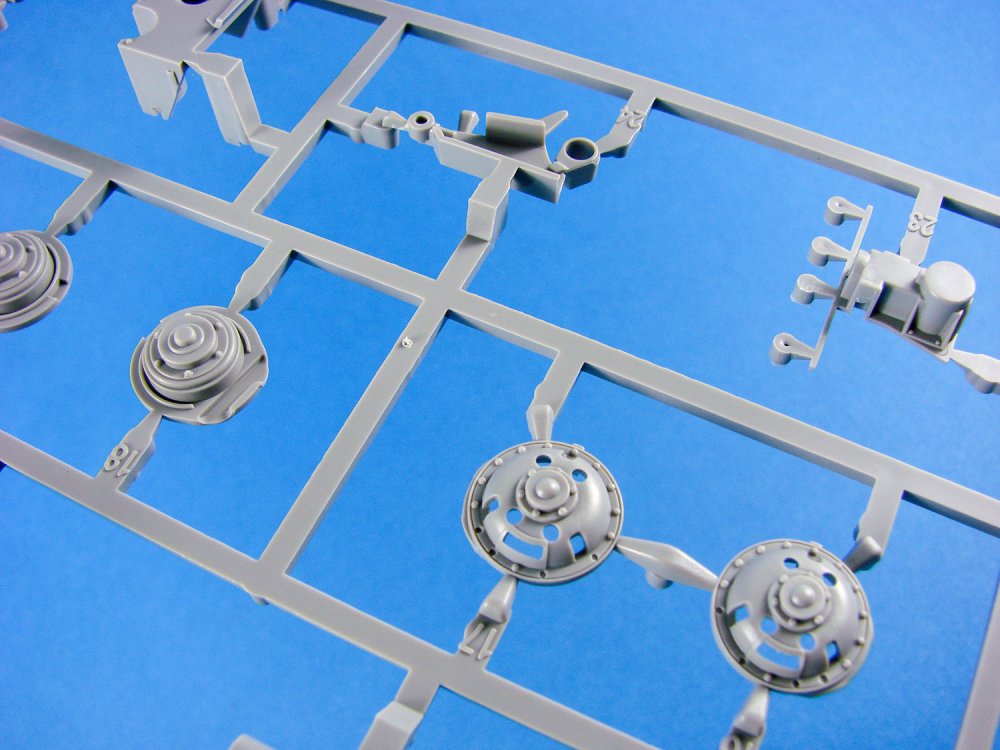
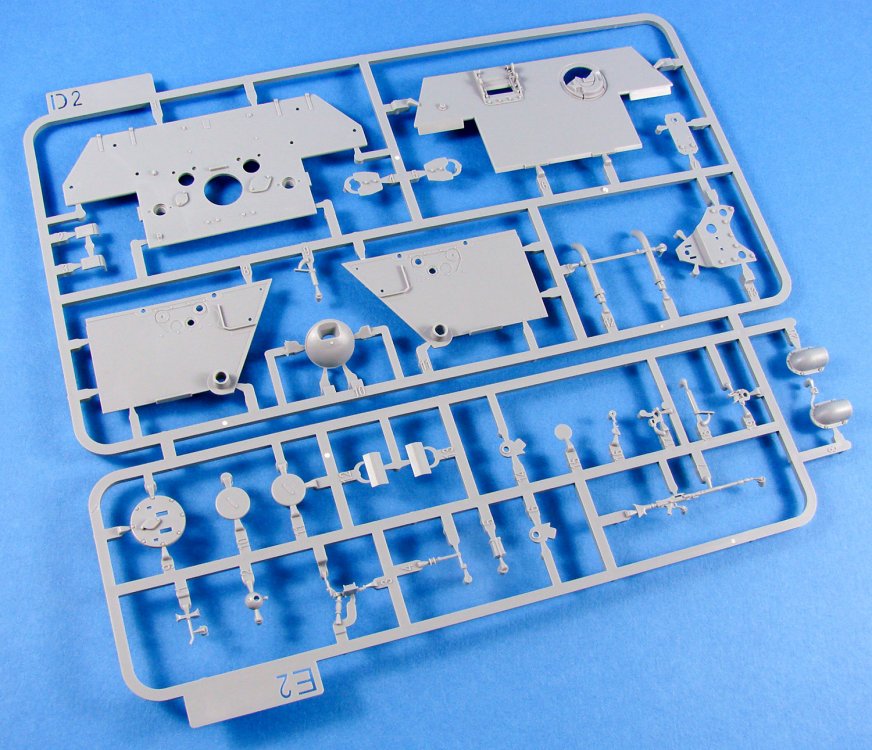
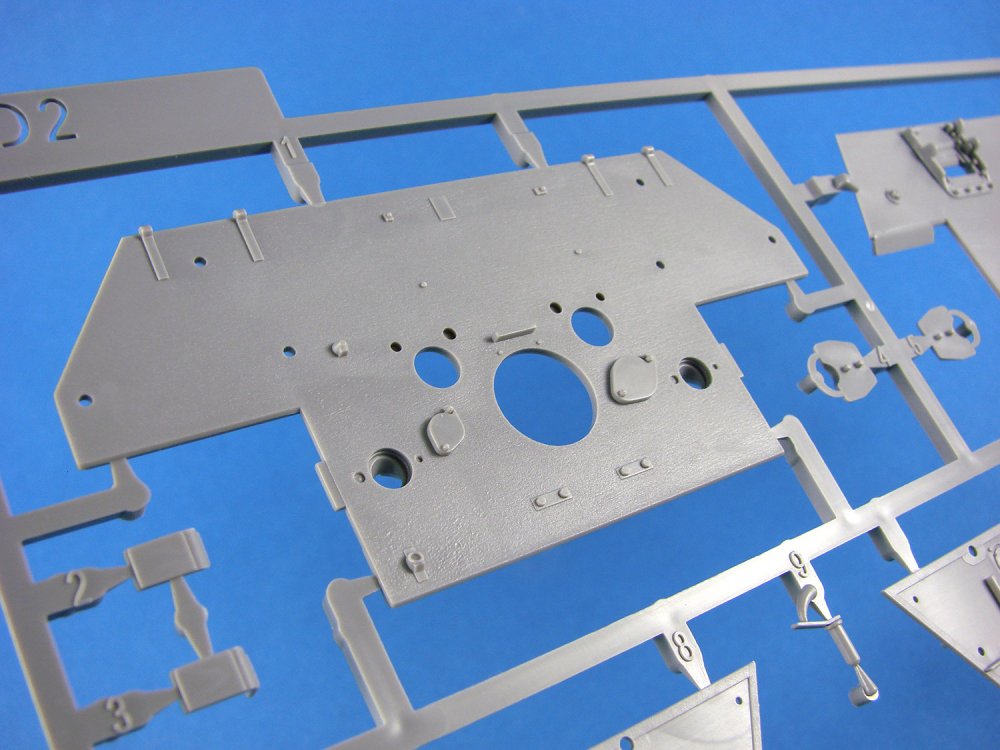
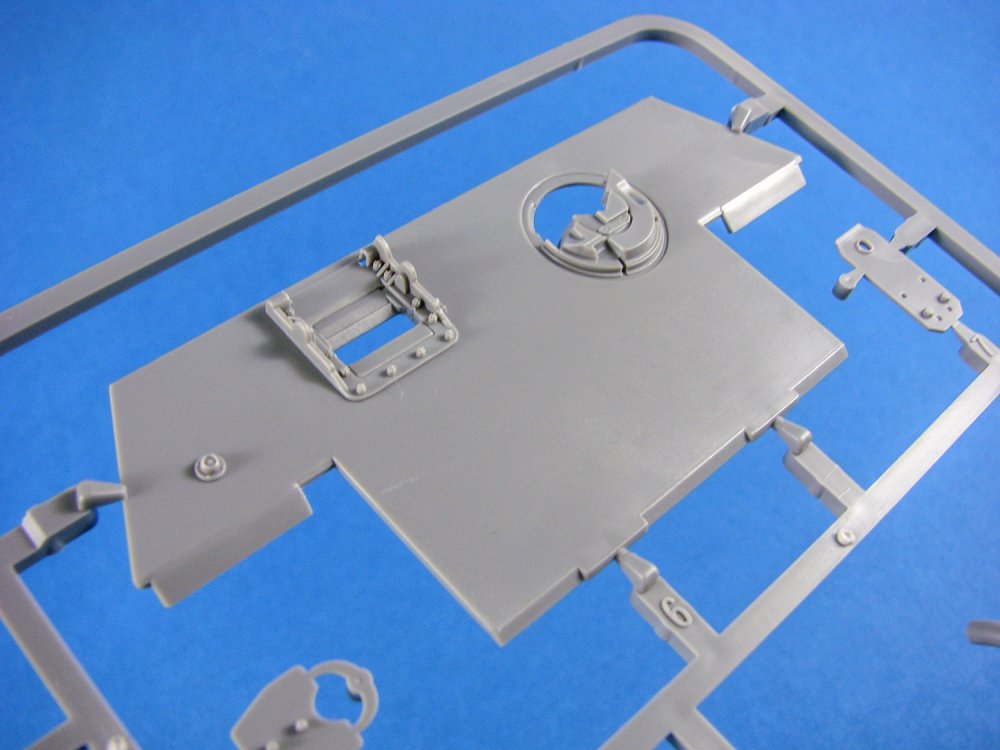
Panther Ausf. A Early Production, full interior We recently looked at Takoms 1/35 Panther Ausf. A Early Production, full interior kit (Catalogue # TAK2097) HERE. For a while, us folks at LSM wanted to create a series of very short test fit/build articles with very brief notes/annotation. You could call these 'build reviews', and as such, we've added this section in our review area. Takom's new Panther kit is amazingly complex with a very high parts count, but the model builds extremely well as per kit, with just a few notes needed with regards to building chronology. Let's take a look at our very first LSM Pilot. This kit has a very small number of ejector pin towers, but they tend to be in unobtrusive areas, such as we see in the rear of the engine bay area. The lower hull looks like a road map for a Tetris game, but it provides the positive design engineering that you need for these important first stages. So far, so good. Not much to report in these first steps, and everything fits superbly. Takom chose to use thin plastic parts for the frames in the belly of the Panther, unlike the PE ones in the Rye Field kit. Both options will work well, but take care with the plastic parts because they are are a little flimsy. The transmission unit builds with little fuss, but be wary of the instructions. Here, as in many other places, your worst enemy are the tiny, ambiguous drawings. Never has the saying 'test fit ten times and glue once' been more pertinent. This unit fits well to the base due to the flexibility of the hull floor and various frames. Just make sure that all is dry before you start to manipulate things to fit the transmission unit. Detail parts are added to the interior hull sides. Again, location points are key here so as not to misplace parts that will foul anything else in the crammed hull. A quick test fit of the sides to the lower hull gives me a good idea of how I will fit the numerous torsion bars... Takom would have you more or less install the torsion bars like this, but it can be awkward. Forget this method... ...and slide them through the frames first, followed by added the hull sides. When the hull sides are in place, the torsion bars can be slotted up into the semi-circular holes provided, and a small quantity of cement used to lock them in place. You can really begin to see how cramped this model will become in the later stages, although nothing is really giving any cause for concern with the number of parts involved, and depth of detail. To help with swing arm alignment and later track assembly, Takom has included two jigs that slot over the swing arms whilst the glue dries. Wheels, wheels and more wheels... The Panther's interleaved wheels are now fitted. Note that the rearmost, outside wheel is DRY FITTED, or you will NOT be able to fit the idler wheel later. Takom doesn't clearly indicate this, so beware... Work on the interior begins. Just a few parts to start, but you'll soon see the interior fill up. Again, Takom is quite ambiguous with exact location, so you need to carefully study the drawings and the various keyed parts. Sometimes, they aren't too obvious. Attention is temporarily paid to the engine bay, with the installation of the firewall and side bulkheads. The latter tend to float around a little until the bay is fitted out. Ironic that very little of this will be seen unless you build a factory/workshop diorama. Many of these subassemblies begin to have more understandable location points as construction begins to advance. Remember to fit the rearmost ammunition storage BEFORE the rear floor goes down or you will struggle. Don't ask me how I know. To ensure that the track sections (both individual links and link lengths) fit properly, the orientation of the drive while is crucial. here you can see how the jig defines that key position. Each link comprises of 3 parts, but these horns are added in strips to the track sprues. They are then glued and when dry, the sprues are snipped away. Simples! Maybach construction begins. Amazingly detailed with layers of detail upon detail. No special instructions for fitting the engine. Everything goes exactly as it should, even with all the various lengths of plumbing. here is a finished track, still sat on the jig. The lowest section is dry fitted and fill be fitted once the tracks are fitted to the tank. Tracks fitted! Zero drama, even for an airplane guy like myself. Takom's approach works superbly. Takom would have you fit the side sections once the ammunition etc. are installed. DON'T DO THAT! You can manipulate the sides much easier with them bare, and only them add the extra details once the glue is fully cures. All internal ammunition and equipment are now installed. This is one seriously busy hull. Enjoy that view whilst you can. The engine bay is now complete too. Here you see the rear face fitted out without glue. Again, it's easier to fit the plate before adding any glue. For this early version, some external details needed to be shaved off. I also opt to fit out the panels on the upper hull before installing to the lower hull. Things are just less fragile this way. Of course, a few internal details are to be added, as well as the main internal armoured glacis. A superb fit, even with all the internal detail. It could've gone so, so wrong, but I think the success is more done to Takom's engineering and not my luck. Note also that this is fitted BEFORE the hull is fitted out with frames, tracks and pioneer tools. Much better than Takom's approach of fitting this stuff beforehand. Hull just about fitted out. The periscope shrouds are fitted whilst on their mini-sprue, aiding alignment. Once set, the sprue is removed. Et voila!! Turret interior detail is excellent, but WHY did Takom choose to mould the kit serial and date inside!!!!?? On yours, this will of course need to be removed. Quite complicated-looking, but relatively simple to build. Even the breech loading block slides up and down. If the barrel were hollow, this would be amazing to be able to see right through to the muzzle. Here you can see that I pulled the loading block downwards (view from underside) Various drive mechanisms are installed, for turret transverse. Lower turret fitted out, complete with crew seats. The detail is astonishing. Will it all fit in the turret though? The answer is YES! Here's the finished turret, complete with barrel and muzzle. The model is finished! Hope you like it!! Thanks to MBK Distribution for supplying this kit for us to review and build.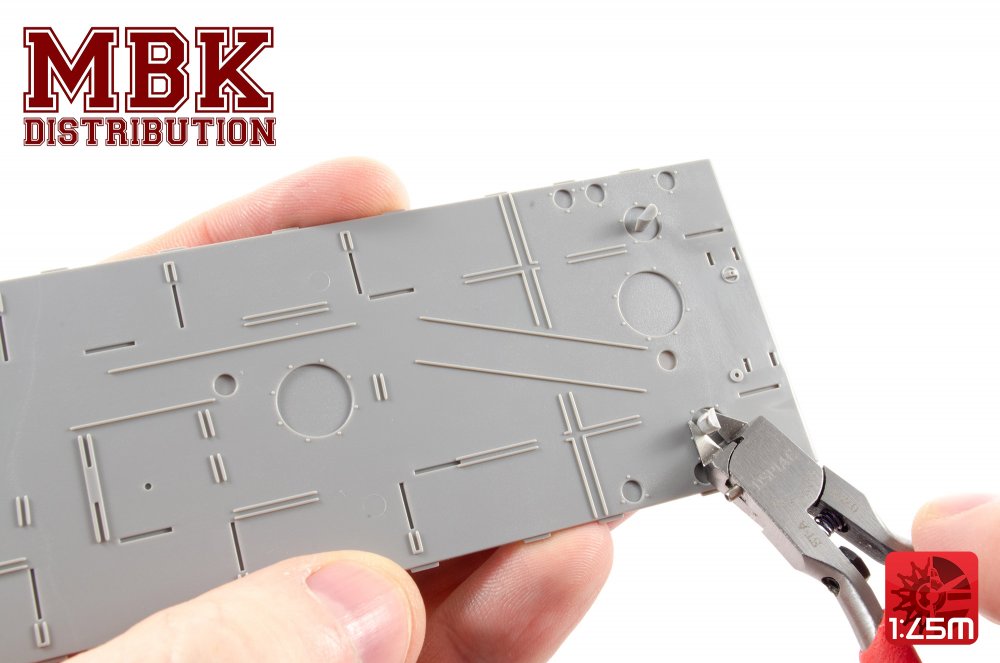


-
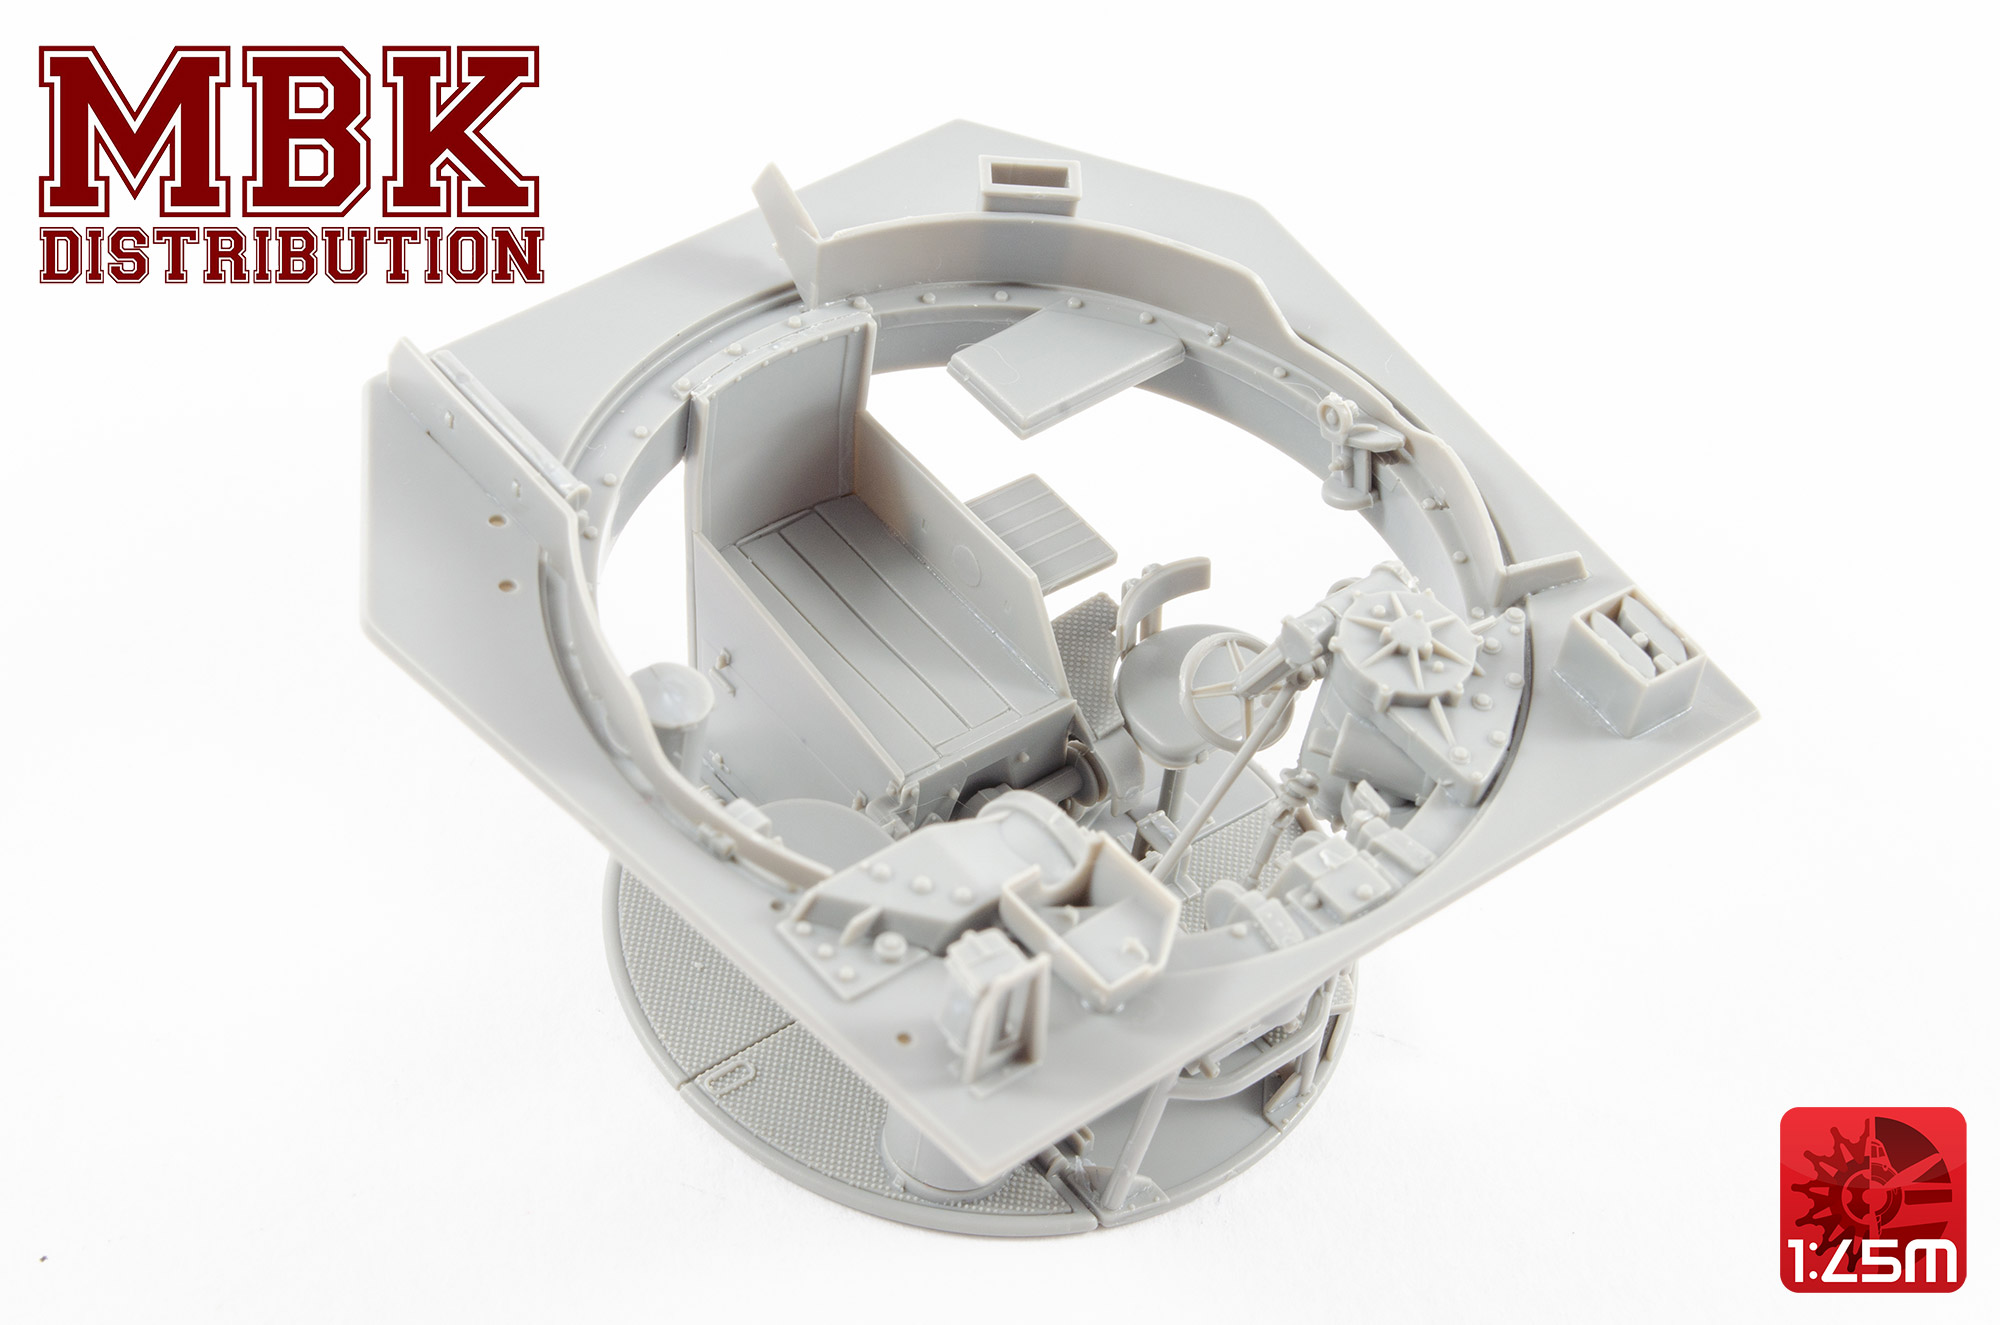
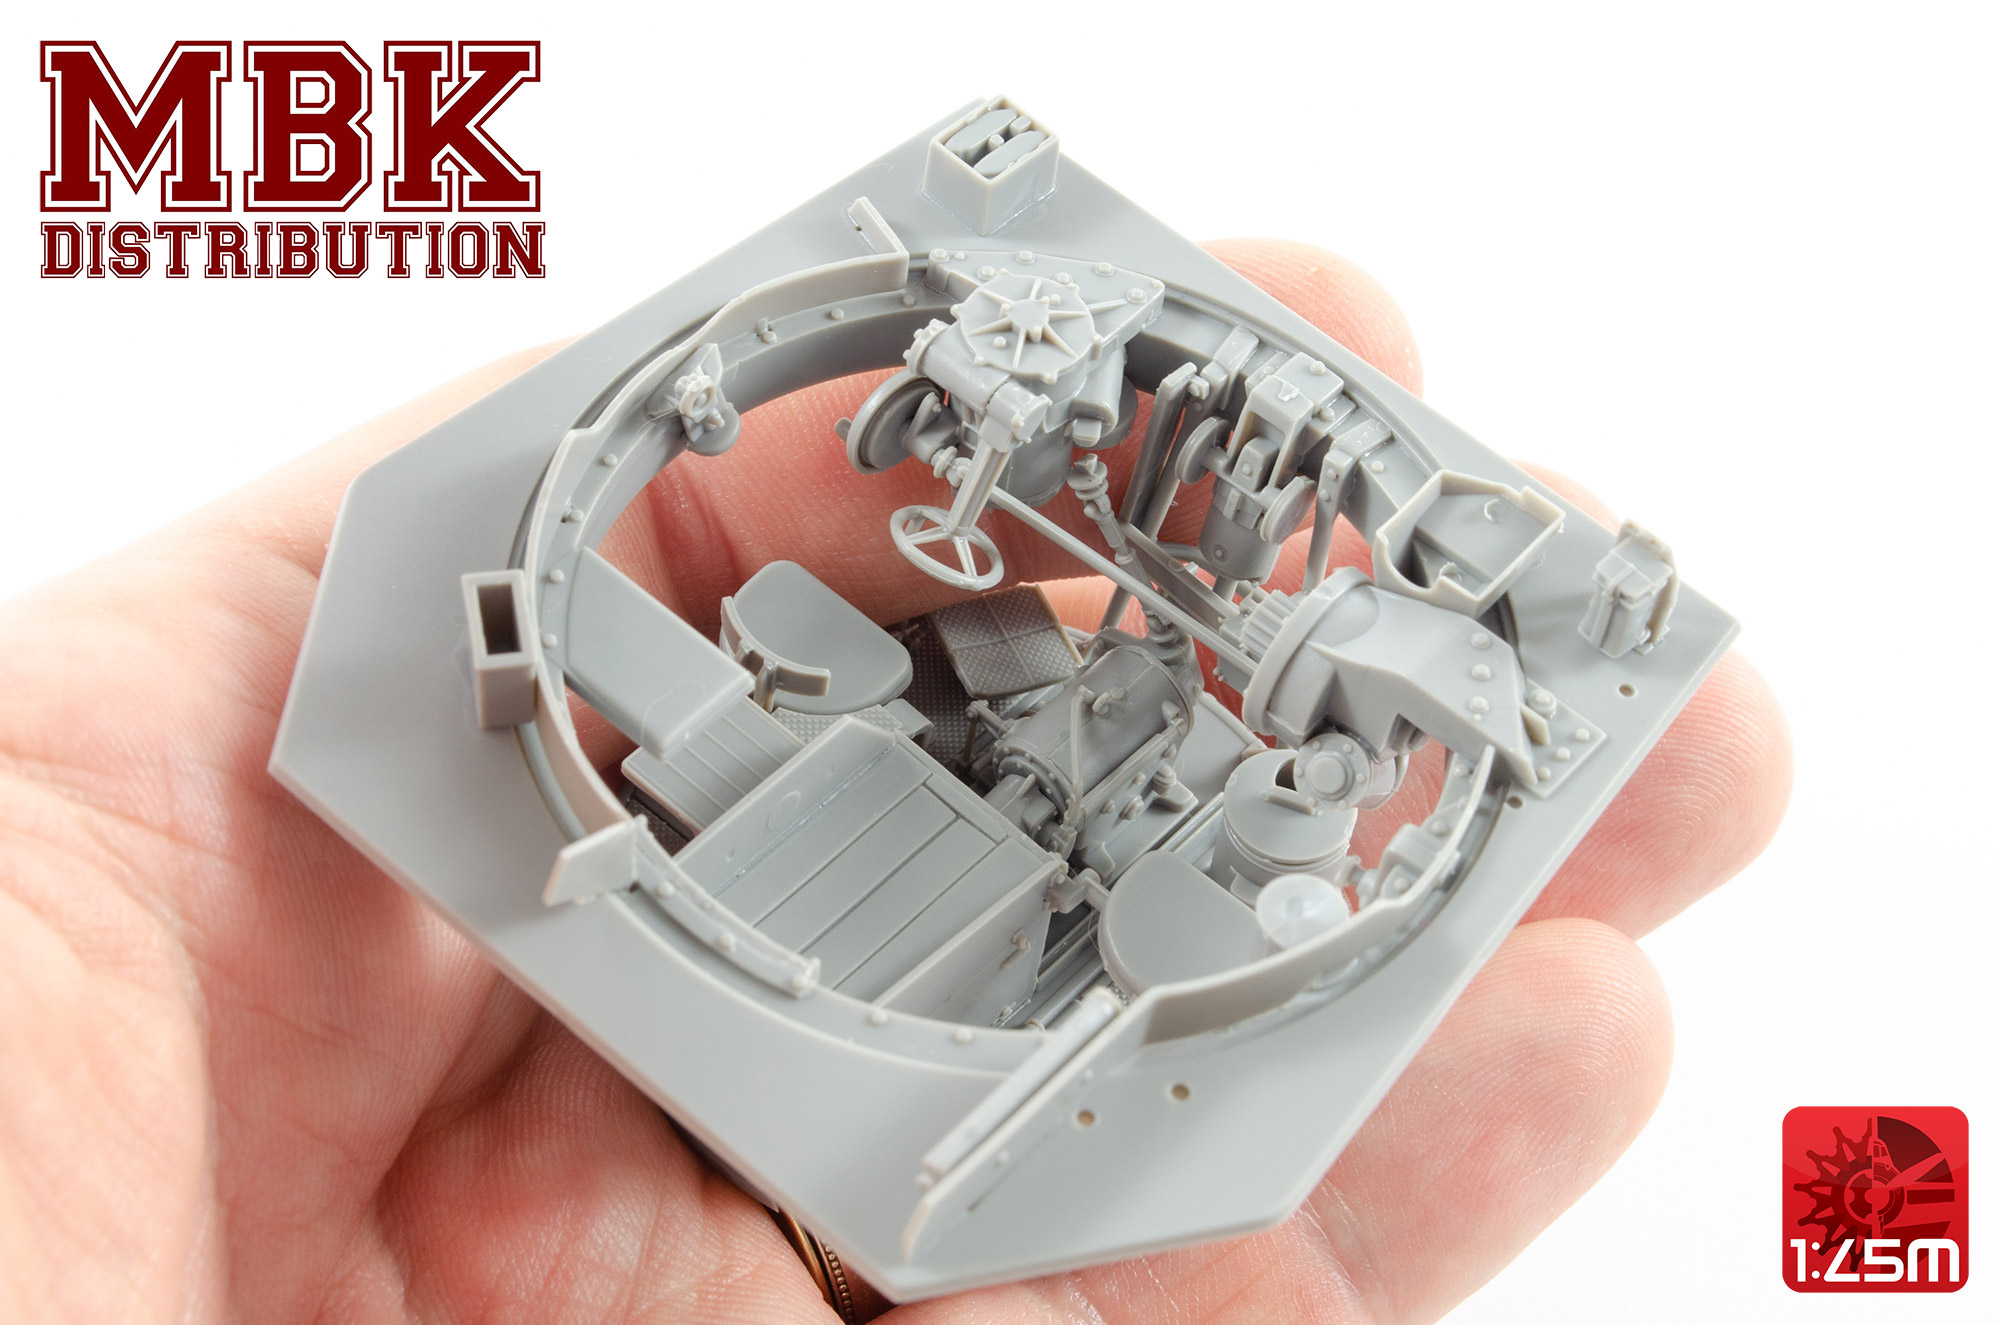
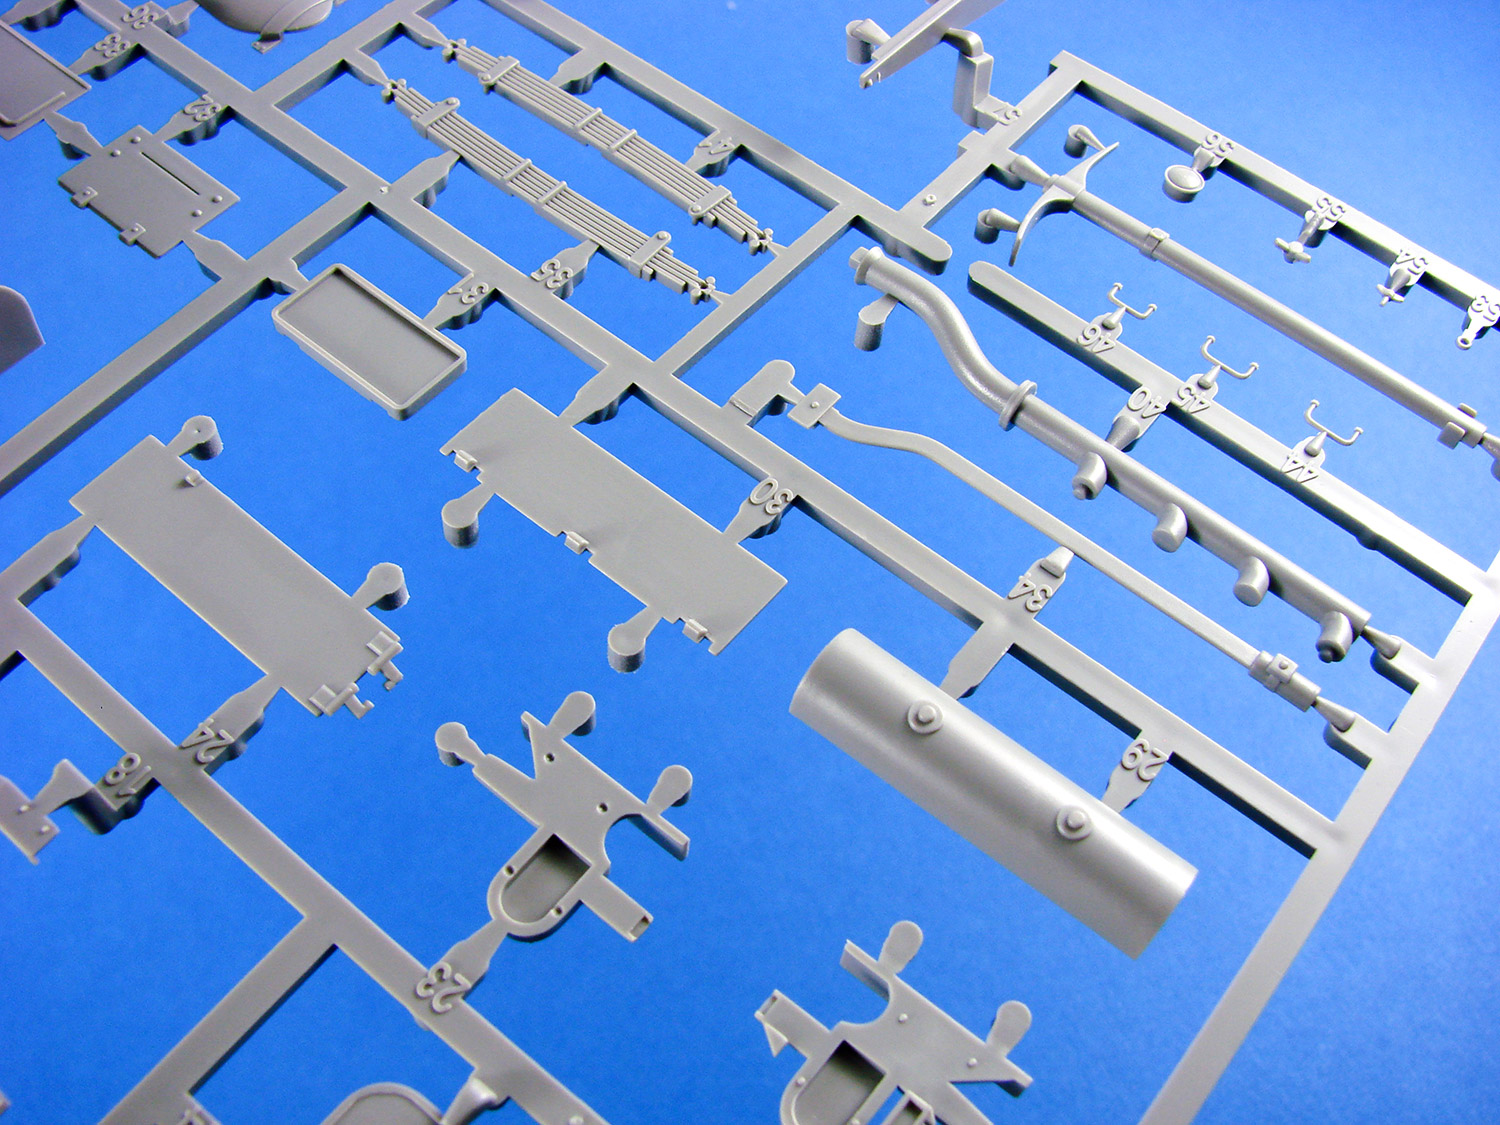
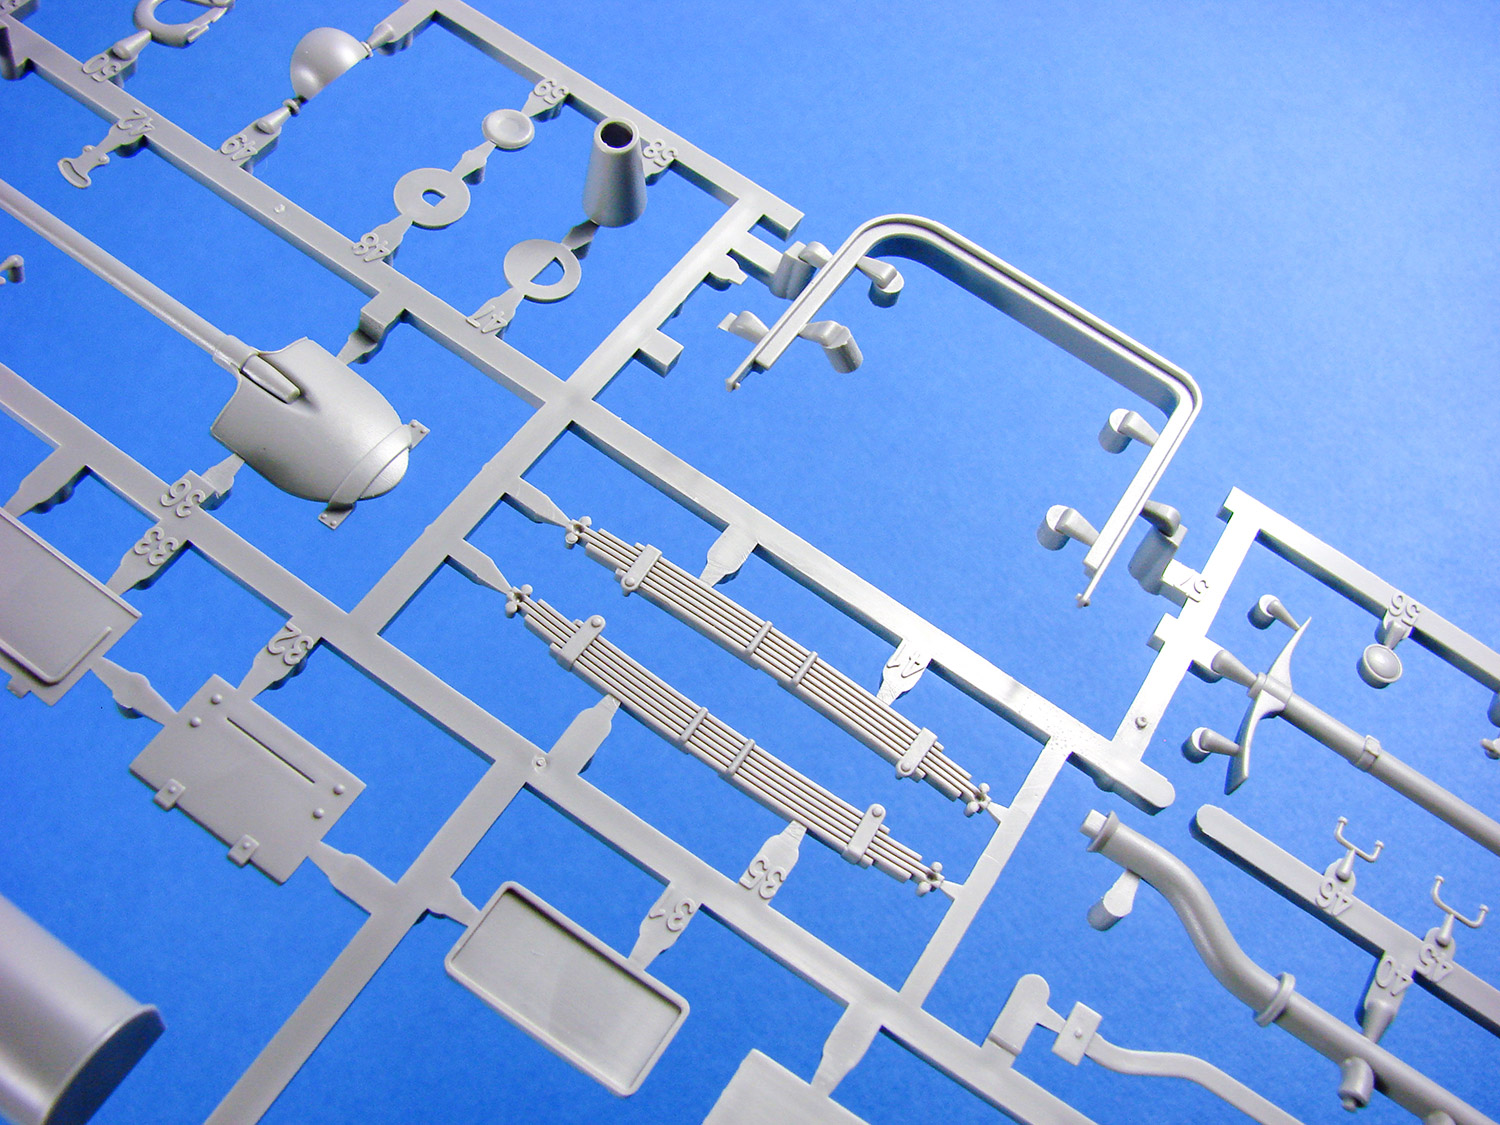
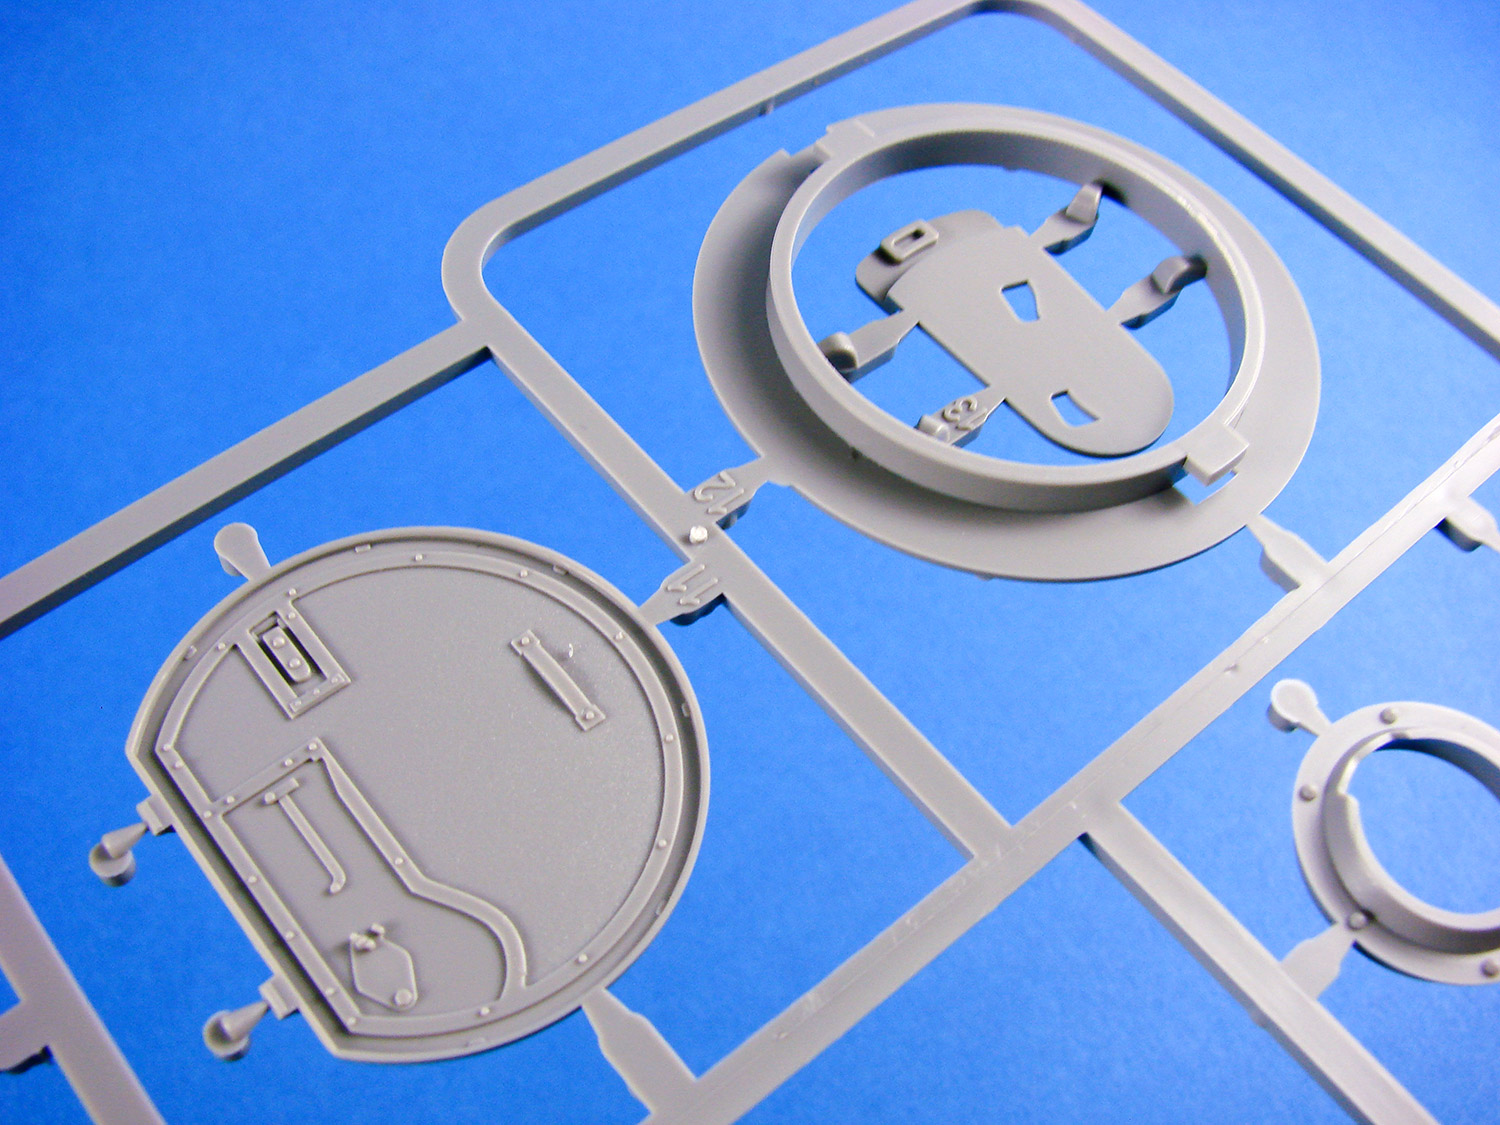
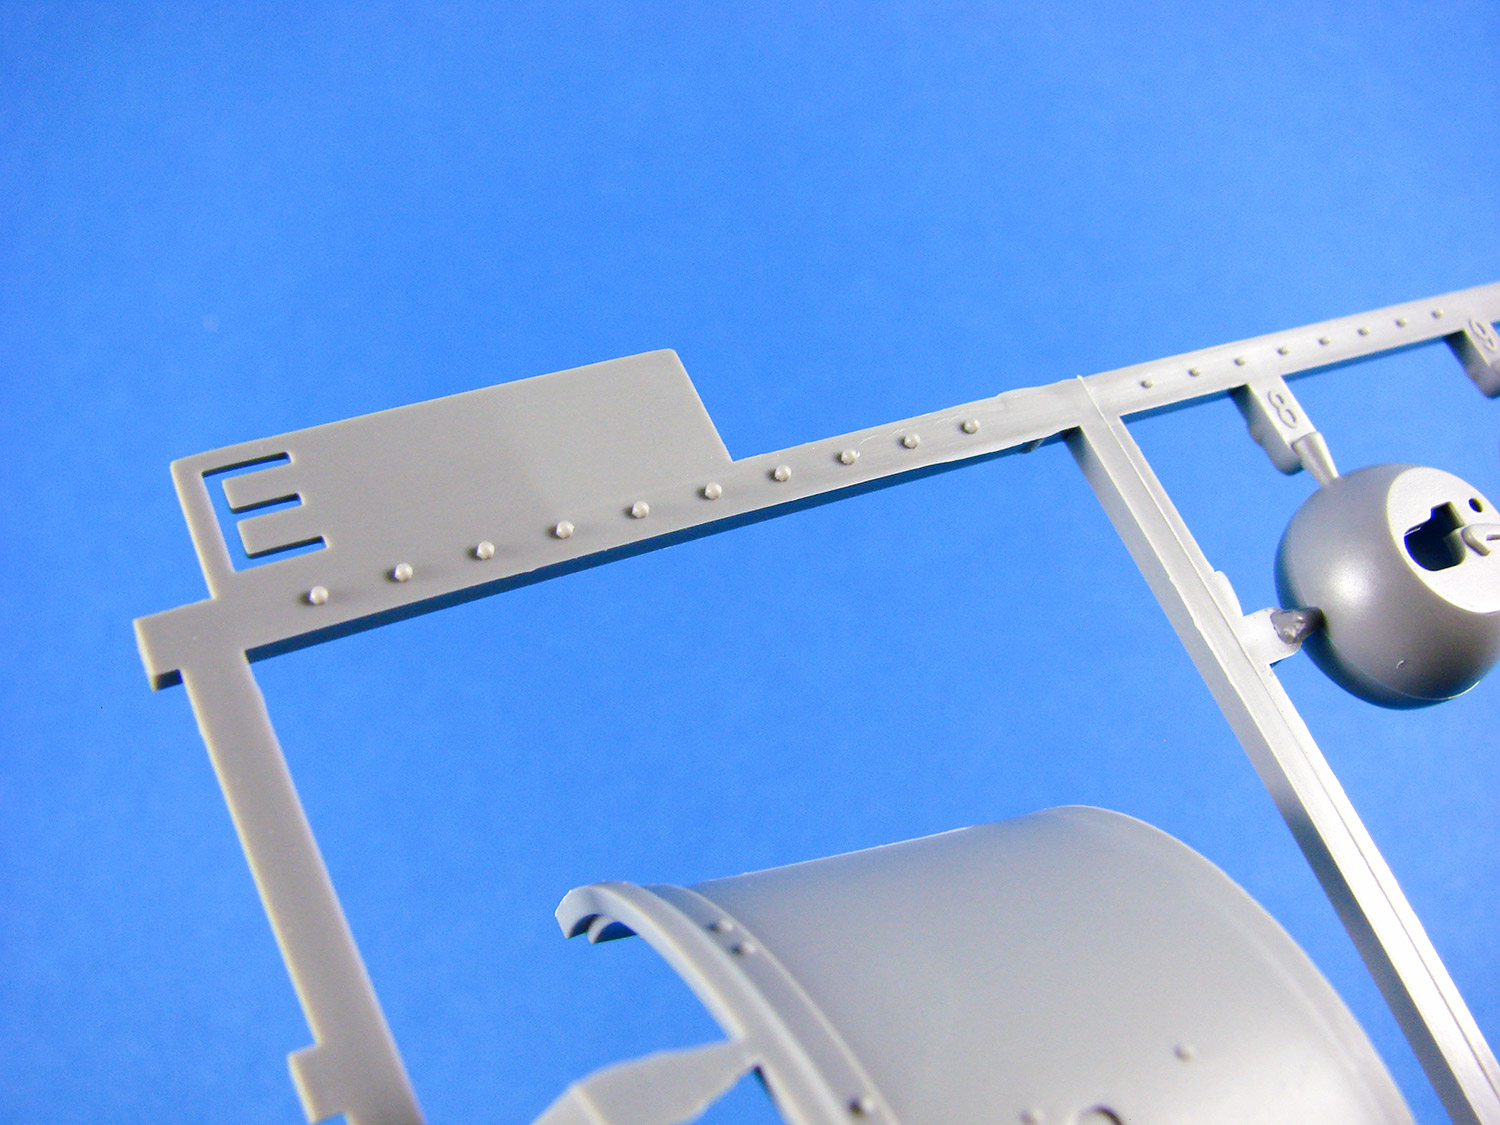
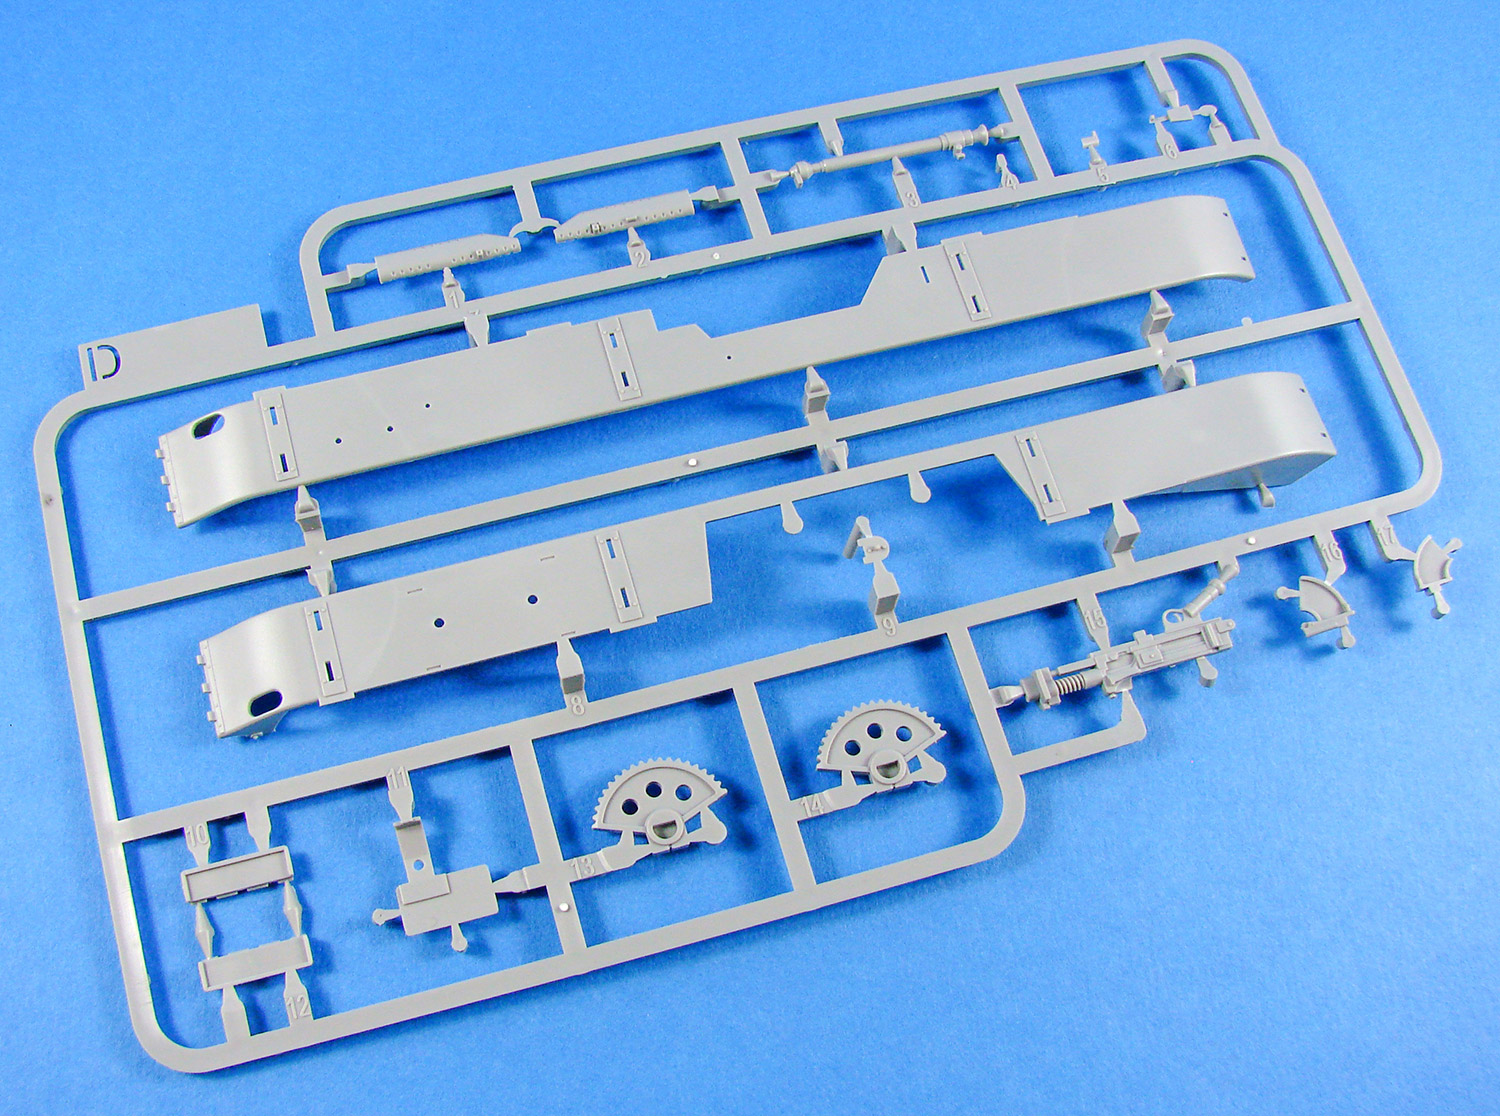
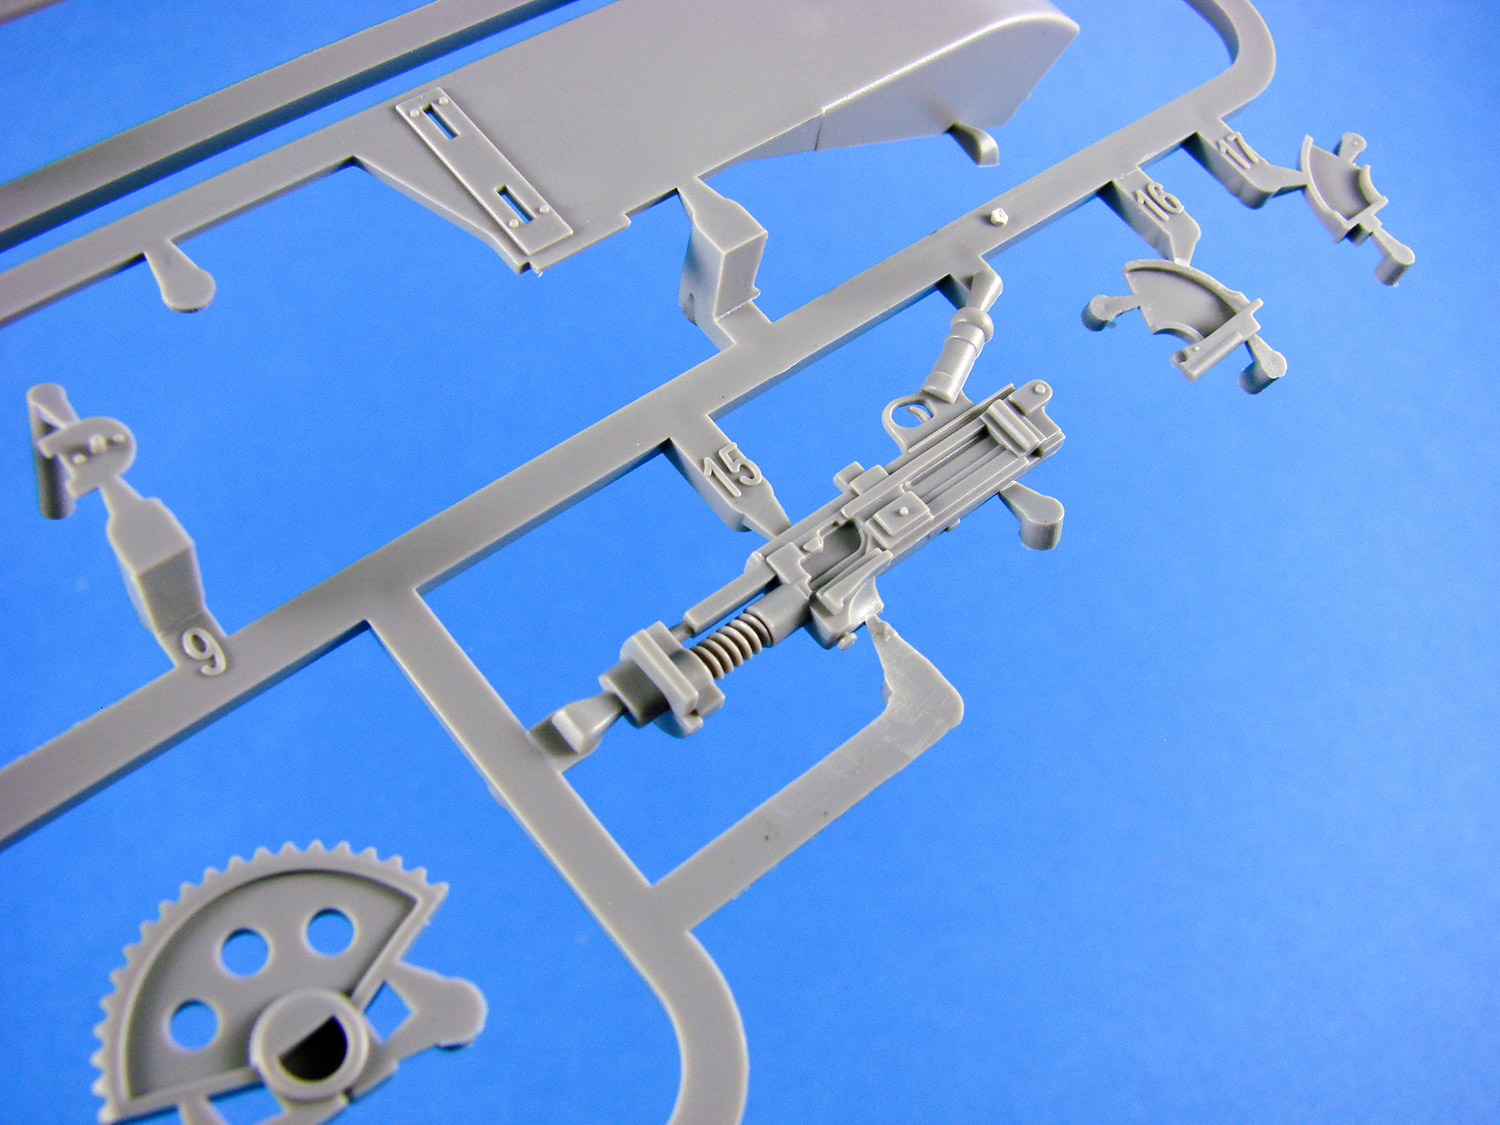
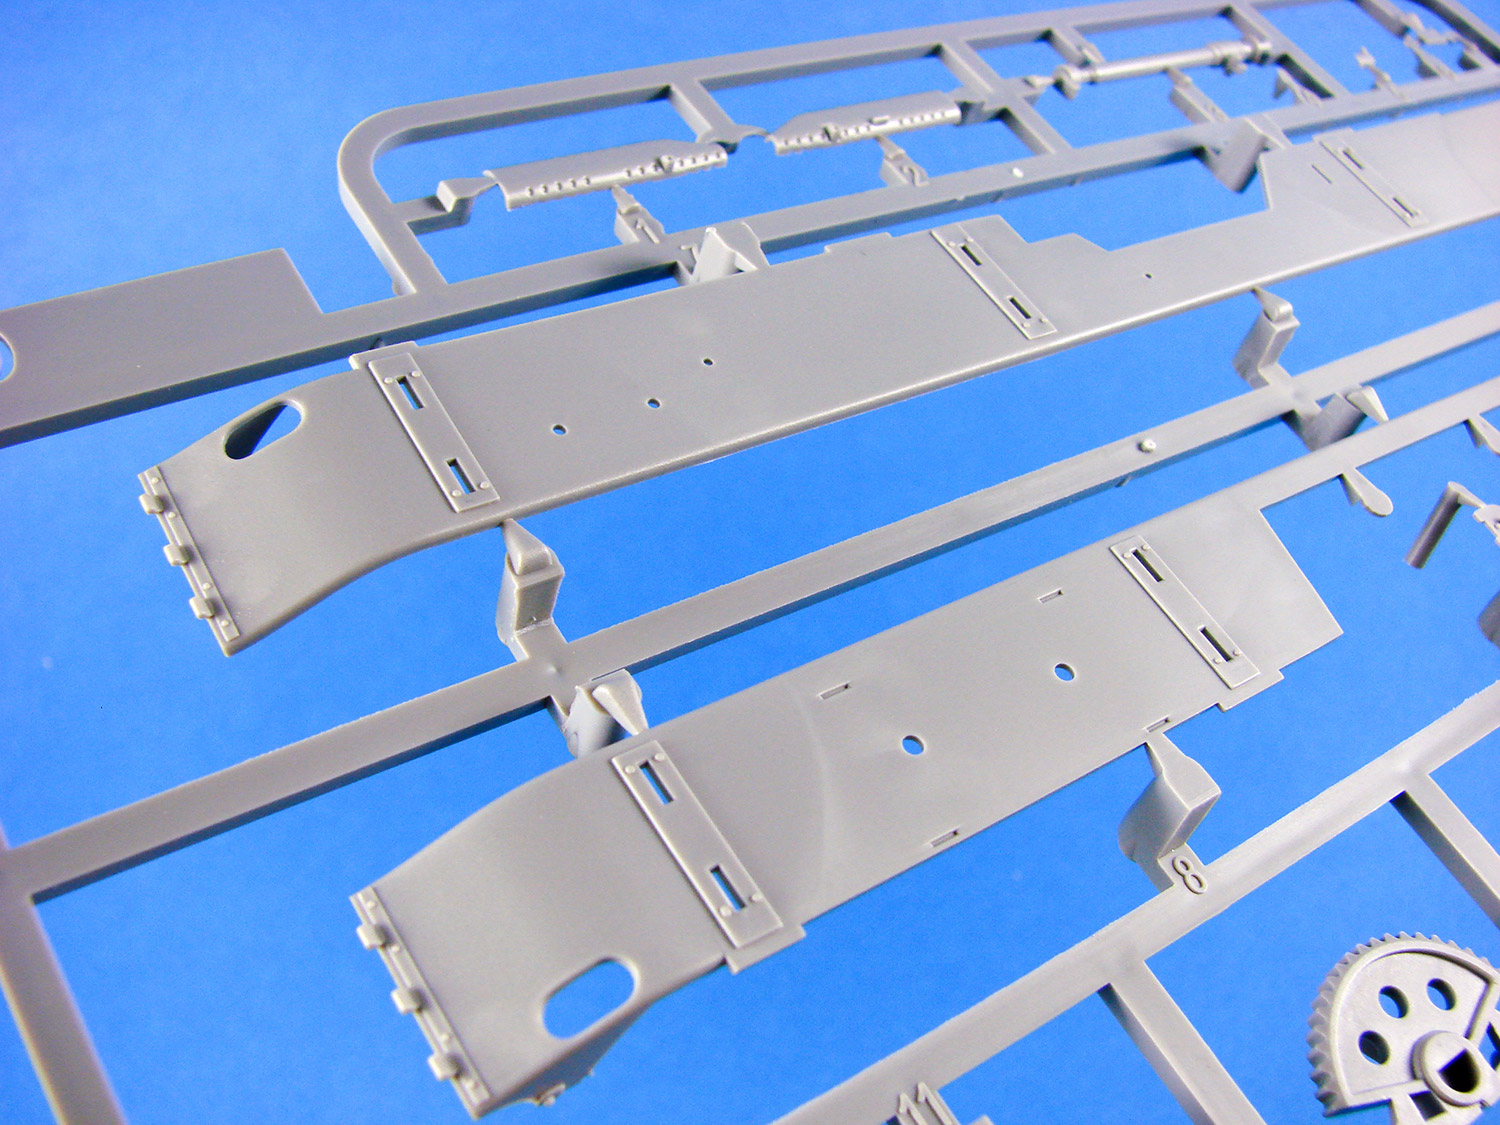
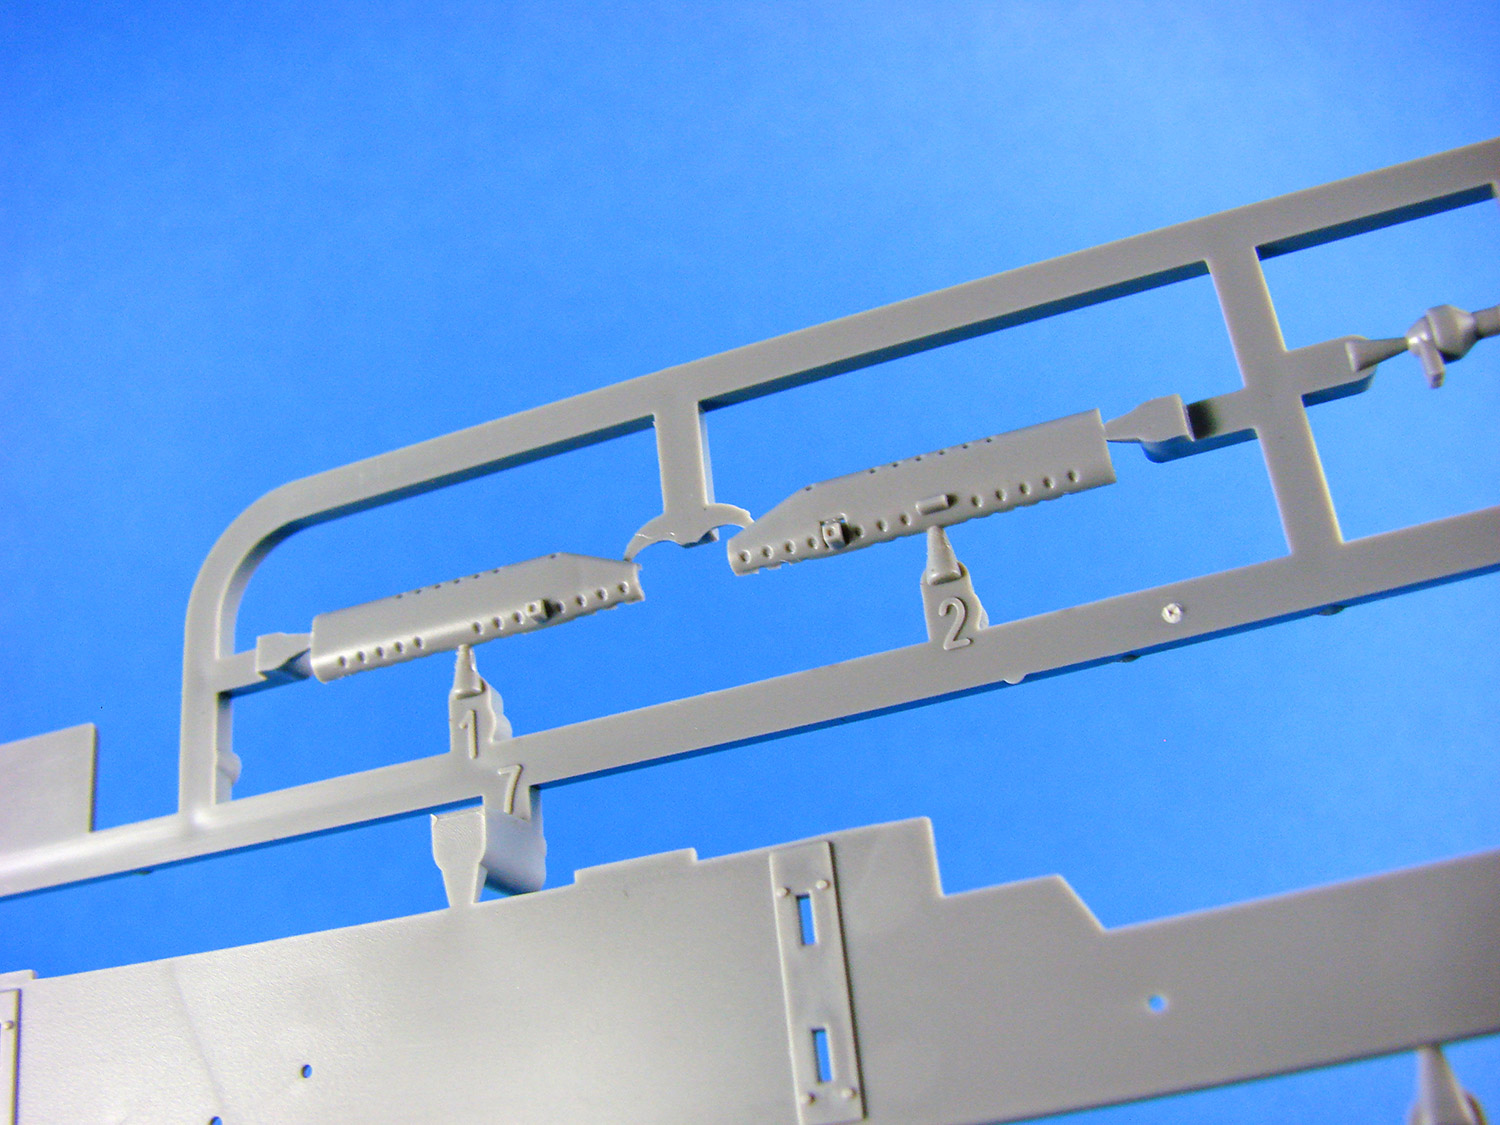
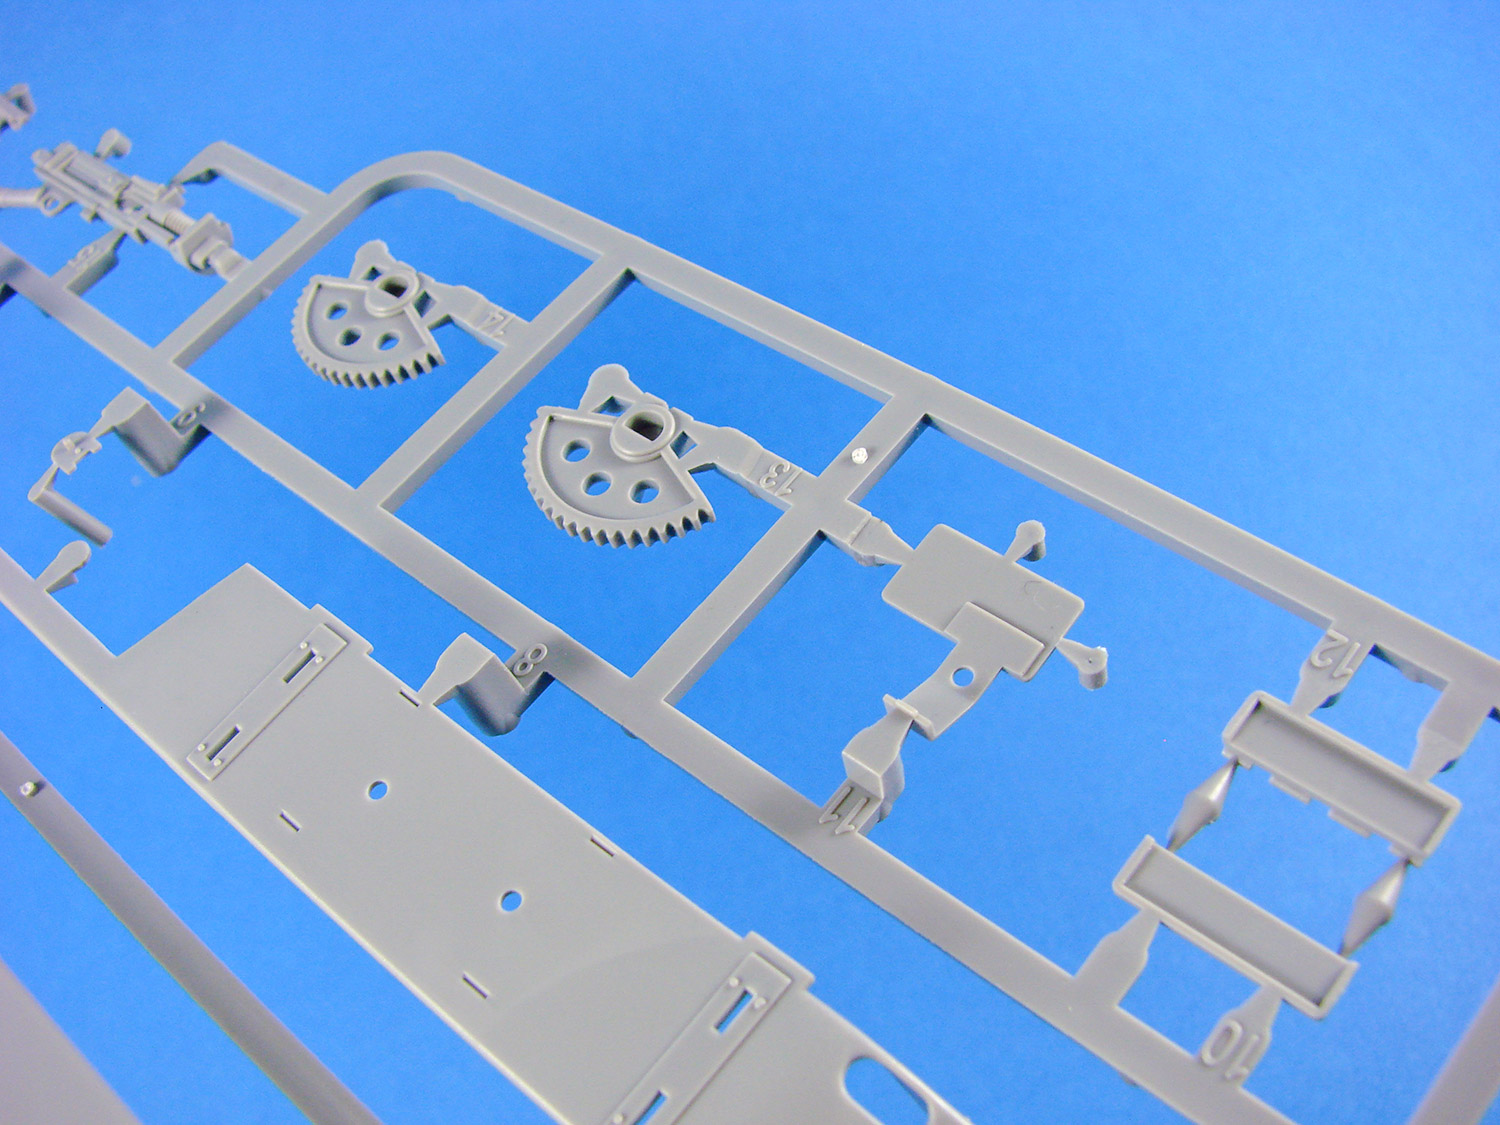
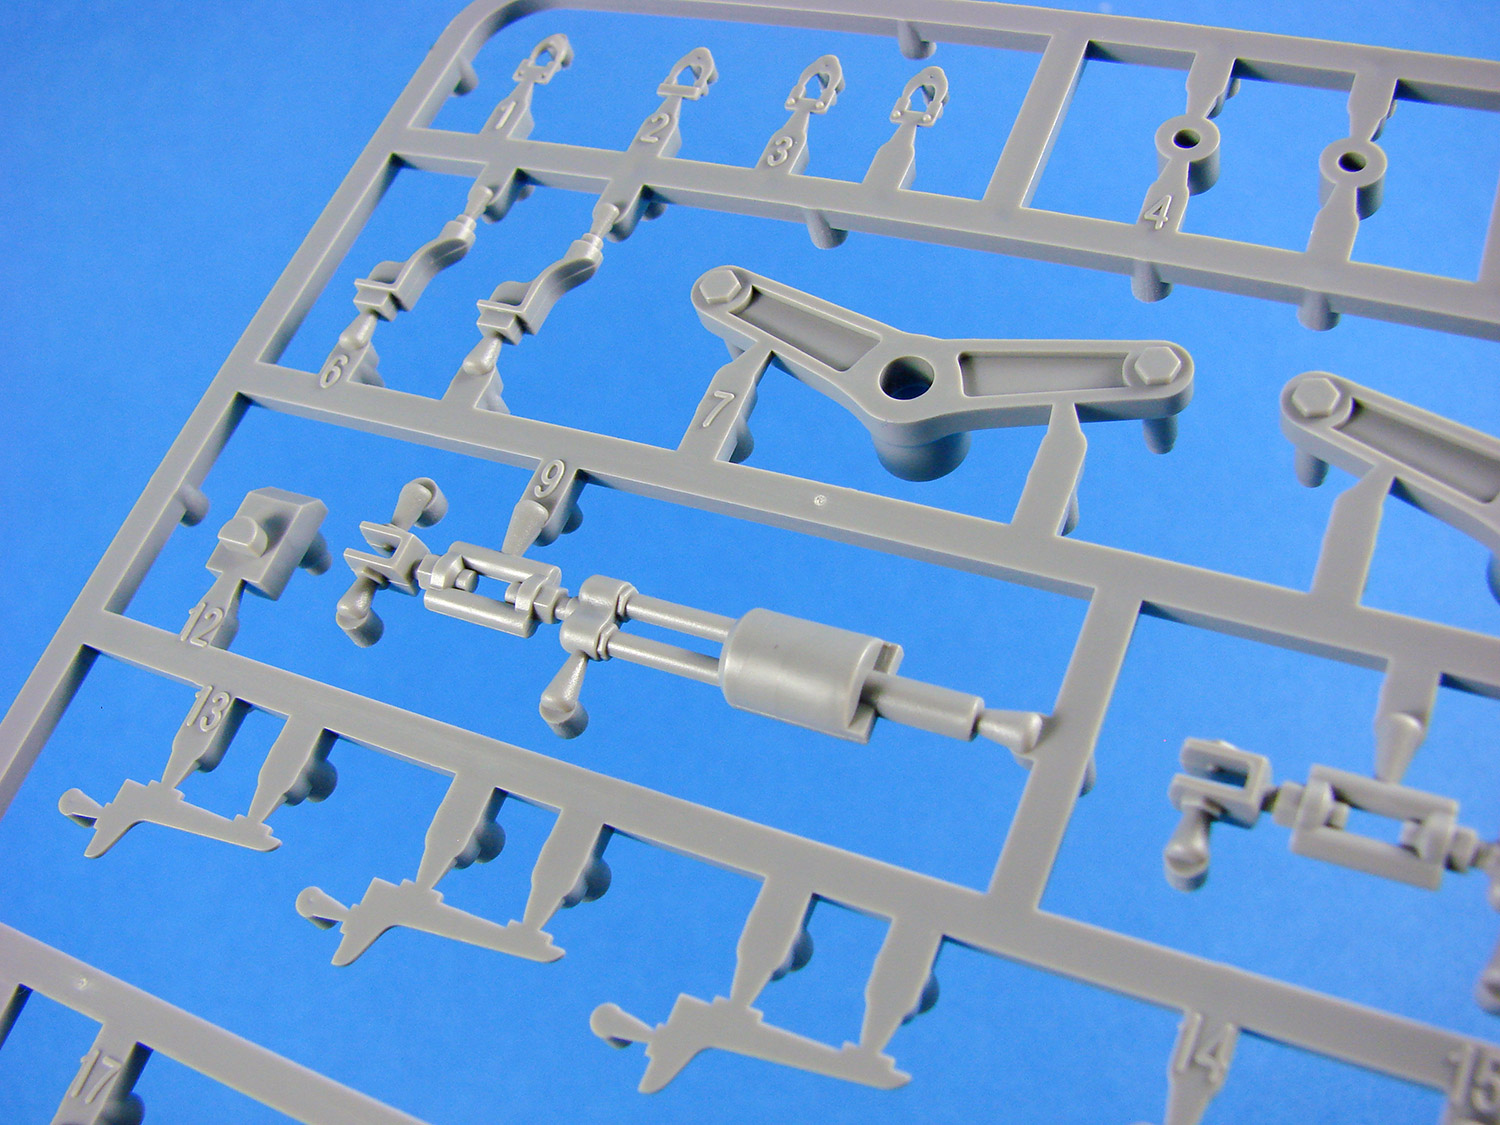
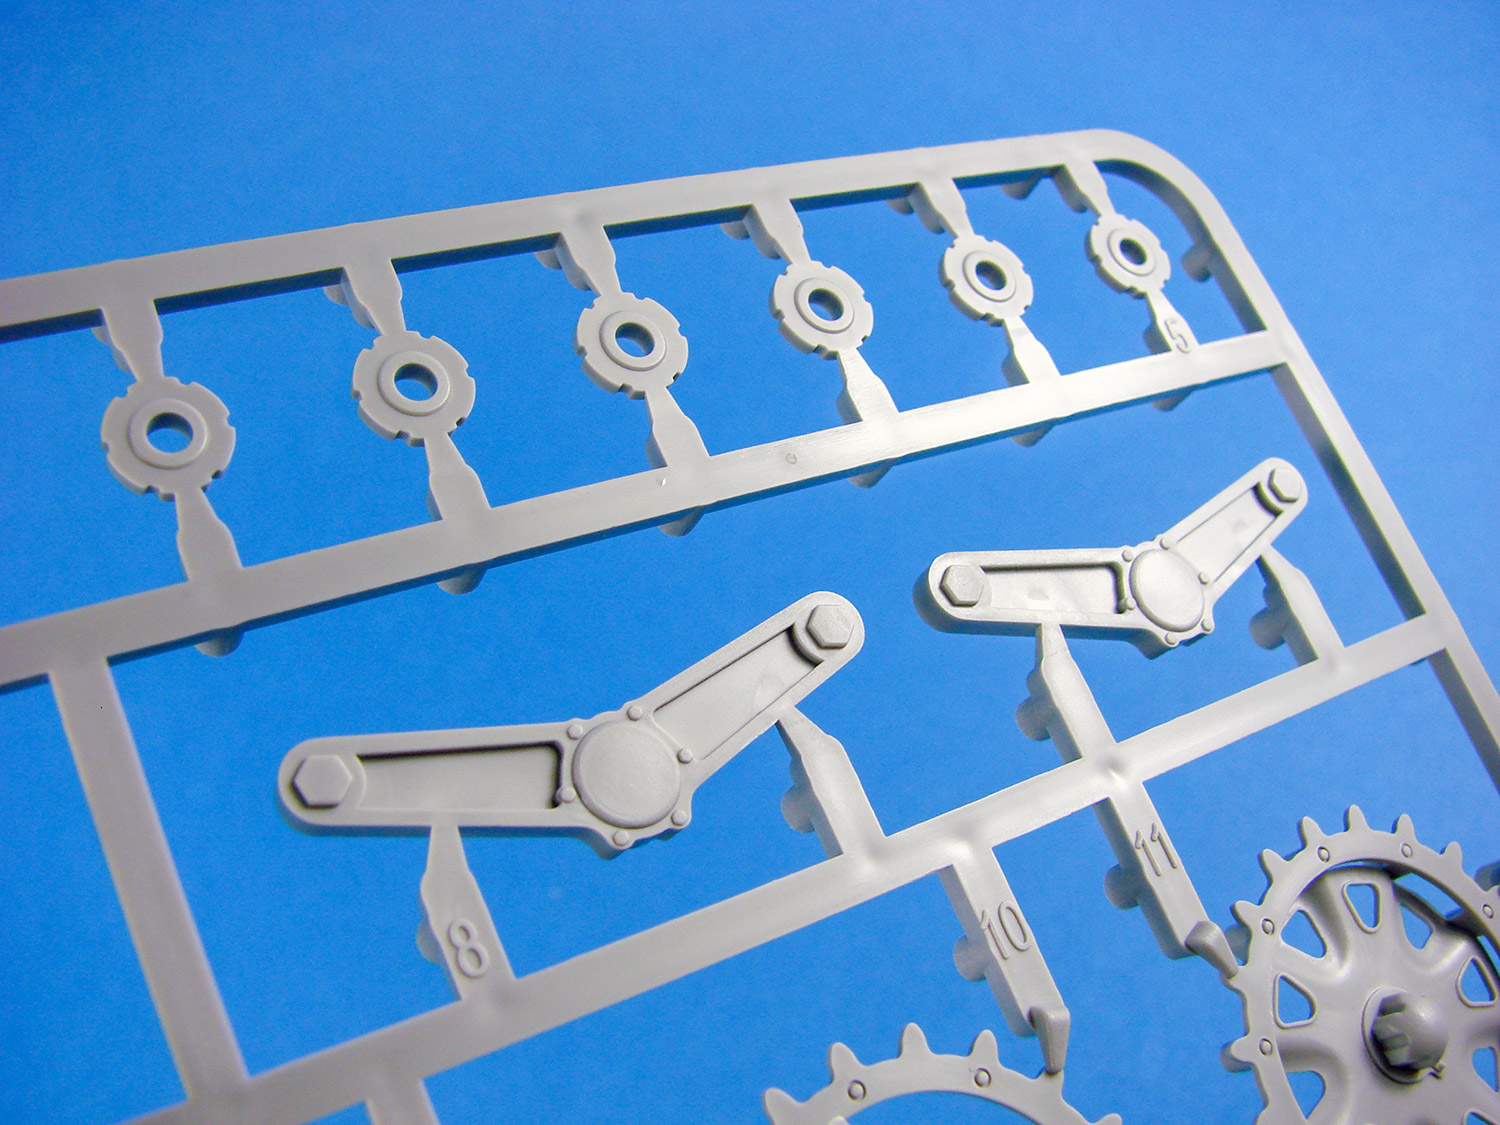
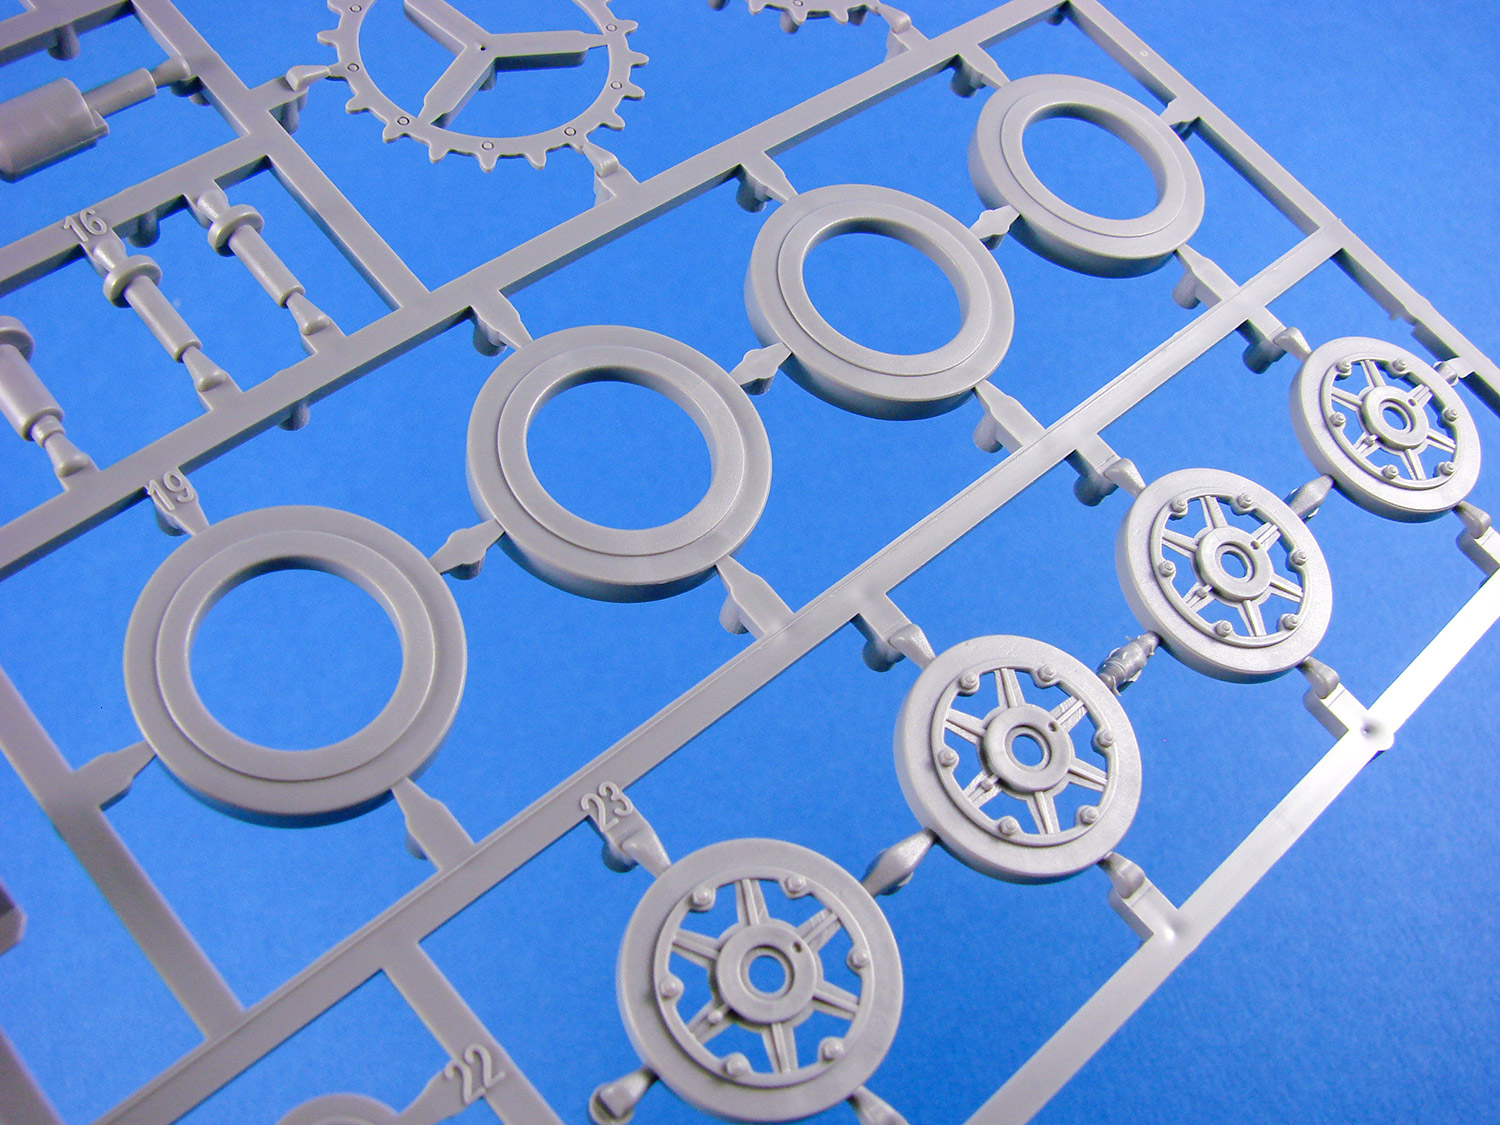
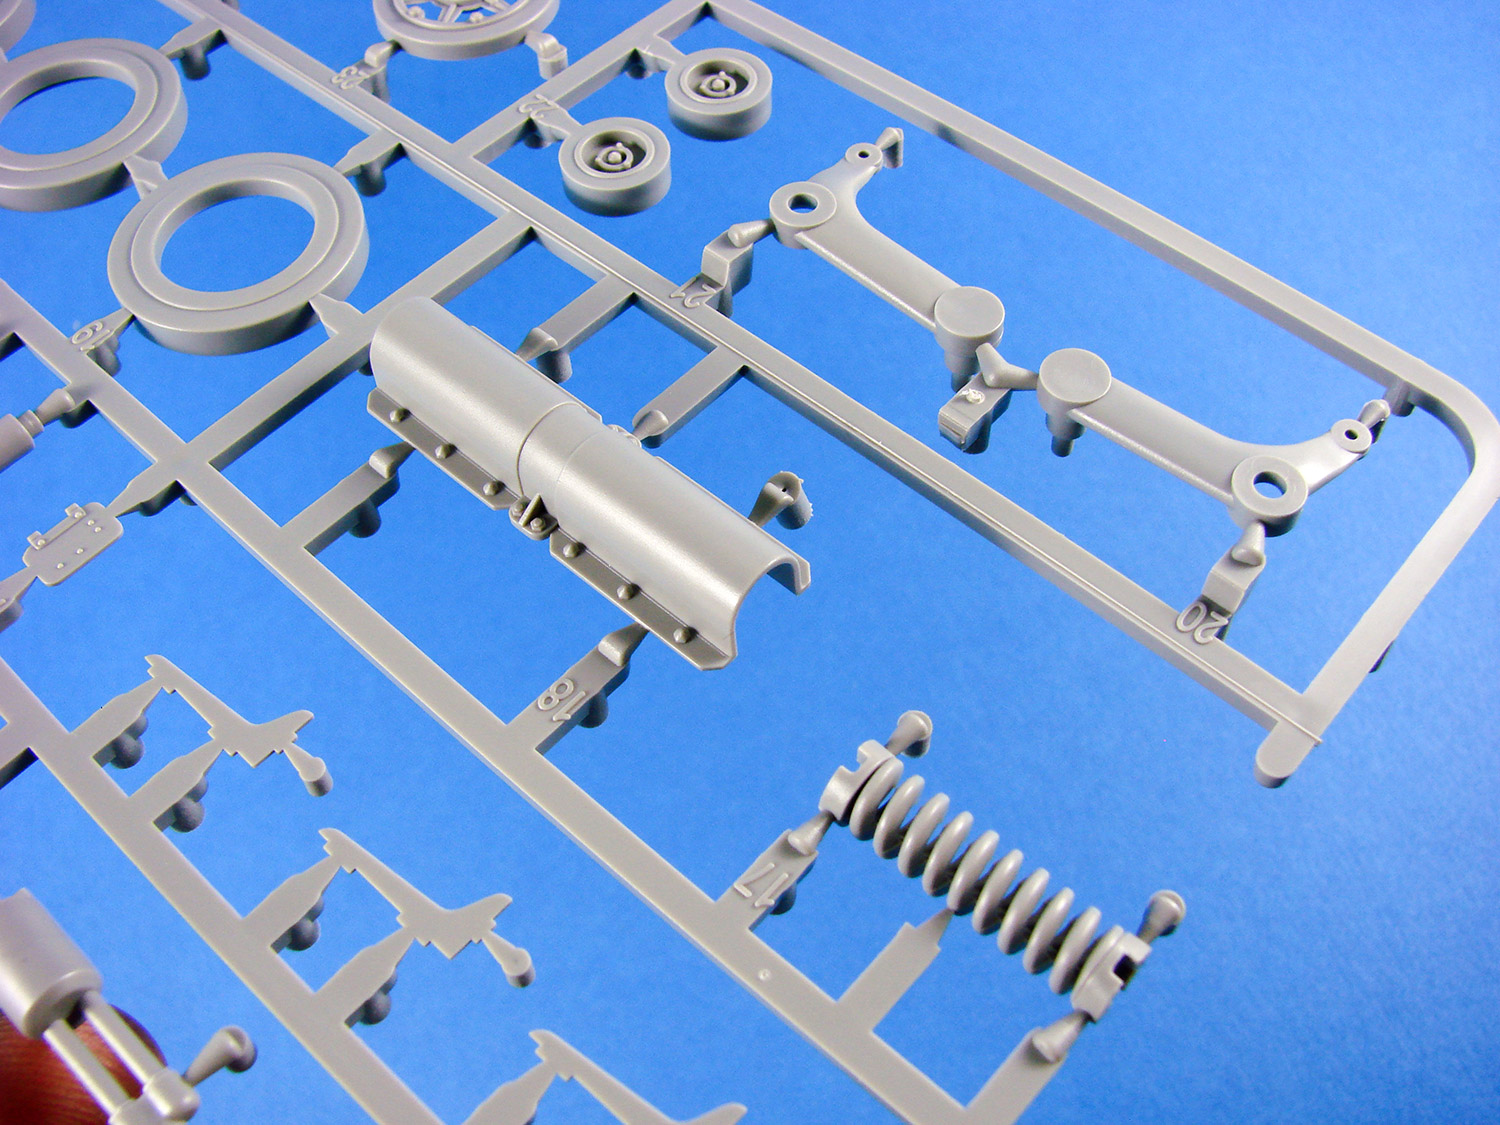
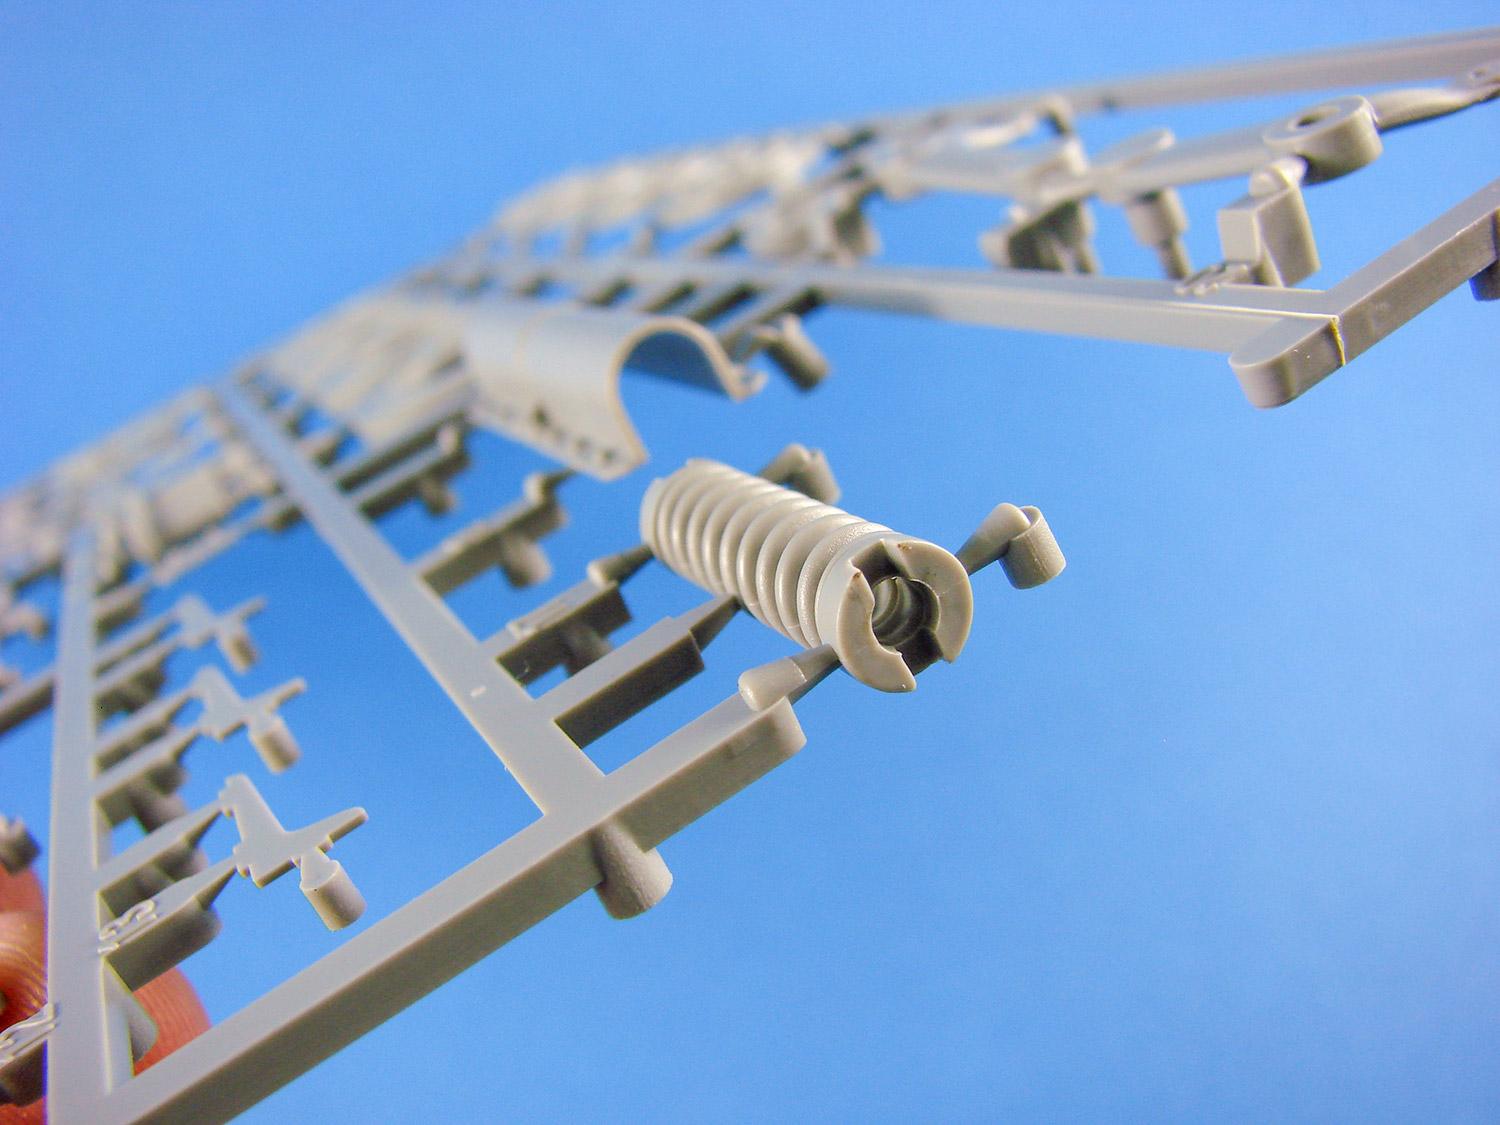
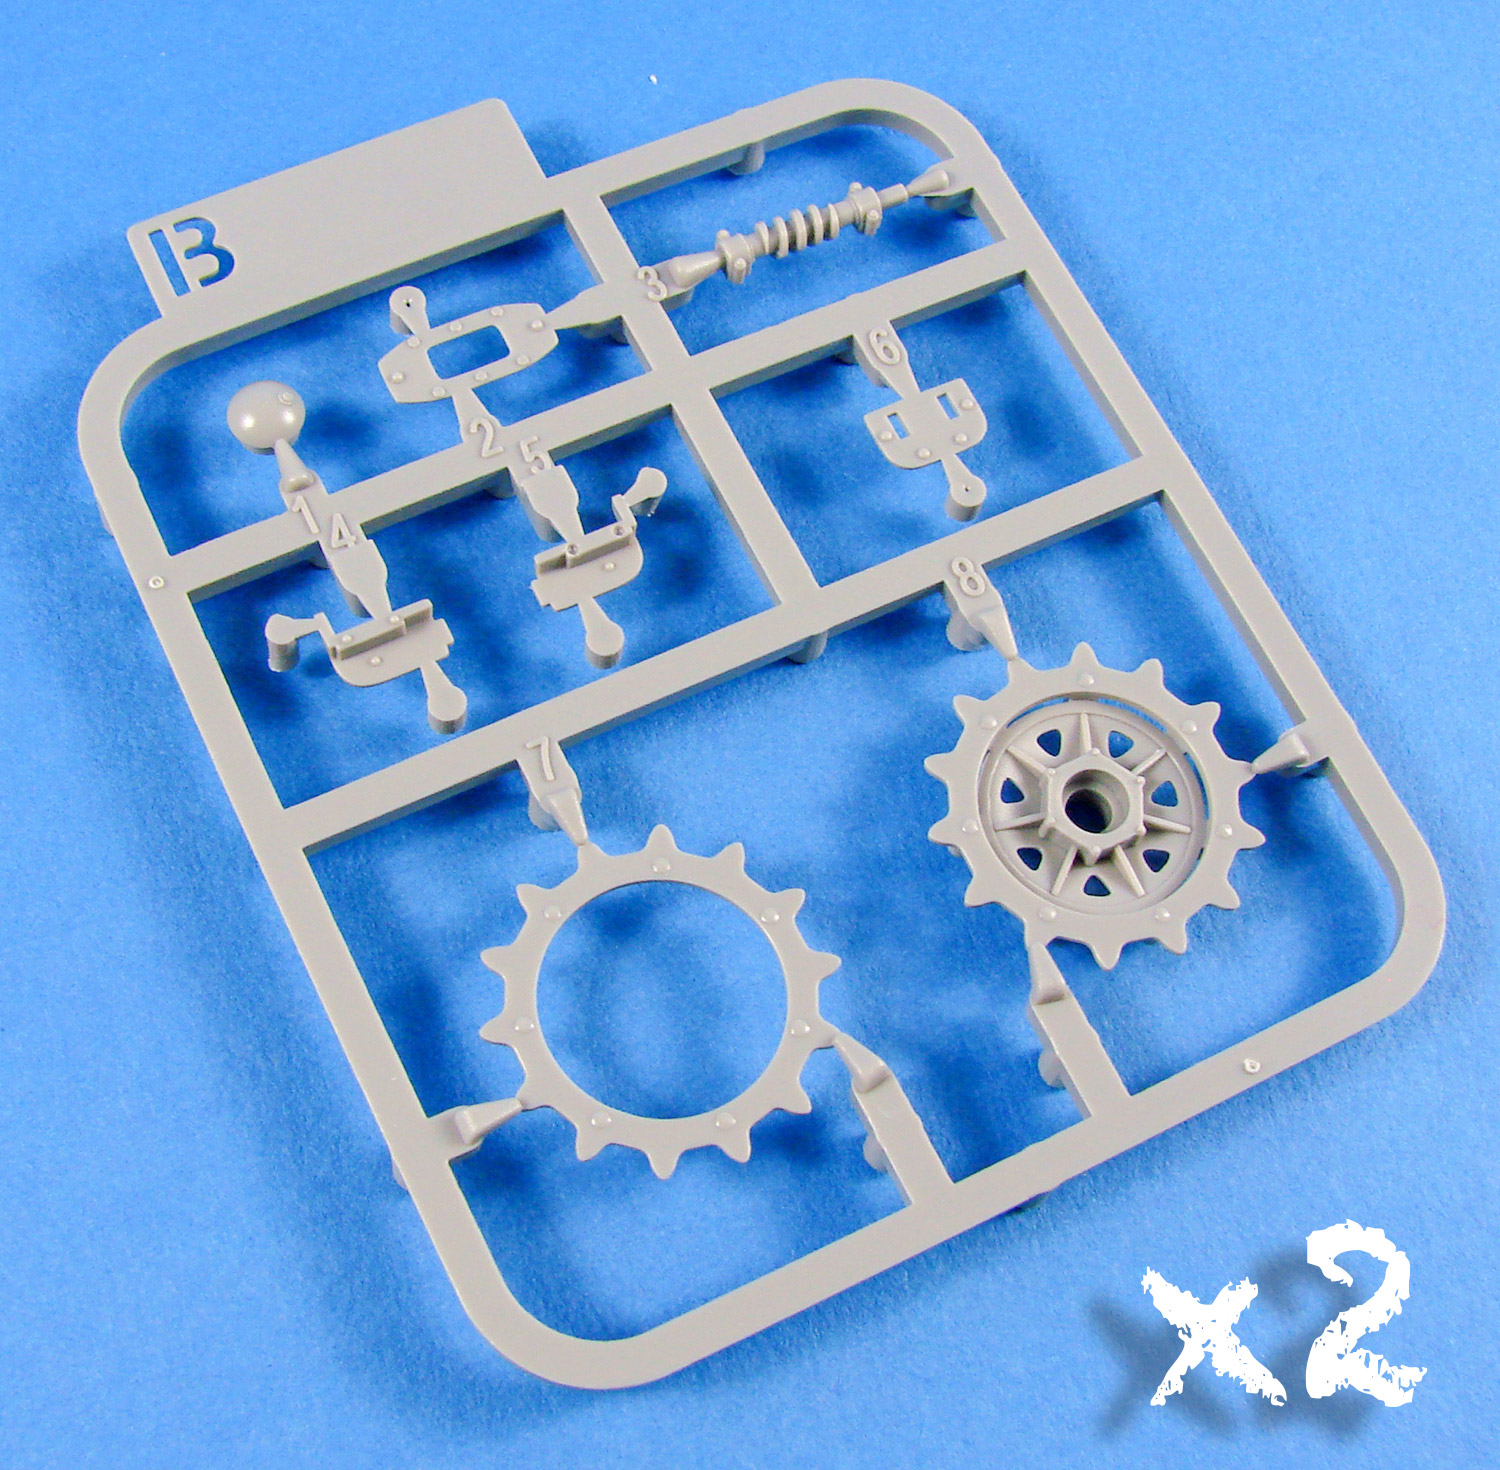
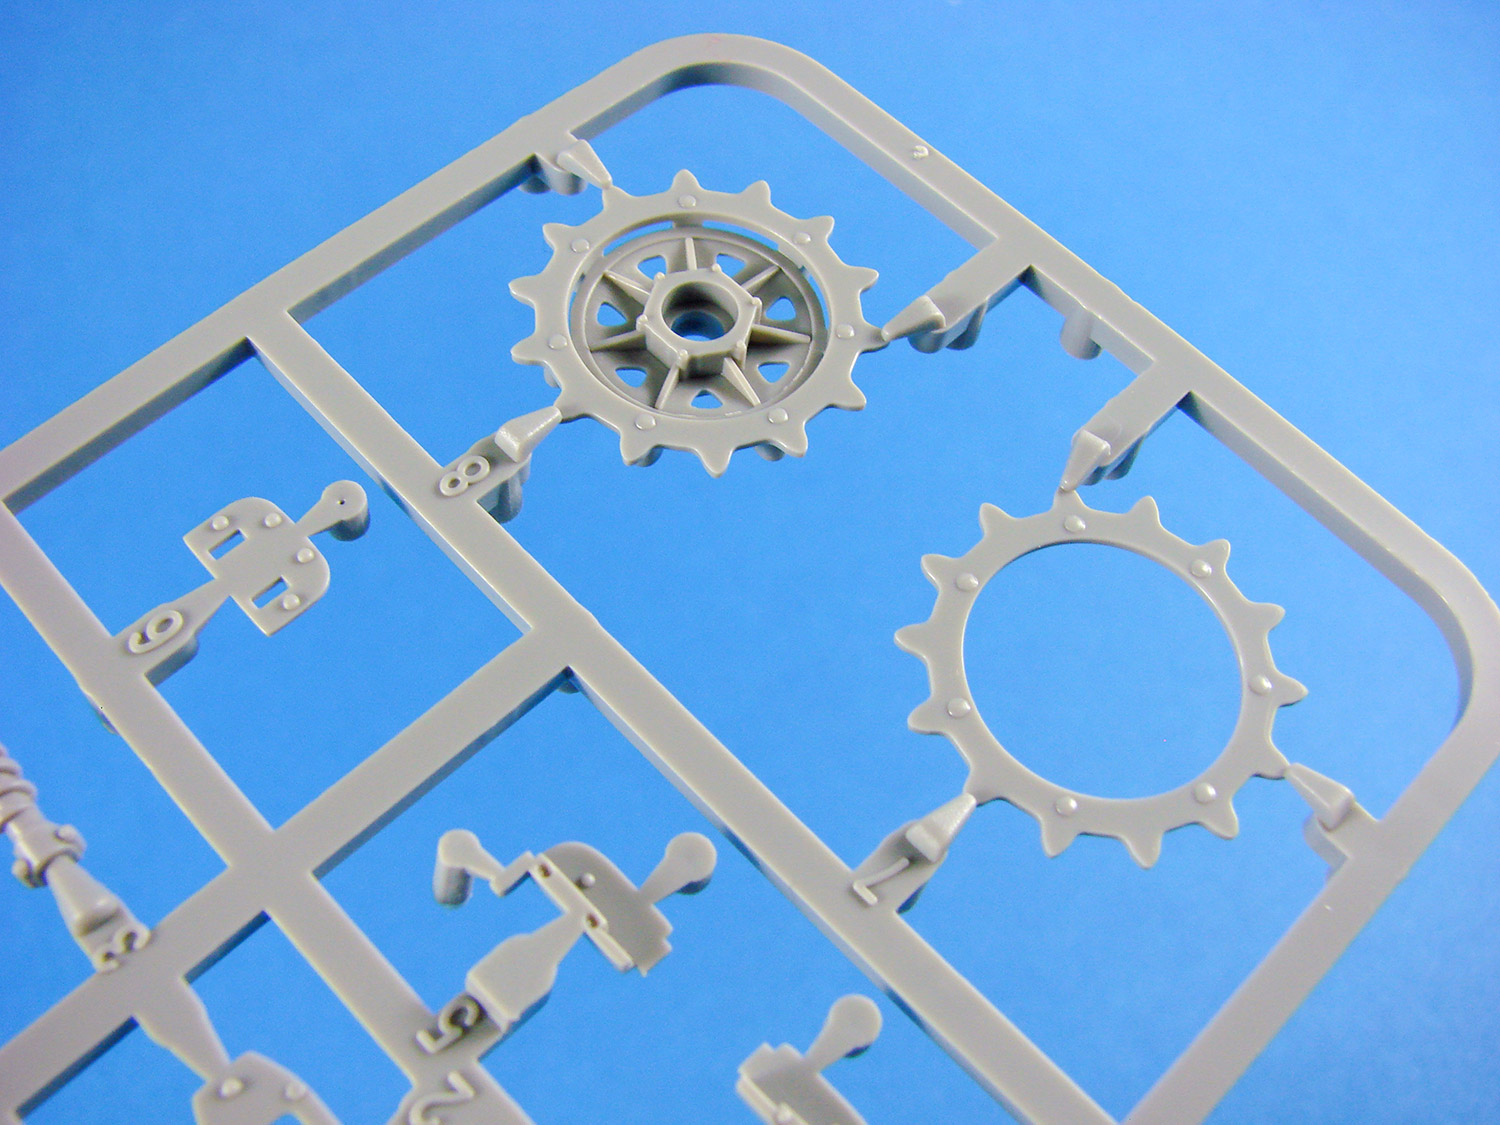
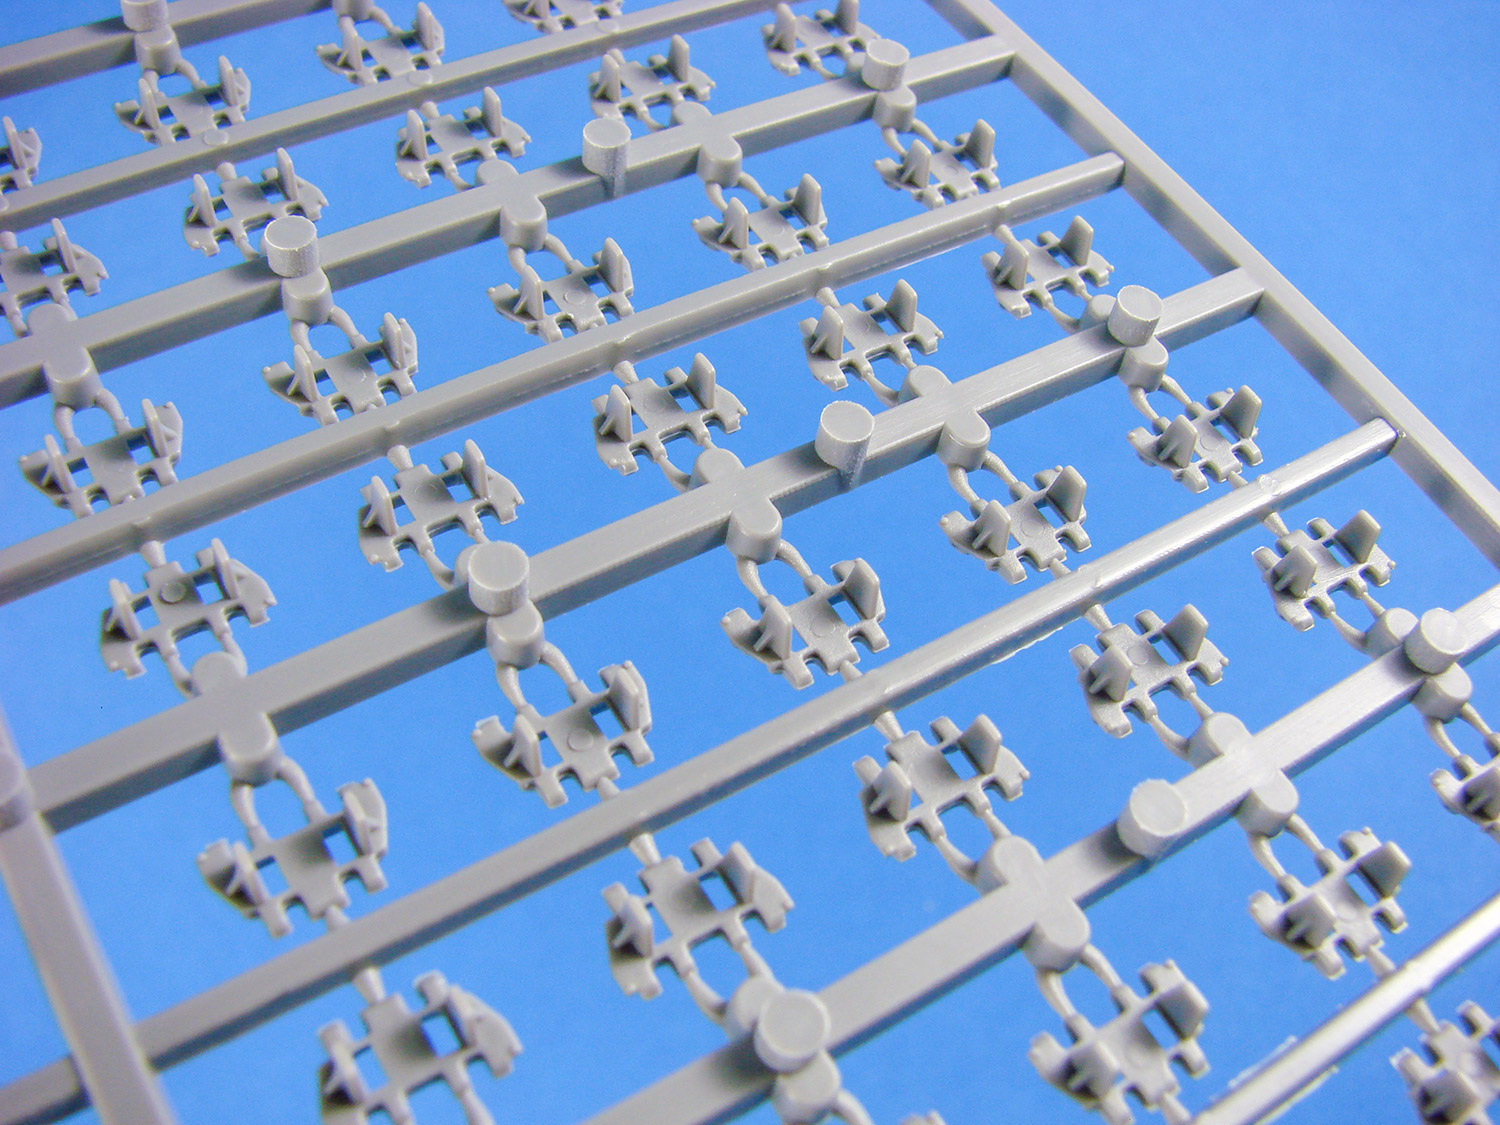
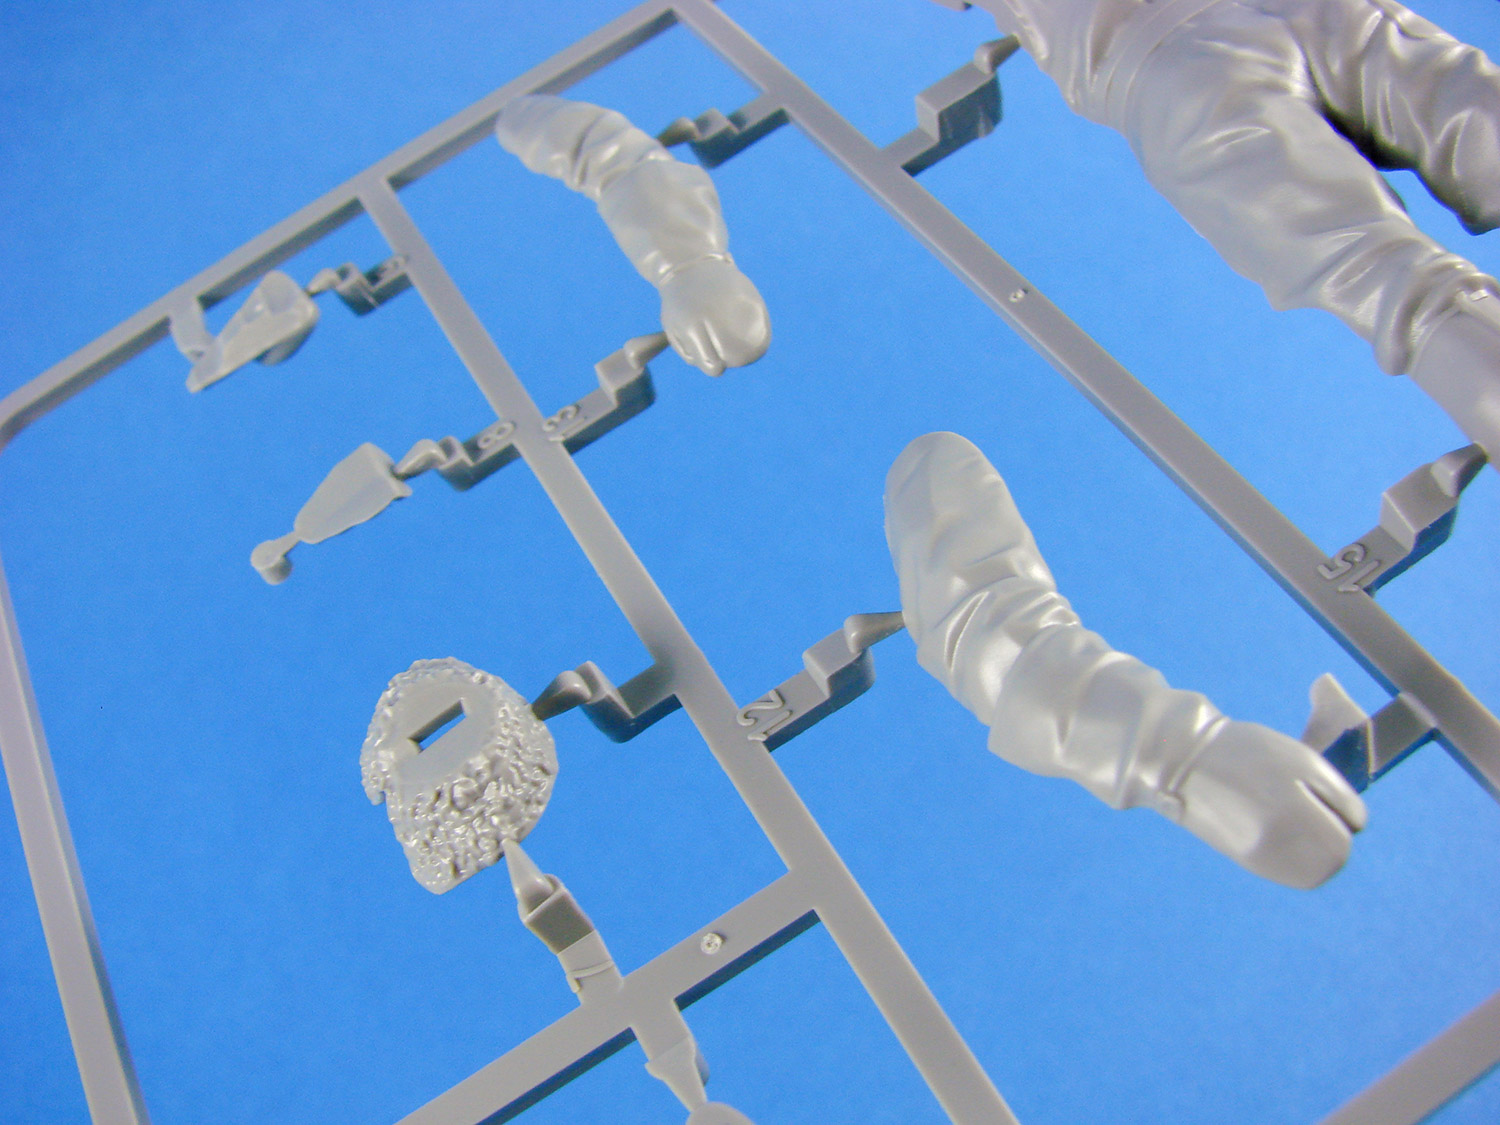
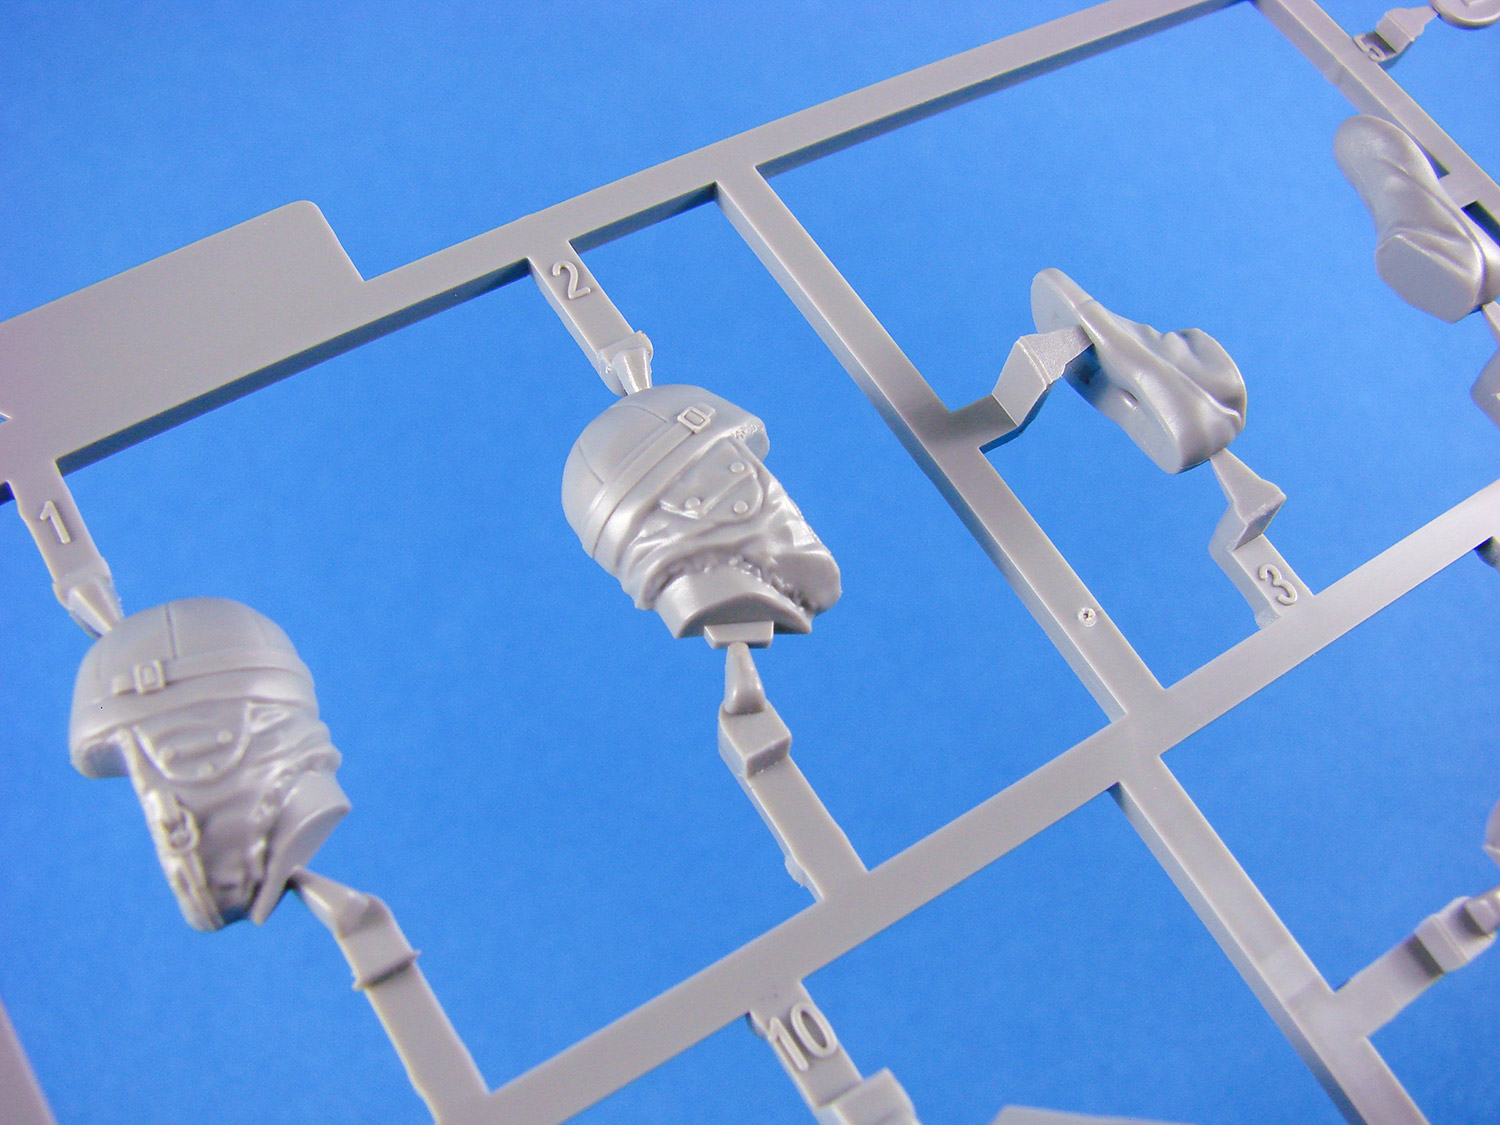
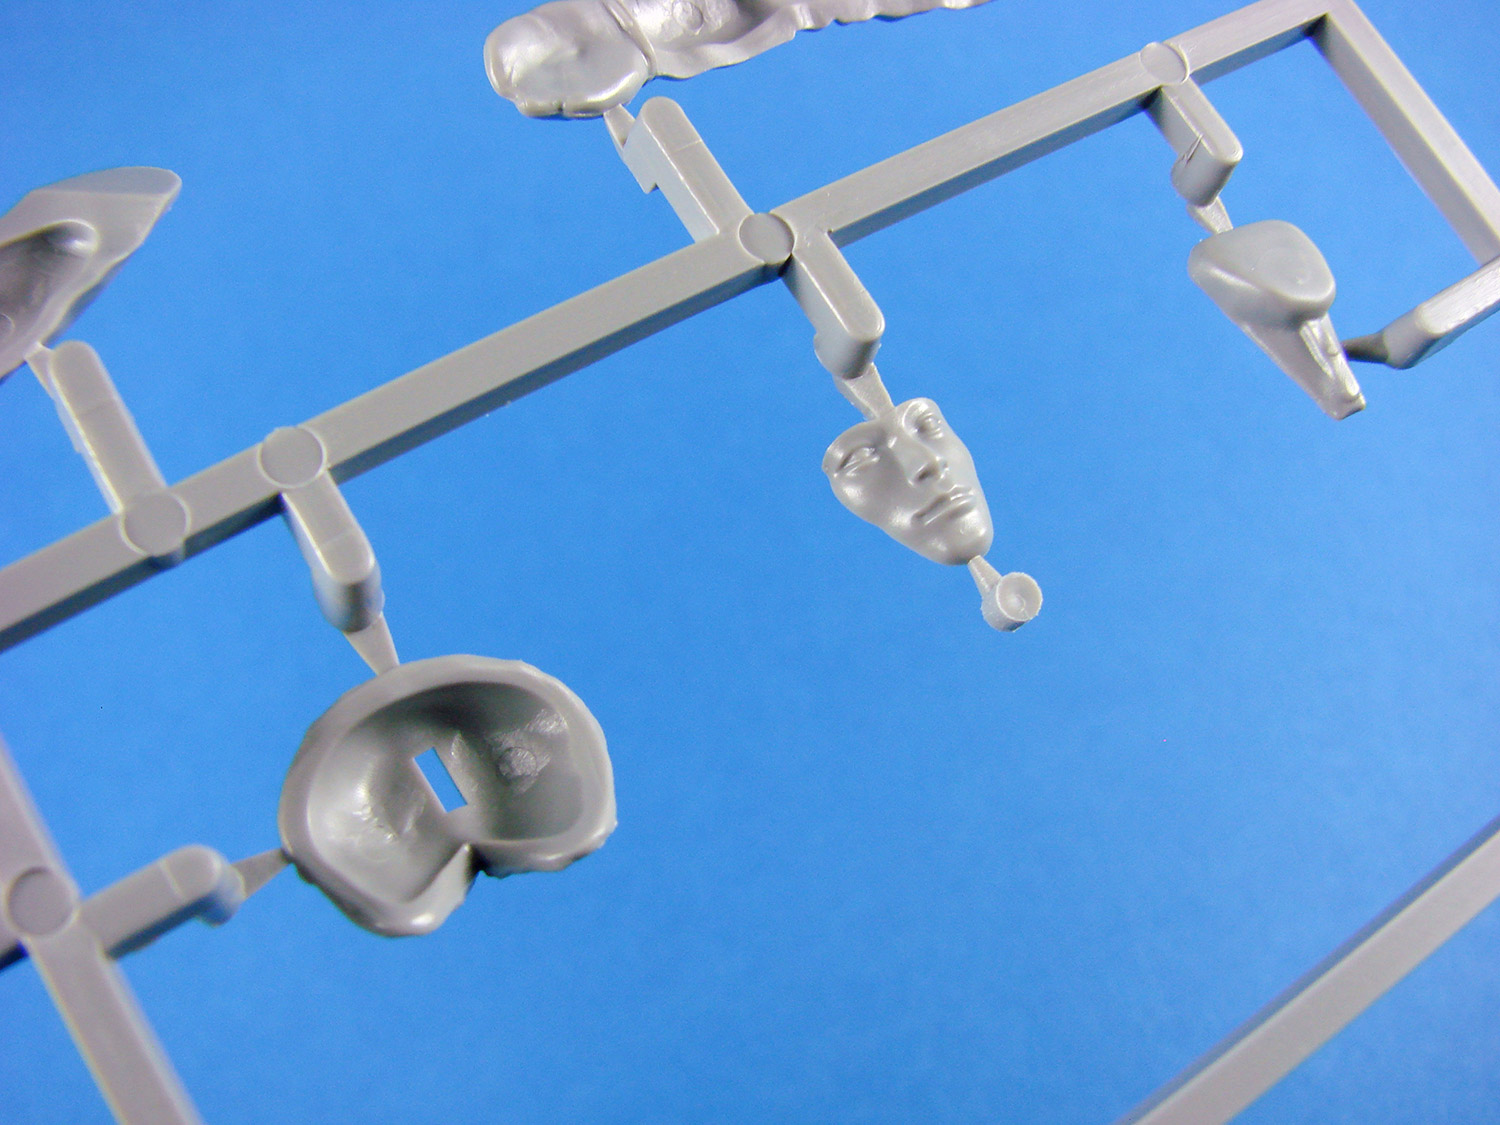
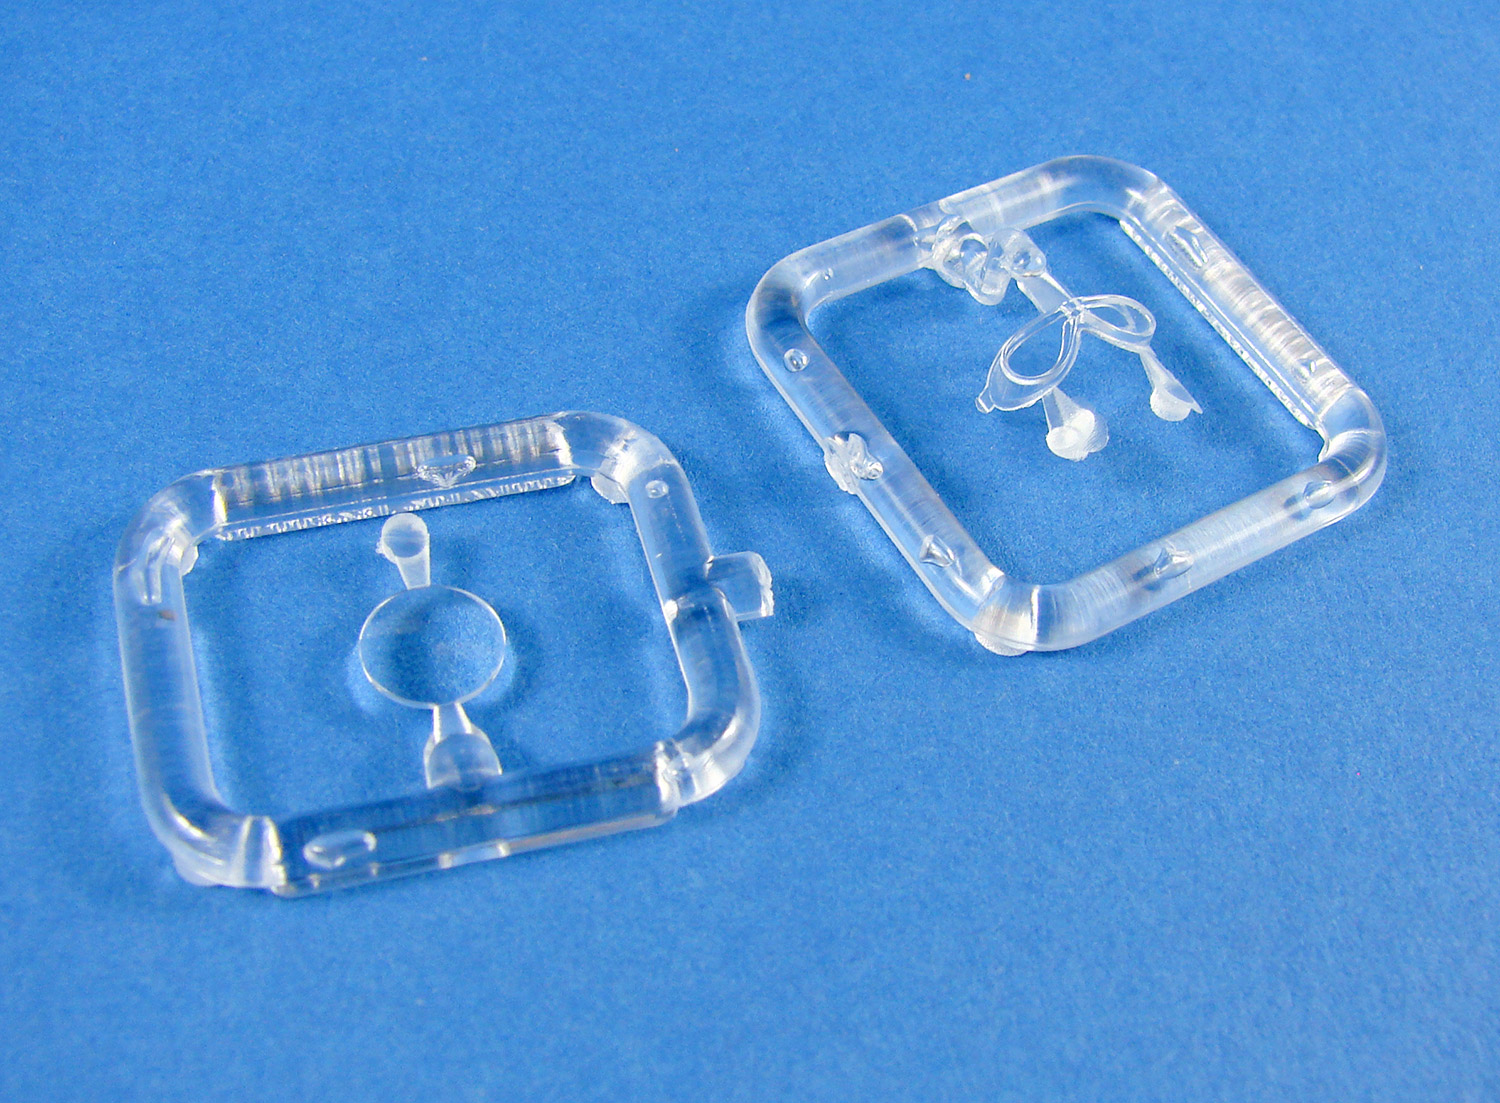
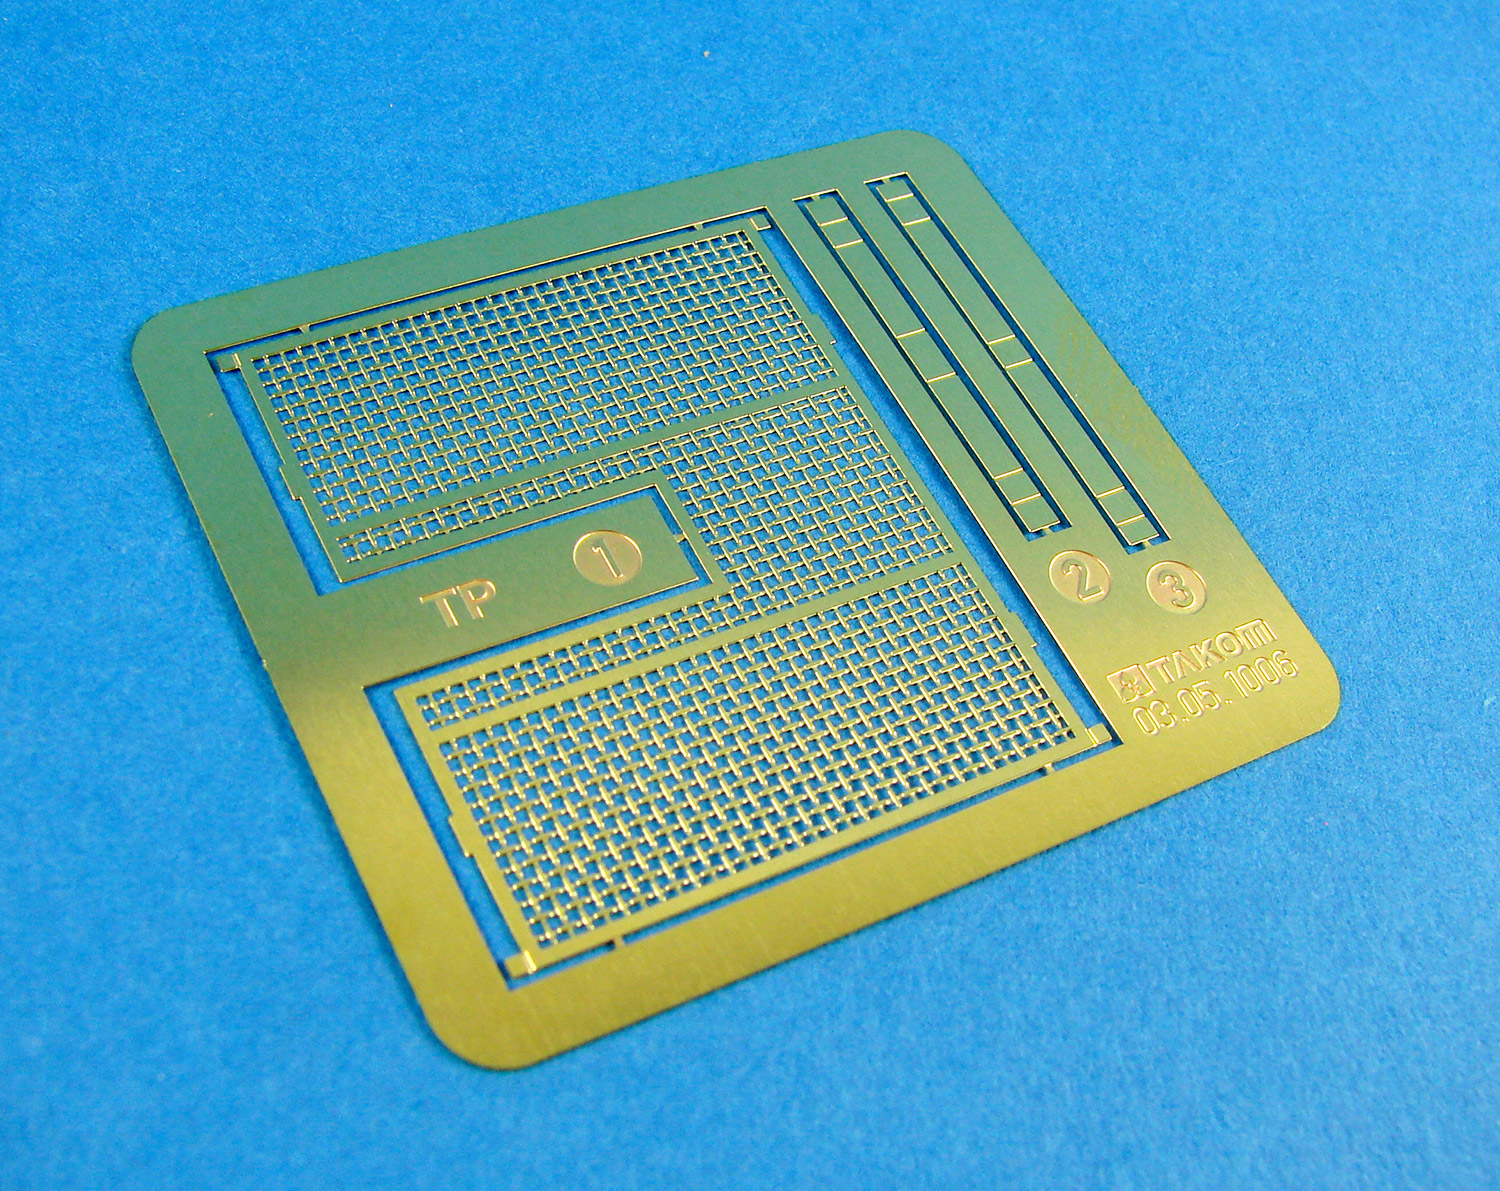
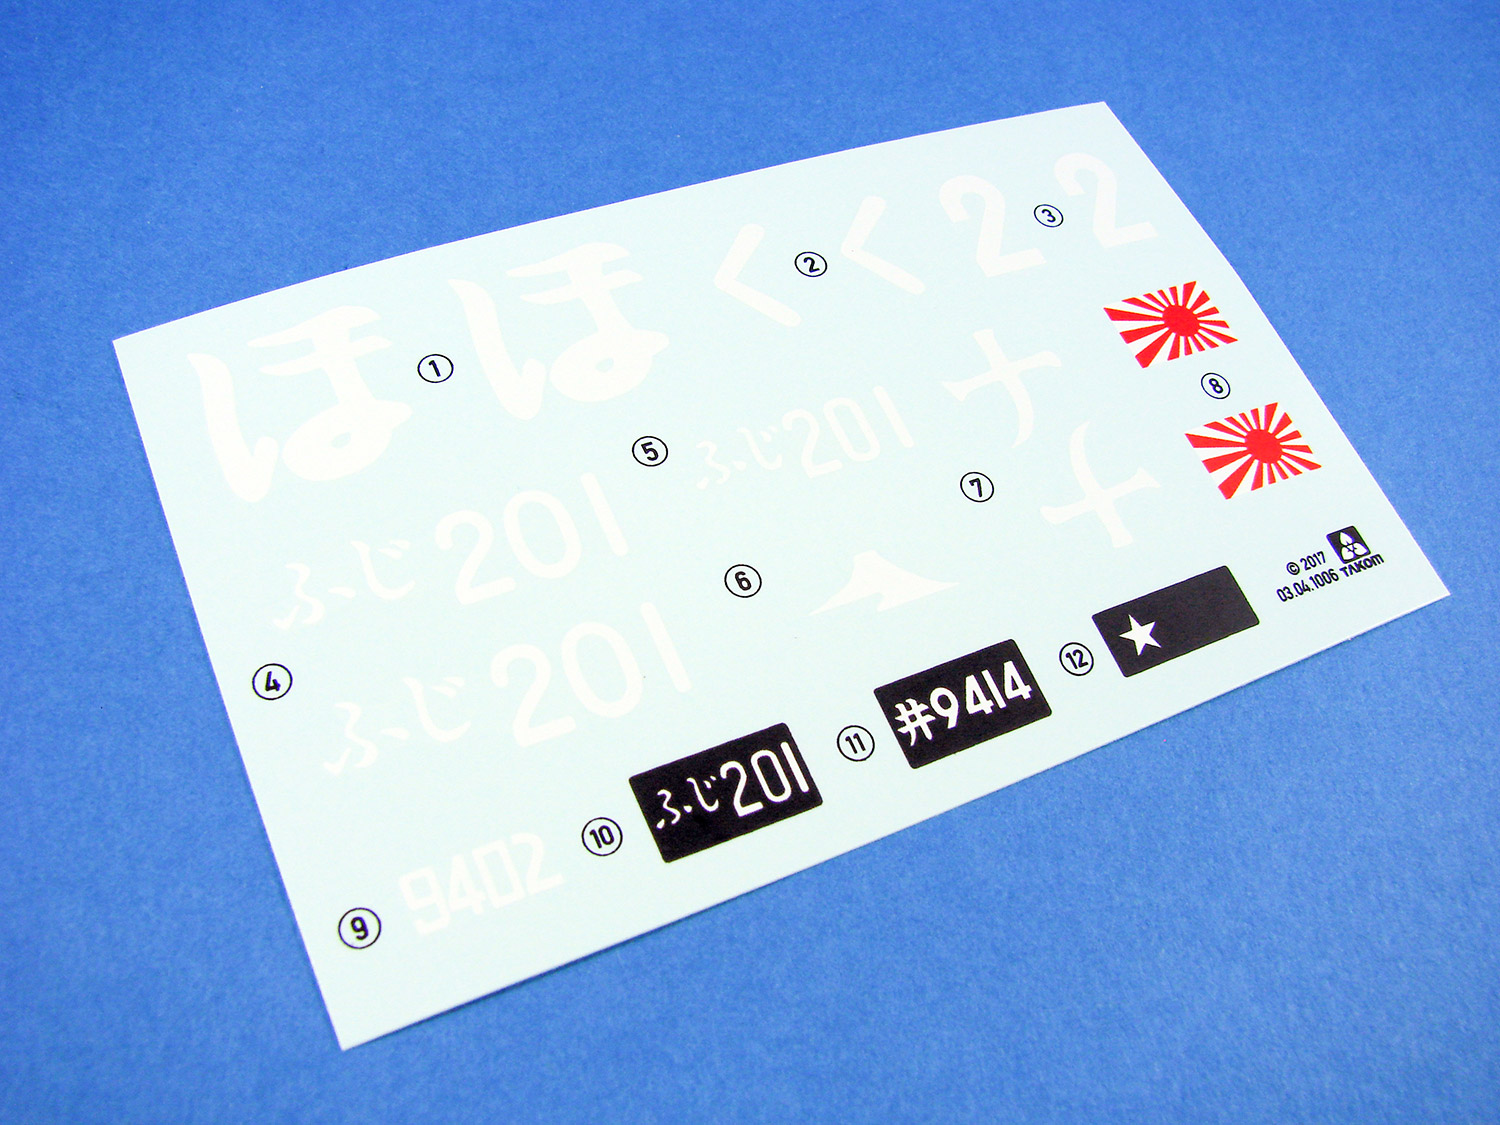
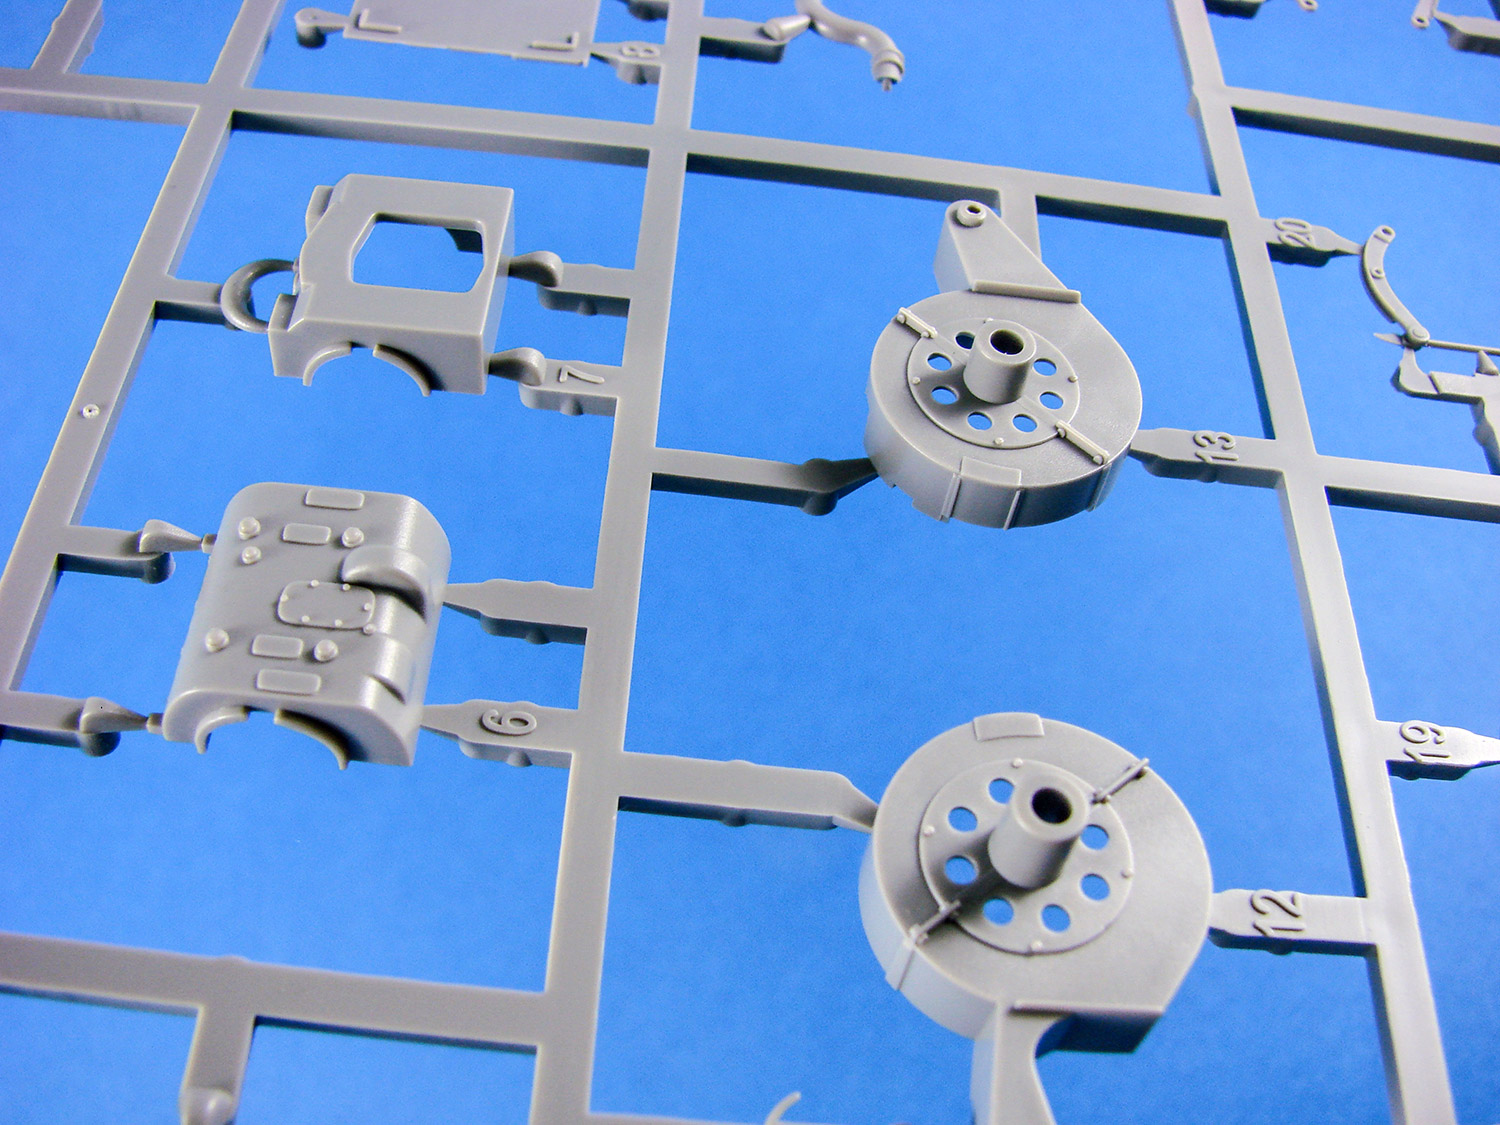
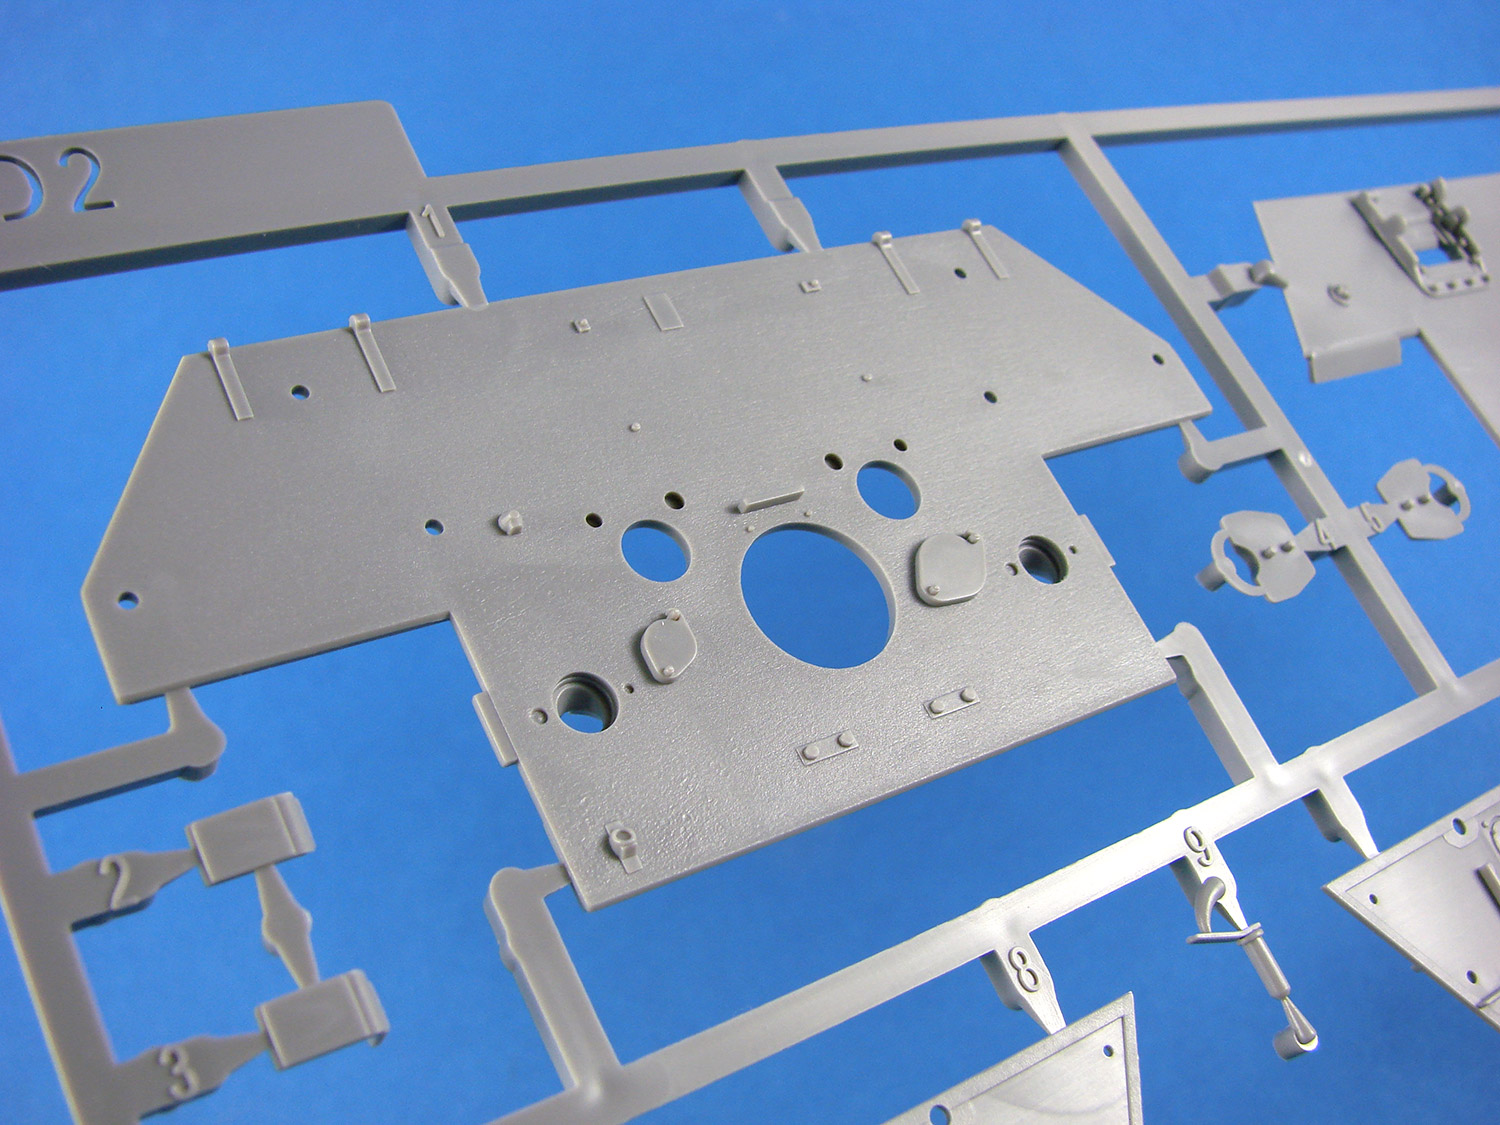
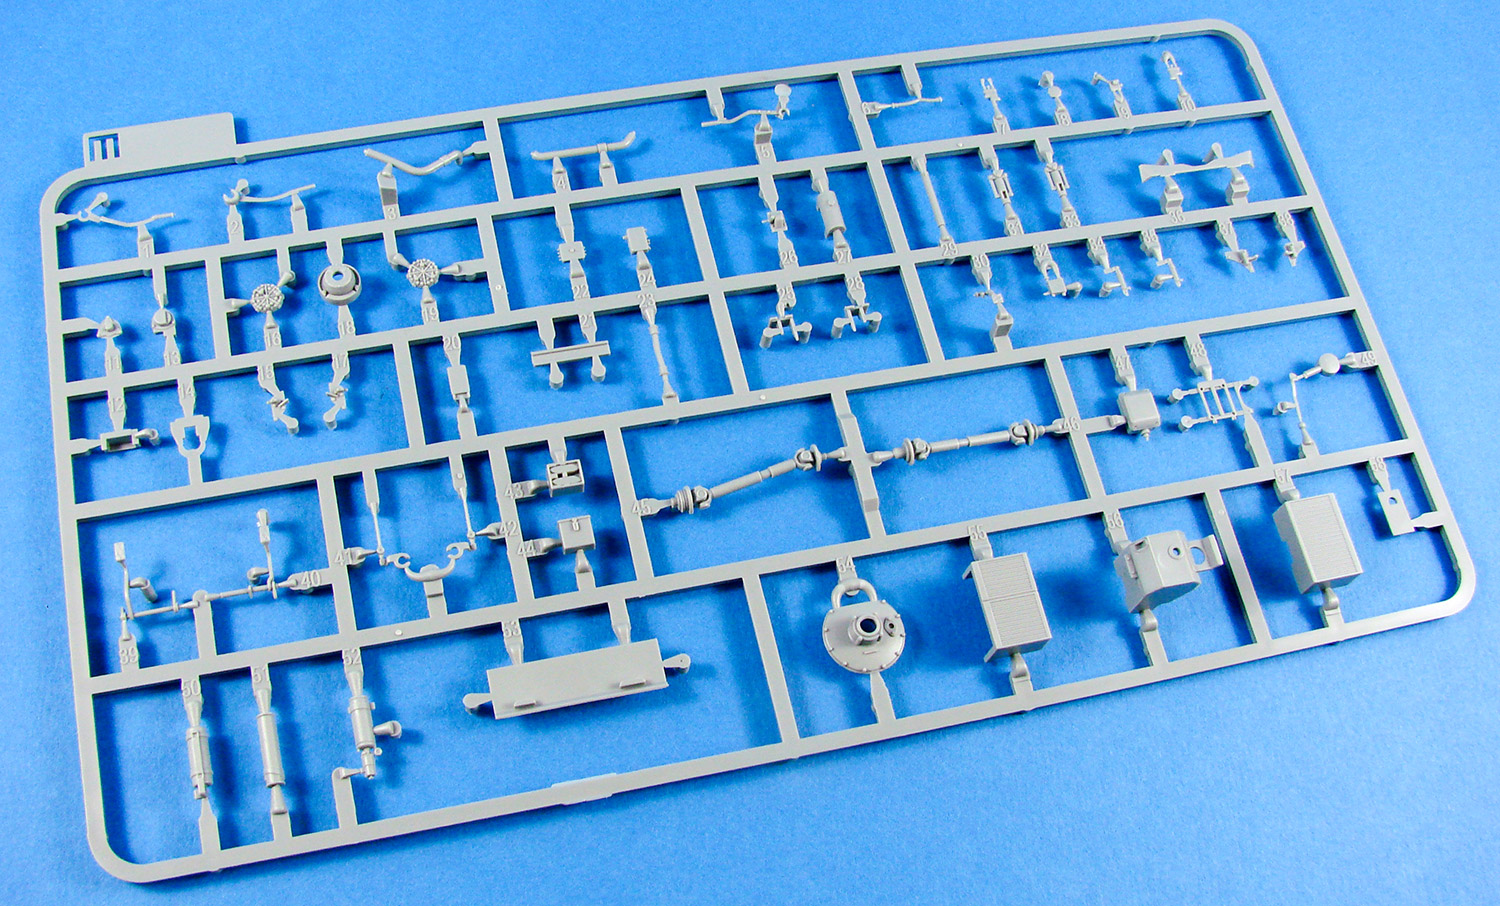
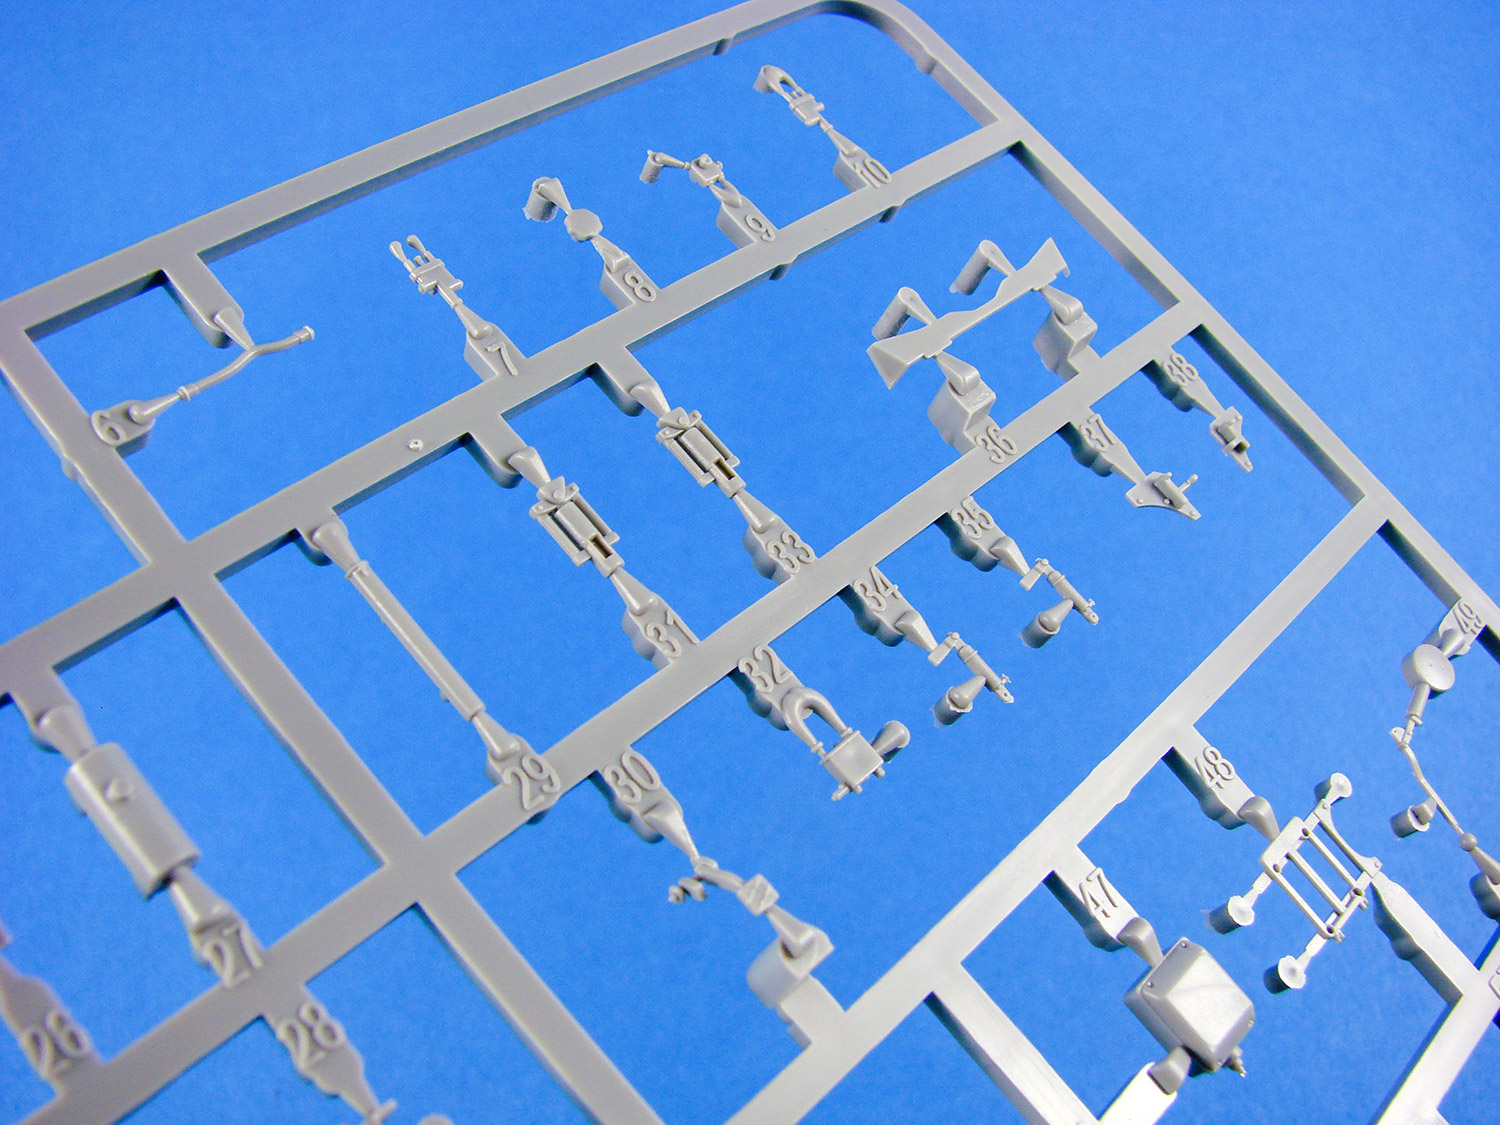
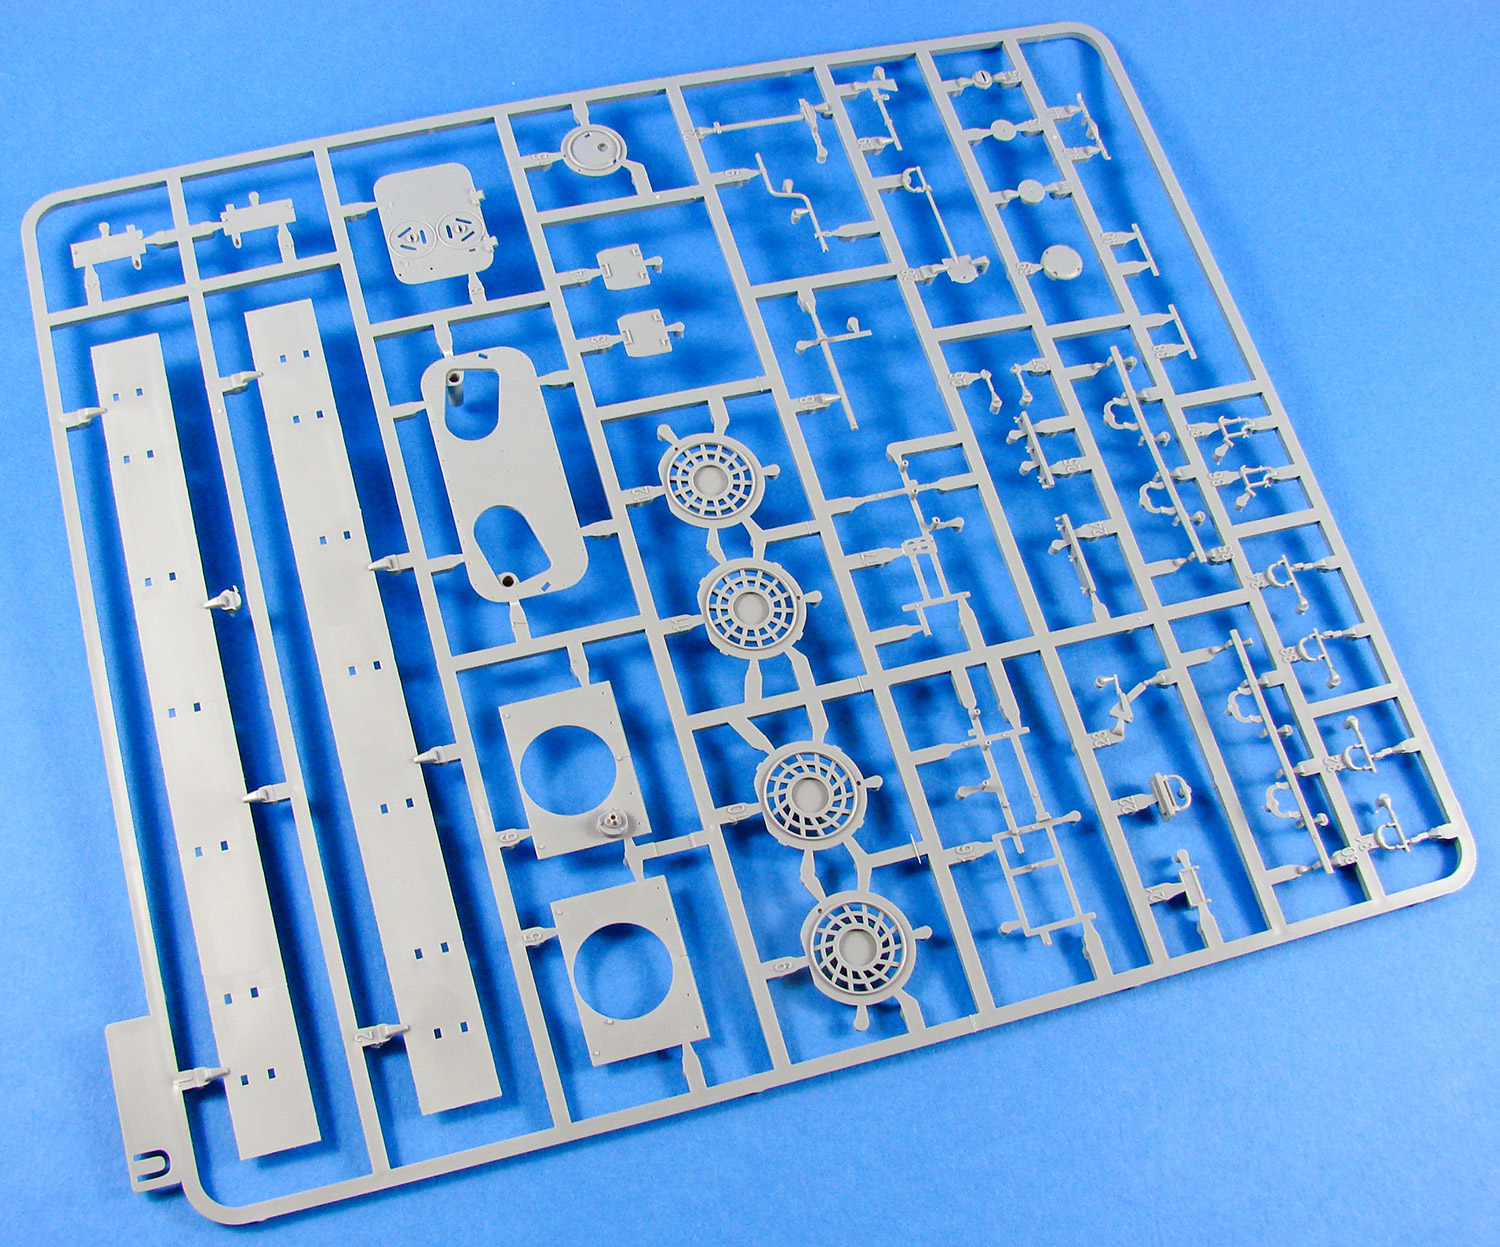
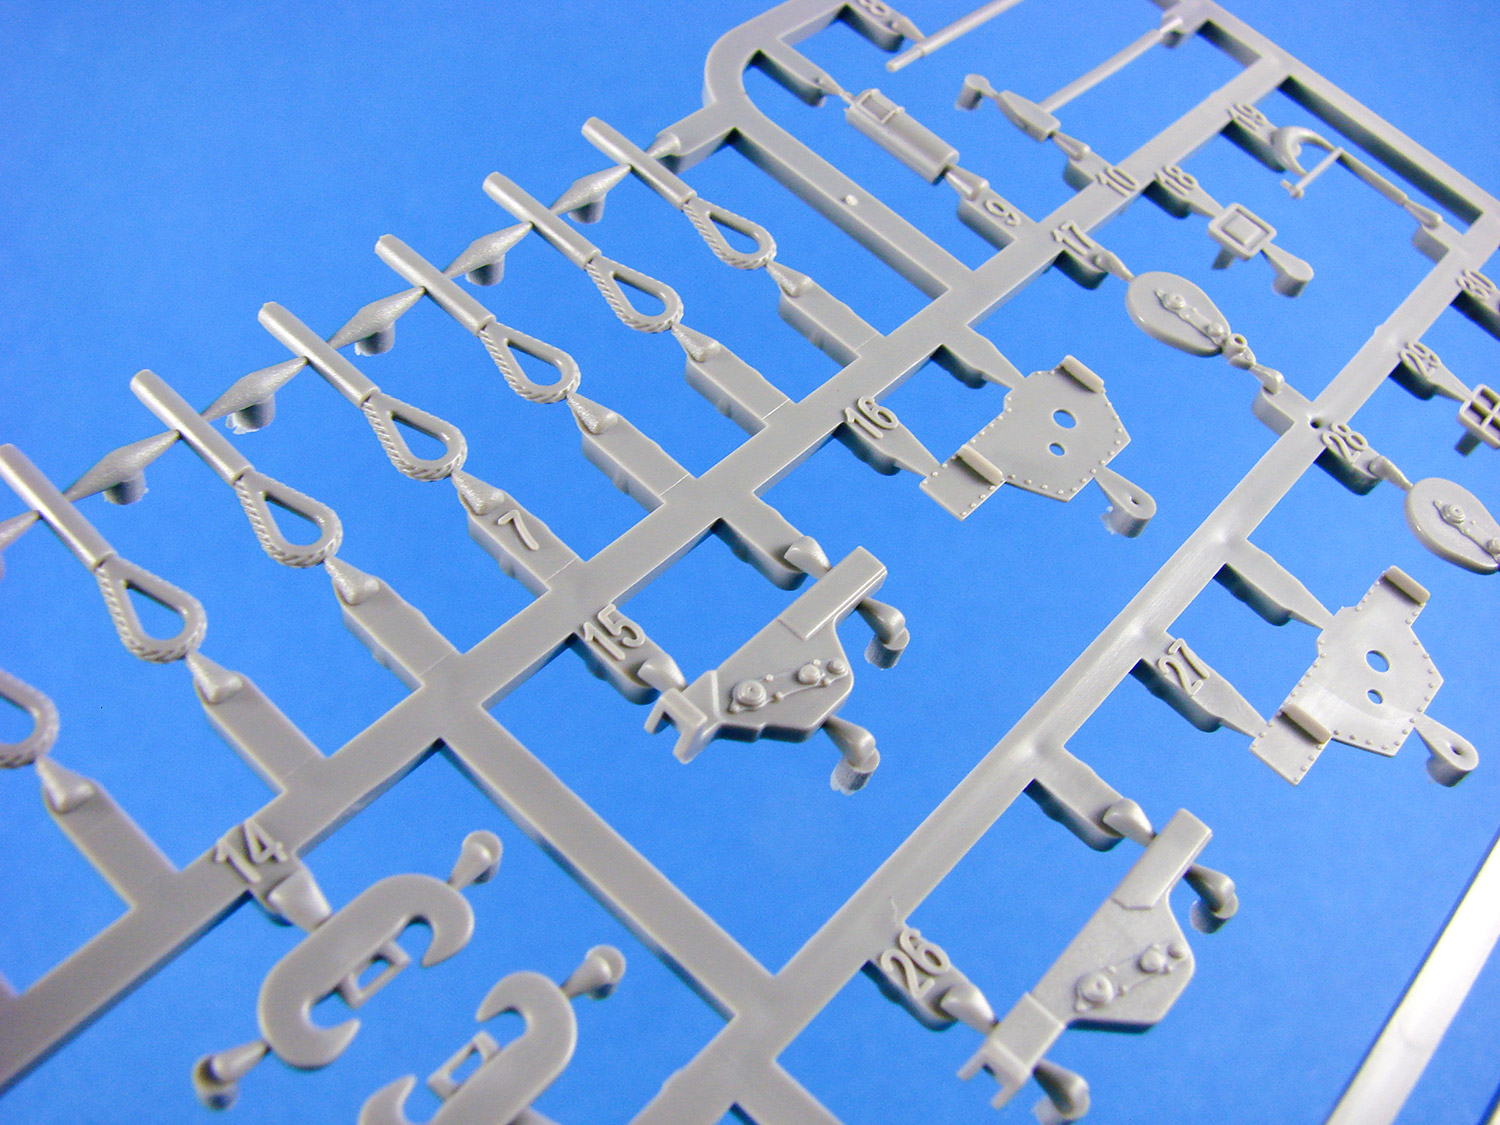
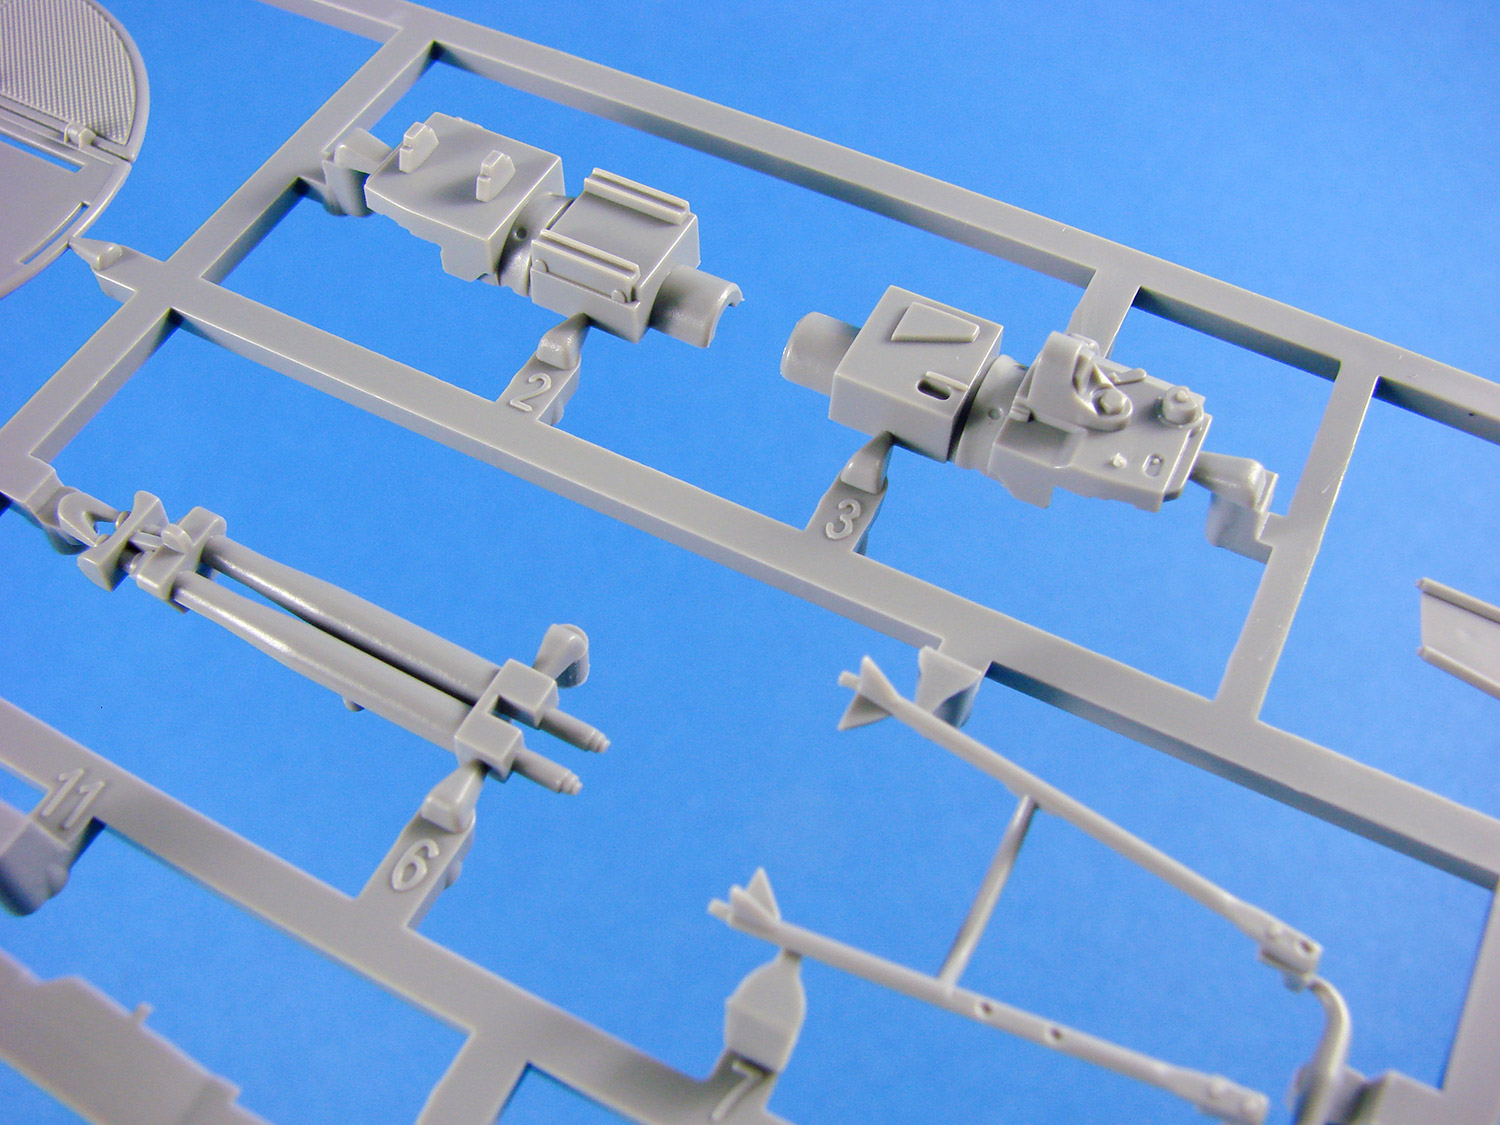
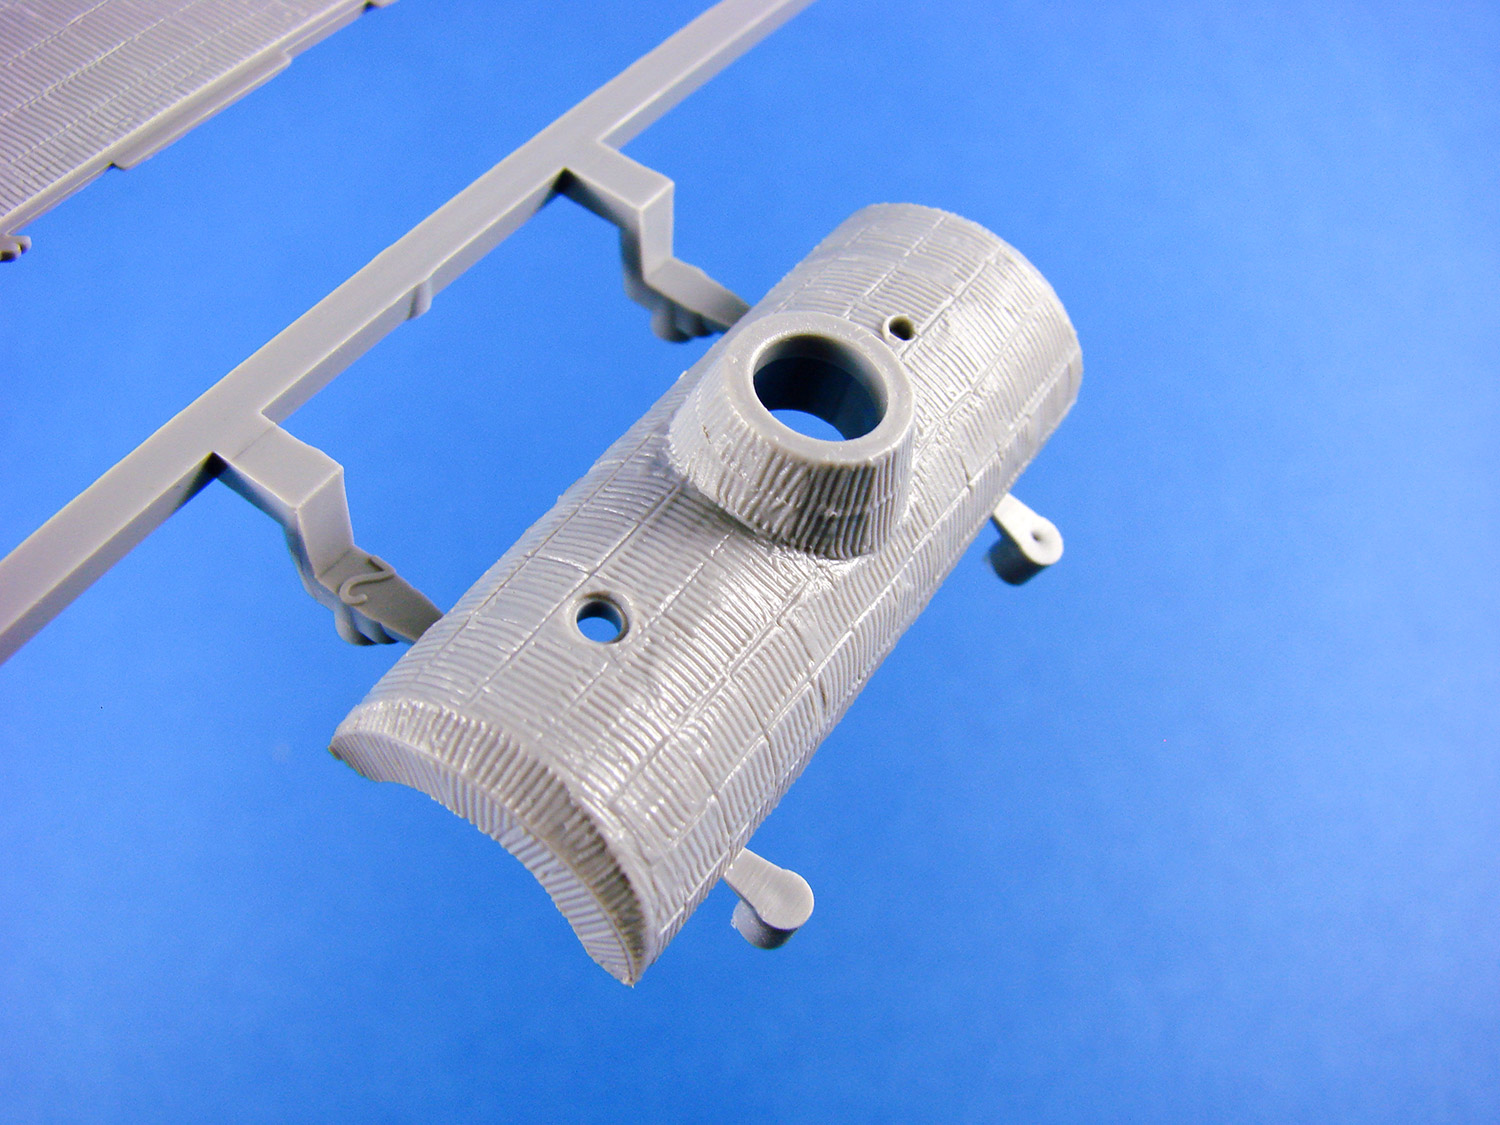
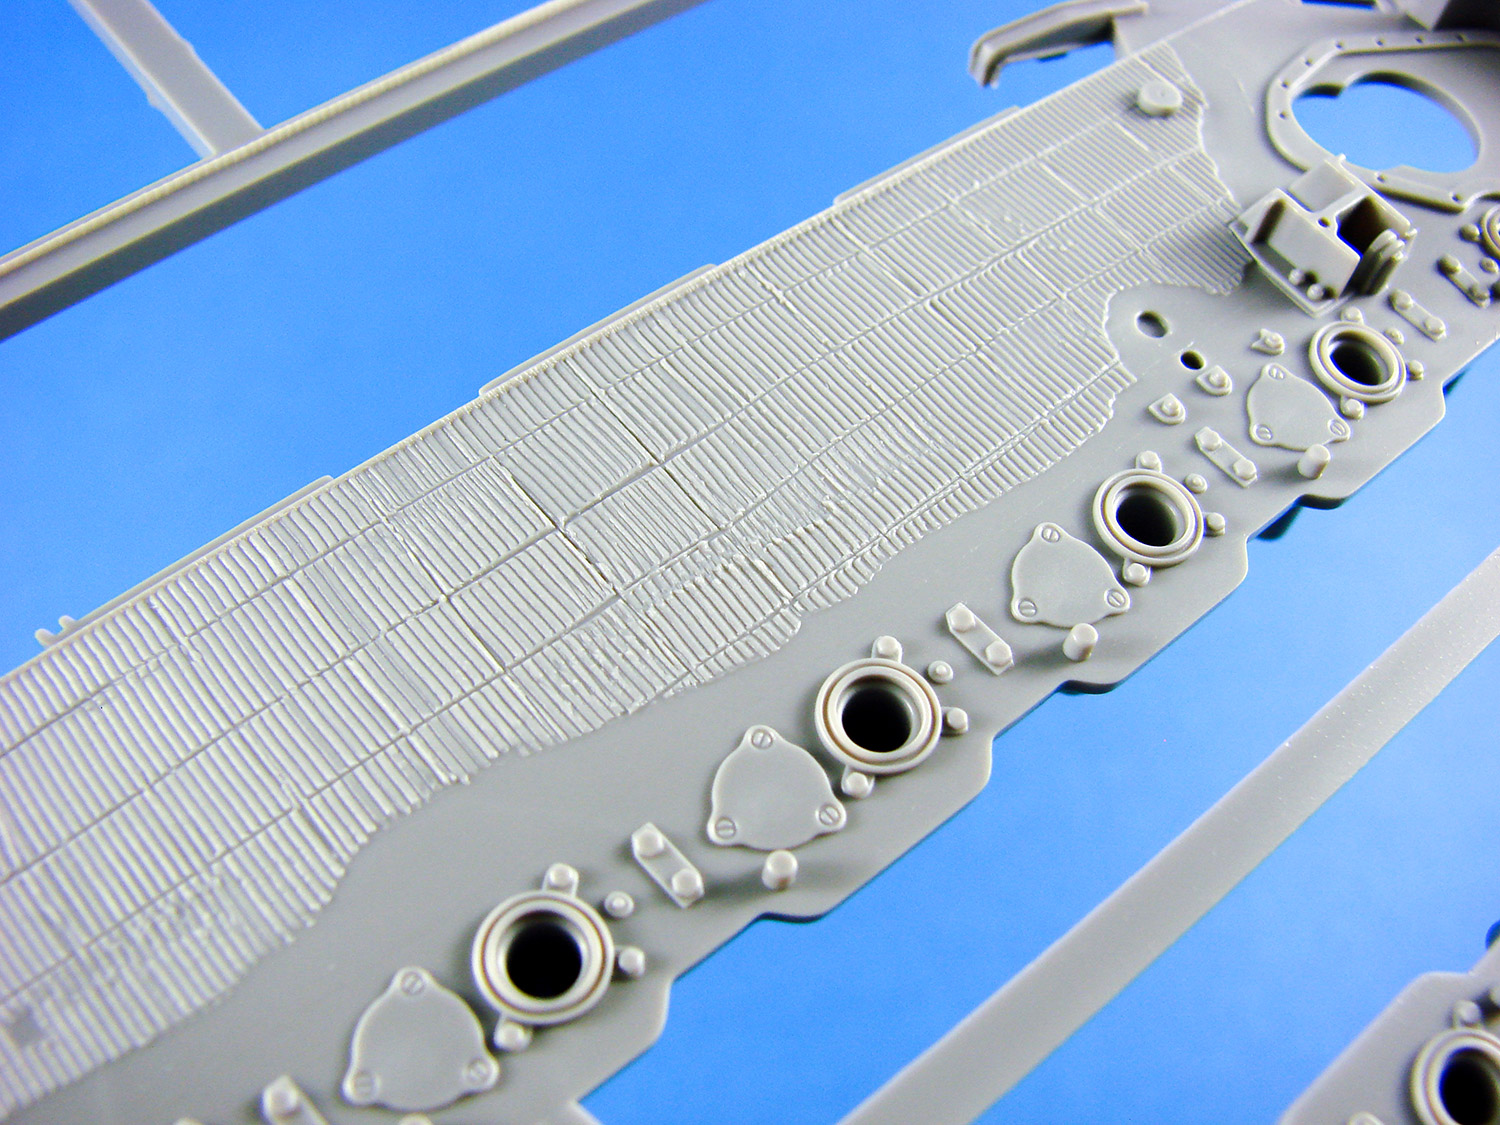
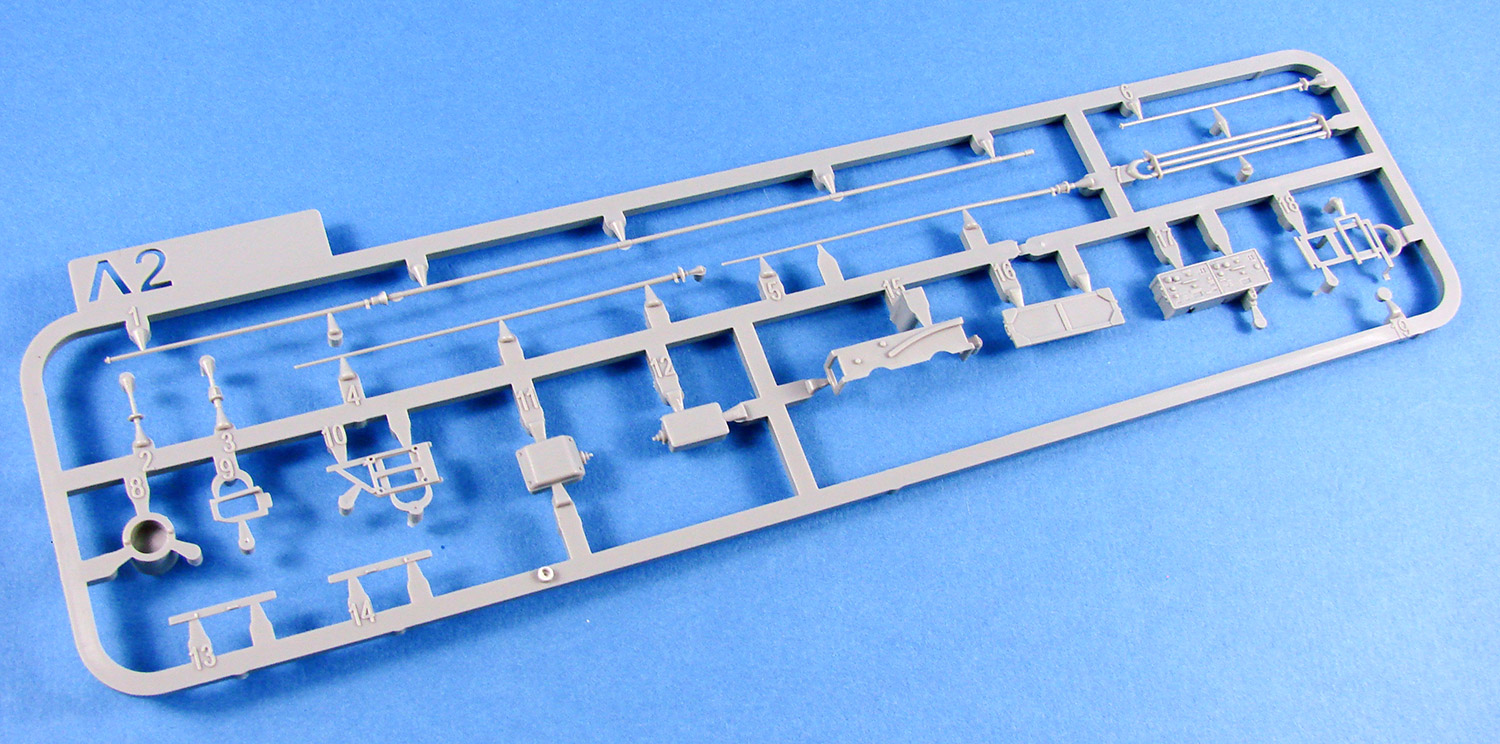
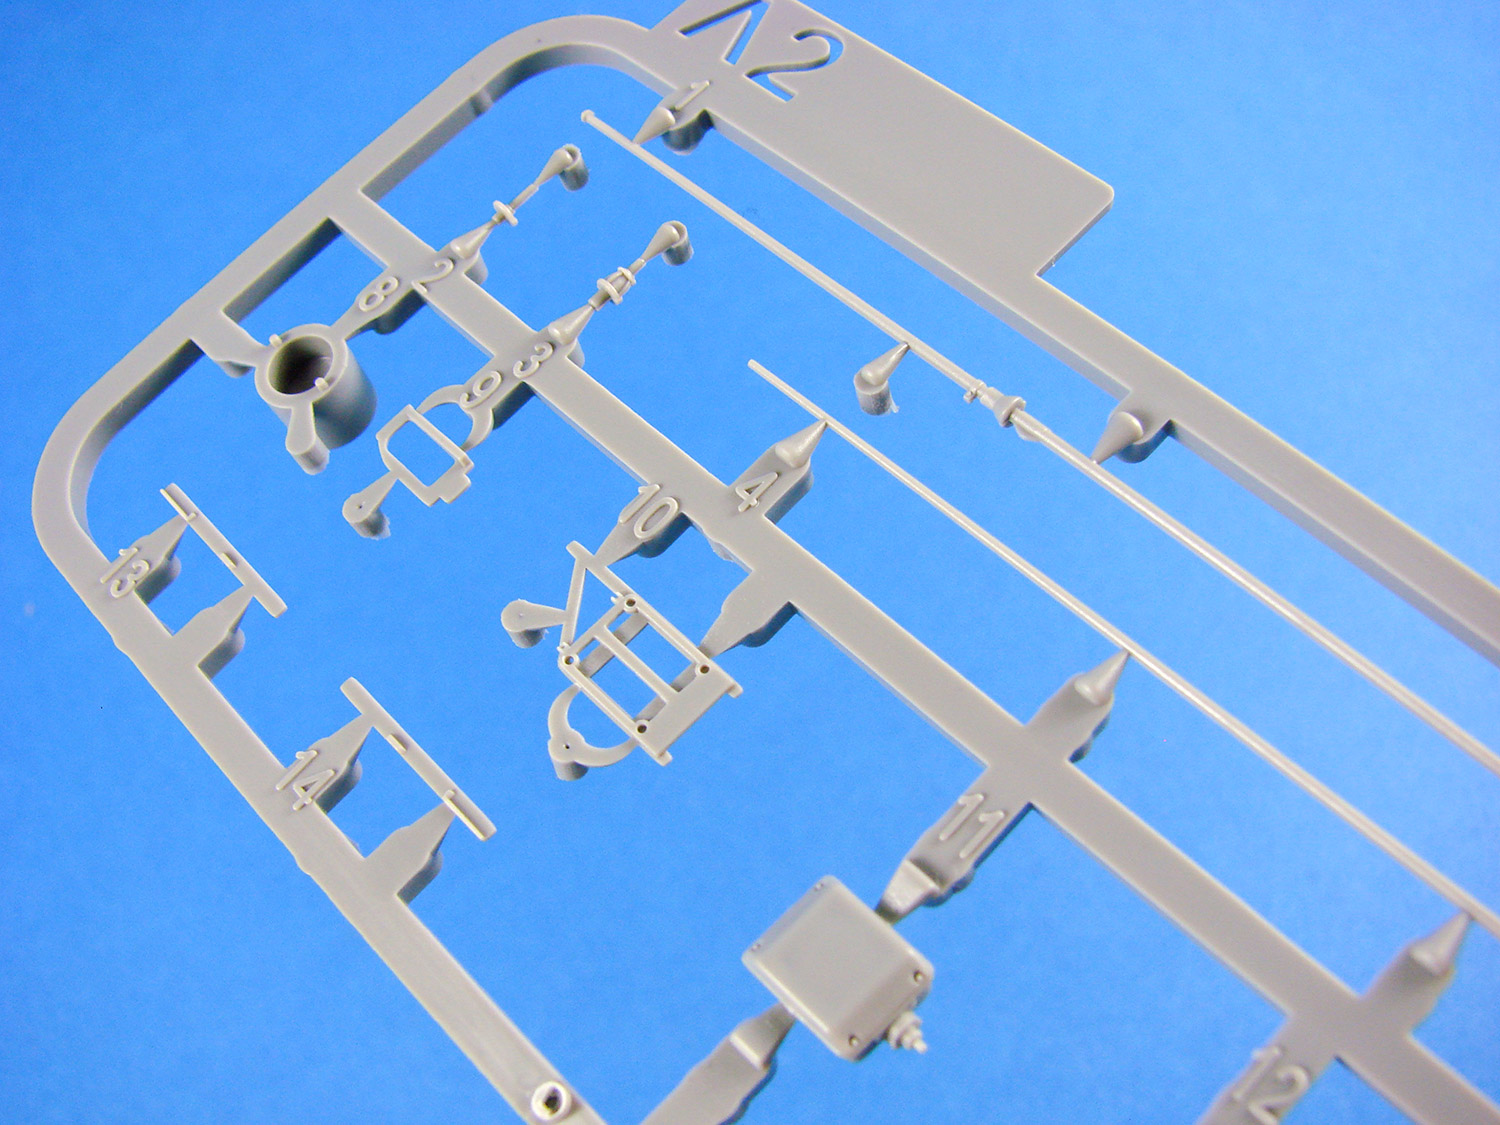
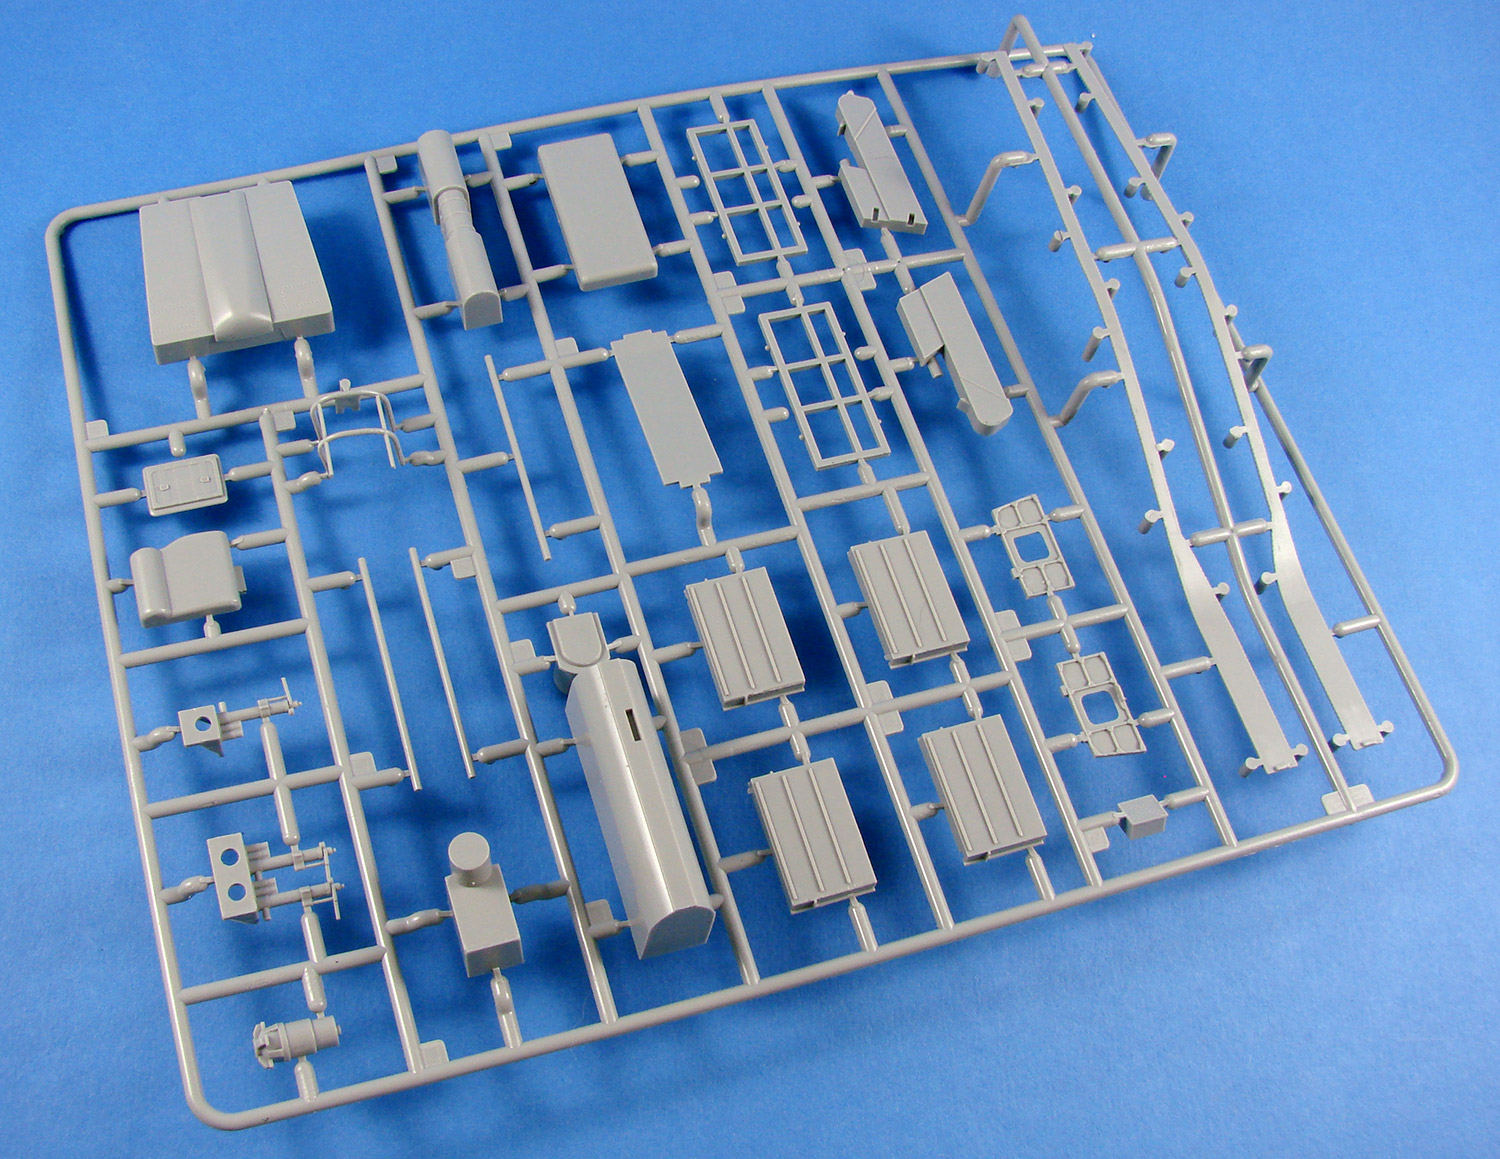
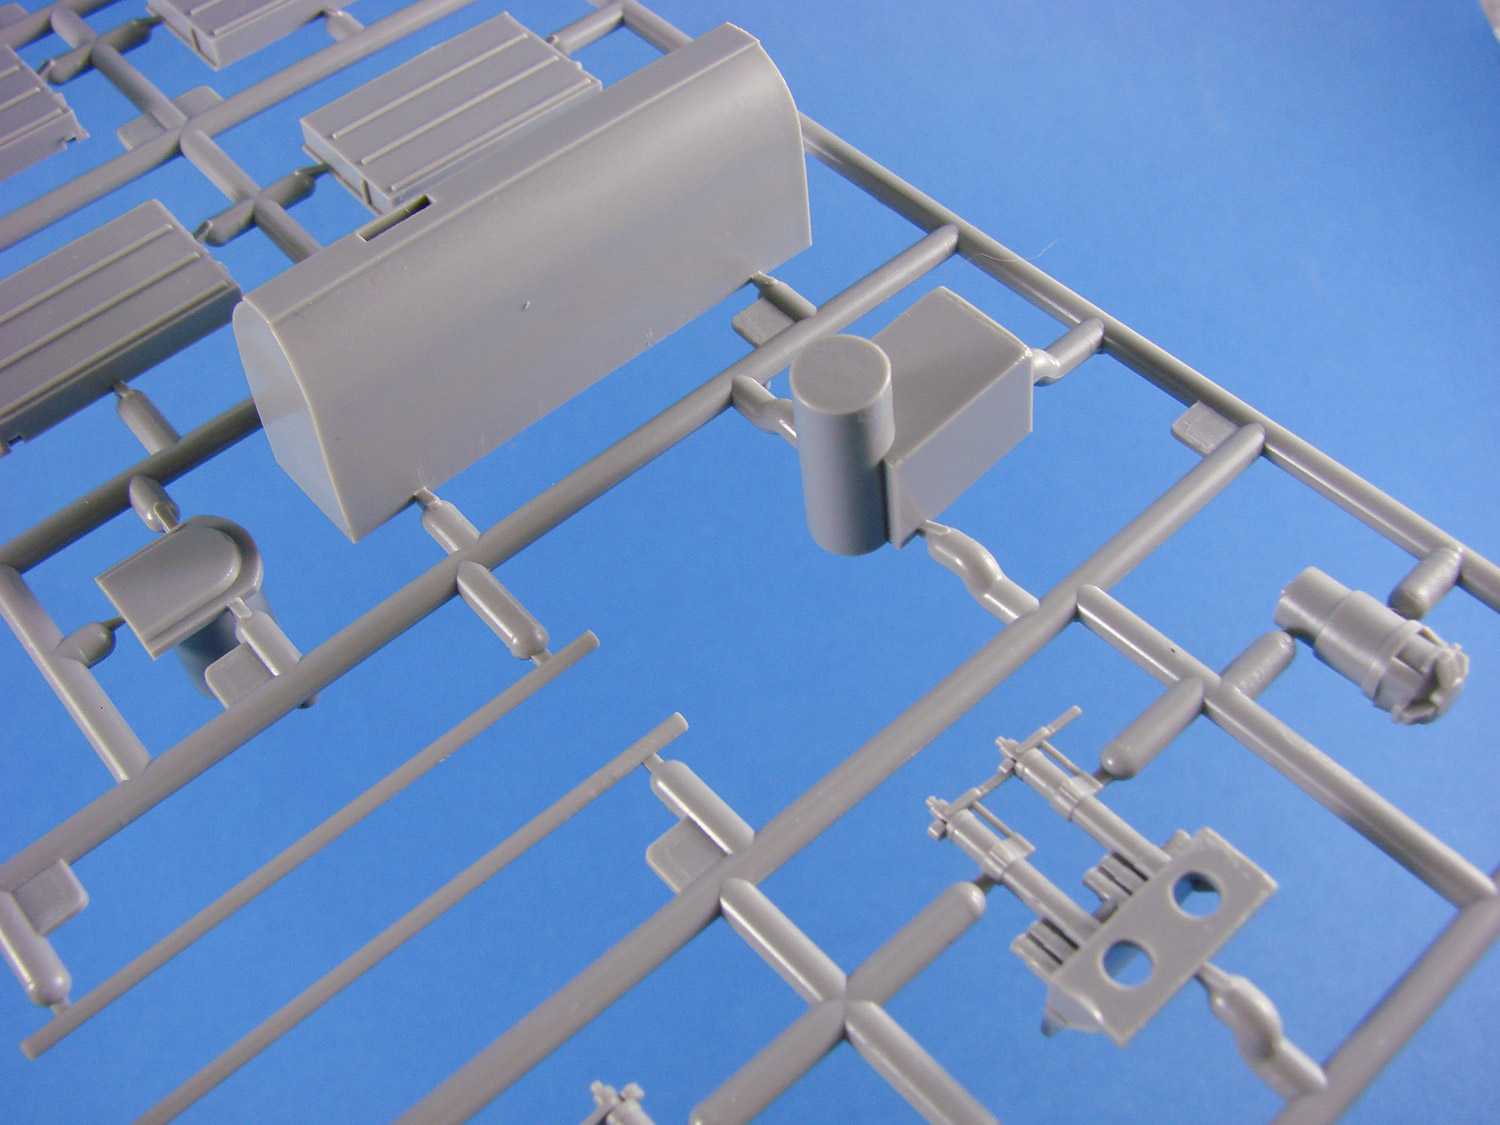
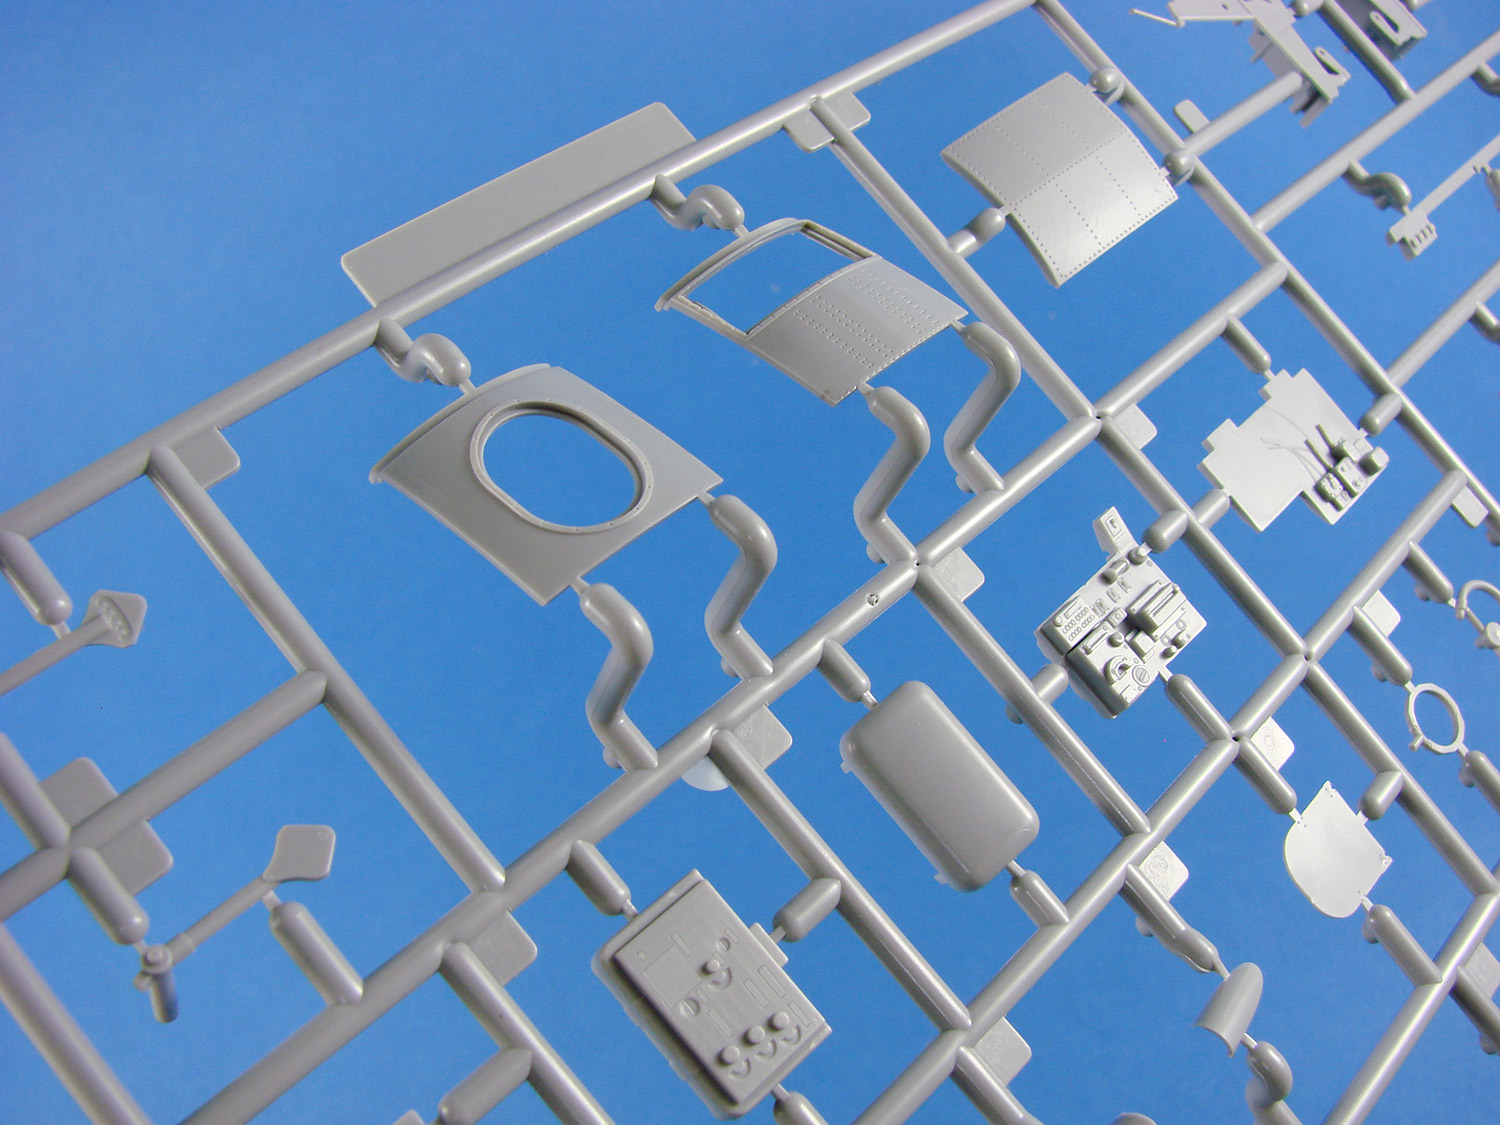
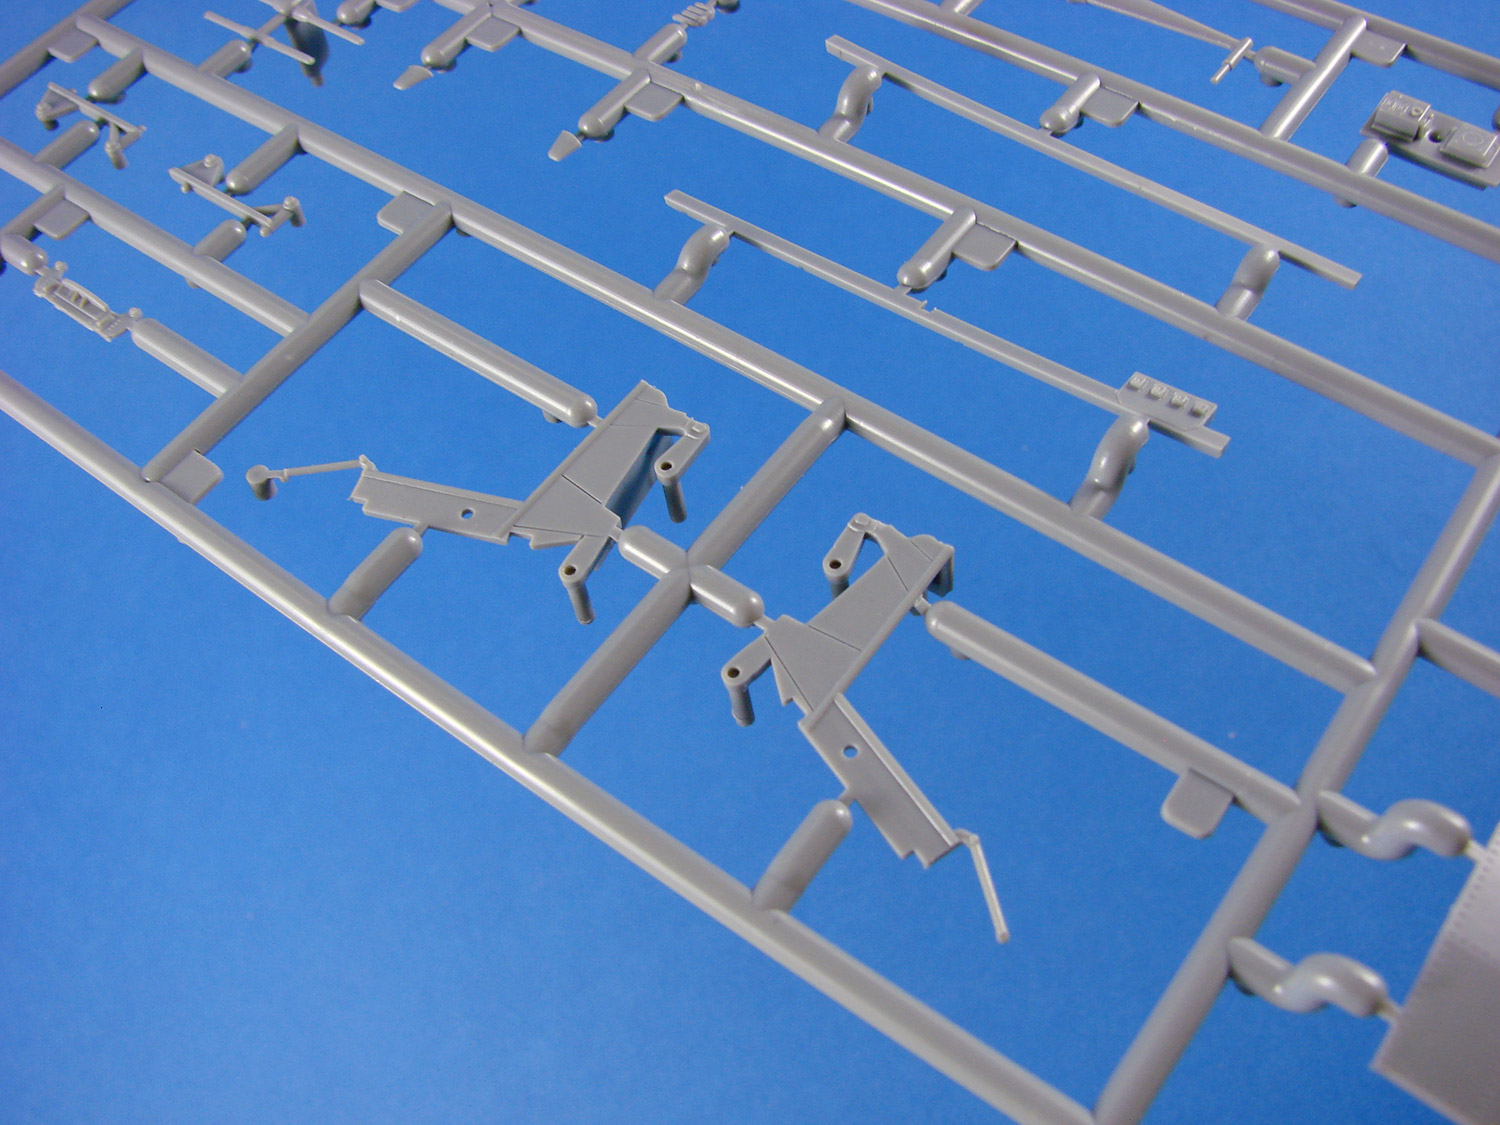
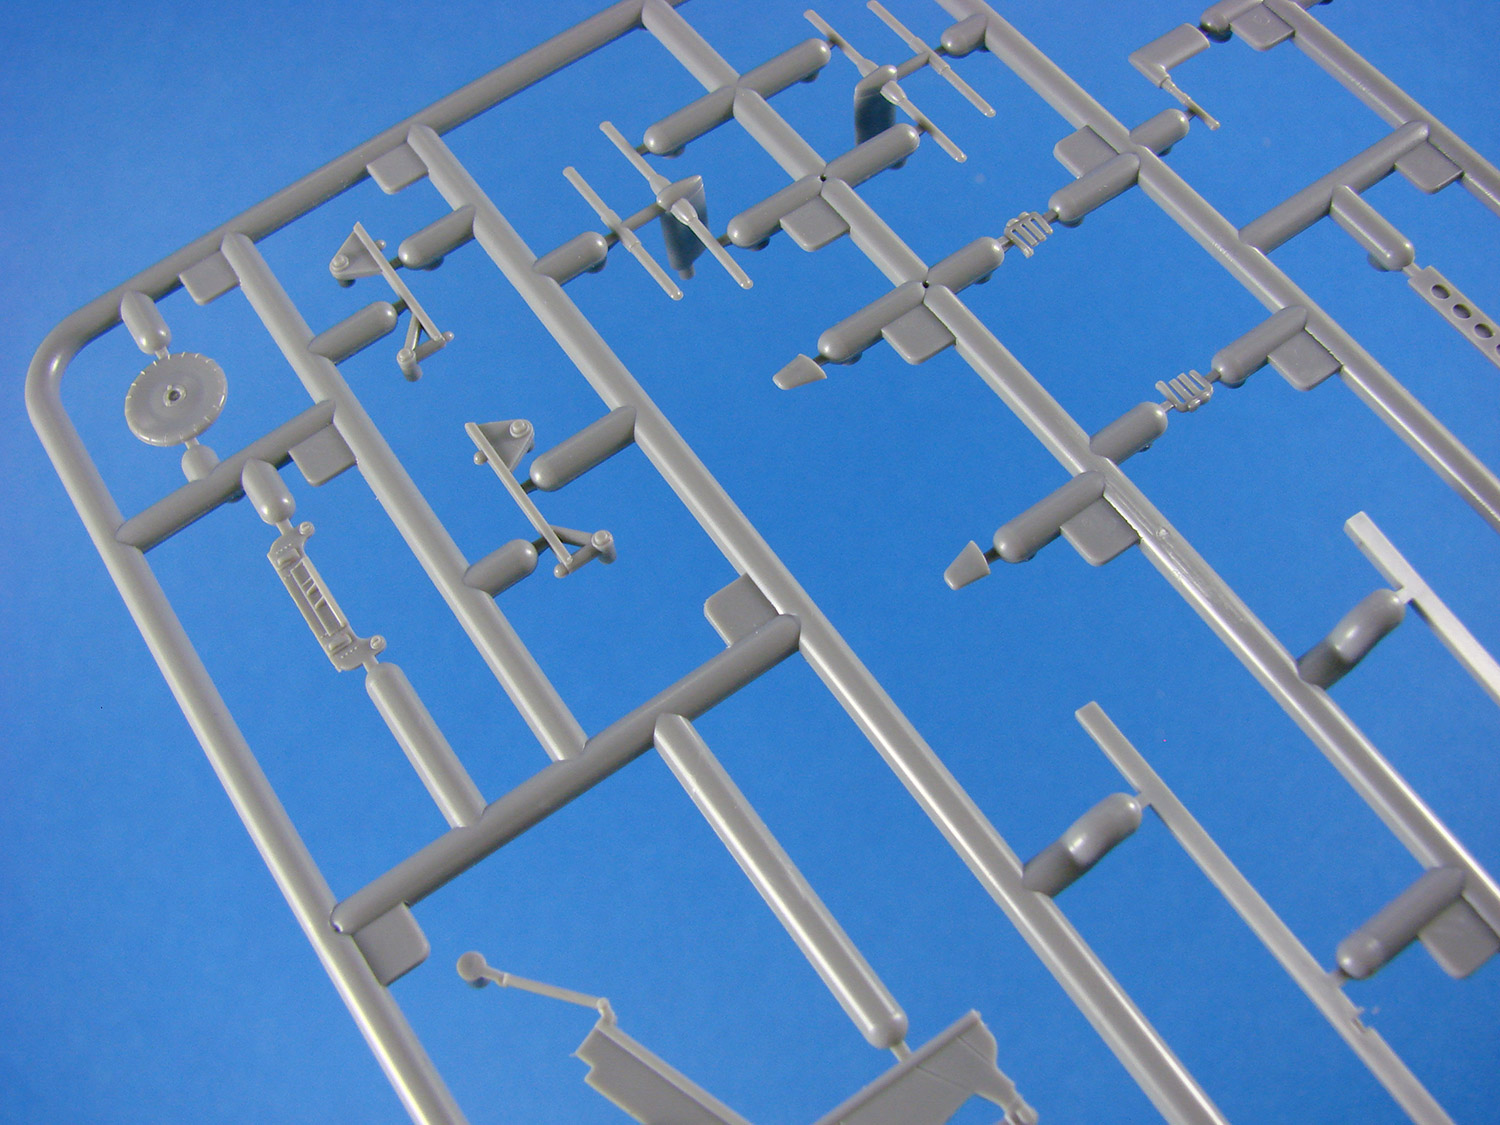
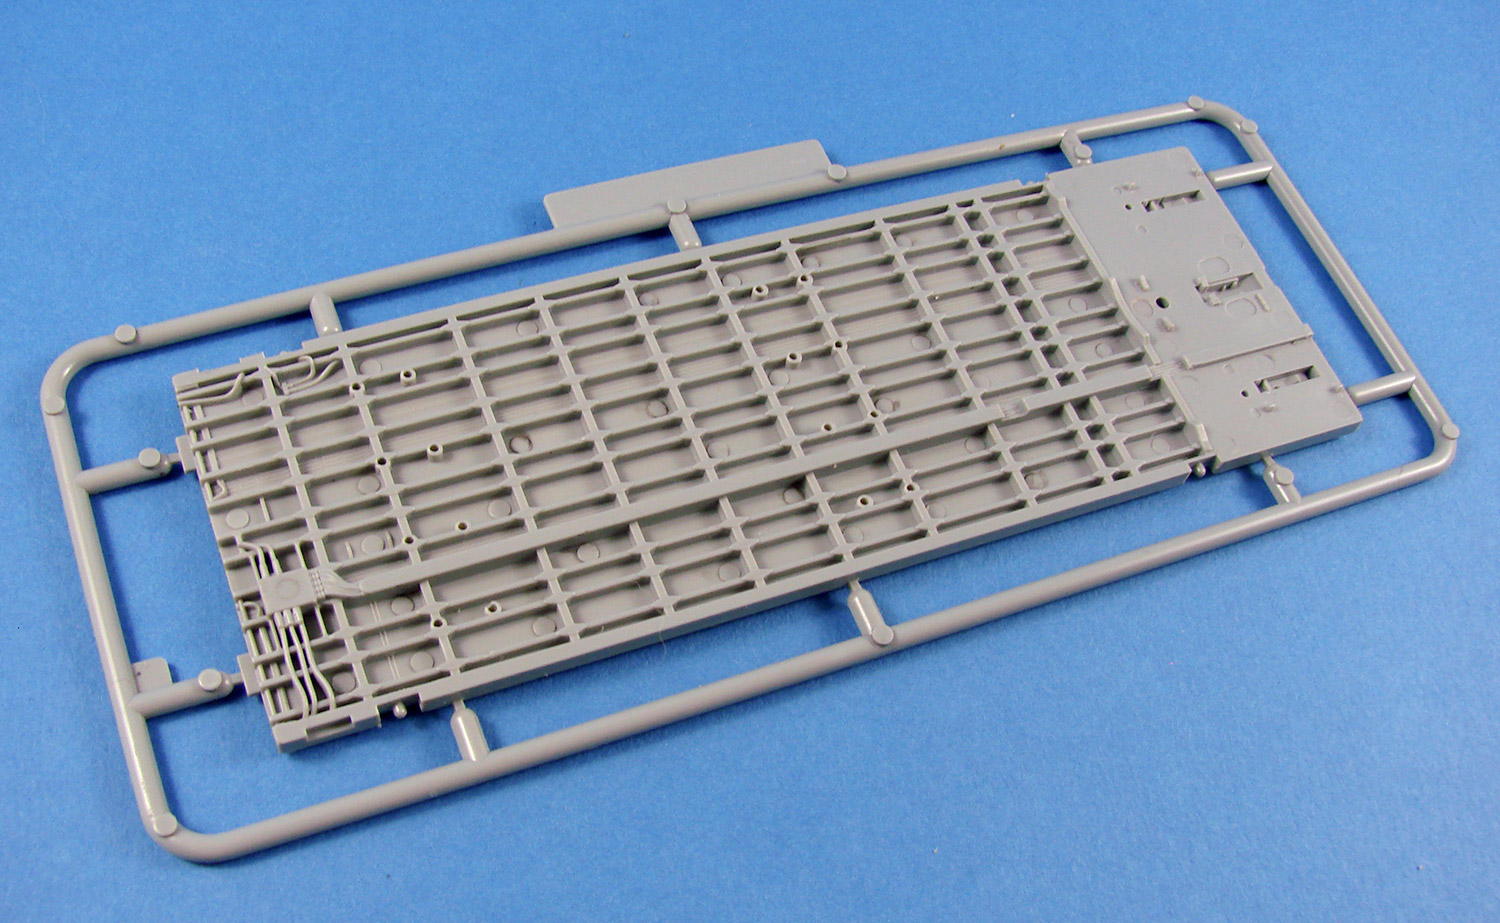
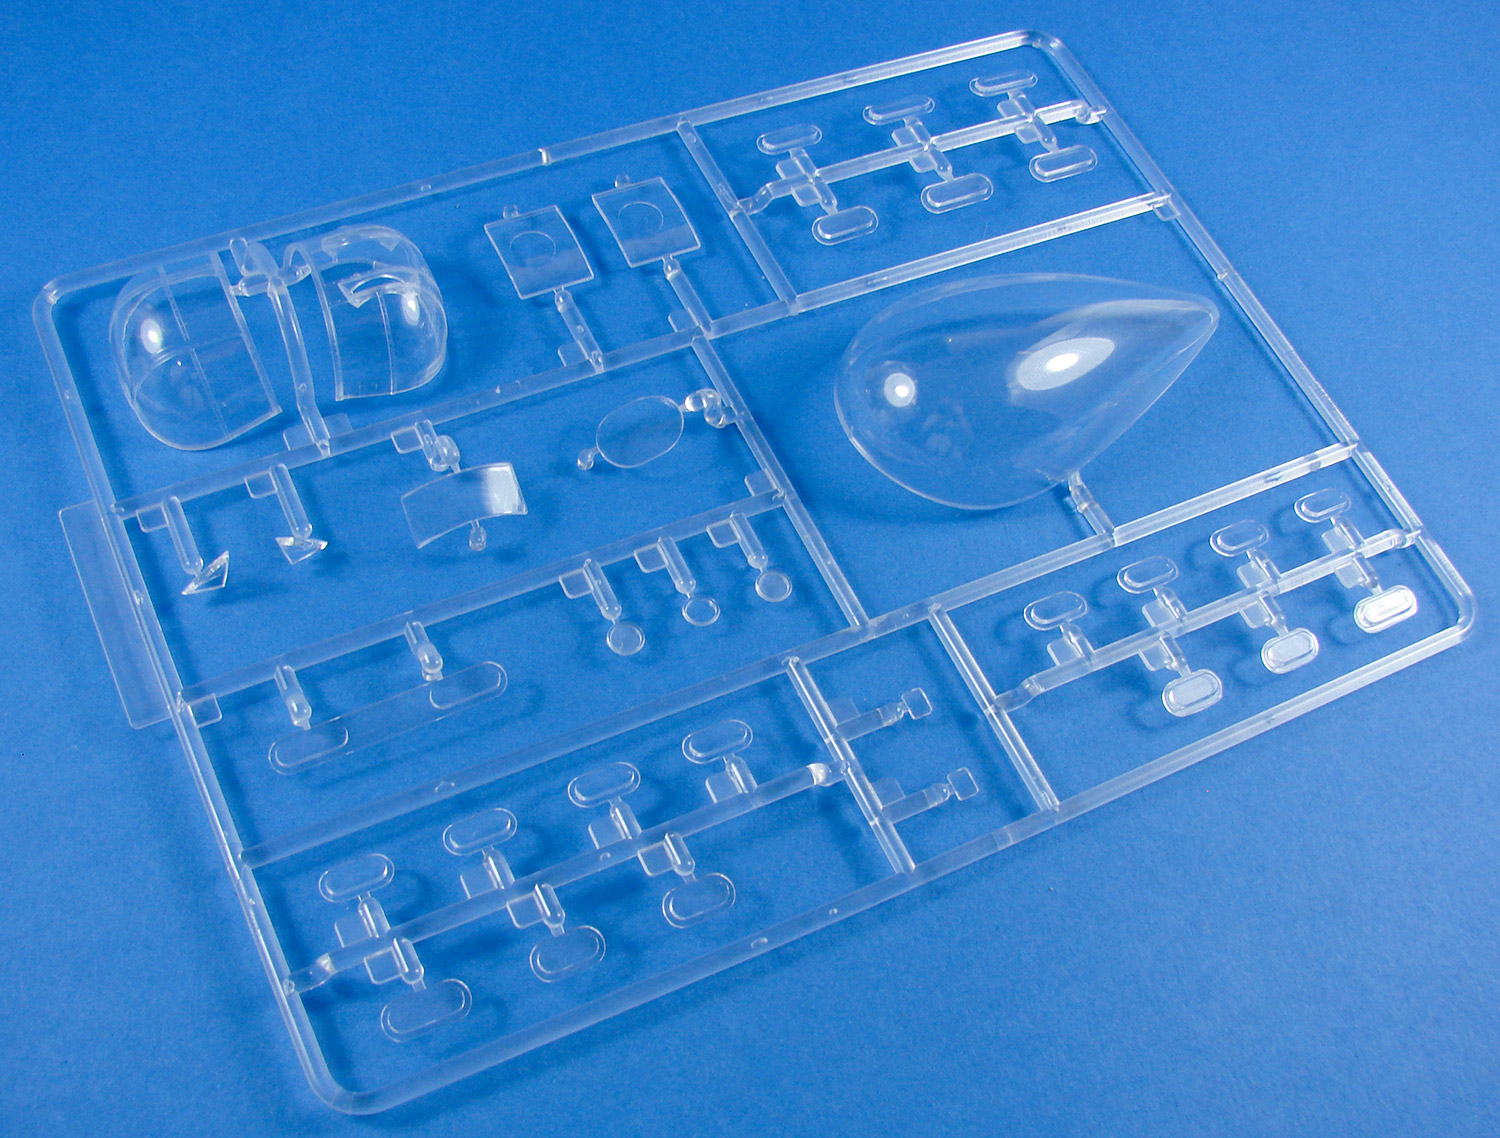
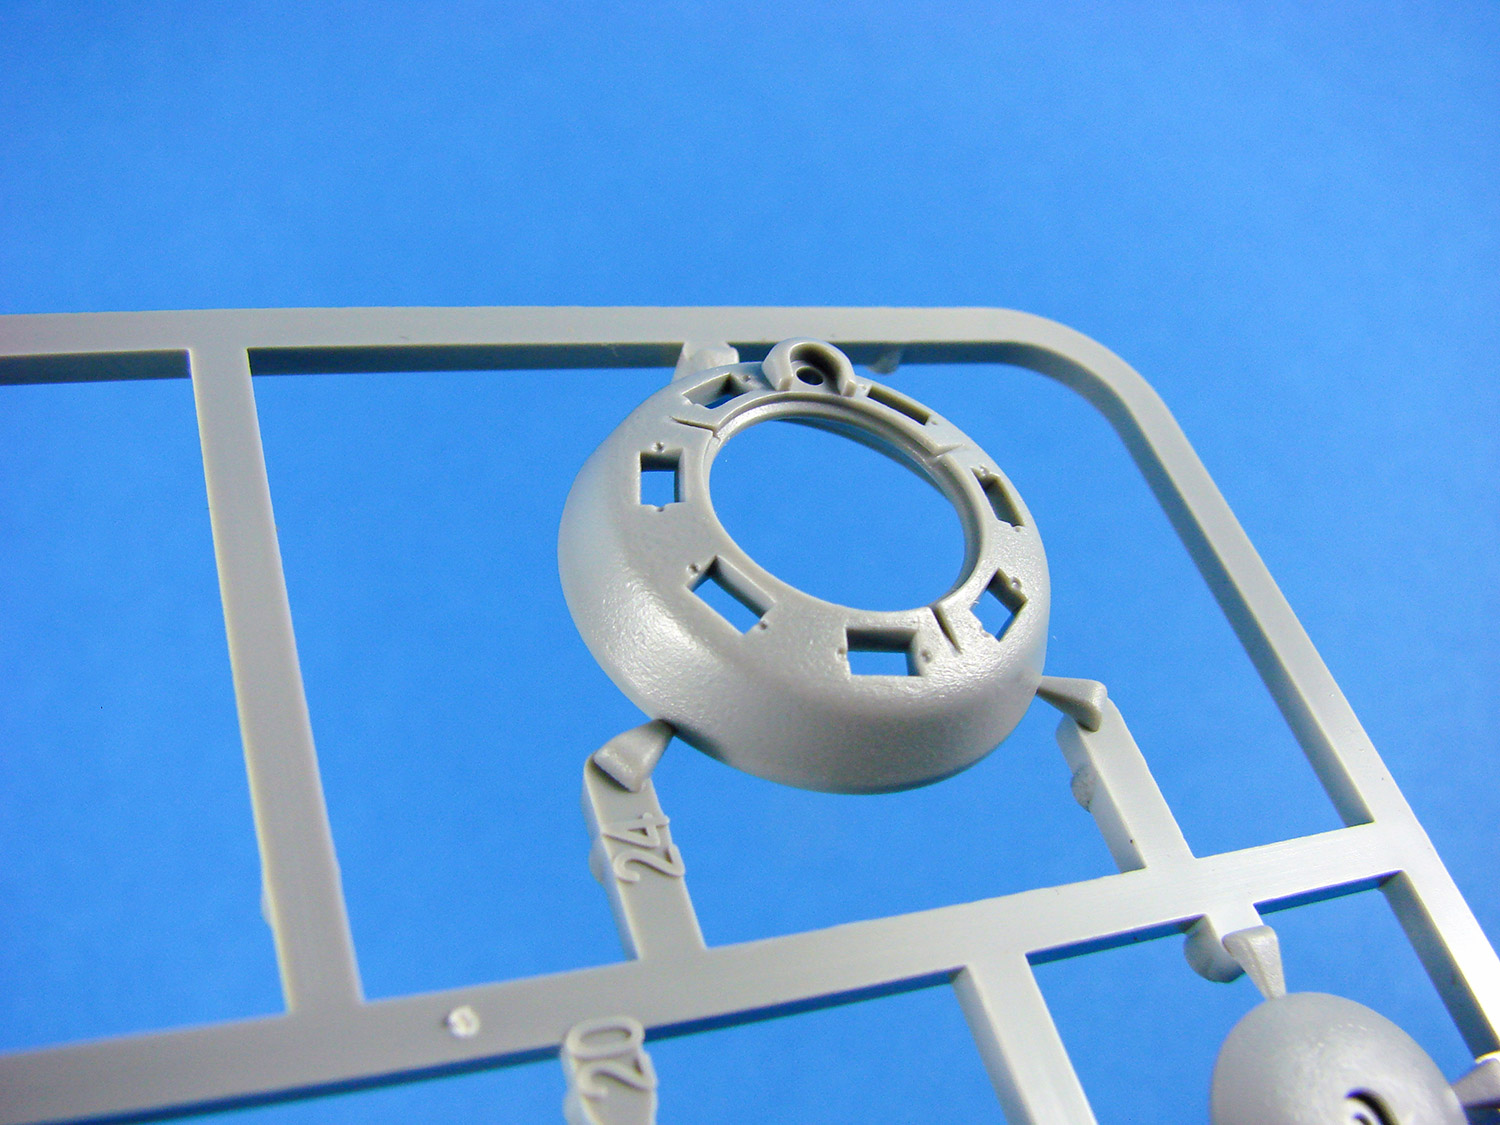
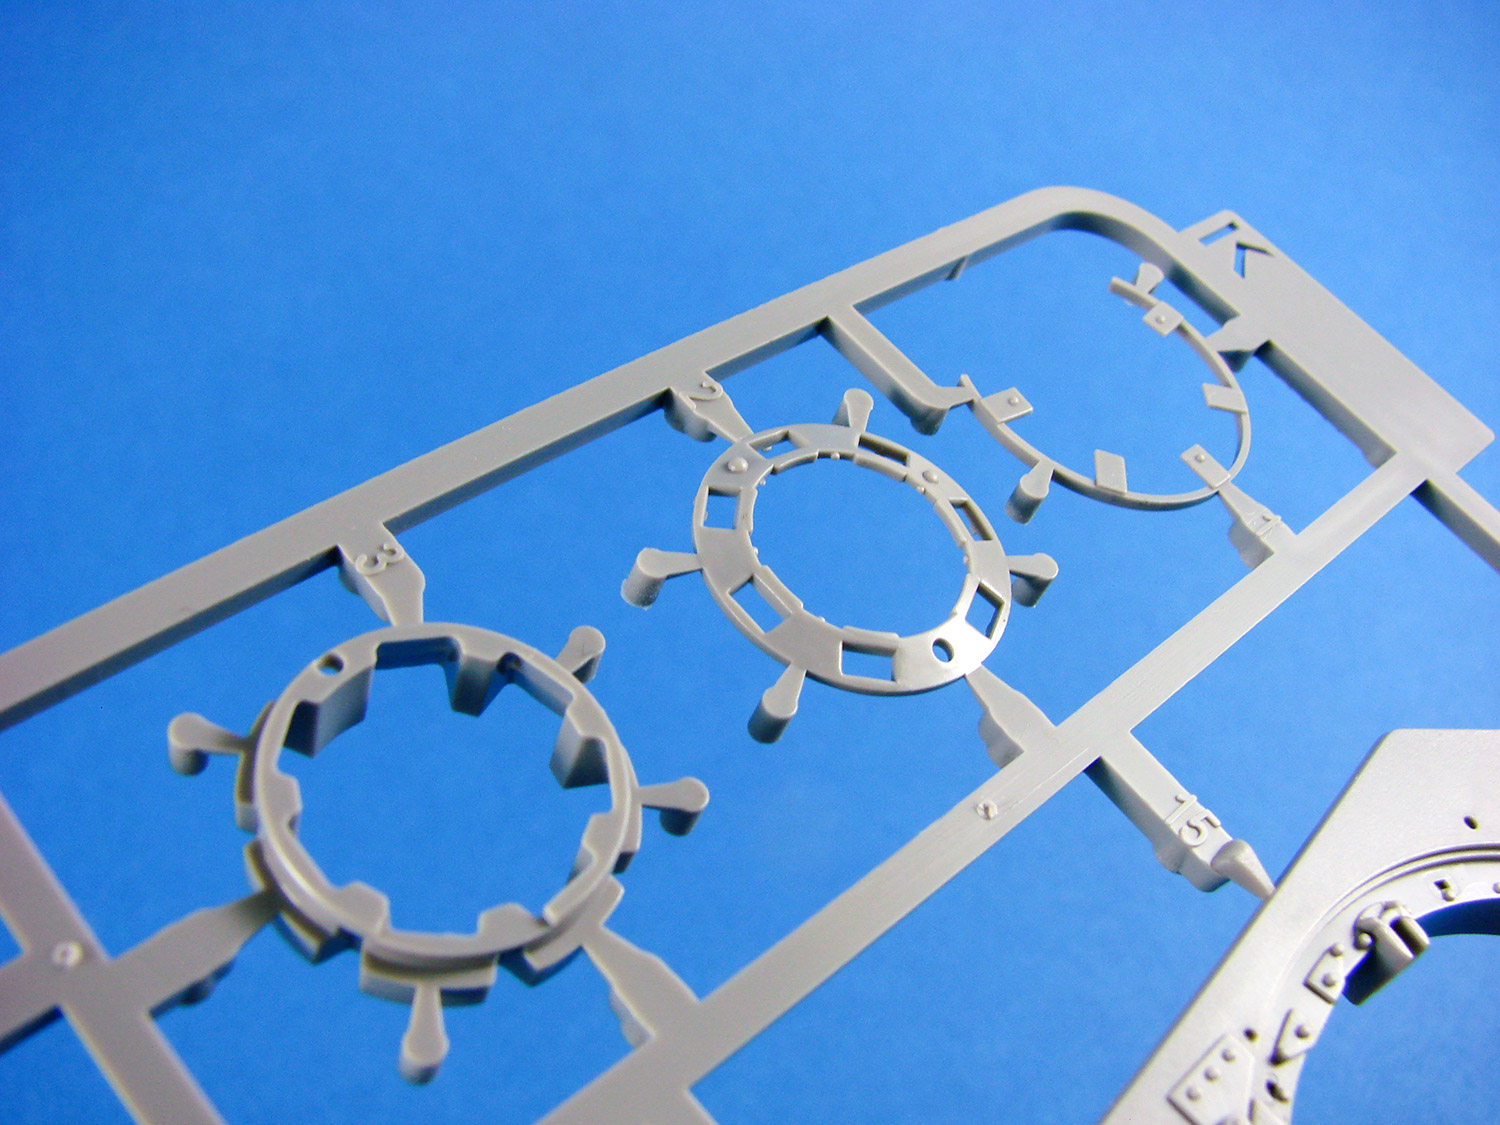
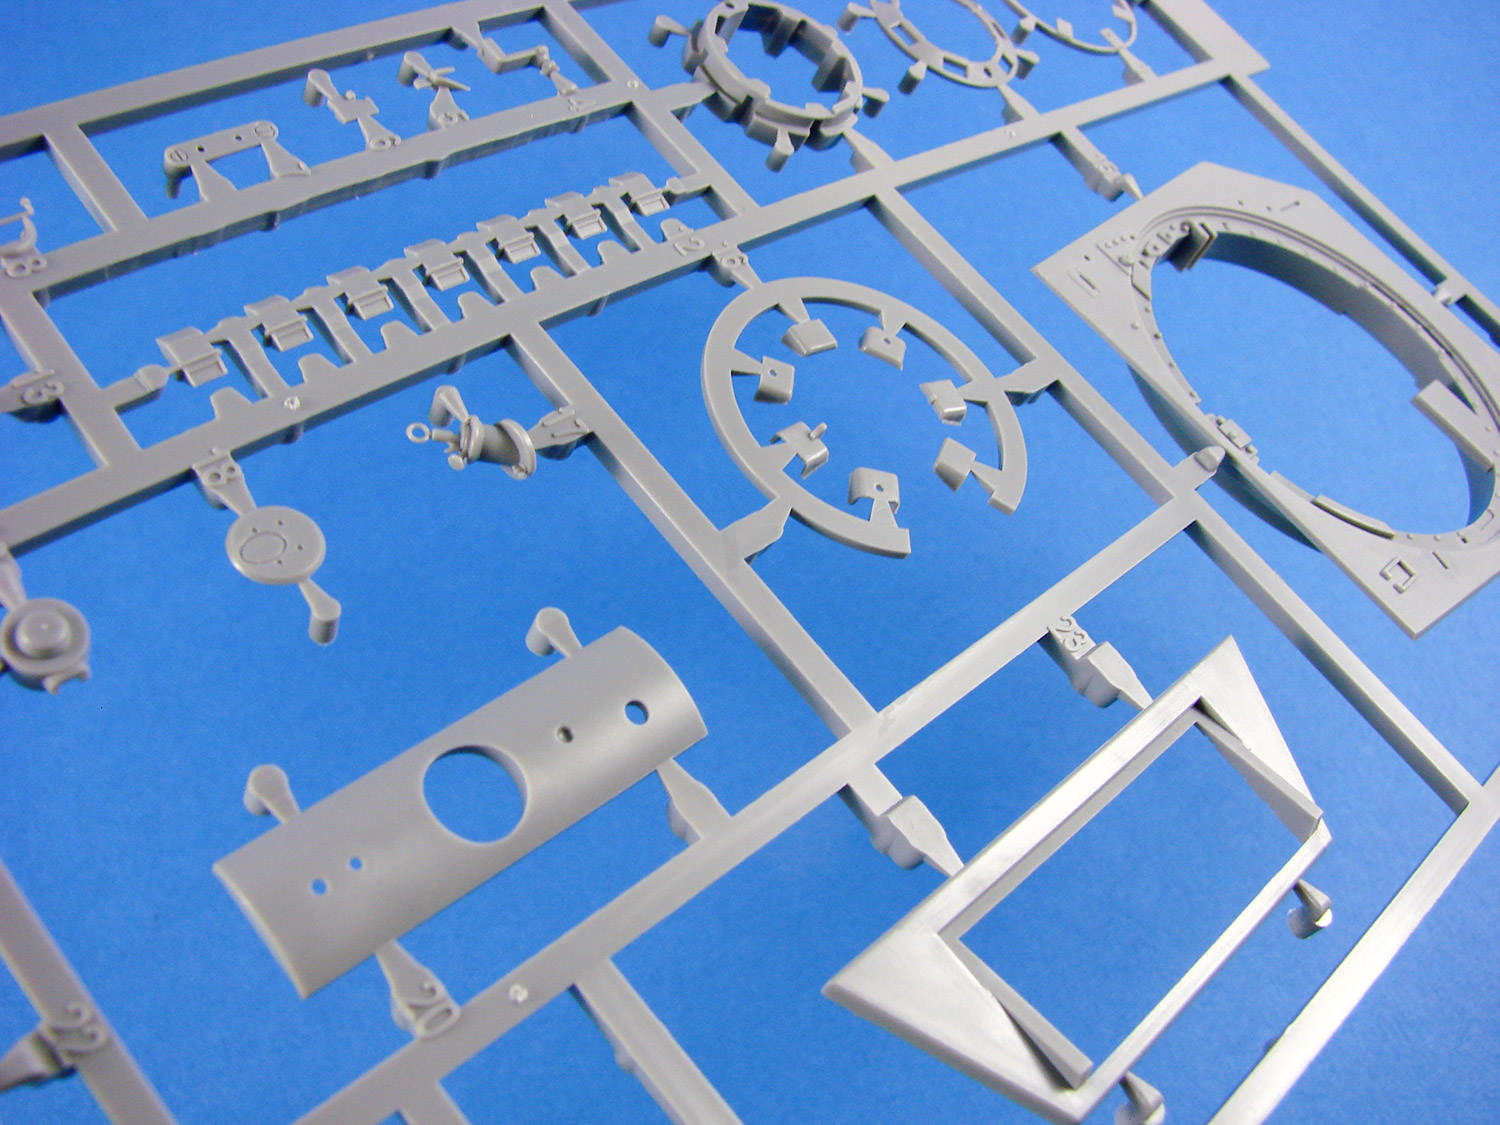
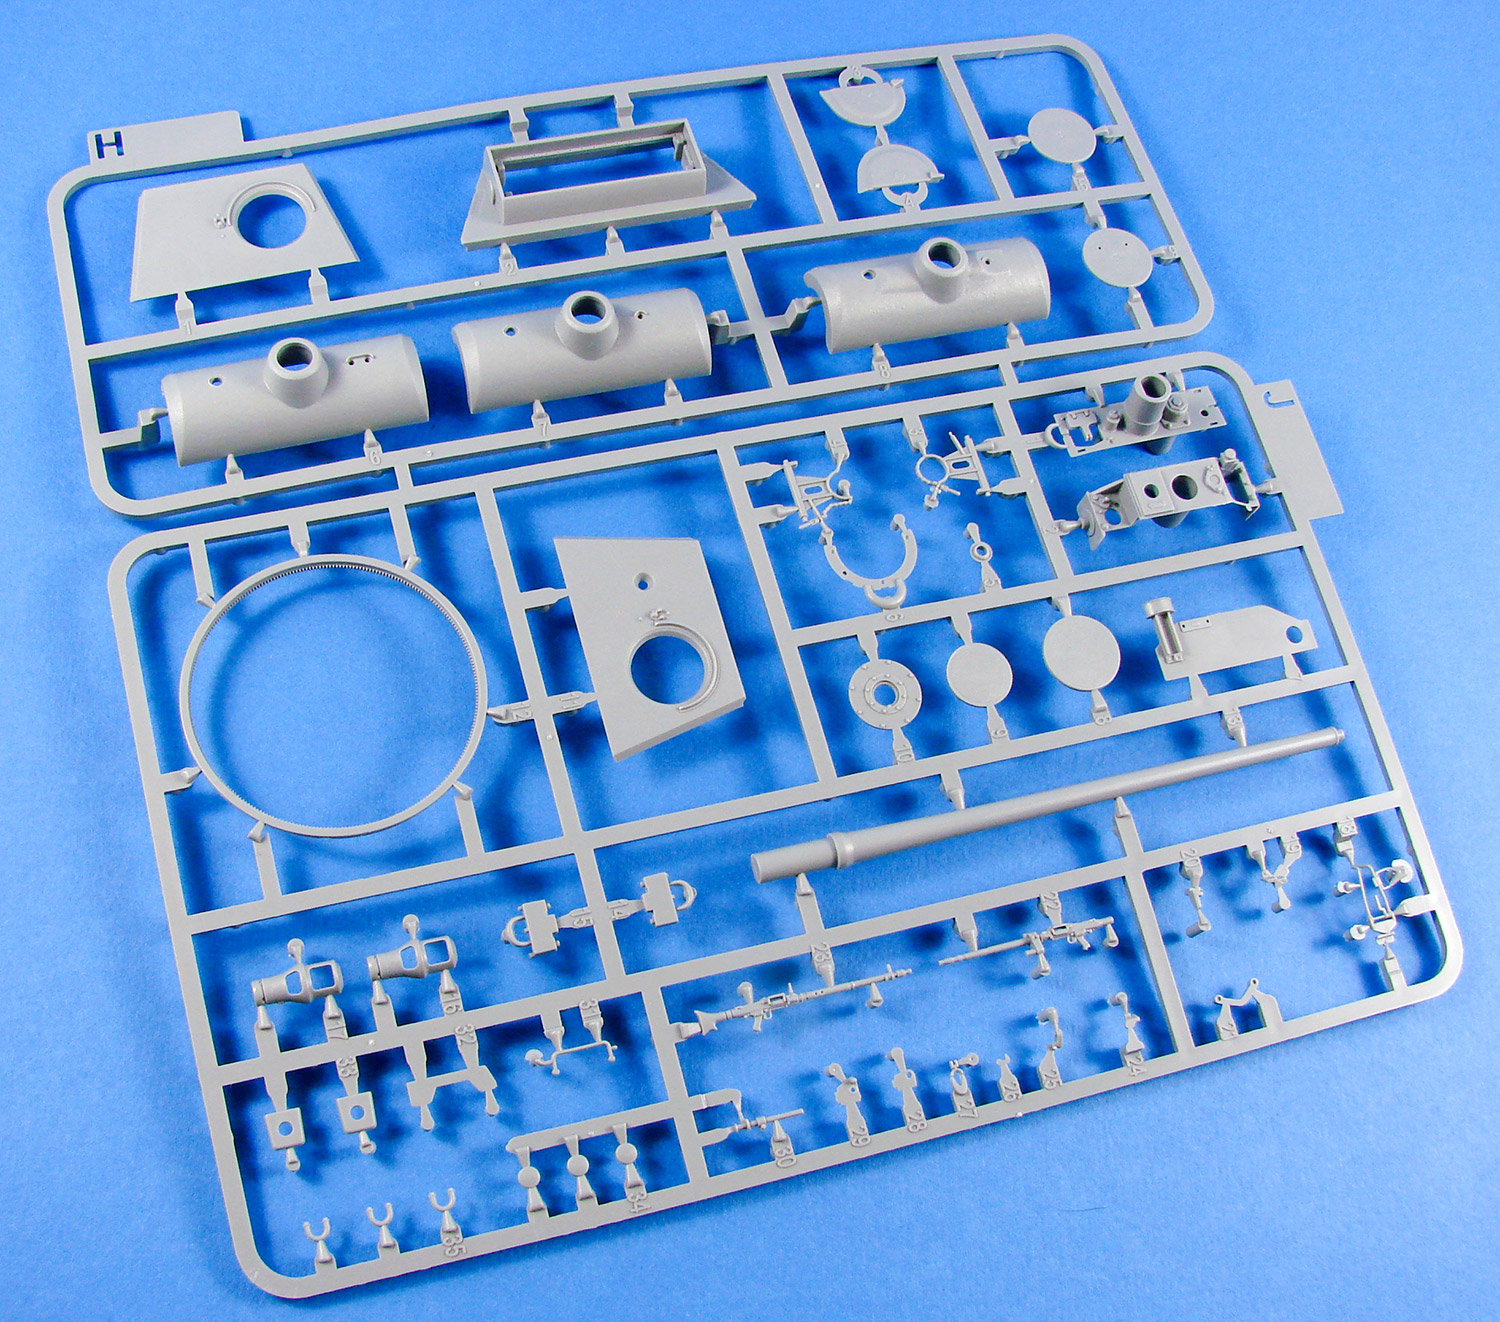
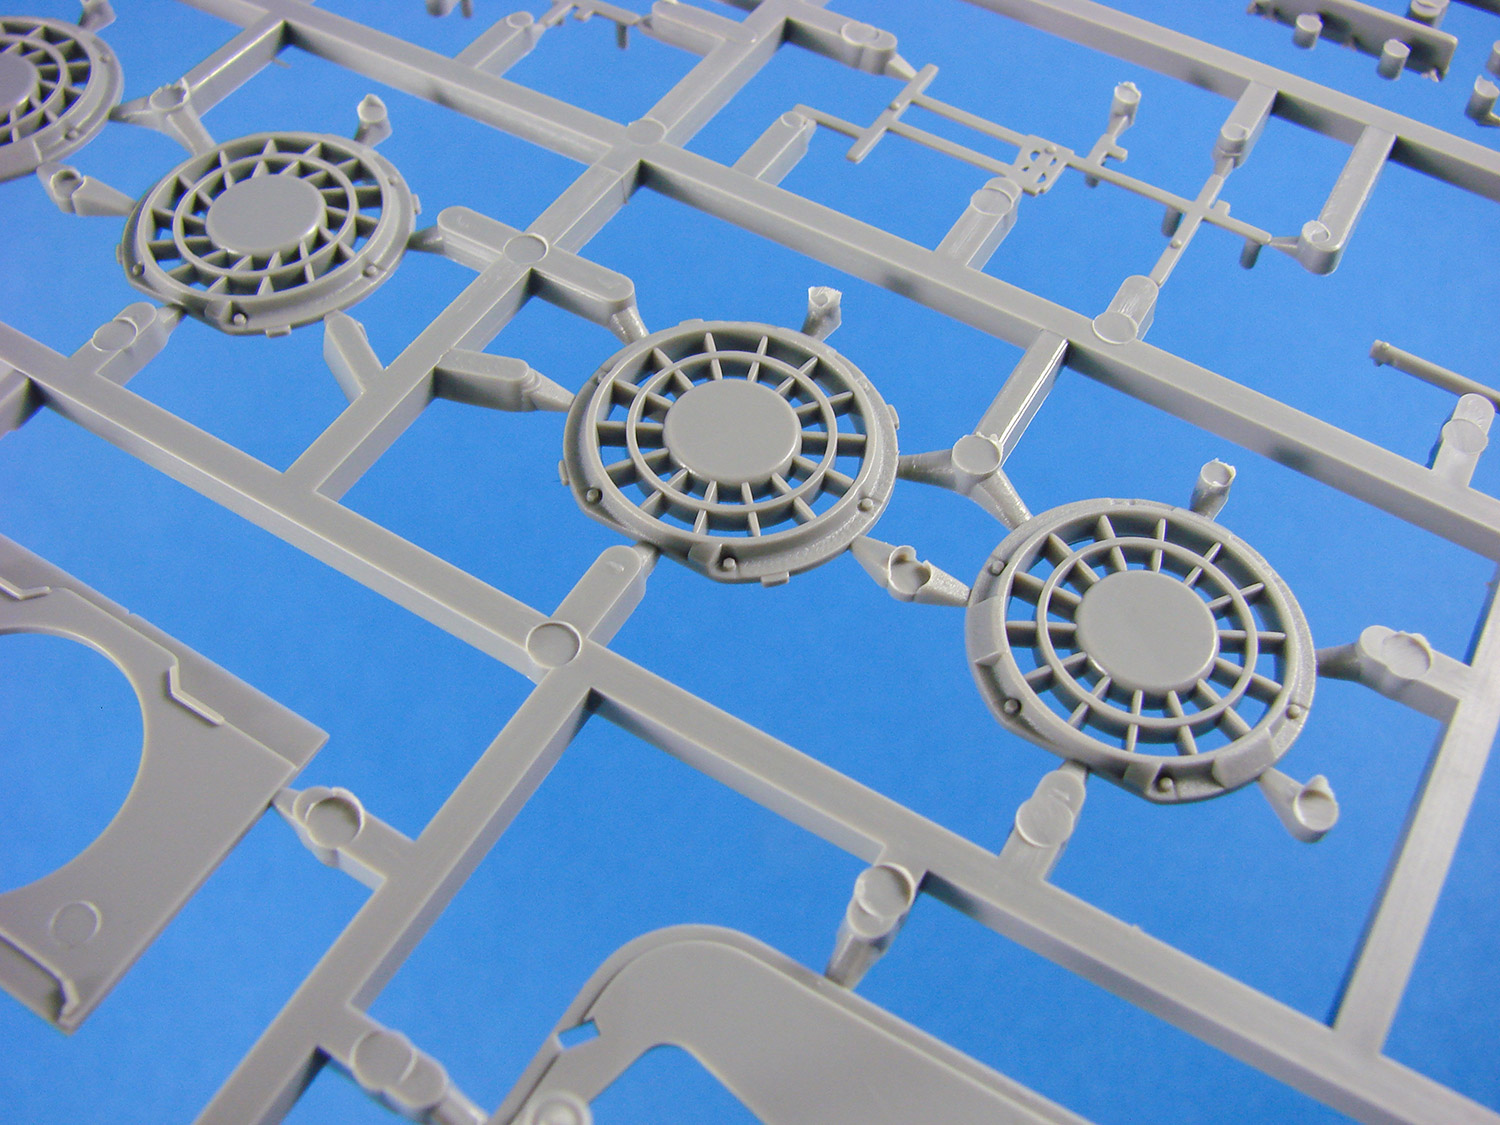
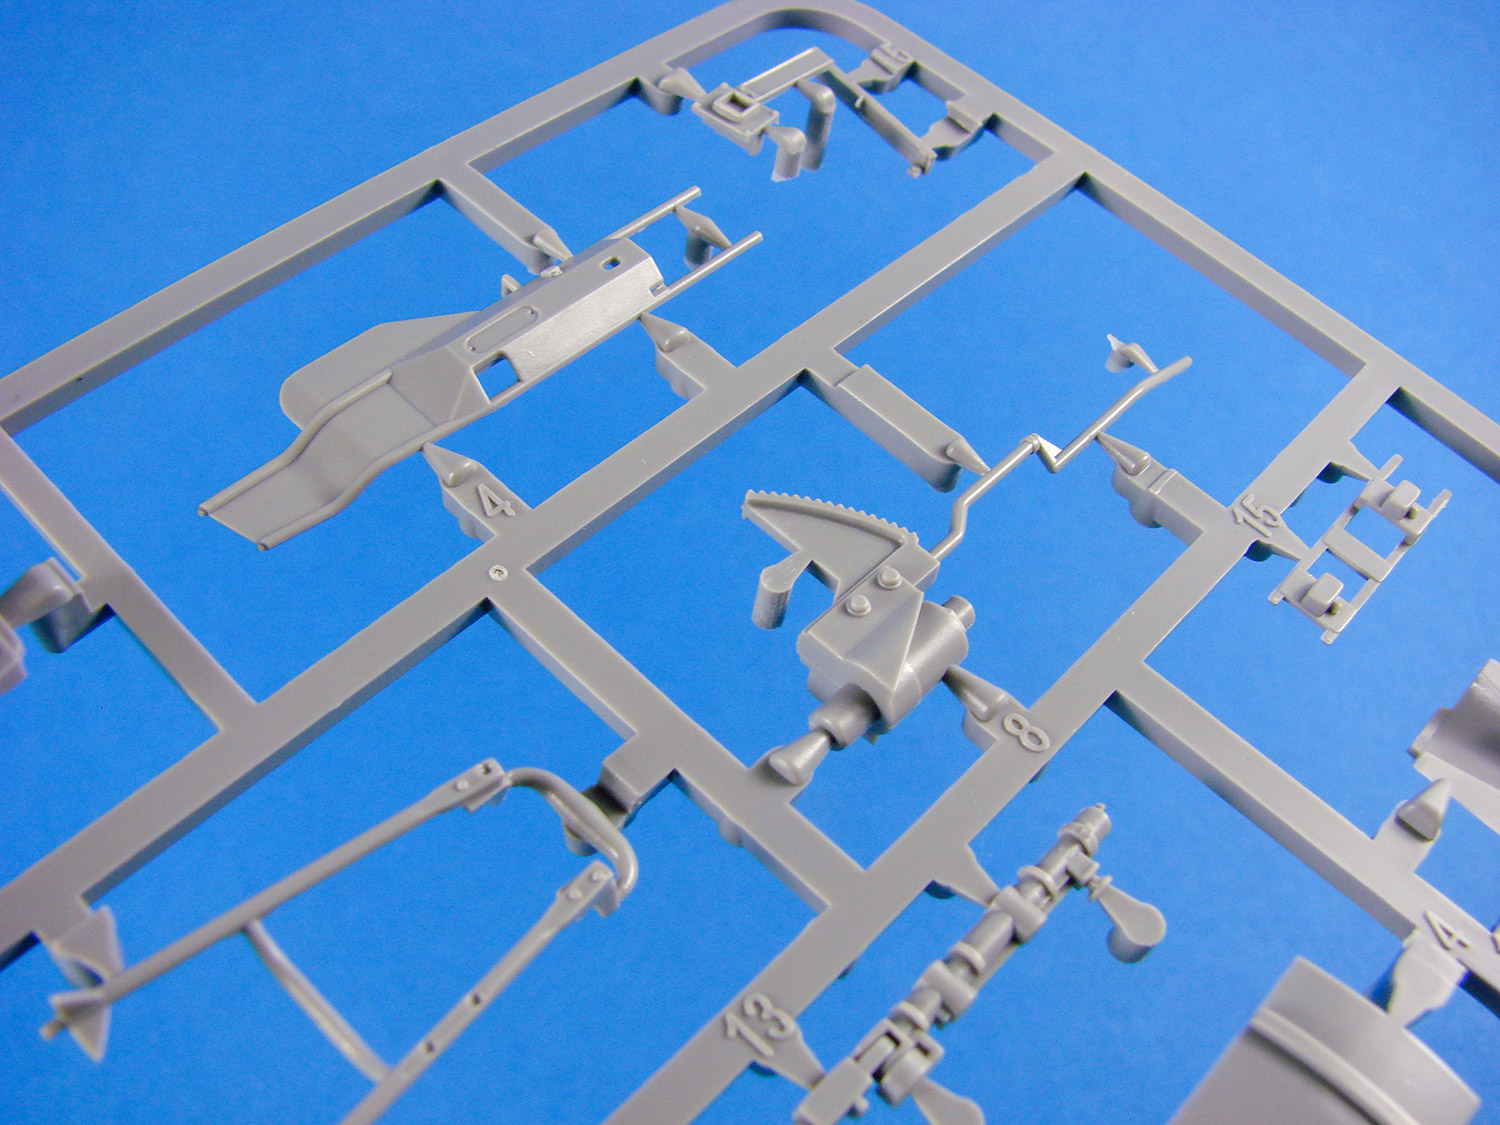
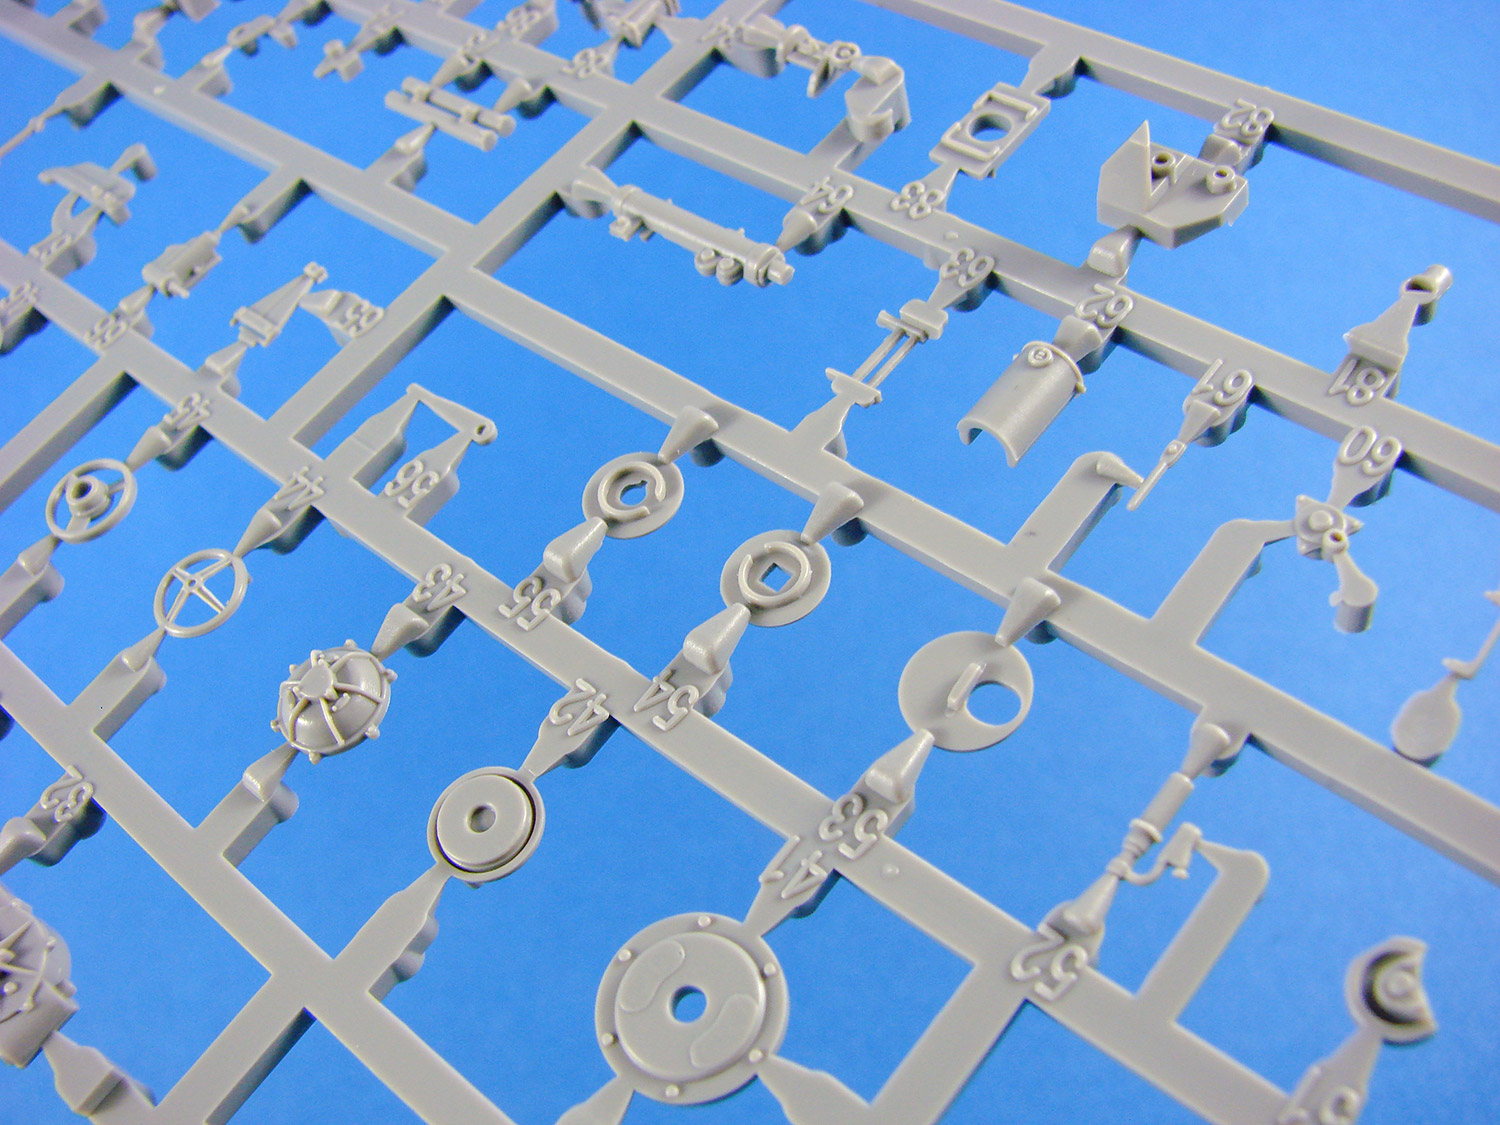
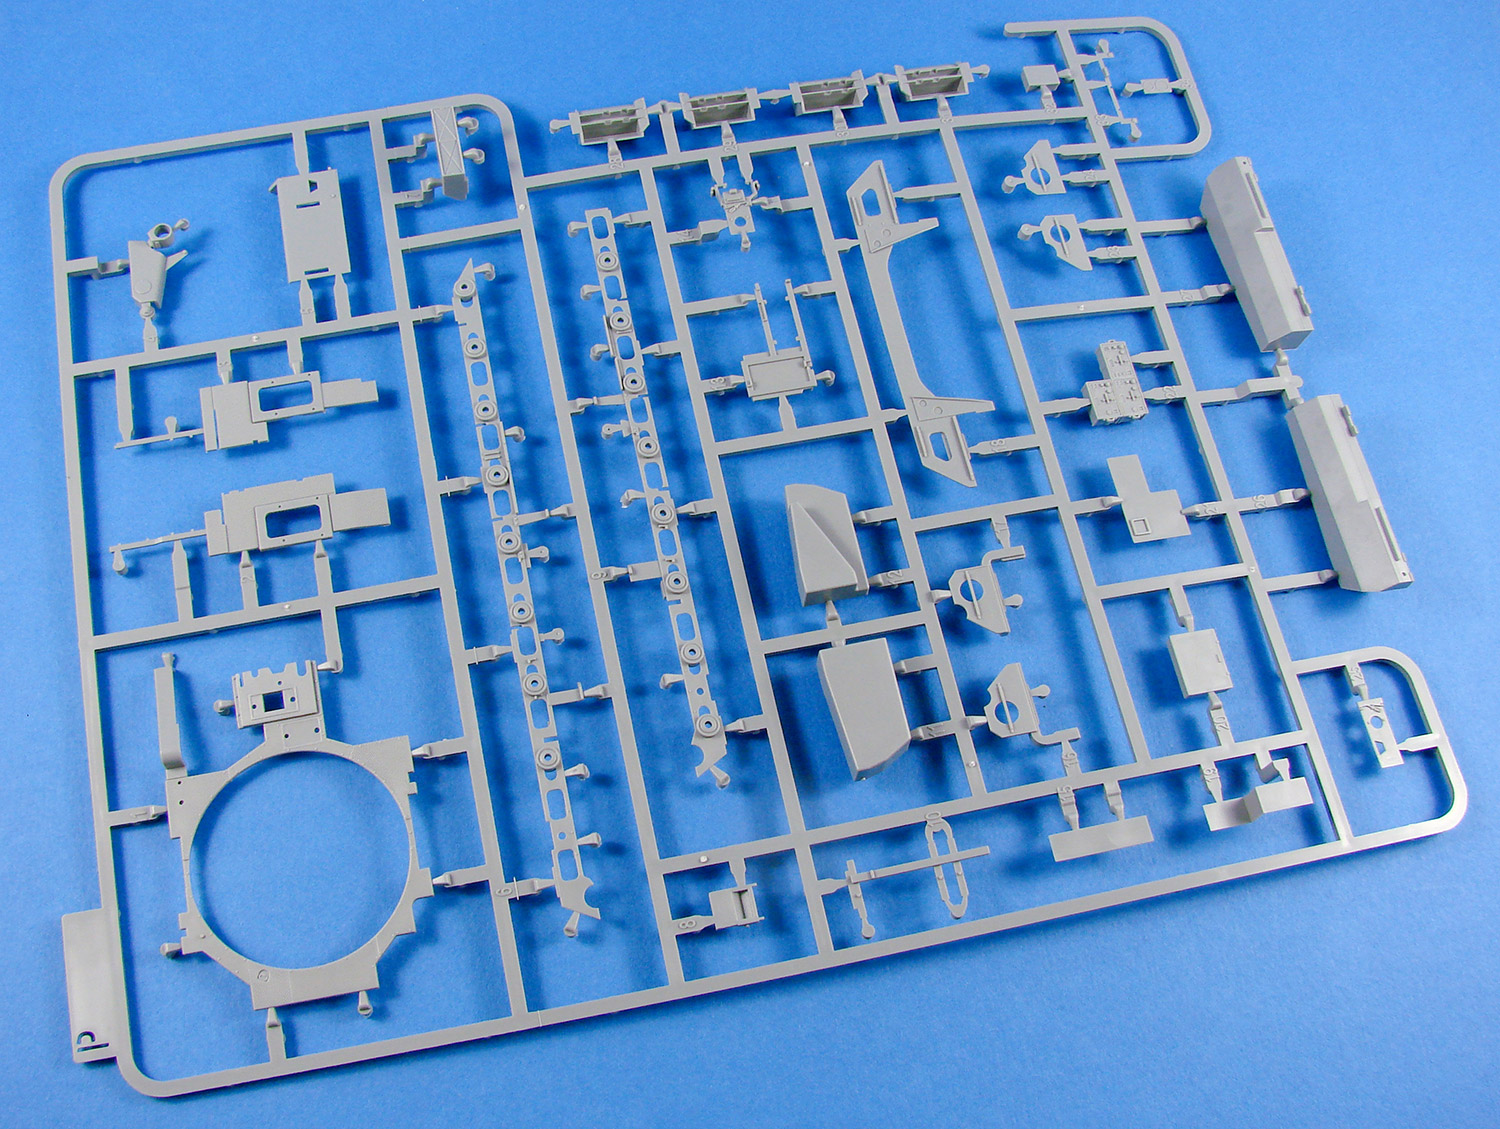
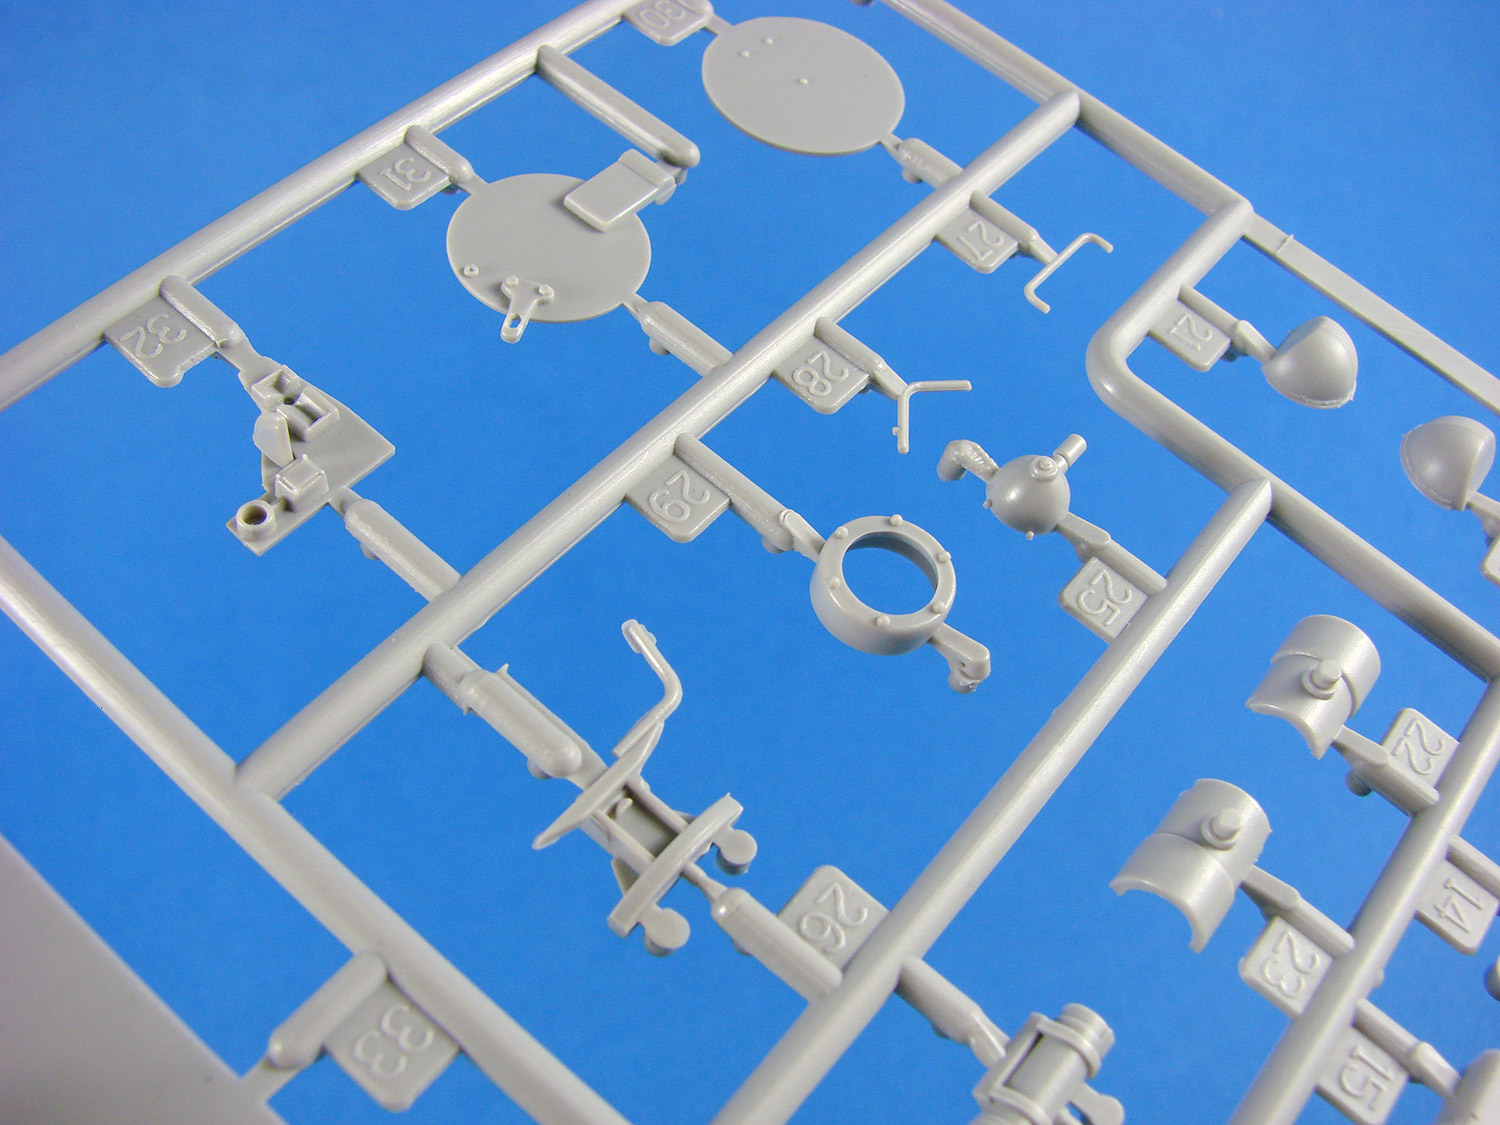
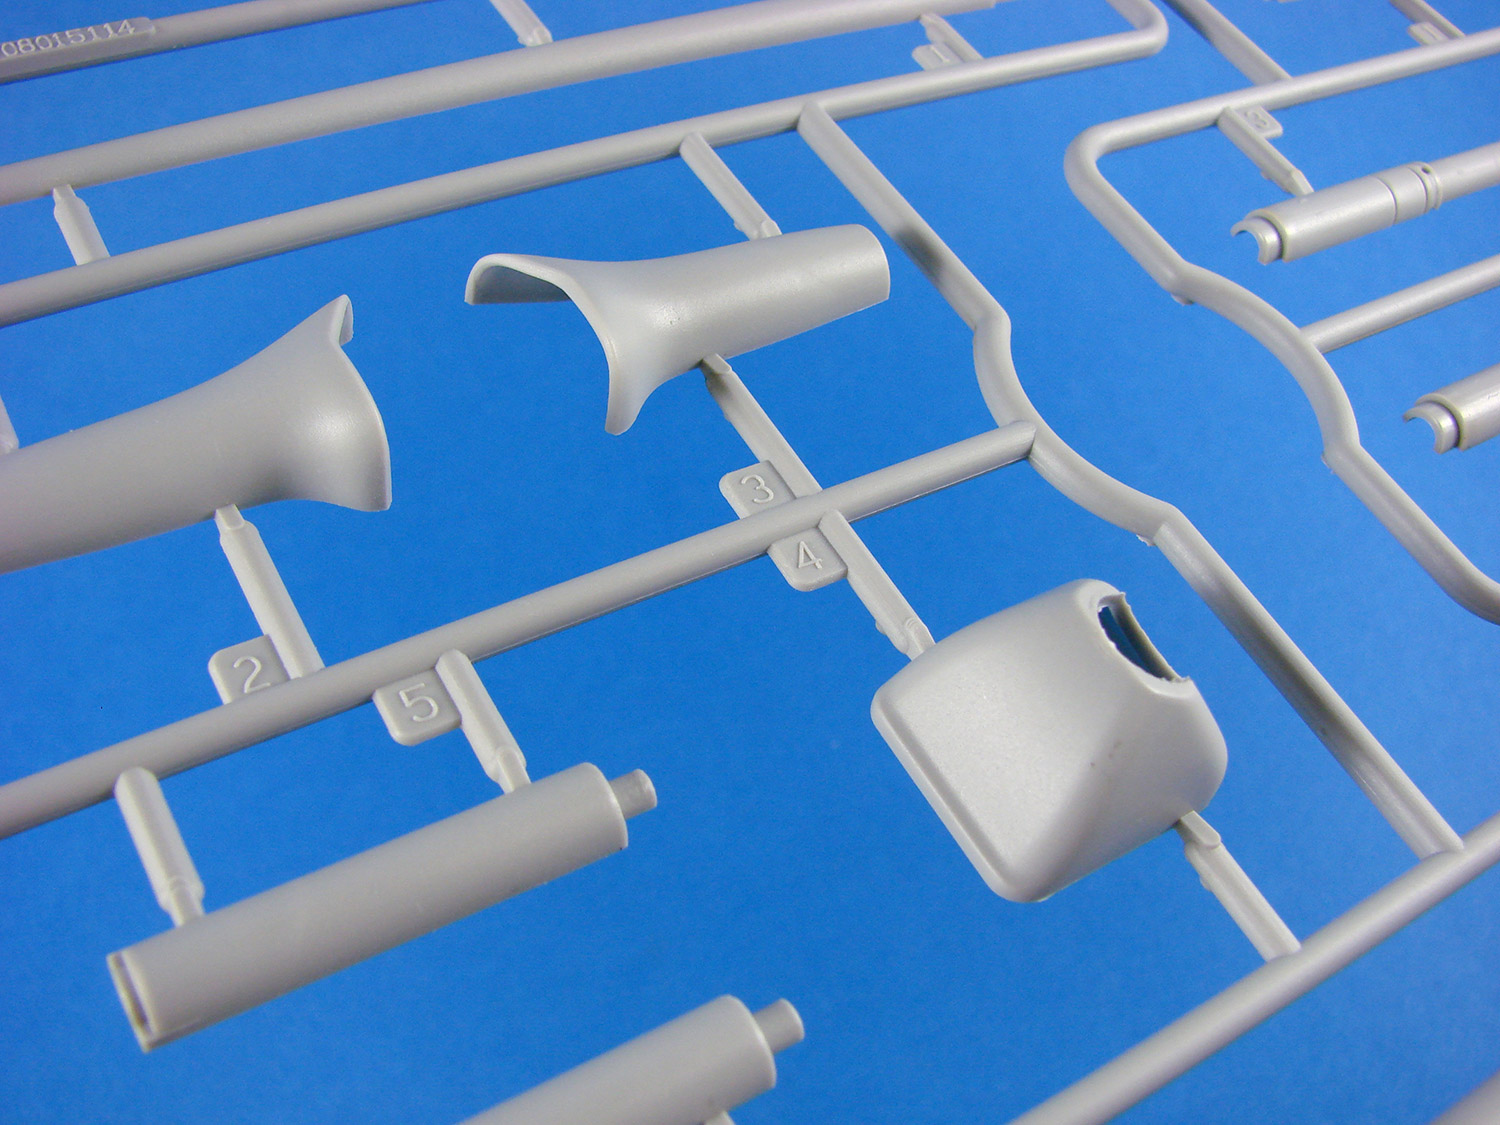
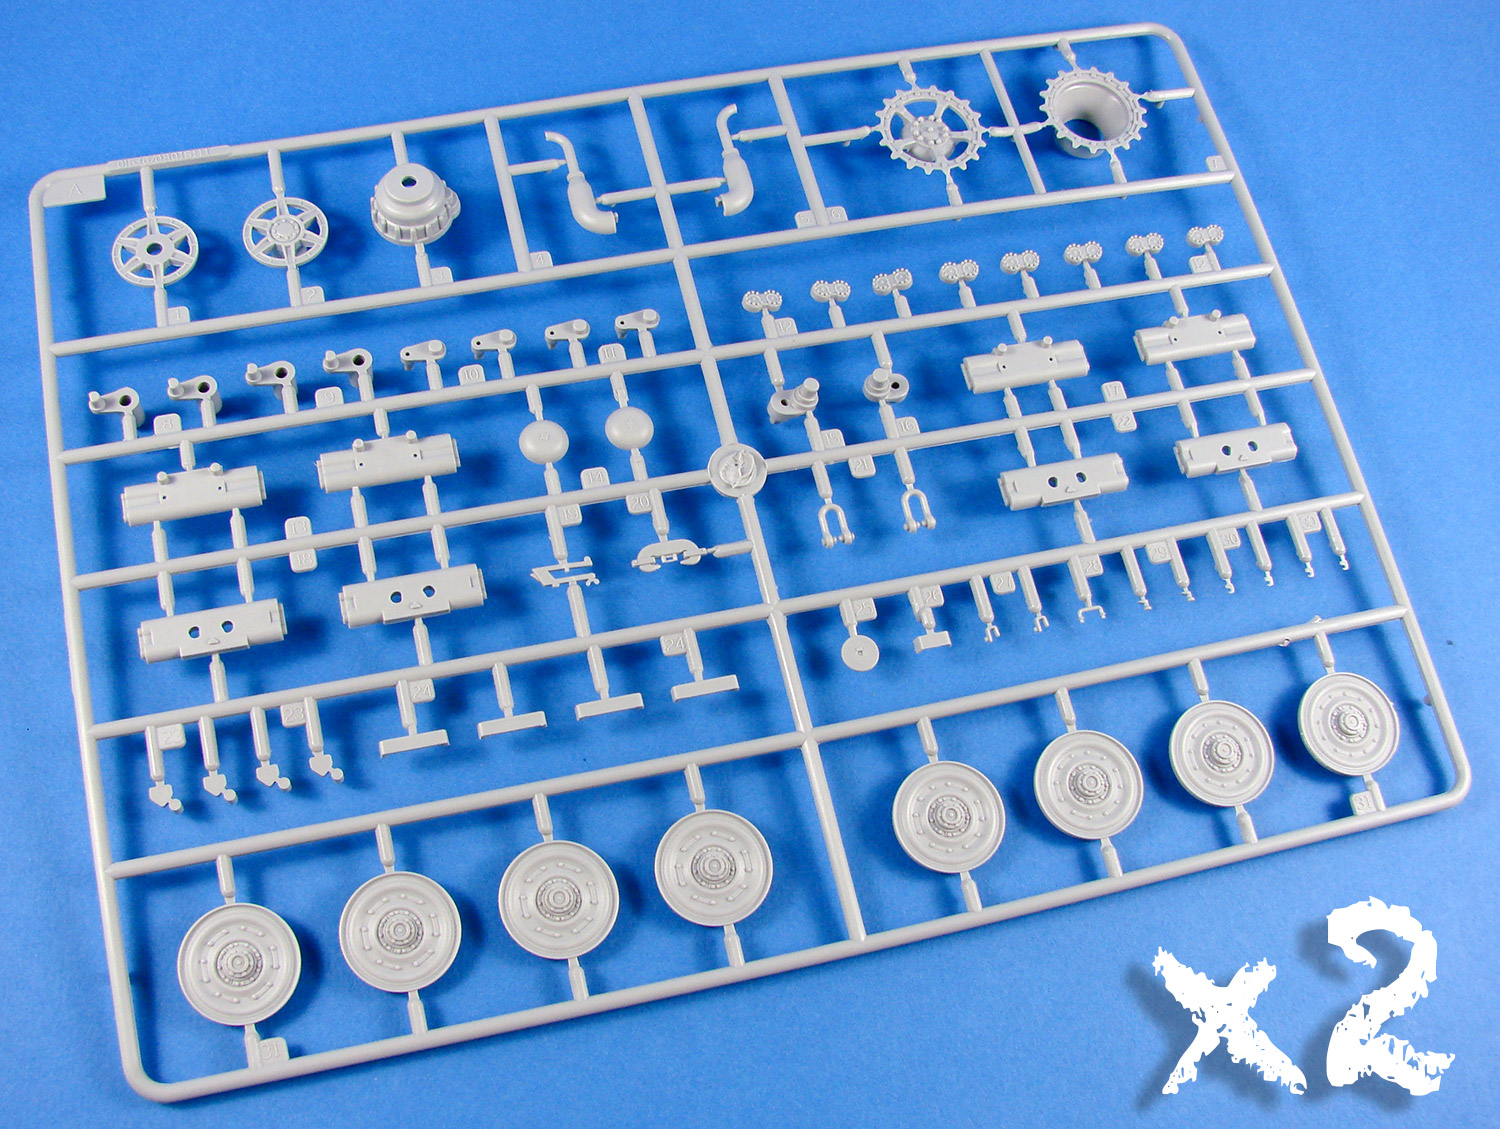
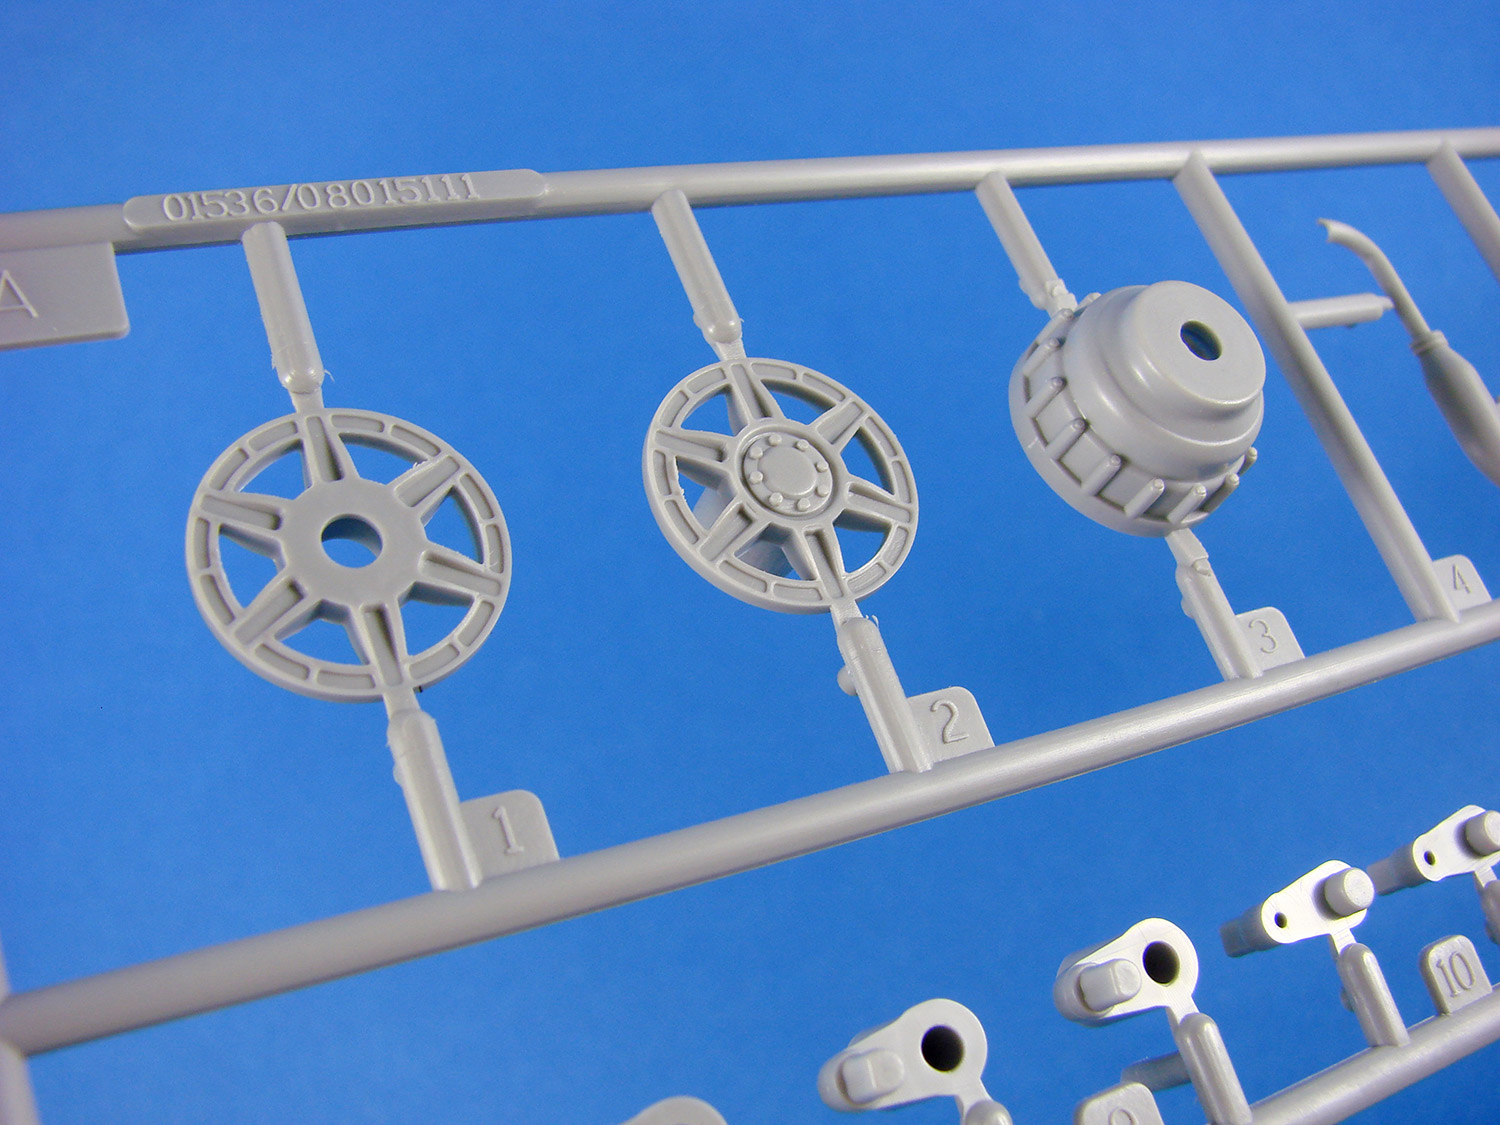
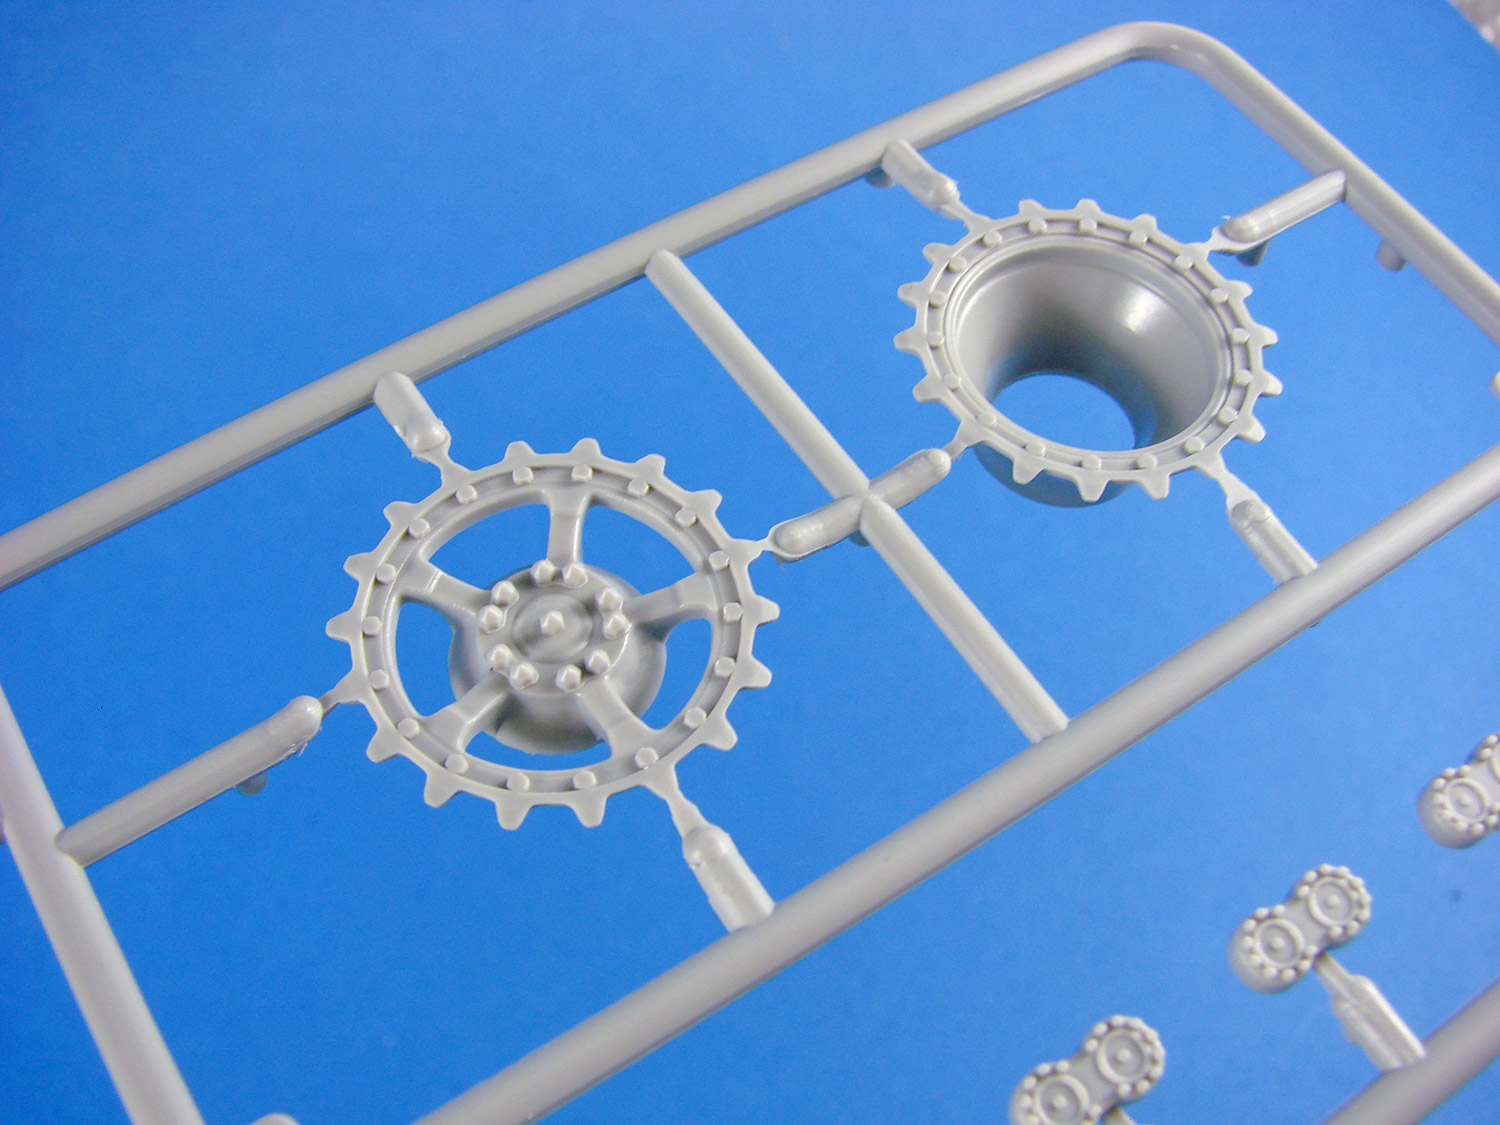
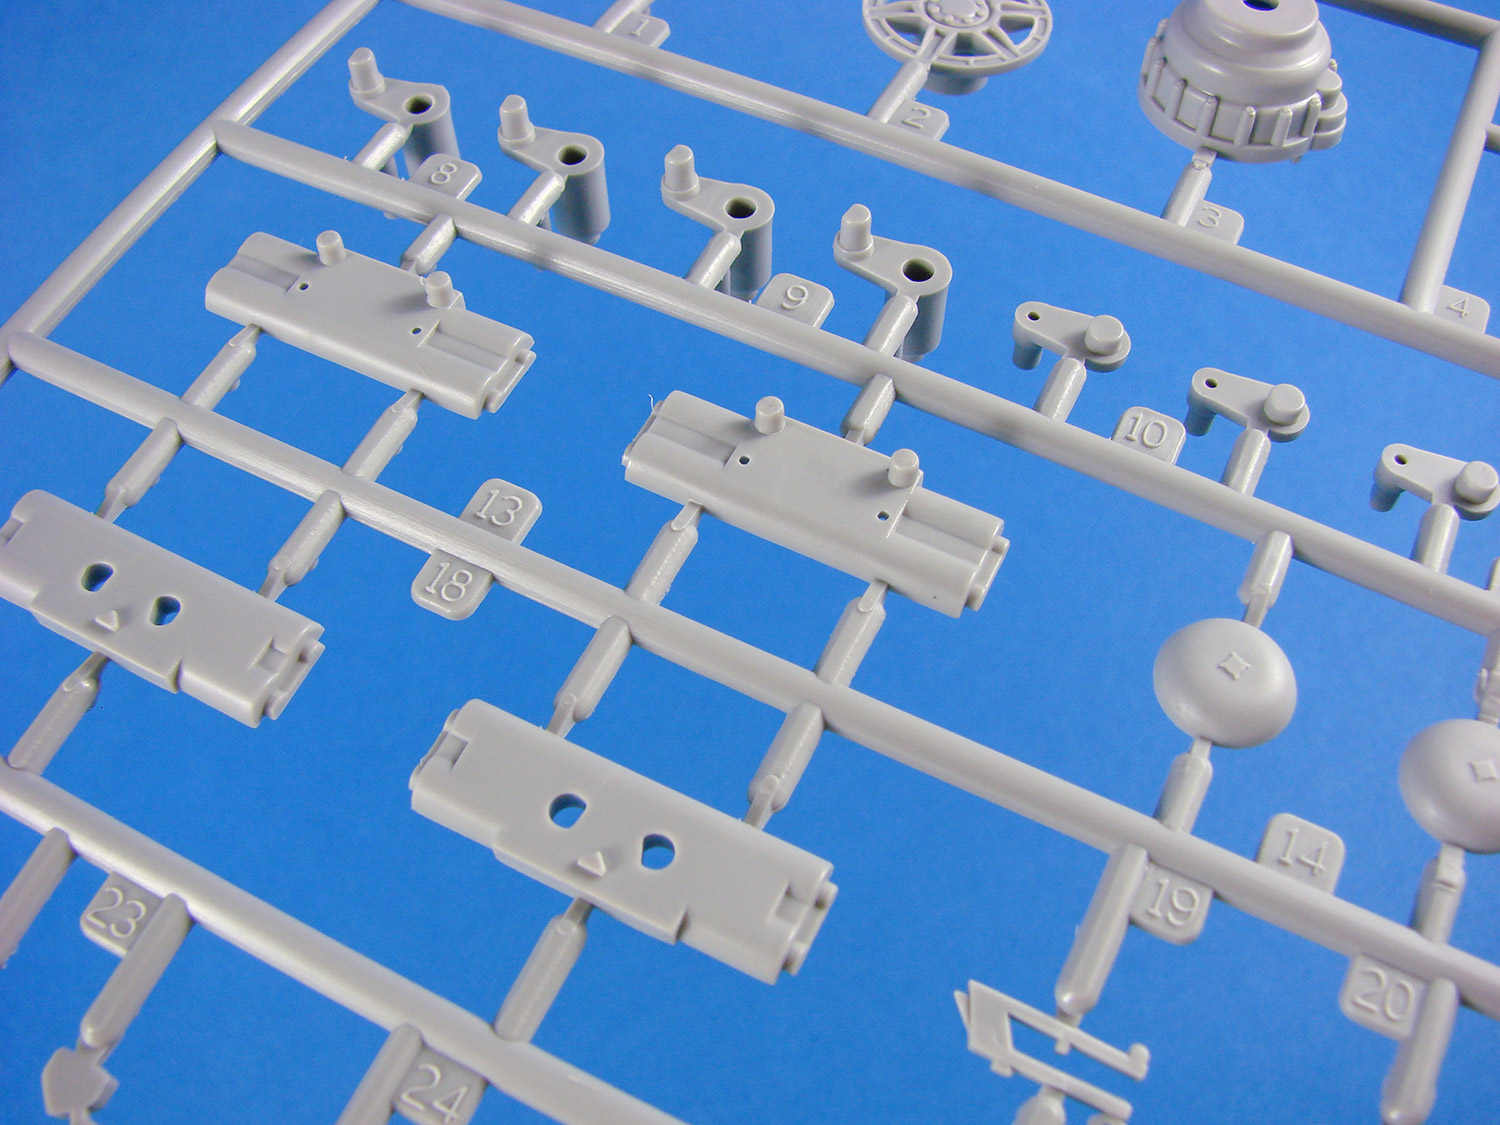
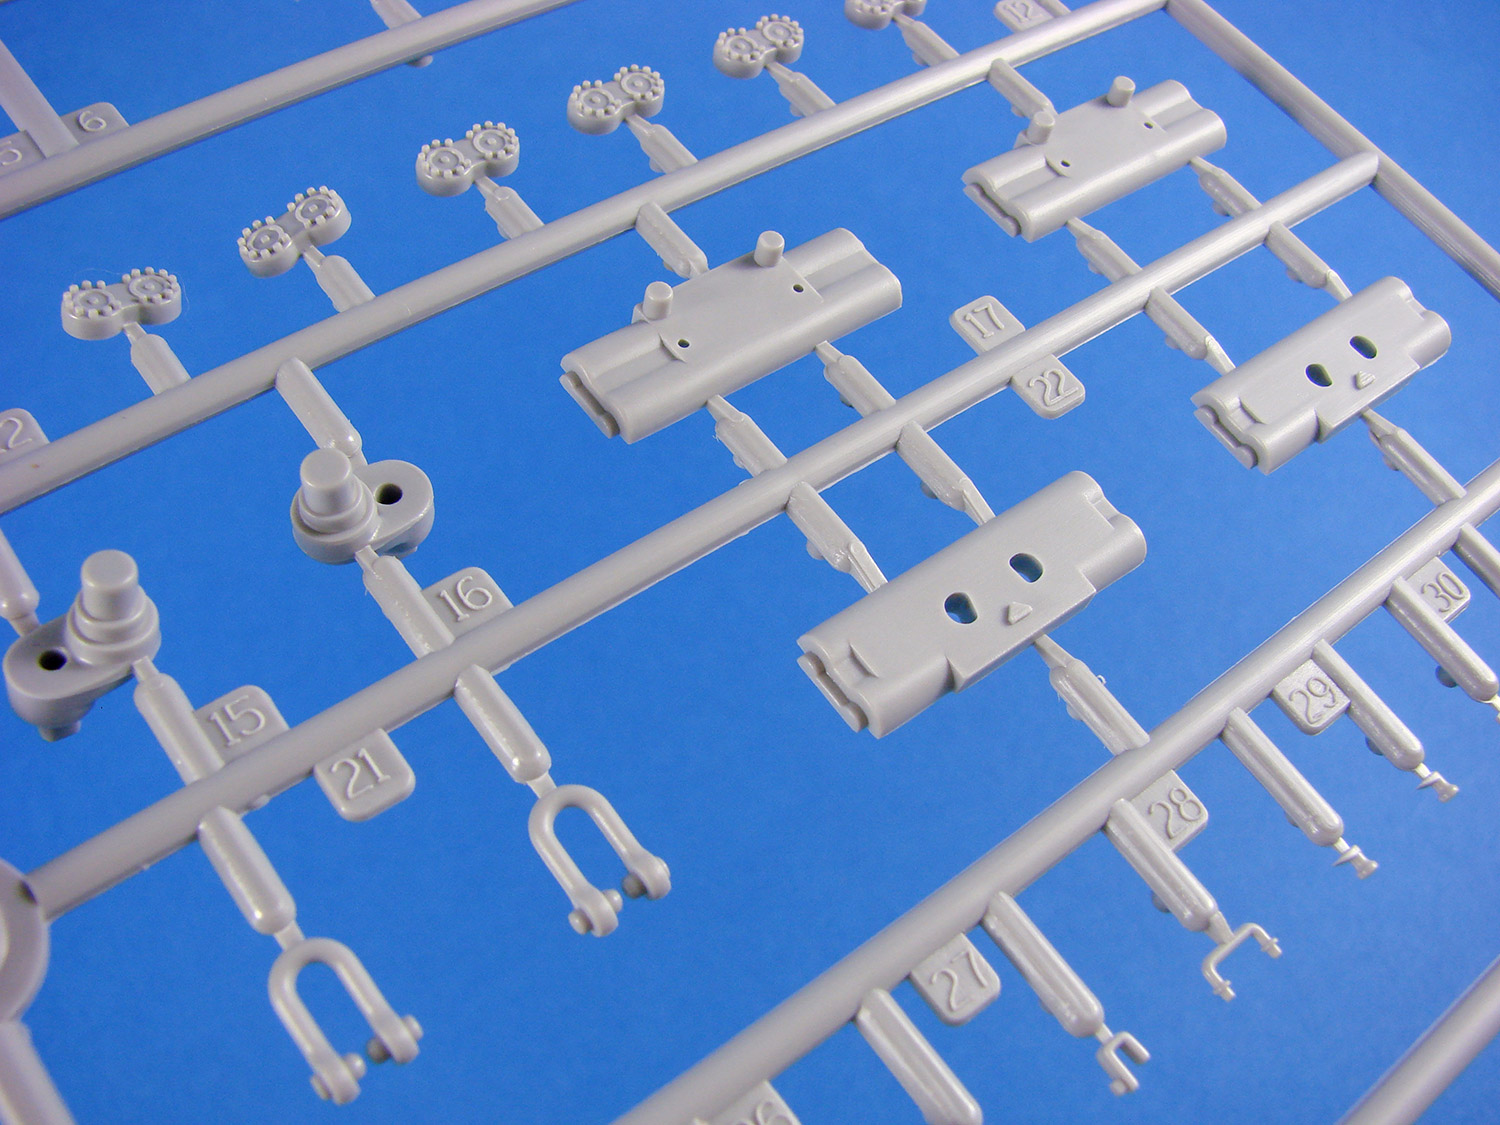
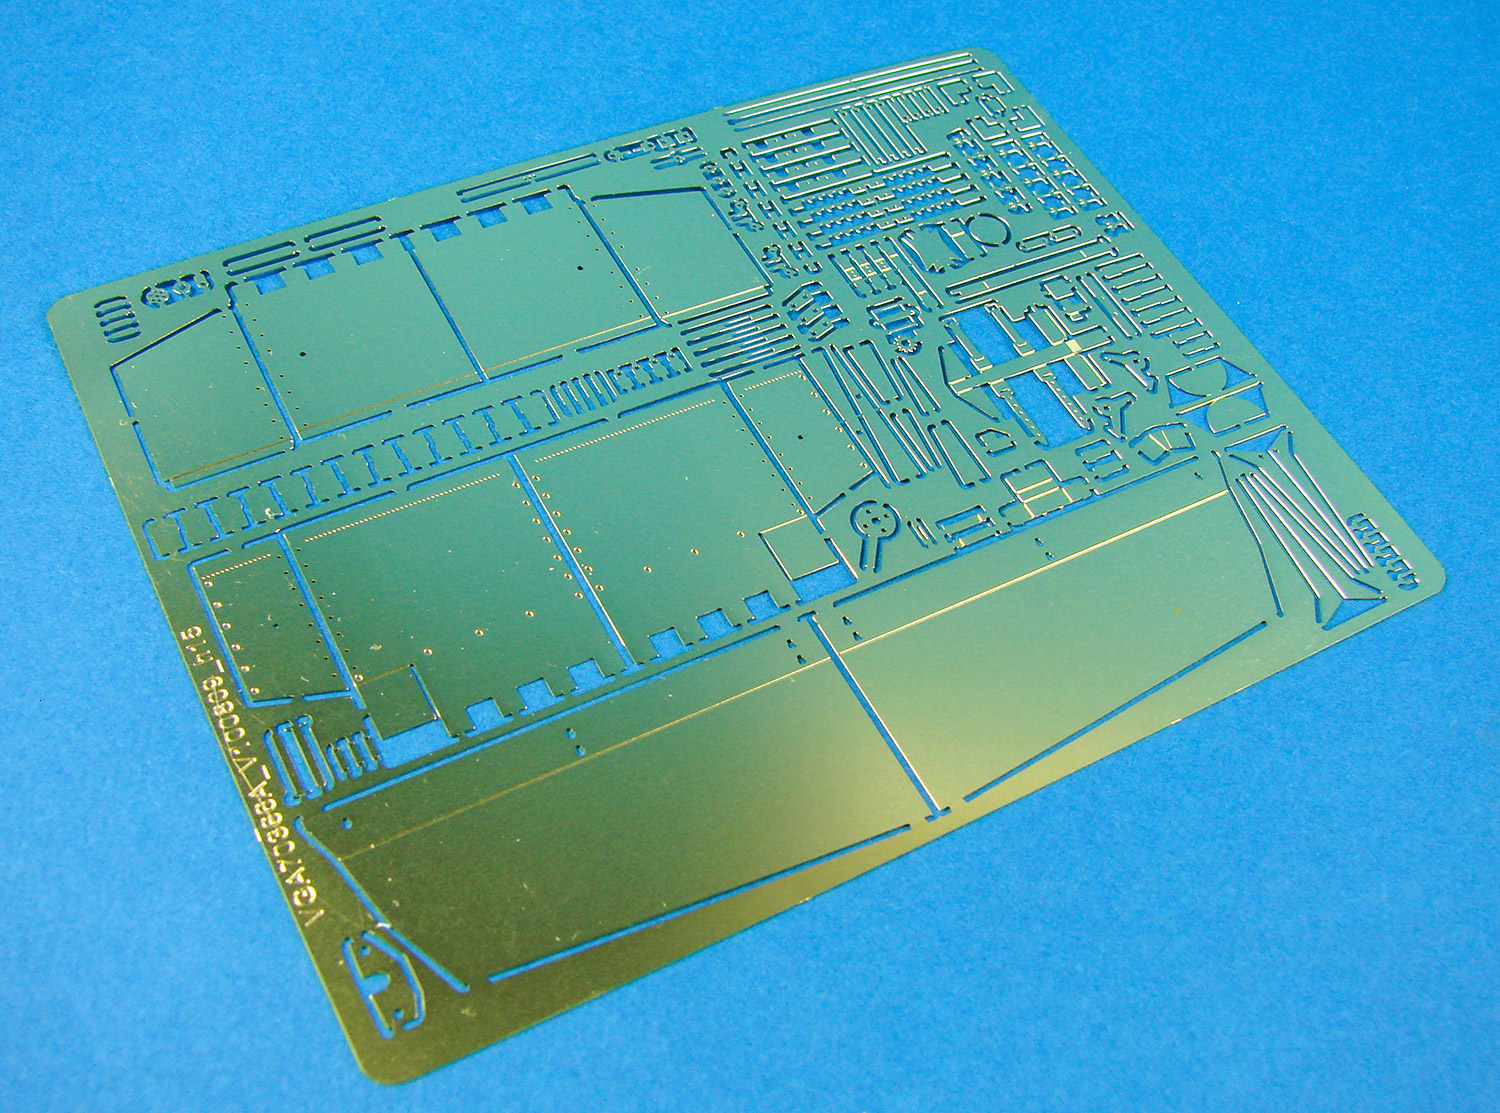
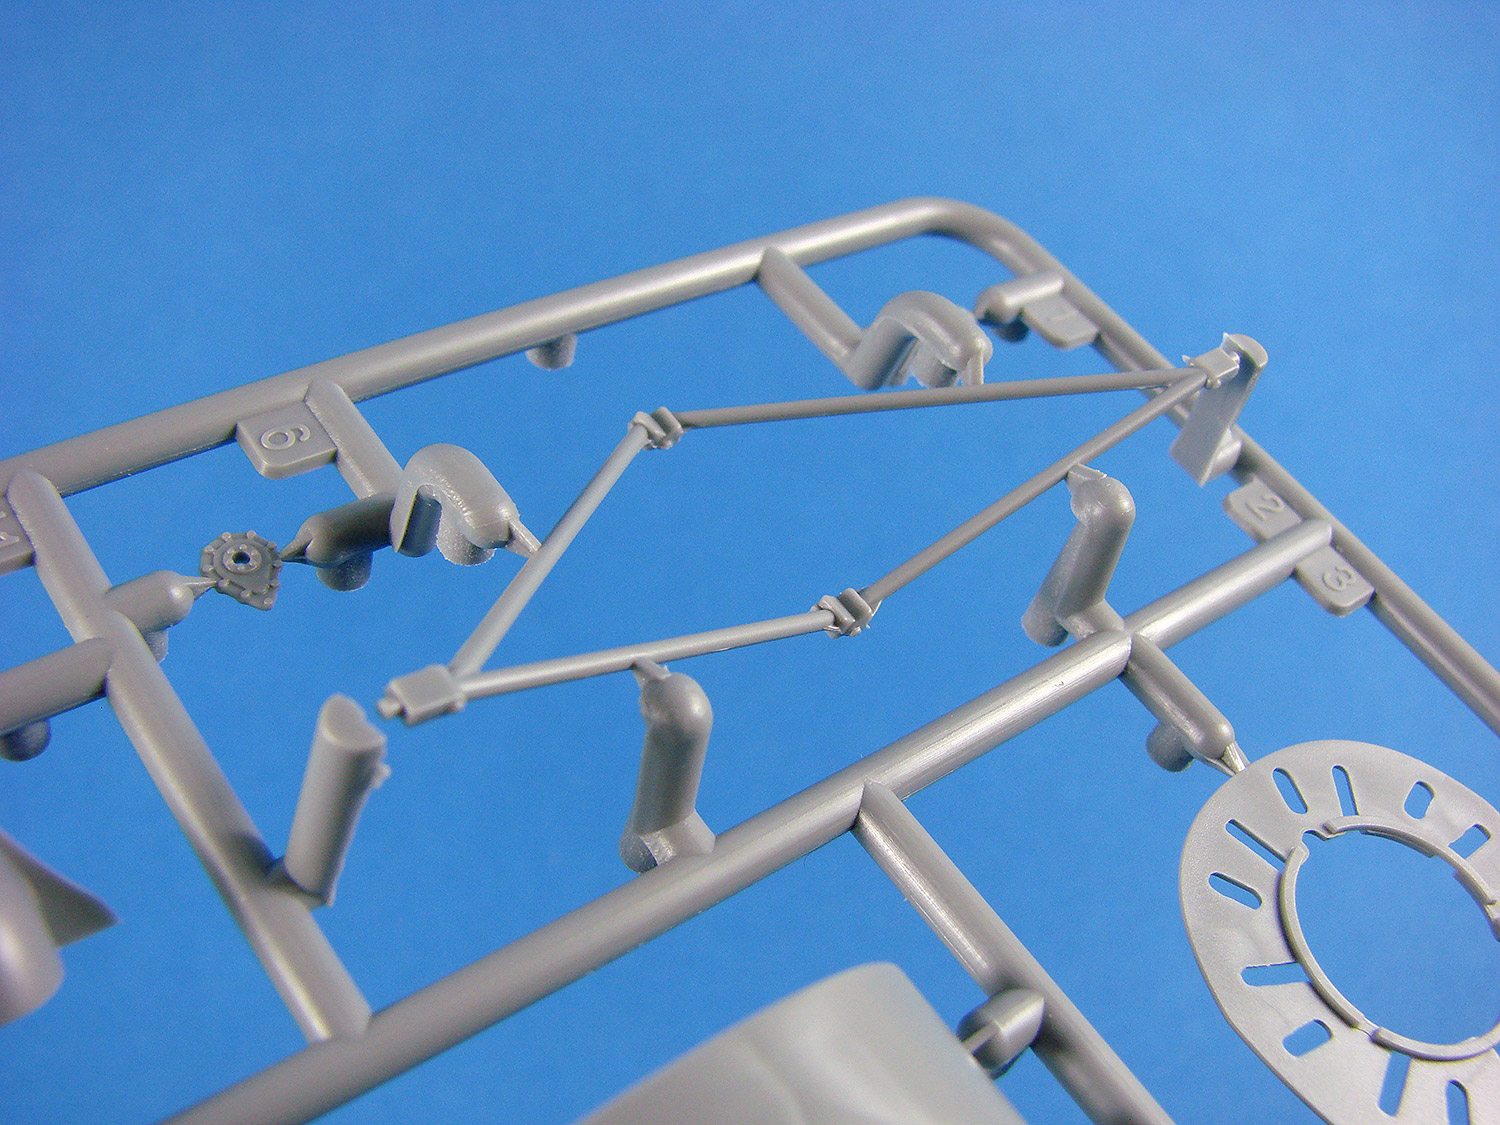
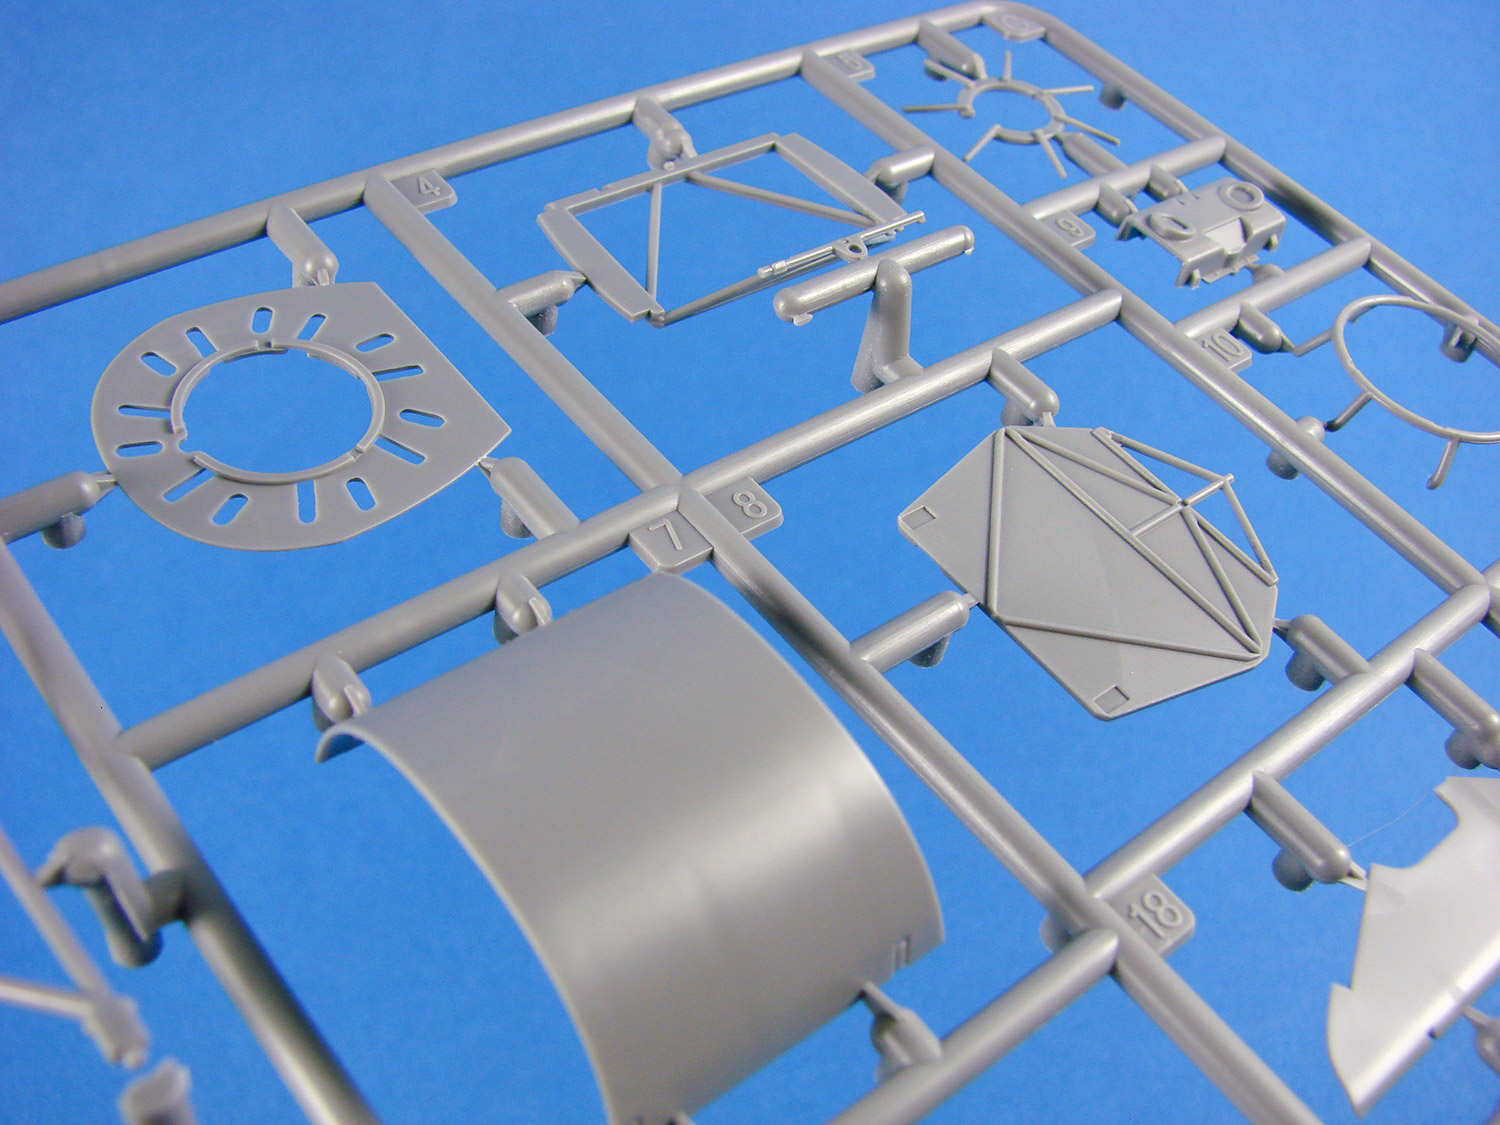
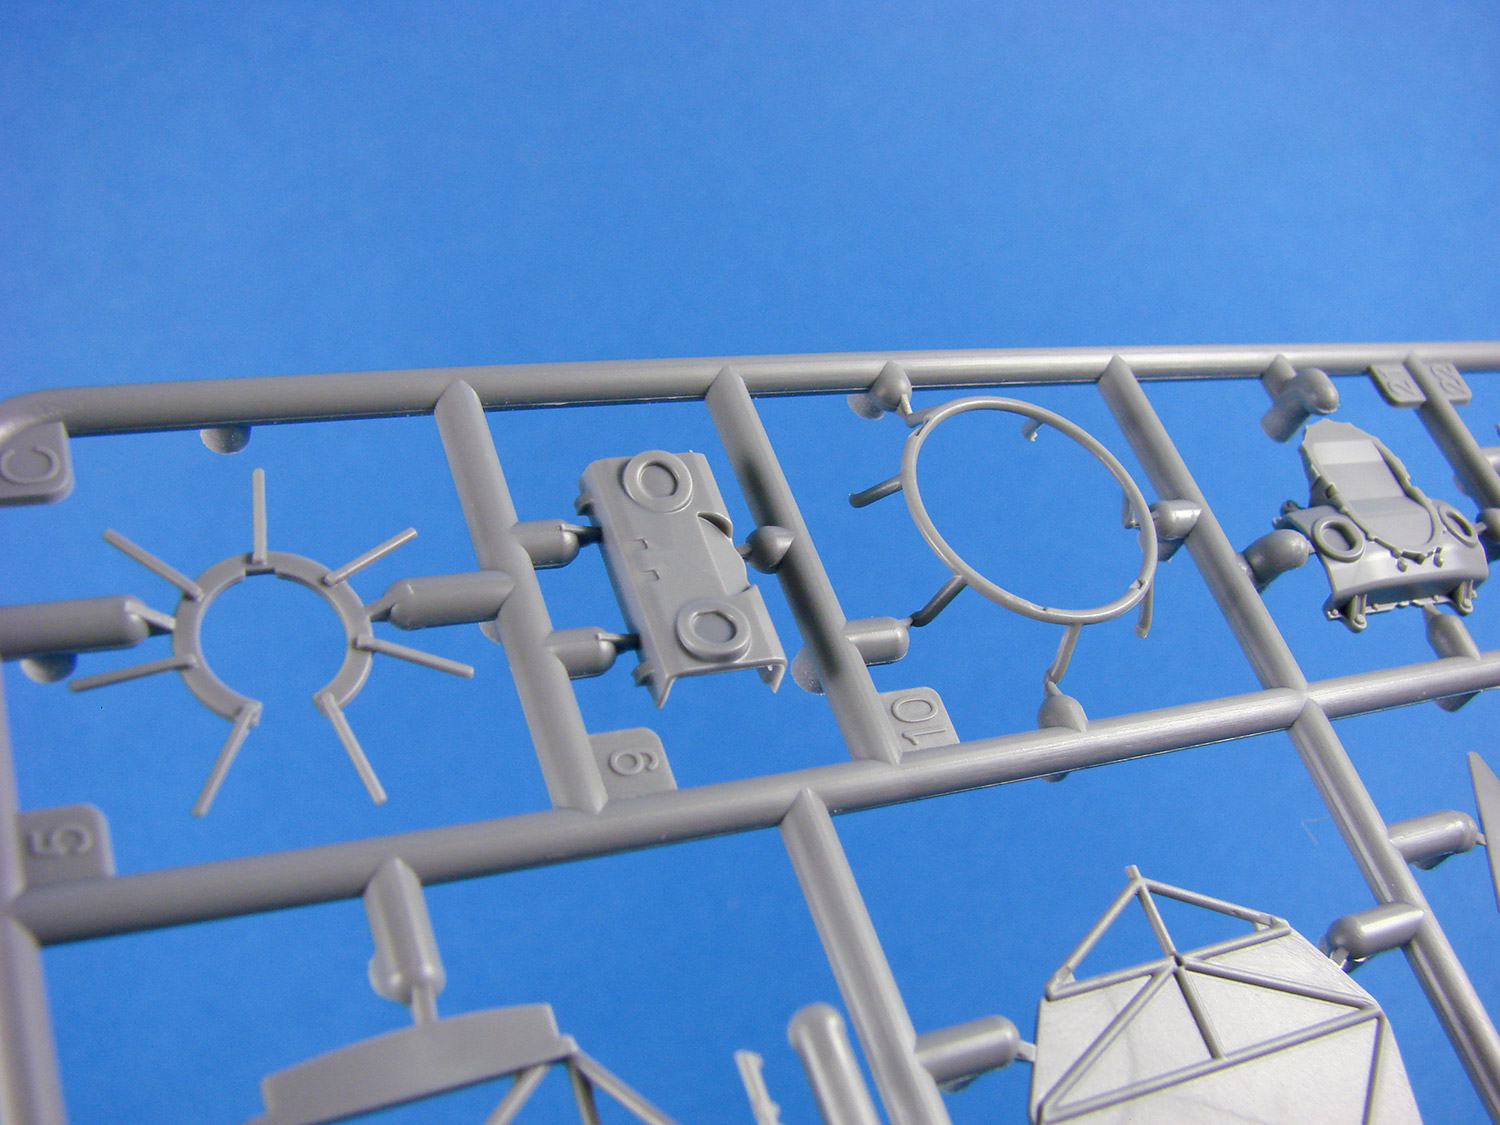
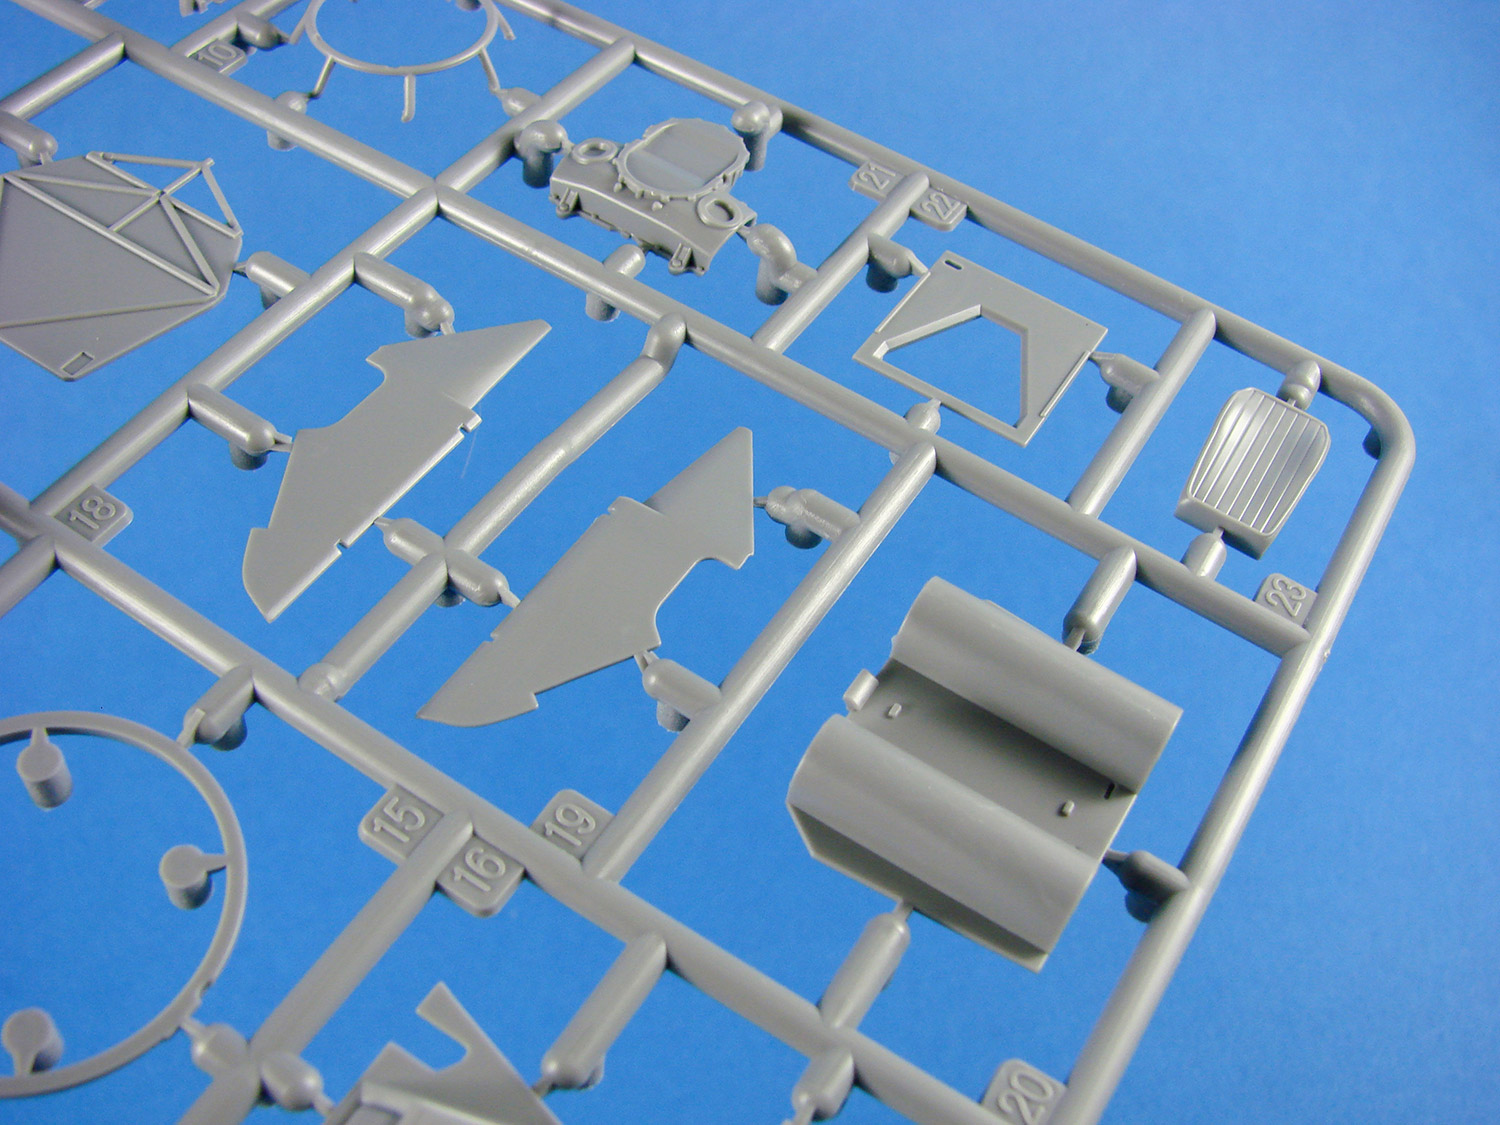
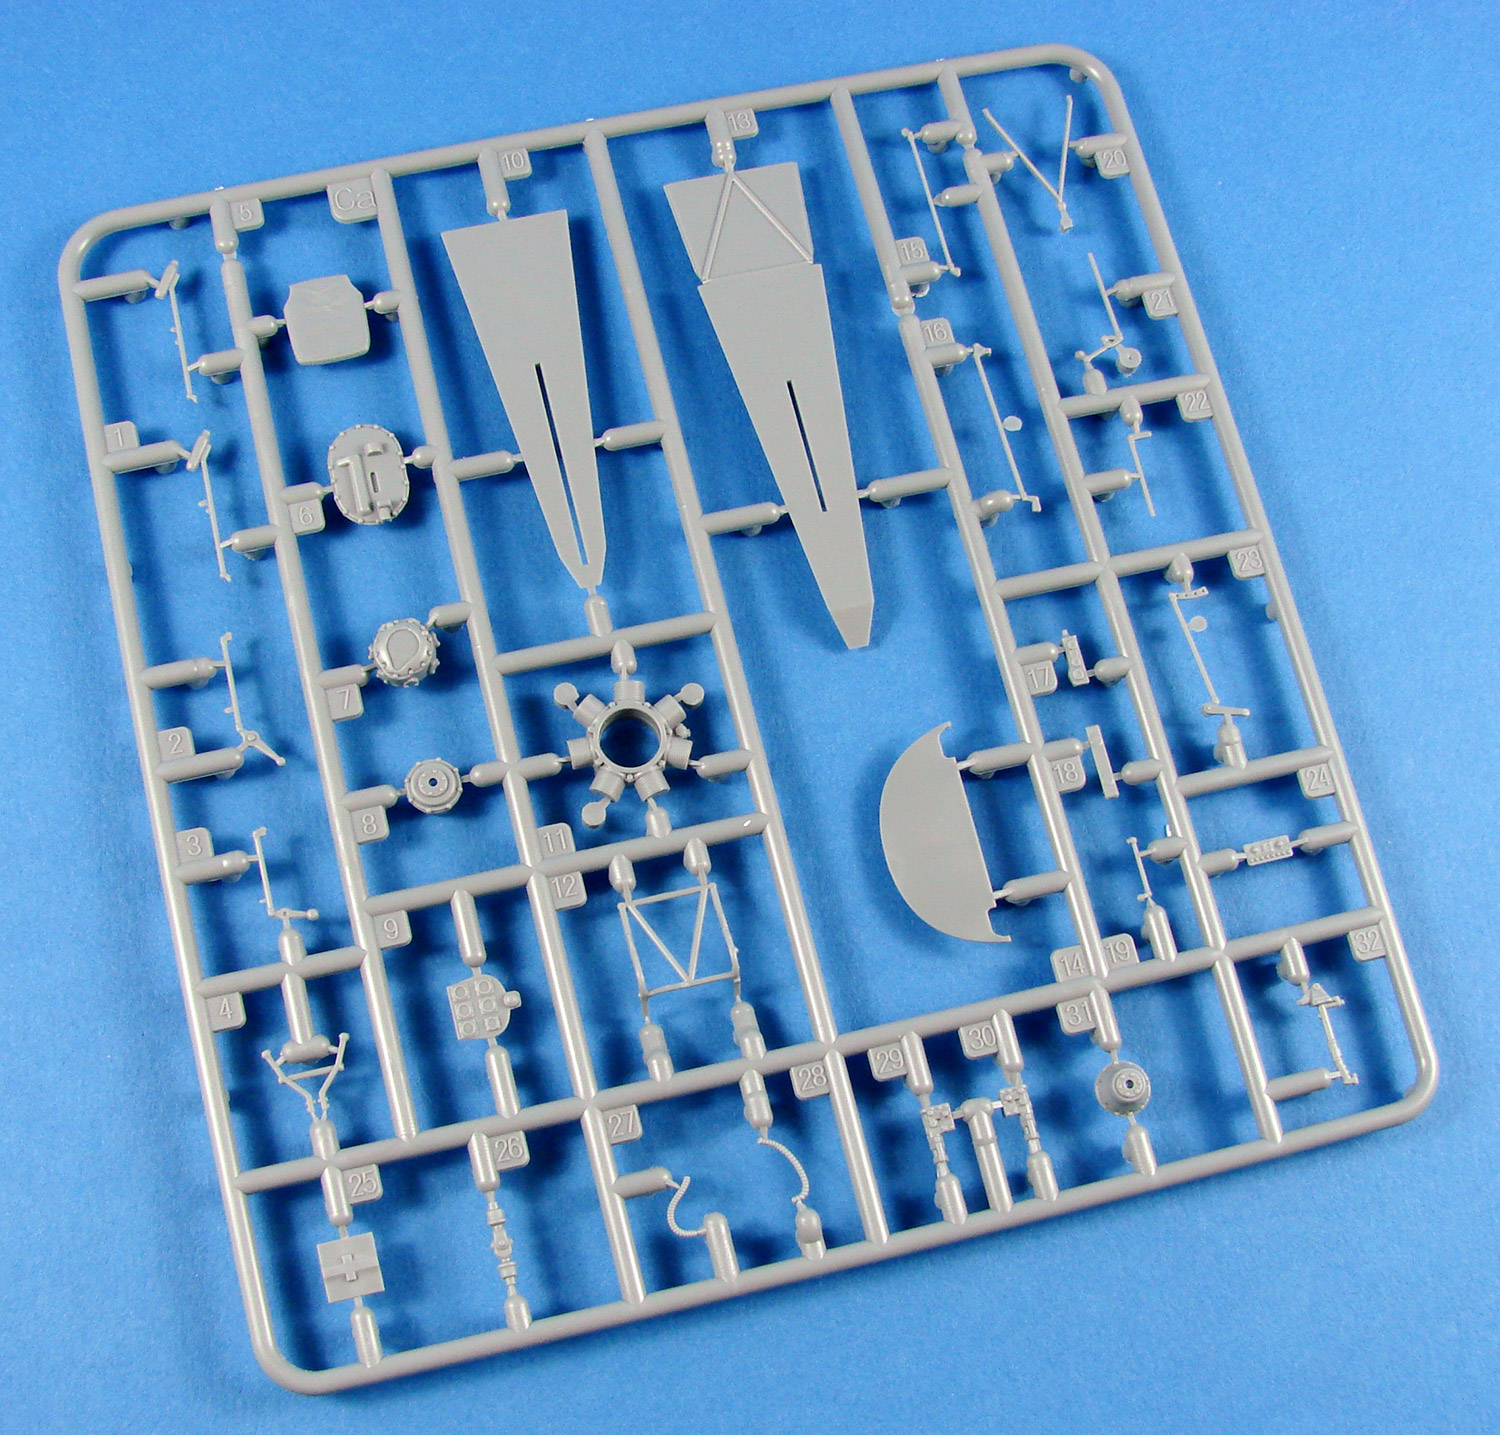
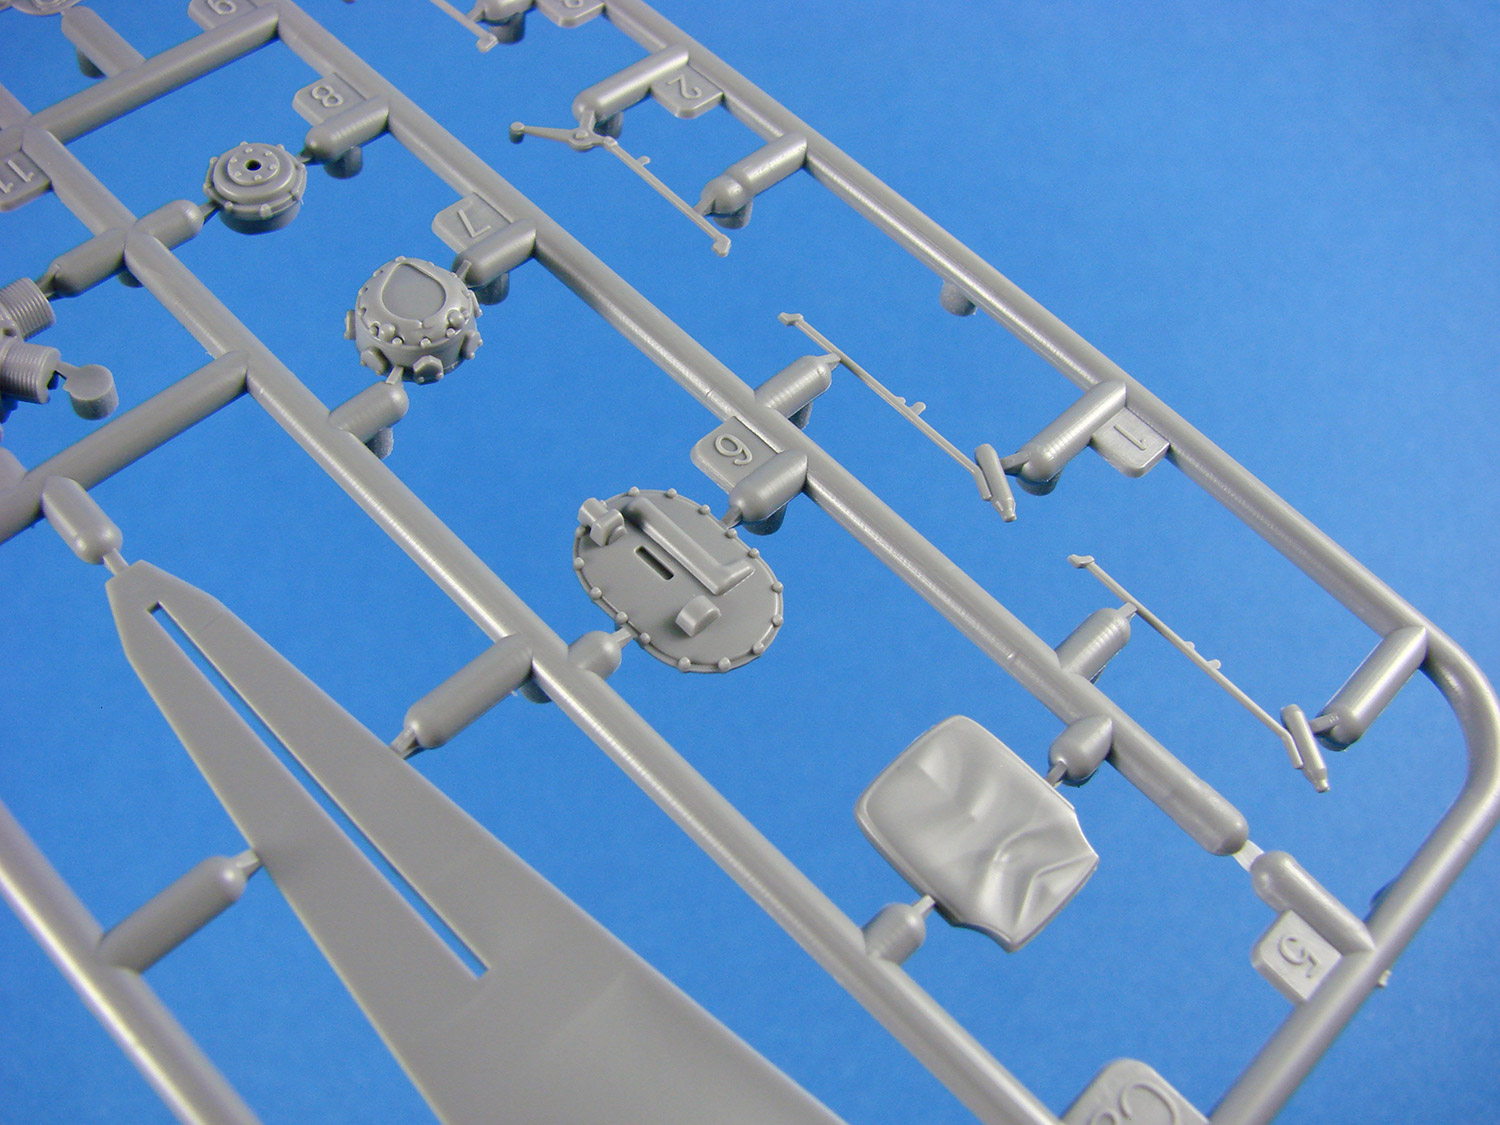
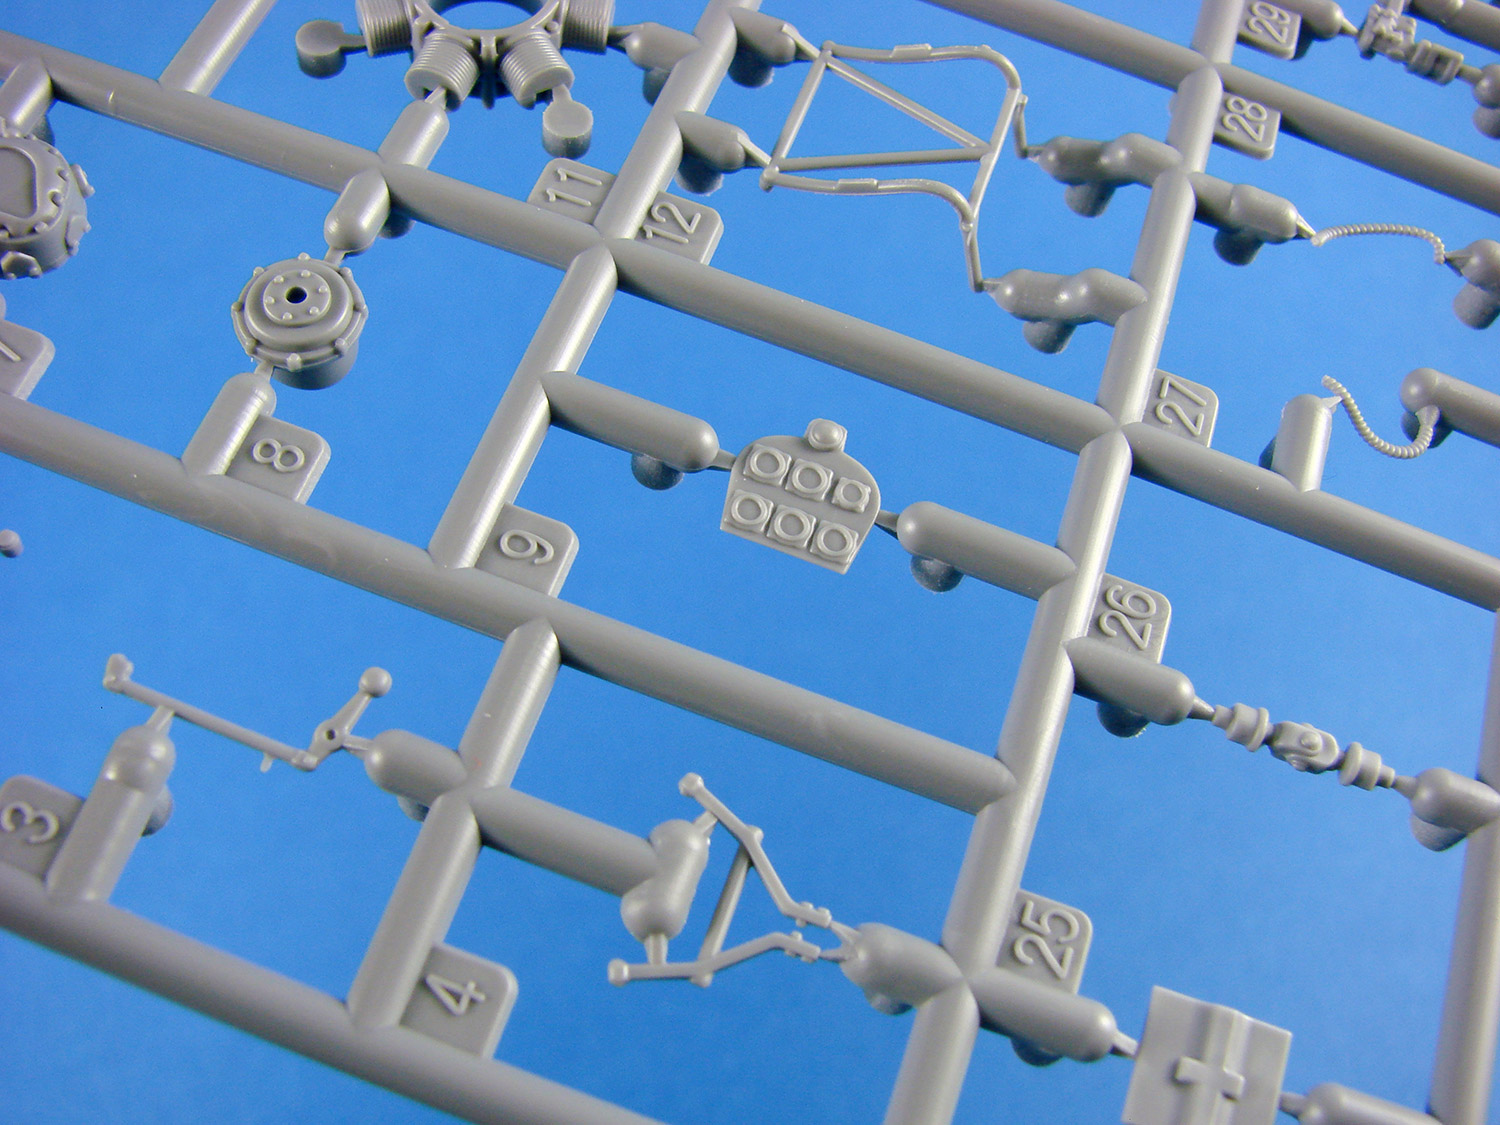
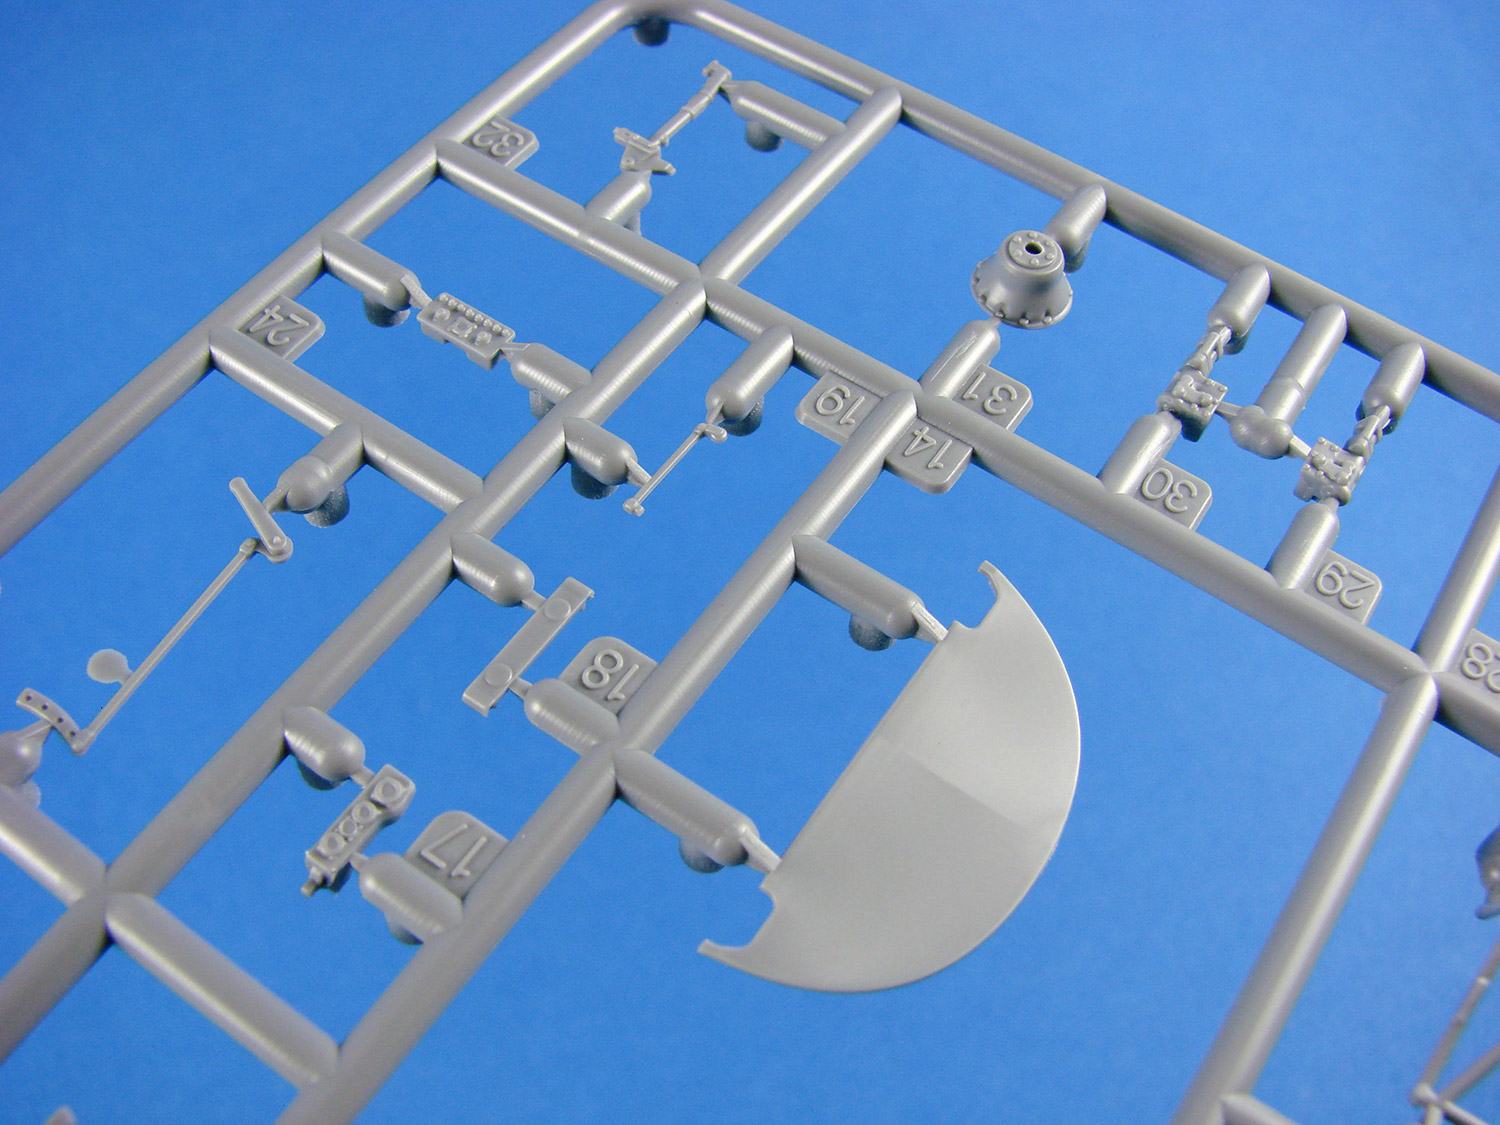
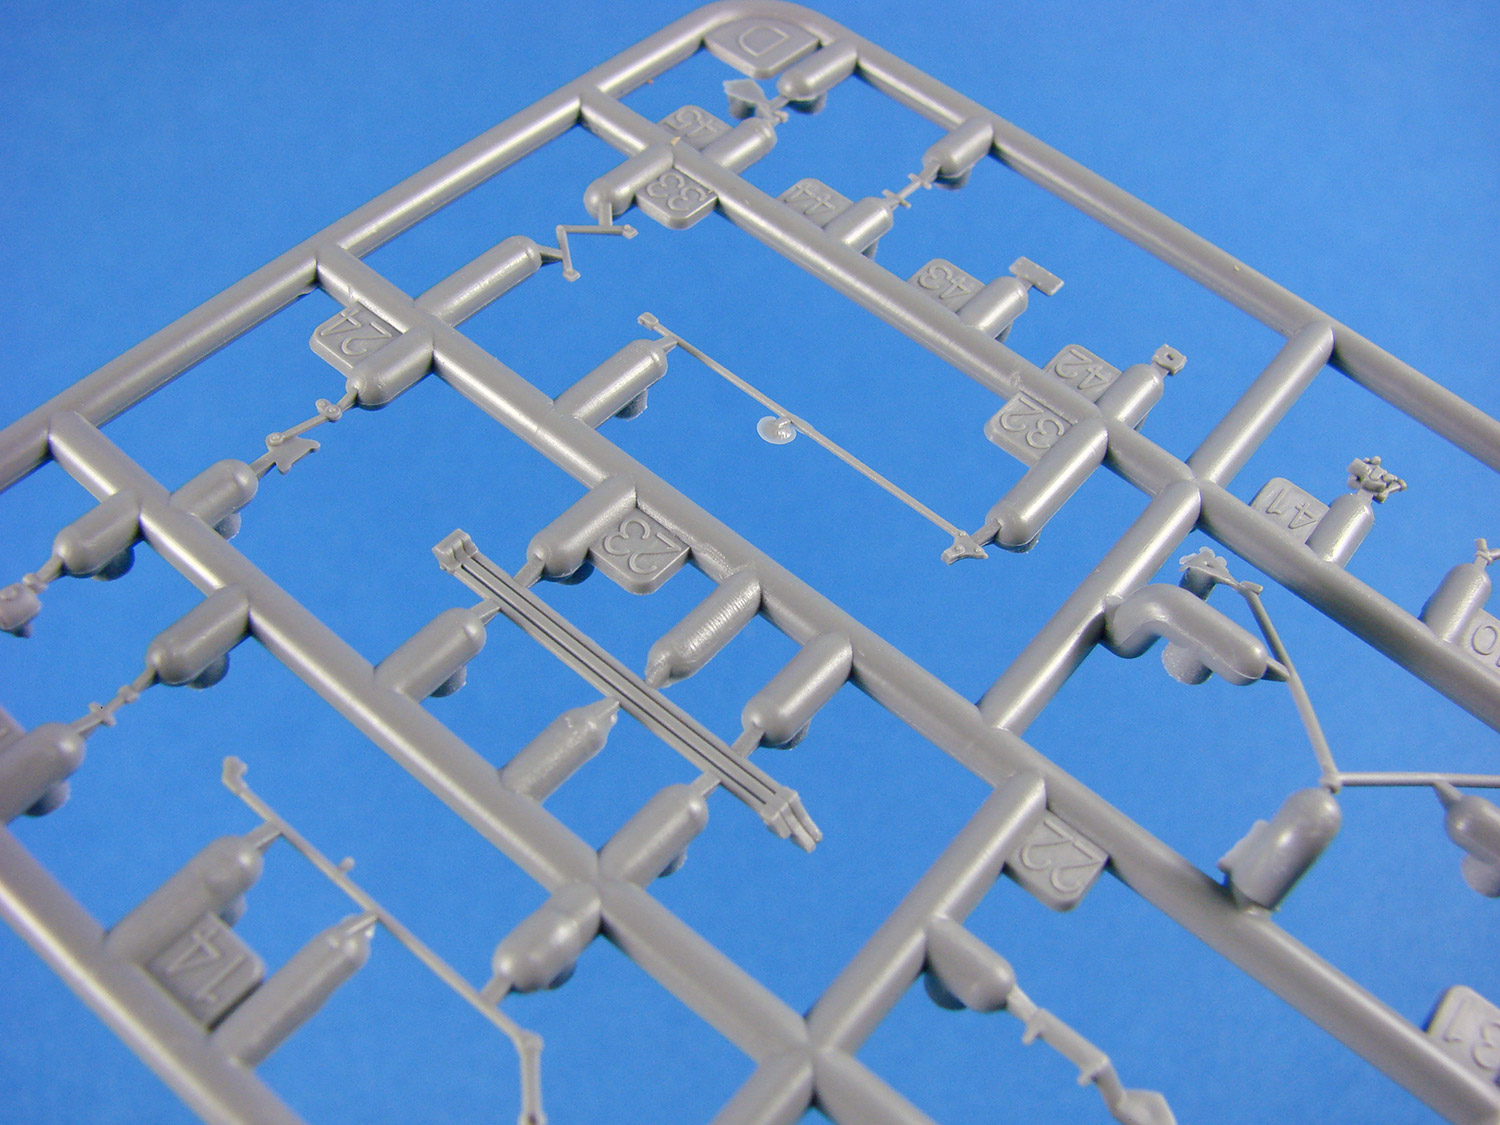
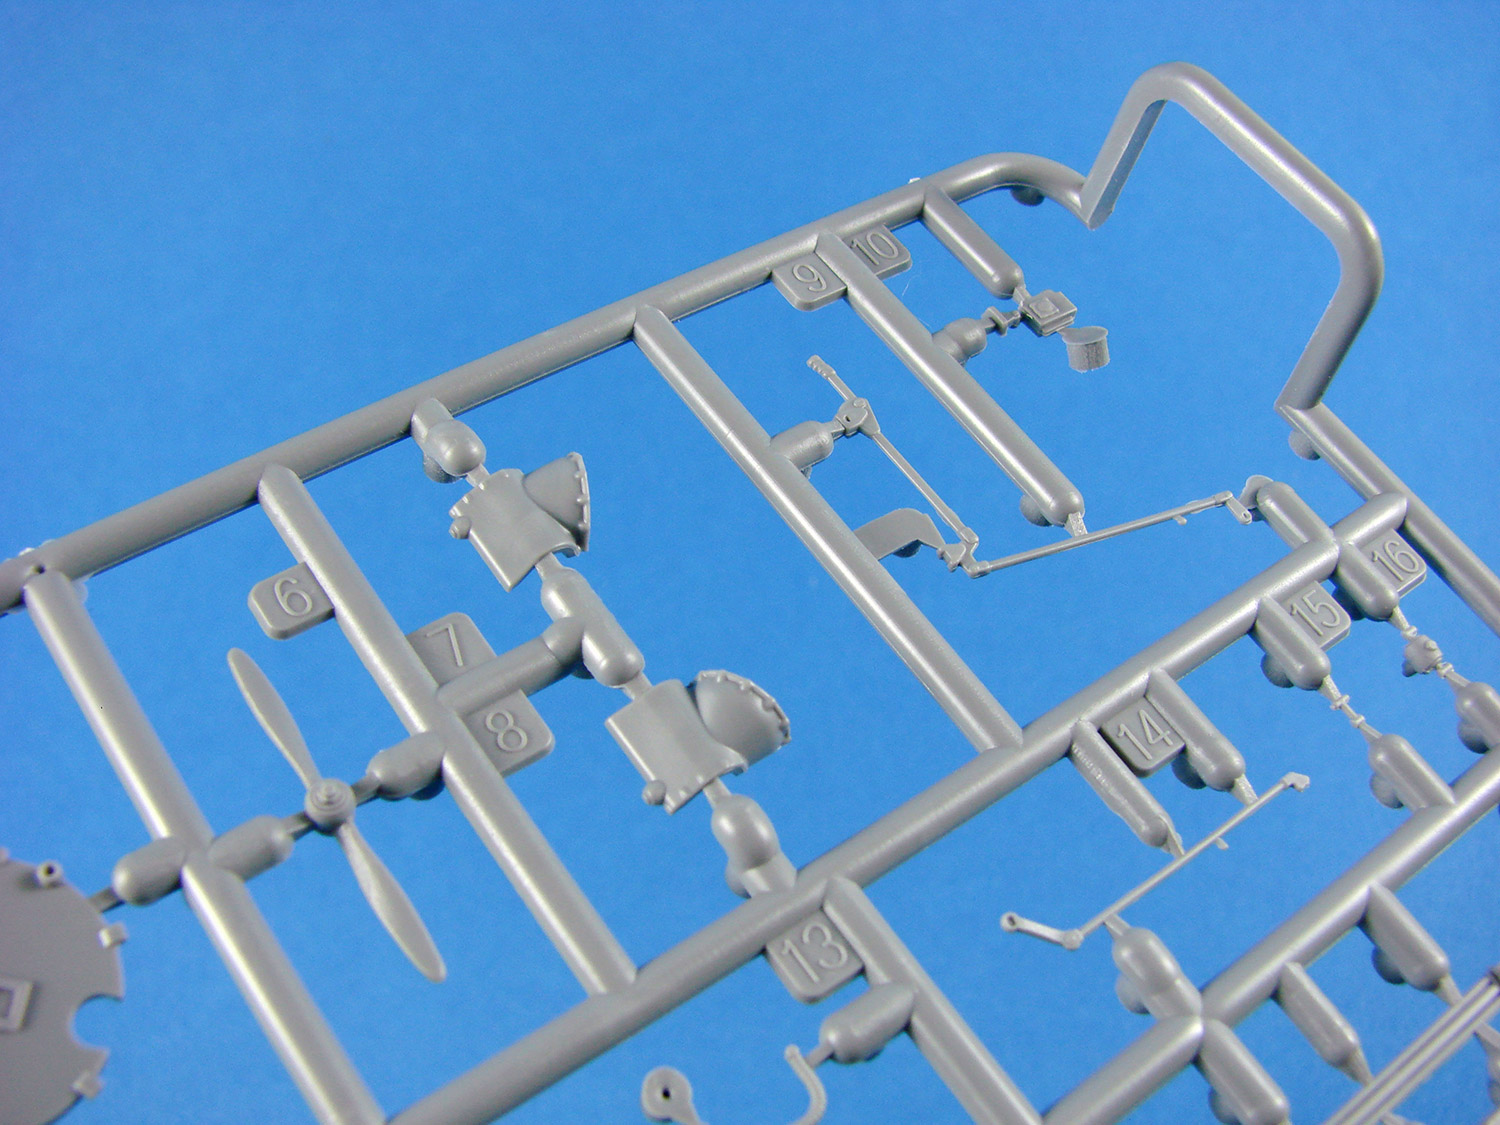
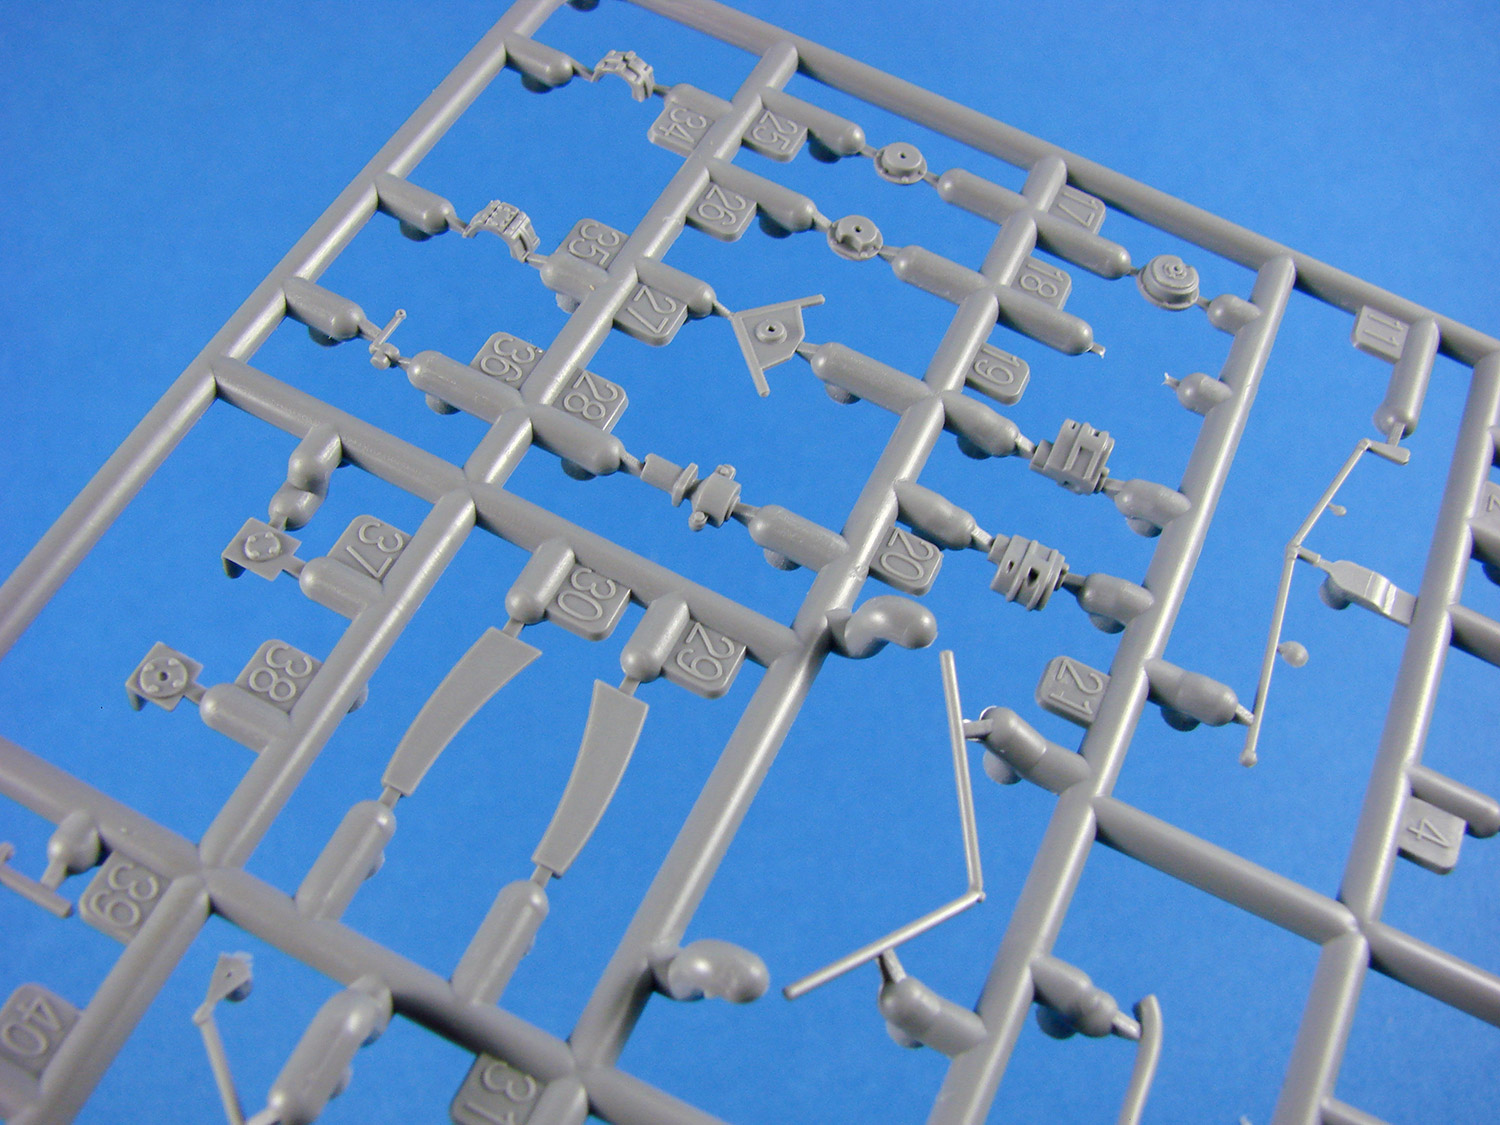
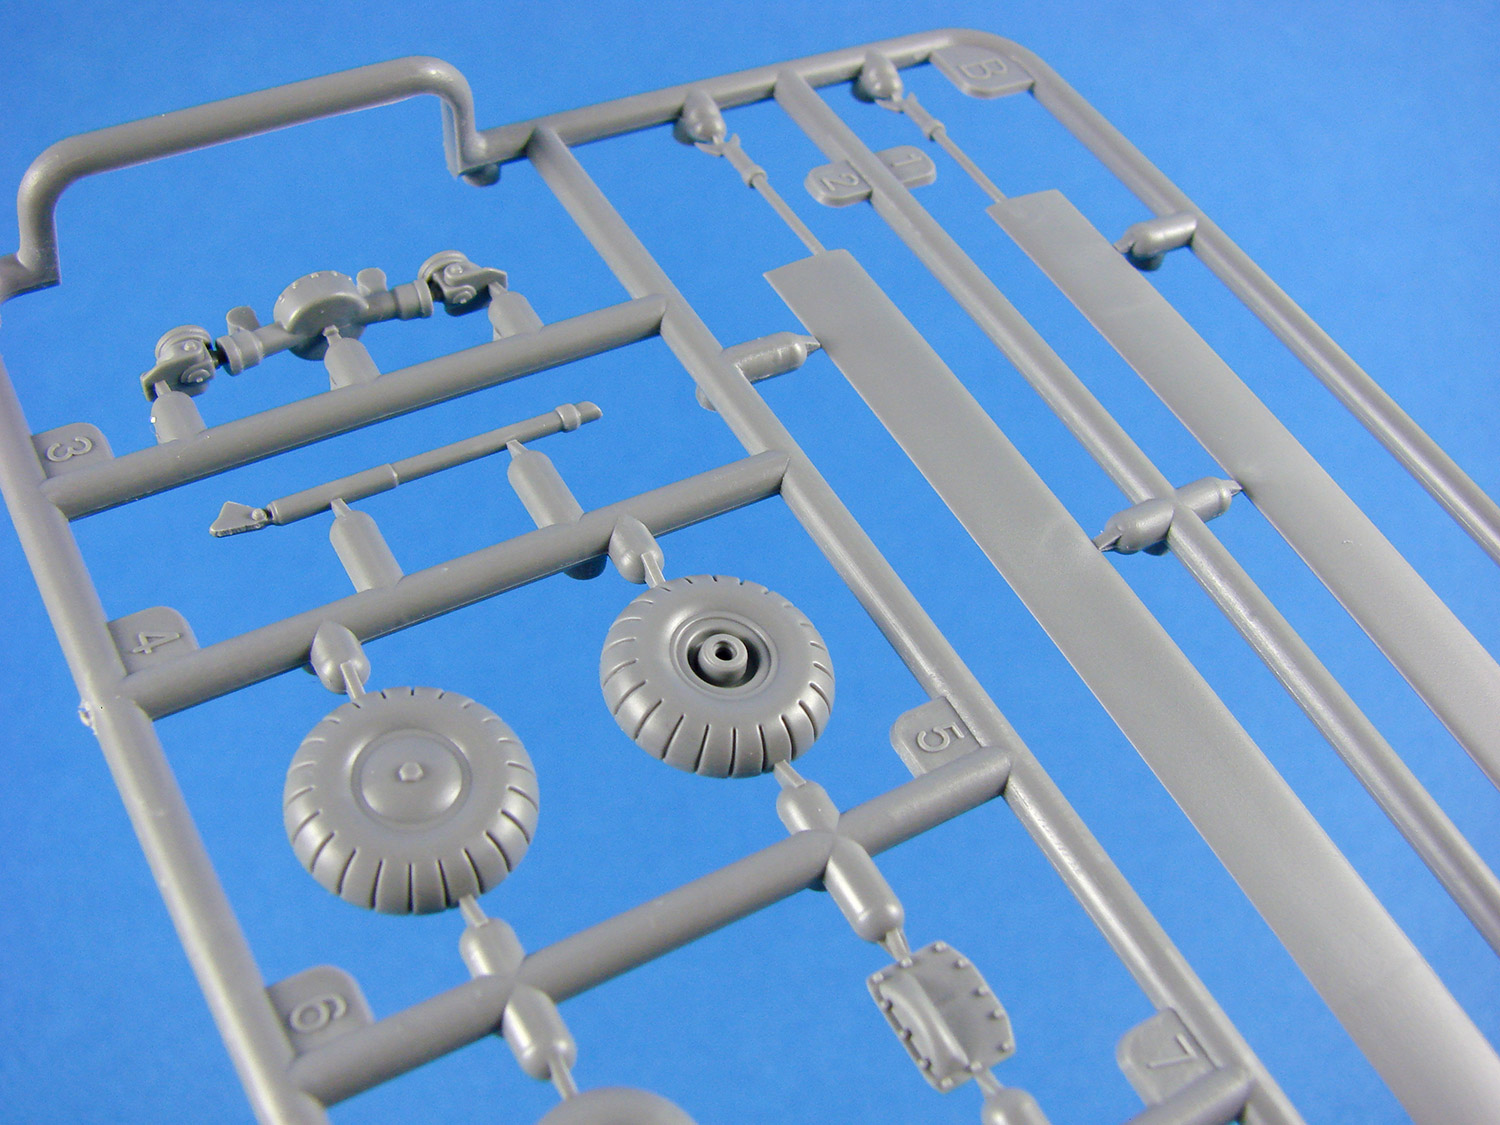
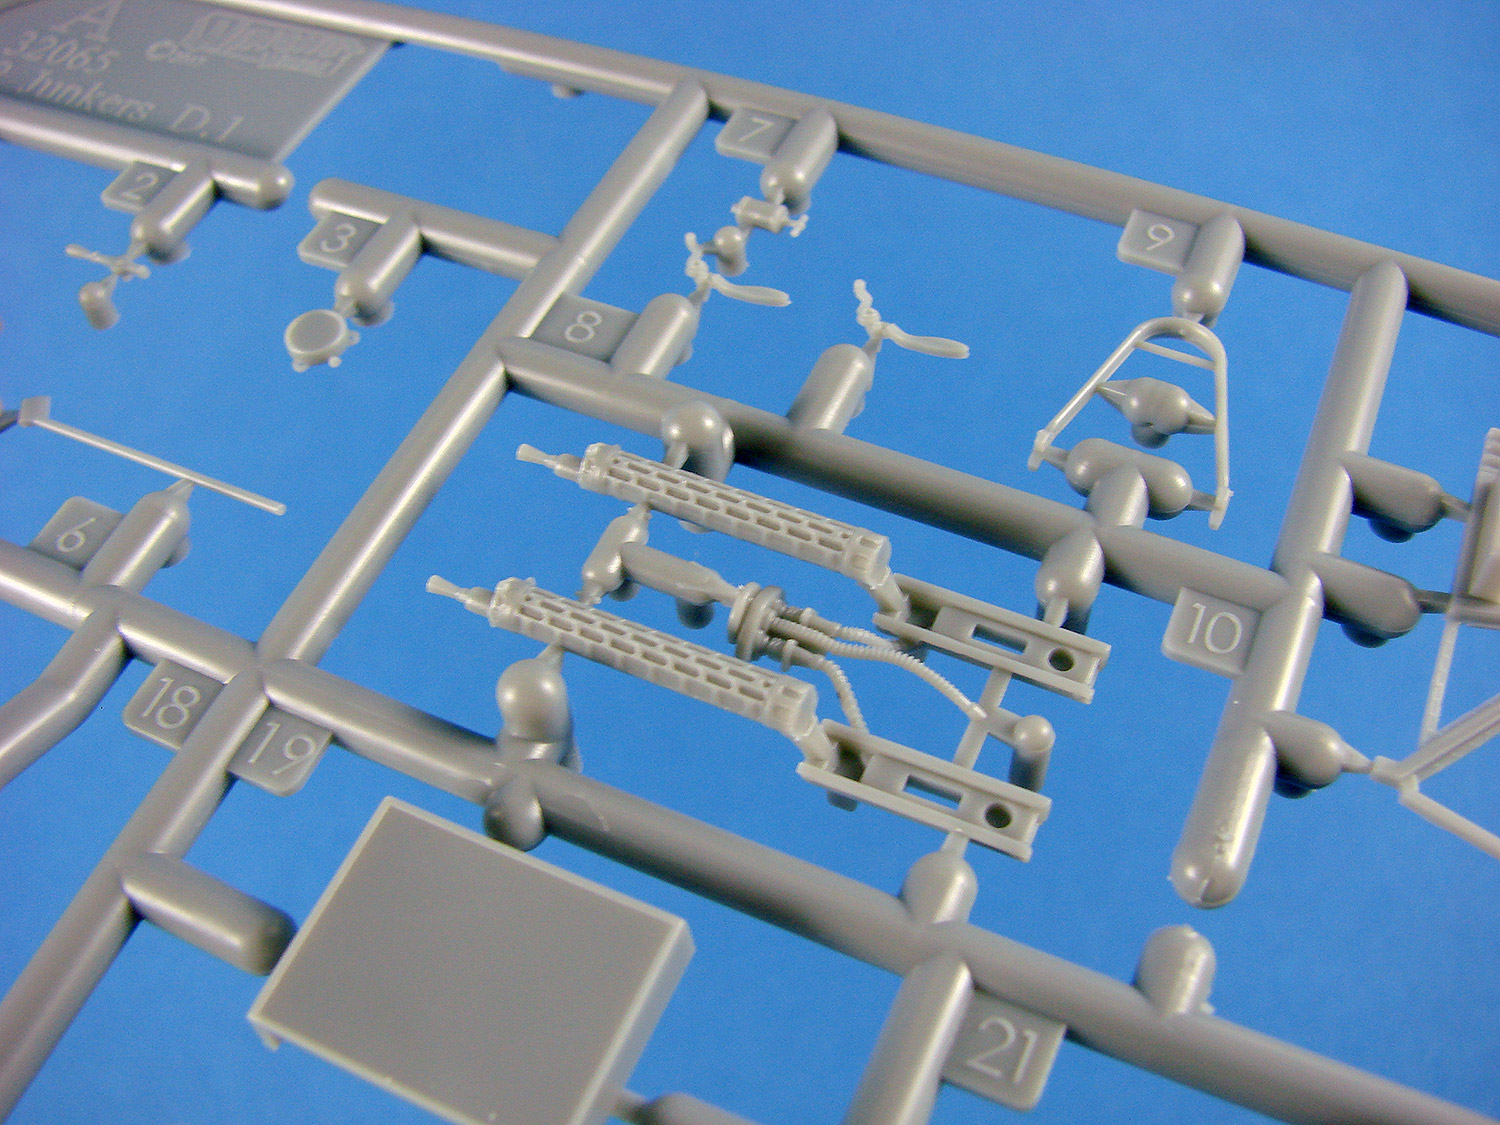
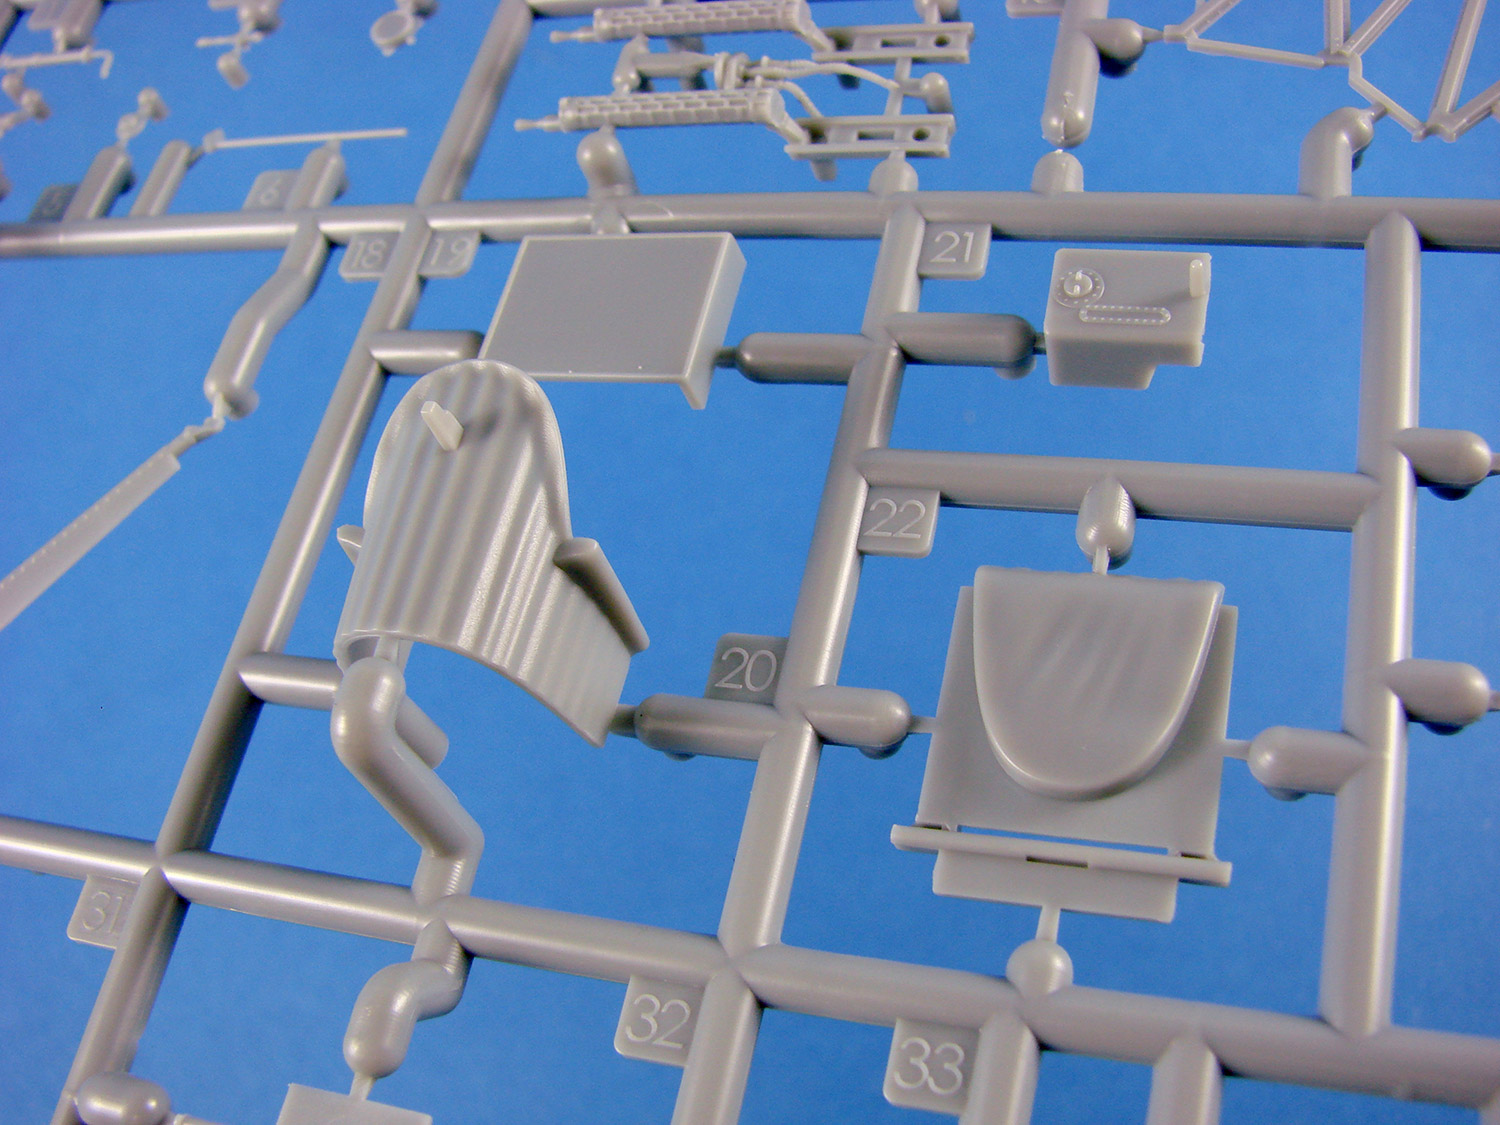
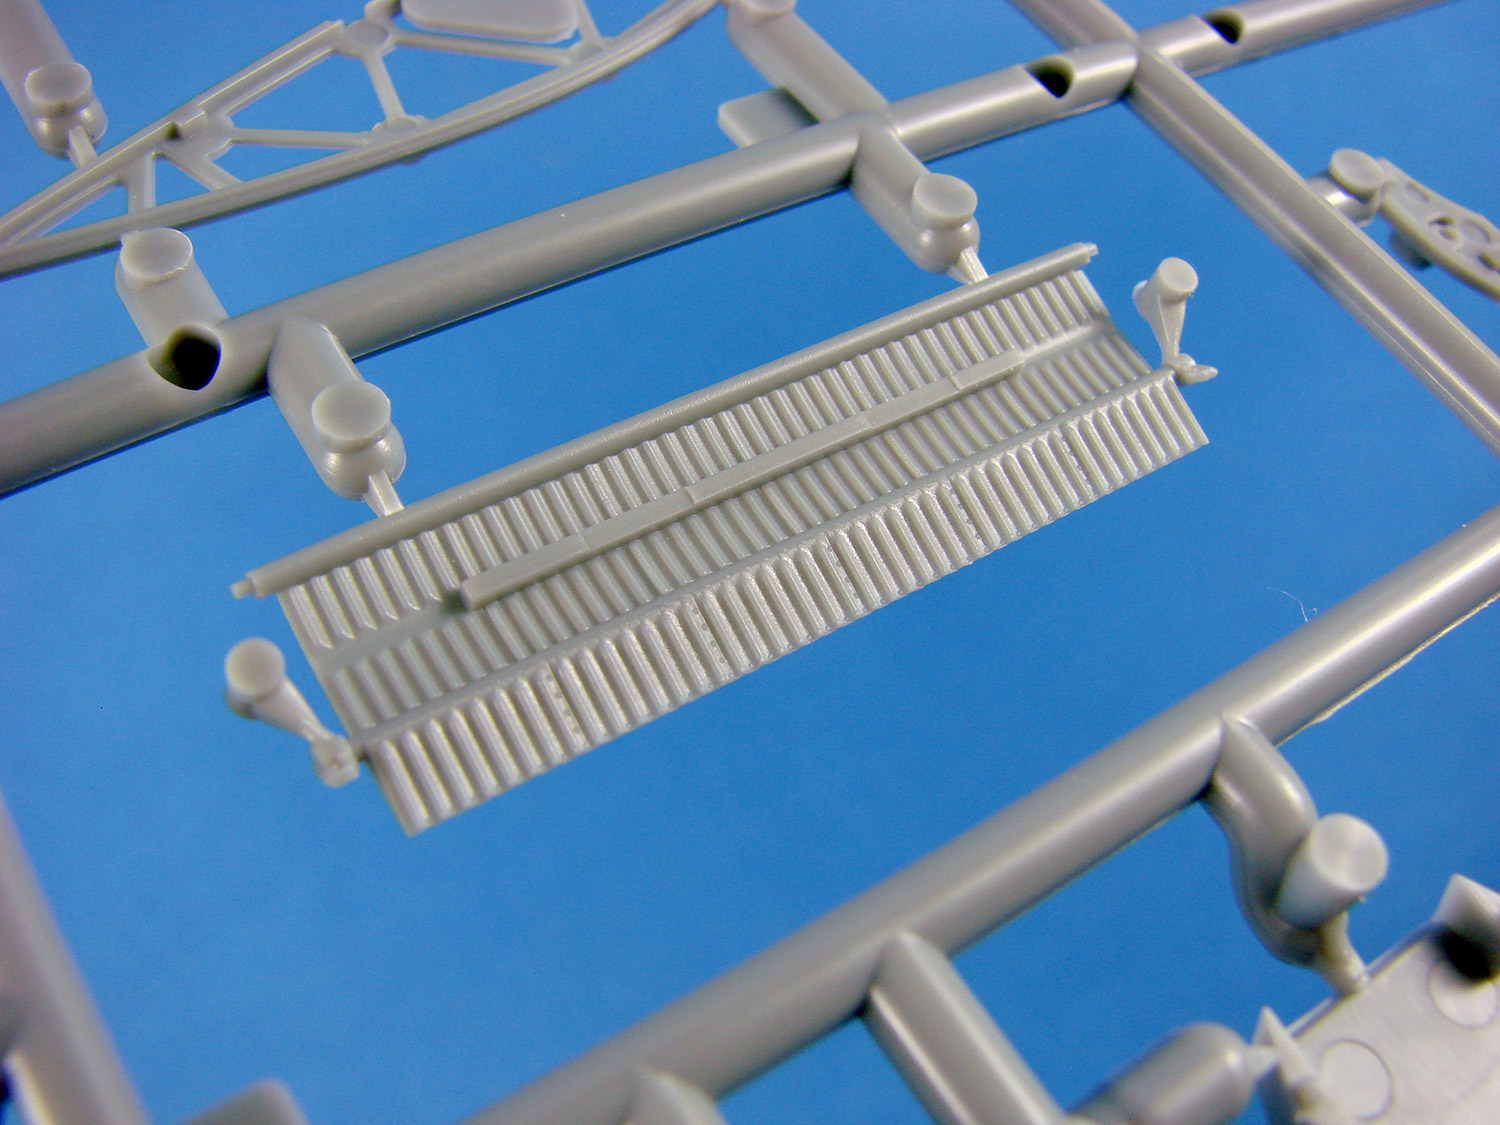
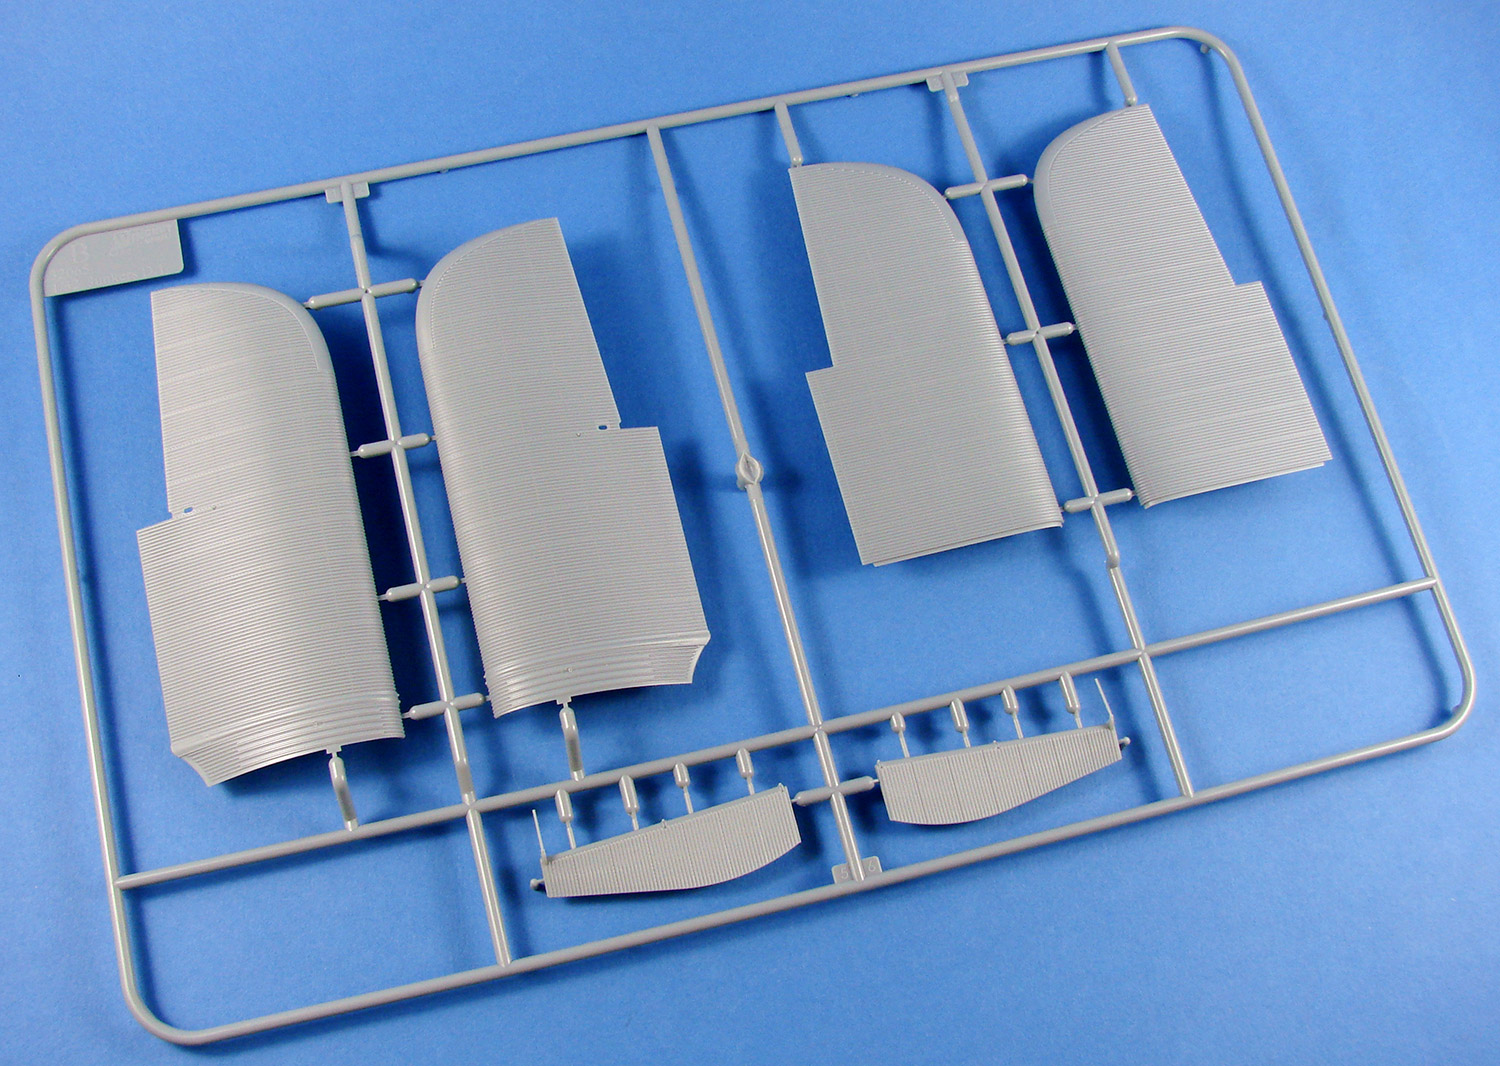
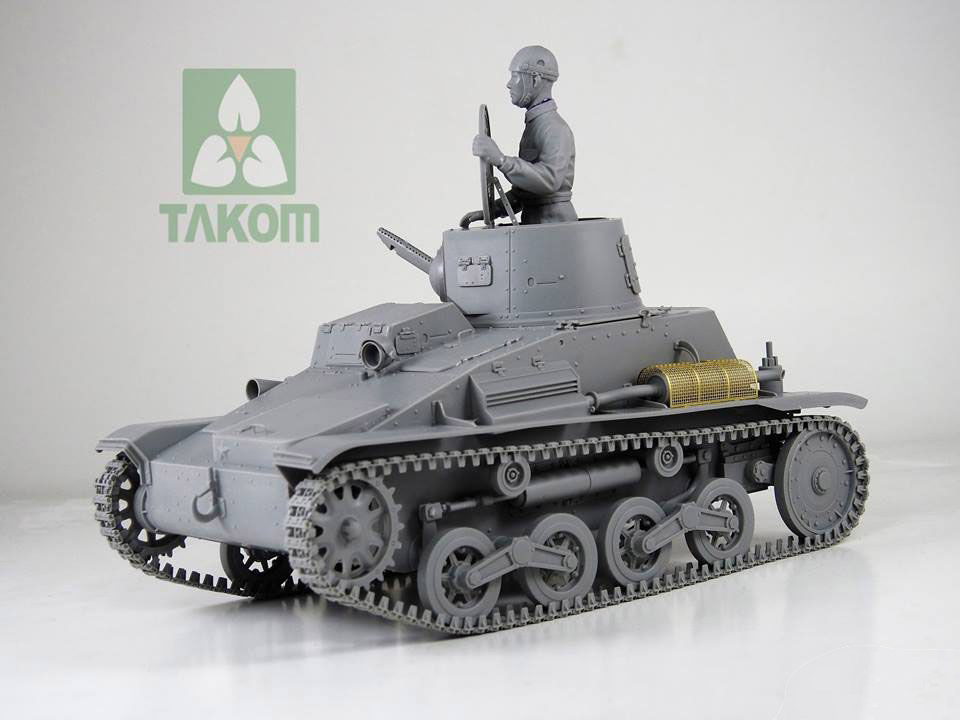
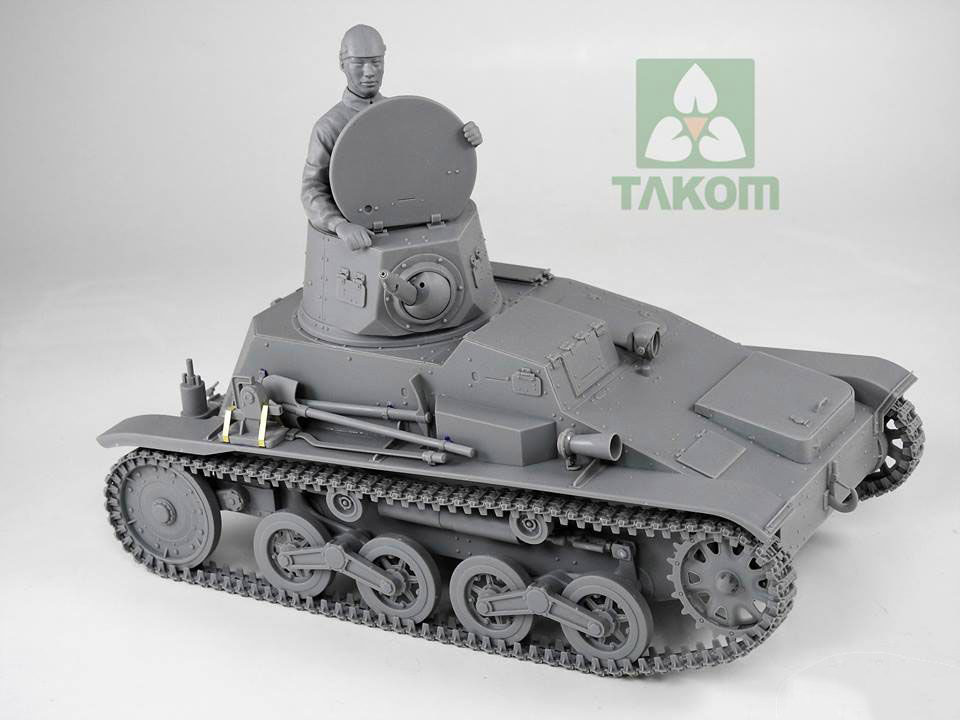
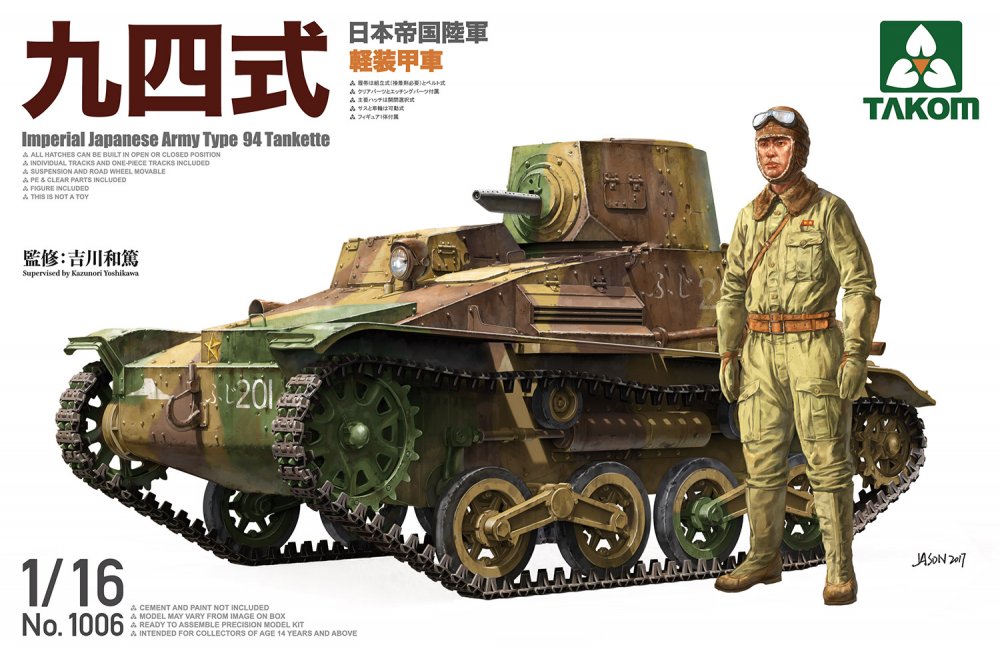
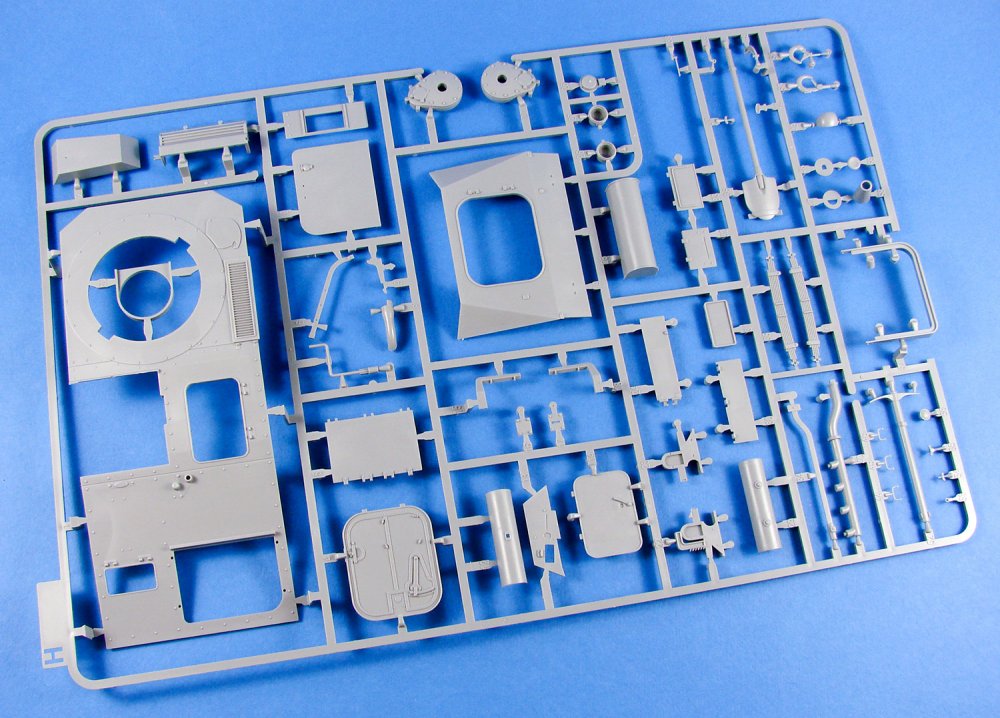
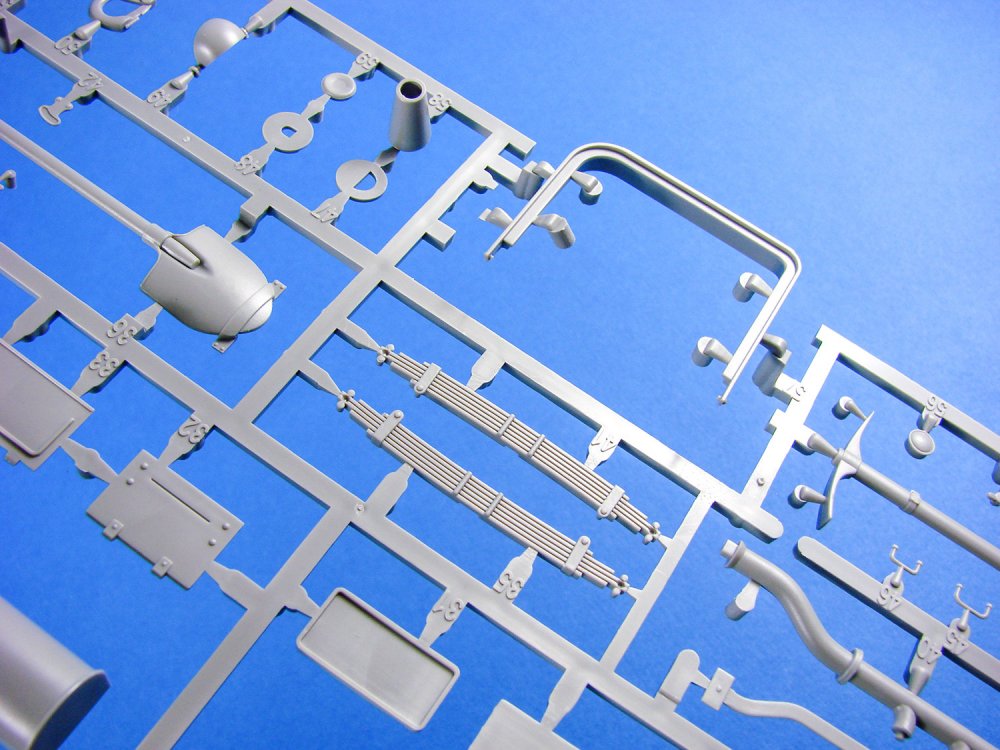
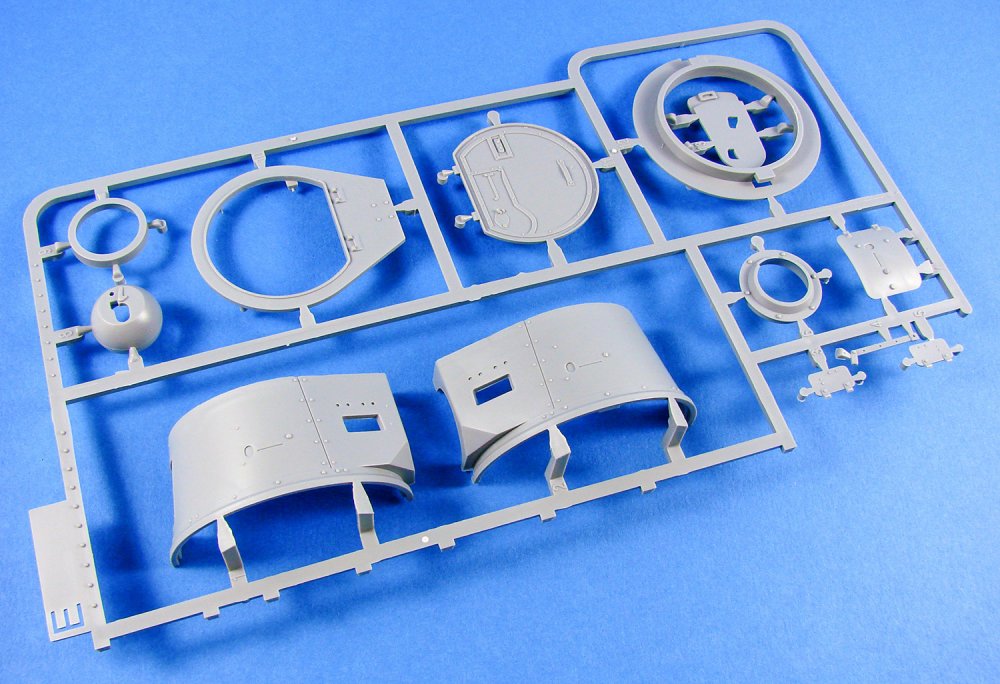
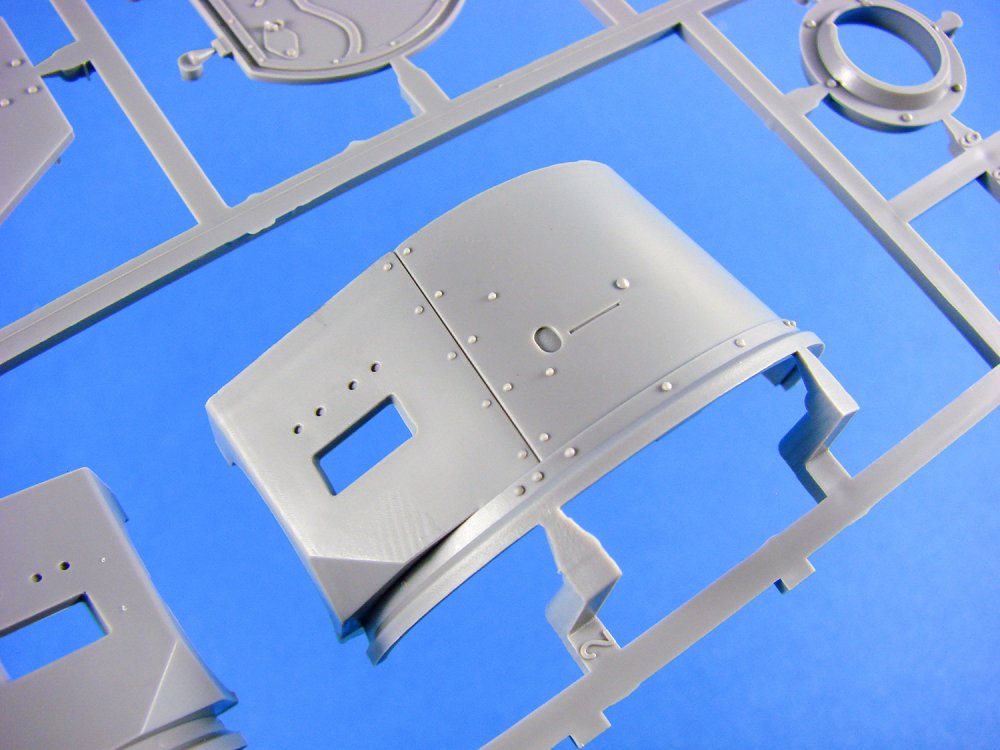
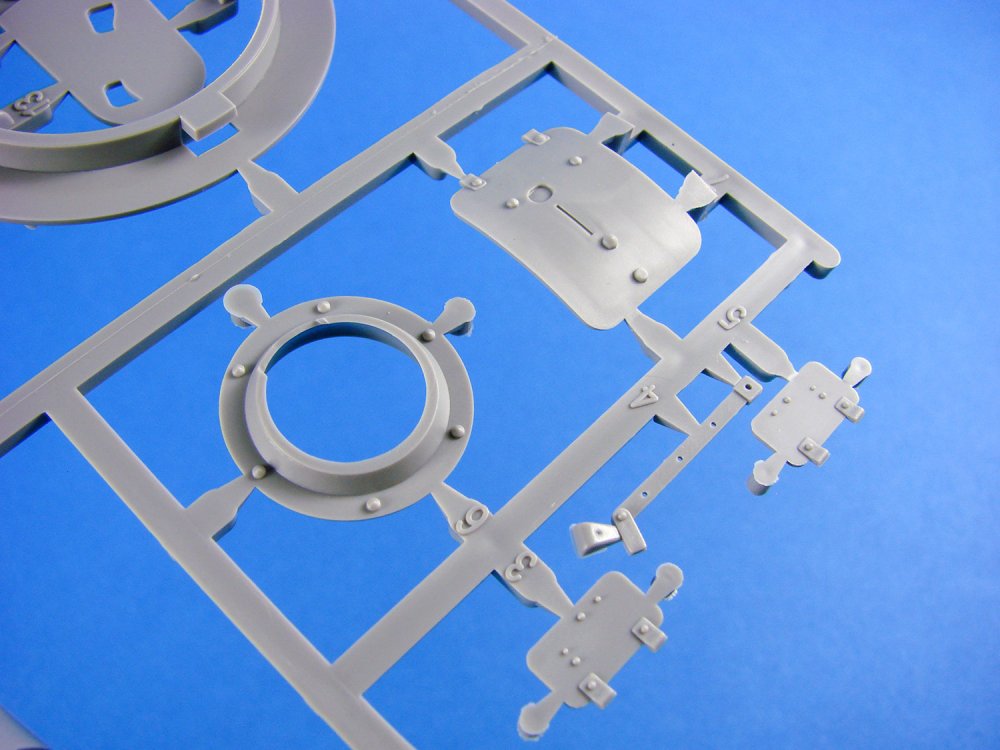
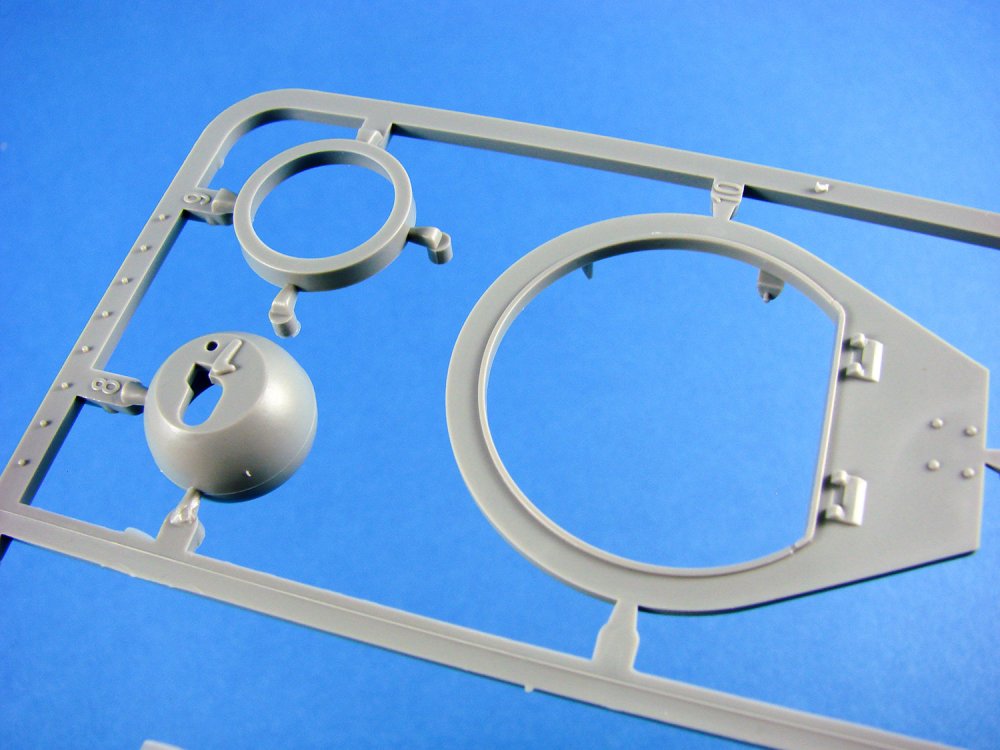
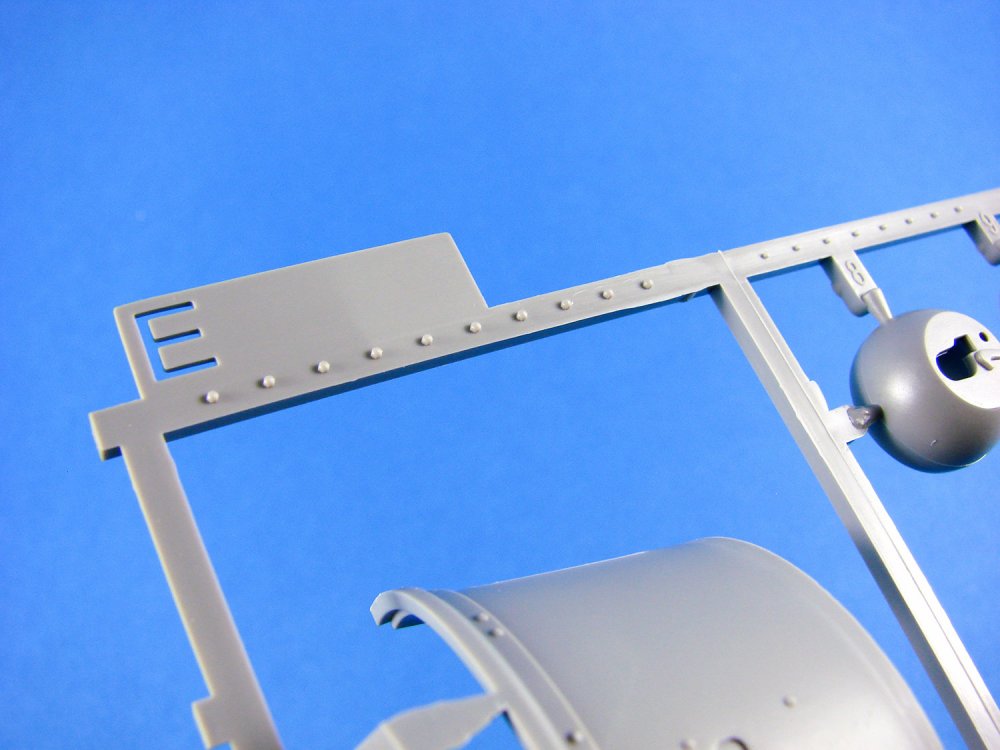
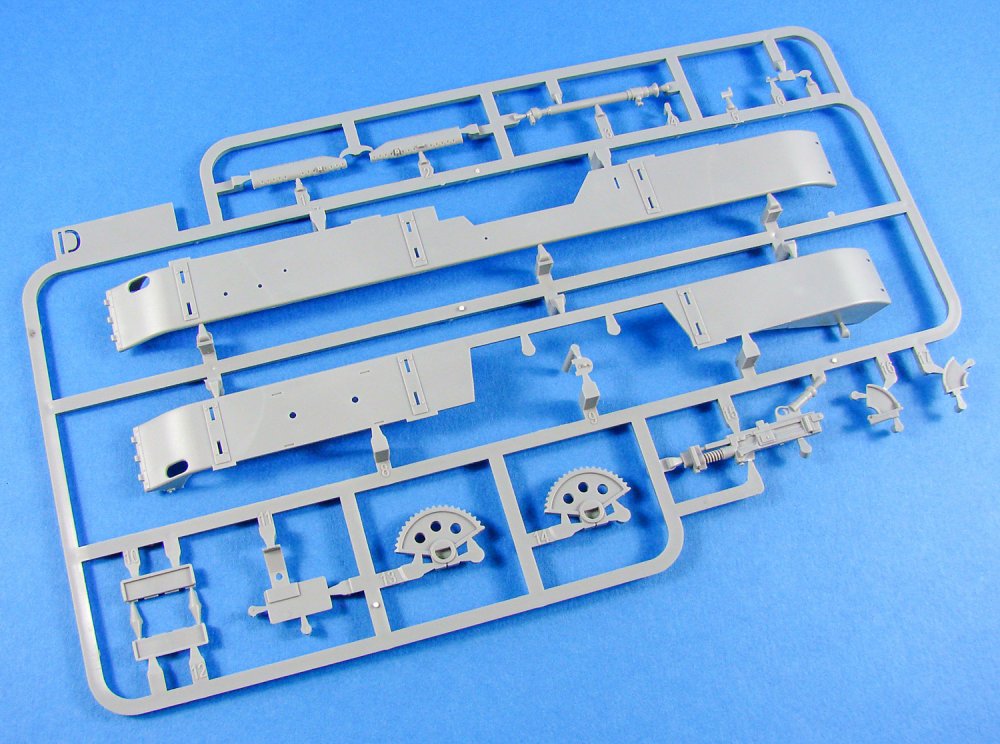
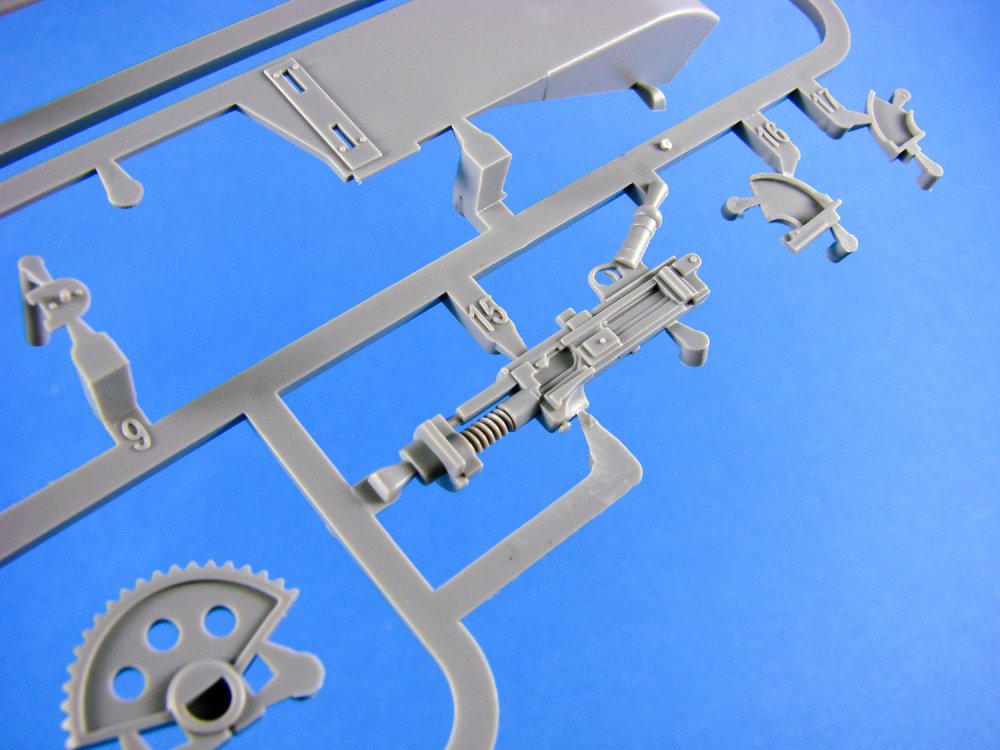
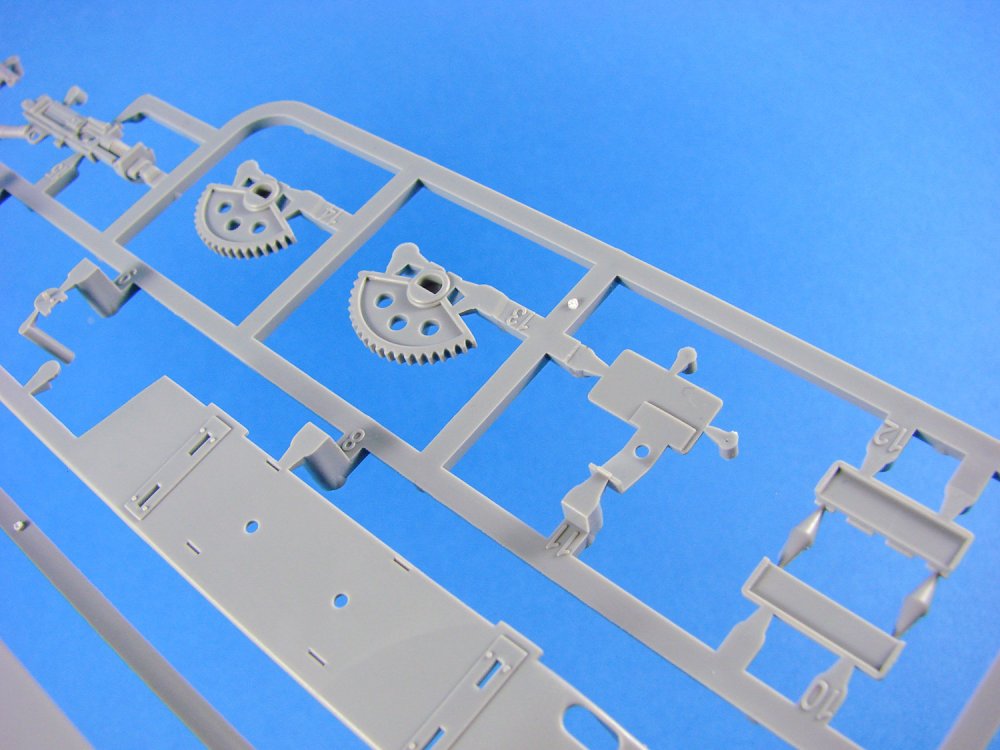
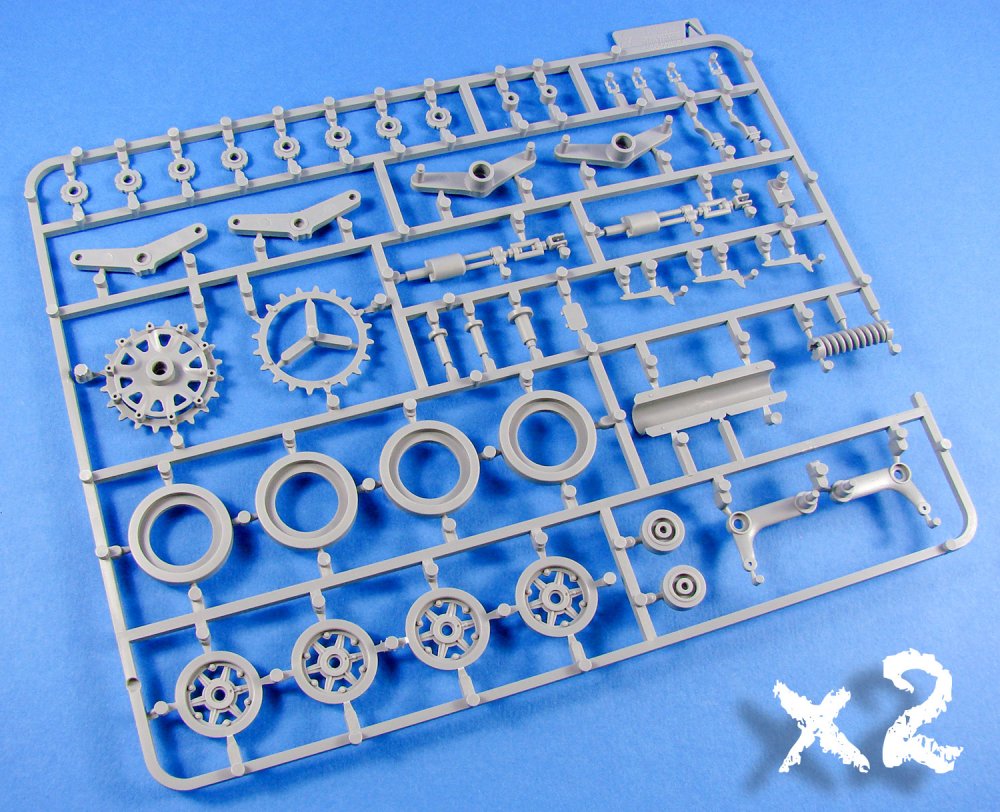
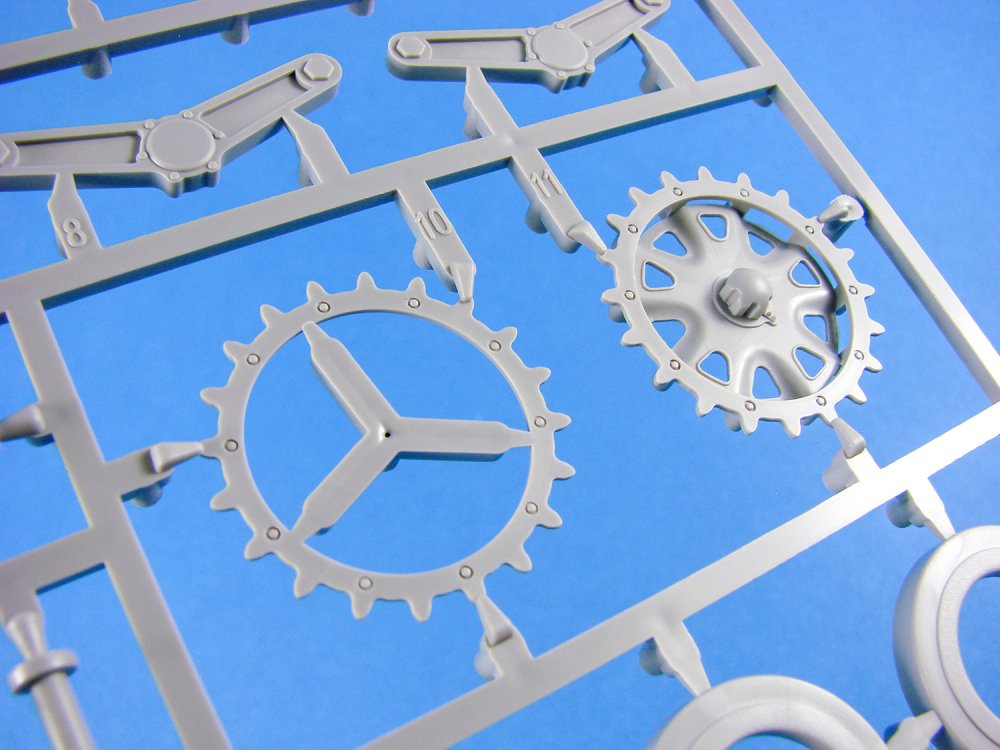
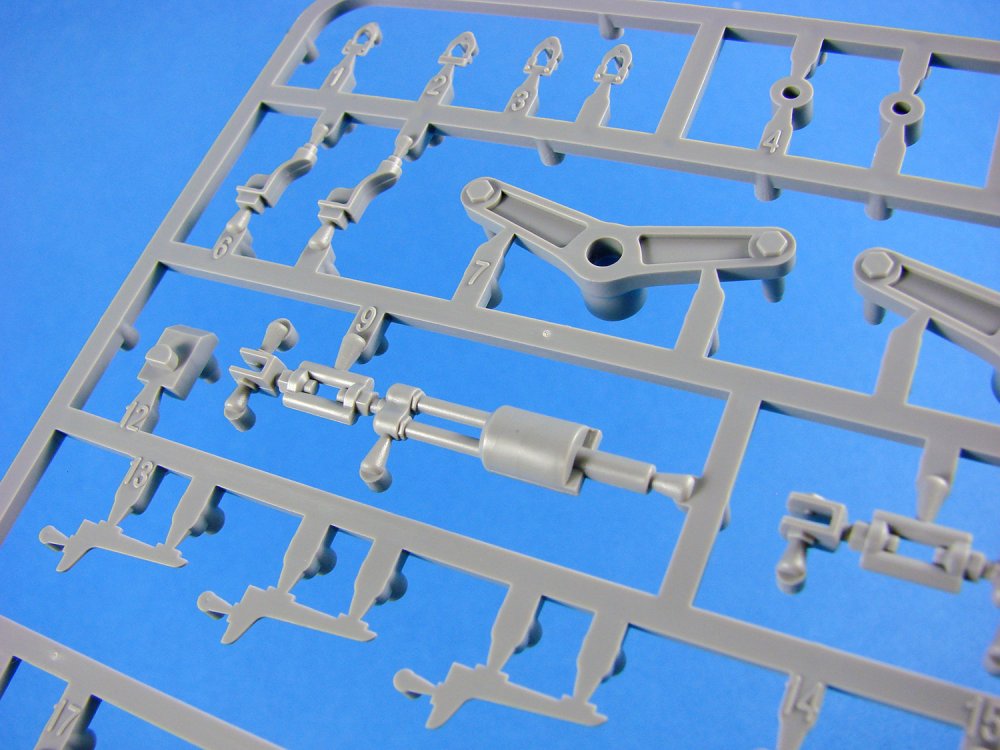
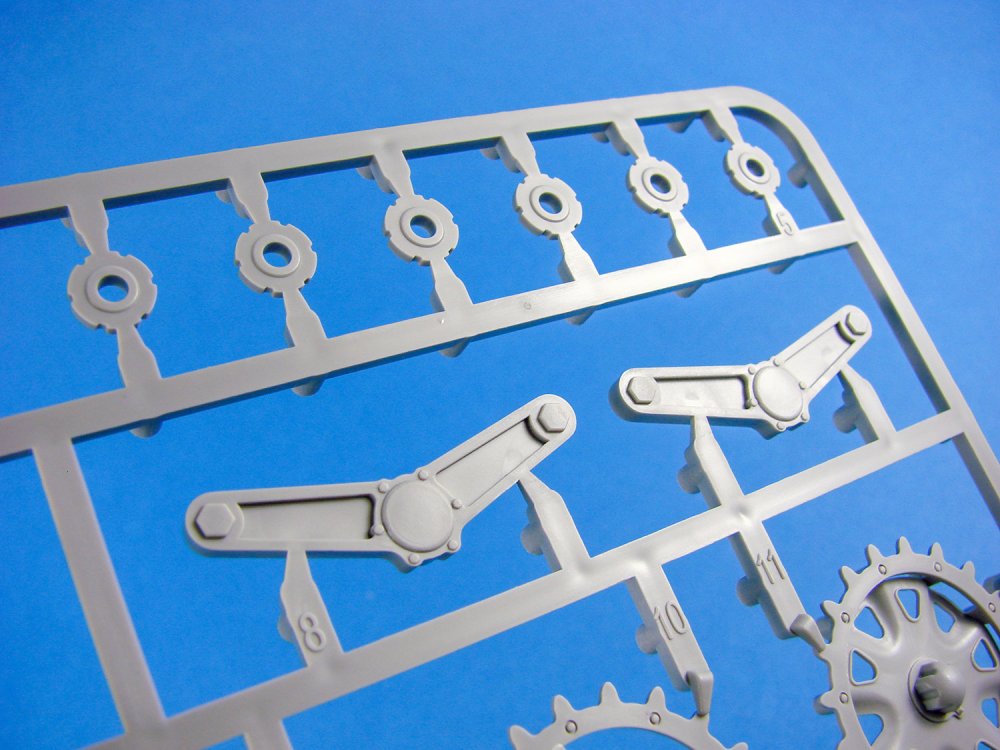
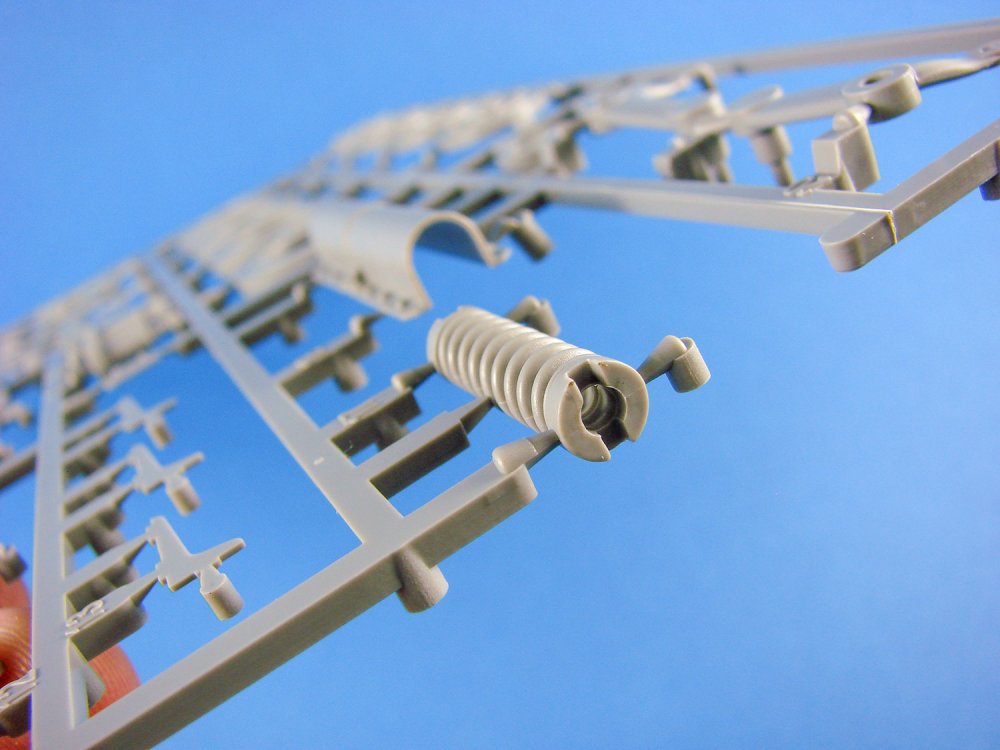
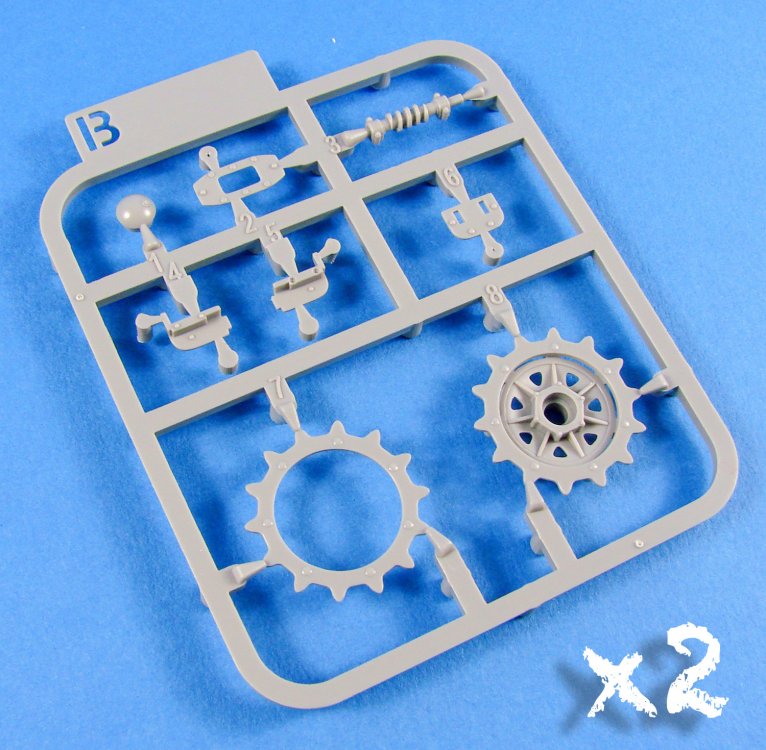
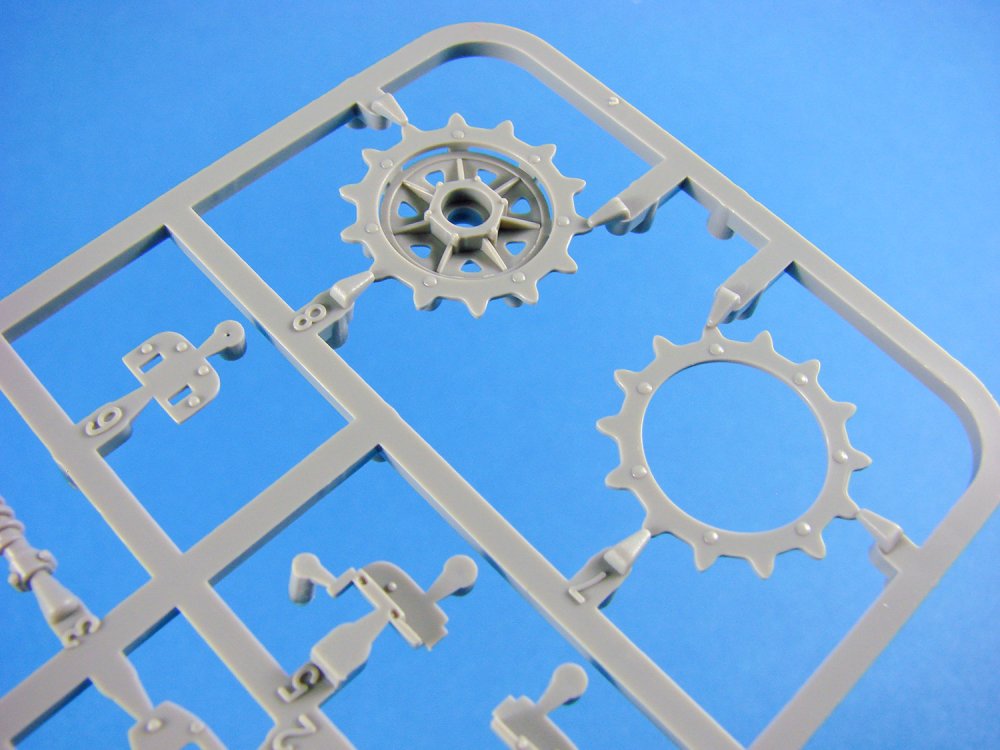
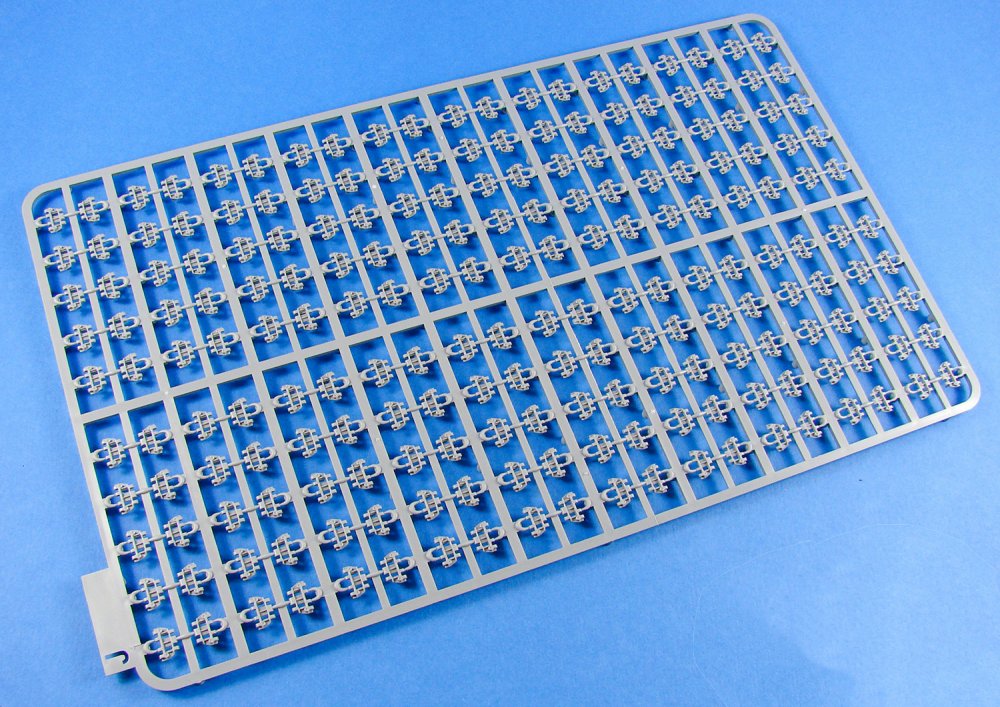
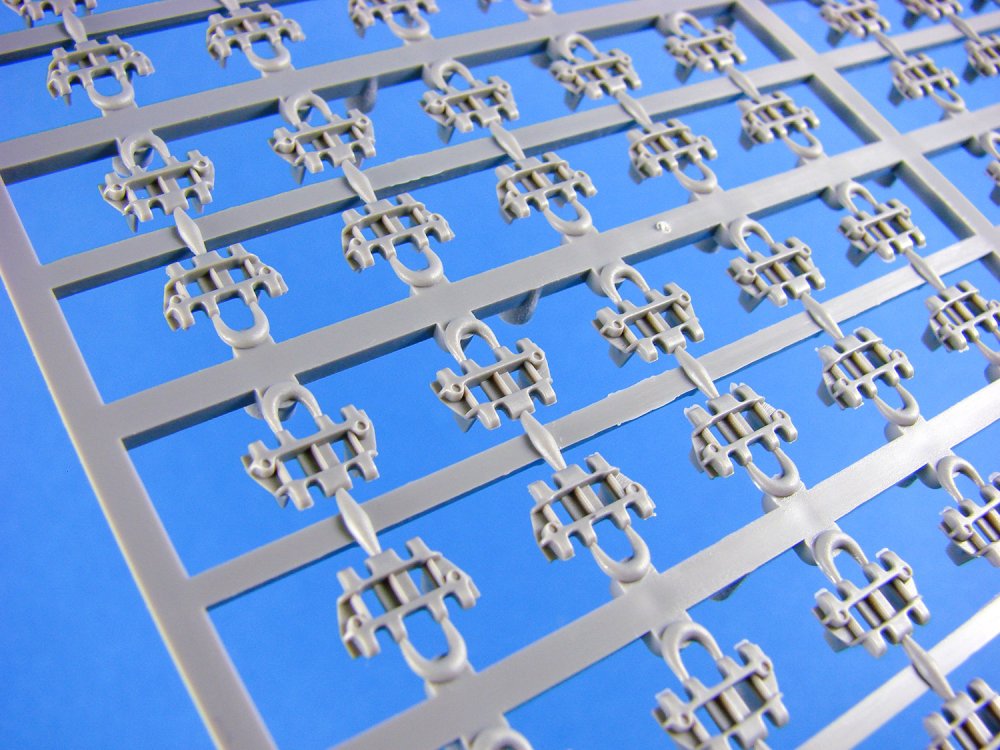
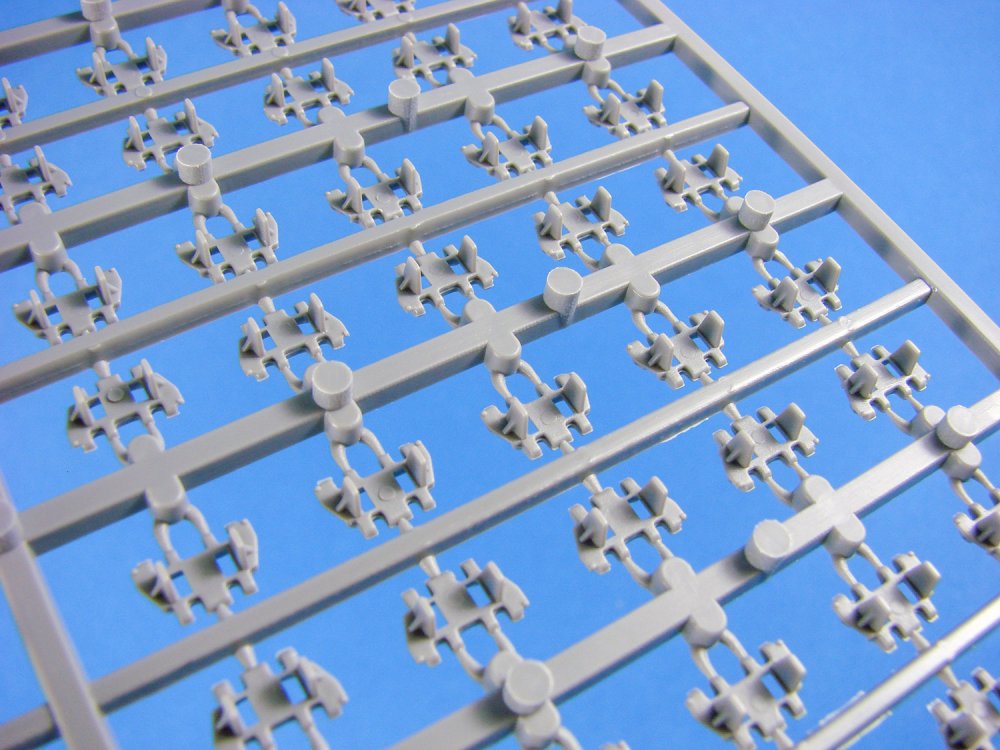
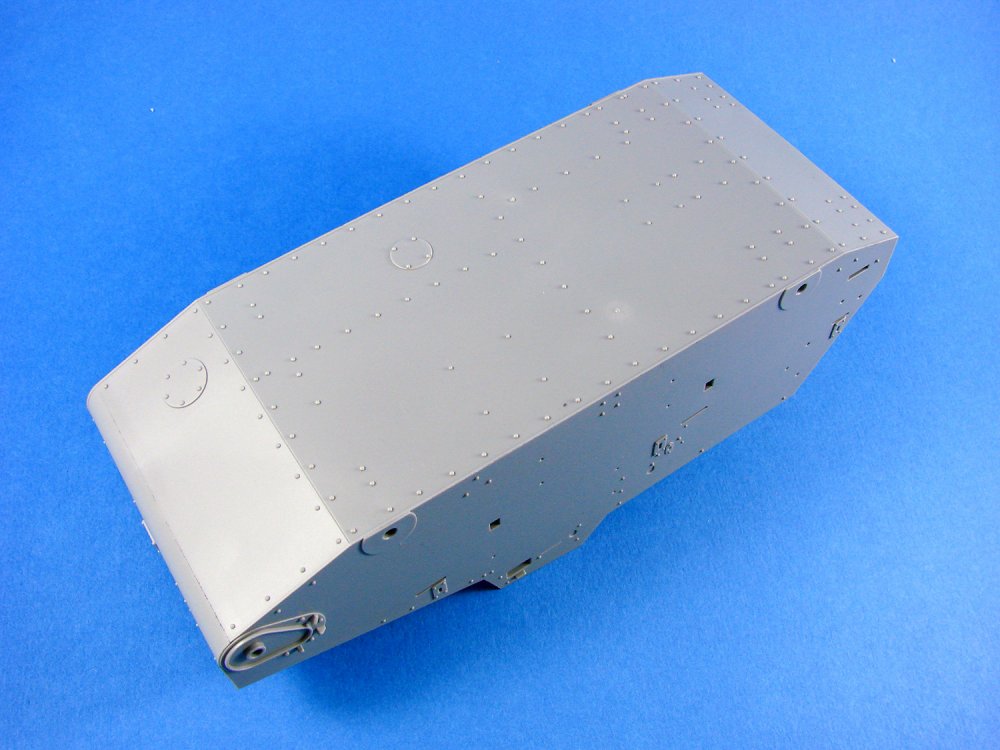
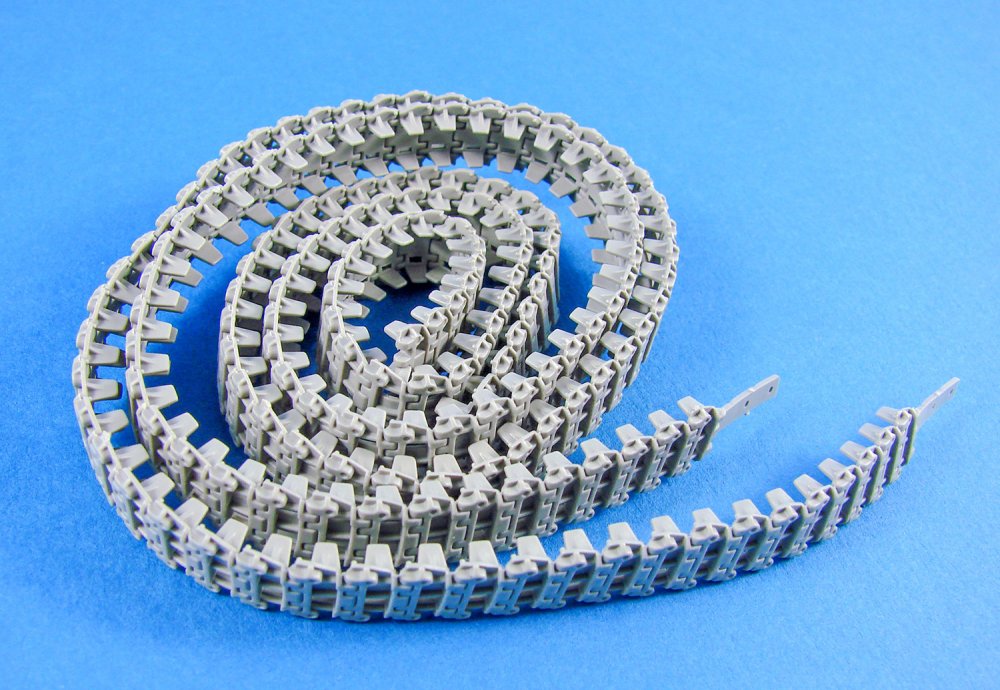
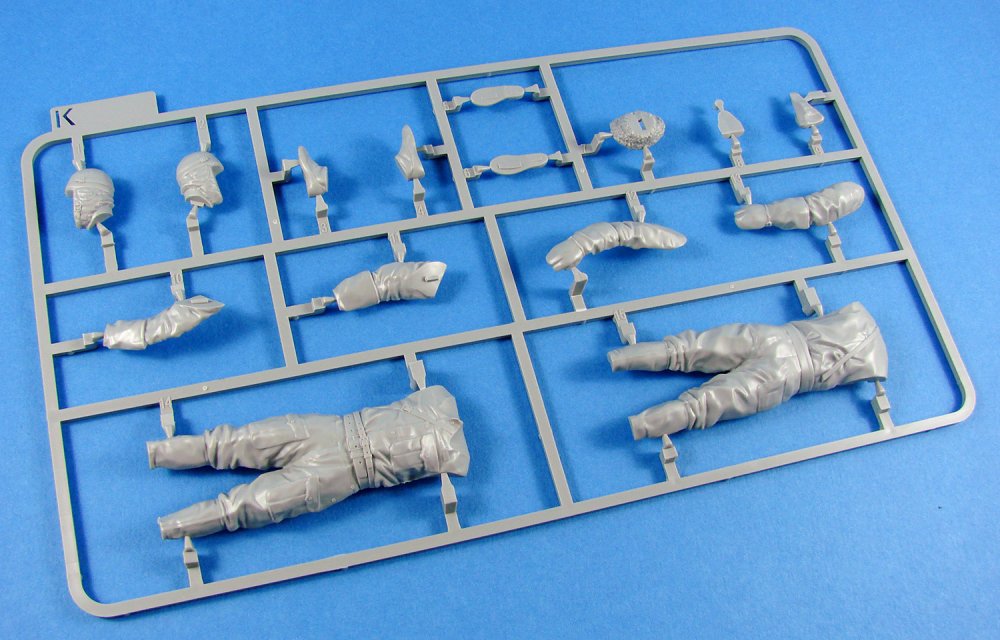
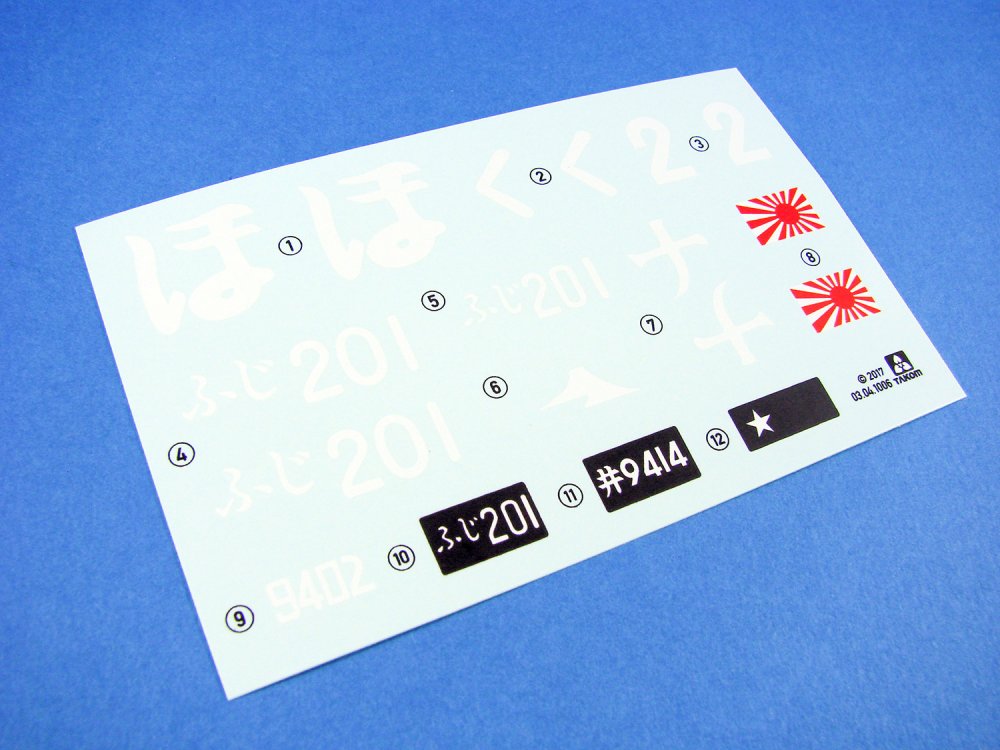
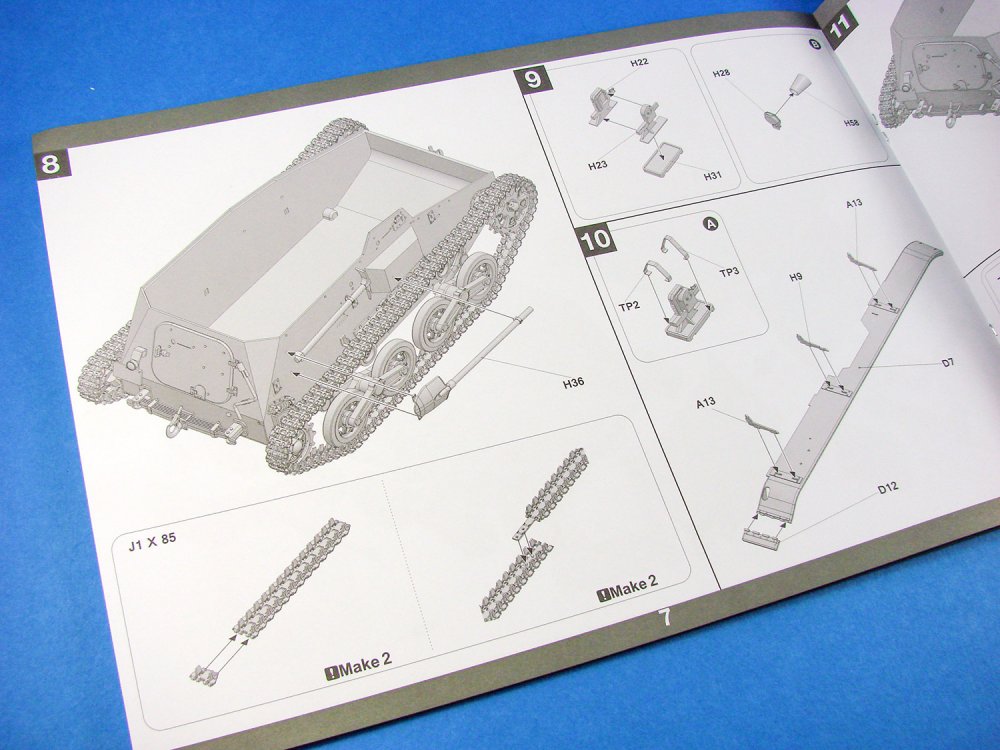
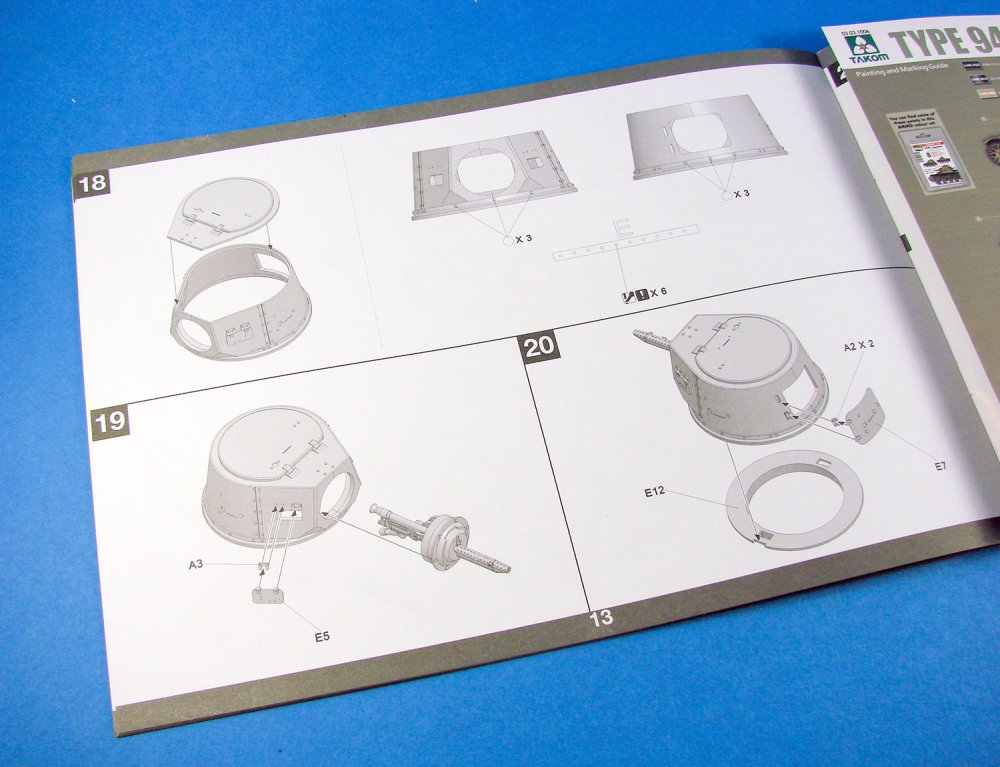
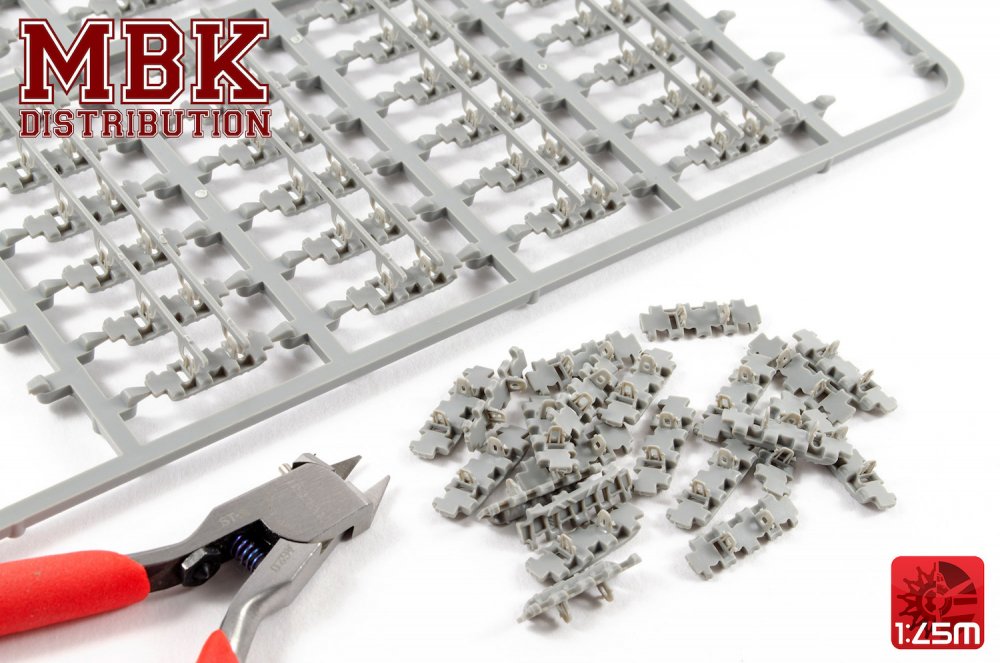
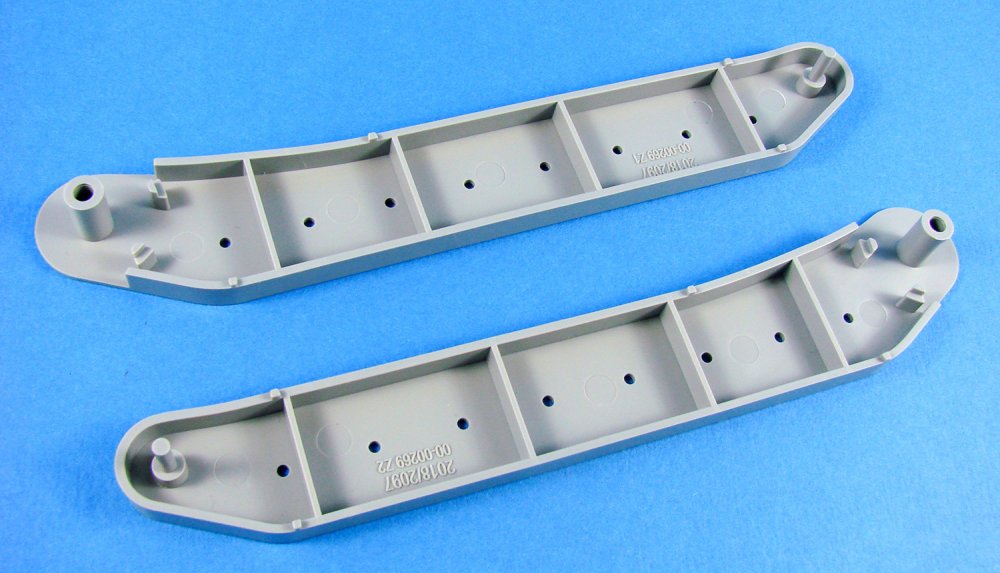
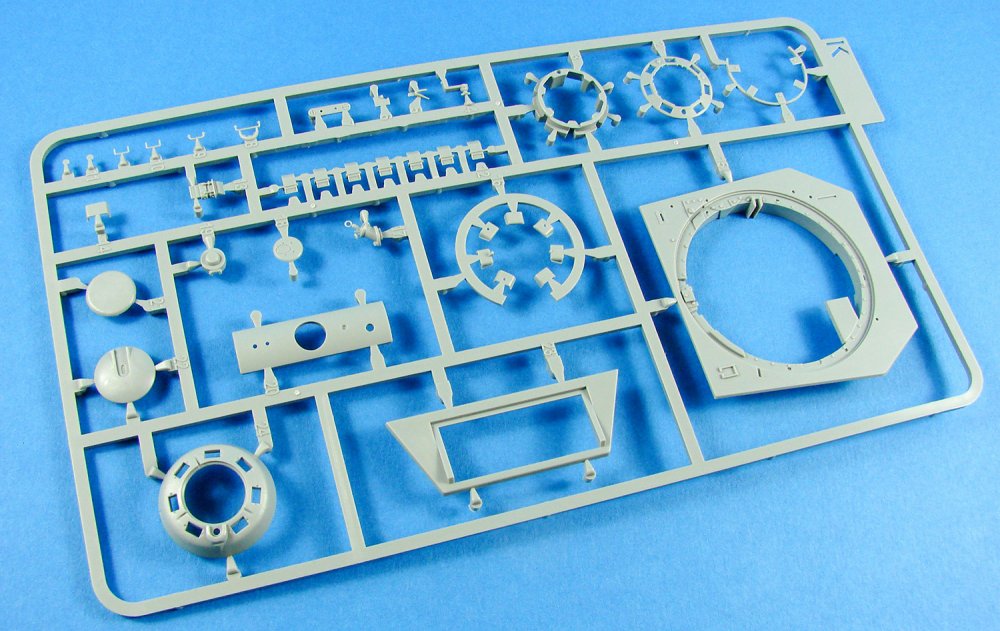
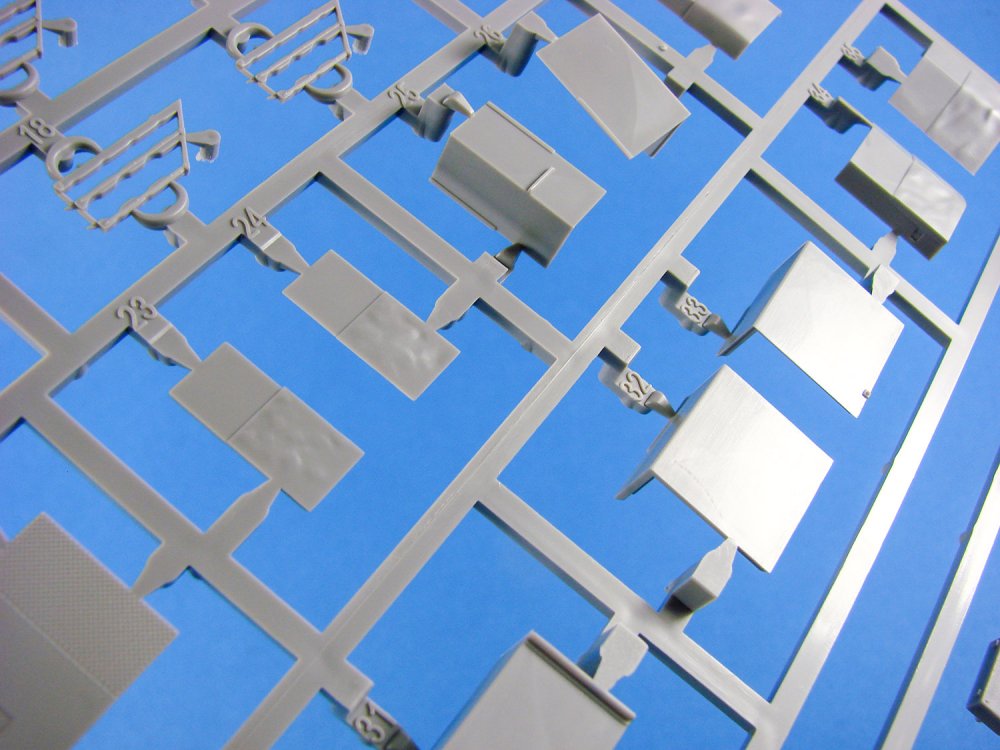
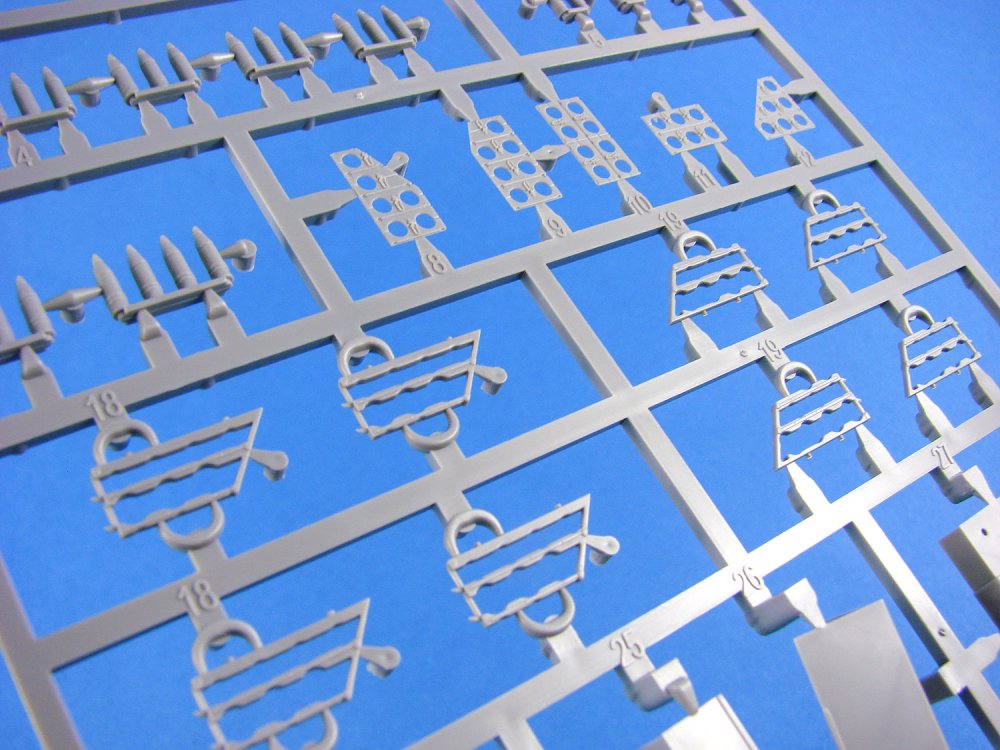
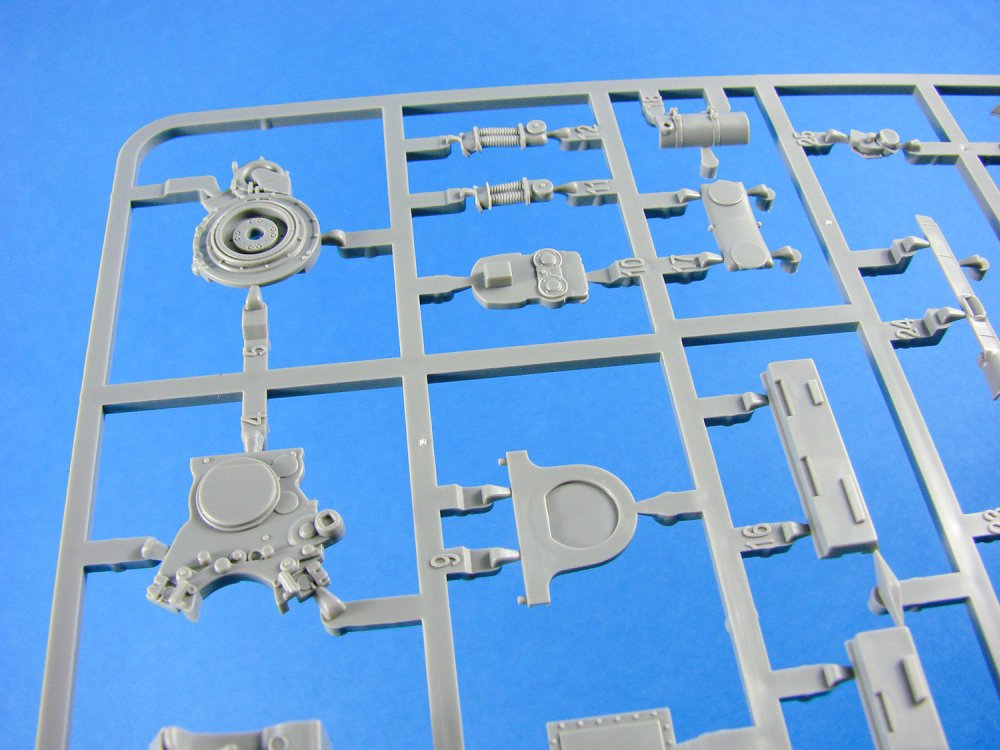
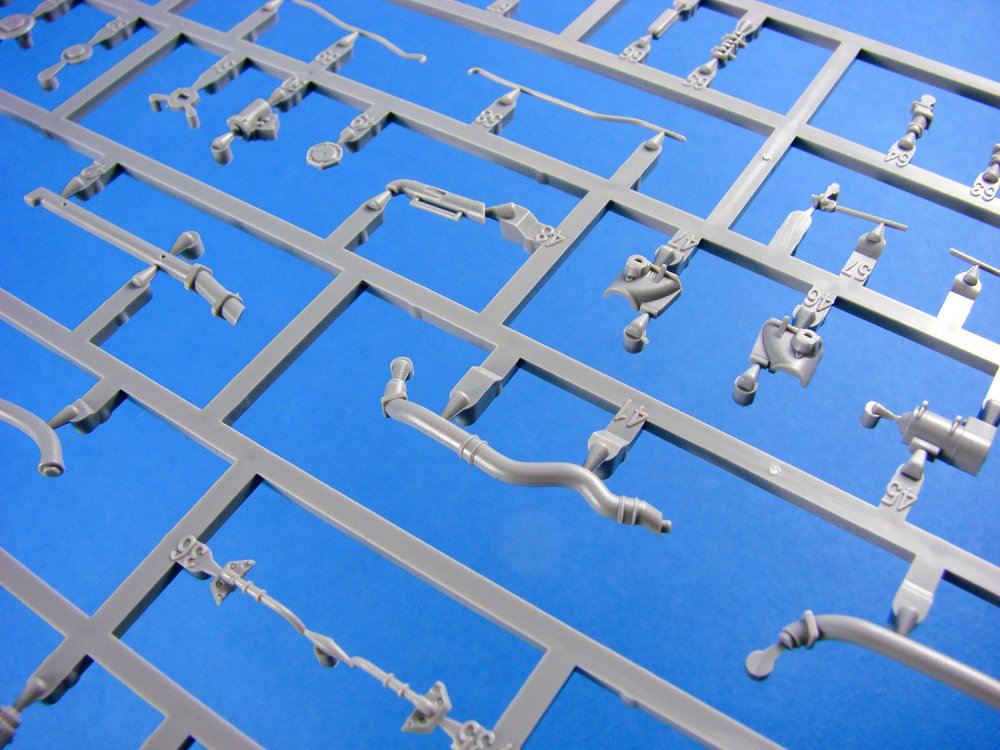
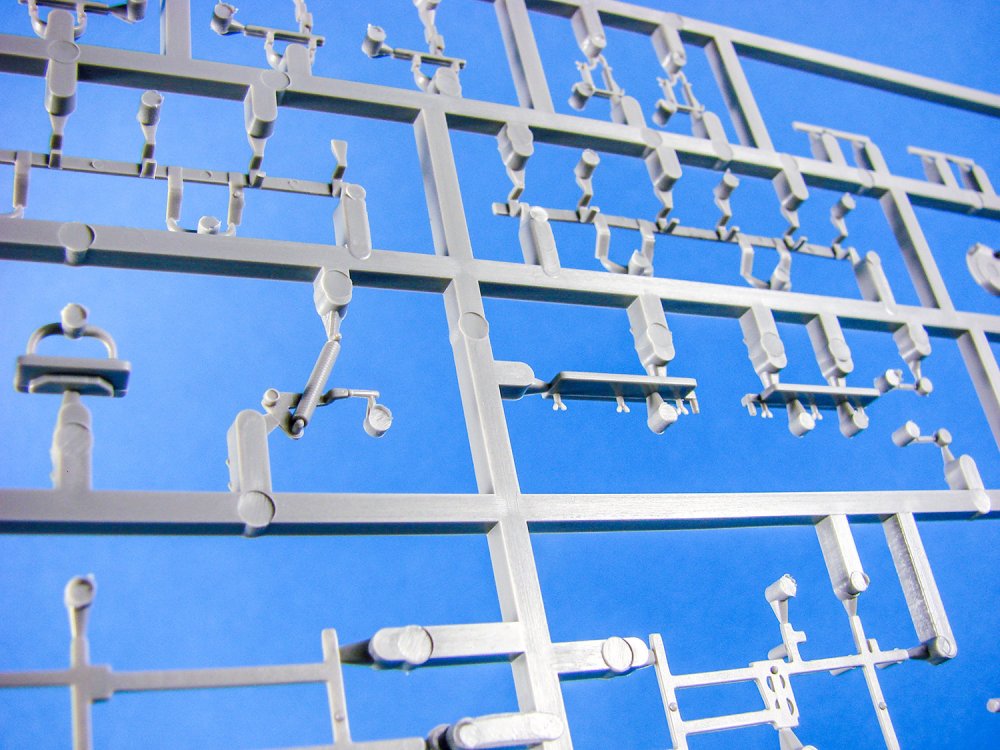
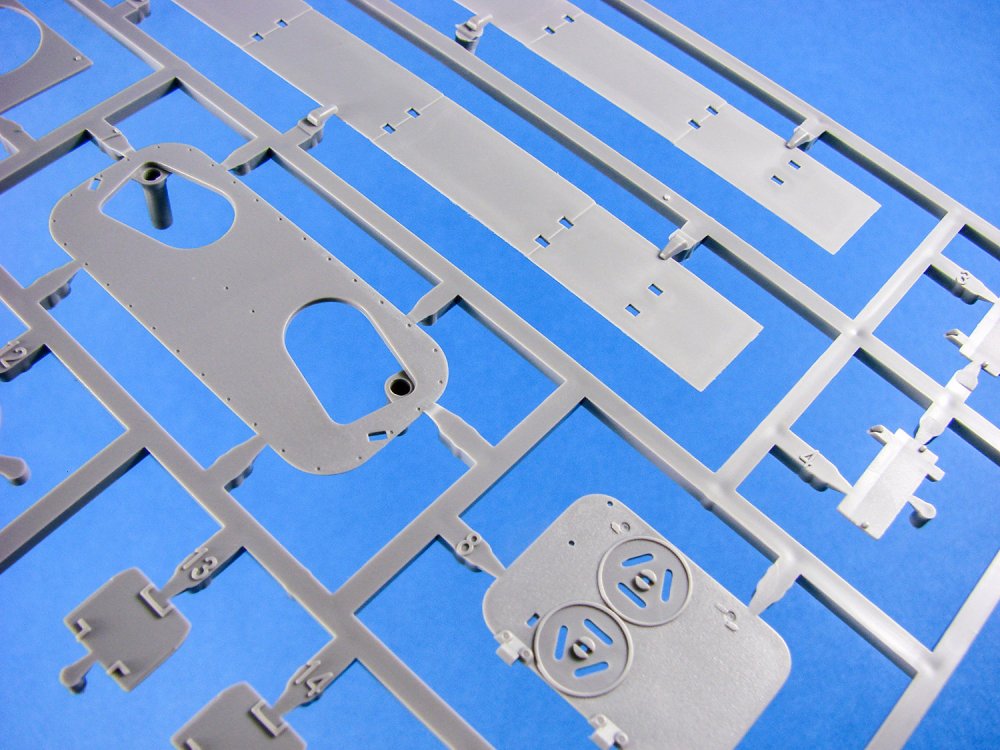
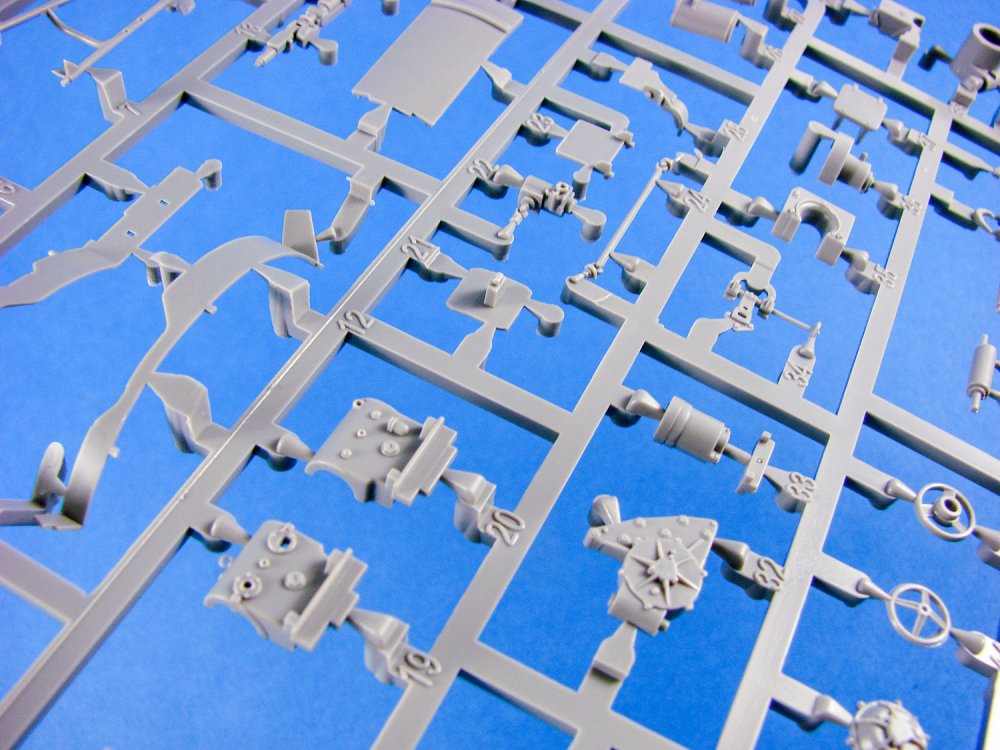
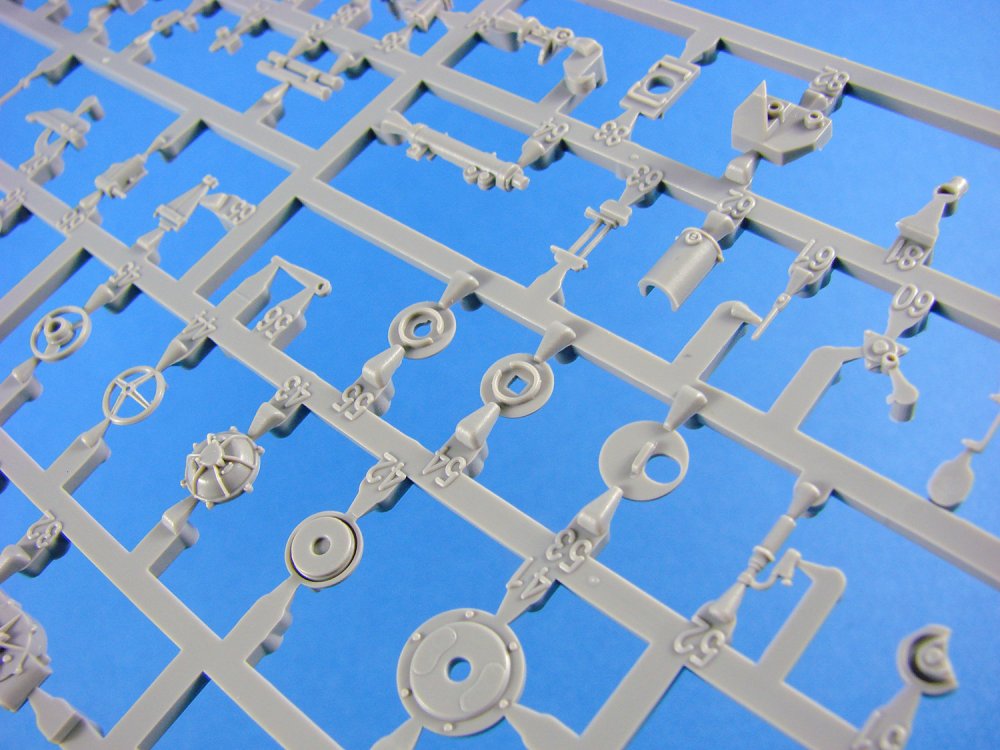
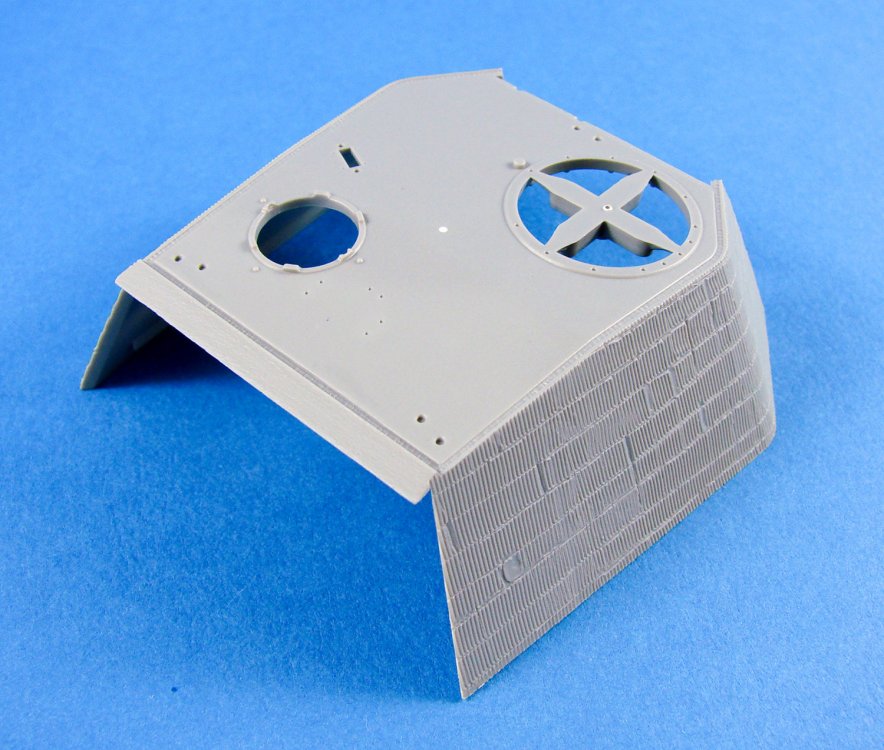
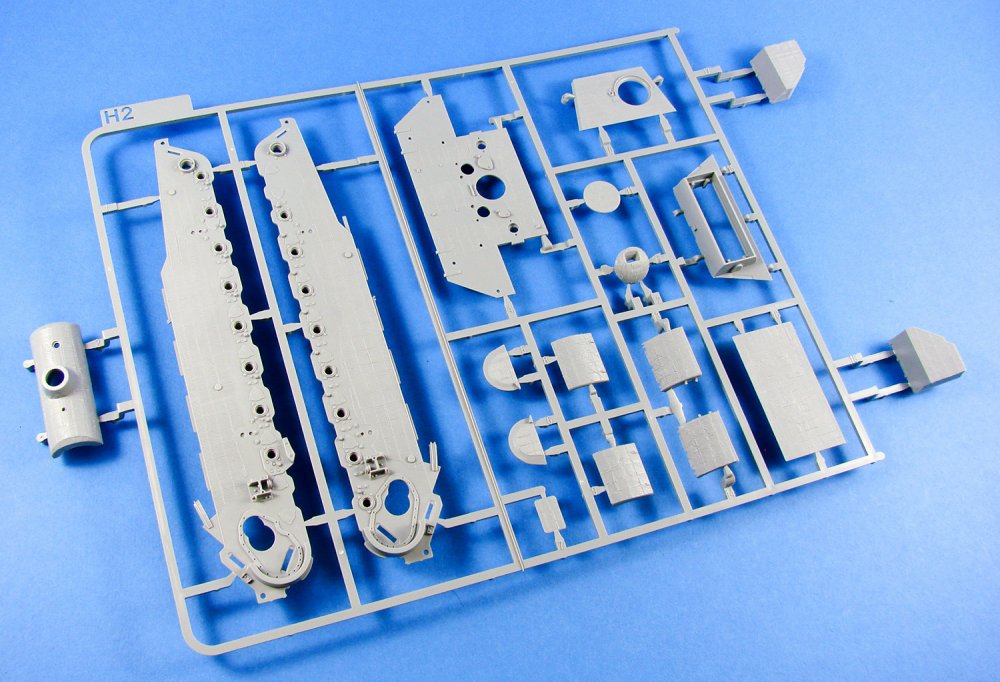
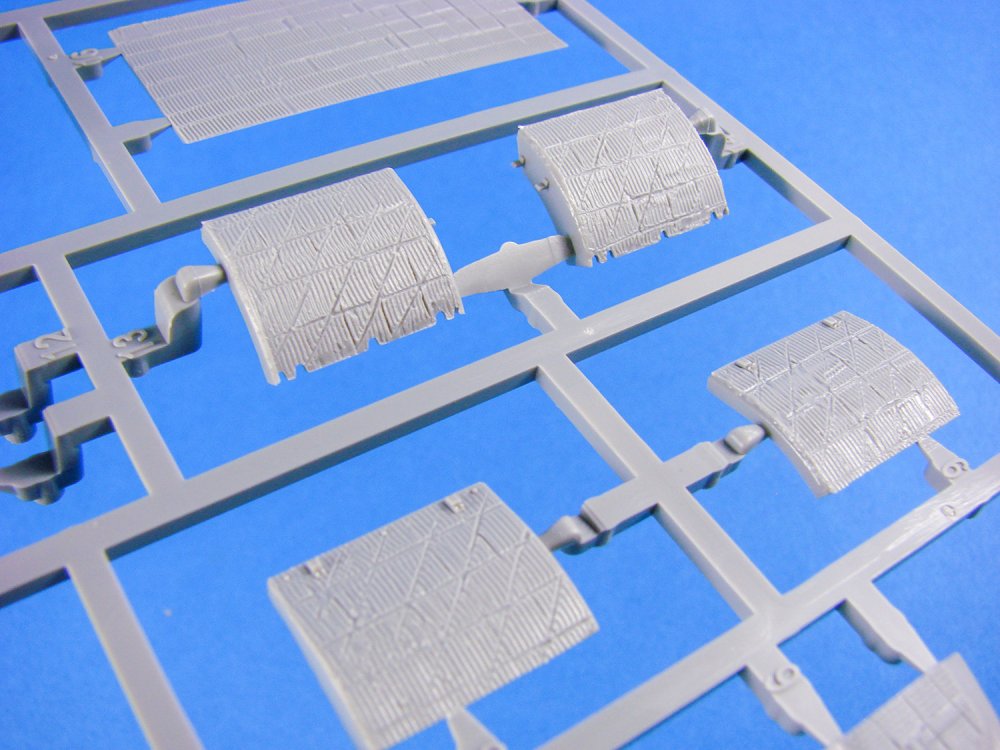
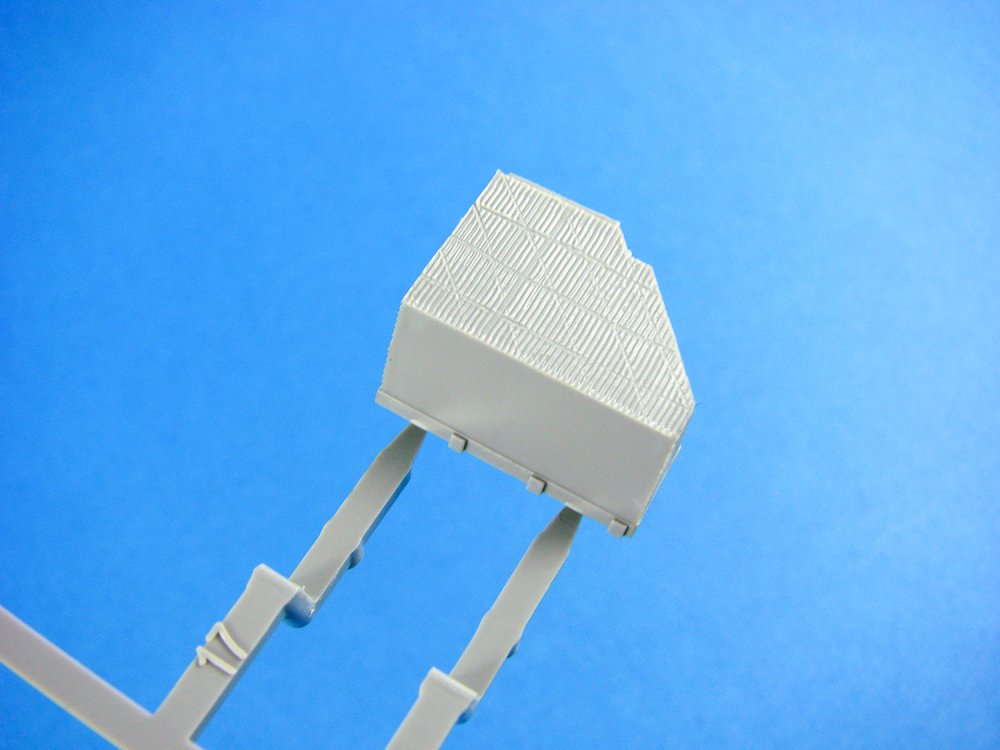
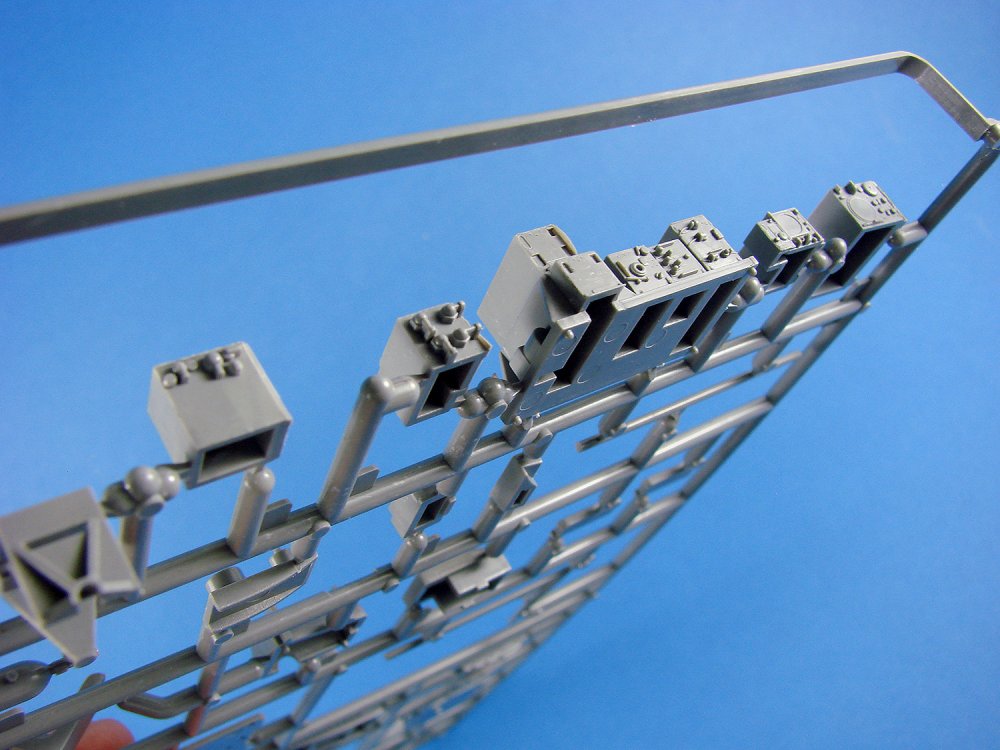
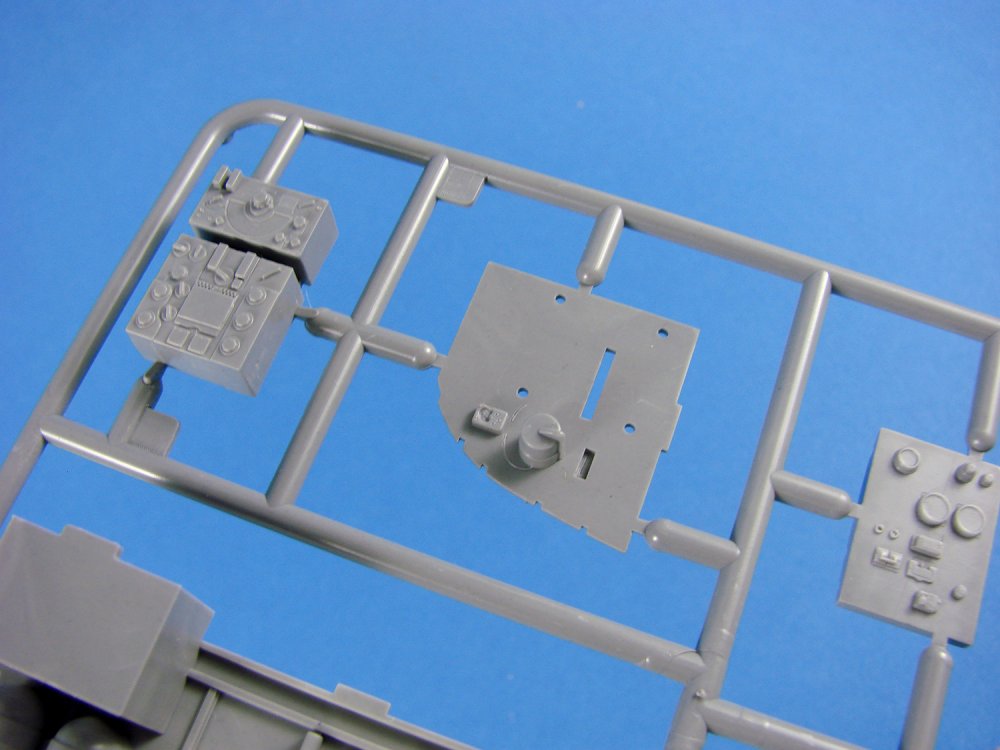
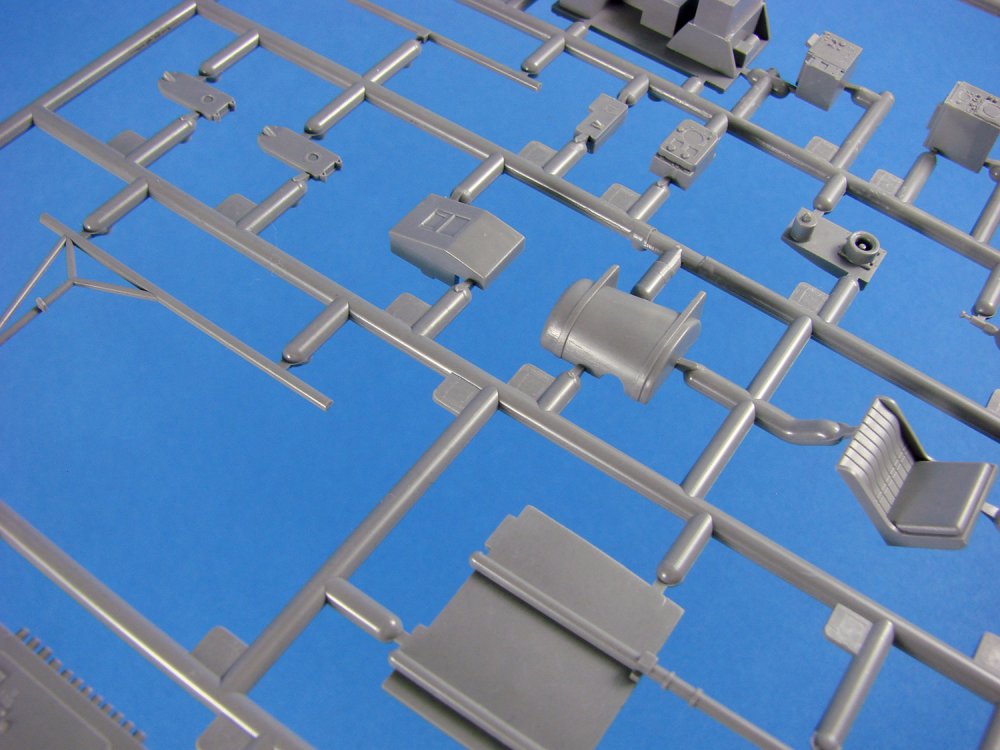
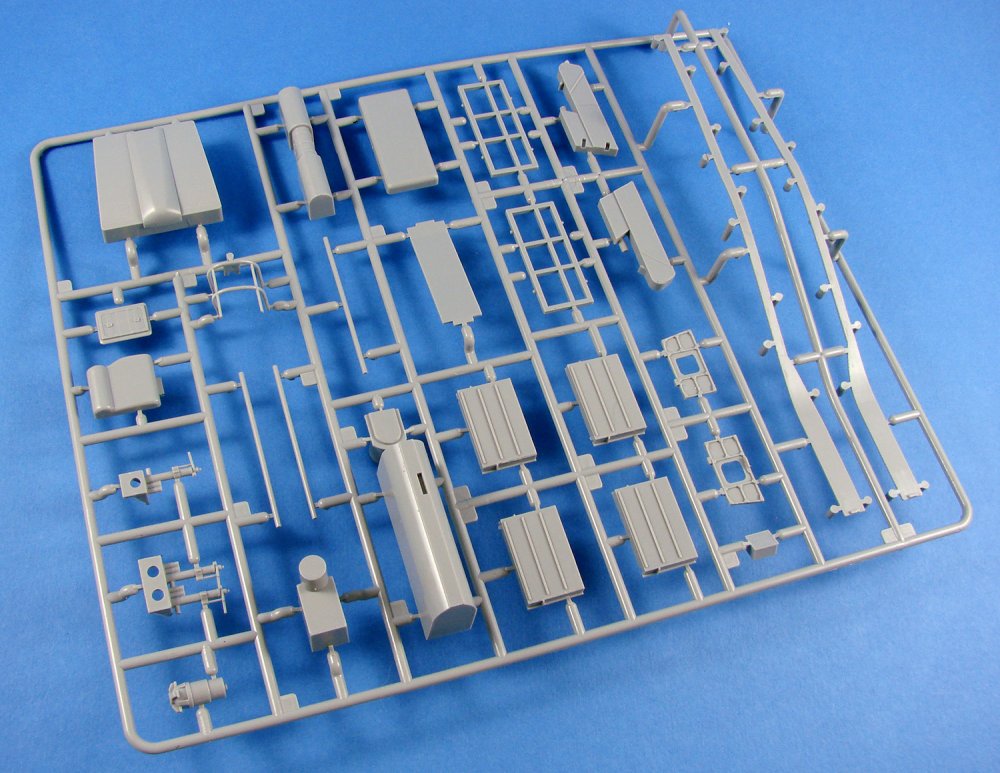
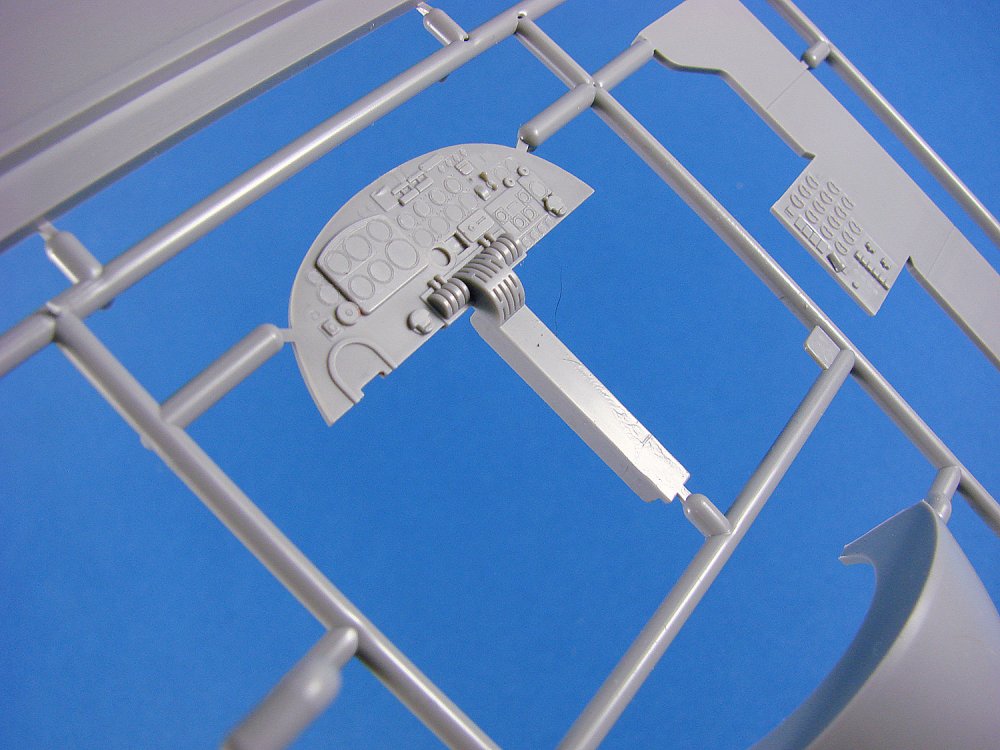
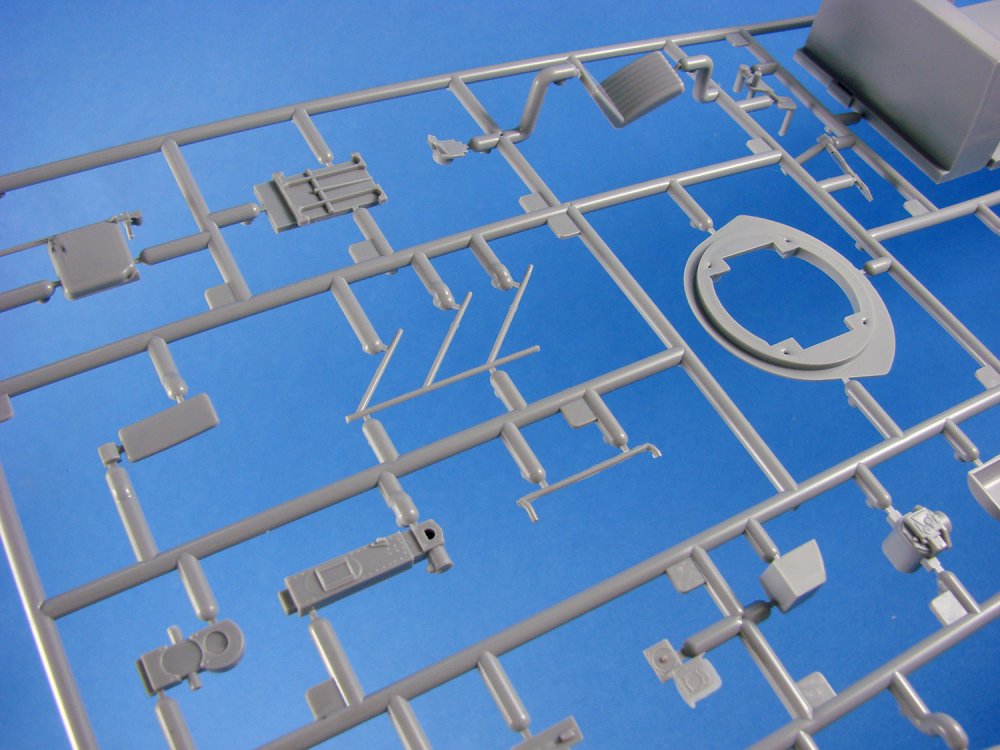
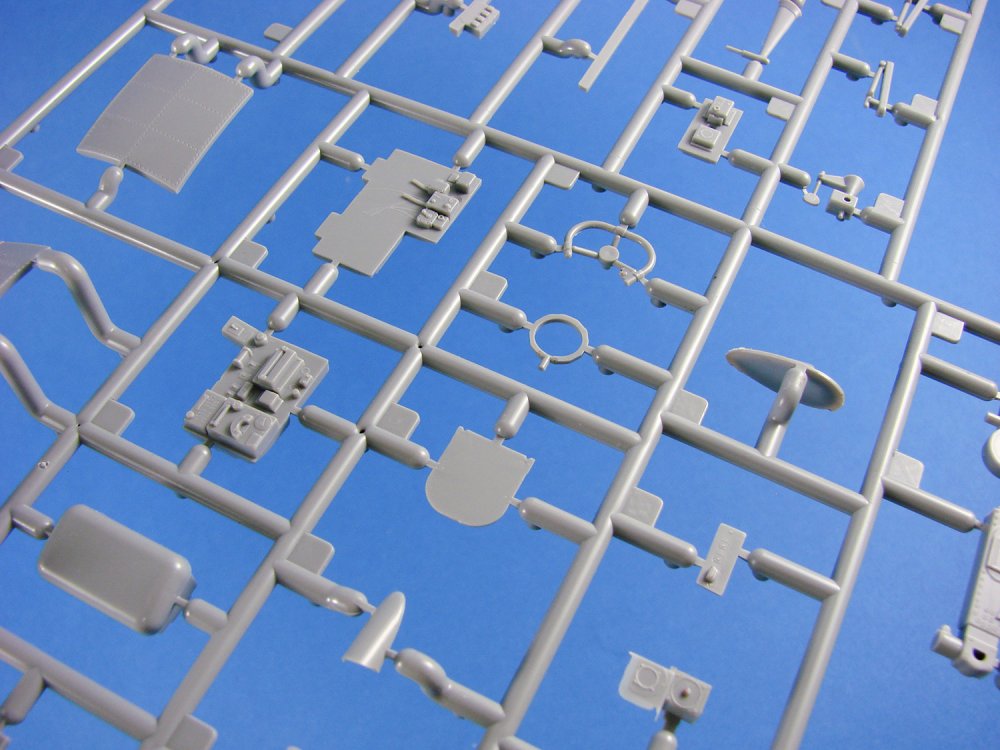
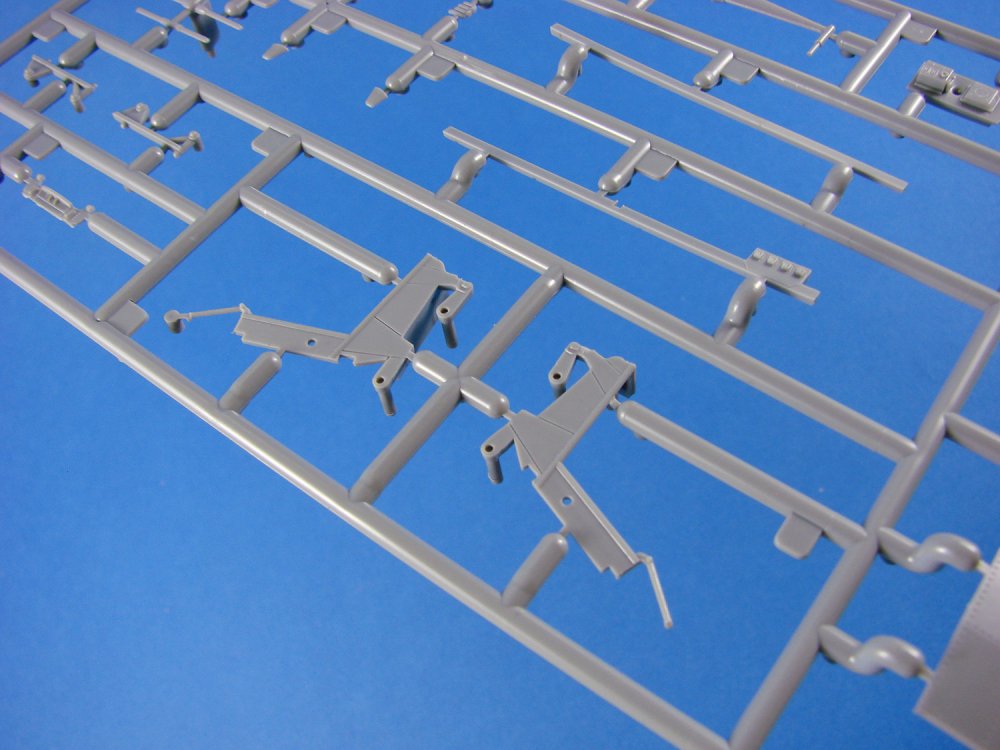
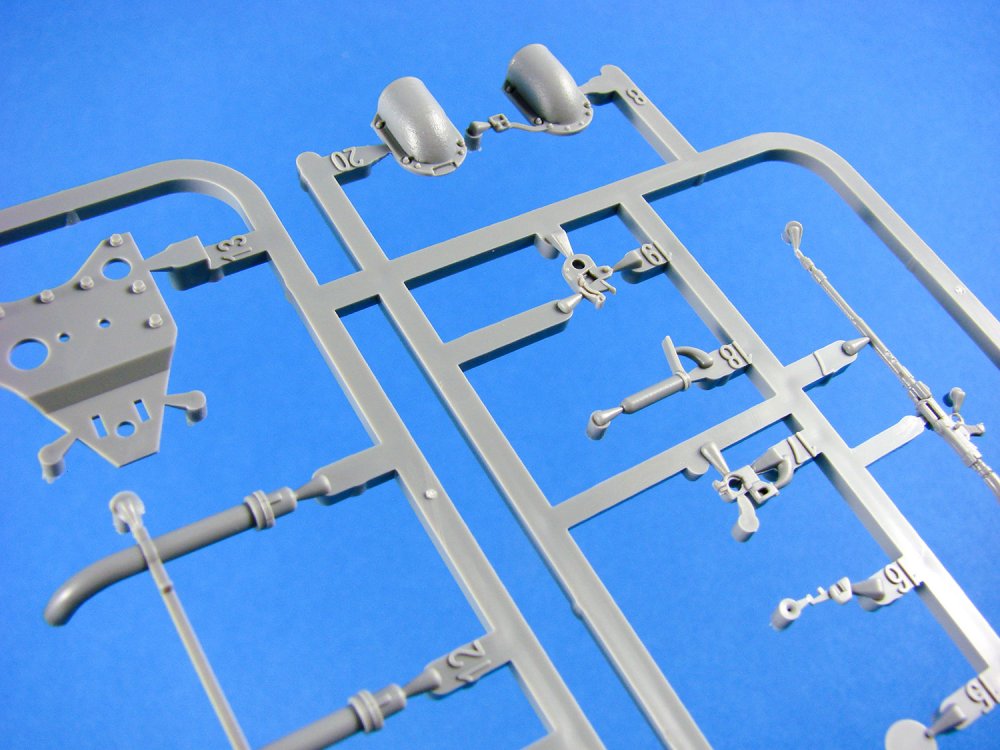
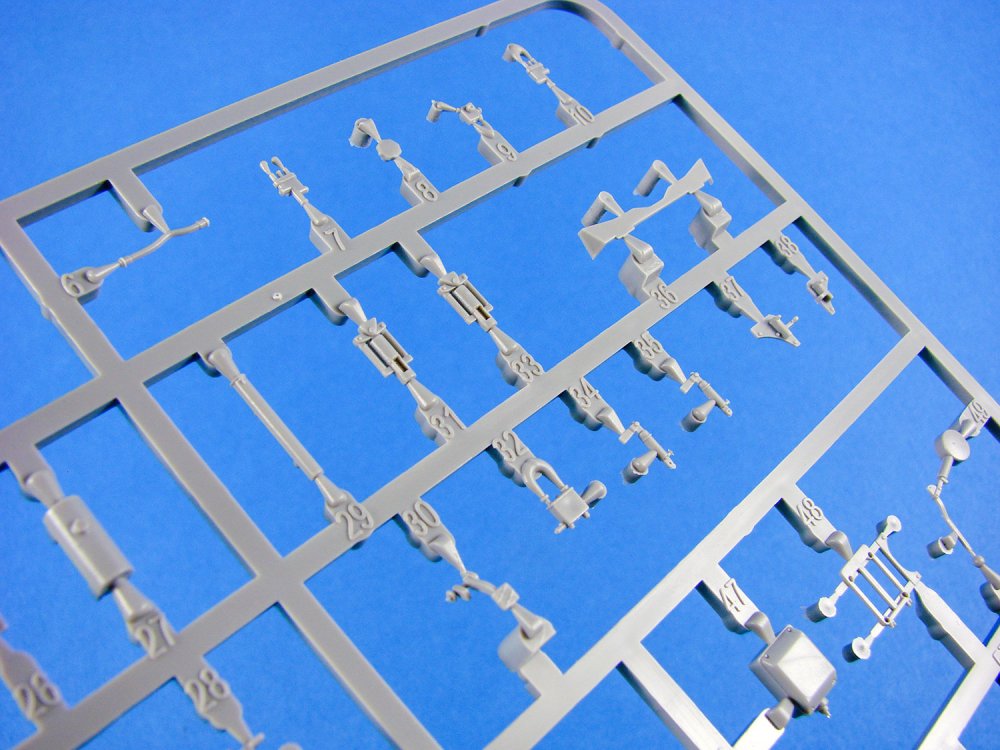
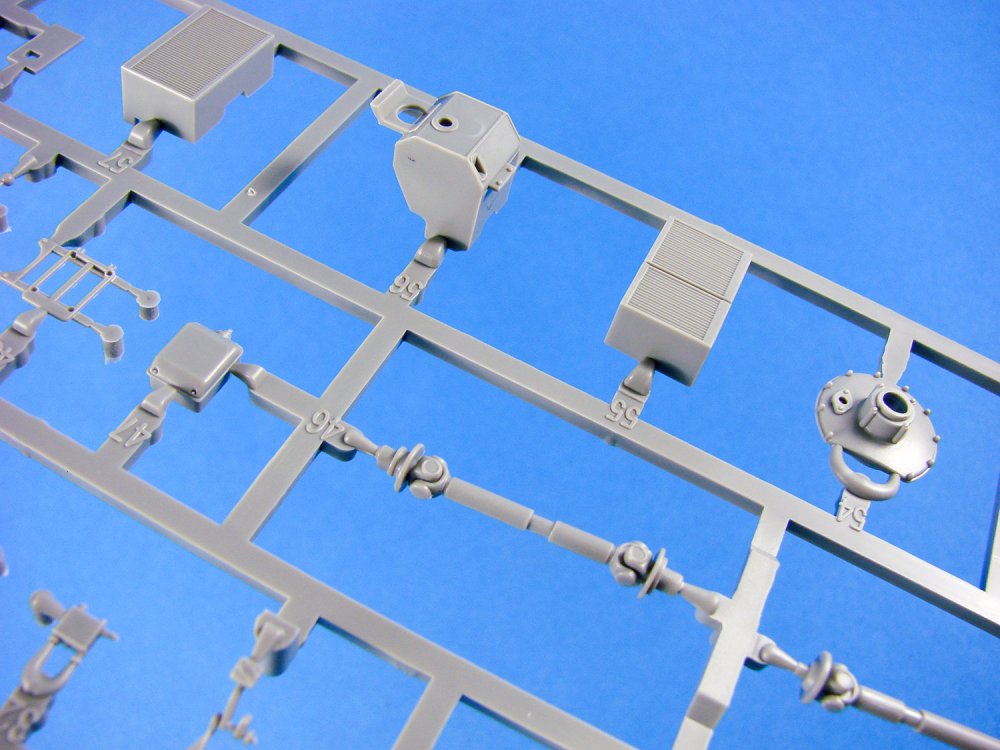
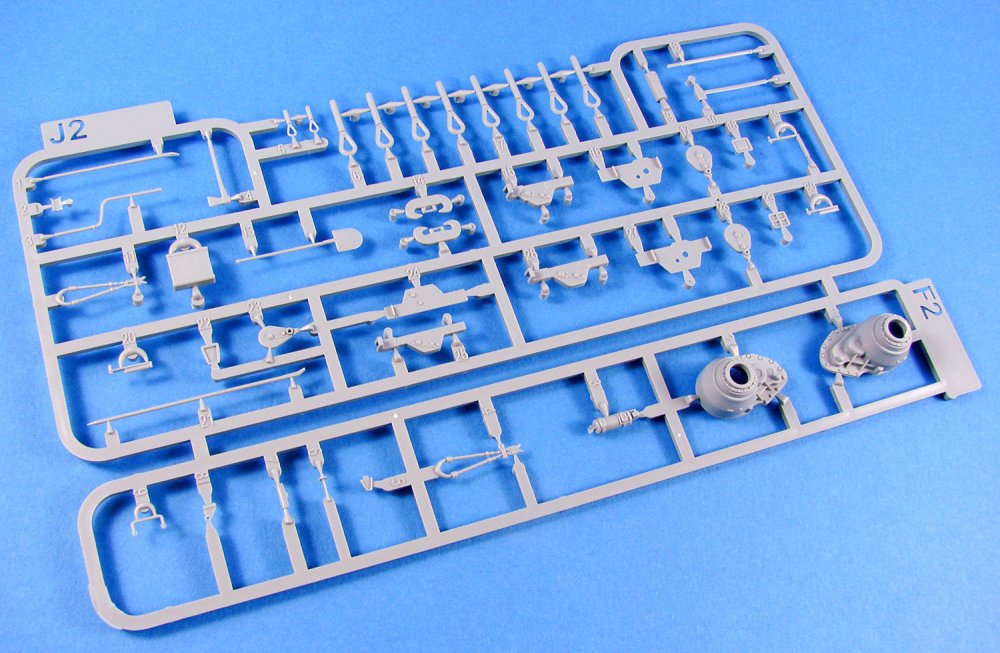
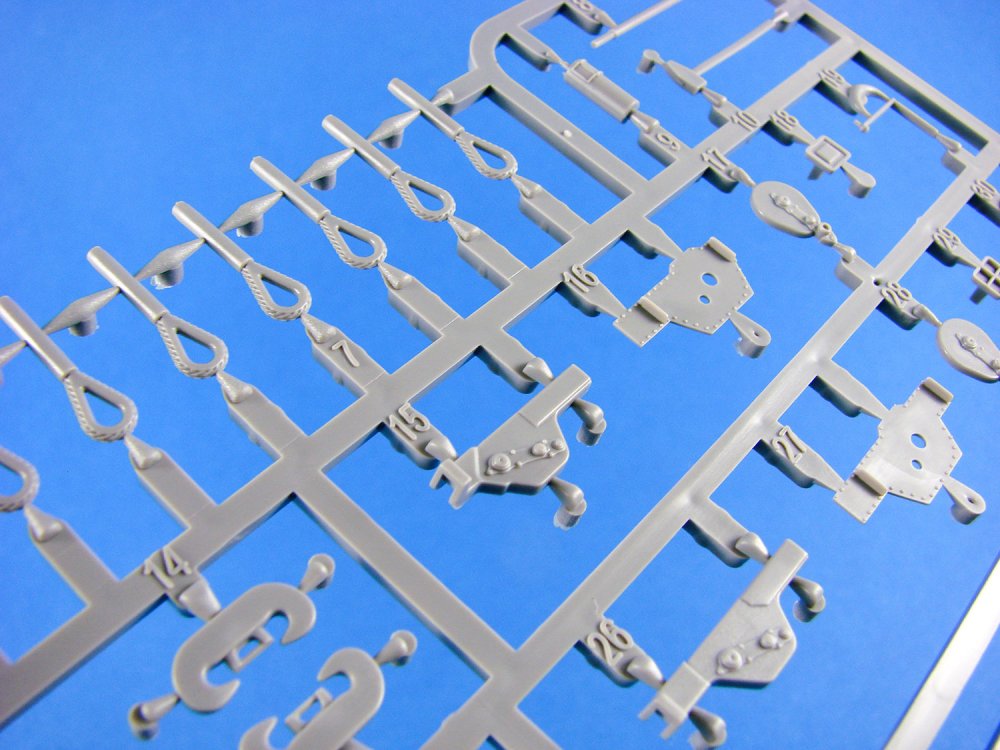
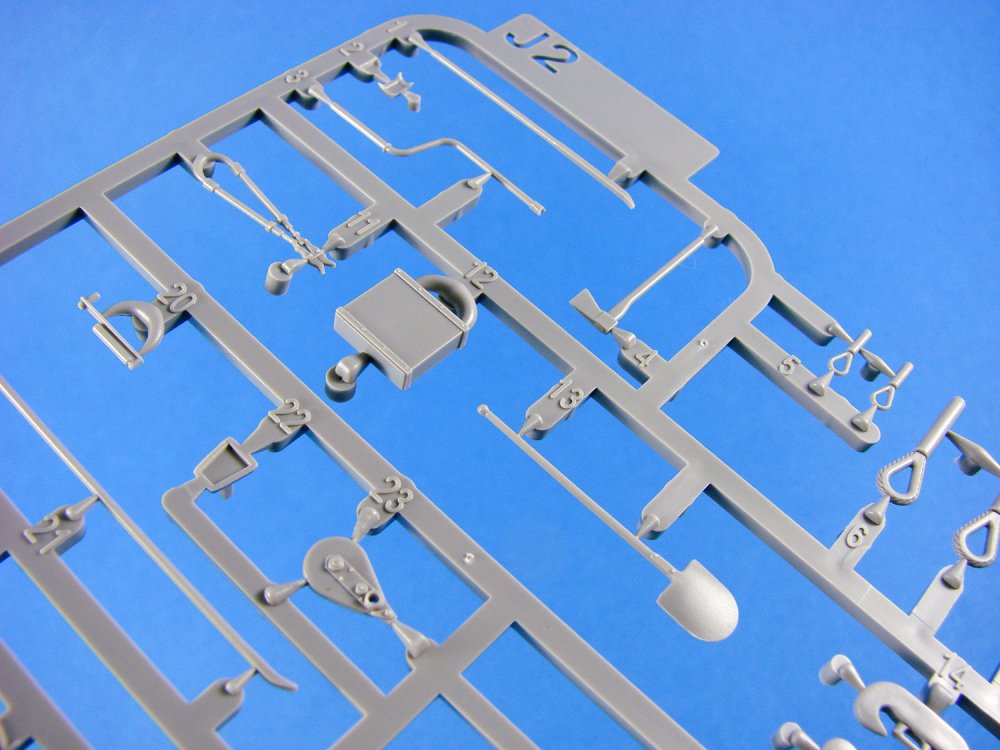
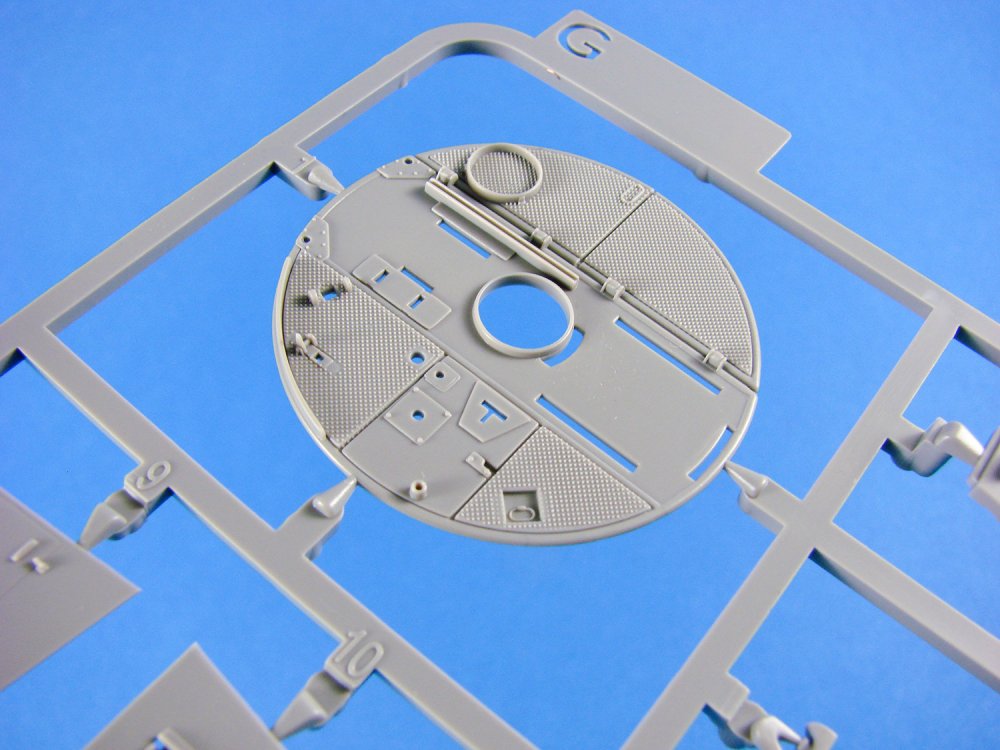
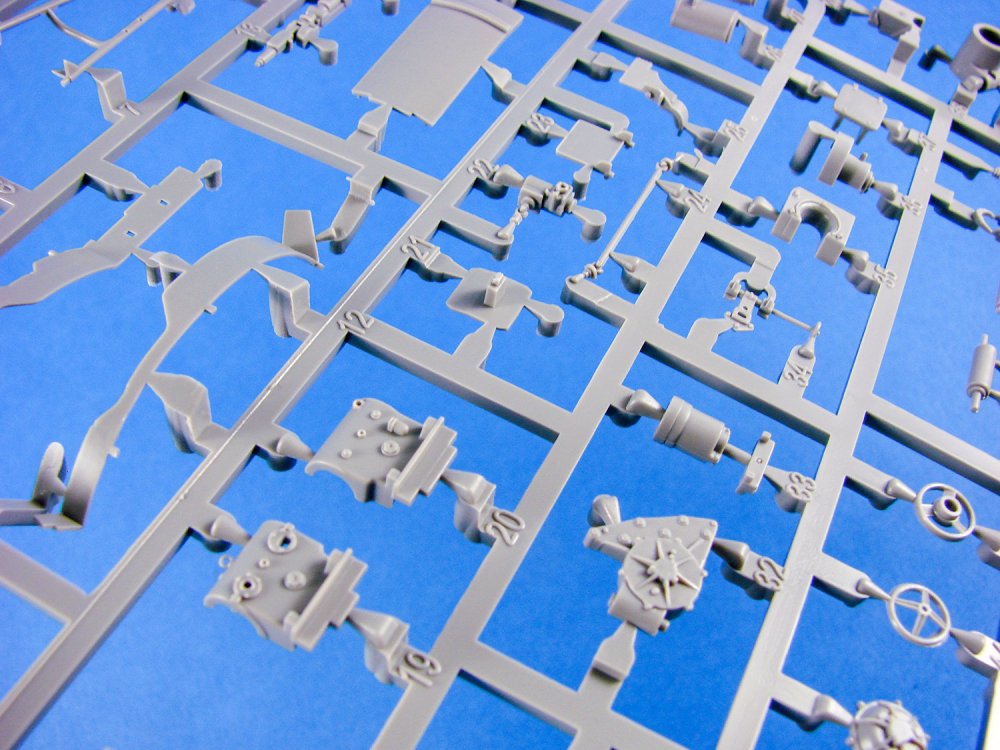
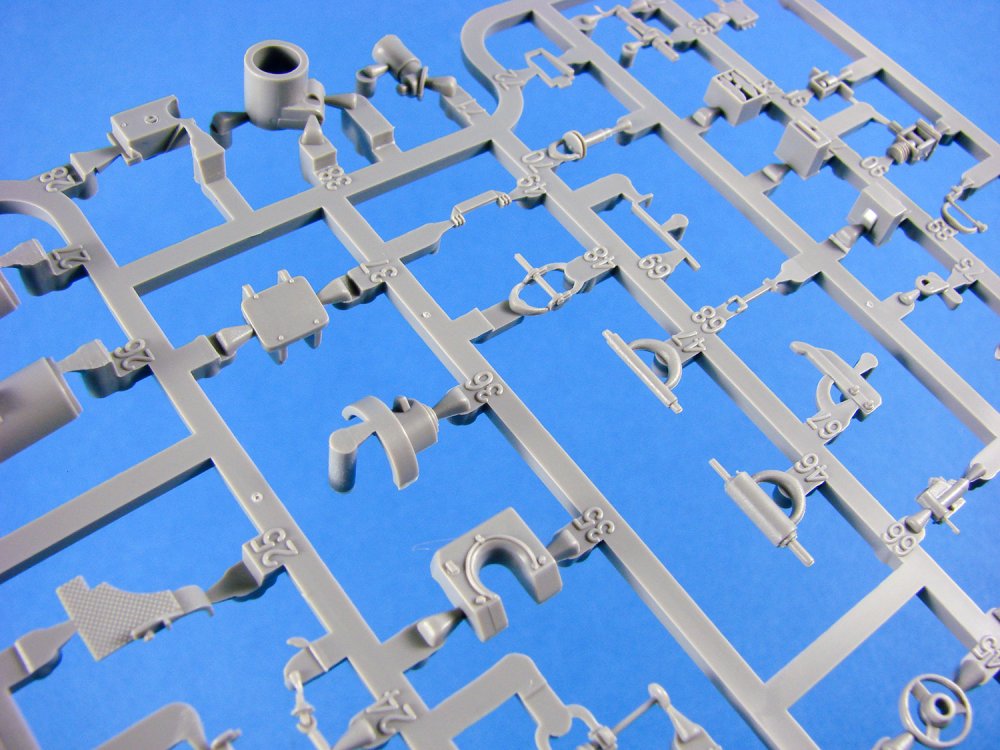
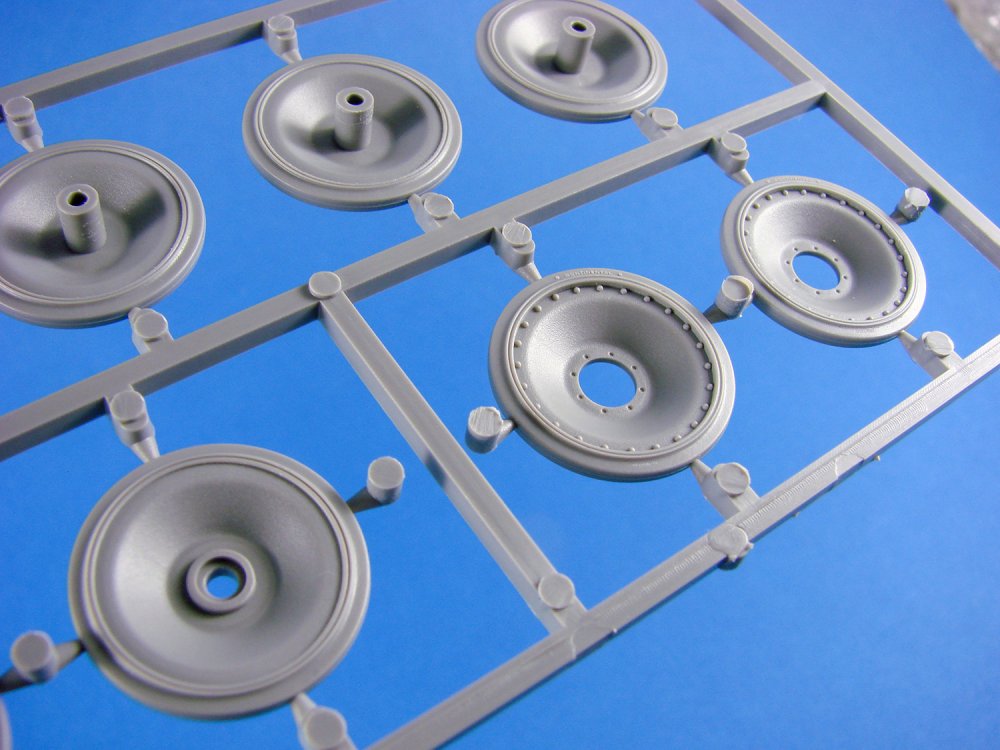
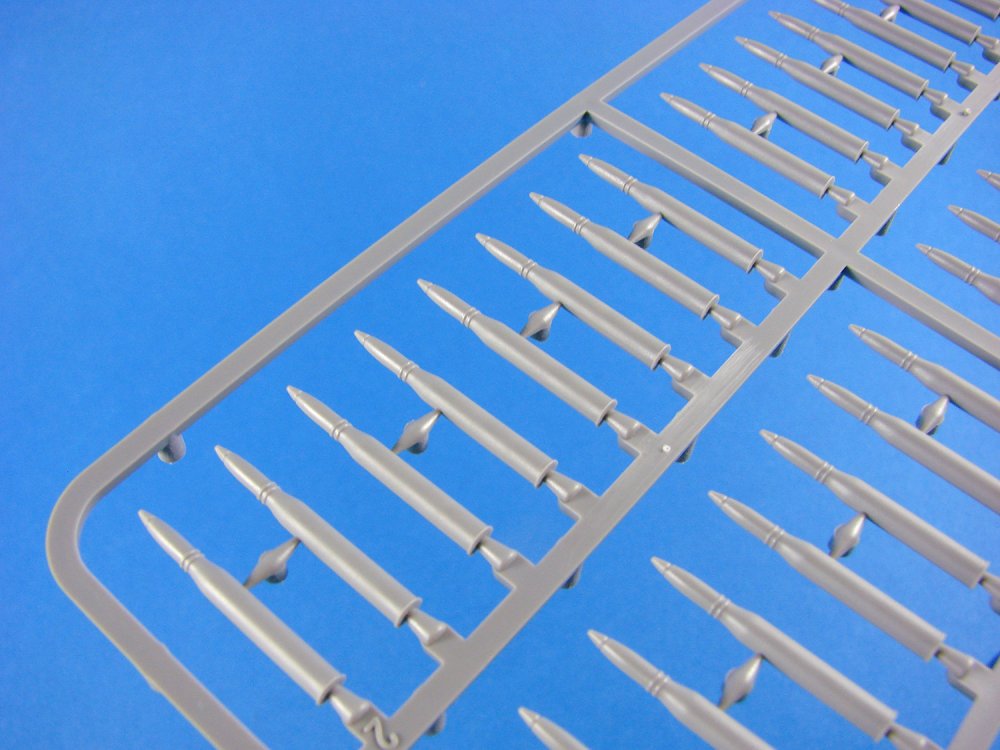
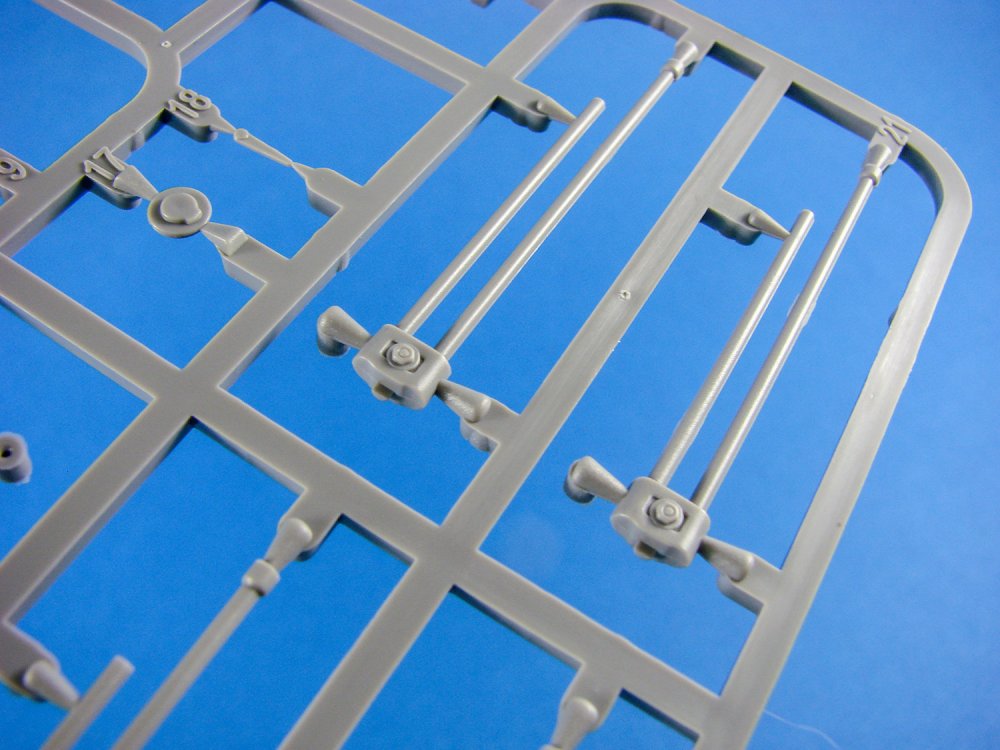
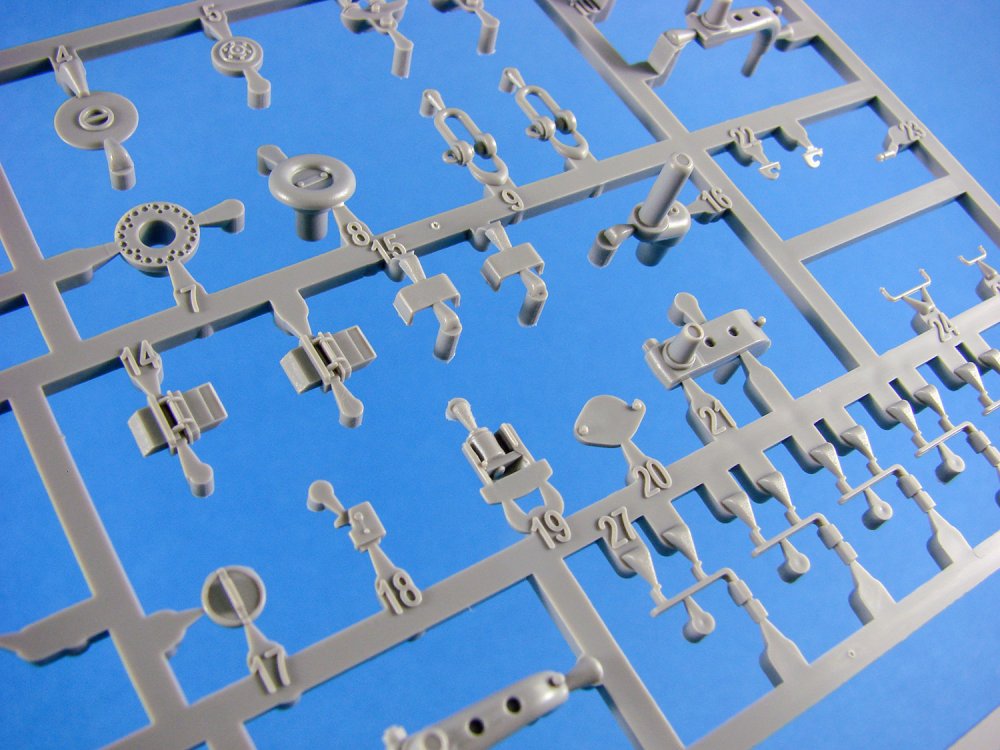
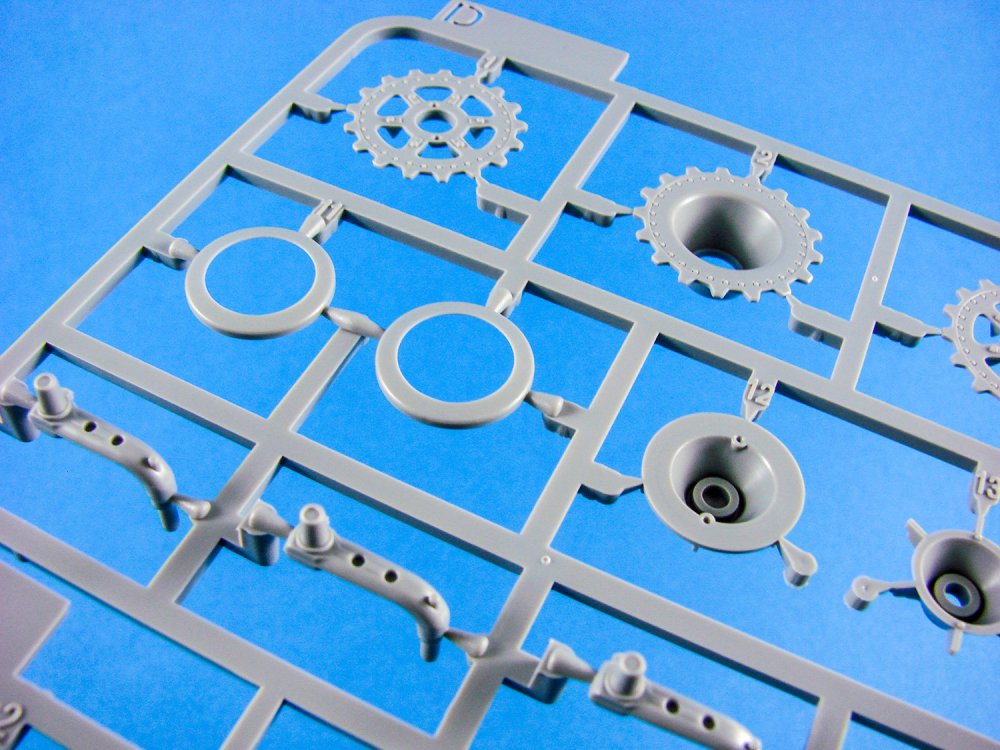
1/16 Imperial Japanese Army Type 94 Tankette Takom Catalogue # 1006 Available for around £50 The Type 94 tankette (Japanese: 九四式軽装甲車, Kyūyon-shiki keisōkōsha, literally "94 type light armored car", also known as TK that is abbreviation of "Tokushu Keninsha" that means special tractor, was a tankette used by the Imperial Japanese Army in the Second Sino-Japanese War, at Nomonhan against the Soviet Union, and in World War II. Although tankettes were often used as ammunition tractors, and general infantry support, they were designed for reconnaissance, and not for direct combat. The lightweight Type 94 proved effective in China as the Chinese National Revolutionary Army consisted of only three tank battalions to oppose them, and those tank battalions only consisted of some British export models and Italian CV-33 tankettes. As with nearly all tankettes built in the 1920s and 1930s, they had thin armour that could be penetrated by .50 calibre machine gun fire at 600 yards range. The design of the Type 94 began in 1932. Development was then given to Tokyo Gas and Electric Industry (later known as Hino Motors) in 1933, and an experimental model was completed in 1934. It was a small light tracked vehicle with a turret armed with one machine gun. For cargo transportation it pulled an ammunition trailer. The hull of the Type 94 was of riveted and welded construction, with a front-mounted engine with the driver to the right. The engine was an air-cooled petrol motor that developed 35hp at 2,500 rpm. The commander stood in a small unpowered turret at the rear of the hull. A large door in the rear of the hull accessed the storage compartment. With the start of World War II, a number of Type 94s were issued to each Japanese infantry division in the Pacific theatre, with a tracked trailer. They saw action in Burma, the Netherlands East Indies, the Philippines and on a number of islands in the South Pacific Mandate. Some were also assigned to Imperial Japanese Navy Land Forces. A detachment of eight Type 94 tankettes forming the 56th Infantry Group Tankette Unit (Also named the Anai tankette unit, after the name of their captain), part of the "Sakaguchi Detachment", had a notable role in the Japanese conquest of Java, engaging a large enemy element on 2 March and routing them, capturing a bridge on the same night, and at dawn overrunning a position of 600 enemy soldiers on the opposite bank, and participating in offensive operations that led to the surrender of Dutch forces on the next few days near Surakarta. Extract from Wikipedia The kit This kit is the initial release of the Type 94 Tankette, hitting the market only within the last 2 months. Another Late Production version will be released here soon, with the Japanese markets already seeing this new version. For a 1/16 kit, the box for this model kit is relatively small, as befits such a vehicle of such stature. Despite the size of this little vehicle, the kit box itself is pretty full. Please note that this model does notoffer a full interior as with very recent Takom kits. Takom’s Type 94 Tankette comprises of 9 sprues of light grey styrene, two clear sprues and two lengths of grey vinyl track of the same shade as the styrene. Sprues are packaged separately except for the multiples of the same sprue. A single PE fret is also included, as is a single decal sheet. The instruction manual is a 16-page landscape format publication, roughly A4 in size and with fold out colour illustrations at the rear. Hull This single-piece moulding is of the typical bathtub-style design and is very deep in form, whilst being short from front to back, indicating the squat nature of the Type 24. The part itself is quite simple, with only the very basics needed in side detail, and numerous dome-headed rivets covering the various faces of the part. Takom has designed the rear hull plate as a separate part. No sprue is connected to this, but there is the tiniest of styrene nubs on the underside that needs a quick trim. Sprue A (x2) We first take a look at a sprue for which two sets are included. Here we have the majority of the parts that concern the running gear etc. Note that the forward drive wheels are moulded with the inner toothed rim separate to the outer portion, and these are fitted with a whole row of locating pins to as to ensure alignment of inner and outer teeth. The roadwheels are moulded with the main rim separate to the inner spoked hub. Orientation of these isn’t important. The rest of this sprue is taken over with the parts for the bogies and the transverse spring suspension that was a quirk of this little vehicle. Takom has used slide-moulding to recreate that hefty spring, and it does actually look very good, despite the fact that it will be hidden behind a separate cover. Plenty of scope for building this with a lost or damaged cover, maybe. The Type 94 consists of two bogies per side that are connected to this transverse spring suspension. Sprue B (x2) These very small sprues contain the idler wheel, moulded in the same two-part style of the drive wheels. A very small number of other parts are included here, such as the idler hub and tensioner for the same said wheel. Sprue D Here we have both full-length fenders, front fender hinged flaps, idler tensioner mechanism, machine gun and associated parts (gun scope etc.), forward light bracket. The only thing I would do with the gun’s sleeve is to drill the holes out. Note that the mounting brackets for the fenders are separately moulded and included on Sprue A. Sprue E Even in 1/16 scale, it’s pretty clear how small this little vehicle was by the paucity of the turret. This is moulded as halves instead of the recent trend in making these as more or less a single piece. External plating and raised rivet detail is excellent, but there are limitations in this unless you opt for more expensive slide-moulding. That factor here involved the raised/domed rivets at the front and back of the turret, which can’t be created properly in a conventional rigid steel mould. To fix this, Takom has included a number of small rivets that are moulded onto the sprue itself. These will need to be shaved off and applied as per instructions. Other parts on this include the turret lid and hinged door, plus the turret base, mantlet, vision ports and escape hatch. Sprue H Takom have gone to a lot of trouble to ensure all the various hatches etc can be posed open, but you need to remember that this model has no interior. Some of these hatches are rather large in 1/16, so it would seem nonsensical to do this unless you planned on some serious scratch-building. Nonetheless, the options are there. Here you can see the full upper hull with the various openings, and plated that create the raised, angular portions of the upper hull. Again, all hatches themselves are moulded with interior/underside details, should you want to pose them open. The rear hull plate with its access hatch and door can be seen here. This sprue really contains the rest of the parts for the tank superstructure, such as the drive wheel gear housings, towing hook with its leaf-spring mounting, pioneer tool (spade), jack, multipart exhaust, storage boxes, headlight, etc. Sprue J A single sprue contains the individual track links for this kit, with there being 85 per side. Takom are actually very generous here as they supply a total of 200 track parts, giving you 30 spare parts. These appear to click together, but at this stage I’ve not tested their fit. Crucially, moulding here is excellent with only sprue gate clean-up really being required. These are also moulded with their horns in situ. A benefit of separate track links is the ability to create a reasonably realistic sag, unlike vinyl which can be more difficult to manipulate into the most realistic pose. Sprue K I’m not really a fan of figures, primarily because I’m not very good at figure painting! Takom has, however, included a very nice styrene figure which takes up all of this sprue. He comprises of 15 parts, with separate face, neck collar, boots etc. and the uniform has been very nicely recreated. He should look superb when complete. There is actually a fifteenth part on the clear sprue, for his goggles. A very nice little touch. Sculpture of his face is perfect, with a suitably Japanese appearance. Vinyl Tracks I’m not really a fan of vinyl tracks or wheels etc, but Takom does give you the option of using these instead of the individual links. Moulded in the same colour as the kit styrene, these provide a much simpler alternative to the separate links, in case that option doesn’t suit you. Photo Etch A single fret contains just three pieces of PE. The largest is for the mesh gate that surrounds the exhaust, and the other parts are for the straps that hold the fender-mounted jack in place. Production is excellent with a nice interleaved mesh effect on the exhaust covering, and minimal gates to cut through to remove the parts. Clear Parts Only two parts here, on two tiny sprues. These contain the figure’s goggles and the tankette headlight lens. Superbly clear and with minimal gate connections too. Decals Just one decal sheet is provided for the three included schemes. Printing is suitably thin, with solid colour, minimal carrier film and perfect registration. Instructions The 16-page manual starts with a potted history of the type and includes a parts map for reference. Construction is broken down into 21 easy to follow stages with clear line drawing illustrations. General paint references are provided at the front of the manual with Mig AMMO colours. Mig also provides the colour illustrations for the schemes at the back of the manual, by means of a fold-out section. Conclusion There’s no doubt that this is a very unusual and well-executed rendition of this diminutive vehicle, and certainly allows the modeller to create something very unusual for their display shelf. The kit itself is fairly basic but doesn’t really need to be anything else as Takom has covered just about all detail and angles here. I think I would’ve liked to have seen an interior with the kit, as they included with their Renault FT release though. Still, for me, I’d build this with all hatches and ports closed, so the interior wouldn’t really matter to me. I think the figure would be best represented by him standing next to the tank. Quality is pure Takom with superb tooling and moulding and detail. In all, not too expensive a kit either, and definitely one you should contemplate if you’re having Panther burnout! Highly recommended My sincere thanks to Takom for the review sample seen here. Check out your regular online retailers for this kit. It should be in the shops around now.


-
Watching closely
-
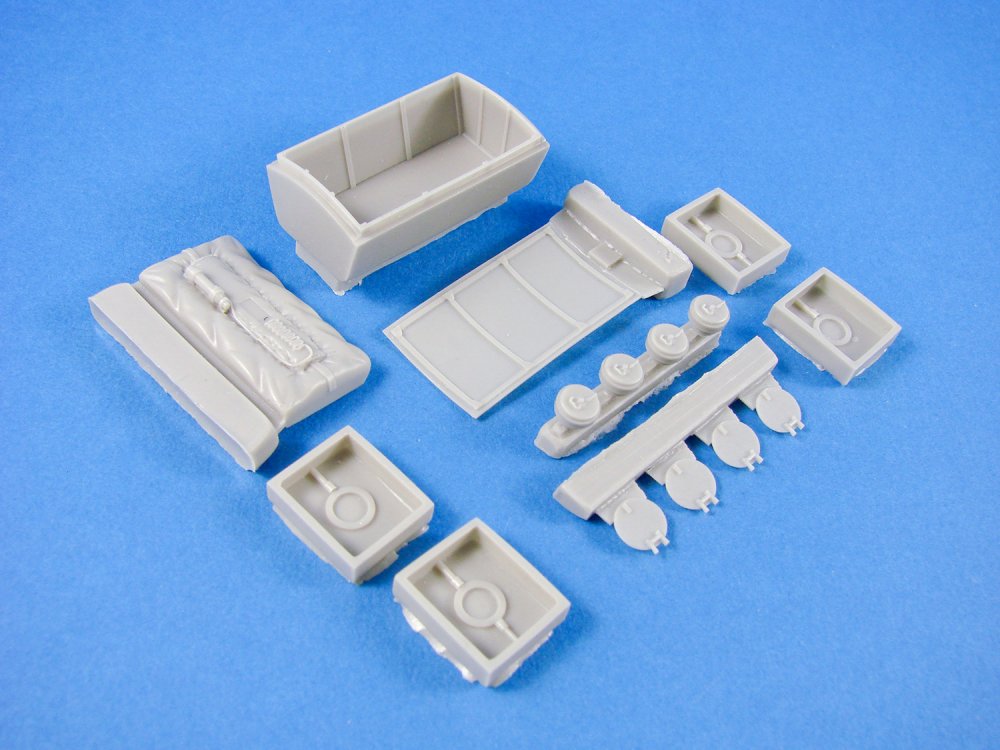
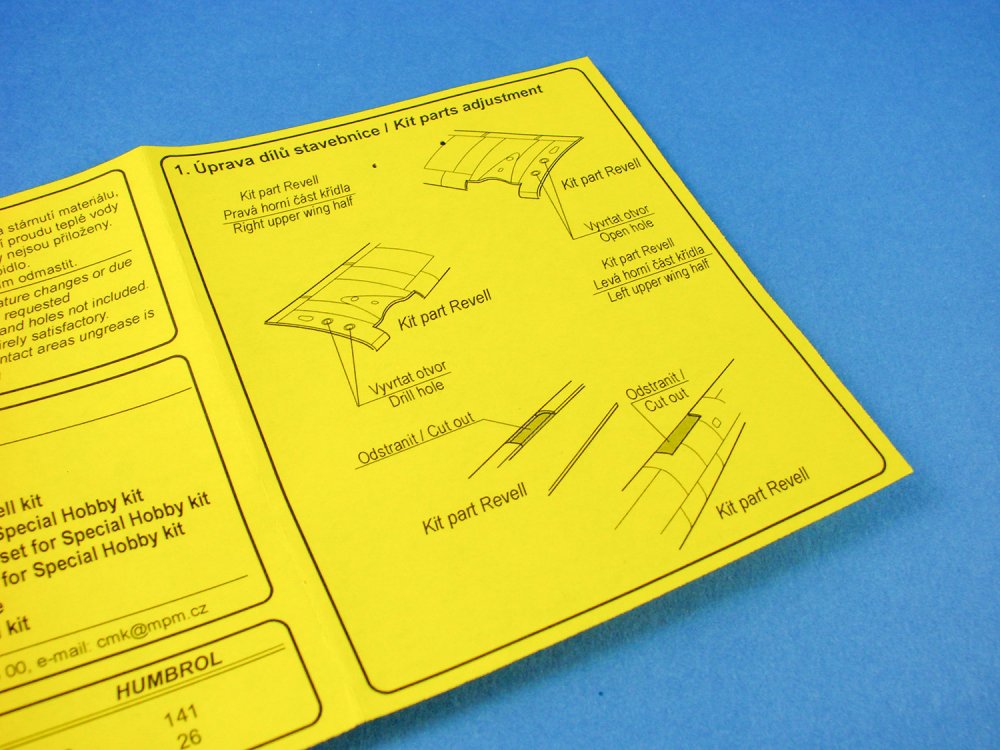
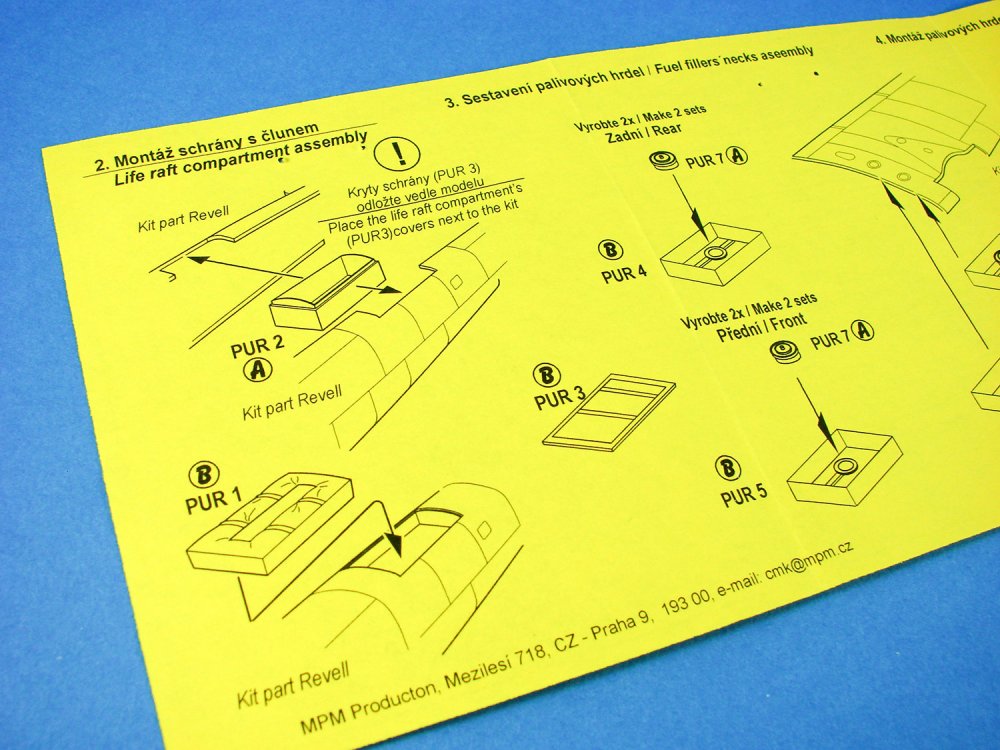
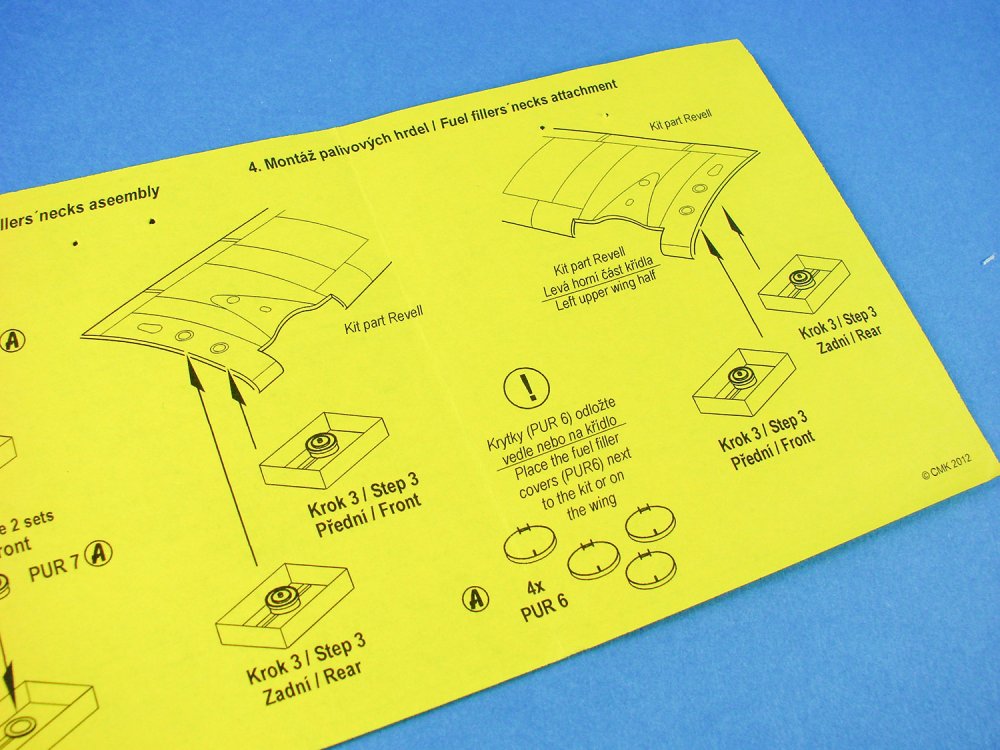
June News from Special Hobby / CMK team
JayDee replied to petr@specialhobby's topic in Special Hobby
Nice to see this version being released. Can't wait to see it. -
1/48 Wellington Mk.X (He727 NA-K)
JayDee replied to JeroenPeters's topic in LSM 1/35 and Larger Work In Progress
That gear work is insane. Just wait till you get the Lanc- 304 replies
-
- 1
-

-
- wilnis crash
- trumpeter
- (and 1 more)
-
takom 1/35 Panther A mid-late w/Zimmerit & full interior
JayDee posted a topic in Armour/AFV Reviews
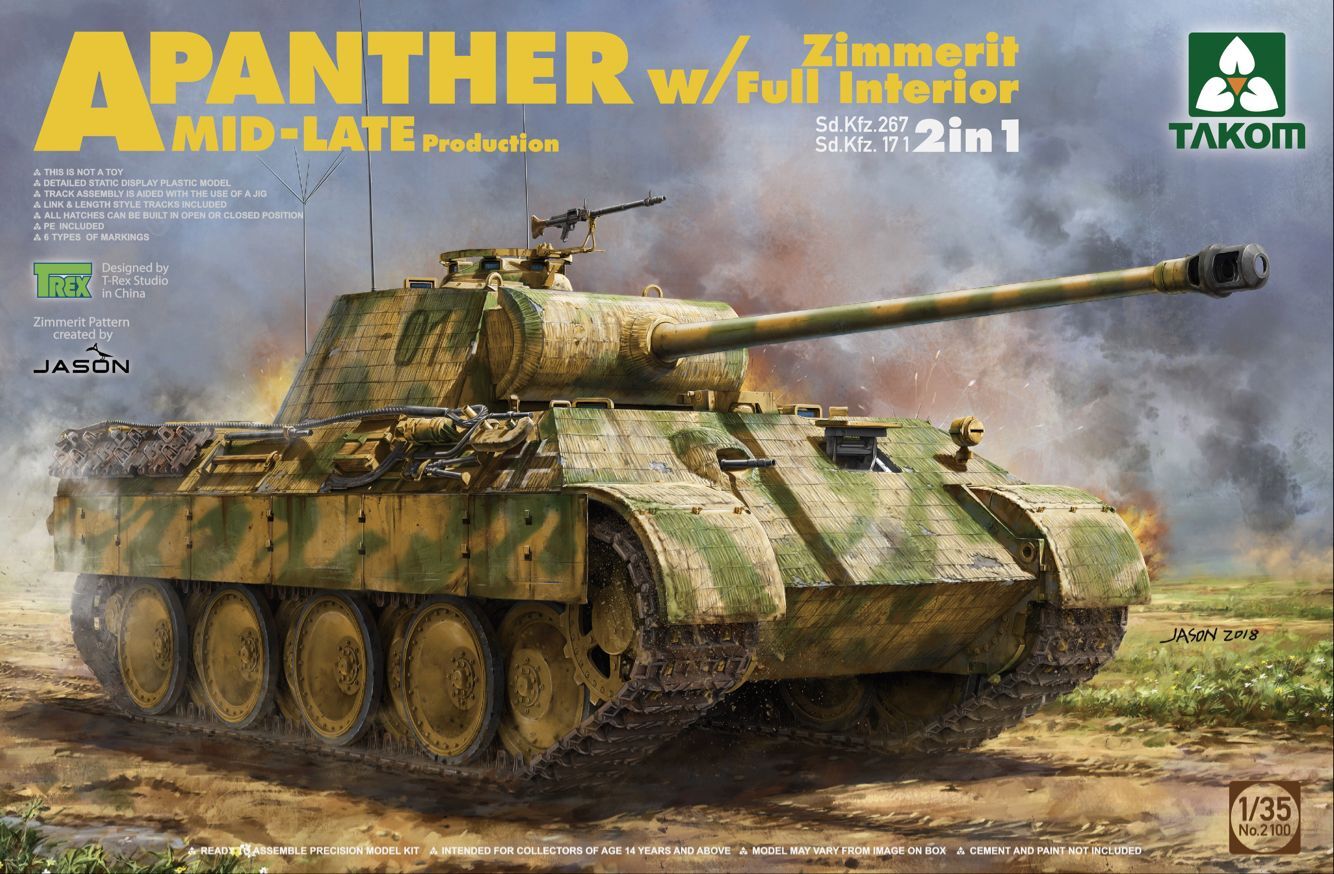
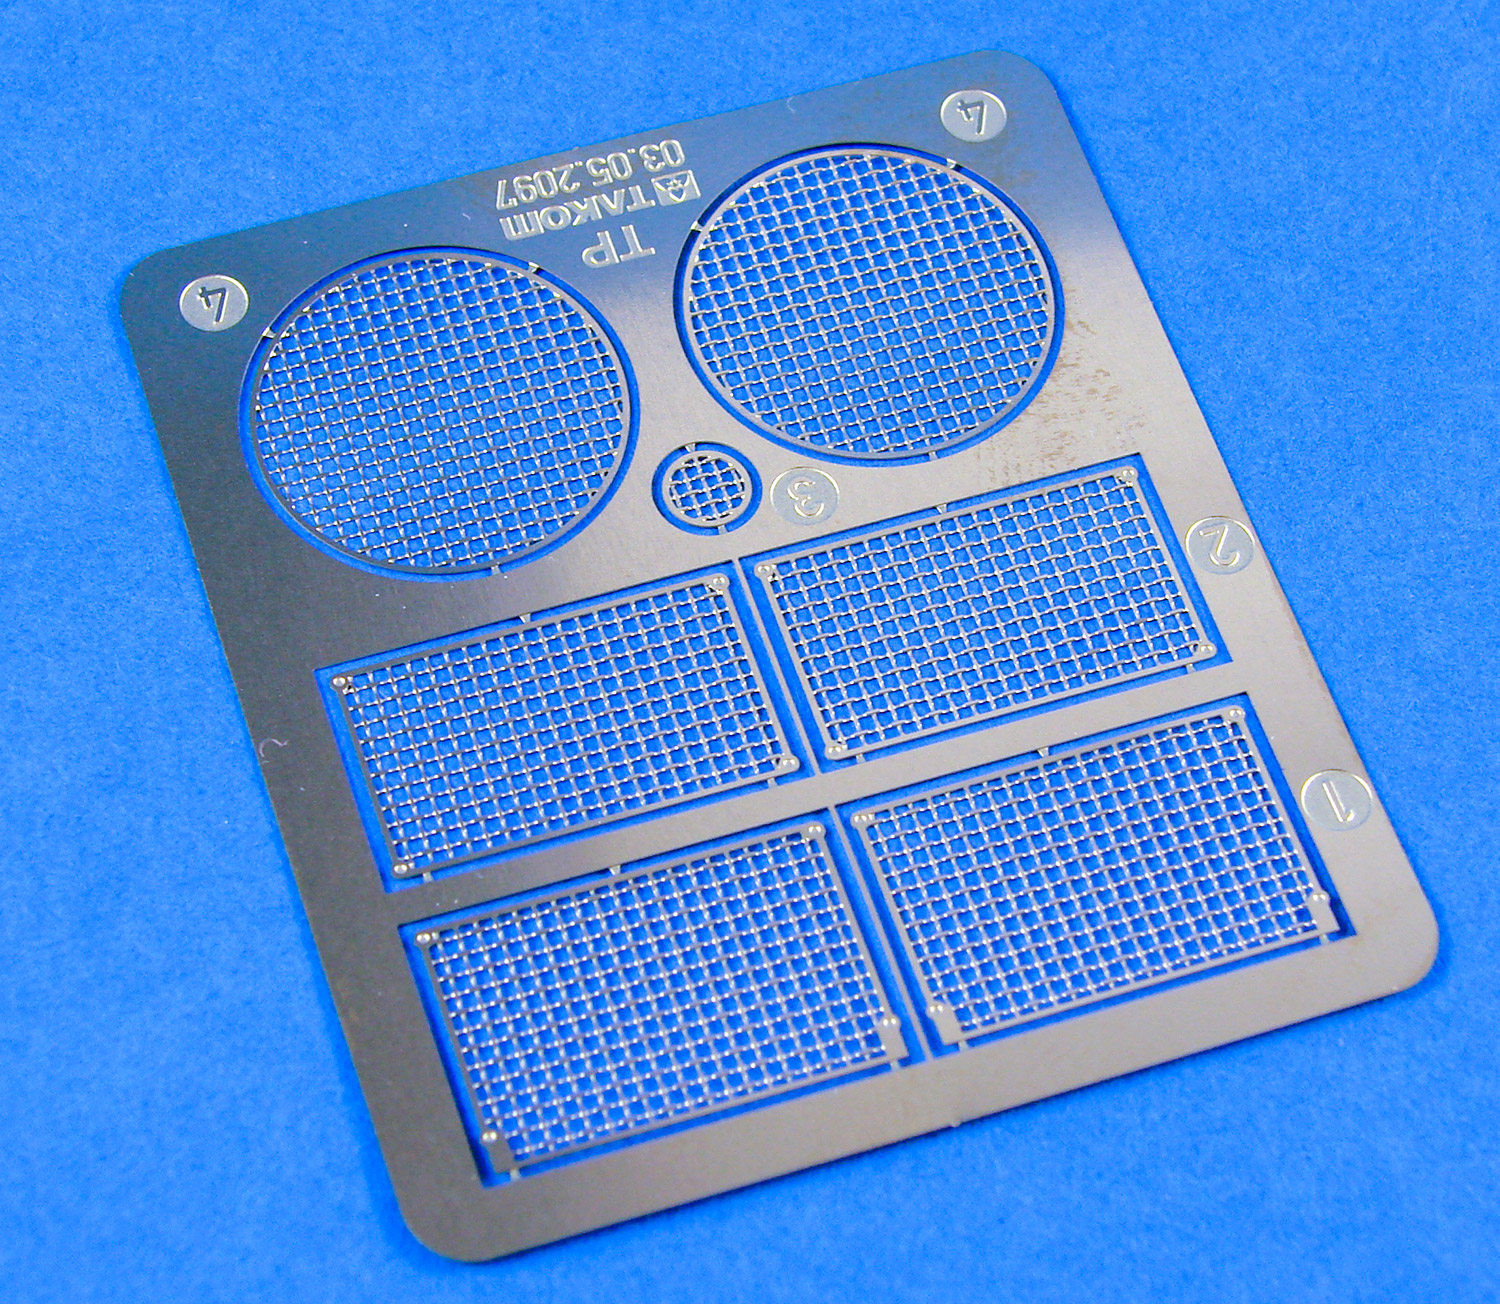
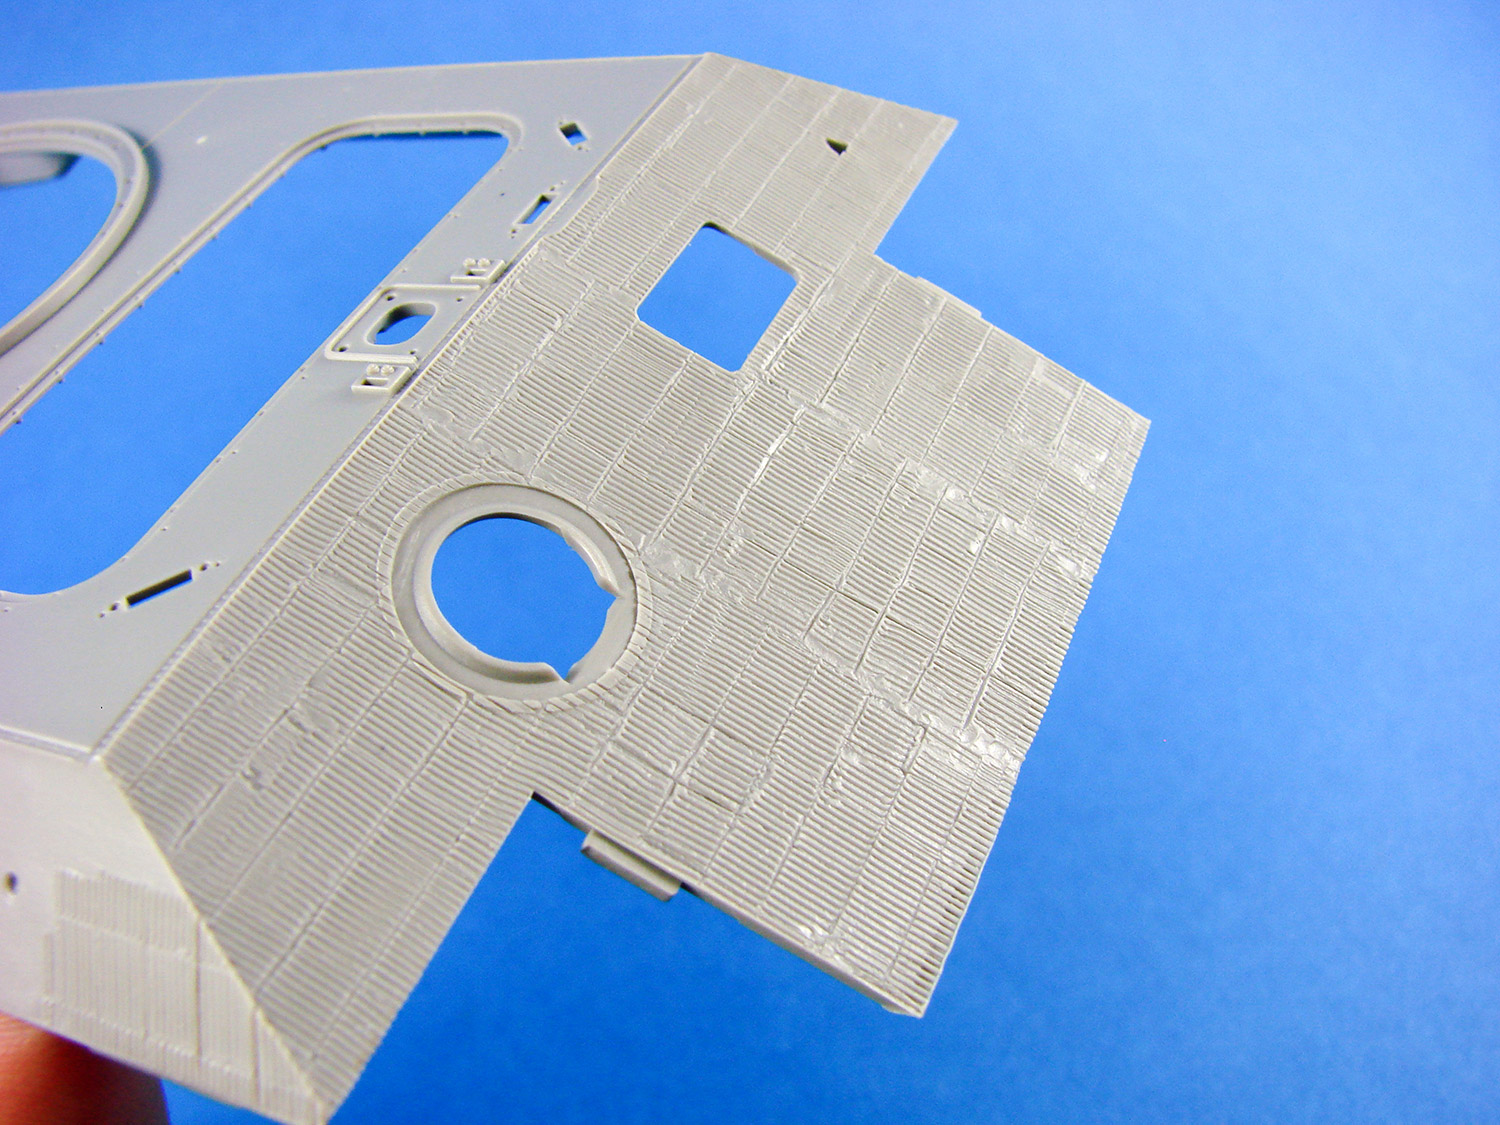
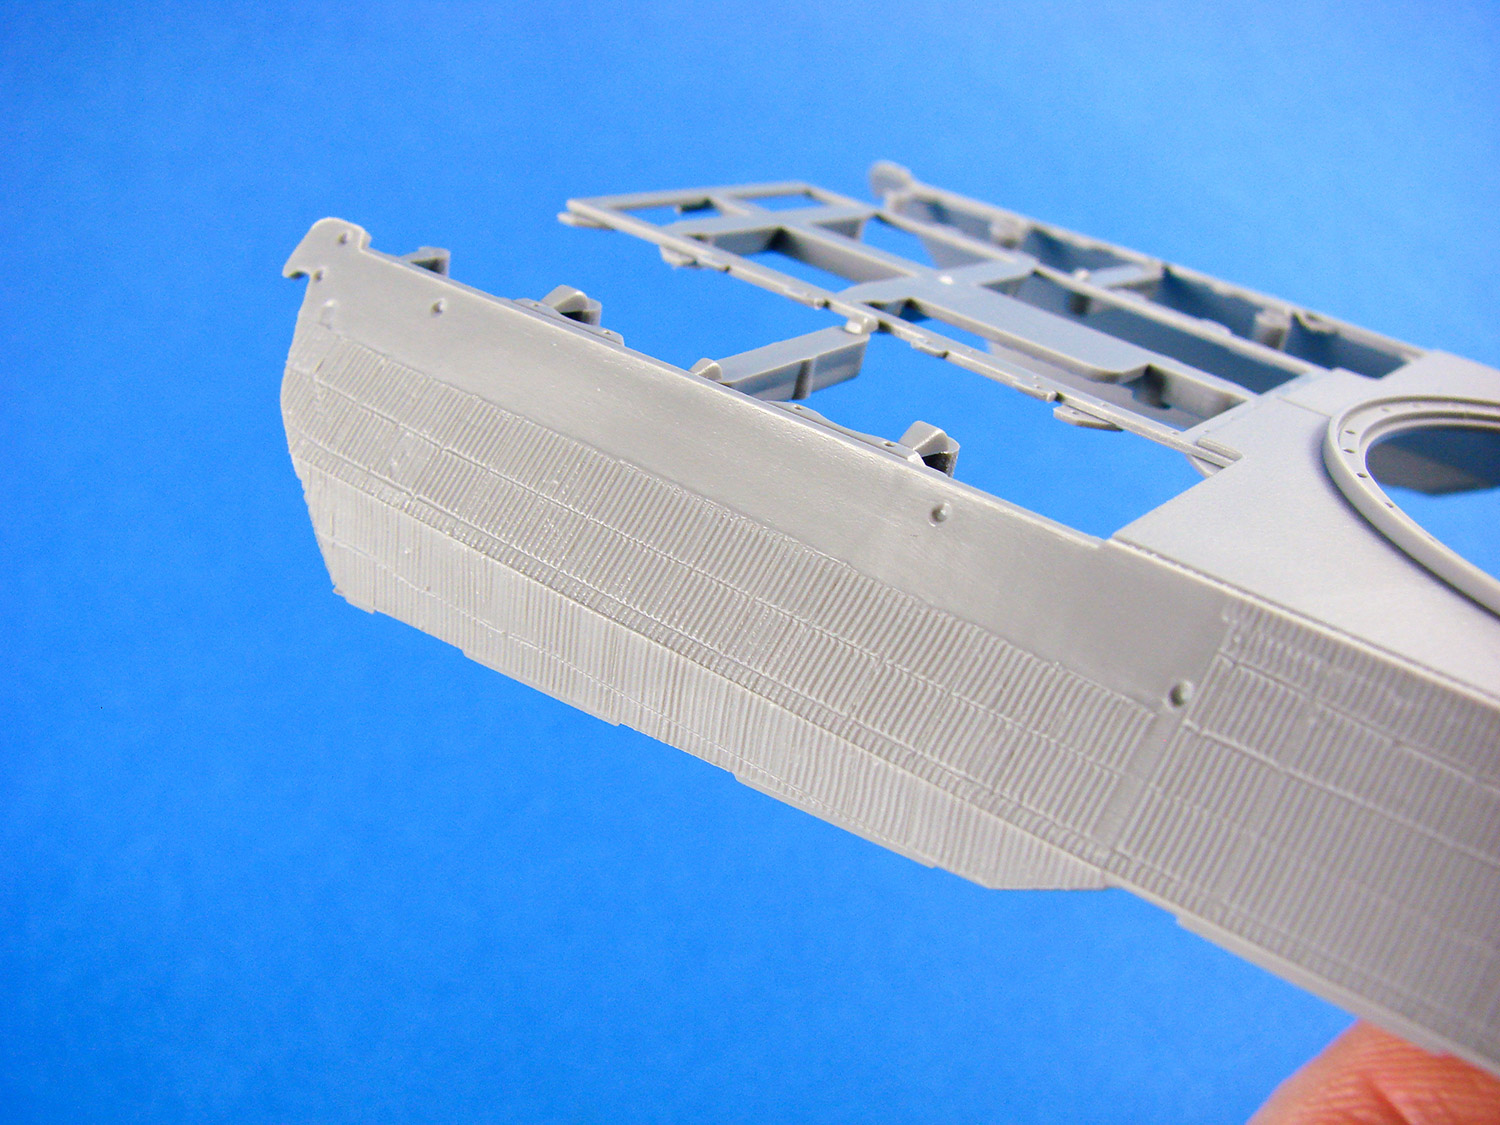
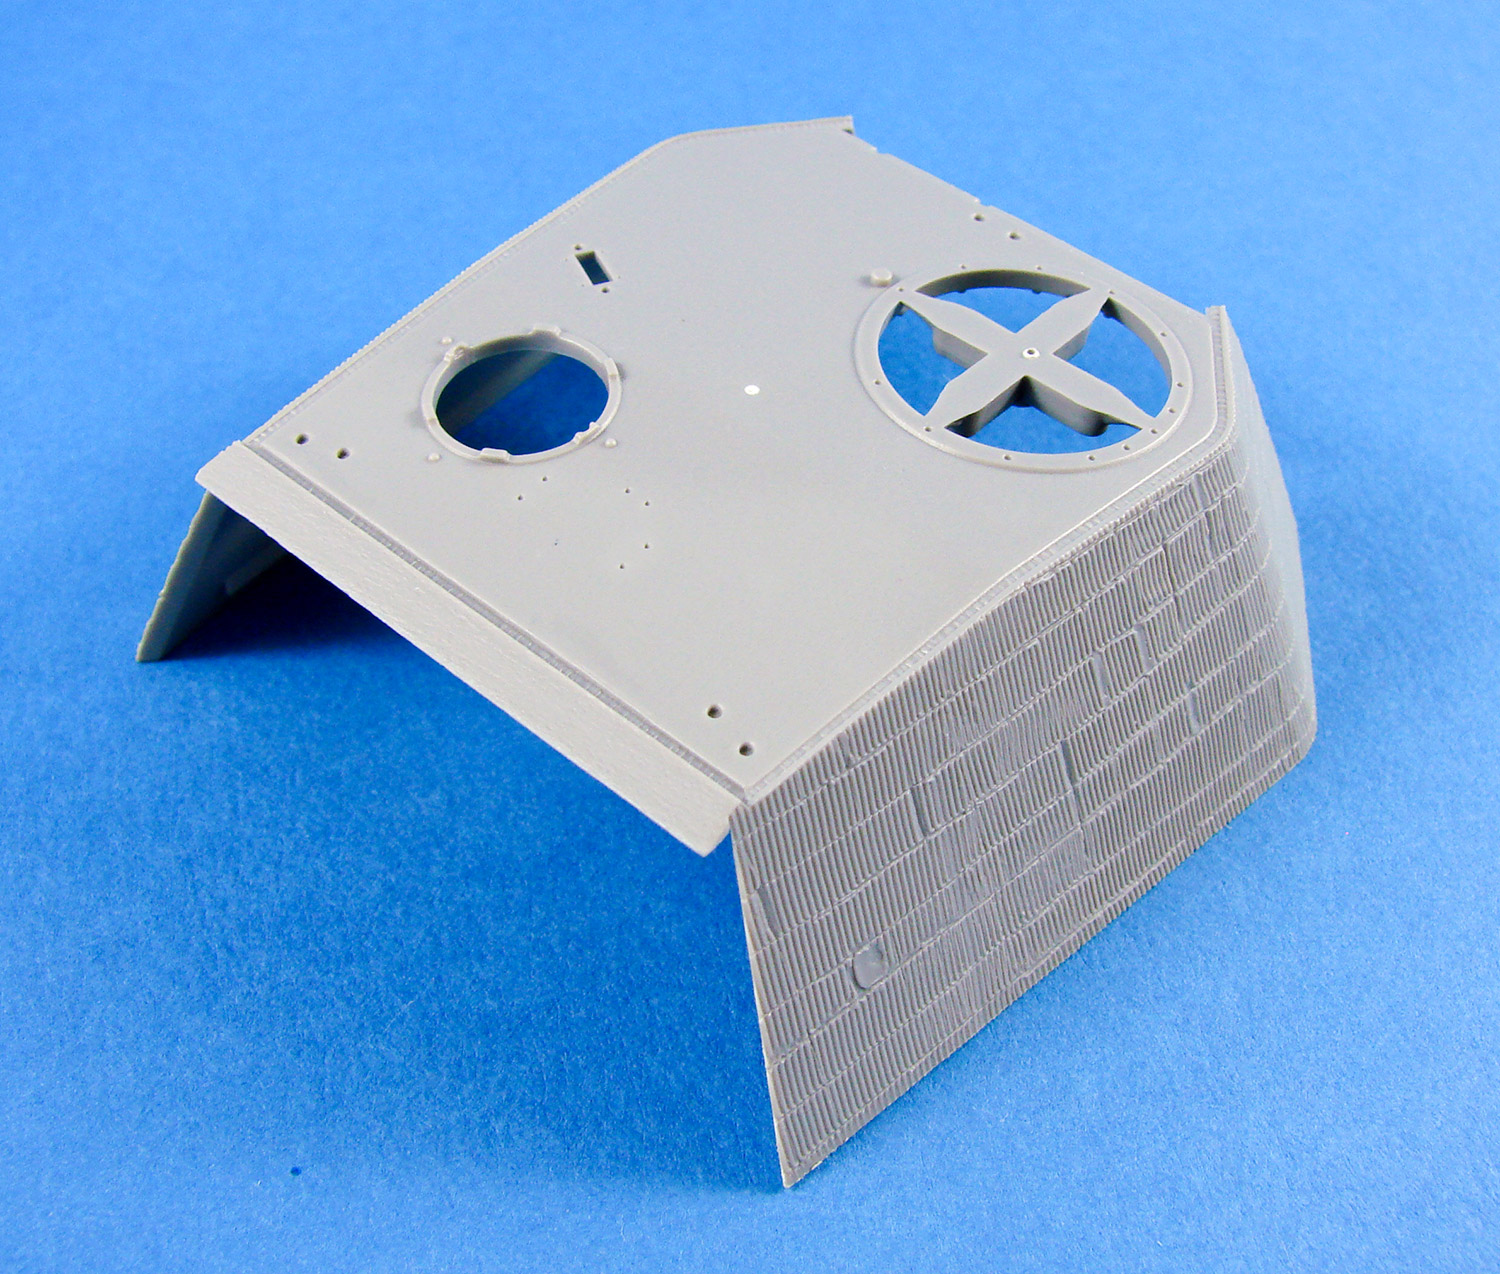
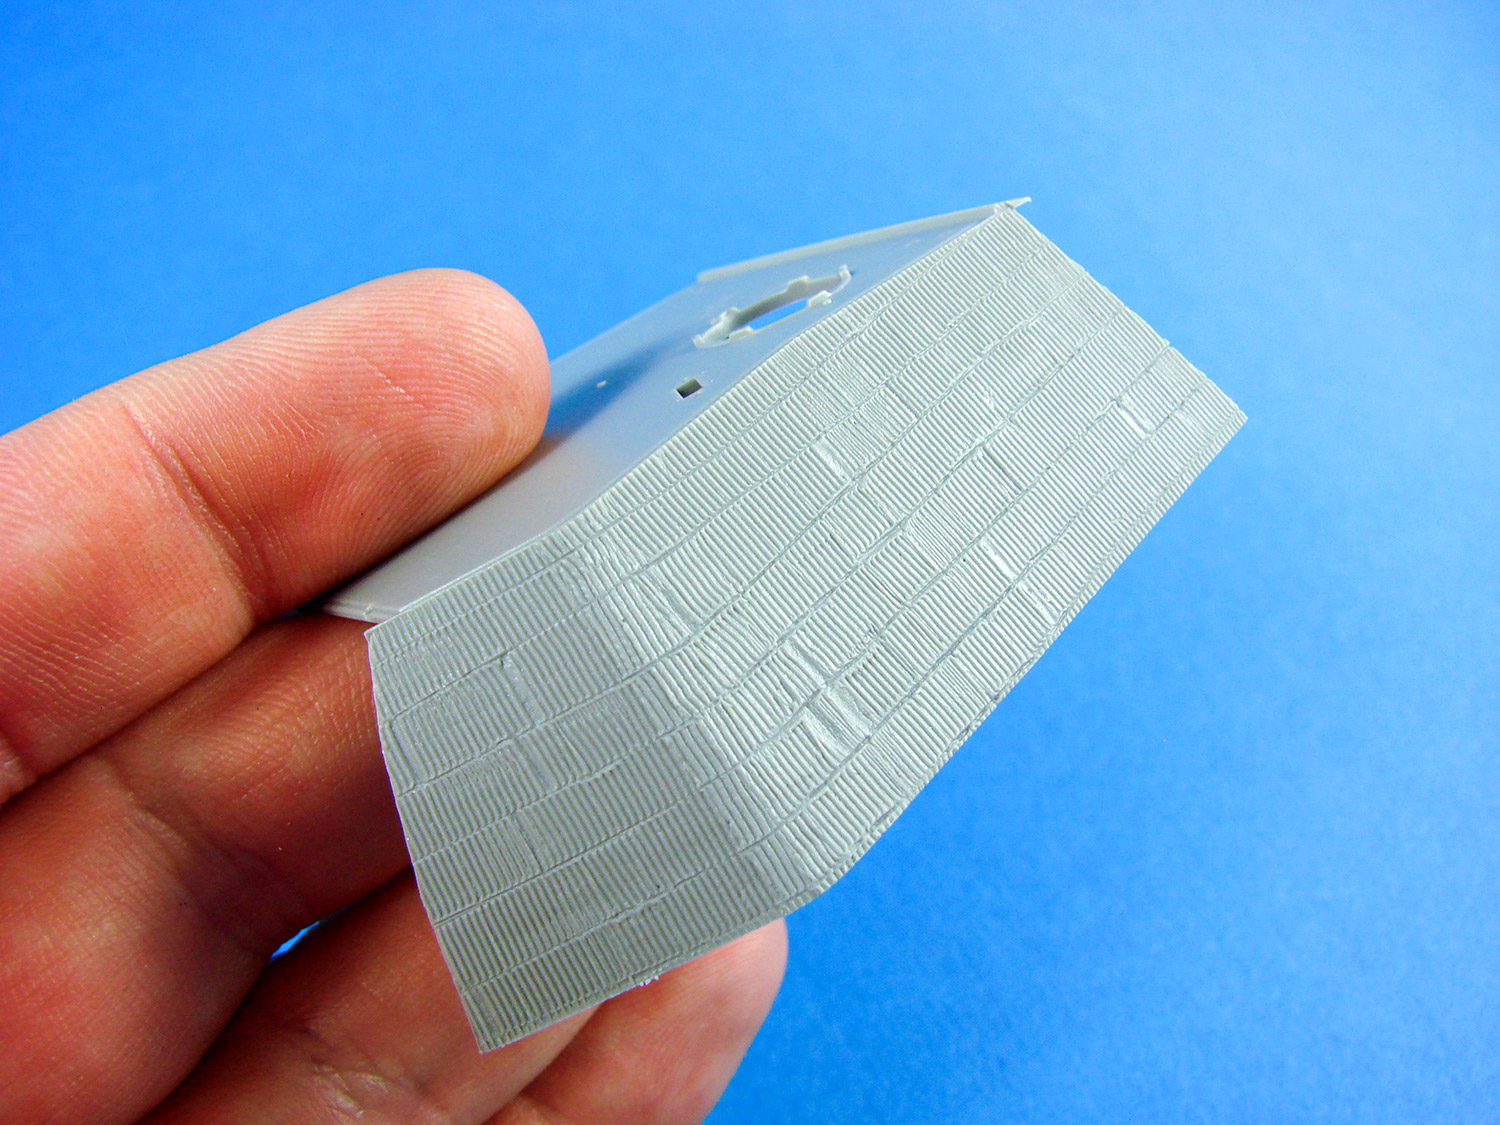
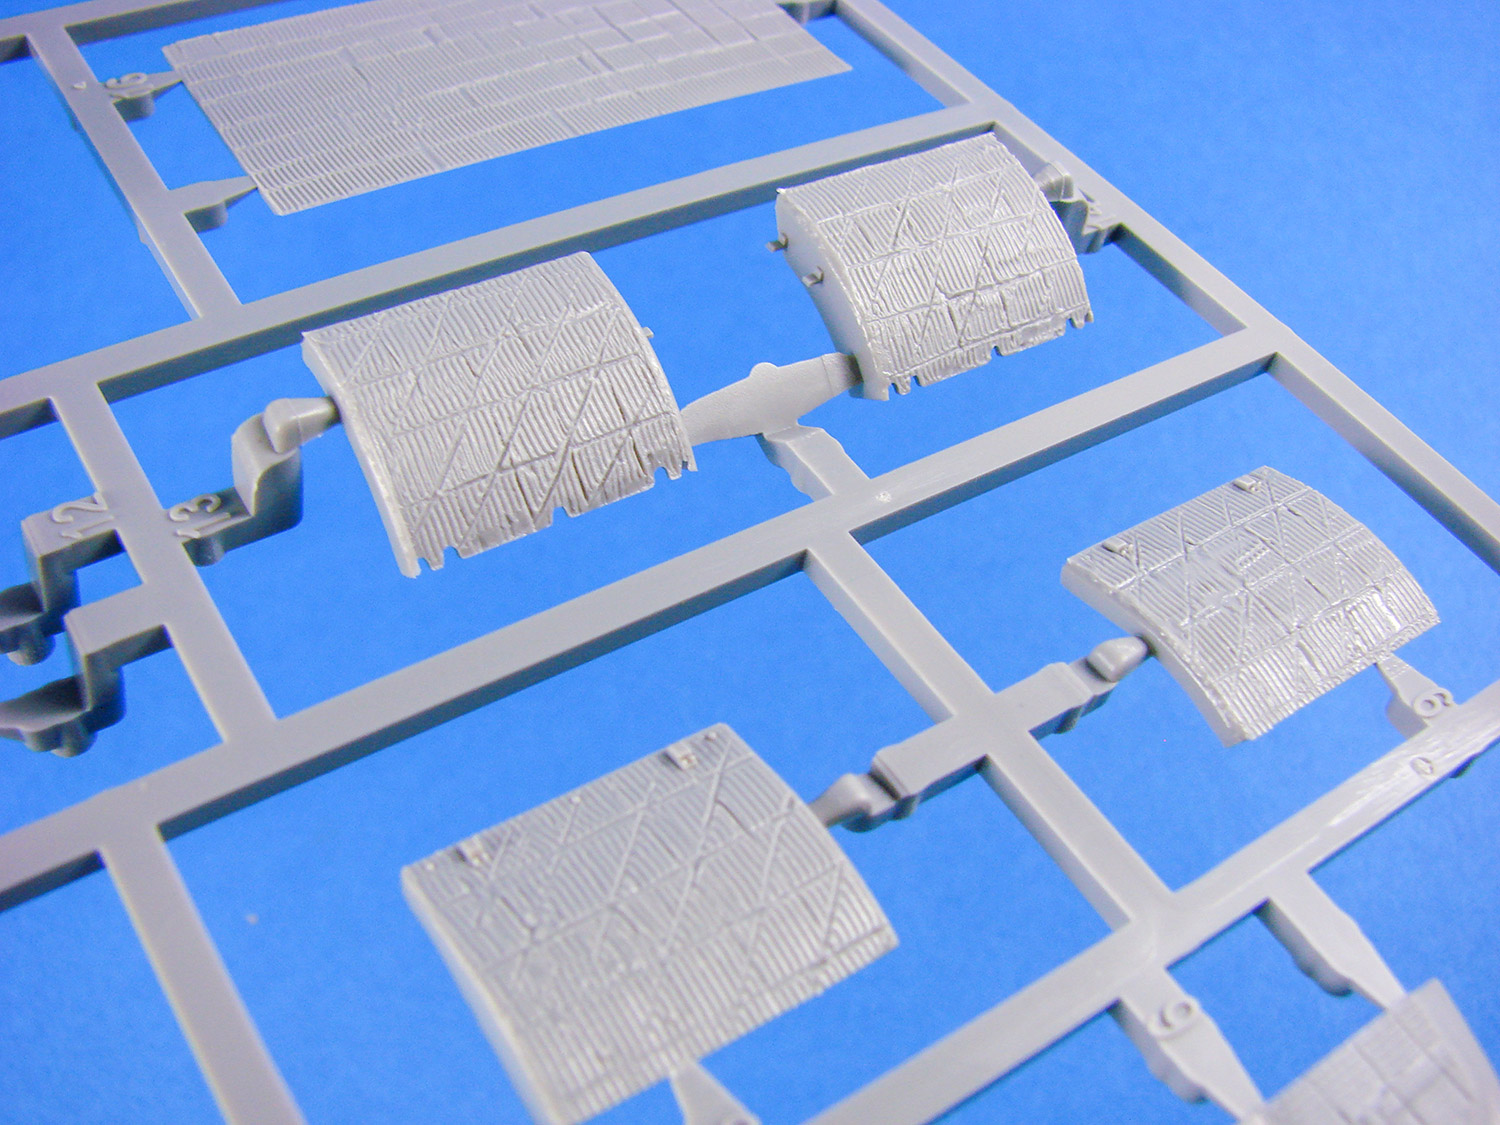
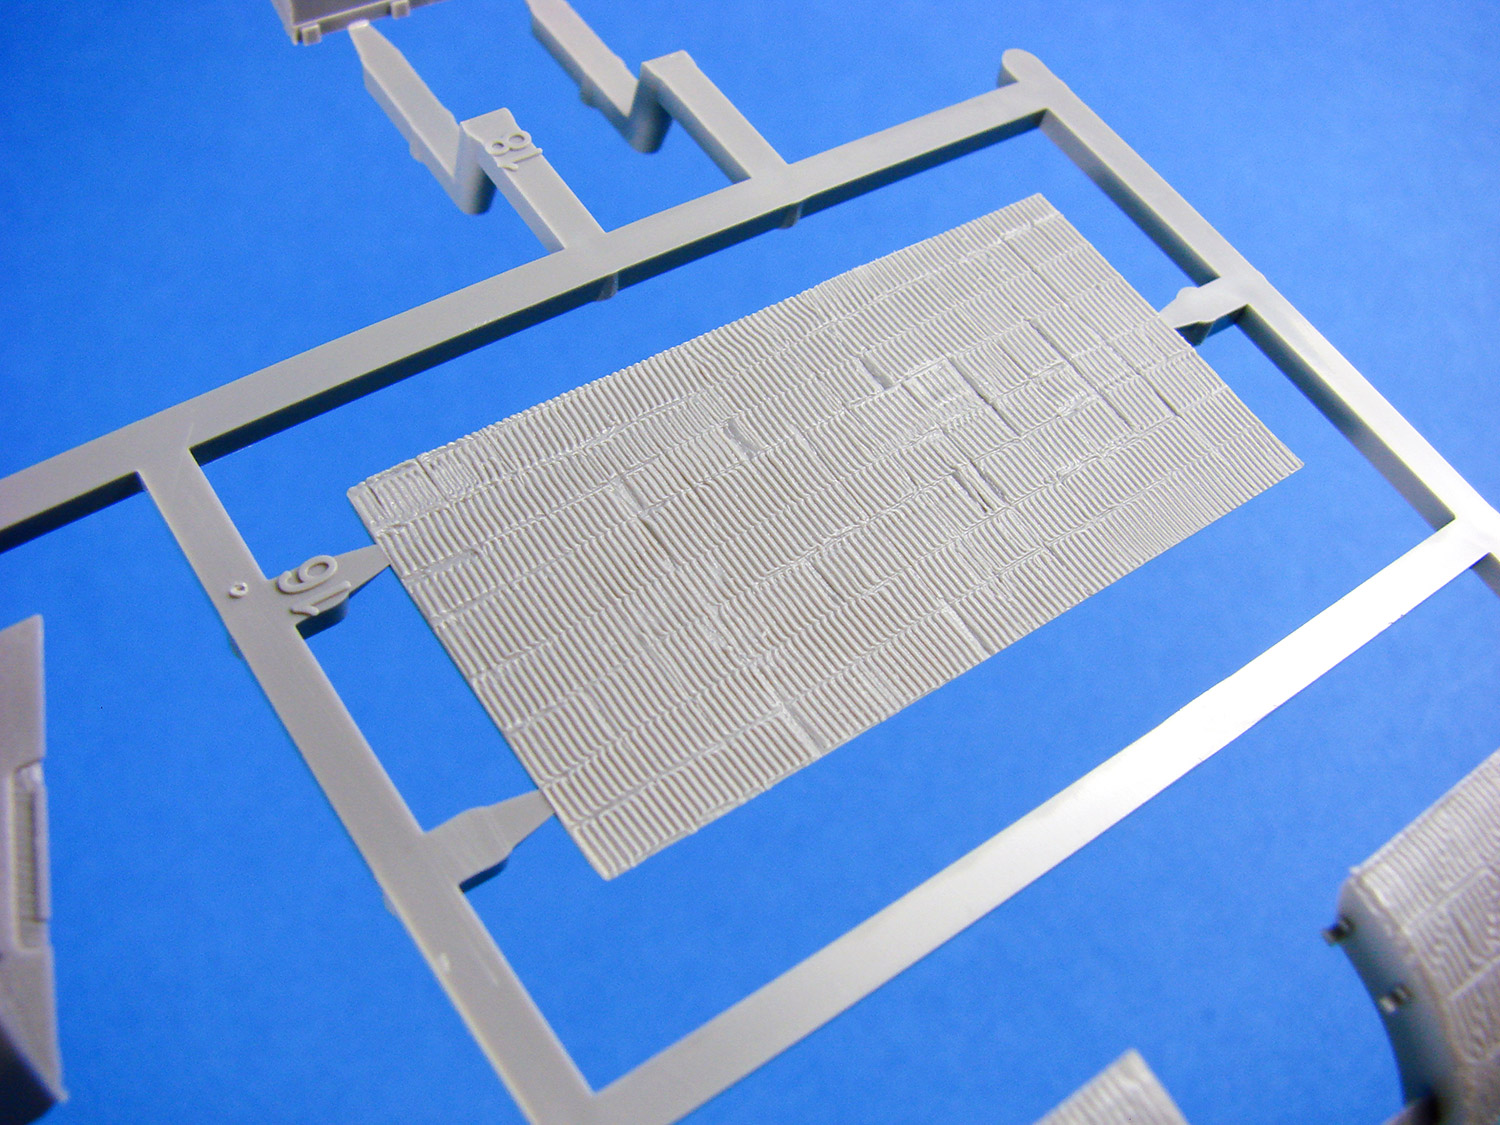
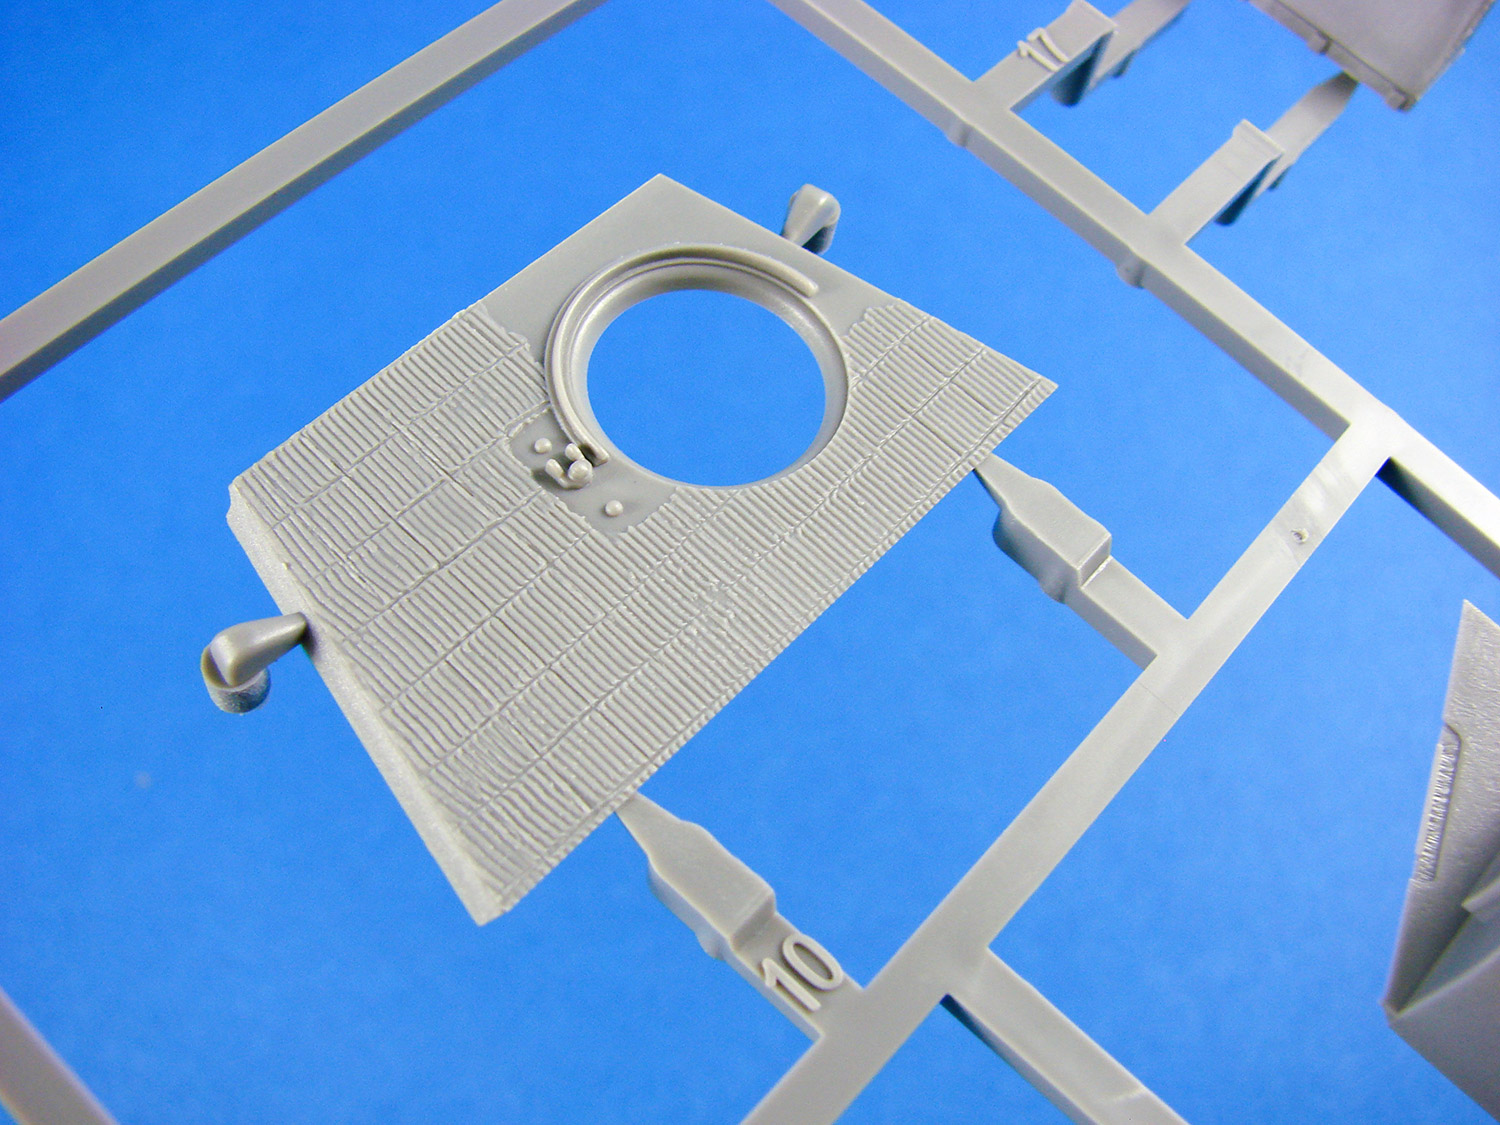
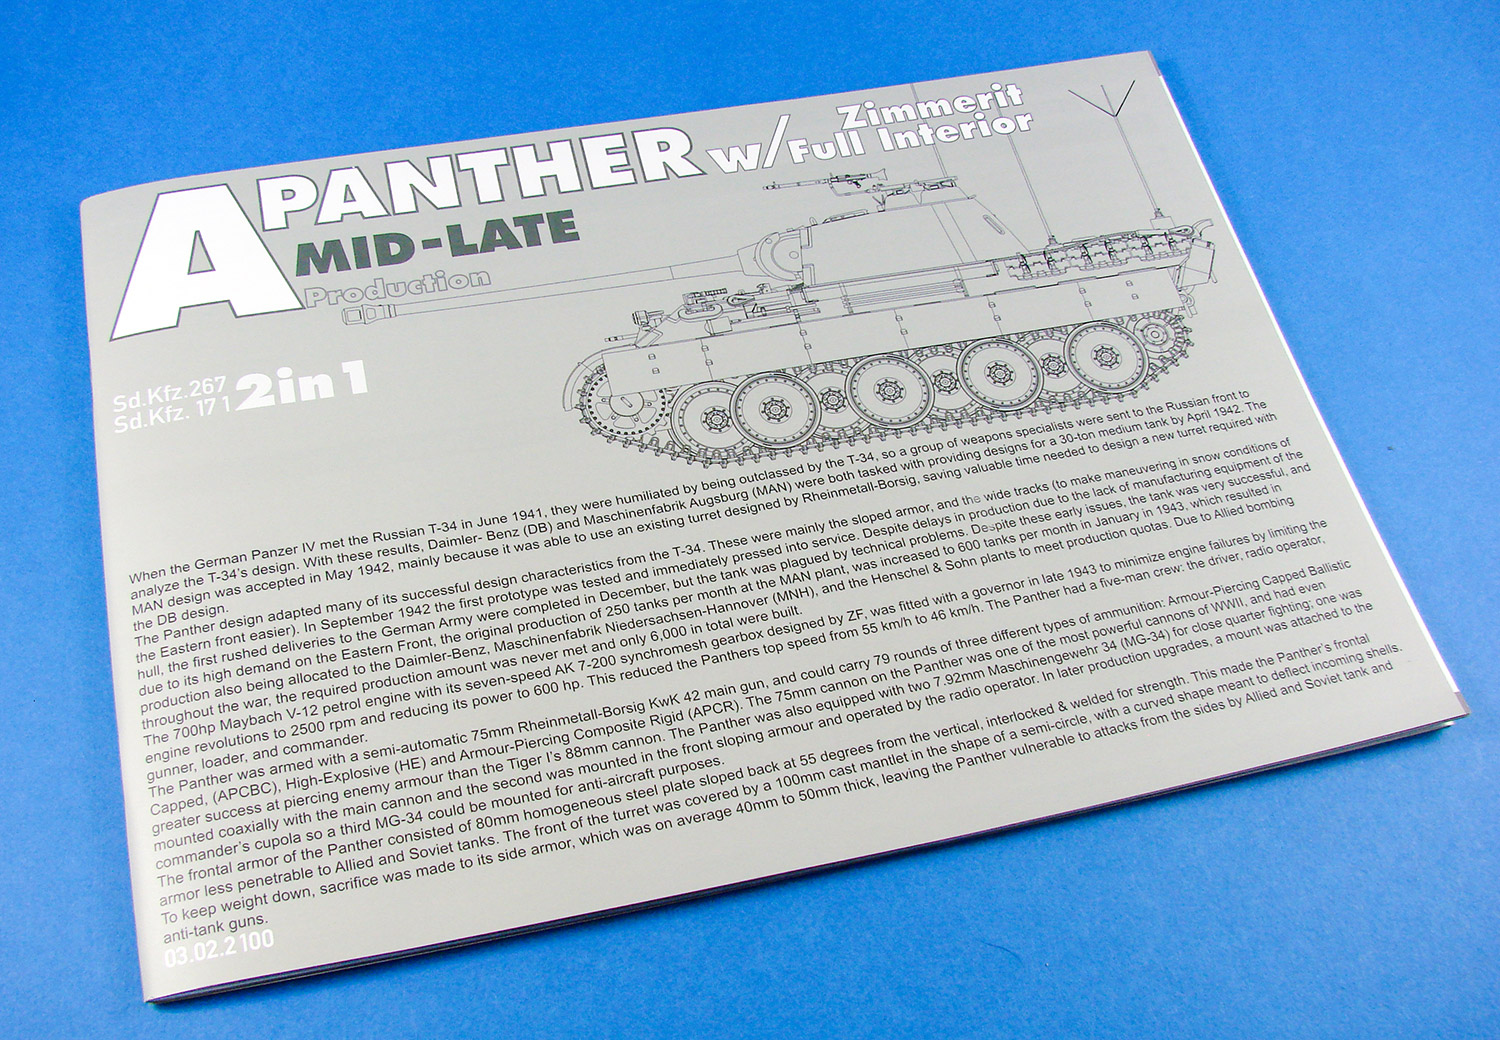
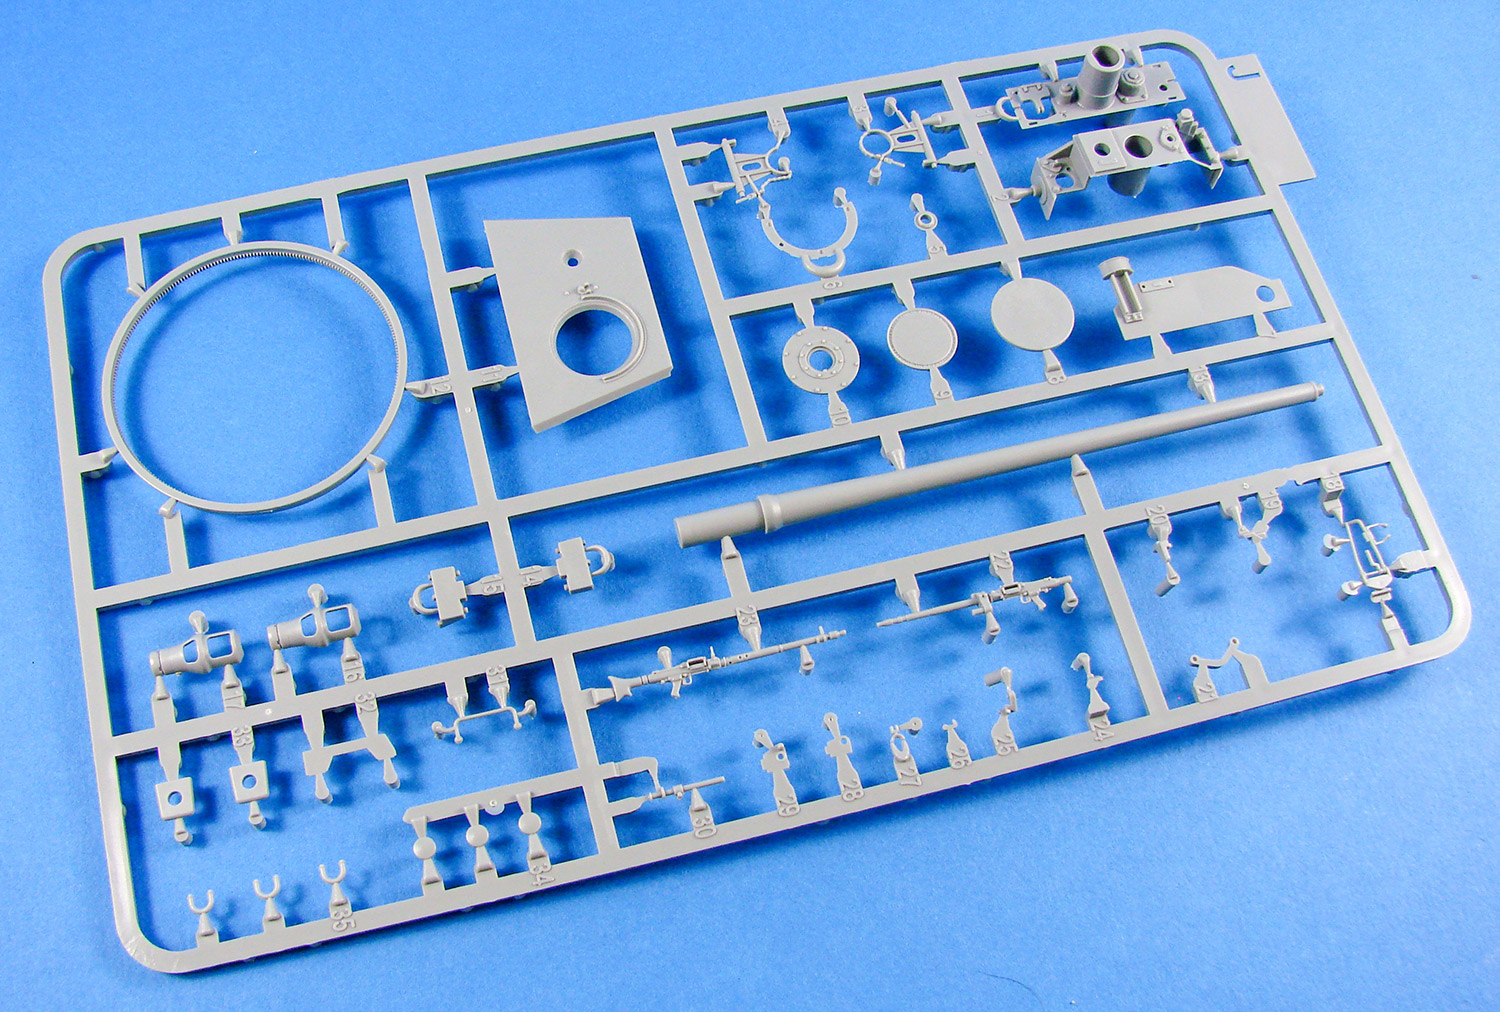
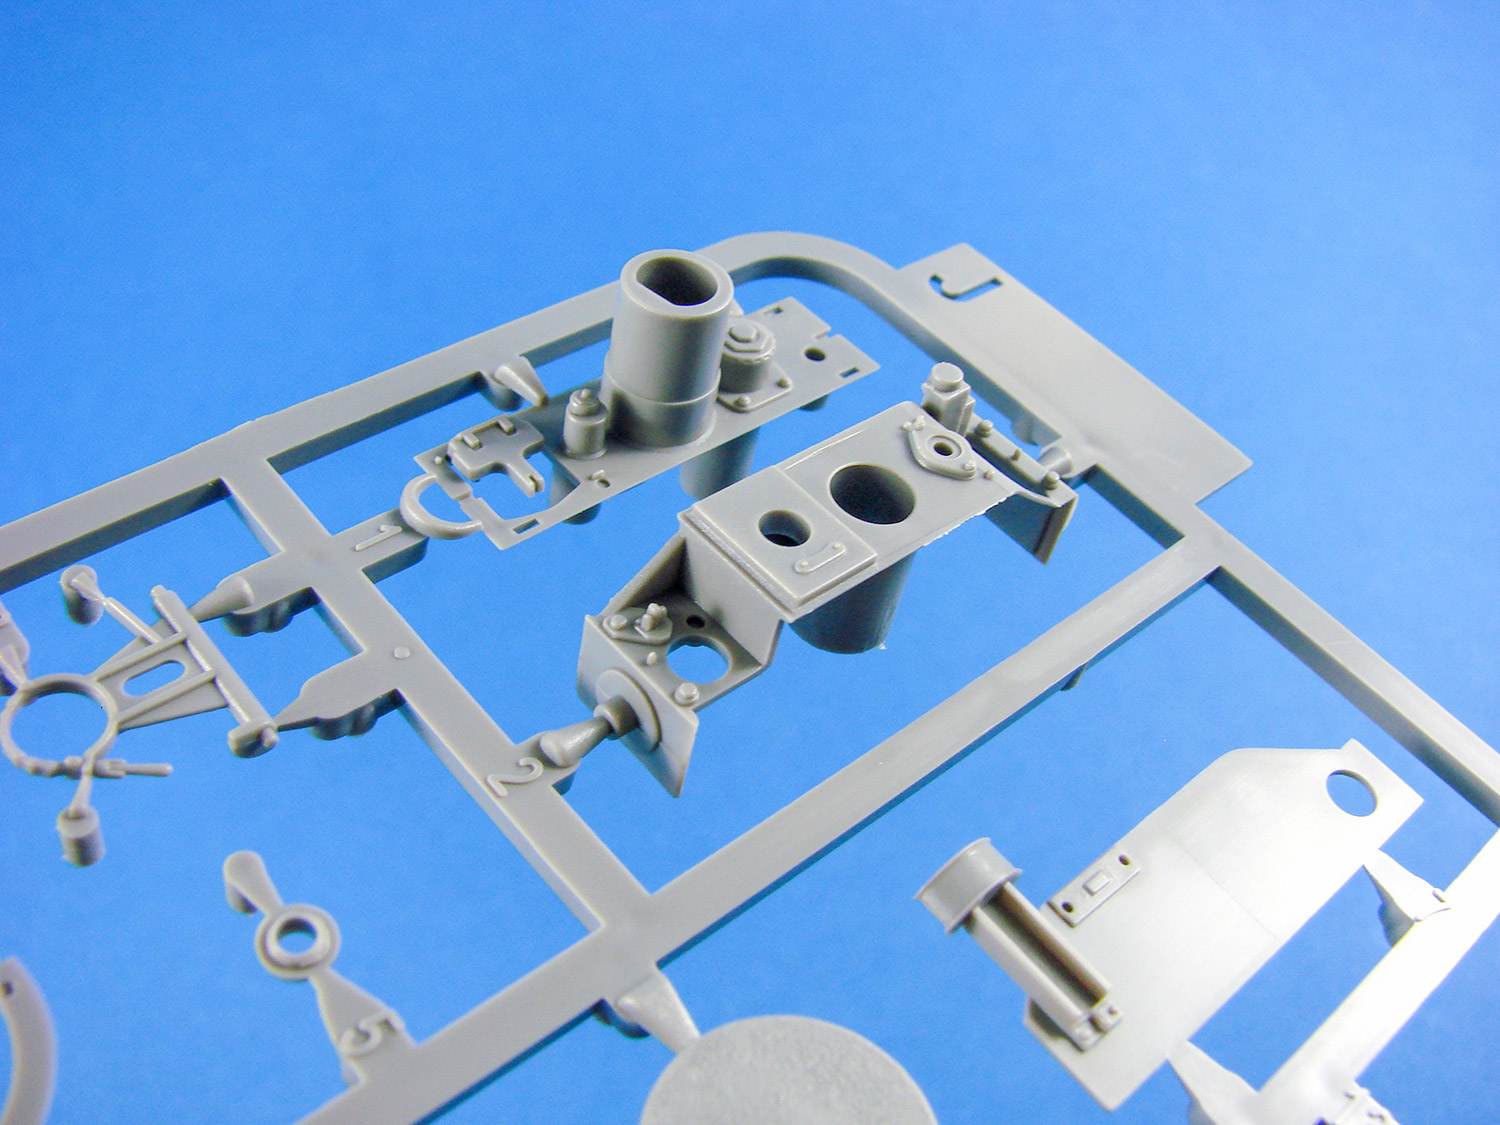
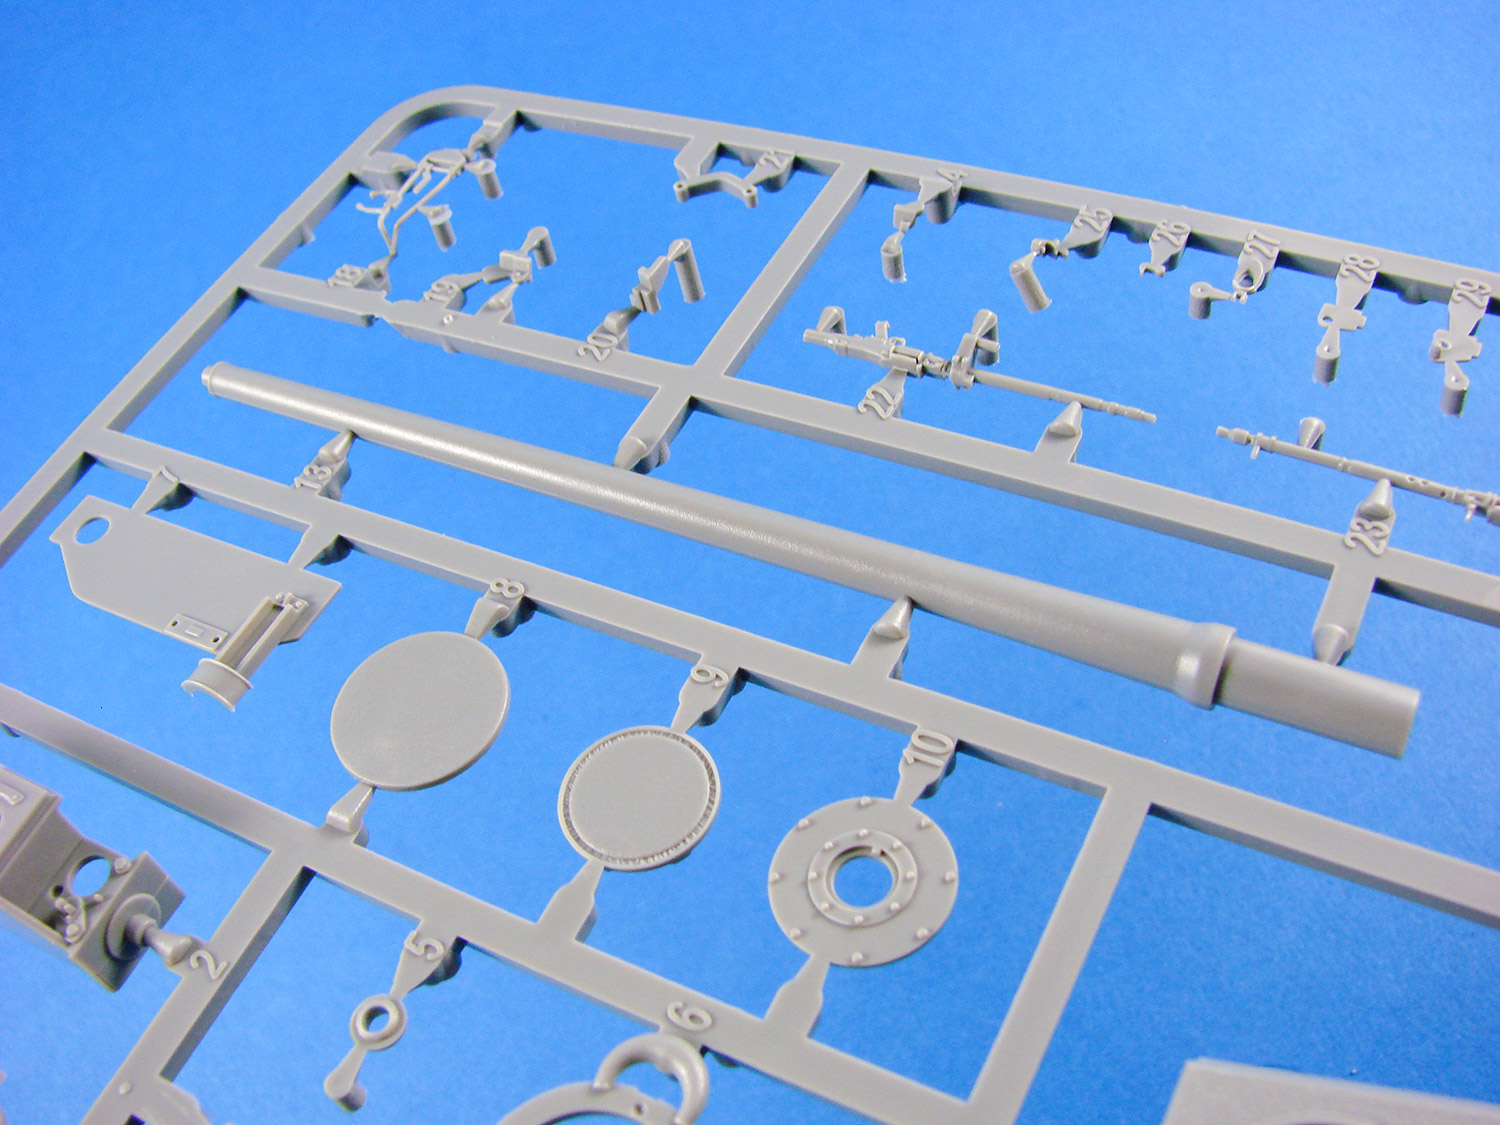
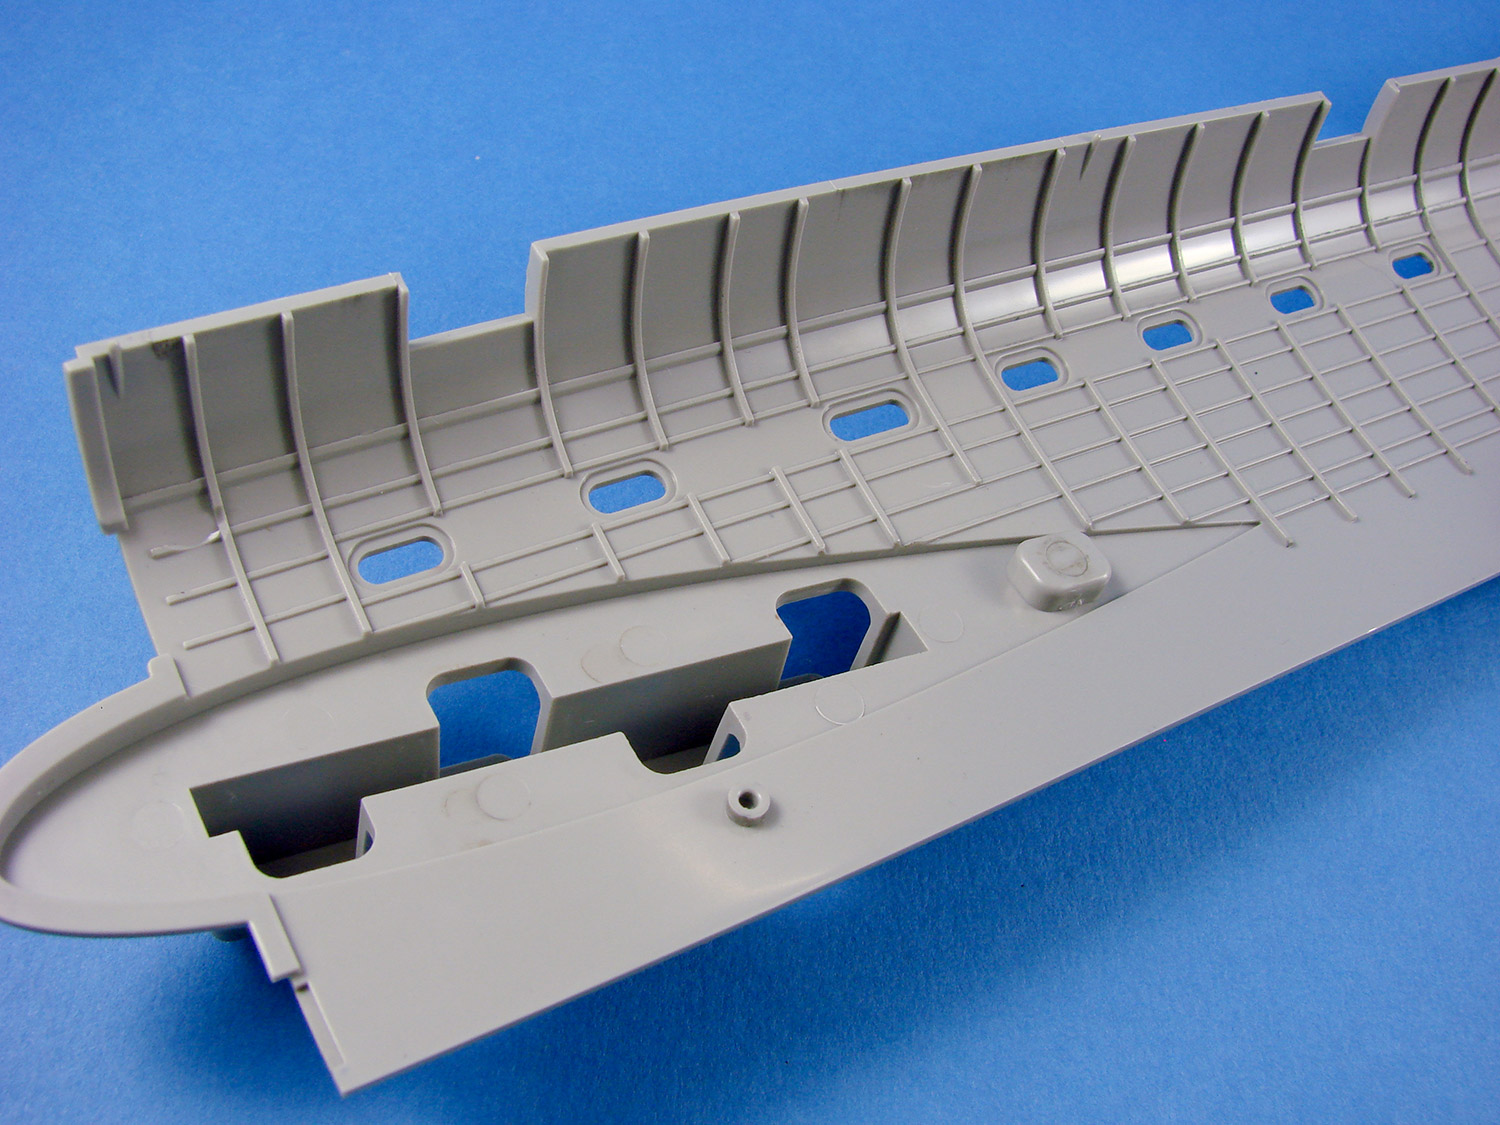
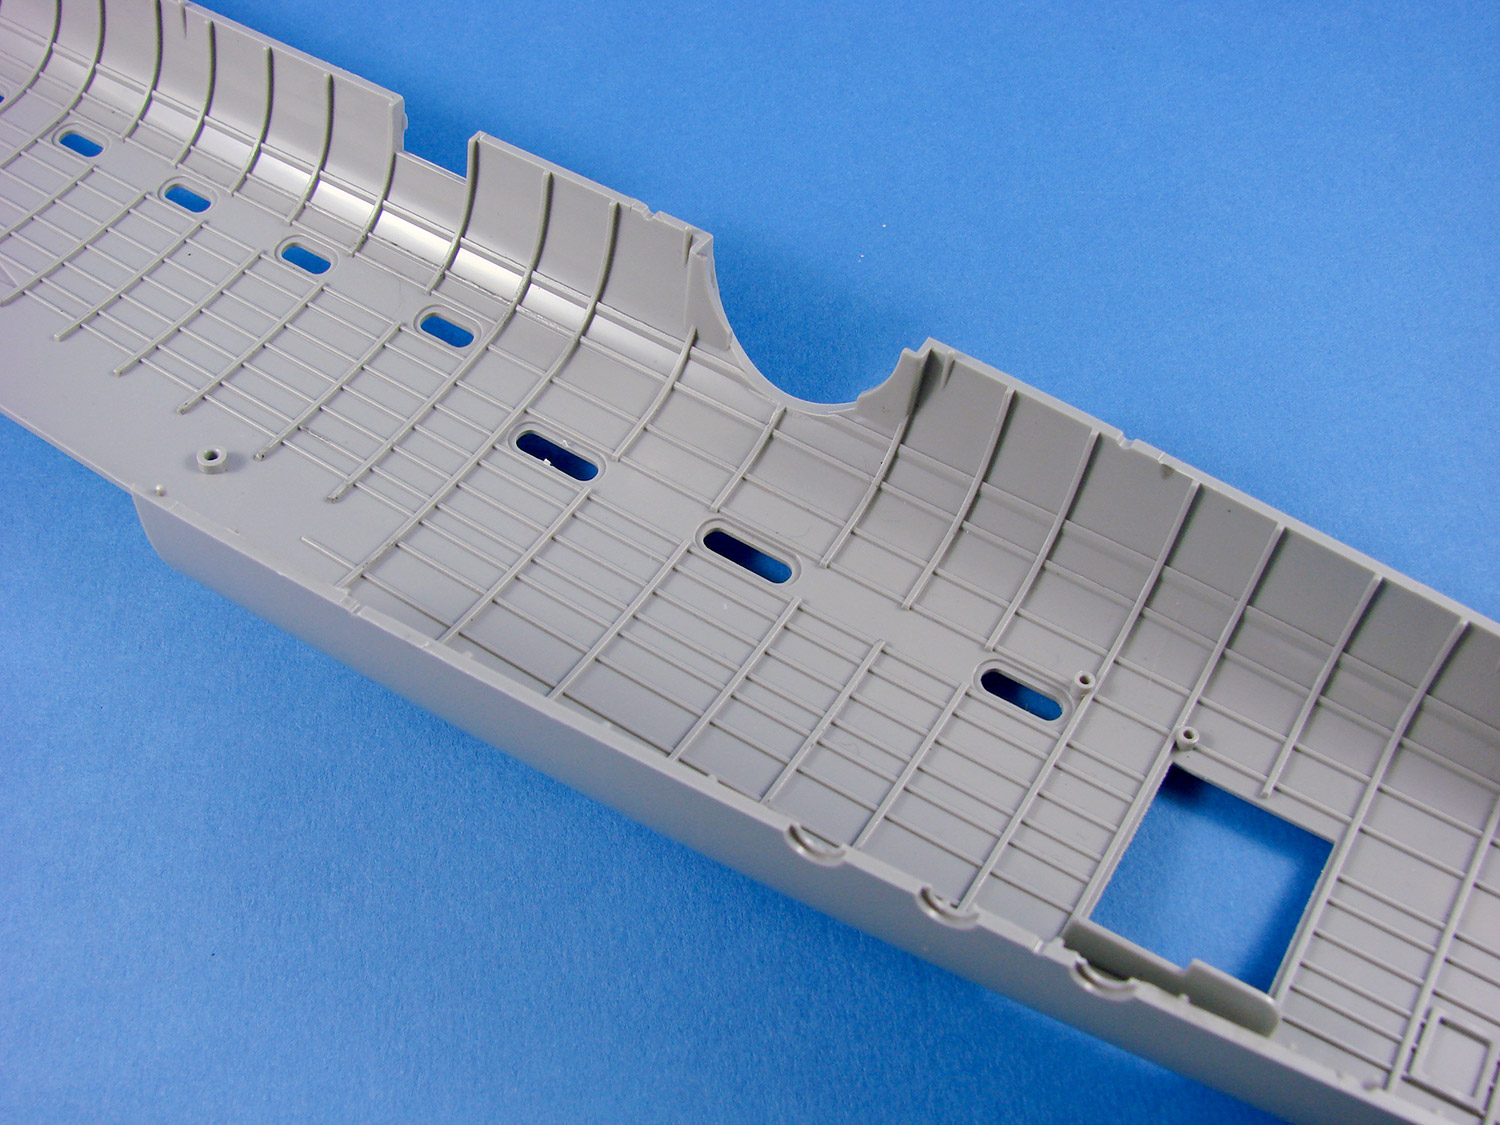
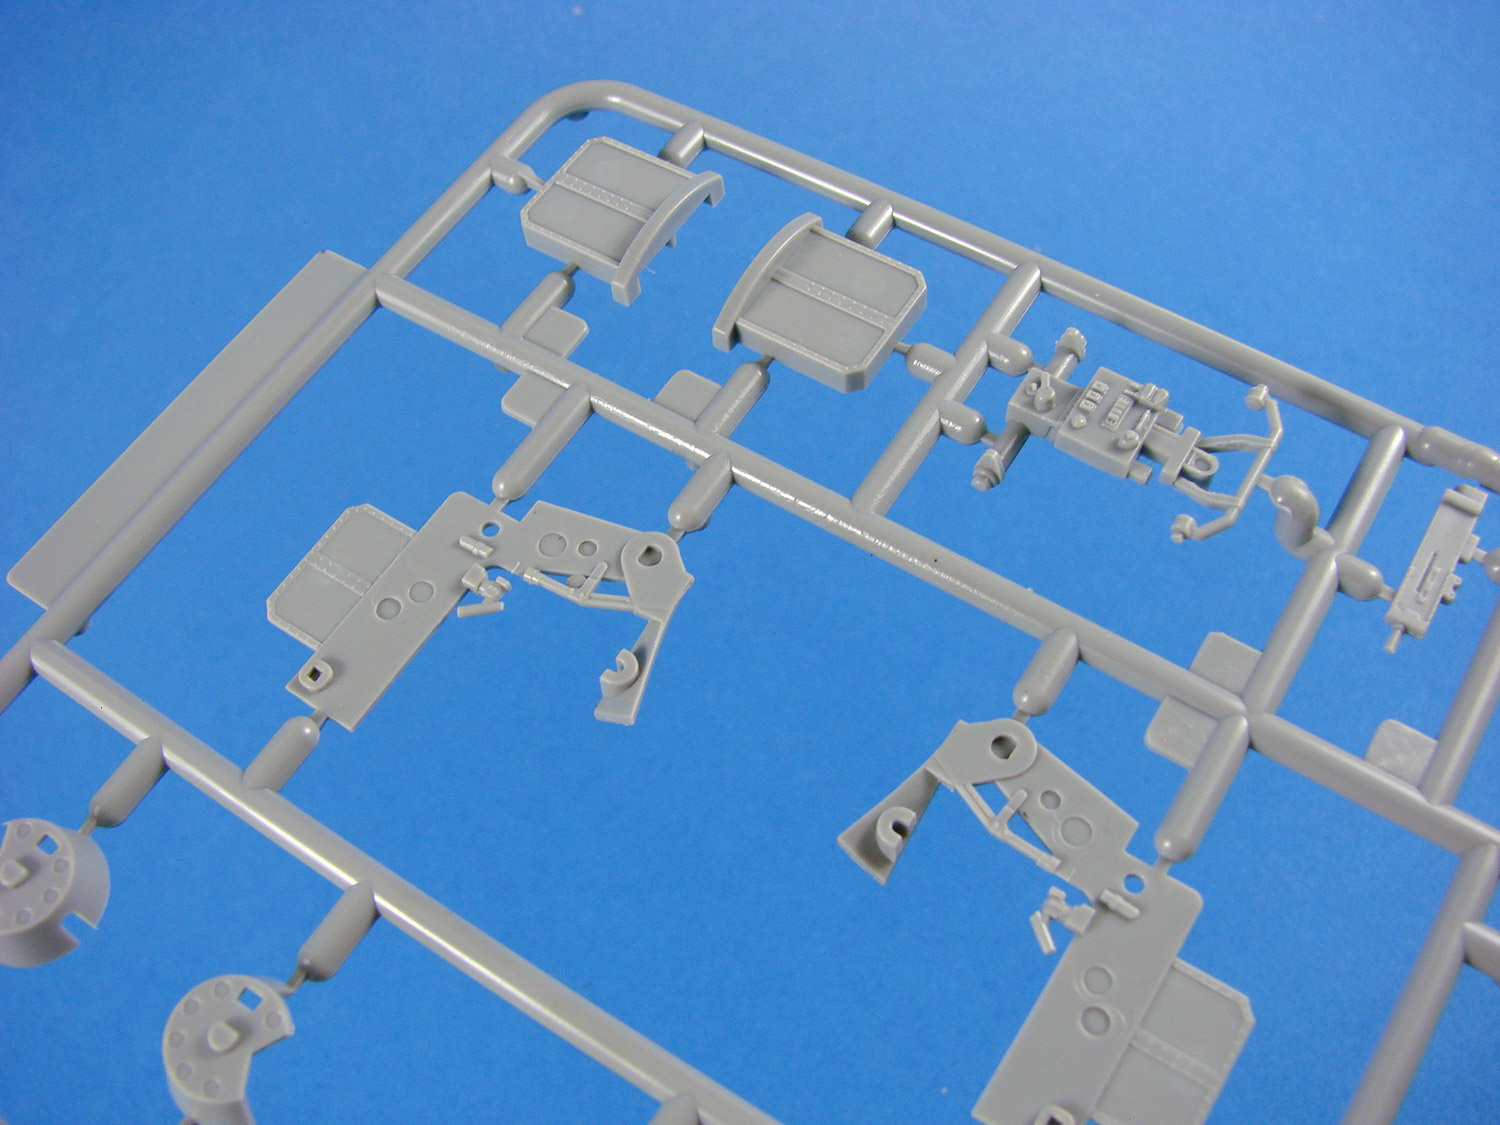
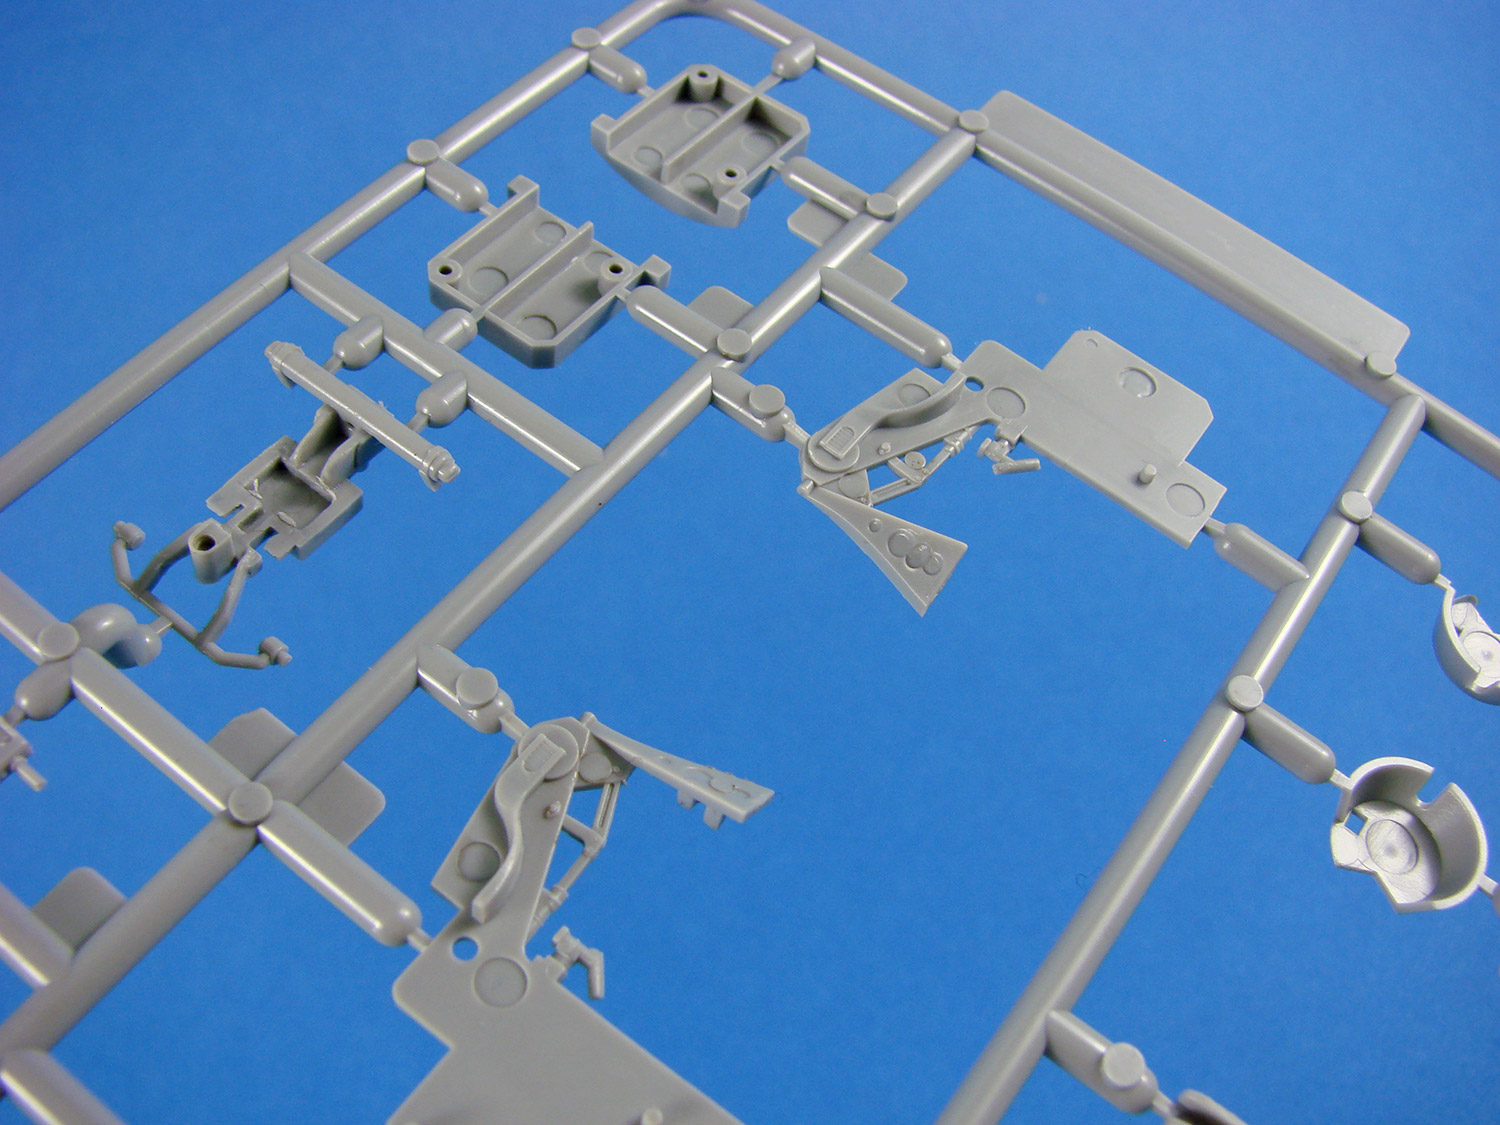
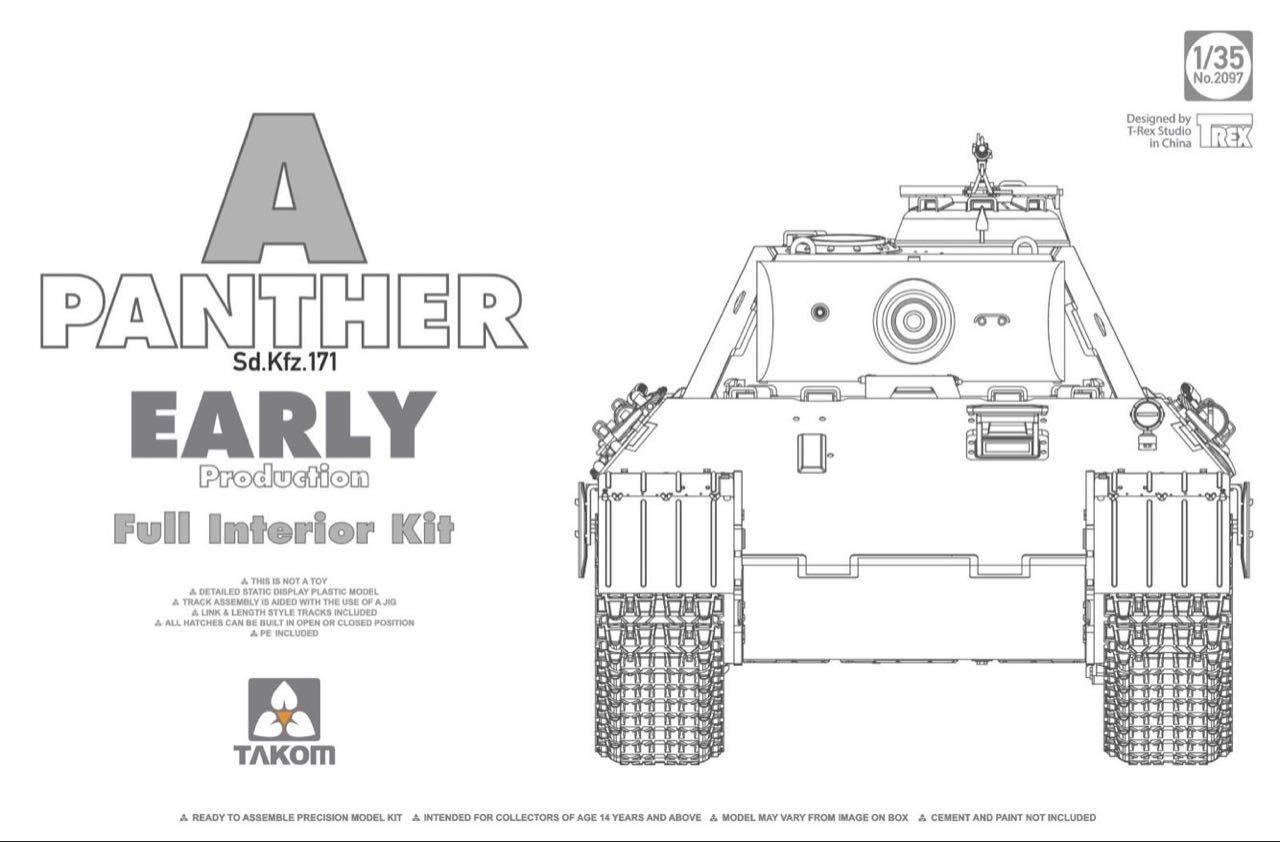
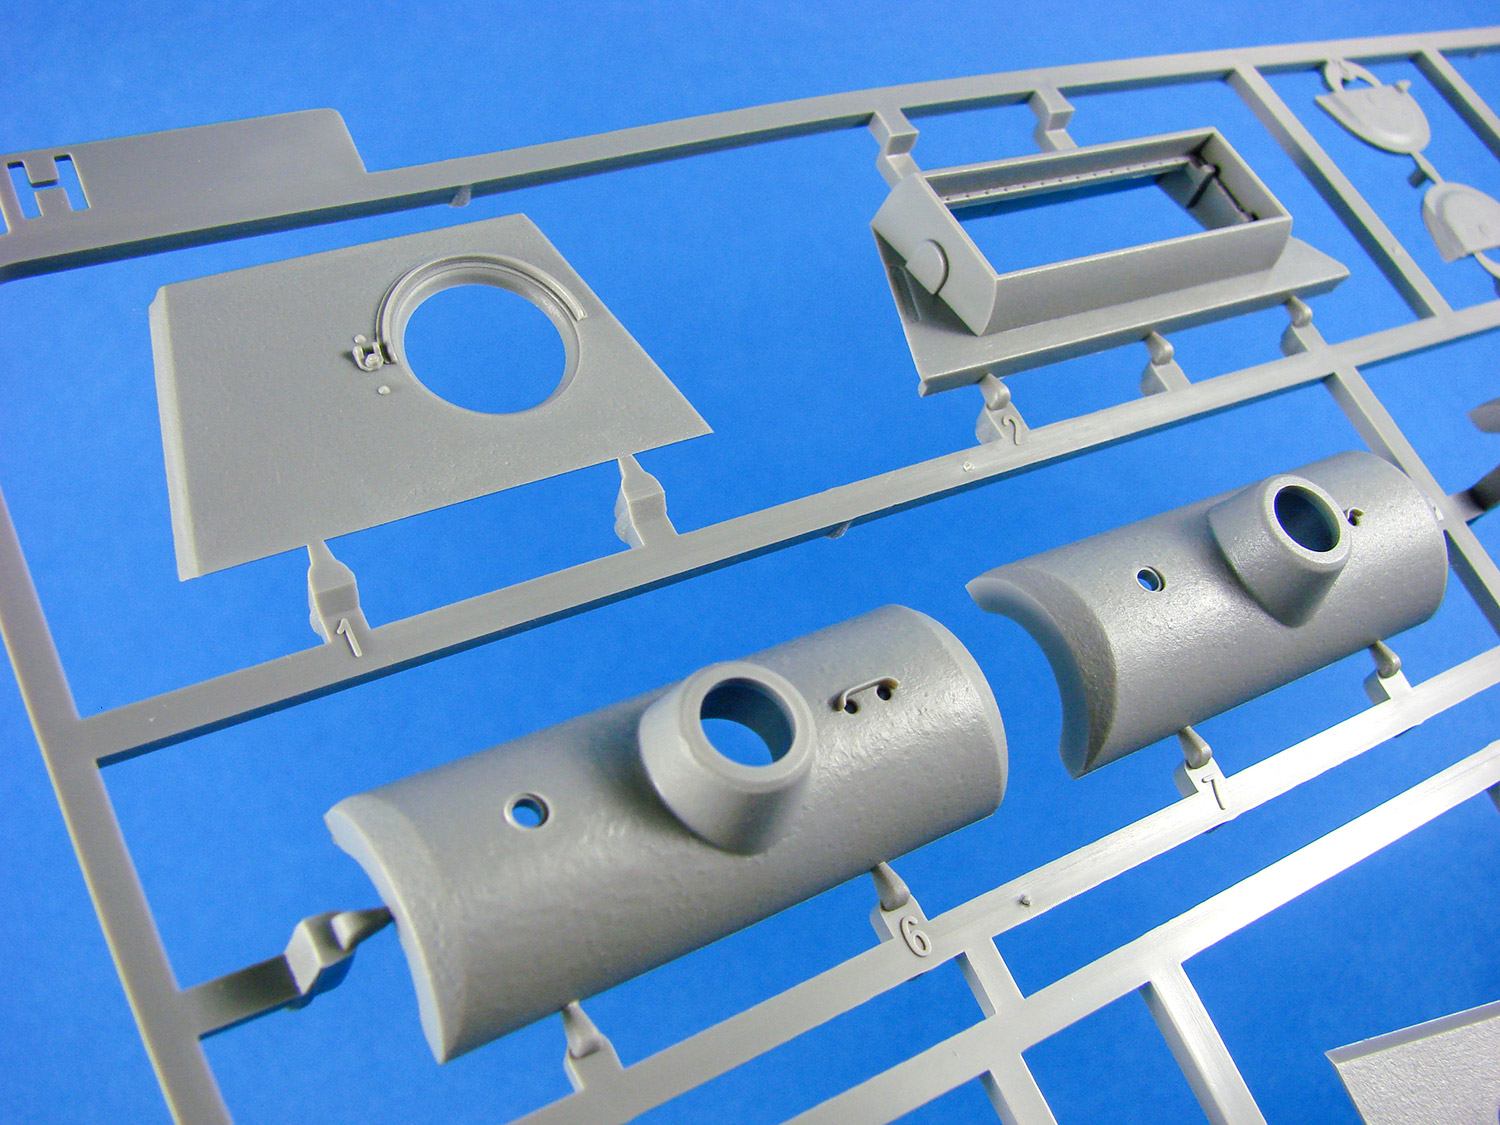
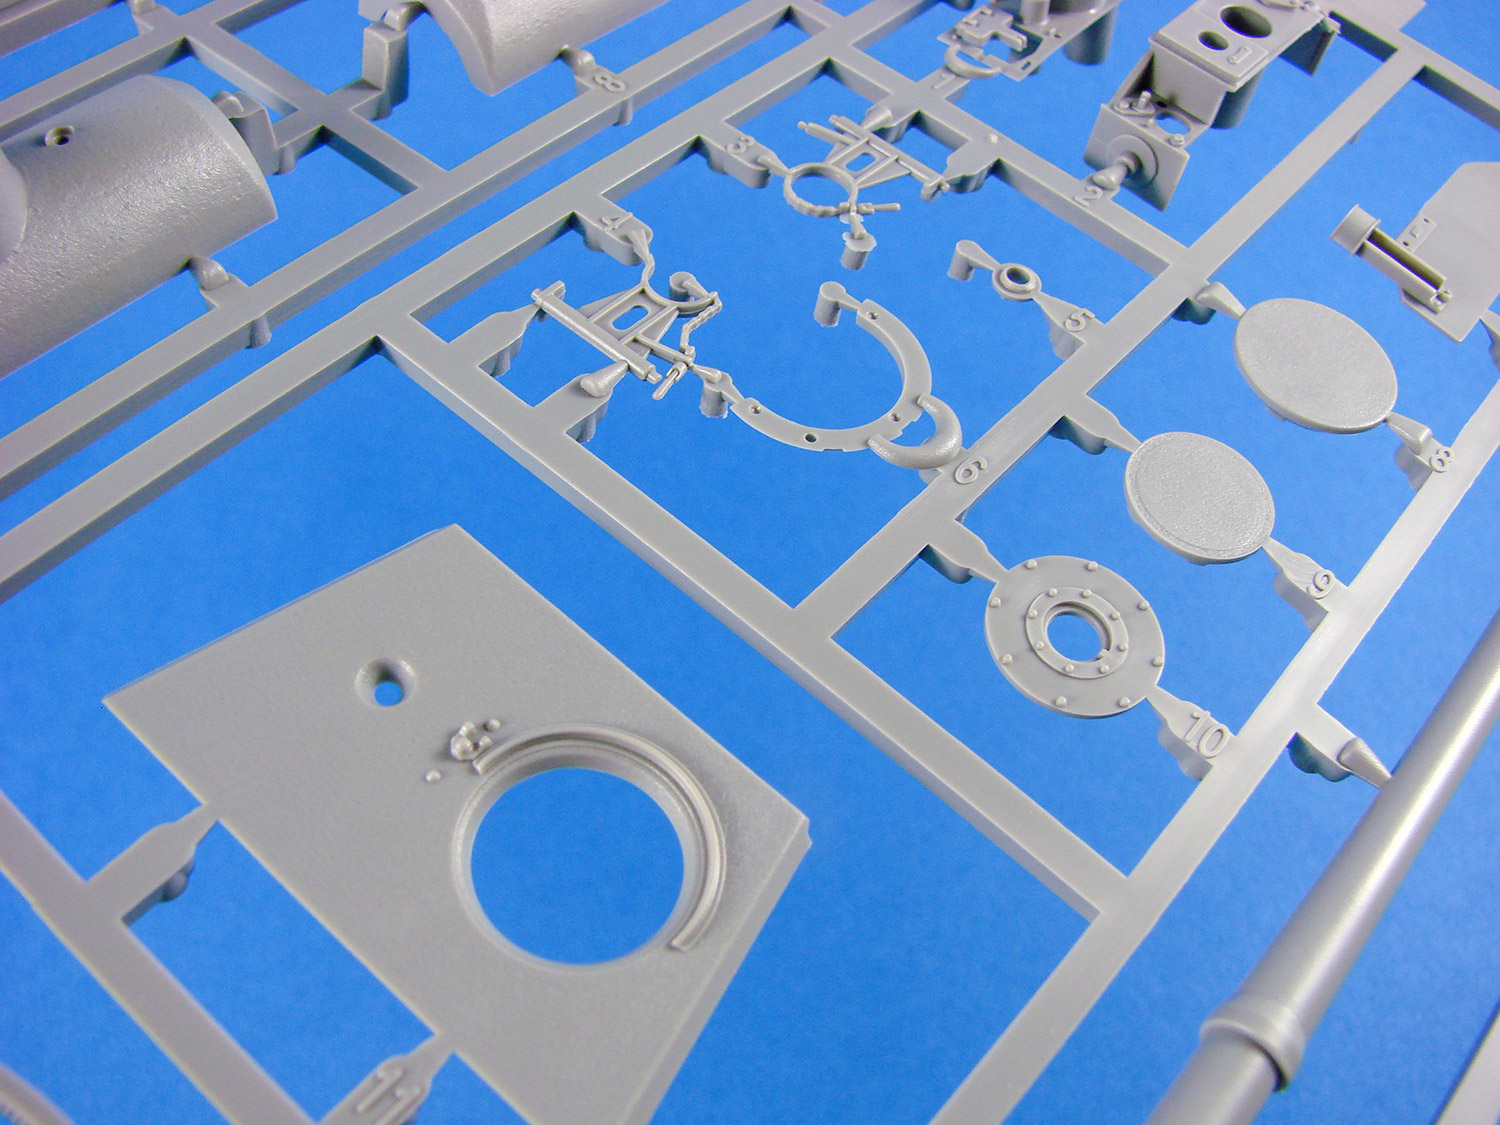
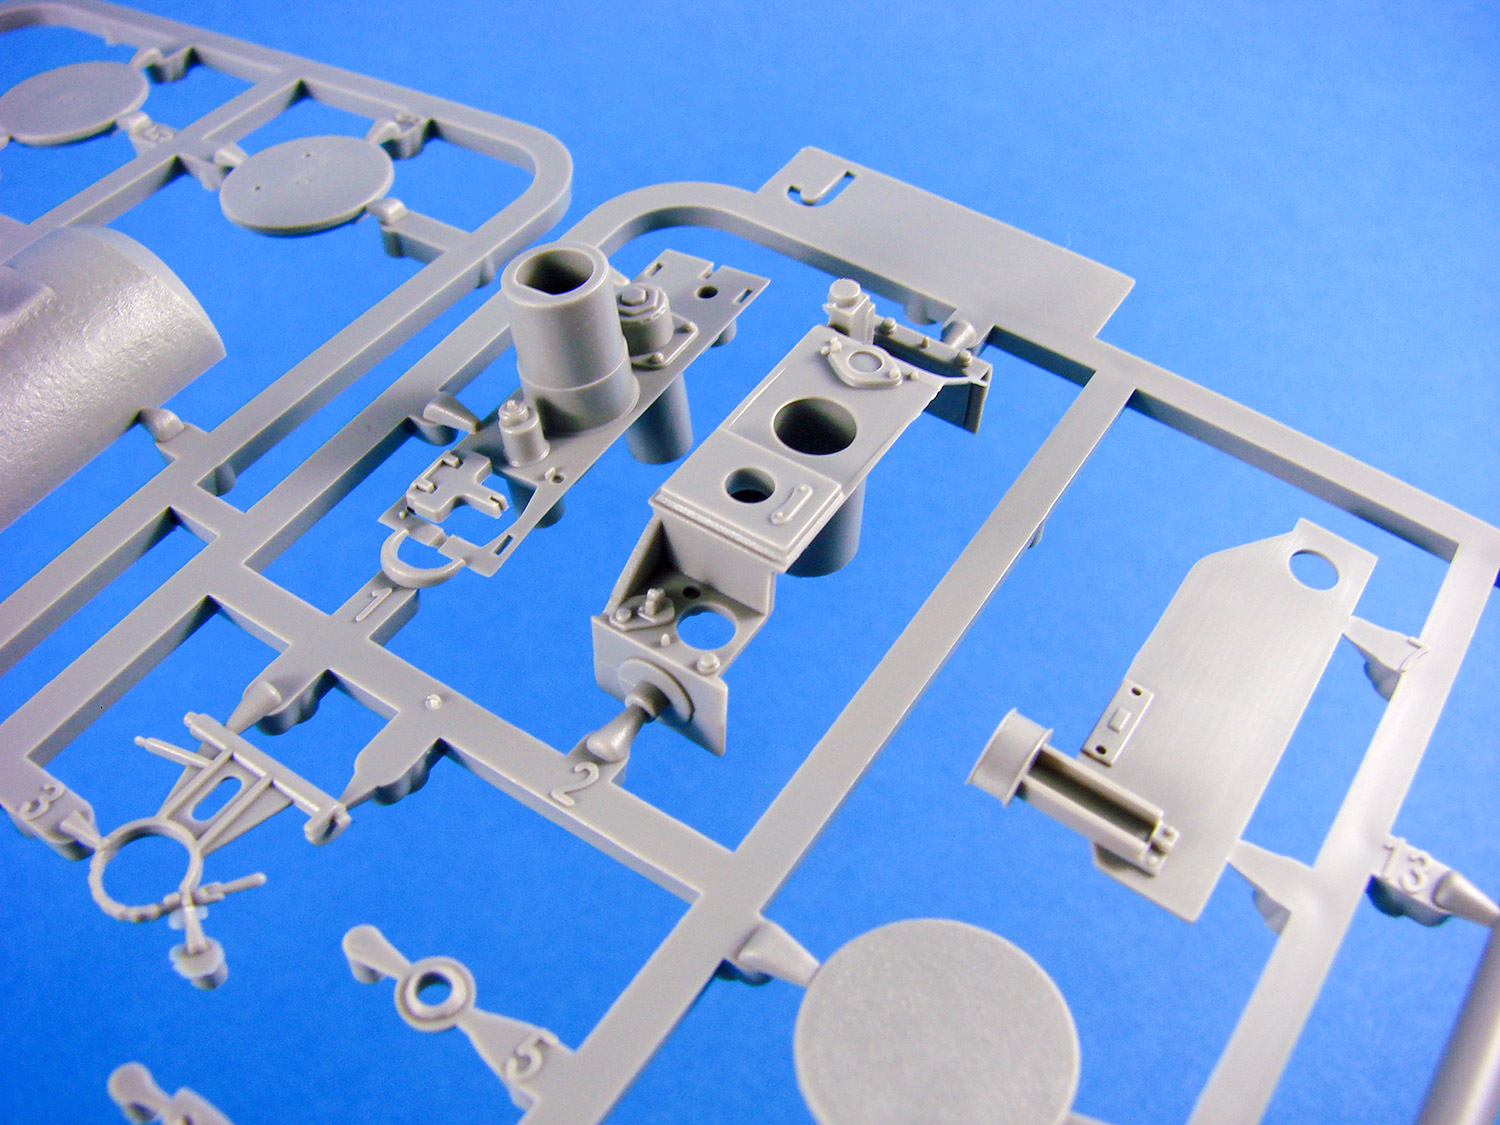
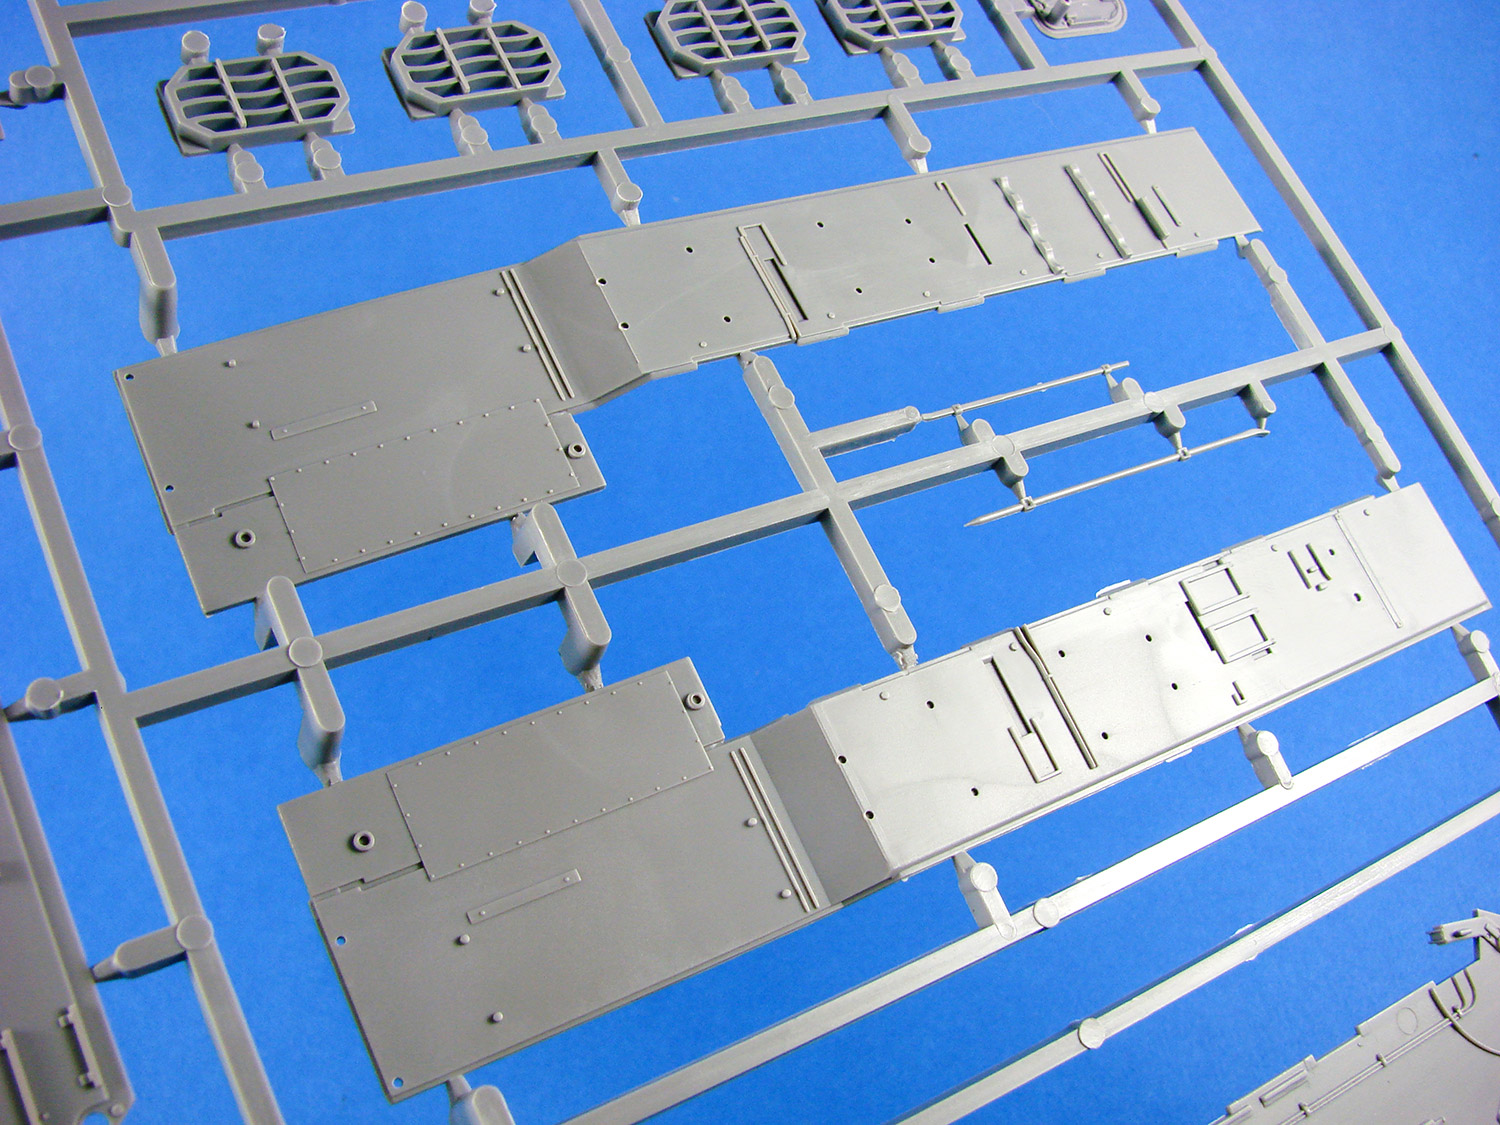
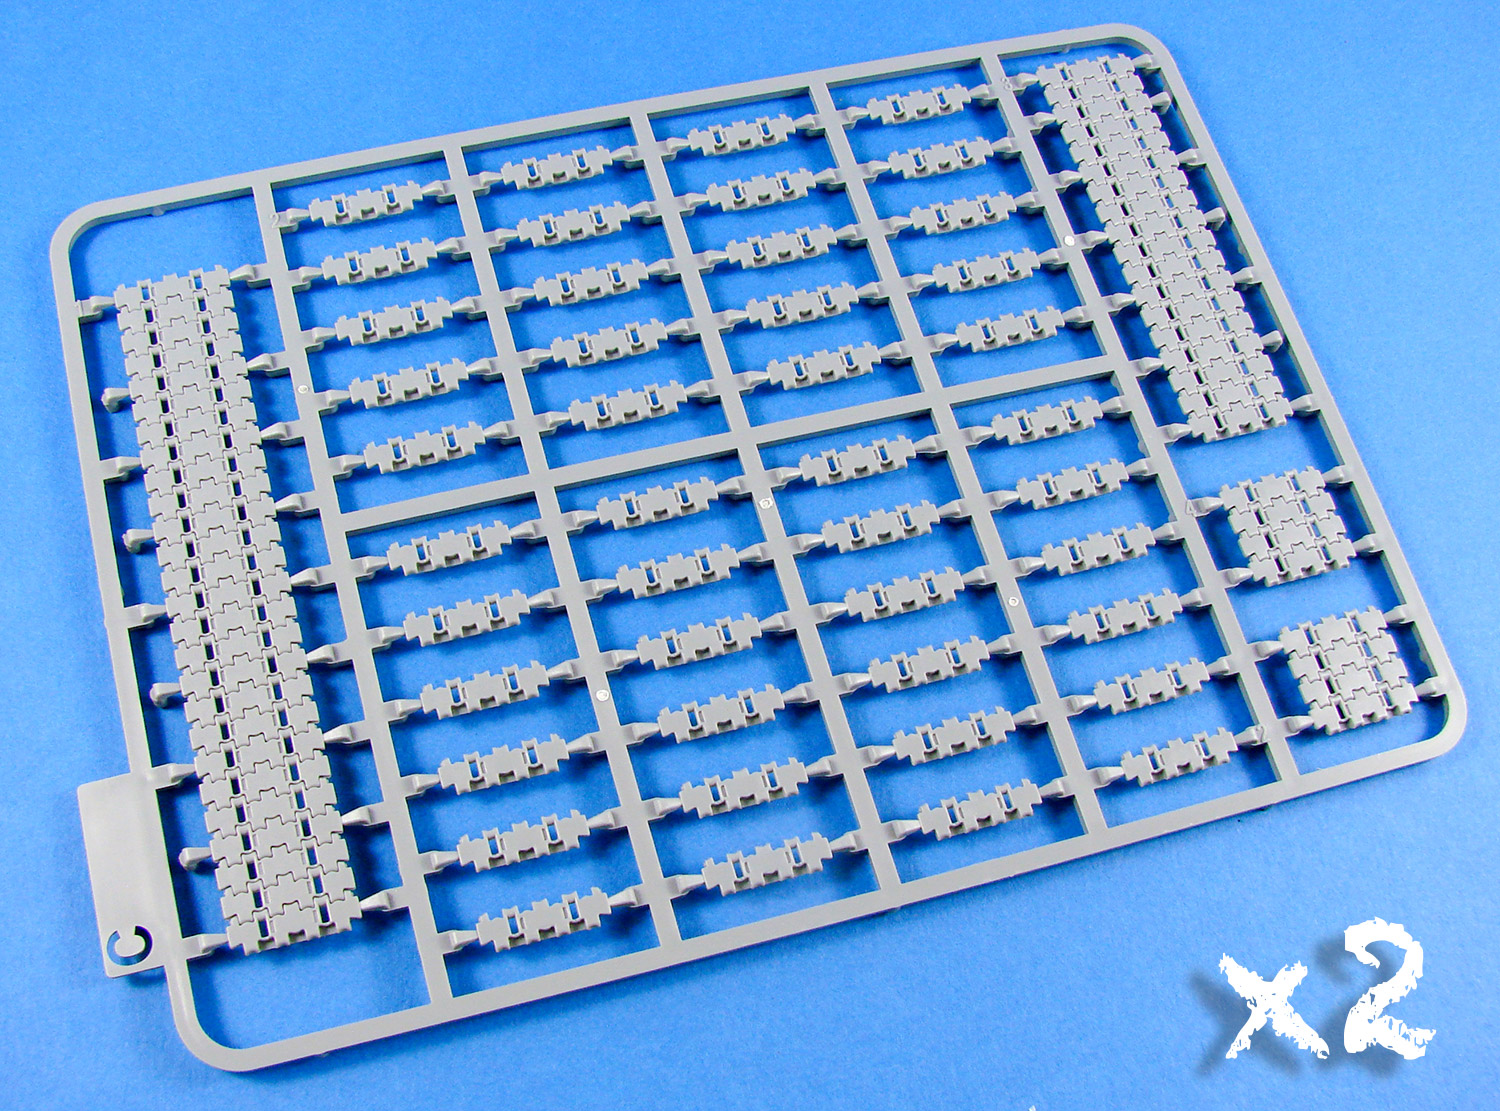
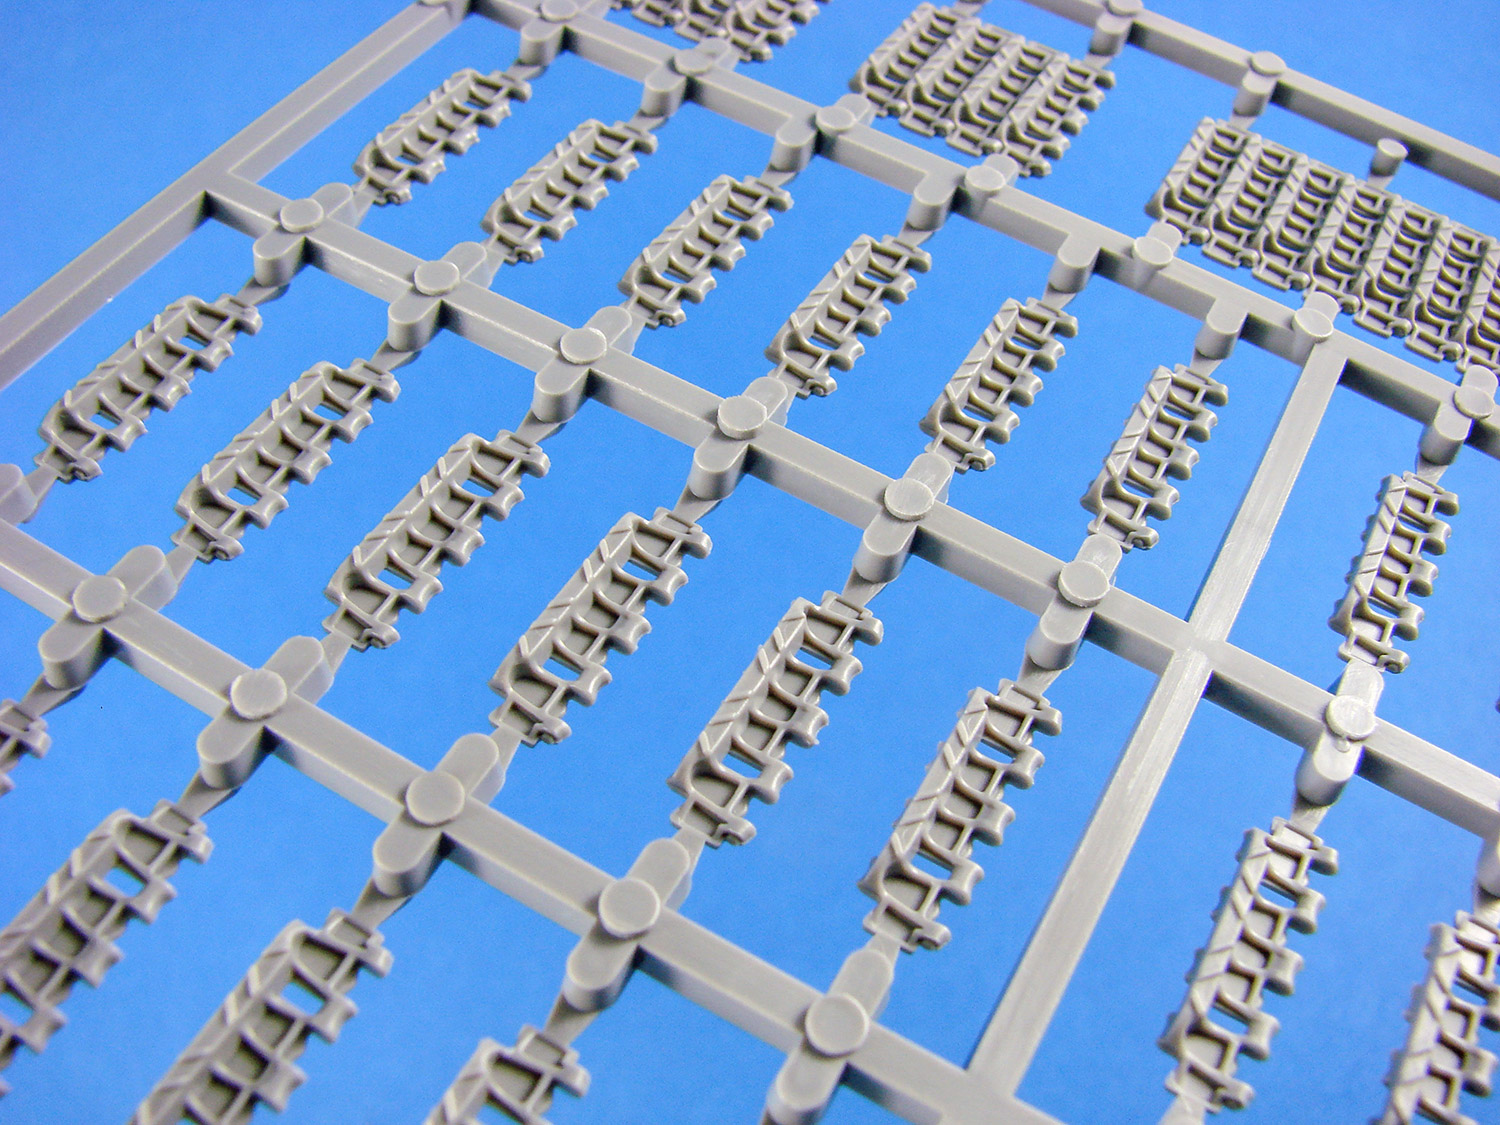
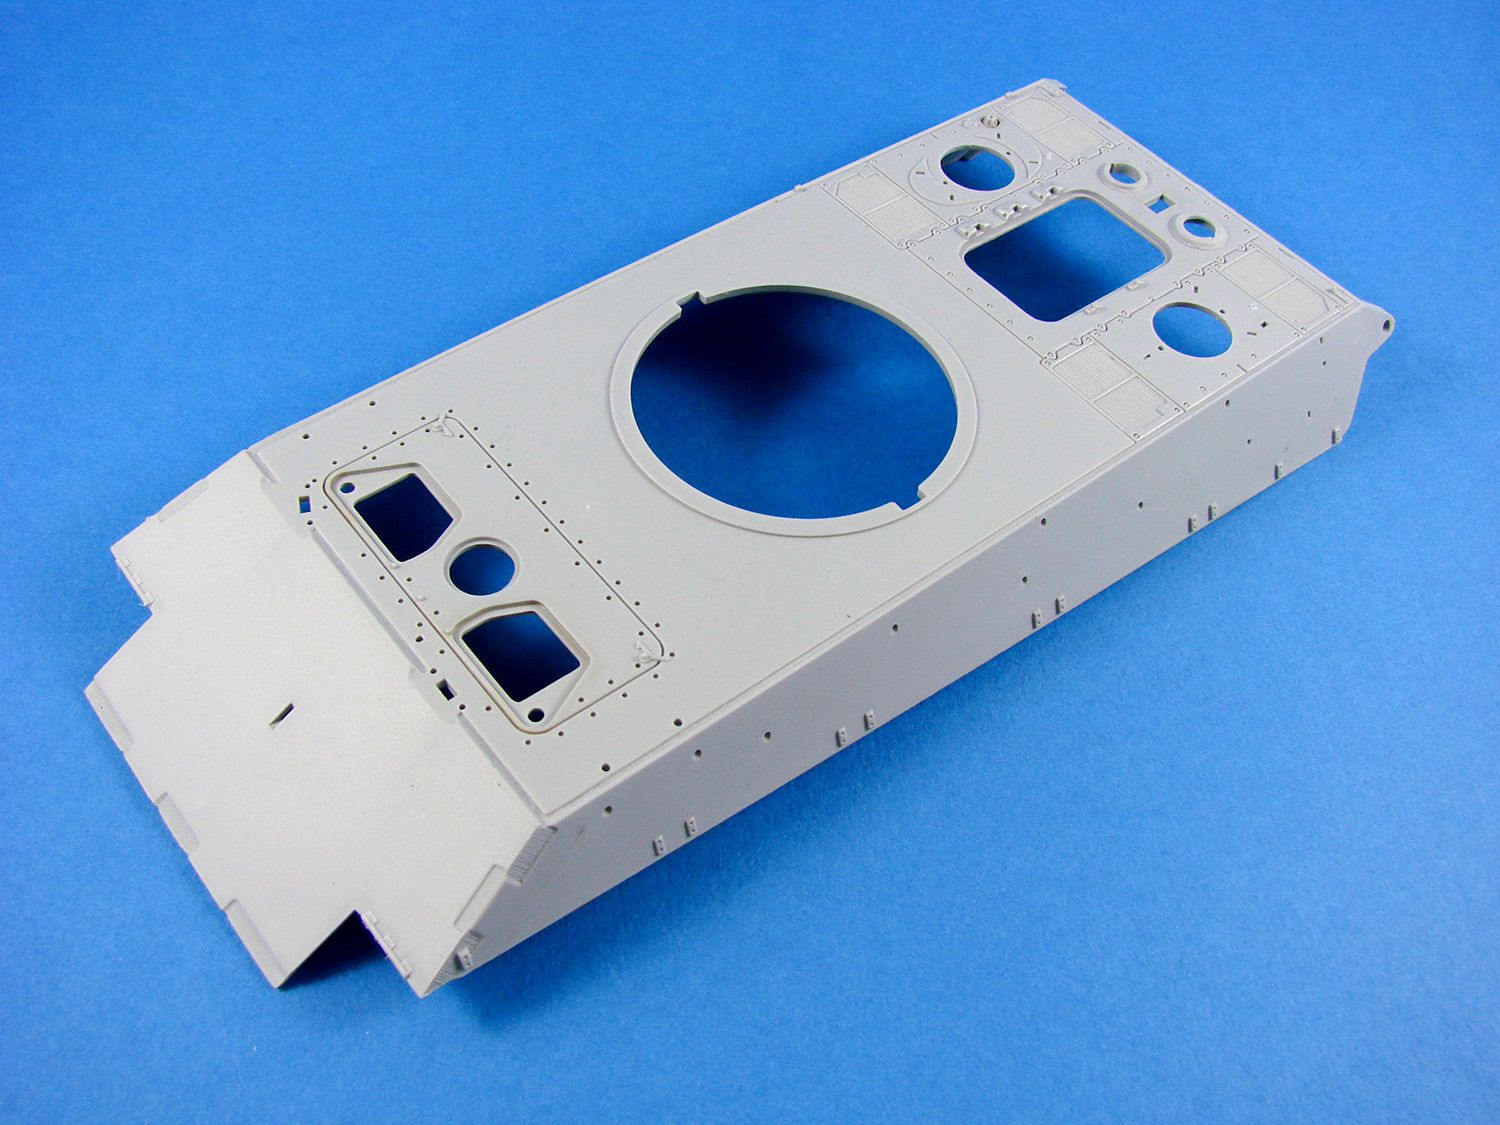
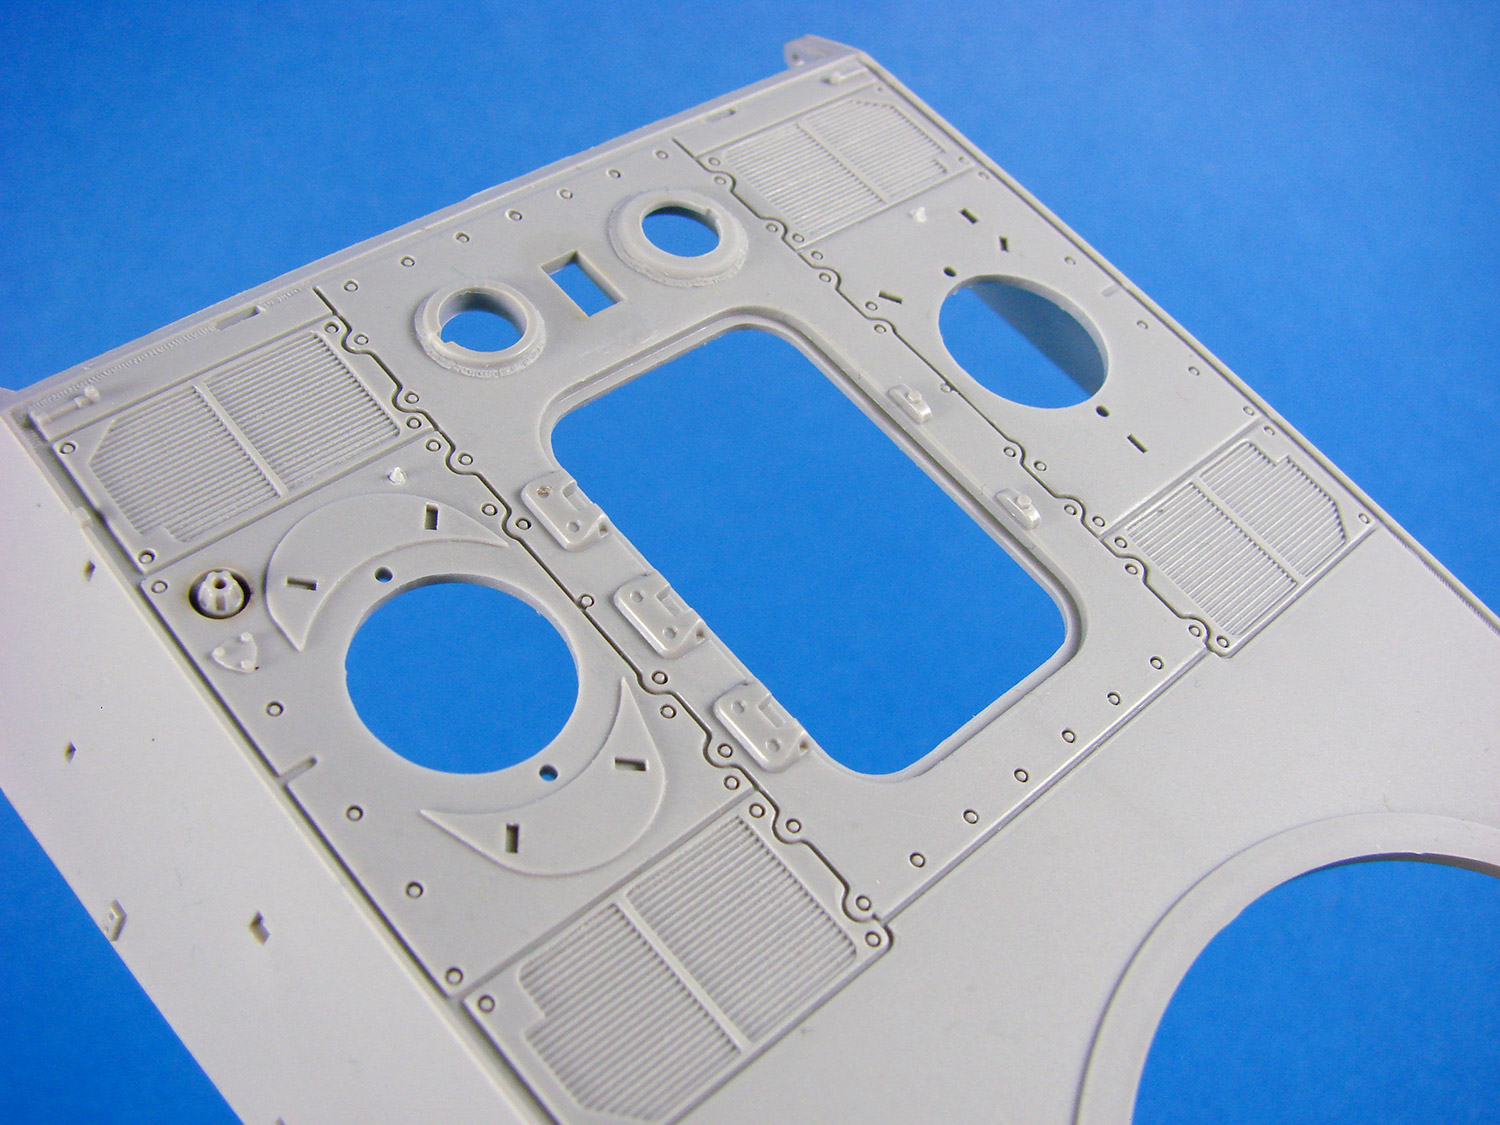
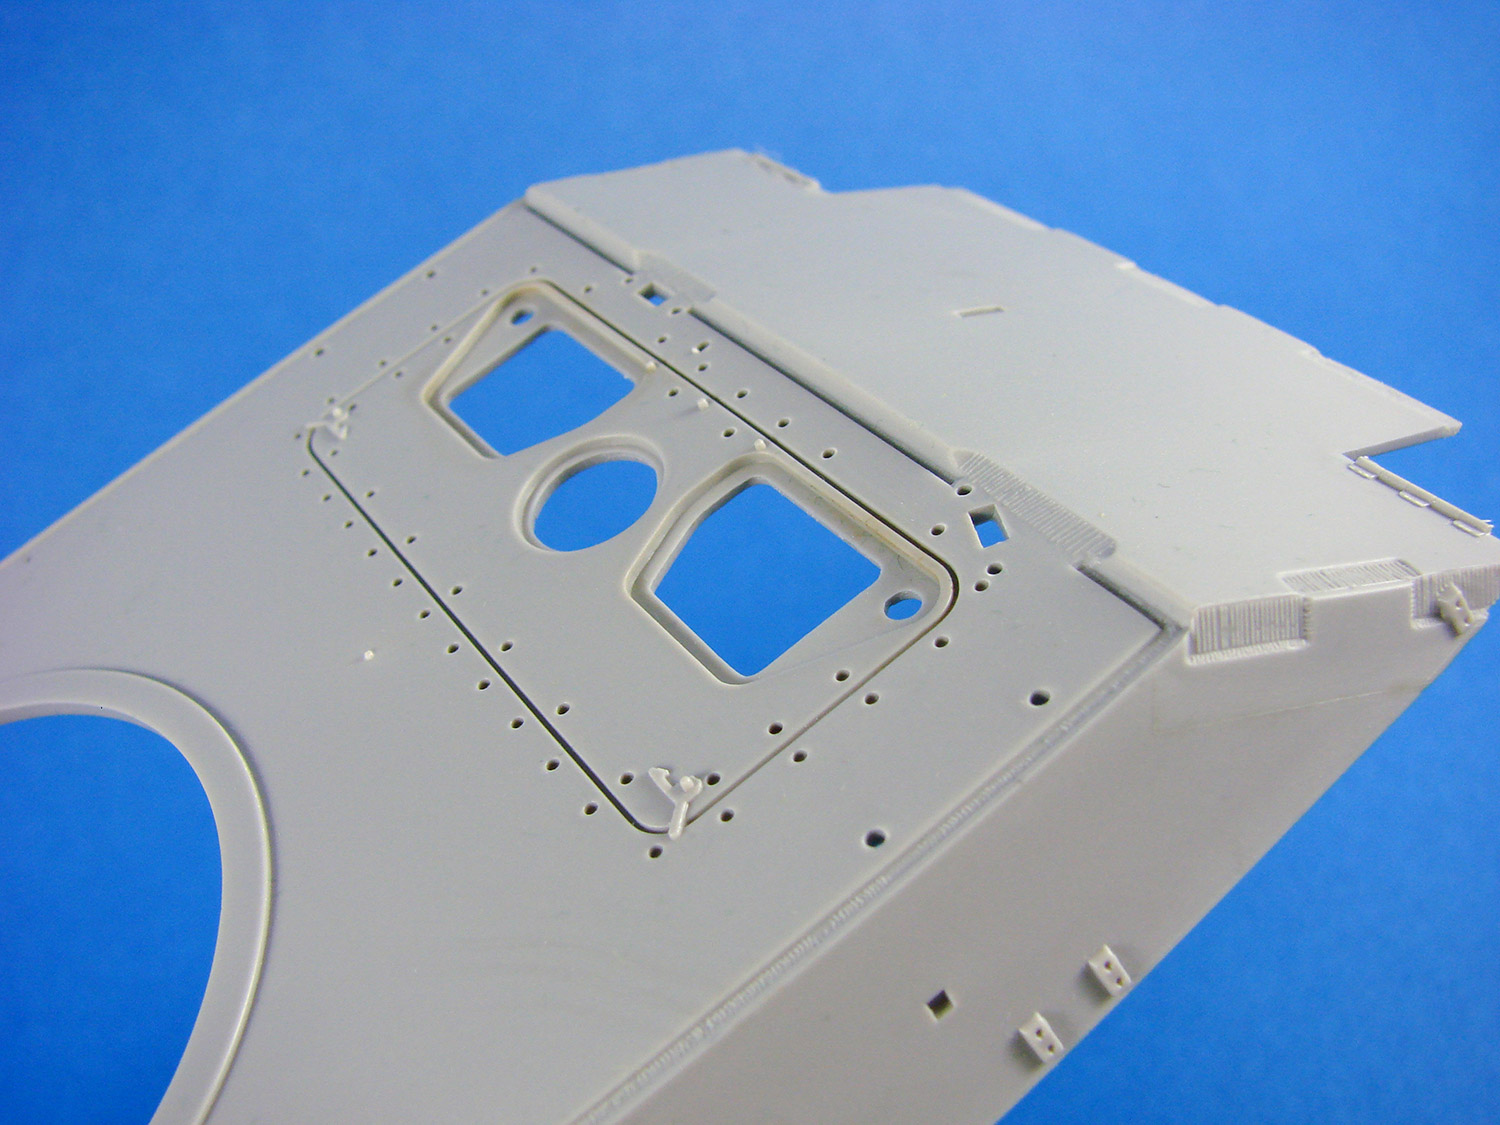
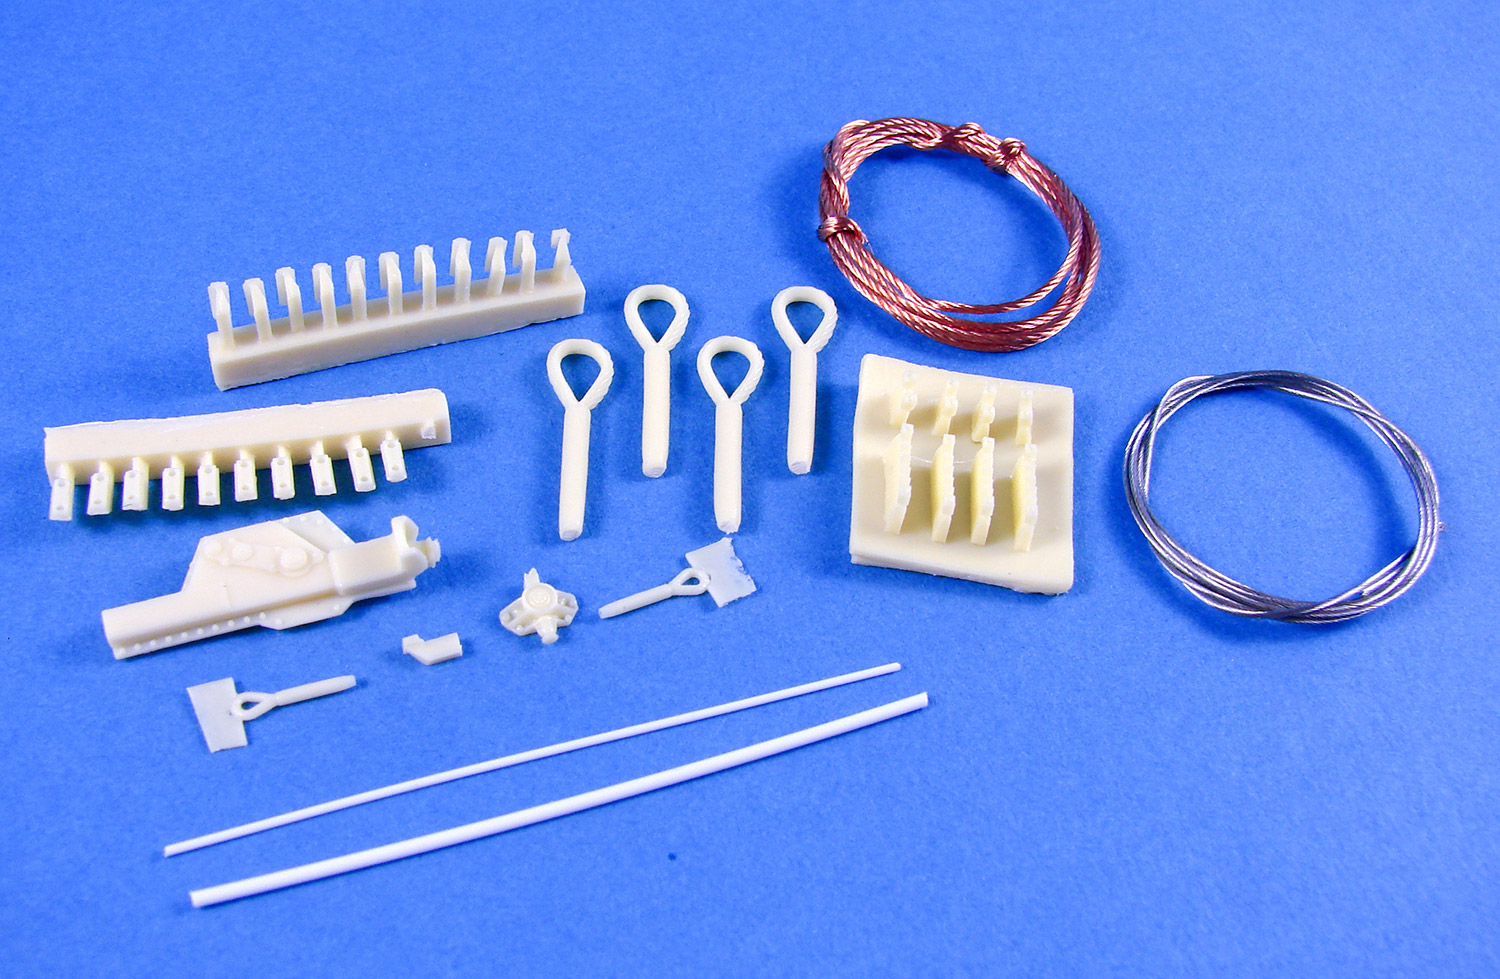
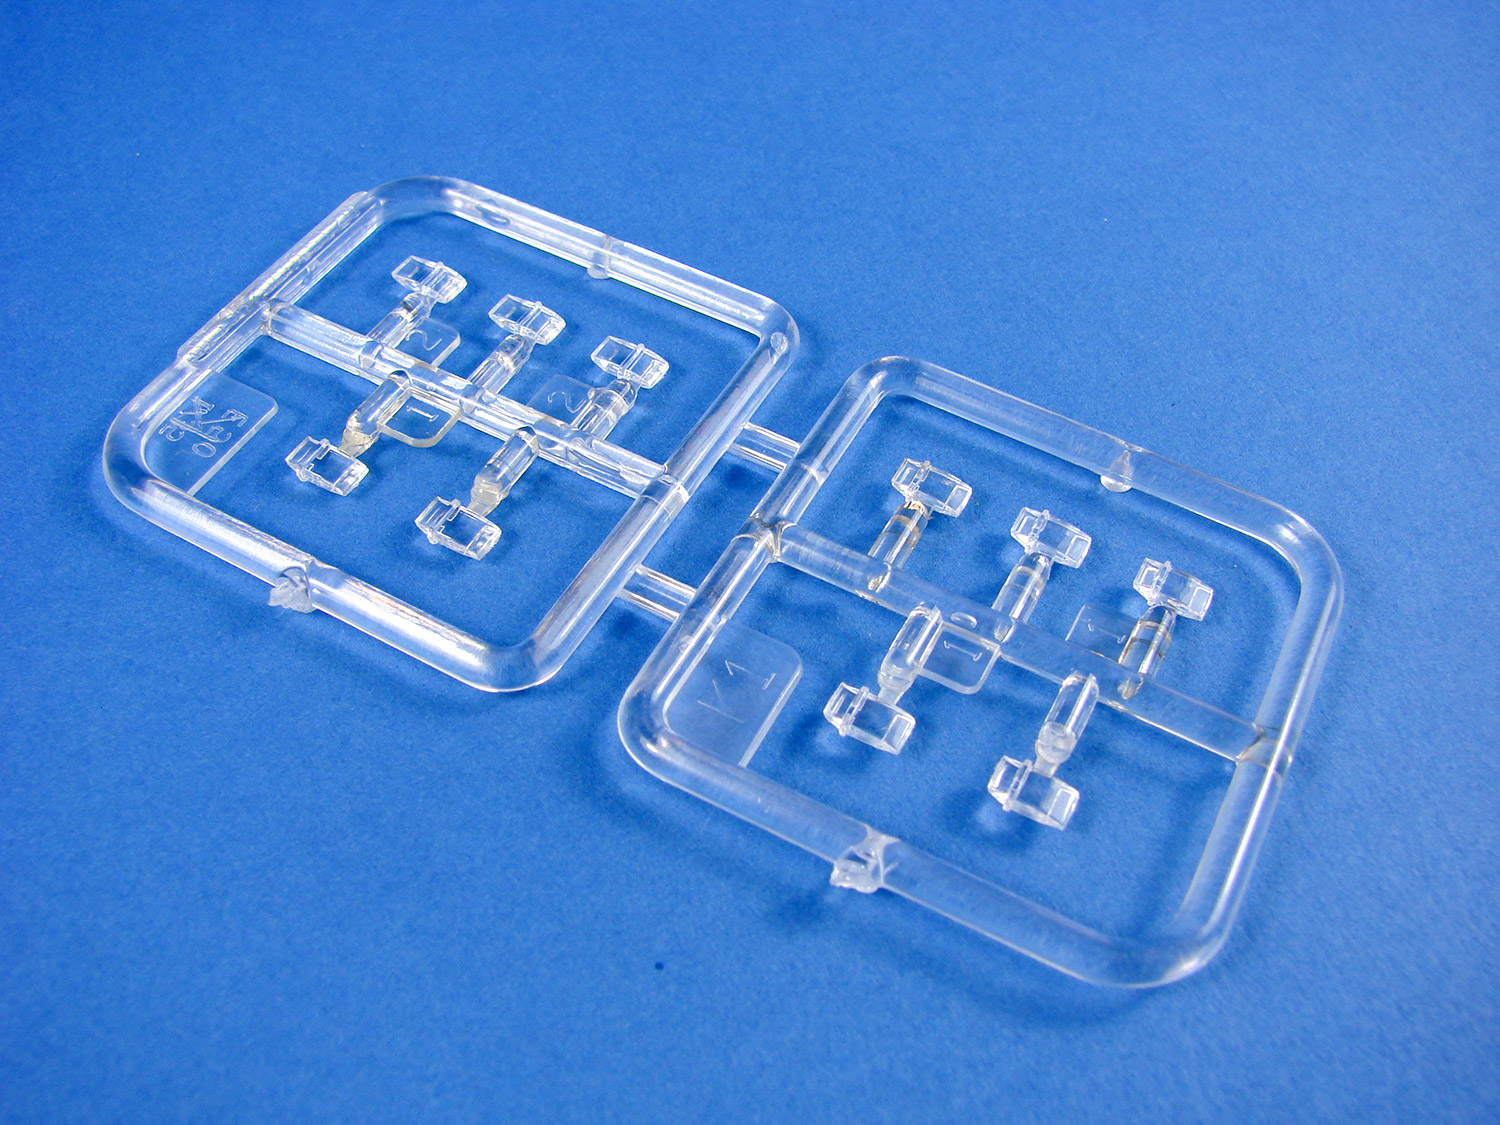
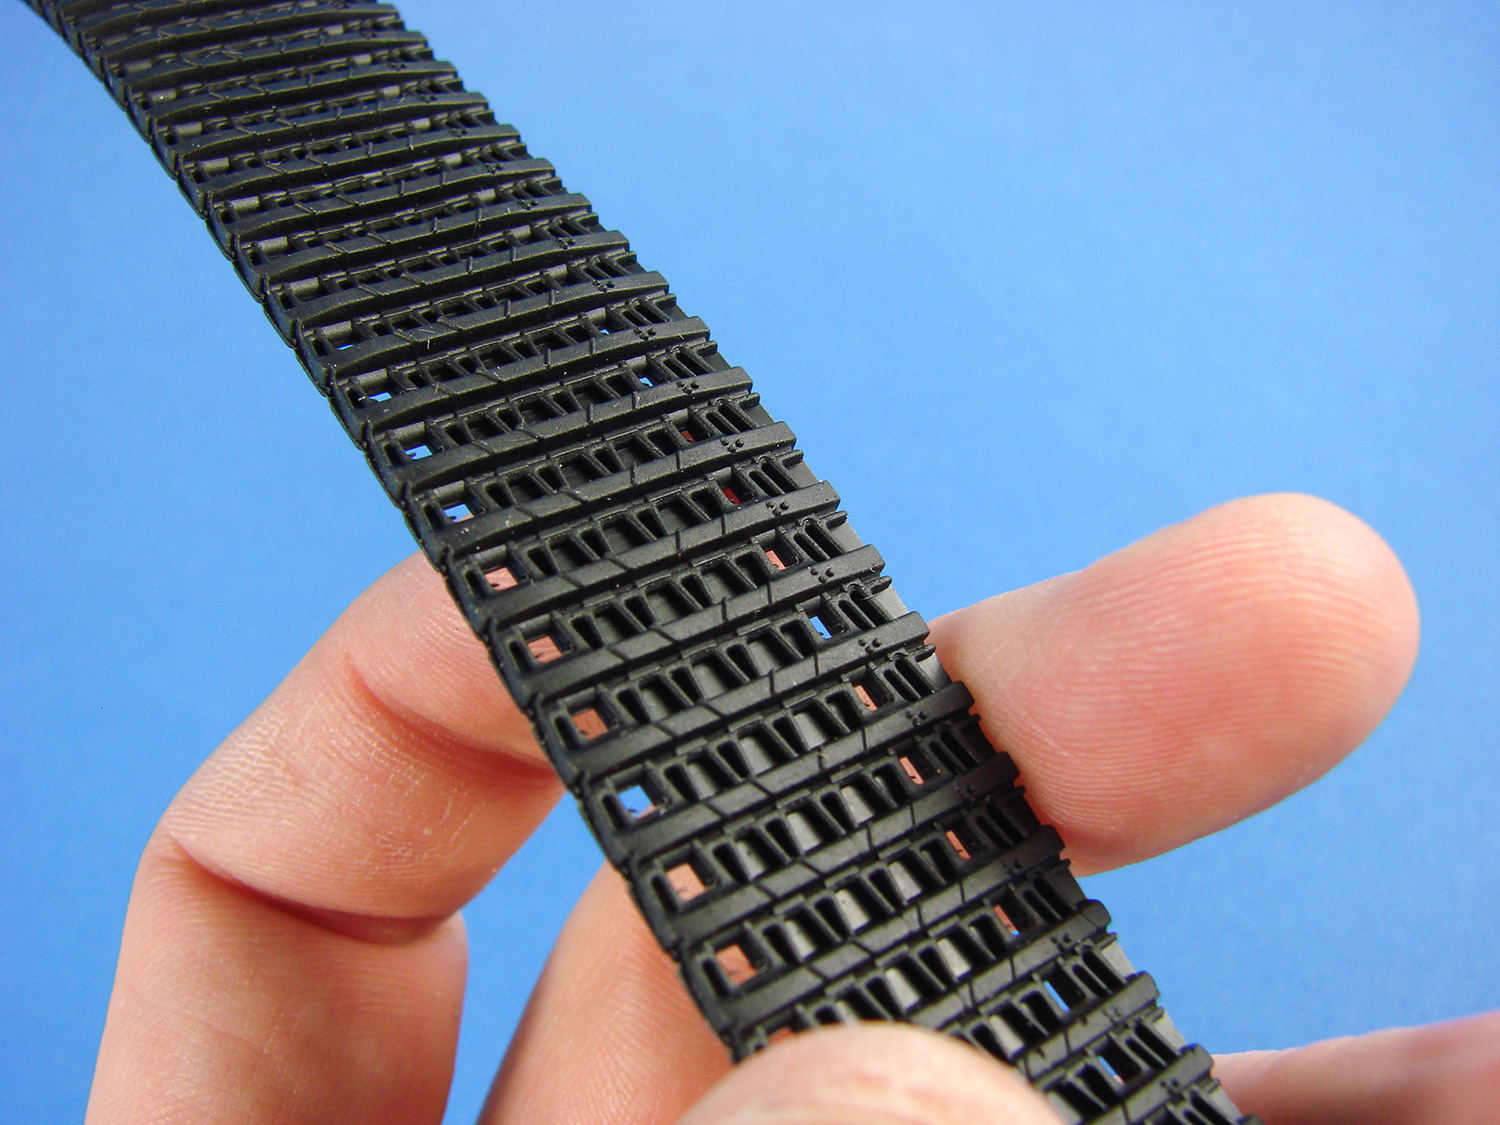
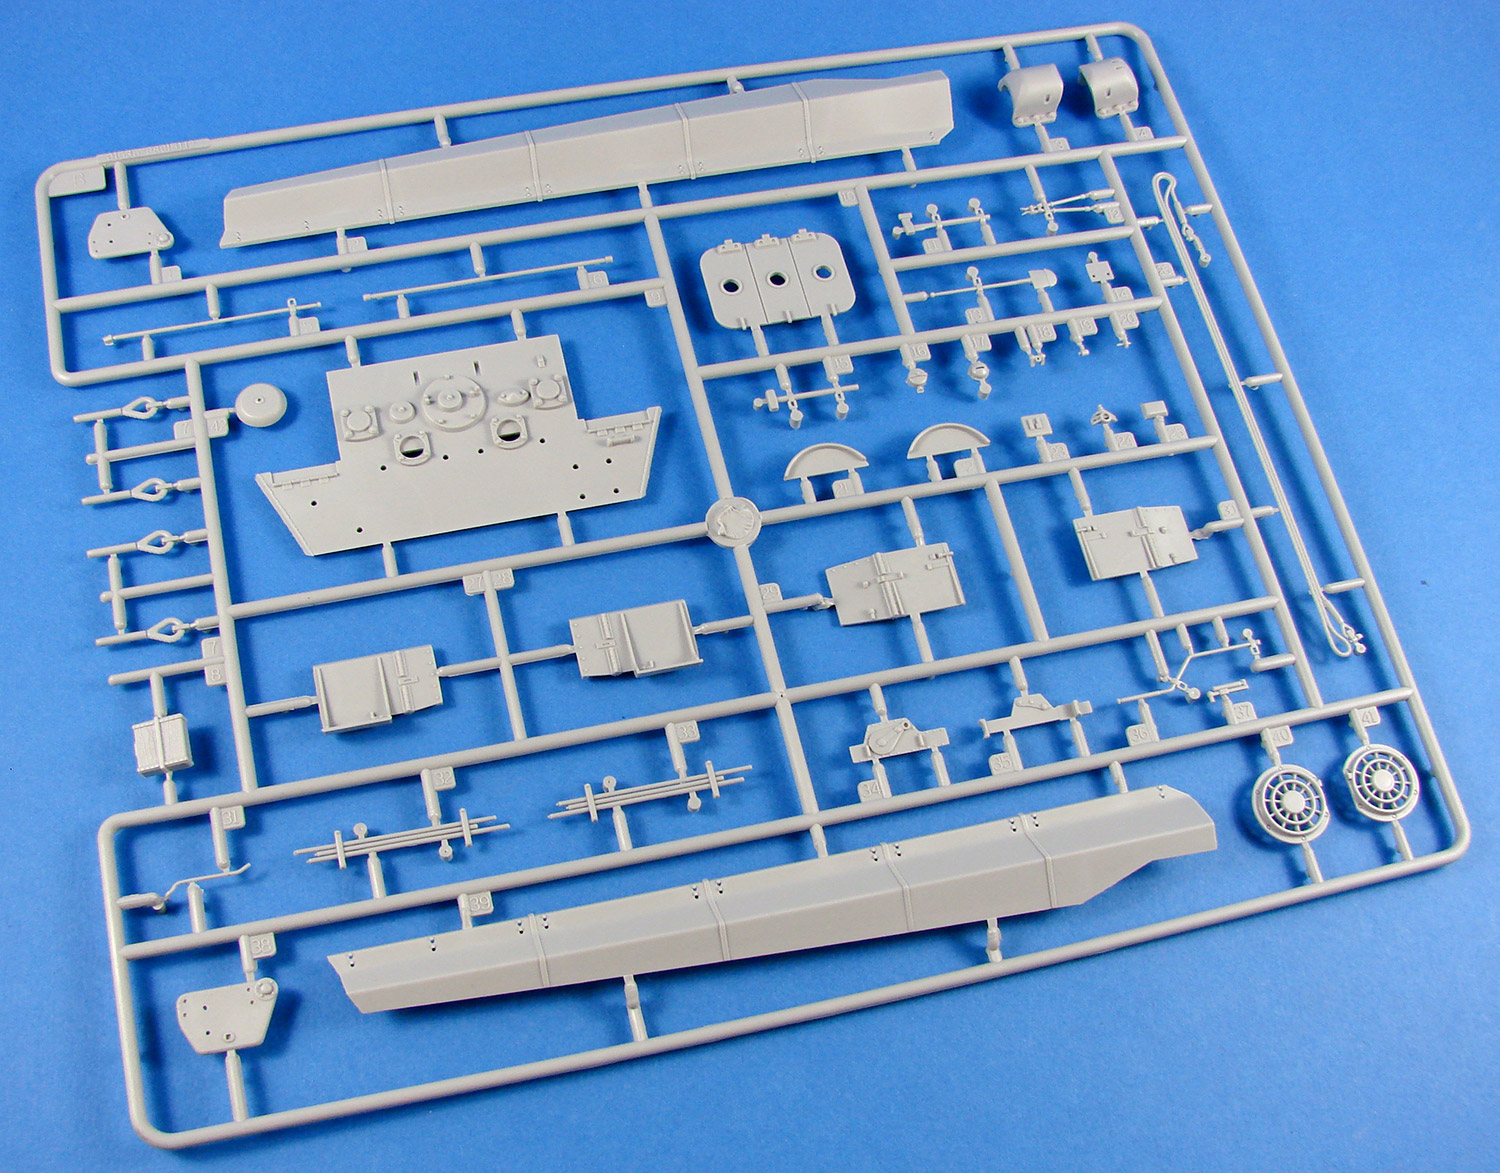
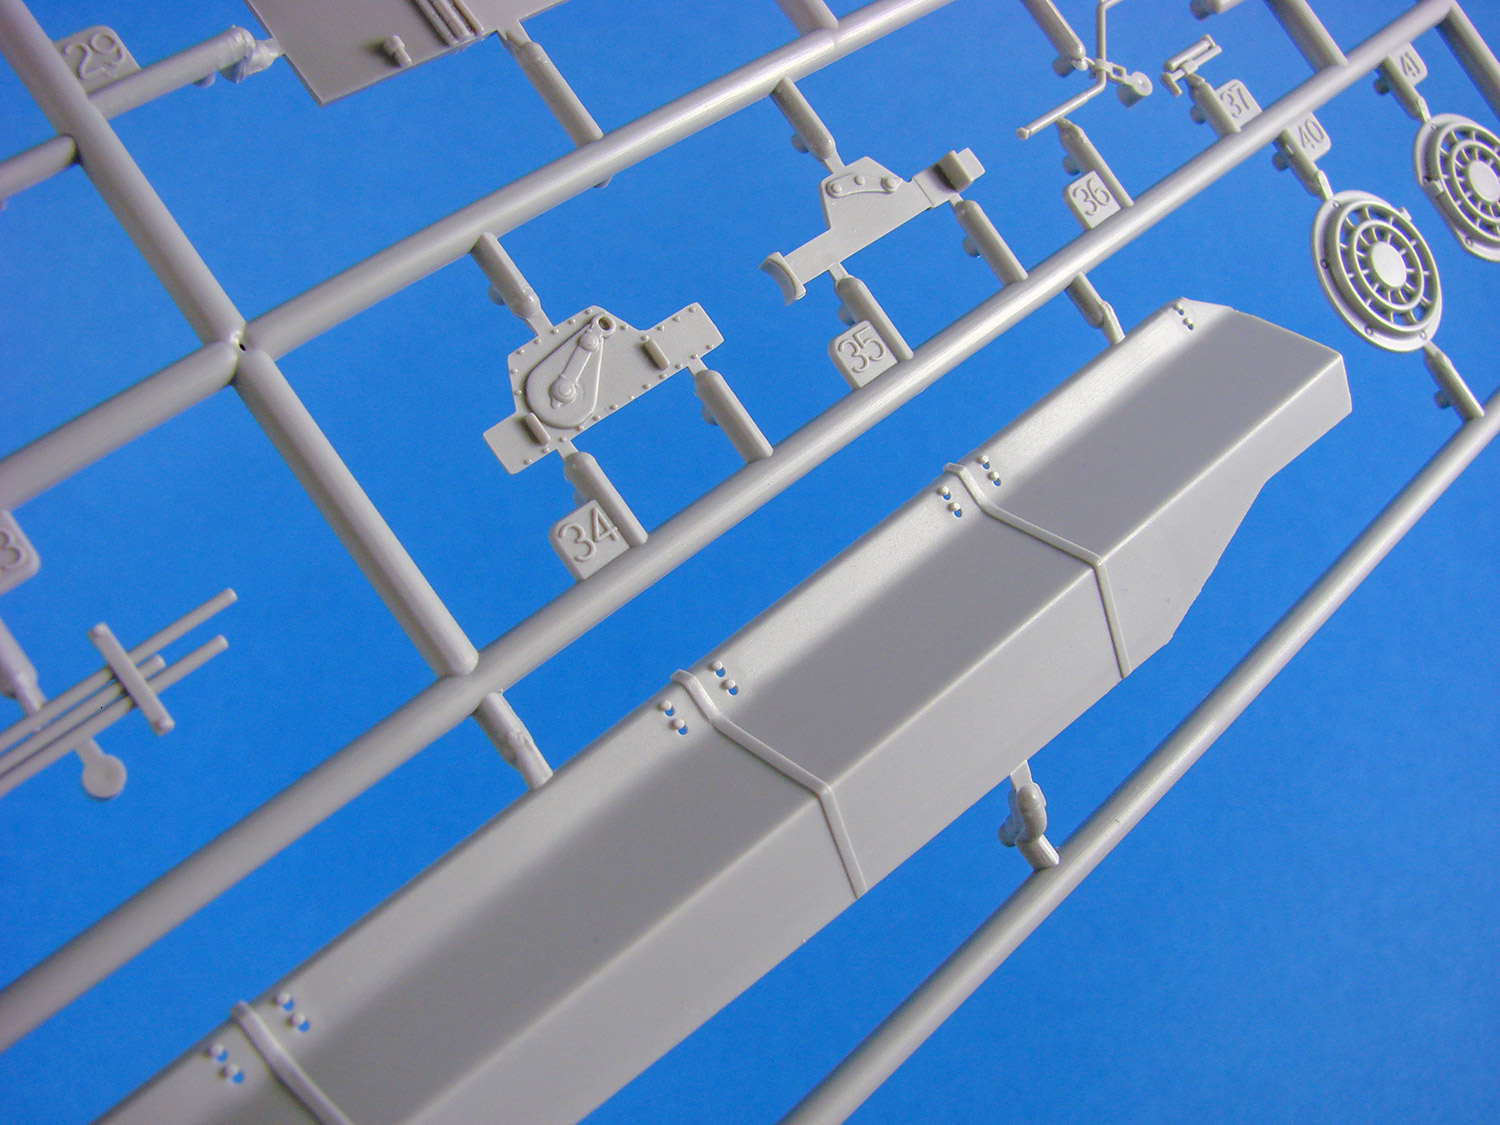
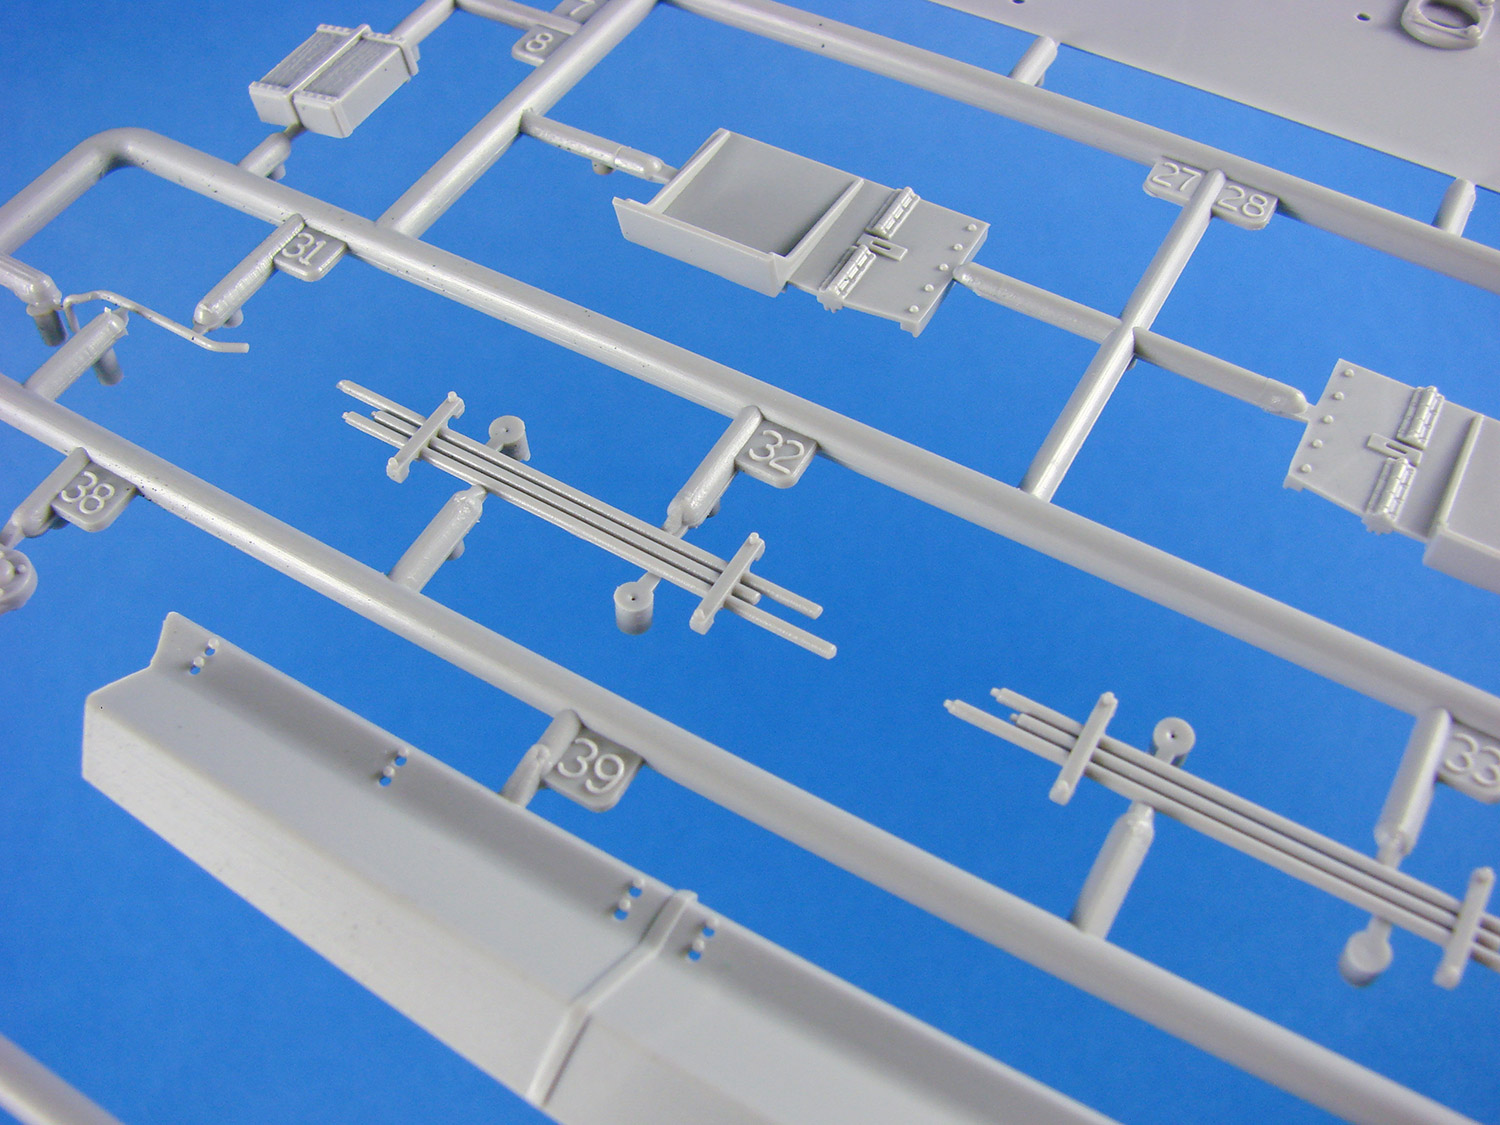
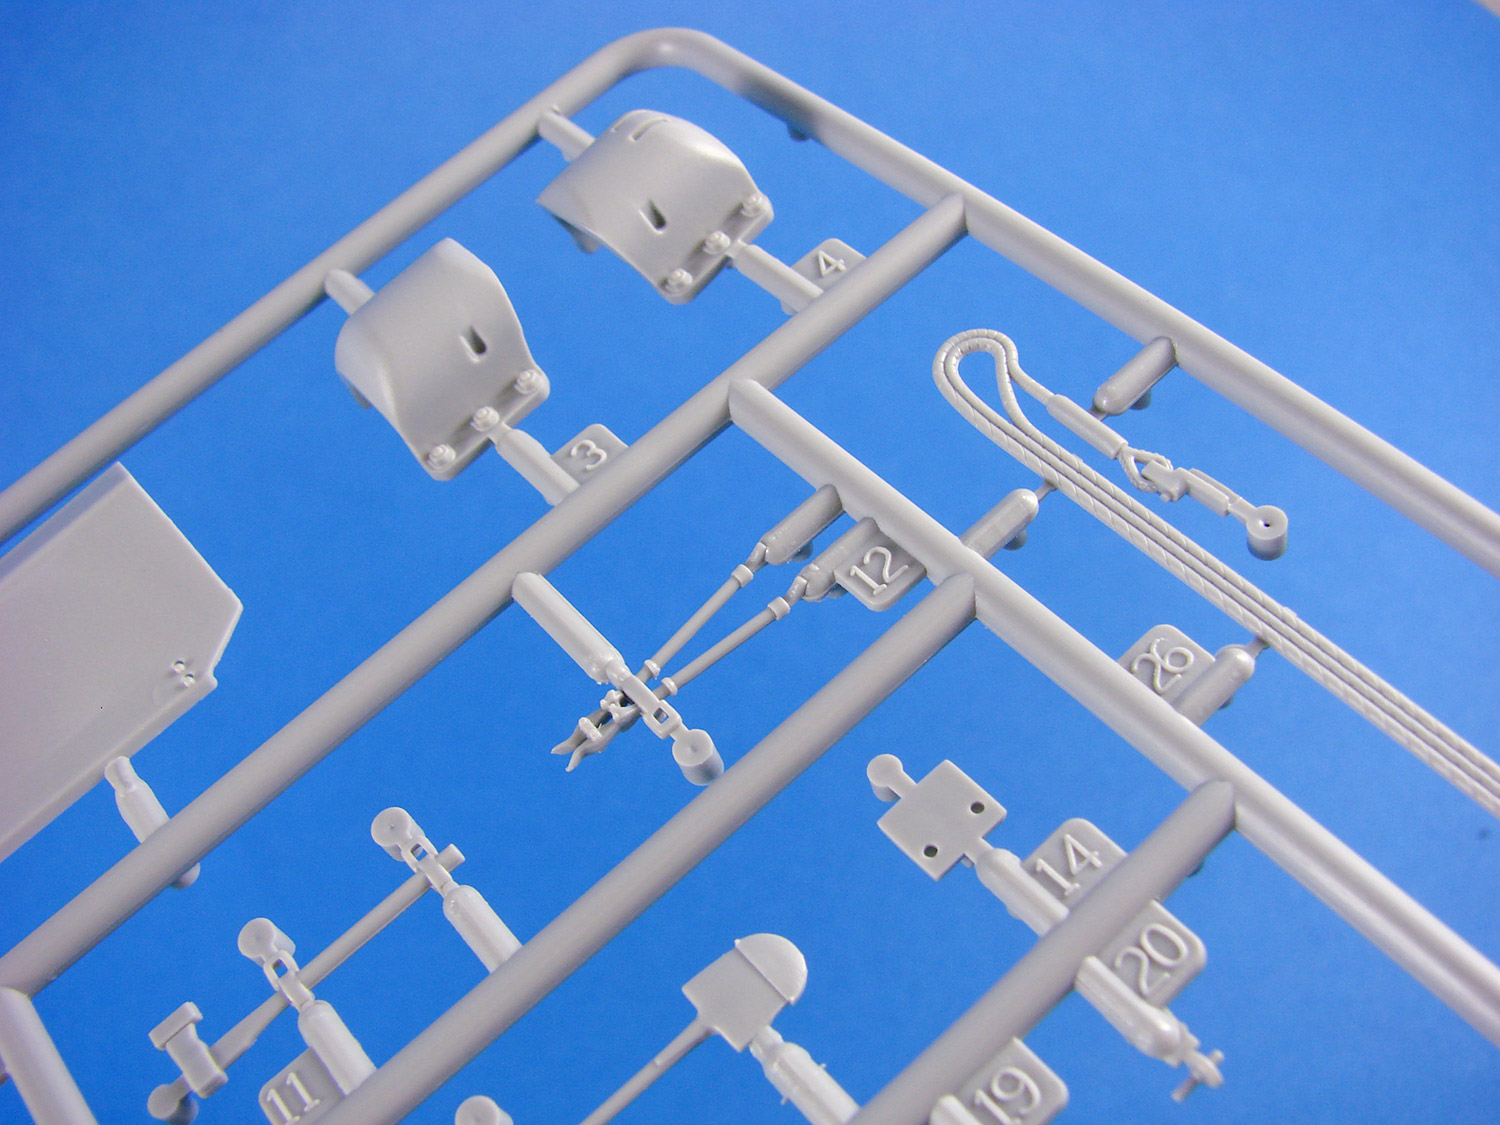
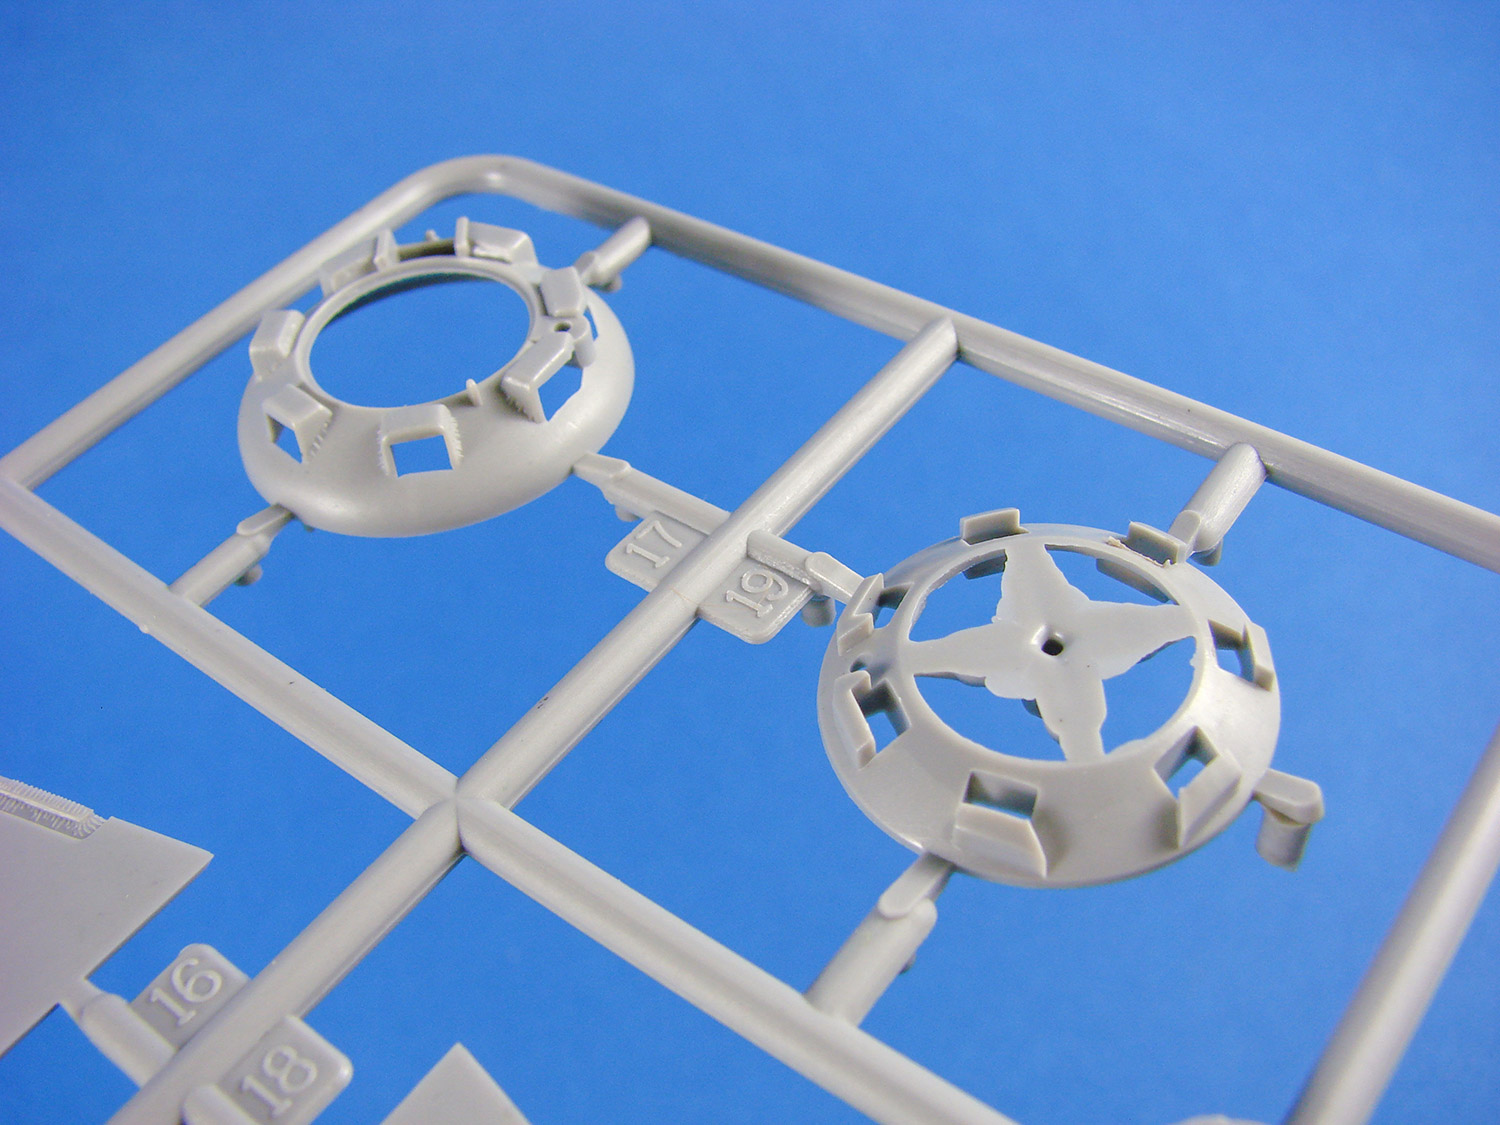
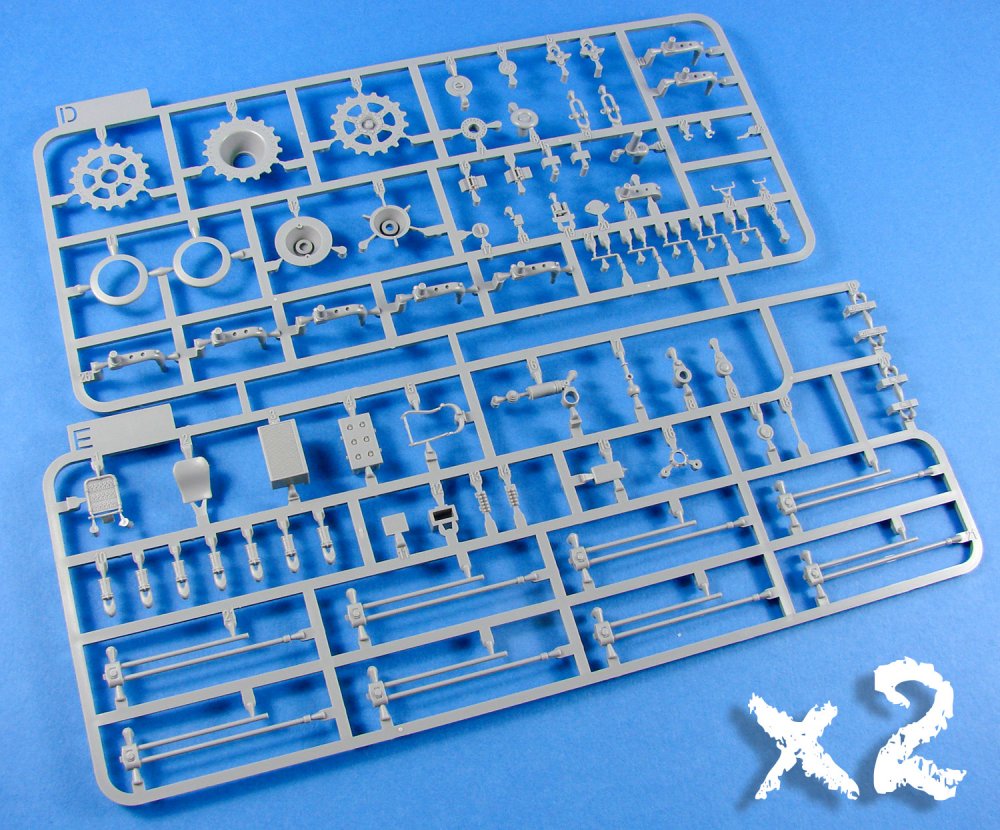
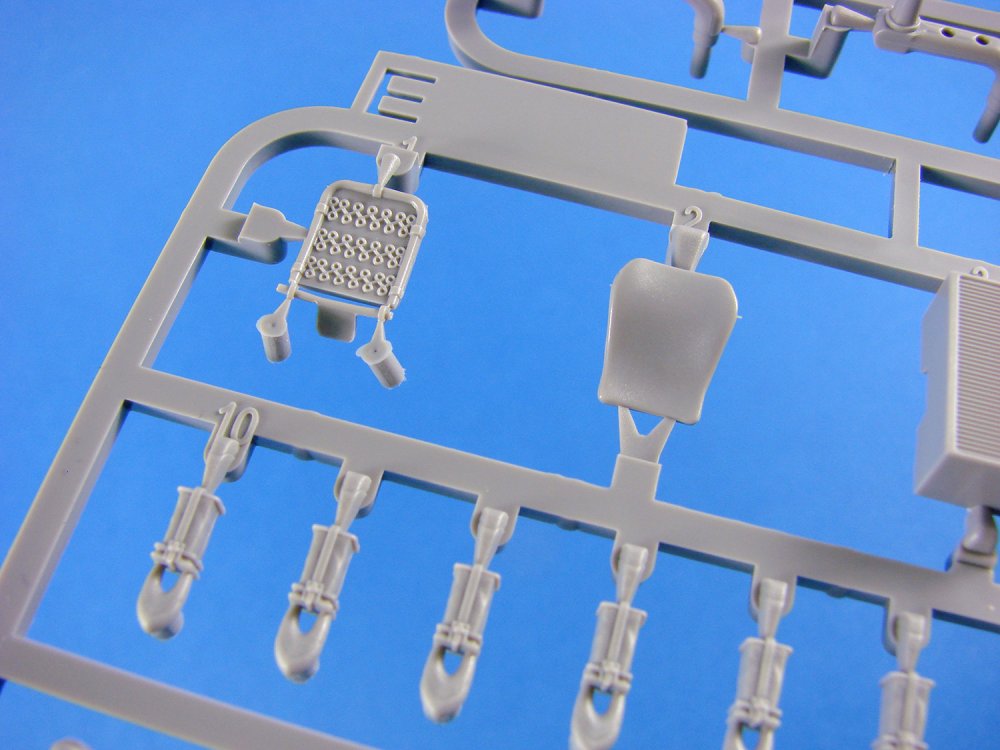
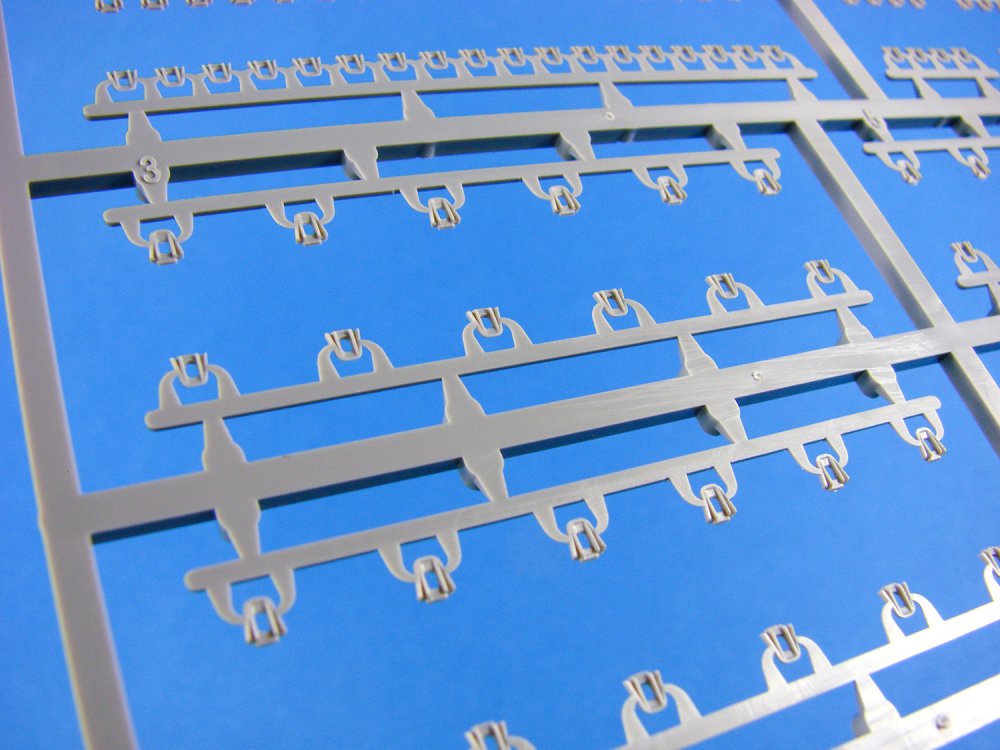
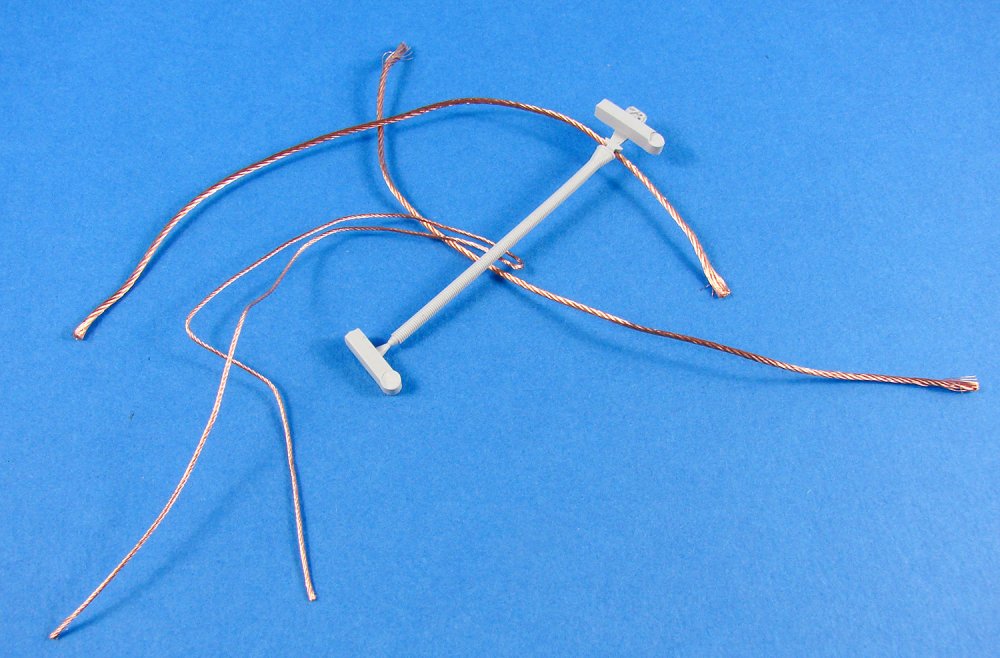
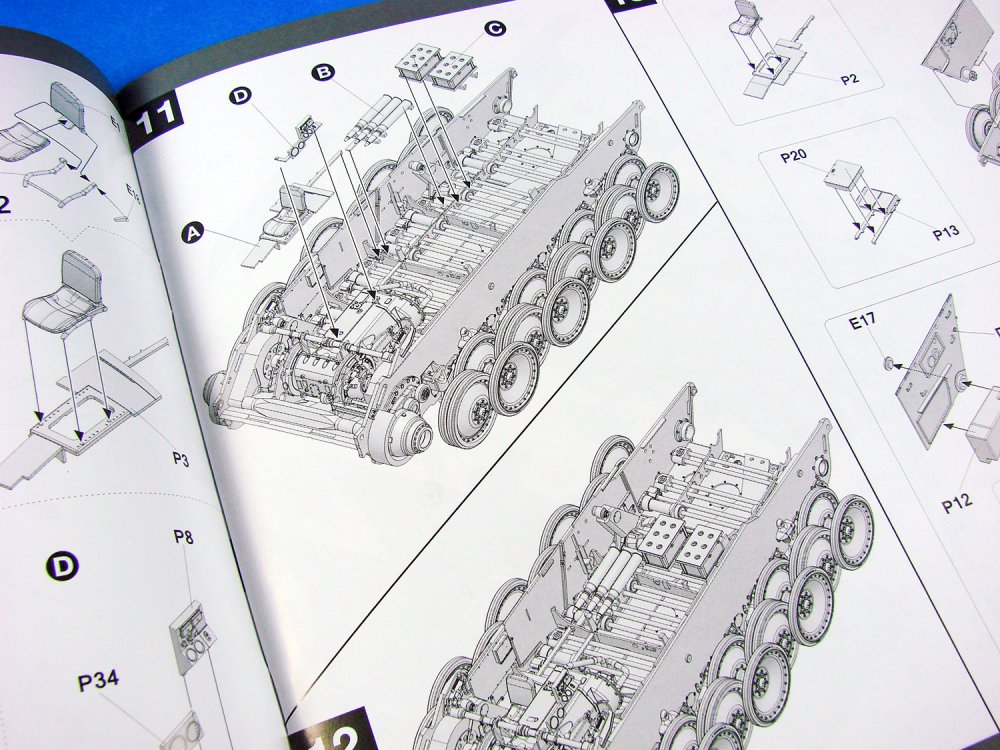
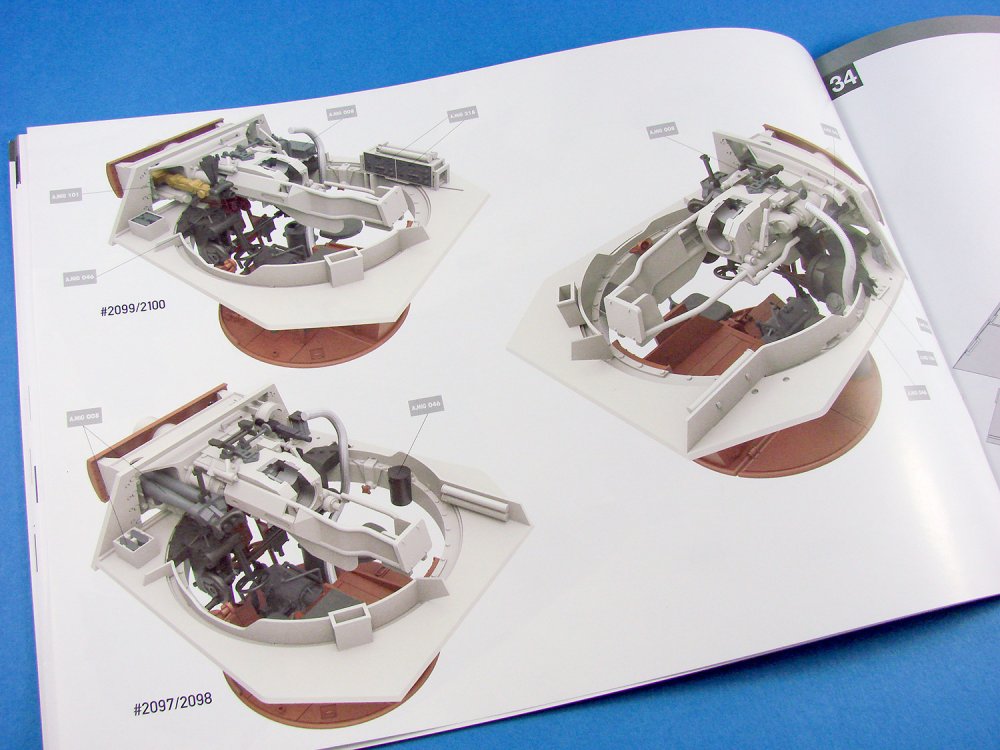
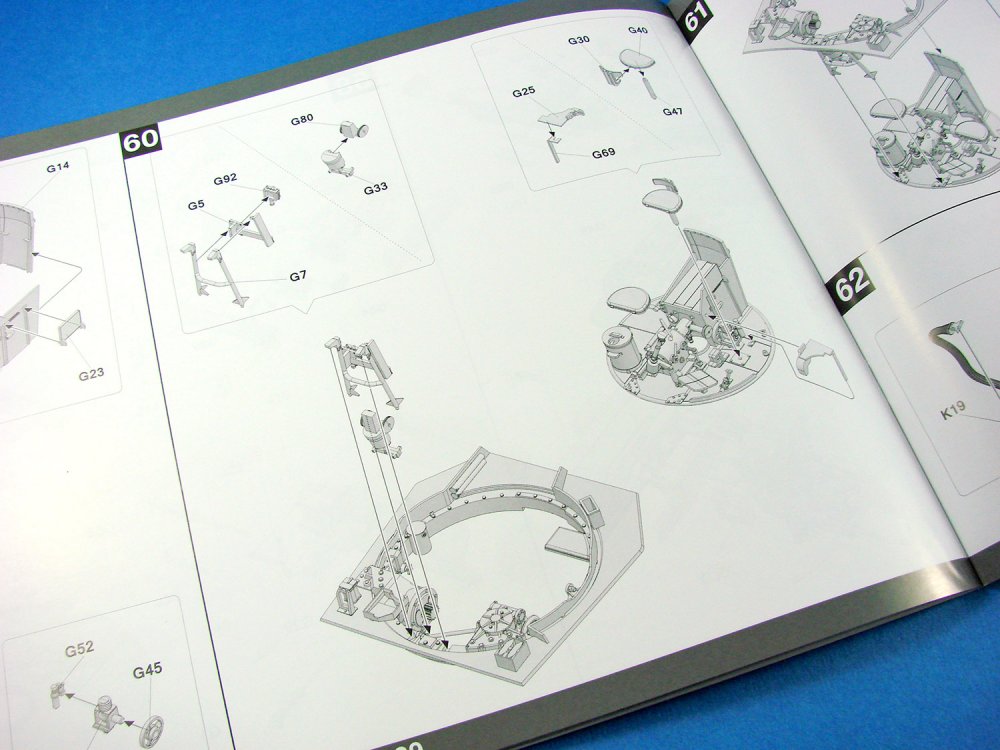
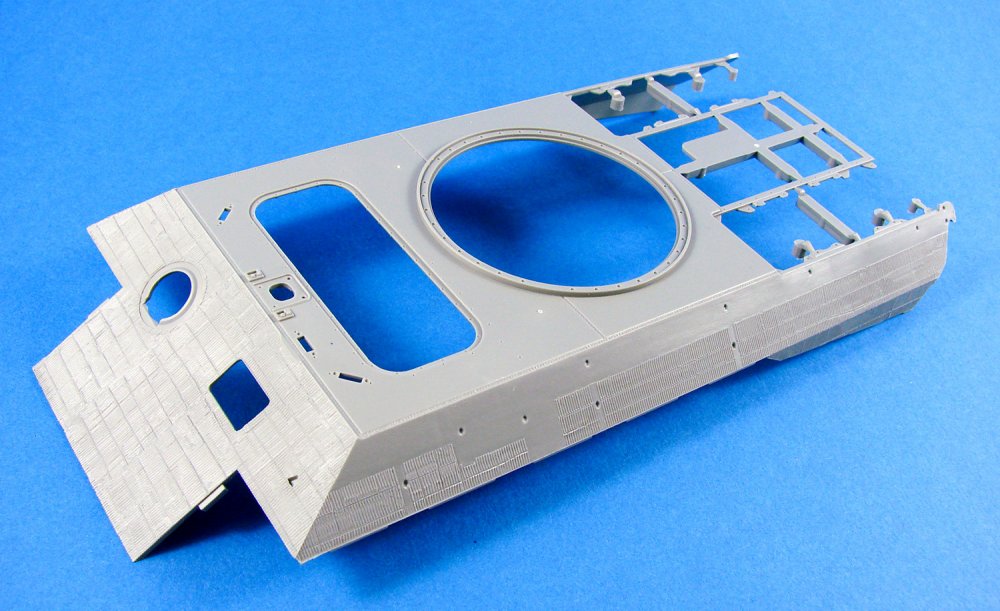
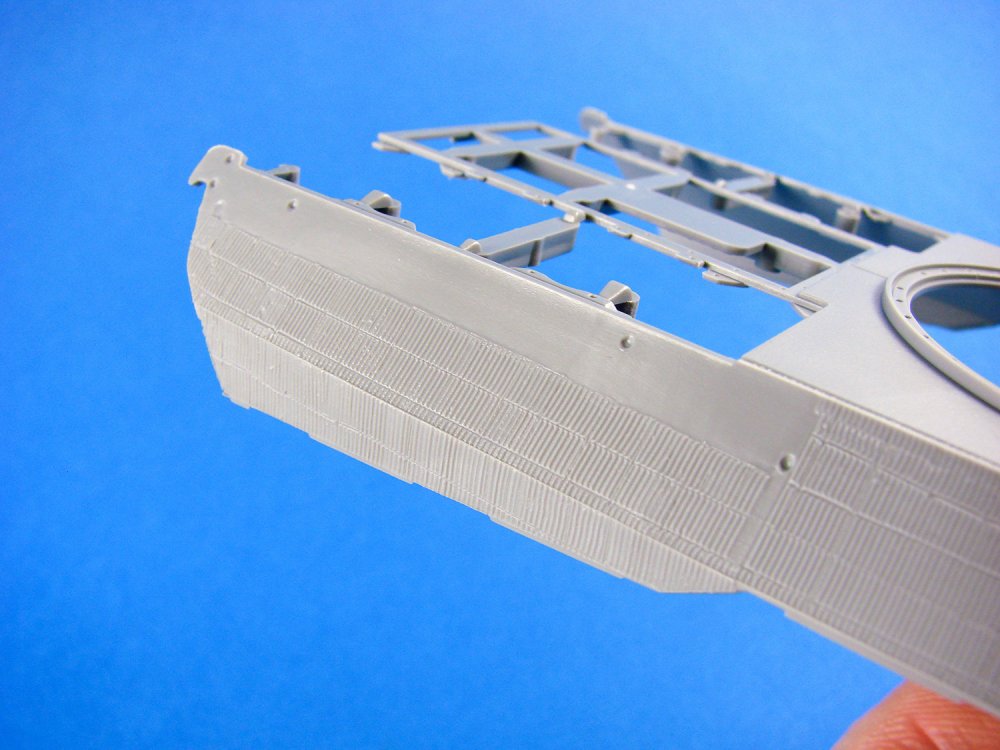
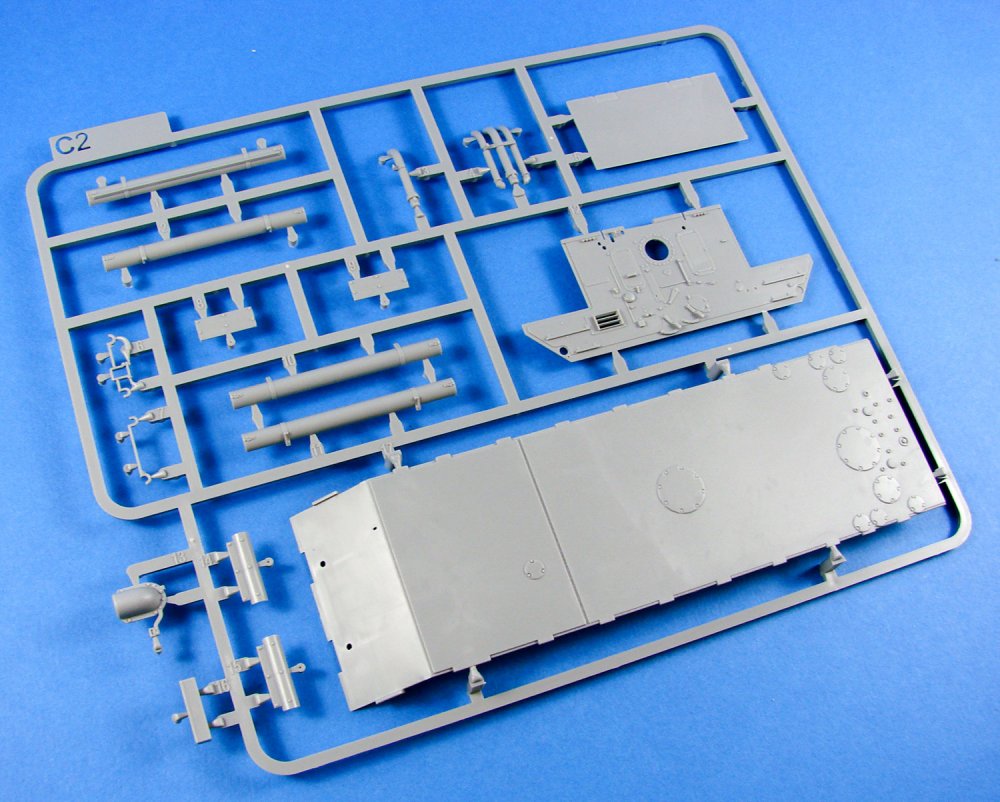
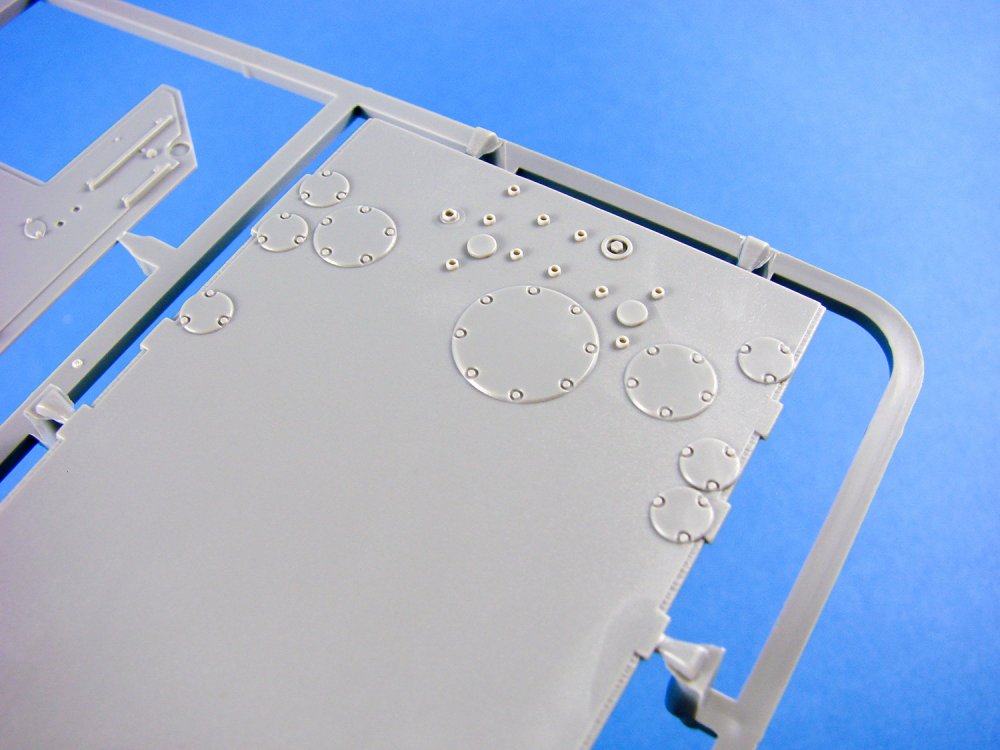
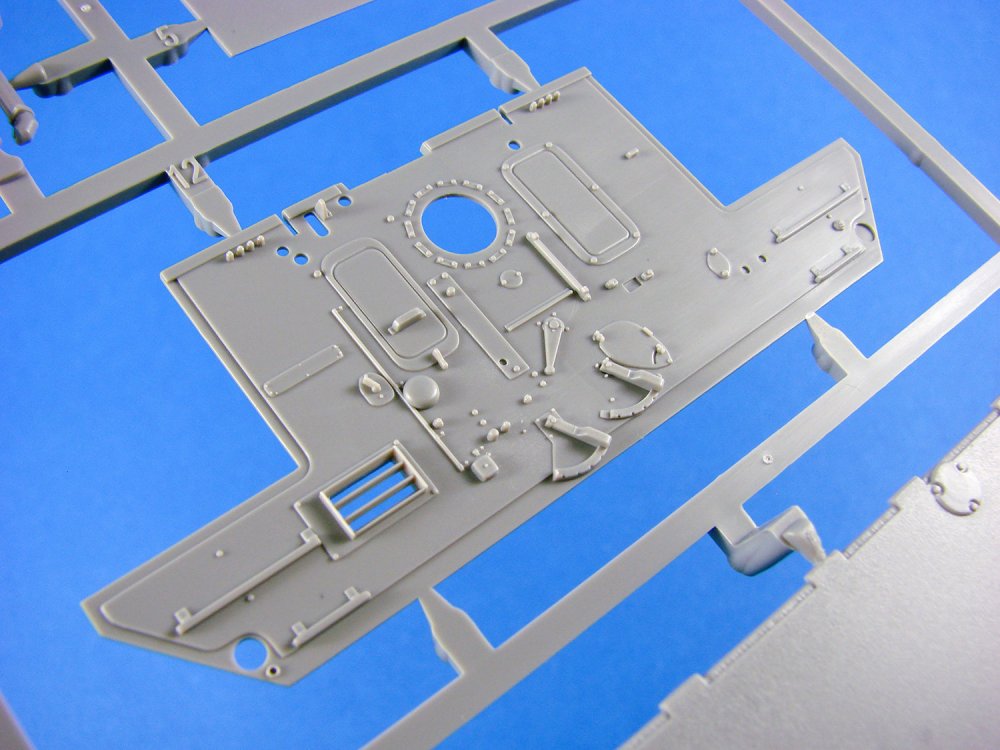
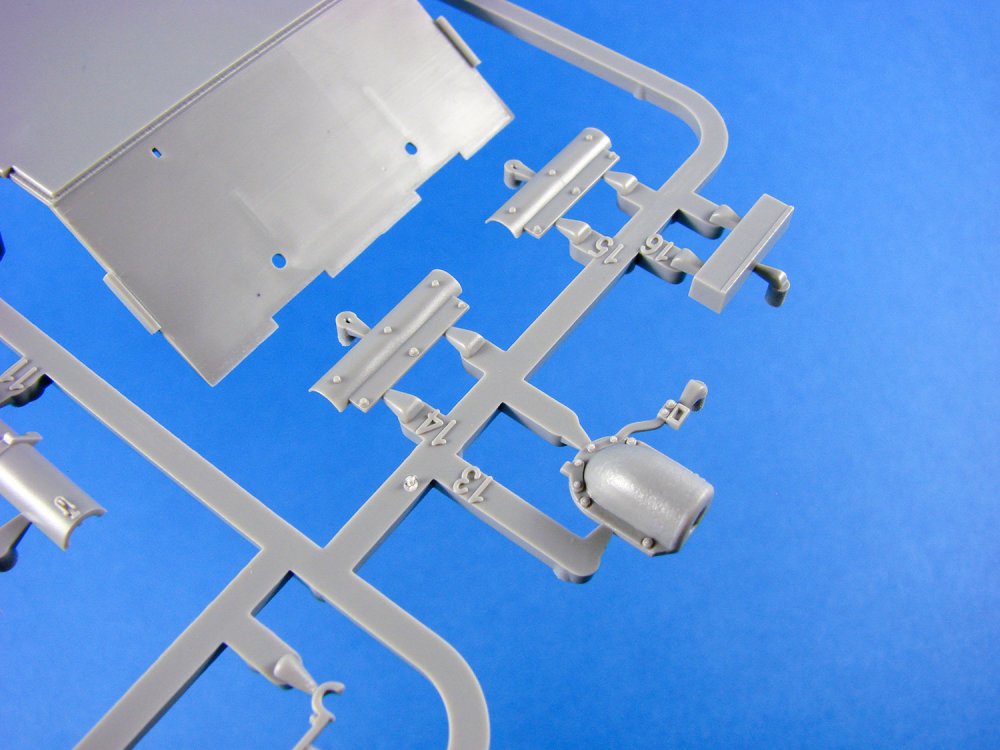
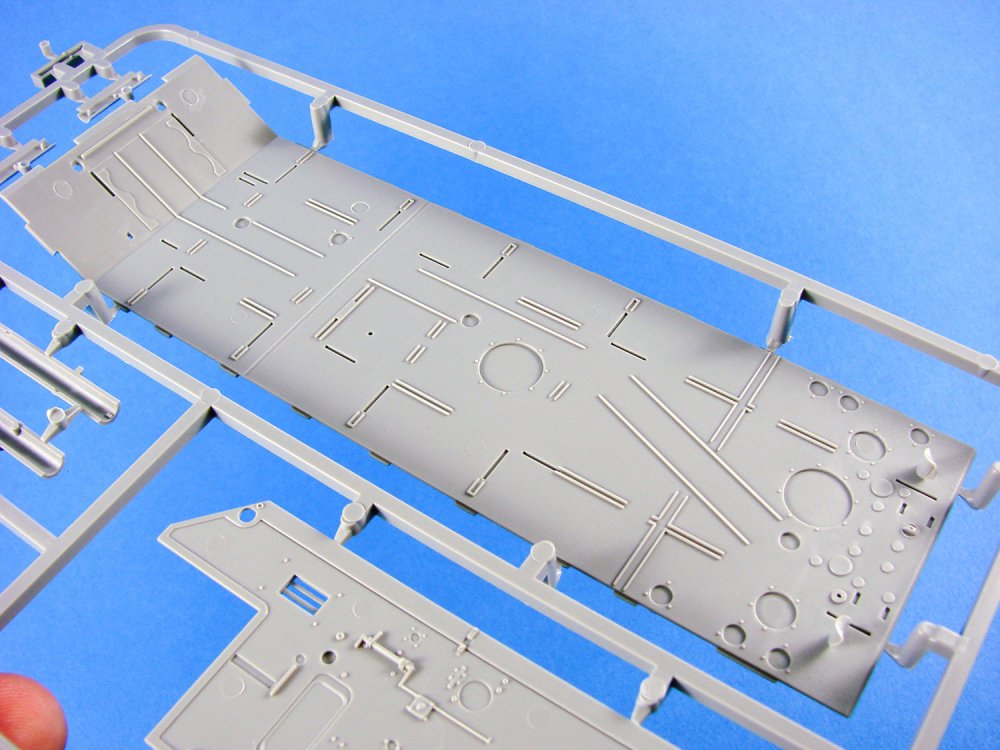
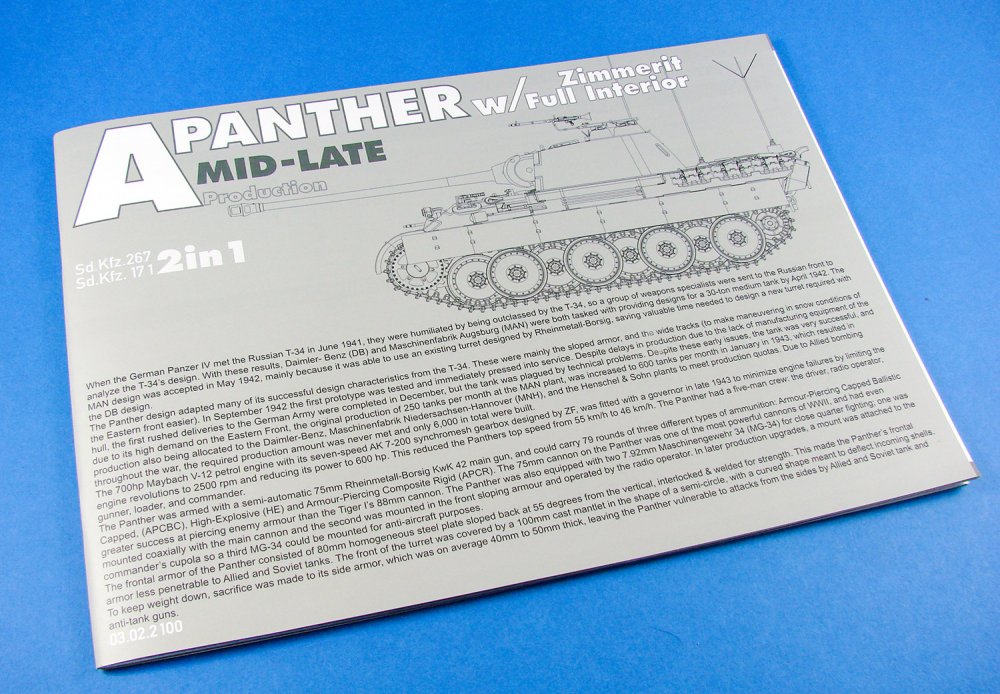
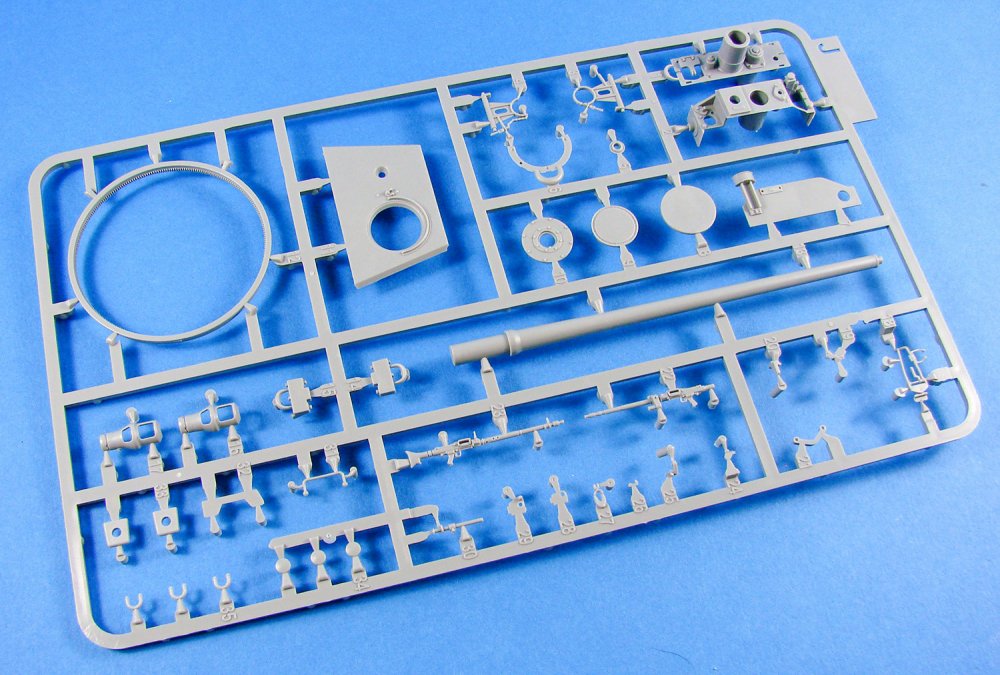
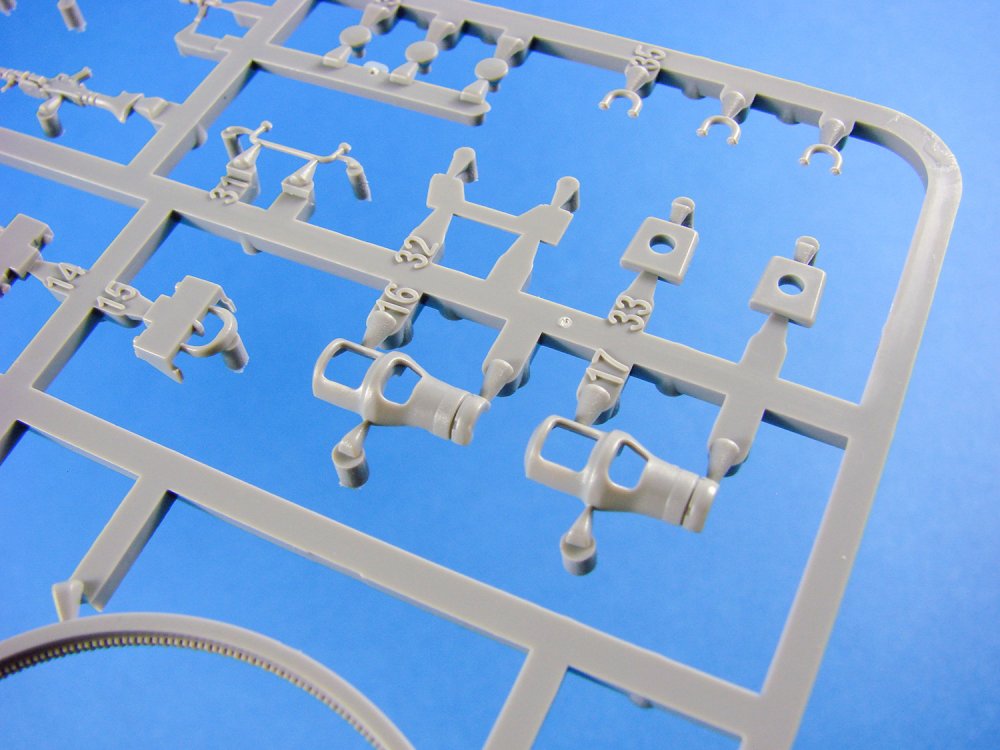
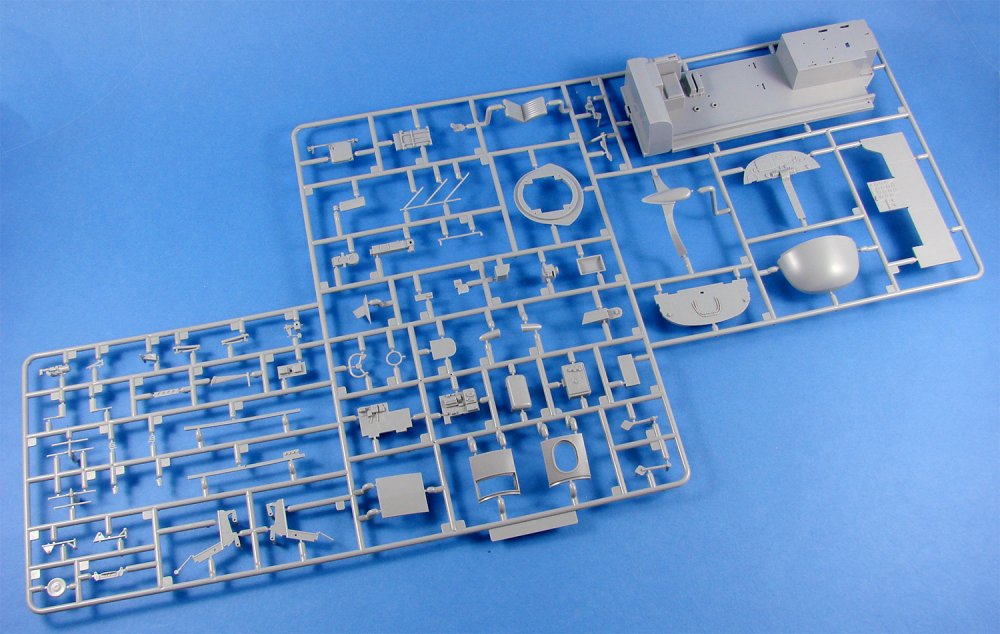
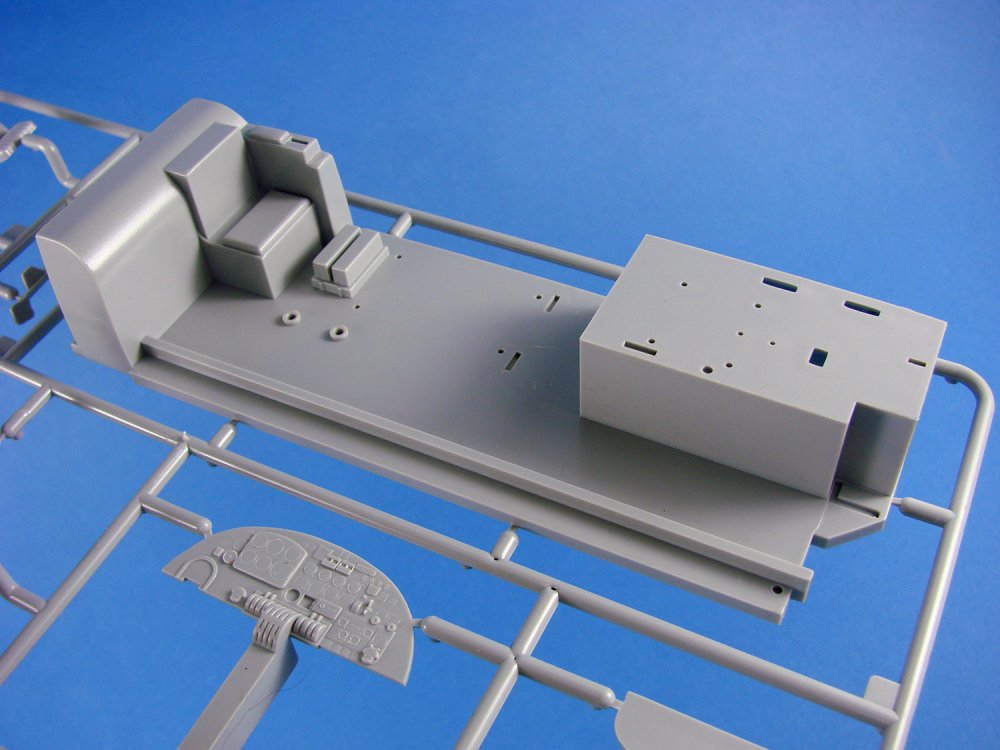
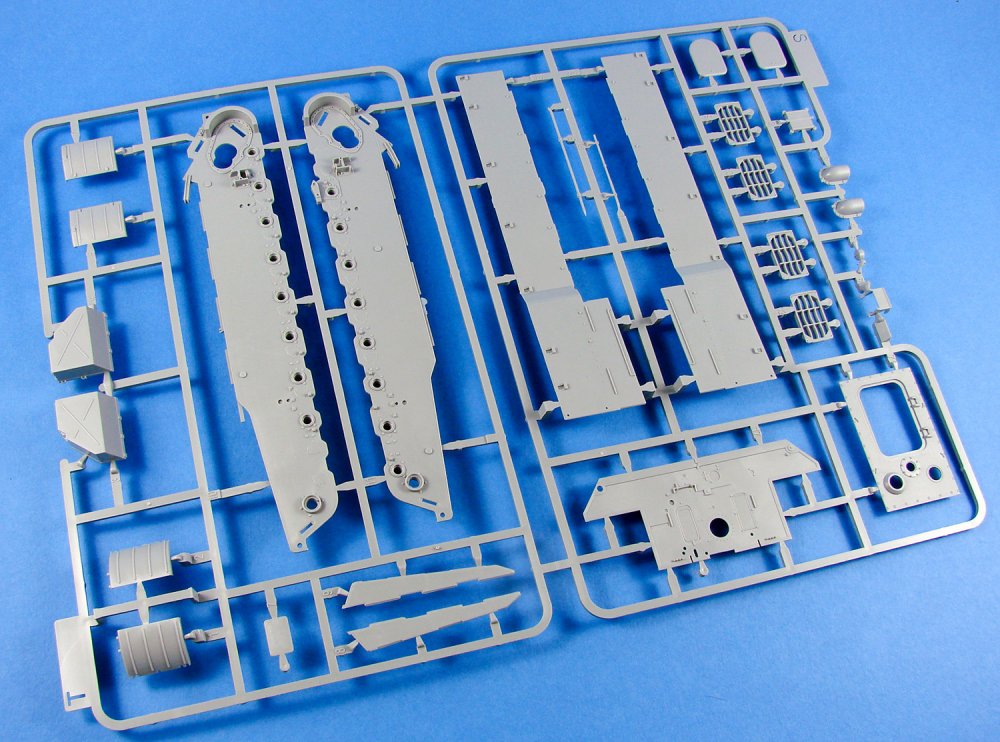
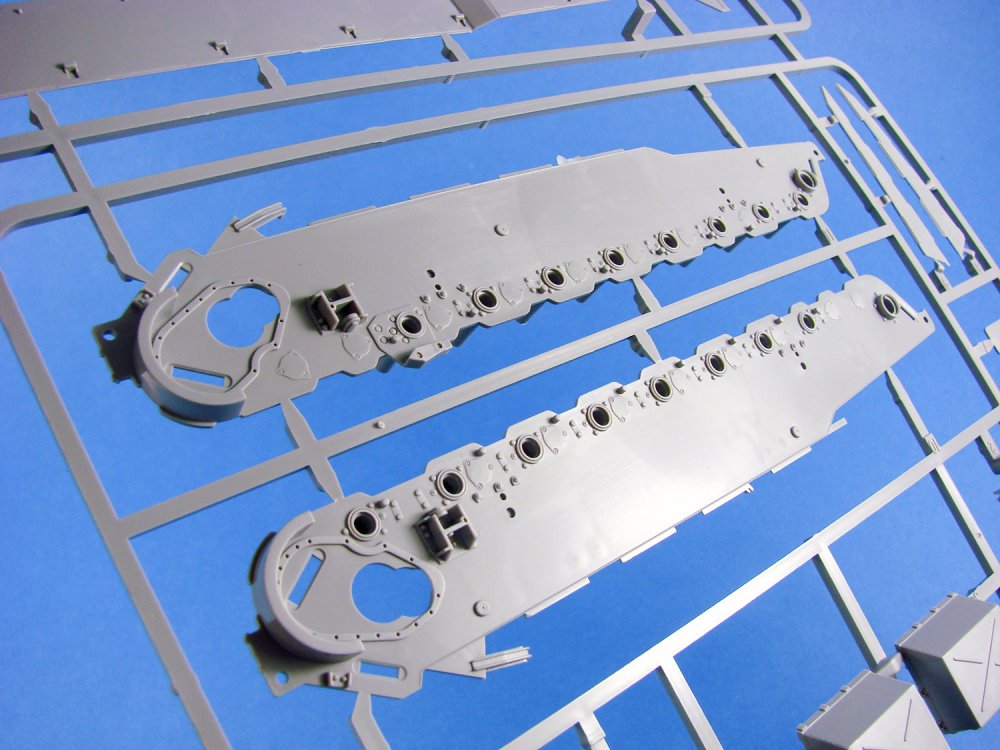
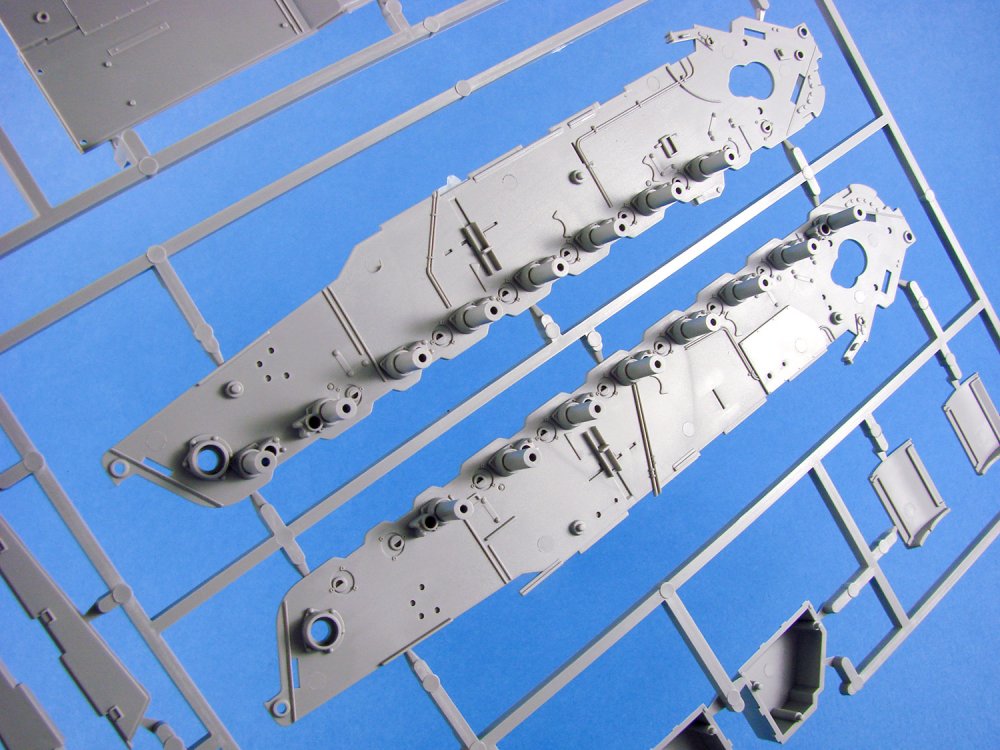
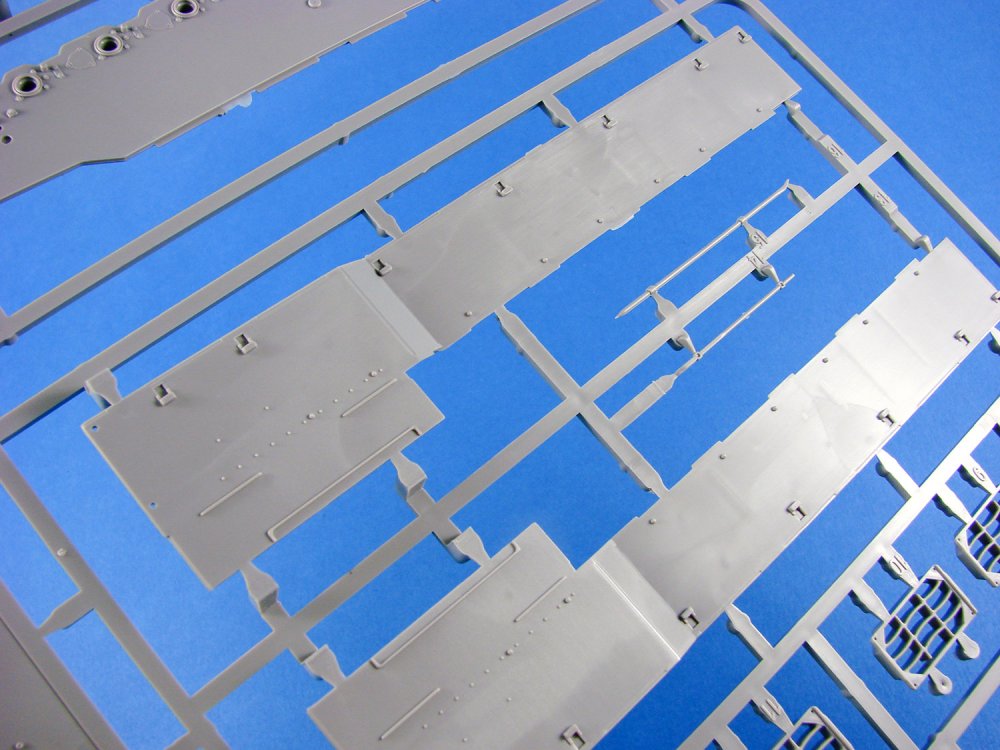
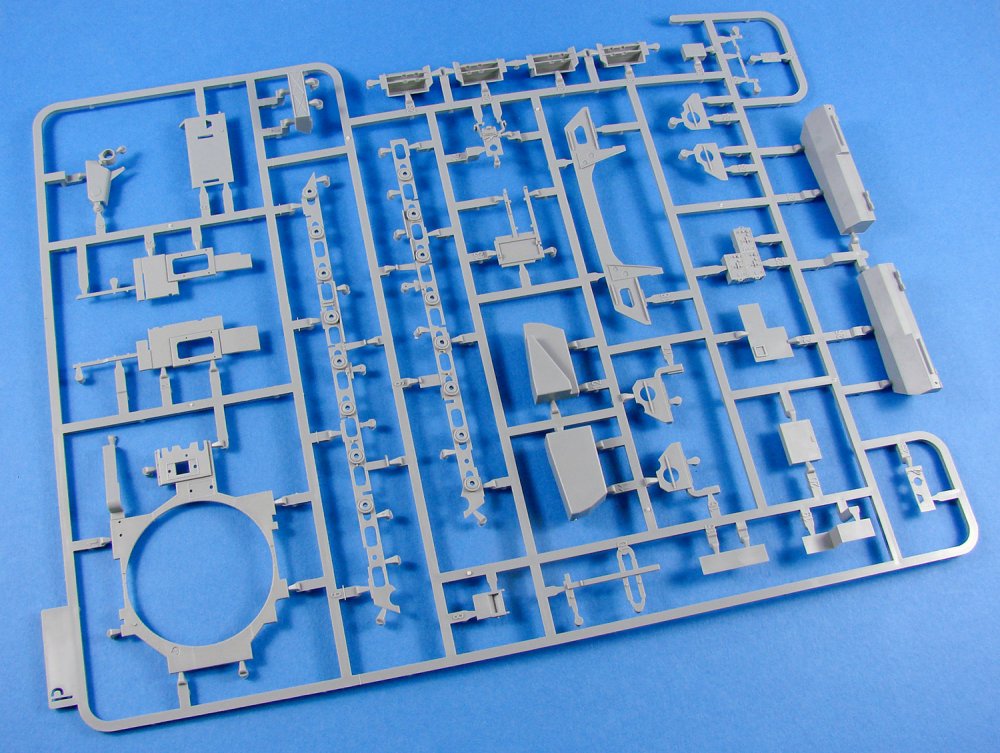
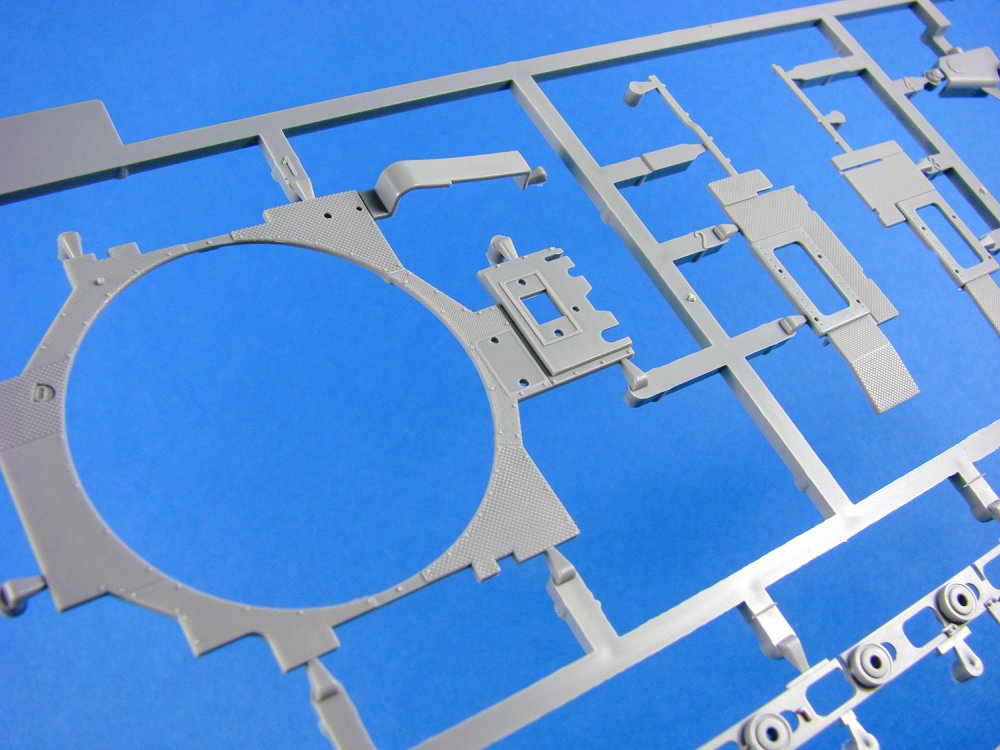
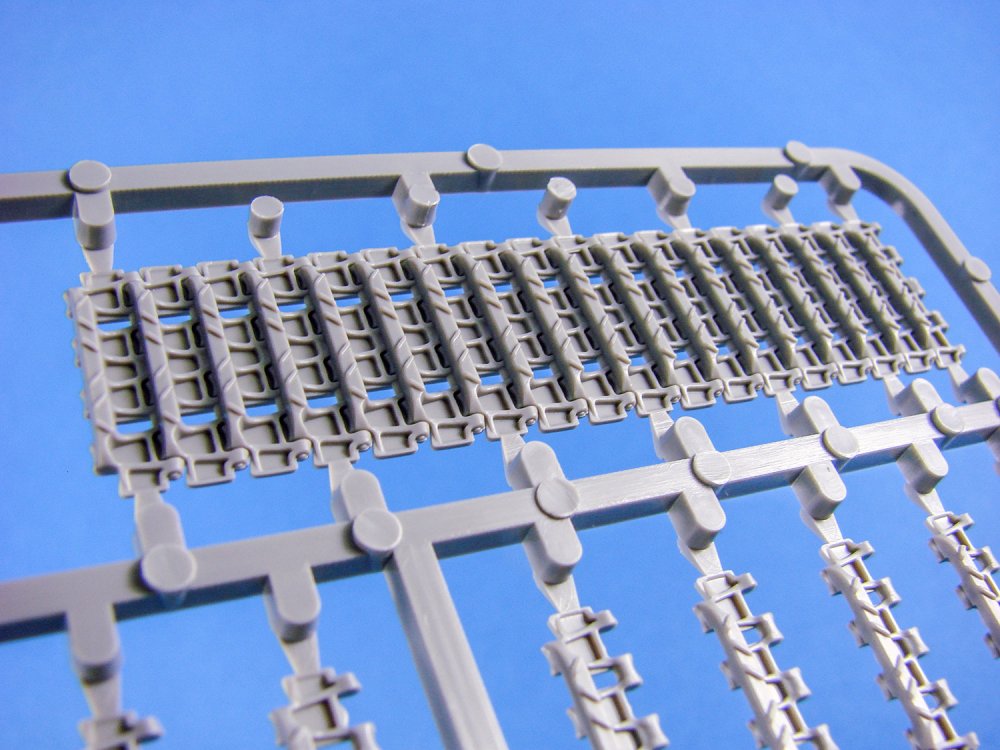
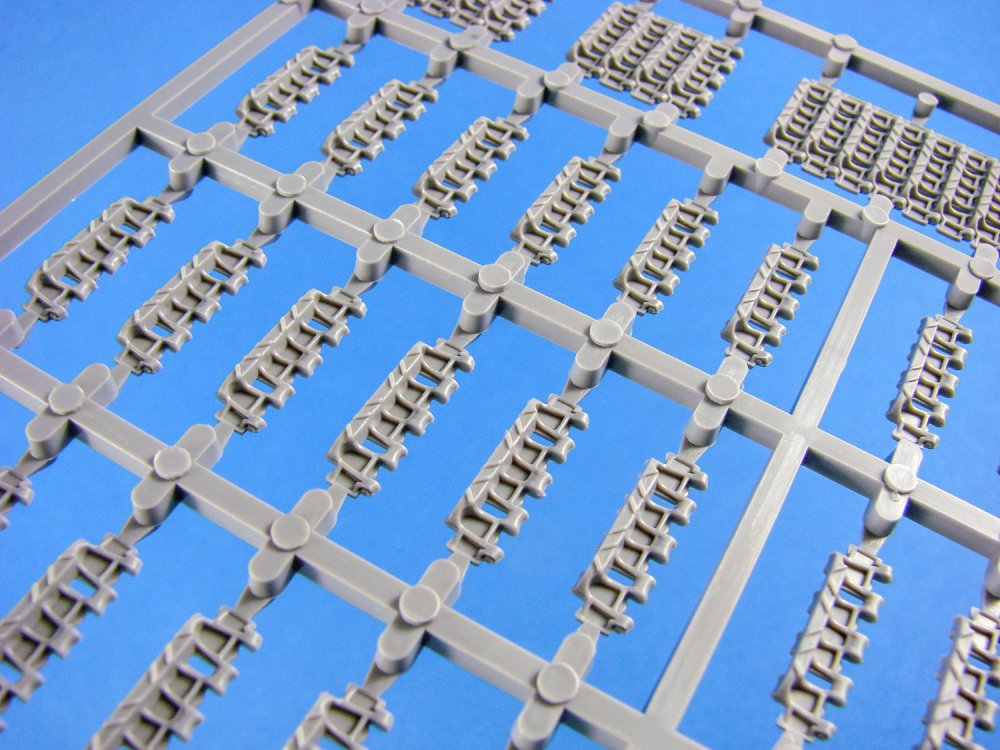
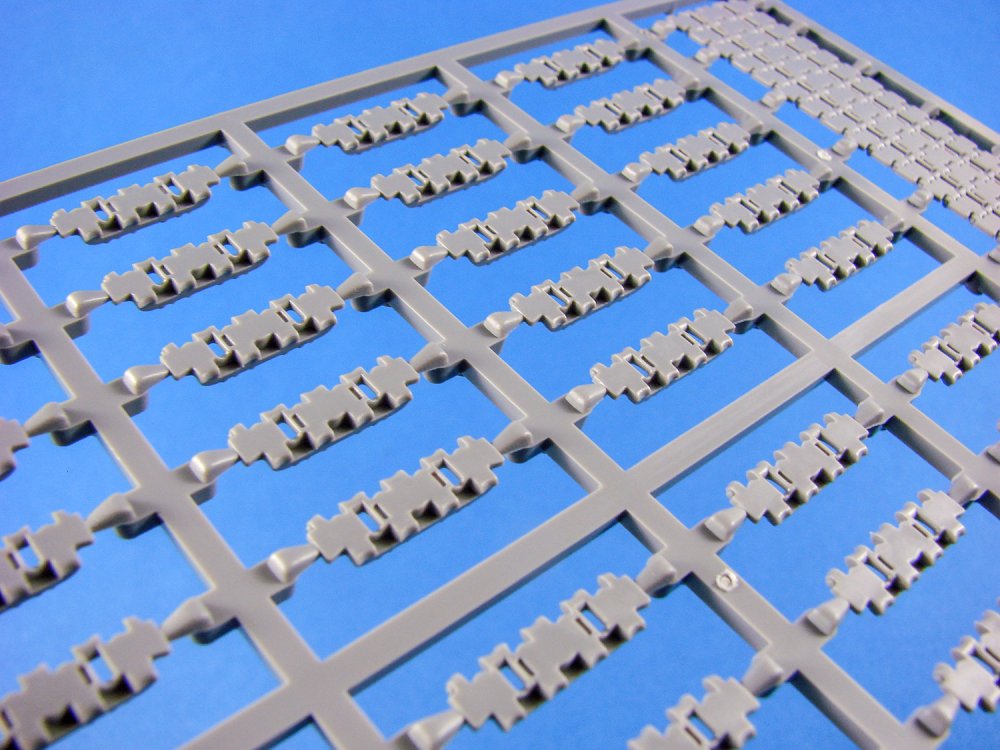
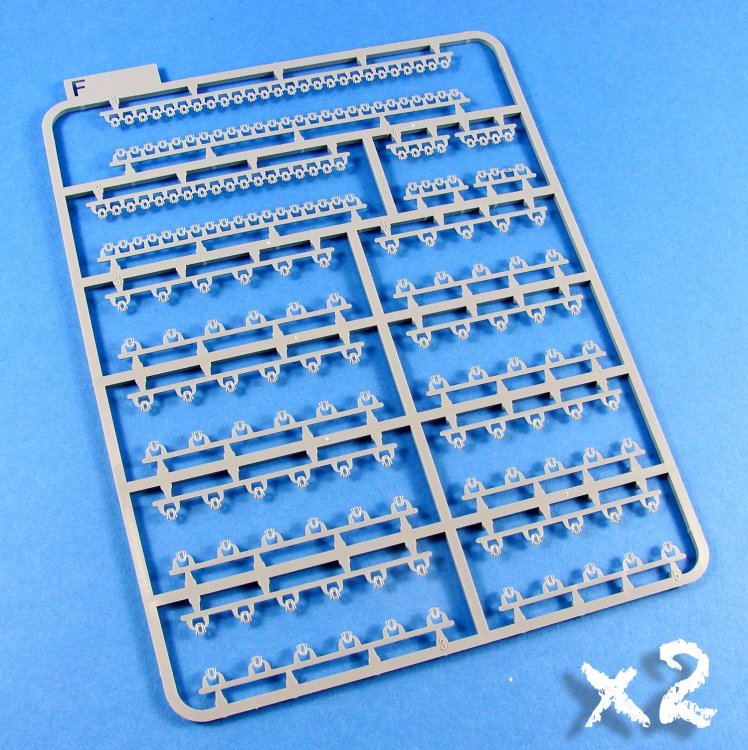
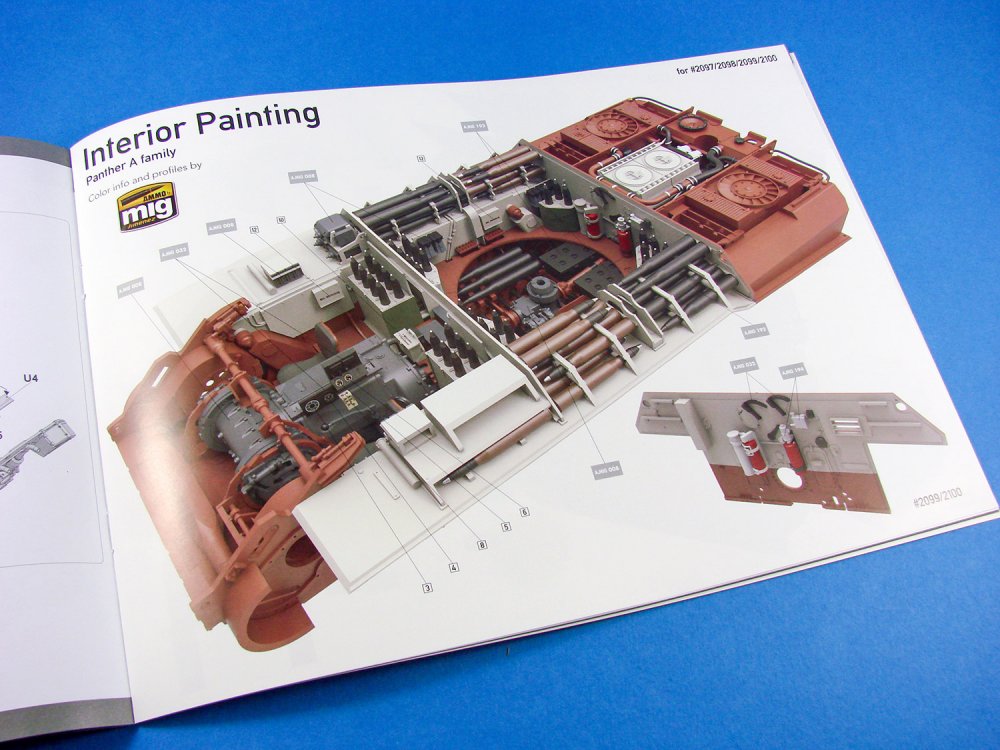
1/35 Panther A mid-late w/Zimmerit & full interior Sd.Kfz.267/Sd.Kfz.171 2 in 1 Takom Catalogue # 2100 Available for around £50 The Panther is a German medium tank deployed during World War II on the Eastern and Western Fronts in Europe from mid-1943 to the war's end in 1945. It had the ordnance inventory designation of Sd.Kfz. 171. It was designated as the Panzerkampfwagen V Panther until 27 February 1944, when Hitler ordered that the Roman numeral "V" be deleted. Contemporary English language reports sometimes refer to it as the Mark V. The Panther was intended to counter the Soviet T-34 and to replace the Panzer III and Panzer IV. Nevertheless, it served alongside the Panzer IV and the heavier Tiger I until the end of the war. It is considered one of the best tanks of World War II for its excellent firepower and protection, although its reliability was less impressive. The Panther was a compromise. While having essentially the same engine as the Tiger I, it had more efficient frontal hull armour, better gun penetration, was lighter and faster, and could traverse rough terrain better than the Tiger I. The trade-off was weaker side armour, which made it vulnerable to flanking fire. The Panther proved to be effective in open country and long-range engagements but did not provide enough high explosive firepower against infantry. The Panther was far cheaper to produce than the Tiger I, and only slightly more expensive than the Panzer IV. Key elements of the Panther design, such as its armour, transmission, and final drive, were simplifications made to improve production rates and address raw material shortages. The overall design remained somewhat over-engineered. The Panther was rushed into combat at the Battle of Kursk despite numerous unresolved technical problems, leading to high losses due to mechanical failure. Most design flaws were rectified by late 1943 and the spring of 1944, though the bombing of production plants, increasing shortages of high quality alloys for critical components, shortage of fuel and training space, and the declining quality of crews all impacted the tank's effectiveness. Though officially classified as a medium tank, its weight is more like that of a heavy tank, as its weight of 44.8 tons puts it roughly in the same category as the American M26 Pershing (41.7 tons), British Churchill (40.7 tons) and the Soviet IS-2 (46 tons) heavy tanks. The tank had a very high power to weight ratio however, making it extremely mobile regardless of its weight. Its weight still caused heavy tank-esque problems however, such as an inability to cross certain bridges. Extract from Wikipedia The kit Well, this kit is another much-anticipated Panther release from Takom, following closely on the heels of their three recent Ausf.A series kits (early, mid-early, late production). This one fills the missing ‘mid-late’hole from the initial releases, but also comes resplendent in a covering of faux-Zimmerit! Yes, no trowelling modelling putty and agonising over the appearance and pattern of the finished application. The hard work is done for you. Oh, I don’t think I mentioned, but this kit, like the others, also has a highly detailed full interior too. What more could you want? This release is packaged into the same size box as the previous Panther kits, but instead of the austere main box art, this particular offering has some rather nice full-colour art on the lid, depicting a three-quarter view of the beast, coated in all that lovely Zimmerit. As with the other releases, the box sides show colour renders of the interior of the tank as a taste for what to expect. Some images of the Ausf.A Early Production kit, under construction our for LSM Pilots project. Inside the box, TWENTY-NINE light grey sprues are either packed separately or in multiples with the cellophane folded between them, so they don’t foul each other. Note that there are no clear parts for the periscopes, so these will need to be painted carefully to represent reflective glass. Still not too hard to do, but clear parts would’ve been nice. The box is absolutely crammed with styrene, as you can imagine with this being a full interior kit. As well as the sprues, a turret and upper hull are included, as well as two track building guides that we’ll look at soon. To complete the package, we have two small decal sheets, a PE fret containing 7 parts, lengths of copper cable, a flexible hose, and a very thick 40-page instruction manual. These last items are packed into multiple sleeves that are then packed with the manual. One thing I simply can’t do here is to give a sprue by sprue résumé, due to the complexity of the kit. Instead, I will look at features and engineering break down of this release. Please remember that several of the sprues in this release are newly tooled to represent the Zimmerit coating. I will of course look at these with some detail photographs. Getting started A quick look around the kit contents and you’ll notice a lack of the usual bathtub-style lower hull. For their Panther releases, Takom has chosen to break down everything into constituent components, such as the hull floor, hull sides and forward lower glacis, although the latter is fitted to an inner plate that is connected to the floor. The reasoning behind this is to make everything as accessible as possible to the modeller as they progress through these easy hull construction stages where the frames, transmission, brake drums and torsion bars are to be fitted. Unlike Rye Field Model, Takom provides the lower hull frames as plastic parts, as opposed to their competitor who supply these in photo-etch. Both options work great for me, with perhaps the plastic parts being easier to fit and align. They are also moulded, as with the rest of the interior, with huge finesse. The swing arms are next to be fitted, and to help with absolute positioning, two plastic jigs are included. These have alignment holes for the swing arm axles to fit into. Takom hasn’t designed this kit to have articulated swing arms, so if you want to pose the model whilst sitting on uneven ground, this is the time for you to look at that and mock things up for later. It’s now the time for the interior to be fitted out, and this is no quick task. Apart from the many ammunition shells and their storage racks, you also have what is probably the busiest detailed interior that I’ve seen in any kit thus far. Work progresses with the installation of the crew seats (moulded rear spring detail unlike the PE of the RFM release), interior walls and bulkheads, radio sets, drive shaft, and turret floor. Also, of note are that the boxed ammunition shells only have the protruding tip as a part, with the box below them being hollow. This certainly makes more sense that depicting the full ammunition body. I hope you didn’t throw away the swing arm guides as these are now used to create the shape of the tracks. Onto the guides will plug the drive and idler wheels (no glue!) and then the tracks can be formed over the curves of the guide, with the drive/idler/track assembly being transferred to your lower hull. FOUR sprues of track links and associated parts are included, incorporating several completed sections of track, along with many separate links. None of the track links have moulded horns. These are provided as separate parts that are moulded to a tree that you install as a single piece, and then when dry, snip away the tree from the tracks. That’s a smart move that will save some swearing. Having just made a set of these for one of the initial releases, I can say that the approach is trouble-free and stressless. The Panther’s Maybach engine is faithfully reproduced and is a project in itself, complete with its plumbing that interconnects to the engine bay walls. This, along with fuel tanks, engine cooling apparatus and more internal framing. This is a model for which you will need to carefully plan each painting and weathering stage ahead of getting to that part. A single-piece upper hull is included with sections missing for the crew compartment, engine and engine cooling. These are moulded as separate parts, thus maximising the opportunity to show the interior of the model to its fullest potential. Even so, you would still be limited, under normal circumstances, to pose these off in any realistic way, unless you created a factory diorama of the Panther being built. Still, we know all those detail goodies are in there, so that’s all that really matters. Note again the excellent rendition of Zimmerit on this piece, continuing through the main external areas of this specific release. That turret is obviously the main feature of this kitty, and this of course is resplendent in amazing interior details. The turret itself is moulded as lid and sides, with the front and rear plates being separate. Plate and weld seam details are superb. Of course, there is an amount of moulded detail within the roof interior, pertaining mostly to electrical conduits etc. I find it most odd that Takom chose to mould, in raised detail, the kit year and serial adjacent to the actual details! Working hinges are provided for the escape hatch on the rear face, and the cupola is supplied with a single-piece ring that contains the shrouds for the periscopes. With this glued in situ, the ring can be cut away, leaving the shrouds in the correct position. External Zimmerit detail is again excellent, and of course there is the cupola mounted MG, etc. but the interior is spectacular. If it’s supposed to be in there, the chances are that Takom has faithfully reproduced it, including turret traverse motors, gun counterbalance, hydraulic drive, loader/gunner/commander seats, azimuth etc. The gun breech is superbly detailed, and like it or not, the barrel in this release is plastic, albeit single part, with separate three-piece muzzle brake. A flexible hose is supplied for the turret interior. Where RFM added a little extra was by means of showing any plumbing and wiring that would be in this area so that the modeller could add it him/herself. You’d be best to avail yourself of the required information and add it yourself from lead wire too. For such a comprehensive kit, there is surprisingly little PE in this release, with Takom opting to create many of the finer parts in standard injection plastic. Only six pieces of photo-etch are included in this release, and these are for the engine cooling grilles on the rear top deck. The mesh is certainly fine enough to pass muster, and the quality is excellent. Decals Two small decal sheets are included, with one for the various external numbers etc. and the other being for the many pieces of ammunition and other internal details. There is no printing manufacturer on the sheets, but they are very thin with solid colour, minimal carrier film and in perfect register. The five schemes in this release are: Panther A, 3./SS-Panzer Regiment 1, France 1944 Panther A, 3Kompanie, Pz. Reg. Grossdeutschland, France, June 1944 Panther A, Stab I Abteilung SS Pz.Reg. 2, France 1944 Panther A, 4 Kompanie SS Pz.Reg. 2, Mont Ormel, Italy 1944 Panther A, Regiment Grossdeutschland, Jassy Romania, April 1944 Instructions A 40-page A4 manual is included (landscape format) which breaks the Panther down into 64 constructional sequences with numerous sub-stages. As I said, this is no quick project. The cover of the manual gives a history of the type and we then get a comprehensive parts map showing each sprue, decal sheet and PE fret. Most of the constructional imagery, provided as shaded illustrations, is printed on matt paper except for where corresponding leaves are printed on gloss for the numerous colour illustrations, courtesy of AMMO. These images provide priceless info on interior painting and will save us countless hours trawling the information either online or in books. Painting reference is also provided in AMMO reference codes. The last pages of the manual are given over to the four schemes provided with this kit, printed in glossy colour and with more AMMO paint references to negotiate. Inside the manual, a small correction sheet is included for the track building section. Conclusion I’ve already sacrificed my initial Panther Ausf.A Early Production kit on the altar of test fit and a construction guide (for which I enclose a couple of images in this review). Despite the apparent complexity of the kit, I can say, unequivocally, that this model will fit together with a minimum of issues. Applying Zimmerit is also something that some modellers would be inclined to shy away from because of the patterns used or how to apply it properly, but with this kit, there are no such hurdles to overcome. Takom has created a very realistic ant-magnetic putty pattern, complete with the natural unevenness that would be seen. You can of course add damage to this wherever you wish, using a curved scalpel blade. There is a tiny amount of moulded damage too, so how you finally depict things is up to you. My only niggle is the lack of clear parts for the periscopes, but it’s certainly no deal breaker as you can either paint the grey plastic accordingly or use acetate. In all, a top-notch release that adds to the year’s score of new Panther kits. Very highly recommended! My sincere thanks to the good people at Takom for sending this review sample you see here.


-
hong kong models PREVIEW:Dornier Do 335B-6 Nightfighter
JayDee replied to JayDee's topic in Aircraft Reviews
Ah, my bad. Sorry. -
hong kong models PREVIEW:Dornier Do 335B-6 Nightfighter
JayDee replied to JayDee's topic in Aircraft Reviews
The radar is indeed in the shots above...
-
hong kong models PREVIEW:Dornier Do 335B-6 Nightfighter
JayDee replied to JayDee's topic in Aircraft Reviews
Asked Steve about the radar and leading edge sprues. -
hong kong models PREVIEW:Dornier Do 335B-6 Nightfighter
JayDee replied to JayDee's topic in Aircraft Reviews
Not me.....not deleted anything. -
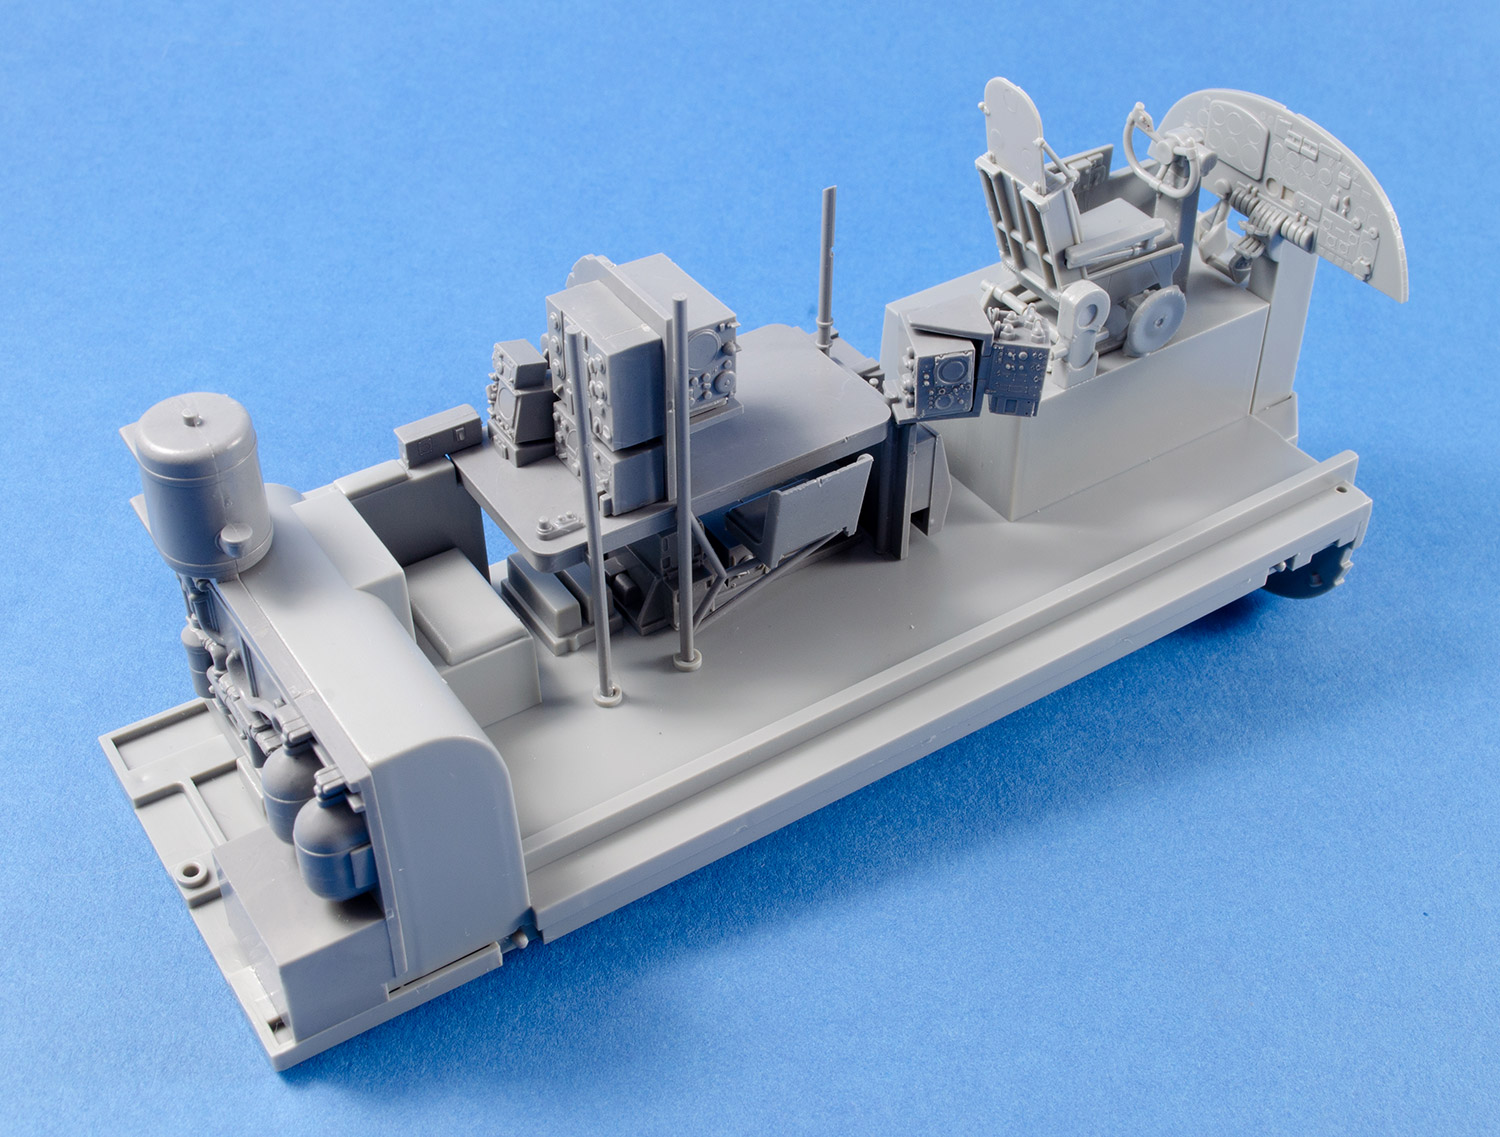
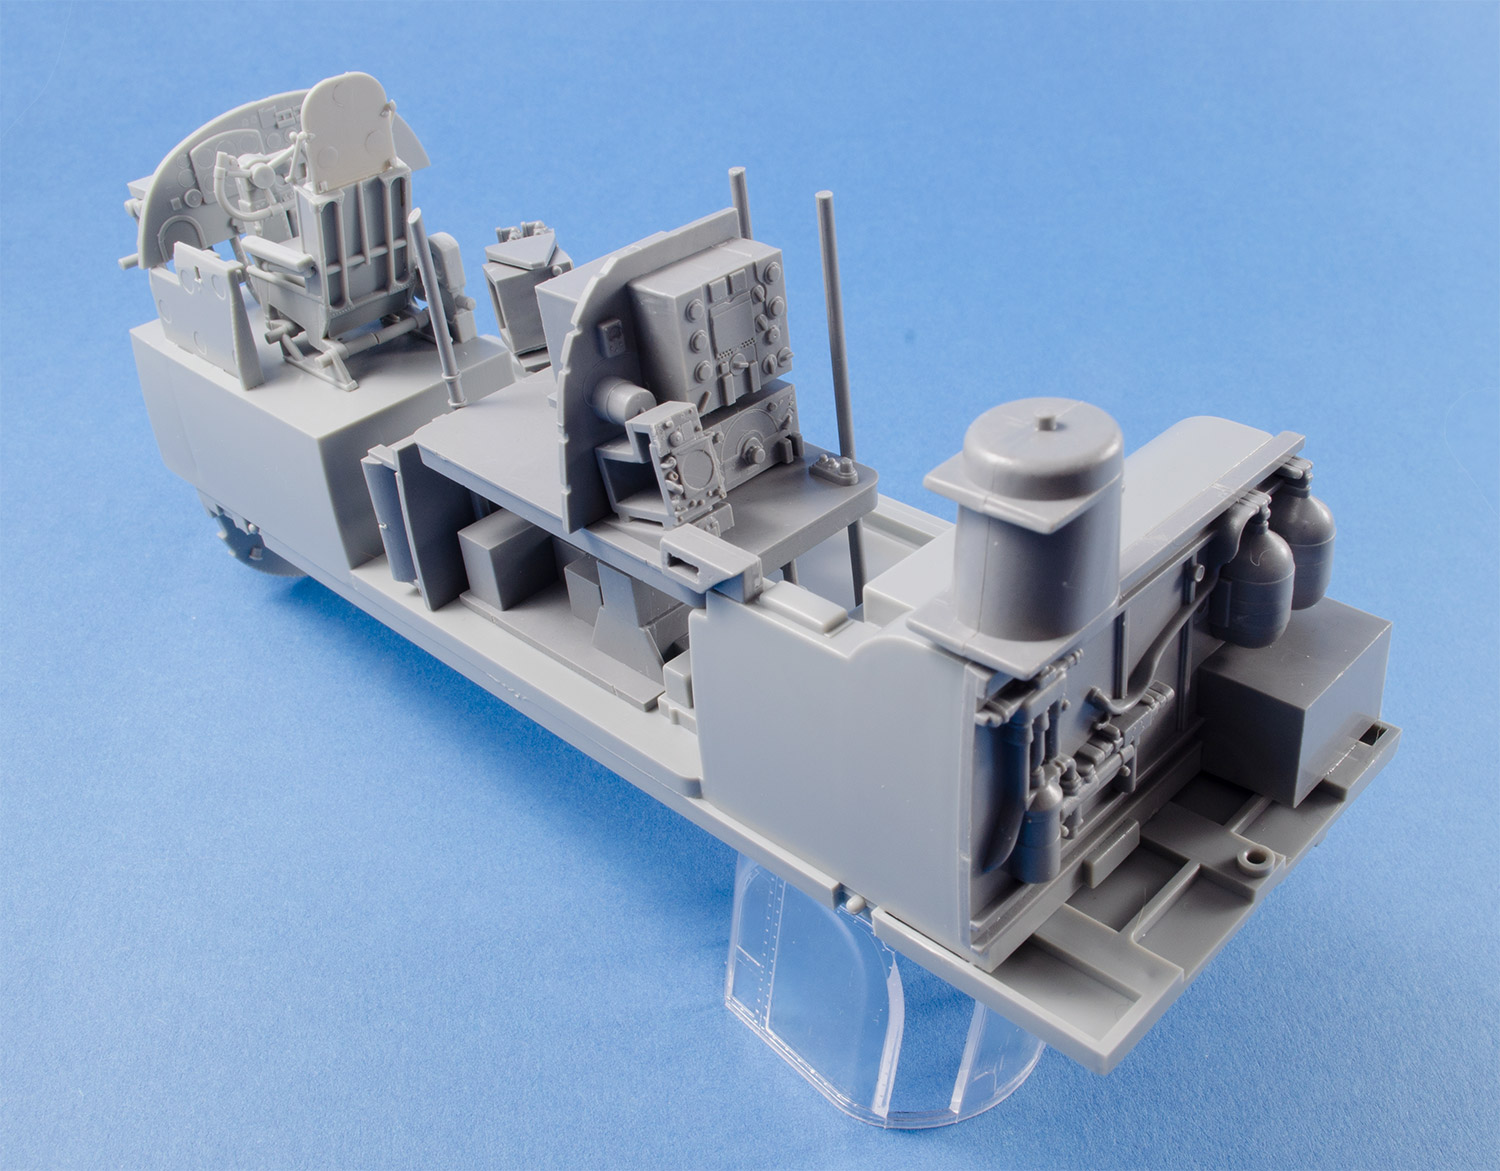
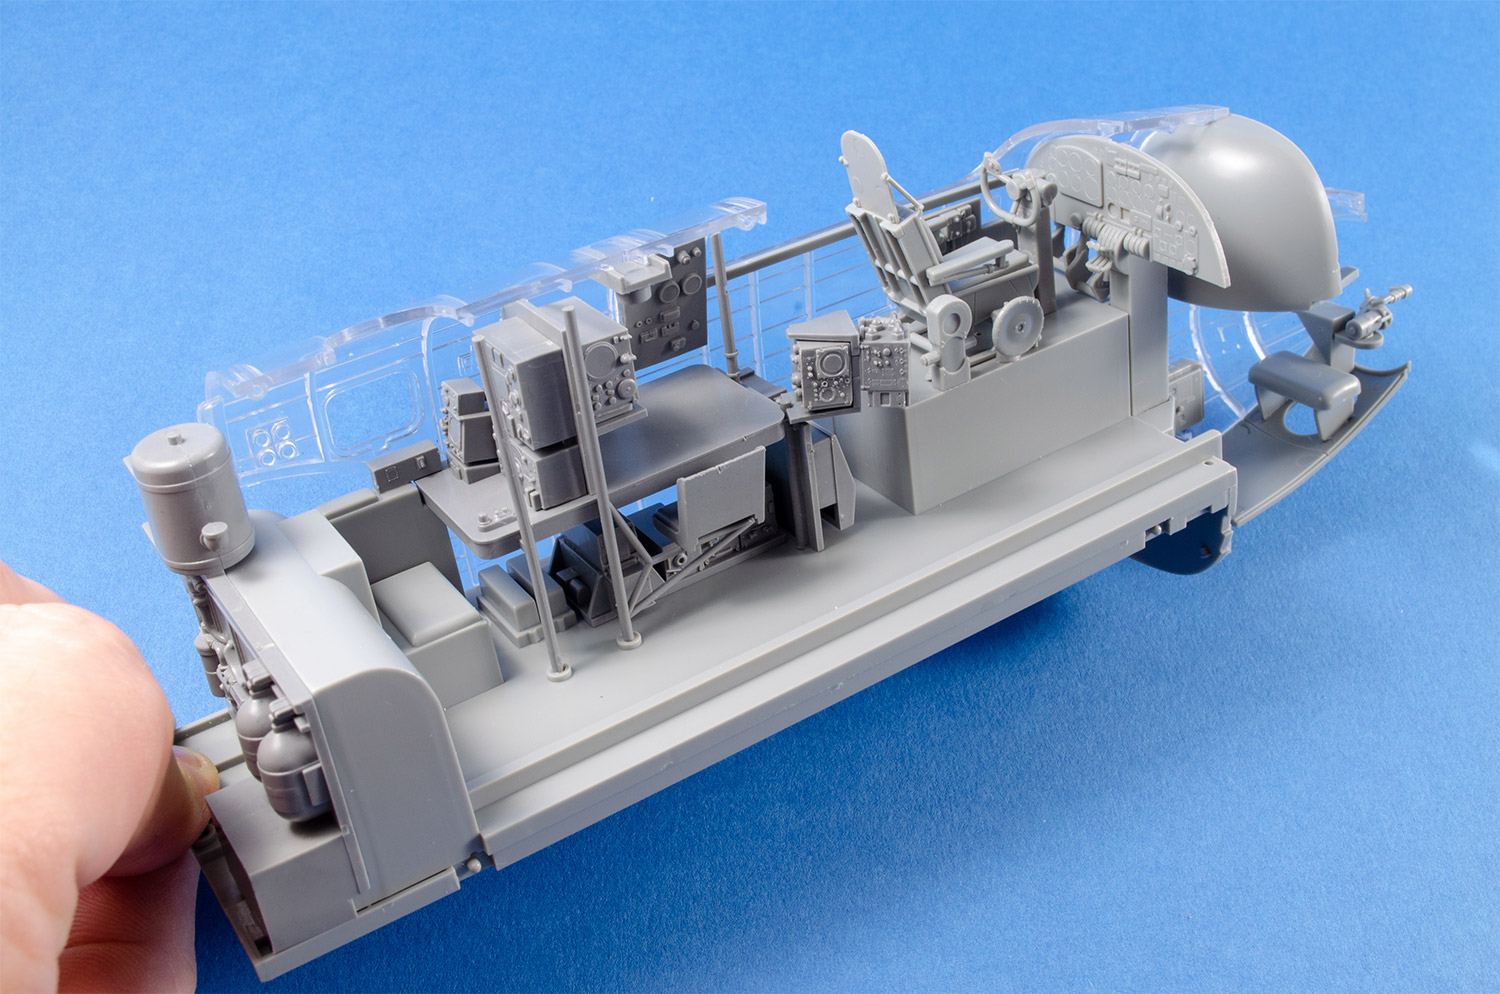
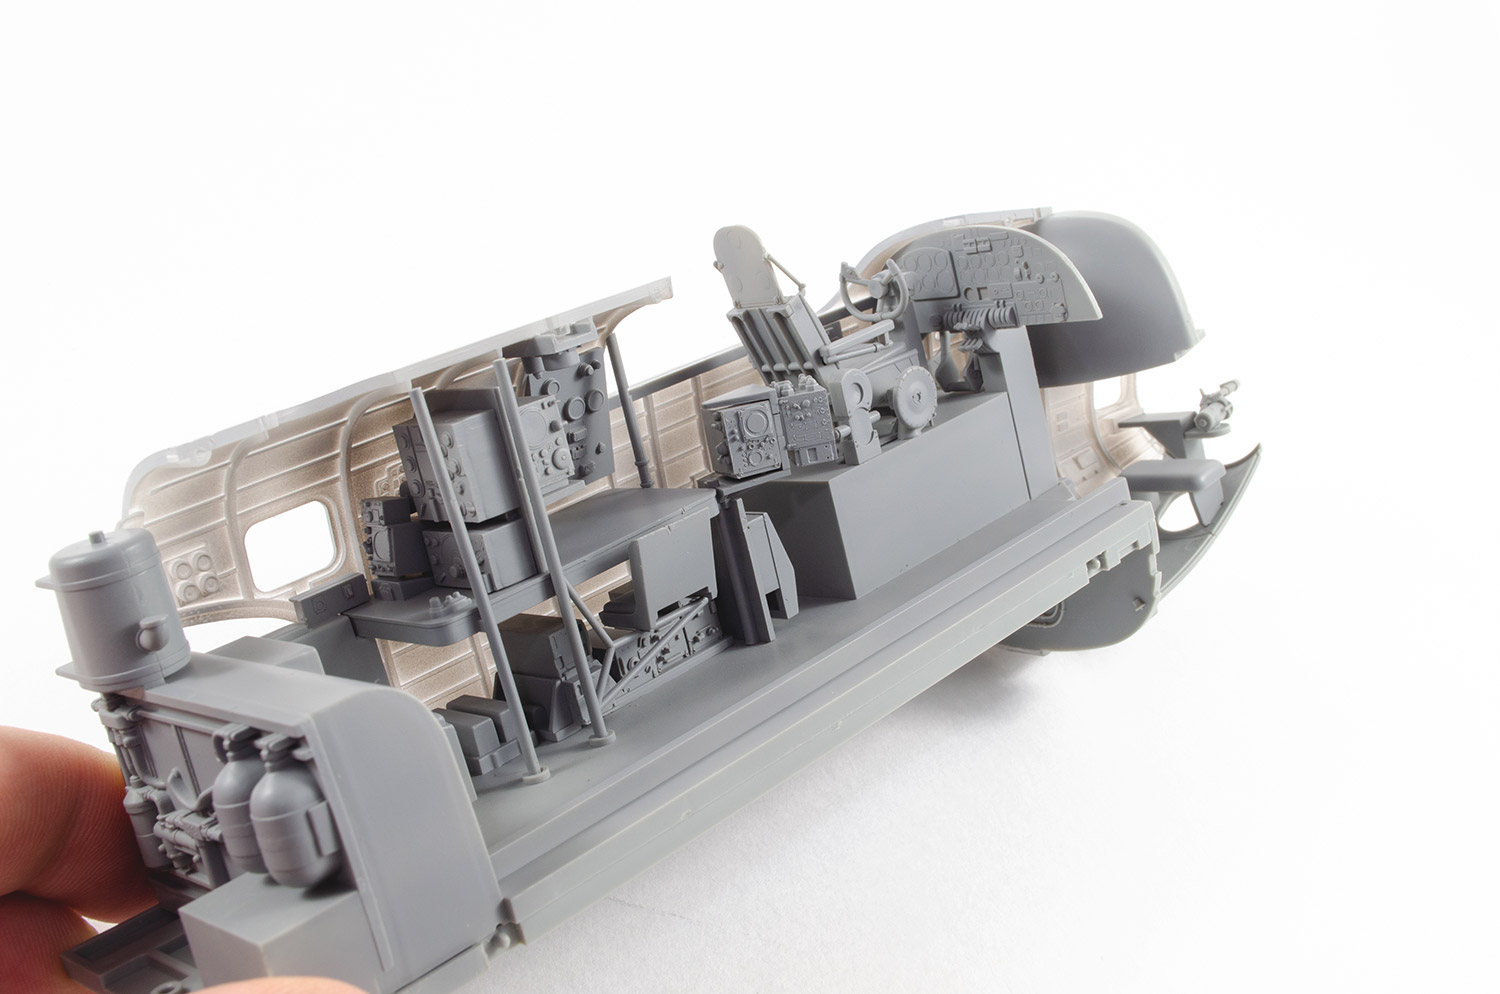
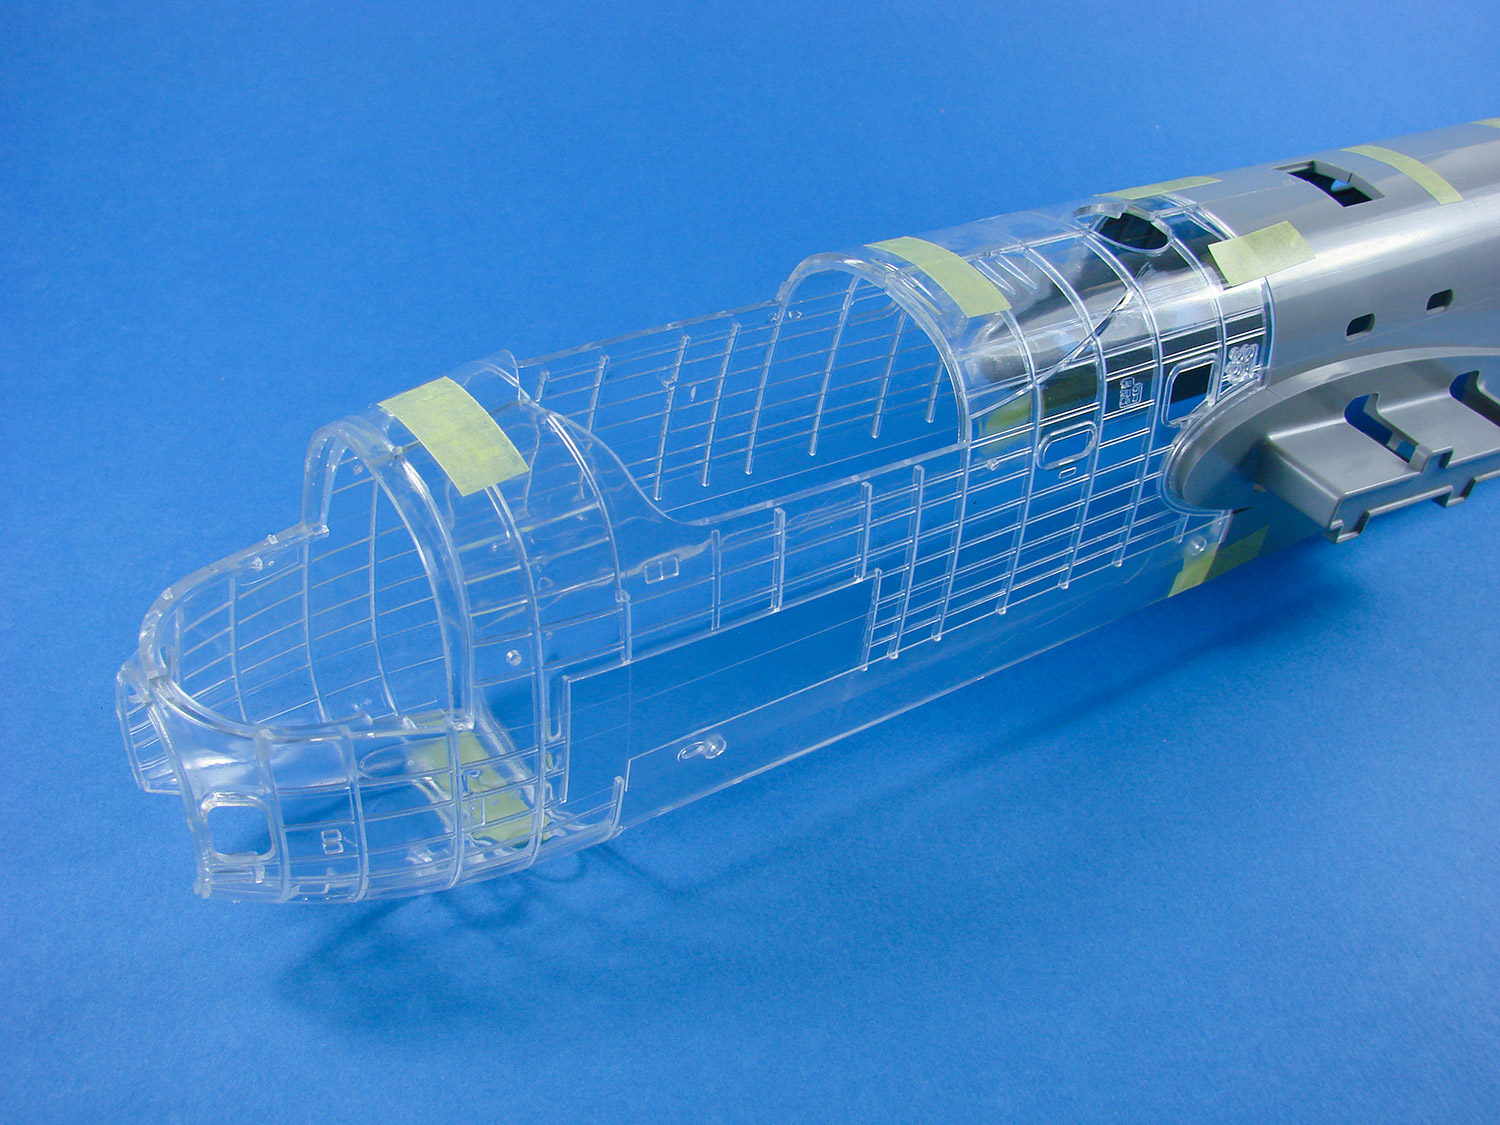
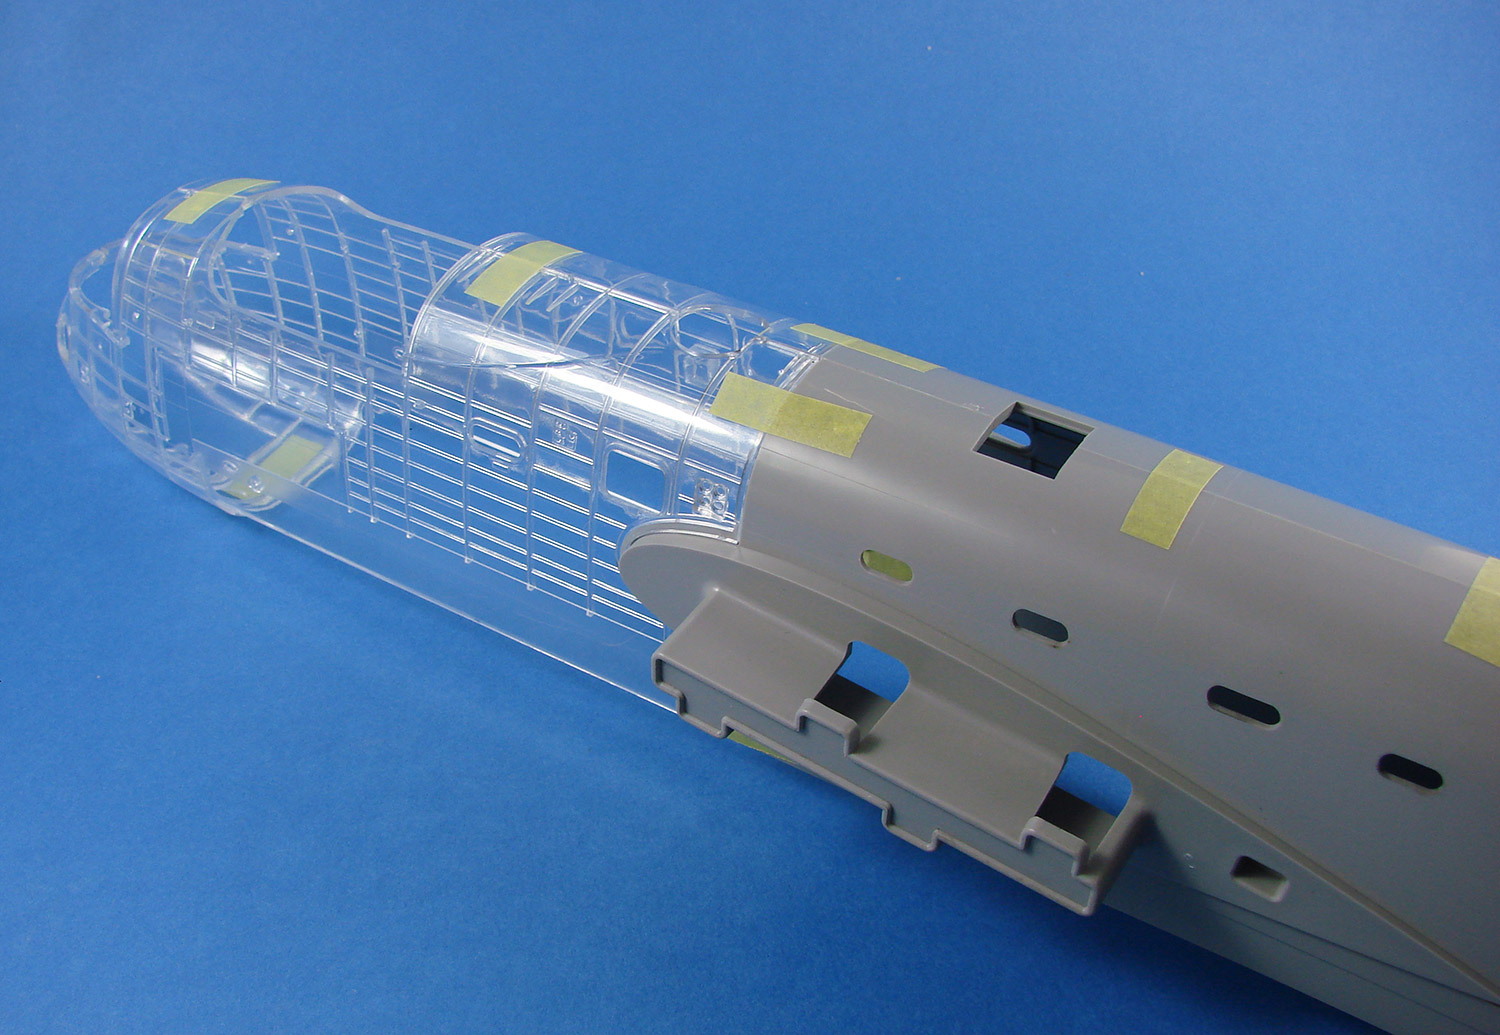
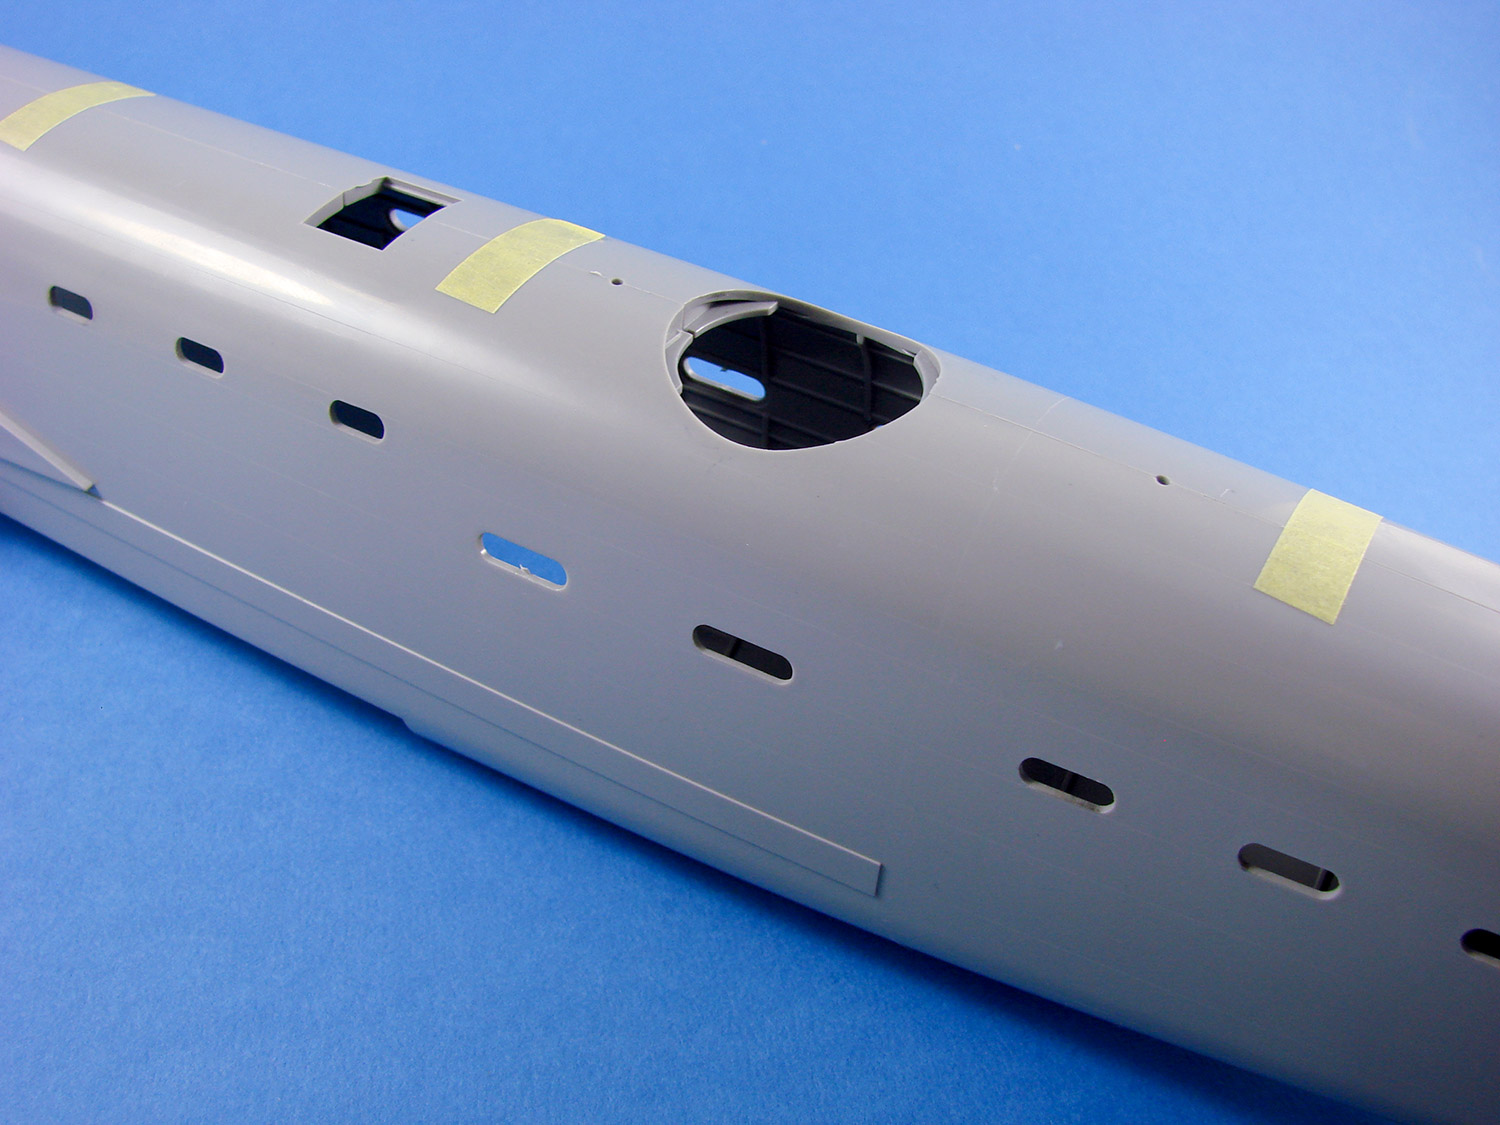
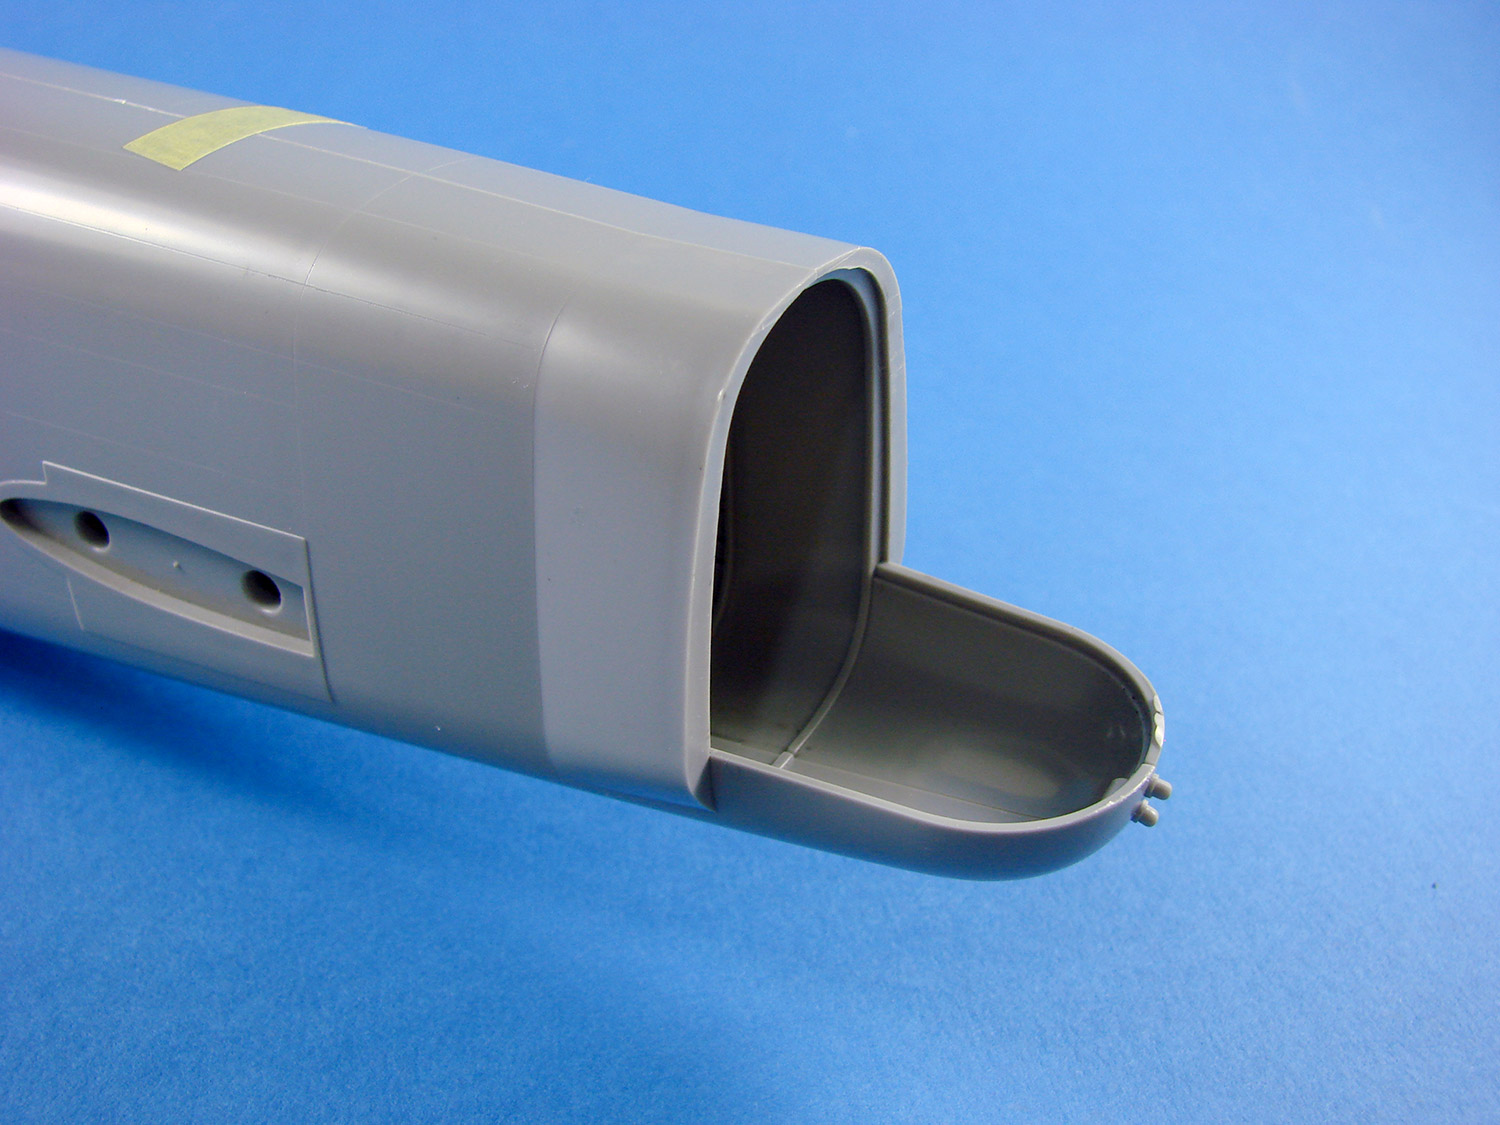
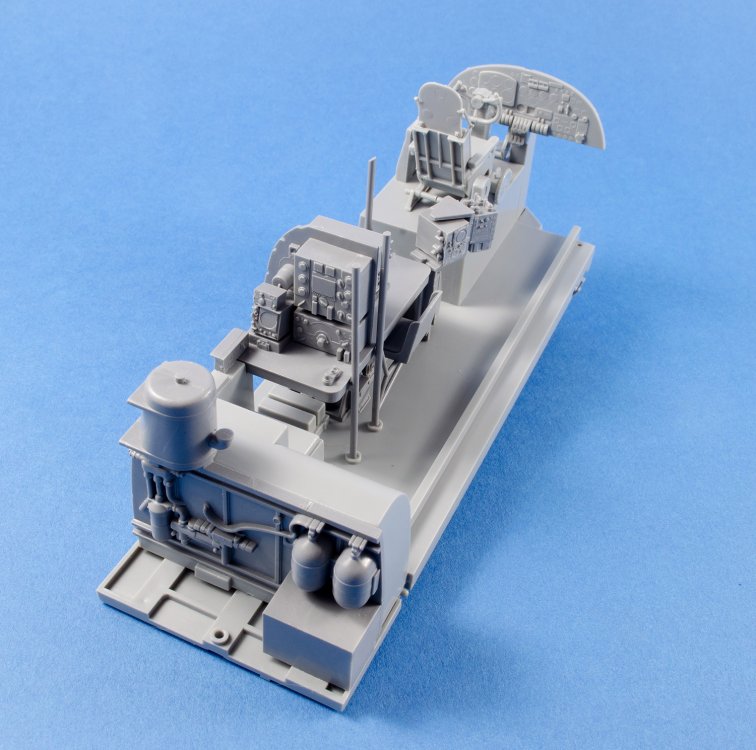
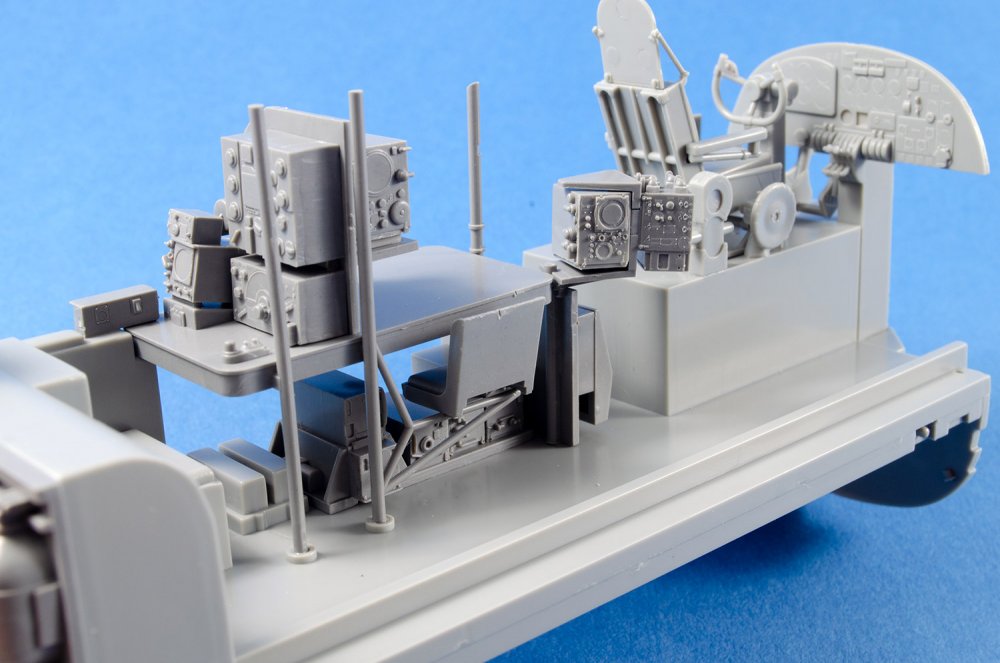
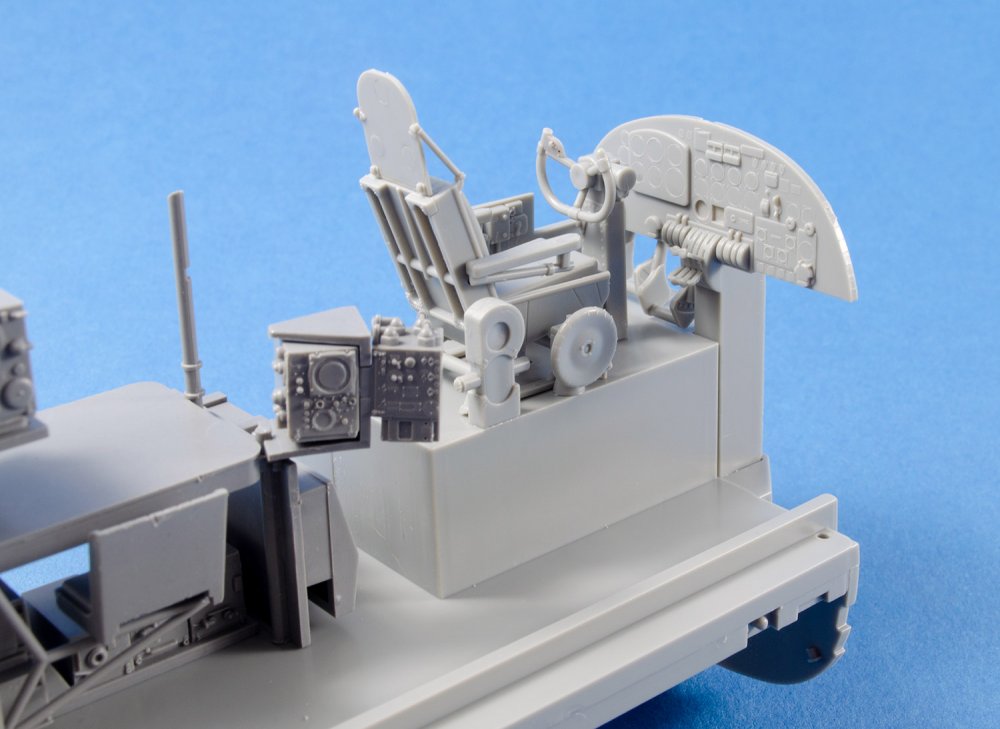
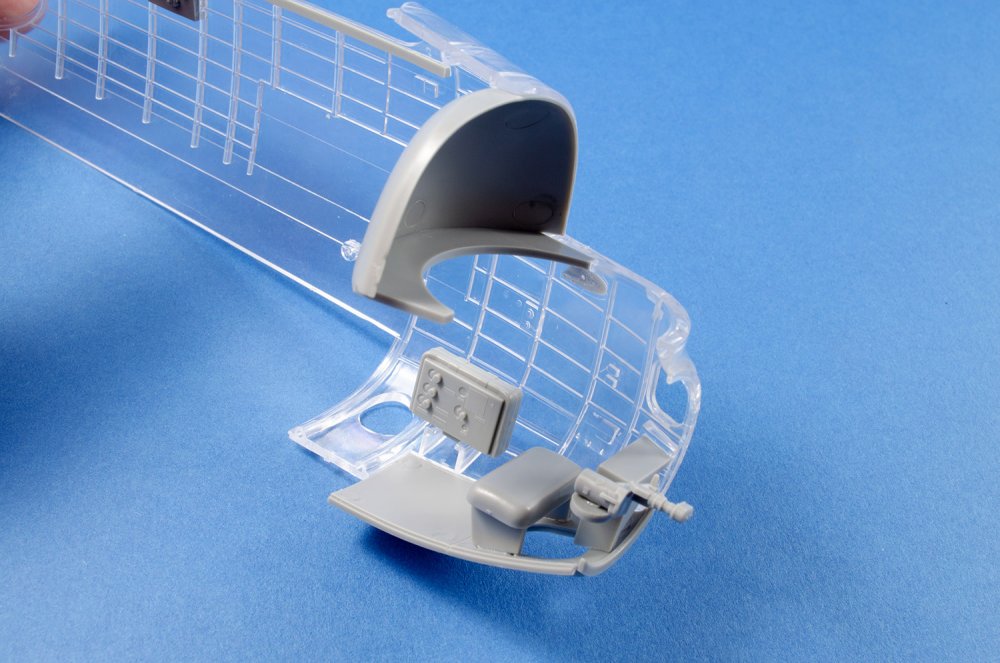
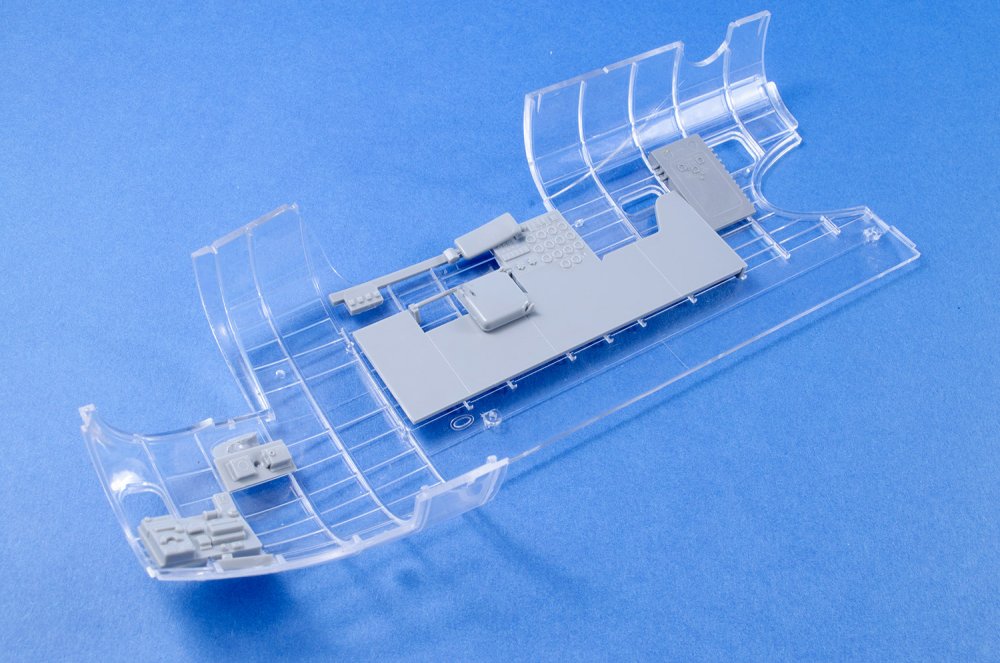
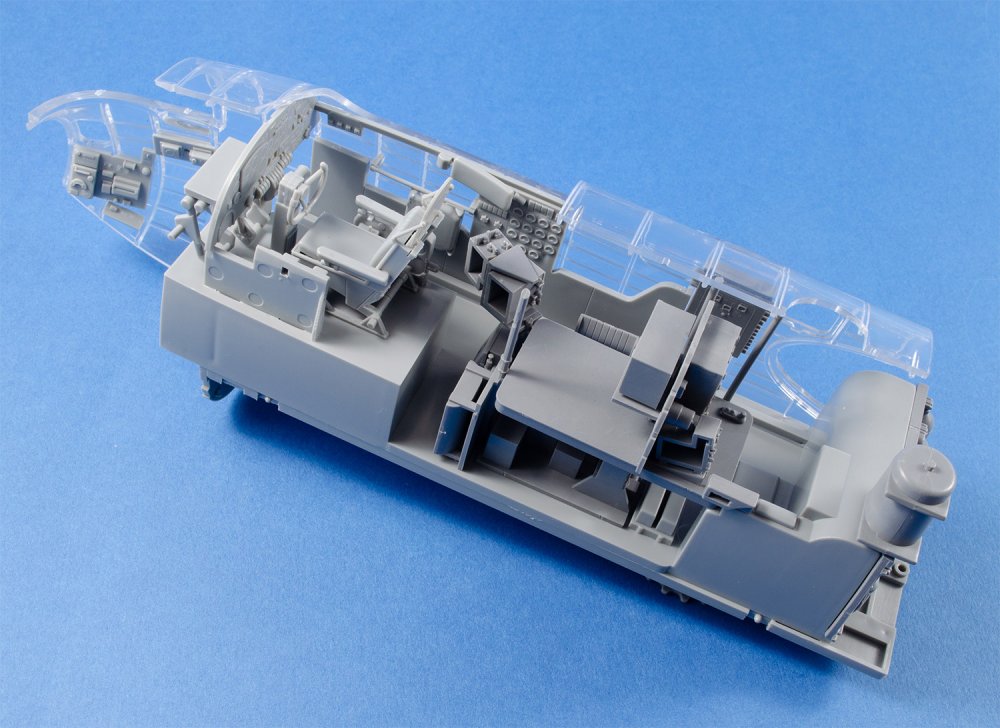
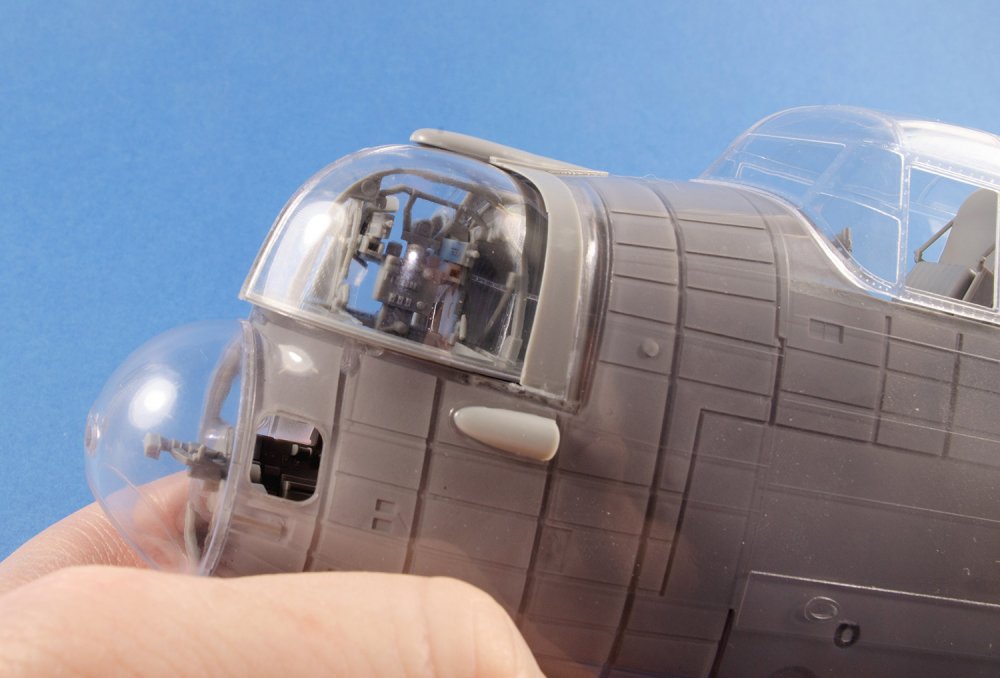
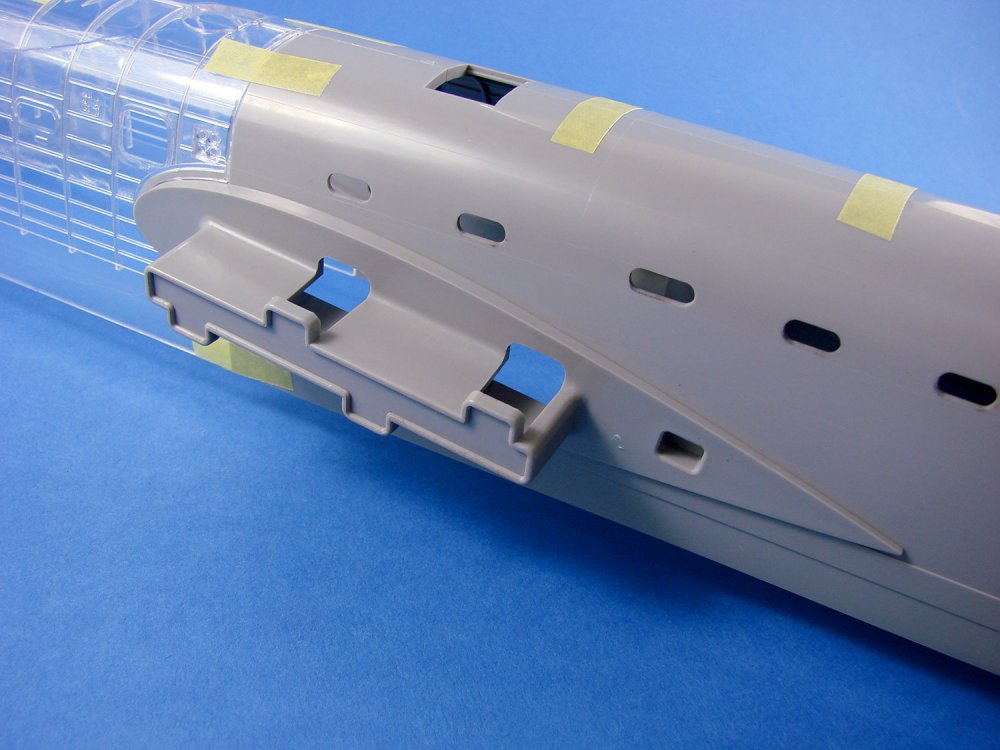
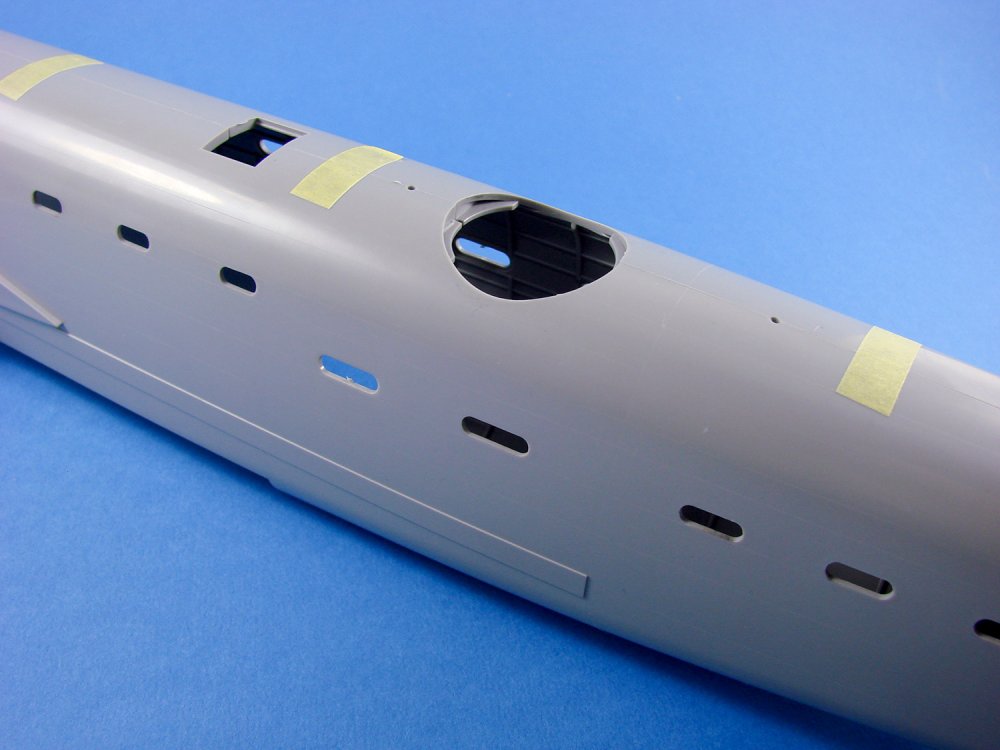
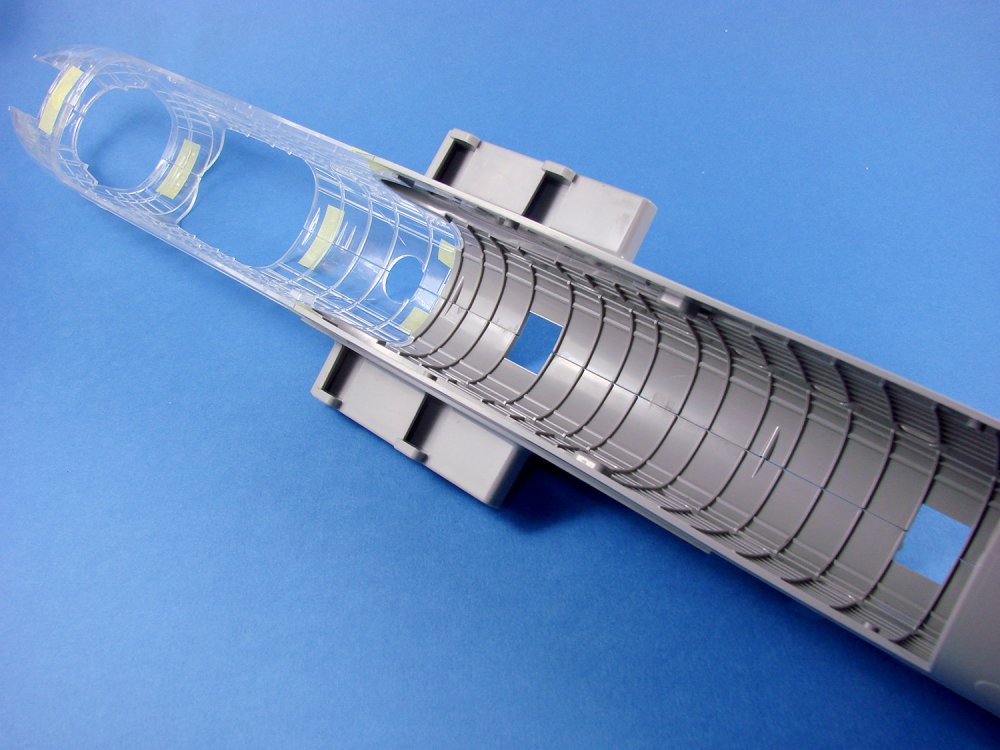
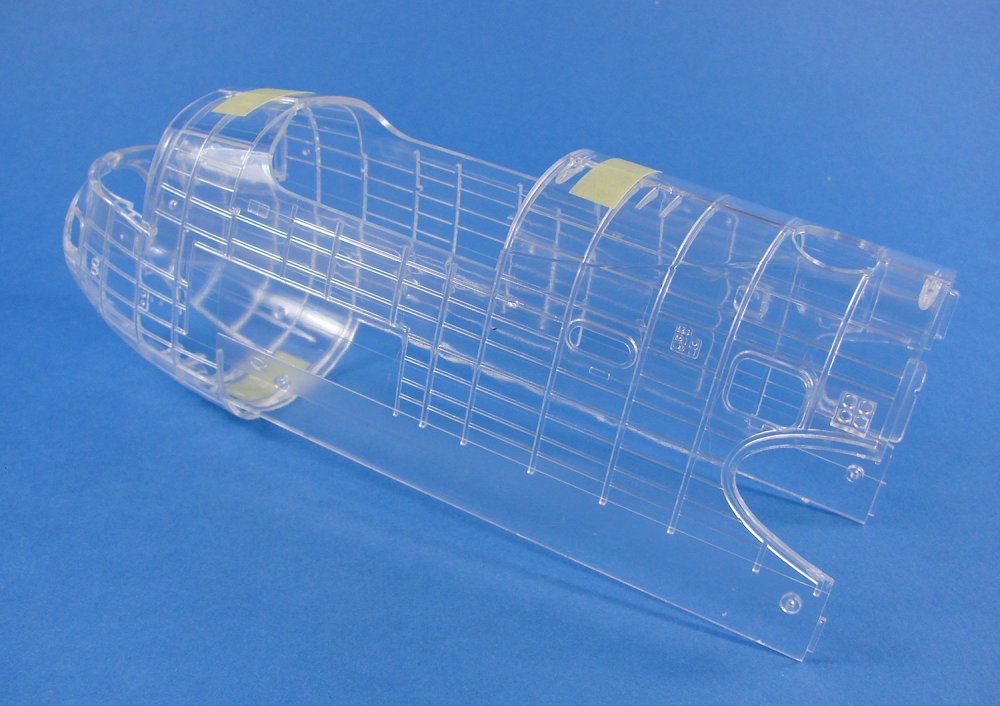
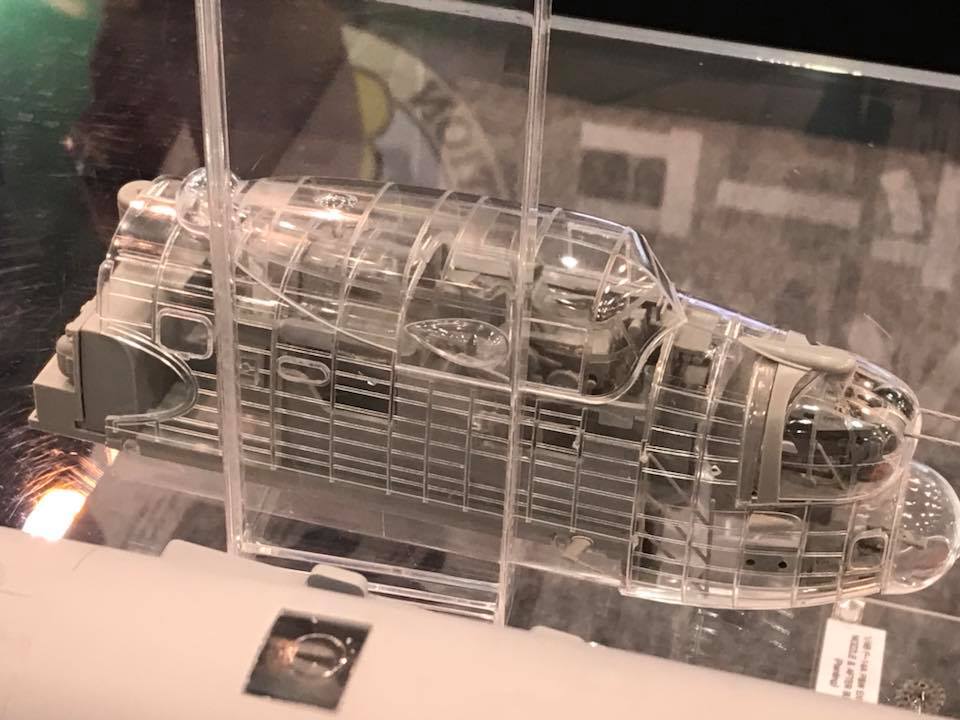
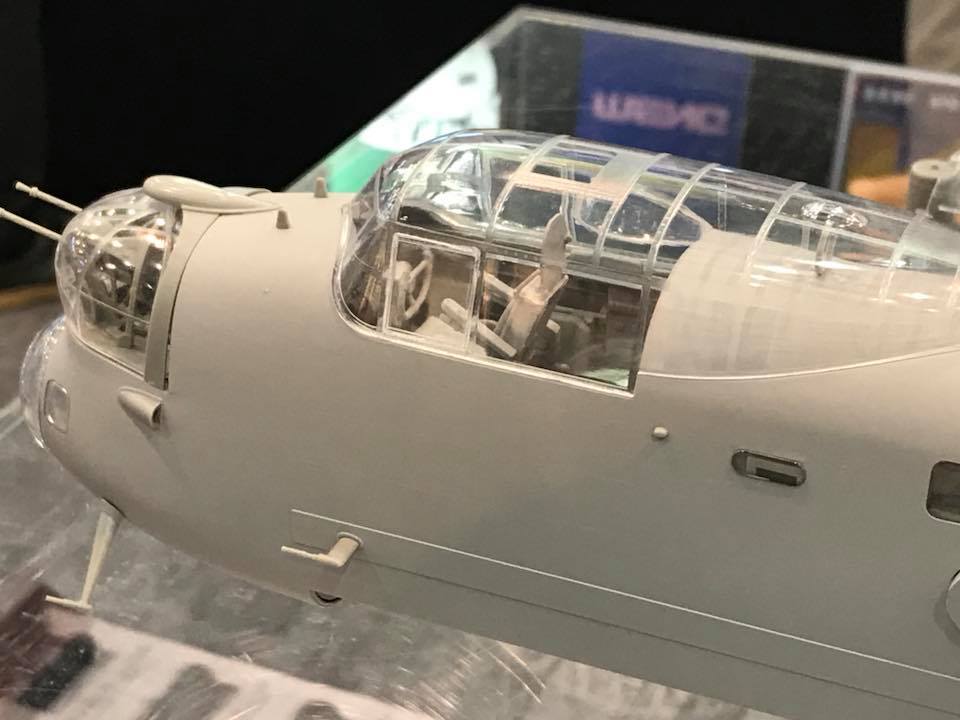
Hi all, Here's a very rough build of the cockpit section for the forthcoming Avro Lancaster from Hong King Models. Please remember that this ISN'T the final product and pieces are missing from the cockpit area too, so it will be more comprehensive than you see here. Also, the external surface textures haven't yet been applied. I was going to paint this up properly but as it isn't complete, it didn't seem worth that extra time. We wanted to get this to you as soon as we could in the wake of the Shizuoka show. Hope you like it!


-
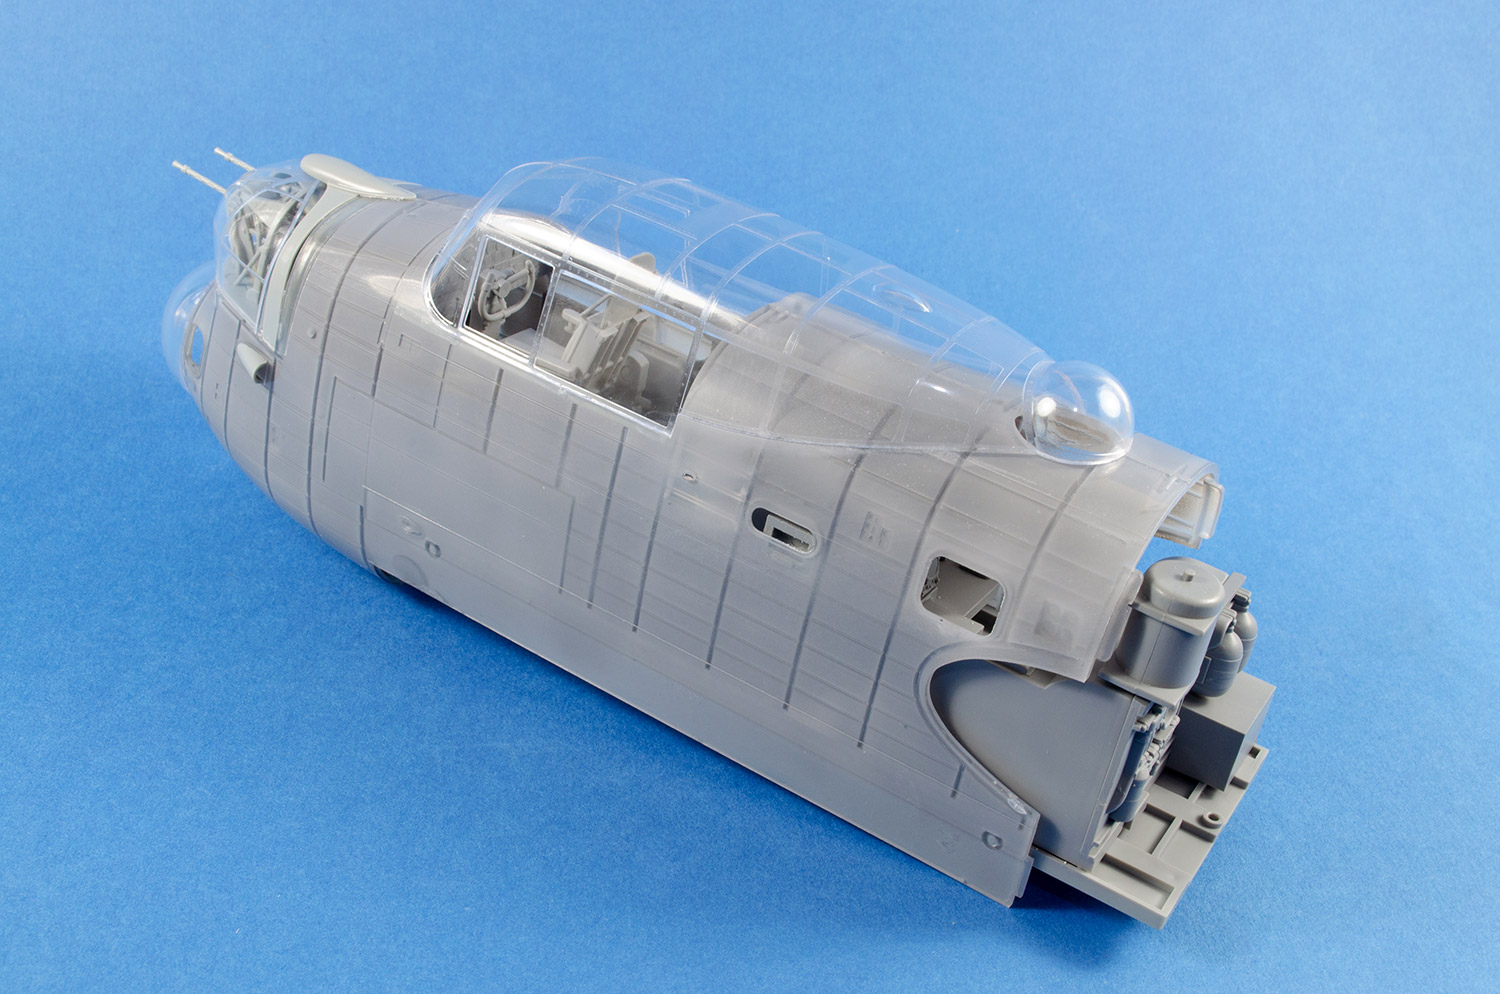
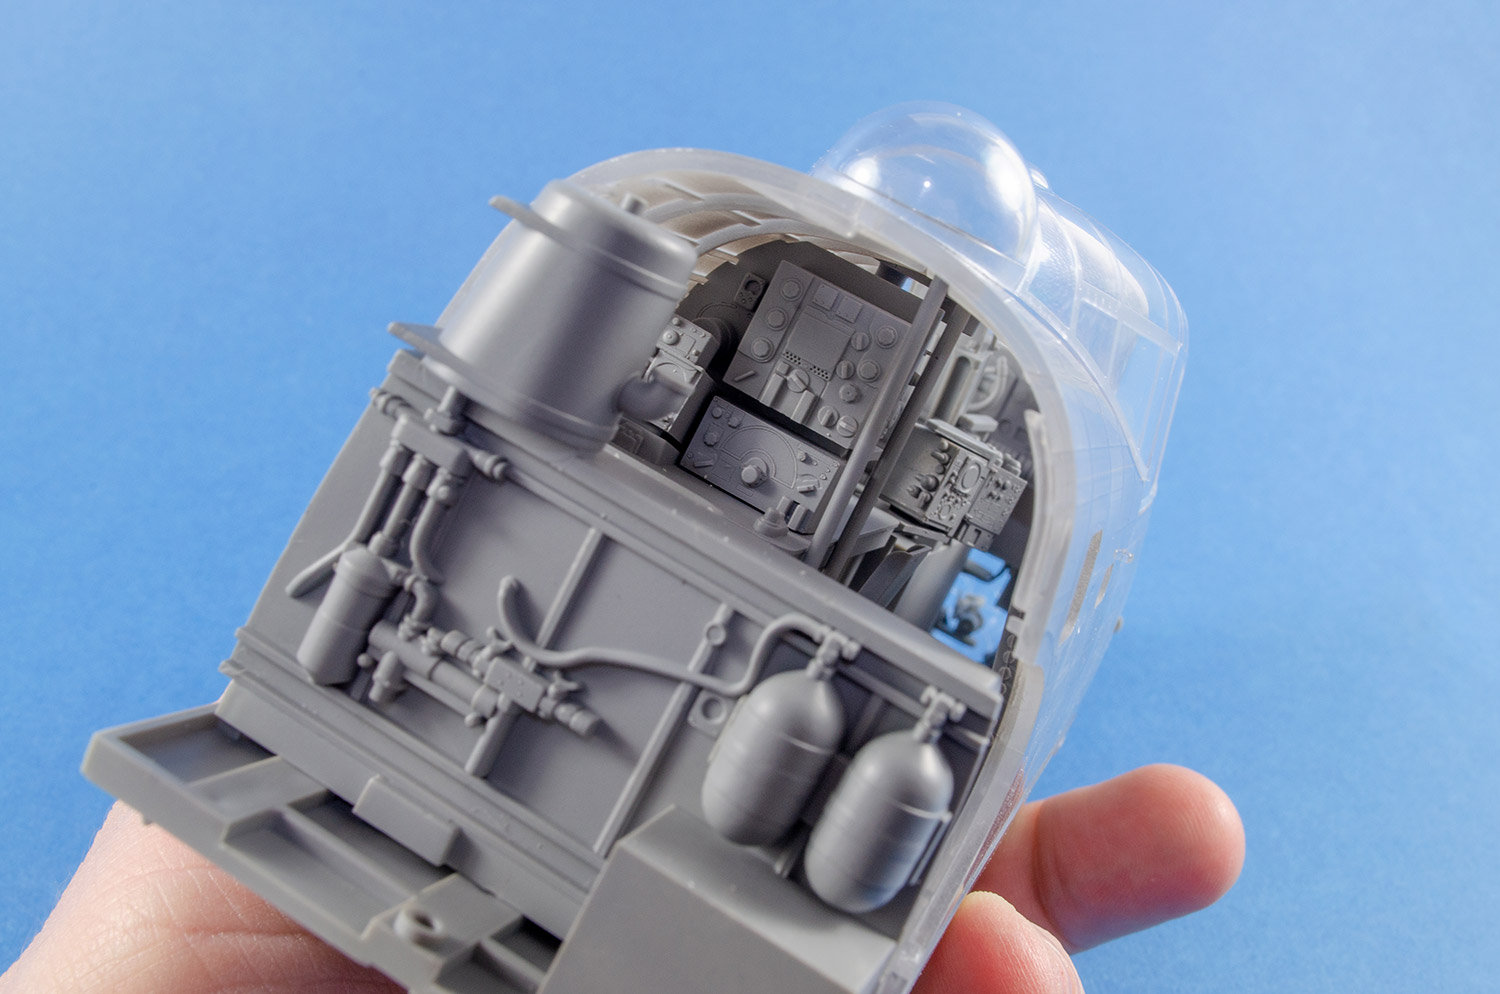
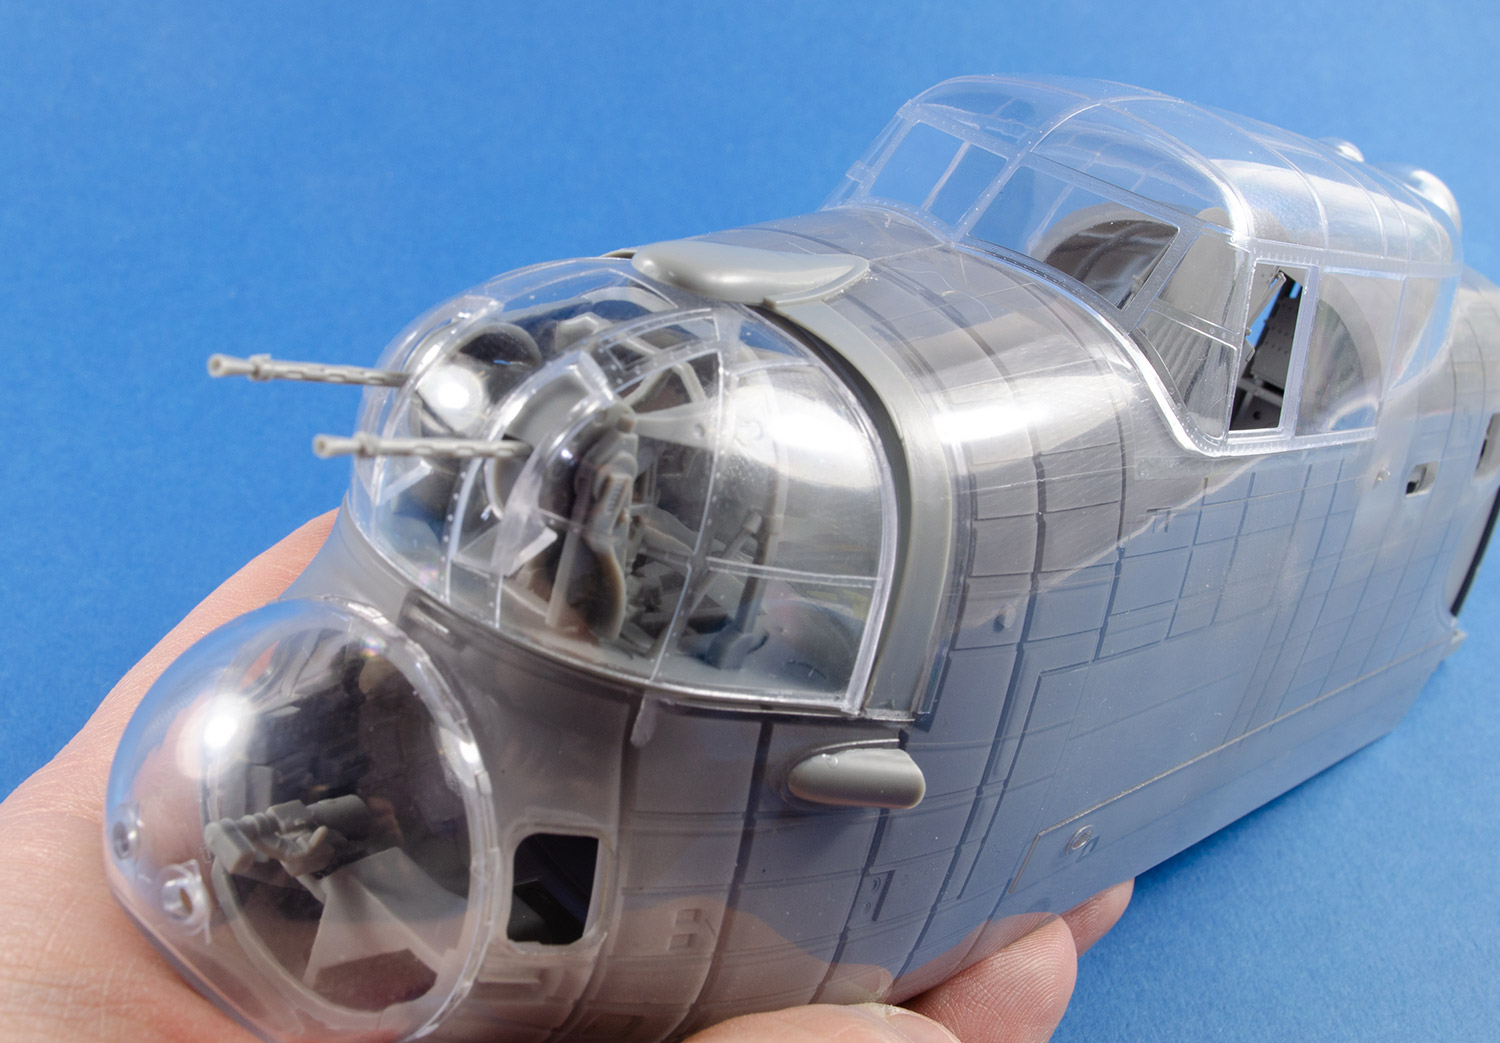
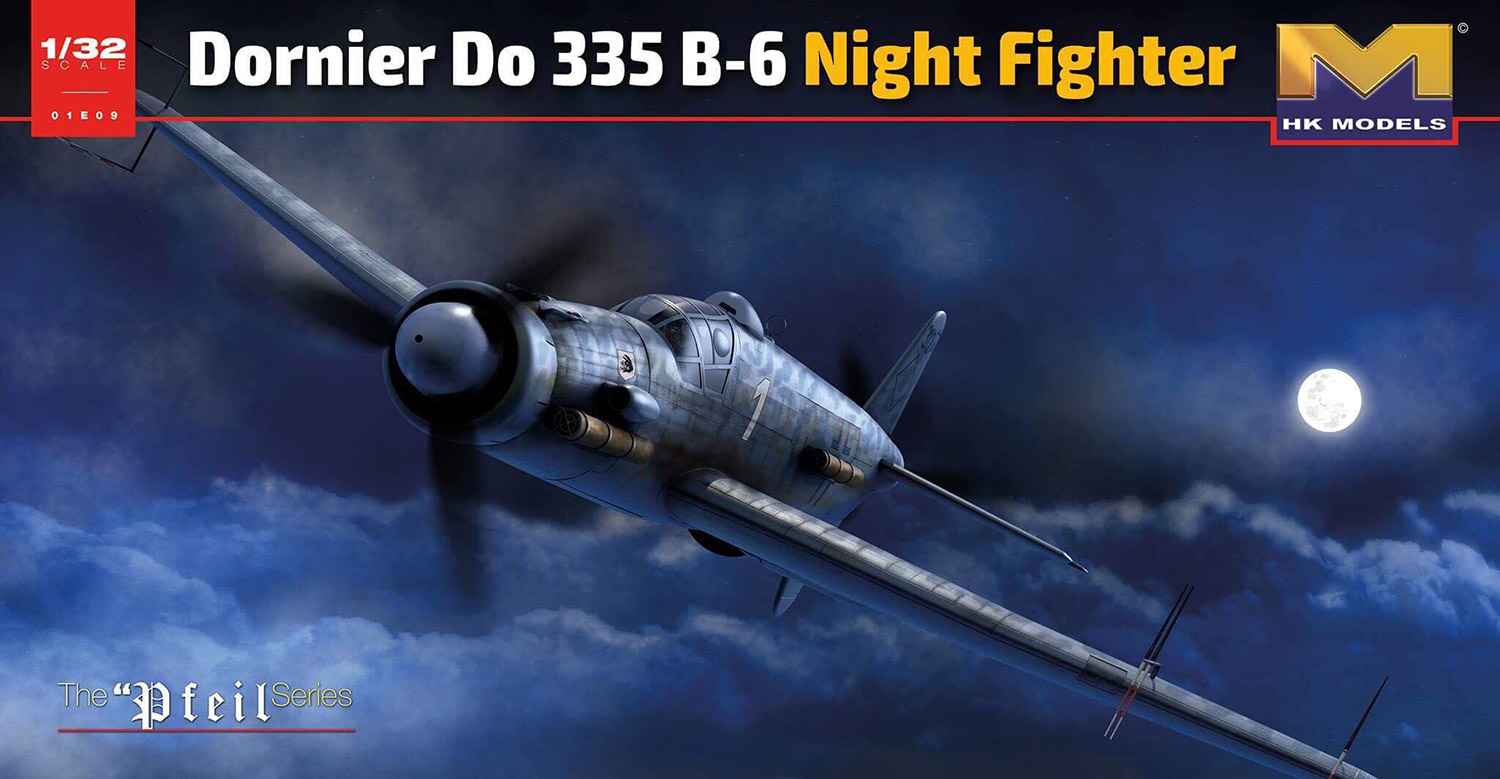
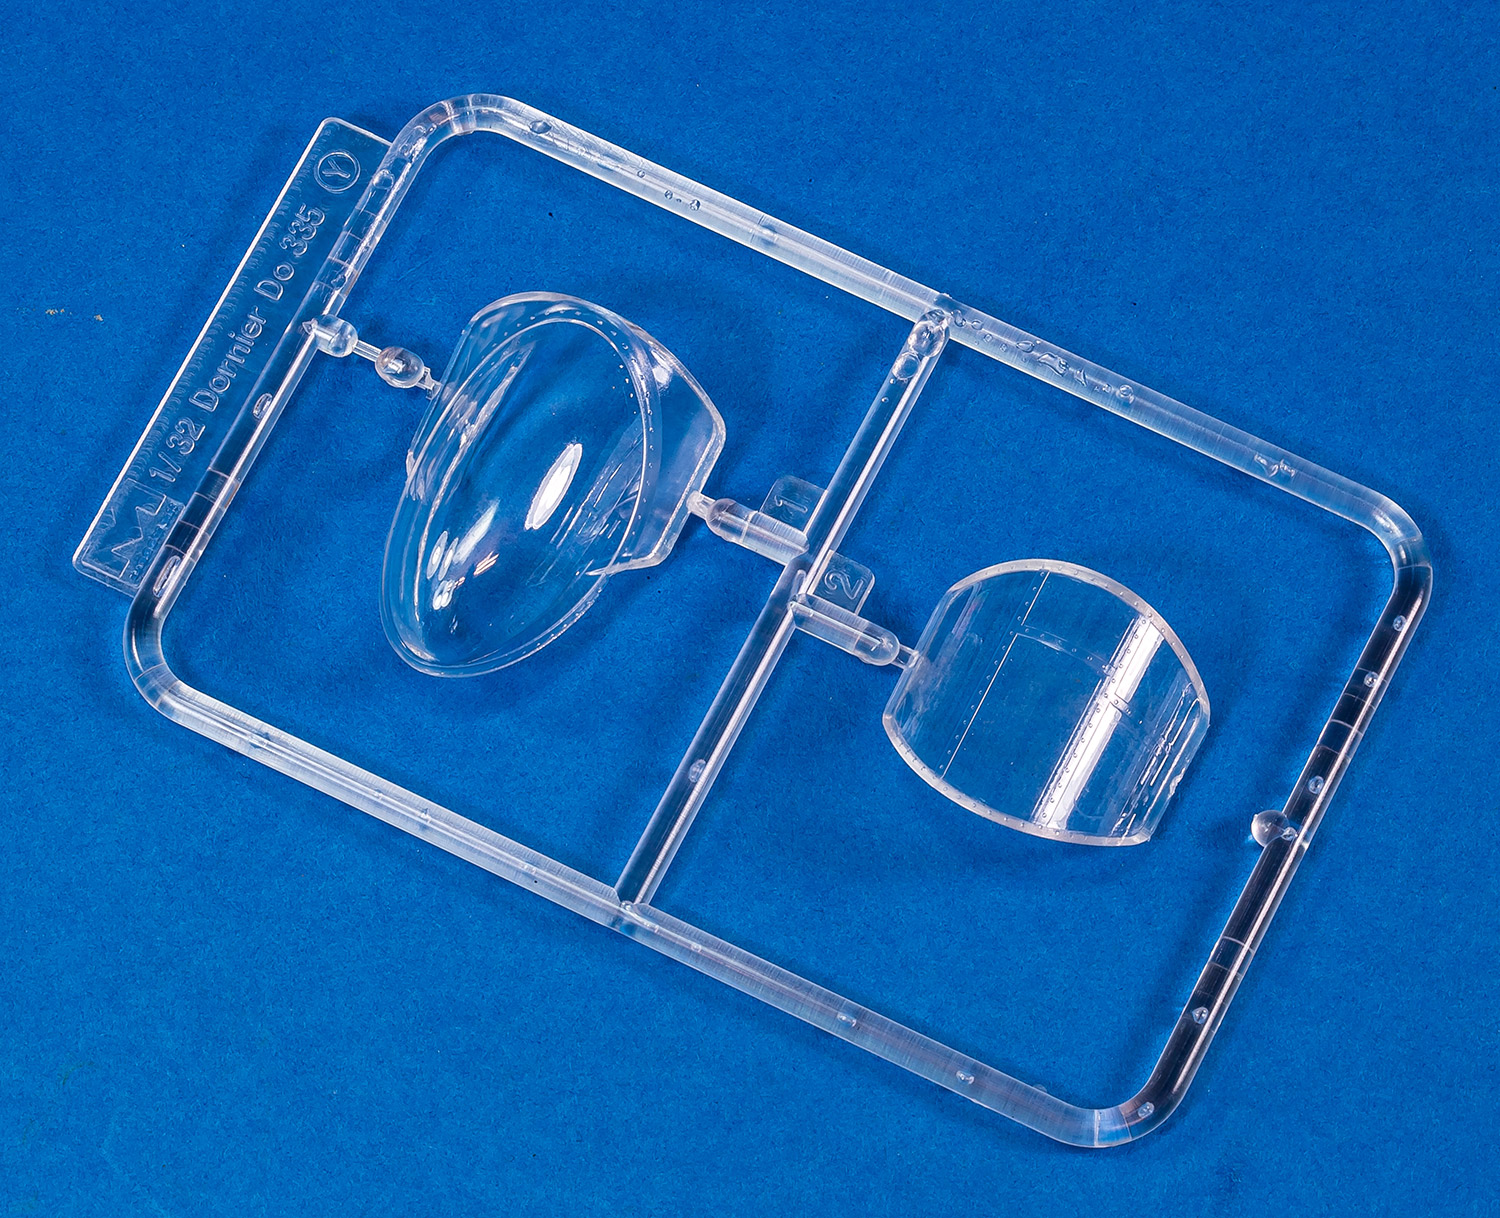
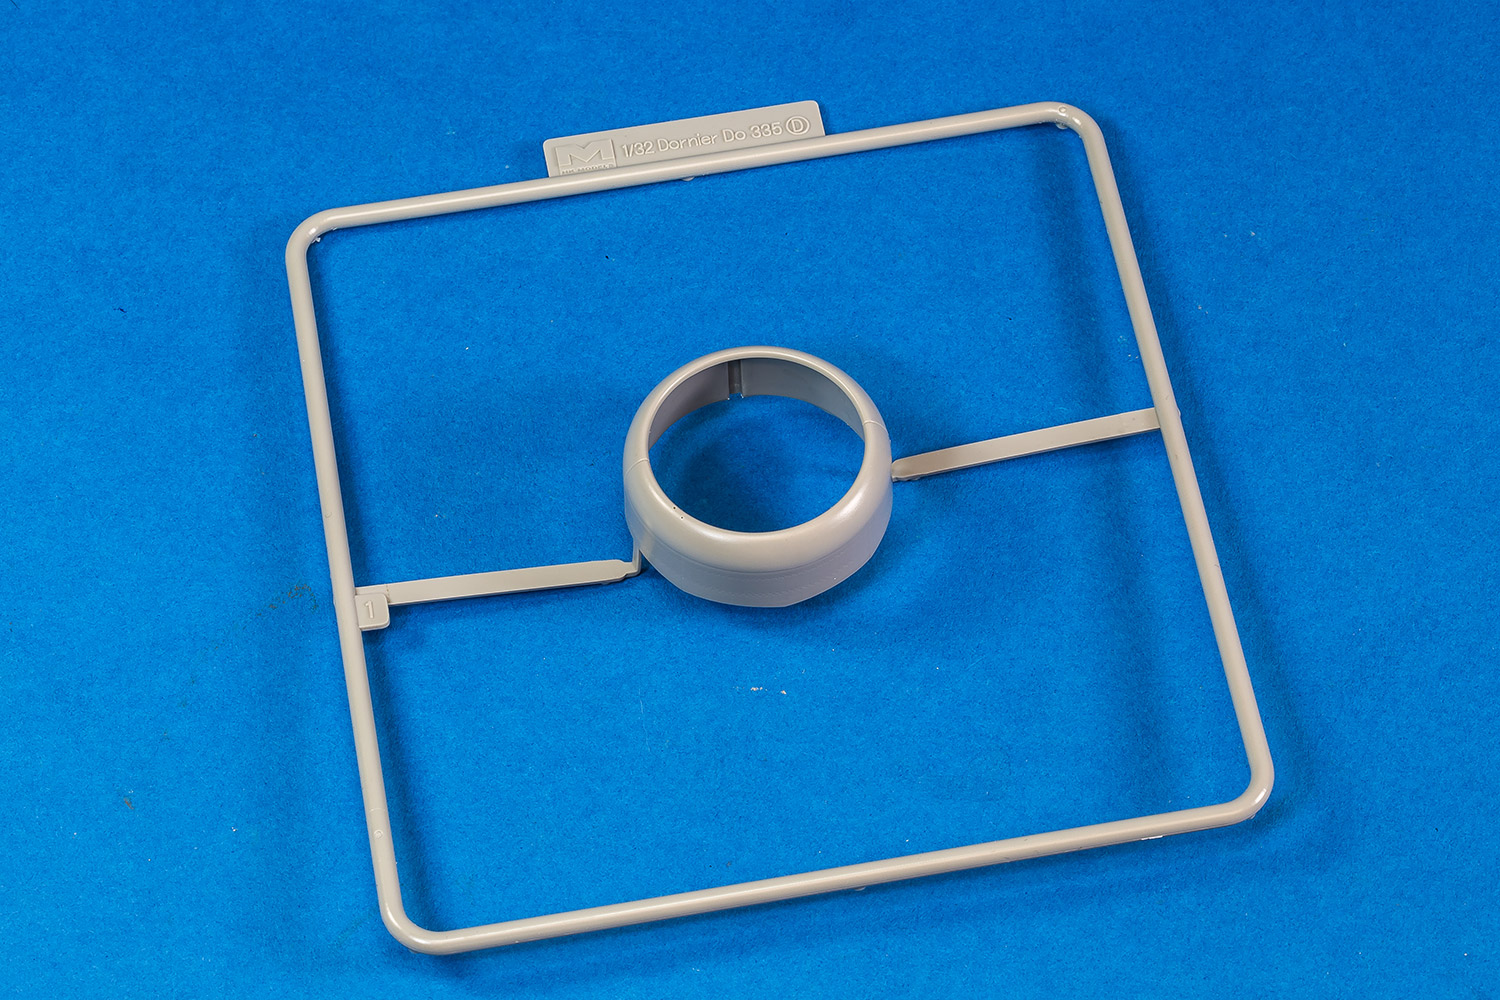
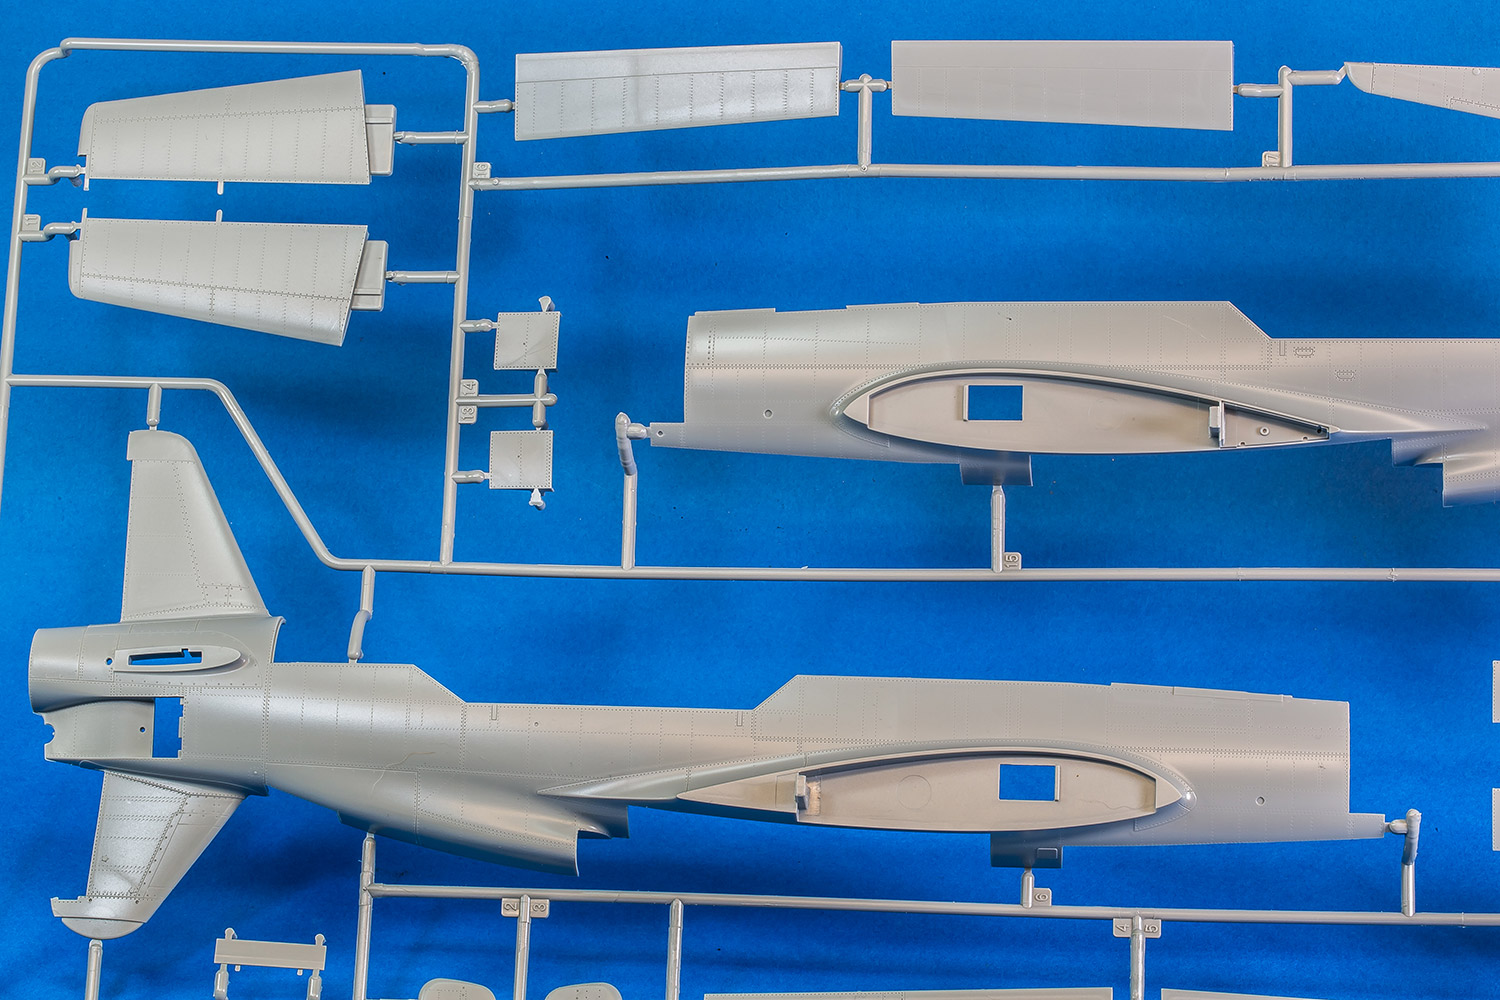
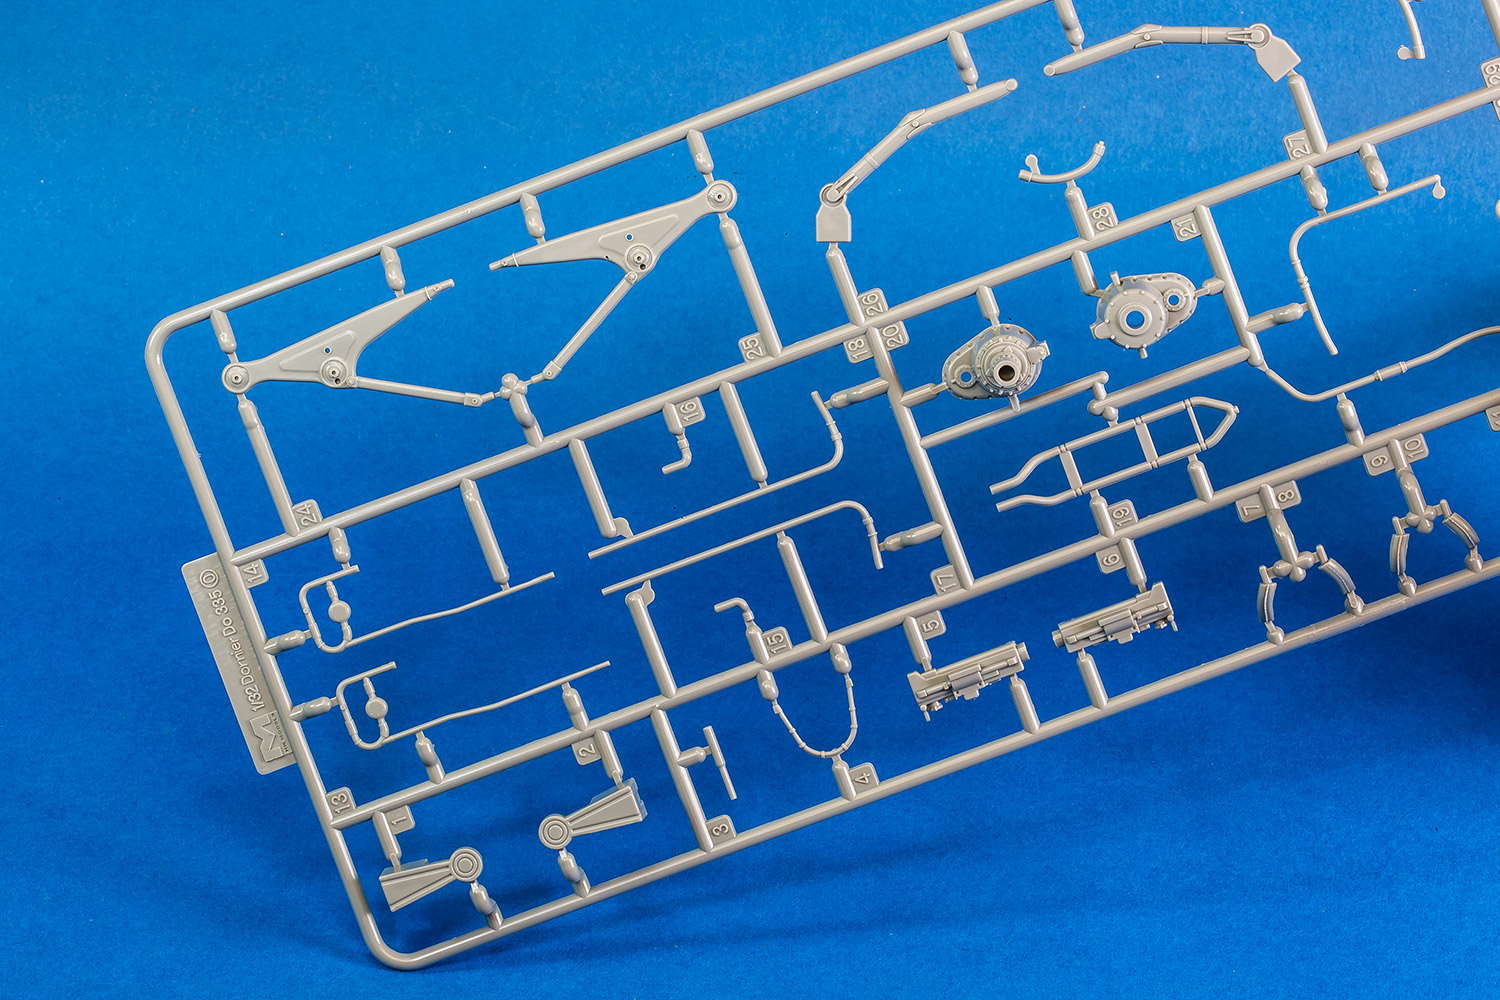
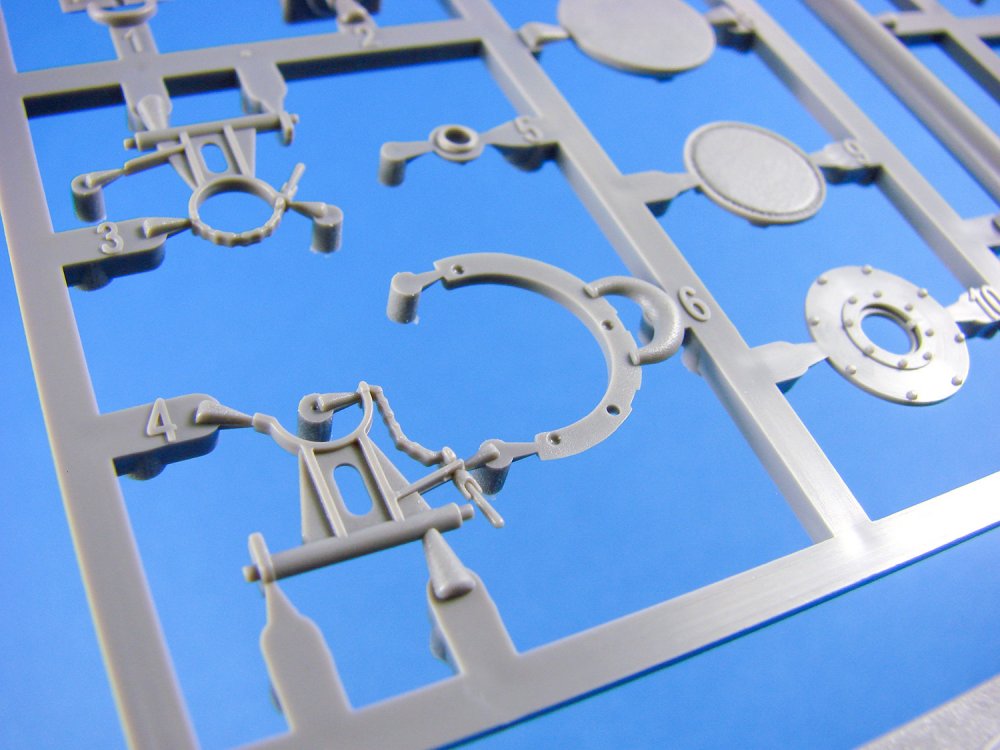
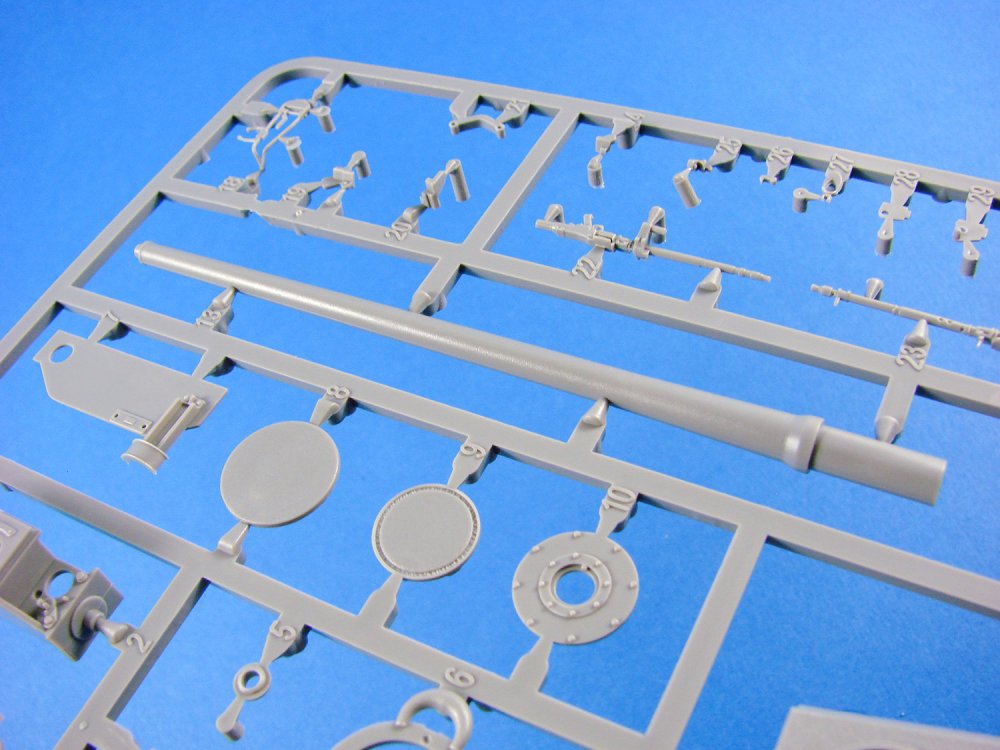
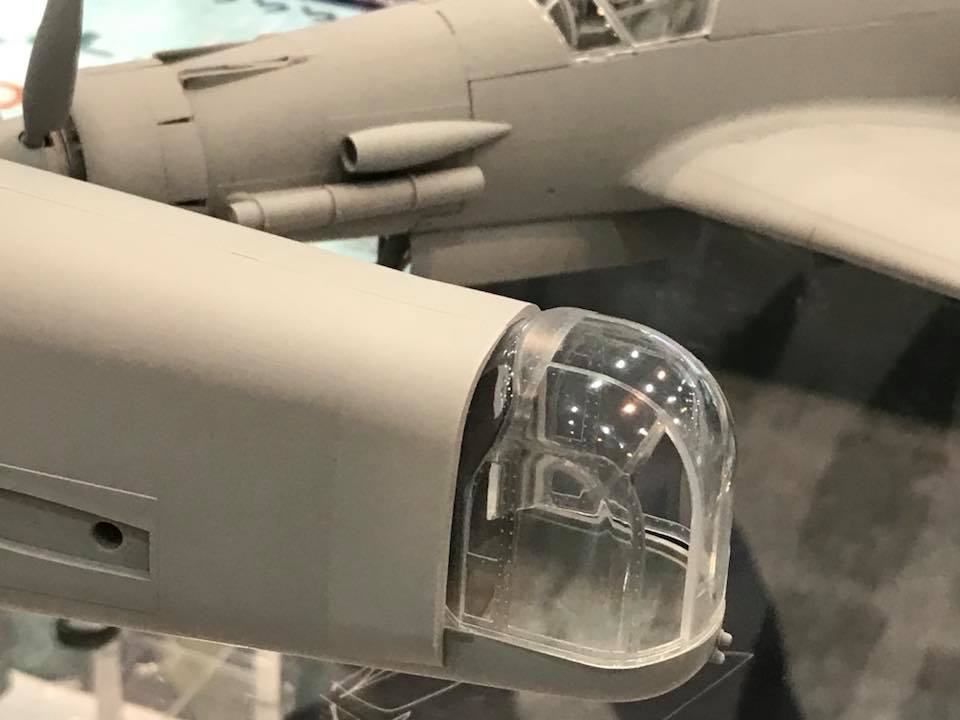
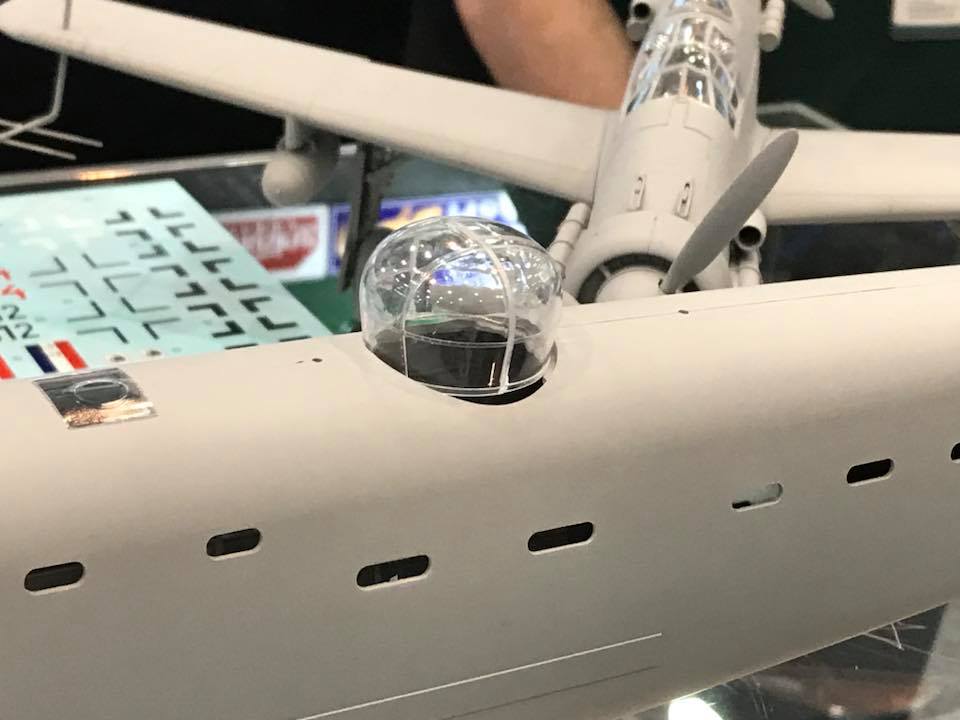
Dornier Do335B-6 Night fighter Hong Kong Models Written by Steven Budd Hong Kong Models' (HKM) ongoing love affair with 1/32 continues unabated with the B-6 night fighter variant of their sumptuous Dornier 335 kit. The 335A version first appeared in 2014, later followed by the heavily armed B-2 Zerstorer and the runners from this release provide the guts of the forthcoming B-6. James Hatch has extensively reviewed and built these and I believe is on the cusp of nailing his third, the A-12 ‘Anteater’ together! New sprues naturally compliment the B-2 parts, which include full radar arrays, exhaust flame dampers, underwing drop tanks, a revised spine and clear part over the radar operator’s position, as well as the necessary additional cockpit and associated appointments. Engineering and fit of the 335 has been widely praised, here and elsewhere, for outright precision and (as Jim has already twice demonstrated) will undoubtedly remain the case with the B-6. Surface detail is sublime, crisp and perfectly weighted. Of the many things that have impressed me, the lack of sink marks is perhaps most prominent (if that’s not a contradiction in terms) and a devotion to quality is apparent with every sprue plucked from the large box. Speaking of the box, if like me, you’re a sucker for punchy, attention grabbing art work, then HKM’s night fighter will certainly have your peepers by the scruff, with its depiction of this nocturnal killer dramatically banking to port, above the cloud base; a ‘hunter’s moon’ hanging in the background. On a different note, the logical assembly sequence puts me in mind of Accurate Miniatures, who based theirs on test builds of around 100 pre-production samples before finally settling on what they felt was the preferred completion route. Neil Yan’s development strategy clearly involves open consultation with Jim and others and no doubt underpins that over-arching sense of real modelling minds having shaped that all important assembly aspect. If it’s options you like, then HKM has you covered, with two complete engines and removable panels to reveal them. Further posable panels and doors sit over the nose gun breeches and bomb bay, should you wish to have it all ‘hanging out’. Cartograf decals will be provided for three aircraft, two marked as ‘What-if’ options: one in RLM76 with patches of RLM75, the second in RLM81, 82, with RLM76 Wellenmuster, with the last in overall khaki (Dornier Do 335 M17, W.Nr. 230017, CEV, Brétigny-sur-Orge, France, 1947). Two white metal weights and etched parts, including seat belts, round out the presentation. This HKM incarnation of the fastest piston engined aircraft of World War II will, like its stablemates before it, be imposing in size, highly accurate and a pleasure to complete. My personal thanks to Jim here, for liaising with Neil to make the pre-production sample available to me - I much look forward to completing it for Airfix Model World in due course. Happy days.


-
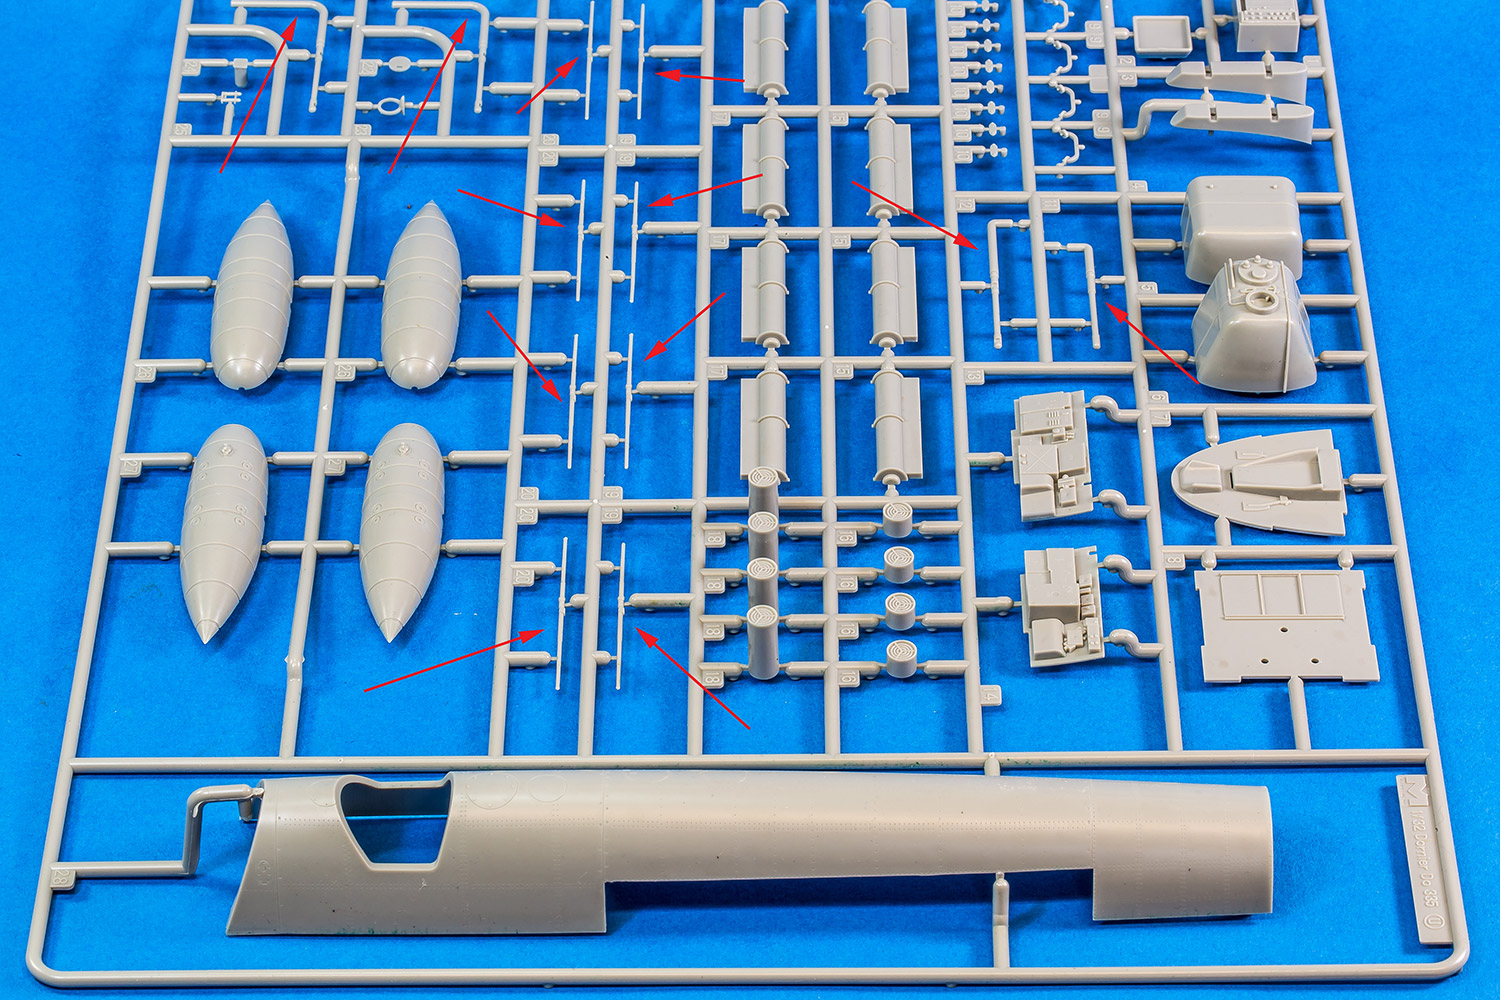
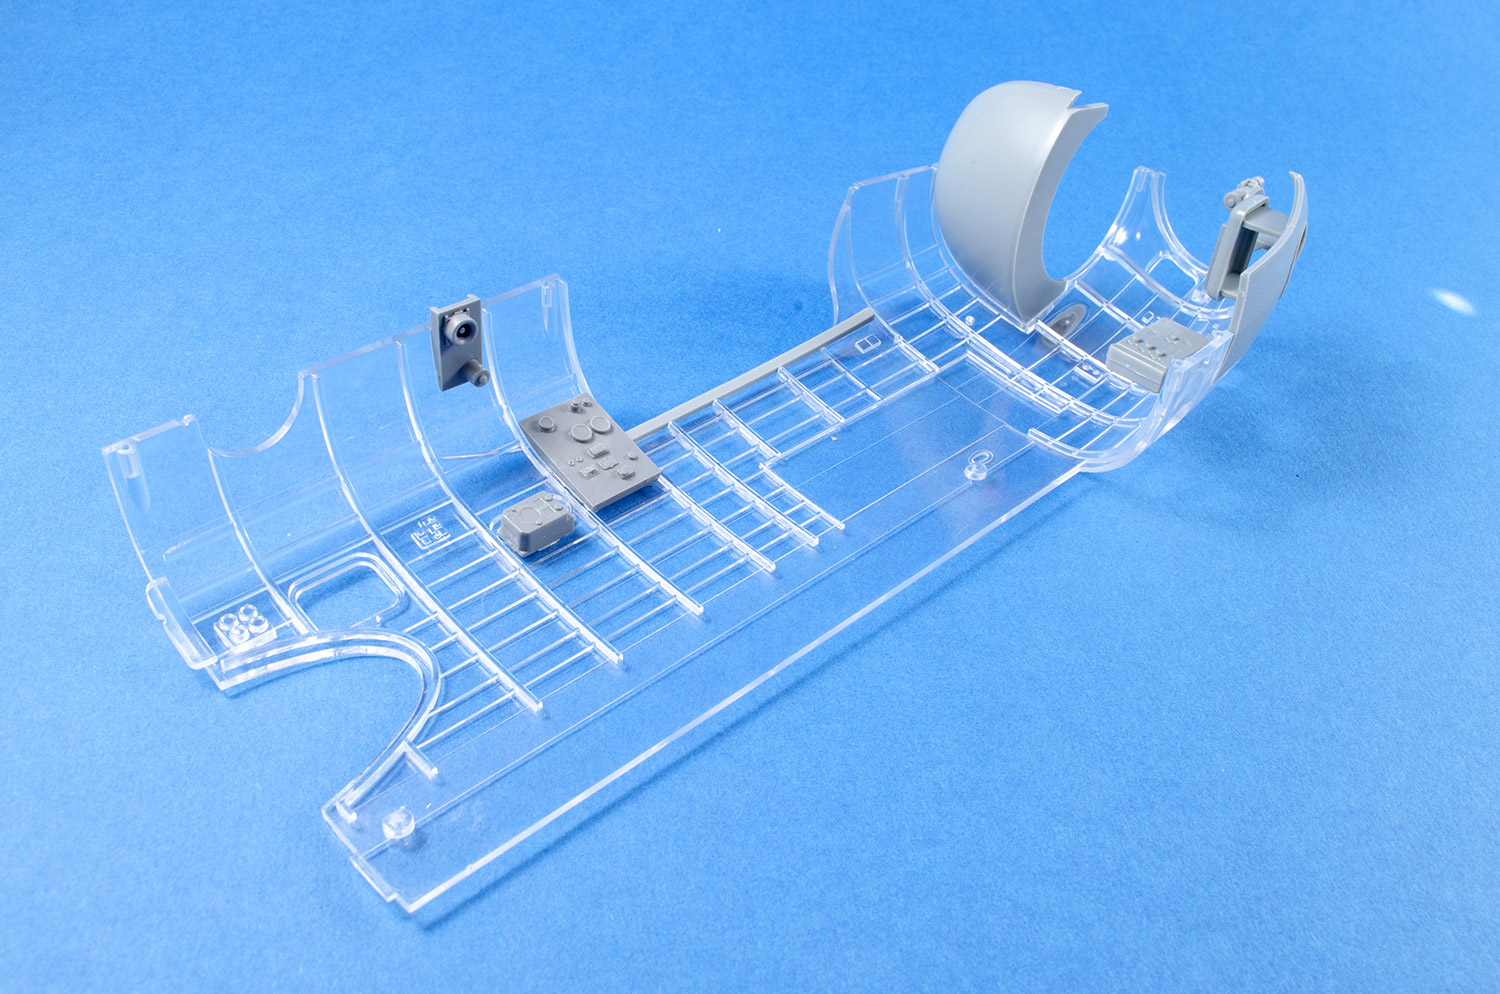
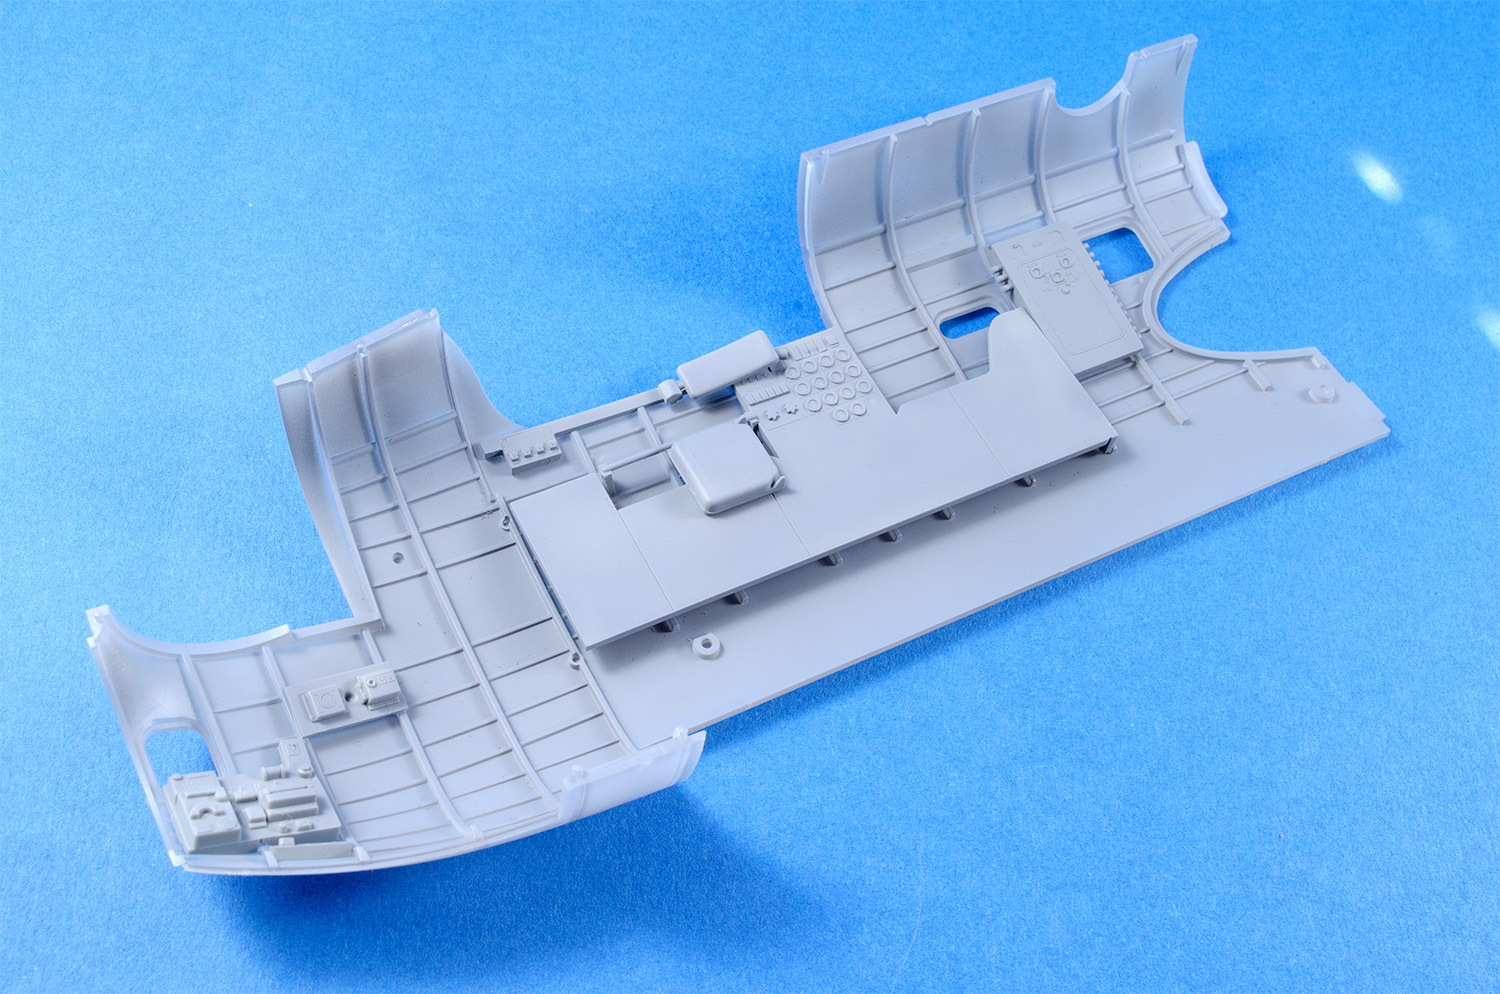
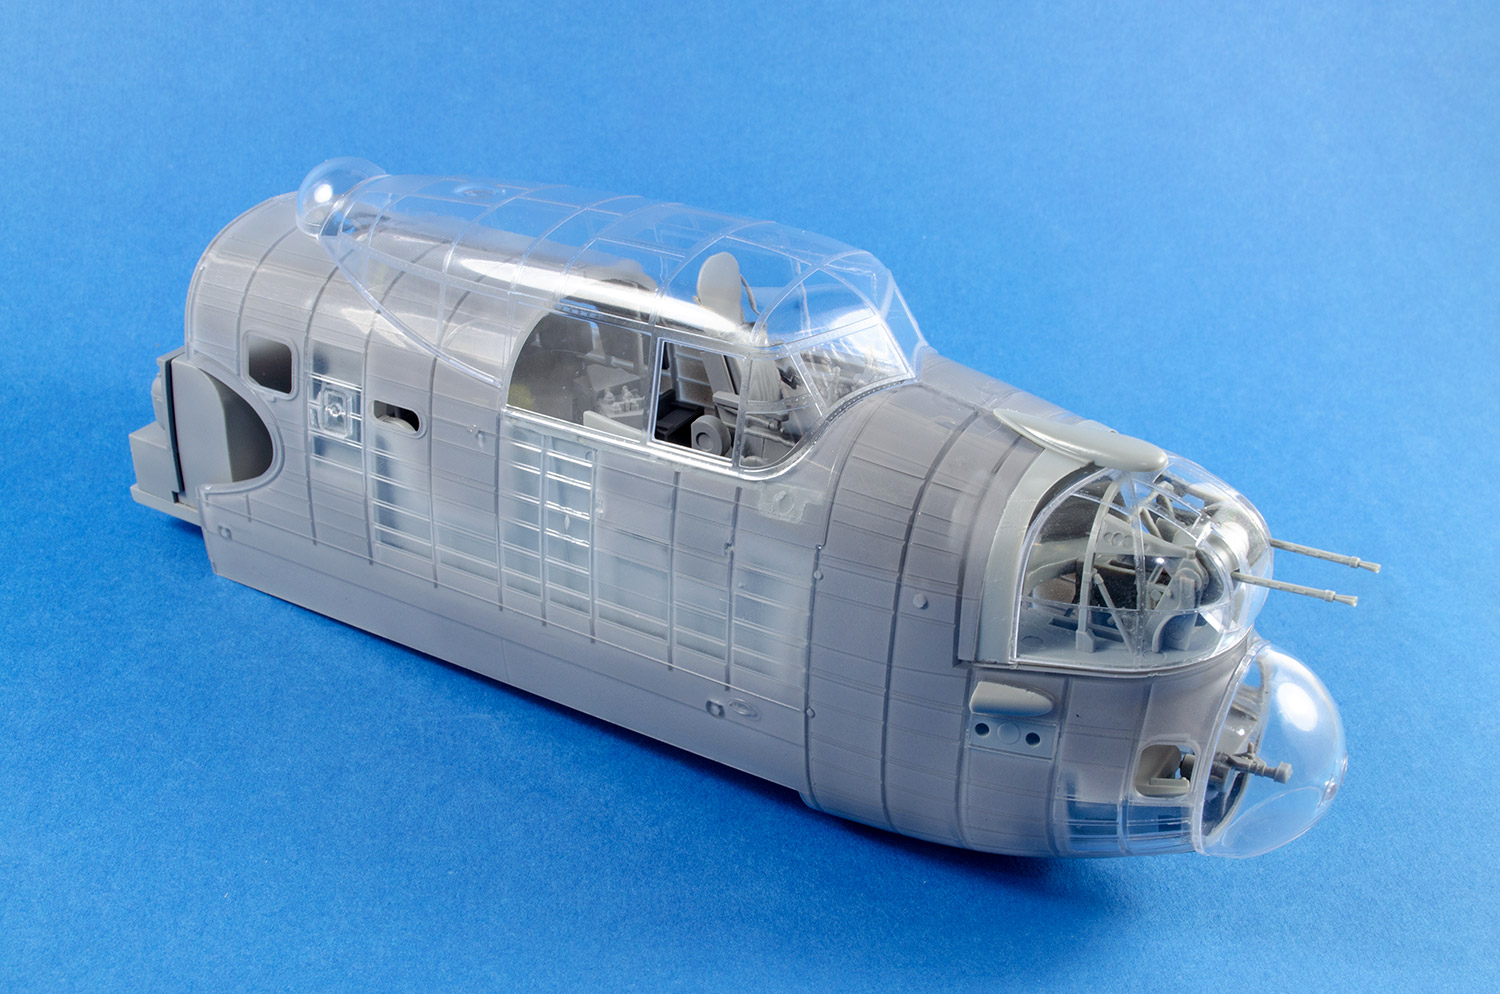
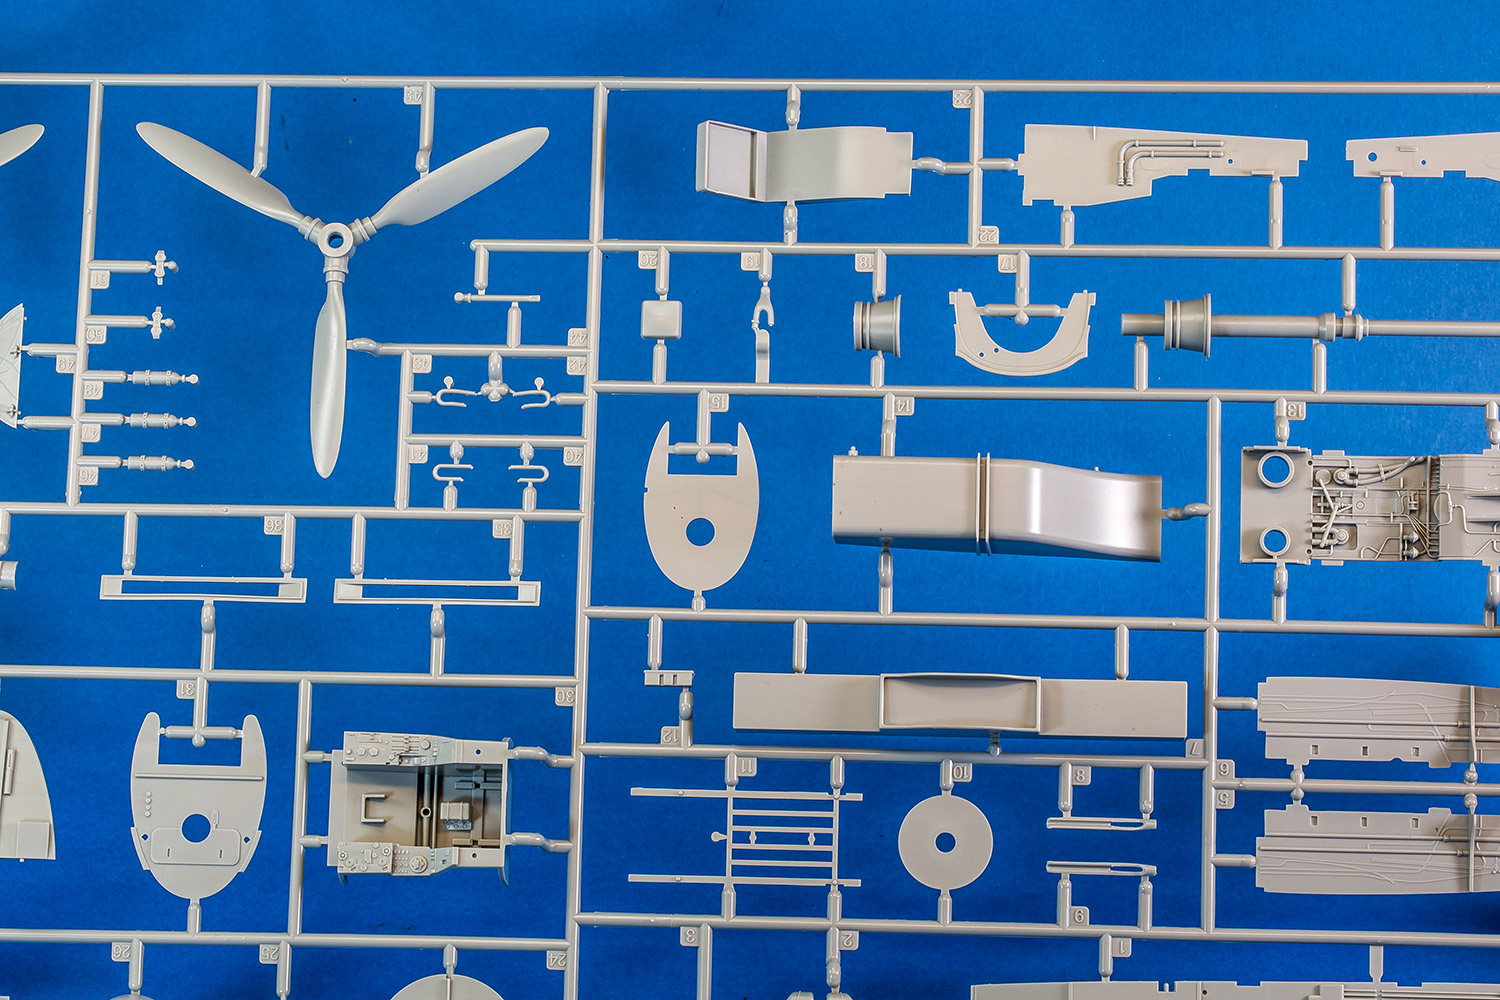
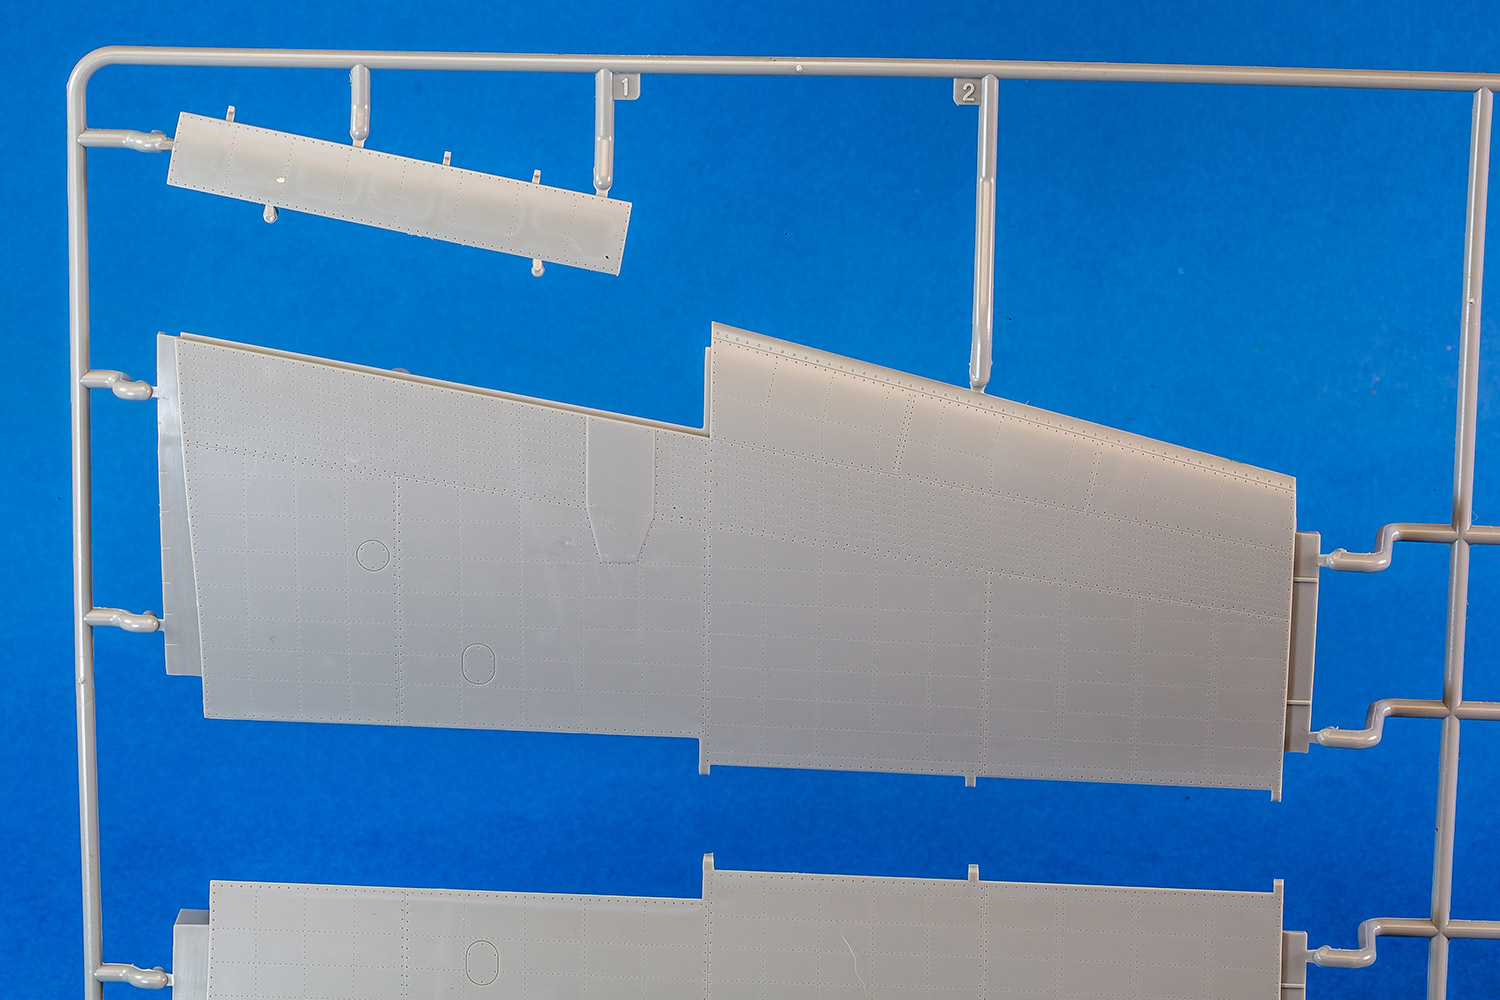
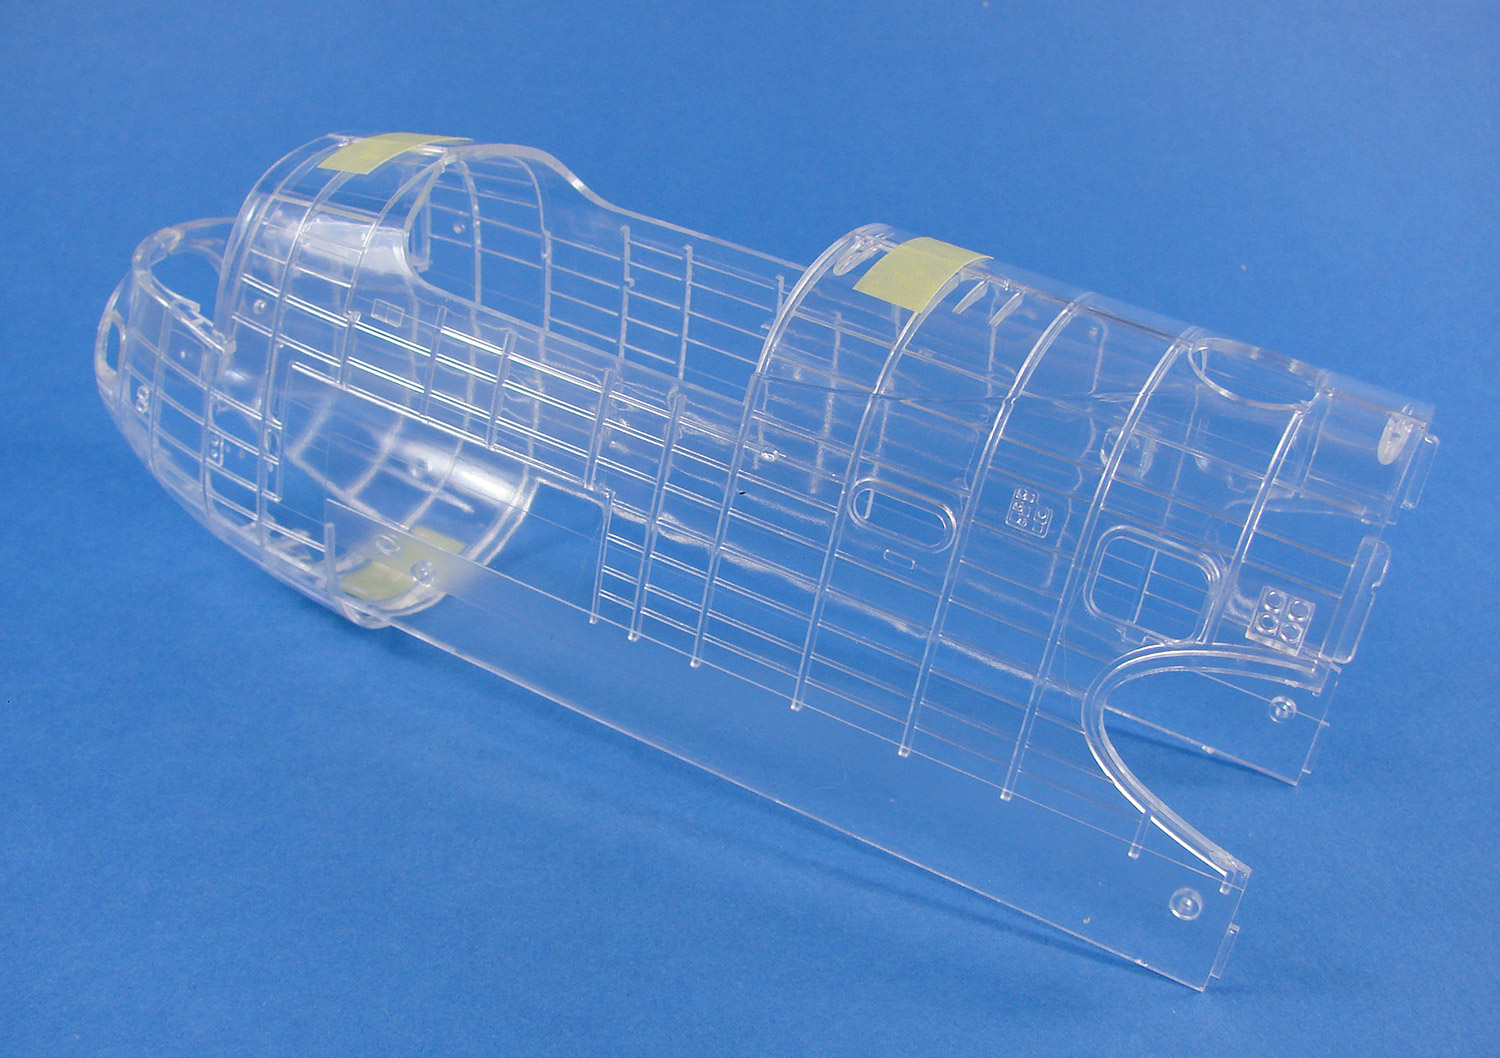
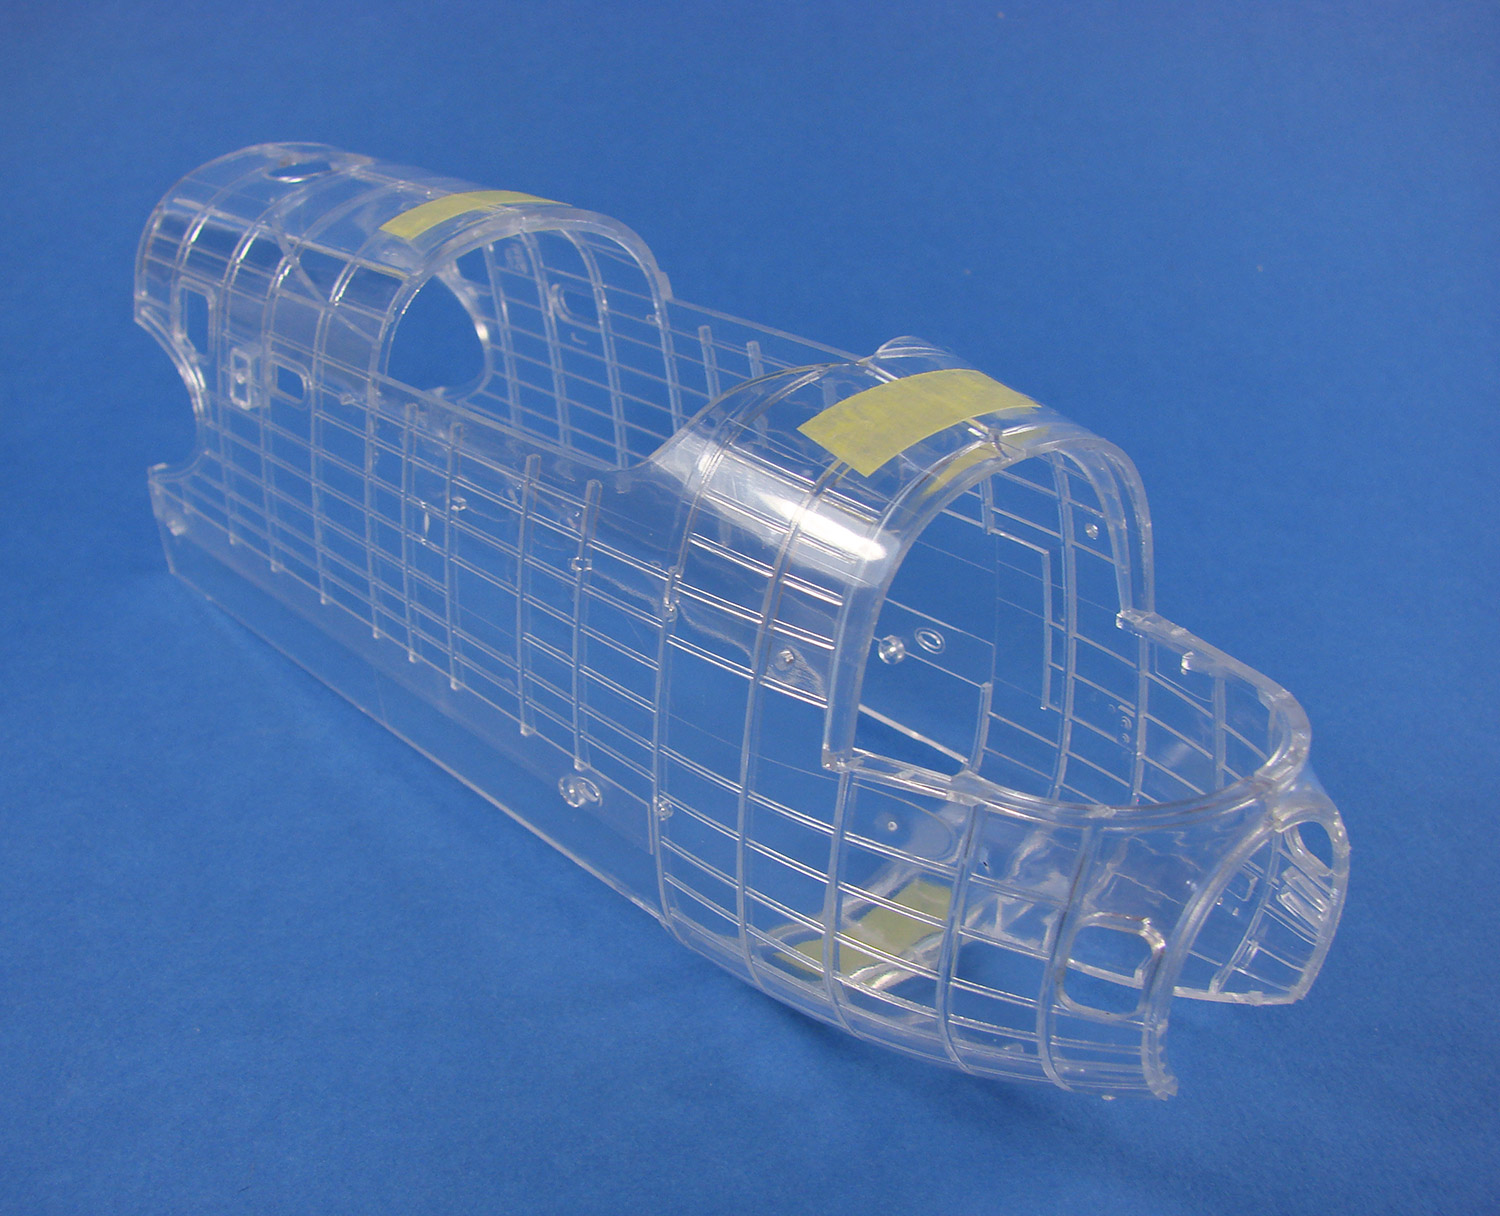
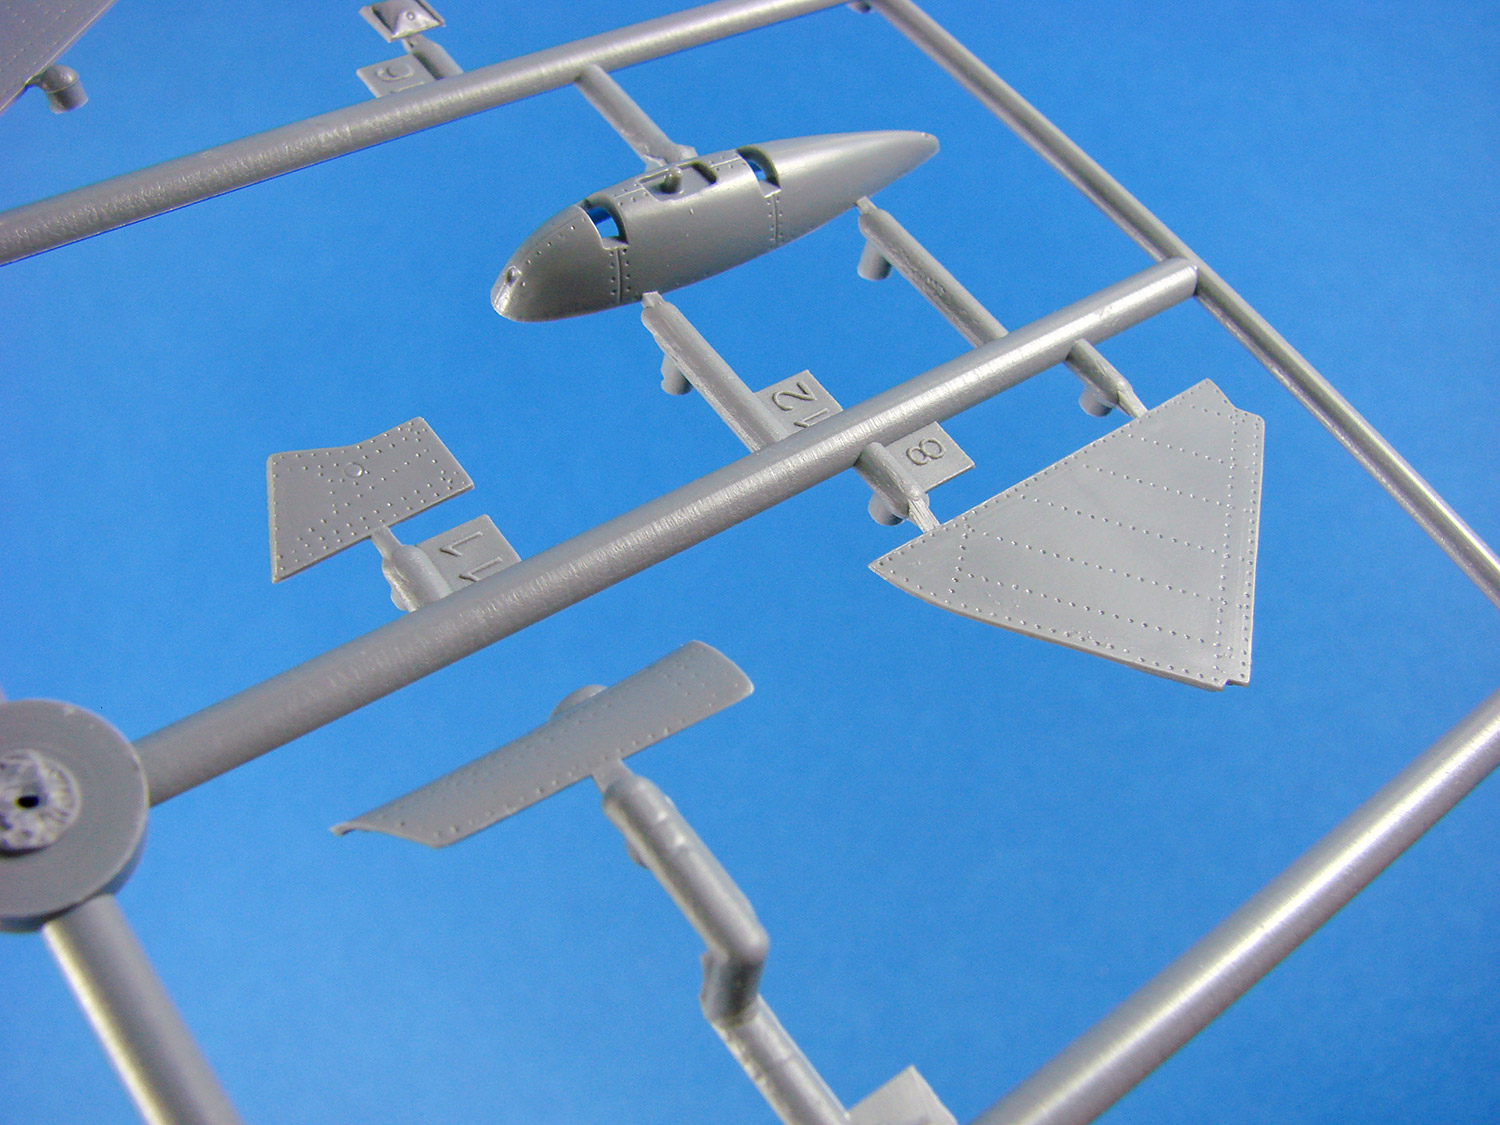
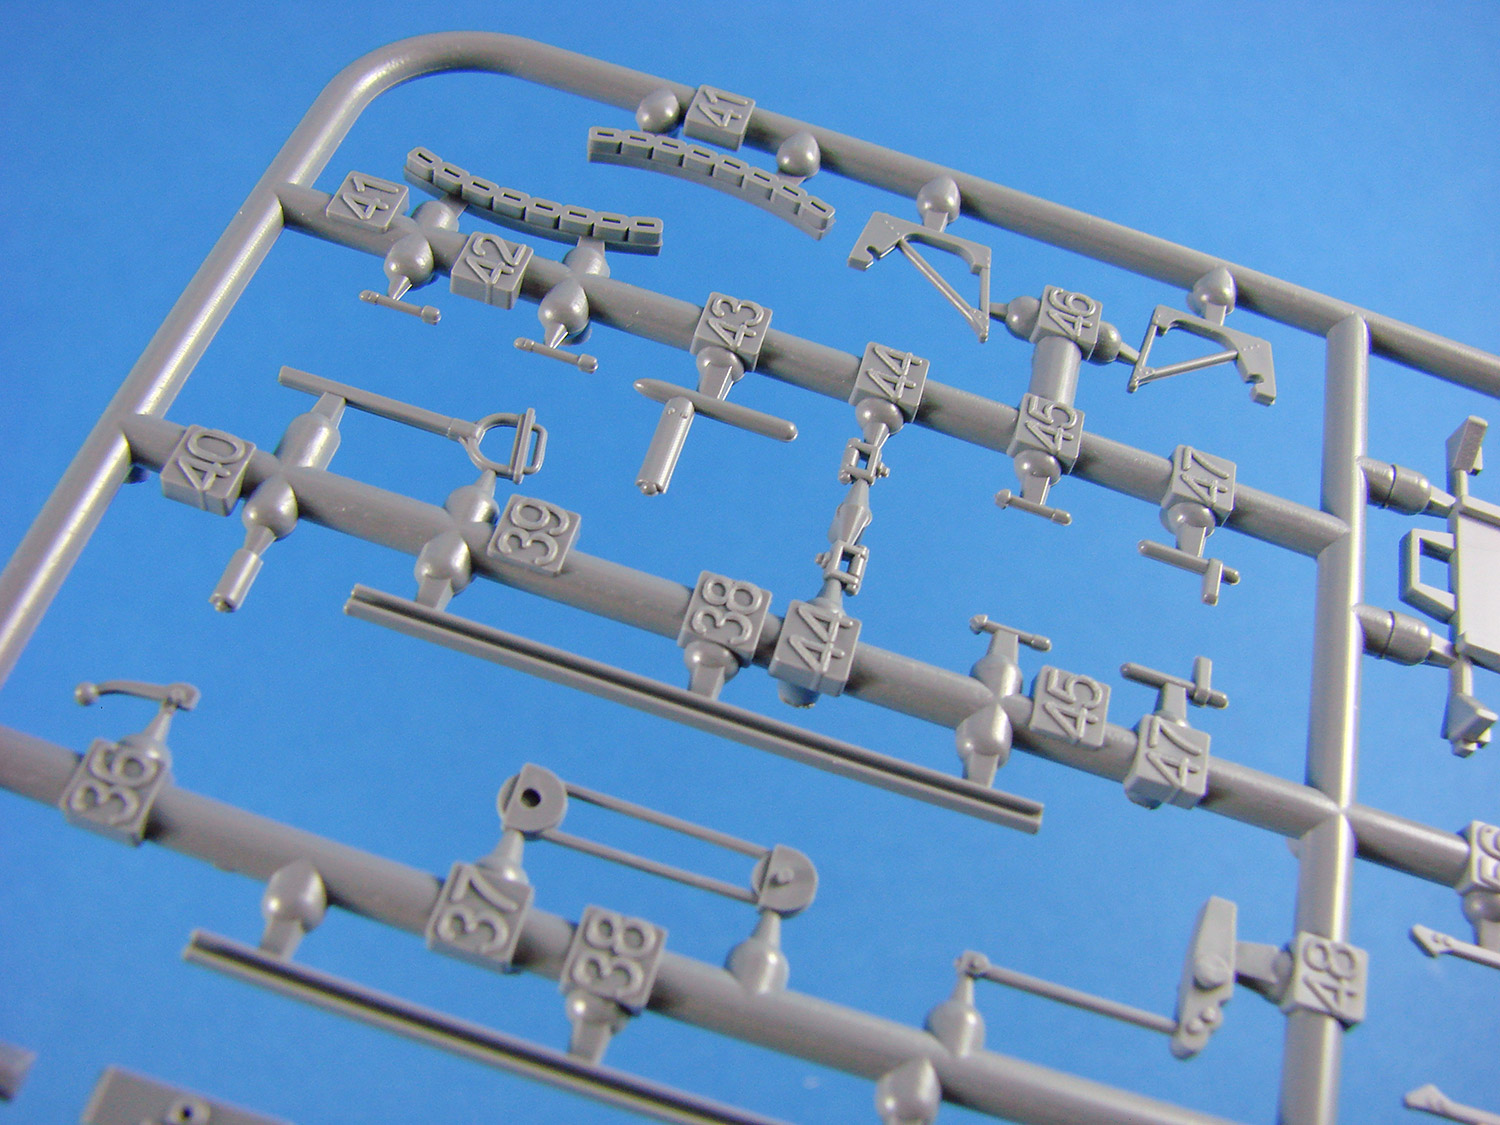
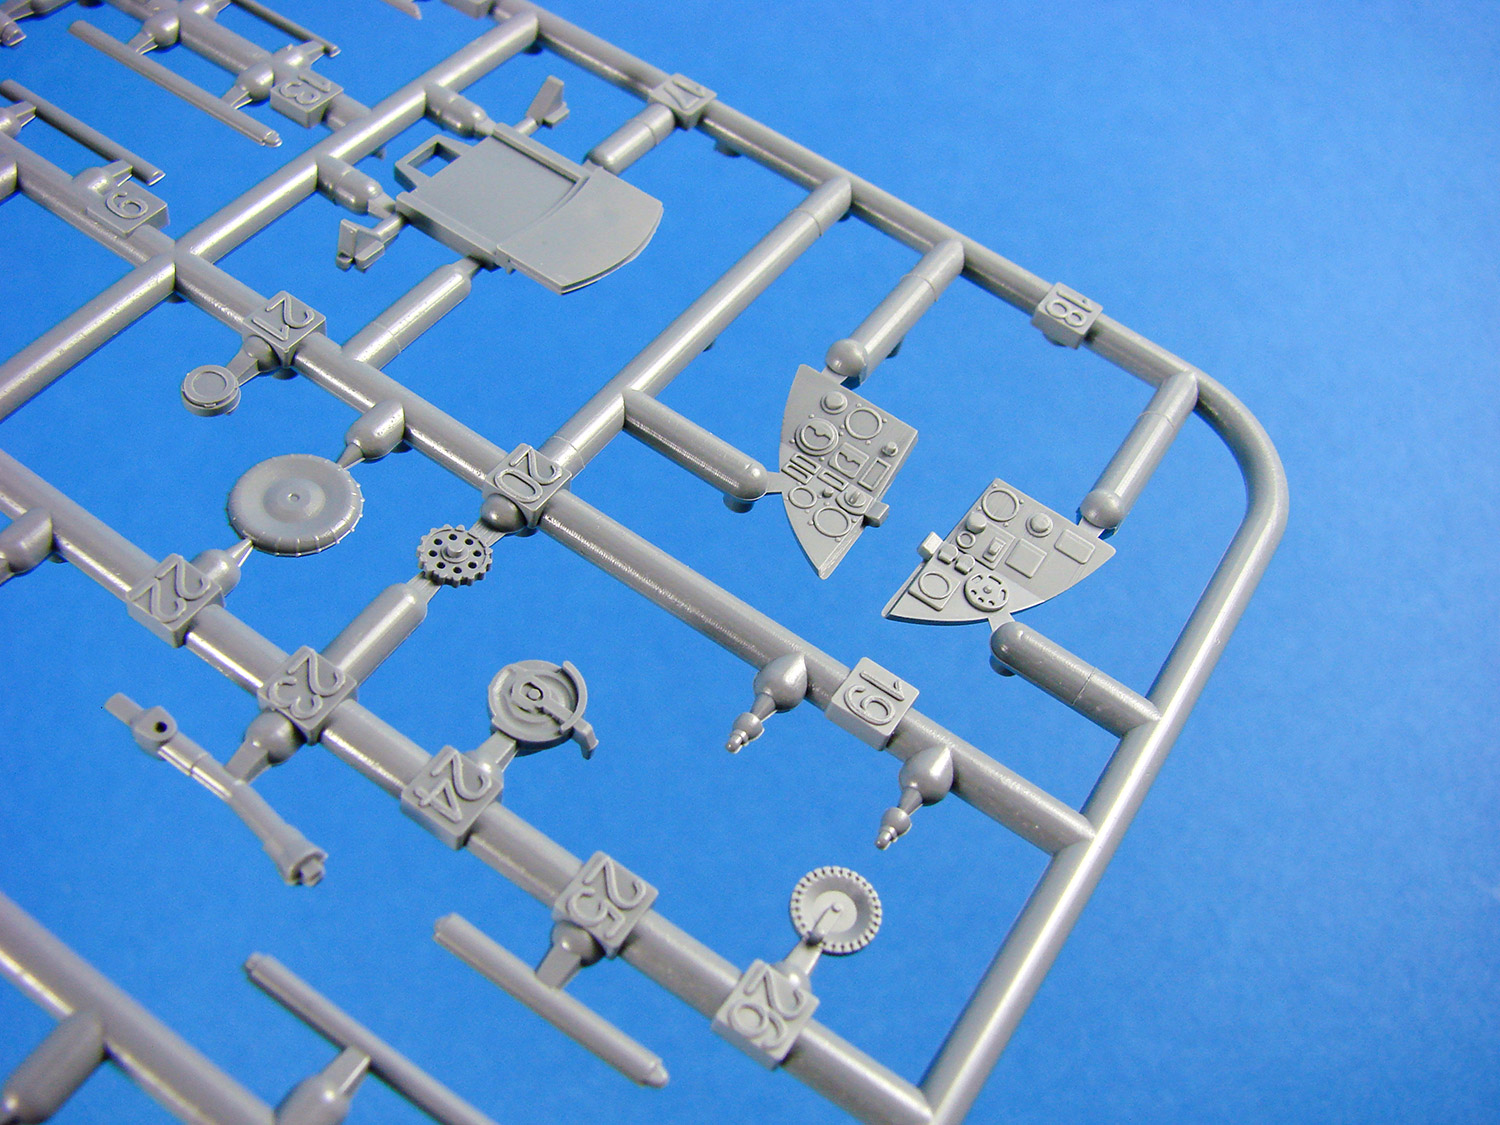
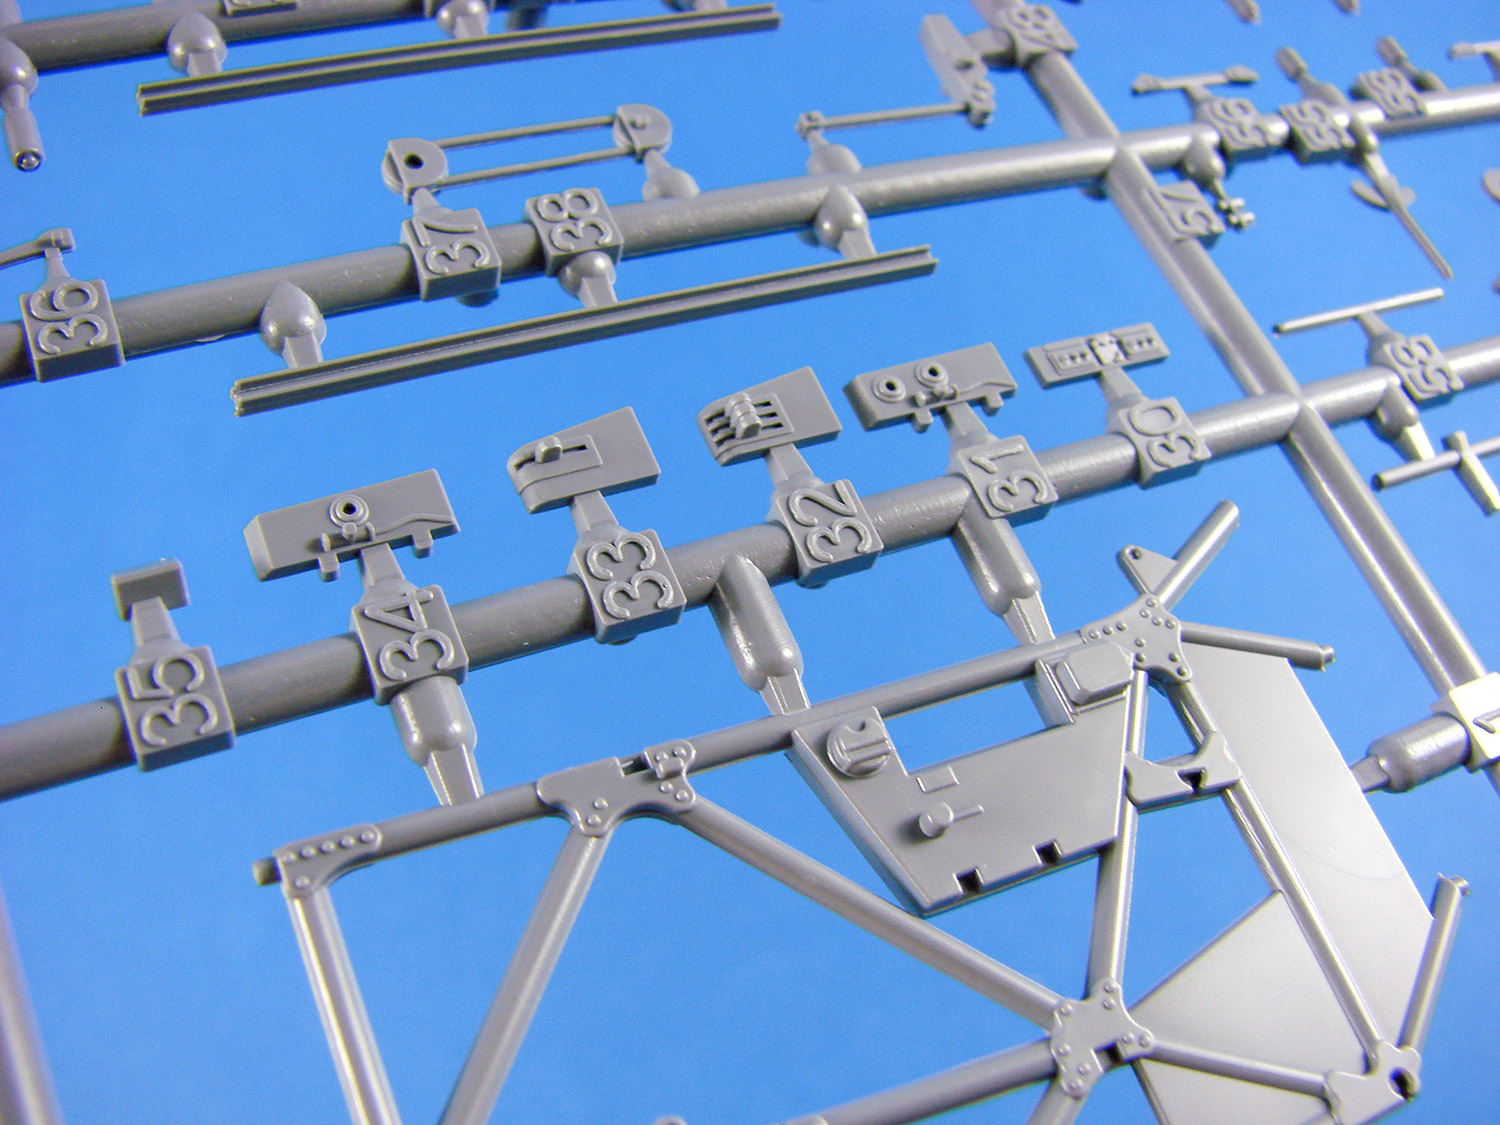
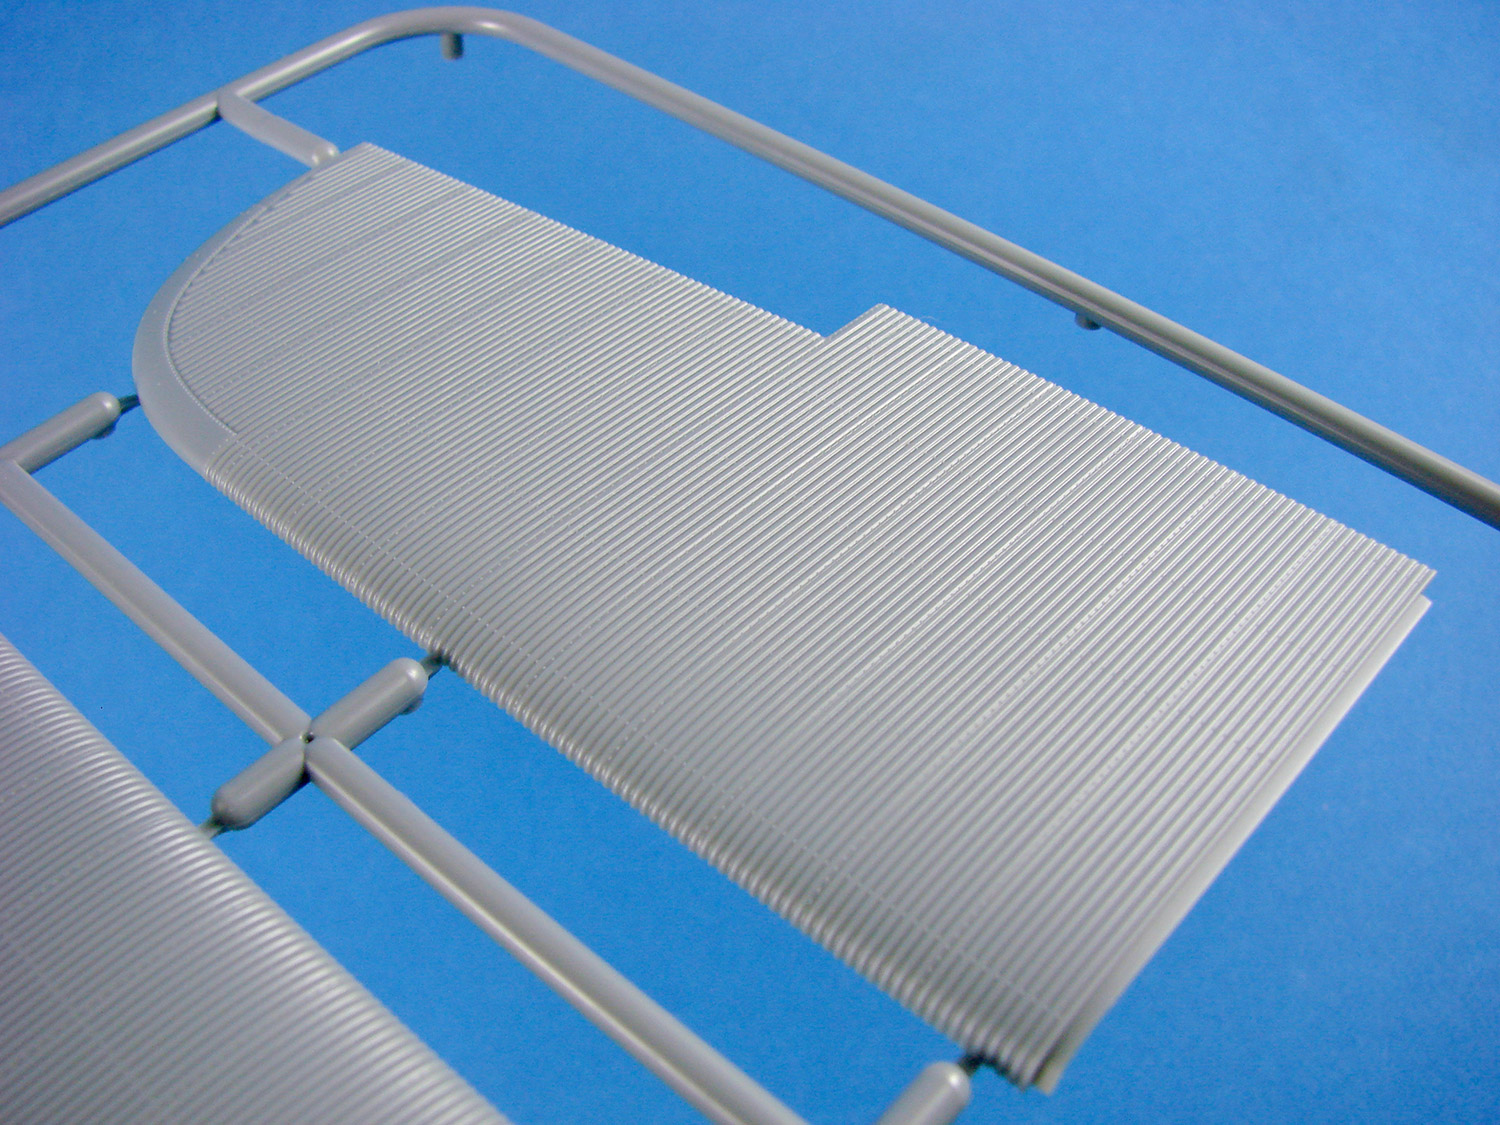
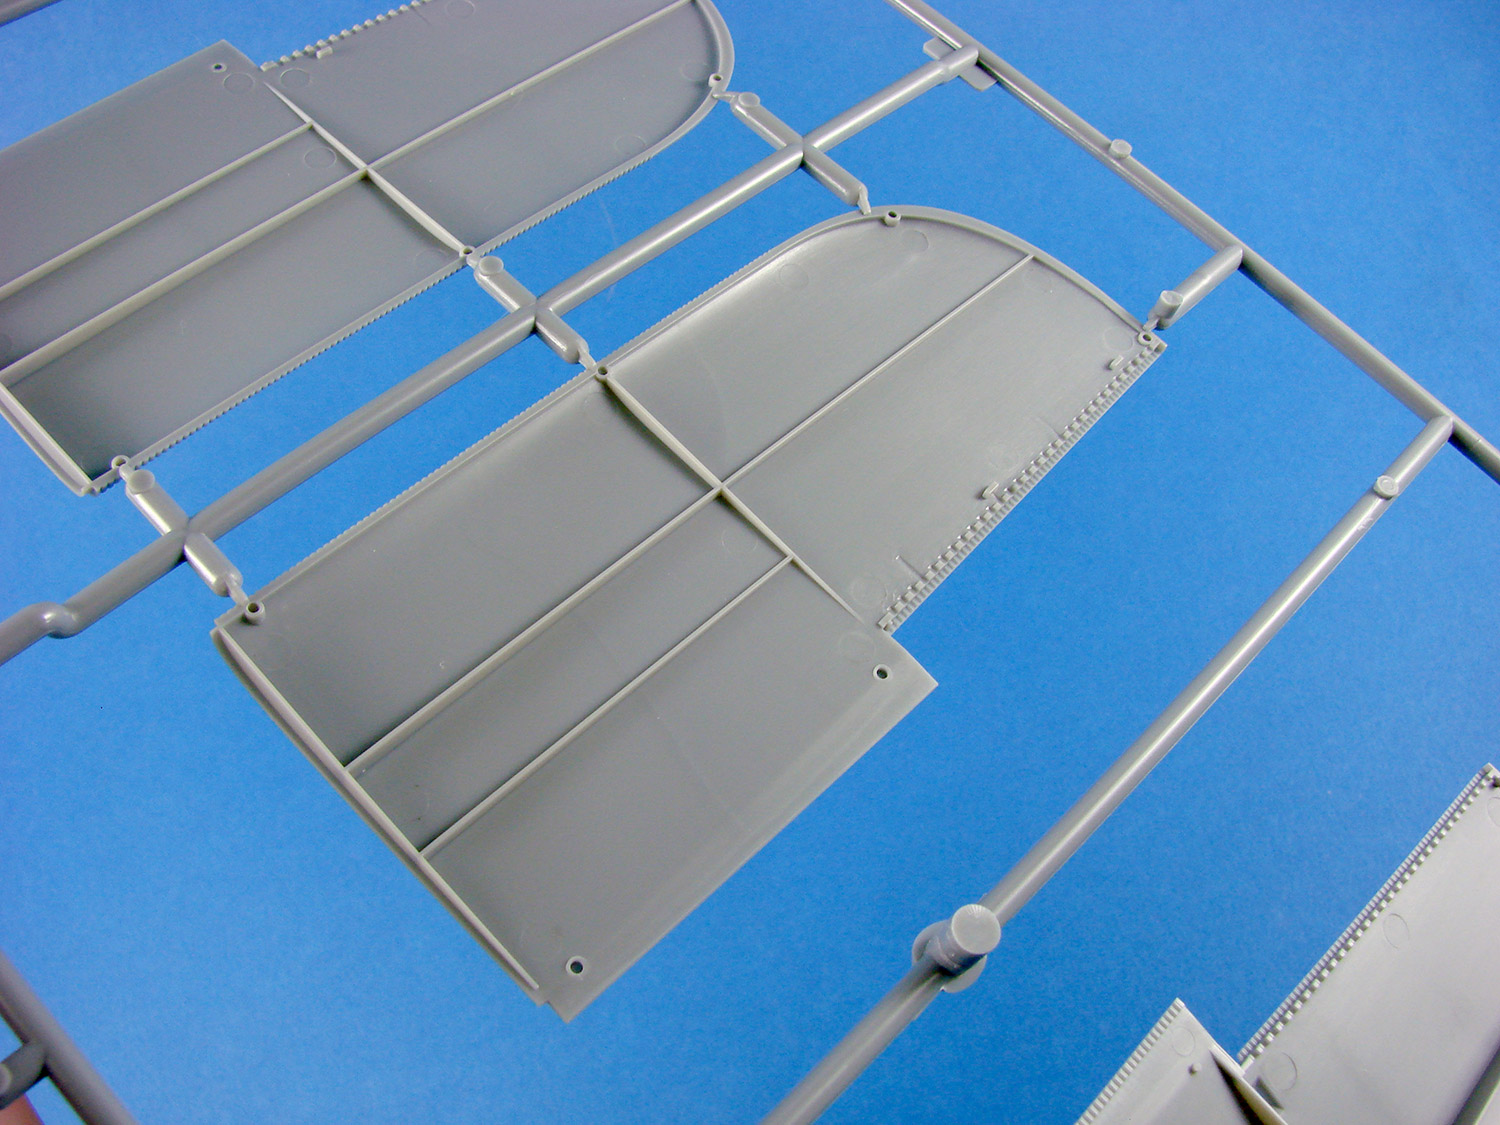
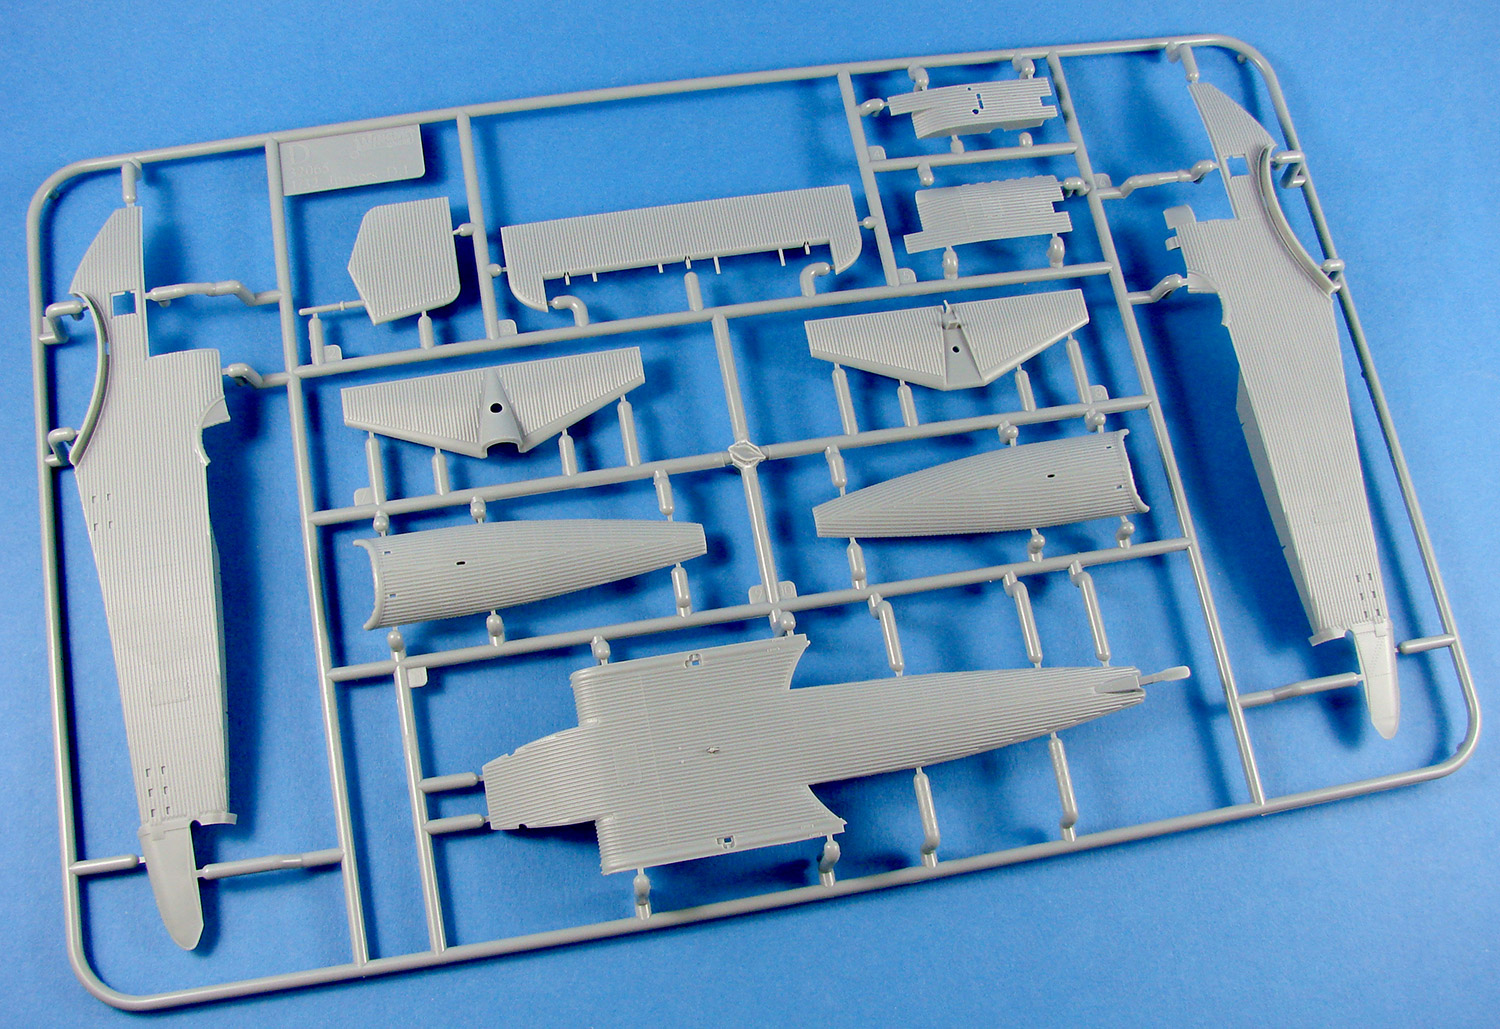
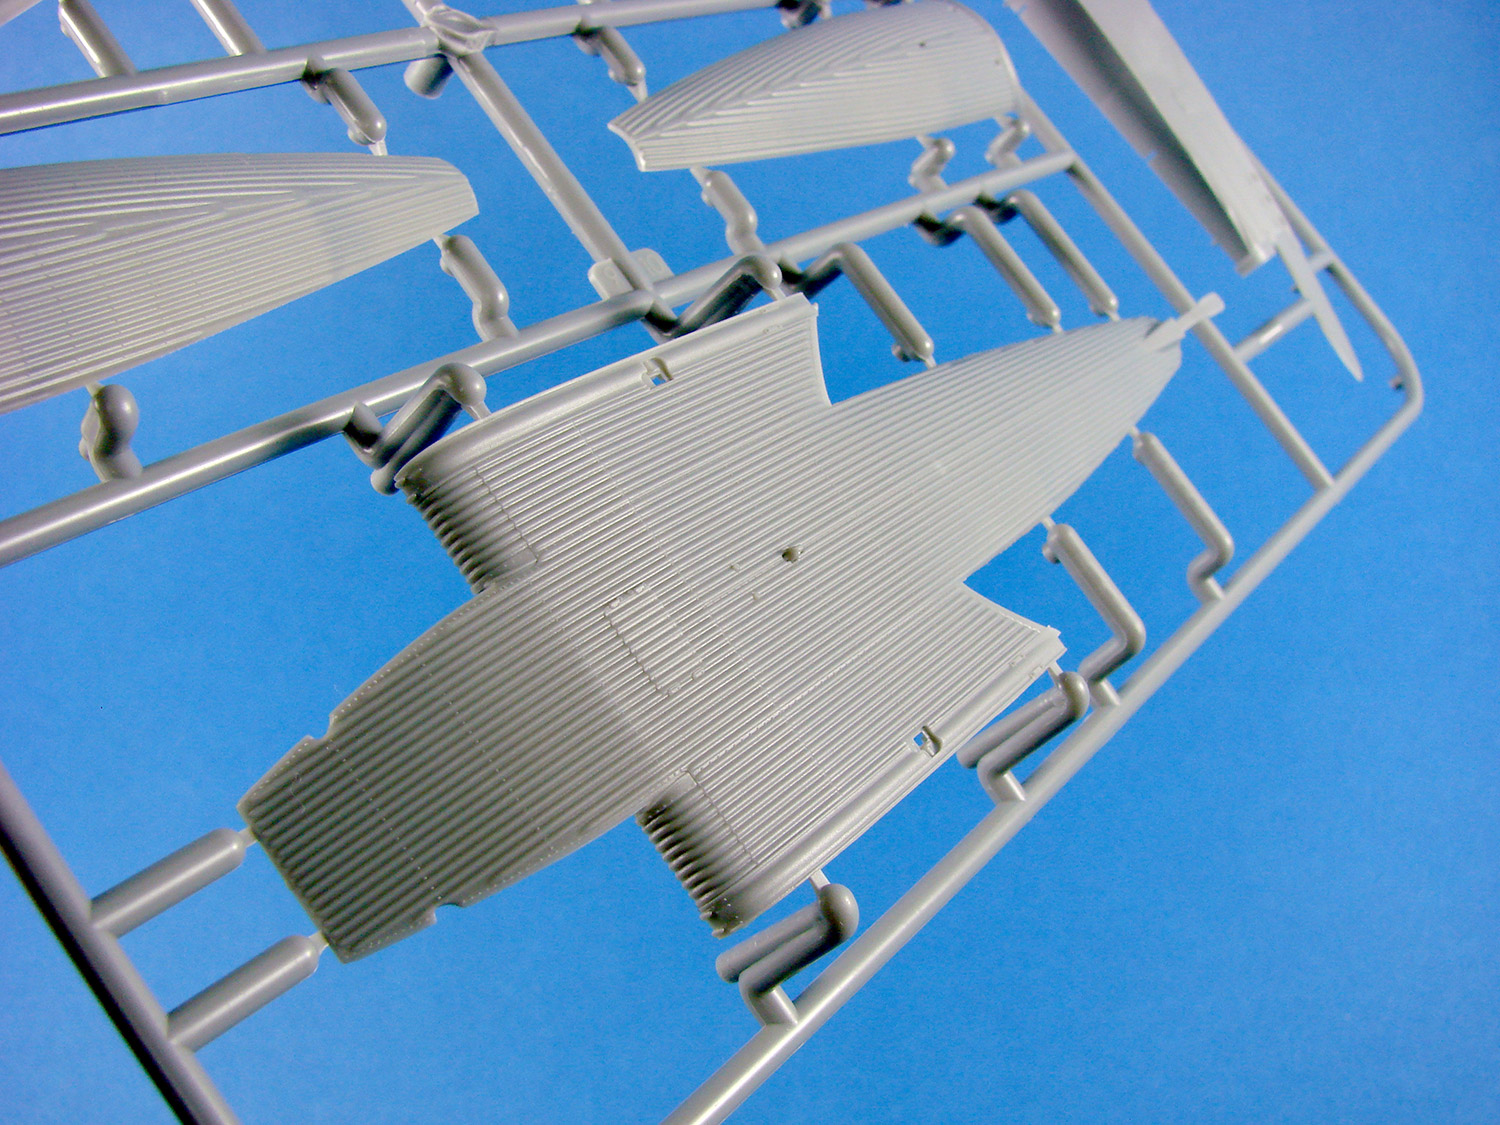
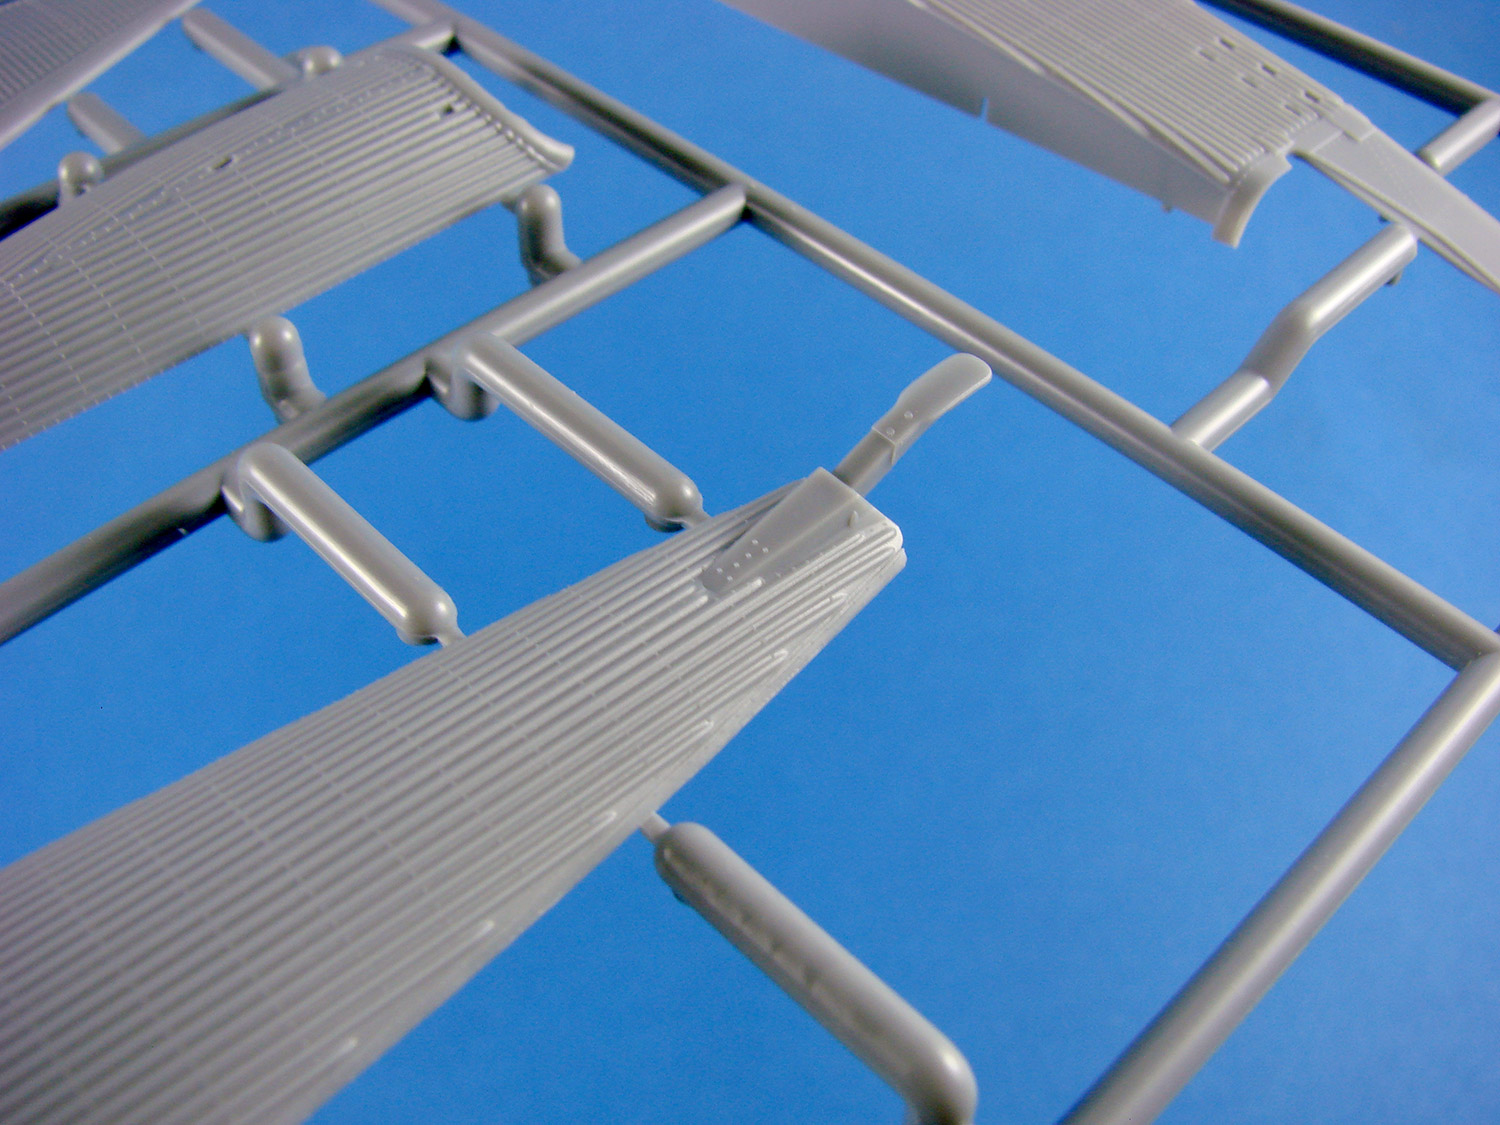
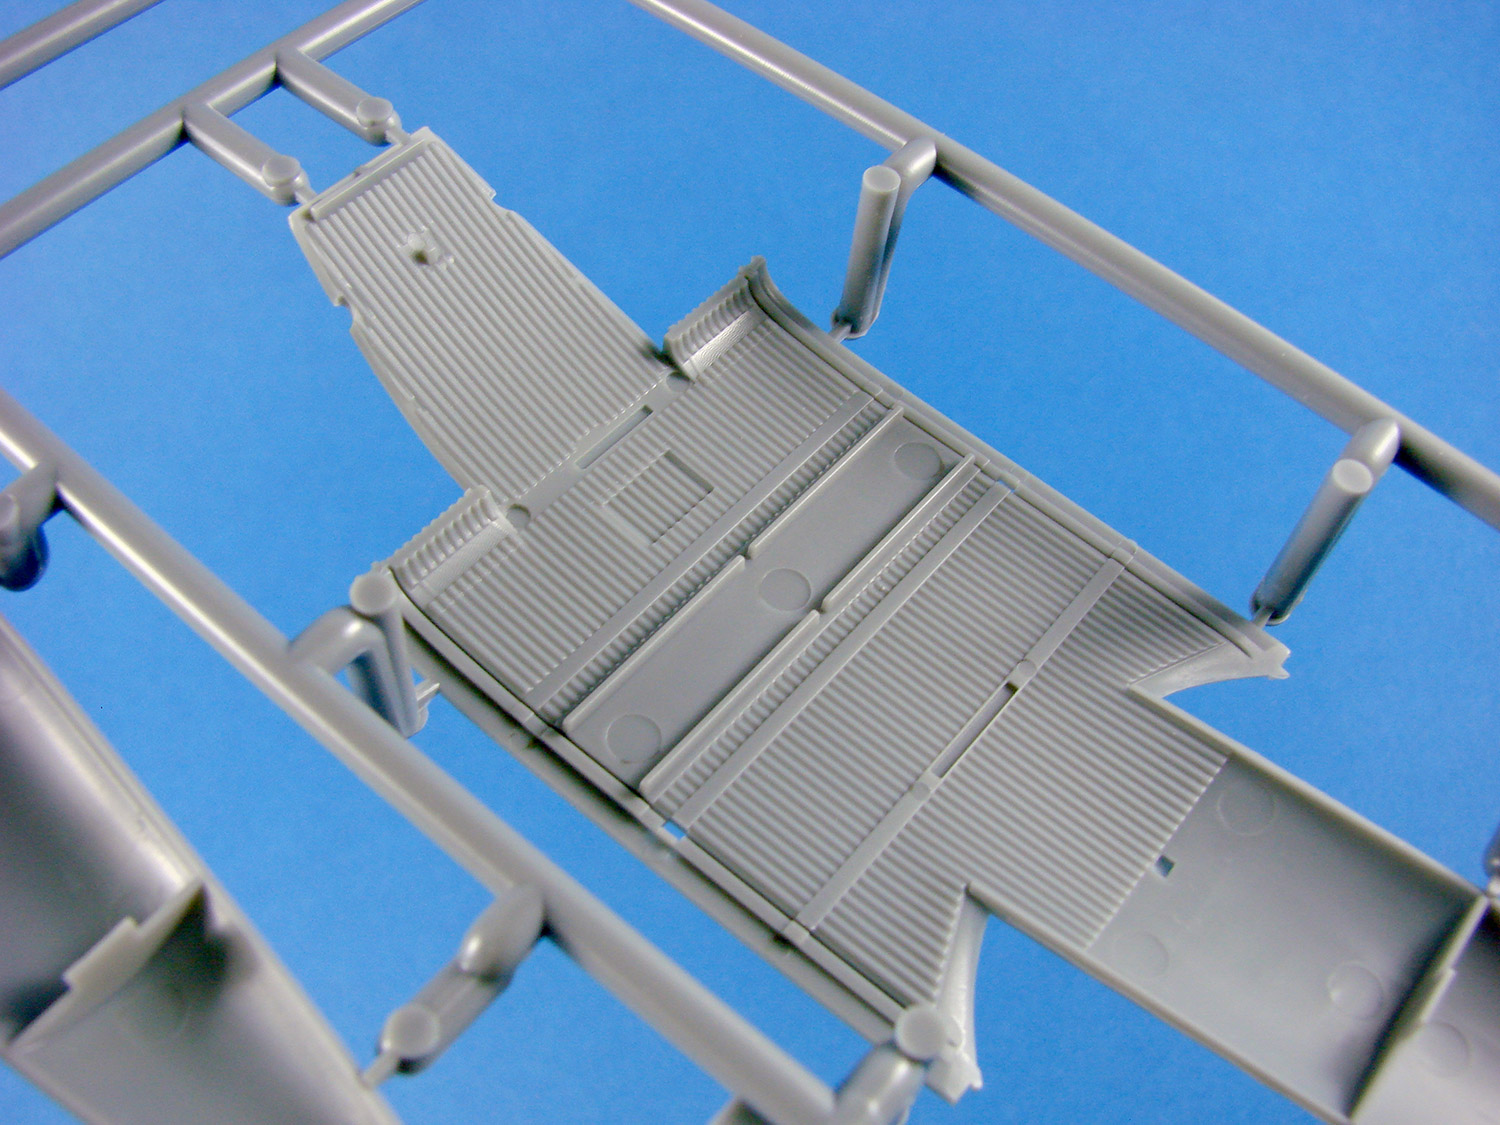
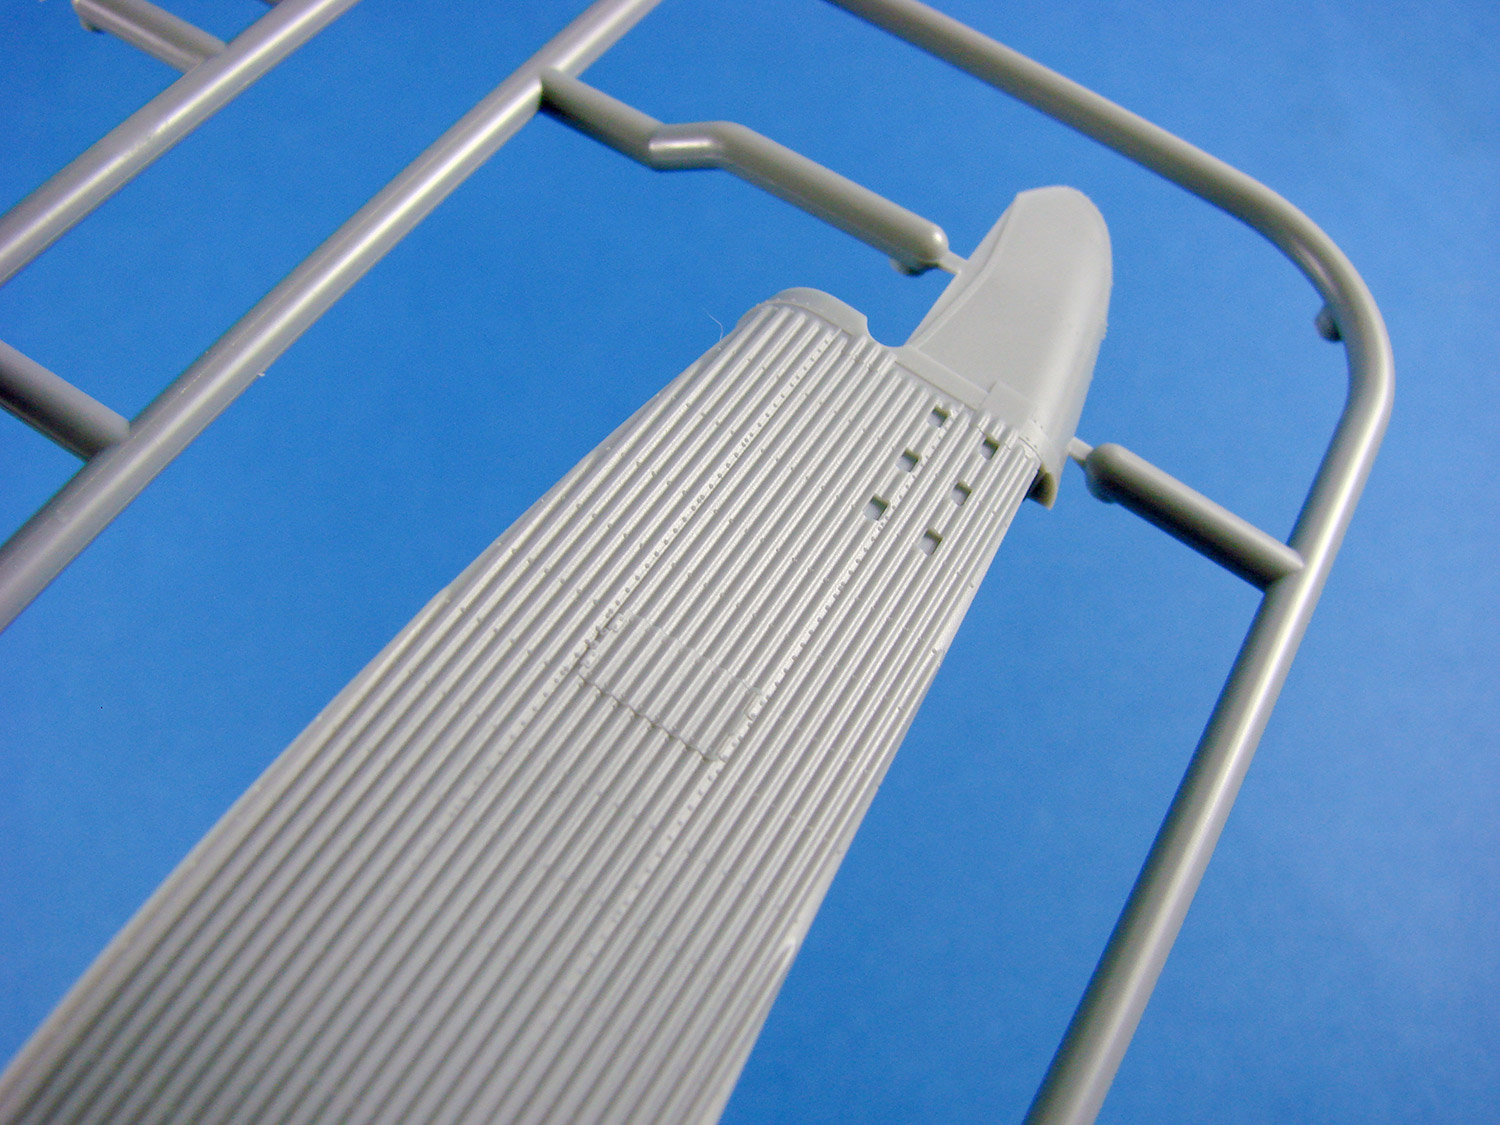
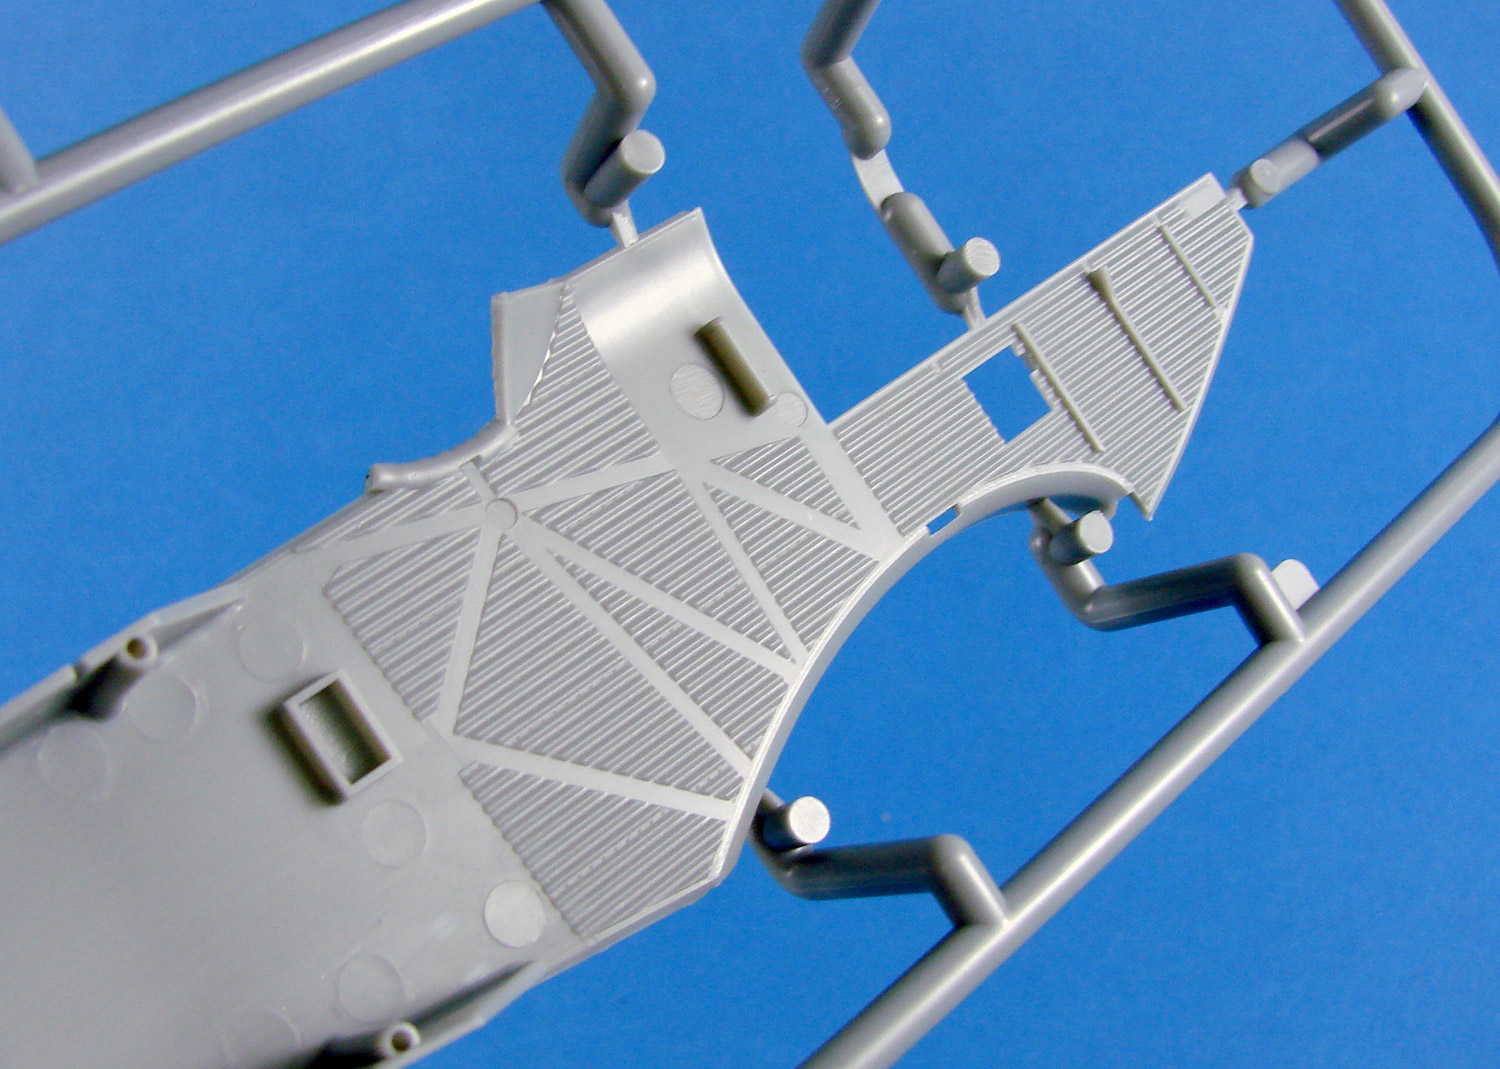
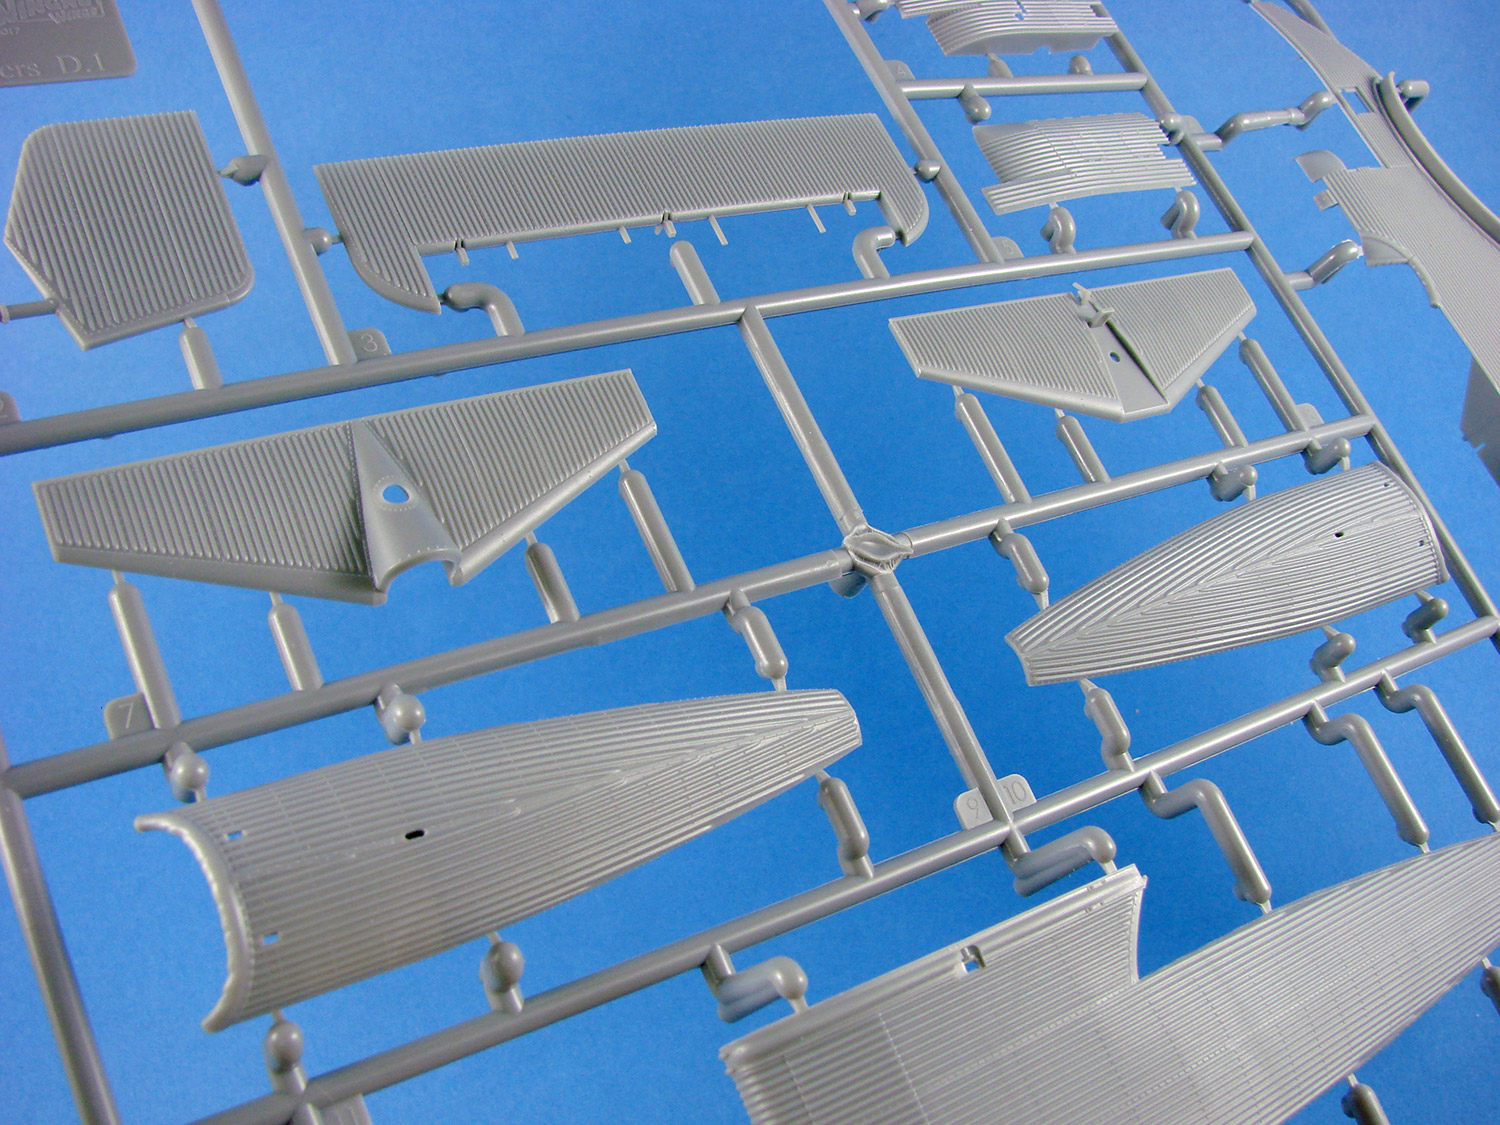
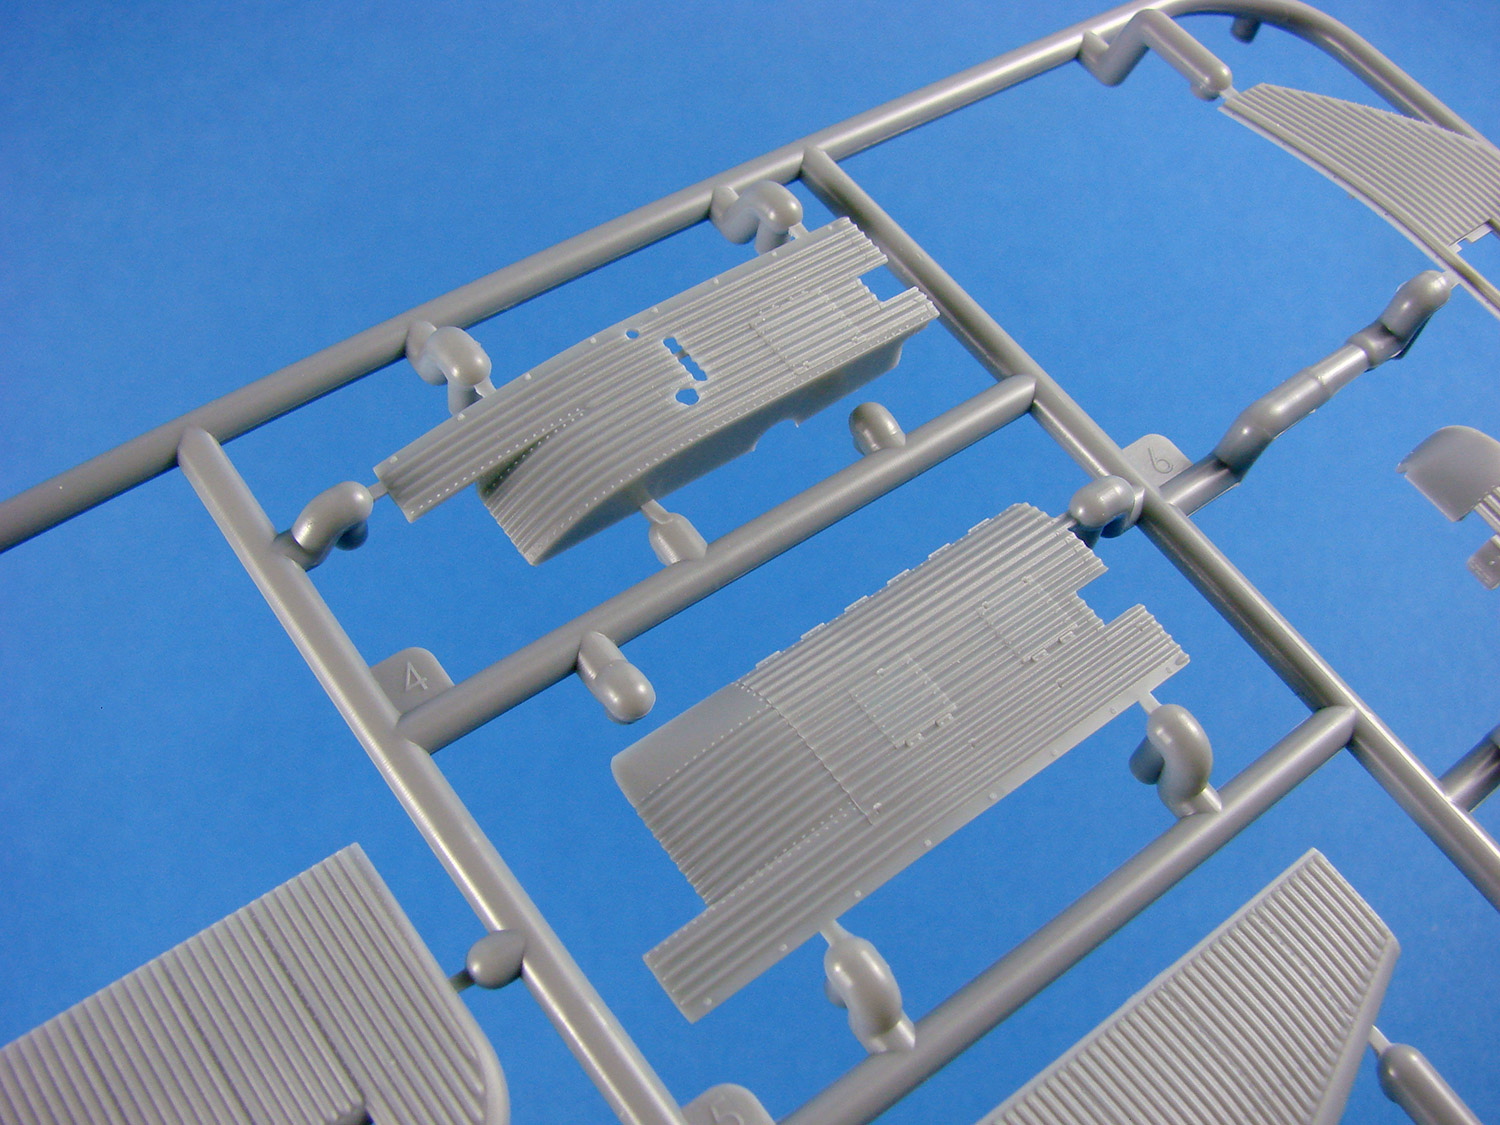
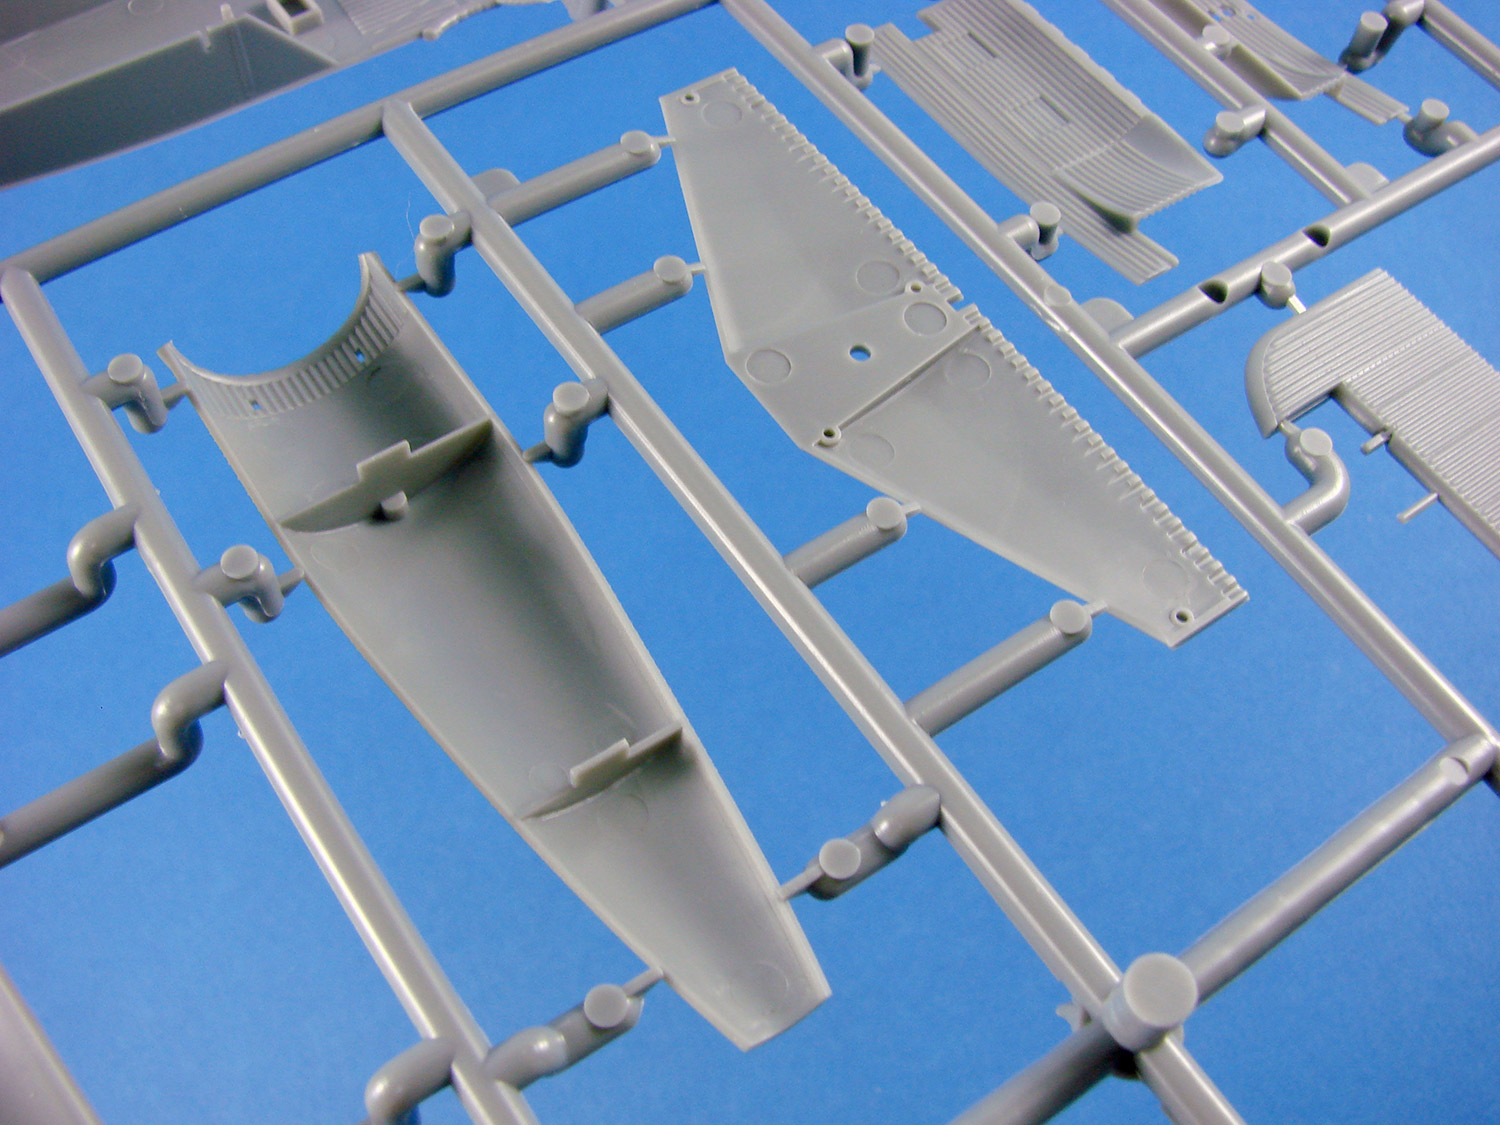
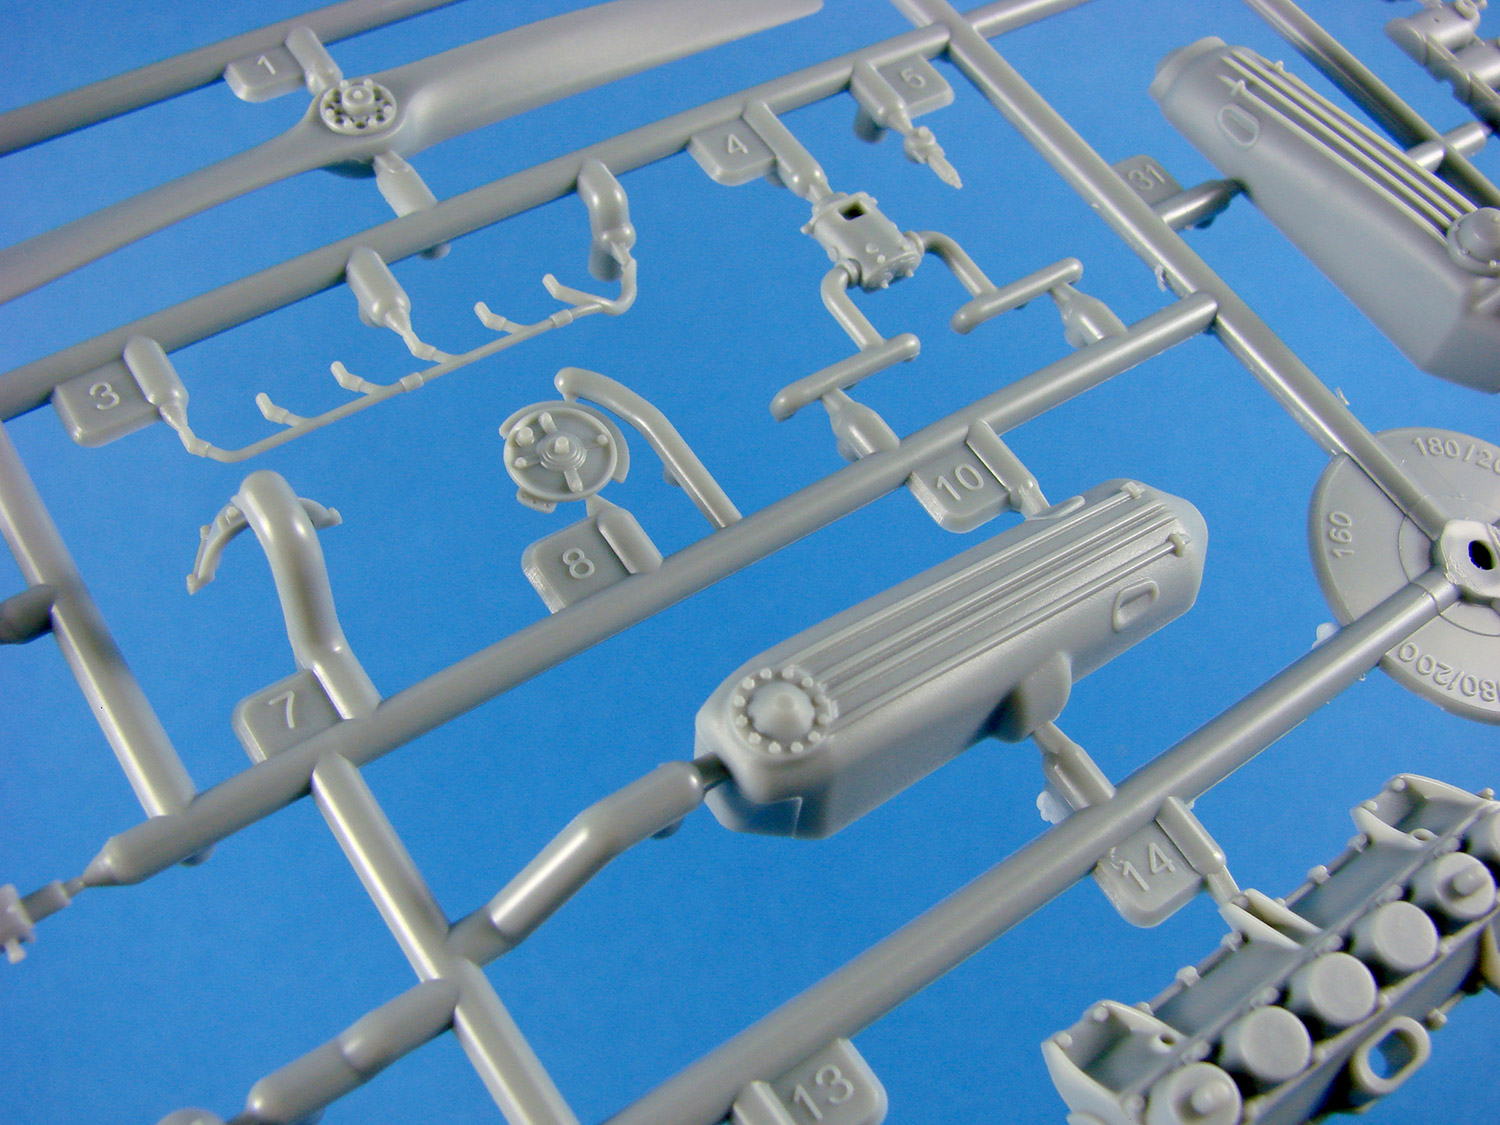
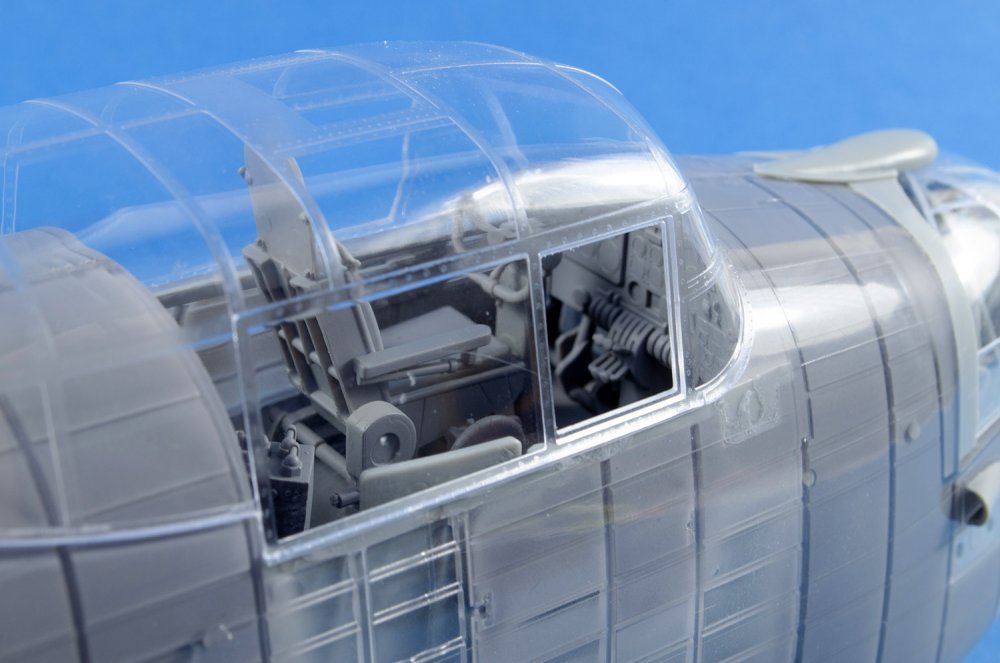
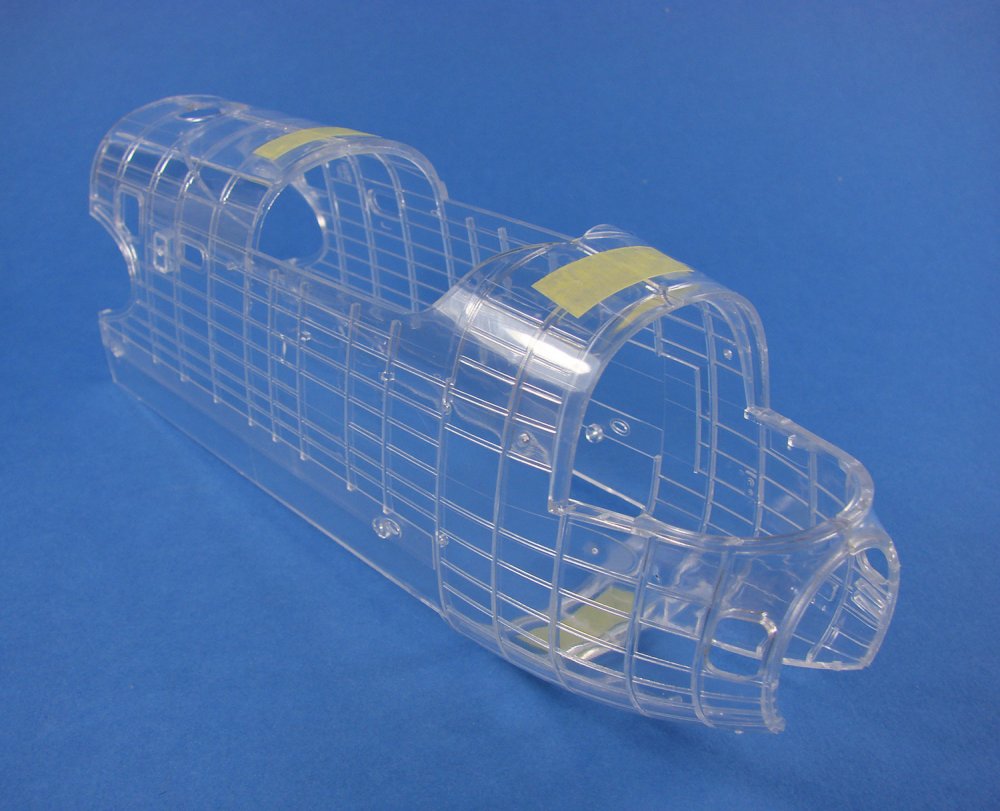
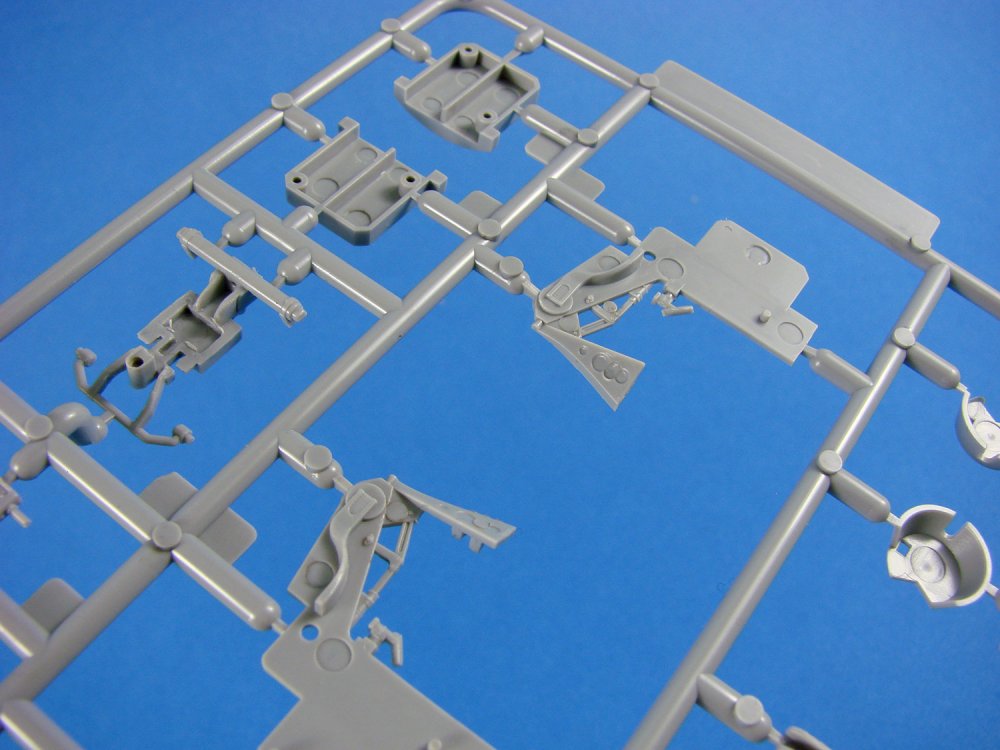
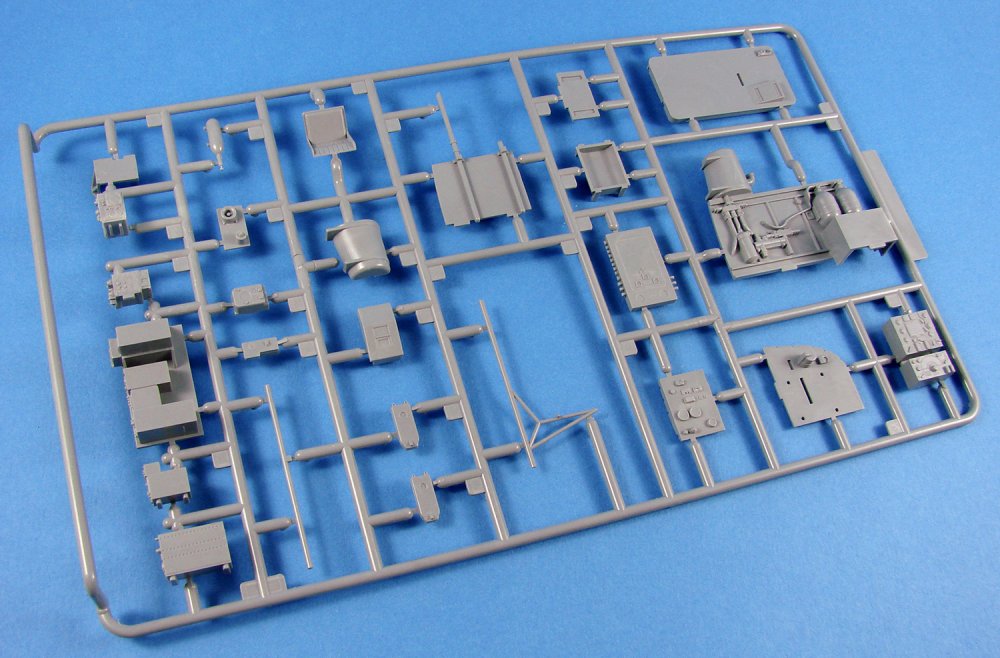
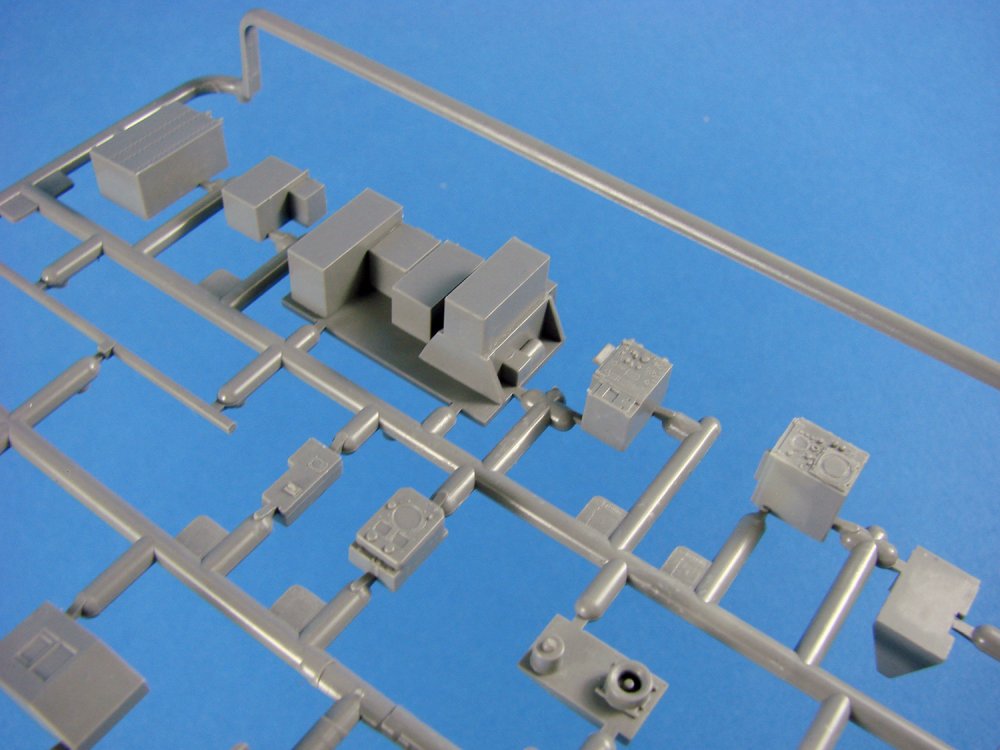
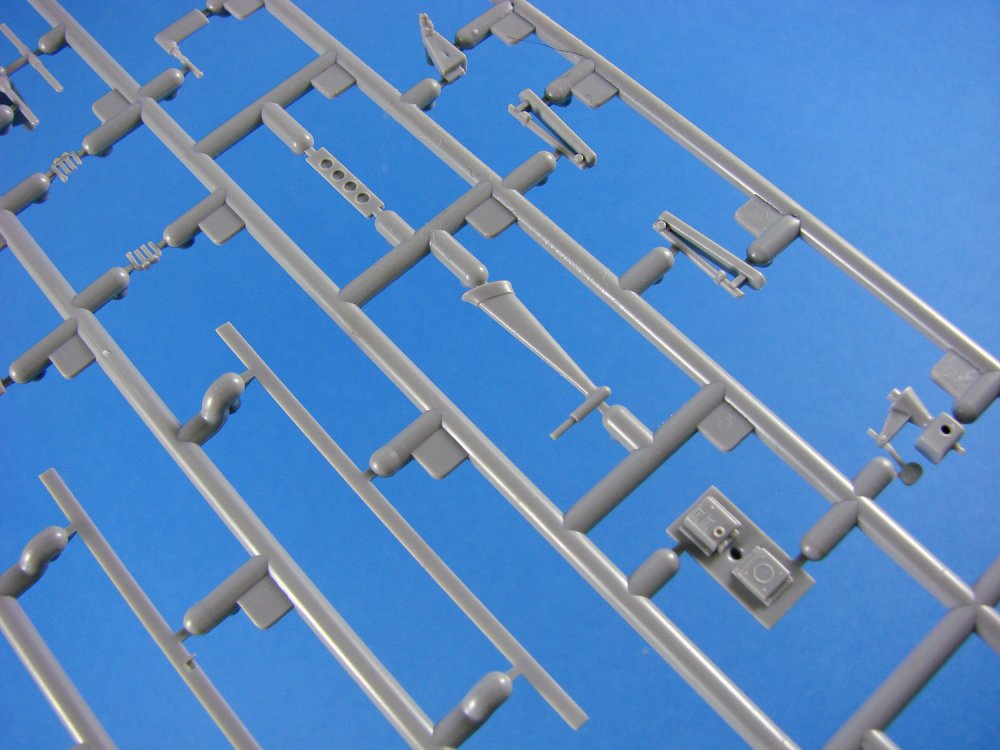
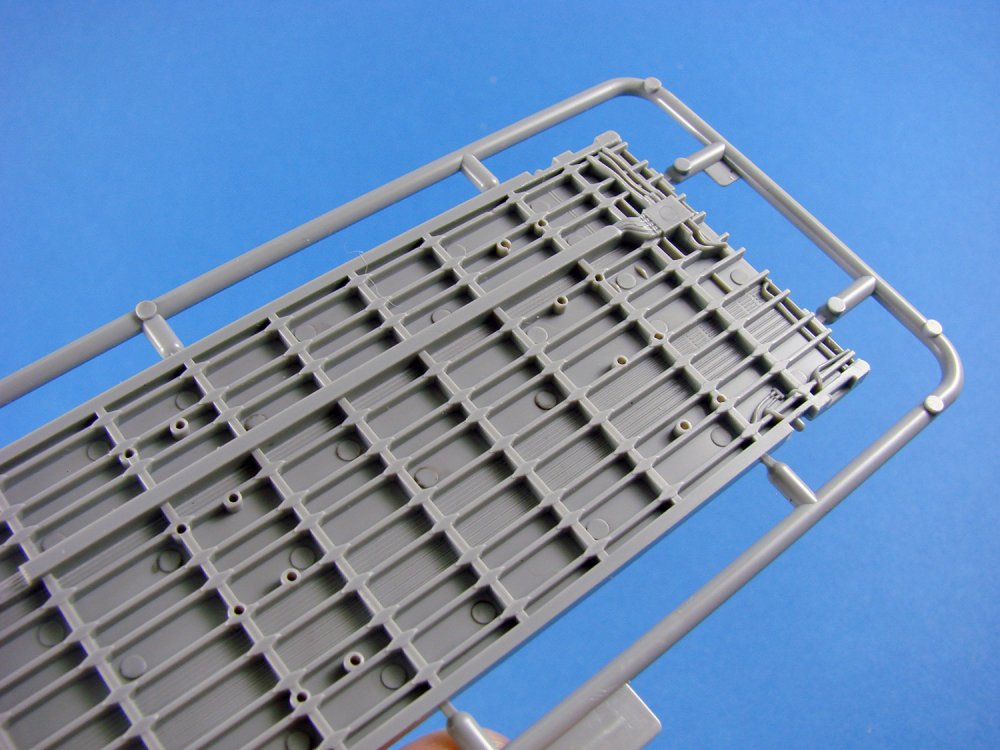
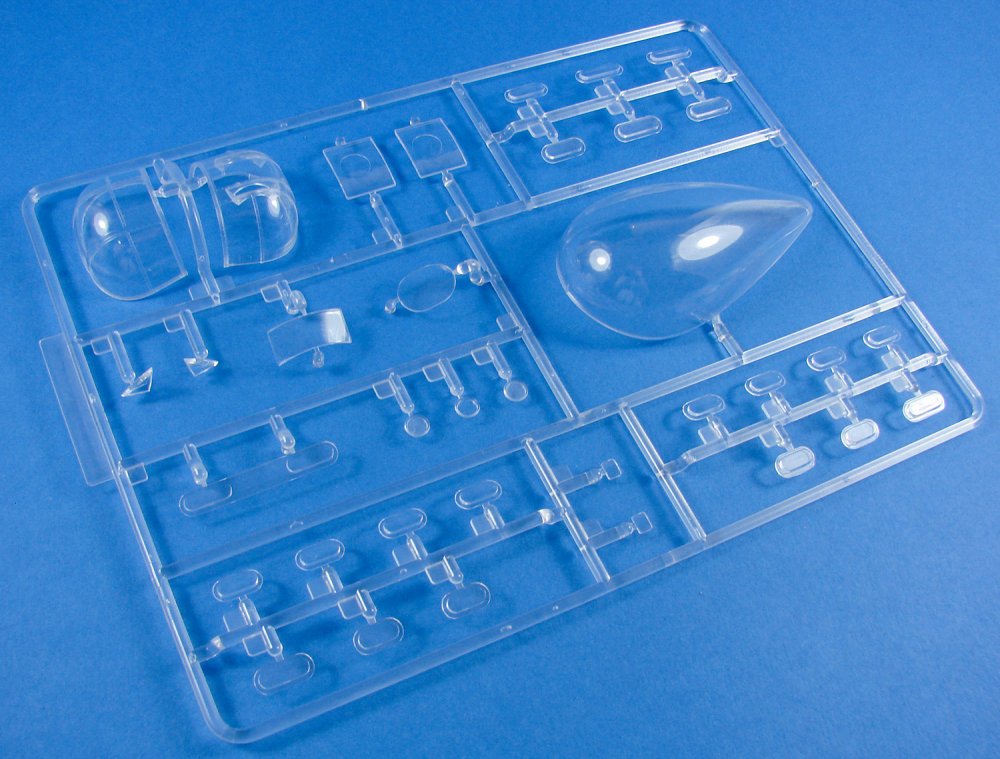
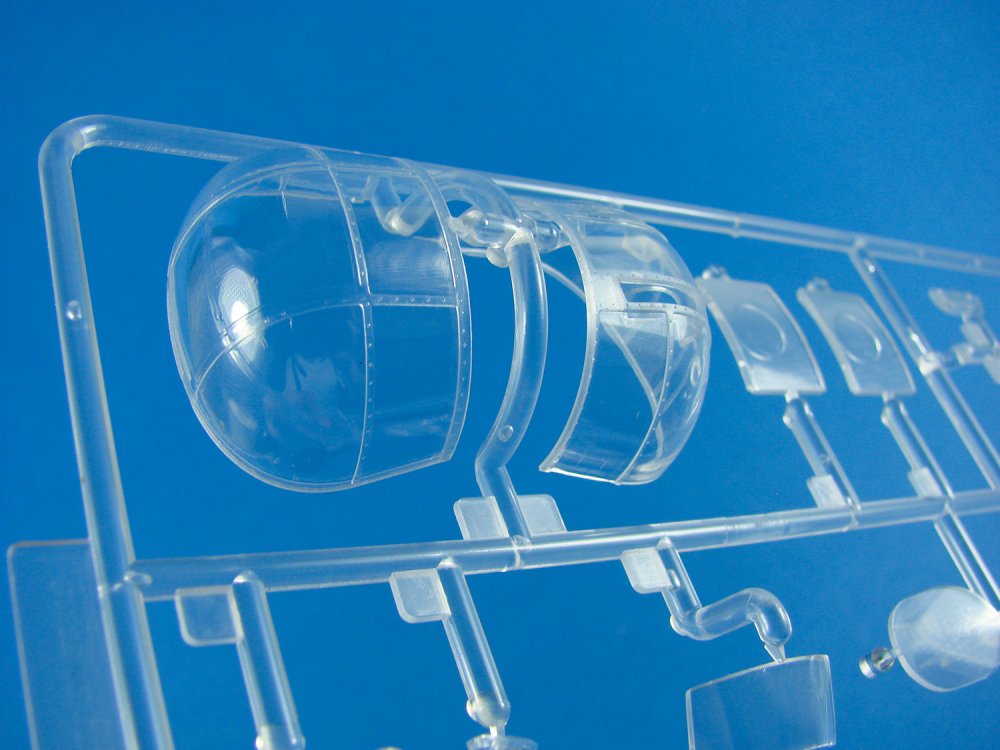
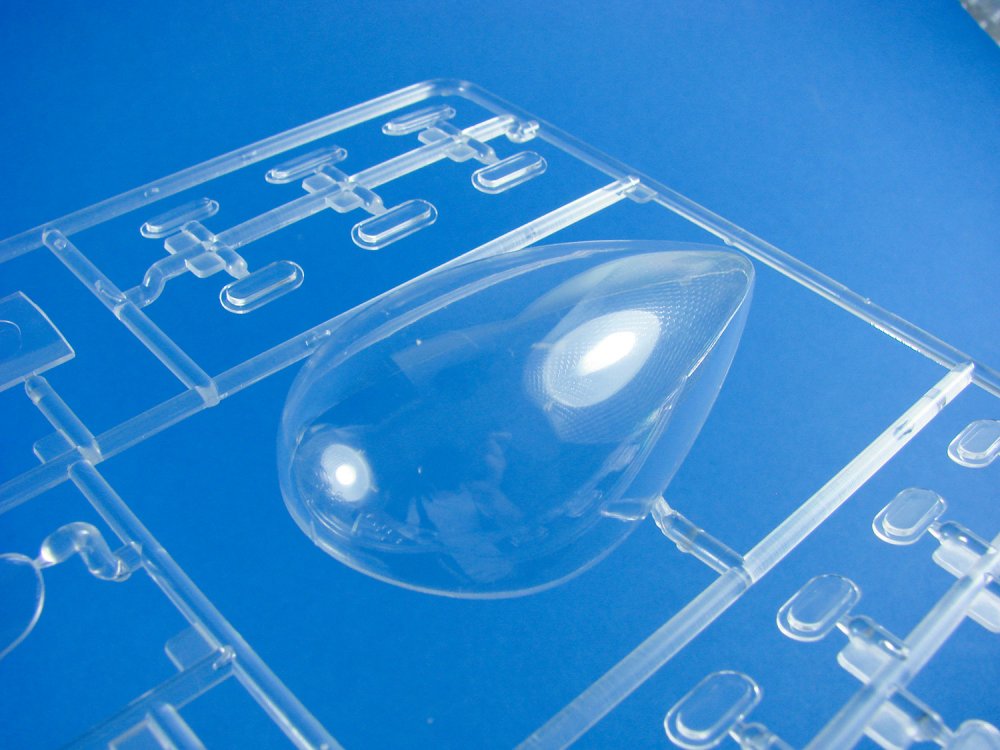
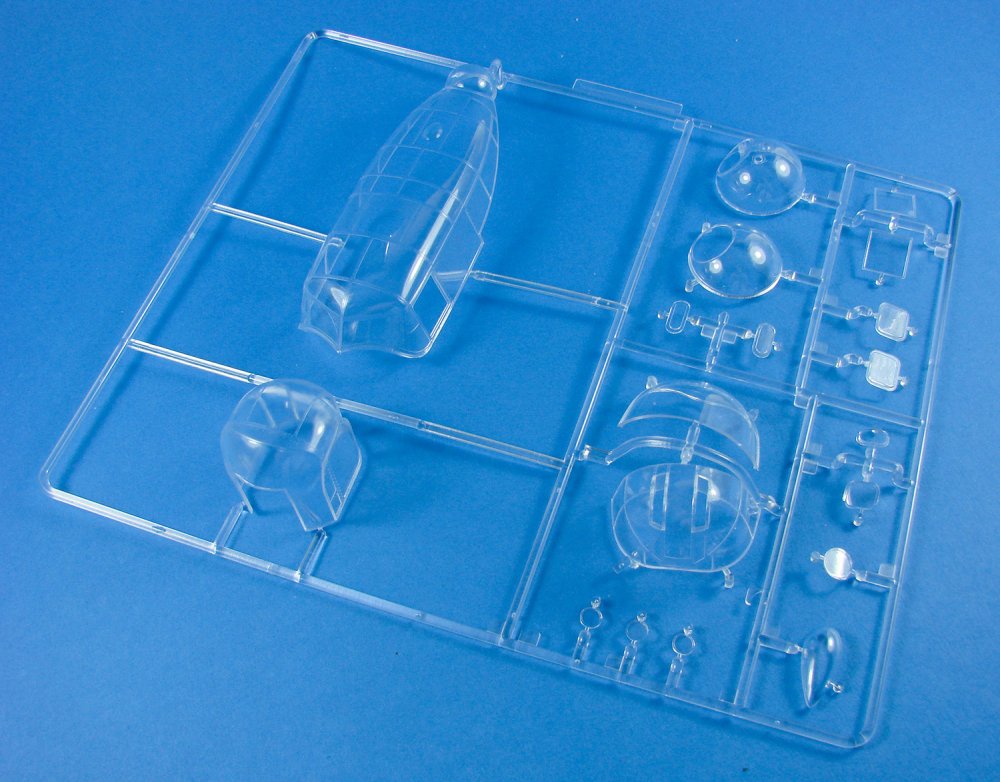
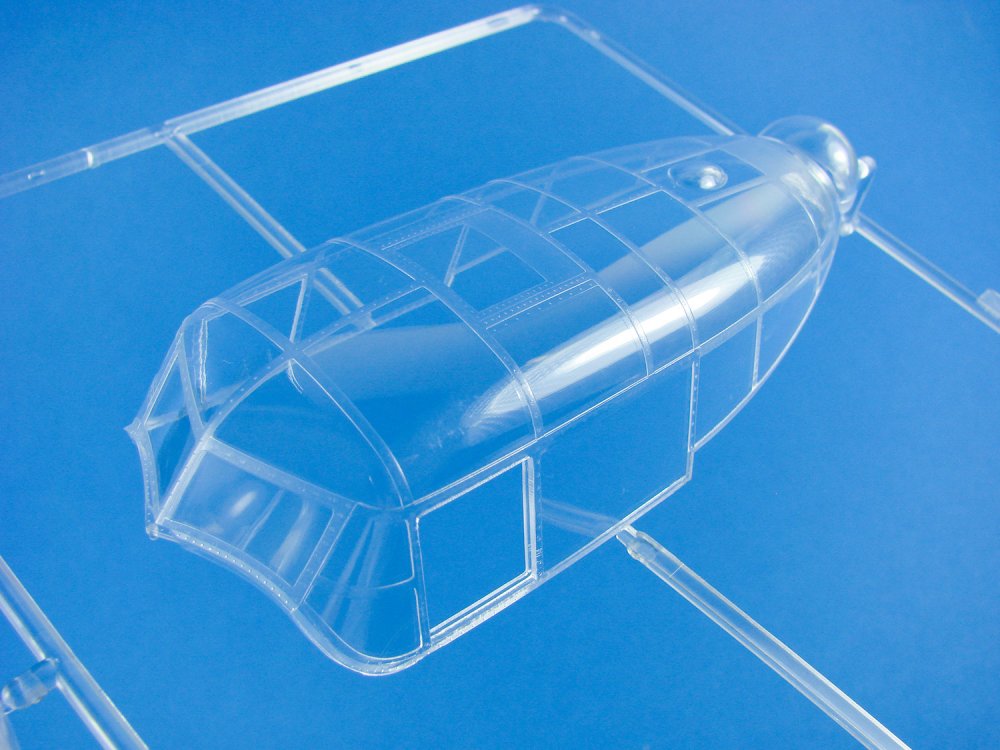
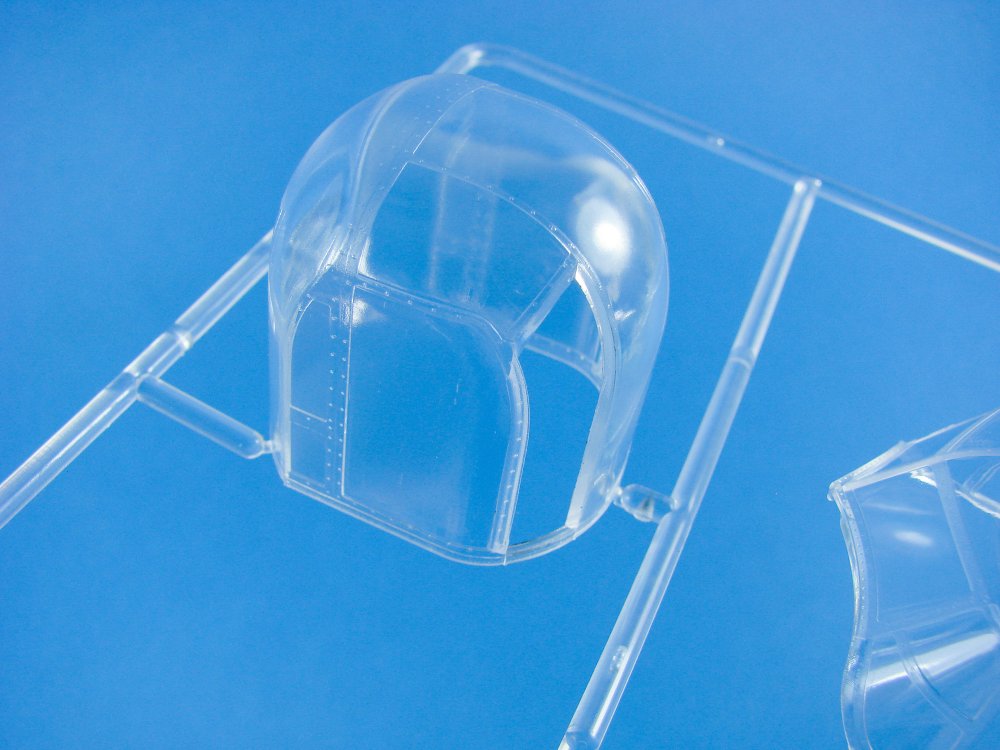
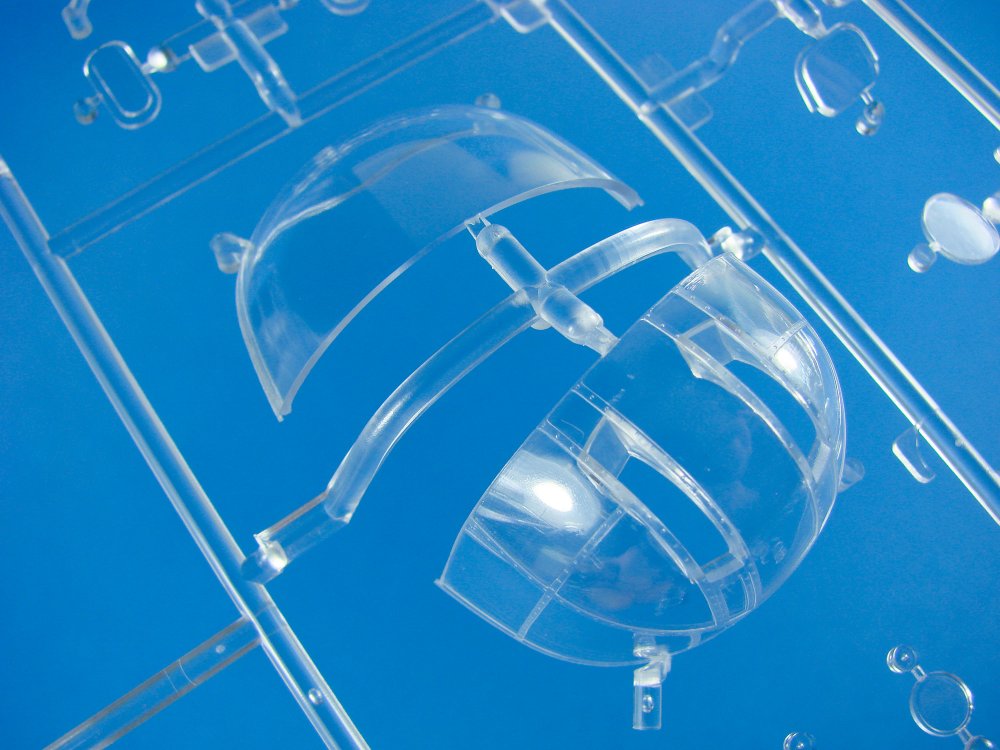
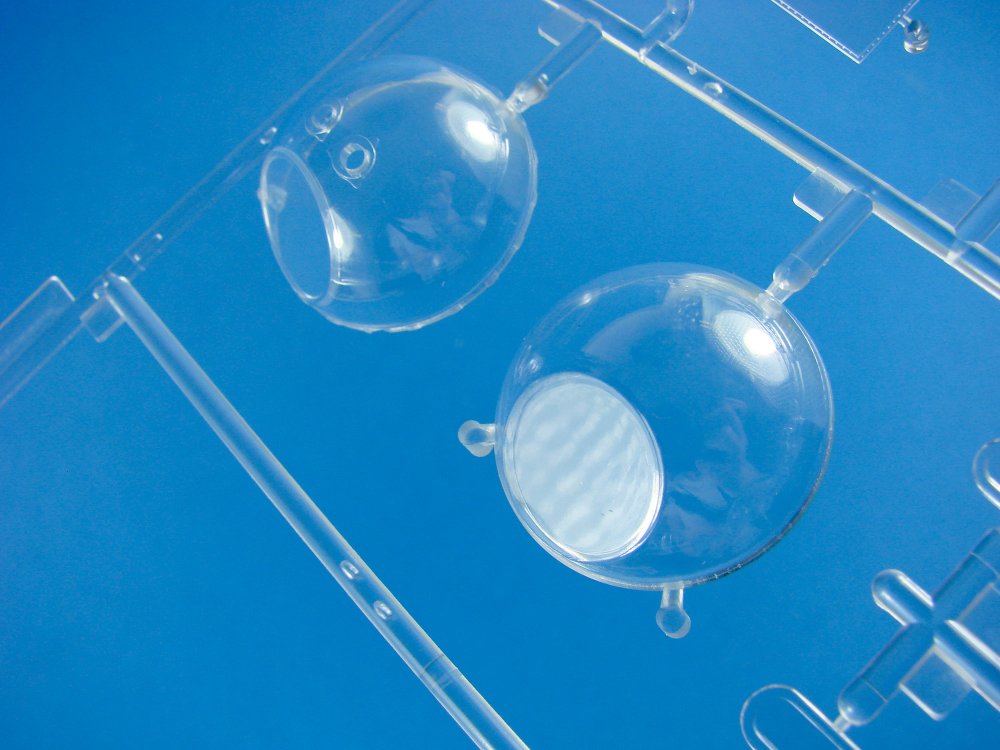
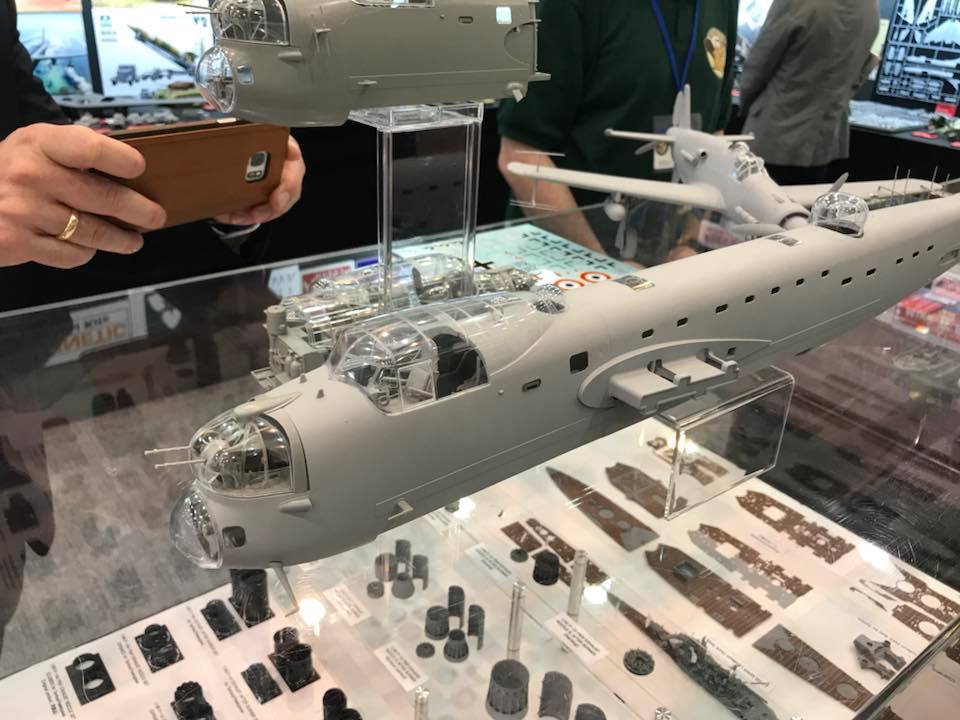
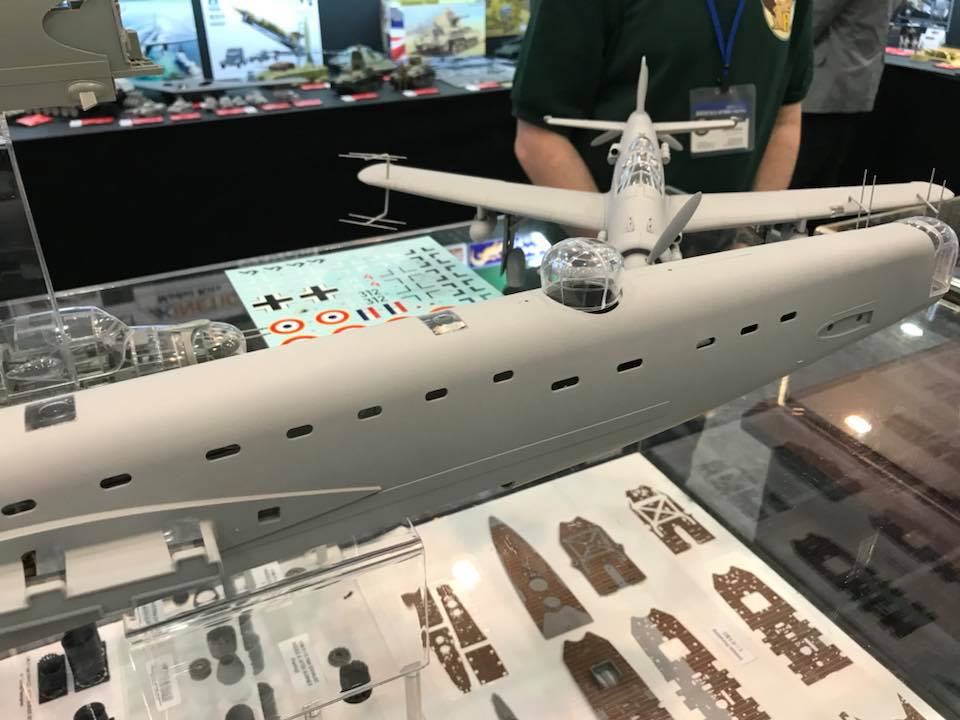
1/32 Avro Lancaster B. Mk.I Test Shot First Look Hong Kong Models Price: TBA Large Scale Modeller was lucky enough to have been in attendance at the Shizuoka Hobby Fair 2018, when Hong Kong Models’ forthcoming Lancaster B. Mk.I test shot was on display. We were also lucky enough to receive our own test shot to bring home and look more closely at, before we actually build it up for you and show you what it looks like. What you must understand from the start is that things WILLchange from what you see here, more specifically in what you see as external details, although we can’t rule out internal amendments too. As soon as the tooling was used to produce these parts for the Shizuoka show, they went straight back into the machine shop for completion. This is envisaged to last another 6 weeks, approximately. HKM has invested a lot of time in this release, and the production kit will have stressed skin appearance. Notice this is totally missing at the moment, as are panel lines and rivets. What we see here is a basic exterior appearance but with quite a comprehensive interior. One of the niggles of the B-17 was the ejector pin marks in between the various internal details. You’ll notice here that the Lancaster has no such marks and is ready for assembly and paint. The fuselage itself is split into two sections, with the nose being separate to the main fuselage. The latter is moulded with windows, as befits the early B. Mk.I machines, and this means that HKM can easily produce the windowless B. Mk.III version later, should they so choose. HK designed the split in the fuse to be the same one that Avro used in the manufacture of the bomber. Whilst the main fuselage is moulded in grey styrene, for the purposes of this test, the nose is moulded in clear styrene. This could be used for a limited-edition version in the future, with grey styrene then used as a standard edition. We’ll have to see. I’d love to see HKM release the nose as a separate kit too, so the modeller can choose to maybe build a range of nose-art subjects. Now that would be verycool indeed. The interior of the fuselage has stringer and frame details from front to back, with the nose section fitting cleanly to the main fuselage. For the upper turret, there will of course be a fairing, but this is on a sprue which is currently unfinished. You’ll see it in the final release. We all know the levels of detail in the B-17, and this seems to perhaps surpass even this landmark kit. In my photos you’ll see much of what constitutes the interior of this future release, along with some images I’ve included from the Shizuoka show. I don’t have all the interior here, with there being parts missing that belong to the main interior, plus some floor and bomb bay sections, but you’ll get a general idea. Having seen the CAD as well as the test shot, HKM seem to have very much captured that interior, including the infamous main spar area, and the stabiliser as it passes through and into the rear fuselage area, just forward of the tail turret. Also of note are the double doors that separate the rear turret from the fuselage interior. Please remember that I’m still exploring this kit at the moment and will get a better grip on things as I start to glue things together, and I’ll share those findings here. Internals are included for the forward turret in my test shot, but not for the others due to the fact that the tooling process is still ongoing. I hope you get the general gist from what I can show. I received two clear sprues for this model, with some extremely nice details. The main canopy is almost a single part, with the two forward side windows being separate parts. Forward and upper turrets are moulded as halves whilst the rear turret is a single clear part. Also note the inclusion of the blister for the H2S radar which would be fitted to a later variant. Two nose blisters are also included. These are the early production shallow blister, and also the deeper type used on later versions, again hinting of course at the B. Mk.III being a future kit. Note that a canopy blister is also supplied as a separate part. As soon as I have the final test shot for my magazine work, I’ll provide a clearer and more expansive look at this much anticipated release.


-
I got some 1/32 Lancaster test shot sprues in Japan, so will post some photos later
-
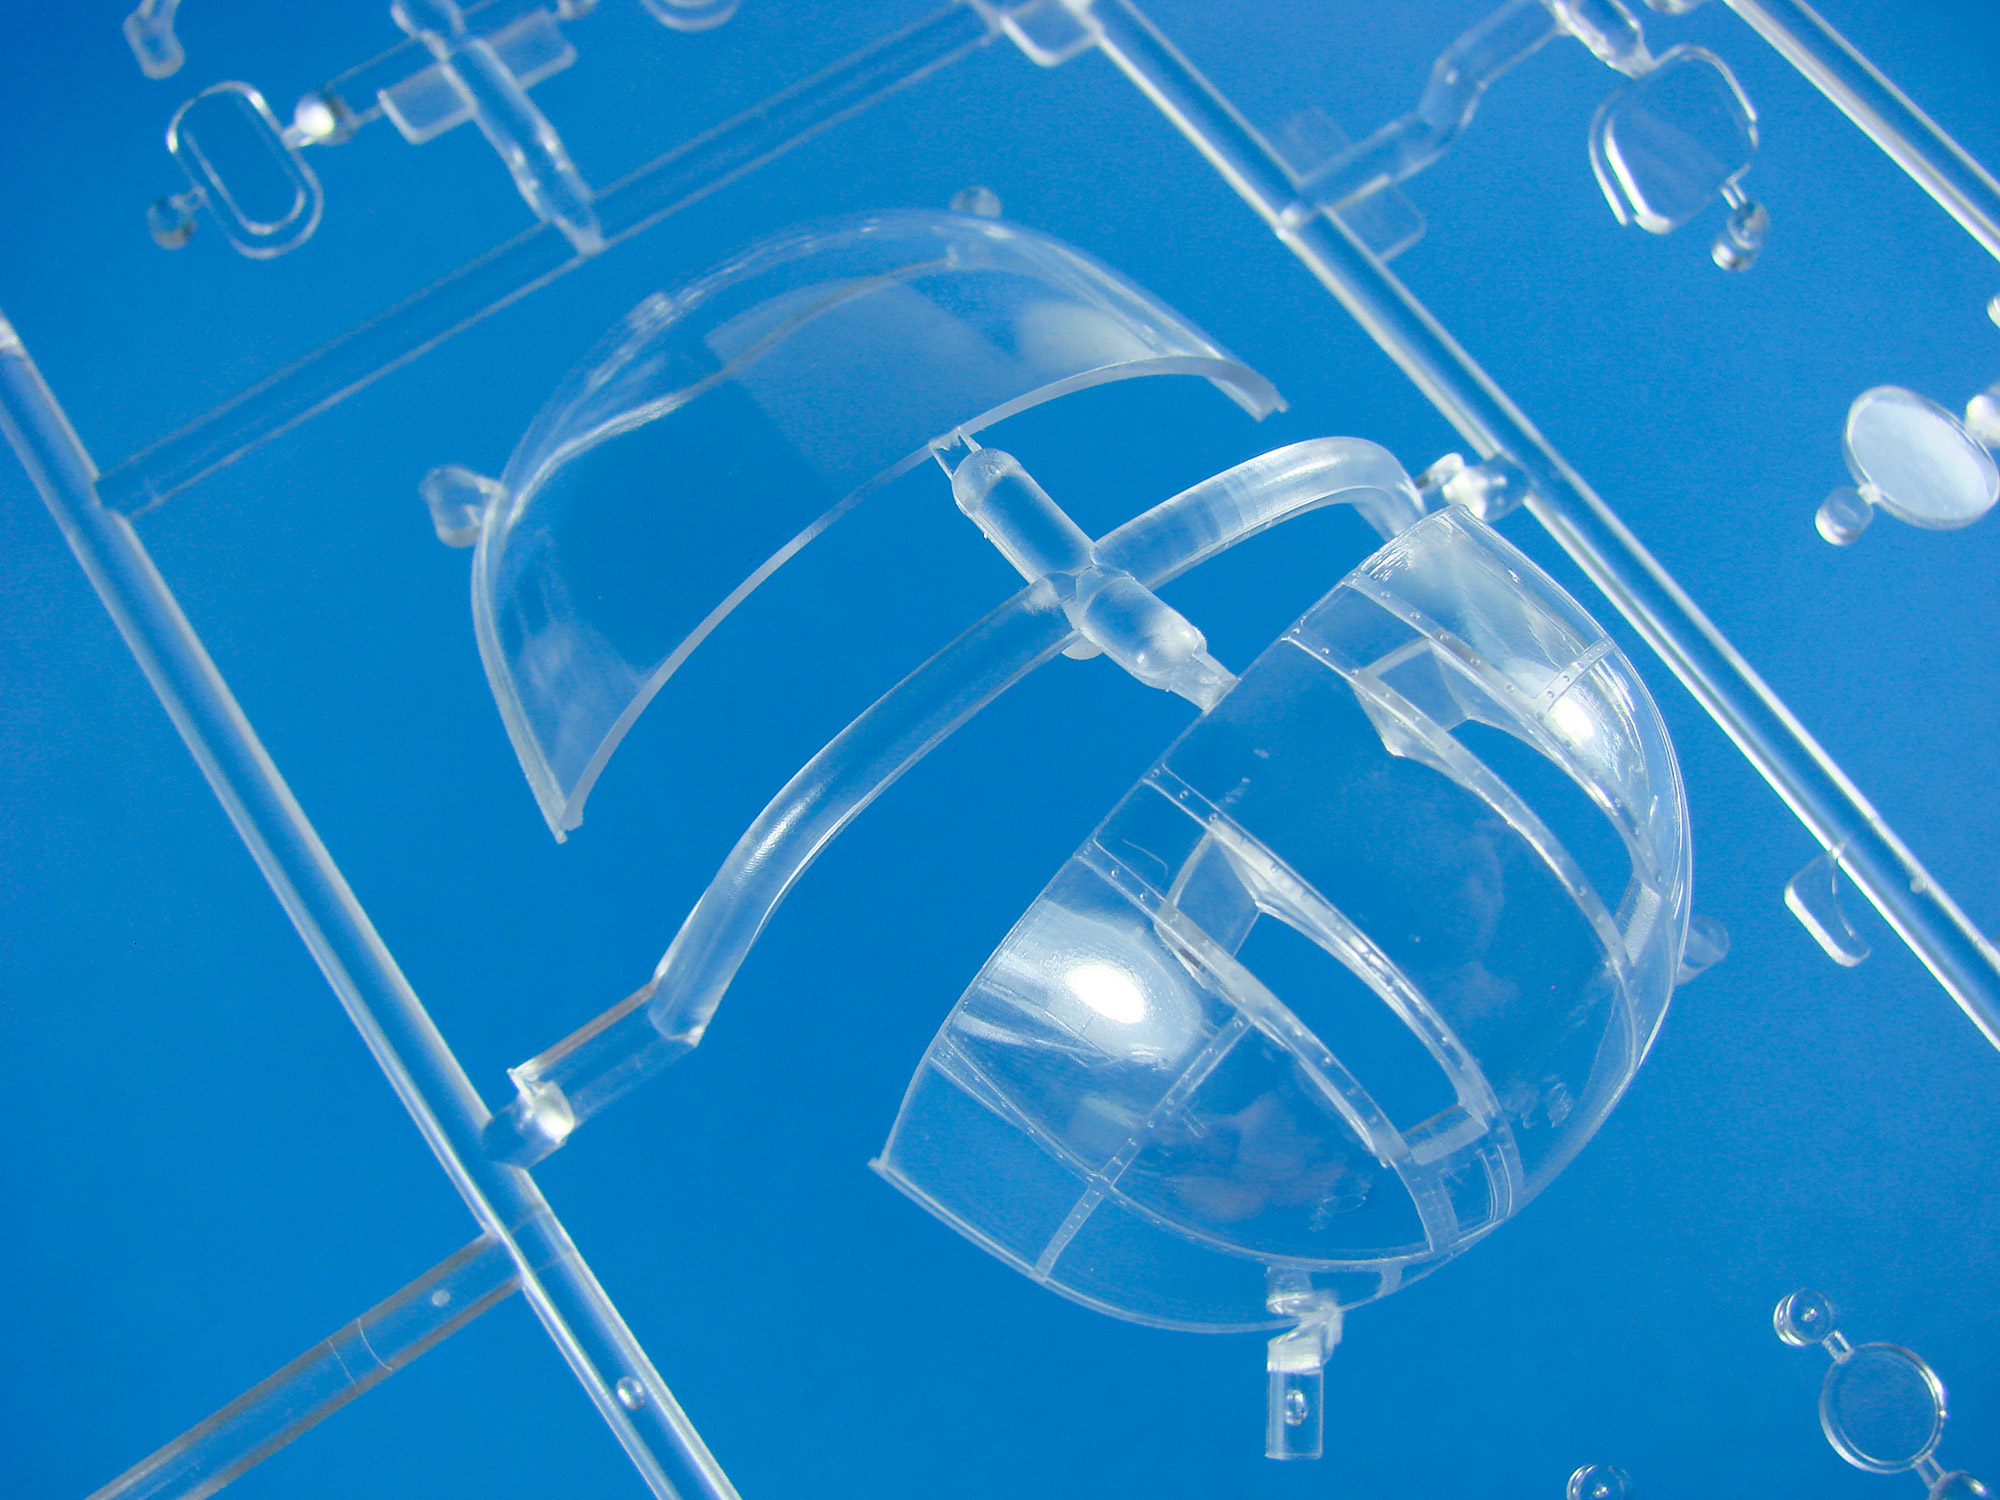
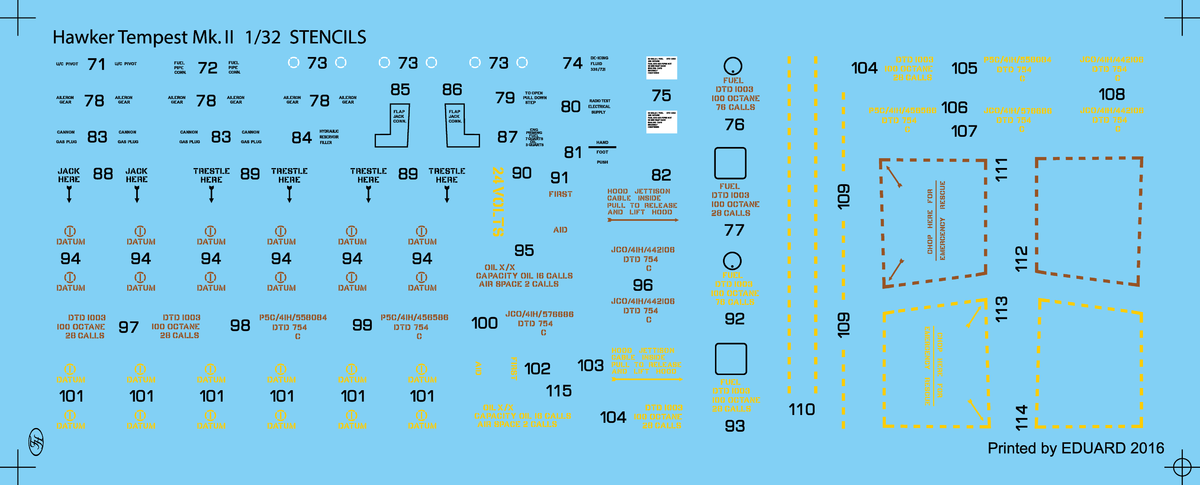
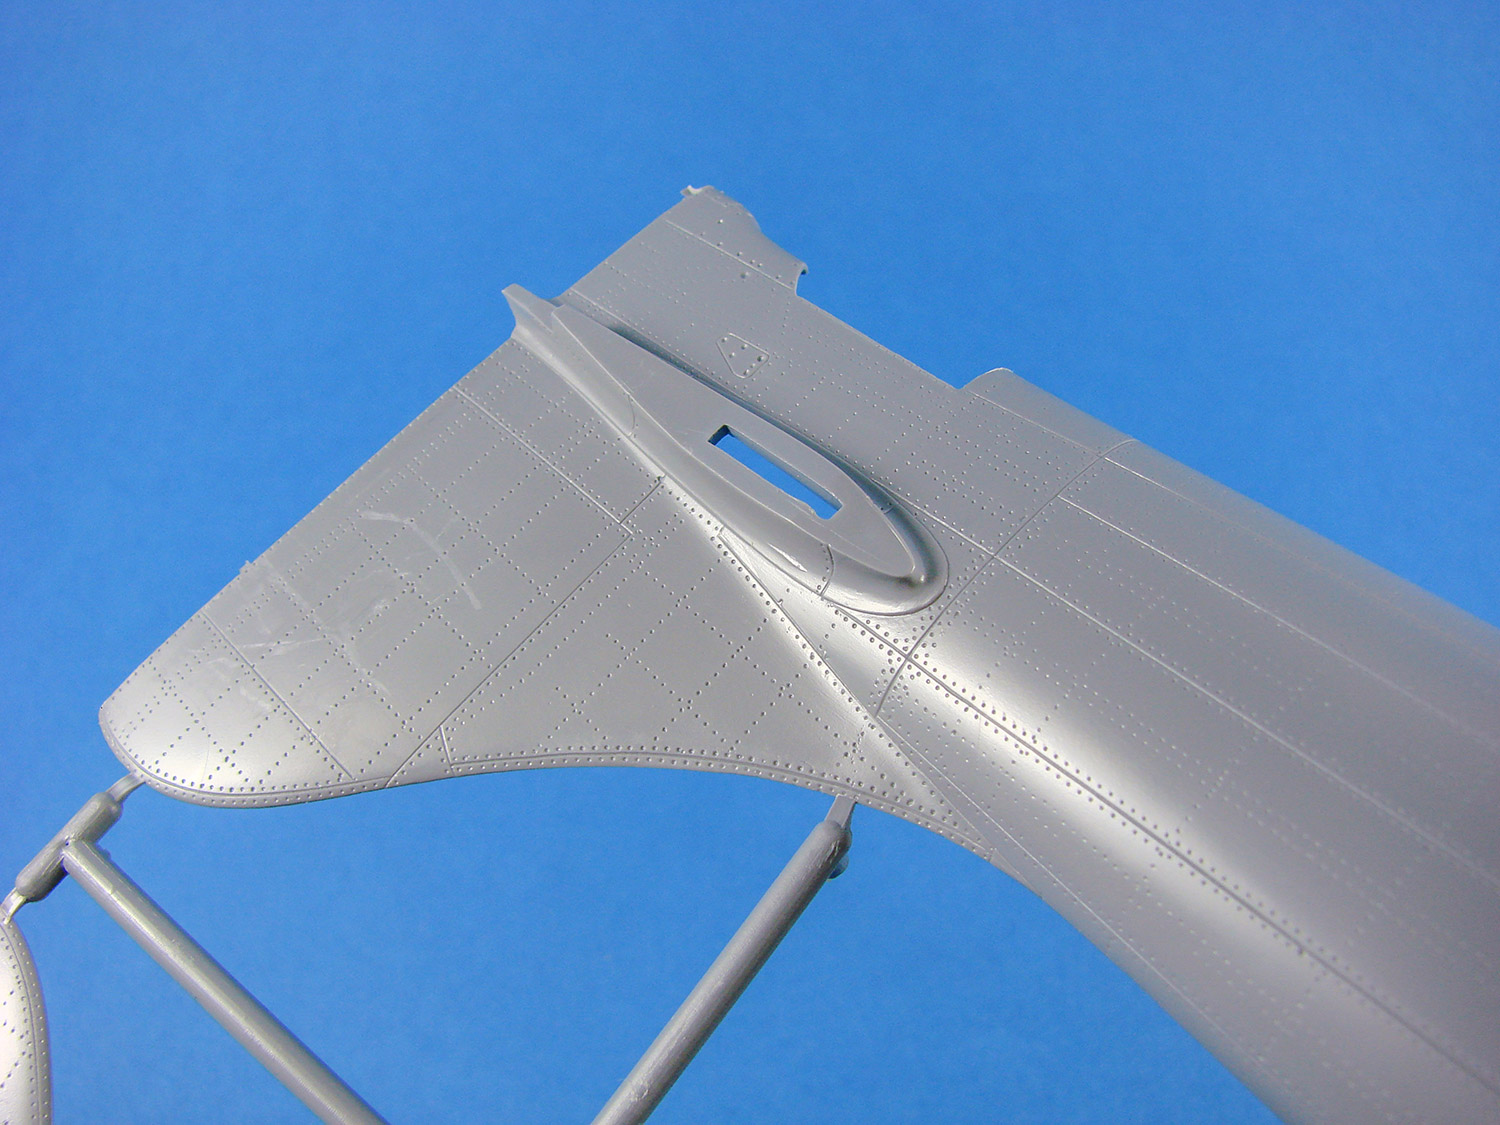
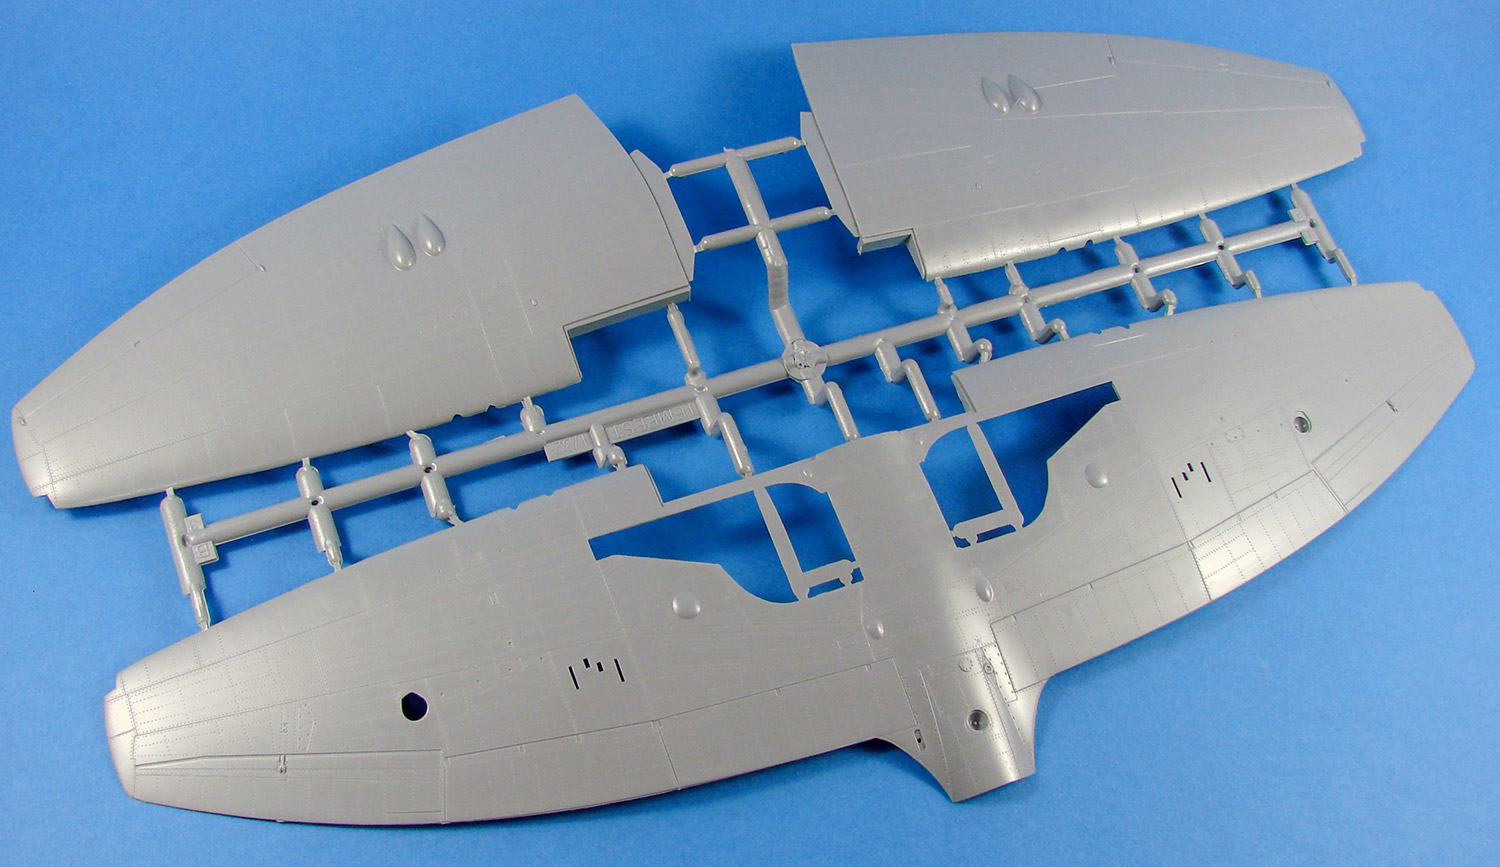
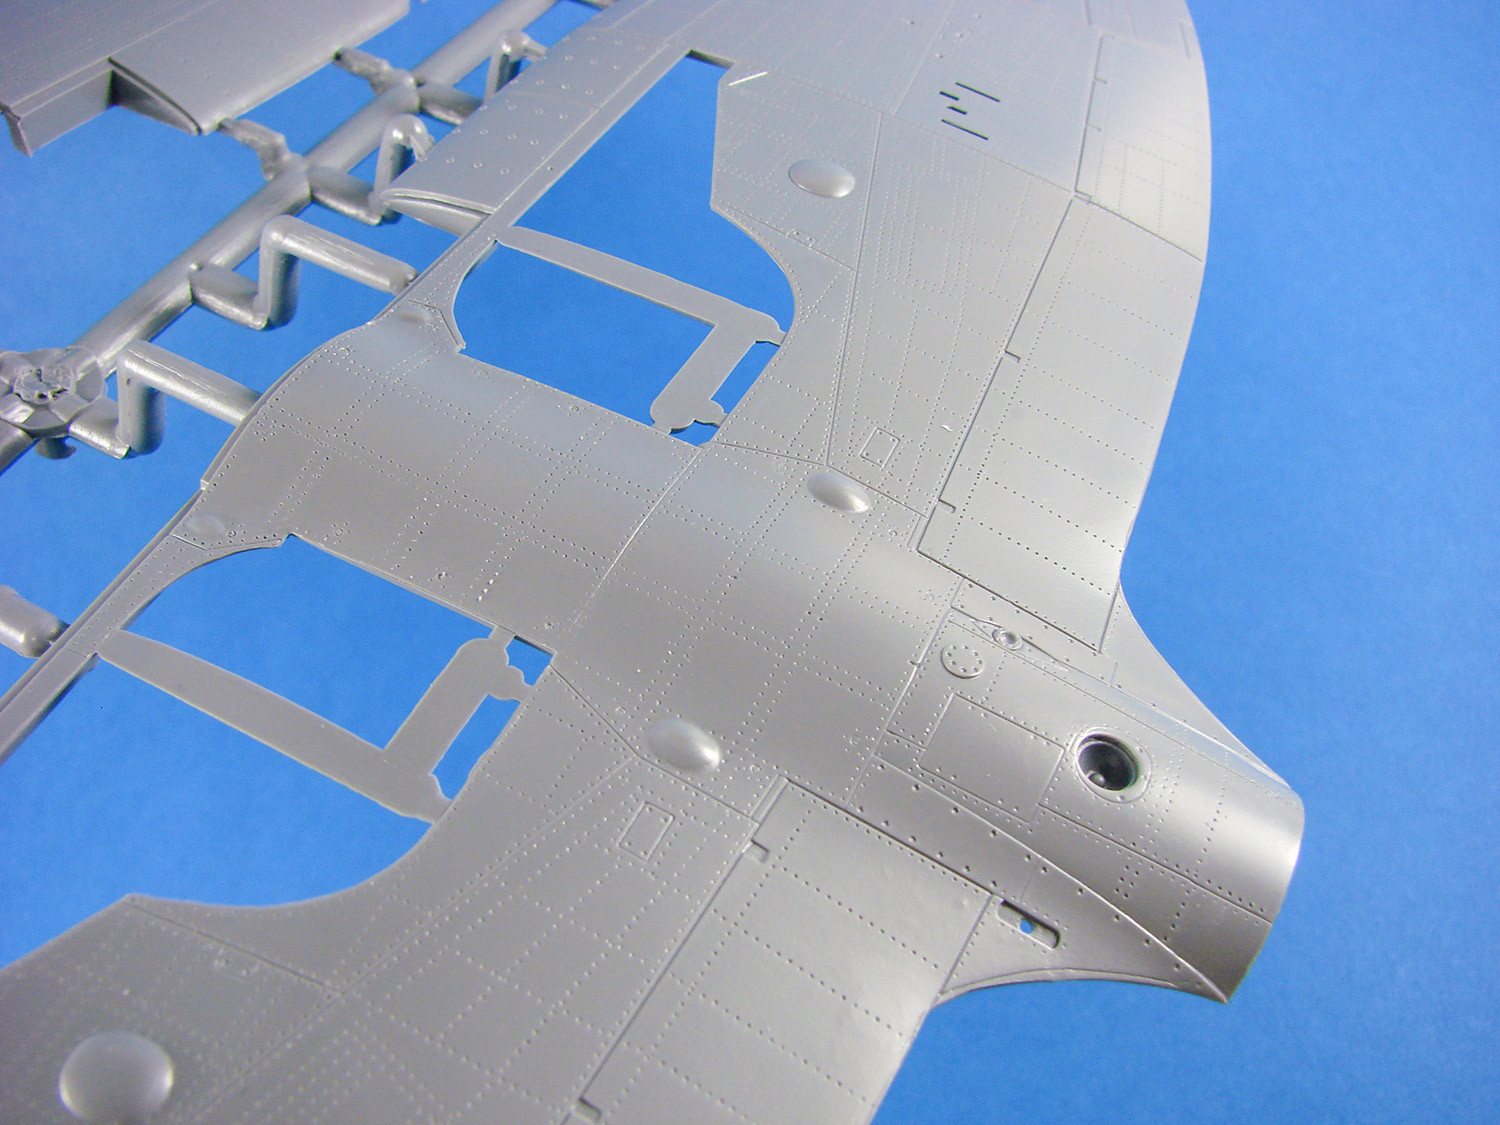
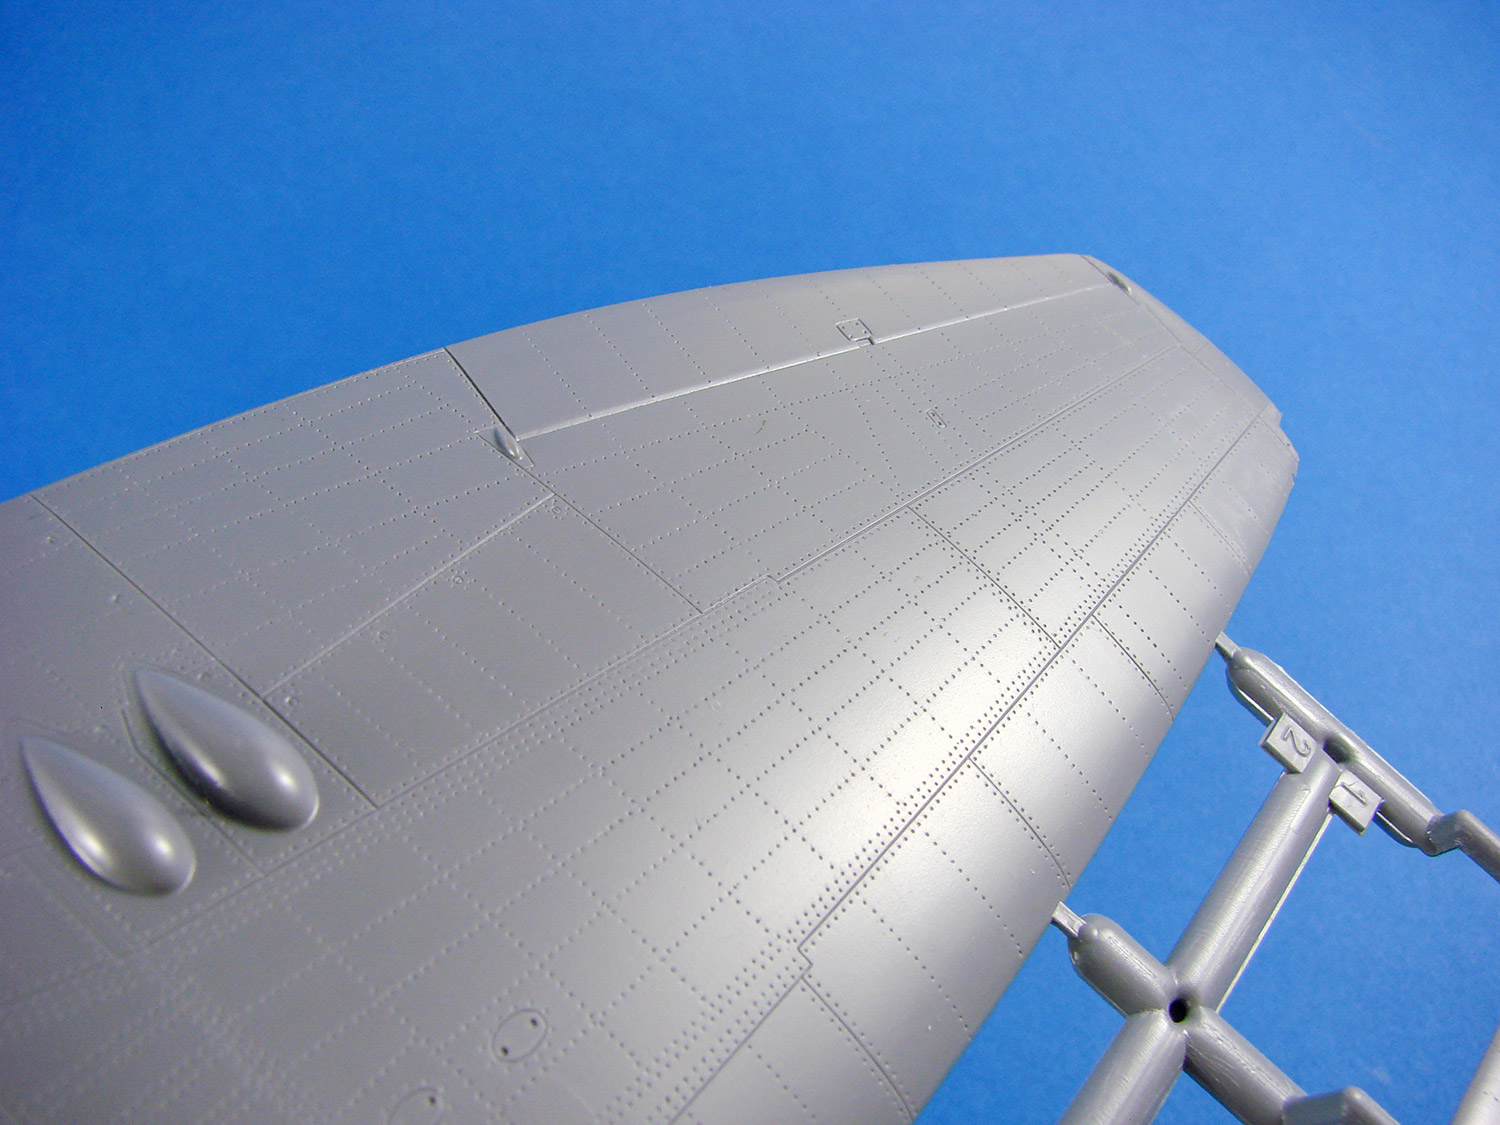
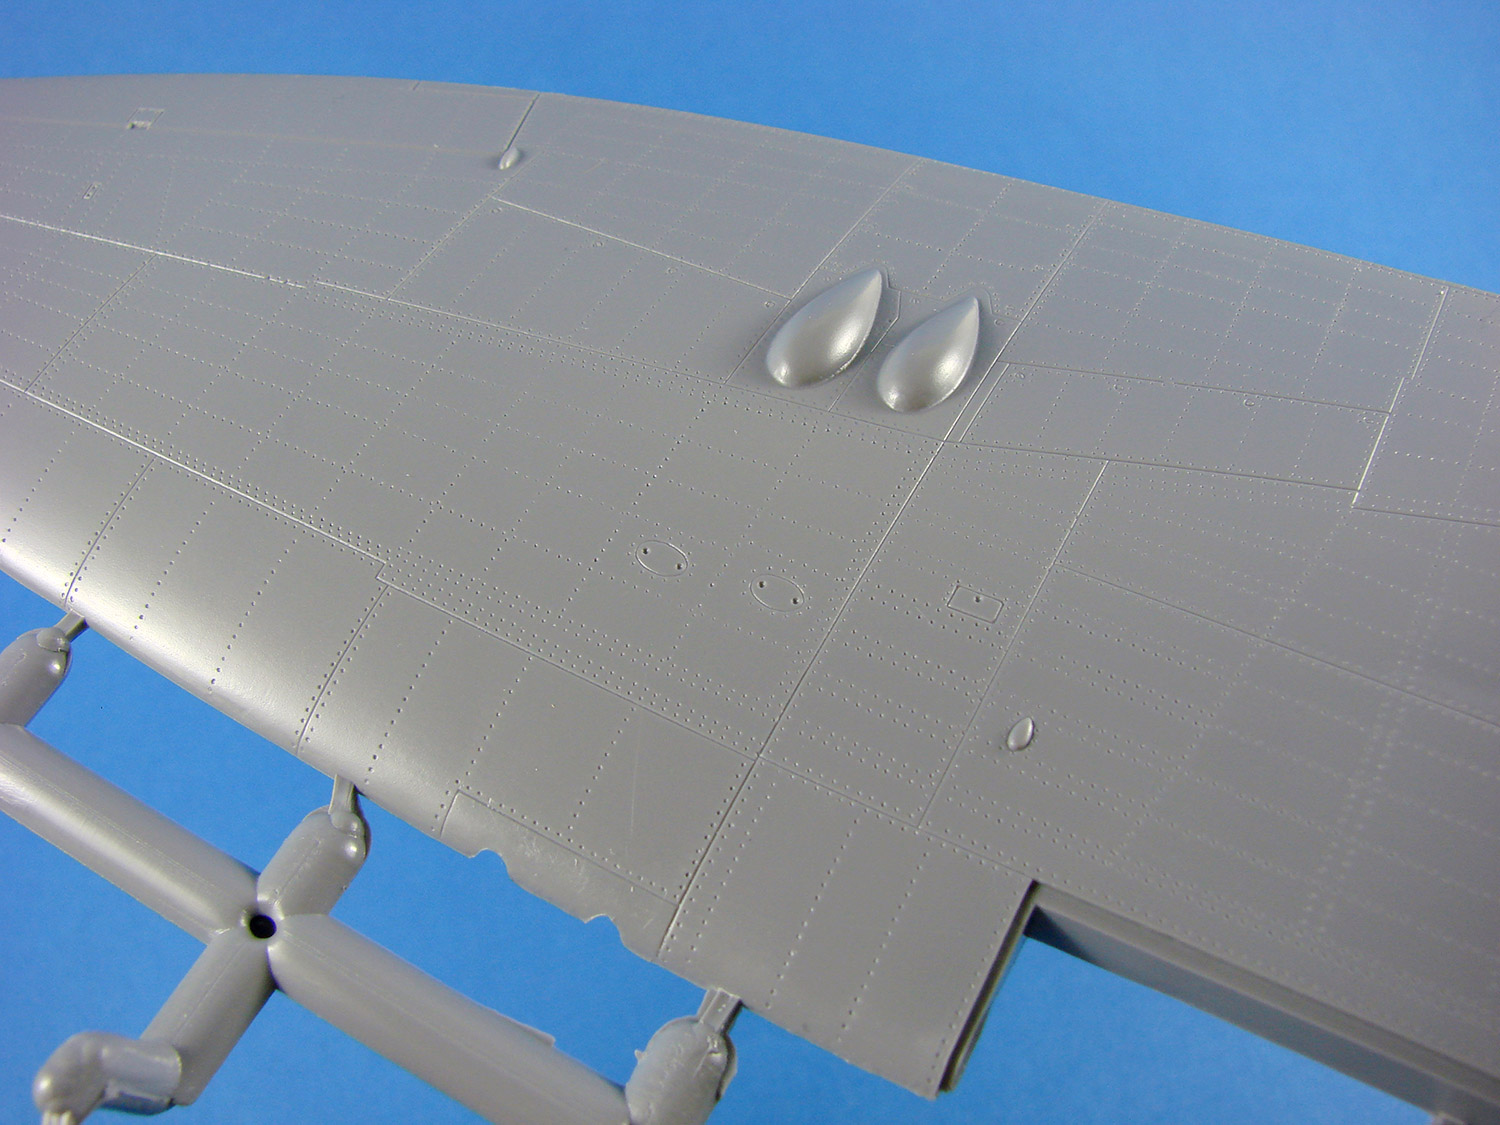
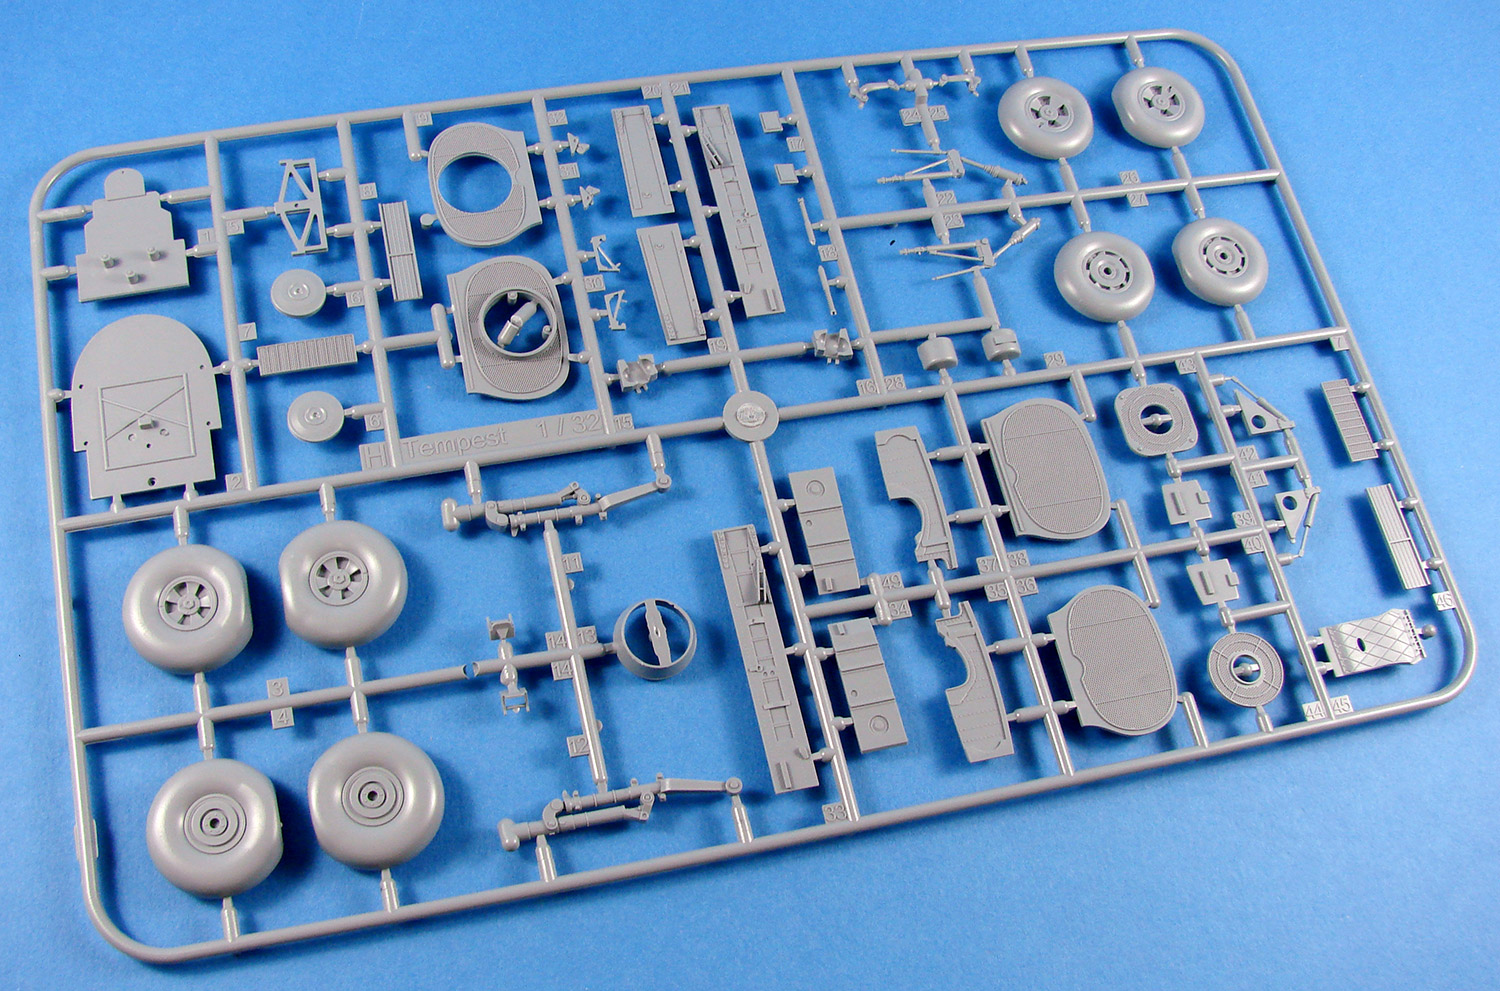
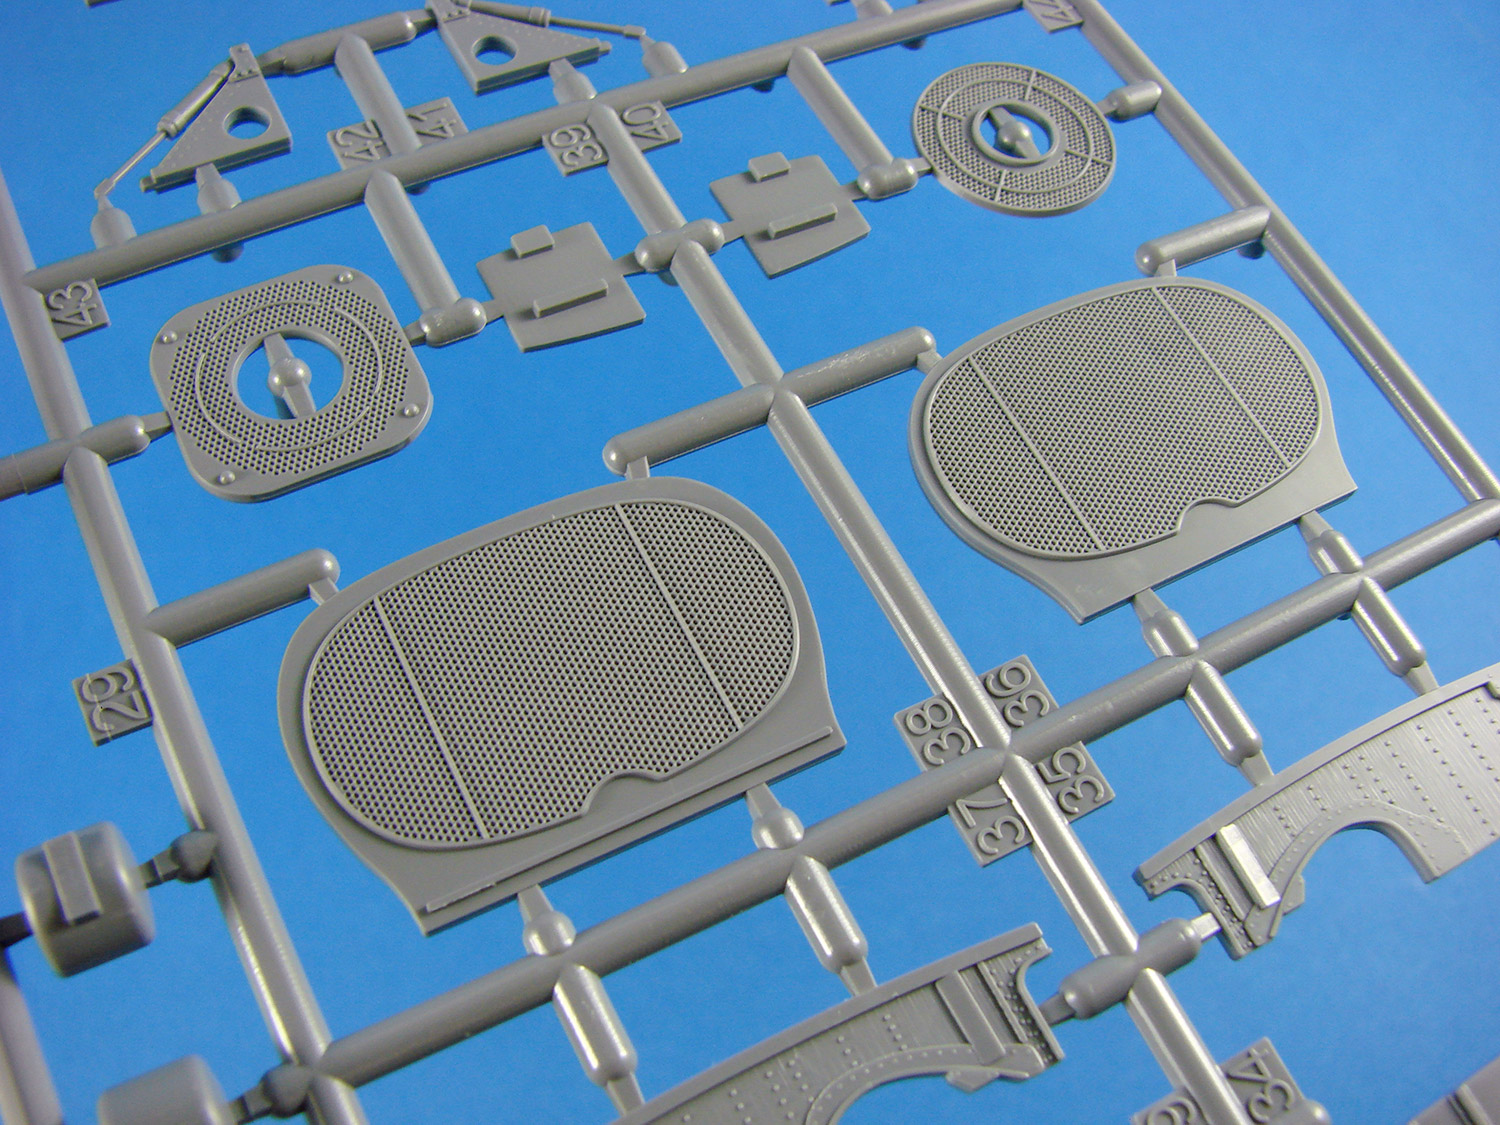
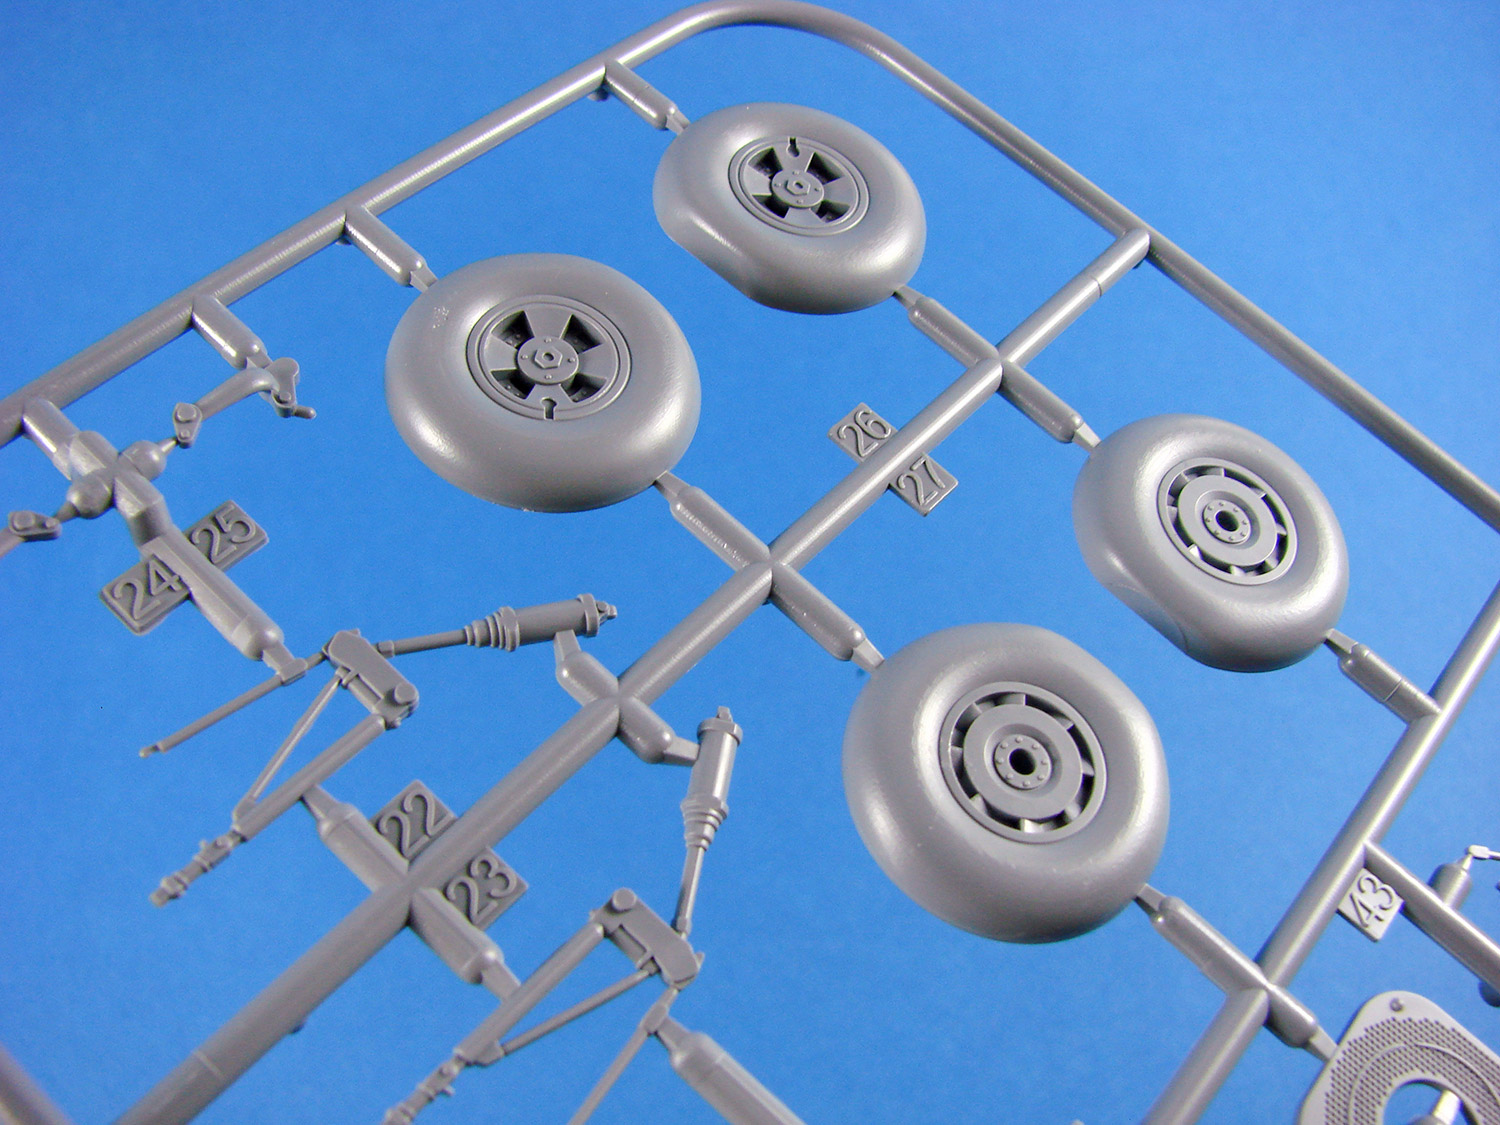
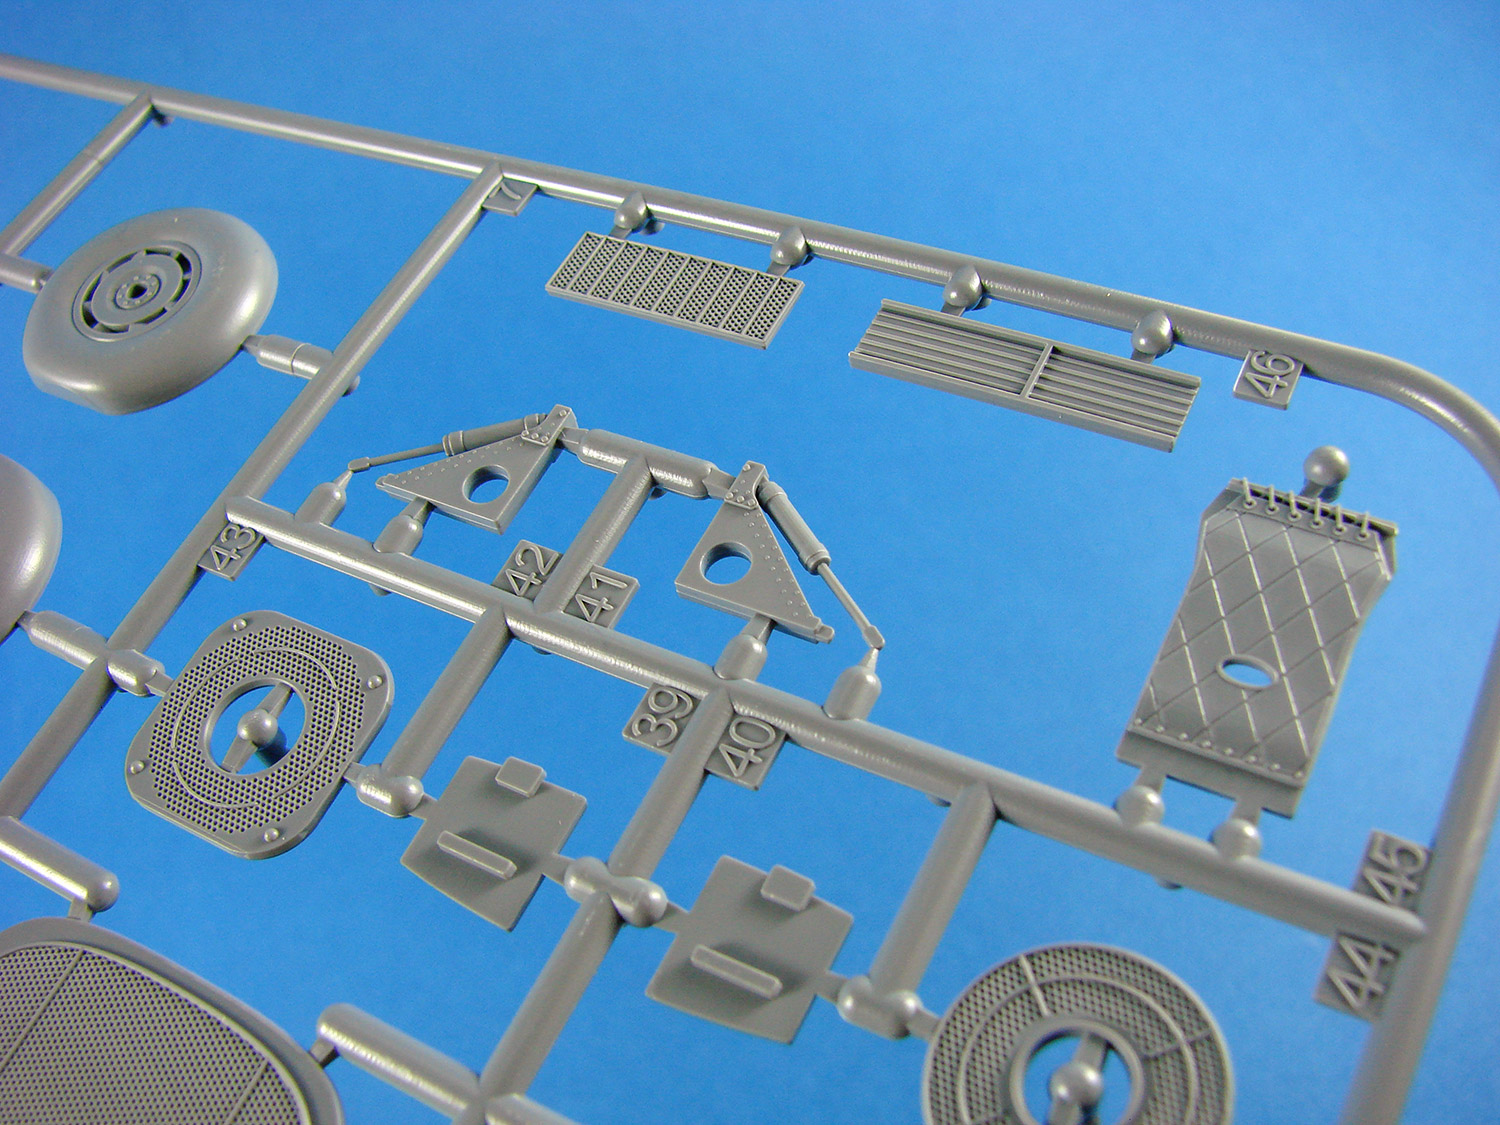
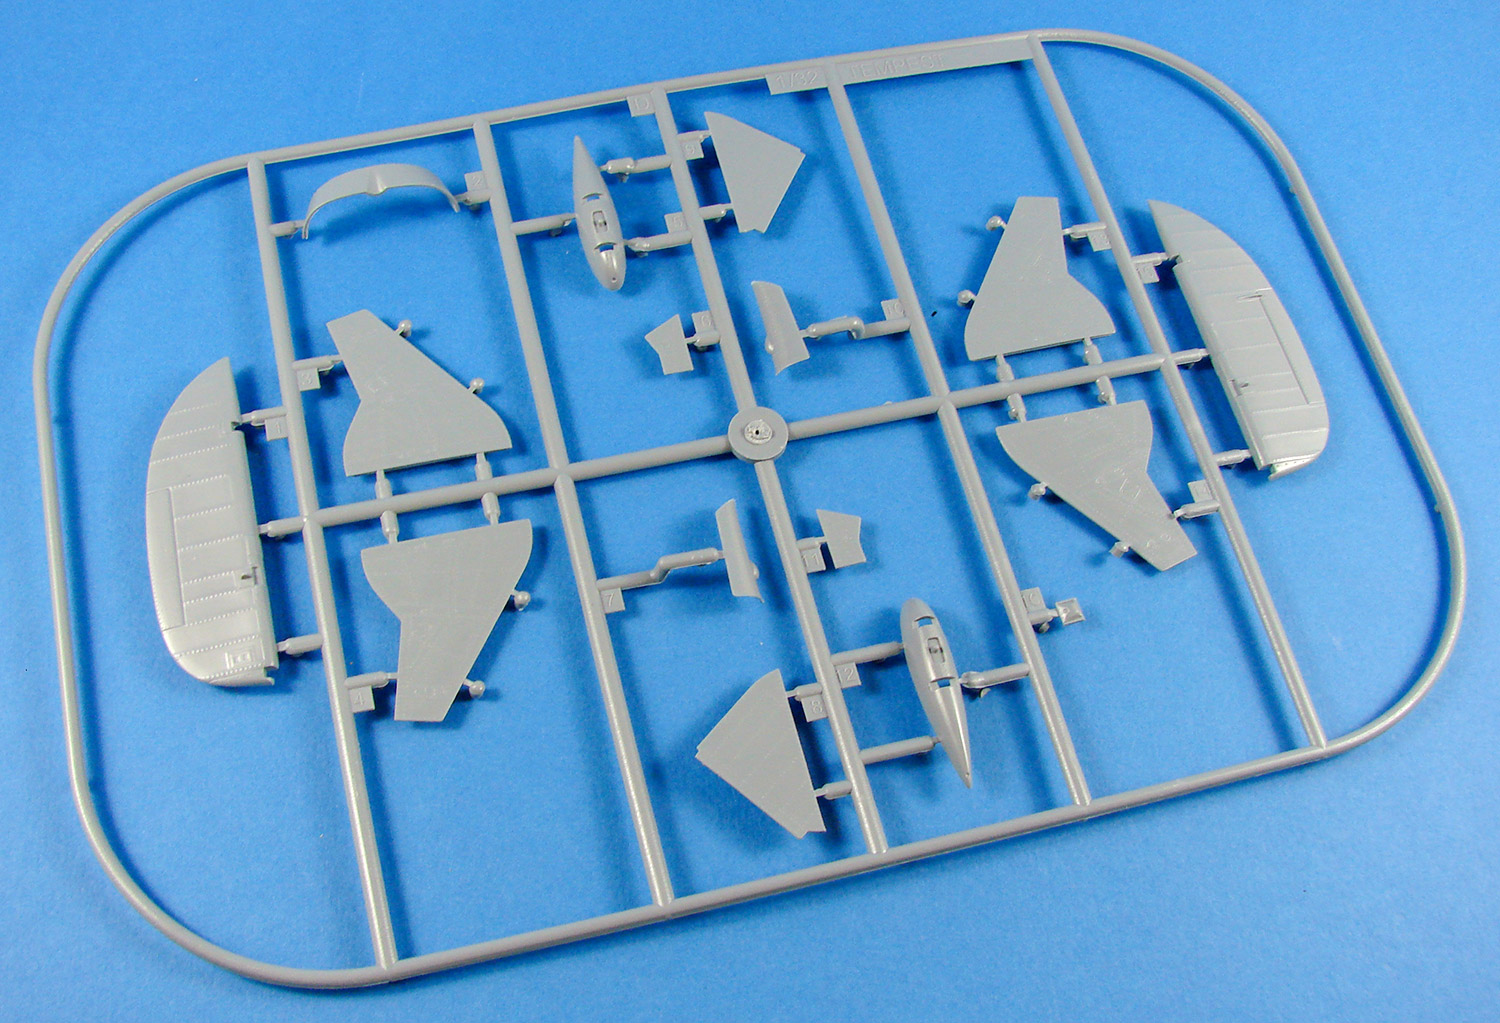
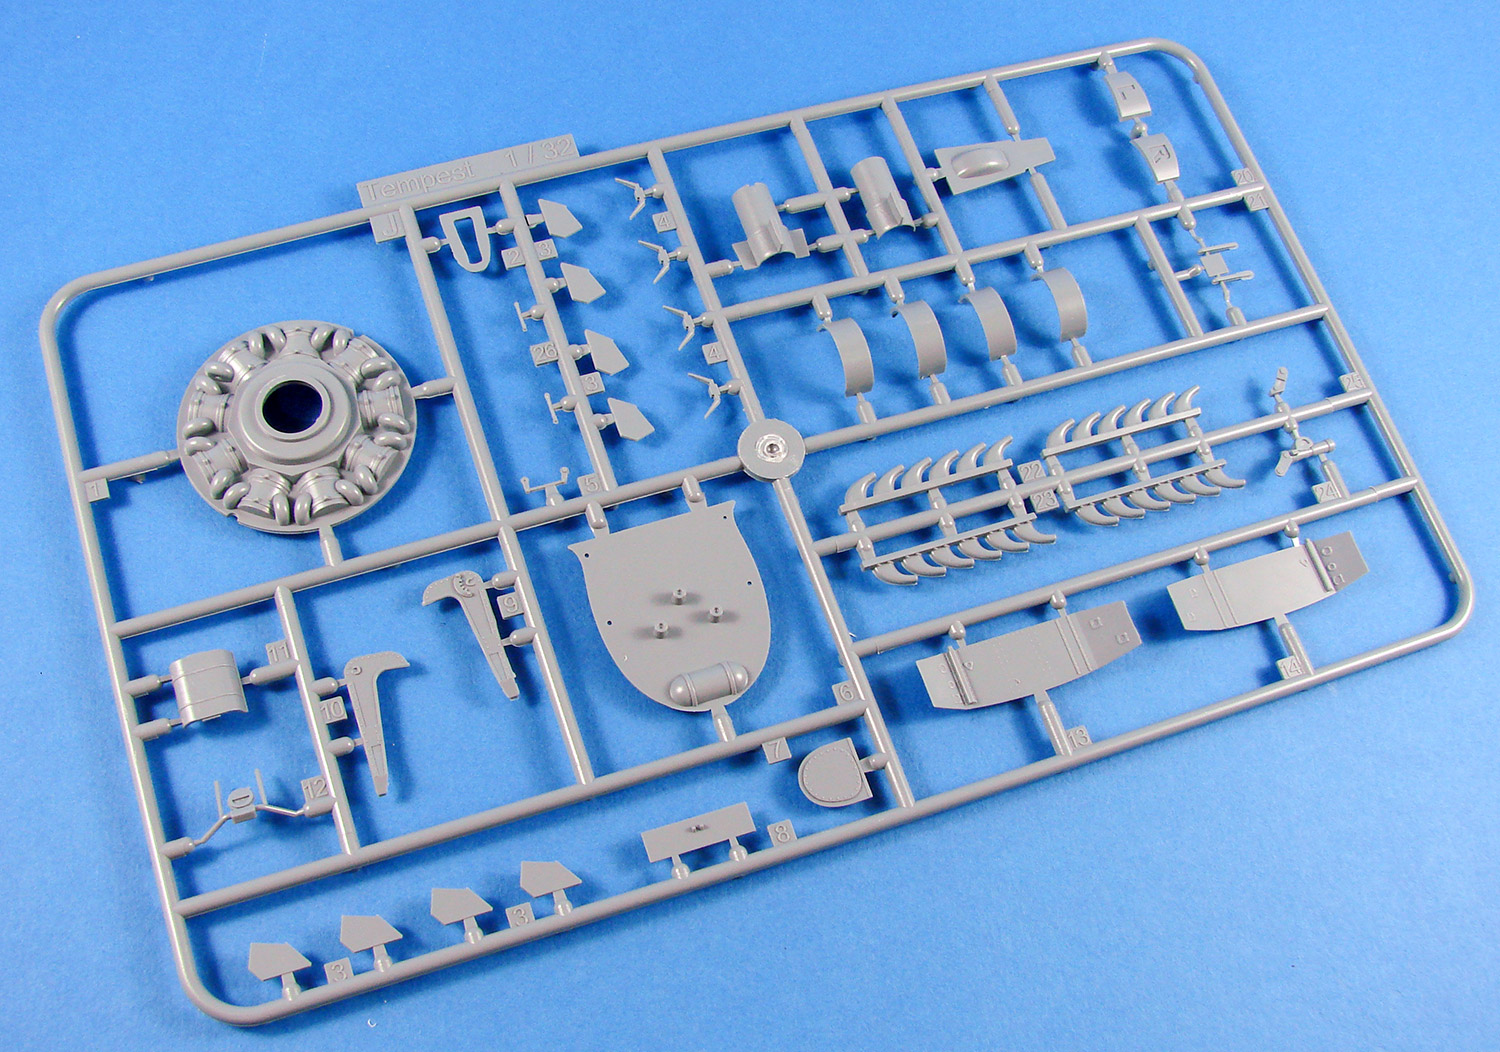
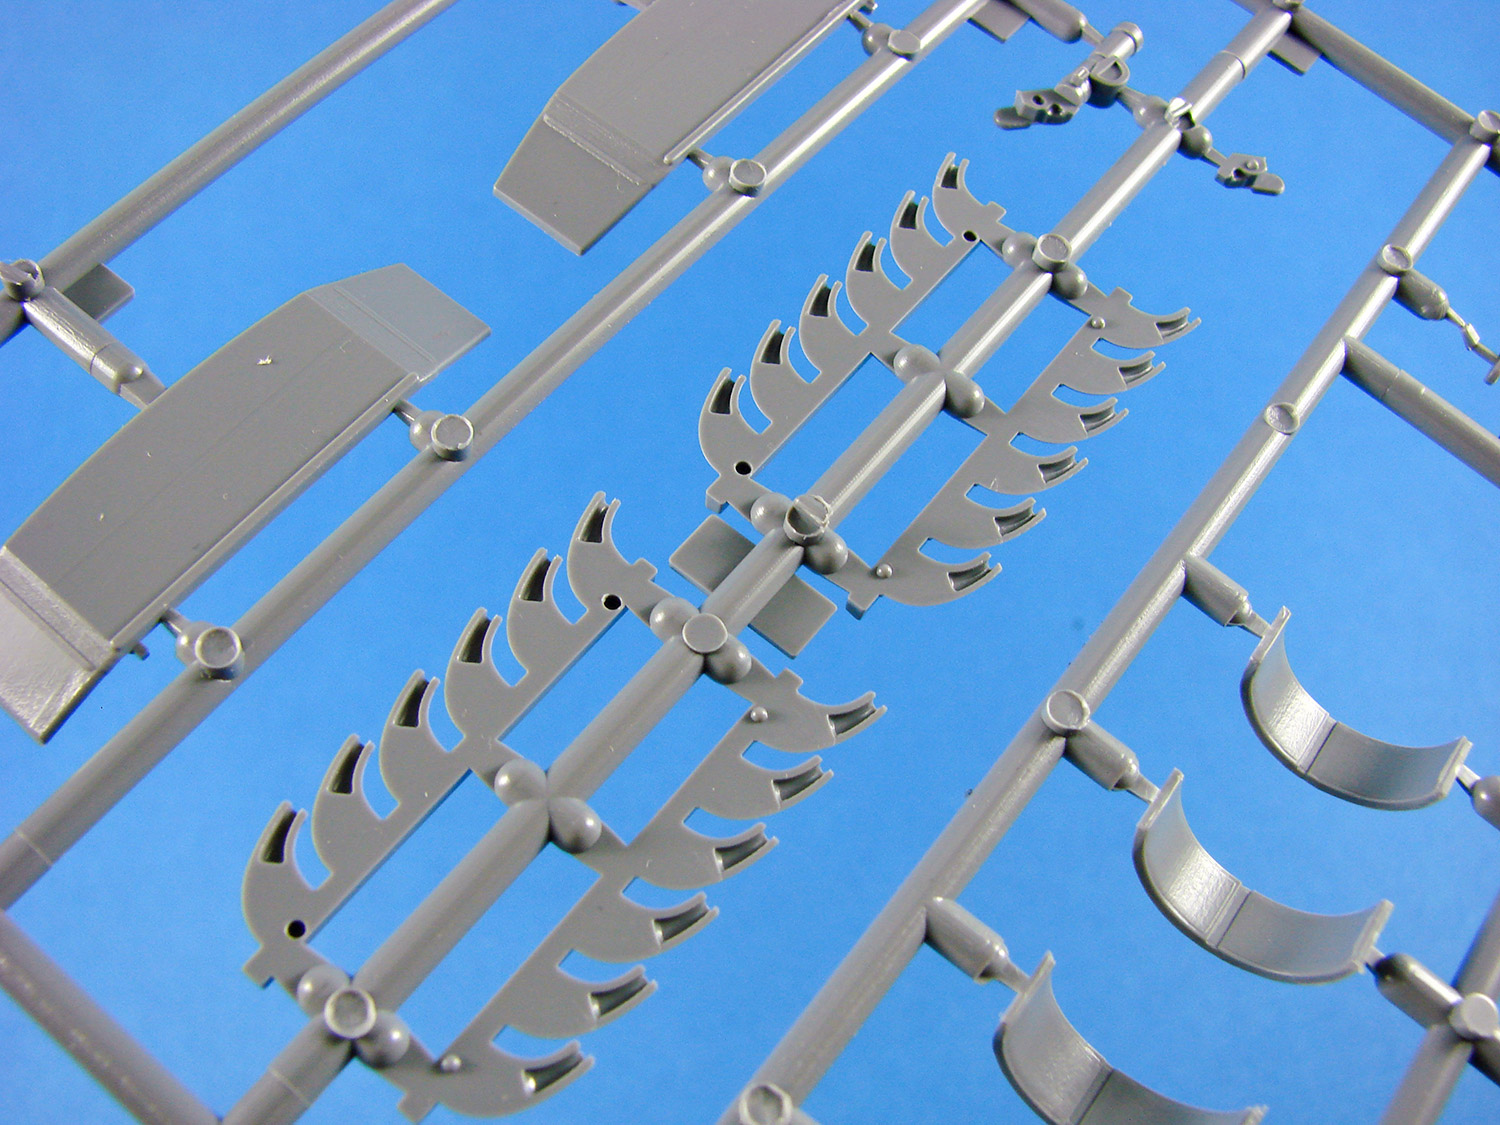
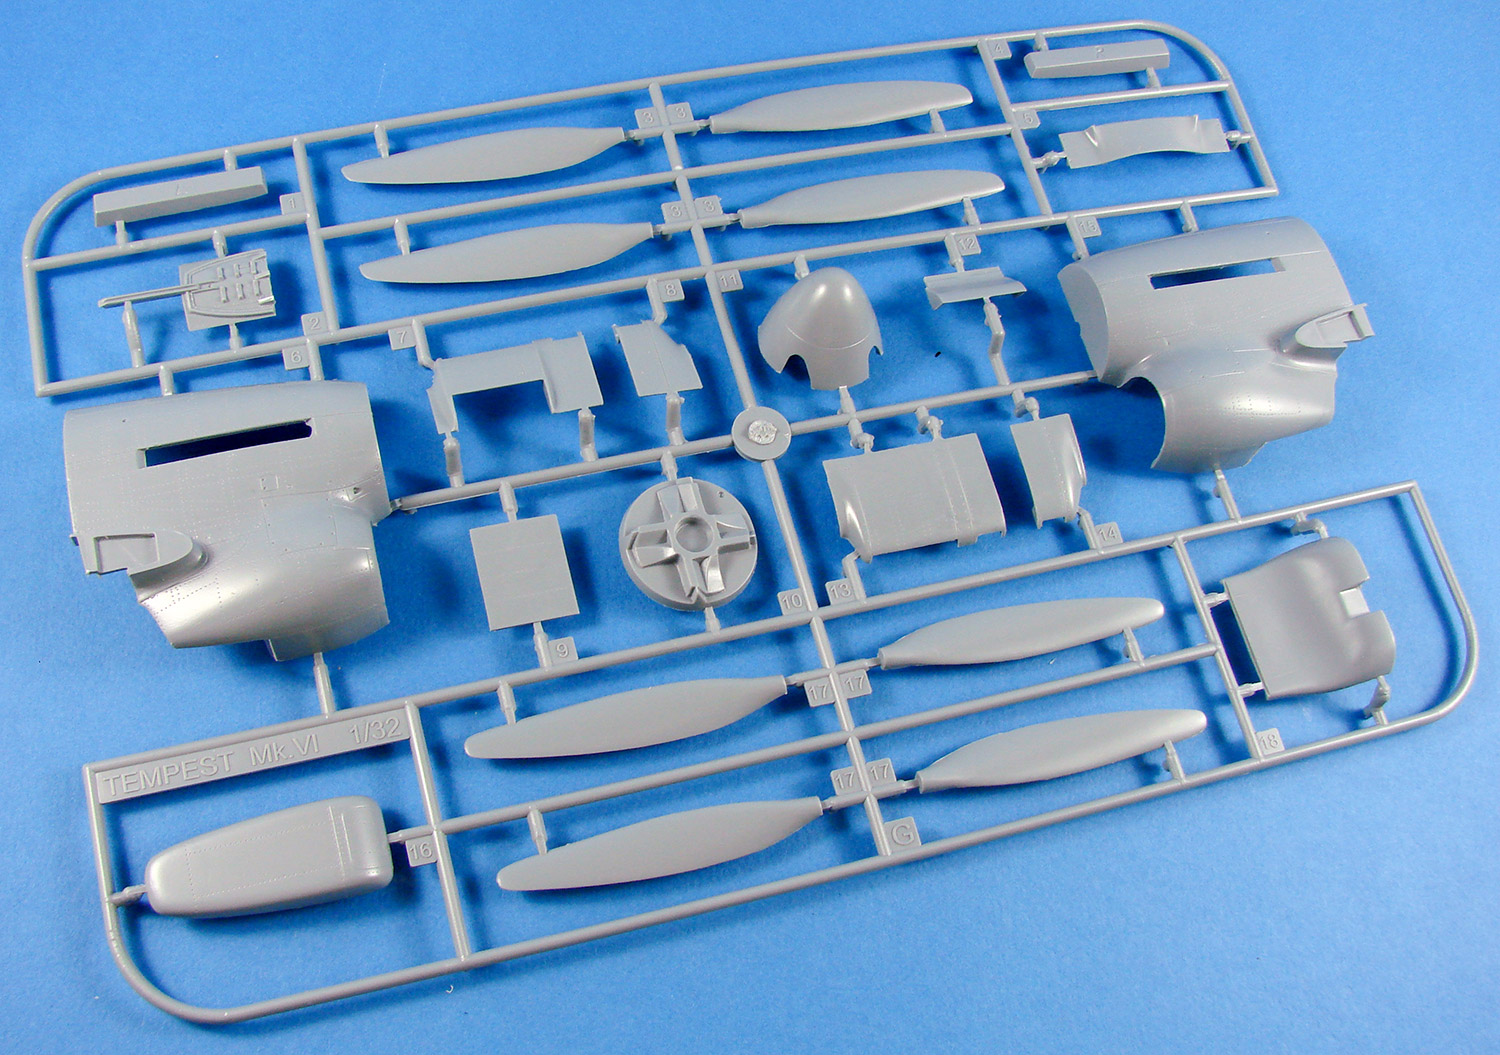
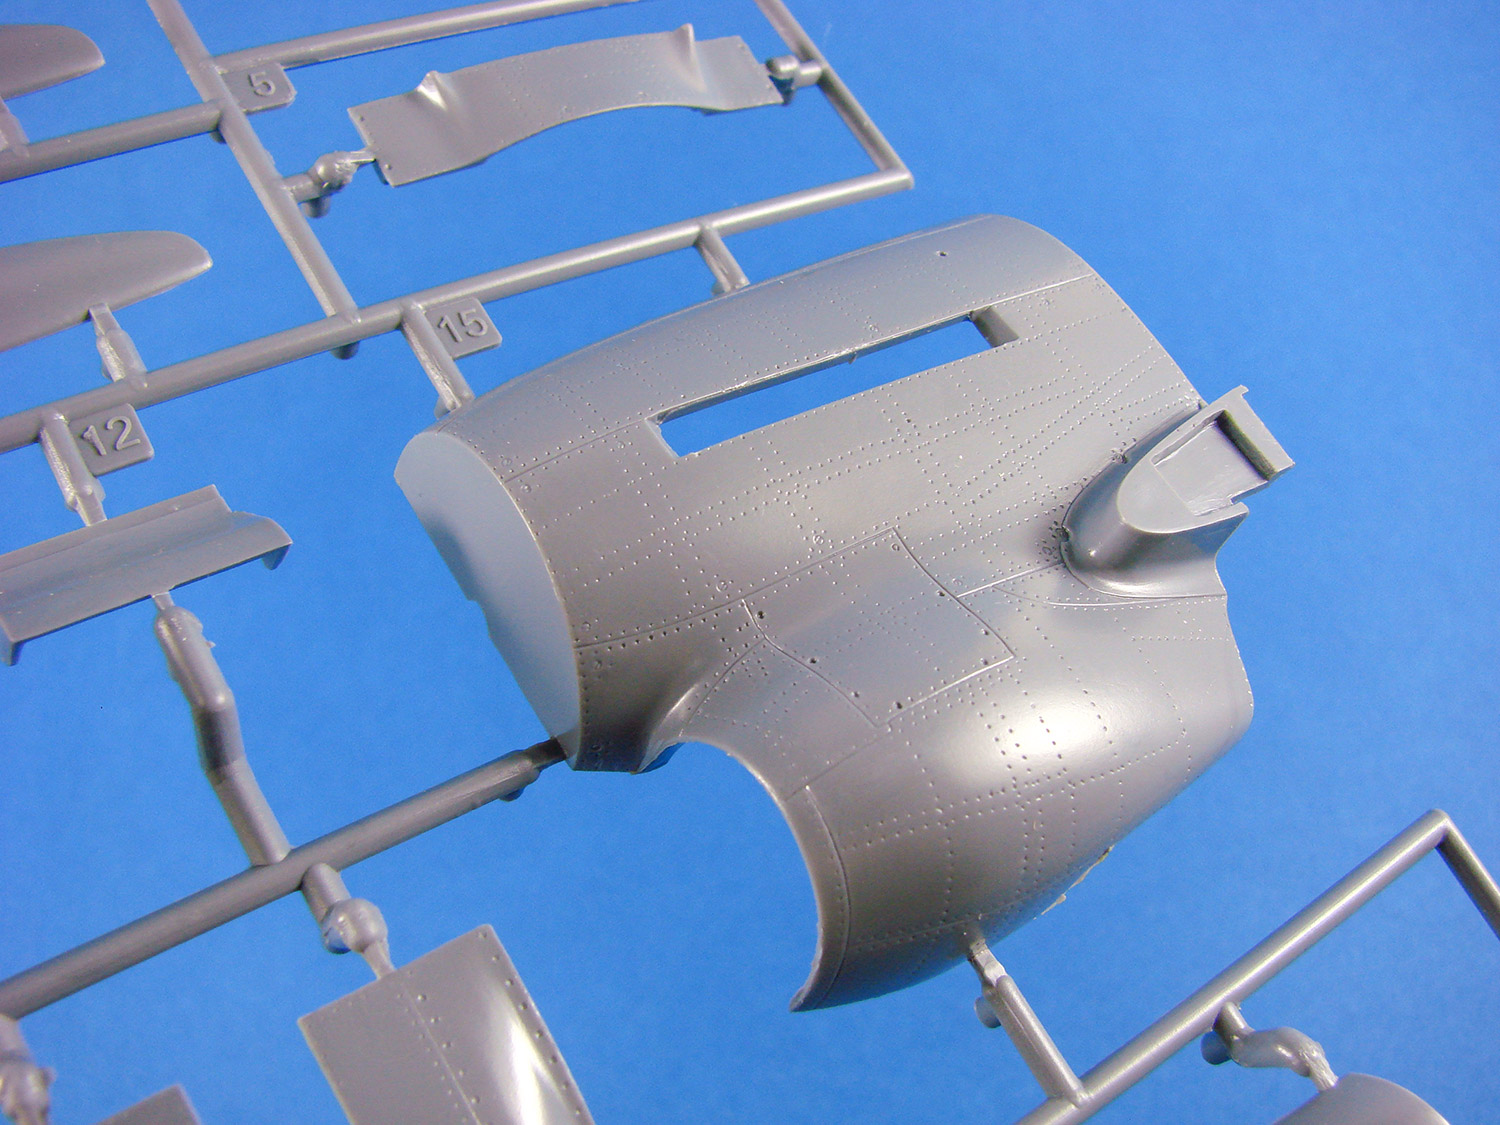
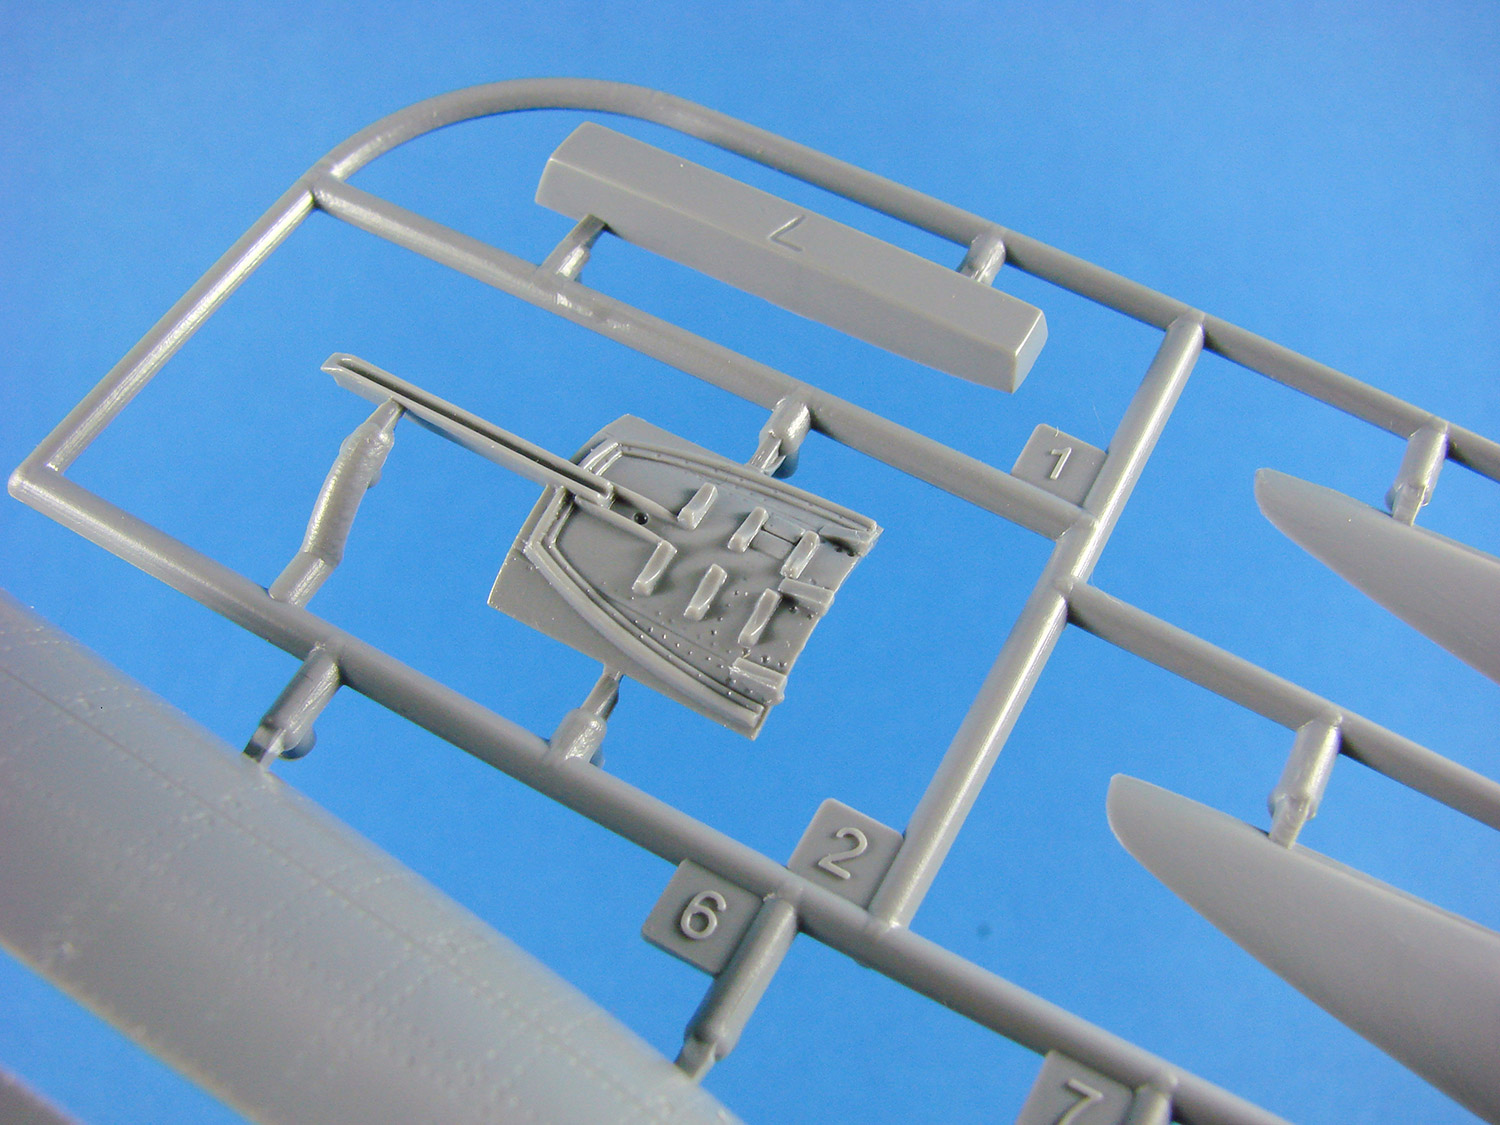
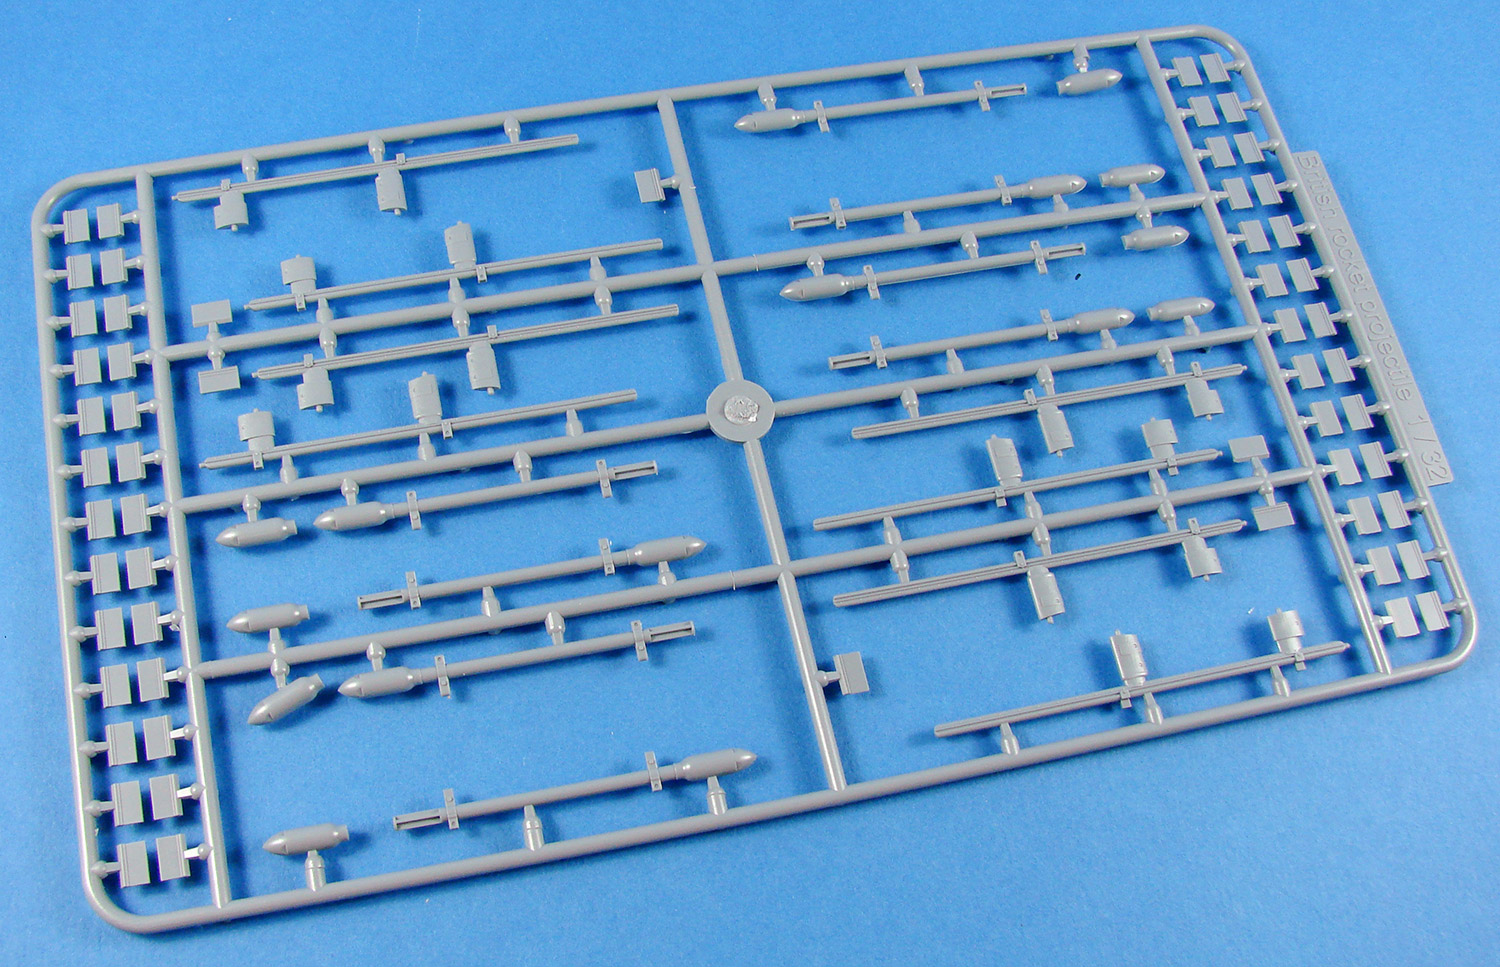
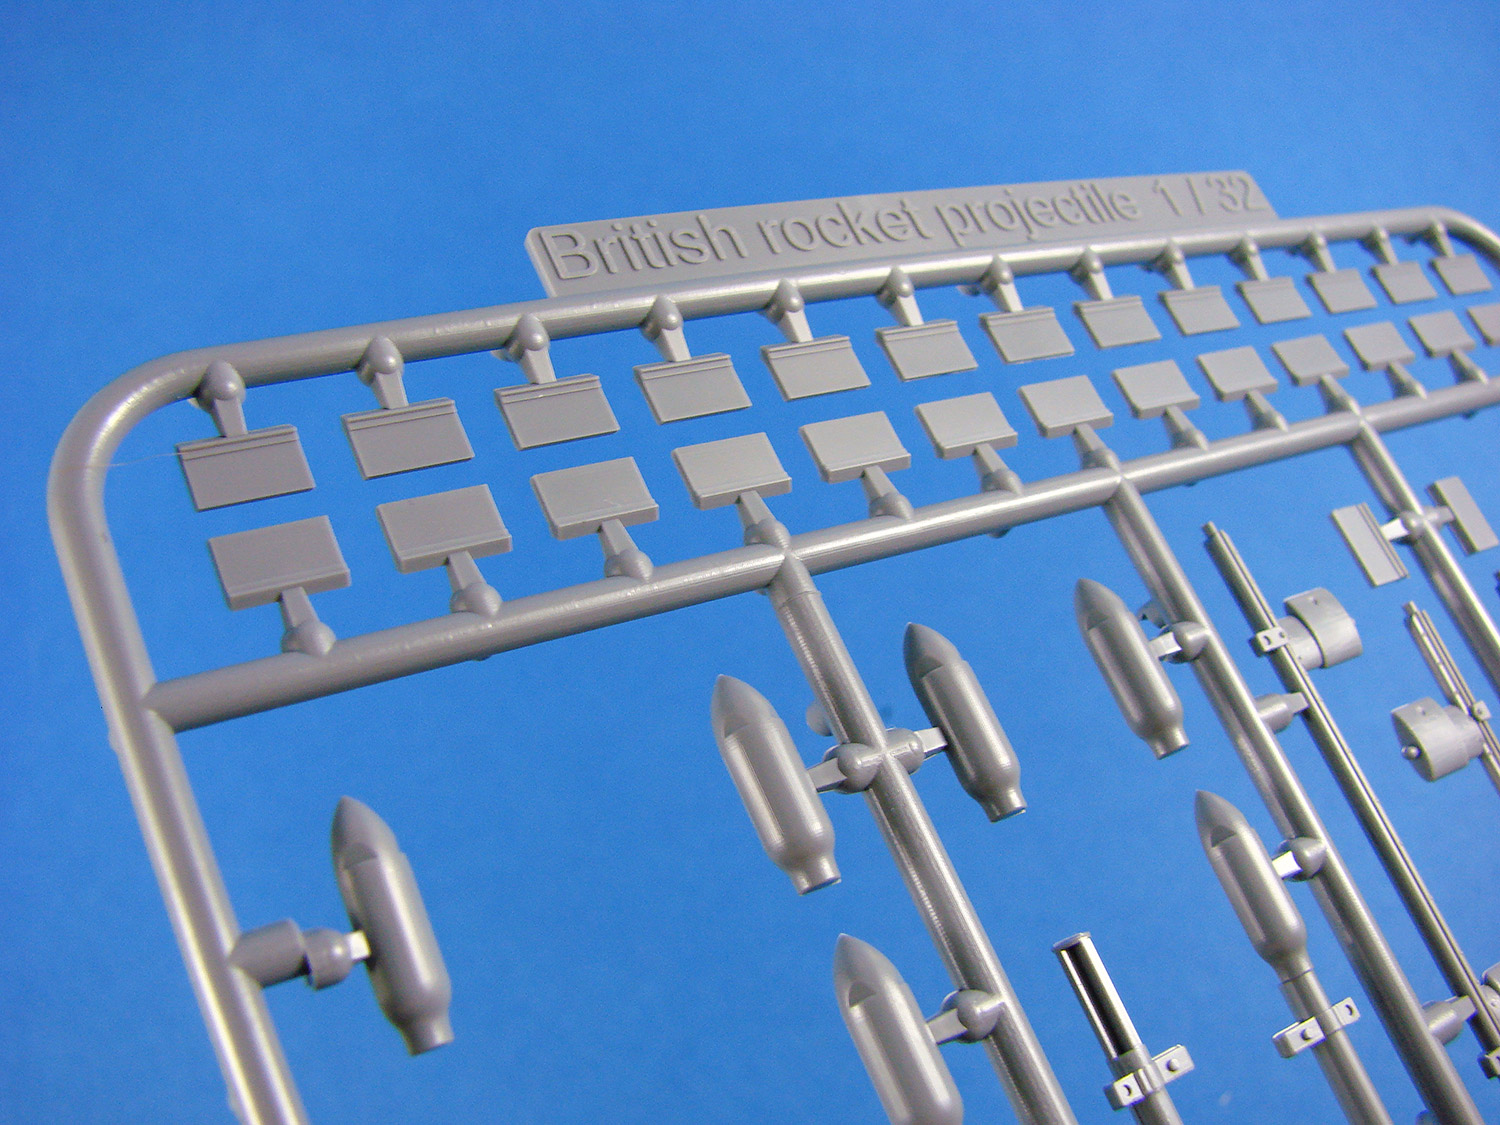
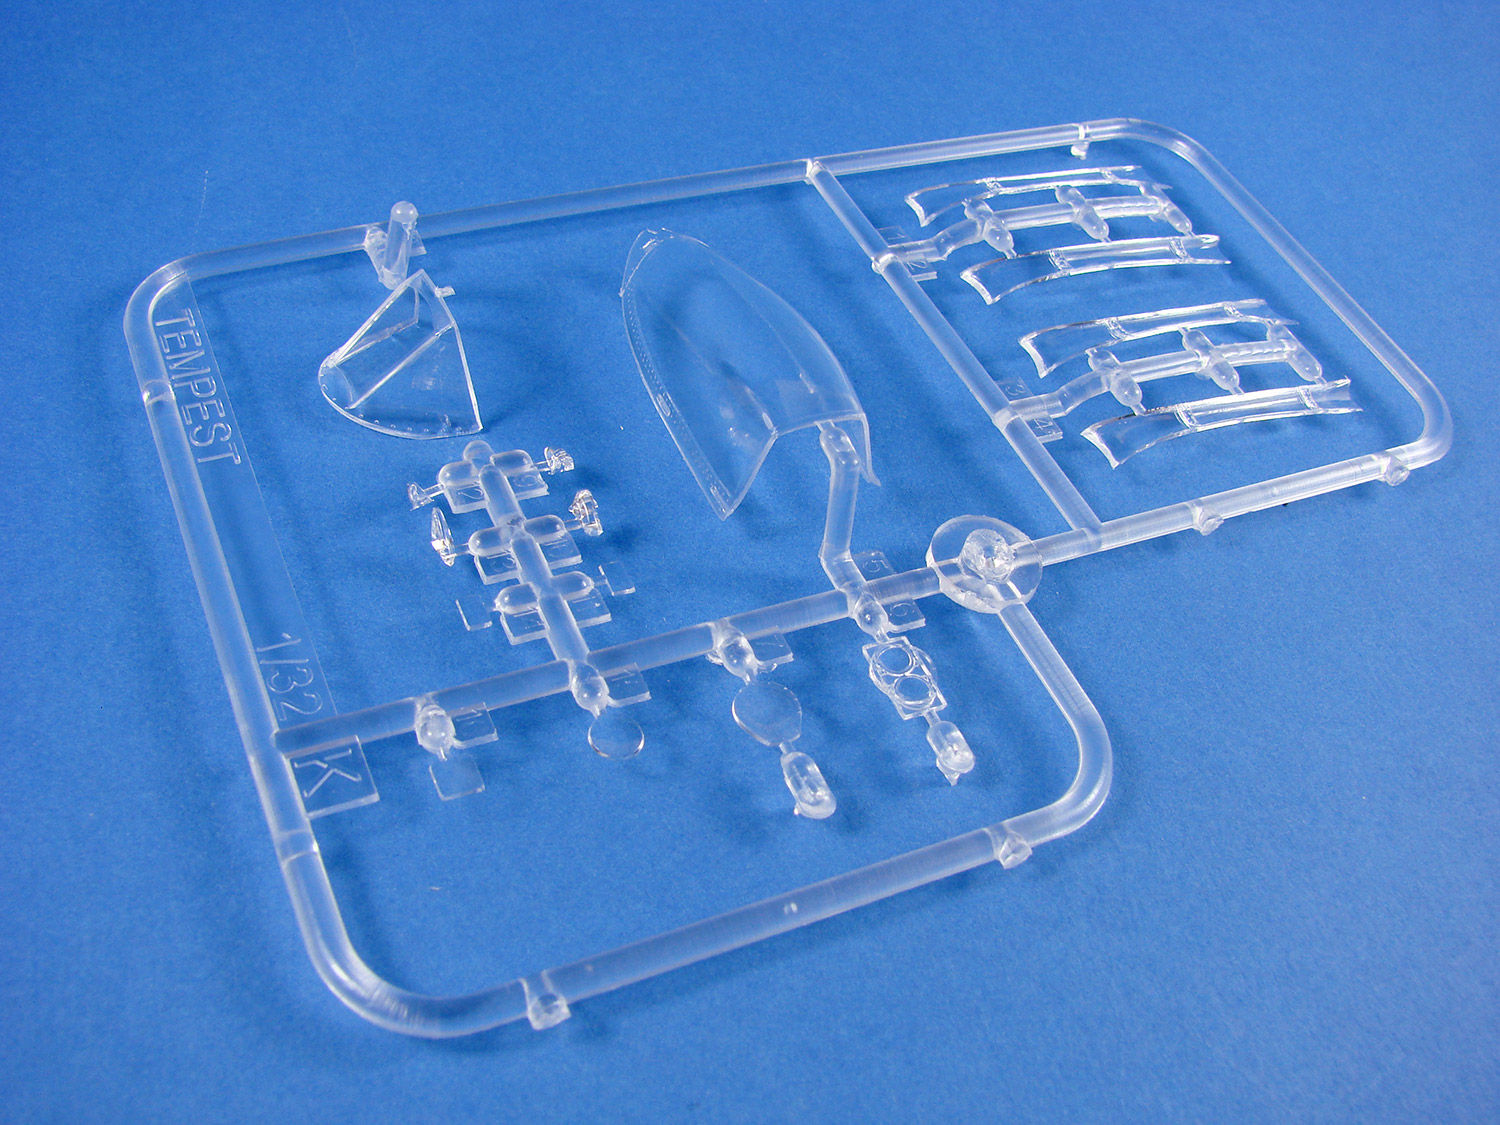
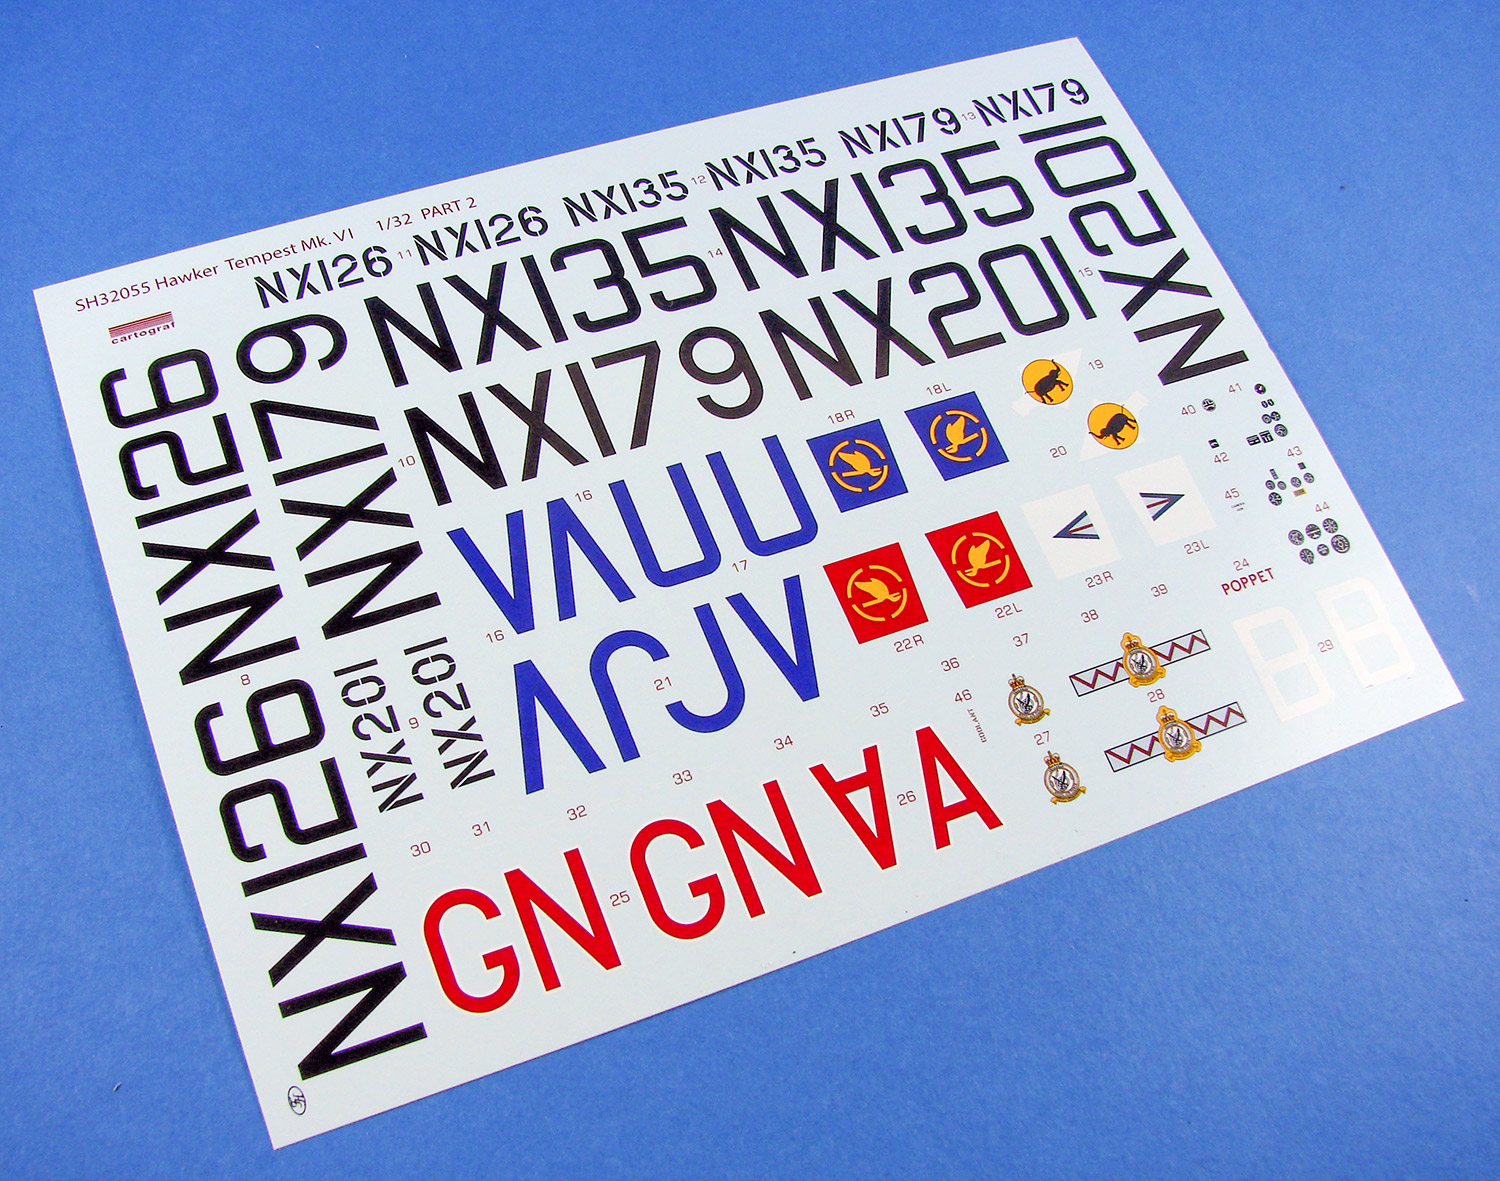
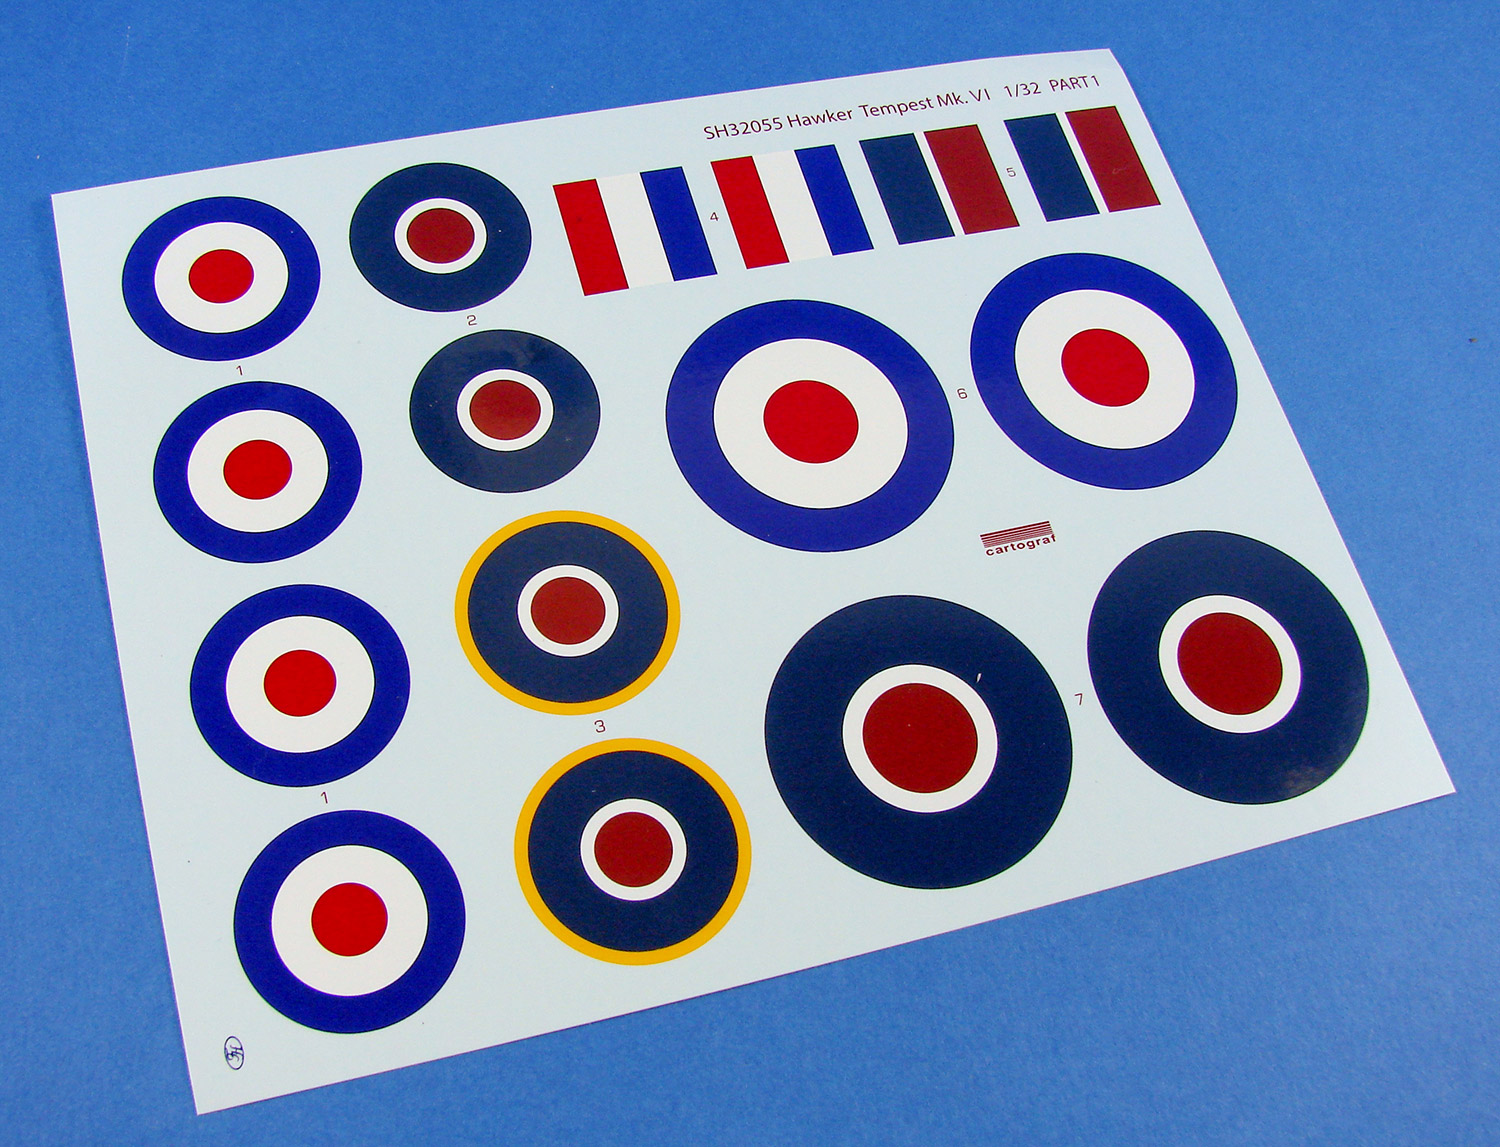
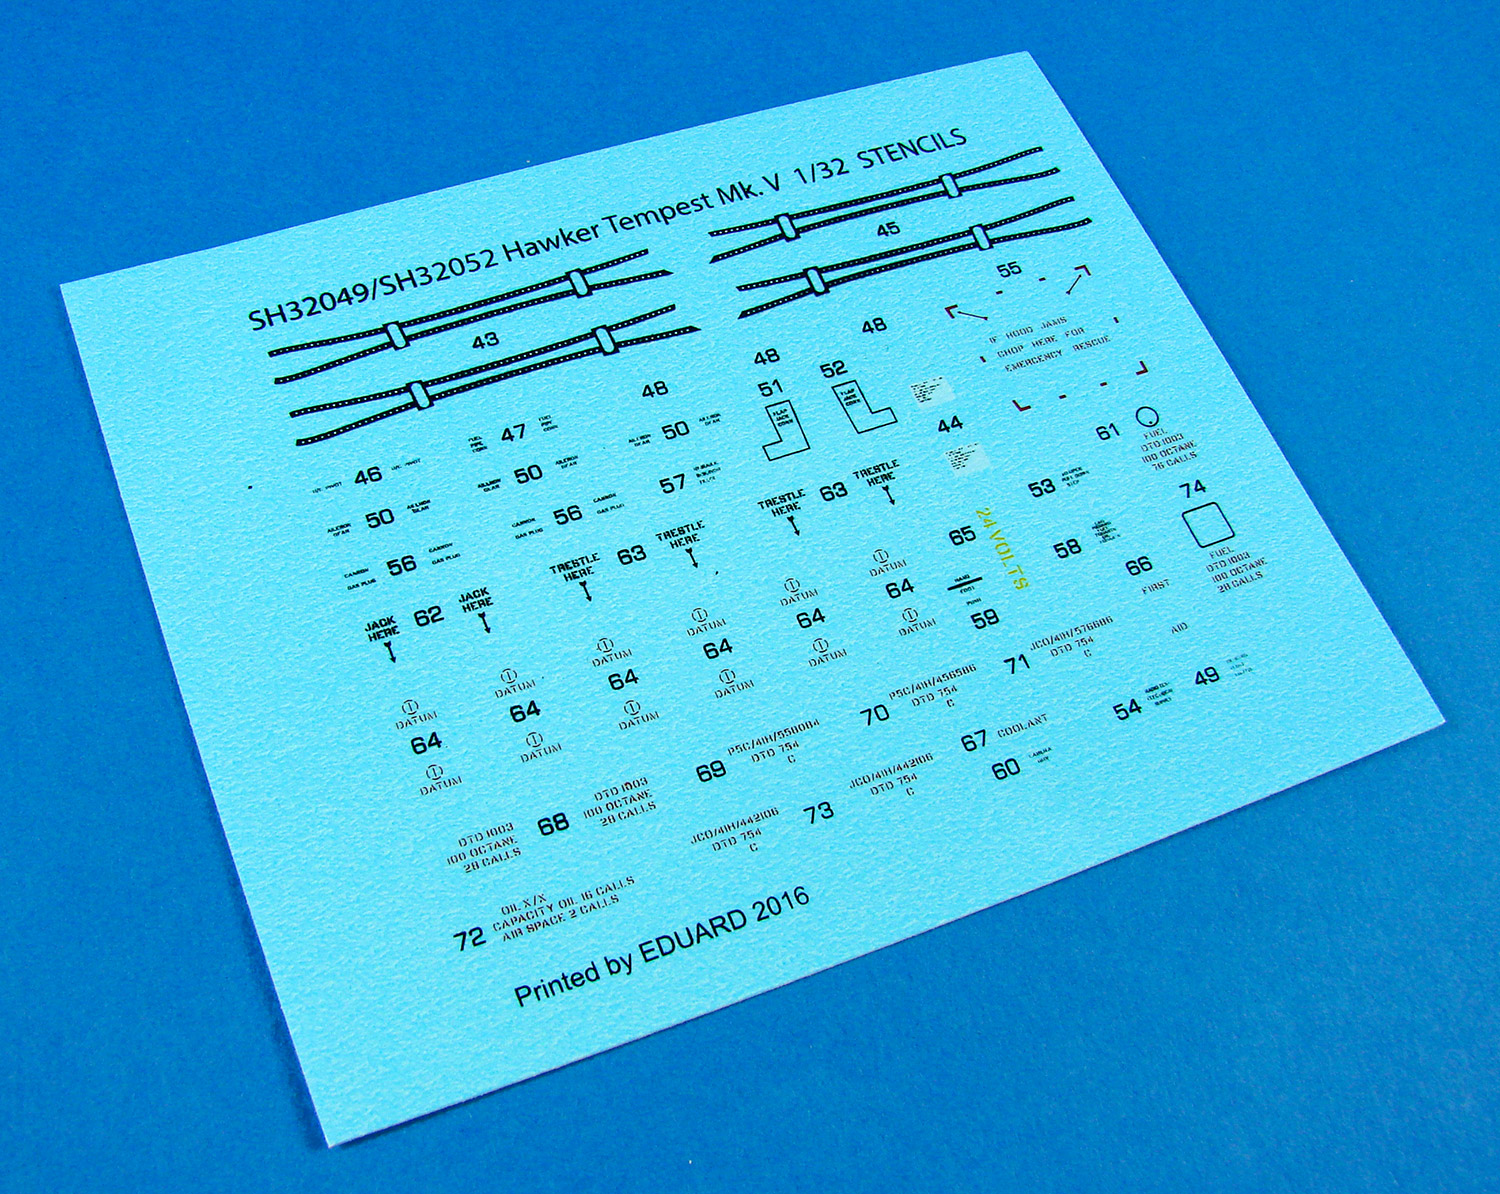
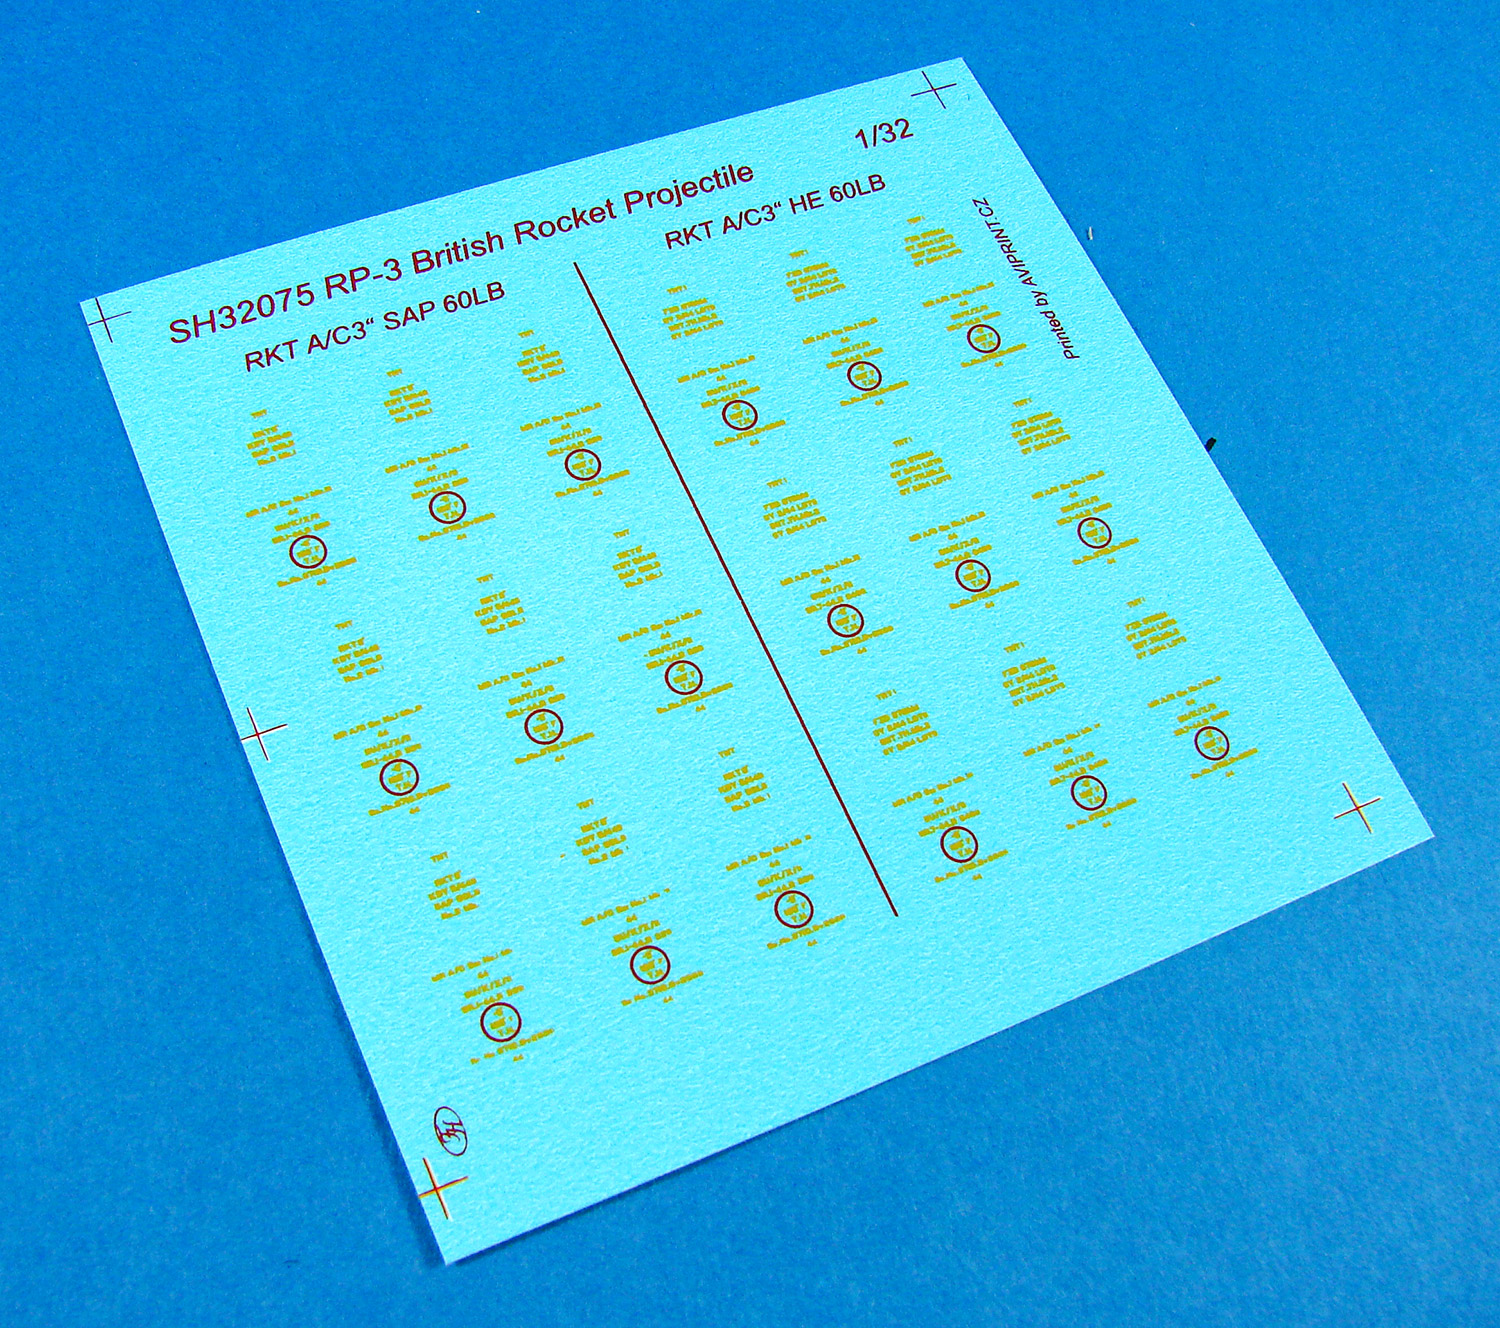
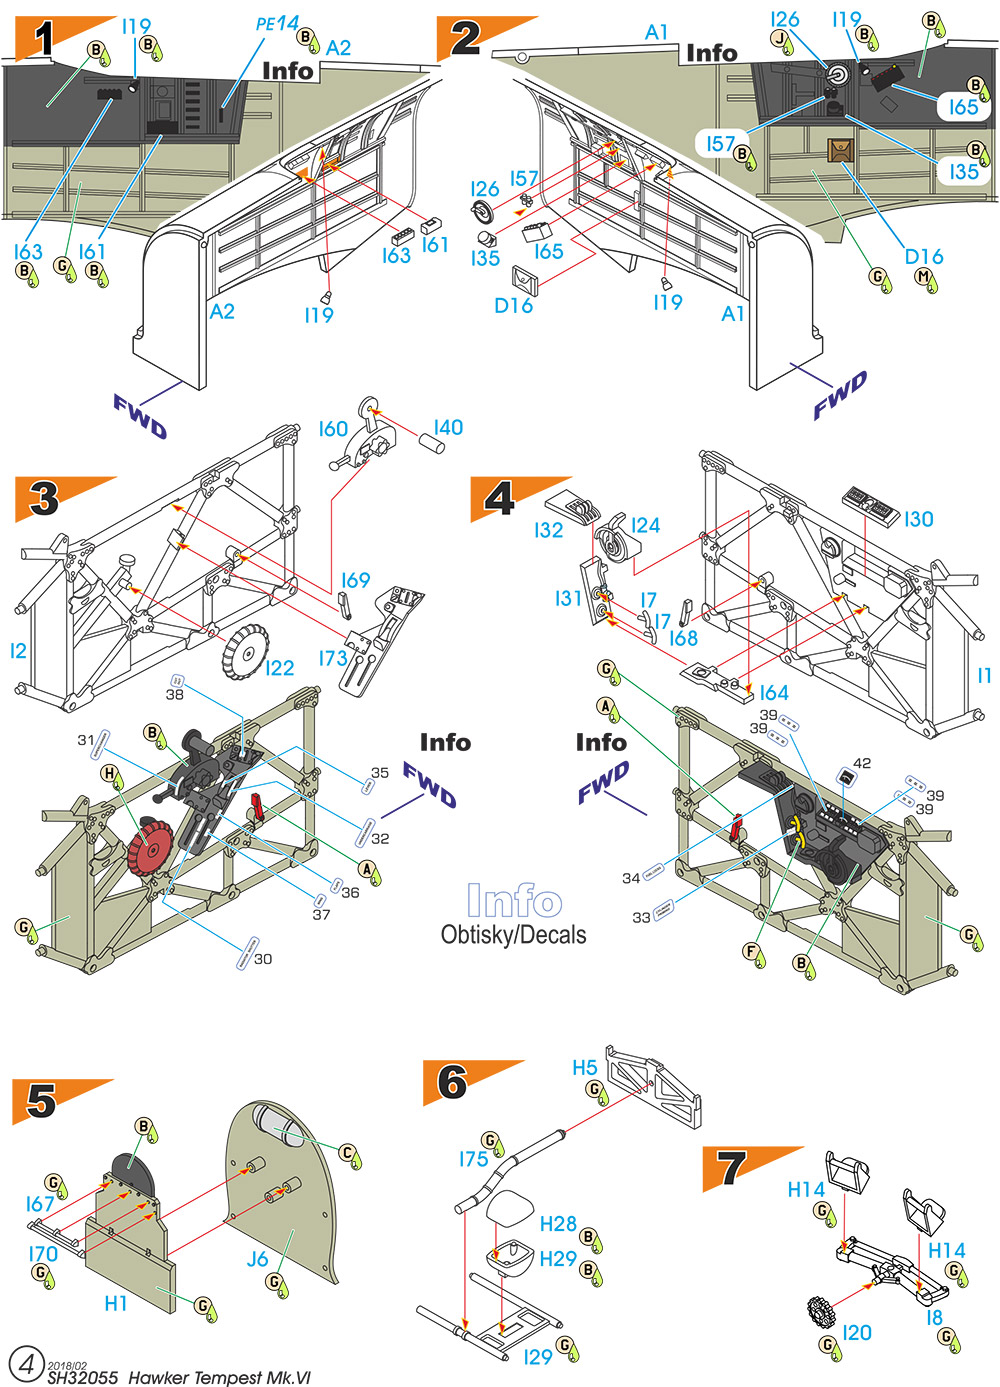
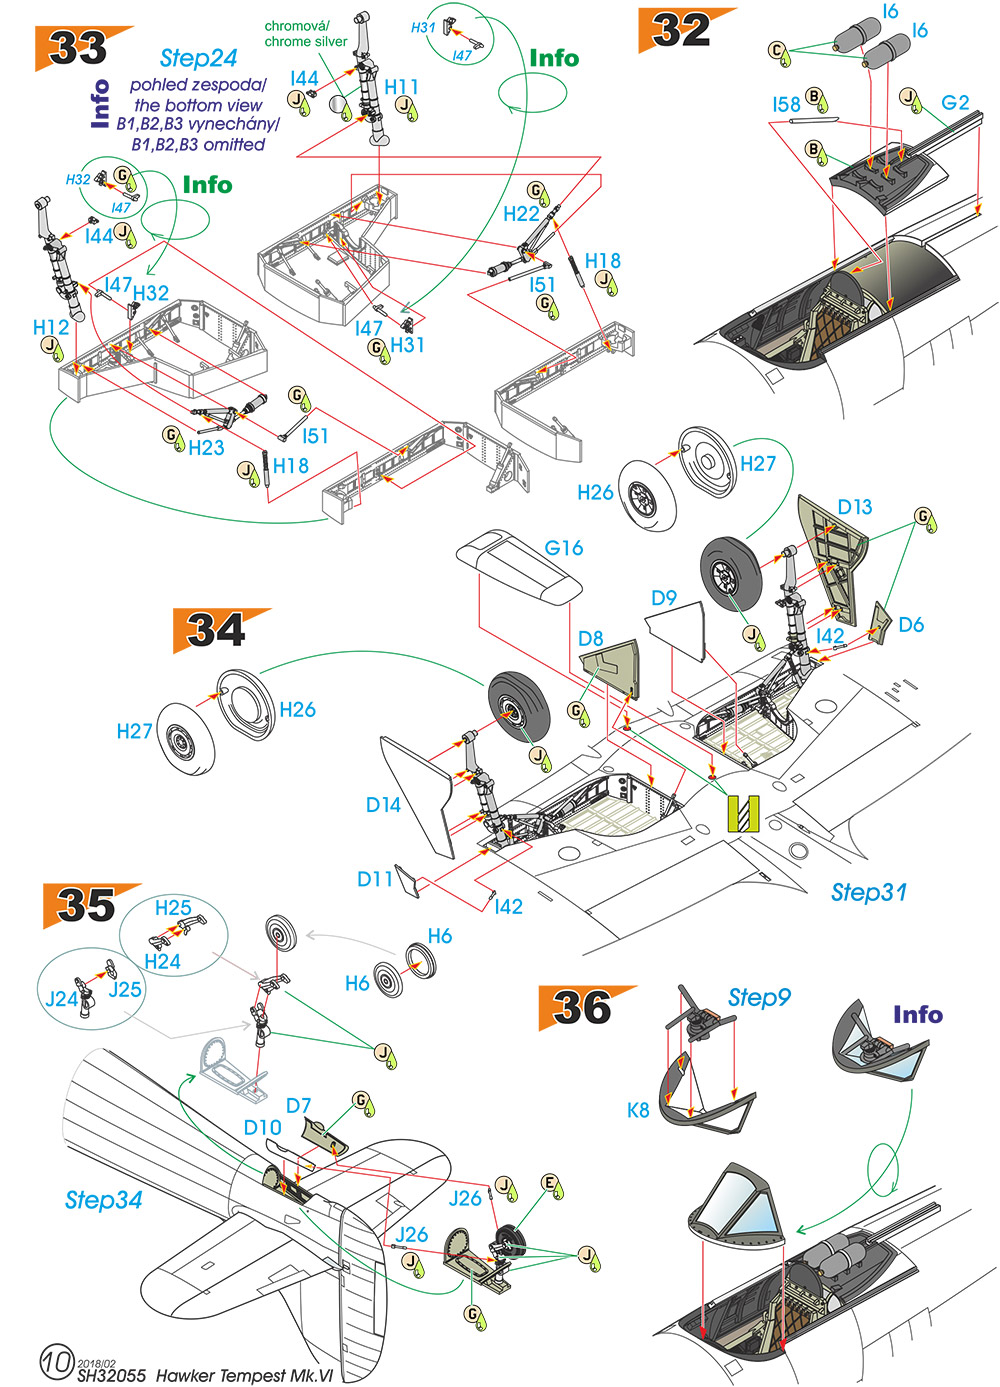
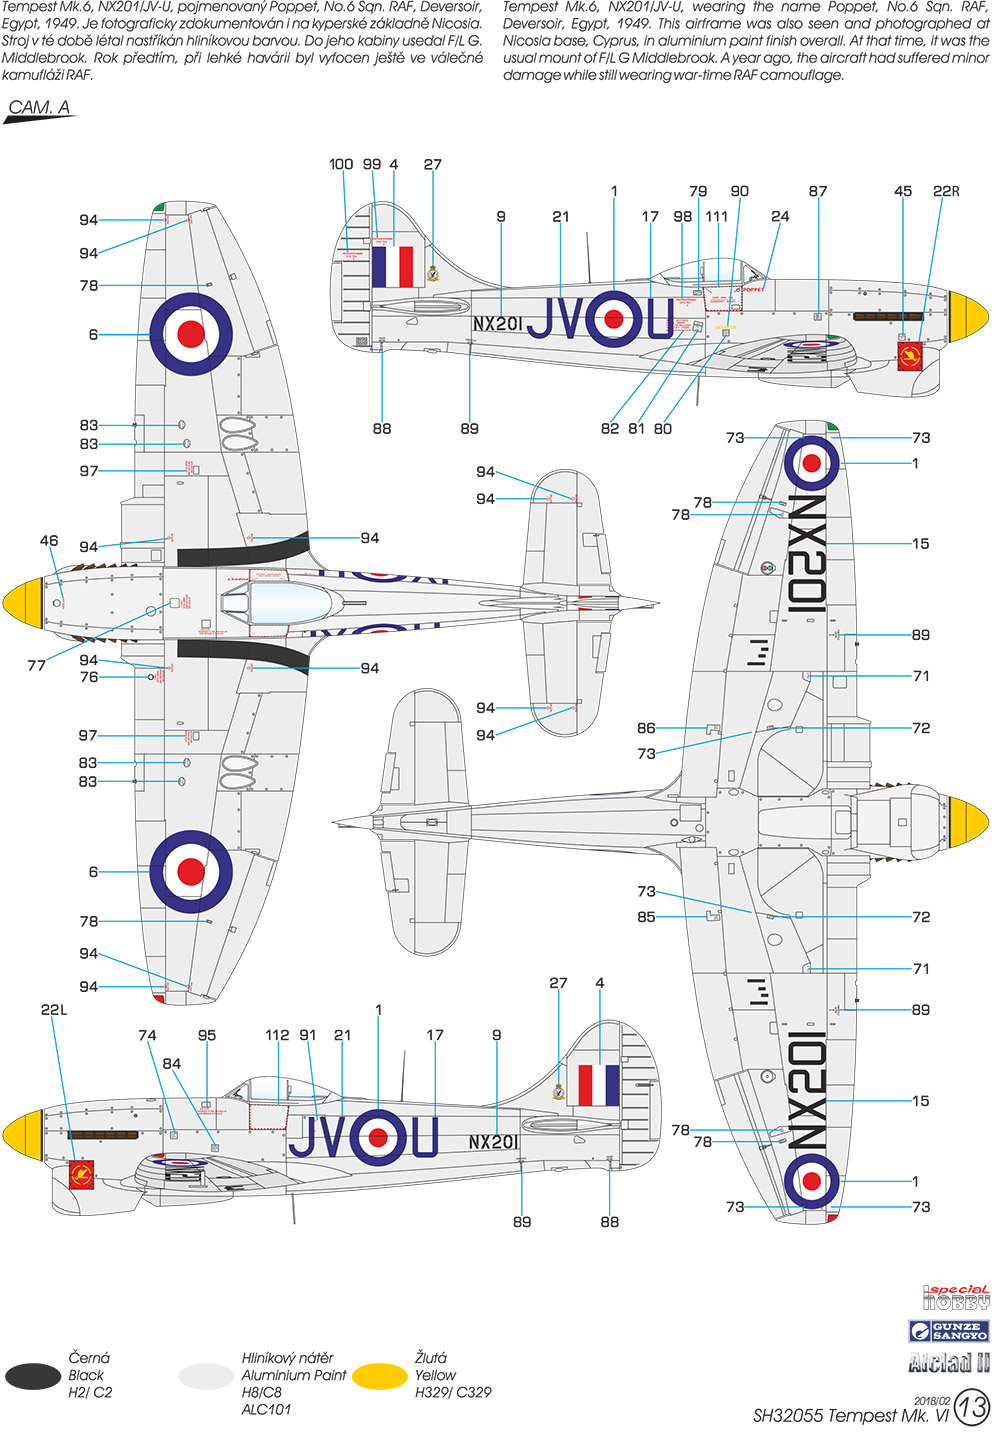
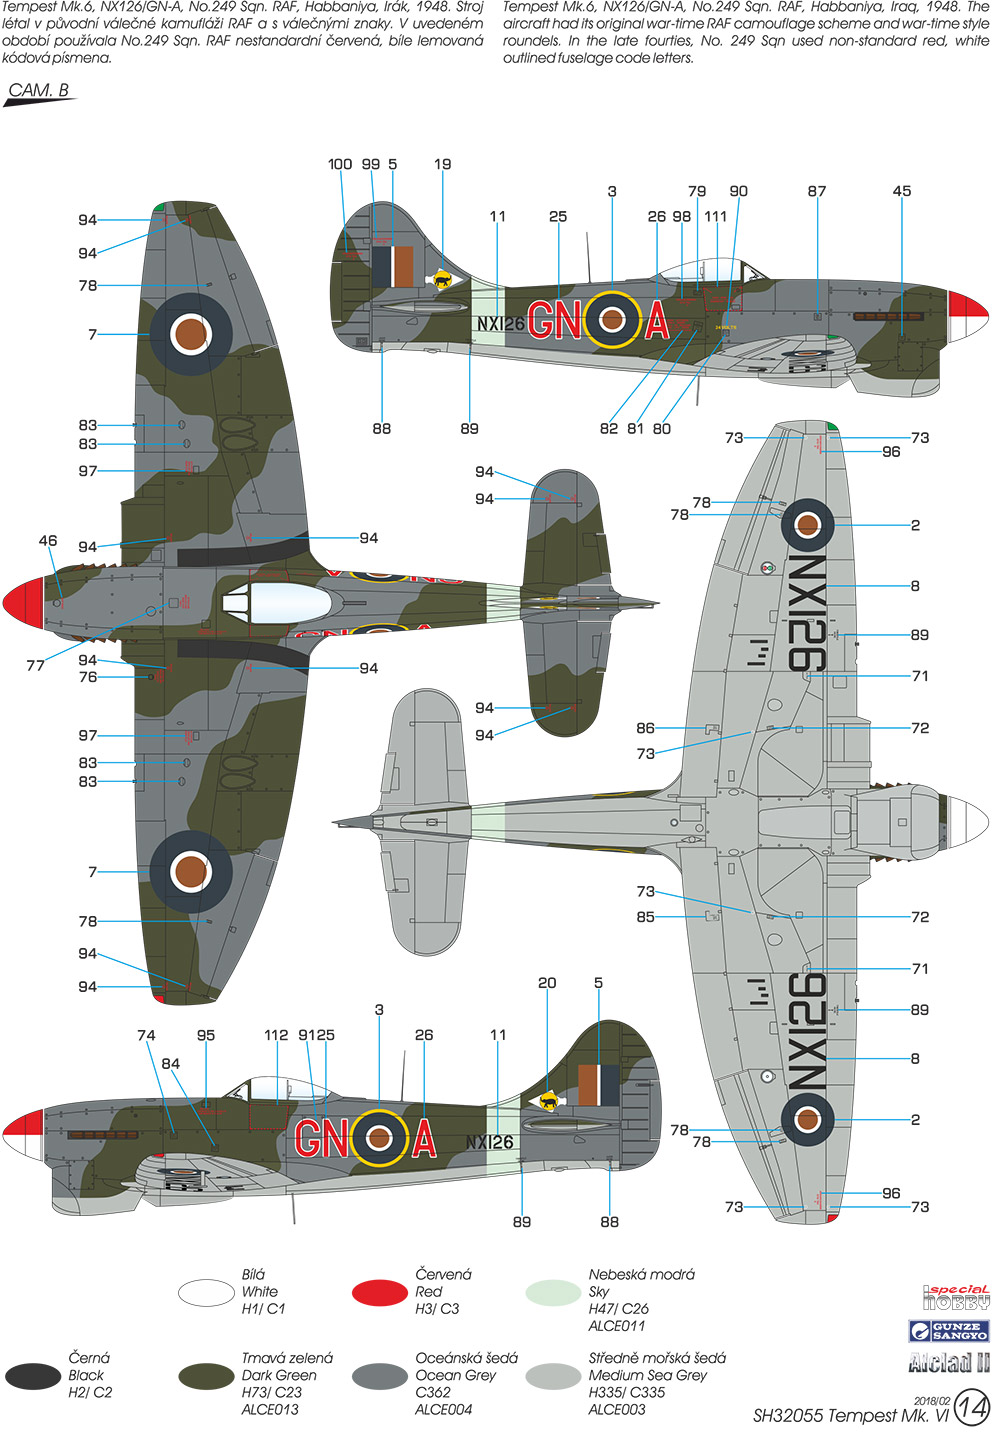
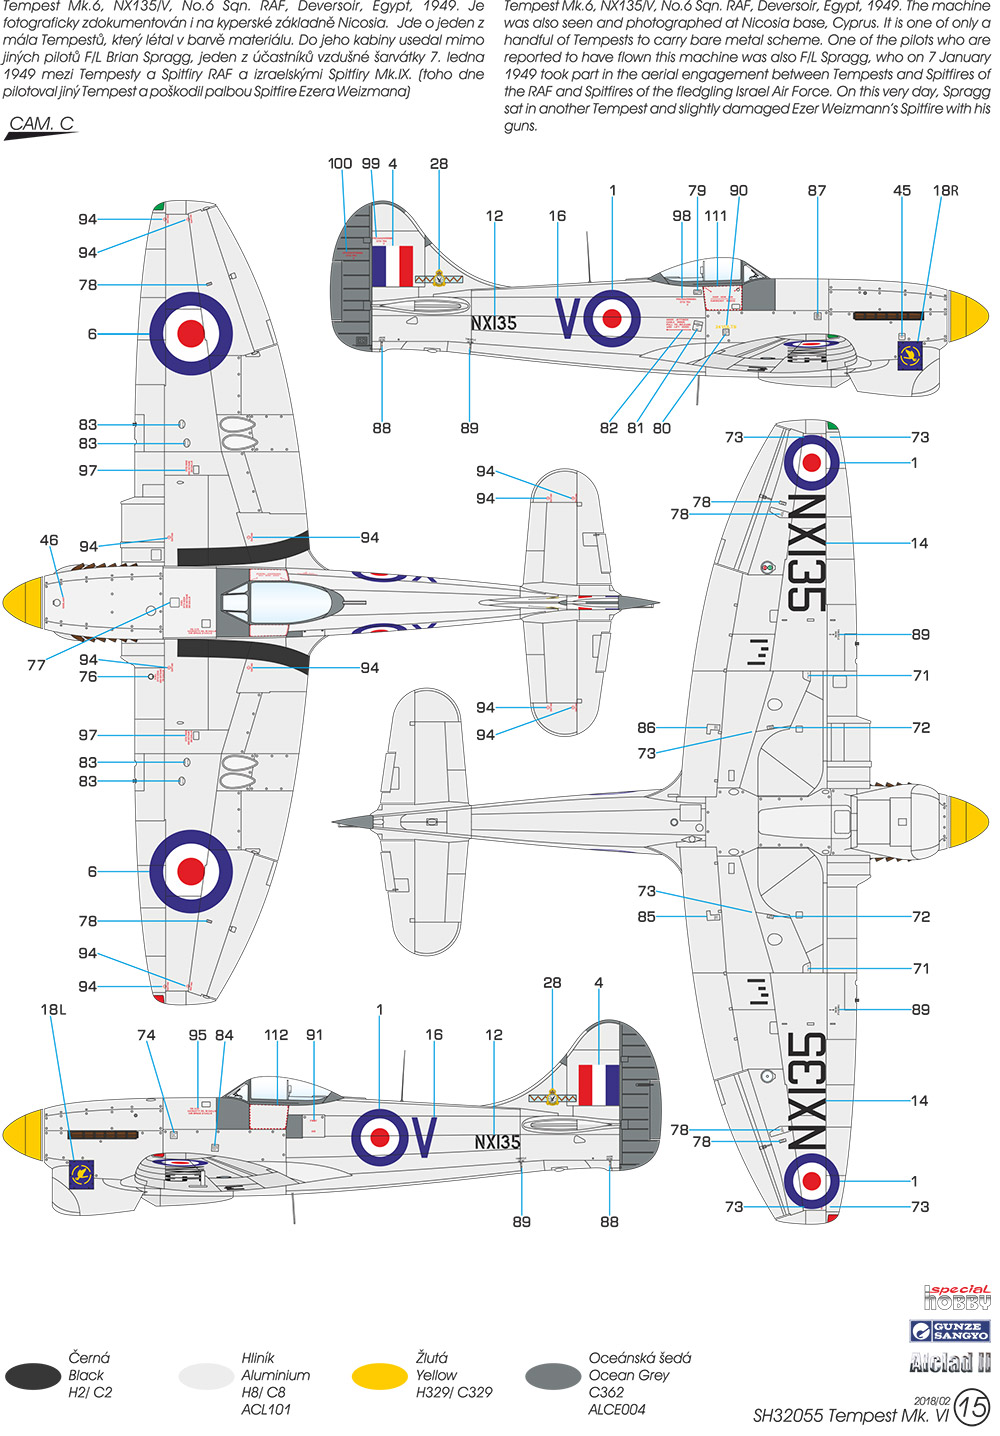
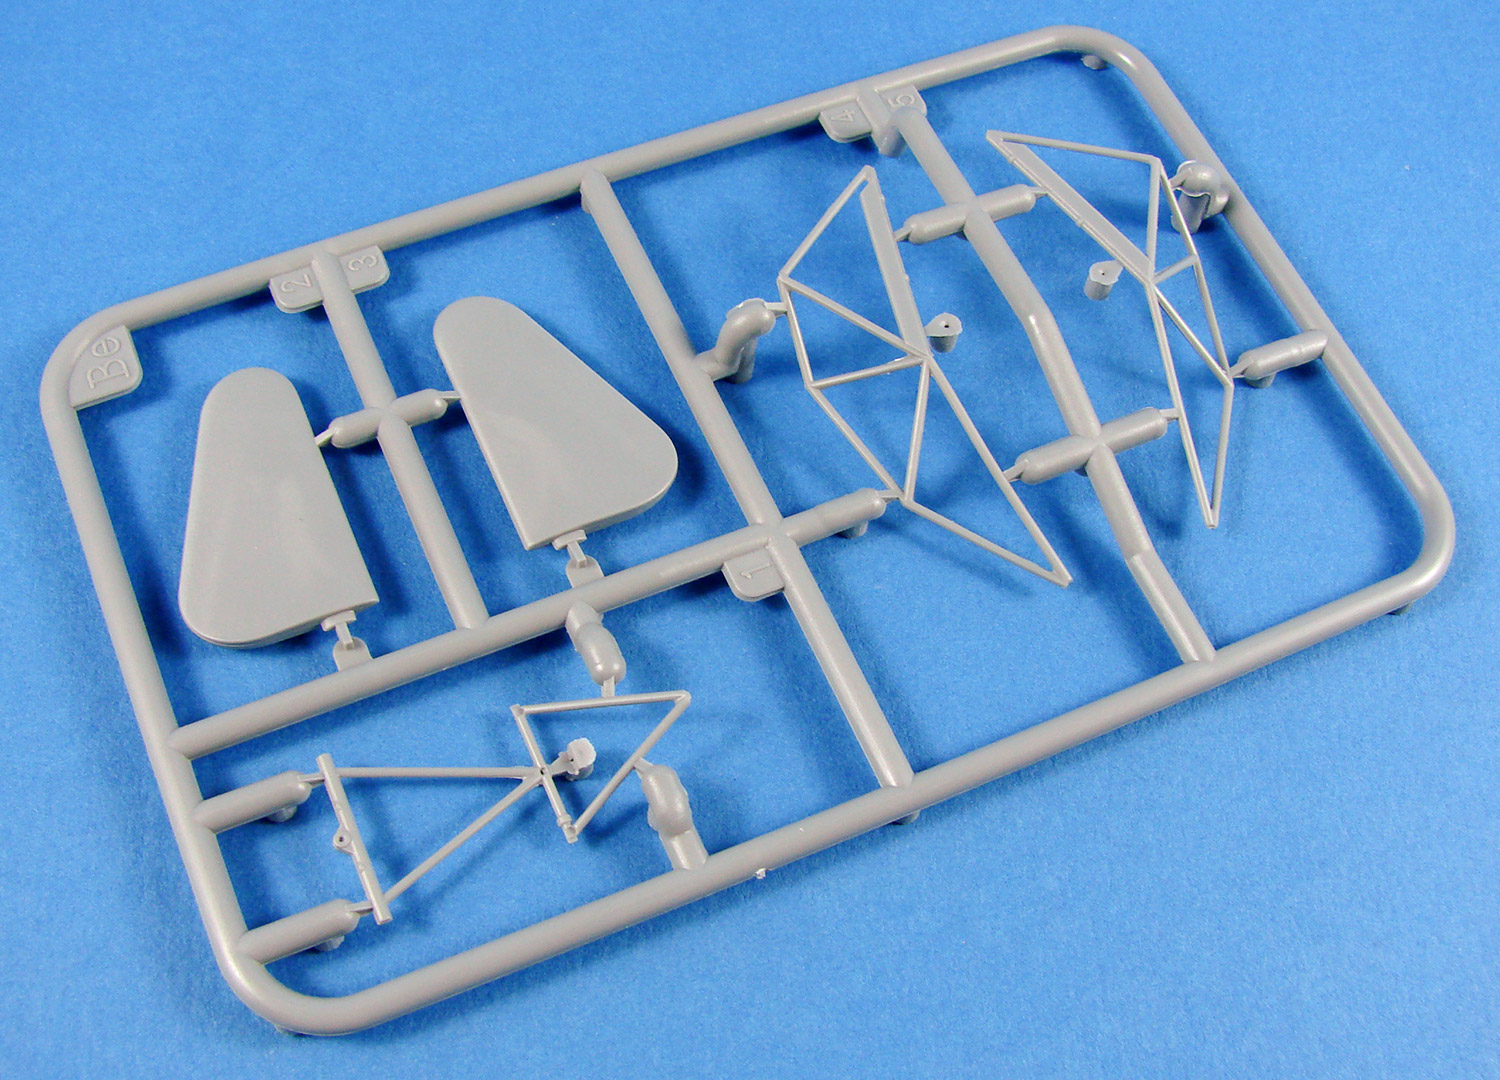
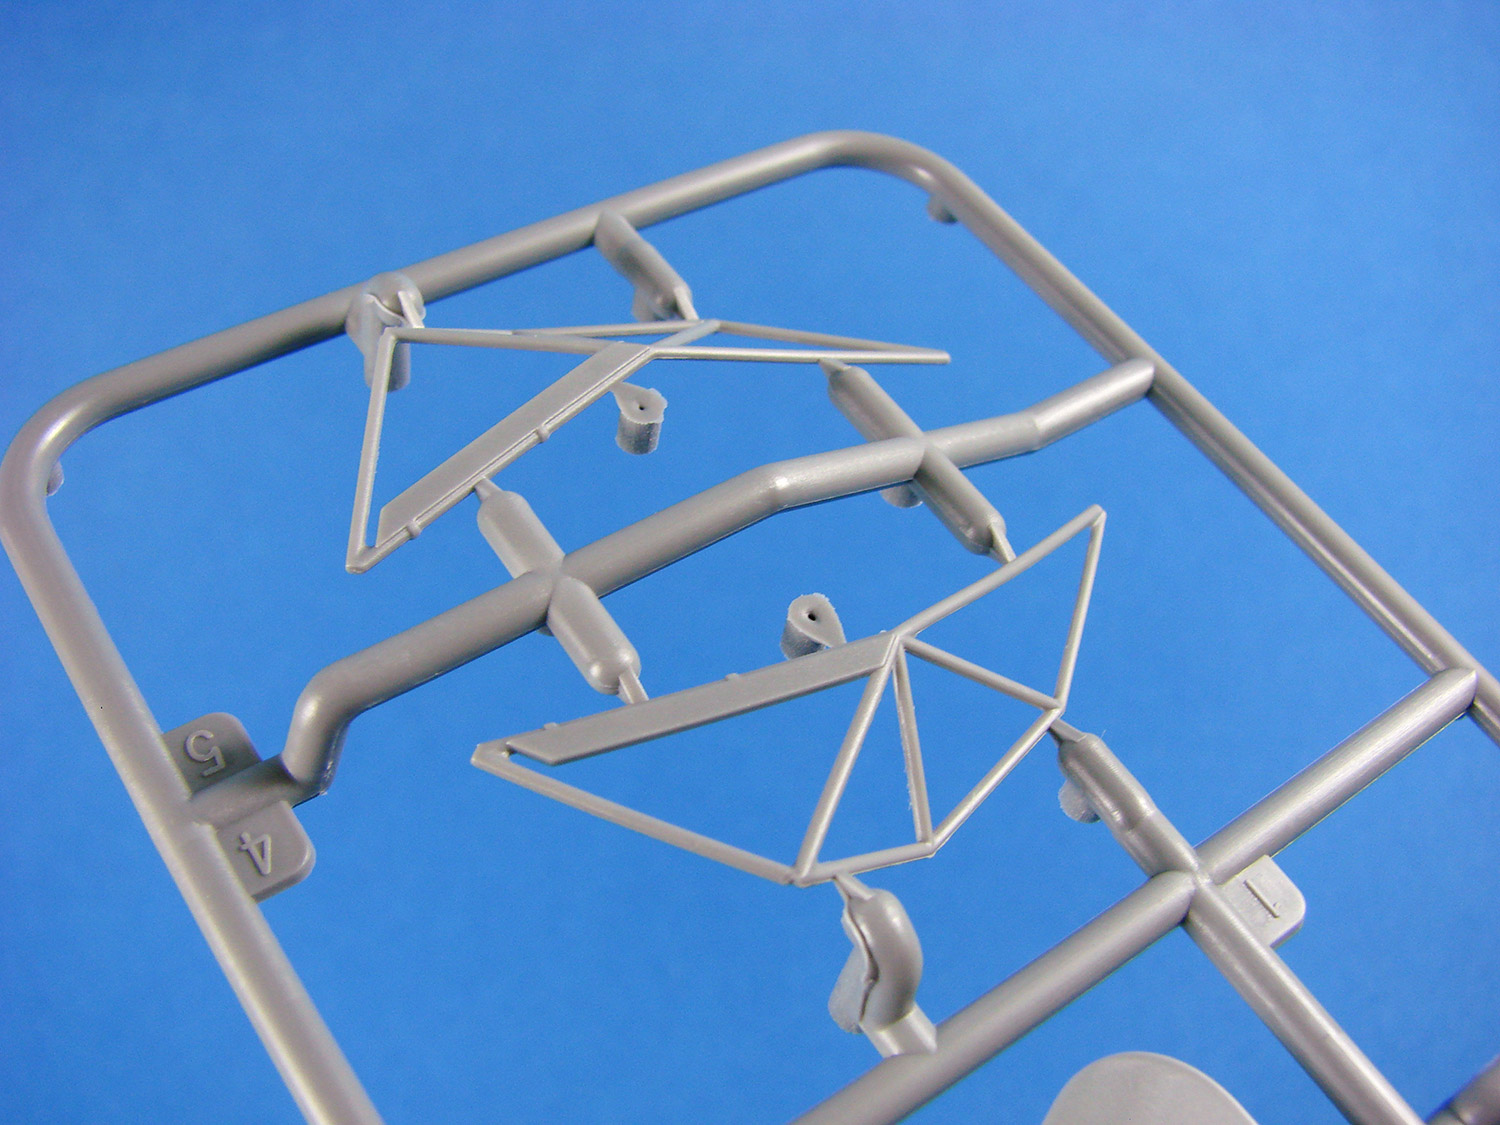
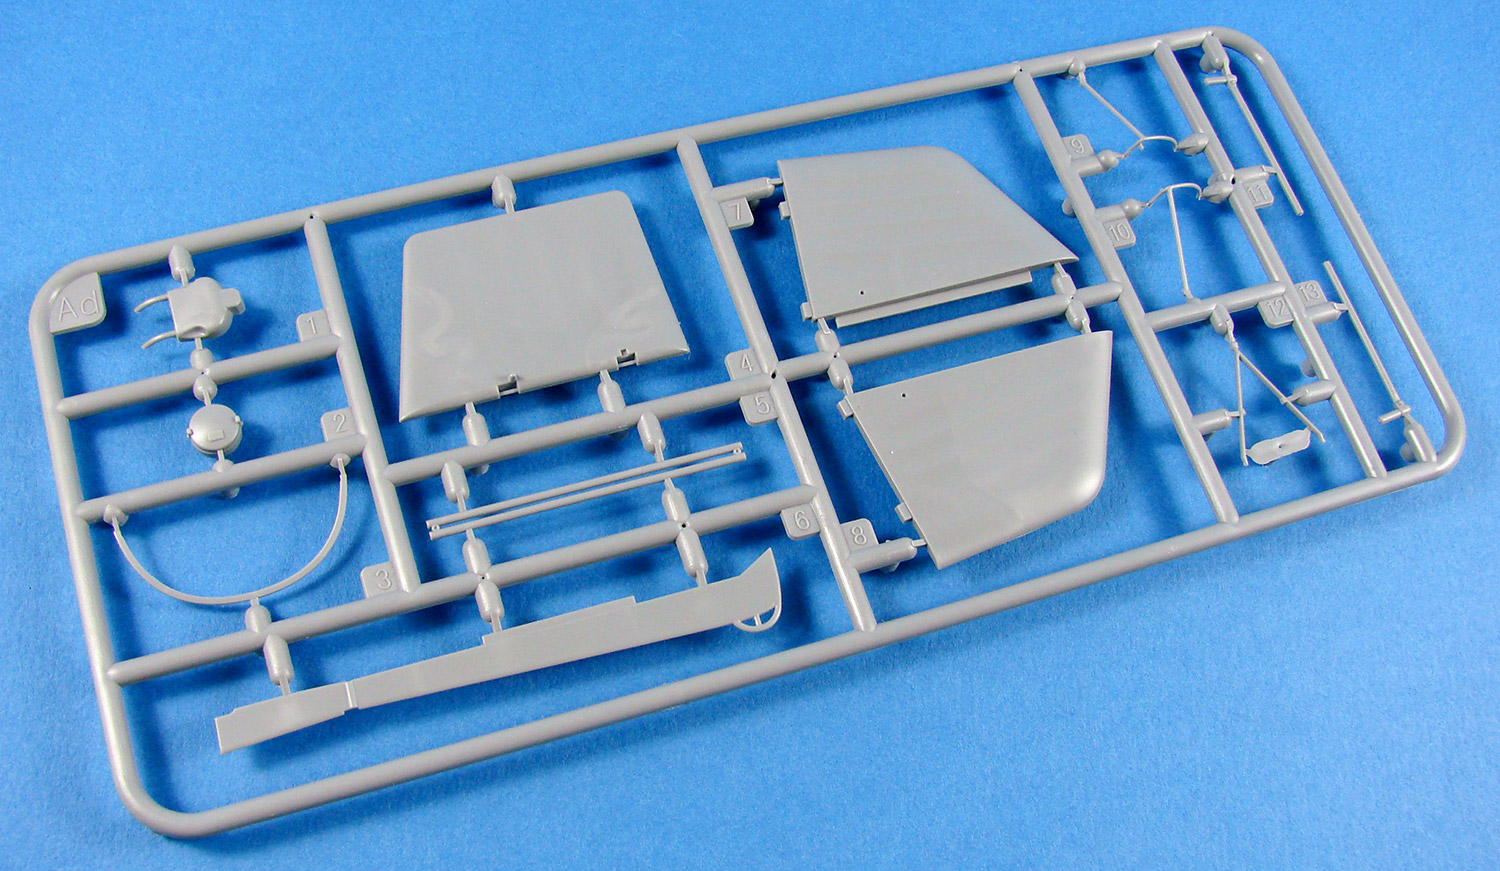
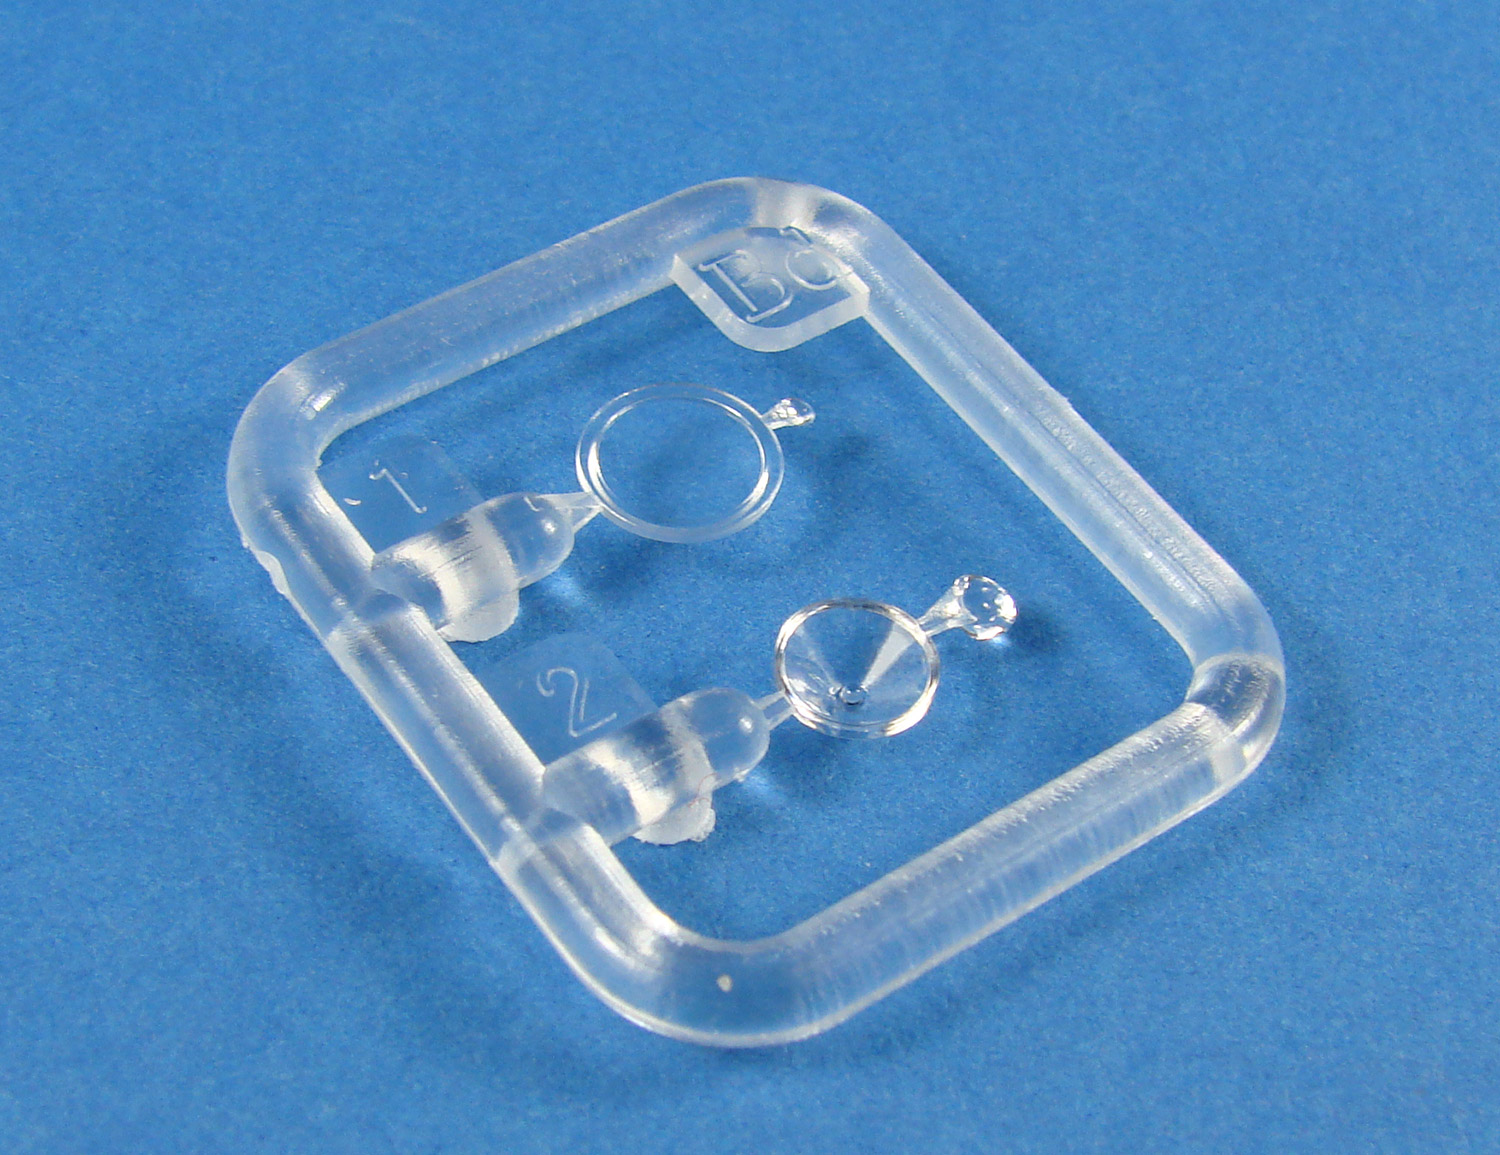
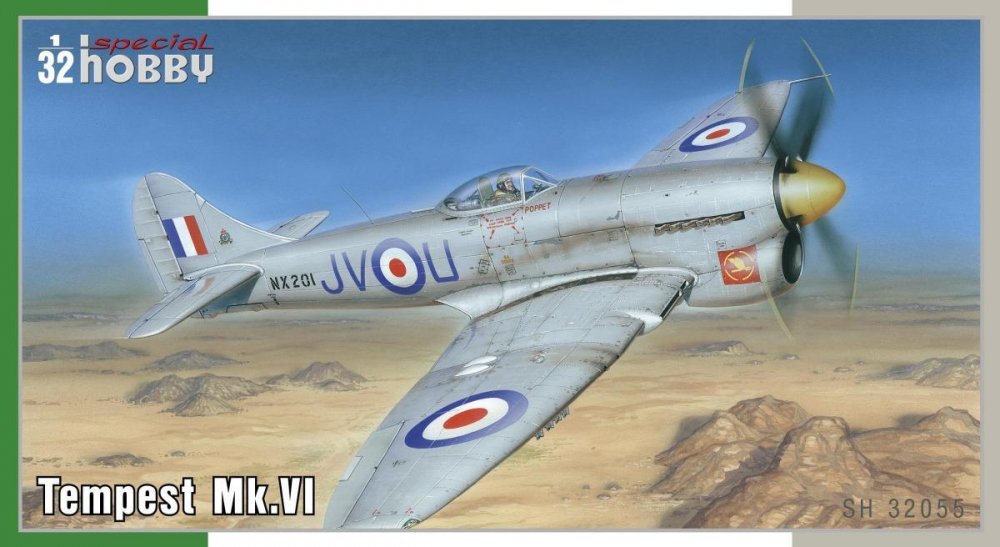
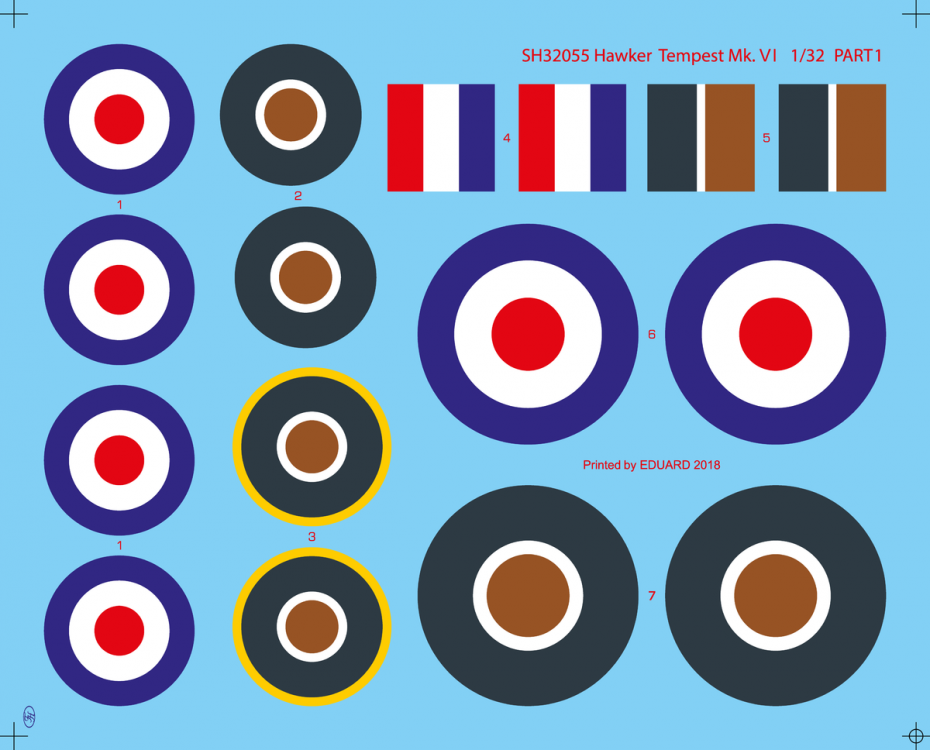
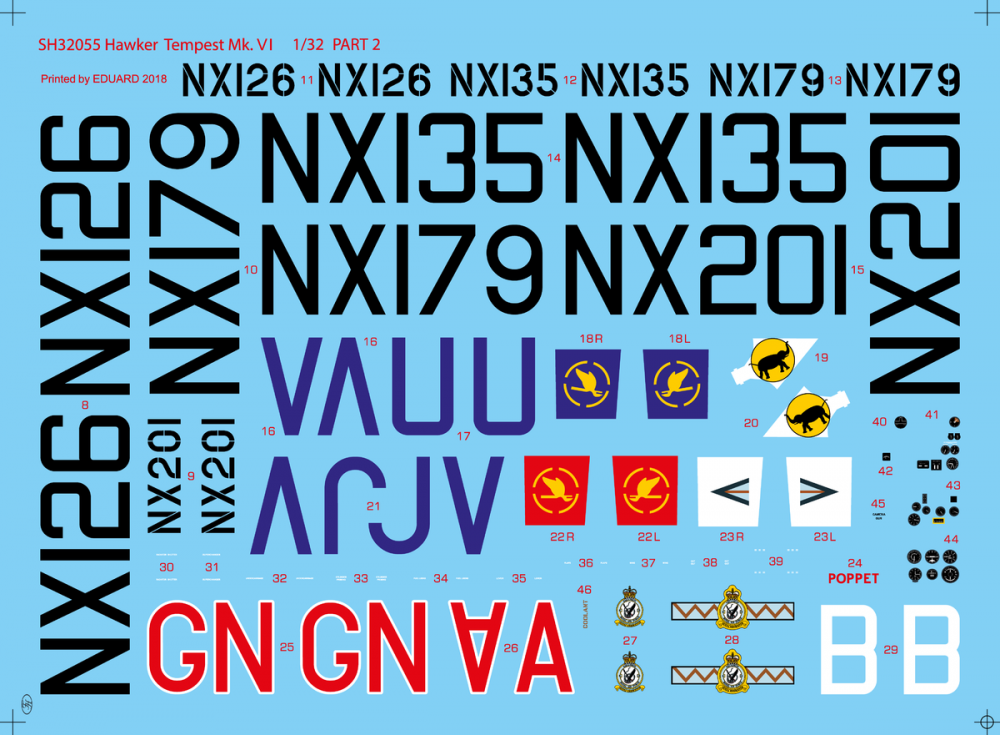
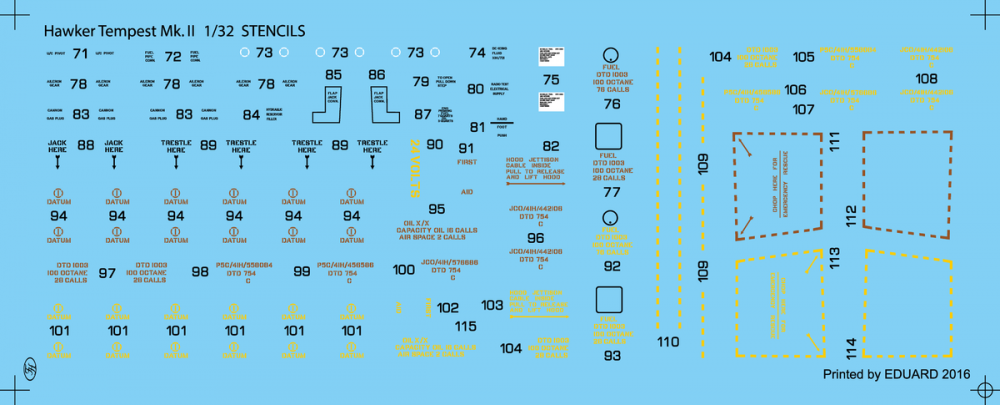
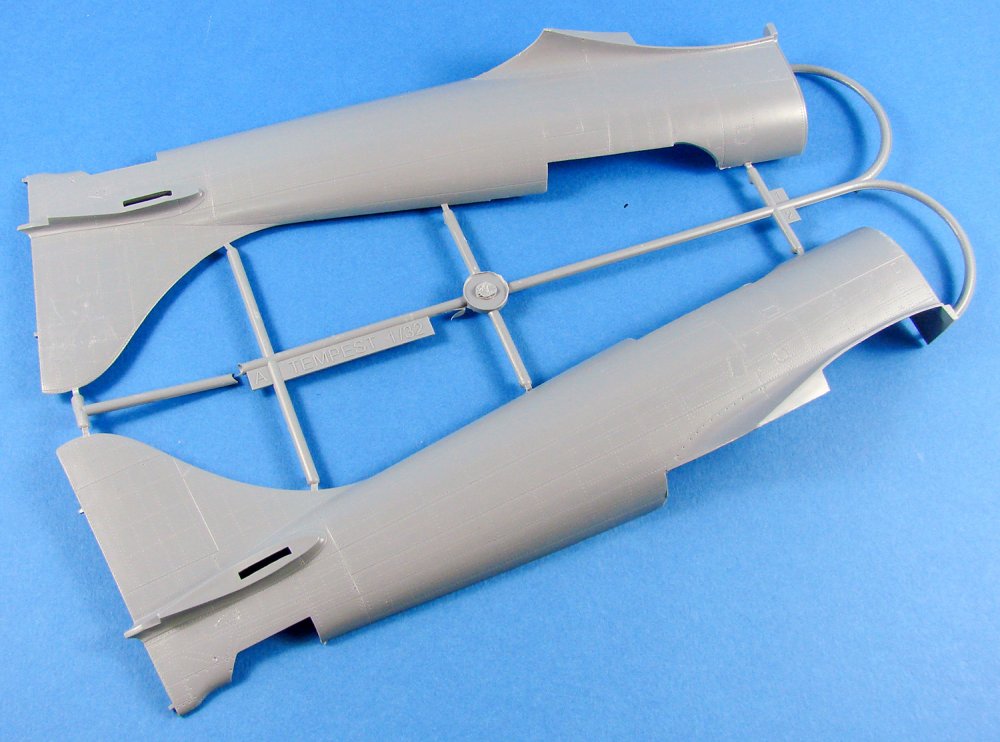
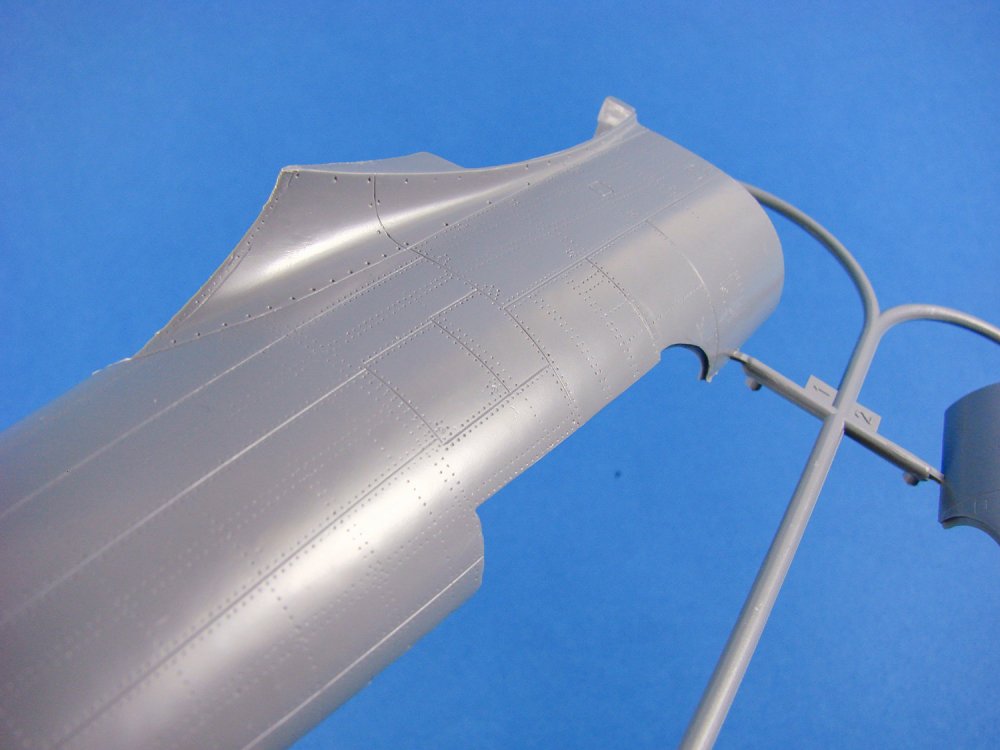
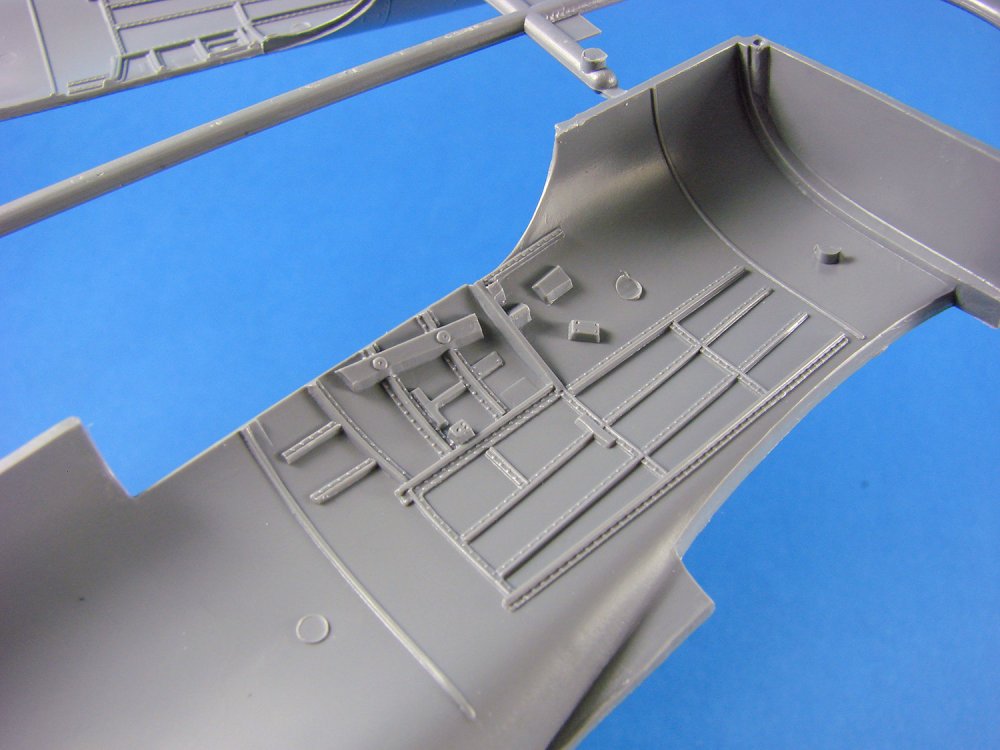
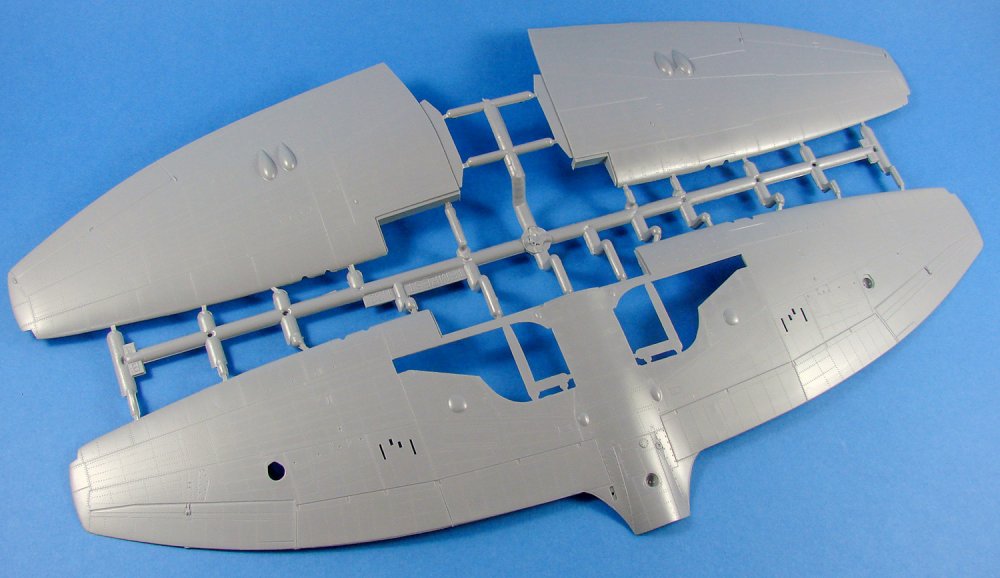
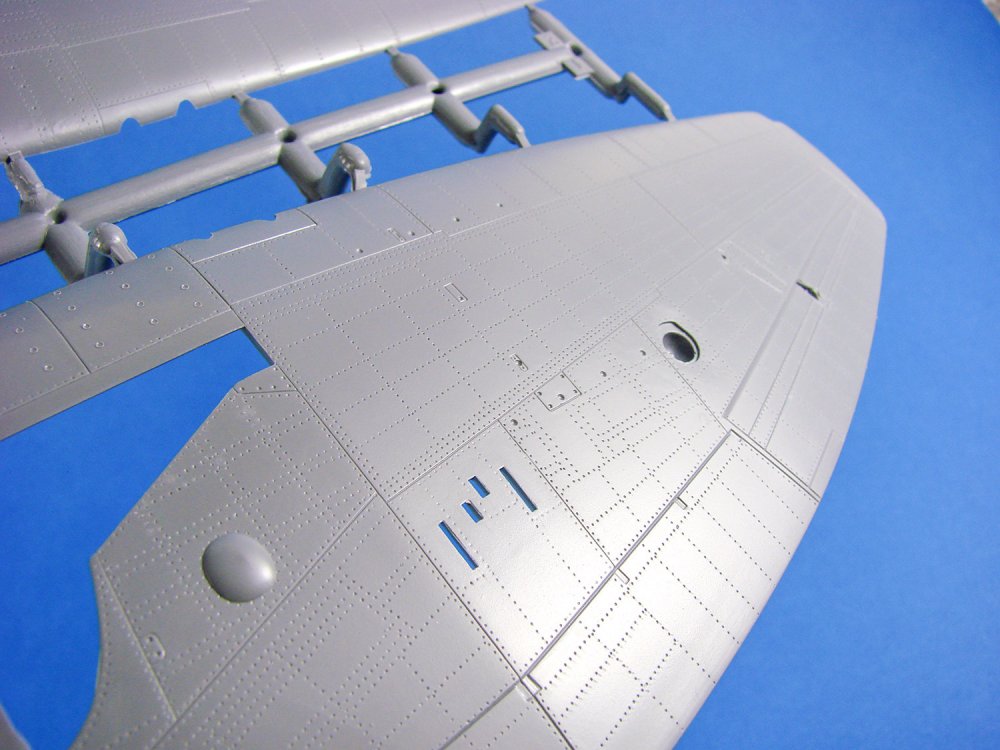
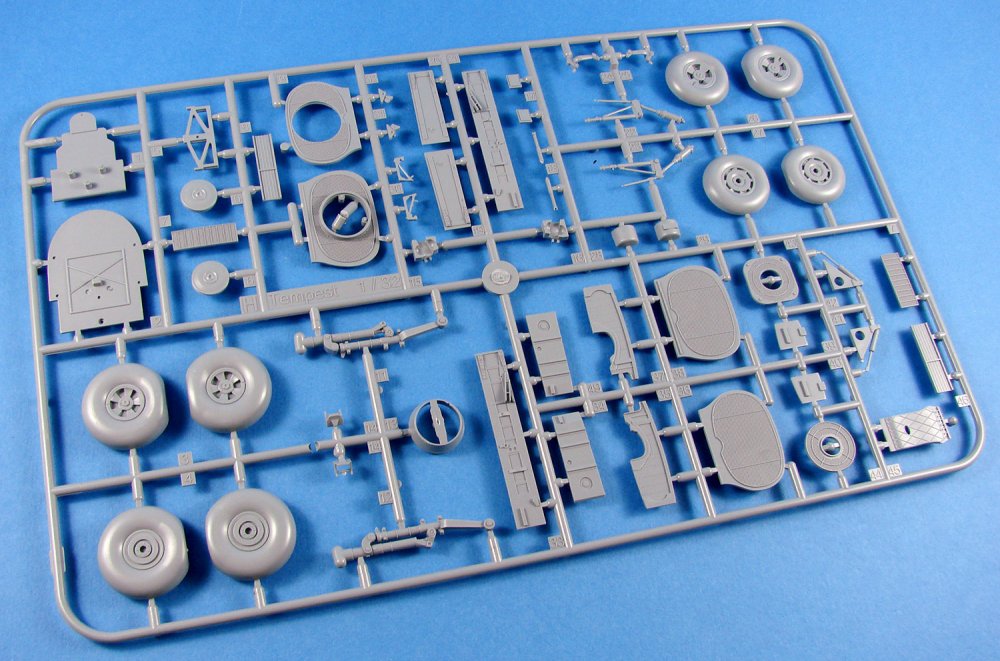
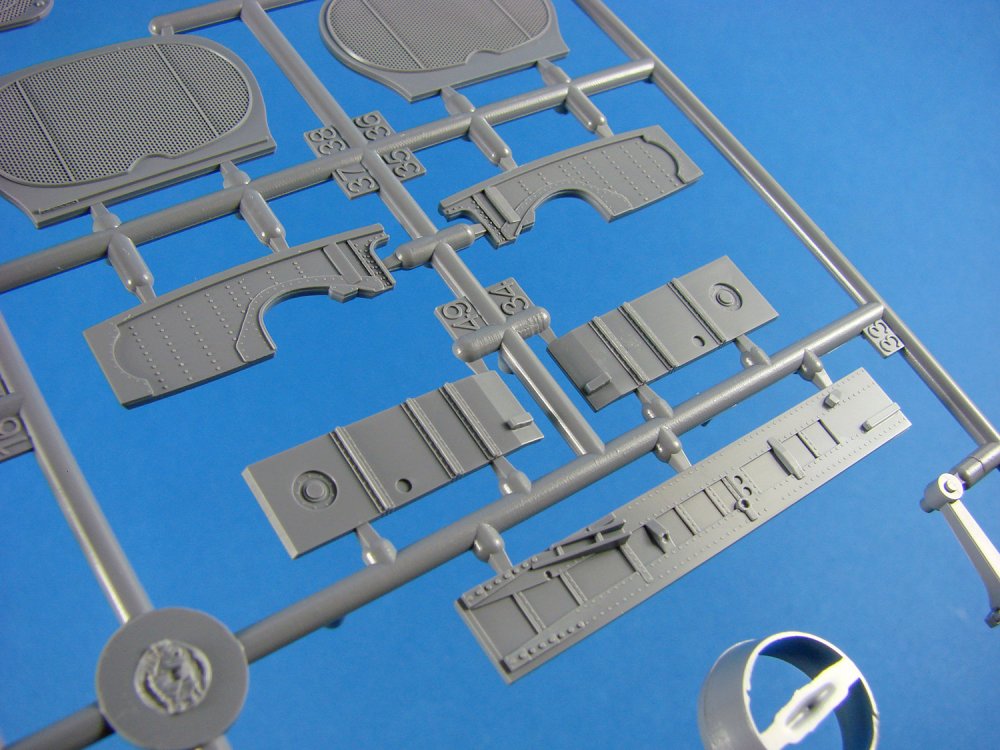
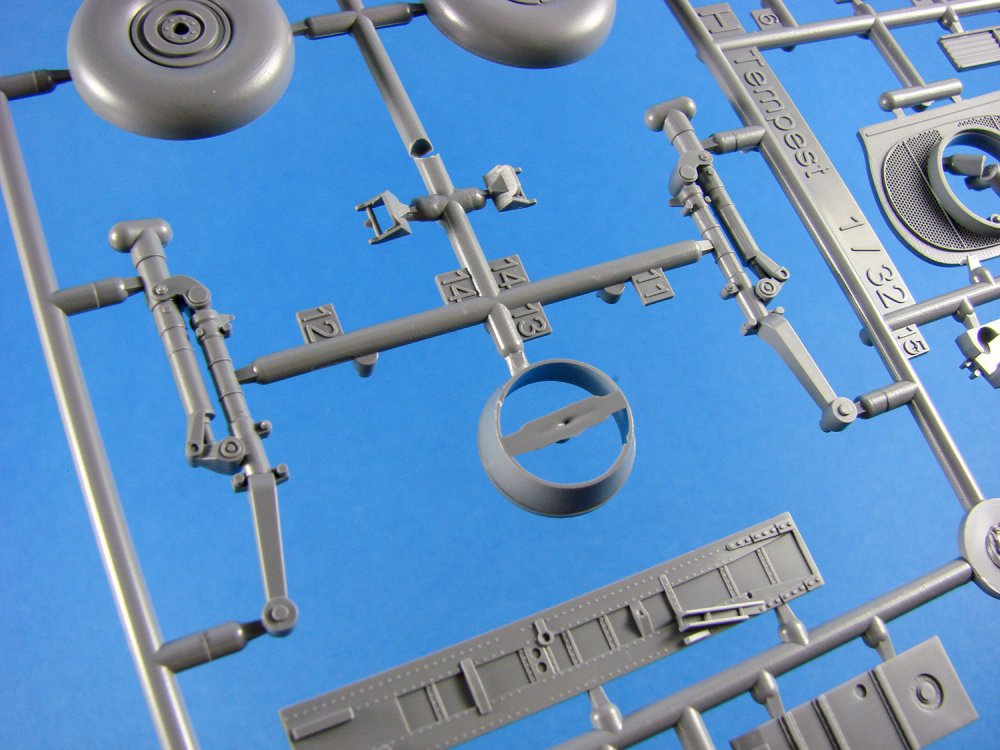
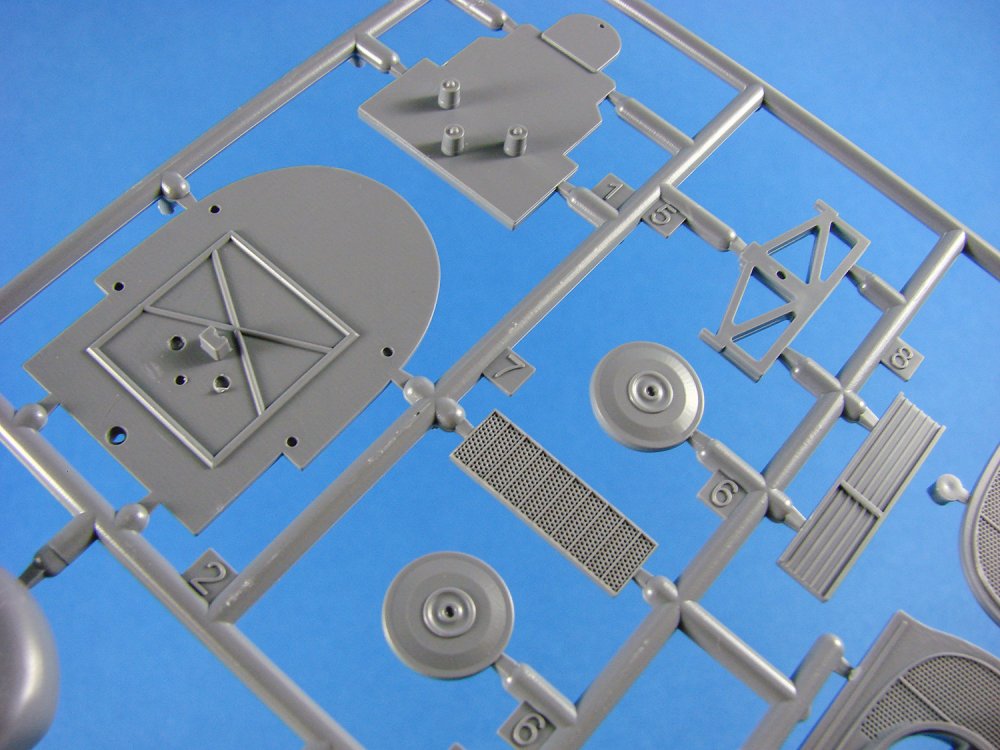
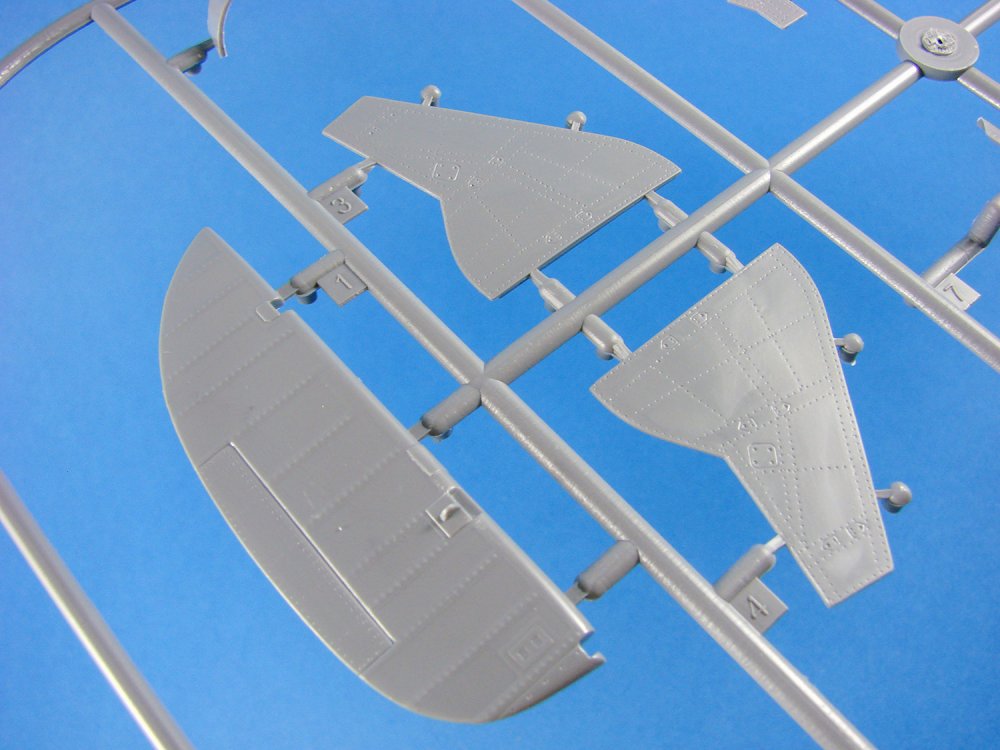
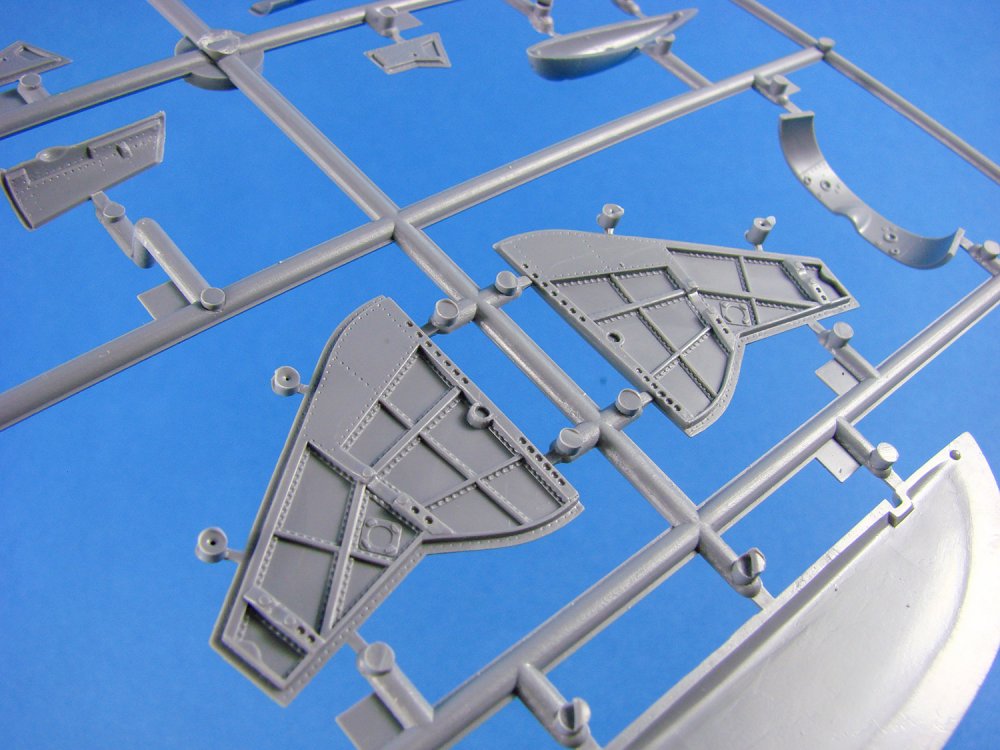
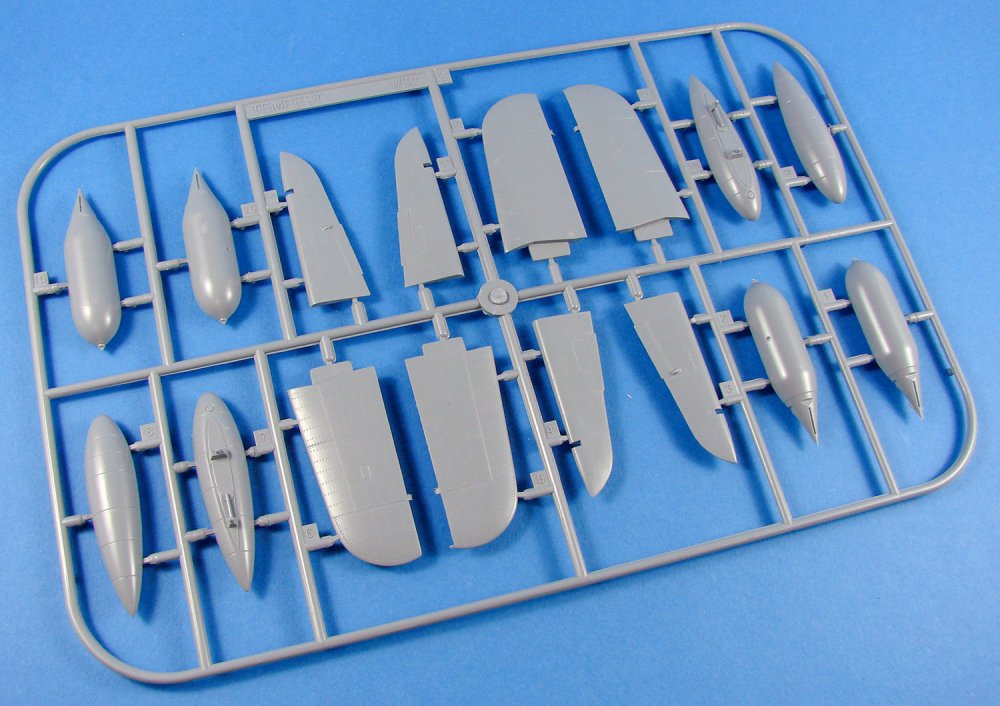
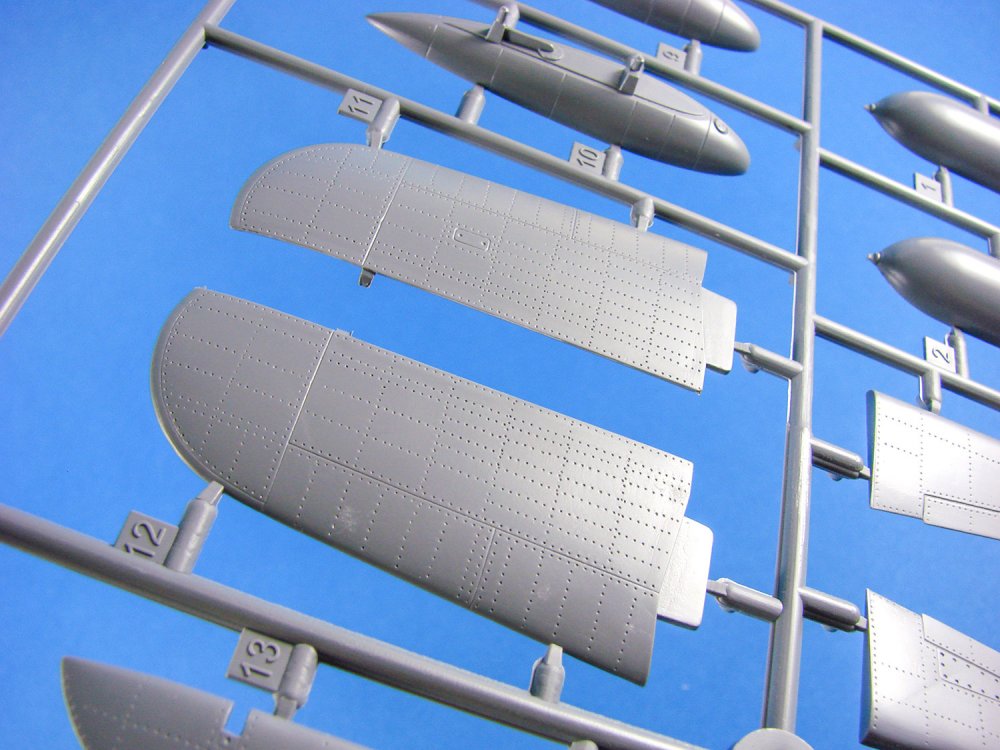
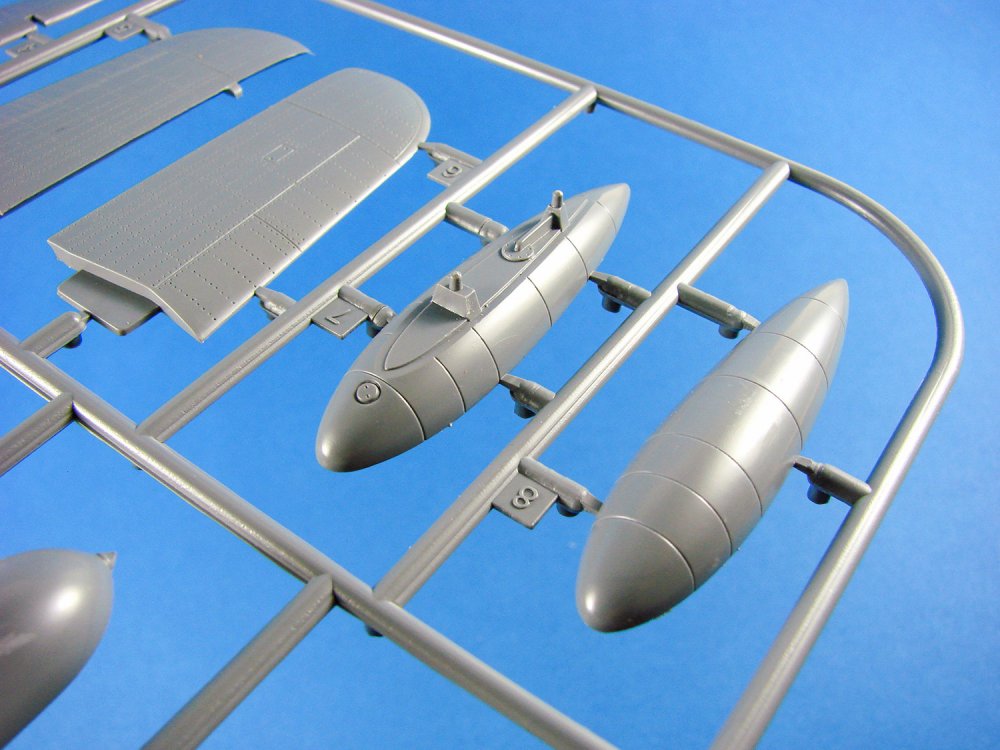
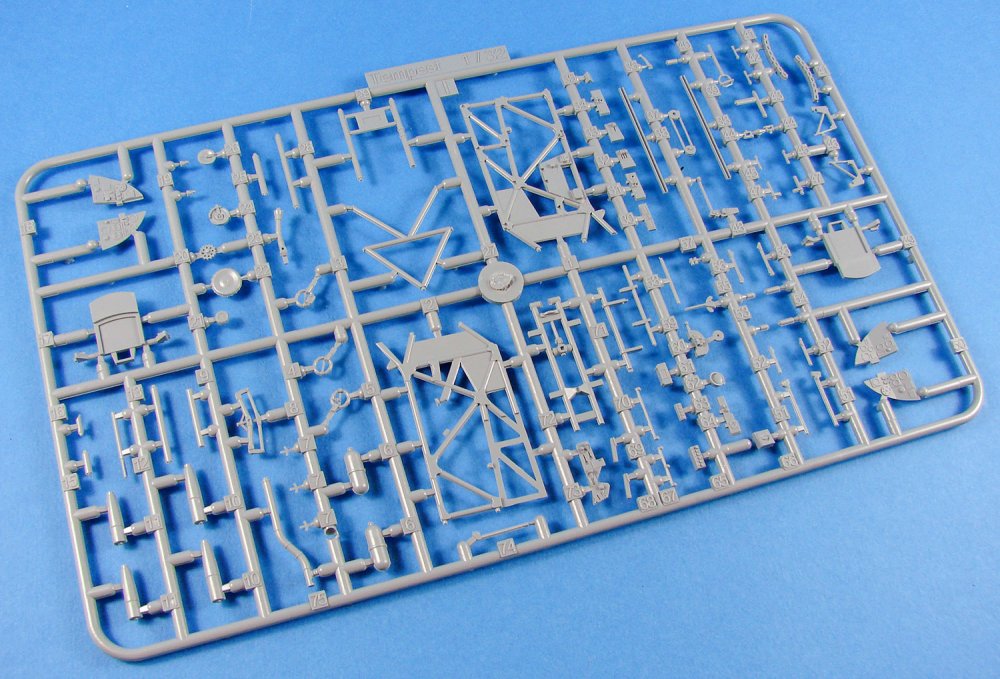
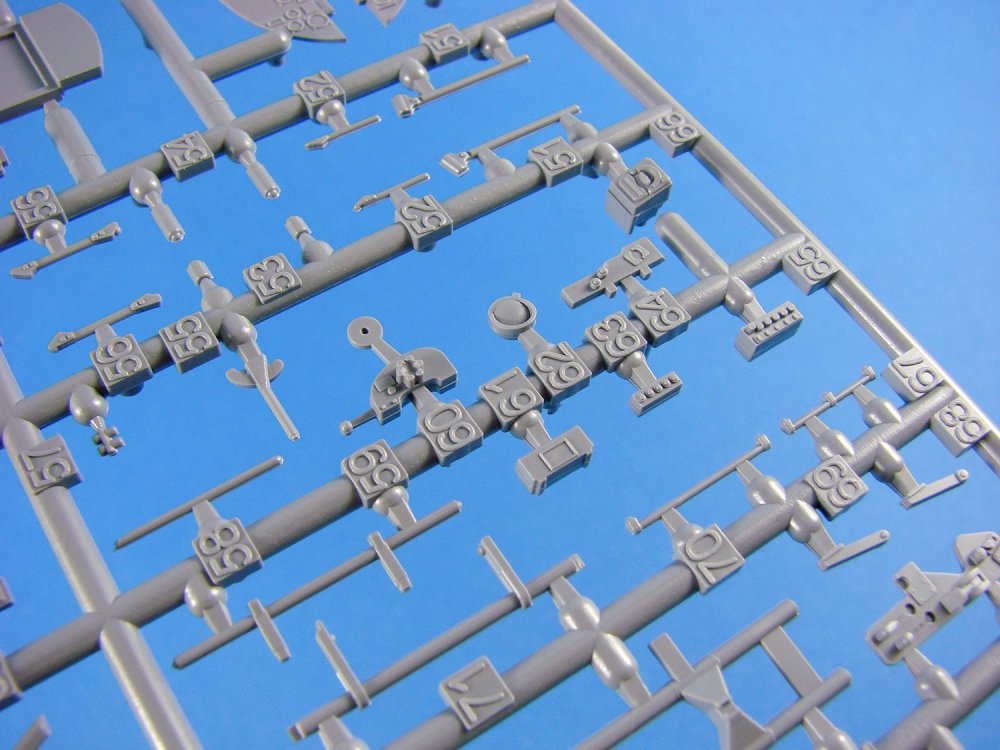
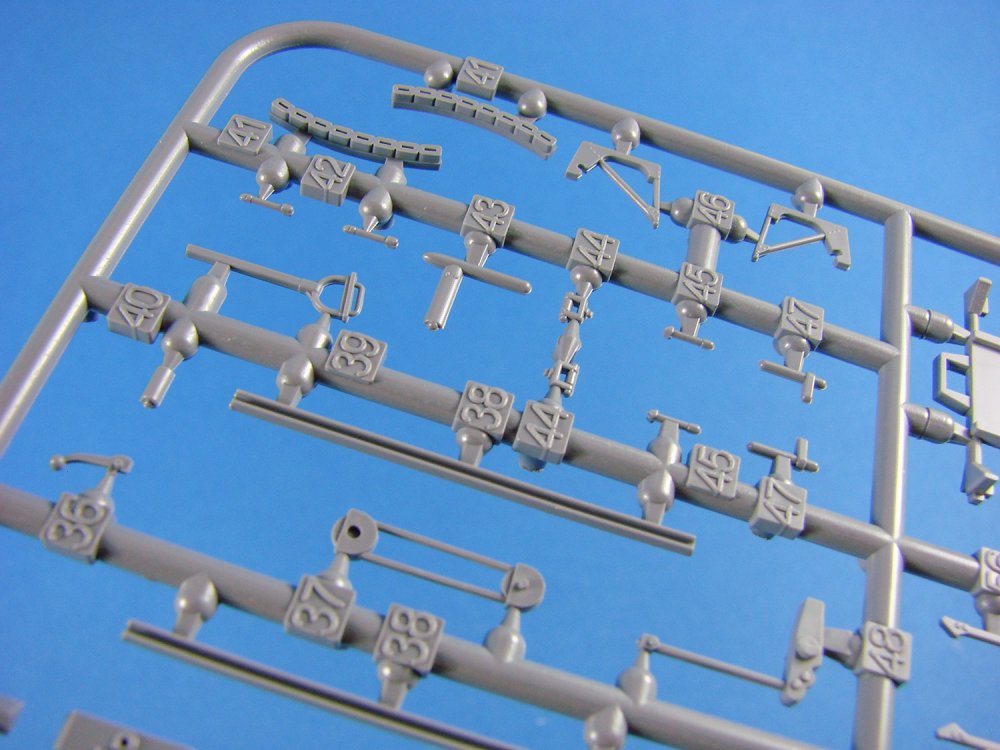
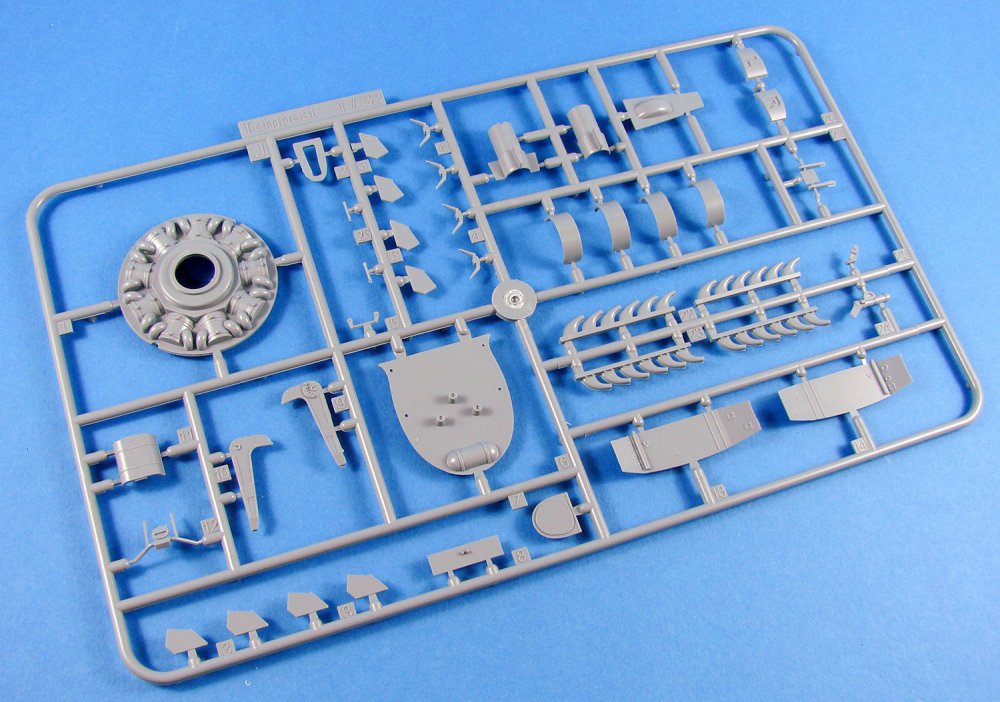
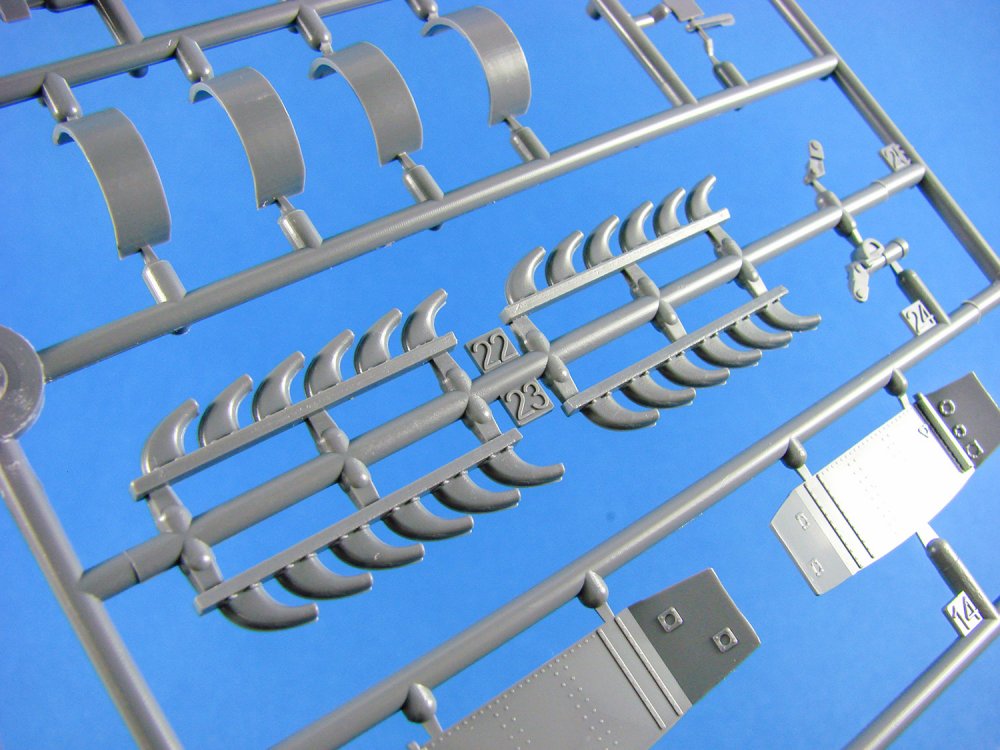
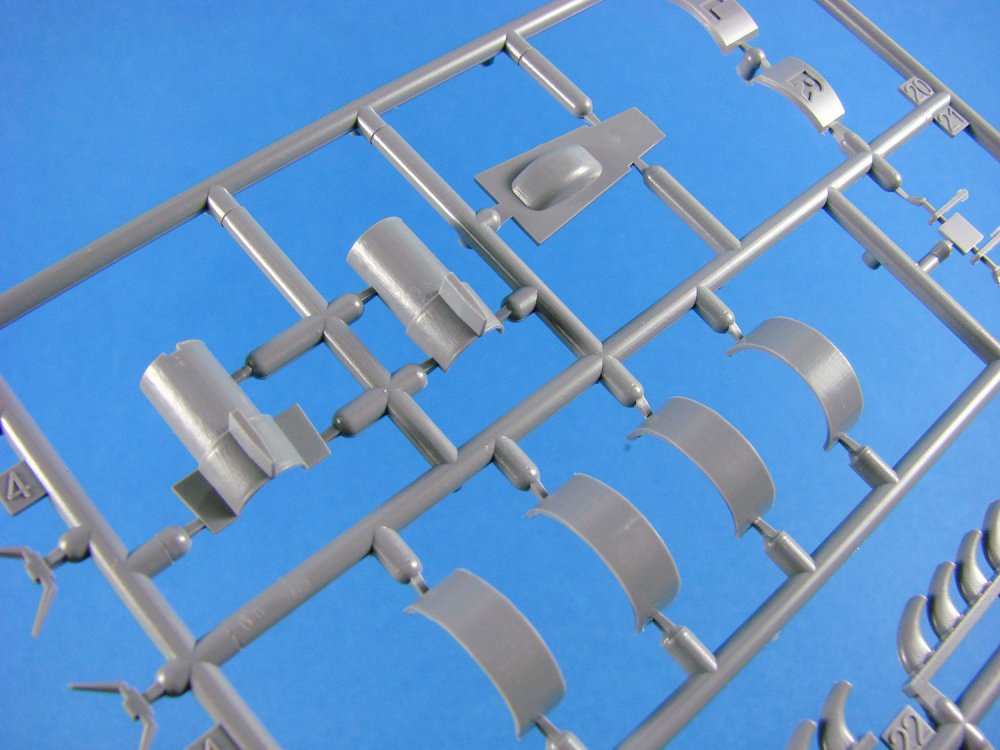
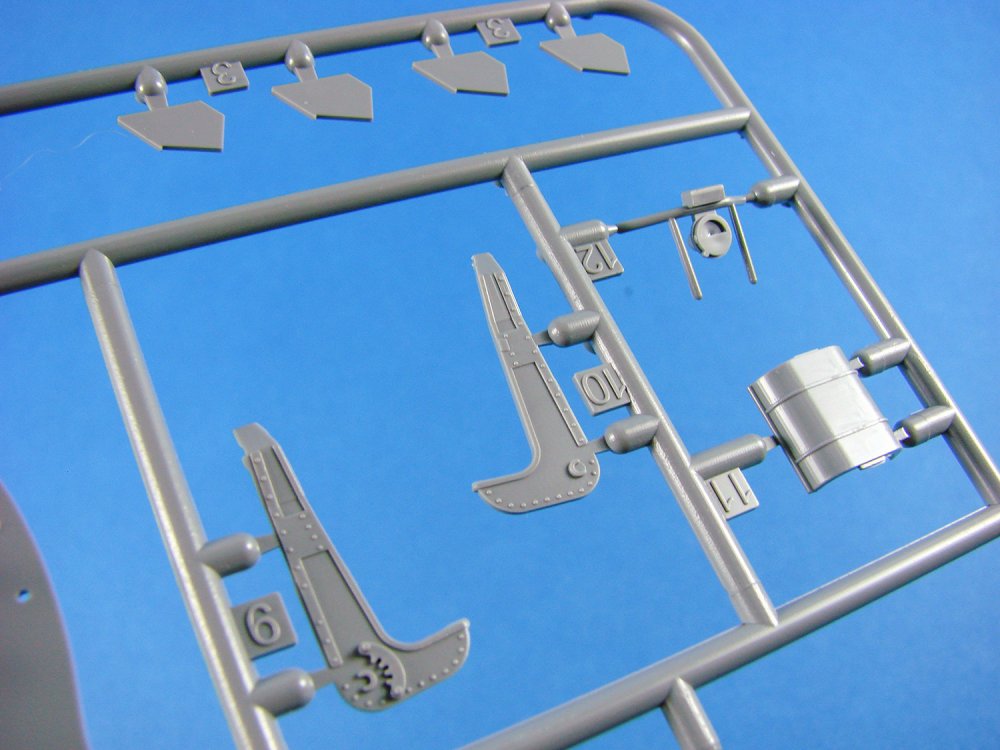
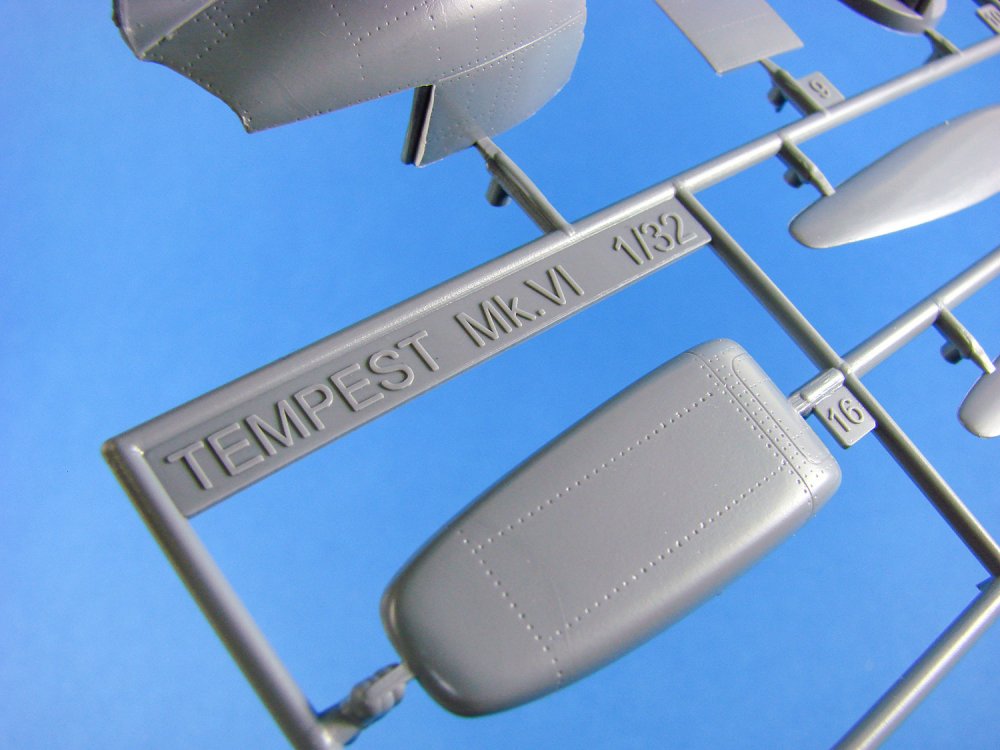
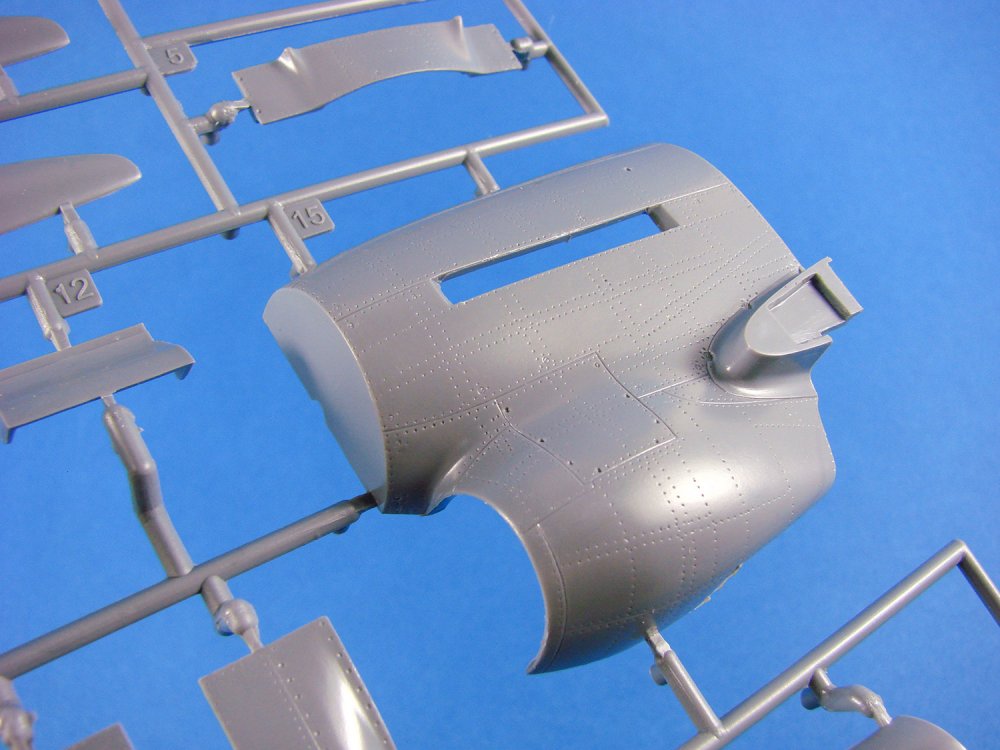
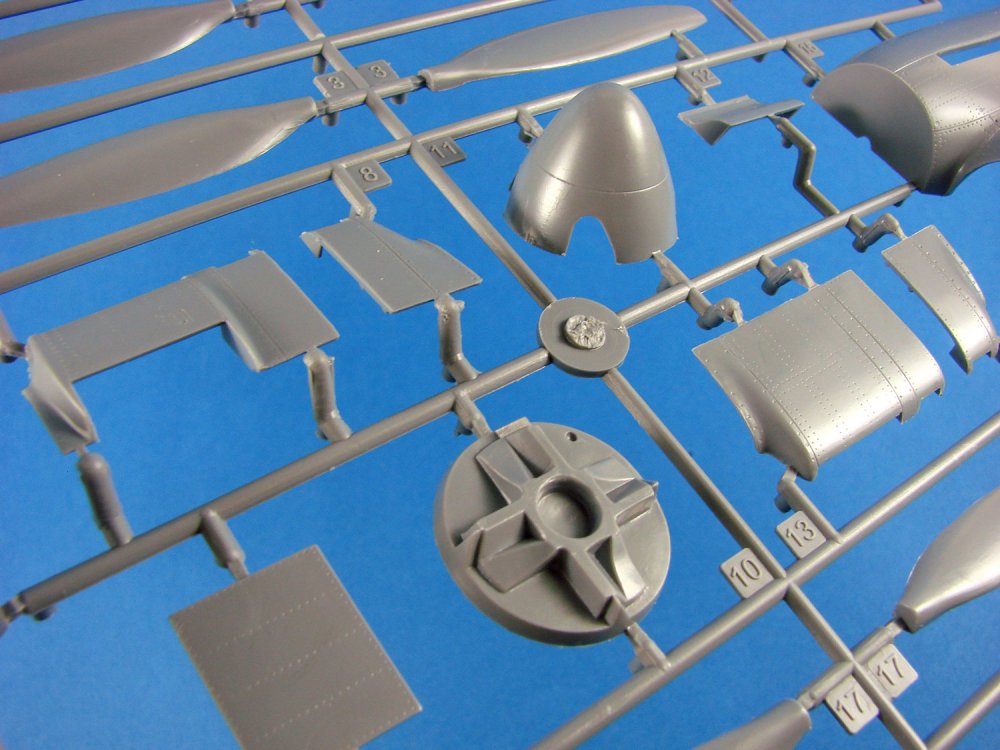
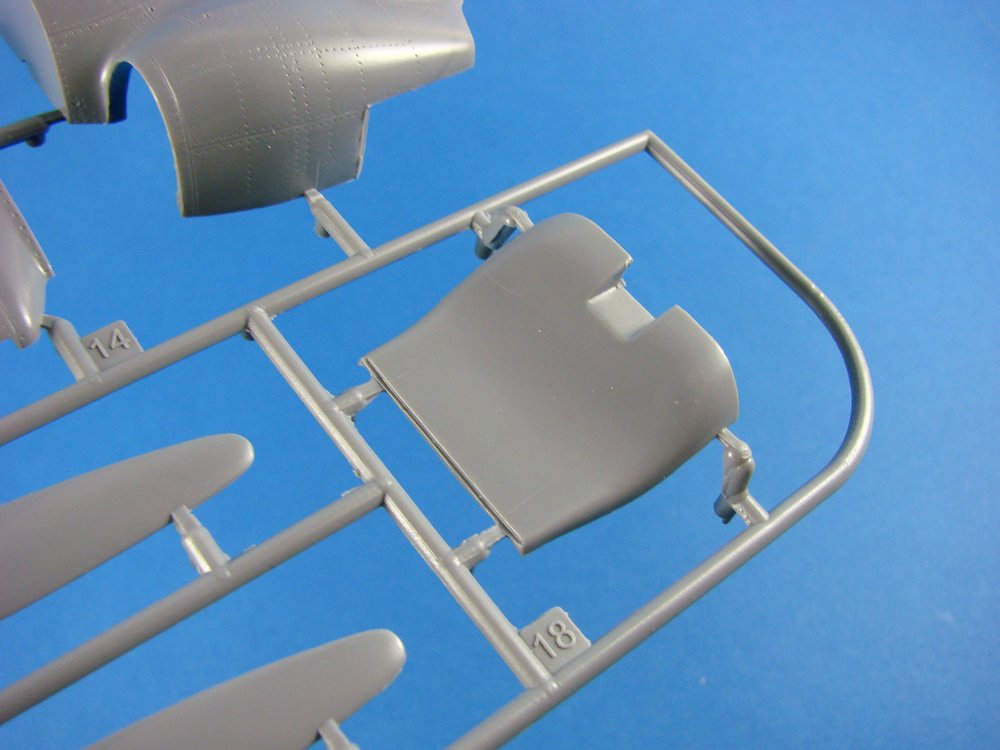
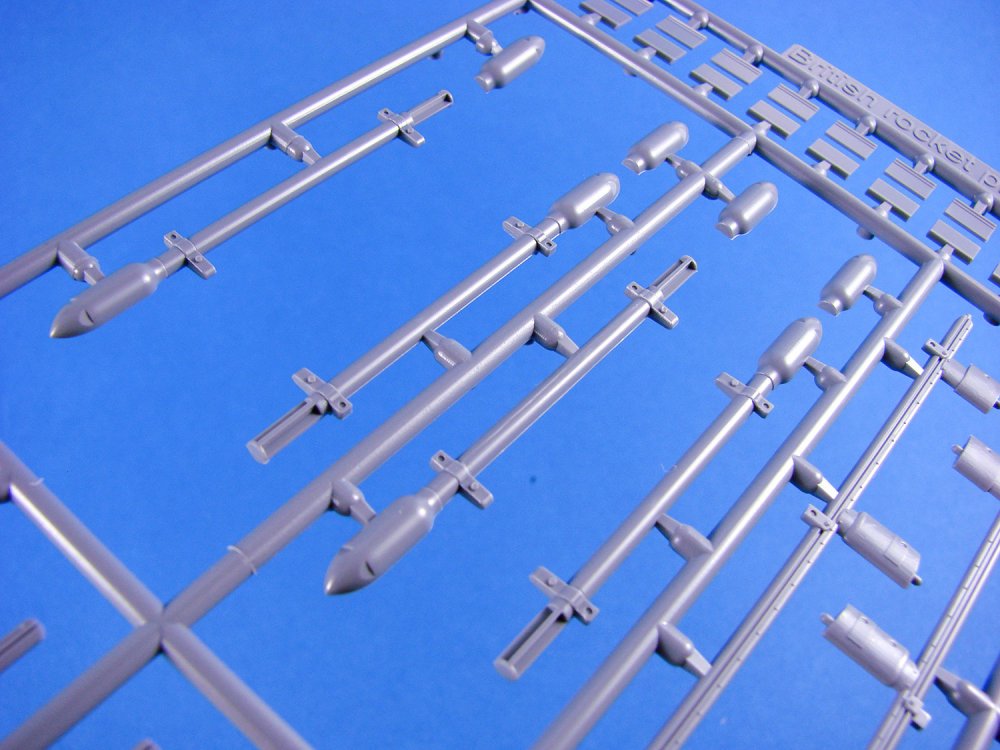
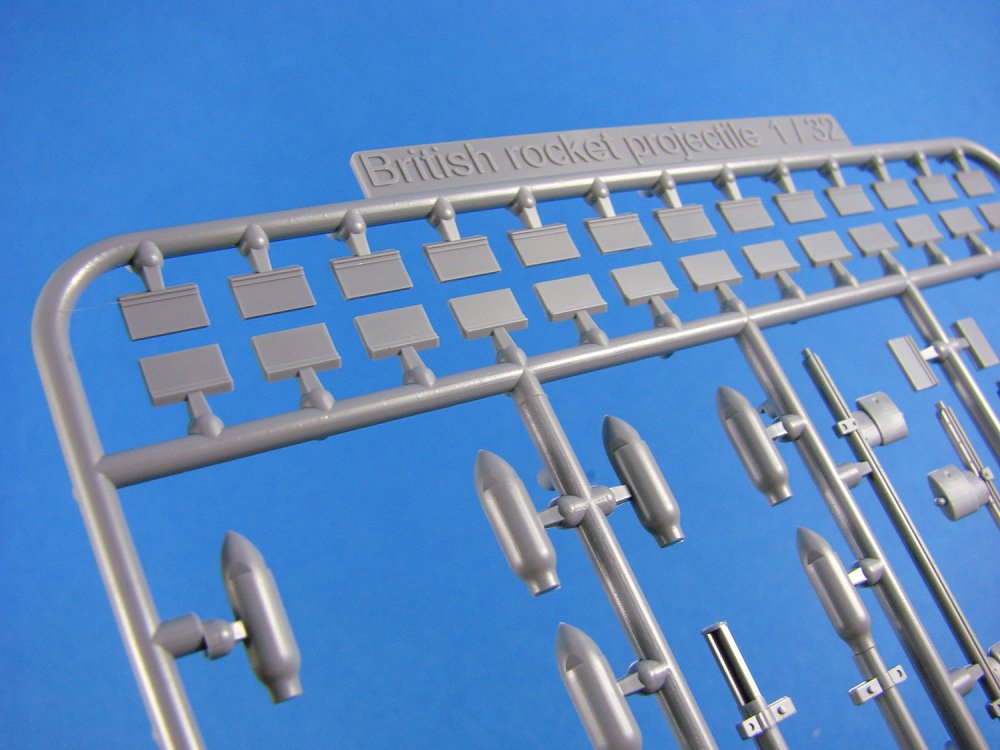
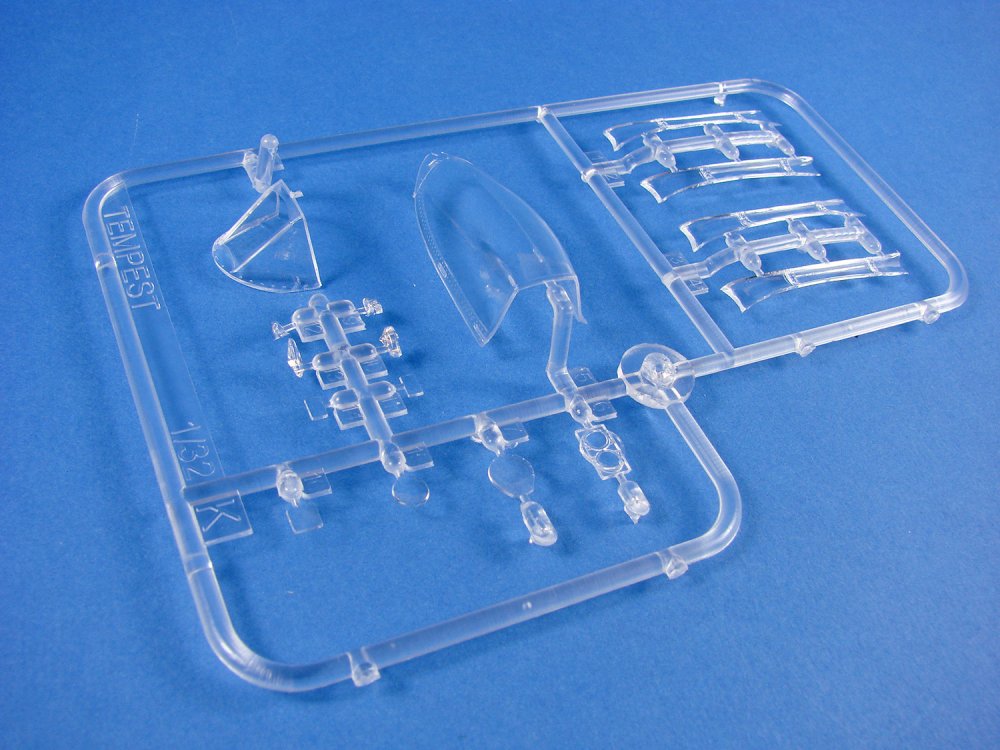
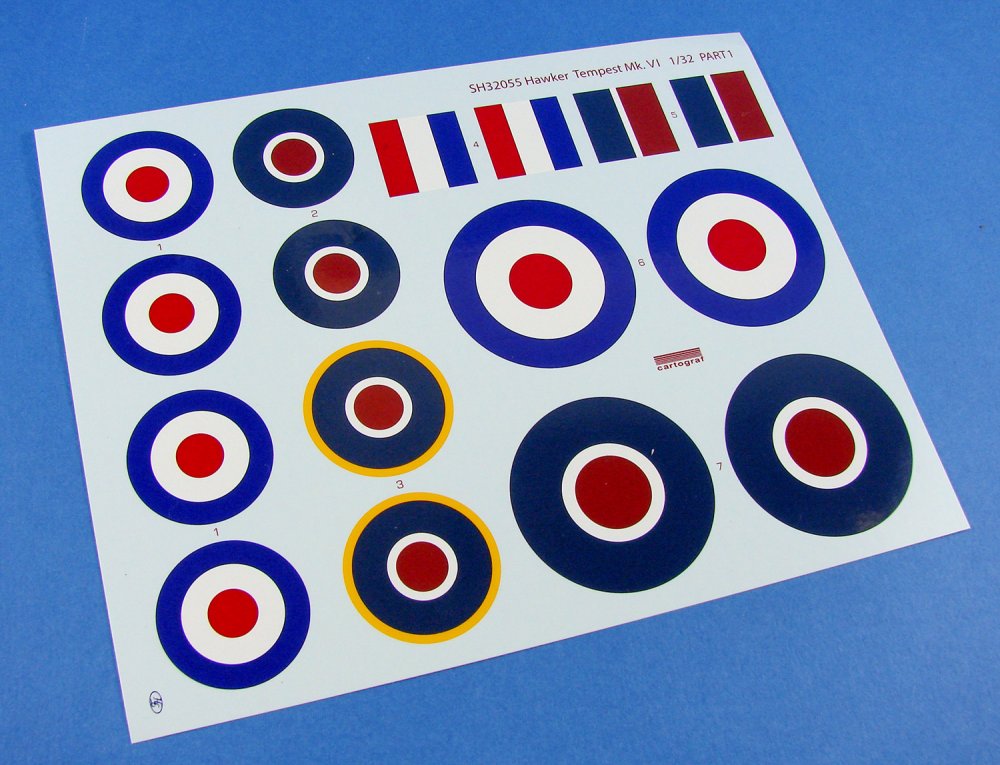
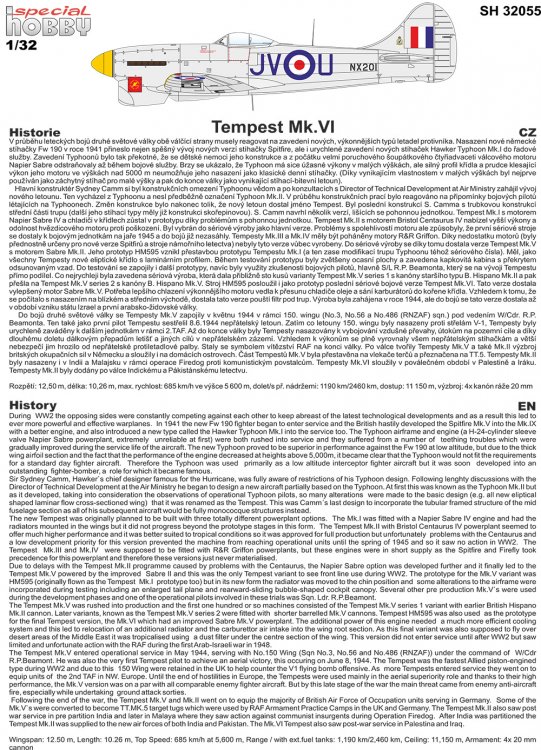
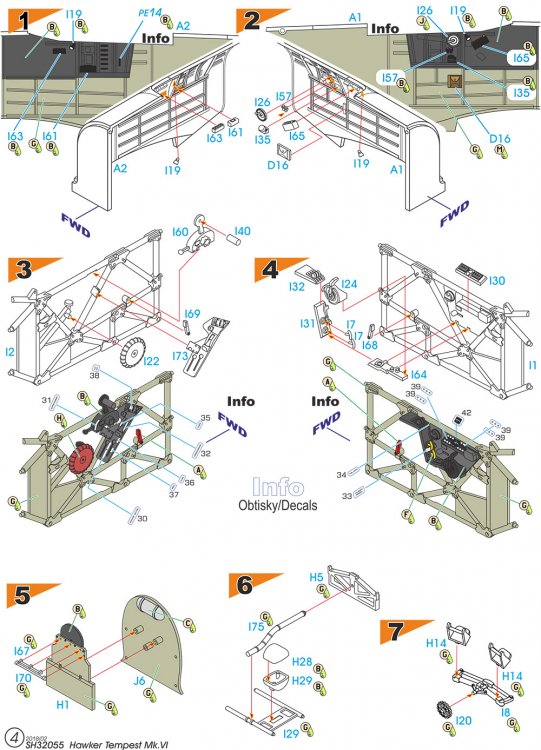
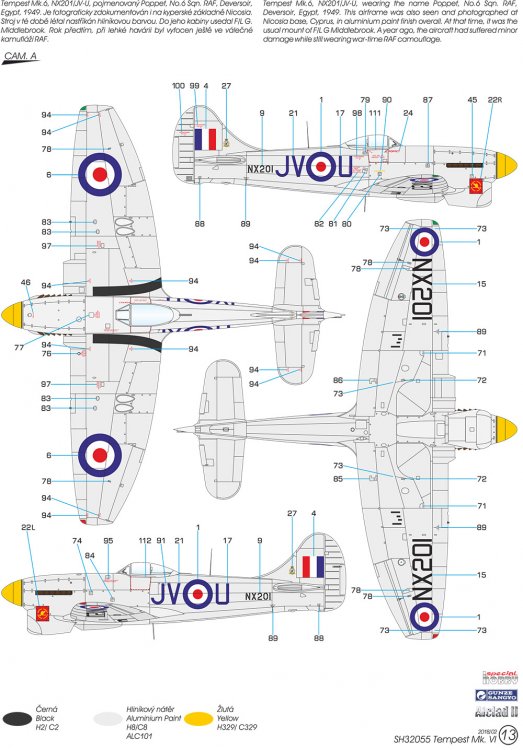
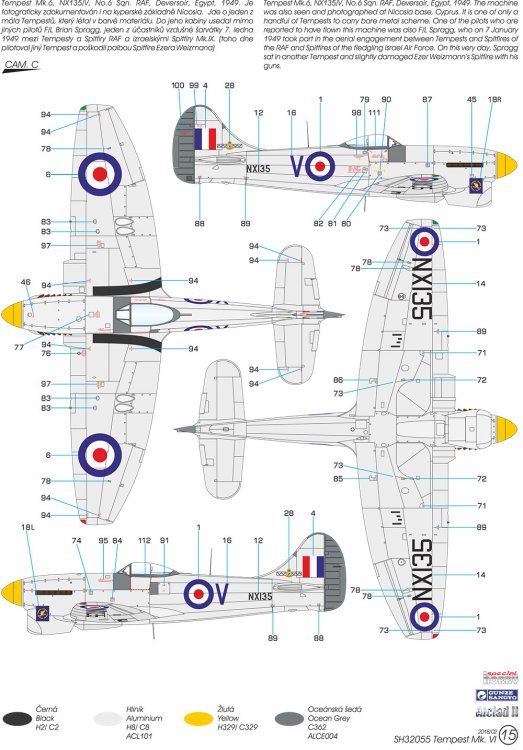
1/32 Tempest Mk.VI Special Hobby Catalogue # SH32055 Available from Special Hobby for 1.053 Kč (approx. £36) Unlike Spitfire development, where even major airframe revisions saw the type keep its original name, Hawker’s Typhoon project was different. The Typhoon wasn’t without its problems, such as a seemingly unstoppable leaking of carbon monoxide gas into the cockpit, and of course that tail unit which had broken away completely on some aircraft, ending with a series of reinforcement straps that were designed as a simple fix for this. Like the Hurricane, the Typhoon also had a thick wing section that provided the machine with enough space for heavy armament, fuel tanks and resulted in a steady gun platform that could be used for low-level operations. Unfortunately, the thick wing was responsible for high levels of drag that slowed the aircraft at certain altitudes and affected climb rates. To fix these problems needed a number of radical solutions which resulted in Sydney Camm and his team taking the Typhoon literally back to the drawing board. The resulting aircraft was sufficiently different enough to the Typhoon, as to eventually merit a name change, and in keeping with Hawker’s use of severe storm condition names for its range of fighters, ‘Tempest’ was chosen. Originally, the type was to have been called Typhoon II. Six prototypes were built, using different engines, resulting in not just the large-intake Typhoon style machine being built, but also a radial machine and a sleek-cowl Griffon-engine Tempest. Other variables including bubble canopy and car-door style canopy (á la early Typhoon), were included. The small tail fin surface of the prototype machines was eventually enlarged too, and the recognisable filleted fin introduced into production machines, as well as the wider span horizontal tail-plane that was seen on later versions of the Typhoon. A wider track landing gear helped with higher landing speeds. What made the Tempest radically different to the Typhoon was the design of a sleeker, laminar flow wing that was designed by NACA in the USA and implemented on the new Mustang design. The Tempest Mk.V, which is the subject of this kit release, was fitted with a Napier Sabre IIa/b liquid-cooled H-24 sleeve-valve engine, and had wingspan of 41ft, length of 33ft 8in, and a maximum speed of between 432 and 435mph at 19,000ft. Armament was typically Mk.II/V Hispano cannon (x4), and rockets and bombs could be carried externally, as could drop-tanks for increased range/operational time. The Tempest went through various incarnations, and the later Sea Fury was a development of this, through the Tempest II family, retaining the later Bristol Centaurus engine. The Kit It’s hard to believe that this is now the FIFTH incarnation of Special Hobby’s Hawker Tempest kit since it was initially released as a new-tool in 2016. In that time, we have seen three Mk.V kits (Hi-TECH #1, Hi-TECH #2 with resin engine), standard Mk.V, and also a standard Mk.II with the Centaurus engine. We knew a while ago that the Mk.VI would be making an appearance eventually, and here it finally is. One thing we have learned about the previous Sabre-engine variants is that there were a few shape issues with the nose, although I do struggle to really see them, they are there. This release has a newly-tooled sprue with a slightly different layout that caters specifically to the Mk.VI with its leading-edge intakes. I know for certainty that Special Hobby haven’t re-tooled the nose for shape, and this remains identical to the Mk.V release. If it really concerns you, then Barracuda have their resin nose replacement. Special Hobby’s Tempest kit is packed into quite a large, standard type box with a removable lid, and adorned with a superb artwork of a high-speed silverTempest over the sands of Egypt. This is one of the FOUR scheme options provided. As with the other Tempest kits, the lid is difficult due to the tight fit, but once off, you’ll see NINE sprues of medium grey styrene, packed into two single clear sleeves, ONE sprue of clear parts that is packed into a separate sleeve and a set of decals. The new Mk.VI parts are bagged separately to the legacy parts. A large colour-printed instruction manual sits on top of all of the parts. Being a standard release, this kit contains no photo-etch or resin parts. SPRUE A Only two parts here, but pretty key ones; both fuselage halves. The nose is moulded separately, allowing this tooling to be good for all versions. The kit shows just how far this company have come in the last years, with regards to both moulding, tooling and detailing. You would be hard pressed to differentiate the Tempest from a kit made by a whole multitude of more mainstream manufacturers out there, such as Hasegawa, Revell, Airfix etc. Surface detailing is excellent, with restrained, even rows of rivets, and lots of extremely fine panel lining and port/panel access plates. Edges are sharp where the wing will meet the fuselage etc. and the parts have a nicely polished finish to them that wouldn’t look out of place on a Tamiya release. The rudder is separately moulded, and where the nose cowl parts will fit, the forward fuselage has a moulded bulkhead that will provide rigidity to the proceedings. Internally, those high standards of detail are also evident, with stringer and former representation being both refined and sharp, and with associated rivet detail included. Only one ejector pin mark exists in this area, and this is on the area adjacent to the instrument panel. As no other detail is in the vicinity, removing this will be easy. Some detail is also included around the area of the retractable tail wheel, using the same level of refinement seen in the cockpit area. Note also that this model has locating pins too, unlike some of the other less mainstream model kits. I have to say here too that Special Hobby is NOT a Limited-Run company, but fully mainstream. SPRUE B Simply put, here be wings! These are supplied as a single span lower part, and upper port and starboard panels. Note that the inboard leading edge is a separate part to accommodate the various versions of this kit. I have to say that each time I take a look at this kit, I like it more and more. Surface detail is commensurate with that of the fuselage, incorporating full rivet detail (plus double rows, where applicable), finely engraved panel lines, fastener detail, access panels and nicely shaped cannon blisters. All control surfaces are integrally moulded, so can’t be posed without taking a saw to the model. Ailerons are moulded along with very fine actuator arms that really do look very good. Cannon shell ejection chutes are also finely moulded. One thing I like here are the tabs that protrude from the upper panels and provide a support for the wing to fuselage connection. Actually, there is another purpose for those tabs. If you flip the wing parts over, you will see they form the roof of the main gear wells. These areas contain rib and stringer detail, along with rivets, and this will be detailed further with various rods, pistons etc. All of this will be framed by the gear bay walls that are supplied as separate parts that will be fitted into the recessed area in the upper wing panel. Cannon fairings are separate parts too, and the wing has a small bulkhead within that stops them from being inserted too far within. SPRUE C You will be able to pose the elevators dynamically, as these are moulded separately to the stabilisers. All parts here are the traditional upper and lower halves, and external detail is of the same high standard that we have seen so far, including rivet and fastener detail and trim tab actuators/actuator fairings. Other parts included here are for external drop-tanks and bomb bodies. Bomb fins are separately moulded. Bombs and tanks are moulded as halves also, and with the latter, you will of course need to reinstate any panel line detail that may be lost from seam eradication. The fuel filler cap is nicely engraved, but I think the detail to the rear of this is supposed to represent a pipe and is instead moulded as a fillet. If this is the case, cut away and replace with a little length of bent, rigid wire. SPRUE D This sprue looks very Eduard-ish in design, with its large radius corners. Here we have the fabric covered rudder, complete with its rib tape detail and metal trim tab. This is the only fabric covered area on the Tempest, and I do like the representation here. The multiple undercarriage door parts are just beautiful…both inside and out, with some great detail there, and no pesky ejection pin marks to worry about. Only one set of these doors is for use with this Mk.VI release. Small tags have instead been placed externally to the main doors, and these just require snipping off, followed by a quick swipe of a sanding stick. Et voila! Other parts here include the upper, chin intake wall and the bomb release fairings. SPRUE G In previous Tempest releases, this particular sprue was labelled as Sprue E, but Special Hobby has now re-tooled this and provided new nomenclature to distinguish it from the previous kits. Unlike the other Mk.V kits tough, this sprue now contains parts for the wing leading edge intakes that pertained to the Mk.VI. You will also have seen these parts on the engine cowl sprue of the Centaurus radial engine version. Again, the instructions show parts here that won’t be used on this build. Here, that is for a second set of propeller blades. Engine cowl halves are moulded here, as are a number of parts that form the flap section and intake outlet to the rear of the main intake. The exhaust attachment boxes can be found here, and these will just glue internally. A two-part spinner is included, with the back-plate including channels that will precisely angle the propeller blades. There is a little flash on the spinner, but nothing to be concerned about. One thing to note is that the fuselage decking to the rear of the pilot, is included here as a separate part. That’s a nice touch as there is a lot of detail in this area and removing a seam would have been a pain in the arse. SPRUE H Quite a few parts here are shown as not for use on this release. These include one set of balloon tyres and several intake parts for the earlier releases. What can be used here are the various undercarriage parts, including well detail, walls and the struts, pistons and rods themselves. Looking at how refined much of the detail is here, I’m going to stick my neck out and say it’s Tamiya-esque. Simply gorgeous details that you’ll bury away in those gear bays. Even the sprung-loaded rods look very authentic and filigree. I am particularly impressed with the gear struts and the detail definition here. Please be careful with the removal of parts from this sprue, as so many of the landing gear parts have some very fine detail protrusions. If in doubt, use a razor saw. Note also the forward cockpit bulkhead and the armoured frame onto which pilot’s seat will fit. SPRUE I A small sprue, but one with perhaps more parts on it than any other. One area that features heavily here is the cockpit. For me, a nicely detailed cockpit is the very heart of a satisfying project, and this cockpit it certainly better than most I’ve seen in quite a long time. Two detailed tubular side frames are adorned with various fixing plates and panels and brackets, and there are numerous console parts, throttle, spacers, torsion rods and linkages etc. The main instrument panel is moulded in three parts; central panel and two angled panels that fit to its sides. Be careful here as there are two different sets of side panels. The instructions clearly show what you should not use. This also goes for one complete instrument panel, with there being sets for two on this sprue. Here you will also find the canopy rails and three different types of joystick grip, although only one of these is shown as for use. Even if you don’t wish to lavish any resin on this project, the plastic parts are actually still very nice and super with no softness to any of that all-important detail. Again, watch out for the numerous parts that won’t be used here, and there’s a fair few of them, such as the protruding gun fairings. SPRUE J The last grey styrene sprue. Another bulkhead is supplied here, for the rear of the cockpit, and the exhausts are included as halves. I would still prefer the resin exhaust replacements though, as the plastic parts will take some careful seam removal work. More wheel well parts are found here, as well as the three-part assembly for the tail wheel, again with some very nice structural detail included. Several intake parts are moulded here, as are the bomb sway braces and fins and tail wheel strut. The most obvious part though, the radial engine of the Centaurus Mk.II, is just there to tease us to buy that release too! SPRUE K This is the clear sprue. A number of other parts here are drop tank fairings that I think were made from clear acetate or similar. Nice to see these, and they’ll certainly show off that wire modification I mentioned earlier, for the drop tank itself. Finally, note the various wingtip, fuselage, tail and wing-underside lenses for the various lights that were fitted to the Tempest. The windscreen in my sample has come adrift but is undamaged. A very slight scuff mark is also on the main hood, and this will need to be polished out. Clarity is very good, and the parts are suitably thin. SPRUE L This sprue contains enough parts to build EIGHT RP-3 rockets, including their mounting rails, which as I’ve mentioned, are likely profiled to fit onto the Tempest kit. Each rocket is made up from a single-piece body with half of the warhead moulded in situ. The other half being a separate part. The four fins are also separate, but the mounting lugs to the rails are a part of the rocket. Lastly, the rail. The rail is moulded to the mounting points which you may need to modify if you don’t fit these to the Tempest. Moulded detail looks to be commensurate with the many photos of these that can be found online. The only compromise being a solid connection between the rocket instead of the spring-loaded clip that was used in reality. This is also the way Airfix tackled the subject for their superb 1/24 Typhoon. I seem to recall that the only other way of representing such intricate details is with metal, as per the Master 1/24 series. However, these are still very, very good and that detail doesn’t detract. Moulding quality is superb, with all details being sharp, and nothing in the way of visible seam lines. No flash or defects are present. A single decal sheet contains decals for both the A/C3” SAP 60lb, and the A/C3” HE 60lb types. Printing is by Aviprint, and the inks are in yellow and red, with the text being readable and fine. Registration is also perfect, and the printing is thin, with minimal carrier film. Plastic Summary This kit is almost flash and seam free, with nice tight sprue gate points that are generally well placed so as not to cause problems. I can’t see any sink marks either, except for a couple on the reverse of a part, so they don’t count. Ejector pin marks; there’s only two I can see that need removal, and that will take just a few minutes. Plastic quality is excellent, and the quality of the mouldings are very high quality. Decals FOUR sheets are supplied here, printed by Eduard. The largest contains roundels and fin flashes. A slightly smaller sheet holds he various serials, codes, emblems, and instrument dials for the cockpit. The latter is printed in banks of instruments, and I would be tempted to punch these out to remove their carrier film. Their definition is excellent, and they can certainly be used without having to resort to an aftermarket product. A stencils sheet is also included, also with decals for the acetate areas of the drop tanks. The last sheet concerns the rocket decals and is identical to the one they include in the separate rocket set. Printing is excellent throughout, with minimal carrier film, solid colour and perfect register. The schemes offered are: Tempest Mk.VI, NX201/JV-U, ‘Poppet’, No.6 Sqn. RAF, Deversoir, Egypt, 1949 Tempest Mk.VI, NX126/GN-A, No. 249 Sqn. RAF, Habbaniya, Iraq, 1948 Tempest Mk.VI, NX135/V, No. 6 Sqn. RAF, Deversoir, Egypt, 1949 Tempest Mk.VI, NX179/B, No. 6 Sqn. RAF, Deversoir, Egypt, 1949 Instructions This is printed in a glossy 16-page A-4 format, similar to that of Eduard, with a profile on the front page, and a history of the type given in both English and Czech. There are two pages dedicated to a parts map, which is useful for knowing the parts not to use, and then we are into the construction. A series of excellent line drawings are annotated with splashes of colour to signify paint and other nomenclature, such as drilling and mask use etc. Illustrations are very clear and should present no problems. Colour call-outs are supplied throughout construction and refer to both Gunze and Alclad II paints, and the last pages of the manual are given over to the 4 schemes, with each being shown in all 4 planforms. Conclusion I really never tire of seeing new incarnations of this kit, and this is no exception. The ability to now build three different versions of this iconic brute of a fighter and display them together, really is fantastic! The base kit, even without any resin or PE embellishment, has excellent detail. The only thing it’s missing is a set of seatbelts as the plastic parts have no moulded belt options. This doesn’t even register as a blip on what is another fine release of the Tempest. If you do want to add lots of resin goodies etc. then check out our reviews on LSM and head over to the Special Hobby site to see what can be served up. Very highly recommended My sincere thanks to Special Hobby for the review sample seen here. To purchase direct, click THISlink.


-
takom 1/35 Panther Ausf. A Early Production, full interior
JayDee posted a topic in Armour/AFV Reviews
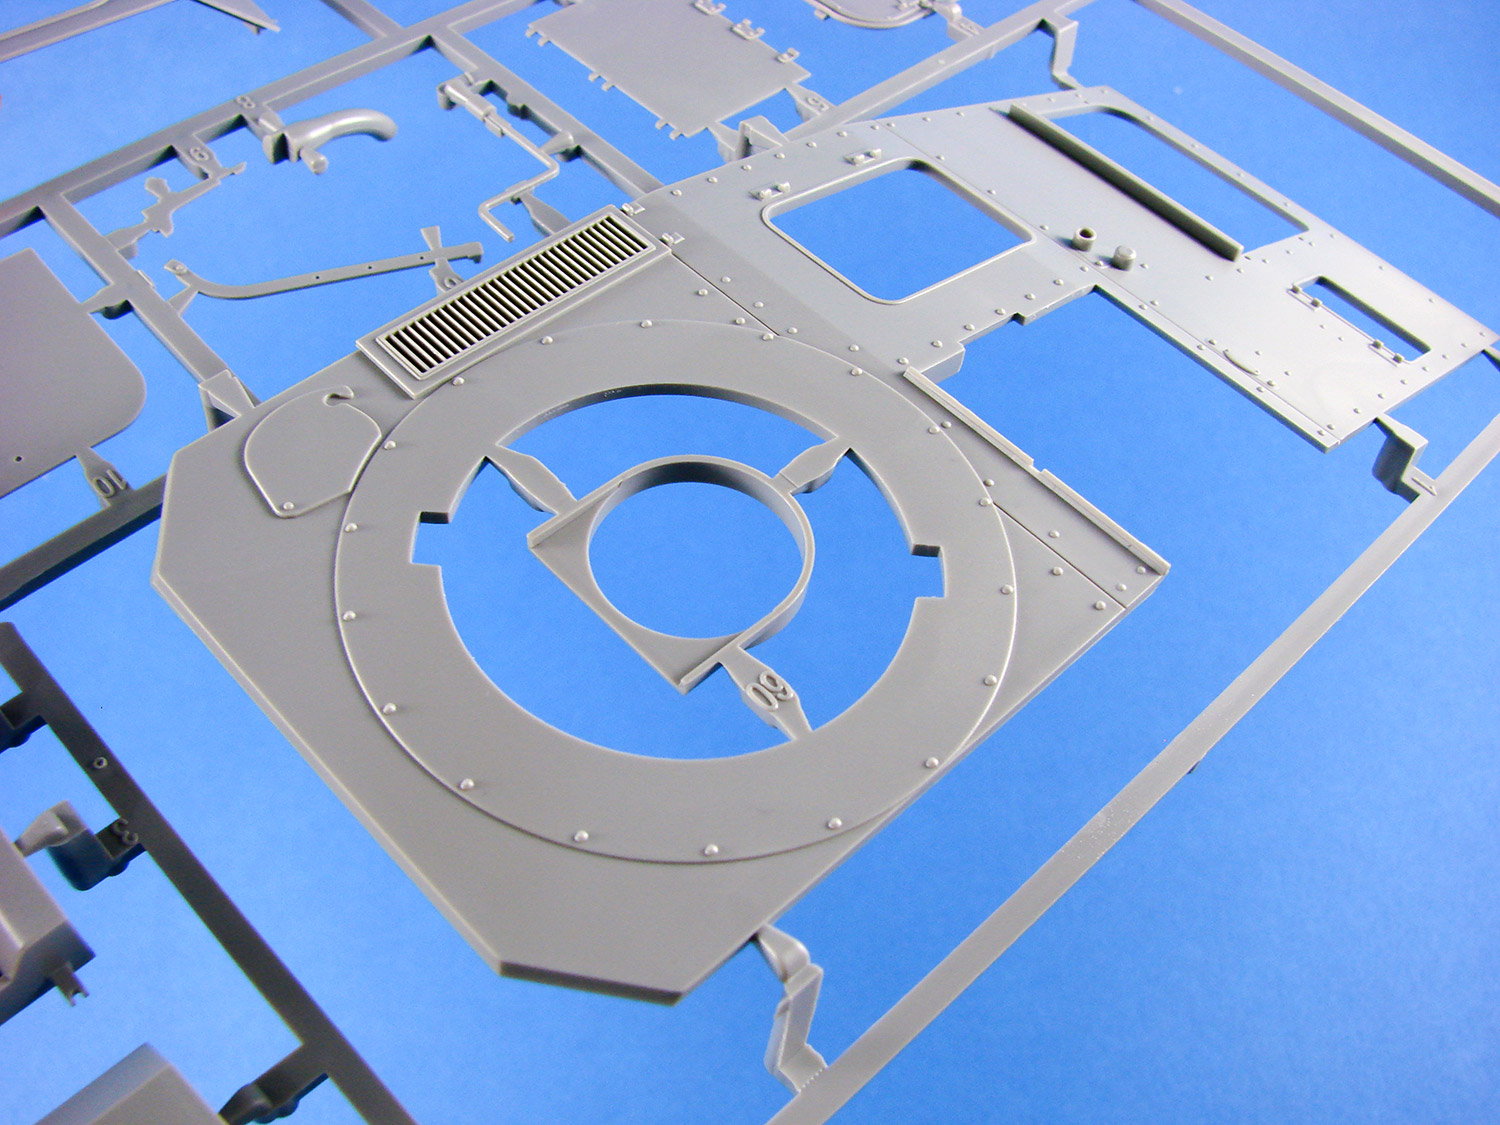
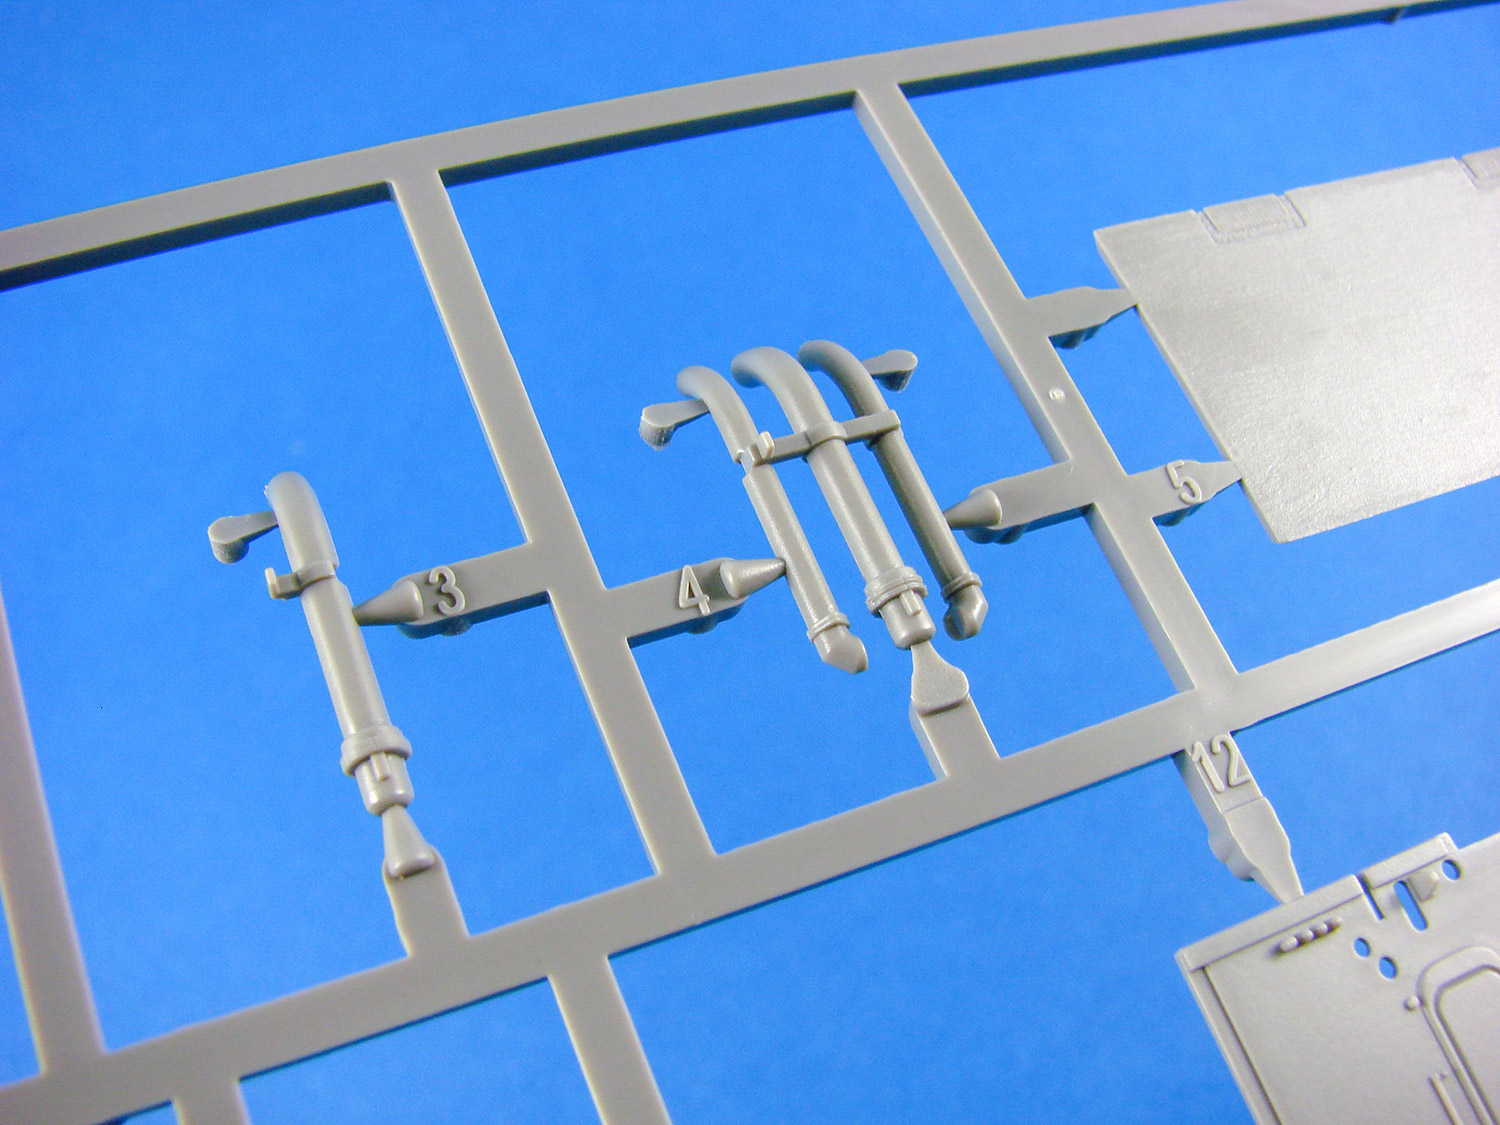
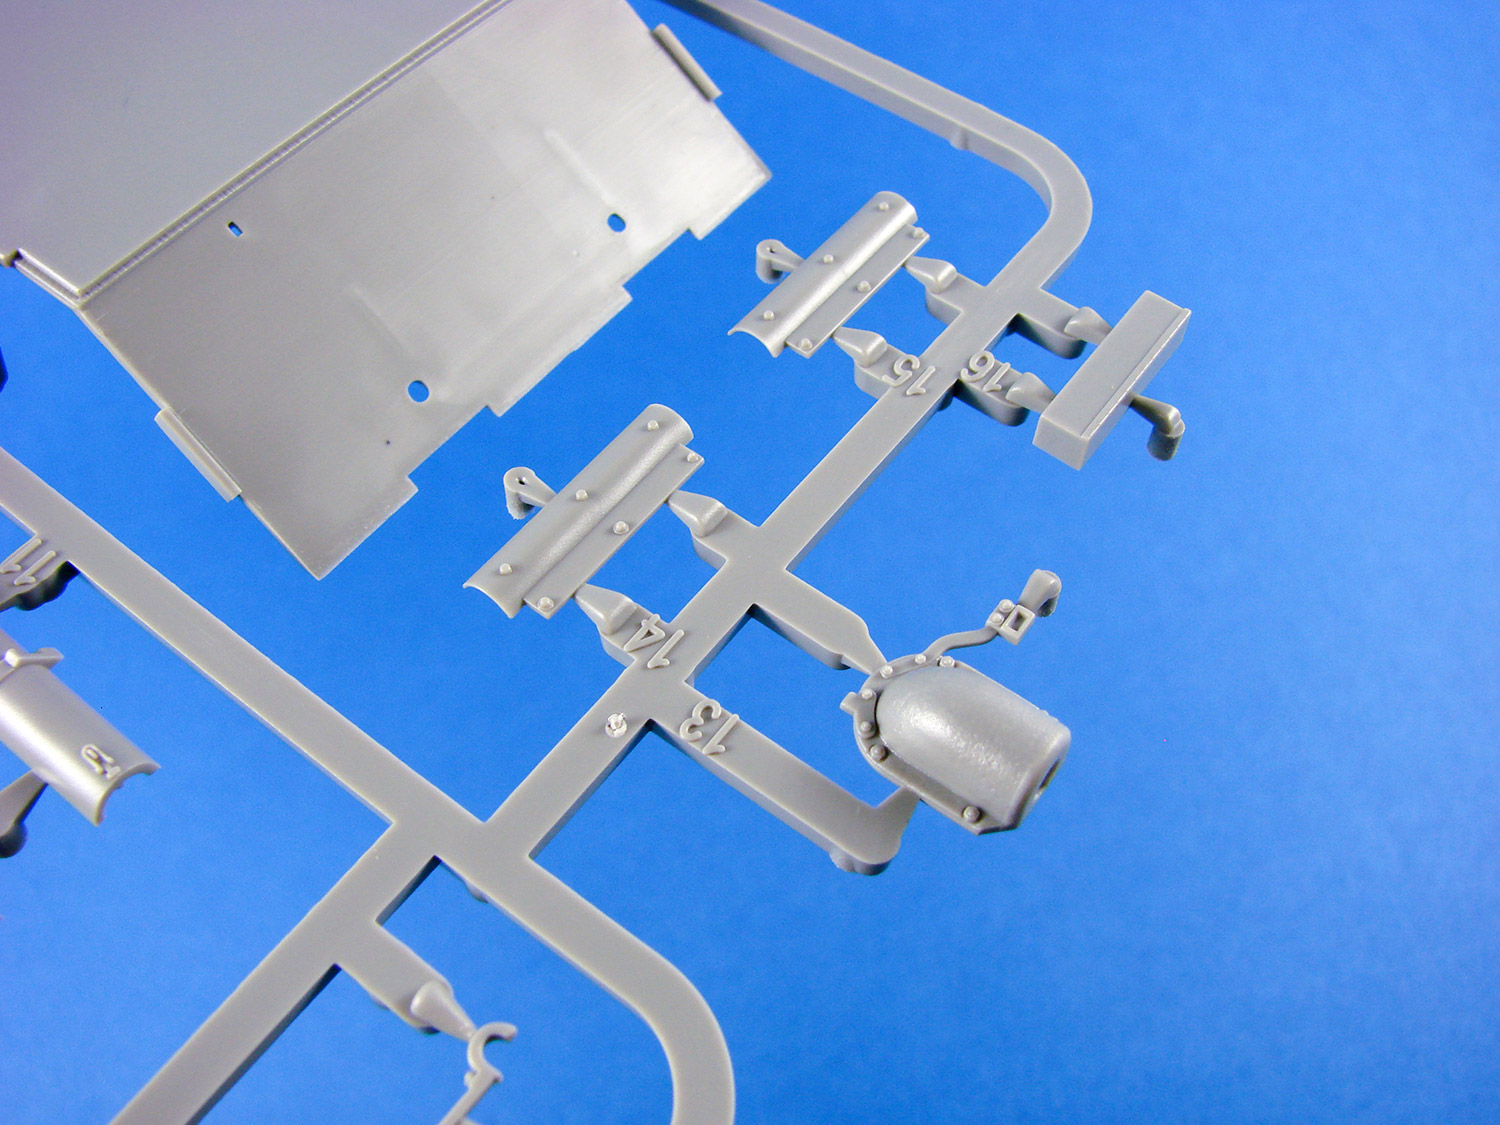
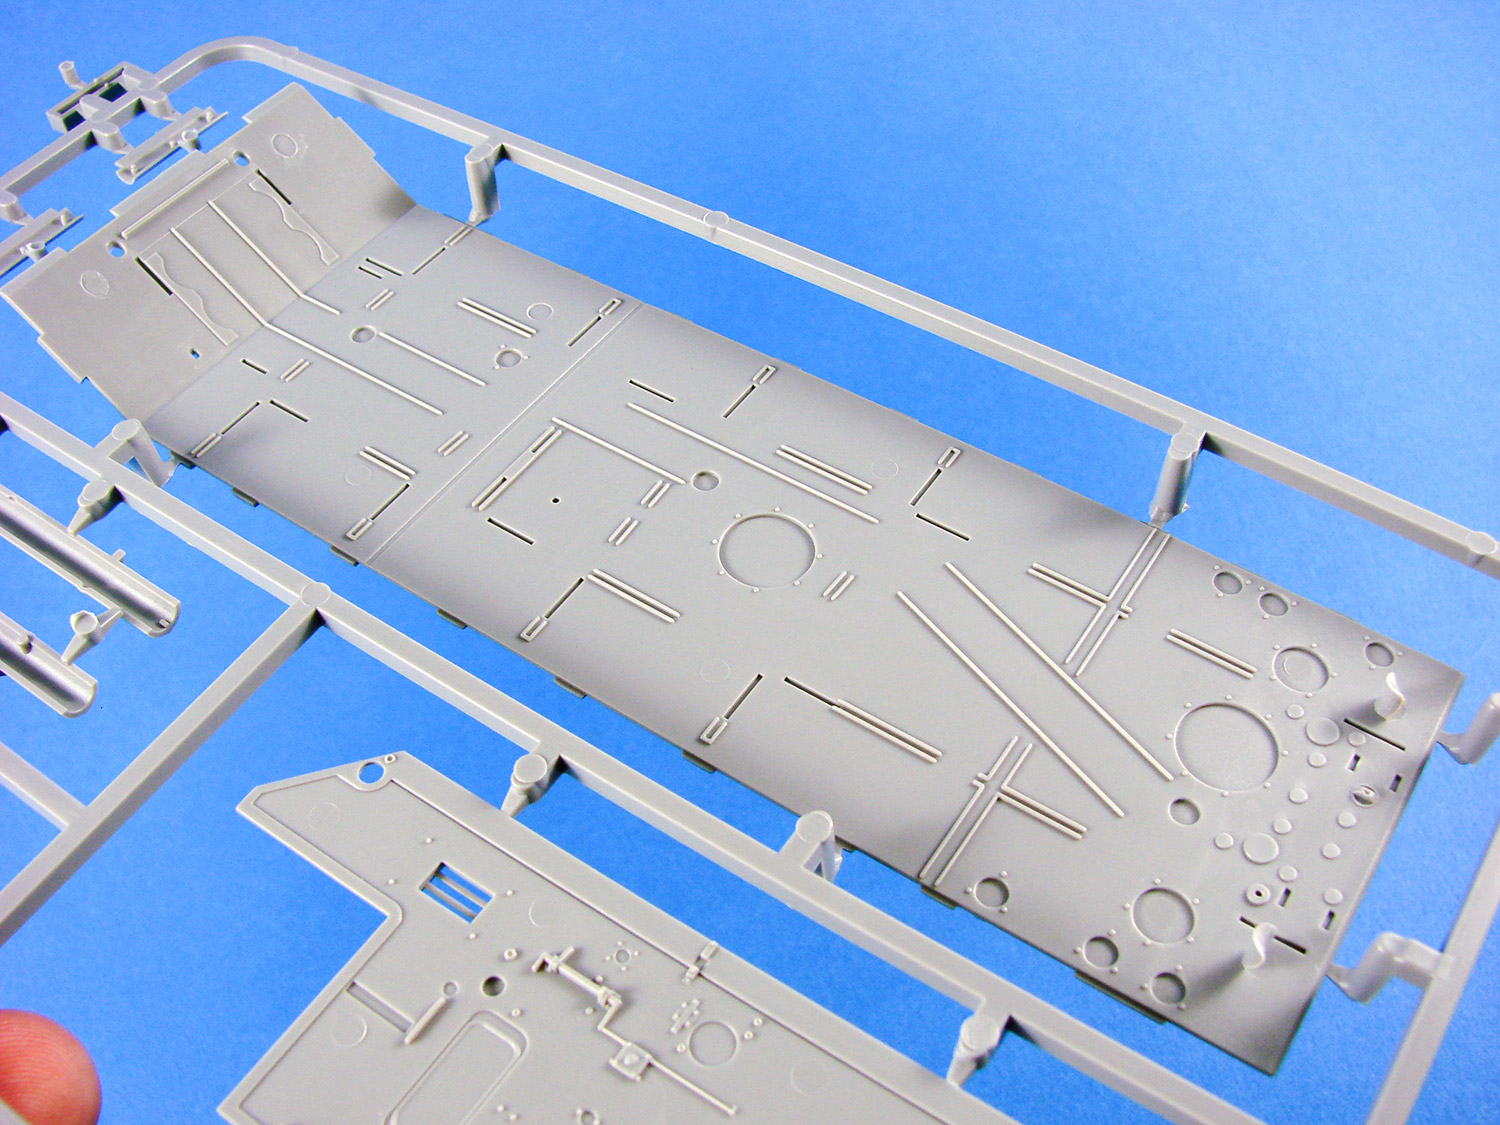
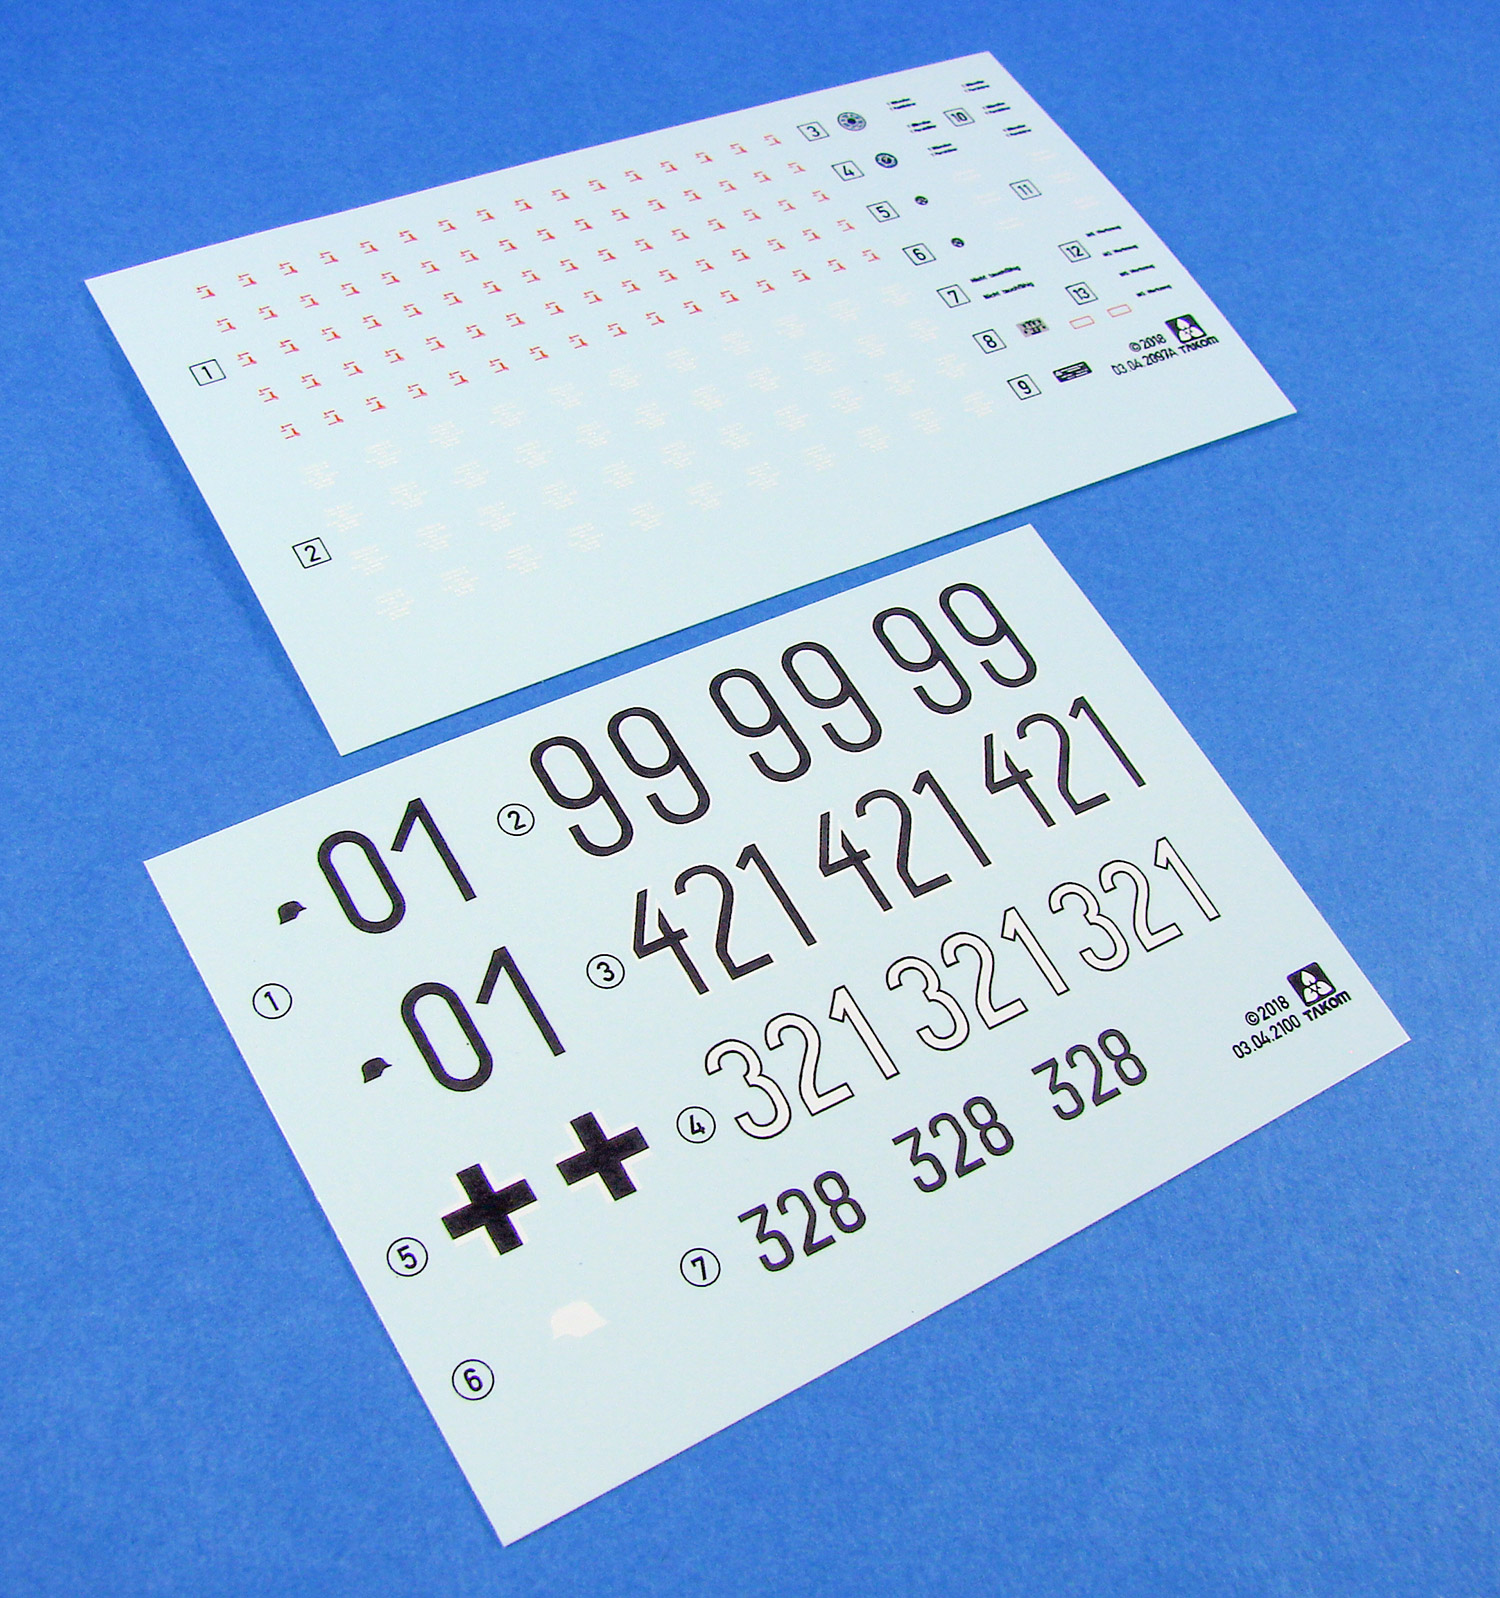
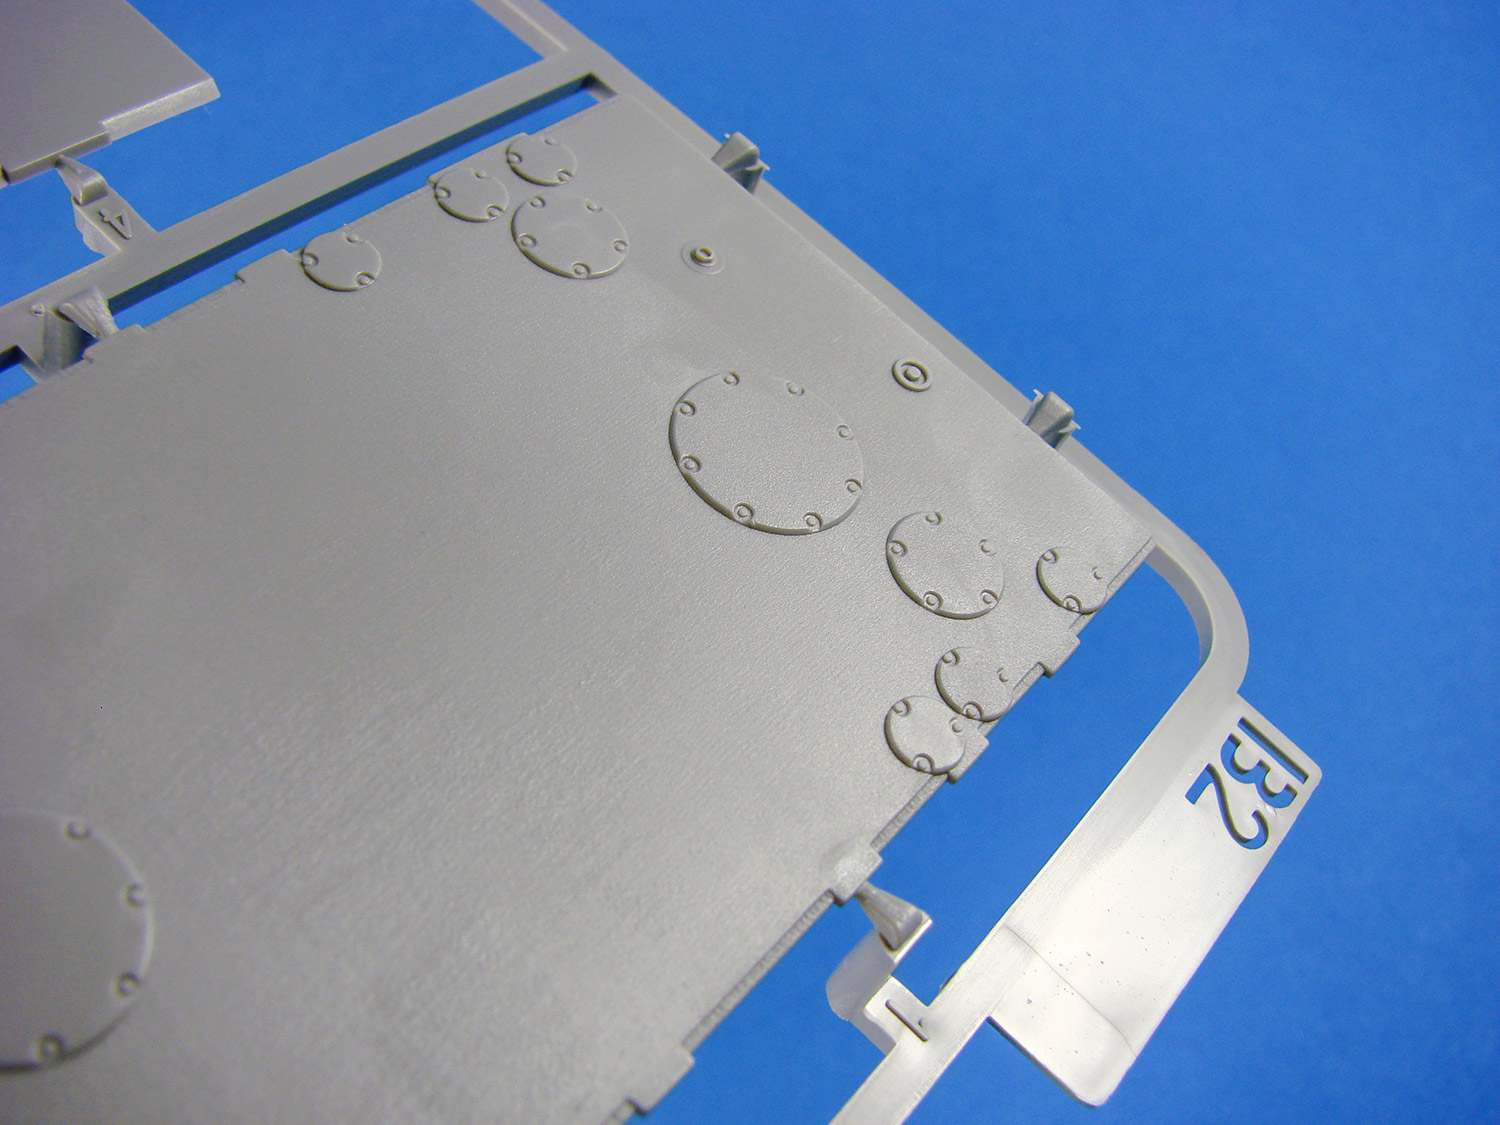
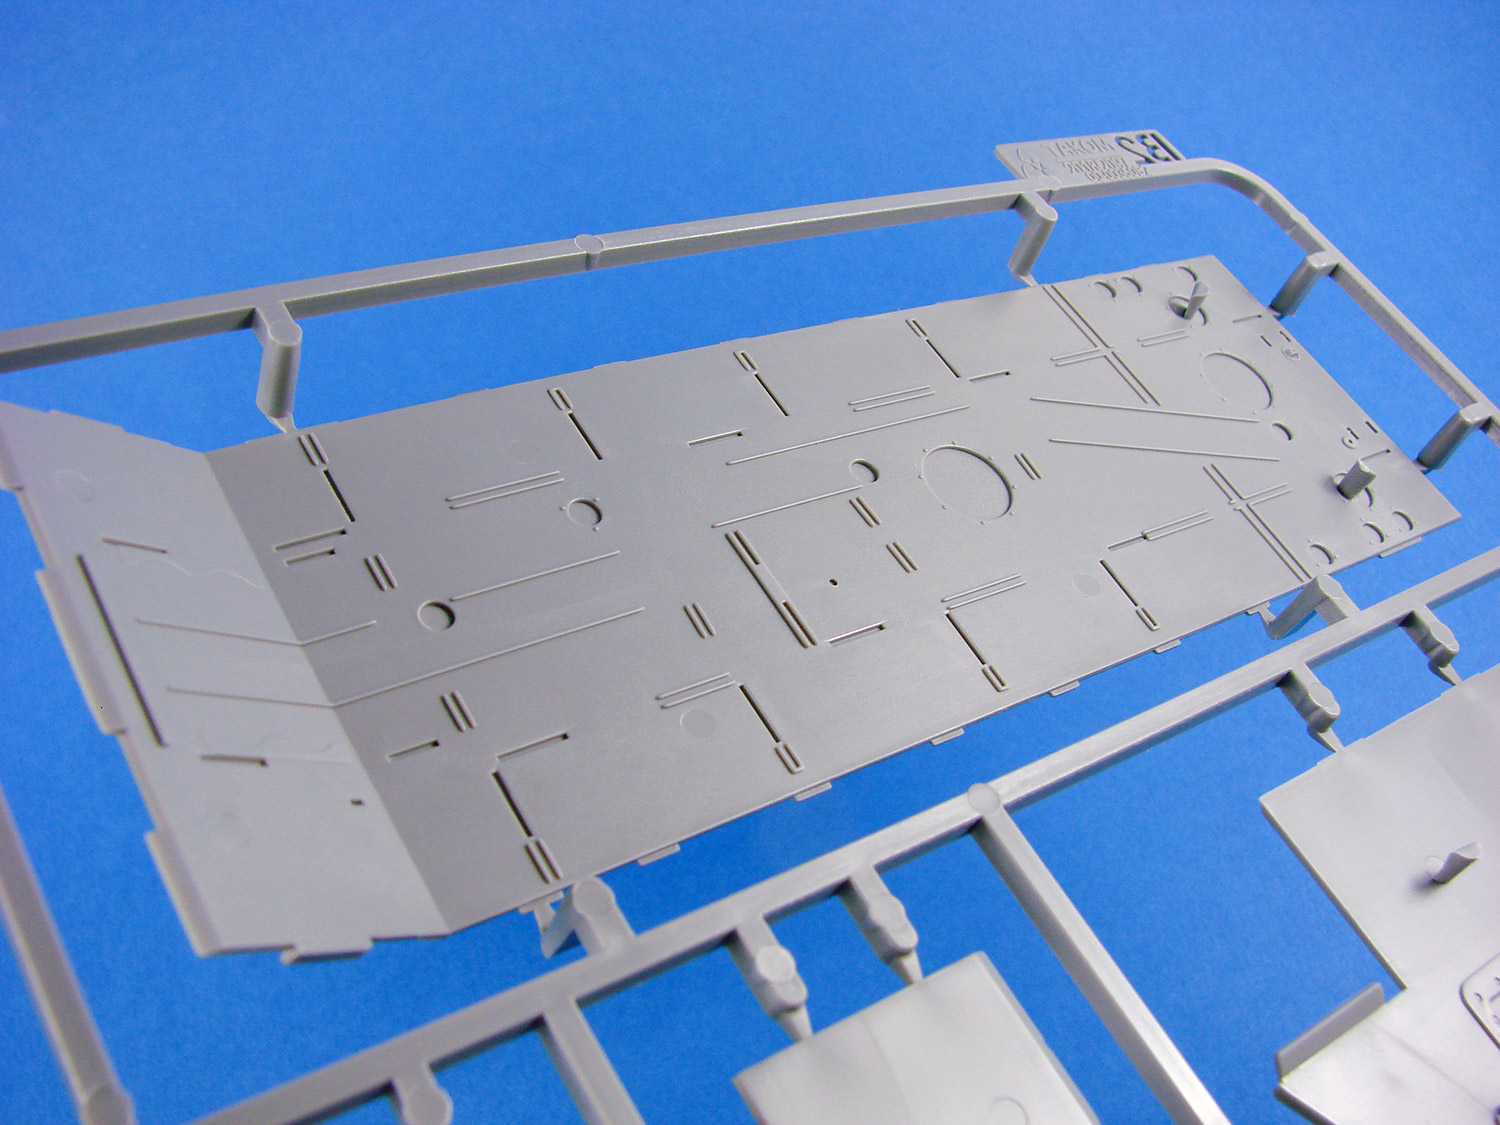
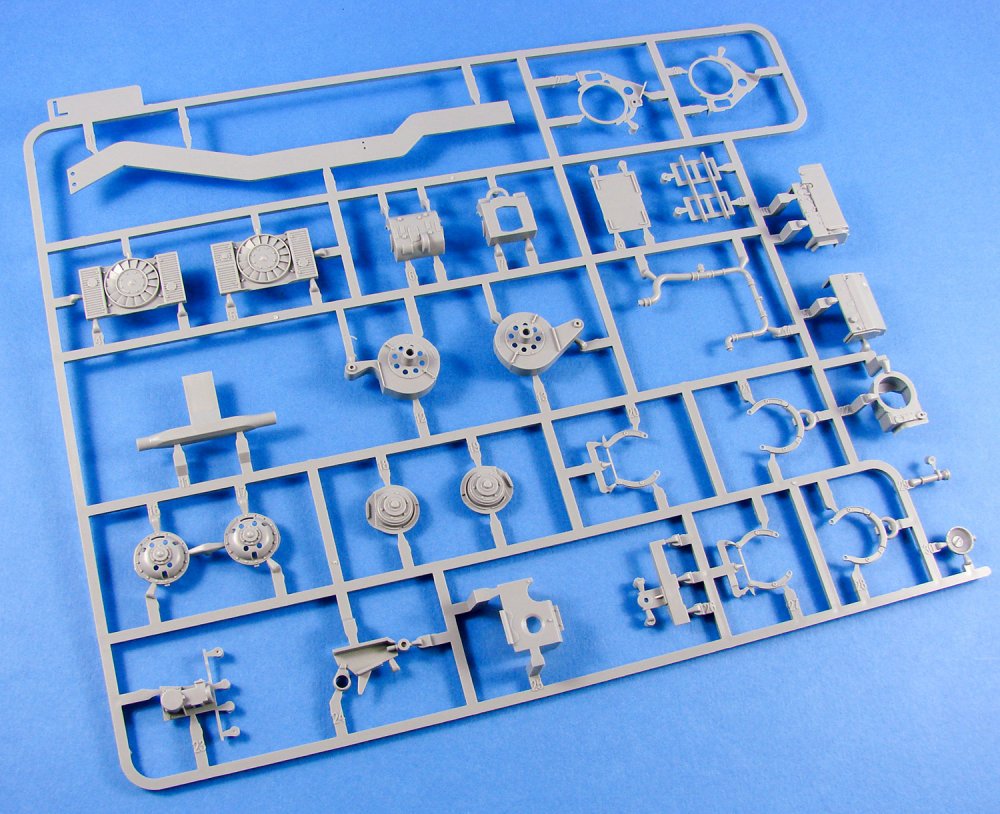
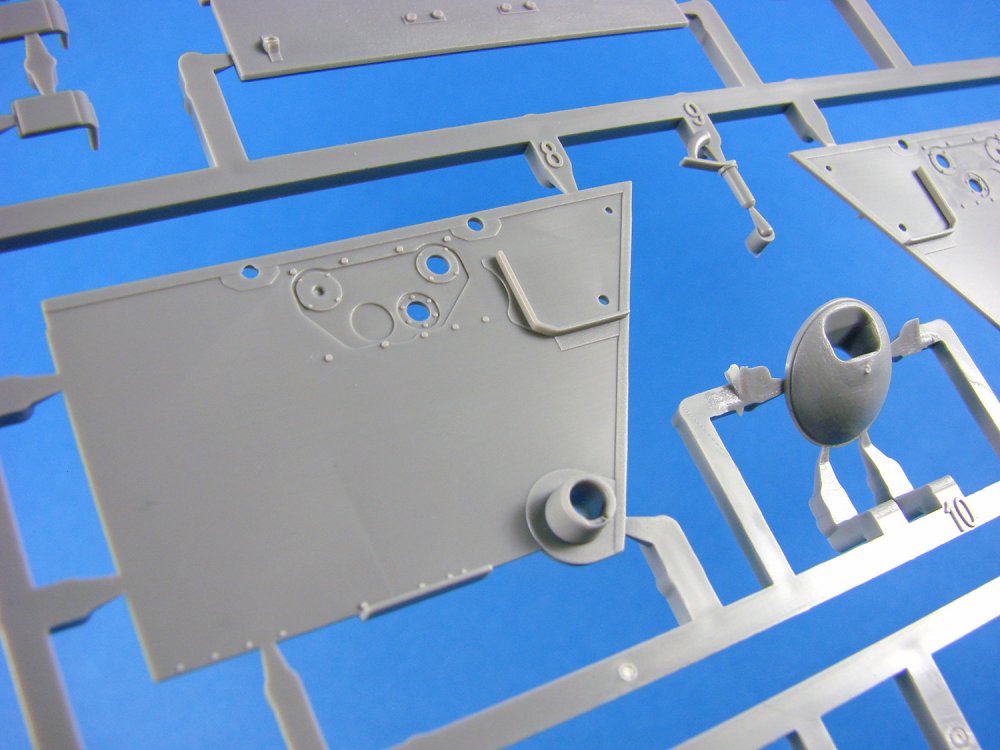
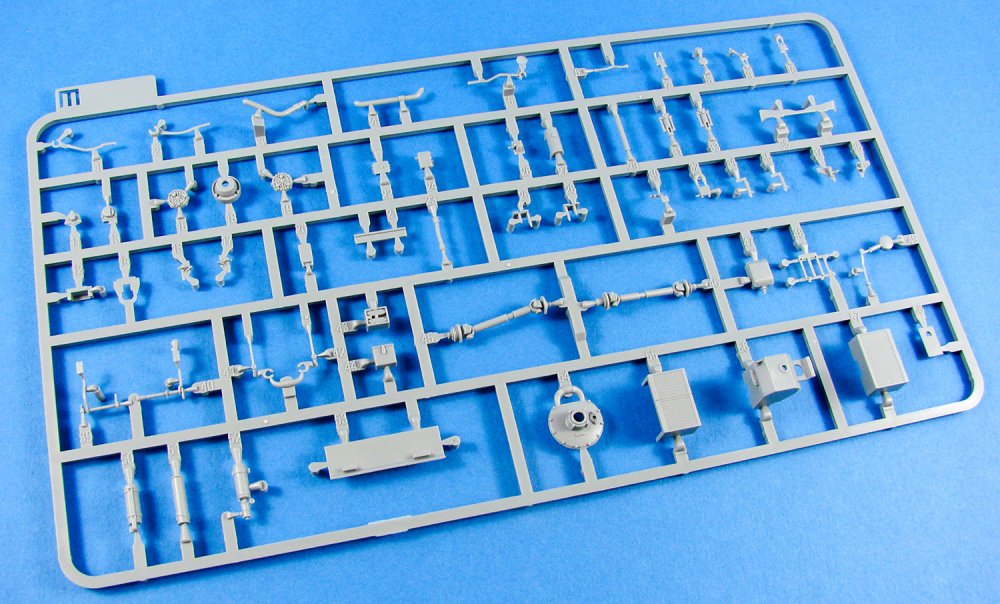
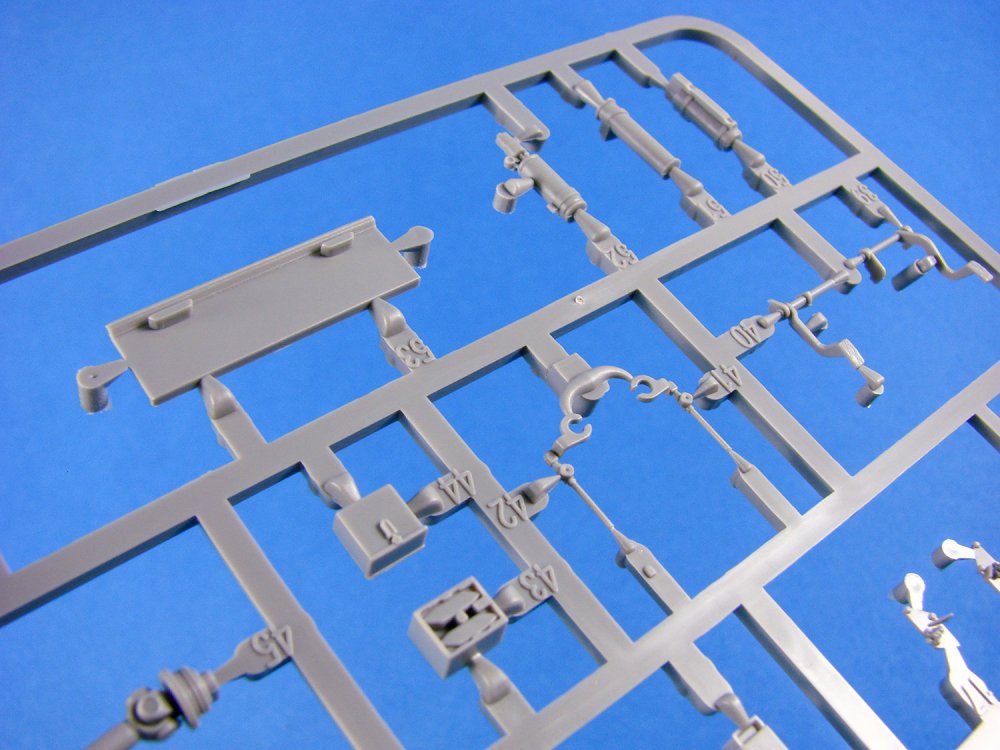
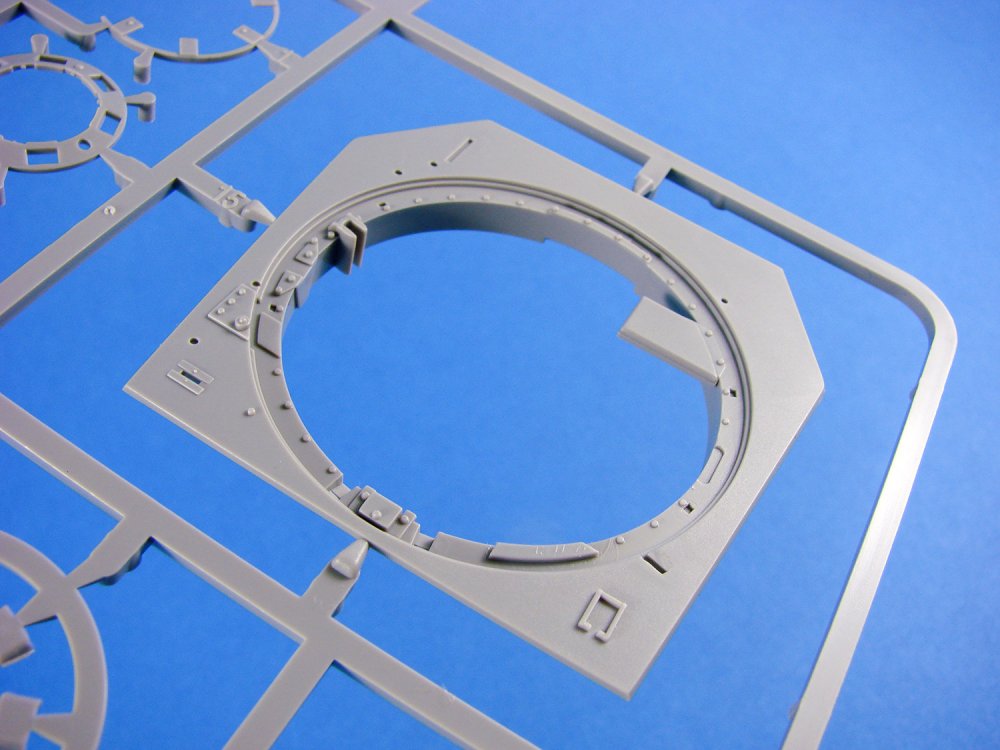
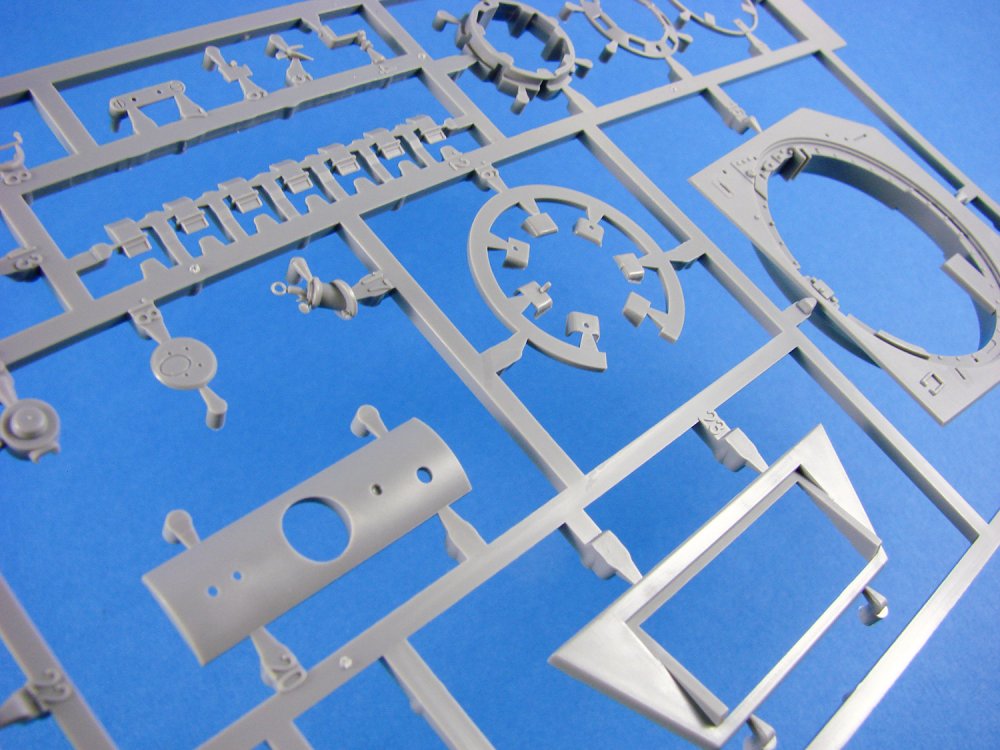
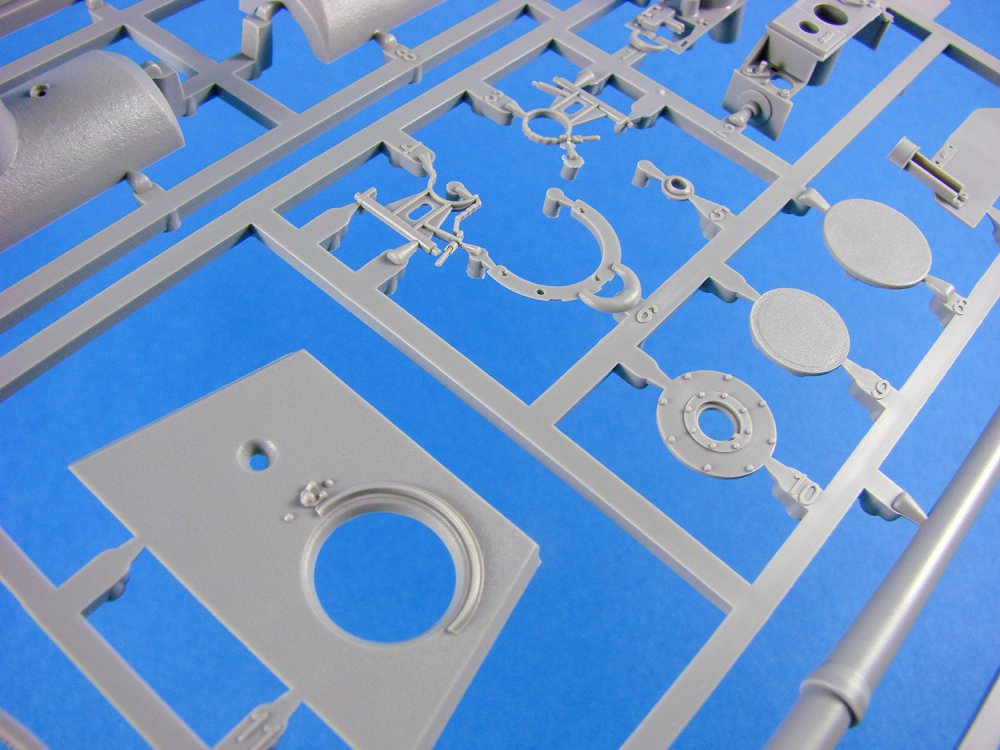
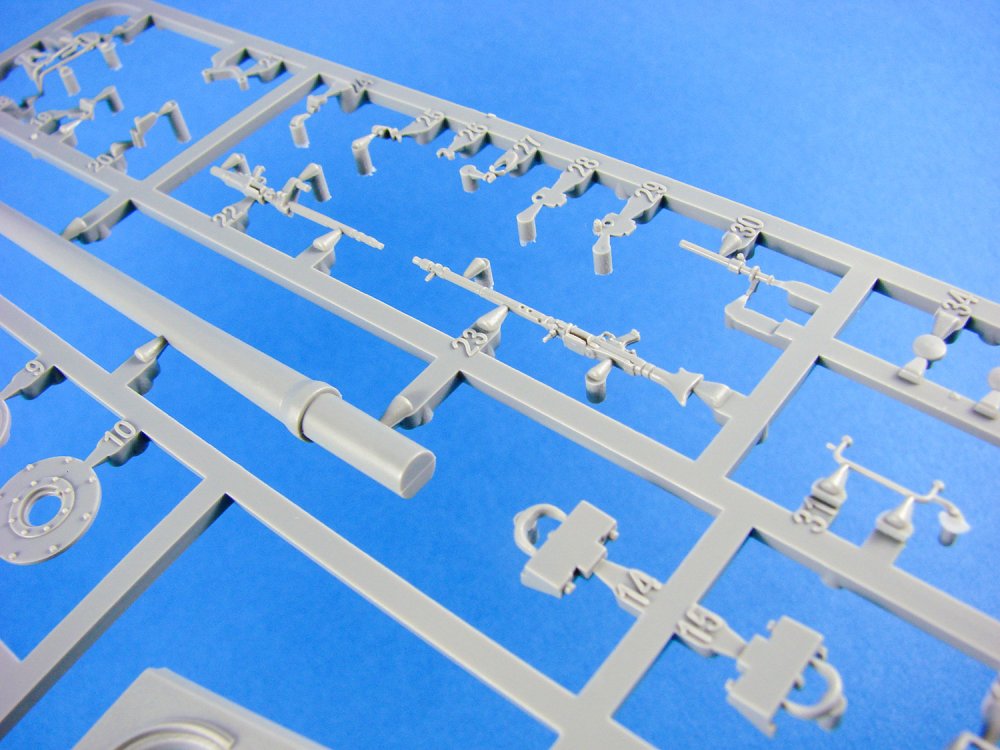
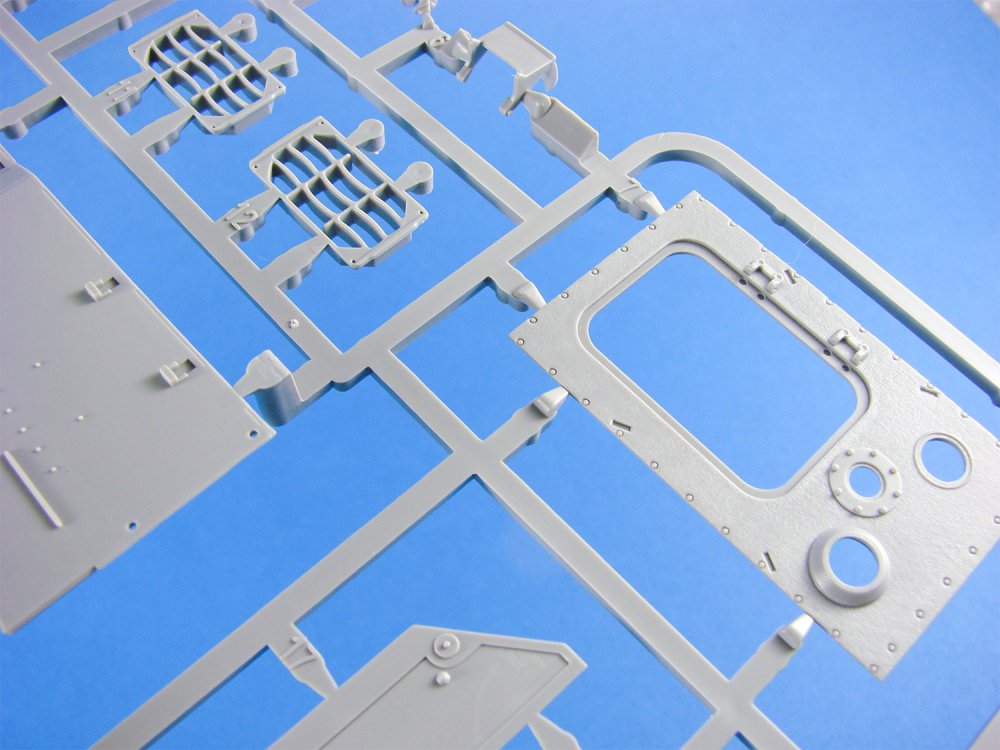
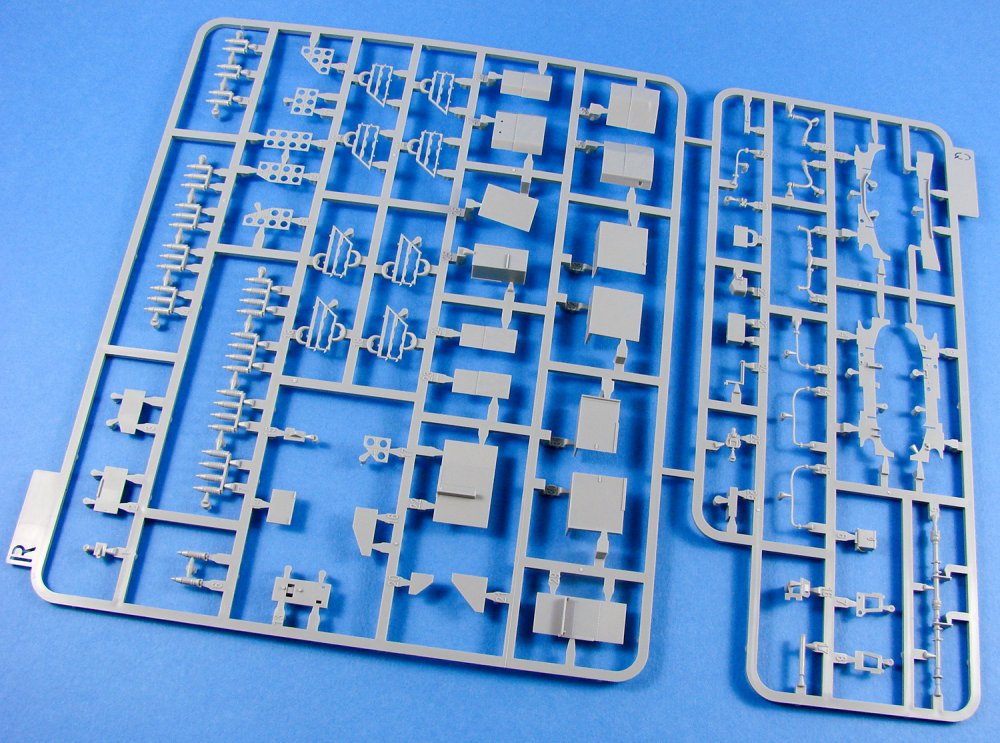
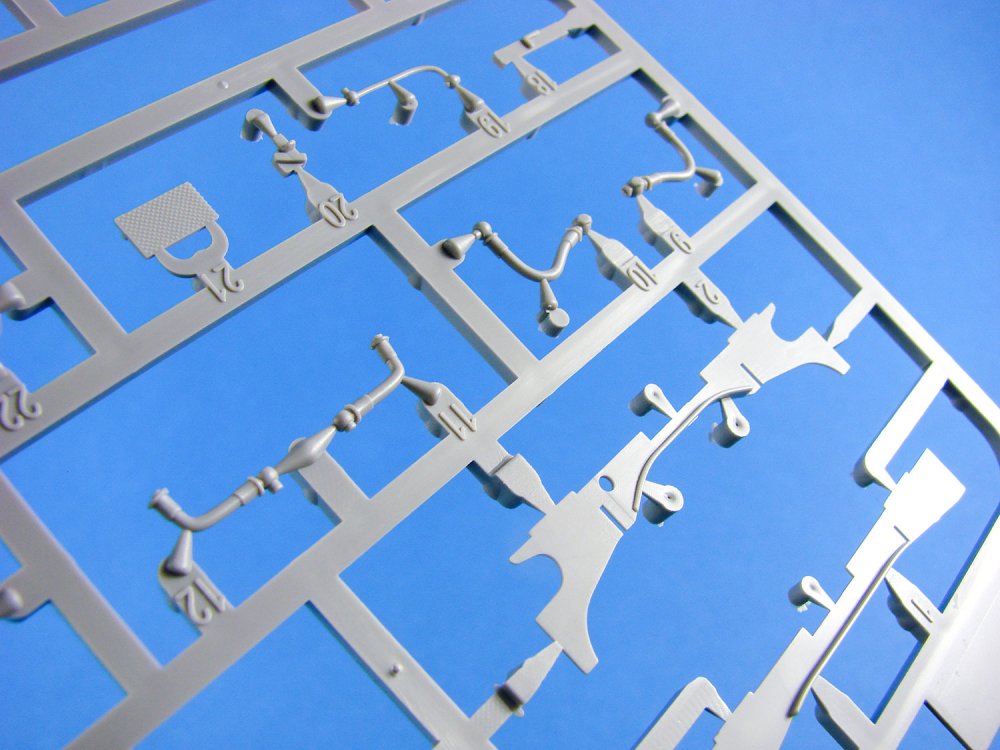
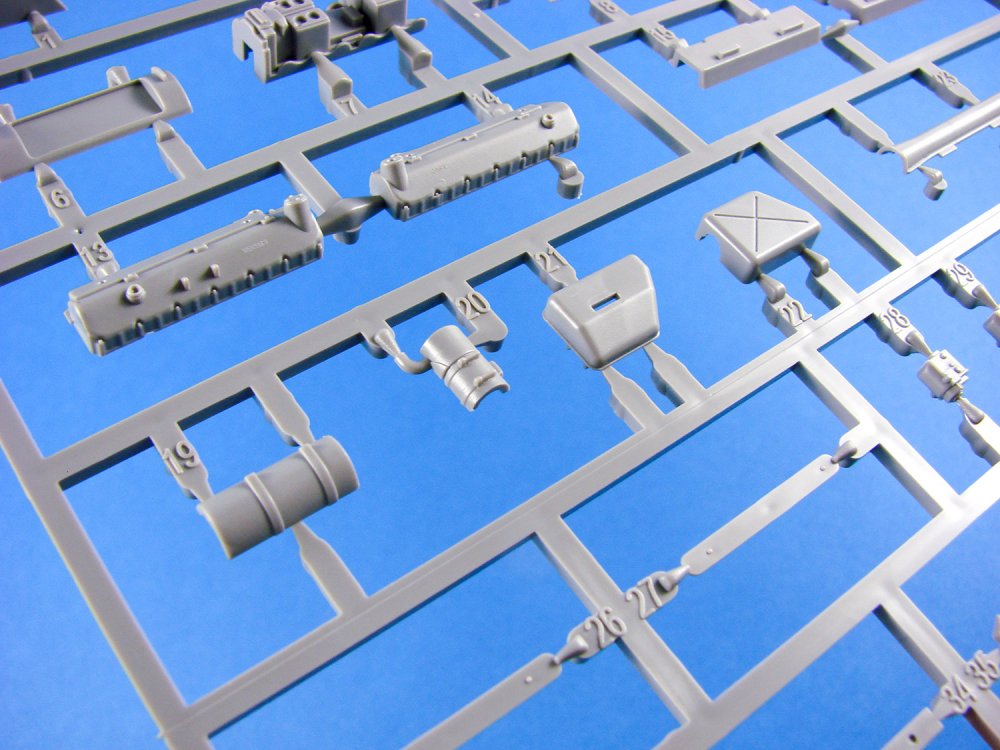
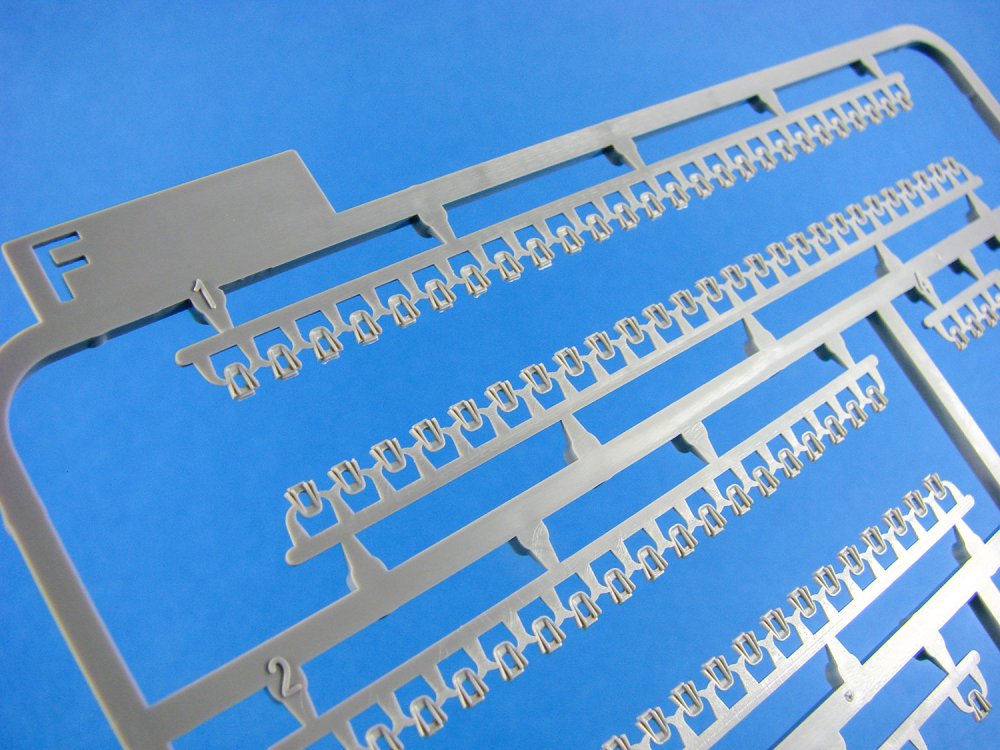
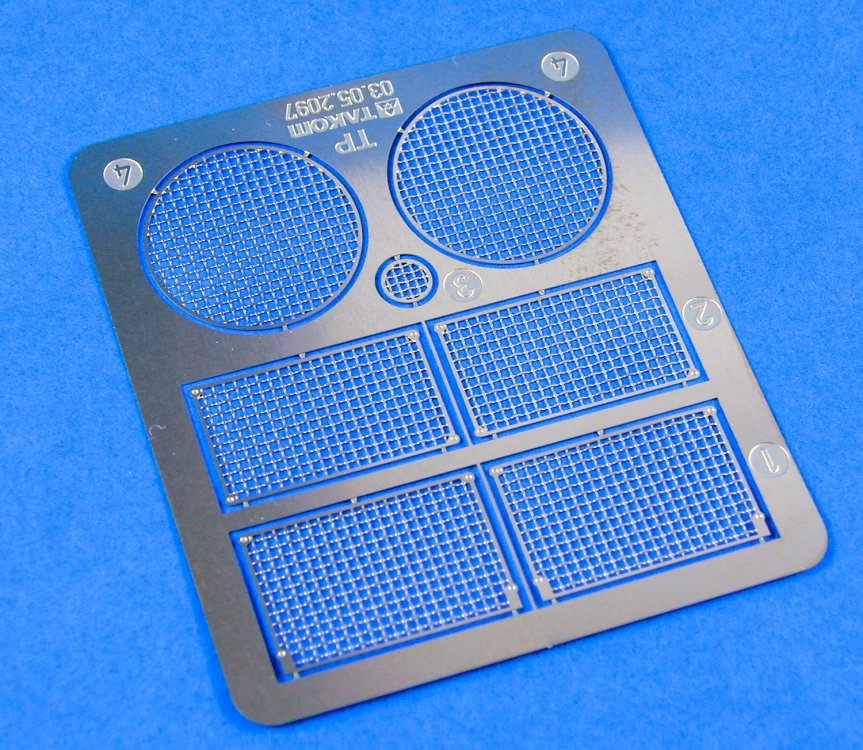
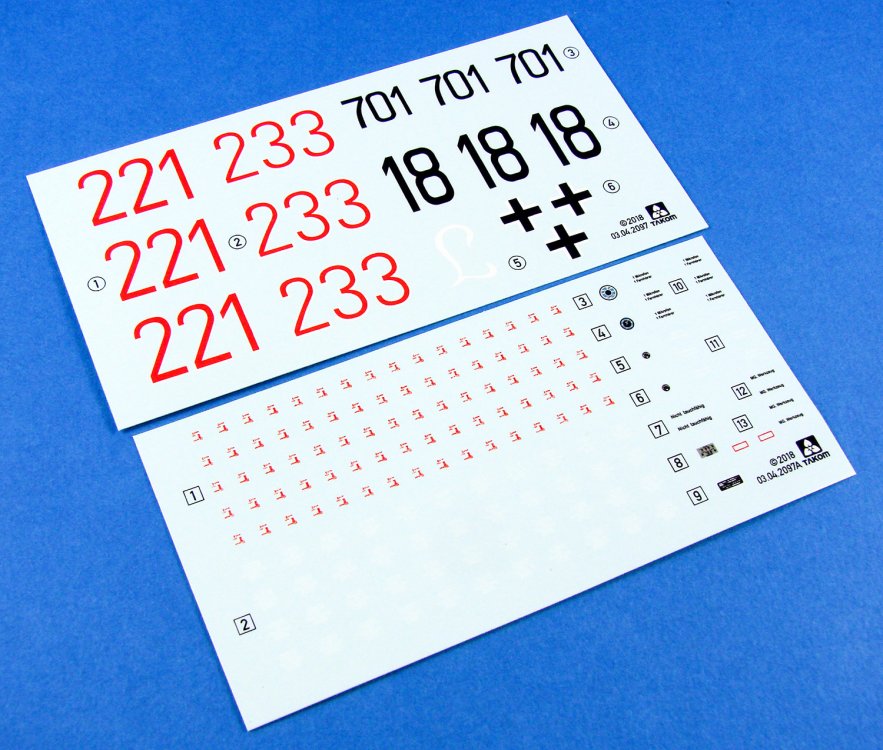
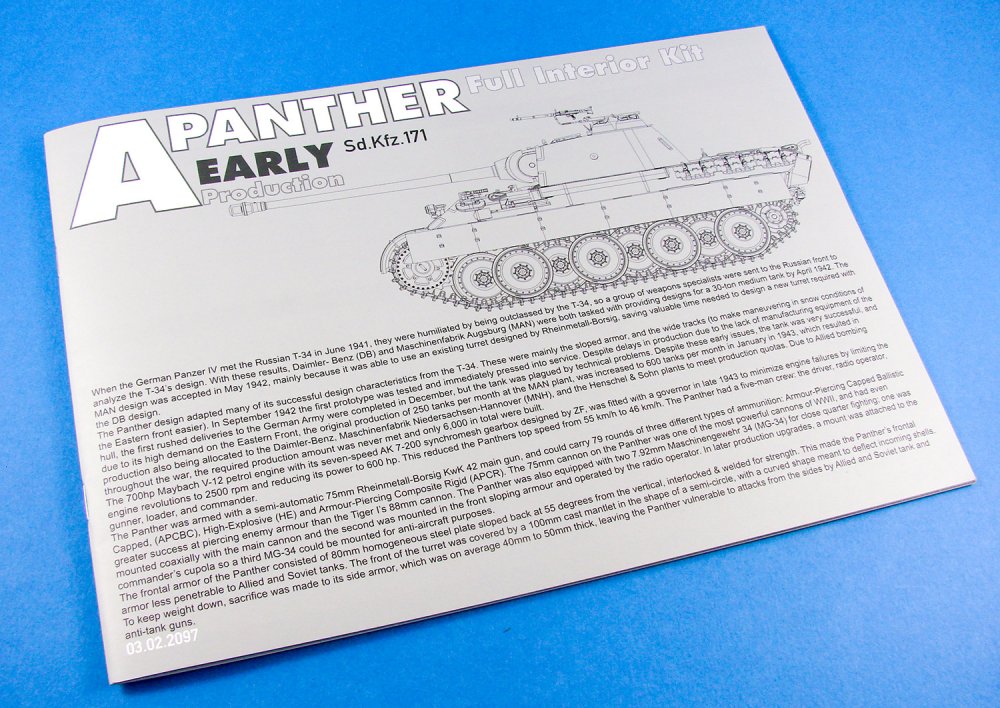
1/35 Panther Ausf. A Early Production, full interior Takom Catalogue # TAK2097 The Panther is a German medium tank deployed during World War II on the Eastern and Western Fronts in Europe from mid-1943 to the war's end in 1945. It had the ordnance inventory designation of Sd.Kfz. 171. It was designated as the Panzerkampfwagen V Panther until 27 February 1944, when Hitler ordered that the Roman numeral "V" be deleted. Contemporary English language reports sometimes refer to it as the Mark V. The Panther was intended to counter the Soviet T-34 and to replace the Panzer III and Panzer IV. Nevertheless, it served alongside the Panzer IV and the heavier Tiger I until the end of the war. It is considered one of the best tanks of World War II for its excellent firepower and protection, although its reliability was less impressive. The Panther was a compromise. While having essentially the same engine as the Tiger I, it had more efficient frontal hull armour, better gun penetration, was lighter and faster, and could traverse rough terrain better than the Tiger I. The trade-off was weaker side armour, which made it vulnerable to flanking fire. The Panther proved to be effective in open country and long-range engagements but did not provide enough high explosive firepower against infantry. The Panther was far cheaper to produce than the Tiger I, and only slightly more expensive than the Panzer IV. Key elements of the Panther design, such as its armour, transmission, and final drive, were simplifications made to improve production rates and address raw material shortages. The overall design remained somewhat over-engineered. The Panther was rushed into combat at the Battle of Kursk despite numerous unresolved technical problems, leading to high losses due to mechanical failure. Most design flaws were rectified by late 1943 and the spring of 1944, though the bombing of production plants, increasing shortages of high quality alloys for critical components, shortage of fuel and training space, and the declining quality of crews all impacted the tank's effectiveness. Though officially classified as a medium tank, its weight is more like that of a heavy tank, as its weight of 44.8 tons puts it roughly in the same category as the American M26 Pershing (41.7 tons), British Churchill (40.7 tons) and the Soviet IS-2 (46 tons) heavy tanks. The tank had a very high power to weight ratio however, making it extremely mobile regardless of its weight. Its weight still caused heavy tank-esque problems however, such as an inability to cross certain bridges. Extract from Wikipedia The kit Without a doubt, this is most certainly the year of the Panther. It must be a trait in armour modelling circles that those modellers are happy and grateful to see different companies try their hand at subjects such as this. If this was a Mustang or Bf 109, the whinge-fest would be on about everybody releasing the same subject. Personally, I am super-pleased to see new incarnations of the Panther, and in brand-new tooling also. Takom’s plans for the 2018 are very much Panther related, with 3 kits now in circulation, and a further five that will come to market, including two Bergepanther variants (cue the excitement with the latter!). We have been lucky enough to receive the Ausf.A Early Production, which we see in this review, and the Ausf.A Late Production which Jeroen Peters will look at in the very near future. One of the hallmarks of these initial Panther Ausf.A kits from Takom is the austere box art. Printed on a plain white box lid, the illustration is a simple line drawing, with the kit title. However, on the sides, we have some nice colour illustrations of cutaway and interior sections of the new kit, definitely supplying a little eye-candy to proceedings. Now, lift that lid at your peril, because removing those contents and getting them back in again afterwards will be a task. The box is absolutely crammed with styrene, as you can imagine with this being a full interiorkit. Each of the TWENTY-NINE light grey sprues is packaged into a separate sleeve to protect the many small and fragile parts. As well as those, a turret and upper hull are included, as well as two track building guides that we’ll look at soon. To complete the package, we have two small decal sheets, a PE fret, lengths of copper cable, a flexible hose, and a very thick instruction manual. These last items are packed into multiple sleeves that are then packed with the manual. One thing I simply can’t do here is to give a sprue by sprue résumé, due to the complexity of the kit. Instead, I will look at features and engineering break down of this release. Getting started A quick look around the kit contents and you’ll notice a lack of the usual bathtub-style lower hull. For their Panther releases, Takom has chosen to break down everything into constituent components, such as the hull floor, hull sides and forward lower glacis, although the latter is fitted to an inner plate that is connected to the floor. The reasoning behind this is to make everything as accessible as possible to the modeller as they progress through these easy hull construction stages where the frames, transmission, brake drums and torsion bars are to be fitted. Unlike Rye Field Model, Takom provides the lower hull frames as plastic parts, as opposed to their competitor who supply these in photo-etch. Both options work great for me, with perhaps the plastic parts being easier to fit and align. They are also moulded, as with the rest of the interior, with huge finesse. A few very light ejector pin marks are found here and there, but these seem to be hidden by subsequent construction. Before the sides are fitted to the hull floor, they are fitted out internally with the brake drums etc. These side plates are moulded with the torsion tube sleeves in situ, so there shouldn’t be any wall to wall alignment issues. With the walls complete, these glue into place. Takom would have you insert the torsion bars before this, and as they don’t extend to the hull exterior, it might be wise to do as they say, but dry fit them in case you have any minor alignment issues that could arise from gluing them in place from the start. The swing arms are next to be fitted, and to help with absolute positioning, two plastic jigs are included. These have alignment holes for the swing arm axles to fit into. Takom hasn’t designed this kit to have articulated swing arms, so if you want to pose the model whilst sitting on uneven ground, this is the time for you to look at that and mock things up for later. It’s now the time for the interior to be fitted out, and this is no quick task. Apart from the many ammunition shells and their storage racks, you also have what is probably the busiest detailed interior that I’ve seen in any kit thus far. Work progresses with the installation of the crew seats (moulded rear spring detail unlike the PE of the RFM release), interior walls and bulkheads, radio sets, drive shaft, and turret floor. Also of note are that the boxed ammunition shells only have the protruding tip as a part, with the box below them being hollow. Certainly makes more sense that depicting the full ammunition body. I hope you didn’t throw away the swing arm guides as these are now used to create the shape of the tracks. Onto the guides will plug the drive and idler wheels (no glue!) and then the tracks can be formed over the curves of the guide, with the drive/idler/track assembly being transferred to your lower hull. FOUR sprues of track links and associated parts are included, incorporating several completed sections of track, along with many separate links. None of the track links have moulded horns. These are provided as separate parts that are moulded to a tree that you install as a single piece, and then when dry, snip away the tree from the tracks. That’s a smart move that will save some swearing. The Panther’s Maybach engine is faithfully reproduced and is a project in itself, complete with its plumbing that interconnects to the engine bay walls. This, along with fuel tanks, engine cooling apparatus and more internal framing. This is a model for which you will need to carefully plan each painting and weathering stage ahead of getting to that part. A single-piece upper hull is included with sections missing for the crew compartment, engine and engine cooling. These are moulded as separate parts, thus maximising the opportunity to show the interior of the model to its fullest potential. Even so, you would still be limited, under normal circumstances, to pose these off in any realistic way, unless you created a factory diorama of the Panther being built. Still, we know all those detail goodies are in there, so that’s all that reallymatters. That turret is obviously the main feature of this kitty, and this of course is resplendent in amazing interior details. The turret itself is moulded as lid and sides, with the front and rear plates being separate. Plate and weld seam details are superb. Of course, there is an amount of moulded detail within the roof interior, pertaining mostly to electrical conduits etc. I find it most odd that Takom chose to mould, in raised detail, the kit year and serial adjacent to the actual details! Working hinges are provided for the escape hatch on the rear face, and the cupola is supplied with a single-piece ring that contains the shrouds for the periscopes. With this glued in situ, the ring can be cut away, leaving the shrouds in the correct position. External detail is again excellent with the cupola mounted MG, etc but the interior is spectacular. If it’s supposed to be in there, the chances are that Takom has faithfully reproduced it, including turret traverse motors, gun counterbalance, hydraulic drive, loader/gunner/commander seats, azimuth etc. The gun breech is superbly detailed, and like it or not, the barrel in this release is plastic, albeit single part, with separate three-piece muzzle brake. A flexible hose is supplied for the turret interior. Where RFM added a little extra was by means of showing any plumbing and wiring that would be in this area so that the modeller could add it him/herself. You’d be best to avail yourself of the required information and add it yourself from lead wire too. PE For such a comprehensive kit, there is surprisingly little PE in this release, with Takom opting to create many of the finer parts in standard injection plastic. Only six pieces of photo-etch are included in this release, and these are for the engine cooling grilles on the rear top deck. The mesh is certainly fine enough to pass muster, and the quality is excellent. Decals Two small decal sheets are included, with one for the various external numbers etc. and the other being for the many pieces of ammunition and other internal details. There is no printing manufacturer on the sheets, but they are very thin with solid colour, minimal carrier film and in perfect register. The four schemes in this release are: Panther Ausf.A, ‘701’, Panzer Regiment 23 Panther Ausf.A, ‘18’, 16 Panzer Division, Russia, 1944 Panther Ausf.A, ‘233’, Pz.Lehr. of 1. Kompanie, 12 Julio, Normandy, 1944 Panther Ausf.A, ‘221’, 16 Panzer Division Instructions A 34-page A4 manual is included (landscape format) which breaks the Panther down into 64 constructional sequences. Don’t let that fool you though, as you can probably triple that number with the addition of sub-stages per sequence. As I said, this is no quick project. The cover of the manual gives a history of the type and we then get a comprehensive parts map showing each sprue, decal sheet and PE fret. Most of the constructional imagery, provided as shaded illustrations, is printed on matt paper except for where corresponding leaves are printed on gloss for the numerous colour illustrations, courtesy of AMMO. These images provide priceless info on interior painting and will save us countless hours trawling the information either online or in books. Painting reference is also provided in AMMO reference codes. The last pages of the manual are given over to the four schemes provided with this kit, printed in glossy colour and with more AMMO paint references to negotiate. Inside the manual, a small correction sheet is included for the track building section. As the basis of this kit is the same as for the other two Panther’s in this specific Ausf.A range, a number of parts in this kit won’t be used. I would have liked to have seen the redundant parts shaded on the sprue map, but they aren’t. Conclusion As an extra to this article, I’ll build this model straight from box and leave it unpainted, so you can see how things go together and gauge the construction for yourself. I’ll add any relevant notes as I go along and mention if I encounter any issues that you should be aware of. In all though, this is another epic release of 2018, along with the slightly earlier Rye Field Model kit. For the sheer amount of plastic that you get though, and the pleasure you’ll derive from this build, the cost is pretty hard to beat, especially as I compare this against aircraft kits that I usually build. Armour certainly seems to provide more value for money, and at the moment, more detail for your buck! Very highly recommended! My sincere thanks to the good folks at MBK Distribution for sending us this sample.


-
1/35 German E-50 Standardpanzer Das Werk Catalogue # DW3503 The Entwicklungseries (from German Entwicklung, "development"), more commonly known as the E-Series, was a late-World War II attempt by Germany to produce a standardised series of tank designs. There were to be standard designs in six different weight classes, from which several specialised variants were to be developed. This intended to reverse the trend of extremely complex tank designs that had resulted in poor production rates and mechanical unreliability. The E-series designs were simpler, cheaper to produce and more efficient than their predecessors; however, their design offered only modest improvements in armour and firepower over the designs they were intended to replace, such as the Jagdpanzer 38(t), Panther Ausf.G or Tiger II; and would have represented the final standardization of German armoured vehicle design. Indeed, nearly all of the E-series vehicles — up through and including the E-75 — were intended to use what were essentially the Tiger II's eighty centimeter diameter, steel-rimmed road wheels for their suspension, meant to overlap each other (as on the later production Tiger I-E and Panther designs that also used them), abandoning the interleaved Shachtellaufwerk roadwheel system that first appeared on German military half-tracks in the early 1930s. The E-50 Standardpanzer was intended as a standard medium tank, replacing the Panther and Tiger I and the conversions based on these tanks. The E-50 hull was to be longer than the Panther, in fact it was practically identical to the Königstiger (Tiger II) in overall dimensions except for the upper and lower glacis plate layout. Compared to these earlier designs however, the amount of drilling and machining involved in producing these Standardpanzer was reduced drastically, which would have made them quicker, easier and cheaper to produce, as would the proposed conical spring system, replacing their predecessors' torsion bar system which required a special steel alloy. Other sources show that a variant of the narrow-mantlet 'Schmalturm' turret designed for the Panther Ausf.F would have been used, coupled with a variant of the 88 mm L/71 gun. As indicated by its name, the weight of the E-50 would fall between 50 and 75 tonnes. The engine was an improved Maybach HL234 which had 900 hp. Maximum speed was supposed to be 60 km/h. Extract courtesy of Wikipedia The kit Das Werk are a fairly new name in our hobby, being an MBK Distribution and Uschi van der Rosten collaboration, and whilst only having a very small number of products available, I know there will be big things from these guys in the future. Watch this space. This release isn’t a Das Werk-engineered kit, but instead is based upon the 2010 Trumpeter kit of the same same, but this edition has a little spice added to it. It’s a sort of mini-compilation of kit and aftermarket, marketed under the Das Werk label. As well as the Trumpeter plastic, you also receive the Voyager E-50 upgrade set containing both PE and resin, and a rather nice RB Models metal barrel. So, everything you will immediately need, all in one box. The only thing this kit doesn’t have are a set of metal tracks to replace Trumpeter’s flexible plastic ones. Das Werk has used a plain white corrugated cardboard box for this release, with their own artwork added as stickers to the lid and side and folding under the bottom of the box on one side. The artwork is the same as the initial Trumpeter release but reversed and shrunken, and set against a monochrome, Germanic style illustration that is quite eye-catching. Opening up the box shows a little compartmentalisation with the upper and lower hulls (individually bagged) in a small sectioned off area along with the decals, resin parts and metal barrel. The main area contains all of the Trumpeter sprues, vinyl tracks, Voyager PE sets and the instructions. The latter are the original Trumpeter instructions and a glossy. Colour sheet for the Voyager. A cardboard sleeve protects the turret. Plastic The E-50 hull is very typical of model tank design, with a single-piece bathtub style lower hull, and a full length upper hull. The upper hull is moulded with separate entry hatches and cooling fan intakes, although the fore and aft grilles are a part of this moulding. Fenders are of course separate, and I’ll discuss the options soon. Other hull details are fine in depiction, although the welding seams aren’t as nice as we see on contemporary kits from the likes of Takom and Rye Field Model. The lower hull is quite simple in the fact that all external side details are provided separately. Access ports are moulded to the underside of this part. For such a large tank, the turret was relatively small. The moulding here is single-piece, with the forward and rear faces being separate. Of course, the cupola and other smaller external details are separate. Again, the weld seams look a little lacking, but you can of course bolster these with a little putty. In all though, still a very nicely reproduced part. The rest of the plastic parts are moulded across five light grey sprues, all bagged individually with the exception of Sprue A, for which two identical sprues are included. Trumpeter’s original kit states that there are actually almost 300 parts in this release, so that isn’t too shabby at all! Remember, there is no interior in this model, accounting for that figure. The first two sprues are identical and contain the parts for the suspension (no internal torsion bars in this release), road wheels, drive and idler wheels, plus towing hoops and parts for the exhaust and shroud, and rear plate track tools. On the next sprue you will see the fenders, rear hull plate, pioneer tools, jack, towing cable, tow cable ends (in case you wanted to use braided wire etc.), engine intake fan grilles, exhaust shrouds. With this release, you will ditch the plastic fenders in favour of the Voyager multipart options, giving the modeller not only something of a more realistic thickness, but also with the ability to remove sections and/or buckle them realistically. Sprue C seems to deal mostly, if not wholly, with the turret. The most obvious parts here are the turret front and rear faces, and the turret floor. Also note the cupola, cupola liner, cupola hatch, escape hatch and hinge, barrel mount and hinge, vents, grab handles etc. This next sprue concerns the barrels (two types, although only one is supplied as a metal alternative), and two types of mantlet. It wouldn’t make any sense not to use the metal barrel with this release, so your options are pretty much laid out for you, plus the Voyager PE is designed to fit with the metal barrel option. Two sprues of clear parts (K & K1) are included for the various periscopes etc. Not much to say here, but the clarity is excellent. Tracks Love them or loathe them, this kit comes with a set of black vinyl tracks. I know these aren’t the favourite for many serious modellers, but you can always replace with the Friul set, ATL-37, as these will give the model the much-needed punch required. Moulding of the vinyl is actually very good, with plenty of sharp detail. These are of course linked together with the melted pin method, aided and abetted by a little CA. As the model will be fitted with multi-part metal fenders for which sections can be left off, you may still want to go with the Friul set. Photo-etch, wire and resin Trumpeter’s original PE is not included with this release, but you don’t need it as the Voyager PE parts improve massively on this. There are FIVE frets of PE parts in this release, bagged into a tightly-fitting clear sleeve, with the smaller ones contained within another sleeve. These parts are all wide-ranging and to fit some of them, such as the pioneer tool clasps etc. will require a little surgery of the original plastic. This is hardly rocket science to a regular armour modeller. Other parts in these frets include a extra armour plating for the turret roof, mantlet fairing, hatch latches, pioneer tool shovel head, multipart fenders, escape hatch hinge detail, replacement mudguards etc. Some plastic rod and wire is included too. From the original Trumpeter release, the braided copper wire is also present. Barrel A finely turned aluminium barrel replaces the two-part plastic offering in the original Trumpeter sprues. This replacement is superbly and finely turned and a vast improvement over the original parts, with everything looking sharper and more defined. No surgery is needed here as it’s a drop fit. There is also rifling in the end of the barrel. Decals Only a small sheet here that caters to this kit, and no schemes are given. Everything is in the modeller’s hands. Printing quality is very good, being thin and with minimal carrier film. Registration is also perfect. Instructions Trumpeter’s original instruction manual is included in this release, being an A4 production covering 12 pages. All illustrations in line drawing format and should be very easy to follow with obvious parts location and no ambiguity that I can see. Optional mantlet parts are supplied, but only one of these will be scheduled to incorporate some of the Voyager upgrade metal. You’d be best to make your choice at the outset. Only simple paint references are supplied on the Trumpeter instructions. A single, glossy sheet is supplied for Voyager’s PE and resin instructions. These are actually broken down into pages, 2 per side of the sheet, and it obviously a legacy from the original aftermarket set by this company. Voyager’s instructions are always attractive and easy to follow with their minimal use of colour. The instructions make it easy to identify the original kit parts, resin and PE, and where the parts either replace the plastic, or supplement it. No colour notification here, but this is standard. Conclusion I’ve not been too acquainted with Trumpeter armour, and don’t really know much about it in terms of accuracy etc, but as this was a paper-Panzer, that doesn’t really matter too much. The plastic itself is superb, with plenty of detail and a reasonable parts-count. Overall detail of the standard kit is above my expectations, and along with the Voyager and RB Models updates, this makes up into a tidy little package. I like Das Werk’s idea with this release, in creating an all-in-one affordable package with everything under one box lid (unless you want those Friul tracks!). Whilst I’m familiar with their recent 1/48 Luftwaffe Jack Stand set, the armour is something new to me. I sincerely hope we see more compendium-style releases such as this in future. Highly recommended My sincere thanks to the folk at MBK Distribution for the review sample seen here.

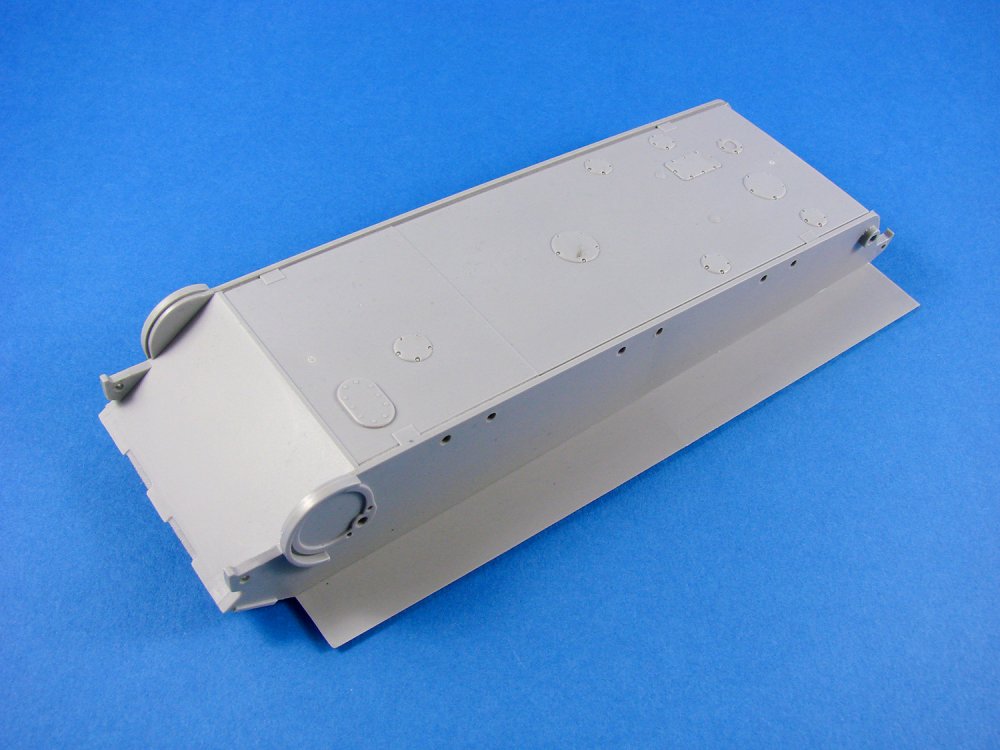
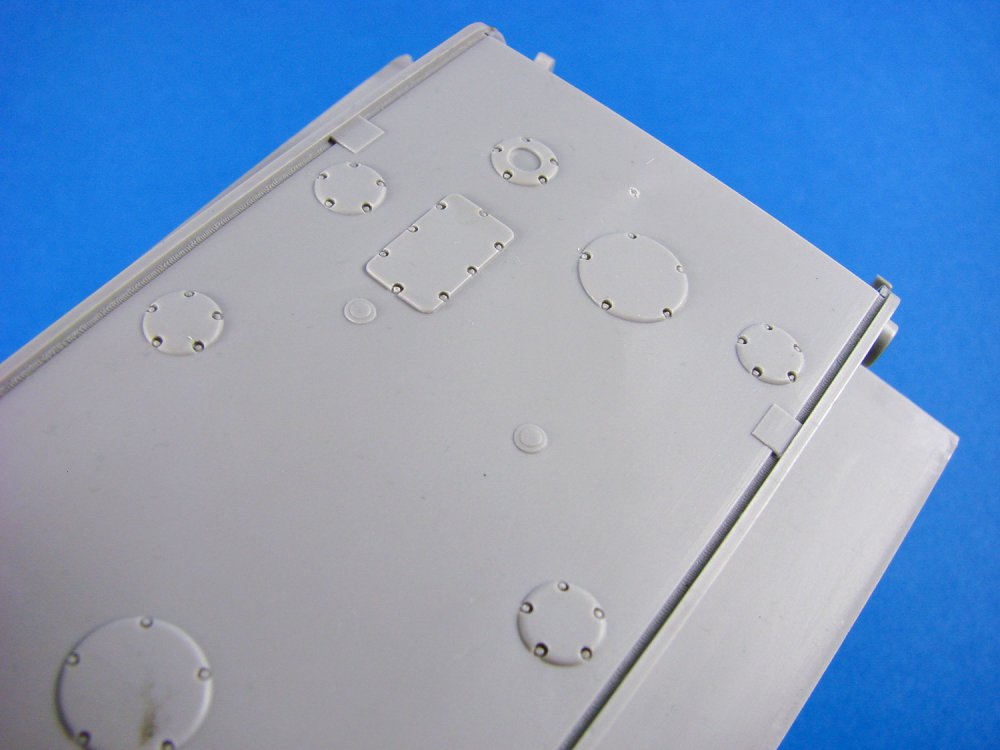

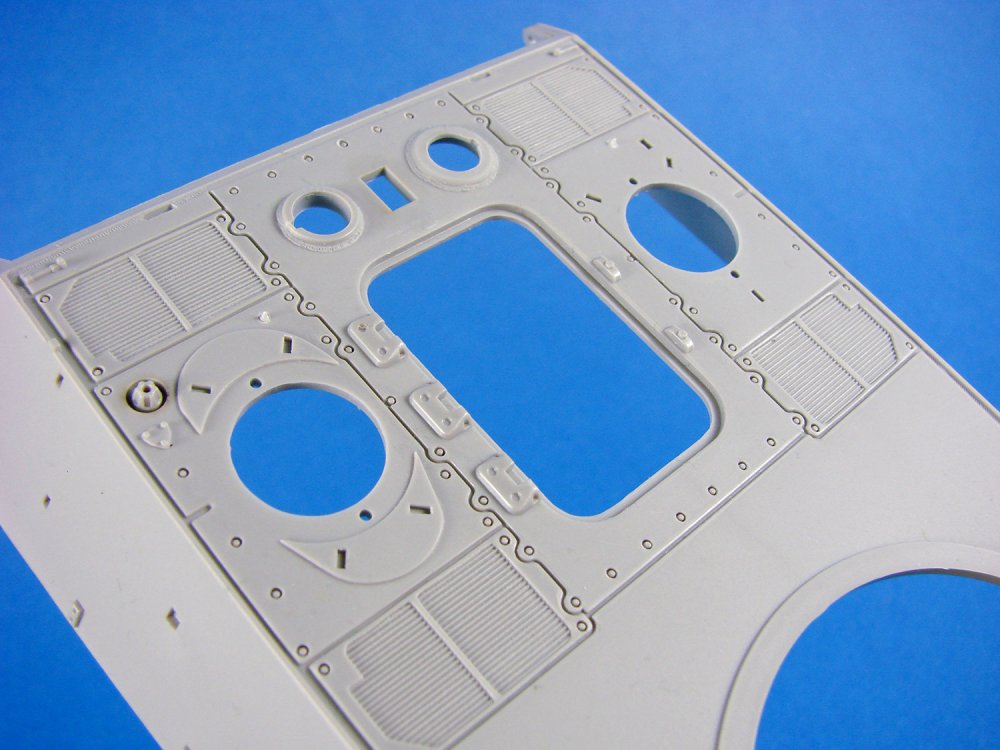


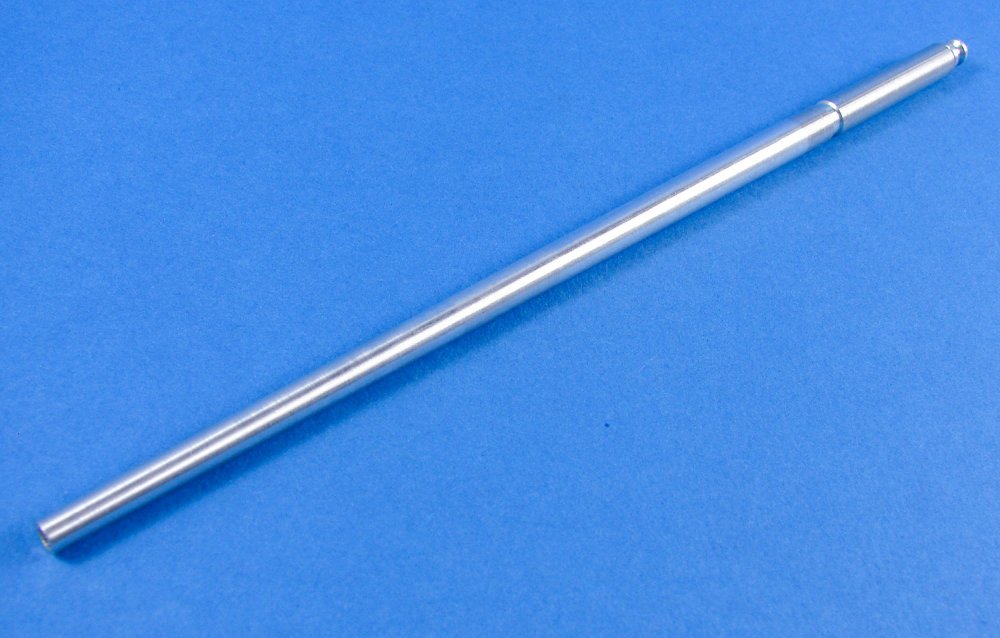
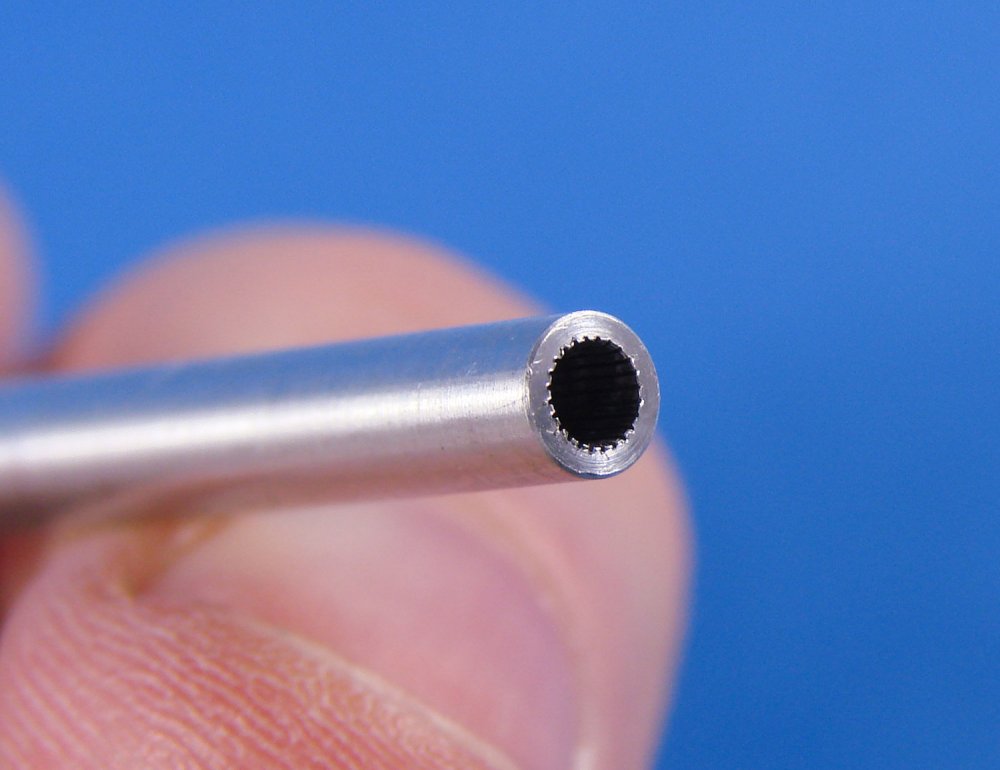

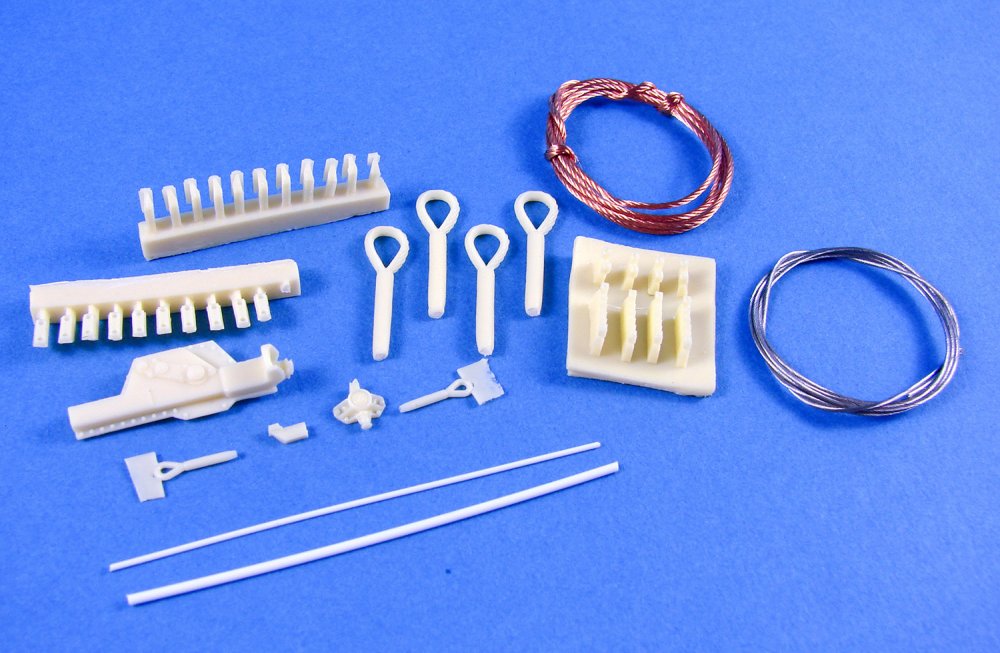
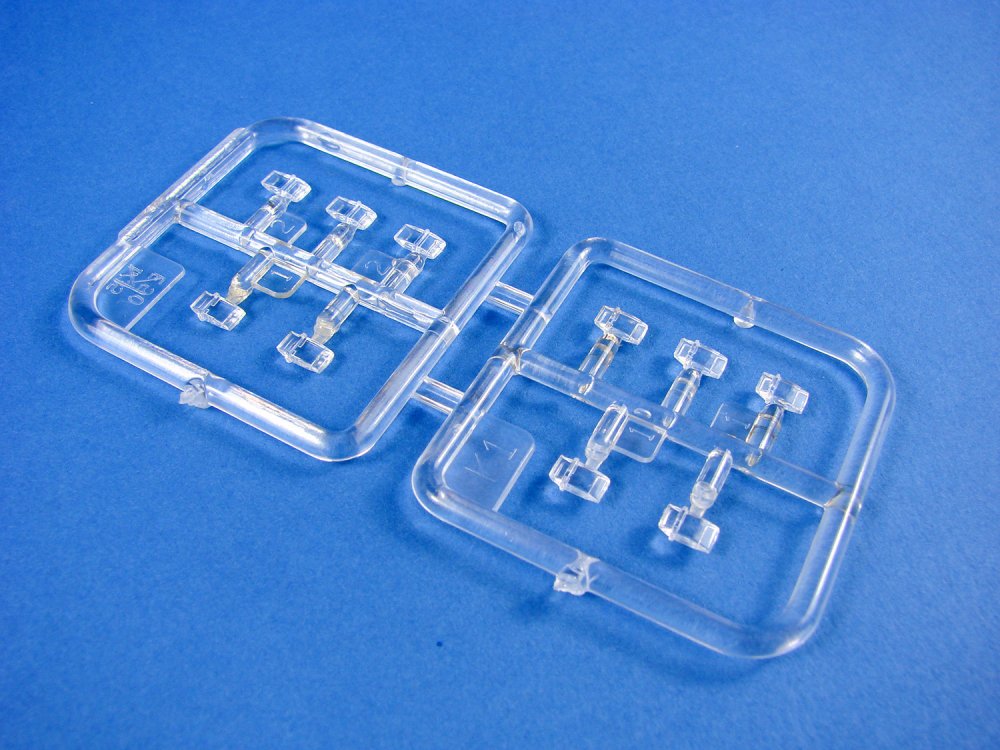


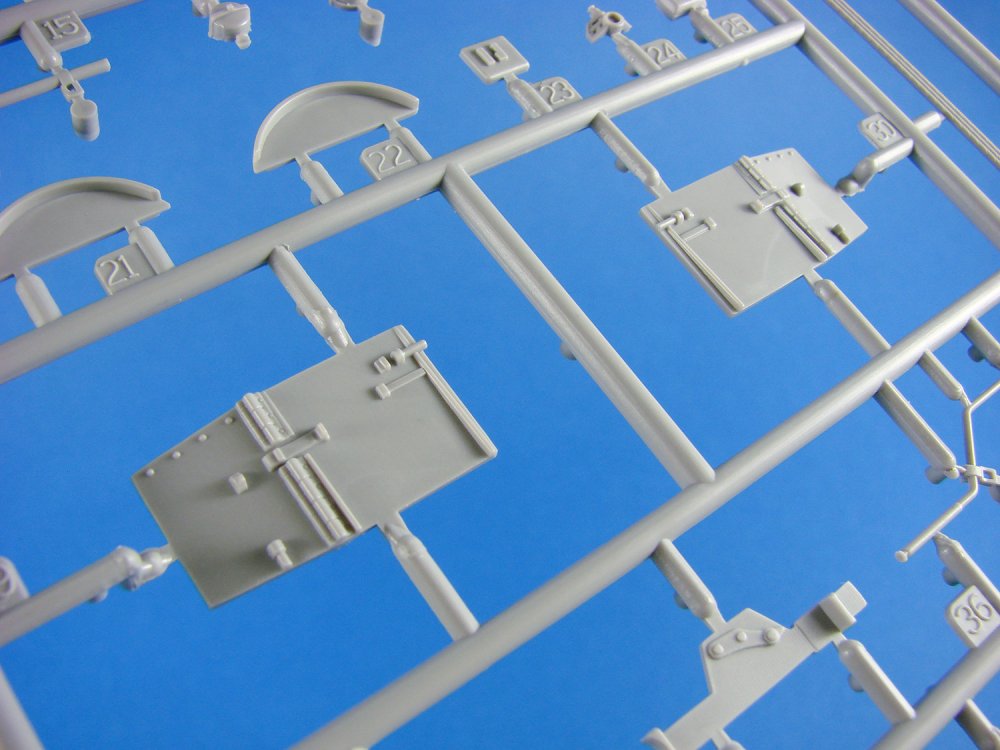


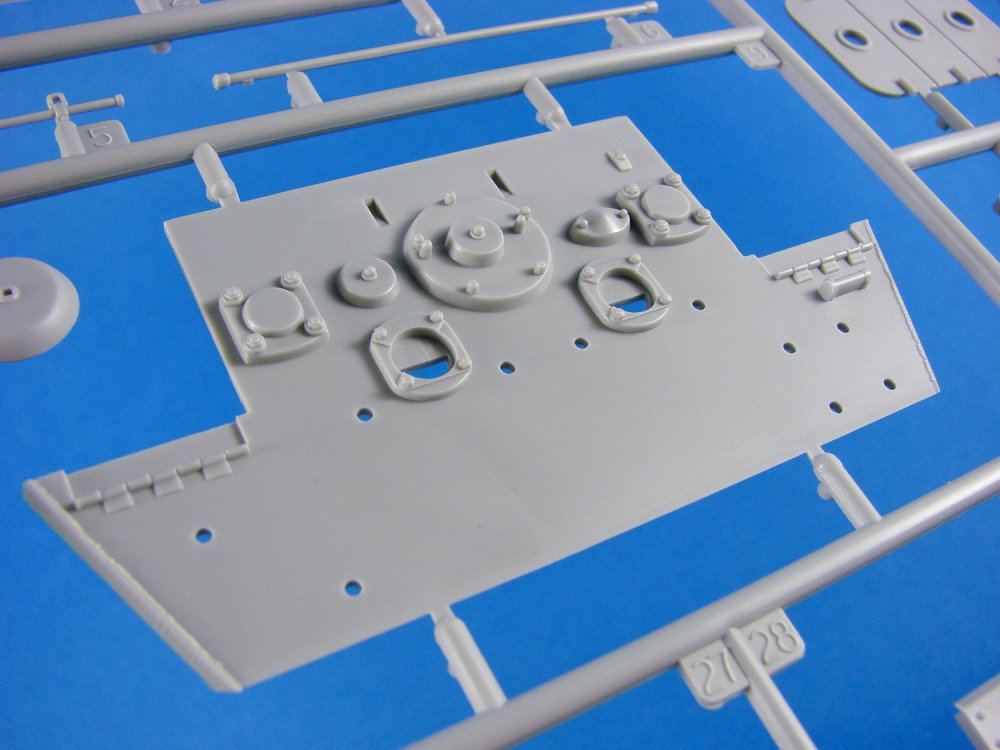
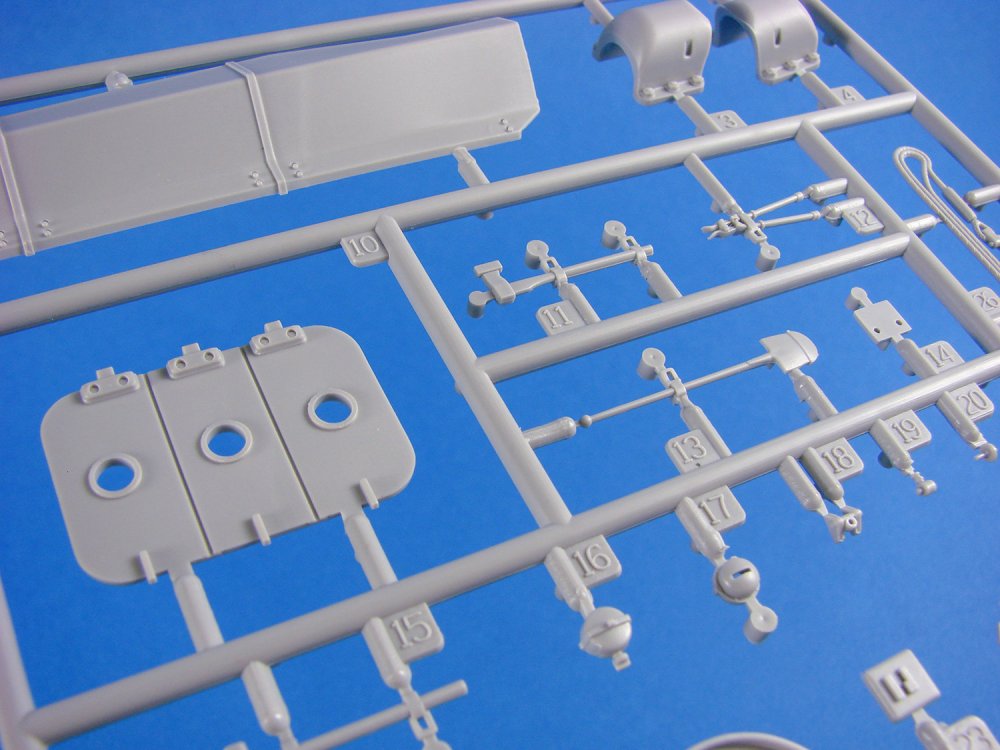

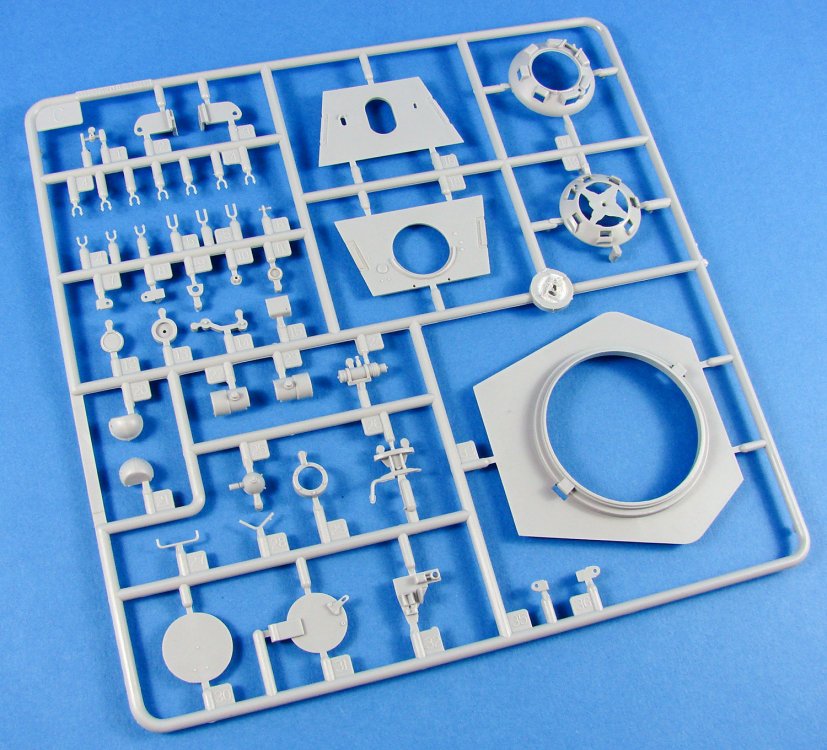
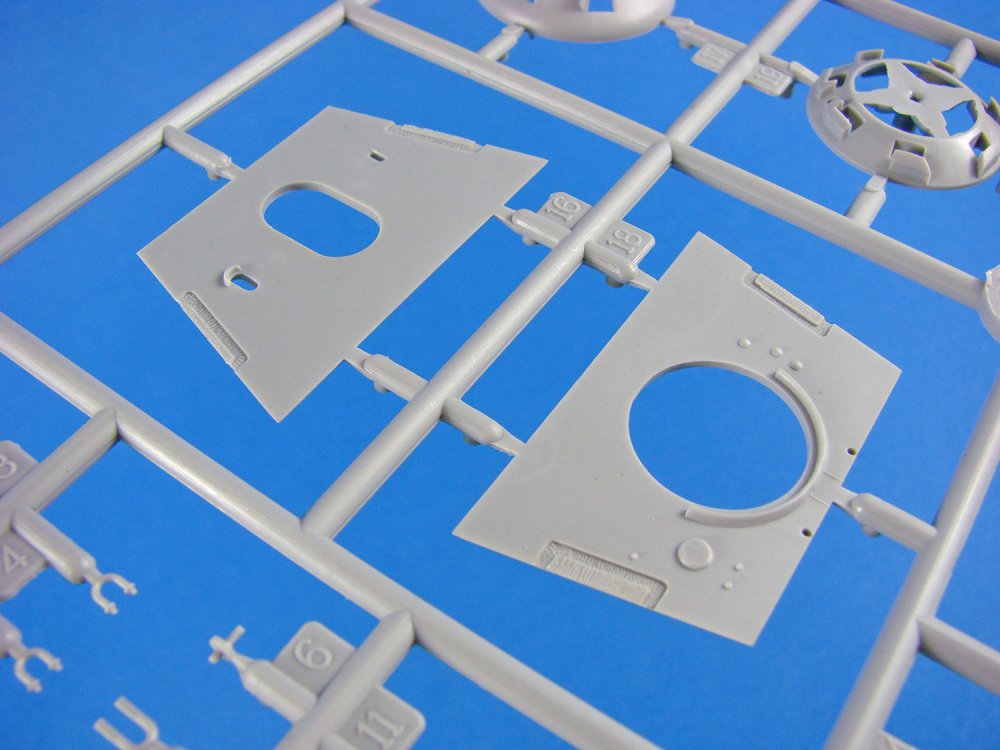

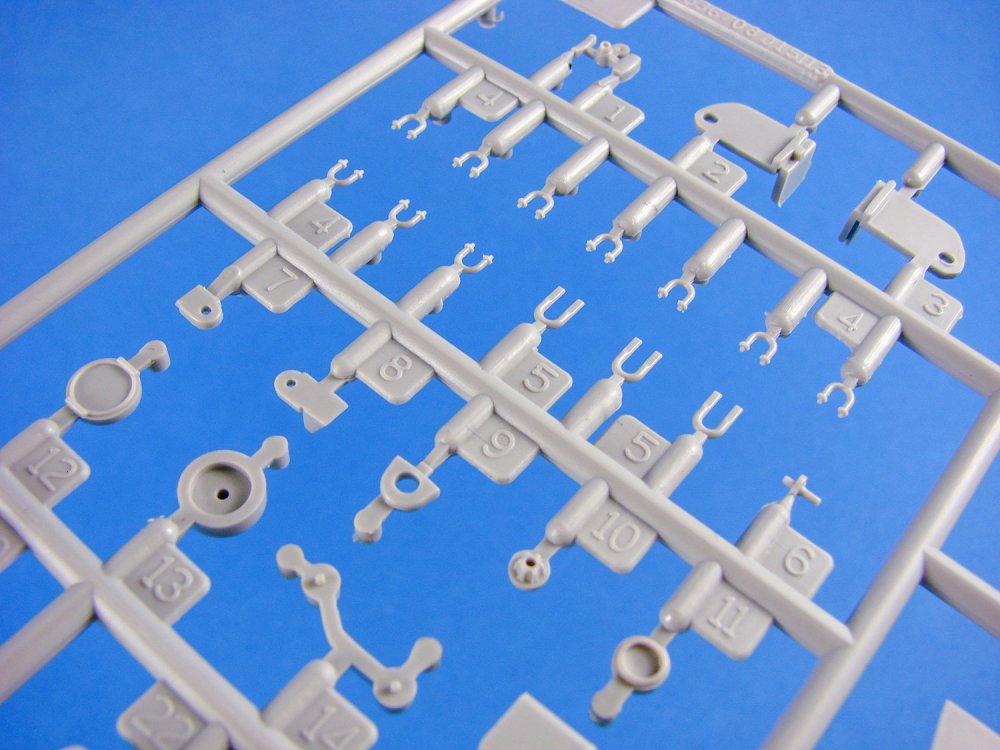
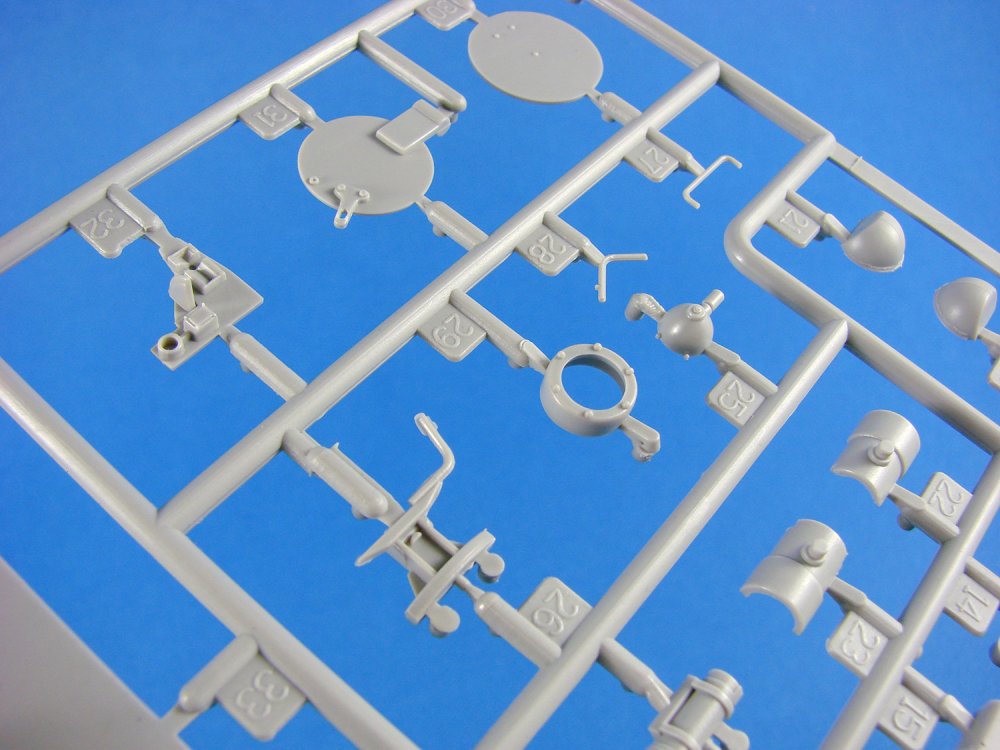
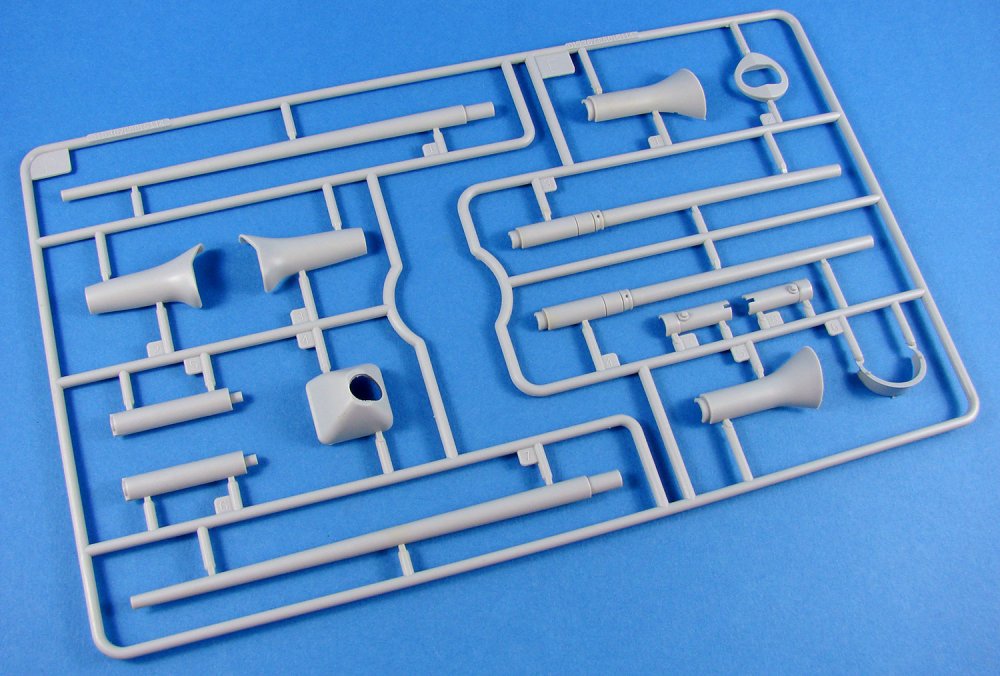
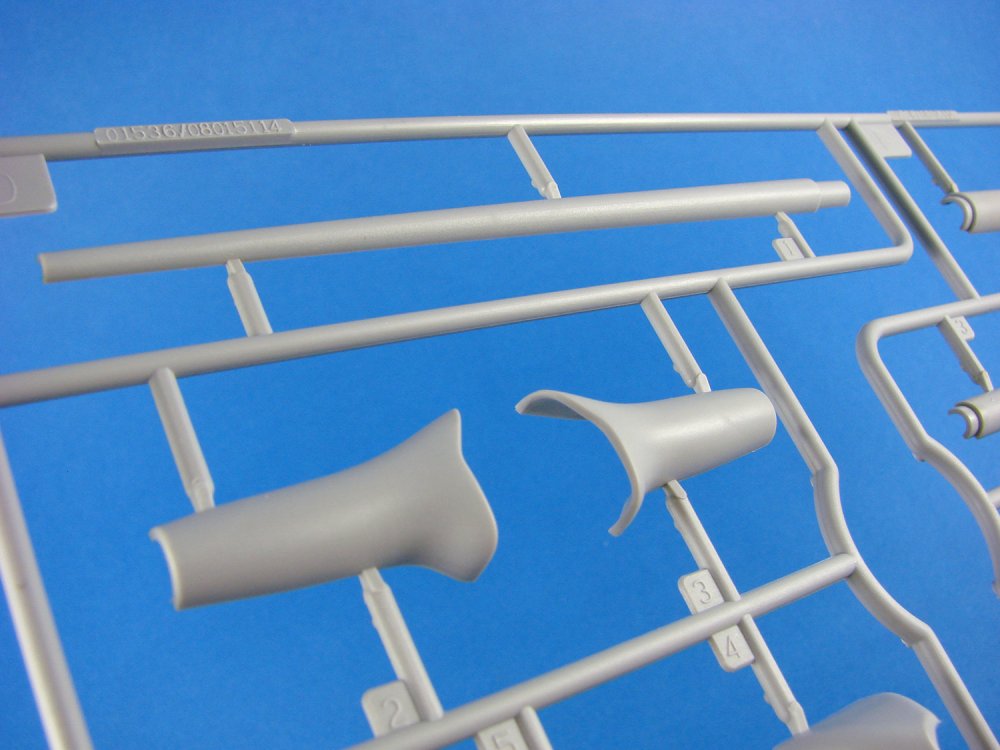
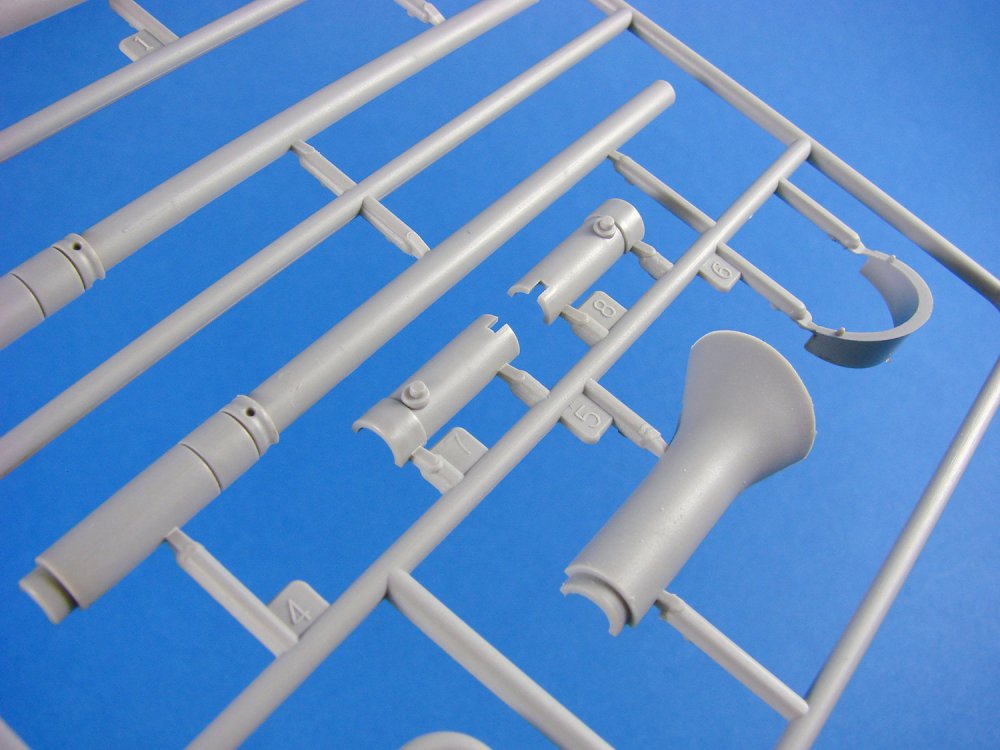


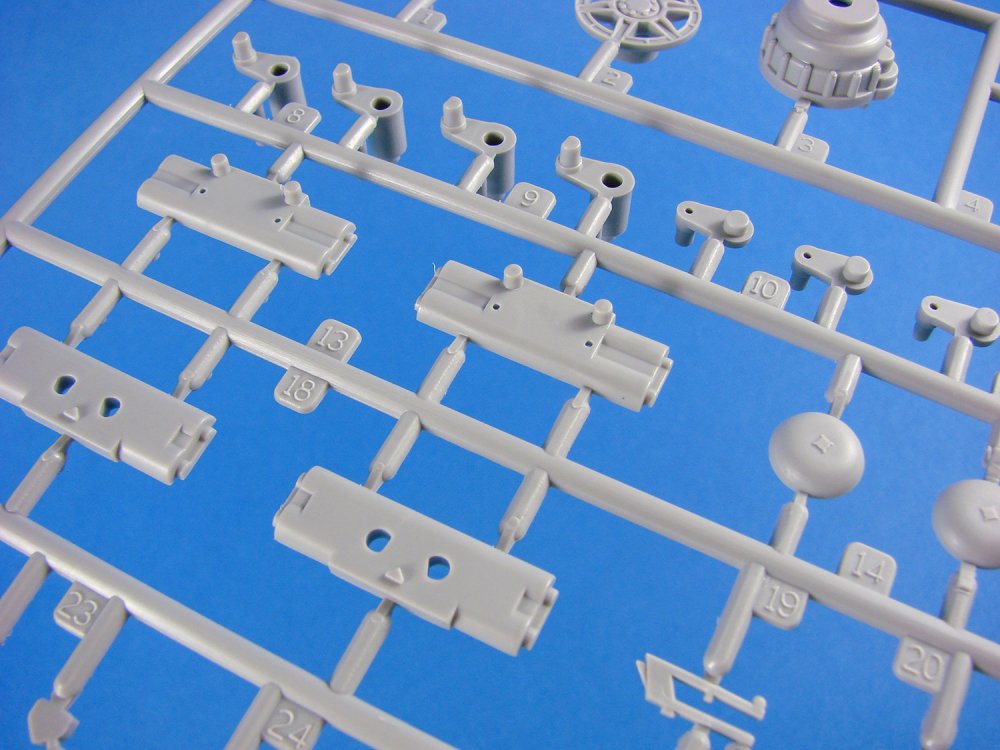

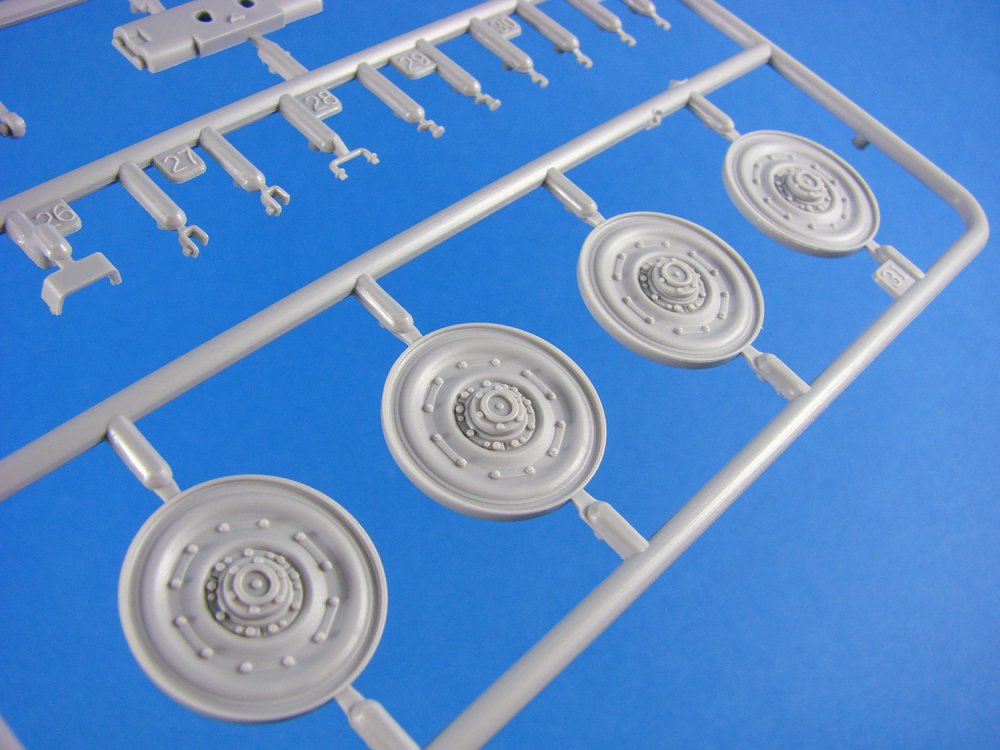
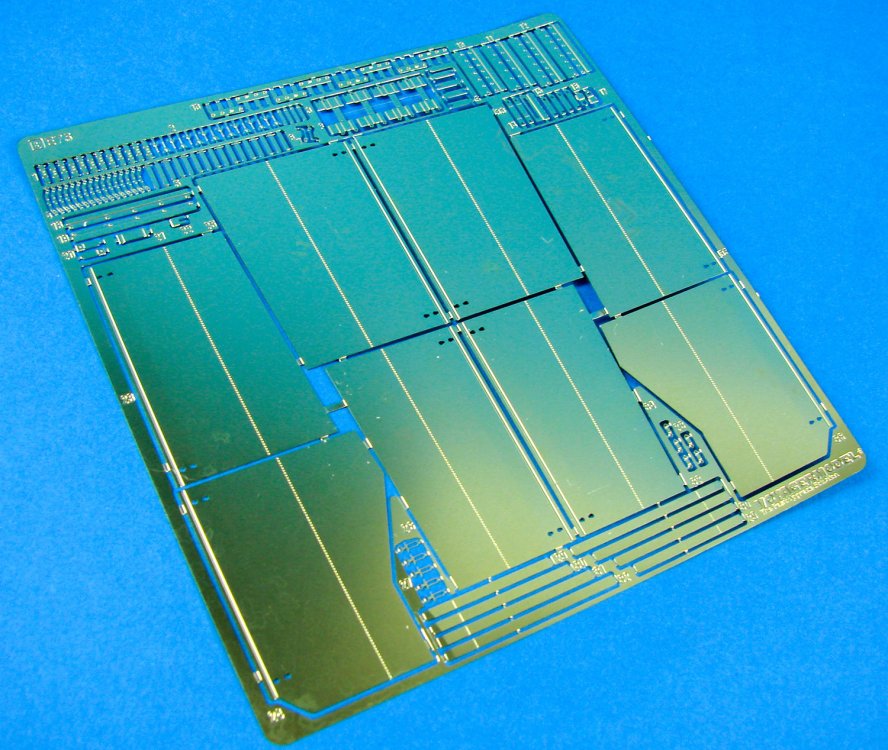
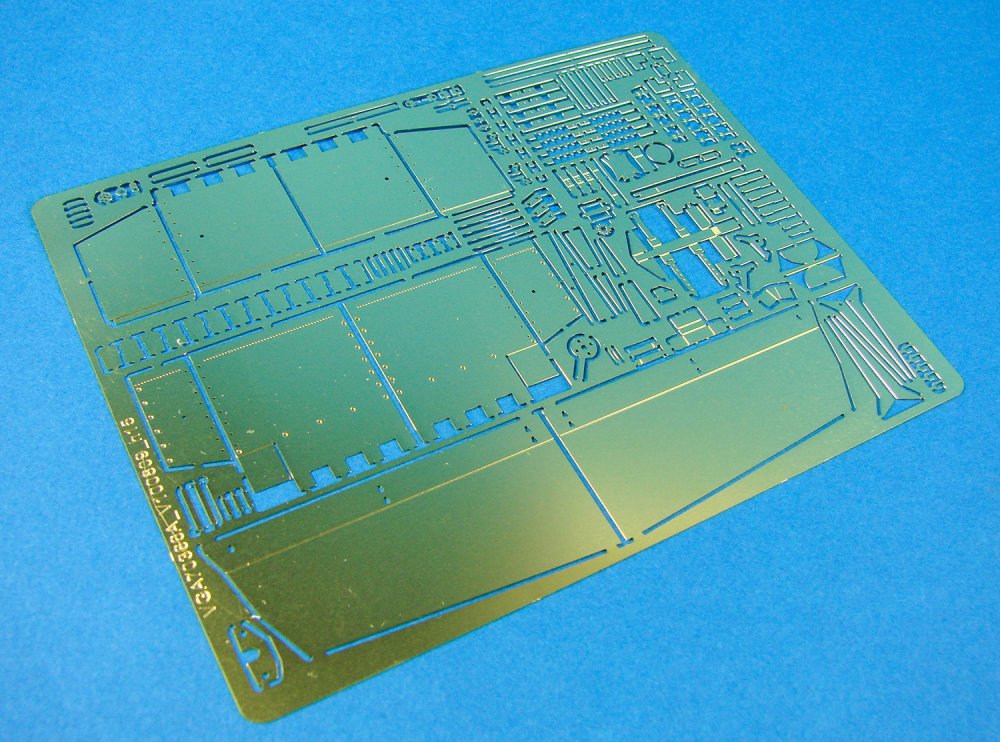
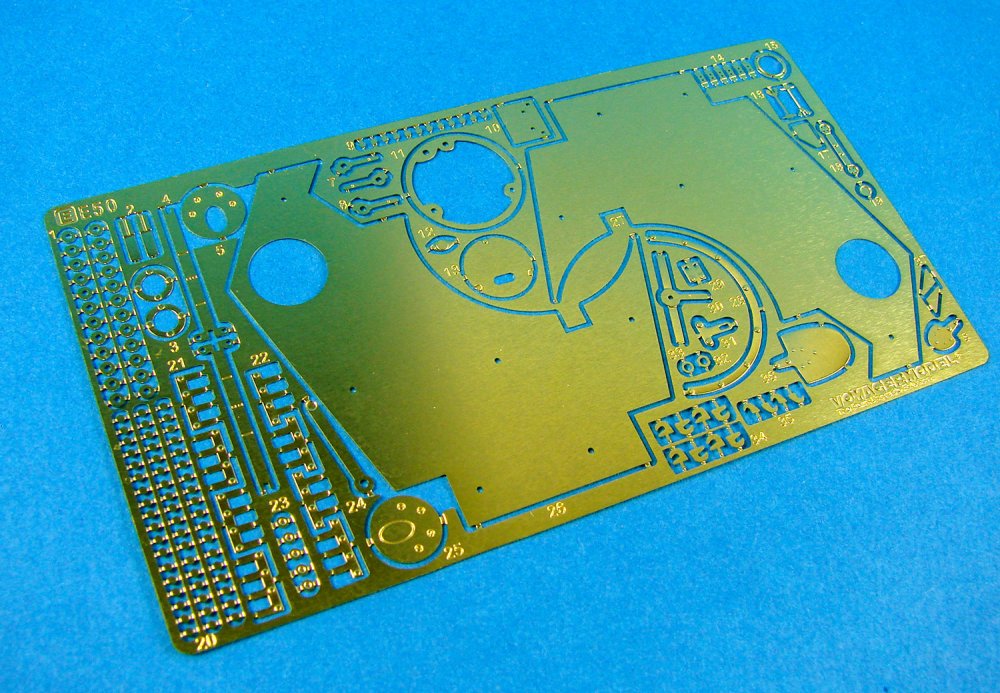
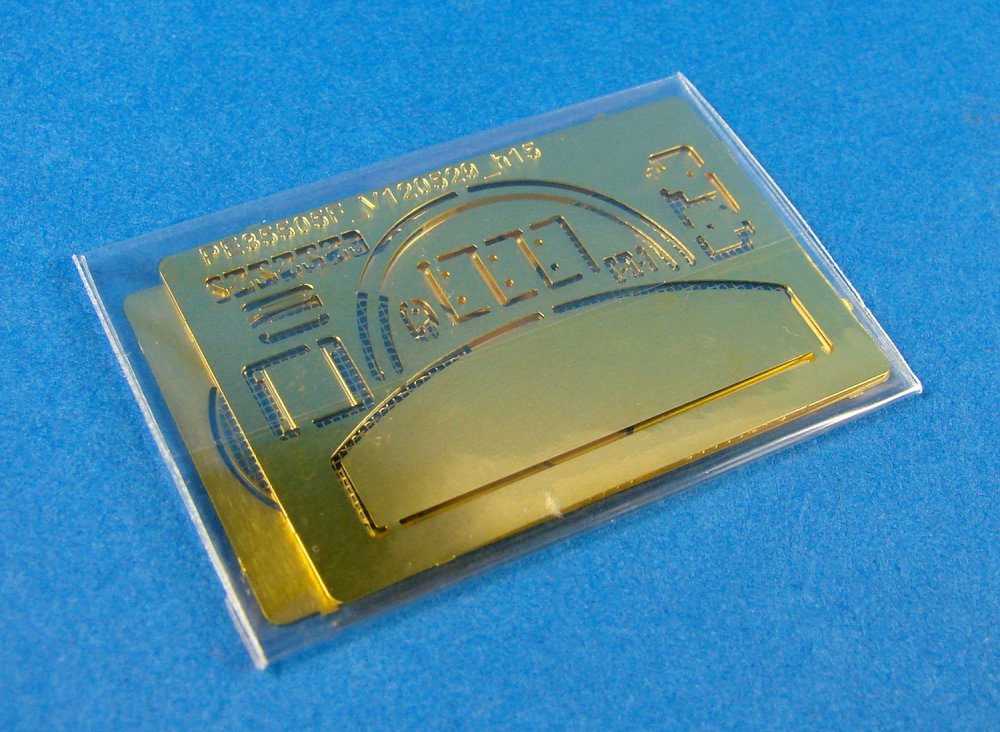

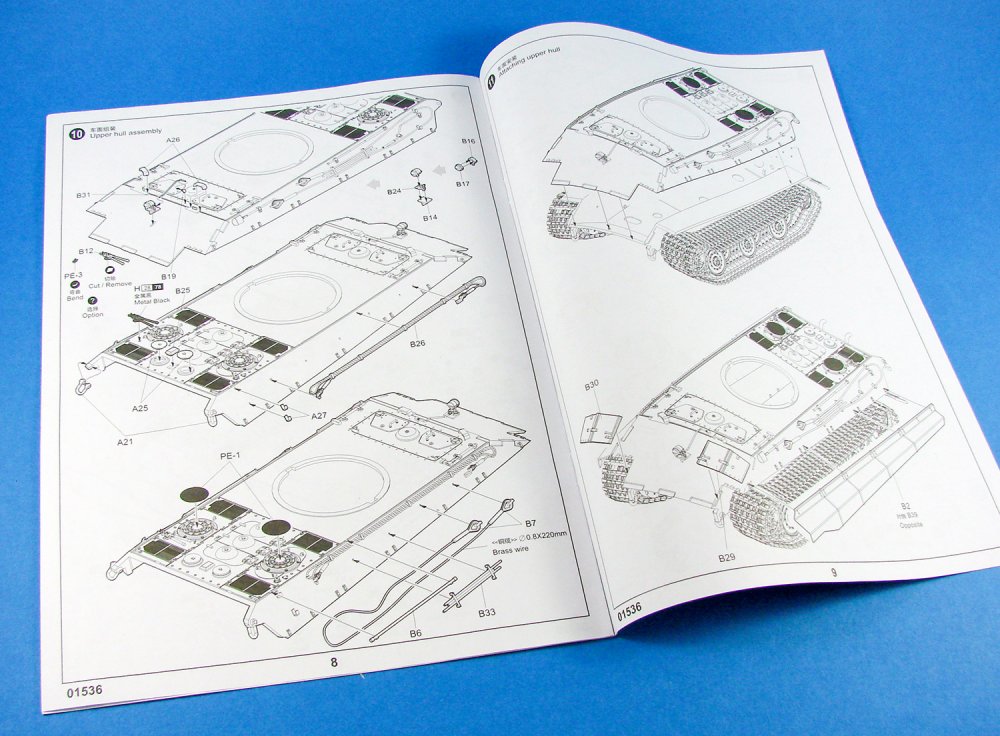

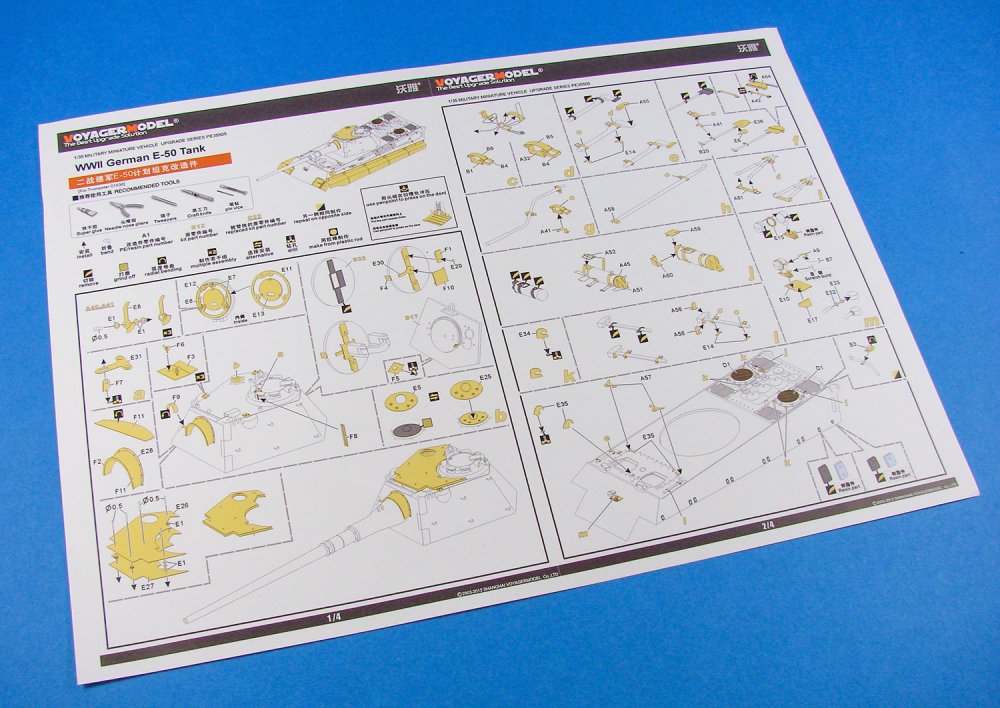
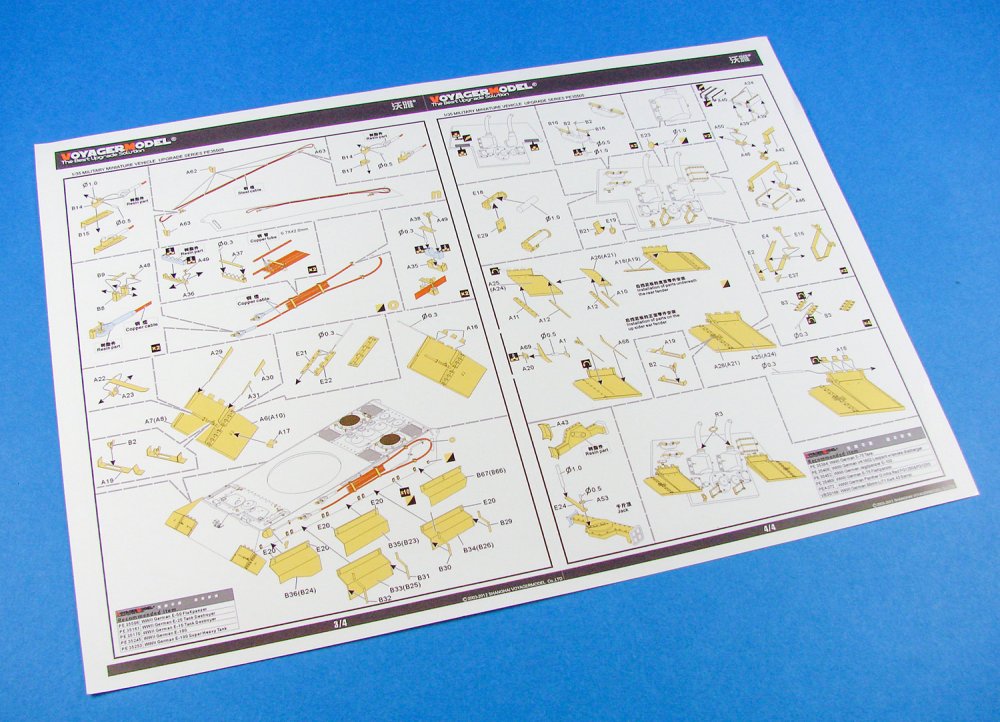

-
Always a pleasure. Just post if you have questions. I hope you'll start a build log so we can watch this.
-
You first need to score around the edge of the part with a scalpel knife and remove the external waste resin. You then need to use a very fine razor saw, such as the RB Productions one, and then carefully remove material from underneath the parts (if possible). After this, use a piece of abrasive paper (medium grit) and then draw the parts over the paper and slowly sand away the excess resin. Make sure you do this evenly so that it's flat, and use water too so the resin dust doesn't get in the air.
-
1/35 Flettner Fl 282V-6 Kolibri Aircraft Miniatures Series MiniArt Catalogue # 41001 The Flettner Fl 282 Kolibri ("Hummingbird") is a single-seat intermeshing rotor helicopter, or synchropter, produced by Anton Flettner of Germany. According to Yves Le Bec, the Flettner Fl 282 was the world's first series production helicopter. though other writers claim the same for the Focke-Achgelis Fa 223. Flettner’s Fl 282 Kolibri was an improved version of the Flettner Fl 265 announced in July 1940, which pioneered the same intermeshing rotor configuration that the Kolibri used. It had a 7.7 litre displacement, seven-cylinder Siemens-Halske Sh 14 radial engine of 150-160 hp mounted in the centre of the fuselage, with a transmission mounted on the front of the engine from which a drive shaft ran to an upper gearbox, which then split the power to a pair of opposite-rotation drive shafts to turn the rotors. The Sh 14 engine was a tried-and-true design that only required servicing every 400 hours, as opposed to the nearly 27 litre displacement, nine-cylinder BMW/Bramo Fafnir 750hp radial engine powering the larger Focke-Achgelis Fa 223 helicopter, whose outdated design required maintenance every 25 hours. The Fl 282's fuselage was constructed from steel tube covered with doped fabric, and it was fitted with a fixed tricycle undercarriage. The German Navy was impressed with the Kolibri and wanted to evaluate it for submarine spotting duties, ordering an initial 15 examples, to be followed by 30 production models. Flight testing of the first two prototypes was carried out through 1941, including repeated take-offs and landings from a pad mounted on the German cruiser Köln. The first two "A" series prototypes had enclosed cockpits; all subsequent examples had open cockpits and were designated "B" series. In case of an engine failure, the switch from helicopter to autorotation was automatic. Good handling in bad weather led the German Air Ministry to issue a contract in 1944 to BMW to produce 1,000 units. However, the company's Munich plant was destroyed by Allied bombing raids after producing just 24 machines. Towards the end of World War II most of the surviving Fl 282s were stationed at Rangsdorf, in their role as artillery spotters, but gradually fell victim to Soviet fighters and anti-aircraft fire. A total of 24 machines were built. Edit courtesy of Wikipedia The kit When Ukrainian company, MiniArt, announced their new Fl 282 kit, it caught us all pretty much by surprise, despite the companies more leftfield releases. We’ve not exactly been inundated with large scale models of this quirky yet important helicopter, with the only other kit being Anyuta’s 3D-printed 1/18 kit. MiniArt’s release started to trickle into retailers around a month or so ago, and we’ve managed to get our hands on this one from our friends at Modellbau-König (MBK), in Germany. This release is packaged into a box which is perhaps a little bigger than it should be, with the bag of contents rattling around it inside. The box artwork depicts the V-6 machine on the deck of the minelayer ‘Drache’ in the Adriatic in 1942. Box side images show some coloured CAD renders of the Fl 282. Inside the box, EIGHT medium-grey sprues are packed into two bags, and then sealed into a single, heat-sealed bag. Out of those grey sprues, two are duplicates, and a small clear sprue is separately packed within the main bag to protect it from scuffing. A single PE fret is included, and this is packaged into a small cardboard sleeve. Of course, decals are also a part of this release, and the small sheet is also packaged into a separate sleeve, again within the main bag. The kit’s instruction manual is a 12-page A4 publication in a mix of matt and glossy paper, with the glossy leaves containing the various artworks etc. More on that later. Sprue A On this first sprue, we are presented with most of the larger parts of the Fl 282, pertaining of course to the fuselage. The Fl 282’s fuselage was constructed from tubular steel and the majority of it was covered in fabric. This effect is clearly seen in the port and starboard halves, with the forward section being uncovered and the rear portion exhibiting a nicely reproduced taught fabric effect, hinting at the structures below. Other parts on this sprue are the upper deck with forward tubular framework, engine side panels and control surface rods. In order to cater to the multitude of thin frame parts, MiniArt has used a series of small tags for their ejector pins, and these simply need to be snipped off and cleaned up. Sprue Ad We look at the Kolibri these days and appreciate how unusual it is with regards to modern helicopter design. Here, we don’t have a tail rotor assembly and small tail surfaces. Instead we have a propeller rotor buried within the fuselage, and the tail surfaces are reasonably conventional with tubular frames fin, rudder and stabiliser. On this sprue we have a two-part fin with a rather nicely rendered frame and fabric exterior, and a single-piece rudder with those same details. You will also notice the small frames/mass balance for the rudder too. These are very delicate, so care need to be exercised when removing them. This also goes for the other small frame parts on this sprue, of which there are several. Lastly, note the lower belly section with sprung tail hoop skid and also the instrument panel rear enclosure. With that last part, there’s no need to plumb the rear of the instruments, but you will want to look at adding wiring from this unit to other parts of the airframe. Sprue B (x2) Remember, this isn’t a 4-blade rotor, but instead two 2-blade intermeshing rotors. Here you can see the blades for those, moulded with a sag in them so that you don’t need to manipulate the plastic and bend them yourselves. Other parts on here are for the two-part main and nose gear wheels, engine and gearbox parts, and rotor connection areas etc. Whilst the wheels don’t have any flat spots on them for the weighted effect, they are still bulged, strangely enough, in that area. Sprue Be This fairly small sprue contains the tubular cockpit sidewalls and floor, as well as the single piece stabiliser parts. These parts are finely represented with delicate tubular frames and the various fittings. The use of ejector pin tags has been employed again so as to stop the tooling miring the parts. Seams are generally minimal, and sprue gates are thankfully small. Sprue Bd Only two parts are included on this, the only clear sprue in this specific release. Having excellent transparency, these parts are for reflector and lens that mount to the nose gear strut. The reflector itself will sit inside a main light housing. A little lead wire for the power cable, would really set this off. Sprue C Here we have the lion’s share of the engineering that went into the technology that made this thing fly….i.e. engine parts and gearbox/transmission units. You’ll note engine pushrods, transmission housing plates and drive shafts, propeller housing ring, exhaust gases collector ring, pilot seat back with nicely detailed cushion, main gear spreader tubes, nose gear forked strut, etc. A number of bulkheads are also moulded here, including the engine mounting backplate. I don’t think we can call the latter a firewall, in this instance. Note also the transmission/gearbox cowl panels and the plate which separates the brave pilot from the propeller spinning around to his rear. Sprue Ca I admit that the sprue nomenclature is a little confusing here. This is presumably because MiniArt will use other sprues with subsequent kit versions of this model. This sprue contains the engine and hub, more parts for the drive/gearing and transmission units, upper rear fuselage top into which the fin sits, lower fuselage belly, instrument panel with blank instruments (good!), pilot seat base with realistic wrinkles cockpit components, numerous other small frame components, etc. Sprue D This is the last sprue in this release. It appears that the majority of the parts here concern the engine and other ancillary elements. Note the transmission housing, fuel piping, propeller, control rods and their linkages, side panel interior details, and of course, a few more pieces of tubular frame. This is probably the busiest of all sprues, and the parts tend to be either small or fragile, or both. One part is broken from the sprue, but that part is undamaged. Photo Etch Like many kits these days, this one also comes equipped with a fret of PE parts, albeit quite small. Packaged into a cardboard sleeve to protect it from the rigours of the oversized box, this fret contains 11 parts. These make up the seatbelts, frame edge sections, and a small number of parts for the engine. The PE itself is nicely manufactured and left in its bare metal state. Both sides are covered in film which needs to be removed before use. Decals A single, small sheet of decals, printed in the Ukraine by Decograph, is included in this release. Printing is thin, with minimal carrier film and the colours appear to be opaque. There seems to have been an issue with registration with the white borders on the yellow fuel triangles, but these have also been supplied, on the same sheet, as separates, so all is good. Swastikas are supplied, but in a two-part format. Instrument decals are provided as a single panel or separate dials. I would use the latter, and also a punch & die to remove them so as to eliminate carrier film. The schemes provided in this kit are: Erprobungs-und Lehrkommando 20, on board the minelayer ‘Drache’, Trieste, Adriatic Sea, November 1942 Tests on the floating base hydroaviation ‘Greif’, Travemünde, Lübeck Bay, Baltic Sea, August 1942 Erprobungs-und Lehrkommando 20, on board the minelayer ‘Drache’, Trieste, Adriatic Sea, January 1943 Erprobungs-und Lehrkommando 20, aboard the anti-submarine ship KUJ 13, Baltic Sea, April – May 1943 Instructions These are printed as a 12-page, glossy A4 publication, with a scheme profile and blueprintstyle image on the front page, along with a brief resume of the kit contents. Inside the manual, the first thing we are presented with is a proper set of scheme profiles for GF+YF. Please remember that all schemes in this kit are for the same prototype, and generally just vary in base colour, give or take. A parts map is then supplied, complete with a paint chart for Vallejo, Mr. Color, Humbrol, Testors, and an unknown type, with a generic list of colour names too. Construction is shown in clear line drawings over 32 stages, in easy to follow imagery and annotation. The last pages are given over to the remaining scheme profiles. Decal placement is easy to follow and the painting codes are easily referenced. Conclusion Sometimes you come across a subject that you had no real idea you wanted to build, until you see it in the box in front of you. For me, this is definitely one. Yes, I knew of the type, and saw the large scale 3-D printed one, but I never really expected to see it in this scale, in injected plastic. Moulding quality is excellent throughout and whilst the parts count is fairly high (185 parts), the model does look relatively simple to build, and has excellent overall detail. I also think the price point is very attractive. If you are a fan of the esoteric and anything Luftwaffe-related, then you should check out this release. Take a look at our partner shop, MBK, and pick one up soon. HIGHLY recommended! My sincere thanks to the Heike and the good folks at MBK Distribution for shipping this sample out for review.

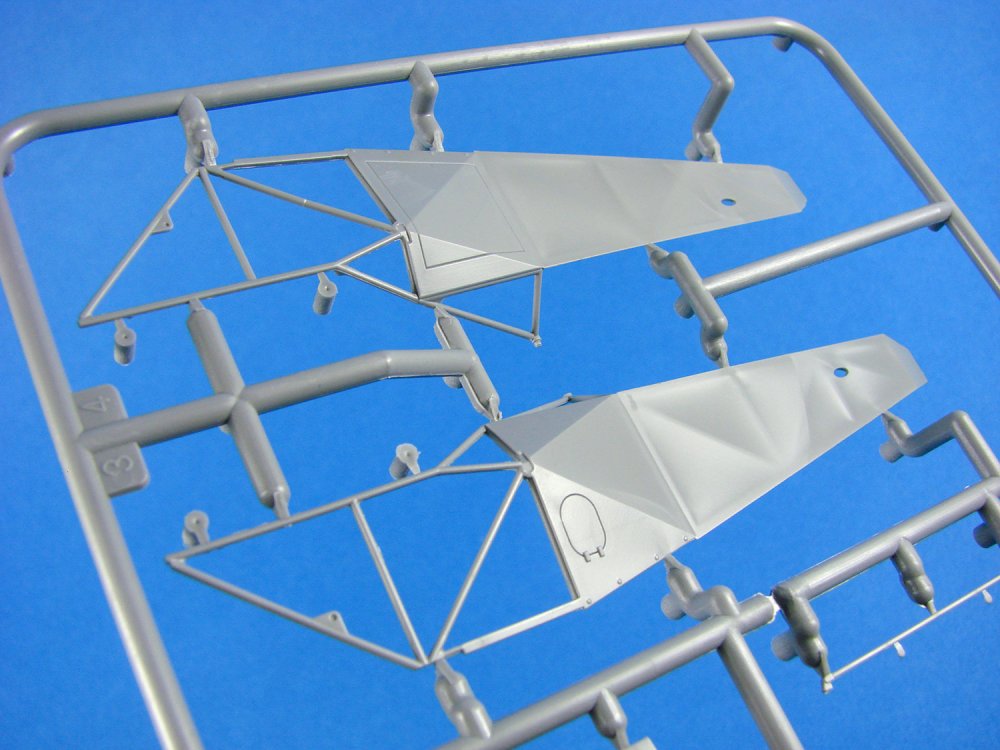
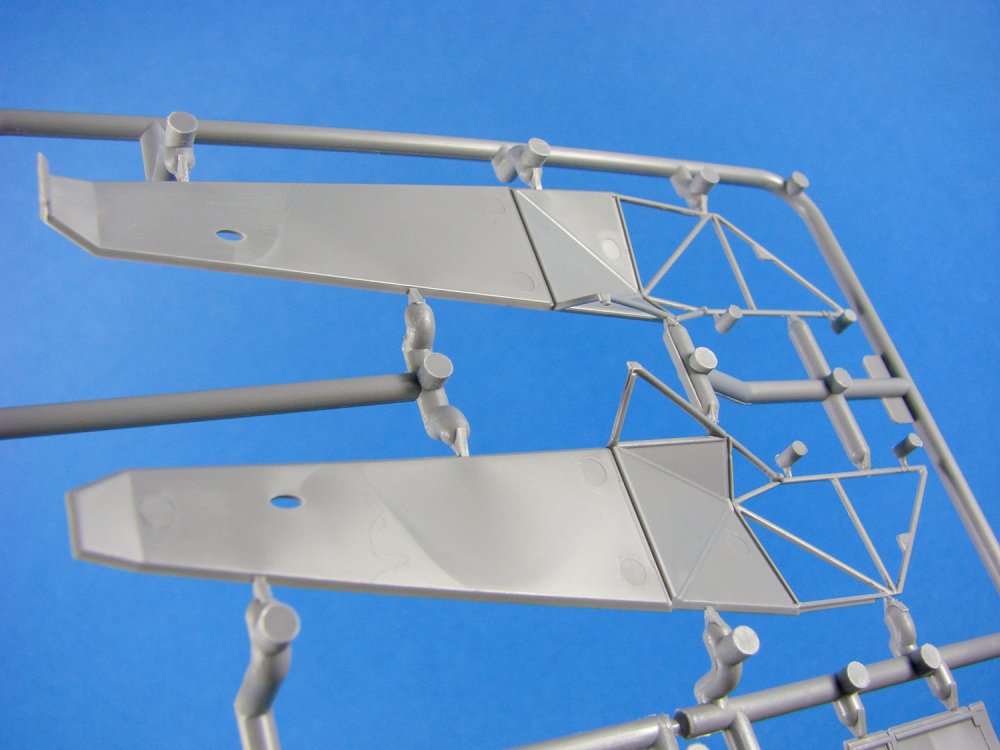

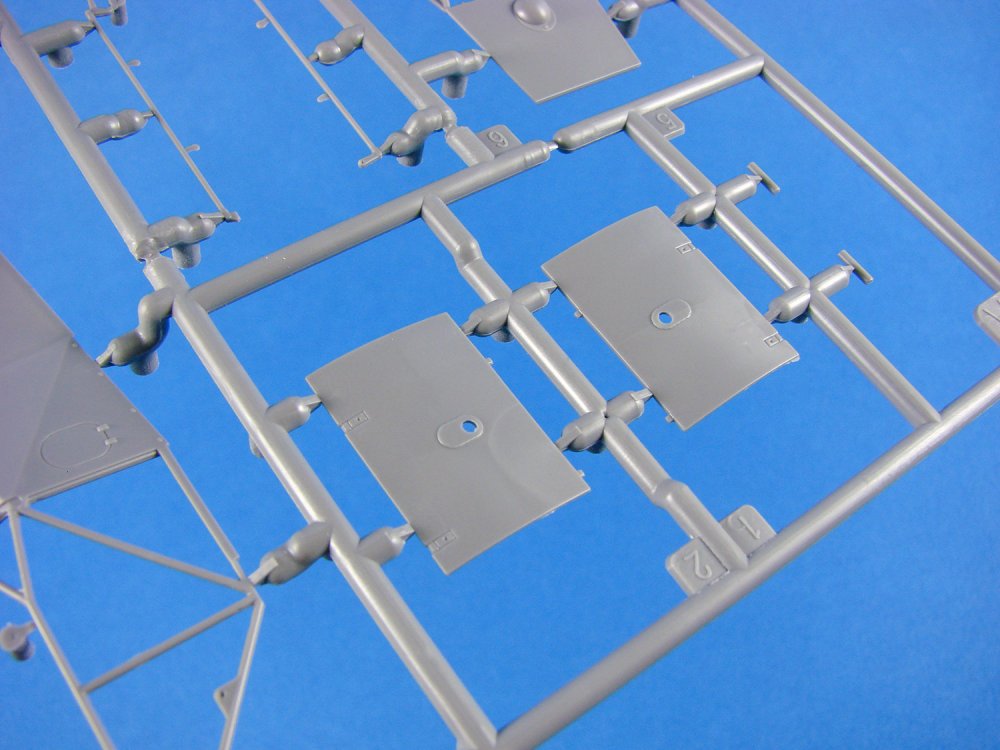

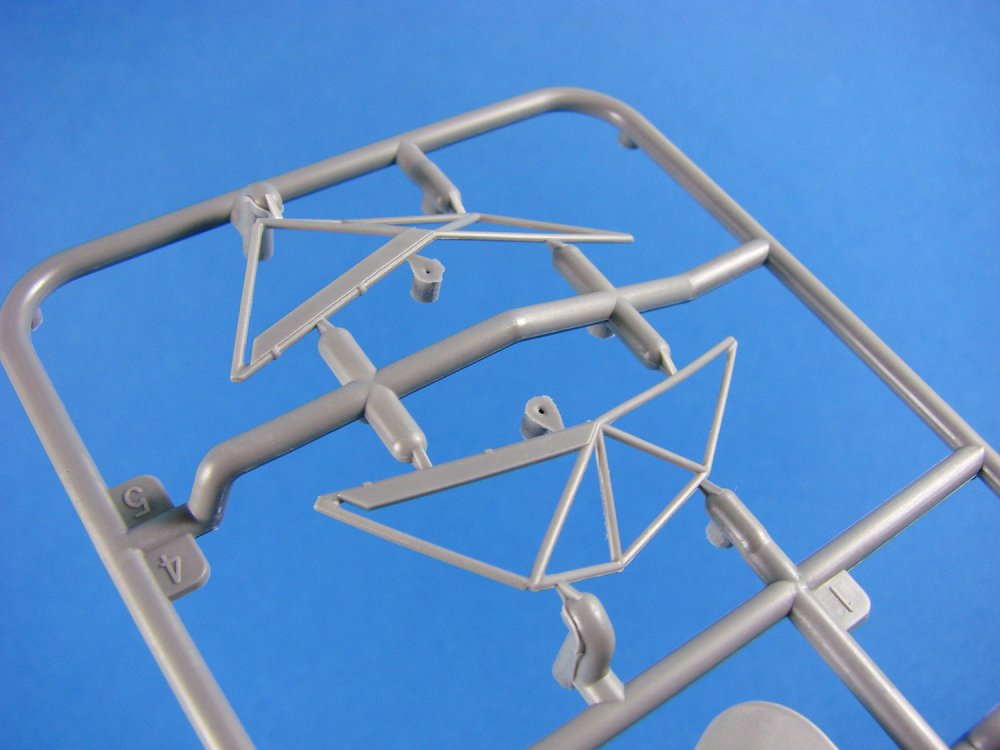
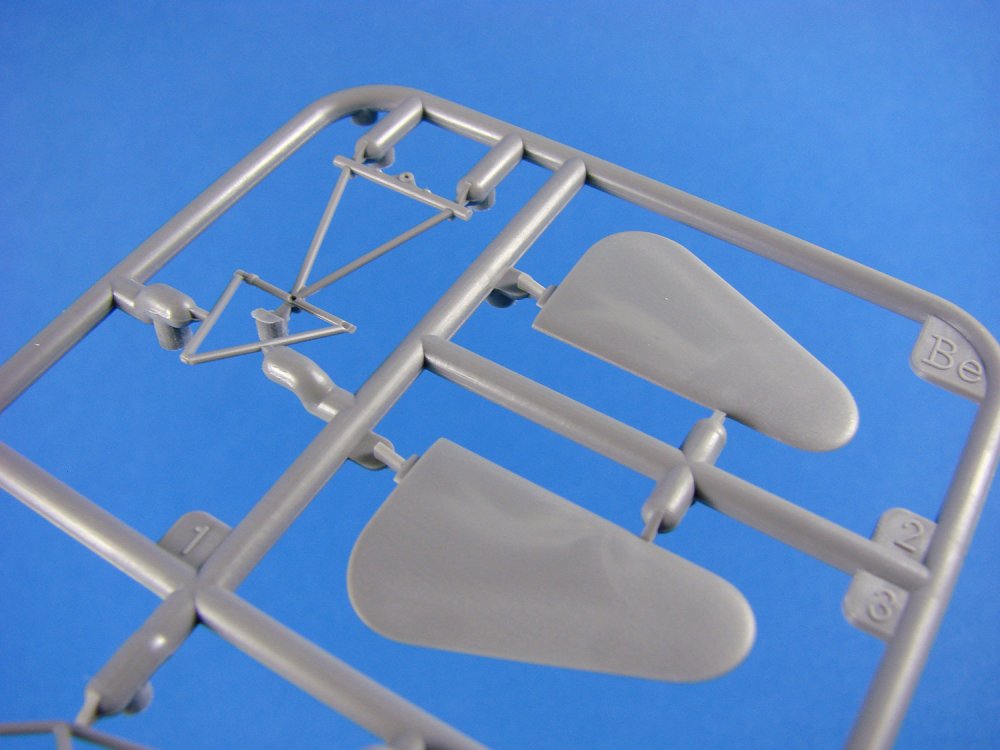


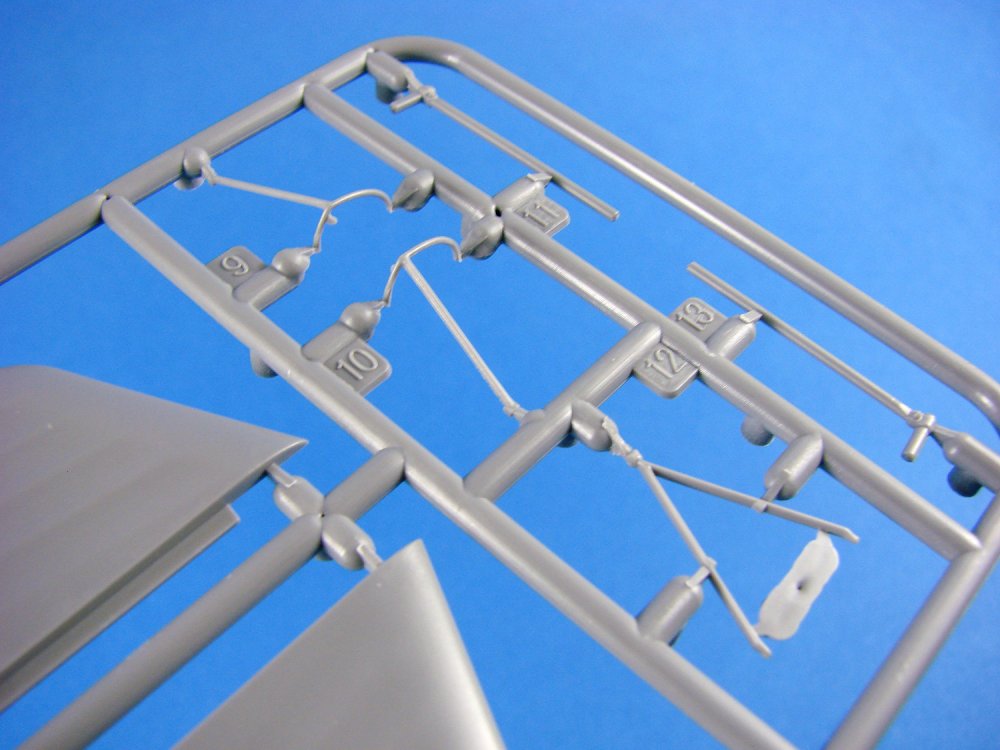

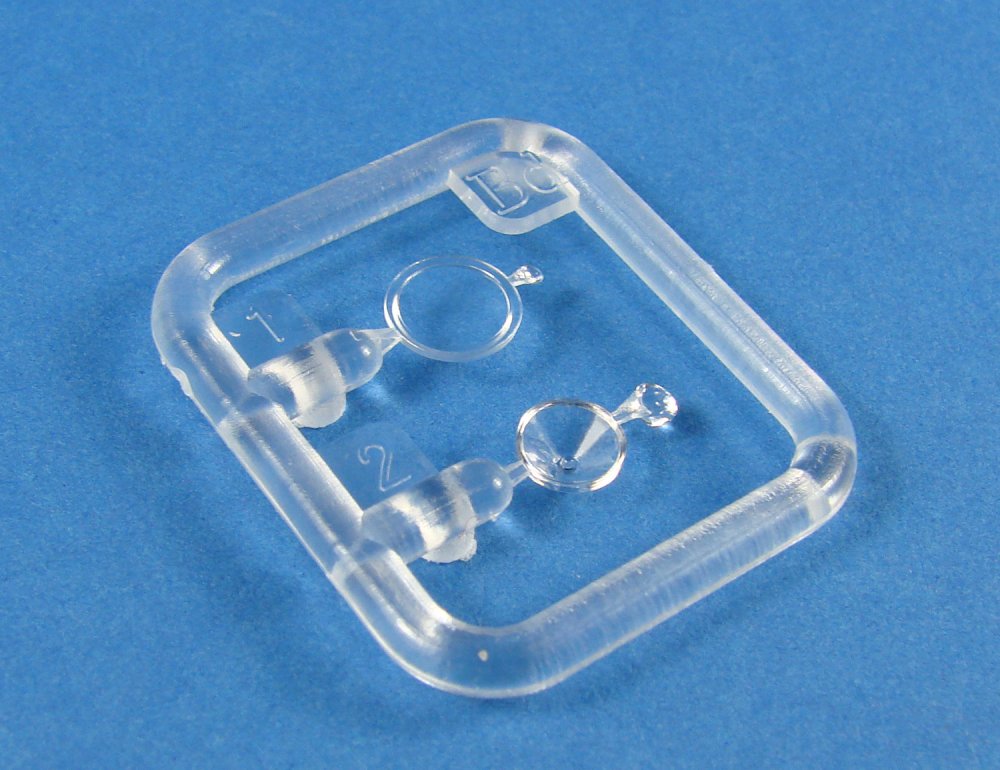
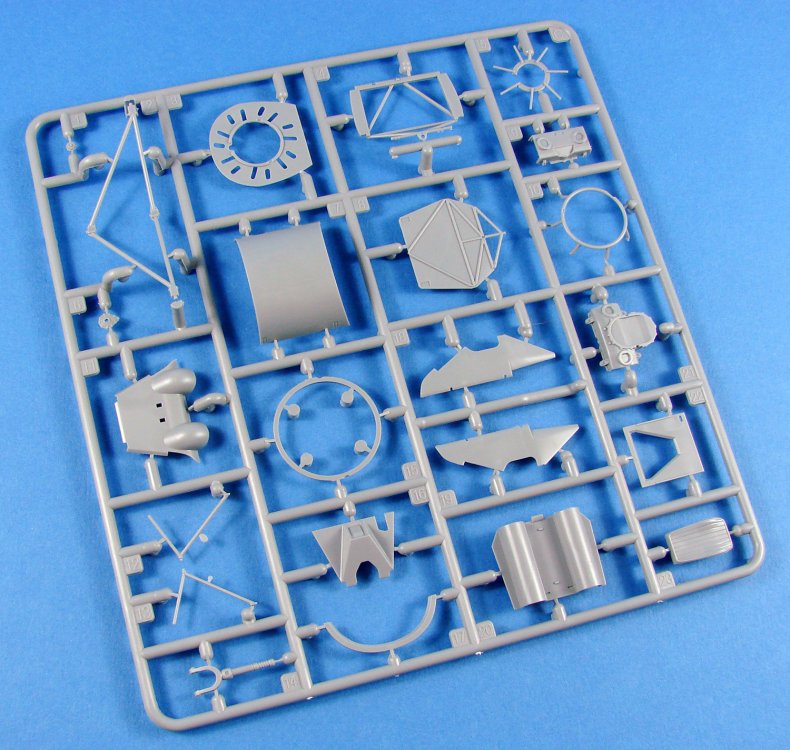
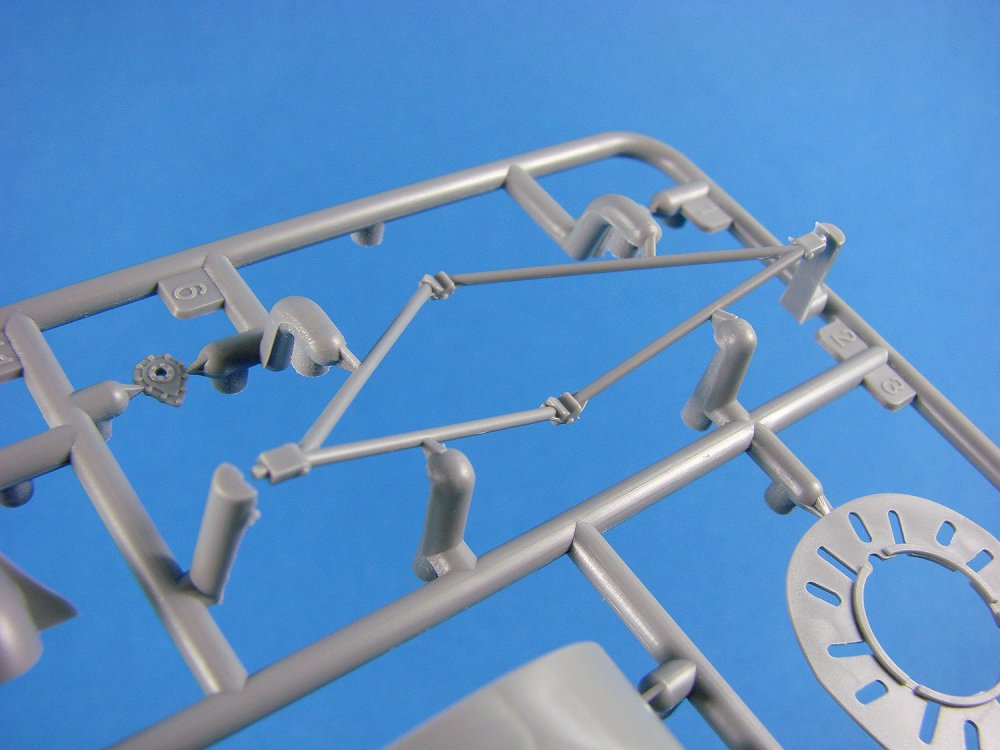

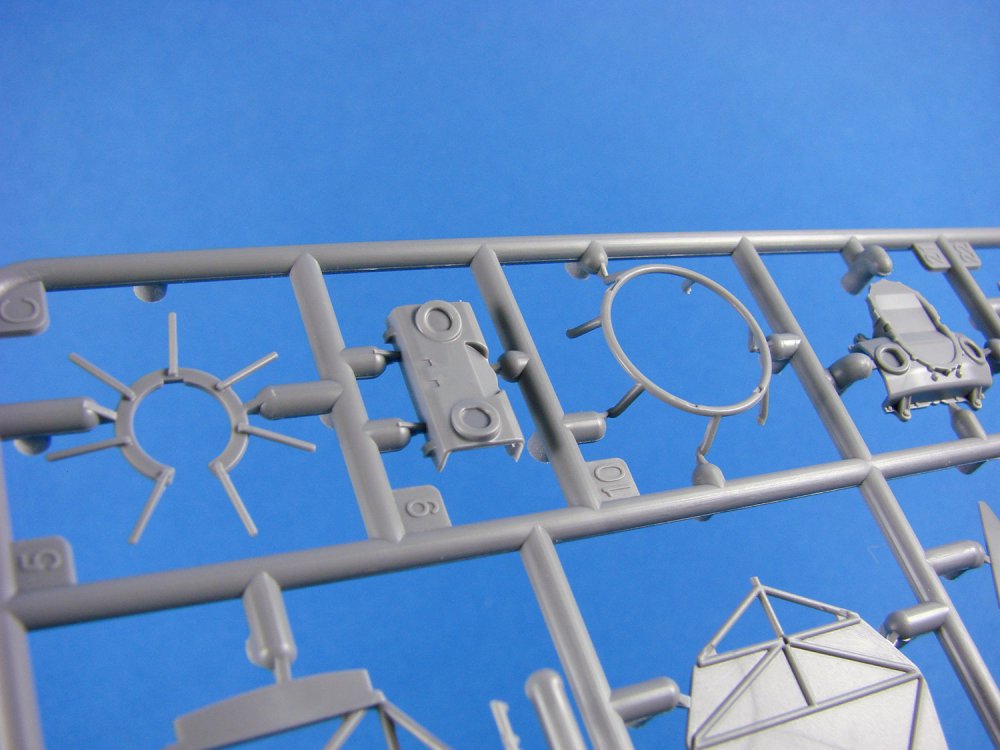

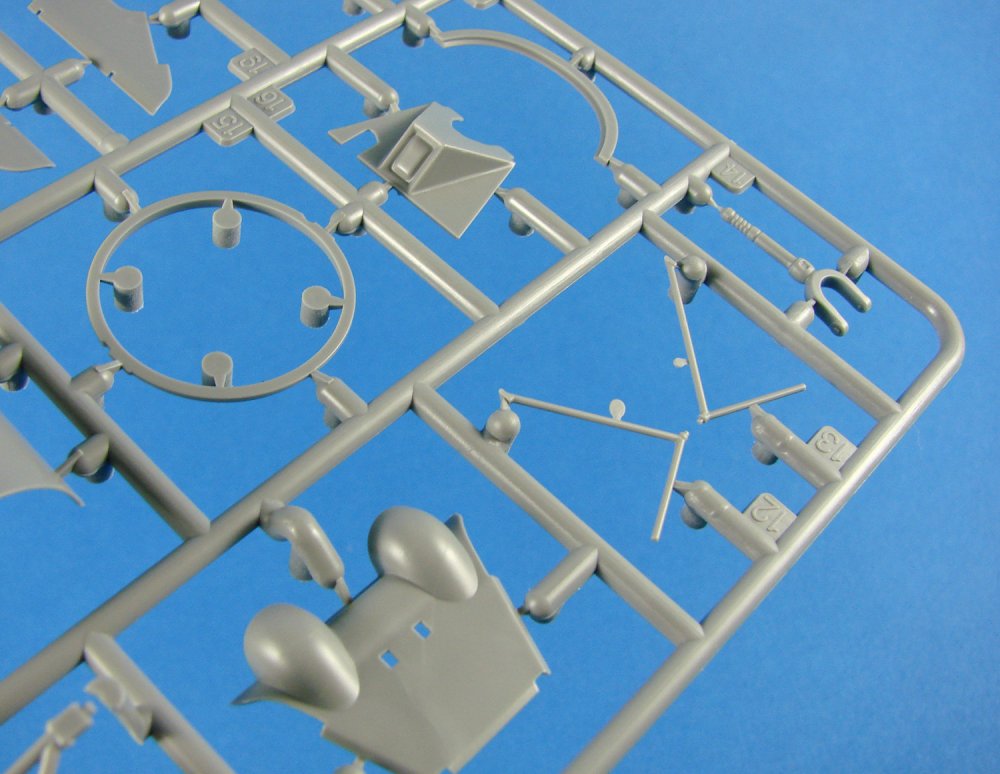

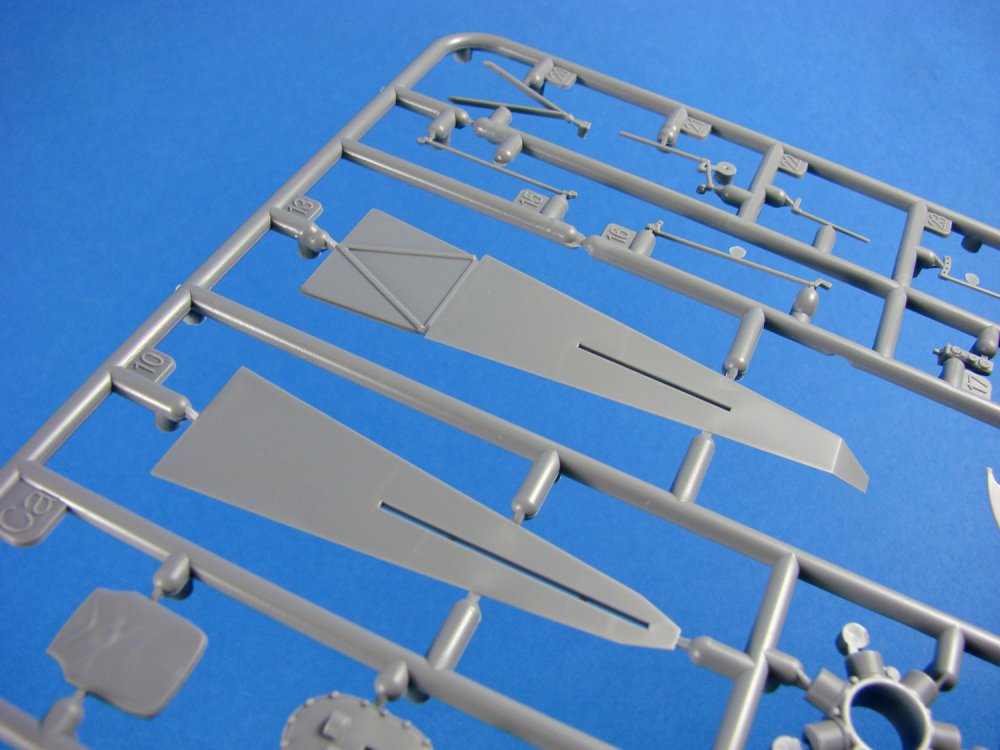
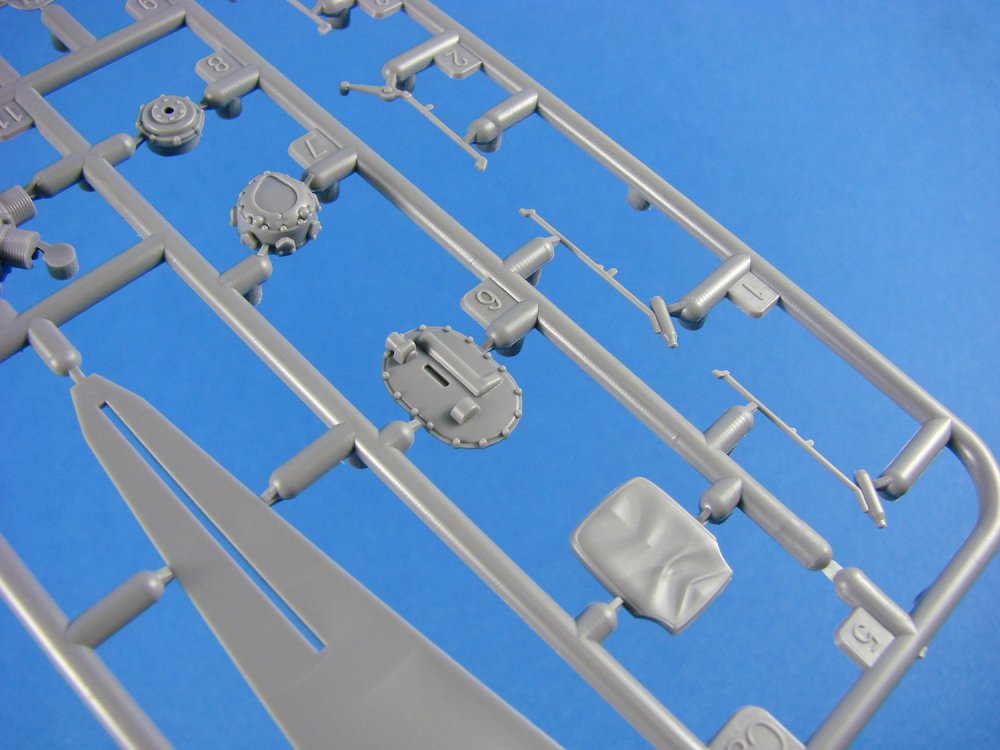
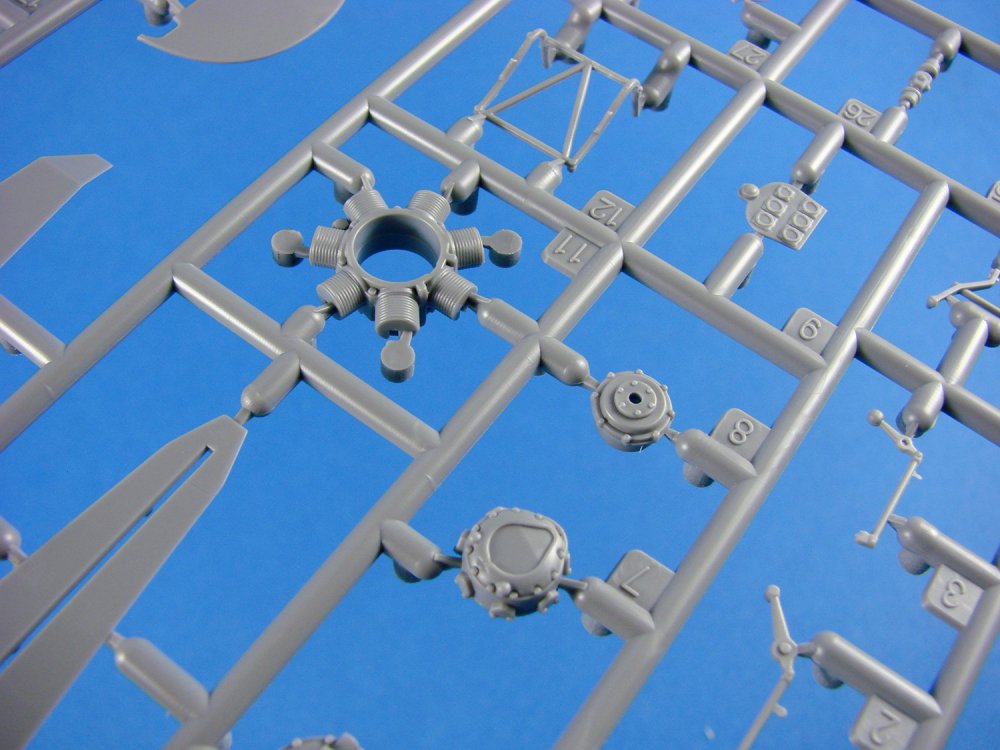


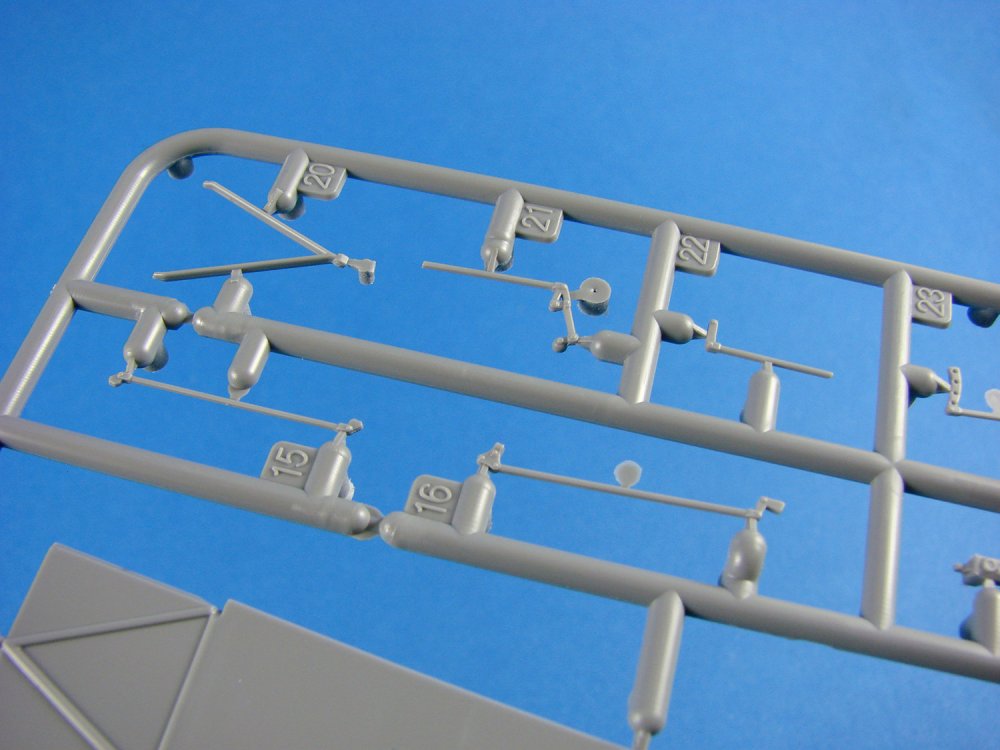
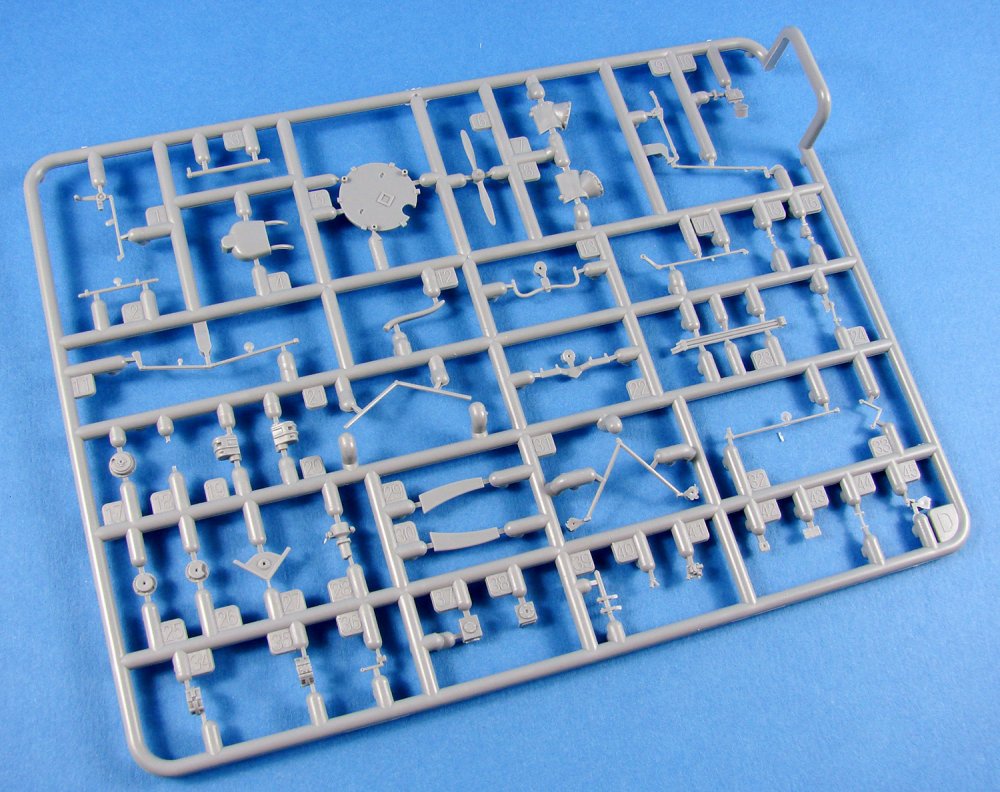


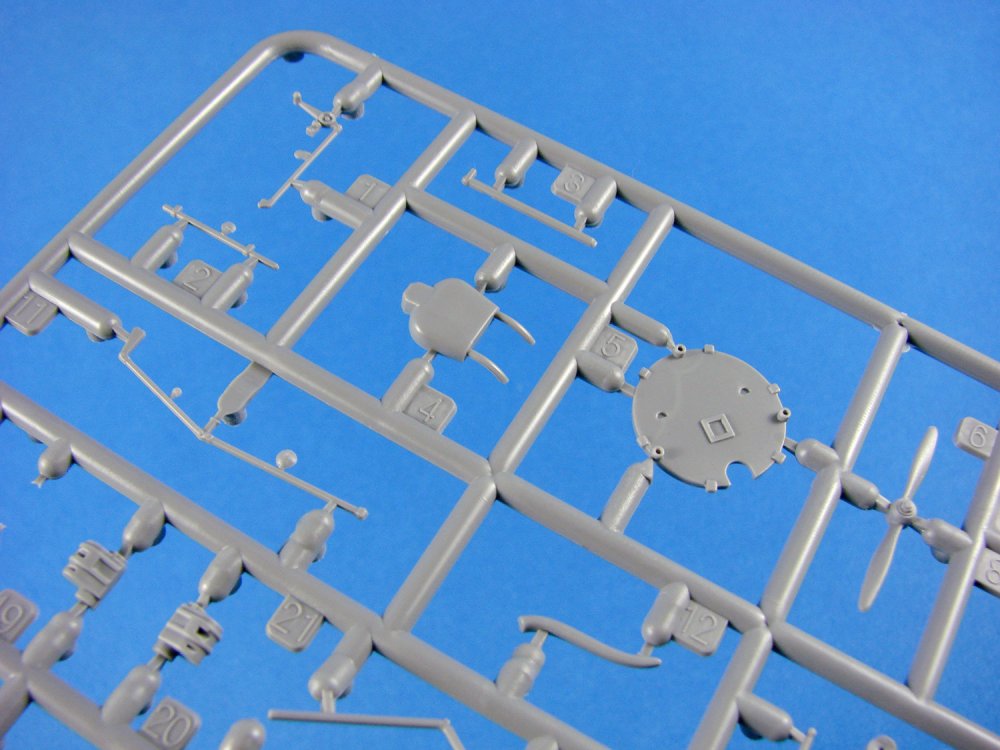

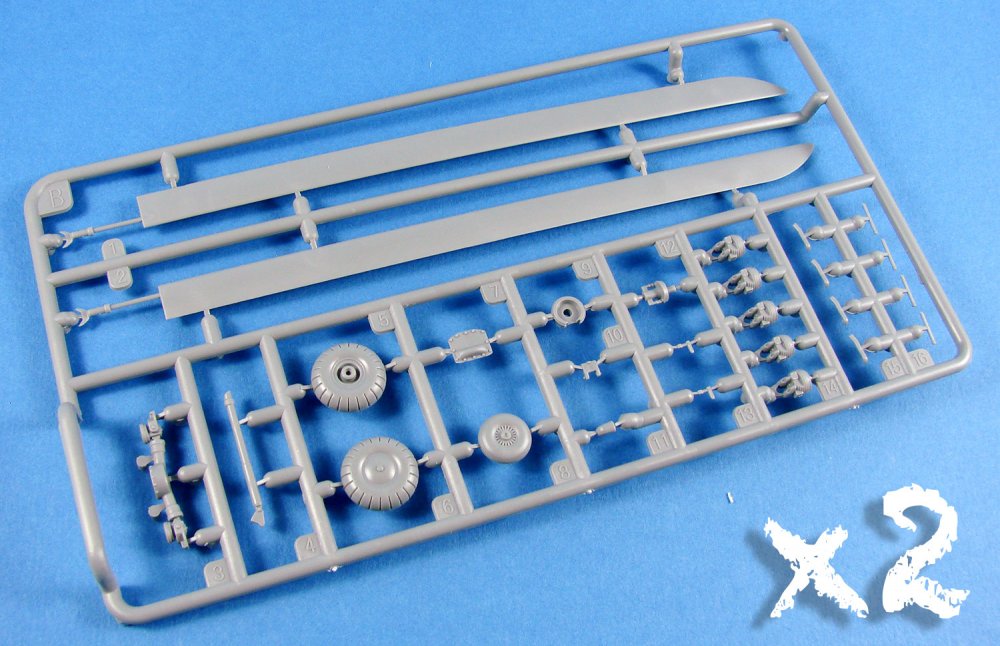
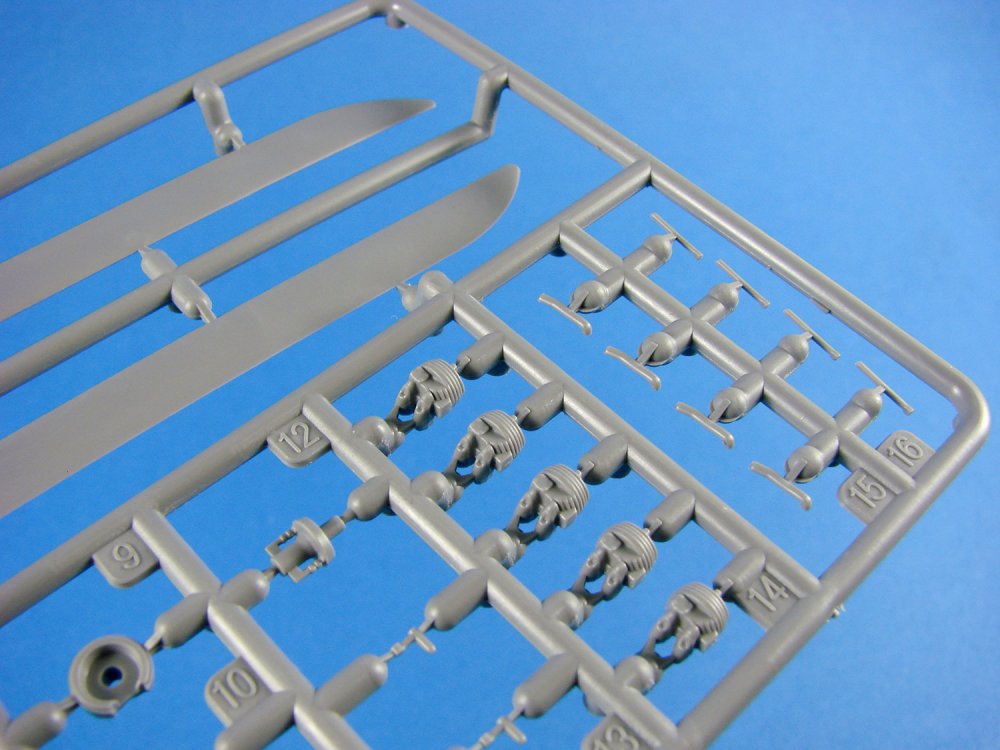

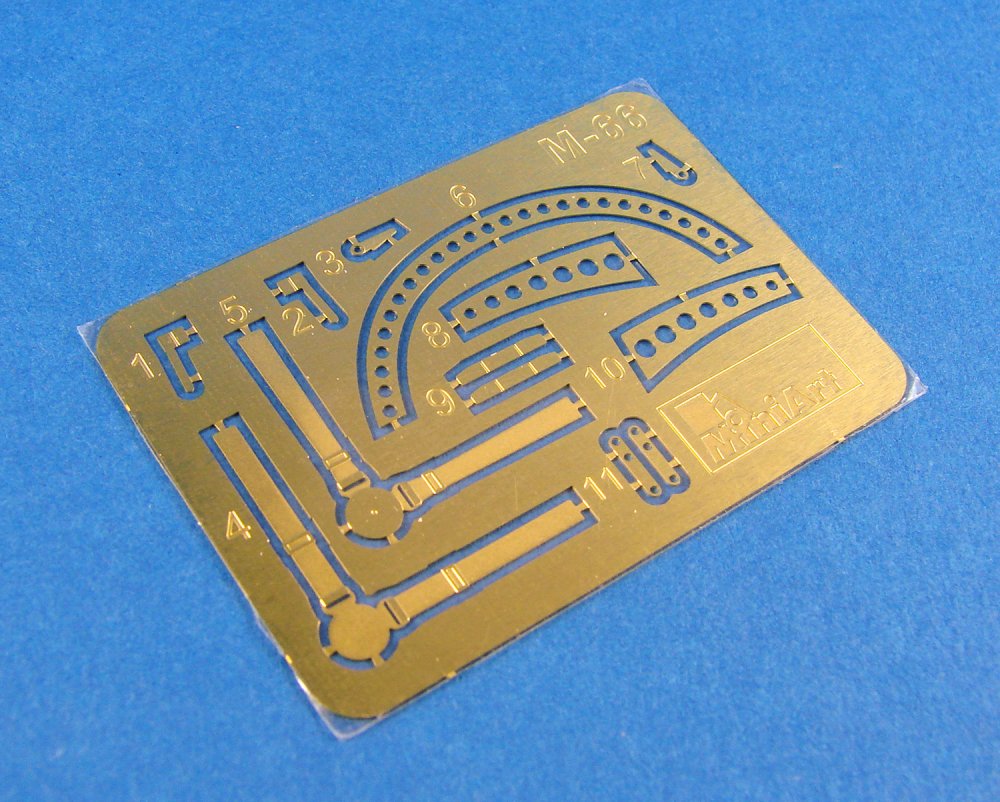
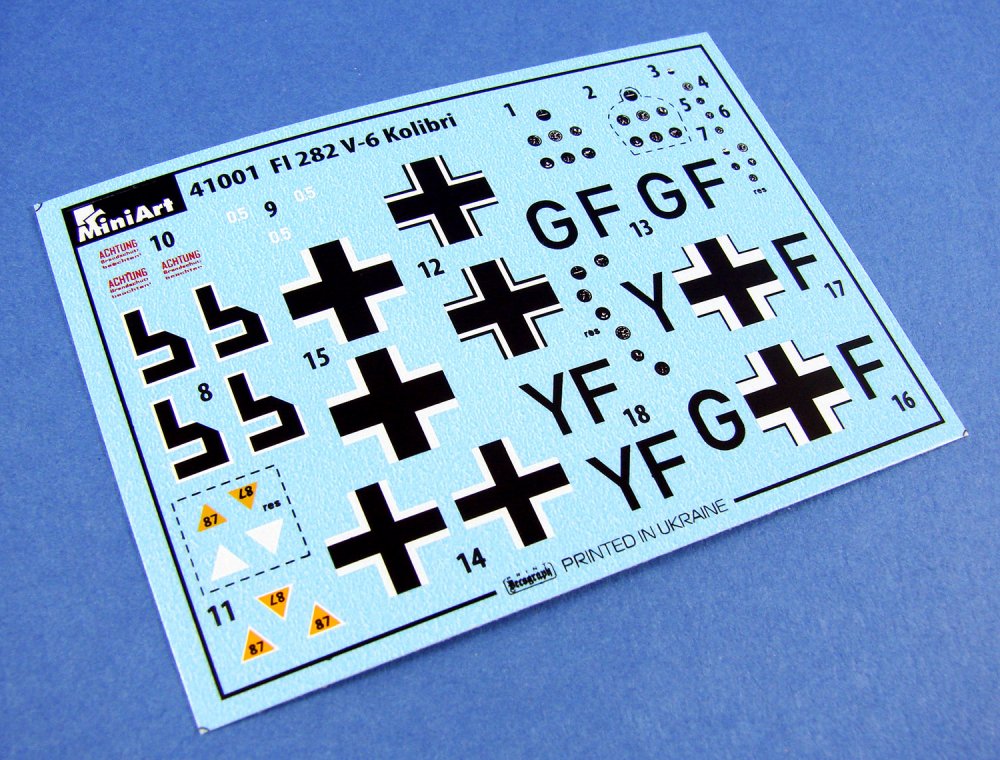
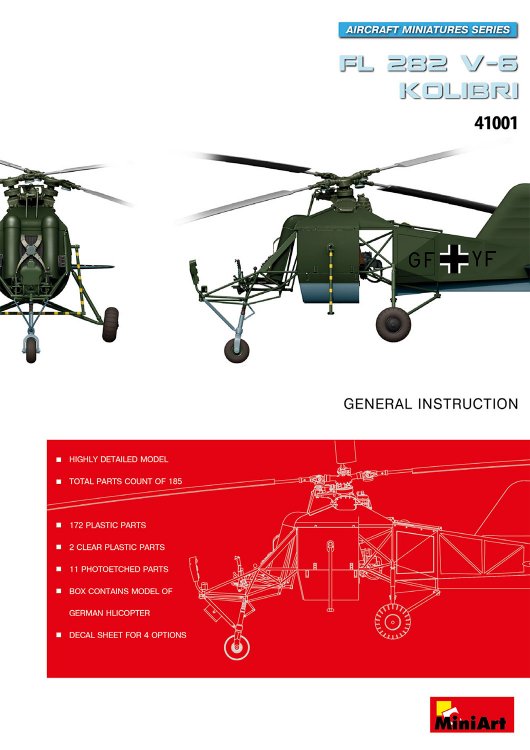
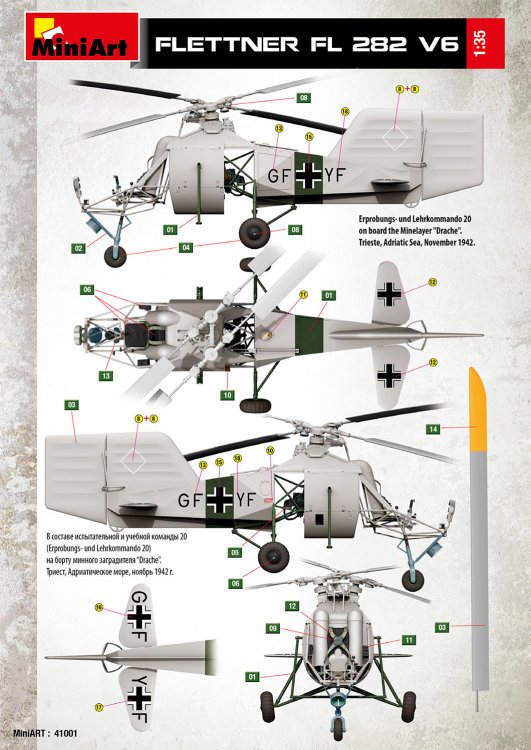
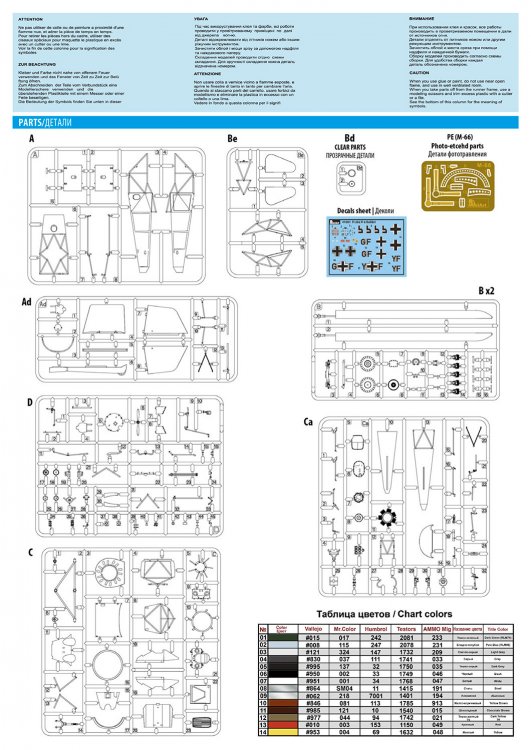
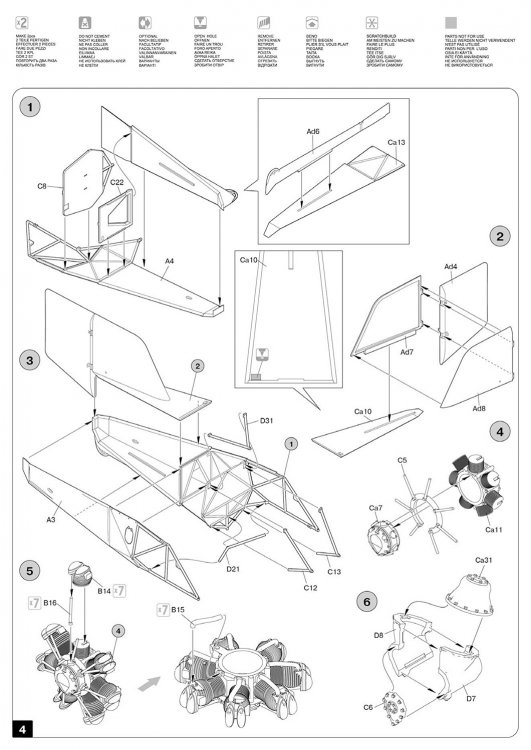
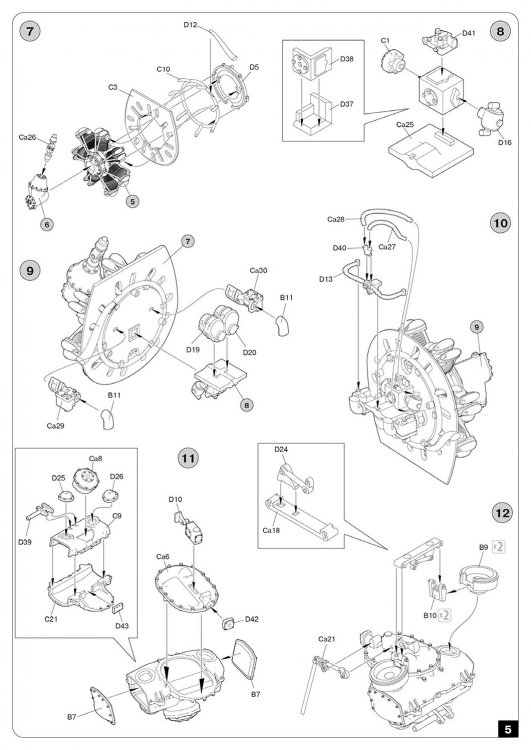

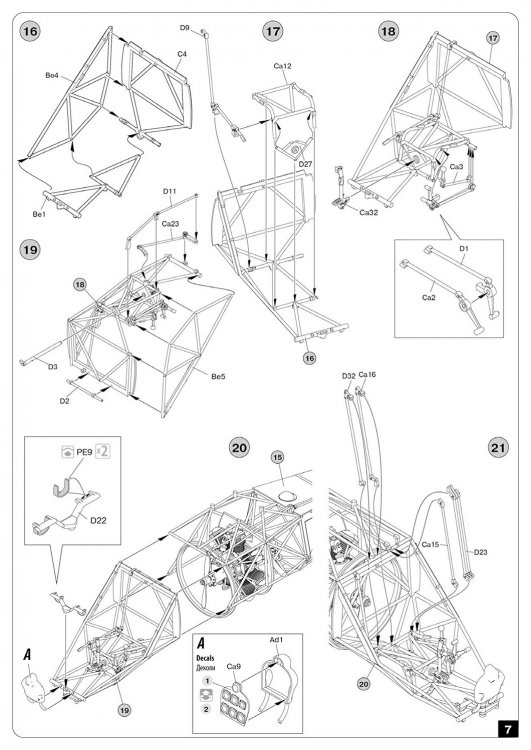
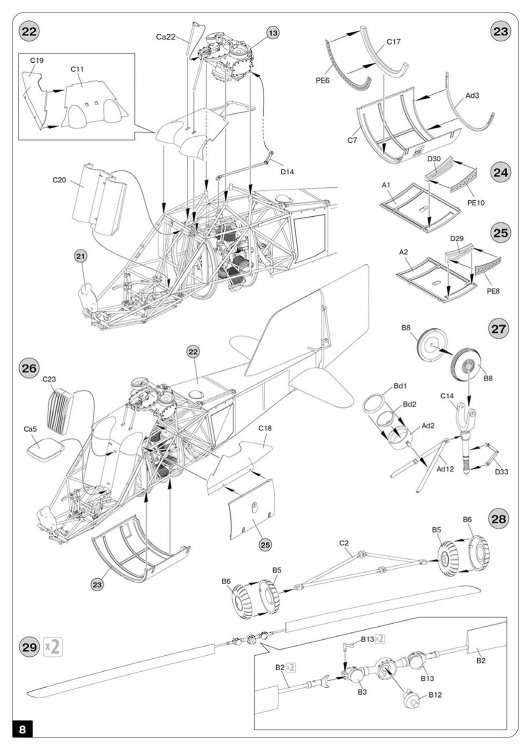
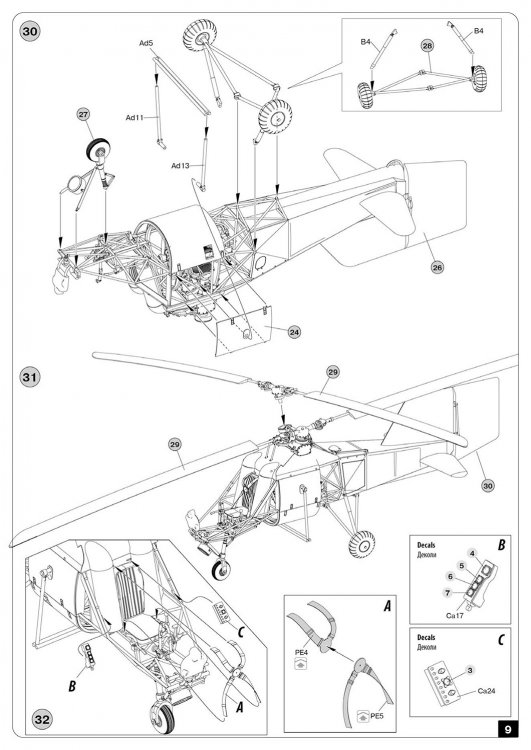
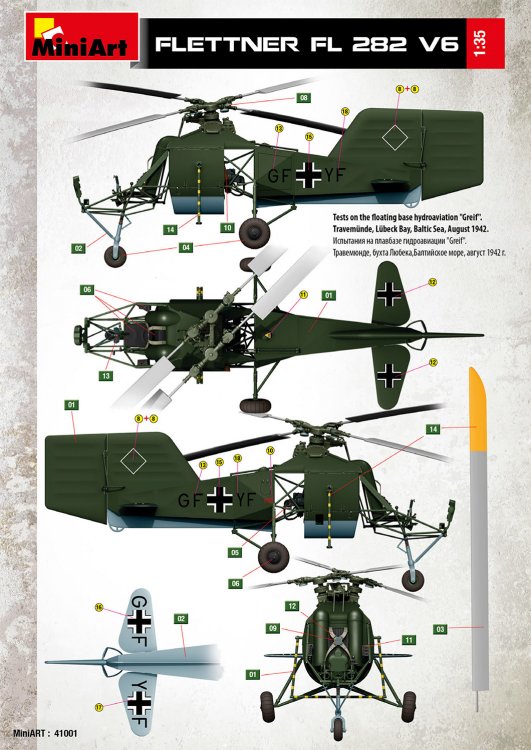

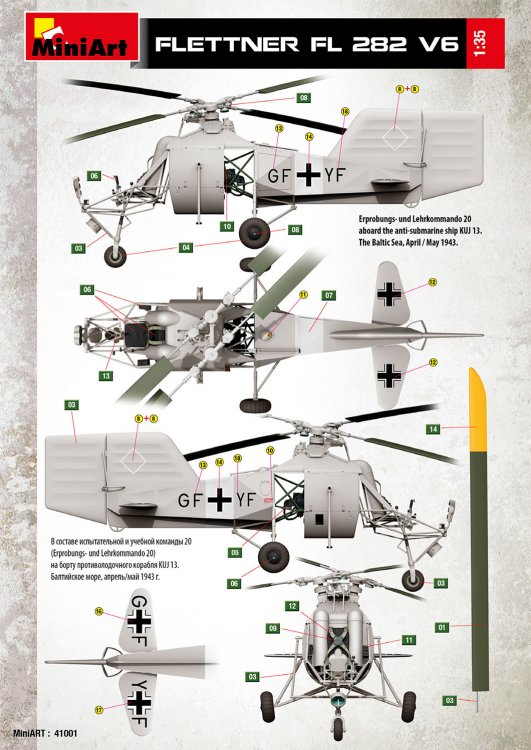
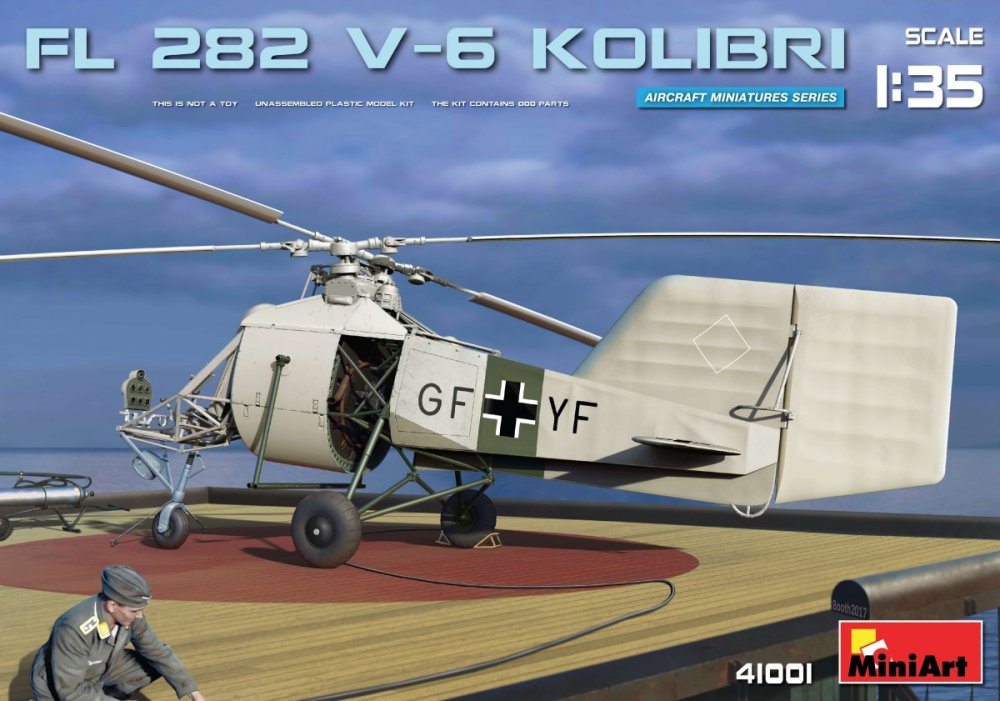

-
VERY cool! Looks fiddly in places, but never seen one of these built before.
-
Everyone's a joker! Try finding forum posts hosted by Photobucket in 2013 that aren't affected
-
These photos were from a redundant Photobucket account unfortunately. I don't think I have the original photos any longer.
-
1/32 Junkers D.1 Wingnut Wings Catalogue # 32065 Available from Wingnut Wings for $79.00 plus shipping The Junkers D.I (factory designation J 9) was a monoplane fighter aircraft produced in Germany late in World War I, significant for becoming the first all-metal fighter to enter service. The prototype, a private venture by Junkers designated the J 7, first flew on 17 September 1917, going through nearly a half-dozen detail changes in its design during its tests. When it was demonstrated to the Idflieg early the following year it proved impressive enough to result in an order for three additional aircraft for trials. However, the changes made by Junkers were significant enough for the firm to re-designate the next example the J 9, which was supplied to the Idflieg instead of the three J 7s ordered. During tests, the J 9 lacked the manoeuvrability necessary for a front-line fighter, but was judged fit for a naval fighter, and a batch of 12 was ordered. These were supplied to a naval unit by September 1918, which then redeployed to the Eastern Front after the Armistice. One example survives and is on display in the Musée de l'Air et de l'Espace, at the Paris–Le Bourget Airport, 11km north of Paris, France. Several replicas have been built, including one on display at the Luftwaffenmuseum Berlin-Gatow. Powered by a 180/200h Daimler-Mercedes D.IIIa/aü, and armed with two Spandau LMG08/15 guns, the D.1 First flew in 1918, only 41 were built before the Armistice. Extract from Wikipedia The kit It seems such a long time since the last Wingnut Wings release, but it was only 5 months ago when the Sopwith Dolphin was put on sale in time for Christmas. Prior to that in 2017, we had the amazing Stahltaub, and Green Tail Trilogy (triple Albatros D.V) release, and exactly a year ago, the quintet of Sopwith Camel kits. We’re certainly in no position to whinge and moan! A few months ago, WNW announced that they were to release the Junkers D.1 and having seen images of the test shot from the Nuremberg show, WNW’s General Manager, Richard Alexander, said that a limited number would initially be available for sale at Scale Models Expo, Upper Hutt, New Zealand. Thankfully, a few were set aside for review samples, and today we have one here to paw over and investigate. The Junkers D.1 is packed into probably the smaller of the kit release boxes such as we saw for the SE.5a etc. and is again adorned with some rather nice and atmospheric artwork, courtesy of Steve Anderson, again edged with an attractive silver frame. This image shows a pretty much full-on side profile of the diminutive looking all-metal fighter aircraft. This particular angle does lend itself to ask where the upper wing is! This was probably as close to state of the art for the time, being a monoplane with ailerons and no wing-warping system…which would have been pretty difficult on a corrugated metal and steel tube wing. Profiles of all FIVE schemes are shown on the box sides. Inside the box, four light grey sprues are supplied in separate clear bags. No clear sprue this time! A single photo-etch fret is packed along with the Cartograf-printed decal sheet. The package is completed with the addition of a 24-page A4 instruction manual. Wingnut Wings spiel for this kit reads as follows: High quality (extra thin) Cartograf decals with markings for 5 colour schemes 124 high quality injection moulded plastic parts Optional fuselage spine corrugations, foot steps, propellers, Daimler-Mercedes 180hp D.IIIa & 200hp D.IIIau engine details and “wings removed” diorama display option Authentically reproduced corrugated Duralumin surface details, lapped panels & hatches and raised rivets 11 photo-etched metal detail parts No interplane struts and (almost) no rigging makes this model the perfect introduction to First World War aircraft modelling. Sprue A As is the norm with Wingnuts kits, this sprue contains the majority of detail parts, with the exception of the engine itself. If you’re technically minded, then this particular model will really provide you with some stimuli. As with Hawker fighter aircraft of a generation further on, the Junkers D.1 is built around a tubular steel centre-section which incorporates the cockpit and engine bearer supports, plus connections onto which the main wing panels would secure (the wings on the D.1 were detachable). Work starts, predictably, on that cockpit, with a centre section that is built upon a central arrangement of sheet metal and various angled tubes. This part is moulded as a single piece in what can only be described as superb engineering on the part of WNW. Onto this fits a firewall with corrugated details and fuel gauges. This also incorporates the ammunition magazines and empty belt box. With this section complete, it is then fitted to a lower fuselage that includes the lower cowl section before the rudder pedal and control column unit are installed. Our pilot is then to be sandwiched in between the square-section cockpit side frames, with more corrugated detail and places for a grease pump, fuel tank pressurising pump and spark advance lever to be fitted. These details, as with the frames, are superb. Although the frames are square, look alongside the edges and you’ll see a fine lip with raised riveting. Very impressive. The little things mean a lot. In some attempt to lighten things overall, the rear bulkhead onto which the pilot’s seat installs, appears to have a fabric covering, with a very faint ripple detected in the surface texture. The seat itself is moulded in two parts, with the lower seat cushion having the mounting framework attached. A small tag in the rear seat locates into the bulkhead, providing a 100% sure system of installation. This is now installed into the cockpit, along with a set of nicely etched PE seatbelts. You’ll notice that the instrument board in the D.1 is a very simple affair and is moulded as a single piece. Unlike other WNW kits though, there are some small PE switches to install to this. Small holes exist to insert these into, but I would recommend drilling them out a little more with a micro drill bit. With this installed, the actual engine bearers are now added to the burgeoning assembly. This sprue also contains a few other key items for the airframe. These include the undercarriage v-struts with superb elastic bungee cord details, axle with a separate corrugated under-sheet, and wheels with separate outer hubs and their delicately tooled CONTINENTAL text. Of particular note here is the LMG08/15 Spandau assembly. Yes…assembly. These aren’t provided as individual guns, but instead they are moulded with their respective breech mounting blocks and just the solid cooling jackets in situ. Various other bits of interconnecting plumbing are included. To use the standard detail version, you must snip the inner barrel from the breech block and install to the aforementioned assembly. If you want to use the high detail option, then you fit the PE cooling jackets to the moulded guns and instead remove the solid cooling jacket from the all-in-one assembly. This model can be built with the wings removed, in case you want to create a workshop diorama etc. In order to do this, tube and frame wing ribs are moulded here, and these will insert to the wing root once the upper corrugated inboard wing panels are installed. Sprue B The very essence of the D.1 can now be seen as we take a first look at that corrugated external skin. This sprue contains the upper and lower wing panels, and the separate ailerons. You’ll see just how deep the wing chord is when you look at these parts. So as to eliminate any compression between the upper and lower panels, stiffening ribs are moulded within the wing and these line up on each panel so cement can be run along them, ensuring a rock solid final assembly. Externally, WNW really has nailed that corrugated detail, but then again, they had plenty of practice with the J.1 which formed one of their first four releases. Rivet lines can be seen running every few corrugations, lining up with what would be the internal rib construction. Each upper panel has a hole into which the aileron actuator rods will disappear. Those ailerons are moulded as single pieces, along with their actuator rods. Care will most definitely be needed here so as not to break them off. Sprue D Here we have all the remaining main airframe components, such as the lower fuselage with integral tailskid, fuselage sides, optional detail fuselage spines, engine cowls, full span stabiliser, full span elevator, and single piece rudder. Details on the lower fuselage are exquisite, with nicely pinched corrugated wing root details and positive rear v-strut undercarriage mounting points. Due to the nature of the open cockpit, it goes without saying that WNW has had to extend the corrugated details into the interior of the fuselage, and this can be seen here. The ejector pin marks in the non-corrugated band will be covered over with the lower inside tubular and corrugated frame part onto which the cockpit is built. Another nice touch designed to make our lives a little easier. I must admit that I find this rather dumpy-looking fighter quick attractive, and those lines are clearly seen with the fuselage halves, moulded with the wing root fairing. Only the very rear of the fuselage isn’t corrugated, with a small amount of flat plate metal seen here. Locating positions for the lifting handles are clearly seen. One of the schemes needs a small section of plastic removing from the forward cockpit coaming area. This is clearly defined and will be an easy task to perform. As previously stated, the engine cowls are separate parts and have corrugated details both inside and outside. Within the fuselage halves, the corrugations continue with smooth lines into which the cockpit side frames will sit, along with those lipped and riveted edges. Corrugations extend into the engine bay, of course. \ Note that this fuselage has a separate spine. This is because there are two slightly different corrugation patterns. I had to look twice to notice, and I’m sure most of us wouldn’t have missed it had WNW not included the option. That goes to show their level of research. These parts are designed to properly locate to the fuselage via tabs that plug into the false spine that runs along the top of the fuselage halves. The stabiliser is provided as a full span part that is moulded as upper and lower panels and although corrugated, has a smooth leading edge that will make the seam easy to remove As for the elevator, this is also moulded full span and as a single piece. The trailing edge on this is superbly thin with a slightly kinked lip where the plated would be riveted together. You can just about feel this on the part. The same effect can be felt on the rudder, which is moulded with an integral rudder post. Sprue E Depending on your scheme, this model can be fitted with either a 180hp Daimler-Mercedes D.IIIa or 200hp D.IIIaü. Apart from a little extra water piping and some over-compression red bands on the cylinders, there is no difference between the two engines. As I always say, the engine is a model in itself, but with this one, ensure you use the correct parts as there aren’t any shaded out on the instructions, and I know there is only one sump option to be used here, for example. Details are again superb, from those detailed crankcase parts, to the cylinders, rocker heads, magneto and ignition conduits. The only thing you might consider adding are the ignition leads, and perhaps even the excellent Taurus spark plugs. I have to say that not much else is really needed as Wingnut Wings standalone engine is just a work of art. Photo Etch Eleven parts are included as PE here, and supplied on a single, bare brass fret. These parts concern the seatbelts, MG cooling jackets and sight reticules (for the high detail option), plus instrument board switches. Production is of a very high standard with thin tags holding the parts in place. Decals A single sheet is supplied with this release, printed by Cartograf. WNW claims that the decals are extra thin is for a reason. Remember, you need to get these to settle into the corrugated skin of this fighter. That thinness is a necessity. Decals supplied here are for the national markings (split for the ailerons), various colour bands and serials. The lower section of this sheet contains the various stencils and instrument decals. Printing really is very thin, and carrier film is at a bare minimum. Colour density is excellent, and registration is perfect. The five schemes in this release are: Junkers D.1, 5185/18, Adlershof, October 1918 Junkers D.1, 5185/18, “Bänder”. Hombeek, Marine-Feld-Jagdgeschwader, November 1918 Junkers D.1, 5184/18?. “Weißer Schwanz”, Hombeek, Marine-Feld-Jagdgeschwader, November 1918 Junkers D.1, 5188/18?, “11”, October 1918 Junkers D.1, Gotthard Sachsenberg (31 victories), Theodore Osterkamp (38 victories) & Josef Jacobs (48 victories), FA 416, September – October 1919 Instructions A 24-page A4 manual is included and is every bit as good as we have come to expect. After a decent history on the type (a part of which briefly introduced this article), followed by a paint chart (Tamiya, Hymbrol and FS codes) and parts map. Construction is via by means of line drawing type illustrations, with good use of shading and coloured ink to denote part/assembly placement, and the drawings are clearly annotated throughout with colour reference and other codes. Some colour assembly illustration is supplied (cockpit, engine etc.) and a number of period photos litter the manual. You will note that some rigging is required, but only in the cockpit area for cables etc. This model is simplicity itself when it comes to this. The last pages of the manual are given over to the five schemes, ably and superbly illustrated by Ronny Bar, with colour reference details and historical notes given. Scheme colour details and decal placement are clear to follow. More period illustrations are supplied too. Conclusion Well, I’m seriously impressed with this release and it really is good to see it finally in a realscale. Details are commensurate with what we have come to expect from WNW, and you’ll certainly not be disappointed, despite the relatively low parts count. This is an important type, directly linked to the future development of the metal monoplane fighter of WW2, and it is captured here splendidly. I really do hope we seen plenty of these being built. This is also one of WNW’s cheaper releases, and I have a feeling that it’ll sell rather well. Highly recommended My sincere thanks to Wingnut Wingsfor the review sample seen here. To purchase directly, click THIS link.

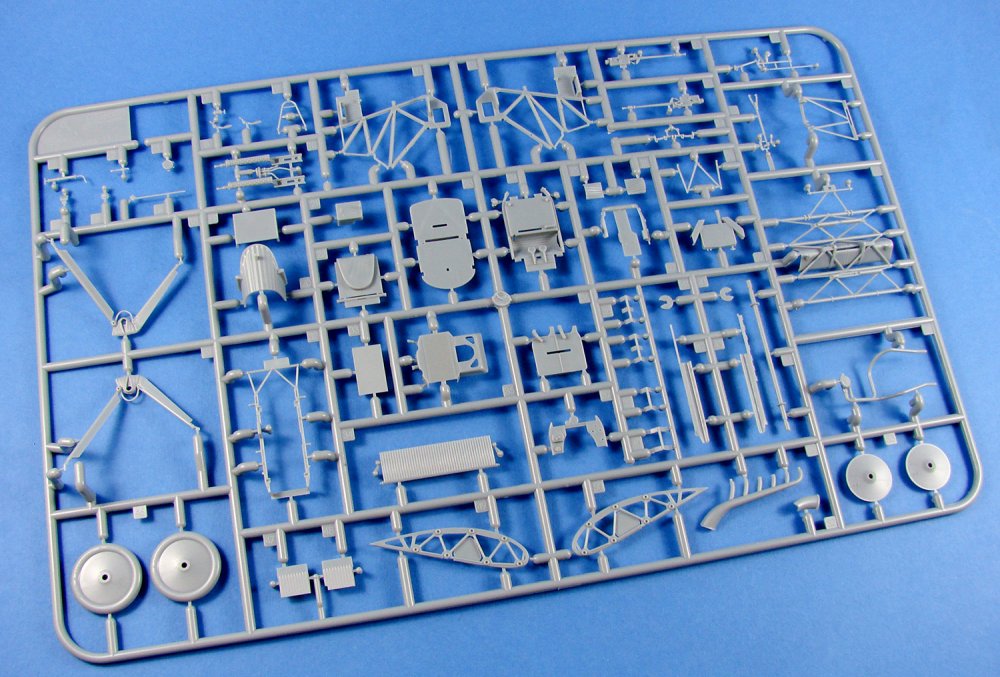
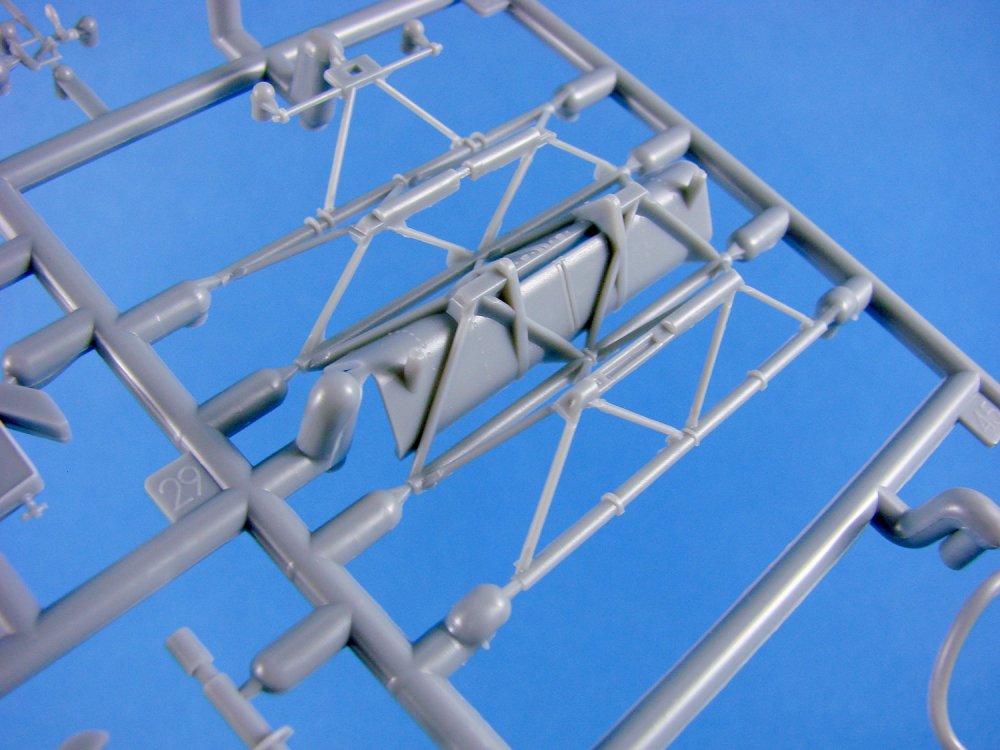


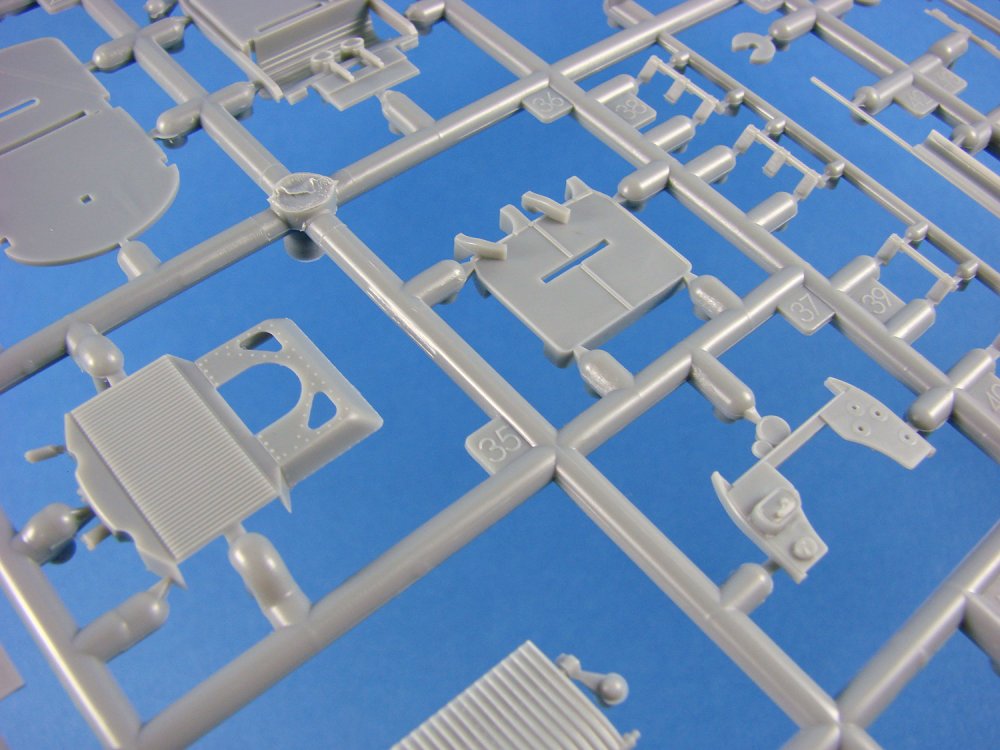
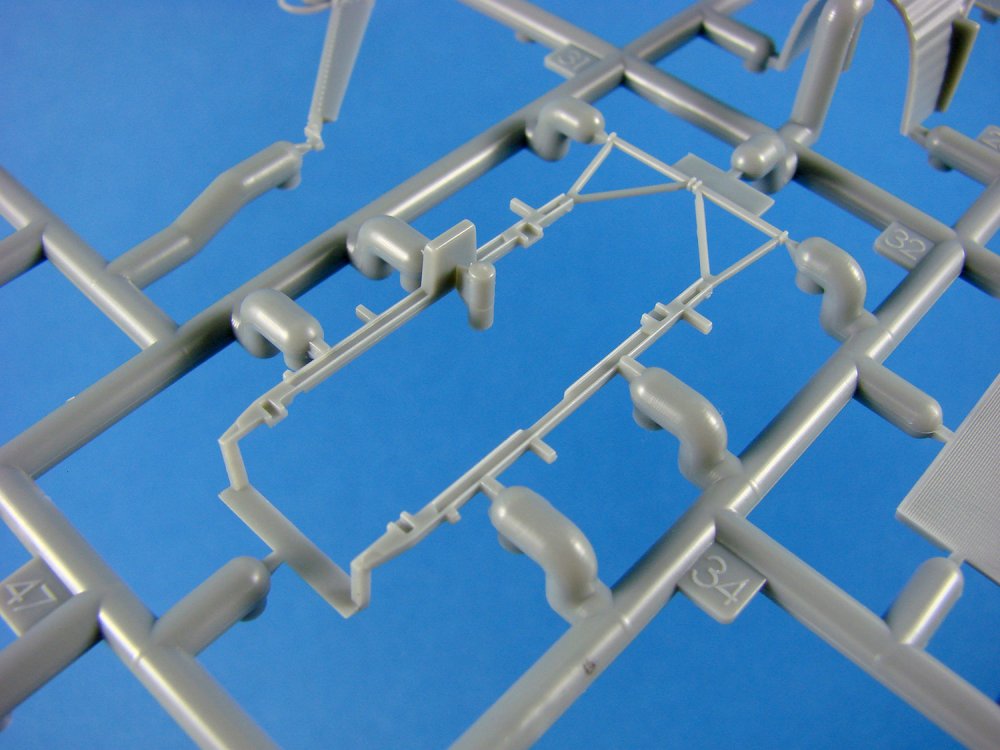
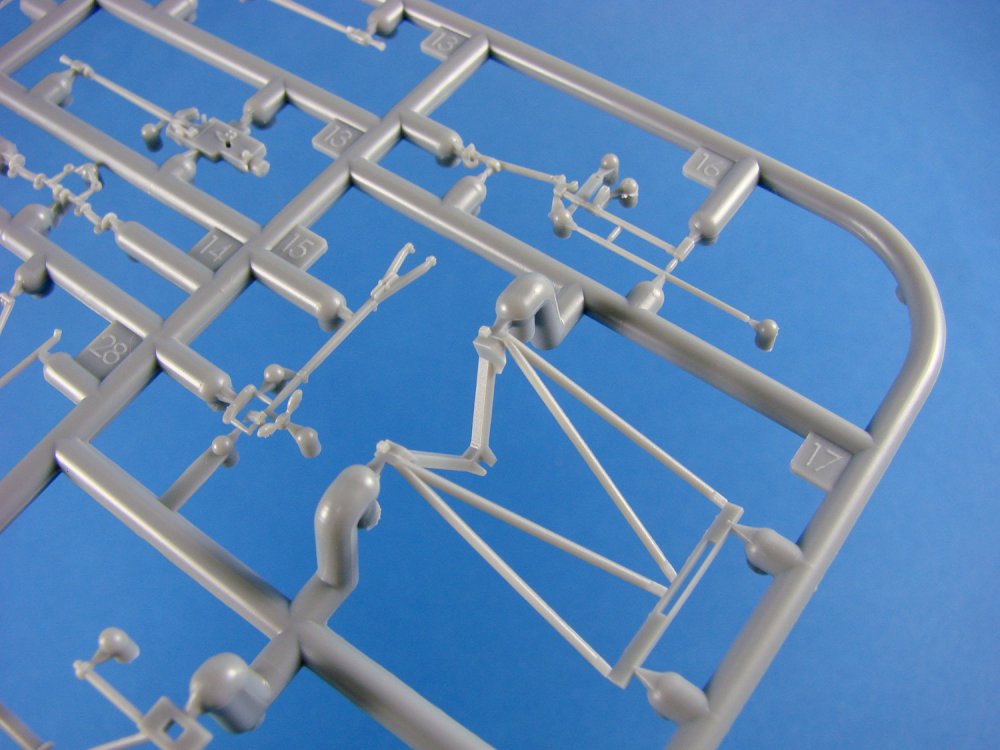
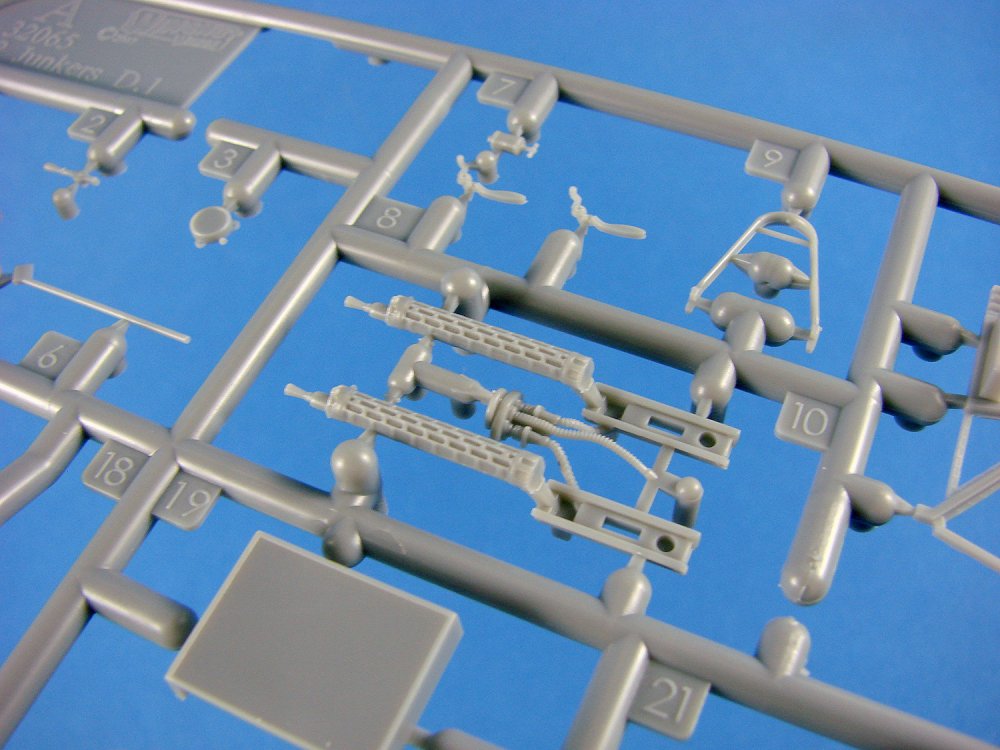
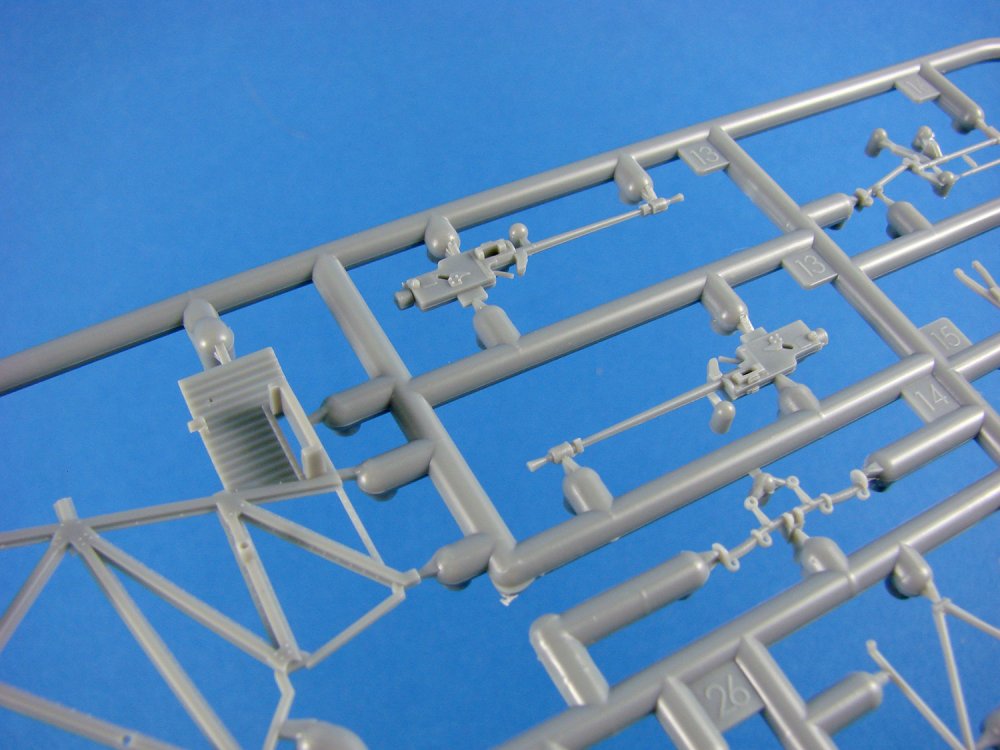

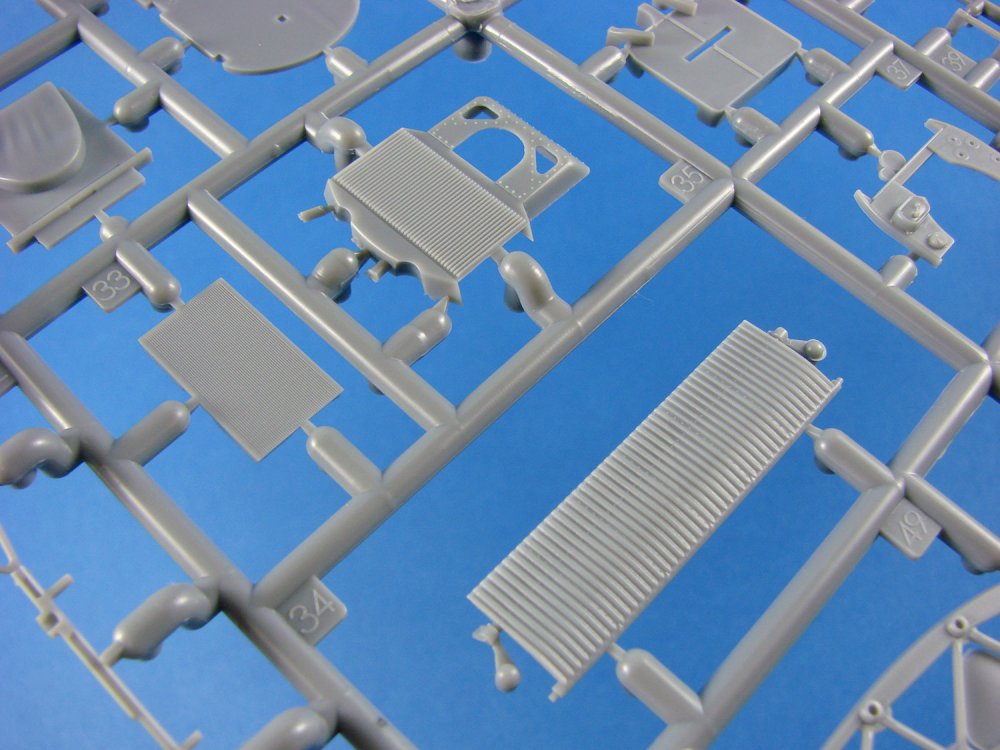

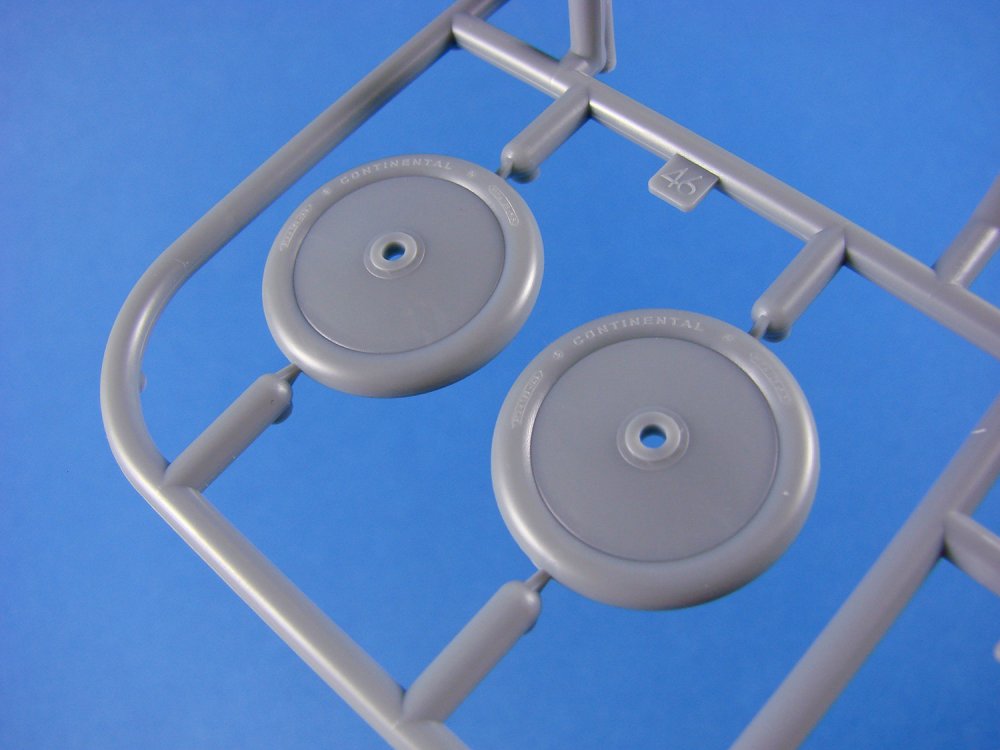
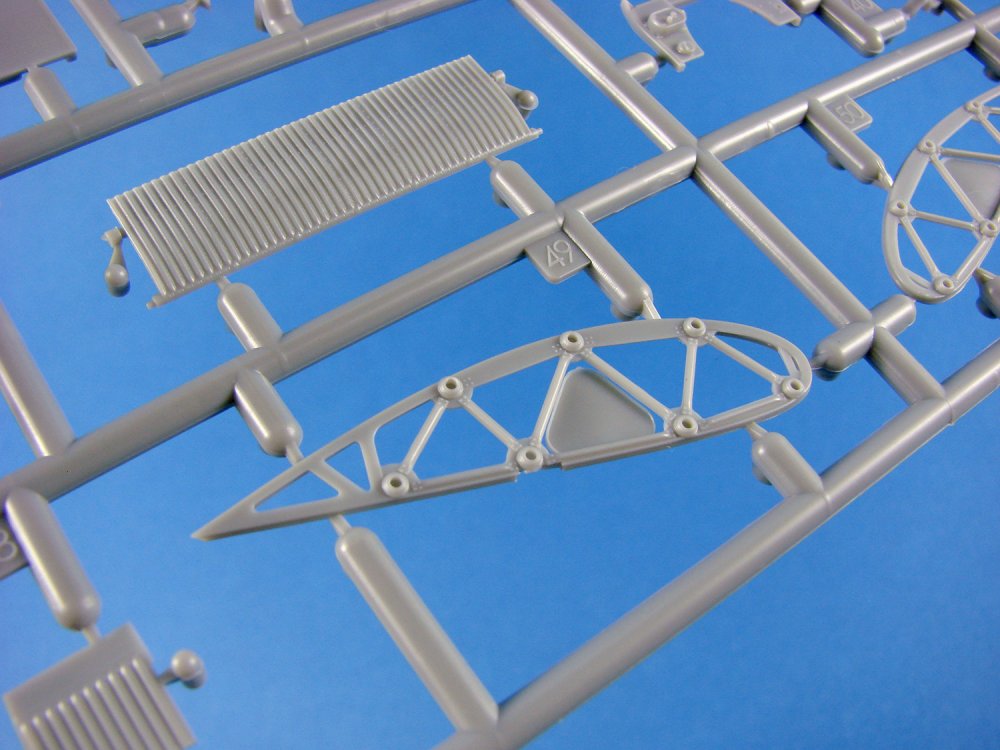
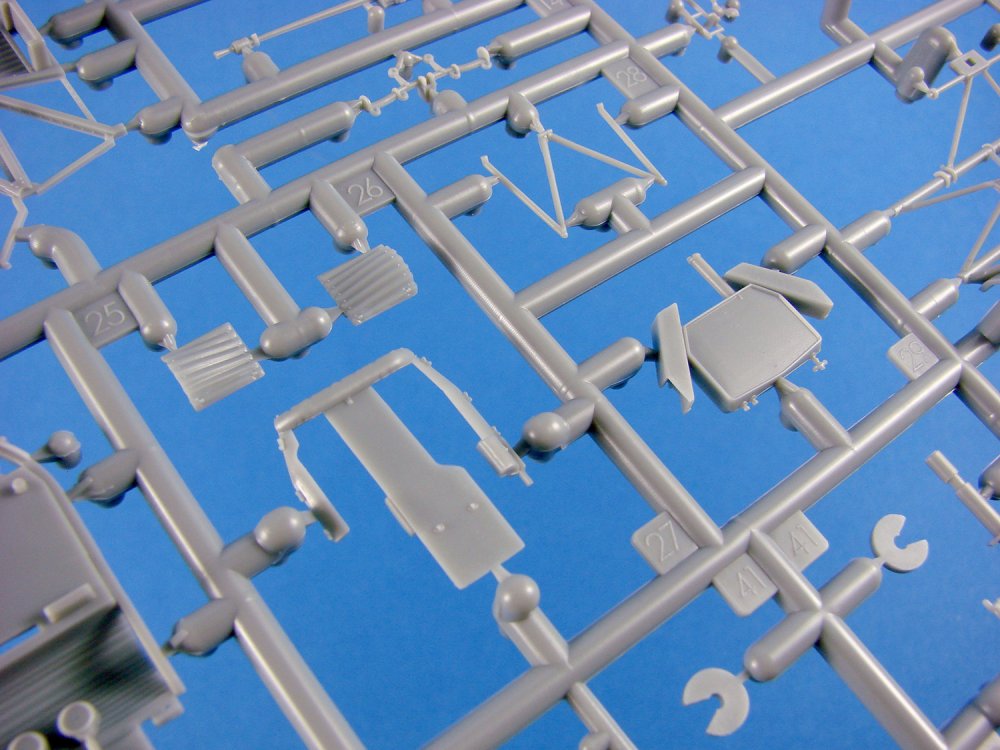


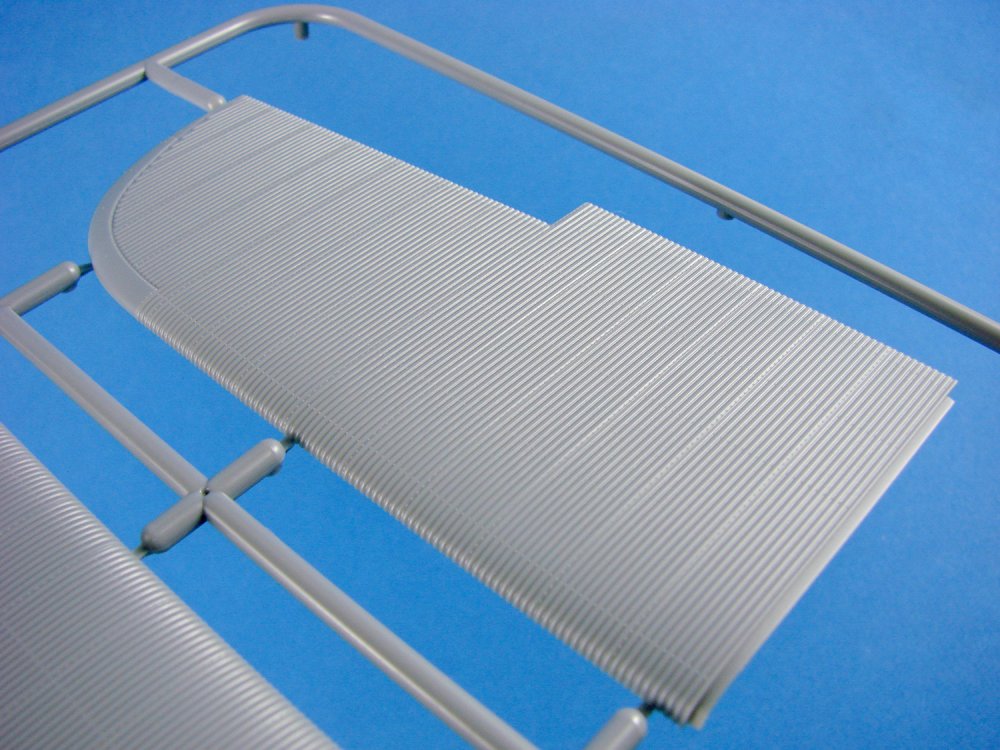
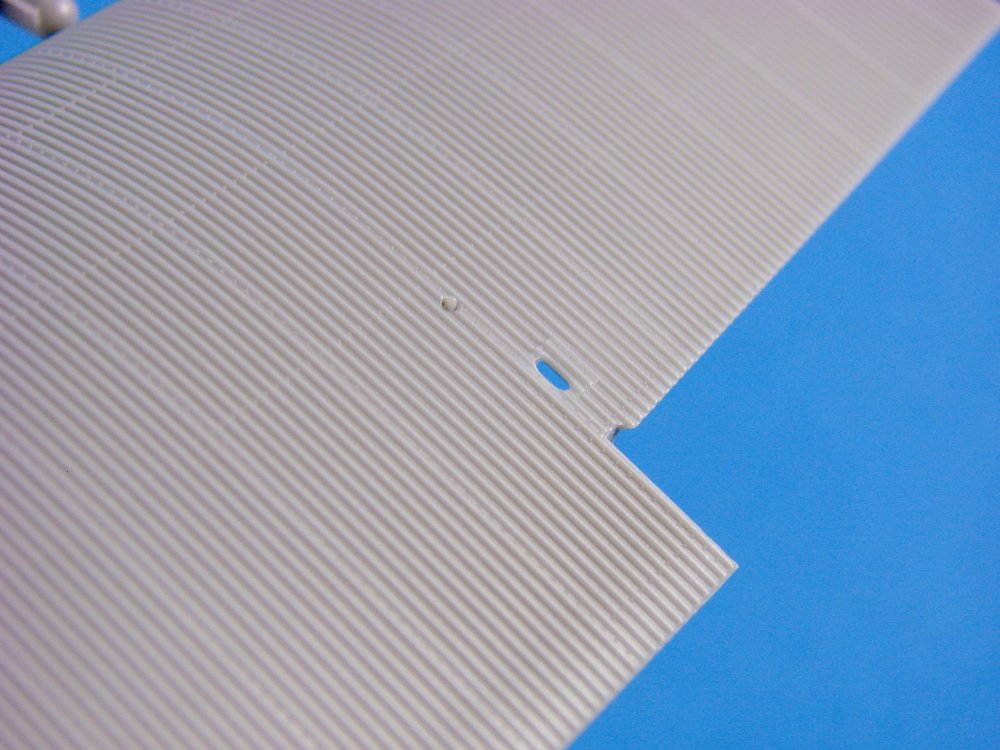
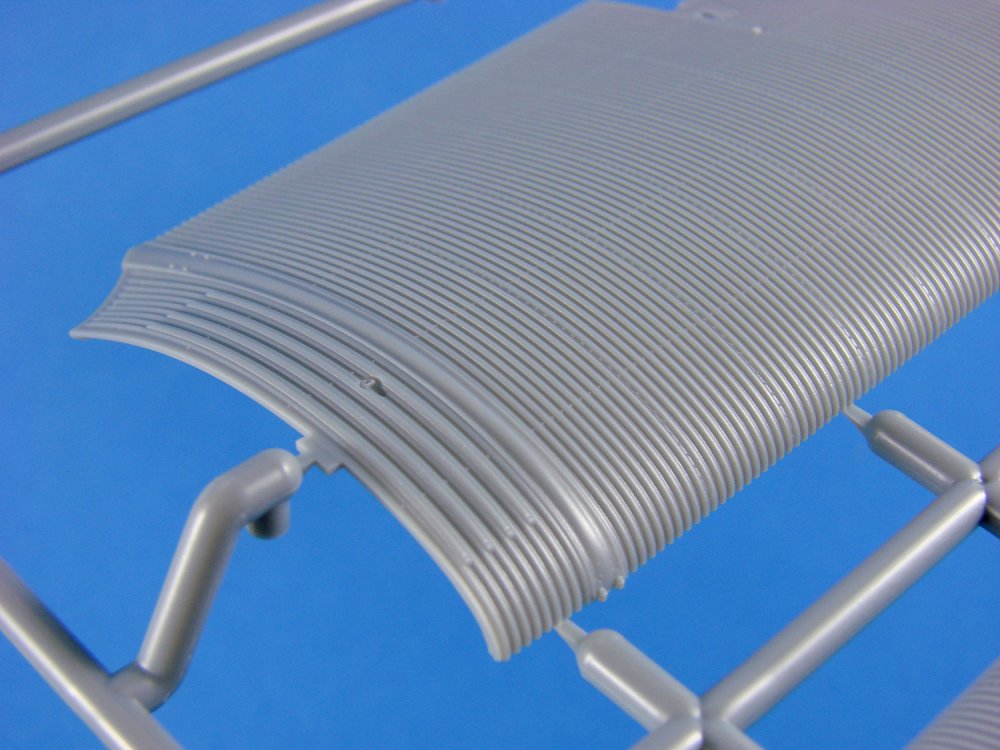
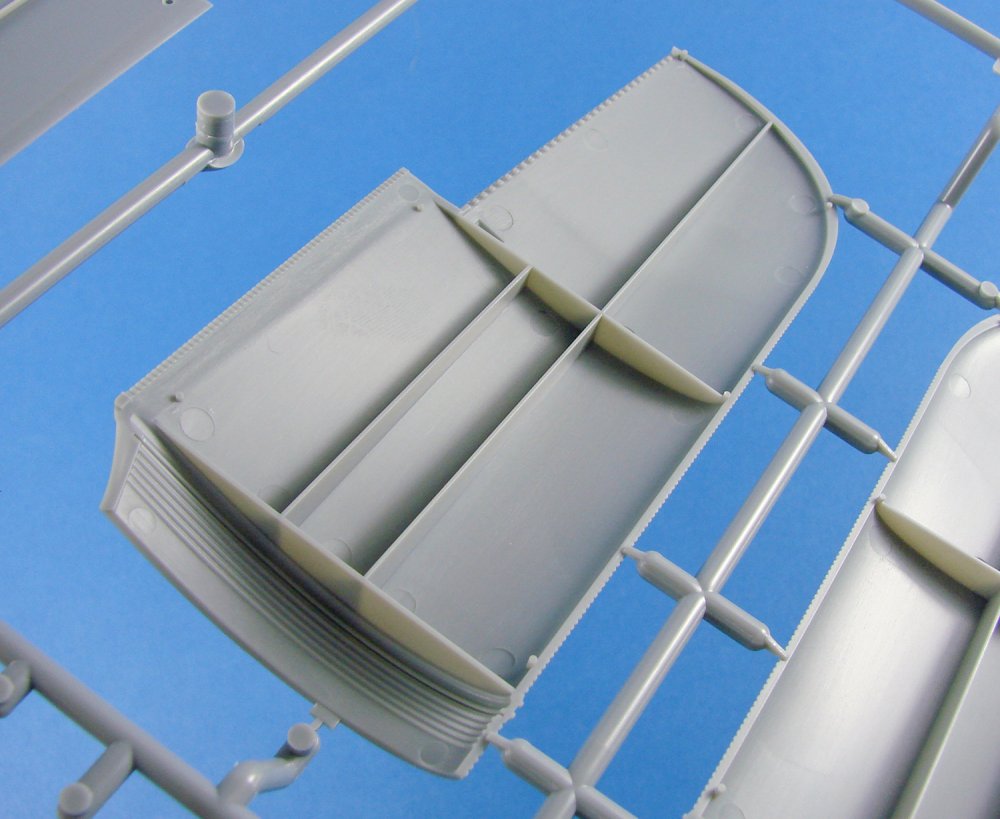

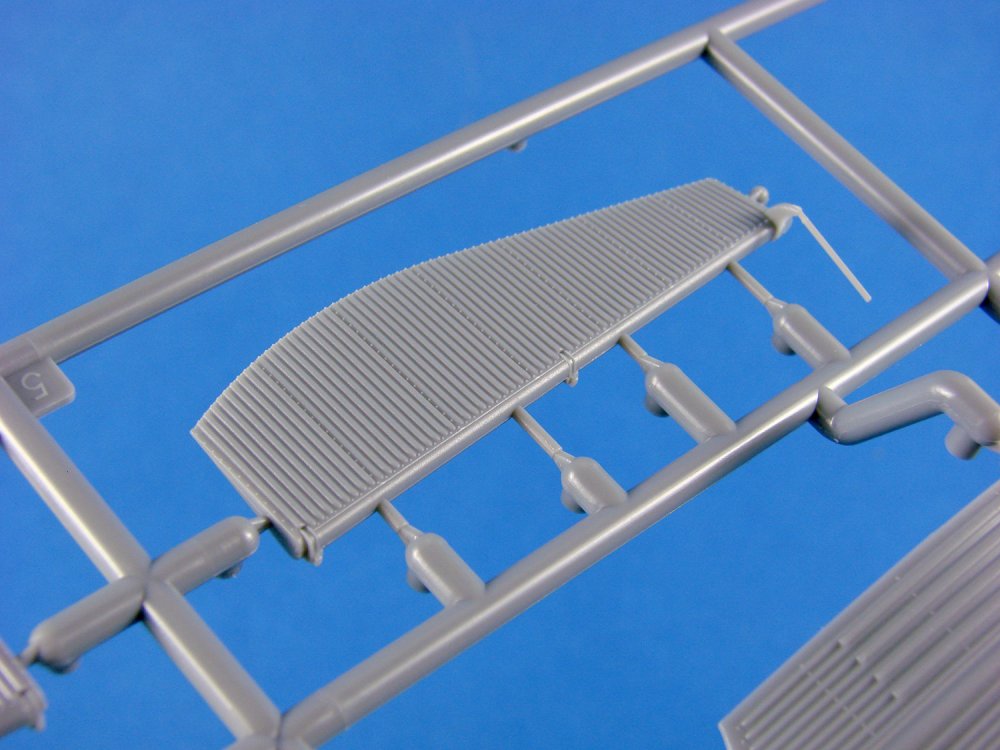


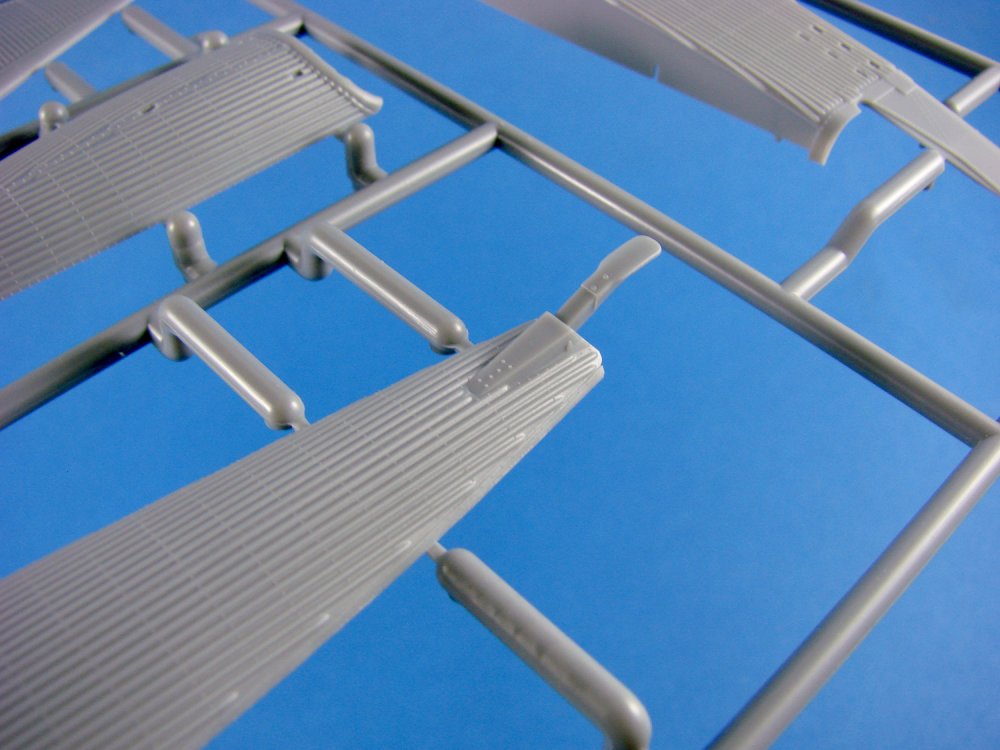

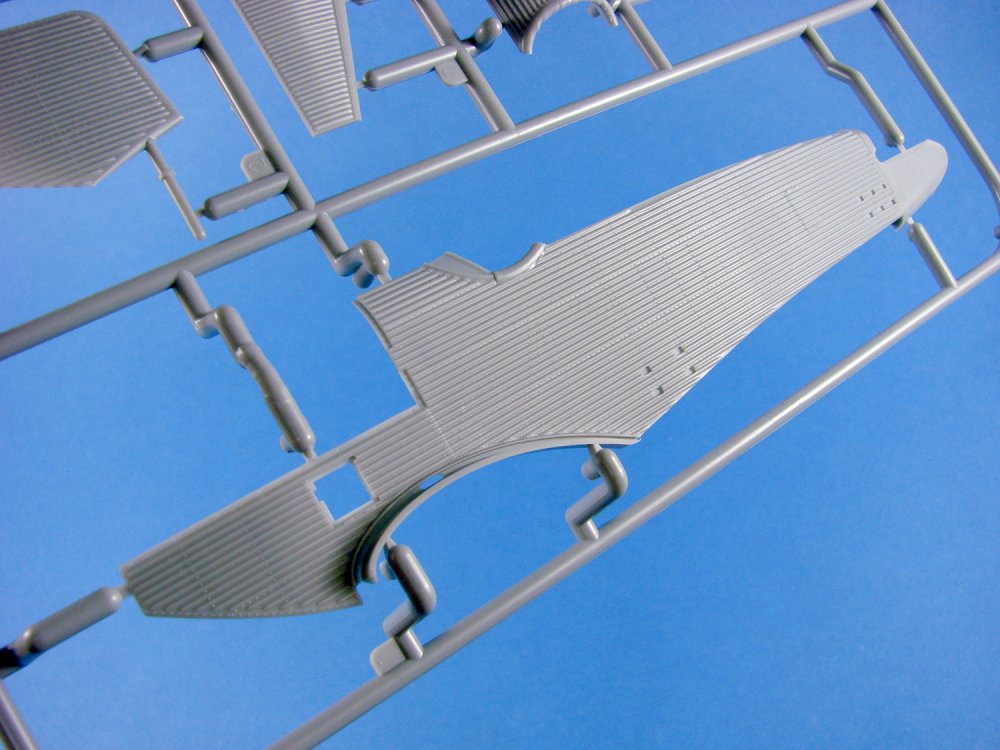

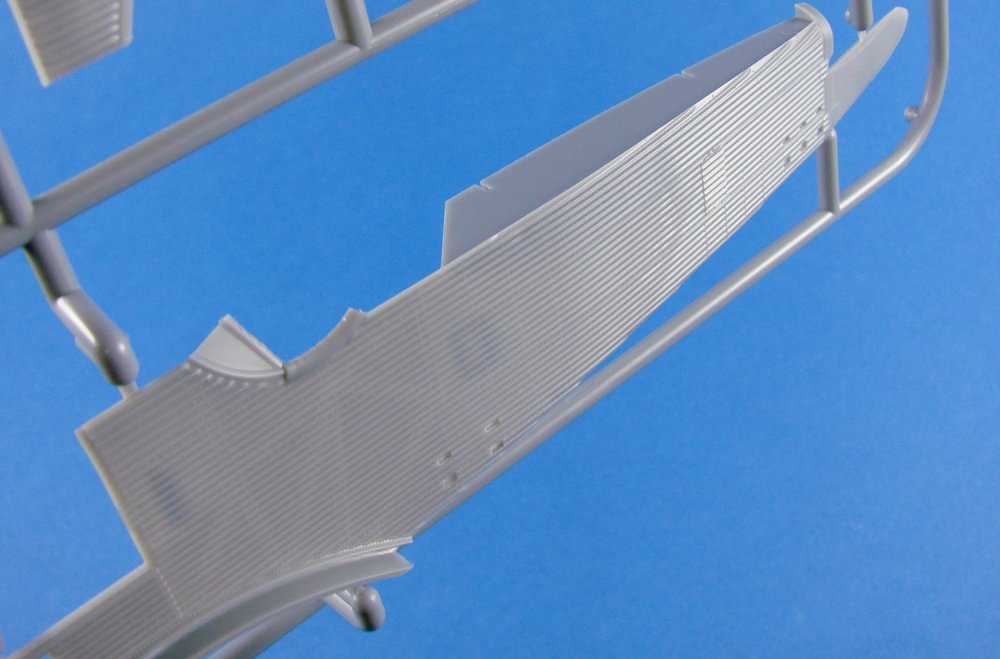
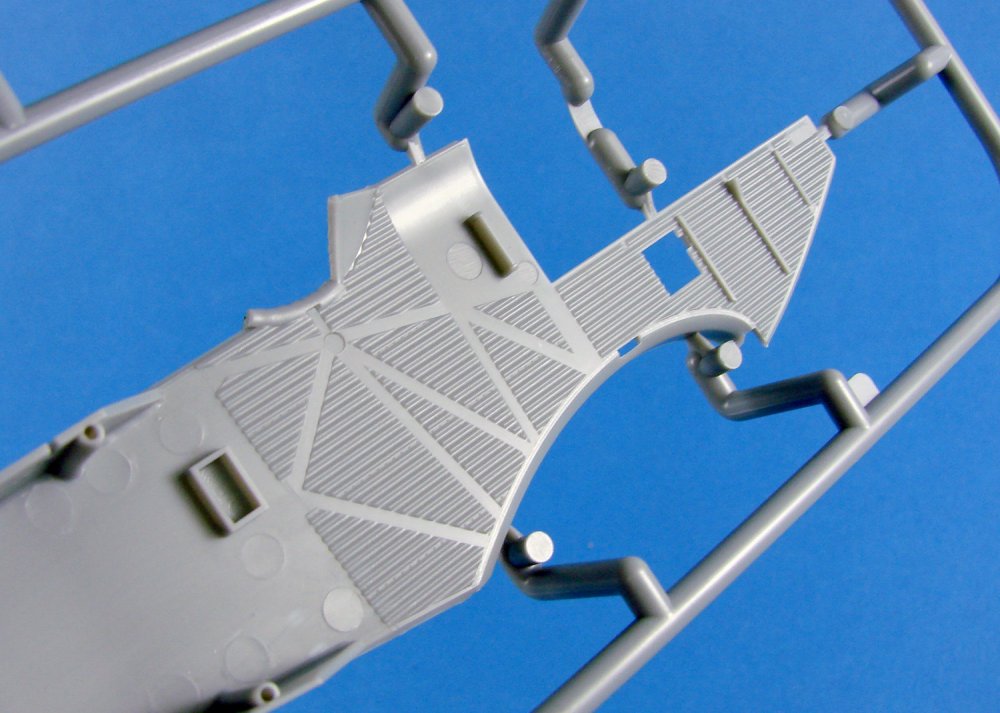
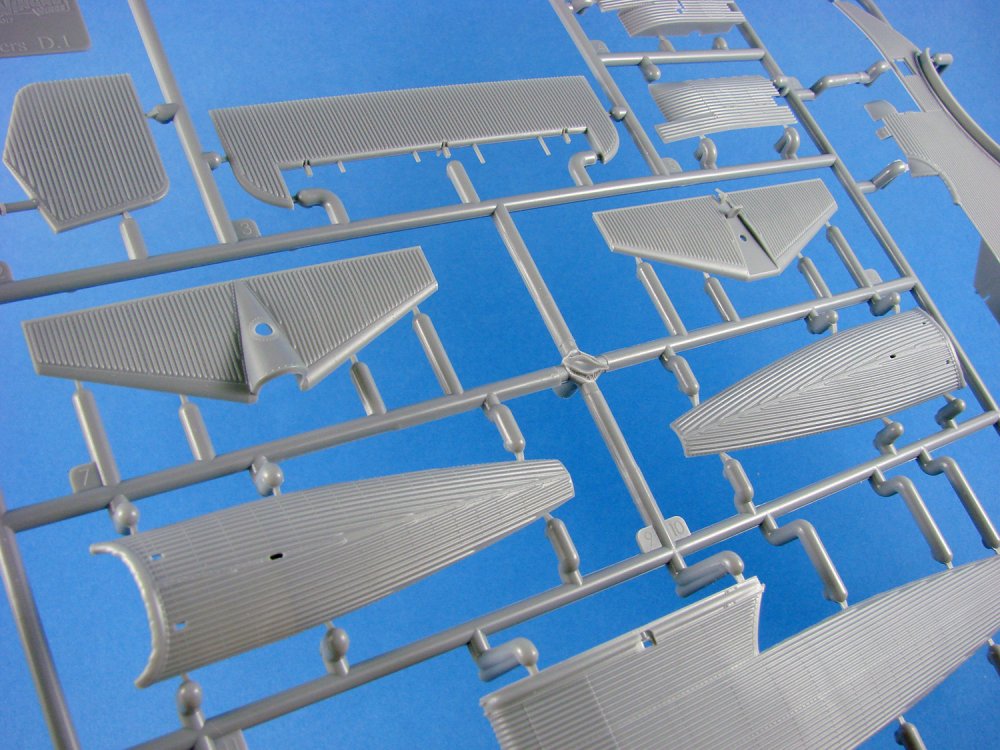

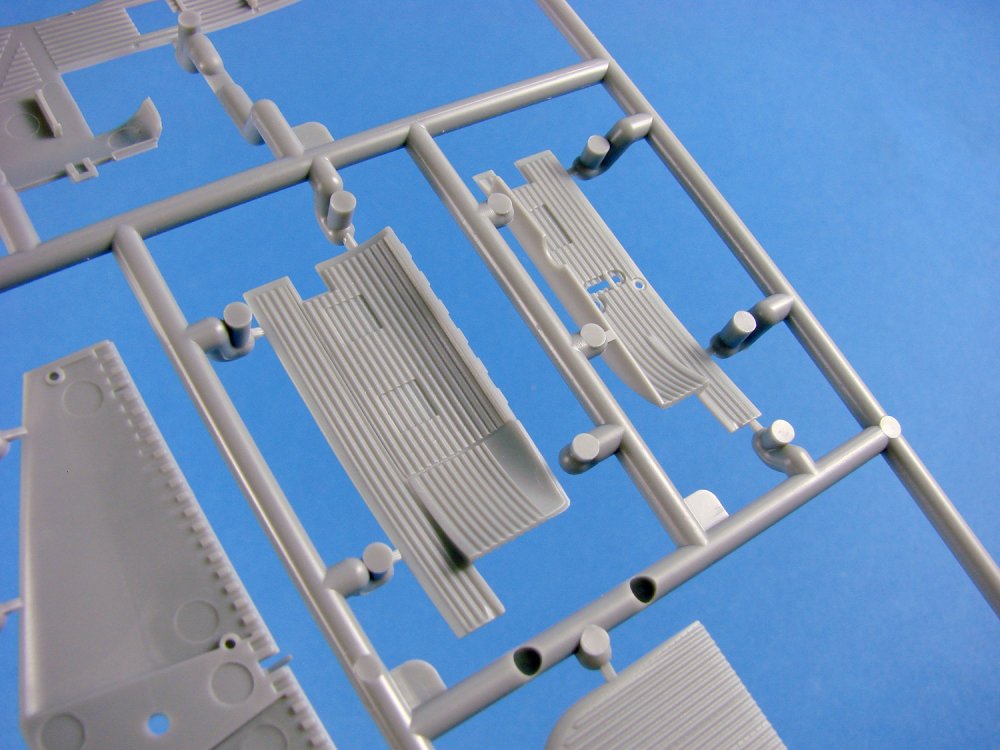

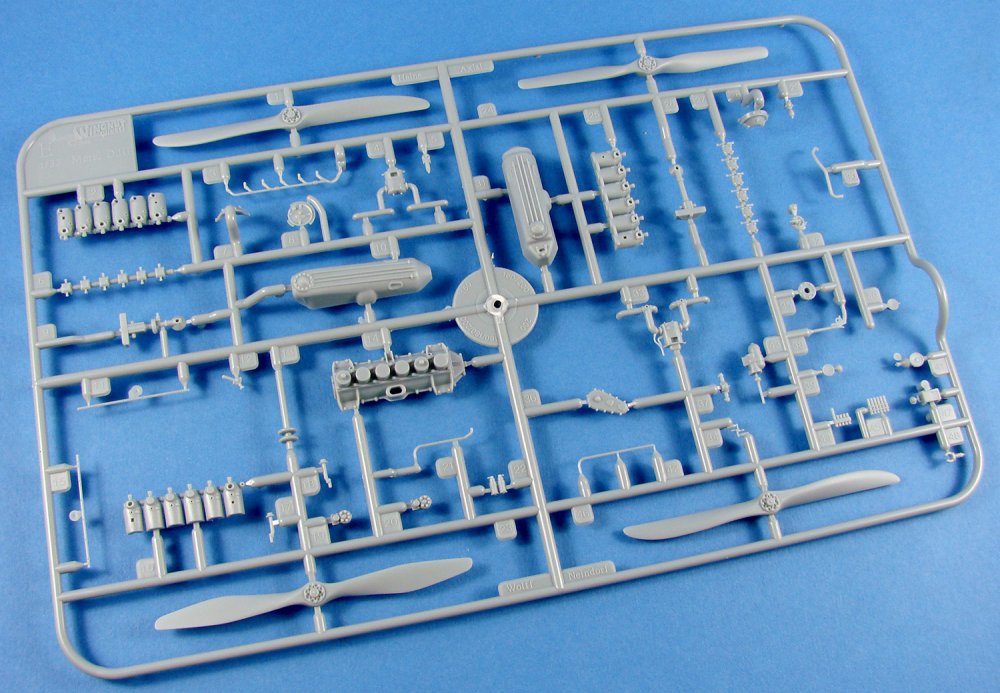


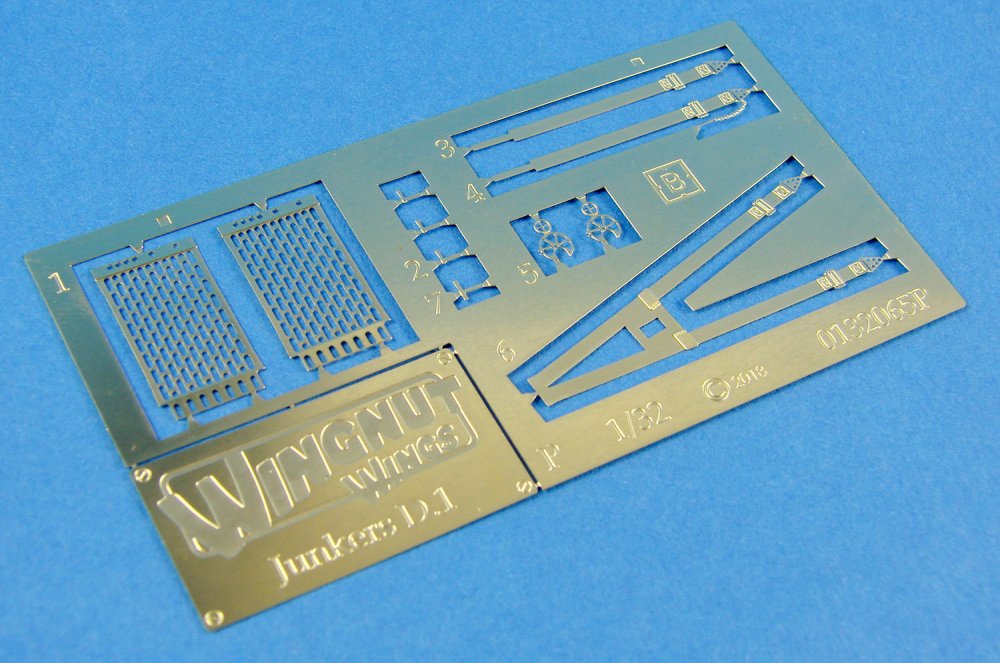
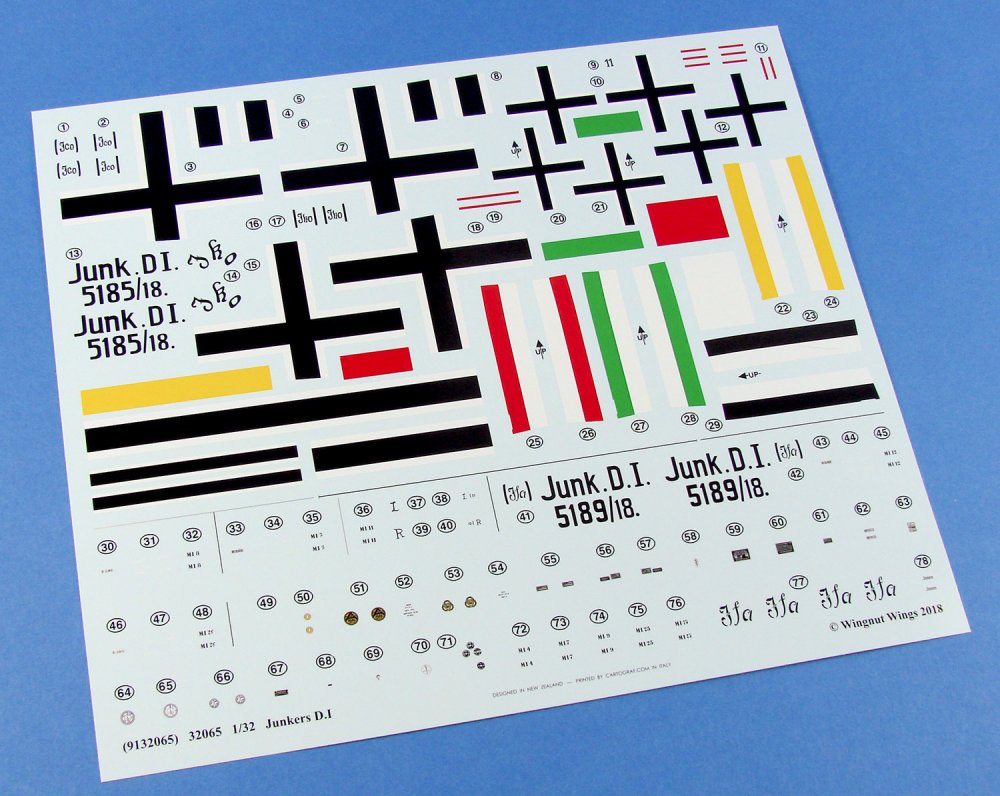


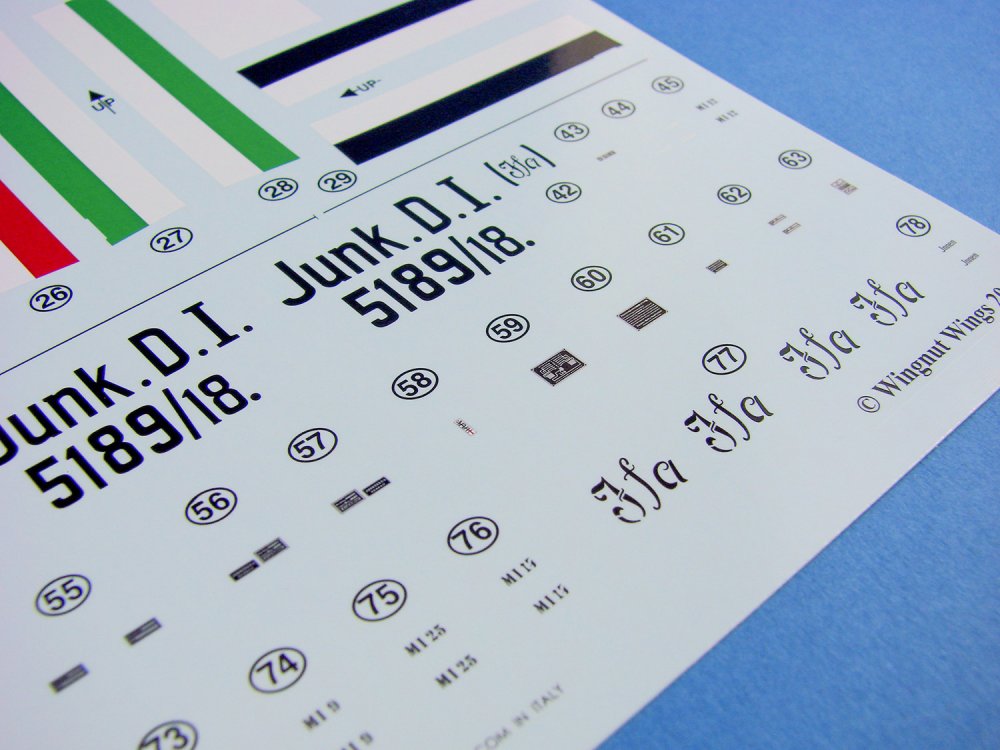

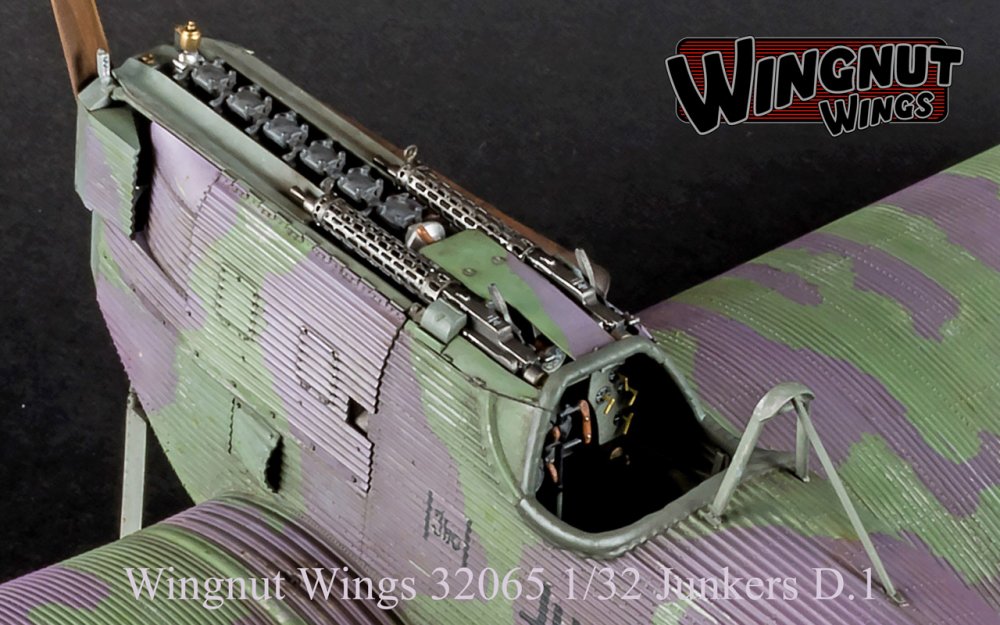
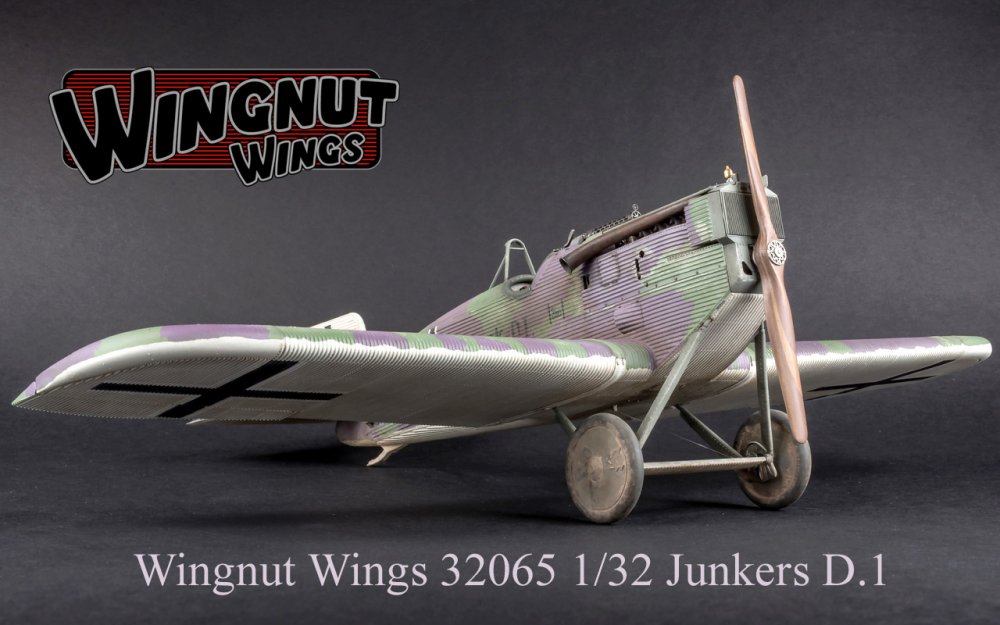
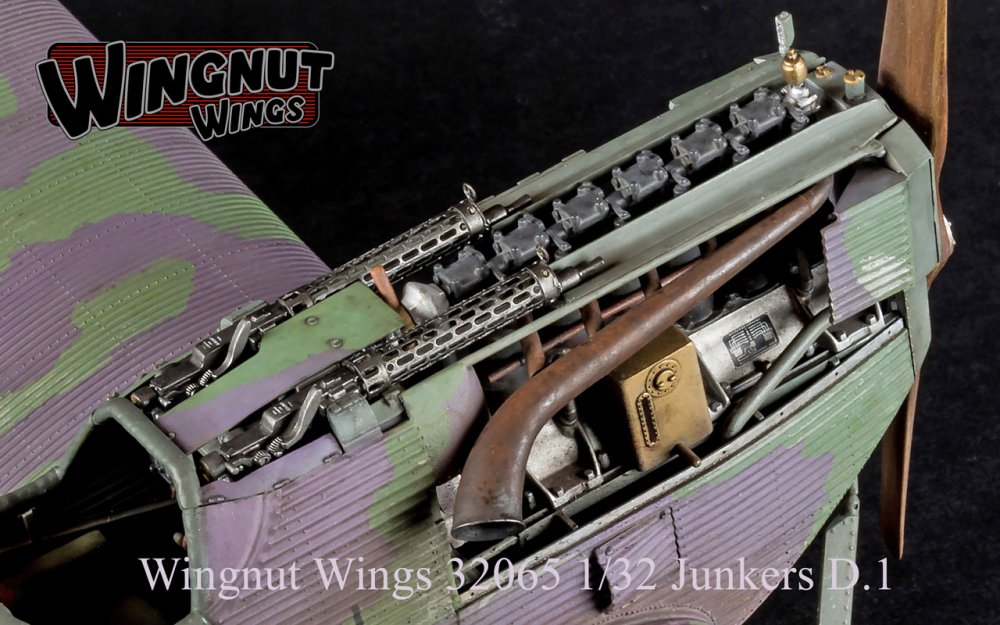
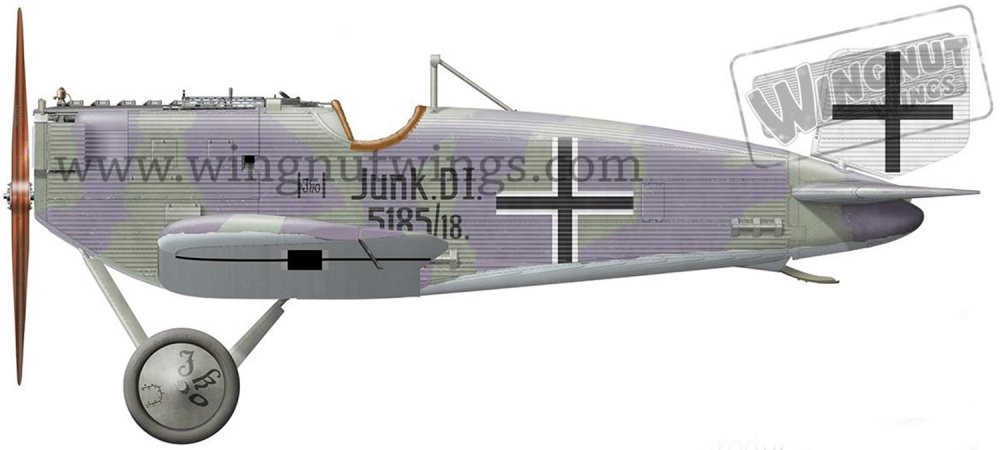
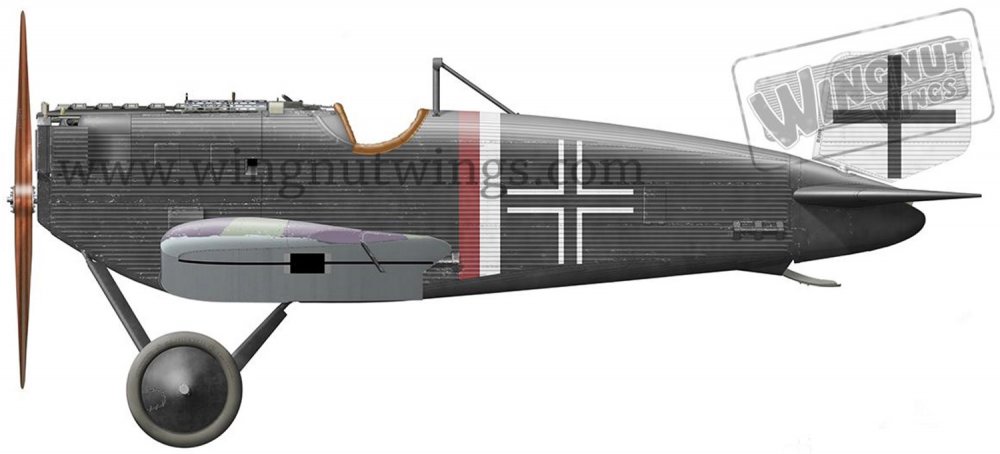

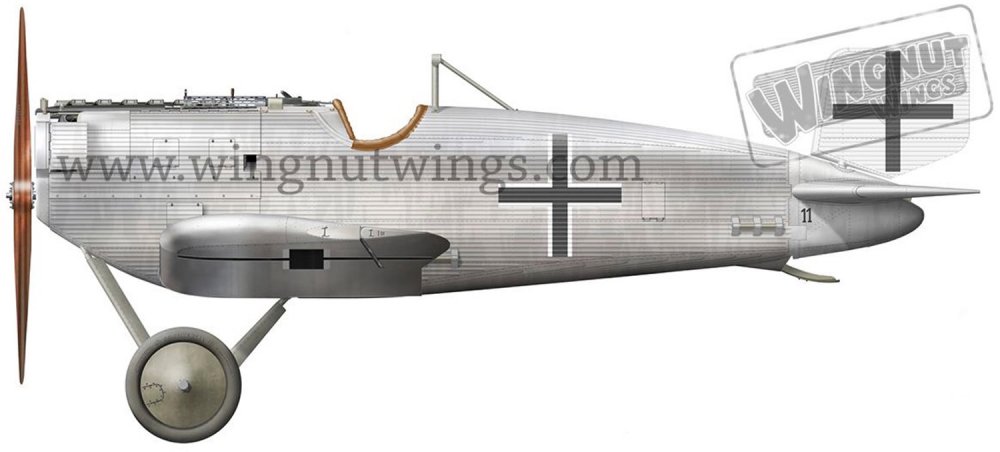
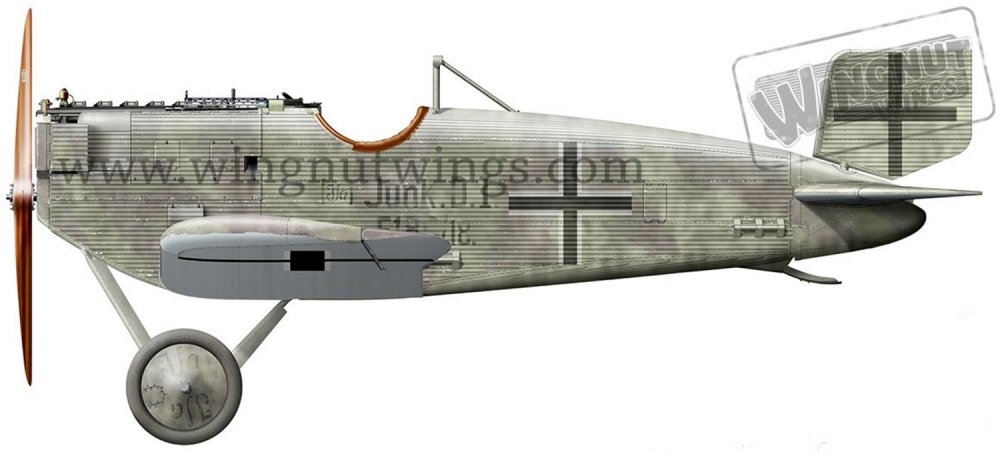
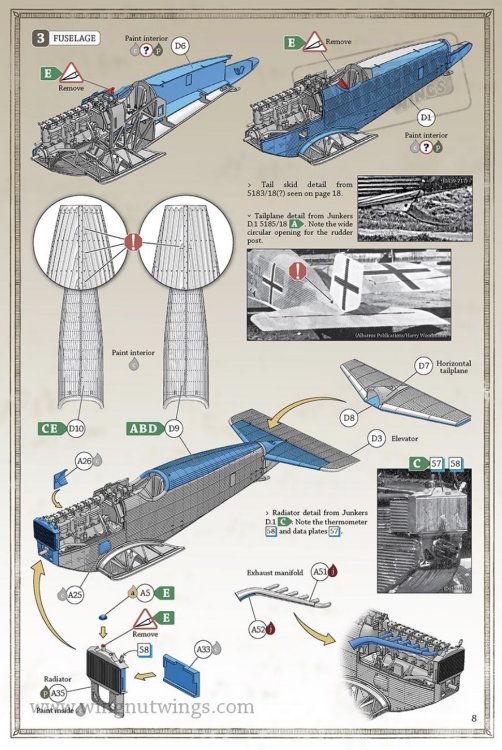
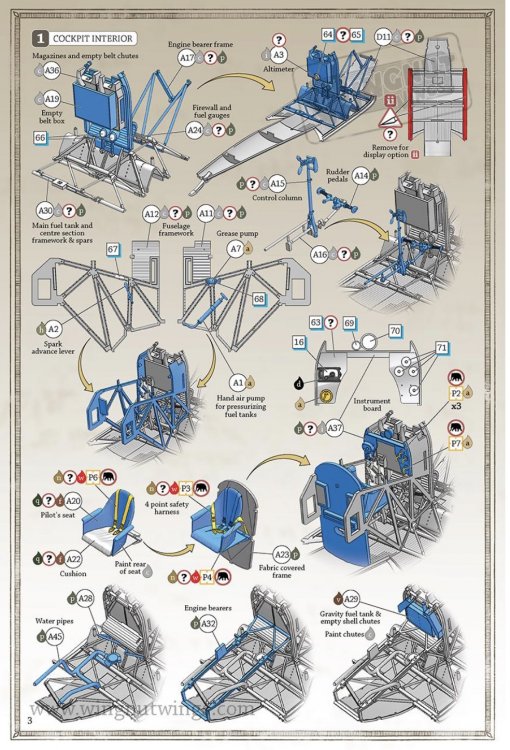

-
1/32 Heinkel He 111 detail sets CMK Catalogue # check article for codes Available from Special Hobby. Links in article. We recently looked at the 1/32 CMK He 111 Interior set, which provides a whole new replacement cockpit for Revell’s large and rather nice kit of this iconic German medium bomber. That set merited a standalone article due to its complexity, as you can see. However, in this article, I will take a look at the other sets available for this kit, again from CMK. Set # 5068,Heinkel He 111P - Wing fuel tanks, 418 Kč (approx. £15) Purchase link This set is packed into one of CMK’s larger blister packs due to the quantity of resin within. I actually couldn’t get it all to fit back in once I’d done the photography for this review. Designed to give the modeller an option to display the two inboard fuel tanks, this set requires some radical butchery of the main lower wing panels, so be prepared. A significant proportion of the plastic will need to be removed between the main gear bay opening and the fuselage. You are supplied with EIGHTEEN pieces of light grey resin, all flawlessly cast, although one fuel bay wing skin panel will need the hot water treatment to correct its shape. The premise of this set is quite simple. Each bay needs to be constructed from a ceiling and four sidewall pieces. All of these are suitably detailed within, bearing in mind that they will be filled with the tanks (2 per bay). Those tanks are nicely detailed, with securing straps and fuel filler points, plus the ribbing that could be seen on the rubber skinning of the tanks. Externally, the main wing bay panel is devoid of detail, as per the kit, but internally has some constructional elements cast into it. Instructions are clear enough with simple line drawings telling you all that you need to know. Details are provided for painting too, with codes given for Humbrol paints. Set # 5069, Heinkel He 111P Fuel filler necks and life raft, 247 Kč (approx. £8.50) Purchase link I must say that this is an unusual concoction for a detail set with a life raft compartment being sold with fuel filling points! Now, as the previous set shows you the wing fuel tanks from below, this set provides the tank fuelling points that exist in the inboard area of the upper wing panels. Instead of removing whole swathes of plastic though, you simply need to drill out the filling points on Revell’s moulded plastic. Underneath these points you will fit a resin box that will have a fuel filler point fastened to. Parts are of course supplied for the fuel filler plates that you drilled out previously. No real clean-up needs to be done on the resin boxes, but the filler ports and access plates are cast onto a block and will need removing and some tidying before you can use them. As for the life raft, this is a very simple mod indeed. After cutting away the relevant plastic on the spine of the He 111 kit, you will secure a compartment within this area, lipped so that it will recess into your newly-cut opening. When the fuse is closed and the compartment painted, a resin life raft can then be dropped into position, all folded with the relevant details such as gas canister and pull/inflation cord. Lastly, a panel is supplied which would cover this area. Casting is again excellent, and this set is packaged into one of the smaller CMK blister packs. Instructions are clear and easy to follow, with suitable Humbrol paint references. Set # 5070, Heinkel He 111P Tail undercarriage strut and bay set, 247 Kč (approx. £8.50) Purchase link If you’re going to super-detail your He 111, you may as well do the job properly. Presented in another blister pack, this set contains just five pieces, cast in light grey resin. Some casting block removal will of course be needed. Once done, this is a very simple set to install. Port and starboard tail wheel well walls are cast various constructional element details, such as longeron and stringers, plus a little plumbing too. Not too much, so you can add more if you feel the need, but this should be good enough for most modellers in the detail stakes. Once these are fitted, painted and the fuselage closed up, the resin wheel form is then fitted to the strut (I suggest pinning this too), and then resin pins are used to fit the tail wheel itself, plus the strut into the bay. As the locating point is quite high in the fuse, this could be a little awkward. I would also suggest you replace the resin pins for this job with some steel pins or rigid wire. The instructions look simple enough to follow, but the proof of the pudding is always in the eating. Looks a great little set, providing all fits well. Set # Q32159, Heinkel He 111H/P Instrument panels, 134 Kč (approx. £4.60) Purchase link Out last set is packaged into a standard sleeve with a cardboard backing. If you don’t wish to fit the entire cockpit set, then this simple upgrade could be for you. This set is designed to replace the Revell instrument panel with something far more presentable. Firstly, a resin panel is supplied, and this simply has rear instrument detail. You will need to add wiring etc. to this yourself. Onto the front of this fits a two-part photo-etch instrument panel, produced by Eduard and printed in full colour. PE quality is excellent, as we’ve come to expect from Eduard. Two other resin parts are included and cast onto a single block. These are for the large central console that fastens into the upper canopy area, and for a small side console. Details are very nice and I think just a little accompanying wire will seal the deal. Again, the instructions are simple but do the job effectively. Conclusion If you want to super-detail your He 111 kit, then whilst Eduard will provide some really nice sets, such as the bomb bay etc., if you want to add resin to enhance your work, then these really are the only sets in town that will give you what you need. Thankfully though, CMK’s work is excellent and straightforward to fit and the price is more than acceptable. All we really need now is for Revell to start moulding their kit again and perhaps we can see more of these sets used on the club and competition stalls. Highly recommended My sincere thanks to Special Hobby for the review samples seen here. To purchase directly, click the links in the article.